Διαχείριση
Βασικές παράμετροι
Πηγαίνετε εκεί: Περισσότερα > Διαχείριση
Σημαντικό
Ρυθμίστε όλες τις «παραμέτρους» με τη σειρά που εμφανίζονται.
Βιβλιοθήκες
Κατά τη ρύθμιση του συστήματος Koha θα πρέπει να προσθέσετε πληροφορίες για κάθε βιβλιοθήκη που θα χρησιμοποιεί το σύστημά σας. Τα δεδομένα αυτά χρησιμοποιούνται σε διάφορους τομείς του Koha.
Πηγαίνετε εκεί: Περισσότερα > Διαχείριση > Βασικές παράμετροι > Βιβλιοθήκες
Σημείωση
Μόνο το προσωπικό με το δικαίωμα διαχείρισης manage_libraries (ή το δικαίωμα του υπερβιβλιοθηκαρίου superlibrarian) θα έχει πρόσβαση σε αυτό το τμήμα.
Όταν επισκέπτεστε αυτή τη σελίδα, σάς παρουσιάζεται μία λίστα με τις βιβλιοθήκες που έχουν ήδη προστεθεί στο σύστημα.
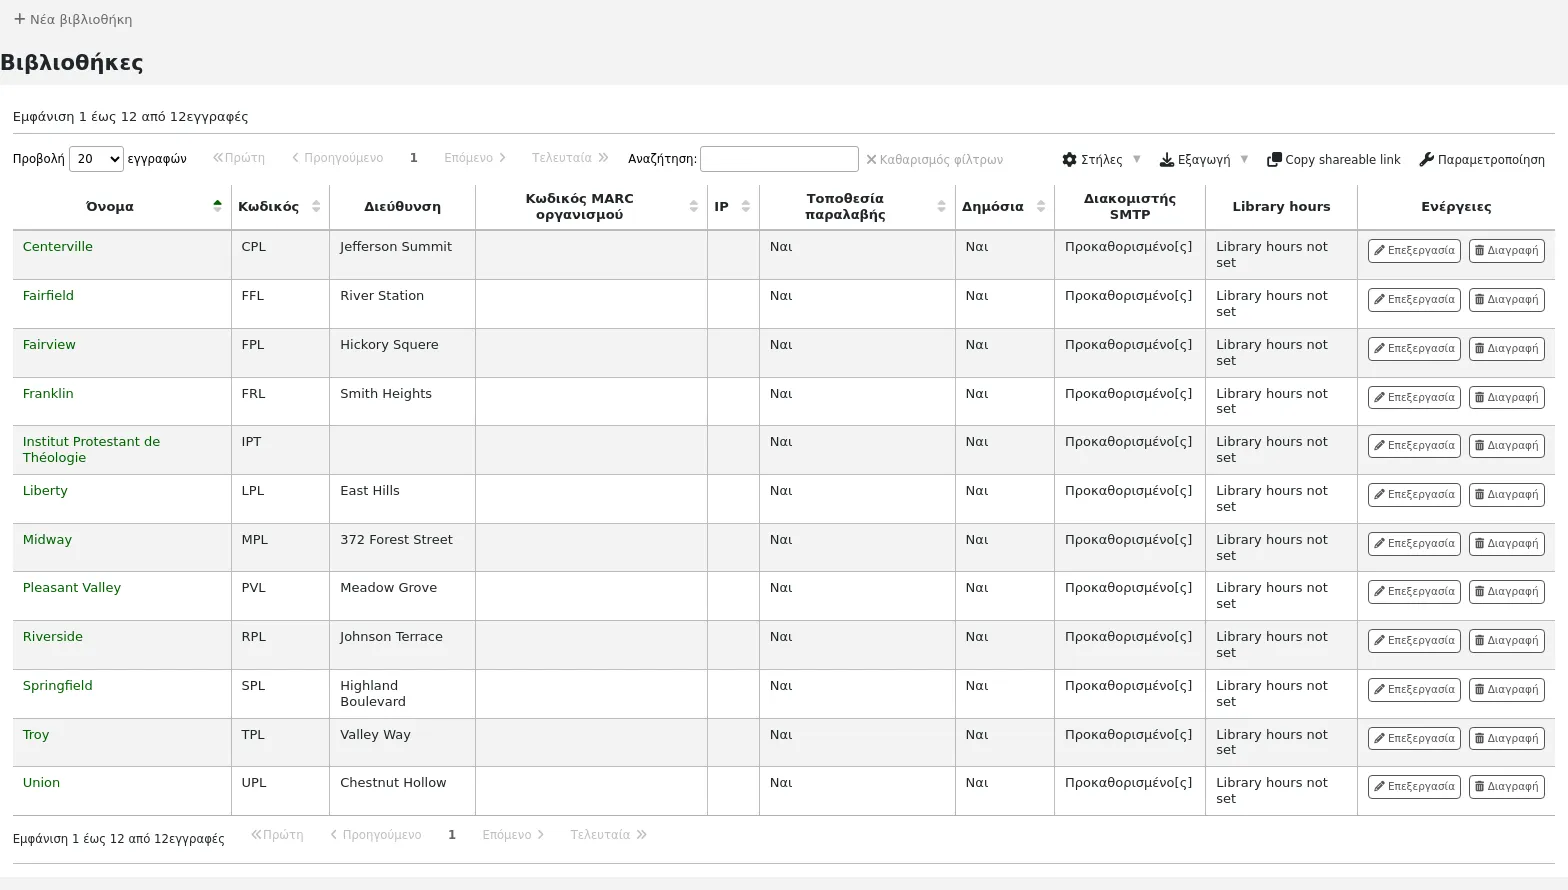
Σημείωση
You can customize the columns of this table in the Table settings section of the Administration module (table id: libraries).
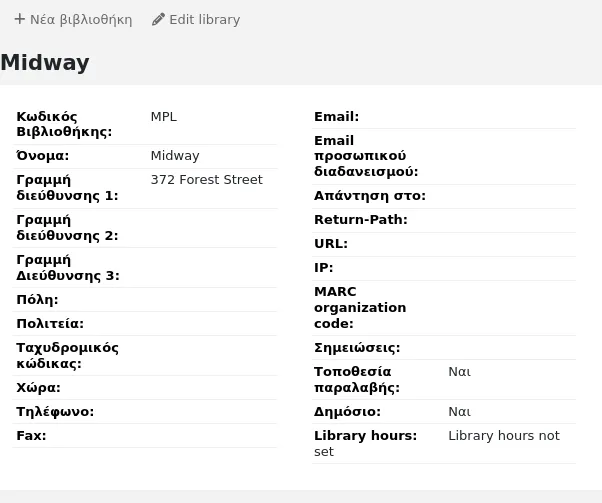
Επιλέγοντας το όνομα της βιβλιοθήκης θα μεταφερθείτε σε μια λεπτομερή προβολή των πληροφοριών της βιβλιοθήκης.
Προσθέτοντας μία βιβλιοθήκη
Για να προσθέσετε μία νέα βιβλιοθήκη:
Επιλέξτε «Νέα βιβλιοθήκη»
Συμπληρώσετ τη φόρμα
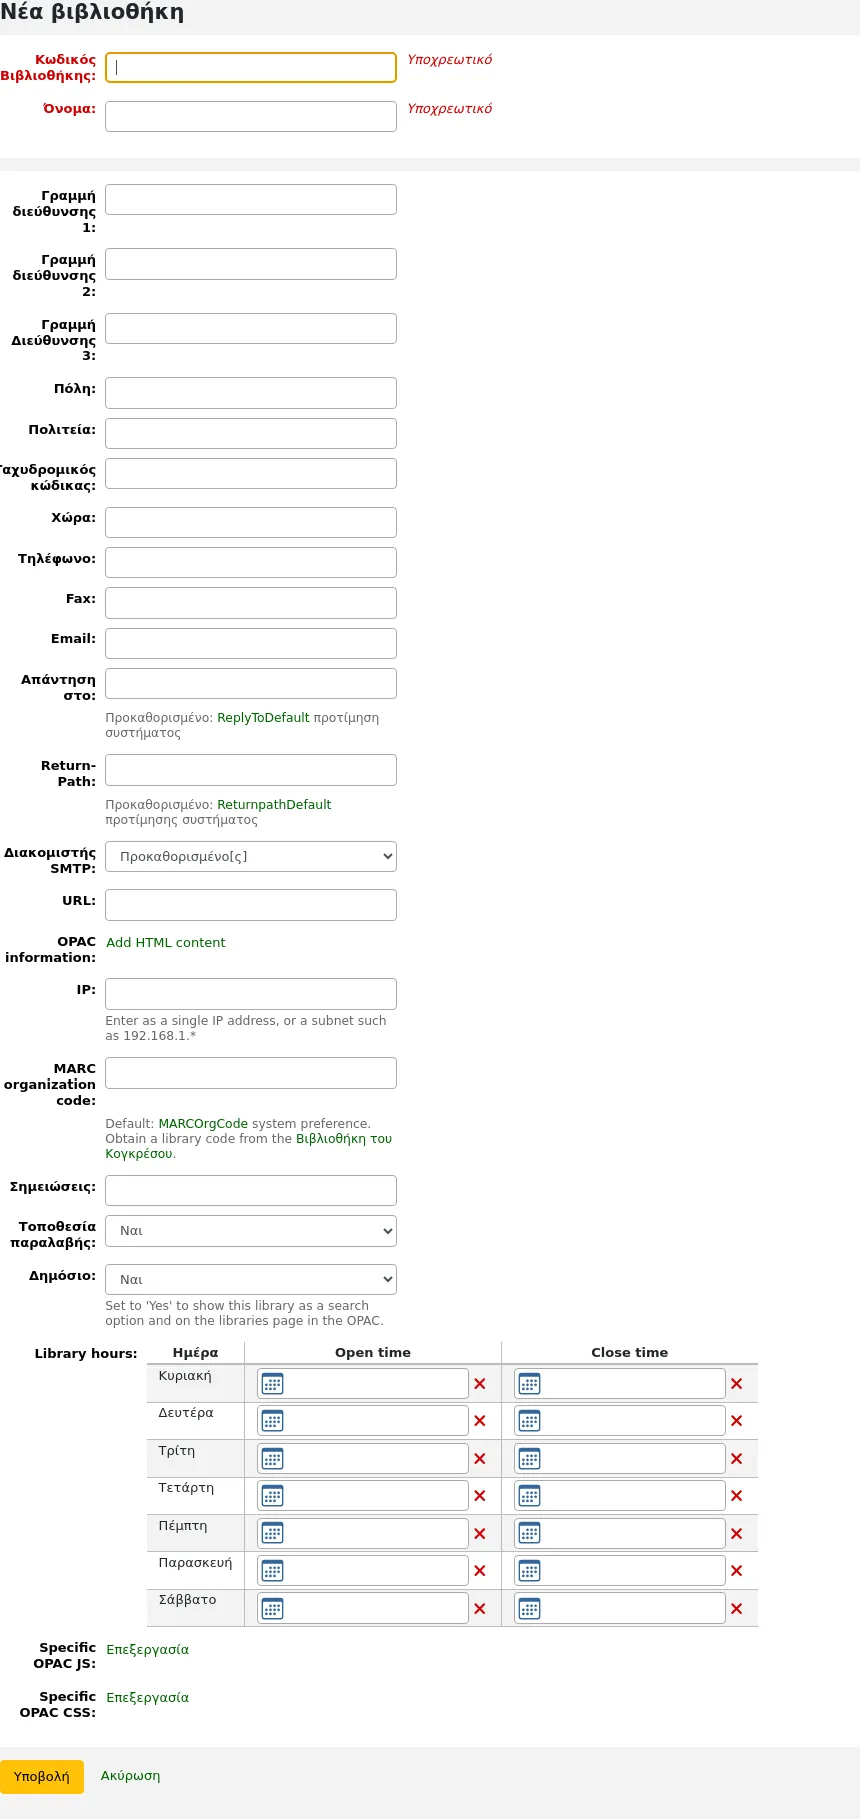
Κωδικός βιβλιοθήκης (υποχρεωτικός): ο κωδικός δεν πρέπει να περιέχει κενά ή παύλες και να είναι 10 ή λιγότεροι χαρακτήρες. Αυτός ο κωδικός θα χρησιμοποιηθεί ως μοναδικό αναγνωριστικό στη βάση δεδομένων.
Όνομα (υποχρεωτικό): το όνομα θα εμφανίζεται στον OPAC και στο διαχειριστικό περιβάλλον, όπου εμφανίζεται το όνομα της βιβλιοθήκης, και θα πρέπει να είναι ένα όνομα που έχει νόημα για τα μέλη και το προσωπικό σας.
Διεύθυνση, πόλη, πολιτεία, ταχυδρομικός κώδικας, χώρα, τηλέφωνο, φαξ: τα πεδία διεύθυνσης και επικοινωνίας μπορούν να χρησιμοποιηθούν για να γίνουν ειδοποιήσεις και σημειώματα notices προσαρμοσμένα για κάθε βιβλιοθήκη, θα εμφανίζονται επίσης στη σελίδα των Βιβλιοθηκών του OPAC “Libraries” page of the OPAC, αν αυτή η βιβλιοθήκη έχει οριστεί ως «Δημόσια»
Ηλεκτρονικό ταχυδρομείο: το πεδίο της διεύθυνσης ηλεκτρονικού ταχυδρομείου δεν είναι υποχρεωτικό, αλλά θα πρέπει να συμπληρωθεί για κάθε βιβλιοθήκη στο σύστημά σας
Σημείωση
Φροντίστε να εισαγάγετε μια διεύθυνση ηλεκτρονικού ταχυδρομείου της βιβλιοθήκης για να βεβαιωθείτε ότι οι ειδοποιήσεις αποστέλλονται στη σωστή διεύθυνση και από τη σωστή διεύθυνση
Σημείωση
Εάν δεν εισαχθεί διεύθυνση ηλεκτρονικού ταχυδρομείου εδώ, η διεύθυνση στην παράμετρο του συστήματος KohaAdminEmailAddress θα χρησιμοποιηθεί για την αποστολή ειδοποιήσεων από αυτή τη βιβλιοθήκη
Ηλεκτρονικό ταχυδρομείο προσωπικού Διαδανεισμών: εάν η βιβλιοθήκη χρησιμοποιεί συγκεκριμένη διεύθυνση ηλεκτρονικού ταχυδρομείου για τη διαχείριση του διαδανεισμού, πληκτρολογήστε την εδώ
Σημείωση
Εάν δεν εισαχθεί διεύθυνση ηλεκτρονικού ταχυδρομείου εδώ, η διεύθυνση στην παράμετρο του συστήματος ILLDefaultStaffEmail θα χρησιμοποιηθεί για την παραλαβή αιτημάτων Διαδανεισμού προς αυτή τη βιβλιοθήκη
Απάντηση: μπορείτε να εισαγάγετε μια διαφορετική διεύθυνση ηλεκτρονικού ταχυδρομείου «Απάντησης». Αυτή είναι η διεύθυνση ηλεκτρονικού ταχυδρομείου στην οποία θα πηγαίνουν όλες οι απαντήσεις.
Σημείωση
Εάν δεν εισαχθεί διεύθυνση ηλεκτρονικού ταχυδρομείου εδώ, η διεύθυνση στην παράμετρο του συστήματος ReplytoDefault θα χρησιμοποιηθεί για τη λήψη απαντήσεων σε αυτή τη βιβλιοθήκη
Διεύθυνση επιστροφής: μπορείτε να εισαγάγετε μια διαφορετική διεύθυνση ηλεκτρονικού ταχυδρομείου «Διεύθυνση επιστροφής». Αυτή είναι η διεύθυνση ηλεκτρονικού ταχυδρομείου στην οποία θα πηγαίνουν όλα τα μηνύματα που απορρίπτονται.
Σημείωση
Αν δεν εισαχθεί διεύθυνση ηλεκτρονικού ταχυδρομείου εδώ, η διεύθυνση στην παράμετρο του συστήματος ReturnpathDefault θα χρησιμοποιηθεί για τη λήψη αναπάντητων μηνυμάτων από αυτή τη βιβλιοθήκη.
Διακομιστής SMTP: αν αυτή η βιβλιοθήκη χρησιμοποιεί διαφορετικό SMTP server από τον προεπιλεγμένο, καθορίστε τον εδώ.
URL: εάν αυτό το πεδίο είναι συμπληρωμένο, το όνομα της βιβλιοθήκης θα συνδέεται με τον πίνακα των τεκμηρίων στον OPAC

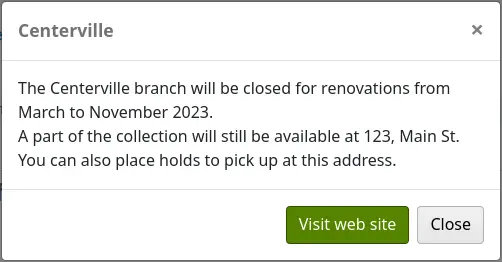
Πληροφορίες Δημόσιου Καταλόγου: οδηγούν στο εργαλείο της προσαρμογής HTML HTML customization, ώστε να μπορείτε να προσθέτετε πρόσθετες πληροφορίες σχετικά με τη βιβλιοθήκη. Οι πληροφορίες αυτές θα εμφανίζονται στη σελίδα των Βιβλιοθηκών στο Δημόσιο Κατάλογο “Libraries” page in the OPAC, καθώς και στον πίνακα των τεκμηρίων στο Δημόσιο Κατάλογο.

Επιλέγοντας το όνομα της βιβλιοθήκης που έχει ένα μικρό εικονίδιο «i» δίπλα του, θα ανοίξει ένα αναδυόμενο παράθυρο με πληροφορίες.
IP: αυτό το πεδίο δεν χρειάζεται να συμπληρωθεί, εκτός εάν σκοπεύετε να περιορίσετε την πρόσβαση στο διαχειριστικό περιβάλλον σε μια συγκεκριμένη διεύθυνση IP ή σε μια σειρά διευθύνσεων IP.
Σημείωση
Οι διευθύνσεις IP των βιβλιοθηκών και οι περιοχές IP χρησιμοποιούνται από τις παραμέτρους του συστήματος StaffLoginLibraryBasedOnIP και StaffLoginRestrictLibraryByIP.
MARC organization code: if this library has a specific MARC organization code, you can enter it here.
Σημείωση
Εάν δεν συμπληρωθεί, ο κωδικός που έχει εισαχθεί στην παράμετρο του συστήματος MARCOrgCode θα χρησιμοποιηθεί για αυτή τη βιβλιοθήκη.
Σημειώσεις: αν έχετε σημειώσεις μπορείτε να τις βάλετε εδώ. Αυτές δεν θα εμφανιστούν στο Δημόσιο Κατάλογο (OPAC).
Τοποθεσία παραλαβής: επιλέξτε αν αυτή η βιβλιοθήκη θα εμφανίζεται ως διαθέσιμη τοποθεσία παραλαβής για τις κρατήσεις.
Δημόσια: επιλέξτε αν αυτή η βιβλιοθήκη θα εμφανίζεται στη σελίδα των βιβλιοθηκών στο Δημόσιο Κατάλογο “Libraries” page on the OPAC, καθώς και ως επιλογή ορισμού στη σύνθετη αναζήτηση στο Δημόσιο Κατάλογο.
Ώρες λειτουργίας: αν κάνετε ωριαίο δανεισμό, συμπληρώστε τις ώρες λειτουργίας της βιβλιοθήκης για κάθε ημέρα της εβδομάδας. Στη συνέχεια μπορείτε να ορίσετε την παράμετρο του συστήματος ConsiderLibraryHoursInCirculation σύμφωνα με τις πολιτικές σας.
Έκδοση
Αυτή η επιλογή προστέθηκε στην έκδοση 24.05 του Koha.
UserJS: use this field to add custom JavaScript to the OPAC of this library (when patrons are logged in, or if there is a
SetEnv OPAC_BRANCH_DEFAULTentry in the Apache configuration file)Έκδοση
Αυτό το στοιχείο προστέθηκε στην έκδοση 23.11 του Koha.
Σημείωση
Οι γενικές τροποποιήσεις που ισχύουν για όλες τις βιβλιοθήκες μπορούν να καταχωρηθούν στην παράμετρο του συστήματος OPACUserJS.
UserCSS: use this field to add custom CSS to the OPAC of this library (when patrons are logged in, or if there is a
SetEnv OPAC_BRANCH_DEFAULTentry in the Apache configuration file)Έκδοση
Αυτό το στοιχείο προστέθηκε στην έκδοση 23.11 του Koha.
Σημείωση
Οι γενικές τροποποιήσεις που ισχύουν για όλες τις βιβλιοθήκες μπορούν να καταχωρηθούν στην παράμετρο του συστήματος OPACUserCSS.
Εάν έχετε πρόσθετα πεδία additional fields για βιβλιοθήκες (παραρτήματα), αυτά θα εμφανίζονται στο κάτω μέρος της φόρμας.
Επιλέξτε «Υποβολή» για να αποθηκεύσετε τη νέα σας βιβλιοθήκη.
Επεξεργασία/διαγραφή μίας βιβλιοθήκης
Από τον πίνακα βιβλιοθηκών, επιλέξτε «Επεξεργασία» ή «Διαγραφή» για να επεξεργαστείτε ή να διαγράψετε μία βιβλιοθήκη.

Προειδοποίηση
Δεν μπορείτε να επεξεργαστείτε τον «κωδικό βιβλιοθήκης».
Προειδοποίηση
Δεν μπορείτε να διαγράψετε καμία βιβλιοθήκη, η οποία έχει συνδεδεμένα με αυτή μέλη ή αντίτυπα.

Ομάδες βιβλιοθηκών
Οι ομάδες βιβλιοθηκών μπορούν να εξυπηρετήσουν διάφορους σκοπούς: να περιορίσουν την πρόσβαση σε δεδομένα μελών, να περιορίσουν την τροποποίηση αντιτύπων, να περιορίσουν τις αναζητήσεις στο Δημόσιο Κατάλογο (OPAC) ή στο διαχειριστικό περιβάλλον ή να καθορίσουν τη λειτουργία των κρατήσεων.
Πηγαίνετε εκεί: Περισσότερα > Διαχείριση > Βασικές παράμετροι > Ομάδες βιβλιοθηκών
Σημείωση
Μόνο το προσωπικό με το δικαίωμα διαχείρισης manage_libraries (ή το δικαίωμα του υπερβιβλιοθηκαρίου superlibrarian) θα έχει πρόσβαση σε αυτό το τμήμα.
Όταν επισκέπτεστε αυτή τη σελίδα, σας παρουσιάζεται μια λίστα με τις ομάδες που έχουν ήδη προστεθεί στο σύστημα.
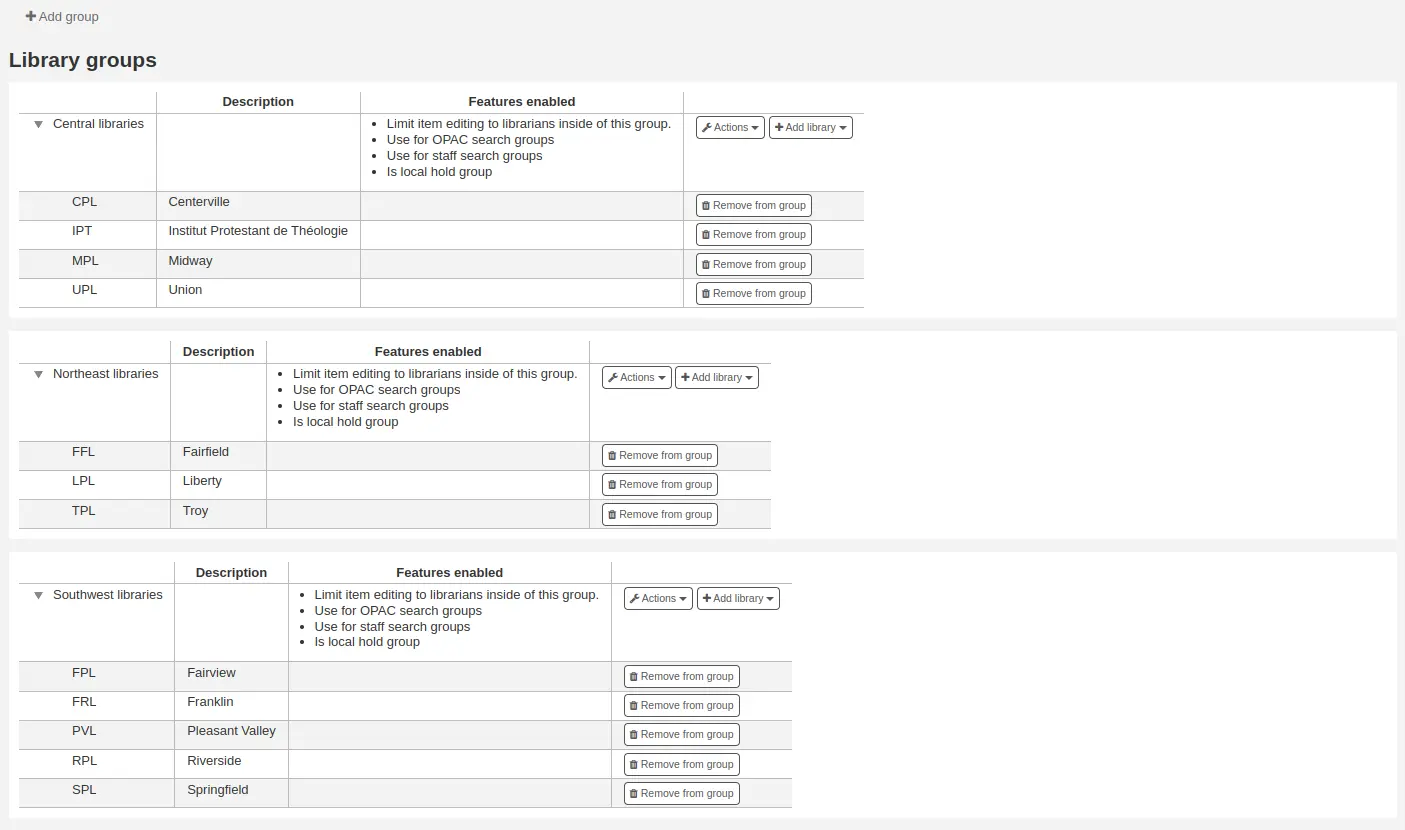
Προσθήκη μίας ομάδας
Για να δημιουργήσετε μια νέα ομάδα βιβλιοθηκών,
Επιλέξτε το κουμπί «Προσθήκη ομάδας» στο επάνω μέρος της οθόνης.
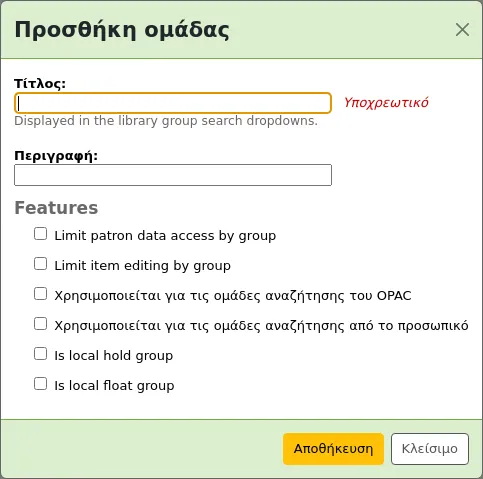
Τίτλος (απαιτείται): δώστε έναν τίτλο στην ομάδα. Αυτός ο τίτλος θα εμφανίζεται στο αναδιπλούμενο πλαίσιο των ορίων στη Σύνθετη Αναζήτηση advanced search limit dropdown.
Περιγραφή: προαιρετικά, εισαγάγετε μια περιγραφή για αυτή την ομάδα. Η περιγραφή χρησιμοποιείται μόνο σε αυτή τη σελίδα για να δώσει μια ιδέα για το τι περιλαμβάνει η ομάδα.
Χαρακτηριστικά: ελέγξτε τη χρήση αυτής της ομάδας
Περιορίστε την πρόσβαση στα δεδομένα των μελών ανά ομάδα: αυτό δεν θα επιτρέψει στο προσωπικό να βλέπει τα μέλη άλλων ομάδων.
Σημείωση
Αυτό μπορεί να παρακαμφθεί με το δικαίωμα view_borrower_infos_from_any_libraries (ή το δικαίωμα superlibrarian).
Περιορισμός της επεξεργασίας αντιτύπων ανά ομάδα: αυτό δεν θα επιτρέπει στο προσωπικό να επεξεργάζεται αντίτυπα βιβλιοθηκών άλλων ομάδων.
Σημείωση
Αυτό μπορεί να παρακαμφθεί με το δικαίωμα edit_any_item (ή το δικαίωμα superlibrarian).
Χρήση για ομάδες αναζήτησης στον OPAC: αυτό θα κάνει την ομάδα ορατή στο αναδιπλούμενο μενού βιβλιοθηκών στο επάνω μέρος του OPAC (όταν η παράμετρος του συστήματος OpacAddMastheadLibraryPulldown έχει οριστεί στην τιμή «Να προστίθεται») και στη σελίδα της Σύνθετης Αναζήτησης advanced search page.

Χρήση για ομάδες αναζήτησης στο διαχειριστικό περιβάλλον: αυτό θα κάνει την ομάδα ορατή στο αναδιπλούμενο μενού της βιβλιοθήκης στην στη Σύνθετη Αναζήτηση στο διαχειριστικό περιβάλλον.

Είναι τοπική ομάδα κρατήσεων: αυτό θα κάνει αυτή την ομάδα μια τοπική ομάδα κρατήσεων, η οποία μπορεί να χρησιμοποιηθεί για την προσθήκη Πολιτικών κρατήσεων στους κανόνες κυκλοφορίας του υλικού hold policies in the circulation rules για να μην επιτρέπεται στα μέλη να κάνουν κρατήσεις, παρά μόνο για αντίτυπα εντός της ομάδας.
Είναι τοπική ομάδα πλεύσης: αυτό θα κάνει αυτή την ομάδα μια τοπική ομάδα πλεύσης, η οποία μπορεί να χρησιμοποιηθεί σε μια πολιτική επιστροφών return policy ή σε μια πολιτική κρατήσεων hold policy στους κανόνες κυκλοφορίας του υλικού για να καθορίσει αν ένα τεκμήριο «πλέει» (παραμένει στη βιβλιοθήκη που επιστράφηκε) ή μεταφέρεται πίσω στη βιβλιοθήκη προέλευσης.
Επιλέξτε την «Αποθήκευση» για να δημιουργήσετε την ομάδα.
Προσθήκη βιβλιοθήκης σε μία ομάδα
Επιλέξτε το κουμπί «Προσθήκη βιβλιοθήκης» δίπλα στην ομάδα για να προσθέσετε μια βιβλιοθήκη σε αυτή την ομάδα. Θα εμφανιστεί μια λίστα με τις βιβλιοθήκες που δεν είναι ήδη στην ομάδα.
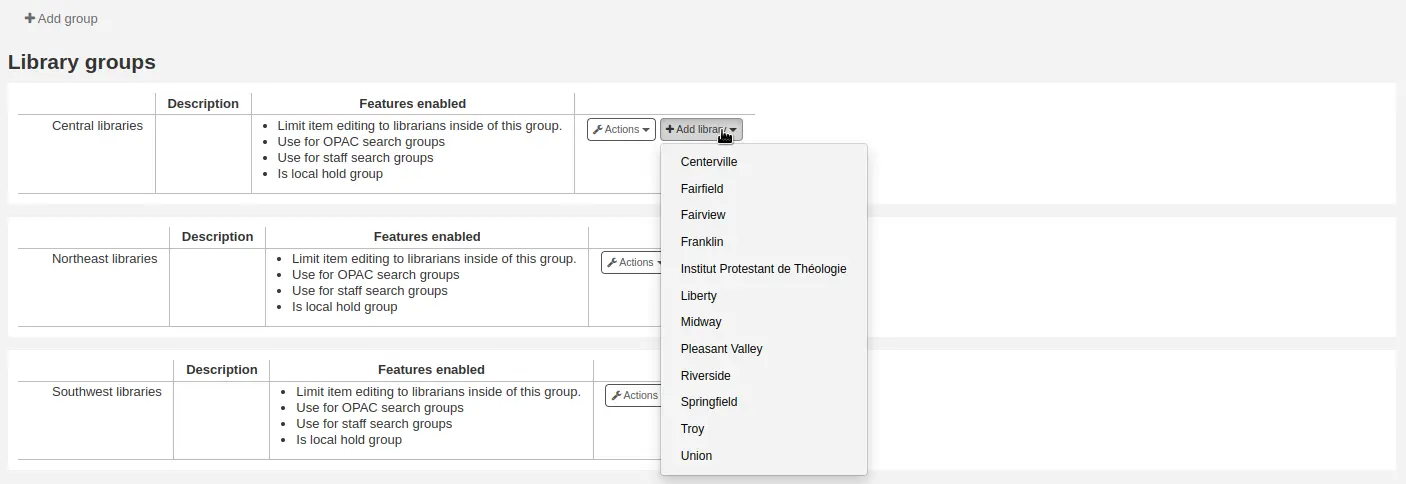
Προσθήκη μίας υπο-ομάδας
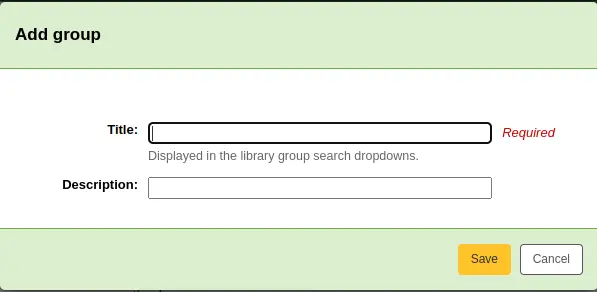
Εάν το σύστημά σας είναι πολύ μεγάλο, μπορείτε να δημιουργήσετε υποομάδες. Επιλέξτε το κουμπί «Ενέργειες» δίπλα στην ομάδα και ορίστε την επιλογή «Προσθήκη υποομάδας».

Συμπληρώστε τον τίτλο και την περιγραφή (προαιρετικά) της υποομάδας. Τα χαρακτηριστικά θα κληρονομηθούν από τη μητρική ομάδα.
Διαγραφή μίας ομάδας
Για να διαγράψετε μια ομάδα, επιλέξτε το κουμπί «Ενέργειες» δίπλα στην ομάδα και ακολούθως την επιλογή «Διαγραφή».

Το σύστημα θα σας ζητήσει να επιβεβαιώσετε τη διαγραφή.

Επιλέξτε τη «Διαγραφή» για να επιβεβαιώσετε και να διαγράψετε την ομάδα.
Γραφεία διακίνησης
Το Koha σάς επιτρέπει να ορίσετε πολλά γραφεία διακίνησης του υλικού μέσα σε μια ενιαία βιβλιοθήκη. Για παράδειγμα, αν έχετε ένα γραφείο διακίνησης για ενήλικες και ένα γραφείο διακίνησης για παιδιά ή αν έχετε ένα διαφορετικό γραφείο για κάθε όροφο ή για κάθε τμήμα.
Βεβαιωθείτε ότι έχετε ενεργοποιήσει την παράμετρο του συστήματος UseCirculationDesks για να χρησιμοποιήσετε αυτή τη λειτουργία.
Πηγαίνετε εκεί: Περισσότερα > Διοίκηση > Μέλη και κυκλοφορία > Γραφεία διακίνησης
Προσθήκη γραφείων διακίνησης
Για να προσθέσετε ένα νέο γραφείο διακίνησης, επιλέξτε το κουμπί «Νέο γραφείο» στο επάνω μέρος της σελίδας.

Στο πεδίο «Γραφείο», εισαγάγετε ένα όνομα για το γραφείο σας.
Επιλέξτε τη βιβλιοθήκη στην οποία βρίσκεται αυτό το γραφείο.
Επιλέξτε «Υποβολή».
Επεξεργασία γραφείου διακίνησης
Για να επεξεργαστείτε ένα υπάρχον γραφείο διακίνησης, επιλέξτε το κουμπί «Επεξεργασία» στα δεξιά του γραφείου που θέλετε να τροποποιήσετε.
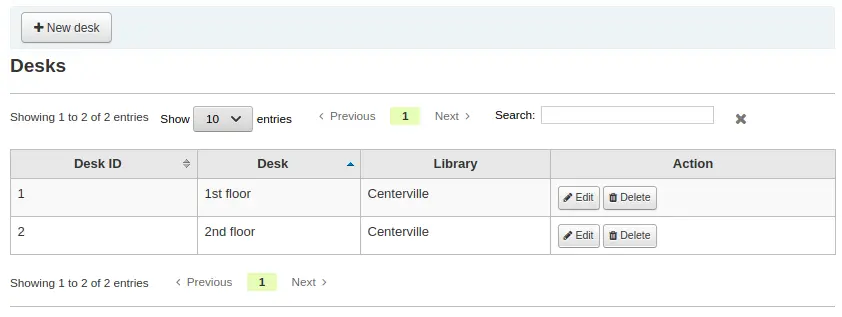
Από εκεί μπορείτε να αλλάξετε το όνομα ή/και τη βιβλιοθήκη του γραφείου.
Διαγραφή γραφείου διακίνησης
Για να διαγράψετε ένα υπάρχον γραφείο διακίνησης, επιλέξτε το κουμπί «Διαγραφή» στα δεξιά του γραφείου που θέλετε να αφαιρέσετε.
Τύποι τεκμηρίων
Πηγαίνετε εκεί: Περισσότερα > Διαχείριση > Βασικές παράμετροι > Τύποι τεκμηρίων
Σημείωση
Μόνο το προσωπικό με το δικαίωμα manage_itemtypes (ή το δικαίωμα superlibrarian) θα έχει πρόσβαση σε αυτό το τμήμα.
Το Koha σας επιτρέπει να οργανώσετε τη συλλογή σας με βάση τους τύπους τεκμηρίων και τους κωδικούς συλλογής. Μαζί με τις βιβλιοθήκες libraries και τις κατηγορίες μελών patron categories, οι τύποι τεκμηρίων χρησιμοποιούνται για τον έλεγχο των κανόνων κυκλοφορίας του υλικού circulation rules.
Οι τύποι τεκμηρίων αναφέρονται συνήθως στον τύπο του υλικού (βιβλίο, CD, DVD, κ.λπ.), αλλά μπορούν να χρησιμοποιηθούν με οποιονδήποτε τρόπο εξυπηρετεί τη βιβλιοθήκη σας.
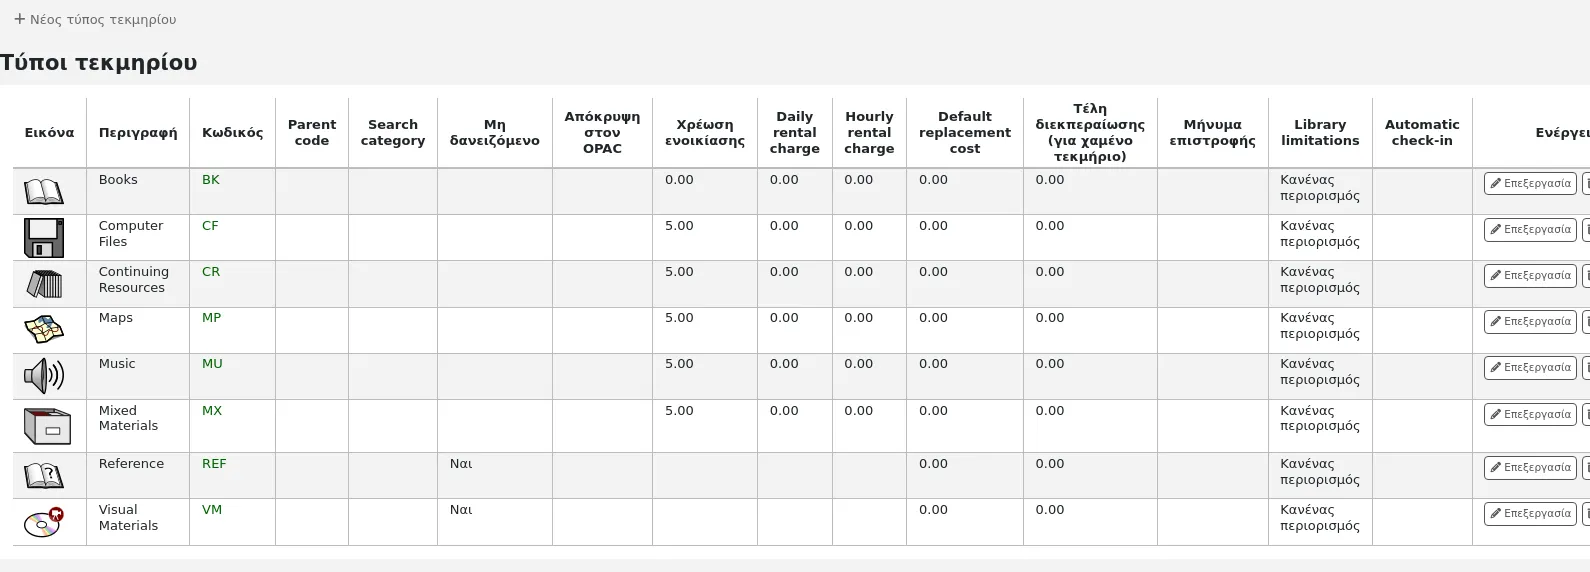
Σημείωση
You can customize the columns of this table in the Table settings section of the Administration module (table id: table_item_type).
Προσθήκη τύπων τεκμηρίων
Για να προσθέσετε ένα τύπου τεκμηρίου,
Επιλέξτε το κουμπί «Νέος τύπος τεκμηρίου» στο επάνω μέρος της σελίδας των τύπων τεκμηρίων.
Συμπληρώστε τη φόρμα:
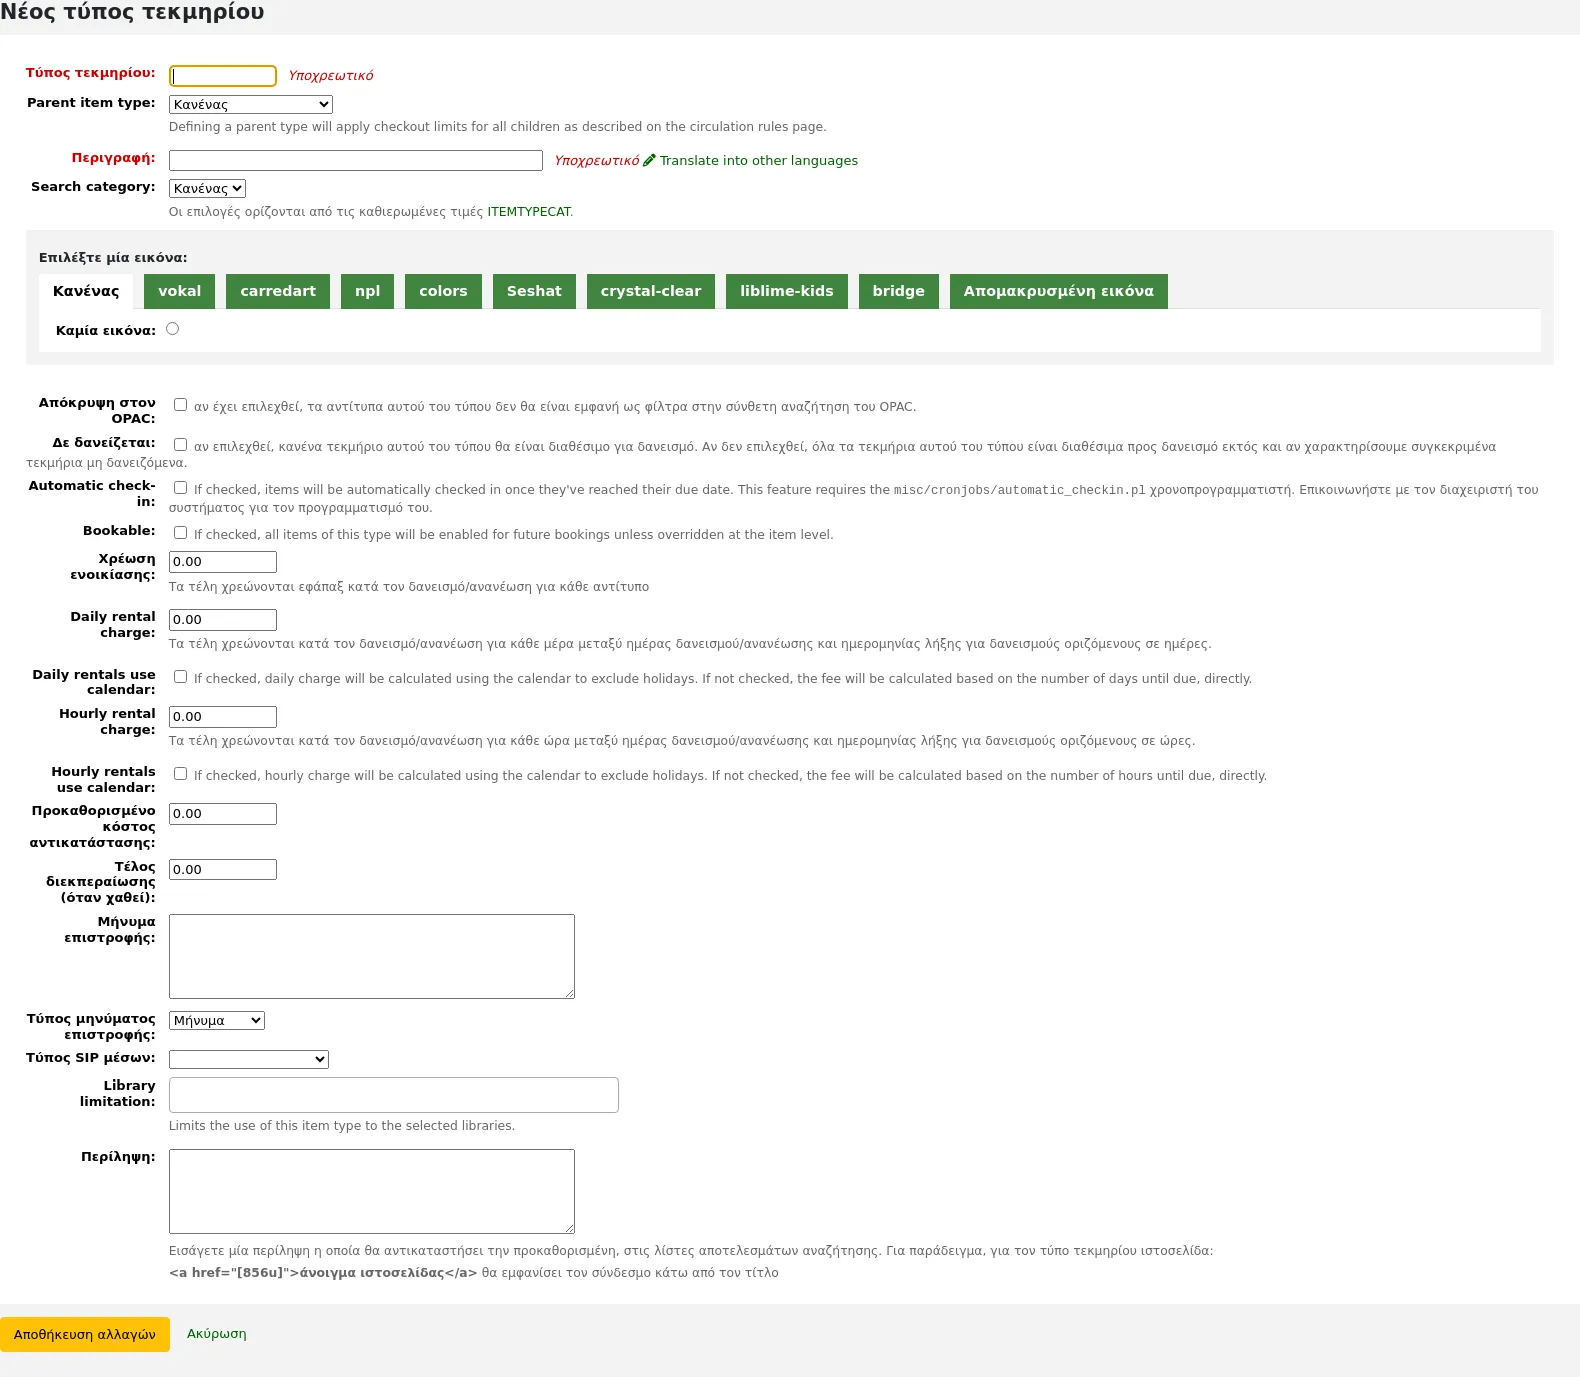
Τύπος τεκμηρίου: εισαγάγετε έναν σύντομο κωδικό για τον τύπο του τεκμηρίου σας (μέγιστο 10 χαρακτήρες)
Μητρικός τύπος τεκμηρίου: μπορείτε να επιλέξετε έναν τύπο τεκμηρίου που θα λειτουργεί ως μητρική κατηγορία για αυτόν τον τύπο τεκμηρίου. Στη συνέχεια, μπορείτε να ορίσετε κανόνες κυκλοφορίας circulation rules με βάση αυτόν τον μητρικό τύπο τεκμηρίου.
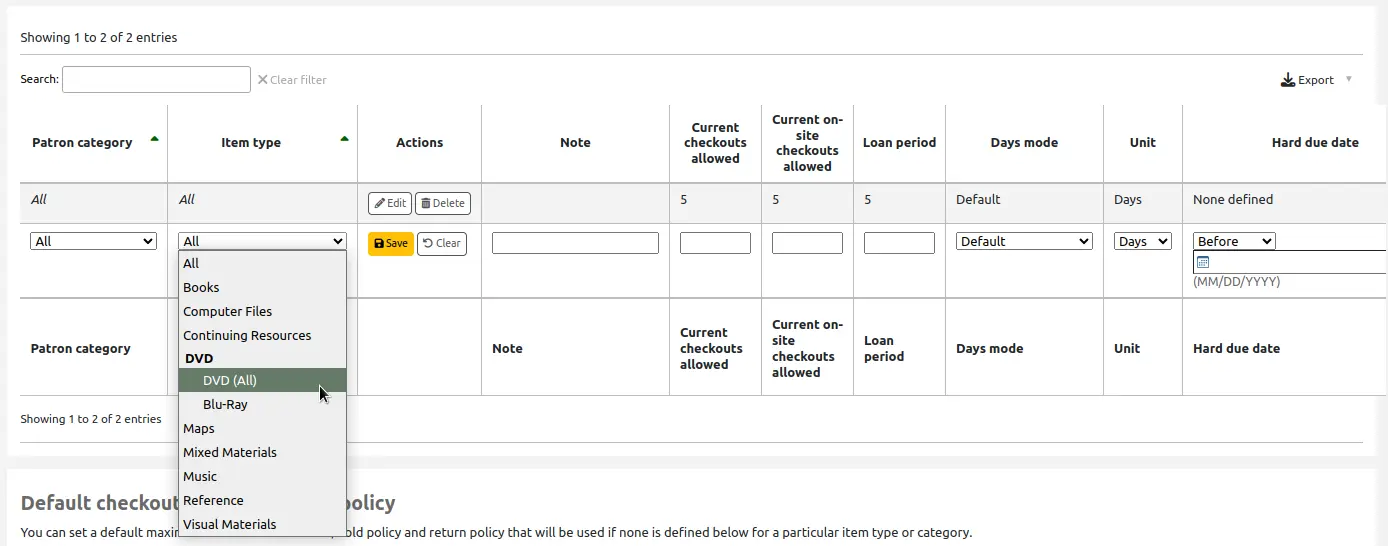
Για παράδειγμα, θα μπορούσατε να έχετε τύπους τεκμηρίων DVD και Blu-ray και το DVD θα ήταν ο μητρικός τύπος του τύπου τεκμηρίου Blu-ray.
Στη συνέχεια, μπορείτε να δημιουργήσετε έναν κανόνα κυκλοφορίας circulation rule, είτε μόνο για Blu-ray, είτε για DVD και Blu-ray (DVD (Όλα))
Περιγραφή: πληκτρολογήστε τον περιγραφικό ορισμό του τύπου τεκμηρίου
Σε συστήματα με εγκατεστημένες πολλές γλώσσες, μπορείτε να μεταφράσετε την περιγραφή του τύπου τεκμηρίου σε όλες αυτές τις γλώσσες χρησιμοποιώντας το σύνδεσμο «Μετάφραση σε άλλες γλώσσες».
Κατηγορία αναζήτησης: οι τύποι τεκμηρίων μπορούν να ομαδοποιηθούν για ταυτόχρονη αναζήτηση στη σύνθετη αναζήτηση του Δημόσιου Καταλόγου (OPAC). Για παράδειγμα, μπορείτε να τοποθετήσετε τα DVD και τα Blu-ray σε μια ομάδα που ονομάζεται «Ταινίες» και στη συνέχεια τα μέλη μπορούν να τα αναζητήσουν μαζί. Αυτές οι ομάδες ορίζονται στην παράμετρο ITEMTYPECAT authorized value category.
Σημείωση
Οι κατηγορίες αναζήτησης χρησιμοποιούνται μόνο στο Δημόσιο Κατάλογο (OPAC). Το προσωπικό μπορεί να αναζητήσει μεμονωμένους τύπους τεκμηρίων στη σύνθετη αναζήτηση του διαχειριστικού περιβάλλοντος.
Επιλέξτε ένα εικονίδιο: μπορείτε να επιλέξετε να συσχετίσετε μια εικόνα με τον τύπο του τεκμηρίου σας. Αυτές οι εικόνες θα εμφανίζονται στο διαχειριστικό περιβάλλον και στον OPAC, στη σύνθετη αναζήτηση και στον πίνακα των τεκμηρίων ή στη βιβλιογραφική εγγραφή, εάν η παράμετρος του συστήματος item-level_itypes έχει οριστεί σε επίπεδο εγγραφής. Μπορείτε να επιλέξετε ένα εικονίδιο από μια σειρά συλλογών εικόνων ή να συνδεθείτε με μια απομακρυσμένη εικόνα.
Προειδοποίηση
Εάν αυτή η επιλογή δεν είναι ενεργοποιημένη, μπορείτε να αλλάξετε τη ρύθμιση των noItemTypeImages ή OPACNoItemTypeImages.
Σημείωση
Για να εμφανίζονται οι εικόνες των τύπων τεκμηρίων σας στο Δημόσιο Κατάλογο (OPAC) πρέπει να ορίσετε την παράμετρο OPACnoItemTypeImages στην τιμή «Να εμφανίζονται».
Απόκρυψη στο Δημόσιο Κατάλογο (OPAC): για αντίτυπα που αποκλείετε από τον OPAC, μπορείτε να αποκρύψετε τον τύπο του τεκμηρίου τους από την αναζήτηση στον OPAC.
Σημαντικό
Αυτό δεν θα εμποδίσει την εμφάνιση αυτών των αντιτύπων στα αποτελέσματα αναζήτησης, απλώς θα αφαιρέσει τον τύπο τεκμηρίου από τη φόρμα της σύνθετης αναζήτησης.
Αν θέλετε να αποκρύψετε τελείως τα τεκμήρια ενός συγκεκριμένου τύπου τεκμηρίου, ας πούμε ότι έχετε μια επαγγελματική βιβλιοθήκη με βιβλία που προορίζονται για το προσωπικό και δεν θέλετε να εμφανίζονται στον OPAC, χρησιμοποιήστε την παράμετρο του συστήματος OpacHiddenItems.
Μη δανειζόμενο: επιλέξτε αυτή την ένδειξη για τύπους τεκμηρίων που δεν πρέπει να κυκλοφορούν (δανεισμός). Τα αντίτυπα με την ένδειξη «Μη δανειζόμενο» θα εμφανίζονται στον κατάλογο, αλλά δεν θα μπορούν να δοθούν για δανεισμό στα μέλη.
Αυτόματη επιστροφή: μπορείτε να επιλέξετε αυτή την επιλογή για αντίτυπα να που δεν είναι φυσικά, αλλά για τα οποία εξακολουθείτε να έχετε κανόνες κυκλοφορίας, όπως τα δελτία μουσείων ή τα ηλεκτρονικά βιβλία.
Σημείωση
Αυτή η επιλογή απαιτεί την εργασία παρασκηνίου για την αυτόματη επιστροφή cronjob misc/cronjobs/automatic_checkin.pl. Ζητήστε από το διαχειριστή του συστήματός σας να την προγραμματίσει.
Με δυνατότητα προκράτησης: κάντε αυτή την επιλογή για να επιτρέψετε τις προκρατήσεις bookings για όλα τα αντίτυπα αυτού του τύπου τεκμηρίου.
Έκδοση
Αυτή η επιλογή προστέθηκε στην έκδοση 24.11 του Koha.
Χρέωση δανεισμού: εάν χρεώνετε ένα κατ” αποκοπήν τέλος δανεισμού για το δανεισμό αντιτύπων αυτού του τύπου, καταχωρίστε το τέλος εδώ. Αυτό το τέλος θα χρεωθεί στο μέλος κατά το δανεισμό και την ανανέωση.
Σημαντικό
Μην εισάγετε σύμβολα σε αυτό το πεδίο, μόνο αριθμούς και δεκαδικά ψηφία (π.χ. 5,00 δολάρια πρέπει να εισαχθούν ως 5 ή 5,00).
Ημερήσια χρέωση δανεισμού: εάν η χρέωση δανεισμού πρέπει να χρεώνεται με βάση τον αριθμό των ημερών για τις οποίες το αντίτυπο έχει δοθεί για δανεισμό, εισαγάγετε εδώ την ημερήσια χρέωση. Αυτό το τέλος θα χρεωθεί στο μέλος κατά την ολοκλήρωση του δανεισμού πολλαπλασιαζόμενο με τον αριθμό των ημερών που το συγκεκριμένο αντίτυπο έχει δοθεί για δανεισμό. Για παράδειγμα, για ένα αντίτυπο που έχει δοθεί για δανεισμό για 7 ημέρες με ημερήσια χρέωση ενοικίασης 1$, το μέλος θα χρεωθεί 7$ κατά την ολοκλήρωση του δανεισμού. Αυτή η ημερήσια χρέωση δανεισμού θα εφαρμόζεται επίσης για τις ανανεώσεις.
Σημαντικό
Μην εισάγετε σύμβολα σε αυτό το πεδίο, μόνο αριθμούς και δεκαδικά ψηφία (π.χ. 5,00 δολάρια πρέπει να εισαχθούν ως 5 ή 5,00).
Οι ημερήσιοι δανεισμοί χρησιμοποιούν ημερολόγιο: επιλέξτε αυτή τη ρύθμιση για να αποκλείσετε τις αργίες από τον υπολογισμό του ημερήσιου τέλους δανεισμού.
Σημείωση
Φροντίστε να καταχωρήσετε τις κλειστές ημέρες στο ημερολόγιο calendar για να τις εξαιρέσετε από την ημερήσια χρέωση δανεισμού.
Ωριαία χρέωση δανεισμού: εάν τα αντίτυπα διατίθενται με ωριαίο δανεισμό, αναγράψτε εδώ το κόστος ανά ώρα. Και πάλι, το συνολικό ποσό (ωριαίο κόστος * αριθμός ωρών δανεισμού) θα χρεωθεί στο μέλος κατά το δανεισμό και την ανανέωση.
Σημαντικό
Μην εισάγετε σύμβολα σε αυτό το πεδίο, μόνο αριθμούς και δεκαδικά ψηφία (π.χ. 5,00 δολάρια πρέπει να εισαχθούν ως 5 ή 5,00).
Οι ωριαίοι δανεισμοί χρησιμοποιούν ημερολόγιο: ενεργοποιήστε αυτή την επιλογή για να αποκλείσετε τις αργίες από τον υπολογισμό της ωριαίας χρέωσης δανεισμού.
Σημείωση
Φροντίστε να καταχωρήσετε τις κλειστές ημέρες στο ημερολόγιο calendar για να τις εξαιρέσετε από την ημερήσια χρέωση δανεισμού.
Προεπιλεγμένο κόστος αντικατάστασης: αυτό είναι το ποσό που θα χρεωθεί στο μέλος όταν ένα αντίτυπο αυτού του τύπου χαθεί ΚΑΙ το αντίτυπο δεν έχει κόστος αντικατάστασης replacement cost. Εάν το αντίτυπο έχει κόστος αντικατάστασης, αυτό είναι το ποσό που θα χρεωθεί στο μέλος.
Σημαντικό
Μην εισάγετε σύμβολα σε αυτό το πεδίο, μόνο αριθμούς και δεκαδικά ψηφία (π.χ. 5,00 δολάρια πρέπει να εισαχθούν ως 5 ή 5,00).
Τέλος επεξεργασίας (όταν χαθεί): αυτό το τέλος επεξεργασίας θα προστεθεί στο κόστος αντικατάστασης εάν ένα μέλος χάσει ένα αντίτυπο αυτού του τύπου.
Σημαντικό
Μην εισάγετε σύμβολα σε αυτό το πεδίο, μόνο αριθμούς και δεκαδικά ψηφία (π.χ. 5,00 δολάρια πρέπει να εισαχθούν ως 5 ή 5,00).
Μήνυμα επιστροφής: αν θέλετε να εμφανίζεται ένα μήνυμα ή μια ειδοποίηση όταν επιστρέφονται αντίτυπα αυτού του τύπου, εισαγάγετε το μήνυμα εδώ.
Τύπος μηνύματος επιστροφής: το μήνυμα επιστροφής μπορεί να είναι «μήνυμα» ή «ειδοποίηση». Η μόνη διαφορά μεταξύ αυτών των δύο είναι το στυλ. Το μήνυμα είναι μπλε
και η ειδοποίηση είναι κίτρινη.
Τύπος μέσου SIP: ορισμένες συσκευές SIP χρειάζονται να χρησιμοποιήσετε έναν τύπο μέσου που είναι συγκεκριμένος για το SIP αντί για τον τύπο τεκμηρίου του Koha (συνήθως οι θυρίδες και οι ταξινομητές χρειάζονται αυτόν τον τύπο μέσου). Εάν χρησιμοποιείτε μια τέτοια συσκευή, επιλέξτε τον τύπο μέσων SIP για αυτόν τον τύπο τεκμηρίου.
Περιορισμός βιβλιοθήκης: αν αυτός ο τύπος τεκμηρίου πρόκειται να χρησιμοποιηθεί μόνο σε συγκεκριμένες βιβλιοθήκες, μπορείτε να τις επιλέξετε εδώ. Επιλέξτε «Όλες οι βιβλιοθήκες», εάν αυτός ο τύπος τεκμηρίου χρησιμοποιείται σε όλο το σύστημα βιβλιοθηκών.
Σημείωση
Εάν αυτό το πεδίο παραμείνει κενό, θεωρείται ότι είναι «Όλες οι βιβλιοθήκες».
Πρακτική συμβουλή
Για να επιλέξετε περισσότερες από μία βιβλιοθήκες, κρατήστε πατημένο το πλήκτρο “Ctrl” ενώ επιλέγετε τις βιβλιοθήκες.
Περίληψη: αυτή η περίληψη χρησιμοποιείται μόνο σε μη XSLT προβολές.
Έλεγχος για προηγούμενους δανεισμούς: αυτή η ρύθμιση εμφανίζεται μόνο αν η παράμετρος του συστήματος CheckPrevCheckout έχει οριστεί στις τιμές «Εκτός αν αντικατασταθεί από την κατηγορία μέλους ή τον τύπο τεκμηρίου, να γίνεται» ή «Εκτός αν αντικατασταθεί από την κατηγορία μέλους ή τον τύπο τεκμηρίου, να μην γίνεται». Αυτό επιτρέπει στις βιβλιοθήκες να προσαρμόσουν το κατά πόσον το Koha θα πρέπει να προειδοποιεί το προσωπικό όταν ένα μέλος έχει ήδη δανειστεί τον ίδιο τίτλο, ανά τύπο τεκμηρίου.
Μεταφορά από τις παράμετρους του συστήματος: θα χρησιμοποιηθεί η ρύθμιση της παραμέτρου του συστήματος CheckPrevCheckout.
Ναι και παράκαμψη των παραμέτρων του συστήματος: να ελέγχεται πάντα το ιστορικό κυκλοφορίας του μέλους για αυτόν τον τύπο τεκμηρίου, ανεξάρτητα από τη ρύθμιση της παραμέτρου CheckPrevCheckout.
Όχι και παράκαμψη των παραμέτρων του συστήματος: Να μην ελέγχεται ποτέ το ιστορικό δανεισμού του μέλους για αυτόν τον τύπο τεκμηρίου, ανεξάρτητα από τη ρύθμιση της παραμέτρου CheckPrevCheckout.
Έκδοση
Αυτή η επιλογή προστέθηκε στην έκδοση 25.11 του Koha.
Οταν ολοκληρώσετε, επιλέξτε την «Αποθήκευση αλλαγών».
Σημείωση
Όλα τα πεδία, με εξαίρεση το «Είδος τεκμηρίου», θα μπορούν να υπόκεινται επεξεργασία από τη λίστα των τύπων τεκμηρίων.
Ο νέος σας τύπος τεκμηρίου θα εμφανιστεί τώρα στη λίστα.
Επεξεργασία τύπων τεκμηρίων
Για να επεξεργαστείτε ένα τύπο τεκμηρίου, επιλέξτε την «Επεξεργασία» δίπλα του, ή επιλέξτε τον κωδικό του τύπου τεκμηρίου.
Δείτε στην ενότητα της προσθήκης τύπων τεκμηρίων Adding item types για μια περιγραφή κάθε πεδίου.
Σημαντικό
Δεν θα μπορείτε να επεξεργαστείτε τον κωδικό που ορίσατε ως «Τύπο τεκμηρίου», αλλά θα μπορείτε να επεξεργαστείτε την περιγραφή του τεκμηρίου.
Διαγραφή τύπων τεκμηρίων
Για να διαγράψετε ένα τύπο τεκμηρίου, επιλέξτε τη «Διαγραφή» δίπλα του.
Σημαντικό
Δεν θα μπορείτε να διαγράψετε τύπους τεκμηρίων που χρησιμοποιούνται από αντίτυπα ή βιβλιογραφικές εγγραφές στο σύστημά σας. Σε αυτή την περίπτωση, ένα μήνυμα θα σας ειδοποιήσει ότι ο τύπος τεκμηρίου είναι σε χρήση.

Μέλη και κυκλοφορία υλικού
Ρυθμίσεις για τον έλεγχο της κυκλοφορίας και της πληροφόρησης των μελών.
Κατηγορίες μελών
Οι κατηγορίες μελών σάς επιτρέπουν να οργανώσετε τα μέλη σας σε διαφορετικούς ρόλους, ηλικιακές ομάδες και τύπους μελών.
Πηγαίνετε εκεί: Περισσότερα > Διαχείριση > Μέλη και κυκλοφορία > Κατηγορίες μελών
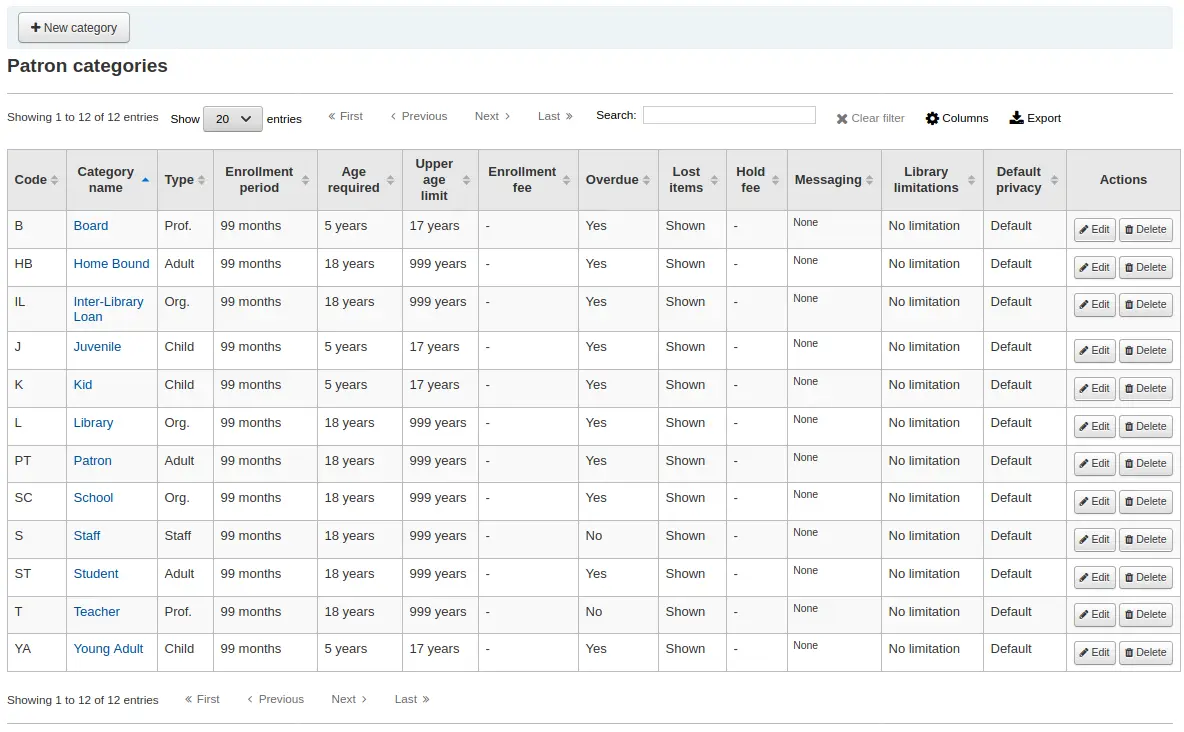
Σημείωση
You can customize the columns of this table in the Table settings section of the Administration module (table id: patron_categories).
Σημείωση
Μόνο το προσωπικό με το δικαίωμα manage_patron_categories (ή το δικαίωμα superlibrarian) θα έχει πρόσβαση σε αυτό το τμήμα.
Προσθήκη μίας κατηγορίας μελών
Για να προσθέσετε μια νέα κατηγορία μελών επιλέξτε τη «Νέα κατηγορία» στο πάνω μέρος της σελίδας
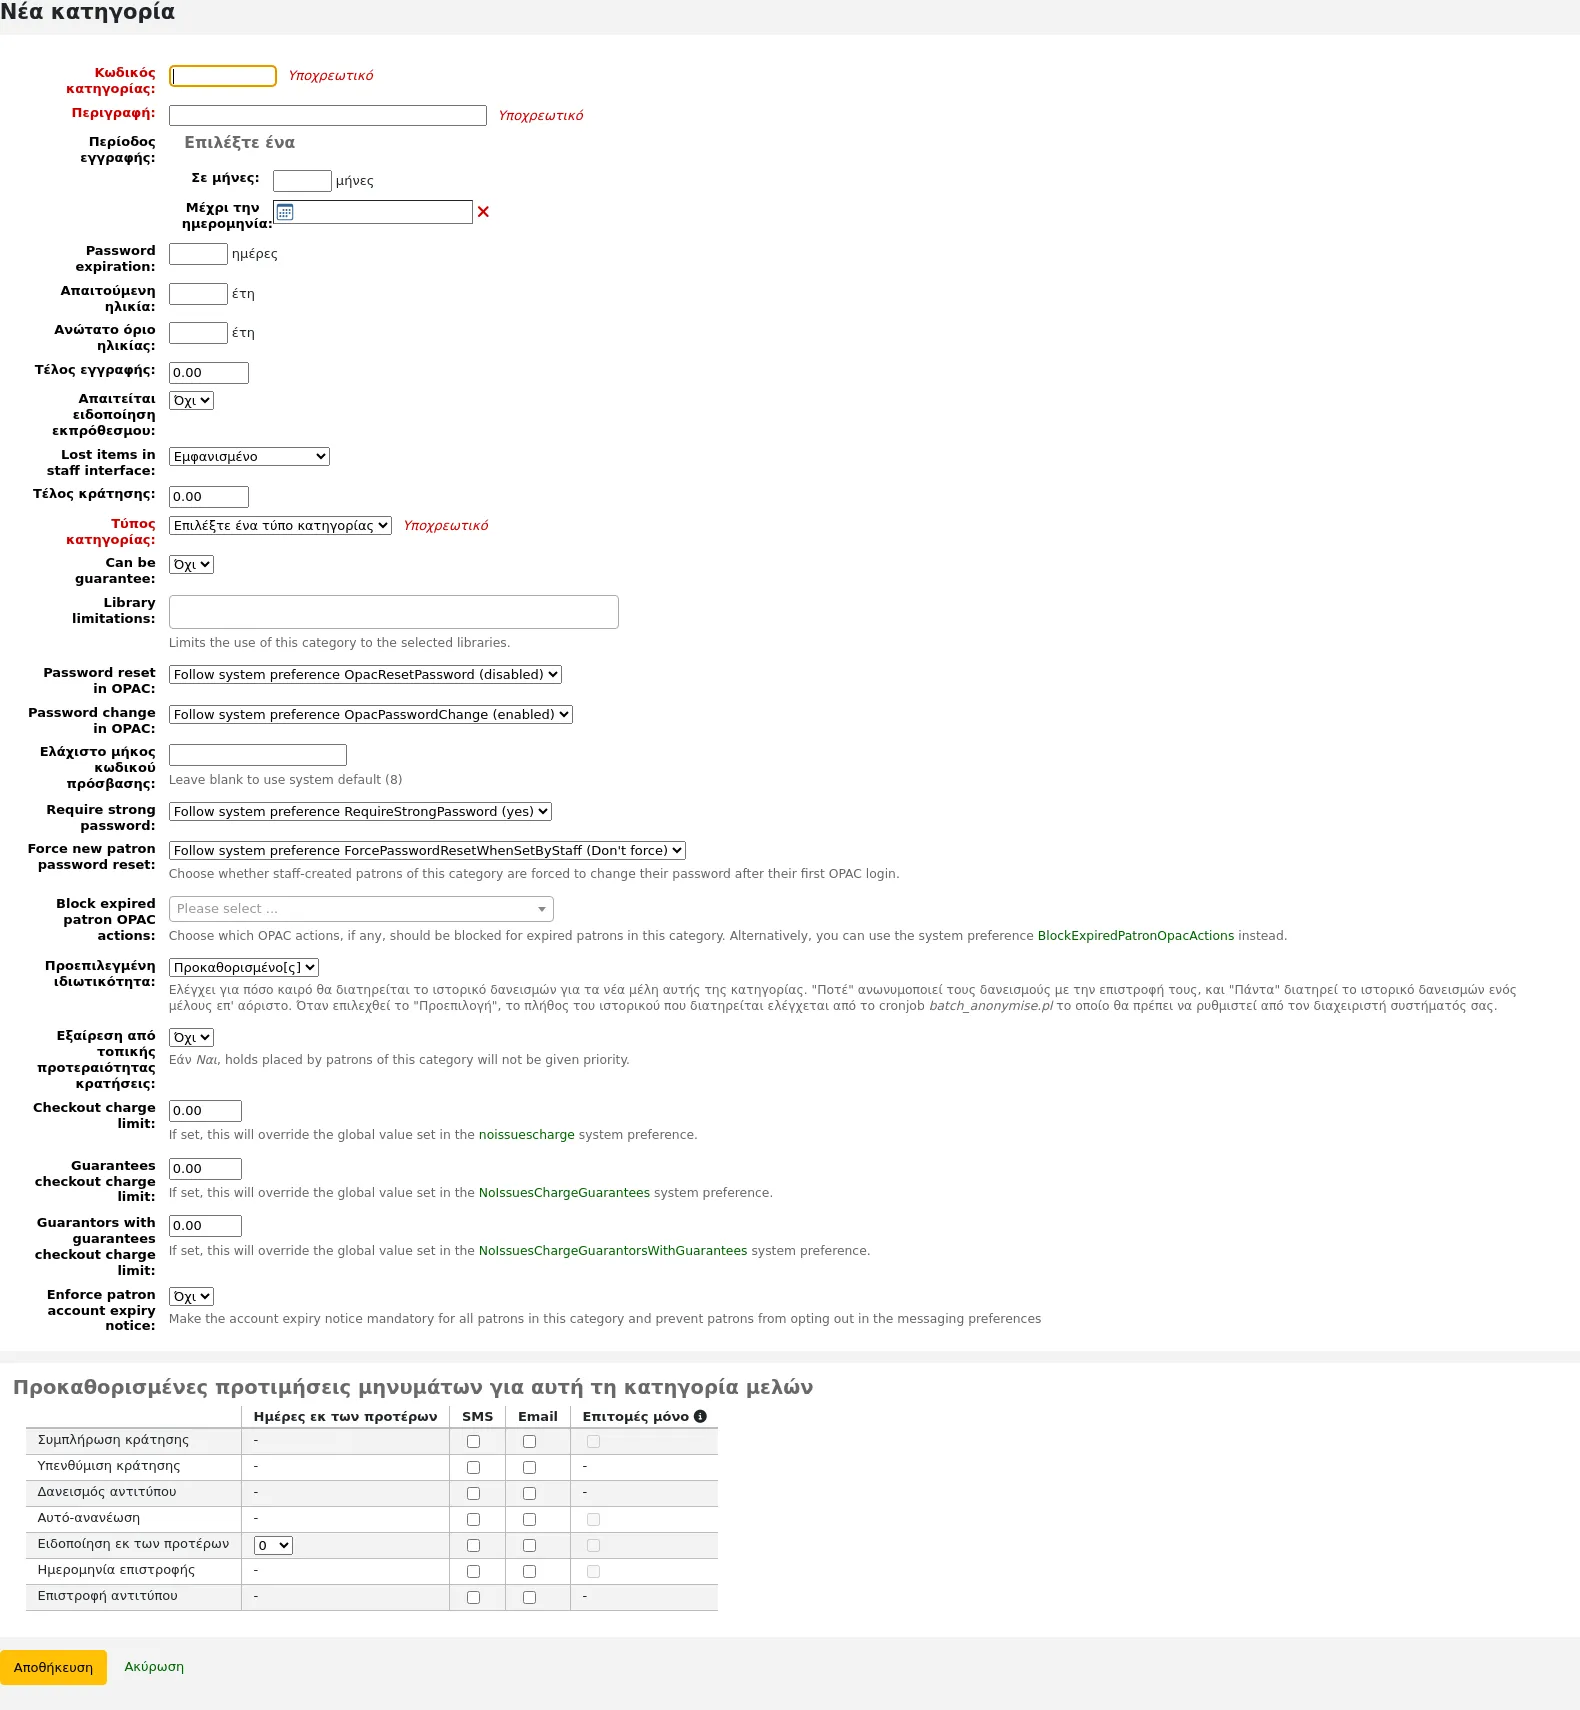
Κωδικός κατηγορίας: ένα αναγνωριστικό για τη νέα σας κατηγορία.
Ο κωδικός κατηγορίας δεν υπερβαίνει τους 10 χαρακτήρες (αριθμούς και γράμματα) και πρέπει να είναι μοναδικός.
Αυτό το πεδίο είναι απαραίτητο για να αποθηκεύσετε την κατηγορία των μελών σας. Εάν παραμείνει κενό, θα εμφανιστεί σφάλμα.
Περιγραφή: μια εκδοχή απλού κειμένου της κατηγορίας.
Η περιγραφή θα είναι ορατή σε όλο το Koha.
Αυτό το πεδίο είναι απαραίτητο για να αποθηκεύσετε την κατηγορία των μελών σας. Εάν παραμείνει κενό, θα εμφανιστεί σφάλμα.
Διάρκεια εγγραφής:
Σε μήνες: θα πρέπει να συμπληρωθεί εάν έχετε περιορισμένη διάρκεια εγγραφής για τα μέλη σας. Για παράδειγμα, οι φοιτητικές κάρτες λήγουν μετά από 9 μήνες
Μέχρι την ημερομηνία: μπορείτε να επιλέξετε μια ημερομηνία, στην οποία θα λήξουν οι κάρτες
Αυτό το πεδίο είναι απαραίτητο για να αποθηκεύσετε την κατηγορία των μελών σας. Εάν παραμείνει κενό, θα εμφανιστεί σφάλμα.
Προειδοποίηση
Δεν μπορείτε να καταχωρήσετε και ένα όριο μηνών, και μια ημερομηνία για μια κατηγορία. Επιλέξτε να εισαγάγετε είτε το ένα, είτε το άλλο.
Λήξη κωδικού πρόσβασης: εισαγάγετε τον αριθμό των ημερών, μετά τις οποίες το μέλος πρέπει να αλλάξει τον κωδικό πρόσβασής του.
Απαιτούμενη ηλικία: ελάχιστη ηλικία (σε έτη) που απαιτείται για την κατηγορία. Για παράδειγμα, μια κατηγορία μελών «Ενήλικοι» μπορεί να έχει ελάχιστη ηλικία 18 ετών - αυτό σημαίνει ότι τα μέλη πρέπει να είναι τουλάχιστον 18 ετών για να ανήκουν σε αυτή την κατηγορία μελών.
Κατά τη δημιουργία ή την ενημέρωση της εγγραφής ενός μέλους , θα εμφανιστεί μια προειδοποίηση εάν το μέλος είναι πολύ μικρό για αυτή την κατηγορία.

Αυτή η τιμή χρησιμοποιείται από την εργασία παρασκηνίου update_patrons_category.pl για την αλλαγή της κατηγορίας των μελών που είναι πολύ νέοι.
Ανώτατο όριο ηλικίας: μέγιστη ηλικία (σε έτη) που σχετίζεται με την κατηγορία. Για παράδειγμα, μια κατηγορία μελών «Παιδιά» μπορεί να έχει ανώτερο όριο ηλικίας τα 18 έτη, πράγμα που σημαίνει ότι τα μέλη μπορούν να έχουν κάρτες παιδιών μέχρι να γίνουν 18 ετών.
Κατά τη δημιουργία ή την ενημέρωση της εγγραφής ενός μέλους, θα εμφανιστεί μια προειδοποίηση εάν το μέλος είναι πολύ μεγάλο για αυτή την κατηγορία.

Αυτή η τιμή χρησιμοποιείται από την εργασία παρασκηνίου update_patrons_category.pl για την αλλαγή της κατηγορίας των μελών που είναι πολύ μεγάλοι.
Κόστος εγγραφής: πληκτρολογήστε το ποσό, εάν χρεώνετε συνδρομή μέλους για τα μέλη σας (π.χ. εκείνα που ζουν σε άλλη περιοχή).
Προειδοποίηση
Εισαγάγετε μόνο αριθμούς και δεκαδικά ψηφία σε αυτό το πεδίο.
Σημείωση
Ανάλογα με την τιμή στην παράμετρο του συστήματος FeeOnChangePatronCategory, το τέλος αυτό θα χρεώνεται κατά την ανανέωση της ιδιότητας του μέλους, καθώς και κατά την πρώτη εγγραφή του.
Απαιτείται ειδοποίηση καθυστέρησης: επιλέξτε «Ναι» εάν θέλετε τα μέλη αυτής της κατηγορίας να λαμβάνουν ειδοποιήσεις καθυστέρησης. Αυτό θα σας επιτρέψει να ορίσετε την ενεργοποίηση των ειδοποιήσεων καθυστέρησης overdue notice triggers στην ενότητα των Ετγαλείων Tools module.
Χαμένα τεκμήρια στο διαχειριστικό περιβάλλον: αποφασίστε ανά κατηγορία μέλους, αν τα χαμένα τεκμήρια θα εμφανίζονται στο διαχειριστικό περιβάλλον.
Εμφανιζόμενα: τα χαμένα τεκμήρια εμφανίζονται στο διαχειριστικό περιβάλλον.
Αποκρυπτόμενα εξαρχής: τα χαμένα τεκμήρια είναι κρυμμένα, αλλά το προσωπικό μπορεί να επιλέξει την «Εμφάνιση όλων των τεκμηρίων» για να τα δουν.
Σημείωση
Αυτό ισχύει μόνο στο διαχειριστικό περιβάλλον, οπότε η αλλαγή αυτής της τιμής στις κατηγορίες μελών που δεν είναι συνδεδεμένες με το διαχειριστικό περιβάλλον δεν θα κάνει καμία διαφορά.
Τέλος κράτησης: εισαγάγετε το ποσό του τέλους, αν χρεώνετε στα μέλη αυτής της κατηγορίας κάποιο τέλος για την κράτηση τεκμηρίων.
Προειδοποίηση
Εισαγάγετε μόνο αριθμούς και δεκαδικά ψηφία σε αυτό το πεδίο.
Τύπος κατηγορίας: επιλέξτε μία από τις έξι κύριες μητρικές κατηγορίες
Ενήλικας: ο συνηθέστερος τύπος μέλους, συνήθως χρησιμοποιείται για μια γενική κατηγορία «μέλους».
Παιδί: ένας ακόμη κοινός τύπος μέλους.
Προσωπικό: το προσωπικό της βιβλιοθήκης
Οργανωτικό: οι οργανισμοί μπορούν να χρησιμοποιηθούν ως επόπτες για τα επαγγελματικά μέλη.
Επαγγελματικό: τα επαγγελµατικά μέλη µπορούν να συνδεθούν µε τα οργανωτικά μέλη.
Στατιστικό: αυτός ο τύπος μέλους χρησιμοποιείται αυστηρά για στατιστικούς σκοπούς, όπως η εσωτερική χρήση των τεκμηρίων.
Αυτό το πεδίο είναι απαραίτητο για να αποθηκεύσετε την κατηγορία των μελών σας. Εάν παραμείνει κενό, θα εμφανιστεί σφάλμα.
Can be guarantee: if the patrons of this category can have guarantors, choose yes. This will make the “Patron guarantor” and “Non-patron guarantor” sections appear in the patron form.
Περιορισμοί βιβλιοθηκών: εάν είναι απαραίτητο, περιορίστε αυτή την κατηγορία μελών σε ορισμένες μόνο βιβλιοθήκες του συστήματος της βιβλιοθήκης σας. Επιλέξτε «Όλες τις βιβλιοθήκες» αν θέλετε να μπορεί να χρησιμοποιηθεί αυτή η κατηγορία από οποιαδήποτε βιβλιοθήκη.
Πρακτική συμβουλή
Για να επιλέξετε περισσότερες από μία βιβλιοθήκες, κρατήστε πατημένο το πλήκτρο Ctrl ενώ κάνετε την επιλογή σας.
Επαναφορά κωδικού πρόσβασης στον OPAC: αποφασίστε αν τα μέλη αυτής της κατηγορίας επιτρέπεται να επαναφέρουν τον κωδικό πρόσβασής τους μέσω της λειτουργίας «Ξεχάσατε τον κωδικό πρόσβασης» του OPAC. Εξαρχής, θα ακολουθεί τον κανόνα που έχει οριστεί στην παράμετρο του συστήματος OpacResetPassword.
Ακολουθήστε την παράμετρο του συστήματος OpacResetPassword.
Να επιτρέπεται: τα μέλη αυτής της κατηγορίας θα μπορούν να επαναφέρουν τον κωδικό πρόσβασής τους μέσω του OPAC, ανεξάρτητα από τη ρύθμιση στην παράμετρο OpacResetPassword.
Να μην επιτρέπεται: τα μέλη αυτής της κατηγορίας δεν θα μπορούν να επαναφέρουν τον κωδικό πρόσβασής τους μέσω του OPAC, ανεξάρτητα από τη ρύθμιση στην παράμετρο OpacResetPassword.
Αλλαγή κωδικού πρόσβασης στον OPAC: αποφασίστε αν τα μέλη αυτής της κατηγορίας επιτρέπεται να αλλάζουν τον κωδικό πρόσβασής τους μέσω του OPAC. Εξαρχής, θα ακολουθείται ο κανόνας που έχει οριστεί στην παράμετρο του συστήματος OpacPasswordChange.
Ακολουθήστε την παράμετρο του συστήματος OpacPasswordChange.
Να επιτρέπεται: τα μέλη αυτής της κατηγορίας θα μπορούν να αλλάζουν τον κωδικό πρόσβασής τους μέσω του OPAC, ανεξάρτητα από τη ρύθμιση στην παράμετρο OpacPasswordChange.
Να μην επιτρέπεται: τα μέλη αυτής της κατηγορίας δεν θα μπορούν να αλλάξουν τον κωδικό πρόσβασής τους μέσω του OPAC, ανεξάρτητα από τη ρύθμιση στην παράμετρο OpacPasswordChange.
Ελάχιστο μήκος κωδικού πρόσβασης: εισαγάγετε το ελάχιστο μήκος του κωδικού πρόσβασης για τα μέλη αυτής της κατηγορίας. Αφήστε το κενό για να χρησιμοποιήσετε το προεπιλεγμένο μήκος που έχει οριστεί στην παράμετρο του συστήματος minPasswordLength.
Απαίτηση ισχυρού κωδικού πρόσβασης: αποφασίστε αν θα επιβάλλετε πολιτική ισχυρού κωδικού πρόσβασης (τουλάχιστον ένα κεφαλαίο γράμμα, ένα πεζό γράμμα και ένα ψηφίο) για τα μέλη αυτής της κατηγορίας. Από προεπιλογή, θα ακολουθείται ο κανόνας που έχει οριστεί στην παράμετρο του συστήματος RequireStrongPassword.
Ακολουθήστε την παράμετρο του συστήματος RequireStrongPassword.
Ναι: Τα μέλη αυτής της κατηγορίας θα πρέπει να έχουν ισχυρό κωδικό πρόσβασης ανεξάρτητα από τη ρύθμιση στην παράμετρο RequireStrongPassword.
Όχι: τα μέλη αυτής της κατηγορίας δεν απαιτείται να έχουν ισχυρό κωδικό πρόσβασης ανεξάρτητα από τη ρύθμιση στην παράμετρο RequireStrongPassword.
Αναγκαστική επαναφορά κωδικού πρόσβασης νέου μέλους: επιλέξτε αν τα μέλη αυτής της κατηγορίας που έχουν δημιουργηθεί από το προσωπικό θα αναγκάζονται να αλλάξουν τον κωδικό πρόσβασής τους μετά την πρώτη τους είσοδο στο Δημόσιο Κατάλογο (OPAC).
Ακολουθήστε την παράμετρο του συστήματος ForcePasswordResetWhenSetByStaff
Να επιτρέπεται: τα μέλη αυτής της κατηγορίας θα μπορούν να αλλάζουν τον κωδικό πρόσβασής τους μέσω του OPAC, ανεξάρτητα από τη ρύθμιση στην παράμετρο ForcePasswordResetWhenSetByStaff
Να μην επιτρέπεται: τα μέλη αυτής της κατηγορίας δεν θα μπορούν να αλλάξουν τον κωδικό πρόσβασής τους μέσω του OPAC, ανεξάρτητα από τη ρύθμιση στην παράμετρο ForcePasswordResetWhenSetByStaff
Σημείωση
Αυτό ισχύει μόνο για τα μέλη των οποίων ο λογαριασμός δημιουργήθηκε χειροκίνητα από μέλη του προσωπικού (σε αντίθεση με τα αυτοεγγεγραμμένα μέλη).
Έκδοση
Η επιλογή αυτή προστέθηκε στην έκδοση 24.11 του Koha.
Αποκλεισμός των ενεργειών στον OPAC από τα μελη που έχει λήξει ο λογαριασμός τους: αποφασίστε εάν τα μέλη αυτής της κατηγορίας αποκλείονται από την εκτέλεση ενεργειών στον OPAC εάν ο λογαριασμός τους έχει λήξει. Από προεπιλογή, θα ακολουθείται ο κανόνας που έχει οριστεί στην παράμετρο του συστήματος BlockExpiredPatronOpacActions.
Ακολουθήστε την παράμετρο του συστήματος BlockExpiredPatronOpacActions.
Αποκλεισμός συγκεκριμένων ενεργειών:
την υποβολή κράτησης σε ένα αντίτυπο Placing a hold on an item.
την υποβολή αιτήματος διαδανεισμού Placing ILL requests.
την ανανέωση δανεισμού ενός αντιτύπου Renewing an item.
Σημείωση
Αυτή η ρύθμιση υπερισχύει των ρυθμίσεων που περιέχονται στην παράμετρο του συστήματος BlockExpiredPatronOpacActions.
Προειδοποίηση
Πριν από την έκδοση Koha 24.11, αυτή η ρύθμιση ήταν μια απλή επιλογή ενεργοποίησης/απενεργοποίησης και όλες οι ενέργειες μπλοκαρίζονταν αν ήταν ενεργοποιημένη.
Έλεγχος για προηγούμενους δανεισμούς: αν η παράμετρος του συστήματος CheckPrevCheckout έχει οριστεί σε μία από τις επιλογές «Εκτός αν παρακαμφθεί από την κατηγορία μελών», θα μπορείτε να ορίσετε την τιμή για τη συγκεκριμένη κατηγορία μελών εδώ.
Ναι και προσπαθήστε να παρακάμψετε τις παραμέτρους του συστήματος: εκτός αν οι προσωπικές ρυθμίσεις του μέλους το εμποδίζουν.
Όχι και προσπαθήστε να παρακάμψετε τις παραμέτρους του συστήματος: εκτός αν οι προσωπικές ρυθμίσεις του μέλους, το επιτρέπουν.
Μεταφορά από τις παράμετρους του συστήματος: θα ακολουθηθεί η ρύθμιση της παραμέτρου του συστήματος CheckPrevCheckout.
Να επιτρέπεται αίτημα διαδανεισμού στον OPAC: εάν η παράμετρος του συστήματος ILLModule είναι ενεργοποιημένη, αυτή η ρύθμιση καθορίζει εάν τα μέλη αυτής της κατηγορίας μπορούν να υποβάλλουν αιτήσεις διαδανεισμού από τον OPAC.
Έκδοση
Αυτή η επιλογή προστέθηκε στο Koha στην έκδοση 23.11. Στις προηγούμενες εκδόσεις, όλα τα μέλη μπορούν να υποβάλλουν αιτήματα διαδανεισμού από τον Δημόσιο κατάλογο (OPAC).
Προεπιλεγμένη ιδιωτικότητα: επιλέξτε τις προεπιλεγμένες ρυθμίσεις ιδιωτικότητας για τα μέλη αυτής της κατηγορίας.
Προεπιλογή: το ιστορικό δανεισμών θα διατηρείται επ” αόριστον, έως ότου εκτελεστεί είτε το σενάριο batch_anonymize.pl, είτε υπάρξει χειροκίνητη ανωνυμοποίηση του παραρτήματος batch anonymization, η οποία θα εκτελεστεί.
Ποτέ: το ιστορικό δανεισμών ανωνυμοποιείται κατά την επιστροφή του υλικού. Τα στατιστικά στοιχεία διατηρούνται, αλλά η σύνδεση μεταξύ του δανεισμού, του τεκμηρίου και του μέλους αφαιρείται.
Για πάντα: το ιστορικό του δανεισμού δεν ανωνυμοποιείται ποτέ για τα μέλη αυτής της κατηγορίας, ανεξάρτητα από την εργασία παρασκηνίου ή τη χειροκίνητη ανωνυμοποίηση.
Αυτή η ρύθμιση μπορεί να τροποποιηθεί από το μέλος μέσω του OPAC, εάν το επιτρέπετε με την παράμετρο του συστήματος OPACPrivacy.
Εξαίρεση από την προτεραιότητα τοπικών κρατήσεων: επιλέξτε αν οι κρατήσεις για τα μέλη αυτής της κατηγορίας θα έχουν προτεραιότητα.
Ναι: οι κρατήσεις για τα μέλη αυτής της κατηγορίας δεν έχουν ιδιαίτερη προτεραιότητα, ανεξάρτητα από τη ρύθμιση στην παράμετρο LocalHoldsPriority.
Όχι: οι κρατήσεις για τα μέλη αυτής της κατηγορίας υπόκεινται στις ρυθμίσεις της παραμέτρου LocalHoldsPriority.
Όριο οφειλών δανεισμού: εμποδίστε τα μέλη αυτής της κατηγορίας να δανείζονται, εάν χρωστούν περισσότερο από το καθορισμένο ποσό.
Εάν αυτό το πεδίο παραμείνει κενό ή είναι 0, η τιμή στην παράμετρο του συστήματος noissuescharge θα χρησιμοποιηθεί για τα μέλη αυτής της κατηγορίας.
Εάν αυτό το πεδίο έχει μία τιμή, θα παρακάμψει την τιμή στην παράμετρο του συστήματος noissuescharge για τα μέλη αυτής της κατηγορίας.
Έκδοση
Η επιλογή αυτή προστέθηκε στην έκδοση 24.11 του Koha.
Όριο χρέωσης δανεισμού εποπτευόμενων: εμποδίστε τα μέλη αυτής της κατηγορίας να δανείζονται αντίτυπα, εάν οι εποπτευόμενοί τους χρωστούν συνολικά περισσότερο από το καθορισμένο ποσό.
Εάν αυτό το πεδίο παραμείνει κενό ή είναι 0, η τιμή στην παράμετρο του συστήματος NoIssuesChargeGuarantees θα χρησιμοποιηθεί για τα μέλη αυτής της κατηγορίας.
Εάν αυτό το πεδίο έχει μία τιμή, θα υπερισχύσει της τιμής στην παράμετρο του συστήματος NoIssuesChargeGuarantees για τα μέλη αυτής της κατηγορίας.
Έκδοση
Η επιλογή αυτή προστέθηκε στην έκδοση 24.11 του Koha.
Επόπτες με όριο χρέωσης δανεισμών σε εποπτευόμενους: εμποδίζει τα μέλη αυτής της κατηγορίας να δανειστούν τεκμήρια, εάν το μέλος έχει επόπτες και οι εποπτευόμενοι αυτών των εποπτών οφείλουν συνολικά περισσότερο από το καθορισμένο ποσό.
Εάν αυτό το πεδίο παραμείνει κενό ή είναι 0, η τιμή στο πεδίο NoIssuesChargeGuarantorsWithGuarantees θα χρησιμοποιηθεί για τα μέλη αυτής της κατηγορίας.
Εάν αυτό το πεδίο έχει μία τιμή, θα υπερισχύσει της τιμής στο πεδίο NoIssuesChargeGuarantorsWithGuarantees της παραμέτρου του συστήματος για τα μέλη αυτής της κατηγορίας.
Έκδοση
Η επιλογή αυτή προστέθηκε στην έκδοση 24.11 του Koha.
Προεπιλεγμένες παράμετροι ανταλλαγής μηνυμάτων για αυτή την κατηγορία μελών : ορισμός παραμέτρων σύνθετης ανταλλαγής μηνυμάτων advanced messaging preferences από προεπιλογή στην κατηγορία μελών
Αυτές οι προεπιλεγμένες προτιμήσεις μπορούν να αλλάξουν σε ατομική βάση changed on an individual basis για κάθε μέλος. Αυτή η ρύθμιση είναι απλώς μια προεπιλογή για να διευκολύνει τη ρύθμιση των μηνυμάτων κατά τη δημιουργία νέων μελών.
Σημείωση
Αυτό απαιτεί να έχετε ορίσει την παράμετρο του συστήματος EnhancedMessagingPreferences στην τιμή «Να επιτρέπεται».
Προειδοποίηση
Αυτές οι προεπιλογές θα εφαρμοστούν μόνο στα νέα μέλη που προστίθενται στο σύστημα. Δεν θα επηρεάσουν τις προτιμήσεις των υφιστάμενων μελών.
Εάν πρέπει να εφαρμόσετε τις προεπιλεγμένες προτιμήσεις στα υπάρχοντα μέλη, μπορείτε να επιβάλλετε αυτές τις αλλαγές εκτελώντας το σενάριο borrowers-force-messaging-defaults που βρίσκεται στο φάκελο misc/maintenance. Ζητήστε τη βοήθεια του διαχειριστή του συστήματός σας για αυτό το σενάριο.
Κανόνες κυκλοφορίας και προστίμων
Αυτοί οι κανόνες καθορίζουν τον τρόπο με τον οποίο κυκλοφορούν τα τεκμήριά σας, τον τρόπο και τον χρόνο υπολογισμού των προστίμων και τον τρόπο χειρισμού των κρατήσεων.
Πηγαίνετε εκεί: Περισσότερα > Διαχείριση> Μέλη και κυκλοφορία > Κυκλοφορία και κανόνες προστίμων
Σημείωση
Μόνο το προσωπικό με το δικαίωμα manage_circ_rules (ή το δικαίωμα superlibrarian) θα έχει πρόσβαση σε αυτό το τμήμα.
Οι κανόνες εφαρμόζονται από τους πιο ειδικούς προς τους λιγότερο ειδικούς, χρησιμοποιώντας τους πρώτους που βρέθηκαν με αυτή τη σειρά:
ίδια βιβλιοθήκη, ίδια κατηγορία μέλους, ίδιος τύπος τεκμηρίου
ίδια βιβλιοθήκη, ίδια κατηγορία μέλους, όλοι οι τύποι τεκμηρίων
ίδια βιβλιοθήκη, όλες οι κατηγορίες μελών, ίδιος τύπος τεκμηρίου
ίδια βιβλιοθήκη, όλες οι κατηγορίες μελών, όλοι οι τύποι τεκμηρίων
προεπιλογή (όλες οι βιβλιοθήκες), ίδια κατηγορία μέλους, ίδιος τύπος τεκμηρίου
προεπιλογή (όλες οι βιβλιοθήκες), ίδια κατηγορία μέλους, όλοι οι τύποι τεκμηρίων
προεπιλογή (όλες οι βιβλιοθήκες), όλες οι κατηγορίες μελών, ίδιος τύπος τεκμηρίου
προεπιλογή (όλες οι βιβλιοθήκες), όλες οι κατηγορίες μελών, όλοι οι τύποι τεκμηρίων
Οι παράμετροι CircControl και HomeOrHoldingBranch μπαίνουν επίσης στο παιχνίδι όταν υπολογίζετε ποιος κανόνας κυκλοφορίας πρέπει να ακολουθηθεί.
Εάν η παράμετρος CircControl έχει οριστεί στην τιμή «η βιβλιοθήκη στην οποία έχετε συνδεθεί», οι κανόνες κυκλοφορίας θα επιλέγονται με βάση τη βιβλιοθήκη στην οποία έχετε συνδεθεί
Εάν η παράμετρος CircControl έχει οριστεί στην τιμή «η βιβλιοθήκη από την οποία προέρχεται το μέλος», οι κανόνες κυκλοφορίας θα επιλέγονται με βάση τη βιβλιοθήκη του μέλους
Εάν η παράμετρος CircControl έχει οριστεί στην τιμή «η βιβλιοθήκη προέλευσης του τεκμηρίου», οι κανόνες κυκλοφορίας θα επιλέγονται με βάση τη βιβλιοθήκη προέλευσης του τεκμηρίου, όπου το HomeOrHoldingBranch επιλέγει εάν χρησιμοποιείται η βιβλιοθήκη προέλευσης του τεκμηρίου ή η τρέχουσα βιβλιοθήκη του.
Εάν η παράμετρος IndependentBranches έχει οριστεί στην τιμή «Να αποτρέπεται», τότε η τιμή του HomeOrHoldingBranch χρησιμοποιείται για να υπολογιστεί εάν το τεκμήριο μπορεί να δοθεί για δανεισμό. Εάν η βιβλιοθήκη προέλευσης του τεκμηρίου δεν ταιριάζει με τη βιβλιοθήκη που έχετε συνδεθεί, το τεκμήριο δεν μπορεί να δοθεί για δανεισμό, εκτός εάν έχετε το δικαίωμα του superlibrarian superlibrarian permission.
Σημαντικό
Το λιγότερο που θα πρέπει να κάνετε είναι να ορίσετε έναν προεπιλεγμένο κανόνα κυκλοφορίας. Αυτός ο κανόνας θα πρέπει να οριστεί για όλους τους τύπους τεκμηρίων, όλες τις βιβλιοθήκες και όλες τις κατηγορίες μελών. Αυτό θα πιάσει όλες τις περιπτώσεις που δεν ταιριάζουν με έναν συγκεκριμένο κανόνα. Κατά το δανεισμό αν δεν έχετε έναν κανόνα για όλες τις βιβλιοθήκες, όλους τους τύπους τεκμηρίων και όλες τις κατηγορίες μελών, τότε μπορεί να δείτε ότι τα μέλη εμποδίζονται στις κρατήσεις.
Ορισμός κανόνων κυκλοφορίας
Χρησιμοποιώντας τον πίνακα κανόνων διαχείρισης, μπορείτε να ορίσετε κανόνες που εξαρτώνται από τους συνδυασμούς κατηγορίας μέλους/τύπου τεκμηρίου.
Σημείωση
Επειδή ο πίνακας είναι πολύ ευρύς, μπορείτε να εξάγετε τους υπάρχοντες κανόνες σε μορφή Microsoft Excel ή CSV, για να τους εξετάσετε, χρησιμοποιώντας το κουμπί «Εξαγωγή» στο επάνω μέρος του πίνακα.
Για να ορίσετε τους κανόνες σας, επιλέξτε μια βιβλιοθήκη από το αναδιπλούμενο μενού (ή «Τυπικοί κανόνες για όλες τις βιβλιοθήκες» αν θέλετε να εφαρμοστούν αυτοί οι κανόνες σε όλα τα παραρτήματα):
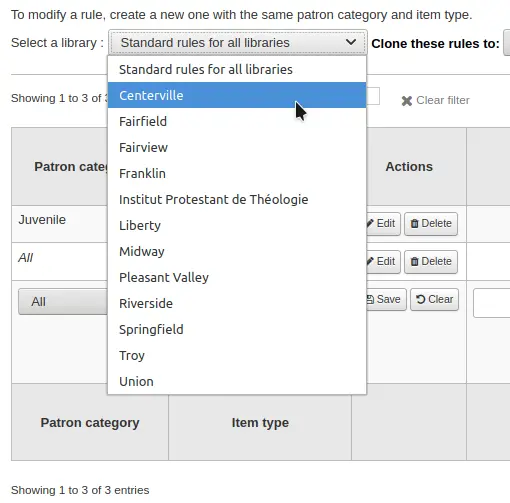
Από τον πίνακα μπορείτε να επιλέξετε οποιονδήποτε συνδυασμό κατηγοριών μελών και τύπων τεκμηρίων για να εφαρμόσετε τους κανόνες

Πρώτα επιλέξτε σε ποια κατηγορία μέλους θέλετε να εφαρμοστεί ο κανόνας. Αν αφήσετε την επιλογή «Όλες», θα εφαρμοστεί σε όλες τις κατηγορίες μελών
Επιλέξτε τον τύπο τεκμηρίου, στον οποίο θέλετε να εφαρμοστεί αυτός ο κανόνας. Αν αφήσετε το πεδίο «Όλοι», θα ισχύει για όλους τους τύπους τεκμηρίων αυτής της κατηγορίας μελών
Εάν ένας τύπος τεκμηρίου έχει έναν μητρικό τύπο τεκμηρίου, ο κανόνας θα εμφανίζεται ως Μητέρα-> Παιδί. Ο αριθμός των τρεχόντων δανεισμών θα περιορίζεται είτε στο μέγιστο για τον μητρικό (συμπεριλαμβανομένων των αδελφών τύπων), είτε στον κανόνα του συγκεκριμένου τύπου, όποιος από τους δύο είναι μικρότερος.

Στο παραπάνω παράδειγμα, υπάρχει ένας κανόνας για τον τύπο τεκμηρίου DVD με μέγιστο όριο 5 δανεισμούς και ένας κανόνας για το Blu-ray, θυγατρικός τύπος του DVD, με μέγιστο όριο 2 δανεισμούς. Ένα μέλος σε αυτή τη βιβλιοθήκη θα μπορεί να δανείζεται το πολύ 2 Blu-ray σε σύνολο 5 τεκμηρίων, είτε του τύπου DVD είτε του τύπου Blu-ray.
Συνοψίζοντας, ένα μέλος σε αυτή τη βιβλιοθήκη θα μπορούσε να πάρει είτε -0 Blu-ray και το πολύ 5 DVD, είτε 1 Blu-ray και το πολύ 4 DVD, είτε 2 Blu-ray και το πολύ 3 DVD
Προσθέστε σημειώσεις σχετικά με τον κανόνα κυκλοφορίας σας στο πεδίο των σημειώσεων. Αυτό μπορεί να είναι χρήσιμο για να θυμάστε γιατί και πότε άλλαξε κάτι τελευταία φορά.
Περιορίστε τον αριθμό των τεκμηρίων αυτού του τύπου που μπορεί να δανειστεί ταυτόχρονα ένα μέλος αυτής της κατηγορίας, εισάγοντας έναν αριθμό στο πεδίο «Επιτρεπόμενοι τρέχοντες δανεισμοί».
Αν επιτρέπετε τους αυτόματους δανεισμούς on-site checkouts, τότε μπορεί επίσης να θέλετε να ορίσετε ένα όριο στον αριθμό των τεκμηρίων αυτού του τύπου που τα μέλη αυτής της κατηγορίας μπορούν να δανειστούν αυτόματα.
Σημείωση
Αυτή η ρύθμιση εξαρτάται επίσης από την παράμετρο ConsiderOnSiteCheckoutsAsNormalCheckouts
Καθορίστε το χρονικό διάστημα κατά το οποίο ένα τεκμήριο αυτού του τύπου μπορεί να δοθεί για δανεισμό σε ένα μέλος αυτής της κατηγορίας, εισάγοντας τον αριθμό των μονάδων (ημέρες ή ώρες) στο πλαίσιο «Περίοδος δανεισμού».
Καθορίστε αν η περίοδος δανεισμού θα πρέπει να περιλαμβάνει ή όχι τις ημέρες κλεισίματος στη στήλη « Μέρες λειτουργίας». Η ρύθμιση που επιλέγεται εδώ θα παρακάμψει την παράμετρο του συστήματος useDaysMode για τον συγκεκριμένο κανόνα.
Η ρύθμιση «Προεπιλογή» θα λάβει την επιλογή που ορίζεται στην παράμετρο του συστήματος useDaysMode
Επιλέξτε την ένδειξη «Ημερολόγιο» αν θέλετε να χρησιμοποιήσετε το ημερολόγιο για να παραλείψετε τις ημέρες που η βιβλιοθήκη είναι κλειστή
Επιλέξτε την επιλογή «Ημερομηνία λήξης» εάν θέλετε να μεταθέσετε την ημερομηνία λήξης στην επόμενη εργάσιμη ημέρα
Επιλέξτε την ένδειξη «Ημέρες» αν θέλετε να αγνοήσετε το ημερολόγιο και να υπολογίσετε απευθείας την ημερομηνία λήξης
Επιλέξτε την επιλογή «Ημέρα εβδομάδας» εάν θέλετε να χρησιμοποιήσετε το ημερολόγιο για να μεταφέρετε την ημερομηνία λήξης στην επόμενη ανοικτή αντίστοιχη εργάσιμη ημέρα για τις εβδομαδιαίες περιόδους δανεισμού, ή στην επόμενη ανοικτή ημέρα σε αντίθετη περίπτωση
Επιλέξτε σε ποια μονάδα χρόνου, ημέρες ή ώρες, θα υπολογίζονται η περίοδος δανεισμού και τα πρόστιμα στη στήλη «Μονάδα»
Σημείωση
Εάν χρησιμοποιείτε την επιλογή «ώρες», μπορείτε να ορίσετε τις ώρες λειτουργίας των βιβλιοθηκών για κάθε βιβλιοθήκη library και να καθορίσετε τον τρόπο υπολογισμού της ώρας λήξης σε περίπτωση που αυτή πέφτει εκτός των ωρών λειτουργίας.
Μπορείτε επίσης να ορίσετε μια ανελαστική ημερομηνία λήξης για μια συγκεκριμένη κατηγορία μέλους και τύπο τεκμηρίου. Η αυστηρή ημερομηνία λήξης προσφέρει τρεις επιλογές:
Ακριβώς στις: Η ημερομηνία λήξης του δανεισμού οποιουδήποτε τεκμηρίου έχει δοθεί με αυτόν τον κανόνα θα οριστεί στην ανελαστική ημερομηνία λήξης.
Πριν τις: Το Koha θα υπολογίσει την κανονική περίοδο δανεισμού. Εάν η υπολογιζόμενη ημερομηνία λήξης είναι ή μετά ή στην ανελαστική ημερομηνία λήξης, θα επιλεγεί η ανελαστική ημερομηνία λήξης.
Μετά τις: Το Koha θα υπολογίσει την κανονική περίοδο δανεισμού. Εάν η υπολογιζόμενη ημερομηνία λήξης είναι πριν από την ανελαστική ημερομηνία λήξης, θα χρησιμοποιηθεί η ανελαστική ημερομηνία λήξης.
Το «Ποσό προστίμου» θα πρέπει να περιέχει το ποσό που θέλετε να χρεώνετε για τα καθυστερημένα τεκμήρια.
Σημαντικό
Εισάγετε μόνο αριθμούς και δεκαδικά σημεία (όχι σύμβολα νομισμάτων).
Πληκτρολογήστε το «Διάστημα χρέωσης προστίμου» στη μονάδα που έχετε ορίσει (π.χ. χρέωση προστίμου κάθε 1 ημέρα ή κάθε 2 ώρες). Η παράμετρος του συστήματος finesCalendar ορίζει αν θα λαμβάνονται υπόψη ή όχι οι ημέρες που η βιβλιοθήκη είναι κλειστή.
Η επιλογή «Χρόνος χρέωσης» είναι πιο χρήσιμη σε βιβλιοθήκες που έχουν διάστημα χρέωσης άνω της 1 ημέρας.
Τέλος του διαστήματος: Δεδομένου ότι η περίοδος χάριτος είναι 2 ημέρες και το διάστημα προστίμου 7 ημέρες, το πρώτο πρόστιμο θα εμφανιστεί 7 ημέρες μετά την ημερομηνία λήξης, θα χρειάζεται πάντα ένα διάστημα επιβολής προστίμου (7 ημέρες), πριν καταλογιστεί το πρώτο πρόστιμο.
Έναρξη του διαστήματος: Με δεδομένη περίοδο χάριτος 2 ημερών και διάστημα επιβολής προστίμου 7 ημερών, το πρώτο πρόστιμο θα εμφανιστεί 2 ημέρες μετά την ημερομηνία λήξης και το δεύτερο πρόστιμο 7 ημέρες μετά την ημερομηνία λήξης.
Η «περίοδος χάριτος προστίμων» είναι το χρονικό διάστημα που μπορεί να καθυστερήσει η επιστροφή ενός τεκμήριου πριν αρχίσετε να χρεώνετε πρόστιμα. Η παράμετρος του συστήματος FinesIncludeGracePeriod ορίζει αν η περίοδος χάριτος θα συμπεριληφθεί κατά τον υπολογισμό του προστίμου ή όχι.
Σημαντικό
Αυτό μπορεί να ρυθμιστεί μόνο για τη μονάδα «Ημέρα», όχι στις «Ώρες»
Το «Ανώτατο όριο προστίμων καθυστέρησης» είναι το μέγιστο πρόστιμο ανά τεκμήριο για αυτόν τον συνδυασμό μέλους και τύπου τεκμηρίου.
Σημαντικό
Εάν αυτό το πεδίο παραμείνει κενό, τότε το Koha δεν θα θέσει όριο στα πρόστιμα που θα προκύψουν σε αυτό το τεκμήριο. Ένα μέγιστο ποσό προστίμου για όλες τις υπερβάσεις μπορεί να οριστεί χρησιμοποιώντας την παράμετρο του συστήματος MaxFine.
Εάν θέλετε να αποφύγετε την υπέρμετρη χρέωση των μελών σας για ένα χαμένο τεκμήριο, μπορείτε να επιλέξετε το τετραγωνίδιο στο πεδίο «Ανώτατο όριο προστίμου στο κόστος αντικατάστασης». Αυτό θα εμποδίσει τα πρόστιμα των μελών να υπερβούν το κόστος αντικατάστασης του τεκμηρίου.
Σημείωση
Εάν έχει επίσης οριστεί το «Ανώτατο όριο προστίμων υπέρβασης», το πρόστιμο θα είναι το μικρότερο από τα δύο, εάν ισχύουν και τα δύο για το συγκεκριμένο ληξιπρόθεσμο δανεισμό.
Εάν χρεώνετε στους μέλη πρόστιμο όταν δεν έρχονται να παραλάβουν τις κρατήσεις τους εγκαίρως (δείτε παρακάτω τον αριθμό των ημερών που έχει οριστεί στην «Περίοδο παραλαβής κρατήσεων (ημέρες)»), εισαγάγετε το ποσό του προστίμου στο «Χρέωση για ληγμένες κρατήσεις».
Εάν αυτό το πεδίο παραμείνει κενό ή είναι 0, η τιμή στην παράμετρο του συστήματος ExpireReservesMaxPickUpDelayCharge θα χρησιμοποιηθεί για τα μέλη αυτής της κατηγορίας.
Έκδοση
Αυτή η επιλογή προστέθηκε στην έκδοση 25.05 του Koha.
Εάν η βιβλιοθήκη σας επιβάλλει πρόστιμα στα μέλη σας αναστέλλοντας τον λογαριασμό τους, μπορείτε να εισαγάγετε τον αριθμό των ημερών αναστολής του προστίμου που πρέπει να επιβληθεί στο πεδίο «Αναστολή σε ημέρες».
Σημαντικό
Αυτό μπορεί να ρυθμιστεί μόνο για τη μονάδα «Ημέρα», όχι στις «Ώρες»
Μπορείτε επίσης να ορίσετε το μέγιστο αριθμό ημερών αναστολής ενός μέλους στη ρύθμιση «Μέγιστη διάρκεια αναστολής»
Η επιλογή «Διάστημα χρέωσης αναστολής» είναι ακριβώς όπως η επιλογή «Διάστημα χρέωσης προστίμου». Για παράδειγμα, θα μπορούσατε να «επιβάλλετε πρόστιμο» σε ένα μέλος μία ημέρα αναστολής δικαιώματος δανεισμού για κάθε δύο ημέρες καθυστέρησης.
Στη συνέχεια, αποφασίστε αν το μέλος μπορεί να ανανεώσει αυτόν τον τύπο τεκμηρίου και αν ναι, εισάγετε πόσες φορές μπορεί να το ανανεώσει στο πλαίσιο «Επιτρεπόμενες ανανεώσεις».
Αν επιτρέπετε αόρατες ανανεώσεις (βλ. UnseenRenewals), εισαγάγετε πόσες «αόρατες» ανανεώσεις μπορούν να κάνουν τα μέλη. Αυτές δεν είναι πρόσθετες στις κανονικές ανανεώσεις, αλλά περισσότερο πόσες «αόρατες» ανανεώσεις μπορούν να γίνουν ανάμεσα στο συνολικό αριθμό ανανεώσεων.
Εάν επιτρέπετε τις ανανεώσεις, μπορείτε να ρυθμίσετε πόσο μεγάλη θα είναι η περίοδος ανανέωσης του δανεισμού (στις μονάδες που έχετε επιλέξει) στο πλαίσιο «Περίοδος ανανέωσης».
Εάν επιτρέπετε τις ανανεώσεις, μπορείτε να ρυθμίσετε πόσο σύντομα πριν από την ημερομηνία λήξης τα μέλη μπορούν να ανανεώσουν το υλικό τους με το πλαίσιο «Δεν επιτρέπονται ανανεώσεις πριν τις».
Ο δανεισμός των τεκμηρίων μπορεί να ανανεωθεί ανά πάσα στιγμή, εάν η τιμή αυτή παραμείνει κενή. Διαφορετικά, ο δανεισμός μπορεί να ανανεωθεί μόνο εάν λήγει μετά τον αριθμό σε μονάδες (ημέρες/ώρες) που έχει εισαχθεί σε αυτό το πλαίσιο.
Για να ρυθμίσετε αυτή την τιμή σε πιο λεπτομερές επίπεδο, ορίστε την παράμετρο NoRenewalBeforePrecision.
Εάν ενεργοποιήσετε τις αυτόματες ανανεώσεις (βλ. παρακάτω), πληκτρολογήστε πόσο χρόνο πριν από την ημερομηνία λήξης θα πραγματοποιηθεί η αυτόματη ανανέωση.
Έκδοση
Αυτή η ενότητα προστέθηκε στο Koha στην έκδοση 23.11.
Στις προηγούμενες εκδόσεις, οι αυτόματες ανανεώσεις χρησιμοποιούσαν την τιμή «όχι ανανεώσεις πριν τις», η οποία ίσχυε τόσο για τις κανονικές όσο και για τις αυτόματες ανανεώσεις.
Αν θέλετε, μπορείτε να ενεργοποιήσετε τις αυτόματες ανανεώσεις για ορισμένα τεκμήρια/μέλη. Αυτές θα γίνονται αυτόματα σύμφωνα με τους κανόνες κυκλοφορίας σας, εκτός αν υπάρχει κράτηση για το τεκμήριο.
Σημαντικό
Θα πρέπει να ενεργοποιήσετε την εργασία παρασκηνίου για την αυτόματη ανανέωση automatic renewal cron job για να λειτουργήσει αυτό.
Σημαντικό
Αυτή η λειτουργία πρέπει να έχει συμπληρωμένη τη στήλη «όχι αυτόματη ανανέωση πριν τις», αλλιώς γίνεται ανανέωση αυτόματα κάθε μέρα μετά την ημερομηνία λήξης.
Εάν χρησιμοποιείτε αυτόματες ανανεώσεις, μπορείτε να χρησιμοποιήσετε το «Καμία αυτόματη ανανέωση μετά τις» για να περιορίσετε το χρονικό διάστημα που μπορεί να έχει ένα μέλος το τεκμήριο. Για παράδειγμα: να μην επιτρέπονται αυτόματες ανανεώσεις μετά από μια περίοδο δανεισμού 80 ημερών.
Παρόμοια με τη ρύθμιση της ανελαστική ημερομηνίας λήξης, μπορείτε επίσης να σταματήσετε τις αυτόματες ανανεώσεις μετά από μια συγκεκριμένη ημερομηνία χρησιμοποιώντας τη ρύθμιση «Καμία αυτόματη ανανέωση μετά από τις (ανελαστικό όριο)».
Εάν μέλη αυτής της κατηγορίας μπορούν να κάνουν κρατήσεις σε τεκμήρια αυτού του τύπου, εισαγάγετε τον συνολικό αριθμό των τεκμηρίων (αυτού του τύπου) που μπορούν να υποβληθούν σε κράτηση στο πεδίο «Επιτρεπόμενες κρατήσεις».
Αφήστε το πεδίο κενό για να έχετε απεριόριστες κρατήσεις.
Αν προτιμάτε να θέσετε ένα όριο κράτησης ανά κατηγορία μελών, ανεξάρτητα από τον τύπο του τεκμηρίου, ανατρέξτε στην ενότητα των πολιτικών δανεισμού και κρατήσεων ανά κατηγορία default checkout and hold policy by patron category παρακάτω.
Αν θέλετε να έχετε ένα ανελαστικό όριο κρατήσεων, ανεξάρτητο από την κατηγορία του μέλους και τον τύπο του τεκμηρίου, για τη συγκεκριμένη βιβλιοθήκη, ανατρέξτε στην ενότητα των προεπιλεγμένων πολιτικών δανεισμού κρατήσεων και επιστροφών Default checkout, hold, and return policy παρακάτω.
Αν θέλετε να έχετε ένα ανελαστικό όριο κράτησης, ανεξάρτητο από την κατηγορία μέλους, τον τύπο τεκμηρίου και σε όλες τις βιβλιοθήκες, δείτε την παράμετρο του συστήματος maxreserves.
Μπορείτε επίσης να ορίσετε ένα ημερήσιο όριο στον αριθμό των κρατήσεων που μπορεί να κάνει ένα μέλος.
Ενώ οι δύο προηγούμενες ρυθμίσεις περιορίζουν τις κρατήσεις που μπορούν να γίνουν σε διάφορες εγγραφές, η επόμενη ρύθμιση χρησιμοποιείται για τον περιορισμό του αριθμού των κρατήσεων που μπορούν να γίνουν ταυτόχρονα σε μια εγγραφή. Για παράδειγμα, για βιβλία μυθοπλασίας μπορεί να θέλετε να επιτρέπεται να διατίθεται μόνο ένα αντίτυπο για κράτηση την ίδια στιγμή από τον ίδιο χρήστη. Όμως για τα περιοδικά, όπου τα αντίτυπα αντιπροσωπεύουν διαφορετικά τεύχη, περισσότερες από μία κρατήσεις την ίδια στιγμή είναι επιτρεπτές.
Σημείωση
Εάν αυτή η ρύθμιση οριστεί σε έναν αριθμό μεγαλύτερο του 1, αλλά όχι Απεριόριστα, τότε το προσωπικό θα έχει τη δυνατότητα να τοποθετεί πολλαπλές κρατήσεις ταυτόχρονα, όταν γίνεται μια κράτηση στο επόμενο διαθέσιμο τεκμήριο στο διαχειριστικό περιβάλλον staff interface
Στη συνέχεια μπορείτε να αποφασίσετε πώς η διαθεσιμότητα των τεκμηρίων επηρεάζει τη δυνατότητα μιας κράτησης. Η επιλογή «Επιτρεπόμενες κρατήσεις στο ράφι» έχει τρεις ρυθμίσεις:
Ναι: αυτή η ρύθμιση θα επιτρέψει την υλοποίηση κρατήσεων σε τεκμήρια ανά πάσα στιγμή. Δεν έχει σημασία αν είναι διαθέσιμα ή αν έχουν δοθεί για δανεισμό.
Εάν δεν είναι διαθέσιμο: αυτή η ρύθμιση θα επιτρέψει την υλοποίηση μιας κράτησης μόλις ένα ή περισσότερα τεκμήρια της εγγραφής δοθούν για δανεισμό. Δεν έχει σημασία αν υπάρχουν ακόμα ένα ή περισσότερα τεκμήρια διαθέσιμα στο ράφι.
Εάν όλα δεν είναι διαθέσιμα: αυτή η ρύθμιση θα επιτρέψει την υλοποίηση μίας κράτησης εφόσον όλα τα τεκμήρια μίας εγγραφής έχουν δοθεί για δανεισμό και θα μπορούσαν να καλύψουν το αίτημα. Αυτό είναι ιδιαίτερα χρήσιμο για τις βιβλιοθήκες που δεν προσφέρουν την υπηρεσία του να παίρνουν τα τεκμήρια που έχουν τεθεί σε κράτηση από τα ράφια για τα μέλη.
Στην ενότητα «κράτησης στον Κατάλογο σε επίπεδο αντιτύπου» μπορείτε να αποφασίσετε αν τα μέλη επιτρέπεται να υποβάλλουν συγκεκριμένες κρατήσεις για το συγκεκριμένο τύπο τεκμηρίου. Οι επιλογές είναι οι εξής:
Να επιτρέπεται: επιτρέπει στα μέλη να επιλέγουν το επόμενο διαθέσιμο ή ένα συγκεκριμένο τεκμήριο.
Να μην επιτρέπεται: θα επιτρέπει στα μέλη να επιλέγουν μόνο το επόμενο διαθέσιμο τεκμήριο.
Να επιβάλλεται: θα επιτρέπει στα μέλη να επιλέγουν μόνο ένα συγκεκριμένο τεκμήριο.
Μπορείτε να ορίσετε τον αριθμό των ημερών που θα πρέπει να έρθουν τα μέλη να παραλάβουν τις κρατήσεις τους στη στήλη «Περίοδος παραλαβής κρατήσεων (ημέρα)». Αυτή η τιμή θα ορίσει την «ημερομηνία λήξης» της κράτησης. Μετά την παρέλευση αυτής της περιόδου, οι κρατήσεις θα χαρακτηρίζονται ως προβληματικές και θα εμφανίζονται στην καρτέλα «Κρατήσεις σε εκκρεμότητα μετά την ημερομηνία λήξης τους» στην Έκθεση των κρατήσεων που αναμένουν παραλαβή Holds awaiting pickup.
Η προεπιλεγμένη περίοδος ορίζεται στην παράμετρο του συστήματος ReservesMaxPickUpDelay, αλλά αυτή η στήλη επιτρέπει να έχετε πιο λεπτομερείς κανόνες για διάφορους συνδυασμούς βιβλιοθηκών, κατηγοριών μελών και τύπων τεκμηρίων.
Έκδοση
Αυτή η επιλογή κανόνα κυκλοφορίας προστέθηκε στο Koha στην έκδοση 23.11.
Αν θέλετε να επιτρέψετε στα μέλη αυτής της κατηγορίας να μπορούν να υποβάλλουν αιτήματα για άρθρο σε τεκμήρια αυτού του τύπου, επιλέξτε μια επιλογή στη στήλη «Αιτήματα άρθρων»
Όχι: τα μέλη αυτής της κατηγορίας δεν θα μπορούν να υποβάλλουν αιτήματα για άρθρο σε τεκμήρια αυτού του τύπου
Ναι: τα μέλη αυτής της κατηγορίας θα μπορούν να υποβάλλουν αιτήματα για άρθρα σε τεκμήρια αυτού του τύπου, είτε για συγκεκριμένα τεκμήρια (π.χ. στην περίπτωση τευχών περιοδικού) είτε για ολόκληρες εγγραφές (π.χ. στην περίπτωση μονογραφιών)
Μόνο εγγραφή: τα μέλη αυτής της κατηγορίας θα μπορούν να υποβάλλουν αιτήματα για άρθρα σε εγγραφές αυτού του τύπου, αλλά όχι για συγκεκριμένα τεκμήρια
Μόνο τεκμήριο: τα μέλη αυτής της κατηγορίας θα μπορούν να υποβάλλουν αιτήματα για άρθρα σε τεκμήρια αυτού του τύπου, αλλά όχι σε ολόκληρες εγγραφές
Προειδοποίηση
Αυτή η στήλη θα εμφανίζεται μόνο αν είναι ενεργοποιημένη η παράμετρος του συστήματος ArticleRequests.
Αν θέλετε να χρησιμοποιήσετε τη λειτουργία του αιτήματος για άρθρο, πρέπει να την ενεργοποιήσετε χρησιμοποιώντας την παράμετρο του συστήματος ArticleRequests και να διαμορφώσετε τη φόρμα χρησιμοποιώντας τις άλλες σχετικές παραμέτρους.
Αν χρεώνετε τέλος δανεισμού για τον τύπο τεκμηρίου charge a rental fee for the item type και θέλετε να δώσετε σε αυτή τη συγκεκριμένη κατηγορία μελών έκπτωση επί του τέλους αυτού, πληκτρολογήστε το ποσοστό έκπτωσης (χωρίς το σύμβολο %) στο πεδίο «Έκπτωση δανεισμού»
Σημείωση
Εισαγάγετε το ποσοστό έκπτωσης χρησιμοποιώντας ένα δεκαδικό ψηφίο.
Οι εκπτώσεις πρέπει να είναι θετικοί αριθμοί με όχι περισσότερα από δύο ψηφία μετά την υποδιαστολή. Επιτρέπονται επίσης ακέραιοι αριθμοί. Για παράδειγμα:
5,10,0.50,3.25,99.99.Τιμές όπως
0.5,25.123ή-10δεν γίνονται αποδεκτές.Εάν η παράμετρος του συστήματος UseRecalls είναι ενεργοποιημένη, θα έχετε διάφορες επιλογές για τον έλεγχο των ανακλήσεων.
Επιτρεπόμενες ανακλήσεις (σύνολο): εισαγάγετε τον αριθμό των τρεχουσών ανακλήσεων που μπορεί να αιτείται ένα μέλος αυτής της κατηγορίας σε τεκμήρια ή εγγραφές αυτού του τύπου τεκμηρίου.
Ανακλήσεις ανά εγγραφή (πλήθος): εισαγάγετε τον αριθμό των τρεχουσών ανακλήσεων που μπορεί να αιτηθεί ένα μέλος αυτής της κατηγορίας σε οποιαδήποτε εγγραφή αυτού του τύπου τεκμηρίου.
Επιτρεπόμενες ανακλήσεις στο ράφι: επιλέξτε αν τα μέλη μπορούν να ανακαλέσουν τεκμήρια σε εγγραφές που έχουν διαθέσιμα αντίτυπα
Εάν κάποιο τεκμήριο δεν είναι διαθέσιμο: εάν μια εγγραφή έχει περισσότερα από ένα τεκμήρια και τουλάχιστον ένα από αυτά δεν είναι διαθέσιμο, το μέλος θα μπορεί να ανακαλέσει τεκμήρια από αυτή την εγγραφή
Εάν όλα τα τεκμήρια δεν είναι διαθέσιμα: όλα τα αντίτυπα μιας εγγραφής πρέπει να είναι μη διαθέσιμα προκειμένου ένα μέλος να ανακαλέσει ένα τεκμήριο από αυτή την εγγραφή
Διάστημα προθεσμίας ανάκλησης (ημέρα): πληκτρολογήστε τον αριθμό των ημερών που έχει στη διάθεσή του ένα μέλος για να επιστρέψει ένα τεκμήριο που έχει ανακληθεί
Ποσό προστίμου ληξιπρόθεσμης ανάκλησης: εισαγάγετε το ποσό του προστίμου που θα χρεωθεί το μέλος εάν δεν επιστρέψει το ανακληθέν τεκμήριο μέχρι την ημερομηνία λήξης
Περίοδος παραλαβής ανάκλησης: εισαγάγετε τον αριθμό των ημερών που έχει στη διάθεσή του το μέλος για να παραλάβει το τεκμήριο που έχει ανακληθεί, μόλις αυτό επισημανθεί ως διαθέσιμο για παραλαβή.
Σημείωση
Αυτή η τιμή αντικαθιστά την τιμή στην παράμετρο του συστήματος RecallsMaxPickUpDelay.
Όταν ολοκληρώσετε, επιλέξτε «Αποθήκευση» για να διατηρήσετε τις αλλαγές σας. Για να τροποποιήσετε έναν κανόνα, απλά επιλέξτε το κουμπί «Επεξεργασία» είτε στην αρχή είτε στο τέλος της γραμμής. Η γραμμή του κανόνα που επεξεργάζεστε θα επισημανθεί με κίτρινο χρώμα και οι τιμές θα εμφανιστούν συμπληρωμένες στο κάτω μέρος του πίνακα. Επεξεργαστείτε τις τιμές στο κάτω μέρος και επιλέξτε το κουμπί της αποθήκευσης.

Σημείωση
Εάν κατά την επεξεργασία ενός κανόνα, αλλάξετε είτε την κατηγορία μέλους, είτε τον τύπο τεκμηρίου, θα δημιουργηθεί ένας νέος κανόνας. Μπορείτε να το κάνετε αυτό για να αντιγράψετε κανόνες αντί να δημιουργήσετε νέους, εάν οι τιμές είναι παρόμοιες.
Εναλλακτικά, μπορείτε να δημιουργήσετε έναν κανόνα με την ίδια κατηγορία μελών και τον ίδιο τύπο τεκμηρίου και αυτός θα διαφοροποιήσει τον υπάρχοντα κανόνα, καθώς μπορεί να υπάρχει μόνο ένας κανόνας ανά συνδυασμό βιβλιοθήκης-κατηγορίας μέλους-τύπου τεκμηρίου.
Αν θέλετε να διαγράψετε τον κανόνα σας, επιλέξτε το κουμπί της «Διαγραφής» στην αρχή ή στο τέλος της γραμμής του κανόνα.
Για να εξοικονομήσετε χρόνο, μπορείτε να κλωνοποιήσετε κανόνες από μια βιβλιοθήκη σε μια άλλη, επιλέγοντας την επιλογή κλωνοποίηση πάνω από τον πίνακα κανόνων. Λάβετε υπόψη ότι αυτό θα αντικαταστήσει όλους τους κανόνες που έχουν ήδη ρυθμιστεί για τη συγκεκριμένη βιβλιοθήκη.

Αφού επιλέξετε να κλωνοποιήσετε, θα σας εμφανιστεί ένα μήνυμα επιβεβαίωσης.

Προεπιλεγμένη πολιτική δανεισμών, κρατήσεων και επιστροφών
Μπορείτε να ορίσετε έναν προεπιλεγμένο μέγιστο αριθμό δανεισμών, έναν προεπιλεγμένο μέγιστο αριθμό κρατήσεων και μια πολιτική κρατήσεων που θα χρησιμοποιείται εάν δεν έχει οριστεί παρακάτω για έναν συγκεκριμένο τύπο ή κατηγορία τεκμηρίου. Αυτός είναι ο κανόνας εφεδρείας για τις προεπιλογές.

Από αυτό το μενού μπορείτε να ορίσετε μια προεπιλογή που θα ισχύει για όλους τους τύπους τεκμηρίων και τα μέλη της βιβλιοθήκης, εάν δεν έχει οριστεί άλλη επιλογή στις παρακάτω φόρμες.
Total current checkouts allowed: enter the total number of items patrons can have checked out at one time
Total current on-site checkouts allowed: enter the total number of items patrons can have checked out on site at a time (OnSiteCheckouts needs to be set to “Enable”)
Maximum total holds allowed (count): enter the total number of pending holds patrons can have at the same time.
Hold policy: control where patrons can place holds from
From any library: patrons from any library may put items on hold (default if none is defined)
From local hold group: only patrons from a library in the item home library’s local hold group may put this book on hold
From home library: only patrons from the item’s home library may put items on hold.
No holds allowed: no patron may put items on hold.
Hold and booking pickup library match: control where patron can pick up holds and bookings
οποιαδήποτε βιβλιοθήκη
ομάδα κρατήσεων τεκμηρίου
ομάδα κρατήσων μέλους
η βιβλιοθήκη προέλευσης του τεκμηρίου
η τρέχουσα βιβλιοθήκη του τεκμηρίου
Booking pre-processing (days): enter a number of days to prevent a new booking from starting too soon after an existing booking ends. This gives staff time to prepare the item between two bookings.
Έκδοση
Αυτή η επιλογή προστέθηκε στην έκδοση 24.11 του Koha.
Booking post-processing (days): enter a number of days to prevent a new booking from ending too close to the start of an existing booking. This gives staff time to receive and process the item between two bookings.
Έκδοση
Αυτή η επιλογή προστέθηκε στην έκδοση 24.11 του Koha.
Return policy: control where the item returns to once it is checked in
Το αντίτυπο επιστρέφει στη βιβλιοθήκη που ανήκει
Το αντίτυπο επιστρέφει στη βιβλιοθήκη που το δάνεισε
Item floats: when an item floats, it stays where it was checked in and does not ever return “home”
Το τεκμήριο, μένει σε εκκρεμότητα ανά ομάδα βιβλιοθήκης: δεν θα μεταφερθεί και θα παραμείνει στη βιβλιοθήκη στην οποία έγινε η επιστροφή, εάν η βιβλιοθήκη επιστροφής βρίσκεται εντός της ίδιας «ομάδας» στην παράμετρο των ομάδων βιβλιοθηκών library groups με την αρχική βιβλιοθήκη του τεκμηρίου. Εάν η βιβλιοθήκη δεν ανήκει στην ίδια ομάδα, το τεκμήριο θα μεταφερθεί πίσω στην βιβλιοθήκη προέλευσής του.
Once your policy is set, you can unset it by clicking the “Unset” button to the right of the rule.
Προεπιλεγμένη πολιτική δανεισμών και κρατήσεων ανά κατηγορία μέλους
Για αυτή τη βιβλιοθήκη, μπορείτε να καθορίσετε τον μέγιστο αριθμό δανεισμών, επιτόπιων δανεισμών και κρατήσεων που μπορεί να έχει ένα μέλος μιας συγκεκριμένης κατηγορίας, ανεξάρτητα από τον τύπο του τεκμηρίου.

Σημείωση
Εάν το συνολικό πλήθος των δανεισμών, των επιτόπιων δανεισμών και των κρατήσεων για μια δεδομένη κατηγορία μελών παραμείνει κενό, δεν ισχύει κανένα όριο, εκτός ενδεχομένως από ένα όριο που ορίζετε στους κανόνες κυκλοφορίας παραπάνω.
Για παράδειγμα, αν έχετε έναν κανόνα στον πίνακα που να λέει ότι τα μέλη του διοικητικού συμβουλίου μπορούν να δανειστούν 10 βιβλία και 5 DVD, αλλά θέλετε να το κάνετε έτσι ώστε τα μέλη του διοικητικού συμβουλίου να μπορούν να δανειστούν συνολικά μόνο 12 πράγματα ταυτόχρονα. Αν εισάγετε 12 εδώ και το μέλος έχει ήδη 10 βιβλία, θα του επιτραπούν μόνο 2 DVD για να εξισωθούν τα 12 συνολικά που του επιτρέπονται.
Προεπιλεγμένη πολιτική ακύρωσης κράτησης
Για αυτή τη βιβλιοθήκη, μπορείτε να καθορίσετε αν τα μέλη μπορούν να ακυρώσουν κρατήσεις που περιμένουν ήδη παραλαβή.

Για κάθε συνδυασμό κατηγορίας μέλους και τύπου τεκμηρίου, επιλέξτε αν αυτά τα μέλη μπορούν να ακυρώσουν τις κρατήσεις που περιμένουν ήδη για παραλαβή.
Ακριβώς όπως και στους κανόνες κυκλοφορίας, οι πιο ειδικοί κανόνες θα εφαρμόζονται πριν από τους πιο γενικούς κανόνες (π.χ. ο κανόνας «όλες» οι κατηγορίες μελών / «όλοι» οι τύποι τεκμηρίων θα εφαρμόζεται μόνο εάν δεν υπάρχει άλλος κανόνας για αυτόν τον συνδυασμό).
Προεπιλεγμένο όριο ανοιχτών αιτημάτων άρθρων
Εάν είναι ενεργοποιημένη η παράμετρος ArticleRequests, μπορείτε να ορίσετε έναν μέγιστο αριθμό ανοικτών αιτημάτων άρθρων που μπορεί να έχει ταυτόχρονα ένα μέλος μιας κατηγορίας.

Σημείωση
Αυτό θα εμφανίζεται μόνο αν είναι ενεργοποιημένη η παράμετρος του συστήματος ArticleRequests.
Επιλέξτε την κατηγορία μέλους που θέλετε να καθορίσετε.
Πληκτρολογήστε τον αριθμό των ανοικτών αιτημάτων άρθρων που μπορεί να έχει ένα μέλος αυτής της κατηγορίας σε μια δεδομένη χρονική στιγμή
Επιλέξτε «Προσθήκη»
Προεπιλεγμένα τέλη αιτημάτων άρθρων
Αν είναι ενεργοποιημένα τα αιτήματα άρθρων ArticleRequests, μπορείτε να ορίσετε την εισφορά που πρέπει να πληρώσει ένα μέλος μιας συγκεκριμένης κατηγορίας (ή οποιαδήποτε κατηγορία) για να ζητήσει το άρθρο.

Σημείωση
Αυτό θα εμφανίζεται μόνο αν είναι ενεργοποιημένη η παράμετρος του συστήματος ArticleRequests.
Επιλέξτε την κατηγορία μελών για την οποία θέλετε να προσθέσετε ένα τέλος ή επιλέξτε «Όλοι» για να ορίσετε ένα συνολικό τέλος για όλα τα μέλη
Σημείωση
Το ειδικό τέλος για μια κατηγορία μελών υπερισχύει του τέλους για όλες τις κατηγορίες.
Για παράδειγμα, αν ορίσετε ένα τέλος για όλες τις κατηγορίες στα 2€ και ένα τέλος για το Τμήμα στα 3€, τα μέλη του Τμήματος θα χρεώνονται με 3€ και κάθε άλλο μέλος θα χρεώνεται με 2€.
Πληκτρολογήστε το ποσό της χρέωσης (χρησιμοποιήστε μια τελεία ως δεκαδικό ψηφίο και μην εισάγετε σύμβολα, π.χ. πληκτρολογήστε 5.00 για 5€)
Επιλέξτε «Προσθήκη»
The fee is charged to the patron when the request is placed.
Κατά την υποβολή του αιτήματος, είτε μέσω του διαχειριστικού περιβάλλοντος, είτε μέσω του OPAC, εμφανίζεται ένα μήνυμα που ενημερώνει το μέλος του προσωπικού ή το μέλος της βιβλιοθήκης ότι αυτό θα χρεωθεί για κάθε αίτημα και για το ποσό αυτής της χρέωσης.
Προεπιλεγμένη επιστροφή τέλους χαμένου τεκμηρίου στην πολιτική των επιστροφών
Εδώ μπορείτε να καθορίσετε την προεπιλεγμένη πολιτική για τις αποζημιώσεις για χαμένα τεκμήρια που επιστρέφονται.

Επιστροφή τέλους αντικατάστασης χαμένου τεκμηρίου: επιλέξτε εάν το κόστος αντικατάστασης του τεκμηρίου θα επιστρέφεται ή όχι όταν επιστρέφεται το χαμένο τεκμήριο.
Επιστροφή τέλους χαμένου τεκμηρίου: επιστρέφεται το κόστος αντικατάστασης. Αυτό μπορεί να δημιουργήσει μια πίστωση που πρέπει να καταβληθεί στο μέλος, εάν είχε ήδη καταβάλει το τέλος.
Επιστροφή της χρέωσης χαμένου τεκμηρίου (μόνο αν δεν έχει πληρωθεί): το κόστος αντικατάστασης επιστρέφεται μόνο αν δεν έχει ακόμη πληρωθεί.
Επιστροφή της χρέωσης χαμένου τεκμηρίου και χρέωση νέου προστίμου εκπρόθεσμης επιστροφής: το κόστος αντικατάστασης επιστρέφεται και τα πρόστιμα εκπρόθεσμης παραλαβής υπολογίζονται από σήμερα.
Επιστροφή της χρέωσης χαμένου τεκμηρίου και επαναφορά του προστίμου εκπρόθεσμης επιστροφής του: το κόστος αντικατάστασης επιστρέφεται και τα πρόστιμα επαναφέρονται από την ημέρα που δηλώθηκε η απώλεια του τεκμηρίου.
Διατήρηση της χρέωσης χαμένου τεκμηρίου: το κόστος αντικατάστασης παραμένει στο λογαριασμό του μέλους.
Επιστροφή τέλους διαχείρισης χαμένου τεκμηρίου: επιλέξτε εάν το τέλος διαχείρισης του τεκμηρίου θα επιστραφεί ή όχι, όταν επιστραφεί το χαμένο τεκμήριο.
Επιστροφή του τέλους διαχείρισης χαμένου τεκμηρίου: το τέλος διαχείρισης επιστρέφεται. Αυτό μπορεί να δημιουργήσει μια πίστωση που πρέπει να καταβληθεί στο μέλος, εάν είχε ήδη καταβάλει το τέλος.
Επιστροφή της χρέωσης διαχείρισης χαμένου τεκμηρίου (μόνο αν δεν έχει πληρωθεί): το τέλος διαχείρισης επιστρέφεται μόνο αν δεν έχει ακόμη πληρωθεί.
Παραμονή της χρέωσης διαχείρισης χαμένου τεκμηρίου : το τέλος διαχείρισης παραμένει στο λογαριασμό του μέλους.
Αυτή η πολιτική θα ισχύει για τη συγκεκριμένη βιβλιοθήκη. Αυτός ο κανόνας πρέπει να χρησιμοποιείται με την παράμετρο του συστήματος RefundLostOnReturnControl.
Σημείωση
Μπορείτε να περιορίσετε τις επιστροφές με βάση την ηλικία:
χρησιμοποιήστε την παράμετρο του συστήματος NoRefundOnLostReturnedItemsAge για να περιορίσετε τις επιστροφές χρημάτων με βάση το πότε το τεκμήριο χαρακτηρίστηκε χαμένο,
χρησιμοποιήστε την παράμετρο του συστήματος NoRefundOnLostFinesPaidAge για να περιορίσετε τις επιστροφές με βάση το πότε καταβλήθηκε το τέλος.
Προεπιλεγμένη πολιτική κρατήσεων και προκρατήσεων ανά τύπο τεκμηρίου
Μπορείτε να ορίσετε και να επεξεργαστείτε τις πολιτικές κρατήσεων holds και προκρατήσεων bookings για έναν συγκεκριμένο τύπο τεκμηρίου, ανεξάρτητα από την κατηγορία του μέλους.
Επιλέξτε τον τύπο του τεκμηρίου από το αναδιπλούμενο μενού.
Ορίστε τις πολιτικές όπως εξηγείται παρακάτω.
Επιλέξτε την «Προσθήκη» για να αποθηκεύσετε αυτό τον κανόνα.
Μπορείτε να προσθέσετε όσους κανόνες χρειάζεται.

Πολιτική κράτησης: οι διάφορες πολιτικές κρατήσεων έχουν τα ακόλουθα αποτελέσματα.
Από οποιαδήποτε βιβλιοθήκη: τα μέλη οποιασδήποτε βιβλιοθήκης μπορούν να θέσουν αυτό το τεκμήριο σε κράτηση. (προεπιλεγμένη ρύθμιση, αν δεν έχει οριστεί καμία)
Από την τοπική ομάδα κρατήσεων: μόνο μέλη από βιβλιοθήκες που ανήκουν στην ίδια ομάδα κρατήσεων με τη βιβλιοθήκη προέλευσης του τεκμήριου μπορούν να θέσουν αυτό το βιβλίο σε κράτηση.
Από την βιβλιοθήκη προέλευσης του τεκμηρίου: μόνο μέλη από τη βιβλιοθήκη προέλευσης του τεκμηρίου μπορούν να θέσουν αυτό το βιβλίο σε κράτηση.
Δεν επιτρέπονται κρατήσεις: κανένα μέλος δεν μπορεί να θέσει αυτό το βιβλίο σε κράτηση.
Εάν η παράμετρος του συστήματος AllowHoldPolicyOverride έχει οριστεί στην τιμή «Να επιτρέπεται», αυτές οι πολιτικές κρατήσεων μπορούν να παρακαμφθούν από το προσωπικό.
Σημείωση
Αυτές οι πολιτικές κρατήσεων εφαρμόζονται με βάση την παράμετρο του συστήματος ReservesControlBranch.
Αντιστοίχιση βιβλιοθήκης παραλαβής κρατήσεων και προκρατήσεων: Ορίστε πού μπορεί ένας χρήστης να παραλάβει κρατήσεις και προκρατήσεις του συγκεκριμένου τύπου τεκμηρίου.
οποιαδήποτε βιβλιοθήκη
ομάδα κρατήσεων τεκμηρίου
ομάδα κρατήσων μέλους
η βιβλιοθήκη προέλευσης του τεκμηρίου
η τρέχουσα βιβλιοθήκη του τεκμηρίου
Προεπεξεργασία προκρατήσεων (ημέρες): προσθέστε μια περίοδο αναμονής πριν από μια νέα κράτηση, ώστε να δοθεί στο προσωπικό χρόνος να προετοιμάσει το τεκμήριο μεταξύ δύο προκρατήσεων.
Εισαγάγετε έναν αριθμό ημερών. Αυτό θα αποτρέψει την έναρξη μιας νέας προκράτησης πολύ σύντομα μετά τη λήξη μιας τρέχουσας προκράτησης.
Μετα-επεξεργασία προκρατήσεων (ημέρες): προσθέστε μια περίοδο αναμονής μετά από μια νέα προκράτηση, ώστε να δοθεί στο προσωπικό χρόνος να παραλάβει το τεκμήριο μεταξύ δύο προκρατήσεων.
Εισαγάγετε έναν αριθμό ημερών. Αυτό θα αποτρέψει μια νέα προκράτηση από το να λήξει πολύ κοντά στην έναρξη μιας υπάρχουσας προκράτησης.
Πολιτικές επιστροφών: οι διάφορες πολιτικές επιστροφών έχουν τα ακόλουθα αποτελέσματα.
Επιστροφή του τεκμηρίου στην αρχική του θέση: κατά την επιστροφή σε άλλη βιβλιοθήκη, ο βιβλιοθηκονόμος θα κληθεί να μεταφέρει το τεκμήριο στην αρχική του θέση.
Το τεκμήριο επιστρέφει στο παράρτημα που το δάνεισε: θα ζητηθεί από τον βιβλιοθηκονόμο να μεταφέρει το τεκμήριο πίσω στη βιβλιοθήκη από την οποία έγινε ο δανεισμός.
Το τεκμήριο μένει σε εκκρεμότητα: το τεκμήριο δεν θα μεταφερθεί από τη βιβλιοθήκη στην οποία επιστράφηκε. Θα παραμείνει στη βιβλιοθήκη επιστροφής έως ότου μεταφερθεί χειροκίνητα ή επιστραφεί σε άλλη βιβλιοθήκη.
Το τεκμήριο, μένει σε εκκρεμότητα ανά ομάδα βιβλιοθήκης: το τεκμήριο δεν θα μεταφερθεί και θα παραμείνει στη βιβλιοθήκη στην οποία έγινε η επιστροφή, εάν η βιβλιοθήκη επιστροφής βρίσκεται στην ίδια «ομάδα» στις library groups με την αρχική βιβλιοθήκη του τεκμηρίου. Εάν η βιβλιοθήκη δεν ανήκει στην ίδια ομάδα, το τεκμήριο θα μεταφερθεί πίσω στην βιβλιοθήκη προέλευσής του.
Όταν η πολιτική επιστροφής έχει οριστεί στην τιμή «το τεκμήριο μετακινείται ανά ομάδα βιβλιοθηκών», η αρχική θέση του τεκμηρίου θα χρησιμοποιείται για την εύρεση ομάδων.
Σημείωση
Η βιβλιοθήκη, της οποίας η πολιτική επιστροφής χρησιμοποιείται, καθορίζεται από την παράμετρο του συστήματος CircControlReturnsBranch.
Παράδειγμα
Μπορείτε να επιτρέψετε γενικά τις κρατήσεις στη βιβλιοθήκη σας. Ωστόσο, δεν θέλετε τα ολοκαίνουργια τεκμήρια του τύπου «Νέα τεκμήρια» να μπορούν να κρατηθούν από τους χρήστες σε βιβλιοθήκες άλλες από εκείνη στην οποία ανήκουν τα νέα τεκμήρια.
Για τον τύπο τεκμηρίου «Νέα τεκμήρια», θα ορίσετε την «Πολιτική κράτησης» στην επιλογή «Από την βιβλιοθήκη προέλευσης», έτσι ώστε τα τεκμήρια αυτά να μπορούν να κρατηθούν μόνο εάν η βιβλιοθήκη που τα κατέχει και η βιβλιοθήκη του χρήστη είναι η ίδια. Μπορείτε να ορίσετε την «Αντιστοιχία βιβλιοθήκης παραλαβής κράτησης και προκράτησης» στην επιλογή «βιβλιοθήκη προέλευσης του τεκμηρίου», για να διασφαλίσετε ότι τα τεκμήρια που έχουν κρατηθεί μπορούν να παραληφθούν μόνο από τη βιβλιοθήκη προέλευσής τους. Θα πρέπει επίσης να ορίσετε την «Πολιτική επιστροφής» στην επιλογή «το τεκμήριο επιστρέφει στην αρχική του θέση».
Τύποι χαρακτηριστικών μελών
Πηγαίνετε εκεί: Περισσότερα > Διαχείριση > Μέλη και κυκλοφορία > Τύποι χαρακτηριστικών μελών
Σημείωση
Μόνο το προσωπικό με το δικαίωμα manage_patron_attributes (ή το δικαίωμα superlibrarian) θα έχει πρόσβαση σε αυτό το τμήμα.
Τα χαρακτηριστικά των μελών μπορούν να χρησιμοποιηθούν για τον ορισμό προσαρμοσμένων πεδίων που θα συσχετίζονται με τις εγγραφές των μελών. Για να ενεργοποιήσετε τη χρήση προσαρμοσμένων πεδίων πρέπει να ορίσετε την παράμετρο του συστήματος ExtendedPatronAttributes.
Μια συνηθισμένη χρήση αυτού του πεδίου είναι ο αριθμός φοιτητικής ταυτότητας ή ο αριθμός άδειας οδήγησης.
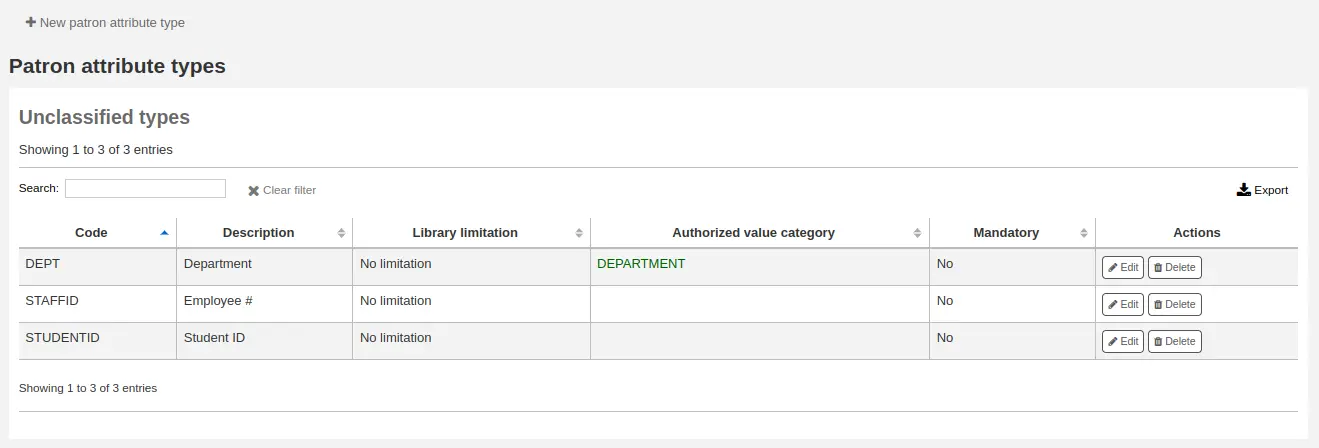
Προσθήκη των τύπων απόδοσης των μελών
Για να προσθέσετε έναν νέο τύπο χαρακτηριστικού μέλους, επιλέξτε το κουμπί «“Νέος τύπος χαρακτηριστικού μέλους”» στο επάνω μέρος της σελίδας
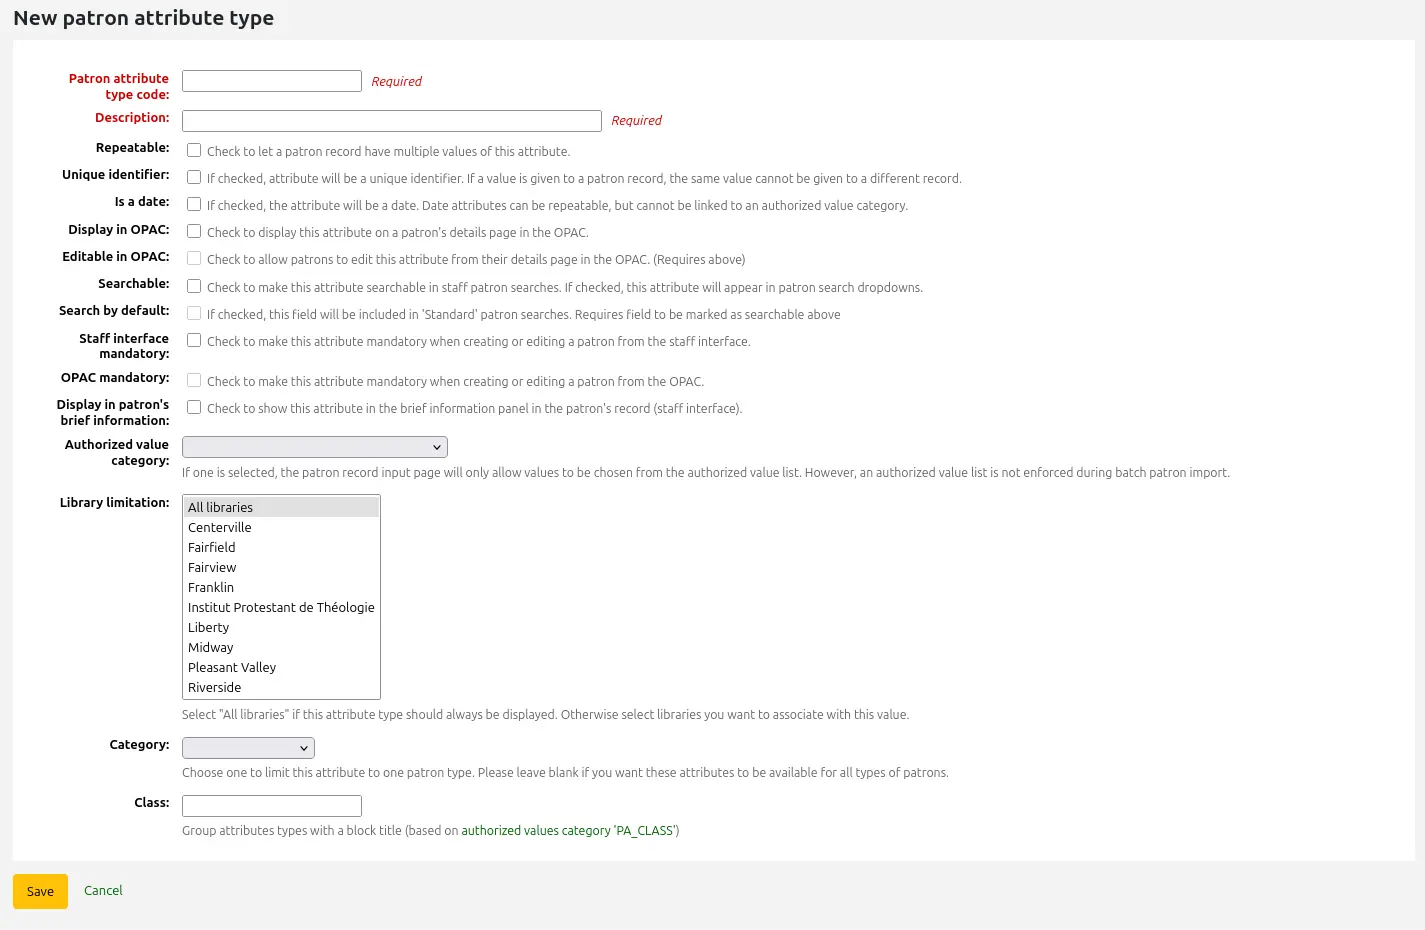
Κωδικός τύπου χαρακτηριστικού μέλους: εισαγάγετε έναν σύντομο κωδικό για την ταυτοποίηση αυτού του πεδίου
Προειδοποίηση
Αυτή η ρύθμιση δεν μπορεί να αλλάξει μετά τον ορισμό ενός χαρακτηριστικού
Περιγραφή: εισαγάγετε μια εκτενέστερη εξήγηση (απλό κείμενο) για το τι θα περιέχει αυτό το πεδίο
Επαναλαμβανόμενο: επιλέξτε αυτό το πλαίσιο εάν μια εγγραφή μέλους μπορεί να έχει πολλαπλές τιμές αυτού του χαρακτηριστικού.
Προειδοποίηση
Αυτή η ρύθμιση δεν μπορεί να αλλάξει μετά τον ορισμό ενός χαρακτηριστικού
Μοναδικό αναγνωριστικό: επιλέξτε αυτό το πλαίσιο εάν δοθεί μία τιμή σε μια εγγραφή μέλους, η ίδια τιμή δεν μπορεί να δοθεί σε διαφορετική εγγραφή.
Μοναδικά χαρακτηριστικά μπορούν να χρησιμοποιηθούν ως κριτήρια αντιστοίχισης στο εργαλείο της εισαγωγής μελών patron import tool
Προειδοποίηση
Αυτή η ρύθμιση δεν μπορεί να αλλάξει μετά τον ορισμό ενός χαρακτηριστικού
Είναι ημερομηνία: επιλέξτε αυτό το πλαίσιο εάν η τιμή του χαρακτηριστικού πρέπει να είναι ημερομηνία. Θα είναι διαθέσιμος ένας επιλογέας ημερομηνίας.
Σημαντικό
Οι τύποι χαρακτηριστικών ημερομηνίας δεν μπορούν να συνδεθούν με καθιερωμένες κατηγορίες τιμών.
Έκδοση
Η επιλογή της ημερομηνίας προστέθηκε στο Koha στην έκδοση 24.05.
Εμφάνιση στον OPAC: επιλέξτε αυτό το πλαίσιο για να εμφανίσετε αυτό το χαρακτηριστικό στη σελίδα λεπτομερειών ενός μέλους στον OPAC.
Επεξεργάσιμος στον OPAC: επιλέξτε αυτό το πλαίσιο για να επιτρέψετε στα μέλη να επεξεργαστούν αυτές τις πληροφορίες στον OPAC.
Αναζητήσιμος: επιλέξτε αυτό το πλαίσιο για να είναι δυνατή η αναζήτηση αυτού του χαρακτηριστικού στο διαχειριστικό περιβάλλον της αναζήτησης του μέλους patron search.
Αναζήτηση από προεπιλογή: επιλέξτε αυτό το πλαίσιο για να είναι δυνατή η αναζήτηση αυτού του χαρακτηριστικού στην «τυπική» αναζήτηση μέλους στο διαχειριστικό περιβάλλον, για παράδειγμα μη αναζήτηση σε συγκεκριμένο πεδίο.
Αυτή η επιλογή απαιτεί ο τύπος του χαρακτηριστικού να είναι αναζητήσιμος (βλ. προηγούμενη επιλογή).
Έκδοση
Αυτή η ενότητα προστέθηκε στο Koha στην έκδοση 23.11.
Υποχρεωτικός: επιλέξτε αυτό το πλαίσιο εάν το χαρακτηριστικό πρέπει να συμπληρώνεται για κάθε μέλος
Εμφάνιση στις σύντομες πληροφορίες του μέλους: επιλέξτε αυτό το πλαίσιο για να είναι ορατό αυτό το χαρακτηριστικό στην εμφάνιση των σύντομων πληροφοριών του μέλους στα αριστερά της οθόνης των δανεισμών και σε άλλες σελίδες του μέλους
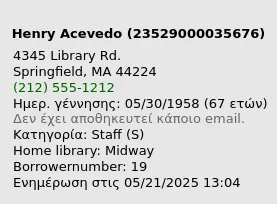
Κατηγορία καθιερωμένης τιμής: εάν έχει επιλεγεί μία, η σελίδα εισαγωγής της εγγραφής μέλους θα επιτρέπει την επιλογή τιμών μόνο από τη λίστα καθιερωμένων τιμών.
You will first need to add an authorized value list for it to appear in this menu
Προειδοποίηση
An authorized value list is not enforced during batch patron import.
Περιορισμοί βιβλιοθήκης: αν θέλετε αυτό το χαρακτηριστικό να χρησιμοποιείται μόνο από συγκεκριμένα παραρτήματα, μπορείτε να επιλέξετε αυτά τα παραρτήματα από αυτή τη λίστα. Επιλέξτε «Όλα τα παραρτήματα» για να το εμφανίσετε για όλες τις βιβλιοθήκες.
Προειδοποίηση
Τα μέλη με χαρακτηριστικά που έχουν ήδη οριστεί γι” αυτούς δεν θα τροποποιηθούν. Ο περιορισμός του παραρτήματος περιορίζει το πεδίο μόνο με βάση τη βιβλιοθήκη, στην οποία έχει συνδεθεί το συγκεκριμένο προσωπικό.
Εάν οριστεί ένα χαρακτηριστικό για ένα μέλος, θα εμφανίζεται στον φάκελό του σε όλο το προσωπικό. Ωστόσο, μόνο το προσωπικό από τα επιλεγμένα παραρτήματα θα μπορεί να το επεξεργαστεί.
Κατηγορία: αν θέλετε να εμφανίζεται αυτό το χαρακτηριστικό μόνο σε μέλη ενός τύπου, επιλέξτε την κατηγορία του μέλους εδώ
Ταξινόμηση: αν έχετε πολλά χαρακτηριστικά, μπορεί να είναι χρήσιμο να τα ομαδοποιήσετε ώστε να μπορείτε να τα βρίσκετε εύκολα για επεξεργασία. Αν δημιουργήσετε μια καθιερωμένη τιμή authorized value για το PA_CLASS θα εμφανιστεί στο κυλιόμενο μενού «Ταξινόμηση» και στη συνέχεια μπορείτε να αλλάξετε τη σελίδα των χαρακτηριστικών σας ώστε να έχετε τμήματα των χαρακτηριστικών
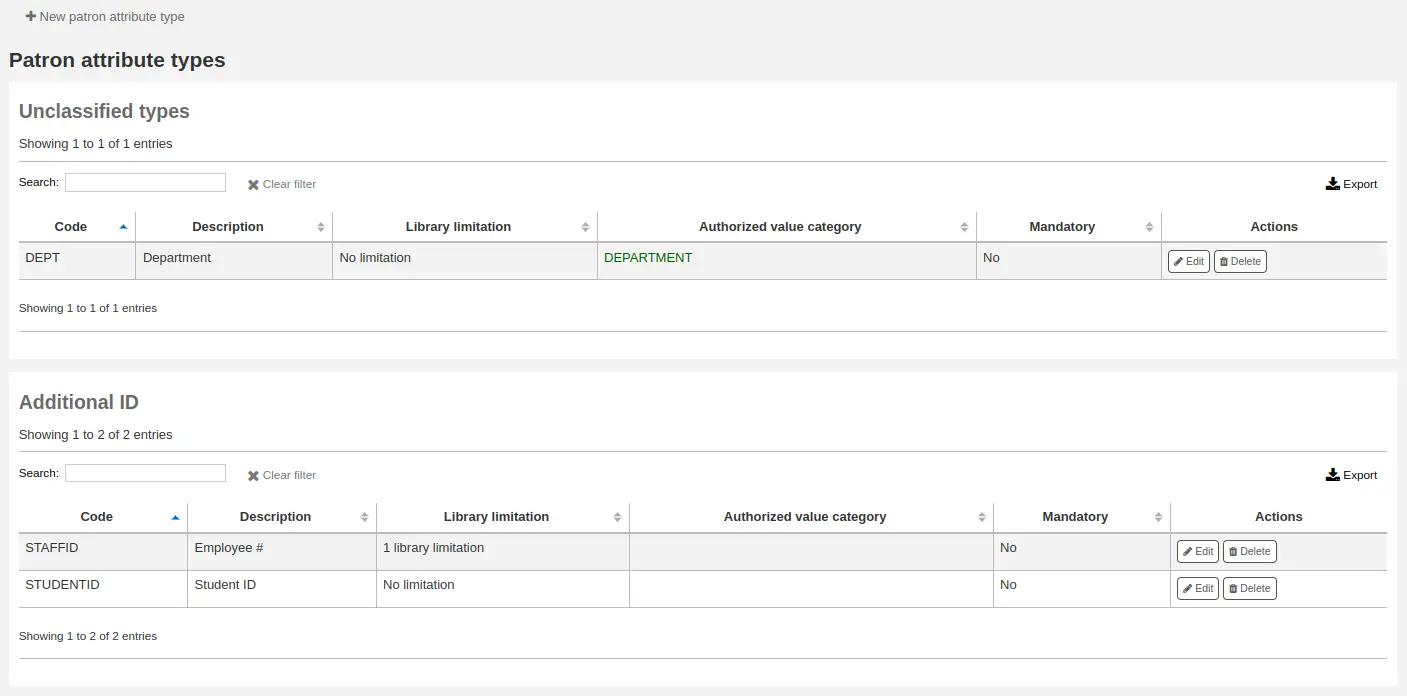
Επιλέξτε «Αποθήκευση» για να αποθηκεύσετε το νέο σας χαρακτηριστικό.
Once added, your attribute will appear on the list of attributes and also on the patron record add/edit form
Επεξεργασία/διαγραφή τύπου χαρακτηριστικού μέλους
Κάθε χαρακτηριστικό μέλους έχει ένα κουμπί επεξεργασίας και ένα κουμπί διαγραφής δίπλα του στον κατάλογο των χαρακτηριστικών.

Ορισμένα πεδία του χαρακτηριστικού δεν μπορούν να τροποποιηθούν μετά τη δημιουργία τους:
Κωδικός τύπου χαρακτηριστικού μέλους
Επαναλαμβανόμενο
Μοναδικό αναγνωριστικό
Δεν θα μπορείτε να διαγράψετε ένα χαρακτηριστικό εάν είναι σε χρήση.

Όρια μεταφοράς βιβλιοθήκης
Περιορίστε τη δυνατότητα μεταφοράς τεκμηρίων μεταξύ βιβλιοθηκών με βάση τη βιβλιοθήκη που αποστέλλει, τη βιβλιοθήκη που παραλαμβάνει και τον κωδικό συλλογής που εμπλέκεται.
Πηγαίνετε εκεί: Περισσότερα > Διαχείριση > Μέλη και κυκλοφορία υλικού > Όρια μεταφοράς της βιβλιοθήκης
Σημείωση
Μόνο το προσωπικό με το δικαίωμα διαχείρισης των μεταφορών manage_transfers permission (ή το δικαίωμα superlibrarian) θα έχει πρόσβαση σε αυτή την ενότητα.
Αυτοί οι κανόνες τίθενται σε ισχύ μόνο εάν η παράμετρος UseBranchTransferLimits έχει οριστεί «Να επιβάλλεται».
Πριν ξεκινήσετε, θα πρέπει να επιλέξετε για ποια βιβλιοθήκη θα ορίσετε αυτά τα όρια.

Τα όρια μεταφοράς καθορίζονται με βάση τους κωδικούς συλλογής που έχετε ορίσει στην ενότητα διαχείρισης των καθιερωμένων τιμών Authorized values.
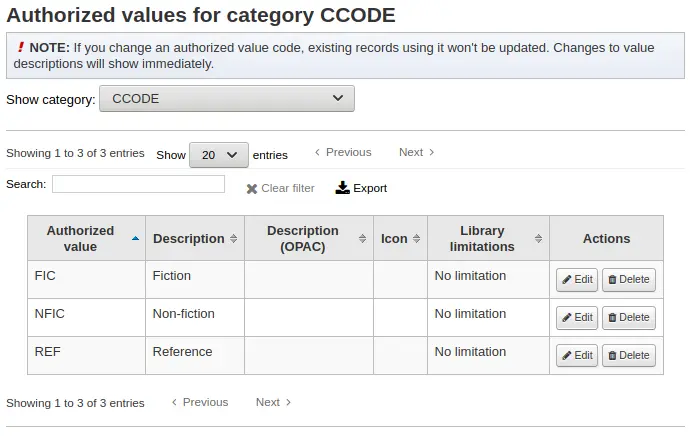
Οι κωδικοί συλλογής θα εμφανίζονται ως καρτέλες πάνω από τα πλαίσια ελέγχου:
Επιλέξτε τα κουτάκια για τις βιβλιοθήκες στις οποίες επιτρέπετε να μεταφερθούν τα τεκμήριά σας για τον κωδικό συλλογής που έχετε επιλέξει στο πάνω μέρος (στο παράδειγμα παρακάτω - FIC)
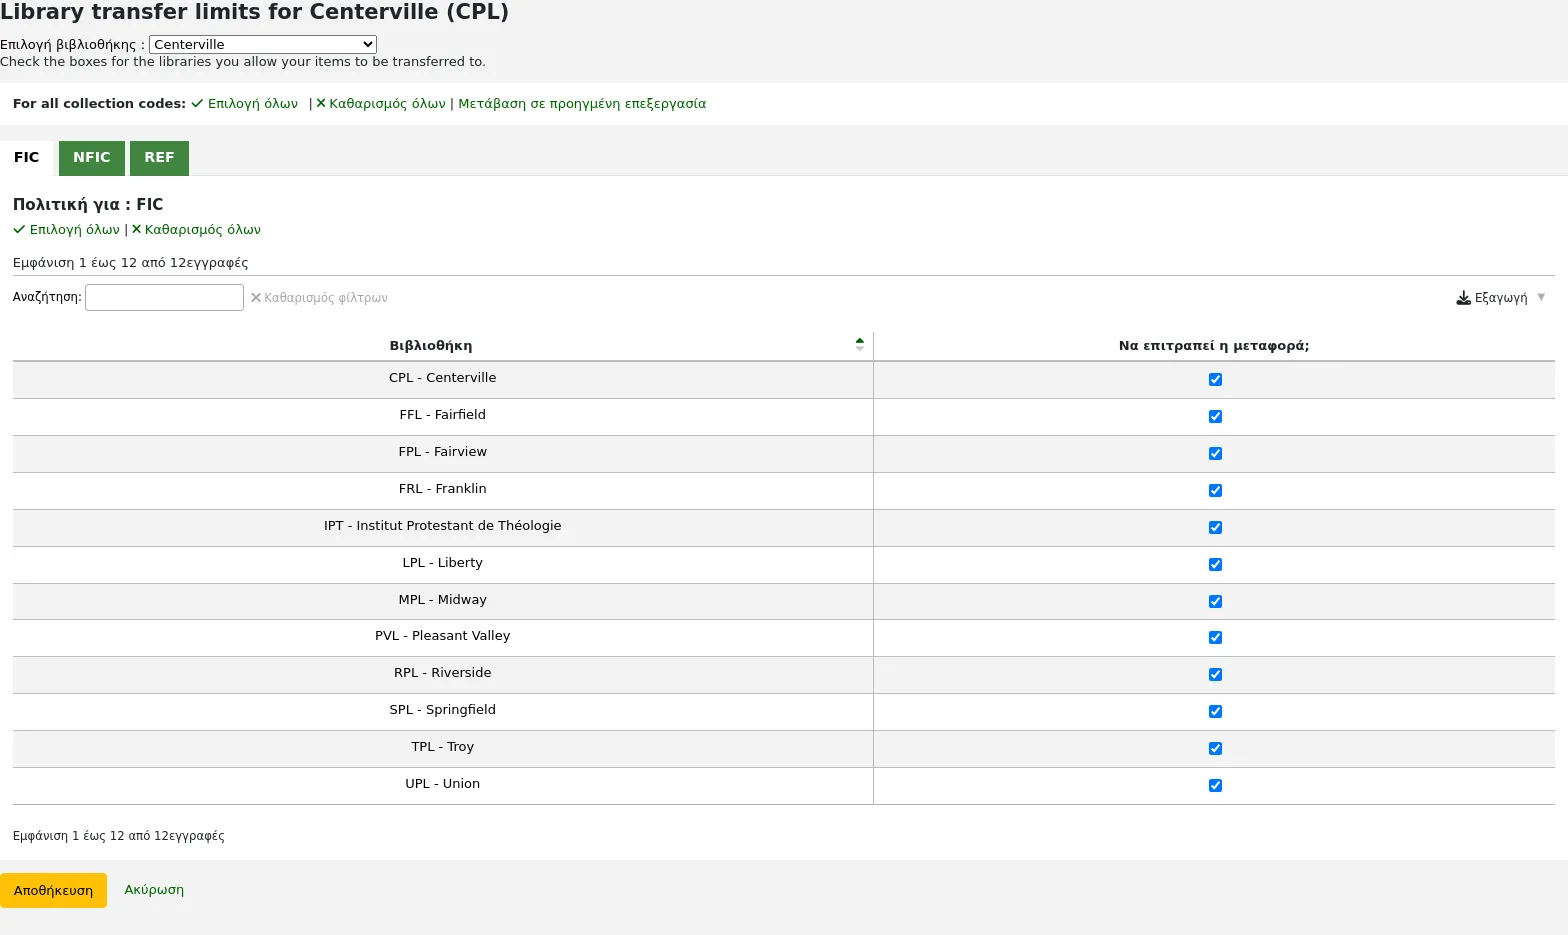
Στο παραπάνω παράδειγμα, η βιβλιοθήκη του Centerville θα επιτρέψει στα μέλη όλων των βιβλιοθηκών εκτός από τις βιβλιοθήκες Liberty και Franklin να ζητήσουν τεκμήρια από το παράρτημά τους.
Πίνακας κόστους μεταφοράς
Ο πίνακας κόστους μεταφοράς επιτρέπει σε ένα σύστημα βιβλιοθηκών να καθορίσει το σχετικό κόστος μεταφοράς βιβλίων μεταξύ τους.
Σημείωση
Μόνο το προσωπικό με το δικαίωμα διαχείρισης των μεταφορών manage_transfers permission (ή το δικαίωμα superlibrarian) θα έχει πρόσβαση σε αυτή την ενότητα.
Για να χρησιμοποιήσει το σύστημα αυτόν τον πίνακα, πρέπει πρώτα να ορίσετε την παράμετρο UseTransportCostMatrix στην τιμή «Να χρησιμοποιείται».
Σημαντικό
Ο πίνακας κόστους μεταφοράς υπερισχύει στον καθορισμό του από πού γίνονται οι κρατήσεις, εάν ο πίνακας δεν χρησιμοποιείται, τότε το Koha επιλέγει το StaticHoldsQueueWeight.
Τα κόστη είναι δεκαδικές τιμές μεταξύ κάποιας αυθαίρετης μέγιστης τιμής (π.χ. 1 ή 100) και του 0 που είναι το ελάχιστο (μηδενικό) κόστος. Για παράδειγμα, θα μπορούσατε απλά να χρησιμοποιήσετε την απόσταση μεταξύ κάθε βιβλιοθήκης σε μίλια ως «κόστος», αν αυτό θα αντικατοπτρίζει με ακρίβεια το κόστος μεταφοράς τους. Ίσως τα ταχυδρομικά καταστήματα θα ήταν ένα καλύτερο μέτρο. Οι βιβλιοθήκες που μοιράζονται ένα ταχυδρομείο θα έχουν κόστος 1, τα γειτονικά ταχυδρομικά καταστήματα θα έχουν κόστος 2 κ.λπ.
Για να εισαγάγετε το κόστος μεταφοράς, απλά επιλέξτε το πεδίο που θέλετε να αλλάξετε, αποεπιλέξτε το πλαίσιο «Απενεργοποίηση» και εισαγάγετε το «κόστος» σας

Αφού εισαγάγετε το κόστος σας, πατήστε το πλήκτρο «Enter» στο πληκτρολόγιό σας ή επιλέξτε το κουμπί «Αποθήκευση» στο κάτω μέρος του πίνακα για να αποθηκεύσετε τις αλλαγές σας.
Σημείωση
Η τιμή NULL δεν θα κάνει καμία διαφορά όταν οι βιβλιοθήκες Από και Προς είναι η ίδια βιβλιοθήκη. Ωστόσο, ως βέλτιστη πρακτική, θα πρέπει να βάζετε εκεί ένα 0. Για όλους τους άλλους συνδυασμούς Προς/Από, μια (κενή) τιμή NULL θα κάνει τη σχέση αυτή να ενεργεί σαν να έχει απενεργοποιηθεί. Έτσι, συνοπτικά, μην αφήνετε καμία από τις τιμές κενή. Είναι καλύτερο να βάζετε πάντα έναν αριθμό εκεί ( ακόμα και αν επιλέξετε να απενεργοποιήσετε τη συγκεκριμένη επιλογή Προς/Από ).
Ειδοποιήσεις κυκλοφορίας υλικού
Οι βιβλιοθήκες μπορούν να αποφασίσουν αν θέλουν να ενημερώνονται αυτόματα τα μέλη για τα περιστατικά κυκλοφορίας (επιστροφές και δανεισμούς).
Πηγαίνετε εκεί: Περισσότερα > Διαχείριση > Μέλη και κυκλοφορία υλικού > Ειδοποιήσεις κυκλοφορίας υλικού
Σημείωση
Μόνο το προσωπικό με το δικαίωμα διαχείρισης των ειδοποιήσεων κυκλοφορίας του υλικού manage_item_circ_alerts (ή το δικαίωμα superlibrarian) θα έχει πρόσβαση σε αυτή την ενότητα.
Αυτές οι παράμετροι καθορίζονται με βάση τους τύπους μελών και τους τύπους τεκμηρίων.
Σημαντικό
Αυτές οι παράμετροι μπορούν να παρακαμφθούν από αλλαγές στις προτιμήσεις των μηνυμάτων του εκάστοτε μέλους.
Για να ρυθμίσετε ειδοποιήσεις κυκλοφορίας:
Επιλέξτε τη βιβλιοθήκη σας από το αναδυόμενο μενού στο επάνω μέρος της οθόνης
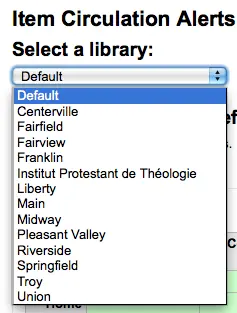
Για να ορίσετε τις παραμέτρους για όλες τις βιβλιοθήκες, κρατήστε το μενού στην «Προεπιλογή»
Προεπιλεγμένα, όλοι οι τύποι τεκμηρίων και όλα τα μέλη ενημερώνονται για τις επιστροφές και τους δανεισμούς. Για να το αλλάξετε αυτό, επιλέξτε το συνδυασμό τύπου τεκμηρίου/μέλους, για τον οποίο θέλετε να σταματήσετε τις ειδοποιήσεις.
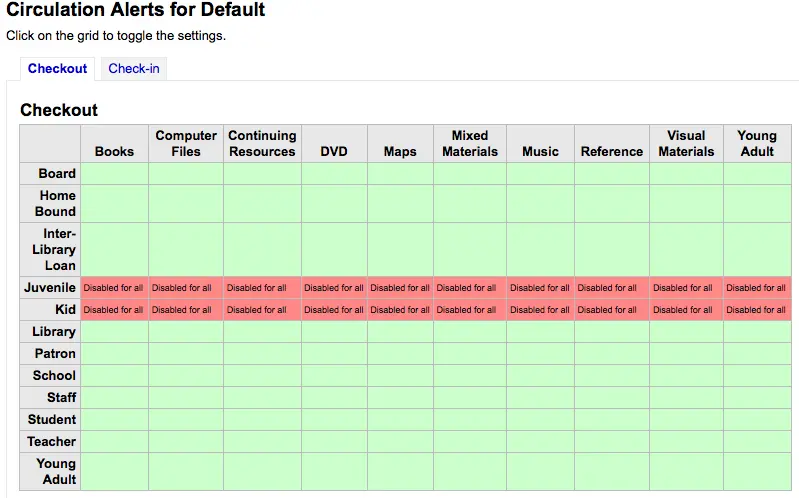
Στο παραπάνω παράδειγμα, οι Ανήλικοι και τα Παιδιά δεν θα λαμβάνουν ειδοποιήσεις δανεισμού.
Πόλεις και οικισμοί
Για να τυποποιήσετε την εισαγωγή μελών μπορείτε να ορίσετε πόλεις ή οικισμούς εντός της περιοχής σας, ώστε όταν προστίθενται νέα μέλη, οι βιβλιοθηκονόμοι απλώς να επιλέγουν την πόλη από μια λίστα, αντί να πληκτρολογούν την πόλη και τον ταχυδρομικό (ή ταχυδρομικό) κώδικα.
Πηγαίνετε εκεί: Περισσότερα > Διαχείριση > Μέλη και κυκλοφορία υλικού > Πόλεις και οικισμοί
Σημείωση
Μόνο το προσωπικό με το δικαίωμα διαχείρισης των πόλεων manage_cities (ή το δικαίωμα superlibrarian) θα έχει πρόσβαση σε αυτή την ενότητα.
Προσθήκη μίας πόλης
Για να προσθέσετε μια νέα πόλη, επιλέξτε το κουμπί «Νέα πόλη» στο επάνω μέρος της σελίδας και πληκτρολογήστε το όνομα της πόλης, την επαρχία, τον ταχυδρομικό κώδικα και τη χώρα.

Μόλις επιλέξετε το κουμπί Υποβολή, η πόλη σας θα αποθηκευτεί και θα εμφανίζεται στη σελίδα Πόλεις και οικισμοί

Οι πόλεις μπορούν να δεχθούν επεξεργασία ή να διαγραφούν οποιαδήποτε στιγμή.
Προβολή πόλεων στη φόρμα προσθήκης μέλους
Εάν έχετε ορίσει τοπικές πόλεις χρησιμοποιώντας τη φόρμα «Νέα πόλη», τότε κατά την προσθήκη ή την επεξεργασία μιας εγγραφής μέλους θα βλέπετε αυτές τις πόλεις σε ένα αναδιπλούμενο μενού για να διευκολύνεστε στην επιλογή της πόλης.
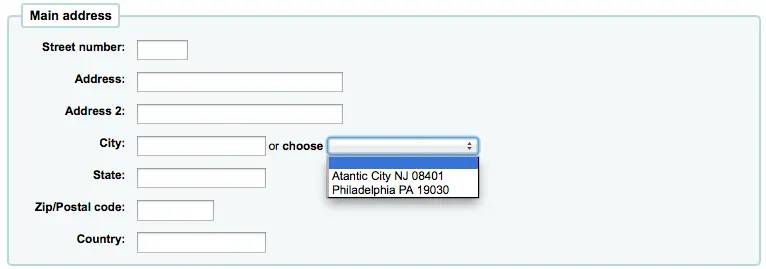
Αυτό θα επιτρέπει την εύκολη καταχώρηση των κατά τόπους πόλεων στο μητρώο των μελών χωρίς να υπάρχει κίνδυνος τυπογραφικών λαθών ή λανθασμένων ταχυδρομικών κωδίκων.
Παραλαβή εκτός βιβλιοθήκης
Η δυνατότητα παραλαβής εκτός της βιβλιοθήκης χρησιμοποιείται για να κλείνετε ραντεβού με τα μέλη για να παραλάβουν τα βιβλία που έχουν κάνει κράτηση. Αυτή η ενότητα χρησιμοποιείται για τη διαμόρφωση των σημείων παραλαβής
Πηγαίνετε εκεί: Περισσότερα > Διαχείριση > Μέλη και κυκλοφορία υλικού > Παραλαβή εκτός Βιβλιοθήκης
Σημείωση
Για να χρησιμοποιήσετε αυτή την λειτουργία, πρέπει να την ενεργοποιήσετε στην ομώνυμη παράμετρο του συστήματος CurbsidePickup.
Σημείωση
Μόνο το προσωπικό με το δικαίωμα διαχείρισης των παραλαβών εκτός της Βιβλιοθήκης manage_curbside_pickups (ή το δικαίωμα superlibrarian) θα έχει πρόσβαση σε αυτή την ενότητα.
Ρύθμιση της παραλαβής εκτός της Βιβλιοθήκης
Από τη σελίδα των ρυθμίσεων, επιλέξτε την καρτέλα που αντιστοιχεί στη βιβλιοθήκη για την οποία ρυθμίζετε την παραλαβή εκτός του χώρου της
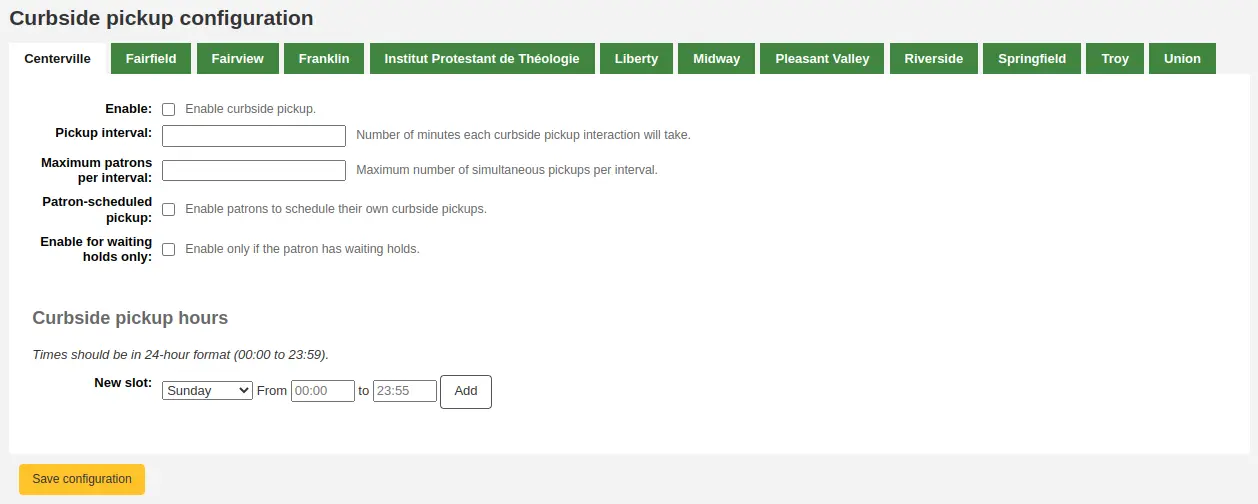
Συμπληρώσετ τη φόρμα
Ενεργοποίηση: επιλέξτε αυτό το πλαίσιο για να ενεργοποιήσετε την εν λόγω παραλαβή γι” αυτή τη βιβλιοθήκη
Χρονικό διάστημα παραλαβής: εισαγάγετε τον αριθμό των λεπτών που θα διατίθενται για παραλαβή εκτός της βιβλιοθήκης
Μέγιστος αριθμός μελών ανά χρονικό διάστημα: εισαγάγετε τον αριθμό των μελώνν που μπορούν να παραλάβουν μέσα στο ίδιο χρονικό διάστημα
Προγραμματισμένη από τα μέλη παραλαβή: επιλέξτε αυτό το πλαίσιο εάν θέλετε να επιτρέπετε στα μέλη να ορίσουν το δικό τους ραντεβού παραλαβής εκτός της βιβλιοθήκης μέσω του OPAC
Ενεργοποίηση μόνο για τις κρατήσεις εν αναμονή: επιλέξτε αυτό το πλαίσιο εάν η παραλαβή εκτός βιβλιοθήκης πρέπει να περιορίζεται μόνο στα μέλη που έχουν κρατήσεις που αναμένεται να παραληφθούν
Δημιουργία θυρίδων παραλαβής εκτός βιβλιοθήκης
Για κάθε θυρίδα, εισαγάγετε την ημέρα της εβδομάδας, τις ώρες έναρξης και λήξης της θυρίδας, κατά τις οποίες μπορούν να προσέλθουν τα μέλη
αυτές μπορεί να είναι οι ώρες λειτουργίας σας, εάν επιτρέπετε την παραλαβή εκτός βιβλιοθήκης καθ” όλη τη διάρκεια της ημέρας, ή συγκεκριμένες ώρες λειτουργίας των θυρίδων, κατά τις οποίες επιτρέπετε στα μέλη να έρθουν
Για τις ώρες, η μορφή πρέπει να είναι XX:XX (αριθμοί με άνω και κάτω τελεία) και πρέπει να είναι σε 24ωρη μορφή (π.χ. 1 μ.μ. είναι 13:00)
Επιλέξτε «Προσθήκη»
Επιλέξτε «Αποθήκευση ρυθμίσεων»
Κάντε το αυτό για κάθε βιβλιοθήκη που προσφέρει την υπηρεσία της παραλαβής εκτός του χώρου της.
Τύποι περιορισμού μελών
Εάν χρησιμοποιείτε τύπους περιορισμού μελών, μπορείτε να διαχειριστείτε τους διαθέσιμους τύπους περιορισμού εδώ.
Οι τύποι περιορισμού μελών ενεργοποιούνται στη σχετική παράμετρο του συστήματος PatronRestrictionTypes.
Πηγαίνετε εκεί: Περισσότερα > Διαχείριση > Μέλη και κυκλοφορία υλικού > Τύποι περιορισμού μελών

Σημείωση
Μόνο το προσωπικό με το δικαίωμα διαχείρισης του περιορισμού μελών manage_patron_restrictions (ή το δικαίωμα superlibrarian) θα έχει πρόσβαση σε αυτή την ενότητα.
Προσθήκη ενός τύπου περιορισμού
Για να προσθέσετε έναν νέο τύπο περιορισμού, επιλέξτε «Νέος τύπος περιορισμού» στο επάνω μέρος της σελίδας.
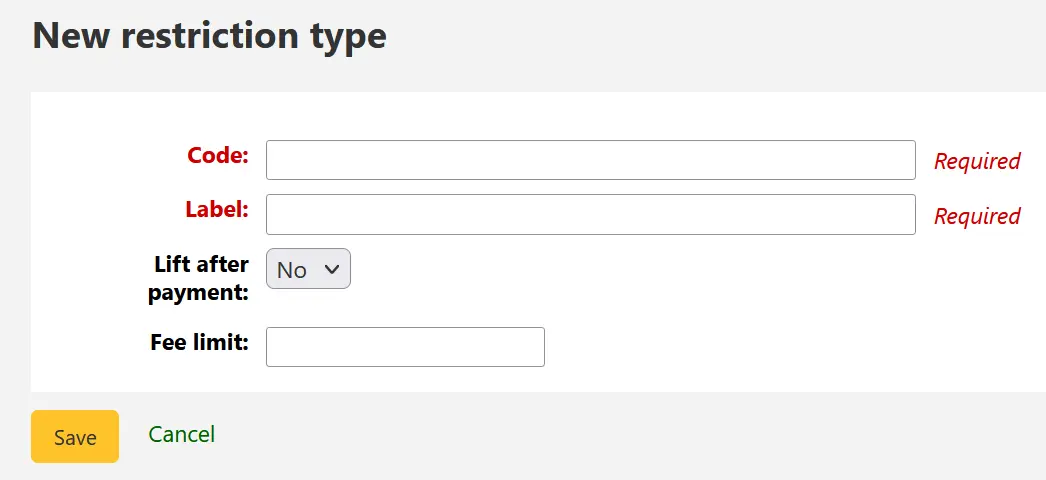
Κωδικός: εισαγάγετε έναν κωδικό για τον περιορισμό. Οι κωδικοί περιορίζονται σε 50 χαρακτήρες και δεν πρέπει να περιέχουν κενά, διακριτικά ή ειδικούς χαρακτήρες.
Ετικέτα: εισαγάγετε την ετικέτα του περιορισμού. Η ετικέτα θα είναι αυτή που θα εμφανίζεται σε όλο το Koha.
Κατάργηση μετά από πληρωμή: αν οριστεί στην τιμή «Ναι», οι περιορισμοί που χρησιμοποιούν αυτόν τον τύπο θα καταργούνται αυτόματα μετά από την πληρωμή ποσού ίσου ή μεγαλύτερου από το ποσό που ορίζεται στο «Όριο χρέωσης».
Όριο χρέωσης: πληκτρολογήστε το ποσό που πρέπει να καταβληθεί για την κατάργηση ενός περιορισμού αυτού του τύπου. Αυτό το πεδίο χρησιμοποιείται μόνο εάν η επιλογή «Κατάργηση μετά από πληρωμή» έχει οριστεί στην τιμή «Ναι».
Μόλιςεπιλέξετε την «Αποθήκευση», ο τύπος περιορισμού σας θα αποθηκευτεί και θα εμφανίζεται στον πίνακα των τύπων περιορισμού.
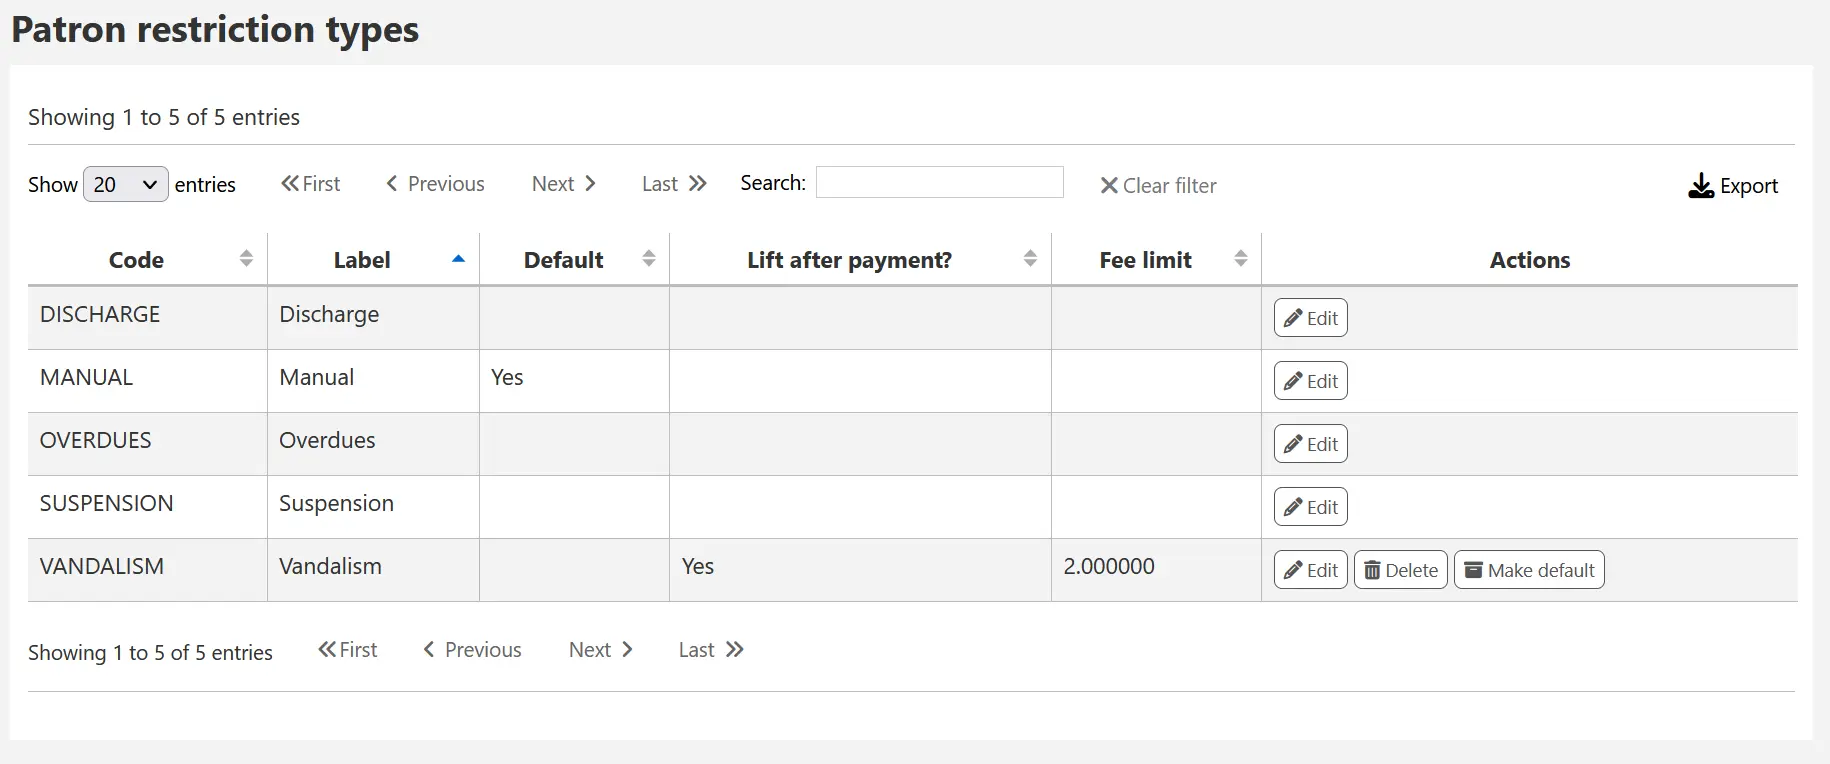
Οι τοπικά δημιουργημένοι τύποι περιορισμού μπορούν να οριστούν ως ο προεπιλεγμένος τύπος περιορισμού που θα χρησιμοποιείται όταν προστίθεται χειροκίνητα ένας περιορισμός σε έναν λογαριασμό μέλους. Αυτό μπορεί να επιτευχθεί χρησιμοποιώντας το κουμπί «Όρισε προεπιλεγμένο».
Μπορείτε επίσης να διαγράψετε οποιουσδήποτε τοπικά δημιουργημένους τύπους περιορισμών χρησιμοποιώντας τη «Διαγραφή», εφόσον δεν έχουν οριστεί ως προεπιλεγμένοι.
Λογιστήριο
Πηγαίνετε εκεί: Περισσότερα > Διαχείριση > Λογιστήριο
Αυτή η ενότητα αφορά τις παραμέτρους που χρησιμοποιούνται για τη διαχείριση των λογαριασμών των μελών.
Τύποι χρέωσης
Πηγαίνετε εκεί: Περισσότερα > Διαχείριση > Λογιστήριο > Τύποι χρέωσης
Σημείωση
Μόνο το προσωπικό με το δικαίωμα διαχείρισης των λογαριασμών manage_accounts (ή το δικαίωμα superlibrarian) θα έχει πρόσβαση σε αυτή την ενότητα.
Εδώ καθορίζετε τις μη αυτόματες χρεώσεις που μπορεί να επιβαρύνουν τα μέλη σας.

Όταν μεταβαίνετε για πρώτη φορά στη σελίδα, θα δείτε μόνο τις μη αυτόματες χρεώσεις που έχουν ήδη οριστεί στο σύστημά σας.
Μπορείτε να δείτε τις προεπιλεγμένες χρεώσεις του συστήματος επιλέγοντας την «Εμφάνιση όλων των τύπων χρέωσης».
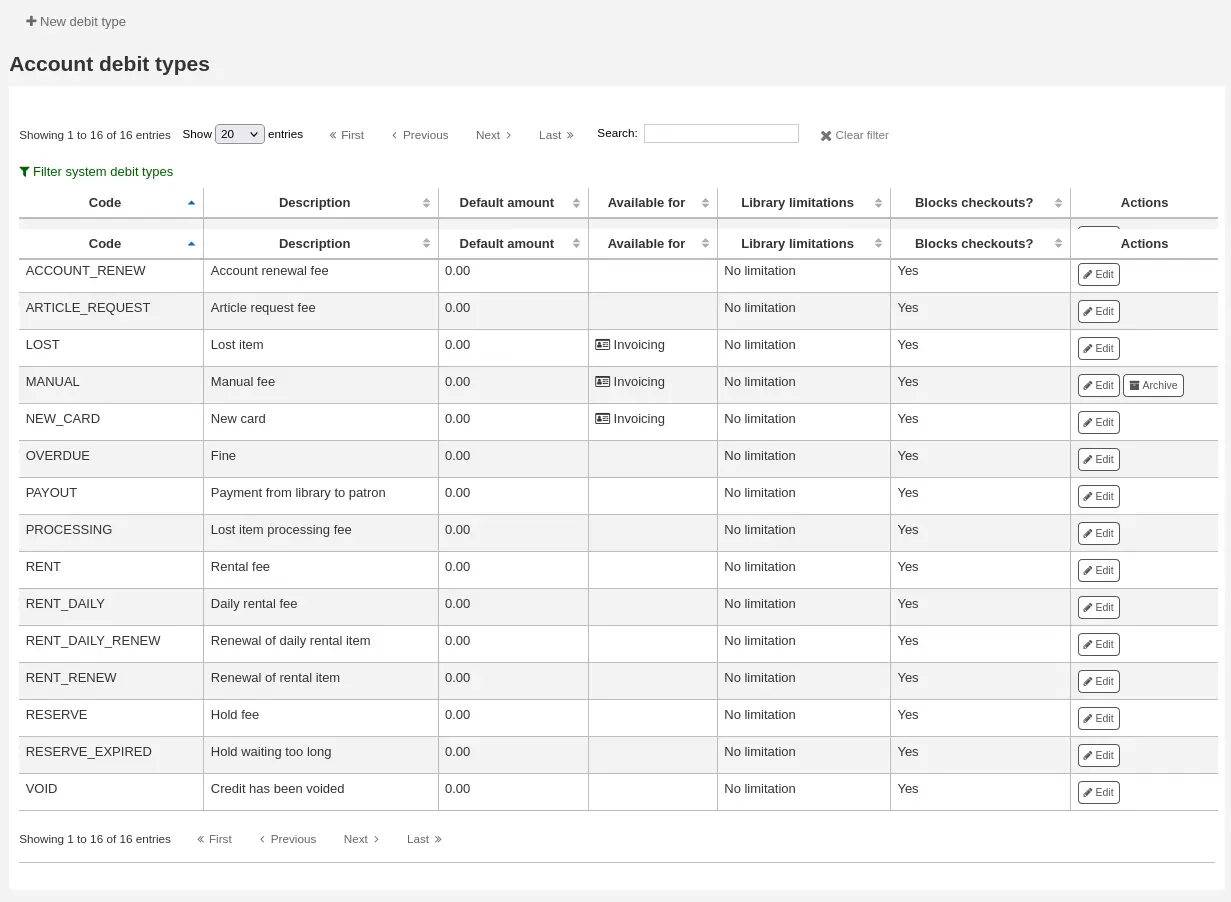
Μπορείτε να επιστρέψετε στην εμφάνιση μόνο των μη αυτόματων χρεώσεων επιλέγοντας το «Φίλτρο τύπων χρέωσης του συστήματος».
Τύποι χρέωσης του συστήματος
Αρκετοί τύποι χρέωσης είναι εγκατεστημένοι στο Koha. Οι περισσότεροι από αυτούς είναι αυτόματες χρεώσεις που προστίθενται σύμφωνα με τις πολιτικές που έχετε ρυθμίσει αλλού στο Koha.
ACCOUNT (Χρέωση δημιουργίας λογαριασμού»): χρεώνεται στο λογαριασμό του μέλους κατά την εγγραφή του. Η χρέωση μπορεί να αλλάξει στις ρυθμίσεις της κατηγορίας μέλους patron category settings στην ένδειξη «Τέλος εγγραφής».
ACCOUNT_RENEW (Χρέωση ανανέωσης λογαριασμού): χρεώνεται στο λογαριασμό του μέλους όταν ανανεώνεται ο λογαριασμός του. Όπως και ο τύπος χρέωσης ACCOUNT παραπάνω, αυτό μπορεί να αλλάξει στις ρυθμίσεις της κατηγορίας μέλους patron category settings στην ένδειξη «Τέλος εγγραφής».
LOST («Χαμένο τεκμήριο»): χρεώνεται στο λογαριασμό του μέλους όταν ένα τεκμήριο στο μητρώο του δηλωθεί ως χαμένο. Το ποσό εξαρτάται από το πεδίο «κόστος αντικατάστασης» item’s “replacement cost” field ή από το προεπιλεγμένο κόστος αντικατάστασης του σχετικού τύπου τεκμηρίου item type’s default replacement cost. Μπορεί επίσης να προστεθεί με το χέρι στην καρτέλα των μη αυτόματων τιμολογίων manual invoices.
MANUAL («Μη αυτόματη χρέωση»): πρόκειται για την προεπιλεγμένη μη αυτόματη χρέωση που είναι εγκατεστημένη με το Koha. Δεν χρεώνεται αυτόματα από το Koha, αλλά μπορεί να προστεθεί στο λογαριασμό ενός μέλους χειροκίνητα στην καρτέλα των μη αυτόματων τιμολογίων manual invoices.
NEW_CARD (Χρέωση νέας κάρτας): πρόκειται για μια άλλη προεπιλεγμένη μη αυτόματη χρέωση που έχει εγκατασταθεί με το Koha. Δεν χρεώνεται αυτόματα από το Koha, αλλά μπορεί να προστεθεί στο λογαριασμό ενός μέλους χειροκίνητα στην καρτέλα των μη αυτόματων τιμολογίων manual invoices.
OVERDUE (Πρόστιμο καθυστέρησης): χρεώνεται αυτόματα στο λογαριασμό του μέλους όταν έχει καθυστερήσει την επιστροφή δανεισμένου υλικού. Το ποσό για τα πρόστιμα καθυστέρησης ορίζεται στους κανόνες κυκλοφορίας και προστίμων circulation and fines rules.
PAYOUT (Πληρωμή από τη βιβλιοθήκη στο μέλος): χρησιμοποιείται όταν η βιβλιοθήκη επιστρέφει ποσό σε ένα μέλος (για παράδειγμα, για υπερβολική χρέωση).
PROCESSING (τέλος διεκπεραίωσης χαμένων τεκμηρίων): χρεώνεται αυτόματα στο λογαριασμό του μέλους όταν ένα τεκμήριο στο μητρώο του δηλωθεί ως χαμένο. Το ποσό καθορίζεται από τον τύπο τεκμηρίου item type στην ενότητα «Τέλος διεκπεραίωσης (όταν χάνεται)».
RENT (Χρέωση δανεισμού): χρεώνεται αυτόματα στο λογαριασμό του μέλους κατά την ολοκλήρωση του δανεισμού, εάν ο τύπος τεκμηρίου item type έχει ένα τέλος δανεισμού.
RENT_DAILY (Ημερήσια χρέωση δανεισμού): χρεώνεται αυτόματα στο λογαριασμό του μέλους κατά την ολοκλήρωση του δανεισμού, εάν ο τύπος τεκμηρίου item type έχει ένα ημερήσιο τέλος δανεισμού.
RENT_DAILY_RENEW (Ανανέωση ημερήσιας χρέωσης δανεισμού ενός τεκμηρίου): χρεώνεται αυτόματα στο λογαριασμό του μέλους κατά την ανανέωση, εάν ο τύπος τεκμηρίου item type έχει χρέωση ημερήσιου δανεισμού.
RENT_RENEW (Ανανέωση δανεισμού ενός τεκμηρίου): χρεώνεται αυτόματα στο λογαριασμό του μέλους κατά την ανανέωση, εάν ο τύπος τεκμηρίου item type έχει χρέωση δανεισμού.
RESERVE (τέλος κράτησης): χρεώνεται αυτόματα στο λογαριασμό του μέλους κατά την κράτηση. Το ποσό εξαρτάται από το ποσό του «Τέλους κράτησης» στις ρυθμίσεις της κατηγορίας μέλους patron’s category.
RESERVE_EXPIRED (Αναμονή κράτησης για μεγάλο χρονικό διάστημα): χρεώνεται αυτόματα στο λογαριασμό του μέλους, εάν δεν έχει παραλάβει την κράτησή του μετά από τον αριθμό ημερών που ορίζεται στην παράμετρο του συστήματος ExpireReservesMaxPickUpDelay. Το ποσό ορίζεται στην παράμετρο του συστήματος ExpireReservesMaxPickUpDelayCharge.
Προσθήκη νέου τύπου χρέωσης
Για να προσθέσετε ένα νέο τύπο χρέωσης:
Επιλέξτε «Νέος τύπος χρέωσης»
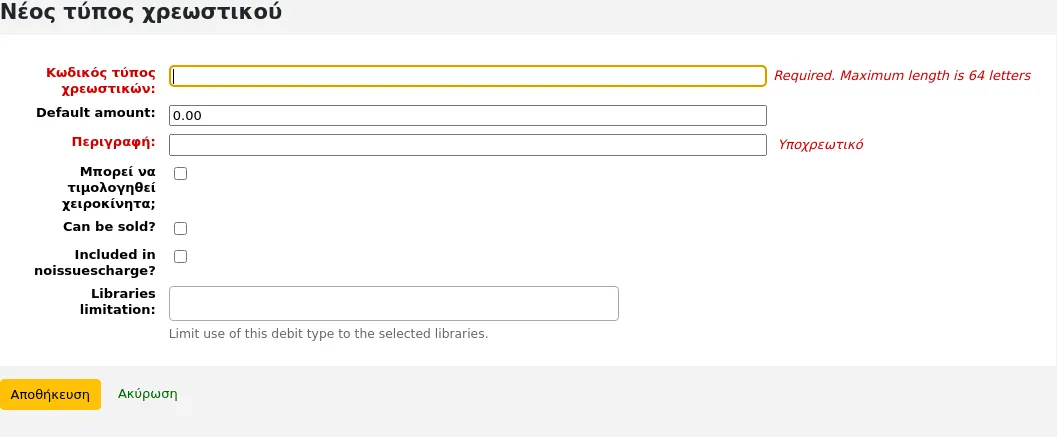
Κωδικός τύπου χρέωσης: πληκτρολογήστε έναν κωδικό (που δεν μπορεί να υπερβαίνει τα 64 γράμματα).
Προειδοποίηση
Οι κωδικοί πρέπει να είναι αποκλειστικά γράμματα, αριθμοί και υπογράμμιση (_).
Αποφύγετε τα κενά, τους διακριτικούς χαρακτήρες και τους ειδικούς χαρακτήρες.
Προεπιλεγμένο ποσό: εισαγάγετε το προεπιλεγμένο ποσό.
Σημείωση
Το προσωπικό θα μπορεί να αλλάξει το ποσό αυτό κατά την προσθήκη της χρέωσης στο λογαριασμό του μέλους, εάν είναι απαραίτητο.
Σημαντικό
Μην πληκτρολογείτε σύμβολα νομίσματος. Γράψτε μόνο το ποσό με δεκαδικό αριθμό (για παράδειγμα, 5 ή 5,00 αντί για 5 δολάρια).
Περιγραφή: γράψτε μια περιγραφή, αυτή η περιγραφή θα χρησιμοποιείται στο αναδιπλούμενο μενού κατά την προσθήκη νέας χρέωσης στο λογαριασμό ενός μέλους adding a new charge to a patron’s account ή κατά την πραγματοποίηση μιας πώλησης στο σημείο πώλησης point of sale καθώς και στο ιστορικό συναλλαγών transaction history.
Μπορεί να τιμολογηθεί με μη αυτόματο τρόπο: επιλέξτε αυτό το πλαίσιο εάν αυτός ο τύπος χρέωσης μπορεί να προστεθεί με μη αυτόματο τρόπο από το προσωπικό στο λογαριασμό ενός μέλους μέσω των μη αυτόματων τιμολογίων manual invoices.
Μπορεί να πωληθεί: επιλέξτε αυτό το πλαίσιο εάν αυτός ο τύπος χρέωσης μπορεί να χρησιμοποιηθεί στο σημείο πώλησης point of sale.
Συνυπολογίζεται στο noissuescharge: επιλέξτε αυτό το πλαίσιο εάν αυτός ο τύπος χρέωσης πρέπει να συνυπολογιστεί στον υπολογισμό του ποσού που οφείλει ένα μέλος στην παράμετρο του συστήματος noissuescharge. Αυτή η παράμετρος του συστήματος χρησιμοποιείται για να μπλοκάρει τους δανεισμούς όταν ένα μέλος οφείλει πάνω από ένα συγκεκριμένο ποσό στη βιβλιοθήκη.
Ορισμός βιβλιοθηκών: εάν είναι απαραίτητο, επιλέξτε τις βιβλιοθήκες στις οποίες μπορεί να χρησιμοποιηθεί αυτός ο τύπος χρέωσης. Η επιλογή «Όλες οι βιβλιοθήκες» θα καταστήσει τον τύπο χρέωσης διαθέσιμο παντού.
Σημείωση
Μπορείτε να επιλέξετε περισσότερες από μία βιβλιοθήκες πατώντας το πλήκτρο “Ctrl” κατά την επιλογή.
Εάν έχετε πρόσθετα πεδία additional fields για τους τύπους χρέωσης λογαριασμού (account_debit_types), αυτά θα εμφανίζονται εδώ.
Επιλέξτε «Αποθήκευση»
Επεξεργασία υφιστάμενου τύπου χρέωσης
Μπορείτε να τροποποιήσετε μόνο τους τύπους χρέωσης που έχετε προσθέσει, καθώς και τη «Μη αυτόματη χρέωση».
Για την επεξεργασία ενός τύπου χρέωσης:
Επιλέξτε την «Επεξεργασία» στα δεξιά του τύπου χρέωσης
Τροποποιήστε οποιοδήποτε πεδίο
Επιλέξτε «Αποθήκευση»
Αρχειοθέτηση ενός τύπου χρέωσης
Εάν υπάρχει ένας τύπος χρέωσης που δεν χρειάζεστε πλέον, μπορείτε να τον αρχειοθετήσετε.
Σημείωση
Δεν υπάρχει τρόπος να διαγράψετε έναν τύπο χρέωσης, δεδομένου ότι χρησιμοποιείται στο λογιστικό τμήμα του μέλους.
Για να αρχειοθετήσετε έναν τύπο χρέωσης, απλώς επιλέξτε την «Αρχειοθέτηση» στα δεξιά του τύπου χρέωσης.
Επαναφορά αρχειοθετημένου τύπου χρέωσης
Εάν χρειαστεί να χρησιμοποιήσετε ξανά έναν αρχειοθετημένο τύπο χρέωσης, απλώς επιλέξτε την «Επαναφορά» στα δεξιά του τύπου χρέωσης.
Αυτό θα τον καταστήσει ξανά διαθέσιμο.
Τύποι πίστωσης
Πηγαίνετε εκεί: Περισσότερα > Διαχείριση > Λογιστήριο > Τύποι πίστωσης
Σημείωση
Μόνο το προσωπικό με το δικαίωμα διαχείρισης των λογαριασμών manage_accounts (ή το δικαίωμα superlibrarian) θα έχει πρόσβαση σε αυτή την ενότητα.
Εδώ καθορίζετε τις μη αυτόματες πιστώσεις που μπορείτε να κάνετε στα μέλη.
Όταν μεταβαίνετε για πρώτη φορά στη σελίδα, θα δείτε μόνο τις πιστώσεις που έχουν ήδη οριστεί στο σύστημά σας.
Μπορείτε να δείτε τους προεπιλεγμένους τύπους πίστωσης του συστήματος επιλέγοντας την «Εμφάνιση όλων των τύπων πίστωσης».
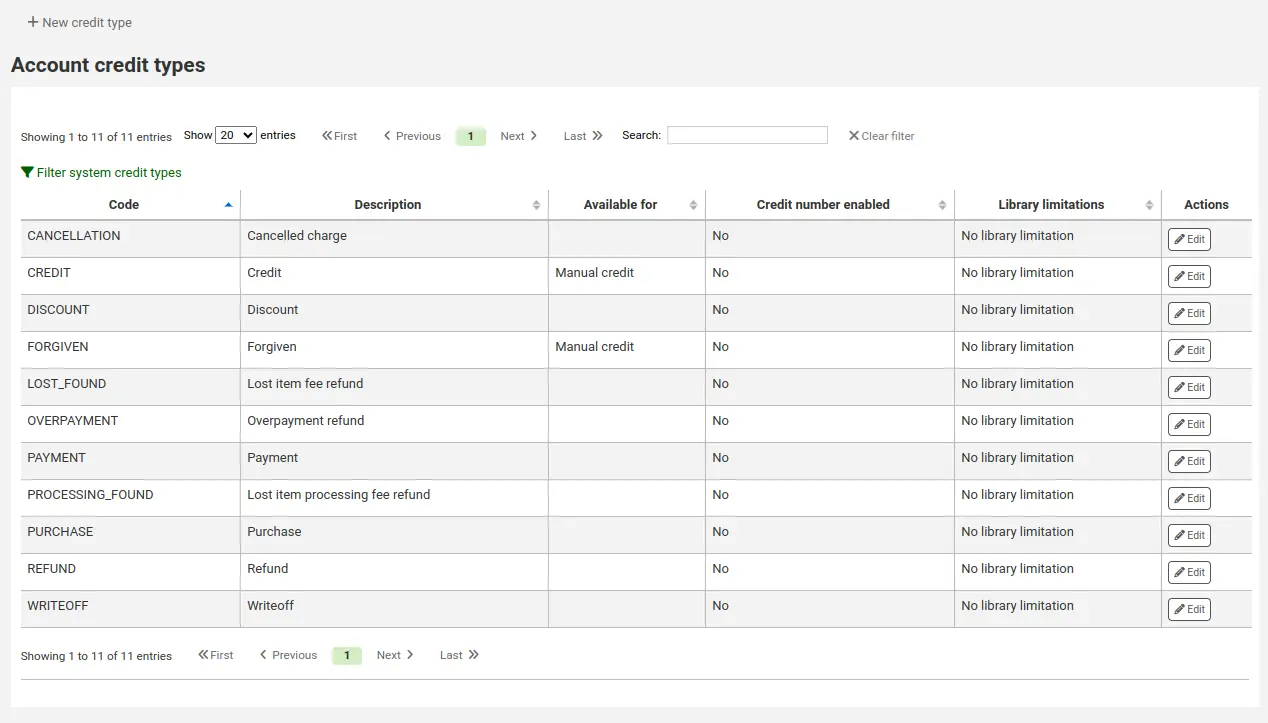
Μπορείτε να επιστρέψετε στην προβολή μόνο των μη αυτόματων τύπων πίστωσης επιλέγοντας το «Φίλτρο τύπων πίστωσης του συστήματος».
Τύποι πίστωσης του συστήματος
Αρκετοί τύποι πιστώσεων είναι εγκατεστημένοι στο Koha. Οι περισσότεροι από αυτούς είναι αυτόματες πιστώσεις που προστίθενται σύμφωνα με τις πολιτικές που έχετε ορίσει αλλού στο Koha. Δεν μπορούν να διαγραφούν.
CANCELLATION (Canceled charge): this is used when canceling a charge in a patron’s account
CREDIT (Πίστωση): χρησιμοποιείται για μη αυτόματες πιστώσεις manual credits κάνετε στα μέλη σας.
DISCOUNT (Έκπτωση που εφαρμόζεται σε πρόστιμο μέλους): χρησιμοποιείται για εκπτώσεις σε πρόστιμα και χρεώσεις discount fines and charges.
FORGIVEN («Συγχωρείται»): αυτό χρησιμοποιείται για μη αυτόματες πιστώσεις manual credits που κάνετε στα μέλη σας.
LOST_FOUND (Επιστροφή τέλους χαμένου τεκμηρίου): χρησιμοποιείται όταν επιστρέφεται ένα προηγουμένως χαμένο τεκμήριο. Εάν επιστρέψετε τα τέλη που χάθηκαν (βλ. Προεπιλεγμένη επιστροφή τέλους χαμένου τεκμηρίου στην πολιτική επιστροφών Default lost item fee refund on return policy), αυτή η πίστωση θα χρησιμοποιηθεί για την επιστροφή του τέλους.
OVERPAYMENT (Επιστροφή χρημάτων υπερχρέωσης): εφαρμόζεται αυτόματα στο λογαριασμό ενός μέλους όταν έχει πληρώσει υπερβολικά πολλά για ένα τέλος. Αυτό χρησιμοποιείται κυρίως κατά την αναχρονολογείται η επιστροφή, και το μέλος έχει ήδη πληρώσει ολόκληρο το πρόστιμο.
PAYMENT (Πληρωμή): όπως δηλώνει και το όνομά του, χρησιμοποιείται για να υποδείξει πληρωμές τελών fee payments.
PURCHASE (Purchase): this is used when a payment is made through the point of sale module.
REFUND (Επιστροφή χρημάτων που αφορούν πρόστιμο μέλους): χρησιμοποιείται όταν επιστρέφονται χρήματα από πληρωμή προστίμου ή χρέωσης refunding the payment of a fine or charge.
WRITEOFF (Writeoff): this is used when writing off a fine or charge.
Προσθήκη τύπου πίστωσης
Για να προσθέσετε ένα νέο τύπο πίστωσης:
Επιλέξτε «Νέος τύπος πίστωσης»
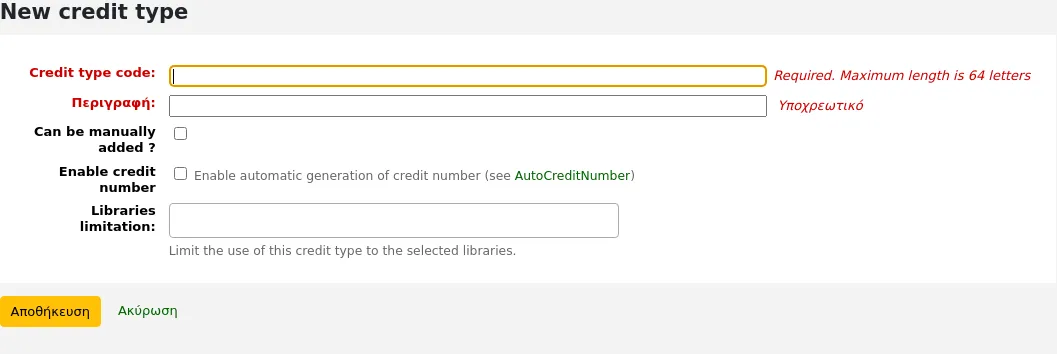
Εισαγάγετε ένα κωδικό (που δεν μπορεί να υπερβαίνει τα 64 γράμματα)
Προειδοποίηση
Οι κωδικοί πρέπει να είναι αποκλειστικά γράμματα, αριθμοί και υπογράμμιση (_).
Αποφύγετε τα κενά, τους διακριτικούς χαρακτήρες και τους ειδικούς χαρακτήρες.
Γράψτε μία περιγραφή
Αυτή η περιγραφή θα χρησιμοποιείται στο αναδιπλούμενο μενού κατά την προσθήκη μιας νέας πίστωσης στο λογαριασμό ενός μέλους, καθώς και στο ιστορικό των συναλλαγών του
Εάν αυτός ο τύπος πίστωσης μπορεί να προστεθεί μη αυτόματα από το προσωπικό στο λογαριασμό ενός μέλους μέσω της μη αυτόματης πίστωσης manual credit, επιλέξτε το πλαίσιο ελέγχου « Μπορεί να προστεθεί μη αυτόματα;»
Εάν θέλετε αυτός ο τύπος πίστωσης να έχει συνεχόμενη αρίθμηση, επιλέξτε την «Ενεργοποίηση αριθμού πίστωσης». Η μορφή του αριθμού ορίζεται στην παράμετρο του συστήματος για τον αυτόματο αριθμό πίστωσης AutoCreditNumber.
Εάν αυτός ο τύπος πίστωσης πρόκειται να χρησιμοποιηθεί μόνο σε συγκεκριμένα παραρτήματα, μπορείτε να επιλέξετε τις βιβλιοθήκες στο πεδίο «Ορισμός βιβλιοθηκών»
Σημείωση
Μπορείτε να επιλέξετε περισσότερες από μία βιβλιοθήκες πατώντας το πλήκτρο “Ctrl” κατά την επιλογή.
Εάν έχετε πρόσθετα πεδία additional fields για τους τύπους πίστωσης λογαριασμού (account_credit_types), θα εμφανίζονται εδώ.
Επιλέξτε «Αποθήκευση»
Επεξεργασία υφιστάμενου τύπου πίστωσης
Μπορείτε να τροποποιήστε μόνο τους τύπους πίστωσης που έχετε προσθέσει.
Για να επεξεργαστείτε ένα τύπο πίστωσης:
Επιλέξτε την «Επεξεργασία» στα δεξιά του τύπου πίστωσης
Τροποποιήστε οποιοδήποτε πεδίο
Επιλέξτε «Αποθήκευση»
Αρχειοθέτηση ενός τύπου πίστωσης
Εάν υπάρχει ένας τύπος πίστωσης που δεν χρειάζεστε πλέον, μπορείτε να τον αρχειοθετήσετε.
Σημείωση
Δεν υπάρχει τρόπος να διαγράψετε έναν τύπο πίστωσης, δεδομένου ότι χρησιμοποιείται στο λογιστικό τμήμα του μέλους.
Για να αρχειοθετήσετε έναν τύπο πίστωσης, απλώς επιλέξτε την «Αρχειοθέτηση» στα δεξιά του τύπου πίστωσης.
Επαναφορά αρχειοθετημένου τύπου πίστωσης
Εάν θέλετε να χρησιμοποιήσετε ξανά έναν αρχειοθετημένο τύπο πίστωσης, απλά επιλέξτε την «Επαναφορά» στα δεξιά του τύπου πίστωσης.
Αυτό θα τον καταστήσει ξανά διαθέσιμο.
Ταμειακές μηχανές
Πηγαίνετε εκεί: Περισσότερα > Διαχείριση > Λογιστήριο > Ταμειακές μηχανές
Αυτή η λειτουργία ενεργοποιείται μέσω της παραμέτρου του συστήματος για τη χρήση ταμειακών μηχανών UseCashRegisters.
Σημείωση
Μόνο το προσωπικό με το δικαίωμα διαχείρισης ταμειακών μηχανών manage_cash_registers permission (ή το δικαίωμα superlibrarian) θα έχει πρόσβαση σε αυτό το τμήμα.
Εάν δεν έχετε ήδη ορίσει ταμειακές μηχανές, θα σας ζητηθεί να δημιουργήσετε μία.
Διαφορετικά, θα δείτε τη λίστα με όλες τις ταμειακές σας μηχανές.

Στις στήλες των «Ενεργειών», μπορείτε να επιλέξετε να επεξεργαστείτε τις ταμειακές σας μηχανές, να κάνετε μια από αυτές προεπιλεγμένη ή να καταργήσετε την προεπιλεγμένη κατάσταση και να αρχειοθετήσετε ή να επαναφέρετε μια αρχειοθετημένη μηχανή.
Η προεπιλεγμένη κατάσταση είναι χρήσιμη μόνο σε βιβλιοθήκες που έχουν περισσότερους από έναν καταχωρητές ανά παράρτημα. Ο προεπιλεγμένος καταχωρητής θα προεπιλέγεται όταν καταχωρίζεται μία πληρωμή entering a payment. Εάν υπάρχει μόνο μία ταμειακή μηχανή ανά παράρτημα, η ταμειακή μηχανή του παραρτήματος θα επιλέγεται κατά την πληρωμή.
Προσθήκη μίας νέας ταμειακής μηχανής
Επιλέξτε «Νέα ταμειακή μηχανή»
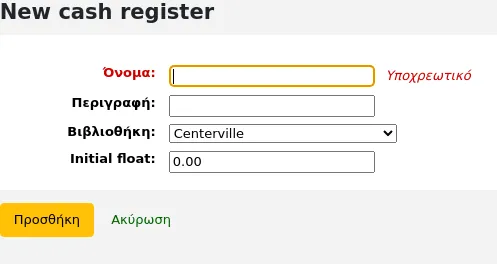
Δώστε στην ταμειακή μηχανή ένα όνομα
Προαιρετικά μπορείτε επίσης να προσθέσετε μια περιγραφή
Επιλέξτε σε ποια βιβλιοθήκη βρίσκεται αυτή η ταμειακή μηχανή
Και τέλος, εισαγάγετε την αρχική ποσότητα, δηλαδή το ποσό στην ταμειακή μηχανή
Επιλέξτε «Προσθήκη»
Πρόσθετα
Αυτή η ενότητα χρησιμοποιείται για τη διαχείριση όλων των τύπων πρόσθετων λειτουργιών.
Σημαντικό
Πριν χρησιμοποιήσετε τα πρόσθετα, βεβαιωθείτε ότι είναι ενεργοποιημένα στο αρχείο των ρυθμίσεων they are enabled in the configuration file.
Σημείωση
Μόνο το προσωπικό με το δικαίωμα ρύθμισης manage permission, το δικαίωμα παραμετροποίησης configure permission, ή το δικαίωμα διαχείρισης admin permission (ή το δικαίωμα superlibrarian permission) θα δει αυτό το τμήμα.
Δείτε επίσης τις ενότητες των πρόσθετων των εργαλείων tool plugins και των εκθέσεων report plugins.
Πηγαίνετε εκεί: Περισσότερα > Διαχείριση > Πρόσθετα
Εάν υπάρχουν εγκατεστημένα πρόσθετα διαχείρισης, θα εμφανιστούν σε αυτή την ενότητα.
Σημείωση
Μόνο το προσωπικό με το δικαίωμα διαχείρισης admin permission (ή το δικαίωμα superlibrarian) θα μπορεί να χρησιμοποιεί πρόσθετα διαχείρισης.
Ρύθμιση πρόσθετων
Αυτή η ενότητα χρησιμοποιείται για την εμφάνιση, τη διαχείριση και την παραμετροποίηση όλων των τύπων πρόσθετων λειτουργιών.
Σημείωση
Μόνο το προσωπικό με το δικαίωμα διαχείρισης manage permission (ή το δικαίωμα superlibrarian permission) θα μπορεί να εγκαθιστά και να απεγκαθιστά πρόσθετα.
Η σελίδα θα εμφανίσει όλα τα εγκατεστημένα πρόσθετα (plugins).

Αν έχετε πολλά πρόσθετα, μπορείτε να δείτε ένα υποσύνολο επιλέγοντας «Εμφάνιση πρόσθετων ανά κατηγορία».

Εγκατάσταση πρόσθετου
Για να εγκαταστήσετε ένα νέο πρόσθετο χειροκίνητα,
Επιλέξτε «Μεταφόρτωση πρόσθετου».
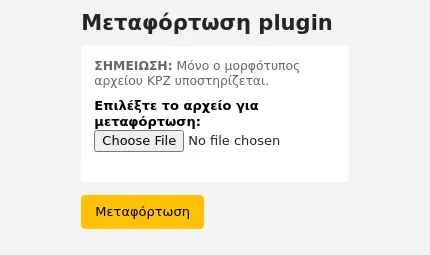
Επιλέξτε το αρχείο KPZ στον υπολογιστή σας και επιλέξτε «Μεταφόρτωση».
Αν έχετε ρυθμίσει αποθετήρια εξωτερικών πρόσθετων configured external plugin repositories, θα έχετε ένα πλαίσιο αναζήτησης στο πάνω μέρος της σελίδας για να αναζητήσετε αυτά τα αποθετήρια και να εγκαταστήσετε απευθείας από εκεί χωρίς να χρειάζεται να κατεβάσετε και να ανεβάσετε το αρχείο KPZ. Για να εγκαταστήσετε ένα πρόσθετο από ένα αποθετήριο,
Εισαγάγετε έναν όρο αναζήτησης στο πλαίσιο αναζήτησης.
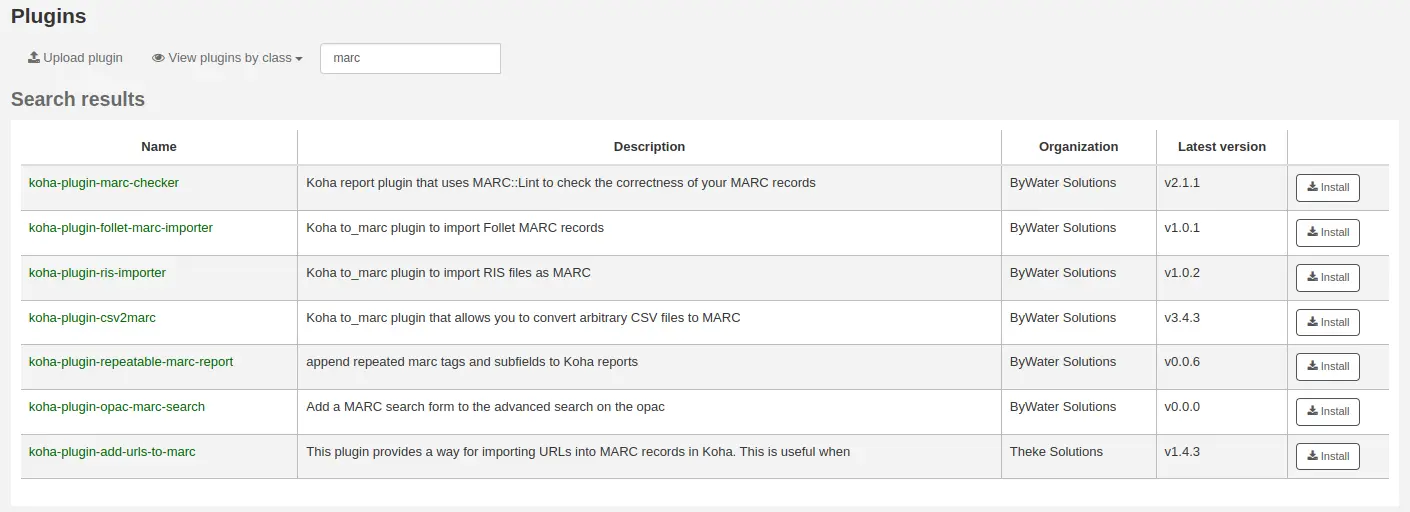
Επιλέξτε «Εγκατάσταση» στα δεξιά του πρόσθετου.
Ορισμένα πρόσθετα ενδέχεται να πρέπει να ενεργοποιηθούν πριν από τη χρήση.
Για να ενεργοποιηθεί ένα πρόσθετο,
Επιλέξτε τις «Ενέργειες» στα δεξιά του πρόσθετου και στη συνέχεια επιλέξτε «Ενεργοποίηση»

Χρήση ενός πρόσθετου
Όλα τα πρόσθετα είναι διαφορετικά. Κάποια μπορεί να χρειάζονται διαμόρφωση πριν από τη χρήση, ενώ άλλα απλά εκτελούνται.
Επιλέξτε τις «Ενέργειες» και στη συνέχεια επιλέξτε «Διαμόρφωση» ή «Εκτέλεση».
Ακολουθήστε τις σχετικές οδηγίες του δημιουργού του πρόσθετου.
Σημείωση
Μόνο το προσωπικό με το δικαίωμα των ρυθμίσεων configure permission (ή το δικαίωμα superlibrarian permission) θα μπορεί να έχει πρόσβαση στις ρυθμίσεις του πρόσθετου.
Απενεργοποίηση ενός πρόσθετου
Αν θέλετε να διακόψετε προσωρινά τη λειτουργία του πρόσθετου, μπορείτε να το απενεργοποιήσετε.
Επιλέξτε τις «Ενέργειες» στα δεξιά του πρόσθετου και στη συνέχεια επιλέξτε «Απενεργοποίηση»
Αυτό δεν θα απεγκαταστήσει το πρόσθετο. Θα παραμείνει εγκατεστημένο, αλλά δεν θα έχει καμία επίδραση στην εγκατάστασή σας στο Koha.
Διαγραφή ενός πρόσθετου
Για να διαγράψετε ή να απεγκαταστήσετε ένα πρόσθετο,
Επιλέξτε το κουμπί «Ενέργειες» στα δεξιά του πρόσθετου και έπειτα «Διαγραφή»
Αυτό θα αφαιρέσει το πρόσθετο από την εγκατάστασή σας στο Koha. Κάθε ενέργεια ή αποτέλεσμα που είχε θα σταματήσει. Αν χρειαστεί, μπορείτε να το επανεγκαταστήσετε αργότερα, εφόσον εξακολουθεί να είναι διαθέσιμο.
Εργασίες
Αυτή η ενότητα χρησιμοποιείται για τη διαχείριση εργασιών παρασκηνίου. Οι εργασίες είναι λειτουργίες που μπαίνουν σε αναμονή στο σύστημα για να αντιμετωπιστούν όταν ο διακομιστής έχει τους πόρους για να το κάνει, όπως η μαζική τροποποίηση εγγραφών batch record modification και άλλες.
Πηγαίνετε εκεί: Περισσότερα > Διαχείριση > Εργασίες
Σημείωση
Μόνο το προσωπικό με το δικαίωμα διαχείρισης των εργασιών παρασκηνίου manage_background_jobs (ή το δικαίωμα superlibrarian) θα έχει πρόσβαση σε αυτό το τμήμα.
Διαχείριση εργασιών
Προεπιλεγμένα, κατά την πρόσβαση στη σελίδα, θα βλέπετε μόνο τις τρέχουσες εργασίες και τις εργασίες που έχουν τεθεί σε αναμονή την τελευταία ώρα.

Για να δείτε όλες τις εργασίες, αποεπιλέξτε τα κουτάκια στο επάνω μέρος της σελίδας.
Μόνο τρέχουσες εργασίες: αποεπιλέξτε το για να συμπεριλάβετε τις ολοκληρωμένες εργασίες
Συμπεριλαμβάνονται μόνο οι εργασίες που τέθηκαν σε αναμονή την τελευταία ώρα: Αποεπιλέξτε το για να συμπεριλάβετε εργασίες που τέθηκαν σε αναμονή νωρίτερα
Μπορείτε να αναζητήσετε εργασίες χρησιμοποιώντας τα πεδία αναζήτησης κάτω από τις επικεφαλίδες των πινάκων.
Στα δεξιά κάθε εργασίας υπάρχουν κουμπιά ενεργειών.
Εμφάνιση: εδώ θα εμφανιστούν οι λεπτομέρειες της εργασίας, συμπεριλαμβανομένων, μεταξύ άλλων, των εξής:
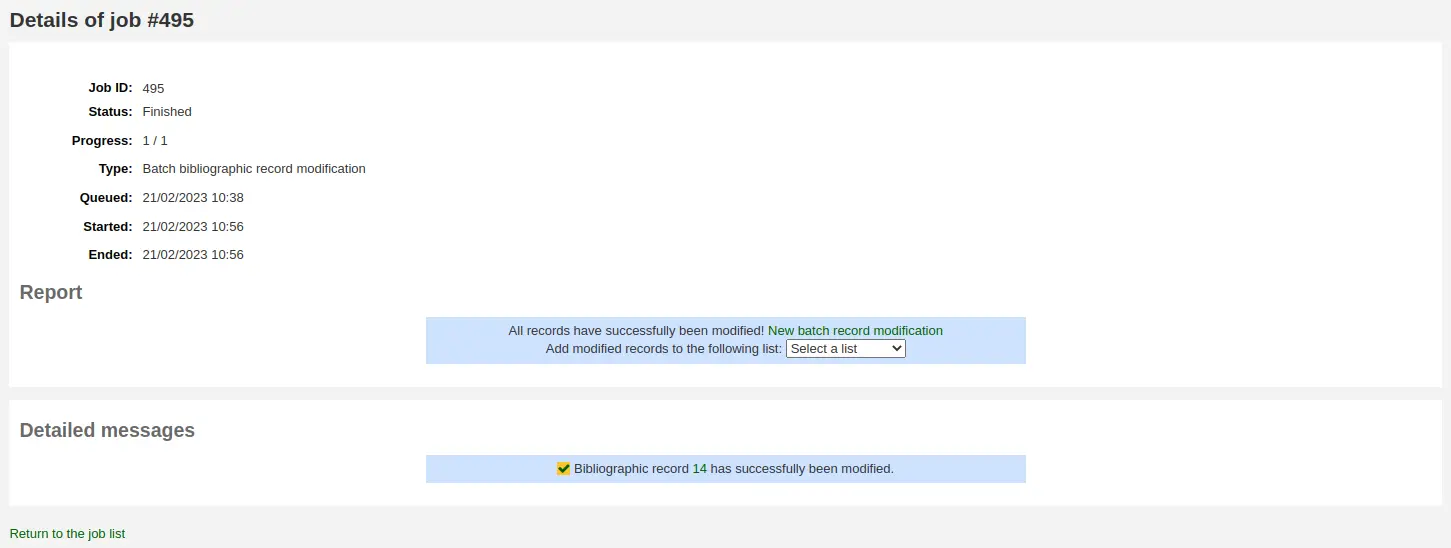
Αναγνωριστικό εργασίας: πρόκειται για το αναγνωριστικό της εργασίας στη βάση δεδομένων Koha, ένας αυξανόμενος αριθμός
Κατάσταση: η κατάσταση της εργασίας
Νέο: η εργασία έχει μπει σε αναμονή
Ακυρώθηκε: η εργασία ακυρώθηκε από έναν χρήστη
Ολοκληρώθηκε: η εργασία εκτελέστηκε επιτυχώς
Ξεκίνησε: η εργασία ξεκίνησε, αλλά δεν έχει ακόμη ολοκληρωθεί
Εκτελείται: η εργασία εκτελείται αυτή τη στιγμή
Απέτυχε: η εργασία ξεκίνησε, αλλά απέτυχε για κάποιο λόγο
Πρόοδος: υποδεικνύει πόσο μέρος της εργασίας έχει ολοκληρωθεί
Τύπος: δηλώνει το είδος της εργασίας
Batch bibliographic record modification:: μαζική τροποποίηση βιβλιογραφικών εγγραφών.
Batch bibliographic record deletion: μαζική διαγραφή βιβλιογραφικών εγγραφών.
Batch authority record modification: μαζική τροποποίηση εγγραφών καθιερωμένων όρων.
Batch authority record deletion: μαζική διαγραφή καθιερωμένων όρων.
Batch item record modification: μαζική τροποποίηση αντιτύπων.
Batch item record deletion: μαζική διαγραφή αντιτύπων.
Batch hold cancellation: a batch of holds to be canceled (when using the “Cancel selected” button).
Δημιουργία τίτλων ηλεκτρονικών εκδόσεων: οι τίτλοι πρέπει να δημιουργούνται από μία λίστα created from a list στην ενότητα ERM.
Ενημέρωση ευρετηρίου Elasticsearch: βιβλιογραφικές εγγραφές ή εγγραφές καθιερωμένων όρων ή αντίτυπα που πρέπει να επικαιροποιηθούν στο ευρετήριο Elasticsearch. Οποιεσδήποτε αλλαγές σε μια βιβλιογραφική εγγραφή ή εγγραφή καθιερωμένου όρου ή σε ένα τεκμήριο ενεργοποιούν την ενημέρωση του ευρετηρίου, συμπεριλαμβανομένων των αλλαγών στην κατάσταση κυκλοφορίας.
Ενημέρωση της αναμονής των κρατήσεων: όταν είναι ενεργοποιημένη η παράμετρος του συστήματος RealTimeHoldsQueue, οι αλλαγές στις κρατήσεις ενεργοποιούν την ενημέρωση της αναμονής των κρατήσεων holds queue.
Staged MARC records for import: βιβλιογραφικές εγγραφές ή εγγραφές καθιερωμένων όρων που πρέπει να προετοιμαστούν για εισαγωγή.
Import MARC records: προετοιμασμένες βιβλιογραφικές εγγραφές ή εγγραφές καθιερωμένων όρων που πρέπει να εισαχθούν στον κατάλογο.
Ανάκληση εισαγωγής εγγραφών MARC: οι εισαχθείσες βιβλιογραφικές εγγραφές ή εγγραφές καθιερωμένων όρων να ανακληθούν.
Σε κατάσταση αναμονής: ημερομηνία και ώρα, κατά την οποία η εργασία τέθηκε σε κατάσταση αναμονής
Εκκίνηση: ημερομηνία και ώρα έναρξης της εργασίας
Λήξη: ημερομηνία και ώρα λήξης της εργασίας
Έκθεση: η ενότητα αυτή θα περιέχει μηνύματα ειδικά για τον τύπο της εργασίας (για παράδειγμα, αριθμός εγγραφών που τροποποιήθηκαν, στην περίπτωση μαζικής τροποποίησης εγγραφών)
Αναλυτικά μηνύματα: η ενότητα αυτή θα περιέχει μηνύματα ειδικά για τον τύπο της εργασίας (για παράδειγμα, ποιες εγγραφές τροποποιήθηκαν, στην περίπτωση μαζικής τροποποίησης εγγραφών)
Ακύρωση: για εργασίες που είναι ακόμα νέες ή έχουν ξεκινήσει, είναι δυνατή η ακύρωσή τους
Κατάλογος
Ρυθμίστε αυτά τα στοιχεία ελέγχου, πριν ξεκινήσετε την καταλογογράφηση στο σύστημα Koha.
Πηγαίνετε εκεί: Περισσότερα > Διαχείριση > Κατάλογος
Βιβλιογραφικά πλαίσια MARC
Σκεφτείτε τα πλαίσια ως πρότυπα για τη δημιουργία νέων βιβλιογραφικών εγγραφών. Το Koha έρχεται με κάποια προκαθορισμένα πλαίσια που μπορούν να τροποποιηθούν ή να διαγραφούν, ενώ οι βιβλιοθηκονόμοι μπορούν να δημιουργήσουν τα δικά τους πλαίσια για το περιεχόμενο που αφορά τις βιβλιοθήκες τους.
Πηγαίνετε εκεί: Περισσότερα > Διαχείριση > Κατάλογος > Βιβλιογραφικά πλαίσια MARC
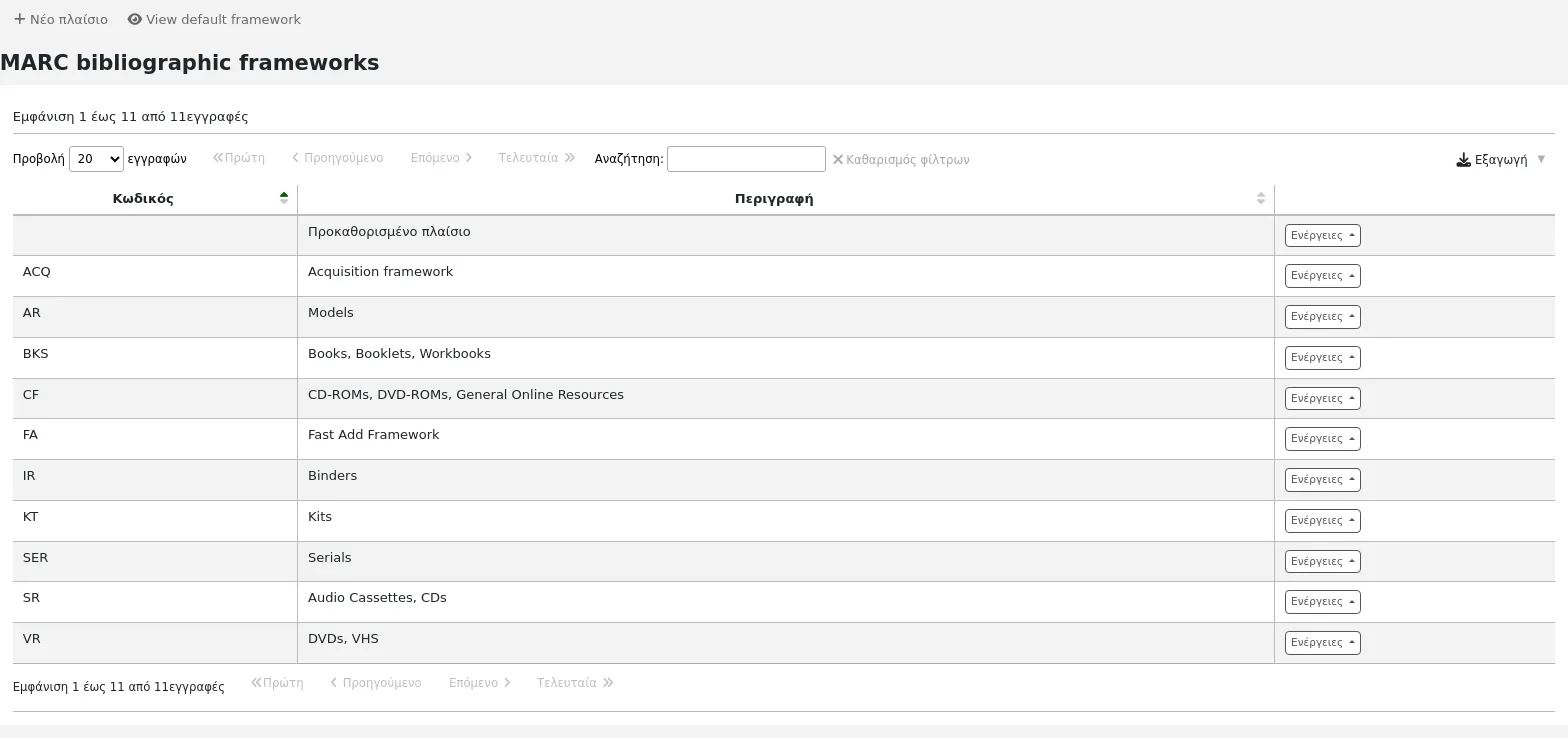
Σημείωση
Μόνο το προσωπικό με το δικαίωμα διαχείρισης πλαισίων marc manage_marc_frameworks (ή το δικαίωμα superlibrarian) θα έχει πρόσβαση σε αυτή την ενότητα.
Σημαντικό
Μην διαγράφετε ή επεξεργάζεστε το προεπιλεγμένο πλαίσιο, καθώς αυτό θα προκαλέσει προβλήματα στις εγγραφές καταλογογράφησης - δημιουργείτε πάντα ένα νέο πρότυπο με βάση το προεπιλεγμένο ή τροποποιείτε τα άλλα πλαίσια.
Προσθήκη ενός νέου πλαισίου
Για να προσθέσετε ένα νέο πλαίσιο
Επιλέξτε «Νέο πλαίσιο»
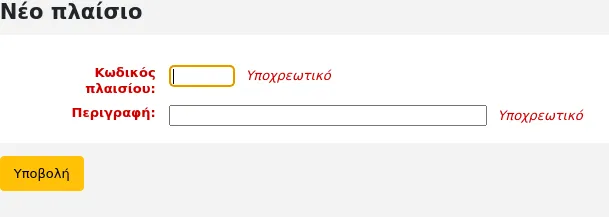
Κωδικός: πληκτρολογήστε έναν κωδικό με 4 ή λιγότερους χαρακτήρες, αποφεύγοντας τα κενά, τα διακριτικά ή άλλους ειδικούς χαρακτήρες.
Περιγραφή: εισαγάγετε έναν πιο λεπτομερή ορισμό του πλαισίου σας, αυτός είναι ο ορισμός που θα εμφανίζεται στο Koha.
Επιλέξτε «Υποβολή»
Μόλις προστεθεί το πλαίσιό σας, επιλέξτε «Ενέργειες» στα δεξιά του στη λίστα των πλαισίων και έπειτα «δομή MARC»
Θα σας ζητηθεί να επιλέξετε ένα πλαίσιο, πάνω στο οποίο θα βασιστεί το νέο σας πλαίσιο, αυτό θα σας διευκολύνει περισσότερο από το να ξεκινήσετε από το μηδέν

Μόλις το πλαίσιό σας εμφανιστεί στην οθόνη, μπορείτε να επεξεργαστείτε ή να διαγράψετε κάθε πεδίο ακολουθώντας τις οδηγίες για την επεξεργασία πεδίων και υποπεδίων editing fields and subfields
Επεξεργασία υφιστάμενων πλαισίων
Επιλέγοντας τις «Ενέργειες» και στη συνέχεια την «Επεξεργασία» στα δεξιά ενός πλαισίου, μπορείτε να επεξεργαστείτε μόνο την περιγραφή του πλαισίου.

Επεξεργασία πεδίων και υποπεδίων του πλαισίου
Τα πλαίσια αποτελούνται από πεδία MARC (ετικέτες) και υποπεδία. Για να προβείτε σε επεξεργασία των πεδίων και των υποπεδίων που σχετίζονται με το πλαίσιο, πρέπει να επιλέξετε «Ενέργειες» και στη συνέχεια «Δομή MARC».
Σημαντικό
Κάθε φορά που κάνετε αλλαγές στα πεδία και τα υποπεδία του πλαισίου, φροντίστε να εκτελείτε τον έλεγχο των βιβλιογραφικών πλαισίων του MARC MARC bibliographic framework test.
Επεξεργασία ενός πεδίου MARC (ετικέτα)
Αφού επιλέξετε τη «δομή MARC», θα μεταφερθείτε σε μια οθόνη που θα παραθέτει όλες τις διαθέσιμες ετικέτες για το συγκεκριμένο πλαίσιο και μπορείτε να αναζητήσετε την ετικέτα που χρειάζεστε. Για να κάνετε αλλαγές σε ένα πεδίο MARC επιλέξτε «Ενέργειες» στα δεξιά του πεδίου και στη συνέχεια «Επεξεργασία ετικέτας».

Στην επόμενη οθόνη εμφανίζονται οι λεπτομέρειες της ετικέτας.
Ετικέτα: η ετικέτα MARC ή ο αριθμός πεδίου είναι μη επεξεργάσιμοι.
Ετικέτα για το Βιβλιοθηκονόμο: κείμενο που θα εμφανίζεται στην προβολή του MARC στο διαχειριστικό περιβάλλον και στο βασικό επεξεργαστή basic editor εάν η παράμετρος του συστήματος για τον σύνθετο επεξεργαστή του MARC advancedMARCeditor έχει οριστεί να εμφανίζει ετικέτες.
Σημείωση
Εάν χρησιμοποιείτε XSLT (δείτε την παράμετρο του συστήματος XSLTDetailsDisplay), οι ετικέτες για την «Κανονική» προβολή ορίζονται στο αρχείο μορφοποίησης XSLT.
Αυτό δεν θα επηρεάσει την «Κανονική» προβολή, εκτός αν δεν χρησιμοποιείτε XSLT.
Ετικέτα για OPAC: κείμενο που θα εμφανίζεται στην προβολή MARC στο Δημόσιο Κατάλογο (OPAC).
Σημείωση
Εάν χρησιμοποιείτε XSLT (δείτε την παράμετρο του συστήματος OPACXSLTDetailsDisplay), οι ετικέτες για την «Κανονική» προβολή ορίζονται στο αρχείο μορφοποίησης XSLT.
Αυτό δεν θα επηρεάσει την «Κανονική» προβολή, εκτός αν δεν χρησιμοποιείτε XSLT.
Επαναλαμβανόμενη: όταν είναι επιλεγμένη, το πεδίο θα έχει ένα εικονίδιο δίπλα του στο βασικό επεξεργαστή Basic editor, επιτρέποντάς σας να προσθέσετε πλήθος αντιγράφων αυτής της ετικέτας.
Υποχρεωτική: όταν είναι επιλεγμένη, η εγγραφή δεν μπορεί να αποθηκευτεί αν το πεδίο δεν έχει τιμή. Στο βασικό επεξεργαστή basic editor, μία σημαία με τον όρο «Υποχρεωτική» θα εμφανίζεται ως σύσταση.
Σημαντική: όταν είναι επιλεγμένη, το πεδίο θα δημιουργήσει μια προειδοποίηση εάν δεν είναι συμπληρωμένο, αλλά σε αντίθεση με την «Υποχρεωτική», θα μπορείτε να αποθηκεύσετε την εγγραφή σας. Στο βασικό επεξεργαστή basic editor, μια σημαία με τον όρο «Σημαντική» θα εμφανίζεται ως σύσταση.
Προεπιλεγμένες τιμές δεικτών: προσθέστε εδώ τις προεπιλεγμένες τιμές για τους δείκτες, ώστε να είναι προσυμπληρωμένοι για να εξοικονομείτε χρόνο κατά την καταλογογράφηση, μπορείτε ωστόσο να τις επεξεργαστείτε αν χρειαστεί.
Καθιερωμένη τιμή: ορίστε μια λίστα αναδυόμενων καθιερωμένων τιμών authorized value για τους καταλογογράφους
Προειδοποίηση
Η επιλογή καθριερωμένης τιμής σε επίπεδο πεδίου δεν λειτουργεί.
Επιλέξτε «Αποθήκευση αλλαγών» για να αποθηκεύσετε κάθε τροποποίηση.
Επεξεργασία ενός υποπεδίου MARC
Για να επεξεργαστείτε τα υποπεδία που σχετίζονται με την ετικέτα, επιλέξτε «Ενέργειες» και στη συνέχεια στην «Επεξεργασία υποπεδίων» στα δεξιά της ετικέτας στη λίστα πεδίων πλαισίου. Κάθε υποπεδίο έχει τη δική του καρτέλα που περιέχει τρεις ενότητες - Βασικοί περιορισμοί, Σύνθετοι περιορισμοί και Άλλες επιλογές.
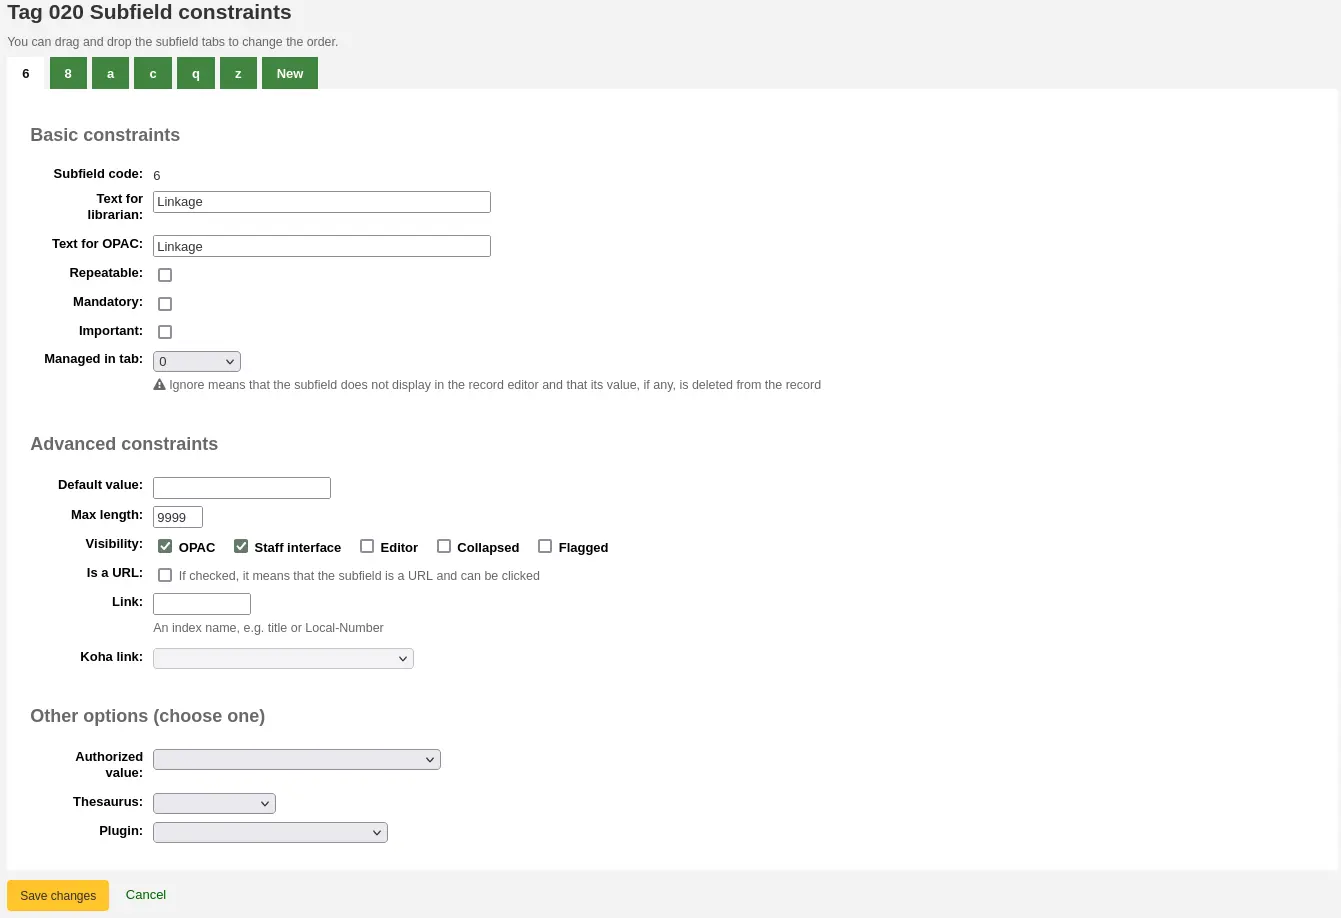
Για κάθε υποπεδίο μπορείτε να ορίσετε τις ακόλουθες βασικές επιλογές περιορισμών
Κωδικός υποπεδίου: πρόκειται για τον κωδικό υποπεδίου MARC, ο οποίος κανονικά δεν αλλάζει.
Κείμενο για τον βιβλιοθηκονόμο: το κείμενο που θα εμφανίζεται στην προβολή MARC στο διαχειριστικό περιβάλλον και στο βασικό επεξεργαστή basic editor εάν η παράμετρος του συστήματος για τον σύνθετο επεξεργαστή advancedMARCeditor έχει ρυθμιστεί να εμφανίζει ετικέτες.
Σημείωση
Εάν χρησιμοποιείτε XSLT (δείτε την παράμετρο του συστήματος XSLTDetailsDisplay), οι ετικέτες για την «Κανονική» προβολή ορίζονται στο αρχείο μορφοποίησης XSLT.
Αυτό δεν θα επηρεάσει την «Κανονική» προβολή, εκτός αν δεν χρησιμοποιείτε XSLT.
Κείμενο για τον OPAC: κείμενο που θα εμφανίζεται στην προβολή MARC στο Δημόσιο Κατάλογο (OPAC).
Σημείωση
Εάν παραμείνει κενό, χρησιμοποιείται το «Κείμενο για τον βιβλιοθηκονόμο»
Σημείωση
Εάν χρησιμοποιείτε XSLT (δείτε την παράμετρο του συστήματος OPACXSLTDetailsDisplay), οι ετικέτες για την «Κανονική» προβολή ορίζονται στο αρχείο μορφοποίησης XSLT.
Αυτό δεν θα επηρεάσει την «Κανονική» προβολή, εκτός αν δεν χρησιμοποιείτε XSLT.
Επαναλαμβανόμενο: όταν είναι επιλεγμένο, το πεδίο θα έχει ένα εικονίδιο δίπλα του στο βασικό επεξεργαστή basic editor, επιτρέποντάς σας να προσθέσετε πλήθος αντιγράφων αυτού του υποπεδίου.
Υποχρεωτικό: όταν είναι επιλεγμένο, η εγγραφή δεν μπορεί να αποθηκευτεί εφόσον το υποπεδίο δεν έχει τιμή. Στο βασικό επεξεργαστή basic editor, μία σημαία με τον όρο «Υποχρεωτικό» θα εμφανίζεται ως σύσταση.
Σημαντική: όταν είναι επιλεγμένη, το πεδίο θα δημιουργήσει μια προειδοποίηση εάν δεν είναι συμπληρωμένο, αλλά σε αντίθεση με την «Υποχρεωτική», θα μπορείτε να αποθηκεύσετε την εγγραφή σας. Στο βασικό επεξεργαστή basic editor, μια σημαία με τον όρο «Σημαντική» θα εμφανίζεται ως σύσταση.
Διαχειριζόμενο σε ετικέτα: καθορίζει την ετικέτα στην οποία εμφανίζεται το υποπεδίο.
Σημαντικό
Όλα τα υποπεδία ενός συγκεκριμένου πεδίου πρέπει να βρίσκονται στην ίδια ετικέτα ή να παραβλέπονται. Παράβλεψη σημαίνει ότι το υποπεδίο δεν είναι διαχειρίσιμο.
Προειδοποίηση
When importing records, or editing existing records, subfields that are managed in tab “ignore” will be deleted. If you still wish to keep the subfields, but hide them, use the “Visibility” options below.
Για κάθε υποπεδίο μπορείτε να ορίσετε τις ακόλουθες επιλογές σύνθετων περιορισμών
Προεπιλεγμένη τιμή: καθορίζει τι θέλετε να εμφανίζεται στο πεδίο από προεπιλογή, αυτό θα είναι επεξεργάσιμο, αλλά εξοικονομεί χρόνο αν χρησιμοποιείτε το ίδιο κείμενο ξανά και ξανά ή την ίδια τιμή σε ένα πεδίο συχνά.
Σημείωση
Υπάρχουν διάφορες τιμές που μπορείτε να χρησιμοποιήσετε εδώ, οι οποίες θα αντικαθίστανται αυτόματα όταν δημιουργείται μια νέα εγγραφή:
<<MM>> - ο τρέχων μήνας, 2 ψηφία
<<DD>> - η τρέχουσα ημέρα του μήνα, 2 ψηφία
<<YY>> - το τρέχον έτος, 2 ψηφία
<<YYYY>> - το τρέχον έτος, 4 ψηφία
<<USER>> - το όνομα χρήστη του χρήστη που τώρα είναι συνδεδεμένος
Για παράδειγμα: μία προεπιλεγμένη τιμή «<<MM>>/<<<DD>>/<<<YYYY>>» (χωρίς εισαγωγικά) θα εκτυπώσει την τρέχουσα ημερομηνία με τη μορφή «01/21/2021»
Σημείωση
Το πότε συμπληρώνονται αυτές οι προεπιλεγμένες τιμές εξαρτάται από την παράμετρο του συστήματος ApplyFrameworkDefaults.
Μέγιστο μήκος: εισαγάγετε εδώ μια τιμή για να περιορίσετε τον αριθμό των χαρακτήρων που μπορούν να εισαχθούν στο υποπεδίο.
Ορατότητα: σας επιτρέπει να επιλέξετε από πού είναι ορατό ή κρυφό αυτό το υποπεδίο. Επιλέξτε τα κουτάκια όπου θέλετε να εμφανίζεται το πεδίο και καταργήστε την επιλογή στα κουτάκια όπου θέλετε να είναι κρυμμένο.
OPAC: όταν επιλεγεί, το υποπεδίο θα είναι διαθέσιμο για εμφάνιση στο Δημόσιο Κατάλογο (OPAC). Για προβολές που δεν είναι XSLT, το πεδίο θα εμφανίζεται. Για προβολές XSLT, θα εξαρτάται από το αρχείο μορφοποίησης.
Διαχειριστικό περιβάλλον: όταν επιλεγεί, το υποπεδίο θα είναι διαθέσιμο για εμφάνιση στο διαχειριστικό περιβάλλον. Για προβολές που δεν είναι XSLT, το πεδίο θα εμφανίζεται. Για προβολές XSLT, θα εξαρτάται από το αρχείο μορφοποίησης.
Επεξεργαστής: όταν επιλεγεί, αυτό θα καταστήσει το υποπεδίο διαθέσιμο για τροποποίηση στο βασικό επεξεργαστή basic editor.
Κρυφό: όταν είναι επιλεγμένο, το υποπεδίο θα είναι κρυμμένο στο βασικό επεξεργαστή basic editor, αλλά θα εμφανίζεται όταν επιλέγεται η ετικέτα του πεδίου για να αναπτυχθούν όλα τα υποπεδία.
Σημαδεμένο: όταν είναι επιλεγμένο, το υποπεδίο δεν θα είναι διαθέσιμο και θα αποκρύπτεται από όλες τις προβολές (ισοδυναμεί με την απενεργοποίηση όλων των κουτιών).
Είναι διεύθυνση URL: αν είναι επιλεγμένο, σημαίνει ότι το υποπεδίο είναι διεύθυνση URL και μπορεί να επιλεγεί.
Σύνδεσμος: αν εισαγάγετε ένα όνομα ευρετηρίου εδώ, εμφανίζεται ένας σύνδεσμος μετά το υποπεδίο στην προβολή λεπτομερειών MARC στο διαχειριστικό περιβάλλον. Εάν ο/η βιβλιοθηκονόμος επιλέξει το σύνδεσμο, πραγματοποιείται αναζήτηση στον κατάλογο χρησιμοποιώντας το ευρετήριο και το περιεχόμενο του υποπεδίου.
Σύνδεσμος Koha: αυτό το πεδίο χρησιμοποιείται για τη δημιουργία μιας σύνδεσης μεταξύ του υποπεδίου MARC και μιας στήλης στους πίνακες items, biblioitems και biblio της βάσης δεδομένων. Οι αντιστοιχίσεις μπορούν να αλλάξουν από τη σελίδα των αντιστοιχήσεων του Koha σε MARC Koha to MARC mapping.
Για κάθε υποπεδίο μπορείτε να ορίσετε τις ακόλουθες Τιμές άλλων επιλογών
Καθιερωμένη τιμή: σημαίνει ότι η τιμή πρέπει να επιλεγεί από ένα αναδιπλούμενο μενού που δημιουργείται από τη λίστα εγκεκριμένων τιμών authorized value.
Στο παρακάτω παράδειγμα, η κατηγορία καθιερωμένης τιμής γλώσσας (LANG) έχει οριστεί σε 041$a.

Αυτό δημιουργεί ένα αναδιπλούμενο μενού στο βασικό επεξεργαστή της καταλογογράφησης basic editor.

Θησαυρός: σημαίνει ότι η τιμή συνδέεται με τον κατάλογο των καθιερώσεων authority catalog της επιλεγμένης κατηγορίας. Η διαχείριση των κατηγοριών των καθιερώσεων γίνεται στην ενότητα των τύπων καθιέρωσης Authority types.
Πρόσθετα: σημαίνει ότι η τιμή υπολογίζεται ή ρυθμίζεται από ένα πρόσθετο καταλογογράφησης cataloguing plugin. Τα πρόσθετα καταλογογράφησης, ή οι δημιουργοί τιμών, μπορούν να κάνουν σχεδόν τα πάντα.
Παραδείγματα:
Για τους ταξιθετικούς αριθμούς υπάρχει η δυνατότητα να προσθέσετε ένα πρόγραμμα περιήγησης στους ταξιθετικούς αριθμούς δίπλα στο υποπεδίο ταξιθετικού αριθμού , ώστε να μπορείτε να εντοπίζετε ποιοι ταξιθετικοί αριθμοί χρησιμοποιούνται και ποιοι όχι. Απλώς επιλέξτε το πρόσθετο cn_browser.pl. Μάθετε περισσότερα στην ενότητα cataloging section.
Αν θέλετε να επιτρέψετε το ανέβασμα αρχείων μέσω της καταλογογράφησης, μπορείτε να επιλέξετε το πρόσθετο upload.pl και αυτό θα σας επιτρέψει να ανεβάζετε αρχεία στο Koha για να τα συνδέσετε με τις εγγραφές σας upload files to Koha to link to your records.
Στο UNIMARC υπάρχουν πρόσθετα για κάθε πεδία 1xx που είναι κωδικοποιημένα πεδία. Το πρόσθετο είναι μια τεράστια βοήθεια για τον καταλογογράφο! Υπάρχουν επίσης δύο πρόσθετα (unimarc_plugin_210c και unimarc_plugin_225a που μπορούν να βρουν «μαγικά» τον εκδότη από ένα ISBN και τον κατάλογο συλλογής για τον εκδότη)
Αν θέλετε να ενεργοποιήσετε μια αναζήτηση με αυτόματη συμπλήρωση για τους εκδότες στα 260b και 264b, μπορείτε να ορίσετε το πρόσθετο marc21_field_260b.pl. Όταν αρχίσετε να πληκτρολογείτε ένα όνομα εκδότη, θα σας δίνονται αποτελέσματα αναζήτησης με βάση τα ονόματα εκδοτών που υπάρχουν ήδη στον κατάλογο.
Για να αποθηκεύσετε τις αλλαγές σας, επιλέξτε την «Αποθήκευση αλλαγών».
Πρακτική συμβουλή
Μπορείτε να σύρετε και να τοποθετήσετε τις καρτέλες των υποπεδίων για να αλλάξετε τη σειρά με την οποία εμφανίζονται κατά την καταλογογράφηση με τον βασικό επεξεργαστή cataloging with the basic editor.
Εξαρχής, θα εμφανίζονται με αλφαριθμητική σειρά (0-9, στη συνέχεια a-z).
Προσθήκη πεδίων σε πλαίσια
Εάν ένα πλαίσιο δεν περιέχει ένα πεδίο που χρειάζεστε, ίσως χρειαστεί να το προσθέσετε. Για να προσθέσετε ένα πεδίο σε ένα πλαίσιο επιλέξτε το κουμπί «Νέα ετικέτα» στο πάνω μέρος του ορισμού του πλαισίου.
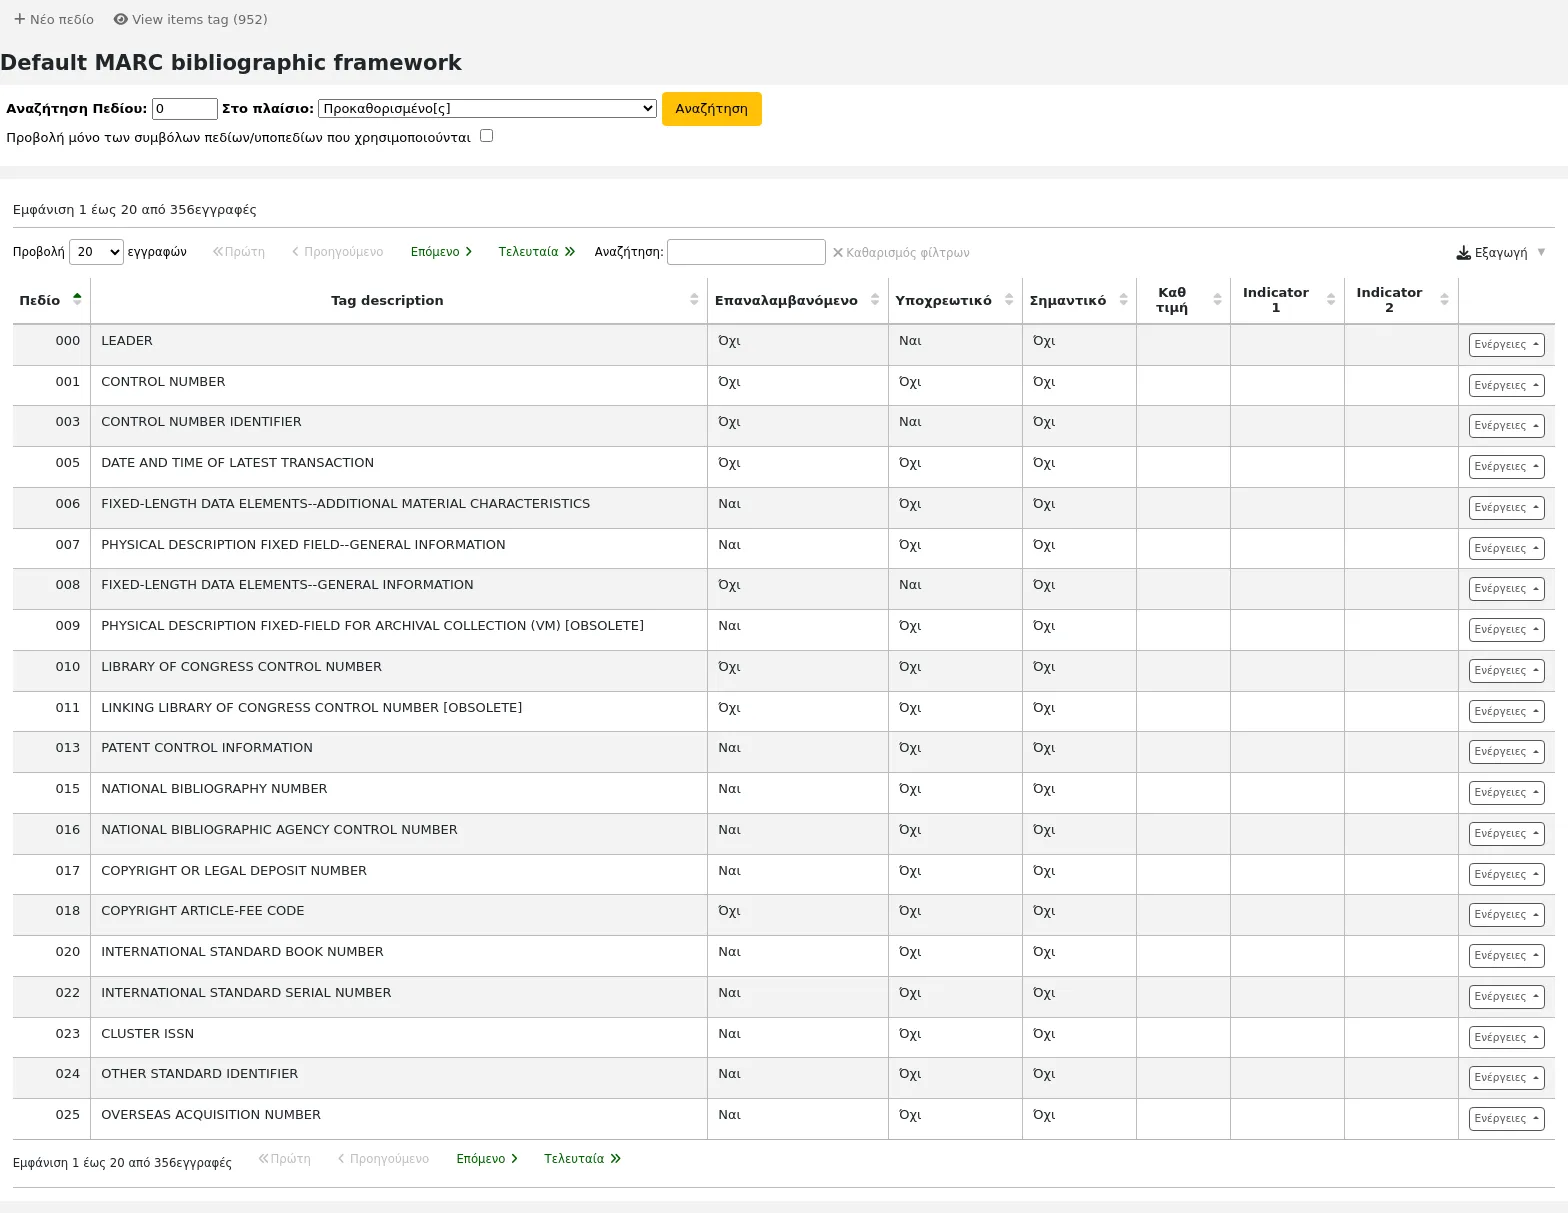
Αυτή θα ανοίξει μια κενή φόρμα για την εισαγωγή δεδομένων πεδίων MARC
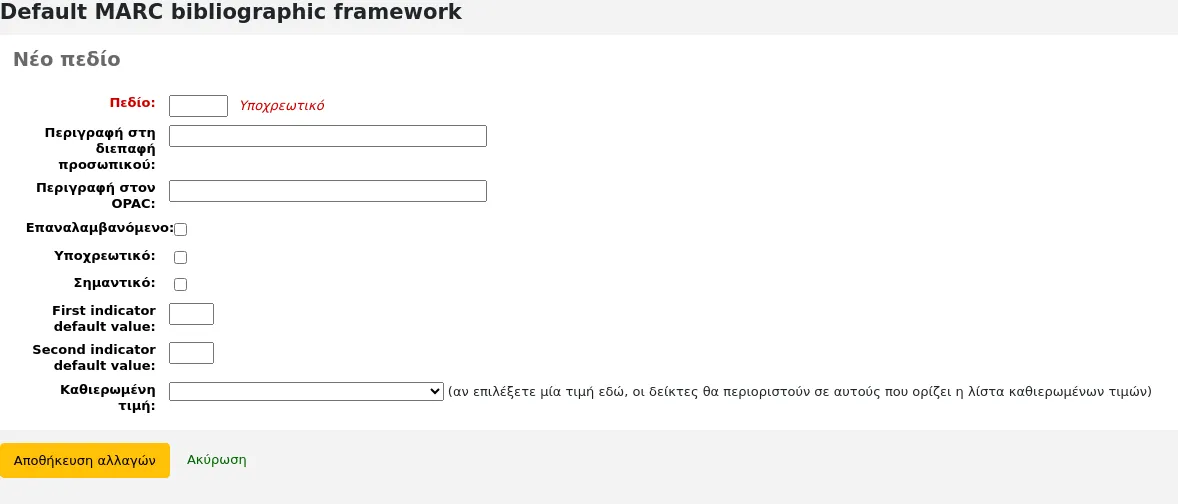
Εισαγάγετε τον αριθμό πεδίου για τη νέα σας ετικέτα. Η διαδικασία για την εισαγωγή των υπόλοιπων ρυθμίσεων για τη νέα ετικέτα είναι η ίδια με εκείνη που θα βρείτε στην ενότητα της επεξεργασίας πεδίων και υποπεδίων στα πλαίσια editing fields and subfields in frameworks του παρόντος εγχειριδίου.
Όταν τελειώσετε, επιλέξτε την «Αποθήκευση αλλαγών» και η νέα σας ετικέτα θα εμφανιστεί στη λίστα των πεδίων πλαισίου.
Θα πρέπει να προσθέσετε τουλάχιστον ένα υποπεδίο στη νέα σας ετικέτα για να εμφανιστεί στο πλαίσιό σας κατά την καταλογογράφηση.
Επιλέξτε το κουμπί «Ενέργειες» για τη νέα σας ετικέτα και στη συνέχεια το κουμπί «Επεξεργασία υποπεδίων». Επιλέξτε την καρτέλα «Νέο» και εισαγάγετε τον κωδικό του υποπεδίου σας. Η διαδικασία για την εισαγωγή των υπόλοιπων ρυθμίσεων για το νέο υποπεδίο είναι η ίδια με αυτές που βρίσκονται στην ενότητα της επεξεργασία πεδίων και υποπεδίων στα πλαίσια editing fields and subfields in frameworks του παρόντος εγχειριδίου.
Εισαγωγή και εξαγωγή πλαισίων
Δίπλα σε κάθε πλαίσιο υπάρχει ένας σύνδεσμος για την εισαγωγή ή την εξαγωγή του πλαισίου.
Εξαγωγή πλαισίου
Για να εξαγάγετε ένα πλαίσιο, επιλέξτε «Εξαγωγή» στο κουμπί «Ενέργειες» στα δεξιά του τίτλου του πλαισίου.

Όταν επιλέγετε την «Εξαγωγή», θα σας ζητηθεί να επιλέξετε σε ποια μορφή θα εξαγάγετε το αρχείο.
Ένα πλαίσιο που εξάγεται με αυτόν τον τρόπο μπορεί να εισαχθεί σε οποιαδήποτε άλλη εγκατάσταση Koha χρησιμοποιώντας την επιλογή εισαγωγής πλαισίου.
Εισαγωγή πλαισίου
Ένας εύκολος τρόπος για να δημιουργήσετε ένα νέο πλαίσιο είναι να εισαγάγετε ένα που έχει δημιουργηθεί για τη δική σας ή άλλη εγκατάσταση του Koha. Αυτό το πλαίσιο θα πρέπει να εξαχθεί από το άλλο σύστημα χρησιμοποιώντας τις οδηγίες παραπάνω using the instructions above για να είναι διαθέσιμο για εισαγωγή εδώ.
Για να εισαγάγετε ένα πλαίσιο πρέπει πρώτα να δημιουργήσετε ένα νέο πλαίσιο. Μόλις δημιουργήσετε αυτό το πλαίσιο, επιλέξτε τις «Ενέργειες» και στη συνέχεια την «Εισαγωγή» στα δεξιά του νέου πλαισίου.

Θα σας ζητηθεί να βρείτε ένα αρχείο στον υπολογιστή σας για να το εισαγάγετε στο πλαίσιο.
Θα σας ζητηθεί να επιβεβαιώσετε τις ενέργειές σας πριν από την εισαγωγή του αρχείου.

Καθώς το αρχείο σας μεταφορτώνεται, θα δείτε ένα περιστρεφόμενο εικονίδιο που υποδεικνύει ότι το σύστημα λειτουργεί.
Μόλις ολοκληρωθεί η εισαγωγή σας, θα μεταφερθείτε στο εργαλείο επεξεργασίας του πλαισίου, όπου μπορείτε να κάνετε οποιεσδήποτε αλλαγές make any changes χρειάζεστε στο πλαίσιο που εισαγάγατε.
Αντιστοίχιση του Koha στο MARC
Ενώ το Koha αποθηκεύει ολόκληρη την εγγραφή MARC, αποθηκεύει επίσης κοινά πεδία για εύκολη πρόσβαση σε διάφορους πίνακες της βάσης δεδομένων (κυρίως στους πίνακες items, biblioitems και biblio). Η αντιστοίχιση Koha στο MARC χρησιμοποιείται για να πει στο Koha πού να βρει αυτές τις τιμές στην εγγραφή MARC. Κάθε φορά που προστίθεται ή αλλάζει μια εγγραφή, αυτή η αντιστοίχιση θα χρησιμοποιείται για την ενημέρωση της συνδεδεμένης στήλης της βάσης δεδομένων. Οι πληροφορίες από τις στήλες της βάσης δεδομένων χρησιμοποιούνται ως ένας τρόπος γρήγορης αναζήτησης σημαντικών πληροφοριών χωρίς να χρειάζεται να αναλύσετε την πλήρη εγγραφή MARC. Χρησιμοποιείται για την εμφάνιση πληροφοριών σε πολλές σελίδες και μπορεί επίσης να χρησιμοποιηθεί σε εκθέσεις.
Σε πολλές περιπτώσεις, δεν θα χρειαστεί να αλλάξετε τις προεπιλεγμένες τιμές που έχουν οριστεί κατά την εγκατάσταση, αλλά είναι σημαντικό να γνωρίζετε ότι το εργαλείο είναι εδώ και μπορεί να χρησιμοποιηθεί ανά πάσα στιγμή.
Προειδοποίηση
Εάν αλλάξετε τις αντιστοιχίσεις μετά την προσθήκη δεδομένων στον κατάλογό σας, ζητήστε από τον διαχειριστή του συστήματός σας να εκτελέσει το misc/batchRebuildBiblioTables.pl. Αυτό θα ενημερώσει τις τιμές στις στήλες της βάσης δεδομένων για όλες τις εγγραφές σας.
Πηγαίνετε εκεί: Περισσότερα > Διαχείριση > Κατάλογος > Αντιστοίχιση Koha στο MARC
Σημείωση
Μόνο το προσωπικό με το δικαίωμα διαχείρισης πλαισίων marc manage_marc_frameworks (ή το δικαίωμα superlibrarian) θα έχει πρόσβαση σε αυτή την ενότητα.
Ο πίνακας δείχνει όλα τα πεδία της βάσης δεδομένων που μπορούν να αντιστοιχιστούν σε πεδία MARC.
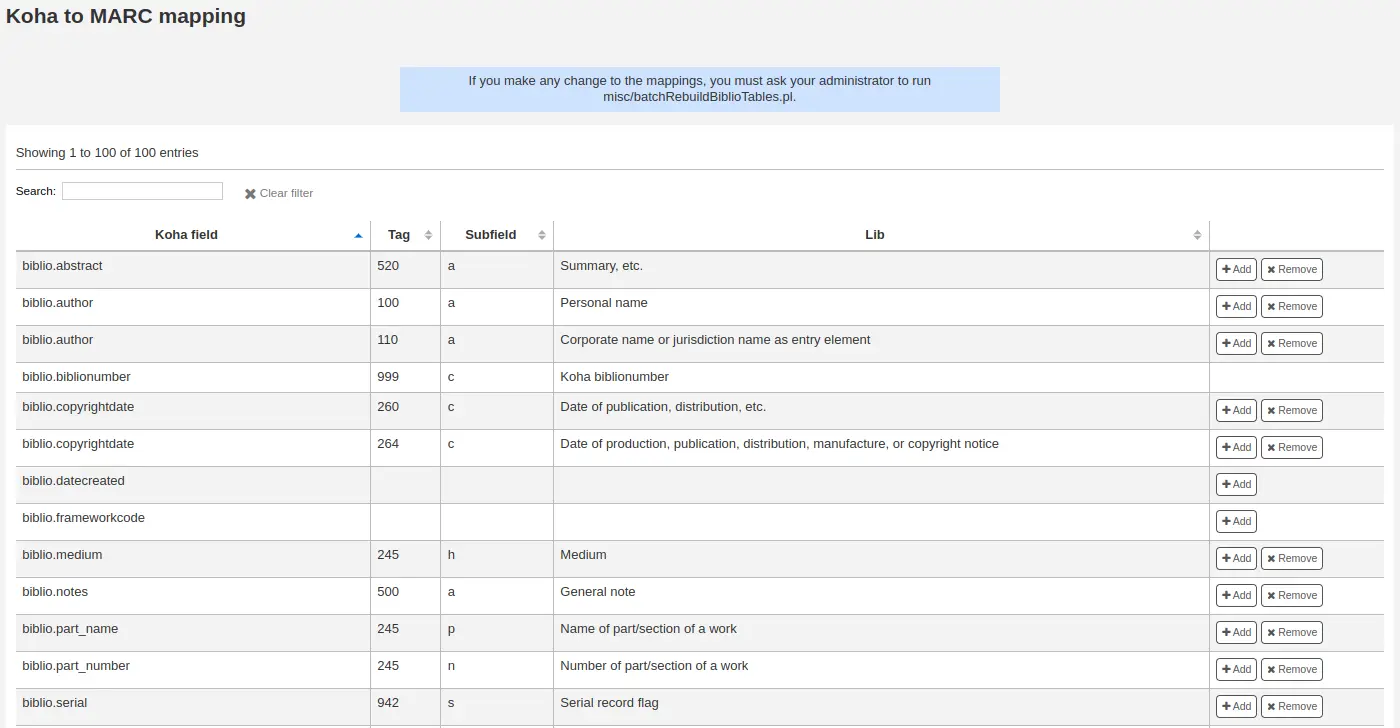
Για να προσθέσετε μια νέα αντιστοίχιση, επιλέξτε το κουμπί «Προσθήκη» στα δεξιά του κατάλληλου πεδίου.

Γράψτε το πεδίο MARC και το υποπεδίο που θέλετε να αντιστοιχίσετε, χωρισμένα με κόμμα, σε αυτό το πεδίο Koha (για παράδειγμα, «264,a») και επιλέξτε το κουμπί «OK».
Σημείωση
Είναι δυνατόν να συνδέσετε περισσότερα από ένα πεδία MARC με ένα πεδίο της βάσης δεδομένων. Για παράδειγμα, θα μπορούσατε να συνδέσετε τόσο το 260$a όσο και το 264$a με το πεδίο biblioitems.place.
Αν θέλετε να καταργήσετε την αντιστοίχιση για ένα πεδίο της βάσης δεδομένων, επιλέξτε το κουμπί «Κατάργηση».
Σημείωση
Όλες οι αλλαγές είναι άμεσες. Οι εγγραφές που δημιουργούνται ή υπόκεινται κάποια επεξεργασία μετά την αλλαγή θα έχουν αμέσως τις νέες αντιστοιχίσεις. Ωστόσο, αν θέλετε να ενημερώσετε τις αντιστοιχίσεις για εγγραφές που βρίσκονται ήδη στον κατάλογο, ζητήστε από το διαχειριστή του συστήματός σας να εκτελέσει το misc/batchRebuildBiblioTables.pl. Αυτό θα ενημερώσει τις τιμές στις στήλες της βάσης δεδομένων για όλες τις εγγραφές σας.
Δοκιμή βιβλιογραφικού πλαισίου MARC
Το εργαλείο ελέγχει τη δομή MARC των βιβλιογραφικών πλαισίων.
Πηγαίνετε εκεί: Περισσότερα > Διαχείριση > Κατάλογος > Δοκιμή βιβλιογραφικού πλαισίου MARC
Σημείωση
Μόνο το προσωπικό με το δικαίωμα διαχείρισης πλαισίων marc manage_marc_frameworks (ή το δικαίωμα superlibrarian) θα έχει πρόσβαση σε αυτή την ενότητα.
Εάν αλλάξετε το βιβλιογραφικό πλαίσιο MARC MARC bibliographic framework, συνιστάται να εκτελέσετε αυτό το εργαλείο για να ελέγξετε για σφάλματα στον ορισμό σας.
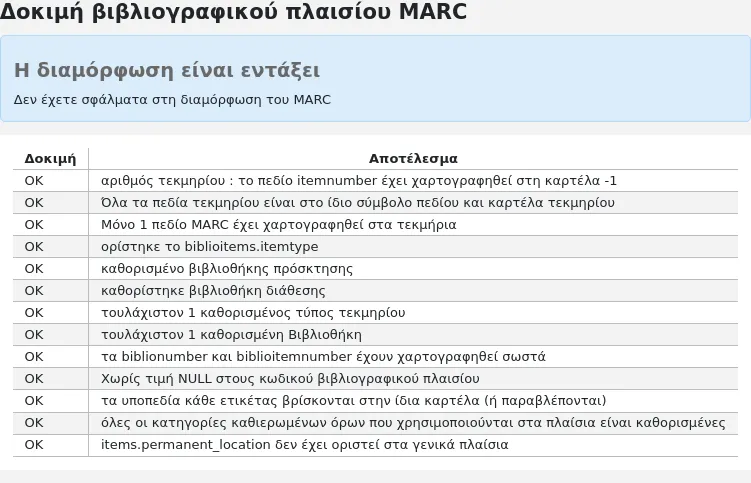
Πηγές ταξινόμησης
Η πηγή της ταξινόμησης ή το σύστημα ταξιθέτησης αντιστοιχίζονται στο πεδίο 952$2 και 942$2 στα βιβλιογραφικά πλαίσια MARC MARC bibliographic frameworks του Koha και αποθηκεύονται στα πεδία items.cn_source και biblioitems.cn_source στη βάση δεδομένων.
Πηγαίνετε εκεί: Περισσότερα > Διαχείριση > Κατάλογος > Πηγές ταξινόμησης
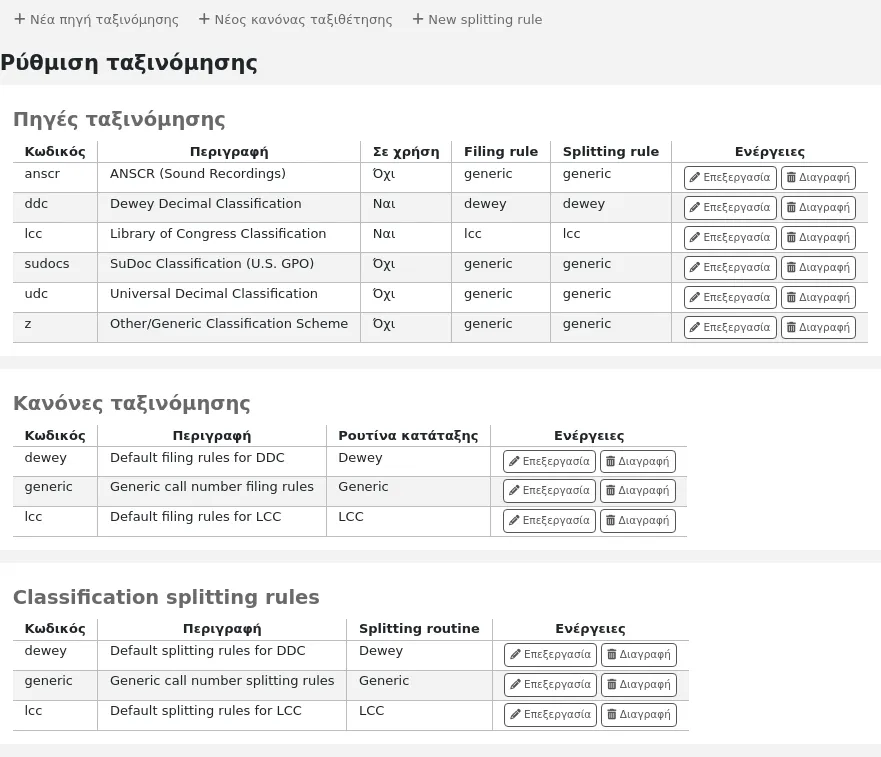
Σημείωση
Μόνο το προσωπικό με το δικαίωμα διαχείρισης της ταξινόμησης manage_classifications (ή το δικαίωμα superlibrarian) θα έχει πρόσβαση σε αυτή την ενότητα.
Συνήθεις πηγές ταξινόμησης είναι:
ddc - Δεκαδική Ταξινόμηση (Dewey Decimal Classification)
lcc - Ταξινόμηση Βιβλιοθήκης του Κογκρέσου (Library of Congress Classification)
Αν επιλέξετε να εγκαταστήσετε τις πηγές ταξινόμησης κατά την εγκατάσταση του Koha, θα δείτε και άλλες τιμές:
ANSCR (ηχογραφήσεις)
Ταξινόμηση του Πανεπιστημιακού Συστήματος Τεκμηρίωσης (SuDOC)
Παγκόσμια δεκαδική ταξινόμηση (Universal Decimal Classification)
Άλλη/γενική ταξινόμηση
Προσθήκη/επεξεργασία πηγών ταξινόμησης
Μπορείτε να προσθέσετε τη δική σας πηγή ταξινόμησης χρησιμοποιώντας το κουμπί «Νέα πηγή ταξινόμησης». Για να την επεξεργαστείτε, χρησιμοποιήστε το κουμπί «Επεξεργασία».
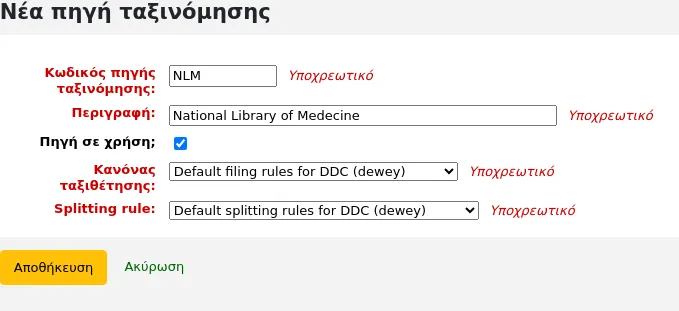
Κατά τη δημιουργία ή την επεξεργασία:
Εισαγάγετε έναν κωδικό. Ο κωδικός περιορίζεται σε 10 χαρακτήρες και πρέπει να είναι μοναδικός.
Σημείωση
Ο κώδικας δεν είναι επεξεργάσιμος από τη στιγμή που έχει δημιουργηθεί.
Εισαγάγετε μια περιγραφή. Η περιγραφή χρησιμοποιείται στις αναδιπλούμενες λίστες της ενότητας καταλογογράφησης.
Ενεργοποιήστε το πλαίσιο ελέγχου «Πηγή σε χρήση;» εάν θέλετε η τιμή να εμφανίζεται στην αναδιπλούμενη λίστα αυτής της κατηγορίας.
Επιλέξτε τον κατάλληλο κανόνα κατάταξης filing rule από την αναδιπλούμενη λίστα.
Επιλέξτε τον κατάλληλο κανόνα διαχωρισμού splitting rule από την αναδιπλούμενη λίστα.
Κανόνες κατάταξης της ταξινόμησης
Οι κανόνες κατάταξης καθορίζουν τη σειρά με την οποία τοποθετούνται τα τεκμήρια στα ράφια. Οι κανόνες κατάταξης ομαλοποιούν τους ταξιθετικούς αριθμούς, ώστε το Koha να μπορεί να τους συγκρίνει και να τους ταξινομεί στη σωστή σειρά.
Για παράδειγμα, ένας ταξιθετικός αριθμός Dewey όπως «636.8/07 SHAW» θα γίνει «636_8000000000000000000_07_SHAW» προκειμένου να ταξινομηθεί.
Ο ταξινομημένος ταξιθετικός αριθμός αποθηκεύεται στα πεδία items.cn_sort ή biblioitems.cn_sort στη βάση δεδομένων
Οι τιμές που έχουν ρυθμιστεί εκ των προτέρων στο Koha είναι οι εξής:
Dewey
LCC
Generic
Οι κανόνες κατάταξης αντιστοιχίζονται στις πηγές ταξινόμησης Classification sources. Μπορείτε να ρυθμίσετε νέους κανόνες κατάταξης χρησιμοποιώντας το κουμπί «Νέος κανόνας κατάταξης». Για να τον επεξεργαστείτε, χρησιμοποιήστε το κουμπί της «Επεξεργασίας».
Κατά τη δημιουργία ή την επεξεργασία:
Εισαγάγετε έναν κωδικό. Ο κωδικός περιορίζεται σε 10 χαρακτήρες και πρέπει να είναι μοναδικός.
Σημείωση
Ο κώδικας δεν είναι επεξεργάσιμος από τη στιγμή που έχει δημιουργηθεί.
Εισαγάγετε μία περιγραφή. Η περιγραφή χρησιμοποιείται στην αναδιπλούμενη λίστα κατά τη δημιουργία ή επεξεργασία μιας πηγής ταξινόμησης creating or editing a classification source.
Επιλέξτε μια κατάλληλη μέθοδο κατάταξης - dewey, generic ή lcc
Η μέθοδος κατάταξης του Dewey παράγει έναν ταξινομημένο ταξιθετικό αριθμό ακολουθώντας τους εξής κανόνες:
Συνδυάζει τα τμήματα ταξινόμησης και τεκμηρίου.
Μετατρέπει σε κεφαλαία γράμματα.
Αφαιρεί τα κενά διαστήματα που προηγούνται ή ακολουθούν, καθώς και τις πλάγιες κάθετες (/)
Διαχωρίζει το αλφαβητικό πρόθεμα από τον υπόλοιπο ταξιθετικό αριθμό
Χωρίζεται σε κομμάτια στα κενά διαστήματα και στις περιόδους.
Αφήνει την πρώτη ομάδα ψηφίων ως έχει.
Μετατρέπει τη δεύτερη ομάδα ψηφίων σε 15ψήφια μεγάλη ομάδα, συμπληρωμένη στα δεξιά με μηδενικά.
Μετατρέπει κάθε κενό διάστημα σε κάτω παύλα.
Αφαιρεί τυχόν εναπομείναντες μη αλφαβητικούς, μη αριθμητικούς, μη υπογραμμισμένους χαρακτήρες.
Η γενική μέθοδος κατάταξης παράγει έναν ταξινομημένο ταξιθετικό αριθμό ακολουθώντας αυτούς τους κανόνες:
Συνδυάζει τα τμήματα ταξινόμησης και τεκμηρίου.
Αφαιρεί τυχόν προηγούμενα ή επόμενα κενά διαστήματα.
Μετατρέπει κάθε κενό διάστημα σε κάτω παύλα.
Μετατρέπει σε κεφαλαία γράμματα.
Αφαιρεί τους μη αλφαβητικούς, μη αριθμητικούς, μη υπογραμμισμένους χαρακτήρες.
Η μέθοδος κατάταξης LCC παράγει έναν ταξινομημένο ταξιθετικό αριθμό ακολουθώντας αυτούς τους κανόνες:
Κανόνες διαχωρισμού της ταξινόμησης
Οι κανόνες διαχωρισμού καθορίζουν τον τρόπο διαχωρισμού των ταξιθετικών αριθμών κατά την εκτύπωση σε μια ετικέτα ράχης.
Σημείωση
Οι κανόνες διαχωρισμού χρησιμοποιούνται μόνο εάν η διάταξη της ετικέτας label layout καθορίζει τον διαχωρισμό των ταξιθετικών αριθμών.
Για παράδειγμα, ένας ταξιθετικός αριθμός Dewey όπως «636.8/07 SHAW» θα γίνει
636.807
SHAW
κάποτε τυπωμένο σε ετικέτα ράχης.
Οι τιμές που έχουν ρυθμιστεί εκ των προτέρων στο Koha είναι οι εξής:
Dewey
LCC
Generic
Οι κανόνες διαχωρισμού αντιστοιχίζονται στις πηγές ταξινόμησης Classification sources. Μπορείτε να ρυθμίσετε νέους κανόνες διαχωρισμού χρησιμοποιώντας το κουμπί «Νέος κανόνας διαχωρισμού». Για να τον επεξεργαστείτε, χρησιμοποιήστε το κουμπί της «Επεξεργασία».
Κατά τη δημιουργία ή την επεξεργασία:
Εισαγάγετε έναν κωδικό. Ο κωδικός περιορίζεται σε 10 χαρακτήρες και πρέπει να είναι μοναδικός.
Σημείωση
Ο κώδικας δεν είναι επεξεργάσιμος από τη στιγμή που έχει δημιουργηθεί.
Εισαγάγετε μία περιγραφή. Η περιγραφή χρησιμοποιείται στην αναδιπλούμενη λίστα κατά τη δημιουργία ή επεξεργασία μιας πηγής ταξινόμησης creating or editing a classification source.
Επιλέξτε μια κατάλληλη μέθοδο διαχωρισμού - Dewey, Generic, LCC ή RegEx
Η μέθοδος διαχωρισμού Dewey αναζητά τα τρία ψηφία και το δεκαδικό, τα τοποθετεί σε μία γραμμή με τα άλλα μέρη (κόφτης, πρόθεμα κ.λπ.) το καθένα σε ξεχωριστή γραμμή (γενικά χωρισμένα με κενά).
Η μεθοδος διαχωρισμού Generic διαχωρίζει σε χώρους.
Η μέθοδος διαχωρισμού LCC τοποθετεί κάθε συστατικό σε ξεχωριστή γραμμή.
Η μέθοδος διαχωρισμού RegEx σας επιτρέπει να δημιουργήσετε μια προσαρμοσμένη μέθοδο διαχωρισμού.
Μερικά παραδείγματα μεθόδων διαχωρισμού RegEx:
Διαχωρισμός σε κενά:
s/\s/\n/g
Διαχωρισμός σε σύμβολα ισότητας (=):
s/(\s?=)/\n=/g
Διαχωρισμός σε πλάγιες κάθετες (/):
s/(\s?\/)/\n/g
Αφαίρεση του πρώτου τμήματος εάν ο ταξιθετικός αριθμός αρχίζει με J ή K:
s/^(J|K)\n/$1 /
Περικοπή μετά από 9 χαρακτήρες:
s/(^.{9})/$1\n/
Είναι δυνατό να αναμίξετε και να ταιριάξετε τις μεθόδους διαχωρισμού RegEx επιλέγοντας τον σύνδεσμο «Νέα» ακριβώς κάτω από το πλαίσιο εισαγωγής RegEx.
Για παράδειγμα, αν θέλετε να προβείτε σε αποκοπή μετά από εννέα χαρακτήρες ΚΑΙ σε διαχωρισμό σε κενά, μπορείτε να γράψετε και τα δύο και ο ταξιθετικός αριθμός«971.42805092 C669r» θα διαχωριστεί
971.42805
092
C669r
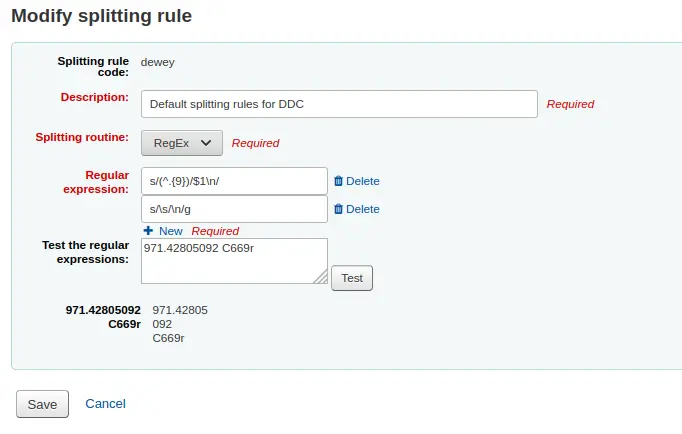
Κανόνες αντιστοίχισης εγγραφών
Οι κανόνες αντιστοίχισης εγγραφών χρησιμοποιούνται κατά την εισαγωγή εγγραφών MARC στο Koha.
Πηγαίνετε εκεί: Περισσότερα > Διαχείριση > Κατάλογος > Κανόνες αντιστοίχισης εγγραφών
Σημείωση
Μόνο το προσωπικό με το δικαίωμα διαχείρισης των κανόνων αντιστοίχισης manage_matching_rules (ή το δικαίωμα superlibrarian) θα έχει πρόσβαση σε αυτή την ενότητα.
Οι κανόνες που ρυθμίζετε εδώ θα παραπέμπονται σε εσάς για την προετοιμασία των εγγραφών marc για εισαγωγή Stage MARC records for import.
Είναι σημαντικό να κατανοήσετε τη διαφορά μεταξύ των «σημείων αντιστοίχισης» και των «ελέγχων αντιστοίχισης» πριν προσθέσετε νέους κανόνες αντιστοίχισης στο Koha.
Τα σημεία αντιστοίχισης είναι τα κριτήρια που εισάγετε και τα οποία πρέπει να τηρούνται προκειμένου μια εισερχόμενη εγγραφή να ταιριάζει με μια υπάρχουσα εγγραφή MARC στον κατάλογό σας. Μπορείτε να έχετε πολλαπλά σημεία αντιστοίχισης σε έναν κανόνα εισαγωγής, το καθένα με τη δική του βαθμολογία. Μια εισερχόμενη εγγραφή θα συγκριθεί με τις υπάρχουσες εγγραφές σας («μία εγγραφή κάθε φορά») και θα λάβει μια βαθμολογία για κάθε σημείο αντιστοίχισης. Όταν η συνολική βαθμολογία των σημείων αντιστοίχισης ταιριάζει ή υπερβαίνει το όριο που έχει δοθεί για τον κανόνα αντιστοίχισης, το Koha θεωρεί ότι υπάρχει καλή αντιστοίχιση και κάνει εισαγωγές/επικαλύψεις σύμφωνα με τις προδιαγραφές σας κατά τη διαδικασία εισαγωγής. Μία περιοχή που πρέπει να προσέξετε εδώ είναι το άθροισμα των σημείων αντιστοίχισης. Ελέγξτε δύο φορές ότι οι αντιστοιχίσεις που θέλετε θα καταλήξουν σε μια επιτυχή αντιστοίχιση.
Παράδειγμα:
Κατώτατο όριο 1000
Σημείο αντιστοίχισης στο 020$a 1000
Σημείο αντιστοίχισης στο 022$a 1000
Σημείο αντιστοίχισης στο245$a 500
Σημείο αντιστοίχισης στο 100$a 100
Στο παραπάνω παράδειγμα, μια αντιστοίχιση είτε στο 020$a είτε στο 022$a θα οδηγήσει σε επιτυχή αντιστοίχιση. Μια αντιστοίχιση στον τίτλο 245$a και στον συγγραφέα 100$a (και όχι στα 020$a ή 022$a) θα συμπληρώσει μόνο 600 και δεν θα οδηγήσει σε αντιστοίχιση. Και μία αντιστοίχιση στα 020$a και 245$a θα οδηγήσει σε 1500 και ενώ πρόκειται για επιτυχημένη αντιστοίχιση, οι επιπλέον 500 πόντοι για την αντιστοίχιση του τίτλου 245$a είναι περιττοί. Το εισερχόμενο αρχείο ταιριάζει επιτυχώς με το 020$a χωρίς να είναι απαραίτητη η αντιστοίχιση με το 245$a. Ωστόσο, αν αντιστοιχίσετε 500 πόντους στο σημείο αντιστοίχισης 100$a, μια αντιστοίχιση στον τίτλο 245$a και στον συγγραφέα 100$a θα θεωρηθεί επιτυχής αντιστοίχιση (σύνολο 1000), ακόμη και αν το 020$a δεν αποτελεί αντιστοίχιση.
Οι έλεγχοι αντιστοίχισης δεν χρησιμοποιούνται συνήθως σε κανόνες εισαγωγής. Ωστόσο, μπορούν να χρησιμεύσουν για διάφορους σκοπούς στην αντιστοίχιση εγγραφών. Πρώτον, οι έλεγχοι αντιστοίχισης μπορούν να χρησιμοποιηθούν ως κριτήρια αντιστοίχισης αντί για τα σημεία αντιστοίχισης, εάν τα ευρετήριά σας είναι παρωχημένα και ξεπερασμένα. Οι έλεγχοι αντιστοίχισης πηγαίνουν κατευθείαν στα δεδομένα αντί να βασίζονται στα δεδομένα στα ευρετήρια. (Εάν φοβάστε ότι τα ευρετήριά σας είναι ξεπερασμένα, μια ανασύνταξη των ευρετηρίων σας θα ήταν μια πολύ καλή ιδέα και θα έλυνε αυτή την κατάσταση!) Η άλλη χρήση ενός ελέγχου αντιστοίχισης είναι ως «διπλός έλεγχος» ή «βέτο» του κανόνα αντιστοίχισης. Για παράδειγμα, αν έχετε έναν κανόνα αντιστοίχισης όπως παρακάτω:
Κατώτατο όριο 1000
Σημείο αντιστοίχισης στο 020$a 1000
Έλεγχος αντιστοίχισης στο 245$a
Το Koha θα εξετάσει πρώτα την ετικέτα/υποπεδίο 020$a για να δει αν η εισερχόμενη εγγραφή ταιριάζει με μια υπάρχουσα εγγραφή. Εάν ναι, τότε θα προχωρήσει στον έλεγχο αντιστοίχισης και θα εξετάσει απευθείας την τιμή 245$a στα εισερχόμενα δεδομένα και θα τη συγκρίνει με την τιμή 245$a στην υπάρχουσα «αντιστοιχισμένη» εγγραφή στον κατάλογό σας. Εάν το 245$a ταιριάζει, το Koha συνεχίζει σαν να ήταν επιτυχής η αντιστοίχιση. Εάν η 245$a δεν ταιριάζει, τότε η Koha συμπεραίνει ότι οι δύο εγγραφές δεν ταιριάζουν τελικά. Οι έλεγχοι αντιστοίχισης μπορούν να αποτελέσουν ένα πραγματικά χρήσιμο εργαλείο για την επιβεβαίωση πραγματικών αντιστοιχίσεων.
Όταν επιθυμείτε να δημιουργήσετε κανόνες αντιστοίχισης για τις εγγραφές καθιερωμένων σας, τα ακόλουθα ευρετήρια θα σας φανούν χρήσιμα:
Όνομα ευρετηρίου |
Αντιστοιχίζεται με την ετικέτα MARC |
|---|---|
Αριθμός καρτέλας LC (LC-cardnumber) |
010$a |
Προσωπικό όνομα |
100$a |
Αναγραφή Ονόματος Συλλογικού Οργάνου |
110$a |
Όνομα Συνάντησης |
111$a |
Ομοιόμορφος τίτλος |
130$a |
Χρονολογικός όρος |
148$a |
Τοπικό θέμα |
150$a |
Γεωγραφικό όνομα |
151$a |
Όρος είδους/μορφής |
155$a |
Πίνακας: Ευρετήρια καθιερωμένων όρων
Προσθήκη κανόνων αντιστοίχισης
Για να δημιουργήσετε ένα νέο κανόνα αντιστοίχισης:
Επιλέξτε «Νέος κανόνας αντιστοίχισης εγγραφών»
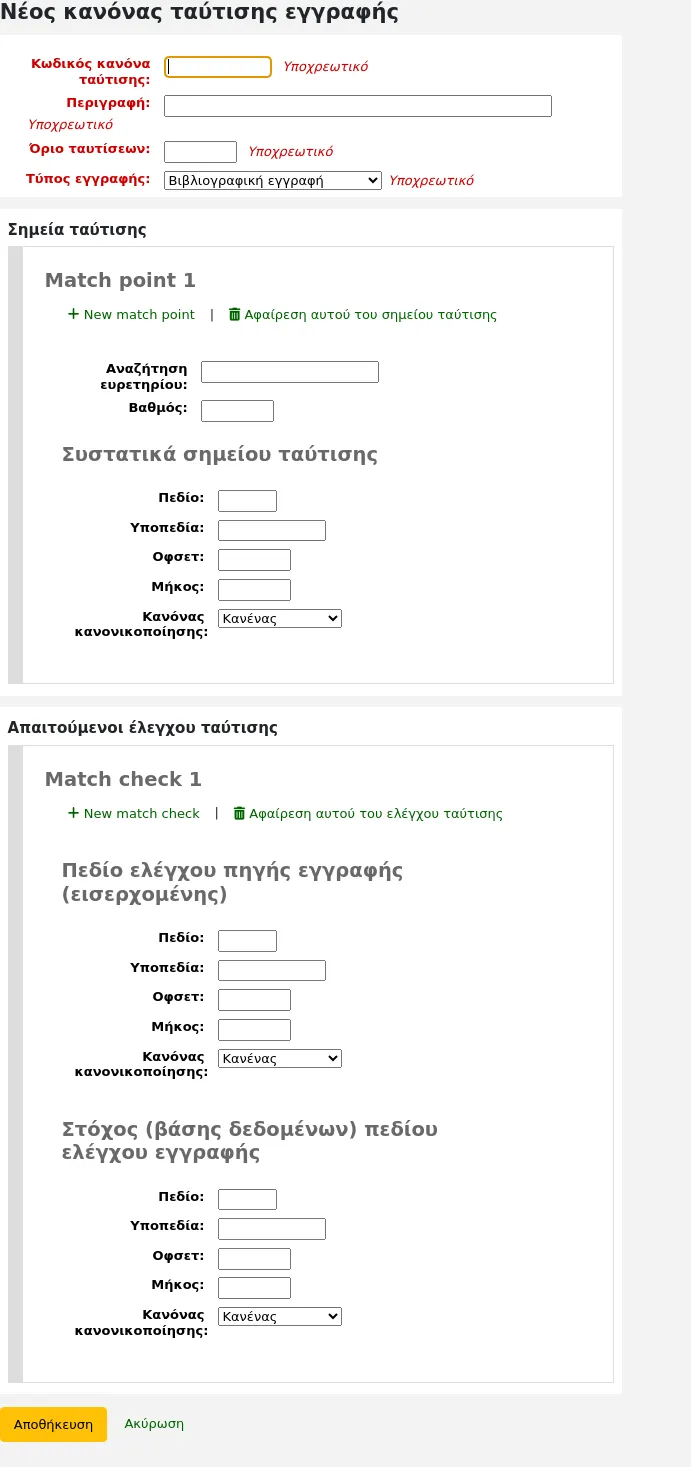
Επιλέξτε ένα μοναδικό όνομα και πληκτρολογήστε το στο πεδίο «Κωδικός κανόνα αντιστοίχισης»
Η “«Περιγραφή”» μπορεί να είναι οτιδήποτε θέλετε για να σας καταστήσει σαφές ποιον κανόνα επιλέγετε
Το « κατώτατο όριο αντιστοίχισης» είναι ο συνολικός αριθμός των «βαθμών» που πρέπει να συγκεντρώσει μια εγγραφή για να θεωρηθεί ότι υπάρχει «αντιστοίχιση»
«Τύπος εγγραφής» είναι ο τύπος εισαγωγής για τον οποίο θα χρησιμοποιηθεί αυτός ο κανόνας - είτε πρόκειται για εγγραφή καθιερωμένου όρου είτε για βιβλιογραφική
Τα σημεία αντιστοίχισης ορίζονται για να καθορίσουν σε ποια πεδία θα γίνει η αντιστοίχιση
Το «ευρετήριο αναζήτησης» μπορεί να βρεθεί εξετάζοντας τη ρύθμιση ευρετηρίου στο σύστημά σας. Για τη Zebra μπορείτε να βρείτε τα σωστά ονόματα ευρετηρίων στο αρχείο ccl.properties. Μπορείτε επίσης να βρείτε χρήσιμες πληροφορίες στο κεφάλαιο των ευρετηρίων αναζήτησης του Koha Koha search indexes σε αυτό το εγχειρίδιο.
Βαθμολογία - Ο αριθμός των « βαθμών » που επιτρέπει μία αντιστοίχιση σε αυτό το πεδίο. Εάν το άθροισμα κάθε βαθμολογίας είναι ίσο ή μεγαλύτερο από το κατώτατο όριο αντιστοίχισης, η εισερχόμενη εγγραφή ταιριάζει με την υπάρχουσα εγγραφή.
Εισάγετε την ετικέτα MARC που θέλετε να αντιστοιχίσετε στο πεδίο «Ετικέτα».
Εισάγετε το υποπεδίο της ετικέτας MARC που θέλετε να αντιστοιχίσετε στο πεδίο «Υποπεδία». Για αντιστοίχιση σε πεδία ελέγχου όπως το 001, το πεδίο εισαγωγής υποπεδίων μπορεί να παραμείνει κενό.
«Όφσετ» - Για χρήση με πεδία ελέγχου, 001-009
«Μήκος» - Για χρήση με πεδία ελέγχου, 001-009
Προς το παρόν υπάρχουν διάφορες επιλογές για τους «Κανόνες εξομάλυνσης»:
Κανένας - δεν θα εφαρμοστεί κανένας κανόνας εξομάλυνσης
Αφαίρεση διαστημάτων
Κεφαλαία γράμματα
Πεζά γράμματα
Παλαιά προεπιλογή - αυτή η επιλογή προστέθηκε για να διατηρηθεί η φόρμα αντιμετώπισης πριν γίνουν διαθέσιμοι οι άλλοι κανόνες εξομάλυνσης.
ISBN - η χρήση αυτής της επιλογής θα βελτιώσει την αντιστοίχιση με το ISBN. Εάν τα πεδία ISBN των εισερχόμενων εγγραφών σας περιέχουν επιπλέον κείμενο, όπως «9780670026623 (αλκαλ. χαρτί)», θα εξακολουθήσουν να αντιστοιχίζονται σωστά.
«Απαιτούμενοι έλεγχοι αντιστοίχισης» - Ενώ τα σημεία αντιστοίχισης ενεργούν στο ευρετήριο αναζήτησης, οι έλεγχοι αντιστοίχισης εργάζονται απευθείας στα δεδομένα και μπορούν να χρησιμοποιηθούν ως κριτήρια αντιστοίχισης αντί των σημείων αντιστοίχισης ή επιπλέον αυτών για την επιβεβαίωση πραγματικών αντιστοιχίσεων.
Δείγμα κανόνα αντιστοίχισης βιβλιογραφικών εγγραφών: Αριθμός ελέγχου
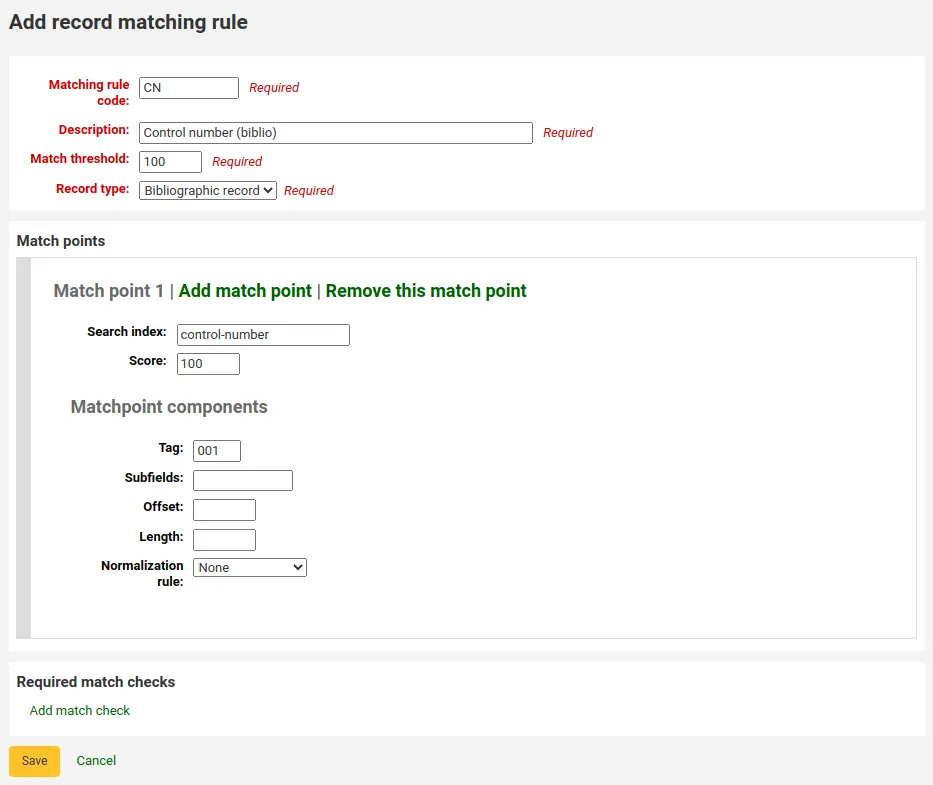
Κατώτατο όριο αντιστοίχισης: 100
Τύπος εγγραφής: Βιβλιογραφική εγγραφή
Σημείωση
Για να ταιριάξετε με το 001 στις εγγραφές καθιερωμένων όρων, θα πρέπει να δημιουργήσετε έναν δεύτερο κανόνα, επαναλαμβάνοντας όλες αυτές τις τιμές και αλλάζοντας μόνο τον τύπο εγγραφής σε «Εγγραφή καθιερωμένου όρου».
Σημεία αντιστοίχισης (μόνο το ένα):
Ευρετήριο αναζήτησης: αριθμός ελέγχου
Βαθμολογία: 100
Ετικέτα: 001
Σημείωση
Στο MARC21, αυτό το πεδίο αφορά τον αριθμό ελέγχου που αποδίδεται από τον οργανισμό που δημιουργεί, χρησιμοποιεί ή διανέμει την εγγραφή.
Υποπεδία: κενά
Όφσετ: 0 ή κενό
Μήκος: 0 ή κενό
Κανόνας εξομάλυνσης: Κανένας
Απαιτούμενοι έλεγχοι αντιστοίχισης: κανένας (επιλέξτε «Κατάργηση αυτού του ελέγχου αντιστοίχισης»)
Πηγές εγγραφών
Έκδοση
Αυτή η ενότητα προστέθηκε στο Koha στην έκδοση 24.05.
Οι πηγές εγγραφών χρησιμοποιούνται για να υποδεικνύουν από πού προέρχονται οι εγγραφές και προαιρετικά αποτρέπουν την επεξεργασία εγγραφών από συγκεκριμένες πηγές στο Koha.
Αυτό είναι ιδιαίτερα χρήσιμο σε περιπτώσεις όπου οι εγγραφές καταλογογραφούνται σε άλλο σύστημα και προωθούνται στο Koha. Μερικές φορές, σε αυτές τις περιπτώσεις, είναι καλύτερο να επεξεργάζεστε τις εγγραφές στο σύστημα προέλευσης παρά στο Koha.
Σημείωση
Μόνο το προσωπικό με το δικαίωμα διαχείρισης εγγραφών manage_record_sources (ή το δικαίωμα superlibrarian) θα έχει πρόσβαση σε αυτή την ενότητα.

Προσθήκη μίας πηγής εγγραφής
Για να προσθέσετε μία πηγή εγγραφής,
Επιλέξτε «Νέα πηγή εγγραφής»

Συμπληρώσετ τη φόρμα
Όνομα: πληκτρολογήστε το όνομα της πηγής
Μπορεί να υποβληθεί σε επεξεργασία: εάν αυτό το πλαίσιο είναι επιλεγμένο, οι εγγραφές από αυτή την πηγή θα μπορούν να υποβληθούν σε επεξεργασία στο Koha. Εάν δεν είναι επιλεγμένο, μόνο τα μέλη του προσωπικού με το δικαίωμα επεξεργασίας κλειδωμένων εγγραφών edit_locked_records θα μπορούν να επεξεργαστούν τις εγγραφές.
Επιλέξτε «Υποβολή»
Επεξεργασία μιας πηγής εγγραφής
Για να επεξεργαστείτε μια πηγή εγγραφής, επιλέξτε την «Επεξεργασία» δίπλα στην πηγή.

Διαγραφή μίας πηγής εγγραφής
Για να διαγράψετε μια πηγή εγγραφής, επιλέξτε το κουμπί «Διαγραφή» δίπλα στην πηγή και επιβεβαιώστε.

Κανόνες επικάλυψης εγγραφών
Οι κανόνες επικάλυψης εγγραφών επιτρέπουν τον ορισμό κανόνων για τον τρόπο με τον οποίο οι εισερχόμενες και οι αρχικές εγγραφές MARC θα πρέπει να συγχωνεύονται με βάση την ετικέτα πεδίου και τα συγκείμενα όταν επικαιροποιείται μια εγγραφή MARC.
Σημείωση
Μόνο το προσωπικό με το δικαίωμα διαχείρισης των κανόνων υπερκάλυψης στο marc manage_marc_overlay_rules (ή το δικαίωμα superlibrarian) θα έχει πρόσβαση σε αυτή την ενότητα.
Συγκείμενα
Ας επικεντρωθούμε πρώτα στην κατανόηση της έννοιας των συγκειμένων.
Τα συγκείμενα ορίζονται ανά «ενότητα» και «φίλτρο», επιτρέποντας ξεχωριστά σύνολα κανόνων για διαφορετικά συγκείμενα.
Ορίζοντας διαφορετικές τιμές φίλτρου για αυτές τις ενότητες, οι κανόνες εφαρμόζονται μόνο όταν η τιμή του φίλτρου ταιριάζει για μια συγκεκριμένη ενότητα. Ένας χαρακτήρας αναπλήρωσης (μπαλαντέρ) «*» μπορεί να χρησιμοποιηθεί για να ταιριάζει με όλες τις πιθανές τιμές φίλτρου.
Υπάρχουν τρεις διαφορετικές ενότητες συγκειμένων:
- borrower
Allows for defining rules that will be applied if the currently logged in user’s borrowernumber matches the filter condition.
- categorycode
Επιτρέπει τον ορισμό κανόνων που θα εφαρμόζονται εάν ο κωδικός κατηγορίας του συνδεδεμένου χρήστη ταιριάζει με τη προϋπόθεση του φίλτρου.
- source
Επιτρέπει τον ορισμό κανόνων που θα εφαρμοστούν εάν η εγγραφή επικαιροποιηθεί σε ένα συγκεκριμένο τμήμα του Koha. Υποστηρίζονται οι ακόλουθες μέθοδοι ενημερώσεων:
batchimport
z39.50
intranet
bulkmarcimport
import_lexile
batchmod
Ένα συγκείμενο δεν είναι στην πραγματικότητα τίποτα άλλο παρά ένας συνδυασμός ενότητας και φίλτρου. Κάθε φορά που ενημερώνεται μια εγγραφή στο Koha, ορίζεται ένα συγκείμενο και οι τιμές των φίλτρων συμπληρώνονται με τιμές που εξαρτώνται από το συγκείμενο.
Examples of two different contexts are saving record in the staff client or the currently logged in user having a particular borrowernumber, for example «12».
Αυτά τα δύο συγκείμενα ορίζονται ως εξής:
Module: source, filter: intranet
Module: borrower, filter: 12
Εφαρμόζονται μόνο οι κανόνες ενός συγκειμένου, δηλαδή ένας συνδυασμός ενότητας και φίλτρου. Εάν ταιριάζουν πολλά συγκείμενα, αυτά δεν συγχωνεύονται μεταξύ τους.
Αν έχουμε τους ακόλουθους κανόνες:
Module: source, filter: *, tag: 650, preset: Protect
Module: source, filter: *, tag: 500, preset: Protect
Module: borrower, filter: 12, tag: *, preset: Overwrite
Και το συγκείμενο της αναβάθμισης στο οποίο εφαρμόζονται οι κανόνες, είναι το εξής:
source => "intranet" (wildcard match)
borrower => 1 (no match)
Θα εφαρμόζονται μόνο οι δύο πρώτοι κανόνες.
Αν αντ” αυτού το συγκείμενο της αξιολόγησης του κανόνα ήταν:
source => "intranet" (wildcard match)
borrower => 12 (an exact match, which is considered more specific than a wildcard match)
Μόνο ο δεύτερος κανόνας θα εφαρμοστεί, παρόλο που οι δύο πρώτοι κανόνες επίσης ταιριάζουν, θα απορριφθούν, καθώς η ταύτιση συγκειμένου αυτού του συνόλου κανόνων είναι χαμηλότερης ακρίβειας λόγω του μπαλαντέρ.
Η ακρίβεια του συγκειμένου κατατάσσεται με τον ακόλουθο τρόπο:
Πρώτα όλοι οι κανόνες ομαδοποιούνται σε σύνολα κανόνων που προσδιορίζονται από ένα μοναδικό συνδυασμό φίλτρου και ενότητας.
Εάν ένα ή περισσότερα συγκείμενα έχουν ταύτιση με μία συνθήκη με φίλτρο χωρίς μπαλαντέρ, επιλέγεται το σύνολο κανόνων του συγκειμένου με την ενότητα μεγαλύτερης ακρίβειας. (Οι ενότητες παρατίθενται κατά σειρά ακρίβειας παραπάνω).
Εάν δεν βρεθεί ακριβής αντιστοίχιση με το συγκείμενο, αλλά βρεθούν μία ή περισσότερες αντιστοιχίσεις μπαλαντέρ, επιλέγεται το σύνολο κανόνων του συγκειμένου με την ενότητα μεγαλύτερης ακρίβειας.
Εάν δεν υπάρχει αντιστοίχιση συγκειμένου, η προεπιλεγμένη αντιμετώπιση είναι η αντικατάσταση της αρχικής εγγραφής με την εισερχόμενη εγγραφή.
Κανόνες
Ένας κανόνας αποτελείται από τρία διαφορετικά μέρη:
- Συγκείμενο
Μια ενότητα και ένα φίλτρο για την αντιπαραβολή, όπως περιγράφεται παραπάνω.
- Ετικέτα
Μια έκφραση ετικέτας πεδίου για τον ορισμό των ετικετών στις οποίες θα πρέπει να εφαρμοστεί ο κανόνας. Υποστηρίζονται τρεις διαφορετικές εκφράσεις ετικέτας:
Μια ακριβής ετικέτα, για παράδειγμα «650».
Μια ομαδική έκφραση, για παράδειγμα «6…» που ταιριάζει σε όλες τις ετικέτες 6XX.
Ένας μπαλαντέρ, «*», που ταιριάζει με όλες τις ετικέτες
Όταν αξιολογούνται οι κανόνες για ένα συγκεκριμένο συγκείμενο, επιλέγεται η πιο συγκεκριμένη αντιστοίχιση. Οι παραπάνω εκφράσεις ετικέτας παρατίθενται κατά σειρά εξειδίκευσης.
- Ενέργειες
Κάθε κανόνας ορίζει ένα σύνολο ενεργειών που πρέπει να εκτελούνται ανάλογα με τον τύπο της ενημέρωσης. Υπάρχουν τέσσερις τύποι συμβάντων ενημέρωσης: Προσθήκη, Συμπλήρωση, Αφαίρεση και Διαγραφή. Για κάθε συμβάν καθορίζεται μια ενέργεια, είτε για την εκτέλεση της ενημέρωσης είτε για την παράλειψή της.
Ενεργοποιώντας/απενεργοποιώντας τις ενημερώσεις για αυτά τα διαφορετικά συμβάντα μπορούν να οριστούν 16 διαφορετικές πρακτικές ενημέρωσης (updating). Υπάρχουν διαθέσιμες προεπιλογές για τους πιο συνηθισμένους/χρήσιμους συνδυασμούς:
Προεπιλογή |
Προσθήκη |
Συμπλήρωση |
Αφαίρεση |
Διαγραφή |
|---|---|---|---|---|
Προστασία |
Παράλειψη |
Παράλειψη |
Παράλειψη |
Παράλειψη |
Αντικατάσταση |
Να προστίθεται |
Συμπλήρωση |
Αφαίρεση |
Διαγραφή |
Προσθήκη νέου |
Να προστίθεται |
Παράλειψη |
Παράλειψη |
Παράλειψη |
Πρόσθεση και συμπλήρωση |
Να προστίθεται |
Συμπλήρωση |
Παράλειψη |
Παράλειψη |
Προστασία από διαγραφή |
Να προστίθεται |
Συμπλήρωση |
Αφαίρεση |
Διαγραφή |
Προστασία
Added: Skip, Appended: Skip, Removed: Skip, Deleted: Skip
Η προεπιλογή «Προστασία» θα αποτρέψει όλες τις ενημερώσεις στα πεδία που ταιριάζουν, προστατεύοντάς τα από την αντικατάστασή τους.
Λαμβάνοντας υπόψη αυτόν τον κανόνα:
Module: source, filter: *, Tag: 650, Preset: Protect
Και τα ακόλουθα αρχικά και εισερχόμενα αρχεία:
100 1#$aTerrace, Vincent,$d1948-
650 #0$aTelevision serials$zUnited States$vCatalogs.
100 1#$aTerrace, Vincent,$d1948-
500 ##$aIncludes index.
650 #0$aTelevision pilot programs$zUnited States$vCatalogs.
Το πεδίο 650 της αρχικής εγγραφής θα διατηρήσει την αρχική του τιμή μετά την ενημέρωση (αλλά δεδομένου ότι η προεπιλεγμένη αντιμετώπιση σε περίπτωση που δεν ταιριάζει κανένας κανόνας είναι η αντικατάσταση, θα προστεθεί το πεδίο 500):
100 1#$aTerrace, Vincent,$d1948-
500 ##$aIncludes index.
650 #0$aTelevision serials$zUnited States$vCatalogs.
Αντικατάσταση
Added: Add, Appended: Append, Removed: Remove, Deleted: Delete
Η προεπιλογή «Αντικατάσταση» θα επιτρέψει όλες τις ενημερώσεις στα πεδία που ταιριάζουν.
Δεδομένου ότι η προεπιλεγμένη αντιμετώπιση είναι η αντικατάσταση εάν κανένας κανόνας δεν ταιριάζει, η προσθήκη ενός κανόνα με την προεπιλογή της αντικατάστασης έχει νόημα μόνο εάν υπάρχει κάποιος άλλος κανόνας με χαμηλότερη ακρίβεια ετικέτας με διαφορετική συμπεριφορά, για παράδειγμα ένας κανόνας ετικέτας μπαλαντέρ.
Με δεδομένους λοιπόν αυτούς τους δύο κανόνες:
Module: source, filter: *, Tag: *, Preset: Protect
Module: source, filter: *, Tag: 650, Preset: Overwrite
Και τα ακόλουθα αρχικά και εισερχόμενα αρχεία:
500 ##$aIncludes index.
650 #0$aTelevision serials$zUnited States$vCatalogs.
Εισερχόμενη εγγραφή:
100 1#$aTerrace, Vincent,$d1948-
500 ##$aIncludes index.
650 #0$aTelevision pilot programs$zUnited States$vCatalogs.
Όλα τα πεδία εκτός από το 650 θα είναι προστατευμένα στην αρχική εγγραφή και η εγγραφή που θα προκύψει θα είναι:
500 ##$aIncludes index.
650 #0$aTelevision pilot programs$zUnited States$vCatalogs.
Προσθήκη νέου
Added: Add, Appended: Skip, Removed: Skip, Deleted: Skip
Η επιλογή «Προσθήκη νέου» επιτρέπει ενημερώσεις μόνο εάν το εισερχόμενο πεδίο είναι νέο, δηλαδή δεν υπάρχουν πεδία με αυτή την ετικέτα στην αρχική εγγραφή.
Λαμβάνοντας υπόψη αυτόν τον κανόνα:
Module: source, filter: *, Tag: 650, Preset: Add
Και τα ακόλουθα αρχικά και εισερχόμενα αρχεία:
100 1#$aTerrace, Vincent,$d1948-
650 #0$aTelevision serials$zUnited States$vCatalogs.
100 1#$aTerrace, Vincent,$d1948-
500 ##$aIncludes index.
650 #0$aTelevision pilot programs$zUnited States$vCatalogs.
Το πεδίο 650 στην εισερχόμενη εγγραφή δεν θα αντικαταστήσει το πεδίο 650 στην αρχική εγγραφή, δεδομένου ότι η αρχική εγγραφή περιέχει ένα ή περισσότερα πεδία 650. Το πεδίο 500 θα προστεθεί αφού ο προεπιλεγμένος κανόνας είναι η αντικατάσταση. Η προκύπτουσα εγγραφή θα είναι:
100 1#$aTerrace, Vincent,$d1948-
500 ##$aIncludes index.
650 #0$aTelevision serials$zUnited States$vCatalogs.
Από την άλλη πλευρά, εάν η αρχική εγγραφή ήταν:
100 1#$aTerrace, Vincent,$d1948-
Η εγγραφή που θα προκύψει θα είναι:
100 1#$aTerrace, Vincent,$d1948-
500 ##$aIncludes index.
650 #0$aTelevision pilot programs$zUnited States$vCatalogs.
Αυτό συμβαίνει επειδή δεν υπήρχαν πεδία 650 στην αρχική εγγραφή, οπότε επιτρέπεται η προσθήκη νέων.
Πρόσθεση και συμπλήρωση
Added: Add, Appended: Append, Removed: Skip, Deleted: Skip
Στην προεπιλογή «Πρόσθεση και συμπλήρωση», επιτρέπεται επίσης η συμπλήρωση, αλλά όχι η αφαίρεση ή η διαγραφή.
Έτσι, αν έχουμε τον ακόλουθο κανόνα:
Module: source, filter: *, Tag: 650, Preset: Add and append
Και τα ακόλουθα αρχικά και εισερχόμενα αρχεία:
100 1#$aTerrace, Vincent,$d1948-
650 #0$aTelevision serials$zUnited States$vCatalogs.
100 1#$aTerrace, Vincent,$d1948-
500 ##$aIncludes index.
650 #0$aTelevision pilot programs$zUnited States$vCatalogs.
Η εγγραφή που θα προκύψει θα είναι:
100 1#$aTerrace, Vincent,$d1948-
500 ##$aIncludes index.
650 #0$aTelevision serials$zUnited States$vCatalogs.
650 #0$aTelevision pilot programs$zUnited States$vCatalogs.
Σημειώστε ότι το «παλιό» πεδίο 650 από την αρχική εγγραφή δεν αφαιρέθηκε, δεδομένου ότι επιτρέπεται μόνο η προσθήκη ή η προσθήκη νέων τιμών.
Αν αντ” αυτού χρησιμοποιούσαμε την προεπιλογή «Αντικατάσταση», η εγγραφή που θα προέκυπτε θα ήταν:
100 1#$aTerrace, Vincent,$d1948-
500 ##$aIncludes index.
650 #0$aTelevision pilot programs$zUnited States$vCatalogs.
με το πεδίο 650 της αρχικής εγγραφής να έχει αφαιρεθεί.
Προστασία από διαγραφή
Added: Add, Appended: Append, Removed: Remove, Deleted: Skip
Η προεπιλογή «Προστασία από διαγραφή» θα επιτρέψει όλες τις λειτουργίες ενημέρωσης εκτός από τη διαγραφή. Διαγραφή ορίζεται όταν δεν υπάρχουν πεδία της αντίστοιχης ετικέτας στην εισερχόμενη εγγραφή, έτσι ώστε όλα τα πεδία με αυτή την ετικέτα να αφαιρεθούν από την αρχική εγγραφή.
Με δεδομένο λοιπόν τον ακόλουθο κανόνα:
Module: source, filter: *, Tag: 650, Preset: Protect from deletion
Και τα ακόλουθα αρχικά και εισερχόμενα αρχεία:
100 1#$aTerrace, Vincent,$d1948-
650 #0$aTelevision serials$zUnited States$vCatalogs.
100 1#$aTerrace, Vincent,$d1948-
500 ##$aIncludes index.
650 #0$aTelevision pilot programs$zUnited States$vCatalogs.
Η εγγραφή που θα προκύψει θα είναι:
100 1#$aTerrace, Vincent,$d1948-
500 ##$aIncludes index.
650 #0$aTelevision pilot programs$zUnited States$vCatalogs.
Από την άλλη πλευρά, εάν η εισερχόμενη εγγραφή ήταν:
100 1#$aTerrace, Vincent,$d1948-
500 ##$aIncludes index.
Στην περίπτωση αυτή δεν επιτρέπεται η διαγραφή του 650 και προστατεύεται η τιμή του πεδίου στην αρχική εγγραφή. Η εγγραφή που θα προέκυπτε θα ήταν:
100 1#$aTerrace, Vincent,$d1948-
500 ##$aIncludes index.
650 #0$aTelevision serials$zUnited States$vCatalogs.
Προσαρμοσμένες προεπιλογές
Για να εργαστείτε με προσαρμοσμένες προεπιλογές, απαιτείται μια πληρέστερη κατανόηση των ενεργειών ενημέρωσης:
- Προσθήκη
Για έναν κανόνα αντιστοίχισης με μια ετικέτα, η ενέργεια που έχει ρυθμιστεί για το συμβάν « Προσθήκη » εφαρμόζεται για νέα πεδία στην εισερχόμενη εγγραφή, εάν η αρχική εγγραφή δεν έχει πεδία με αυτή την ετικέτα. Εάν η ενέργεια είναι «Πρόσθεση», θα προστεθούν στην αρχική εγγραφή, εάν είναι «Πράλειψη», θα απορριφθούν.
- Συμπλήρωση
Εάν οι δύο εγγραφές έχουν κοινά πεδία με την ετικέτα του κανόνα, δηλαδή ένα ή περισσότερα πεδία με πανομοιότυπες τιμές υποπεδίου και δείκτη, η ρυθμισμένη ενέργεια για το συμβάν «Συμπλήρωση» εφαρμόζεται για τα πεδία που βρίσκονται στην εισερχόμενη εγγραφή αλλά όχι στην αρχική εγγραφή. Εάν η ενέργεια είναι «Συμπλήρωση», θα προστεθούν στην αρχική εγγραφή, εάν είναι «Παράλειψη», θα απορριφθούν.
- Αφαίρεση
Εάν οι δύο εγγραφές έχουν κοινά πεδία με την ετικέτα κανόνα, η ρυθμισμένη ενέργεια για την ενέργεια «Αφαίρεση» εφαρμόζεται για τα πεδία που βρίσκονται στην αρχική εγγραφή αλλά όχι στην εισερχόμενη εγγραφή. Εάν η ενέργεια είναι «Αφαίρεση», θα αφαιρεθούν από την αρχική εγγραφή, εάν είναι «Παράλειψη», θα διατηρηθούν.
- Διαγραφή
Εάν η αρχική εγγραφή έχει πεδία με την ετικέτα κανόνα, αλλά δεν υπάρχουν πεδία με αυτή την ετικέτα στην εισερχόμενη εγγραφή, η ρυθμισμένη ενέργεια για το συμβάν «Διαγραφή» εφαρμόζεται στα πεδία της εισερχόμενης εγγραφής. Εάν η ενέργεια είναι «Διαγραφή», τα πεδία θα αφαιρεθούν από την αρχική εγγραφή, εάν είναι «Παράλειψη», θα διατηρηθούν.
Παραμετροποίηση συνόλων OAI
Σε αυτή τη σελίδα μπορείτε να δημιουργήσετε, να τροποποιήσετε και να διαγράψετε σύνολα OAI-PMH
Σημείωση
Μόνο το προσωπικό με το δικαίωμα διαχείρισης συνόλων OAI manage_oai_sets (ή το δικαίωμα superlibrarian) θα έχει πρόσβαση σε αυτή την ενότητα.
Δημιουργία ενός συνόλου
Για να δημιουργήσετε ένα σύνολο:
Επιλέξτε το σύνδεσμο «Προσθήκη ενός νέου συνόλου»
Συμπληρώστε τα υποχρεωτικά πεδία “setSpec” και “setName”
Στη συνέχεια, μπορείτε να προσθέσετε περιγραφές για αυτό το σύνολο. Για να το κάνετε αυτό, επιλέξτε «Προσθήκη περιγραφής» και συμπληρώστε το νέο πλαίσιο κειμένου που δημιουργήθηκε. Μπορείτε να προσθέσετε όσες περιγραφές θέλετε.
Επιλέξτε το κουμπί της «Αποθήκευσης»
Τροποποίηση/Διαγραφή ενός συνόλου
Για να τροποποιήσετε ένα σύνολο, απλώς επιλέξτε τον σύνδεσμο «Τροποποίηση» στην ίδια γραμμή του συνόλου που θέλετε να τροποποιήσετε. Θα εμφανιστεί μια φόρμα παρόμοια με τη φόρμα δημιουργίας συνόλων και θα σας επιτρέψει να τροποποιήσετε το setSpec, το setName και τις περιγραφές.
Για να διαγράψετε ένα σύνολο, απλώς επιλέξτε τον σύνδεσμο «Διαγραφή» στην ίδια γραμμή με το σύνολο που θέλετε να διαγράψετε.
Ορισμός αντιστοιχίσεων
Εδώ μπορείτε να ορίσετε πώς θα δημιουργηθεί ένα σύνολο (ποιες εγγραφές θα ανήκουν σε αυτό το σύνολο), ορίζοντας αντιστοιχίσεις. Οι αντιστοιχίσεις είναι ένας κατάλογος καταστάσεων σχετικά με το περιεχόμενο των εγγραφών.
Συμπληρώστε τα πεδία «Πεδίο», «Υποπεδίο» και «Τιμή». Για παράδειγμα, αν θέλετε να συμπεριλάβετε σε αυτό το σύνολο όλες τις εγγραφές που έχουν 999$9 ίσο με “XXX”. Συμπληρώστε το «Πεδίο» με 999, το «Υποπεδίο» με 9 και την «Τιμή» με ΧΧΧ.
Αν θέλετε να προσθέσετε μία άλλη συνθήκη, επιλέξτε την «Προσθήκη» και επαναλάβετε το βήμα 1. Μπορείτε να επιλέξετε μεταξύ των τελεστών Boolean «και» ή «ή» για να συνδέσετε τις καταστάσεις σας.
Επιλέξτε «Αποθήκευση»
Για να διαγράψετε μια συνθήκη, αφήστε τουλάχιστον ένα από τα πεδία «Πεδίο», «Υποπεδίο» ή «Τιμή» κενό και επιλέξτε την «Αποθήκευση».
Σημείωση
Στην πραγματικότητα, μια συνθήκη είναι αληθής εάν η τιμή στο αντίστοιχο υποπεδίο είναι αυστηρά ίση με την τιμή που ορίζεται ως «Τιμή». Μια εγγραφή που έχει 999$9 = “XXX YYY” δεν θα ανήκει σε ένα σύνολο όπου η συνθήκη είναι 999$9 = “XXX”.
Και είναι ευαίσθητο στην πεζότητα των χαρακτήρων : μια εγγραφή που έχει 999$9 = “xxx” δεν θα ανήκει σε ένα σύνολο όπου η συνθήκη είναι 999$9 = “XXX”.
Δημιουργία συνόλων
Αφού ρυθμίσετε όλα τα σύνολά σας, πρέπει να κατασκευάσετε τα σύνολα. Αυτό γίνεται με την ενεργοποίηση του σεναρίου misc/migration_tools/build_oai_sets.pl.
Πεδία αναζήτησης τεκμηρίων
Πηγαίνετε εκεί: Περισσότερα > Διαχείριση > Κατάλογος > Πεδία αναζήτησης τεκμηρίων
Εδώ μπορείτε να προσθέσετε προσαρμοσμένα πεδία αναζήτησης στην επιλογή αναζήτησης των τεκμηρίων item search στο διαχειριστικό περιβάλλον.
Σημείωση
Μόνο το προσωπικό με το δικαίωμα διαχείρισης πεδίων αναζήτησης τεκμηρίων manage_item_search_fields (ή το δικαίωμα superlibrarian) θα έχει πρόσβαση σε αυτή την ενότητα.
Προσθήκη προσαρμοσμένου πεδίου αναζήτησης τεκμηρίων
Για να προσθέσετε έναν νέο όρο αναζήτησης, επιλέξτε «Νέο πεδίο αναζήτησης».
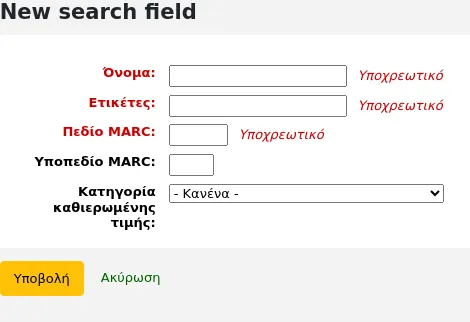
Όνομα: πληκτρολογήστε το όνομα του πεδίου αναζήτησης
Τίτλος : πληκτρολογήστε την επωνυμία του πεδίου αναζήτησης, όπως θα εμφανίζεται στη σελίδα αναζήτησης τεκμηρίων item search page
πεδίο MARC: πληκτρολογήστε τον αριθμό του πεδίου MARC στο οποίο θέλετε να πραγματοποιήσετε αναζήτηση- το πεδίο του MARC θα εμφανίζεται επίσης στη σελίδα αναζήτησης των τεκμηρίων item search page
Υποπεδίο MARC: πληκτρολογήστε τον κωδικό του υποπεδίου MARC για αναζήτηση σε αυτό
Κατηγορία καθιερωμένης τιμής: εάν χρειάζεται, επιλέξτε μια κατηγορία καθιερωμένης τιμής για αυτό το πεδίο αναζήτησης- αυτό θα μετατρέψει ουσιαστικά αυτό το πεδίο αναζήτησης σε αναδιπλούμενο μενού αντί για πεδίο ελεύθερου κειμένου
Επιλέξτε «Υποβολή».
Μόλις προστεθεί το νέο πεδίο, θα είναι ορατό στη σελίδα αναζήτησης τεκμηρίων item search page, στο αναδιπλούμενο μενού που αρχίζει με το «Barcode».

Επεξεργασία ενός προσαρμοσμένου πεδίου αναζήτησης τεκμηρίων
Για να επεξεργαστείτε ένα πεδίο αναζήτησης τεκμηρίων, επιλέξτε το κουμπί «Επεξεργασία» δίπλα στο πεδίο αναζήτησης στον πίνακα.

Πραγματοποιήστε τις αλλαγές και επιλέξτε την «Υποβολή».
Διαγραφή ενός προσαρμοσμένου πεδίου αναζήτησης τεκμηρίων
Για να διαγράψετε ένα πεδίο αναζήτησης τεκμηρίων, επιλέξτε το κουμπί «Διαγραφή» δίπλα στο πεδίο αναζήτησης στον πίνακα και επιβεβαιώστε τη διαγραφή.

Φίλτρα αναζήτησης
Τα φίλτρα αναζήτησης είναι προσαρμοσμένες αναζητήσεις ή φίλτρα που μπορούν να εφαρμοστούν στα αποτελέσματα αναζήτησης.
Αυτή η λειτουργία ενεργοποιείται με τη χρήση της παραμέτρου του συστήματος SavedSearchFilters.
Σημείωση
Αυτή η ενότητα θα είναι ορατή μόνο αν είναι ενεργοποιημένη η παράμετρος του συστήματος με τα αποθηκευμένα φίλτρα αναζήτησης SavedSearchFilters.
Σημείωση
Μόνο το προσωπικό με το δικαίωμα διαχείρισης φίλτρων αναζήτησης manage_search_filters permission (ή το δικαίωμα superlibrarian permission) θα έχει πρόσβαση σε αυτή την ενότητα.
Τα φίλτρα αναζήτησης προστίθενται με την παράμετρο αναζήτησης στον κατάλογο από το διαχειριστικό περιβάλλον searching the catalog through the staff interface.
Αυτή η σελίδα χρησιμοποιείται για τη διαχείριση των υφιστάμενων φίλτρων αναζήτησης.

Μπορείτε να κάνετε αλλαγές σε κάθε φίλτρο αναζήτησης επιλέγοντας τα κουμπιά ενεργειών στα δεξιά.
Επεξεργασία φίλτρου: αλλάξτε το όνομα του φίλτρου και τη διαθεσιμότητά του στο Δημόσιο Κατάλογο (OPAC) ή στο διαχειριστικό περιβάλλον
Επεξεργασία αναζήτησης: πατώντας αυτό το κουμπί θα μεταφερθείτε στη φόρμα της σύνθετης αναζήτησης advanced search form, με το φίλτρο να έχει ήδη εφαρμοστεί. Μπορείτε να αλλάξετε τις παραμέτρους αναζήτησης και να επιλέξετε «Αποθήκευση φίλτρου» στο επάνω μέρος της σελίδας.

Διαγραφή: επιλέγοντας αυτό το κουμπί θα διαγράψετε το φίλτρο.
Προειδοποίηση
Δεν υπάρχει επιβεβαίωση κατά τη διαγραφή ενός φίλτρου αναζήτησης. Μόλις επιλέξετε «Διαγραφή», το φίλτρο θα διαγραφεί αμέσως.
Σημείωση
Τα φίλτρα αναζήτησης μπορούν να χρησιμοποιηθούν ως προκαθορισμένα URL αναζήτησης που μπορείτε να χρησιμοποιήσετε στον ιστότοπό σας ή στις προσαρμογές HTML HTML customizations.
Τα φίλτρα αναζήτησης είναι διαθέσιμα μέσω σχετικά μικρών συνδέσμων.
<OPACBaseURL>/cgi-bin/koha/opac-search.pl?limit=search_filter:<Id of filter>
Χρησιμοποιήστε αυτή τη διεύθυνση URL οπουδήποτε για να συνδεθείτε απευθείας με την αναζήτηση.
Παραμετροποίηση μηχανής αναζήτησης
Μόλις μεταβείτε στην Elasticsearch στις παραμέτρους του συστήματος της Μηχανής Αναζήτησης, θα δείτε έναν νέο σύνδεσμο για τη παραμετροποίηση της Μηχανής Αναζήτησης στην ενότητα του Καταλόγου στη Διαχείριση. Εδώ θα διαχειριστείτε τα ευρετήρια, τις φασέτες και τις αντιστοιχίσεις τους σε πεδία και υποπεδία MARC.
Σημείωση
Μόνο το προσωπικό με το δικαίωμα διαχείρισης στην παραμετροποίηση της μηχανής αναζήτησης manage_search_engine_config (ή το δικαίωμα superlibrarian) θα έχει πρόσβαση σε αυτή την ενότητα.
Η σελίδα χωρίζεται σε τρεις καρτέλες: πεδία αναζήτησης, βιβλιογραφικές εγγραφές και εγγραφές καθιερωμένων όρων.
Σημαντικό
Αν αλλάξετε κάτι σε αυτή τη σελίδα, θα πρέπει να αναπροσαρμόσετε πλήρως τις εγγραφές σας, διαφορετικά θα επηρεαστούν μόνο οι εγγραφές που προστέθηκαν ή υπέστησαν επεξεργασία μετά την αλλαγή.
Κίνδυνος
Οποιαδήποτε αλλαγή γίνει μέσω του διαχειριστικού περιβάλλοντος θα χαθεί εάν επιλέξετε την «Επαναφορά των αντιστοιχίσεων» ή εάν η εντολή αναδημιουργίας εκτελεστεί με την παράμετρο --reset ή -r. Το κουμπί «Επαναφορά αντιστοιχίσεων» και η παράμετρος --reset επαναφέρουν τις ρυθμίσεις στις προεπιλογές.
Φίλτρα αναζήτησης
Η καρτέλα των πεδίων αναζήτησης στη σελίδα διαμόρφωσης της μηχανής αναζήτησης εμφανίζει όλα τα πεδία αναζήτησης που χρησιμοποιούνται από το Elasticsearch στο Koha.
Στον πίνακα εμφανίζονται:
Όνομα: το όνομα του πεδίου αναζήτησης, όπως ορίζεται στο αρχείο των αντιστοιχίσεων.
Διακριτικά: ορισμένα πεδία έχουν διακριτικά, για παράδειγμα, το «author» μπορεί επίσης να είναι «au». Αυτά είναι κωδικοποιημένα και δεν μπορούν να αλλάξουν.
Ετικέτα: ορισμένα πεδία έχουν ετικέτες που διαφέρουν από το όνομά τους. Αυτές χρησιμοποιούνται ως επικεφαλίδες φασέτας όταν το πεδίο χρησιμοποιείται ως φασέτα.
Τύπος: ο τύπος επηρεάζει τον τρόπο αποθήκευσης και αναζήτησης των δεδομένων.
Τελεστές Bool: τιμή 0 / 1 (όχι / ναι).
Ταξιθετικός Αριθμός: ένας ταξιθετικός αριθμός που επηρεάζεται από την πηγή ταξινόμησης.
Ημερομηνία: μια ημερομηνία αποθηκευμένη σε μορφή ISO.
Γεωγραφικό σημείο: μια γεωγραφική τιμή γεωγραφικού πλάτους και γεωγραφικού μήκους.
Έκδοση
Αυτός ο τύπος ειδοποίησης προστέθηκε στην έκδοση 24.05 του Koha.
ISBN: Τυποποιημένος αριθμός ISBN.
Αριθμός: ένας αριθμός.
Τυποποιημένος αριθμός: ένας αριθμός.
Συμβολοσειρά: μια απλή συμβολοσειρά χαρακτήρων.
Άθροισμα: άθροισμα τιμών.
Έτος: ένας τετραψήφιος αριθμός έτους.
Βάρος: μια θετική αριθμητική τιμή που αποδίδεται σε αυτό το πεδίο αναζήτησης για να το κάνει πιο «σημαντικό» σε μια απλή αναζήτηση. Όσο υψηλότερη είναι η τιμή, τόσο πιο «σημαντικό» είναι αυτό το πεδίο στην ταξινόμηση της σχετικότητας.
Σημείωση
Η σταθμισμένη αναζήτηση λειτουργεί μόνο για τη βιβλιογραφική αναζήτηση, όχι για την αναζήτηση καθιερωμένων όρων. Λειτουργεί επίσης μόνο για την απλή αναζήτηση, εκτός εάν έχει επιλεγεί η επιλογή «Εφαρμογή στάθμισης πεδίων στην αναζήτηση» στη σύνθετη αναζήτηση.
Αναζητήσιμο: αν το πεδίο αυτό χρησιμοποιείται στο διαχειριστικό περιβάλλον ή στον OPAC.
Προσθήκη πεδίων αναζήτησης
Έκδοση
Η δυνατότητα προσθήκης πεδίων αναζήτησης προστέθηκε στο Koha στην έκδοση 24.05.
Μπορεί να γίνει προσθήκη πεδίων αναζήτησης από αυτόν τον πίνακα. Προσθέστε τις πληροφορίες του πεδίου αναζήτησης στην τελευταία γραμμή του πίνακα και επιλέξτε το κουμπί «Προσθήκη» στο τέλος της γραμμής.
Διαγραφή πεδίων αναζήτησης
Έκδοση
Η δυνατότητα διαγραφής πρόσθετων πεδίων αναζήτησης προστέθηκε στο Koha στην έκδοση 24.05.
Είναι δυνατή η διαγραφή πεδίων αναζήτησης που προστέθηκαν χειροκίνητα. Τα προεπιλεγμένα πεδία αναζήτησης δεν μπορούν να διαγραφούν επειδή είναι απαραίτητα για τη σωστή λειτουργία του Koha.
Για να διαγράψετε ένα πεδίο αναζήτησης, επιλέξτε το κουμπί «Διαγραφή» στο τέλος της γραμμής.
Βιβλιογραφικές εγραφές
Η καρτέλα των βιβλιογραφικών εγγραφών στη σελίδα διαμόρφωσης της μηχανής αναζήτησης εμφανίζει τις αντιστοιχίσεις MARC για κάθε πεδίο αναζήτησης που χρησιμοποιείται από το Elasticsearch στο Koha.
Σημείωση
Οι προεπιλεγμένες αντιστοιχίσεις περιγράφονται στην ενότητα Elasticsearch indexes στο κεφάλαιο των αναζητήσεων Searching.
Στον πίνακα εμφανίζονται:
Πεδίο αναζήτησης: το αντίστοιχο πεδίο αναζήτησης (όπως ορίζεται στην καρτέλα των πεδίων αναζήτησης search fields tab). Τα πεδία αναζήτησης μπορούν να επαναλαμβάνονται για να περιλαμβάνουν πολλά πεδία MARC.
Ταξινομήσιμο: υποδεικνύει εάν αυτή η αντιστοίχιση θα πρέπει να χρησιμοποιείται στην ταξινόμηση για αυτό το πεδίο αναζήτησης. Για παράδειγμα, στο MARC21, το ευρετήριο τίτλου έχει πολλά διαφορετικά πεδία τίτλου, αλλά μόνο το πεδίο 245 χρησιμοποιείται για την ταξινόμηση.
Αξιοποιήσιμο στις φασέτες: υποδεικνύει αν η αντιστοίχιση αυτή μπορεί να χρησιμοποιηθεί στις φασέτες.
Έκδοση
Η διαμόρφωση φασετών προστέθηκε στο Koha στην έκδοση 24.05.
Προτεινόμενο: υποδεικνύει αν αυτή η αντιστοίχιση χρησιμοποιείται στην αναζήτηση με περιήγηση browse search.
Αναζητήσιμο: υποδεικνύει αν η αντιστοίχιση αυτή χρησιμοποιείται για αναζήτηση.
Φίλτρο: ο τύπος επηρεάζει τον τρόπο ευρετηρίασης των τιμών.
Στίξη: αφαιρεί τα σημεία στίξης.
Καμία: οι τιμές ευρετηριάζονται ως έχουν.
Έκδοση
Τα φίλτρα προστέθηκαν στο Koha στην έκδοση 23.11.
Αντιστοίχιση: υποδεικνύει το πεδίο MARC που αντιστοιχίζεται σε αυτό το πεδίο αναζήτησης.
Σημείωση
Οι αντιστοιχίσεις μπορούν να περιλαμβάνουν ολόκληρα πεδία ή μόνο συγκεκριμένα υποπεδία. Στην περίπτωση των υποπεδίων, μπορούν να ευρετηριάζονται μεμονωμένα ή ως ενιαία τιμή.
Για παράδειγμα :
520θα ευρετηριάσει όλα τα περιεχόμενα του πεδίου 520. Κάθε υποπεδίο του πεδίου θα ευρετηριαστεί ξεχωριστά.100aθα ευρετηριάσει μόνο τα περιεχόμενα του 100$a.020azθα ευρετηριάσει μόνο τα περιεχόμενα των υποπεδίων $a και $z του πεδίου 020. Θα ευρετηριαστούν μεμονωμένα.245(abp)θα ευρετηριάσει μόνο τα περιεχόμενα των υποπεδίων $a, $b και $p του πεδίου 245. Θα ευρετηριαστούν ως μία καταχώρηση.
Για πεδία σταθερού μήκους, η σύνταξη έχει ως εξής :
leader_/6θα ευρετηριάσει τη θέση 6 της ετικέτας εγγραφής (leader) (000).007_/0θα ευρετηριάσει τη θέση 0 του πεδίου 007.008_/39θα ευρετηριάσει τη θέση 39 του πεδίου 008.008_/15-17θα ευρετηριάσει τις θέσεις 15 έως 17 του πεδίου 008, ως μία ενότητα.
Προσθήκη αντιστοιχίσεων
Για να προσθέσετε μια αντιστοίχιση, προσθέστε τις πληροφορίες στην τελευταία γραμμή του πίνακα και επιλέξτε «Προσθήκη» στο τέλος της γραμμής.
Σημαντικό
Να θυμάστε ότι αν αλλάξετε οτιδήποτε σε αυτή τη σελίδα, πρέπει να αναπροσαρμόσετε πλήρως τις εγγραφές σας, διαφορετικά θα επηρεαστούν μόνο οι εγγραφές που προστέθηκαν ή τροποποιήθηκαν μετά την αλλαγή.
Κίνδυνος
Οποιαδήποτε αλλαγή γίνει μέσω του διαχειριστικού περιβάλλοντος θα χαθεί εάν επιλέξετε την «Επαναφορά των αντιστοιχίσεων» ή εάν η εντολή αναδημιουργίας εκτελεστεί με την παράμετρο --reset ή -r. Το κουμπί «Επαναφορά αντιστοιχίσεων» και η παράμετρος --reset επαναφέρουν τις ρυθμίσεις στις προεπιλογές.
Διαγραφή αντιστοιχίσεων
Για να διαγράψετε μια αντιστοίχιση, επιλέξτε τη «Διαγραφή» στο τέλος της γραμμής.
Ορισμένες αντιστοιχίσεις είναι απαραίτητες για τη σωστή λειτουργία του Koha και δεν μπορούν να διαγραφούν.
Σημαντικό
Να θυμάστε ότι αν αλλάξετε οτιδήποτε σε αυτή τη σελίδα, πρέπει να αναπροσαρμόσετε πλήρως τις εγγραφές σας, διαφορετικά θα επηρεαστούν μόνο οι εγγραφές που προστέθηκαν ή τροποποιήθηκαν μετά την αλλαγή.
Κίνδυνος
Οποιαδήποτε αλλαγή γίνει μέσω του διαχειριστικού περιβάλλοντος θα χαθεί εάν επιλέξετε την «Επαναφορά των αντιστοιχίσεων» ή εάν η εντολή αναδημιουργίας εκτελεστεί με την παράμετρο --reset ή -r. Το κουμπί «Επαναφορά αντιστοιχίσεων» και η παράμετρος --reset επαναφέρουν τις ρυθμίσεις στις προεπιλογές.
Διάταξη φασετών
Αυτή η ενότητα σας επιτρέπει να προσαρμόσετε τις φασέτες facets, όπως εμφανίζονται στα αποτελέσματα αναζήτησης στον OPAC και στο διαχειριστικό περιβάλλον.
Πεδίο αναζήτησης: το αντίστοιχο πεδίο αναζήτησης (όπως ορίζεται στην καρτέλα των πεδίων αναζήτησης search fields tab).
Ετικέτα: η ετικέτα του πεδίου αναζήτησης (όπως ορίζεται στην καρτέλα των πεδίων αναζήτησης search fields tab).
Έκδοση
Αυτή η στήλη προστέθηκε στο Koha στην έκδοση 23.11.
Κατηγορία καθιερωμένης τιμής: για ορισμένες φασέτες, είναι δυνατό να οριστεί μια κατηγορία καθιερωμένης τιμής που θα καθορίζει το κείμενο που εμφανίζεται για τα φασετοποιημένα τεκμήρια. Ορισμένες φασέτες έχουν αυστηρά καθορισμένες κατηγορίες καθιερωμένων τιμών, όπως η LOC για την τοποθεσία και η CCODE για τις συλλογές.
Έκδοση
Αυτή η ενότητα προστέθηκε στο Koha στην έκδοση 23.11.
Για να αναδιατάξετε τις φασέτες, απλά σύρετε και αφήστε τη γραμμή εκεί που θέλετε.
Για να μετονομάσετε τις φασέτες, πρέπει να αλλάξετε την ετικέτα στην καρτέλα των πεδίων αναζήτησης search fields tab.
Για να διαγράψετε μια φασέτα, επιλέξτε τη «Διαγραφή».
Προσοχή
Στις εκδόσεις Koha 23.11 και προγενέστερες, δεν είναι δυνατή η διαγραφή φασετών. Είναι όμως δυνατό να απενεργοποιήσετε το πλαίσιο ελέγχου «Εμφάνιση» για να τις αποκρύψετε από τα αποτελέσματα αναζήτησης.
Για να προσθέσετε μία νέα φασέτα,
πρώτα, προσθέστε το πεδίο αναζήτησης add the search field,
ακολούθως προσθέστε αντιστοιχίσεις σε αυτό το πεδίο αναζήτησης add mappings to that search field, φροντίζοντας να ορίσετε το «Αξιοποιήσιμο στις φασέτες» στην επιλογή «Ναι»,
τέλος, προσθέστε τη φασέτα στον πίνακα διάταξης των φασετών, χρησιμοποιώντας την τελευταία γραμμή για να εισαγάγετε τις τιμές και επιλέξτε το κουμπί «Προσθήκη» στο τέλος της γραμμής.
Έκδοση
Η δυνατότητα προσθήκης φασετών προστέθηκε στο Koha στην έκδοση 24.05.
Προσκτήσεις
Η ενότητα των προσκτήσεων στο Koha παρέχει στη βιβλιοθήκη έναν τρόπο καταγραφής των παραγγελιών που έχουν δοθεί στους προμηθευτές και διαχείρισης των προϋπολογισμών για τις αγορές.
Πριν χρησιμοποιήσετε την ενότητα των Προσκτήσεων acquisitions module, θα πρέπει να βεβαιωθείτε ότι έχετε ολοκληρώσει όλες τις ρυθμίσεις.
Πηγαίνετε εκεί: Περισσότερα > Διαχείριση > Προσκτήσεις
Νομίσματα και συναλλαγματικές ισοτιμίες
Εάν πραγματοποιείτε παραγγελίες από περισσότερες από μία χώρες, θα πρέπει να εισαγάγετε τις συναλλαγματικές ισοτιμίες, ώστε η ενότητα των Προσκτήσεων να υπολογίζει σωστά τα ποσά.
Σημείωση
Μόνο το προσωπικό με το δικαίωμα διαχείρισης των νομισμάτων currencies_manage (ή το δικαίωμα superlibrarian) θα έχει πρόσβαση σε αυτό το τμήμα.
Πηγαίνετε εκεί: Περισσότερα > Διαχείριση > Προσκτήσεις > Νομίσματα και συναλλαγματικές ισοτιμίες

Σημείωση
You can customize the columns of this table in the Table settings section of the Administration module (table id: currency).
Νόμισμα: αυτός είναι ο κωδικός του νομίσματος. Για τα προεπιλεγμένα νομίσματα, ο κωδικός ISO χρησιμοποιείται ως κωδικός νομίσματος (για παράδειγμα «USD» για το δολάριο ΗΠΑ). Ο κωδικός ISO θα χρησιμοποιείται κατά την εισαγωγή αρχείων MARC μέσω των εργαλείων προετοιμασίας staging tools. Το εργαλείο θα προσπαθήσει να βρει και να χρησιμοποιήσει την τιμή του τρέχοντος ενεργού νομίσματος.
Ισοτιμία: η ισοτιμία θα χρησιμοποιηθεί για τον υπολογισμό της τιμής στο ενεργό νόμισμα.
Σημείωση
Τα δεδομένα αυτά δεν ενημερώνονται αυτόματα, οπότε φροντίστε να τα διατηρείτε ενημερωμένα, ώστε οι υπολογισμοί σας να είναι σωστοί.
Σύμβολο: πρόκειται για το σύμβολο του νομίσματος (για παράδειγμα, $ για USD ή € για EUR).
Τελευταία ενημέρωση: αυτή είναι η ημερομηνία κατά την οποία το νόμισμα ενημερώθηκε τελευταία φορά στο Koha.
Ενεργό: το ενεργό νόμισμα είναι το κύριο νόμισμα που χρησιμοποιείτε στη βιβλιοθήκη σας. Το ενεργό νόμισμα θα έχει ένα σημάδι ελέγχου στη στήλη «Ενεργό». Εάν δεν έχετε ενεργό νόμισμα, θα δείτε ένα μήνυμα σφάλματος που θα σας λέει να επιλέξετε ένα ενεργό νόμισμα.

Το ενεργό νόμισμα πρέπει να έχει ισοτιμία 1. Μπορεί να υπάρχει μόνο ένα ενεργό νόμισμα.
Αρχειοθετημένα: τα αρχειοθετημένα νομίσματα θα έχουν «Ναι» σε αυτή τη στήλη. Τα αρχειοθετημένα νομίσματα δεν μπορούν να χρησιμοποιηθούν στην ενότητα των Προσκτήσεων.
Σημείωση
Προς το παρόν δεν είναι δυνατή η χειροκίνητη αρχειοθέτηση των ισοτιμιών. Οι ισοτιμίες θα αρχειοθετηθούν εάν ενημερωθεί το Koha και διαγραφεί ένα νόμισμα που χρησιμοποιήθηκε προηγουμένως στην ενότητα των Προκτήσεων.
Ενέργειες: χρησιμοποιήστε τα κουμπιά για να επεξεργαστείτε ή να διαγράψετε νομίσματα.
Σημείωση
Εάν ένα νόμισμα έχει χρησιμοποιηθεί τουλάχιστον μία φορά, δεν είναι δυνατή η διαγραφή του.
Προσθήκη ενός νέου νομίσματος
Εάν ένα νόμισμα που χρησιμοποιείτε δεν υπάρχει ήδη στο σύστημά σας, μπορείτε να το δημιουργήσετε.
Επιλέξτε «Νέο νόμισμα».
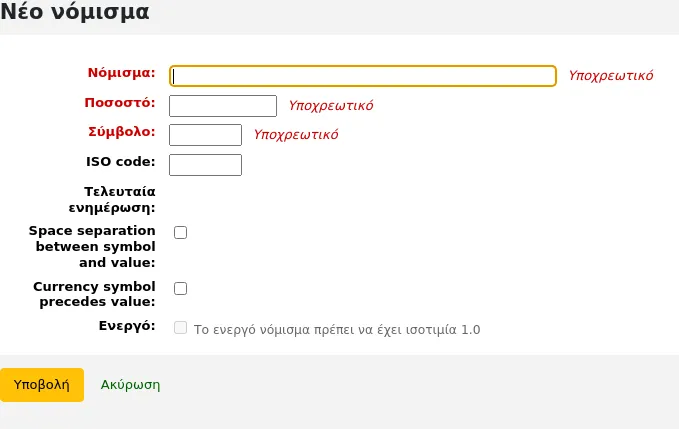
Συμπληρώστε τη φόρμα.
Νόμισμα: εισαγάγετε έναν κωδικό για το νόμισμα, μπορεί να είναι ο κωδικός ISO ή άλλος κωδικός. Αυτός είναι ο κωδικός που θα εμφανίζεται στην ενότητα των Προσκτήσεων acquisitions module.
Σημείωση
Εάν αποφασίσετε να χρησιμοποιήσετε έναν προσαρμοσμένο κωδικό εδώ, βεβαιωθείτε ότι έχετε συμπληρώσει τον κωδικό ISO με τον σωστό κωδικό για το νόμισμα. Αυτό θα διασφαλίσει ότι οι τιμές υπολογίζονται σύμφωνα με την ισοτιμία.
Σημείωση
Το πεδίο αυτό έχει όριο τους 10 χαρακτήρες.
Ισοτιμία: εισαγάγετε την ισοτιμία αυτού του νομίσματος σε σχέση με το ενεργό σας νόμισμα.
Σύμβολο: πληκτρολογήστε το σύμβολο του νομίσματος (για παράδειγμα, $ για USD ή € για EUR).
Κωδικός ISO: πληκτρολογήστε τον κωδικό ISO για το νόμισμα (π.χ. «USD» για το δολάριο ΗΠΑ). Το πεδίο αυτό είναι προαιρετικό. Εάν αυτό το πεδίο είναι κενό, το Koha θα χρησιμοποιήσει τον κωδικό νομίσματος (παραπάνω) ως κωδικό ISO για τους υπολογισμούς των τιμών.
Τελευταία ενημέρωση: θα συμπληρωθεί αυτόματα με τη σημερινή ημερομηνία, δεν είναι δυνατή η χειροκίνητη αλλαγή αυτής της ημερομηνίας.
Διαχωρισμός διαστήματος μεταξύ συμβόλου και τιμής: αν επιλεγεί, το Koha θα εμφανίζει την τιμή με ένα κενό πριν από το σύμβολο νομίσματος (για παράδειγμα, 10.99 $ αντί για 10.99$).
Το σύμβολο του νομίσματος προηγείται της τιμής: αν είναι επιλεγμένο, το Koha θα εμφανίζει το σύμβολο του νομίσματος πριν από την τιμή (για παράδειγμα, $10,99 αντί για 10,99$).
Έκδοση
Αυτή η επιλογή προστέθηκε στην έκδοση 24.11 του Koha.
Ενεργό: επιλέξτε αυτό το πλαίσιο εάν αυτό το νόμισμα είναι το προεπιλεγμένο νόμισμα που χρησιμοποιείται στην ενότητα των Προσκτήσεων. Να σημειωθεί ότι μπορεί να υπάρχει μόνο ένα ενεργό νόμισμα και ότι η ισοτιμία του ενεργού νομίσματος πρέπει να είναι 1.
Επιλέξτε «Υποβολή».
Επεξεργασία ενός νομίσματος
Εάν παραγγέλνετε συχνά από άλλες χώρες, θα πρέπει να ενημερώνετε τακτικά τη συναλλαγματική ισοτιμία για να υπολογίζετε τις τιμές με ακρίβεια.
Για να επεξεργαστείτε ένα υπάρχον νόμισμα,
Επιλέξτε το κουμπί «Επεξεργασία» στα δεξιά του νομίσματος στον πίνακα νομισμάτων.
Αλλάξτε την ισοτιμία ή άλλη τιμή.
Σημείωση
Να σημειωθεί ότι ο κωδικός νομίσματος και η ημερομηνία τελευταίας ενημέρωσης δεν μπορούν να τροποποιηθούν.
Επιλέξτε «Υποβολή».
Διαγραφή μίας ισοτιμίας
Εάν υπάρχουν νομίσματα που δεν χρησιμοποιείτε ποτέ, μπορείτε να τα διαγράψετε.
Από τον πίνακα νομισμάτων, επιλέξτε τη «Διαγραφή» στα δεξιά του νομίσματος.
Προειδοποίηση
Δεν είναι δυνατή η διαγραφή νομισμάτων που έχουν χρησιμοποιηθεί τουλάχιστον μία φορά στην ενότητα των Προσκτήσεων acquisitions module.
Προϋπολογισμοί
Οι προϋπολογισμοί χρησιμοποιούνται για την παρακολούθηση των λογιστικών στοιχείων που σχετίζονται με τις προσκτήσεις acquisitions. Για παράδειγμα, θα μπορούσατε να δημιουργήσετε έναν προϋπολογισμό για το τρέχον έτος (π.χ. 2015) και στη συνέχεια να τον αναλύσετε σε κεφάλαια funds για διάφορους τομείς της βιβλιοθήκης (π.χ. βιβλία, μουσική, κ.λπ.).
Πηγαίνετε εκεί: Περισσότερα > Διαχείριση > Προσκτήσεις > Προϋπολογισμοί
Σημείωση
Το προσωπικό πρέπει να έχει το σχετικό δικαίωμα period_manage (ή το δικαίωμα superlibrarian) προκειμένου να έχει πρόσβαση στη σελίδα διαχείρισης των προϋπολογισμών.
Συνιστάται να δίνετε κατ” ελάχιστο τα ακόλουθα δικαιώματα στα μέλη του προσωπικού που πρέπει να διαχειρίζονται προϋπολογισμούς, δεδομένου ότι αυτά είναι αλληλοεξαρτώμενα:
Όταν επισκεφθείτε την κύρια διαχείριση του προϋπολογισμού, θα δείτε δύο καρτέλες, μία για τους ενεργούς και μία για τους ανενεργούς προϋπολογισμούς.
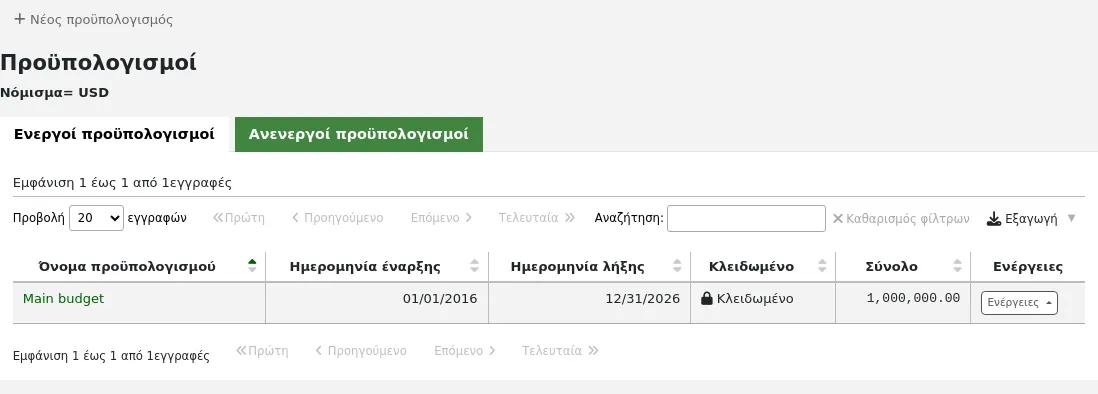
Προσθήκη προϋπολογισμών
Οι προϋπολογισμοί μπορούν να δημιουργηθούν είτε από το μηδέν from scratch είτε με αντιγραφή του προϋπολογισμού της προηγούμενης χρονιάς duplicating the previous year’s budget.
Σημείωση
Το προσωπικό πρέπει να έχει το δικαίωμα διαχείρισης των περιόδων period_manage (ή το δικαίωμα superlibrarian) προκειμένου να δημιουργεί νέους προϋπολογισμούς ή να αντιγράφει υπάρχοντες προϋπολογισμούς.
Προσθήκη ενός νέου προϋπολογισμού
Αν δεν έχετε χρησιμοποιήσει το Koha στο παρελθόν για προσκτήσεις, θα πρέπει να ξεκινήσετε από την αρχή με νέο προϋπολογισμό.
Για να προσθέσετε ένα νέο προϋπολογισμό,
Επιλέξτε το κουμπί «Νέος προϋπολογισμός».
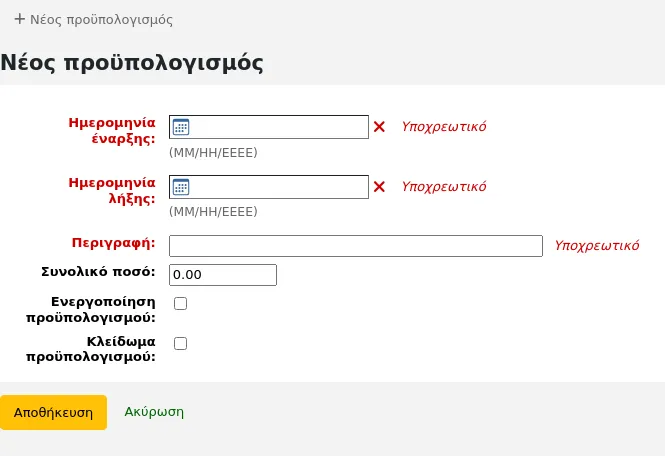
Συμπληρώστε τη φόρμα:
Ημερομηνία έναρξης (υποχρεωτική): επιλέξτε την ημερομηνία έναρξης της χρονικής περιόδου για την οποία ισχύει ο προϋπολογισμός. Αυτή μπορεί να είναι η αρχή του ημερολογιακού έτους, του οικονομικού έτους, του ακαδημαϊκού έτους, του τριμήνου κ.λπ.
Ημερομηνία λήξης (υποχρεωτική): επιλέξτε την ημερομηνία λήξης της χρονικής περιόδου για την οποία ισχύει ο προϋπολογισμός.
Περιγραφή (υποχρεωτική): εισαγάγετε μια περιγραφή για αυτόν τον προϋπολογισμό. Η περιγραφή θα πρέπει να είναι κάτι που θα σας βοηθήσει να αναγνωρίσετε τον προϋπολογισμό κατά την παραγγελία.
Συνολικό ποσό: πληκτρολογήστε το ποσό του προϋπολογισμού. Μην χρησιμοποιείτε σύμβολα, απλώς πληκτρολογήστε το ποσό του προϋπολογισμού με αριθμούς και δεκαδικά ψηφία.
Ενεργοποίηση του προϋπολογισμού: η επισήμανση ενός προϋπολογισμού ως ενεργού τον καθιστά χρησιμοποιήσιμο κατά την εκτέλεση παραγγελιών στην ενότητα των Προσκτήσεων acquisitions module, ακόμη και αν η παραγγελία γίνει μετά την ημερομηνία λήξης του προϋπολογισμού. Αυτό θα σας επιτρέψει να καταχωρήσετε παραγγελίες που έγιναν σε περίοδο προηγούμενου προϋπολογισμού.
Κλείδωμα προϋπολογισμού: Το κλείδωμα ενός προϋπολογισμού σημαίνει ότι δεν θα μπορείτε να προσθέσετε κεφάλαια add funds ή υποκεφάλαια προσθήκη υπο-κεφαλαίων σε αυτόν τον προϋπολογισμό και δεν θα μπορείτε να σχεδιάσετε τις δαπάνες plan spending. Κλειδώστε τον προϋπολογισμό μόλις τον ρυθμίσετε όπως επιθυμείτε.
Επιλέξτε «Αποθήκευση».
Θα επιστρέψετε στη λίστα με τους υπάρχοντες προϋπολογισμούς.
Προχωρήστε στην επιλογή της προσθήκης κεφαλαίων add funds στον προϋπολογισμό.
Αναπαραγωγή ενός προϋπολογισμού
Στο τέλος του έτους ή στο τέλος της περιόδου ισχύος του προϋπολογισμού σας, μπορείτε να αναπαράγετε τον τρέχοντα προϋπολογισμό. Αυτό θα αναπαράγει επίσης όλα τα κεφάλαια, ώστε να μην χρειάζεται να ξεκινάτε από το μηδέν κάθε έτος ή περίοδο.
Για να αναπαράγετε ένα προϋπολογισμό,
Από τη λίστα των προϋπολογισμών, επιλέξτε το κουμπί «Ενέργειες» στα δεξιά.

Επιλέξτε «Αντιγραφή».
Εναλλακτικά,
Από τον πίνακα των προϋπολογισμών, επιλέξτε το όνομα του προϋπολογισμού.

Στην οθόνη με την ανάλυση του προϋπολογισμού, επιλέξτε το κουμπί «Επεξεργασία» στο επάνω μέρος και ακολούθως «Αντιγραφή προϋπολογισμού».
Και στις δύο περιπτώσεις, θα σας παρουσιαστεί μία φόρμα για να αντιγράψετε τον προϋπολογισμό.
Ημερομηνία έναρξης (υποχρεωτική): επιλέξτε την ημερομηνία έναρξης της χρονικής περιόδου για την οποία ισχύει ο νέος προϋπολογισμός.
Ημερομηνία λήξης (υποχρεωτική): επιλέξτε την ημερομηνία λήξης της χρονικής περιόδου για την οποία ισχύει ο προϋπολογισμός.
Περιγραφή (υποχρεωτική): εισαγάγετε μια περιγραφή για αυτόν τον νέο προϋπολογισμό.
Αλλαγή ποσών κατά: από προεπιλογή, θα χρησιμοποιηθεί το συνολικό ποσό από τον προηγούμενο προϋπολογισμό και τα αρχικά ποσά για κάθε κεφάλαιο. Ωστόσο, εάν χρειάζεται, μπορείτε να υποδείξετε την αλλαγή των ποσών κατά ένα ποσοστό, το οποίο μπορεί να είναι θετικό ή αρνητικό. Για παράδειγμα, εάν ο νέος προϋπολογισμός σας αυξήθηκε κατά 2%, πληκτρολογήστε 2. Αντίστροφα, αν ο νέος προϋπολογισμός σας μειώθηκε κατά 2%, πληκτρολογήστε -2.
Εάν τα ποσά έχουν αλλάξει, στρογγυλοποιήστε σε πολλαπλάσιο του: εάν έχετε εισαγάγει μια τιμή στο πεδίο «Αλλαγή ποσών κατά», το Koha θα υπολογίσει τα ποσά αυτόματα. Μπορείτε να το αναγκάσετε να στρογγυλοποιήσει τα ποσά προς τα κάτω. Για παράδειγμα, εισάγοντας «100», τα ποσά θα στρογγυλοποιηθούν προς τα κάτω σε εκατοντάδες (το 5542 θα γίνει 5500).
Σημειώστε τον αρχικό προϋπολογισμό ως ανενεργό: επιλέξτε αυτό το πλαίσιο εάν ο αρχικός προϋπολογισμός δεν πρέπει πλέον να χρησιμοποιείται, με άμεση ισχύ. Μπορείτε πάντα να επεξεργαστείτε τον προϋπολογισμό edit the budget αργότερα για να τον κάνετε ανενεργό.
Μηδενισμός όλων των κεφαλαίων: επιλέξτε αυτό το πλαίσιο εάν επιθυμείτε ο νέος προϋπολογισμός να περιέχει όλες τις ίδιες δομές κεφαλαίων με τον προηγούμενο προϋπολογισμό, αλλά καμία κατανομή μέχρι να εισαγάγετε χειροκίνητα ένα ποσό στο κεφάλαιο.
Αυτό θα αναπαράγει όχι μόνο τον προϋπολογισμό, αλλά και όλα τα κεφάλαια που σχετίζονται με τον εν λόγω προϋπολογισμό, ώστε να μπορείτε να επαναχρησιμοποιείτε προϋπολογισμούς και κεφάλαια από έτος σε έτος.
Όταν έρθει η ώρα, μπορείτε να κλείσετε τον προηγούμενο προϋπολογισμό close the previous budget για να μεταφέρετε τις μη παραληφθείσες παραγγελίες και, αν θέλετε, τα μη δαπανηθέντα κεφάλαια στο νέο προϋπολογισμό.
Επεξεργασία ενός προϋπολογισμού
Σημείωση
Το προσωπικό πρέπει να έχει το σχετικό δικαίωμα period_manage (ή το δικαίωμα superlibrarian) προκειμένου να επεξεργαστεί υπάρχοντες προϋπολογισμούς.
Μπορείτε να επεξεργαστείτε τους υπάρχοντες προϋπολογισμούς για να τους καταστήσετε ανενεργούς ή να τους κλειδώσετε για να αποτρέψετε αλλαγές σε κεφάλαια, για παράδειγμα.
Για να επεξεργαστείτε ένα προϋπολογισμό,
Από τη λίστα των προϋπολογισμών, επιλέξτε το κουμπί «Ενέργειες» στα δεξιά.

Επιλέξτε «Επεξεργασία».
Εναλλακτικά,
Από τον πίνακα των προϋπολογισμών, επιλέξτε το όνομα του προϋπολογισμού.

Στην οθόνη με την ανάλυση του προϋπολογισμού, επιλέξτε την «Επεξεργασία» στο επάνω μέρος και ακολούθως «Επεξεργασία προϋπολογισμού»
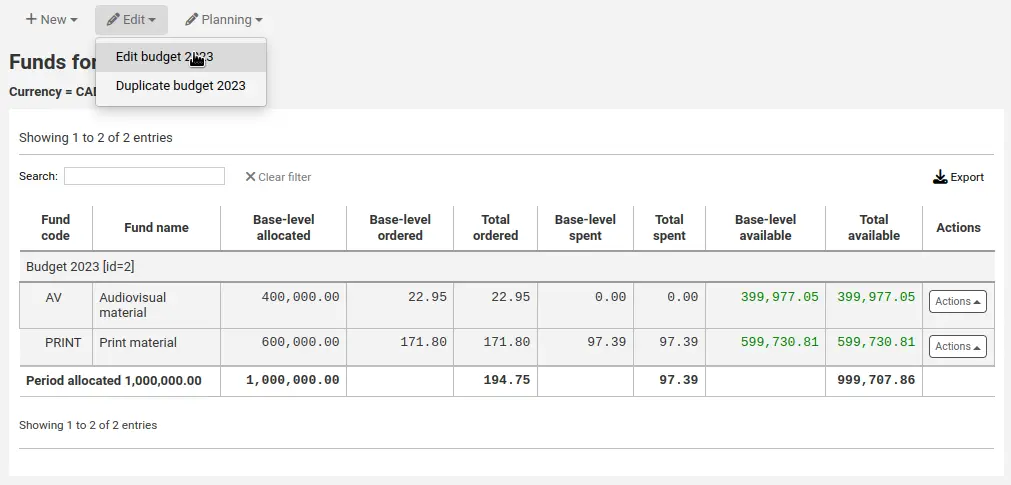
Και στις δύο περιπτώσεις, θα σας παρουσιαστεί μία φόρμα για να αντιγράψετε τον προϋπολογισμό.
Κάντε τις αλλαγές σας (δείτε τις περιγραφές των πεδίων παραπάνω).
Επιλέξτε «Αποθήκευση».
Κλείσιμο ενός προϋπολογισμού
Κλείστε έναν προϋπολογισμό για να μεταφέρετε ή να μετακυλήσετε μη παραληφθείσες παραγγελίες και, εάν θέλετε, μη δαπανηθέντα κεφάλαια από έναν προηγούμενο προϋπολογισμό σε έναν νέο προϋπολογισμό. Πριν κλείσετε τον προϋπολογισμό σας, ίσως θελήσετε να αντιγράψετε τον προϋπολογισμό του προηγούμενου έτους duplicate the previous year’s budget ώστε να έχετε κάπου να μετακυλήσετε τις μη παραληφθείσες παραγγελίες.
Σημείωση
Το προσωπικό πρέπει να έχει το σχετικό δικαίωμα period_manage (ή το δικαίωμα superlibrarian) προκειμένου να κλείνει υπάρχοντες προϋπολογισμούς.
Για να κλείσετε ένα προϋπολογισμό,
Από τη λίστα των προϋπολογισμών, επιλέξτε το κουμπί «Ενέργειες» στα δεξιά.

Επιλέξτε «Κλείσιμο»
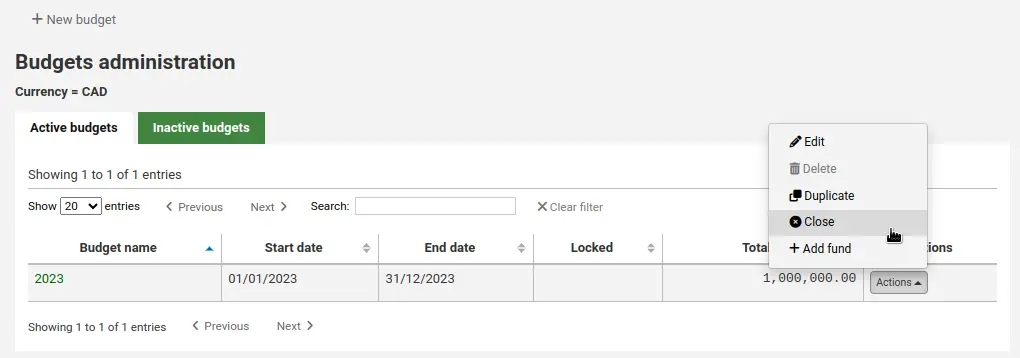
Σημείωση
Προϋπολογισμοί με μη παραληφθείσες παραγγελίες δεν μπορούν να κλείσουν.
Συμπληρώστε τη φόρμα.
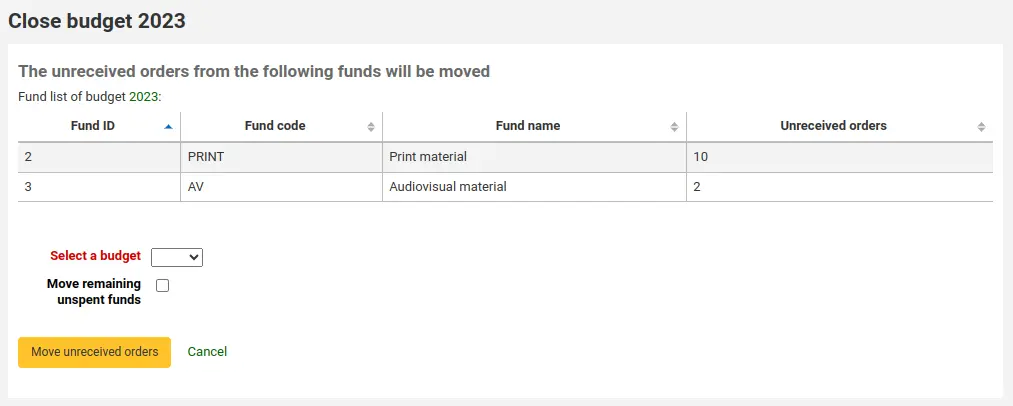
Επιλογή προϋπολογισμού: επιλέξτε τον νέο προϋπολογισμό για τις μη παραληφθείσες παραγγελίες από το αναδιπλούμενο μενού.
Σημείωση
Για να μεταφερθούν αυτόματα οι μη παραληφθείσες παραγγελίες στον νέο προϋπολογισμό, οι δομές των κεφαλαίων του προηγούμενου προϋπολογισμού πρέπει να υπάρχουν στον νέο προϋπολογισμό.
Μεταφορά των υπόλοιπων αδιάθετων κεφαλαίων: επιλέξτε αυτό το πλαίσιο για να μεταφέρετε τα αδιάθετα ποσά από τα κεφάλαια του προϋπολογισμού που κλείνει στον επιλεγόμενο προϋπολογισμό.
Επιλέξτε το κουμπί « Μεταφορά ανολοκλήρωτων παραγγελιών».
Θα εμφανιστεί ένα παράθυρο διαλόγου που θα λέει «Επιλέξατε να μεταφέρετε όλες τις μη παραληφθείσες παραγγελίες από τον «Προϋπολογισμό Χ» στον «Προϋπολογισμό Υ». Αυτή η ενέργεια δεν μπορεί να αντιστραφεί. Επιθυμείτε να συνεχίσετε; Ο προϋπολογισμός Χ είναι ο προϋπολογισμός που πρόκειται να κλείσει και ο προϋπολογισμός Υ είναι ο επιλεγόμένος προϋπολογισμός.
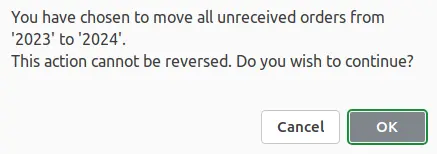
Εάν όλα φαίνονται σωστά, επιλέξτε το «OK» και οι μη ληφθείσες παραγγελίες και, εάν επιλεγεί, τα μη δαπανηθέντα κεφάλαια θα μεταφερθούν.
Περιμένετε μέχρι να εμφανιστεί η «Αναφορά μετά τη μετακίνηση μη ολοκληρωμένων παραγγελιών από τον προϋπολογισμό X στον Y». Εκεί θα εμφανιστούν οι αριθμοί των παραγγελιών που επηρεάστηκαν (ομαδοποιημένοι ανά κεφάλαιο) και θα αναφερθεί λεπτομερώς αν η μη ληφθείσα παραγγελία μετακινήθηκε ή αν υπήρξε πρόβλημα. Για παράδειγμα, εάν ο νέος προϋπολογισμός δεν περιέχει κεφάλαιο με το ίδιο όνομα με τον προηγούμενο προϋπολογισμό, η παραγγελία δεν θα μετακινηθεί.
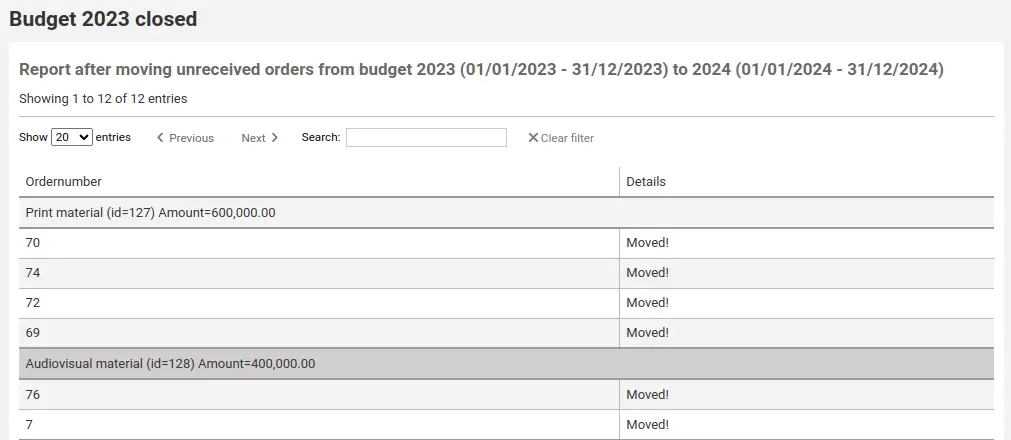
Διαγραφή ενός προϋπολογισμού
Για να διαγραφεί ένας προϋπολογισμός, πρέπει να μην υπάρχουν κεφάλαια. Ξεκινήστε με τη διαγραφή των κεφαλαίων deleting the funds.
Προειδοποίηση
Αυτή η ενέργεια δεν μπορεί να αναιρεθεί. Βεβαιωθείτε ότι είστε σίγουροι ότι αυτός ο προϋπολογισμός πρέπει να διαγραφεί. Μπορείτε να τον κάνετε ανενεργό make it inactive ή να τον κλείσετε close it, αντί για αυτό.
Για να διαγράψετε ένα προϋπολογισμό,
Από τη λίστα των προϋπολογισμών, επιλέξτε το κουμπί «Ενέργειες» στα δεξιά.

Επιλέξτε «Διαγραφή».
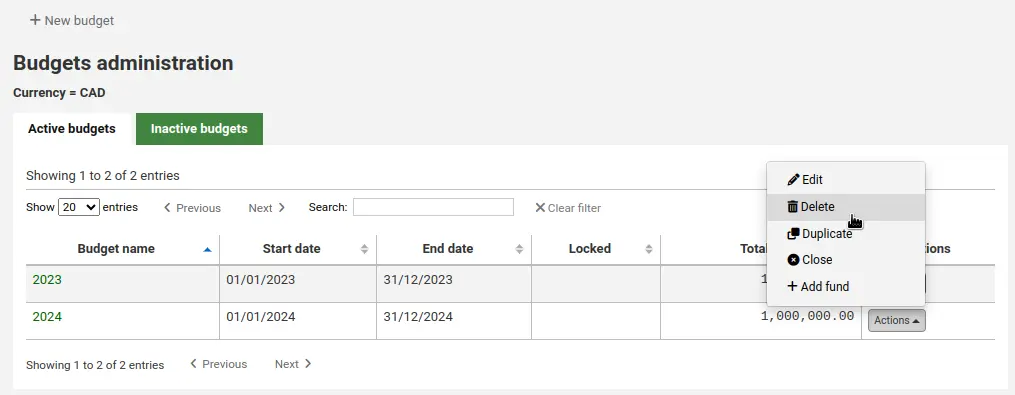
Επιλέξτε «Ναι, διαγραφή».

Κεφάλαια
Τα κεφάλαια είναι τμήματα ενός προϋπολογισμού. Για παράδειγμα, θα μπορούσατε να έχετε έναν προϋπολογισμό για το τρέχον έτος (π.χ. 2015) και στη συνέχεια να τον χωρίσετε σε κεφάλαια για διάφορους τομείς της βιβλιοθήκης (π.χ. βιβλία, ήχος κ.λπ.).
Πηγαίνετε εκεί: Περισσότερα > Διαχείριση > Προσκτήσεις > Κεφάλαια
Προσθήκη κεφαλαίου σε ένα προϋπολογισμό
Ένα κεφάλαιο προστίθεται σε έναν προϋπολογισμό. Βεβαιωθείτε ότι έχετε κάνει προσθήκη ενός προϋπολογισμού add a budget πριν προσθέσετε κεφάλαια.
Σημείωση
Εάν ένας προϋπολογισμός είναι κλειδωμένος, δεν θα είναι δυνατή η προσθήκη κεφαλαίων.
Για να προσθέσετε ένα νέο κεφάλαιο,
Από τη λίστα των προϋπολογισμών, επιλέξτε το κουμπί «Ενέργειες» στα δεξιά.

Επιλέξτε «Προσθήκη κεφαλαίου».
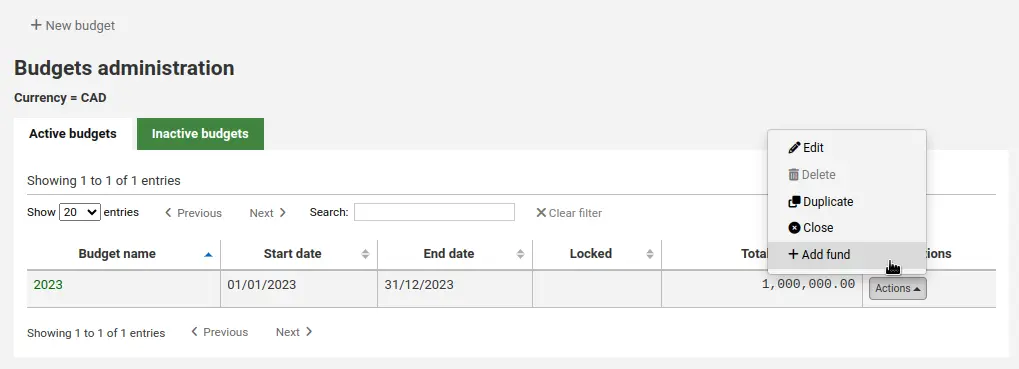
Εναλλακτικά,
Από τον πίνακα των προϋπολογισμών, επιλέξτε το όνομα του προϋπολογισμού.

Στην οθόνη με την ανάλυση του προϋπολογισμού, επιλέξτε το κουμπί «Νέο» στο επάνω μέρος και ακολούθως «Νέο κεφάλαιο για…».
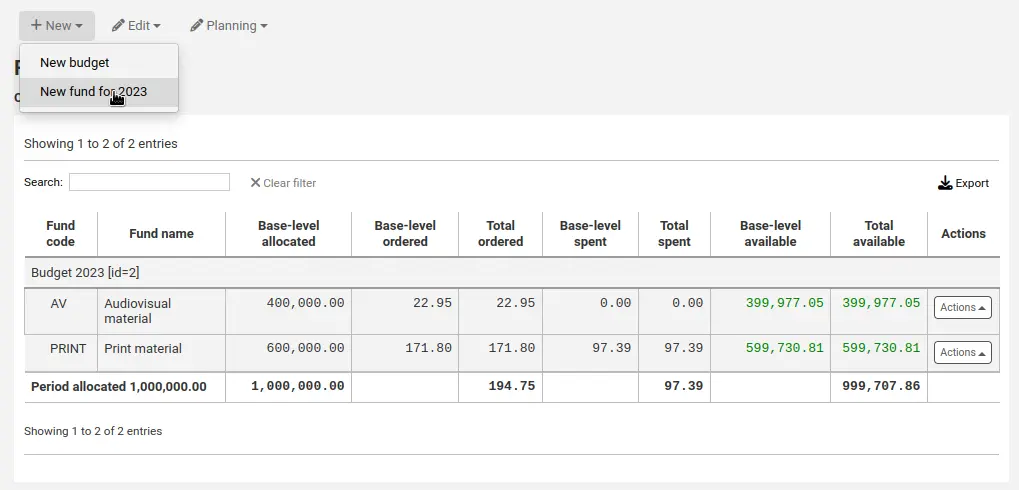
Και στις δύο περιπτώσεις, θα σας παρουσιαστεί μία φόρμα για τη δημιουργία του νέου κεφαλαίου.
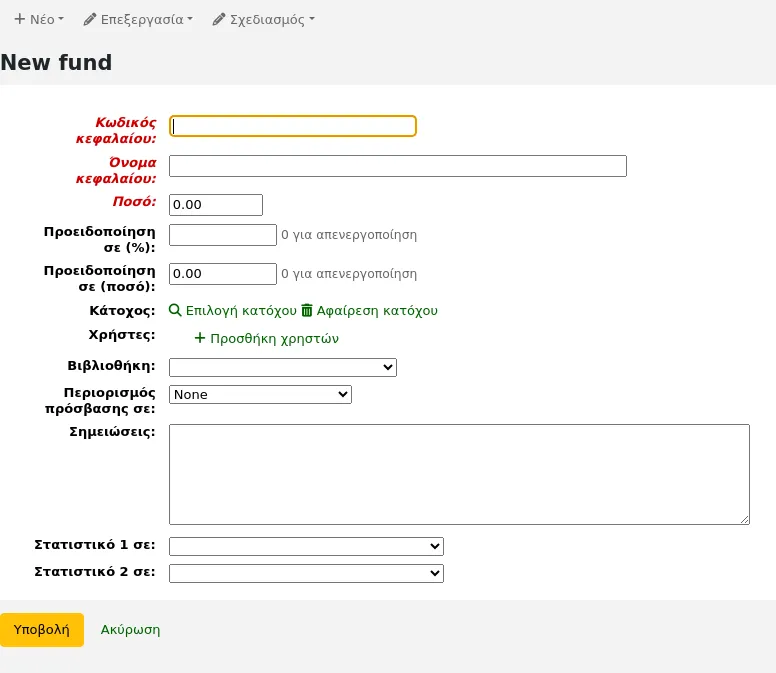
Κωδικός κεφαλαίου (υποχρεωτικός): εισαγάγετε ένα μοναδικό αναγνωριστικό για το κεφάλαιό σας.
Όνομα κεφαλαίου (υποχρεωτικό): εισαγάγετε ένα όνομα για το κεφάλαιο. Αυτό θα πρέπει να είναι κάτι που θα κατανοεί το προσωπικό, καθώς θα εμφανίζεται κατά την παραγγελία.
Ποσό (υποχρεωτικό): πληκτρολογήστε το ποσό μόνο με αριθμούς και δεκαδικά ψηφία, χωρίς άλλους χαρακτήρες.
Προειδοποίηση σε ποσοστό (%): εισαγάγετε μια ποσοστιαία τιμή για να σας προειδοποιεί το Koha όταν έχετε ξοδέψει αυτό το ποσοστό του κεφαλαίου, προκειμένου να αποφύγετε την υπέρβαση των δαπανών. Για παράδειγμα, αν εισαγάγετε το 90%, το Koha θα σας προειδοποιεί για κάθε παραγγελία μετά την κάλυψη του 90% του κεφαλαίου.
Προειδοποίηση σε (ποσό): το ίδιο όπως παραπάνω, αλλά για ένα συγκεκριμένο ποσό χρημάτων που δαπανήθηκε. Για παράδειγμα, αν εισαγάγετε 5000, το Koha θα σας προειδοποιεί για κάθε παραγγελία μετά την δαπάνη 5000 από το κεφάλαιο.
Διαχειριστής: μπορείτε να επιλέξετε να αναθέσετε αυτό το κεφάλαιο σε ένα μέλος του προσωπικού.
Επιλέξτε «Επιλογή διαχειριστή».
Αναζητήστε το μέλος του προσωπικού στη φόρμα αναζήτησης μέλους.
Σημείωση
Μόνο το προσωπικό με το δικαίωμα διαχείρισης των προϋπολογισμών budget_modify permission (ή το δικαίωμα superlibrarian) εμφανίζεται στα αποτελέσματα της αναζήτησης.
Επιλέξτε την «Επιλογή» στα δεξιά του αποτελέσματος με το μέλος του προσωπικού που θέλετε να ορίσετε ως διαχειριστή.
Σημείωση
Ένα κεφάλαιο μπορεί να έχει μόνο έναν διαχειριστή.
Σημείωση
Για να ορίσετε τη χρήση αυτού του κεφαλαίου από το διαχειριστή, πρέπει να επιλέξετε είτε «Διαχειριστής», είτε «Διαχειριστής και χρήστες» είτε «Διαχειριστής, χρήστες και βιβλιοθήκη» στο πεδίο «Ορισμός πρόσβασης σε» παρακάτω. Διαφορετικά, η προσθήκη χρηστών δεν θα έχει κανένα περιοριστικό αποτέλεσμα.
Σημείωση
Τα μέλη του προσωπικού με το δικαίωμα διαχείρισης παραγγελιών order_manage_all permission (ή το δικαίωμα superlibrarian) θα μπορούν να χρησιμοποιούν τα κεφάλαια ανεξάρτητα από τους περιορισμούς.
Βεβαιωθείτε ότι το προσωπικό σας δεν έχει αυτό το δικαίωμα, αν θέλετε να περιορίσετε την πρόσβαση στα κεφάλαια.
Χρήστες: μπορείτε επίσης να προσθέσετε χρήστες που θα μπορούν να κάνουν δαπάνες σε αυτό το κεφάλαιο.
Σημείωση
Για να περιορίσετε τη χρήση αυτού του κεφαλαίου στους χρήστες, πρέπει να επιλέξετε είτε «Διαχειριστής και χρήστες» είτε «Διαχειριστής, χρήστες και βιβλιοθήκη» στο πεδίο «Ορισμός πρόσβασης σε» παρακάτω. Διαφορετικά, η προσθήκη χρηστών δεν θα έχει κανένα περιοριστικό αποτέλεσμα.
Σημείωση
Τα μέλη του προσωπικού με το δικαίωμα διαχείρισης παραγγελιών order_manage_all permission (ή το δικαίωμα superlibrarian) θα μπορούν να χρησιμοποιούν τα κεφάλαια ανεξάρτητα από τους περιορισμούς.
Βεβαιωθείτε ότι το προσωπικό σας δεν έχει αυτό το δικαίωμα, αν θέλετε να περιορίσετε την πρόσβαση στα κεφάλαια.
Επιλέξτε «Προσθήκη χρηστών»
Αναζητήστε το μέλος του προσωπικού στη φόρμα αναζήτησης μέλους.
Σημείωση
Μόνο το προσωπικό με το δικαίωμα διαχείρισης των προϋπολογισμών budget_modify permission (ή το δικαίωμα superlibrarian) εμφανίζεται στα αποτελέσματα της αναζήτησης.
Επιλέξτε την «Προσθήκη» στα δεξιά του αποτελέσματος με το μέλος του προσωπικού.
Σημείωση
Μπορείτε να προσθέσετε όσους χρήστες χρειάζεται.
Επιλέξτε το «Κλείσιμο» μόλις προστεθούν όλοι οι χρήστες.
Βιβλιοθήκη: Αν αυτό το κεφάλαιο προορίζεται για μια συγκεκριμένη βιβλιοθήκη, επιλέξτε το εδώ.
Σημείωση
Για να περιορίσετε της χρήση αυτού του κεφαλαίου στη βιβλιοθήκη, πρέπει να επιλέξετε «Διαχειριστής, χρήστες και βιβλιοθήκη» στο πεδίο «Περιορισμός πρόσβασης σε» παρακάτω. Διαφορετικά, η επιλογή μιας βιβλιοθήκης δεν θα έχει κανένα περιοριστικό αποτέλεσμα.
Σημείωση
Τα μέλη του προσωπικού με το δικαίωμα διαχείρισης παραγγελιών order_manage_all permission (ή το δικαίωμα superlibrarian) θα μπορούν να χρησιμοποιούν τα κεφάλαια ανεξάρτητα από τους περιορισμούς.
Βεβαιωθείτε ότι το προσωπικό σας δεν έχει αυτό το δικαίωμα, αν θέλετε να περιορίσετε την πρόσβαση στα κεφάλαια.
Περιορισμός πρόσβασης σε: μπορείτε να περιορίσετε ποιος μπορεί να παραγγείλει από αυτό το κεφάλαιο επιλέγοντας είτε το «διαχειριστή», είτε το «διαχειριστή και τους χρήστες» είτε τον «διαχειριστή, τους χρήστες και τη βιβλιοθήκη».
Προειδοποίηση
Χωρίς ένα διαχειριστή, ο περιορισμός πρόσβασης θα αγνοηθεί, βεβαιωθείτε ότι έχετε εισάγει ένα διαχειριστή και επιλέξει έναν περιορισμό.
Σημείωση
Τα μέλη του προσωπικού με το δικαίωμα διαχείρισης παραγγελιών order_manage_all permission (ή το δικαίωμα superlibrarian) θα μπορούν να χρησιμοποιούν τα κεφάλαια ανεξάρτητα από τους περιορισμούς.
Βεβαιωθείτε ότι το προσωπικό σας δεν έχει αυτό το δικαίωμα, αν θέλετε να περιορίσετε την πρόσβαση στα κεφάλαια.
Σημειώσεις: οποιεσδήποτε περιγραφικές σημειώσεις σχετικά με αυτό το κεφάλαιο.
Σημείωση
Οι σημειώσεις θα εμφανίζονται μόνο σε αυτή την οθόνη (κατά την επεξεργασία του κεφαλαίου).
Στατιστικό στοιχείο 1 που εφαρμόζεται στην: χρησιμοποιείται για στατιστικούς σκοπούς. Επιλέξτε μια κατηγορία καθιερωμένων τιμών authorized value category από την οποία θα επιλέγετε τιμές κατά την υποβολή παραγγελιών κατά τη χρήση αυτού του κεφαλαίου. Στη συνέχεια θα μπορείτε να σχεδιάσετε τις δαπάνες plan spending και να κάνετε εκθέσεις με βάση τις δαπάνες σε αυτές τις κατηγορίες report on spending according to those categories. Η προεπιλεγμένη κατηγορία καθιερωμένων τιμών Asort1 έχει δημιουργηθεί ειδικά για το σκοπό αυτό, αλλά μπορείτε να χρησιμοποιήσετε οποιαδήποτε κατηγορία καθιερωμένων τιμών σε αυτό το πεδίο (CCODE για παράδειγμα για τον προγραμματισμό των δαπανών ανά συλλογή).
Στατιστικό στοιχείο 2 που εφαρμόζεται στην: όπως παραπάνω, για μια δεύτερη στατιστική κατηγορία. Η προεπιλεγμένη κατηγορία καθιερωμένων τιμών Asort2 έχει δημιουργηθεί ειδικά για το σκοπό αυτό, αλλά μπορείτε να χρησιμοποιήσετε οποιαδήποτε κατηγορία καθιερωμένων τιμών.
Σημείωση
Για να μάθετε περισσότερα σχετικά με τις κατηγορίες προγραμματισμού, ανατρέξτε στην ενότητα των Συχνών ερωτήσεων για τις κατηγορίες προγραμματισμού Planning category FAQ.
Επιλέξτε «Υποβολή».
Θα εμφανιστεί μία λίστα με όλα τα κεφάλαια του προϋπολογισμού.

Οι στήλες με τα χρηματικά ποσά στον πίνακα του κεφαλαίου κατανέμονται ως εξής:
Το βασικό επίπεδο που διατίθεται είναι η τιμή «Ποσό» που ορίσατε κατά τη δημιουργία του κεφαλαίου
Το βασικό επίπεδο παραγγελίας είναι το ποσό παραγγελίας για αυτό το κεφάλαιο (χωρίς τα θυγατρικά κεφάλαια)
Το σύνολο της παραγγελίας είναι το βασικό επίπεδο παραγγελίας για αυτό το κεφάλαιο και όλα τα θυγατρικά του κεφάλαια
Το βασικό επίπεδο δαπανών είναι το δαπανηθέν ποσό για το συγκεκριμένο κεφάλαιο (χωρίς τα θυγατρικά κεφάλαια)
Το σύνολο των δαπανών είναι το βασικό επίπεδο δαπανών για το κεφάλαιο αυτό και όλα τα θυγατρικά του κεφάλαια
Το βασικό διαθέσιμο είναι 1 - 2
Το συνολικό διαθέσιμο είναι 1-3
Στα δεξιά κάθε κεφαλαίου θα βρείτε το κουμπί «Ενέργειες», κάτω από το οποίο θα βρείτε τις επιλογές «Επεξεργασία», «Διαγραφή» και «Προσθήκη υποκεφαλαίου».
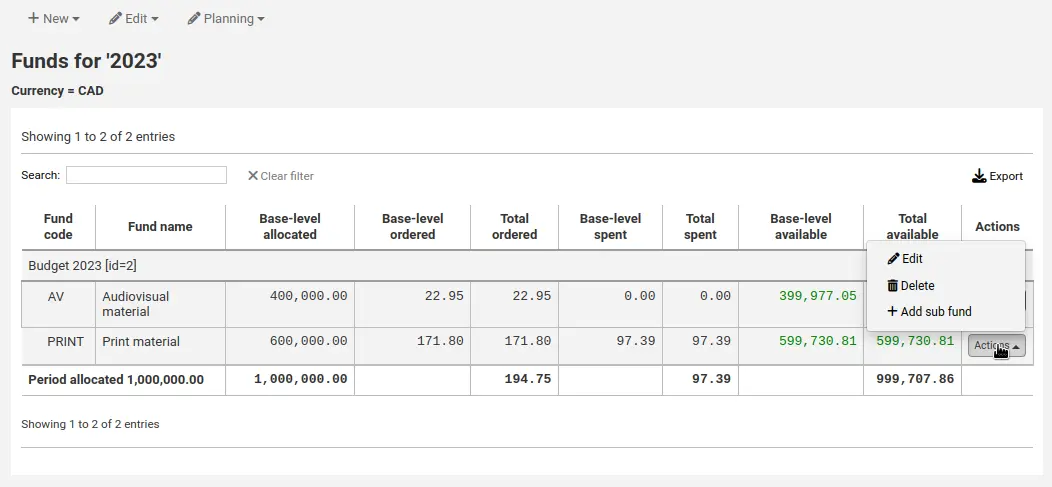
Προσθήκη ενός υποκεφαλαίου
Ένα υποκεφάλαιο είναι μια πιο επιμέρους διαίρεση του κεφαλαίου. Ένα παράδειγμα θα ήταν να έχετε ένα ταμείο για τη «Λογοτεχνία» και κάτω από αυτό ένα κεφάλαιο για τις «Νέες κυκλοφορίες» και ένα κεφάλαιο για την «Επιστημονική Φαντασία». Είναι ένας προαιρετικός τρόπος για να οργανώσετε περαιτέρω τα οικονομικά σας.
Σημείωση
Εάν ένας προϋπολογισμός είναι κλειδωμένος, δεν θα είναι δυνατή η προσθήκη επιμέρους κεφαλαίων.
Για να προσθέσετε ένα υποκεφάλαιο σε ένα κεφάλαιο,
Από τη λίστα όλων των κεφαλαίων ή από τη λίστα των κεφαλαίων ενός συγκεκριμένου προϋπολογισμού, επιλέξτε τις «Ενέργειες» στα δεξιά.

Επιλέξτε «Προσθήκη υποκεφαλαίου».
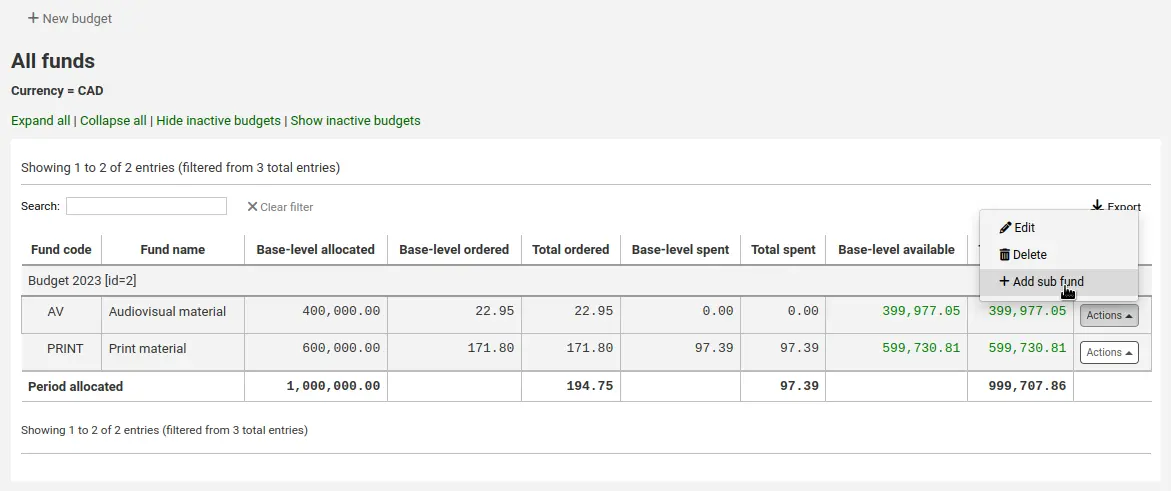
Συμπληρώστε το φόρμα του νέου υποκεφαλαίου. Τα πεδία είναι τα ίδια με εκείνα της προσθήκης νέου κεφαλαίου adding a new fund. Η μόνη διαφορά είναι ότι η φόρμα θα αναφέρει το «μητρικό» κεφάλαιο.
Επιλέξτε «Υποβολή».
Τα κεφάλαια με υποκεφάλαια θα εμφανίζονται με ένα μικρό βέλος στα αριστερά. Επιλέγοντας αυτό, θα εμφανιστούν τα επιμέρους κεφάλαια.

Διαγραφή κεφαλαίων
Αν θέλετε, μπορείτε να διαγράψετε κεφάλαια.
Προειδοποίηση
Η διαγραφή ενός κεφαλαίου, στο οποίο υπάρχουν παραγγελίες, θα διαγράψει και αυτές τις παραγγελίες. Διαγράψτε τα κεφάλαια μόνο αν είστε βέβαιοι ότι πρέπει να διαγραφούν. Δεν είναι δυνατή η ανάκληση αυτής της ενέργειας.
Για να διαγράψετε ένα κεφάλαιο,
Από τη λίστα όλων των κεφαλαίων ή από τη λίστα των κεφαλαίων ενός συγκεκριμένου προϋπολογισμού, επιλέξτε τις «Ενέργειες» στα δεξιά.

Επιλέξτε «Διαγραφή».
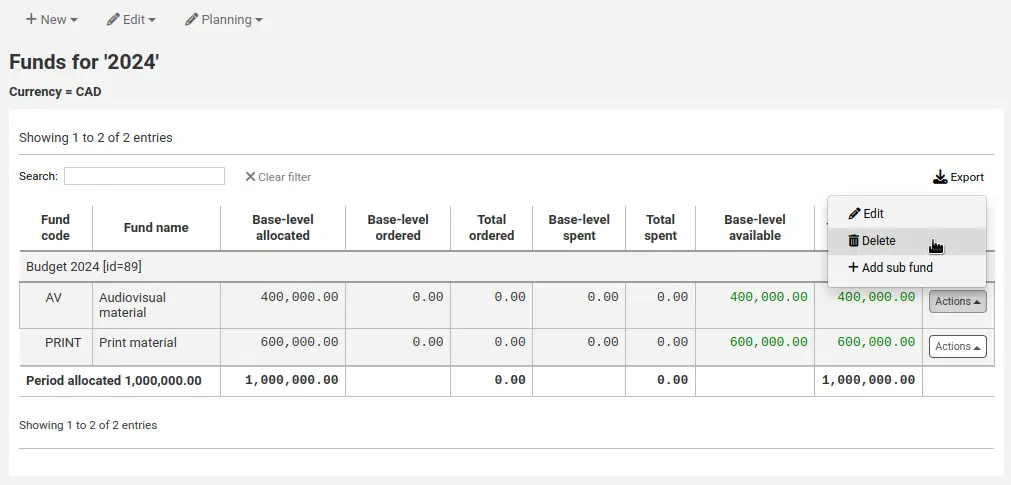
Επιλέξτε «Ναι, διαγραφή αυτού του κεφαλαίου» στο προειδοποιητικό μήνυμα.

Σχεδιασμός προϋπολογισμού
Σημείωση
Τα μέλη του προσωπικού πρέπει να έχουν το δικαίωμα διαχείρισης του σχεδιασμού planning_manage permission, το δικαίωμα διαχείρισης των προϋπολογισμών budget_manage permission και το δικαίωμα διαχείρισης της περιόδου period_manage permission (ή το δικαίωμα superlibrarian permission) για να έχουν πρόσβαση στον σχεδιασμό του προϋπολογισμού.
Κατά την εμφάνιση του λίστας των κεφαλαίων επιλέξτε το κουμπί «Σχεδιασμός» και ακολούθως τον τρόπο με τον οποίο θα θέλατε να σχεδιάσετε τις δαπάνες του προϋπολογισμού σας.

Εάν επιλέξετε «Σχεδιασμός ανά μήνα», θα δείτε το προϋπολογισμένο ποσό κατανεμημένο ανά μήνα.

Στα αριστερά υπάρχουν φίλτρα που μπορούν να χρησιμοποιηθούν για να περιορίσετε αυτό που εμφανίζεται στον πίνακα.
Επιλογή τύπου σχεδιασμού: επιλέξτε το σχεδιασμό ανά μήνες, ανά βιβλιοθήκες, ανά τύπους τεκμηρίων ή οποιαδήποτε κατηγορία καθιερωμένων τιμών που χρησιμοποιείται ως στατιστικό 1 ή 2 στα κεφάλαια.
Εμφάνιση μόνο των κεφαλαίων μου: έτσι θα αποκλειστούν τα κεφάλαια των οποίων δεν είστε ο διαχειριστής.
Εμφάνιση μόνο ενεργών κεφαλαίων: έτσι θα εξαιρεθούν τα κεφάλαια που δεν έχουν χρησιμοποιηθεί (χωρίς ποσό παραγγελίας).
Εμφάνιση πραγματικών/εκτιμώμενων τιμών: έτσι θα αλλάξει ο πίνακας ώστε να εμφανίζονται και τα ποσά που είναι σε παραγγελίες.
Για να αποκρύψετε ορισμένες από τις στήλες, αποεπιλέξτε τα πλαίσια στο επάνω μέρος του πίνακα.
Από εδώ, μπορείτε να προγραμματίσετε τις δαπάνες του προϋπολογισμού σας εισάγοντας τιμές χειροκίνητα ή επιλέγοντας την «Αυτόματη συμπλήρωση γραμμής». Εάν επιλέξετε την αυτόματη συμπλήρωση της φόρμας, το σύστημα θα προσπαθήσει να διαιρέσει το ποσό ανάλογα, ίσως χρειαστεί να κάνετε κάποιες επεξεργασίες για να χωρίσετε τα πράγματα με μεγαλύτερη ακρίβεια.

Μόλις πραγματοποιήσετε τις αλλαγές σας, επιλέξτε το κουμπί «Αποθήκευση».
Σημείωση
Εάν ένας προϋπολογισμός είναι κλειδωμένος, δεν θα είναι δυνατή η επεξεργασία των τιμών.
Για να εξάγετε τα δεδομένα σας σε αρχείο CSV, συμπληρώστε ένα όνομα αρχείου στο πεδίο «Εξαγωγή σε αρχείο με το όνομα», στην ενότητα «Εξαγωγή» στα αριστερά, και επιλέξτε την «Υποβολή».
Λογαριασμοί ΕDI
Από εδώ μπορείτε να ρυθμίσετε τις πληροφορίες που απαιτούνται για τη σύνδεση με τους προμηθευτές των προσκτήσεών σας.
Σημείωση
Αυτή η ενότητα θα εμφανίζεται μόνο εάν είναι ενεργοποιημένη η παράμετρος του συστήματος EDIFACT.
Σημείωση
Μόνο το προσωπικό με το δικαίωμα διαχείρισης του EDI edi_manage (ή το δικαίωμα superlibrarian) θα έχει πρόσβαση σε αυτό το τμήμα.
Σημείωση
Πριν ξεκινήσετε, θα πρέπει να έχετε δημιουργήσει τουλάχιστον έναν προμηθευτή στις Προσκτήσεις vendor set up in acquisitions.
Για να προσθέσετε πληροφορίες λογαριασμού, επιλέξτε το κουμπί «Νέος λογαριασμός».
Εισαγάγετε τα στοιχεία του προμηθευτή σας στη φόρμα.
See the EDI questions for vendors section of the acquisitions module chapter for a description of each field.
Κάθε προμηθευτής θα έχει έναν λογαριασμό.
EAN Βιβλιοθήκης
Το EAN της βιβλιοθήκης είναι το αναγνωριστικό που δίνει ο προμηθευτής στη βιβλιοθήκη για να του το στείλει πίσω, ώστε να ξέρει ποιον λογαριασμό να χρησιμοποιήσει κατά την τιμολόγηση. Ένας λογαριασμός EDI μπορεί να έχει πολλαπλά EAN.
Σημείωση
Αυτή η ενότητα θα εμφανίζεται μόνο εάν είναι ενεργοποιημένη η παράμετρος του συστήματος EDIFACT.
Σημείωση
Μόνο το προσωπικό με το δικαίωμα διαχείρισης του EDI edi_manage (ή το δικαίωμα superlibrarian) θα έχει πρόσβαση σε αυτό το τμήμα.
Για να προσθέσετε ένα EAN επιλέξτε «Νέο EAN».
Στη φόρμα που εμφανίζεται εισαγάγετε τις πληροφορίες που σας παρέχει ο προμηθευτής σας.
See the EDI questions for vendors section of the acquisitions module chapter for a description of each field.
Επιπρόσθετες παράμετροι
Πηγαίνετε εκεί: Περισσότερα > Διαχείριση > Επιπρόσθετες παράμετροι
Πάροχοι ταυτότητας
Αυτή η ενότητα χρησιμοποιείται για τον ορισμό και τη διαχείριση παρόχων εξωτερικής ταυτότητας για τους χρήστες του Koha. Χρησιμοποιείται όταν οι χρήστες σας προέρχονται από μια εξωτερική πηγή, όπως το σύστημα διαχείρισης φοιτητών, ο ενεργός κατάλογος ή άλλες παρόμοιες βάσεις δεδομένων.
Πηγαίνετε εκεί: Περισσότερα > Διαχείριση > Πρόσθετες παράμετροι > Πάροχοι ταυτότητας
Σημείωση
Μόνο το προσωπικό με το σχετικό δικαίωμα manage_identity_providers (ή το δικαίωμα superlibrarian) θα έχει πρόσβαση σε αυτό το τμήμα.
Προσθήκη ενός διαχειριστή ταυτότητας
Για να προσθέσετε έναν πάροχο ταυτότητας, επιλέξτε το κουμπί «Νέος πάροχος ταυτότητας».
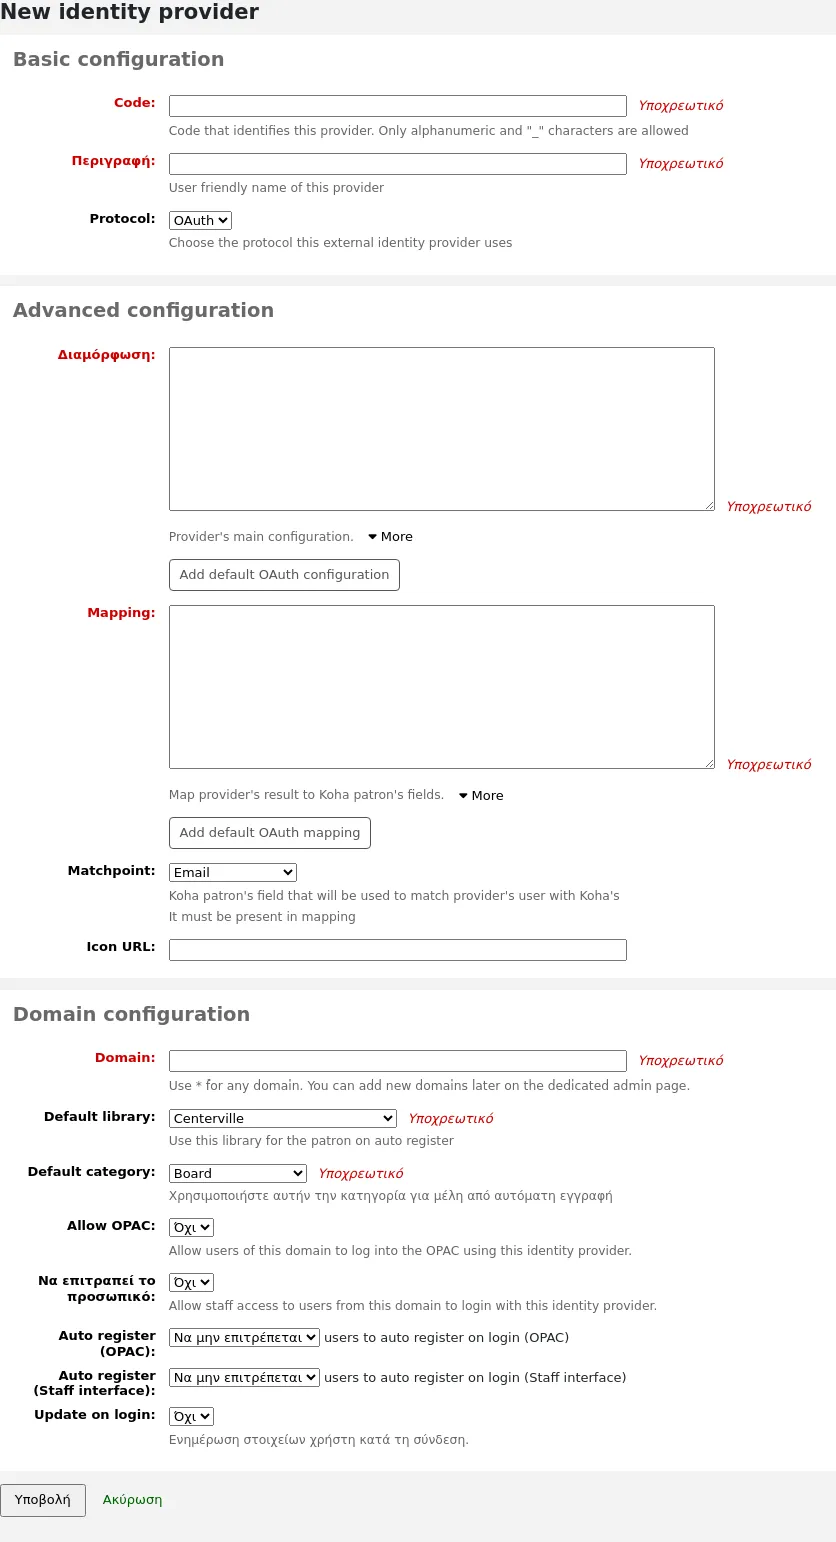
Βασική παραμετροποίηση
Κωδικός: εισαγάγετε έναν κωδικό για αυτόν τον πάροχο.
Σημείωση
Ο κωδικός για τον πάροχο ταυτότητας περιορίζεται σε 20 χαρακτήρες και μπορεί να αποτελείται μόνο από γράμματα, αριθμούς και υπογράμμιση (_).
Περιγραφή: εισαγάγετε ένα όνομα για αυτόν τον πάροχο. Θα είναι αυτό που θα βλέπετε στο διαχειριστικό περιβάλλον.
Πρωτόκολλο: επιλέξτε ποιο πρωτόκολλο χρησιμοποιεί αυτός ο πάροχος ταυτότητας.
OAuth
OIDC
Σύνθετες παραμετροποιήσεις
Παραμετροποίηση: Χρησιμοποιήστε αυτό το πεδίο για να εισαγάγετε τη διαμόρφωση που αφορά το πρωτόκολλο που επιλέχθηκε παραπάνω.
Μπορείτε να επιλέξετε το κουμπί «Προσθήκη προεπιλεγμένων ρυθμίσεων OAuth» ή το κουμπί «Προσθήκη προεπιλεγμένων ρυθμίσεων OIDC» για να προσυμπληρώσετε το πεδίο με ορισμένες προεπιλεγμένες τιμές, τις οποίες μπορείτε να αλλάξετε με τις δικές σας τιμές.
Η προεπιλεγμένη παραμετροποίηση OAuth είναι:
{
 "key": "<enter client id>",
 "secret": "<enter client secret>",
 "authorize_url": "<enter authorization endpoint>",
 "token_url": "<enter token endpoint>",
 "userinfo_url": "<enter user info endpoint (optional)>",
 "scope": "email"
}
Η προεπιλεγμένη παραμετροποίηση OIDC είναι:
{
 "key": "<enter client id>",
 "secret": "<enter client secret>",
 "well_known_url": "<enter openid configuration endpoint>",
 "scope": "openid email"
}
Αντιστοίχιση: Χρησιμοποιήστε αυτό το πεδίο για να ορίσετε τις αντιστοιχίσεις πεδίων από την εξωτερική βάση δεδομένων με τα πεδία υποδοχής του Koha.
Το κλειδί είναι το πεδίο Koha από τον πίνακα «Υποδοχείς» και η τιμή είναι το εξωτερικό πεδίο.
Σημείωση
You can find all fields for the borrowers table in the database structure.
Μπορείτε να επιλέξετε το κουμπί «Προσθήκη προεπιλεγμένης αντιστοίχισης OAuth» ή το κουμπί «Προσθήκη προεπιλεγμένης αντιστοίχισης OIDC» για να προσυμπληρώσετε το πεδίο με ορισμένες προεπιλεγμένες τιμές, τις οποίες μπορείτε να αλλάξετε με τις δικές σας τιμές.
Τόσο η προεπιλεγμένη αντιστοίχιση OAuth όσο και η προεπιλεγμένη αντιστοίχιση OIDC είναι:
{
 "email": "email",
 "firstname": "given_name",
 "surname": "family_name"
}
Εάν τα εξωτερικά πεδία είναι ενσωματωμένα, μπορείτε να χρησιμοποιήσετε περιόδους για να διαχωρίσετε τα επίπεδα.
Για παράδειγμα, αν το όνομα είναι ένθετο ως εξής:
<user>
   <given_name>First name</given_name>
   <family_name>Family name</family_name>
   <email>Email address</email>
</user>
Χρήση:
"firstname": "user.0.given_name"
Αυτό θα φέρει το πεδίο «given_name» στο πρώτο πεδίο «user» (0 = πρώτο).
Σημαντικό
Αν σκοπεύετε να χρησιμοποιήσετε τη λειτουργία αυτόματης καταχώρησης (βλ. παρακάτω), βεβαιωθείτε ότι είτε το «userid» είτε το «cardnumber» είναι διαθέσιμα στις αντιστοιχίσεις.
Σημαντικό
Βεβαιωθείτε ότι το πεδίο για το σημείο ταυτοποίησης (βλ. παρακάτω) περιλαμβάνεται στις αντιστοιχίσεις.
Σημείο ταυτοποίησης: επιλέξτε ποιο πεδίο χρησιμοποιείται για την ταυτοποίηση των εισερχόμενων χρηστών με τους υπάρχοντες χρήστες.
Σημείωση
Το πεδίο που επιλέγεται εδώ πρέπει να περιλαμβάνεται στις αντιστοιχίσεις (βλέπε παραπάνω).
Διεύθυνση URL εικονιδίου: αν θέλετε να εμφανίζεται ένα εικονίδιο στην οθόνη σύνδεσης για αυτόν τον πάροχο, εισαγάγετε εδώ τη διεύθυνση URL του αρχείου εικόνας.
Ρύθμιση ονόματος τομέα (domain)
Σημείωση
Εισαγάγετε τουλάχιστον ένα όνομα τομέα (domain) για αυτόν τον πάροχο. Μόλις αποθηκευτεί, θα μπορείτε να προσθέσετε περισσότερα add more domains to this provider.
Όνομα τομέα: εισαγάγετε τον τομέα (domain) του ηλεκτρονικού ταχυδρομείου για τους εισερχόμενους χρήστες.
Σημείωση
Εισαγάγετε έναν αστερίσκο (*) για να συμπεριλάβετε όλους τα ονόματα τομέων (domains).
Προεπιλεγμένη βιβλιοθήκη: αν η αυτόματη καταχώριση είναι ενεργοποιημένη, επιλέξτε σε ποια βιβλιοθήκη library θα καταχωρούνται οι νέοι χρήστες.
Προεπιλεγμένη κατηγορία: αν η αυτόματη καταχώριση είναι ενεργοποιημένη, επιλέξτε ποια κατηγορία μέλους patron category θα καταχωρηθεί στους νέους χρήστες.
Σύνδεση OPAC: επιλέξτε αν τα μέλη αυτού του τομέα (domain) μπορούν να συνδεθούν στον OPAC με τα στοιχεία σύνδεσής τους από αυτόν τον πάροχο ταυτότητας.
Σύνδεση προσωπικού: επιλέξτε αν τα μέλη του προσωπικού αυτού του τομέα μπορούν να συνδεθούν στο διαχειριστικό περιβάλλον με τα στοιχεία σύνδεσής τους από αυτόν τον πάροχο ταυτότητας.
Αυτόματη σύνδεση: επιλέξτε αν θα δημιουργηθεί ή όχι ένας νέος λογαριασμός μέλους στο Koha όταν ένας χρήστης από αυτόν τον τομέα (domain) συνδεθεί για πρώτη φορά με τα στοιχεία σύνδεσής του από αυτόν τον πάροχο ταυτότητας.
Σημείωση
Εάν είναι ενεργοποιημένη η αυτόματη σύνδεση, βεβαιωθείτε ότι τα πεδία «userid» ή «cardnumber» περιλαμβάνονται στις αντιστοιχίσεις (βλ. παραπάνω).
Βεβαιωθείτε επίσης ότι η προεπιλεγμένη βιβλιοθήκη και η προεπιλεγμένη κατηγορία έχουν οριστεί σωστά για τα νέα μέλη. Αυτά θα αποδοθούν στα νέα μέλη.
Ενημέρωση κατά την είσοδο: επιλέξτε εάν ο λογαριασμός του μέλους στο Koha θα επικαιροποιείται ή όχι με τις εξωτερικές πληροφορίες όταν ένας χρήστης από αυτόν τον τομέα (domain) συνδέεται με τα στοιχεία σύνδεσής του από αυτόν τον πάροχο ταυτότητας.
Προειδοποίηση
Οι πληροφορίες ενδέχεται να χαθούν εάν τις αλλάξετε απευθείας στο Koha.
Μόλις συμπληρώσετε τη φόρμα, επιλέξτε το κουμπί «Υποβολή» για να αποθηκεύσετε τον πάροχο νέας ταυτότητας.
Θα χρειαστεί να επανεκκινήσετε το Koha μόλις προστεθεί ο πάροχος ταυτότητας.
Προσθήκη τομέα (domain) ηλεκτρονικού ταχυδρομείου σε υπάρχοντα πάροχο ταυτότητας
Θα χρειαστεί να προσθέσετε τουλάχιστον έναν τομέα (domain) ηλεκτρονικού ταχυδρομείου όταν δημιουργείτε έναν πάροχο νέας ταυτότητας creating a new identity provider. Μπορείτε να προσθέσετε περισσότερους επιλέγοντας τη «Διαχείριση τομέων» στα δεξιά του παρόχου ταυτότητας από την κύρια σελίδα παρόχων ταυτότητας και επιλέγοντας «Νέος τομέας ηλεκτρονικού ταχυδρομείου».
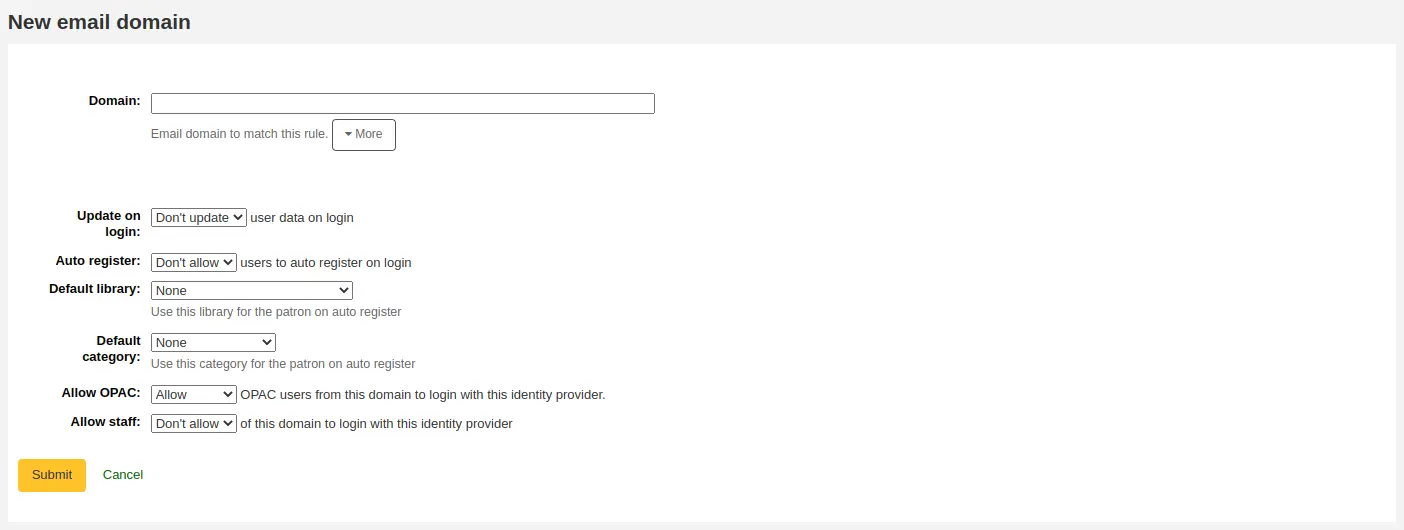
Όνομα τομέα: εισαγάγετε τον τομέα (domain) του ηλεκτρονικού ταχυδρομείου για τους εισερχόμενους χρήστες.
Σημείωση
Εισαγάγετε έναν αστερίσκο (*) για να συμπεριλάβετε όλους τα ονόματα τομέων (domains).
Ενημέρωση κατά την είσοδο: επιλέξτε εάν ο λογαριασμός του μέλους στο Koha θα επικαιροποιείται ή όχι με τις εξωτερικές πληροφορίες όταν ένας χρήστης από αυτόν τον τομέα (domain) συνδέεται με τα στοιχεία σύνδεσής του από αυτόν τον πάροχο ταυτότητας.
Προειδοποίηση
Οι πληροφορίες ενδέχεται να χαθούν εάν τις αλλάξετε απευθείας στο Koha.
Αυτόματη σύνδεση: επιλέξτε αν θα δημιουργηθεί ή όχι ένας νέος λογαριασμός μέλους στο Koha όταν ένας χρήστης από αυτόν τον τομέα (domain) συνδεθεί για πρώτη φορά με τα στοιχεία σύνδεσής του από αυτόν τον πάροχο ταυτότητας.
Σημείωση
Εάν είναι ενεργοποιημένη η αυτόματη καταχώριση, βεβαιωθείτε ότι τα πεδία «userid» ή «cardnumber» περιλαμβάνονται στις αντιστοιχίσεις του παρόχου ταυτότητας identity provider.
Βεβαιωθείτε επίσης ότι η προεπιλεγμένη βιβλιοθήκη και η προεπιλεγμένη κατηγορία έχουν οριστεί σωστά για τα νέα μέλη. Αυτά θα αποδοθούν στα νέα μέλη.
Προεπιλεγμένη βιβλιοθήκη: αν η αυτόματη καταχώριση είναι ενεργοποιημένη, επιλέξτε σε ποια βιβλιοθήκη library θα καταχωρούνται οι νέοι χρήστες.
Προεπιλεγμένη κατηγορία: αν η αυτόματη καταχώριση είναι ενεργοποιημένη, επιλέξτε ποια κατηγορία μέλους patron category θα καταχωρηθεί στους νέους χρήστες.
Σύνδεση OPAC: επιλέξτε αν τα μέλη αυτού του τομέα (domain) μπορούν να συνδεθούν στον OPAC με τα στοιχεία σύνδεσής τους από αυτόν τον πάροχο ταυτότητας.
Σύνδεση προσωπικού: επιλέξτε αν τα μέλη του προσωπικού αυτού του τομέα μπορούν να συνδεθούν στο διαχειριστικό περιβάλλον με τα στοιχεία σύνδεσής τους από αυτόν τον πάροχο ταυτότητας.
Μόλις συμπληρώσετε τη φόρμα, επιλέξτε την «Υποβολή» για να αποθηκεύσετε το νέο τομέα (domain) ηλεκτρονικού ταχυδρομείου.
Διακομιστές Z39.50/SRU
Το Z39.50 είναι ένα πρωτόκολλο πελάτη/εξυπηρετητή για την αναζήτηση και ανάκτηση πληροφοριών από απομακρυσμένες βάσεις δεδομένων υπολογιστών. Εν ολίγοις, είναι ένα εργαλείο που χρησιμοποιείται για καταλογογράφηση διά της αντιγραφής.
Το SRU (Search/Retrieve via URL) είναι ένα πρότυπο πρωτόκολλο βασισμένο σε XML για ερωτήματα αναζήτησης, που χρησιμοποιεί την CQL (Contextual Query Language), μια τυποποιημένη σύνταξη για την υποβολή ερωτημάτων.
Χρησιμοποιώντας το Koha μπορείτε να συνδεθείτε σε οποιονδήποτε διαθέσιμο στο κοινό στόχο Z39.50 ή SRU ή έχετε τις πληροφορίες σύνδεσης για να αντιγράψετε βιβλιογραφικές εγγραφές ή εγγραφές καθιερωμένων όρων από την πηγή αυτή.
Πηγαίνετε εκεί: Περισσότερα > Διαχείριση > Πρόσθετες παράμετροι > Διακομιστές Z39.50/SRU
Σημείωση
Μόνο το προσωπικό με το δικαίωμα manage_search_targets permission (ή το δικαίωμα superlibrarian permission) θα έχει πρόσβαση σε αυτό το τμήμα.
Το Koha έρχεται με μια προεπιλεγμένη λίστα στόχων Z39.50/SRU, στην οποία μπορείτε να προσθέσετε, να επεξεργαστείτε ή να διαγράψετε επιλογές σας.
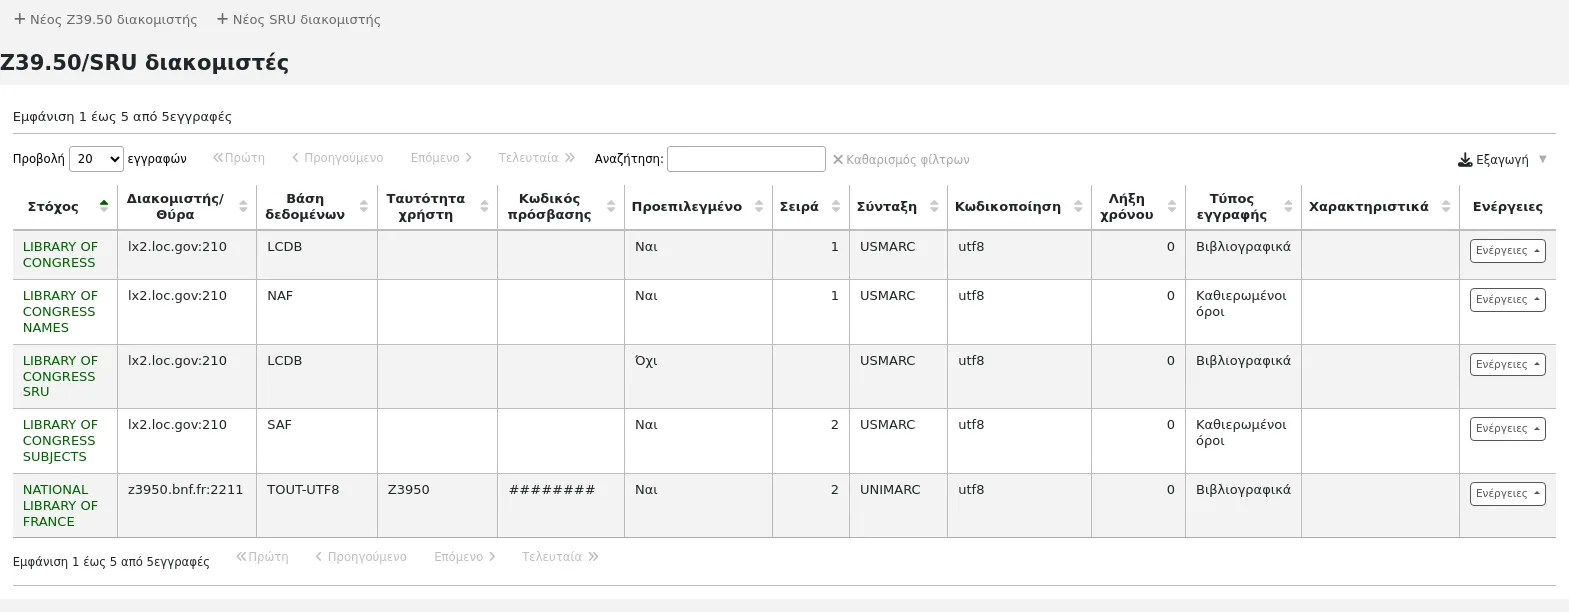
Προσθήκη προορισμού Z39.50
To find additional Z39.50 targets, you can use Index Data’s IRSpy https://irspy.indexdata.com or the Library of Congress’s list of targets https://www.loc.gov/z3950/. You can also contact individual libraries and ask for their Z39.50 information.
Από την κύρια σελίδα Z39.50, επιλέξτε «Νέος διακομιστής Z39.50».
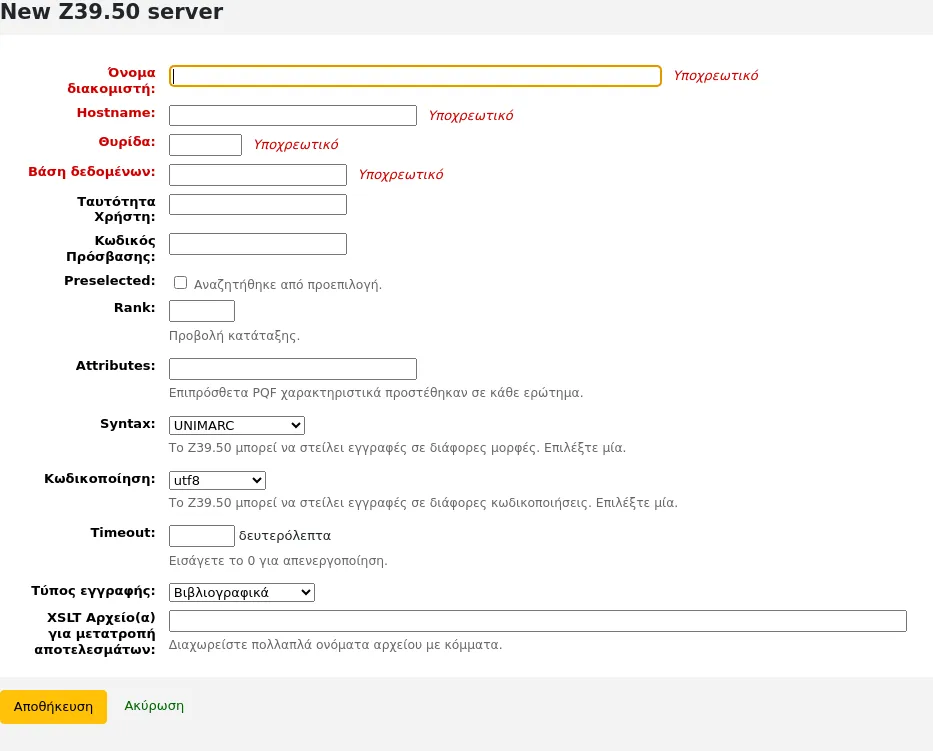
Όνομα διακομιστή: εισαγάγετε ένα όνομα που θα σας βοηθήσει να αναγνωρίσετε την πηγή (όπως το όνομα της βιβλιοθήκης). Θα αποθηκευτεί με κεφαλαία γράμματα.
Όνομα κεντρικού υπολογιστή: εισαγάγετε τη διεύθυνση του προορισμού Z39.50.
Θύρα: εισαγάγετε τον αριθμό θύρας που θα χρησιμοποιείται για την εμφάνιση αποτελεσμάτων από αυτόν τον προορισμό.
Βάση δεδομένων: πληκτρολογήστε το όνομα της βάσης δεδομένων.
Userid: ορισμένοι διακομιστές ενδέχεται να προστατεύονται με κωδικό πρόσβασης. Αν αυτό ισχύει για τον διακομιστή που προσπαθείτε να προσθέσετε, πληκτρολογήστε το αναγνωριστικό του χρήστη για την πηγή αυτή.
Κωδικός πρόσβασης: εάν ο διακομιστής προστατεύεται με κωδικό πρόσβασης, πληκτρολογήστε τον κωδικό πρόσβασης για τη συγκεκριμένη πηγή.
Προεπιλεγμένος: επιλέξτε αυτό το πλαίσιο εάν θέλετε αυτός ο προορισμός να είναι πάντα προεπιλεγμένος.
Κατάταξη: εισαγάγετε έναν αριθμό που αντιπροσωπεύει τη θέση στη λίστα που θέλετε να εμφανίζεται αυτός ο προορισμός. Το 0 είναι η πρώτη θέση, στη συνέχεια το 1, το 2, κ.λπ.
Εάν αυτό το πεδίο παραμείνει κενό, οι προορισμοί θα είναι με αλφαβητική σειρά.
Χαρακτηριστικά: εισαγάγετε τα χαρακτηριστικά PQF που θα προστεθούν σε όλα τα ερωτήματα.
Σύνταξη: επιλέξτε τη μορφή MARC που χρησιμοποιείται από αυτόν τον προορισμό.
Κωδικοποίηση: επιλέξτε την κωδικοποίηση χαρακτήρων που χρησιμοποιείται από αυτόν τον προορισμό.
Σημείωση
Εάν παρατηρήσετε ότι οι ειδικοί χαρακτήρες δεν εμφανίζονται σωστά κατά την εισαγωγή εγγραφών μέσω Z39.50, αυτό σημαίνει ότι η κωδικοποίηση είναι λανθασμένη. Αλλάξτε την σε άλλη και δοκιμάστε ξανά την εισαγωγή.
Χρονικό όριο: εισαγάγετε έναν αριθμό δευτερολέπτων μετά τον οποίο θα σταματήσει η προσπάθεια αναζήτησης του προορισμού, εάν δεν βρεθούν αποτελέσματα σε εύλογο χρονικό διάστημα. Είναι χρήσιμο για στόχους που χρειάζονται πολύ χρόνο.
Τύπος εγγραφής: επιλέξτε αν πρόκειται για προορισμό με βιβλιογραφικές εγγραφές ή για προορισμό με καθιερωμένους όρους.
Αρχείο(α) XSLT για το μετασχηματισμό των αποτελεσμάτων: εισαγάγετε ένα ή περισσότερα (διαχωρισμένα με κόμμα) ονόματα αρχείων XSLT που θέλετε να χρησιμοποιηθούν στα αποτελέσματα της αναζήτησης.
Κατά την ανάκτηση εγγραφών από εξωτερικούς προορισμούς μπορεί να επιθυμείτε να αυτοματοποιήσετε ορισμένες αλλαγές στις εν λόγω εγγραφές. Το XSLT σας επιτρέπει να το κάνετε αυτό. Το Koha συνοδεύεται από μερικά δείγματα αρχείων XSLT στον κατάλογο /koha-tmpl/intranet-tmpl/prog/en/xslt/ έτοιμα για χρήση:
Del952.xsl: Αφαίρεση αντιτύπων Koha (πεδίο 952) (MARC21)
Del995.xsl: Αφαίρεση αντιτύπων Koha (πεδίο 995) (UNIMARC)
Del9LinksExcept952.xsl: Αφαίρεση των συνδέσμων με τις καθιερώσεις στις βιβλιογραφικές εγγραφές ($9), εκτός από την περίπτωση 952$9 (itemnumber) (MARC21)
Del9LinksExcept995.xsl: Αφαίρεση των συνδέσμων με τις καθιερώσεις σε βιβλιογραφικές εγγραφές ($9), εκτός από την περίπτωση 995$9 (itemnumber) (UNIMARC)
Επιλέξτε «Αποθήκευση».
Προτεινόμενοι βιβλιογραφικοί προορισμοί Z39.50
Οι βιβλιοθήκες στο Koha με ανοικτούς προορισμούς Z39.50 μπορούν να κοινοποιήσουν και να βρουν πληροφορίες σύνδεσης στο wiki του Koha: http://wiki.koha-community.org/wiki/Koha_Open_Z39.50_Sources.
Οι γνωστοί δημόσια διαθέσιμοι προορισμοί παρατίθενται στο Koha wiki στη διεύθυνση https://wiki.koha-community.org/wiki/Configure_Z39.50/SRU_targets.
Μπορείτε επίσης να βρείτε ανοιχτούς προορισμούς Z39.50 που αναφέρονται στον ιστότοπο IRSpy στη διεύθυνση https://irspy.indexdata.com/.
Αυτοί οι προορισμοί είναι γνωστό ότι λειτουργούν:
LIBRARY OF CONGRESS
- Όνομα διακομιστή:
LIBRARY OF CONGRESS
- Όνομα κεντρικού υπολογιστή:
lx2.loc.gov
- Πύλη:
210
- Βάση δεδομένων:
LCDB
- Προεπιλογή:
επιλέξτε για αναζήτηση από προεπιλογή
- Κατάταξη:
εισαγάγετε μια τιμή για τη σειρά εμφάνισης, για παράδειγμα 1
- Σύνταξη:
MARC21/USMARC
- Κωδικοποίηση:
utf8
- Διάλειμμα:
0
- Τύπος εγγραφής:
Βιβλιογραφική
OHIOLINK
- Όνομα διακομιστή:
OHIOLINK
- Όνομα κεντρικού υπολογιστή:
olc1.ohiolink.edu
- Πύλη:
210
- Βάση δεδομένων:
INNOPAC
- Προεπιλογή:
επιλέξτε για αναζήτηση από προεπιλογή
- Κατάταξη:
εισαγάγετε μια τιμή για τη σειρά εμφάνισης, για παράδειγμα 1
- Σύνταξη:
MARC21/USMARC
- Κωδικοποίηση:
utf8
- Διάλειμμα:
0
- Τύπος εγγραφής:
Βιβλιογραφική
Προσθήκη προορισμού SRU
Από την κύρια σελίδα Z39.50/SRU, επιλέξτε «Νέος διακομιστής SRU»
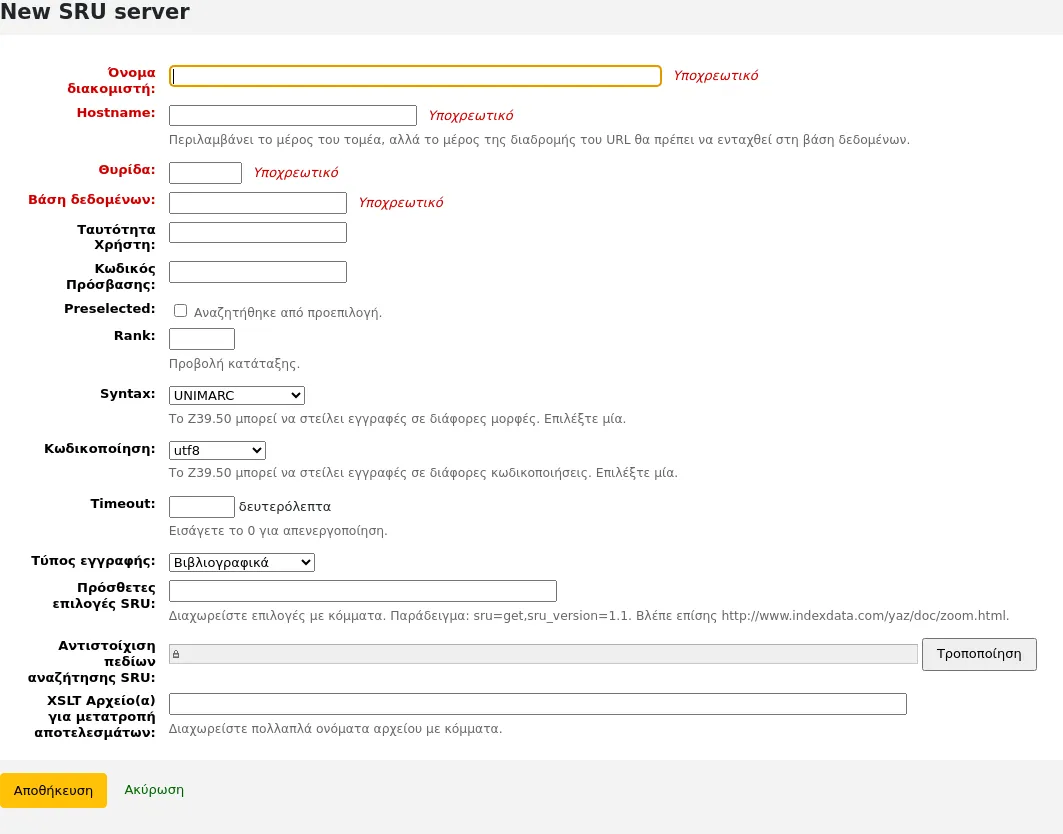
Όνομα διακομιστή: εισαγάγετε ένα όνομα που θα σας βοηθήσει να αναγνωρίσετε την πηγή (όπως το όνομα της βιβλιοθήκης).
Όνομα κεντρικού υπολογιστή: εισαγάγετε τη διεύθυνση (URL) του προορισμού SRU.
Θύρα: εισαγάγετε τον αριθμό θύρας που θα χρησιμοποιείται για την εμφάνιση αποτελεσμάτων από αυτόν τον προορισμό.
Βάση δεδομένων: πληκτρολογήστε το όνομα της βάσης δεδομένων.
Userid: ορισμένοι διακομιστές ενδέχεται να προστατεύονται με κωδικό πρόσβασης. Αν αυτό ισχύει για τον διακομιστή που προσπαθείτε να προσθέσετε, πληκτρολογήστε το αναγνωριστικό του χρήστη για την πηγή αυτή.
Κωδικός πρόσβασης: εάν ο διακομιστής προστατεύεται με κωδικό πρόσβασης, πληκτρολογήστε τον κωδικό πρόσβασης για τη συγκεκριμένη πηγή.
Προεπιλεγμένος: επιλέξτε αυτό το πλαίσιο εάν θέλετε αυτός ο προορισμός να είναι πάντα προεπιλεγμένος.
Κατάταξη: εισαγάγετε έναν αριθμό που αντιπροσωπεύει τη θέση στη λίστα που θέλετε να εμφανίζεται αυτός ο προορισμός. Το 0 είναι η πρώτη θέση, στη συνέχεια το 1, το 2, κ.λπ.
Εάν αυτό το πεδίο παραμείνει κενό, οι προορισμοί θα είναι με αλφαβητική σειρά.
Σύνταξη: επιλέξτε τη μορφή MARC που χρησιμοποιείται από αυτόν τον προορισμό.
Κωδικοποίηση: επιλέξτε την κωδικοποίηση χαρακτήρων που χρησιμοποιείται από αυτόν τον προορισμό.
Σημείωση
Εάν παρατηρήσετε ότι οι ειδικοί χαρακτήρες δεν εμφανίζονται σωστά κατά την εισαγωγή εγγραφών μέσω Z39.50, αυτό σημαίνει ότι η κωδικοποίηση είναι λανθασμένη. Αλλάξτε την σε άλλη και δοκιμάστε ξανά την εισαγωγή.
Χρονικό όριο: εισαγάγετε έναν αριθμό δευτερολέπτων μετά τον οποίο θα σταματήσει η προσπάθεια αναζήτησης του προορισμού, εάν δεν βρεθούν αποτελέσματα σε εύλογο χρονικό διάστημα. Είναι χρήσιμο για στόχους που χρειάζονται πολύ χρόνο.
Τύπος εγγραφής: επιλέξτε αν πρόκειται για προορισμό με βιβλιογραφικές εγγραφές ή για προορισμό με καθιερωμένους όρους.
Πρόσθετες επιλογές SRU: εισαγάγετε εδώ πρόσθετες επιλογές του εξωτερικού διακομιστή, όπως
sru_version=1.1ήschema=marc21, κ.λπ. Σημειώστε ότι αυτές οι επιλογές εξαρτώνται από τον διακομιστή.Αντιστοίχιση πεδίων αναζήτησης SRU: επιλέξτε την «Τροποποίηση» για να προσθέσετε ή να αναπροσαρμόσετε την αντιστοίχιση από τα διαθέσιμα πεδία της φόρμας αναζήτησης Koha στα συγκεκριμένα ονόματα ευρετηρίων που εξαρτώνται από τον διακομιστή.
Για να βελτιώσετε περαιτέρω τις αναζητήσεις σας, μπορείτε να προσθέσετε τα ακόλουθα ονόματα ευρετηρίων στις αντιστοιχίσεις πεδίων αναζήτησης SRU. Για να το κάνετε αυτό, επεξεργαστείτε το διακομιστή και επιλέξτε την «Τροποποίηση» δίπλα σε αυτό το πεδίο.
Τίτλος
dc.title
ISBN
bath.isbn
Οπουδήποτε
cql.anywhere
Συγγραφέας
dc.author
ISSN
bath.issn
Θέμα
dc.subject
Τυπικό αναγνωριστικό
bath.standardIdentifier
Πίνακας: αντιστοίχιση SRU
Αρχείο(α) XSLT για το μετασχηματισμό των αποτελεσμάτων: εισαγάγετε ένα ή περισσότερα (διαχωρισμένα με κόμμα) ονόματα αρχείων XSLT που θέλετε να χρησιμοποιηθούν στα αποτελέσματα της αναζήτησης.
Κατά την ανάκτηση εγγραφών από εξωτερικούς προορισμούς μπορεί να επιθυμείτε να αυτοματοποιήσετε ορισμένες αλλαγές στις εν λόγω εγγραφές. Το XSLT σας επιτρέπει να το κάνετε αυτό. Το Koha συνοδεύεται από μερικά δείγματα αρχείων XSLT στον κατάλογο /koha-tmpl/intranet-tmpl/prog/en/xslt/ έτοιμα για χρήση:
Del952.xsl: Αφαίρεση αντιτύπων Koha (πεδίο 952) (MARC21)
Del995.xsl: Αφαίρεση αντιτύπων Koha (πεδίο 995) (UNIMARC)
Del9LinksExcept952.xsl: Αφαίρεση των συνδέσμων με τις καθιερώσεις στις βιβλιογραφικές εγγραφές ($9), εκτός από την περίπτωση 952$9 (itemnumber) (MARC21)
Del9LinksExcept995.xsl: Αφαίρεση των συνδέσμων με τις καθιερώσεις σε βιβλιογραφικές εγγραφές ($9), εκτός από την περίπτωση 995$9 (itemnumber) (UNIMARC)
Επιλέξτε «Αποθήκευση».
Διακομιστές SMTP
Πηγαίνετε εκεί: Περισσότερα > Διαχείριση > Πρόσθετες παράμετροι > Διακομιστές SMTP
Αυτή η ενότητα χρησιμοποιείται για τη διαμόρφωση διακομιστών SMTP για την αποστολή μηνυμάτων ηλεκτρονικού ταχυδρομείου μέσω του Koha.
Σημείωση
Μόνο το προσωπικό με το αντίστοιχο δικαίωμα manage_smtp_servers (ή το δικαίωμα superlibrarian) θα έχει πρόσβαση σε αυτό το τμήμα.
Η προεπιλεγμένη ρύθμιση παραμέτρων του STMP ορίζεται στο αρχείο koha-conf.xml. Αλλά αυτή η ενότητα σας επιτρέπει να προσθέσετε επιπλέον διακομιστές.
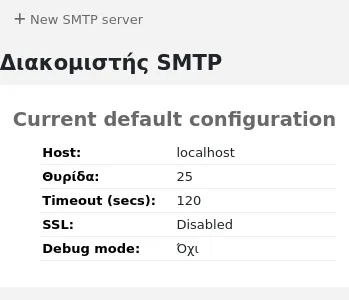
Για να προσθέσετε ένα νέο διακομιστή,
Επιλέξτε το «Νέο διακομιστή SMTP»
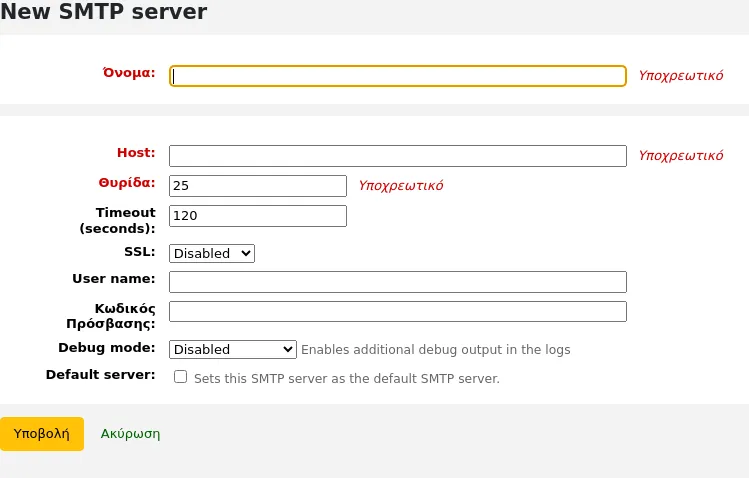
Όνομα (υποχρεωτικό): δώστε ένα χαρακτηριστικό όνομα στο διακομιστή, αυτό είναι το όνομα που θα εμφανίζεται στο Koha
Κεντρικός υπολογιστής (απαιτείται): πληκτρολογήστε το όνομα κεντρικού υπολογιστή ή τη διεύθυνση IP του διακομιστή
Θύρα (υποχρεωτικό): πληκτρολογήστε τον αριθμό θύρας που σας έδωσε ο διαχειριστής σας
Χρονικό όριο (δευτερόλεπτα): εισαγάγετε τον αριθμό των δευτερολέπτων μετά τα οποία ένα μη αποσταλμένο email θα καταλήξει σε σφάλμα
SSL: επιλέξτε το πρωτόκολλο ασφαλείας που παρέχει ο διαχειριστής σας
Απενεργοποιημένος: καμία ασφάλεια (δεν συνιστάται)
SSL
STARTTLS
Όνομα χρήστη: πληκτρολογήστε το όνομα χρήστη που σας έδωσε ο διαχειριστής σας
Κωδικός πρόσβασης: πληκτρολογήστε τον κωδικό πρόσβασης που σας έδωσε ο διαχειριστής σας
Λειτουργία εντοπισμού σφαλμάτων: επιλέξτε αν θα ενεργοποιήσετε τη λειτουργία εντοπισμού σφαλμάτων για να στείλετε πρόσθετη έξοδο στα αρχεία καταγραφής
Προεπιλεγμένος διακομιστής: επιλέξτε αν αυτός ο διακομιστής είναι ο προεπιλεγμένος που θα χρησιμοποιείται από όλες τις βιβλιοθήκες
Επιλέξτε «Υποβολή»
Αφού προστεθεί ο διακομιστής, μπορείτε να τον επιλέξετε στις ρυθμίσεις library’s details.
Μήπως εννοείτε;
Πηγαίνετε εκεί: Περισσότερα > Διαχείριση > Πρόσθετες παράμετροι > Μήπως εννοείτε;
Σημείωση
Μόνο το προσωπικό με το σχετικό δικαίωμα manage_didyoumean (ή το δικαίωμα superlibrarian) θα έχει πρόσβαση σε αυτό το τμήμα.
Το Koha μπορεί να προσφέρει επιλογές «Μήπως εννοείτε;» σε αναζητήσεις που βασίζονται σε τιμές στους καθιερωμένους όρους σας authorities.
Σημαντικό
Μήπως εννοείτε; λειτουργεί μόνο στον OPAC αυτή τη στιγμή. Οι επιλογές του εσωτερικού δικτύου είναι εδώ για μελλοντική ανάπτυξη.
Χρησιμοποιώντας αυτή τη σελίδα μπορείτε να ελέγξετε τις επιλογές που δίνει το Koha στα μέλη για τα αποτελέσματα της αναζήτησής τους.
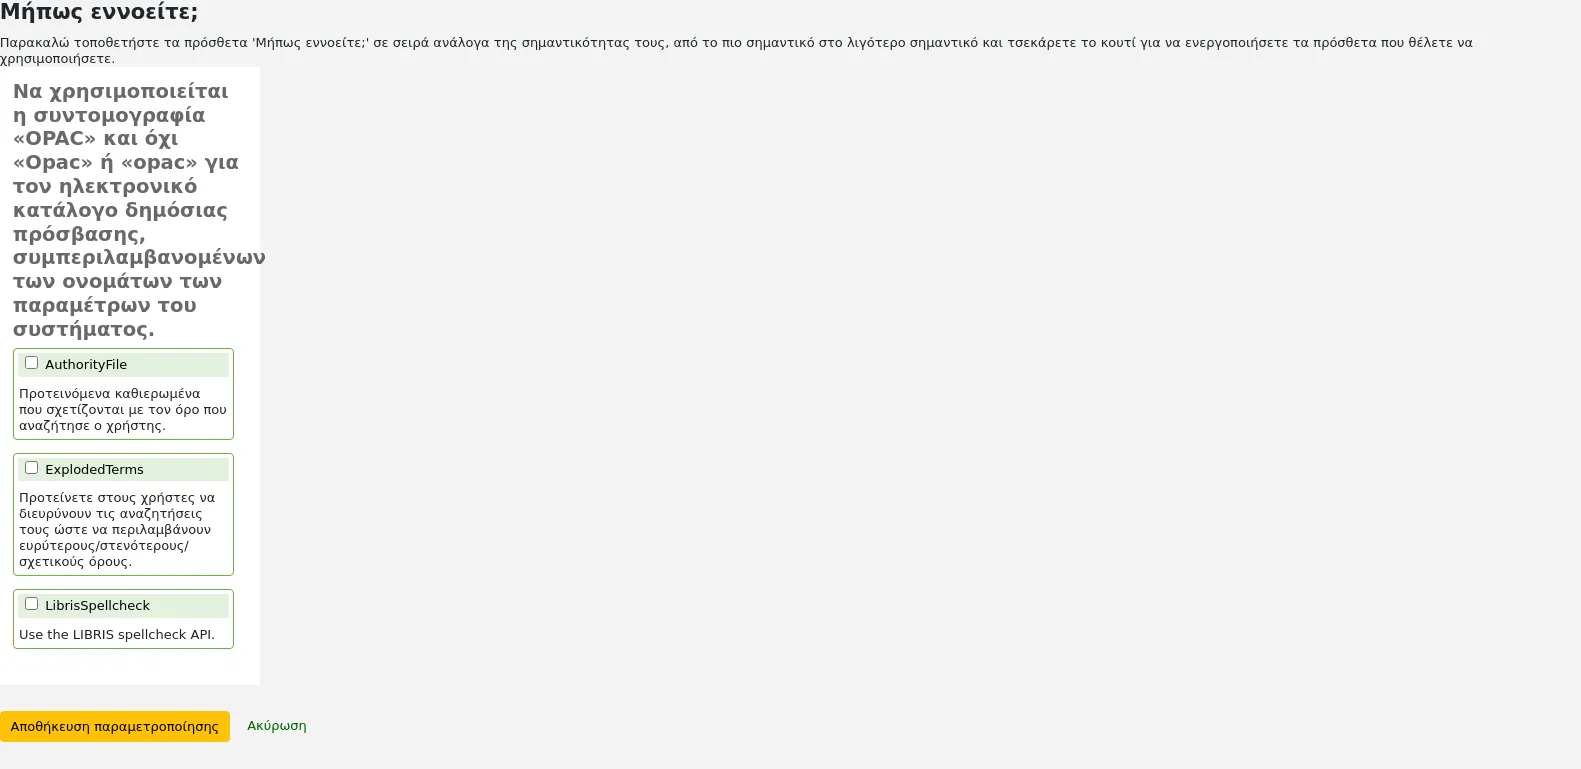
Για να ενεργοποιήσετε τη γραμμή «Μήπως εννοείτε;» στα αποτελέσματα της αναζήτησής σας, πρέπει να επιλέξετε το πλαίσιο δίπλα σε κάθε πρόσθετο που θέλετε να χρησιμοποιήσετε. Τα δύο πρόσθετα που έχετε να επιλέξετε είναι τα εξής:
Το πρόσθετο ExplodedTerms προτείνει στο χρήστη να προσπαθήσει να αναζητήσει ευρύτερους/στενότερους/σχετικούς όρους για μια δεδομένη αναζήτηση (π.χ. ένας χρήστης που αναζητά τη «Νέα Υόρκη (Πολιτεία)» θα επιλέξει τον σύνδεσμο για στενότερους όρους, αν ενδιαφέρεται επίσης για τη «Νέα Υόρκη (Πόλη)»). Αυτό έχει σημασία μόνο για βιβλιοθήκες με ιδιαίτερα ιεραρχικά δεδομένα καθιερωμένων όρων.
Το πρόσθετο AuthorityFile αναζητά το αρχείο καθιερωμένων όρων και προτείνει στο χρήστη ότι μπορεί να τον ενδιαφέρουν οι βιβλιογραφικές εγγραφές που συνδέονται με τους 5 κυριότερους καθιερωμένους όρους
Αν θέλετε ένα πρόσθετο να έχει προτεραιότητα έναντι ενός άλλου, απλά σύρετέ το πάνω από το άλλο.
Εάν επιλέξετε και τα δύο πρόσθετα, θα δείτε διάφορες επιλογές στην κορυφή των αποτελεσμάτων της αναζήτησής σας

Αν επιλέξετε μόνο το αρχείο AuthorityFile θα δείτε μόνο τις καθιερωμένες τιμές.

Ρυθμίσεις πινάκων
Αυτή η περιοχή διαχείρισης θα σας βοηθήσει να αποκρύψετε ή να εμφανίσετε στήλες σε σταθερούς πίνακες σε όλο το διαχειριστικό περιβάλλον και τον OPAC.
Πηγαίνετε εκεί: Διαχείριση > Πρόσθετες παράμετροι > Ρυθμίσεις πινάκων
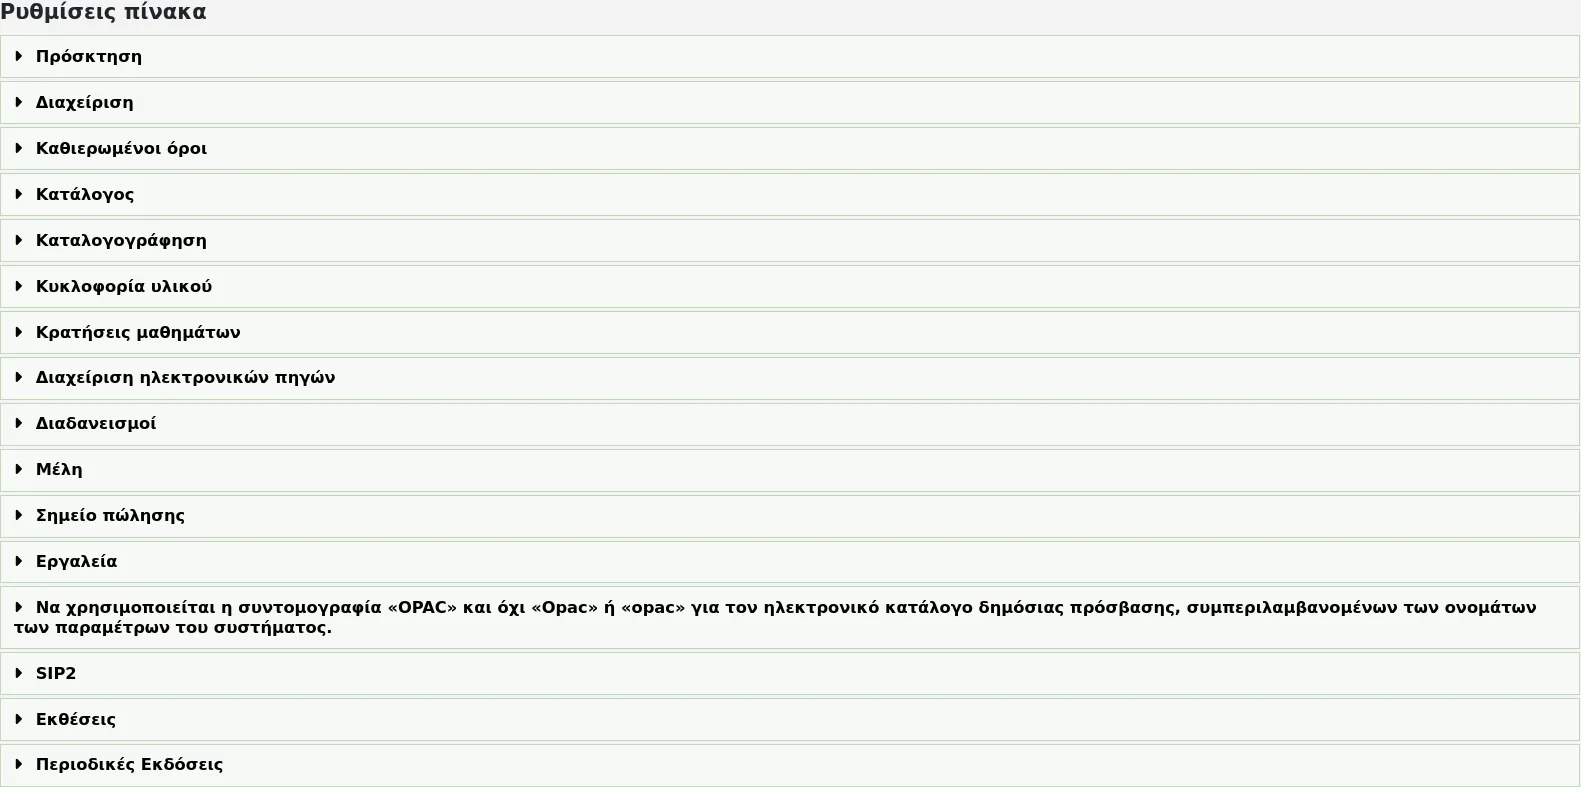
Σημείωση
Μόνο το προσωπικό με το δικαίωμα διαχείρισης των πινάκων manage_column_config (ή το δικαίωμα superlibrarian) θα έχει πρόσβαση σε αυτό το τμήμα.
Επιλέγοντας την ενότητα για την οποία θέλετε να επεξεργαστείτε τους πίνακες, θα σας εμφανιστούν οι διαθέσιμες επιλογές.
Αυτή η περιοχή σας επιτρέπει να ελέγχετε τις στήλες που εμφανίζονται στον εν λόγω πίνακα. Εάν δεν είναι κρυμμένο τίποτα, δεν θα δείτε κανένα σημάδι ελέγχου στη στήλη που «είναι κρυμμένη από προεπιλογή».
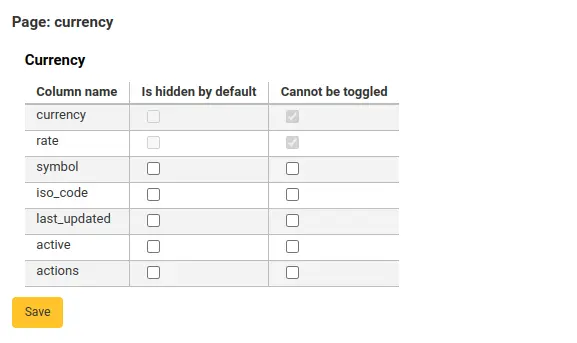
Και θα βλέπετε όλες τις στήλες κατά την εμφάνιση του πίνακα στην κανονική του σελίδα.

Εάν οι στήλες είναι κρυμμένες, θα έχουν πλαίσια ελέγχου στη στήλη που «είναι κρυμμένη από προεπιλογή».
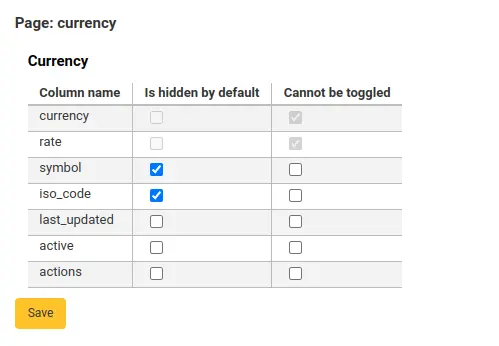
Και κρύβεται όταν βλέπετε τον πίνακα.

Η στήλη « Δεν μπορεί να ενεργοποιηθεί» χρησιμοποιείται για να εμποδίζει μεμονωμένους χρήστες να εμφανίζουν ή να αποκρύπτουν αυτή τη στήλη κατά την εμφάνιση του πίνακα.
Οι μεμονωμένοι χρήστες μπορούν να αλλάζουν τις στήλες χρησιμοποιώντας το κουμπί «Στήλες» στο επάνω μέρος του πίνακα.

Για παράδειγμα, στον πίνακα «Νομίσματα», οι στήλες «Νόμισμα» και «Τιμή» δεν μπορούν να εναλλάσσονται. Όταν ο χρήστης επιλέξει το κουμπί «Στήλες», δεν είναι σε θέση να επιλέξει αν αυτές οι δύο στήλες θα είναι κρυφές ή ορατές.
Σημειώστε ότι η χρήση του κουμπιού «Στήλες» για την εμφάνιση ή απόκρυψη στηλών θα τις αλλάξει μόνο για τον τρέχοντα χρήστη και την τρέχουσα περίοδο λειτουργίας. Μόλις ο χρήστης αποσυνδεθεί, οι στήλες θα επανέλθουν στις προεπιλεγμένες ρυθμίσεις τους, όπως αυτές έχουν οριστεί στη σελίδα διαχείρισης των ρυθμίσεων των πίνακων. Αυτό δεν θα επηρεάσει κανέναν άλλο χρήστη.
Ενότητα |
Πίνακες |
|---|---|
Προσκτήσεις |
|
Διαχείριση |
|
Καθιερώσεις |
Δεν υπάρχουν πίνακες που μπορούν να ρυθμιστούν από την ενότητα των Καθιερωμένων όρων. |
Κατάλογος |
|
Καταλογογράφηση |
|
Κυκλοφορία υλικού |
|
Βιβλιογραφίες μαθημάτων |
|
Διαχείριση ηλεκτρονικών πόρων |
|
Διαδανεισμοί |
|
Μέλη |
|
Σημείο πώλησης |
|
Εργαλεία |
|
OPAC |
|
Εκθέσεις |
|
Περιοδικές εκδόσεις |
|
Σημείωση
Τα μέλη στον OPAC δεν μπορούν να μεταβάλουν την ορατότητα των στηλών. Για τους πίνακες στον OPAC αυτή η λειτουργία επιτρέπει μόνο τον έλεγχο της ορατότητας των στηλών.
Σημείωση
Όλοι οι πίνακες με στήλες που αναφέρονται εδώ έχουν επίσης τη δυνατότητα να εξαχθούν σε Excel, σε CSV, να αντιγραφούν ή να εκτυπωθούν μέσα υπό την επικεφαλίδα του πίνακα.
Ηχητικές ειδοποιήσεις
Αν έχετε ορίσει την παράμετρο των ηχητικών ειδοποιήσεων AudioAlerts στην τιμή «Να ενεργοποιείται», θα μπορείτε να ελέγχετε τους διάφορους ήχους ειδοποίησης που χρησιμοποιεί το Koha από αυτή την ενότητα.
Πηγαίνετε εκεί: Περισσότερα > Διαχείριση > Πρόσθετες παράμετροι > Ηχητικές ειδοποιήσεις
Σημείωση
Μόνο το προσωπικό με το δικαίωμα διαχείρισης των ηχητικών ειδοποιήσεων manage_audio_alerts (ή το δικαίωμα superlibrarian) θα έχει πρόσβαση σε αυτό το τμήμα.
Σε κάθε παράθυρο διαλόγου στο Koha έχει αντιστοιχιστεί μια κατηγορία CSS που μπορεί να χρησιμοποιηθεί ως επιλογέας για έναν ήχο.
Μπορείτε να επεξεργαστείτε τις προεπιλογές επιλέγοντας την «Επεξεργασία» στα δεξιά κάθε ειδοποίησης.
Μπορείτε να αντιστοιχίσετε ειδοποιήσεις σε άλλες κατηγορίες CSS στο Koha εισάγοντας τις πληροφορίες αυτές στο πλαίσιο επιλογής. Για παράδειγμα, αν εισαγάγετε
body:contains('Check in message')
Στη συνέχεια, όταν επισκεφθείτε τη σελίδα των επιστροφών θα ακούσετε μια ειδοποίηση.
Κάθε σελίδα στο Koha έχει ένα μοναδικό αναγνωριστικό στην ετικέτα του πλαισίου, που μπορεί να χρησιμοποιηθεί για τον περιορισμό ενός ήχου σε μια συγκεκριμένη σελίδα
Οποιοσδήποτε επιλογέας αναγνωριστικού (όπου η HTML περιέχει id=«name_of_id» ) μπορεί επίσης να είναι ένα εργαλείο ενεργοποίησης όπως: #name_of_selector
Πάροχοι κινητής τηλεφωνίας με SMS
Σημαντικό
- Αυτή η επιλογή θα εμφανιστεί μόνο εάν
η παράμετρος SMSSendDriver, SMSSendMaxChar έχει οριστεί στην τιμή «Email».
Σημείωση
Μόνο το προσωπικό με το δικαίωμα διαχείρισης των παρόχων sms manage_sms_providers (ή το δικαίωμα superlibrarian) θα έχει πρόσβαση σε αυτό το τμήμα.
Σημείωση
Πολλοί πάροχοι κινητής τηλεφωνίας έχουν καταργήσει την υποστήριξη της λειτουργίας SMS::Send::Email. Δεν συνιστάται η χρήση της, εκτός αν διαθέτετε μια ειδική πύλη SMS για Email.
Από εδώ μπορείτε να εισάγετε όσους παρόχους κινητής τηλεφωνίας χρειάζεστε, για να στέλνετε ειδοποιήσεις SMS στα μέλης σας χρησιμοποιώντας το πρωτόκολλο ηλεκτρονικού ταχυδρομείου.
Μερικά παραδείγματα στις ΗΠΑ είναι:
Φορέας κινητής τηλεφωνίας |
Τομέας της πύλης SMS |
|---|---|
Alltel |
sms.alltelwireless.com |
AT&T |
txt.att.net |
Boost Mobile |
sms.myboostmobile.com |
Project Fi |
msg.fi.google.com |
Republic Wireless |
text.republicwireless.com |
Sprint |
messaging.sprintpcs.com |
T-Mobile |
tmomail.net |
U.S. Cellular |
email.uscc.net |
Verizon Wireless |
vtext.com |
Virgin Mobile |
vmobl.com |
Πίνακας: Παραδείγματα παρόχων SMS
Για να προσθέσετε νέους παρόχους, καταχωρίστε τα στοιχεία στη φόρμα και επιλέξτε την «Προσθήκη νέου» για να τα αποθηκεύσετε.
Αυτές οι επιλογές θα εμφανίζονται στο Δημόσιο Κατάλογο (OPAC) για να μπορούν να τις επιλέξουν τα μέλη στην καρτέλα των μηνυμάτων messaging tab αν έχετε ενεργοποιήσει την επιλογή EnhancedMessagingPreferences.
Επιπρόσθετα πεδία
Αυτή η ενότητα χρησιμοποιείται για την προσθήκη προσαρμοσμένων πεδίων στα καλάθια των παραγγελιών, τα τιμολόγια, τις συνδρομές περιοδικών και τις γραμμές των λογαριασμών.
Σημείωση
Μόνο το προσωπικό με το δικαίωμα διαχείρισης των επιπρόσθετων πεδίων manage_additional_fields (ή το δικαίωμα superlibrarian) θα έχει πρόσβαση σε αυτό το τμήμα.
Για να προσθέσετε ένα νέο πεδίο, επιλέξτε πρώτα σε ποιον πίνακα θέλετε να το προσθέσετε.
Προσκτήσεις
Τιμολόγια (aqinvoices): ένα πεδίο που προστίθεται στο aqinvoices θα εμφανίζεται κατά την προβολή ενός τιμολογίου στην ενότητα των Προσκτήσεων invoice in the acquisitions module.
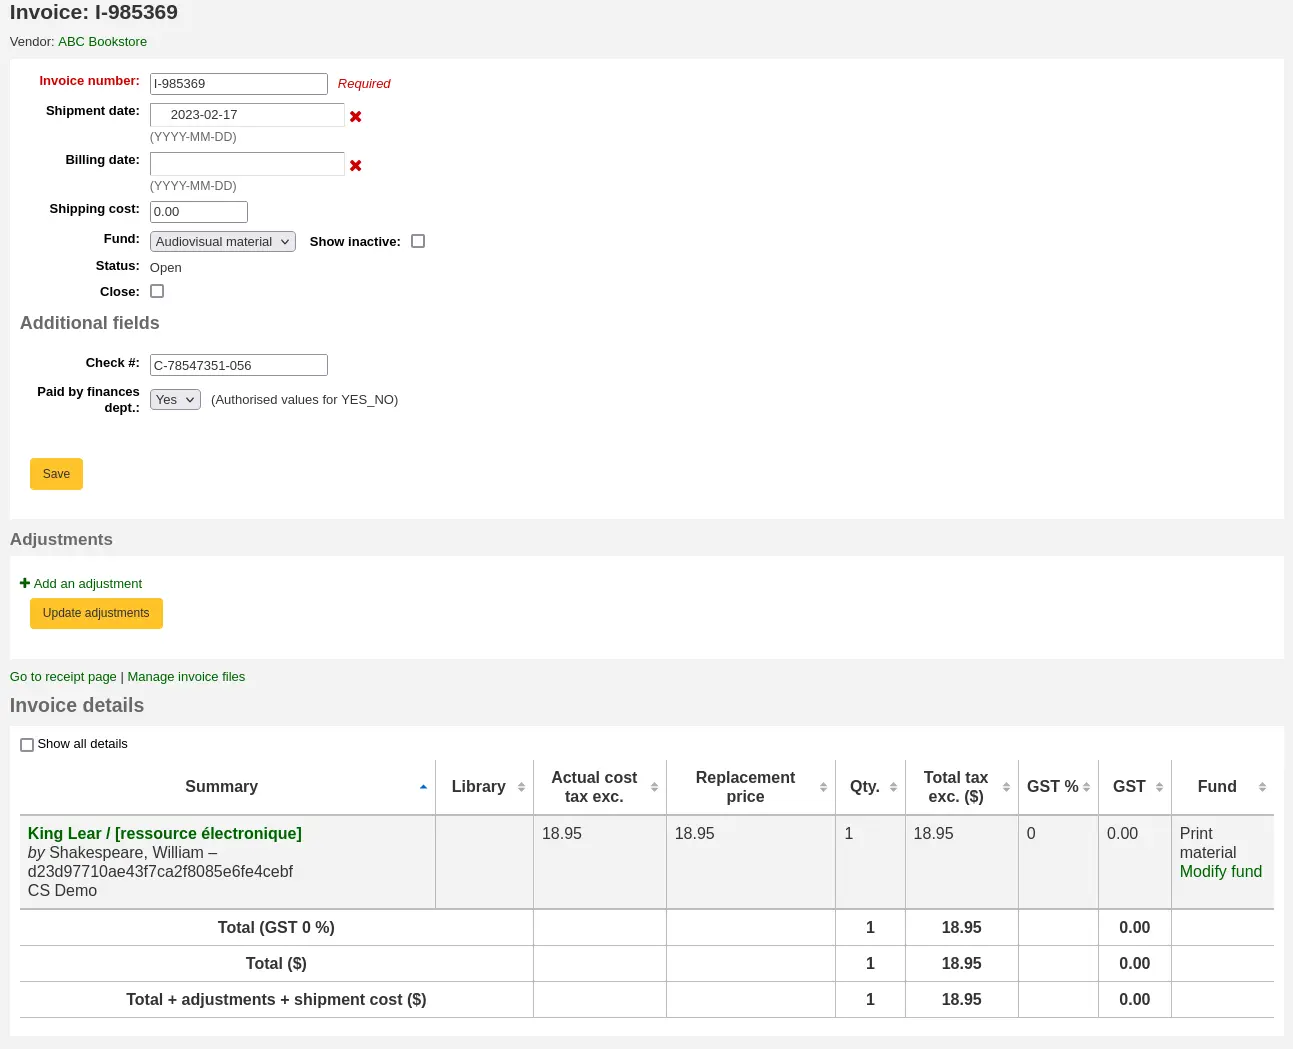
Order baskets (aqbasket): a field added to aqbasket will appear upon the creation of a new order basket or the modification of an existing order basket in the acquisitions module.
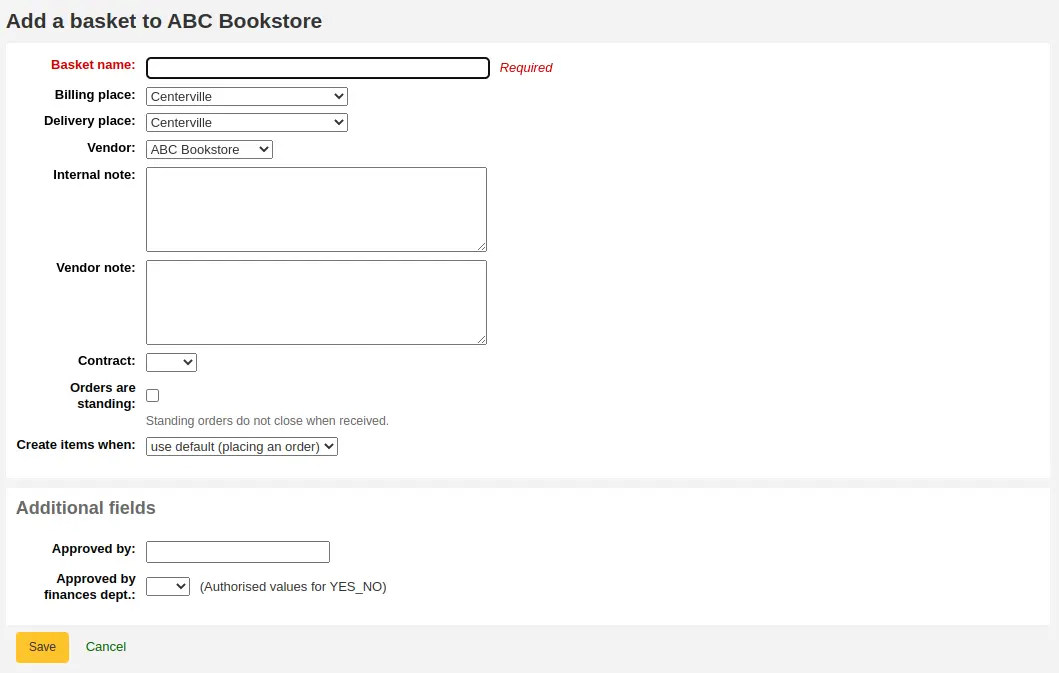
Γραμμές παραγγελιών (aqorders): ένα πεδίο που προστίθεται στο aqorders θα εμφανίζεται όταν προσθέτετε μία παραγγελία σε ένα καλάθι adding orders to a basket ή όταν επεξεργάζεστε παραγγελίες σε ανοικτά καλάθια.
Διαχείριση
Βιβλιοθήκες (παραρτήματα): ένα πεδίο που προστίθεται στα παραρτήματα θα εμφανίζεται κατά την επεξεργασία των βιβλιοθηκών editing libraries.
Έκδοση
Στην έκδοση 25.05 του Koha προστέθηκαν επιπλέον πεδία για βιβλιοθήκες.
ERM
Συμφωνίες (erm_agreements): ένα πεδίο που προστέθηκε στο erm_agreements θα εμφανιστεί κατά τη δημιουργία ή επεξεργασία συμφωνιών creating or editing agreements στην ενότητα του ERM.
Έκδοση
Στην έκδοση 24.11 του Koha προστέθηκαν επιπλέον πεδία για τις συμφωνίες του ERM.
Άδειες (erm_licenses): ένα πεδίο που προστέθηκε στο erm_licenses θα εμφανιστεί κατά τη δημιουργία ή επεξεργασία συμφωνιών creating or editing agreements στην ενότητα του ERM.
Έκδοση
Στην έκδοση 24.11 του Koha προστέθηκαν επιπλέον πεδία για τις άδειες του ERM.
Πακέτα (erm_packages): ένα πεδίο που προστέθηκε στο erm_packages θα εμφανιστεί κατά δημιουργία ή επεξεργασία πακέτων creating or editing packages στην ενότητα του ERM.
Έκδοση
Στην έκδοση 24.11 του Koha προστέθηκαν επιπλέον πεδία για τα πακέτα του ERM.
Μέλη
Γραμμές λογαριασμού (πίστωση) (accountlines:credit): ένα πεδίο που προστίθεται στις πιστώσεις των γραμμών του λογαριασμού θα εμφανίζεται όταν πληρώνονται ή διαγράφονται χρεώσεις στο λογαριασμό ενός μέλους paying or writing off charges in a patron’s account ή όταν δημιουργούνται μη αυτόματες χρεώσεις creating manual credits.
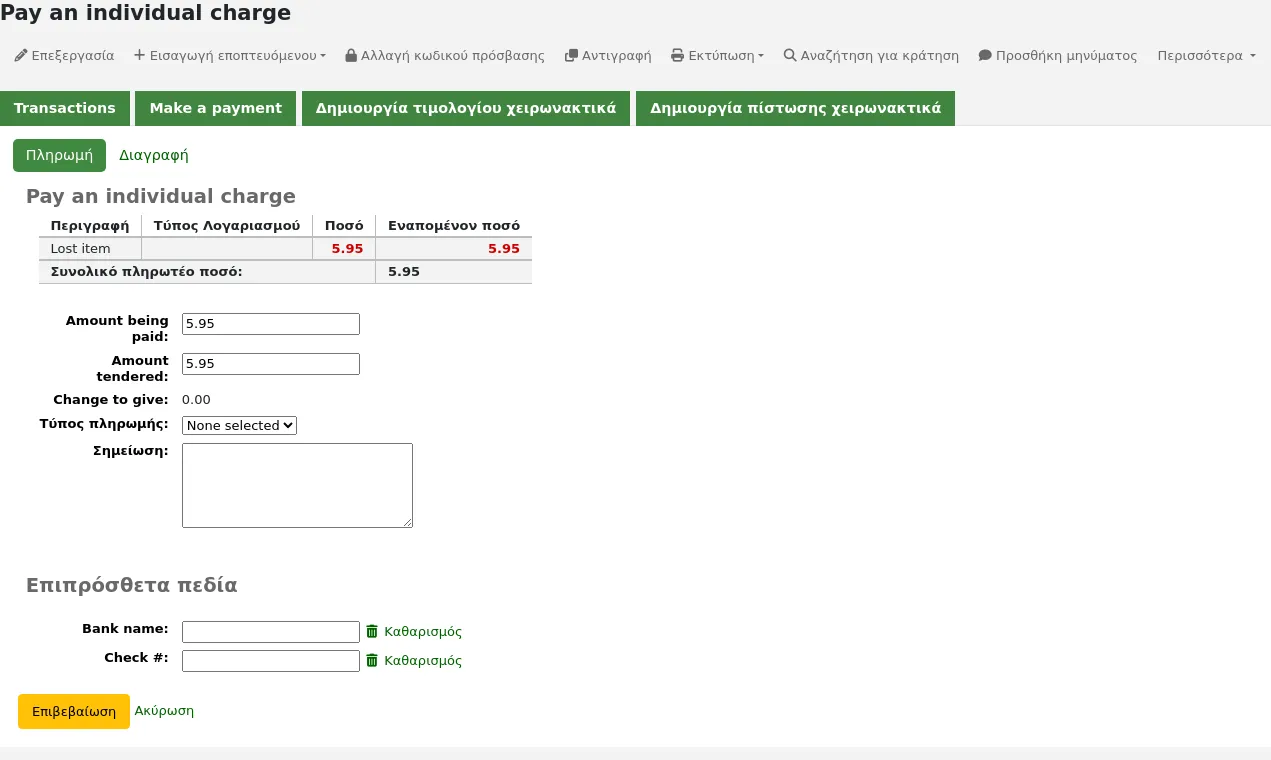
Γραμμές λογαριασμού («χρέωση») (accountlines:debit): ένα πεδίο που προστίθεται στη χρέωση της γραμμής λογαριασμού θα εμφανίζεται όταν δημιουργείται μη αυτόματα ένα τιμολόγιο creating a manual invoice
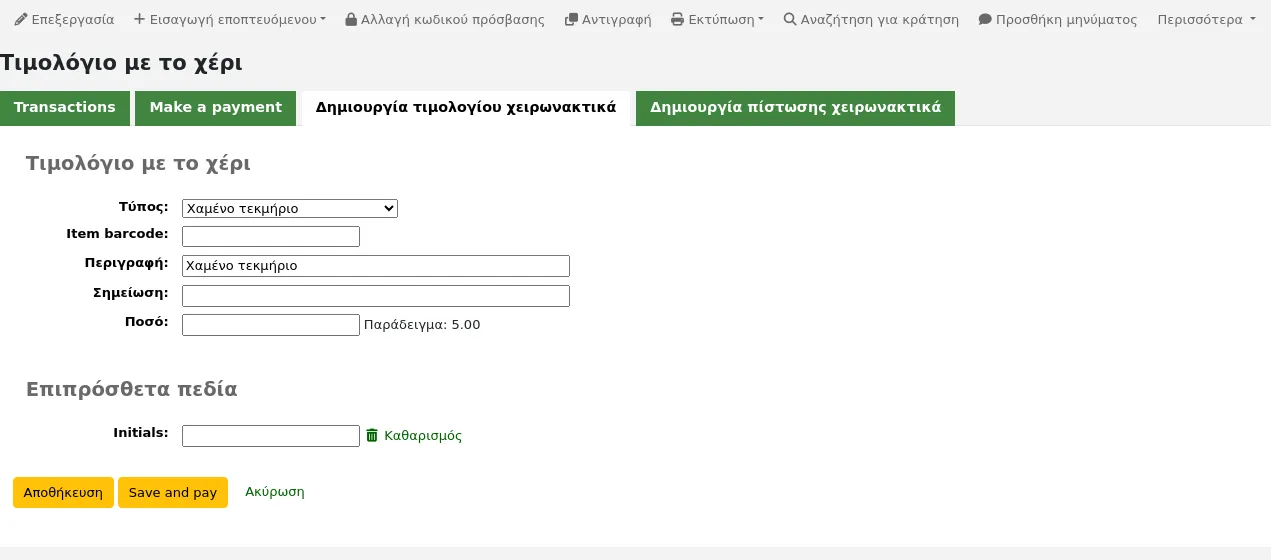
Τύποι πιστώσεων λογαριασμού (account_credit_types): ένα πεδίο που προστέθηκε στους τύπους πιστώσεων λογαριασμού θα εμφανίζεται κατά την προσθήκη ή την επεξεργασία των τύπων πιστώσεων credit types.
Έκδοση
Στην έκδοση 25.05 του Koha προστέθηκαν επιπλέον πεδία για τους τύπους πιστώσεων.
Τύποι χρεώσεων λογαριασμού (account_debit_types): ένα πεδίο που προστέθηκε στους τύπους χρεώσεων λογαριασμού θα εμφανιστεί κατά την προσθήκη ή την επεξεργασία των τύπων χρεώσεων debit types.
Έκδοση
Στην έκδοση 25.05 του Koha προστέθηκαν επιπλέον πεδία για τους τύπους χρεώσεων.
Περιοδικές εκδόσεις
Συνδρομές (subscription): ένα πεδίο που προστίθεται στη συνδρομή θα εμφανίζεται όταν δημιουργείται μία νέα συνδρομή creating a new subscription ή στην επεξεργασία μίας υπάρχουσας editing an existing subscription στην ενότητα των Περιοδικών εκδόσεων.
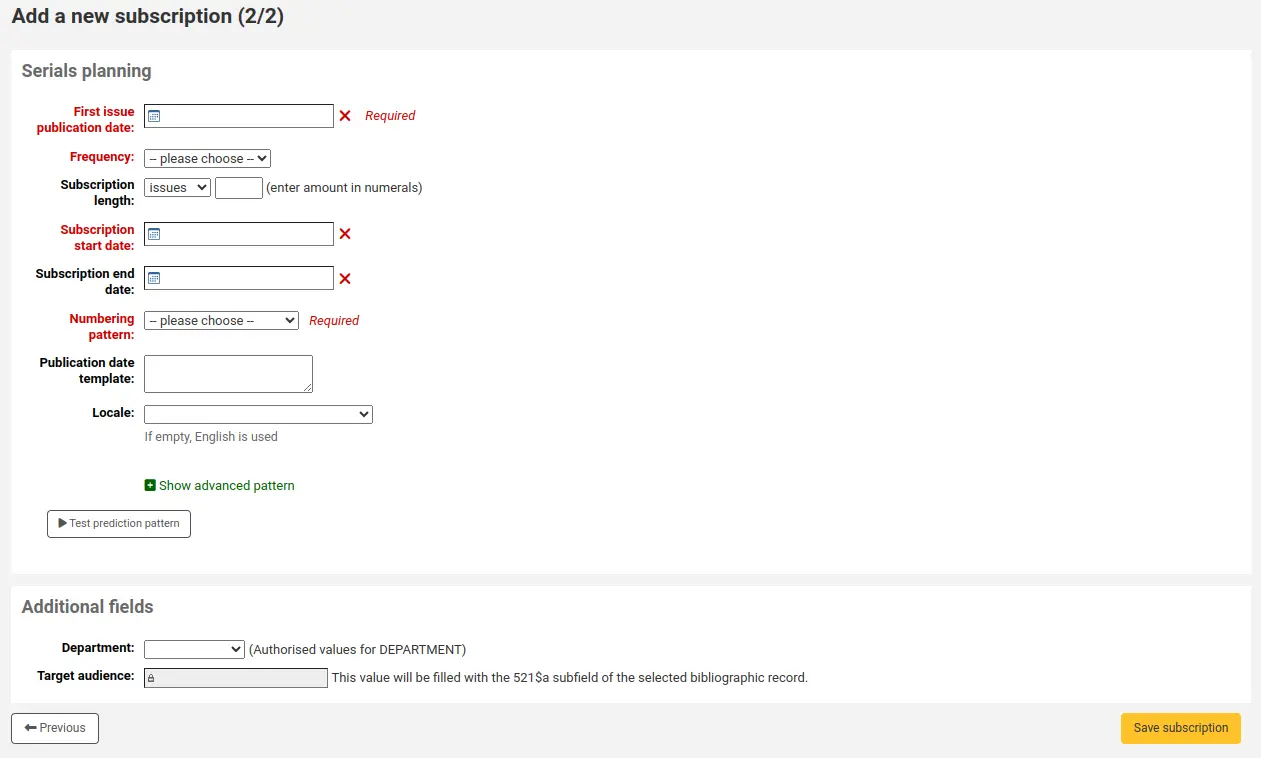
Επιλέξτε το «Νέο πεδίο».
Συμπληρώστε τη φόρμα.
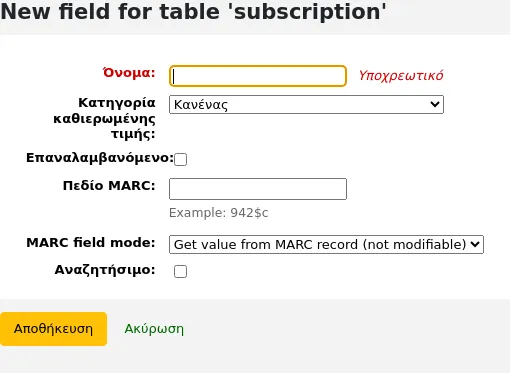
Όνομα: αυτό είναι το όνομα του πεδίου, όπως θέλετε να εμφανίζεται.
Κατηγορία καθιερωμένων τιμων: αν θέλετε να προσθέσετε ένα αναδυόμενο μενού στο πεδίο, επιλέξτε εδώ μια κατηγορία καθιερωμένων τιμών authorized value category (μπορείτε επίσης να δημιουργήσετε μία κατηγορία καθιερωμένων τιμών create a new authorized value category αν χρειαστεί).
Επαναλαμβανόμενο: αν θέλετε το πεδίο να είναι επαναλαμβανόμενο, επιλέξτε αυτό το πλαίσιο. Για τα πεδία ελεύθερου κειμένου, θα προστεθεί ένα κουμπί «Νέο» δίπλα στο πεδίο, ώστε το προσωπικό να μπορεί να επαναλάβει το πεδίο και να προσθέσει μια νέα τιμή. Για τα πεδία με καθιερωμένες κατηγορίες τιμών, θα δημιουργηθεί μια λίστα με πλαίσια ελέγχου αντί για ένα αναδιπλούμενο μενού, επιτρέποντας στο προσωπικό να επιλέξει περισσότερες από μία επιλογές.
Έκδοση
Αυτή η επιλογή προστέθηκε στην έκδοση 24.11 του Koha.
Πεδίο MARC: για πρόσθετα πεδία συνδρομών, είναι δυνατή η σύνδεση του πεδίου με ένα πεδίο MARC. Το πρόσθετο πεδίο θα συμπληρωθεί αυτόματα με την τιμή της αντίστοιχης εγγραφής για το εν λόγω πεδίο του MARC.
Σημείωση
Μπορείτε να επιλέξετε μόνο μία από τις δύο επιλογές (καθιερωμένη τιμή Ή πεδίο MARC)
Προειδοποίηση
Εάν επιλέξετε το πεδίο MARC, βεβαιωθείτε ότι το εισάγετε με την εξής μορφή: field$subfield
Για παράδειγμα: 590$a
Αναζητήσιμο: επιλέξτε αυτό το πλαίσιο αν θέλετε να μπορείτε να κάνετε αναζήτηση σε καλάθια ή συνδρομές με βάση αυτό το πεδίο
Τα πρόσθετα πεδία αναζήτησης στο καλάθι παραγγελιών θα είναι διαθέσιμα στη φόρμα της σύνθετης αναζήτησης παραγγελιών orders advanced search
Τα πρόσθετα πεδία αναζήτησης στα τιμολόγια θα είναι διαθέσιμα στη φόρμα αναζήτησης τιμολογίων invoice search
Τα πρόσθετα πεδία αναζήτησης συνδρομής θα είναι διαθέσιμα στη φόρμα της σύνθετης αναζήτησης συνδρομών subscription advanced search
Παραδείγματα επιπρόσθετων πεδίων
Παράδειγμα 1: Πρόσθετο πεδίο συνδρομής με χρήση καθιερωμένων τιμών authorized values
Ίσως να θέλετε να εντοπίσετε για ποιο τμήμα παραγγέλνετε αυτό το περιοδικό
Στο πεδίο «Όνομα», καταχωρήστε «Τμήμα»
Στην «Κατηγορία καθιερωμένης τιμής», επιλέξετε ΤΜΗΜΑ
Επιλέξτε το πλαίσιο «Αναζητήσιμο»
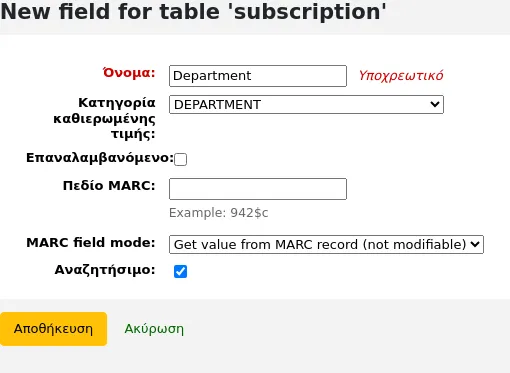
Όταν κάνετε προσθήκη συνδρομής adding a subscription, το πεδίο θα βρίσκεται στην ενότητα «Πρόσθετα πεδία» με το αναδυόμενο μενού των καθιερωμένων τιμών του.

Όταν προβάλετε τη συνδρομή, το πεδίο θα εμφανιστεί στα «Πρόσθετα πεδία».

Επειδή το πεδίο είναι αναζητήσιμο, θα είναι επίσης στην αναζήτηση συνδρομών περιοδικών.
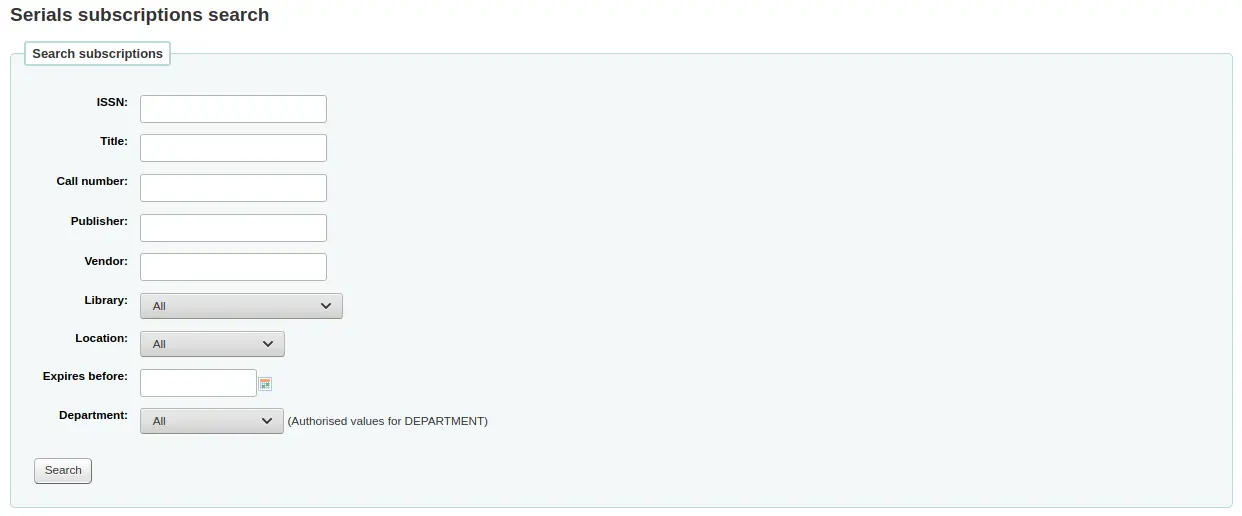
Παράδειγμα 2: Πεδίο πρόσθετης συνδρομής με χρήση πεδίου MARC
Αυτό είναι ιδιαίτερα χρήσιμο αν θέλετε να δείτε βιβλιογραφικές πληροφορίες στη σελίδα των στοιχείων της συνδρομής. Σε αυτό το παράδειγμα, θα προσθέσουμε το πεδίο 521$a, το οποίο είναι, στο MARC21, η σημείωση του επιδιωκόμενου κοινού.
Στο πεδίο «Όνομα», πληκτρολογήστε «Επιδιωκόμενο κοινό»
Στο πεδίο «πεδίο MARC», πληκτρολογήστε «521$a»
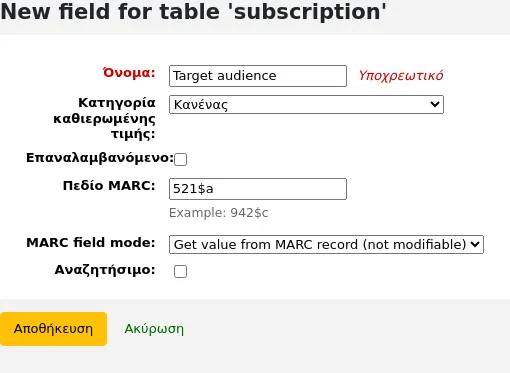
Σημείωση
Δεν θα μπορείτε να επεξεργαστείτε αυτό το πεδίο από τη φόρμα της συνδρομής. Αν χρειαστεί να προσθέσετε ή να αλλάξετε την τιμή σε αυτό το πεδίο, θα πρέπει να περάσετε από την ενότητα της Καταλογογράφησης cataloging module.
Όταν προβάλλετε τη συνδρομή, το πεδίο και οι πληροφορίες από τη βιβλιογραφική εγγραφή θα εμφανιστούν στο πεδίο «Πρόσθετα πεδία».

Παράδειγμα 3: Πρόσθετο πεδίο τιμολογίου με ελεύθερο κείμενο
Εάν χρειάζεται να καταχωρίσετε πρόσθετες πληροφορίες στα τιμολόγια, όπως τον αριθμό της επιταγής που χρησιμοποιήθηκε για την πληρωμή του τιμολογίου, μπορείτε να επιλέξετε να μην χρησιμοποιήσετε καθόλου μία καθιερωμένη τιμή.
Στο πεδίο του «Ονόματος», πληκτρολογήστε «Έλεγχος #»
Επιλέξτε το πλαίσιο «Αναζητήσιμο»
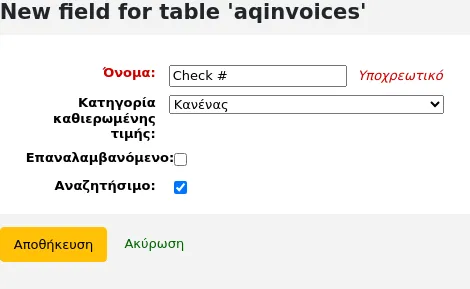
Τα νέα πεδία θα εμφανίζονται κατά την προβολή του τιμολογίου viewing the invoice στην ενότητα των Προσκτήσεων acquisitions module.

Επειδή κάναμε το πεδίο αναζητήσιμο, θα υπάρχει και στην αναζήτηση τιμολογίου.
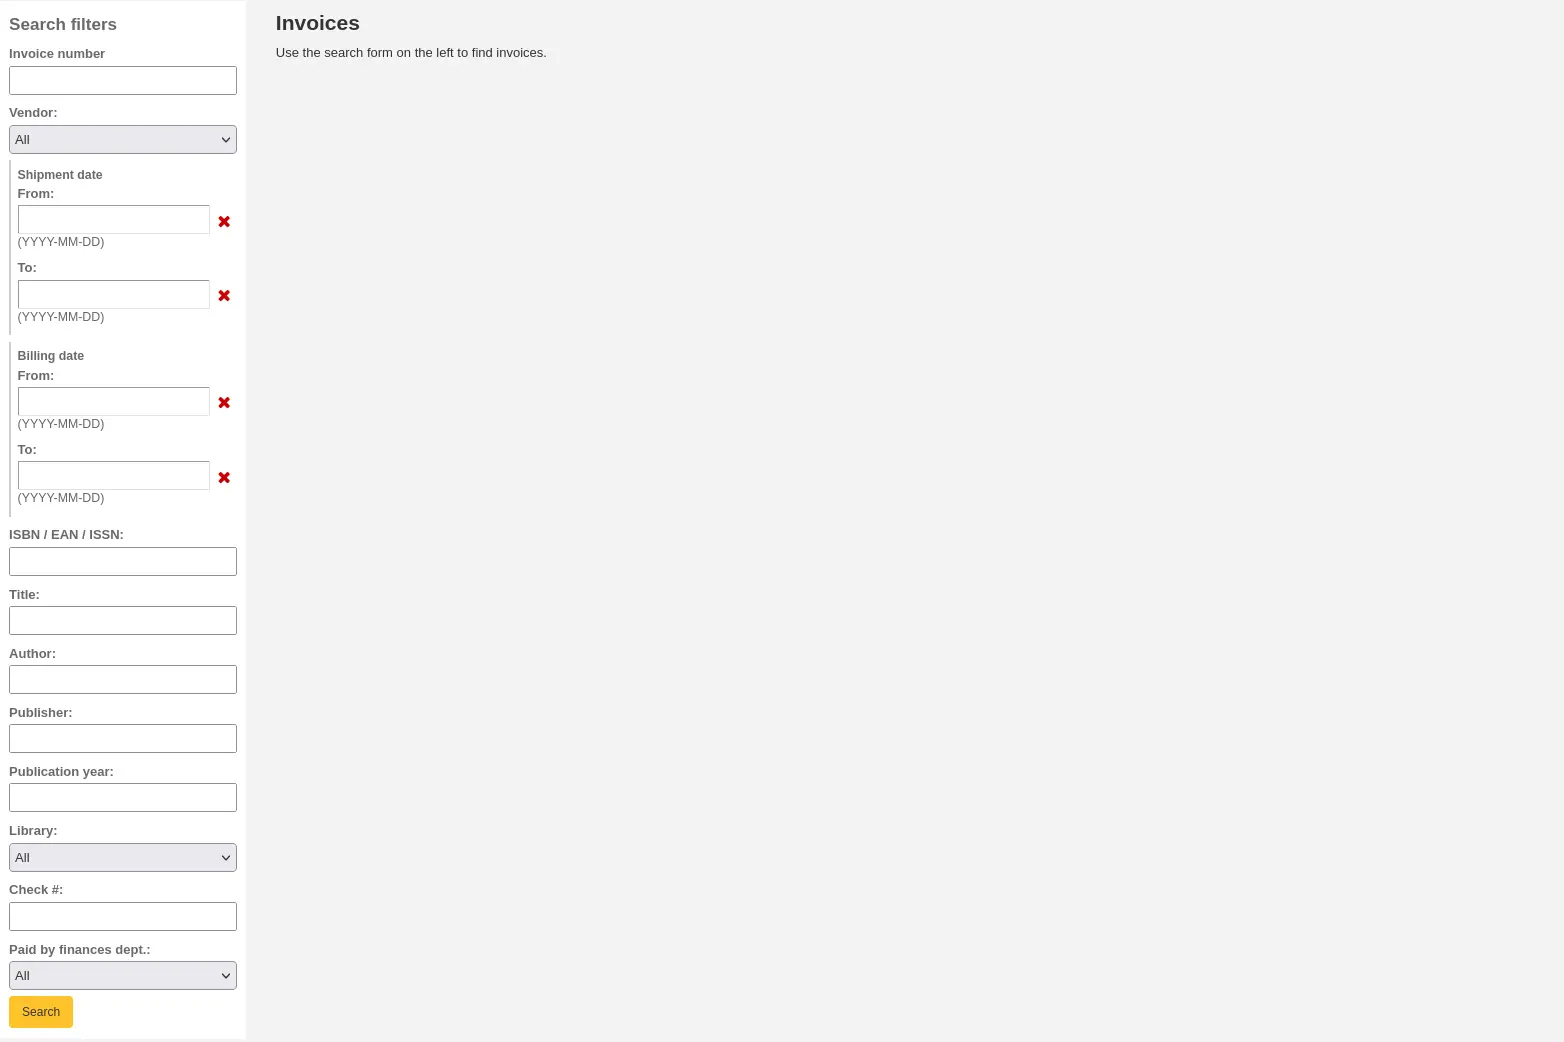
Συντομεύσεις πληκτρολογίου
Αυτή η ενότητα χρησιμοποιείται για τον επαναπροσδιορισμό των συντομεύσεων του πληκτρολογίου που χρησιμοποιούνται στον επεξεργαστή της σύνθετης καταλογογράφησης advanced cataloging editor.
Σημείωση
Αυτή η ενότητα θα εμφανιστεί μόνο αν είναι ενεργοποιημένη η παράμετρος του συστήματος για τον επεξεργαστή της σύνθετης καταλογογράφησης EnableAdvancedCatalogingEditor.
Σημείωση
Μόνο το προσωπικό με το σχετικό δικαίωμα manage_keyboard_shortcuts (ή το δικαίωμα superlibrarian) θα έχει πρόσβαση σε αυτό το τμήμα.
Για να αλλάξετε μια συντόμευση, εισαγάγετε τον συνδυασμό πλήκτρων που θέλετε να χρησιμοποιήσετε στο πεδίο στη στήλη «Συντόμευση» και επιλέξτε την «Αποθήκευση συντομεύσεων».
Βεβαιωθείτε ότι ακολουθείτε τους κανόνες του χάρτη των πλήκτρων κατά την εισαγωγή των συνδυασμών πλήκτρων:
Διαχωρίστε τα πλήκτρα χρησιμοποιώντας μια παύλα “-”
Το πλήκτρο ελέγχου είναι το «Ctrl»
Το πλήκτρο Alt είναι το «Alt»
Το Shift είναι το «Shift»
Εάν συνδυάζετε πολλαπλά πλήκτρα, αυτά πρέπει να είναι σε καθορισμένη σειρά: Shift-Cmd-Ctrl-Alt

