OPAC
Résultats de la recherche
Pour lancer une recherche via l’OPAC, vous pouvez utiliser la barre de recherche rapide située en haut ou cliquer sur le lien “Recherche avancée” pour une recherche plus détaillée.

Si Elasticsearch est utilisé et que la préférence système OpacBrowseSearch est activée, vous verrez également l’option Feuilleter.
Note
For more on searching check the Searching chapter in this manual.
Vue d’ensemble des résultats
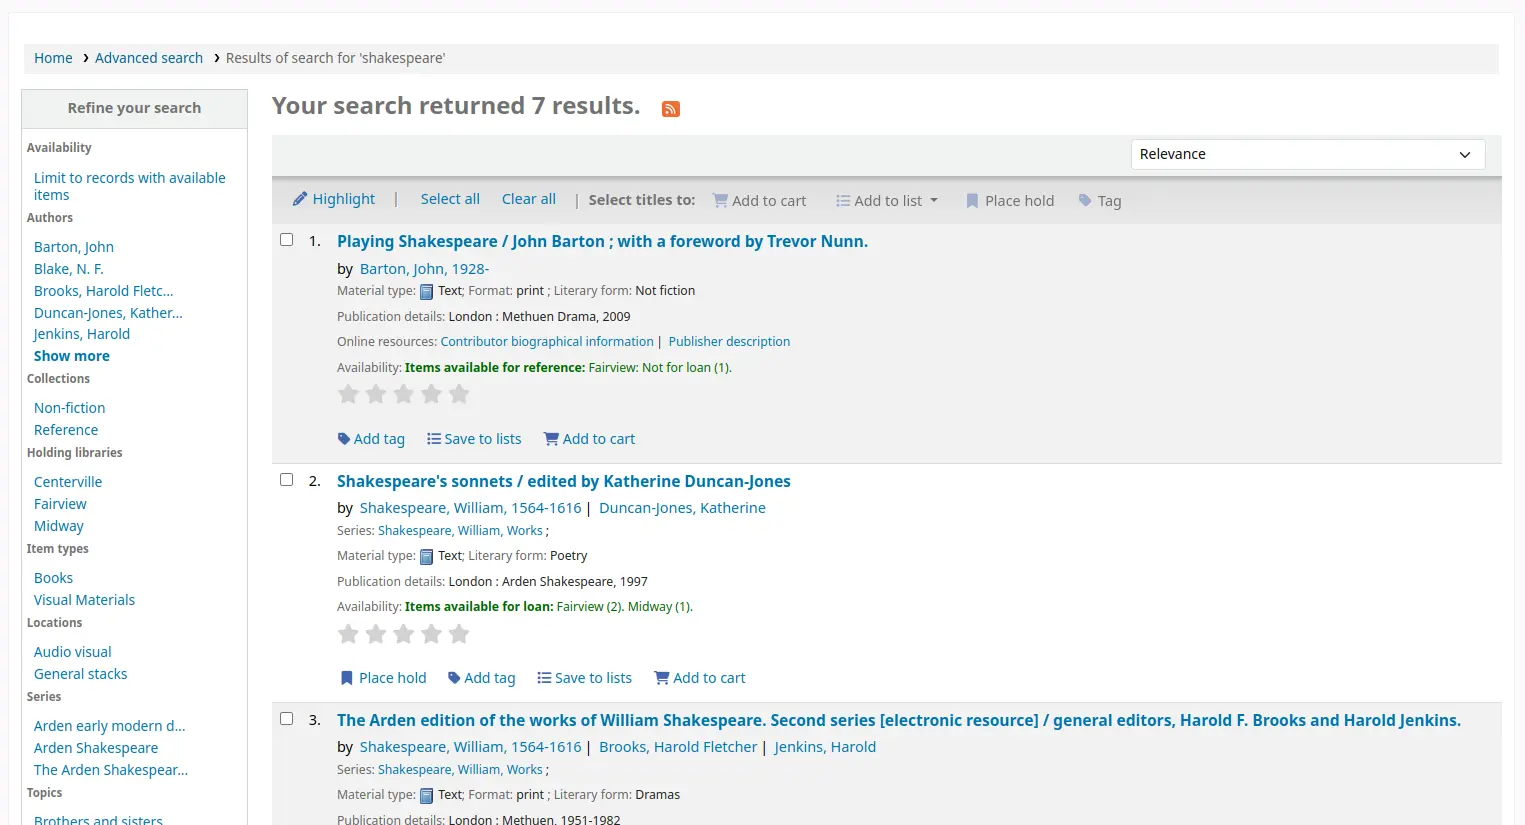
Après avoir lancé la recherche, le nombre de résultats trouvés s’affiche au-dessus des résultats.
Par défaut vos résultats de recherche seront triés en fonction des valeurs des préférences système OPACdefaultSortField and OPACdefaultSortOrder. Pour modifier cela vous pouvez choisir un autre critère de tri dans le menu déroulant à droite.
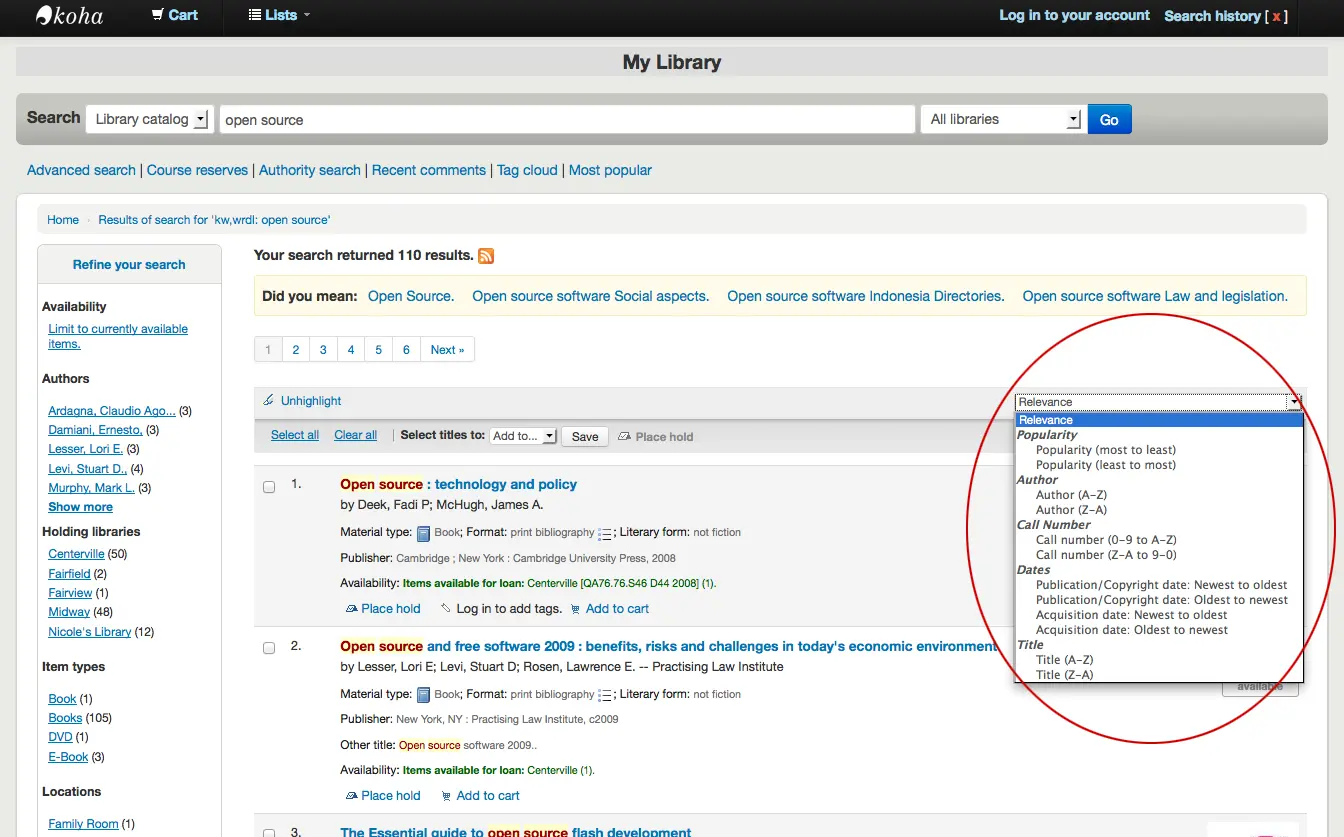
Sous chaque titre de la liste des résultats, il y aura une série de valeurs issues du leader de la notice (champ 000).

Note
Ces valeurs n’ont rien à voir avec les types de documents ou les codes collection que vous avez appliqués à vos notices ou exemplaires. Ces données sont toutes tirées des champs de contrôle de la notice.
Ceci peut être activé ou désactivé avec la préférence système DisplayOPACiconsXSLT.
Sous chaque titre est précisée la disponibilité des exemplaires attachés à la notice.
Note
Même si vous avez limité vos recherches à une bibliothèque, tous les sites possédant le document recherché apparaîtront dans les résultats.
Avertissement
Le statut réservé d’un exemplaire ne modifie pas sa disponibilité jusqu’à qu’il ait le statut “en attente”. Les exemplaires en demande de réservation s’afficheront disponibles jusqu’à ce que le bibliothécaire retire l’exemplaire du rayon et l’enregistre comme “en attente de retrait”.
Si vous activé les préférences système Contenu enrichi, les pages de couverture s’affichent dans les résultats de recherche.
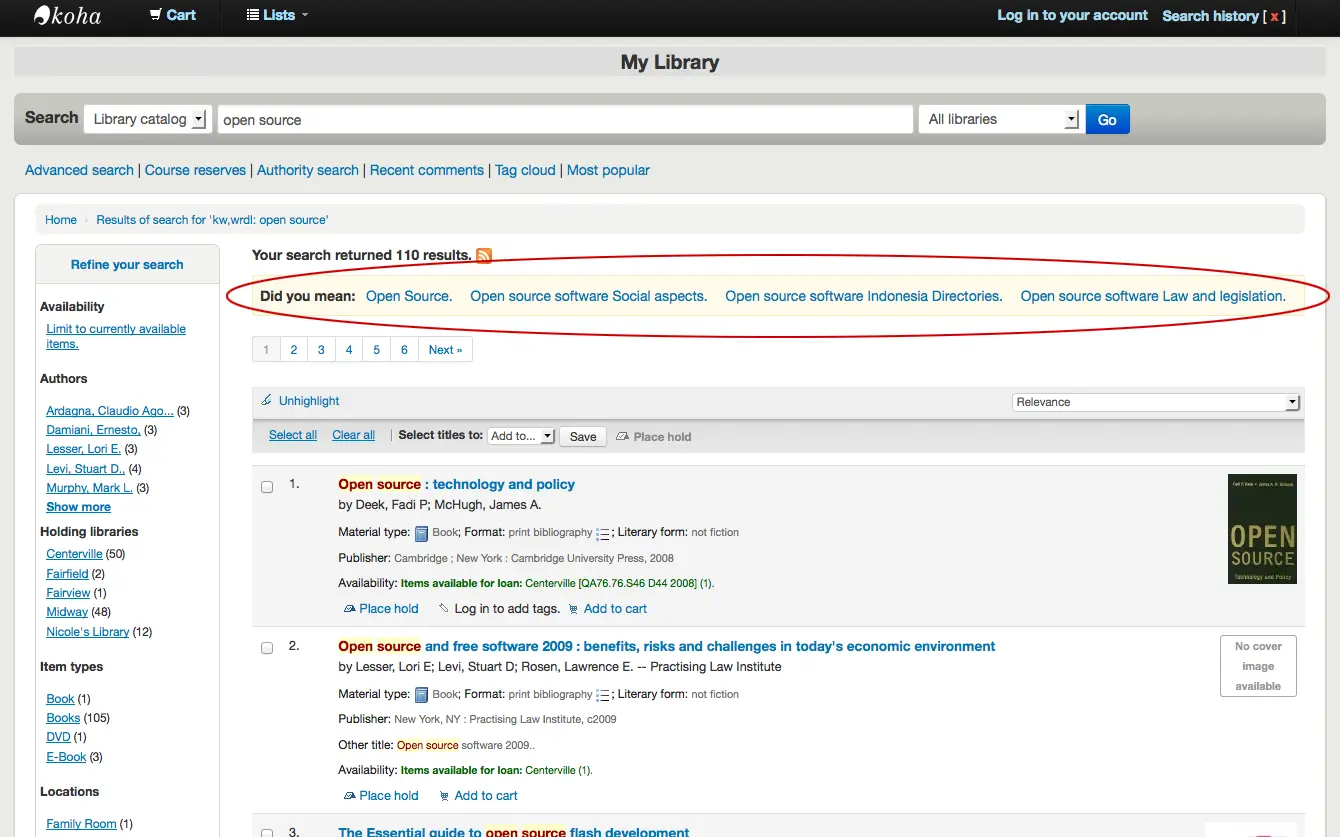
Si vous avez paramétré vos options Vouliez-vous dire ?, vous verrez une barre jaune en haut de vos résultats de recherche avec des propositions de recherches associées.
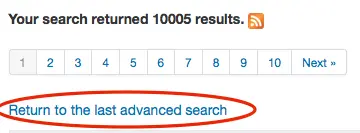
Si vous avez effectué une recherche avancée, une option vous permettant de revenir en arrière et de modifier votre recherche avancée apparaît dans la liste des pages de résultats.
Filtres (facettes)
Pour filtrer vos résultats, cliquez sur les liens situés sous le menu “Affiner votre recherche” à gauche de votre écran.

Après avoir cliqué sur une facette, vous pouvez supprimer ce filtre en cliquant sur le petit “x” qui apparaît sur la droite de la facette.
![Vue rapprochée des facettes, dans les facettes Auteurs, "Shakespeare, William" n'est plus cliquable et il y a un [x] à côté](_images/removefilter.webp)
Voir la section sur les facettes des résultats de recherche pour plus de détails sur les facettes.
Vous pouvez ajouter du contenu personnalisé sous les facettes avec l’emplacement d’affichage OPACResultsSidebar dans l’outil de personnalisation HTML.
Recherche de flux RSS
You will be able to subscribe to your search results as an RSS feed by clicking the RSS icon in your address bar or next to the number of results.

L’intérêt de vous abonner à un flux RSS consiste à être informé des nouveaux documents qui s’ajoutent dans le catalogue dans le domaine de votre choix.
Notice bibliographique
Lorsque vous cliquez sur un titre des résultats de recherche, vous arrivez sur la notice bibliographique détaillée. Cette page est organisée en plusieurs parties.
En haut de l’écran s’affichent le titre et le support :
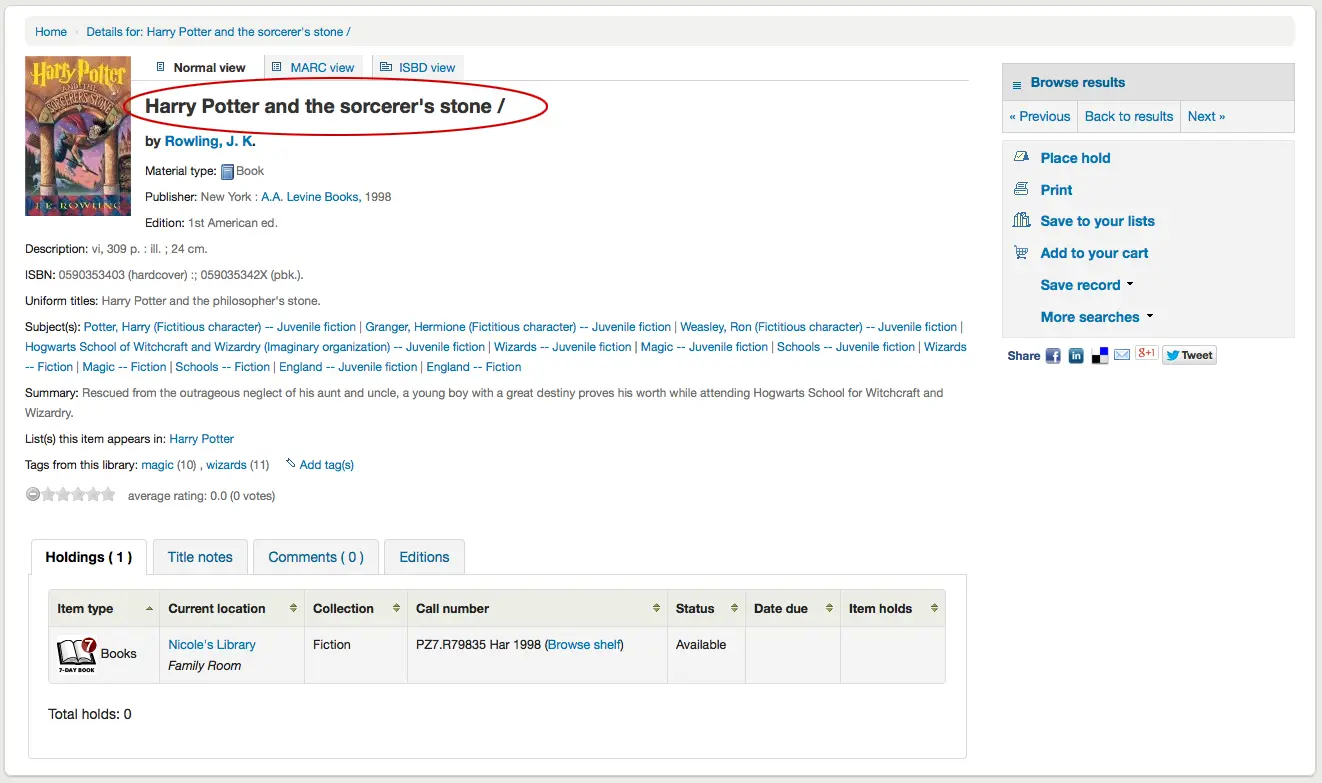
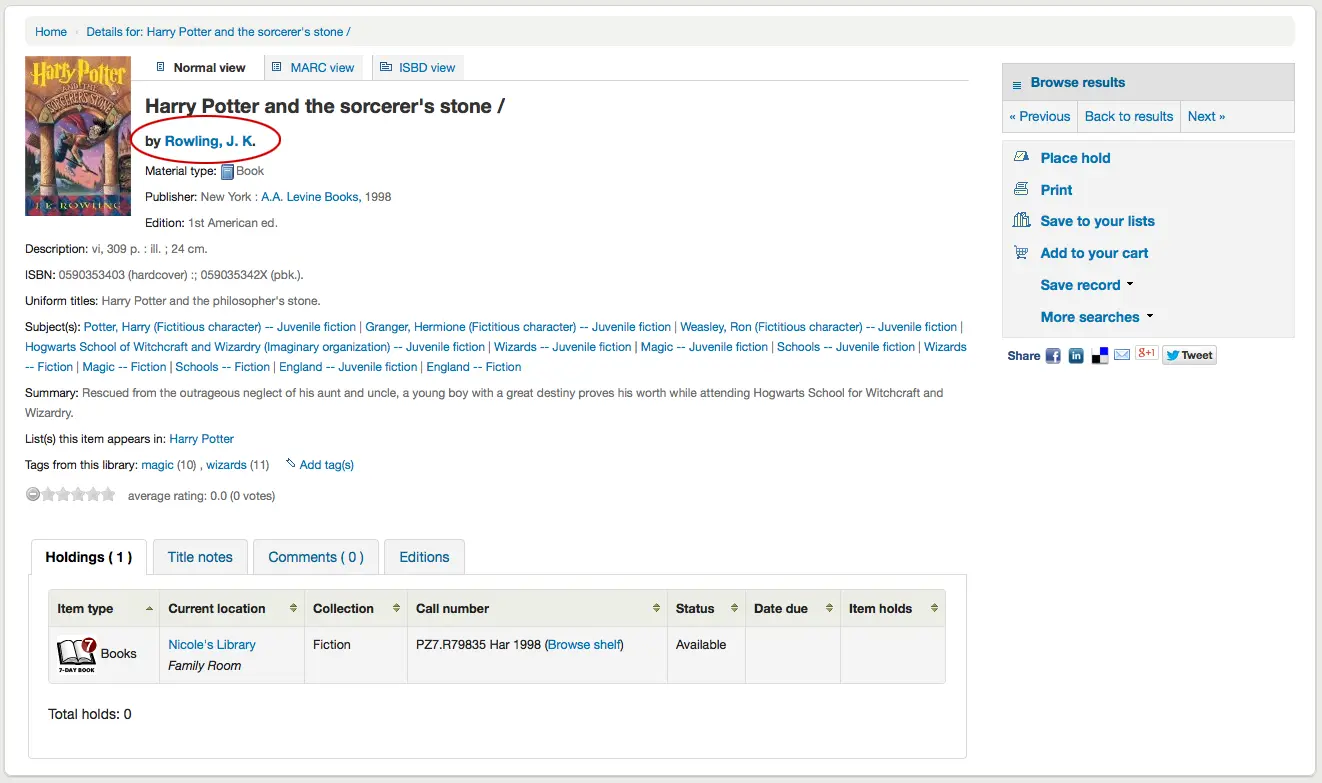
Le nom des auteurs est affiché juste en dessous du titre. Ils sont définis dans les champs 1xx et 7xx. Si vous cliquez sur l’auteur, ceci lancera une recherche de tous les documents de cet auteur.
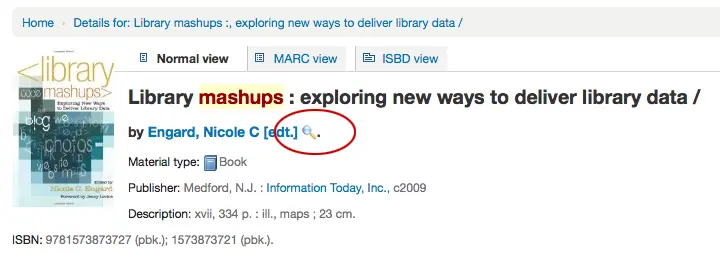
Si vous avez un fichier d’autorité, vous verrez une petite loupe à droite des autorités de l’auteur (ou des autres). Si vous cliquez sur cette loupe, cela vous basculera directement sur la notice d’autorité.
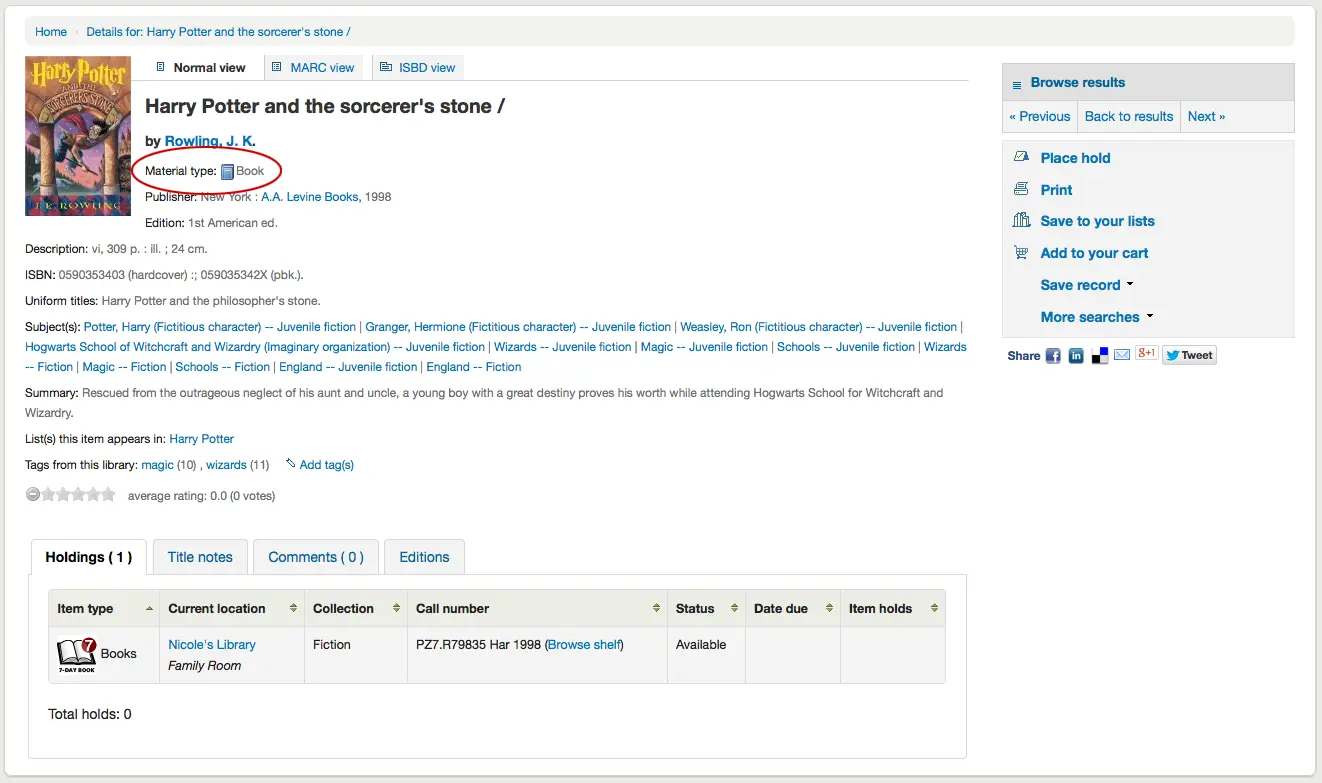
If you have your DisplayOPACiconsXSLT preference set to “show” you will see a material type that is determined by values in your fixed fields (learn more in the XSLT material type icons cataloging guide).
Vous verrez ensuite les zones de description de la notice que vous visualisez :
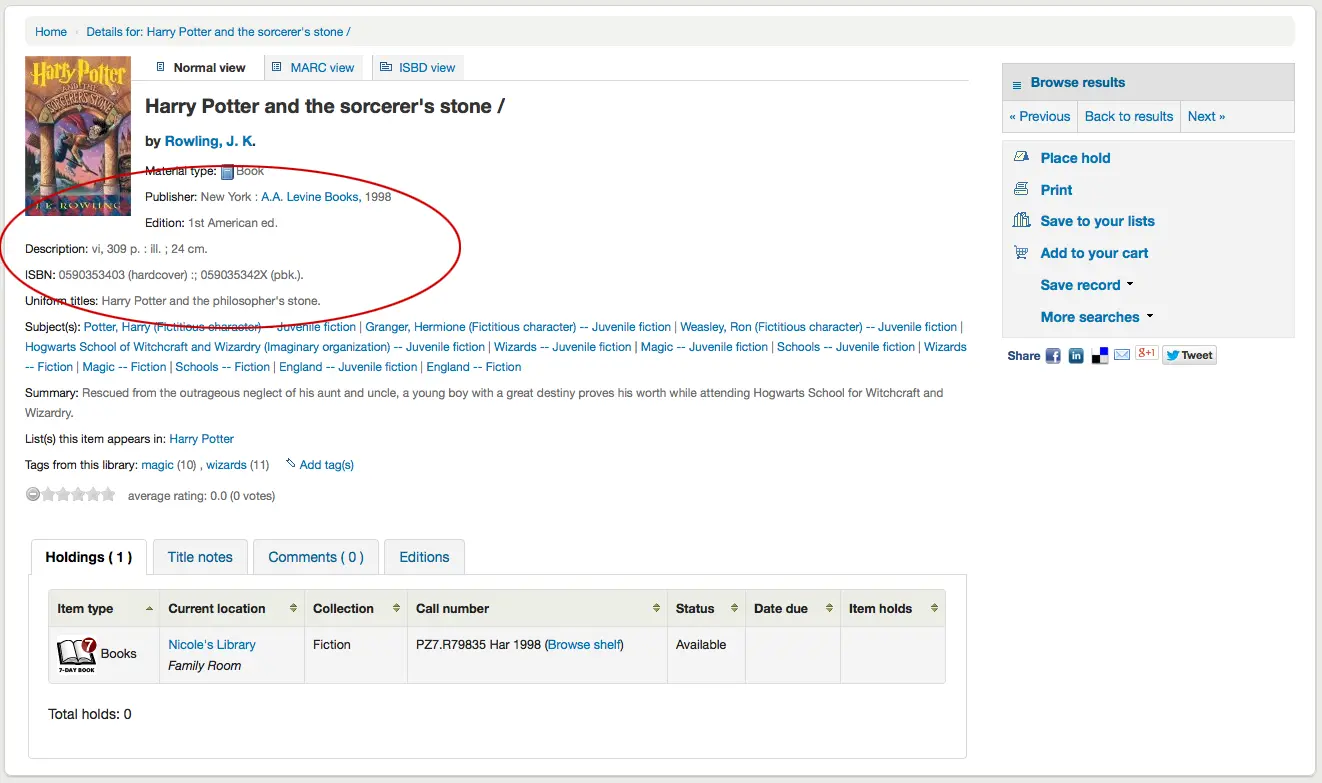
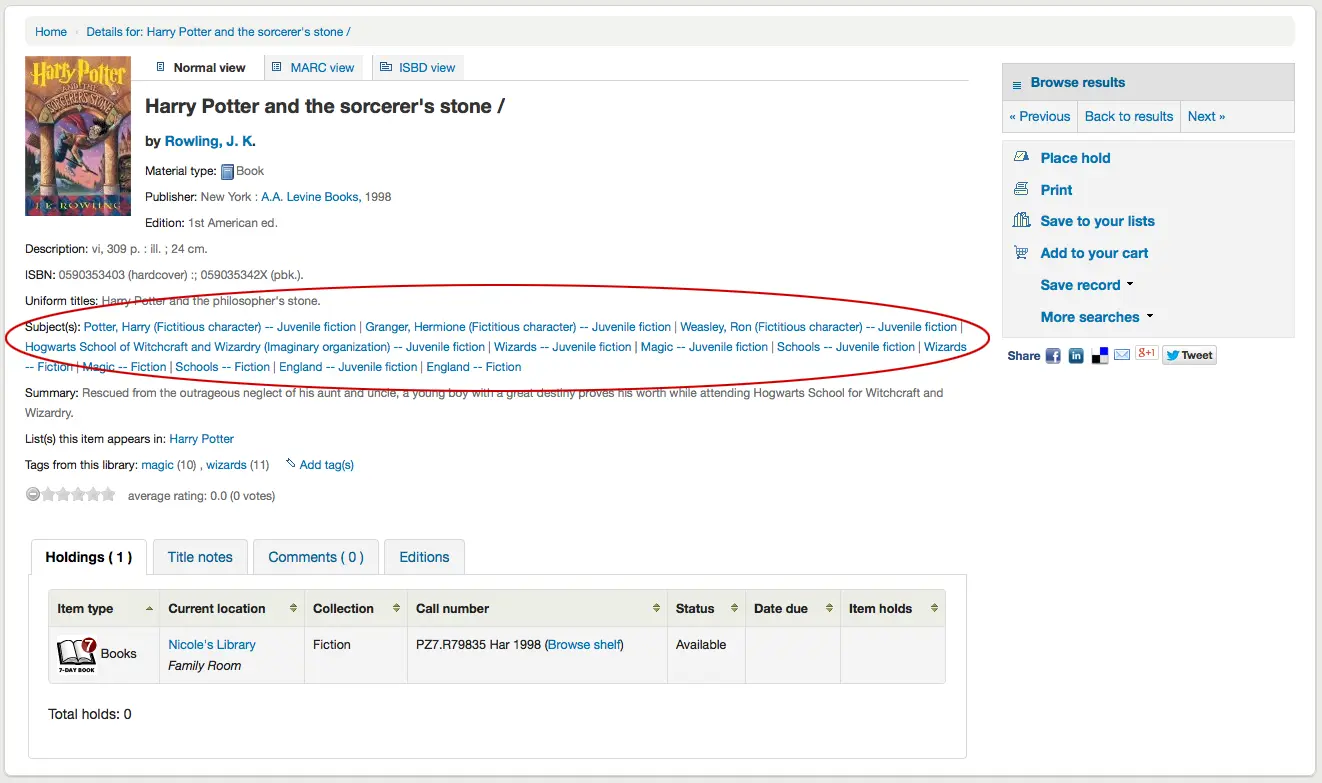
Parmi ces informations, vous trouverez les vedettes sujet sur lesquelles vous pouvez cliquer pour rechercher d’autres titres associés ou des sujets similaires
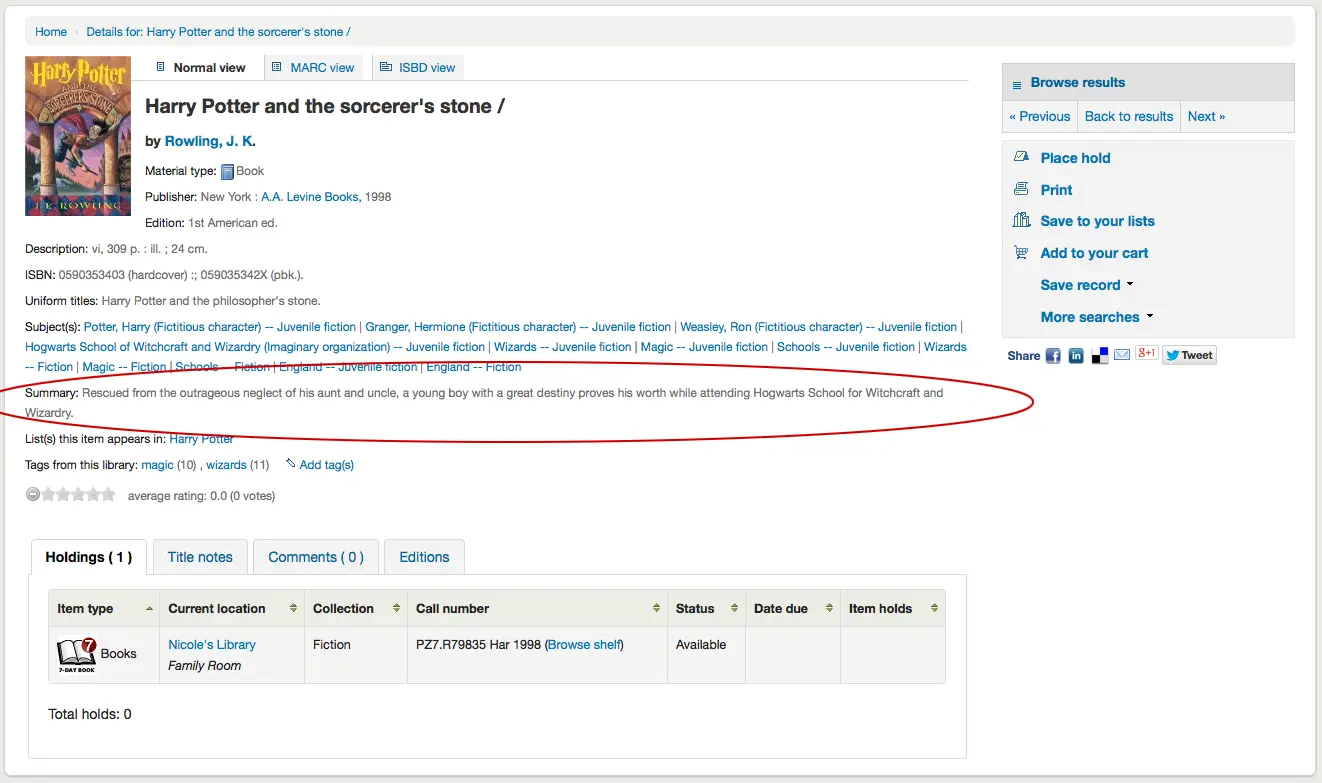
Si votre notice a une table des matières ou un résumé, cela s’affichera à côté des mentions “Résumé” ou “Tables des matières”
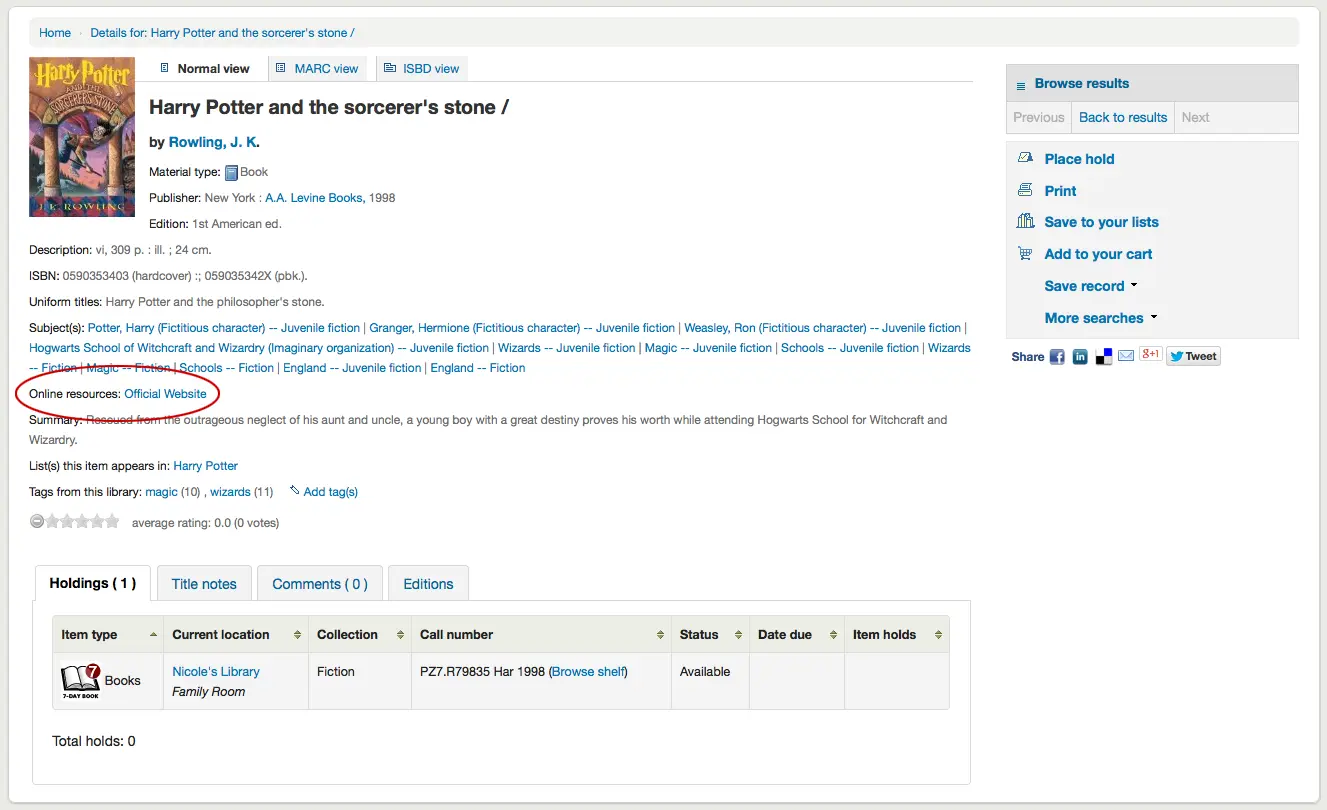
Si votre notice a des données dans les champs 856, vous verrez les liens à droite de la mention “Ressources en ligne”
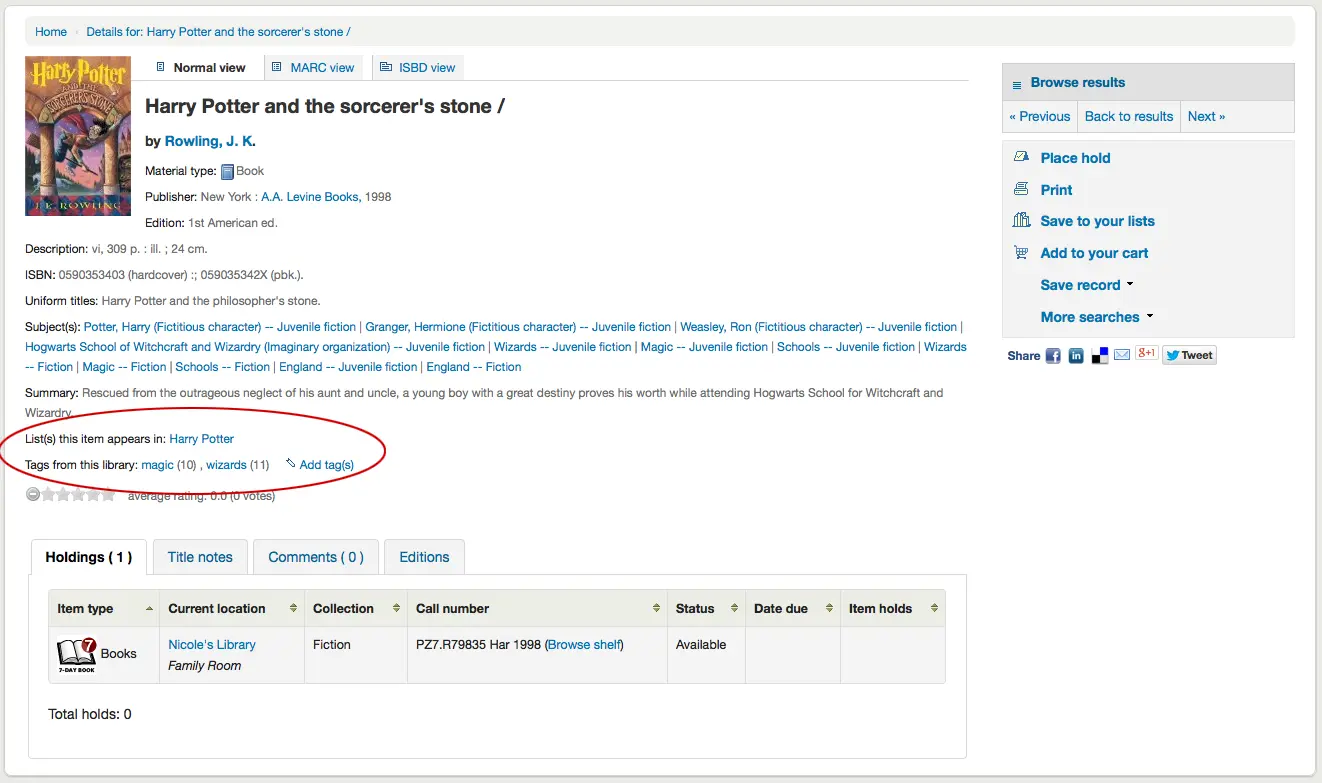
Si le titre que vous êtes en train de consulter est sur une liste publique, vous verrez une liste à droite de la mention “Ce document apparaît dans la/les liste(s)”. Et si votre notice est associée à des tags (mots-clés), ils apparaîtront sous la mention “Tags de cette bibliothèque”
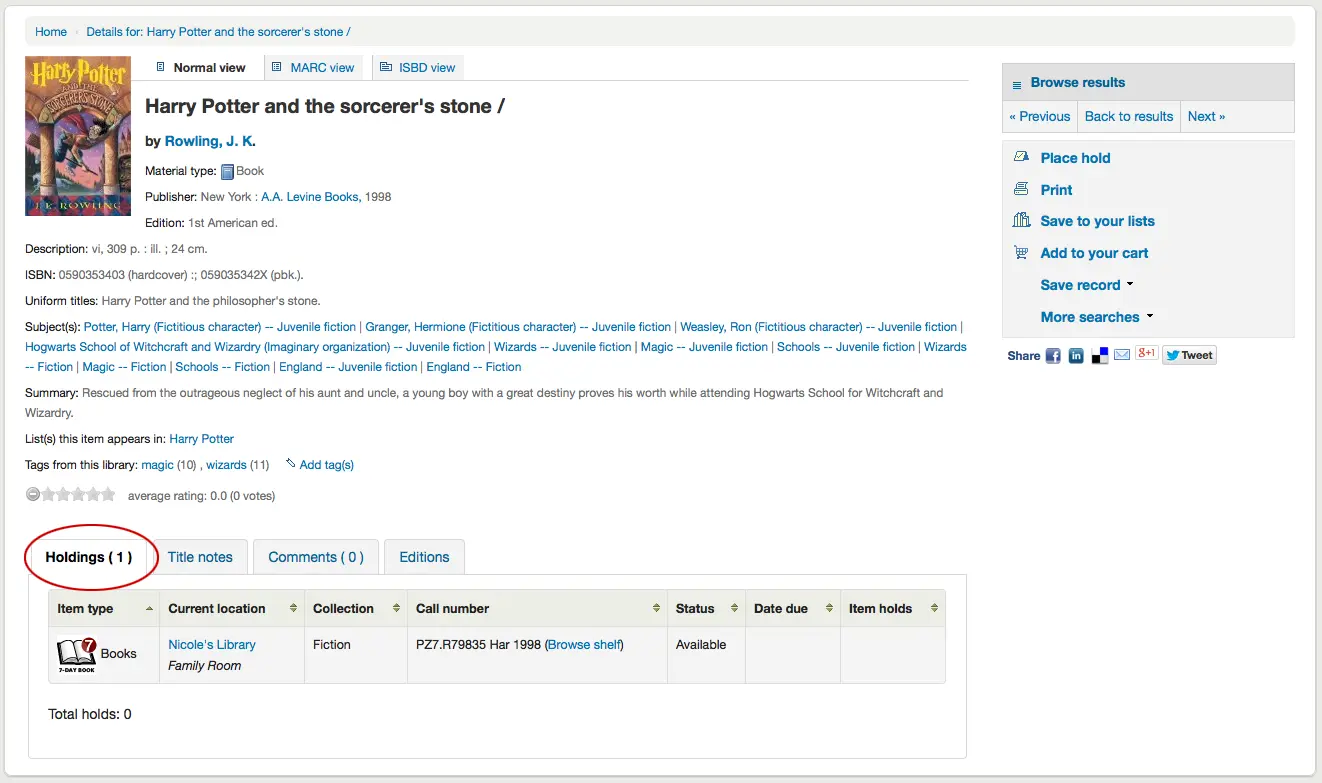
Dans les onglets situés sous les détails de la notice, vous trouverez toutes les informations de l’exemplaire
Note
You can customize the columns of this table in the Table settings section of the Administration module (table id: holdingst).
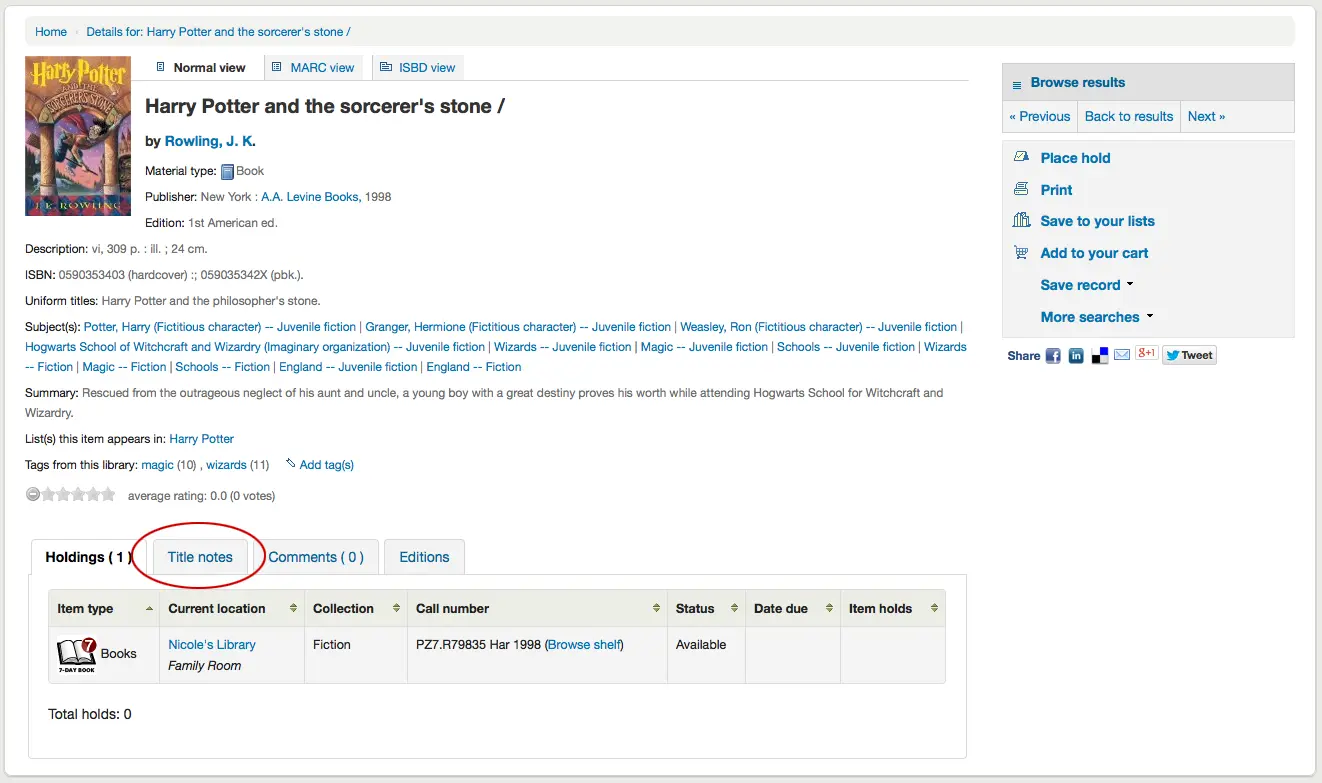
Toutes les notes cataloguées dans les champs 5xx s’afficheront sous “Notes sur le titre”
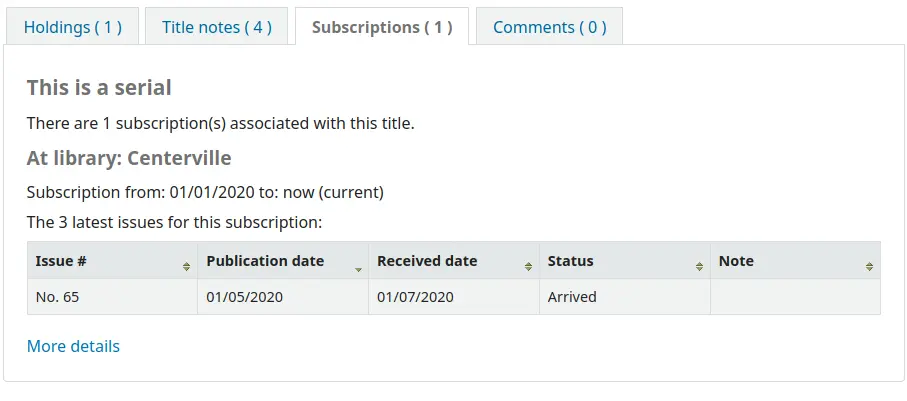
If the bibliographic record is linked to a subscription in the Serials module, there will be a “Subscriptions” tab with the subscription and issues information.
Note
You can customize the columns of this table in the Table settings section of the Administration module (table id: subscriptionst).
Note
Si vous choisissez une notification dans le champ “Notifications aux adhérents” lors de l’ajout d’un abonnement, un bouton sera affiché et si les adhérents cliquent dessus, ils recevront un courriel notifiant la réception d’un nouveau fascicule.
Si vous autorisez les commentaires, ils s’afficheront dans l’onglet suivant
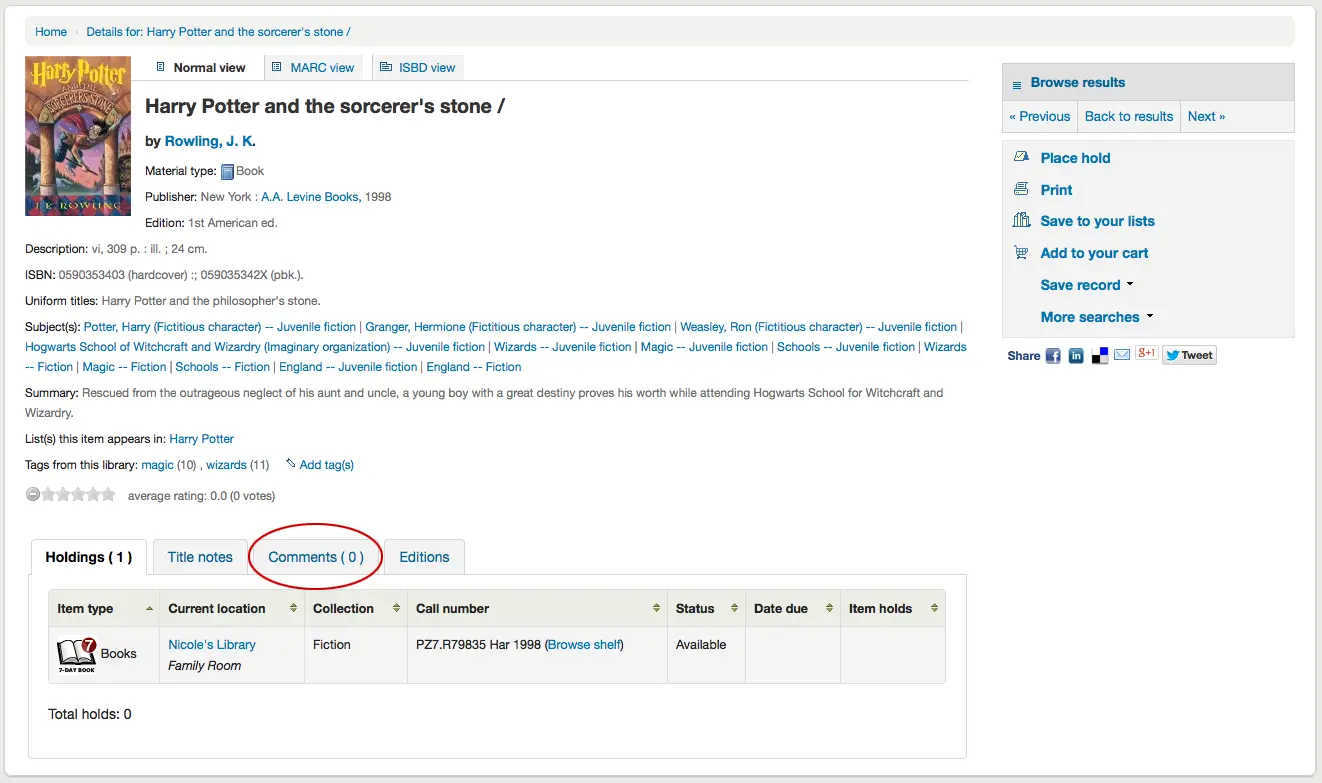
Si la préférence système OPACAuthorIdentifiers est activée et que vos notices autorités Auteurs ont des identificateurs, un onglet “Identifiants d’auteur” affichera les identifiants ainsi que des liens vers la notice Auteur sur le site ressource.
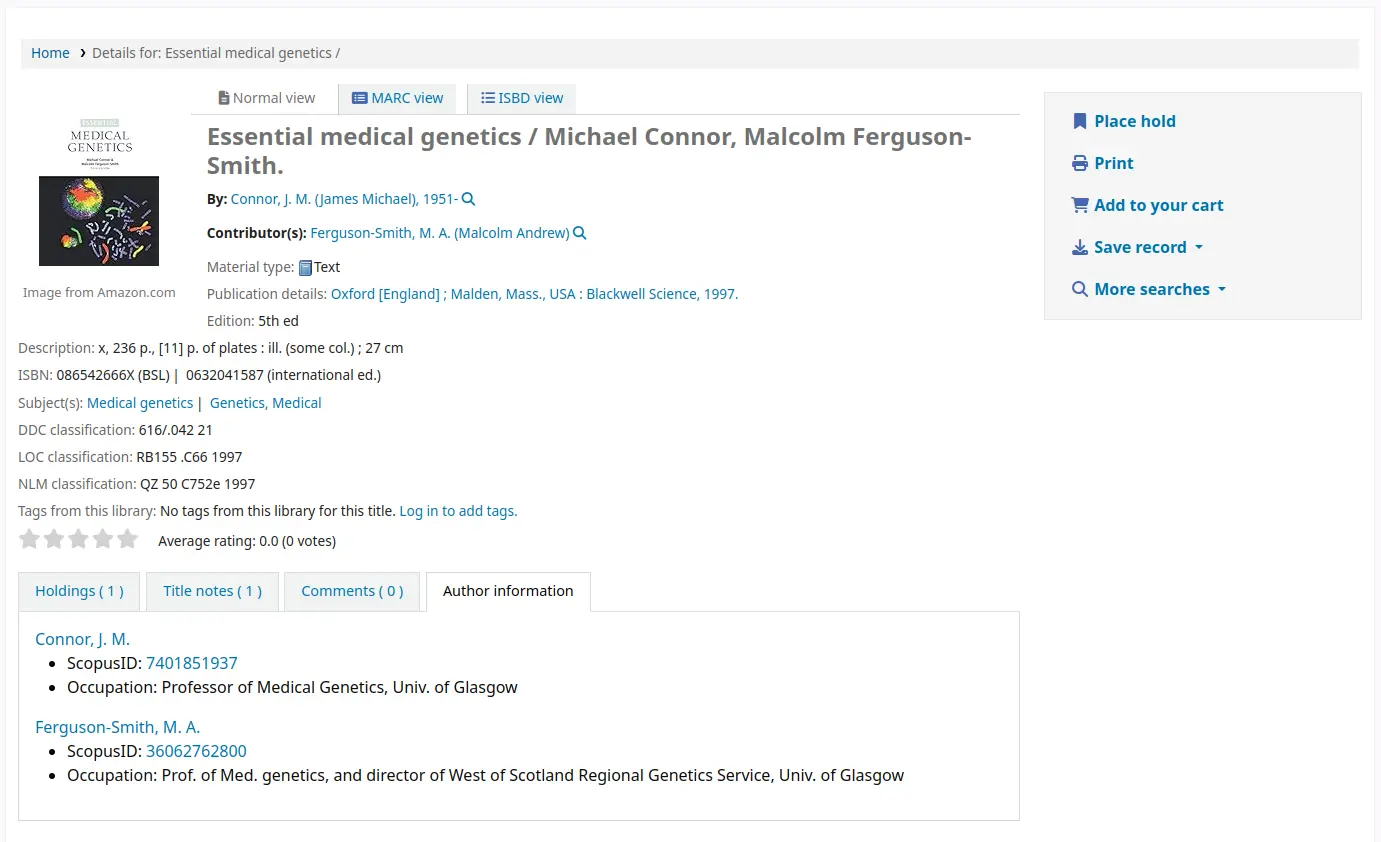
Enfin, si vous avez activé FRBR et que vous avez d’autres éditions du titre dans votre collection, vous les verrez dans l’onglet “Editions”.
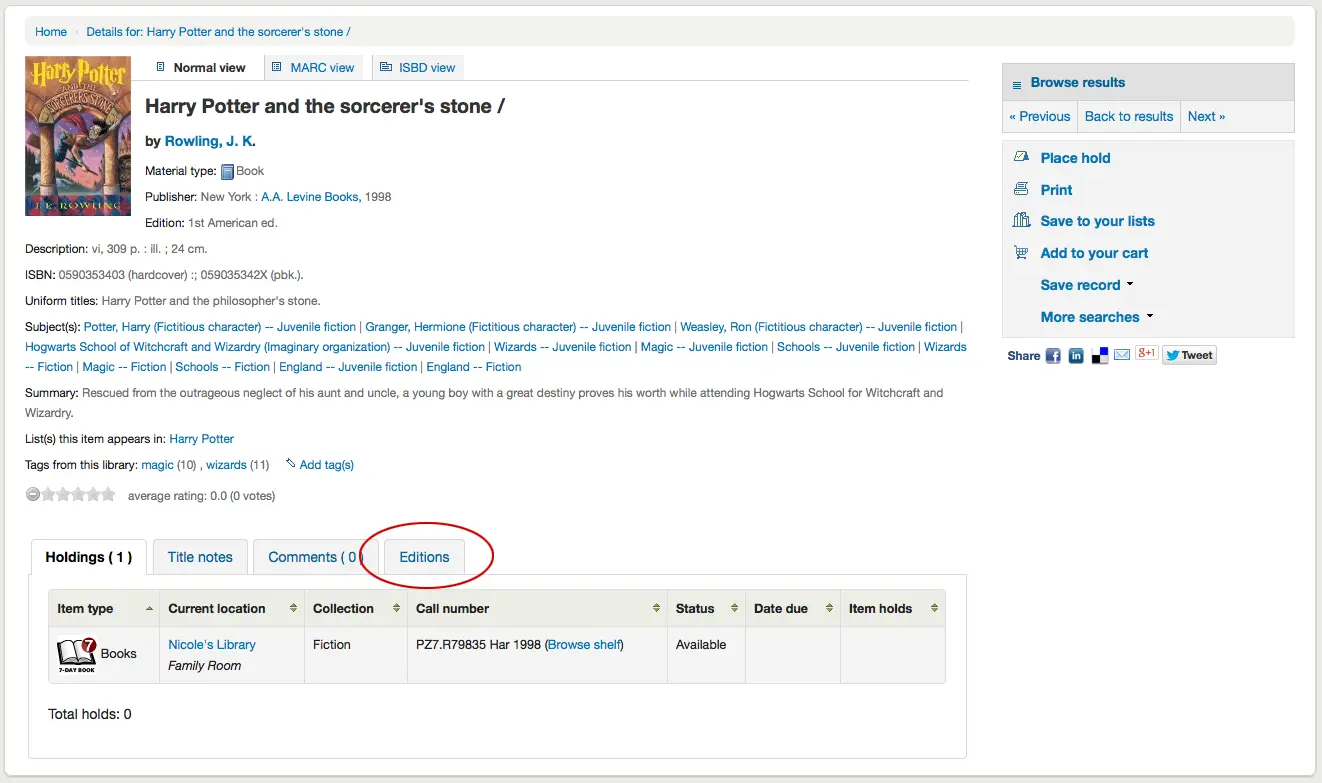
A droite des détails, vous trouverez une série de cases. La première case contient plusieurs boutons aidant à naviguer dans les résultats de recherche. A partir de là, vous pouvez voir le prochain résultat, ou le précédent, de votre recherche ou revenir aux résultats.
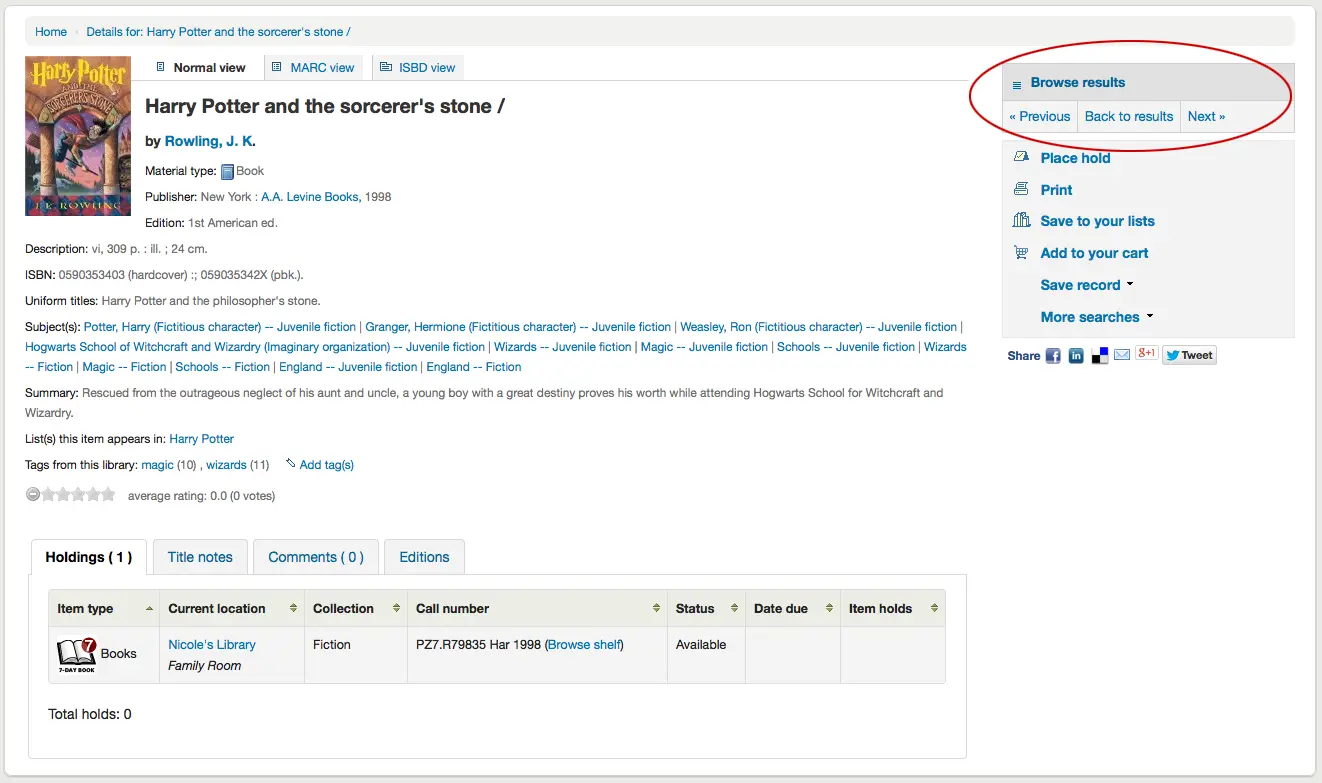
Si vous cliquez sur “Parcourir les résultats” en haut de la colonne de droite, cela ouvrira vos résultats sur la page de détails
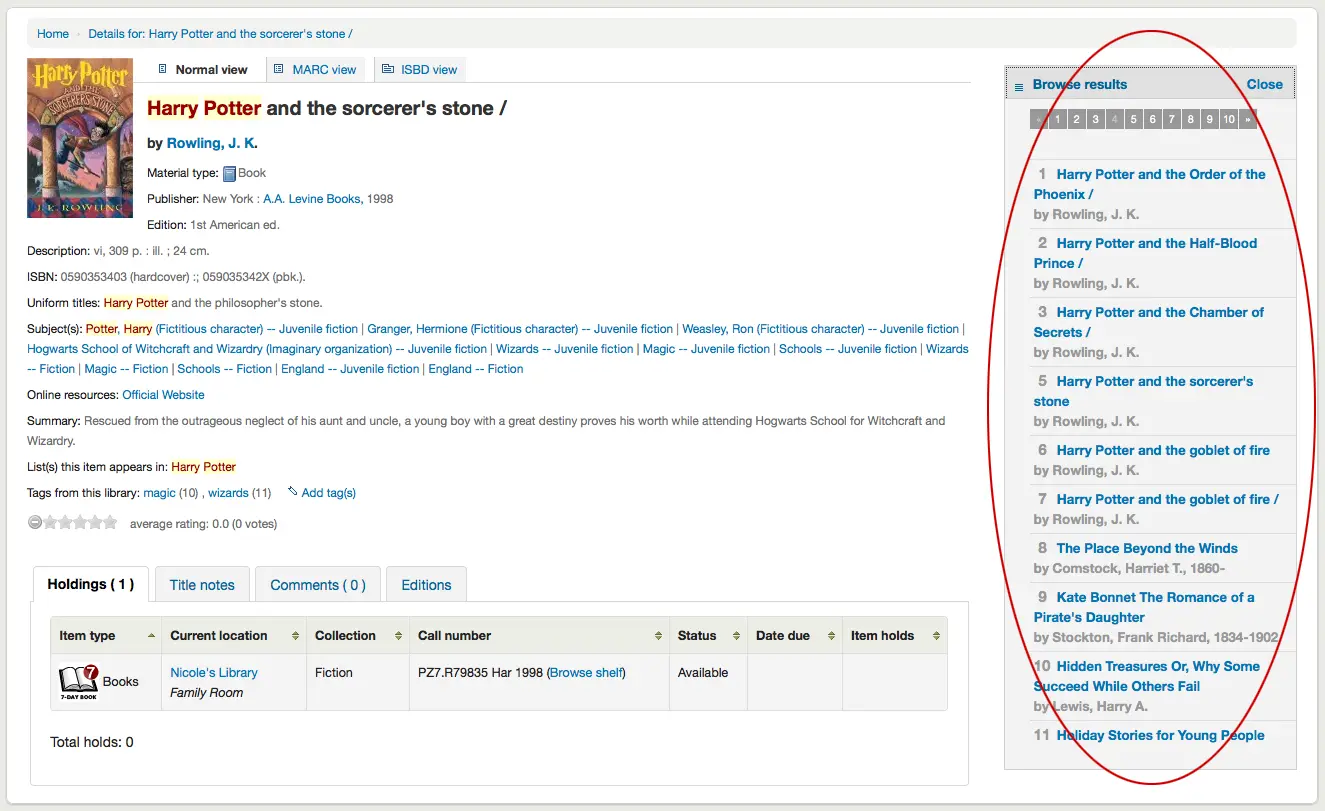
Sous ces boutons de recherche, vous trouverez des liens pour réserver, imprimer, enregistrer la notice dans vos listes, l’ajouter à votre panier ou l’envoyer à un périphérique (en utilisant un QR code).
Another option that will appear on this right hand side bar, if a library is allowing purchase suggestions (see the suggestion system preference), is the ability to “Suggest for Purchase”. Clicking this link will bring the user to the purchase suggestion form to fill out.
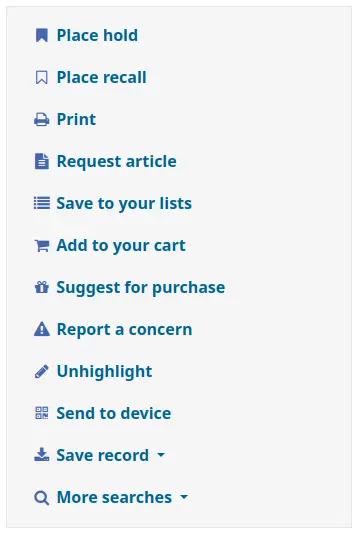
Cliquer sur “Plus de recherches” affichera la liste des bibliothèques que vous avez enregistrées dans la préférence système OPACSearchForTitleIn
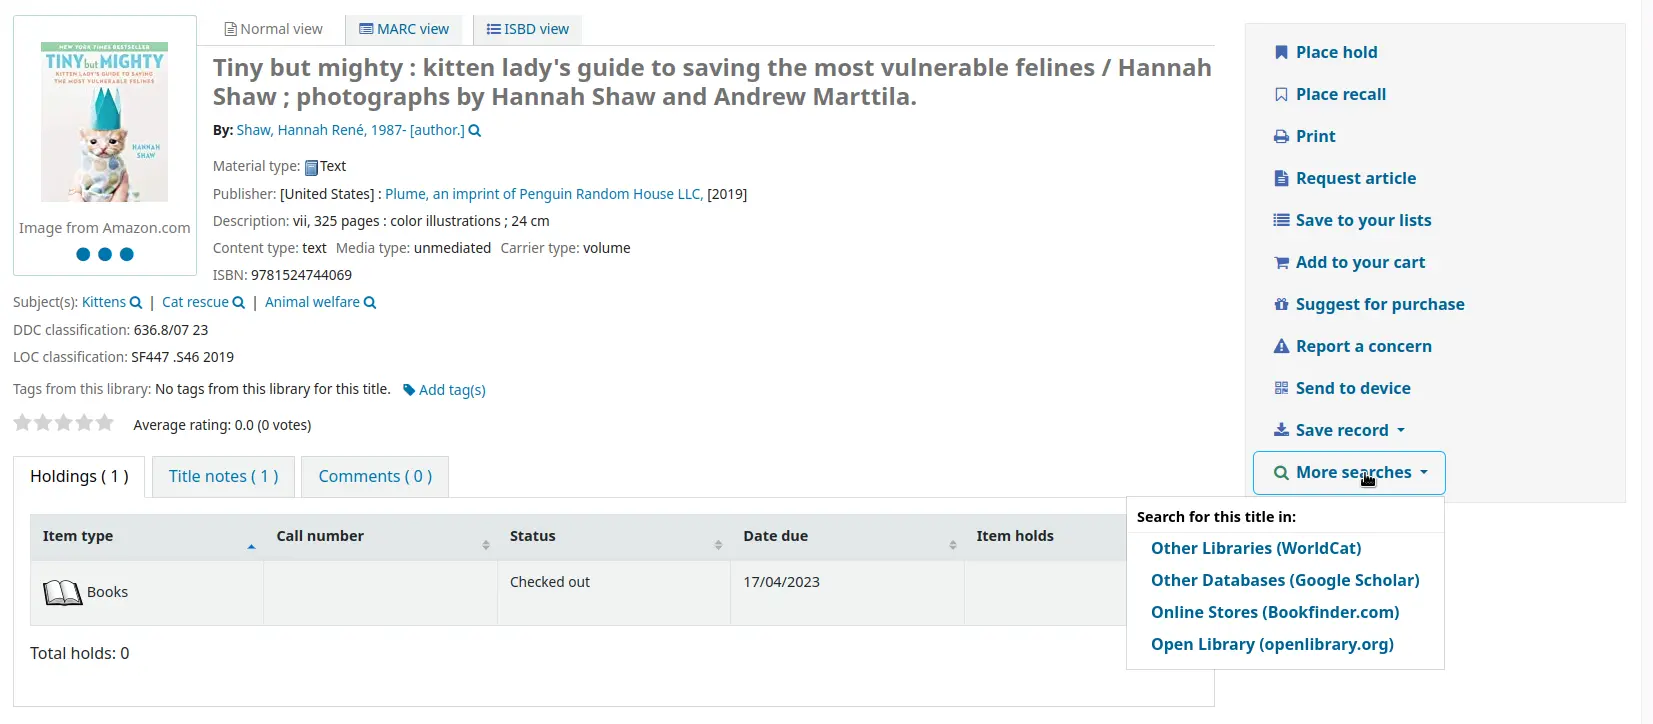
Sous le lien “Enregistrer la notice” vous trouverez une liste de formats de fichiers sous lesquels enregistrer la notice. Cette liste peut être personnalisée en modifiant la préférence système OpacExportOptions.
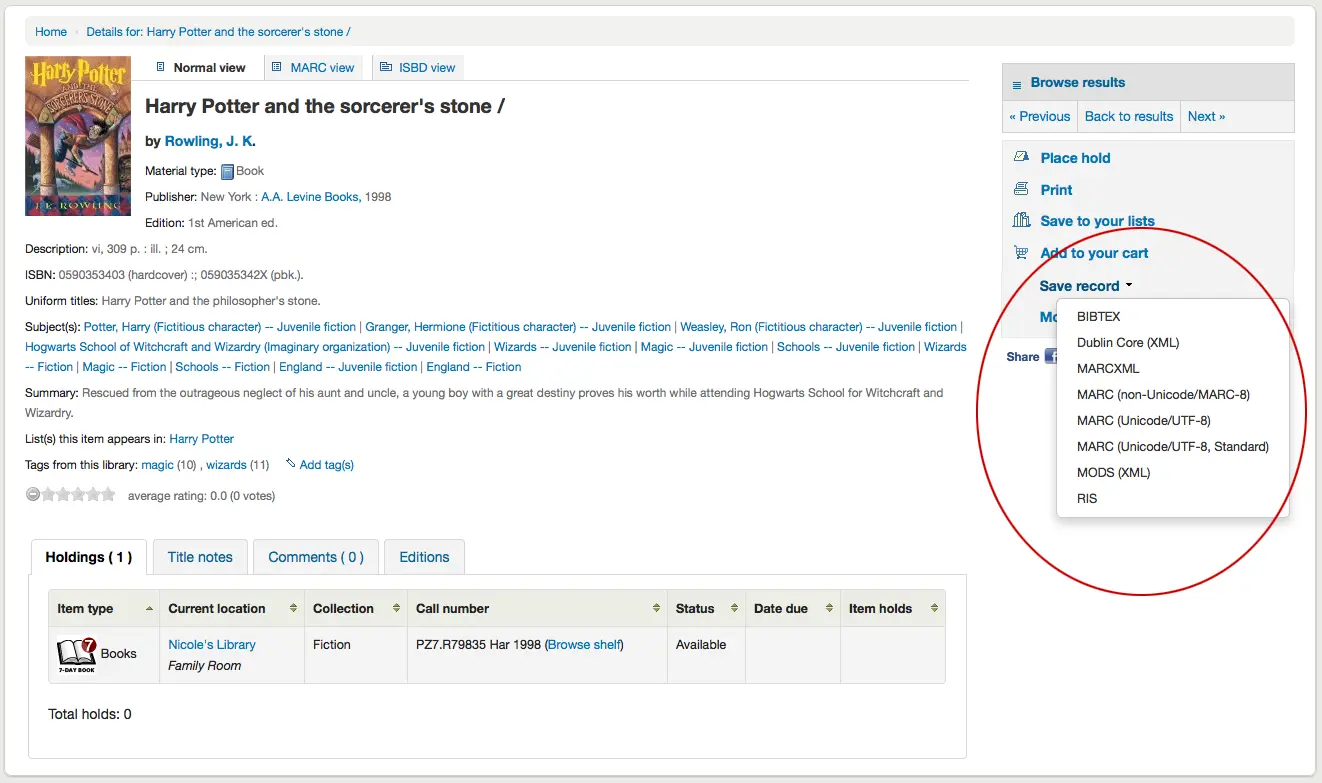
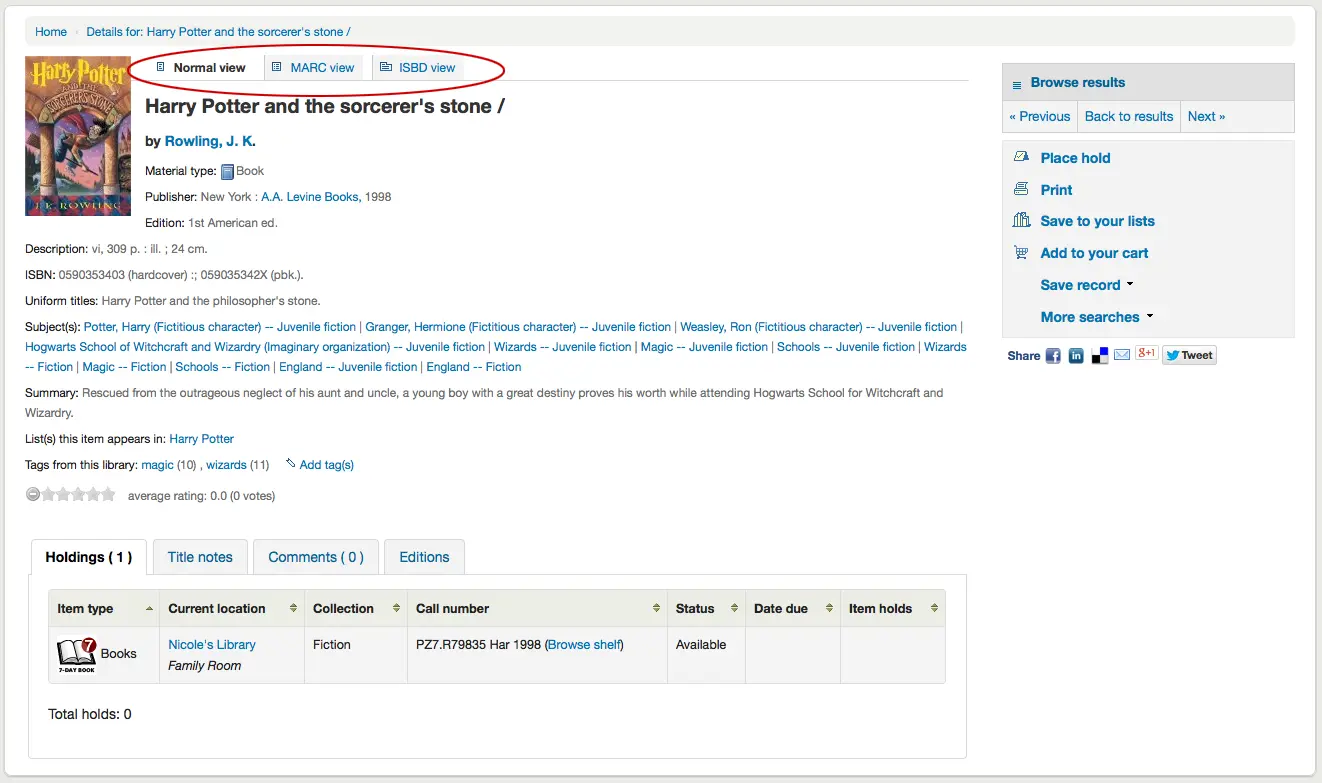
Il est possible d’activer jusqu’à trois modes d’affichage du détail bibliographique : Vue normale, MARC et ISBD. Pour cela, cliquez sur les onglets situés tout en haut de la notice
Rapporter des problèmes concernant des notices bibliographiques
Si la préférence système OpacCatalogConcerns est activée, les adhérents pourront rapporter des problèmes concernant des notices bibliographiques précises.
Ceci est similaire à la fonctionnalité Signaler une anomalie, mais est lié à une notice bibliographique spécifique, et il y a la possibilité d’avoir une résolution.
Pour signaler un nouveau problème,
Dans la page détaillée de la notice bibliographique, cliquez sur le lien “Rapporter un problème” dans les options à droite.

Note
Les adhérents doivent être connectés pour signaler un problème. S’ils ne sont pas connectés, le système leur demandera leurs informations de connexion.
Complétez le formulaire de signalement.
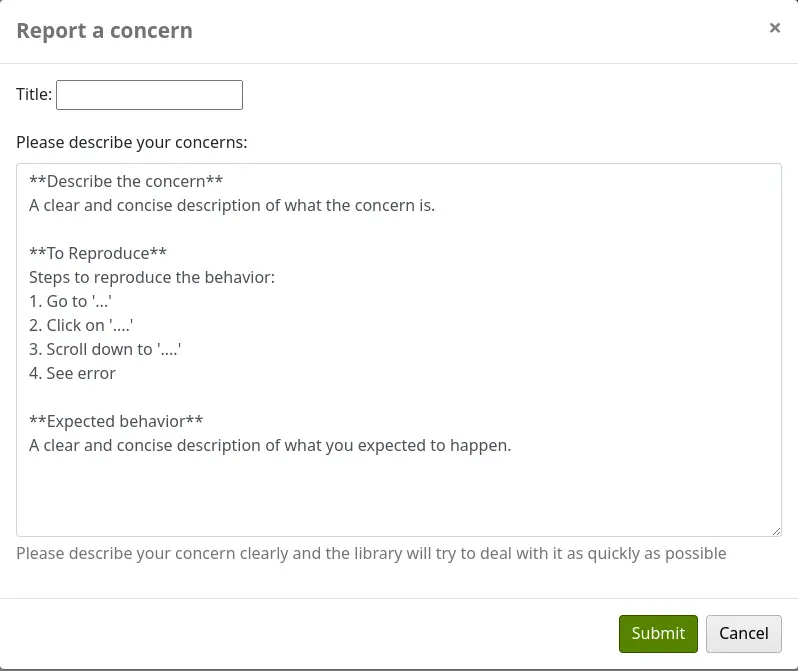
Titre : saisissez un titre décrivant succinctement le problème.
Merci de décrire vos problèmes : entrez des détails sur le problème, en étant le plus descriptif possible afin que la personne qui reçoit ce signalement puisse le reproduire et le constater.
Un exemple de ce qui est attendu dans la description est fourni dans le champ :
**Describe the concern**

A clear and concise description of what the concern is.

**To Reproduce**

Steps to reproduce the behavior:
1. Go to '...'
2. Click on '....'
3. Scroll down to '....'
4. See error

**Expected behavior**

A clear and concise description of what you expected to happen.
Note
Ce texte est personnalisable dans l’outil de personnalisation HTML, en modifiant l’entrée “CatalogConcernTemplate”.
Le texte en bas du formulaire (« Merci de décrire votre problème clairement… ») est également personnalisable dans l’outil personnalisations HTML, en modifiant l’entrée “CatalogConcernHelp”.
Cliquer sur “Valider”.
Ceci enverra un courriel à l’équipe de catalogage pour les informer qu’un nouveau problème a été créé. Le courriell sera envoyé à l’adresse de courriel dans la préférence système CatalogerEmails. Le courriel envoyé est la notification TICKET_NOTIFY, qui peut être personnalisée dans l’outil Notifications et tickets.
Un courriel sera également envoyé au rapporteur pour l’informer que le problème a été reçu. Le courriel envoyé est la notification TICKET_ACKNOWLEDGE, qui peut être personnalisé dans l’outil Notifications et tickets.
Les problèmes signalés au sujet de cette notice sont visibles dans l’onglet “Problèmes”.

Tous les tickets de problème sont visibles dans le rapport Problèmes dans le catalogue.
Les rapports de problème nouvellement ouverts apparaîtront également dans la section notification au bas de la page principale de l’interface professionnelle.

Listes et panier
A cart is a temporary holding place for records you’re interested in finding during this session. That means that once you log out of the OPAC or close the browser you lose the items in your cart.
A list is a more permanent location for saving items.
Pour en savoir plus sur les listes, consultez le chapitre Listes et panier de ce manuel, qui traite de ces fonctionnalités dans l’interface du personnel.
Listes
Patrons can manage their own private lists and find all public lists by visiting the “Lists” section of their account.
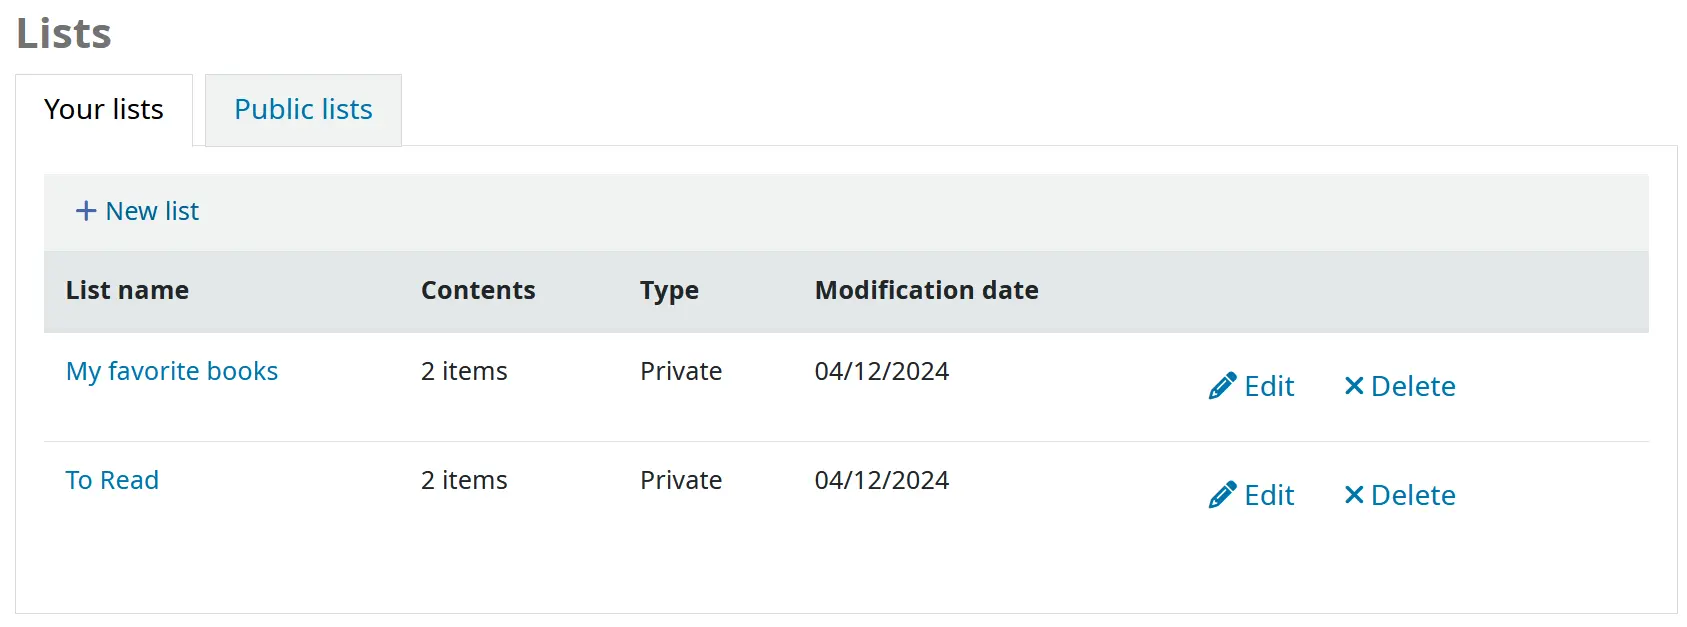
La colonne “Date de modification” indique quand la liste a été modifiée pour la dernière fois et est utile pour savoir rapidement si la liste est à jour.
Création de listes
Pour créer une liste, l’adhérent doit simplement cliquer sur le lien “Nouvelle liste” et remplir le formulaire qui apparaît.

Nom de la liste : l’adhérent doit saisir un nom de liste, c’est le seul champ requis
Trier cette liste par : l’adhérent peut choisir comment il veut trier la liste (par titre, auteur, année de publication, cote ou date d’ajout à la liste).
Catégorie : l’adhérent peut choisir de garder cette liste privée ou de la rendre publique. Une liste publique sera visible par tous les utilisateurs de l’OPAC.
Note
Si vous n’autorisez pas les adhérents à créer des listes publiques avec la préférence système OpacAllowPublicListCreation , les adhérents auront seulement le droit de créer des listes privées.
Autoriser les modifications du contenu par : l’adhérent peut choisir qui pourra ajouter ou supprimer des titres de la liste.
Personne : personne, y compris l’adhérent lui-même, ne pourra ajouter ou supprimer des titres.
Owner only: only the patron who created the list will be able to add or remove titles. If the list is public or shared, the OPAC users or sharers will not be able to change the list contents.
Quiconque visualisant cette liste : toute personne ayant accès à la liste pourra ajouter ou supprimer des éléments. Si la liste est publique, cela signifie toute personne. Si la liste est privée, seul le propriétaire pourra modifier le contenu. Si la liste est partagée, le propriétaire et les bénéficiaires du partage pourront le modifier.
Personnel uniquement : cette option n’apparaîtra qu’aux membres du personnel pour que la liste puisse être modifiée par tous les membres du personnel.
Vous pouvez créer des listes en cliquant sur “Nouvelle liste” dans le menu “Ajouter à” des résultats de recherche

Ajouter des titres aux Listes
Titles can be added to lists from the search results or from the bibliographic record.
In the search results, the option to add items to the list appear below each result (“Save to lists” button)

and across the top of the results page, next to “Select titles to: Add to…”

Pour ajouter un seul titre à une liste, cliquez sur l’option “Enregistrer dans Listes”, puis choisissez la liste dans laquelle vous souhaitez ajouter le titre. Pour ajouter plusieurs titres à une liste, cochez les cases à gauche des titres que vous souhaitez ajouter et choisissez la liste dans laquelle vous souhaitez ajouter les titres, en cliquant sur le menu déroulant “Ajouter à” en haut de l’écran.
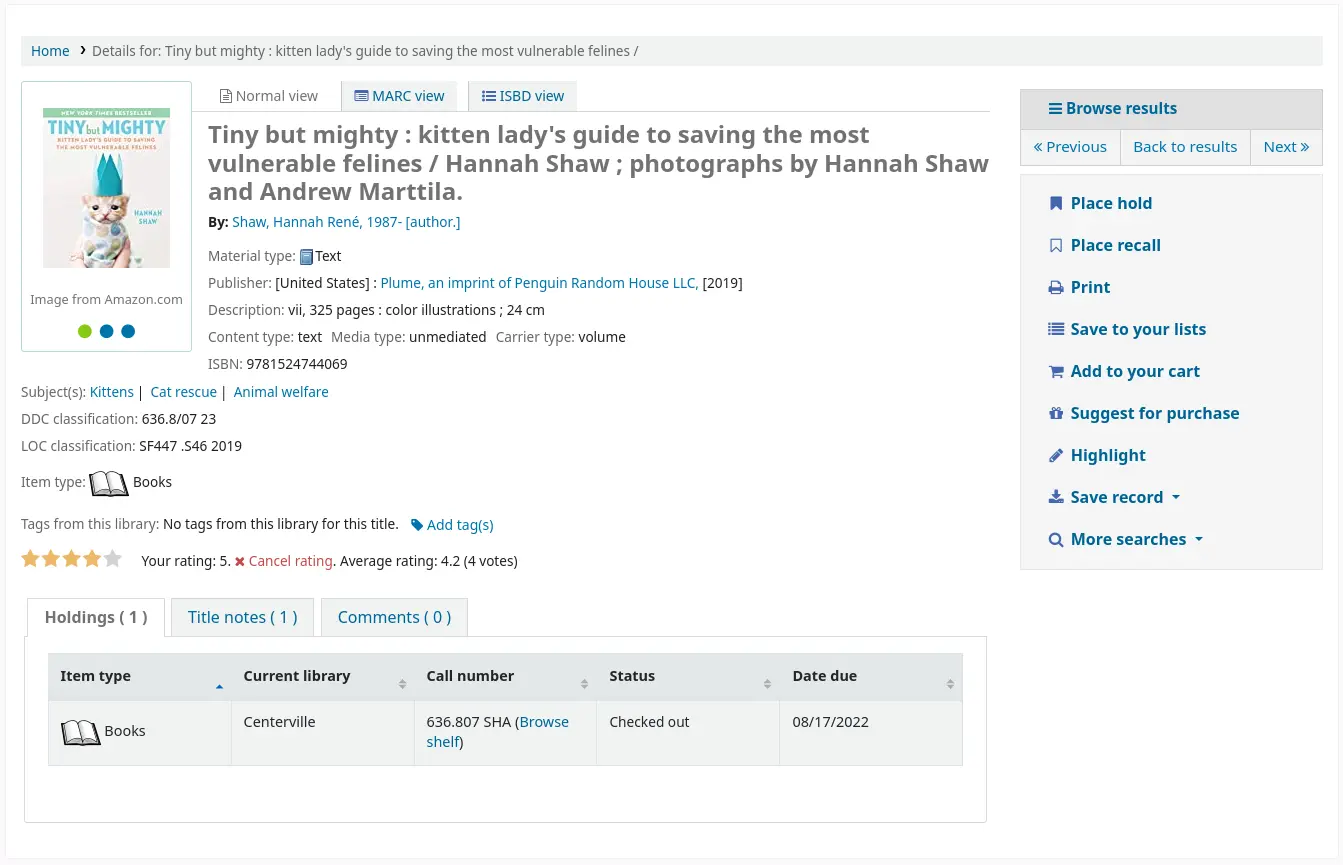
From the bibliographic record, the option to save the title to a list is in the menu on the right.
Titles can also be added to a list from the cart.
Visualiser le contenu des listes
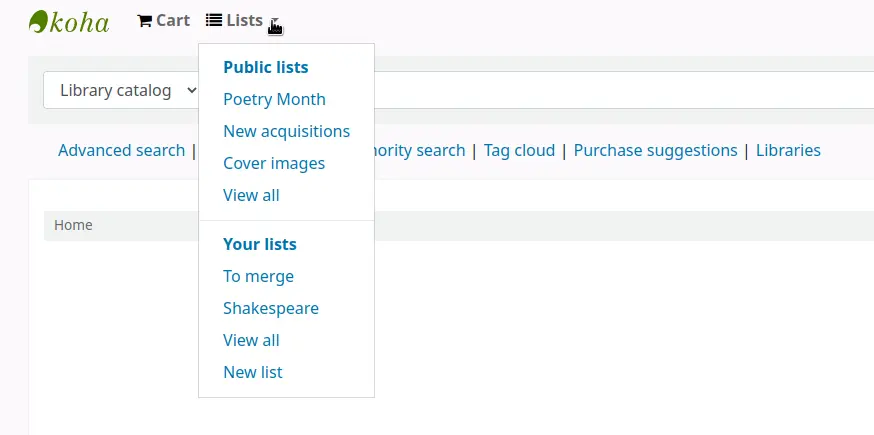
Pour visualiser le contenu d’une liste, cliquez sur le nom de la liste sur le menu déroulant “Listes”.
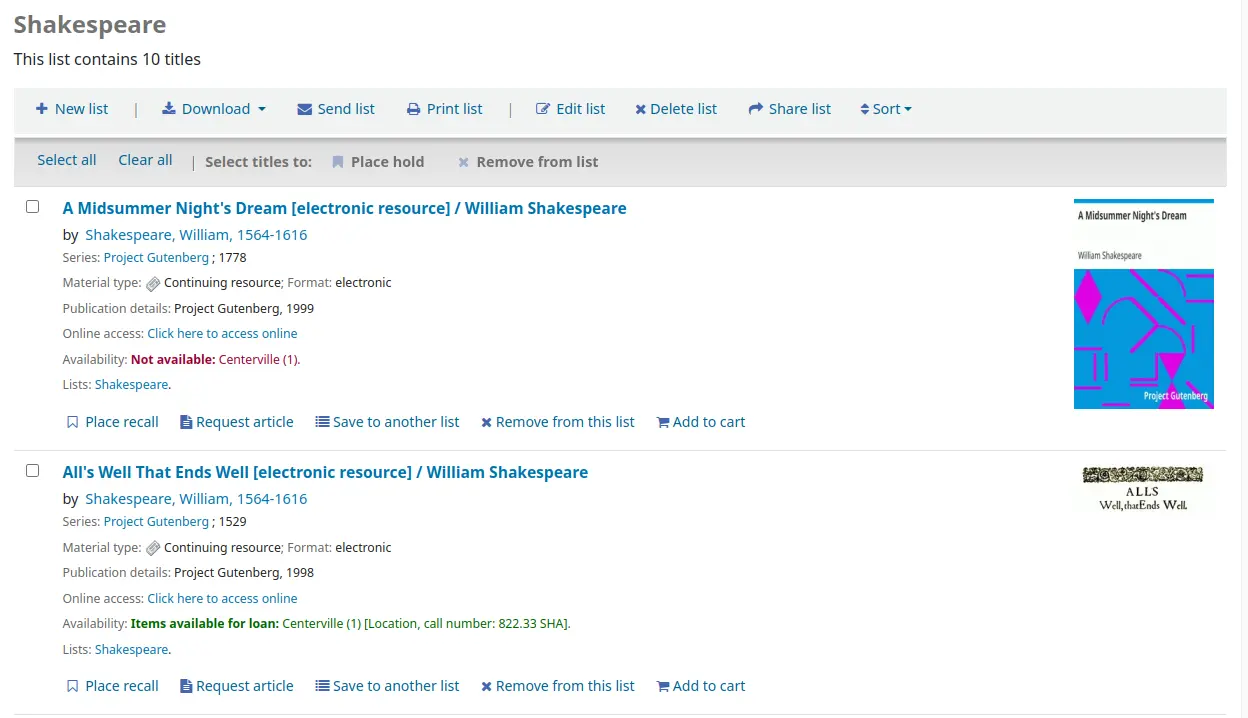
Le contenu de la liste sera similaire aux pages de résultats de recherche sauf qu’il y aura différentes options situées en haut de la liste.
À la droite du titre de la liste, il y a une icône de fil RSS qui vous permettra de vous abonner aux mises à jour de la liste.
Note
The RSS icon only appears on public lists.
Si vous utilisez les options situées au-dessus de la liste, vous pouvez réserver plusieurs documents , télécharger le contenu de la liste, envoyer par courriel la liste ou l’imprimer.
Pour réserver un ou plusieurs documents de la liste, cochez la case à gauche des titres et cliquez sur le lien “Réserver” situé en haut
Pour télécharger le contenu de la liste, cliquez sur “Télécharger liste” et choisissez le format dans lequel vous souhaitez la télécharger
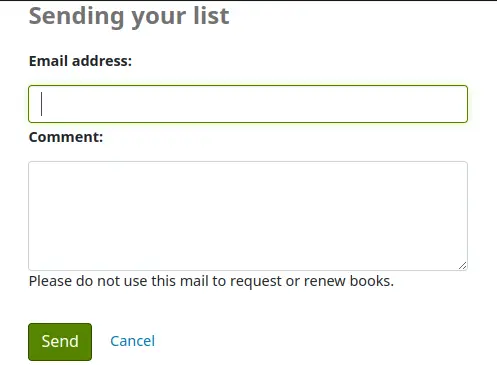
Pour envoyer le contenu de la liste par courriel, cliquez sur le lien « Envoyer la liste » et saisissez votre courriel dans le formulaire qui s’affiche
Note
Le message envoyé lors de l’envoi de la liste par courriel est LIST, et peut être configuré avec l’outil Notifications et tickets.
Note
The “Send list” option will only appear if the OPACDisableSendList system preference is set to “Allow.”
Pour imprimer le contenu de vos listes, cliquez sur le lien “Imprimer liste”
Removing titles from lists
To remove a title from a list,
-

Click “Remove from this list” under the title to remove.
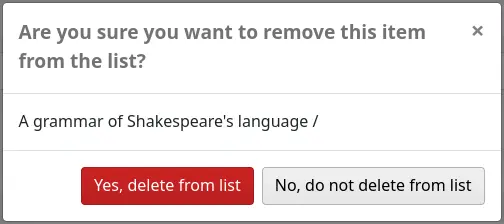
Cliquer sur “Oui, retirer de la liste” pour confirmer la suppression du titre de la liste.
Gestion des listes
Une fois que la liste est enregistrée, les adhérents peuvent commencer à lui ajouter de documents. Depuis l’onglet Mes listes du compte adhérent, l’usager peut modifier et supprimer les listes qu’il a créées en cliquant sur le lien approprié situé à droite du nom de la liste.

To edit the list’s title or sorting patrons click the “Edit” button to the right of the list description.

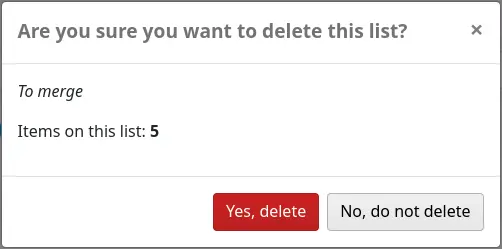
Lorsque vous cliquez sur “Supprimer” à côté d’une liste, il vous sera demandé de confirmer la suppression de la liste.
If the OpacAllowSharingPrivateLists system preference is set to “Allow”, patrons will see the “Share” button on the list of lists and the “Share list” button at the top of each individual list. Clicking this will ask you to enter the email address of a patron.

Une fois le courriel saisi, un message de confirmation s’affichera

et un message sera envoyé à cet adhérent.
Once the other patron accepts the shared list, the sharing patron will receive a confirmation.
Note
The message sent to share the list is SHARE_INVITE and the message sent to the sharing patron to confirm the other patron has accepted the share is SHARE_ACCEPT. Both messages are customizable in the Notices and slips tool.
The other patron will see the shared list with their own private lists (the type will be “Shared” rather than “Private”). They will also have the option to remove the share, if they don’t want to have access to this list anymore.
The owner of the shared list will have the option to transfer the ownership of the list to one of the patrons with whom the list is shared.
If the TagsInputOnDetail system preference is enabled, patrons will have the possibility of adding tags to titles from the list view.
Panier
Ajouter des titres au Panier
Titles can be added to the cart from the search results or from the bibliographic record.
In the search results, the option to add items to the cart appear below each result (“Add to cart” button)

and across the top of the results page, next to “Select titles to: Add to…”

Clicking the “Add to cart” button under a single result will add the one title to your cart.
Pour ajouter plusieurs titres à la fois, cochez les cases situées à gauche de chaque résultat et sélectionnez “Panier” dans le menu déroulant “Ajouter à”. Une fois tous vos titres ajoutés au panier, un message de confirmation s’affichera en haut de la page.

A partir des résultats, vous verrez les exemplaires qui sont déjàdans votre panier et vous pourrez supprimer ces exemplaires de votre panier en cliquant sur “Supprimer” (remove).

From the bibliographic record, the option to add the title to the cart is in the menu on the right.

Gestion du Panier
Once there are titles in the cart, you can manage the contents by clicking on the “Cart” button usually found at the top of the screen. Your cart will open in a new window.
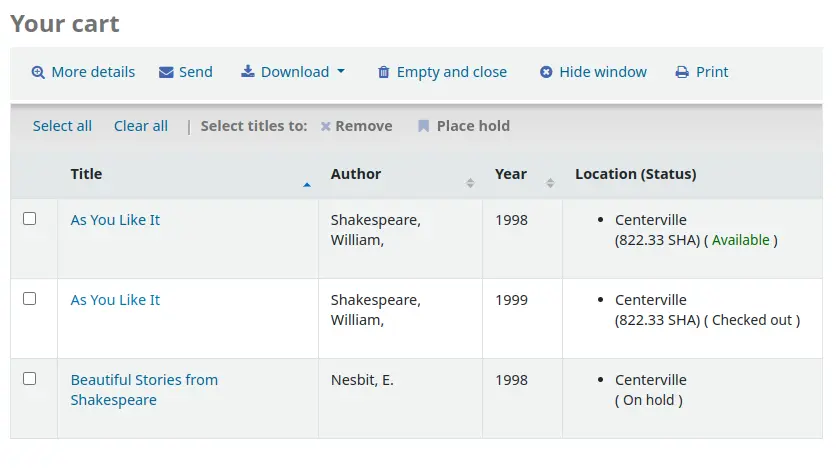
Il y a plusieurs boutons situés dans la partie supérieure du panier.
Plus de détails : cliquer dessus fra s’afficher des informations supplémentaires concernant les titres de votre panier (ISBN, sujets, éditeur, notes etc.).
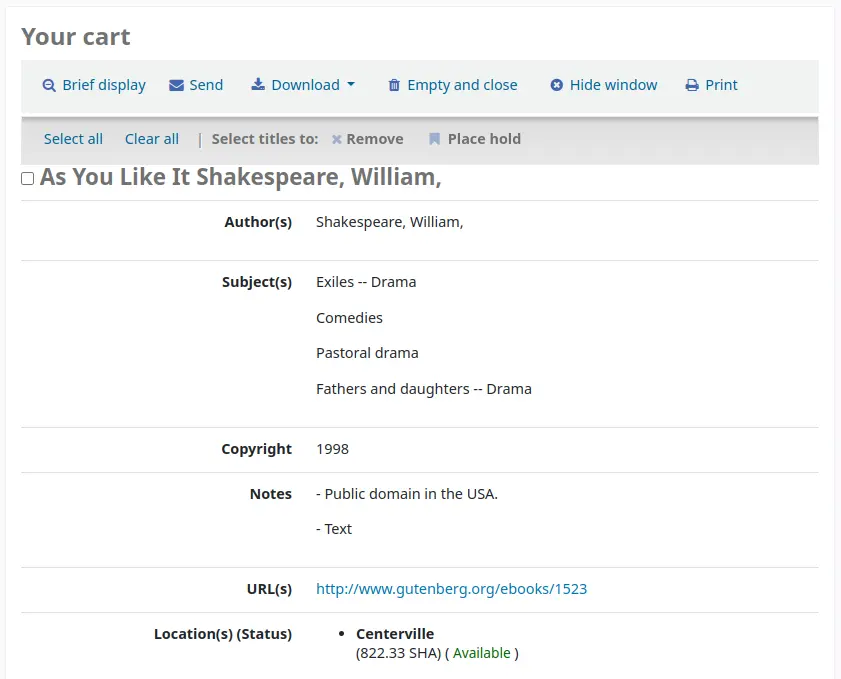
When clicked, the “More details” button will become “Brief display”. Clicking this will return to the default display in table form of the title, author, copyright date and item location and status.
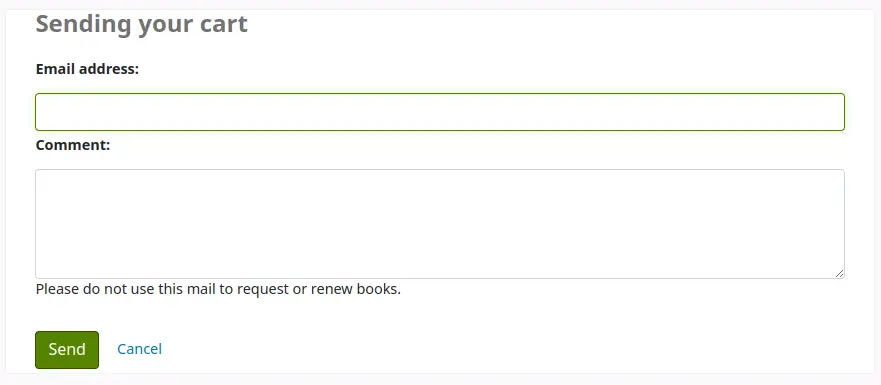
Send: the option to send the contents of the cart to an email address. This is handy if you want to send the resources you found at the library to your home email account to refer to later or to send to a patron researching a specific topic. Clicking this link will open up a new window that asks for the email address and message to send.
Avertissement
The cart can only be emailed by logged in users. This will prevent the cart email function from being used for spamming.
Note
Le message envoyé lors de l’envoi de la liste par courriel est CART, et peut être paramétré avec l’outil Notifications et tickets.
Download: you can download the contents of the cart in several predefined formats or using a CSV profile that you defined in the tools module.
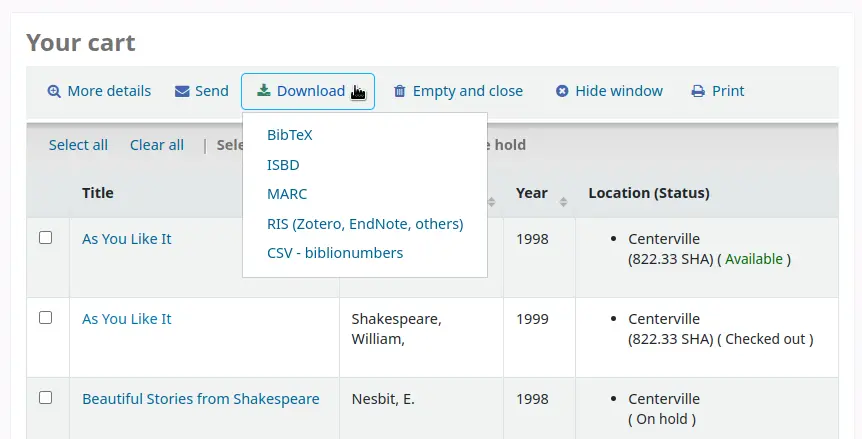
Empty and close: this will empty the cart and close the window.
Hide window: this will close the window, but the cart will not be emptied.
Print: this will print out the contents of the cart.
En plus des différentes manières d’enregistrer le contenu de votre panier, il y a de nombreuses façons d’enrichir sa valeur.
Select one or more titles from the cart and choose one of the options:
Remove: this will remove the selected titles from the cart.
Add to a list: this will add the selected titles to a list
Place hold: this will place a hold on all selected titles
Tag: if the TagsInputOnDetail system preference is enabled, patrons will be able to add tags to selected titles.
Faire une réservation
Patrons can place holds on items via the OPAC if they’re logged in and the OPACHoldRequests system preference is set to “Allow”. If the item can be placed on hold, the option to place it on hold will appear in several different places.
Si la préférence système DisplayMultiPlaceHold est activée, lors de la visualisation d’une liste ou de la page de résultats d’une recherche, vous pourrez réserver plusieurs documents en cochant les cases situées à gauche des résultats et cliquant sur “Réserver” en haut.

En visualisation d’une liste ou de résultats de recherche, vous apercevrez l’option de réservation de documents en bas des informations du titre.

Si vous consultez un titre individuel, vous verrez l’option pour réserver située dans le cadre sur le côté droit de l’écran

All of the above links will show the same hold screen.
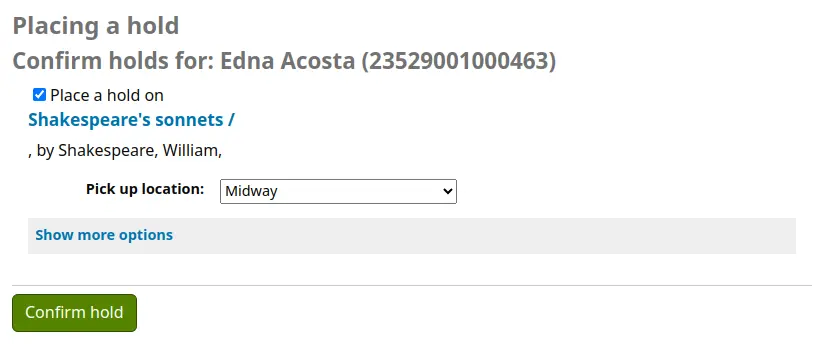
La case à gauche des documents que vous souhaitez réserver doit être cochée.
Le titre inclut un lien direct pour la page de détails de la notice.
Your priority: if the OPACShowHoldQueueDetails system preference is set to show the priority level, the priority, where in the holds queue this hold will fall, will be displayed.
Si l’option est autorisée par votre préférence système OPACAllowUserToChooseBranch, l’adhérent peut choisir dans quel site retirer sa réservation. La liste des sites possibles inclura tous les sites ayant paramétré “Site de retrait” sur “Oui” dans la page de configuration de la bibliothèque.
Click “Show more options” to show additional settings for this hold.
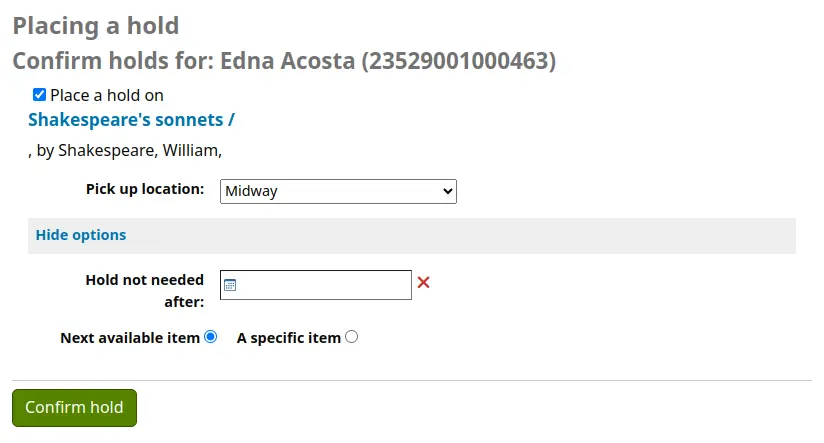
Début de réservation : si la préférence système OPACAllowHoldDateInFuture est activée, la barre de saisie “Début de réservation” s’affichera et permettra à l’adhérent de faire débuter sa réservation à une date future.
Hold not needed after: by default, holds placed in the system remain until canceled, but if the patron fills in this field, the hold will have an expiration date.
Important
Les réservations arrivées à expiration sont retirées par le cron job cancel_expired_holds.pl. Ceci n’est pas un processus automatique et doit être planifié par votre administrateur système.
Request specific item type: if the AllowHoldItemTypeSelection system preference is set to “Allow”, this option will be displayed for the patron to choose to limit the hold to a specific item type.
Request specific item group: if the EnableItemGroupHolds system preference is set to “Enable” and the record has item groups, the patron can choose to place a hold on the next available item of a group, rather than the next available item on the whole record or a specific item.
Hold notes: if the OpacHoldNotes system preference is enabled, patrons will be able to leave notes about their holds for the library.
Depending on the circulation rules regarding item-specific holds, the patron will be allowed to choose whether to place the hold on the next available item or a specific item.
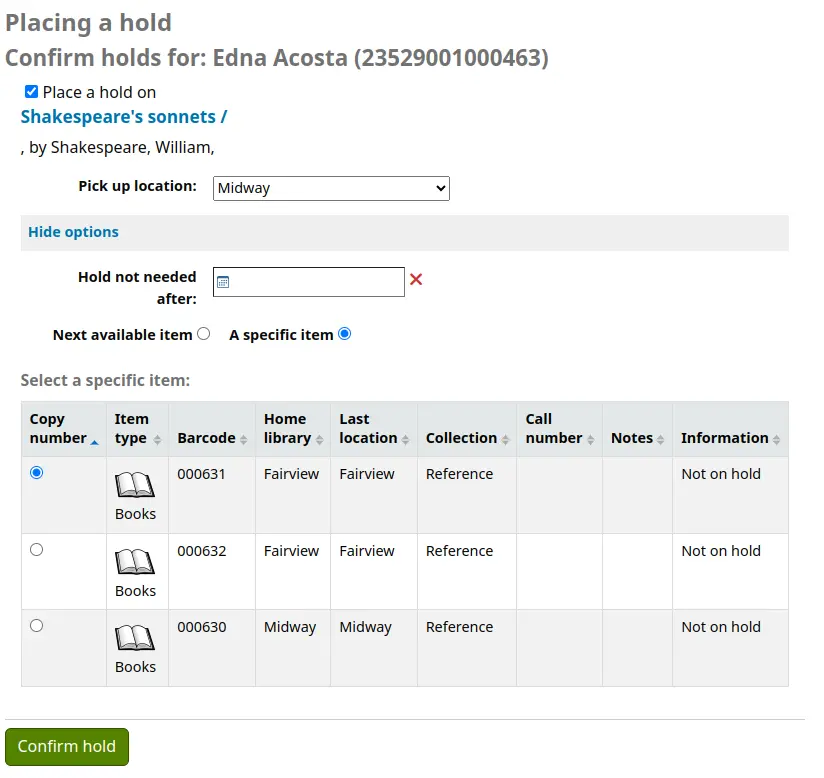
After clicking the “Confirm hold” button, the patron will be brought to their account page where they’ll see all of the items they have on hold.
Rappels en attente
If your library accepts recalls (see setting up recalls for more information), patrons will be able to place recalls on items.
L’option de demande de rappel se trouve à de multiples endroits à l’OPAC :
Dans la liste des résultats suite à une recherche, l’option “Placer un rappel” apparaît en bas de chaque résultat sur lequel un rappel peut être placé.

Dans l’affichage des détails d’une notice, l’option “Placer un rappel” apparaît à droite de l’écran (ou en bas sur une version “mobile”) dans les options

Chacun de ces liens dirige vers le formulaire de rappel.
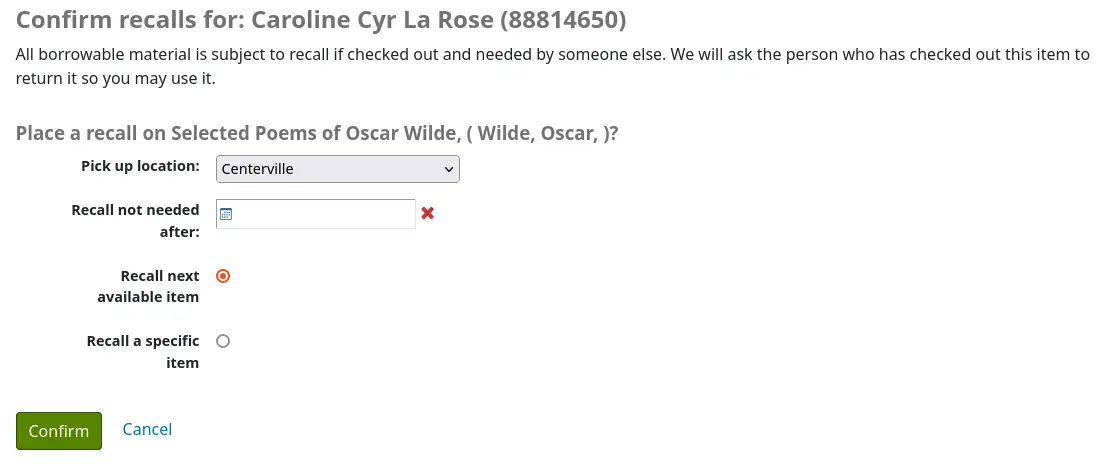
Site de retrait : l’adhérent peut choisir où il souhaite récupérer le document rappelé.
Recall not needed after: if the patron not need this item after a certain date, they can enter it here. The recall will be automatically expired (with the expire_recalls.pl cronjob) after that date.
Recall next available item or Recall a specific item: the patron can choose to recall any item or a specific one. If they choose “Recall a specific item”, they will be asked to select the item in the list.
Once the patron confirms their recall request, they will have get a message saying the the patron who currently has the item will be notified.
Note
The notice sent to the patron who currently has the item is RETURN_RECALLED_ITEM. It can be edited in the Notices and slips tool.
The request will be added to the recalls tab in their account summary, as well as in their recall history list.
Contenu enrichi
OverDrive
If the OverDrive system preferences are used, an OPAC search will also search the library’s OverDrive collection.
After conducting a search, you will see a hyperlink above the library catalogue results: “Found X results in the library’s OverDrive collection”.
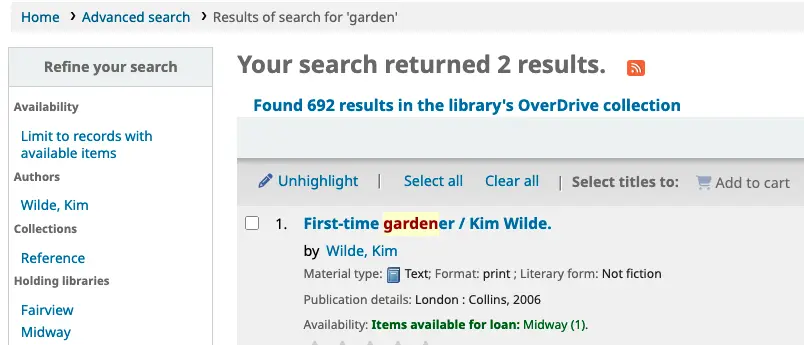
When you click on this link, you will see all the corresponding OverDrive results without navigating away from the OPAC.
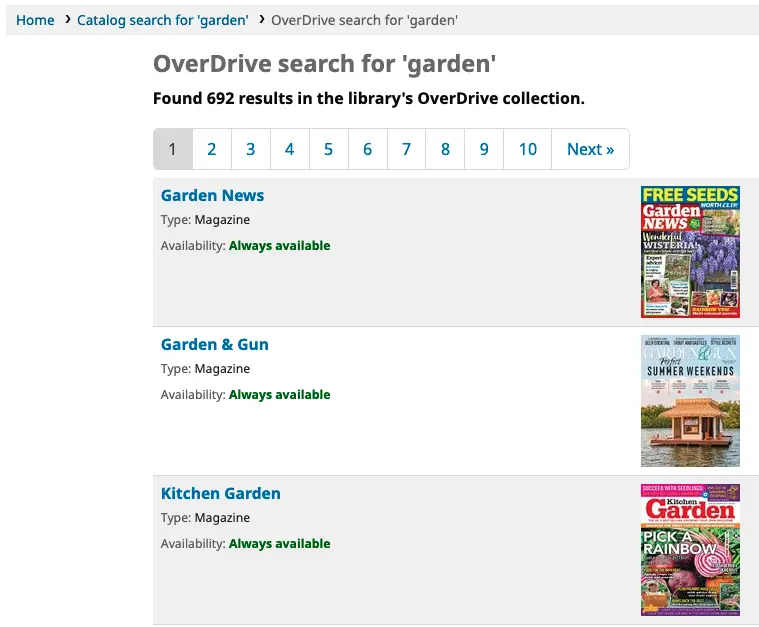
Clicking on a title in this list will take you to the record on the OverDrive website.
Taguer (mots-clés)
Depending on the settings for the TagsEnabled, TagsInputOnList and TagsInputOnDetail system preferences, patrons may be able to add tags to bibliographic records from the search results and/or from the bibliographic records” detail page.
If you are allowing patrons to add tags from the search results list (see TagsInputOnDetail), patron will see an “Add tag” button below each result and a “Tag” option at the top of the screen.

To add a tag to one item, click “Add tag”, type the tag or tags (separated by commas) in the “New tag” box and click “Add”. You will be presented with a confirmation of your tags being added.

A partir des résultats, il est possible de taguer des titres par groupe en cochant les cases sur la gauche et en cliquant sur le bouton “Tag”. Une barre de saisie apparaîtra pour que vous ajoutiez des tags à tous les titres que vous avez sélectionnés.
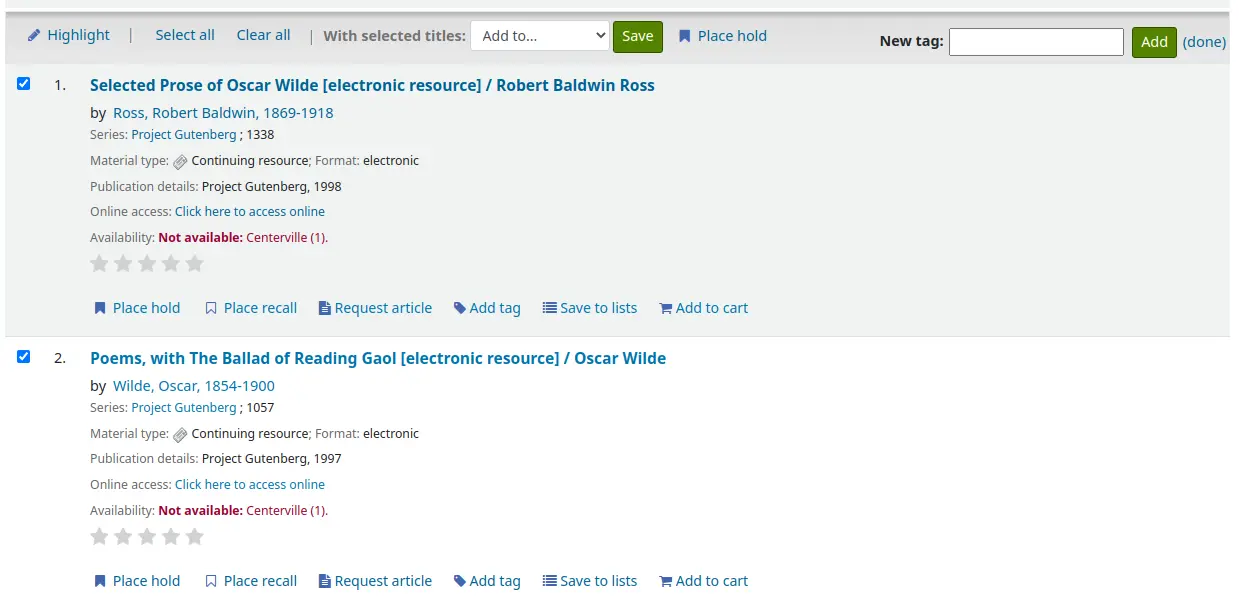
If the TagsInputOnDetail system preference is enabled, patrons will also have the possibility to add tags from a list and from the cart.
If the TagsInputOnDetail system preference is enabled, patrons will have the possibility of adding tags from the record detail page by clicking the “Add tag(s)” link. The link will be replaced by an input box.
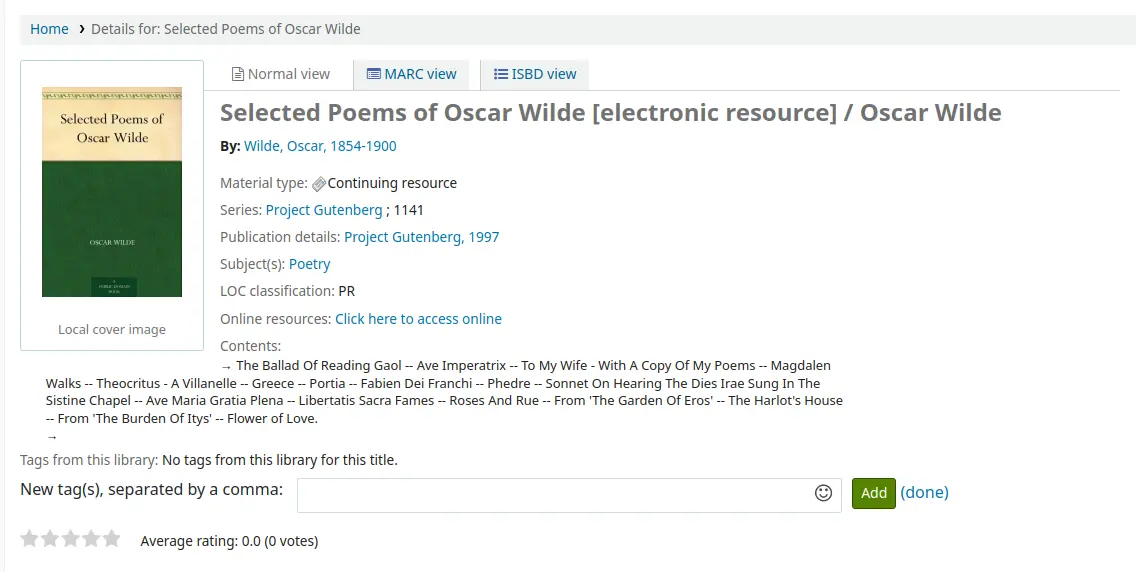
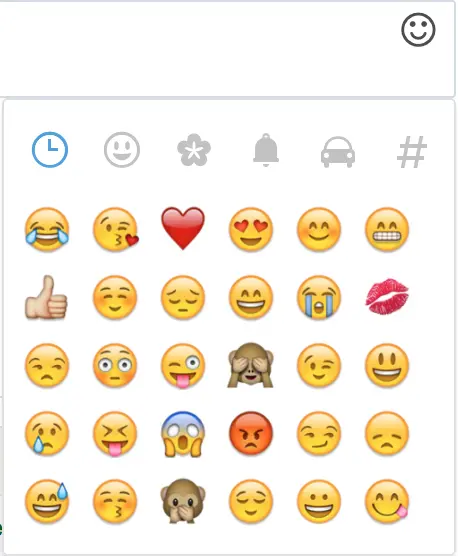
Des émoticônes peuvent également être ajoutées en utilisant le sélecteur d’émoticônes au moment d’ajouter des tags à partir de la page de détails de la notice.
Zotero
Zotero is an open source reference manager for saving and managing a bibliography. Learn more about and download Zotero at https://www.zotero.org.
A partir des résultats à l’OPAC, si Zotero est installé, vous verrez un icône sous forme de dossier dans la barre d’adresse à droite de l’URL. Cliquez sur le dossier afin de remonter la liste des titres de la recherche et de les ajouter à Zotero.
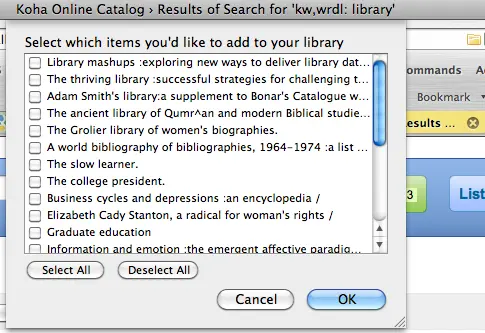
Sélectionnez les titres que voulez ajouter à Zotero et cliquez sur le bouton “OK”. Vous pourrez voir les titres ajoutés dans votre bibliothèque Zotero.

Personnaliser les flux RSS
En utilisant le cron job flux RSS vous pouvez créer un flux RSS pour toute requête SQL (par exemple un flux RSS pour les nouvelles acquisitions). Le cron job est exécuté en ligne de commande pour produire un document RSS XML.
Le résultat pourra être classé dans un répertoire accessible depuis OPAC (ou l’intranet) afin que les utilisateurs puissent télécharger le flux RSS.
An example of usage can be found at: misc/cronjobs/rss/lastAcquired.conf
Normalement le cron job (rss.pl) devrait être lancé périodiquement (ex : quotidien) afin de garder à jour le fil RSS.
Les listes du fichier de configuration (par exemple lastAcquired.conf)
nom du fichier modèle à utiliser
chemin du fichier exporté
Requête SQL
Le cron job rss.pl lance la requête SQL, puis envoie les résultats de la requête selon par le modèle pour produire le fichier de sortie.
Important
Pour utiliser les flux RSS personnalisés, vous devrez activer le cron job RSS.
OPAC self-registration
If you allow it, patrons can register for their own accounts via the OPAC. If you have the PatronSelfRegistration preference set to “Allow” then patrons will see a link to register below the log in box.
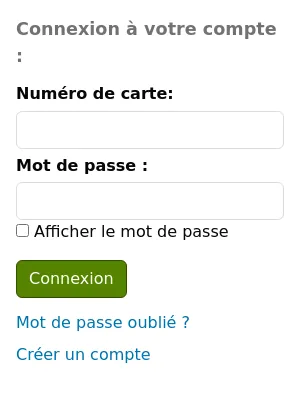
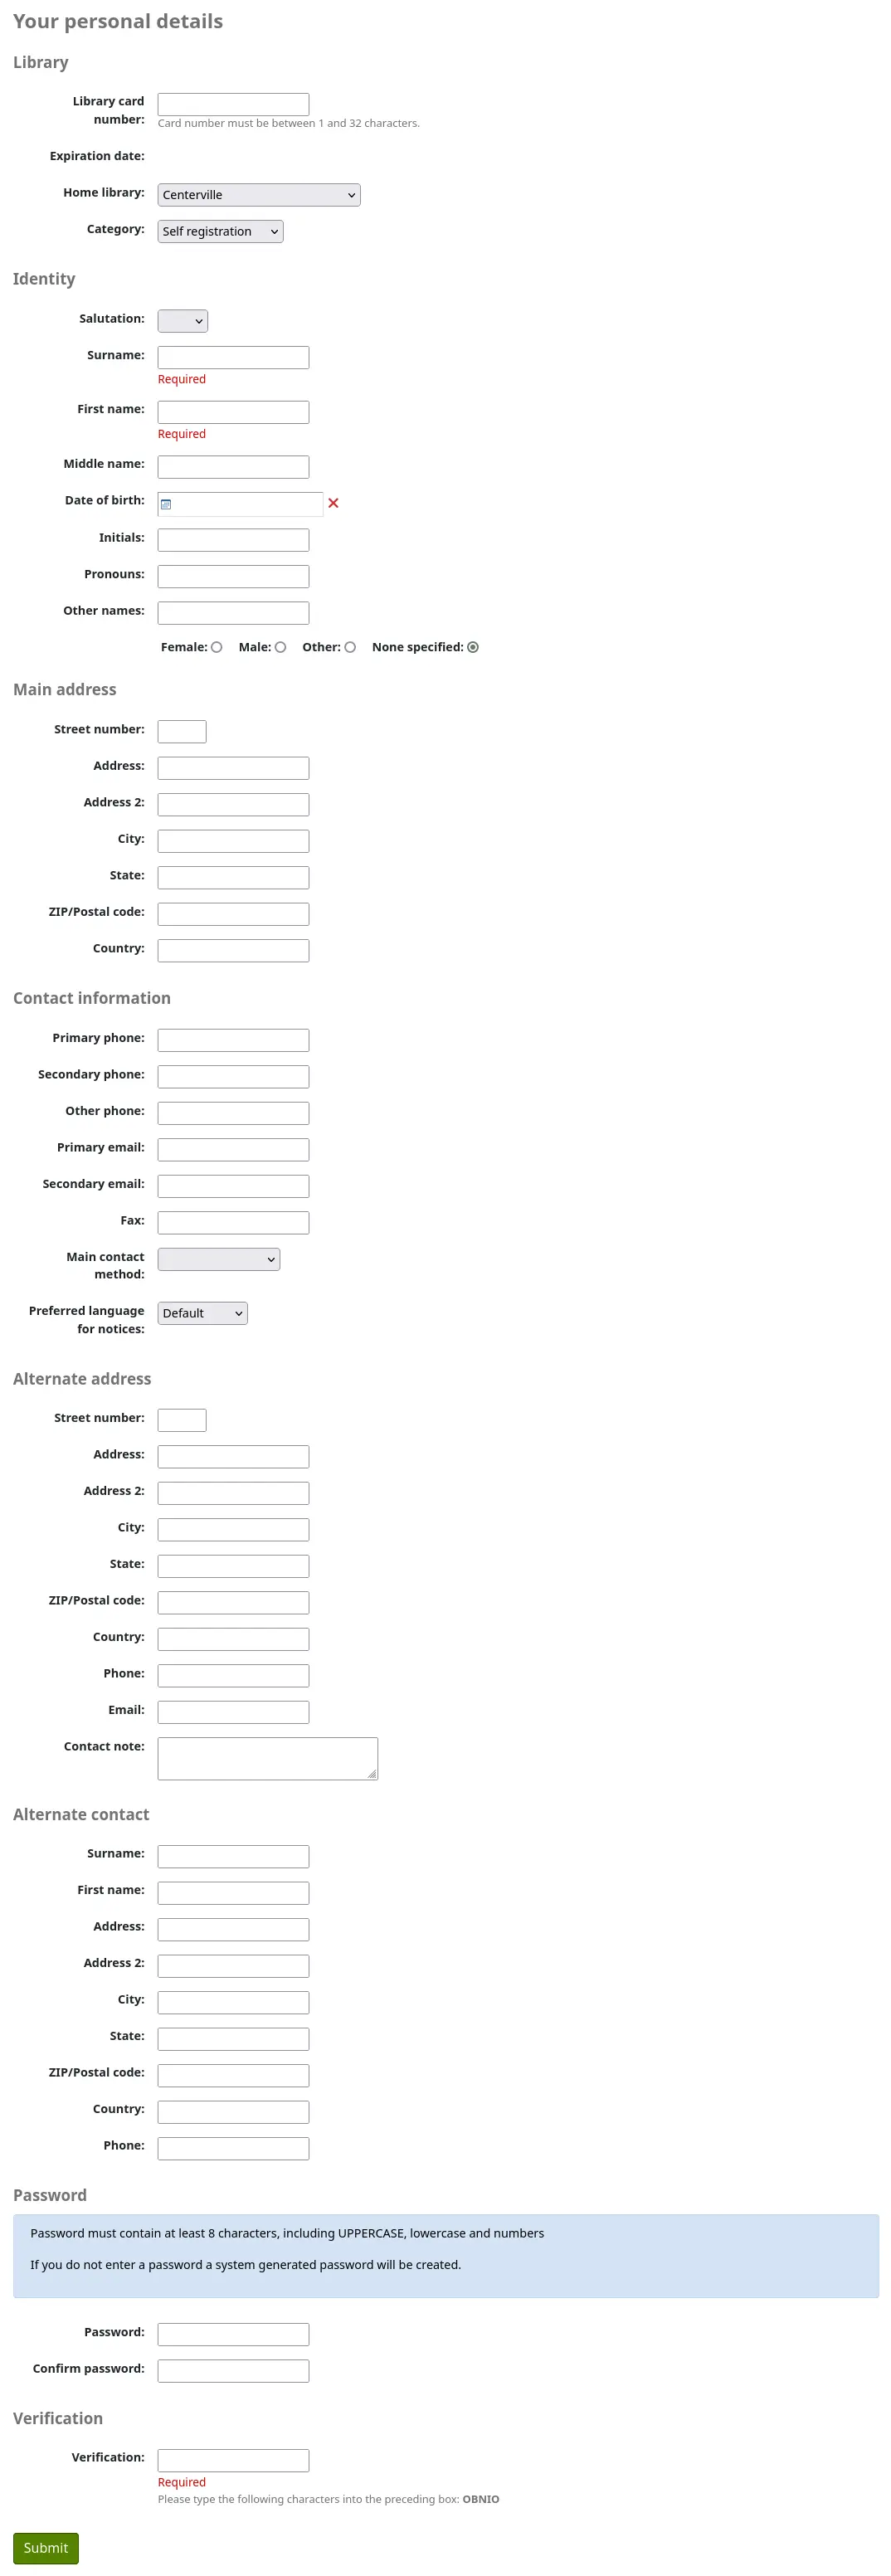
When the patron clicks the “Create an account” link they will be brought to a registration page. The options on the registration page can be controlled by editing the PatronSelfRegistrationBorrowerMandatoryField and the PatronSelfRegistrationBorrowerUnwantedField preferences.
Note
To prevent errors in birth years, you can enable the PatronSelfRegistrationAgeRestriction system preference. This adds a maximum age check to the self-registration.
Once the patron has submitted their registration they will either be sent an email to confirm their account (if you have the PatronSelfRegistrationVerifyByEmail preference to require this) or presented with their new username and password. If the PatronSelfRegistrationPrefillForm system preference is set to “Show and prefill”, they will be presented with the prefilled login form.

You can add additional instructions on this page by creating an HTML customization with the display location “PatronSelfRegistrationAdditionalInstructions”.
To be notified when a patron registers via the OPAC, use the EmailPatronRegistrations system preference, or the PatronSelfRegistrationAlert system preference.
Patrons registered in this way will not have a card number until assigned one by the library, but will have access to all OPAC functionality immediately. For this reason it is recommended that you:
set up a provisional patron category for self registered patrons (such as “Self-Registered) instead of using an existing patron category and set that value in the PatronSelfRegistrationDefaultCategory preference
donner à cette catégorie d’adhérents des droits de prêts limités dans Circulation and fines rules (comme d’autoriser quelques réservations mais pas de prêt)
That way patrons will either have to come in to the library to verify their identity before given a card number and the ability to check items out or the library will have to come up with internal policy on generating card numbers before providing them to self-registered patrons. Once this is done the library can change the category to one that is more appropriate (be it an adult, resident, non resident, student, etc) and add a card number/barcode.
Mon compte
Si la préférence système opacuserlogin est paramétrée sur “Autoriser”, les adhérents peuvent se connecter et accéder à leur compte.
Une fois connectés, les adhérents sont dirigés vers le menu du compte.
Si les adhérents demandent l’affichage de la page d’accueil alors qu’ils sont connectés et que OPACUserSummary est paramétrée sur “Afficher”, ils auront un aperçu de leur compte au lieu des champs de connexion.

If OPACShowSavings is set to display savings in the summary box, this summary section will also contain the savings the patron made by using the library rather than purchasing the items.
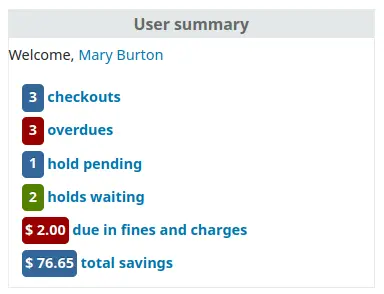
A partir de n’importe quelle page de l’OPAC, cliquer sur leur nom en haut à droite dirigera les adhérents sur leur compte.
Réinitialiser votre mot de passe
Si vous avez paramétré la préférence système OpacResetPassword sur “Autoriser”, les adhérents pourront réinitialiser leur mot de passe en cliquant sur le lien “Mot de passe oublié ?” sous l’encart de connexion.

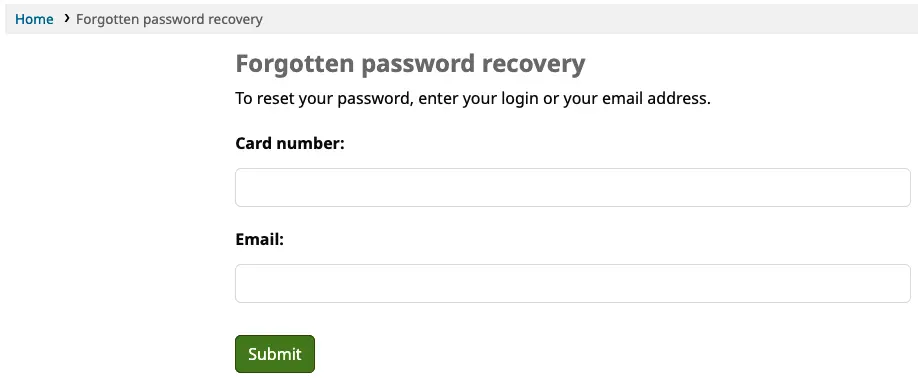
Once clicked, they will be presented with a form asking for their login or their email address.
Avertissement
Les adhérents doivent avoir, pour réinitialiser leur mot de passe, une adresse de courriel. S’ils n’ont pas déjà d’adresse de courriel déjà renseignée dans leur compte, ils auront un message d’erreur

Le système enverra alors par courriel à l’adhérent les instructions pour réinitialiser son mot de passe.

Le contenu de ce courriel peut être personnalisé avec l’outil Notifications et tickets. Le code du courrier est PASSWORD_RESET.
Si la préférence système NotifyPasswordChange est activée, l’adhérent recevra un message lui indiquant que son mot de passe a été modifié.
Le contenu de ce courriel peut être personnalisé avec l’outil Notifications et tickets. Le code du courrier est PASSWORD_CHANGE.
Mon compte
A partir de l’onglet “Mon compte”, les adhérents voient tous les documents qu’ils ont empruntés avec, surlignés en rouge, ceux en retard.
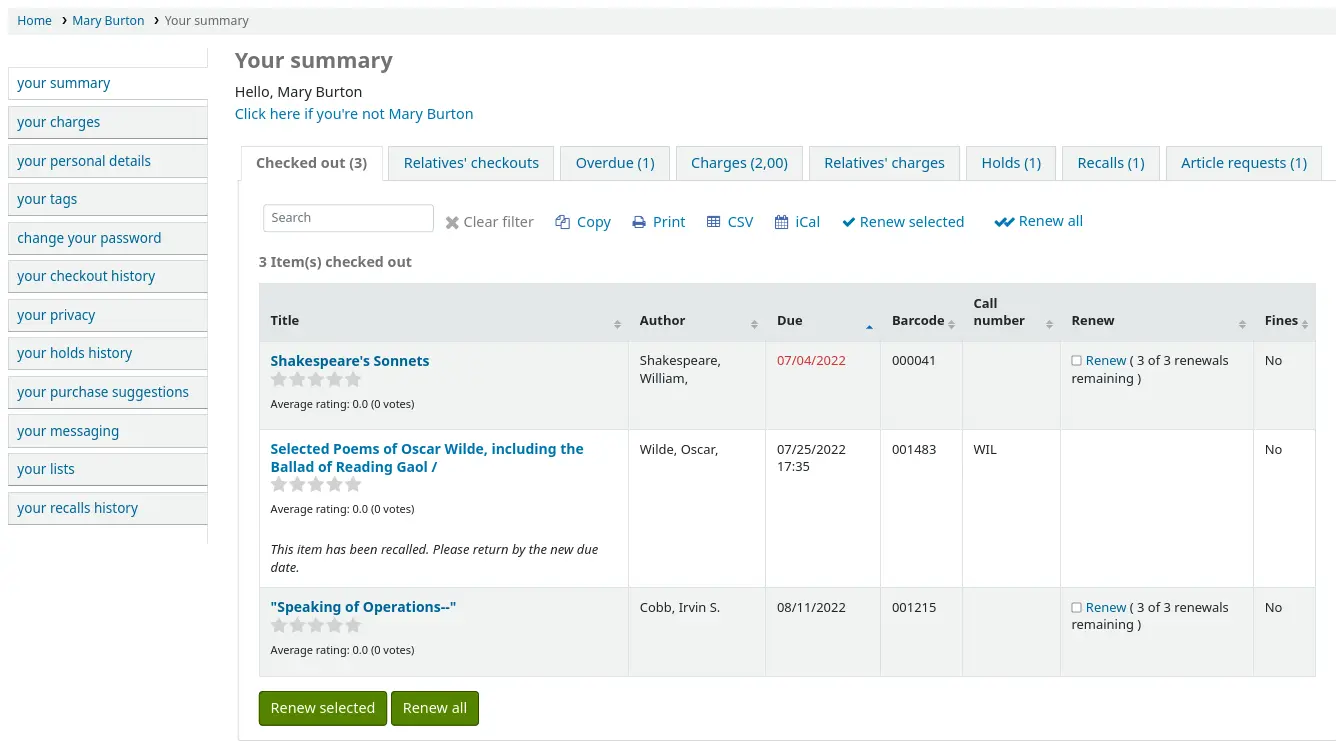
OPAC messages and OPAC notes will be displayed at the top of this page. For OPAC messages, the patron will have the option to dismiss the message. This will hide the message from their OPAC account and mark it as read, but it will not delete the message.

You can add content to this page with the OpacMySummaryNote HTML customization location. Content added there will appear above the patron’s summary and below the welcome message.

If OPACShowSavings is set to display savings in the “your summary” page, this section will also contain the savings the patron made by using the library rather than purchasing the items.

Si OpacRenewalAllowed est paramétrée sur “Autoriser”, les adhérents pourront renouveler leurs prêts à partir de l’OPAC.
Si l’adhérent a des frais en attente supérieurs à la valeur définie dans OPACFineNoRenewals, une note s’affichera pour expliquer que les renouvellements ne peuvent être effectués.

Une note s’affichera si l’adhérent ne peut effectuer de réservation parce que ses frais sont supérieurs à la valeur définie dans la préférence système maxoutstanding.

If AllowPatronToControlAutoRenewal is set to “Allow patrons”, patrons will be able to choose whether or not they want their checkouts to be renewed automatically. If they choose ‘Yes’, items for which automatic renewal is enabled in the circulation rules will renew as expected. If they choose ‘No’, the automatic renewals that would have applied to this patron’s checkouts will not take place.

Si vous avez ajouté du code HTML dans la préférence OPACMySummaryHTML vous le verrez alors à droite de la colonne “Amendes”.
Astuce
By default, the barcode is not displayed in the patron’s checkout table on the OPAC. If your patrons would like to see the items barcodes on their list of checked out items you can set up a patron attribute with the value of SHOW_BCODE and authorized value of YES_NO.
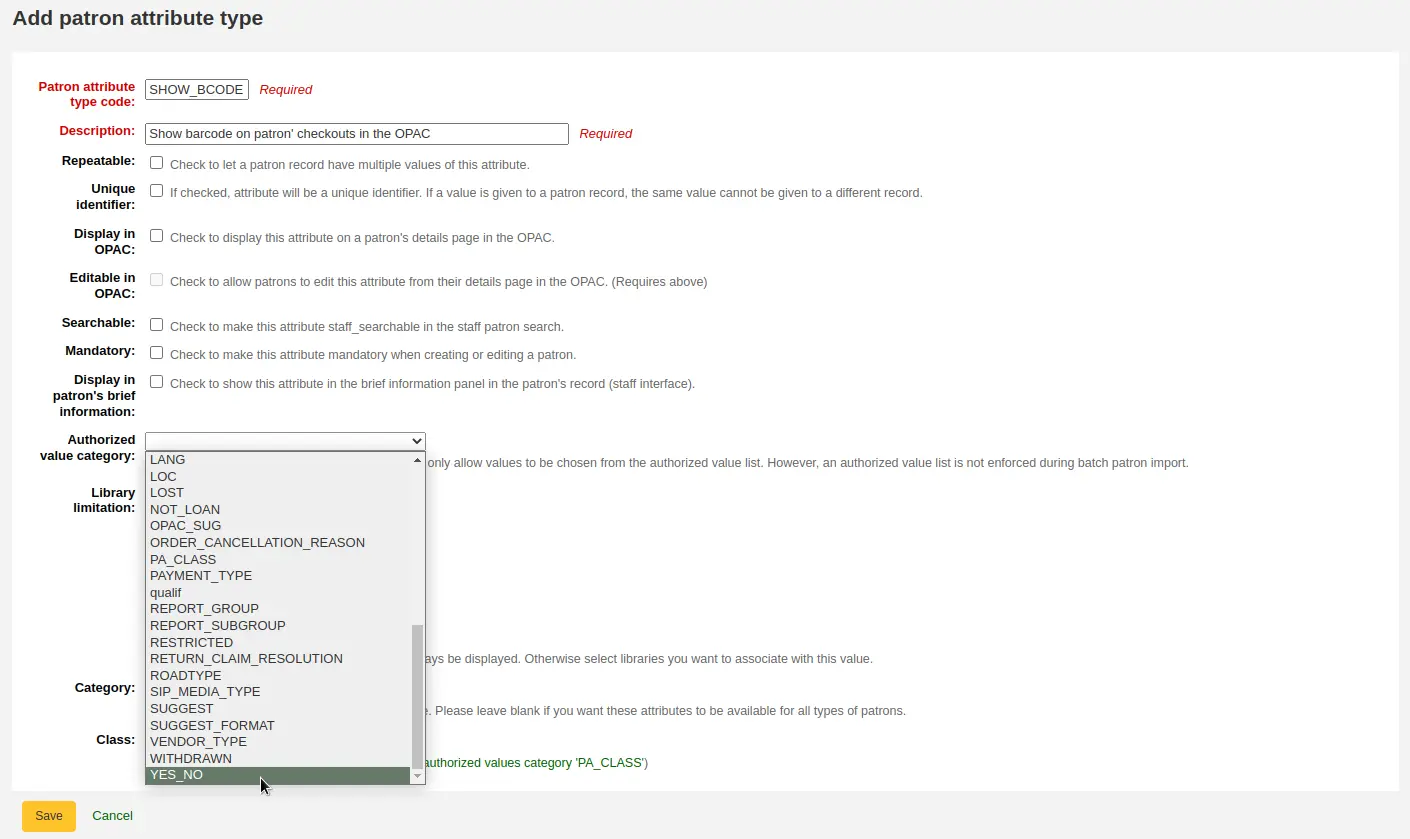
Then, on the patron’s record set the value for SHOW_BCODE to “Yes”.

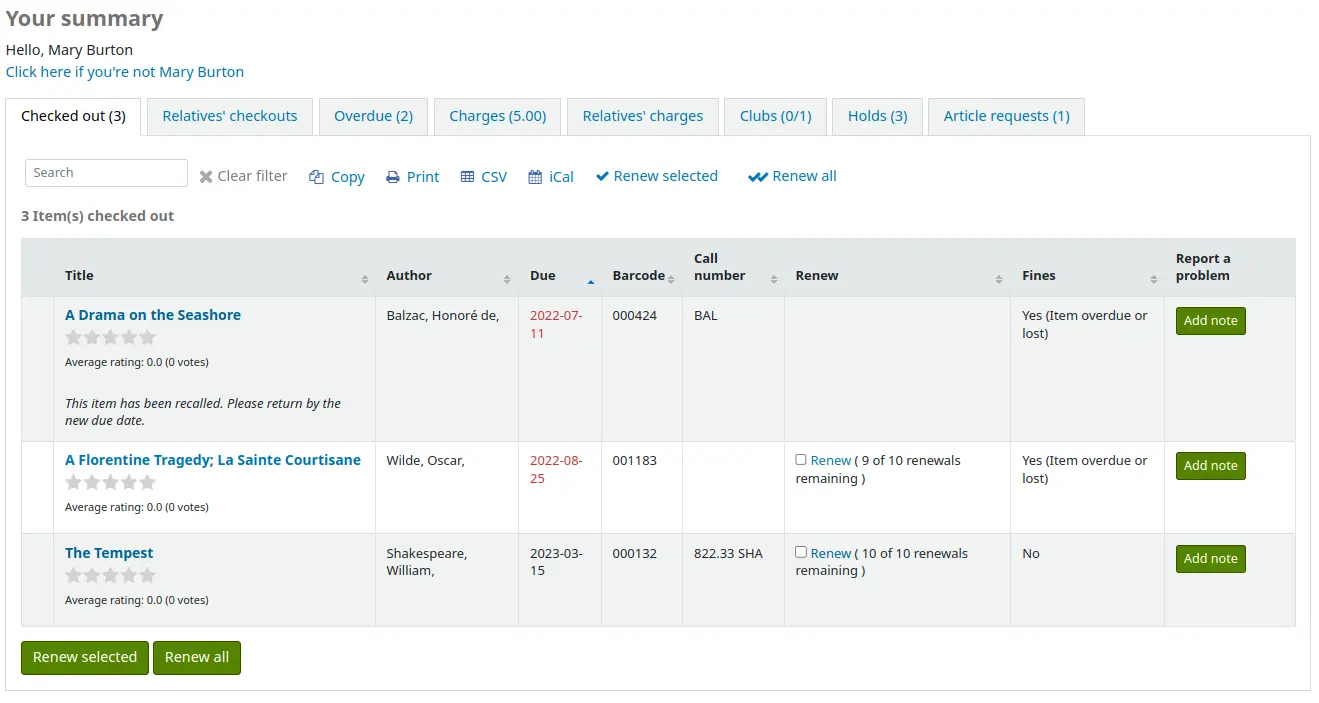
This will add a column to the checkout summary in the OPAC that shows the patron the barcodes of the items they have checked out.
If you would like your patrons to leave a note on an item they have checked out AllowCheckoutNotes preference must be set to allow.
In the patron’s summary of checkouts, there will be an added column to allow the patron to leave a note (for example: missing first page, or DVD is scratched).
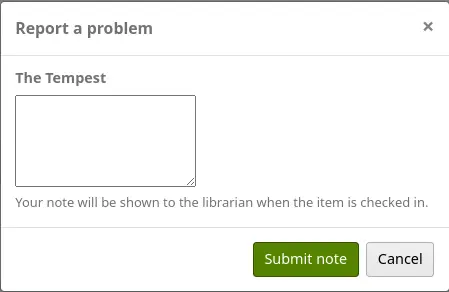
Si l’adhérent clique sur “Ajouter une note”, il peut ajouter un commentaire sur son prêt.
Staff will be able to see and manage checkout notes from the staff interface.
Si leurs personnes à charge l’ont autorisé via leurs options de vie privée, ou encore si les bibliothécaires sont autorisés à modifier ce paramètre de vie privée via la préférence système AllowStaffToSetCheckoutsVisibilityForGuarantor et qu’ils l’ont activée, les garants se connectant verront un onglet « Prêts de la famille » dans leur onglet résumé.

Si vous cliquez sur l’onglet “Retards”, cela affichera tous les documents en retard.
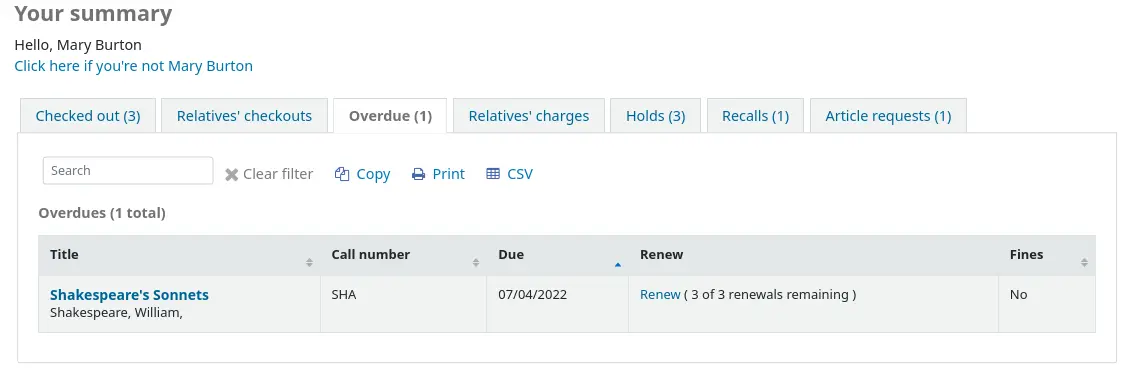
La colonne “Amendes” présentera juste le total de ce que l’adhérent doit. En cliquant sur le total, ils basculeront sur l’onglet “Mes amendes” où ils verront une ventilation complète de leurs amendes et de leurs frais. Si vous n’utilisez pas les amendes dans votre bibliothèque, vous pouvez désactiver leur affichage en paramétrant la préférence OPACFinesTab sur “Ne pas autoriser”.

Si leurs personnes à charge l’ont autorisé via leurs options de vie privée, ou encore si les bibliothécaires sont autorisés à modifier ce paramètre de vie privée via la préférence système AllowStaffToSetFinesVisibilityForGuarantor et qu’ils l’ont activée, les garants se connectant verront un onglet « Frais des personnes à charge » dans leur onglet résumé.

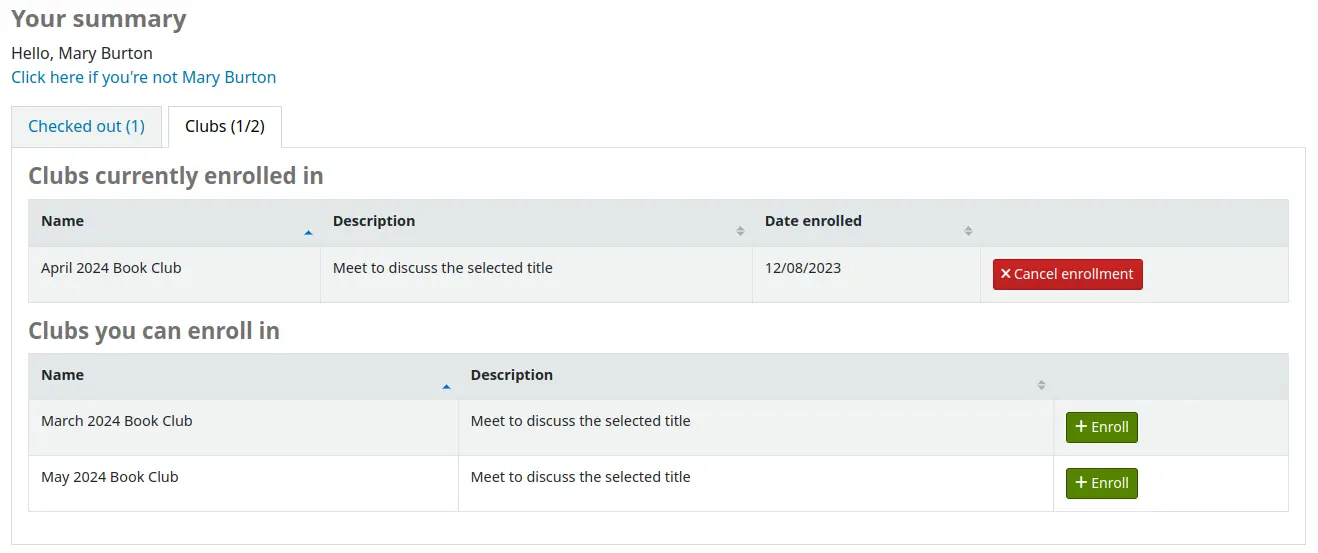
The “Clubs” tab shows all ongoing clubs which allow public enrollment. From here, patrons can enroll in clubs by clicking the “Enroll” button.
L’onglet “Réservations” indique à l’adhérent le statut de chacun des exemplaires qui ont fait l’objet d’une réservation.
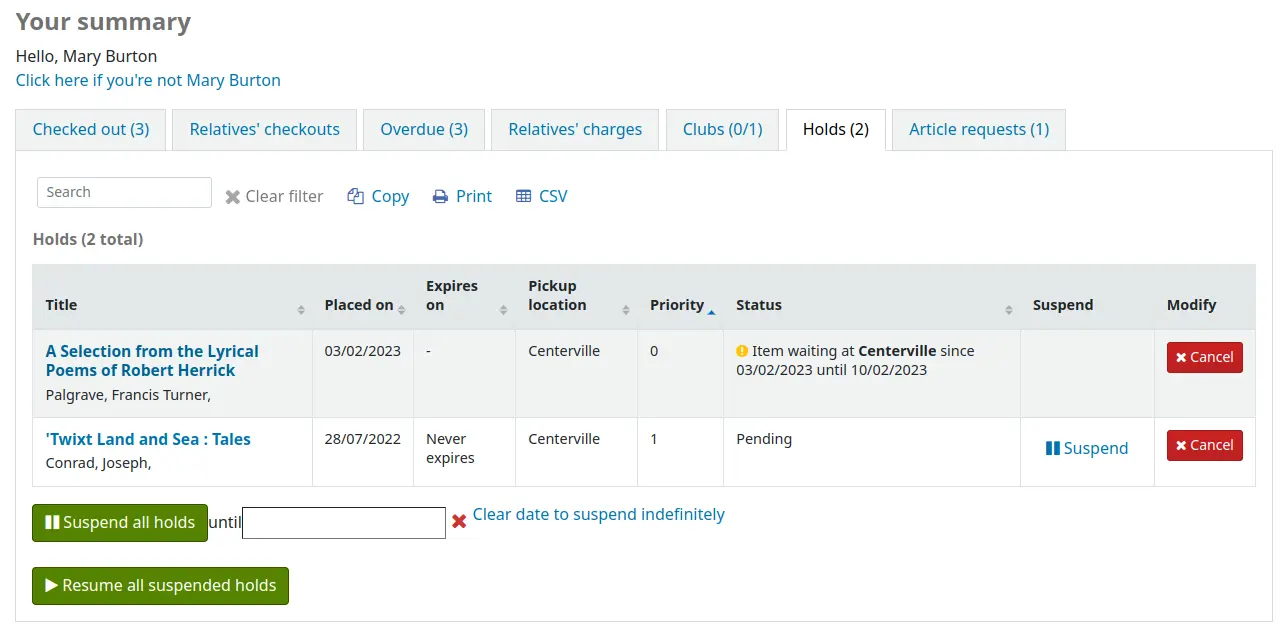
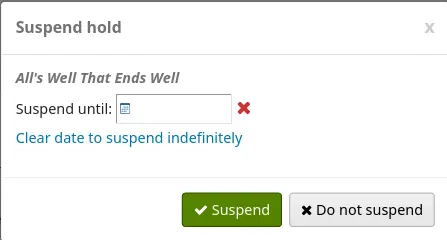
En fonction des valeurs de la préférence système SuspendHoldsOpac, les adhérents peuvent annuler ou suspendre leurs réservations si elles ne sont pas en transfert ou déjà en attente. Quand ils cliquent sur “Suspendre”, ils devront choisir une date de reprise de leur réservation.
Ils peuvent également suspendre toutes leurs réservations pour une période non définie ou jusqu’à une date précise, s’ils remplissent les options de suspension situées en bas de la page.
Note
Si vous avez paramétré la préférence système AutoResumeSuspendedHolds sur “Ne pas permettre”, vous n’aurez pas la possibilité de définir une date de fin pour la suspension des réservations.
From this tab, patrons can also cancel holds. Depending on the waiting hold cancellation policy, they may also be able to cancel holds that are already waiting for them.
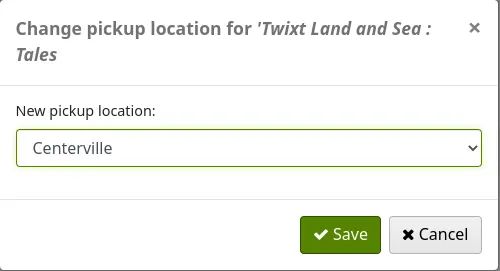
Depending on the value of the OPACAllowUserToChangeBranch system preference, the patron may be able to change the pickup library of holds. When one or more status is selected in the system preference, a “Change” link will appear under the current pickup library’s name for holds that have that status.
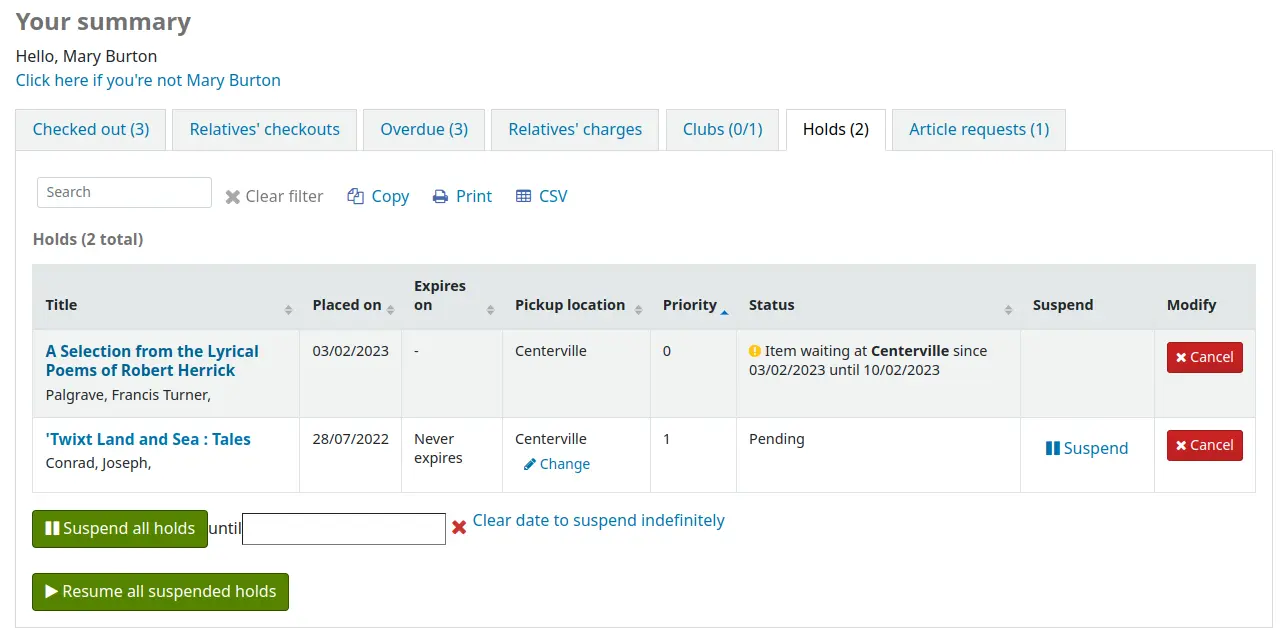
When the patron clicks on the “Change” link, there is a pop-up with a selection of libraries that allow hold pickups.
If your library allows recalls, the patron can see the recalls they have requested and their various statuses in the “Recalls” tab.
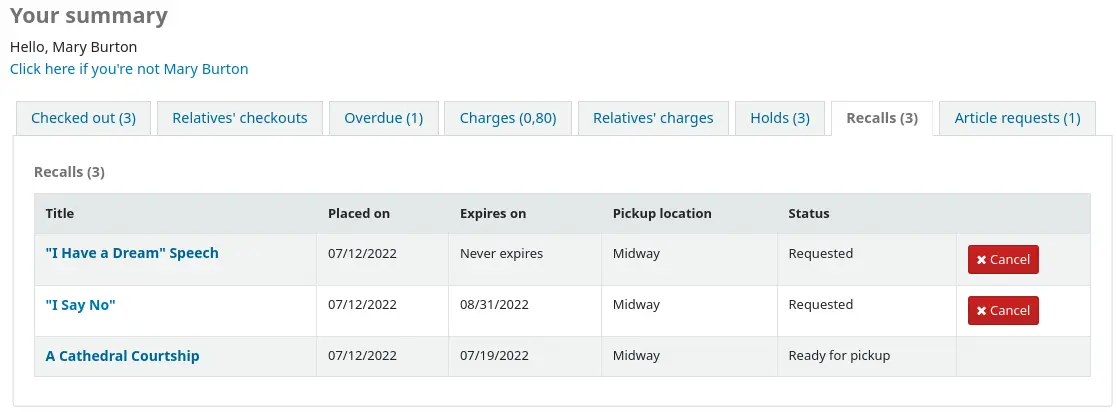
The patron can cancel a recall by clicking the “Cancel” button, provided that it is not already awaiting pickup.
Pièges adhérent
If you have flagged your patron’s account they may see one of the following error messages at the top of their account.
Carte perdue

Changement d’adresse de l’adhérent

Note
le message d’erreur ne comportera pas de lien vers un formulaire de mise à jour si vous avez paramétré OPACPatronDetails sur « Ne pas autoriser »
Adhérent suspendu

Library card
Version
Cette fonctionnalité a été ajoutée à Koha dans sa version 24.11.
If the OPACVirtualCard system preference is set to “Allow”, patrons will see a “Library card” tab where their library card barcode is displayed.
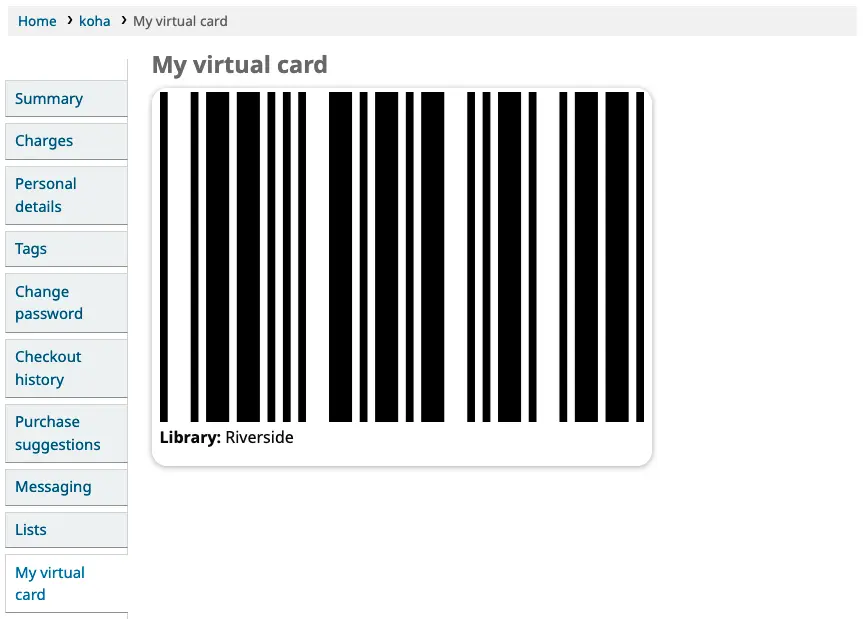
If the patron has logged in to their OPAC account from a mobile device, their barcode can then easily be scanned by library self-service kiosks and other services.
Mes amendes
Si la bibliothèque applique les amendes, l’onglet “mes amendes” situé à gauche affichera l’historique des amendes de l’adhérent.
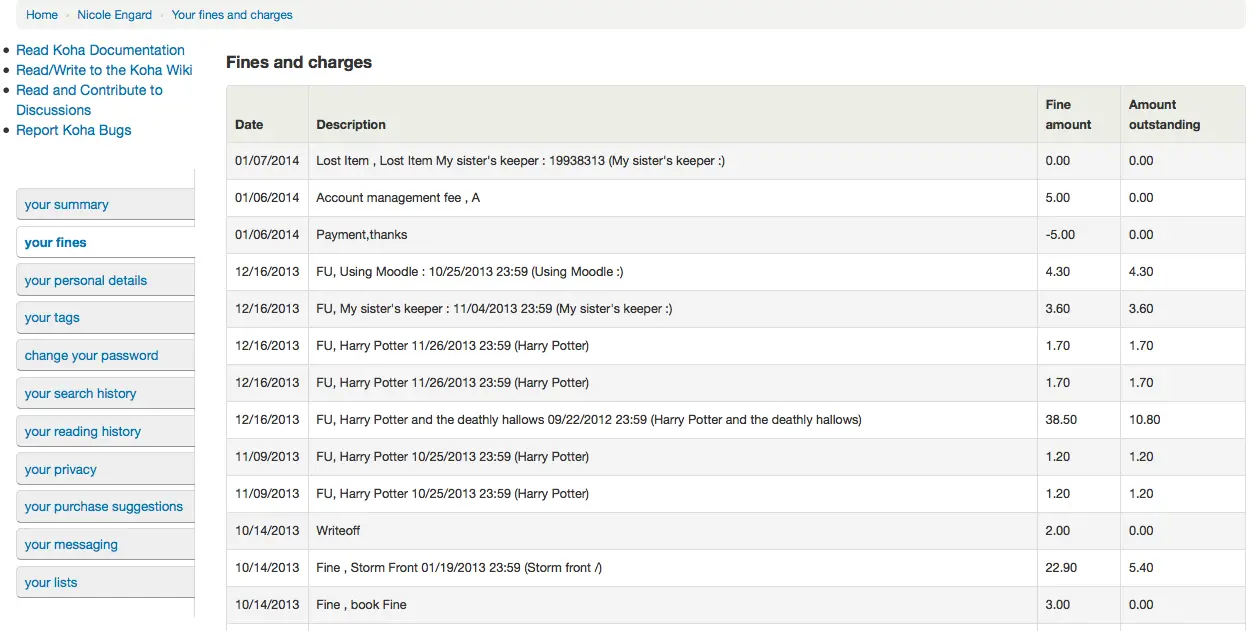
Si vous autorisez les adhérent à régler leurs amendes en utilisant PayPal avec la préférence EnablePayPalOpacPayments il y aura des cases à cocher à gauche de chaque amende avec un montant à recouvrer.
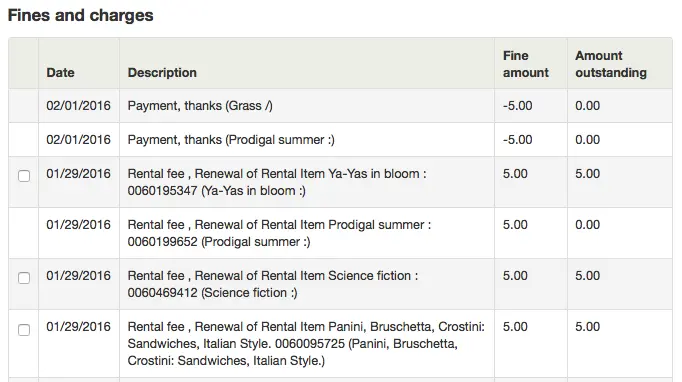
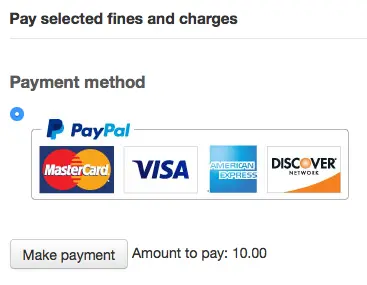
Au bas de l’écran, l’usager pourra voir l’option de payer avec PayPal pour les amendes qu’il aura sélectionnées.
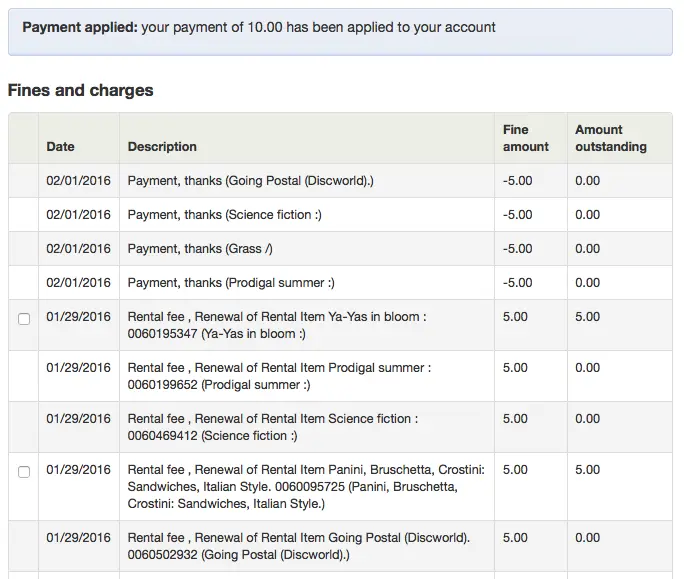
Après le paiement un message de confirmation s’affichera
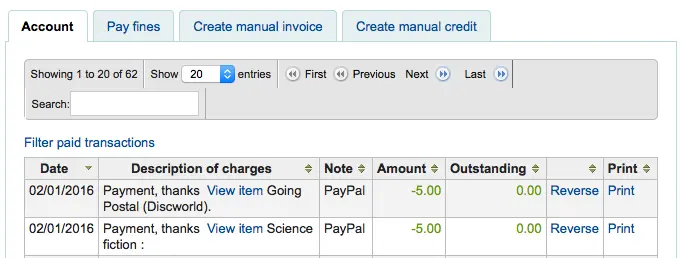
Et vous verrez que l’amende a été payée via PayPal dans l’interface professionnelle.
Mes informations personnelles
Si vous avez paramétré la préférence OPACPatronDetails sur “Autoriser”, vos adhérents verront un formulaire renseigné avec leurs coordonnées en cliquant sur l’onglet “Mes informations personnelles”. Vous pouvez contrôler les champs que les adhérents peuvent voir et modifier à l’OPAC en configurant les préférences PatronSelfModificationBorrowerUnwantedField et PatronSelfModificationMandatoryField.
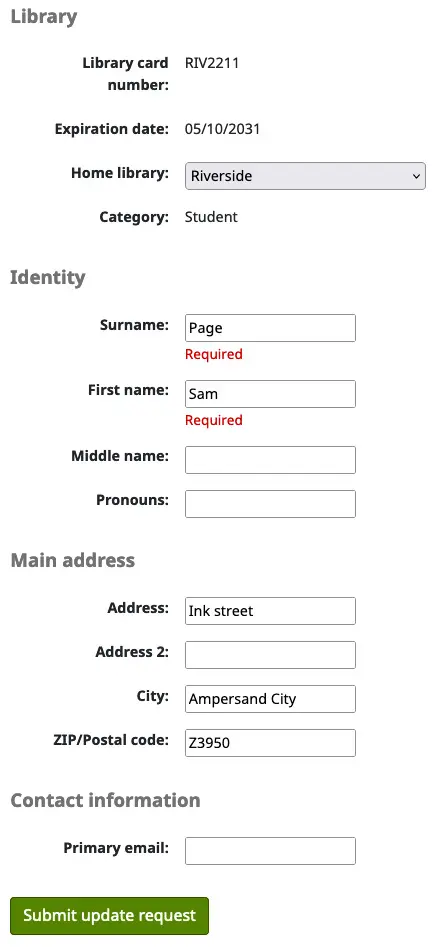
Les adhérents peuvent modifier leurs détails personnels sur le formulaire et cliquer sur “Soumettre les modifications”. Les modifications seront envoyées à la bibliothèque avant leur mise à jour. Le personnel verra toutes les demandes de modification listées.

If the AutoApprovePatronProfileSettings system preference is enabled, staff will not need to approve changes.
Si la préférence OPACPatronDetails est paramétrée sur “Ne pas autoriser”, les adhérents verront alors simplement leurs coordonnées et un message indiquant qu’ils peuvent contacter la bibliothèque pour signaler des changements.
Consents
If you have set the system preference PrivacyPolicyConsent to “permissive” or “enforced” then logged in patrons in the OPAC will have a tab labeled “Consents” where their consent statements are saved. By default the library’s privacy policy is referred to in the consent statement. You can use a URL to link to your own privacy policy using the system preference PrivacyPolicyURL.

Version
A new plugin hook for “patron_consent_type” was added in version 23.11 of Koha to allow for further types of consent in the OPAC. See the Plugin Hooks page on the wiki for more information.
Modifier mon mot de passe
Ensuite, si vous avez paramétré OpacPasswordChange sur “Autoriser”, l’onglet suivant sera “Changer mon mot de passe”, dans lequel les adhérents peuvent changer leur mot de passer pour se connecter à l’OPAC. Les adhérents verront un formulaire standard dans lequel ils devront renseigner leur ancien mot de passe et, à deux reprises, leur nouveau mot de passe.
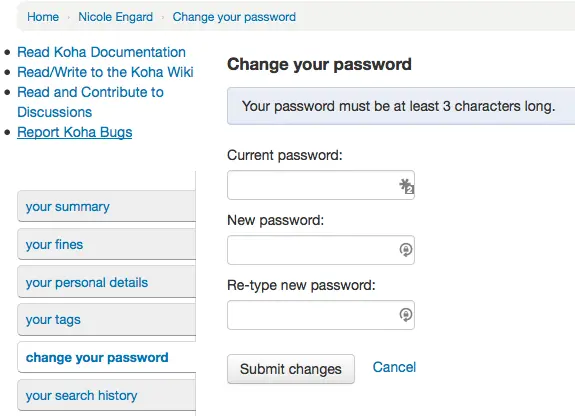
Si la préférence système NotifyPasswordChange est activée, l’adhérent recevra un message lui indiquant que son mot de passe a été modifié.
Le contenu de ce courriel peut être personnalisé avec l’outil Notifications et tickets. Le code du courrier est PASSWORD_CHANGE.
Mon historique de recherche
Si vous avez paramétré votre préférence système EnableOPACSearchHistory sur “Conserver”, vos adhérents pourront alors accéder à leur historique de recherche via l’onglet “Mon historique de recherche”.
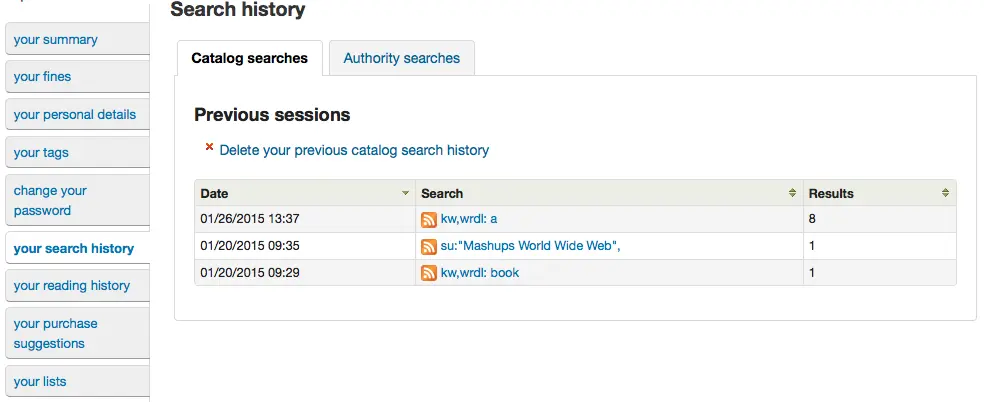
L’historique de recherche affiche tous les termes recherchés par l’adhérent. Si vous cliquez sur l’un des termes, vous relancerez une recherche sur ce terme. L’historique de recherche peut être supprimé par l’adhérent en cliquant sur le lien “Supprimer votre historique de recherche” situé en haut de l’historique ou en cliquant sur la petite “x” rouge située à côté du lien “Historique de recherche” en haut à droite de l’écran.

Checkout history
If the opacreadinghistory system preference is set to “Allow”, patrons will have access to the “Checkout history” tab. This will show the patron their entire borrowing history, unless they have asked the library to not keep that information via the “Privacy” tab.
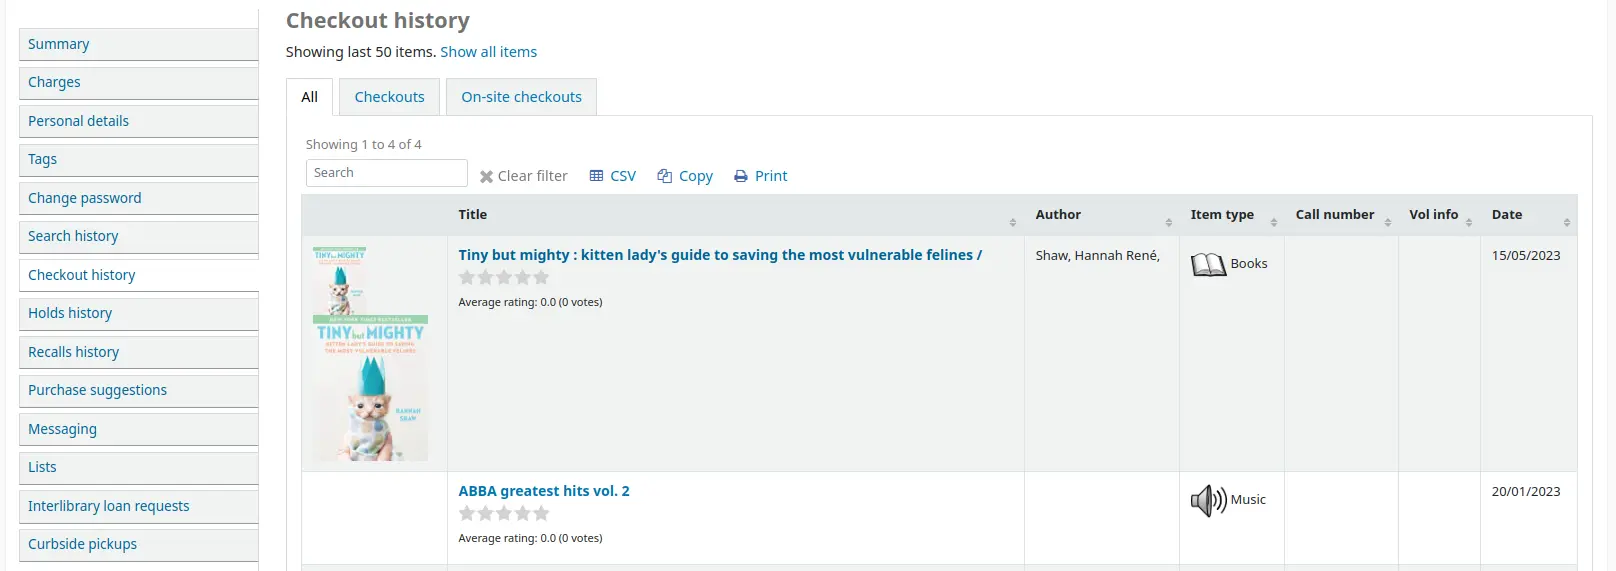
If OPACShowSavings is set to display savings in the “your summary” page, this section will also contain the savings the patron made by using the library rather than purchasing the items.

Ma vie privée
L’onglet “Ma vie privée” apparaîtra si vous avez à la fois paramétré sur “Autoriser” les préférences opacreadinghistory et OPACPrivacy. Cet onglet permettra aux adhérents de définir comment la bibliothèque doit conserver leurs données d’historique de circulation.
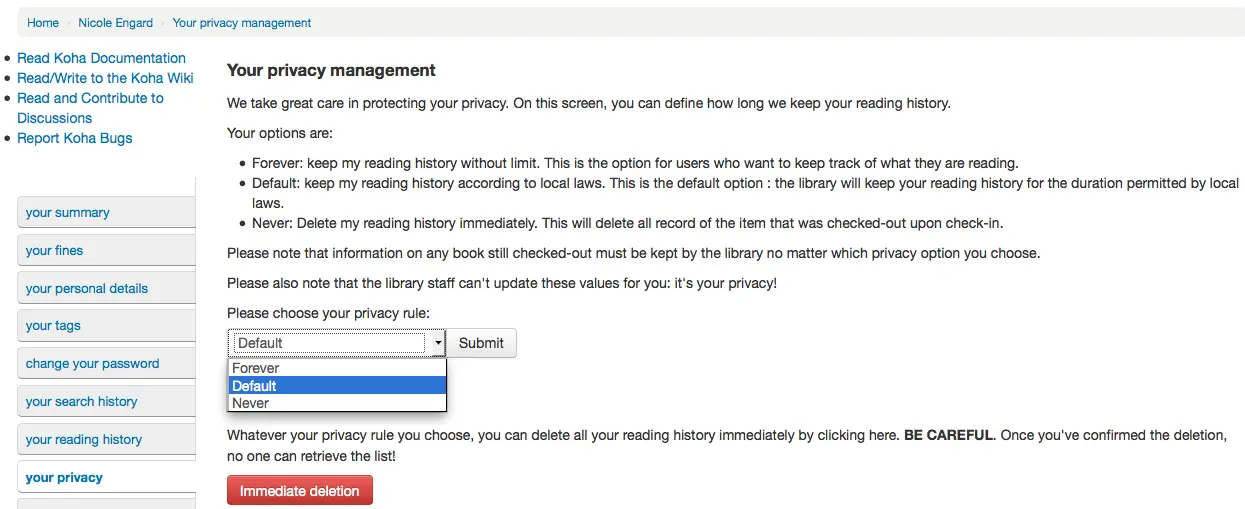
L’adhérent a le choix parmi ces trois options :
Pour toujours : conserver ma liste de lecture indéfiniment.
Par défaut : Conserve mon historique de lecture conformément aux lois en vigueur. C’est l’option par défaut. La bibliothèque se chargera de conserver votre historique de lecture pour la durée autorisée par la loi.
Jamais : Efface immédiatement mon historique de lecture. Cela effacera de votre historique tous vos documents empruntés au moment où vous les rendez.
En fonction des suggestions des adhérents, les contenus de l’onglet “mon historique de lecture à l’OPAC et de l’onglet “Historique de prêts” dans l’interface professionnelle peuvent être différents.
Quelque soit le choix de l’adhérent, celui-ci peut supprimer à tout moment son historique de lecture en cliquant sur le bouton “Suppression immédiate”.

Cliquer sur ce bouton ne supprimera pas les prêts en cours mais effacera l’historique de lecture antérieur de l’adhérent.
Important
Pour que l’adhérent puisse supprimer son historique de prêt, vous devez avoir paramétré la préférence AnonymousPatron.
If you’re allowing guarantees to grant permission to their guarantors to view their current checkouts with the AllowPatronToSetCheckoutsVisibilityForGuarantor preference they will see that option on this screen.
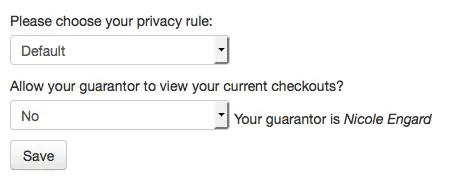
Quand les garants se connectent, ils verront un onglet intitulé « Prêts liés » sur leur résumé.

Mon historique de réservations
Si la préférence système OPACHoldsHistory est paramétrée sur “Autoriser”, les adhérents pourront voir toutes leurs réservations, en cours ou révolues.
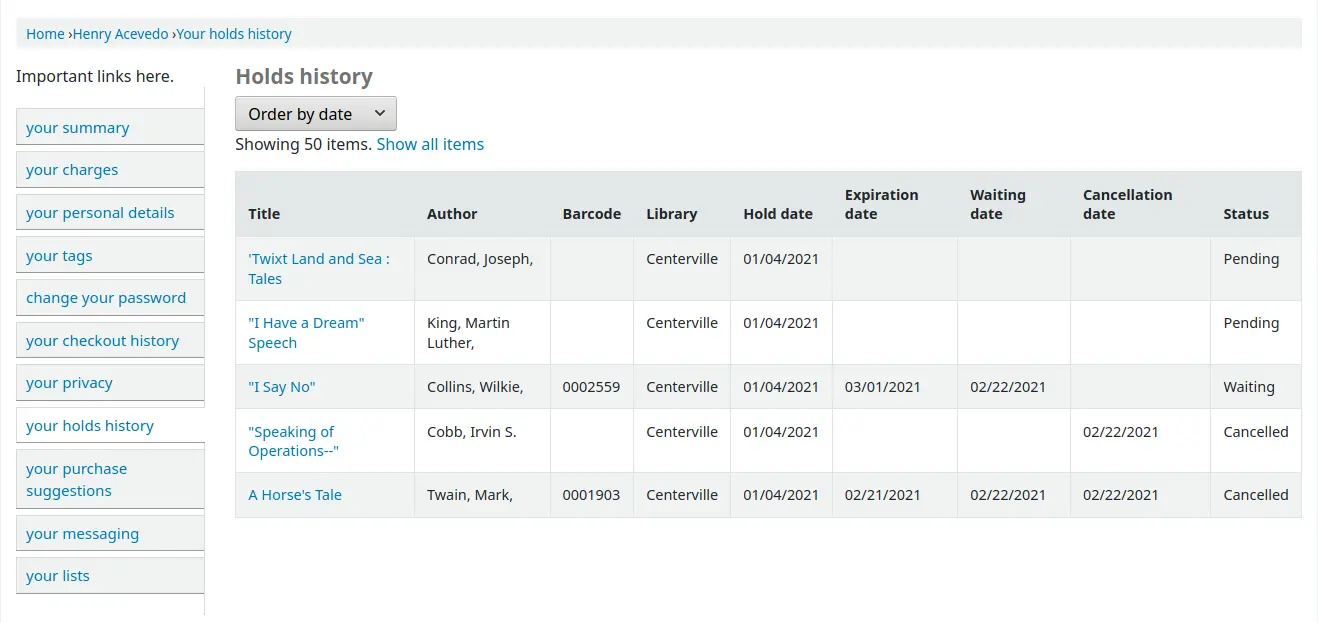
Mes suggestions d’achat
Si votre bibliothèque permet aux adhérents de proposer des suggestions d’achat, le prochain onglet présentera toutes les suggestions qu’un adhérent a proposées à sa bibliothèque et leur statut. Pour désactiver cet onglet et la fonctionnalité de suggestions, paramétrez la préférence système suggestion sur “Ne pas autoriser”.
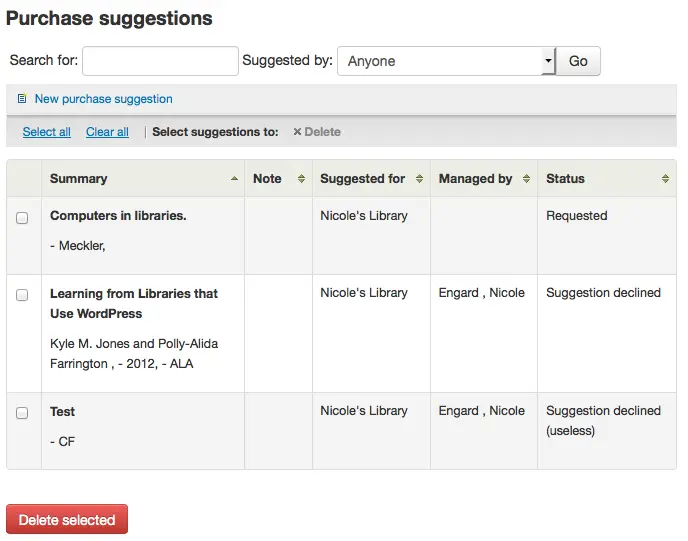
Si vous avez paramétré OPACViewOthersSuggestions sur “Montrer”, les adhérents pourront chercher des suggestions en haut de cette liste.
Messaging
Si votre bibliothèque a paramétré sur “Autoriser” la préférence EnhancedMessagingPreferences et sur “Afficher”, EnhancedMessagingPreferencesOPAC, vos adhérents pourront alors choisir quels messages ils souhaitent recevoir de la bibliothèque (à l’exception des relances de retard pour lesquelles la bibliothèque décide).
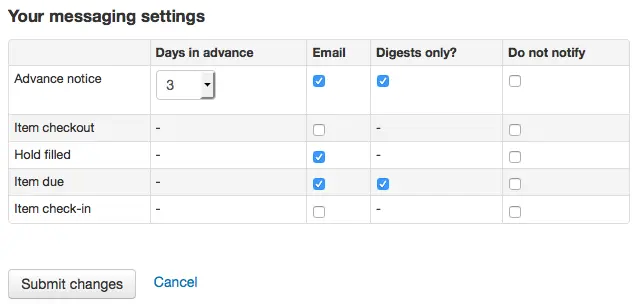
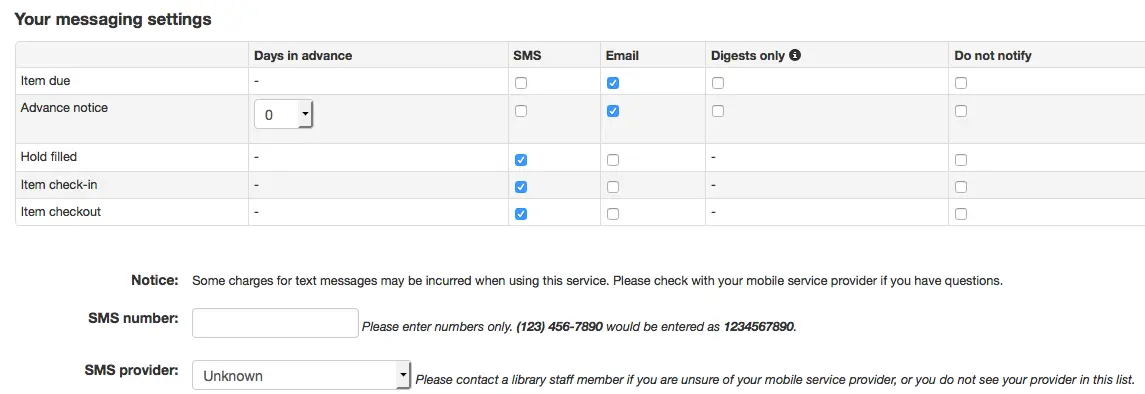
Si vous utilisez un pilote externe défini dans la préférence SMSSendDriver pour envoyer des SMS, s’afficheront une colonne supplémentaire pour recevoir ces messages par SMS et un champ pour saisir un numéro de téléphone portable.
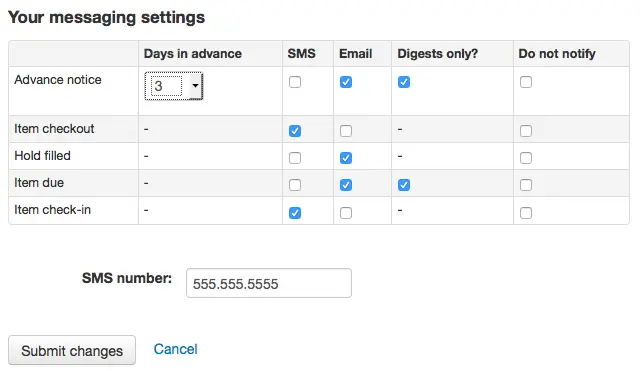
Si vous utilisez un protocole de courriel pour envoyer des SMS avec la préférence SMSSendDriver, s’afficheront une colonne supplémentaire pour recevoir ces messages par SMS, un champ pour saisir un numéro de téléphone portable et une liste déroulante de fournisseurs d’accès paramétrés dans l’administration.
If you are using the i-tiva Talking Tech service you will see an additional column to receive these messages via Phone.
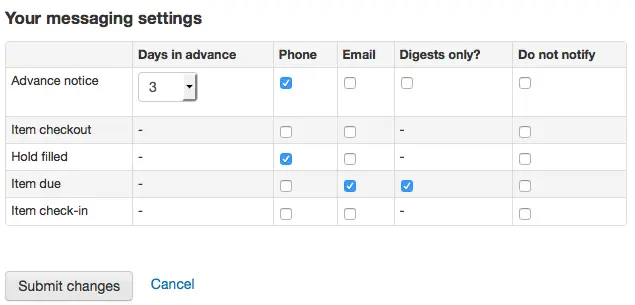
Ces notifications sont :
Notification préalable : une notification avant que le document emprunté soit à rendre (l’adhérent peut choisir le nombre de jours d’avance)
Exemplaire prêté : une notification qui liste tous les exemplaires que l’adhérent vient d’emprunter et/ou de renouveler; c’est la version électronique d’un reçu de prêt
Réservation satisfaite : une notification qui prévient l’adhérent que l’exemplaire réservé a été mis de côté
Exemplaire à rendre : une notification envoyée le jour où un exemplaire est à rendre à la bibliothèque
Exemplaire rendu : Une notification qui liste tous les exemplaires que l’adhérent vient de rendre
Note
Le contenu de ce courriel peut être personnalisé en éditant la notification CHECKIN dans l’outil Notifications et tickets.
Exemplaire prêté : une notification qui liste tous les exemplaires que l’adhérent vient d’emprunter et/ou de renouveler; c’est la version électronique d’un reçu de prêt
Note
Le contenu de ce courriel peut être personnalisé en modifiant la notification CHECKOUT dans l’outil Notifications et tickets.
Renouvellement automatique : Une notification qui indique à l’adhérent que ses prêts ont été renouvelés automatiquement, ou s’il y a eu un problème avec ce renouvellement automatique.
Note
This notice can be customized by editing the AUTO_RENEWAL or AUTO_RENEWAL_DGST notices in the Notices and slips tool.
This option will only appear if the AutoRenewalNotices is set to « according to patrons messaging preferences ».
Les adhérents peuvent choisir de recevoir leurs notifications en un seul résumé en cochant les cases dans “Résumé seulement?”. Ils recevront en un seul email tous les types de messages vus ci-dessus au lieu de plusieurs emails pour chaque alerte.
Si la préférence TranslateNotices est paramétrée sur “Autoriser”, les adhérents auront une option “Langue favorite pour les messages” avec un menu déroulant listant les langues disponibles.
Important
Vous devez choisir votre mode d’envoi (SMS, e-mail ou téléphone). Si vous souhaitez recevoir un résumé des notifications, cliquez sur “Résumé seulement ?”.
Listes
If the virtualshelves system preference is set to “Allow”, patrons will see a “Lists” tab.
From here, patrons can view public lists and create or edit their own private lists.

Alerte sur les abonnements (périodiques)
Version
Cette section a été ajoutée à Koha dans sa version 23.11.
If the RoutingSerials system preference is enabled, patrons who have opted in to email alerts for new serial issues via the “Subscriptions” tab in the bibliographic record will see an “Alert subscriptions” tab in their account.

This tab lists all the serial email alerts the patron has subscribed to. Patrons can cancel alerts by clicking the “Unsubscribe from email alerts” link if desired.
Demander un reçu
If the useDischarge system preference is enabled, patrons will be able to request a discharge via the OPAC. A discharge is a certificate that says the patron has no current checkouts and no holds.
Patrons can request a discharge from the library by going to the “Ask for discharge” tab in their online account.
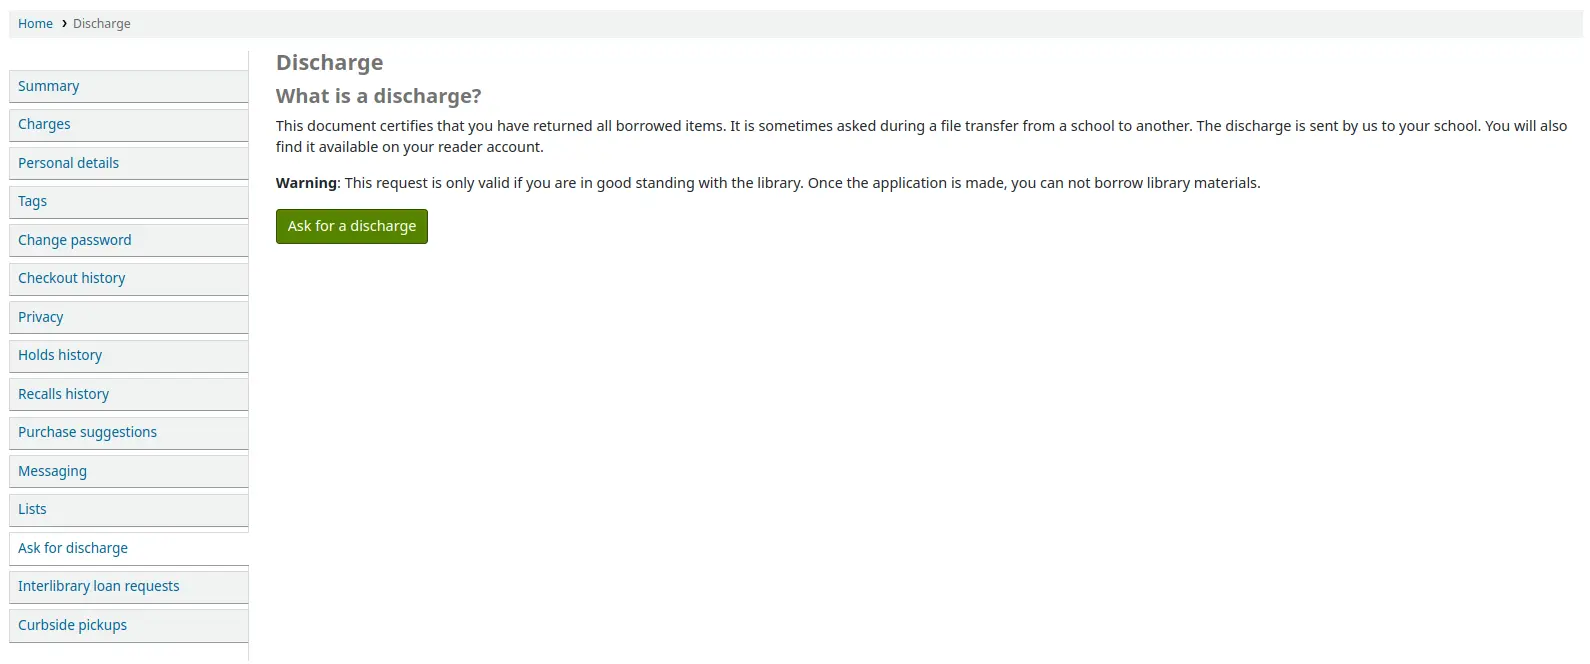
From here they can request a discharge by clicking the “Ask for a discharge” button. They will receive a confirmation of their request.
Once the discharge is approved by library staff, the patron will see a download link to download a PDF of their discharge.

Mes listes de routage
Si vous êtes nommés comme destinataires de listes de routage, vous les verrez listées ici. Le message suivant est affiché : « Vous êtes inscrit aux listes de routage pour les titres suivants. Si vous voulez apporter des changements, merci de contacter votre bibliothèque ».
Mes requêtes de prêt entre bibliothèques
If your library has the ILLModule preference set to ‘Enable’ patrons will have the option to make ILL requests when logged in to their OPAC account. From here they can view their existing requests and place new ones.

Pour faire une nouvelle demande de prêt entre bibliothèques, cliquez sur « Créer une nouvelle demande » et choisissez un formulaire de demande.
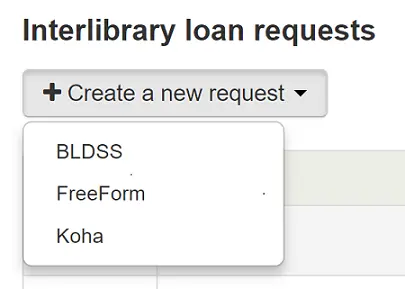
Note
Les options affichées dépendent de votre configuration du PEB. Voir la page wiki sur les interfaces PEB à l’adresse https://wiki.koha-community.org/wiki/ILL_backends pour plus d’explications.
Note
If there is a copyright clearance text in a “ILLModuleCopyrightClearance” HTML customization display location, the text displays here and patrons need to click “Yes” to accept before continuing.
Complete the publication details as fully as possible. Depending on the form in use you may see the option to add Custom fields for additional information such as notes. Destination branch is a required field, this is the branch you would like the request to be sent to.
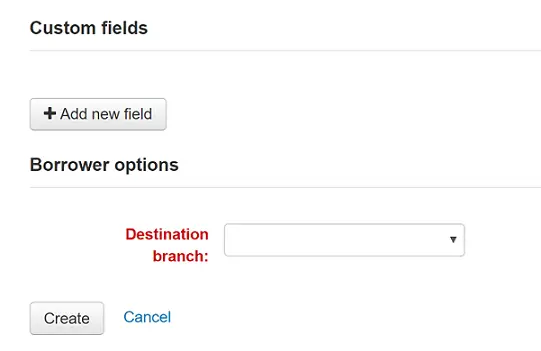
Cliquer sur “Créer” pour valider la demande à la bibliothèque.
Your submitted request will be listed with a status of ‘New request’. Once processed the status will be updated to ‘Requested’.
Cliquer sur « Voir » pour modifier ou annuler votre demande.
You cannot edit the form details but you can add a note to request a modification and then click on ‘Submit modifications’ at the bottom of the screen. Your modification will be sent to the library for processing.
Note
When a patron modifies an inter-library loan request, an email is sent to library staff so that they can view the changes from the ILL module.
Le contenu de ce courriel est basé sur le modèle ILL_REQUEST_MODIFIED. Il peut être personnalisé avec l’outil Notifications et tickets.
Pour les nouvelles demandes, vous aurez également la possibilité de «Demander l’annulation». Votre demande sera mise à jour avec le statut ‘Annulation demandée’ et pourra ensuite être supprimée par le personnel de la bibliothèque.
Note
When a patron cancels an inter-library loan request, an email is sent to library staff so that they can cancel it from the ILL module.
Le contenu de ce courriel est basé sur le modèle ILL_REQUEST_CANCEL. Il peut être personnalisé avec l’outil Notifications et tickets.
Mon historique de rappels
If your library allows recalls, the patron can see all their past and current recalls they have requested and their various statuses in the “your recalls history” tab.

The patron can cancel a recall by clicking the “Cancel” button, provided that it is not already awaiting pickup.
Collectes sur rendez-vous
Si votre bibliothèque propose la collecte sur rendez-vous, l’adhérent pourra voir ses retraits programmés sous “Collectes sur rendez-vous”.

The patron has the option to indicate that they are outside the library by clicking “Alert staff of your arrival”.
The patron also has the option to cancel their scheduled pickup with the “Cancel this pickup” button.
Si le paramètre “Retrait programmé par l’adhérent” est activé dans la configuration des collectes sur rendez-vous, l’adhérent pourra programmer son rendez-vous pour le retrait.

The patron must first choose a library at which they want to pick up their items
Note
Seules les bibliothèques ayant activé la collecte sur rendez-vous seront affichées dans le menu déroulant.
Furthermore, if the “Enable for waiting holds only” setting is turned on, only the libraries at which the patron has waiting holds will be enabled.
L’adhérent doit alors choisir une date
Note
Seules les dates pour lesquelles des créneaux horaires sont disponibles seront affichées.
Les horaires de retrait possible s’afficheront, en fonction du jour de la semaine

Note
The number in parentheses under each time slot is the number of available appointments for that time. If the maximum number of appointments has been reached, based on the “Maximum patrons per interval” setting in the curbside pickup configuration, the time slot will be grayed out and the patron will not be able to select it.
The patron can optionally add a note about their pickup
The patron must then click “Schedule pickup” to save their appointment
Suggestions d’achat
Si votre bibliothèque a paramétré la préférence suggestion sur “Autoriser”, les adhérents auront alors la possibilité de proposer des suggestions d’achat à plusieurs endroits à l’OPAC.
Si vous autorisez tout le monde à voir les suggestions d’achat faites par d’autres adhérents avec la préférence OPACViewOthersSuggestions, il y aura alors un lien en haut de l’OPAC sous la boîte de recherche.

Un lien s’affichera si l’adhérent ne trouve rien pour sa recherche.

There will be a “Suggest for purchase” option in the detailed view of a bibliographic record.

And there will be a link in the Your purchase suggestions tab in the patron’s account.
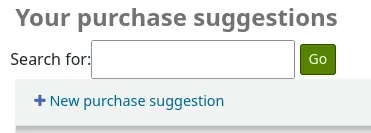
Cliquez sur l’un de ces liens pour ouvrir le formulaire de la suggestion d’achat.
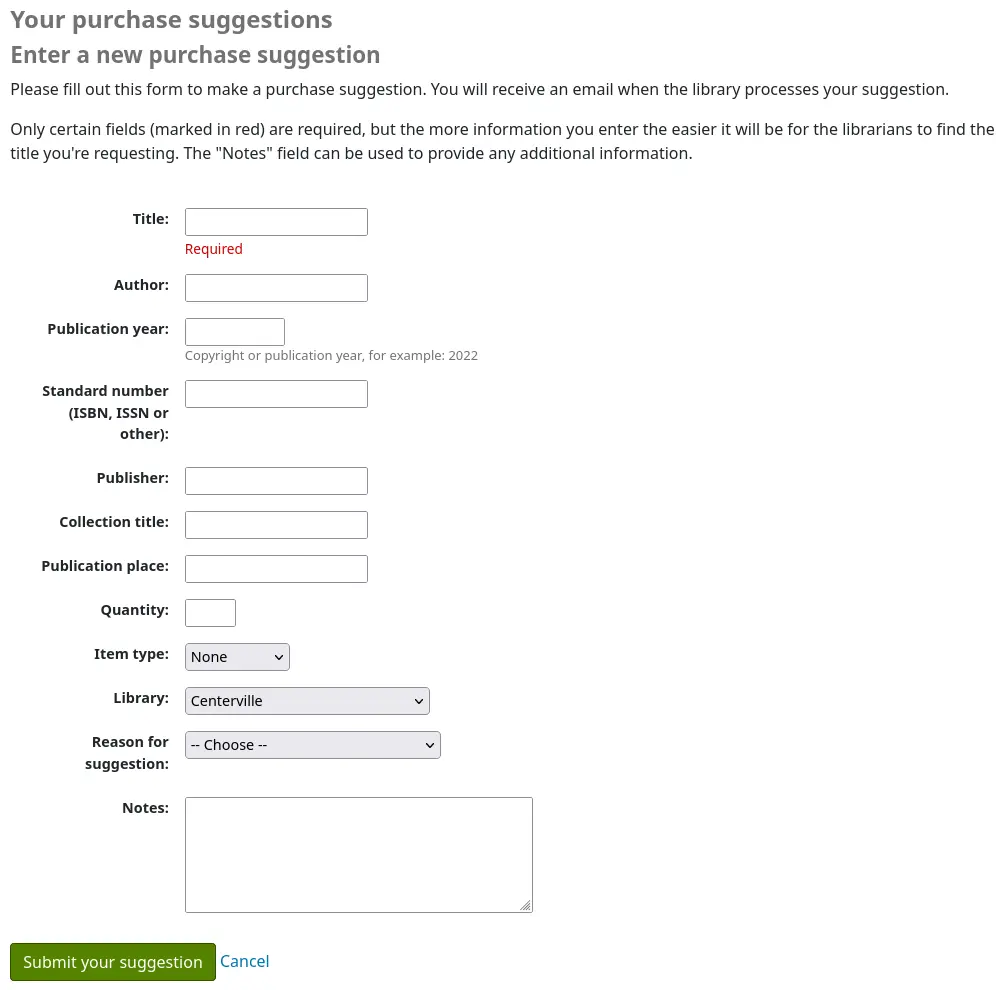
The informational text at the top of the form can be replaced using the HTML customizations tool, display location OpacSuggestionInstructions.
From the form only the “Title” is required by default.
Mandatory fields can be set using the OPACSuggestionMandatoryFields system preference.
The OPACSuggestionUnwantedFields system preference can be used to hide unnecessary fields.
The OPACSuggestionAutoFill system preference can be used to help patrons fill out the form using information from Google Books.
The item type list can be edited by editing the SUGGEST_FORMAT authorized value list.
The “Reason for suggestion” list can be edited by editing the OPAC_SUG authorized value list.
If the item already exists in the catalog, the patron will see a message with what Koha thinks is the corresponding title. Matches are made on the title/ author, ISBN or ISSN. If the title isn’t what the patron is trying to suggest, they can click “Confirm your suggestion”, to suggest it anyway.

Once the form is submitted the purchase suggestion will appear in the acquisitions module for the librarians to manage.
If a purchase suggestion has been ordered through the acquisitions module, the patron’s purchase suggestion title will be clickable and bring the patron directly to the ordered record in the OPAC.
Libraries / Contact
Si la préférence système OPACShowLibraries est paramétrée sur “Afficher” et que au moins une de vos bibliothèques est “Publique”, un lien vers la page Bibliothèques sera affiché sous la barre de recherche.
Attention
As of Koha version 25.05, the link is labeled “Contact” if there is only one library set as “public”.
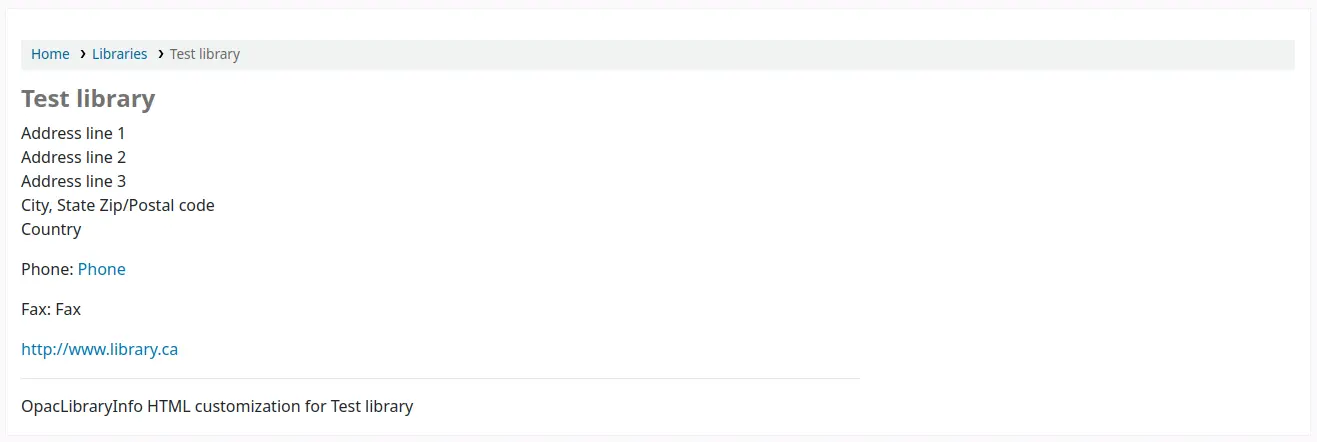
The Libraries page shows a list of all libraries set as “Public”, with their contact information (address lines, city, state, zip/postal code, country, phone number, fax number, website).
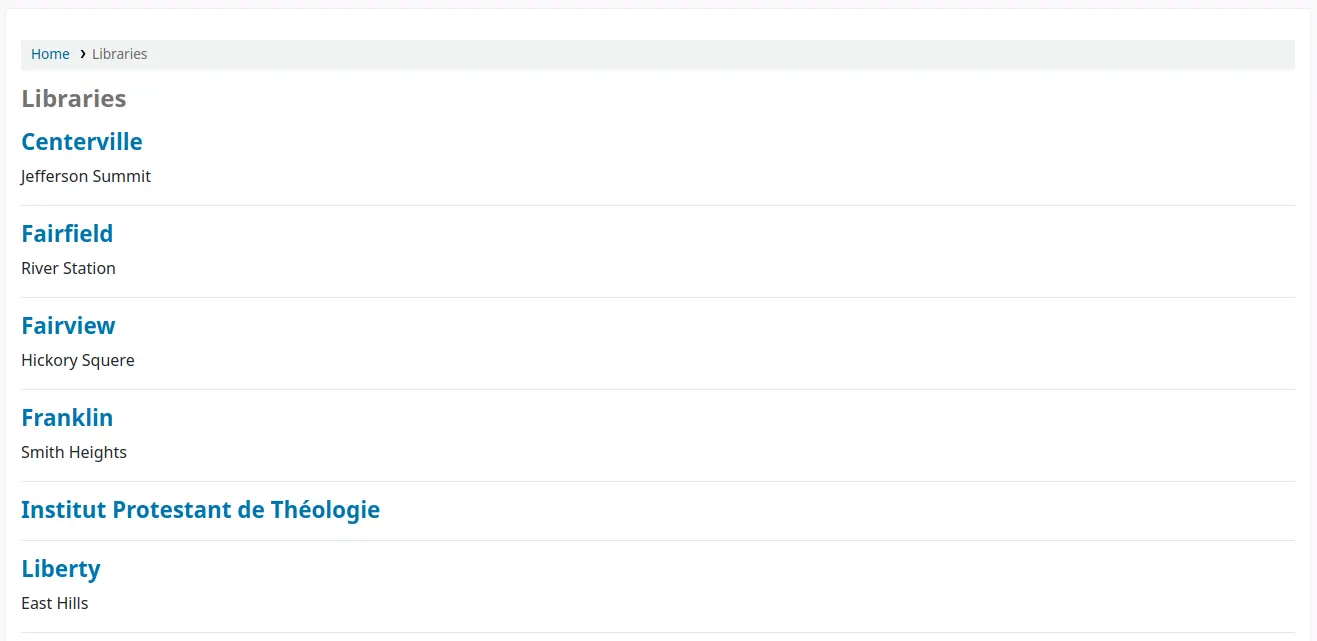
The library name itself is a link to a specific page for that library. This second page also includes “OpacLibraryInfo” HTML customizations for that library.
Reporting problems
If the OPACReportProblem system preference is enabled, patrons will have the option to report problems on the OPAC (broken links or inaccurate information for example).
En bas de chaque page, il y a un lien “signaler une anomalie”.
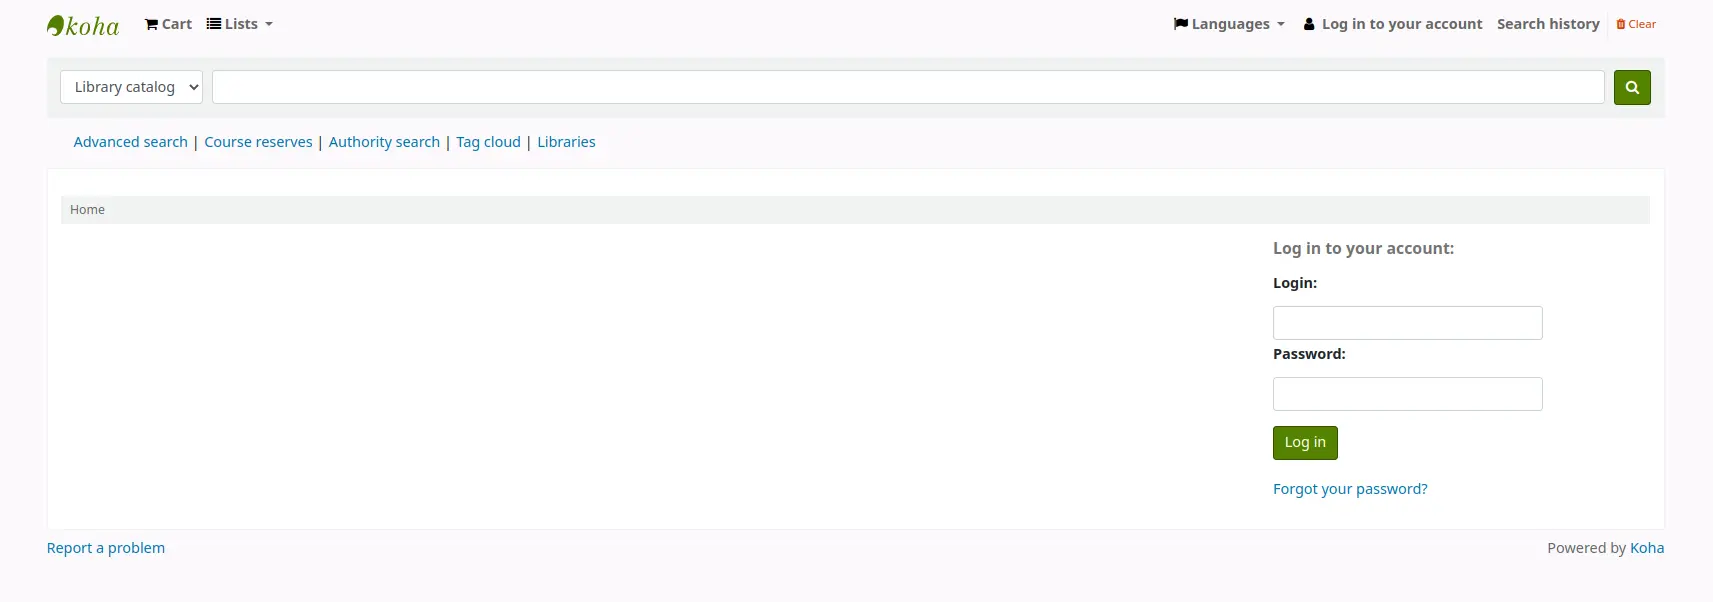
When the patron clicks on the link, they are brought to a form where they can specify what exactly is the problem.
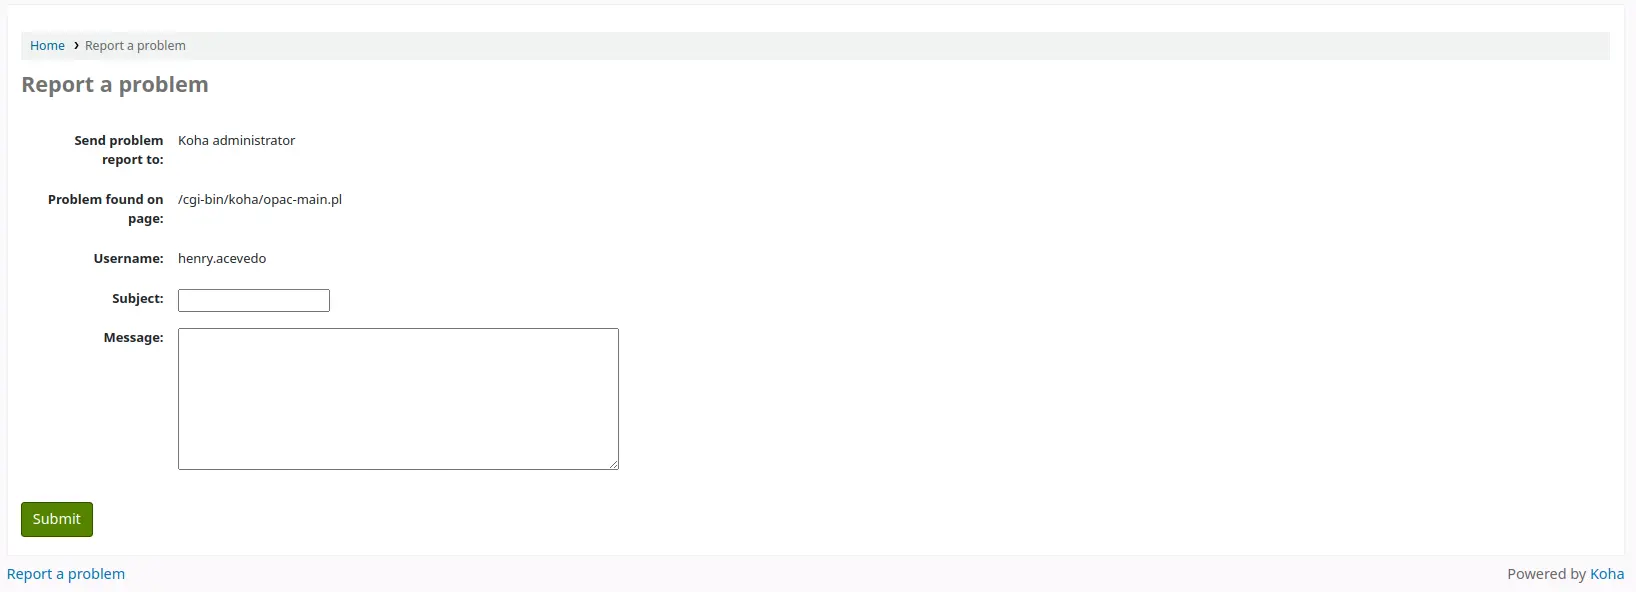
Le rapport d’anomalie est envoyé à l’administrateur Koha par courriel (à l’adresse précisée dans KohaAdminEmailAddress) et apparaîtra dans l’outil Rapports d’anomalie à l’OPAC. Si la bibliothèque a une adresse de courriel, l’adhérents pourra choisir d’envoyer le rapport à la bibliothèque ou à l’adminitrateur.
Note
Le contenu de ce courriel peut être personnalisé avec l’outil Notifications et tickets. Le code du courrier est PROBLEM_REPORT.
Prêt en self service à l’OPAC
Version
Cette fonctionnalité a été ajoutée à Koha dans sa version 23.11.
In addition to the self checkout module, there is a lighter weight option for libraries with smaller, trusted communities. With this option, patrons are allowed to check out items to themselves through their OPAC account with no oversight from library staff. This self checkout feature can be used on any computer or device with access to the OPAC, as opposed to the self checkout module which is meant to be used on dedicated computers.
Once the OpacTrustedCheckout system preference is enabled, logged in patrons will see a “Self checkout” option at the top of the page in the OPAC.

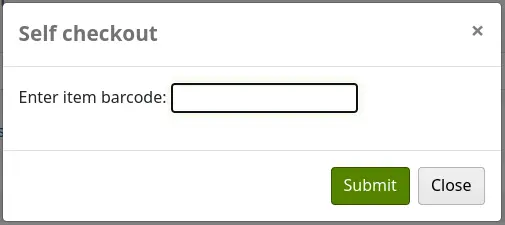
Clicking on the “Self checkout” link will open a pop-up where the patron can enter the item’s barcode and click “Submit” or press the enter key.
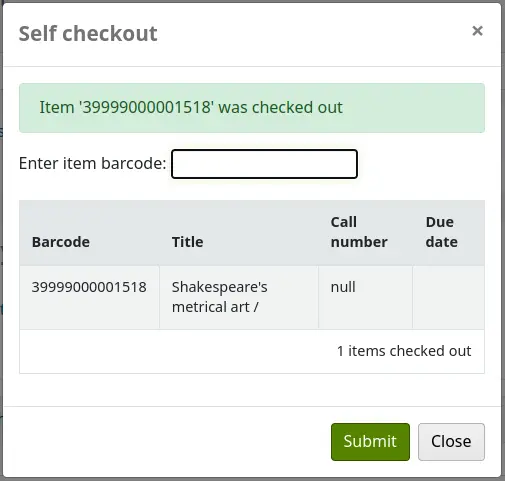
Once the item’s barcode has been entered, a confirmation message appears at the top of the pop-up and the item’s barcode, title, call number and due date are listed at the bottom. The patron has the option to scan or enter another barcode.
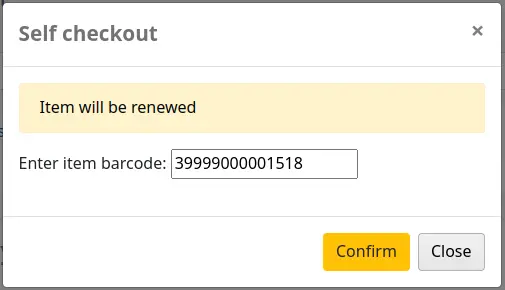
To renew the checkout, the patron only has to check out again (or renew from their summary).
If an item is already checked out to another patron, a message will say so.
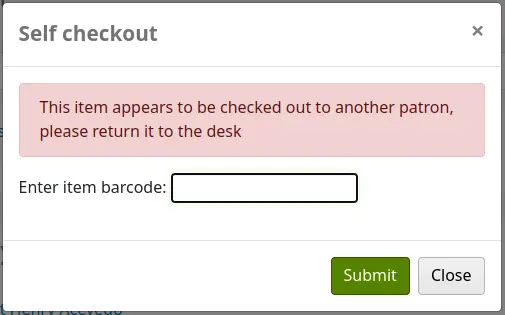
Checkout will also be blocked if:
the barcode is not found;
the item is on hold for another patron;
the patron’s outstanding charges are over the limit;
the patron already has the maximum amount of checkouts;
the patron does not have the required age to checkout the item;
the item cannot be checked out because of a not for loan or withdrawn status.


Commentaires
Les adhérents peuvent laisser des commentaires à l’OPAC si vous l’avez autorisé dans la préférence OPACComments. Chaque notice bibliographique a un onglet de commentaires sous le pavé bibliographique.
Si l’adhérent est connecté sur l’OPAC, il verra un lien pour ajouter un commentaire sur un document. En cliquant dessus cela ouvrira une fenêtre avec un cadre de saisie.
Une fois le commentaire rédigé, cliquez sur le bouton “Valider”. L’adhérent verra son commentaire en attente, et les autres adhérents verront qu’il n’y a aucun commentaire sur le document.
Once the comment is approved the patron will see the number of comments on the “Comments” tab and their comment labeled among the other comments. If the ShowReviewerPhoto system preference is set to “Show”, the patron’s photo pulled from the Libravatar library will be displayed next to their comment.
Les autres adhérents verront le commentaire ainsi que le nom de l’adhérent qui l’a laissé (à moins d’avoir paramétré la préférence système ShowReviewer pour ne pas montrer les noms des adhérents).
Si votre préférence système OpacShowRecentComments est paramétrée sur “Afficher”, vous verrez les commentaires approuvés sur cette page.
Depuis cette page, les adhérents peuvent s’abonner aux commentaires récents utilisant le RSS s’ils le souhaitent.