Point de vente
Point de vente est un module conçu pour vendre des objets aux personnes qui ne sont pas inscrites à la bibliothèque ou pour faire des ventes que vous n’avez pas besoin de lier à un compte adhérent.
Par exemple, vous pouvez vendre des livres usagés ou du matériel promotionnel. Ces objets peuvent être vendus à n’importe qui et vous n’avez pas besoin de lier la vente à un adhérent en particulier.
Pour les factures qui doivent être liées à un compte (comme un exemplaire perdu ou des frais de changement de carte), utilisez la facturation manuelle.
Aller à : Plus > Point de vente
Configuration
Pour activer le module Point de vente, vous devez paramétrer la préférence système EnablePointOfSale.
Si cela n’est pas déjà fait, vous devez aussi activer la préférence système UseCashRegisters.
Assurez-vous de configurer vos caisses dans le module Administration.
Enfin, vous devez ajouter les objets que vous vendrez dans la section types de débit du module Administration.
Faire une vente
Note
Seuls les bibliothécaires avec la permission takepayment (ou la permission superlibrarian) ont accès à ce module.
Quand vous allez pour la première fois dans le module Points de vente, le côté gauche montrera tous les objets en vente. Ce sont les types de débit qui ont été marqués comme “Peut être vendu”.
Note
Vous pouvez personnaliser les colonnes de ce tableau dans la section Configurer les colonnes du module Administration (référence du tableau : invoices).
Sur le côté droit c’est la vente en cours.
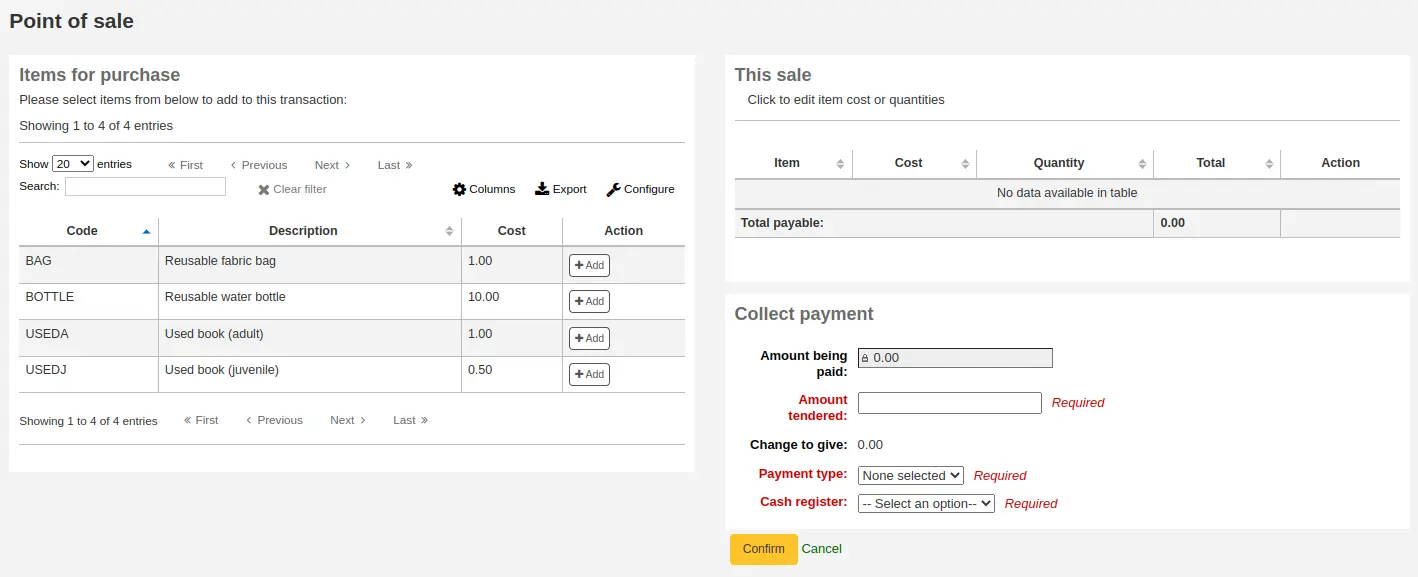
Cliquez sur le bouton “Ajouter” à côté des objets pour ajouter à la vente en cours.
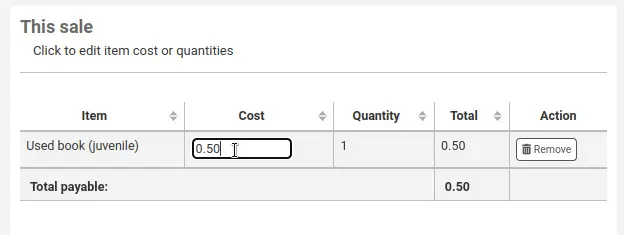
Si vous avez besoin de changer le coût ou la quantité, cliquez sur le montant à droite et il deviendra un champ de saisie dans lequel vous pourrez saisir le montant correct.
Une fois que tous les éléments ont été ajoutés, et que les quantités et prix ont été corrigés si besoin, remplissez le formulaire “Recevoir un paiement”.
Montant à payer : il s’agit du total, et ne peut être modifié ni payé partiellement car il n’est pas rattaché à un dossier d’adhérent.
Montant perçu : saisir le montant réellement versé par l’adhérent. Le montant perçu doit être supérieur ou égal au “Montant à payer”.
Monnaie à rendre : si le montant perçu est supérieur au montant à payer, Koha calcule le montant à rendre à l’adhérent.
Type de paiement : choisir le type de paiement.
Note
Les valeurs sont gérées par la valeur autorisée PAYMENT_TYPE.
Caisse : choisir la caisse sur laquelle saisir l’opération.
Cliquer sur “Confirmer” pour finaliser la vente.
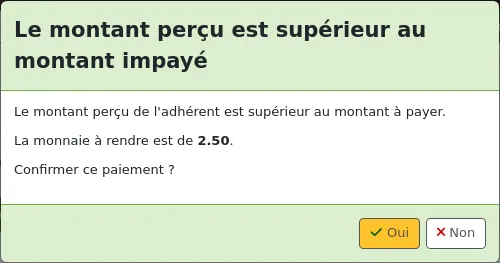
Si de la monnaie doit être rendue à l’adhérent, un pop-up apparaîtra pour vous le rappeler ; cliquer sur “Oui” pour confirmer que vous avez rendu le bon montant et confirmer le paiement.
Vous pourrez choisir d’imprimer un reçu pour la vente ou de l’envoyer par courriel.

Note
Les reçus peuvent être personnalisés dans l”outil Notifications et tickets. Le code est RECEIPT.