Catalogage
Aller à : Plus > Catalogage
Avant de commencer à cataloguer dans Koha, vous devez effectuer des réglages de base. Reportez vous à la liste de contrôle de mise en oeuvre pour avoir la liste complète de ces réglages. Vous devez absolument vérifier que vos grilles de catalogage MARC sont toutes définies selon vos besoins. Une fois dans le module Catalogage, vous ne pourrez plus ajouter ou supprimer de champs ni de sous-champs donc vos grilles doivent être prêtes avant de commencer à cataloguer.
Vous pouvez également utiliser des services de catalogage d’OCLC comme WorldShare Record Manager et Connexion pour envoyer des notices directement à Koha. Pour plus d’informations, voir OCLC Cataloging Services.
Notices bibliographies
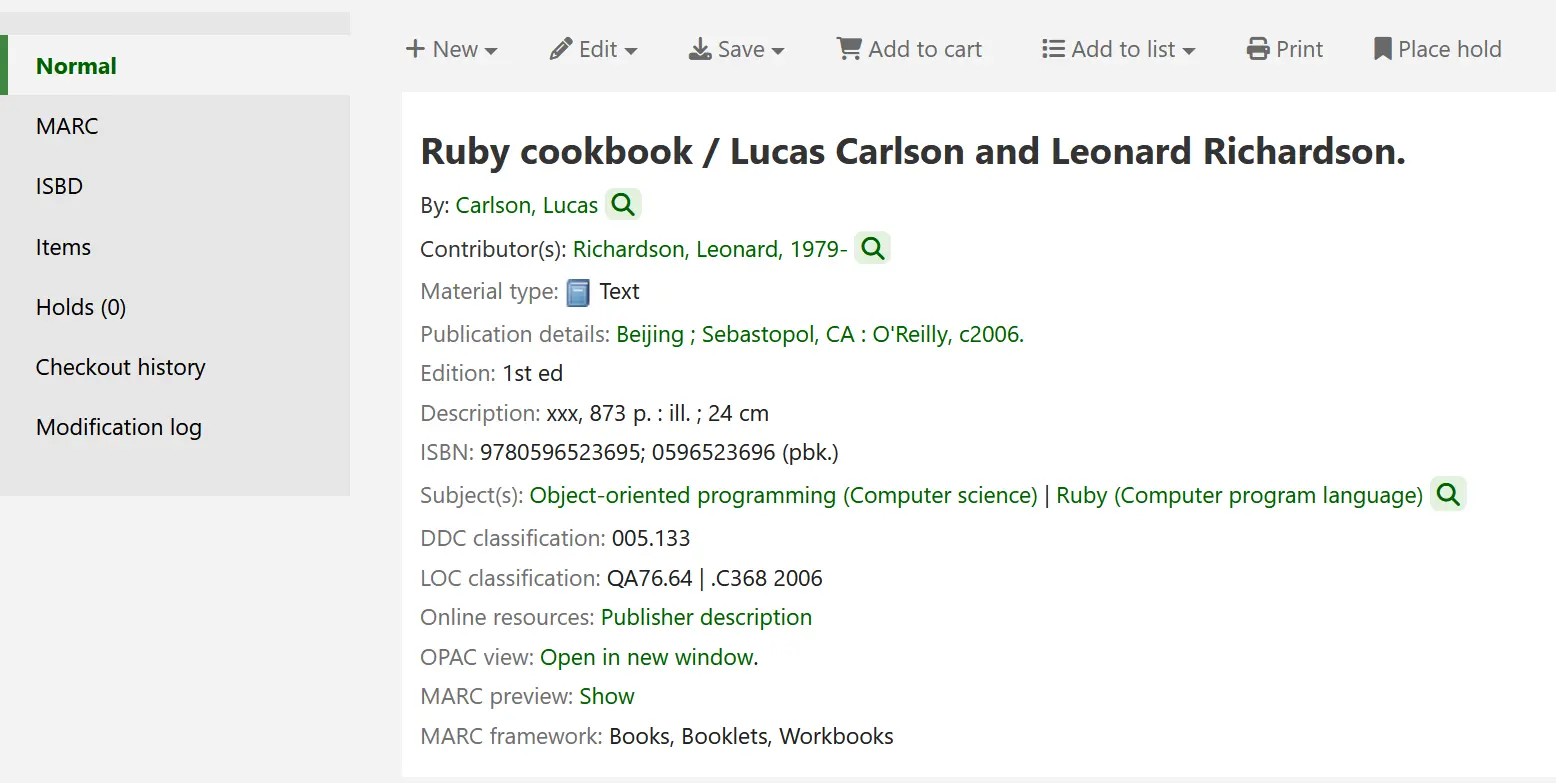
Dans Koha, la notice bibliographique contient les principales informations relatives au document. Cela comprend le titre, l’auteur, l’ISBN, etc. Ces informations sont enregistrées dans Koha au format MARC. Par défaut la page de notice détaillée s’affiche dans l’onglet “Normal” et affiche les éléments les plus importants de la notice.
Note
L’onglet “Normal” de la page de détails de la notice indique quelle grille de catalogage MARC a été utilisée pour créer la notice.

Note
Koha prend en charge les formats MARC21 et UNIMARC.
Une fois que la notice bibliographique a été sauvegardée, des notices d’exemplaires peuvent y être rattachées.
Ajouter des notices
Les notices sont ajoutées à Koha par saisie originale ou par catalogage dérivé. Vous pouvez opter pour l’éditeur de catalogage simple , ou avancée, pour l’ensemble de votre travail.
Note
Les membres du personnel doivent avoir la permission edit_catalogue (ou la permission superbibliothécaire) pour pouvoir ajouter des notices bibliographiques.
Pour cataloguer une nouvelle notice en utilisant l’éditeur simple :
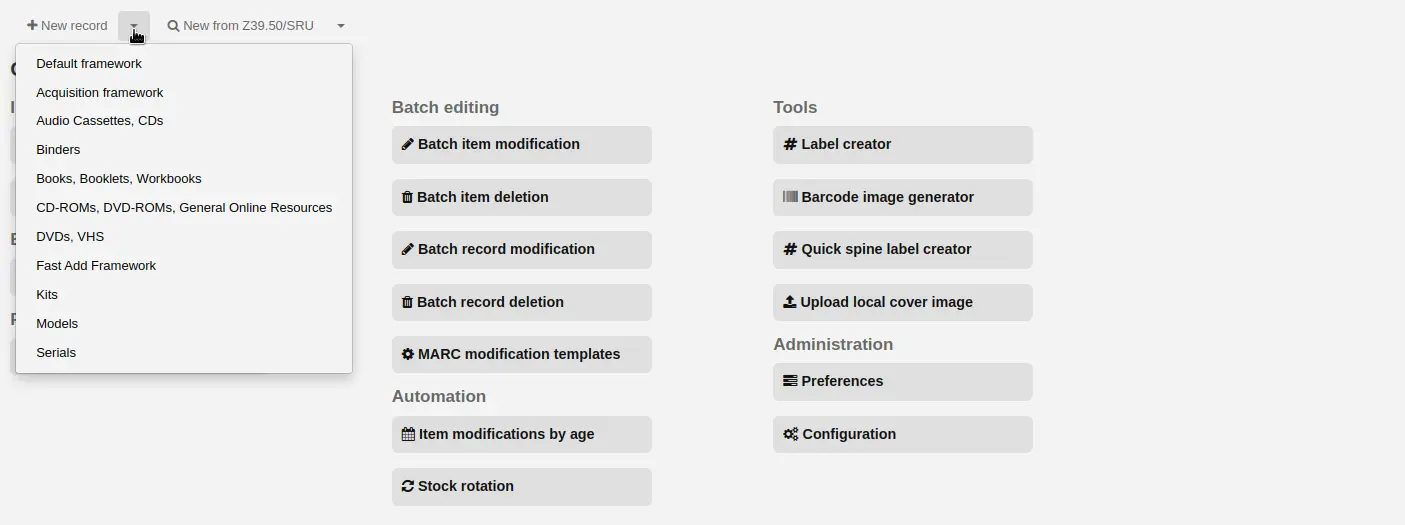
Cliquez sur “Nouvelle notice”

Note
Le bouton “Nouvelle notice” ouvre la grille de catalogage par défaut. Pour utiliser une autre grille, cliquer sur la flèche à droite du bouton “Nouvelle notice” et sélectionner la grille souhaitée.
Note
Vous pouvez créer ou modifier des grilles de catalogage dans le module Administration.
Pour cataloguer une nouvelle notice en utilisant un modèle vide dans l’éditeur de catalogage avancé :
Activez la préférence système EnableAdvancedCatalogingEditor
Cliquez sur le bouton “Editeur avancé”
Pour cataloguer une nouvelle notice en la dérivant d’une notice existante dans une autre bibliothèque en utilisant l’éditeur simple ou avancé :
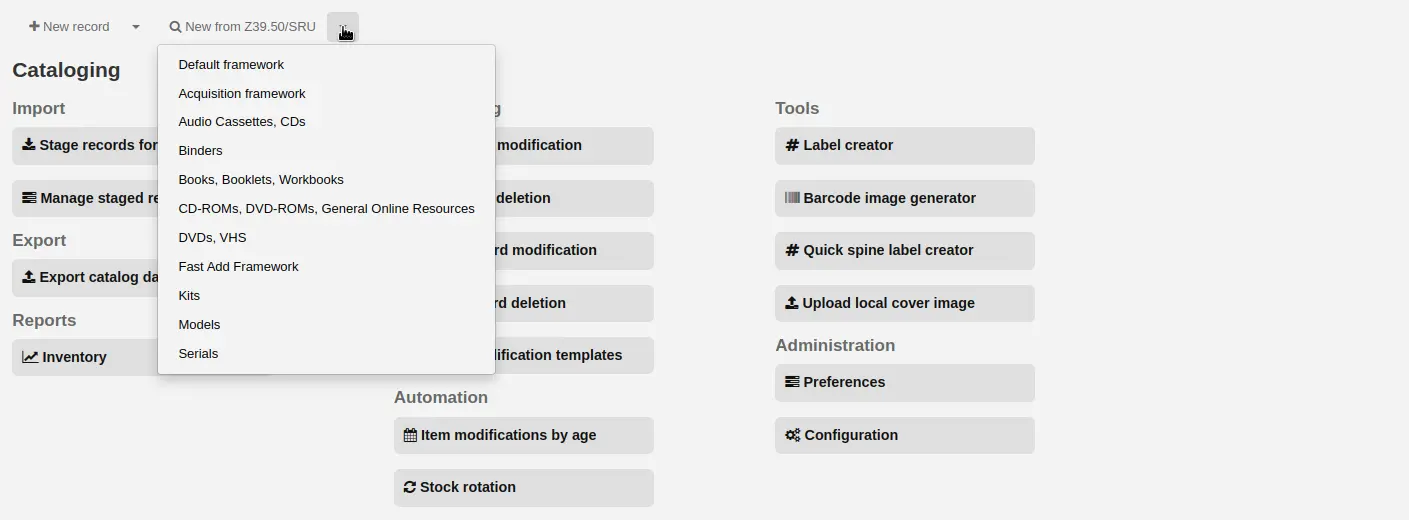
Cliquer sur “Dériver une nouvelle notice via Z39.50”
Note
Le bouton “Dériver une nouvelle notice via Z39.50/SRU” importera la notice avec la grille de catalogage par défaut. Si vous souhaitez utiliser une autre grille, cliquez sur la petite flèche à droite du bouton “Dériver une nouvelle notice via Z39.50/SRU” et choisissez la grille.
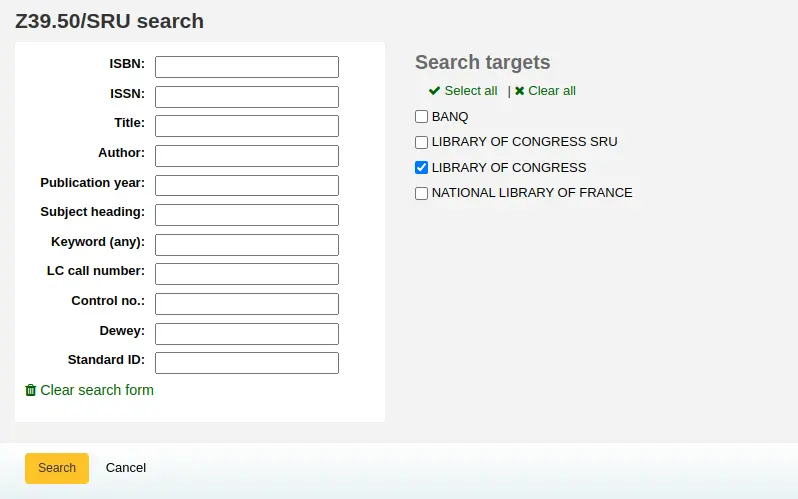
Cherchez le document que vous voulez cataloguer
Note
Si aucun résultat n’est trouvé, ciblez votre recherche Z39.50 dans moins de champs et non sur tous.
Note
Les cibles de recherche peuvent être modifiées dans la rubrique Serveurs Z39.50/SRU du module administration.
Note
L’affichage de champs et sous-champs MARC supplémentaires peut être configuré via la préférence système AdditionalFieldsInZ3950ResultSearch.
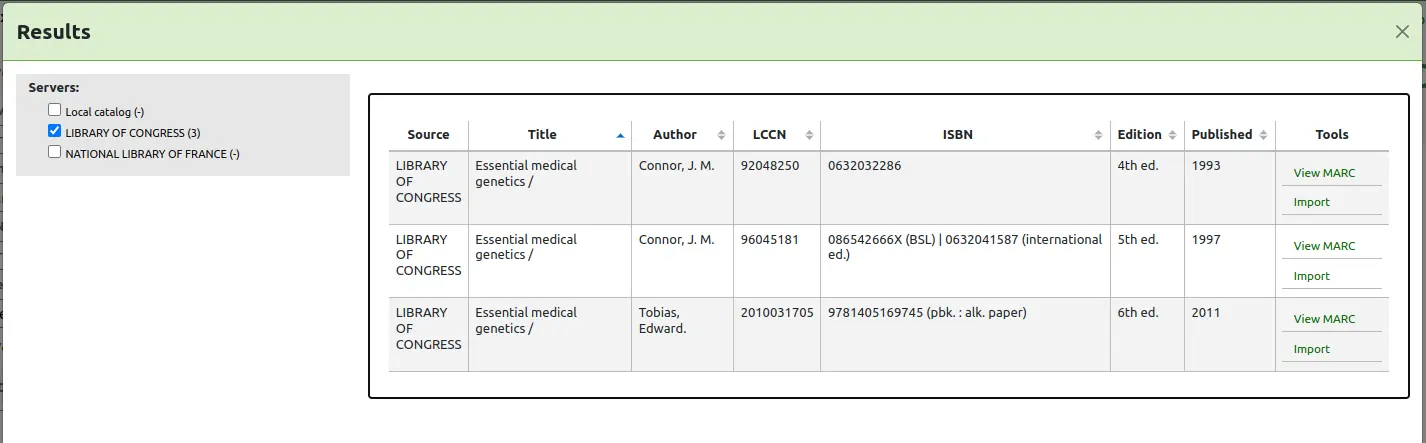
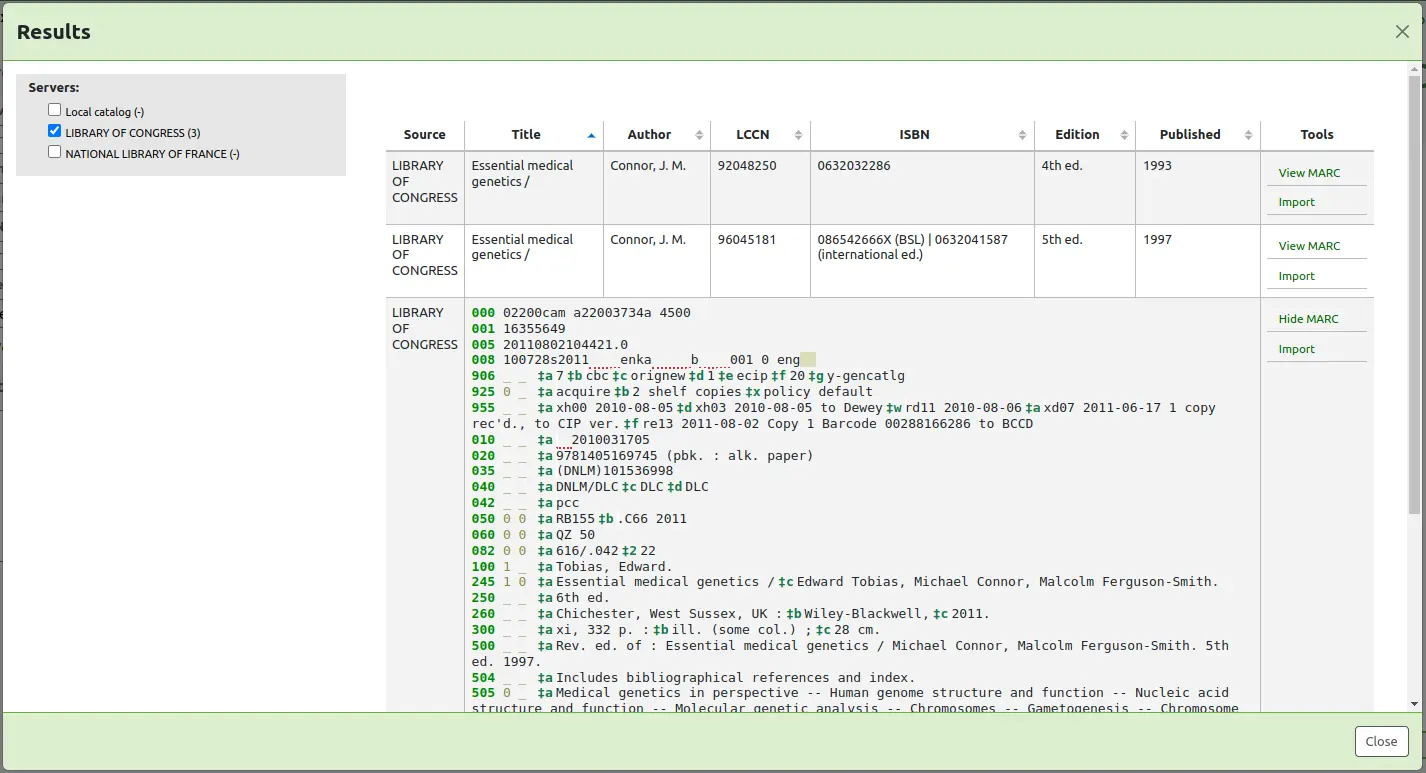
Cliquer sur la flèche à droite du résultat (ou cliquer n’importe où sur la ligne du résultat) permet d’accéder à l’aperçu de l’import et à ses options.
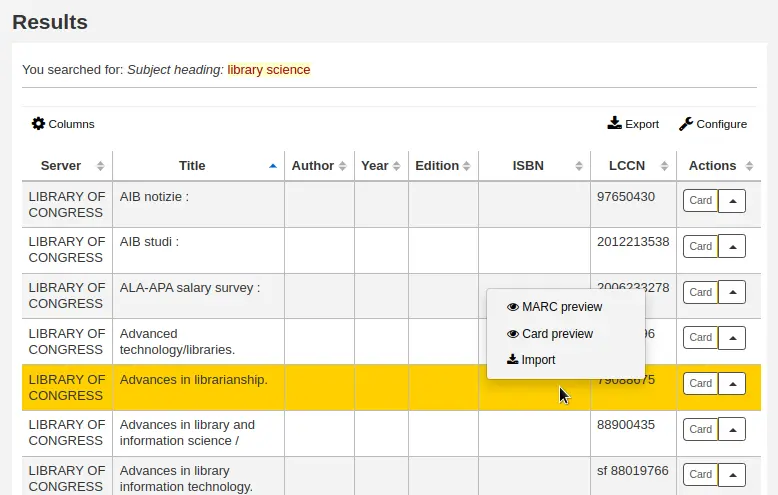
Note
L’option par défaut du bouton à côté du résultat est la dernière option utilisée. Sur la capture d’écran ci-dessus, la dernière option choisie était “Prévisualisation Carte” (pavé ISBD) donc le bouton est paramétré pour afficher Carte par défaut.
Note
You can customize the columns of this table in the Table settings section of the Administration module (table id: resultst).
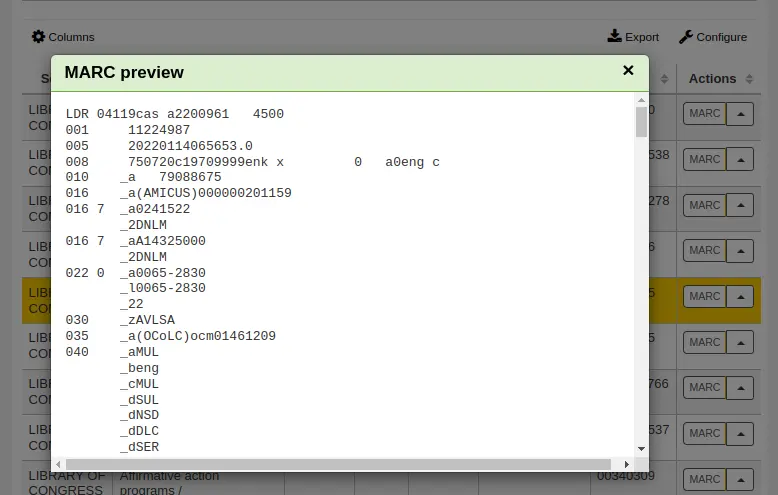
Prévisualisation MARC : cette option permet d’ouvrir la notice en format MARC.
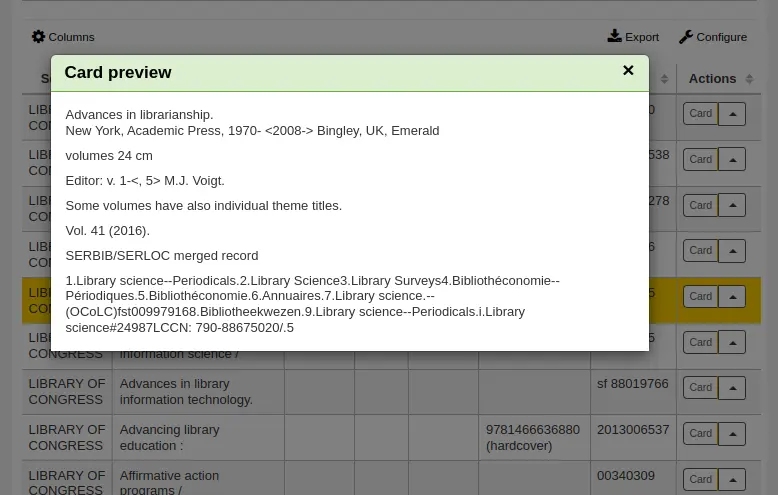
Prévisualisation ISBD : cette option afficher la notice présentée sous forme d’une fiche catalogue (pavé ISBD).
Importer : cette option ouvre la notice dans l’éditeur de catalogage de Koha pour que vous puissiez la modifier et l’enregistrer dans votre catalogue.
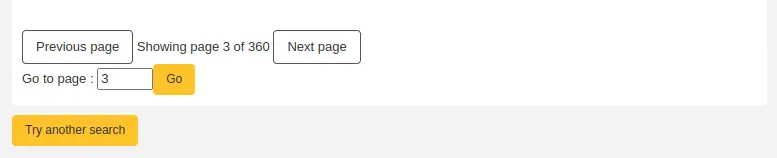
Si vous ne trouvez pas le titre que vous recherchez dans le résultat d’une requête Z.39.50, cliquez sur “Essayer une autre recherche” dans le coin inférieur gauche de la page
Interface de catalogage simple
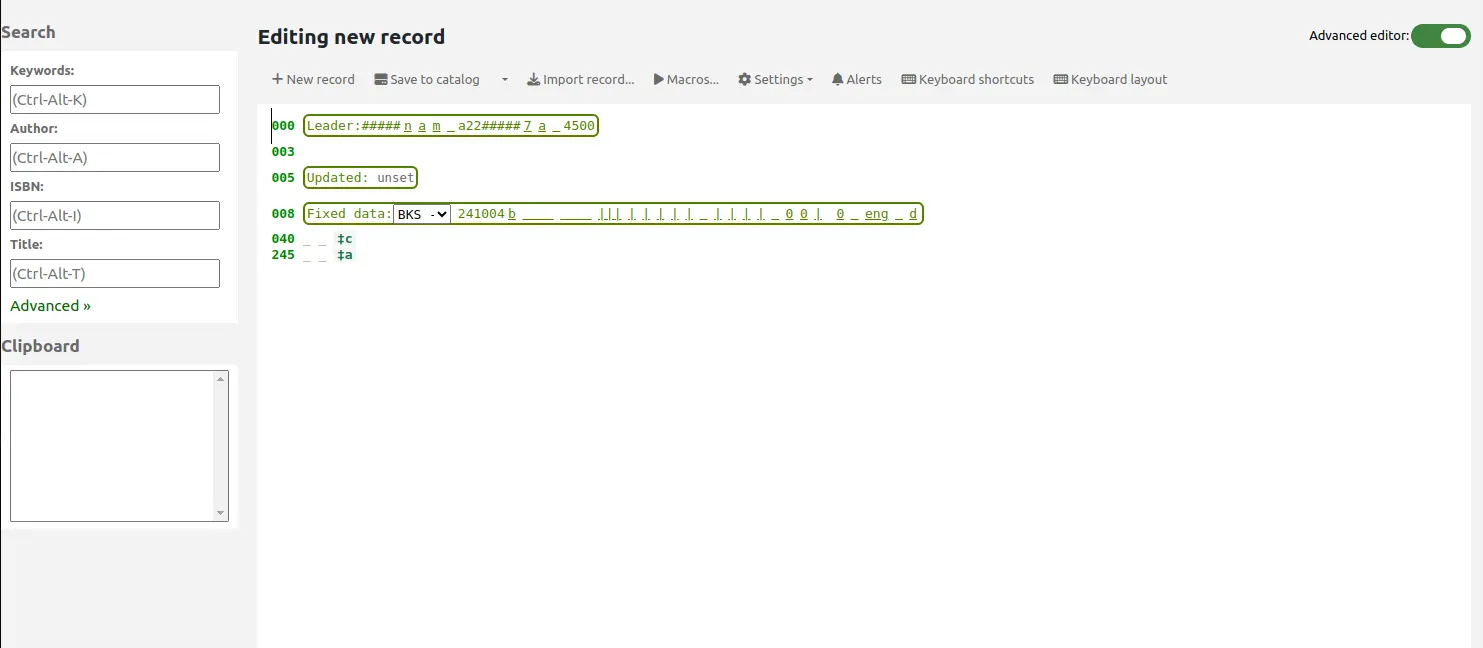
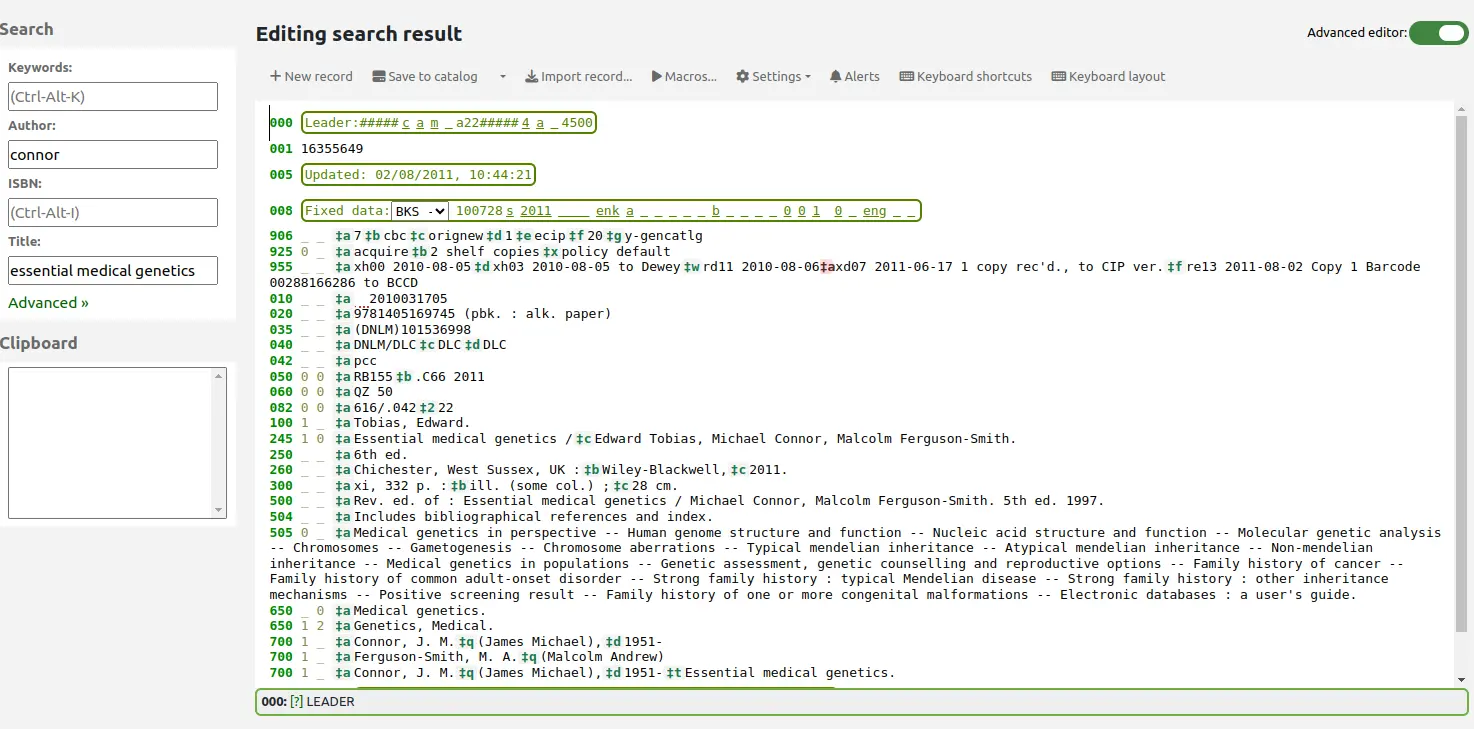
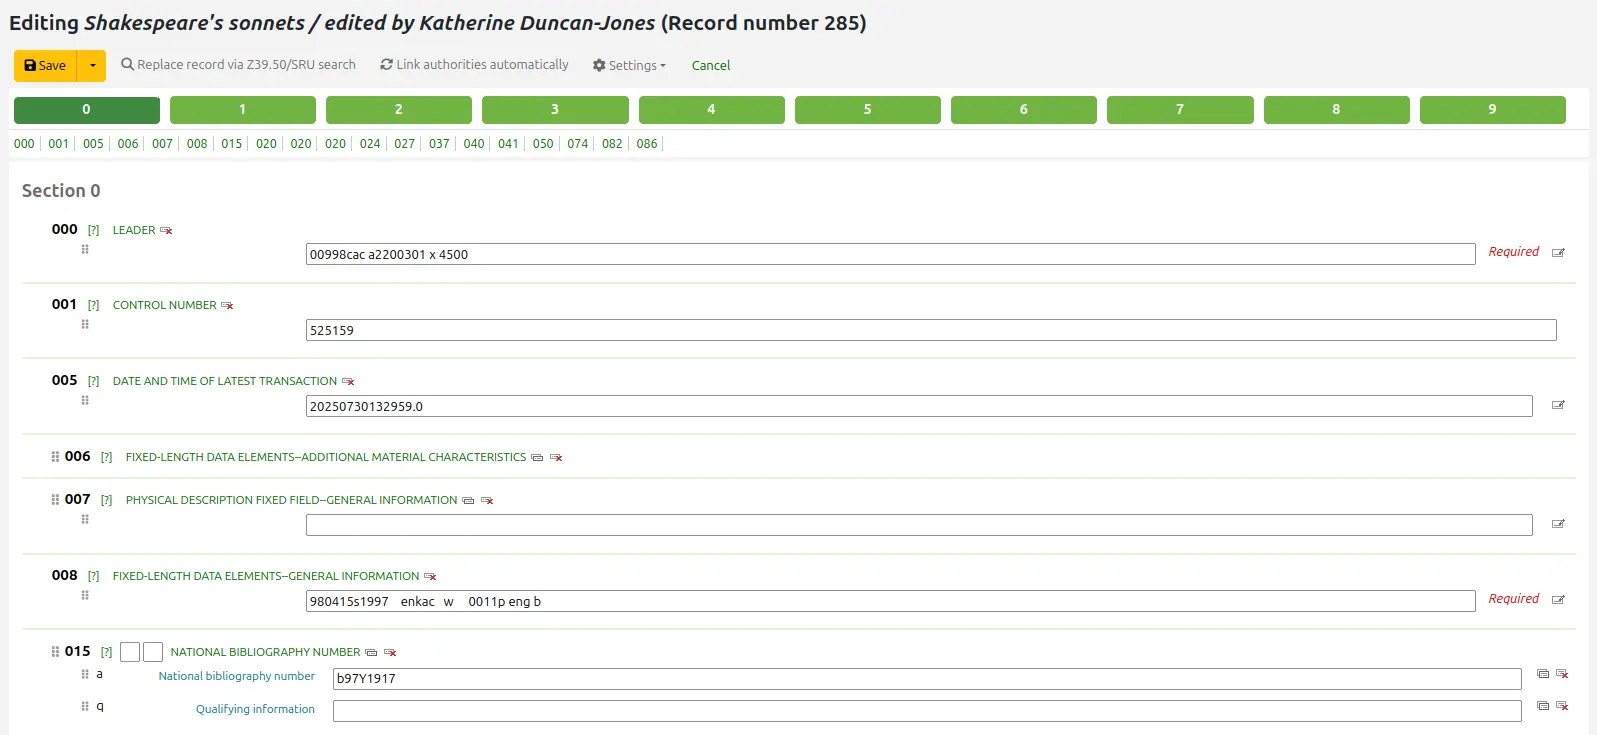
Dans l’éditeur simple, quand vous ouvrez une grille vide ou que vous importez une notice via Z39.50, un formulaire s’affichera dans lequel vous pouvez poursuivre le catalogage

Si vous préférez ne pas voir les numéros des champs MARC, vous pouvez changer la valeur de la préférence système hide_marc. Tout utilisateur peut également cocher la case “Afficher les champs” sous le bouton “Paramétrages”.

Pour développer un champ replié, cliquez sur sa description
Pour obtenir de l’aide à propos d’un champ MARC, cliquez sur le point d’interrogation (?) à droite de chaque numéro de champ, cela vous amènera à des explications de la Bibliothèque du Congrès
Il est possible de modifier la source de la documentation MARC en utilisant la préférence système MARCFieldDocURL
Si vous considérez que cette information est inutile, vous pouvez désactiver cette option en cliquant sur “Montrer les liens vers la documentation MARC” en haut de la grille
Parfois les champs peuvent ne pas être modifiés à cause de la valeur paramétrée dans la préférence système RequireChoosingExistingAuthority. Si vous avez paramétré cette préférence système sur « obliger », vous verrez un petit symbole de verrouillage à gauche du champ.

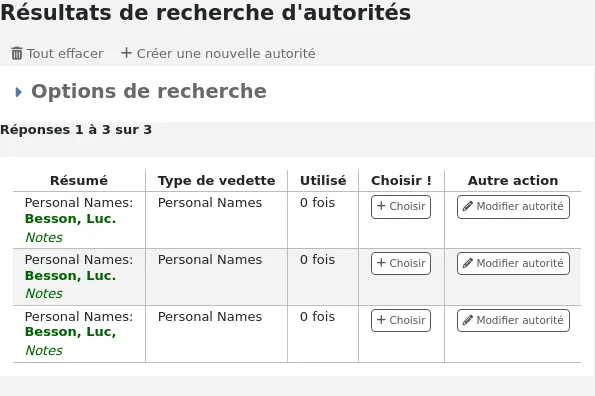
Si cette icône apparaît, vous devez cliquez dessus afin de lancer une recherche d’une autorité existante.
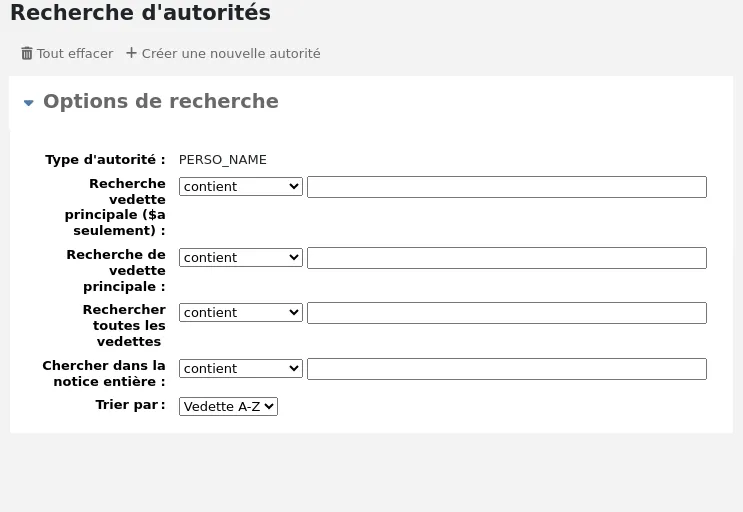
Dans la liste des résultats, cliquez sur « Choisir autorité » afin de la reporter dans votre notice bibliographique
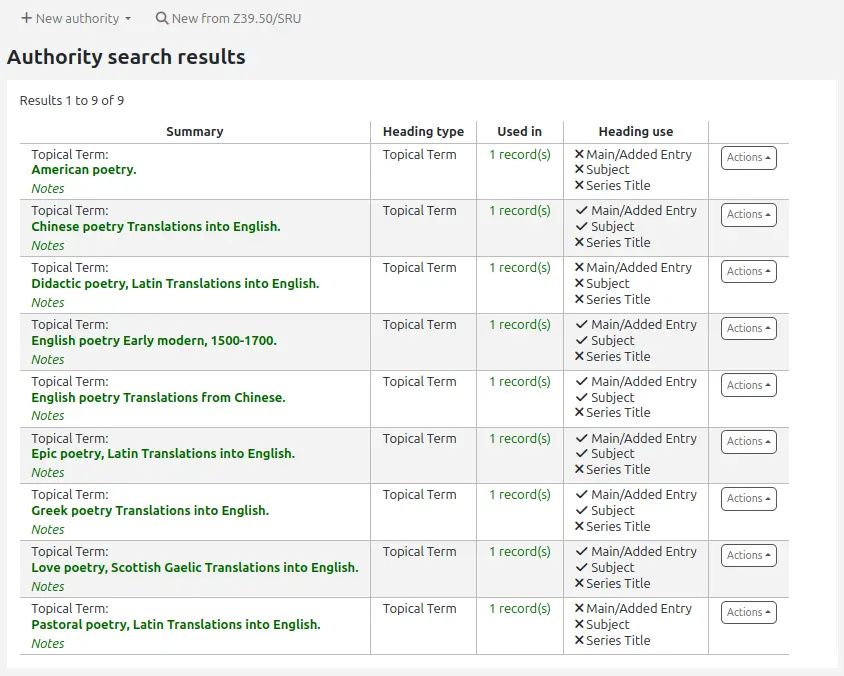
Note
In MARC21 systems, if the ShowHeadingUse system preference is enabled, there will be an additional column showing the appropriate use of the authority record in main or added entries, subject headings, or series titles.
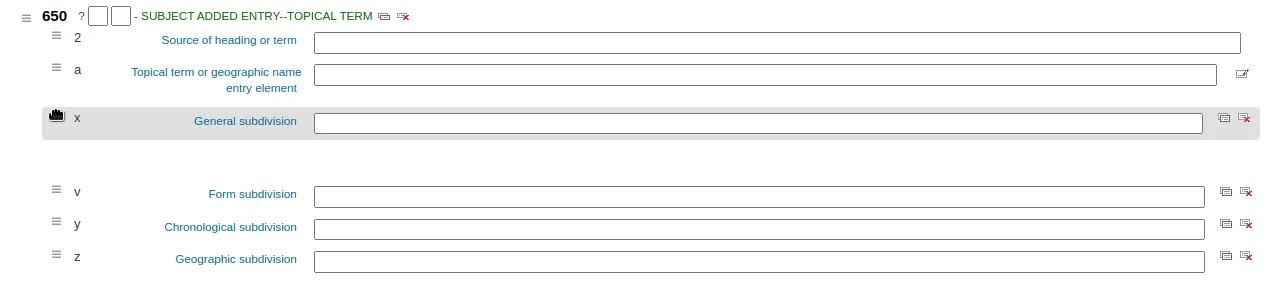
Pour dupliquer un champ cliquez sur l’icône « répéter ce champ » à droite du champ

Pour positionner les sous-champs correctement, faites les glisser en utilisant les pougnées sur la droite
Note
Vous pouvez modifier l’ordre par défaut des sous-champs de la grille de catalogage en cliquant-glissant les onglets de sous-champ lorsque vous modifiez les champs.
Pour dupliquer un sous-champ, cliquez sur l’icône de clonage à droite du champ (pour supprimer un champ, cliquez sur l’icône de suppression)
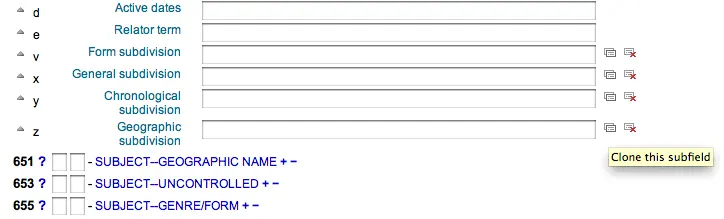
Pour supprimer un sous-champ (s’il y en a plus d’un du même type), cliquez sur - (le signe moins) à droit du champ
Pour utiliser un plugin, cliquez sur l’icône à droite du champ
Certains champs fixes ont des éditeurs qui changeront selon le type de document que vous êtes en train de cataloguer (par exemple les champs 006 et 008)
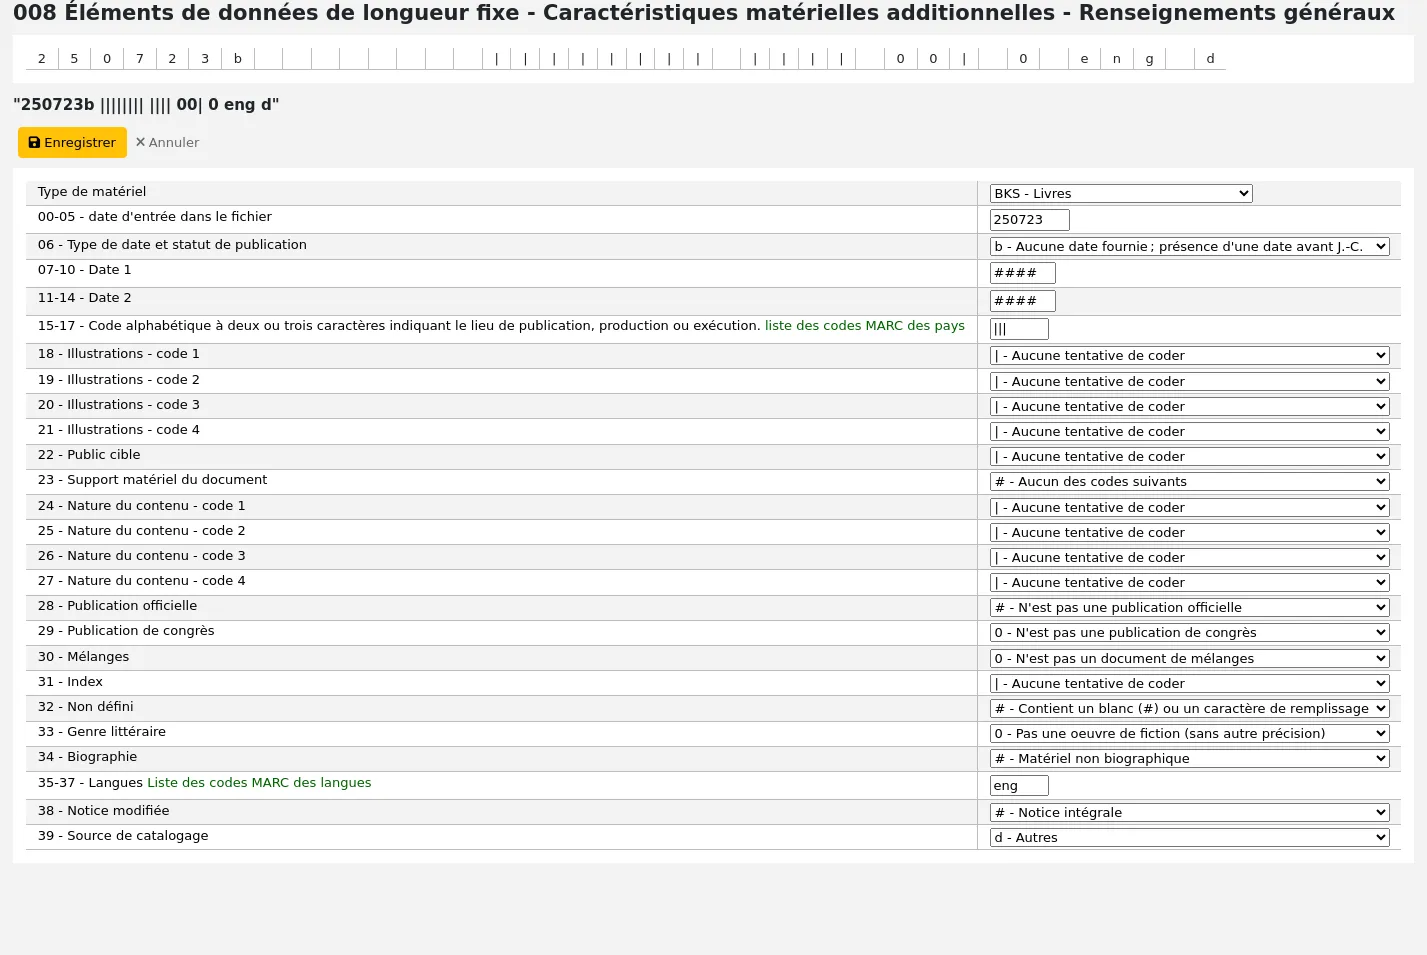
Note
Le “Type de matériel” en 008 est défini par la valeur dans leader/06.
Une fois que vous avez fini, cliquez sur le bouton « Enregistrer » en haut et choisissez soit d’enregistrer et visualiser la notice bibliographique que vous venez de créer, soit continuer en ajoutant/modifiant les exemplaires associés à la notice
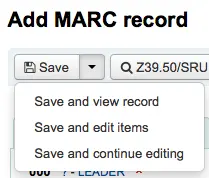
Cliquer sur “Enregistrer et voir la notice” affichera directement la notice que vous venez de cataloguer
Cliquer sur “Enregistrer et ajouter des exemplaires” vous affichera le formulaire d’ajout/modification après l’enregistrement de la notice bibliographique à laquelle vous pouvez associer des exemplaires
Cliquer sur « Enregistrer et poursuivre la modification » vous permettra d’enregistrer votre travail jusqu’ici et de le poursuivre
Si vous êtes sur le point d’ajouter une notice en doublon à votre catalogue, le système vous le signale avant son enregistrement
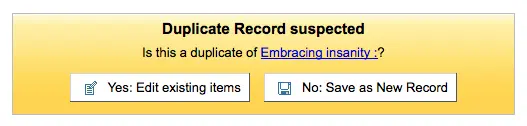
Note
Le système vérifie les éventuels doublons au niveau de l’ISBN. À défaut d’ISBN, il vérifie les combinaisons de titre et auteurs similaires.
Si les champs ou sous-champs importants ne sont pas remplis, un avertissement s’affiche. Cliquer sur « Aller au champ » pour voir et corriger le champ posant problème.
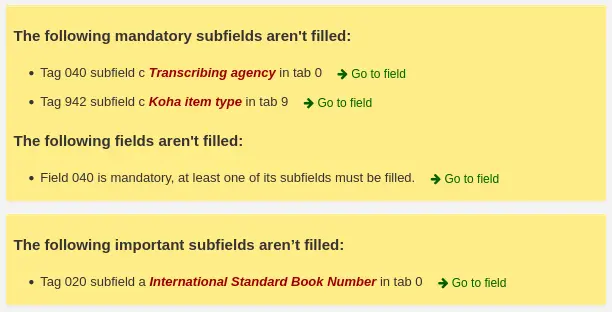
Si vous avez fait défiler l’écran vers le bas et que vous souhaitez revoir l’avertissement, cliquez sur le bouton « Erreurs » à droite de la barre d’outils.

Note
Les champs ou sous-champs importants n’empêchent pas de sauvegarder la notice.
Seuls les champs ou sous-champs obligatoires vides, empêchent la sauvegarde de la notice.
Interface de catalogage avancé
Pour pouvoir utiliser l’interface de catalogage avancé vous devez activer la préférence système EnableAdvancedCatalogingEditor.
Note
Les membres du personnel doivent avoir la permission advanced_editor ainsi que la permission edit_catalogue (ou la permission superbibliothécaire) pour pouvoir utiliser l’éditeur avancé.
Note
Cette fonction n’inclut actuellement aucun support pour les champs fixes UNIMARC.
Pour cataloguer avec l’éditeur avancé, cliquez sur le bouton “Éditeur avancé” de la page d’accueil du module catalogage, ou bien utilisez le commutateur situé dans le coin supérieur droit de l’écran éditeur simple.
Quand vous ouvrez une grille vide ou que vous importez une notice via Z39.50, un formulaire s’affichera dans lequel vous pouvez poursuivre le catalogage.
Vous pouvez faire des recherches Z39.50 en utilisant la zone de recherche sur la gauche.
A partir de ces résultats Z39.50, vous pouvez voir la notice MARC en cliquant sur le lien sur la droite
Cliquer sur “Importer” ouvrira la notice dans l’éditeur pour que vous puissiez la modifier.
Note
Quand vous ajoutez un nouveau champs dans l’éditeur avancé, vous devez saisir un tiret-bas dans le cas d’un indicateur vide, et entourer les indicateurs d’espaces.
Note
Vous devez insérer un espace avant le premier délimiteur de sous-zone, mais pas avant ou après les autres délimiteurs de sous-zone dans le champs.
En bas de l’éditeur, vous trouverez l’aide de la Library of Congress (ou la documentation de MarcFieldDocURL) pour le champ sur lequel vous êtes positionnés.
Dans le cas où le MARC est invalide, vous verrez une mise en évidence en rouge.
Le bouton “Raccourcis clavier” vous indiquera les commandes nécessaires pour éditer l’enregistrement en utilisant uniquement les fonctions clavier.
Un presse-papier est disponible pour copier et coller du texte entre les champs. Voir le tableau ci-dessous pour les raccourcis clavier utilisés pour le presse-papier.
Raccourcis claviers du catalogage avancé
Les raccourcis clavier suivants peuvent être utilisés dans l’éditeur avancé pour gagner du temps et des clics.
Raccourci |
Comportement |
|---|---|
Ctrl-Alt-C |
Copier le champ actuel |
Maj+Ctrl+C |
Copier le sous-champ actuel |
Ctrl+X |
Supprimer ce champ et le copier dans le “presse-papiers” |
Maj+Ctrl+X |
Supprimer ce sous-champ et le copier dans le “presse-papiers” |
Alt-C |
Insère le symbole copyright (©) |
Alt-P |
Insère le symbole copyright (℗) (enregistrements sonores) |
Ctrl+D |
Insérer un séparateur |
Ctrl+I |
Copier le champ actuel sur la ligne suivante |
Maj-Entrée |
Insérer un saut de ligne |
Maj+Ctrl+L |
Zone de lien vers les autorités |
Entrer |
Nouveau champ sur la ligne suivante |
Onglet |
Passez à la page suivante |
Ctrl+P |
Coller la sélection à partir du presse-papiers |
Maj-Tab |
Retour à la position précédente |
Ctrl+H |
Obtenir de l’aide sur le sous-champ actuel |
Maj+Ctrl+K |
Basculer le clavier |
Ctrl+S |
Enregistrer la notice (ne peut pas être refait) |
Attention
Le raccourci par défaut pour copier le champ courant a changé dans la version 24.11 de Koha. Dans les versions précédentes, il s’agissait de Ctrl-C.
Il est possible de modifier les raccourcis clavier si ceux par défaut ne conviennent pas à votre usage en cliquant sur “Redéfinir les raccourcis clavier”. Cela vous mènera sur la page d’administration des raccourcis clavier.
Clavier virutel du catalogage avancé
Un clavier virtuel est disponible pour ajouter des diacritiques et des symboles. Utilisez le raccourci clavier Maj+Ctrl+K pour afficher le clavier.
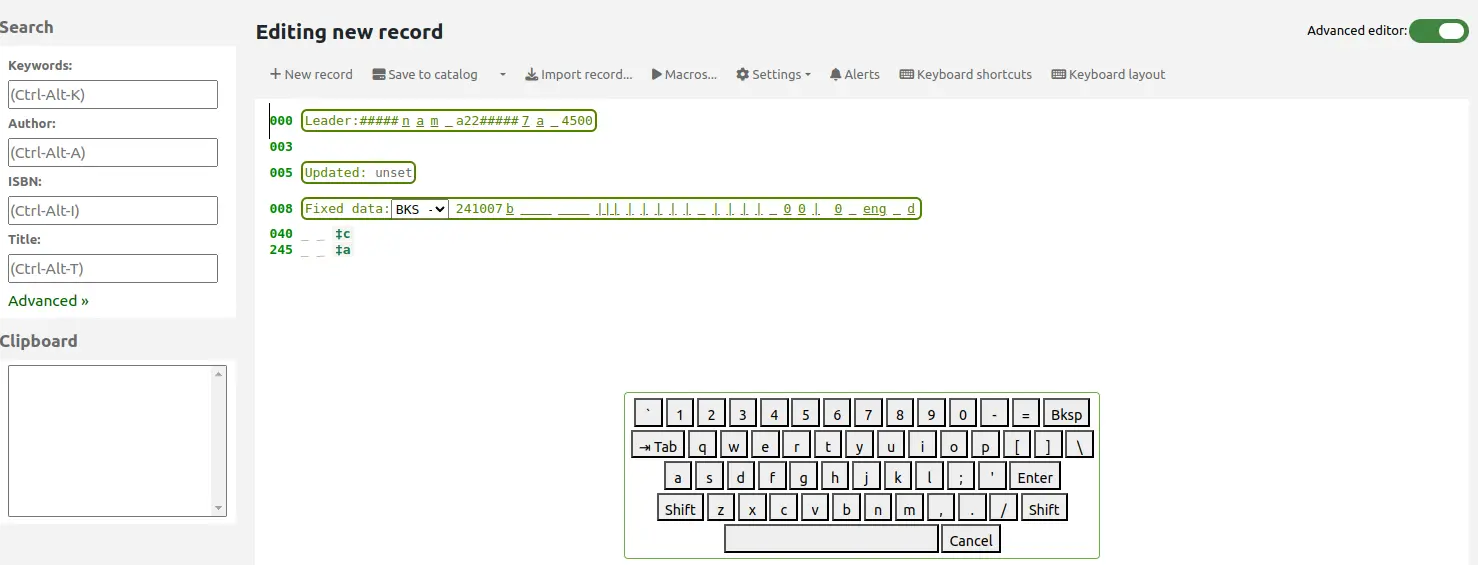
Un bouton “Formats de clavier” s’affichera en haut de l’éditeur avancé, il vous permettra de paramétrer le format de clavier virtuel pour différentes langues.
Macros dans le catalogage avancé
Des macros peuvent être utilisées pour éviter de saisir des informations répétitives dans les notices.
Note
Les membres du personnel doivent avoir la permission create_shared_macros (ou la permission superbibliothécaire) pour créer des macros destinées à l’éditeur avancé.
Les membres du personnel doivent avoir la permission delete_shared_macros (ou la permission superbibliothécaire) pour supprimer des macros de l’éditeur avancé.
Pour enregistrer une nouvelle macro :
Cliquez sur le bouton “Macros…”.
Dans la fenêtre pop-up, cliquez sur le bouton “Nouvelle macro…”.
Saisissez le nom de la nouvelle macro dans la boîte correspondante, puis cliquez sur OK.
Now click to the right of the little number 1, and enter the first line of your macro (see macro syntax below). For a multi-line, or multi-field, macro, hit the return key so that a little number 2 appears, and enter the second line/field, etc.
Vos macros seront automatiquement sauvegardées. Quand vous aurez terminé, cliquez sur le « x » pour fermer la fenêtre, ou sélectionnez une macro de la notice courante, ou sélectionnez une autre macro.
Pour modifier une macro existante :
Cliquez sur le bouton “Macros…”.
In the pop-up window, select the macro that you wish to edit & make your changes.
Vos travaux seront automatiquement sauvegardés, ainsi quand vous aurez terminé, cliquez sur le « x » pour fermer la fenêtre, ou sélectionnez une macro de la notice courante, ou sélectionnez un autre macro.
Pour exécuter une macro :
Cliquez sur le bouton “Macros…”.
In the pop-up window, select the macro that you wish to run
Click “Run macro”
La syntaxe de base du langage macro :
new 500=‡aEdited with Rancor
Créera une nouvelle zone 500 avec une sous-zone ‡a, et y inscrira « Modifié avec Rancor ».
245c= par J.K. Rowling.
Inscrit au premier sous-champs ‡c du champs MARC 245 “par J.K. Rowling”, le créant si nécessaire.
082a={084a}
Assigne le contenu du sous-champs ‡a du premier code 082 (créant le sous-champs si nécessaire) au même contenu que la première sous-zone 084‡a.
indicators=_1
Assigne les indicateurs du dernier tag mentionné (dans ce cas-ci, 082), à « _ »et « 1 ».
new 090a=Z674.75.W67
Creates a new ‡a subfield on the first 090 (but only if that field already exists) and sets it to « Z674.75.W67 ».
new 090a at end=Z674.75.W67
Tel que précédemment.
new 245b after a= a tale of might and magic /`
Crée un nouveau ‡b après le premier sous-champs ‡a et inscrit « a tale of might and magic / ».
delete 245b
Deletes the first ‡b subfield on the first 245 to ‡b.
Importer des notices
Il est possible d’importer dans Koha des fichiers de notices bibliographiques et de notices d’autorité MARC. Les fichiers à importer peuvent être au format MARC ou MARCXML.
L’import de notices dans Koha se fait en deux étapes.
The first is to stage records for import, which prepares the records, and imports them in the reservoir.
The second step is to import the prepared, or « staged », files from the reservoir into the catalog.
Import des notices dans le réservoir
Note
Seuls les membres du personnel ayant la permission stage_marc_import (ou la permission superbibliothécaire) aura accès à cet outil.
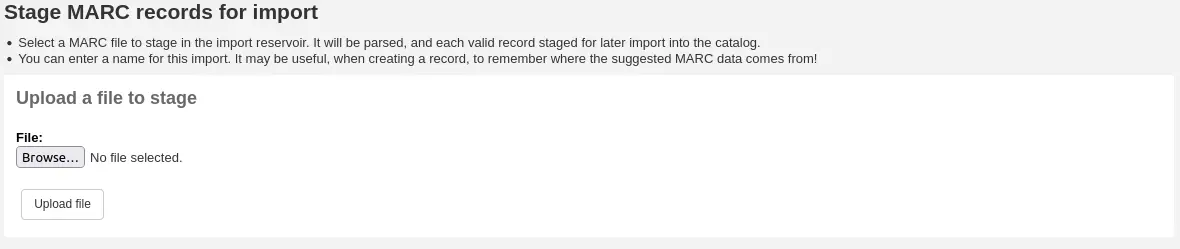
Aller à : Plus > Catalogage > Importer > Importer des notices dans le réservoir
D’abord, trouvez le fichier MARC sur votre ordinateur
- Ensuite, il vous sera proposé les options de correspondance entre notices et pour les exemplaires
imports

Prefill values with profile: if you already have staging profiles set up, you can choose the appropriate profile from the dropdown list
Profiles are used to prefill the rest of the staging settings form.
Vous pouvez créer un profil en sélectionnant les différents paramètres dans les sections ci-dessous et en saisissant un nom de profil à la fin du formulaire. La prochaine fois que vous importerez des notices, ce profil sera disponible.
“Commentaires au sujet de ce fichier” : saisissez un commentaire pour distinguer votre téléchargement dans l’outil “Gestion des notices importées dans le réservoir
Type de notice : Choisissez le type de notices contenues dans le fichier, notices bibliographiques ou autorité

Encodage des caractères : choisissez l’encodage de votre fichier
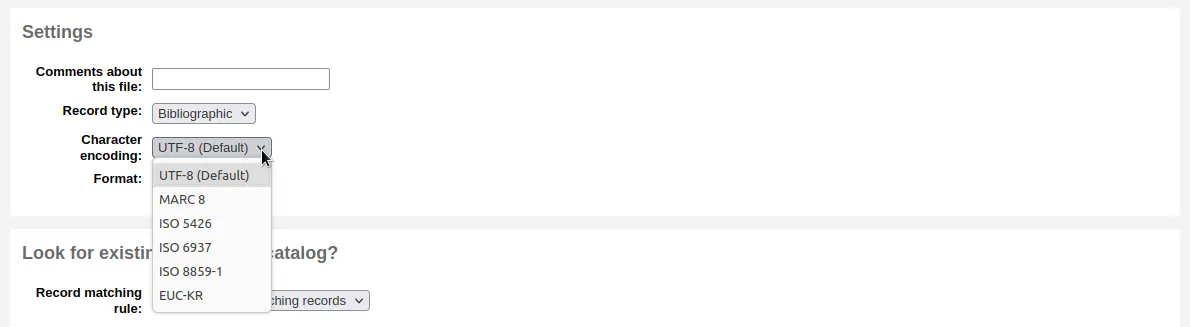
Format : choisissez le format MARC de votre fichier
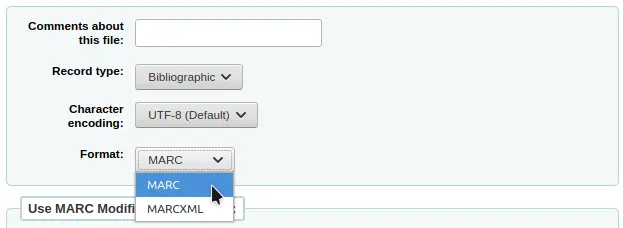
Modifier les notices en utilisant un modèle de transformation MARC : choisissez si vous souhaitez utiliser un modèle de transformation MARC pour modifier les données de vous allez importer

Choisissez si vous souhaitez rechercher les correspondances de notices

Règles de correspondance : choisissez les règles à utiliser pour vérifier si ces notices existent déjà dans votre catalogue.

Note
Vous pouvez configurer les règles de correspondances dans le module Administration
Note
En utilisant la règle de correspondance par ISBN, Koha ne trouvera que des correspondances exactes. Si la correspondance par ISBN ne vous satisfait pas, vous pouvez changer la préférence AgressiveMatchOnISBN à “Essayer”, puis relancer l’import.
Action si une notice concordante est trouvée : choisir ce qu’il faut faire avec les notices concordantes si elles sont détectées
Remplacer la notice existante par la notice entrante : choisissez ceci si vous importez des notices plus complètes que les notices actuelles, ou si vous avez apporté des modifications à l’aide d’un outil externe (MarcEdit par exemple)
Ajouter la notice entrante : cela conserve les notices existantes et ajoute la notice entrante, ce qui peut conduire à la création de doublons
Ignorer la notice entrante (ses exemplaires pourront être traités) : choisissez cette option si vous ne souhaitez pas remplacer les notices existantes
Action s’il n’y a pas de concordance : choisissez ce que vous souhaitez faire lorsque la notice n’a pas de correspondance dans le catalogue
Ajouter la notice entrante : choisissez cette option si vous souhaitez importer des notices qui ne sont pas encore dans votre catalogue (des nouveaux titres par exemple)
Ignorer la notice entrante : choisissez cette option si vous ne souhaitez pas importer les notices qui ne sont pas déjà dans votre catalogue (par exemple si vous souhaiter seulement remplacer les notices existantes sans en ajouter de nouvelles)
Vérifier les exemplaires inclus ? : choisissez si vous souhaitez ou non importer les données d’exemplaires (champ 952) présentes dans les notices MARC (si le fichier que vous chargez contient des notices bibliographique).
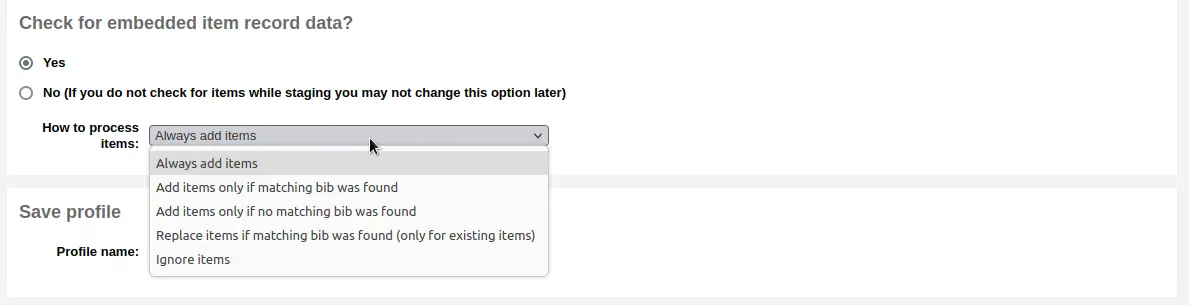
Toujours ajouter les exemplaires : ajoute toujours les exemplaires, quel que soit l’état du rapprochement
Ajouter les exemplaires uniquement si une notice concordante a été trouvée : ajoute uniquement des exemplaires aux notices déjà existantes dans votre catalogue
Ajouter les exemplaires uniquement si aucune notice concordante n’a été trouvée : ajoute uniquement des exemplaires aux nouvelles notices importées, pas à celles déjà présentes
Remplacer les exemplaires si une notice bibliographique concordante a été trouvée : le rapprochement se fait sur les numéros d’exemplaire et les codes-barres ; seuls les exemplaires existants sont alors remplacés.
Note
Les numéros d’exemplaire (itemnumbers) priment sur les codes-barres
Ignorer les exemplaires : n’ajoute aucun exemplaire
Enregistrer le profil : vous pouvez choisir d’enregistrer les paramètres sélectionnés sous un profil, afin de les réutiliser ultérieurement

Cliquez sur “Importer dans le réservoir”
L’import des notices dans le réservoir sera traitée comme une tâche en arrière-plan. Une barre de progression vous indiquera l’avancement de la tâche.

Cliquez sur “Voir les détails de la tâche en file d’attente” pour afficher un résumé de l’import dans le réservoir
Il vous sera présentée une confirmation de votre importation MARC
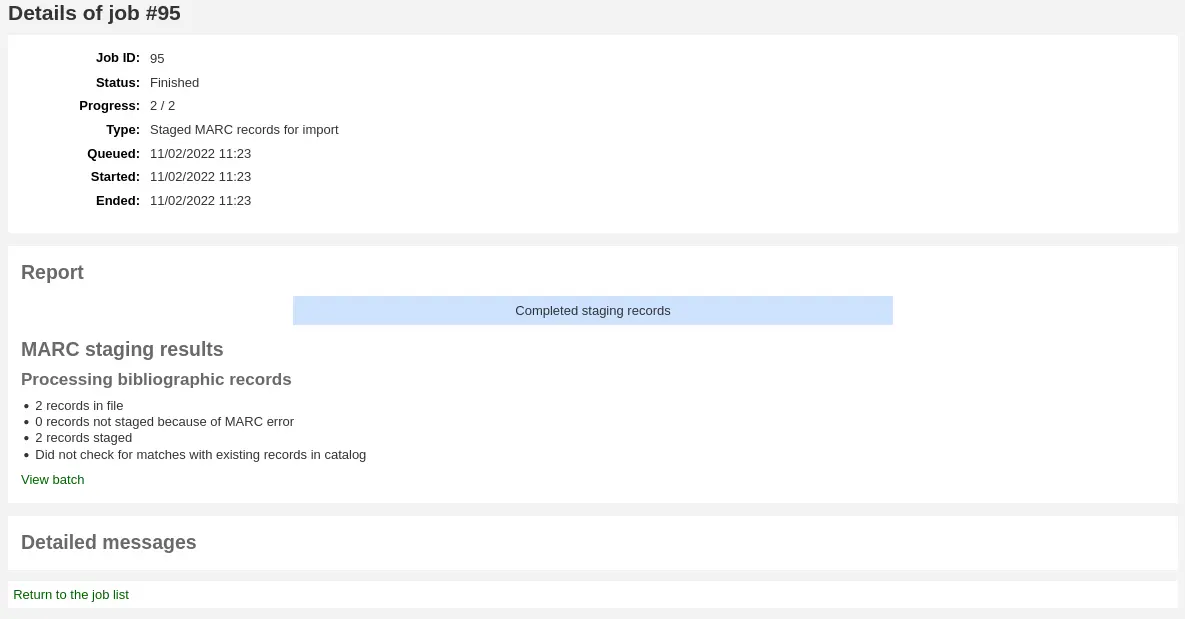
Nombres de notices dans le fichier
Nombre de notices avec des erreurs MARC
Number of records staged
Number of records matching existing records in the catalog
Number of items staged
Pour achever l’opération, rendez-vous à l’outil de Gestion des notices importées dans le réservoir en cliquant sur le lien “Voir le lot”.
If these records are to be used in acquisitions, you can stop here and add these records to a basket by ordering from a staged file
Gestion des notices téléchargées
Note
Only staff with the manage_staged_marc permission (or the superlibrarian permission) will have access to this tool.
Aller à : Plus > Catalogage > Importer > Gestion des notices téléchargées
Once you have staged your records for import you can complete the import using this tool.
From the list of staged files, click on the file name that you want to finish importing
Note that records that have already been imported will say so under “Status”
Note
If you’re coming directly from the Stage records for import tool you will not see this list of staged files, you will be taken automatically to the right file summary
A summary of your staged file will appear along with the option to change your matching rules
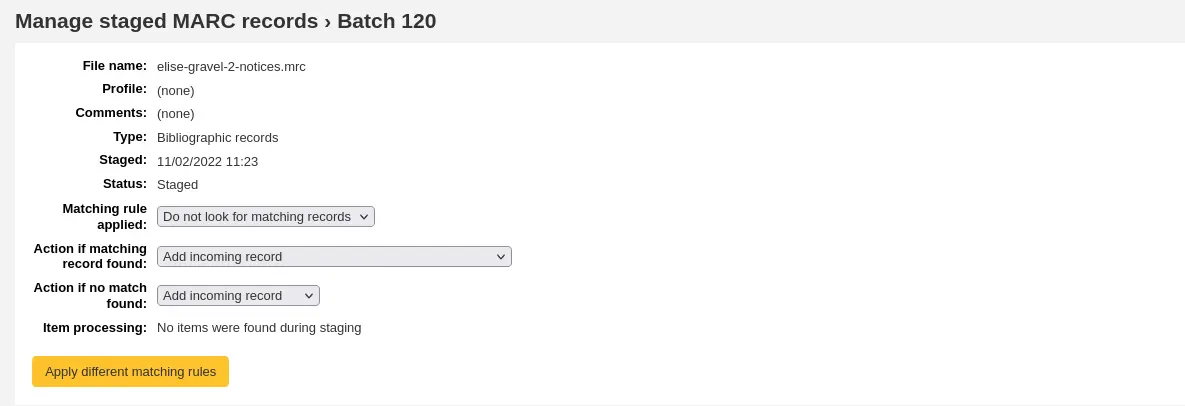
Below the summary is the option to import the batch of records using a specific framework
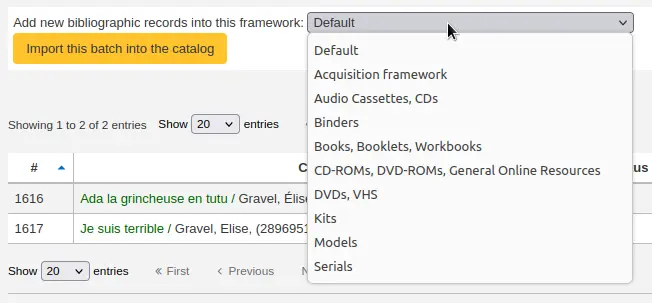
Choosing a framework other than “Default” isn’t necessary, but it’s helpful for running reports.
Below the framework selection there will be a list of the records that will be imported
Review your summary before completing your import to make sure that your matching rule worked and that the records appear as you expect them to
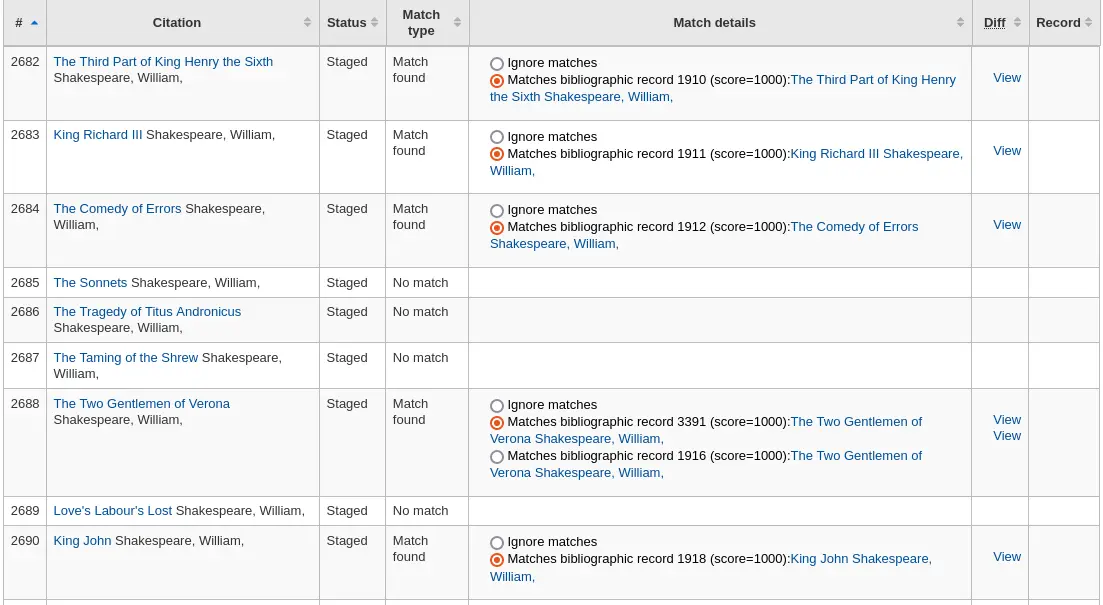
Matches will appear with info under the “Match details” column

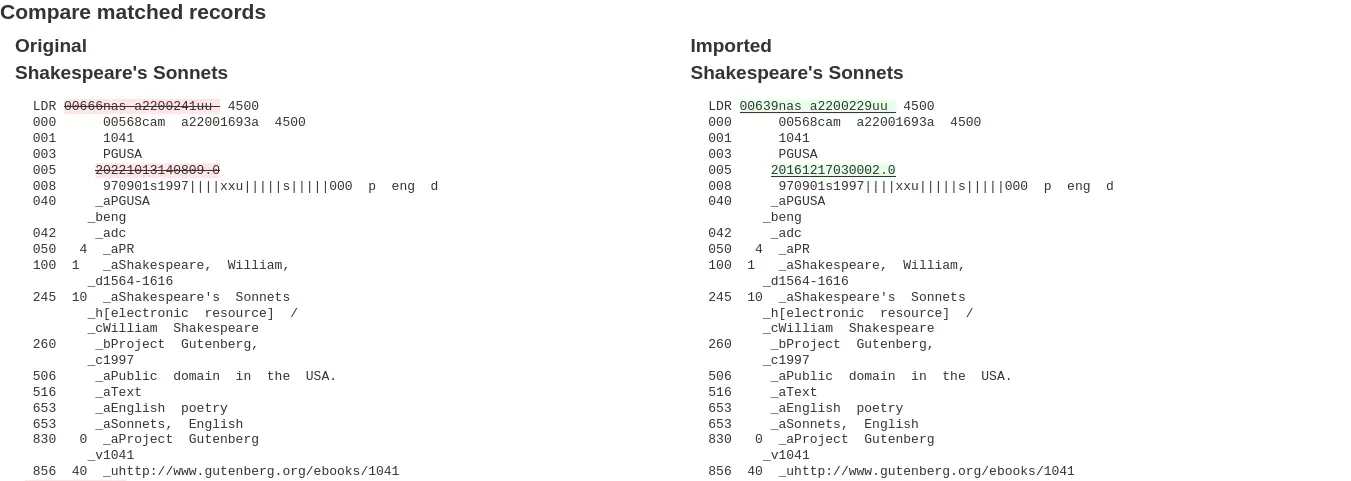
and when clicking the “View” link under “Diff” you can see the difference between versions.
For each match, you can choose to ignore the match by selecting the “Ignore matches” radio button. If more than one matching record was found, they will all be listed and you can choose with which to match your incoming record.

If “Ignore matches” is selected, the action chosen in “Action if no match is found” from the staging step will be applied.
Note
Here are the different behaviors depending on the “Action if matching record found” choice from the staging step and if a match is selected or if “Ignore matches” is selected.
Action if matching record found
Match selected
“Ignore matches” selected
Replace existing record with incoming record
Incoming record replaces selected matching record
“Action if no match is found” is applied
Add incoming record
Incoming record is added
Incoming record is added
Ignore incoming record
Incoming record is ignored
“Action if no match is found” is applied
Click “Import this batch into the catalog” to complete the import
The record importation will be treated as a background job.

Il vous sera présentée une confirmation de votre importation MARC

Number of records added: new records added
Number of records updated: existing records replaced with the incoming ones
Number of records ignored: records that were ignored due to the matching rule
Number of items added: new items added
Number of items replaced: existing items updated with the incoming ones
Nombre d’exemplaires ignorés en raison d’un code-barres en double : exemplaires qui ont été ignorés car le code-barres existe déjà dans la base de données
Once your import is complete a link to the new records will appear to the right of each title that was imported
You can undo your import by clicking the “Undo import into catalog” button
Records imported using this tool remain in the “reservoir” until they are cleaned either through the “Clean” button in the Staged MARC record management home page (see below) or through the cleanup_database cronjob. Reservoir records will appear when searching the catalog from the cataloging module
To manually clean items out of the “reservoir”:
Consultez l’écran principal de l’outil d’import de notices MARC dans le réservoir

To clean a batch, click the “Clean” button to the right
You will be presented with a confirmation message

Accept the deletion and the records will be removed from the reservoir and the status will be changed to “cleaned”
Ajouter des notices de dépouillement
Certaines bibliothèques proposent aux usagers l’accès à des articles de journaux, de périodiques, des extraits de monographies, grâce au catalogage analytique. Le catalogage analytique crée des notices bibliographiques distinctes pour les articles, les chapitres, paragraphes, etc. inclus dans des volumes entiers comme un livre, journal, périodique. Dans le catalogage analytique, bien que la notice bibliographique soit créée séparément pour son titre, elle n’est pas physiquement séparée de son exemplaire de base. Pour en savoir plus sur le catalogage analytique, consultez le Chapitre 13 de AACR2.
Si vous souhaitez créer des notices de dépouillement dans Koha, vous avez deux options. La première consiste à utiliser la fonction Notices de dépouillement simplifiées; la seconde est la gestion des Notices de dépouillement améliorées.
Notices de dépouillement simplifiées
La fonction Notices de dépouillement simplifiées facilite la création de liens/relations entre notices. La première chose à faire est de paramétrer la préférence système EasyAnalyticalRecords sur “Afficher” et la préférence système UseControlNumber sur “Ne pas utiliser”.
Après avoir catalogué votre notice de dépouillement (reportez vous à Ajouter des notices pour en savoir plus sur la création de notices), cliquez sur “Modifier” depuis la vue normale et choisissez “Lier à un exemplaire hôte”
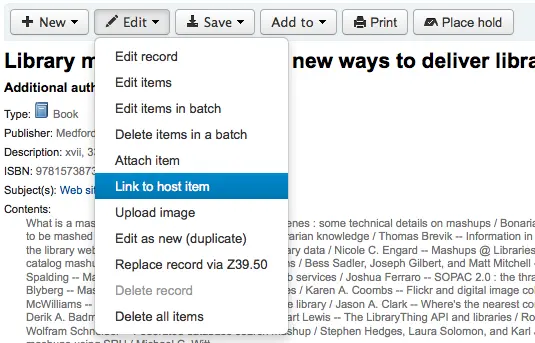
Il vous sera demandé d’entrer le code à barres de l’exemplaire lié à cette notice.
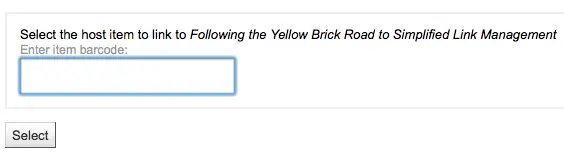
Après avoir scanné le code à barres de l’exemplaire et cliqué “Sélectionner” vous recevrez un message de confirmation.

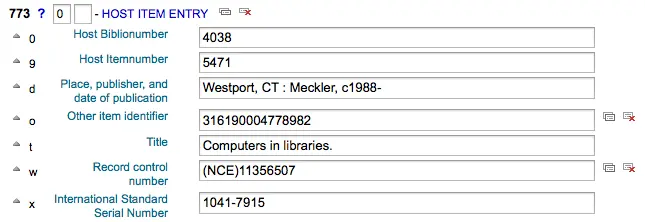
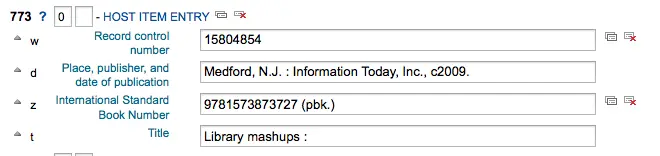
La notice aura maintenant un champ 773 (en MARC21) rempli pour compléter le liens.
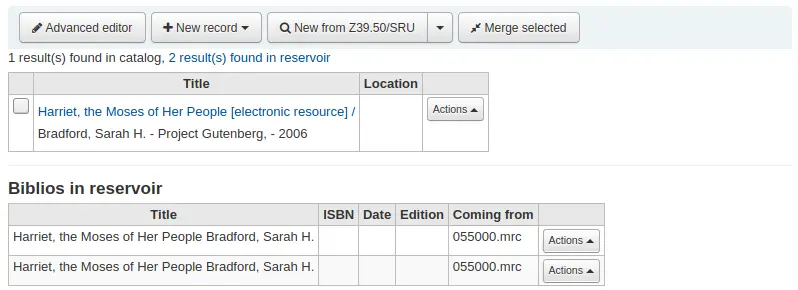
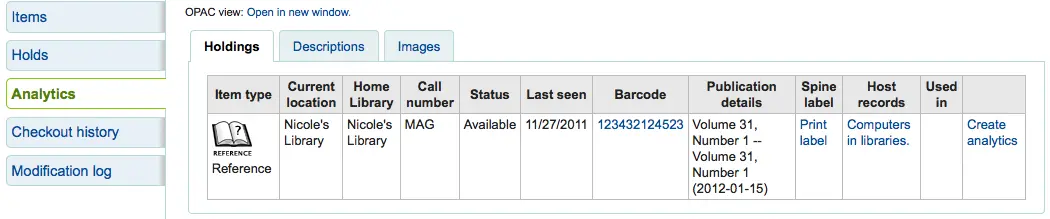
Pour voir tous les exemplaires liées à la notice hôte, faites une recherche sur la notice, cliquez sur l’onglet “Dépouillement” sur la gauche et les notices de dépouillement liées à chaque code à barres seront indiquées dans la colonne “Utilisé dans”.

Note
Il est également possible de créer des notices de dépouillement à partir de cette page en cliquant sur « Créer une notice de dépouillement »
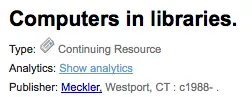
Vous pouvez également consulter les notices de dépouillement liées à cette notice en cliquant sur le lien « Voir les notices de dépouillement » en haut de la notice dans la vue normale.
Lorsque vous consultez la notice de dépouillement dans l’onglet « Dépouillement », vous verrez aussi un lien de l’exemplaire hôte dans la colonne « Notices hôtes ».
Notices de dépouillement améliorées
La fonction Notices de dépouillement simplifiées facilite la création de liens/relations entre notices. La première chose à faire est de paramétrer la préférence système EasyAnalyticalRecords sur “Ne pas afficher” et la préférence système UseControlNumber sur “Utiliser”.
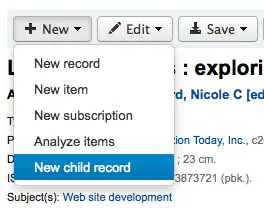
Après avoir catalogué votre notice d’origine (reportez vous à Ajouter des notices pour en savoir plus sur la création de notices), cliquez sur “Ajouter” depuis la vue normale et choisissez “Nouvelle notice de dépouillement”.
Cela ouvrira une nouvelle notice vierge à cataloguer. La notice vierge aura seulement le champ 773 rempli correctement pour compléter le lien qui enregistrera la notice.
The “Show analytics” link from the host record will now use the hosts record control number (001) to search for all records on the system of the type “monographic component part” or “serial component part” (Leader position 7) with a 773 subfield w that contains the hosts record control number.
Modifier les notices de dépouillement
Si vous avez lié une notice de dépouillement à une mauvaise notice, vous pouvez défaire ce lien en éditant la notice de dépouillement (et non pas la notice hôte).
Pour ce faire, allez sur la notice de dépouillement et cliquez sur le bouton “Modifier”. Pour “UseControlNumber”, modifiez ou supprimez simplement le 773 correspondant.
Si vous utilisez EasyAnalytics, choisissez “Modifier exemplaires” ; A la gauche de chaque exemplaire vous verrez deux options.

Cliquez sur le lien « Modifier dans l’hôte » pour pouvoir modifier la description de l’exemplaire.
Cliquer sur “Délier” supprimera la zone 773 (en MARC21) et le lien entre la notice de dépouillement et la notice hôte.
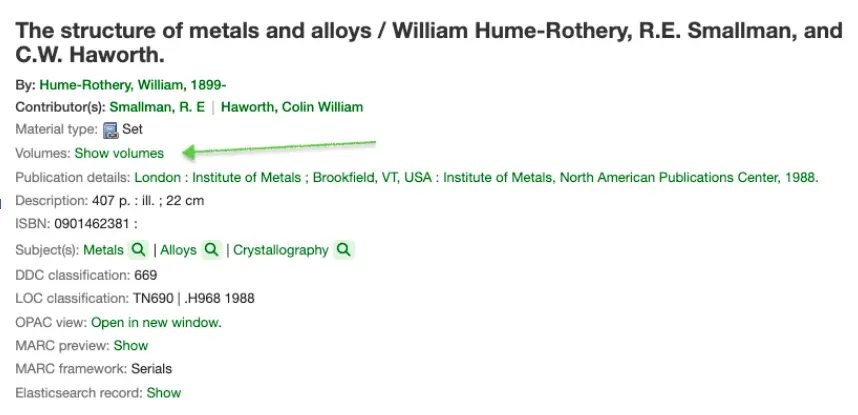
Showing volumes
When cataloging a set with volumes, Koha will display a “Volumes:” label and a link to the items in the bibliographic detail view.
Setup:
When cataloging a set with volumes, the framework being used will need to have MARC field 773$w and 830$w available.
Set the system preference UseControlNumber preference to “Don’t use.”
Note
Set the system preference UseControlNumber to “Don’t use,” so the “In’ label is replaced with the label and link ‘Volumes: Show volumes’ on the Parent record. Child records will not display the ‘Show volumes’ link. If “UseControlNumber” is set to “Use”, the ‘In’ label and link will be displayed.
Catalog the parent record. Take note of the 001 control number.
Exemple :
000 LDR, pos. 19 = a - Set
001 xxx
773 _ _ $a  volume set title
Catalog the child record. Enter the control number from the parent record into tag 773 subfield w.
000 LDR, pos. 7 = m - Monograph/Item
000 LDR, pos. 19 = c - Part with dependent title
773 _  _ $a  volume set title $w xxx
The Parent record will display the “Volumes:” label with the ‘Show volumes’ link. Clicking on the link will take the user to the child record or a search result page of child records.
Modifier une notice
Note
Staff members must have the edit_catalogue permission (or the superlibrarian permission) in order to be able to edit bibliographic records.
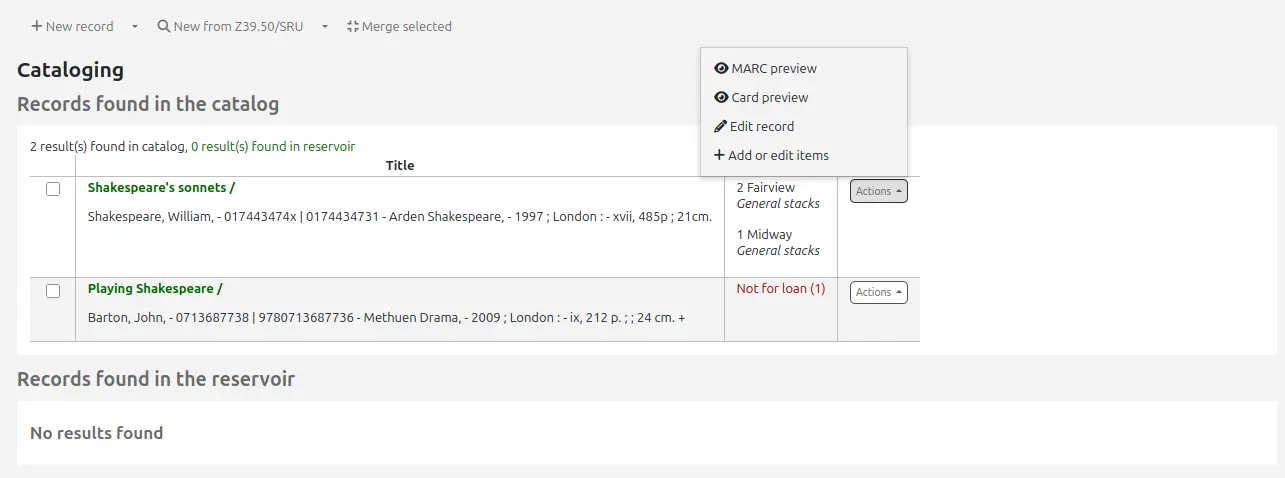
To edit a record, you can click the “Actions” button and choose “Edit record” from the search results on the cataloging search page.
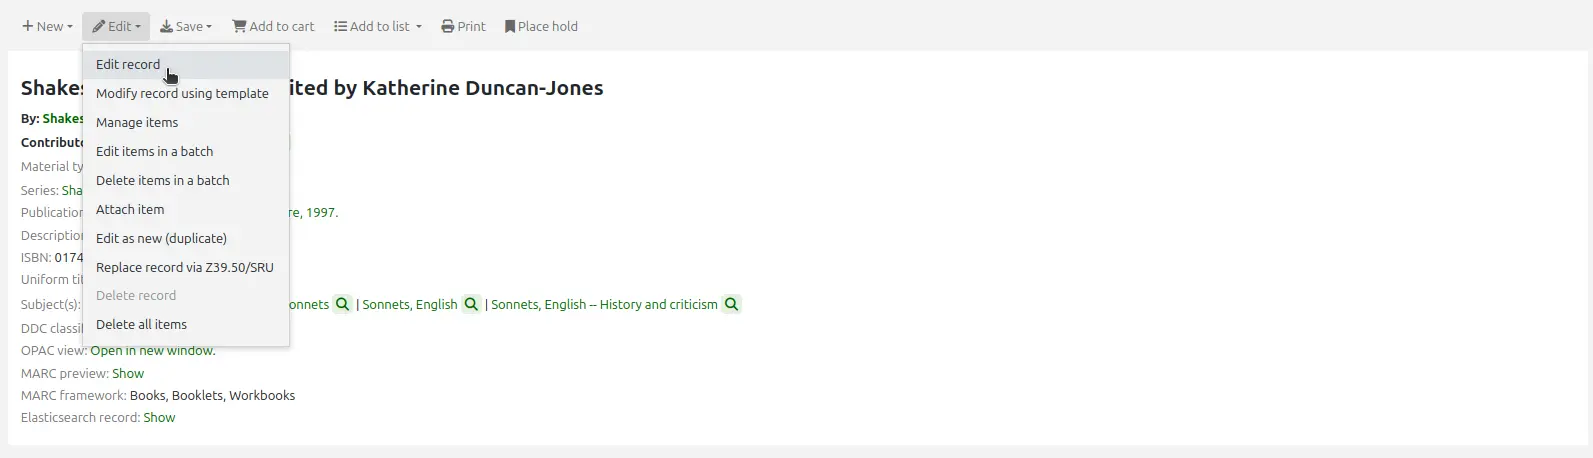
Or, click the “Edit” button on the record’s details page and choose “Edit record”.
La notice s’ouvrira dans l’éditeur MARC.
Vous pouvez également effectuer une recherche via Z39.50 pour écraser une notice de votre catalogue Koha par une notice issue d’une autre bibliothèque. Cliquez sur le bouton « Modifier » puis choisissez l’option « Remplacer via Z 39.50 ».
Après ce choix, vous arriverez à une page de recherche Z39.50 afin de lancer une recherche du titre en question dans d’autres bibliothèques.
Quand vous avez saisi vos modifications (quelle que soit la méthode), cliquez sur « Enregistrer » en haut à gauche.
Modification de notices par lot
Note
Only staff with the records_batchmod permission (or the superlibrarian permission) will have access to this tool.
Aller à : Plus > Catalogage > Modification par lots > Modification de notices par lot
This tool is used to edit batches of bibliographic and authority records using MARC modification templates. Before visiting this tool you will need to set up at least one MARC modification template.
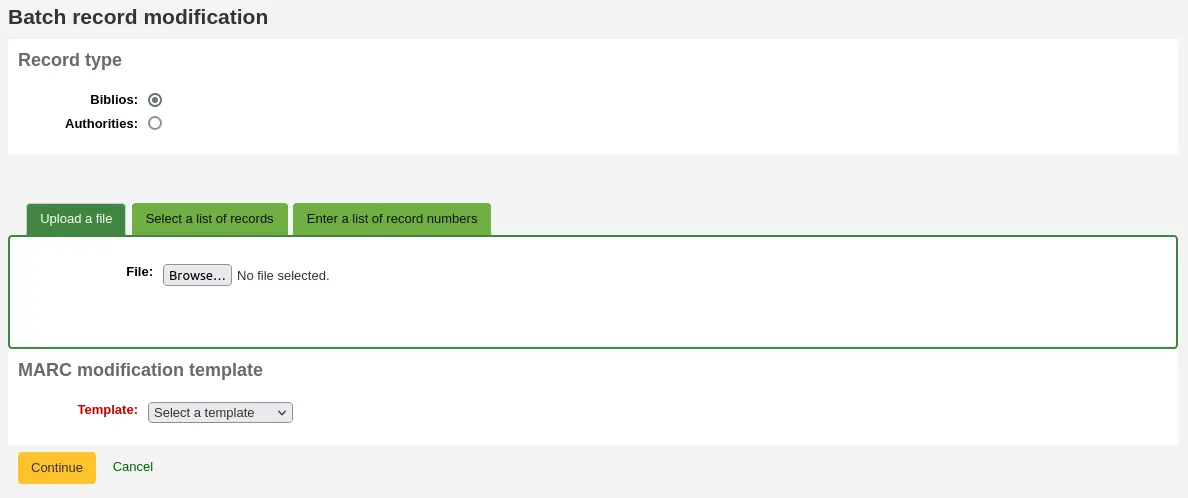
Record type: choose whether you’re editing bibliographic or authority records
Enter the biblionumbers or authids of records to be edited, in one of three ways
Upload a file of biblionumbers or authids
Use a liste de notices;
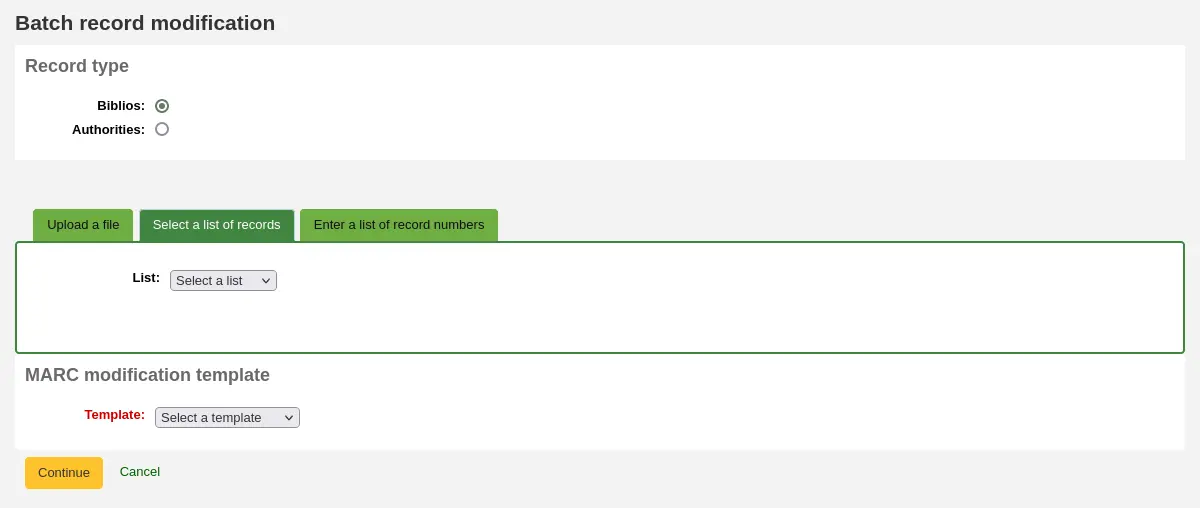
Or enter the numbers (one per line) in the box provided.
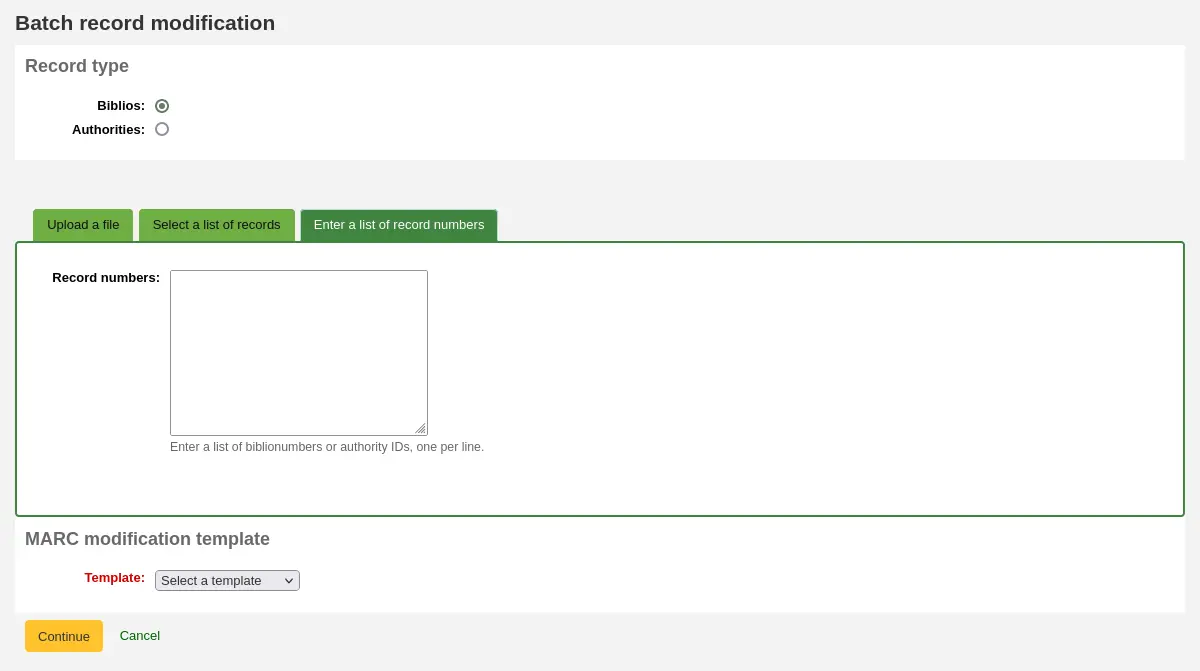
MARC modification template: finally choose the MARC modification template to use to edit these records.
Once you’ve entered your criteria click “Continue”
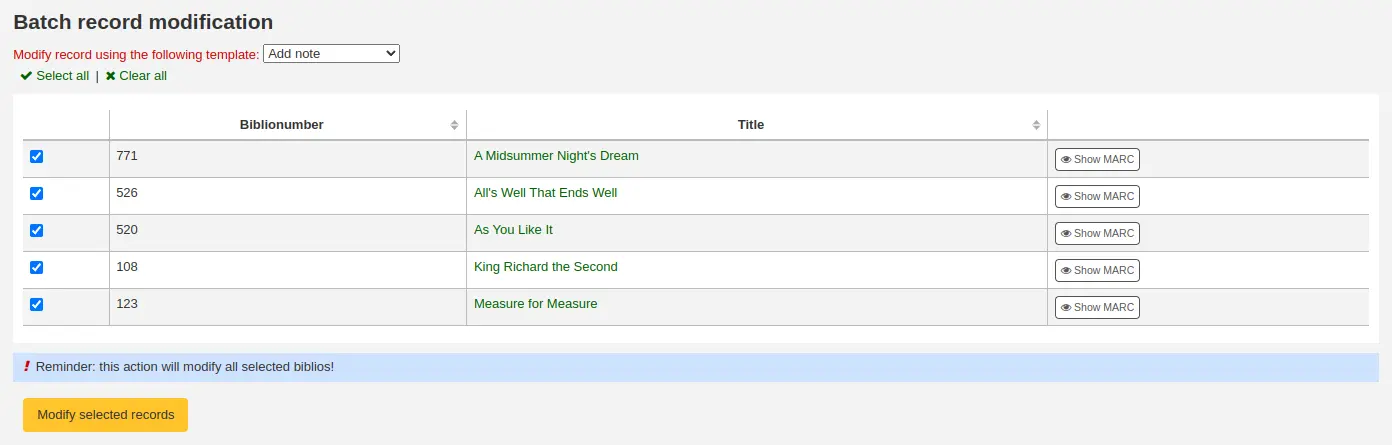
You will be presented with the list of records that will be edited. Next to each one is a checkbox so you can uncheck any records you would rather not edit at this time.
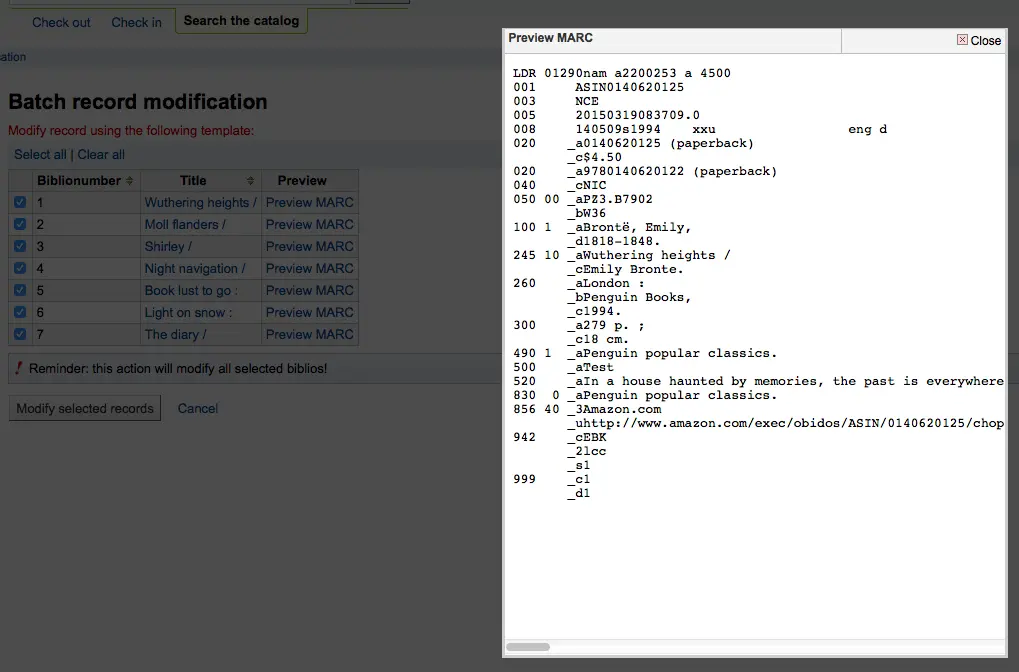
Clicking “Preview MARC” will allow you to see what edits will be made when you finalize the edit.
Once you’re sure everything is the way you want you can click the “Modify selected records” button and your records will be modified.
MARC modification templates
Note
Only staff with the marc_modification_templates permission (or the superlibrarian permission) will have access to this tool.
Aller à : Plus > Catalogage > Modification par lots > Modèles de transformation MARC
Les modèles de modification MARC permettent aux utilisateurs d’apporter automatiquement des modifications aux notices MARC lors de l” import des notices dans le réservoir ou lors de la modification de notices par lots.
This tool is useful for altering MARC records from various vendors or sources. The system essentially allows one to create a basic script using actions to copy, move, add, update and delete fields.
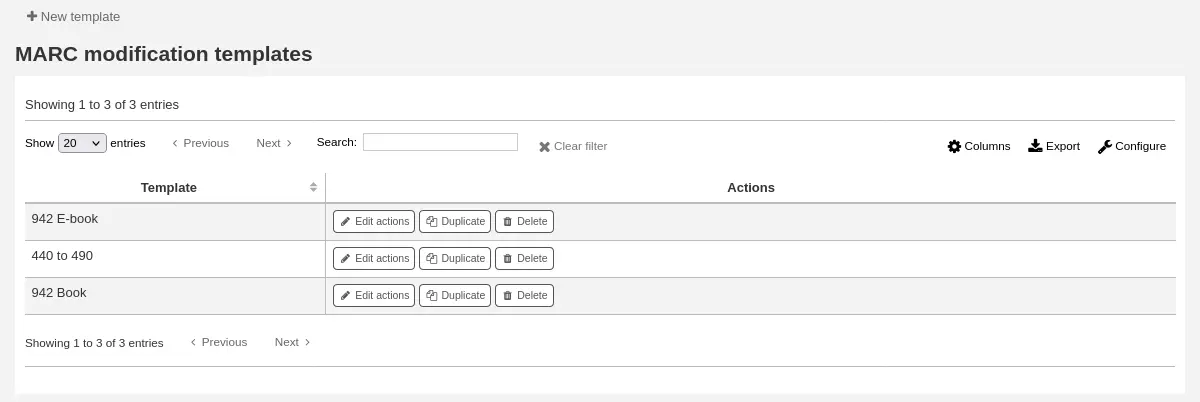
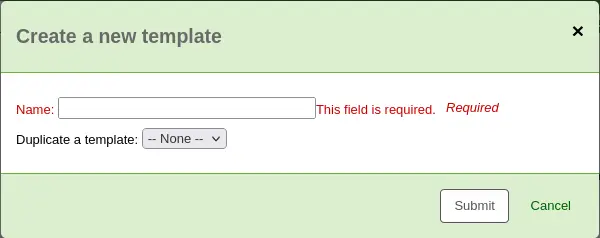
Click on “New template” (a template can be made up of one or more actions), enter a name and click “Submit”.
Optionally, you can copy an existing template by choosing the template to copy in the “Duplicate a template” drop-down menu.
Next, you can add actions to the template. Click on “New action”.
A “Add a new action” box will appear that you can use to specify what exactly you want to do.
For example if you’re loading in a batch of files from your EBook vendor you might want to add the biblio item type of EBOOK to 942$c.
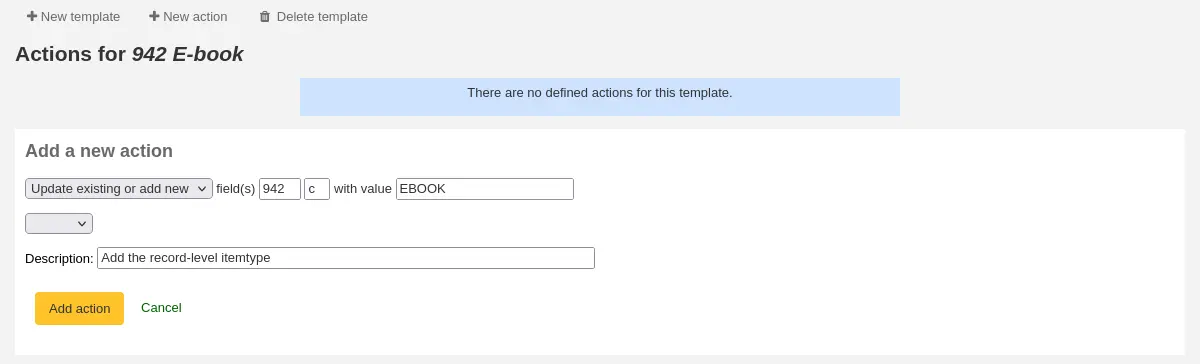
Choose “Add new”
Enter the field 942 and subfield c
Enter the value of “EBOOK” (or whatever your ebook item type code is)
Provide a description so you can identify this action later
Cliquez sur “Ajouter une action”
Note
If you wish to update the values in an existing field choose the option “Update existing or add new”. This will update existing values where found and add a new field if one doesn’t exist.
Each action can also have an optional condition to check the value or existence of another field. For example you might want to add the call number to the item record if it’s not already there.
Note
La modification des champs d’exemplaire ne fonctionne avec le modèle que lors de l” import des notices dans le réservoir. Une fois les notices intégrées dans Koha, l’exemplaire est “séparé” de la notice et ne peut être modifié qu’à l’aide de l” outil de modification d’exemplaires par lot

Choose “Copy”
Decide if you want to copy the first occurrence or all occurrence of the field
Enter the field 090 (or other bibliographic call number field) and subfield a to copy
Enter the 952 field and o subfield to copy to
Choose “if”
Enter the 952 field and o subfield
Choose « doesn’t exist »
Provide a description so you can identify this action later
Cliquez sur “Ajouter une action”
The move, copy, and copy and replace actions support regular expressions, which can be used to automatically modify field values during the copy or move. An example would be to strip out the “$” character in field 020$c.

Choose “Copy and replace”
Decide if you want to copy the first occurrence or all occurrences of the field
Enter the field 020 and subfield c to copy
Enter the 020 field and c subfield to copy to
Check the “RegEx” box and enter your regular expression (in this case s/\$// )
Choose “if”
Enter the 020 field and c subfield
Choose « matches »
Check the “RegEx” box and enter your regular expression (in this case m/^\$/ )
Provide a description so you can identify this action later
Cliquez sur “Ajouter une action”
Note
The value for an update can include variables that change each time the template is used. Currently, the system supports two variables, __BRANCHCODE__ which is replaced with the branchcode of the library currently using the template, and __CURRENTDATE__ which is replaced with the current date in ISO format ( YYYY-MM-DD ).
You could also use regular expressions to add your library’s proxy URL in front of links in your MARC record.

Choose “Copy and replace”
Decide if you want to copy the first occurrence or all occurrences of the field
Enter the field 856 and subfield u to copy
Enter the 856 field and u subfield to copy to
Check the “RegEx” box and enter your regular expression (in this case s/^/PROXY_URL/ )
Provide a description so you can identify this action later
Cliquez sur “Ajouter une action”
When choosing between “Copy” and “Copy and replace” keep the following example in mind:
245 _aThe art of computer programming _cDonald E. Knuth.
300 _aA_exists _bB_exists
If we apply action (a) Copy the whole field 245 to 300, we get:
245 _aThe art of computer programming _cDonald E. Knuth.
300 _aA_exists _bB_exists
300 _aThe art of computer programming _cDonald E. Knuth.
If we apply action (b) Copy the subfield 245$a to 300$a, we get:
245 _aThe art of computer programming _cDonald E. Knuth.
300 _aThe art of computer programming _bB_exists
Once your actions are saved you can view them at the top of the screen. Actions can be moved around using the arrows to the left of them.

Actions will be done in the order they appear. Depending on your actions the order may be very important. For example you don’t want to delete a field before you copy it to another field. You can use the arrows to move actions up or down the list
The up arrow will move the action up one position
The up arrow with a line at the top will move the action to the first position
The down arrow with a line at the bottom will move the action to the last position
The down arrow will move the action down one position
Une fois votre modèle enregistré vous pourrez le choisir en utilisant l’outil d’import de notices dans le réservoir ou l’outil de modification de notices par lots.
Dupliquer une notice
Parfois une copie de la notice que vous avez besoin de cataloguer ne peut pas être trouvée via Z39.50. Dans ces cas vous pouvez créer une copie d’une notice similaire et modifier les rubriques nécessaires pour créer une nouvelle notice. Pour dupliquer une notice existante, cliquer sur “Dupliquer” dans le menu “Modifier” de la notice bibliographique.
Note
Staff members must have the edit_catalogue permission (or the superlibrarian permission) in order to be able to duplicate bibliographic records.
Cela ouvrira une nouvelle notice MARC dont les champs seront déjà renseignés avec les valeurs de la notice initiale.
Edit as needed and save.
Note
This will not change the original record.
Attacher des fichiers aux notices
Vous pouvez, si vous le souhaitez, ajouter des fichiers dans Koha avec peu de paramétrages.
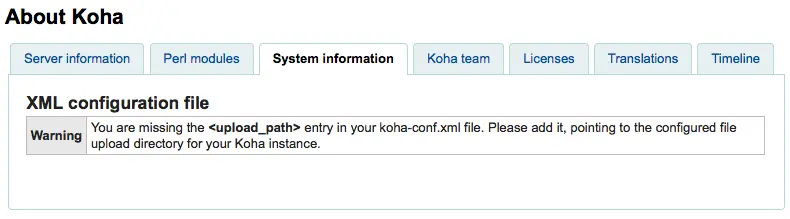
Vous devrez demander à votre administrateur-système de configurer la donnée « upload_path » pour qu’elle cible le dossier où seront conservés les fichiers
Vous pouvez vérifier si le chemin de téléversement est paramétré correctement dans A propos de Koha > Information Système. Les erreurs seront visibles ici.
Vous voudrez être certain que votre préférence système OPACBaseURL est paramétrée correctement
You will want to add the upload.pl plugin to the 856$u subfield in one (or multiple) of your frameworks
Une fois que vous avez tout configuré, vous pouvez continuer a cataloguer comme d’habitude. Vous verrez l’icône du plugin à côté du 856$u, qui ouvrira la fenêtre de téléversement et/ou de recherche
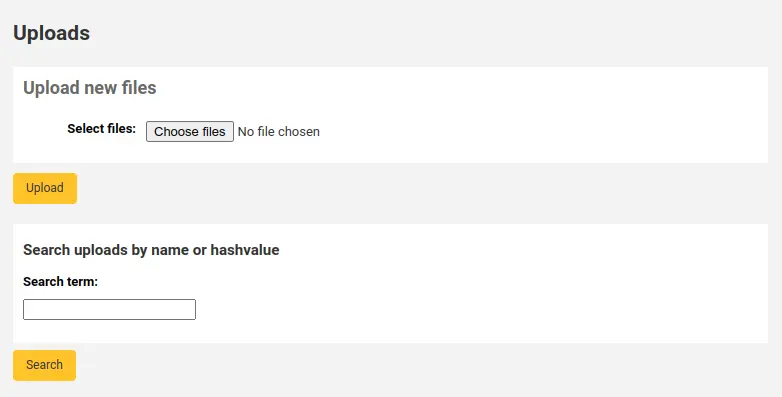
Depuis ce menu vous pouvez cliquer sur Parcourir pour trouver un fichier et le téléverser, ou vous pouvez chercher des fichiers que vous avez précédemment téléversés en utilisant la boîte de recherche. Vous pouvez choisir quel fichier téléverser depuis le résultat de recherche.
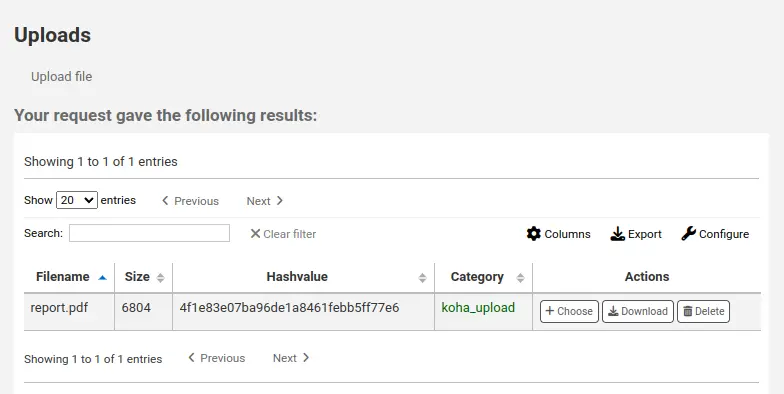
Une fois choisi, le fichier apparaît en tant que lien dans la notice MARC et dans l’affichage en détail.
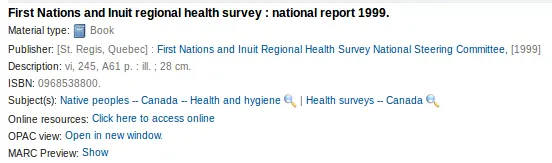
Note
Si le fichier est un PDF, il sera ouvert directement dans le navigateur de l’utilisateur alors que si c’est une image ou tout autre type, l’utilisateur devra le télécharger.
Ajouter des images de couverture
Several free and paying services are integrated with Koha to provide cover images for your catalog, such as Amazon, Google books, NovelList Select, Open Library, and Syndetics. Check the corresponding system preferences to enable the service of your choice.
There are other options such as a Coce image cache server, or having remote cover images with custom URLs.
Avertissement
Si vous activez plus d’un service, vous aurez plusieurs images de couverture dans vos notices.
La plupart de ces services utilisent l’ISBN de la notice pour récupérer l’image de couverture du fournisseur.
Enfin, vous pouvez récupérer vos propres images dans vos notices avec l’outil intitulé Téléverser des images de couverture locales dans Koha.
Avertissement
Assurez-vous de respecter le droit d’auteur lors de l’utilisation des images.
Ajout d’une seule image de couverture locale
Avant d’ajouter des images de couverture locales, assurez-vous que la préférence du système OPACLocalCoverImages et/ou la préférence du système LocalCoverImages est définie sur “Afficher”.
Note
Seuls les bibliothécaires avec la permission upload_local_cover_images (ou la permission superlibrarian) pourra gérer les images de couverture locales.
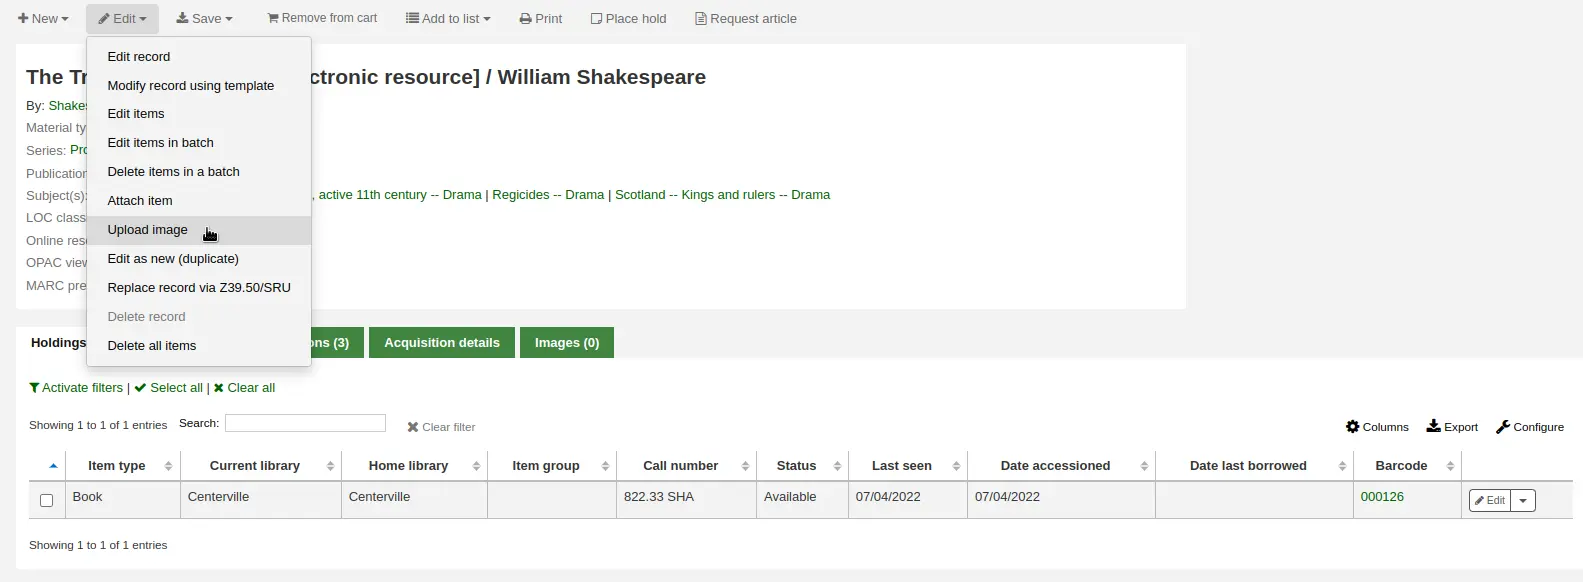
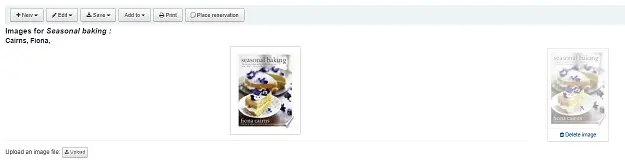
Dans une notice bibliographique, choisissez “Télécharger une image” dans le menu Modifier pour ajouter votre image de couverture.
Drag and drop the image to the area, or click on “Drop files here or click to select a file” a select the image file on your computer.

Avertissement
Koha n’a pas de limite maximale de taille de fichier pour cet outil, mais le serveur web (comme Apache) peut limiter la taille maximale des téléversements (demandez à votre administrateur système).
If the AllowMultipleCovers system preference is set to “Allow”, you will have the choice to replace existing covers or not. If the system preference is set to « Don’t allow », the image will replace existing cover images for this record.
Note
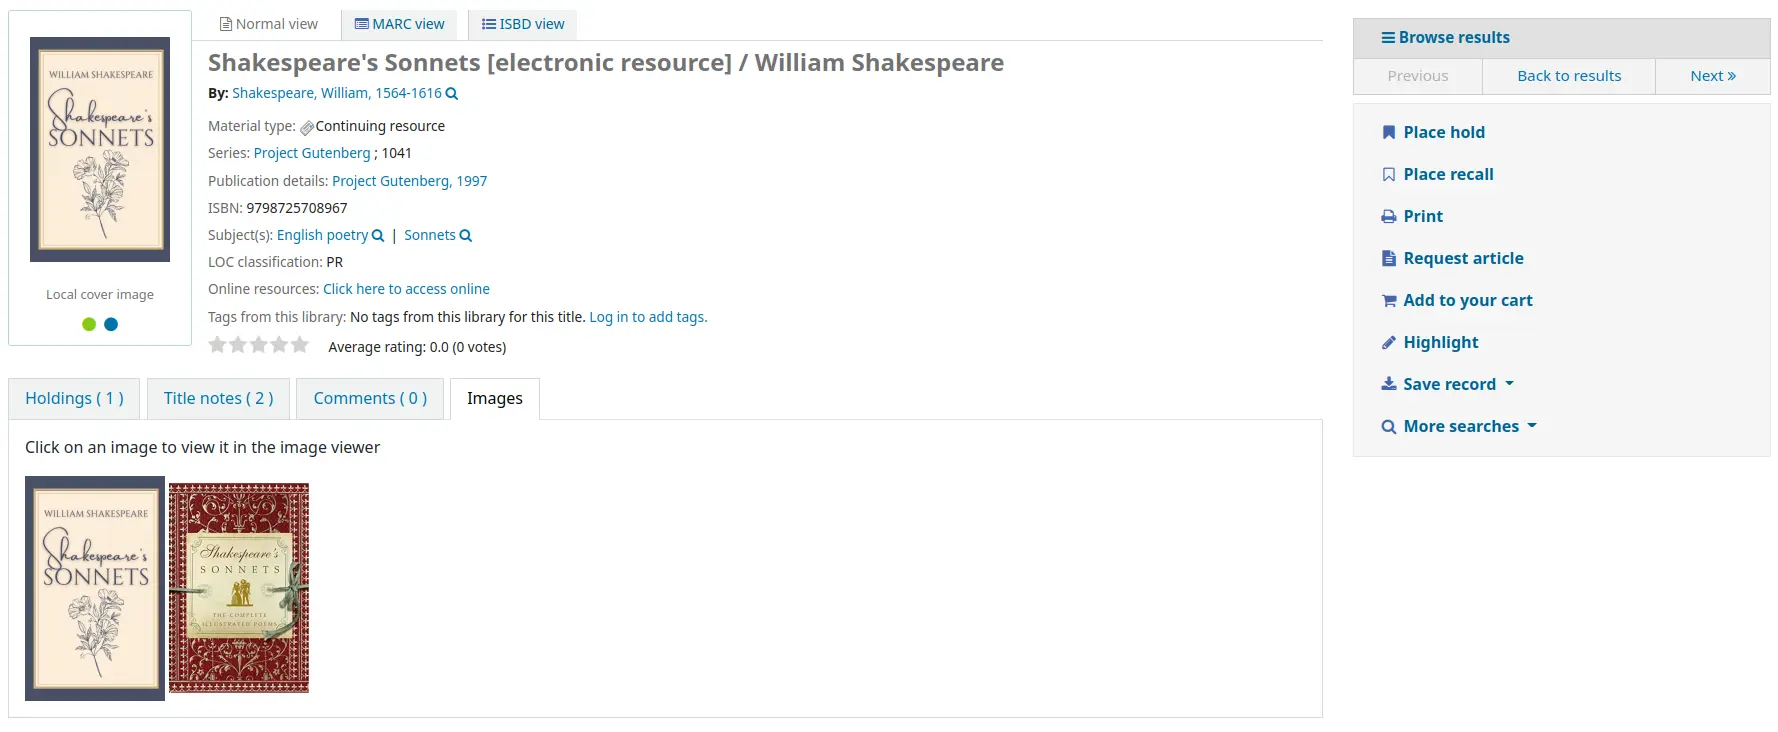
Lorsqu’il y a plusieurs images pour une notice, elles s’affichent de gauche à droite (puis de haut en bas, selon la taille de l’écran) dans l’ordre où elles ont été téléversées. L’image à gauche (la première téléversée) est utilisée comme une vignette dans les résultats de recherche et sur la page de détails. Il n’y a aucun moyen de réorganiser les images de couverture téléversées de cette façon, alors assurez-vous de les téléverser dans l’ordre où vous souhaitez qu’elles apparaissent.
Cliquez sur “Traitement des images “
Vous pouvez également accéder à l’outil de téléversement d’images de couverture dans Catalogage > Outils > Téléverser une image de couverture locale. Vous devrez alors spécifier le biblionumber de la notice pour laquelle vous téléversez l’image.

Note
The biblionumber or bibliographic record number is not the same as the barcode, it is the system-generated number assigned by Koha to each bibliographic record. You can find the biblionumber in various place, namely:
À la fin de l’URL dans la barre d’adresse de votre navigateur depuis la page de détails de la notice. L’URL ressemblera à
Dans l’onglet MARC de la page des détails de la notice dans l’interface professionnelle
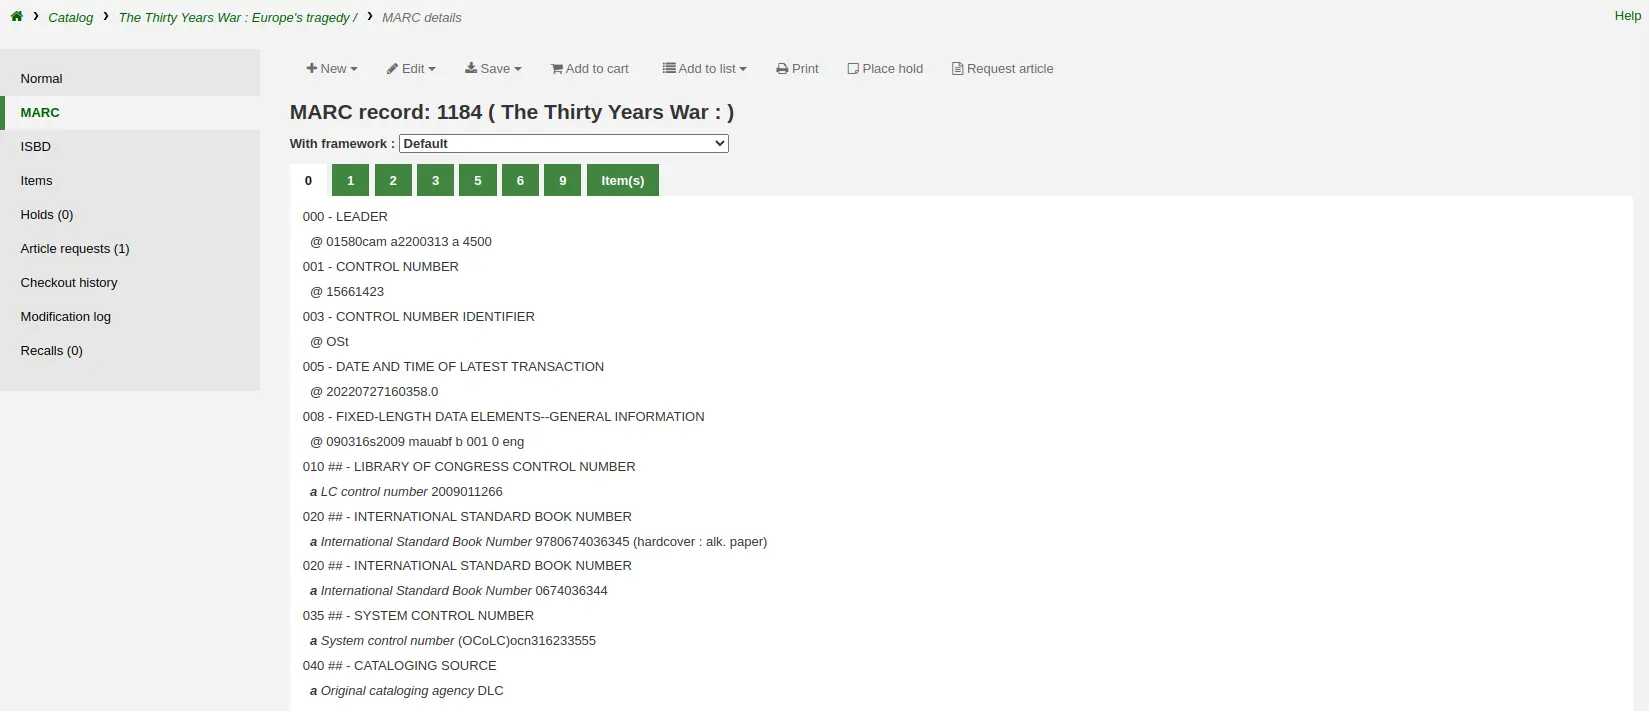
Ajouter un lot d’images de couverture
Note
Seul les bibliothécaires avec la permission upload_local_cover_images (ou la permission superlibrarian) pourront téléverser des lots d’images locales de couverture.
L’outil pour téléverser des images de couverture permet également de charger des lots d’images dans un fichier ZIP.
Pour téléverser un lot d’images :
Créer un dossier avec les images à téléverser
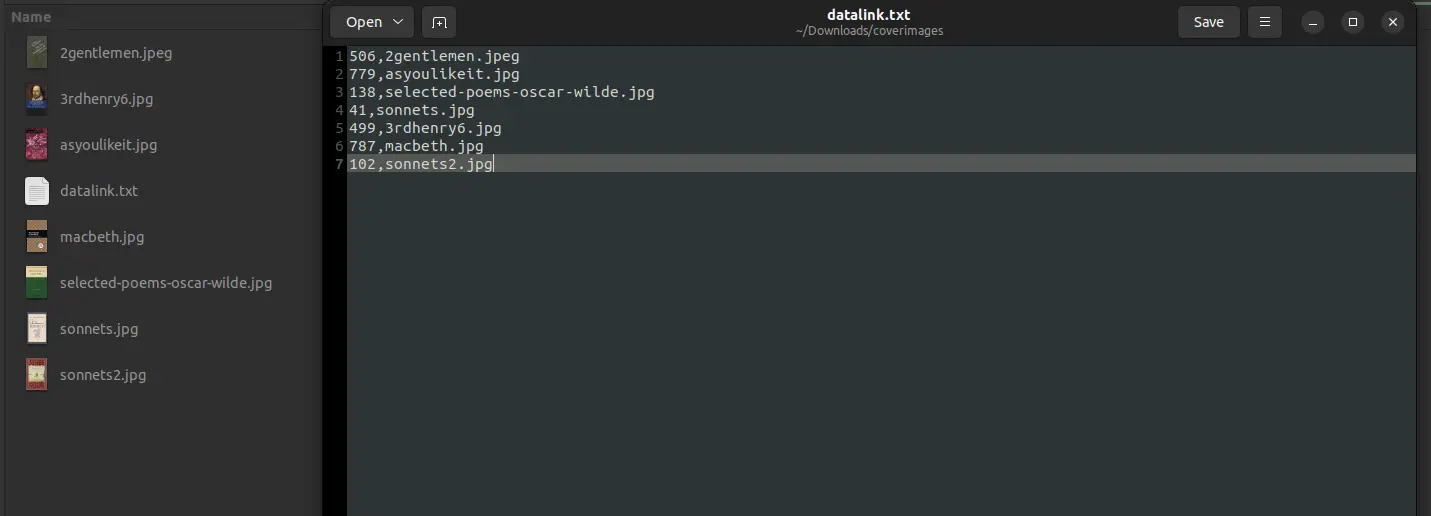
Créer un fichier texte (*.txt) nommé soit datalink.txt ou idlink.txt énumérant le biblionumber suivi du nom de l’image pour chaque image, un par ligne. Par exemple :
- :
506,2gentlemen.jpeg 779,asyoulikeit.jpg 138,selected-poems-oscar-wilde.jpg 41,sonnets.jpg 499,3rdhenry6.jpg 787,macbeth.jpg 102,sonnets2.jpg
Avertissement
Assurez-vous qu’il n’y a pas de lignes ou de caractères supplémentaires dans le fichier texte.
Créer un fichier ZIP qui inclut toutes les images à télécharger et le fichier texte
Dans l’interface professionnelle de Koha, allez à l’outil de téléversement de couverture dans Catalogue > Outils > Téléverser une image de couverture locale, et glisser et déposer ou sélectionner le fichier ZIP de votre ordinateur
Le type de fichier “Fichier ZIP” doit être sélectionné
If the AllowMultipleCovers system preference is set to “Allow”, you will have the choice to replace existing covers or not. If the system preference is set to « Don’t allow », the image will replace existing cover images for this record.
Cliquez sur “Traitement des images “
You are presented with a summary of the upload

Note
L’image source est utilisée pour générer une image miniature de 140 x 200 px et une image pleine grandeur de 600 x 800 px. L’image de taille originale téléversée n’est pas conservée par Koha.
Dans l’interface professionnelle, les images de couverture apparaissent dans les résultats de recherche, dans la page de détails de la notice à droite du titre, et dans l’onglet “Images” du tableau des exemplaires en bas.

Dans l’OPAC, les images de couverture apparaissent dans les résultats de la recherche, dans la page de détails de la notice à gauche du titre, et dans l’onglet “Images” dans le tableau des exemplaires en bas.
Supprimer une image de couverture locale
Note
Seuls les bibliothécaires avec la permission upload_local_cover_images (ou la permission superlibrarian) pourront supprimer les images de couverture locales.
Cliquez sur “Supprimer l’image” sous l’image dans l’onglet “Images” de l’interface professionnelle.
Fusionner des notices
Note
Staff members must have the edit_catalogue permission (or the superlibrarian permission) in order to be able to merge bibliographic records.
To merge bibliographic records together,
Perform a search in the catalog to find the records that need to be merged.
Check the boxes next to the duplicates to select them.
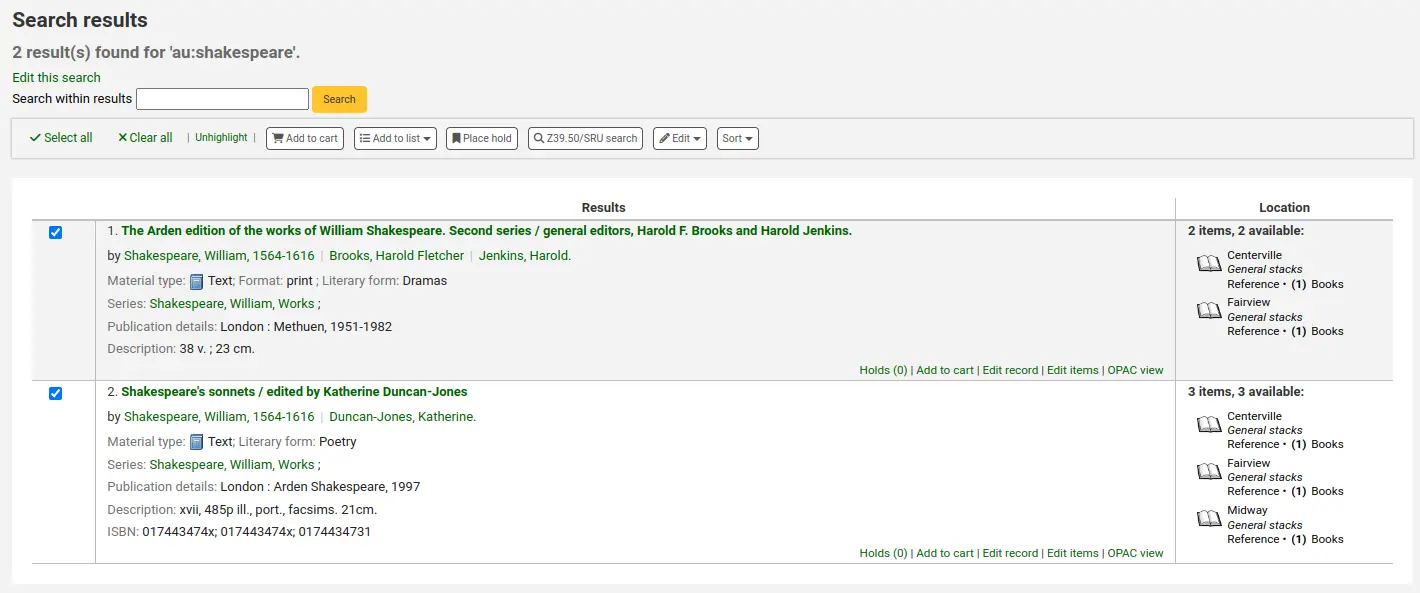
Click « Edit » and choose the « Merge records » option
Note
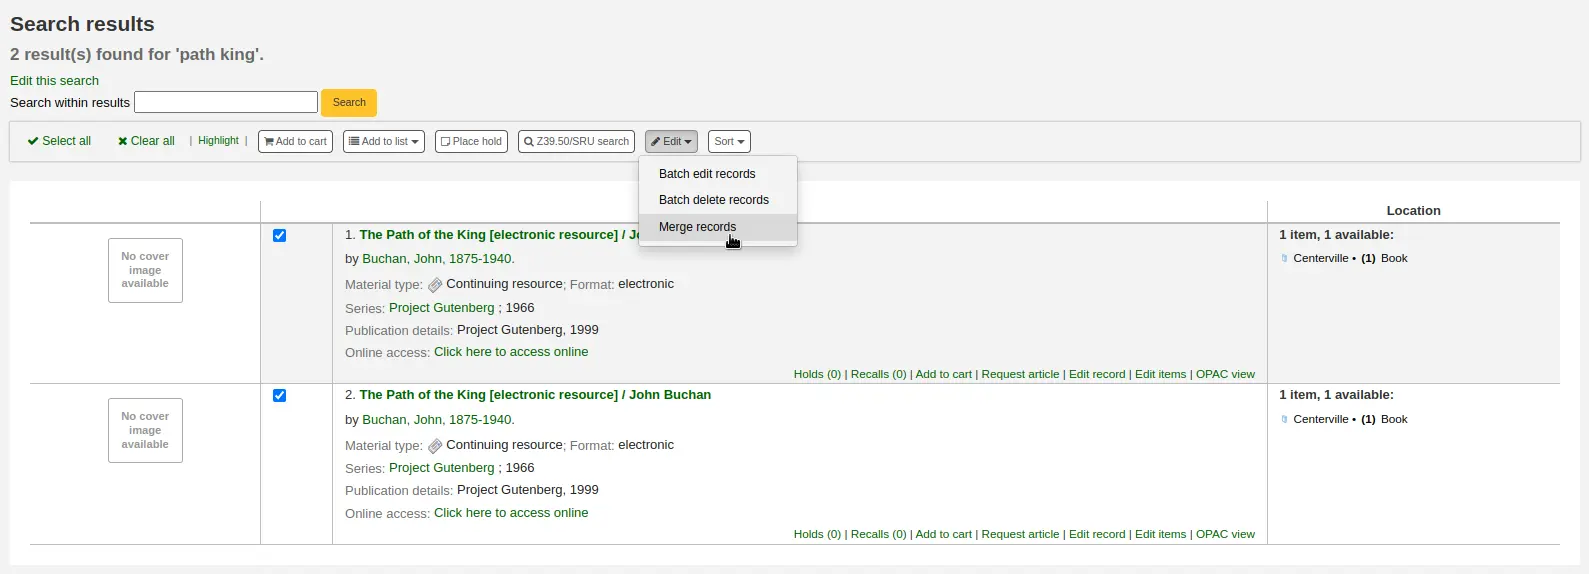
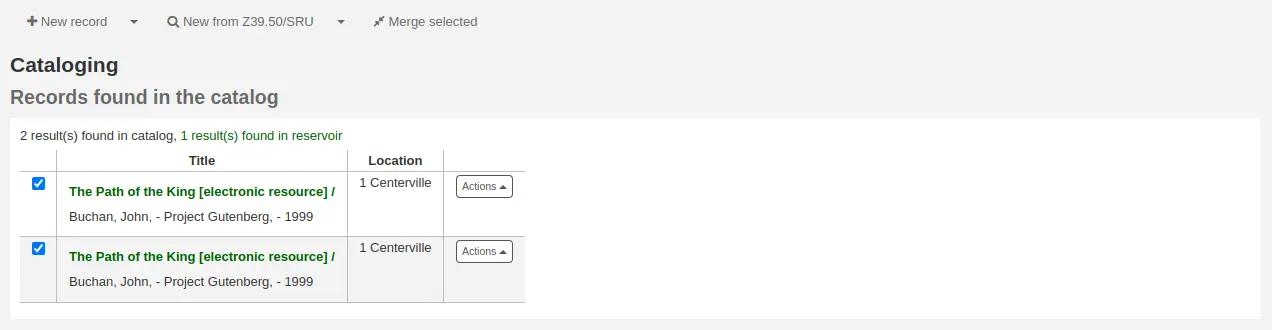
Alternatively, you can go through the cataloging module to merge bibliographic records.
After searching for the records in the cataloging search and selecting the records to be merged, click the “Merge selected” button at the top of the list.
Choisissez la notice à conserver. Les autres seront supprimées après la fusion.
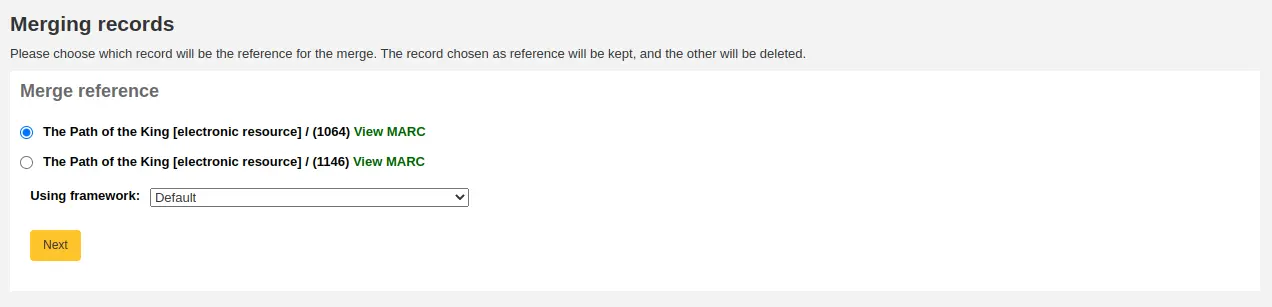
Choose which framework to use for the newly merged record
You will be presented with the MARC for all of the records, each accessible by a tab labeled with the biblionumber for this record. By default the entire first record will be selected.
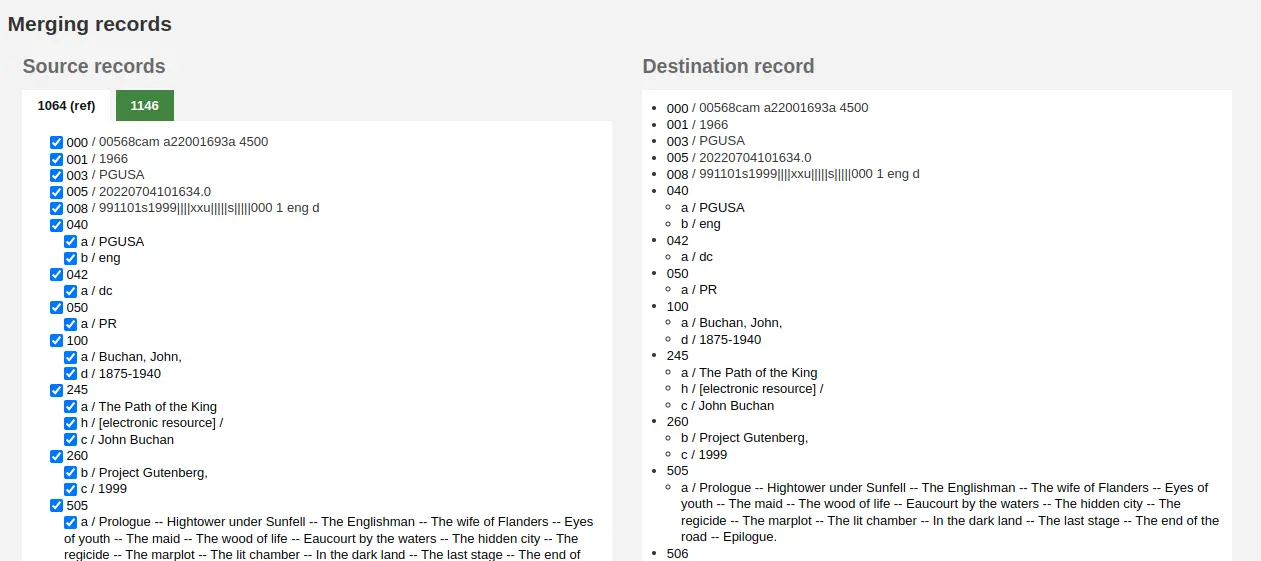
Uncheck the fields you don’t want in the final (destination) record from each source records
Check the fields you want to add in the final (destination) record
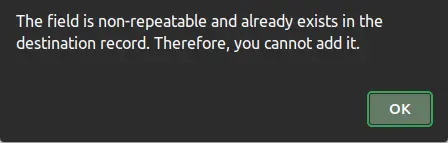
Note
Should you try to add a field that is not repeatable two times (like choosing the 245 field from both records) you will be presented with an error
Note
If mandatory fields are missing in the destination record, Koha will not merge the records. You must select a value for mandatory fields.
If important fields are missing in the destination record, Koha will warn you, but will still merge the records.
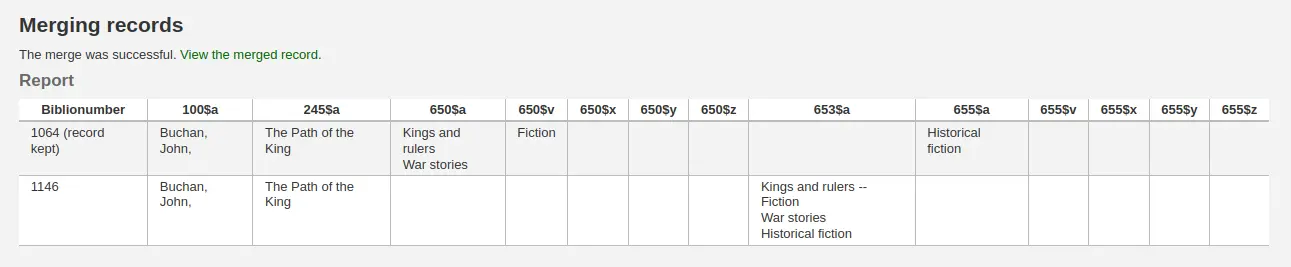
Sous les notices que vous êtes en train de fusionner, vous verrez une option pour saisir les champs à reporter. Ceci vous permettra de choisir quels champs MARC vous verrez apparaître sur la page de confirmation de fusion :

Si vous ne saisissez rien dans cette zone, vous recevrez une confirmation avec des nombres seulement

Si vous saisissez des champs, vous les verrez apparaître sur la page de confirmation.
Note
You can set defaults for this report with the MergeReportFields system preference.
Once you have completed your selections click the “merge” button.
The primary record will now contain the data you chose for it, as well as all of the items and acquisition information from both bibliographic records, and the second record will be deleted.
Merging bibliographic records with lists
Another way to merge together duplicate bibliographic records is to add them to a list and use the merge tool from there.
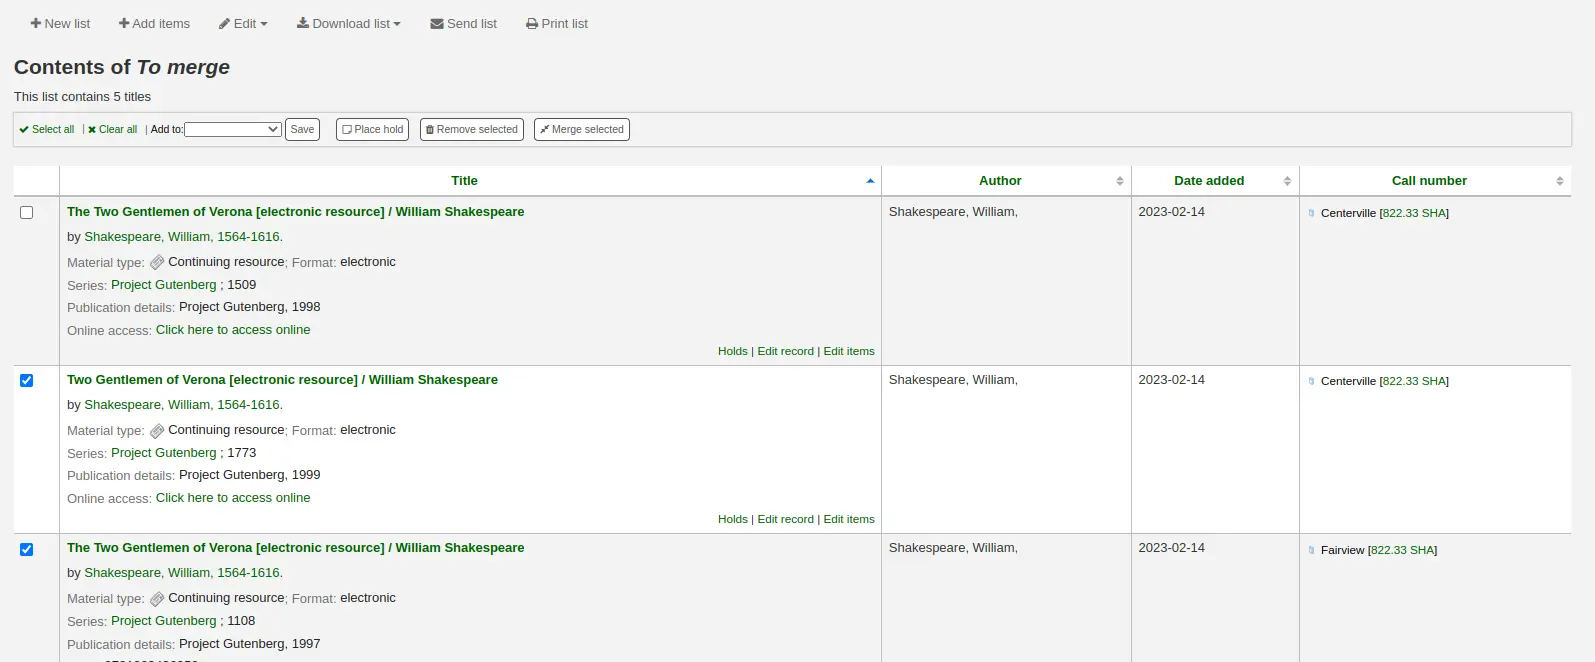
Go to Lists and click on the list title to view the list
Select the records to be merged
Click the “Merge selected” button at the top of the list
Once you have selected the records to merge together the process is the same as merging via cataloging.
Supprimer des notices
Note
Staff members must have the edit_catalogue permission (or the superlibrarian permission) in order to be able to delete bibliographic records.
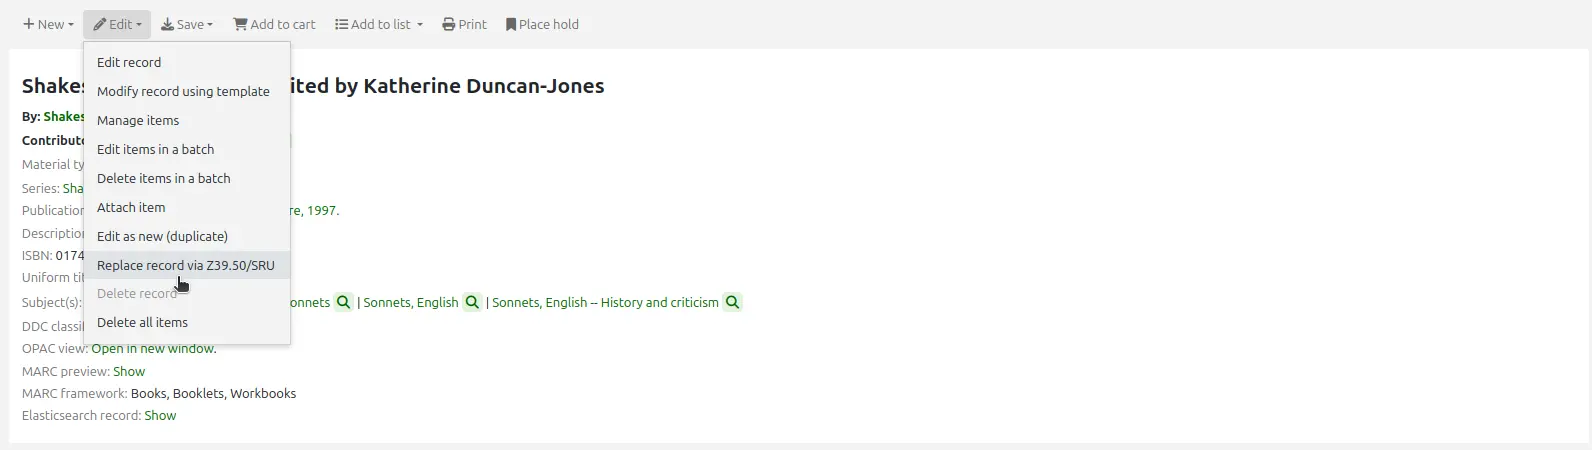
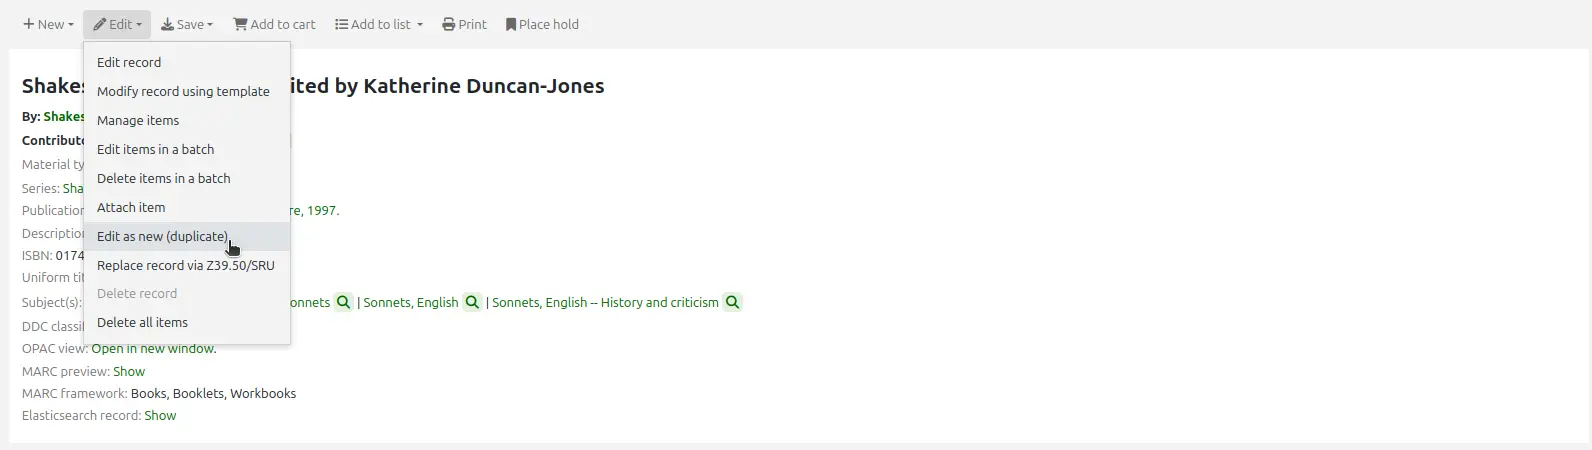
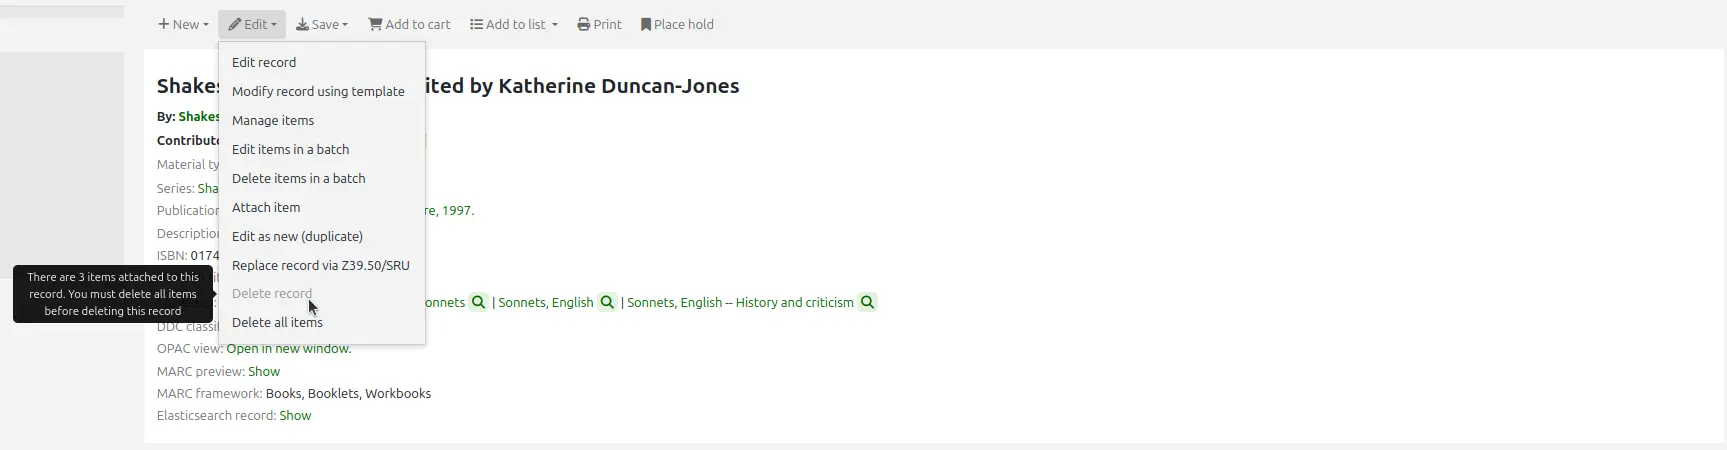
To delete a bibliographic record, click the “Edit” button and choose “Delete record”.
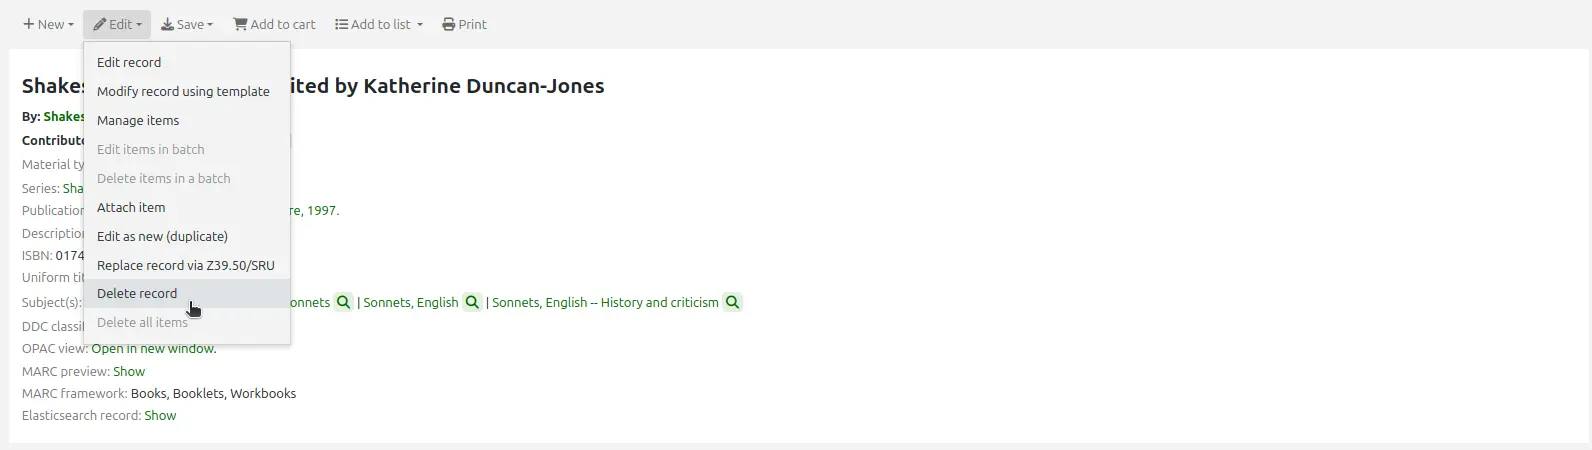
Les notices bibliographiques ne peuvent être supprimées que si tous les exemplaires rattachés ont été supprimés. Si vous tentez de supprimer une notice bibliographique avec des exemplaires rattachés, vous verrez que l’option Supprimer est grisée. (Voir la section Supprimer des exemplaires de ce manuel pour apprendre comment supprimer des exemplaires.)
Batch deleting records
Note
Only staff with the records_batchdel permission (or the superlibrarian permission) will have access to this tool.
Get there: More > Cataloging > Batch editing > Batch record deletion
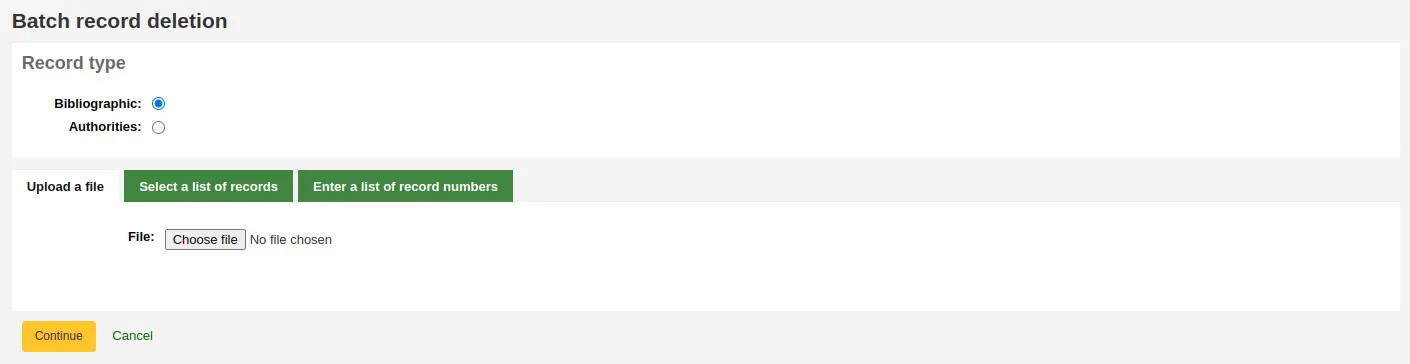
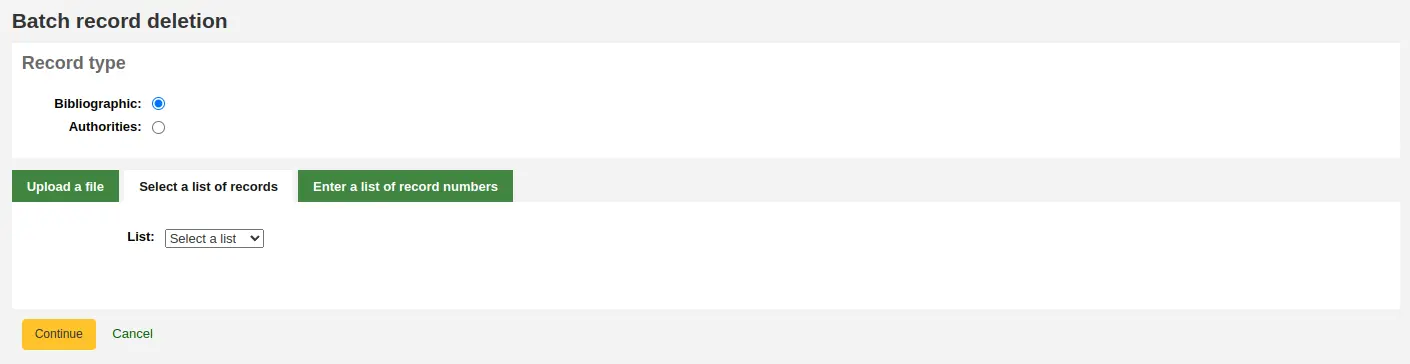
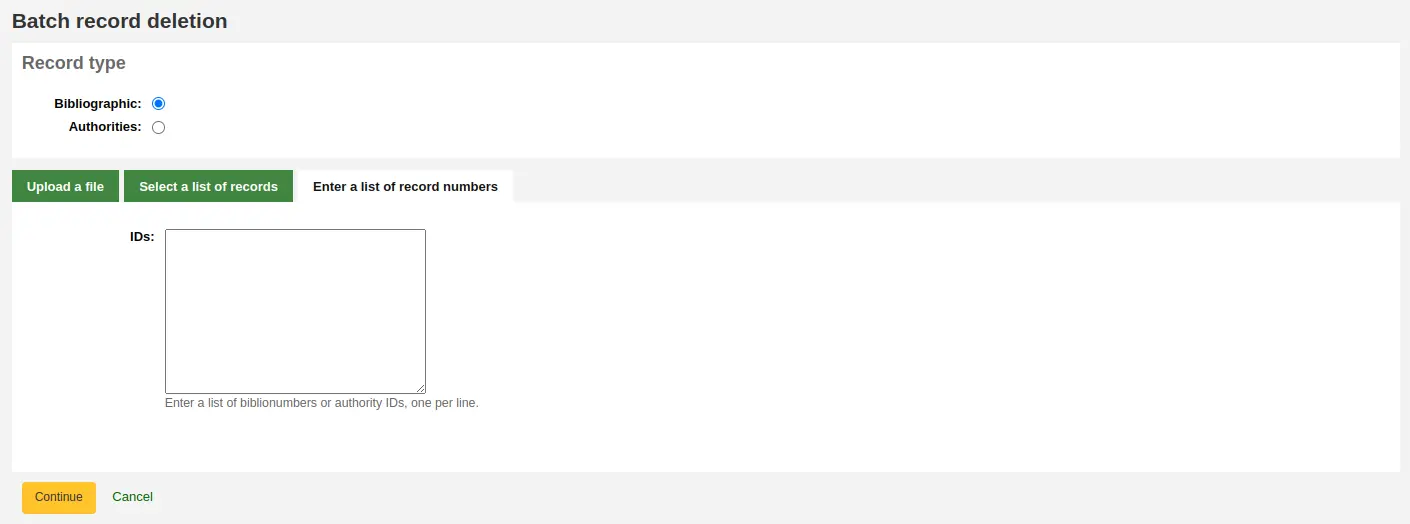
This tool will take a batch of record numbers for either bibliographic records or authority records and delete all those records and any items attached to them in a batch.
First, you need to tell the tool if you’re deleting bibliographic or authority records.
Next, you can:
load a file with biblionumbers or authids;
use a list;
or enter the list of numbers in the box provided.
Once you submit the form you will be presented with a summary of the records you are trying to delete.
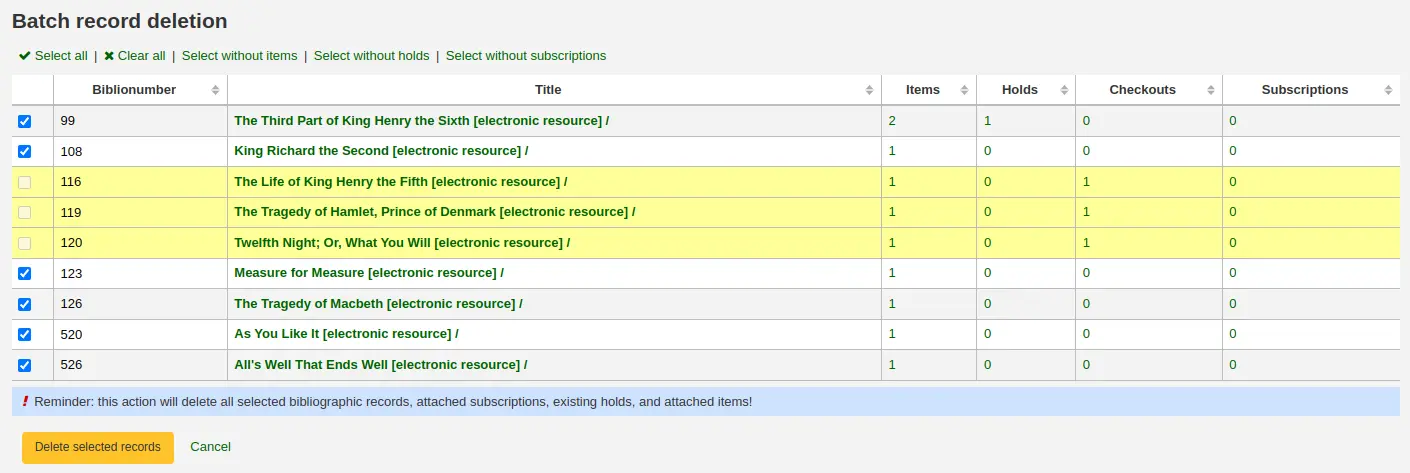
If a record you want to delete can’t be deleted, it will be highlighted.
Check the records you want to delete and click the “Delete selected records” button to finish the process.
You can also use the links at the top of the table to select only the records without items, holds, or subscriptions.
Catalog concerns
Rapporter des problèmes concernant des notices bibliographiques
If the CatalogConcerns system preference is enabled, staff will be able to report concerns regarding specific bibliographic records.
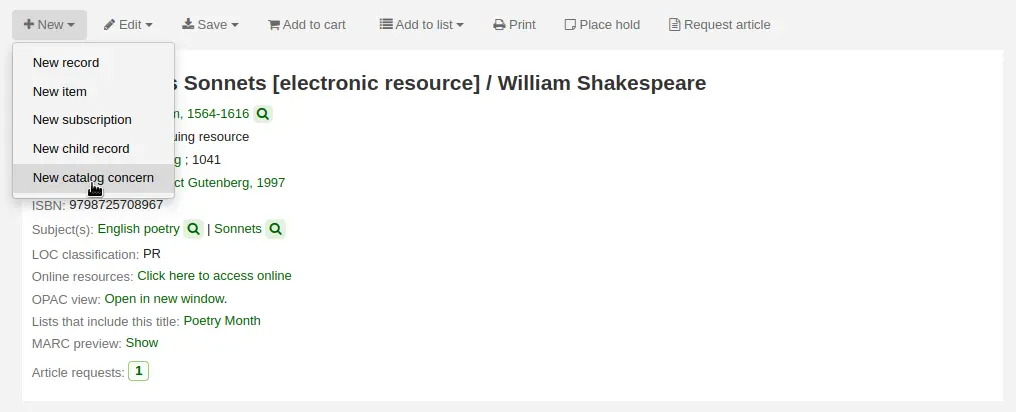
Pour signaler un nouveau problème,
In the bibliographic record’s detail page, click the “New” button and choose “New catalog concern”.
Complétez le formulaire de signalement.
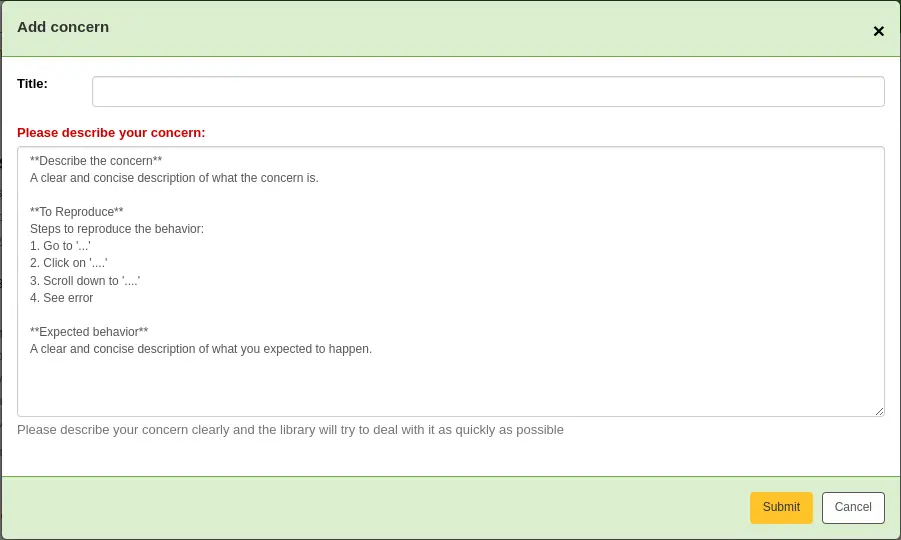
Titre : saisissez un titre décrivant succinctement le problème.
Merci de décrire vos problèmes : entrez des détails sur le problème, en étant le plus descriptif possible afin que la personne qui reçoit ce signalement puisse le reproduire et le constater.
Un exemple de ce qui est attendu dans la description est fourni dans le champ :
**Describe the concern**

A clear and concise description of what the concern is.

**To Reproduce**

Steps to reproduce the behavior:
1. Go to '...'
2. Click on '....'
3. Scroll down to '....'
4. See error

**Expected behavior**

A clear and concise description of what you expected to happen.
Note
Ce texte est personnalisable dans l’outil de personnalisation HTML, en modifiant l’entrée “CatalogConcernTemplate”.
Le texte en bas du formulaire (« Merci de décrire votre problème clairement… ») est également personnalisable dans l’outil personnalisations HTML, en modifiant l’entrée “CatalogConcernHelp”.
Cliquer sur “Valider”.
Ceci enverra un courriel à l’équipe de catalogage pour les informer qu’un nouveau problème a été créé. Le courriell sera envoyé à l’adresse de courriel dans la préférence système CatalogerEmails. Le courriel envoyé est la notification TICKET_NOTIFY, qui peut être personnalisée dans l’outil Notifications et tickets.
Un courriel sera également envoyé au rapporteur pour l’informer que le problème a été reçu. Le courriel envoyé est la notification TICKET_ACKNOWLEDGE, qui peut être personnalisé dans l’outil Notifications et tickets.
Les problèmes signalés au sujet de cette notice sont visibles dans l’onglet “Problèmes”.
All concern tickets will be visible in the catalog concerns report.
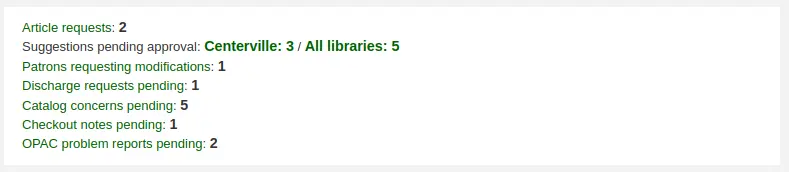
Les rapports de problème nouvellement ouverts apparaîtront également dans la section notification au bas de la page principale de l’interface professionnelle.
Managing catalog concerns
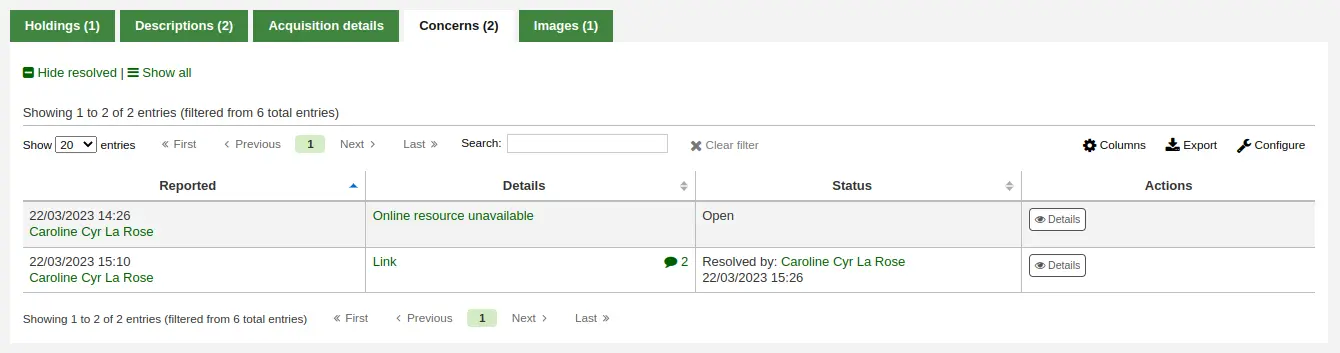
When staff or patrons report concerns about bibliographic records, all concerns will be accessible through the catalog concerns report.
Get there: More > Cataloging > Reports > Catalog concerns
Note
This report will only be visible if either the CatalogConcerns system preference or the OpacCatalogConcerns system preference are enabled.
Note
Only staff with the edit_catalogue permission (or the superlibrarian permission) will have access to this page.
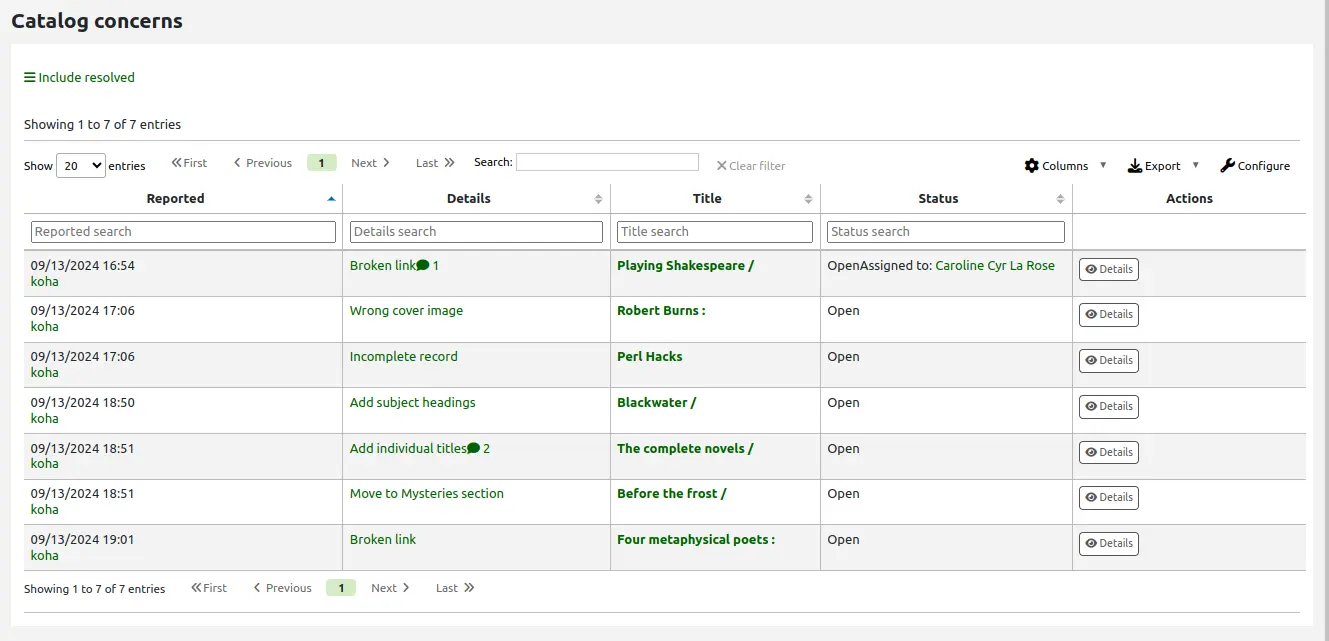
From this report, you can see all concerns, ordered by date, with the name of the reporter, the details of the concern, the title of the bibliographic record, the status, the assignee, if any, and if resolved, the date and name of the staff member who managed it.
Note
In version 24.05 and newer, only current concerns are shown by default. If needed, click on the “Include resolved” button at the top of the page to show concerns that have already been resolved. Click “Filter resolved” to hide the resolved concerns once again.
In version 23.11 and older, all concerns are shown by default. If needed, you can click on “Hide resolved” at the top of the page to hide concerns that have already been resolved. Click “Show all” to return to the full table.
To see the details of a concern, either click the text in the “Details” column, or click the “Details” button in the “Actions” column.
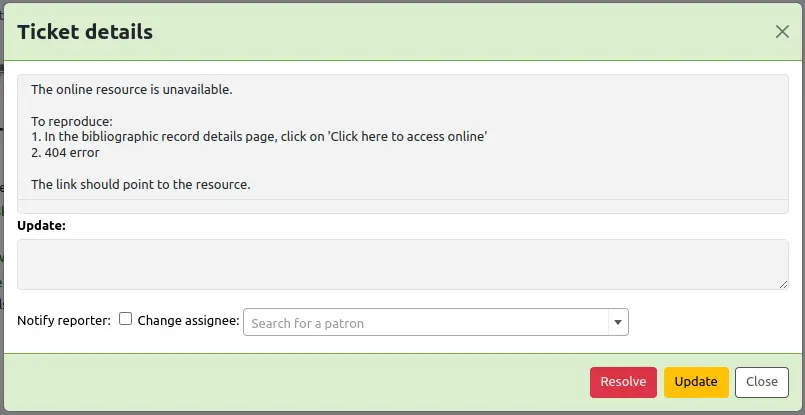
From this view, you can enter a comment in the “Update” field.
To simply add the comment as an update, click the “Update” button.
Note
If there are authorized values in the TICKET_STATUS authorized value category, the “Update” button will offer status options with your custom statuses.
Version
Cette fonctionnalité a été ajoutée à Koha dans sa version 24.05.
Attention
In Koha version 23.11 and older, the “Update” button is labeled “Comment”.
To assign this concern to a staff member, search for the user’s name in the “Change assignee” field, then click “Update”. They will receive an email based on the TICKET_ASSIGNED notice, which can be customized in the Notices and slips tool.
If this concern is resolved, click the “Resolve” button.
Note
If there are authorized values in the TICKET_RESOLUTION authorized value category, the “Resolve” button will offer resolution options with your custom resolution statuses.
Version
Cette fonctionnalité a été ajoutée à Koha dans sa version 24.05.
If “Notify” is checked, the reporter will receive an email indicating that the concern was updated. The email sent for an update is the TICKET_UPDATE notice, and the email sent when the concern is resolved is the TICKET_RESOLVE notice, both of which can be customized in the Notices and slips tool.
Notices d’exemplaires
In Koha, each bibliographic record can have one or more items attached. These items are sometimes referred to as holdings. Each item includes information about the physical copy the library has.
Ajouter des exemplaires
Note
Staff members must have the edit_items permission (or the superlibrarian permission) in order to be able to add items.
After saving a new bibliographic record, you will be redirected to a blank item record so that you can attach an item to the bibliographic record.
Other ways to add an item to a record :
From a record’s details page, click “New”, and choose “New item”.
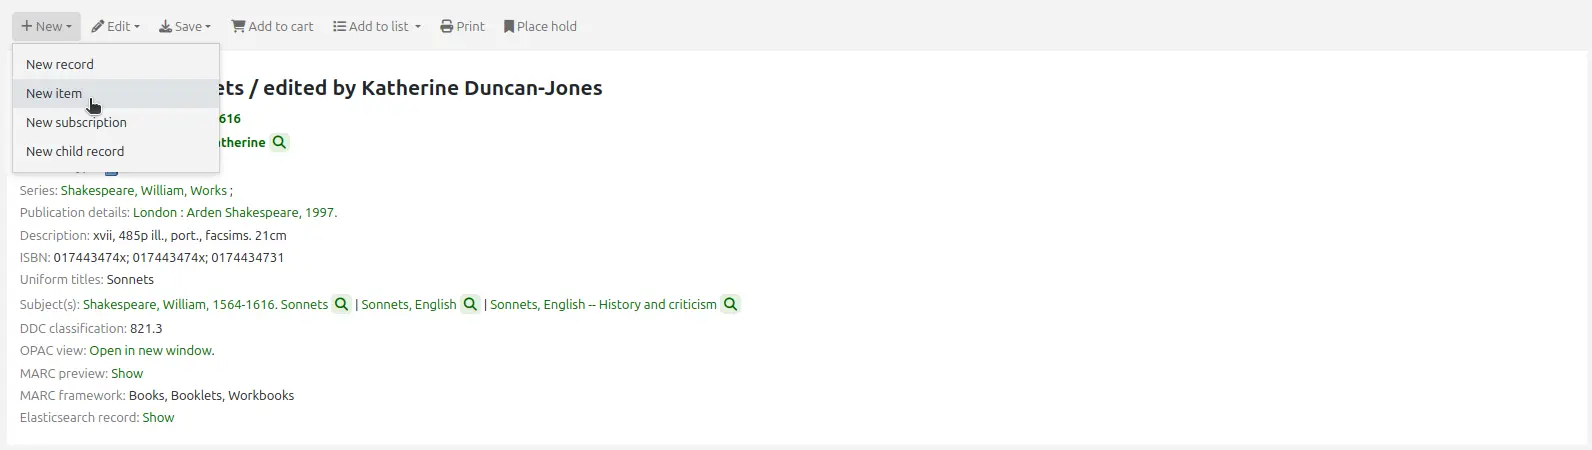
From the cataloging search results, click “Actions” and choose “Add or edit items”.
If you already have item templates, you can choose the template to apply and click “Apply template”. This will prefill the item form with the template values.
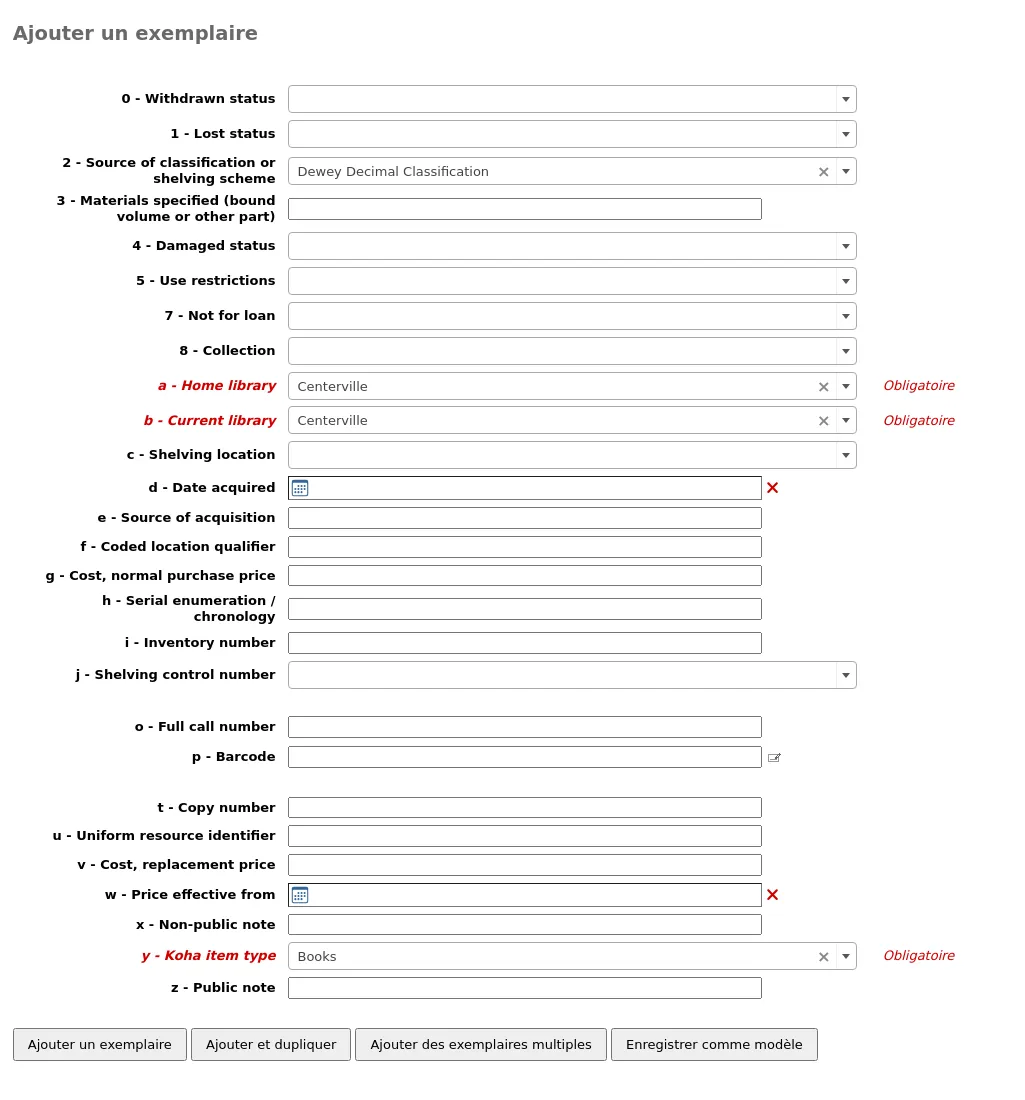
Au strict minimum, si vous prévoyez de faire des prêts, les champs suivants devraient être renseignés pour les nouveaux exemplaires :
-
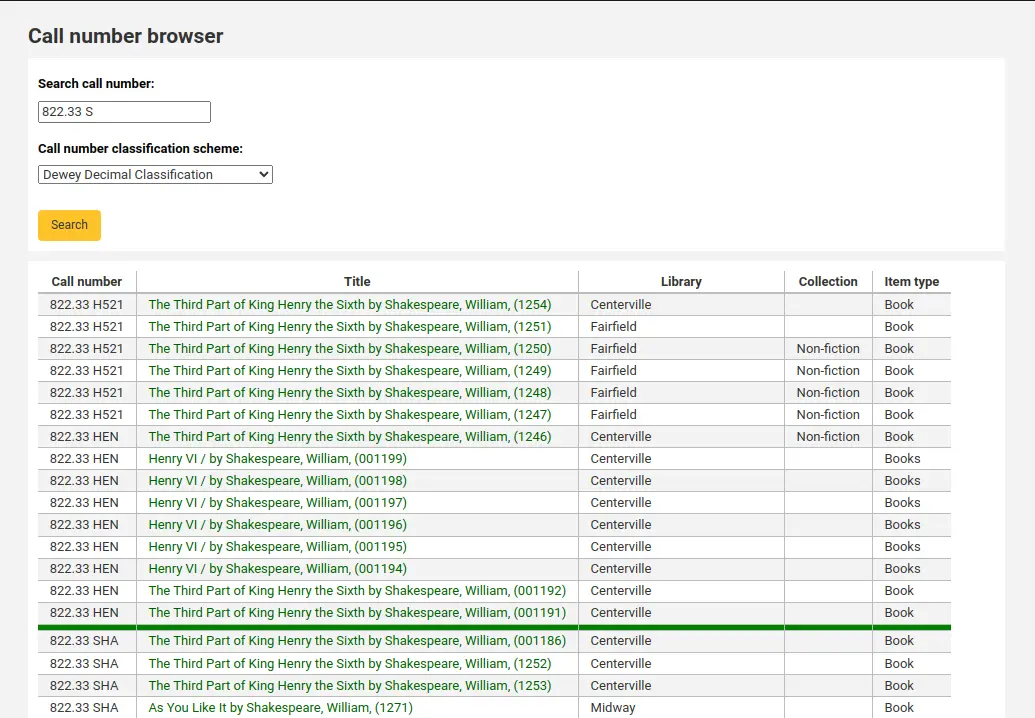
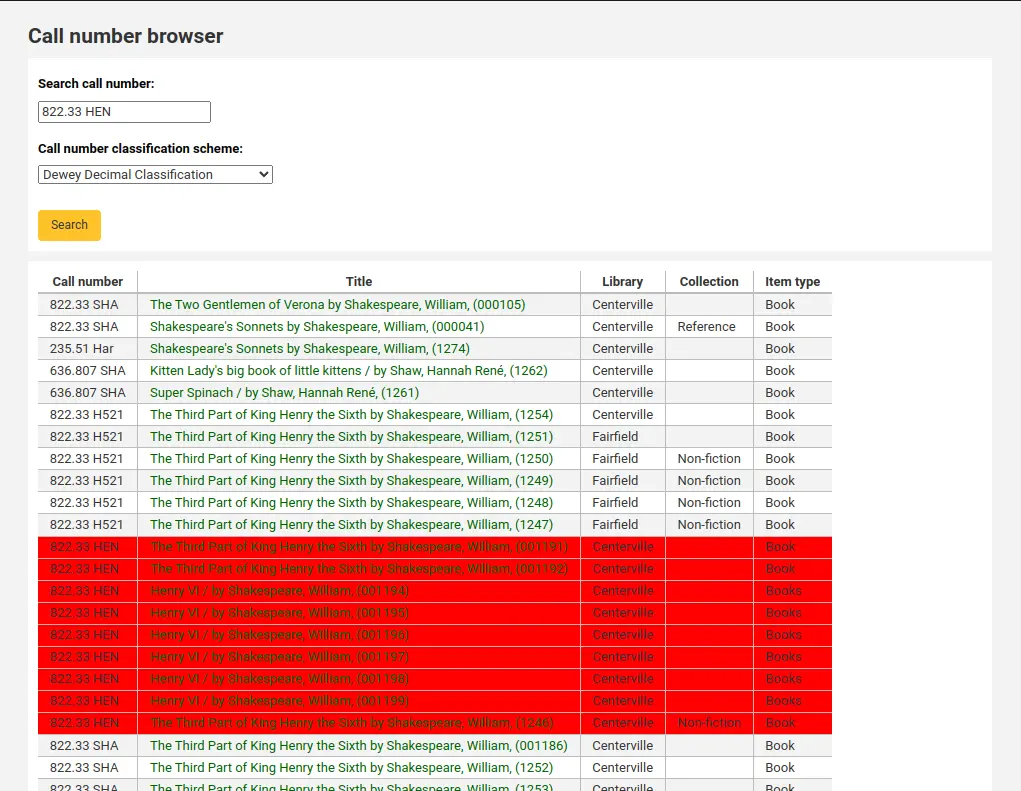
If you’d like you can use the cataloging plugin “call number browser” (cn_browser.pl) for this field. If it’s enabled you’ll see a … to the right of the field. When clicked that will open a call number browser window if the row is highlighted in Red then the call number is in use, if there is a thin Green line instead then the call number can be used.
-
Lorsqu’un document a été déclaré comme étant “Perdu”, le prix de remplacement du document sera facturé aux adhérents
Pour être certain que ces valeurs seront bien renseignées, vous pouvez les rendre obligatoires dans la grille de catalogage que vous utilisez et elles apparaîtront en rouge avec la mention « obligatoire ». Un exemplaire ne pourra être enregistré tant que les champs obligatoires n’auront pas été renseignés.

Note
Pour rendre obligatoire un sous-champ dans une grille de catalogage, modifiez le champ 952 dans la grille de catalogage.
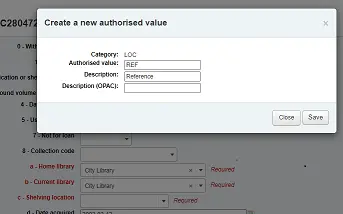
Vous pouvez ajouter une nouvelle valeur autorisée directement depuis l’écran de modification et d’ajout d’exemplaire pour tous les champs qui sont liés à une catégorie de valeurs autorisées comme la Localisation (sous-champ $c) ou le Code de collection (sous-champ $8).
Commencez à saisir la description de la valeur autorisée. Si aucune concordance n’est trouvée vous verrez l’option “(Sélectionner pour créer)”.
Cliquez sur cette option pour afficher une fenêtre pop-up dans laquelle vous pouvez créer votre nouvelle valeur autorisée.
La catégorie de valeur autorisée sera automatiquement complétée depuis le champ que vous utilisez, par exemple LOC pour Localisation, CCODE pour Fonds - Collection. Attention lorsque vous choisissez votre code de valeur autorisée. Référez-vous aux notes sur l’ajout de valeurs autorisées pour connaître le format correct de ces codes. Utilisez le champ Description pour la valeur qui s’affichera réellement
Vous pouvez ajouter des valeurs autorisées de la même manière depuis les notices bibliographiques et les notices d’autorité.
Note
Only staff with the manage_auth_values permission (or the superlibrarian permission) will be able to add authorized values from cataloging.
Sous le formulaire d’ajout, il y a 3 boutons pour ajouter l’exemplaire.

“Ajouter un exemplaire” ajoutera juste un exemplaire
« Ajouter et dupliquer » ajoutera l’exemplaire et pré-remplira un nouveau formulaire avec les mêmes valeurs, que vous pourrez modifier
“Add multiple copies of this item” will ask how many copies and will then add that number of items adding +1 to the barcode so each barcode is unique

“Save as template” will save this item as an item template to reuse later.
Avertissement
Saving as template will not save the item. It will only create the template.
Les exemplaires ajoutés apparaîtront au-dessus du formulaire d’ajout

Note
You can customize the columns of this table in the Table settings section of the Administration module (table id: Items Editor).
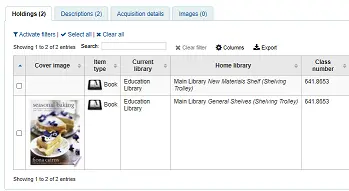
Vos exemplaires seront également affichés sous la notice bibliographique sur la page d’affichage détaillé, dans l’onglet “Exemplaires”.
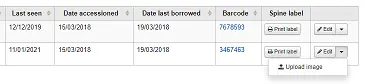
Si vous avez paramétré la préférence système SpineLabelShowPrintOnBibDetails sur “Afficher”, il y aura un lien à côté de chaque exemplaire pour imprimer une étiquette rapide.
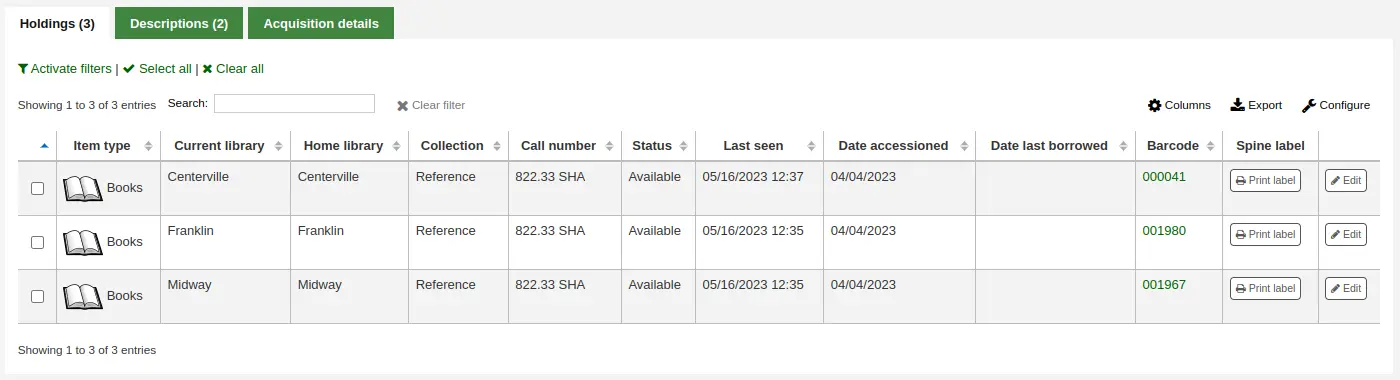
Vous pouvez aussi filtrer le contenu du tableau en cliquant sur le lien “Activer les filtres”. Il affichera alors une rangée en haut où vous pourrez filtrer les résultats dans la colonne que vous souhaitez.
Adding and using item templates
You can create item templates to share and reuse in order to easily fill out the new item form.
Note
Quiconque ayant la permission edit_items peut créer et partager des modèles d’éléments, et supprimer leurs propres modèles.
However, staff members must have the manage_item_editor_templates permission (or the superlibrarian permission) in order to manage item templates created by others.
Creating a new item template
To create an item template,
Go to add a new item
Fill out the item form with the values you want to add to the template
Instead of saving the item, click the “Save as template” button

Choose “Save as new template”
Enter a template name
Choose if you want this template to be shared with all other catalogers
Cliquez sur “Enregistrer”
Pour mettre à jour un modèle existant
Pour modifier un modèle existant,
Go to add a new item
Choose the template to update at the top of the form

Click “Apply template”
Change the values as needed
Click the “Save as template” button.
Choose the template to update
Choose if you want this template to be shared with all other catalogers
Cliquez sur “Enregistrer”
Using a template
To use a template,
Go to add a new item
Choose the template to update at the top of the form
Click “Apply template”
If checking “For session”, all new items will be based on this template, unless otherwise specified
Change the values as needed
Save the item
Deleting a template
To delete a template,
Go to add a new item
Choose the template to delete at the top of the form
Click “Delete template”
Modifier des exemplaires
Note
Les bibliothécaires doivent avoir la permission edit_items (ou la permission superlibrarian) pour pouvoir modifier des exemplaires.
Les exemplaires peuvent être modifiés de plusieurs façons.
En cliquant sur “Modifier les exemplaires” et “Gérer les exemplaires” depuis la notice bibliographique.
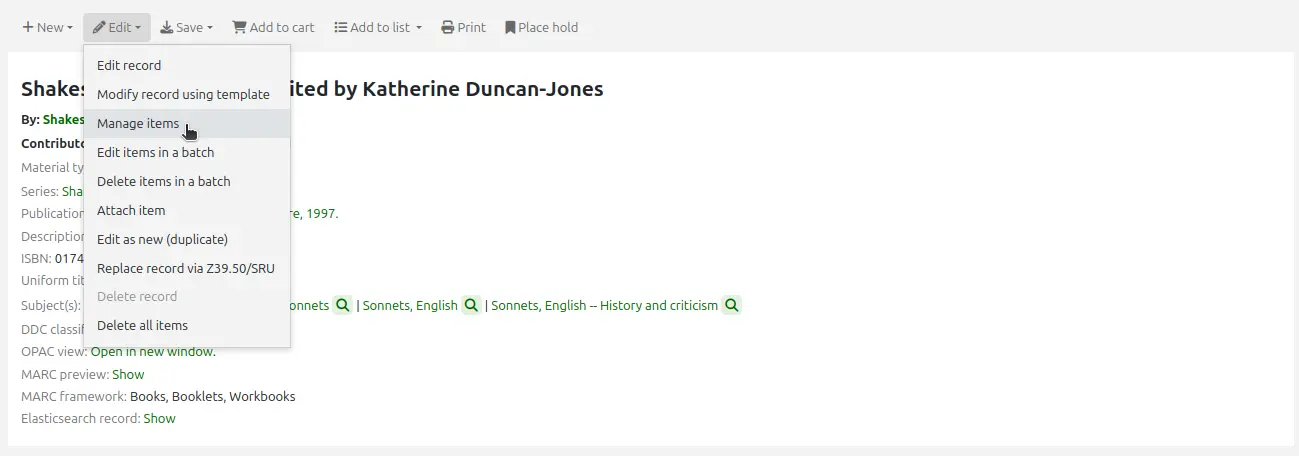
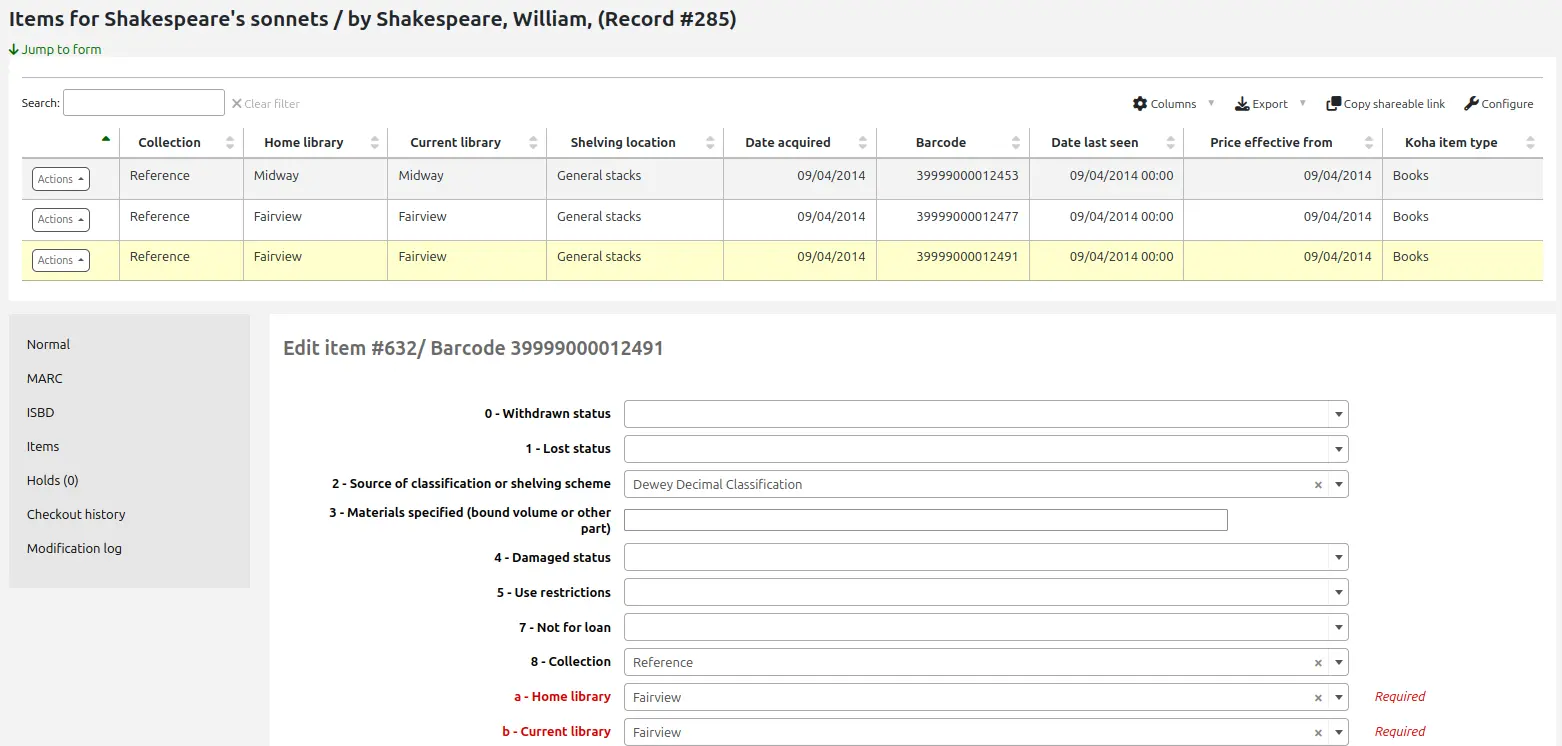
Ceci ouvrira une liste d’exemplaires, dans laquelle vous pourrez cliquer sur le bouton “Action” à gauche de l’exemplaire spécifique que vous voulez modifier, et choisissez “Modifier”.
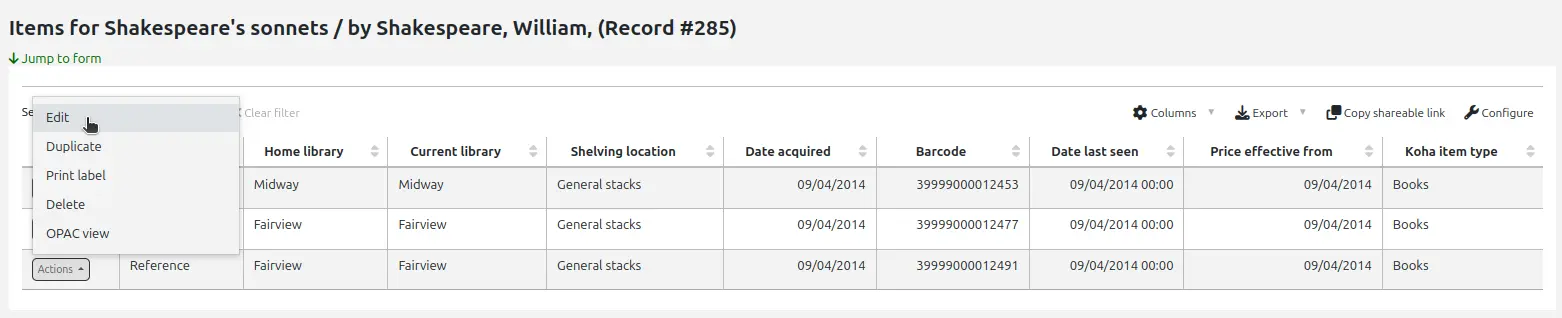
This will open the item in the form under the list of items where you will be able to edit the item information.
Clicking “Edit items” beside the item on the “Items” tab.
This will open up the editor on the item to edit.
Clicking “Edit” and then “Edit items in a batch”.
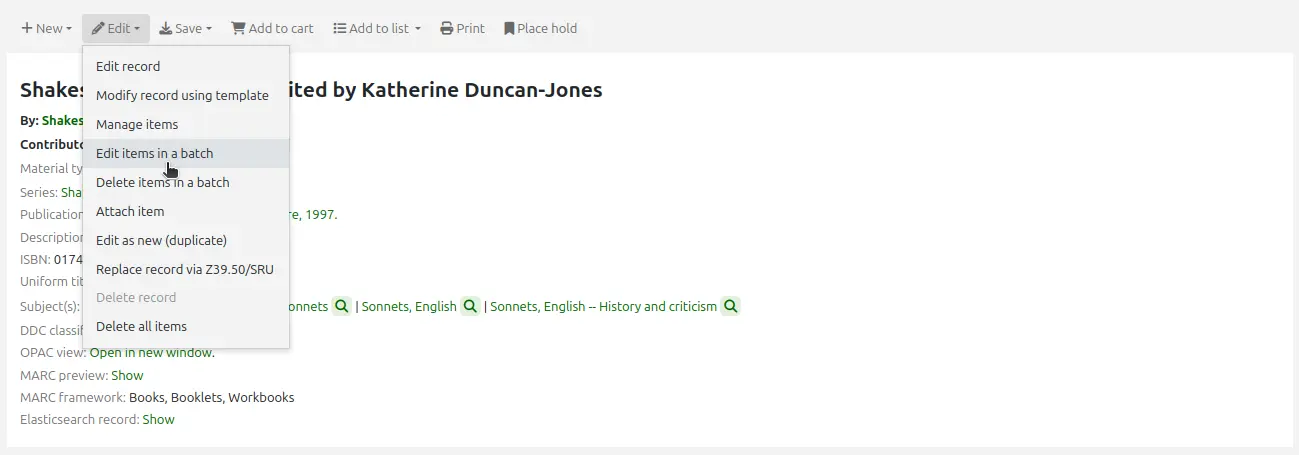
Ceci permettra d’ouvrir l’outil de modification d’exemplaires par lot dans lequel vous pourrez modifier tous les exemplaires de cette notice en lot.
You can check the items you would like to edit and click “Modify selected items” at the top of the list.
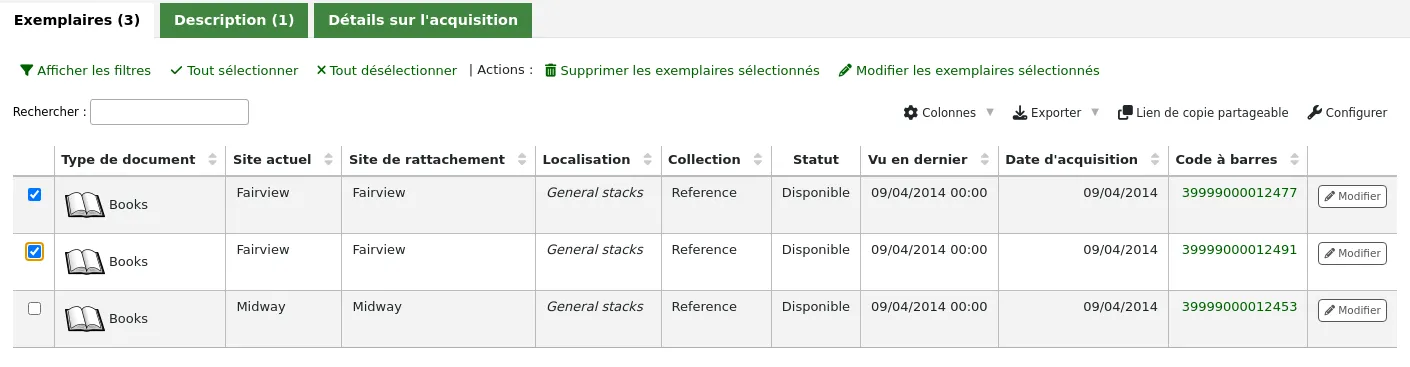
This will open up the batch item modification tool where you will be able to edit all of the selected items as a batch.
Vous pouvez cliquer sur “Modifier” à droite de chaque exemplaire dans l’onglet “Exemplaires”.
There is also a link to “Edit items” under each search result in the staff interface.

This will open up a list of items where you can click the “Actions” button to the left of the specific item to edit and choose “Edit”.
Finally, you can use the batch item modification tool.
Mise à jour rapide du statut de l’exemplaire
Circulation staff often need to change the status of an item to Lost or Damaged. This doesn’t require you to edit the entire item record. Instead, clicking on the item barcode on the checkout summary or checkin history will bring you to an item summary. You can also get to the item summary by clicking on the Items tab to the left of the bibliographic record’s detail page.
From this view, you can mark an item lost by choosing a lost status from the pull down and clicking the “Set status” button. Same applies to the damaged and withdrawn statuses.

Note
If the PreventWithdrawingItemsStatus system preference is enabled, staff members will not be able to withdraw items that are either checked out or in transit.
Dupliquer exemplaires
You can easily duplicate an item by clicking the “Actions” button the left of each item on the manage items screen and choosing “Duplicate”.

This will populate the form with the values from the item you chose.
Batch editing items
Note
Only staff with the items_batchmod permission (or the superlibrarian permission) will have access to this tool.
Get there: More > Cataloging > Batch editing > Batch item modification
This tool will allow you to modify a batch of item records in Koha.
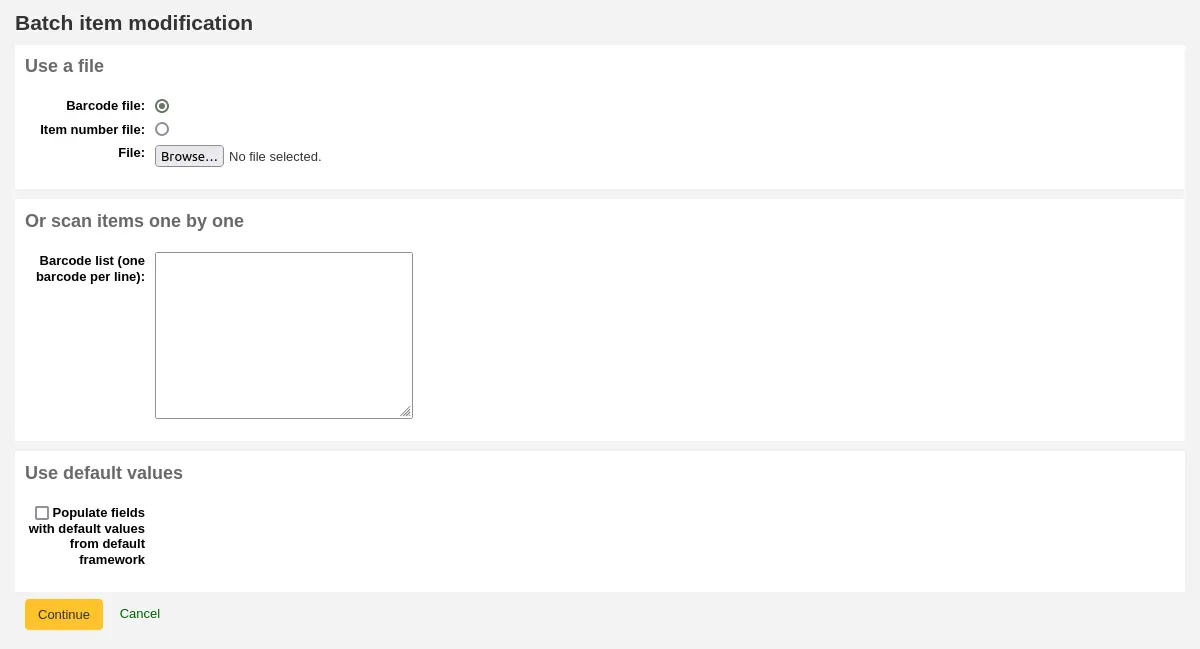
From the tool, choose to either upload a file of barcodes or itemnumbers, or scan item barcodes one by one into the box below the upload tool. You can also decide the items edited should be populated with the default values defined in the default framework.
Once the file is uploaded or the barcodes listed, click “Continue.”
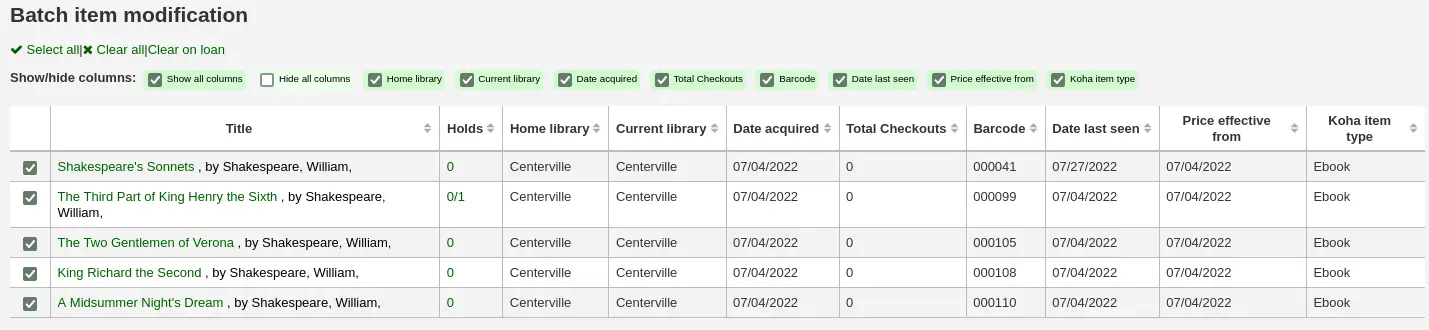
You will be presented with a summary of the items you want to modify. From here, you can uncheck the items you don’t want to modify before making changes in the form below. You can also hide columns you don’t need to see to prevent having to scroll from left to right to see the entire item table. The holds column displays a count of the current holds for the item.
Note
To uncheck all items that are currently checked out you can click the “Clear on loan” link at the top of the form.
Using the edit form, choose which fields to make edits to. By checking the checkbox to the right of each field you can clear the values in that field for the items you are modifying.
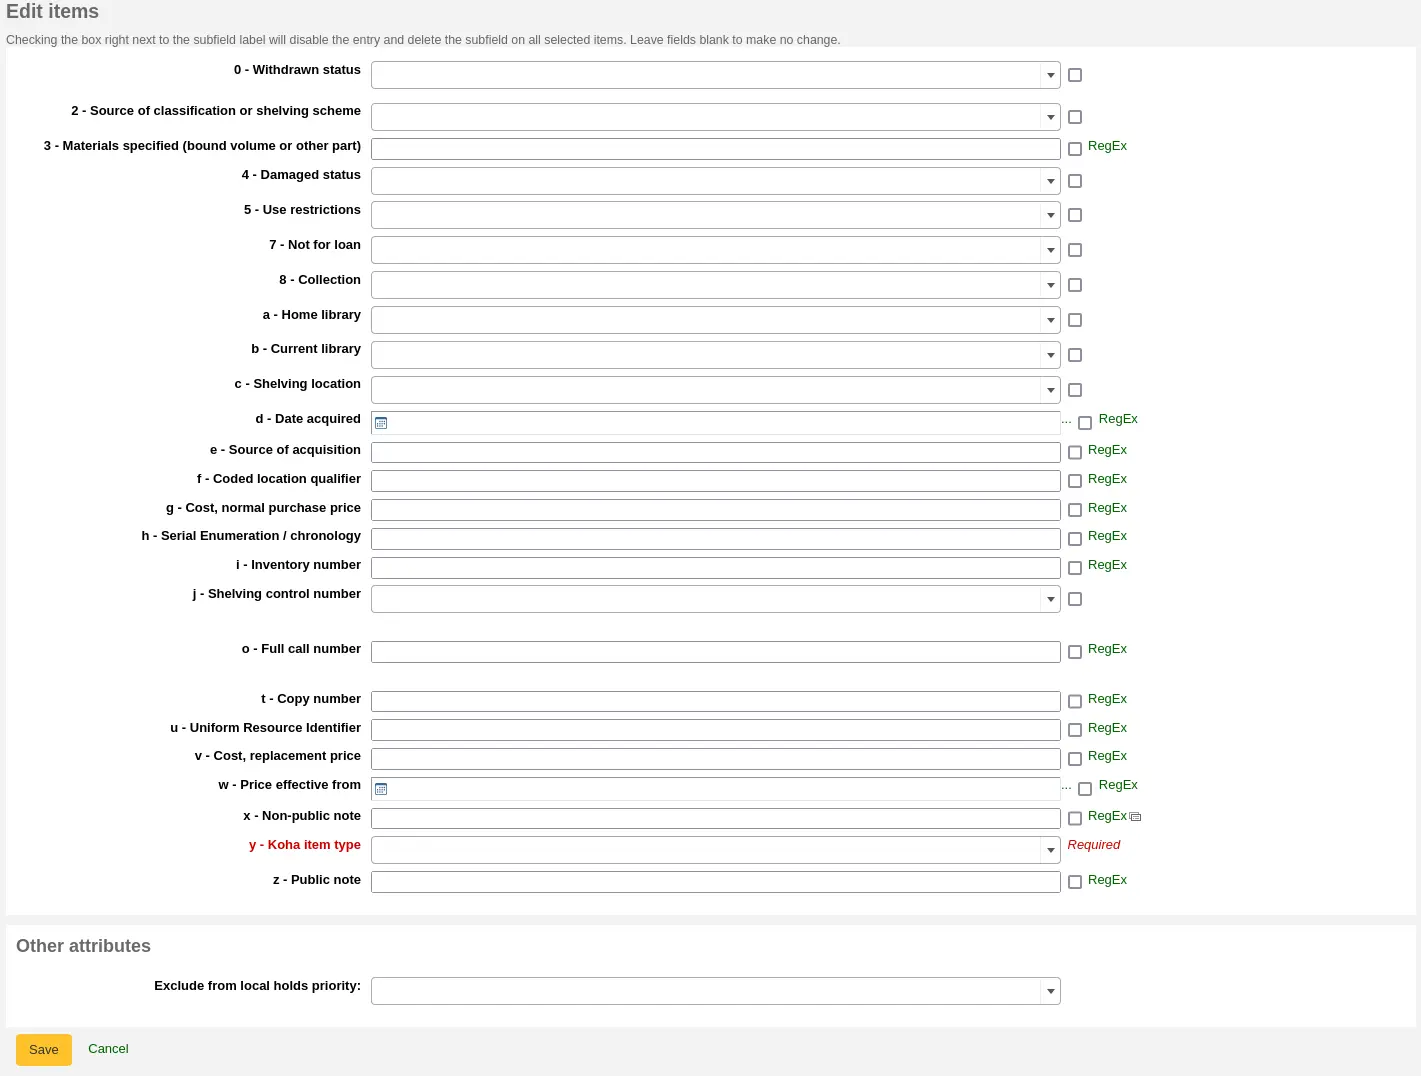
You can also click the “RegEx” link to change the text field to a regular expression substitution. This is used to change only a part of a text string.

Note
If the PreventWithdrawingItemsStatus system preference is enabled, you will not be able to withdraw items that are either checked out or in transit using the batch item editor.
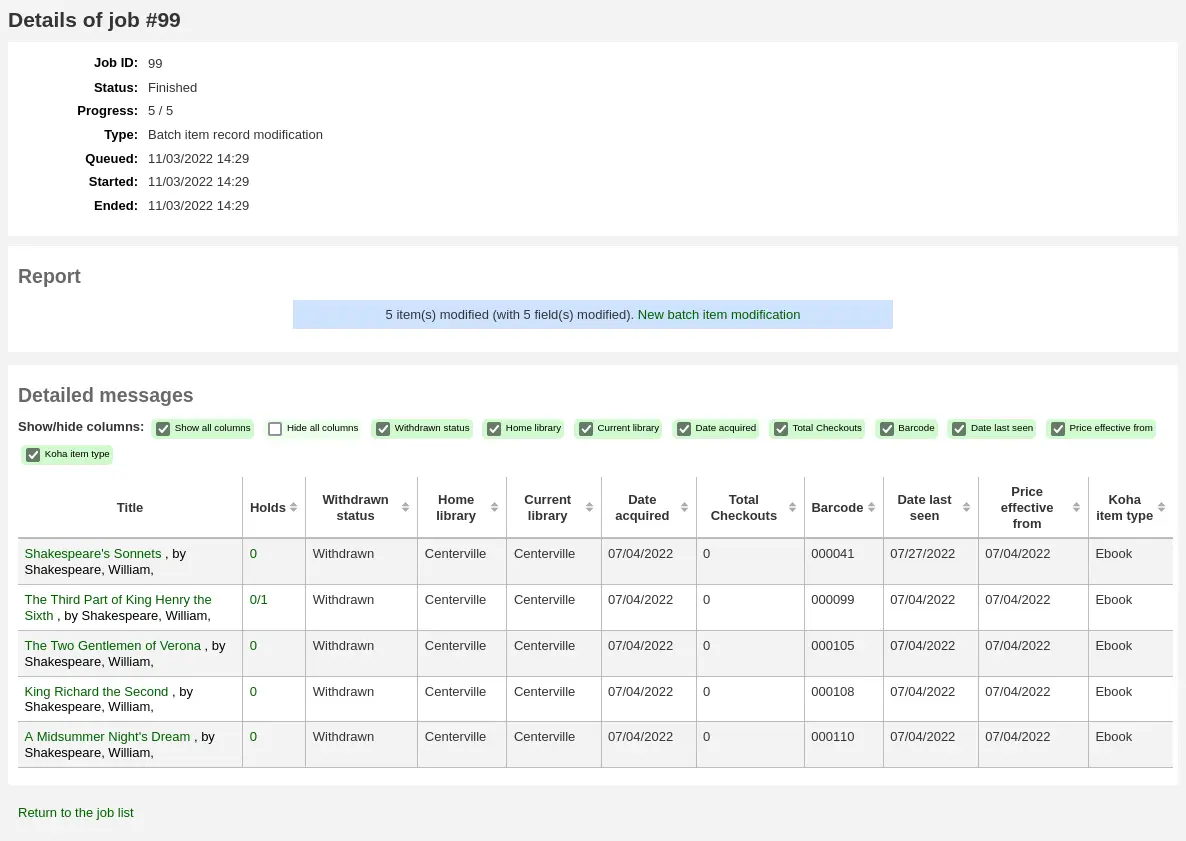
Once the changes are made, the job will be enqueued in the background jobs.

Pour voir les exemplaires modifiés, cliquez sur “Voir les détails de la tâche en file d’attente”.
Batch editing items from the bibliographic record
You can also edit items on one bibliographic record in a batch by going to the bibliographic record and clicking Edit > Edit items in batch.
This will bring you to the same batch item modification tool as above.
Batch editing items from a report
The batch item modification tool is also available from reports results when the results contain itemnumbers.
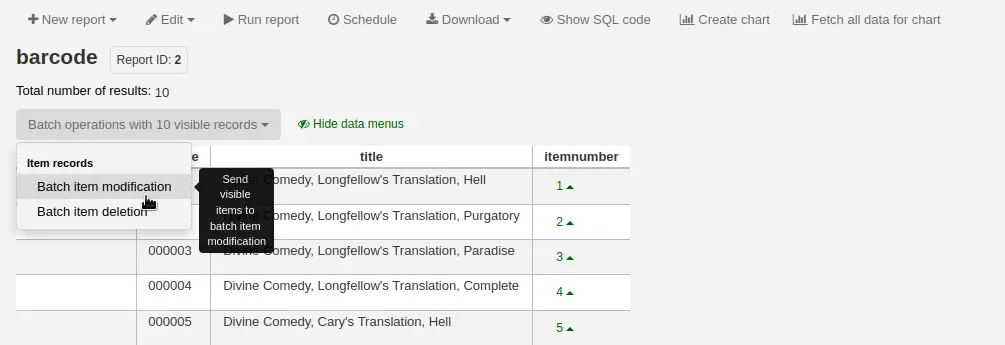
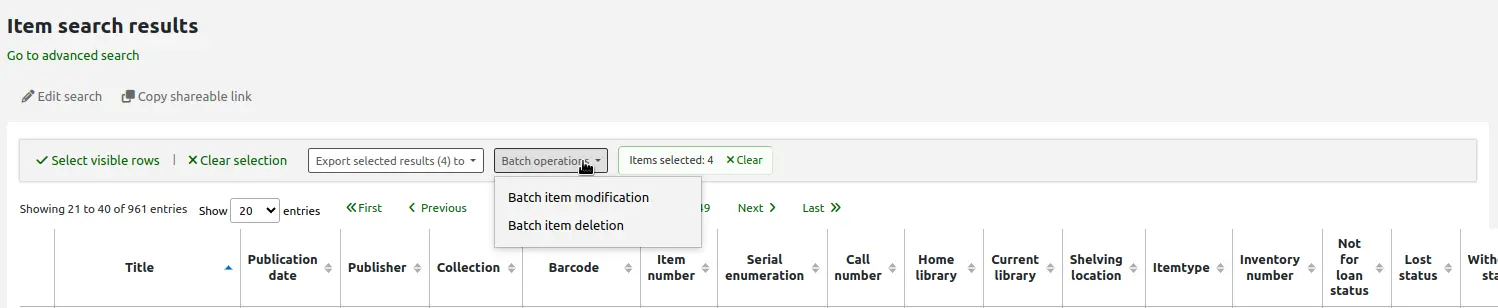
When the report contains the itemnumber, the option “Batch operations with X visible records” will automatically appear. This option contains batch item modification and batch item deletion.
By default, only 20 results are shown when running reports, therefore, the batch modification will only be done on 20 results. If you have more results that you want to edit in a batch, make sure to change the number of results per page before choosing the batch operation.
Batch editing items from the item search
Version
Cette option a été ajoutée à Koha dans sa version 23.11.
The batch item modification tool is also available from the item search results.
Simply select items to be edited from the results list, click “Batch operations”, and choose “Batch item modification”.
Grouping items
You can group items in order to place holds on a subset of items on a bibliographic record, rather than a specific item or the next available item. For example, if you have a bibliographic record for a series, and several items of each volume, you can group items by volumes and then place holds on the next available item of « Vol. 4 ».
Note
Staff members must have the manage_item_groups permission (or the superlibrarian permission) in order to create, edit, and delete item groups.
You need to first enable the item groups feature with the EnableItemGroups system preference.
Once the system preference is enabled, a new “Item groups” tab will appear in the detailed record in the staff interface.

Click on the “New item group” button
In the form that appears,
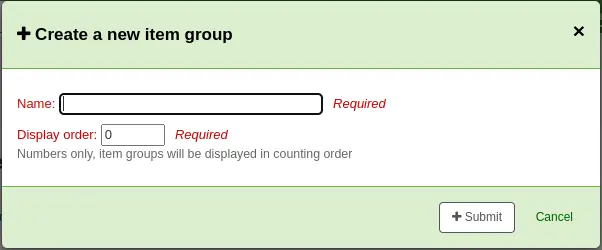
Name: enter a name for the group, this name will visible in the staff interface and the OPAC
Display order: enter a number for the position this group should be displayed compared to the other groups of the same record (for example, if you have groups with 0, 1 and 2 as display order, the 0 group will be displayed first, the 1 group will be displayed second and the 2 group will be displayed third. You can put any number in there, your groups can be 3, 11 and 27, in that case, 3 will be displayed first, then 11 and finally 27)
Click “Submit” to create the group
Once it is created, you can add items to the group.
Dans l’onglet “Exemplaires”, sélectionnez les exemplaires à ajouter au groupe
At the top of the table, there will be batch actions, click on “Add/move to item group”
Choose which group the selected items should be added to
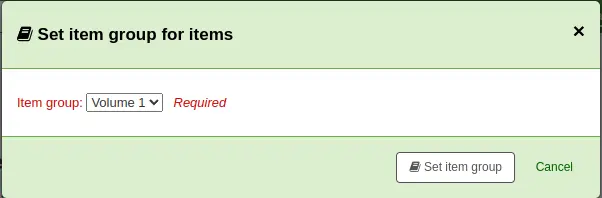
Click “Set item group”
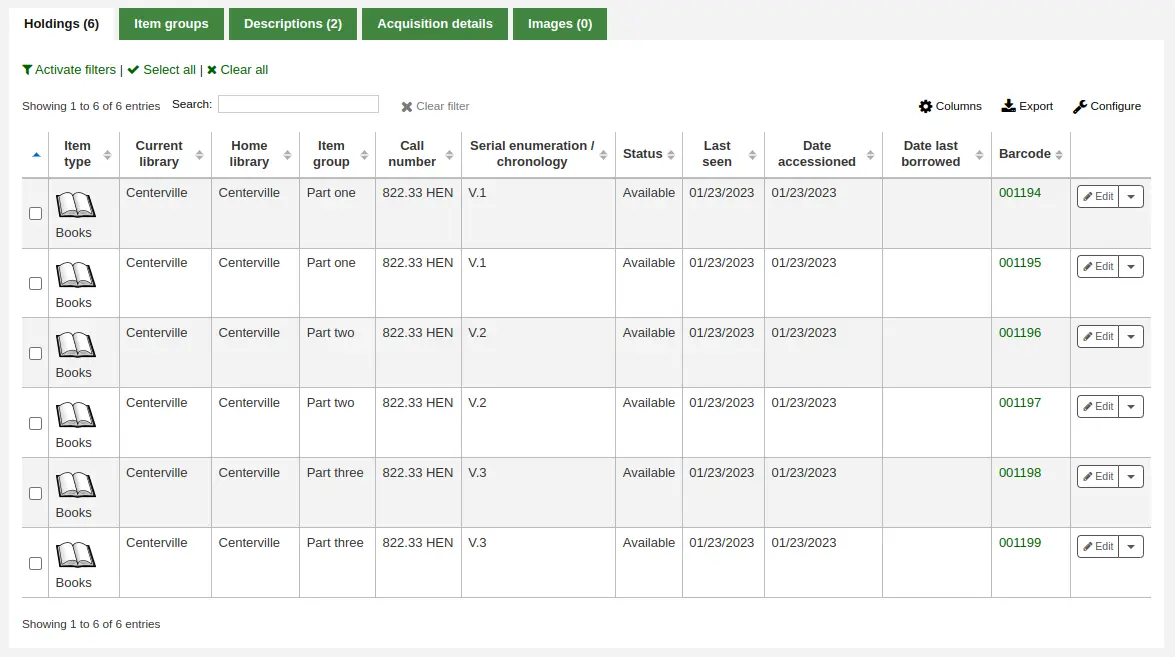
The item group in which each item is will be shown in the “Holding” table.
To delete an item group, go to the “Item groups” tab, and click the “Delete” button. This will only delete the group, the items will remain, but ungrouped.
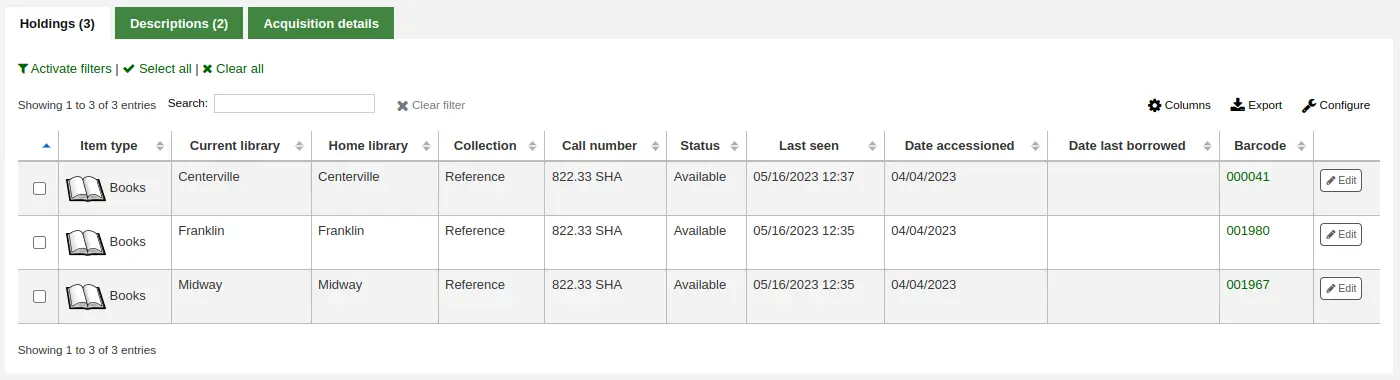
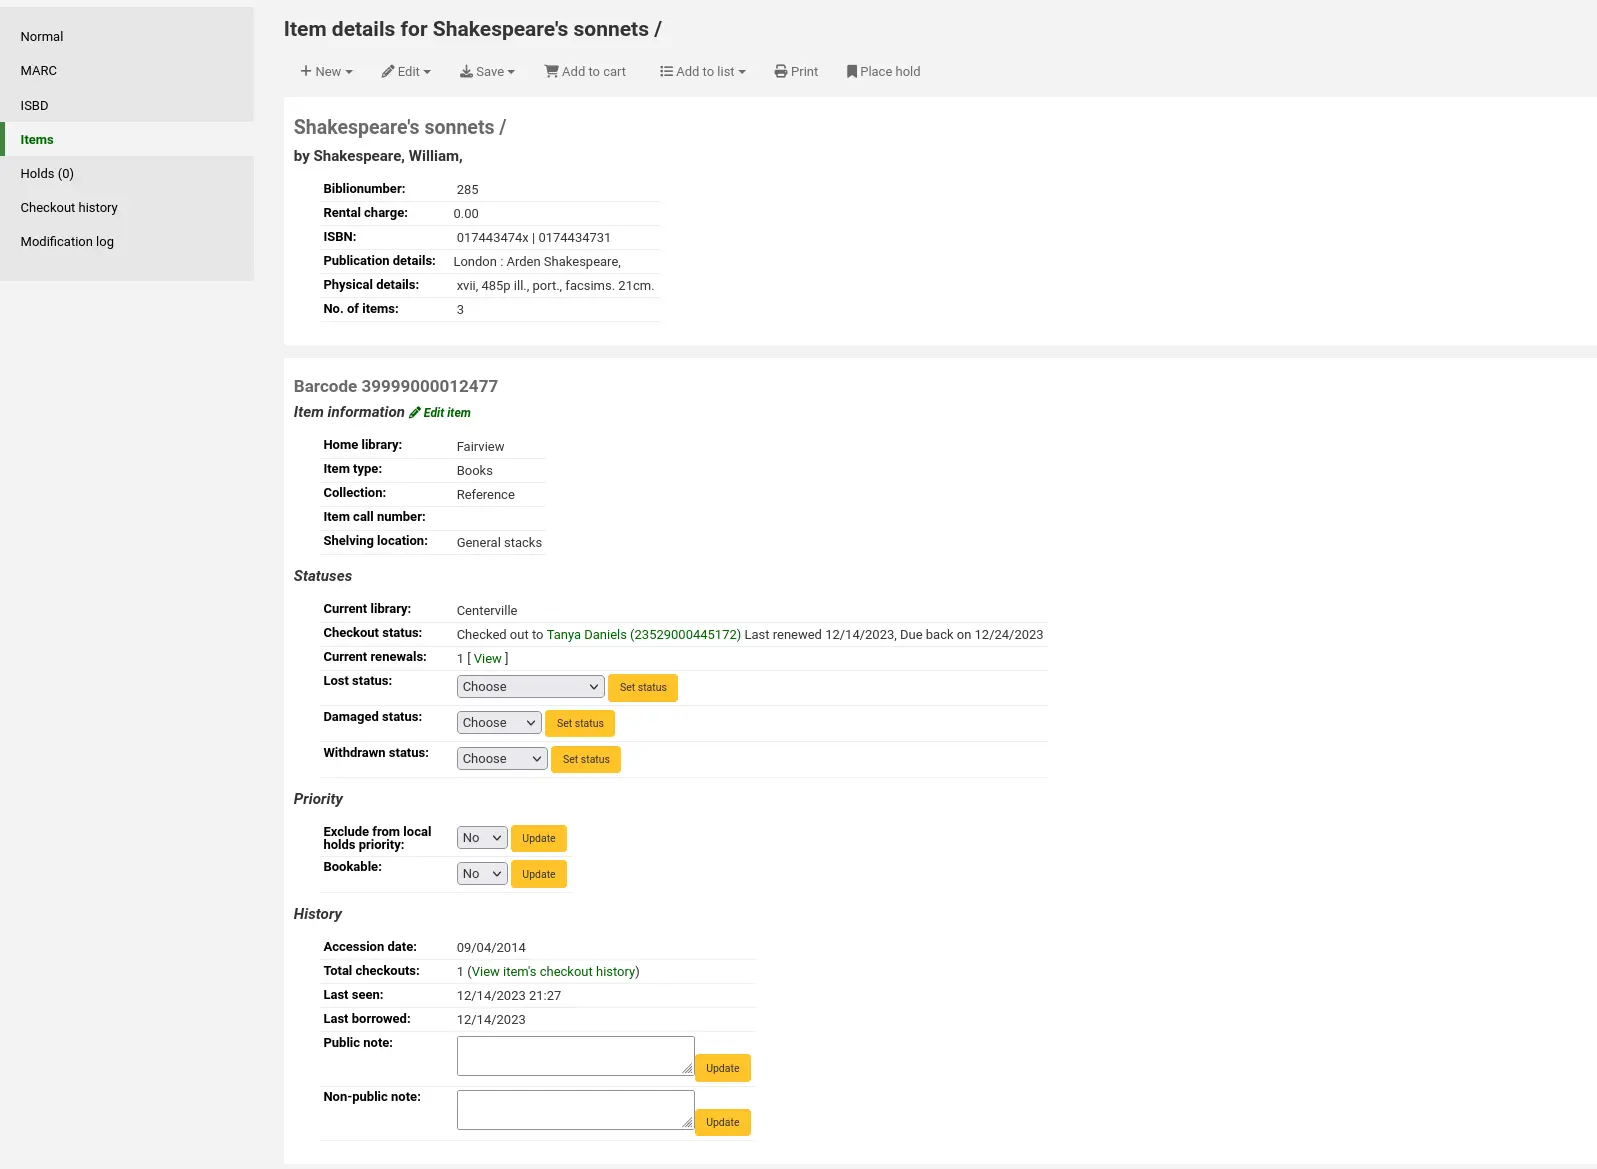
Informations sur l’exemplaire
A gauche de chaque notice bibliographique se trouve l’onglet Exemplaires pour visualiser les informations de l’exemplaire.
Clicking that tab will give you basic information about the items.
The “Item information” section shows basic information about the item such as the home library, item type, collection, call number, copy number, shelving location, replacement price, and accompanying materials.

The “Statuses” section shows the current status of the item. If the item is on loan, the loan details are displayed. If the item was renewed, you can click “View” to see the details of any renewals, which include the date, the staff member who renewed the checkout, as well as if it was done manually or automatically (through the automatic_renewals.pl cronjob).
You can also view and edit the status information in this section. If an item is marked lost, damaged or withdrawn, you will see the date that status was applied.

The “Priority” section shows whether the item is excluded from local holds priority and whether a booking can be placed on this item.

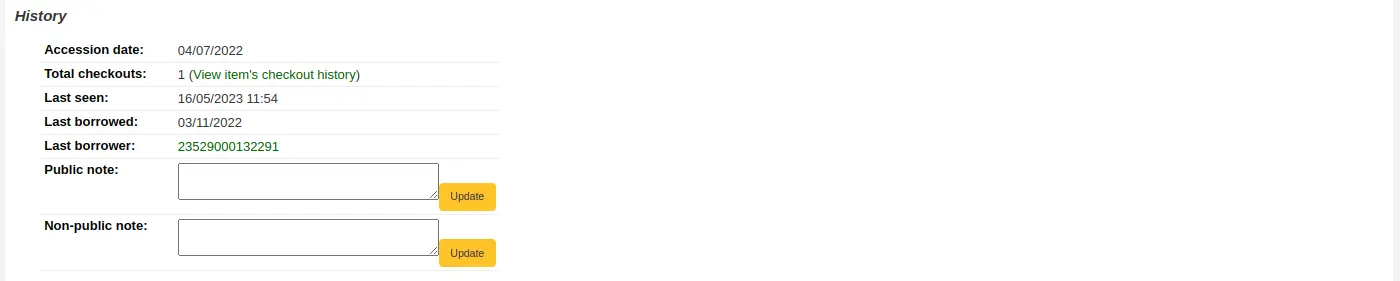
The “History” section shows information about the acquisition and check out history of the item. If you ordered the item through the acquisitions module, this section will include the order date, vendor, accession (receiving) date and invoice number. Clicking the order or accession date will bring you to the acquisitions information for that item. This section also shows the number of total checkouts (with a link to see the checkout history), the date and time the item was last seen, the date it was last borrowed and the last patron to borrow this item (if the StoreLastBorrower system preference is enabled), if the item was paid for by the patron, the volume or serial number information, and public and non-public notes.
Ajouter des images de couverture pour les exemplaires
Note
Only staff with the upload_local_cover_images) permission as well as the edit_items permission (or the superlibrarian permission) will be able to add cover images to items.
Si vous avez paramétré OPACLocalCoverImages ou LocalCoverImages sur “Afficher”, vous pouvez téléverser des images de couvertures pour des notices d’exemplaires à partir de l’option “Télécharger une image” du bouton “Modifier”, à droite du tableau des exemplaires.
Cliquez sur Choisir un fichier pour trouver le fichier image sur votre ordinateur, puis sur Télécharger fichier.
Sur l’écran suivant, vous avez la possibilité de remplacer des images existantes. Vous pouvez cliquer sur Traiter les images.
L’image s’affichera dans une colonne Image de couverture dans le tableau des exemplaires.
Pour supprimer une image, cliquez sur l’image dans le tableau des exemplaires. Vous verrez une copie grisée de l’image avec l’option supprimer.
Déplacement d’exemplaires
Note
Staff members must have the edit_items permission (or the superlibrarian permission) in order to be able to move items.
Items can be moved from one bibliographic record to another using the “Attach item” option.
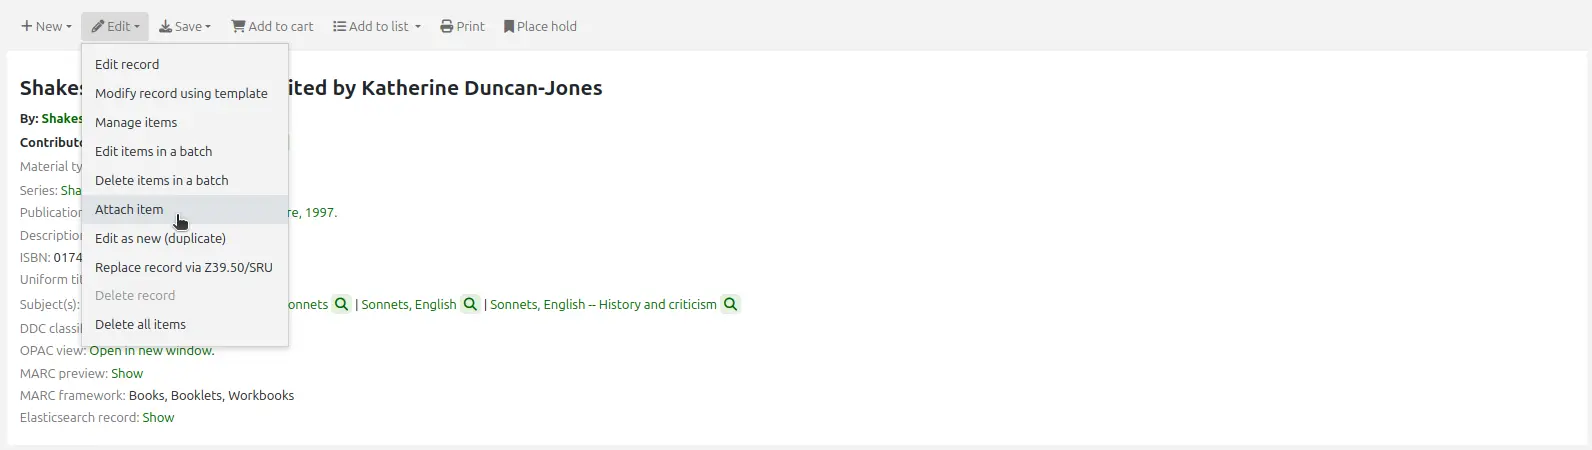
Rendez-vous sur la notice bibliographique à laquelle vous souhaitez rattacher l’exemplaire et sélectionnez “Attacher un exemplaire” dans le menu “Modifier”.
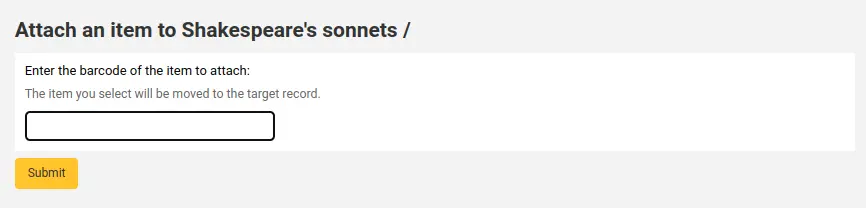
Simply enter the barcode for the item you want to move and click “Submit”.
S’il s’agit du dernier exemplaire rattaché à la notice bibliographique, un bouton vous proposera de supprimer la notice d’origine.

If you want to move all items to a new record creating only one bibliographic record you can use the merge records tool instead.
Supprimer des exemplaires
Note
Staff members must have the edit_items permission (or the superlibrarian permission) in order to be able to delete items.
There are many ways to delete item records.
If you only need to delete one item, you can go to the record’s details page, click the “Edit” button at the top and choose “Manage items”.
Click the “Actions” button next to the item to delete, and choose the “Delete” option. If the item is not checked out, it will be deleted.

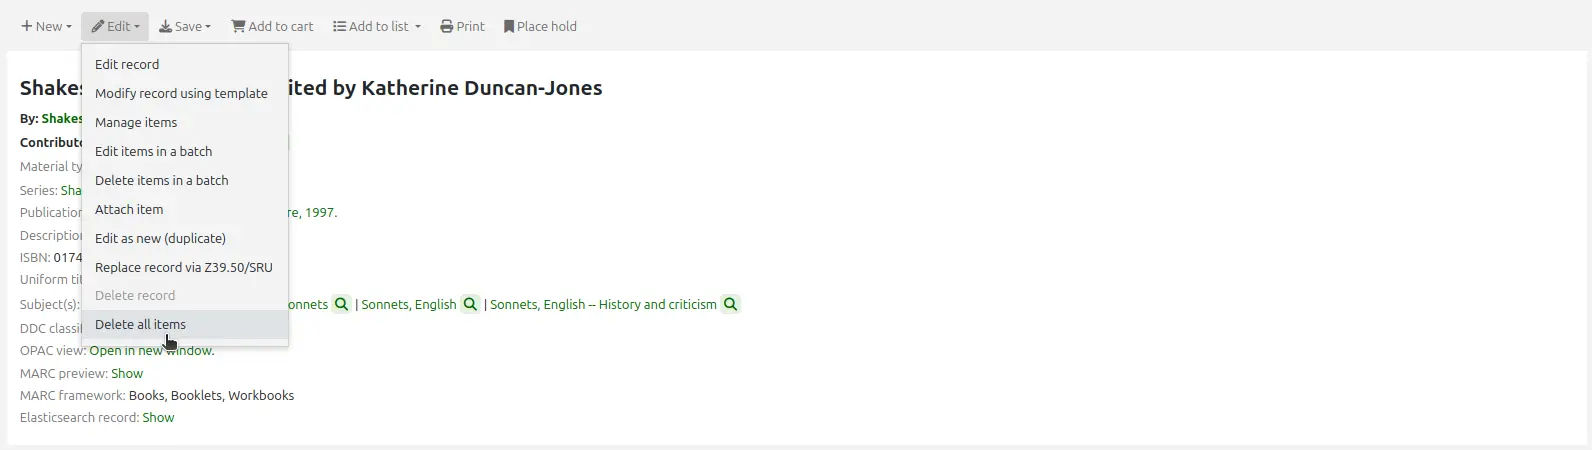
If all the items attached to the record are not currently checked out, from the record’s details page, click the “Edit” button at the top and choose “Delete all items”. This will delete all the items from the record.
Note
Staff members must have the delete_all_items permission (or the superlibrarian permission) in order to be able to delete all of a record’s items.
You can also choose the option “Delete items in a batch”, from the same “Edit” button to delete all the items from the record.
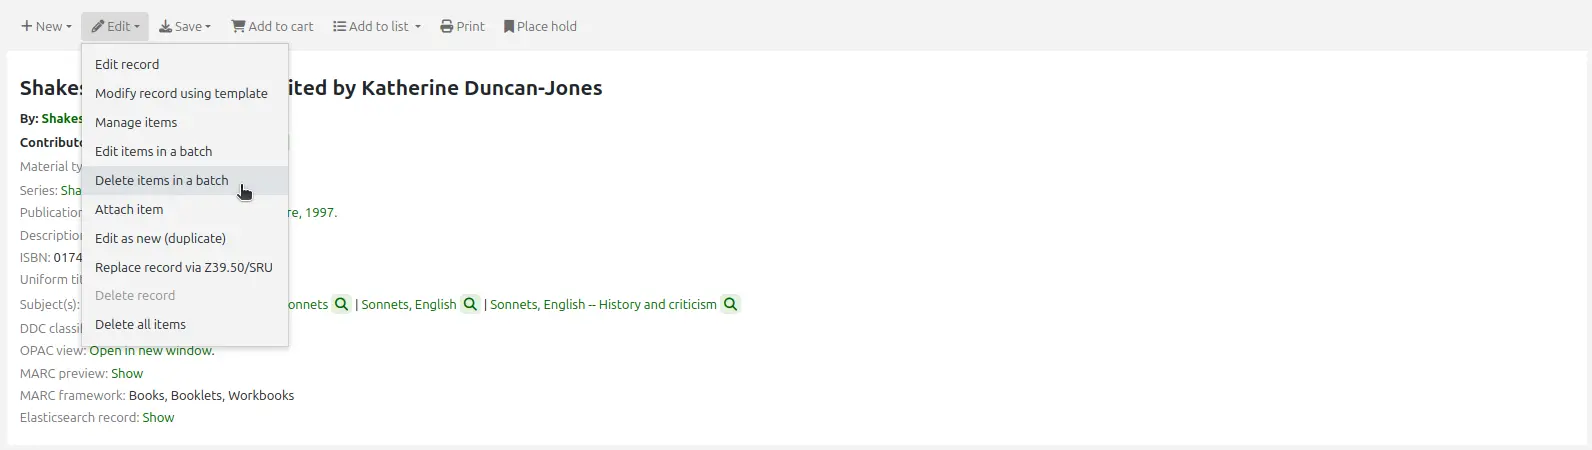
This will open up the batch item deletion tool where you will be able to deleted all of the record’s items as a batch.
To delete several items from a record, but not necessarily all of them, you can check the items to delete and click “Delete selected items” at the top of the list.
This will open up the batch item deletion tool where you will be able to deleted all of the selected items as a batch.
Finally, you can use the batch delete tool to delete a batch of items from different records.
Batch deleting items
Note
Only staff with the items_batchdel permission (or the superlibrarian permission) will have access to this tool.
Get there: More > Cataloging > Batch editing > Batch item deletion
This tool will allow you to delete a batch of item records from Koha.
From the tool, choose to either upload a file of barcodes or itemnumbers, or scan item barcodes one by one into the box below the upload tool.
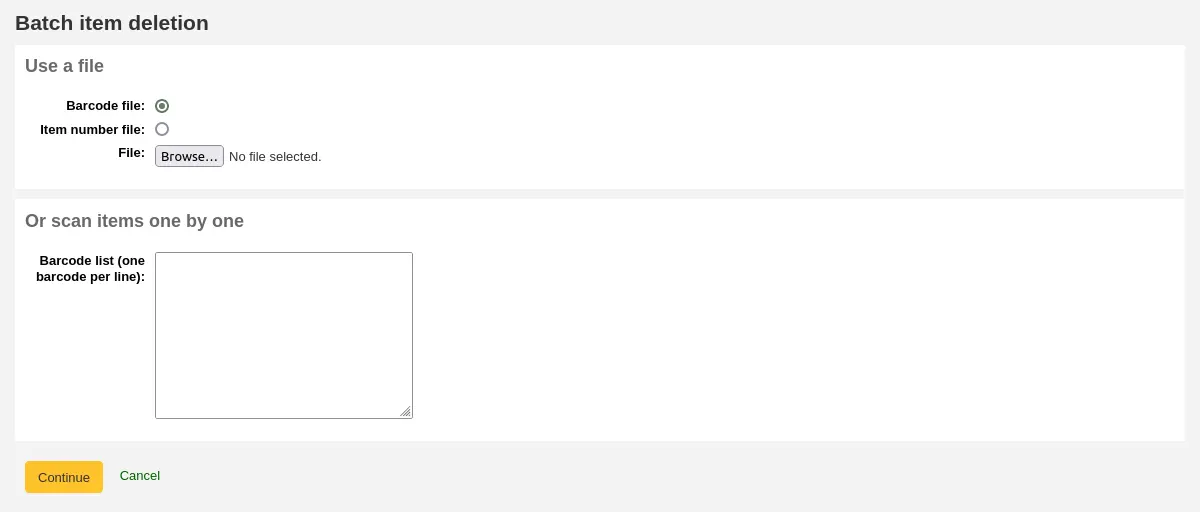
Once the file is uploaded or the barcodes listed, click “Continue.”
You will be presented with a confirmation screen. From here you can uncheck the items you don’t want to delete. You can check the “Delete records if no items remain” box to delete the bibliographic record if the last item is being deleted.
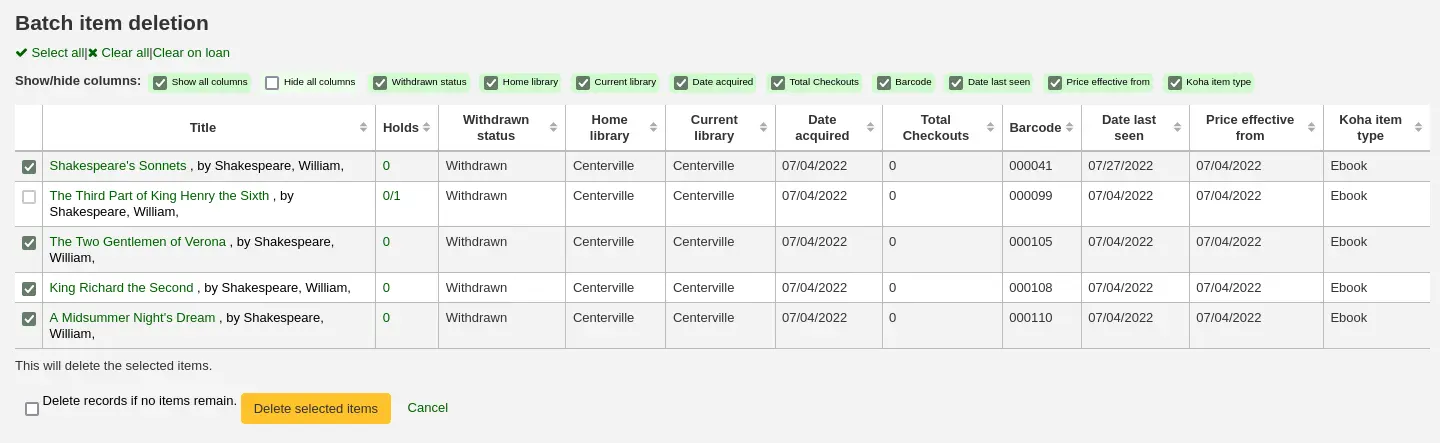
Note
Items that are the last item attached to a bibliographic record with one or more record-level holds will be automatically unchecked. You will need to delete the hold before deleting the item.
Items that are checked out will also be automatically unchecked. They will need to be checked in before they can be deleted.
If your file (or list of scanned barcodes) has more than 1000 barcodes, Koha will be unable to present you with a list of the items. You will still be able to delete them, but not able to choose which items specifically to delete or delete the bibliographic records.

Click “Delete selected items.”
Note
If the items are checked out the items will not be deleted.
The deletion job will be enqueued in the background jobs.

Pour voir le détail des suppressions, cliquez sur “Voir les détails de la tâche en file d’attente”.

To delete a new batch of items, click “New batch item deletion”.
Batch deleting items from the bibliographic record
The batch item deletion tool is also available from the bibliographic record details page.
From the bibliographic record details page, click the “Edit” button and choose the “Delete items in a batch” option.
This will open the batch item deletion tool for the items of the specific record.
Batch deleting items from a report
The batch item deletion tool is also available from reports results when the results contain itemnumbers.
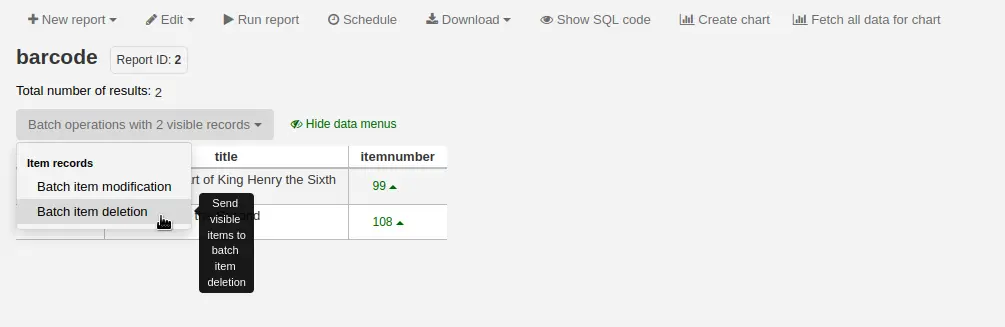
When the report contains the itemnumber, the option “Batch operations with X visible records” will automatically appear. This option contains batch item modification and batch item deletion.
By default, only 20 results are shown when running reports, therefore, the batch deletion will only be done on 20 results. If you have more results that you want to delete in a batch, make sure to change the number of results per page before choosing the batch operation.
Batch deleting items from the item search
Version
Cette option a été ajoutée à Koha dans sa version 23.11.
The batch item deletion tool is also available from the item search results.
Simply select items to be deleted from the results list, click “Batch operations”, and choose “Batch item deletion”.
Historique de prêts d’un exemplaire
Chaque notice bibliographique conserve l’historique de ses opérations de circulation (avec ou sans les informations relatives aux adhérents selon votre paramétrage). Mais chaque exemplaire a également sa propre page d’historique. Pour voir celle-ci, cliquez sur l’onglet Exemplaires de la notice que vous êtes en train de visualiser.
Sous le titre Historique, il y a un lien Voir l’historique des prêtes des exemplaires. En cliquant ce lien, la page historique des exemplaires s’affiche. Elle est sensiblement différente de l’historique de la notice bibliographique.
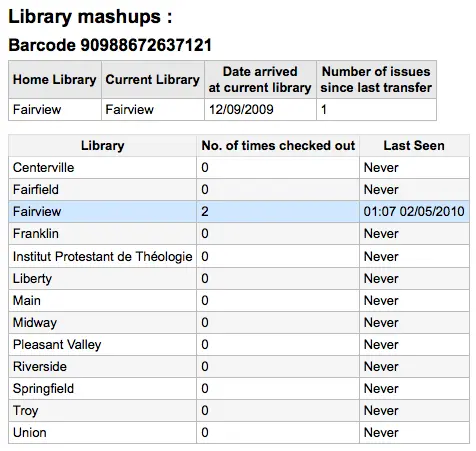
Modifications d’exemplaires par ancienneté
Get there: More > Cataloging > Automation > Automatic item modifications by age
This tool allows you to update item specific fields when an item reaches a certain age.
Note
Only staff with the items_batchmod permission (or the superlibrarian permission) will have access to this tool.
Note
The settings in this tool will be acted upon by the corresponding cron job.
If you haven’t created any rules, you will see the option to “Add rules” on the page. Click this button to create rules.

If you have rules already there will be a button that reads “Edit rules”. To create a new rule click the “Edit rules” button at the top of the page.

You will be brought to a page where you can edit existing rules or create a new rule.

Click “Add rule”.
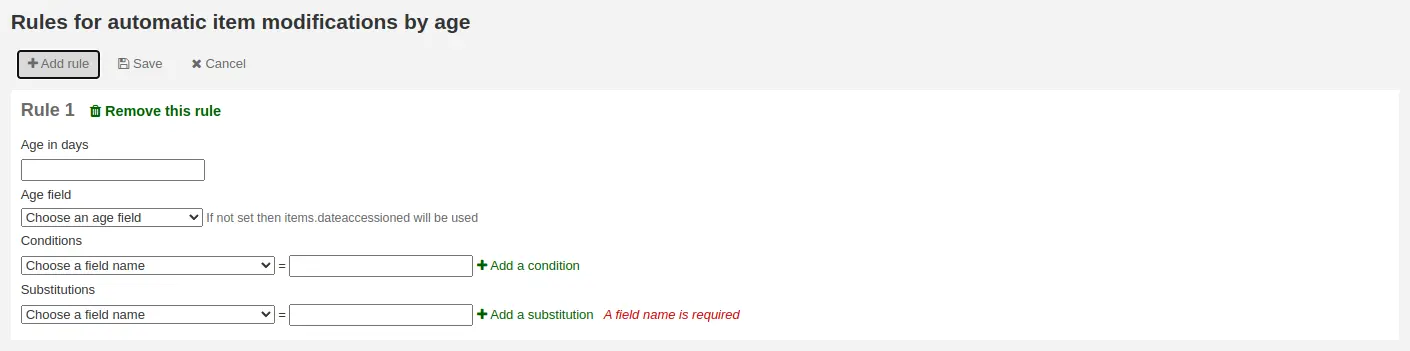
Fill out the form that appears to set the new rule:
Age in days: the age in days at which the item will update
Age field: the field on which the age is based
items.dateaccessioned (default): date of acquisition of the item; in MARC21, it is normally mapped to 952$d
items.replacementpricedate: date the replacement price is effective from; in MARC21, it is normally mapped to 952$w
items.datelastborrowed: date the item was last checked out; in MARC21, it is normally mapped to 952$s (not editable manually)
items.datelastseen: date of the last transaction made on the item; in MARC21, it is normally mapped to 952$r (not editable manually)
items.damaged_on: date on which the damaged status was set (not editable manually)
items.lost_on: date on which the lost status was set (not editable manually)
items.withdrawn_on: date on which the withdrawn status was set (not editable manually)
Conditions: what criteria is needed to trigger the update
Choose the field to check from the dropdown menu
Enter the value the field should have to trigger the update
If you need more than one condition, click “Add a condition”
Substitutions: what changes are made when the script runs
Choose the field to change from the dropdown menu
Enter the value the field should have after the update
If you need to do more than one change, click “Add a substitution”
Once you’re done, click the “Save” button to save the rule and go back to the main page, or click “Add rule” again to add another rule.
Stock rotation
Get there: More > Cataloging > Automation > Stock rotation
Note
This tool will only be available if the StockRotation system preference is enabled.
Note
Only staff with the stockrotation permission or subpermissions (or the superlibrarian permission) will have access to this tool.
Stock rotation helps to spread resources more fairly among library branches and allows patrons to see a wider range of titles.
Items are popular while they are new at a particular branch. However, their use often tails off over time. This tool empowers librarians to automate the movement of items on to another branch before usage declines and thereby extend the items” useful life.
Library staff create rotation plans (rotas) and then assign items to them. A cronjob is then used to cycle these items round the specified libraries on the rotation plan, moving them to the next stage after the prescribed period of time has passed at the current stage.
Note
For this tool to work as intended, the stockrotation.pl cron job needs to be configured to run on a daily basis.
Email notices may be used to provide the libraries with a list of items on the shelf to be put in transit to the next library. If an item is on loan at the time it should be transferred, an alert will be displayed when it is next returned.
Note
The notice used is SR_SLIP. It can be customized with the Notices and slips tool.
From the stock rotation page you can add new rotation plans (rotas) and see a summary of your currently configured rotas. For each existing rota, there are buttons to: edit, manage stages and items, activate or deactivate, delete.
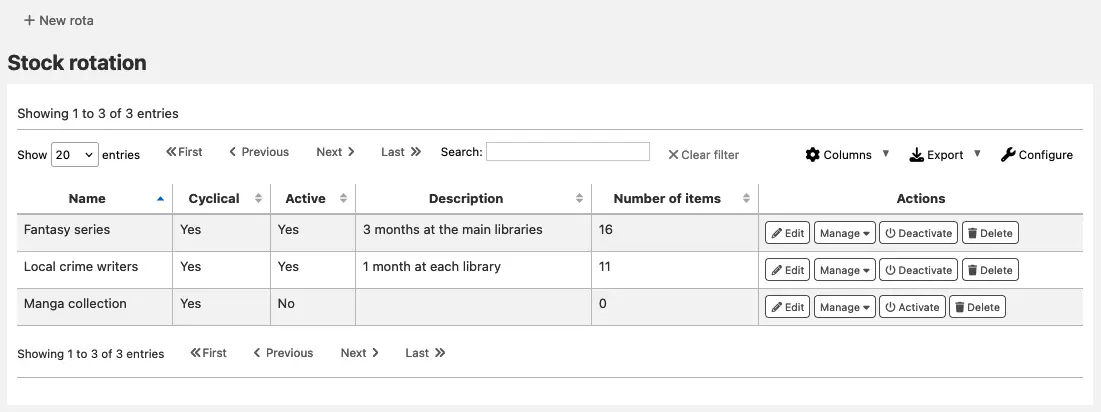
Note
You can customize the columns of this table in the Table settings section of the Administration module (table id: stock_rotation).
Creating a new rota
Note
Only staff with the manage_rotas permission (or the superlibrarian permission) will be able to create new rotas.
To create a new rota (rotation plan), click the “New rota” button on the main stock rotation page.
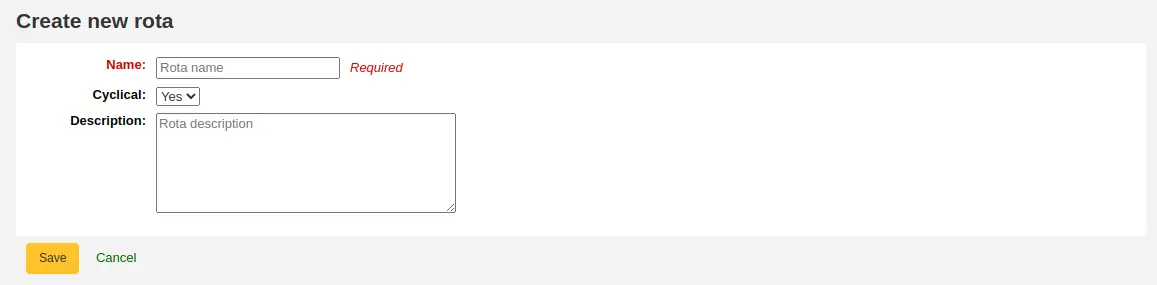
Name: enter a name or code to identify the rota
Cyclical:
No: items will remain at the last library on the rotation plan upon reaching the end of the rota
Yes: items will continue to rotate, returning back to the first library on the rotation plan once they have completed their allotted time at the last library, indefinitely until manually removed from the rota
Description: optionally add an expanded description of the rota for display in summary views
Once the rota is complete with stages and items, activate it to begin cycling the items through the rotation: on the stock rotation summary, click the “Activate” button next to the rota.
Adding stages to a rota
Note
Only staff with the manage_rotas permission (or the superlibrarian permission) will be able to add stages to rotas.
Once the rota is created, you can add stages to it. Stages are a length of time that an item will stay at a particular library before moving on.
From the stock rotation summary page, click the “Manage” button and choose the “Stages” option.
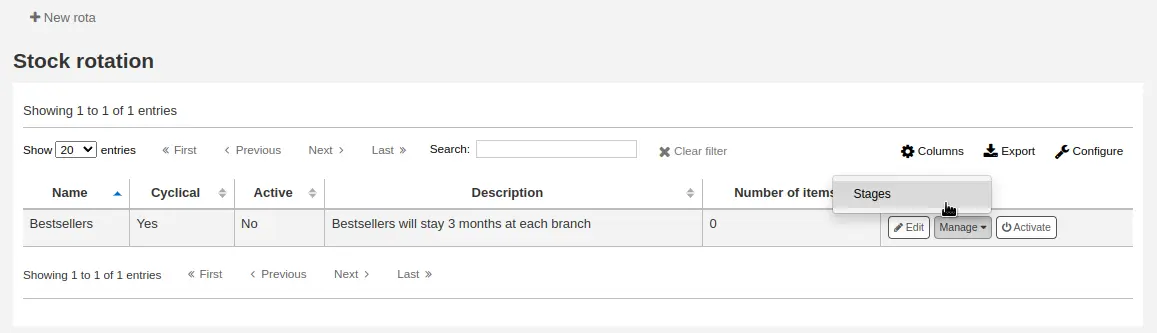
Click the “Add stage” button.
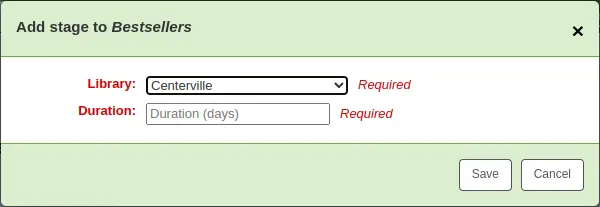
Library: choose the library this stage is for
Duration: enter the number of days the item should stay at this library before moving on
Cliquer sur “Enregistrer”.
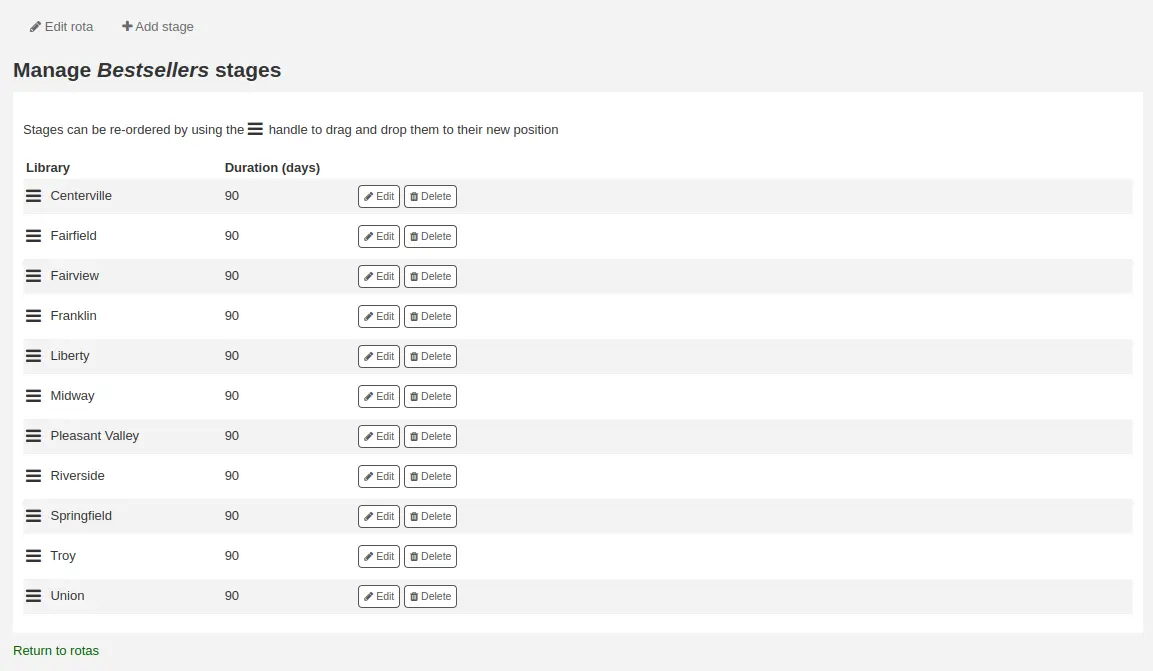
Once all the stages have been added, you can move them around using the handles on the left to change the order.
Adding items to a rota
Note
Only staff with the manage_rota_items permission (or the superlibrarian permission) will be able to add items to existing rotas.
Once a rota has stages, items can be added to it.
From the stock rotation summary page, click the “Manage” button and choose the “Items” option.
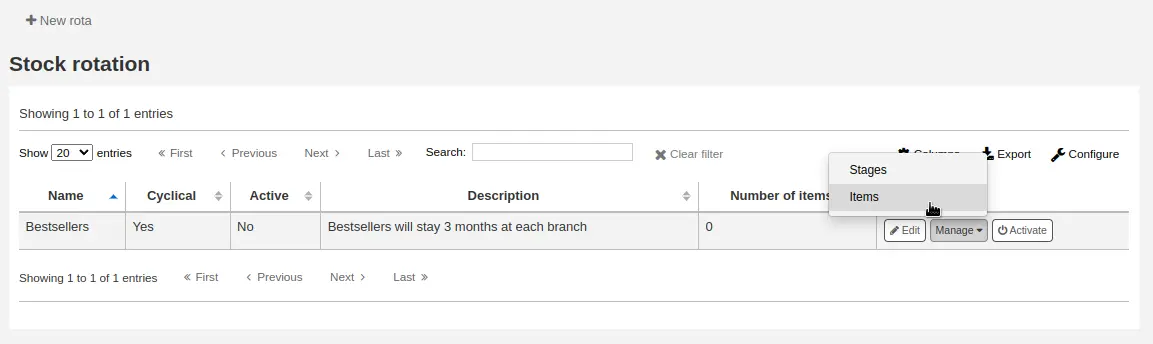
Click the “Add items” button.
Items can be added to a rota individually (by barcode) or in bulk (via the upload of a line delimited barcode file).
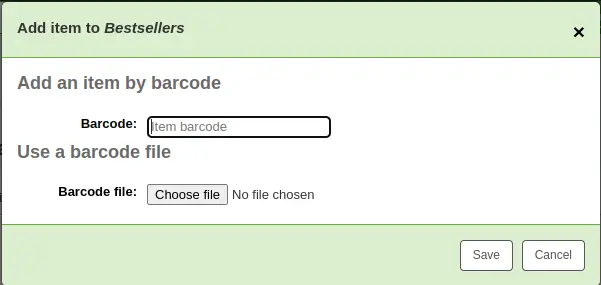
Items can also be added to a rota through the staff interface catalog, in the “Rota” tab on the left when viewing a detailed record.
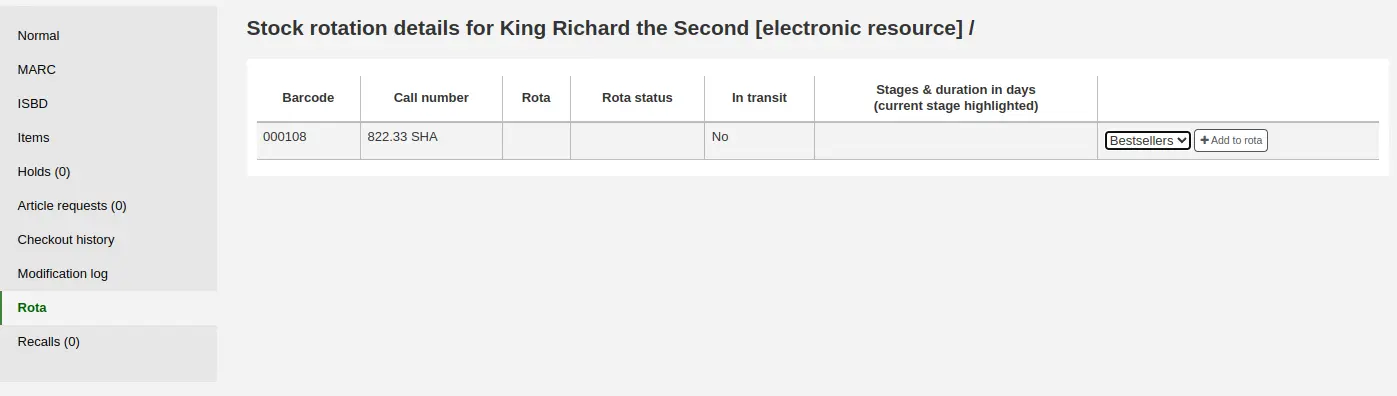
Choose the rota to add the item to and click “Add to rota”.
Items can also be automatically added to rotas at acquisition time by using the LRP (Library Rotation Plan) field in EDI.
On the Manage > Items page, there will be a summary of all items on the rota with their current location. You have options to immediately progress items, mark items as “in demand” and remove an item from rotation.
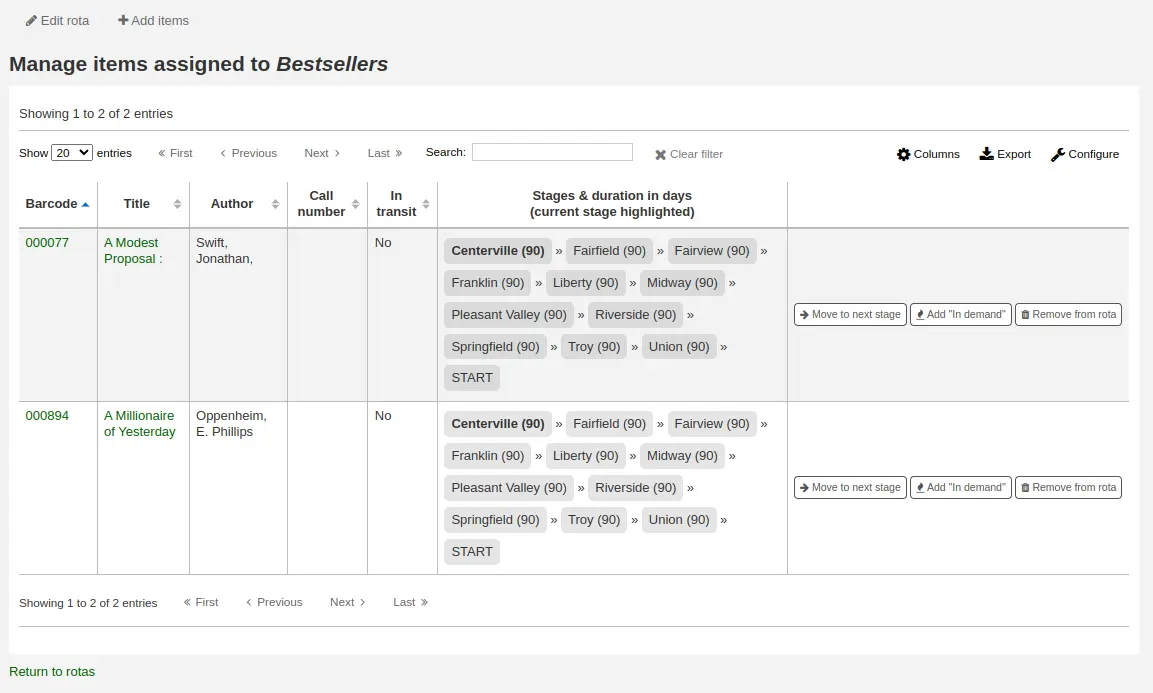
Note
You can customize the columns of this table in the Table settings section of the Administration module (table id: stock_rotation_manage_items).
Move to next stage: progress the item directly to the next stage even if the duration at the current stage is not complete.
Add « In demand »: double the duration the item will stay at it’s current stage compared to what is set in the rota. This is often used for items that are found to be unexpectedly popular at a particular library.
Remove from rota: remove the item from the rota.
Individual items can also be managed from the staff interface catalog, in the “Rota” tab.

Créer des étiquettes
Note
Seuls les bibliothécaires avec la permission label_creator permission (ou la permission superlibrarian) auront accès à cet outil.
Aller à : Plus > Catalogage > Outils > Créateur d’étiquette
L’outil de créateur d’étiquettes vous permet d’utiliser des formats et modèles que vous créez pour imprimer une grande variété d’étiquettes, incluant les codes-barres. Voici certaines des fonctionnalités de l’outil de créateur d’étiquettes :
Formats d’étiquettes personnalisés
Modèles d’étiquettes personnalisation pour impression d’étiquettes
Création et gestion de lots d’étiquettes
Export d’un ou de plusieurs lots
Export d’un ou de plusieurs étiquettes à l’intérieur d’un lot
Export des données d’étiquettes dans un des trois formats suivants :
PDF - Lisible par un lecteur de PDF standard, les étiquettes sont imprimables directement sur une imprimante
CSV - Export des données d’étiquettes après application du format choisi permettant aux étiquettes d’être importées dans une grande variété d’applications
XML - Inclus comme un format d’export alternatif
Format d’étiquette
Aller à : Plus > Catalogage > Outils > Créateur d’étiquettes > Gérer > Formats
Un format est utilisé pour définir les champs que l’on veut voir apparaître sur les étiquettes.
Ajouter un format
Pour ajouter un nouveau format, cliquez sur le bouton “Ajouter” en haut de l’outil de création d’étiquette et choisissez “Format”.
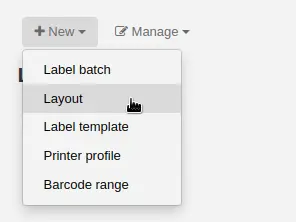
En utilisant le formulaire qui apparaît, choisissez ce qui apparaît sur vos étiquettes.
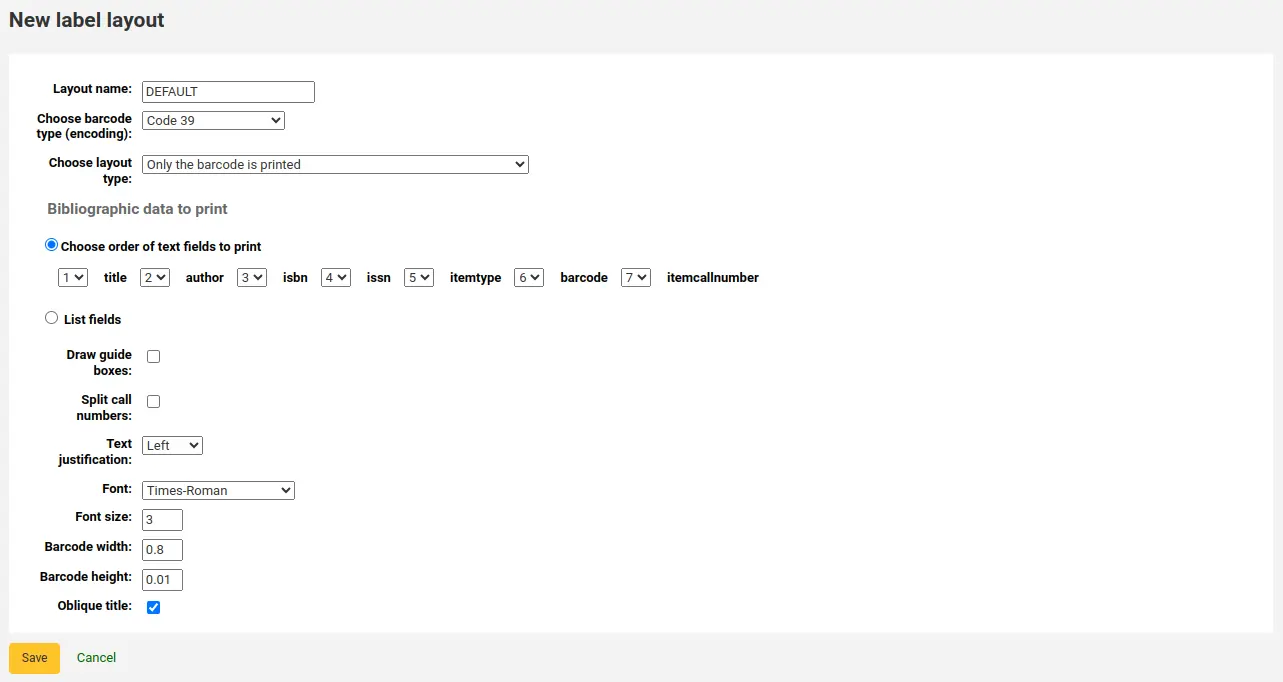
“Nom du format” : Entrez un nom pour le format qui vous permettra de l’identifier par la suite.
“Choisissez le type de code à barres (encodage)” : si c’est une étiquette avec code barre, choisissez l’encodage (Code 39 est le plus courant)
“Choisir le type de présentation” : choisissez le type d’information à imprimer sur l’étiquette.
Seules les données bibliographiques sont imprimées : seules les informations bibliographique apparaîtrons sur l’étiquette (cela peut être utilisé pour les étiquettes sur la tranche par exemple)
Note
Les données bibliographiques incluent tous les champs de données qui peuvent être liés à votre grille de catalogage MARC.
Le code à barres précède les données bibliographiques : le code à barres apparaîtra au sommet de l’étiquette et les informations bibliographiques en dessous
Les données bibliographiques précèdent le code à barres : les informations bibliographiques apparaîtrons au sommet de l’étiquette et le code à barres en dessous
Code à barres et données bibliographiques sont imprimés sur des étiquettes alternatives : Les informations bibliographiques apparaîtront sur une étiquette et le code à barres sur l’étiquette suivante, en alternance pour chaque exemplaire
Only the barcode is printed: only the barcode will appear on the label
“Bibliographic data to print”: if you chose to print bibliographic data on the label, choose from the preset list of fields which fields should appear on the label and in which order. Alternatively, you can click on “List fields” and enter your own data.

Note
In “List fields”, you can specify any database field from the following tables (use the database structure at https://schema.koha-community.org to find the field names):
items
biblioitems
biblio
branches
You can also specify MARC subfields as a 4-character tag-subfield string, for example 254a for the title field in MARC21.
You can also enclose a whitespace-separated list of fields to concatenate on one line in double quotes, for example « 099a 099b » or « itemcallnumber barcode ».
Finally you can add in static text strings in single-quote, for example “Some static text here.”
“Draw guide boxes”: choose if guidelines are printed around each label (this is useful when first setting up the label creator to check alignment with your label sheets)
“Split call numbers”: choose if call numbers should be split (usually used on spine labels)
Note
Call number splitting rules are managed under Administration > Classification sources.
“Text justification”: choose the text alignment (left, center or right)
“Font”: choose the font type
Font type choices are currently limited to:
Times-Roman (regular, bold, italic, or bold-italic): a serif font type
Courier (regular, bold, oblique (italic), or bold-oblique (bold-italic)): a monospace font type
Helvetica (regular, bold, oblique (italic), or bold-oblique (bold-italic)): a sans-serif font type
“Font size”: enter the font size in points
“Barcode width”: when printing barcodes, enter the width of the barcode as a fraction of the label width itself. For example, 0.8 means the barcode will take up 80% of the label length-wise.
- “Barcode height”: when printing barcodes, enter the height of the barcode as
a fraction of the label height.
“Oblique title”: choose if the title should be italicized
Click “Save” to save the new layout.
After saving, your layouts will appear under Manage > Layouts.
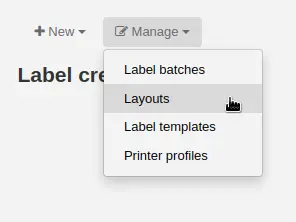
Editing a layout
To edit an existing layout, click on the “Manage” button at the top of the label creator tool and choose “Layout”.
In the table of currently available layouts, click the “Edit” button next to the layout you want to edit.
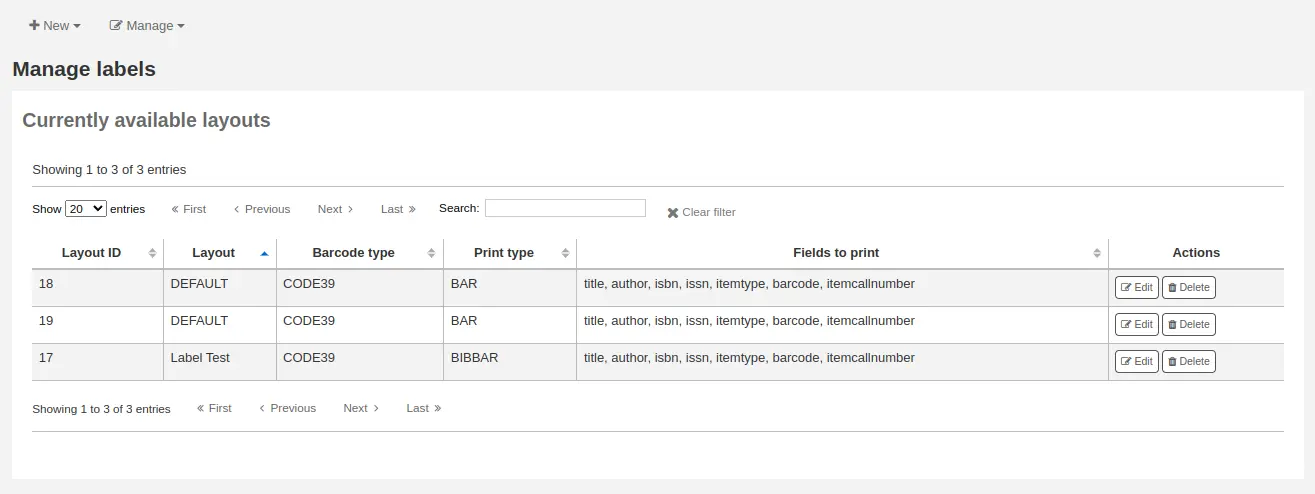
Change the necessary values and click “Save”.
Deleting a layout
To delete an existing layout, click on the “Manage” button at the top of the label creator tool and choose “Layout”.
In the table of currently available layouts, click the “Delete” button next to the layout you want to delete, and confirm the deletion.
Label templates
Get there: More > Cataloging > Tools > Label creator > Manage > Label templates
A template is based on the label/card stock you are using. This might be Avery 5160 for address labels, Gaylord 47-284 for spine labels or Avery 28371 for your patron cards, just to give a couple of examples. These labels will include all of the information you will need for setting up in Koha. This information may be on the packaging, on the vendor’s website or it can be measured manually.
Adding a template
To add a new template, click on the “New” button at the top of the label creator page and choose “Label template”.
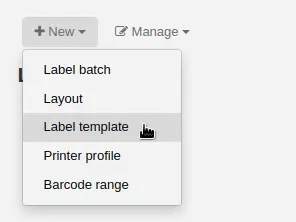
Using the form that appears you can define the template for your sheet of labels or cards.
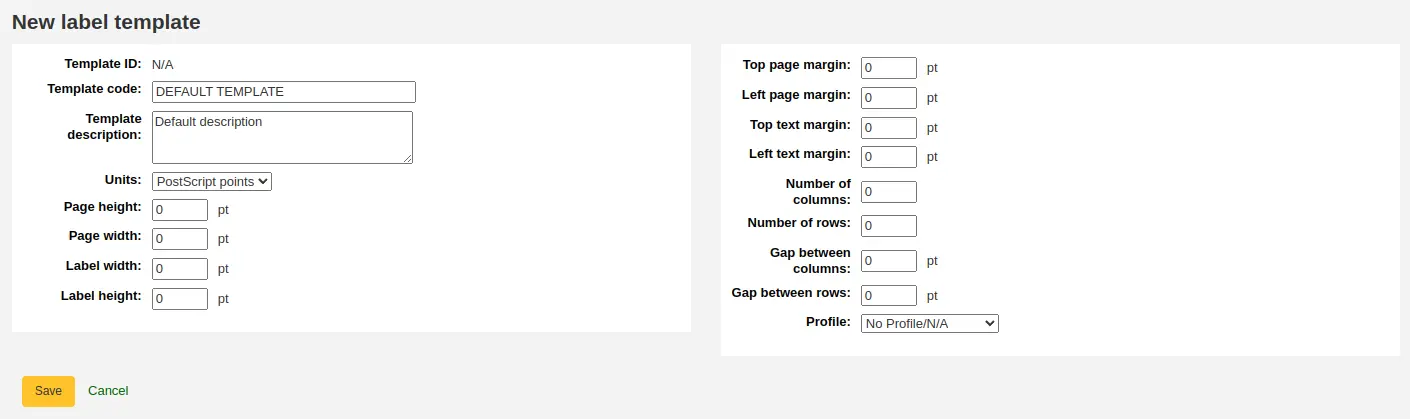
“Template ID”: this will be automatically generated after saving your template, this is simply a system-generated unique id
“Template code”: enter a code for the template, the code should be something you can use to identify your template on a list of templates
“Template description”: use this field to add additional information about the template
“Units”: choose which measurement scale you’re going to be using for the template. This should probably match the unit of measurement used on the template description provided by the product vendor.
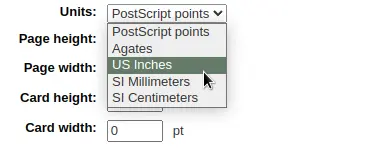
The measurements, number of columns and number of rows can be found on the packaging, on the vendor’s website or they can be measured manually.
Page height: height of the page
Page width: width of the page
Label width: width of the label
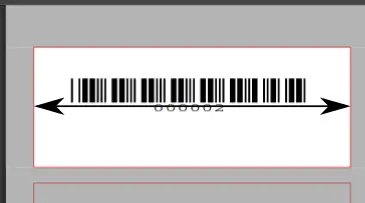
Label height: height of the label
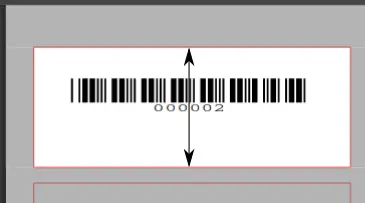
Top page margin: height between the top of the page and the top of the first row of labels
Left page margin: width between the left side of the page and the left side of the first column of labels
Top text margin: height between the top of the label and the top of the first line of text

Left text margin: width between the left side of the label and the start of the text
Note
If you do not supply a left text margin in the template, a 3/16 » (13.5 point) left text margin will apply by default.
Number of columns: number of columns of labels in a page, or number of labels per row
Number of rows: number of rows of labels in a page, or number of labels per column
Gap between columns: width between two columns of labels
Gap between rows: height between two rows of labels
A profile is a set of « adjustments » applied to a given template just prior to printing which compensates for anomalies unique and peculiar to a given printer (to which the profile is assigned).
Before picking a profile try printing some sample labels so that you can easily define a profile that is right for your printer/template combination.
After finding any anomalies in the printed document, create a profile and assign it to the template.
Click “Save” to save the new template.
After saving, your templates will appear under Manage > Label templates.
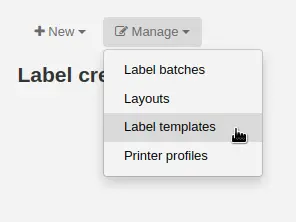
Editing a template
To edit an existing template, click on the “Manage” button at the top of the label creator page and choose “Label template”.
In the table of currently available templates, click the “Edit” button next to the template you want to edit.
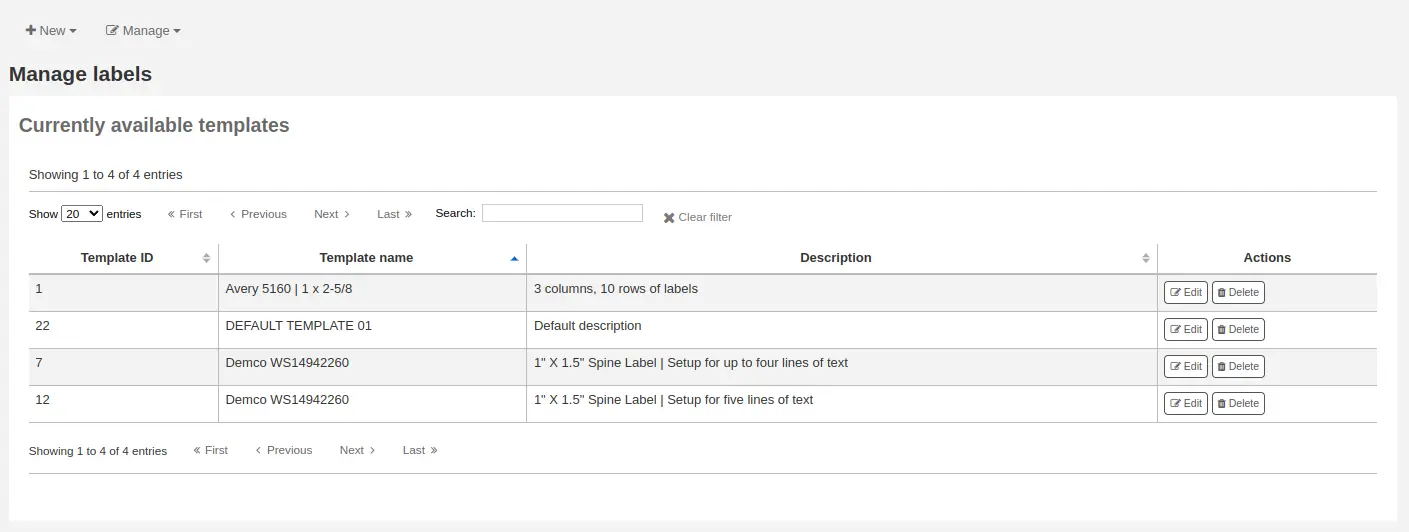
Change the necessary values and click “Save”.
Deleting a template
To delete an existing template, click on the “Manage” button at the top of the label creator page and choose “Label template”.
In the table of currently available layouts, click the “Delete” button next to the layout you want to delete, and confirm the deletion.
Printer profiles
Get there: More > Cataloging > Tools > Label creator > Manage > Printer profiles
A profile is a set of « adjustments » applied to a given template just prior to printing which compensates for anomalies unique and peculiar to a given printer (to which the profile is assigned). This means if you set a template up and then print a sample set of data and find that the items are not all aligned the same on each label, you need to set up a profile for each printer to make up for the differences in printing styles, such as the shifting of text to the left, right, top or bottom.
If your labels are printing just the way you want, you will not need a profile.
Adding a printer profile
To add a new profile, click on the “New” button at the top of the label creator tool and choose “Printer profile”.
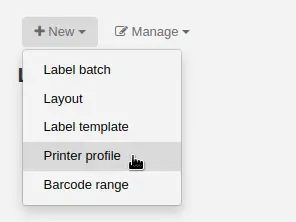
Using the form that appears you can create a profile to fix any problems with your template.
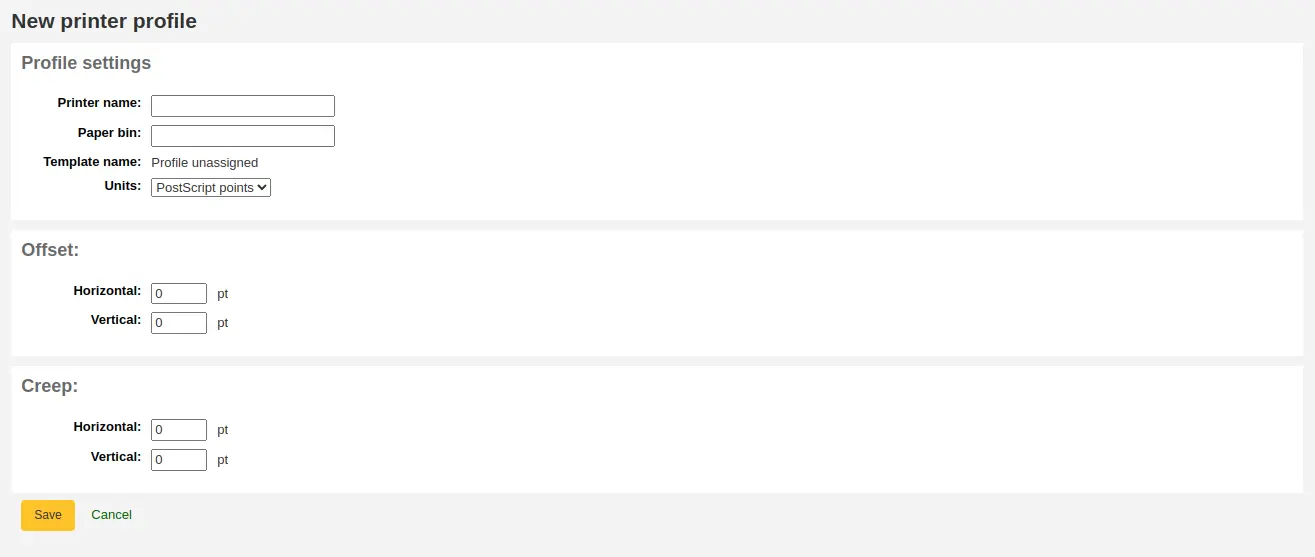
“Printer name”: enter a name for the printer. It does not have to match your printer exactly, it is only used for reference within Koha, so you can use the printer model number or you can call it “the printer on my desk”.
“Paper bin”: enter a name for the printer’s paper tray. Like the printer name, it is only used as a reference.
“Template name” will be filled in once you have chosen which template to apply the profile to in the template edit form
“Units”: define what measurement scale you’re using for your profile.
The next sections are used to adjust the label printing.
Offset describes what happens when the entire image is off center either vertically or horizontally
Creep describes a condition where the distance between the labels changes across the page or up and down the page
Note
For these values, negative numbers move the error up and to the left and positive numbers move the error down and to the right
Example: the text is .25 » from the left edge of the first label, .28 » from the left edge of the second label and .31 » from the left edge of the third label. This means the horizontal creep should be set to .03 » to make up for this difference.
Click “Save” to save the new profile.
After saving, your profiles will appear under Manage > Printer profiles.
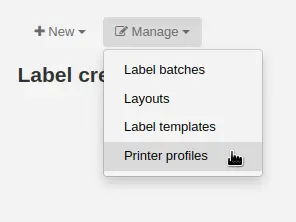
Once you have saved your new profile, you can return to the list of templates and edit the template that this profile is for.
Editing a printer profile
To edit an existing printer profile, click on the “Manage” button at the top of the label creator page and choose “Printer profiles”.
In the table of currently available printer profiles, click the “Edit” button next to the profile you want to edit.
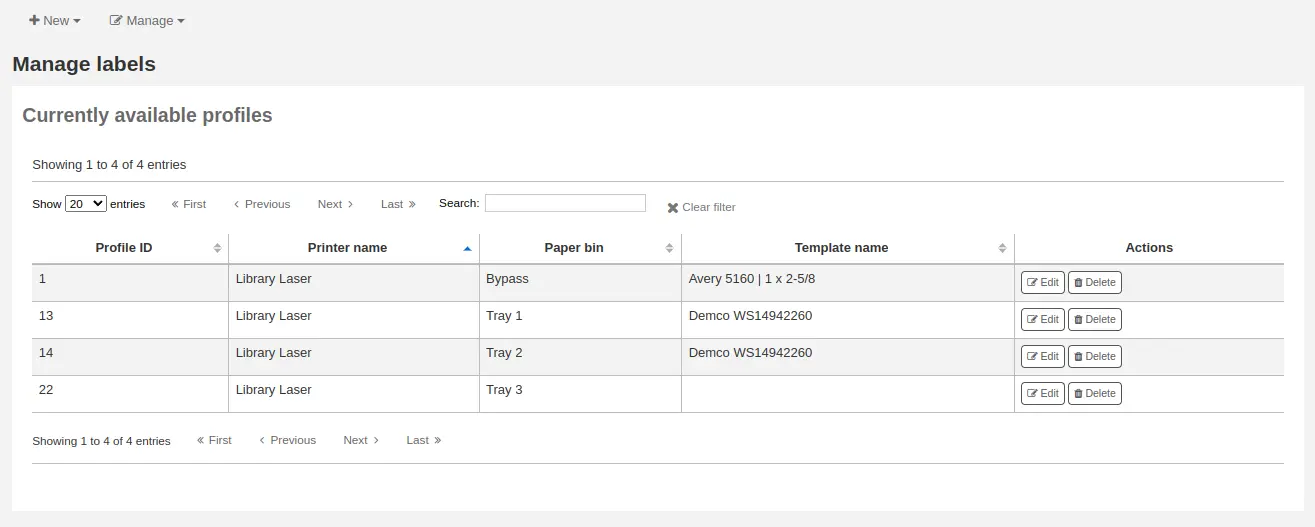
Change the necessary values and click “Save”.
Deleting a printer profile
To delete an existing printer profile, click on the “Manage” button at the top of the label creator page and choose “Printer profiles”.
In the table of currently available profiles, click the “Delete” button next to the profile you want to delete, and confirm the deletion.
Label batches
Get there: More > Cataloging > Tools > Label creator > Manage > Label batches
Batches are made up of the items for which you would like to print labels. Once in this tool you can search for the item records you would like to print out labels for.
Adding a label batch
Batches can be created in one of two ways. The first is to click the “Create label batch” link on the Staged MARC management page.
The other is to choose to create a new batch from the label creator tool
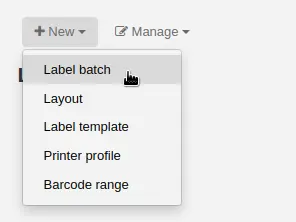
You will be brought to an empty batch with a box to scan barcodes or itemnumbers in to and an “Add item(s)” button at the bottom of the page.
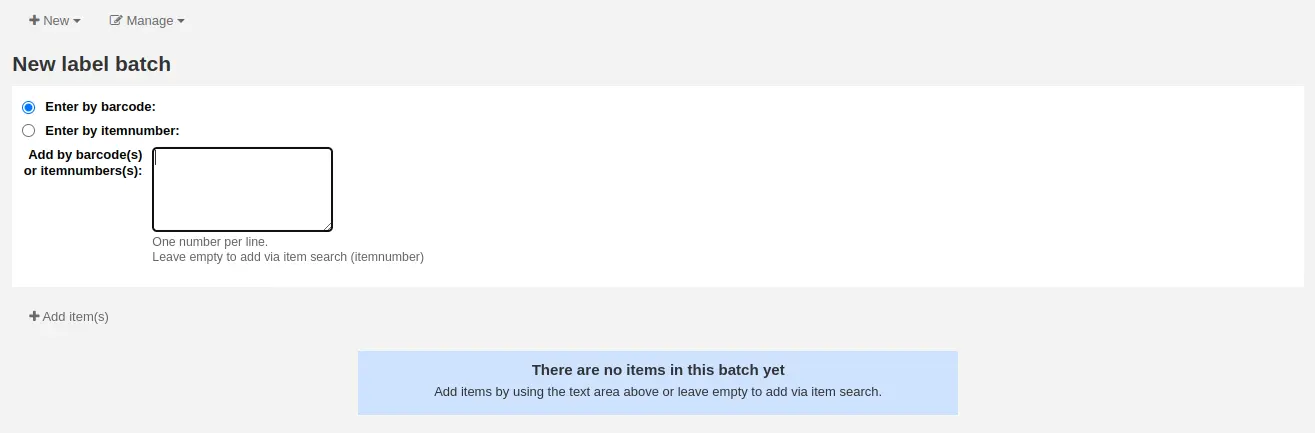
You can either scan barcodes in to the box provided and click the “Add item(s)” button or you can click the “Add item(s)” button with the barcodes box empty. Clicking “Add item(s)” with nothing in the barcodes box will open a search window for you to find the items you want to add to the batch.
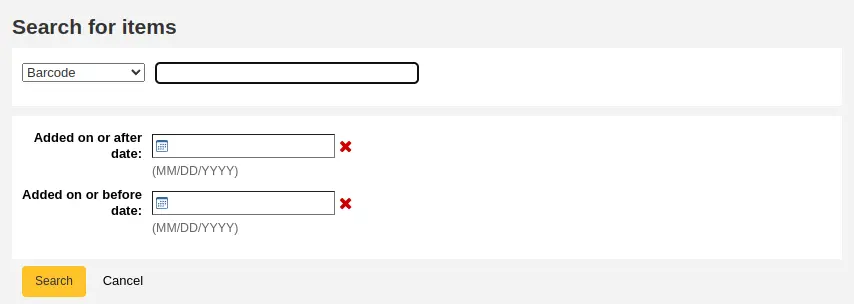
From the search results, click the check box next to the items you want to add to the batch and click the “Add checked” button. You can also add items one by one by clicking the “Add” link to the left of each item.
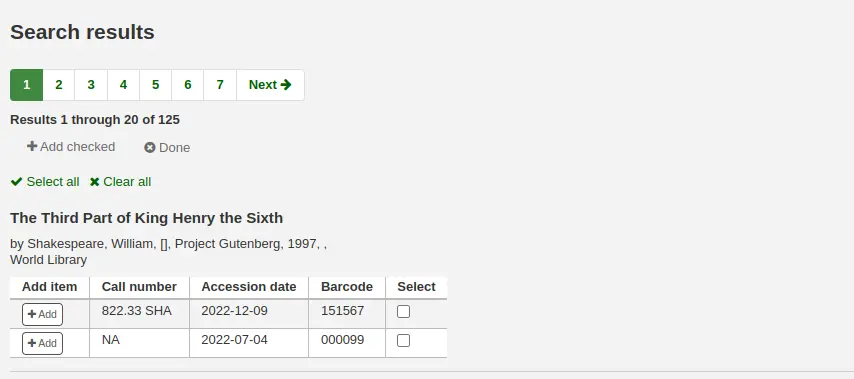
Once you have added all of the items click the “Done” button. Click again on the “Add item(s)” button to transfer the items from the barcode box to the batch. The resulting page will list the items you have selected.
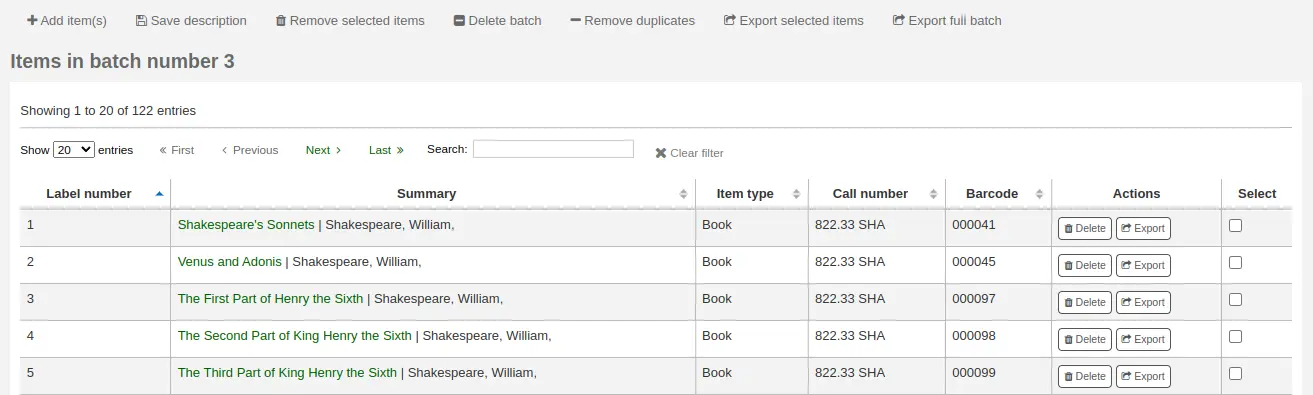
If some items were added more than once by accident, you can click the “Remove duplicates” button. This will check barcodes and remove any duplicates from the batch.
If you need to remove some items from the batch, select them by checking the box on the right and click the “Remove selected items” button.
Optionally, you can add a description to this batch, in case you need to find it later. Enter a description in the “Batch description” field and click “Save description”. This description will appear in the “Currently available batches” page.
To print your labels, click the “Export full batch” button. To print only some of the labels, select the items and click the “Export selected item(s)” button. To print only one label from the batch, click the “Export” button to the right of that item. Either way you will be presented with a confirmation screen where you can choose your template and layout. If you’re using a sheet of labels that is not complete, you can enter the starting label (labels are counted horizontally).
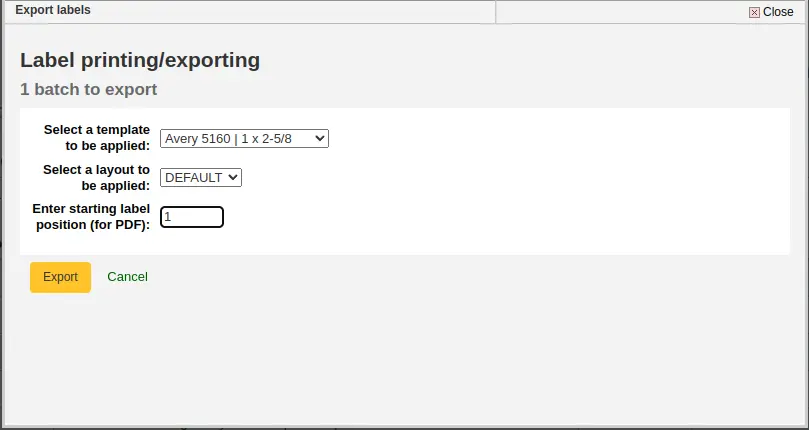
You will then be presented with three download options: PDF, CSV, or XML.
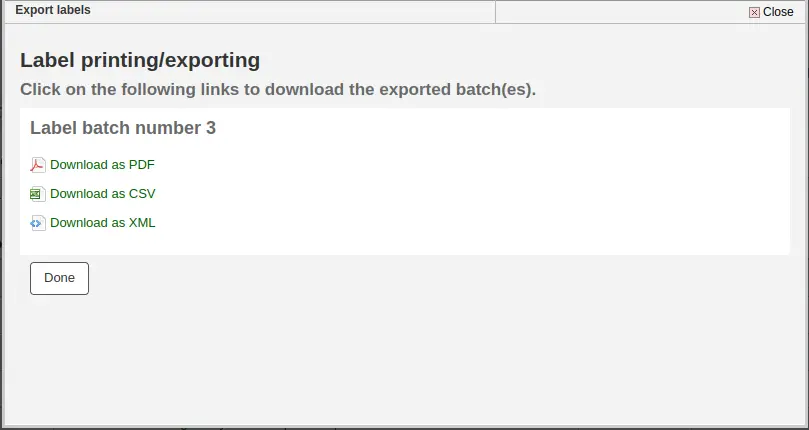
After saving your file, simply print on the blank labels you have in your library.
The batch is saved for later use, if needed, and is accessible under Manage > Label batches.
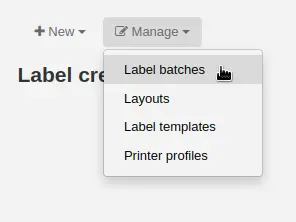
Editing a label batch
To edit an existing label batch, click on the “Manage” button at the top of the label creator page and choose “Label batches”.
You will access currently available batches.
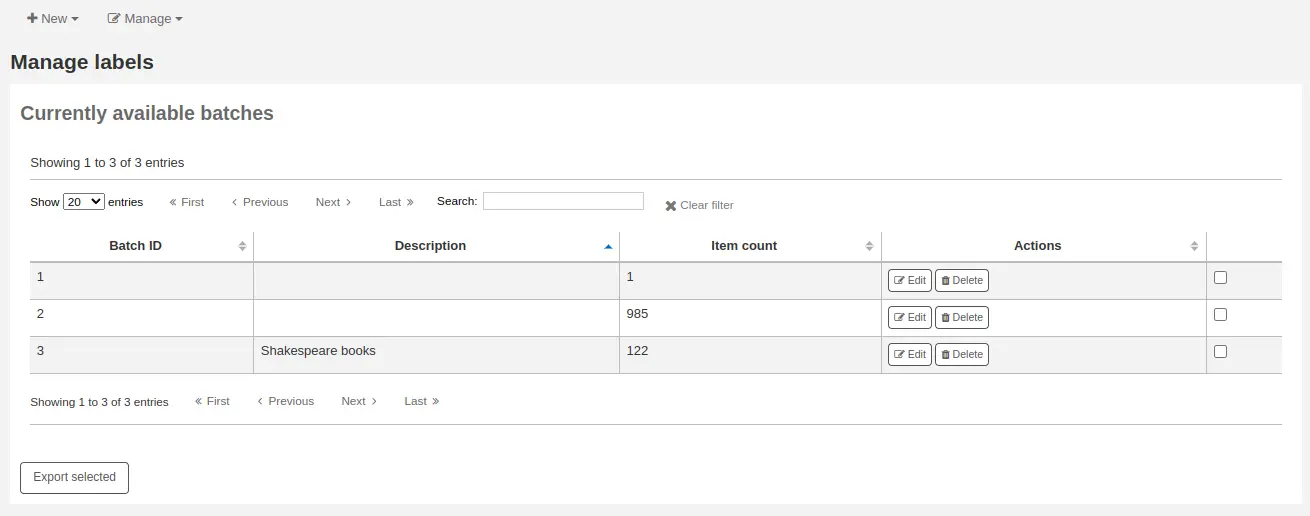
You can print one or more batches directly from this page by checking the box to the right of the batch or batches to print and clicking “Export selected”.
To edit a batch, click the “Edit” button next to the batch you want to edit.
Deleting a label batch
To delete an existing label batch, click on the “Manage” button at the top of the label creator page and choose “Label batches”.
You will access currently available batches.
Click the “Delete” button next to the batch you want to delete, and confirm the deletion.
You can also delete a batch from the batch page itself, by clicking the “Delete batch” button above the table of items in the batch.
Série de codes à barres
Get there: More > Cataloging > Tools > Label creator > New > Barcode range
If you want to print your barcode labels in advance, before even cataloging the items, you can choose to add a batch of a range of barcodes.
Click “New” and choose “Barcode range” from the label creator tool.
Enter the starting and ending barcodes.

Avertissement
The barcode range tool does not accept leading zeroes. If you enter 0001234 the barcode that will be printed will be 1234.
Click “Print range”.
You will be presented with the confirmation screen where you can choose your template and layout and enter the starting label if using an incomplete sheet of labels.
Note
The only download option for barcode ranges is PDF.
Save the file and print it on a blank sheet of labels.
Barcode generator
Note
Seuls les bibliothécaires avec la permission label_creator permission (ou la permission superlibrarian) auront accès à cet outil.
Get there: More > Cataloging > Tools > Barcode generator
Koha offers a barcode generator tool that can be used to create images of barcodes for various uses (in notices for example).
This tool can be used for a number of types of barcodes, as well as QR codes.
It will create an image from the given barcode in the chosen barcode format and also generate a unique HTML tag which can be used anywhere.

To generate a new image, fill out the form.
Barcode type: choose the barcode type to be used
Note
Most barcode types allow only numerical characters.
The following allow alphanumeric characters:
Code39
NW7
QRcode
Some barcode types (EAN13, EAN8, UPCA, and UPCE) expect specific patterns (which can be found here https://barcode.tec-it.com/en/ under EAN/UPC).
Hide text: check this box if you only want the actual barcode on the image. If unchecked, the number will be printed in human readable characters under the barcode.
Barcode height: enter the height in pixels the barcode image should have
Barcode: enter the barcode to be printed
Cliquez sur “Afficher le code à barres”.
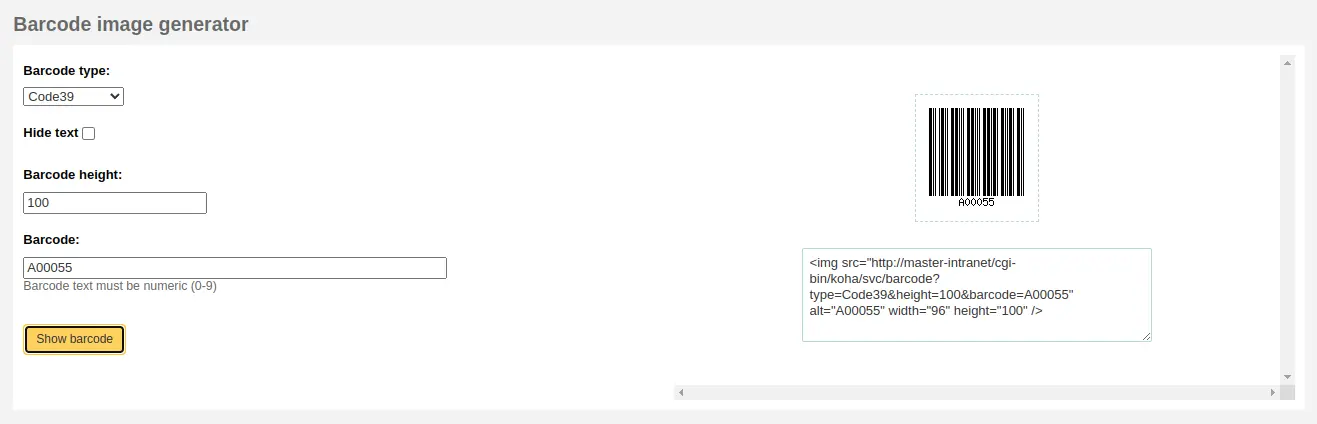
On the right of the screen is the barcode image, which can be downloaded or printed.
Under the image, there is an HTML “img” tag. You can copy the tag and paste it anywhere you need the barcode to appear (however, note that it is only available in the staff interface).
For a QR Code, the options are slightly different. Instead of “Barcode height”, there is a “QR Code module size” field that can be adjusted by slider. The number refers to the size in pixels of each black or white square in the code (modules). The larger the modules, the larger the image will be.
A QR Code can take not only alphanumeric characters, but any type of textual information, such as a URL or even a short text.
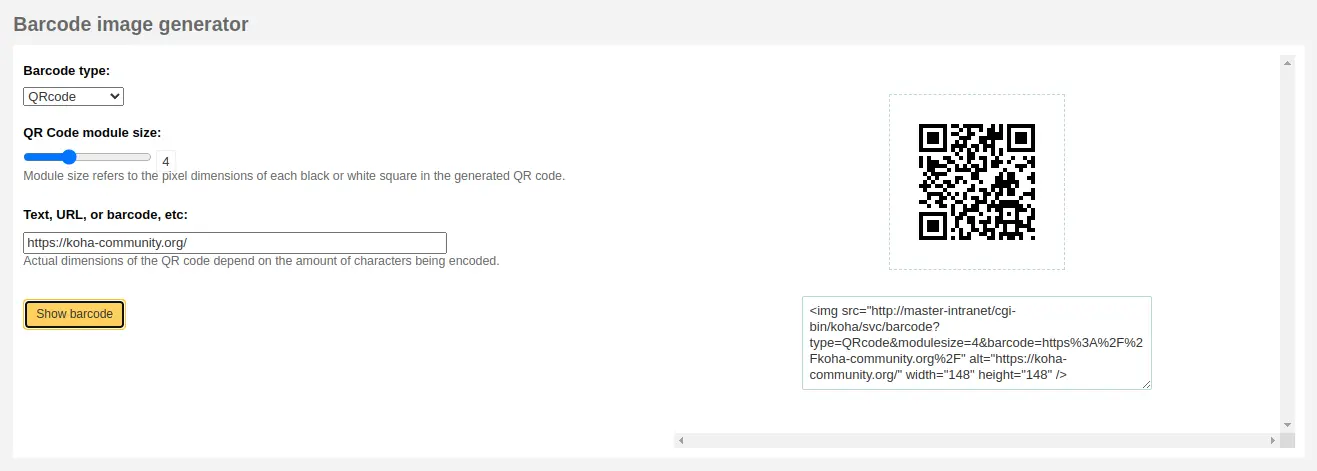
Quick spine label creator
Note
Seuls les bibliothécaires avec la permission label_creator permission (ou la permission superlibrarian) auront accès à cet outil.
Get there: More > Cataloging > Tools > Quick spine label creator
Note
This tool does not use the label layouts or templates, it simply prints a spine label in the first spot on the label sheet, or on a single label from a label printer.
Define the fields you want to print on the spine label in the SpineLabelFormat system preference.
Format your label printing by either editing the spinelabel.css file found in koha-tmpl/intranet-tmpl/prog/en/css/ or adding the CSS directly in the IntranetUserCSS system preference.
For example, adding the following CSS code in IntranetUserCSS will alter the label’s font.
/* Modify the Quick Spine Label Creator Font etc */
.tools.labels #spinelabel {
           font-size:11.5pt;
           font-family:courier new;
           font-weight:bold;
  }

To use this tool you simply need the barcode for the book you’d like to print the spine label for, and click “View spine label”.
From the page that appears, click “Print this label”.
If for some reason you need to change the callnumber, click “Edit this label”. The lock icon on the button will become unlocked, and you will be able to click on the callnumber to edit it.
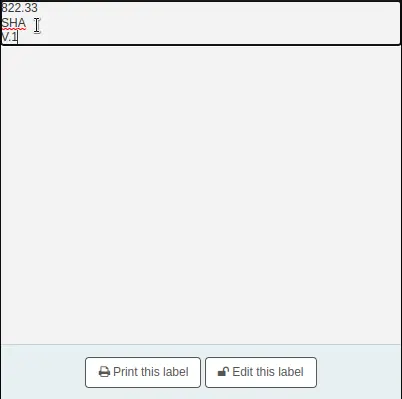
Autorités
Les notices d’autorité sont utilisées pour contrôler des champs dans vos notices bibliographiques, par exemple sujets ou noms de personnes et de lieux.
Ajouter des autorités
Note
Seul le personnel avec la permission editauthorities (ou la permission superbibliothécaire) pourra créer des notices d’autorité.
Pour ajouter une nouvelle notice d’autorité, choisissez le type d’autorité à partir du bouton “Ajouter une autorité”, ou bien cherchez parmi les autorités d’une autre bibliothèque en cliquant sur le bouton “Nouvelle notice via Z39.50”.
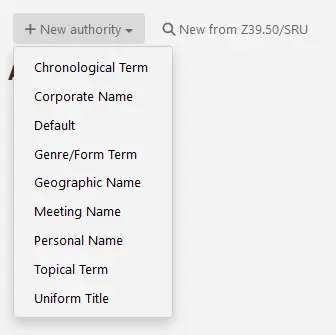
Si vous choisissez de saisir une nouvelle autorité manuellement, un formulaire vous permettra de saisir tous les détails nécessaires concernant votre notice d’autorité.
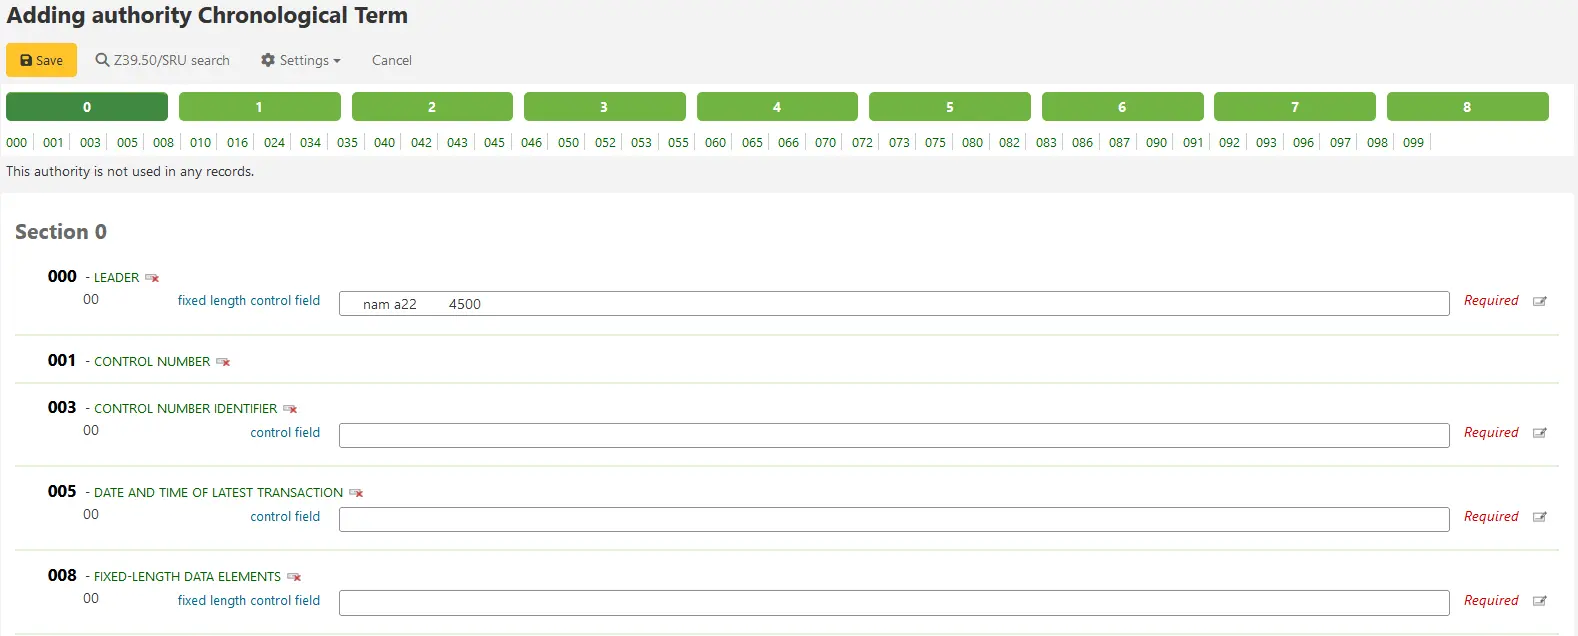
Vous pouvez également modifier le type d’autorité de la notice dans le menu “Paramètres” au-dessus du formulaire de catalogage.
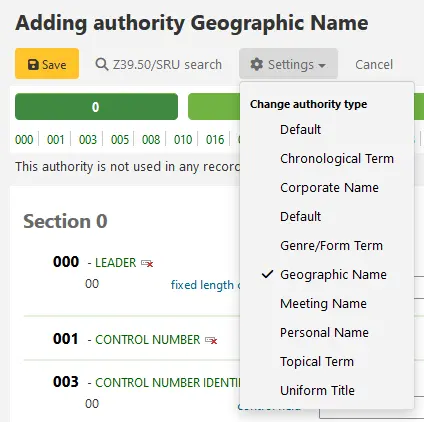
Pour développer des valeurs manquantes, il suffit de cliquer sur le titre et les sous-champs apparaissent. Pour dupliquer un champ ou sous-champ, il suffit de cliquer sur le signe plus (+), à droite de l’étiquette. Pour utiliser les plugins d’assistance, cliquez simplement sur le bouton (…), à droite du champ.
Lorsque vous liez des autorités à d’autres vedettes, vous pouvez utiliser le plugin de recherche d’autorités en cliquant sur les points de suspension (…) à droite du champ.
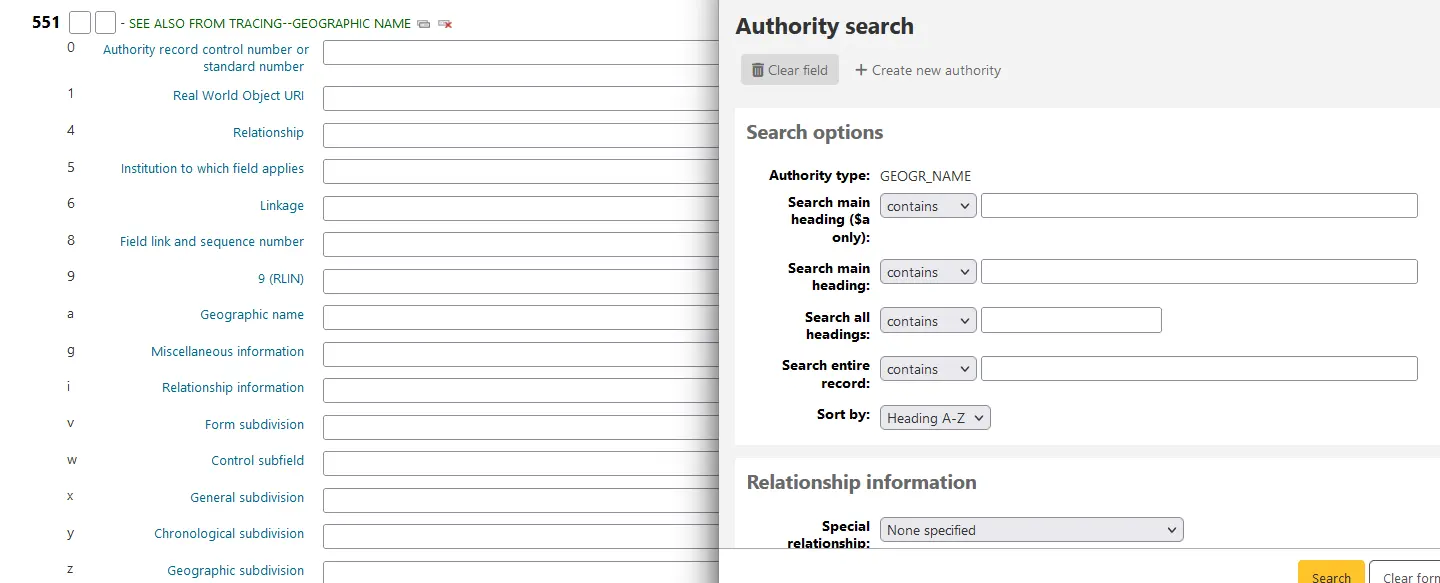
Ici vous pouvez chercher dans votre fichier autorités, l’autorité à lier. Si vous ne la trouvez pas, vous pouvez cliquer sur le bouton “Ajouter nouvelle autorité” et ajouter l’autorité à lier. Ce plugin vous permet aussi de choisir le lien entre les autorités.
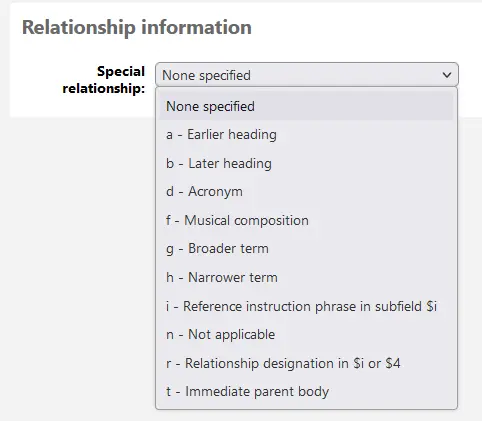
Vous pouvez également importer une notice d’autorité en cliquant sur “recherche Z39.50/SRU” au-dessus du formulaire de catalogage. Le formulaire de recherche Z39.50/SRU s’ouvrira dans une nouvelle fenêtre.
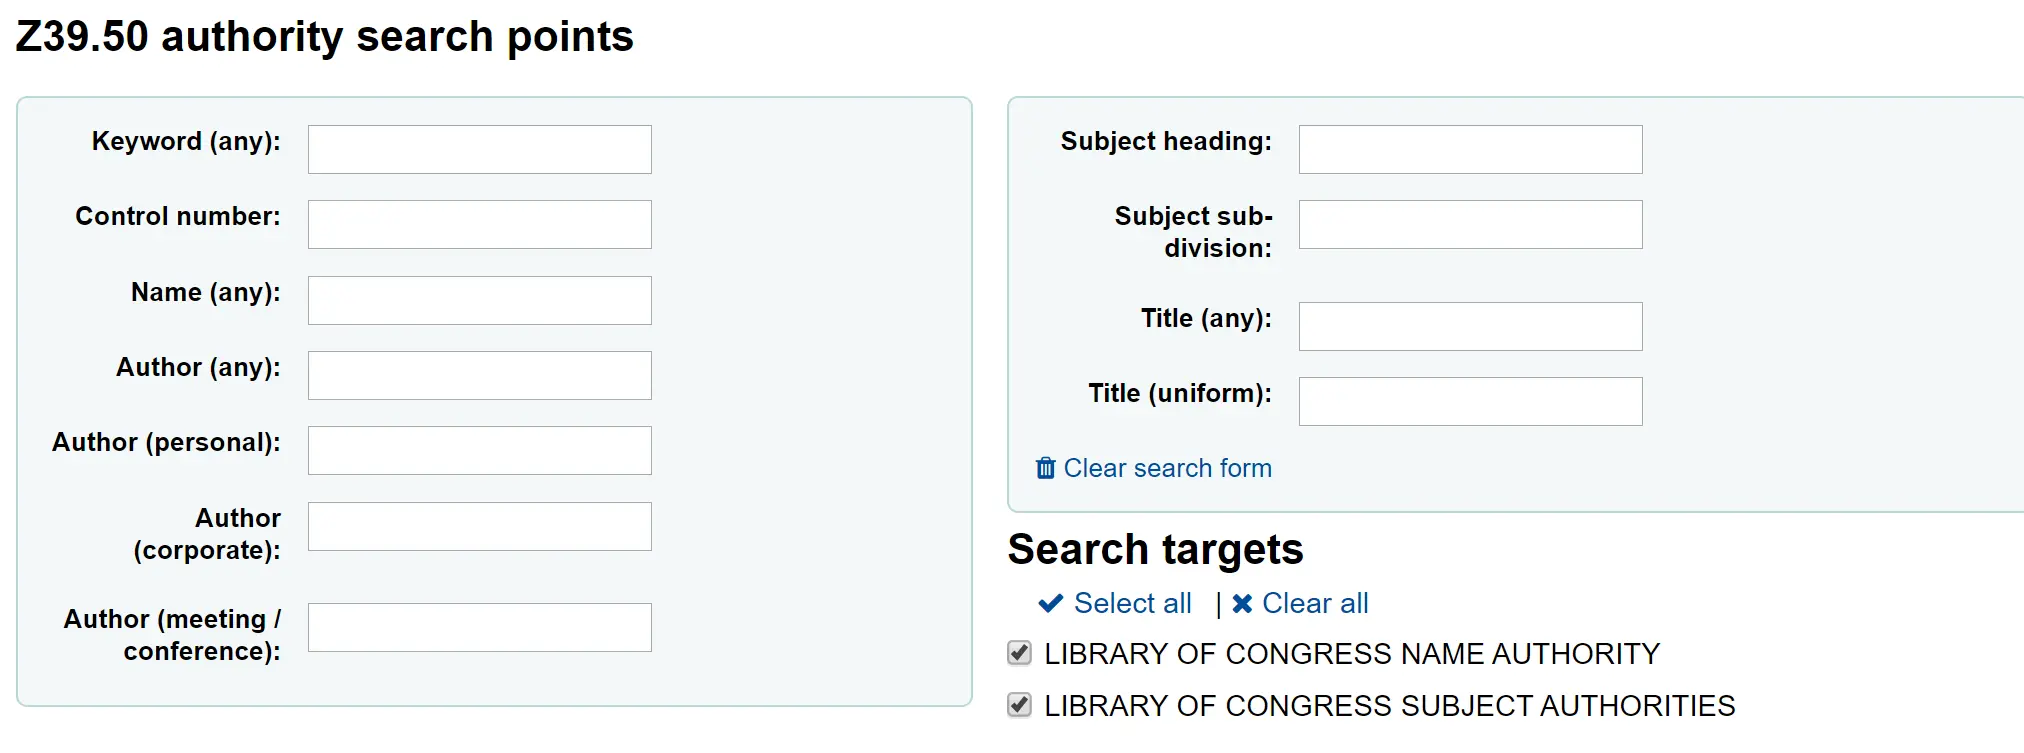
À partir des résultats, vous pouvez utiliser le menu “Actions” à droite de la notice que vous souhaitez ajouter à Koha et sélectionner “Importer” pour l’importer.
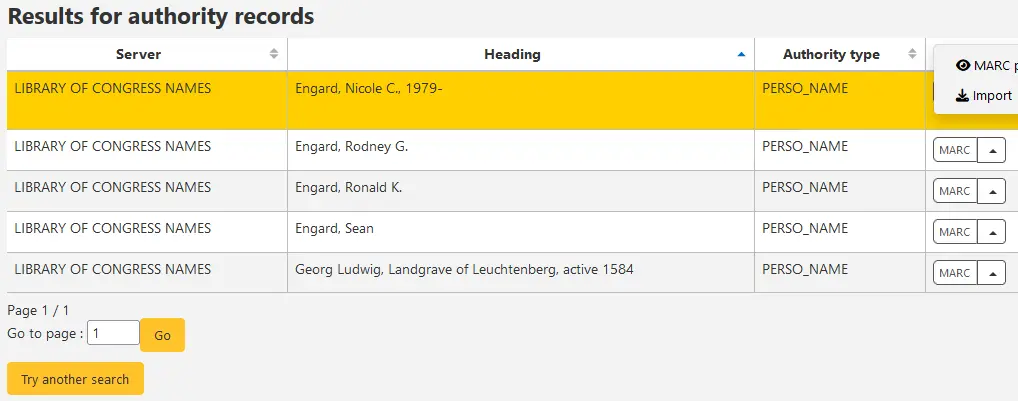
Un formulaire vous permettra de modifier l’autorité avant de l’enregistrer dans votre système.
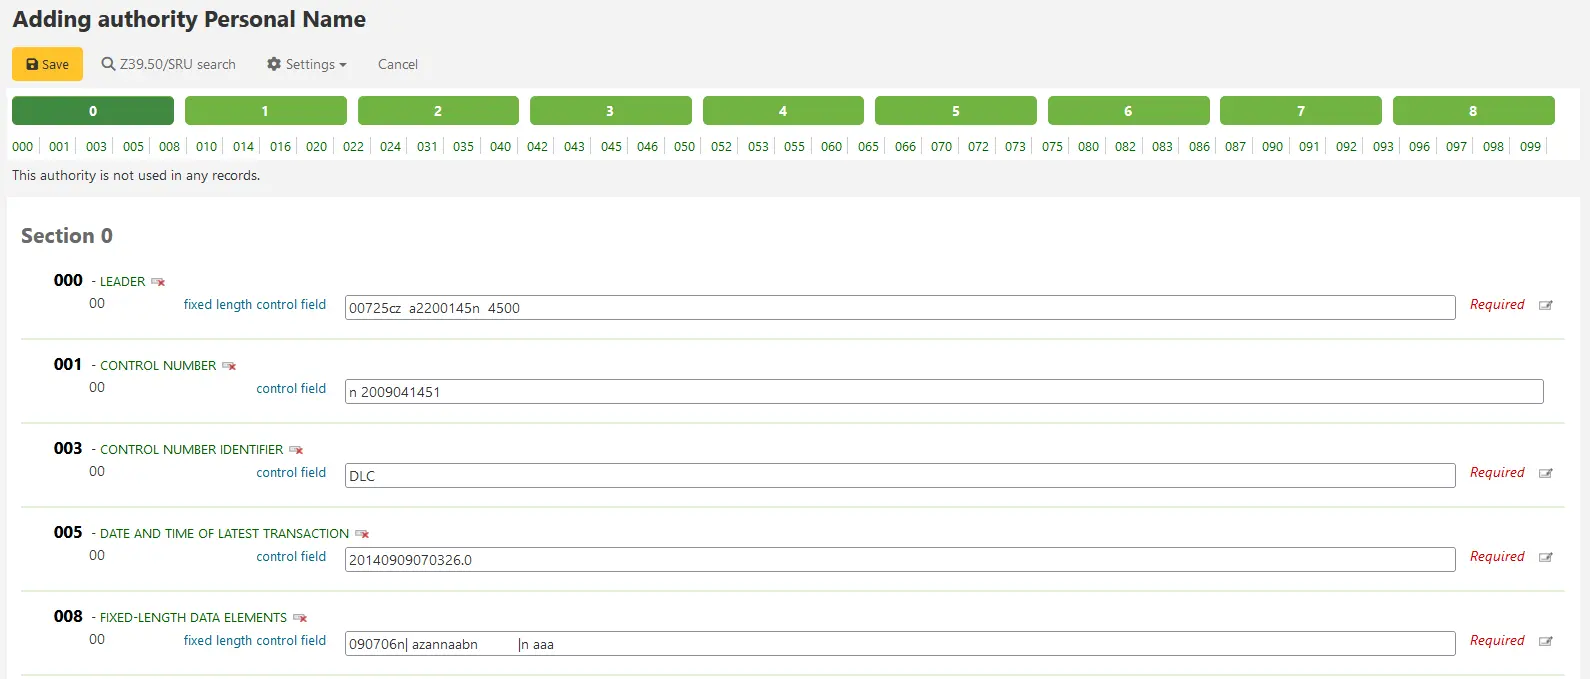
Chercher par autorités
Dans la page des autorités, vous pouvez rechercher les termes existants et les notices bibliographiques qui y sont rattachées.

Dans la page de résultat, vous voyez les autorités, le nombre de notices bibliographiques liées, un menu « Actions » qui vous permet de modifier, fusionner et supprimer (s’il n’y a pas de notice bibliographique liée).
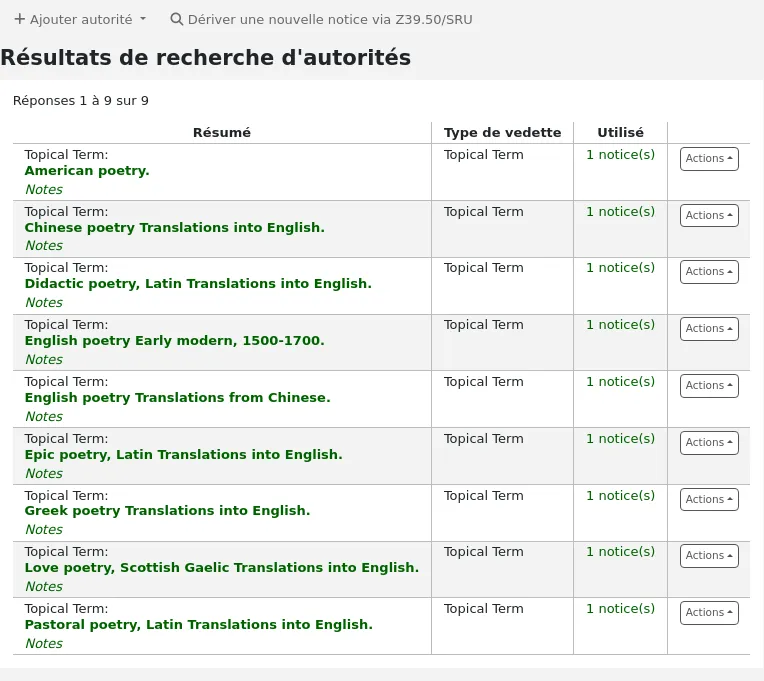
Note
In MARC21 systems, if the ShowHeadingUse system preference is enabled, there will be an additional column showing the appropriate use of the authority record in main or added entries, subject headings, or series titles.
Cliquez sur le lien “Détails” à droite du résumé de la notice d’autorité pour ouvrir la notice en entier et pouvoir la modifier.
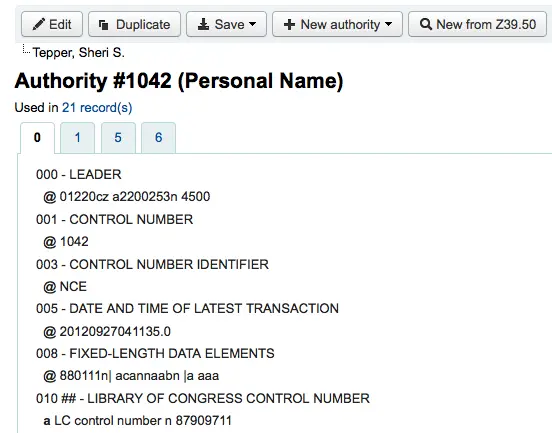
Si l’autorité comprend des renvois, ils seront listés dans les résultats de recherche. Cliquer sur la vedette liée renverra à une recherche pour cette vedette à la place.
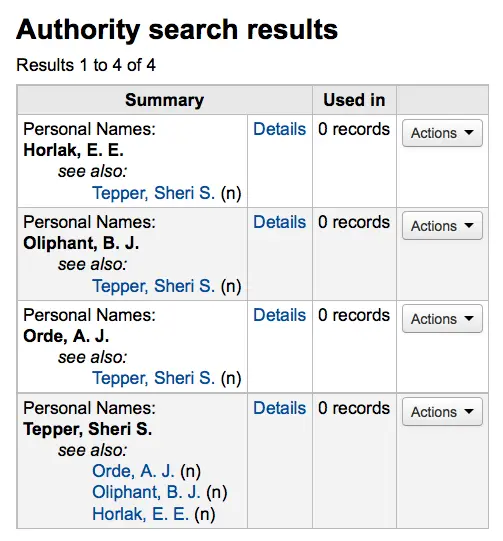
Modification des autorités
Note
Seul le personnel ayant la permission editauthorities (ou la permission superbibliothécaire) pourra modifier ou supprimer les notices d’autorité existantes.
Les autorités peuvent être modifiées en cliquant sur le résumé de l’autorité depuis les résultats de recherche puis en cliquant ensuite sur le bouton « Modifier » au-dessus de la notice. Ou encore en cliquant sur le lien « Modifier » à gauche des résultats de la recherche d’autorité.
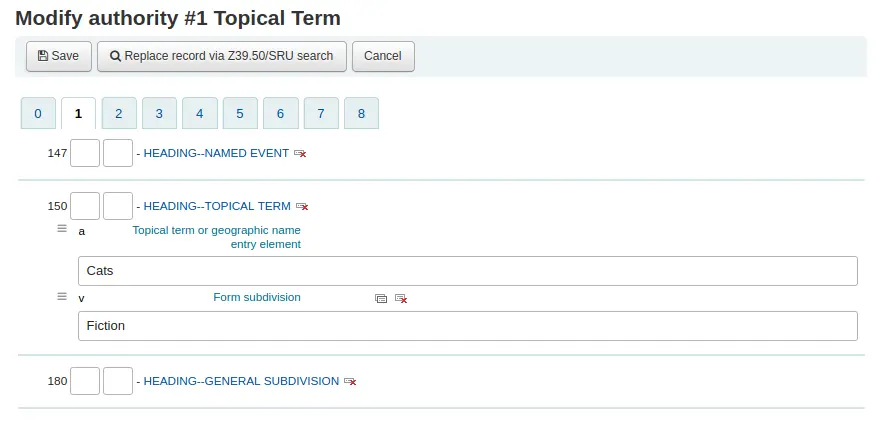
Une fois que vous avez effectué les modifications nécessaires, cliquez simplement sur “Enregistrer”.
En fonction du nombre de notices bibliographiques rattachées à cette notice d’autorité, les notices bibliographiques peuvent être mise à jour immédiatement. Ceci dépend de la valeur dans la préférence système AuthorityMergeLimit (sa valeur par défaut est 50). Si le nombre de notices bibliographiques est inférieur à la valeur de AuthorityMergeLimit, les notices bibliographiques seront modifiées immédiatement. Si le nombre de notices bibliographiques est supérieur à la valeur de AuthorityMergeLimit, elles seront modifiées lorsque le merge_authorities.pl script s’exécutera.
Pour supprimer une autorité, vous devez d’abord être sûr qu’elle n’est pas lié à des notices bibliographiques. Si ce n’est pas le cas, un lien Supprimer est affiché à droite de l’autorité sur la page de résultat d’une recherche et un bouton Supprimer est également affiché sur la page de détail de l’autorité.
Fusionner les autorités
Note
Seul le personnel avec la permission editauthorities (ou la permission superbibliothécaire) pourra fusionner des notices d’autorité.
Si vous avez des doublons de notices d’autorité, vous pouvez les fusionner en cliquant sur le lien “Fusionner”, dans le menu “Action”, à côté des deux résultats de la recherche d’autorité.

Après avoir cliqué sur “Fusionner” du premier résultat, vous verrez cette autorité classée en haut des résultats.
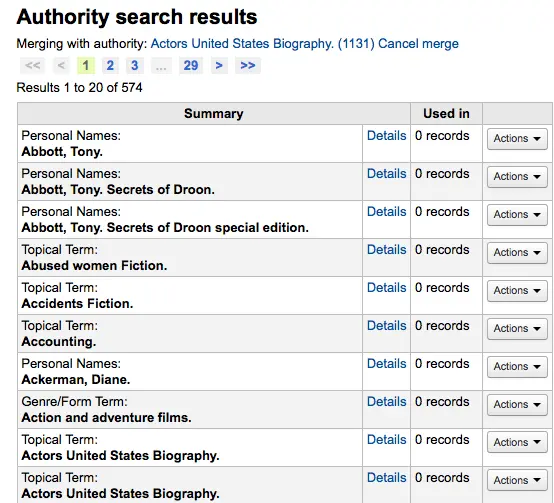
Puis, vous cliquez sur “”Fusionnez”” à la hauteur du second résultat que vous souhaitez fusionner.
Choisissez la notice à conserver. L’autre sera supprimée après la fusion.
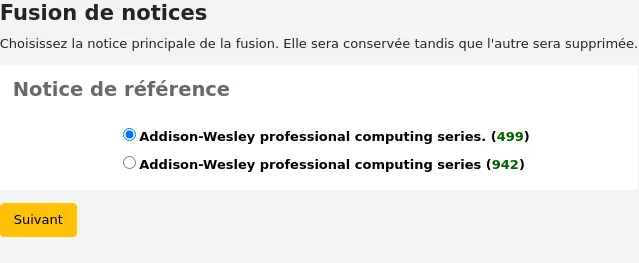
Les deux notices s’afficheront en mode MARC dans des onglets distincts. Par défaut, tous les champs de la première notice seront sélectionnés. Désélectionnez les champs que vous ne voulez pas conserver. Allez ensuite dans le second onglet et choisissez les champs que vous voulez y prendre.
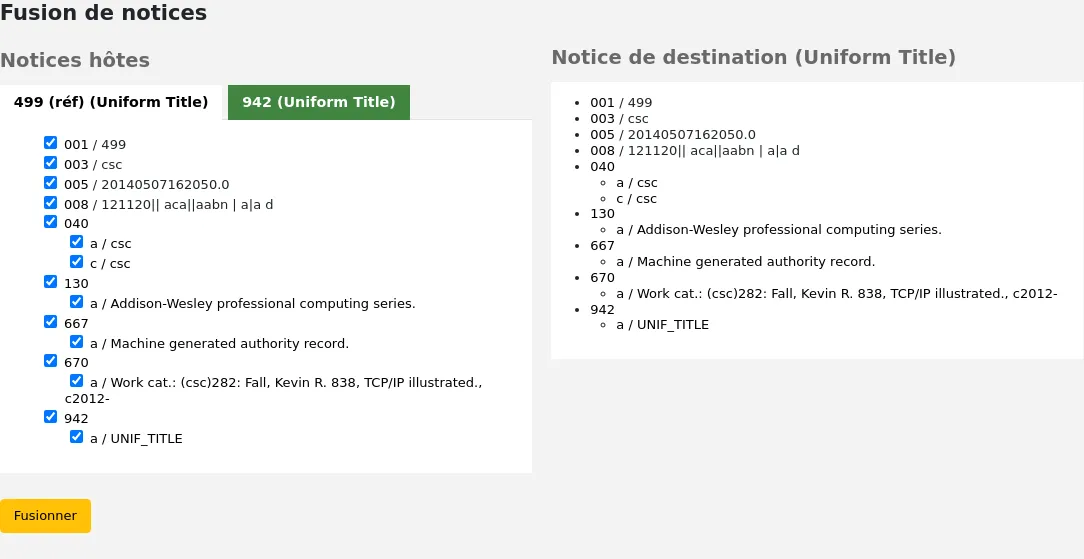
Une fois vos sélections effectuées, cliquez sur le bouton “Fusionner”. La notice principale contiendra maintenant les données que vous avez choisies, et la seconde notice sera supprimée.
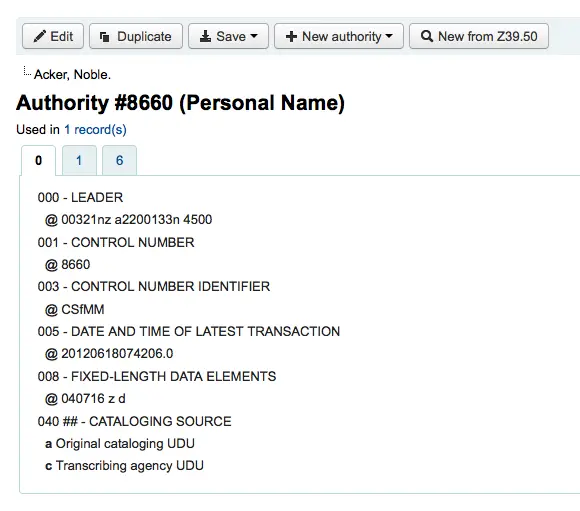
Si vous avez des doublons de notices d’autorité de différents types, vous pouvez les fusionner en cliquant sur le lien “Fusionner”, dans le menu des actions, à côté des deux résultats de la recherche d’autorité. Par exemple, ces notices autorité utilisant différents types peuvent être fusionnées.
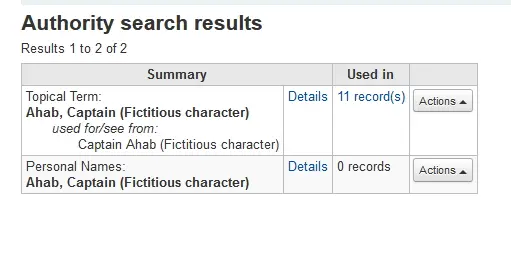
Si vous sélectionnez le lien “Fusionner” du menu d’actions de la première notice.
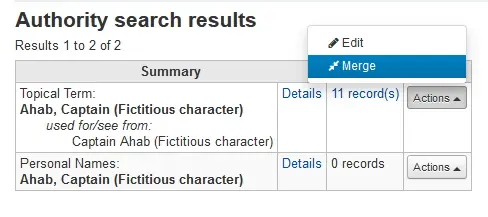
Vous verrez cette autorité classée en haut des résultats.
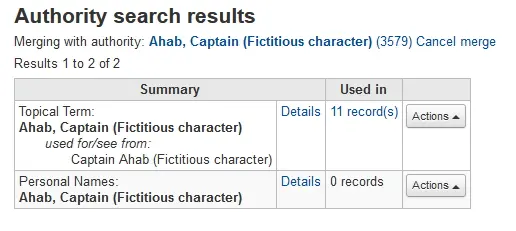
Ensuite, vous devez sélectionner “Fusionner” à côté du second résultat que vous souhaitez fusionner.
Choisissez la notice à conserver. L’autre sera supprimée après la fusion. Vous pourrez également utiliser le menu déroulant pour choisir quelle grille utiliser.
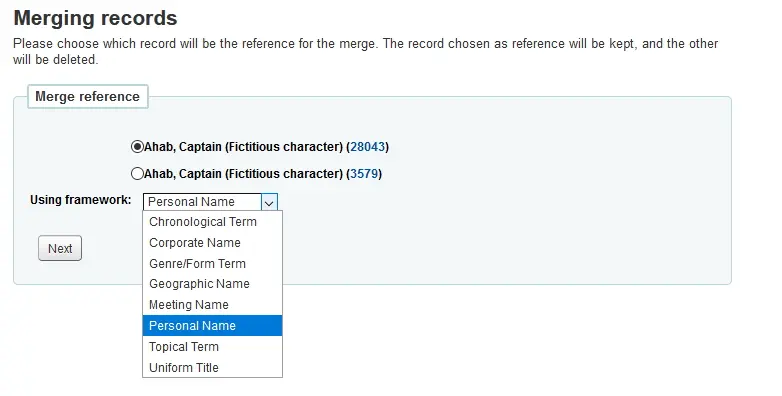
Les deux notices s’afficheront en mode MARC dans des onglets distincts (chacun accessible via les étiquettes des onglets avec le numéro de notice autorité). Par défaut, tous les champs de la première notice seront sélectionnés. Désélectionnez les champs que vous ne voulez pas conserver. Allez ensuite dans le second onglet et choisissez les champs que vous voulez y prendre.
La notice « ref » (la notice principale) sera du type que vous choisissez :
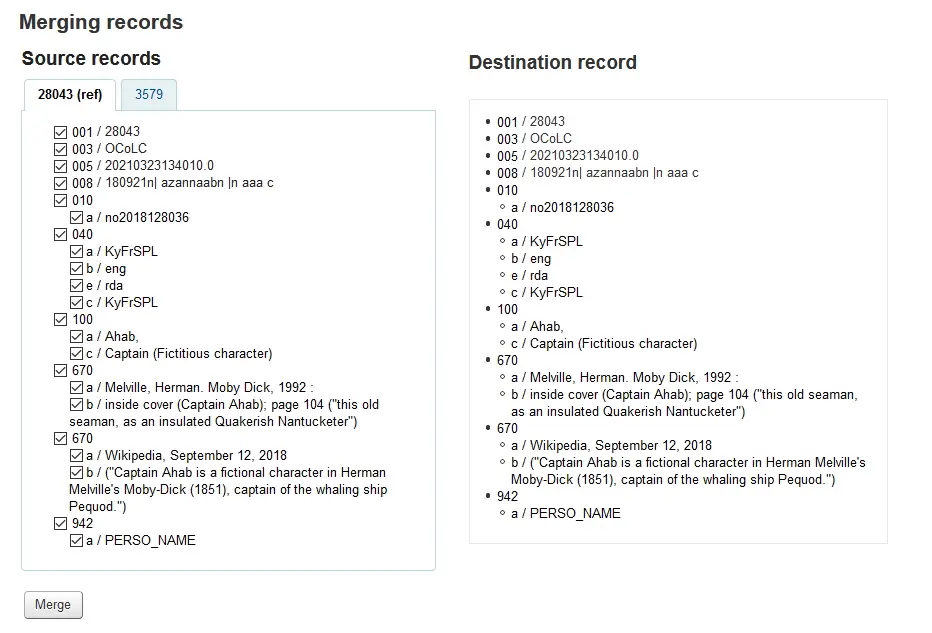
Une fois vos sélections effectuées, cliquez sur le bouton “Fusionner”. La notice principale contiendra maintenant les données que vous avez choisies, et la seconde notice sera supprimée.
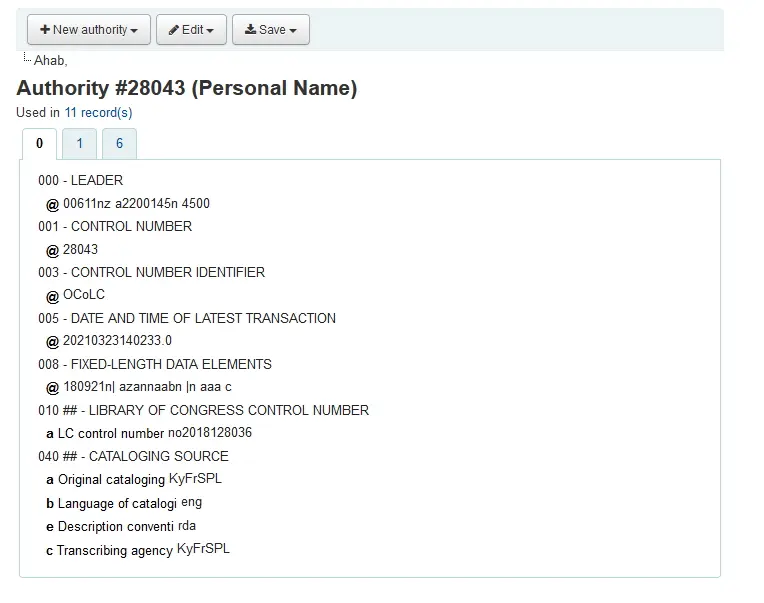
L’étiquette MARC des vedettes liées aura été mise à jour en conséquence.
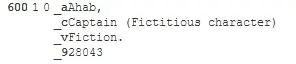
Exporter des données
Note
Only staff with the export_catalog permission as well as at least one of the editcatalogue sub-permissions (or the superlibrarian permission) will have access to this tool.
Get there: More > Cataloging > Export > Export catalog data
Koha comprend un outil qui vous permettra d’exporter par lot vos notices bibliographiques, exemplaires et notices d’autorité. Il peut être utilisé pour transférer vos notices à d’autres bibliothèques, organisations ou services, ou simplement à des fins de sauvegarde.
Exporter des notices bibliographiques
En haut de l’écran, vous devez choisir les données à exporter. Si vous exportez des notices bibliographiques avec ou sans exemplaires, cliquez sur l’onglet “Exporter des notices bibliographiques”.
Remplissez le formulaire afin de limiter les notices à exporter (tous les champs sont facultatifs)
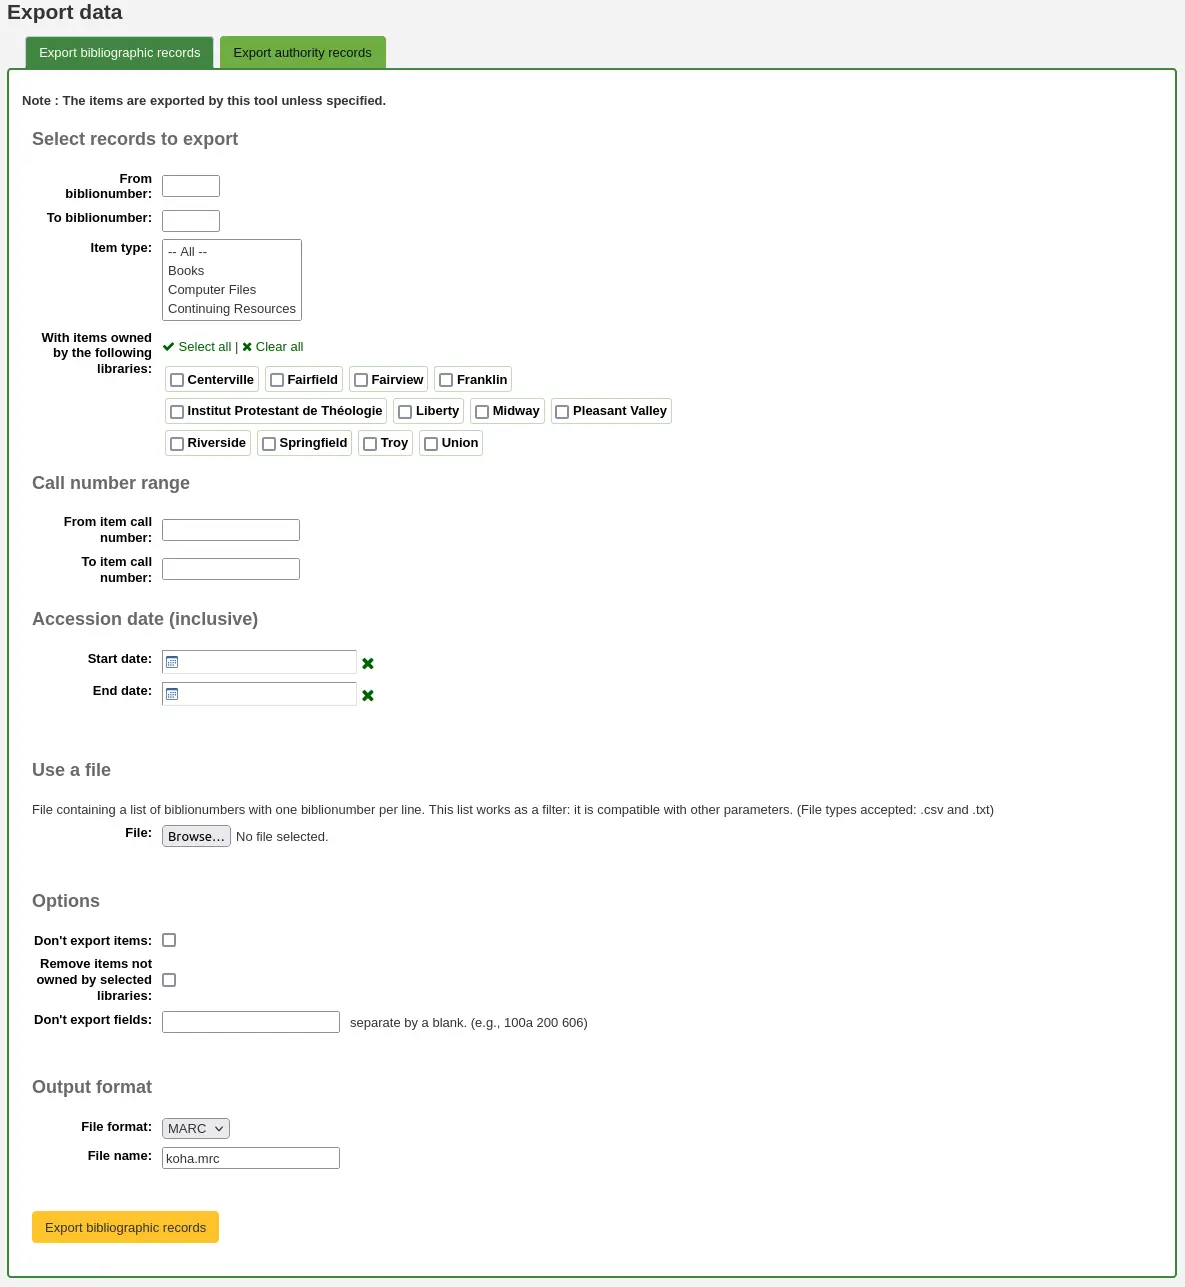
Du biblionumber / Au biblionumber : limite l’export à une plage de biblionumbers
Type de document : limite l’export à un ou plusieurs type(s) de document
Avertissement
Cette limitation utilisera le type de document défini dans la préférence système item-level_itypes.
Si la préférence système item-level_itypes est positionnée sur “exemplaire spécifique” et qu’il n’y a aucun exemplaire attaché à la notice bibliographique, cette notice ne sera pas exportée.
Pour exporter toutes les notices d’un type spécifique, la préférence système item-level_itypes doit être positionnée sur “notice bibliographique”.
With items owned by the following libraries: limit to a specific library or group of libraries
Avertissement
This is a filter; if this is set to the default value (all libraries selected), or select one or more libraries, bibliographic records with no items attached will not be exported.
To get bibliographic records with no items, “clear all” selected libraries (that is, deselect all libraries).
Call number range: limit to a call number range
Accession date (inclusive): limit to an acquisition date range
Use a file: you can load a file of biblionumbers of the records to be exported. The file type needs to be .csv or .txt
Don’t export items: by default, items will be exported. Check this box to only export bibliographic records
Remove items not owned by selected libraries: check this box to limit the exported items to items from the library you’re logged in as (if the “With items owned by the following libraries” field above is set to “All”) or to the library or libraries selected above
Don’t export fields: enter which fields that should not be exported, separated by spaces. This can be handy if you’re sharing your data, you can remove all local fields before sending your data to another library
File format: choose the file type, MARC or MARCXML
File name: if needed, enter a new file name for the export file
Click “Export bibliographic records”
Exporter des notices d’autorité
En haut de l’écran, vous devez choisir les données que vous exportez. Si vous exportez des notices d’autorité, cliquez sur l’onglet “Exporter des notices d’autorité”.
Remplissez le formulaire afin de limiter les notices à exporter (tous les champs sont facultatifs)
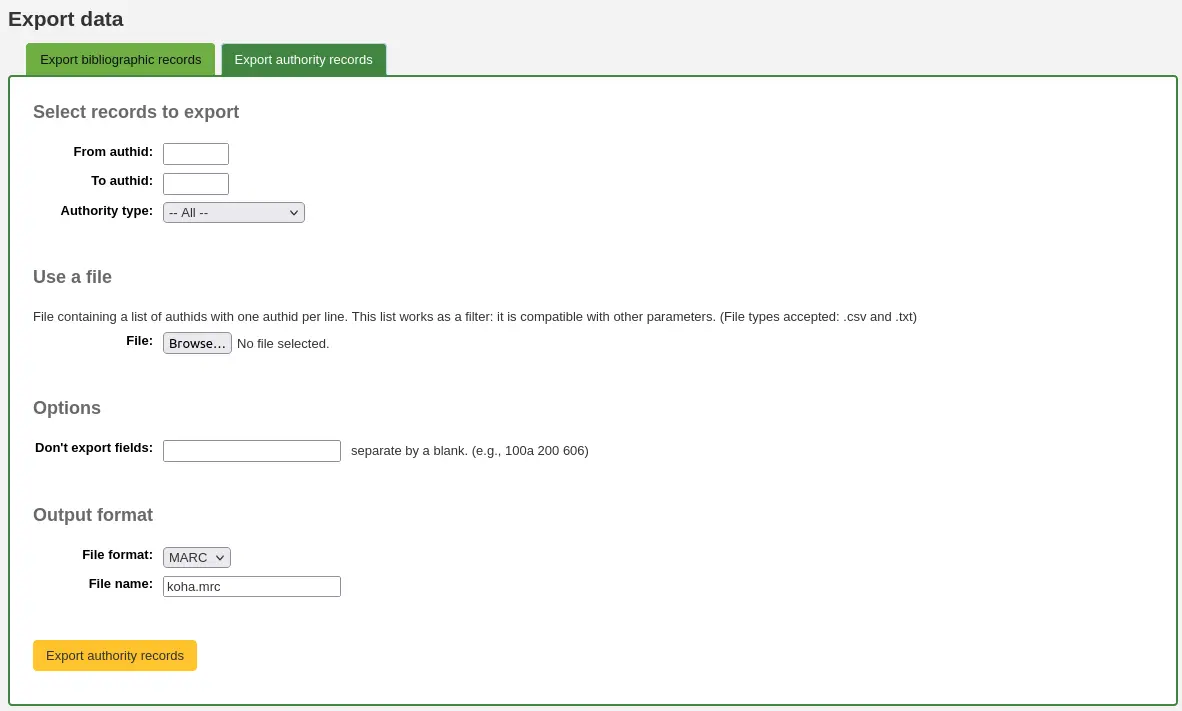
From authid / To authid: limit the exportation to a range of authids
Authority type: limit the exportation to records of a specific authority type
Use a file: you can load a file of authids of the records to be exported. The file type needs to be .csv or .txt
Next choose fields that you would like to exclude from the export separated by a space (no commas)
Don’t export fields: enter which fields that should not be exported, separated by spaces.
To exclude all subfields of the 200 field, for example, just enter 200
To exclude a specific subfield, enter it beside the field value. For example, 100a will exclude just the subfield “a” of the 100 field
File format: choose the file type, MARC or MARCXML
File name: if needed, enter a new file name for the export file
Click “Export authority records”
Inventaire
Note
Seul le personnel ayant la permission inventaire (ou la permission superbibliothécaire) aura accès à cet outil.
Aller à : Plus > Catalogage > Rapports > Inventaire
L’outil inventaire de Koha peut être utilisé de trois manières :
En créant une liste d’inventaire sur laquelle vous pourrez indiquer les exemplaires absents;
En chargeant des codes à barres scannés avec un scanner portable;
En comparant des codes à barres scannés avec un scanner portables ou scannés directement à une liste d’inventaire.
Créer une liste d’inventaire
Si vous n’avez pas la possibilité d’utiliser votre lecteur de code-barres dans la bibliothèque, vous pouvez générer une liste d’inventaire sur la base de critères à définir. Vous pouvez ensuite l’imprimer et l’utiliser en vous déplaçant dans la bibliothèque pour vérifier votre collection ou l’utiliser directement dans Koha sur un appareil portable.
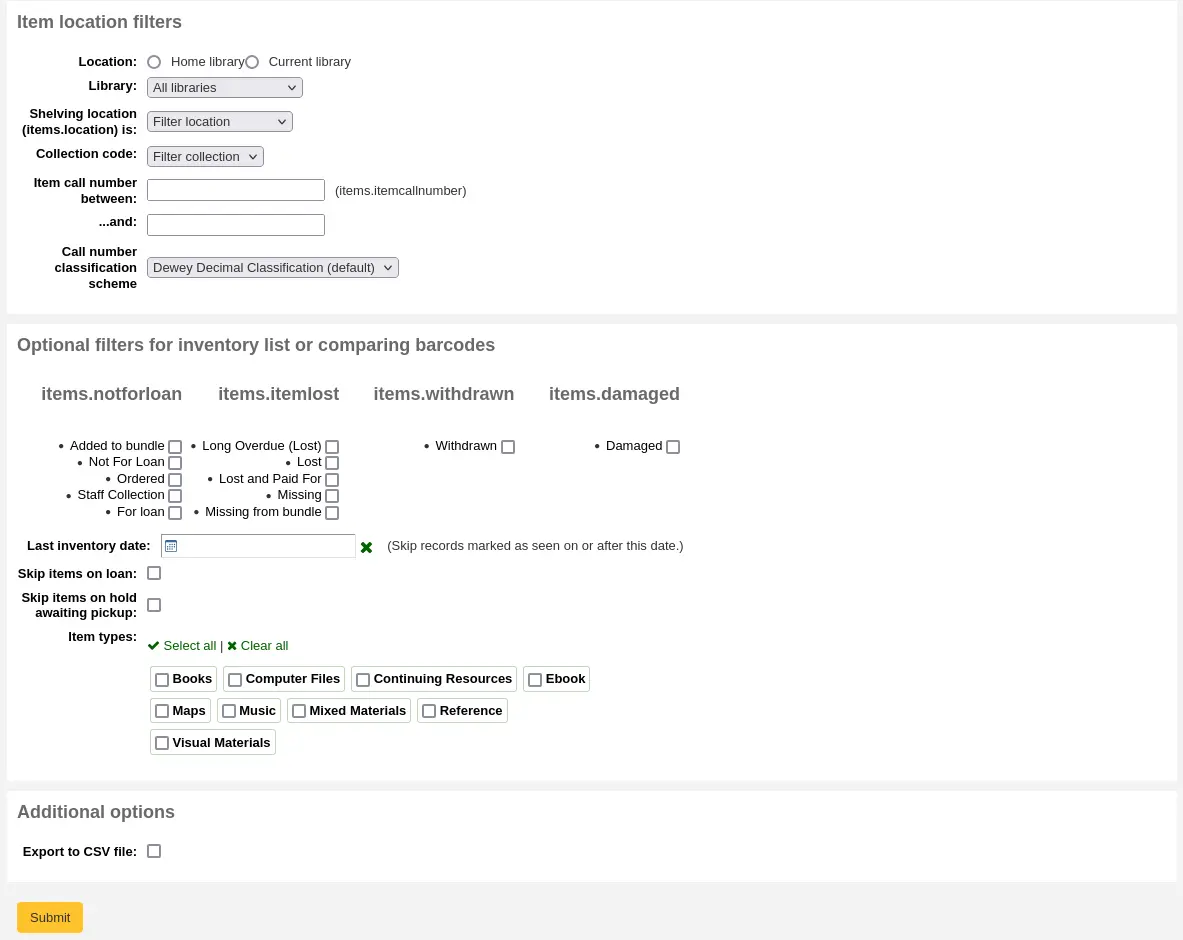
Tout d’abord, définissez les critères pour sélectionner les exemplaires à imprimer sur la liste. Tous les paramètres sont facultatifs, mais si aucun n’est sélectionné, la liste risque d’être très longue.
Bibliothèque : choisissez le site que vous souhaitez contrôler, et précisez si s’il s’agit du site de rattachement ou dépositaire.
La localisation (items.location) est : vous pouvez filtrer par localisation.
Cote entre … et … : vous pouvez également limiter la liste à une tranche de cotes.
Schéma de classification : en cas de filtrage par cote, veillez à choisir le schéma de classification correct
Vous pouvez filtrer davantage en fonction du statut des exemplaires (exclu du prêt, perdu, retiré ou endommagé). Cochez les cases en regard des statuts que vous souhaitez inclure. Par exemple, si vous utilisez la liste pour la lecture en rayon, cochez uniquement le statut “empruntable” car les autres exemplaires ne seront probablement pas en rayon.
Dernière date d’inventaire : saisir une date ici pour ignorer les exemplaires récemment marqués comme vus.
Ignorer les exemplaires en prêt : cochez cette option pour exclure de la liste les exemplaires en prêt.
Ignorer les exemplaires réservés en attente de retrait : cliquez sur cette option pour exclure de la liste les exemplaires en attente de retrait par des adhérents
Types de documents : cliquer sur les options à coté des types d’exemplaire à inclure dans la liste d’inventaire
Exporter un fichier CSV : cliquez sur cette option pour générer un fichier CSV. Si l’option n’est pas cochée, la liste sera affichée à l’écran.
Cliquez sur “Valider” pour générer la liste d’inventaire.
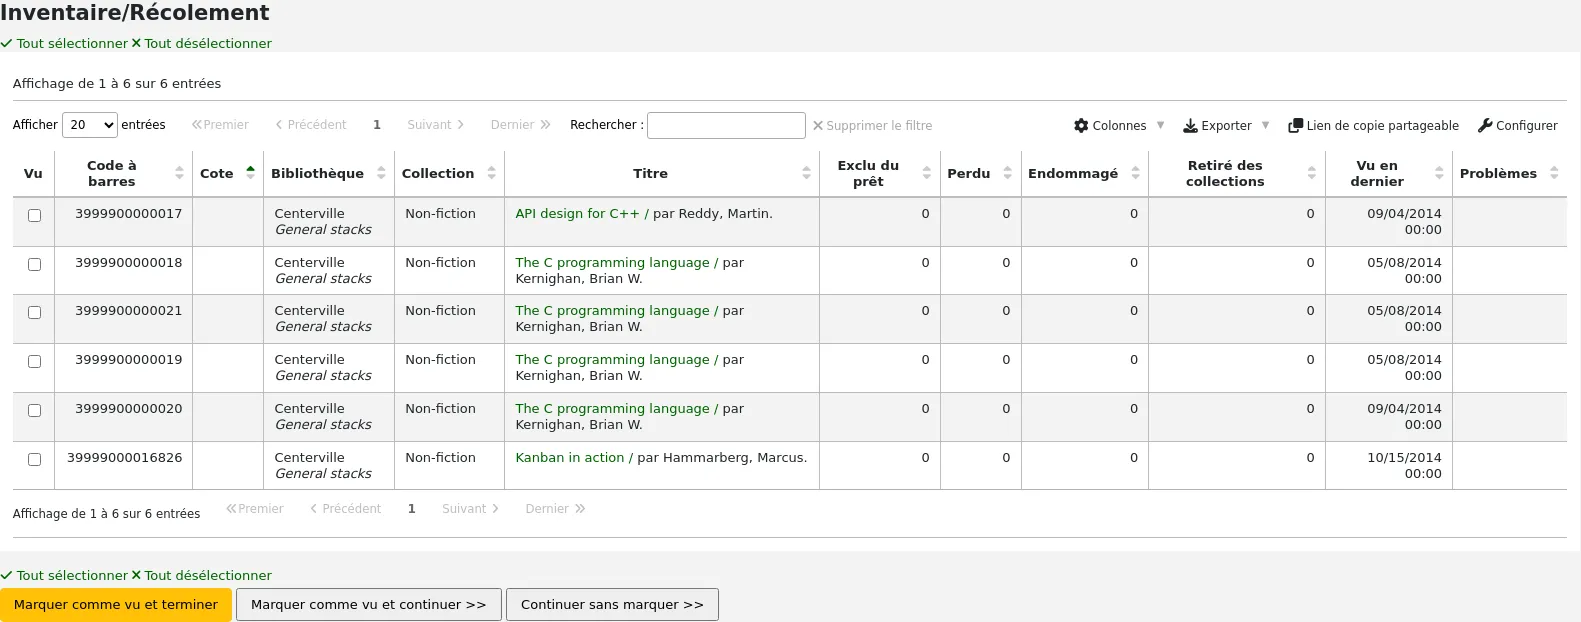
Après avoir trouvé les exemplaires en rayon, revenez à la liste et cochez les cases à coté des exemplaires trouvés. Puis cliquez sur un des trois boutons pour continuer :

Marquer comme vu et terminer : met à jour la date et l’heure “vu en dernier” des exemplaires sélectionnés et revient à l’écran précédent.
Marquer comme vu et continuer : met à jour la date et l’heure “vu en dernier” des exemplaires sélectionnés et affiche la page suivante de la liste.
Continuer sans marquer : ne met pas à jour les exemplaires de cette page et affiche la page suivante de la liste.
Charger les codes à barres avec un scanner
Si vous disposez d’un scanner portable (ou d’un ordinateur portable et d’un scanner USB), vous pouvez vous circuler dans la bibliothèque avec le scanner en main et scanner les codes-barres au fur et à mesure que vous les rencontrez (sur un ordinateur portable, scannez les codes-barres dans un fichier texte ou directement dans la zone de texte à l’écran). Une fois que vous avez terminé, vous pouvez charger dans Koha le fichier texte généré par le scanner.
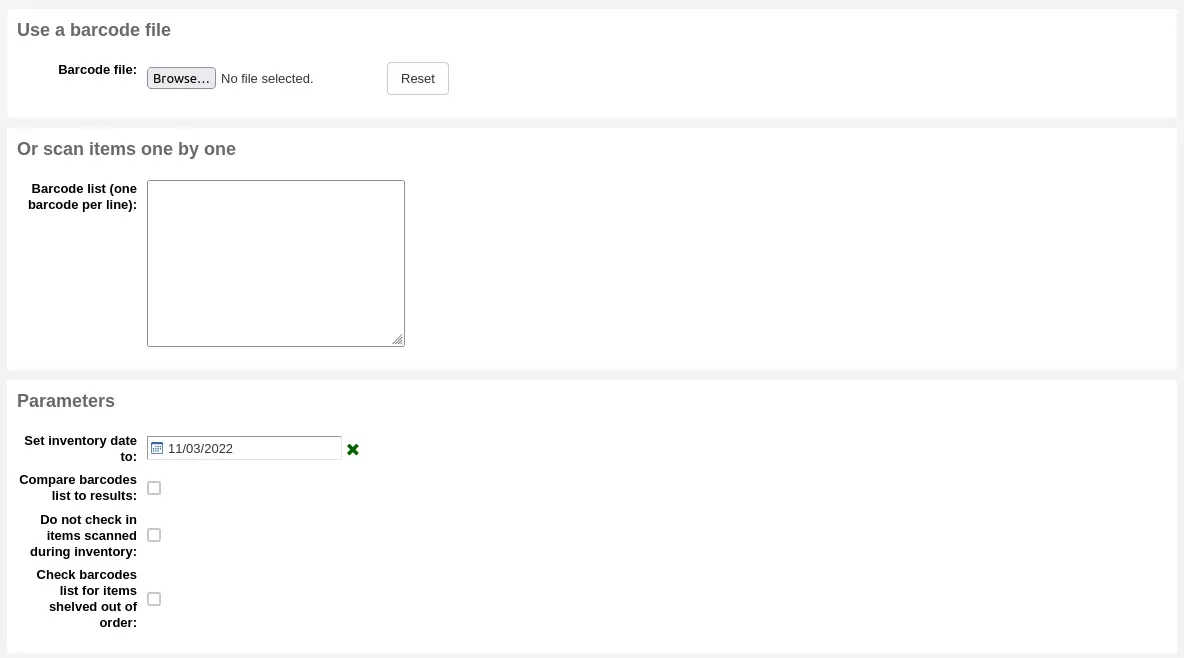
Fixer la date d’inventaire à : choisissez la date à laquelle vous souhaitez marquer tous les exemplaires comme ayant été vus pour la dernière fois.
Comparer la liste de codes à barres aux résultats : laissez décoché pour cette méthode.
Ne pas faire le retour des exemplaires scannés pendant l’inventaire : si cette option n’est pas cochée, Koha passera en retour les exemplaires scannés, car il considèrera qu’ils sont en rayon, et donc non empruntés. Si vous ne voulez pas les passer en retour, cochez cette option.
Vérifier la liste des codes à barres pour les exemplaires absents des rayons : si cette option est cochée, Koha comparera les cotes et vérifiera qu’elles soient dans le bon ordre.
Cliquez sur “Valider”. Cela mettra à jour la date “vu en dernier” de tous les exemplaires à la date choisie (l’heure sera 00:00).
Once you have the updated the last seen date for all items scanned during the inventory it is possible to use reports to identify items that were not scanned and can therefore be assumed missing (you can use the batch item modification tool to change the LOST status of these items). There are sample reports you can use on the Koha SQL Reports Library.
Comparer les codes à barres scannés à une liste d’inventaire
Vous pouvez également combiner les deux méthodes pour comparer automatiquement une liste de codes à barres scannés avec une liste générée.
Tout d’abord, chargez votre fichier de codes à barres ou scannez les codes-barres dans la boîte.
Fixer la date d’inventaire à : choisissez la date que vous souhaitez voir apparaître dans le champ “vu en dernier” des exemplaires (l’heure sera fixée à 00:00).
Comparer la liste de codes à barres aux résultats : devrait être automatiquement cochée.
Ne pas passer en retour les exemplaires scannés lors de l’inventaire : cochez cette option si vous ne souhaitez pas que les exemplaires scannés soient automatiquement passés en retour s’ils étaient empruntés.
Choisissez les filtres (bibliothèque, localisation, cotes, statuts ou types d’exemplaires) pour générer une liste avec laquelle vous pourrez comparer vos codes à barres. Cliquez sur “Valider”.
Note
En fonction du nombre de codes-barres que vous comparez, cette opération peut prendre quelques minutes. Il n’est pas recommandé de comparer des listes de plus de 1 000 codes à barres, car cela peut entraîner un dépassement du délai de la session.
Une fois que Koha aura fini de comparer le fichier de codes à barres à la liste générée, il renverra le nombre d’exemplaires mis à jour et une liste des exemplaires problématiques.
Note
Unlike when creating a shelf list, the list that will be presented here will only contain the items that Koha has determined are problematic.
Manquant (non scanné) : l’exemplaire figure dans la liste générée mais pas dans le fichier de codes à barres.
Trouvé au mauvais emplacement : l’exemplaire figure dans la liste de codes à barres, mais pas dans la liste générée.
Toujours en prêt : l’exemplaire est emprunté, mais figure dans la liste générée. Il n’a pas été automatiquement passé en retour.
Pas de code à barres : le code à barres n’existe pas.
Unknown not-for-loan status: the item has “not for loan” status that is not in the NOT_LOAN authorized value category
L’exemplaire a peut-être été mal classé : la cote est mal classée
Guides de catalogage
Document d’information sur le catalogage de notices bibliographiques
Cette section concerne le MARC21.
Tag |
Label |
Description |
Instructions |
|---|---|---|---|
000 |
LEADER |
Describes the record (i.e. surrogate) – is it a record for a monograph? A serial? |
Click in this field to fill it in. Then set « Bibliographic level » to “a” for articles or “s” for serials. Otherwise, leave everything as is. The value in position 6 influences the type of material in 008. |
001 |
CONTROL NUMBER |
Accession number. |
Enter the accession number written inside the item here. For articles and items which do not have accession numbers, leave blank. You can use the autoControlNumber system preference to automatically fill this field with the biblionumber of the record. |
003 |
CONTROL NUMBER IDENTIFIER |
Your MARC organizational code |
Click in this field to fill it in (will auto fill if you have your MARCOrgCode preference set). |
005 |
D & T LATEST TRANSACTION |
Current date and time. |
Click in this field to fill it in. |
008 |
FIXED-LENGTH DATA ELEMENTS |
Field containing computer-readable representations of a number of things. |
The type of material is automatically set according to the leader, position 06. Generally you will only use “s” (single) or “m” (multiple) options for position 06- use the former when the item was published in a single year, the latter when it was published over the course of several. If there is a single date, only enter a date in the first date field (positions 07-10). Enter the three-digit country code in positions 15-17, being sure to add spaces if the country code is fewer than three characters long. If there is an index, note that fact in position 31. Enter the three-letter language code in positions 35-37. |
010 |
LCCN |
A number assigned by the Library of Congress to uniquely identify the work. |
Check on the copyright page of the book (if it was published in the US) or the LC catalog for this number. If you can’t find it, don’t worry about it. |
020 |
ISBN |
Unique number used by publishers to identify books. |
If this number isn’t listed on the book, there probably isn’t one. |
022 |
ISSN |
Unique number used by publishers to identify serials. |
If this number isn’t listed on the book, there probably isn’t one. |
033 |
DATE/TIME OF EVENT |
Used for auction dates. Required for auction catalogs. |
For auctions that took place on only one day, enter the date of the auction in the format YYYYMMDD in the subfield “a” and a “0” in the first indicator. For auctions that took place over two consecutive days or any number of non-consecutive days, create a subfield “a” for each day with the date in the format YYYYMMDD, and put a “1” in the first indicator. For auctions that took place over more than two consecutive days, create a subfield “a” (in format YYYYMMDD) for the first day and a subfield “a” (also in format YYYYMMDD) for the last day, and put a “2” in the first indicator. |
040 |
CATALOGING SOURCE |
Identifies which libraries created and modified the record. |
For imported records, add a subfield “d” with your OCLC code as the value. For new records, make sure that the subfield “c” with your OCLC code as the value. |
041 |
LANGUAGE CODE |
Identifies all the languages used in an item, when two or more languages are present. |
For significant portions of a text in a given language, there should be a subfield “a” with that language code. If there are only summaries or abstracts in a specific language, create a subfield “b” with that language code. For the language of sung or spoken text use subfield “d”. |
100 |
MAIN ENTRY–PERSONAL |
Authorized form of the main author’s name |
See Authorized headings sheet and AACR2. The first indicator should generally be a “1”, to indicate that the entry is surname first. If the name consists only of a forename, however, the first indicator should be “0”. |
110 |
MAIN ENTRY–CORPORATE |
Authorized form of the name of the main corporate author. Required for auction catalogs. |
Auction catalogs should use a 110 field rather than a 100 field. See Authorized headings sheet and AACR2. Set the first indicator to “2”. |
111 |
MAIN ENTRY–MEETING |
Authorized form of the name of a meeting which acted as a main offer (e.g. conference proceedings) |
See Authorized headings sheet and AACR2. Set the first indicator to “2”. |
245 |
TITLE STATEMENT |
Transcription of the title statement from the title page (or chief source of information) |
Enter the title in subfield “a”, the subtitle in subfield “b”, and the statement of responsibility in subfield “c”. If you are creating a record for a single volume or part of a multi-part item, you should put the part number in subfield “n” and the part title in subfield “p.” For auction catalogs, the date (in “MM/DD/YYYY” format) should be listed in square brackets in subfield “f”. See ISBD punctuation sheet. Set the first indicator to “0” if there is no author, otherwise set it to “1”. Set the second indicator to the number of non-filing characters (i.e. characters in an initial articles plus the space… for « The « set the second indicator to “4”). |
246 |
VARYING FORM OF TITLE |
Alternate form of title for searching and filing purposes |
If the patron might look for the work under a different title, enter it here. Do not include initial articles. The first indicator should be “3”, unless the title is merely a variant spelling, in which case the first indicator should be “1”. |
250 |
EDITION STATEMENT |
Transcription of the edition statement from the title page (or chief source of information) |
Transcribe the edition statement exactly as it appears on the title-page. You may abbreviate if the edition statement is very long. |
260 |
PUBLICATION (IMPRINT) |
Publication information. |
Put the location of publication in subfield “a”, the publisher in subfield “b”, and the year (or probable year) in subfield “c”. See ISBD punctuation sheet. |
264 |
PRODUCTION, PUBLICATION ETC. |
Production, Publication, Distribution, Manufacture, and Copyright Notice. |
Put the location of publication in subfield “a”, the publisher in subfield “b”, and the year (or probable year) in subfield “c”. See ISBD punctuation sheet. The label is set dynamically from the second indicator so generally this would be set to “1” for Publisher: . |
300 |
PHYSICAL DESCRIPTION |
Physical description |
Enter the pagination statement in subfield “a”, a brief description of « special » contents such as illustrations or maps in subfield “b” (see AACR2), and the size of the item in subfield “c”. See ISBD punctuation sheet. |
490 |
SERIES STATEMENT |
Shows the series statement exactly as it appears on the item. |
Transcribe the series statement into subfield “a” with the volume number in subfield “v”. See ISBD punctuation sheet. Set the first indicator to “1” if you are using an 830. As a general rule, you should do so. |
500 |
GENERAL NOTE |
Notes that don’t fit anywhere else. |
Enter notes as full sentences, with a separate 500 field for each distinct topic. |
501 |
WITH NOTE |
Notes whether the work is bound with the works described by other records. |
Put description of relationship in subfield “a”. |
504 |
BIBLIOGRAPHY, ETC. NOTE |
Indicates whether the work includes a bibliography. |
If the work includes a bibliography and index, put the text « Includes bibliographical references (p. XXX-XXX) and index. » in subfield “a”. If the work does not include an index, remove that part of the sentence. If the references are scattered throughout the work and not gathered into a distinct sentence, remove the parenthetical statement. |
505 |
FORMATTED CONTENTS |
List of contents in a standard format. Unformatted contents can be listed in a 500 (General Note) field. |
See ISBD punctuation sheet. Set the first indicator to “0”. If you are separately coding authors and titles, set the second indicator to “0”. Otherwise, leave the second indicator blank. |
518 |
DATE/TIME OF EVENT NOTE |
Used for auction dates. |
For auction catalogs, enter the date of the auction in the format “January 2, 1984” in the subfield “a” |
520 |
SUMMARY, ETC. |
A brief summary or abstract of the book or article. |
In general you do not need to write a summary. A summary might be called for, however, with items that cannot be easily reviewed by a patron, such as books with highly acidic paper or CD-ROMs. |
546 |
LANGUAGE NOTE |
Note describing the languages used in the work |
Only needed for works in multiple languages. See ISBD punctuation sheet. |
561 |
PROVENANCE INFORMATION |
Describes the previous ownership of the item. |
Used only for rare books. |
563 |
BINDING INFORMATION |
Describes the binding of the item. |
Used only for rare books. |
590 |
LOCAL NOTE |
Local notes. Required for auction catalogs. |
Used for auction catalogs to indicate what types of coins are sold in the auction- Roman, Greek, etc. |
600 |
SUBJECT ADDED–PERSONAL |
Authorized form of personal names for people discussed in the work |
See Authorized headings sheet and AACR2. The first indicator should generally be a “1”, to indicate that the entry is surname first. If the name consists only of a forename, however, the first indicator should be “0”. If you found the name in the LC authority file, set the second indicator to “0”. Otherwise set the second indicator to “4”. |
610 |
SUBJECT ADDED–CORPORATE |
Authorized form of corporate names for organizations discussed in the work |
See Authorized headings sheet and AACR2. Set the first indicator to “2”. If you found the name in the LC authority file, set the second indicator to “0”. Otherwise set the second indicator to “4”. |
611 |
SUBJECT ADDED–MEETING |
Authorized form of meeting names for meetings discussed in the work |
See Authorized headings sheet and AACR2. Set the first indicator to “2”. If you found the name in the LC authority file, set the second indicator to “0”. Otherwise set the second indicator to “4”. |
630 |
SUBJECT ADDED–UNIFORM TITLE |
Authorized form of titles for other works discussed in the work |
See Authorized headings sheet and AACR2. Set the first indicator to the number of non-filing characters (i.e. characters in an initial articles plus the space… for « The « set the first indicator to “4”). If you found the name in the LC authority file, set the second indicator to “0”. Otherwise set the second indicator to “4”. |
650 |
SUBJECT ADDED–TOPICAL |
Library of Congress Subject Heading terms describing the subject of the work |
See Authorized headings sheet and AACR2. If you found the name in the LC authority file, set the second indicator to “0”. Otherwise set the second indicator to “4”. |
651 |
SUBJECT ADDED–GEOGRAPHICAL |
Library of Congress Subject Heading geographical terms describing the subject of the work |
See Authorized headings sheet and AACR2. If you found the name in the LC authority file, set the second indicator to “0”. Otherwise set the second indicator to “4”. |
655 |
INDEX TERM–GENRE/FORM |
Describes what an item is as opposed to what the item is about. |
Generally used only for auction catalogs, which should have the genre heading « Auction catalogs. » (make sure to find the authorized heading!) If you found the name in the LC authority file, set the second indicator to “0”. If you are using a term from a specific thesaurus, set the second indicator to “7” and put the code for the thesaurus in subfield “2”. Otherwise set the second indicator to “4”. |
690 |
LOCAL SUBJECT ADDED–TOPICAL |
Used for headings from any custom subject authority file. |
If there is no appropriate LCSH term, you can use a 690 with subject headings you find on other items in the catalog. |
691 |
LOCAL SUBJECT ADDED–GEOGRAPHICAL |
Used for headings from any custom subject authority file. |
If there is no appropriate LCSH term, you can use a 691 with subject headings you find on other items in the catalog. |
700 |
ADDED ENTRY–PERSONAL |
Used for second authors and other persons related to the production of the work. |
See Authorized headings sheet and AACR2. The first indicator should generally be a “1”, to indicate that the entry is surname first. If the name consists only of a forename, however, the first indicator should be “0”. |
710 |
ADDED ENTRY–CORPORATE |
Used for corporate bodies related to the production of the work (e.g. publishers). |
See Authorized headings sheet and AACR2. Set the first indicator to “2”. |
711 |
ADDED ENTRY–MEETING |
Used for meetings related to the production of the work (e.g. symposia that contributed to the work). |
See Authorized headings sheet and AACR2. Set the first indicator to “2”. |
730 |
ADDED ENTRY–UNIFORM TITLE |
Used for uniform titles related to the production of the work (e.g. a work that inspired the present work) |
See Authorized headings sheet and AACR2. Set the first indicator to the number of non-filing characters (i.e. characters in an initial articles plus the space… for « The « set the first indicator to “4”). |
773 |
HOST ITEM ENTRY |
Describes the larger bibliographic unit that contains the work (e.g. book or journal containing the article being described in the current record) |
If the host publication is author main entry, enter the authorized form of the author’s name in subfield “a”. Put the title in subfield “t”. If the host publication is an independent work, put publication information in subfield “d”. When available, ISSN and ISBN should always be used in, in subfields “x” and “z” respectively. Relationship information (e.g. volume number, page number, etc.) goes in subfield “g”. Subfield “q” contains an encoded representation of the location of the item: volume, issue, and section numbers are separated by colons, and the first page is entered following a “<” at the end of the subfield. See ISBD punctuation sheet. Set the first indicator to “0”. If you want the label « In: » to be generated, leave the second indicator blank. If you want something else displayed before the 773 text, set the second indicator to “8” and add a subfield “i” with the label you want at the beginning of the field (e.g. « $iOffprint from: »). |
830 |
SERIES ENTRY–UNIFORM TITLE |
Authorized form of the series name transcribed in the 490 field. Often this will just be the same as the 490. |
See Authorized headings sheet and AACR2. Set the second indicator to the number of non-filing characters (i.e. characters in an initial articles plus the space… for « The « set the second indicator to “4”). |
852 |
LOCATION/CALL NUMBER |
Provides the section name for pre-barcode books, pamphlets, and some articles and serials. |
Do not put anything in this field if you are cataloging a volume which gets only one record and a barcode. If the item does not get a barcode, or you are currently creating a record for an article in a volume, put the section in subfield “a” (see ANS cataloging documentation), and the call number in subfield “i”. Set the first indicator to “8”. |
856 |
ELECTRONIC ACCESS |
Links to material available online. |
Put the URL of any electronic copies or summaries, etc. in subfield “u” and a link title in subfield “y”. Set the first indicator to “4”. |
942 |
ADDED ENTRY ELEMENTS (KOHA) |
Used for Koha-specific data. |
Set the subfield “c” to the appropriate item type. |
Table : Guide de catalogage
Champs spécifiques à Koha
Koha utilise trois champs pour enregistrer des informations spécifiques.
At the record level, 942 (MARC21) or 942 and 099 (UNIMARC) is used to store information such as record-level item type, record-level call number and classification scheme.
Les informations sur les exemplaires sont enregistrées en 952 (MARC21) ou 995 (UNIMARC).
System control numbers for Koha are stored in 999 (MARC21) or 001 and 090 (UNIMARC).
Added entry elements (942 / 099)
942$0 / 099$x - prêts dans Koha, tous les exemplaires
MARC21 : 942$0
UNIMARC : 099$x
This field contains the total number of issues/checkouts of all items of this record. It is populated using the update_totalissues.pl cronjob.
Mapped to: biblioitems.totalissues
Indexed in: totalissues
Avertissement
This field should not be editable nor edited manually.
942$2 - Source de classification ou règle de classement
MARC21: 942$2
UNIMARC: 942$2
This field contains the source of classification used by the record’s call number (942$h and 942$i (MARC21)).
Un choix de sources de classification telles qu’elles sont définies dans l’administration. Si aucun schéma de classification n’est rentré, le système utilisera la valeur saisie dans la préférence système DefaultClassificationSource.
The source of classification will be used, along with the call number itself (942$h and 942$i (MARC21)) to create the normalized call number used when sorting by call number.
Mapped to: biblioitems.cn_source
Indexed in: cn-bib-source
942$6 - Koha normalized classification for sorting
MARC21: 942$6
UNIMARC: 942$6
This field contains the normalized call number used for sorting, based on the record-level call number (942$h and 942$i (MARC21)) and the classification source (942$2).
Mapped to: biblioitems.cn_sort
Indexed in: cn-bib-sort
Avertissement
This field should not be editable nor edited manually.
942$c - Koha item type
MARC21: 942$c
UNIMARC: 942$c
Ce champ contient le type de document de niveau bibliographique.
Le type de document de niveau bibliographique est utilisé à différents endroits dans Koha.
La valeur du 942$c est copiée dans 952$y (MARC21) ou 995$r (UNIMARC) comme valeur par défaut lors de l’ajout d’un nouvel exemplaire à cette notice
The record-level item type can be used for the circulation rules if the item-level_itypes system preference allows it (this system preference lets you choose between using the record-level or item-level item type for the circulation rules, among other things)
The record-level item type is indexed and used in the search (see also the AdvancedSearchTypes system preference) as well as the facets (this is useful to find records that don’t have items, like records for online resources, ebooks, pdf files, etc.)
The record-level item type is used for record-level/ »next available » holds
The record-level item type is used for record-level article requests
The record-level item type is displayed in various tables in the staff interface, in the circulation module among other places (it is possible to hide unwanted columns in the Table settings section of the Administration module)
Mapped to: biblioitems.itemtype
Indexed in: itemtype (mc-itemtype), itype (mc-itype)
942$e - Edition
MARC21: 942$e
UNIMARC: N/A
This field contains the edition information.
942$h - Partie de classification
MARC21: 942$h
UNIMARC: N/A
This field contains classification part of the call number. It is used, along with 942$2 and 942$i (MARC21) to create the normalized call number (942$6) used when sorting by call number.
Mapped to: biblioitems.cn_class
Indexed in: cn-class
942$i - Item part
MARC21: 942$i
UNIMARC: N/A
This field contains item part of the call number. It is used, along with 942$2 and 942$h (MARC21) to create the normalized call number (942$6) used when sorting by call number.
Mapped to: biblioitems.cn_item
Indexed in: cn-item
942$k - Call number prefix
MARC21: 942$k
UNIMARC: N/A
This field contains prefix to the call number.
Mapped to: biblioitems.cn_prefix
Indexed in: cn-prefix
942$m - Call number suffix
MARC21: 942$m
UNIMARC: N/A
This field contains suffix to the call number.
Mapped to: biblioitems.cn_suffix
Indexed in: cn-suffix
942$n / 955$n - Suppress in OPAC
MARC21: 942$n
UNIMARC: 955$n
If the OpacSuppression system preference is set to “hide”, this field indicates if the record should be hidden from the OPAC.
In this field, “1” means the record will be hidden in the OPAC, and “0” (or empty) means the record will be visible in the OPAC.
You can use the YES_NO authorized value category in this field if you don’t want to remember the numerical values.
Indexed in: suppress
942$s / 099$s - Serial record flag
MARC21: 942$s
UNIMARC: 099$s
This field is used by the serials module to indicate whether or not the record is associated with a serial subscription.
Mapped to: biblio.serial
Avertissement
This field should not be editable nor edited manually.
Location and item information (952)
Koha uses field 952 to store item (holding) information in MARC21, and field 995 in UNIMARC.
952$0 / 995$0 - Withdrawn status
MARC21: 952$0
UNIMARC: 995$0
Uses
This field is used to set the withdrawn (weeded) status of the item.
You can use the withdrawn status to weed items without deleting the items.
In the search results, the withdrawn item will be marked as unavailable.
Effects on circulation
A withdrawn item will not be able to be checked out.
A withdrawn item will not be able to be checked in unless the BlockReturnOfWithdrawnItems system preference allows it.
Values
The withdrawn status is numerical, “0” (or empty) means “not withdrawn” and any other number means “withdrawn”.
By default, the field is associated with the WITHDRAWN authorized value category so you don’t have to remember the numerical values. The default values in the WITHDRAWN authorized value category are
1: Withdrawn
Afficher
Interface professionnelle
Search results (withdrawn items will be marked as unavailable)
Tableau des exemplaires dans la page d’affichage détaillée de la notice
“Items” tab of the bibliographic record, “Withdrawn status” under “Statuses”
OPAC
Search results (withdrawn items will be marked as unavailable)
Tableau des exemplaires dans la page d’affichage détaillée de la notice
To hide withdrawn items from the OPAC, use the OpacHiddenItems system preference.
Mapped to: items.withdrawn
Indexed in: withdrawn
952$1 / 995$2 - Lost status
MARC21: 952$1
UNIMARC: 995$2
Uses
This field is used to set the lost status of the item.
You can use the lost status to mark items as lost or missing
In the search results, the lost item will be marked as unavailable.
Marking an item lost while it is checked out can charge the replacement cost (952$v (MARC21) or 995$g (UNIMARC)) to the patron (see WhenLostChargeReplacementFee), as well as a processing fee (the processing fee is set at the item type level)
The lost status can be changed automatically after a number of days overdue with the longoverdue.pl cronjob
Effects on circulation
La possibilité de prêter un exemplaire perdu dépend de la préférence système IssueLostItem.
La possibilité de retourner un exemplaire perdu dépend de la préférence système BlockReturnOfLostItems.
Values
The lost status is numerical, “0” (or empty) means “not lost” and any other number means “lost”.
By default, the field is associated with the LOST authorized value category so you don’t have to remember the numerical values. The default values in the LOST authorized value category are
1: Lost
2: Long overdue (lost)
3: Lost and paid for
4: Missing
5: Missing from bundle
Afficher
Interface professionnelle
Search results (lost items will be marked as unavailable)
Tableau des exemplaires dans la page d’affichage détaillée de la notice
“Items” tab of the bibliographic record, “Lost status” under “Statuses”
OPAC
Search results (lost items will be marked as unavailable)
Tableau des exemplaires dans la page d’affichage détaillée de la notice
Il est possible de configurer l’OPAC afin que les exemplaires perdus ne s’affichent pas à la préférence système hidelostitems.
Mapped to: items.itemlost
Indexed in: lost
952$2 / 995$4 - Source de classification ou règle de classement
MARC21: 952$2
UNIMARC: 995$4
Uses
This field contains the source of classification used by the record’s call number (952$o (MARC21) or 995$k (UNIMARC)).
The source of classification will be used, along with the call number itself (952$o (MARC21) or 995$k (UNIMARC)) to create the normalized call number (952$6 (MARC21) or 995$s (UNIMARC)) used when sorting by call number.
Values
There is a choice of classification sources as they are defined in administration.
Si aucun schéma de classification n’est rentré, le système utilisera la valeur saisie dans la préférence système DefaultClassificationSource.
Afficher
This is not displayed either in the OPAC or in the staff interface. The information is only available in the item’s editing form.
Mapped to: items.cn_source
Indexed in: classification-source
952$3 / 995$l - Materials specified
MARC21: 952$3
UNIMARC: 995$l (L)
Uses
This field is used to add information about accompanying materials or to specify how many pieces the item has.
Effects on circulation
This information will be displayed when circulation the item so that the circulation staff knows to make sure all the accompanying material is there when checkout out and it’s still there when checking the item back in.

Values
This is a free text field, but it is possible to associate it to an authorized value category in the MARC framework to make it into a drop-down menu.
Afficher
Interface professionnelle
This information will appear when checking out or checking in an item
Tableau des exemplaires dans la page d’affichage détaillée de la notice
Note
Use Table settings if you want to hide that column - Module: Catalog - Table id: holdings_table and/or otherholdings_table - Column: holdings_materials or otherholdings_materials
“Items” tab of the bibliographic record, “Materials specified” under “Item information”
OPAC
Tableau des exemplaires (caché par défaut) dans la page d’affichage détaillée de la notice
Note
Use Table settings if you want to show that column - Module: OPAC - Table id: holdingst - Column: item_materials
Mapped to: items.materials
Indexed in: materials-specified
952$4 / 995$1 - Damaged status
MARC21: 952$4
UNIMARC: 995$1
Uses
This field is used to set the damaged status of the item.
In the search results, the damaged item will be marked as unavailable.
Effects on circulation
The damaged status does not affect the ability to check out or check in an item.
The AllowHoldsOnDamagedItems system preference indicates whether or not damaged items can be put on hold.
Values
The damaged status is numerical, “0” (or empty) means “not damaged” and any other number means “damaged”.
By default, the field is associated with the DAMAGED authorized value category so you don’t have to remember the numerical values. The default values in the DAMAGED authorized value category are
1: Damaged
Afficher
Interface professionnelle
Search results (damaged items will be marked as unavailable)
Tableau des exemplaires dans la page d’affichage détaillée de la notice
“Items” tab of the bibliographic record, “Damaged status” under “Statuses”
OPAC
Search results (damaged items will be marked as unavailable)
Tableau des exemplaires dans la page d’affichage détaillée de la notice
To hide damaged items from the OPAC, use the OpacHiddenItems system preference.
Mapped to: items.damaged
Indexed in: damaged
952$5 / 995$3 - Use restrictions
MARC21: 952$5
UNIMARC: 995$3
Uses
This field is used to set the restricted status of the item.
In the search results, the restricted item will be marked as available.
Effects on circulation
A restricted item will not be able to be checked out.
Values
The restricted status is numerical, “1” means restricted and “0” (or empty) means unrestricted.
Note
Unlike other statuses, the restricted status can only be 0 (not restricted) or 1 (restricted).
By default, the field is associated with the RESTRICTED authorized value category so you don’t have to remember the numerical values. The default values in the RESTRICTED authorized value category are
1: Restricted access
Afficher
Interface professionnelle
Search results (restricted items will be marked as available)
Tableau des exemplaires dans la page d’affichage détaillée de la notice
OPAC
Search results (restricted items will be marked as available)
Tableau des exemplaires dans la page d’affichage détaillée de la notice
Mapped to: items.restricted
Indexed in: restricted
952$6 / 995$s - Koha normalized classification for sorting
MARC21: 952$6
UNIMARC: 995$s
Avertissement
This field should not be editable nor edited manually.
Uses
This field contains the normalized call number used for sorting, based on the item-level call number (952$o (MARC21) or 995$k (UNIMARC)) and the classification source (952$2 (MARC21) or 995$4 (UNIMARC)).
Afficher
This information is not displayed anywhere in the OPAC or in the staff interface, it is for Koha’s internal use only.
Mapped to: items.cn_sort
Indexed in: cn-sort
952$7 / 995$o - Not for loan status
MARC21: 952$7
UNIMARC: 995$o
Uses
This field is used to set the not for loan status of the item.
In the search results, the not for loan item will be marked as unavailable or for reference use only (see Reference_NFL_Statuses)
Effects on circulation
Items with a not for loan status cannot be checked out (unless AllowNotForLoanOverride allows it)
Depending on the value, items may or may not be put on hold (see below)
Depending on TrapHoldsOnOrder and SkipHoldTrapOnNotForLoanValue not for loan items may be used to fill holds
The UpdateNotForLoanStatusOnCheckin system preference can be used to automatically change not for loan values upon checkin
The UpdateNotForLoanStatusOnCheckout system preference can be used to automatically change not for loan values when checking out the item
Values
The not for loan status is numerical, “0” (or empty) means available.
Negative values (< 0) mean that the item cannot be checked out, but can be put on hold.
Positive values (> 0) mean that the item cannot be checked out nor be put on hold.
By default, the field is associated with the NOT_LOAN authorized value category so you don’t have to remember the numerical values. The default values in the NOT_LOAN authorized value category are
-1: On order
1: Not for loan
2: Staff collection
3: Added to bundle
Afficher
Interface professionnelle
Search results (not for loan item will be marked as unavailable or for reference use only (see Reference_NFL_Statuses))
Tableau des exemplaires dans la page d’affichage détaillée de la notice
“Items” tab of the bibliographic record, “Withdrawn status” under “Statuses”
OPAC
Search results (not for loan item will be marked as unavailable or for reference use only (see Reference_NFL_Statuses))
Tableau des exemplaires dans la page d’affichage détaillée de la notice
To hide not for loan items from the OPAC, use the OpacHiddenItems system preference.
Mapped to: items.notforloan
Indexed in: notforloan
952$8 / 995$h - Collection
MARC21: 952$8
UNIMARC: 995$h
Uses
This field is used to set the collection of the item.
Collections in Koha are used to group items in ways other than physically (the physical location can be stored in 952$c (MARC21) or 995$e (UNIMARC)). An example of a collection could be “Local authors”.
Collections can also be used to limit transfers in multi-branch systems (see the Library transfer limits section of the administration) if BranchTransferLimitsType is set to “collection code”
The collection of an item is used in the search (see the AdvancedSearchTypes system preference) as well as the facets.
Values
By default, the field is associated with the CCODE authorized value category. The default values in the CCODE authorized value category are
FIC: Fiction
NFIC: Non-fiction
REF: Reference
Afficher
Interface professionnelle
The collections will be part of the facets in the search results
Tableau des exemplaires dans la page d’affichage détaillée de la notice
Note
Use Table settings if you want to hide that column - Module: Catalog - Table id: holdings_table and/or otherholdings_table - Column: holdings_ccode or otherholdings_ccode
Checkouts table in the patron’s file
Note
Use Table settings if you want to hide that column - Module: Circulation and Patrons - Table id: issues-table - Column: collection
Many other places all throughout Koha
OPAC
Search results, if OpacItemLocation allows it
The collections will be part of the facets in the search results
Tableau des exemplaires dans la page d’affichage détaillée de la notice
Note
Use Table settings if you want to hide that column - Module: OPAC - Table id: holdingst - Column: item_ccode
Many other places throughout the OPAC
Mapped to: items.ccode
Indexed in: collection-code
952$9 / 995$9 - Itemnumber
MARC21: 952$9
UNIMARC: 995$9
Avertissement
This field should not be editable nor edited manually.
Uses
The itemnumber is the internal number assigned to each item by Koha. It is unique and cannot be reattributed even when the item is deleted.
Afficher
This information is not displayed anywhere in the OPAC or in the staff interface, it is for Koha’s internal use only.
Mapped to: items.itemnumber
Indexed in: itemnumber
952$a / 995$b - Home library
MARC21: 952$a
UNIMARC: 995$b
Required
Uses
This field indicates the home library of the item.
The home library is important for many things in Koha, including, but not limited to
The home library of an item is used in the search as well as the facets (see the DisplayLibraryFacets system preference)
Effects on circulation
As previously stated, the circulation rules are based on the item’s library (see the HomeOrHoldingBranch system preference)
Values
Libraries are defined in the libraries section of the administration page.
Afficher
Interface professionnelle
Depending on the DisplayLibraryFacets system preference, the home library may be part of the facets in the search results
Tableau des exemplaires dans la page d’affichage détaillée de la notice
Note
Use Table settings if you want to hide that column - Module: Catalog - Table id: holdings_table and/or otherholdings_table - Column: holdings_homebranch or otherholdings_homebranch
This information is displayed in the staff interface, in the “Items” tab of the bibliographic record, “Home library” under “Item information”
Checkouts table in the patron’s file
Note
Use Table settings if you want to hide that column - Module: Circulation and Patrons - Table id: issues-table - Column: homebranch
Many other places all throughout Koha
OPAC
Search results (if OpacItemLocation allows it)
Depending on the DisplayLibraryFacets system preference, the home library may be part of the facets in the search results
Tableau des exemplaires dans la page d’affichage détaillé de la notice, si la préférence OpacLocationBranchToDisplay le permet
Note
Use Table settings if you want to hide that column - Module: OPAC - Table id: holdingst - Column: item_home_location
Many other places throughout the OPAC
Mapped to: items.homebranch
Indexed in: homelibrary
952$b / 995$c - Current library
MARC21: 952$b
UNIMARC: 995$c
Required
Uses
Ce champ indique la bibliothèque actuelle (bibliothèque dépositaire) de l’exemplaire.
La librairie actuelle est importante pour de nombreuses choses dans Koha, dont
La bibliothèque actuelle d’un exemplaire est utilisée pour la recherche ainsi que les facettes (voir la préférence système DisplayLibraryFacets)
Effects on circulation
As previously stated, the circulation rules are based on the item’s library (see the HomeOrHoldingBranch system preference)
Values
Libraries are defined in the libraries section of the administration page.
Afficher
Interface professionnelle
Depending on the DisplayLibraryFacets system preference, the holding library may be part of the facets in the search results
Tableau des exemplaires dans la page d’affichage détaillée de la notice
Note
Use Table settings if you want to hide that column - Module: Catalog - Table id: holdings_table and/or otherholdings_table - Column: holdings_holdingbranch or otherholdings_holdingbranch
Cette information est affichée dans l’interface professionnelle, dans l’onglet “Exemplaires” de la notice bibliographique, “Bibliothèque actuelle” sous “Information sur l’exemplaire”
Many other places all throughout Koha
OPAC
Search results (if OpacItemLocation allows it)
Depending on the DisplayLibraryFacets system preference, the holding library may be part of the facets in the search results
Tableau des exemplaires dans la page d’affichage détaillé de la notice, si la préférence OpacLocationBranchToDisplay le permet
Note
Use Table settings if you want to hide that column - Module: OPAC - Table id: holdingst - Column: item_current_location
Many other places throughout the OPAC
Mapped to: items.holdingbranch
Indexed in: holdinglibrary
952$c / 995$e - Shelving location
MARC21: 952$c
UNIMARC: 995$e
Uses
This field indicates the location of the item (physical place in the library).
Shelving locations in Koha are used to group items physically. An example of a shelving location could be “Children’s section”.
The location of an item is used in the search (see the AdvancedSearchTypes system preference) as well as the facets.
The UpdateItemLocationOnCheckin system preference can be used to automatically change location values upon checkin
The UpdateItemLocationOnCheckout system preference can be used to automatically change location values upon checkout.
Values
By default, the field is associated with the LOC authorized value category. The default values in the LOC authorized value category are
AV: Audio visual
CART: Book cart
CHILD: Children’s area
FIC: Fiction
GEN: General stacks
NEW: New materials shelf
DISPLAY: On display
PROC: Processing center
REF: Reference
STAFF: Staff office
The default value for new items can be set using the NewItemsDefaultLocation system preference
Afficher
Interface professionnelle
The locations will be part of the facets in the search results
Tableau des exemplaires dans la page d’affichage détaillé de la notice (sous la bibliothèque de rattachement)
This information is displayed in the staff interface, in the “Items” tab of the bibliographic record, “Home library” under “Item information”
Checkouts table in the patron’s file
Note
Use Table settings if you want to hide that column - Module: Circulation and Patrons - Table id: issues-table - Column: location
Many other places all throughout Koha
OPAC
Search results (if OpacItemLocation allows it)
The locations will be part of the facets in the search results
Tableau des exemplaires dans la page d’affichage détaillé de la notice, la préférence système OpacLocationOnDetail indique dans quelle colonne se trouve cette information
Note
Use Table settings if you want to hide that column - Module: OPAC
Référence du tableau : holdingst
Column: item_shelving_location (if OpacLocationOnDetail is set to “separate column”)
Many other places throughout the OPAC
Mapped to: items.location
Indexed in: location
952$d / 995$5 - Date acquired
MARC21: 952$d
UNIMARC: 995$5
Uses
This field is used to enter the date of acquisition of the item.
The acquisition date can be used in the search and the sort function in the search results
When using the Acquisitions module, this should be filled automatically with the acquisition date
Values
Ce doit être une date au format AAAA-MM-JJ (il y a un sélecteur de dates pour s’assurer que la date est au bon format)
Afficher
Interface professionnelle
Tableau des exemplaires dans la page d’affichage détaillée de la notice
Note
Use Table settings if you want to hide that column - Module: Catalog - Table id: holdings_table and/or otherholdings_table - Column: holdings_dateaccessioned or otherholdings_dateaccessioned
“Items” tab of the bibliographic record, “Accession date” under “History”
Mapped to: items.dateaccessioned
Indexed in: date-of-acquisition
952$e / 995$a - Source of acquisition
MARC21: 952$e
UNIMARC: 995$a
Uses
This field is used to enter the vendor where the item was acquired
When using the Acquisitions module, this should be filled automatically with the vendor upon receiving
Values
This is a free text field
If using the Acquisitions field, the value in this field will be the vendor id rather than the vendor’s name
Afficher
This is not displayed either in the OPAC or in the staff interface. The information is only available in the item’s editing form.
Mapped to: items.booksellerid
Indexed in: acqsource
952$f / 995$8 - Coded location qualifier
MARC21: 952$f
UNIMARC: 995$8
Uses
This field is used to enter a three-character code that identifies the specific issues of the item that are located apart from the main holdings of the same item (same as MARC21 852$f).
Values
This is a free text field
The field in the database is limited to 10 characters
Afficher
This is not displayed either in the OPAC or in the staff interface. The information is only available in the item’s editing form.
Mapped to: items.coded_location_qualifier
Indexed in: coded-location-qualifier
952$g / 995$p - Cost, normal purchase price
MARC21: 952$g
UNIMARC: 995$p
Uses
This field is used to enter the purchase price of the item
When using the Acquisitions module, this should be filled automatically with the purchase price upon receiving
Values
This is a free text field
The price must be digits, with a period as the decimal, with no currency symbols (e.g. 24.95)
The field in the database limits to two decimal points (e.g. 24.95 is OK but 24.94875 is not)
Afficher
This is not displayed either in the OPAC or in the staff interface. The information is only available in the item’s editing form.
Mapped to: items.price
Indexed in: price
952$h / 995$v - Serial enumeration / chronology
MARC21: 952$h
UNIMARC: 995$v
Uses
Ce champ est utilisé pour saisir le numéro de fascicule des périodiques ou le numéro de volume des séries
Lors de l’utilisation du module Périodiques, ce champ devrait être renseigné automatiquement avec le numéro de fascicule
Values
This is a free text field
Afficher
Interface professionnelle
Tableau des exemplaires dans la page d’affichage détaillée de la notice
Note
Use Table settings if you want to hide that column - Module: Catalog - Table id: holdings_table and/or otherholdings_table - Column: holdings_enumchron or otherholdings_enumchron
Onglet “Exemplaires” sous la notice bibliographique, “Enumération du périodique” sous “Historique”
OPAC
Tableau des exemplaires dans la page d’affichage détaillée de la notice
Note
Use Table settings if you want to hide that column - Module: OPAC - Table id: holdingst - Column: item_enumchron
Mapped to: items.enumchron
952$i / 995$j - Numéro d’inventaire
MARC21: 952$i
UNIMARC: 995$j
Uses
Ce champ permet de saisir un numéro d’inventaire pour l’exemplaire
Note
Le numéro d’inventaire n’est pas le numéro d’exemplaire interne à Koha (qui est stocké en 952$9 (MARC21) ou 995$9 (UNIMARC))
Values
This is a free text field
The field in the database is limited to 32 characters
Afficher
Interface professionnelle
Tableau des exemplaires dans la page d’affichage détaillée de la notice
Note
Use Table settings if you want to hide that column - Module: Catalog - Table id: holdings_table and/or otherholdings_table - Column: holdings_stocknumber or otherholdings_stocknumber
Mapped to: items.stocknumber
Indexed in: number-local-acquisition
952$j / 995$q - Shelving control number
MARC21: 952$j
UNIMARC: 995$q
Uses
This field is used to enter a shelf number where the item is located
Values
The stack number should be numerical
By default, the field is associated with the STACK authorized value category so you don’t have to remember the numerical values. There are no default values.
Afficher
This is not displayed either in the OPAC or in the staff interface. The information is only available in the item’s editing form.
Mapped to: items.stack
Indexed in: stack
952$l / 995$w - Total checkouts
MARC21: 952$l (L)
UNIMARC: 995$w
Avertissement
This field should not be editable nor edited manually.
Uses
This field contains the total number of past and present issues/checkouts of this item
The number of issues is used to sort search results by popularity
The number of issues for each item is used to update the total number of issues for the record (942$0 (MARC21) or 099$x (UNIMARC))
Afficher
Interface professionnelle
“Items” tab of the bibliographic record, “Total checkouts” under “History”
Mapped to: items.issues
Indexed in: issues
952$m / 995$x - Total renewals
MARC21: 952$m
UNIMARC: 995$x
Avertissement
This field should not be editable nor edited manually.
Uses
This field contains the total number of past renewals of this item
Afficher
Interface professionnelle
“Items” tab of the bibliographic record, “Current renewals” under “Statuses”
Mapped to: items.renewals
Indexed in: renewals
952$n / 995$t - Total holds
MARC21: 952$n
UNIMARC: 995$t
Avertissement
This field should not be editable nor edited manually.
Uses
This field contains the total number of past and present holds on this item
The number of holds is used to create a RSS feed for items with the most holds
Afficher
This is not displayed either in the OPAC or in the staff interface.
Mapped to: items.reserves
Indexed in: reserves
952$o / 995$k - Full call number
MARC21: 952$o
UNIMARC: 995$k
Uses
This field is used to store the item’s call number
The call number of an item can used in the search
Values
The records call number can be copied into the item’s call number, the itemcallnumber system preference indicates which record field to use as the source
Afficher
Interface professionnelle
Tableau des exemplaires dans la page d’affichage détaillée de la notice
Note
Use Table settings if you want to hide that column - Module: Catalog - Table id: holdings_table and/or otherholdings_table - Column: holdings_itemcallnumber or otherholdings_itemcallnumber
“Items” tab of the bibliographic record, “Item callnumber” under “Item information”
Checkouts table in the patron’s file
Note
Use Table settings if you want to hide that column - Module: Circulation and Patrons - Table id: issues-table - Column: callno
Many other places all throughout Koha
OPAC
Search results, if OpacItemLocation allows it
Tableau des exemplaires dans la page d’affichage détaillée de la notice
Note
Use Table settings if you want to hide that column - Module: OPAC - Table id: holdingst - Column: item_callnumber
Checkouts table in the patron’s online account
Many other places throughout the OPAC
Mapped to: items.itemcallnumber
Indexed in: local-classification
952$p / 995$f - Barcode
MARC21: 952$p
UNIMARC: 995$f
Requis pour la circulation
Uses
This field is used to store the item’s barcode
The barcode of an item can used in the search
Effects on circulation
Le code à barres est essentiel pour la circulation des documents
Values
This is a free text field
Note
The barcodes in Koha are case insensitive, meaning that ABC123 and abc123 are considered to be the same barcode.
The field in the database is limited to 20 characters
Afficher
Interface professionnelle
Tableau des exemplaires dans la page d’affichage détaillée de la notice
Note
Use Table settings if you want to hide that column - Module: Catalog - Table id: holdings_table and/or otherholdings_table - Column: holdings_barcode or otherholdings_barcode
“Items” tab of the bibliographic record
Checkouts table in the patron’s file (in the title column)
Mapped to: items.barcode
Indexed in: barcode
952$q / 995$n - Date due
MARC21: 952$q
UNIMARC: 995$n
Avertissement
This field should not be editable nor edited manually.
Uses
Lorsque l’exemplaire est prêté, la date d’échéance est stockée dans ce champ (AAAA-MM-DD)
This field is used in the “Limit to currently available items” in the facets
Afficher
La date d’échéance est affichée dans de nombreuses pages du module circulation, mais mais elle provient des prêts et non de l’exemplaire
Mapped to: items.onloan
Indexed in: onloan
952$r / 995$y - Date last seen
MARC21: 952$r
UNIMARC: 995$y
Avertissement
This field should not be editable nor edited manually.
Uses
When the item is checked out or in, inventoried, or during any other transaction that affects the item, the date and time is stored in this field (YYYY-MM-DD HH:MM:SS)
Afficher
Interface professionnelle
Tableau des exemplaires dans la page d’affichage détaillée de la notice
Note
Use Table settings if you want to hide that column - Module: Catalog - Table id: holdings_table and/or otherholdings_table - Column: holdings_lastseen or otherholdings_lastseen
“Items” tab of the bibliographic record, “Last seen” under “History”
Mapped to: items.datelastseen
Indexed in: datelastseen
952$s / 995$m - Date last checked out
MARC21: 952$s
UNIMARC: 995$m
Avertissement
This field should not be editable nor edited manually.
Uses
When the item is checked out, the date is stored in this field (YYYY-MM-DD)
Afficher
Interface professionnelle
Tableau des exemplaires dans la page d’affichage détaillée de la notice
Note
Use Table settings if you want to hide that column - Module: Catalog - Table id: holdings_table and/or otherholdings_table - Column: holdings_datelastborrowed or otherholdings_datelastborrowed
“Items” tab of the bibliographic record, “Last borrowed” under “History”
Mapped to: items.datelastborrowed
Indexed in: datelastborrowed
952$t / 995$6 - Copy number
MARC21: 952$t
UNIMARC: 995$6
Uses
This field is used to enter the copy number of the item
Values
This is a free text field
The field in the database is limited to 32 characters
Afficher
Interface professionnelle
Tableau des exemplaires dans la page d’affichage détaillée de la notice
Note
Use Table settings if you want to hide that column - Module: Catalog - Table id: holdings_table and/or otherholdings_table - Column: holdings_copynumber or otherholdings_copynumber
“Items” tab of the bibliographic record, “Copy number” under “History”
OPAC
Tableau des exemplaires dans la page d’affichage détaillée de la notice
Note
Use Table settings if you want to hide that column - Module: OPAC - Table id: holdingst - Column: item_copy
Mapped to: items.copynumber
Indexed in: copynumber
952$u / 995$7 - URI
MARC21: 952$u
UNIMARC: 995$7
Uses
This field is used to enter a URL or URN specific to the item
It is not necessary to enter a URL here if there is already a URL in 856$u at the record-level, unless the URL for the specific item differs from the one in 856$u (for example, if you have an online periodical, you can put the URL to the periodical in 856$u and the URL to the specific issue in 952$u)
Values
Afficher
Interface professionnelle
Tableau des exemplaires dans la page d’affichage détaillée de la notice
Note
Use Table settings if you want to hide that column - Module: Catalog - Table id: holdings_table and/or otherholdings_table - Column: holdings_uri or otherholdings_uri
OPAC
Tableau des exemplaires dans la page d’affichage détaillée de la notice
Note
Use Table settings if you want to hide that column - Module: OPAC - Table id: holdingst - Column: item_url
Mapped to: items.uri
Indexed in: uri
952$v / 995$g - Cost, replacement price
MARC21: 952$v
UNIMARC: 995$g
Uses
This field is used to enter the replacement cost that will be charged to the patron who loses the item
When using the Acquisitions module, this should be filled automatically with the replacement price upon receiving
Values
This is a free text field
The price must be digits, with a period as the decimal, with no currency symbols (e.g. 24.95)
The field in the database limits to two decimal points (e.g. 24.95 is OK but 24.94875 is not)
Afficher
Interface professionnelle
Checkouts table in the patron’s file (in the price column)
Note
Use Table settings if you want to hide that column - Module: Circulation and Patrons - Table id: issues-table - Column: price
“Items” tab of the bibliographic record, “Replacement price” under “Item information”
Mapped to: items.replacementprice
Indexed in: replacementprice
952$w / 995$i - Price effective from
MARC21: 952$w
UNIMARC: 995$i
Uses
This field is used to enter the date of the replacement price of the item
When using the Acquisitions module, this should be filled automatically with the acquisition date upon receiving
If left empty, it will default to the acquisition date (952$d (MARC21) or 995$5 (UNIMARC))
Values
This should be a date in the YYYY-MM-DD format
Afficher
This is not displayed either in the OPAC or in the staff interface. The information is only available in the item’s editing form.
Mapped to: items.replacementpricedate
Indexed in: replacementpricedate
952$x / 995$z - Non-public note
MARC21: 952$x
UNIMARC: 995$z
Uses
This field is used to enter internal notes about the item
Values
This is a free text field
Afficher
Interface professionnelle
Tableau des exemplaires dans la page d’affichage détaillée de la notice
Note
Use Table settings if you want to hide that column - Module: Catalog
Référence du tableau : holdings_table et/ou otherholdings_table
Column: holdings_itemnotes_nonpublic or otherholdings_itemnotes_nonpublic
“Items” tab of the bibliographic record, “Non-public note” under “History”
Mapped to: items.itemnotes_nonpublic
952$y / 995$r - type de document Koha
MARC21: 952$y
UNIMARC: 995$r
Required
Uses
Ce champ contient le type de document de niveau exemplaire.
Le type de document de niveau exemplaire est utilisé à plusieurs endroits dans Koha.
The item-level item type is generally used for the circulation rules unless the item-level_itypes system preference is set to use the record-level item type (this system preference lets you choose between using the record-level or item-level item type for the circulation rules, among other things)
The item-level item type is indexed and used in the search (see also the AdvancedSearchTypes system preference) as well as the facets
Effects on circulation
Le type de document est utilisé comme l’élément de base des règles de circulation, il affectera le nombre d’exemplaires qu’un adhérent peut emprunter en même temps, le nombre de réservations, etc.)
Values
The values are managed in item types
Afficher
Interface professionnelle
The itemtypes will be part of the facets in the search results
Tableau des exemplaires dans la page d’affichage détaillée de la notice
Note
Use Table settings if you want to hide that column - Module: Catalog - Table id: holdings_table and/or otherholdings_table - Column: holdings_itype or otherholdings_itype
“Items” tab of the bibliographic record, “Item type” under “Item information”
Checkouts table in the patron’s file
Note
Use Table settings if you want to hide that column - Module: Circulation and Patrons - Table id: issues-table - Column: item_type
Many other places all throughout Koha
OPAC
The item types will be part of the facets in the search results
Tableau des exemplaires dans la page d’affichage détaillée de la notice
Note
Use Table settings if you want to hide that column - Module: OPAC - Table id: holdingst - Column: item_itemtype
Many other places throughout the OPAC
Mapped to: items.itype
Indexed in: itemtype (mc-itemtype), itype (mc-itype)
952$z / 995$u - Public note
MARC21: 952$z
UNIMARC: 995$u
Uses
This field is used to enter notes about the item
Values
This is a free text field
Afficher
Interface professionnelle
Tableau des exemplaires dans la page d’affichage détaillée de la notice
Note
Use Table settings if you want to hide that column - Module: Catalog - Table id: holdings_table and/or otherholdings_table - Column: holdings_itemnotes or otherholdings_itemnotes
“Items” tab of the bibliographic record, “Public note” under “History”
OPAC
Tableau des exemplaires dans la page d’affichage détaillée de la notice
Note
Use Table settings if you want to hide that column - Module: OPAC - Table id: holdingst - Column: item_notes
Mapped to: items.itemnotes
Indexed in: note
System control numbers (999)
Koha stores its system control numbers in the 999 field in MARC21 and in the 001 and 090 field in UNIMARC.
Note
The itemnumber is stored in 952$9 (MARC21) or 995$9 (UNIMARC) (see above).
999$c / 001 - Biblionumber
The biblionumber is the internal number assigned to each record by Koha. It is unique and cannot be reattributed even when the record is deleted.
MARC21: 999$c
UNIMARC: 001
Mapped to: biblio.biblionumber
Indexé dans : numéro local (sn, biblionumber)
Avertissement
This field should not be editable nor edited manually.
999$d / 090$a - Biblioitemnumber
The biblioitemnumber is the internal number assigned to each record by Koha. It is unique and cannot be reattributed even when the record is deleted.
MARC21: 999$d
UNIMARC: 090$a
Mapped to: biblioitems.biblioitemnumber
Indexed in: biblioitemnumber
Avertissement
This field should not be editable nor edited manually.
Icônes des types d’exemplaire XSLT de Koha
Lorsque l’une des préférences systèmes XSLT(OPACXSLTDetailsDisplay, OPACXSLTResultsDisplay, XSLTDetailsDisplay, and/or XSLTResultsDisplay) ainsi que DisplayOPACiconsXSLT et DisplayIconsXSLT activées, vous verrez des icônes de type de matériel sur l’écran concerné.
Important
Ces images proviennent des valeurs trouvées dans votre leader, s’il n’est pas catalogué correctement, ce serait mieux de désactiver la préférence système DisplayOPACiconsXSLT (ce peut être fait en laissant les autres préférences système XSLT activées).

Livre [BK]
leader6 = a (et une des valeurs de leader7 plus basse)
leader7 = a
leader7 = c
leader7 = d
leader7 = m
leader6 = t
Fichier informatique [CF]
leader6 = m

Ressource continue [CR]
leader7 = b
leader7 = i
leader7 = s

Map [MP]
leader6 = e
leader6 = f

Divers [MX]
leader6 = p
Son [MU]
leader6 = c
leader6 = d
leader6 = i
leader6 = j
Matériel visuel [VM]
leader6 = g
leader6 = k
leader6 = r

Kit
leader6 = o
Gestion des commandes d’exemplaires et réservations
Si vous avez l’habitude d’importer vos notices MARC après une commande de livres (plutôt qu’après réception des livres) et que vous autorisez les adhérents à réserver des documents, vous devrez ajouter les notices d’exemplaires au fichier *.mrc avant l’importation.
The easiest way to import your latest order is to first run your records through MARCEdit. Download your MARC records, saving them to your desktop or some other location you use/will remember. If you have MARCEdit already installed you should simply have to double click on your MARC records, and they will automatically open in MARCEdit.
Important
Ce tutoriel a été rédigé avec la version MARCEdit 5.2.3769.41641 sur Windows XP, les instructions peuvent donc varier si votre version ou système d’exploitation est différent.
Votre fichier original s’affichera automatiquement en tant que donnée; assurez-vous d’avoir sélectionné MarcBreaker, puis cliquez sur “Exécuter”.
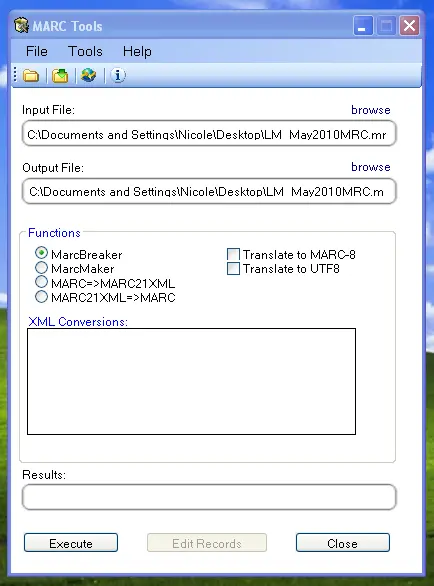
Un résumé des notices s’affichera en bas de l’écran
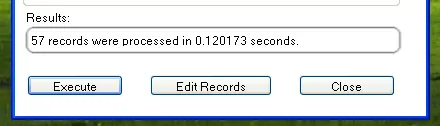
Cliquez sur “Modifier les notices” pour continuer d’ajouter des notices d’exemplaires
Votre écran sera alors remplacé par un écran plus large contenant les notices MARC
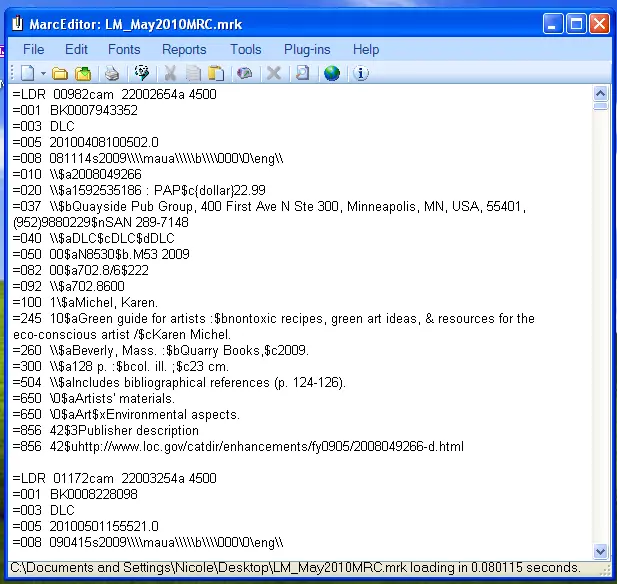
Cliquez sur Outils > Ajouter/Modifier un champ
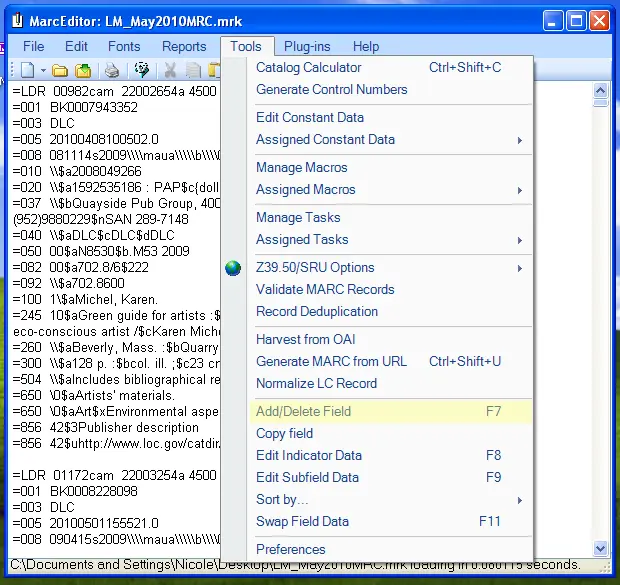
Saisissez les informations de l’exemplaire spécifique dans Koha
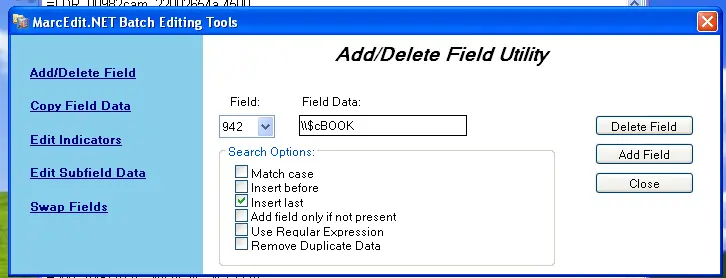
Dans la barre du champ, tapez 942
Dans la barre de données du champ, tapez \\$c et le code du type d’exemplaire (\\$cBOOK dans cet exemple)
Cochez l’option “Insérez en dernier” (Insert last)
Cliquez sur “Ajouter un champ”
Saisissez les données de la notice d’exemplaire
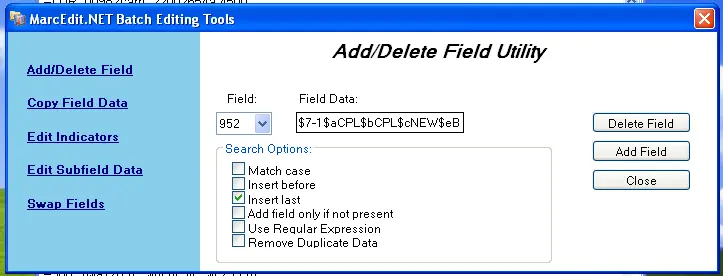
Dans la barre de champ, tapez 952
Dans la barre de données du champ, saisissez $7ORDERED_STATUS$aPERM_LOC$bCURR_LOC$cSHELVING_LOCATION$eSOURCE_OF_ACQ$yITEM_TYPE
ex. $7-1$aCPL$bCPL$cNEW$eBrodart$yBOOK
Dans l’installation par défaut de Koha, -1 est la valeur pour le statut “commandé”
Vous pourrez regarder les autres sous-champs pour lesquels vous souhaitez qu’il y ait les données dedans, par exemple, changer le code de collection pour mettre tous les exemplaires dans la même collection (8), remplit automatiquement la date d’acquisition (d), ou une note publique (z).
Assurez-vous d’utiliser le $ pour séparer les sous-champs. L’ajout de chaque sous-champ sur une ligne séparée fera que plusieurs exemplaires seront importés avec vos notices MARC (dans l’exemple au-dessus, quatre exemplaires, chacun avec un de ces sous-champs rectifiés)
Regardez bien la section Administration > Valeurs autorisées dans Koha pour saisir le code correct dans le champ
Cochez l’option “Insérez en dernier” (Insert last)
Cliquez sur “Ajouter un champ”
Fermez la fenêtre de l’éditeur du champ
Cliquez sur Fichier > Compiler dans MARC
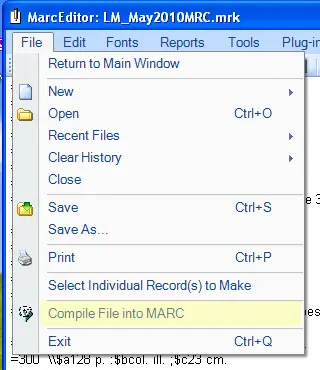
Choisissez l’emplacement où sauvegarder votre fichier
Vous pouvez ensuite aller dans Koha et suivre les instructions pour importer les notices MARC dans le réservoir.
Une fois que l’exemplaire a été saisi, vous devrez aller sur la notice d’exemplaire et changer individuellement l’exemplaire pour avoir le code à barres correct et changer le statut de “Commandé” en “Exclu du prêt”.
Note
Si vous choisissez d’acheter vos notices d’exemplaires cataloguées, vous devrez demander à votre fournisseur de mettre les informations nécessaires dans vos notices MARC; ainsi, vous pourrez importer le fichier édité par le fournisseur, et écraser la notice actuelle, qui sera automatiquement remplacée par les données dont vous avez besoin.