OPAC
Resultados de pesquisa
Para pesquisar no OPAC, pode introduzir os termos de pesquisa na caixa localizada no topo do OPAC ou clicar na ligação ‘Pesquisa avançada’ para realizar uma pesquisa mais detalhada.

Se for utilizado o Elasticsearch e a preferência de sistema OpacBrowseSearch estiver ativada, também verá a opção Procura de navegação.
Nota
Para mais informações sobre pesquisas, consulte o capítulo Pesquisar deste manual.
Visão geral dos resultados
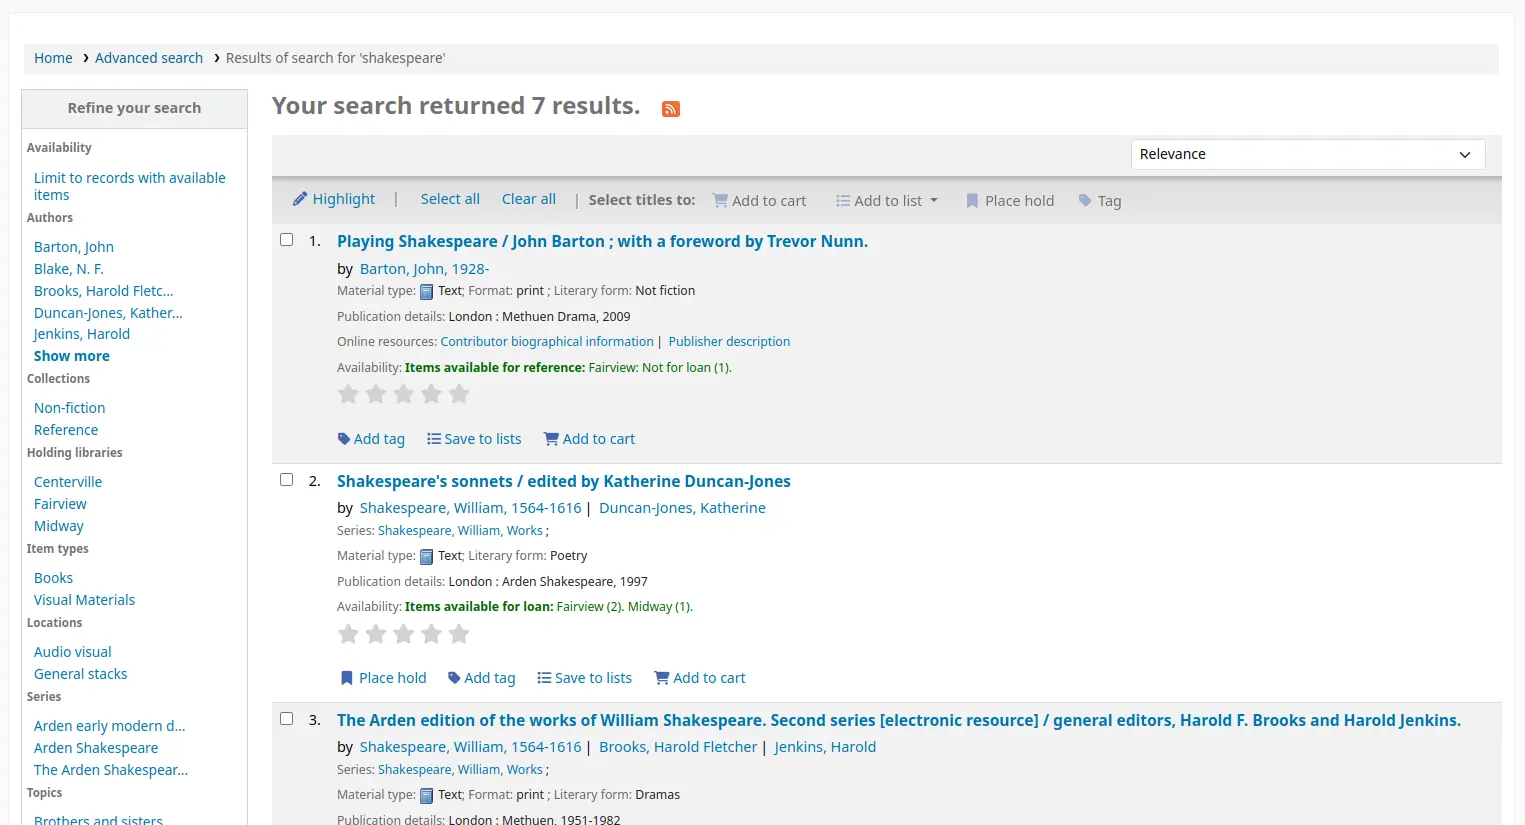
Após realizar uma pesquisa, o número de resultados encontrados aparecerá por cima dos resultados.
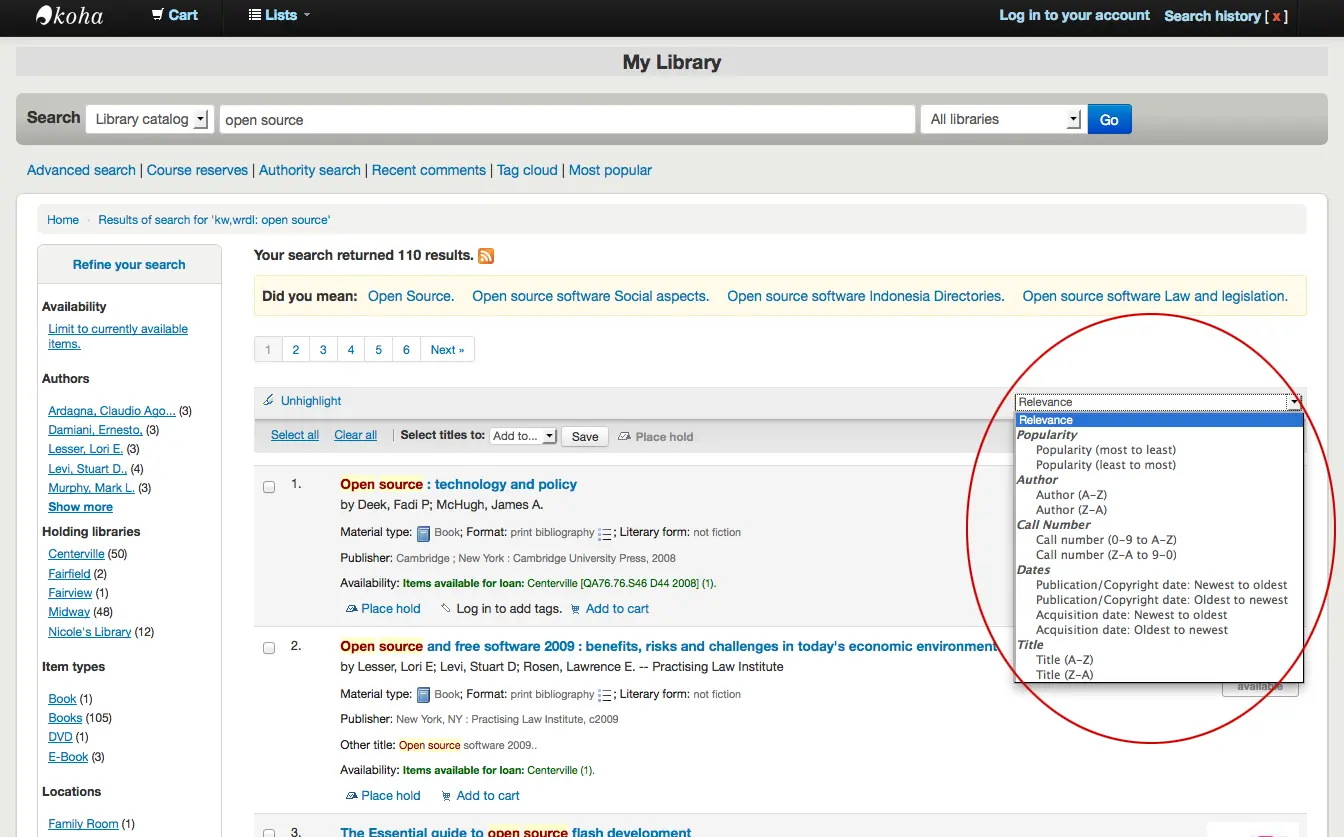
Por omissão, os resultados da pesquisa são ordenados com base nos valores das preferências do sistema OPACdefaultSortField e OPACdefaultSortOrder. Para alterar a ordem de classificação destes resultados, pode escolher outro método de ordenação no menu suspenso à direita.
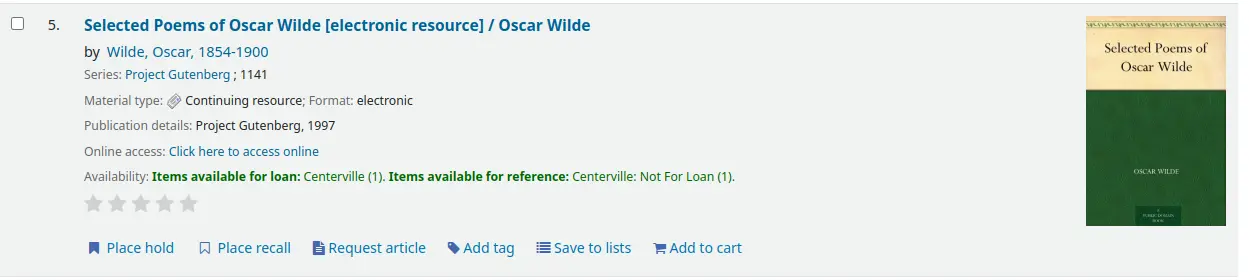
Abaixo de cada título da lista de resultados, existirá uma série de valores provenientes do cabeçalho do registo (campo 000).
Nota
Estes valores não têm qualquer relação com os tipos de documento ou códigos de coleção aplicados aos seus registos ou exemplares. Todos estes dados são extraídos dos campos de controlo do registo.
Isto pode ser ativado ou desativado com a preferência de sistema DisplayOPACiconsXSLT.
Abaixo de cada título, constará a disponibilidade dos exemplares ligados ao registo.
Nota
Mesmo que filtre por uma localização de biblioteca específica, todas as bibliotecas que possuem um exemplar aparecerão nos resultados da pesquisa.
Aviso
O estado de reserva de um exemplar não afeta a sua disponibilidade até que este passe para o estado de ‘em espera’. Os exemplares reservados que ainda estão na estante aparecerão como disponíveis até que um membro da equipa os retire da prateleira e registe a entrada do exemplar no sistema, alterando o seu estado para ‘em espera’.
Se alguma das preferências do sistema de conteúdo melhorado estiver ativada, poderão existir imagens de capa junto dos resultados da pesquisa.
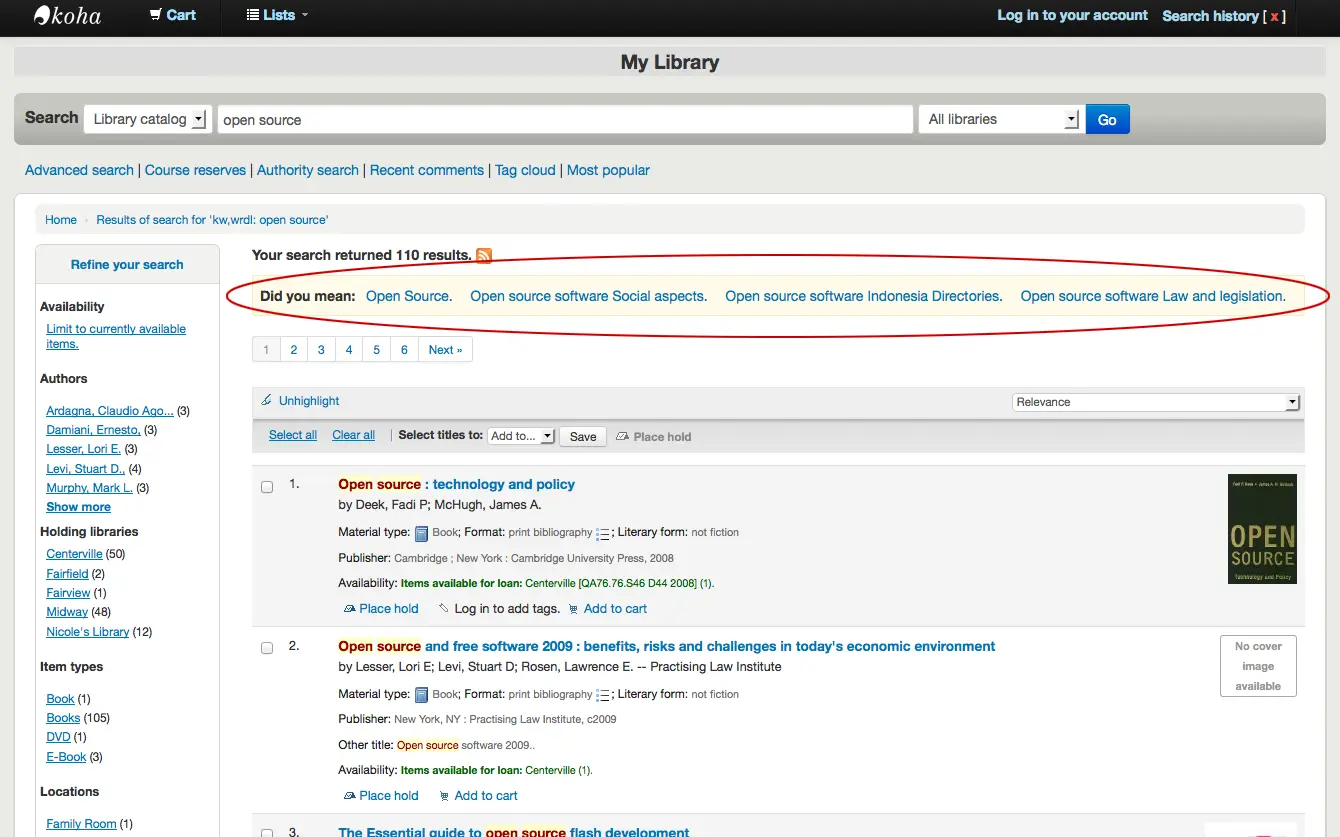
Se as opções de Quis dizer? estiverem definidas, surgirá uma barra amarela na parte superior dos resultados, exibindo outras pesquisas relacionadas.
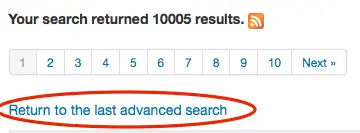
Se tiver realizado uma pesquisa avançada, verá uma opção para voltar atrás e editar a sua pesquisa avançada abaixo da lista de páginas de resultados.
Filtros (facetas)
Para filtrar os seus resultados, clique nos endereços abaixo do menu ‘Refinar a sua pesquisa’, no lado esquerdo do ecrã.
Após clicar num filtro, pode remover o mesmo dos resultados clicando no pequeno ‘x’ que aparece à direita do filtro.
![Vista em grande plano dos filtros de autor, "Shakespeare, William" já não é um endereço clicável e apresenta um [x] ao lado](_images/removefilter.webp)
Consulte a secção sobre filtros de resultados de pesquisa para mais detalhes sobre os filtros.
Pode adicionar conteúdo personalizado abaixo dos filtros utilizando o local de visualização OPACResultsSidebar na ferramenta de personalização HTML.
Feeds RSS de pesquisa
Poderá subscrever os resultados da sua pesquisa como um feed RSS clicando no ícone RSS na barra de endereços ou junto ao número de resultados.
Subscrever os resultados de pesquisa como feeds RSS permitir-lhe-á ver quando um novo registo é adicionado ao catálogo na sua área de interesse.
Registo bibliográfico
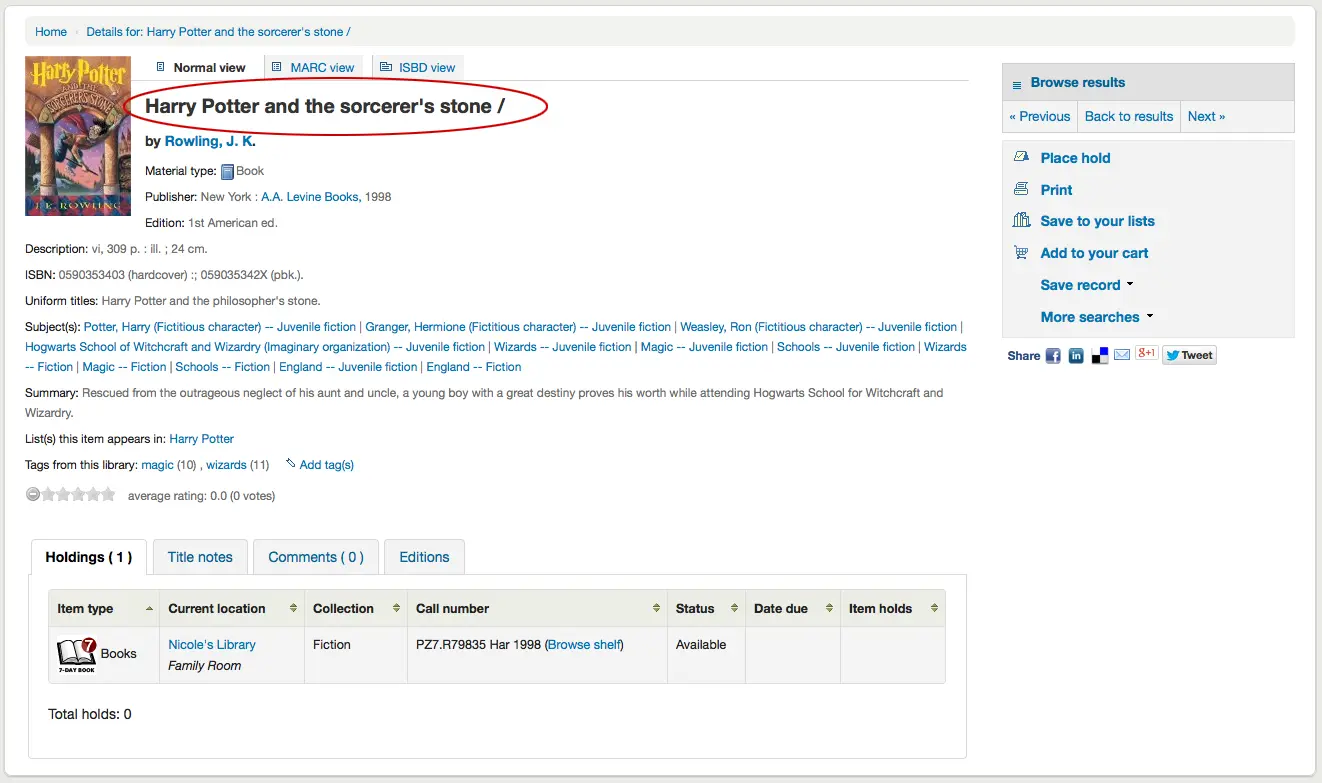
Ao clicar num título nos resultados da pesquisa, é direcionado para os detalhes bibliográficos do registo. Esta página está dividida em várias áreas distintas.
No topo do ecrã estarão o título e a GMD:
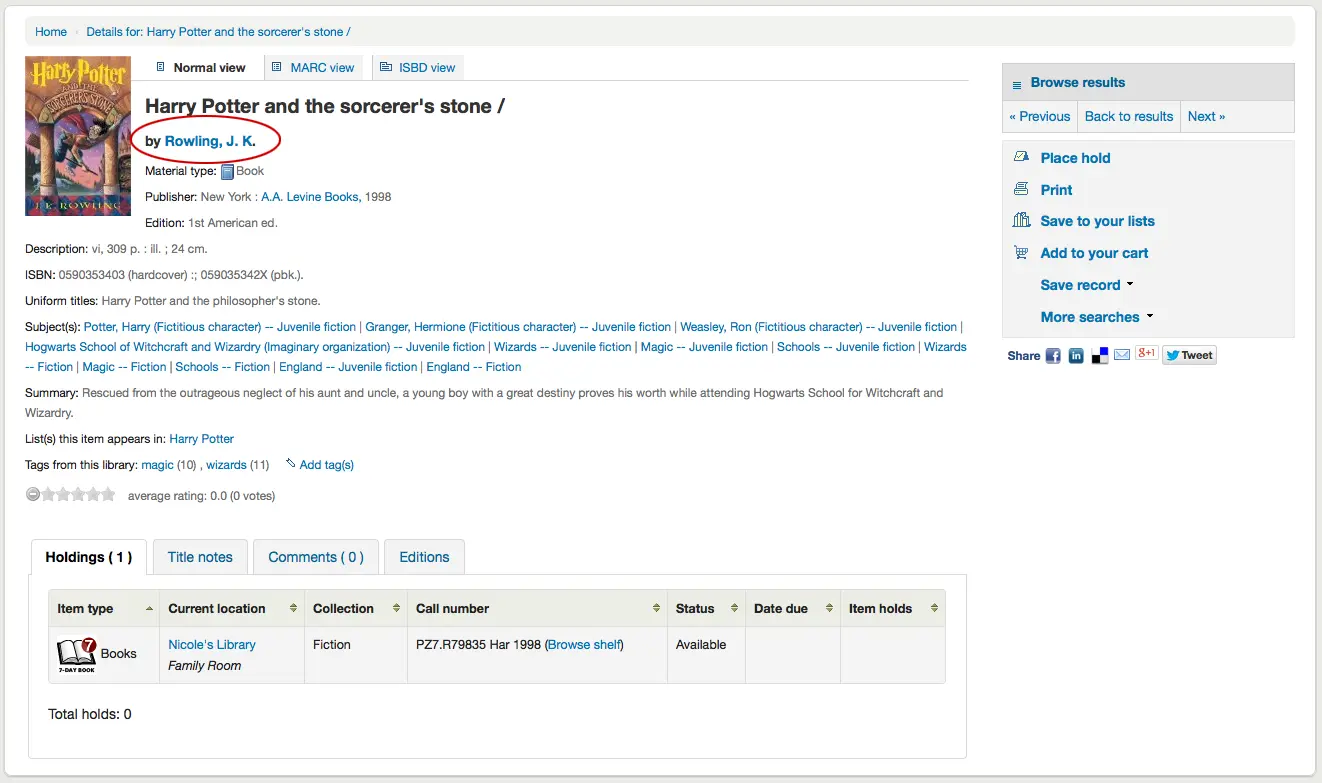
Os autores serão listados abaixo do título. São provenientes dos seus campos 1xx e 7xx. Ao clicar no autor, será iniciada uma pesquisa por outros títulos desse mesmo autor.
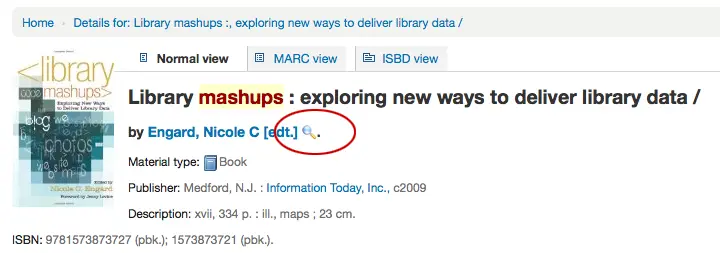
Se tiver um ficheiro de autoridade, verá uma lupa à direita das autoridades de autor (e outras). Clicar nessa lupa levá-lo-á diretamente ao registo de autoridade.
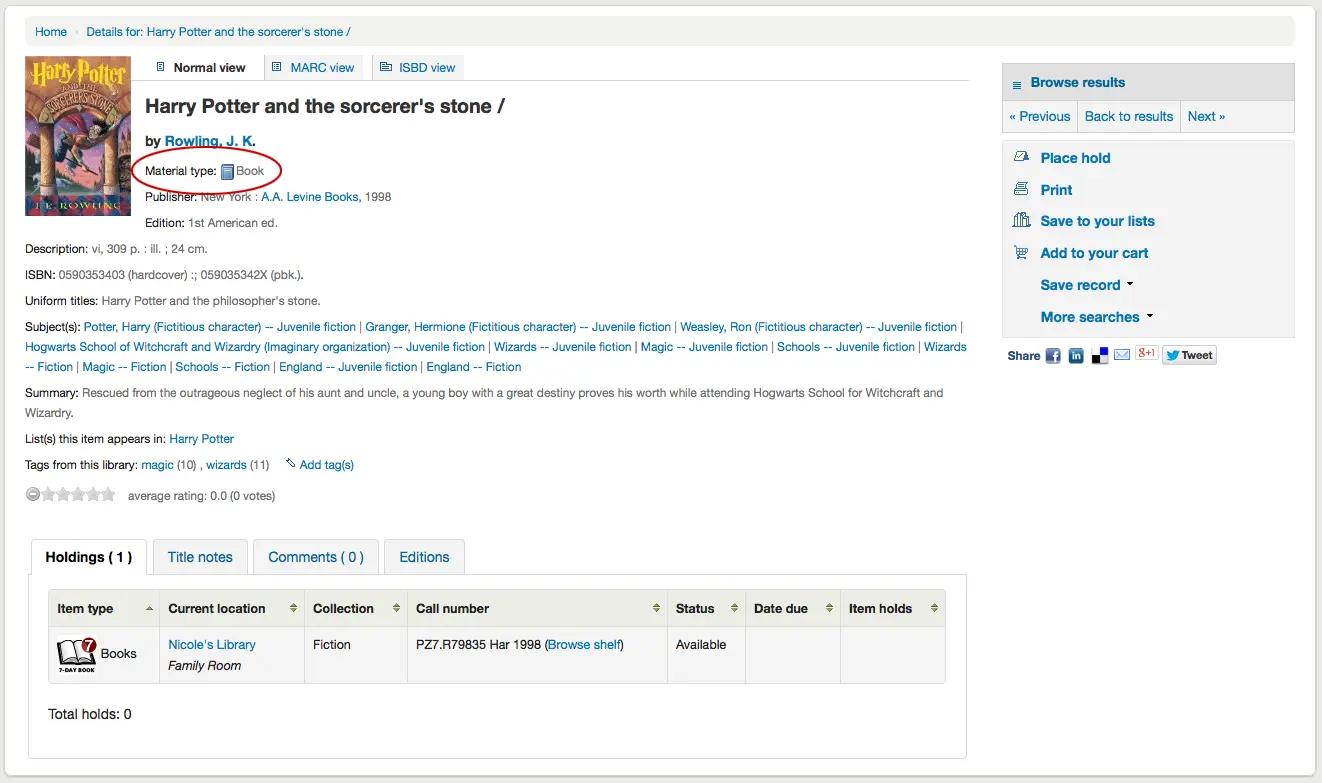
Se a sua preferência DisplayOPACiconsXSLT estiver definida como ‘mostrar’, verá um tipo de documento determinado pelos valores nos seus campos fixos (saiba mais no guia de catalogação ícones de tipo de documento XSLT).
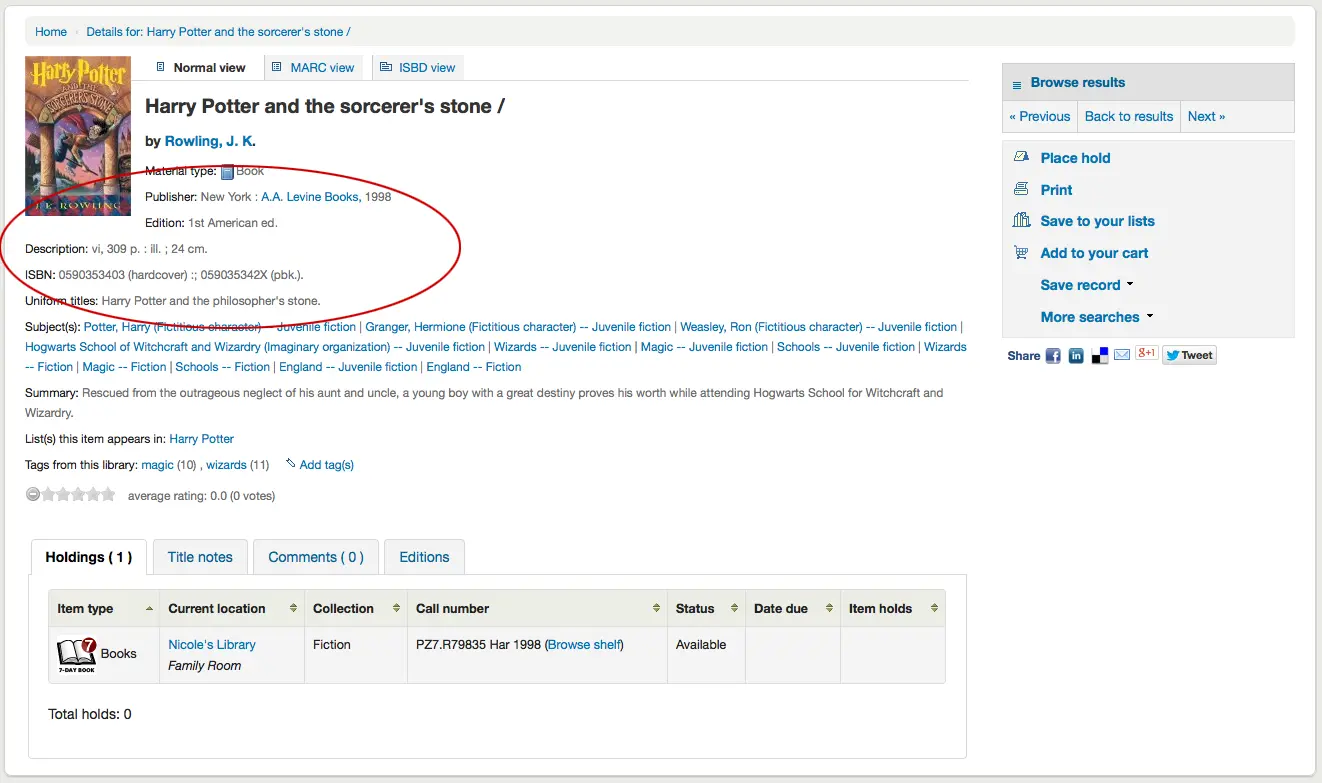
A seguir, verá a descrição do registo que está a visualizar:
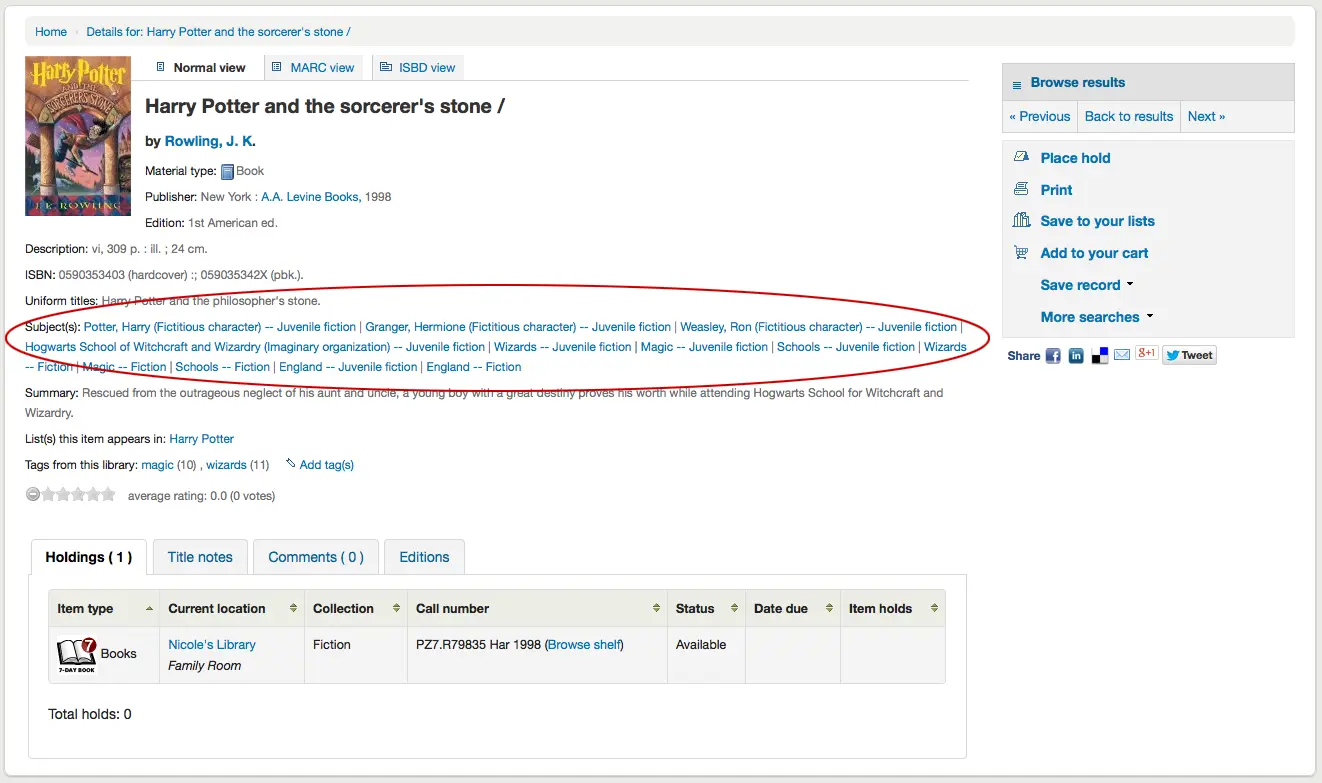
Após esta informação, encontrará os assuntos, nos quais é possível clicar para pesquisar outros títulos sobre temas semelhantes
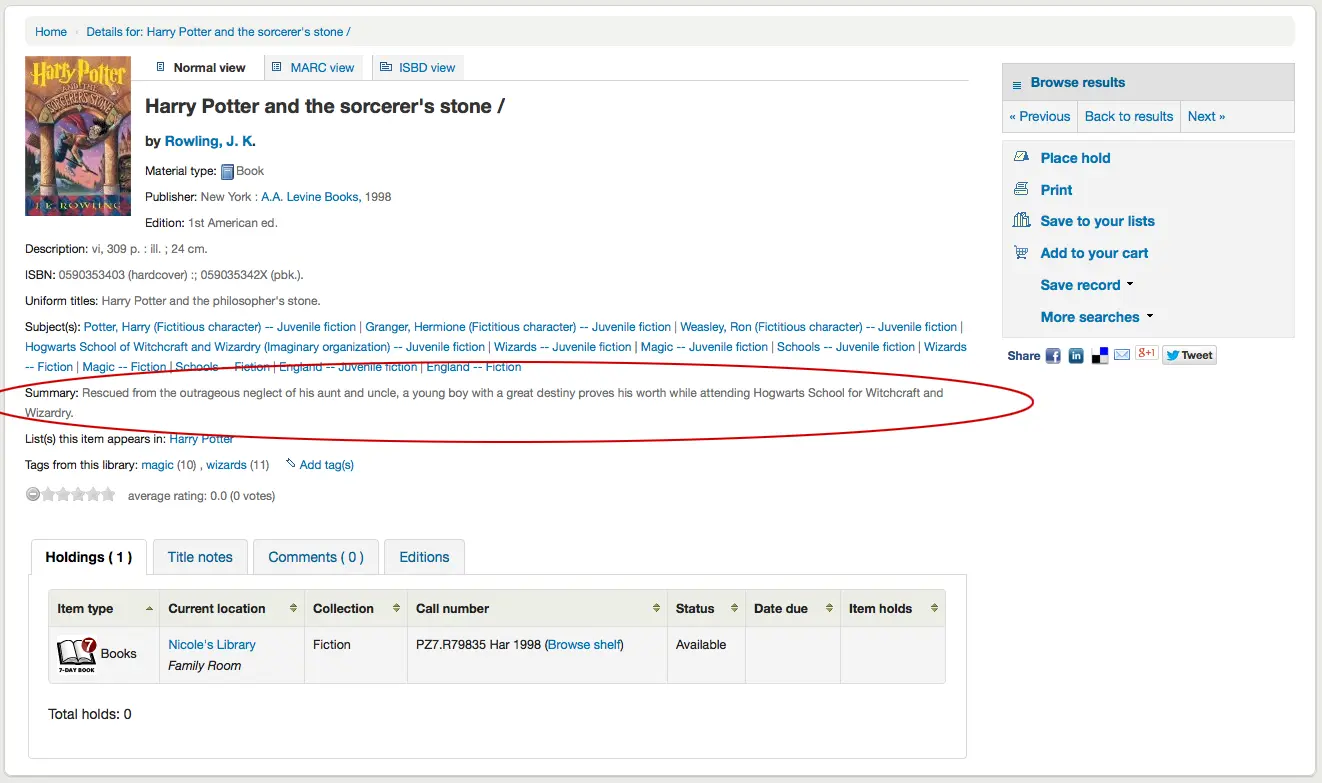
Se o seu registo contiver um sumário ou resumo, este aparecerá ao lado do rótulo ‘Resumo’ ou ‘Tabela de conteúdos’
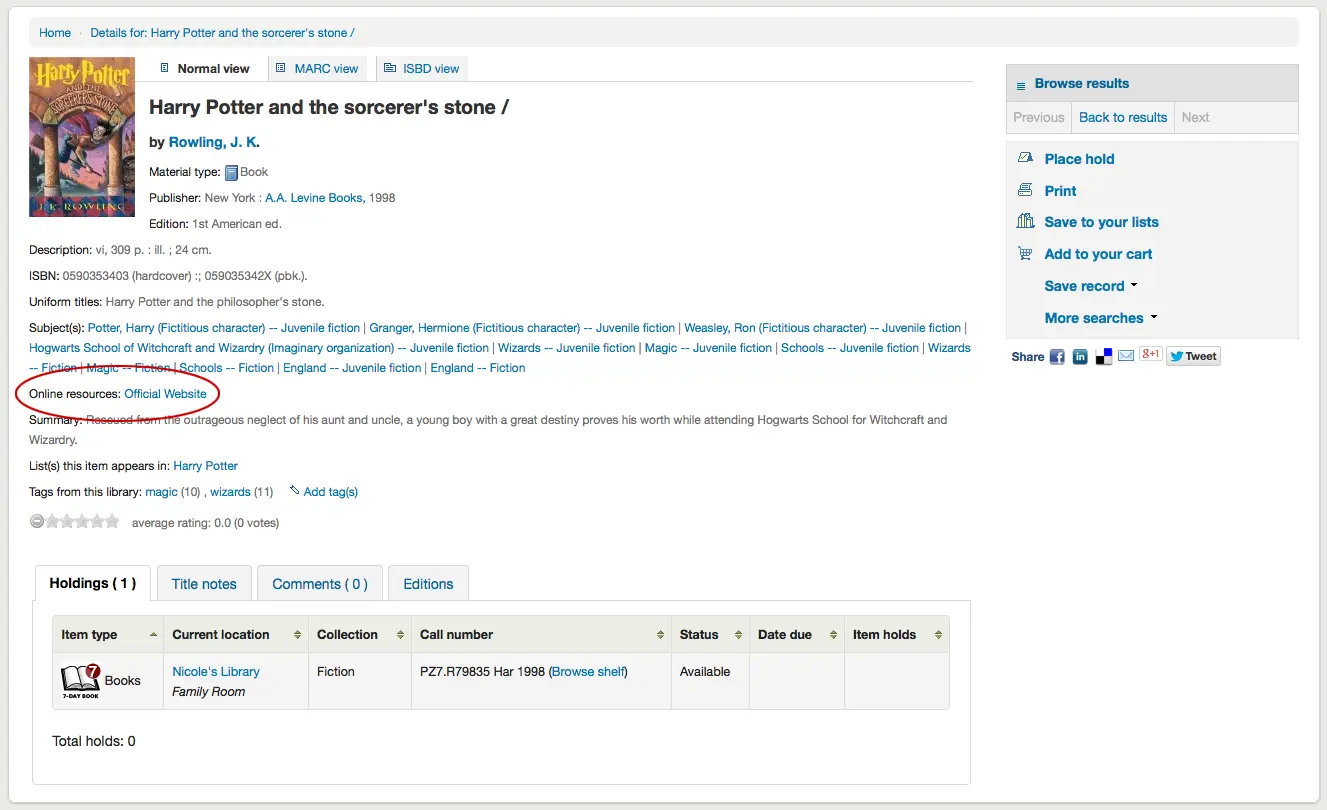
Se o seu registo contiver dados nos campos 856, verá os endereços à direita do rótulo ‘Recursos online’
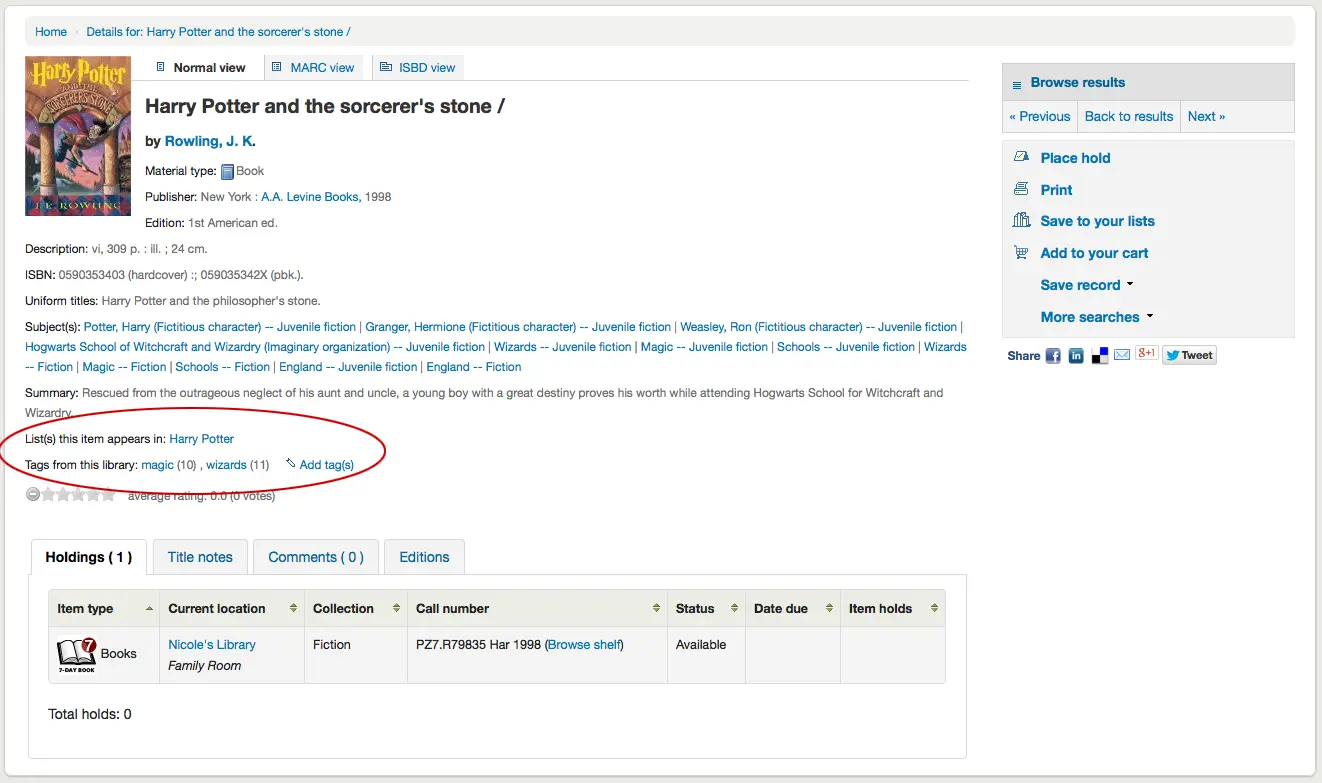
Se o título que está a visualizar estiver numa lista pública, verá uma lista das mesmas à direita do rótulo ‘Lista(s) em que este registo aparece’ e, se existirem etiquetas, estas aparecerão por baixo do rótulo ‘Etiquetas desta biblioteca’
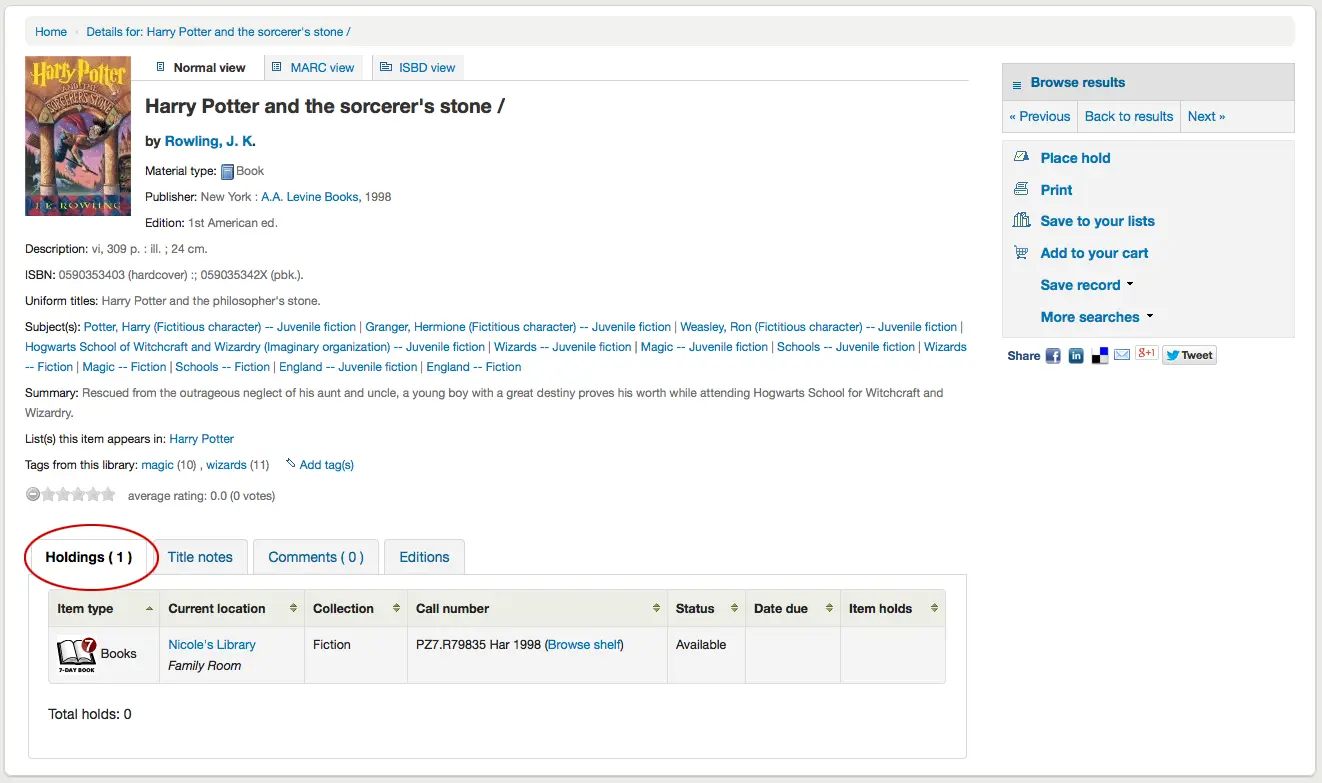
Nos separadores abaixo dos detalhes, encontrará os dados dos seus exemplares
Nota
Pode personalizar as colunas desta tabela na secção Configurações da tabela do módulo de Administração (identificador da tabela: holdingst).
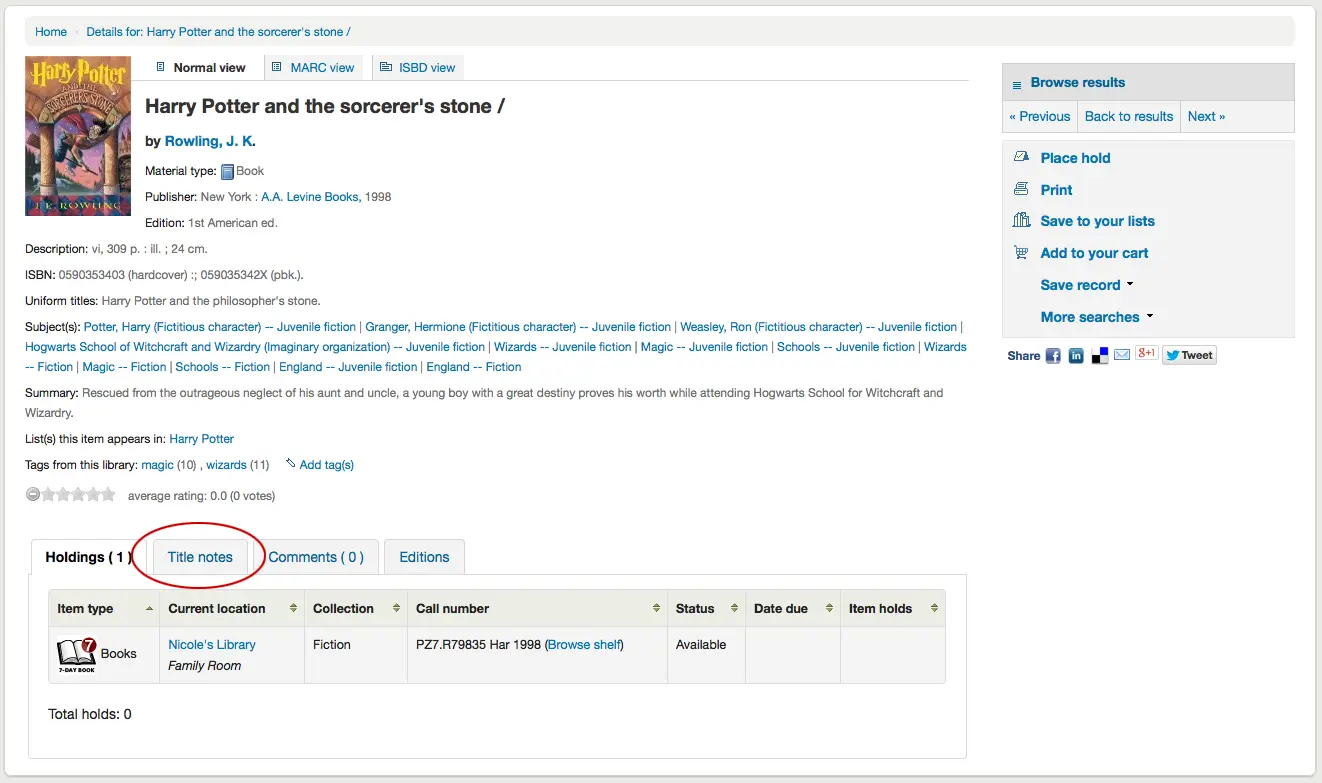
Quaisquer notas (campos 5xx) que tenham sido catalogadas aparecerão em ‘Notas do título’
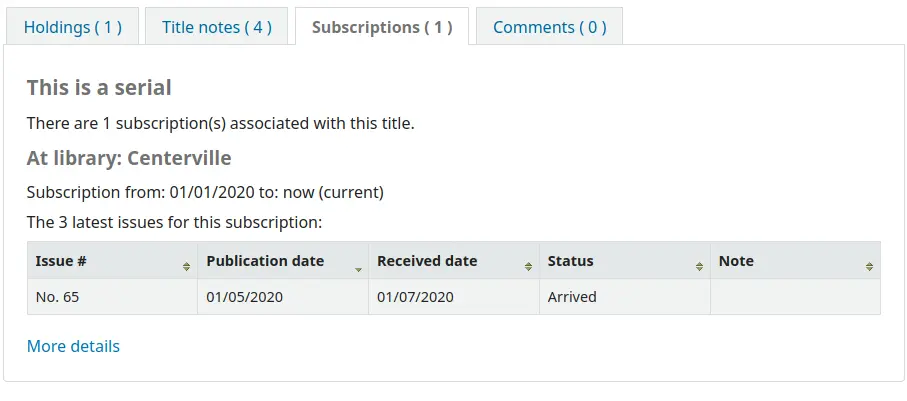
Se o registo bibliográfico estiver ligado a uma assinatura no módulo de Periódicos, existirá um separador ‘Assinaturas’ com a informação da assinatura e dos fascículos.
Nota
Pode personalizar as colunas desta tabela na secção Configurações da tabela do módulo de Administração (identificador da tabela: subscriptionst).
Nota
Se tiver selecionado um aviso no campo ‘Notificação do leitor’ ao adicionar a assinatura, existe um botão no qual os leitores podem clicar para serem notificados por email quando um novo exemplar for recebido.
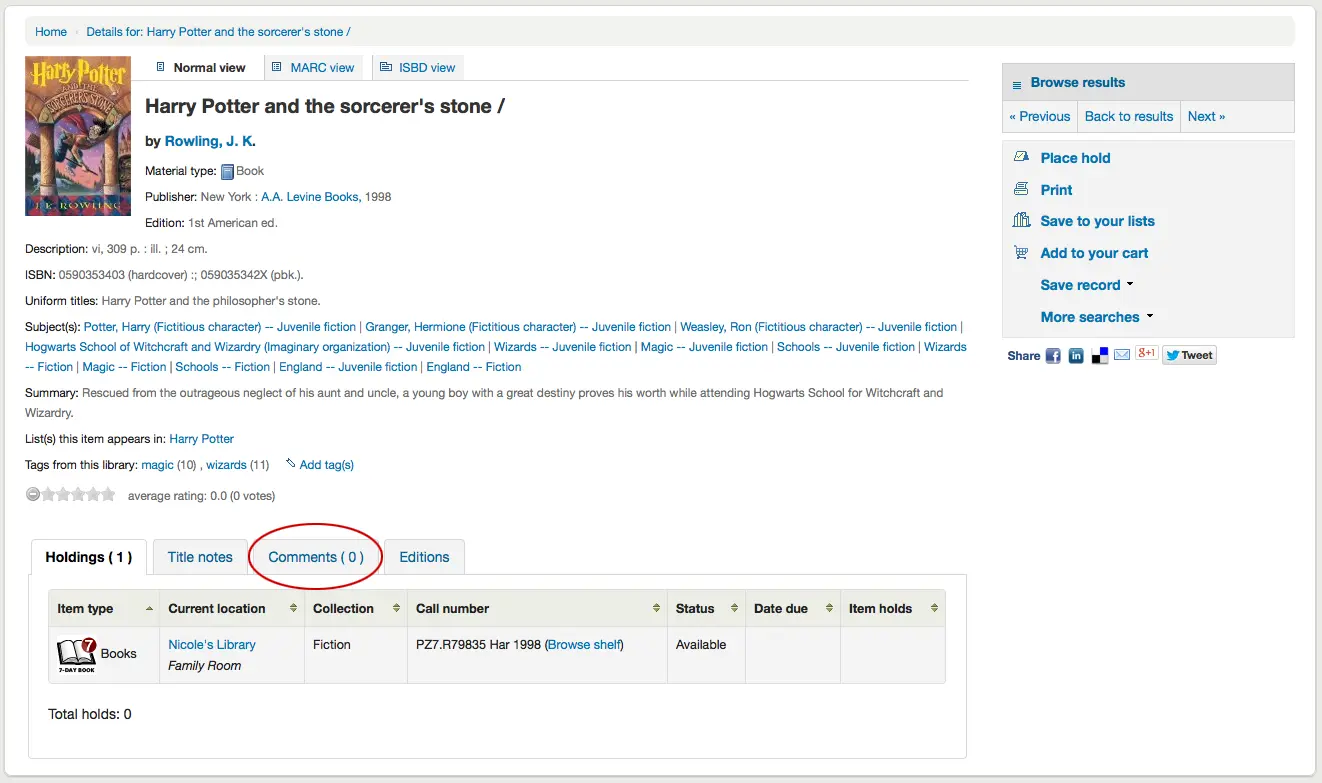
Se permitir comentários, estes aparecerão no separador seguinte
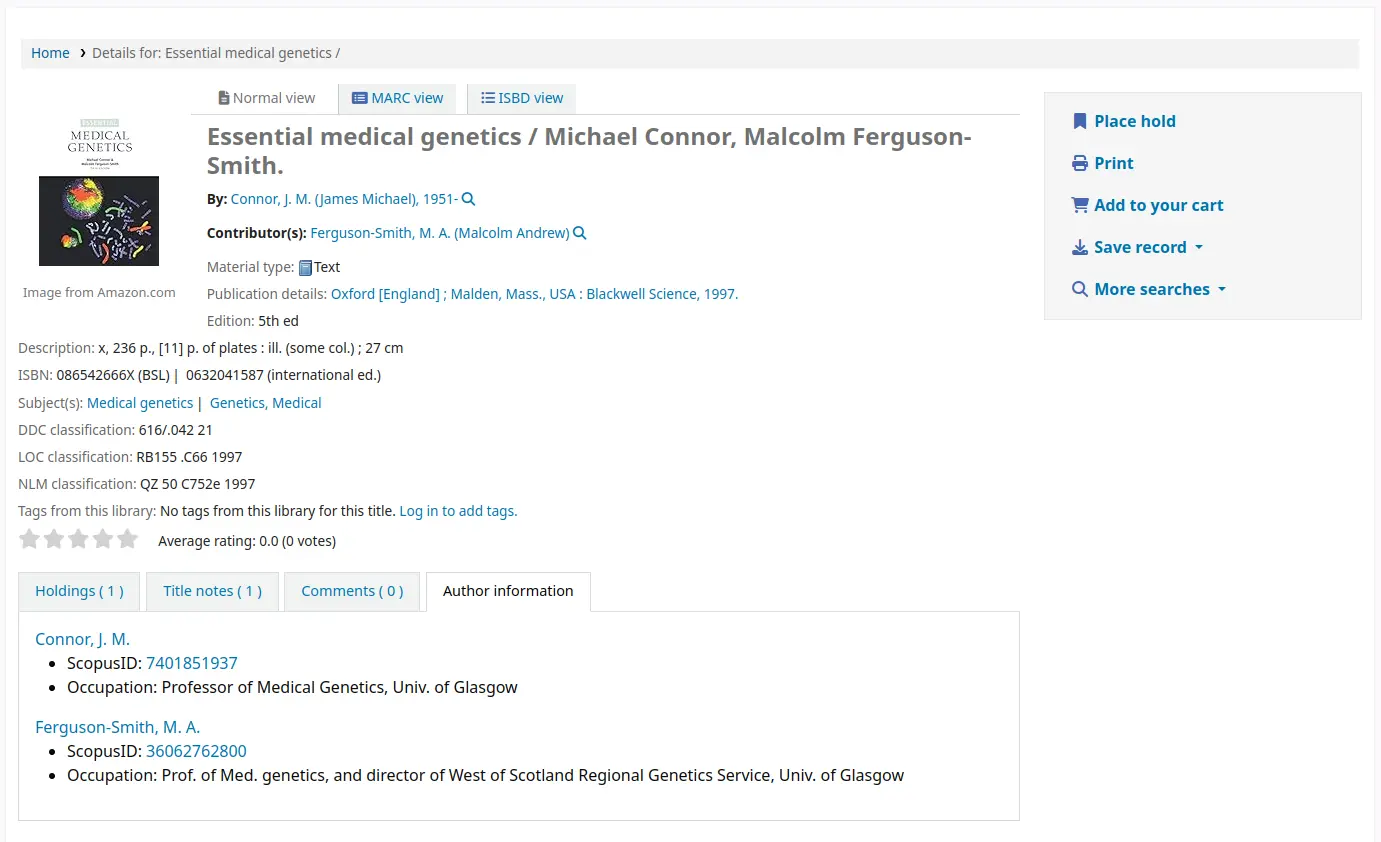
Se a preferência de sistema OPACAuthorIdentifiers estiver ativada e os seus registos de autoridade de autor contiverem identificadores padrão, será apresentado um separador ‘Identificadores de autor’ que mostra os identificadores com ligações para o registo do autor no site de origem.
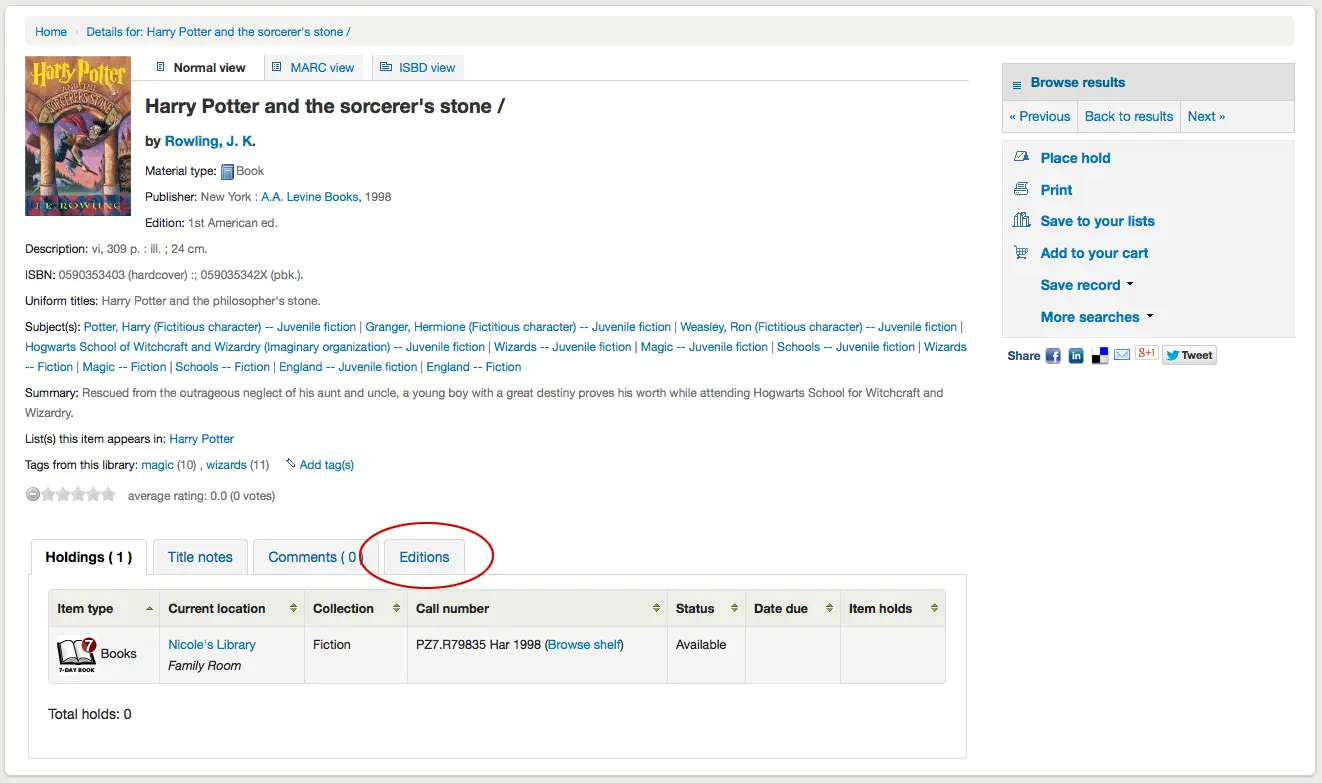
E, por fim, se tiver ativado o FRBR e possuir outras edições do título na sua coleção, verá o separador ‘Edições’.
À direita dos detalhes encontrará uma série de caixas. A primeira caixa contém uma lista de botões para ajudar na navegação pelos resultados da pesquisa. A partir dela, pode visualizar o resultado seguinte ou o anterior, ou voltar aos resultados.
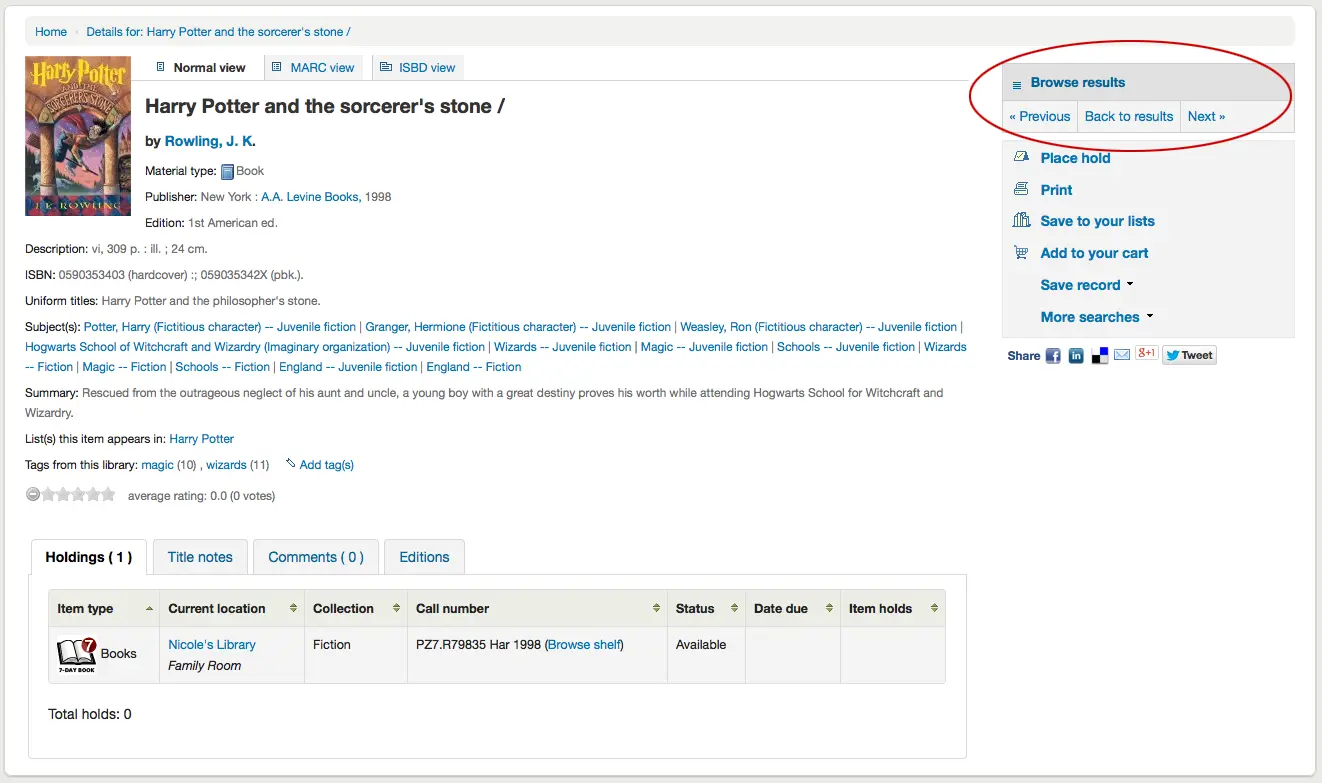
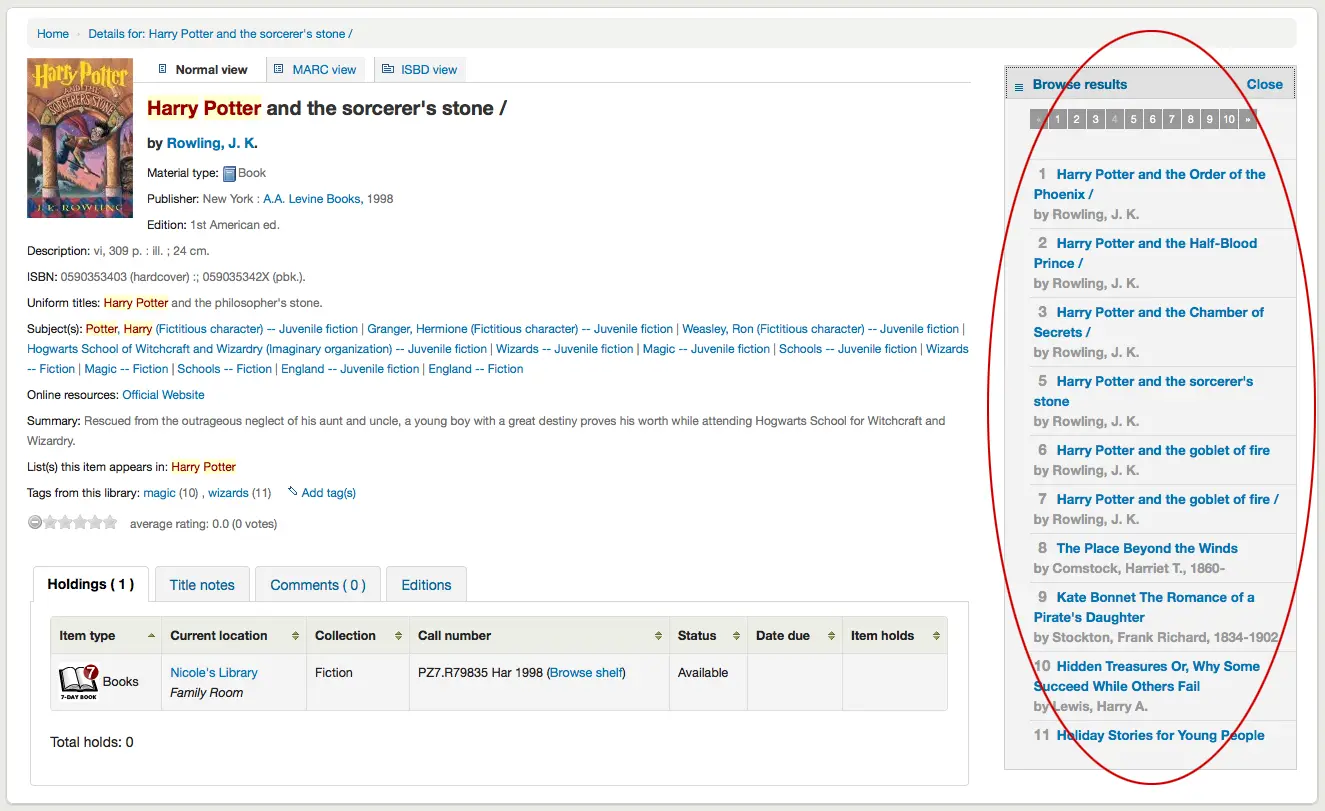
Clicar em ‘Ver resultados’ na parte superior da coluna da direita abrirá os resultados da sua pesquisa na página de detalhes
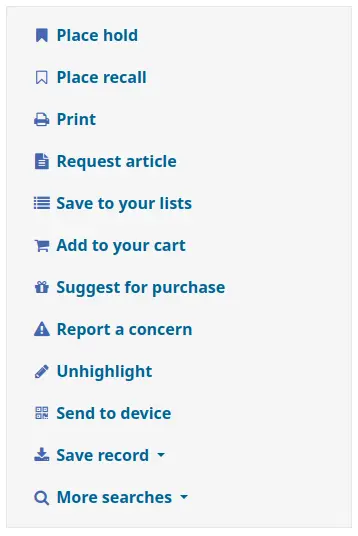
Abaixo dos botões de pesquisa, encontrará os endereços para fazer uma reserva, imprimir o registo, guardá-lo nas suas listas, adicioná-lo ao carrinho ou enviá-lo para um dispositivo (utilizando um código QR).
Outra opção que surgirá nesta barra lateral direita, caso a biblioteca permita sugestões de compra (consulte a preferência de sistema suggestion), é a possibilidade de ‘Sugestão de aquisição’. Ao clicar neste endereço, o leitor será direcionado para o formulário de sugestão de aquisição para preenchimento.
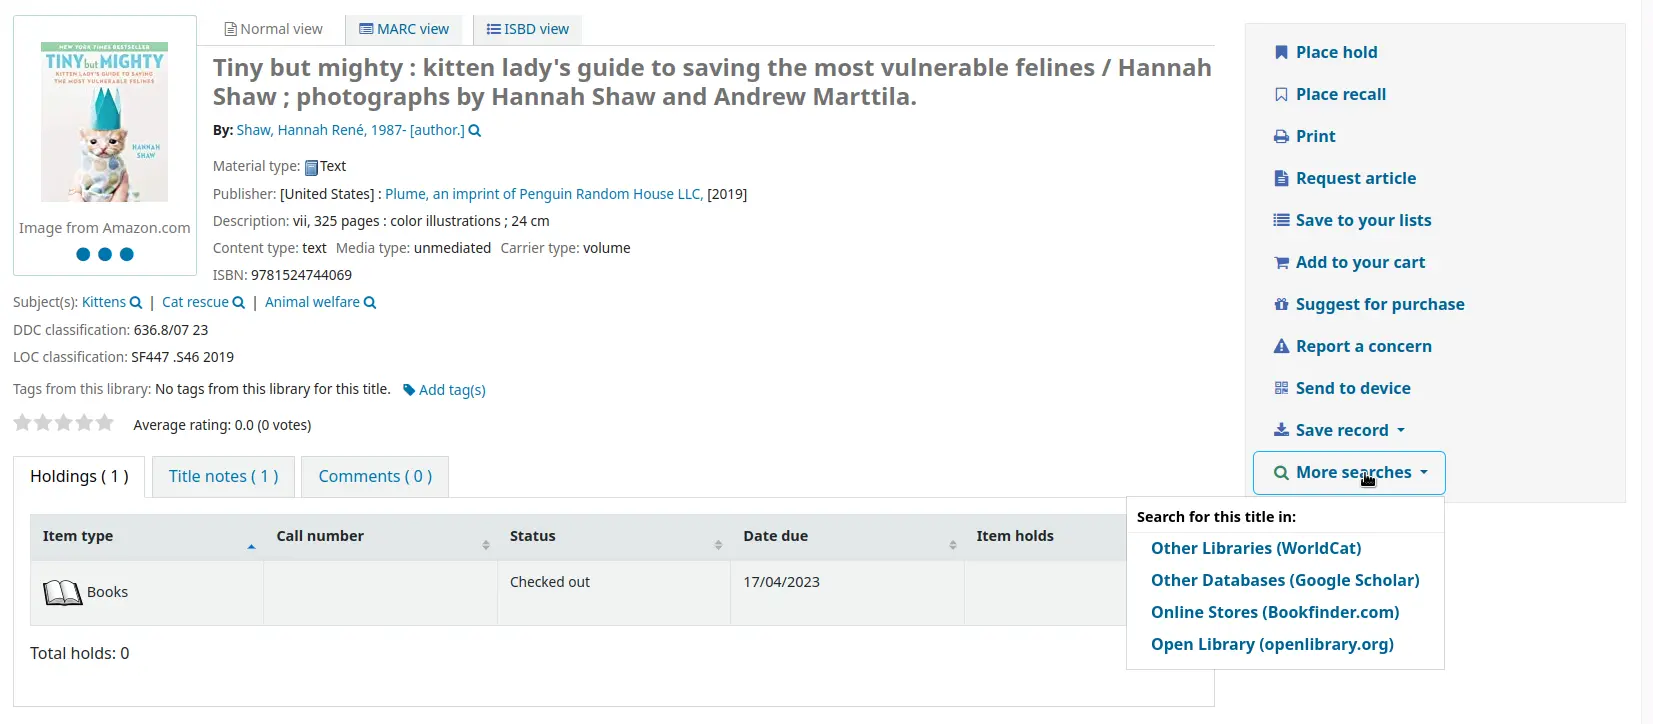
Ao clicar em ‘Mais pesquisas’, será apresentada a lista de bibliotecas que definiu na preferência OPACSearchForTitleIn
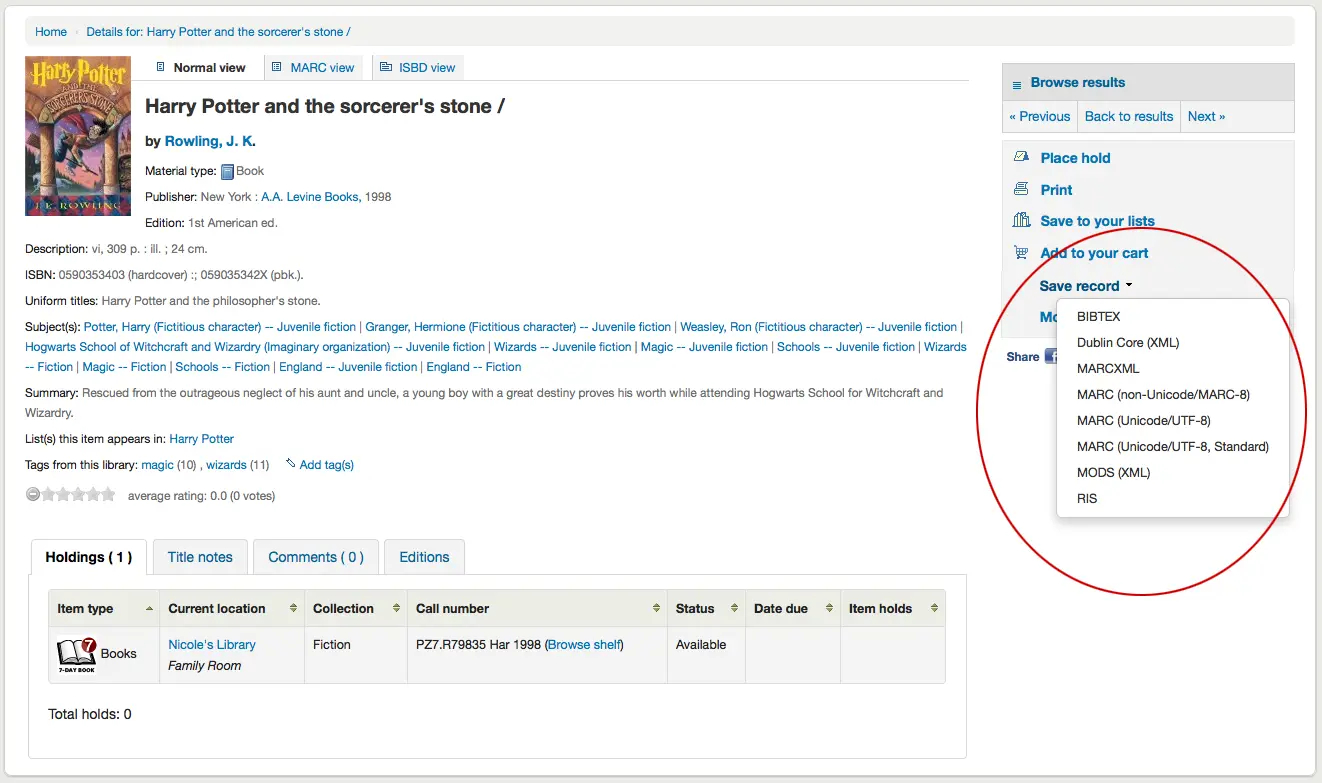
Sob o rótulo ‘Guardar registo’, encontrará uma série de formatos de ficheiro nos quais o registo pode ser guardado. Esta lista pode ser personalizada alterando a preferência de sistema OpacExportOptions.
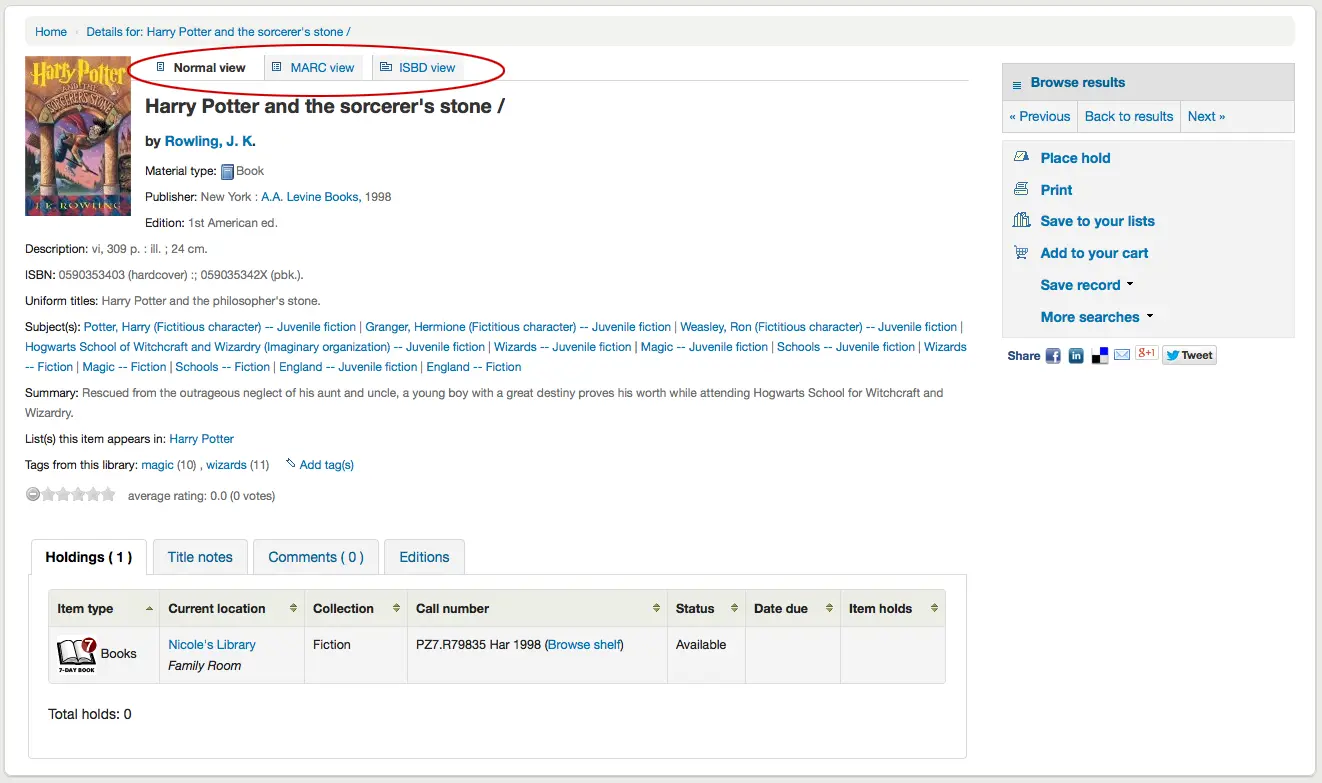
Se, a qualquer momento, pretender alterar a visualização de ‘Normal’ para ver o formato MARC ou ISBD, pode clicar nos separadores na parte superior do registo
Relatar ocorrências sobre registros bibliográficos
Se a preferência de sistema OpacCatalogConcerns estiver ativada, os leitores poderão reportar problemas relacionadas com registos bibliográficos específicos.
Isto é semelhante à funcionalidade de reporte de problemas, mas está ligado a um registo bibliográfico específico e oferece a possibilidade de resolução.
Para relatar uma nova ocorrência,
Na página de detalhes do registo bibliográfico, clique na ligação ‘Reportar um problema’ nas opções do lado direito.
Nota
Os leitores precisam de estar autenticados para reportar um probelam. Caso não estejam ligados, o sistema irá solicitar as suas informações de autenticação.
Preencha o formulário de ocorrência.
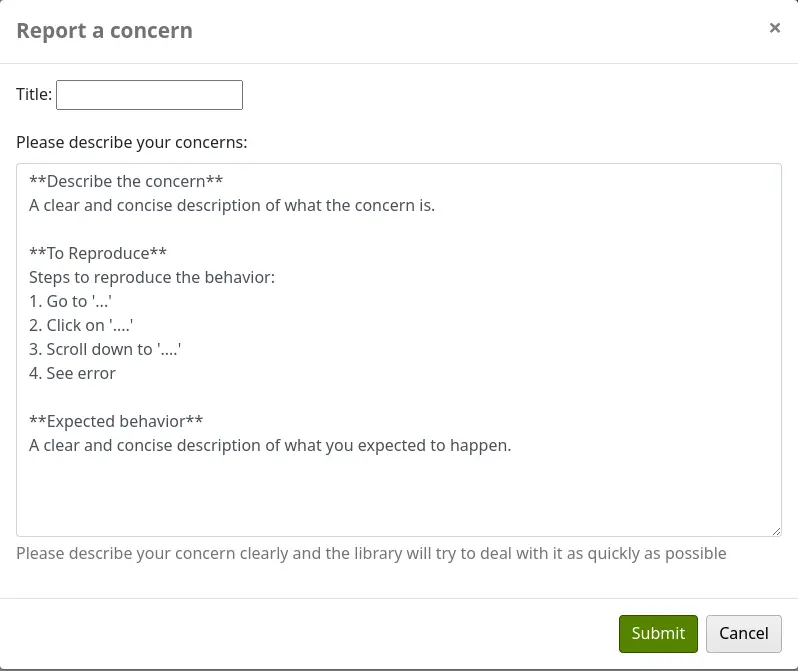
Title: informe um título descrevendo o problema de forma sucinta.
Please describe your concern: informe detalhes sobre o problema, sendo o mais descritivo possível, para que o funcionário que receber a ocorrência consiga reproduzir e ver o problema.
Um exemplo do que é esperado na descrição é fornecido no campo:
**Describe the concern**

A clear and concise description of what the concern is.

**To Reproduce**

Steps to reproduce the behavior:
1. Go to '...'
2. Click on '....'
3. Scroll down to '....'
4. See error

**Expected behavior**

A clear and concise description of what you expected to happen.
Nota
Este texto é personalizável na ferramenta de personalizações HTML, alterando a entrada ‘CatalogConcernTemplate’.
O texto na parte inferior do formulário (“Please describe your concern clearly…”) também é personalizável na ferramenta de personalizações HTML, alterando a entrada ‘CatalogConcernHelp’.
Clique em ‘Enviar’.
Isso enviará um e-mail à equipe de catalogação para notificá-la de que uma nova ocorrência foi criada. O e-mail será enviado ao endereço definido na preferência do sistema CatalogerEmails. O e-mail enviado é o aviso TICKET_NOTIFY, que pode ser personalizado na ferramenta de avisos e recibos.
Um e-mail também será enviado ao autor da ocorrência para notificá-lo de que ela foi recebida. O e-mail enviado é o aviso TICKET_ACKNOWLEDGE, que pode ser personalizado na ferramenta de avisos e recibos.
As ocorrências relatadas sobre este registro ficam visíveis na aba ‘Concerns’.
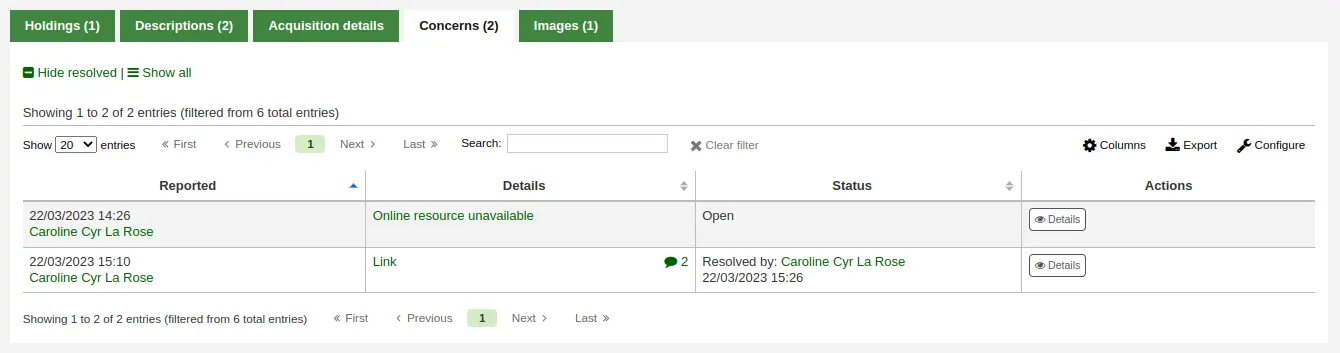
Todos os tickets de problemas estarão visíveis no relatório de problemas do catálogo.
Relatórios de ocorrência recém-abertos também aparecerão na seção de notificações na parte inferior da página principal da interface administrativa.
Pesquisa de autoridades
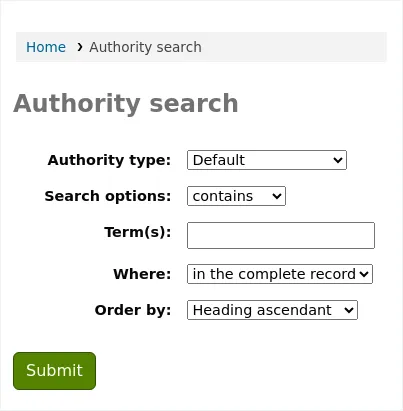
Se a preferência de sistema OpacAuthorities estiver definida para ‘Permitir’, os leitores poderão pesquisar registos de autoridade no OPAC.
A pesquisa de autoridades é acedida através do endereço ‘Pesquisar autoridades’, localizado abaixo da barra de pesquisa no topo da página.
O formulário de pesquisa permite aos utilizadores pesquisar as autoridades por tipo e termos.
Os resultados mostram os cabeçalhos, o tipo de cabeçalho e o número de registos bibliográficos em que este registo de autoridade é utilizado.
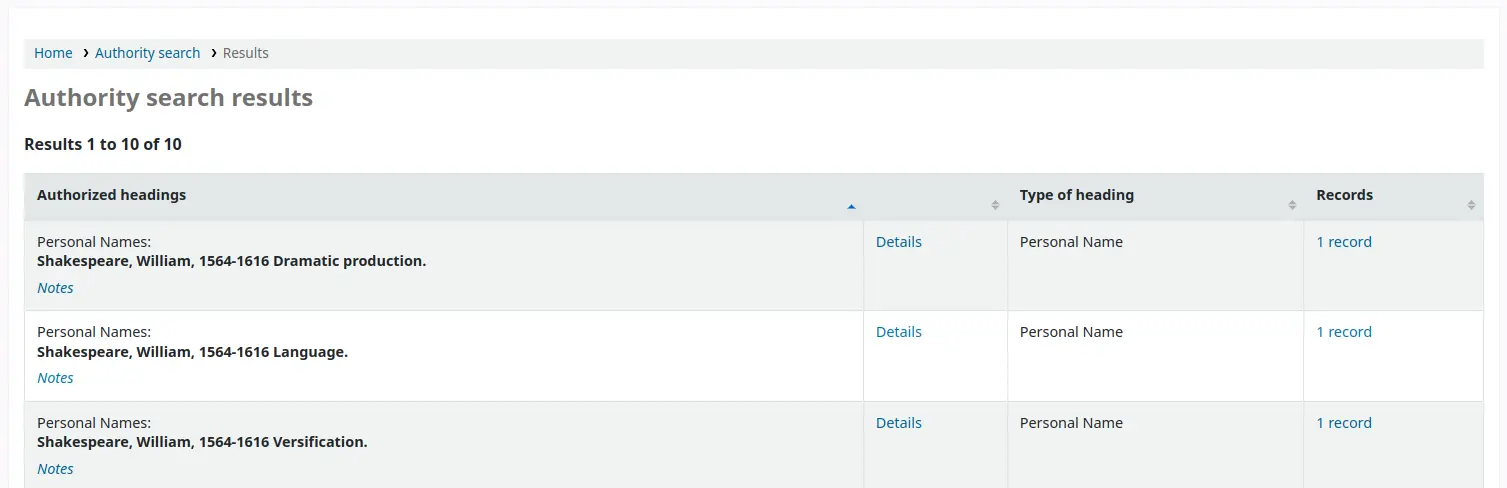
Se o registo de autoridade contiver notas, será apresentado um endereço ‘Notas’ abaixo do cabeçalho.
Clicar em ‘Detalhes’ irá exibir o registo completo.
Clicar no número de registos irá realizar uma pesquisa no catálogo por registos ligados a este registo de autoridade.
Listas e o carrinho
O carrinho é um local de armazenamento temporário para os registos que pretende encontrar durante esta sessão. Isto significa que, ao sair do OPAC ou fechar o browser, perde os registos do carrinho.
Uma lista é um local mais permanente para guardar registos.
Para saber mais sobre listas, consulte o capítulo Listas e carrinho deste manual, que aborda estas características na interface dos técnicos.
Listas
Os leitores podem gerir as suas próprias listas privadas e encontrar todas as listas públicas acedendo à secção ‘Listas’ nas suas contas.
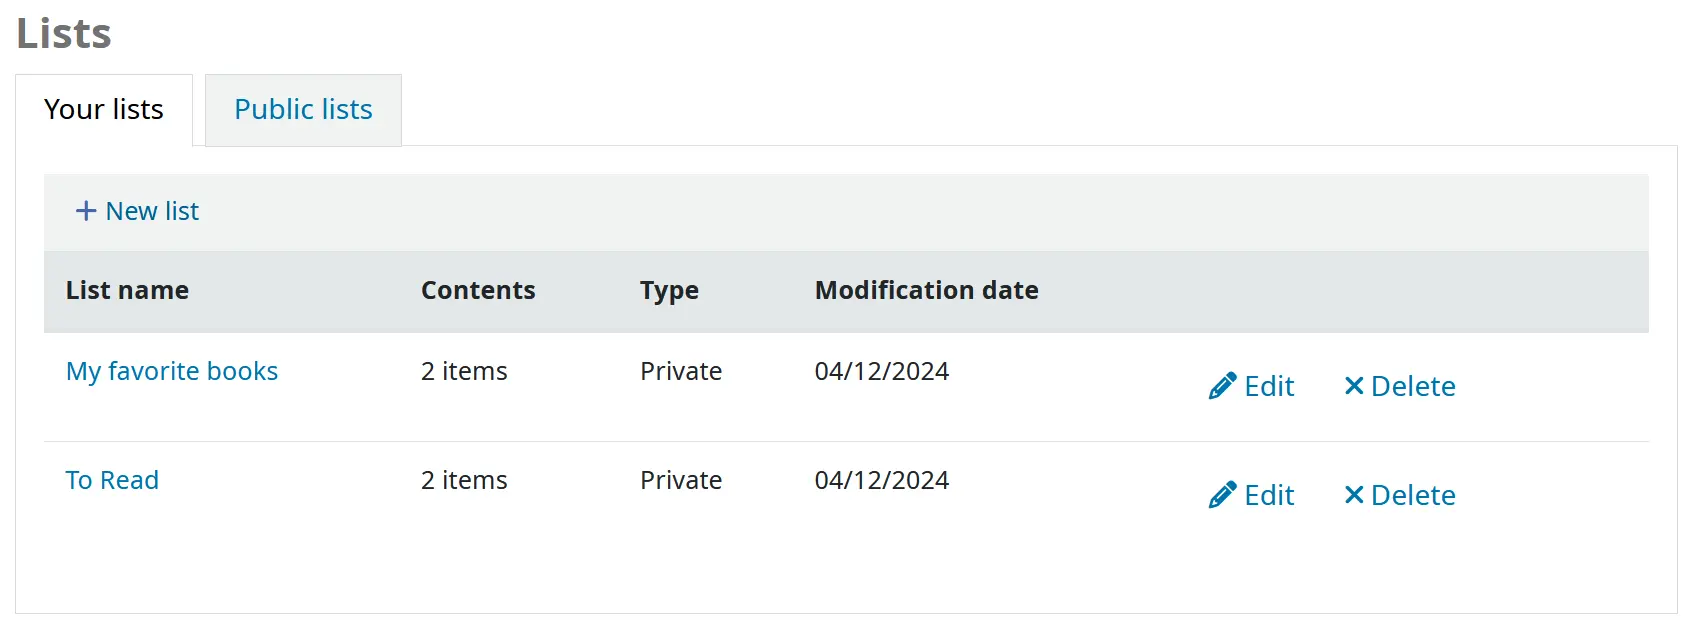
Os leitores podem ordernar as suas listas por data de modificação ou nome da lista utilizando o botão “Ordenar”.
Versão
Esta funcionalidade de ordenação foi introduzida pela primeira vez na versão 25.11 do Koha.
A coluna ‘Data de modificação’ mostra quando a lista foi modificada pela última vez e é útil para verificar rapidamente o quão atualizada está.
Criar listas
Para criar uma lista, o leitor apenas tem de clicar no endereço ‘Nova lista’ e preencher o formulário que aparece.
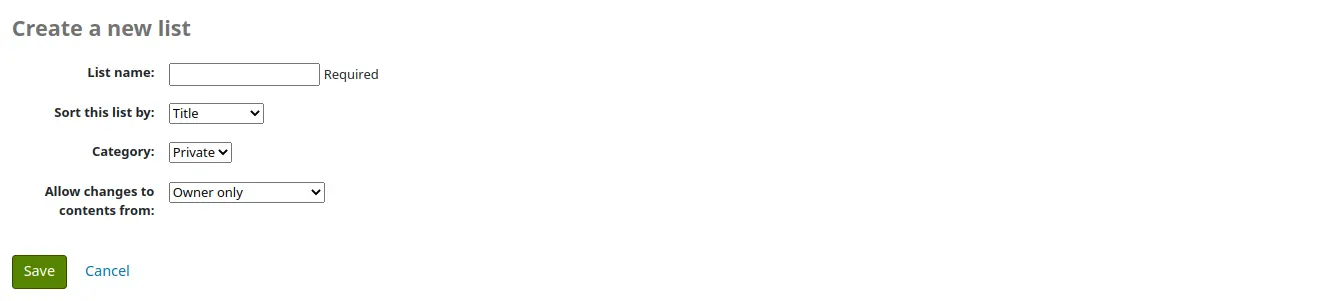
Nome da lista: o leitor deve introduzir um nome para a lista; este é o único campo obrigatório
Ordenar esta lista por: o leitor pode escolher a forma como pretende ordenar a lista (por título, autor, ano de publicação, quota ou data de inclusão na lista).
Categoria: o leitor pode optar por manter esta lista privada ou torná-la pública. Uma lista pública será visível para todos os leitores do OPAC.
Nota
Este campo só aparecerá se a preferência de sistema OpacAllowPublicListCreation estiver definida para ‘Permitir’. Caso contrário, todas as listas criadas pelos utilizadores serão privadas.
Permitir alterações ao conteúdo por: o leitor pode escolher quem poderá adicionar ou remover títulos da lista.
Ninguém: ninguém, nem mesmo o próprio patrono, poderá acrescentar ou retirar títulos.
Apenas o proprietário: apenas o leitor que criou a lista poderá adicionar ou remover títulos. Se a lista for pública ou partilhada, os leitores do OPAC ou as pessoas com quem foi partilhada não poderão alterar o conteúdo da lista.
Qualquer que veja a lista: qualquer pessoa com acesso à lista pode adicionar ou remover títulos. Se a lista é pública, significa toda a gente. Se a lista é privada, apenas o dono tem permissões para modificar os conteúdos. Se a lista é partilhada, o dono e os leitores compartilhadores têm essa capacidade de edição.
Apenas staff: esta opção só aparecerá para os membros da equipa, permitindo que a lista seja editada por todos eles.
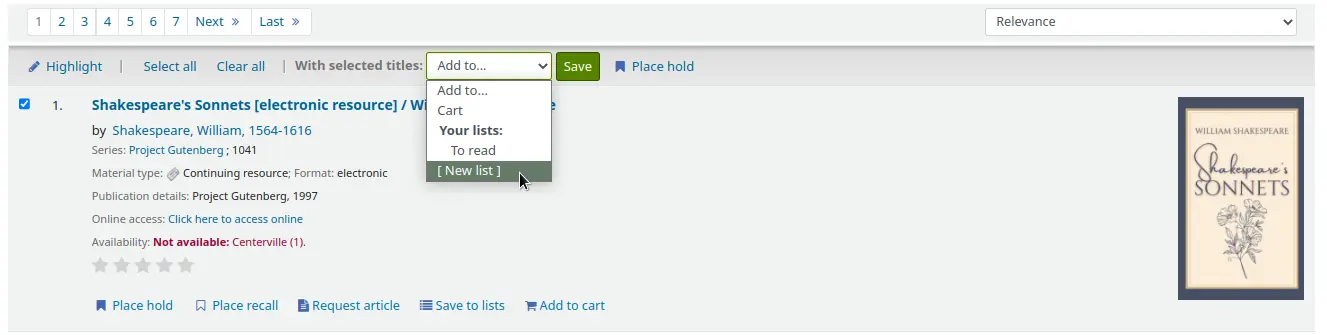
Também é possível criar listas selecionando a opção ‘Nova lista’ no menu ‘Adicionar a’, nos resultados da pesquisa
Adicionar títulos às listas
Os títulos podem ser adicionados às listas a partir dos resultados da pesquisa ou do registo bibliográfico.
Nos resultados da pesquisa, a opção de adicionar registos à lista aparece por baixo de cada resultado (botão ‘Guardar nas listas’)
e no topo da página de resultados, junto a ‘Selecionar títulos para: Adicionar a…’
Para adicionar um único título a uma lista, clique na opção ‘Guardar em listas’ e, em seguida, escolha a lista à qual pretende adicionar o título. Para adicionar vários títulos a uma lista, marque as caixas de selecção à esquerda dos títulos pretendidos e escolha a lista de destino no menu pendente ‘Adicionar a’, localizado na parte superior do ecrã.
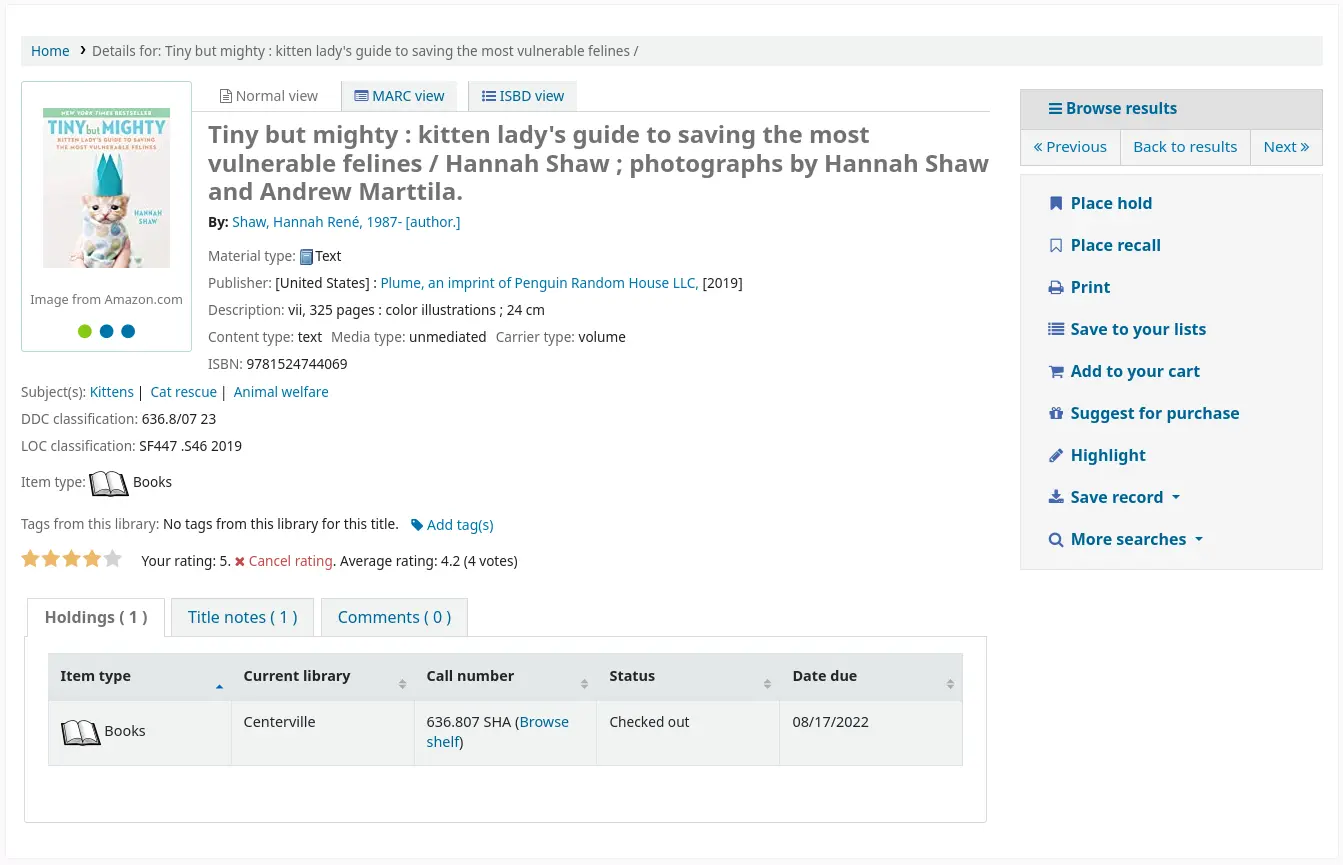
No registo bibliográfico, a opção de guardar o título numa lista encontra-se no menu do lado direito.
Os títulos também podem ser adicionados a uma lista a partir do carrinho.
Visualizar o conteúdo das listas
Para visualizar o conteúdo de uma lista, clique no nome da lista, abaixo do botão ‘Listas’.
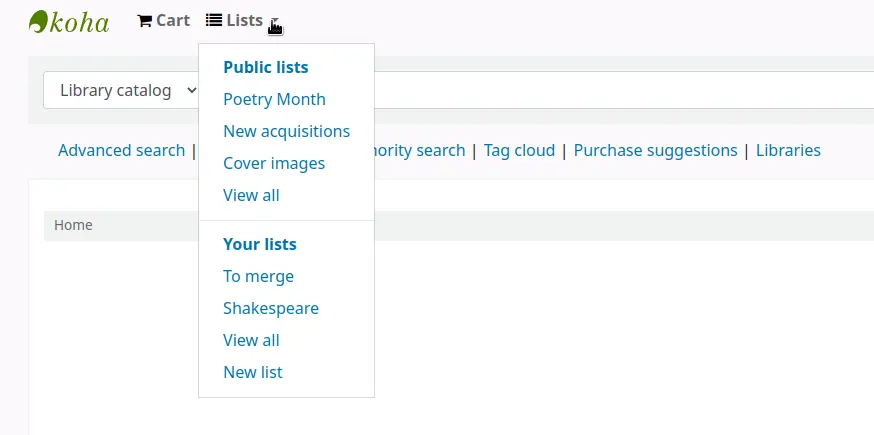
O conteúdo da lista terá um aspeto semelhante ao das suas páginas de resultados de pesquisa, exceto pelo facto de existirem opções de menu diferentes na parte superior da lista.
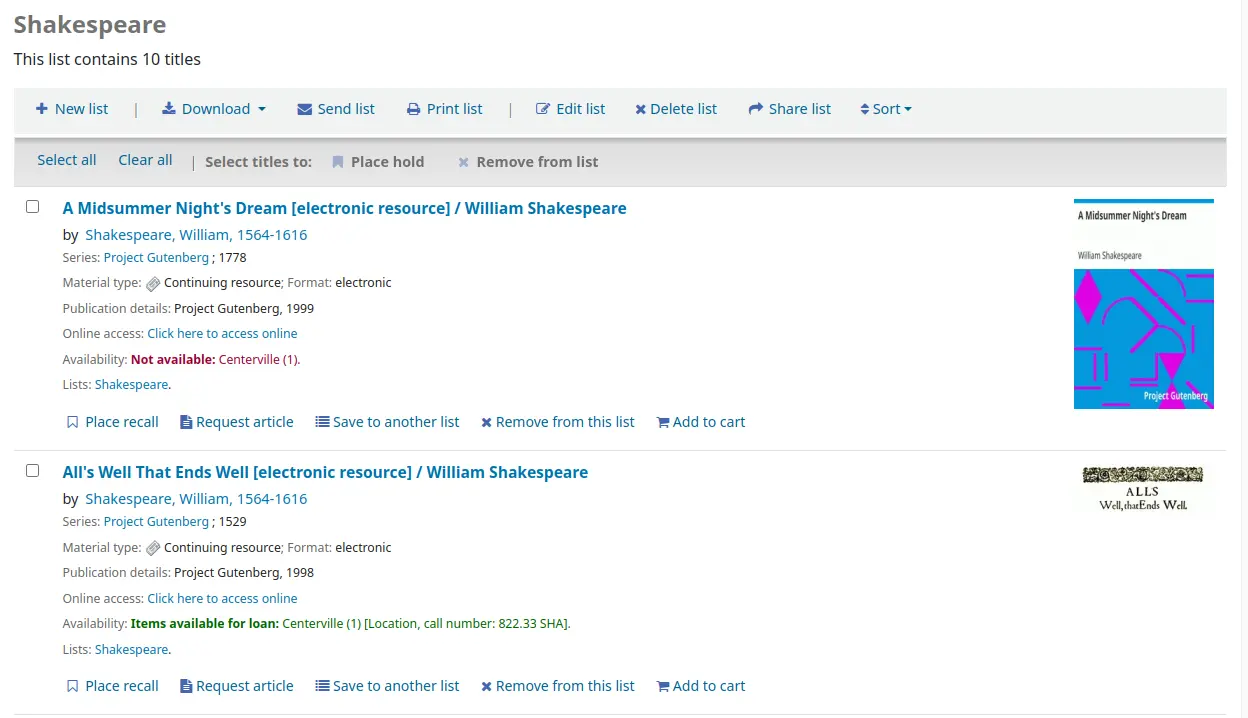
À direita do título da lista, existe um ícone RSS que permite subscrever as atualizações da lista.
Nota
O ícone RSS só aparece em listas públicas.
Utilizando as opções do menu acima da lista, pode colocar vários exemplares em reserva, descarregar o conteúdo da lista, enviar por email ou imprimir.
Para solicitar a reserva de um ou mais itens da lista, marque a caixa de seleção à esquerda do artigo e clique na ligação ‘Reservar’ na parte superior
Para descarregar o conteúdo da lista, clique no endereço ‘Descarregar lista’ e escolha o formato pretendido
Para enviar o conteúdo da lista por email a alguém, clique na ligação ‘Enviar’ e insira os dados do seu email no formulário que aparece
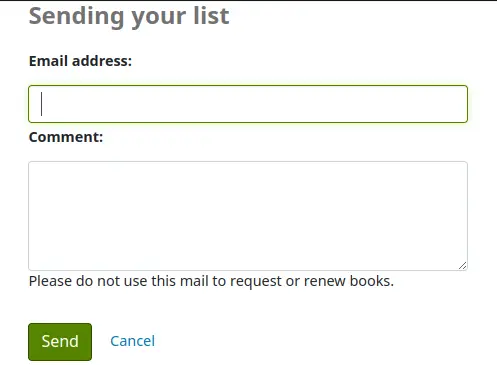
Nota
A mensagens enviada quando envia uma lista é a LIST, que pode ser alterada na ferramenta de Avisos e recibos.
Nota
A opção ‘Enviar lista’ só aparecerá se a preferência de sistema OPACDisableSendList estiver definida para ‘Permitir’.
Para imprimir o conteúdo da sua lista, clique no endereço ‘Imprimir lista’
Remover títulos de listas
Para remover um título de uma lista,
Visualize o conteúdo de uma lista.
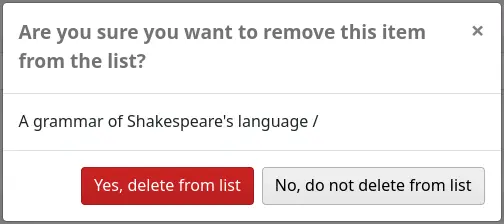
Clique em ‘Remover desta lista’, por baixo do título, para remover.
Clique em ‘Sim, eliminar da lista’ para confirmar a remoção do título da lista.
Gerir listas
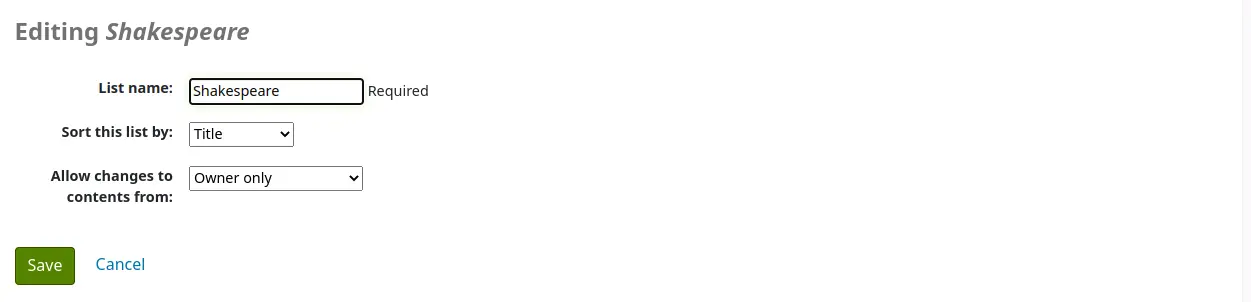
Assim que a lista for guardada, os leitores podem começar a adicionar-lhe itens. No separador ‘Listas’ das suas contas, o leitor pode editar e eliminar as listas que criou clicando no botão correspondente, localizado à direita do nome da lista.
Para editar o título ou a ordenação, clique no botão ‘Editar’ à direita da descrição da lista.
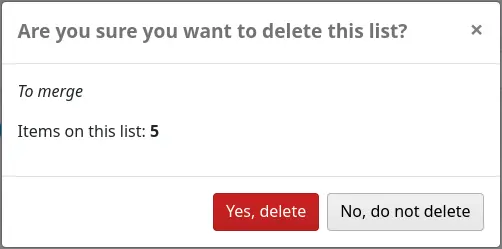
Ao clicar em ‘Eliminar’ ao lado de uma lista, terá de confirmar que pretende apagar a lista.
Se a preferência de sistema OpacAllowSharingPrivateLists estiver definida para ‘Permitir’, os leitores verão o botão ‘Partilhar’ nas listas e o botão ‘Partilhar lista’ no topo de cada lista individual. Ao clicar nele, ser-lhe-á pedido que insira o endereço de email de um leitor.

Assim que o endereço de email for introduzido, o Koha irá apresentar uma mensagem de confirmação

e enviará uma mensagem a esse leitor.
Assim que o outro leitor aceitar a lista partilhada, o utilizador que a partilhou receberá uma confirmação.
Nota
A mensagem enviada para partilhar a lista é SHARE_INVITE, e a mensagem enviada ao leitor que partilhou, para confirmar que o outro leitor aceitou a partilha, é SHARE_ACCEPT. Ambas as mensagens são personalizáveis na ferramenta avisos e recibos.
O outro leitor verá a lista partilhada juntamente com as suas próprias listas privadas (o tipo será ‘Partilhada’ em vez de ‘Privada’). Terá também a opção de remover a partilha, caso não queira continuar a ter acesso a essa lista.
O proprietário da lista partilhada terá a opção de transferir a propriedade da lista para um dos leitores com quem esta é partilhada.
Se a preferência de sistema TagsInputOnDetail estiver ativada, os leitores terão a possibilidade de adicionar etiquetas aos títulos a partir da vista de lista.
Carrinho
Adicionar títulos ao carrinho
Os títulos podem ser adicionados ao carrinho a partir dos resultados da pesquisa ou do registo bibliográfico.
Nos resultados da pesquisa, a opção de adicionar registos ao carrinho aparece por baixo de cada resultado (botão ‘Adicionar ao carrinho’)
e no topo da página de resultados, junto a ‘Selecionar títulos para: Adicionar a…’
Clicar no botão ‘Adicionar ao carrinho’ abaixo de um resultado individual irá adicionar esse título ao seu carrinho.
Para adicionar vários títulos de uma só vez, marque a caixa à esquerda de cada resultado e, em seguida, selecione ‘Carrinho’ no menu suspenso ‘Adicionar a’, localizado na parte superior do ecrã. Após adicionar os títulos ao carrinho, será apresentada uma confirmação no topo da página.

Nos resultados, verá quais os registos que estão no seu carrinho e poderá removê-los clicando em ‘(remover)’.
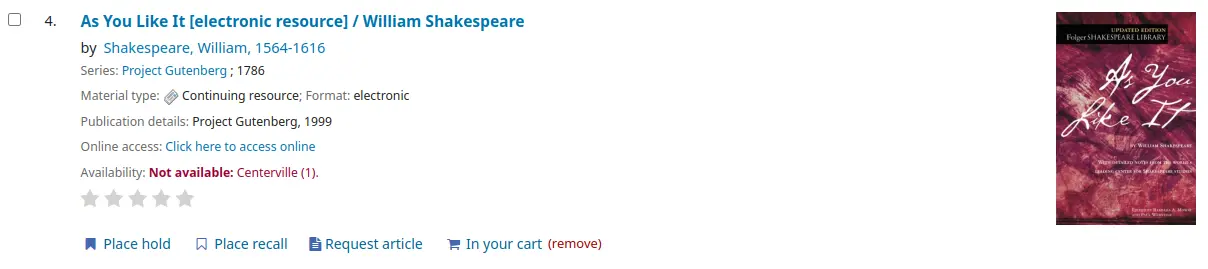
No registo bibliográfico, a opção de adicionar o título ao carrinho encontra-se no menu do lado direito.
Gerir o carrinho
Assim que existirem títulos no carrinho, poderá gerir o conteúdo clicando no botão ‘Carrinho’, normalmente localizado na parte superior do ecrã. O carrinho será aberto numa nova janela.
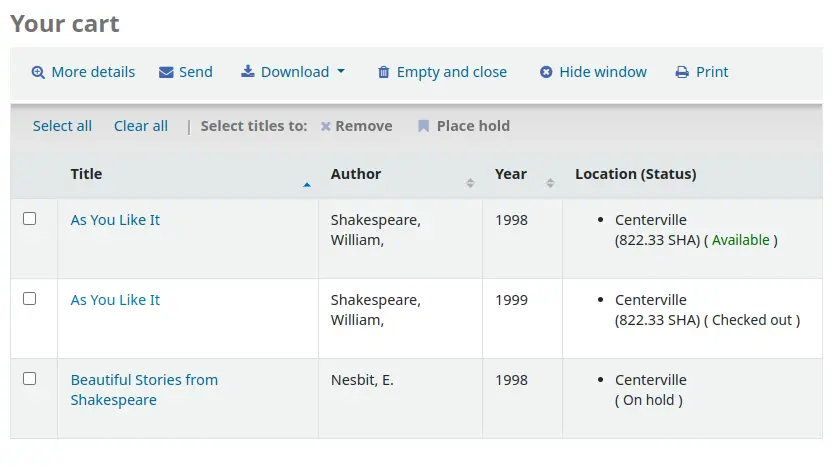
Nesta janela, são apresentadas várias opções. Na parte superior do carrinho, existem vários botões.
Mais detalhes: clicar aqui irá exibir informações adicionais sobre os títulos no carrinho (ISBNs, assuntos, informações da editora, observações e muito mais).
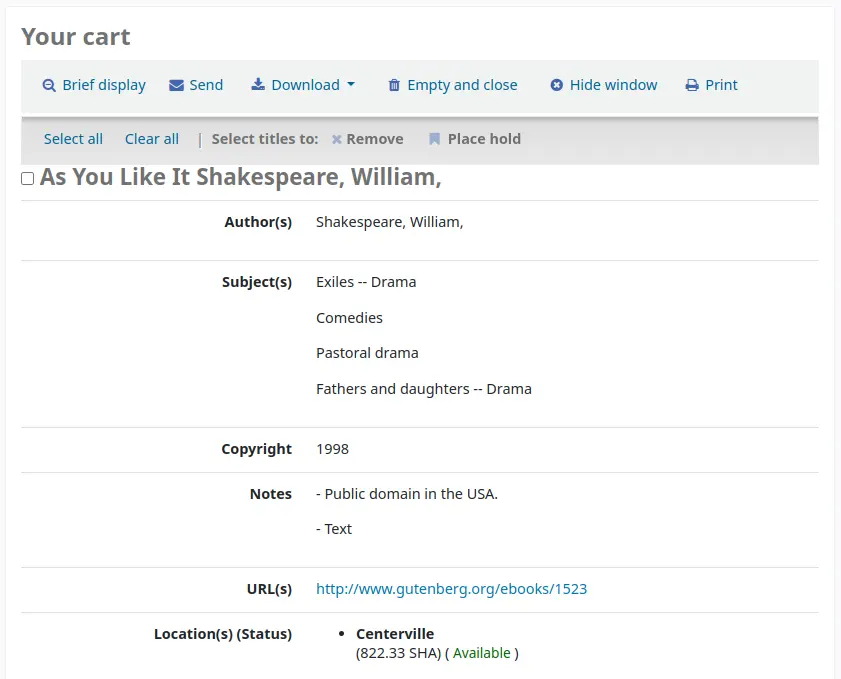
Ao ser clicado, o botão ‘Mais detalhes’ mudará para ‘Visualização resumida’. Ao clicar nele, voltará à vista padrão em formato de tabela, mostrando o título, o autor, a data de direitos de autor, bem como a localização e o estado.
Enviar: a opção de enviar o conteúdo do carrinho para um endereço de email. Isto é útil se quiser enviar os recursos encontrados na biblioteca para a sua conta de email pessoal, para os consultar mais tarde, ou para os enviar a um leitor que esteja a pesquisar um tópico específico. Ao clicar neste endereço, abrirá uma nova janela a solicitar o endereço de email e a mensagem a enviar.
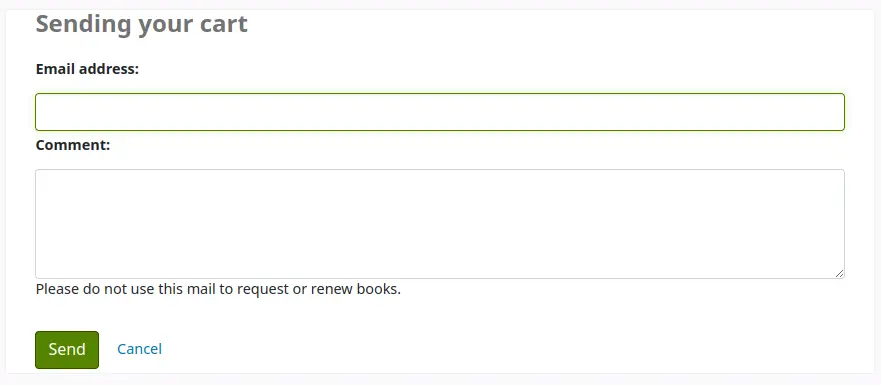
Aviso
O carrinho só pode ser enviado por email por leitores com sessão iniciada. Isto evitará que a função de envio do carrinho por email seja utilizada para o envio de spam.
Nota
A mensagens enviada quando envia uma lista é a CART, que pode ser alterada na ferramenta de Avisos e recibos.
Download: pode descarregar o conteúdo do carrinho em vários formatos predefinidos ou utilizando um perfil CSV definido no módulo de ferramentas.
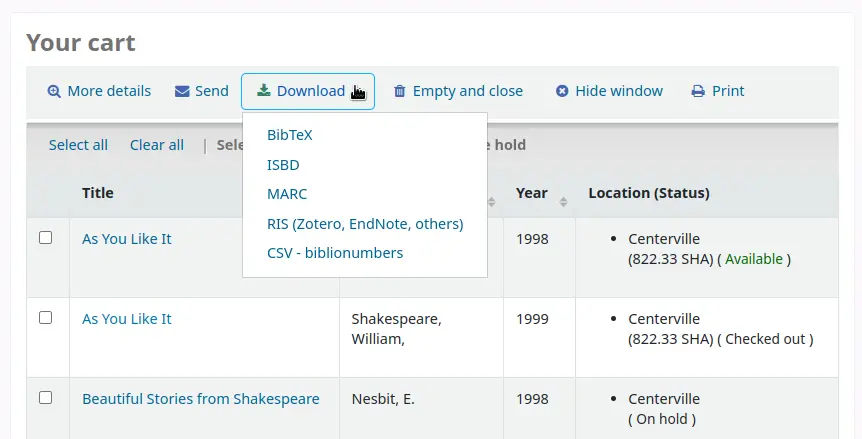
Esvaziar e fechar: isto esvaziará o carrinho e fechará a janela.
Ocultar janela: isto fechará a janela, mas o carrinho não será esvaziado.
Imprimir: isto imprimirá o conteúdo do carrinho.
Para além das várias formas diferentes de guardar o conteúdo do carrinho, existem formas de acrescentar valor aos dados nele contidos.
Selecione um ou mais títulos do carrinho e escolha uma das opções:
Remover: isto removerá os títulos selecionados do carrinho.
Adicionar a uma lista: isto irá adicionar os títulos selecionados a uma lista
Reservar: isto fará uma reserva de todos os títulos selecionados
Tag: se a preferência de sistema TagsInputOnDetail estiver ativada, os utilizadores poderão adicionar etiquetas a títulos selecionados.
Colocar reservas
Os leitores podem efetuar reservas através do OPAC, desde que estejam autenticados e a preferência de sistema OPACHoldRequests esteja definida como ‘Permitir’. Caso o item possa ser reservado, a opção para realizar a reserva aparecerá em vários locais.
Se a preferência de sistema DisplayMultiPlaceHold estiver ativada, ao visualizar uma lista ou uma página de resultados de pesquisa, existe a opção de solicitar a reserva de múltiplos itens, marcando as caixas de seleção à esquerda dos resultados e clicando em ‘Reservar’ na parte superior.
Ao visualizar uma lista ou uma página de resultados de pesquisa, verá a opção de reservar abaixo das informações básicas sobre o título.
Ao visualizar um título específico, verá a opção de fazer uma reserva na caixa localizada no lado direito do ecrã
Todos os endereços acima exibirão o mesmo ecrã de espera.
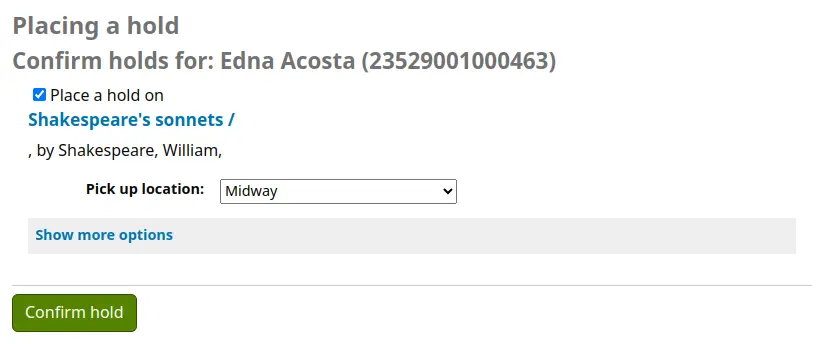
Se a sua biblioteca tiver definido taxas de reserva nas suas regras de circulação e multas e ser o leitor for cobrado por essa reserva, uma observação aparecerá no topo deste ecrã especificando o valor. Ex.: ‘Será cobrada uma taxa de reserva de 0,50 pela realização desta reserva’.
A caixa à esquerda dos itens a colocar em espera deve ser marcada.
O título inclui um endereço de retorno para a página de detalhes do registo.
A sua prioridade: se a preferência de sistema OPACShowHoldQueueDetails estiver configurada para apresentar o nível de prioridade, a prioridade, ou seja, a posição desta reserva na fila de espera, será apresentada.
Local de levantamento: se a preferência de sistema OPACAllowUserToChooseBranch estiver ativada, o leitor pode escolher onde pretende levantar a sua reserva. A lista de locais disponíveis incluirá todas as bibliotecas que tenham a opção ‘Local de levantamento’ definida como ‘Sim’ na página de configuração de bibliotecas.
Clique em ‘Mostrar mais opções’ para visualizar as definições adicionais para esta reserva.
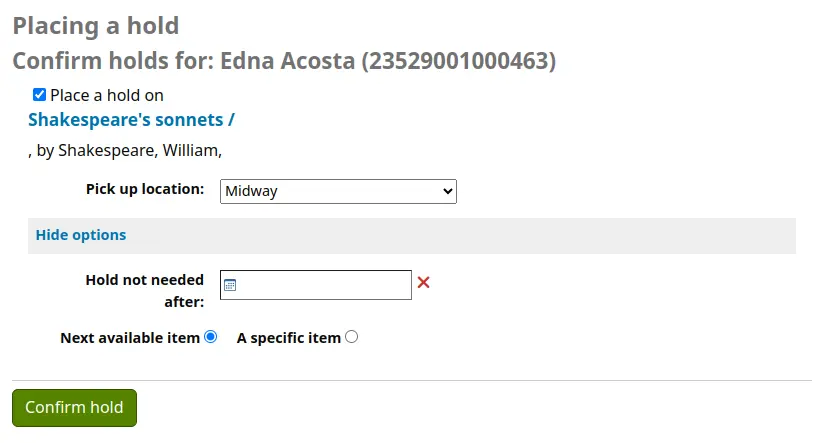
Data de início da reserva: se a preferência de sistema OPACAllowHoldDateInFuture estiver ativada, este campo será apresentado, permitindo ao utilizador definir uma data futura para o início da sua reserva.
Reserva não necessária após: por predefinição, as reservas inseridas no sistema permanecem ativas até serem anuladas; no entanto, se o leitor preencher este campo, a reserva terá uma data de expiração.
Importante
As reservas expiradas são removidas pela tarefa cancel_expired_holds.pl. Este não é um processo automático e deve ser configurado pelo administrador do sistema.
Solicitar tipo de documento específico: se a preferência de sistema AllowHoldItemTypeSelection estiver definida para ‘Permitir’, esta opção será apresentada para que o leitor possa optar por restringir a reserva a um tipo de documento específico.
Solicitar grupo de exemplares específico: se a preferência de sistema EnableItemGroupHolds estiver definida como ‘Permitir’ e o registo possuir grupos de exemplares, o leitor pode optar por solicitar uma reserva para o próximo exemplar disponível de um grupo, em vez de para o próximo exemplar disponível de todo o registo ou para um exemplar específico.
Notas da reserva: se a preferência de sistema OpacHoldNotes estiver ativada, os leitor poderão deixar observações para a biblioteca sobre as suas reservas.
Dependendo das regras de circulação referentes a reservas de exemplares específicos, o leitor poderá escolher se pretende efetuar a reserva para o próximo exemplar disponível ou para um exemplar específico.
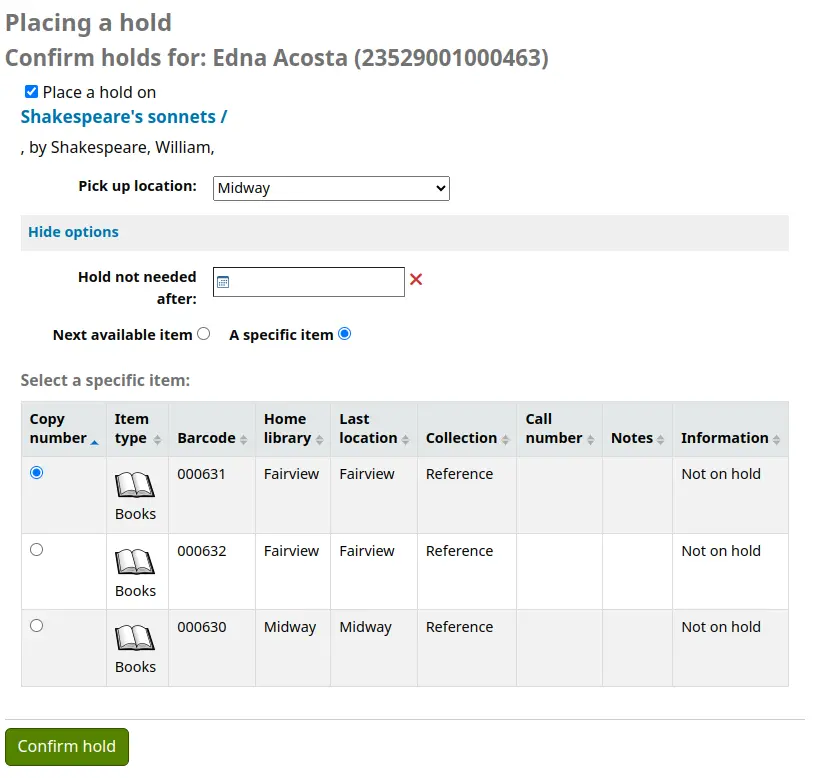
Após clicar no botão ‘Confirmar reserva’, o leitor será direcionado para a página da sua conta, onde poderá visualizar todos os exemplares reservados.
Pedido de empréstimos interbibliotecas
Quando o módulo de pedidos de empréstimo interbibliotecas está ativado e algumas categorias de leitores têm permissão para ‘fazer pedidos de empréstimo interbibliotecas no OPAC’, os leitores verão um endereço abaixo dos resultados da pesquisa para realizar pedidos de empréstimo interbibliotecas.
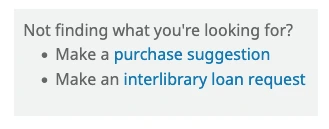
Se a preferência de sistema ILLOpacUnauthenticatedRequest estiver definida para ‘Não permitir’, os leitores têm de iniciar sessão antes de efetuar um pedido. Após a autenticação, serão redirecionados para o separador de pedidos de empréstimo interbibliotecas nas suas contas para criar o pedido.
Se a preferência de sistema ILLOpacUnauthenticatedRequest estiver definida para ‘Permitir’, os leitores podem fazer pedidos sem estarem autenticados ou sem possuírem uma conta. Ao clicar em ‘Fazer um pedido de empréstimo interbibliotecas’, pode ser-lhes pedido que selecionem primeiro um fornecedor (caso a biblioteca utilize mais do que um sistema de retaguarda) antes de acederem ao formulário de pedido de empréstimo interbibliotecas.
Nota
Se existir um texto de autorização de direitos de autor num local de visualização de personalização HTML ‘ILLModuleCopyrightClearance’, o texto será apresentado aqui e os leitores terão de clicar em ‘Sim’ para o aceitar antes de prosseguir.
O formulário inclui campos para os dados pessoais do utilizador (nome, apelido, endereço de email).
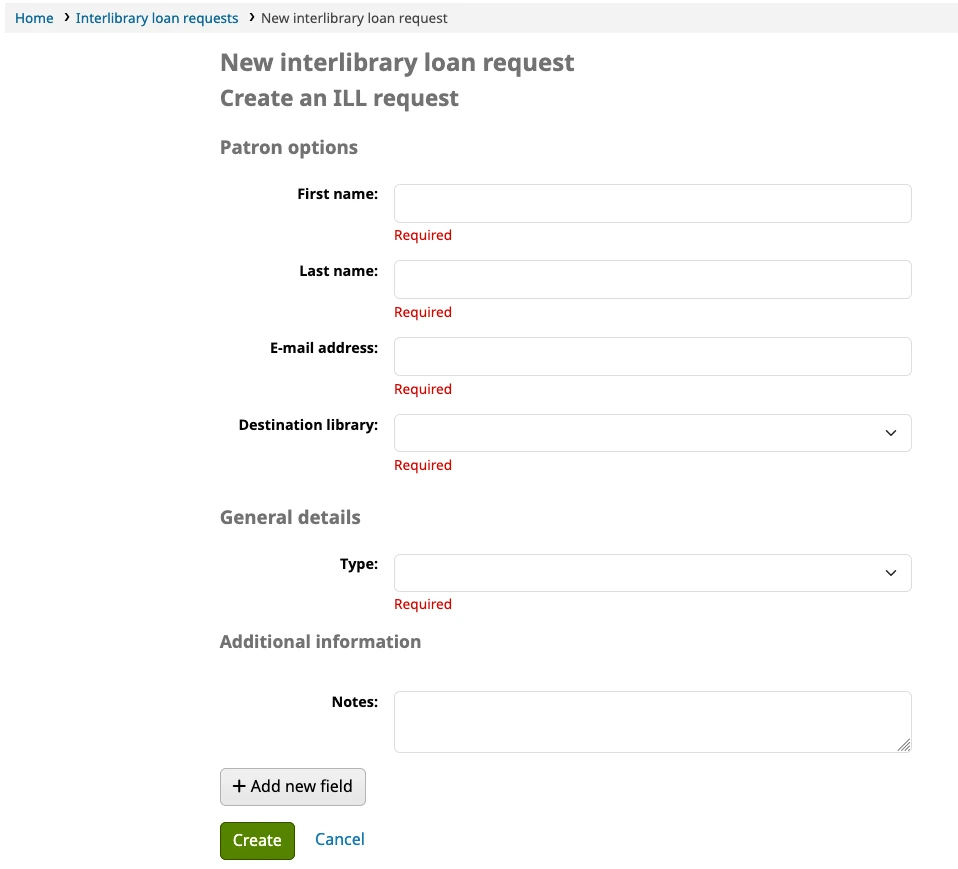
Biblioteca de destino: a lista é composta pelas bibliotecas marcadas como locais de levantamento nas configurações das bibliotecas. Esta é a biblioteca que irá gerir o pedido e servirá como local de levantamento dos exemplares físicos solicitados.
Tipo: quando um tipo é selecionado, são apresentados os campos de entrada relevantes para esse recurso específico. Os conjuntos de campos para cada tipo de pedido são os mesmos que os apresentados ao criar um pedido na interface dos técnicos.
Clicar em ‘Criar’ enviará o pedido à biblioteca para processamento.
Nota
Se a preferência de sistema ILLModuleDisclaimerByType estiver em utilização, o aviso de isenção de responsabilidade será apresentado neste passo. Independentemente da opção escolhida pelo leitor, o pedido será criado e o valor do aviso de isenção será armazenado juntamente com os restantes detalhes do pedido.
Pedidos de devolução
Se a sua biblioteca aceitar pedidos de devolução antecipada (consulte configuração de pedidos de devolução antecipada para mais informações), os leitores poderão fazer estes pedidos em exemplares.
A opção de solicitar um devolução aparece em vários locais do OPAC:
Na lista de resultados após uma pesquisa, a opção ‘Pedir devolução’ aparece na parte inferior de cada resultado passível de pedido de devolução.
No detalhes do registo, a opção ‘Pedir devolução’ surge no lado direito do ecrã (ou na parte inferior, na vista para dispositivos móveis) nas opções
Qualquer um destes endereços levará ao formulário para o pedido.
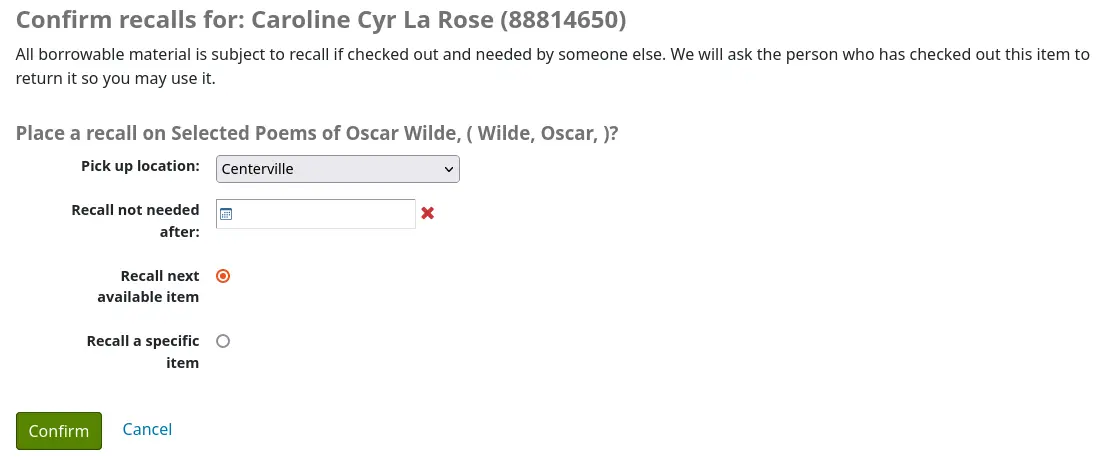
Local de levantamento: o leito pode escolher onde pretende levantar o exemplar solicitado.
Pedido de devolução não necessário após: se o leitor não necessitar deste exemplar após uma determinada data, pode informá-lo aqui. O pedido de devolução expirará automaticamente (através do tarefa expire_recalls.pl) após essa data.
Pedir o próximo exemplar disponível ou pedir um exemplar específico: o leitor pode optar por pedir a devolução qualquer exemplar ou um exemplar específico. Se escolher ‘Solicitar um exemplar específico’, deverá selecionar o exemplar da lista.
Assim que o leitor confirmar o pedido de devolução antecipada, receberá uma mensagem a informar que o leitor que tem atualmente o artigo será notificado.
Nota
O aviso enviado ao leitor que está atualmente com o artigo é o RETURN_RECALLED_ITEM. Pode ser editado na ferramenta Avisos e recibos.
O pedido será adicionado ao separador dos pedidos de devolução no resumo da conta, bem como à lista do histórico de pedidos de devolução.
Conteúdo aprimorado
OverDrive
Se forem utilizadas as preferências de sistema OverDrive, uma pesquisa no OPAC irá também pesquisar a coleção OverDrive da biblioteca.
Após efetuar uma pesquisa, verá um endereço acima dos resultados do catálogo da biblioteca: ‘Encontrados X resultados na coleção OverDrive da biblioteca’.
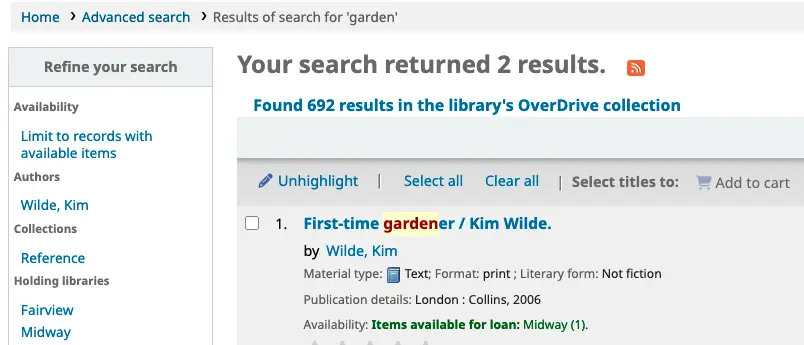
Ao clicar neste endereço, verá todos os resultados correspondentes do OverDrive sem sair do OPAC.
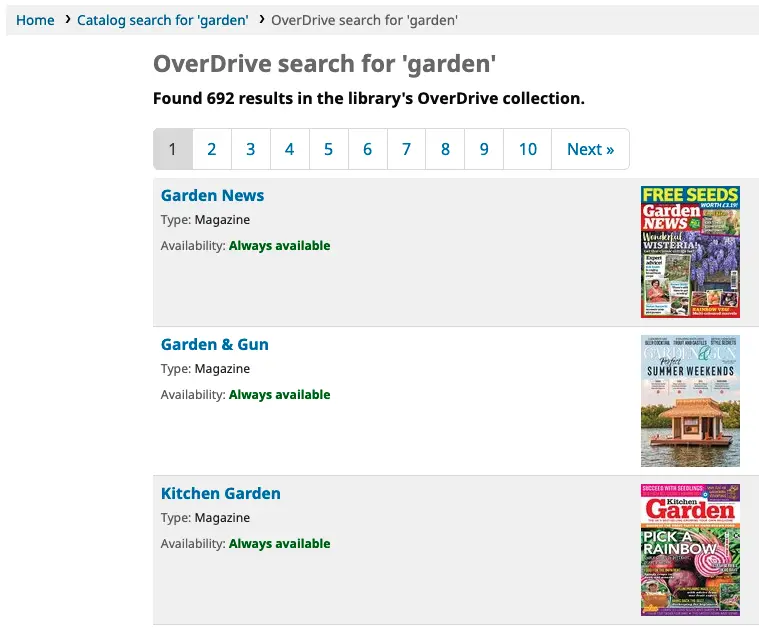
Ao clicar num título nesta lista levará ao registo no site da OverDrive.
Etiquetagem
Dependendo das definições das preferências de sistema TagsEnabled, TagsInputOnList e TagsInputOnDetail, os leitores podem adicionar etiquetas aos registos bibliográficos a partir dos resultados da pesquisa e/ou da página de detalhes dos registos bibliográficos.
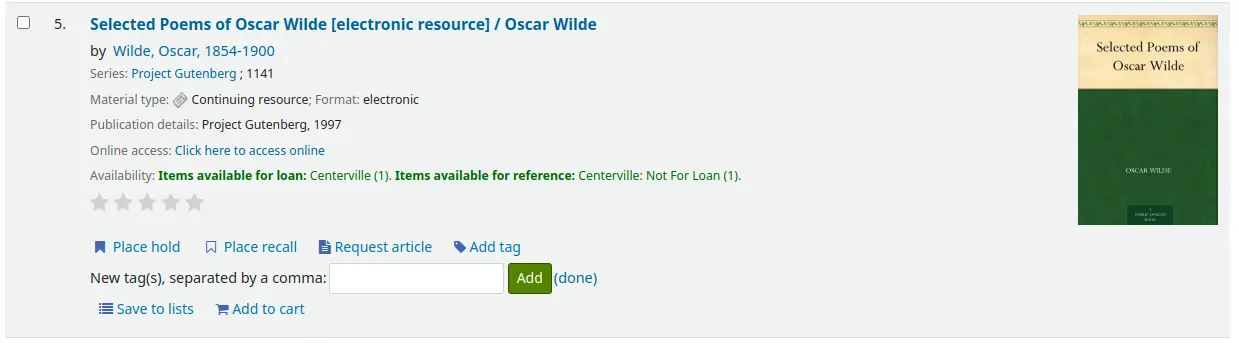
Se permitir que os leitores adicionem etiquetas a partir da lista de resultados de pesquisa (consulte TagsInputOnDetail), estes verão um botão ‘Adicionar etiqueta’ por baixo de cada resultado e uma opção ‘Etiqueta’ na parte superior do ecrã.
Para adicionar uma etiqueta a um registo, clique em ‘Adicionar etiqueta’, introduza a etiqueta ou as etiquetas (separadas por vírgulas) no campo ‘Nova etiqueta’e clique em ‘Adicionar’. Receberá uma confirmação de que as etiquetas foram adicionadas.
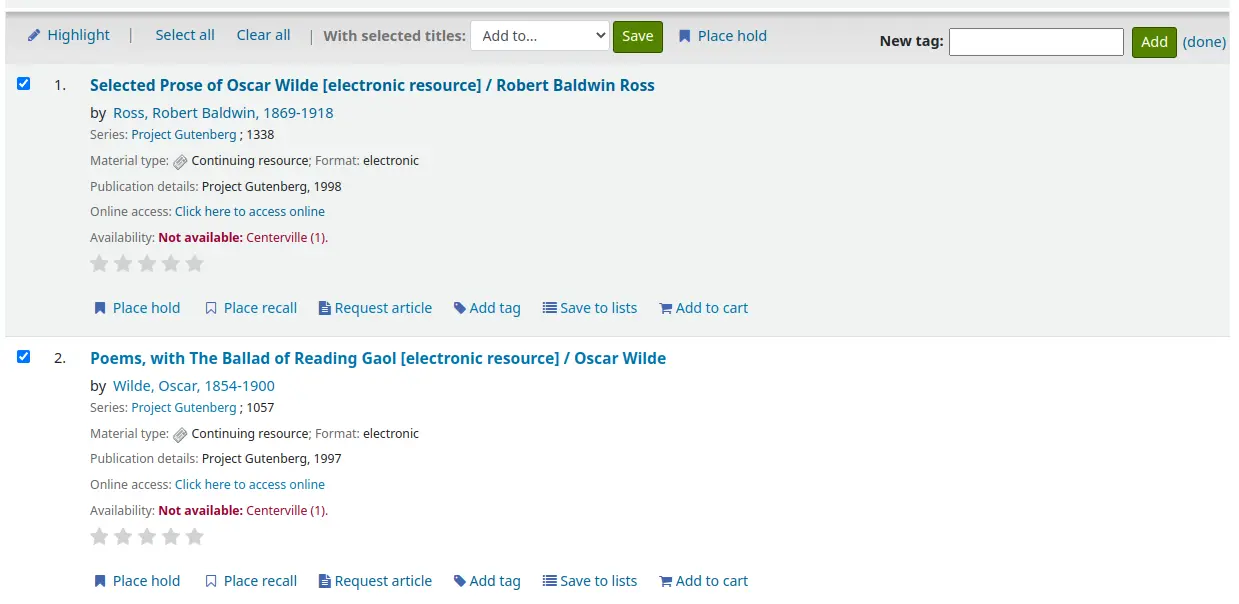
A partir dos resultados, também pode adicionar etiquetas a registos em lote, marcando as caixas de selecção à esquerda dos registos e clicando no botão ‘Etiqueta’ na parte superior. Ao clicar no botão, este irá transformar-se num campo de entrada onde poderá adicionar etiquetas a todos os registos selecionados.
Se a preferência de sistema TagsInputOnDetail estiver ativada, os leitores terão também a possibilidade de adicionar etiquetas a partir de uma lista e do carrinho.
Se a preferência de sistema TagsInputOnDetail estiver ativada, os leitores poderão adicionar etiquetas a partir da página de detalhes do registo, clicando na ligação ‘Adicionar etiqueta(s)’. O endereço será substituído por um campo de entrada.
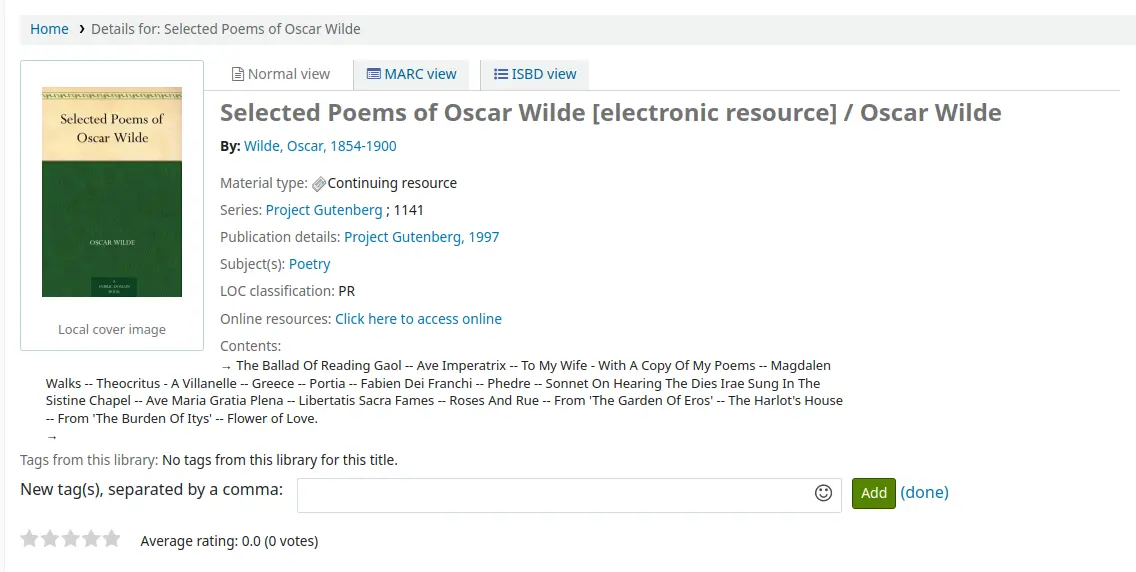
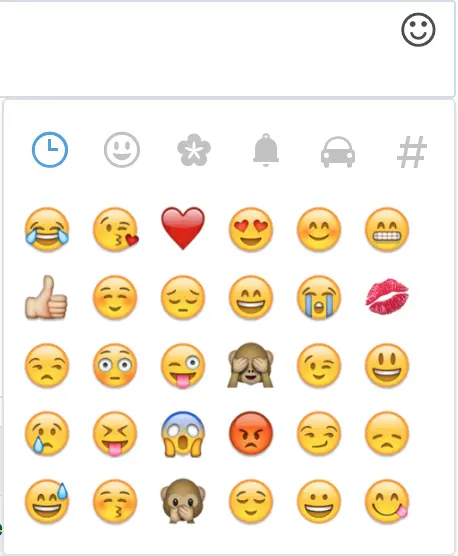
Também é possível incluir emojis utilizando o seletor de emojis ao adicionar etiquetas na página de detalhes do registo.
Zotero
O Zotero é um gestor de referências de código aberto para guardar e gerir bibliografias. Saiba mais sobre o Zotero e faça o download em https://www.zotero.org.
Ao visualizar os resultados de pesquisa no OPAC do Koha, se tiver o Zotero instalado, verá um ícone de pasta na barra de endereços, à direita do URL. Clicar nessa pasta abrirá uma lista com os títulos da página para que possa selecionar e adicionar ao Zotero.
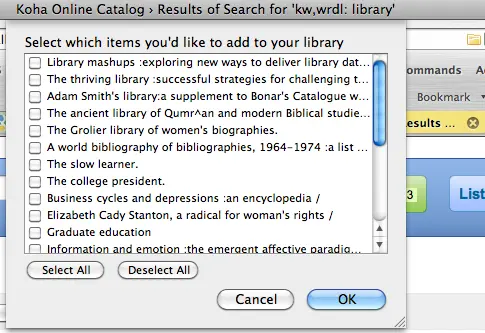
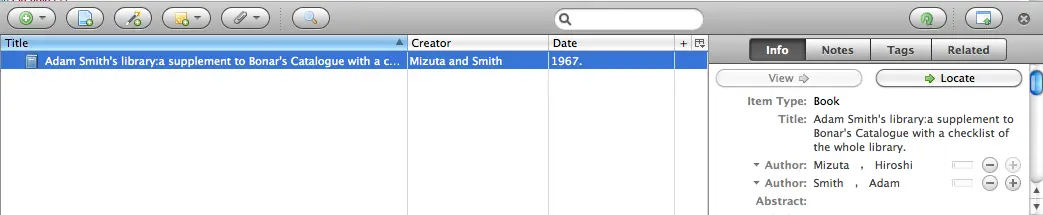
Selecione os títulos que pretende adicionar ao Zotero e, em seguida, clique no botão ‘OK’. Isto adicionará o título ao Zotero. Pode visualizar o título abrindo a sua biblioteca do Zotero.
Feeds RSS personalizados
Utilizando a tarefa de feeds RSS, pode gerar um feed RSS para qualquer consulta SQL (por exemplo, um feed RSS de novas aquisições). A tarefa é executada na linha de comandos para produzir um documento XML RSS.
A saída deve ser colocada num diretório acessível à interface web do OPAC (ou da equipa), para que os leitores possam descarregar o feed RSS.
Um exemplo de utilização pode ser encontrado em: misc/cronjobs/rss/lastAcquired.conf
Normalmente, a tarefa do RSS deve ser executada periodicamente (por exemplo, diariamente) para manter o feed atualizado.
O ficheiro de configuração (por exemplo, lastAcquired. conf) lista
nome do ficheiro de modelo a utilizar
caminho do ficheiro de saída
consulta SQL
A tarefa do RSS executa a consulta SQL e, em seguida, processa o resultado da consulta através do modelo para gerar o ficheiro de saída.
Importante
Para utilizar feeds RSS personalizados, precisa de ativar a tarefa de RSS.
Informações sobre cookies
Pode adicionar informações sobre cookies ao seu OPAC, com um banner e uma política.

A partir do banner de cookies, os leitores têm a opção de aceitar cookies essenciais ou visualizar mais informações. Ao clicarem em ‘Mais informações’, é apresentada a Política de cookies.
O banner de cookies será apresentado em todas as páginas até que o leitor aceite os cookies.
Para configurar as informações sobre os cookies:
Verifique se utiliza cookies não essenciais no seu website.
Verifique se existe código de rastreio de análise na preferência de sistema OpacUserJS.
Transfira qualquer código de rastreio que possua para a preferência do sistema CookieConsentedJS.
Decida qual o texto que pretende exibir no banner de cookies: adicione-o à personalização HTML da CookieConsentBar.
Decida qual o conteúdo que pretende para a janela pop-up da política de cookies: adicione-o à personalização HTML do CookieConsentPopup.
Altere a preferência do sistema CookieConsent para ‘Requer’ e verifique o resultado.
Auto-registo no OPAC
Se permitir, os leitores podem criar as suas próprias contas através do OPAC. Se a preferência PatronSelfRegistration estiver definida para ‘Permitir’, os leitores verão um endereço para registo abaixo da caixa de autenticação.
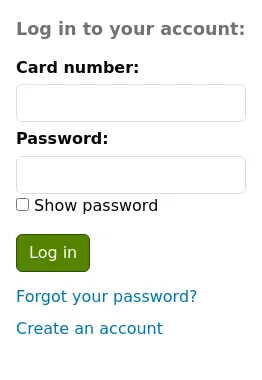
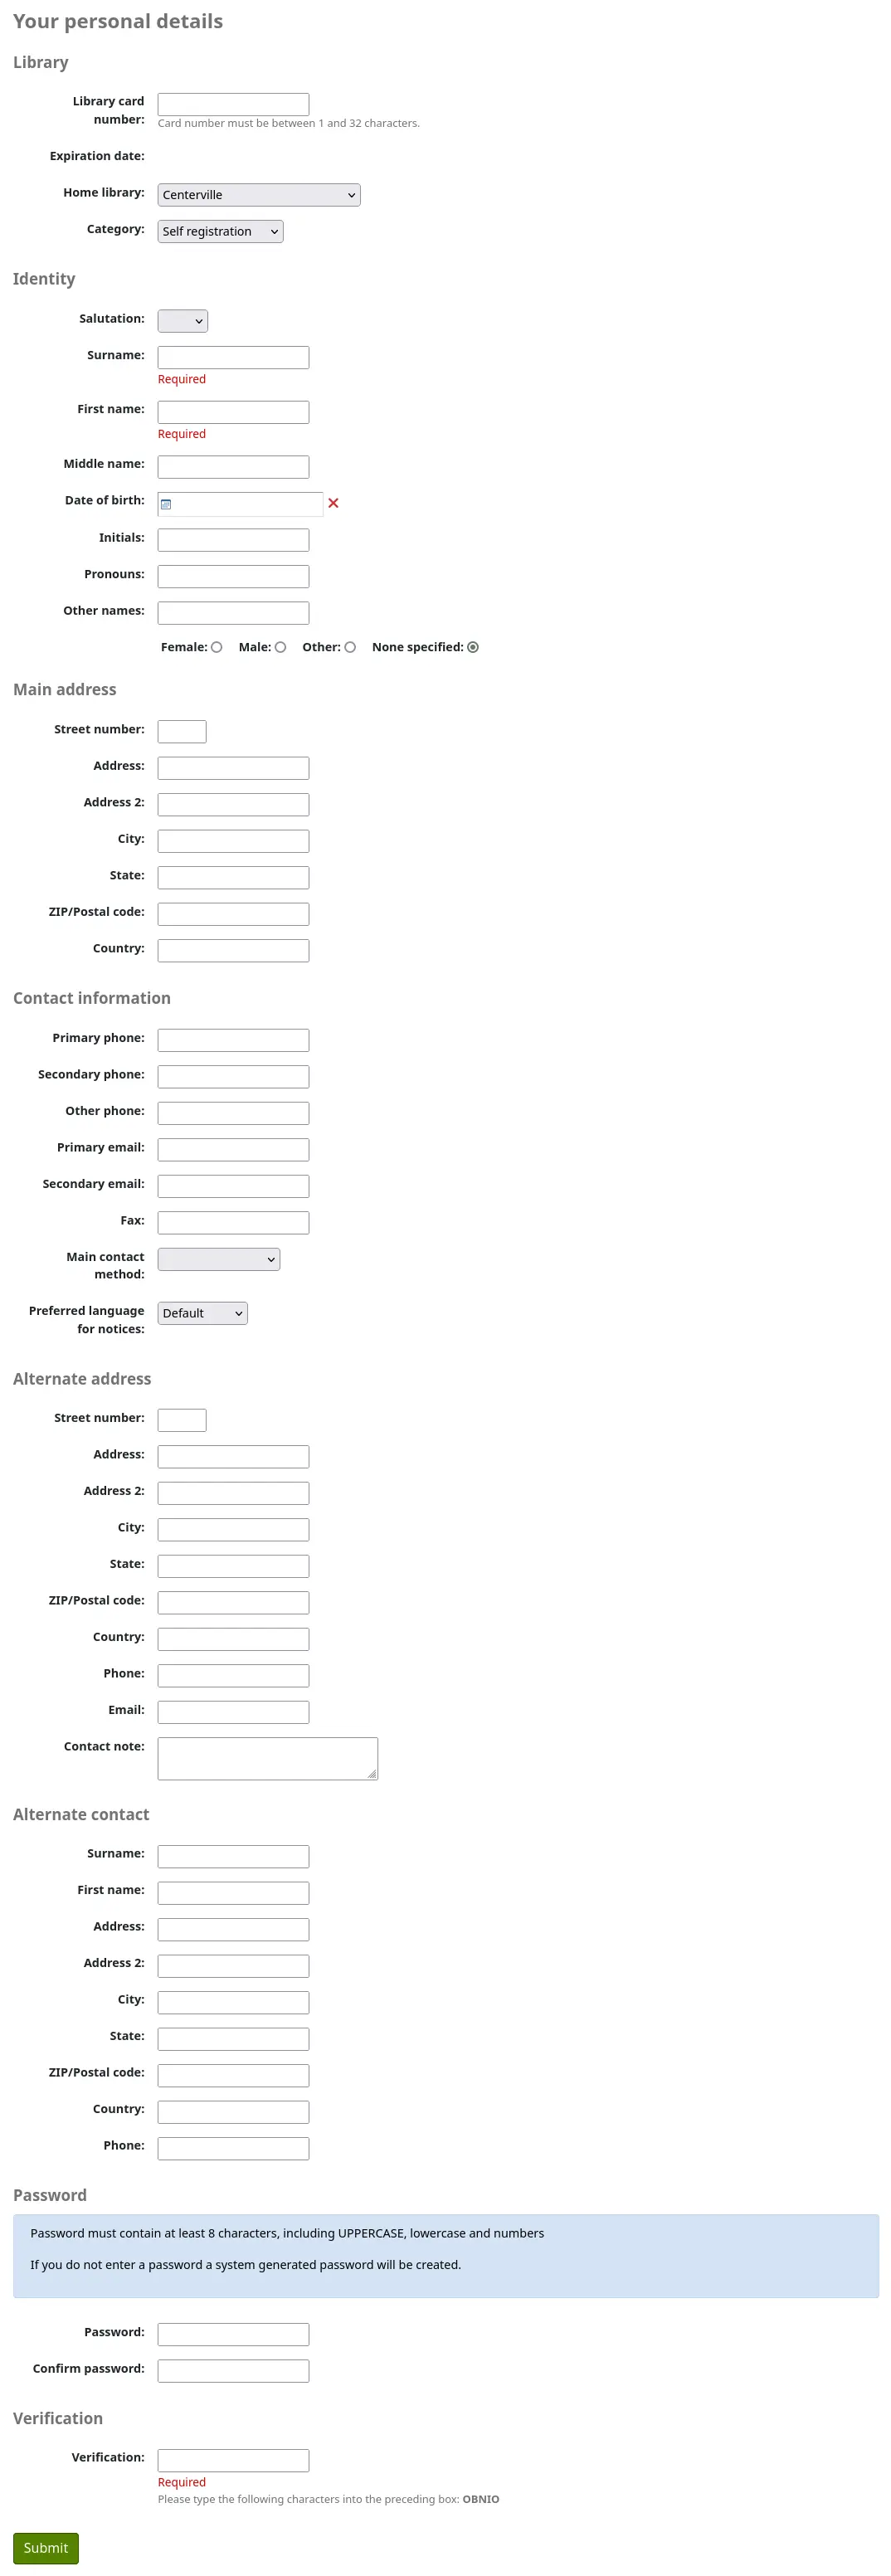
Quando o leitor clica no endereço ‘Criar uma conta’, é direcionado para uma página de registo. As opções nessa página podem ser controladas através da edição das preferências PatronSelfRegistrationBorrowerMandatoryField e PatronSelfRegistrationBorrowerUnwantedField.
Nota
Para evitar erros nos anos de nascimento, pode ativar a preferência de sistema PatronSelfRegistrationAgeRestriction. Isto adiciona uma verificação de idade máxima ao auto-registo.
Assim que o leitor enviar o seu registo, receberá um email para confirmar a conta (caso a preferência PatronSelfRegistrationVerifyByEmail esteja configurada para o exigir) ou verá o seu novo nome de utilizador e palavra-passe. Se a preferência do sistema PatronSelfRegistrationPrefillForm estiver definida para ‘Mostrar e preencher’, ser-lhe-á apresentado o formulário de login já preenchido.
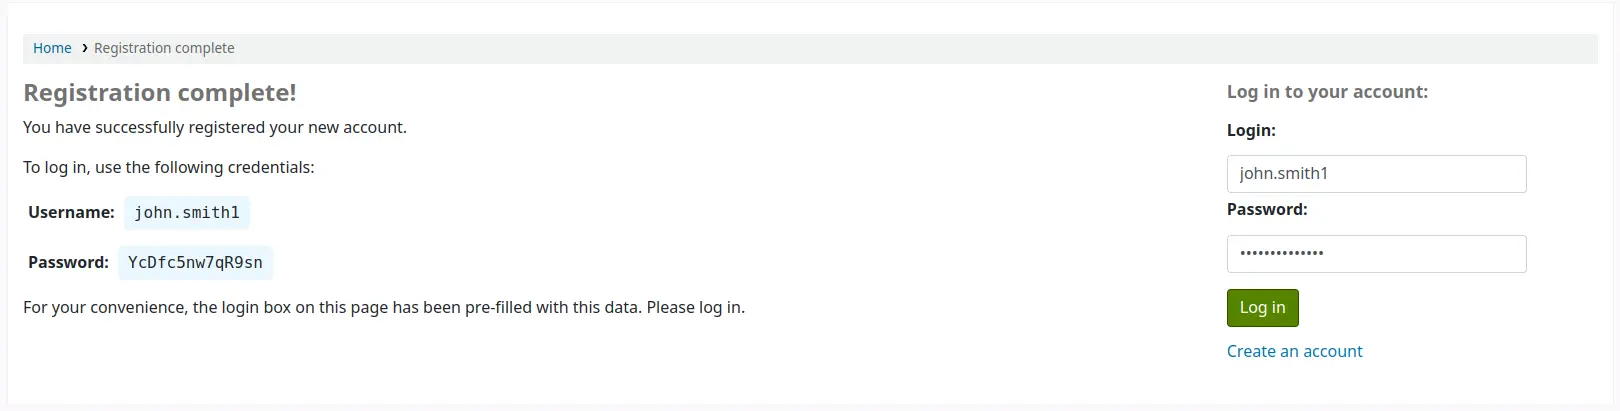
Pode adicionar instruções extra nesta página criando uma personalização HTML com o local de visualização ‘PatronSelfRegistrationAdditionalInstructions’.
Para ser notificado quando um leitor se regista via OPAC, utilize a preferência de sistema EmailPatronRegistrations ou a preferência de sistema PatronSelfRegistrationAlert.
Os leitores registados desta forma não terão um número de cartão até que a biblioteca lhes atribua um, mas terão acesso imediato a todas as funcionalidades do OPAC. Por este motivo, recomenda-se que:
configure uma categoria de leitor provisória para os leitores que realizam o seu próprio registo (como por exemplo ‘Auto-registo’), em vez de utilizar uma categoria existente, e defina esse valor na preferência PatronSelfRegistrationDefaultCategory
conceda a esta categoria de leitor privilégios mínimos de circulação nas regras de circulação e multas (como permitir algumas reservas, mas nenhum empréstimo)
Desta forma, os leitores terão de se deslocar à biblioteca para comprovar a sua identidade antes de receberem um número de cartão e a permissão para requisitar exemplares, ou então a biblioteca necessitará de definir uma política interna para a geração de números de cartão antes de os fornecer aos leitores que realizaram o auto-registo. Uma vez feito isto, a biblioteca poderá alterar a categoria para uma mais adequada (como adulto, residente, não residente, estudante, etc.) e adicionar um número de cartão ou código de barras.
A sua conta
Se a preferência de sistema opacuserlogin estiver definida para ‘Permitir’, os leitores podem iniciar sessão e aceder às suas contas.
Após se autenticarem, os leitores são direcionados para o seu resumo da conta.
Se os leitores acederem à página inicial enquanto estiverem ligados e a preferência OPACUserSummary estiver definida para ‘Mostrar’, verão um breve resumo da sua conta em vez dos campos de início de sessão.
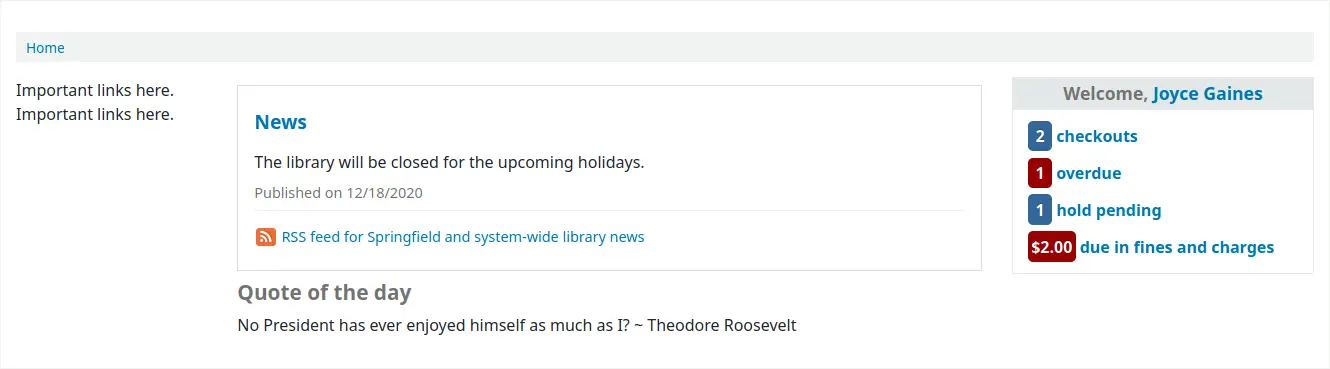
Se OPACShowSavings estiver configurada para apresentar as poupanças na caixa de resumo, esta secção de resumo incluirá também as poupanças que o leitor obteve ao utilizar a biblioteca em vez de comprar os artigos.
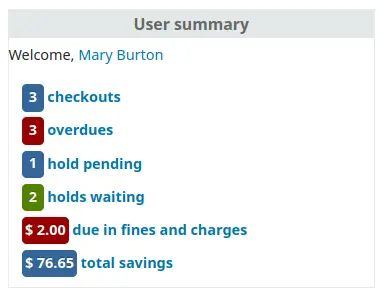
A partir de qualquer página do OPAC, clicar no nome do utilizador no canto superior direito da página irá levá-lo de volta para a sua conta.
Redefinir a sua palavra-passe
Se a preferência de sistema OpacResetPassword estiver definida para ‘Permitir’, os leitores podem redefinir as suas palavras-passe clicando na ligação ‘Esqueceu-se da palavra-passe?’ localizado abaixo da caixa de login.
Ao clicar, será apresentado um formulário a solicitar o nome de utilizador ou o endereço de email.
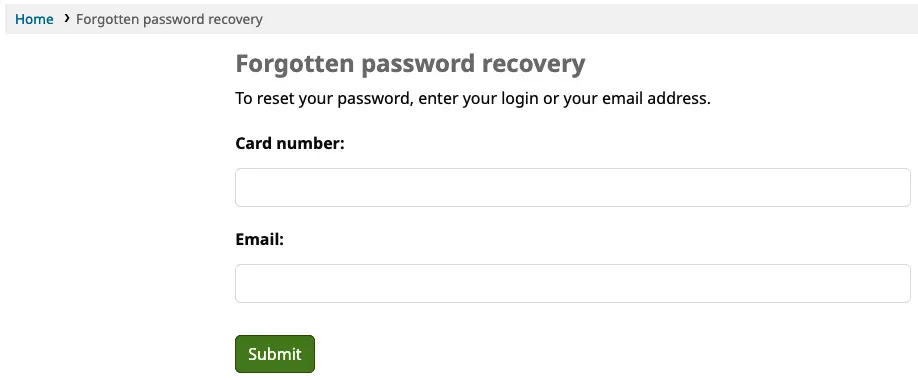
Aviso
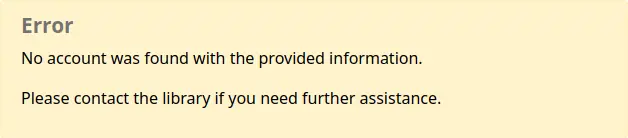
Os leitores devem ter um endereço de email registado para redefinir a palavra-passe. Caso não tenham um email registado, receberão uma mensagem de erro
O sistema enviará então um email ao leitor com instruções para redefinir a sua palavra-passe.
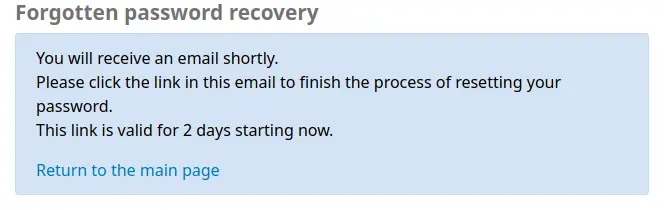
O conteúdo do email pode ser personalizado com a ferramenta de avisos e recibos. O código da mensagem é PASSWORD_RESET.
Se a preferência de sistema NotifyPasswordChange estiver ativada, o leitor receberá uma notificação a informar que a sua palavra-passe foi alterada.
O conteúdo deste email pode ser personalizado com a ferramenta de avisos e recibos. O código da carta é PASSWORD_CHANGE.
Sumário
No separador ‘Sumário’, os leitores verão todos os exemplares que requisitaram, com os empréstimos em atraso destacados a vermelho.
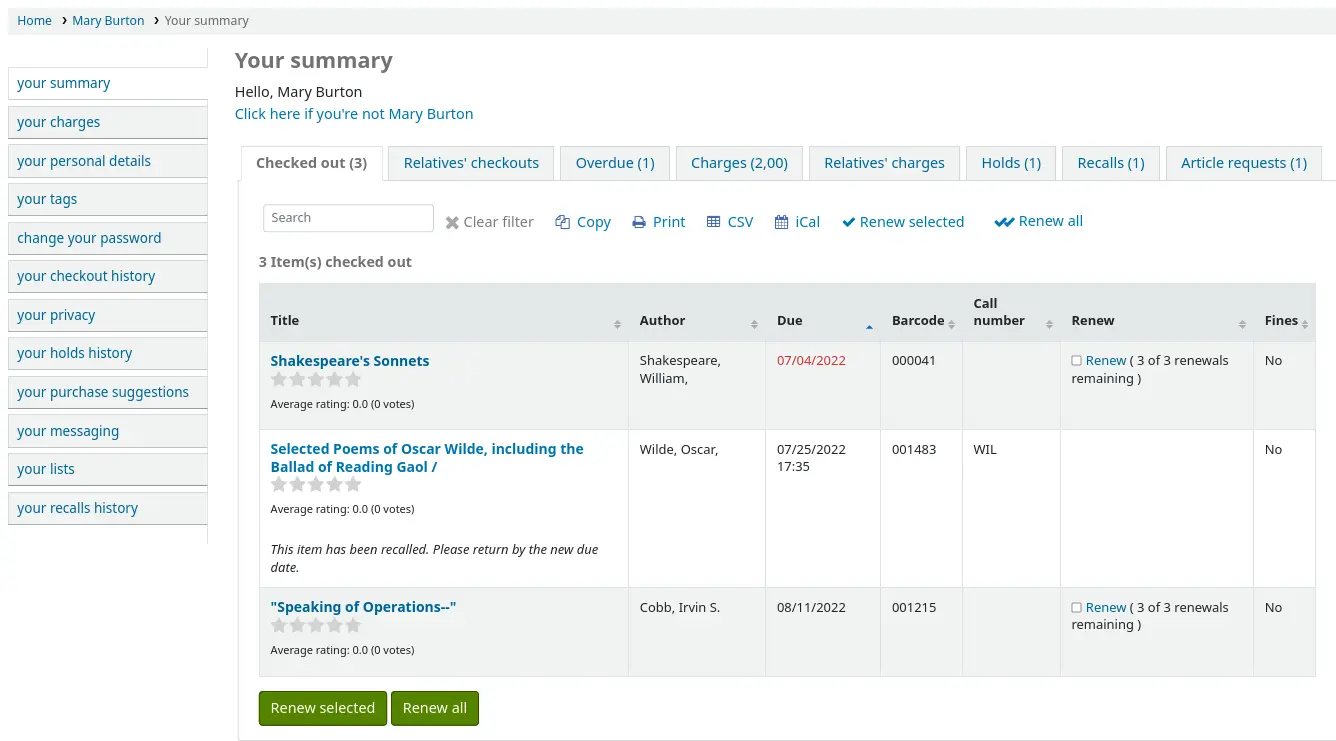
As mensagens do OPAC e as notas do OPAC serão apresentadas no topo desta página. No caso das mensagens OPAC, o leitor terá a opção de dispensar a mensagem. Isto ocultará a mensagem da sua conta no OPAC e marcá-la-á como lida, mas não eliminará a mensagem.

Pode adicionar conteúdo a esta página utilizando o local de personalização HTML OpacMySummaryNote. O conteúdo adicionado nesse local aparecerá acima do resumo do leitor e abaixo da mensagem de boas-vindas.

Se OPACShowSavings estiver configurado para apresentar a poupança na página de ‘Sumário’, esta secção também mostrará a poupança que o leitor obteve ao utilizar a biblioteca em vez de comprar os artigos.

Se OpacRenewalAllowed estiver definida para ‘Permitir’, os leitores poderão renovar os seus empréstimos através do OPAC.
Se o leitor tiver multas pendentes que excedam o valor definido em OPACFineNoRenewals, será apresentada uma mensagem a informar que não é possível efetuar renovações.

Será apresentada uma notificação se o leitor não puder efetuar reservas porque as suas multas excedem o valor definido na preferência do sistema maxoutstanding.

Se AllowPatronToControlAutoRenewal estiver definida para ‘Permitir que os leitores controlem’, os leitores poderão escolher se querem ou não que os seus empréstimos sejam renovados automaticamente. Se escolherem ‘Sim’, os empréstimos para os quais a renovação automática está ativada nas regras de circulação serão renovados conforme o esperado. Se escolherem ‘Não’, as renovações automáticas que se aplicariam aos empréstimos desse leitor não ocorrerão.

Se tiver introduzido código HTML na preferência OPACMySummaryHTML, verá esse conteúdo à direita da coluna ‘Multas’.
Dica
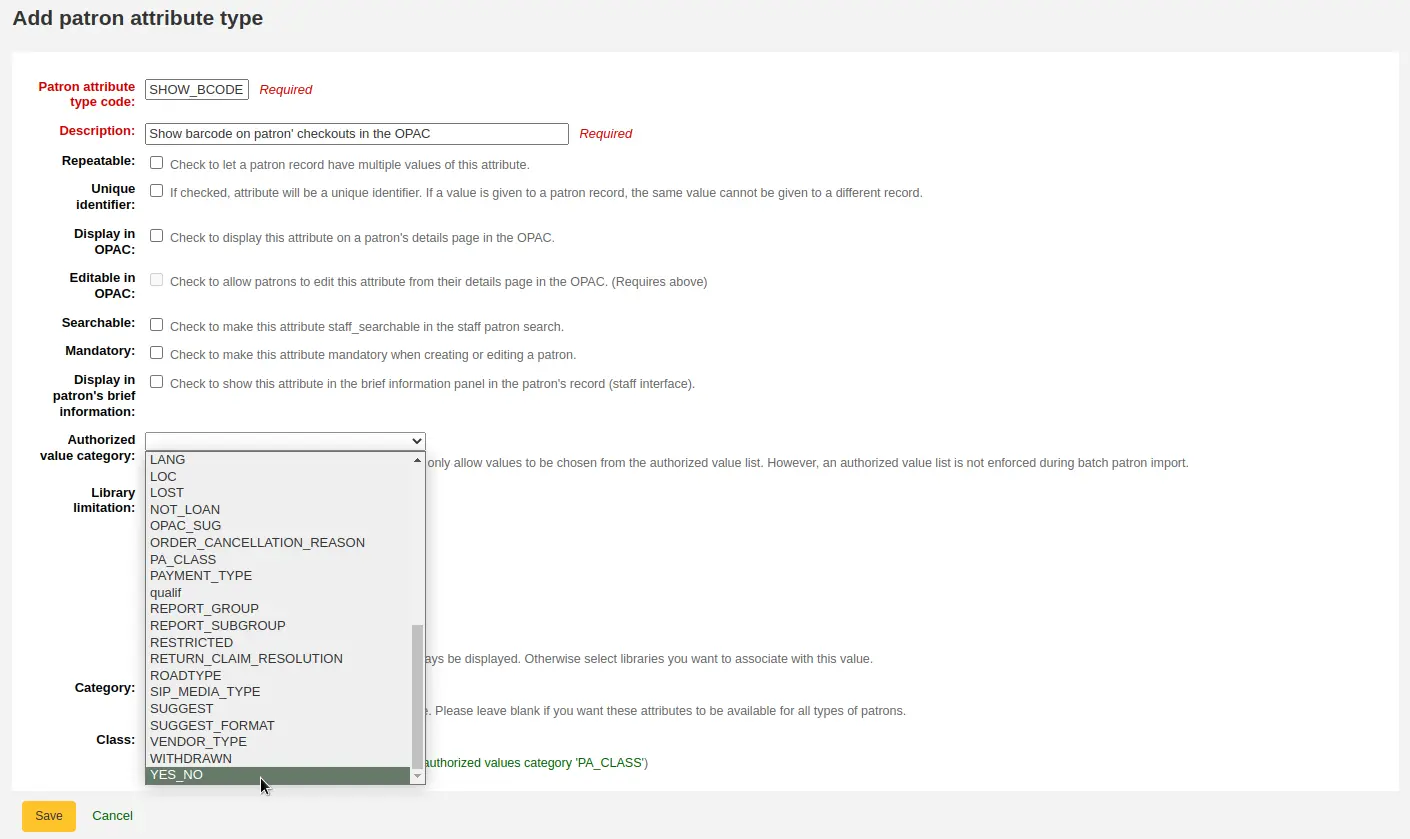
Por predefinição, o código de barras não é apresentado na tabela de empréstimos do leitor no OPAC. Se os seus utilizadores desejarem visualizar os códigos de barras dos exemplares na lista de empréstimos, pode configurar um atributo de leitor com o valor SHOW_BCODE e um valor autorizado do tipo YES_NO.
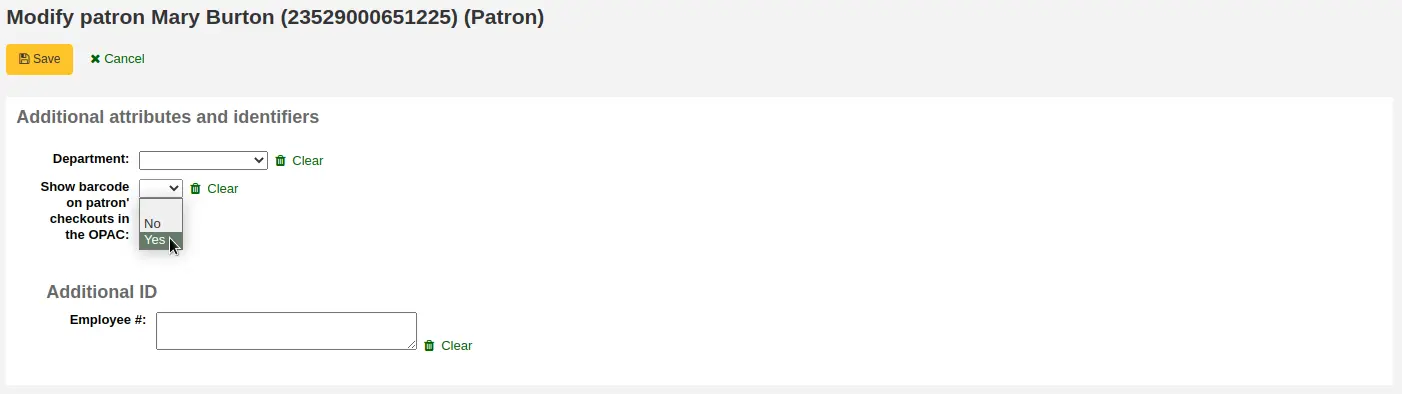
De seguida, no registo do leitor, defina o valor de SHOW_BCODE para ‘Sim’.
Isto irá adicionar uma coluna ao resumo de empréstimos no OPAC, exibindo ao leitor os códigos de barras dos exemplares que requisitou.
Se pretender que os leitores deixem uma observação num exemplar emprestado, a preferência AllowCheckoutNotes deve ser configurada para permitir esta ação.
No resumo de empréstimos do leitor, será adicionada uma coluna para permitir que este deixe uma observação (por exemplo: falta a primeira página ou o DVD está riscado).
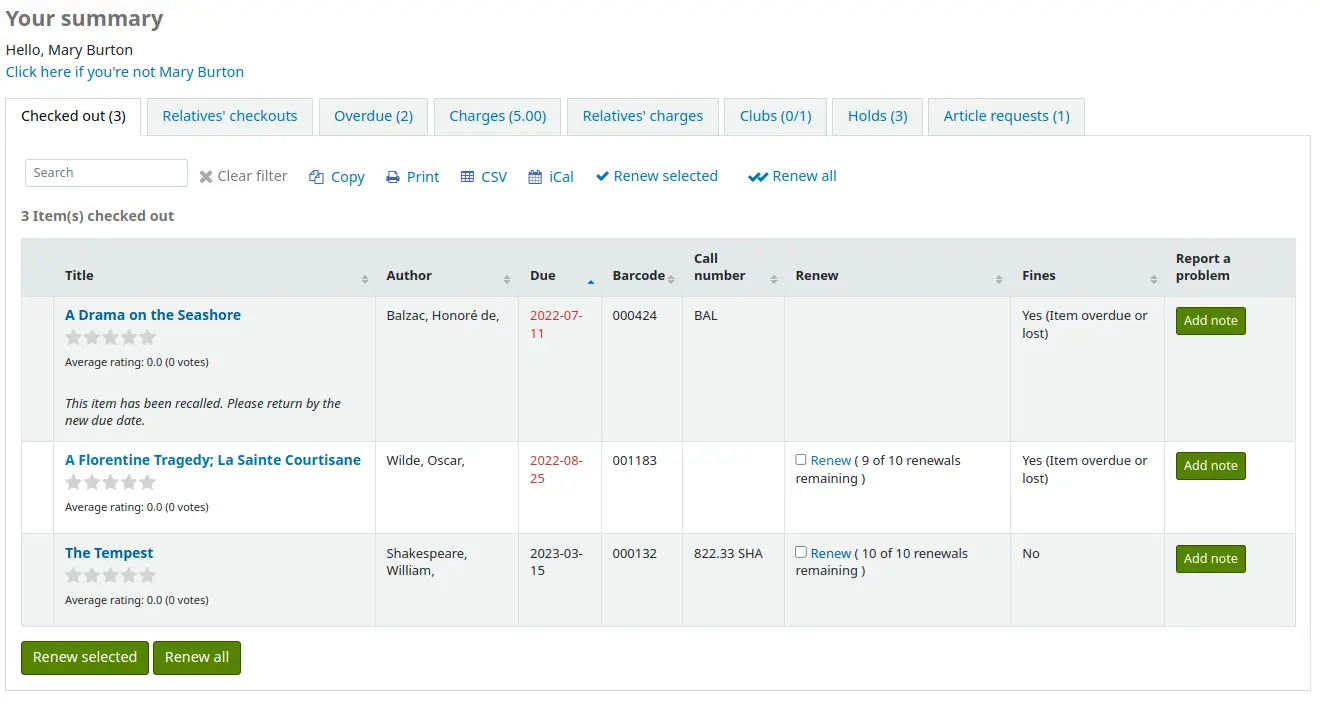
Quando o usuário clicar em ‘Adicionar observação’, poderá escrever uma observação sobre esse empréstimo.
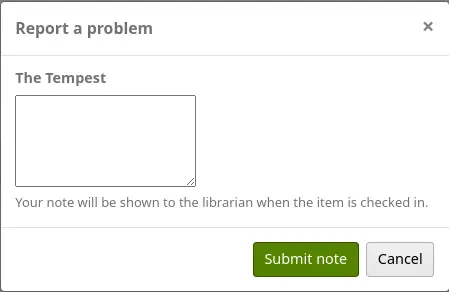
A equipa poderá visualizar e gerir as notas de empréstimo a partir da interface dos técnicos.
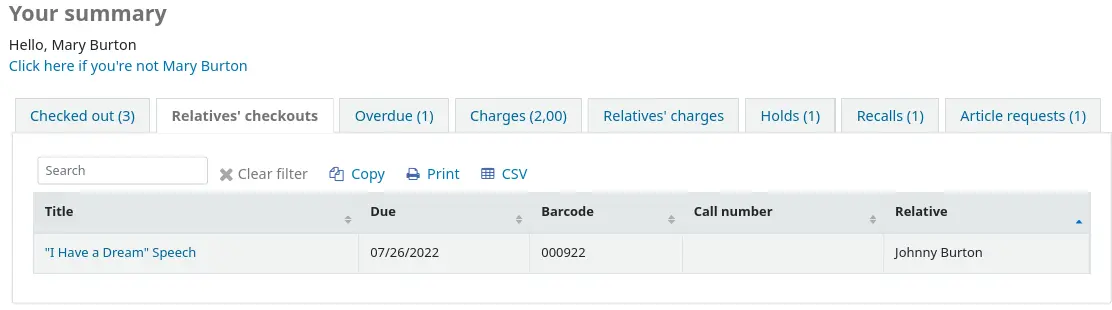
Se as fiados permitiram conforme definido em a sua privacidade, ou, em alternativa, se a equipa tiver permissão para alterar esta definição de privacidade na interface dos técnicos (através da preferência de sistema AllowStaffToSetCheckoutsVisibilityForGuarantor) e esta definição estiver ativada, o fiador verá um separador chamado “Empréstimos de relativos” no seu separador de resumo.
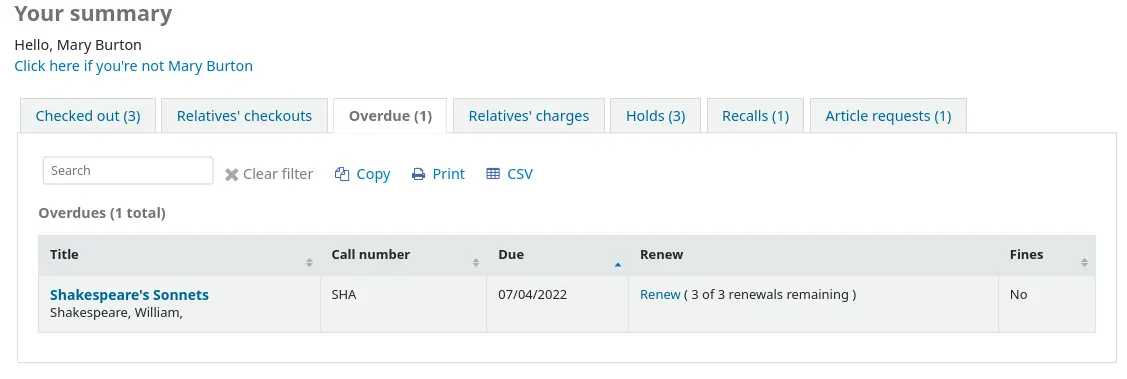
A clicar no separador ‘Em atraso’ apenas exibirá os exemplares que estão em atraso.
O separador ‘Multas’ apenas exibirá o valor total devido pelo leitor. Ao clicar no total, o leitor será direcionado para o separador ‘as suas multas’, onde poderá ver o detalhe completo das suas multas e cobranças. Se a sua biblioteca não cobrar multas, pode desativar a apresentação destes separadores definindo a preferência OPACFinesTab para ‘Não permitir’.
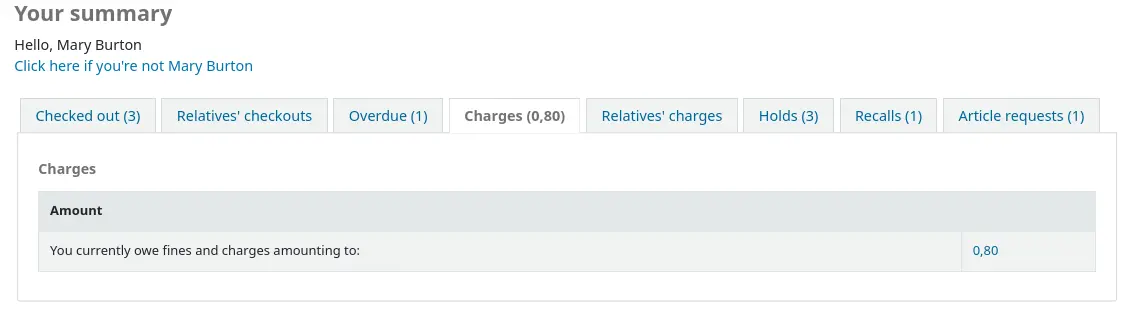
Se as fiados permitiram conforme definido em a sua privacidade, ou, em alternativa, se a equipa tiver permissão para alterar esta definição de privacidade na interface dos técnicos (através da preferência de sistema AllowStaffToSetFinesVisibilityForGuarantor) e esta definição estiver ativada, o fiador verá um separador chamado “Multas de relativos” no seu separador de resumo.
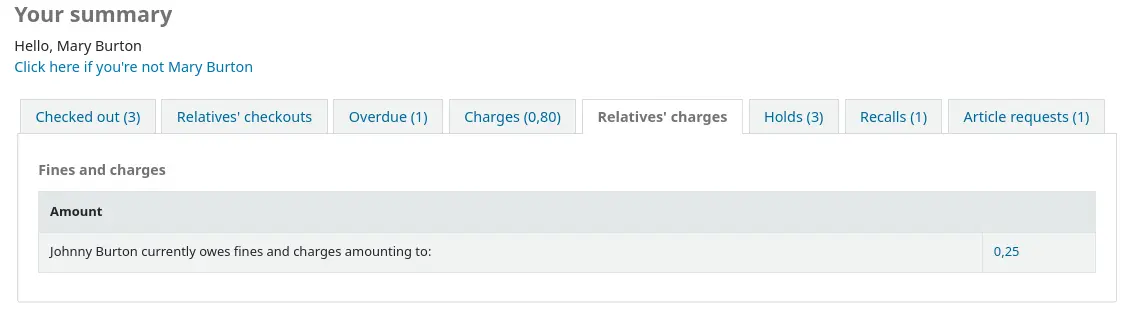
O separador ‘Clubes’ apresenta todos os clubes em curso que permitem a inscrição pública. A partir dela, os leitores podem subscrever clubes clicando no botão ‘Subscrever’.
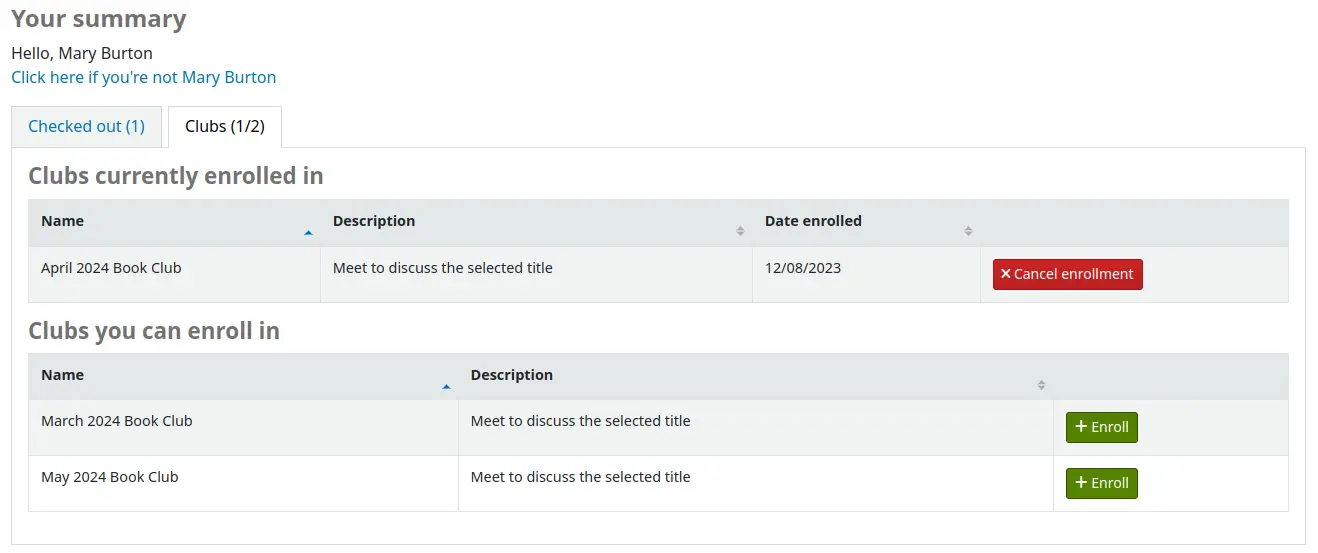
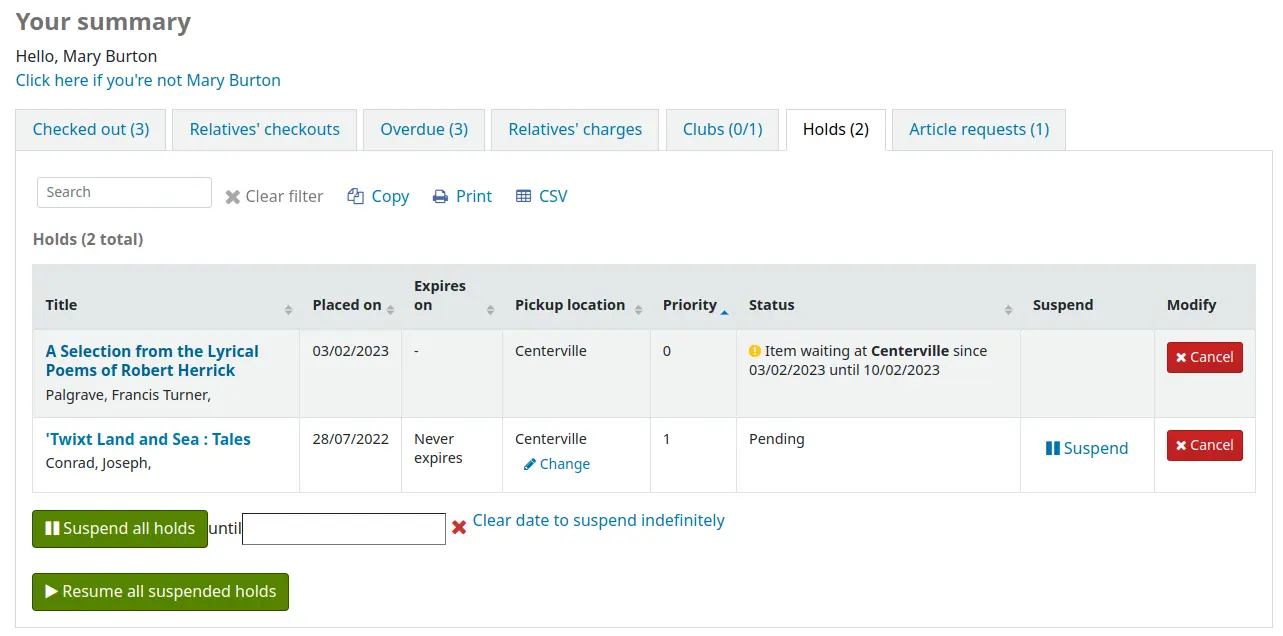
O separador ‘Reservas’ mostra ao leitor o estado de todos os exemplar que reservou.
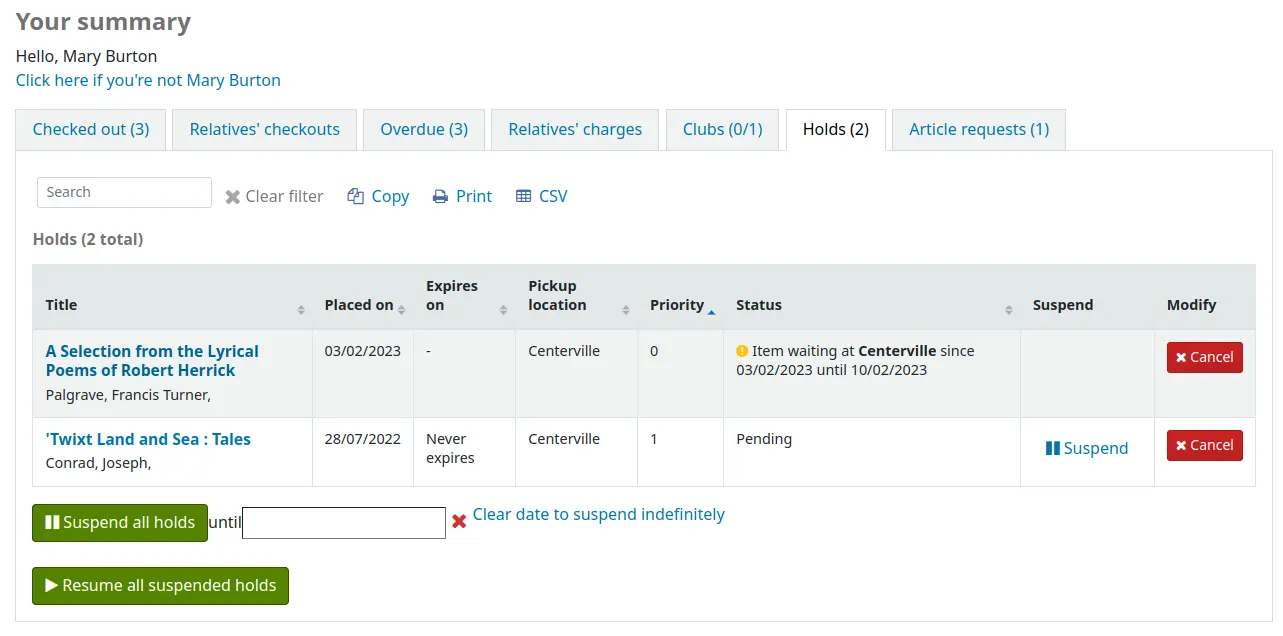
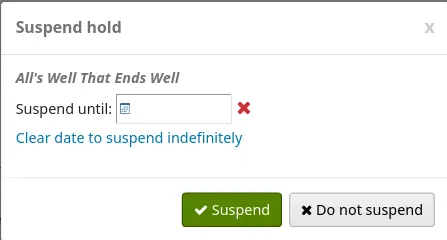
Dependendo do valor da preferência de sistema SuspendHoldsOpac, os leitores podem suspender os seus próprios pedidos de reserva, desde que os exemplares não estejam em trânsito ou já a aguardar a recolha. Ao clicar em ‘Suspender’, ser-lhe-á oferecida a opção de escolher uma data para a retoma da reserva.
Podem também suspender todos os seus pedidos de reserva por tempo indeterminado ou até uma data específica, se assim o desejarem, preenchendo as opções de suspensão na parte inferior da página.
Nota
Se a preferência de sistema AutoResumeSuspendedHolds estiver definida para “Não permitir”, os leitores não terão a opção de definir uma data de fim para a suspensão da reserva.
Neste separador, os leitores também podem cancelar reservas. Dependendo da política de cancelamento de reservas em espera, também podem conseguir cancelar reservas que já estejam à sua espera.
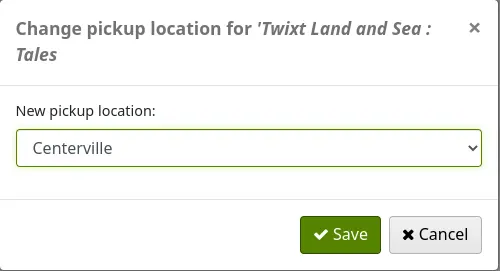
Dependendo do valor da preferência de sistema OPACAllowUserToChangeBranch, o leitor poderá ter a possibilidade de alterar a biblioteca de levantamento de reservas. Quando um ou mais estados são selecionados nesta preferência de sistema, aparecerá um endereço ‘Alterar’ abaixo do nome da biblioteca de levantamento atual para as reservas que possuam esse estado.
Quando o utilizador clica na ligação ‘Alterar’, surge uma janela pop-up com uma seleção de bibliotecas que permitem a retirada de exemplares reservados.
Se a sua biblioteca permitir pedidos de devolução antecipada, o leitor pode visualizar os pedidos que fez e os seus respetivos estados no separador ‘Pedidos de devolução’.
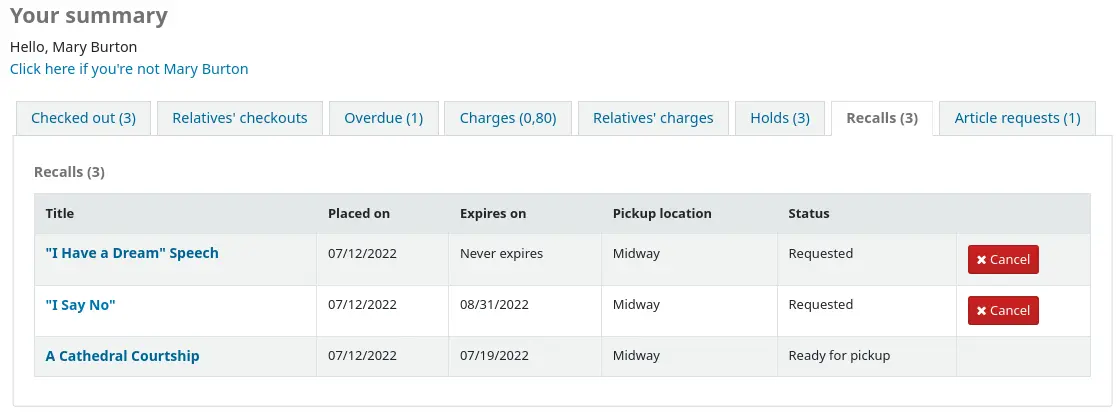
O leitor pode cancelar um pedido de devolução clicando no botão ‘Cancelar’, desde que o exemplar ainda não esteja a aguardar levantamento.
Sinais do leitor
Se marcou a conta do seu leitor, este poderá ver uma das seguintes mensagens de erro na parte superior da conta.
Cartão marcado como perdido

Morada do leitor em dúvida
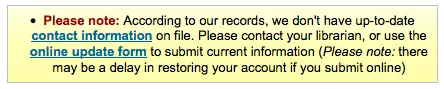
Nota
esta mensagem de erro não incluirá uma ligação para o formulário de atualização se tiver OPACPatronDetails definido como ‘Não permitir’
Leitor restrito

Cartão da biblioteca
Versão
Este recurso foi introduzido na versão 24.11 do Koha.
Se a preferência de sistema OPACVirtualCard estiver definida para ‘Permitir’, os utilizadores verão um separador ‘Cartão da biblioteca’ onde o código de barras do cartão da biblioteca é apresentado.
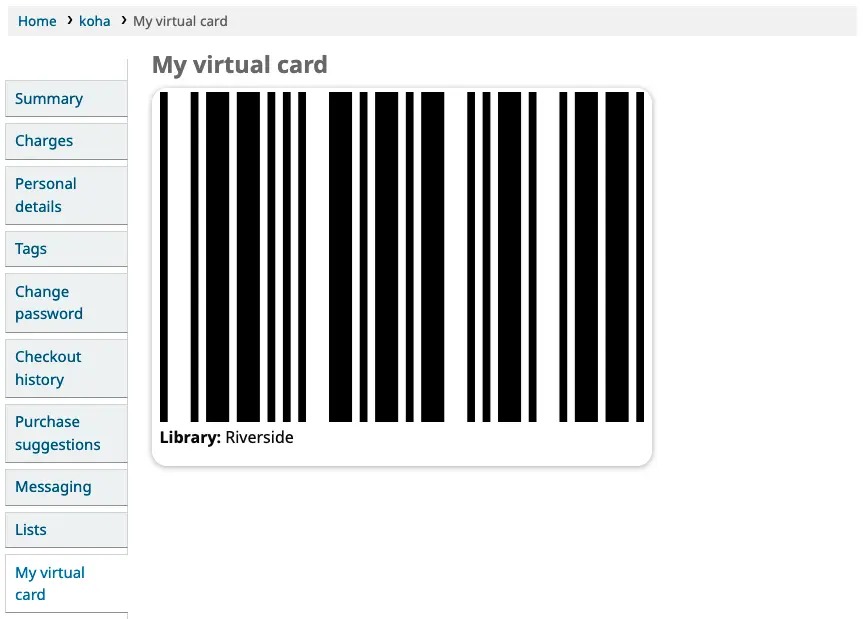
Se o leitor tiver iniciado sessão na sua conta OPAC a partir de um dispositivo móvel, o seu código de barras pode ser facilmente lido pelos quiosques de auto-serviço da biblioteca e outros serviços.
Multas
Se a sua biblioteca cobra multas, o separador seguinte à esquerda é ‘Multas’. Ao abrir este separador, o utilizador poderá visualizar todo o histórico da sua situação financeira na biblioteca.
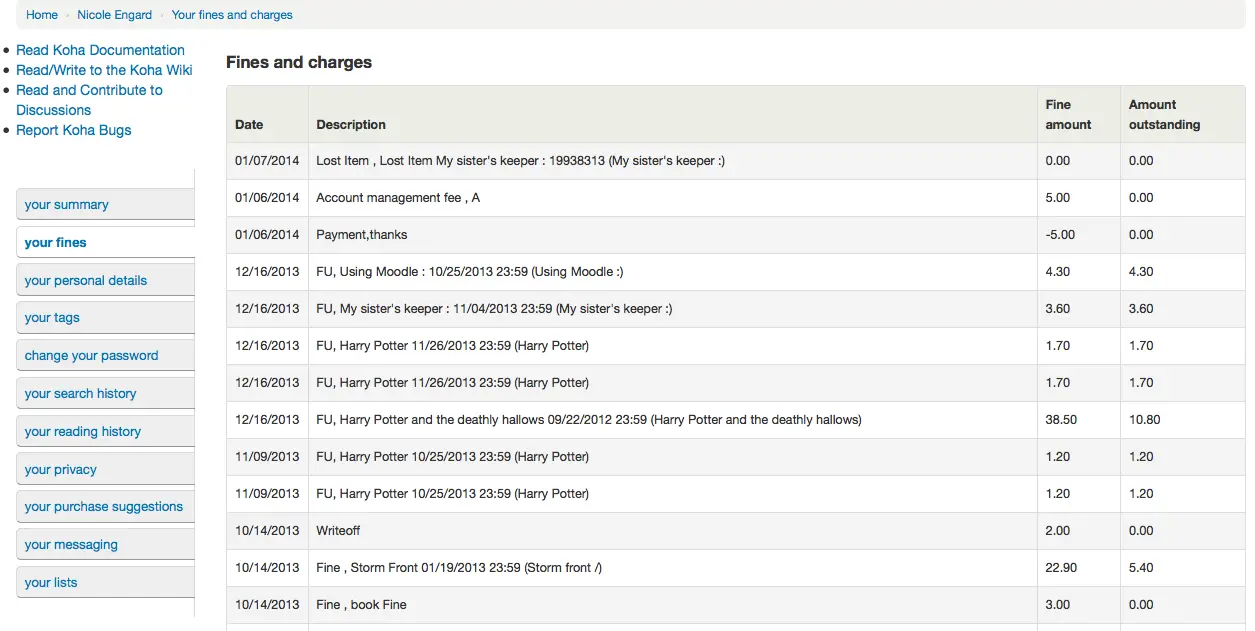
Detalhes pessoais
Se a sua preferência OPACPatronDetails estiver definida para ‘Permitir’, os leitores verão um formulário preenchido com as suas informações de contacto ao clicar no separador ‘Dados pessoais’. Pode controlar quais os campos que os leitores visualizam e podem modificar através do OPAC definindo as preferências PatronSelfModificationBorrowerUnwantedField e PatronSelfModificationMandatoryField.
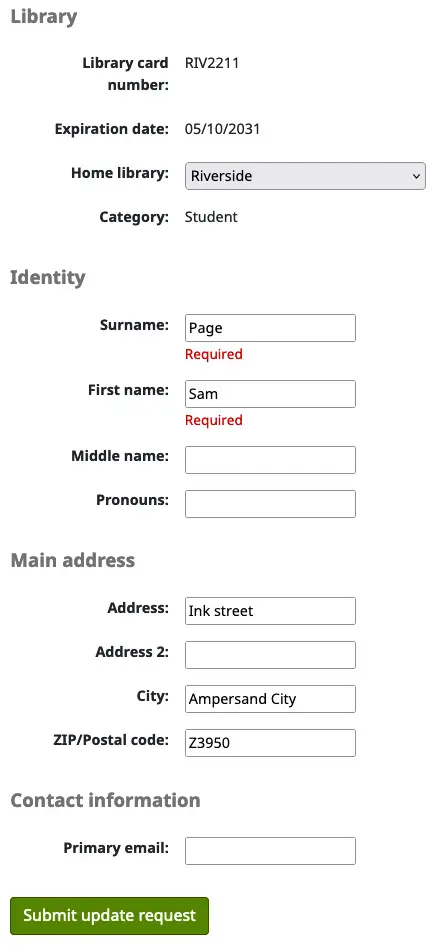
Os leitores podem editar os seus dados neste formulário e clicar em ‘Submeter alterações’ para que as edições sejam encaminhadas para a biblioteca para análise antes da atualização dos seus dados.
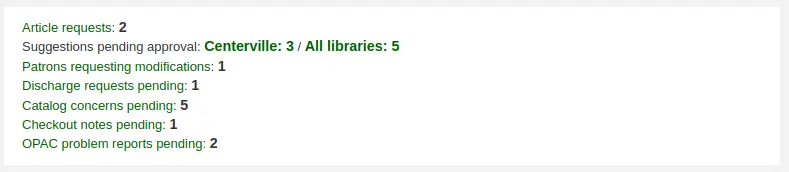
Um pedido de modificação pendente aparecerá, então, como uma notificação nos dados pessoais dos leitores.

Versão
Esta notificação foi introduzida pela primeira vez na versão 26.05 do Koha.
A equipa visualizará todos os leitores que solicitem alterações aos seus registos listados abaixo dos módulos, no painel principal, juntamente com quaisquer outros itens que aguardem diligências da biblioteca.
Se a preferência de sistema AutoApprovePatronProfileSettings estiver ativada, a equipa não necessita de aprovar as alterações.
Se a preferência OPACPatronDetails estiver definida para ‘Não permitir’, os leitores apenas verão os seus dados e uma mensagem a informar que devem contactar a biblioteca para efetuar alterações.
Consentimentos
Se tiver definido a preferência de sistema PrivacyPolicyConsent como ‘permissiva’ ou ‘obrigatória’, os leitores autenticados no OPAC terão um separador chamado ‘Consentimentos’, onde as suas declarações de consentimento são armazenadas. Por omissão, a declaração de consentimento faz referência à política de privacidade da biblioteca. Pode utilizar um URL para ligar a sua própria política de privacidade utilizando a preferência de sistema PrivacyPolicyURL.
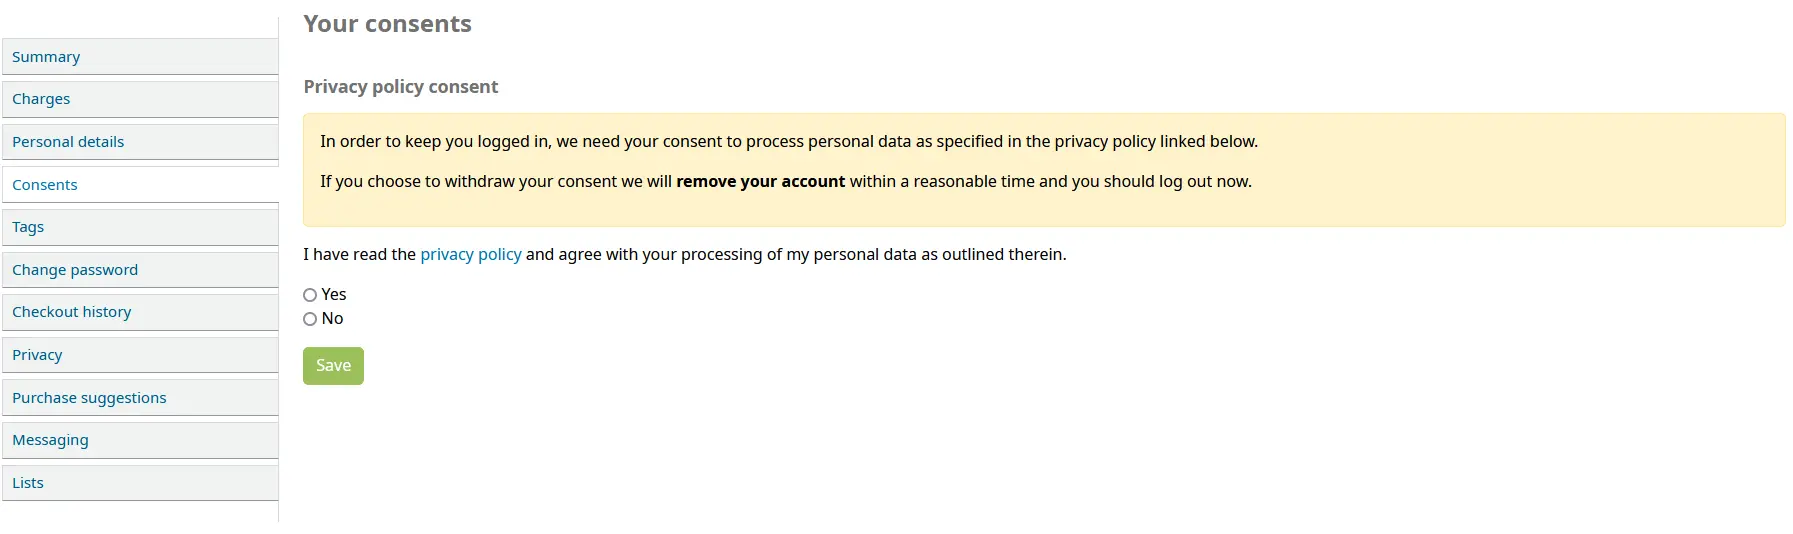
Uma visualização de leitura apenas do estado de consentimento do leitor está disponível no separador Detalhes do registo do leitor na interface dos técnicos.
Versão
A visualização de leitura apenas do consentimento do leitor foi introduzida pela primeira vez na versão 26.05 do Koha.
Um gatilho de plugin para ‘patron_consent_type’ permite tipos adicionais de consentimento no OPAC. Consulte a página Plugin Hooks na wiki para mais informações.
Etiquetas
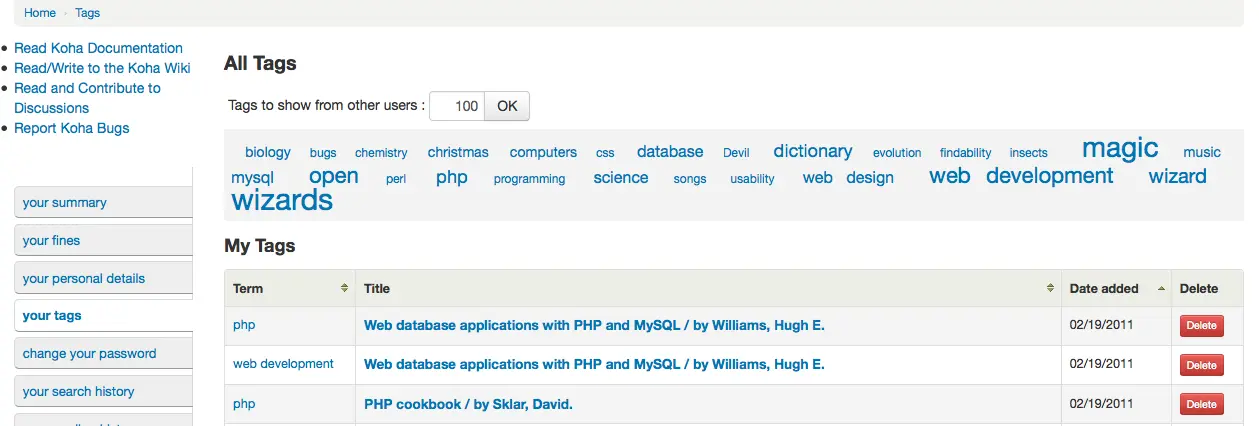
Se a sua biblioteca tiver a opção TagsEnabled definida para ‘Permitir’, o separador seguinte à esquerda será ‘Etiqeutas’. Este separador irá exibir aos leitores todas as etiquetas do sistema em formato de nuvem e, de seguida, todas as etiquetas que aplicaram, em formato de lista. A partir daí, os leitores podem remover as tags que adicionaram, caso assim o desejem.
Alterar palavra-passe
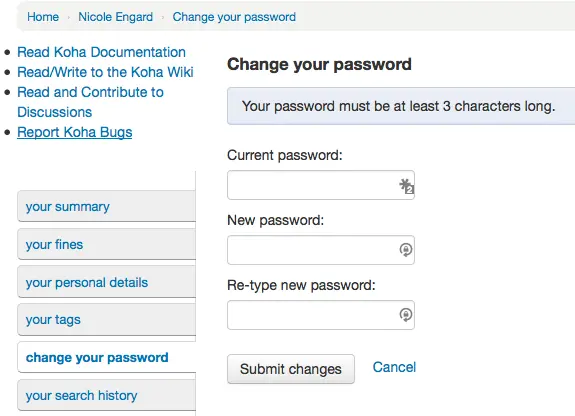
De seguida, se a configuração OpacPasswordChange estiver definida para ‘Permitir’, o separador seguinte será ‘Alterar palavra-passe’; nela, os leitores poderão alterar a palavra-chave utilizada para aceder ao OPAC. Será apresentado um formulário padrão a solicitar ao leitor que introduza a palavra-passe antiga e, na sequência, a nova palavra-passe duas vezes.
Se a preferência de sistema NotifyPasswordChange estiver ativada, o leitor receberá uma notificação a informar que a sua palavra-passe foi alterada.
O conteúdo deste email pode ser personalizado com a ferramenta de avisos e recibos. O código da carta é PASSWORD_CHANGE.
Histórico de pesquisa
Se a sua preferência EnableOpacSearchHistory estiver definida para ‘Manter’, os leitores poderão aceder ao seu histórico de pesquisa através do separador ‘Histórico de pesquisa’.
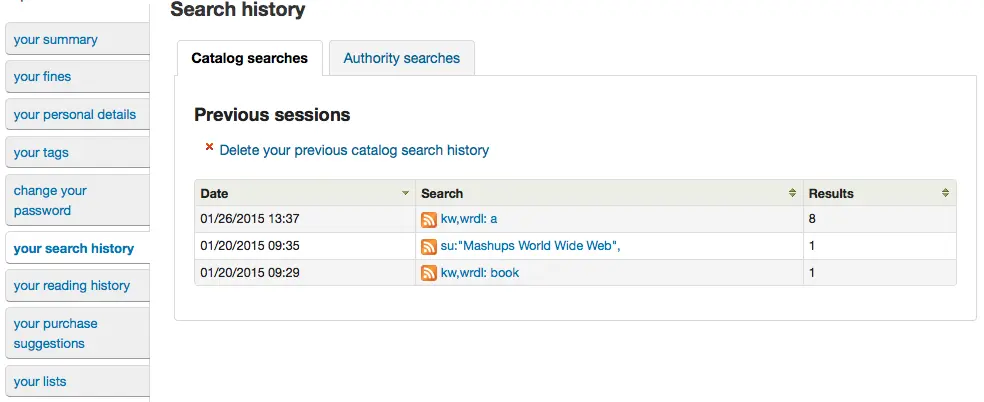
O histórico de pesquisas é um registo de todas as pesquisas realizadas pelo leitor. Clicar em qualquer uma das expressões de pesquisa fará com que a pesquisa seja executada novamente. O leitor pode eliminar o histórico de pesquisa a qualquer momento, clicando no link ‘Apagar o seu histórico de pesquisa’, localizado na parte superior deste separador, ou clicando no pequeno ‘x’ vermelho junto ao endereço ‘Histórico de pesquisa’, no canto superior direito do OPAC.

Histórico de empréstimo
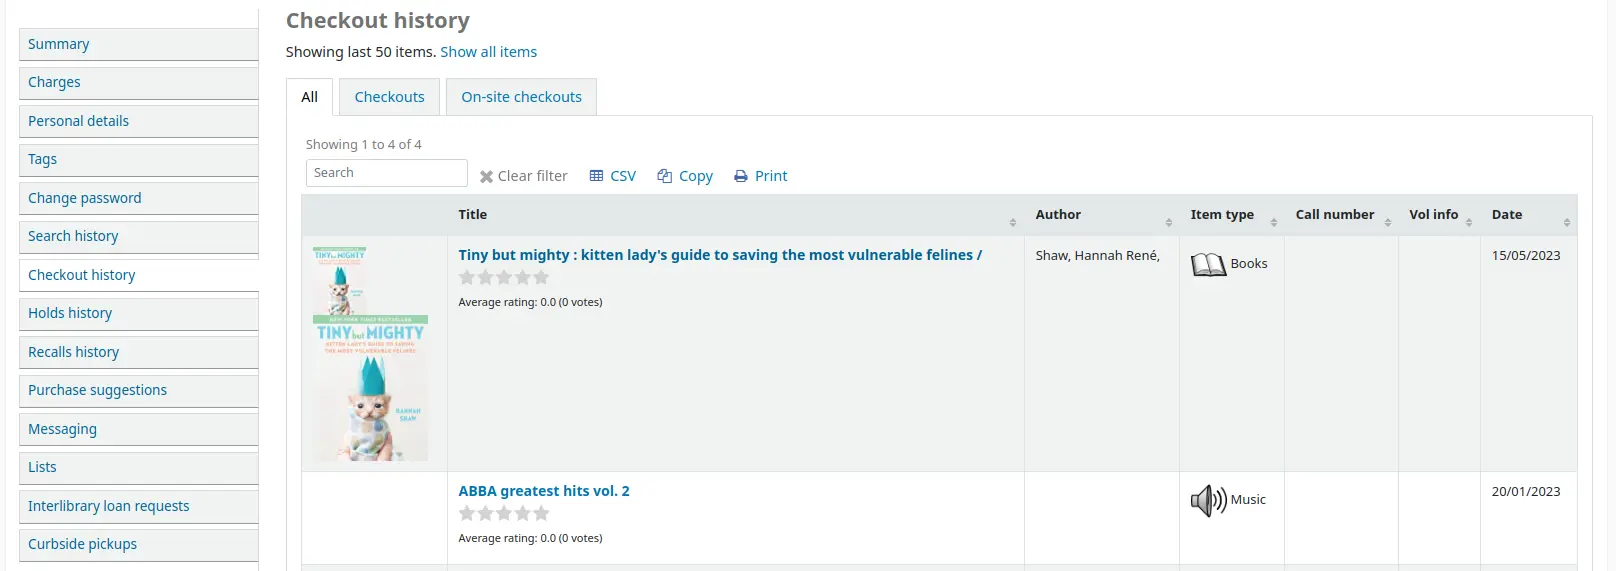
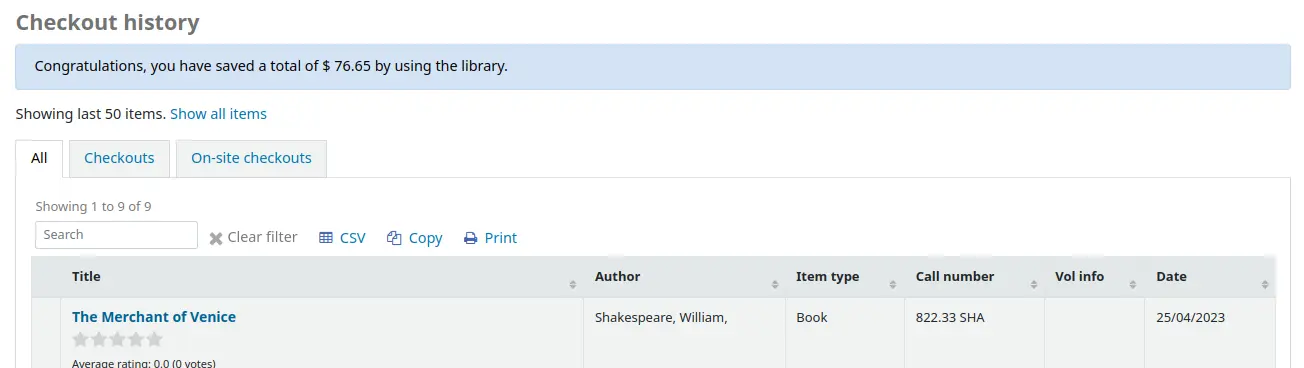
Se a preferência de sistema opacreadinghistory estiver definida para ‘Permitir’, os leitores terão acesso ao separador ‘Histórico de empréstimos’. Isto irá exibir ao leitor todo o seu histórico de empréstimos, a menos que tenha solicitado à biblioteca que não mantenha esta informação através do separador ‘Privacidade’.
Se a preferência OPACShowSavings estiver configurada para apresentar a poupança na página ‘o seu resumo’, esta secção incluirá também a poupança que o leitor obteve ao utilizar a biblioteca em vez de comprar os exemplares.
Privacidade
O separador ‘Privacidade’ aparecerá se as preferências opacreadinghistory e OPACPrivacy estiverem definidas para ‘Permitir’. Este separador permitirá aos leitores decidir como a biblioteca armazena os dados do seu histórico de circulação.
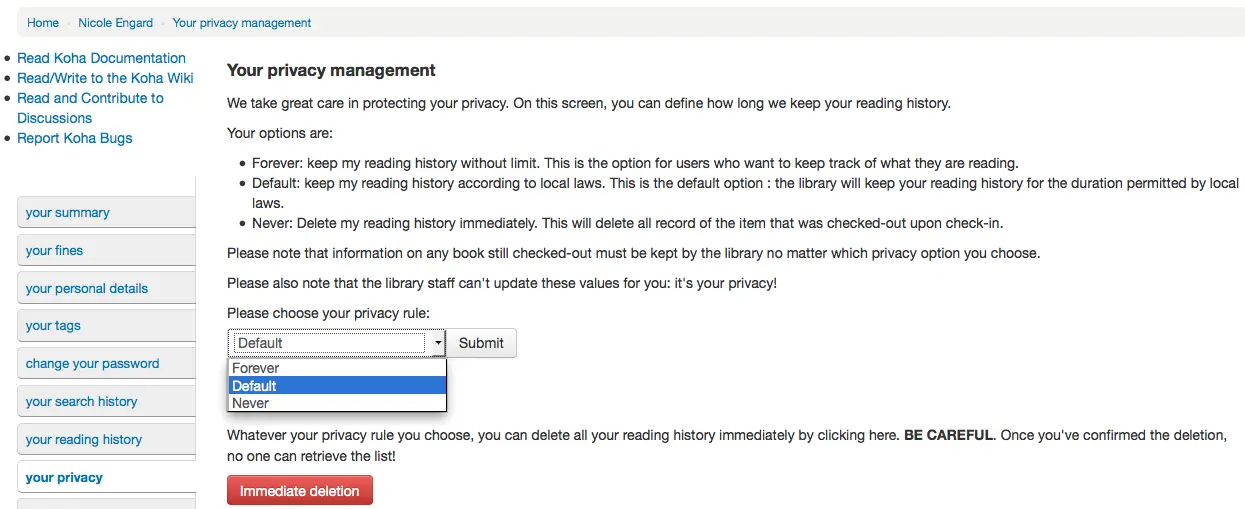
O leitor pode escolher entre três opções:
Eternamente: mantenha meu histórico de empréstimos sem impor limites. Esta opção deve ser usada por usuários que querem manter um histórico de seus empréstimos.
Padrão: Mantenha meu histórico de empréstimos de acordo com as regras locais. Esta é a opção padrão : a biblioteca manterá seu histórico de empréstimos pela duração estabelecida pelas regras locais.
Nunca: Apague meu histórico de empréstimos imediatamente. Isso apagará todos os registros de materiais que foram emprestados.
Dependendo das sugestões do leitor, o conteúdo dos separadores ‘O seu histórico de leitura’ e ‘Histórico de circulação’ na interface dos técnicos pode sofrer alterações.
Independentemente da escolha do leitor, este pode eliminar o seu histórico de leitura em massa a qualquer momento, clicando no botão ‘Eliminação imediata’.
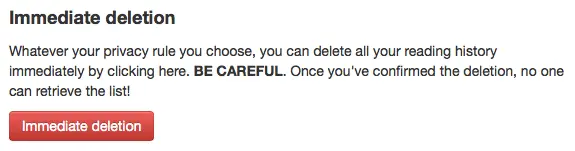
Clicar neste botão não eliminará os exemplares que estão atualmente emprestados, mas limpará o histórico de leitura anterior do leitor.
Importante
Para que o leitor possa eliminar o seu histórico de leitura, a preferência AnonymousPatron deve estar definida.
Se permitir que os leitores garantidos concedam aos seus fiadores permissão para visualizar os seus empréstimos atuais, utilizando a preferência AllowPatronToSetCheckoutsVisibilityForGuarantor, estes verão esta opção neste ecrã.
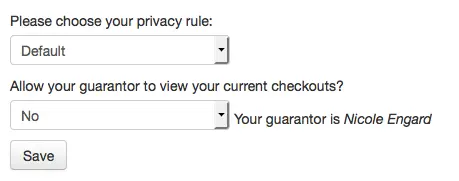
Após autenticação, o fiador verá um separador chamado ‘Empréstimos de familiares’ no seu separador de resumo.
Histórico de reservas
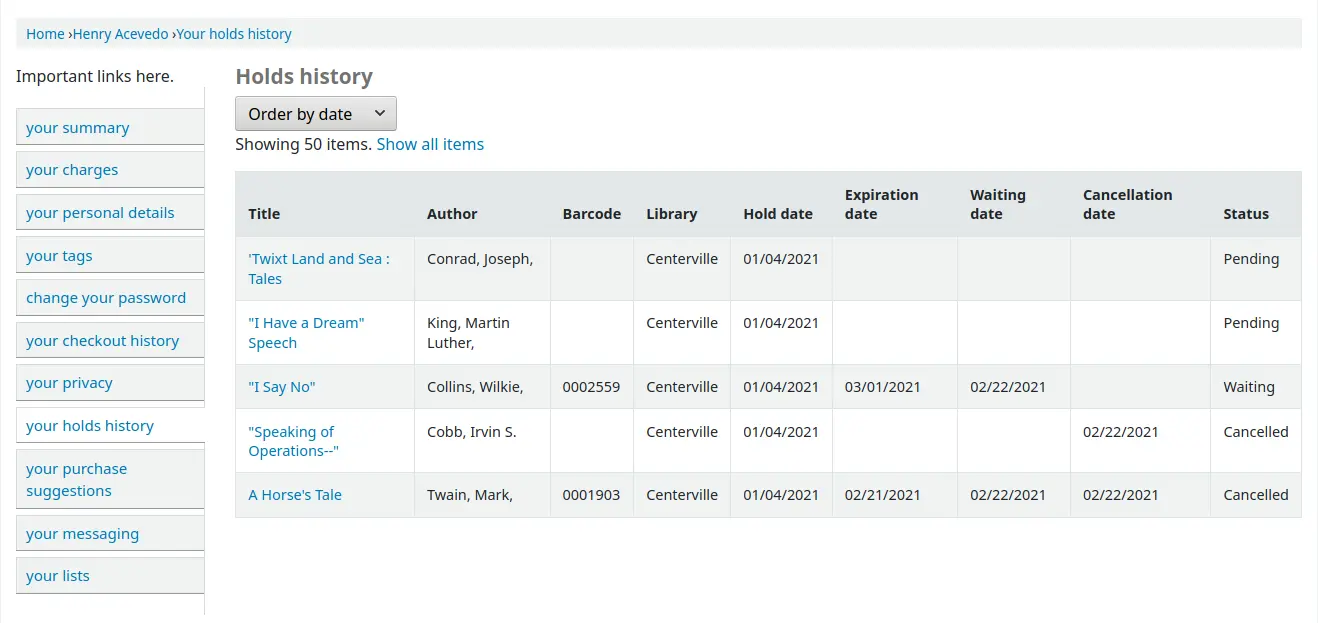
Se a preferência de sistema OPACHoldsHistory estiver definida para ‘Permitir’, os utilizadores poderão visualizar todos os seus pedidos de reserva atuais e passados.
Sugestões de aquisição
Se a sua biblioteca permitir que os leitores façam sugestões de compra, o separador seguinte irá apresentar todas as sugestões feitas pelo utilizador à biblioteca, bem como os seus respetivos estados. Para desativar este separador e a funcionalidade de sugestão, defina a preferência suggestion para ‘Não permitir.’
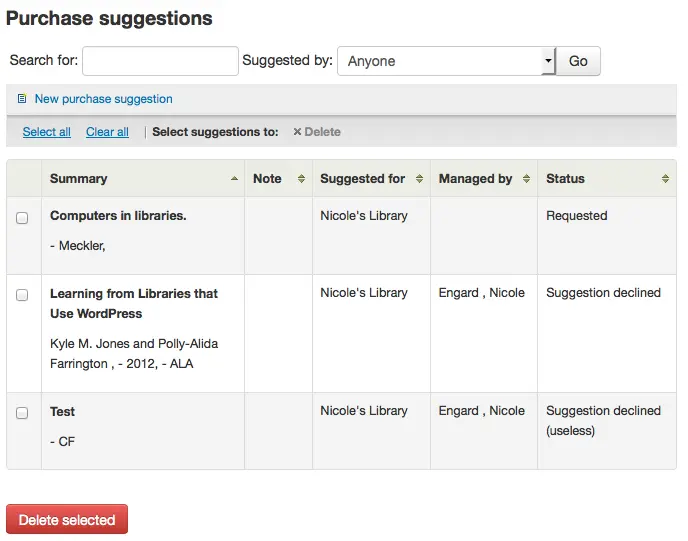
Se a preferência OPACViewOthersSuggestions estiver definida para ‘Mostrar’, os leitores poderão pesquisar sugestões a partir do topo desta lista.
Mensagens
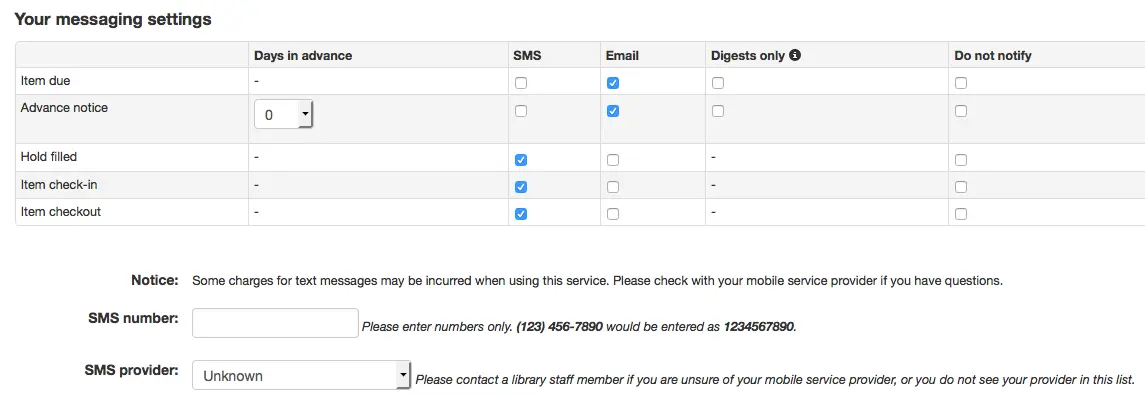
Se a sua biblioteca tiver a preferência de sistema EnhancedMessagingPreferences definida como ‘Permitir’ e a preferência de sistema EnhancedMessagingPreferencesOPAC definida como ‘Mostrar’, os leitores poderão escolher quais as mensagens que desejam receber da biblioteca (com exceção dos avisos de atraso, que são controlados pela biblioteca).
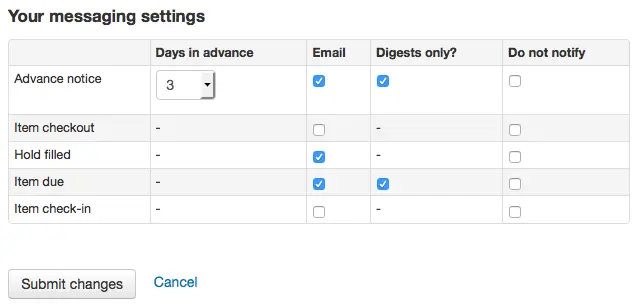
Se utilizar um controlador de SMS para o envio de mensagens de texto, configurado através da preferência de sistema SMSSendDriver, verá uma coluna adicional para selecionar estas mensagens como SMS (ou mensagens de texto) e um campo para o número de telemóvel (ou número para SMS).
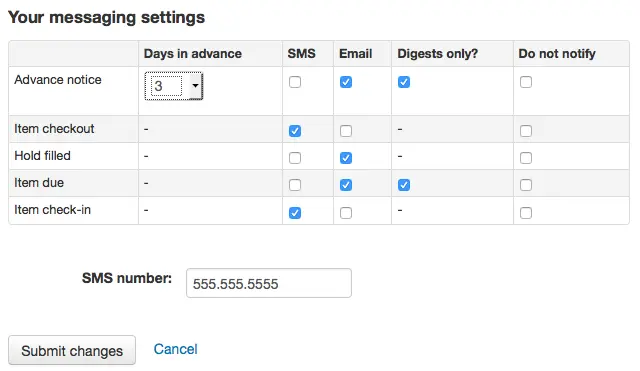
Se estiver a utilizar o protocolo de correio eletrónico para o envio de mensagens de texto, configurado através da preferência do sistema SMSSendDriver, verá uma coluna adicional para a receção destas mensagens como SMS (ou mensagens de texto), um campo para o número de telemóvel (ou SMS) e um menu suspenso com a lista de operadores de telemóveis.
Se estiver a utilizar o serviço i-tiva Talking Tech, verá uma coluna adicional para receber estas mensagens por telefone.
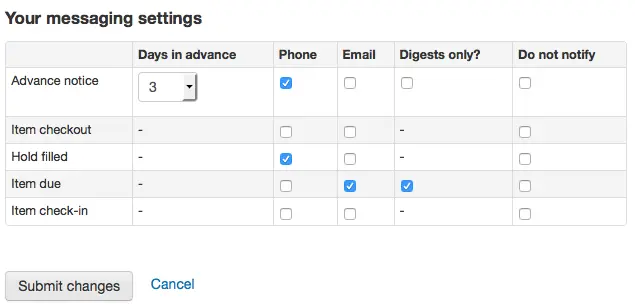
Consulte as mensagens aos leitores para obter uma lista dos avisos disponíveis.
Os leitores podem optar por receber avisos sob a forma de um resumo, marcando a caixa de seleção ‘Apenas resumos’ e escolhendo o método de entrega. Um resumo reúne todas as mensagens de um determinado tipo de aviso num único email (por exemplo, todos os artigos com devolução prevista para daqui a três dias), em vez de enviar vários emails.
Se a preferência de sistema TranslateNotices estiver definida para ‘Permitir’, o utilizador também verá uma opção para escolher o ‘Idioma preferido para avisos’, com uma lista suspensa de idiomas disponíveis.
Importante
Deve escolher um método de entrega (SMS, email ou telefone) e a opção ‘Apenas resumos’ se pretender receber um resumo das mensagens.
Listas
Se a preferência de sistema virtualshelves estiver definida para ‘Permitir’, os leitores verão um separador ‘Listas’.
A partir daqui, os leitores podem visualizar listas públicas e criar ou editar as suas próprias listas privadas.
Alertas de assinaturas
Se a preferência de sistema RoutingSerials estiver ativada, os leitores que optaram por receber alertas por email sobre novas edições de periódicos, através do separador ‘Assinaturas’ no registo bibliográfico, verão um separador ‘Alertas de assinaturas’ nas suas contas.

Este separador lista todos os alertas de email sobre publicações seriadas aos quais o leitor se inscreveu. Os leitores podem cancelar os alertas clicando no link ‘Cancelar a subscrição de alertas por email’, se desejarem.
Pedir uma quitação
Se a preferência de sistema useDischarge estiver ativada, os leitores poderão solicitar uma declaração de quitação via OPAC. Esta declaração atesta que o utilizador não tem empréstimos ativos nem reservas pendentes.
Os leitores podem solicitar a baixa junto da biblioteca acedendo ao separador ‘Pedir uma quitação’ na sua conta online.
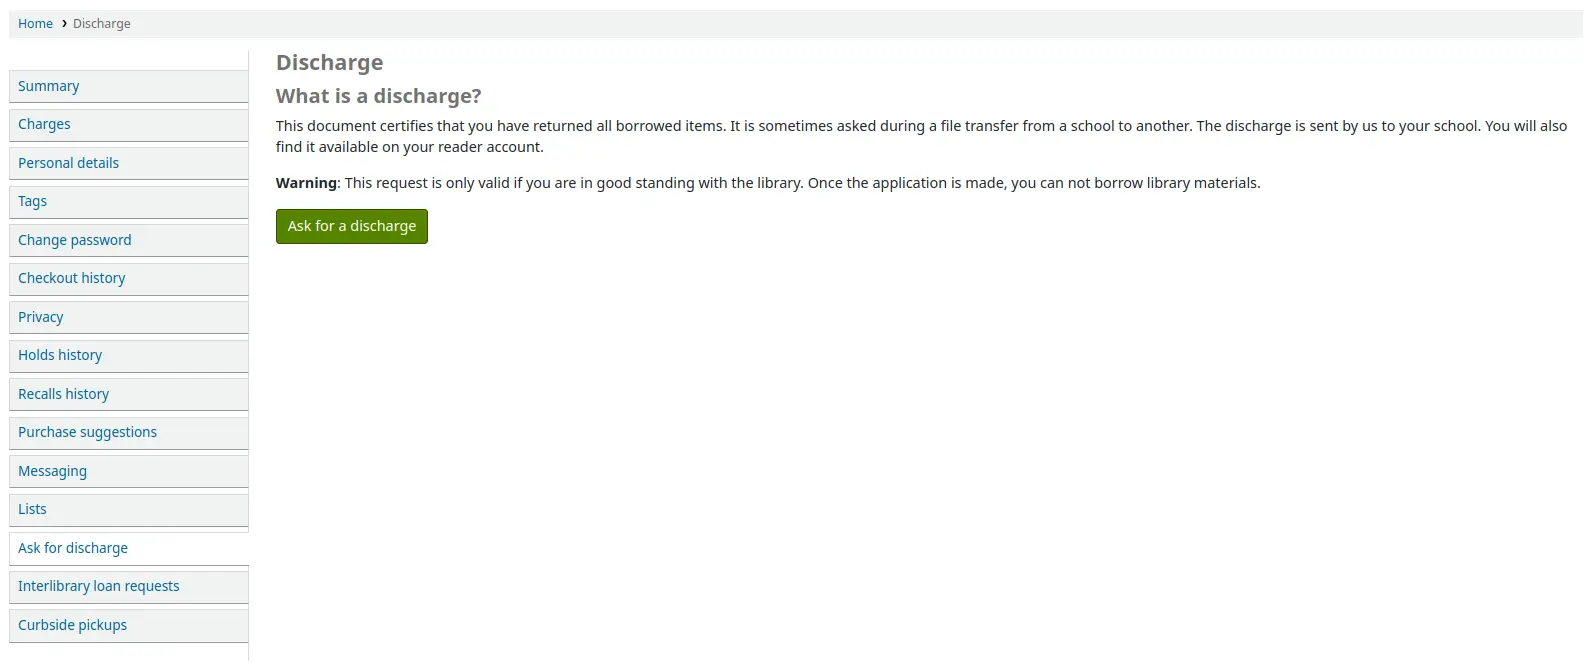
A partir daqui, podem solicitar a quitação clicando no botão ‘Pedir uma quitação’. Receberão uma confirmação da solicitação.
Assim que a quitação for aprovada pela equipa da biblioteca, o leitor verá um endereço para descarregar o PDF respectivo.

Listas de circulação
Se estiver listado como destinatário em alguma lista de circulação de periódicos, estas aparecerão aqui. É apresentada a seguinte mensagem: “Está inscrito nas listas de circulação dos seguintes títulos de periódicos. Caso pretenda efetuar alterações, por favor contacte a biblioteca”.
Pedidos de empréstimo interbibliotecas
Se o módulo de pedidos de empréstimo interbibliotecas estiver ativado, os leitores verão o separador ‘Pedidos de empréstimo interbibliotecas’. Os seus pedidos existentes serão listados aqui, com informações sobre o estado de cada um.
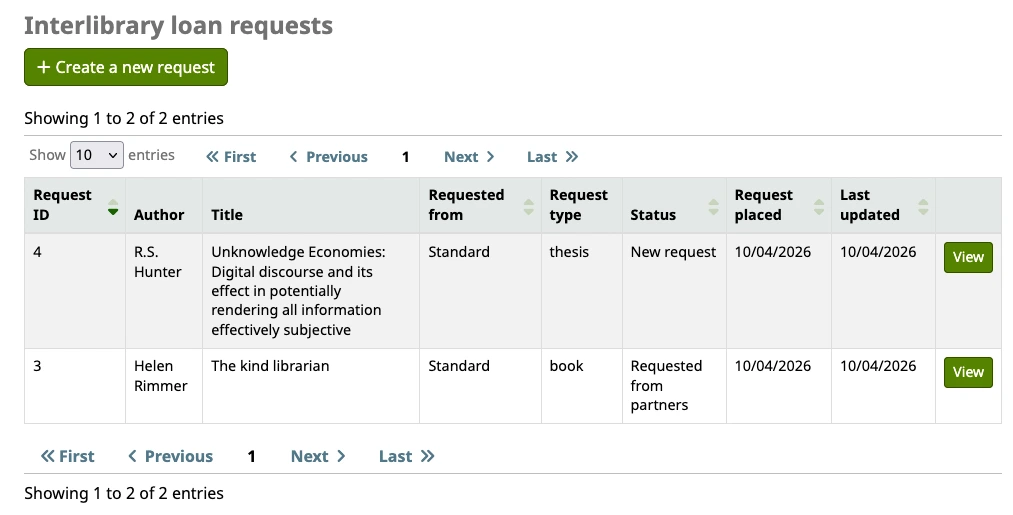
Além disso, se a sua categoria de leitor tiver permissão para fazer pedidos de empréstimo interbibliotecas (ILL) no OPAC, verão um botão ‘Criar novo pedido’. Ao clicar no mesmo, será apresentado o formulário para realizar um novo pedido de empréstimo interbibliotecas. Caso a biblioteca utilize mais do que um sistema, poderá ser solicitado inicialmente que escolham um fornecedor.
Nota
Se existir um texto de autorização de direitos de autor num local de visualização de personalização HTML ‘ILLModuleCopyrightClearance’, o texto será apresentado aqui e os leitores terão de clicar em ‘Sim’ para o aceitar antes de prosseguir.
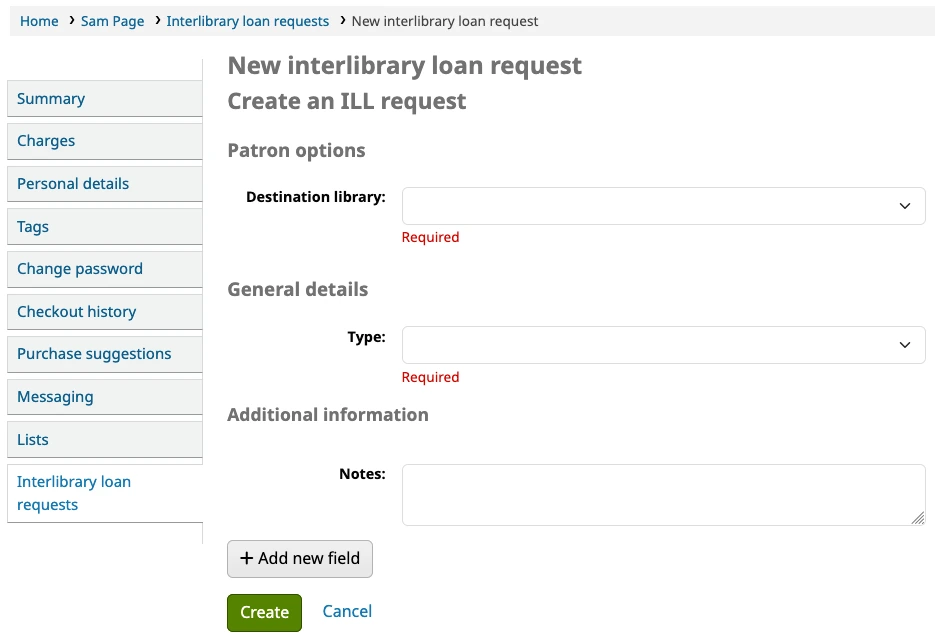
Biblioteca de destino: a lista é composta pelas bibliotecas marcadas como locais de levantamento nas configurações das bibliotecas. Esta é a biblioteca que irá gerir o pedido e servirá como local de levantamento dos exemplares físicos solicitados.
Tipo: quando um tipo é selecionado, são apresentados os campos de entrada relevantes para esse recurso específico. Os conjuntos de campos para cada tipo de pedido são os mesmos que os apresentados ao criar um pedido na interface dos técnicos.
Clicar em ‘Criar’ enviará o pedido à biblioteca para processamento.
Nota
Se a preferência de sistema ILLModuleDisclaimerByType estiver em utilização, o aviso de isenção de responsabilidade será apresentado neste passo. Independentemente da opção escolhida pelo leitor, o pedido será criado e o valor do aviso de isenção será armazenado juntamente com os restantes detalhes do pedido.
Uma vez criado, o pedido aparecerá inicialmente com o estado ‘Novo pedido’. Os estados dos pedidos são atualizados à medida que a equipa processam os mesmos.
Clicar em ‘Ver’ num pedido exibe os detalhes completos.
A única alteração que os leitores podem fazer é adicionar uma observação ao pedido e, em seguida, clicar em ‘Submeter modificações’.
Para pedidos com o estado ‘Nova pedido’, os leitores verão o botão ‘Cancelar pedido’. Se utilizado, o estado do pedido será atualizado para ‘Cancelamento solicitado’. A equipa pode optar por eliminar completamente o pedido.
Dica
Se pretender ser notificado por email quando os leitores modificam ou cancelam um pedido, utilize a preferência de sistema ILLSendStaffNotices. Os emails utilizam os modelos de notificação ILL_REQUEST_MODIFIED e ILL_REQUEST_CANCEL. Podem ser personalizados na ferramenta Avisos e recibos.
Histórico de pedidos de devolução
Se a sua biblioteca permitir pedidos de devolução antecipada, o leitor pode visualizar todos os pedidos (passados e atuais) que fez, bem como os seus respetivos estados, no separador ‘Histórico de pedidos de devolução’.
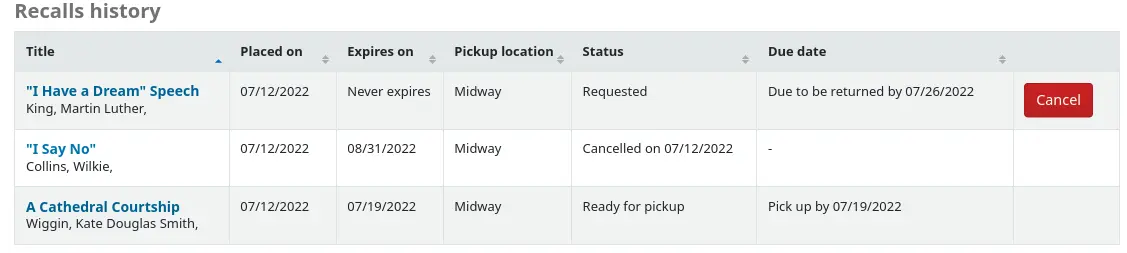
O leitor pode cancelar um pedido de devolução clicando no botão ‘Cancelar’, desde que o exemplar ainda não esteja a aguardar levantamento.
Retiradas na área externa
Se a sua biblioteca permitir levantamentos de rua, o leitor poderá visualizar os seus levantamentos agendados no separar ‘Levantamentos de rua’.
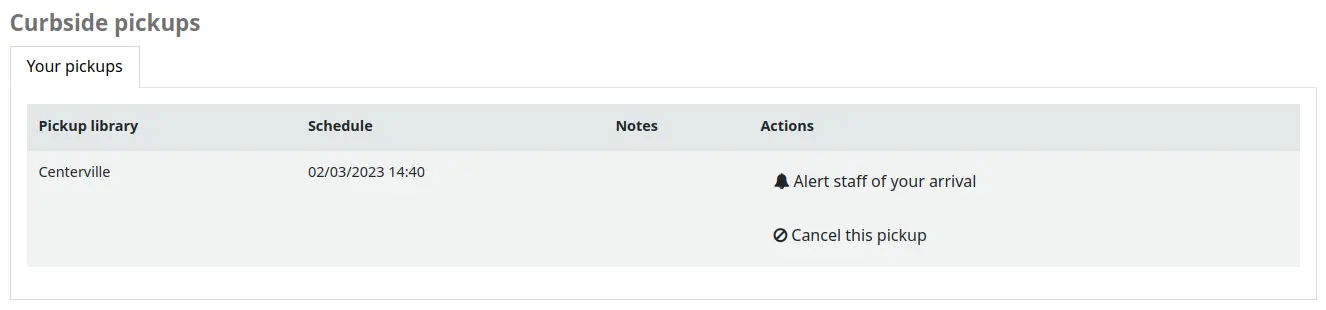
O leitor tem a opção de indicar que está no exterior da biblioteca clicando em ‘Avisar a equipa sobre a sua chegada’.
O leitor tem também a opção de cancelar a recolha agendada através do botão ‘Cancelar este levantamento’.
Se a definição ‘Levantamento agendado pelo leitor” estiver ativada na configuração, o leitor poderá agendar o seu próprio horário para o levantamento.

O leitor deve primeiro escolher a biblioteca onde pretende levantar os exemplares
Nota
Apenas as bibliotecas com a opção de levantamento de rua ativada serão apresentadas no menu suspenso.
Além disso, se a definição ‘Ativar apenas para reservas em espera’ estiver ativada, apenas as bibliotecas onde o leitor tem reservas em espera serão ativadas.
O leitor deve, então, escolher uma data
Nota
Somente serão exibidas datas com horários disponíveis.
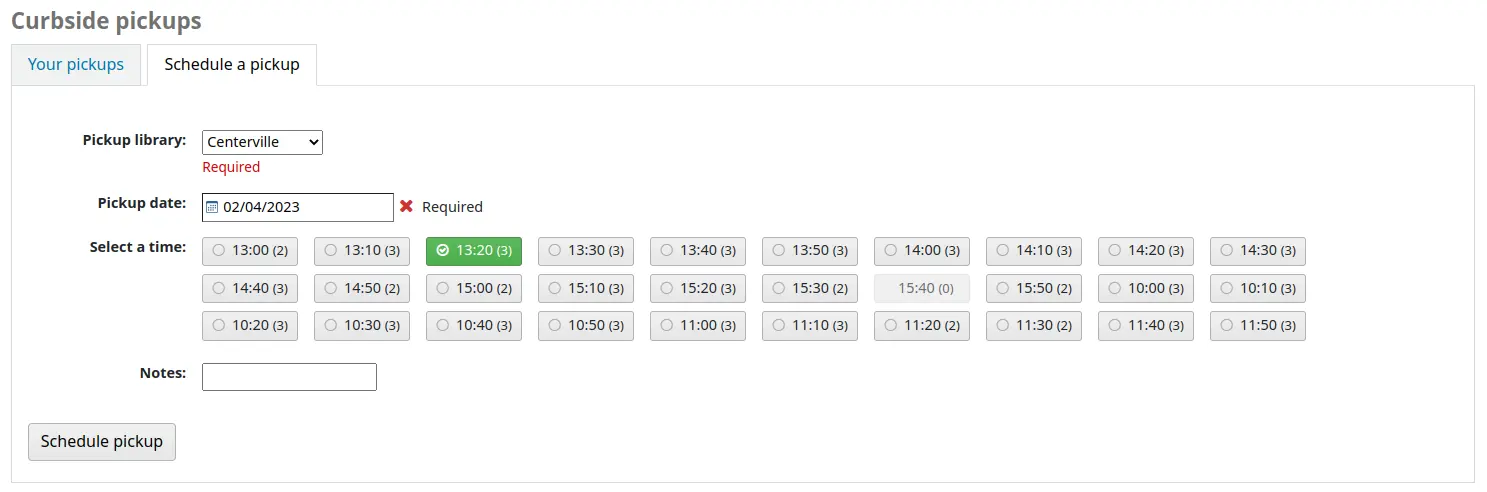
Os possíveis horários de retirada serão exibidos de acordo com o dia da semana
Nota
O número entre parênteses abaixo de cada horário indica a quantidade de marcações disponíveis para esse período. Se o limite máximo de marcações for atingido, com base na definição ‘Número máximo de leitores por intervalo’ definida na configuração, a hora aparecerá esbatida e o leitor não poderá seleccioná-la.
O leitor pode, opcionalmente, acrescentar uma observação sobre o levantamento
O leitor deve então clicar em ‘Agendar levantamento’ para guardar o seu agendamento
Sugestões de aquisição
Se a sua biblioteca tiver a preferência sugestões definida para ‘Permitir’, os leitores terão a opção de fazer sugestões de aquisição em diversas áreas do OPAC.
Se permitir que todos visualizem as sugestões de aquisição feitas por outras pessoas através da preferência OPACViewOthersSuggestions, existe um endereço no topo do seu OPAC, por baixo da caixa de pesquisa.

Haverá um endereço quando o leitor não encontrar resultados para a sua pesquisa.

Existirá uma opção ‘Sugerir para aquisição’ na visualização detalhada de um registo bibliográfico.
E haverá um endereço no separador As suas sugestões de aquisição na conta do leitor.
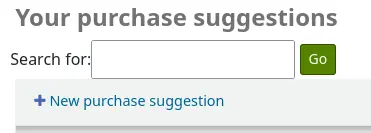
Clicando em qualquer um destes endereços abrirá o formulário de sugestão de aquisição.
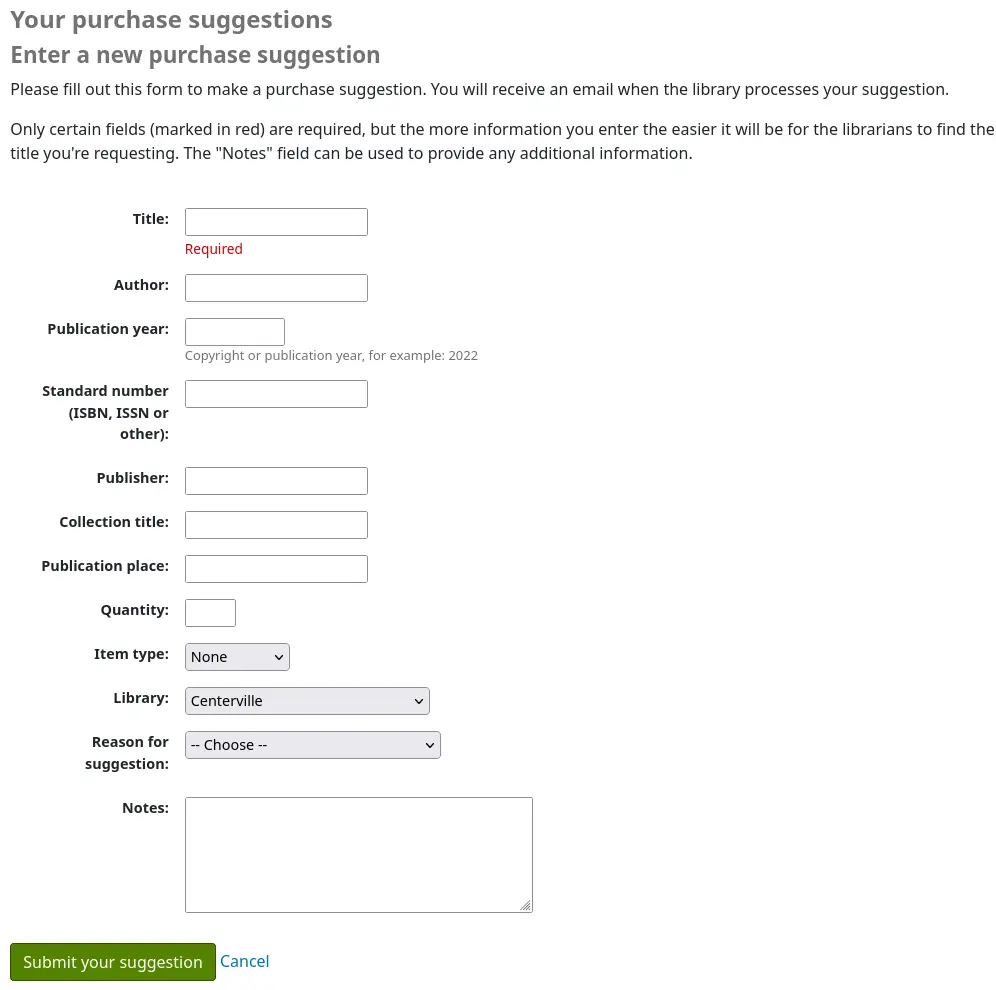
O texto informativo no topo do formulário pode ser substituído utilizando a ferramenta de personalização HTML, no local de visualização OpacSuggestionInstructions.
No formulário, apenas o campo ‘Título’ é obrigatório por omissão.
Os campos obrigatórios podem ser definidos utilizando a preferência de sistema OPACSuggestionMandatoryFields.
A preferência de sistema OPACSuggestionUnwantedFields pode ser utilizada para ocultar campos desnecessários.
A preferência de sistema OPACSuggestionAutoFill pode ser utilizada para ajudar os leitores a preencher o formulário com informação do Google Books.
A lista de tipos de documento pode ser editada através da edição da lista de valores autorizados SUGGEST_FORMAT.
A lista ‘Motivo da sugestão’ pode ser editada através da edição da lista de valores autorizados OPAC_SUG.
Se o item já existir no catálogo, o leitor verá uma mensagem indicando o que o Koha considera ser o título correspondente. A verificação da correspondência é feita com base no título/autor, ISBN ou ISSN. Se o título não for aquele que o leitor pretende sugerir, pode clicar em ‘Confirmar a sua sugestão’ para a enviar na mesma.

Assim que o formulário for submetido, a sugestão de compra aparecerá no módulo de aquisições para que os bibliotecários a possam gerir.
Se tiver sido encomendada uma sugestão de compra através do módulo de aquisições, o título da sugestão de compra do leitor será clicável e levá-lo-á diretamente para o registo encomendado no OPAC.
Bibliotecas / Contacto
Se a preferência de sistema OPACShowLibraries estiver definida para ‘Ver’ e pelo menos uma das suas bibliotecas for do tipo ‘Pública’, será apresentado um endereço para a página das bibliotecas por baixo da barra de pesquisa.
Atenção
A partir da versão 25.05 do Koha, o endereço é rotulado como ‘Contacto’ se existir apenas uma biblioteca definida como ‘pública’.
A página Bibliotecas apresenta uma lista de todas as bibliotecas definidas como ‘Públicas’, com as suas informações de contacto (morada, cidade, estado, código postal/código postal, país, número de telefone, número de fax, site).
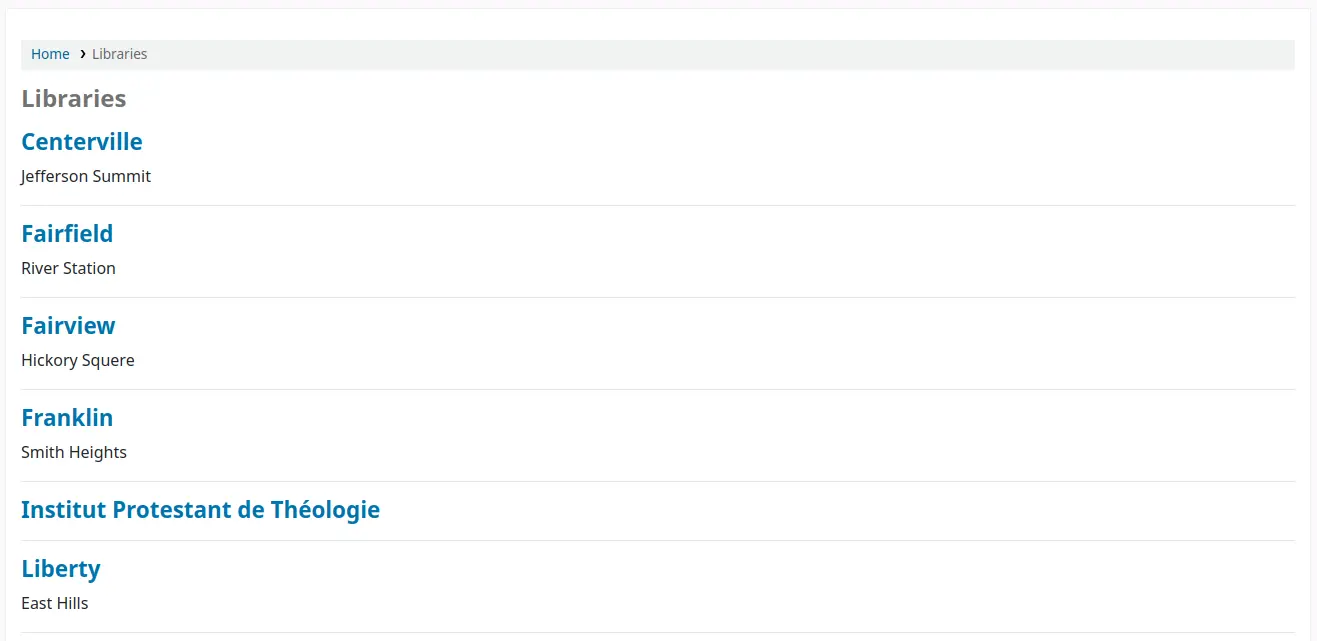
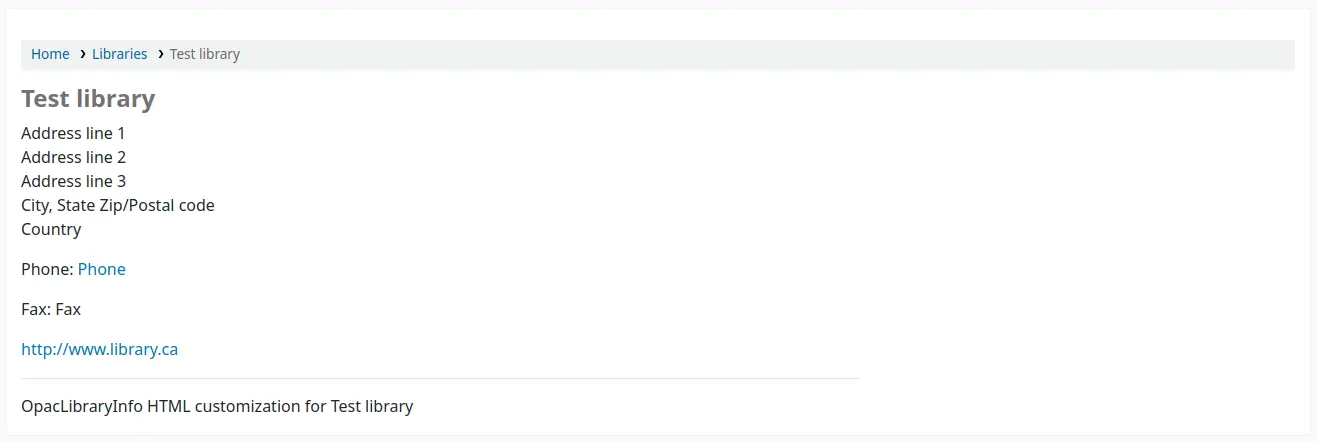
O nome da biblioteca em si é uma ligação para uma página específica dessa biblioteca. Esta segunda página inclui também as personalizações HTML ‘OpacLibraryInfo’ para essa biblioteca.
Reportar problemas
Se a preferência de sistema OPACReportProblem estiver ativada, os leitores terão a opção de reportar problemas no OPAC (endereços quebrados ou informações incorretas, por exemplo).
Na parte inferior de cada página existe um endereço ‘Reportar um problema’.
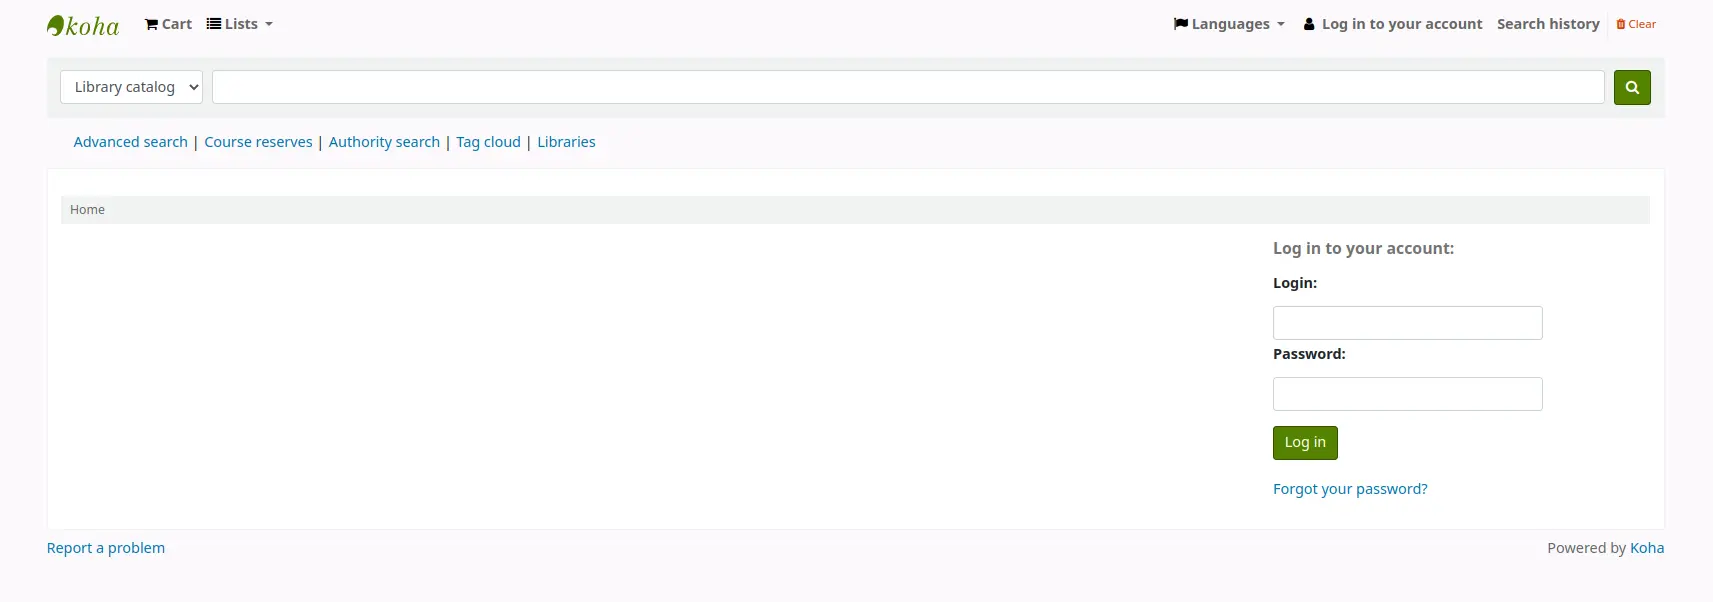
Quando o utilizador clica no endereço, é direcionado para um formulário onde pode especificar exatamente qual é o problema.
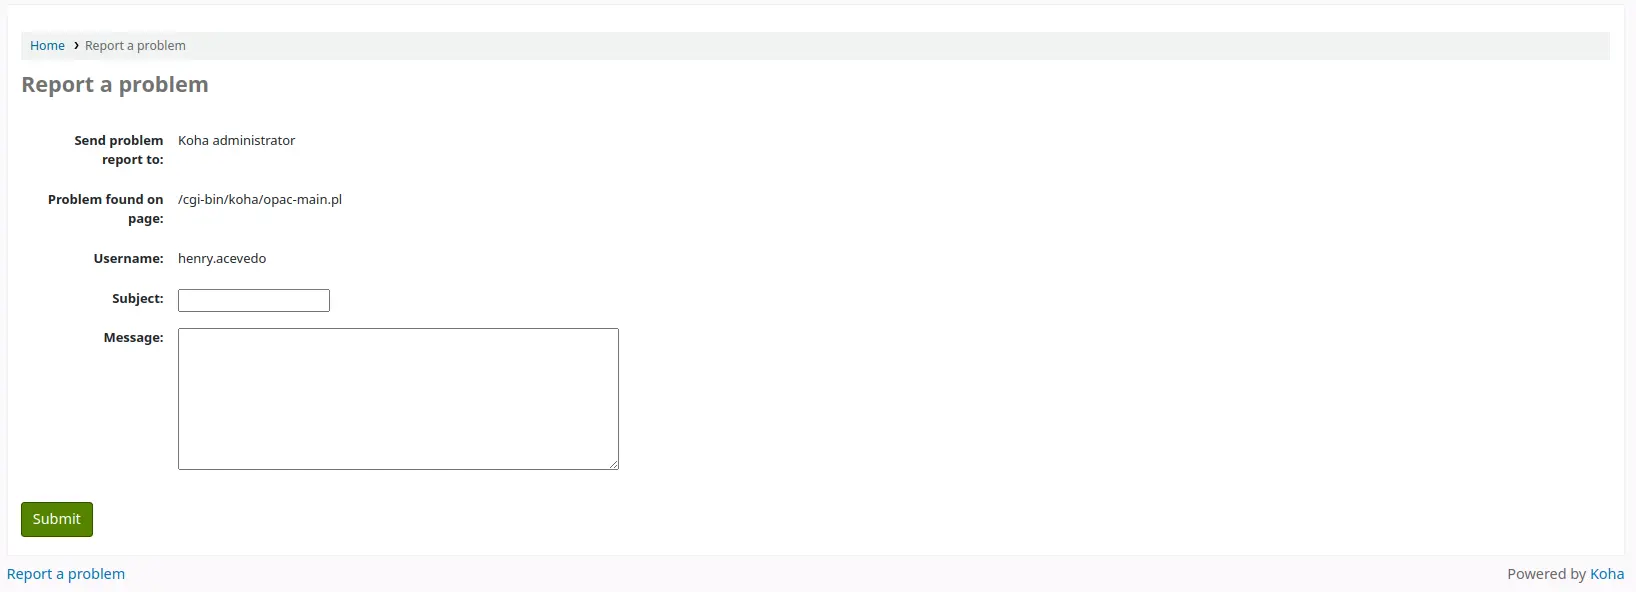
O relatório de problema é enviado para o administrador do Koha por email (para o endereço definido em KohaAdminEmailAddress) e aparecerá na ferramenta de relatórios de problemas do OPAC. Se a biblioteca possuir um endereço de correio eletrónico, o utilizador terá a opção de enviar o relatório de problema para a biblioteca ou para o administrador.
Nota
O aviso enviado por email é personalizável na ferramenta Avisos e recibos. O código do aviso é PROBLEM_REPORT.
Auto empréstimo no OPAC
Para além do módulo de auto-empréstimo, existe uma opção mais leve para bibliotecas com comunidades mais pequenas e de confiança. Com esta opção, os leitores podem realizar o empréstimo de exemplares por conta própria, utilizando a sua conta no OPAC, sem a supervisão do pessoal da biblioteca. Esta funcionalidade de auto-empréstimo pode ser utilizada em qualquer computador ou dispositivo com acesso ao OPAC, ao contrário do módulo de auto-empréstimo, que se destina a ser utilizado em computadores dedicados.
Assim que a preferência de sistema OpacTrustedCheckout for ativada, os leitores autenticados verão uma opção de ‘Auto-empréstimo’ no topo da página no OPAC.

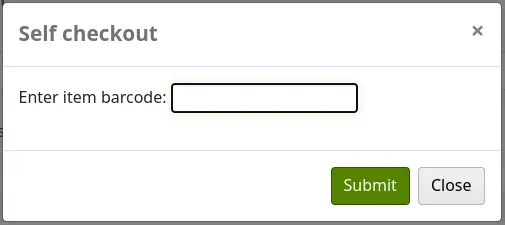
Ao clicar no endereço ‘Auto-empréstimo’ abrirá uma janela onde o utilizador poderá introduzir o código de barras do exemplar e clicar em ‘Submeter’ ou premir a tecla Enter.
Assim que o código de barras do artigo é introduzido, é apresentada uma mensagem de confirmação na parte superior da janela, e o código de barras, o título, a quota e a data de devolução do artigo são listados na parte inferior. O leitor tem a opção de ler ou introduzir outro código de barras.
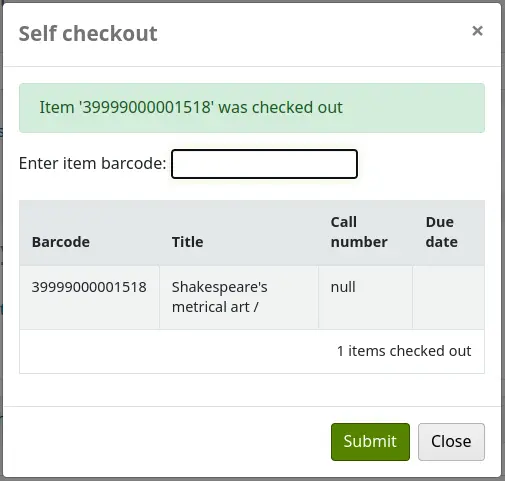
Para renovar o empréstimo, o leitor apenas necessita de realizar o empréstimo novamente (ou renovar a partir do seu resumo).
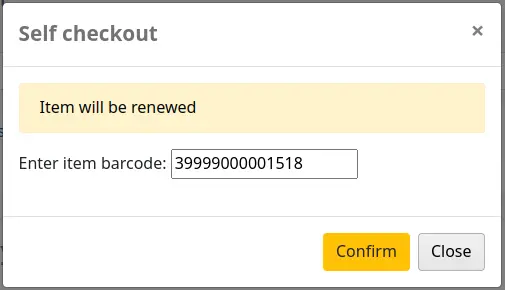
Se um exemplar já estiver emprestado a outro utilizador, uma mensagem irá informá-lo.
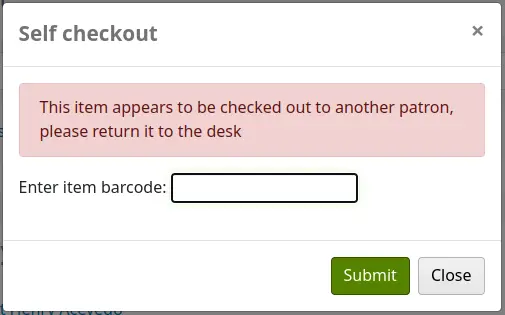
O empréstimo também será bloqueado se:
o código de barras não foi encontrado;
o exemplar está reservado para outro leitor;
as multas pendentes do leitor excedem o limite;
o leitor já atingiu o limite máximo de empréstimos;
o leitor não tem a idade exigida para requisitar o exemplar;
o exemplar não pode ser emprestado devido ao estado de não disponível para empréstimo ou de retirado.
Comentários
Os leitores podem deixar comentários no OPAC se a preferência OPACComments estiver configurada para o permitir. Cada registo bibliográfico possui um separador de comentários abaixo da informação bibliográfica.
Se o leitor estiver autenticado, verá um endereço para adicionar um comentário ao registo. Ao clicar nesse endereço, será aberta uma janela pop-up com um campo para inserir os comentários.
Assim que o comentário for digitado e o botão ‘Submeter’ for clicado, o leitor verá o seu comentário como pendente, enquanto os restantes leitores apenas verão que não existem comentários sobre o registo.
Assim que o comentário for aprovado, o leitor verá o número de comentários no separador ‘Comentários’ e o seu comentário identificado entre os restantes. Se a preferência do sistema ShowReviewerPhoto estiver definida para ‘Mostrar’, a fotografia do leitor, obtida a partir do serviço Libravatar, será apresentada junto ao comentário.
Os outros leitores verão o comentário juntamente com o nome de quem o fez (a menos que tenha definido a preferência ShowReviewer para não apresentar os nomes dos leitores).
Se tiver a configuração OpacShowRecentComments definida para apresentar, verá os comentários aprovados nessa página.
Nesta página, os leitores podem subscrever os comentários recentes via RSS, se assim o desejarem.