Amministrazione
Basic parameters
Vai a: Altro > Amministrazione
Importante
Configura i parametri nell’ordine in cui appaiono.
Biblioteche
Quando si configura Koha, si fornisce informazione per ogni biblioteca che condivide il sistema. Questi dati saranno usati in varie aree di Koha.
Get there: More > Administration > Basic Parameters > Libraries
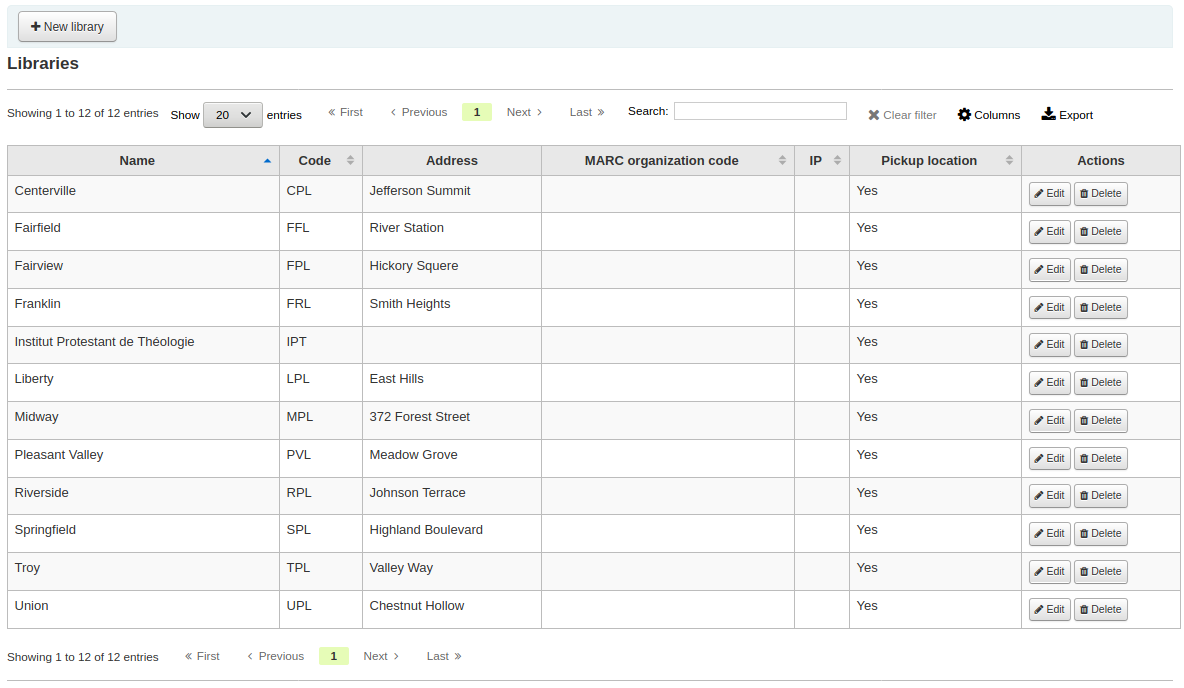
When visiting this page you are presented with a list of the libraries that have already been added to the system.
Nota
You can customize the columns of this table in the “Table settings” section of the Administration module (table id: libraries).
Adding a library
Per aggiungere una biblioteca:
Click “New library”
La parte alta del modulo chiede alcune informazioni di base sulla biblioteca

Il codice della biblioteca non può contenere alcun spazio e può essere di massimo 10 caratteri. Questo codice sarà usato come identificativo univoco nel database.
Il nome sarà visualizzato nell’opac ovunque appaia il nome della biblioteca e dovrà essere un nome significativo per gli utenti.
Inoltre, puoi inserire delle informazioni di contatto di base sulla sede
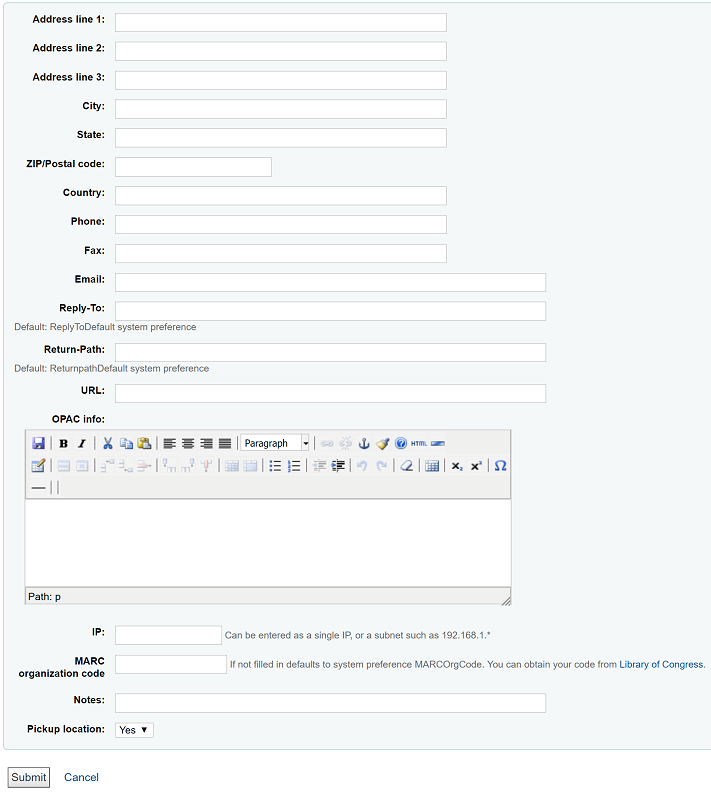
L’indirizzo e i campi del contatto posso essere usati per personalizzare le informazioni su ciascuna biblioteca
Il campo Email non è obbligatorio, ma è bene compilarlo per ogni biblioteca nel tuo sistema
Importante
Inserisci un indirizzo email della biblioteca per assicurare che i messaggi spediti e le relative risposte vi facciano riferimento
Se vuoi puoi inserire un altro indirizzo di posta elettronica “Reply-To”. Questo è l’indirizzo email a cui andranno tutte le risposte.
Nota
Se non si compila questo valore Koha utilizzerà il valore della preferenza ReplytoDefault
Se vuoi puoi anche inserire un altro indirizzo di posta elettronica “Return-Path”. Questo è l’indirizzo email a cui andranno tutti i messaggi respinti.
Nota
Se non si compila questo valore Koha utilizzerà l’indirizzo della preferenza ReturnpathDefault
Una volta riempito il campo URL il nome della biblioteca potrà essere linkato nella tabella con i dati di copia presente nell’opac
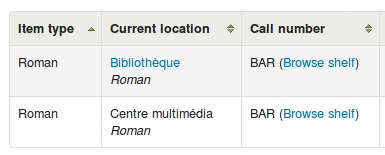
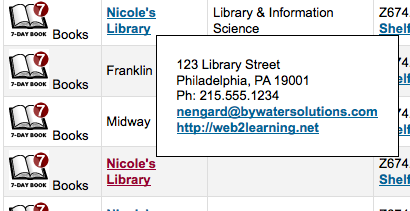
The OPAC info box is for you to put information about the library that will appear in the OPAC when the library name is moused over in the holdings table
IP does not have be filled in unless you plan on limiting access to your staff client to a specific IP Address
Importante
L’indirizzo IP è necessario se hai abilitato la preferenza di sistema AutoLocation
If this library has a specific MARC organization code, you can enter it here. If left blank, the code entered in the MARCOrgCode preference will be used for this library.
If you have any notes you can put them here. These will not show in the OPAC
Finally, you can choose whether the library will display as an available pickup location for holds
Nota
Solo i campi “Codice della biblioteca” e “Nome” sono obbligatori
Editing/deleting a library
Non potrai cancellare biblioteche che abbiano utenti o copie associati.

Le informazioni associate ad una biblioteca possono essere modificate premendo il relativo link “Modifica”.
Importante
Non sarai in grado di modificare il “Codice Biblioteca”
Library groups
Library groups can serve four purposes: to limit access to patron data, to limit OPAC searches, to limit staff searches, and/or to define holds behavior.
Get there: More > Administration > Basic Parameters > Library groups
When visiting this page you are presented with a list of the groups that have already been added to the system.

Aggiungi un gruppo
Click the “Add Group” button at the top of the screen
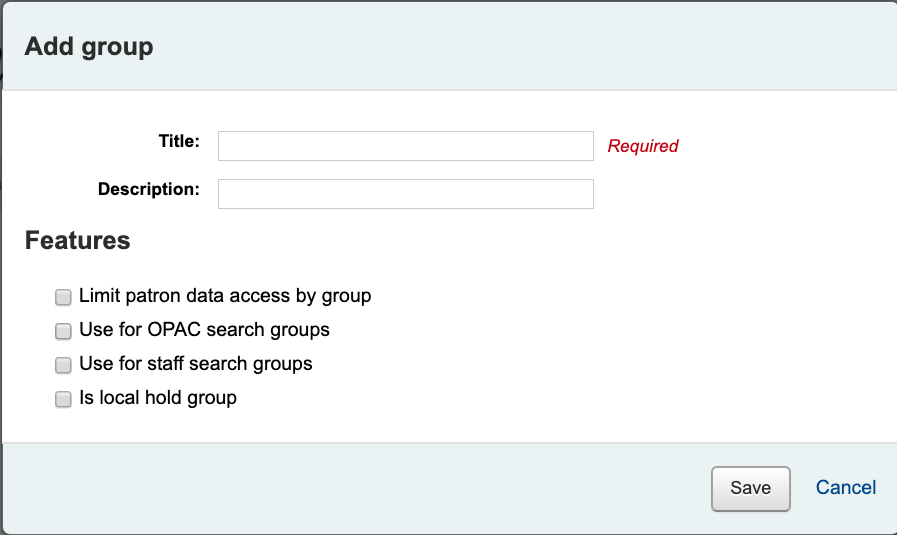
Give the group a title and a description. Only the title is mandatory as it will show up in the staff client and in the OPAC. The description is only used in this page to give an idea of what the group is used for.
You can limit staff from seeing other groups” patrons by checking the box next to the “Limit patron data access by group” option.
Nota
This can be overridden with the user permission view_borrower_infos_ from_any_libraries.
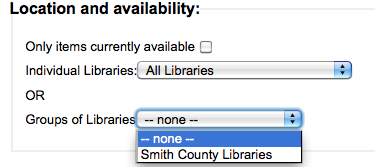
If you want the group to show up in the library pulldown menu at the top of the OPAC (with OpacAddMastheadLibraryPulldown set to “Add”) and on the advanced search page you can check the “Use for OPAC search groups” box.
If you want the group to appear in the library pulldown in the staff client advanced search, check the “Use for staff search groups” box.
If you want to use this group to define holds rules, check the ‘Is local hold group’ box.
Adding a library to a group
Click on the “Add library” button next to the group to add a library to this group. You will be presented with a list of the libraries that are not already in the group.

Adding a sub-group
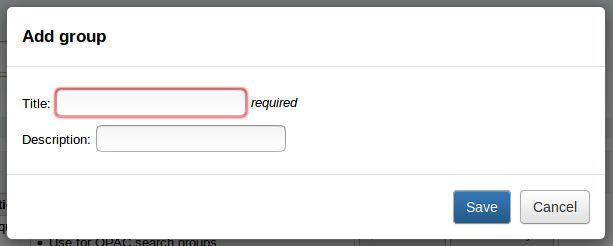
If your system is very large, you can create sub-groups. Click on the “Actions” button next to the group and select the “Add a sub-group” option. Fill in the title and the description (optional) of the sub-group. The features will be inherited from the parent group.
Deleting a group
To delete a group, click on the “Actions” button next to the group and select the “Delete” option.


Circulation desks
Koha allows you to define several circulation desks within a single library. For example, if you have an adult circulation desk and a children’s circulation desk, or if you have a different desk for each floor or each department.
Make sure to enable the UseCirculationDesks system preference to use this functionality.
Get there: More > Administration > Basic parameters > Desks
Adding circulation desks
To add a new circulation desk, click on the “New desk” button at the top of the page.

In the “Desk” field, enter a name for your desk.
Choose the library in which this desk is.
Click “Submit”.
Editing a circulation desk
To edit an existing circulation desk, click on the “Edit” button to the right of the desk to modify.
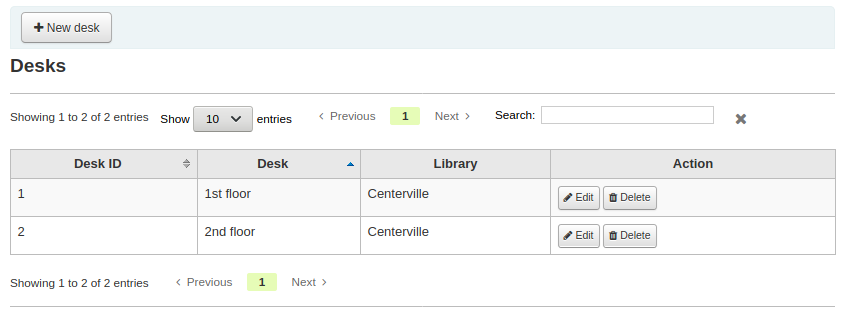
From there, you can change the name and/or the library of the desk.
Deleting a circulation desk
To delete an existing circulation desk, click on the “Delete” button to the right of the desk to remove.
Item types
Koha ti permette di organizzare le tue collezioni per tipo di copia o per codice.
Get there: More > Administration > Basic parameters > Item types
Item types typically refer to the material type (Book, CD, DVD, etc), but can be used in any way that works for your library.
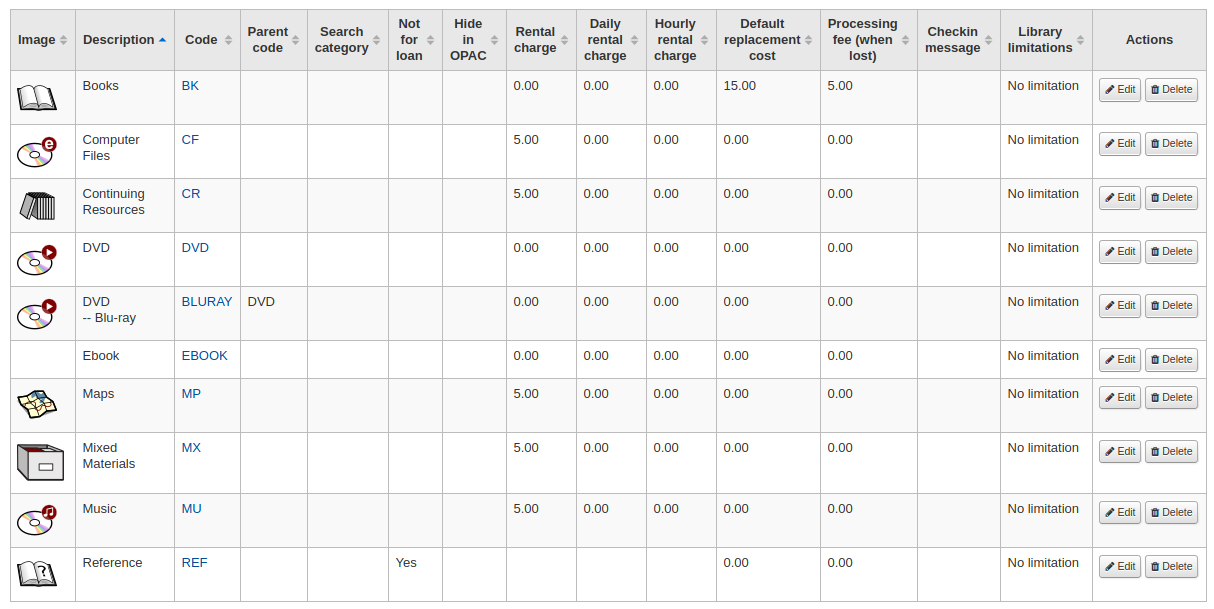
Nota
You can customize the columns of this table in the “Table settings” section of the Administration module (table id: table_item_type).
Adding item types
To add a new item type, simply click the “New item type” button at the top of the Item types page.

In the “Item type” field, enter a short code for your item type (maximum of 10 characters)
The the “Parent item type” field, you can choose an item type that will act as a parent category for this item type. You can then define circulation rules based on those parent item types.
For example, you could have DVD and Blu-ray item types, and the DVD would be the parent of the Blu-ray item type.
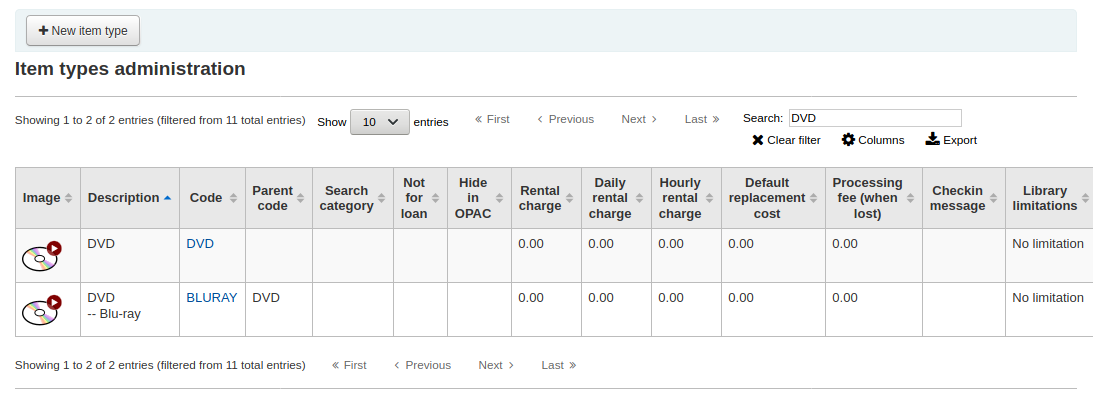
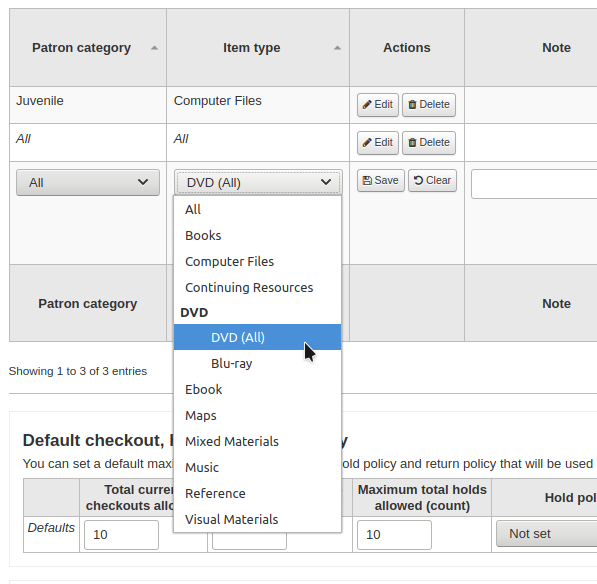
You can then create a circulation rule for either Blu-ray only or DVD and Blu-ray (DVD (All))
La descrizione è la definizione del tipo di elemento (per quelli con più lingue installate è possibile tradurre la descrizione del tipo di oggetto in tutte quelle lingue utilizzando il link “Tradurre in altre lingue”)
Item types can be grouped together for searching at the same time. For example you can put DVDs and Blu-rays in to a group called Movie and then they can be searched together. These groups are defined in the ITEMTYPECAT authorized value category.
Puoi scegliere se associare un’immagine al tuo tipo di copia
Puoi scegliere tra diverse collezioni di icone
Puoi collegare un’immagine da un altro server
Oppure puoi non associare alcuna immagine al tipo di copia
Importante
If this option is not enabled, you can change the setting of the noItemTypeImages or OpacNoItemTypeImages.
To have your item type images appear in the OPAC you need to set OpacNoItemTypeImages to “Yes”
Get there: More > Administration > Global system preferences > OPAC
Per le copie che si stanno nascondendo nell’OPAC, è possibile nascondere il loro tipo di copia per non renderlo cercabile nell’OPAC
Note This will not prevent those items to appear in search results, it will simply remove the item type from the advanced search form.
If you want to completely hide items from a certain item type, let’s say that you have a professional library with books reserved for staff and you don’t want those to appear in the OPAC, use the OpacHiddenItems system preference.
Per le copie non in prestito, seleziona l’opzione “Escluso dal prestito”
Copie con la dicitura “Escluso dal prestito” compaiono nel catalogo ma non potranno essere prestate agli utenti.
For items that are not physical, but for which you still have circulation rules, such as museum passes or ebooks, you can set up automatic checkins.
Check the “Automatic checkin” box
Schedule the cronjob misc/cronjobs/automatic_checkin.pl.
For items that you charge a rental fee for, there are several ways that rental fees can be charged to a patron by item type. A flat rental charge (process fee) or a daily/hourly rental charge.
For items that a library would charge a flat rental charge (process fee) for, enter the total fee you charge in the ‘Rental charge’ field. This will charge the patron on checkout (and renewal).
For items that a rental charge will be charged by the number of days the item is checked out for, enter the daily fee in the “Daily rental charge”. This will be charged to the patron upon checkout - the cost per day and how many days this item can be checked out to the patron. This daily rental charge will also be applied if/when a renewal occurs.
Check the “Daily rentals use calendar”, to exclude holidays from the the rental fee calculation.
For items that are loaned out hourly, enter the cost per hour in “Hourly rental charge”. Again, the total (hourly cost * number of hours loaned) will be charged to the patron upon checkout and renewal.
Check the “Hourly rentals use calendar”, to exclude holidays from the the rental fee calculation.
Each amount will charge the patron on checkout.
Importante
Non inserire simboli in questo campo, ma solo numeri e punti per i decimali (ad esempio 5$ va inserito come 5 o 5.00)
You can add a default replacement cost for this type of item. This is the amount that will be charged to the patron when lost if the item doesn’t have a replacement cost. If the item has a replacement cost, that is the amount that will be charged to the patron.
Importante
Non inserire simboli in questo campo, ma solo numeri e punti per i decimali (ad esempio 5$ va inserito come 5 o 5.00)
You can also add a processing fee that will be added to the replacement cost.
Importante
Non inserire simboli in questo campo, ma solo numeri e punti per i decimali (ad esempio 5$ va inserito come 5 o 5.00)
Se si desidera che appaia un messaggio o avviso quando le copie di questo tipo rientrano dal prestito è possibile immetterle nella casella “messaggio checkin”

The check-in message type can be a “message” or an “alert”. The only difference between these two is the styling. By default a message is blue
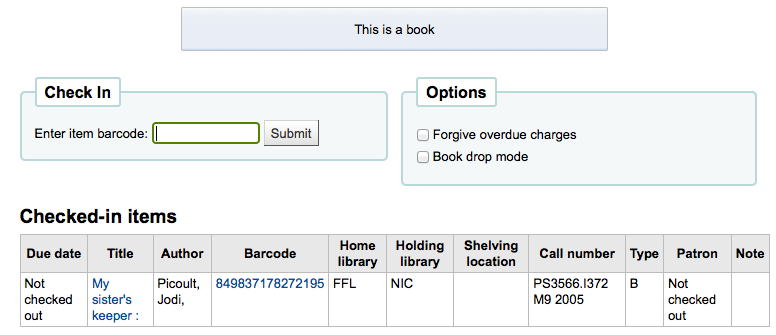
and an alert is yellow.
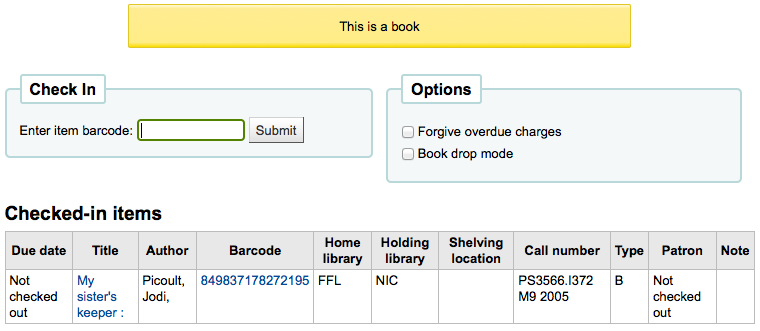
Some SIP devices need you to use a SIP-specific media type instead of Koha’s item type (usually lockers and sorters need this media type). If you use a device like this you’ll want to enter the SIP media type.
If this item type is only to be used in certain libraries, you can select them here. Select “All libraries” if this item type is used across the library system.
Nota
If this is left blank, “All libraries” is assumed.
Nota
To select more than one library, hold the “Ctrl” key while selecting the libraries.
When finished, click “Save changes”
Nota
All fields, with the exception of the “Item type” will be editable from the item types list
Il nuovo tipo di copia apparirà nella lista

Editing item types
Each item type has an Edit button beside it. To edit an item simply click the “Edit” button.
Importante
You will not be able to edit the code you assigned as the “Item type” but you will be able to edit the description for the item.
Deleting item types
Each item has a Delete button beside it. To delete an item type, simply click the “Delete” button.
Importante
Non puoi cancellare tipi di copia a cui sia associata qualche copia nel sistema.

Patrons and circulation
Impostazioni per la gestione della circolazione e delle informazioni degli utenti.
Patron categories
Le categorie utente permettono di organizzare gli utenti sotto differenti ruoli, gruppi di età e tipi.
Get there: More > Administration > Patrons and circulation > Patron categories

Nota
You can customize the columns of this table in the “Table settings” section of the Administration module (table id: patron_categories).
Aggiungi categoria utente
To add a new patron category click “New category” at the top of the page
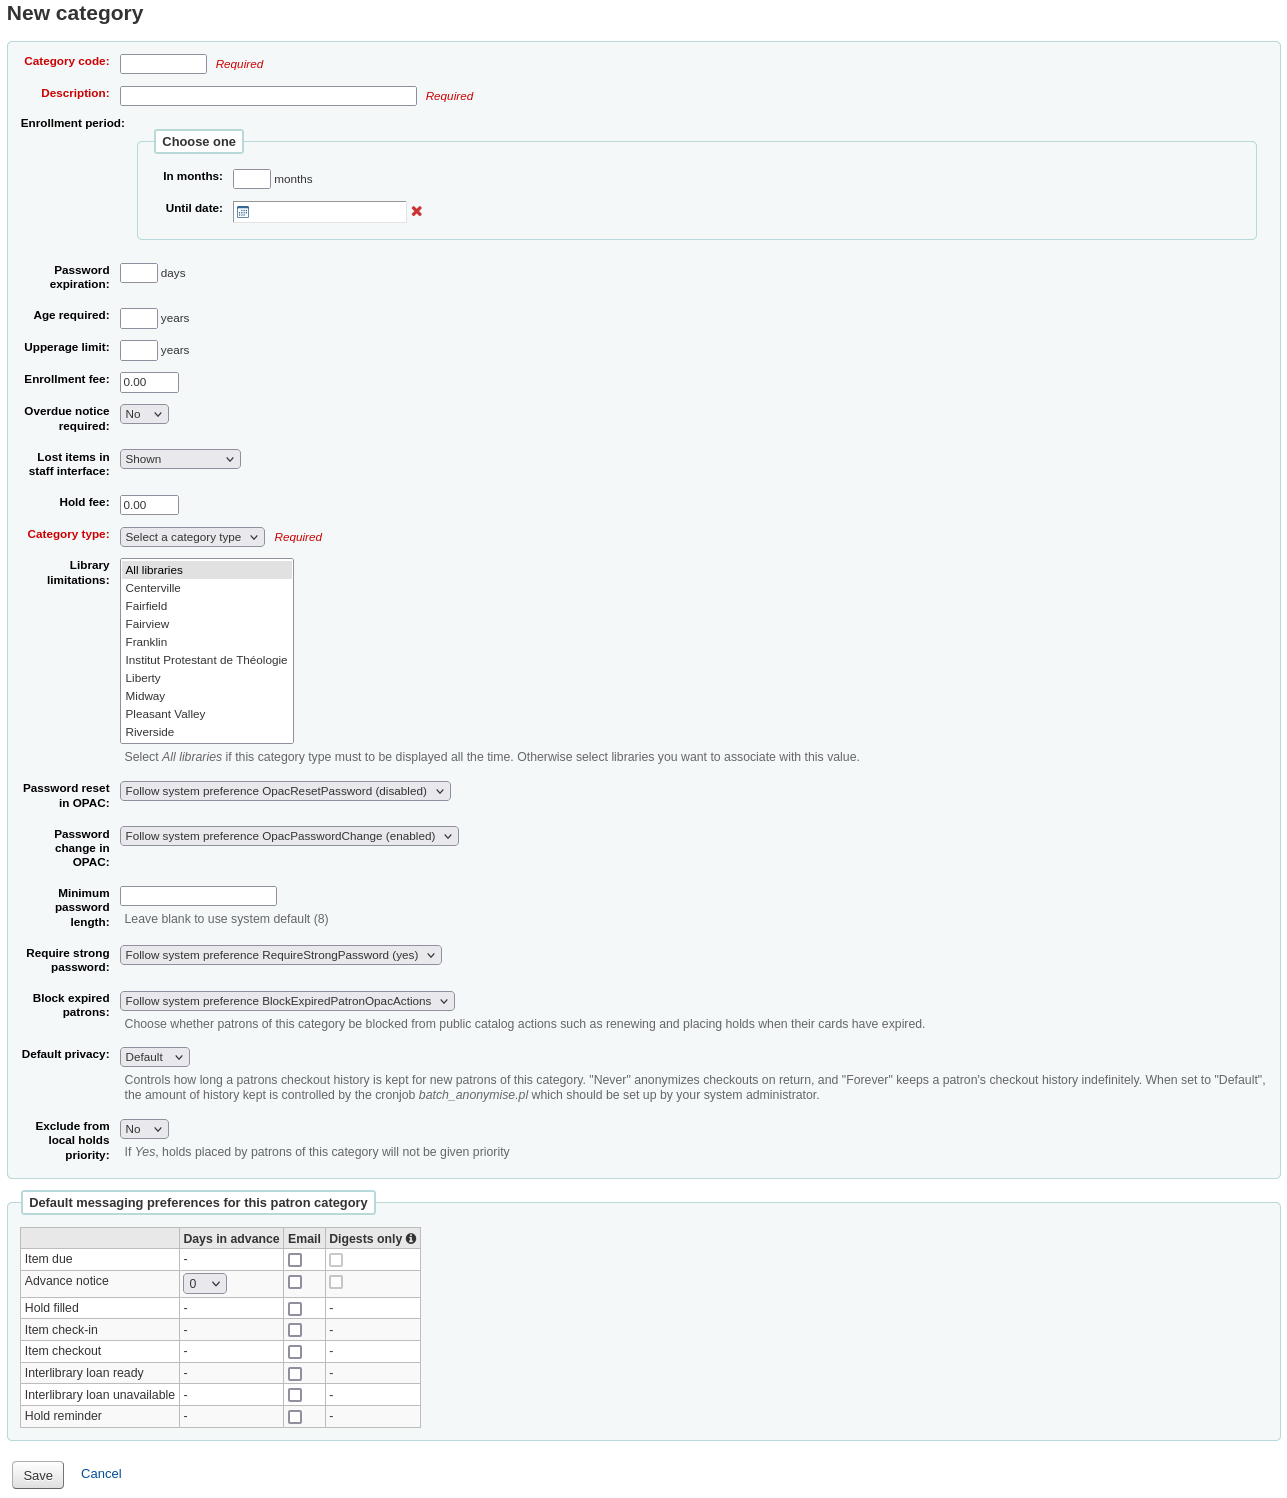
Category code: an identifier for your new category.
The category code is limited to 10 characters (numbers and letters) and must be unique.
Questo campo è obbligatorio per il salvataggio della categoria di utenti. Se non è compilato, ti verrà mostrato un messaggio di errore.
Description: a plain text version of the category.
The description will be visible throughout Koha.
Questo campo è obbligatorio per il salvataggio della categoria di utenti. Se non è compilato, ti verrà mostrato un messaggio di errore.
Enrollment period:
In months: should be filled in if you have a limited enrollment period for your patrons. For example, student cards expire after 9 months
Until date: you can choose a date when the cards will expire
Questo campo è obbligatorio per il salvataggio della categoria di utenti. Se non è compilato, ti verrà mostrato un messaggio di errore.
Avvertimento
You cannot enter both a month limit and a date until for one category. Choose to enter either one or the other.
Password expiration: enter the number of days after which a patron has to change their password.
Age required: minimum age (in years) requirement associated with the category. For example, an “Adult” patron category could have a minimum age of 18 years; this means patrons must be at least 18 to be in the patron category.
When creating or updating a patron, a warning will appear if the patron is too young for this category.

This value is used by the update_patrons_category.pl cron job to change the category of patrons who are too young.
Upper age limit: maximum age (in years) associated with the category. For example, a “Children” patron category could have an upper age limit of 18, meaning patrons can have children cards until they turn 18.
When creating or updating a patron, a warning will appear if the patron is too old for this category.

This value is used by the update_patrons_category.pl cron job to change the category of patrons who are too old.
Enrollment fee: enter the amount if you charge a membership fee for your patrons (such as those who live in another region).
Avvertimento
Only enter numbers and decimals in this field.
Nota
Depending on your value for the FeeOnChangePatronCategory system preference, this fee will be charged on patron renewal as well as when they are first enrolled.
Overdue notice required: choose “Yes” if you want patrons from this category to receive overdue notices. This will enable you to set the overdue notice triggers in the Tools module.
Lost items in staff interface: decide on a patron category basis if lost items are shown in the staff interface.
Shown: lost items are shown in the staff interface.
Hidden by default: lost items are hidden, but staff members can click “Show all items” to see them.
Nota
This is only applicable in the staff interface, so changing this value on patron categories who do not have access to the staff interface won’t make any difference.
Hold fee: enter the fee amount if you charge patrons from this category a fee for placing holds on items.
Avvertimento
Only enter numbers and decimals in this field.
Category type: choose one of the six main parent categories
Adult: most common patron type, usually used for a general “Patron” category.
Child: children patrons can have a guardian to be attached to them.
Staff: library staff
Organizational: organizations can be used as guarantors for Professional patrons.
Professional: professional patrons can be linked to Organizational patrons.
Statistical: this patron type is used strictly for statistical purposes, such as in-house use of items.
Questo campo è obbligatorio per il salvataggio della categoria di utenti. Se non è compilato, ti verrà mostrato un messaggio di errore.
Branch limitations: if necessary, limit this patron category to only some branches in your library system. Select “All branches” if you would like any library to be able to use this category.
To select more than one branch, hold the Ctrl key while making your selection.
Password reset in OPAC: decide whether patrons of this category are allowed to reset their password through the OPAC’s “Forgotten password” function. By default, it will follow the rule set in the OpacResetPassword system preference.
Follow system preference OpacResetPassword.
Allowed: patrons of this category will be able to reset their password through the OPAC regardless of the setting in OpacResetPassword.
Not allowed: patrons of this category will not be able to reset their password through the OPAC regardless of the setting in OpacResetPassword.
Password change in OPAC: decide whether patrons of this category are allowed to change their password through the OPAC. By default, it will follow the rule set in the OpacPasswordChange system preference.
Follow system preference OpacPasswordChange.
Allowed: patrons of this category will be able to change their password through the OPAC regardless of the setting in OpacPasswordChange.
Not allowed: patrons of this category will be not able to change their password through the OPAC regardless of the setting in OpacPasswordChange.
Minimum password length: enter the minimum password length for patrons of this category. Leave blank to use the default length set in the minPasswordLength system preference.
Require strong password: decide whether to enforce a strong password policy (at least one uppercase letter, one lowercase letter and one digit) for patrons of this category. By default, it will follow the rule set in the RequireStrongPassword system preference.
Follow the system preference RequireStrongPassword.
Yes: patrons of this category will be required to have a strong password regardless of the setting in RequireStrongPassword.
No: patrons of this category will not be required to have a strong password regardless of the setting in RequireStrongPassword.
Block expired patrons: decide if this patrons from this category are blocked from performing actions in the OPAC if their card is expired. By default it will follow the rule set in the BlockExpiredPatronOpacActions preference.
Follow the system preference BlockExpiredPatronOpacActions.
Block: patrons of this category whose membership has expired will be blocked from renewing and placing holds in the OPAC, regardless of the setting in BlockExpiredPatronOpacActions.
Don’t block: patrons of this category whose membership has expired will not be blocked from renewing and placing holds in the OPAC, regardless of the setting in BlockExpiredPatronOpacActions.
Default privacy: choose the default privacy settings for patrons of this category.
Default: checkout history will be kept indefinitely, until either the batch_anonymize.pl script is run or there is a manual batch anonymization which is performed.
Never: checkout history is anonymized upon return. Statistics are kept, but the link between the checkout, the item and the patron is removed.
Forever: checkout history is never anonymized for patrons of this category, regardless of the cron job or manual anonymization.
This setting can be edited by the patron via the OPAC if you allow it with the OPACPrivacy system preference.
Exclude from local holds priority: choose whether holds for patrons of this category are given a priority.
Yes: holds for patrons of this category are not given special priority, regardless of the setting in LocalHoldsPriority.
No: holds for patrons of this category are subjected to the setting in LocalHoldsPriority.
Default messaging preferences for this patron category: assign advanced messaging preferences by default to the patron category
These default preferences can be changed on an individual basis for each patron. This setting is just a default to make it easier to set up messages when creating new patrons.
Nota
This requires that you have EnhancedMessagingPreferences system preference set to “Allow”.
Avvertimento
These defaults will only be applied to new patrons that are added to the system. They will not edit the preferences of the existing patrons.
If you need to apply the default preferences to existing patrons, you can force those changes by running the borrowers-force-messaging-defaults script found in the misc/maintenance folder. Ask your system administrator for assistance with this script.
Circulation and fines rules
These rules define how your items are circulated, how and when fines are calculated and how holds are handled.
Get there: More > Administration > Patrons and circulation > Circulation and fines rules
Le regole sono applicate dal più specifico al meno specifico. Nell’ordine:
same library, same patron category, same item type
same library, same patron category, all item types
same library, all patron categories, same item type
same library, all patron categories, all item types
default (all libraries), same patron category, same item type
default (all libraries), same patron category, all item types
default (all libraries), all patron categories, same item type
default (all libraries), all patron categories, all item types
Le preferenze CircControl e HomeOrHoldingBranch entrano in gioco anche per capire la regola di circolazione da seguire.
If CircControl is set to «the library you are logged in at» circulation rules will be selected based on the library you are logged in at
If CircControl is set to «the library the patron is from» circulation rules will be selected based on the patron’s library
If CircControl is set to «the library the item is from» circulation rules will be selected based on the item’s library where HomeOrHoldingBranch chooses if the item’s home library or its holding library is used.
If IndependentBranches is set to “Prevent” then the value of HomeOrHoldingBranch is used in figuring out if the item can be checked out. If the item’s home library does not match the logged in library, the item cannot be checked out unless you are a superlibrarian.
Importante
At the very least you will need to set a default circulation rule. This rule should be set for all item types, all libraries and all patron categories. That will catch all instances that do not match a specific rule. When checking out if you do not have a rule for all libraries, all item types and all patron categories then you may see patrons getting blocked from placing holds.
Defining circulation rules
Using the issuing rules matrix you can define rules that depend on patron category/item type combos.
Nota
The matrix being very wide, you can export the existing rules in Microsoft Excel or CSV format, to look at them, using the “Export” button at the top of the table.
To set your rules, choose a library from the pull down (or “Standard rules for all libraries” if you want to apply these rules to all branches):
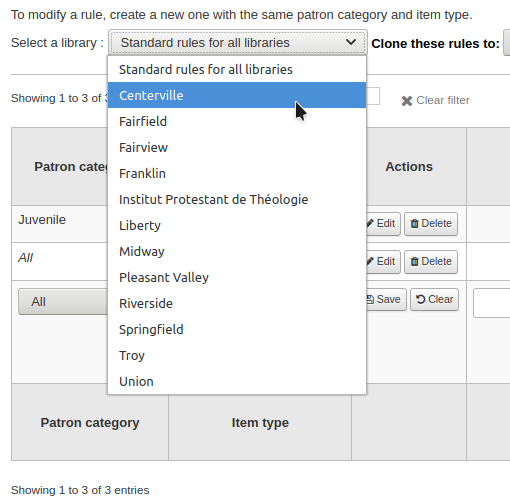
Nella matrice puoi scegliere ogni combinazione di categoria utente e tipologia di copia su cui vuoi applicare le regole che definisci

Per prima cosa scegli a quale categoria utente la regola si applicherà. Se lasci “Tutte”, si applicherà a tutte le categorie utente
Choose the item type you would like this rule to apply to. If you leave this to “All” it will apply to all item types for this patron category
If an item type has a parent item type, the rule will be displayed as Parent -> Child. The number of current checkouts will be limited to either the maximum for the parent (including sibling types) or the specific type’s rule, whichever is less.

In the example above, there is a rule for the DVD item type with a maximum of 5 checkouts and a rule for Blu-ray, a child of DVD, with a maximum of 2 checkouts. A patron at this library will be able to check out a maximum of 2 Blu-rays in a total of 5 items of either DVD or Blu-ray types.
To summarize, a patron at this library would be able to take either : - 0 Blu-ray and a maximum of 5 DVDs - 1 Blu-ray and a maximum of 4 DVDs - 2 Blu-ray and a maximum of 3 DVDs
Add notes about your circulation rule into the notes field. This can be helpful to remember why and when something was last changed.
Limit the number of items of this type a patron of this category can have checked out at the same time by entering a number in the “Current checkouts allowed” field.
If you’re allowing on-site checkouts then you may also want to set a limit on the number of items of this type patrons of this category can have on-site.
Nota
Questa impostazione dipende anche dalla preferenza ConsiderOnSiteCheckoutsAsNormalCheckouts
Define the period of time an item of this type can be checked out to a patron of this category by entering the number of units (days or hours) in the “Loan period” box.
Define if the loan period should include closed days or not in the “Days mode” column. The option chosen here will override the useDaysMode system preference for this particular rule.
The “Default” option will take the option defined in the useDaysMode system preference
Choose the “Calendar” option if you want to use the calendar to skip the days when the library is closed
Choose the “Datedue” option if you want to push the due date to the next open day
Choose the “Days” option if you want to ignore the calendar and calculate the due date directly
Choose the “Dayweek” option if you want to use the calendar to push the due date to the next open matching weekday for weekly loan periods, or the next open day otherwise
Choose which unit of time, days or hours, that the loan period and fines will be calculated in in the “Unit” column
You can also define a hard due date for a specific patron category and item type. The hard due date offers three options:
Exactly on: The due date of any item checked out with this rule will be set to the hard due date.
Before: Koha will calculate the normal loan period. If the calculated due date would be after or on the hard due date, the hard due date will be used instead.
After: Koha will calculate the normal loan period. If the calculated due date would be before the hard due date, the hard due date will be used instead.
“Fine amount” should have the amount you would like to charge for overdue items.
Importante
Inserisci solo numeri e punti per i decimali (nessun simbolo di valuta).
Enter the “Fine charging interval” in the unit you set (ex. charge fines every 1 day, or every 2 hours). The finesCalendar system preference controls whether the days the library is closed will be taken into account or not.
“Quando caricare” è più pratico nelle biblioteche che hanno un intervallo di ricarica multa di più di 1 giorno.
End of interval: Given a grace period of 2 days and a fine interval of 7 days, the first fine will appear 7 days after the due date, it will always take one fine interval (7 days), before the first fine is charged.
Start of interval: Given a grace period of 2 days and a fine interval of 7 days, the first fine will appear 2 days after the due date and the second fine 7 days after the due date.
The “Fine grace period” is the period of time an item can be overdue before you start charging fines. The FinesIncludeGracePeriod system preference controls if the grace period will be included when calculating the fine or not.
Importante
This can only be set for the “Day” unit, not in “Hours”
The “Overdue fines cap” is the maximum fine per item for this patron and item type combination.
Importante
If this field is left blank then Koha will not put a limit on the fines this item will accrue. A maximum fine amount for all overdues can be set using the MaxFine system preference.
Se si desidera evitare di sovracaricare gli utenti per le copie smarrite, puoi attivare la casella di “Multa massima uguale al prezzo di sostituzione.” Questo impedirà alle multe dell’utente di superare il prezzo di sostituzione della copia.
Nota
Se il “tetto multe prestiti scaduti” è pure definito, la multa sarà al massino il minore dei due valori, se entrambi si applicano al prestito in ritardo.
If your library “fines” patrons by suspending their account you can enter the number of days their fine should be suspended in the “Suspension in days” field.
Importante
This can only be set for the “Day” unit, not in “Hours”
Puoi anche definire il numero massimo di giorni che un utente può essere sospeso impostandolo nel campo “ Giorni di sospensione massimi”
The “Suspension charging interval” option is just like the “Fin charging interval”. For example, you could “fine” a patron one day suspension for every two days overdue.
Next decide if the patron can renew this item type and if so, enter how many times they can renew it in the “Renewals allowed” box.
If you allow unseen renewals (see UnseenRenewals), enter how many “unseen” renewals patrons can make. This is not in addition to the regular renewals, but rather how many “unseen” renewals can be made among the total number of renewals.
If you’re allowing renewals you can control how long the renewal loan period will be (in the units you have chosen) in the “Renewal period” box.
Se stai permettendo rinnovi, si può controllare quanto tempo prima della data di scadenza gli utenti possono rinnovare i loro prestiti con la casella “No rinnovi prima di”.
I prestiti possono essere rinnovati in qualsiasi momento, se questo valore viene lasciato vuoto. In caso contrario, i prestiti possono essere rinnovati solo se la copia deve essere resa dopo il numero di unità di tempo (giorni / ore) indicate in questa casella.
Per controllare questo valore in modo più preciso, impostare la preferenza di sistema NoRenewalBeforePrecision.
You can enable automatic renewals for certain items/patrons if you’d like. This will renew automatically following your circulation rules unless there is a hold on the item.
Importante
You will need to enable the automatic renewal cron job for this to work.
Importante
This feature needs to have the «no renewal before» column filled in or it will auto renew every day after the due date.
If you are using automatic renewals, you can use the “No automatic renewals after” to limit the time a patron can have the item. For example: don’t allow automatic renewals after a checkout period of 80 days.
Similar to the hard due date setting, you can also stop automatic renewals after a specific date using the “No automatic renewal after (hard limit)” setting.
If patrons of this category can place holds on items of this type, enter the total numbers of items (of this type) that can be put on hold in the “Holds allowed” field.
Leave empty to have unlimited holds.
If you’d rather put a hold limit per patron category, independent of the item type, see the default checkout and hold policy by patron category section below.
If you want to have a hard hold limit, independent of patron category and item type, for this particular library, see the Default checkout, hold, and return policy section below.
If you want to have a hard hold limit, independent of patron category, item type, and across all libraries, see the maxreserves system preference.
You can also set a daily limit on the number of holds a patron can place.
While the two settings before limit the holds that can be placed across various records, the next setting is used to limit the number of holds that can be placed on one record at the same time. For example, for fiction books you might want to allow only one item to be placed on hold at the same time by the same user. But for serials where items represent different issues more than one hold at the same time is fine.
Next you can decide how the availability of items influences the ability to place a hold. The “On shelf holds allowed” option has three settings:
Yes: This will allow to place holds on items at all times. It doesn’t matter if they are available or checked out.
If any unavailable: This will allow to place a hold as soon as one or more items of the record are checked out. It doesn’t matter if there are still one or more items available on the shelf.
If all unavailable: This will allow to place a hold as soon as all items on the record are checked out that could fill the hold. This is especially useful for libraries that don’t offer the service of getting items placed on hold off the shelf for patrons.
Under “OPAC item level hold” you can decide if patrons are allowed to place item specific holds on the item type in question. The options are:
Allow: Will allow patrons the option to choose next available or a specific item.
Don’t allow: Will only allow patrons to choose next available item.
Force: Will only allow patrons to choose a specific item.
If you want to allow patrons of this category to be able to place article requests on items of this type, choose an option in the “Article requests” column
No: patrons of this category will not be able to place article requests on items of this type
Yes: patrons of this category will be able to place article requests on items of this type, either on specific items (for example in the case of serial issues) or on entire records (for example in the case of monographs)
Record only: patrons of this category will be able to place article requests on records of this type, but not on specific items
Item only: patrons of this category will be able to place article requests on items of this type, but not on entire records
Importante
If you want to use the article request functionality you need to enable it using the ArticleRequests system preference and configure the form using the other related preferences.
If you charge a rental fee for the item type and want to give this specific patron category a discount on that fee, enter the percentage discount (without the % symbol) in the “Rental discount” field
If the UseRecalls system preference is enabled, you will have several options to control recalls.
Recalls allowed (total): enter the number of current recalls a patron of this category can have on items or records of this item type.
Recalls per record (count): enter the number of current recalls a patron of this category can have on any one record of this item type.
On shelf recalls allowed: choose if patrons can recall items on records that have available items
If any unavailable: if a record has more than one item and at least one is unavailable, the patron will be able to recall items from this record
If all unavailable: all items of a record must be unavailable in order for a patron to recall an item from this record
Recall due date interval (day): enter the number of days a patron has to return an item that has been recalled
Recall overdue fine amount: enter the fine amount a patron will be charged if they don’t return the recalled item by the due date
Recall pickup period: enter the number of days a patron has to come pick up the item they have recalled, once it has been marked as awaiting pickup.
Nota
This value supercedes the value in the RecallsMaxPickUpDelay system preference.
When finished, click “Save” to save your changes. To modify a rule, simply click the “Edit” button either at the beginning or at the end of the row. The row of the rule being edited will be highlighted in yellow and the values will appear filled in at the bottom of the table. Edit the values at the bottom and click save.

Nota
If, while editing a rule, you change either the patron category or the item type, it will create a new rule. You can do this to duplicate rules instead of creating new ones if the values are similar.
Alternatively, you can create a rule with the same patron category and item type and it will edit the existing one, as there can only be one rule per library- patron category-item type combination.
If you would like to delete your rule, click the “Delete” button at the beginning or at the end of the rule row.
To save time you can clone rules from one library to another by choosing the clone option above the rules matrix. Please note that this will overwrite all rules already configured for that library.

Dopo aver scelto di fare una copia, ti verrà presentato un messaggio di conferma.

Default checkout, hold, and return policy
You can set a default maximum number of checkouts, a default maximum number of holds and a hold policy that will be used if none is defined below for a particular item type or category. This is the fall back rule for defaults.

Da questo menu è possibile impostare un valore predefinito da applicare a tutti i tipi utente e copia nella biblioteca se nessun’altra opzione è impostata nei moduli sottostanti.
In “Totale prestiti attualmente autorizzati” inserisci il numero totale di copie che un utente può avere in prestito in contemporanea
In “Prestiti locali attualmente autorizzati” inserisci il numero totale di copie che un utente può avere in prestito (OnSiteCheckouts deve essere attiva)
In “Maximum total holds allowed (count)” enter the total number of pending holds patrons can have at the same time.
Con il menu “Configurazione delle prenotazioni” definisci la sede da cui gli utenti possono effettuare le prenotazioni
Da ogni biblioteca: utenti di ogni biblioteca posso fare prenotazioni su questa copia (default se nulla viene definito)
From Local Hold Group: Only patrons from a library in the item home library’s local hold group may put this book on hold.
Dalla biblioteca di appartenenza: solo gli utenti registrati alla biblioteca a cui appartiene la copia posso fare una prenotazione su questo libro.
Prenotazioni non possibili: nessun utente può prenotare quest’opera
Control where patron can pick up holds using the “Hold Pickup Library Match” menu
qualsiasi biblioteca
item’s hold group
patron’s hold group
Biblioteca a cui appartiene la copia
Biblioteca che detiene la copia
Definisci la sede a cui deve ritornare la copia al momento della restituzione
La copia ritorna alla biblioteca proprietaria
La copia rientra nella biblioteca di provenienza
Copia circolante
Quando una copia è circolante, rimane dove è rientrata e non ritorna alla biblioteca che la possiede (home library)
Una volta che una regola è configurata, puoi cancellarla cliccando il link “Pulisci” posto a destra della regola
Default checkout and hold policy by patron category
For this library, you can specify the maximum number of checkouts, on-site checkouts and holds that a patron of a given category can have, regardless of the item type.

Nota
If the total amount of checkouts, on-site checkout and holds for a given patron category is left blank, no limit applies, except possibly for a limit you define in the circulation rules above.
Ad esempio, se si dispone di una regola nella matrice che dice che utenti del Consiglio possono avere 10 libri e 5 DVD ma si vuole fare in modo che abbiano solo al massimo 12 oggetti in prestito alla volta. Se qui si immette 12 e l’utente ha già 10 libri in prestito, potrà prendere solo 2 DVD, per eguagliare il totale 12.
Default open article requests limit
If ArticleRequests is enabled, you can set a maximum number of open article requests a patron of a category can have at one time.

Nota
This will only appear if the ArticleRequests system preference is enabled.
Choose the patron category you want to limit.
Enter the number of open article requests a patron of this category can have at one given time
Click “Add”
Default article request fees
If ArticleRequests is enabled, you can set the fee a patron from a given category (or any category) needs to pay in order to request the article.

Nota
This will only appear if the ArticleRequests system preference is enabled.
Choose the patron category for which you want to add a fee, or choose “All” to set an overall fee for all patrons
Nota
The fee specific to a patron category will supercede the fee for all categories.
For example, if you set a fee for all categories to 2$ and a fee for Faculty to 3$, Faculty members will be charged 3$ and any other patron will be charged 2$.
Enter the fee amount (use a period as the decimal and don’t enter any symbols, e.g. enter 5.00 for 5$)
Click “Add”
The fee is charged to the patron when the request is placed.
When placing the request, either through the staff interface or the OPAC, a message appears to inform the staff member or the patron that the patron will be charged for every request and the amount of the fee.
Default lost item fee refund on return policy
Here, you can specify the default policy for lost item fees on return. This policy will apply to this library. This rule is to be used with the RefundLostOnReturnControl system preference.
You can limit the number of days during which a lost item is refundable using the NoRefundOnLostReturnedItemsAge system preference.
Default holds policy by item type
Per questa biblioteca è possibile modificare i criteri di prenotazione e restituzione per un determinato tipo di copia, indipendentemente dalla categoria utente.
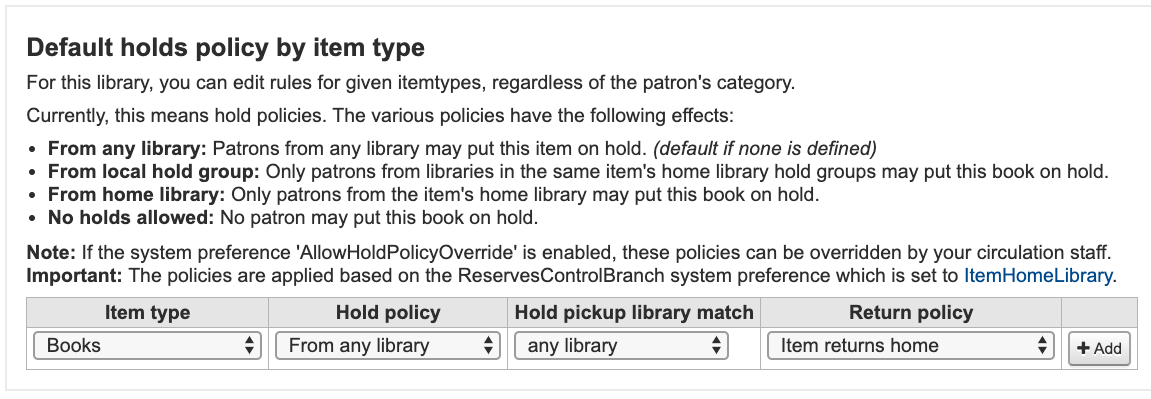
The various hold policies have the following effects:
From any library: Patrons from any library may put this item on hold. (default if none is defined)
From local hold group: Only patrons from libraries in the same item’s home library hold groups may put this book on hold.
From home library: Only patrons from the item’s home library may put this book on hold.
No holds allowed: No patron may put this book on hold.
Importante
Se la preferenza di sistema AllowHoldPolicyOverride è impostata su “Permetti” queste regole possono essere scavalcate dallo staff della circolazione.
Importante
These policies are applied based on the ReservesControlBranch system preference.
Control where patron can pick up holds using the “Hold Pickup Library Match” menu
qualsiasi biblioteca
item’s hold group
patron” hold group
Biblioteca a cui appartiene la copia
Biblioteca che detiene la copia
The various return policies have the following effects:
La copia ritorna alla biblioteca proprietaria: la copia attiverà la procedura di trasferimento alla sua biblioteca di appartenenza
Importante
Se la preferenza di sistema AutomaticItemReturn è impostata per trasferire automaticamente la copia alla sua biblioteca di appartenenza, non verrà mostrato nulla al bibliotecario
La copia ritorna alla biblioteca che l’ha prestata: la copia chiederà al bibliotecario il trasferimento alla biblioteca da cui è stata prestata
Importante
Se la preferenza di sistema AutomaticItemReturn è impostata per trasferire automaticamente la copia alla sua biblioteca di appartenenza, non verrà mostrato nulla al bibliotecario
Copia circolante: la copia non verrà trasferita dalla sede in cui è stata restituita, ma rimarrà lì finché non verrà trasferita manualmente o restituita ad un’altra sede
Ad esempio si potrebbe consentire prenotazioni nella tua biblioteca, ma per evitare prenotazioni di nuove copie o DVD da altre biblioteche del sistema sii può impostare la “Hold policy” a “Dalla propria biblioteca” in modo che tali copie possano essere prenotate solo se la biblioteca che le possiede e la biblioteca dell’utente coincidono. È inoltre possibile bloccare completamente le prenotazioni di specifici tipi di copie tramite questo modulo. Questo è anche il modo per impostare tipi di copie floating e tipi che rimangono nella propria biblioteca.
Patron attribute types
Tramite gli attributi utente è possibile definire dei campi personalizzati associabili al record utente. Per abilitare l’uso di questi campi personalizzati devi abilitare la preferenza di sistema ExtendedPatronAttributes.
Get there: More > Administration > Patrons and circulation > Patron attribute types
Un tipico uso di questo campo è l’ID dello studente o il numero di patente di guida.

Adding patron attributes
To add a new patron attribute type, click the “New patron attribute type” button at the top of the page
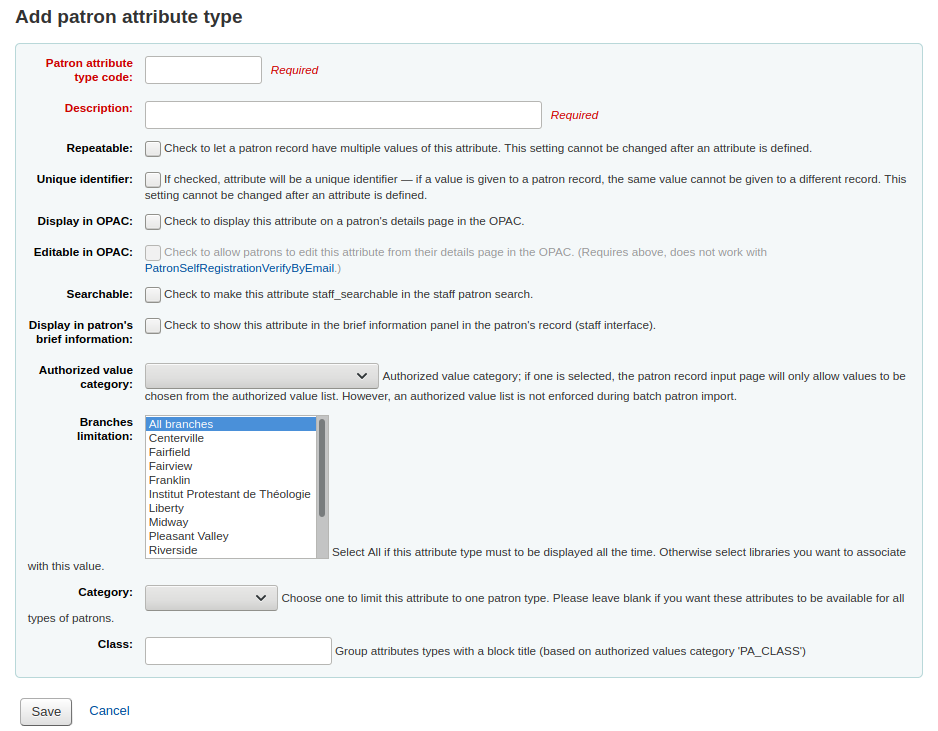
Inserisci un breve codice identificativo nel campo “Codice dell’attributo utente”
Importante
Questo campo è limitato a 10 caratteri esclusivamente alfanumerici
Importante
Questa impostazione non può essere cambiata successivamente alla creazione dell’attributo utente
Nel campo “Descrizione” inserisci una spiegazione libera di cosa conterrà questo campo
Spunta la casella “Ripetibile” per permettere l’assegnazione di un numero multiplo di questo attributo per un singolo utente.
Importante
Questa impostazione non può essere cambiata successivamente alla creazione dell’attributo utente
Se la casella “Identificatore univoco” è spuntata, l’attributo sarà un identificatore univoco nel database, il che significa che se un determinato valore è assegnato ad un utente, non potrà essere assegnato ad un altro utente.
Attributi univoci possono essere usati come regole di coincidenza nello strumento di importazione utenti
Importante
Questa impostazione non può essere cambiata successivamente alla creazione dell’attributo utente
Spunta per visualizzare questo attributo nella pagina dei dettagli dell’utente nell’OPAC.
Check “Editable in OPAC” to enable patrons to edit this information in the OPAC.
Spunta per rendere questo attributo cercabile nell’interfaccia staff.
Check “Display in patron’s brief information” to make this attribute visible in the patron’s short detail display on the left of the checkout screen and other patron pages

Categoria di valori autorizzati: se una categoria è selezionata, la pagina di inserimento dei dati dell’utente permetterà di scegliere solo tra i valori autorizzati della lista.
Devi avere almeno una lista di valori autorizzati affinché appaia nel menu a tendina
Get there:More > Administration > Basic parameters > Authorized values
Importante
le liste di valori autorizzati non vengono applicate in fase di importazione massiva degli utenti.
Se vuoi che questo campo si usato solo da specifiche biblioteche, puoi scegliere le biblioteche abilitate dalla lista “Limitazione per biblioteche”. Oppure scegli “Tutte le biblioteche” per usarlo dovunque.
Importante
Si noti che le copie con posizioni già impostate non saranno modificate. La limitazione evita solo la scelta di un valore autorizzato in base alla sede della biblioteca di login del membro dello staff. Tutti i valori autorizzati per i record di copia (LOC, LOST, CCODE, ecc) appariranno sull’OPAC per tutti gli utenti.
Se vuoi che questo attributo venga solo mostrato per un particolare tipo di utente, allora scegli il tipo di utente dal menu a tendina “Categoria”
If you have a lot of attributes it might be handy to group them so that you can easily find them for editing. If you create an Authorized value for PA_CLASS it will show in the “Class” pull down and you can then change your attributes page to have sections of attributes

Premi “Salva” per salvare il nuovo attributo
Una volta aggiunto l’attributo, apparirà nella lista degli attributi e nella scheda dell’utente

Se hai configurato delle classi per ordinare gli attributi degli utenti, essi appariranno in questo modo nel form per aggiungere/modificare utenti

Editing/deleting patron attributes
Ogni dato di un utente ha accanto un bottone per la modifica o la cancellazione.
Alcun campi nell’attributo non saranno modificabili una volta creati:
Codice dell’attributo utente:
Ripetibile
Identificatore univoco
Non potrai cancellare un attributo se è in uso.

Library transfer limits
Limita la possibilità di trasferire copie tra le biblioteche basandosi sulla biblioteca che invia, la biblioteca che riceve e la tipologia di copia coinvolta.
Get there: More > Administration > Patrons and circulation > Library transfer limits
These rules only go into effect if the preference UseBranchTransferLimits is set to “enforce”.
Prima di tutto occorre scegliere la biblioteca per la quale si stanno definendo questi limiti.

Transfer limits are set based on the collections codes you have applied via the Authorized values administration area.

I codici di collezione appariranno come schede sopra le caselle da spuntare:
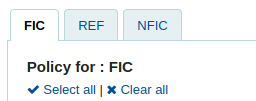
Check the boxes for the libraries you allow your items to be transferred to for the collection code you have selected at the top (in the example below - FIC)
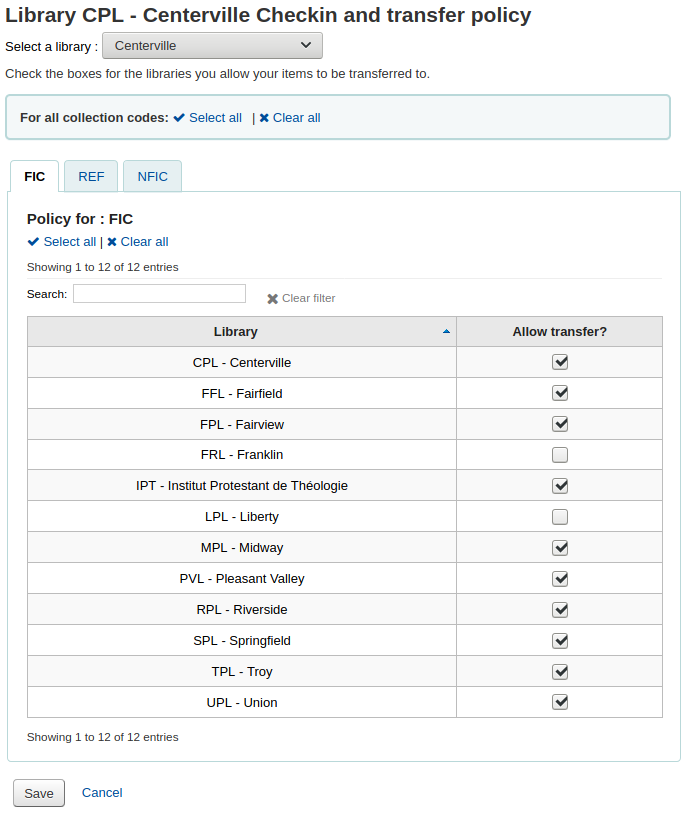
In the above example, Centerville library will allow patrons from all libraries except Liberty and Franklin to request items from their branch.
Matrice Costo Trasporto
The transport cost matrix lets a library system define relative costs to transport books to one another. In order for the system to use this matrix you must first set the UseTransportCostMatrix preference to “Use”.
Importante
The transport cost matrix takes precedence in controlling where holds are filled from, if the matrix is not used then Koha checks the StaticHoldsQueueWeight.
I costi sono valori decimali tra un numero massimo (es.: tra 1 e 100) e 0 (che indica senza costo). Per esempio, puoi usare la distanza tra ogni biblioteca in chilometri come tuo “costo”, se la cosa riflette il costo di trasporto. Forse gli uffici postali usano un parametro diverso. Le biblioteche che condividono un ufficio postale avranno un costo di 1, uffici postali adiacenti avranno costo 2, ecc.
Per indicare il costo di trasporto, clicca sulla cella, togli la spunta e inserisci il costo

Dopo aver indicato il costo, premi “Enter” sulla tastiera o fai click sul bottone “Salva” al fondo della tabella per salvare le modifiche.
Nota
Un valore NULL non farà alcuna differenza se la biblioteca From e To coincidono. Tuttavia, come buona norma, si dovrebbe indicare uno 0. Per tutte le altre combinazioni da/a, un valore NULL disabiliterà la relazione. Per cui, in sintesi, non è bene lasciare valori vuoti. È meglio mettere sempre un numero (anche se si sceglie di disabilitare l’opzione).
Item circulation alerts
Ogni biblioteca può decidere se notificare automaticamente agli utenti i loro prestiti e restituzioni
Get there: More > Administration > Patrons and circulation > Item circulation alerts
Queste preferenze sono basate sul tipo utente e tipo di copia.
Importante
Questi preferenza può essere modificata nelle preferenze di messaggistica dell’utente.
Per definire avvisi di circolazione delle copie:
Scegliere la tua biblioteca dal menu a tendina nella parte superiore dello schermo
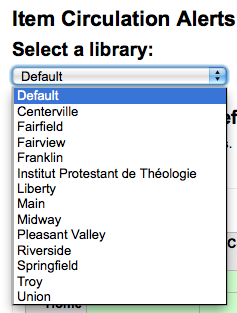
Per definire preferenze per tutte le biblioteche, mantieni il menù al valore “Default”
Per default gli utenti vengono avvisati di prestiti o restituzioni per ogni tipo di copia. Per modificare il default, clicca sulle singole caselle di spunta.
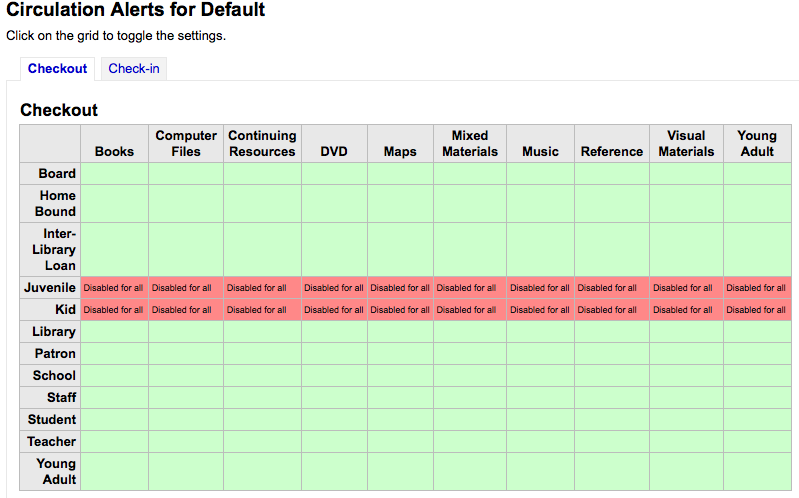
Nell’esempio precedente, ragazzi e bambini non riceveranno comunicazioni di prestiti.
Cities and towns
Per uniformare i dati degli utenti, puoi definire città e paesi della tua zona, per facilitare lo staff quando registra gli utenti. Gli basterà scegliere da menù tendina.
Get there: More > Administration > Patrons and circulation > Cities and towns
Adding a city
To add a new city, click the “New city” button at the top of the page and enter the city name, state, zip/postal code and country.
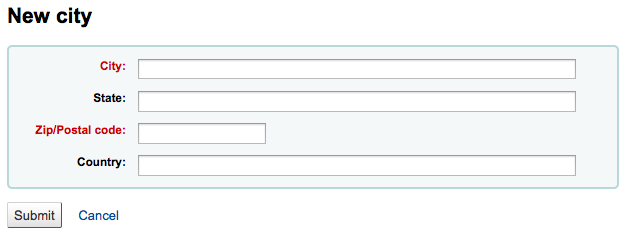
One you click Submit, your city will be saved and will be listed on the Cities and towns page

Le città possono essere modificate o cancellate in qualsiasi momento.
Viewing cities on patron add form
If you have defined local cities using the “New city” form, then when adding or editing a patron record you will see those cities in a pull down menu to make city selection easy.
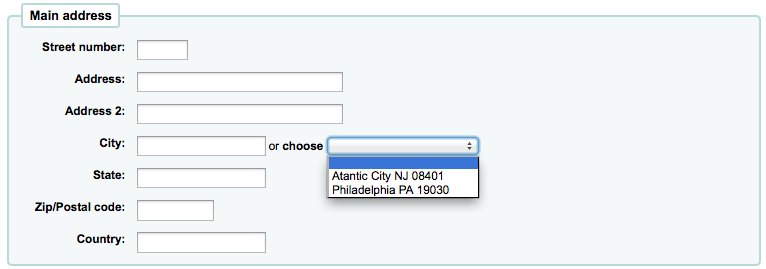
Ciò facilita il data entry di nomi di città nella scheda utente, senza il rischio di errori di battitura nel nome o del CAP
Accounting
Get there: More > Administration > Accounting
This section deals with the parameters used in managing the patron accounts.
Debit types
Get there: More > Administration > Accounting > Debit types
This is where you define the manual fees you can charge patrons.

When you first get to the page, you will only see the manual fees that are already defined in your system.
You can see the default system fees by clicking «Show all debit types».
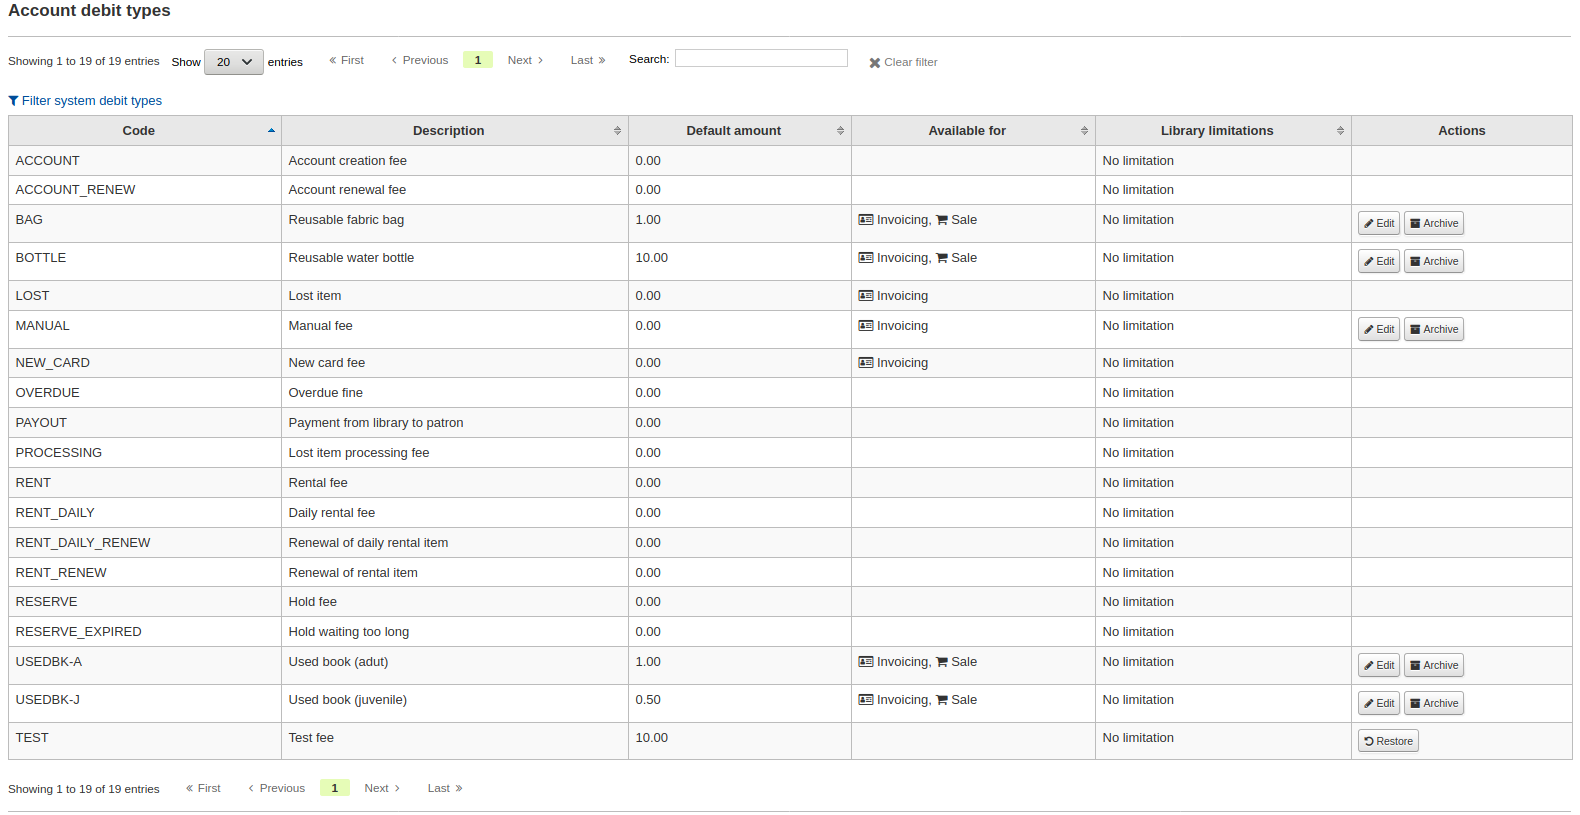
You can go back to seeing only the manual fees by clicking «Filter system debit types».
System debit types
Several debit types come installed with Koha. Most of them are automatic fees that are added according to the policies you set up elsewhere in Koha.
ACCOUNT (Account creation fee): this is charged to the patron’s account upon registration. The fee can be changed in the patron category settings under “Enrollment fee”.
ACCOUNT_RENEW (Account renewal fee): this is charged to the patron’s account when their account is renewed. Like the ACCOUNT debit type above, this can be changed in the patron category settings under “Enrollment fee”.
LOST (Lost item): this is charged to the patron’s account when an item in their file is declared lost. The amount depends on the item’s “replacement cost” field or on the item type’s default replacement cost. It can also be added manually in the manual invoices tab.
MANUAL (Manual fee): this is the default manual fee installed with Koha. This is not charged automatically by Koha, but can be added to a patron’s account manually in the manual invoices tab.
NEW_CARD (New card fee): this is another default manual fee installed with Koha. This will not be charged automatically by Koha, but can be added to a patron’s account manually in the manual invoices tab.
OVERDUE (Overdue fine): this is charged automatically to the patron’s account when they have overdue items. The amount for overdue fines are set in the circulation and fines rules.
PAYOUT (Payment from library to patron): this is used when the library reimburses the patron (for an over payment for example).
PROCESSING (Lost item processing fee): this is charged automatically to the patron’s account when an item in their file is declared lost. The amount is set by item type under “Processing fee (when lost)”.
RENT (Rental fee): this is charged automatically to the patron’s account upon checkout if the item type has a rental charge.
RENT_DAILY (Daily rental fee): this is charged automatically to the patron’s account upon checkout if the item type has a daily rental charge.
RENT_DAILY_RENEW (Renewal of daily rental item): this is charged automatically to the patron’s account upon renewal if the item type has a daily rental charge.
RENT_RENEW (Renewal of rental item): this is charged automatically to the patron’s account upon renewal if the item type has a rental charge.
RESERVE (Hold fee): this is charged automatically to the patron’s account upon placing a hold. The amount depends on the “Hold fee” amount in the patron’s category settings.
RESERVE_EXPIRED (Hold waiting too long): this is charged automatically to the patron’s account if they haven’t picked up their hold after the number of days defined in the ExpireReservesMaxPickUpDelay system preference. The amount is set in the ExpireReservesMaxPickUpDelayCharge system preference.
Adding a new debit type
To add a new debit type:
Click “New debit type”

Enter a code (limited to 64 letters)
Enter the default amount
Nota
Staff will be able to change this amount when adding the charge to the patron’s account, if necessary
Nota
Do not enter currency symbols. Only write the amount with a decimal point (for example, 5 or 5.00 instead of $5)
Write a description
This description will be used in the drop-down menu when adding a new charge to a patron’s account as well as in their transaction history
If this debit type can be added manually by staff to a patron’s account via the manual invoices, check the “Can be added manually?” check box
If this debit type is only to be used in specific branches, you can select the libraries in “Libraries limitation”
Nota
You can select more than one library by pressing the “Ctrl” key while selecting.
Clicca “Salva”
Editing an existing debit type
You can only modify the debit types you have added, as well as the “Manual fee”.
To edit a debit type:
Click the “Edit” button to the right of the debit type
Modify any field
Clicca “Salva”
Archiving a debit type
If there is a debit type you don’t need anymore, you can archive it.
Nota
There is no way to delete a debit type since they are used in the patron’s accounting section.
To archive a debit type, simply click the “Archive” button to the right of the debit type.
Restoring an archived debit type
If you need to use an archived debit type again, simply click on the “Restore” button to the right of the debit type.
This will make it available again.
Credit types
Get there: More > Administration > Accounting > Credit types
This is where you define the manual credits you can give patrons.
When you first get to the page, you will only see the credits that are already defined in your system.
You can see the default system credit types by clicking «Show all credit types».
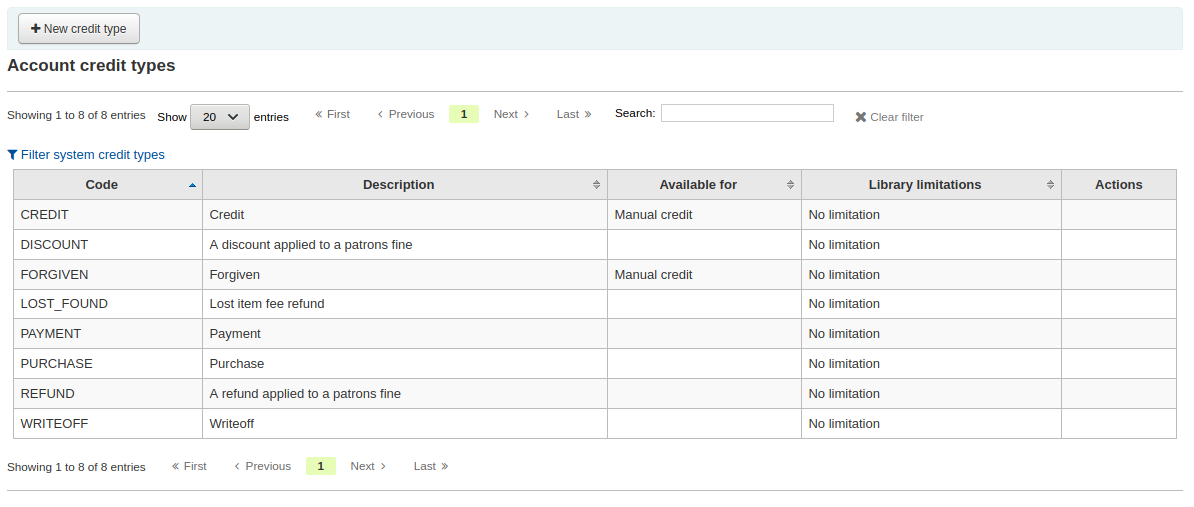
You can go back to seeing only the manual credit types by clicking «Filter system credit types».
System credit types
Several credit types come installed with Koha. Most of them are automatic credits that are added according to the policies you set up elsewhere in Koha. They can not be deleted.
CANCELLATION (Canceled charge): this is used when cancelling a charge in a patron’s account
CREDIT (Credit): this is used for manual credits to give to your patrons.
DISCOUNT (A discount applied to a patrons fine): this is used to discount fines and charges.
FORGIVEN (Forgiven): this is used for manual credits to give to your patrons.
LOST_FOUND (Lost item fee refund): this is used when a previously lost item is returned. If you refund the lost fees (see Default lost item fee refund on return policy), this credit will be applied to refund the fee.
OVERPAYMENT (Over payment refund): this is automatically applied to a patron’s account when they paid too much for a fee. This is mostly used when backdating check-ins where the patron has already paid the full fine.
PAYMENT (Payment): as the name states, this is used to indicate fee payments.
PURCHASE (Purchase): this is used when a payment is made through the point of sale module.
REFUND (A refund applied to a patrons fine): this is used when refunding the payment of a fine or charge.
WRITEOFF (Writeoff): this is used when writing off a fine or charge.
Adding a new credit type
To add a new credit type:
Click “New credit type”
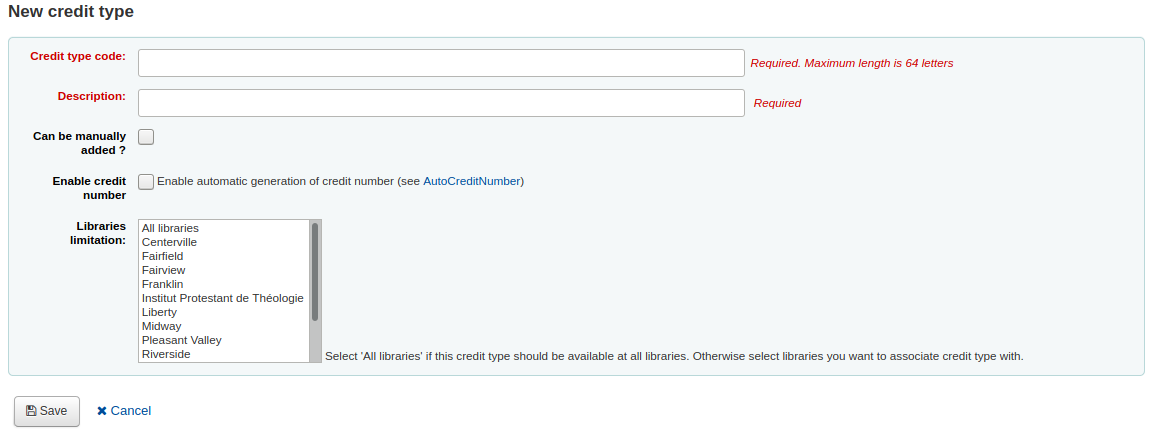
Enter a code (limited to 64 letters)
Write a description
This description will be used in the drop-down menu when adding a new credit to a patron’s account as well as in their transaction history
If this credit type can be added manually by staff to a patron’s account via the manual credit, check the “Can be added manually?” check box
If you need this credit type to be sequentially numbered, check the “Enable credit number”. The format of the number is defined in the AutoCreditNumber system preference.
If this credit type is only to be used in specific branches, you can select the libraries in “Libraries limitation”
Nota
You can select more than one library by pressing the “Ctrl” key while selecting.
Clicca “Salva”
Editing an existing credit type
You can only modify the credit types you have added.
To edit a credit type:
Click the “Edit” button to the right of the credit type
Modify any field
Clicca “Salva”
Archiving a credit type
If there is a credit type you don’t need anymore, you can archive it.
Nota
There is no way to delete a credit type since they are used in the patron’s accounting section.
To archive a credit type, simply click the “Archive” button to the right of the credit type.
Restoring an archived credit type
If you need to use an archived credit type again, simply click on the “Restore” button to the right of the credit type.
This will make it available again.
Cash registers
Get there: More > Administration > Accounting > Cash registers
This feature is enabled through the UseCashRegisters system preference.
If you have no cash registers already defined, you will be invited to create one.
Otherwise, you will see the list of all your cash registers.
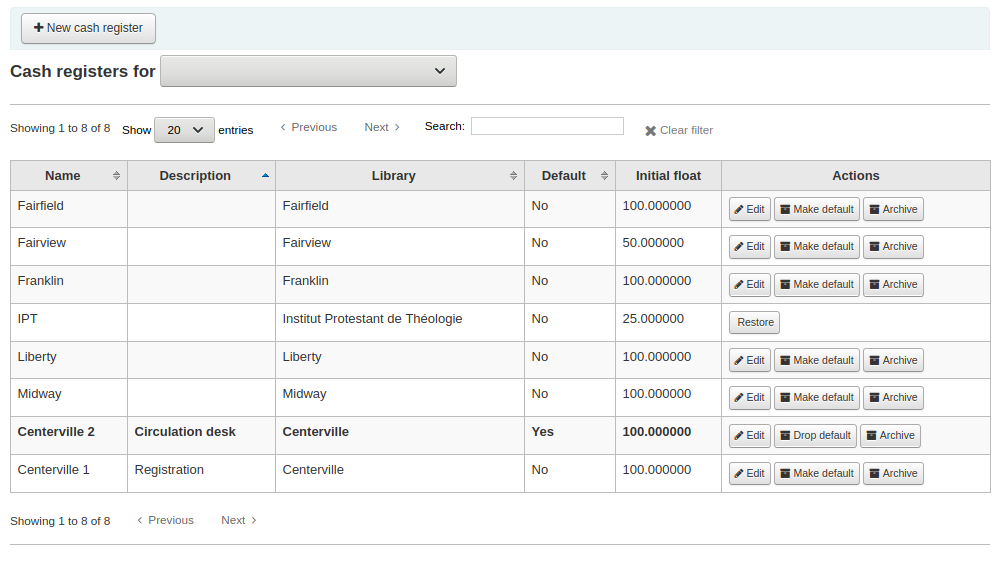
In the “Actions” columns, you can choose to edit your cash registers, make one of them default or remove the default status, and archive or restore an archived register.
The default status is only useful in libraries that have more than one register per branch. The default register will be pre-selected when entering a payment. If there is only one cash register per branch, the branch’s cash register will be selected when paying.
Adding a new cash register
Click on “New cash register”

Give your cash register a name
Optionally you can also add a description
Choose in which library this cash register is located
And finally, enter the initial float, i.e. the amount in the cash register
Click “Add”
Catalog administration
Configura queste impostazioni prima di cominciare la catalogazione con Koha.
Vai a: Più > Amministrazione > Catalogo
MARC bibliographic frameworks
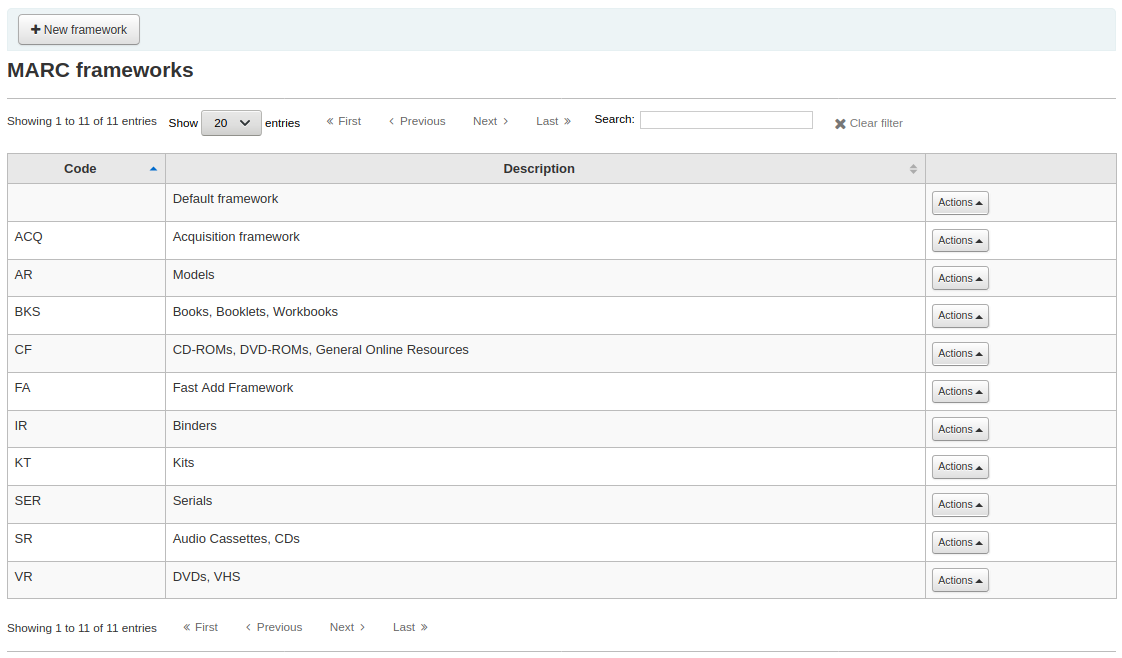
Think of frameworks as templates for creating new bibliographic records. Koha comes with some predefined frameworks that can be edited or deleted, and librarians can create their own frameworks for content specific to their libraries.
Get there: More > Administration > Catalog > MARC bibliographic frameworks
Importante
Do not delete or edit the Default framework since this will cause problems with your cataloging records - always create a new template based on the Default framework, or alter the other frameworks.
Add new framework
Per aggiungere una griglia di catalogazione
Click “New framework”

Inserisci un codice non più lungo di 4 caratteri
Usa il campo Descrizione per descrivere la tua griglia di catalogazione
Clicca “Invia”
Once your framework is added click Actions then “MARC structure” to the right of it on the list of frameworks

You will be asked to choose a framework to base your new framework on, this will make it easier than starting from scratch
Once your framework appears on the screen you can edit or delete each field by following the instructions for editing fields and subfields
Edit existing frameworks
Clicking Actions and then “Edit” to the right of a framework will only allow you to edit the description for the framework:

Edit framework fields and subfields
Frameworks are made up of MARC fields (tags) and subfields. To make edits to the fields and subfields associated with the framework you must click on “Actions” and then “MARC structure”.
Edit a MARC field (tag)
After clicking on “MARC structure” you will be taken to a screen listing all the available tags for that framework and you can search for the tag you need. To make edits to a MARC field click on “Actions” on the right of the field then “Edit tag”.
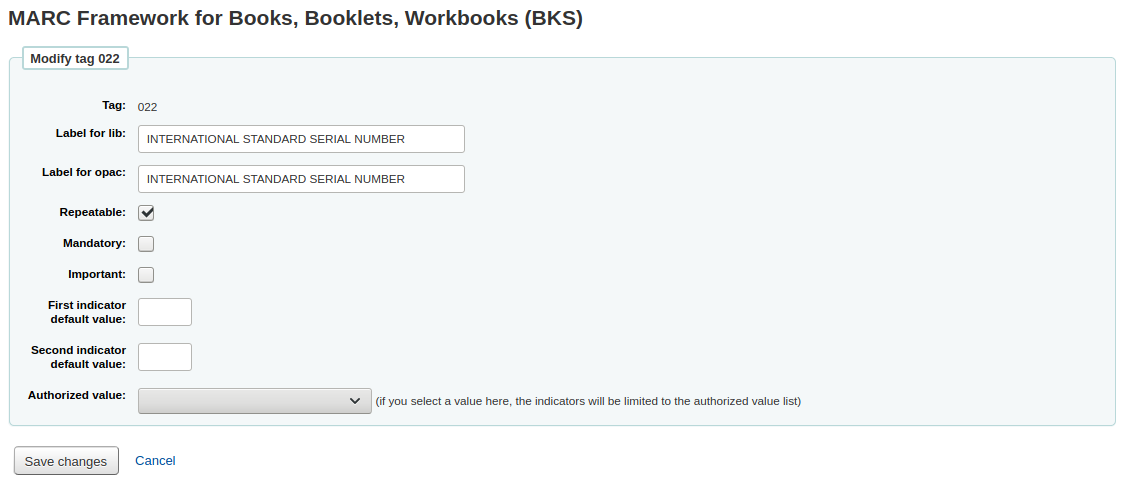
The next screen shows details of the tag.
Ogni campo ha un tag (un tag MARC) che non è editabile
The “Label for lib” is what will show in the staff interface if you have advancedMARCeditor set to display labels
L“«Etichetta per l’OPAC» è il testo visualizzato nella Vista MARC dell’OPAC
If you check “Repeatable” then the field will have an icon next to it allowing you to add multiples of that tag
If you check “Mandatory” the record cannot be saved unless the field has a value. A “Required” flag will display as a prompt
If you check “Important”, the field will generate a warning if it is not filled, but unlike “Mandatory”, you will still be able to save your record nonetheless
If you add default values for indicators here these will be pre-filled to save time when cataloging but can still be edited if required
“Authorized value” is where you define an authorized value pull down list for your catalogers
Nota
The authorized value option at field level does not work.
Edit a MARC subfield
To edit the subfields associated with the tag, click “Actions” then “Edit subfields” to the right of the tag on the framework field list. Each subfield has its own tab which contains three sections - Basic constraints, Advanced constraints and Other options.
For each subfield you can set the following basic constraint options
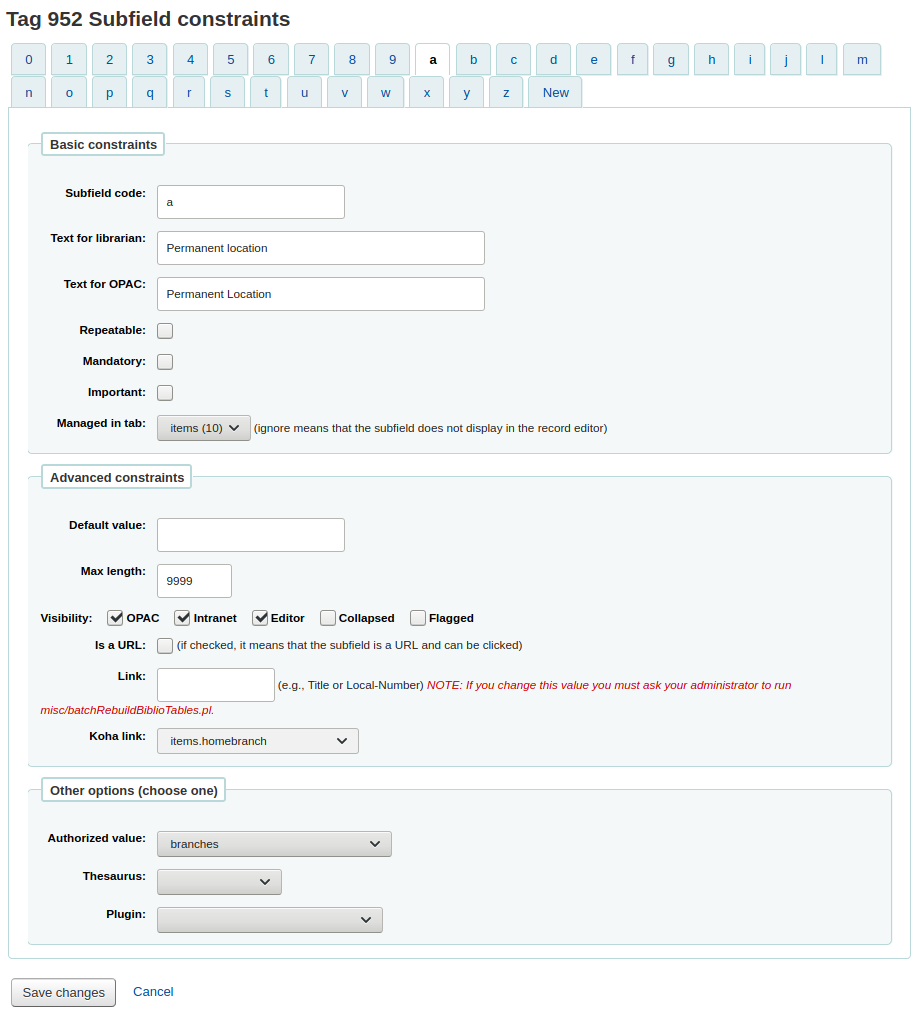
Subfield code: this is the MARC subfield code, this wouldn’t normally be changed
Text for librarian: what appears before the subfield in the staff interface
Text for OPAC: what appears before the field in the OPAC
Se vuoto, viene usato il testo per il bibliotecario al suo posto
Repeatable: the field will have an icon next to it allowing you to add multiples of the subfield
Mandatory: the record cannot be saved unless you have a value assigned to this subfield. A “Required” flag will display as a prompt
Important: this indicates that a field is not mandatory, but important. If you try to save a record where an important field is empty, you will get a warning, but the record will still be saved.
Managed in tab: defines the tab where the subfield is shown.
Importante
All subfields of a given field must be in the same tab or ignored. Ignore means that the subfield is not managed.
Importante
When importing records, subfields that are managed in tab “ignore” will be deleted. If you still wish to keep the subfields, but hide them, use the “Visibility” options below.
For each subfield you can set the following advanced constraint options
Default value: defines what you want to appear in the field by default, this will be editable, but it saves time if you use the same text over and over or the same value in a field often.
Nota
There are several values that you can use here that will be replaced automatically when a new record is created:
<<MM>> - the current month, 2 digits
<<DD>> - the current day of month, 2 digits
<<YYYY>> - the current year, 4 digits
<<USER>> - the username of the currently logged in user
For example: a default of «<<MM>>/<<DD>>/<<YYYY>>» (without quotes) will print the current date in the form of «01/21/2021»
Visibility: allows you to select from where this subfield is visible/hidden, simply check the boxes where you would like the field to show and uncheck the boxes where you would like it hidden.
Nota
The Editor checkbox controls whether this subfield will display within cataloging editor for this framework. If you check Collapsed the subfield will be hidden in the editor but will be displayed if the field label is clicked to expand all subfields

Is a URL: if checked, it means that the subfield is a URL and can be clicked
Link: if you enter an index name here, a link appears after the subfield in the MARC detail view in the staff interface. If the librarian clicks on the link, a catalog search is done using the index and the content of the subfield.
Koha link: this field is used to create a link between the MARC subfield and a column in the items, biblioitems and biblio database tables. Whenever a record is added or changed, this mapping will be used to update the linked database column. The information from the database columns is used as a way to quickly look up important information without having to parse the full MARC record. It is used for displaying information in a lot of pages and can also be used in reports.
It is possible to map multiple MARC subfields to the same database column. The first existing mapped subfield will be saved into the database. Usage example: For a MARC21 installation with both RDA and AACR2 records where some records store the publication data in 260 and others in 264 both fields can be mapped to the database columns for publisher, publication date and publication year.
The mappings can be changed on this page or from the Koha to MARC mapping page.
Avvertimento
The Koha links should not be changed after data has been added to your catalog. If you need to change or improve them, you must ask your system administrator to run misc/batchRebuildBiblioTables.pl. This will update the values in the database columns for all your records.
Per ogni sottocampo puoi impostare i valori per la seguente Altra opzione
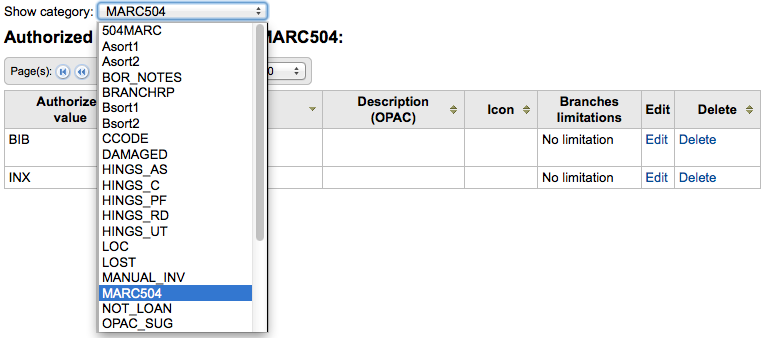
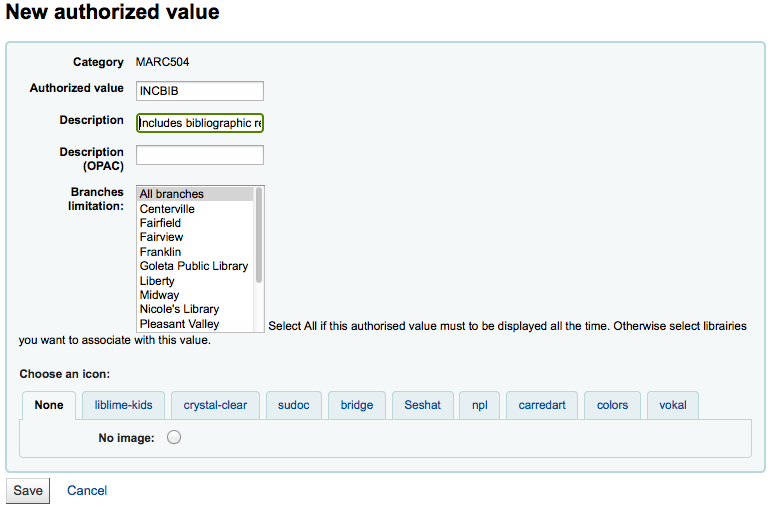
Authorized value: means the value cannot by typed, but must be chosen from a pull down generated by the authorized value list
In the example above, the 504a field will show the MARC504 authorized values when cataloging

Thesaurus: means that the value is not free text, but must be searched in the authority/thesaurus of the selected category
Plugin: means the value is calculated or managed by a cataloguing plugin Cataloguing plugins, or value builders, can do almost anything.
Esempi per MARC 21:
Per le collocazioni vi è la possibilità di aggiungere un visualizzatore di colloccazioni accanto al sottocampo della collocazione in modo da poter identificare quali collocazioni sono in uso e quali no. Basta scegliere il plugin cn_browser.pl. Ulteriori informazioni si trovano nella sezione catalogazione di questo manuale.
Se vuoi permettere il caricamento di file tramite la catalogazione è possibile scegliere il plugin upload.pl e questo permetterà di caricare file in Koha da collegare ai record.
In UNIMARC esistono plugin per tutti i campi 1xx che sono codificati. Il plugin è di grande aiuto per il catalogatore. Ci sono anche due plugin (unimarc_plugin_210c e unimarc_plugin_225a) che possono «magicamente» trovare l’editore da un ISBN e la lista delle collane per editore
If you would like to enable an autocomplete search for publishers in 260b and 264b you can set the plugin to marc21_field_260b.pl. When you start typing in a publisher name you will be given search results based on publisher names already in the catalog.
To save your changes simply click the “Save changes”.
Add fields to frameworks
If a framework doesn’t contain a field that you require you may need to add it. To add a field to a framework click the “New tag” button at the top of the framework definition
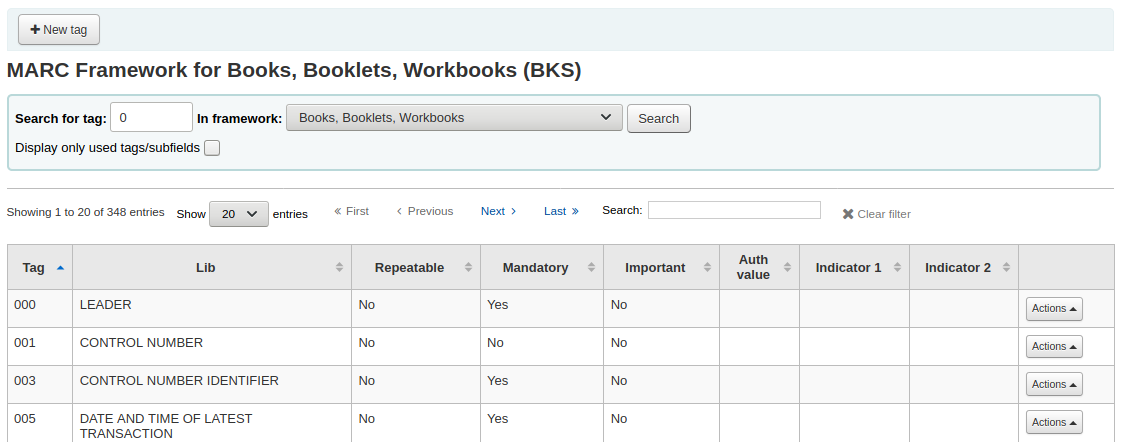
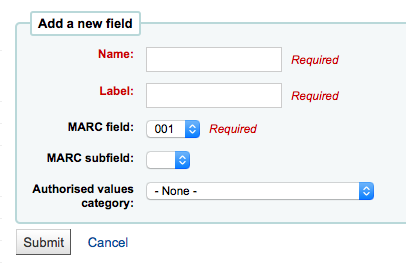
Si aprirà una form vuota per introdurre i campi MARC.
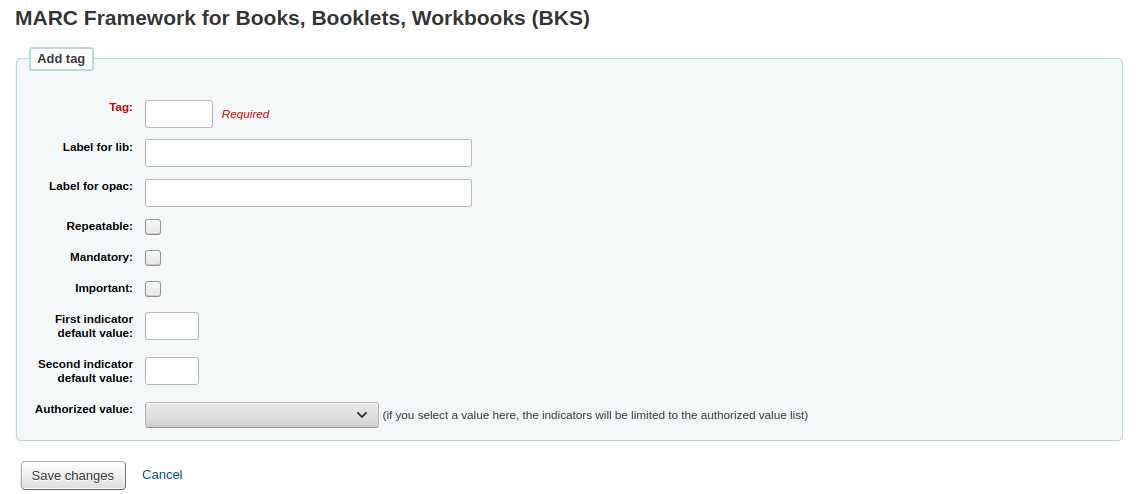
Inserisci l’informazione relativa al tuo nuovo tag:
Il “Tag” è il numero del campo MARC
The “Label for lib” is the text that will appear in the staff interface when in the cataloging module
L’etichetta per l’Opac è il testo che apparirà nell’Opac nella vista MARC del record
Spunta la casella “Ripetibile” se il campo può essere ripetuto
Spunta la casella “Obbligatorio” se il campo deve essere inserito
If this field is not mandatory but is important, check the “Important” box
If the important field is not filled upon saving the record, there will be a warning, but the user will still be able to save the record
You can enter default values for indicators in the “First indicator default value” and “Second indicator default value” field
Se vuoi che questo campo abbia valori determinati e non altri, scegli quale lista di “Valori autorizzati” associargli.
Nota
The authorized value option at field level does not work.
When you’re finished, click “Save changes” and your new tag will be displayed in the framework field list.

You will need to add at least one subfield to your new tag before it will appear in your framework when you are cataloging.
Click on the “Actions” button for your new tag and then “Edit subfields”. Click on the “New” tab and enter your subfield code. The process for entering the remainder of the settings for the new subfield is the same as those found in the editing fields and subfields in frameworks section of this manual.
Import/export frameworks
Accanto ad ogni griglia è presente un link per importare o esportare la griglia.
Export framework
Per esportare una griglia clicca semplicemente il link “Esporta” a destra del titolo della griglia.

Una volta cliccato “Esporta”, ti verrà chiesto in quale formato di file esportare.
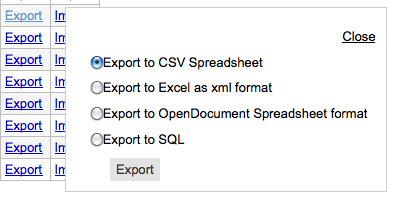
Una griglia esportata in questa maniera può essere importata in qualsiasi altra installazione di Koha utilizzando l’opzione per l’importazione di griglie.
Import framework
Un modo facile per creare una nuova griglia di catalogazione è importarne una da un’altra installazione di Koha. Per esportarlo dall’altro sistema, si vedano le istruzioni.
To import a framework you first need to create a new framework. Once you have that framework, click Actions then “Import” to the right of the new framework.

Ti verrà chiesto di cercare nel disco il file da importare.
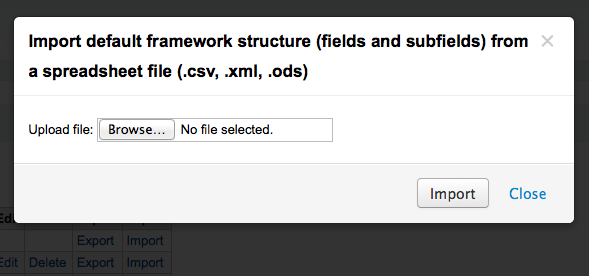
Ti verrà chiesto anche di confermare le tue azioni prima che il file venga importato.

Una volta caricato il file, comparirà un’immagine che conferma l’elaborazione da parte del sistema.

Una volta completata l’importazione, verrà caricata la schermata per la modifica della griglia, dove potrai fare le modifiche che desideri sulla griglia importata.
Koha to MARC mapping
While Koha stores the entire MARC record, it also stores common fields for easy access in various tables in the database. Koha to MARC mapping is used to tell Koha where to find these values in the MARC record. In many cases you will not have to change the default values set by in this tool on installation, but it is important to know that the tool is here and can be used at any time.
Get there: More > Administration > Catalog > Koha to MARC mapping
The table shows all the database fields that can be mapped to MARC fields.
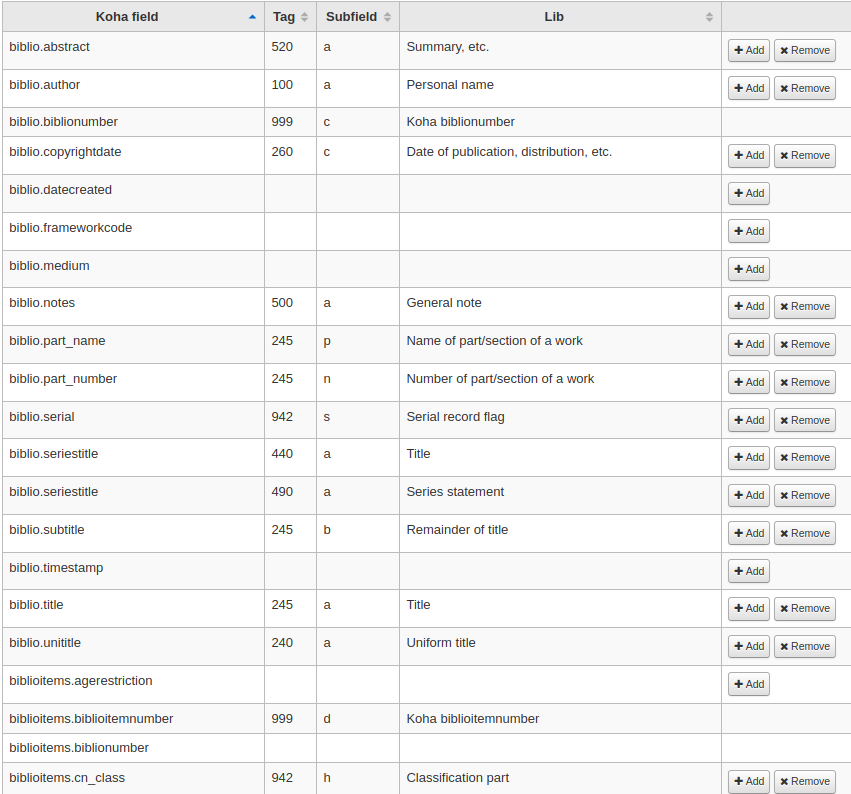
To add a new mapping, click on the “Add” button to the right of the appropriate field.

Write in the MARC field and subfield you would like to map, separated by a comma, to this Koha field and click the “OK” button.
Nota
It is possible to link more than one MARC field to a database field. For example, you could link both 260$a and 264$a to the biblioitems.place field.
If you would like to clear the mapping for a database field, click the “Remove” button.
Nota
All changes are immediate.
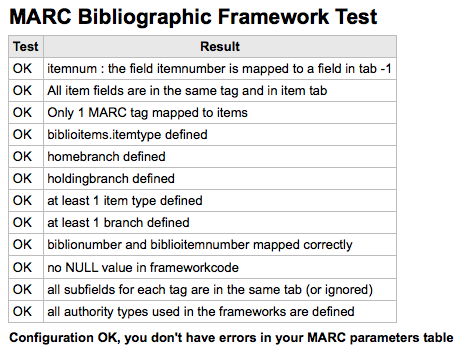
MARC bibliographic framework test
Controlla la struttura MARC.
Get there: More > Administration > Catalog > MARC bibliographic framework test
If you change your MARC bibliographic framework it’s recommended that you run this tool to test for errors in your definition.
Classification sources
Source of classification or shelving scheme are mapped to field 952$2 and 942$2 in Koha’s MARC bibliographic frameworks and stored in the items.cn_source and biblioitems.cn_source fields in the database.
Vai a: Più > Amministrazione > Catalogo > Schemi di classificazione
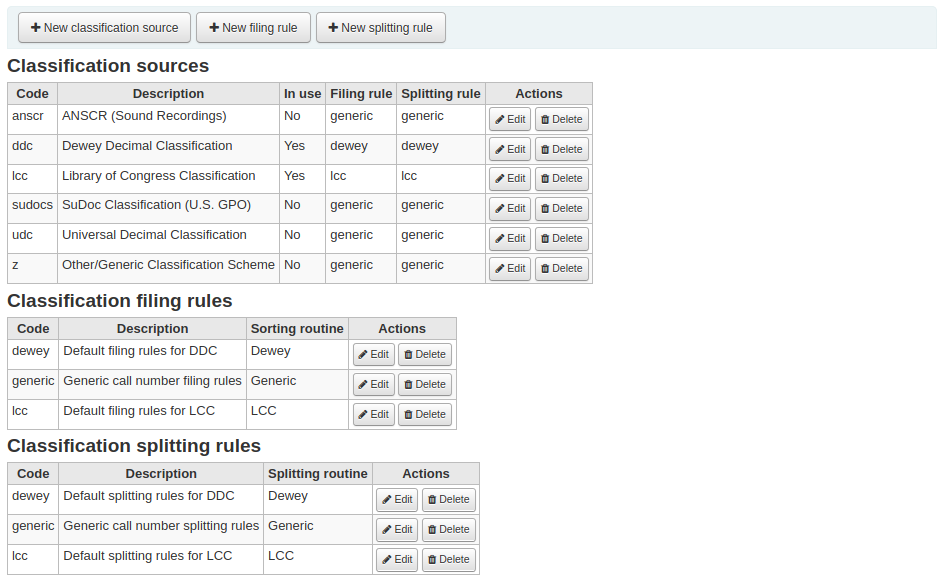
Commonly used classification sources are:
ddc - Classificazione decimale Dewey
lcc - Classificazione della Library of Congress
Se scegli di installare altre regole di classificazione durante l’installazione di Koha, vedrai altri valori:
ANSCR (registrazioni sonore)
Classificazione SuDOC
Classificazione decimale universale
Altra/generica classificazione
Adding/editing classification sources
You can add your own source of classification by using the “New classification source” button. To edit use the “Edit” button.

Quando crei o modifichi:
Enter a code. The code is limited to 10 characters and must be unique.
Nota
The code is not editable once it has been created.
Enter a description. The description is used in the drop-down lists in the cataloging module.
Check the “Source in use?” checkbox if you want the value to appear in the drop-down list for this category.
Select the appropriate filing rule from the drop-down list.
Select the appropriate splitting rule from the drop-down list.
Classification filing rules
Filing rules determine the order in which items are placed on shelves. Filing rules normalize call numbers in order for Koha to be able to compare them and sort them in the right order.
For example, a Dewey call number such as “636.8/07 SHAW” will become “636_800000000000000_07_SHAW” in order to be sorted.
The sorted call number is saved in the items.cn_sort or biblioitems.cn_sort fields in the database
Valori preconfigurati in Koha sono:
Dewey
LCC
Generica
Filing rules are mapped to Classification sources. You can setup new filing rules by using the “New filing rule” button. To edit, use the “Edit” button.
Quando crei o modifichi:
Enter a code. The code is limited to 10 characters and must be unique.
Nota
The code is not editable once it has been created.
Enter a description. The description is used in the drop-down list when creating or editing a classification source.
Scegli la regola di normalizzazione: dewey, generic, lcc
The Dewey filing routine generates a sorted call number by following these rules:
Concatenates classification and item parts.
Converts to uppercase.
Removes any leading or trailing white spaces, and forward slashes (/)
Separates alphabetic prefix from the rest of the call number
Splits into tokens on white spaces and periods.
Leaves first digit group as is.
Converts second digit group to 15-digit long group, padded on right with zeroes.
Converts each whitespace to an underscore.
Removes any remaining non-alphabetical, non-numeric, non-underscore characters.
The generic filing routine generates a sorted call number by following these rules:
Concatenates classification and item parts.
Removes any leading or trailing white spaces.
Converts each whitespace to an underscore.
Converts to uppercase.
Removes non-alphabetical, non-numeric, non-underscore characters.
The LCC filing routine generates a sorted call number by following these rules:
Classification splitting rules
Splitting rules determine how call numbers are split when printed on a spine label.
Nota
Splitting rules are only used if your label layout specifies to split call numbers.
For example, a Dewey call number such as “636.8/07 SHAW” will become
636.807
SHAW
once printed on a spine label.
Valori preconfigurati in Koha sono:
Dewey
LCC
Generica
Splitting rules are mapped to Classification sources. You can setup new splitting rules by using the “New splitting rule” button. To edit, use the “Edit” button.
Quando crei o modifichi:
Enter a code. The code is limited to 10 characters and must be unique.
Nota
The code is not editable once it has been created.
Enter a description. The description is used in the drop-down list when creating or editing a classification source.
Choose an appropriate splitting routine - Dewey, Generic, LCC or RegEx
The Dewey splitting routine looks for the three digits and the decimal, puts it on one line with the other parts (Cutter, prefix, etc.) each on a separate line (generally split on spaces).
The Generic splitting routine splits on spaces.
The LCC splitting routine puts each component on a separate line.
The RegEx splitting routine allows you to create a custom splitting routine.
Some examples of RegEx splitting routines:
Split on spaces:
s/\s/\n/g
Split on equal signs (=):
s/(\s?=)/\n=/g
Split on forward slashes (/):
s/(\s?\/)/\n/g
Remove first split if call number starts with J or K:
s/^(J|K)\n/$1 /
Cut after 9 characters:
s/(^.{9})/$1\n/
It is possible to mix and match RegEx splitting routines by clicking the “New” link just under the RegEx input box.
For example, if you want to cut after nine characters AND split on spaces, you can write both and the call number “971.42805092 C669r” will be split
971.42805
092
C669r

Record matching rules
Le regole di match sono usate quando si importano record MARC in Koha.
Get there: More > Administration > Catalog > Record matching rules
The rules that you set up here will be referenced with you Stage MARC records for import.
It is important to understand the difference between “Match points” and “Match checks” before adding new matching rules to Koha.
Match points are the criteria that you enter that must be met in order for an incoming record to match an existing MARC record in your catalog. You can have multiple match points on an import rule each with its own score. An incoming record will be compared against your existing records (“one record at a time”) and given a score for each match point. When the total score of the match points matches or exceeds the threshold given for the matching rule, Koha assumes a good match and imports/overlays according your specifications in the import process. An area to watch out for here is the sum of the match points. Double check that the matches you want will add up to a successful match.
Esempio:
Soglia di 1000
Match point on 020$a 1000
Match point on 022$a 1000
Match point on 245$a 500
Match point on 100$a 100
Nell’esempio precedente, un match sul campo 020$a o 022$a comporta una coincidenza. Un match su 245$a titolo e 100$a autore (ma non 020$a o 022$a) raggiungerà quota 600 ma non costituisce un match. E un match su 020$a e 245$a raggiunge quota 1500, che è quindi coincidenza, e i restanti 500 punti sono superflui. Il record entrante coincide con lo 020$a senza la necessità della coincidenza con il 245$a. Tuttavia, se si assegna un punteggio di 500 al 100$a, un match con 245$a titolo e 100$a autore verrà considerato sufficiente (totale 1000) anche se non c’è match su 020$a.
Match checks are not commonly used in import rules. However, they can serve a couple of purposes in matching records. First, match checks can be used as the matching criteria instead of the match points if your indexes are stale and out of date. The match checks go right for the data instead of relying on the data in the indexes. (If you fear your indexes are out of date, a rebuild of your indexes would be a great idea and solve that situation!) The other use for a match check is as a “double check” or “veto” of your matching rule. For example, if you have a matching rule as below:
Soglia di 1000
Match point on 020$a 1000
Match check on 245$a
Koha controllerà anzitutto il 020$a per vedere se il record in importazione coincide per ISBN con uno in catalogo. In caso positivo, verificherà confrontando i campi 245$a del titolo. Se coincidono anch’essi, Koha prosegue considerando valida la coincidenza. Se i 245$c non coincidono, Koha considera i due record diversi. I criteri di coincidenza formano uno strumento molto potente.
Quando si creano nuove regole di match per i record di autorità, saranno usati i seguenti indici:
Nome fondo |
Matches MARC tag |
|---|---|
LC-cardnumber |
010$a |
Personal-name |
100$a |
Corporate-name |
110$a |
Nome di convegno |
111$a |
Title-uniform |
130$a |
Termine cronologico |
148$a |
Nome comune usato come soggetto |
150$a |
Code-geographic |
151$a |
Term-genre-form |
155$a |
Table: Authority indexes
Adding matching rules
Per creare una nuova regola di corrispondenza:
Click “New record matching rule”

Scegli un nome univoco e inseriscilo nel campo “Codice della regola di match”
“Descrizione” è un testo libero per aiutare nella scelta della regola
“Soglia di match” è il numero totale di punti che un record deve accumulare perché venga dichiarata la “corrispondenza”
“Tipo di record” è il tipo di importazione per il quale si applica questa regola - record di autorità o bibliografici
I punti di match sono definiti per determinare quali campi confrontare
“Search index” can be found by looking at the index configuration on your system. For Zebra you might find the right index names in your ccl.properties file. You can also find useful information in the Koha search indexes chapter of this manual.
“Score” - The number of “points” a match on this field is worth. If the sum of each score is equal or greater than the match threshold, the incoming record is a match to the existing record.
Enter the MARC tag you want to match on in the “Tag” field.
Enter the MARC tag subfield you want to match on in the “Subfields” field. For matching on controlfields like 001 the subfields input field can be left empty.
“Offset” - Da usare nei campi di controllo, 001-009
“Lunghezza” - Da usare nei campi di controllo, 001-009
There are currently several options for “Normalization rules”:
None - no normalization rule will be applied
Remove spaces
Uppercase
Lowercase
Legacy default - this option was added to maintain the behavior form before the other normalization rules became available.
ISBN - using this option will improve matching on ISBN. If your incoming records ISBN fields contain extra text, like “9780670026623 (alk. paper)”, they will still match correctly.
“Required match checks” - While match points work on the search index, match checks work directly on the data and can be used as the matching criteria instead of the match points or in addition to them to confirm true matches.
Sample bibliographic record matching rule: Control number
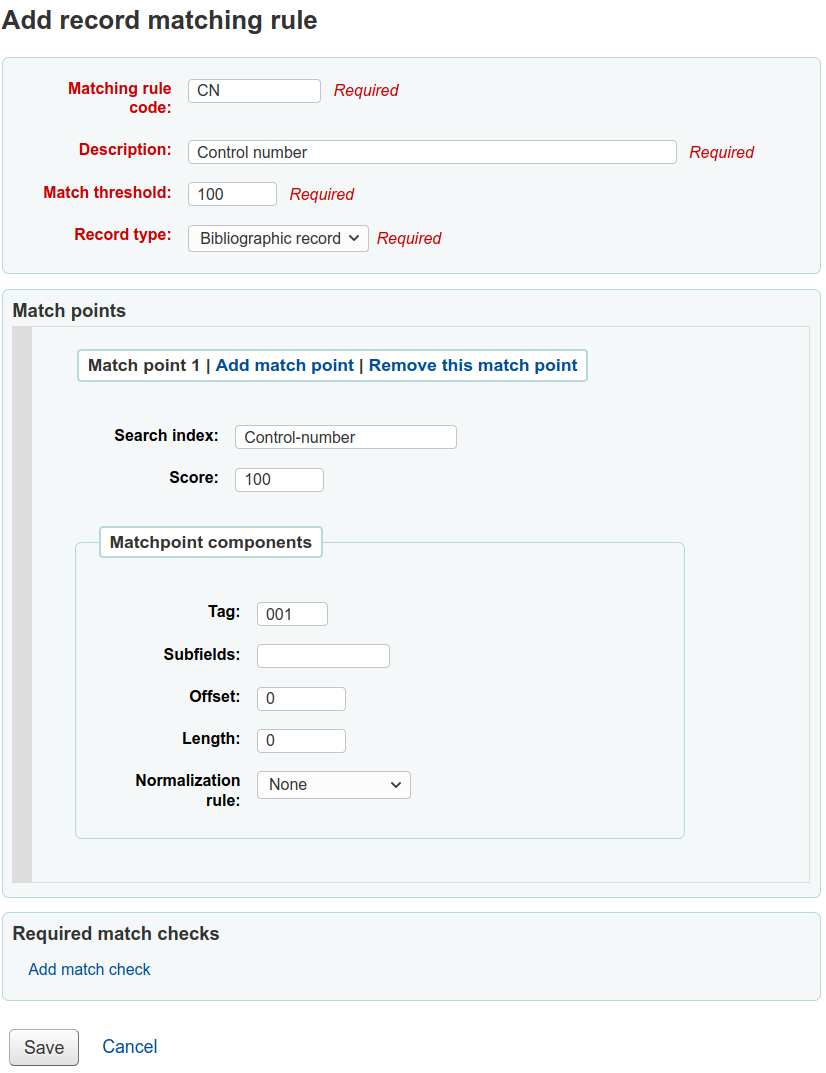
Soglia di corrispondenza: 100
Tipo record: bibliografico
Nota
Se vuoi una regola per abbinare il tag 001 nelle registrazioni di autorità è necessario ripetere tutti questi valori e cambiare il tipo di record a “record di autorità”
Matchpoints (just the one):
Cerca indice: Control-Number
Score: 100
Tag: 001
Nota
questo campo è il numero di controllo assegnato dall’istituzione che crea, usa o distribuisce il record
Subfields: empty
Offset: 0
Lunghezza: 0
Normalization rule: None
Required match checks: none (remove the blank one)
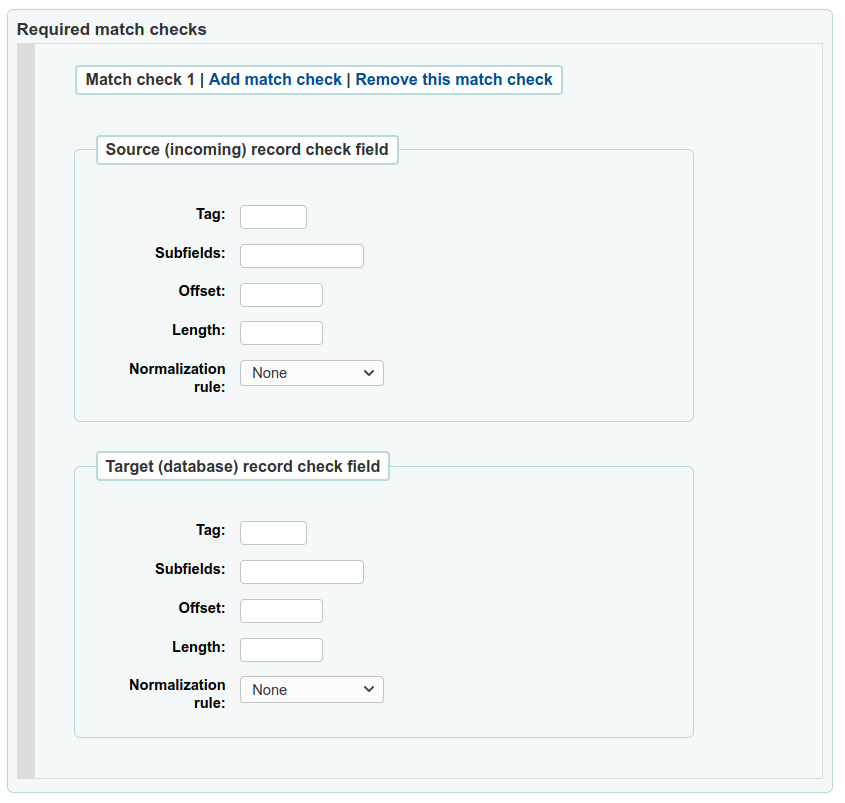
Record overlay rules
Record overlay rules allow for defining rules for how incoming and original MARC records should be merged on a field tag and context basis when a MARC record is updated.
Contexts
Let’s first focus on understanding the concept of contexts.
Contexts are defined by «module» and «filter» enabling separate rule sets for different contexts.
By setting different filter values for these modules, rules are applied only when the filter value matches for a particular module. A wildcard; «*», can be used to match all possible filter values.
There are three different context modules:
- borrower
Allows for defining rules that will be applied if the currently logged in user’s borrower number matches the filter condition.
- categorycode
Allows for defining rules that will be applied if the currently logged in users’s category code matches the filter condition.
- source
Allows for defining rules that will be applied if the record is updated in a particular part of Koha. The following update methods are supported:
batchimport
z39.50
intranet
bulkmarcimport
import_lexile
batchmod
A context is really nothing but a module and filter combination. Every time a record is updated i Koha, a context is set an filter values populated with context dependent values.
Examples of two different contexts are saving record in the staff client or the currently logged in user having a particular borrower number, for example «12».
These two contexts are define as:
Module: source, filter: intranet
Module: borrower, filter: 12
Only the rules of one context, that is a module and filter combination, are applied. If multiple contexts matches they are not merged together.
If we have the following rules:
Module: source, filter: *, tag: 650, preset: Protect
Module: source, filter: *, tag: 500, preset: Protect
Module: borrower, filter: 12, tag: *, preset: Overwrite
And the context of the update where the rules are applied is:
source => "intranet" (wildcard match)
borrower => 1 (no match)
Only the first two rules will be applied.
If instead the context of rule evaluation was:
source => "intranet" (wildcard match)
borrower => 12 (an exact match, which is considered more specific than a wildcard match)
Only the second rule would be applied, even though the first two rules also matches they will be discarded since the context match of that rule set is of lower specificity because of the wildcard.
Context specificity is ranked in the following way:
First all the rules are grouped into rule sets identified by a unique filter and module combination.
If one or more contexts have a non wildcard filter condition match, the rule set of the context with the module of highest specificity is selected. (The modules are listed in order of specificity above).
If no exact context match is found, but one or more wildcard matches are, the rule set of the context with the module of highest specificity is selected.
If no context matches the default behavior is to overwrite, the original record with the incoming record.
Rules
A rule consists of a three different parts:
- Context
A module and filter to match against as described above.
- Tag
A field tag expression for defining which tag(s) the rule should be applied on. Three different tag expressions are supported:
An exact tag, for example «650».
A regular expression, for example «6..» matching all 6XX tags.
A wildcard, «*», matching all tags
When rules for a specific context are evaluated, the most specific match is selected. The tag expressions above are listed in order of specificity.
- Actions
Each rule defines a set of actions to take depending on the type of update. There are four types of update events: Added, Appended, Removed and Deleted. For each event an action is specified, whether to perform the update, or to skip it.
By enabling/disabling updates for these different events 16 different update behaviours can be defined. There are presets available for the most common/useful combinations:
Preset |
Added |
Appended |
Removed |
Deleted |
|---|---|---|---|---|
Protect |
Skip |
Skip |
Skip |
Skip |
Overwrite |
Add |
Append |
Remove |
Delete |
Add new |
Add |
Skip |
Skip |
Skip |
Add and append |
Add |
Append |
Skip |
Skip |
Protect from deletion |
Add |
Append |
Remove |
Delete |
Protect
Added: Skip, Appended: Skip, Removed: Skip, Deleted: Skip
The «Protect» preset will prevent all updates on matching fields, protecting them from being overwritten.
Given this rule:
Module: source, filter: *, Tag: 650, Preset: Protect
And the following original and incoming records:
100 1#$aTerrace, Vincent,$d1948-
650 #0$aTelevision serials$zUnited States$vCatalogs.
100 1#$aTerrace, Vincent,$d1948-
500 ##$aIncludes index.
650 #0$aTelevision pilot programs$zUnited States$vCatalogs.
The 650 field of the original record will retain its original value after the update (but since the default behaviour if no rule matches is to overwrite, the 500 field will be added):
100 1#$aTerrace, Vincent,$d1948-
500 ##$aIncludes index.
650 #0$aTelevision serials$zUnited States$vCatalogs.
Overwrite
Added: Add, Appended: Append, Removed: Remove, Deleted: Delete
The «Overwrite» preset will allow all updates on matching fields.
Since the default behavior is to overwrite if no rule matches, adding a rule with the overwrite preset only makes sense if there is some other rule with a lower tag specificity with a different behavior, for example a wildcard tag rule.
So given these two rules:
Module: source, filter: *, Tag: *, Preset: Protect
Module: source, filter: *, Tag: 650, Preset: Overwrite
And the following original and incoming records:
500 ##$aIncludes index.
650 #0$aTelevision serials$zUnited States$vCatalogs.
Incoming record:
100 1#$aTerrace, Vincent,$d1948-
500 ##$aIncludes index.
650 #0$aTelevision pilot programs$zUnited States$vCatalogs.
All fields but 650 will be protected on the original record, and the resulting record will be:
500 ##$aIncludes index.
650 #0$aTelevision pilot programs$zUnited States$vCatalogs.
Add new
Added: Add, Appended: Skip, Removed: Skip, Deleted: Skip
The «Add new» allow updates only if the incoming field is new, that is there exists no fields with this tag in the original record.
Given this rule:
Module: source, filter: *, Tag: 650, Preset: Add
And the following original and incoming records:
100 1#$aTerrace, Vincent,$d1948-
650 #0$aTelevision serials$zUnited States$vCatalogs.
100 1#$aTerrace, Vincent,$d1948-
500 ##$aIncludes index.
650 #0$aTelevision pilot programs$zUnited States$vCatalogs.
The 650 in the incoming record will not overwrite the 650 field in the original record since the original record contains one or more 650 fields. The 500 field will be added since the default rule is to overwrite. The resulting record will be:
100 1#$aTerrace, Vincent,$d1948-
500 ##$aIncludes index.
650 #0$aTelevision serials$zUnited States$vCatalogs.
On the other hand, if the original record was:
100 1#$aTerrace, Vincent,$d1948-
The resulting record will be:
100 1#$aTerrace, Vincent,$d1948-
500 ##$aIncludes index.
650 #0$aTelevision pilot programs$zUnited States$vCatalogs.
This is because there were no 650 fields in the original record, so adding new ones is permitted.
Add and append
Added: Add, Appended: Append, Removed: Skip, Deleted: Skip
In the «Add and append» preset, appending is also permitted, but not removing or deleting.
So if we have the following rule:
Module: source, filter: *, Tag: 650, Preset: Add and append
And the following original and incoming records:
100 1#$aTerrace, Vincent,$d1948-
650 #0$aTelevision serials$zUnited States$vCatalogs.
100 1#$aTerrace, Vincent,$d1948-
500 ##$aIncludes index.
650 #0$aTelevision pilot programs$zUnited States$vCatalogs.
The resulting record will be:
100 1#$aTerrace, Vincent,$d1948-
500 ##$aIncludes index.
650 #0$aTelevision serials$zUnited States$vCatalogs.
650 #0$aTelevision pilot programs$zUnited States$vCatalogs.
Note that the «old» 650 field from the original record was not removed since we only allow adding or appending new values.
If we instead used the «Overwrite» preset the resulting record would instead be:
100 1#$aTerrace, Vincent,$d1948-
500 ##$aIncludes index.
650 #0$aTelevision pilot programs$zUnited States$vCatalogs.
with the 650 field of the original record removed.
Protect from deletion
Added: Add, Appended: Append, Removed: Remove, Deleted: Skip
The preset «Protect from deletion» will allow all update operations except deletion. Deletion is defined as when there are no fields of the matching tag in the incoming record so that all of the fields with this tag would be removed on the original record.
So given the following rule:
Module: source, filter: *, Tag: 650, Preset: Protect from deletion
And the following original and incoming records:
100 1#$aTerrace, Vincent,$d1948-
650 #0$aTelevision serials$zUnited States$vCatalogs.
100 1#$aTerrace, Vincent,$d1948-
500 ##$aIncludes index.
650 #0$aTelevision pilot programs$zUnited States$vCatalogs.
The resulting record will be:
100 1#$aTerrace, Vincent,$d1948-
500 ##$aIncludes index.
650 #0$aTelevision pilot programs$zUnited States$vCatalogs.
On the other hand, if the incoming record was:
100 1#$aTerrace, Vincent,$d1948-
500 ##$aIncludes index.
In this case the deletion of 650 would not be permitted and the value of the field on the original record would be protected. The resulting record would instead be:
100 1#$aTerrace, Vincent,$d1948-
500 ##$aIncludes index.
650 #0$aTelevision serials$zUnited States$vCatalogs.
Custom presets
To work with custom presets, a more complete understanding of the update events is required:
- Added
For a matching rule with a tag, the action configured for the «Added» event is applied for new fields in the incoming record if the original record has no fields with that tag. If the action is «Add» they will be added to the original record, if «Skip» they will be thrown away.
- Appended
If the two record have common fields with the rule tag, that is one or more fields with identical subfield and identifier values, the action configured for the «Appended» event is applied for fields found in incoming record but not in original record. If the action is «Append» they will be added to the original record, if «Skip» they will be thrown away.
- Removed
If the two records have common fields with the rule tag, the action configured for the «Removed» action is applied for fields found in original record but not in incoming record. If the action is «Remove» they will removed from the original record, if «Skip» they will be kept.
- Deleted
If the original record have fields with the rule tag, but no fields with this tag is found in the incoming record, the action configured for the «Deleted» event is applied for the fields in the incoming record. If the action is «Delete» the fields will be removed from the original record, if «Skip» they will be kept.
OAI sets configuration
In questa pagina puoi creare, modificare e cancellare i set di OAI-PMH
Crea un set
Per creare un set:
Click sul link “Aggiungi un nuovo set”
Compila i campi obbligatori “setSpec” e “setName”
Poi puoi aggiungere una definizione a questo set. Clicca su “Aggiungi una descrizione” e compila il campo. Puoi aggiungere quante descrizioni vuoi.
Clicca il bottone “Salva”
Modify/delete a set
Pre modificare un set clicca il link “Modifica” sulla linea del set che vuoi modificare. Apparirà un form simile a quello per creare i set; esso ti permette di modificare setSpec, setName e le descrizioni.
Per cancellare un set, clicca sul link “Cancella” che si trova sulla linea del set che vuoi cancellare.
Definisci le equivalenze (mapping)
Here you can define how a set will be build (what records will belong to this set) by defining mappings. Mappings are a list of conditions on record content.
Indica “Campo”, “Sottocampo” e “Valore”. Per esempio se vuoi includere in questo set i record che hanno 999$9 uguale a “XXX”, riempi “Campo” con 999, “Sottocampo” con 9 e “Valore” con XXX.
If you want to add another condition, click on “Add” button and repeat step 1. You can choose between “and” or “or” Boolean operators to link your conditions.
Clicca “Salva”
Per cancellare una condizione, lascia vuoto uno tra “campo”, “sottocampo” o “valore” e clicca su “Salva”.
Nota
Una condizione è vera se il valore del corrispondente sottocampo è strettamente uguale al valore usato nell’if. Un record che ha 999$9 = “XXX YYY” non apparterrà al set con condizione 999$9 = “XXX”.
Ed è sensibile alle maiuscole: un record con 999$9 = “xxx” non soddisfa la condizione 999$9 = “XXX”.
Crea sets
Una volta che hai configurato i set, devi costruirli. Questo si fa usando lo script misc/migration_tools/build_oai_sets.pl.
Campi per ricerca di copie
Da qui è possibile aggiungere campi personalizzati all’opzione Ricerca copie nell’interfaccia dello staff.
Per aggiungere un nuovo indice di ricerca è sufficiente riempire l’area “Aggiungere un nuovo campo”
«Nome» è un campo per te per identificare il termine di ricerca
L’etichetta apparirà nella pagina di ricerca sulle copie
«Campo MARC» ti permette di selezionare su quale campo vuoi che avvenga la ricerca
«Sottocampo MARC» indica il sottocampo su cui vuoi ricercare
Authorized values category can be used to turn this search field in to a pull down instead of a free text field
Quando il nuovo campo è stato aggiunto, diventa visibile all’inzio di questa pagina e nella pagina di ricerca sui dati di copia
Search engine configuration
Once you have switched to Elasticsearch in your SearchEngine system preference, you’ll see a new link for Search engine configuration in the Catalog section of Administration. Here you will manage indexes, facets, and their mappings to MARC fields and subfields.
Acquisizioni
Il modulo Acquisizioni di Koha fornisce uno strumento grazie al quale la biblioteca può registrare gli ordini fatti ai fornitori e gestire i budget di spesa.
Prima di utilizzare il Modulo Acquisizioni , si deve fare in modo di aver completato tutto il set up.
Vai a: Più > Amministrazione > Parametri per le acquisizioni
Currencies and exchange rates
Se hai fatto ordini relativi a più nazioni, dovrai indicare i cambi per ogni valuta, in modo che il sistema possa fare i calcoli esatti dei totali.
Get there: More > Administration > Acquisitions > Currencies and exchange rates

Nota
Questi dati non sono aggiornati automaticamente, bisogna essere sicuri di mantenerli aggiornati in modo che la contabilità sia corretta.
Nota
You can customize the columns of this table in the “Table settings” section of the Administration module (table id: currency).
Il codice ISO che inserisci sarà usato durante l’importazione dei files MARC utilizzando la funzione gestisci deposito Marc, lo strumento cercherà e collegherà il valore monetario presente alla divisa in quel momento attiva.
La valuta attiva è la valuta corrente della tua biblioteca. E” marcata con un segno di spunta. Se non ne spunti nessuna, comparirà un messaggio di errore.

Budgets
Budgets are used for tracking accounting values related to acquisitions. For example you could create a budget for the current year (ex. 2015) and then break that into Fondi for different areas of the library (ex. Books, Audio, etc).
Vai a: Più > Amministrazione > Parametri per le acquisizioni > Budgets
Nella pagina di amministrazione dei budget ci sono due sezioni: una per gli attivi una per i non attivi.
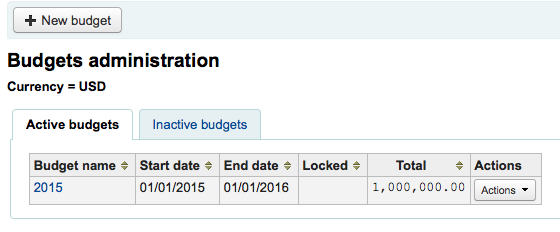
Aggiunta di budget
I bilanci possono sia essere creati da zero, duplicando il bilancio dell’anno precedente oppure in fase di chiusura di bilancio di un anno precedente.
Aggiungere un nuovo budget
If you haven’t used Koha before for acquisitions then you’ll need to start fresh with a new budget. To add a new budget click the “New budget” button.

Scegli la tempistica di questo budget: un anno accademico, un anno fiscale, un quadrimestre, etc.
The description should be something that will help you identify the budget when ordering
Nel campo per l’importo non usare simboli, metti l’importo del budget con numeri e decimali.
Rendere attivo un budget significa renderlo utilizzabile per inserirvi ordini nel modulo acquisizioni, anche se gli ordini sono messi dopo la data di chiusura del bilancio. Questo permette di registrare gli ordini che erano stati messi in un precedente bilancio.
Locking a budget means that funds will not be able to be modified by librarians
Once you have made your edits, click the “Save changes” button. You will be brought to a list of your existing budgets.

Duplicazione budget
Per duplicare un budget dall’anno precedente, clicca sul link del nome del budget nell’elenco dei budget.

On the screen listing the budget breakdown click the “Edit” button at the top and choose to “Duplicate budget”
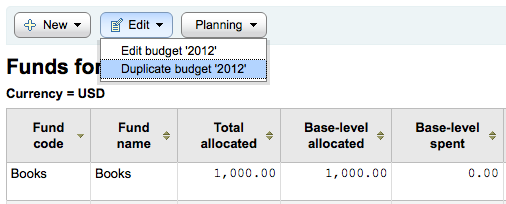
Puoi cliccare il bottone “Azioni” alla destra del budget e scegliere “Duplica”.
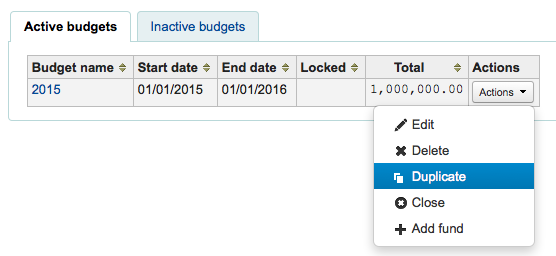
In entrambi i casi ti verrà presentata una form da riempire con le nuove date di inzio e fine e poi salvare il budget.
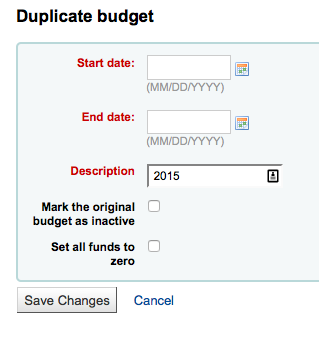
Marca il box “segna il budget iniziale come inattivo” se tale budget non deve più essere utilizzato.
Marca il box “Imposta tutti i fondi a zero” se vuoi che il nuovo budget abbia tutti i fondi con la stessa struttura del budget precedente ma senza alcuna cifra allocata finchè non inserirai manulamente un importo nel fondo.
Questa operazione non duplica solo il budget, ma anche tutti i fondi ad esso associati, così potrai riusare budgets e fondi di anno in anno e così puoi muovere gli ordini non ricevuti e i fondi non spesi da budget preceente al nuovo.
Chiudi un budget
Chiudere un budget per spostare ordini non percepiti e se lo si desidera fondi non spesi da un bilancio precedente per un nuovo bilancio. Prima di chiudere il budget si potrebbe desiderare di duplicare il bilancio dell’anno precedente in modo da avere un posto per gli ordini non percepiti a rotolare a.
Trova il budget precedente con ordini non ricevuti sotto il tab budgets attivi o budgets non attivi e seleziona “Chiudi” dal menù “Azioni”
Nota
Affinché gli ordini non ricevuti possano essere spostati automaticamente nel nuovo budget, le strutture dei fondi nel bilancio precedente devono esistere nel nuovo bilancio. I bilanci senza ordini non ricevuti non possono essere chiusi.
Quando selezioni “Chiudi” ti verrà presentato un form.
Usa il drop down “Seleziona un budget” per scegliere un nuovo budget per gli ordini non ricevuti.
Marca il box “Muovi i fondi con delle rimanenze” per spostare l’ammontare non speso da fondi di budget ormai chiusi a un altro budget selezionato.
Una volta fatta la tua scelta, clicca sul bottone “ Muovi ordini non ricevuti”. Ti si aprirà un finestra di dialogo che dirà “Hai scelto di spostare tutti gli ordini non ricevuti dal “Budget X” al “Budget Y”. Questa azione è irreversibile. Vuoi continuare?” Budget X è il budget che verrà chiuso e Budget Y è il Budget è il budget selezionato.
Se tutto è corretto clicca “OK” e gli ordini non ricevuti e, se selezionati, i fondi non spesi saranno spostati.
Aspetta fino a quando non si mostra il “Report dopo ave mosso ordini non ricevuti dal budget X a Y”. Il report elencherà i numeri d’ordine presi in considerazione (raggruppati per fondo) e dira se l’ordine non ricevuto è stato spostato oppure no. Per esempio se il nuovo budget non contiene un fondo con lo stesso nome del prededente budget, l’ordine non viene spostato.

Fondi
Vai a: Più > Amministrazione > Parametri per le acquisizioni > Fondi
Aggiungi un fondo
Un fondo è aggiunto a un budget.
Importante
Prima di creare un fondo, deve essere definito un budget.
To add a new fund click the “New” button and then choose which budget you would like to add the fund to.

Nel form che appare puoi inserire le informazioni di base riguardo il tuo fondo.

Questi tre campi sono richiesti, gli altri sono opzionali
Fund code is a unique identifier for your fund
The fund name should be something that librarians will understand
La cifra deve essere scritta con solo numeri e decimali senza altri caratteri
Avviso a (%) o avviso a (importo) possono essere compilati per avere da Koha un avviso prima di spendere una certa percentuale o importo del tuo budget. Questo impedirà eccessi di spesa.
You can choose to assign this fund to a librarian. Doing so will make it so that only that librarian can make changes to the fund
Scegli la biblioteca che userà questo fondo
Puoi limitare le persone che possono fare ordini su questo fondo sia scegliendo un “proprietario”, “proprieatario e utenti”, “proprietatio, utenti e biblioteca” dal menu “Restringi l’accesso a”

Importante
Senza un proprietario, la restrizione di accesso ai conti verrà ignorata: assicurati di definire un proprietario e di scegliere una restrizione
Le note sono semplicemente note descrittive che tu potresti voler aggiungere in modo che i bibliotecari possano visualizzarle quando usano questo fondo.
Planning categories are used for statistical purposes. If you will be using the Asort1 and/or Asort2 authorized values lists to track your orders you need to select them when setting up the fund. Select the Asort1/Asort2 option from the dropdown lists for the Statistical 1 done on: and Statistical 2 done on: fields.
To learn more about planning categories, check out the Planning category FAQ.
Quando hai finito, clicca “Invia” e sarai portato a una lista di tutti i fondi del budget.

Le colonne della tabella conti sono le seguenti:
Base-level allocated is the “Amount” value you defined when creating the fund
Livello-base ordinato è l’ammontare degli ordini fatti con questo conto (senza i sottoconti)
Totale ordinato è il livello-base degli ordini fatti con questo conto e tutti i suoi i sottoconti
La spesa livello-base è quanto è stato speso con questo conto (senza i suoi sottoconti)
Totale spesa è quanto è stato speso con questo conto compresi tutti i suoi i suoi sottoconti
Livello di base disponibile è 1 - 2
Totale disponibile è 1 - 3
To the right of each fund you will find the “Actions” button under which you will find the “Edit,” “Delete,” and “Add child fund” options.
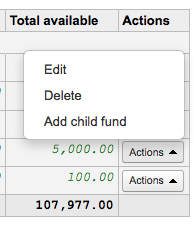
A child fund simply a sub-fund of the fund listed. An example would be to have a fund for “Fiction” and under that have a fund for “New releases” and a fund for “Science Fiction.” It is an optional way to further organize your finances.
I fondi con fondi collegati hanno una piccola freccia a sinistra. Cliccando su questa, saranno visualizzati i fondi collegati.

Budget planning
Quando guardi la lista dei fondi clicca su “Pianificazione” e scegli come vuoi pianificare di spendere il tuo budget.
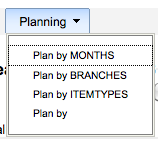
Se si sceglie “Pianificazione per MESI” vedrete la somma prevista suddivisa per mesi:
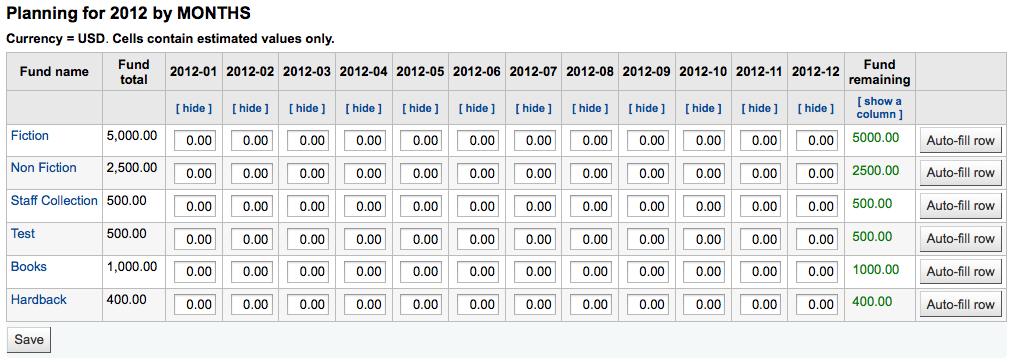
To hide some of the columns you can click the “hide” link to the right (or below as in the screenshot above) the dates. To add more columns you can click the “Show a column” link found below the “Fund remaining” heading.
Da qui puoi pianifcare le spese del budget inserendo i valori a mano o cliccando il bottone “Autocompila linea”. Se scegli l’auto-compilazione, il sistema cerca di dividere la somma, dovrai fare qualche modifica a mano per perfezionare il risultato.

Una volta che hai fatto i tuoi cambiamenti, clicca sul bottone “Salva”. Se vuoi esportare i dati come CSV, puoi farlo mettendo un nome file in “Manda ad un file di nome” e cliccando sul bottone “Output”

EDI accounts
Da qui è possibile impostare le informazioni necessarie per connetterti con i fornitori
Nota
Prima di iniziare occorre almeno un Fornitore impostato in Acquisizioni.
Per aggiungere informazioni di account, fare clic sul pulsante “Nuovo account”.
Nel form che appare puoi inserire le informazioni riguardo il fornitore.
See the EDI questions for vendors section of the acquisitions module chapter for a description of each field.
Ogni fornitore avrà un account.
EANs della biblioteca
Un codice EAN è l’identificativo che il fornitore dà la biblioteca da usare negli invi verso di loro in modo che essi sappiano a chi addebitare la fattura. Un account EDI può avere più EAN.
Per aggiungere un EAN, fare clic sul pulsante “Nuovo EAN”.
Inserisci i dati forniti dal fornitore nella maschera che appare.
See the EDI questions for vendors section of the acquisitions module chapter for a description of each field.
Additional parameters
Get there: More > Administration > Additional parameters
Servers Z39.50/SRU
Lo Z39.50 è un protocollo client-server per cercare e scaricare informazione da db su server remoti, in pratica è uno strumento per copiare record.
SRU- Search/Retrieve via URL - è un protocollo standard basato su XML per le interrogazioni di ricerca, che utilizza il CQL - Common Query Language - una sintassi standard per la rappresentazione di interrogazioni.
Usando Koha è possibile collegarsi a qualsiasi Z39.50 o di destinazione SRU disponibile al pubblico o di cui si dispone le credenziali per accedere e copiare o record bibliografici o di autorità da quella fonte.
Get there: More > Administration > Additional parameters > Z39.50/SRU servers
Koha ha un gruppo di server Z39.50/SRU predefiniti, che puoi modificare.
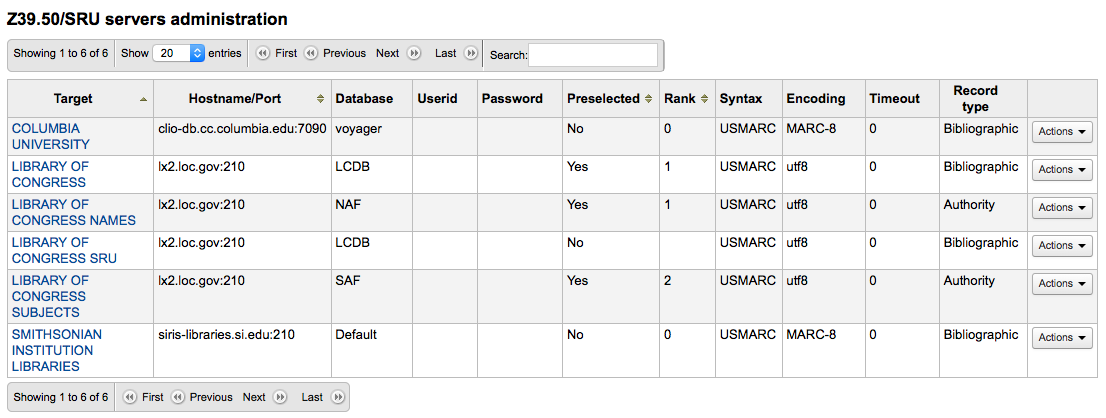
To find additional Z39.50 targets you use IndexData’s IRSpy: http://irspy.indexdata.com or the Library of Congress’s list of targets http://www.loc.gov/z3950/
Add a Z39.50 target
From the main Z39.50 page, click “New Z39.50 server”

Il campo “Z39.50 server” può essere compilato con un nome utile ad identificarlo (tipo il nome della biblioteca).
“Hostname” sarà l’indirizzo del server Z39.50.
“Port” indica a Koha su quale porta contattare il server.
Userid e password sono richiesti solo per server protetti
Seleziona il box “Preselected” se vuoi che questo target sia sempre selezionato di default.
“Rango” consente di inserire questo server nella lista dove si desidera che compaia.
Se non viene compilato i server saranno ordinati alfabeticamente.
“Attributes” lets you define PQF attributes to be added to all queries.
“Syntax” è la tipologia MARC che usi (MARC21/Unimarc/NORMARC).
“Encoding” indica al sistema come trattare i caratteri speciali.
“Timeout” è utile per i target che impiegano molto tempo a rispondere. Puoi impostare un tempo di scadenza di modo che non continui ad interrogarli se i risultati non vengono trovati nell’intervallo di tempo auspicato.
“Tipo record” definisce se si tratta di un server di record bibliografico o di authority.
“File XSLT(s)” permette di inserire uno o più nomi di file XSLT (separati da virgola) che si desidera applicare sui risultati di ricerca.
Quando si recuperano i record da target esterni si potrebbe desiderare di automatizzare alcune modifiche a tali record. Gli XSLT di permettono di fare questo. Koha è preimpostato con alcuni file di esempio XSLT nella directory /koha-tmpl/intranet-tmpl/prog/en/xslt/ pronti per l’uso:
Del952.xsl: Rimuovi le copie (MARC21/NORMARC)
Del995.xsl: Rimuovi le copie (UNIMARC)
Del9LinksExcept952.xsl: Rimuovi ilink $9. Ma non dalle copie (MARC21/NORMARC)
Del9LinksExcept995.xsl: Rimuove i collegamenti $9. Salta i campi di copia (UNIMARC)
Suggested bibliographic Z39.50 targets
Biblioteche Koha con attivo il server Z39.50 possono condividere l’informazione sul wiki di Koha `http://wiki.koha-community.org/wiki/Koha_Open_Z39.50_Sources. È possibile trovare altre sorgenti Z39.50 visitando IRSpy: http://irspy.indexdata.com
I seguenti server Z39.50 sono stati usati con successo da altre biblioteche Koha (nelle Americhe):
ACCESS PENNSYLVANIA 205.247.101.11:210 INNOPAC
CUYAHOGA COUNTY PUBLIC webcat.cuyahoga.lib.oh.us:210 INNOPAC
GREATER SUDBURY PUBLIC 216.223.90.51:210 INNOPAC
HALIFAX PUBLIC catalog.halifaxpubliclibraries.ca:210 horizon
HALTON HILLS PUBLIC cat.hhpl.on.ca:210 halton_hills
LIBRARY OF CONGRESS: lx2.loc.gov:210/LCDB
LONDON PUBLIC LIBRARY catalog.londonpubliclibrary.ca:210 INNOPAC
MANITOBA PUBLIC library.gov.mb.ca:210 horizon
MILTON PL cat.mpl.on.ca:210 horizon
NATIONAL LIBRARY OF WALES cat.llgc.org.uk:210 default
NHUPAC 199.192.6.130:211 nh_nhupac
OCEAN STATE LIBRARIES (RI) catalog.oslri.net:210 INNOPAC
OHIOLINK olc1.ohiolink.edu:210 INNOPAC
PUBCAT prod890.dol.state.vt.us:2300 unicorn
SAN JOAQUIN VALLEY PUBLIC LIBRARY SYSTEM (CA) hip1.sjvls.org:210 ZSERVER
SEATTLE PUBLIC LIBRARY zserver.spl.org:210 HORIZON
TORONTO PUBLIC symphony.torontopubliclibrary.ca:2200 unicorn
TRI-UNI 129.97.129.194:7090 voyager
VANCOUVER PUBLIC LIBRARY z3950.vpl.ca:210 Horizon
Add a SRU target
From the main Z39.50/SRU page, click “New SRU server”
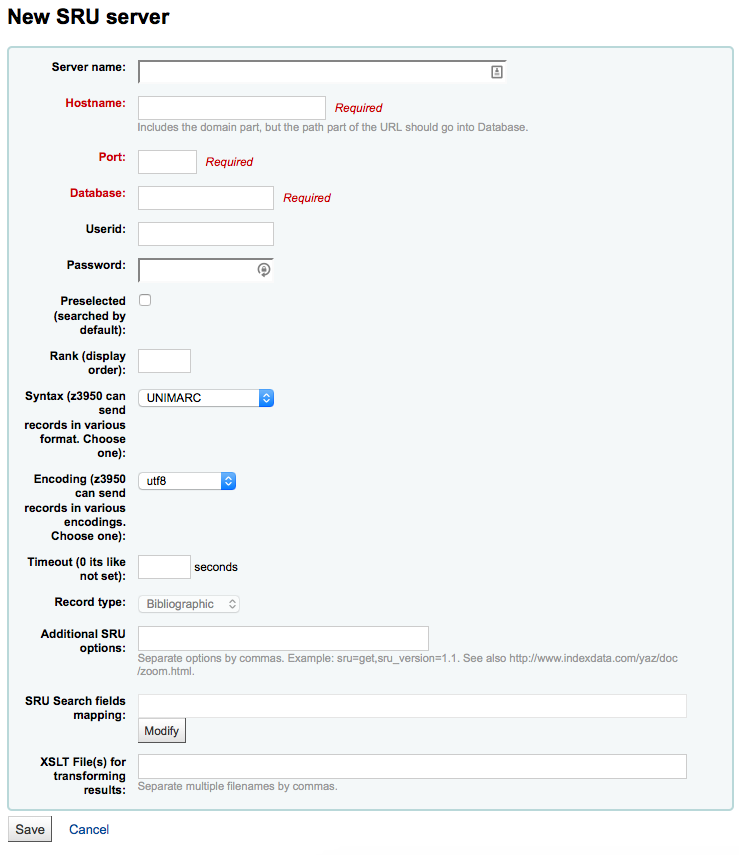
Il campo “nome del server” può essere compilato con un nome utile ad identificarlo (tipo il nome della biblioteca).
“Hostname” sarà l’indirizzo del server Z39.50.
“Port” indica a Koha su quale porta contattare il server.
Userid e password sono richiesti solo per server protetti
Seleziona il box “Preselected” se vuoi che questo target sia sempre selezionato di default.
“Rango” consente di inserire questo server nella lista dove si desidera che compaia.
Se non viene compilato i server saranno ordinati alfabeticamente.
“Syntax” è la tipologia MARC che usi (MARC21/Unimarc/NORMARC).
“Encoding” indica al sistema come trattare i caratteri speciali.
“Timeout” è utile per i target che impiegano molto tempo a rispondere. Puoi impostare un tempo di scadenza di modo che non continui ad interrogarli se i risultati non vengono trovati nell’intervallo di tempo auspicato.
“Ulteriori opzioni SRU” permette di inserire opzioni aggiuntive del server esterno, come sru_version = 1.1 o schema = MARC21, ecc. Si noti che queste opzioni sono server dipendenti.
“Mappatura SRU campo di ricerca” consente di aggiungere o aggiornare la mappatura dei campi disponibili nel modulo di ricerca Koha ai nomi degli indici del server interrogato.
Per raffinare ulteriormente le tue ricerche, è possibile aggiungere i seguenti nomi indicizzati alla mappatura dei campi per la ricerca SRU. Per fare ciò, modifica il server e clicca poi sul bottone Modifica vicino a questi campi.
Titolo
dc.title
ISBN
bath.isbn
Tutti
cql.anywhere
Autore
dc.author
ISSN
bath.issn
Soggetto
dc.subject
ID standard
bath.standardIdentifier
Table: SRU mapping
“File XSLT(s)” permette di inserire uno o più nomi di file XSLT (separati da virgola) che si desidera applicare sui risultati di ricerca.
Quando si recuperano i record da target esterni si potrebbe desiderare di automatizzare alcune modifiche a tali record. Gli XSLT di permettono di fare questo. Koha è preimpostato con alcuni file di esempio XSLT nella directory /koha-tmpl/intranet-tmpl/prog/en/xslt/ pronti per l’uso:
Del952.xsl: Rimuovi le copie (MARC21/NORMARC)
Del995.xsl: Rimuovi le copie (UNIMARC)
Del9LinksExcept952.xsl: Rimuovi ilink $9. Ma non dalle copie (MARC21/NORMARC)
Del9LinksExcept995.xsl: Rimuove i collegamenti $9. Salta i campi di copia (UNIMARC)
Intendi dire:
Get there: More > Administration > Additional parameters > Did you mean?
Koha può offrire le opzioni “Intendi dire” tramite ricerche basate su valori dei record di autorità.
Importante
Did you mean? only works in the OPAC at this time. The intranet options are here for future development.
Con questa pagina puoi controllare quali opzioni offre Koha agli utenti relativamente ai risultati delle ricerche.

Per attivare la feature “Intendi dire:” nei risultati delle ricerche, devi selezionare la casella vicina ad ogni plugin che vuoi usare. I plugin che puoi scegliere sono:
Il plugin ExplodedTerms suggerisce all’utente di effettuare ricerche per termini più restrittivi, meno restrittivi o correlati (per esempio un utente che cerca New York(Stato) potrebbe cliccare sul termine più restrittivo New York(Città)). È rilevante solo per biblioteche con record di autorità fortemente gerarchici.
Il plugin AuthorityFile cerca sui record di autorità e suggerisce all’utente i record bibliografici associati alle prime 5 intestazioni
Se vuoi che un plugin abbia priorità su un altro, spostalo sopra all’altro, trascinandolo.

Se si sceglie di entrambi i plugin vedrai diverse opzioni nella parte superiore dei risultati di ricerca

Se si sceglie solo l’AuthorityFile, vedrai solo le autorità.

Table settings
This administration area will help you hide or display columns on fixed tables throughout the staff interface and OPAC.
Get there: Administration > Additional parameters > Table settings
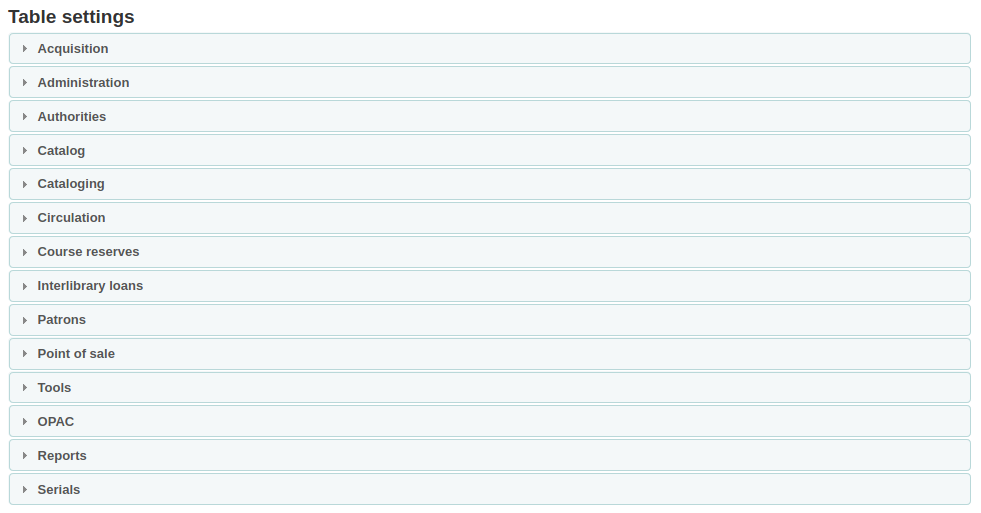
Cliccando sul modulo di cui vuoi modificare le tabelle e ti saranno mostrate le opzioni disponibili.
Questa area consente di controllare le colonne che compaiono nella tabella in questione. Se nulla è nascosto, non vedrai alcun segno di spunta nella colonna “Nascosto per default”.

E si vedranno tutte le colonne durante la visualizzazione della tabella.
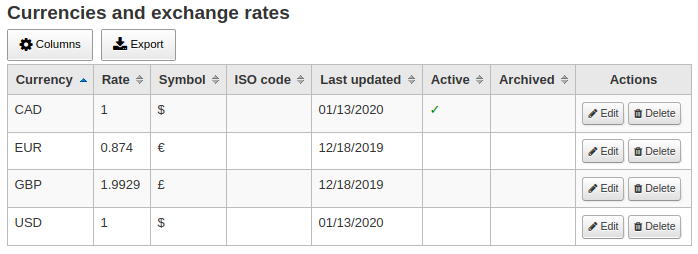
Se le colonne sono nascoste, saranno spuntate nella colonna “Nascosto per default”.
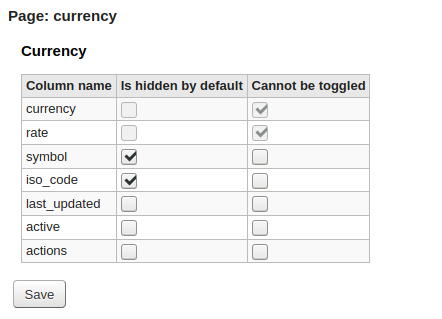
E nascoste quando vedi la tabella.

The “Cannot be toggled” column is used to prevent individual users from showing or hiding this column when viewing the table.
Individual users can toggle columns using the “Columns” button at the top of the table.

For example, in the Currencies table, the “Currency” and “Rate” columns cannot be toggled. When the user clicks on the “Columns” button, they are not able to choose whether these two columns are hidden or visible.
Note that using the “Columns” button show or hide columns will only toggle them for the current user and session. Once the user logs out, the columns will go back to their default settings as set in the table settings administration page. It will not affect any other user.
Nota
Patrons in the OPAC can’t toggle column visibility. For OPAC tables this feature only allows to control the visibility of columns.
Nota
Any tables with columns listed here also have the option to export to Excel, export to CSV, copy, or print within the table header.
Avvisi audio
Se avete la vostra AudioAlerts la preferenza impostata su “Attiva” si sarà in grado di controllare i vari avvisi sonori che Koha utilizza in questa zona.
Get there: More > Administration > Additional parameters > Audio alerts
Ogni finestra di dialogo in Koha ha una classe CSS assegnata che può essere utilizzata come selettore per un suono.
È possibile modificare le impostazioni predefinite facendo clic sul pulsante “Modifica” a destra di ciascun avviso.
È possibile assegnare avvisi ad altre classi CSS in Koha inserendo tali informazioni nella casella di selezione. Per esempio se si immette
body:contains('Check in message')
Then when you visit the check-in page you will hear an alert.
Ogni pagina in Koha ha un ID univoco nel tag body che può essere utilizzato per limitare un suono a una pagina specifica
Ogni selettore di ID (dove HTML contiene id = «name_of_id») può anche essere un trigger, come: #name_of_selector
Provider SMS
Importante
This option will only appear if the SMSSendDriver preference is set to “Email”
Da qui si possono inserire i fornitori di telefonia mobile, tutti quelli che servono per inviare avvisi SMS agli utenti usando però” la posta elettronica.
Alcuni esempi, validi negli USA:
Fornitore di telefonia mobile |
Sito gateway email->SMS |
|---|---|
Alltel |
sms.alltelwireless.com |
AT&T |
txt.att.net |
Boost Mobile |
sms.myboostmobile.com |
Project Fi |
msg.fi.google.com |
Republic Wireless |
text.republicwireless.com |
Sprint |
messaging.sprintpcs.com |
T-Mobile |
tmomail.net |
U.S. Cellular |
email.uscc.net |
Verizon Wireless |
vtext.com |
Virgin Mobile |
vmobl.com |
Table: SMS provider examples
Per aggiungere un fornitore, scrivi i dettagli nel modulo e salvalo.
These options will appear in the OPAC for patrons to choose from on the messaging tab if you have EnhancedMessagingPreferences enabled.
Additional fields
This section is used to add custom fields to serial subscriptions or order baskets.
To add a new field, first choose which table you want to add it to.
Order baskets (aqbasket): a field added to aqbasket will appear upon the creation of a new order basket or the modification of an existing order basket in the acquisitions module.
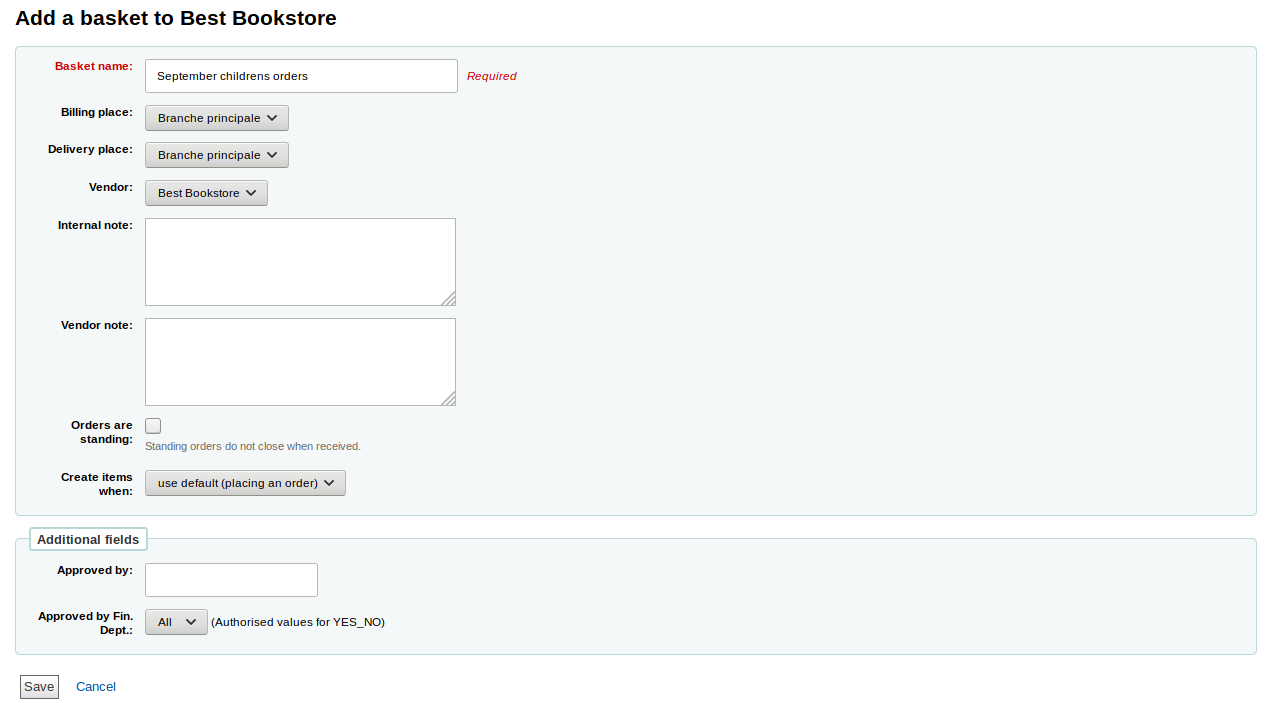
Subscriptions (subscription): a field added to subscription will appear when creating a new subscription or when editing an existing subscription in the serials module.
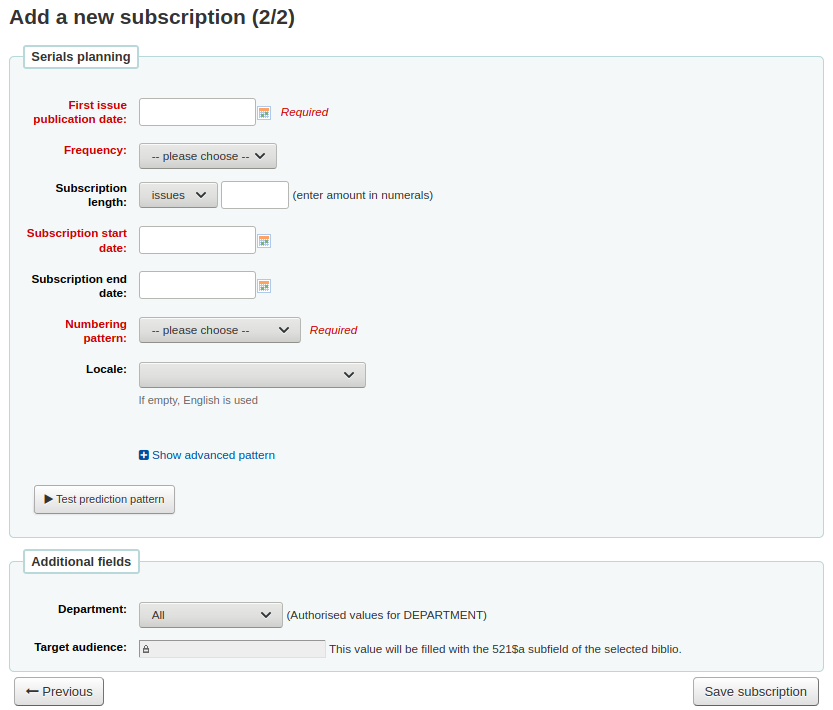
Click on «Create field»
Fill out the form

Name: this is the name of the field as you want it to appear.
Authorized value category: if you want to add a drop-down menu to the field choose an authorized value category here (you can also create a new authorized value category if you need to).
MARC field: for additional subscription fields, it is possible to link the field to a MARC field. The additional field will be automatically populated with the corresponding record’s value for this MARC field.
Nota
You can only choose one of the two options (authorized value OR MARC field)
Avvertimento
If you choose the MARC field, make sure you enter it in this format: field$subfield
For example: 590$a
Searchable: check this box if you want to be able to search baskets or subscriptions based on this field
Order basket searchable additional fields will be available in the orders advanced search form
Subscription searchable additional fields will be available in the subscription advanced search form
Examples of additional fields
Example 1: Additional subscription field using authorized values
You might want to track which department you’re ordering this serial for
In the “Name” field, enter “Department”
In the “Authorized value category” field, choose DEPARTMENT
Check the “Searchable” box

When you are adding a subscription, the field will be in the “Additional fields” section with its authorized values drop-down menu.

When you view the subscription, the field will appear under “Additional fields”.
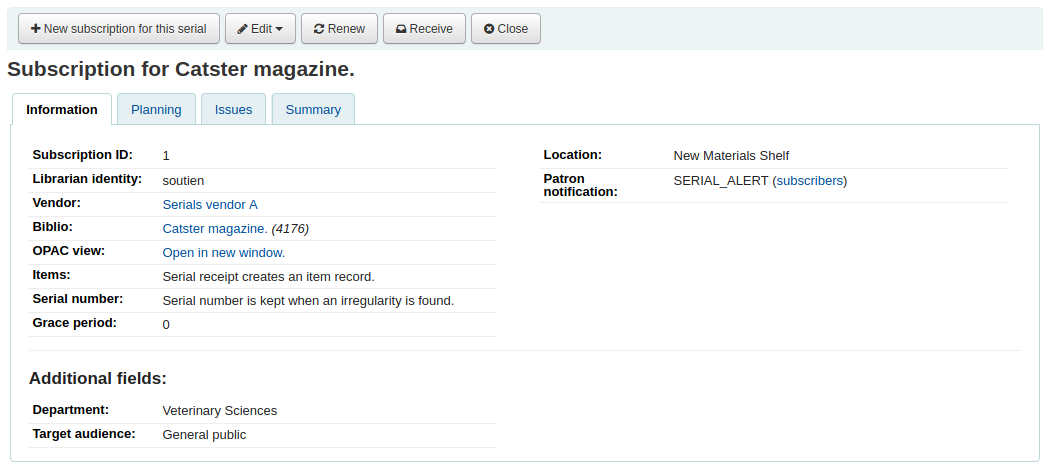
Because we made the field searchable, it will also be in the serials subscription search.
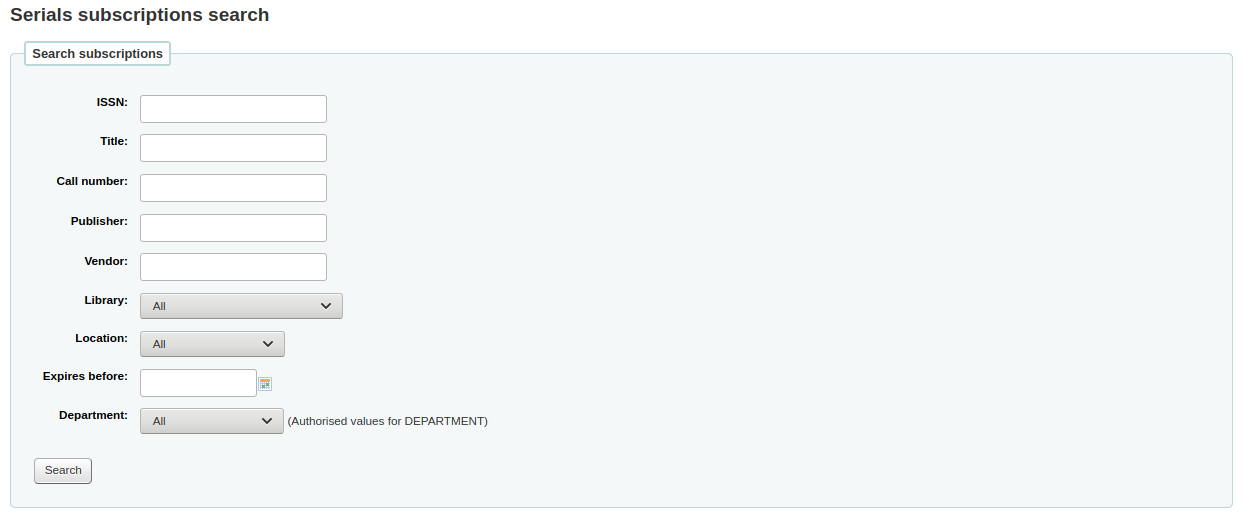
Example 2: Additional field using MARC field
This is particularly useful if you want to view bibliographic information in the subscription detail page. In this example, we will add the 521$a field, which is, in MARC21, the target audience note.
In the “Name” field, enter “Target audience”
In the “MARC field” field, enter “521$a”

Nota
You will not be able to edit this field from the subscription form. If you need to add or change the value in this field, you must go through the cataloging module.
When you view the subscription, the field and the information from the bibliographic record will appear under “Additional fields”.

