OPAC
Search results
To search the OPAC you can either choose to enter your search words in the box at the top of the OPAC or click on the ‘Advanced search’ link to perform a more detailed search.

Arama hakkında daha fazla bilgi için bu kılavuzun ‘Arama’ bölümüne göz atın.
Results overview
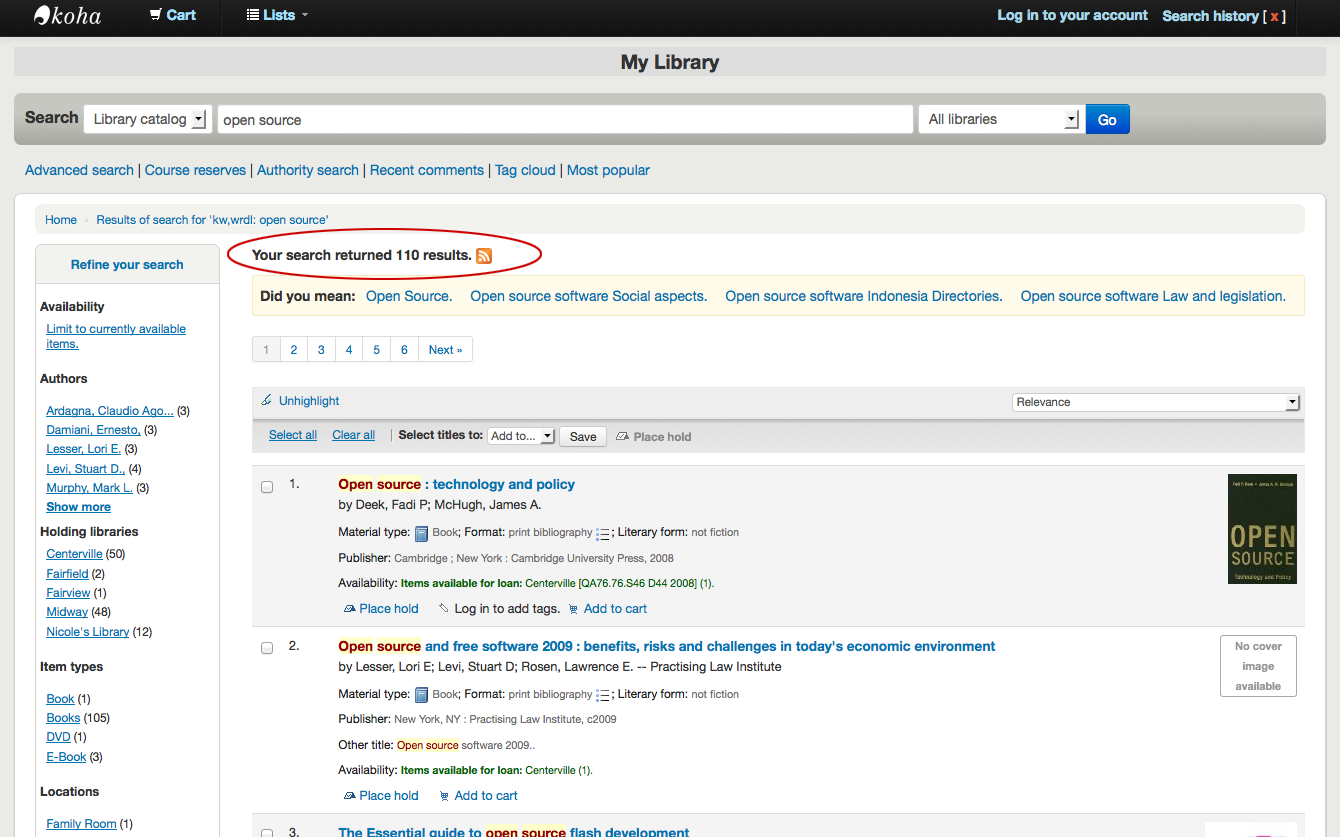
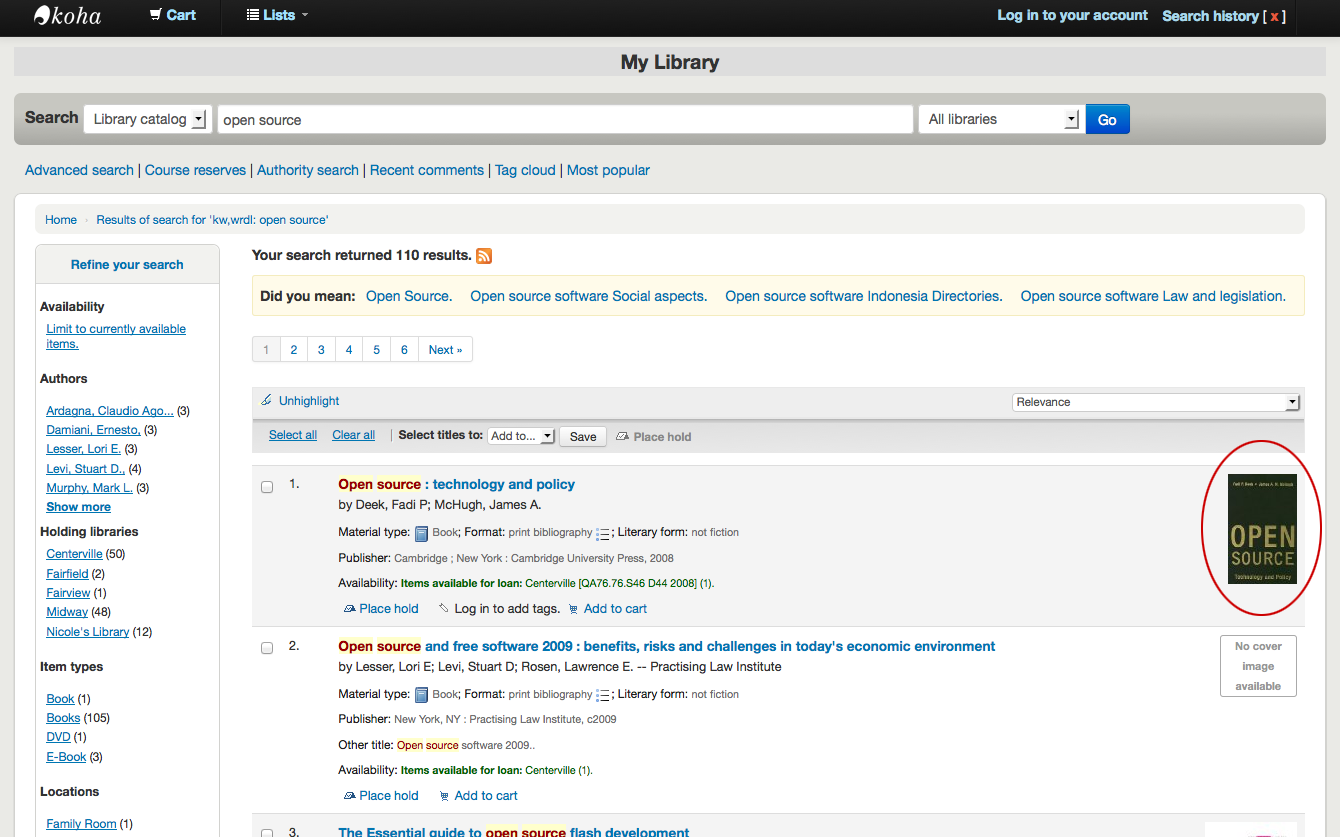
Arama yaptıktan sonra aramanız için bulunan sonuçların sayısı arama sonuçlarının üzerinde görünecektir
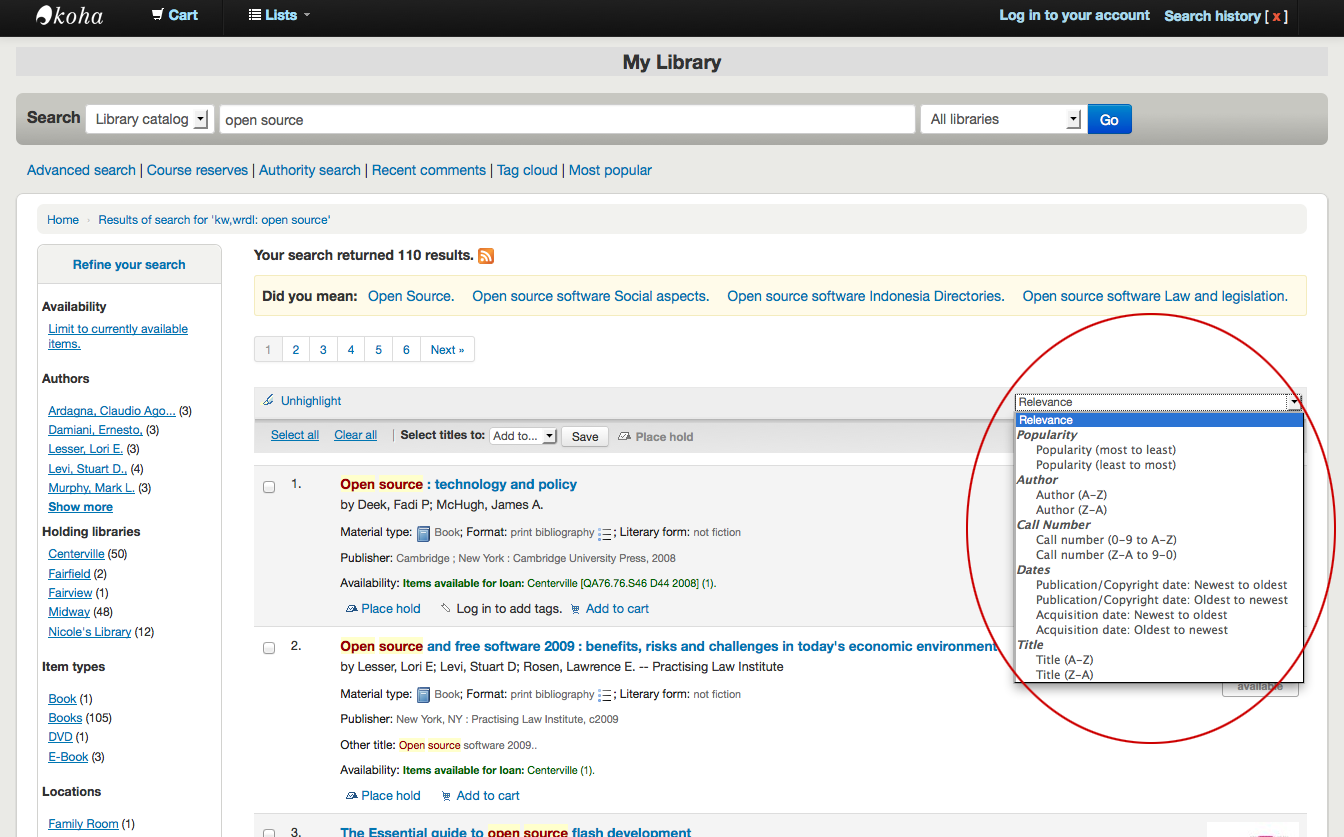
Ön tanımlı olarak arama sonuçlarınız OPACdefaultSortField and OPACdefaultSortOrder sistem tercihiniz esas alınarak sıralanacaktır. Bunu değiştirmek için sağ tarafta bulunan açılır menüden başka bir sıralama yöntemi seçebilirsiniz.
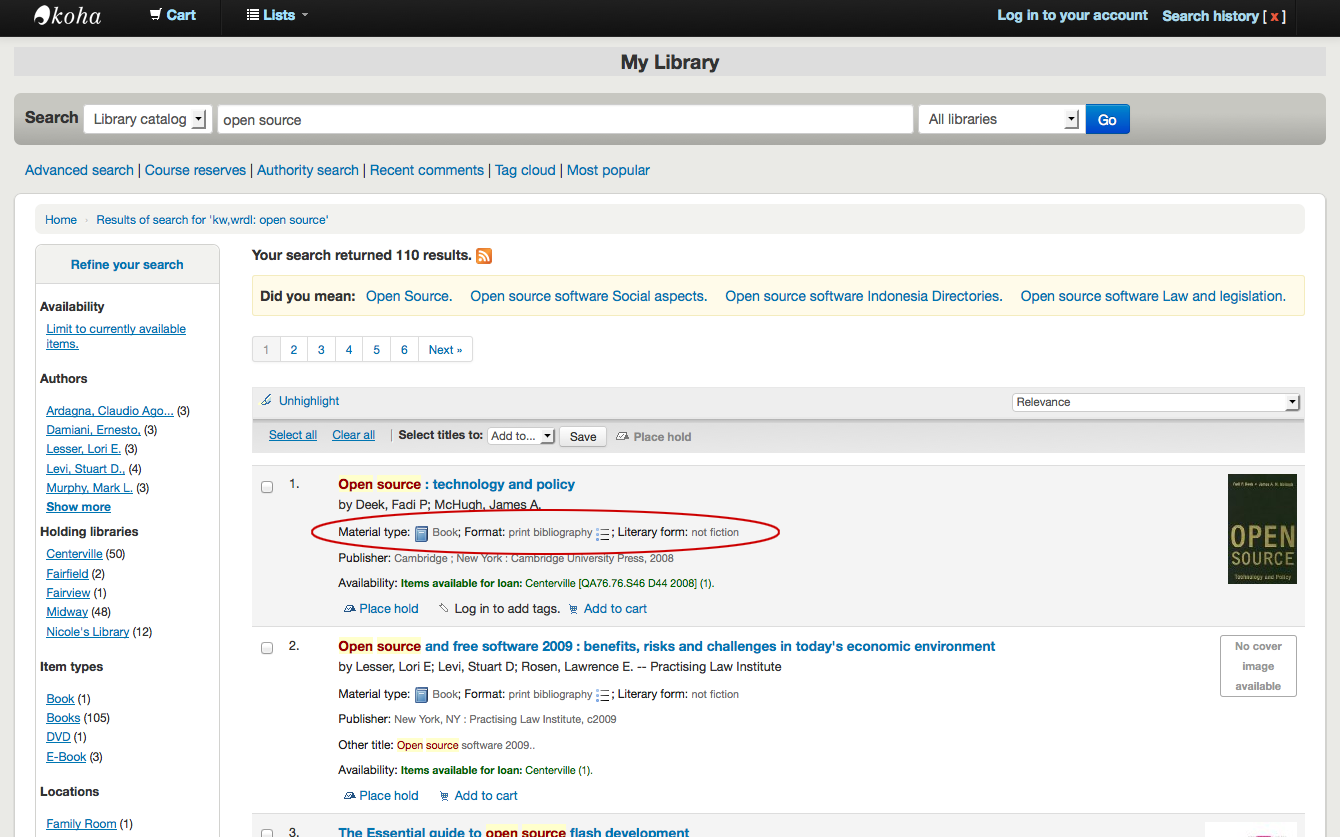
Sonuç listesindeki her başlık altında leader dosyanızdan alınan değerler görüntülenir. Bunun materyal türü veya kayıtlarınız için uyguladığınız koleksiyon kodları ile ilgisi olmadığını unutmamanız gerekir, bu verilerin tümü sabit alanlarınızdan çekilir. Bu özellik DisplayOPACiconsXSLT sistem tercihi ile açılıp kapatılabilir.
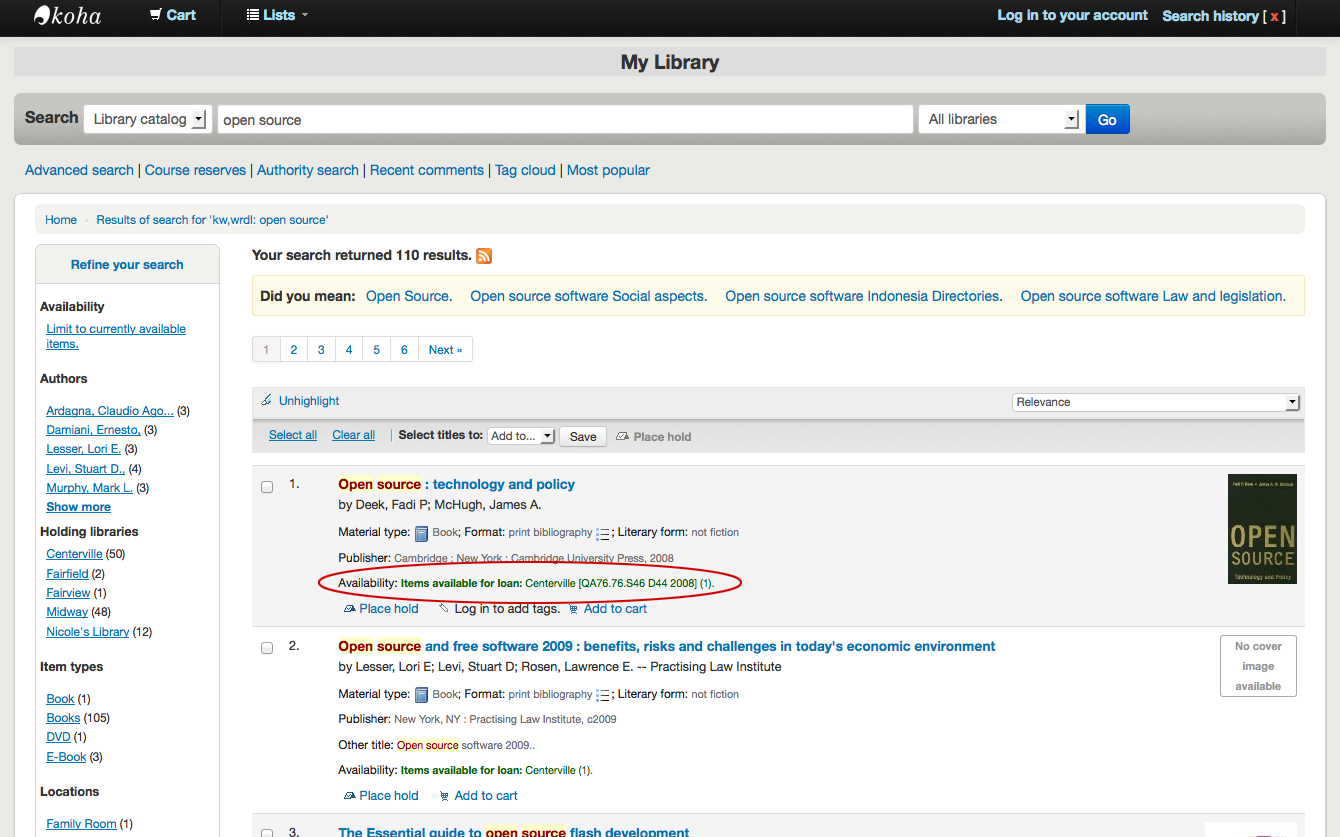
Her başlığın altında kayda eklenmiş olan materyallerin kullanılabilirliğini göreceksiniz.
Not
Bir kütüphane konumunu filtrelemiş olsanız bile materyalin yer aldığı tüm konumlar arama sonuçlarında gösterilecektir.
Önemli
Bir materyalin ayırtma durumu materyalin kullanılabilir olmasını, materyalin durumu ‘beklemede’ olana kadar etkilemez. Ayırtılanlar rafındaki materyallerin durumu bir kütüphaneci bu materyalleri raftan alıp beklemede durumuna getirene kadar kullanılabilir olarak görünecektir.
If you have turned on Enhanced content system preferences preferences you may have book jackets on your search results.
Bunu mu demek istediniz? seçeneklerinizi ayarladıysanız, sonuçlarınızın üstünde diğer aramalarla ilgili sarı bir çubuk göreceksiniz.
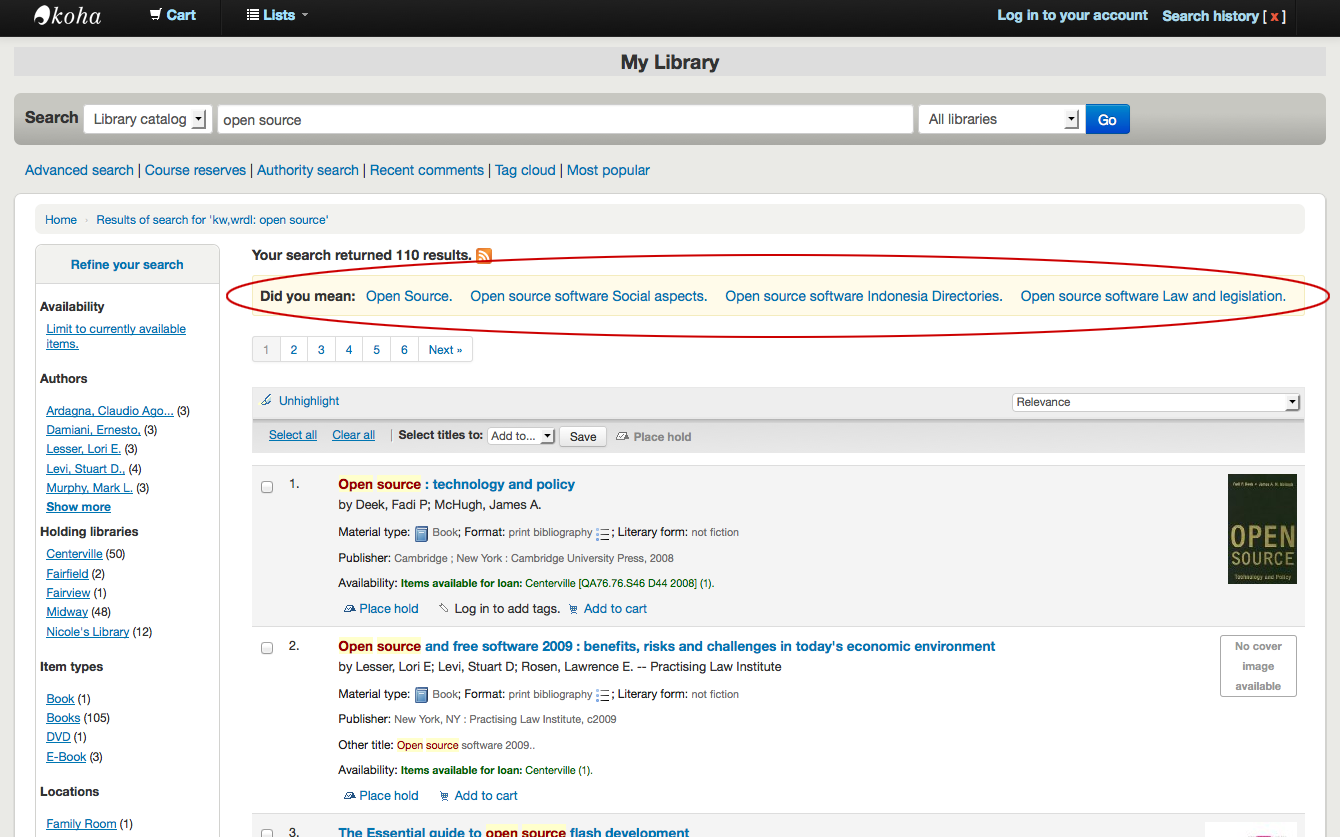
Gelişmiş bir arama gerçekleştirdiyseniz, geri dönme ve gelişmiş aramayı düzenleme seçeneklerini görerek sonuç sayfalarını daraltabilirsiniz.

Filtreler
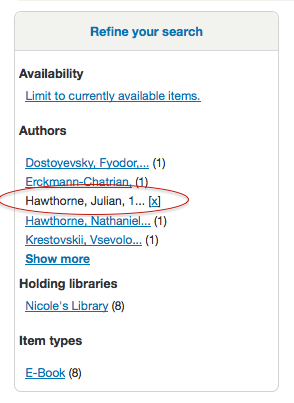
To filter your results click on the links below the ‘Refine your search’ menu on the left of your screen
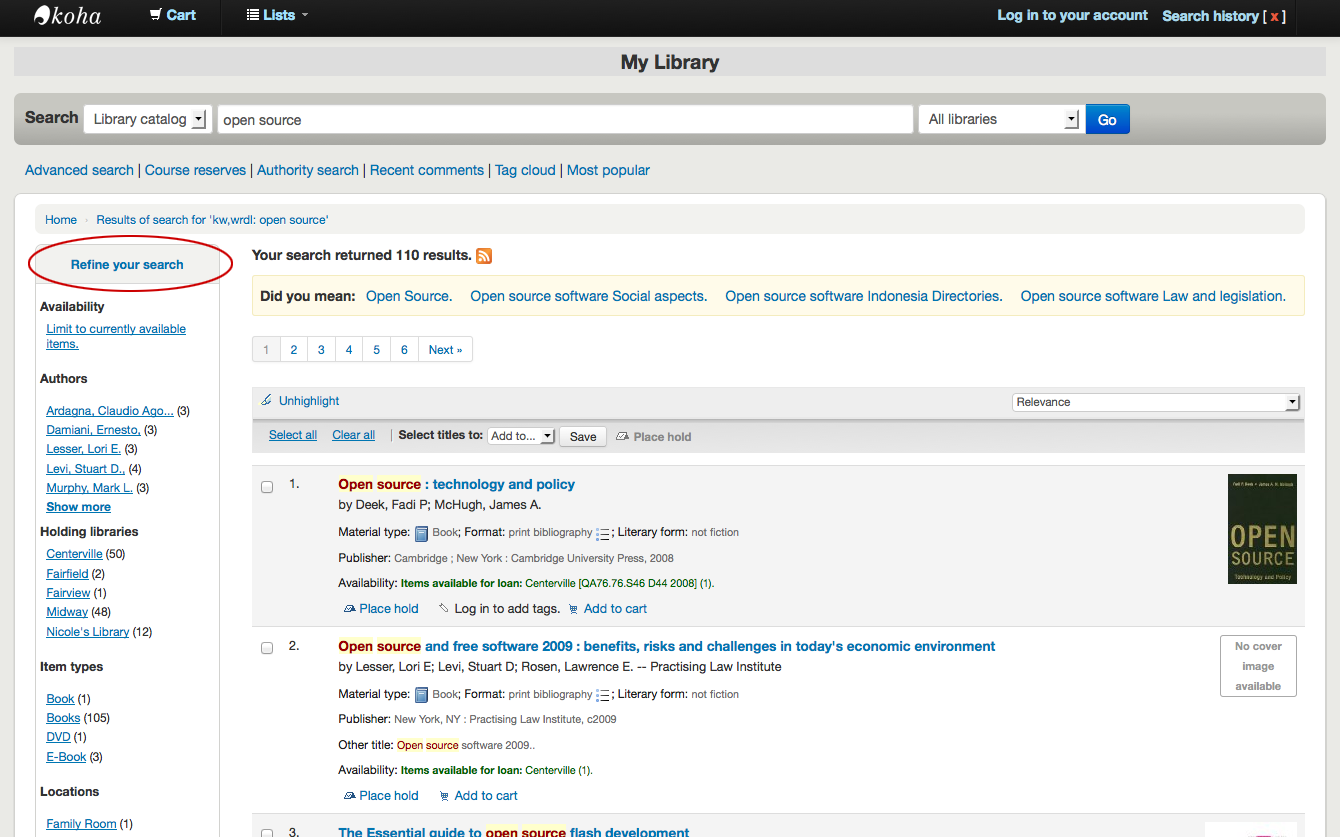
DisplayLibraryFacets sistem tercihinize bağlı olarak ana kütüphane, bulunduran kütüphane ya da her iki kütüphane için filtreler göreceksiniz.
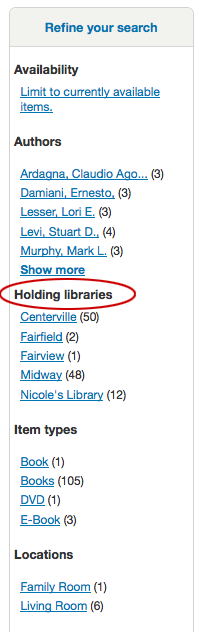
Bir fasete tıkladıkdan sonra fasetin sağında görünen küçük ‘x’ üzerine tıklayarak o filtreyi sonuçlardan kaldırabilirsiniz.
Search RSS feeds
Adres çubuğundaki veya sonuç numaralarının yanındaki RSS simgesini tıklayarak arama sonuçlarına bir RSS beslemesi olarak abone olabilirsiniz. RSS beslemelerinin ne olduğu hakkında daha fazla bilgi edinmek için :ref:`bu eğitim videosunu <http://www.youtube.com/watch?v=0klgLsSxGsU>v=0klgLsSxGsU>`__ inceleyin.
Arama sonuçlarına RSS beslemeleri olarak abone olmak, ilgi alanınızda yer alan yeni bir materyal kataloğa eklendiğinde görmenizi sağlayacaktır.
Bibliographic record
Arama sonuçlarından bir başlık üzerine tıkladığınızda, kaydın bibliyografik ayrıntıları ekrana getirilir. Bu sayfa bir çok farklı alanda arızalıdır.
Ekranın üst kısmında Eser Adı ve GMD olacak:
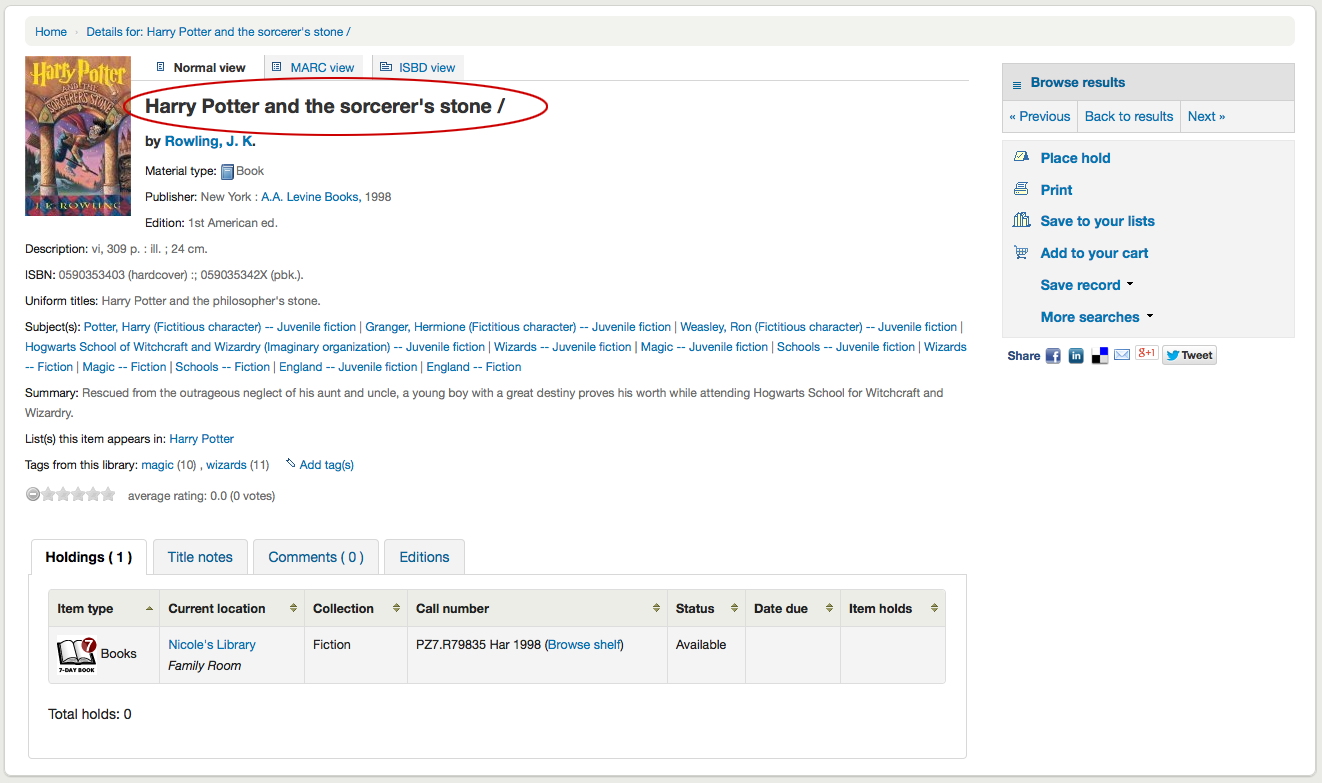
Eser Adı altında yazarlar listelenecektir. Bunlar 1xx ve 7xx alanlarınızdan gelir. Yazar üzerine tıklamak o yazara ait diğer eserler içinde bir arama gerçekleştirecektir.

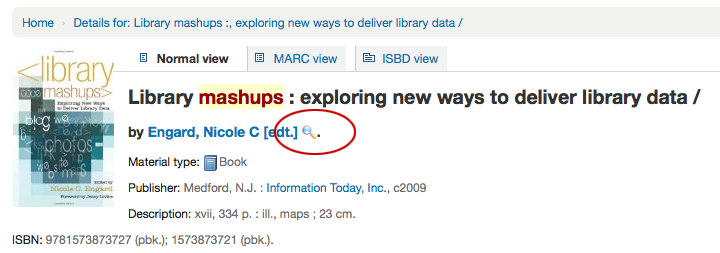
Eğer bir otorite dosyanız varsa yazar (ve diğer) otoritelerin sağında bir büyüteç göreceksiniz. Bu büyüteç üzerine tıklamak sizi doğrudan otorite kayıta götürecektir.
If you have your DisplayOPACiconsXSLT preference set to ‘show’ you will see a material type that is determined by values in your fixed fields (learn more in the XSLT material type icons cataloging guide.
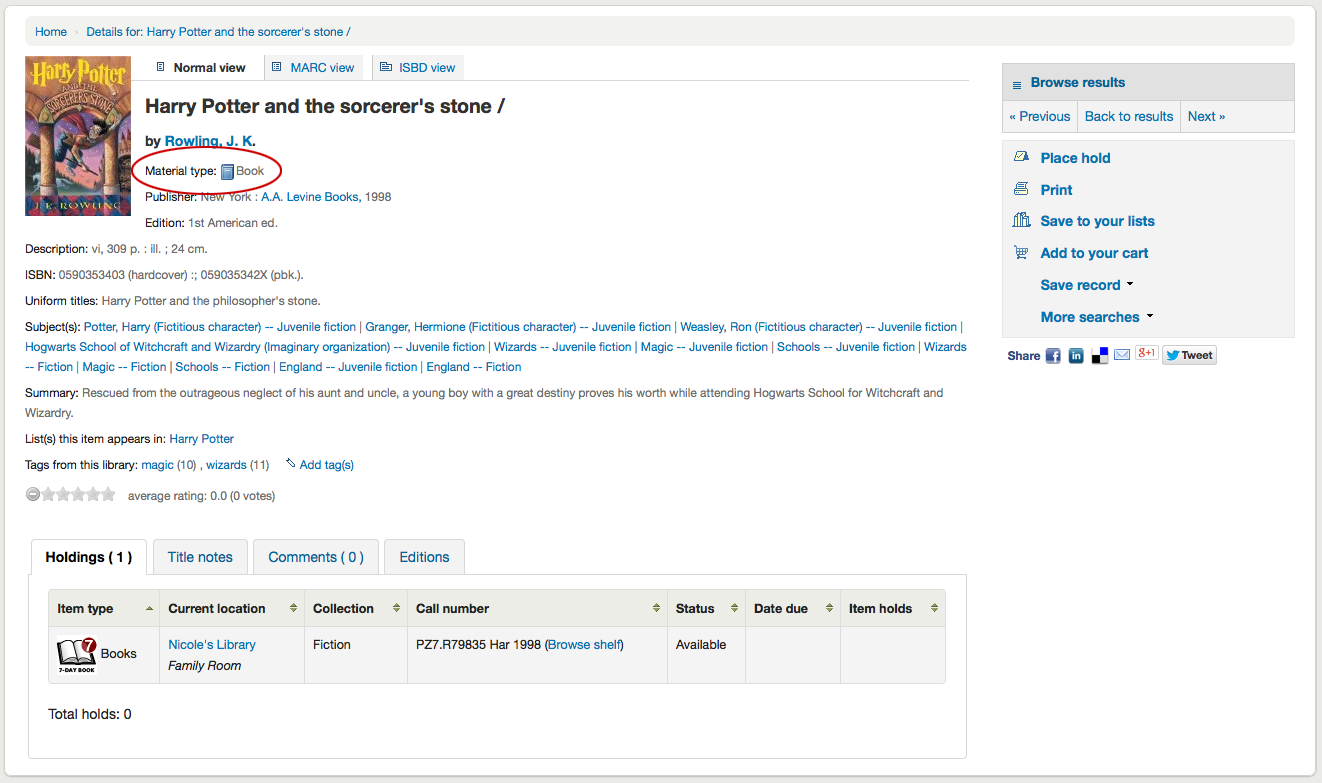
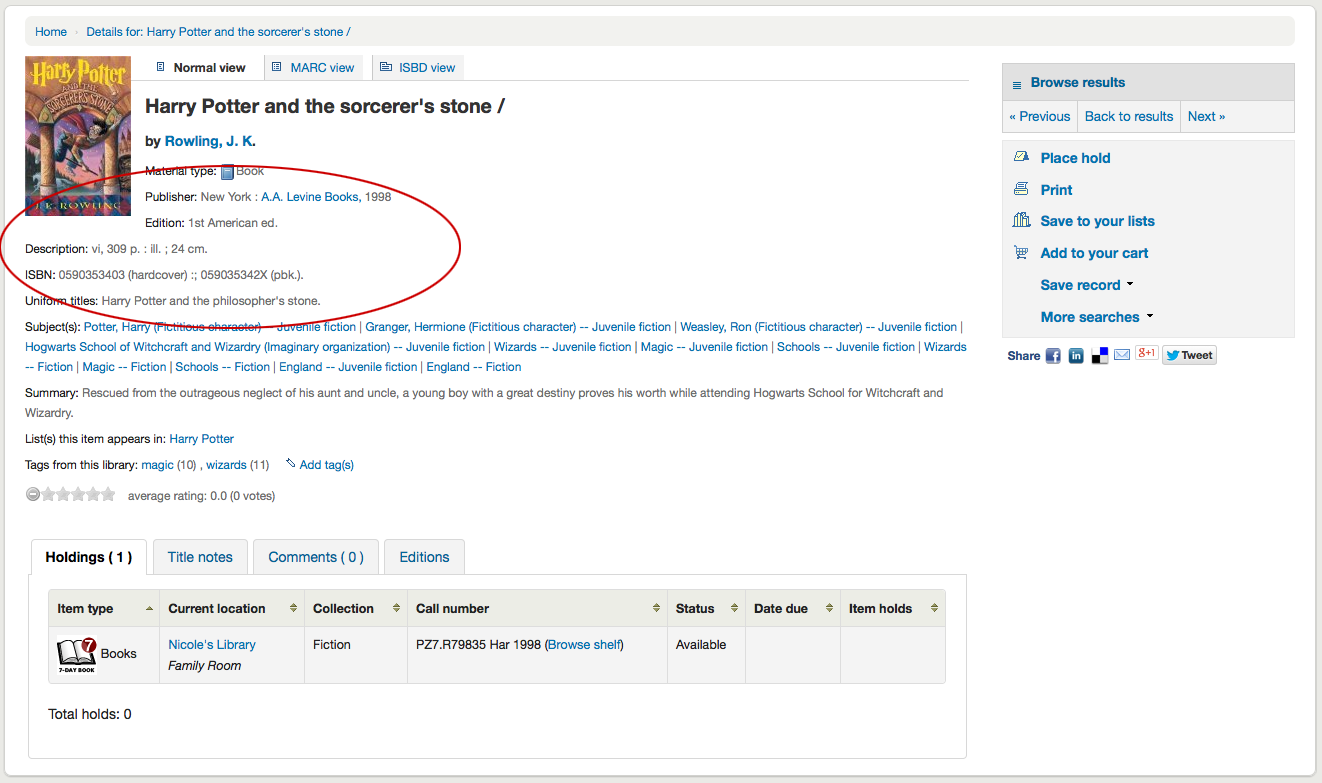
Sonra, görüntülemekte olduğunuz kaydın açıklamasını göreceksiniz:
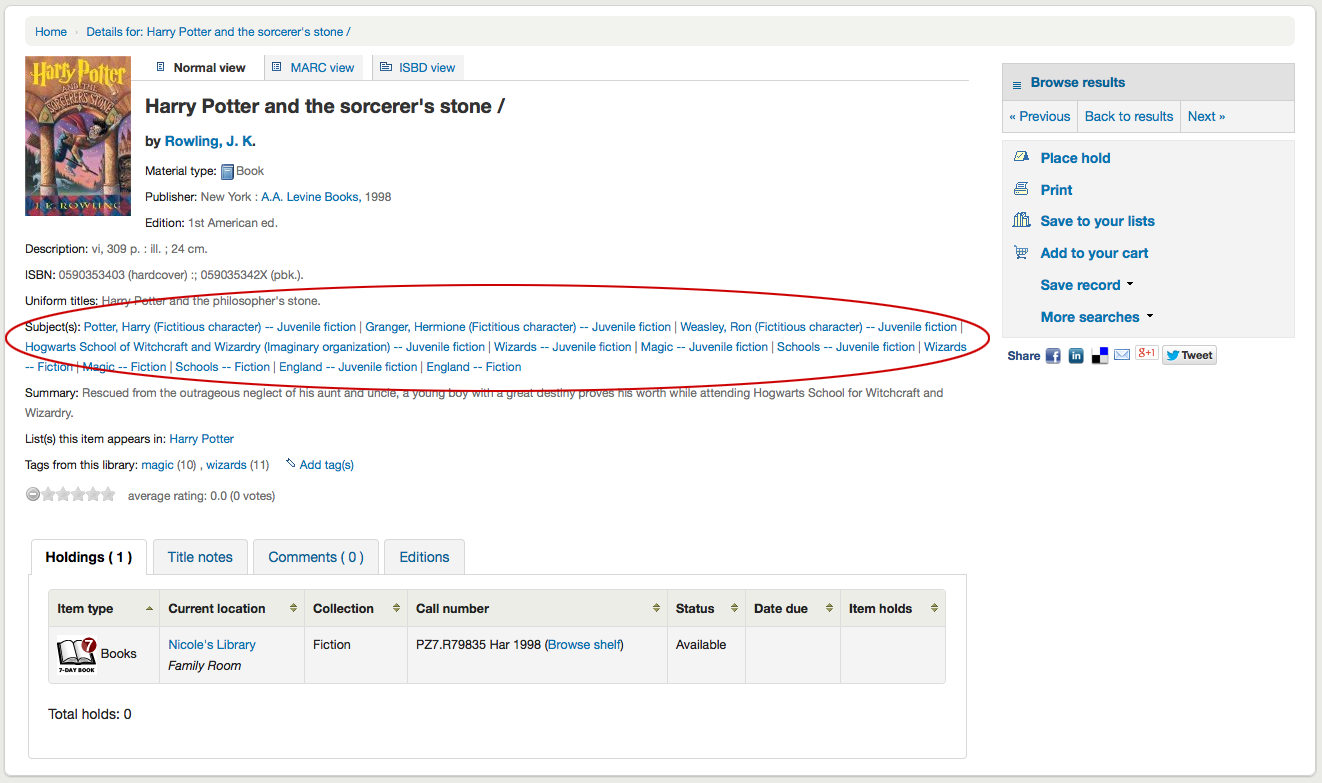
Bu bilgilerin ardından, benzer konularda diğer başlıkları aramak için tıklanabilir konu başlıklarını bulabilirsiniz
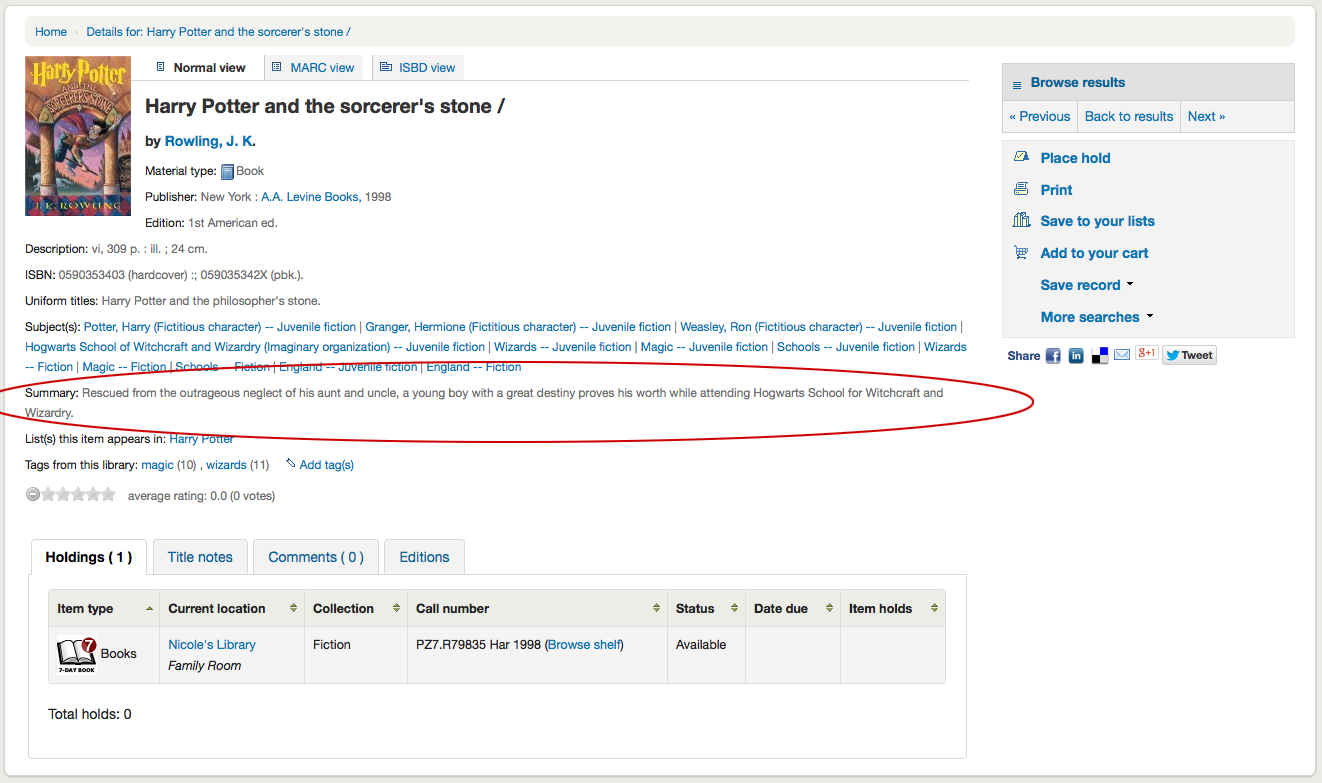
If your record has a table of contents or summary it will appear next to the ‘Summary’ or ‘Table of contents’ label
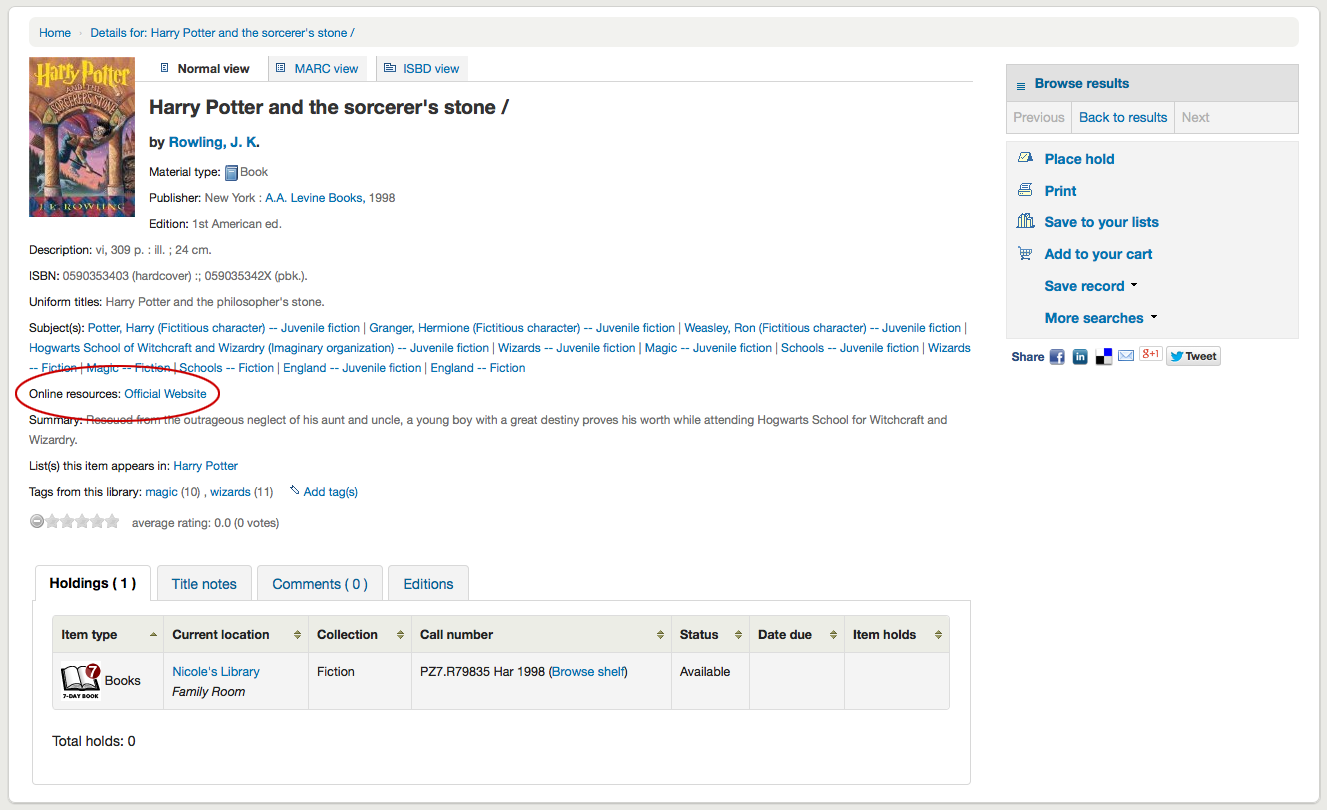
If your record has data in the 856 fields you’ll see the links to the right of the ‘Online resources’ label
Görüntülemekte olduğunuz başlık bir genel liste içerisinde ise ‘Bu materyalin göründüğü liste(ler)’ etiketinin sağında bu başlıkların bir listesini göreceksiniz ve bunların tag’i varsa bu tag’ler ‘Bu kütüphanenin tag’leri’ etiketi altında görünecektir
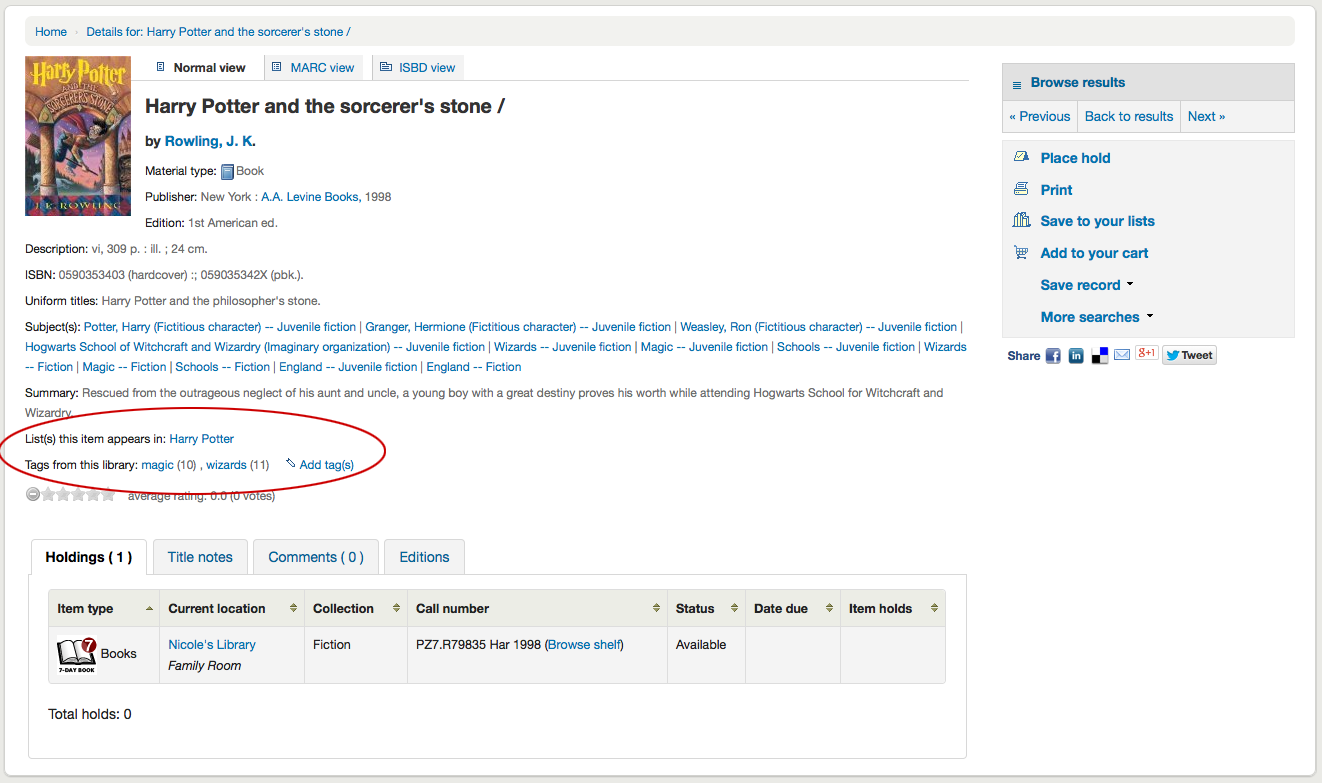
Ayrıntıların altındaki sekmelerde ayırma verilerinizi bulacaksınız
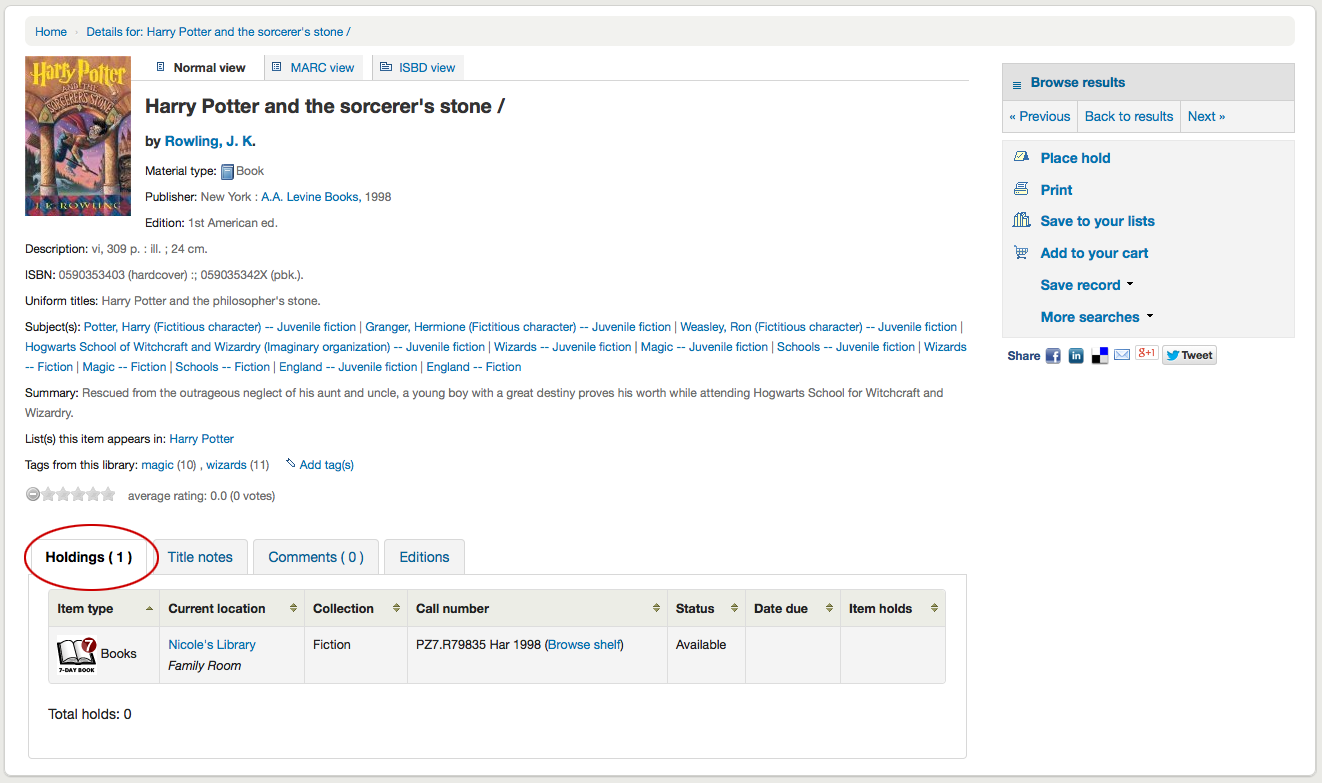
Not
You can customize the columns of this table in the ‘Table settings’ section of the Administration module (table id: holdingst).
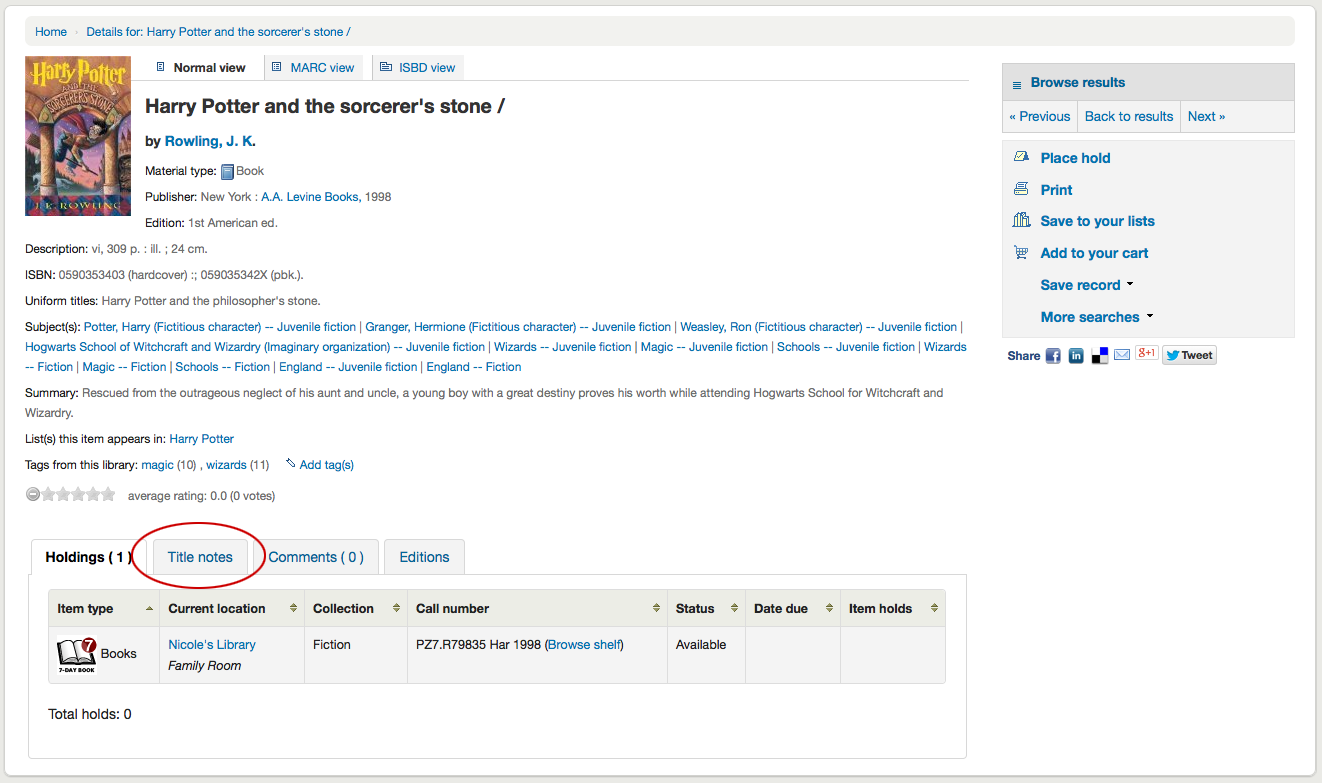
Any notes (5xx fields) that have been cataloged will appear under ‘Title notes’
If the bibliographic record is linked to a subscription in the Serials module, there will be a ‘Subscriptions’ tab with the subscription and issues information.
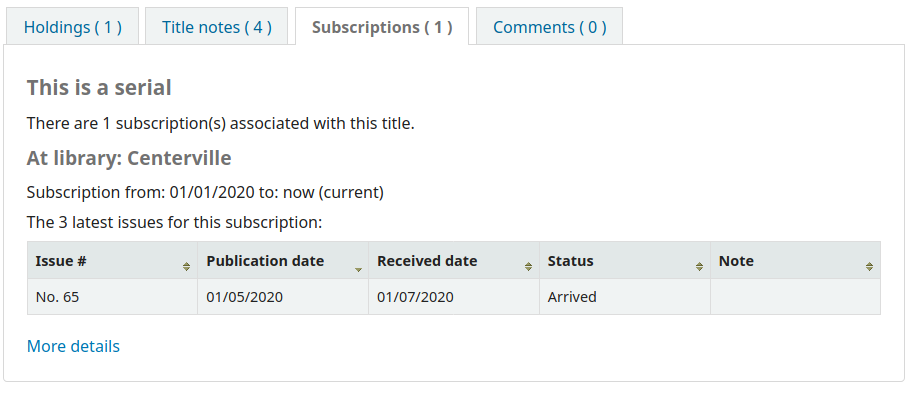
Not
You can customize the columns of this table in the ‘Table settings’ section of the Administration module (table id: subscriptionst).
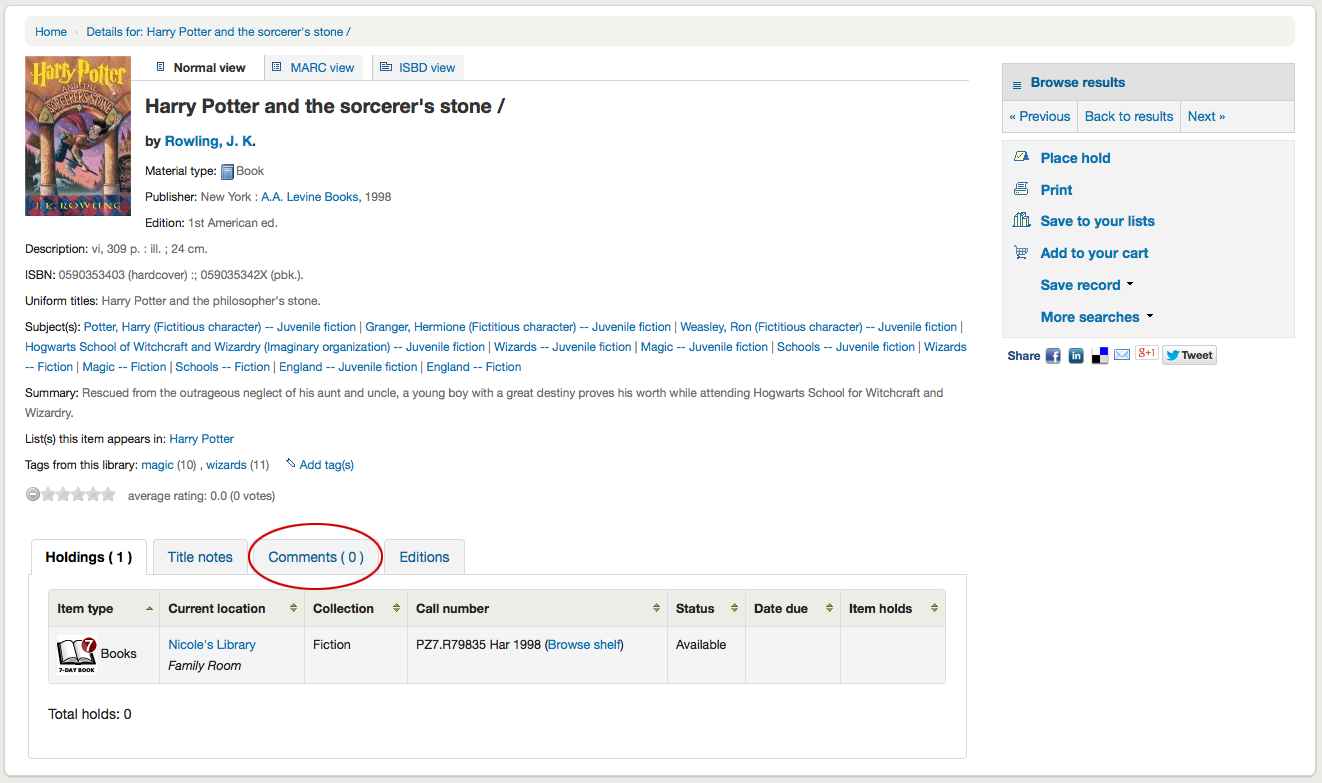
Eğer yorumlara izin veriyorsanız bir sonraki sekmede görüneceklerdir
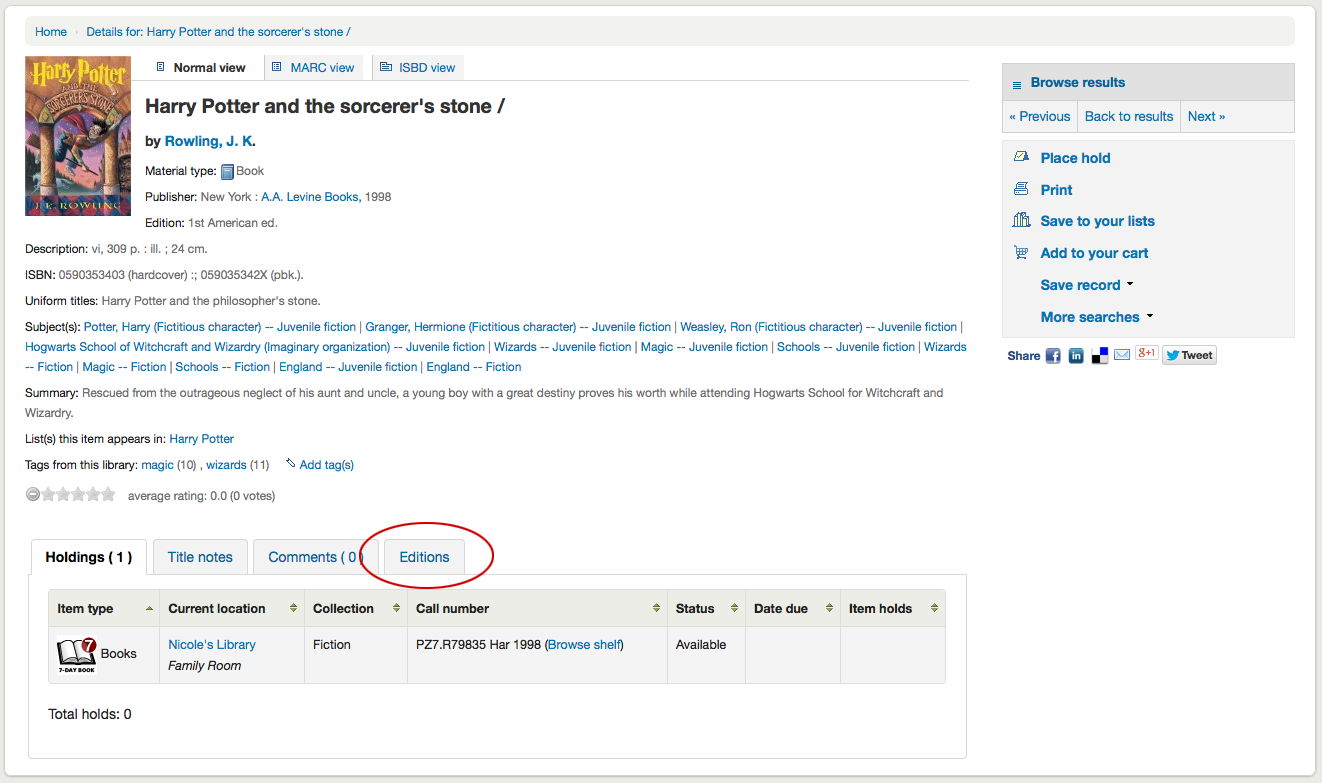
Ve son olarak eğer FRBR etkinleştirilmiş ise ve koleksiyonunuz içinde bir eserin diğer baskıları varsa ‘Edisyonlar’ sekmesini göreceksiniz.
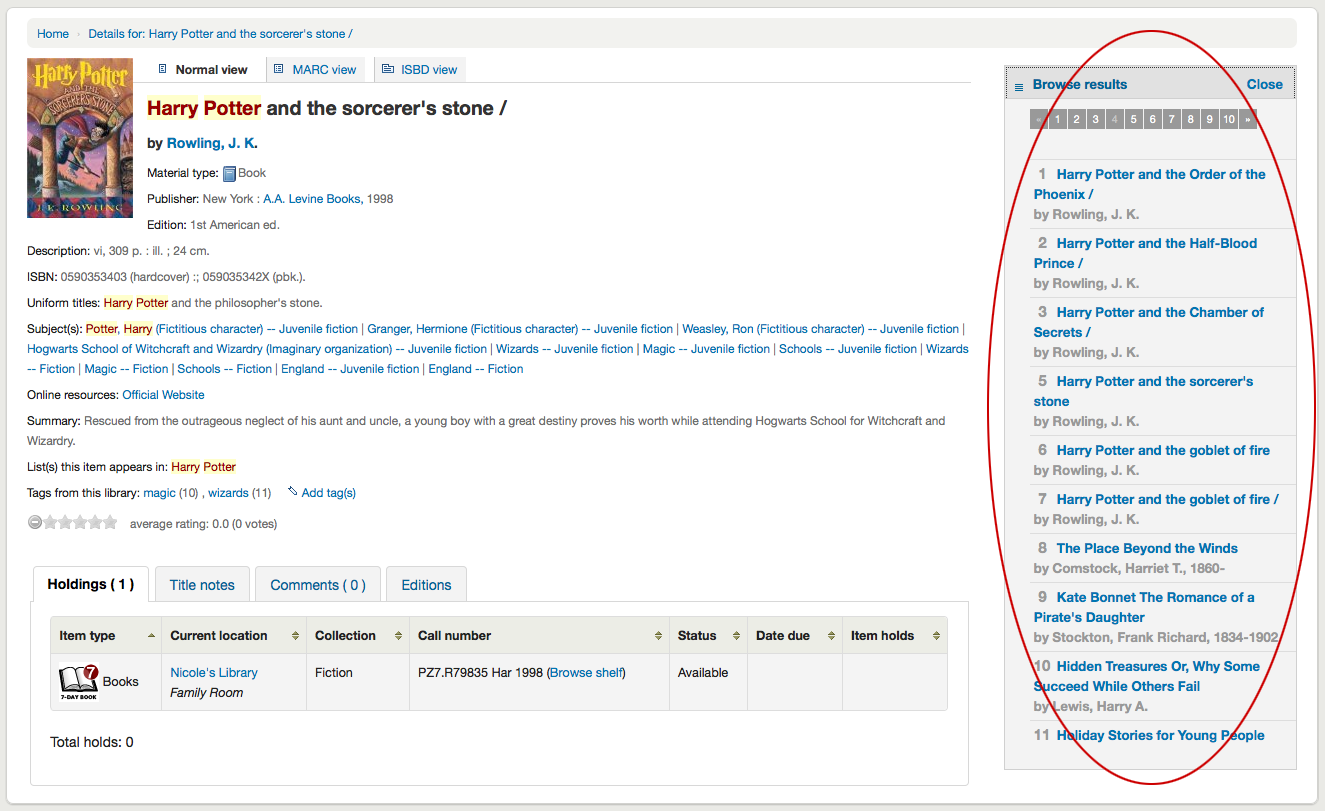
Ayrıntıların sağ tarafında bir dizi kutu göreceksiniz. İlk kutu arama sonuçlarında gezinmeye yardımcı olan düğmelerin listesidir. Buradan aramanızın sonraki veya bir önceki sonucunu görebilirsiniz veya arama sonuçlarınıza geri dönebilirsiniz.
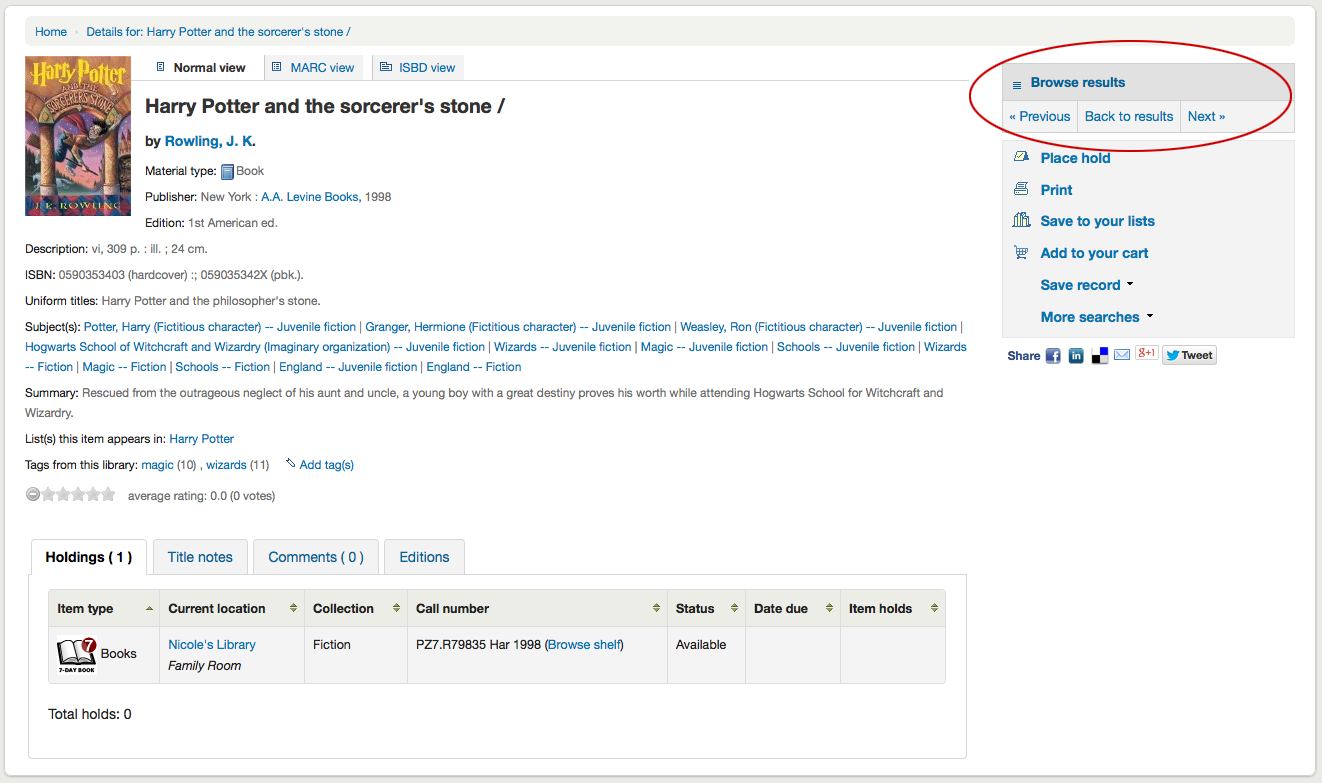
Clicking ‘Browse results’ at the top of the right column will open up your search results on the detail page
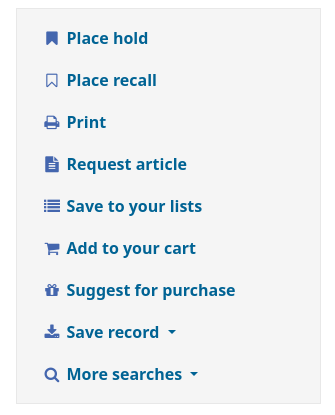
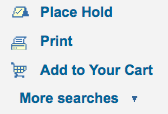
Below the search buttons you’ll find the links to place a hold, print the record, save the record to your lists, add it to your cart or send to a device (using a QR code).
Another option that will appear on this right hand side bar, if a library is allowing purchase suggestions (see the suggestion system preference), is the ability to ‘Suggest for Purchase’. Clicking this link will bring the user to the purchase suggestion form to fill out.
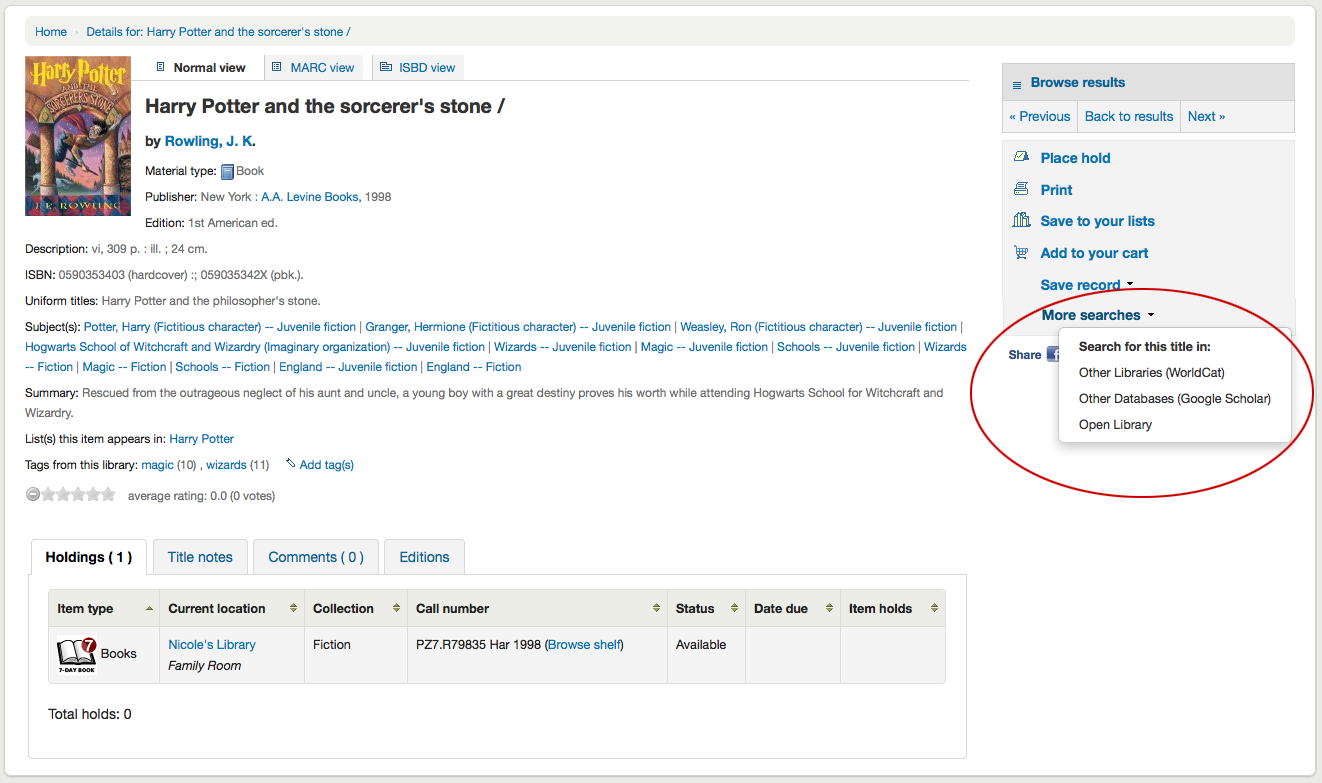
Clicking ‘More searches’ will show the list of libraries you entered in your OPACSearchForTitleIn preference
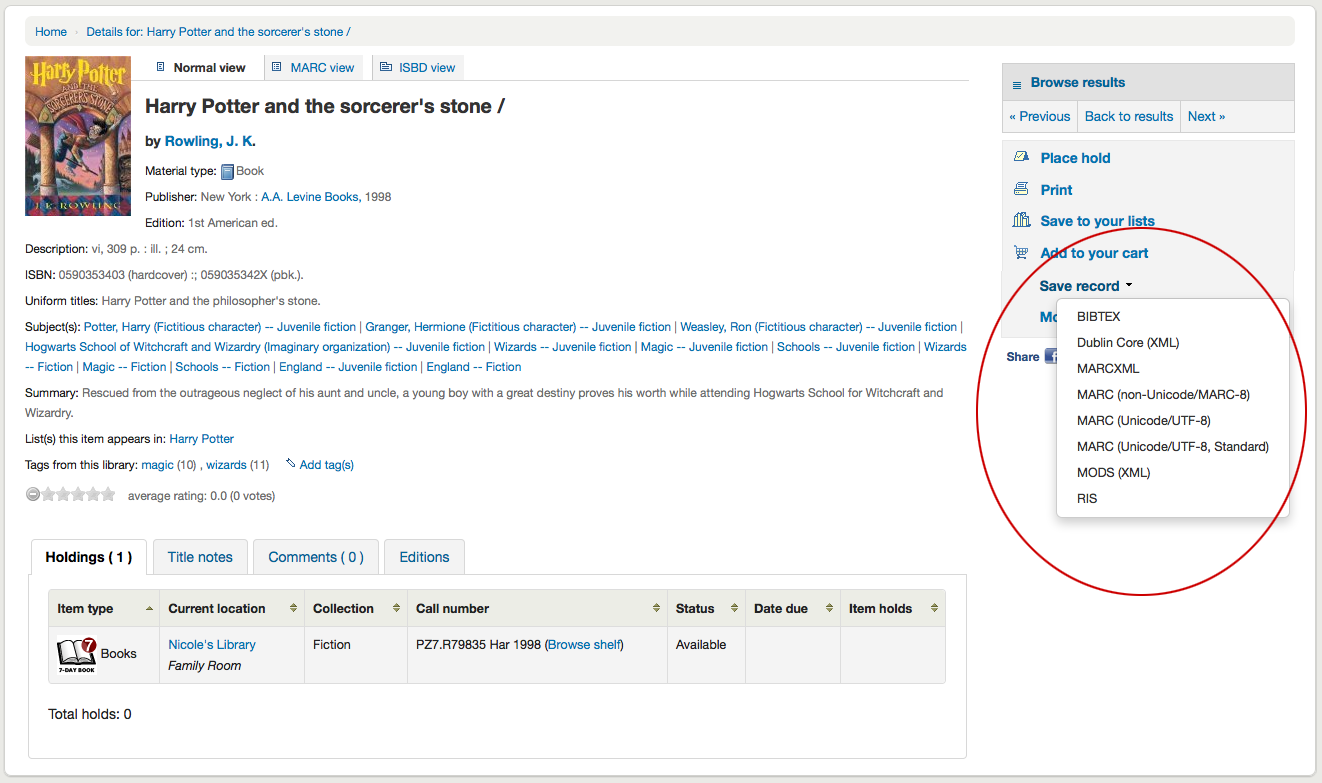
Under the ‘Save record’ label you will find a series of file formats you can save the record as. This list can be customized by altering the OpacExportOptions system preference.
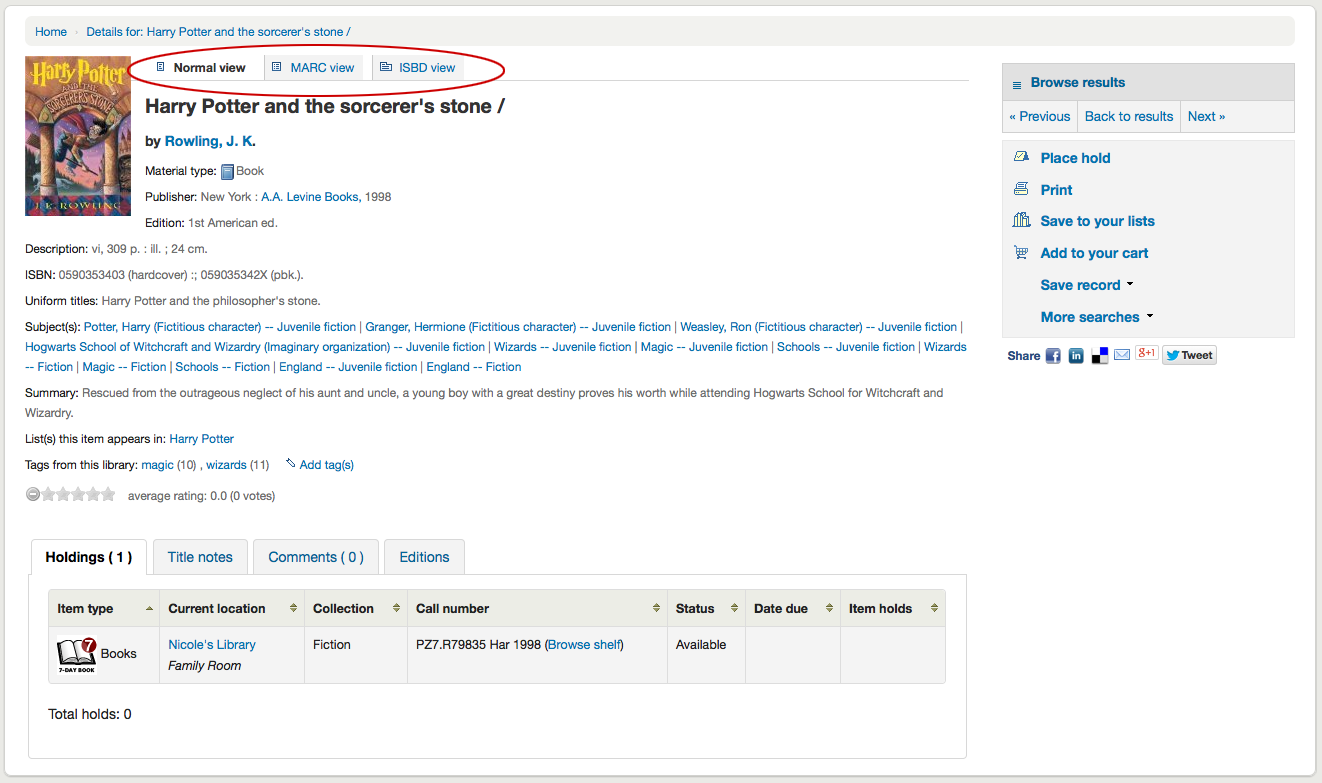
Herhangi bir anda görünümü ‘Normal’ görünümünden Marc veya ISBD görünümüne değiştirmek istiyorsanız, kaydın üstünde yan yana bulunan sekmelerin üzerine tıklayabilirsiniz
Lists and the cart
A cart is a temporary holding place for records you’re interested in finding during this session. That means that once you log out of the OPAC or close the browser you lose the items in your cart. A list is a more permanent location for saving items. To learn more about lists, check the Lists in the staff client chapter of this manual.
Listeler
Patrons can manage their own private lists by visiting the ‘your lists’ section of their account.
Creating lists
Lists can also be created by choosing the ‘New list’ option in the ‘Add to’ menu on the search results

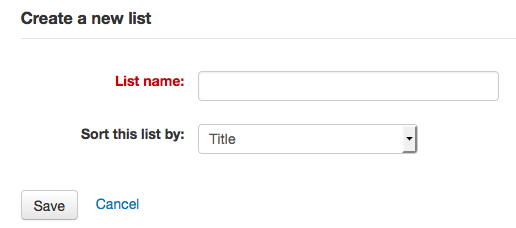
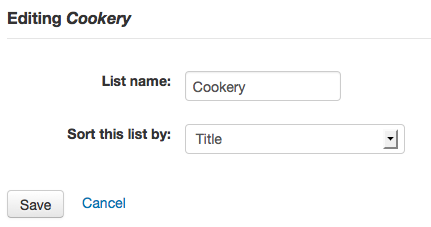
To create a list the patron simply needs to click the ‘New list’ link and populate the form that appears
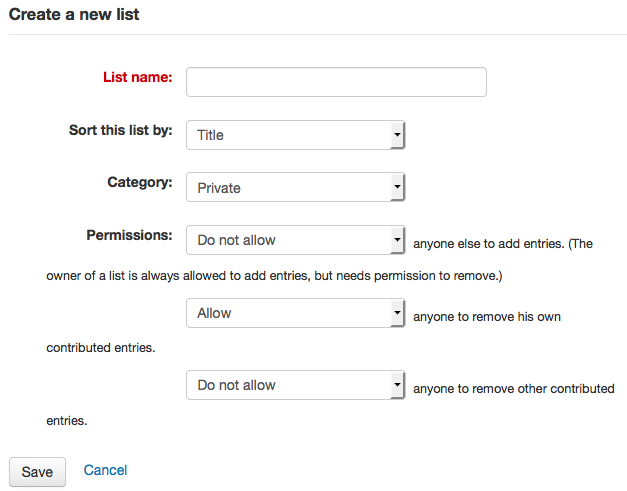
The only field required is the ‘List name,’ but the patron can also choose how they want the list sorted and if the list is public or private.
A private list is managed by you and can be seen only by you (depending on your permissions settings below)
A public list can be seen by everybody, but managed only by you (depending on your permissions settings below)
Önemli
Kullanıcıların OpacAllowPublicListCreation tercihi ile genel listeler oluşturmalarına izin vermiyorsanız, bu durumda kullanıcılar yalnızca özel listeler oluşturabileceklerdir.
Son olarak izinlerinizin listede ne olacağına karar verin. İzin verebilirsiniz ya da vermeyebilirsiniz:
giriş ekleyecek başka herkes
Kendi katkıda bulunduğu girdileri kaldıracak herkes
Not
Liste sahibine her zaman girdi eklemesine imkan verilir fakat bu girdileri silmesi için izne gereksinimi vardır.
Katkıda bulunan diğer girişleri kaldıracak kişi
Adding titles to lists
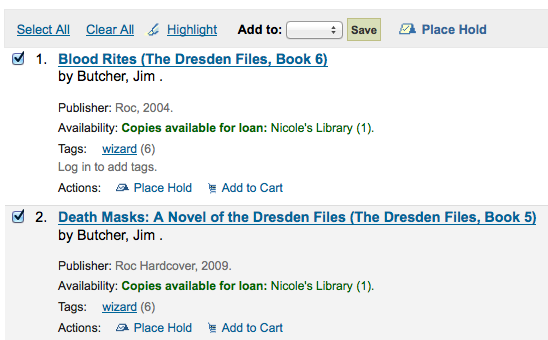
Başlıklar listeye arama sonuçlarından ve/veya bibliyografik kayıttan eklenebilir. Arama sonuçlarında, materyalleri listeye ekleme seçeneği her sonucun altında ve sonuçlar sayfasının üst kısmında görünür
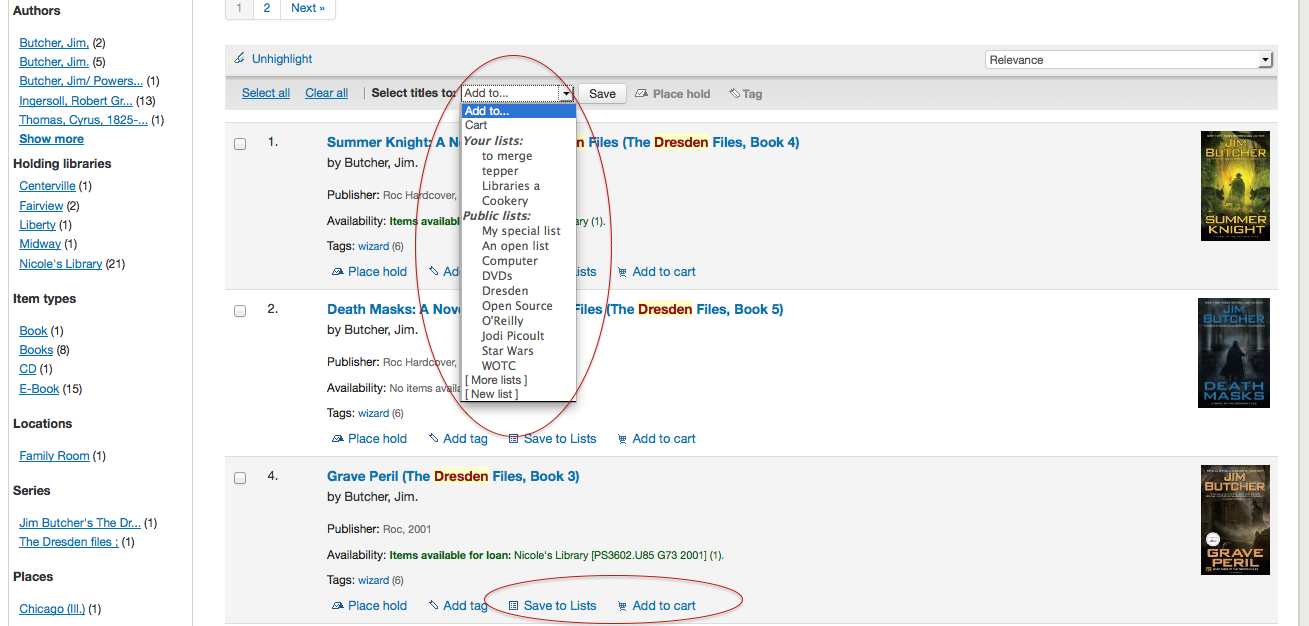
To add a single title to a list, click the ‘Save to lists’ option and then choose the list you’d like to add the title to. To add multiple titles to a list check the boxes on the left of the titles you want to add and then choose the list you want to add the titles to from the ‘Add too’ pull down at the top of the screen.
Viewing lists contents
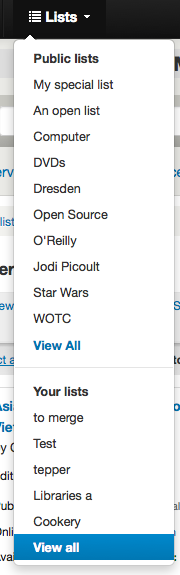
To view the contents of a list, click on the list name under the ‘Lists’ button.
Listenin üst kısmında farklı menü opsiyonları olması dışında liste içerikleri arama sonuçları sayfalarına benzer şekilde görünecektir.
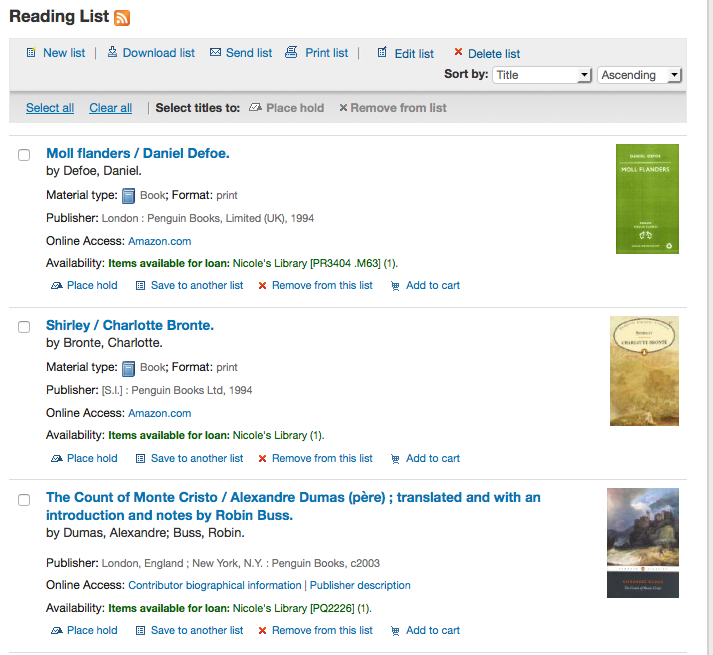
Liste başlığının sağında, listedeki güncellemelere abone olmanızı sağlayacak bir RSS simgesi bulunur.
Listenin üstündeki menü seçeneklerini kullanarak birden çok materyal üzerine ayırma koyabilir, liste içeriklerini indirebilir, listeyi e-posta ile gönderebilir veya listenin çıktısını alabilirsiniz.
To place a hold on one or more list items check the box to the left of the item and click the ‘Place hold’ link at the top
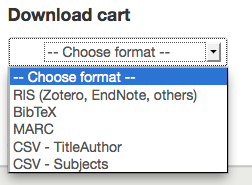
To download the list contents click the ‘Download list’ link and choose the format you’d like to download the list in
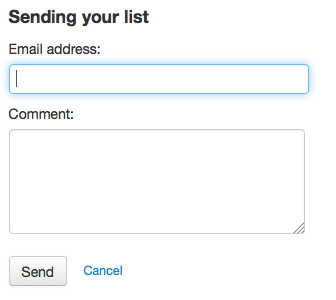
To email the list contents to someone, click the ‘Send list’ link and enter in your email details in the form that pops up
To print the contents of your list out click the ‘Print list’ link
Managing lists
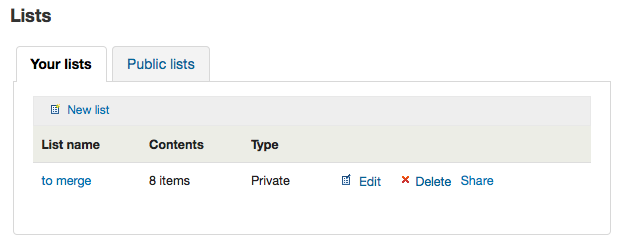
Once the list is saved patrons can begin adding items to it. From the ‘your lists’ tab on the patron record the patron can edit and delete the lists they have created by clicking the appropriate link to the right of the list name.
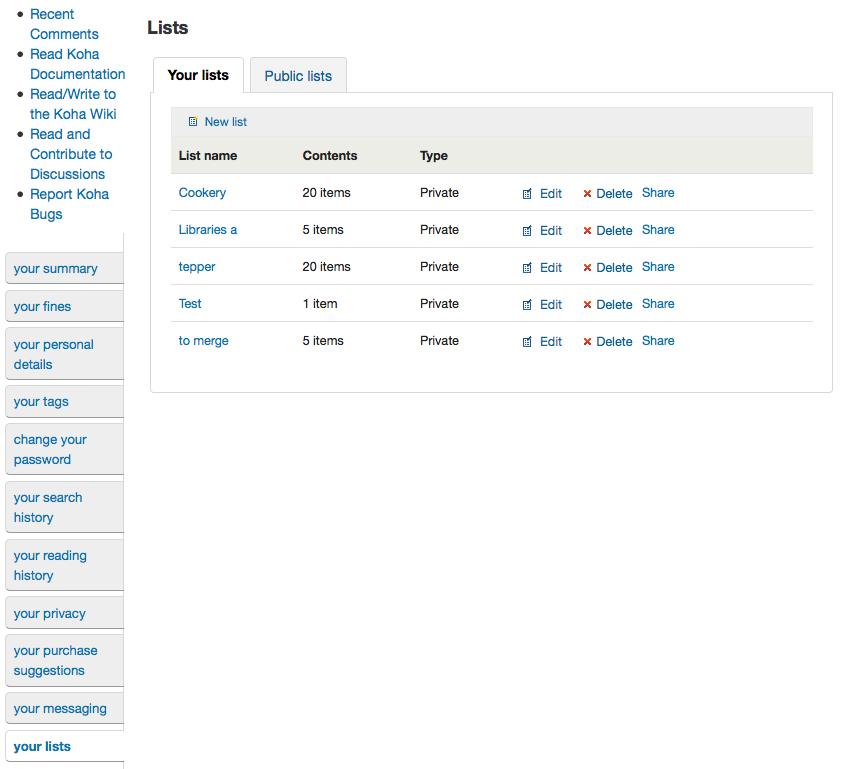
Listelerin başlığını düzenlemek ya da kullanıcıları sıralamak için liste açıklamasının sağında bulunan ‘Düzenle’ bağlantısına tıklayın
Bir listenin yanındaki ‘Sil’ üzerine tıkladığınız zaman listeyi silme işlemini onaylamanız istenecektir.
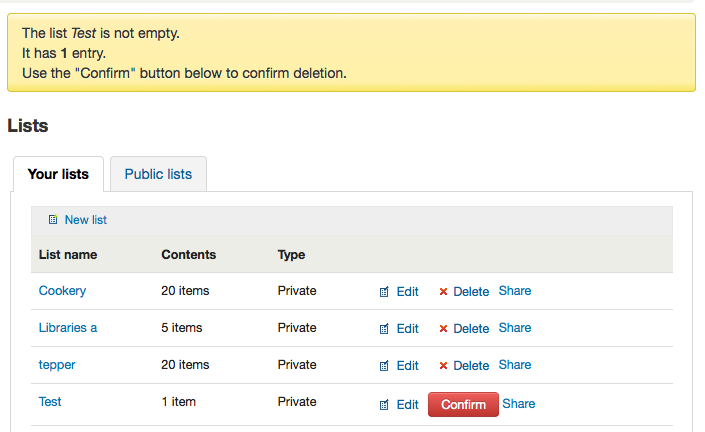
Silmek istediğiniz listenin sağında bulunan ‘Onayla’ butonu tıklanana kadar liste silinmeyecektir.
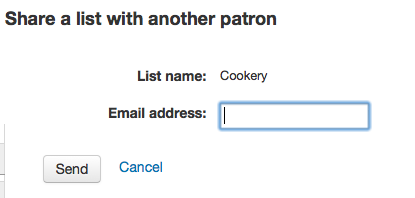
Eğer kütüphaneniz OpacAllowSharingPrivateLists tercihi ile özel listeleri paylaşmanıza izin veriyorsa, listelerinizin listesinde ‘Paylaş’ bağlantısını ve her bir bireysel listenin en üstünde ‘Liste paylaş’ bağlantısını göreceksiniz. Bu bağlantıya tıklayınca sizden kullanıcının e-posta adresini girmeniz istenecektir.
E-posta adresi girildikten sonra Koha tarafından size bir onay mesajı gönderilecektir
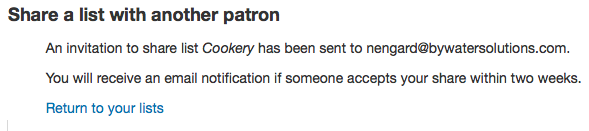
ve o kullanıcıya bir mesaj gönderecektir.
Sepet
Adding titles to the cart
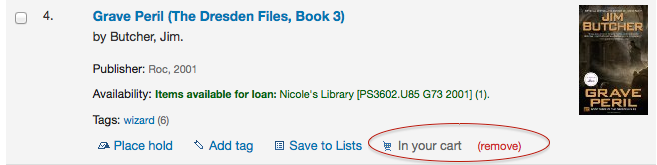
Başlıklar sepete arama sonuçlarından ve/veya bibliyografik kayıttan eklenebilir. Arama sonuçlarında, materyalleri sepete ekleme seçeneği her sonucun altında ve sonuçlar sayfasının üst kısmında görünür
Clicking the ‘Add to cart’ button will add the one title to your cart. To add multiple titles at once, check the box to the left of each result and then choose ‘Cart’ from the ‘Add to’ pull down at the top of the screen. Once titles are added to the cart you will be presented with a confirmation
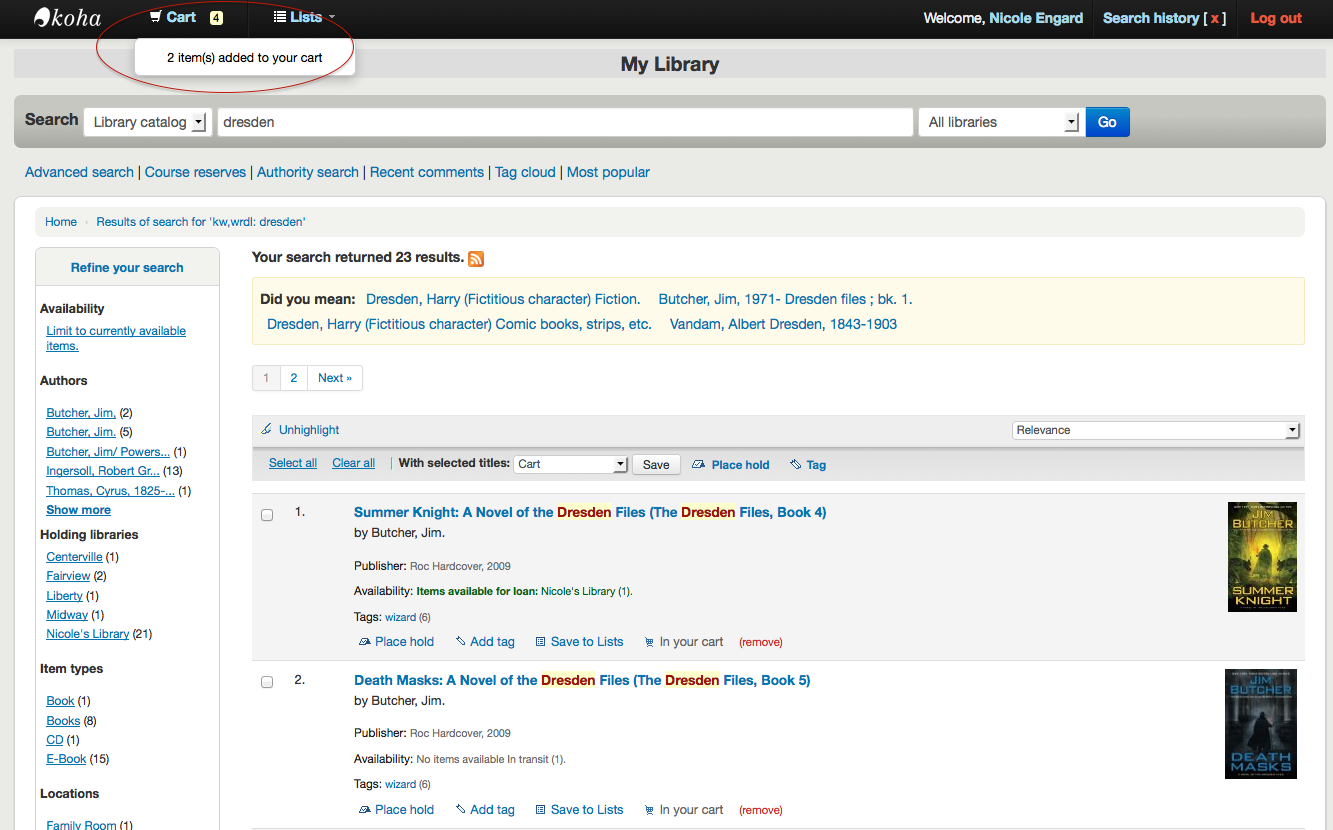
Sonuçlardan hangi materyallerin sepetinizde olduğunu görebilirsiniz ve bu materyalleri ‘(kaldır)’ seçeneğini tıklayarak sepetten çıkarabilirsiniz.
Managing the cart
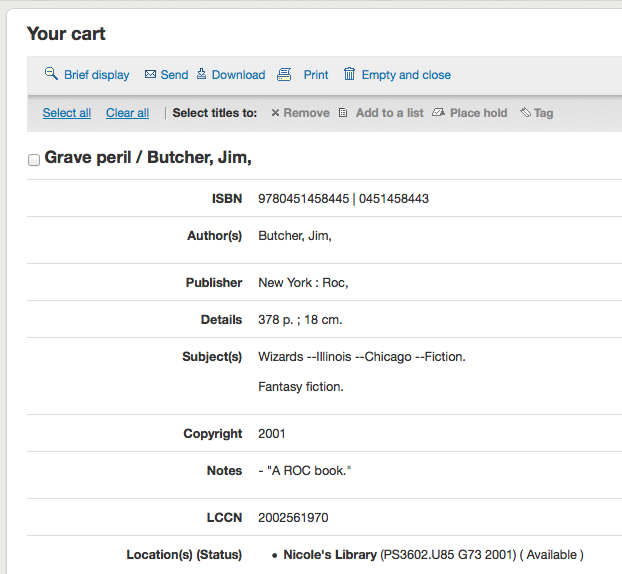
Başlıklar sepetinize eklendikten sonra genellikle ekranın üst kısmında bulunan ‘Sepet’ butonuna tıklayarak sepet içeriğini yönetebilirsiniz. Sepet ekranı yeni bir pencerede açılacaktır.

Bu ekranda karşınıza bir kaç seçenek gelecek. Sepetin en üst kısmında bir kaç tane buton vardır.
First is the ‘More details’ button. Clicking this will show you additional information about the titles in your cart (ISBNs, subjects, publisher info, notes and more).
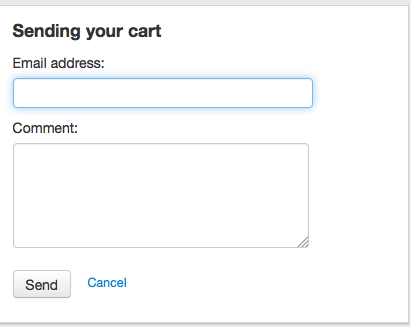
Next is the option to send the contents of your cart to an email address. This is handy if you want to send the resources you found at the library to your home email account to refer to later or to send to a patron researching a specific topic. Clicking this link will open up a new window that asks for the email address and message to send.
Önemli
Sepet, yalnızca sisteme oturum açmış kullanıcılar tarafından e-posta ile gönderilebilir. Bu, sepetinizin e-posta işlevselliğinin spam olarak kullanılmasını önleyecektir.
In addition to sending your cart you can download the contents of your cart in several pre-defined formats or using a CSV profile that you defined in the tools module.
Son olarak ‘Yazdır’ bağlantısını seçerek sepetinizin içeriğinin çıktısını alabilirsiniz.
In addition to the various different ways to save the contents of your cart, there are ways to add value to the data in your cart. By selecting one or more titles from the cart you can add them to a list (click ‘Add to a list’), place hold(s) (click ‘Place hold’), or tag them (click ‘Tag’). All of these operations follow the same procedure as they do when performing them in the OPAC.
Placing holds
Patrons can place holds on items via the OPAC if they’re logged in and you have the OPACHoldRequests preference set to ‘Allow’. If the item can be placed on hold the option to place it on hold will appear in several different places.
When viewing a list or search results page you’ll see the option to place hold on multiple items by checking the boxes to the left of the results and clicking ‘Place hold’ at the top
Bir listeyi ya da arama sonuçları sayfasını görüntülerken, başlık hakkındaki temel bilgilerin altında materyal üzerinde ayırma yapmak için bir seçenek göreceksiniz
Tek bir başlığı görüntülerken, ekranın sağ tarafındaki kutunun içinde bir ayırma yapma seçeneği göreceksiniz
Ayırma yapmak için yukarıdaki bağlantılardan hangisine tıklarsanız tıklayın, sonuç olarak aynı ayırma ekranına getirileceksiniz.
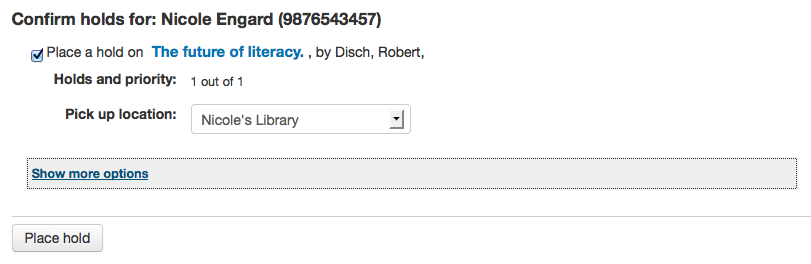
Üzerinde ayırma yapmak istediğiniz materyallerin solunda bulunan kutuyu işaretleyin
Başlık, kayıt bilgileri sayfasına geri dönmek için bir bağlantı içerir
Öncelik, bu yapılan ayırmanın, ayırtılanlar sırasının neresinde yer alacağını gösterir
If allowed by your OPACAllowUserToChooseBranch preference the patron can choose where they’d like to pick up their hold. The list of available pickup locations will include all libraries that have ‘Pickup location’ set to ‘Yes’ on the library configuration page.
Daha fazla seçenek görmek isterseniz, ‘Daha fazla seçenek göster’ bağlantısı üzerine tıklayabilirsiniz
Place hold form with more options
AllowHoldItemTypeSelection tercihi ‘Allow’ (İzin Ver) olarak ayarlanmışsa ve kayıtta birden fazla materyal türü varsa, ayırtmayı belirli bir materyal türüne sınırlamayı seçme seçeneğini görürsünüz
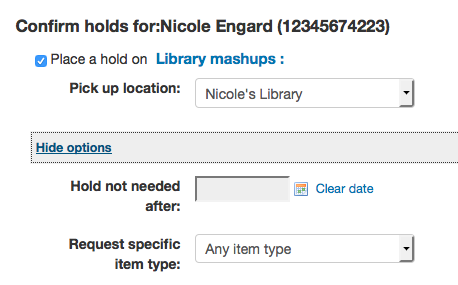
If allowed by your OPACAllowHoldDateInFuture preference, the ‘Hold starts on date’ column will show. This field allows the patron to have their hold start on a future date.
By default holds placed in the system remain until canceled, but if the patron fills in a ‘Hold not needed after’ date then the hold has an expiration date.
Önemli
Expired holds are removed by the expired holds cron job, this is not an automatic process and must be set up by your system administrator
OpacHoldNotes sistem tercihi tarafından izin verildiği takdirde kullanıcılar ‘Notları düzenle’ butonunu tıklayaraki kütüphane için yaptıkları ayırtmalar ile ilgili notlar bırakabilirler
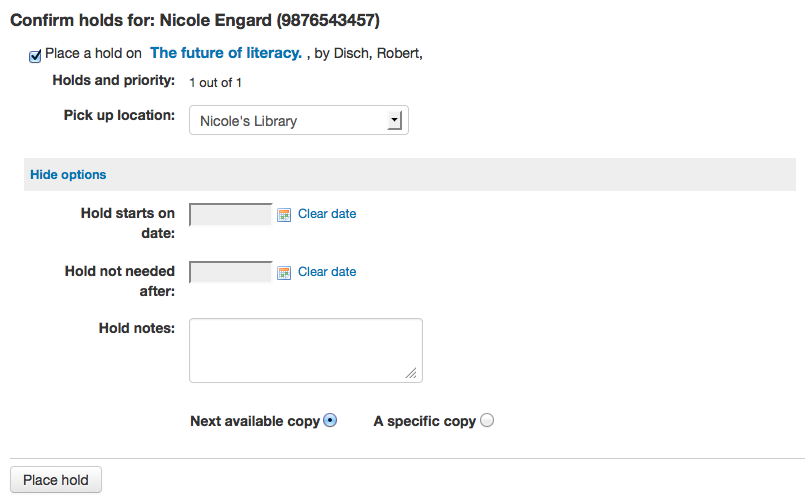
Depending on the rules you set regarding item specific holds in your circulation and fines rules the patron will be allowed to choose whether to place the hold on the next available copy and/or a specific copy.
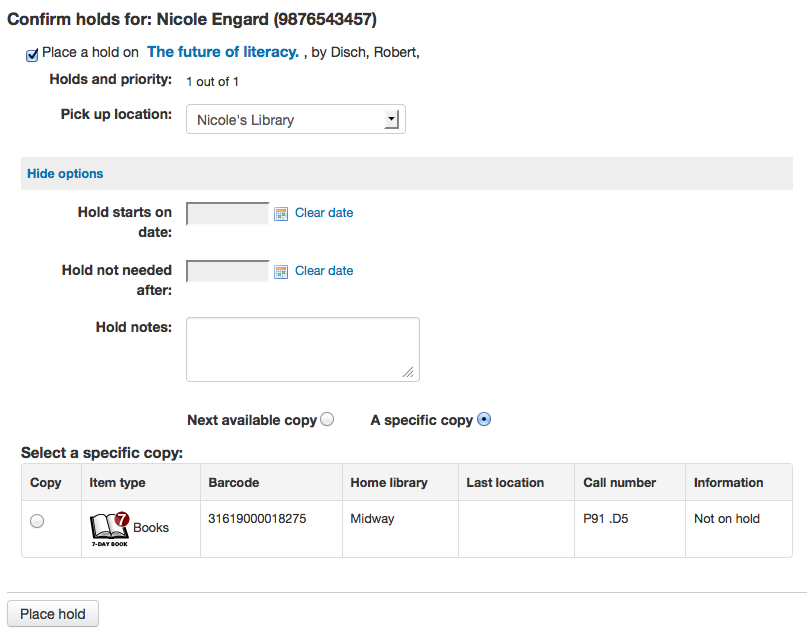
After clicking the ‘Place hold’ button the patron will be brought to their account page where they’ll see all of the items they have on hold.
Requesting recalls
If your library accepts recalls (see setting up recalls for more information), patrons will be able to place recalls on items.
The option to request a recall appears in various places in the OPAC:
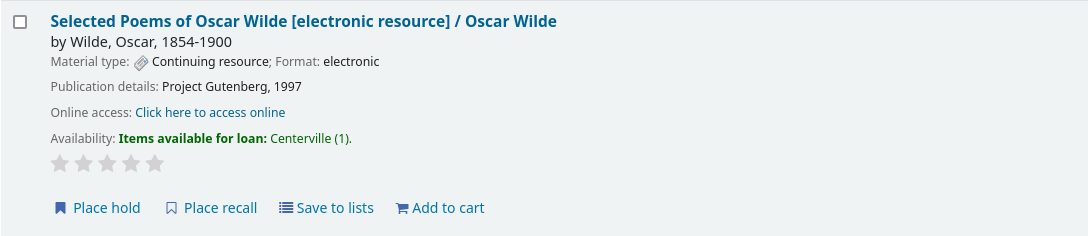
In the results list after a search, the ‘Place recall’ option appears at the bottom of each recallable result.
In the detailed record. the ‘Place recall’ option appears on the right side of the screen (or bottom in mobile view) in the options
Either of those links will lead to the recall form.
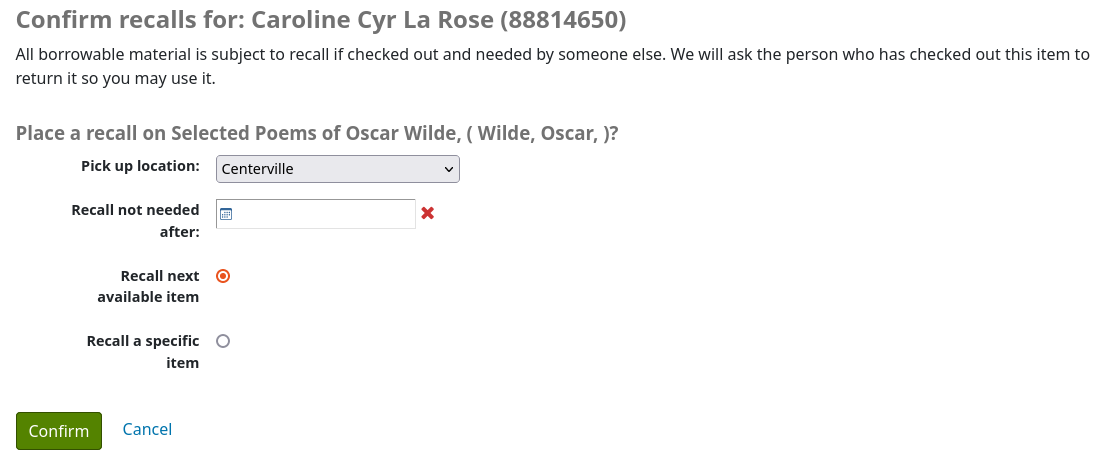
Pick up location: the patron can choose where they’d like to pick up their recalled item.
Recall not needed after: if the patron not need this item after a certain date, they can enter it here. The recall will be automatically expired (with the expire_recalls.pl cronjob) after that date.
Recall next available item or Recall a specific item: the patron can choose to recall any item or a specific one. If they choose ‘Recall a specific item’, they will be asked to select the item in the list.
Once the patron confirms their recall request, they will have get a message saying the the patron who currently has the item will be notified. The request will be added to the recalls tab in their account summary, as well as in their recall history list.
Enhanced content
Tag’leme
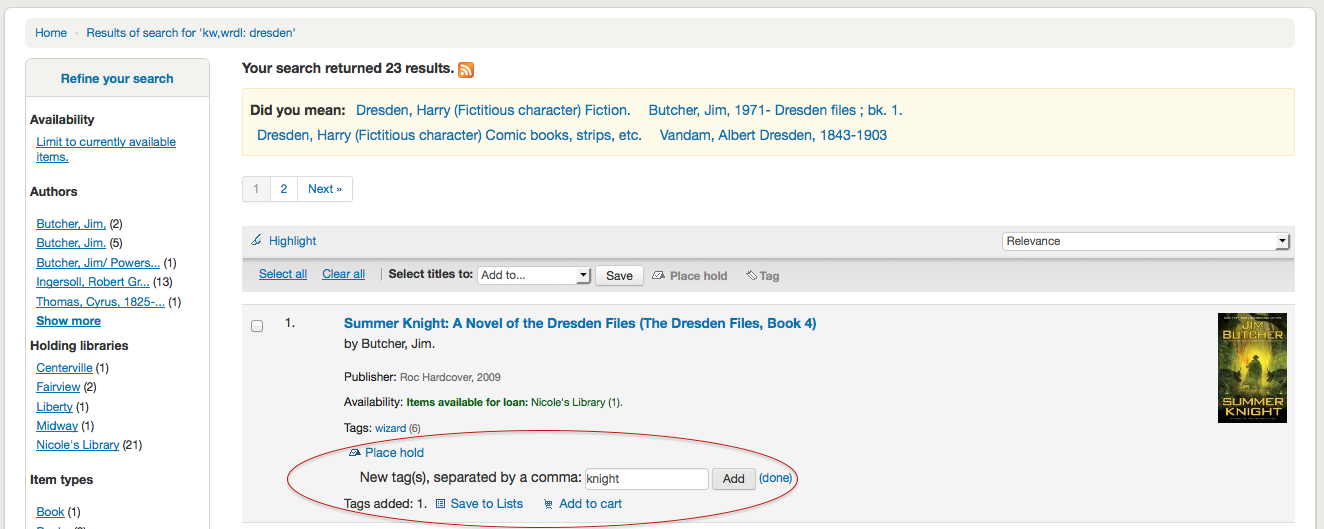
TagsEnabled, TagsInputOnList ve TagsInputOnDetail sistem tercihlerinize bağlı olarak arama sonuçları ve/veya bibliyografik kayıtlardan, bibliyografik kayıtlara tag ekleyebilirsiniz. Kullanıcılarınızın arama sonuçları ekranından tag eklemelerine izin veriyorsanız, her arama sonucunun altında bir giriş kutusu ve ekranın en üstünde bir ‘Tag’ seçeneği göreceksiniz.

Tek bir materyale tag eklemek için, ‘Yeni Tag’ kutusunda sekmeleri (virgülle ayırarak) yazın ve ‘Ekle’ butonuna tıklayın. Ekrana eklenecek tag’ler için bir onay bilgisi gelecektir.
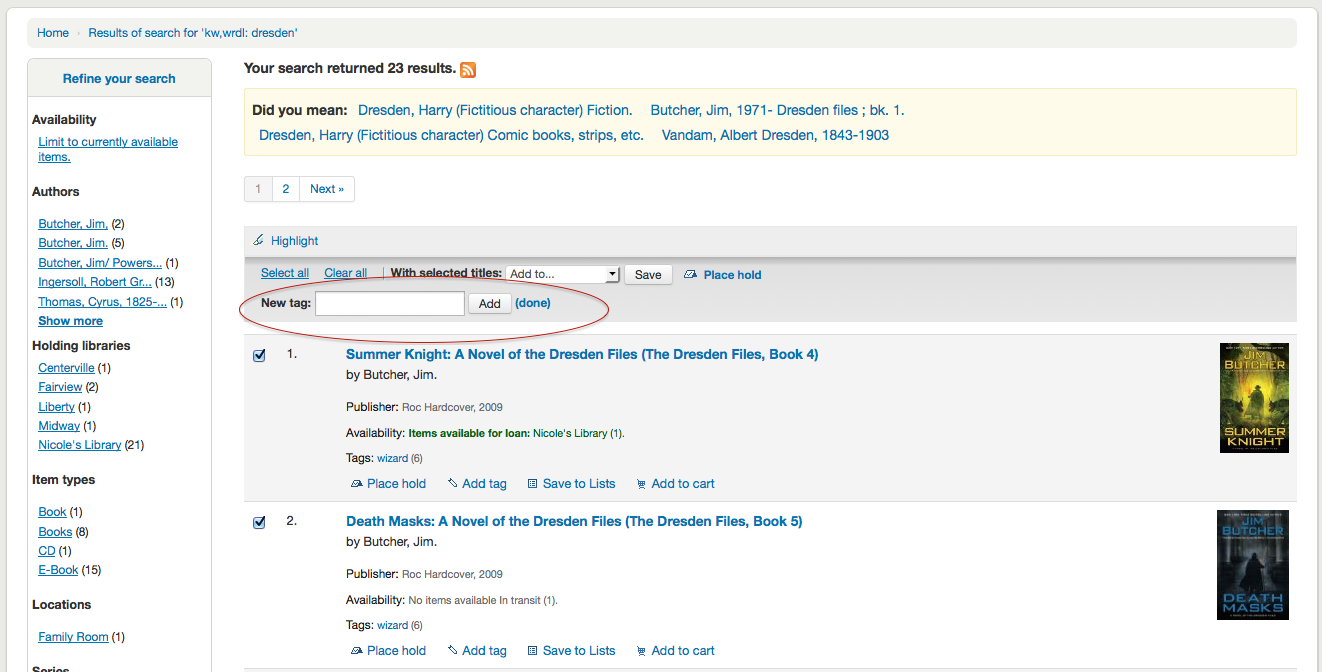
Aynı zamanda sonuçlardan soldaki onay kutularını tıklayıp sonra en üstteki ‘Tag’ butonunu tıklayarak materyalleri toplu olarak tag’leyebilirsiniz. Butona tıkladıktan sonra seçtiğiniz tüm materyallere tag eklemeniz için bir giriş kutusuna dönüşecektir.
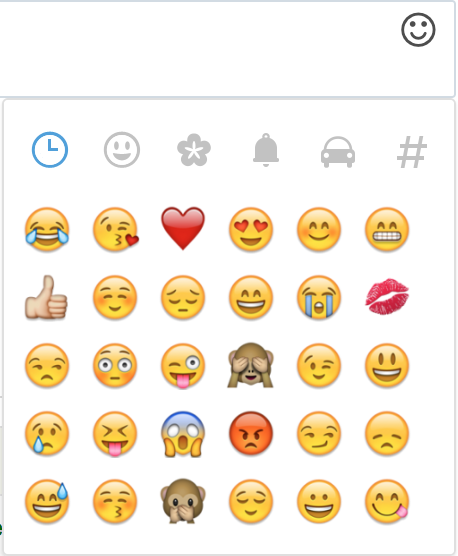
Emojis can also be included using the emoji picker when adding tags
Zotero
Zotero, bir bibliyografya oluşturma ve kaydetme imkanı veren bir Firefox eklentisidir. http://zotero.org sayfasında Zotero’yu indirebilir ve daha fazla bilgi edinebilirsiniz.
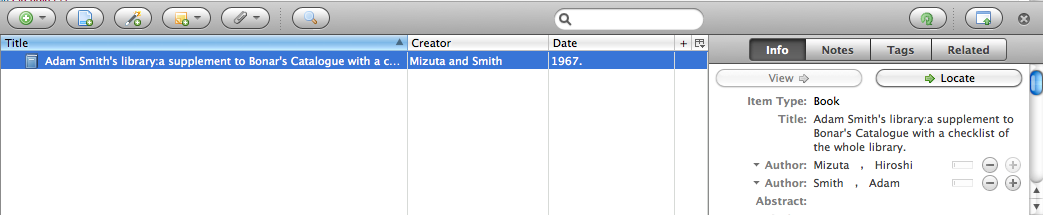
Koha OPAC’da arama sonuçlarında, Zotero kurulmuş ise, URL’nin sağındaki adres çubuğunda bir klasör simgesi göreceksiniz. Bu klasöre tıklayınca sayfada Zotero’ya eklemek için seçim yapacağınız başlıkların listesi açılacaktır.
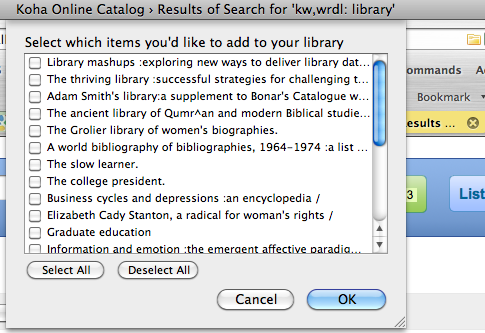
Zotero’ya eklemek istediğiniz başlıkları seçin ve ‘TAMAM’ butonuna tıklayın. Böylece başlıklarınız Zotero’ya eklenecektir. Zotero kütüphanenizi açarak başlıkları görebilirsiniz.
Custom RSS feeds
Using the RSS feeds cron job you can generate an RSS feed for any SQL query (for example a new acquisitions RSS feed). The cron job is run on the command line to produce an RSS XML document.
Çıktı, OPAC (ya da personel) web arayüzüne erişebilen bir dizin içerisine konulmalıdır, böylece kullanıcılar RSS beslemesini indirebilirler.
Kullanımın bir örneği burada bulunabilir: misc/cronjobs/rss.pl lastAcquired.conf
Normally the RSS cron job should be run periodically (e.g., daily) to keep the feed up-to-date.
Yapılandırma dosyası listeleri (örneğin, lastAcquired.conf)
kullanılacak şablon dosyasının adı
çıktı dosyasının yolu
SQL sorgusu
The RSS cron job runs the SQL query, then feeds the output of the query through the template to produce the output file.
Önemli
To use custom RSS feeds you need to turn on the RSS cron job.
OPAC self registration
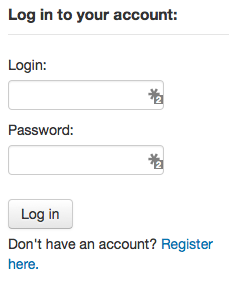
Eğer buna izin verirseniz, kullanıcılar OPAC üzerinden kendi hesapları için kayıt olabilirler. PatronSelfRegistration tercihini ‘İzin ver’ olarak ayarladıysanız bu sefer kullanıcılar OPAC ana sayfasının sağında yer alan oturum açma kutusunun altında bir kayıt olma bağlantısı göreceklerdir.
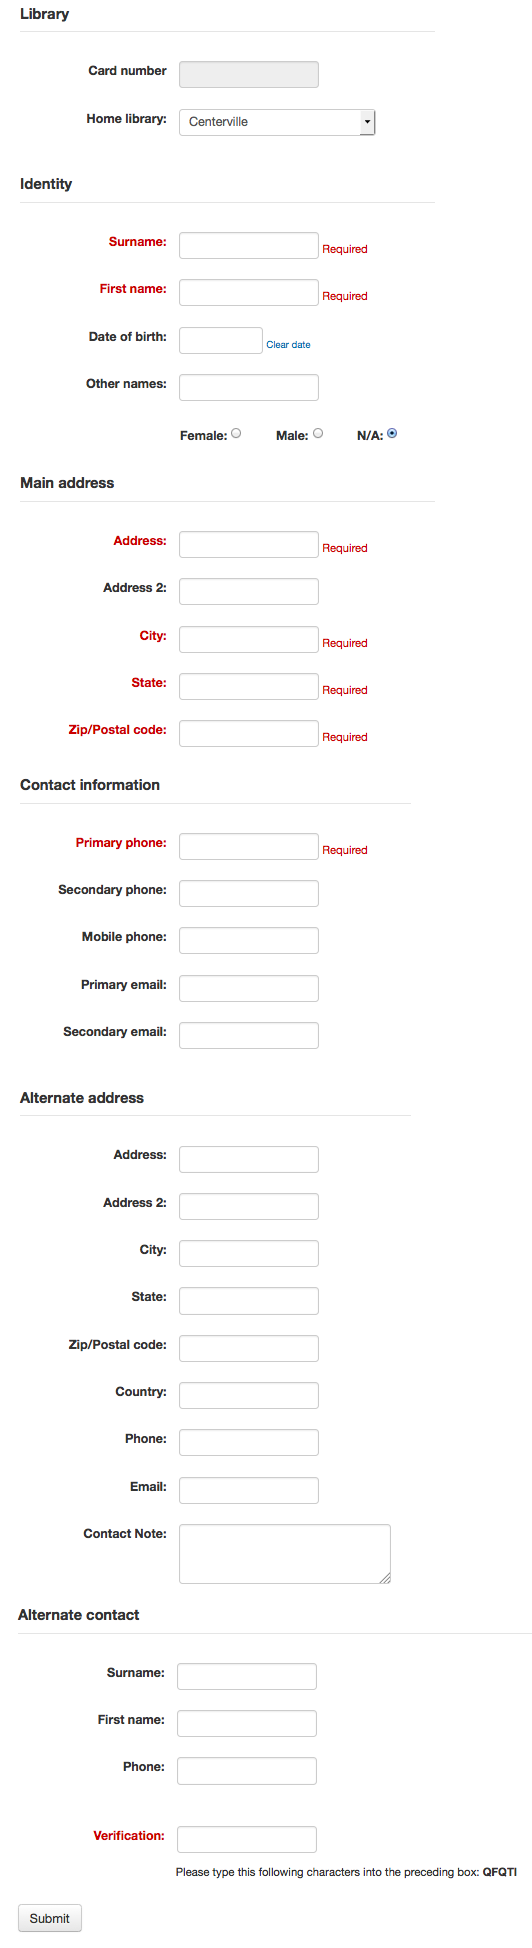
When the patron clicks the ‘Register here’ link they will be brought to a registration page. The options on the registration page can be controlled by editing the PatronSelfRegistrationBorrowerMandatoryField and the PatronSelfRegistrationBorrowerUnwantedField preferences.
Kullanıcılar kayıt olduktan sonra, ya kayıt işlemlerini onaylamak için bir onay e-postası alacaklar (bunu zorunlu tutmak için PatronSelfRegistrationVerifyByEmail tercihini ayarlamalısınız) ya da doğrudan kullanıcı adı ve parolalarını alacaklardır.

Bu şekilde kayıt olan kullanıcıların kütüphane tarafından verilene bir kadar bir kart numarası olmayacak ancak bütün OPAC işlevselliğine anında erişimleri olacaktır. Bu nedenle size tavsiye edilen:
Kendisi kayıt olan kullanıcılar için (mesela ‘Self Registered’) mevcut bir kullanıcı kategorisi kullanmak yerine geçici bir kullanıcı kategorisi <adding-a-patron-category-label> kurun ve bu değeri PatronSelfRegistrationDefaultCategory sistem tercihi içinde ayarlayın
give this patron category minimal circulation privileges in the Circulation and fines rules (such as allowing a couple holds, but no check outs)
Böylelikle kullanıcılar ya kendilerine kütüphaneden materyal ödünç alabilmelerini sağlayan bir kart numarası verilmeden önce kimliklerini doğrulatmak için kütüphaneye gelmelidirler ya da kütüphane kendi kayıt olmuş kullanıcılara verilmeden önce kart numaralarının oluşturulması üzerinde bir iç politika ele almalıdır. Bu bir kez yapıldıktan sonra kütüphane kategoriyi daha uygun olan bir kategori ile değiştirebilir (yetişkin, yerleşik, yerleşik olmayan, öğrenci, vb. gibi) ve bir kart numarası/barkod ekleyebilir.
Your account
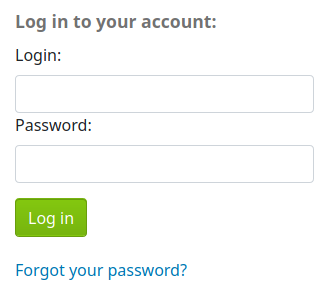
If the opacuserlogin system preference is set to ‘Allow’, patrons can log in and access their account.
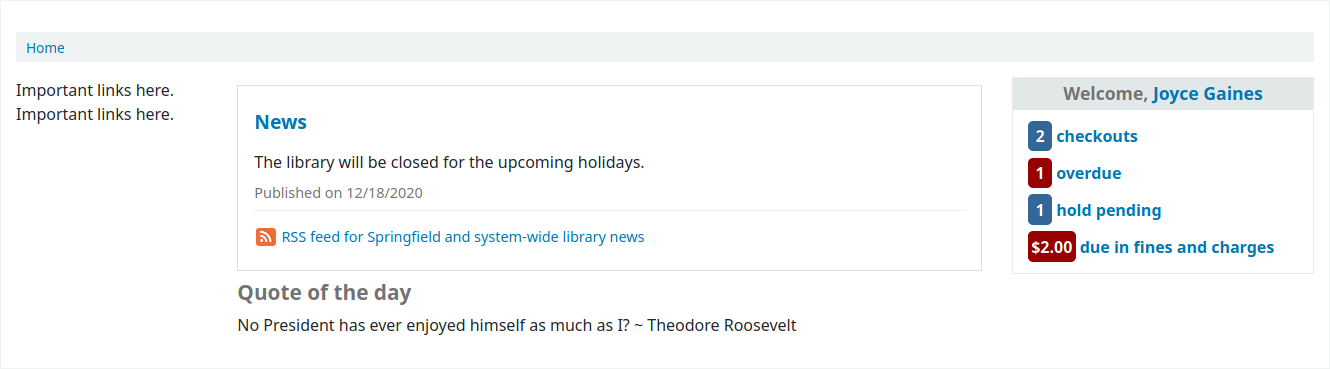
Once logged in patrons are brought to their account summary.
If patrons access the home page while logged in, and OPACUserSummary is set to ‘Show’, they will see a small summary of their account instead of the login fields.
From any page on the OPAC, clicking on their name at the top right of the page will bring a patron back to their account.
Şifrenizi sıfırlama
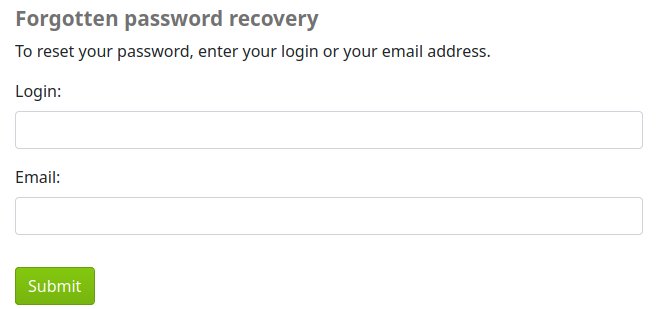
If you have the OpacResetPassword system preference set to ‘Allow’, patrons can reset their password by clicking the ‘Forgot your password?’ link found under the login box.
Once clicked, they will be presented with a form asking for their username and their email address.
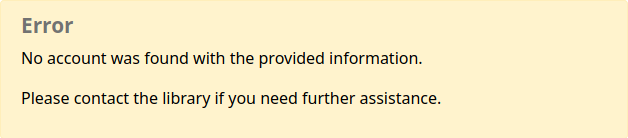
Uyarı
Patrons must have an email address on file to reset their password. If they don’t have an email address already in their file, they will get an error message
Sistem daha sonra şifreyi sıfırlamak için gerekli talimatları kullanıcıya e-postayla gönderecektir.
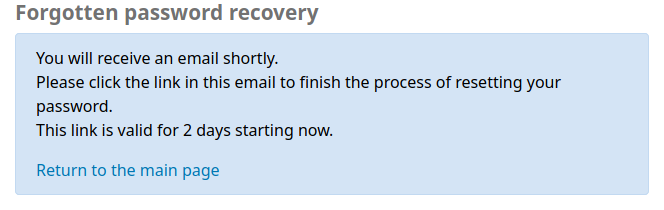
The content of the email can be customized with the Notices and slips tool. The code of the letter is PASSWORD_RESET.
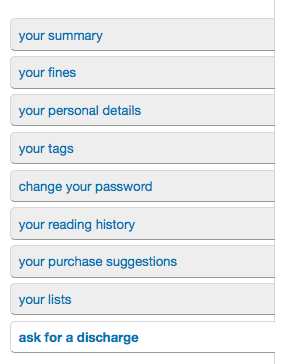
Your summary
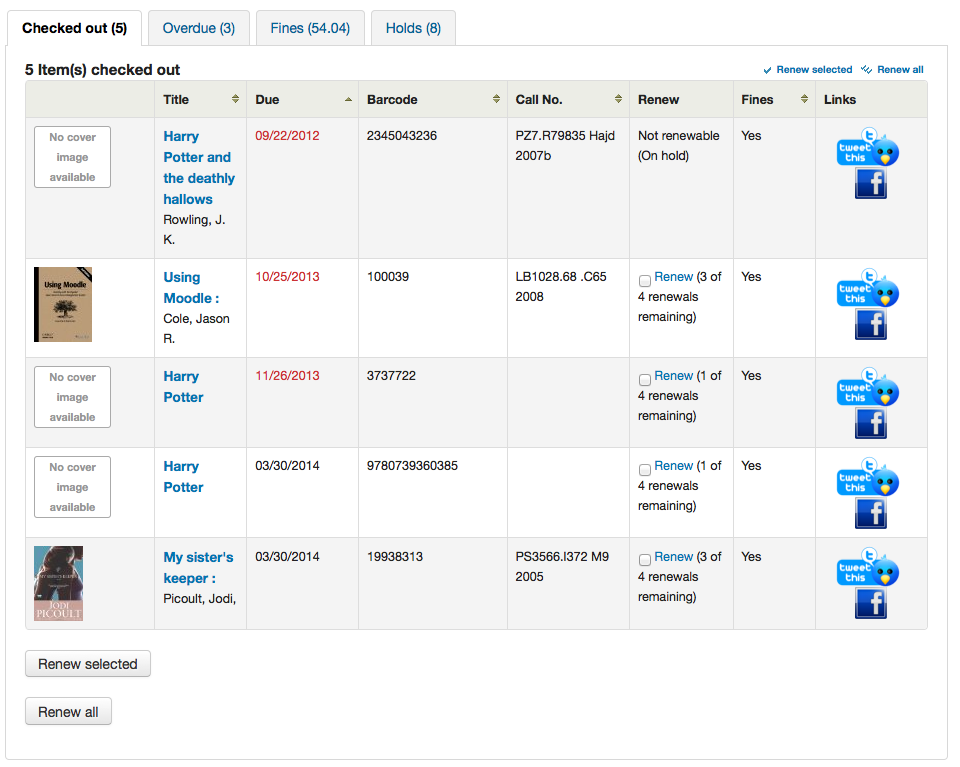
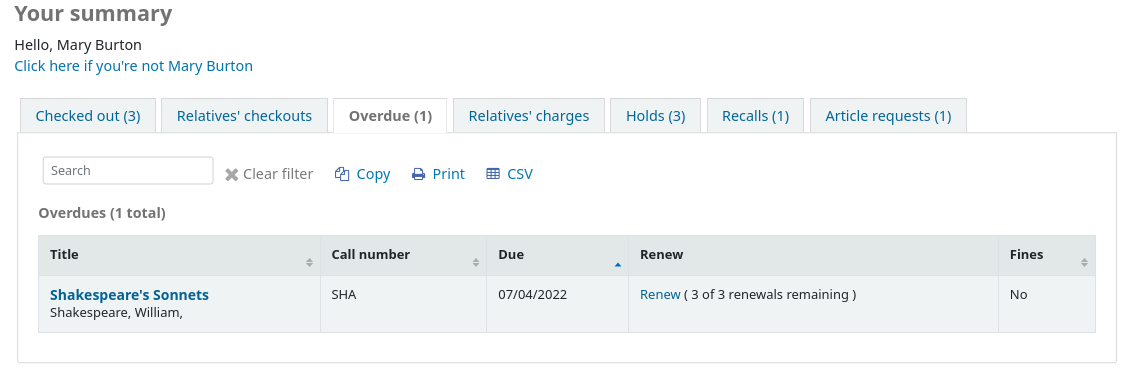
From the ‘your summary’ tab, patrons will see all of the items they have checked out with the overdue items highlighted in red.
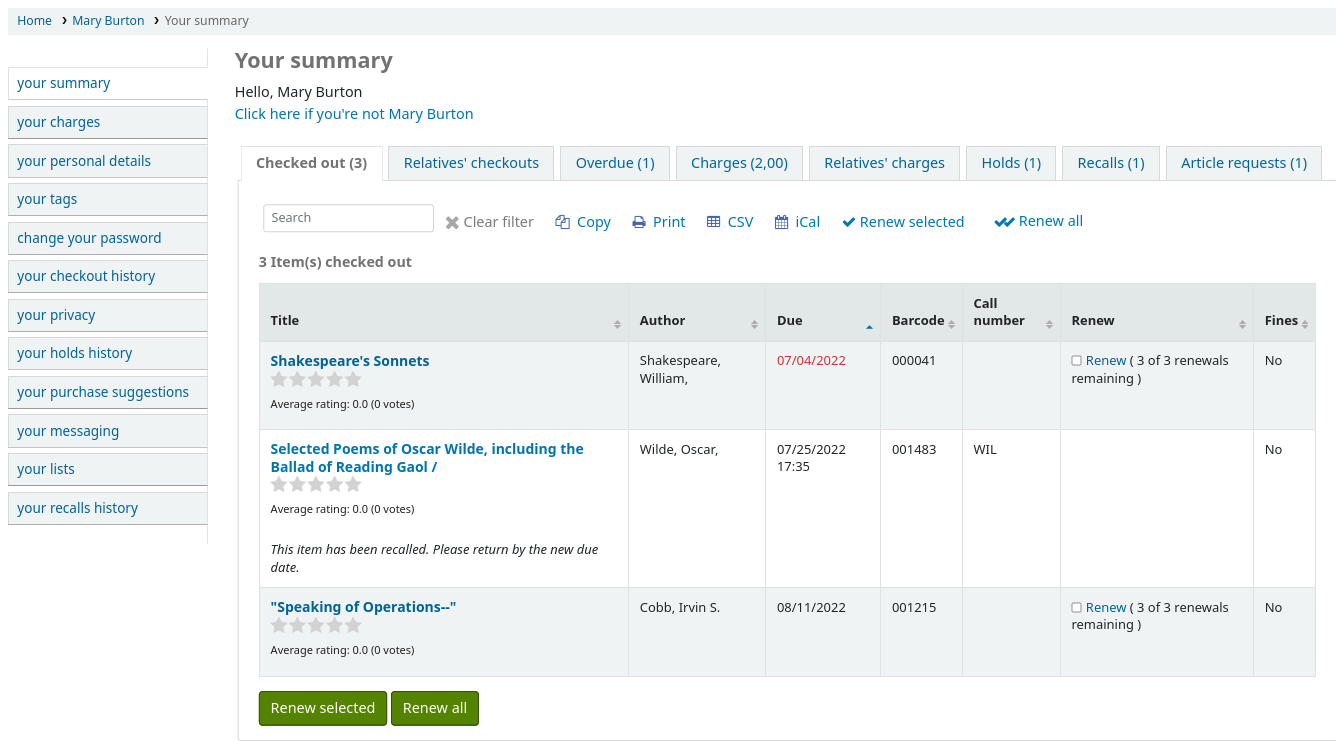
If OpacRenewalAllowed set to ‘Allow’, patrons will be able to renew their checkouts from the OPAC.
If the patron has pending charges exceeding the value set in OPACFineNoRenewals, a note will display explaining that renewals cannot be made.

A note will display if the patron cannot place holds due to their charges exceeding the value set in the maxoutstanding system preference.

If AllowPatronToControlAutoRenewal is set to ‘Allow patrons’, patrons will be able to choose whether or not they want their checkouts to be renewed automatically. If they choose ‘Yes’, items for which automatic renewal is enabled in the circulation rules will renew as expected. If they choose ‘No’, the automatic renewals that would have applied to this patron’s checkouts will not take place.

If you have HTML entered in the OPACMySummaryHTML preference then you will see that to the right of the ‘Fines’ column.
Kullanıcılarınız ödünç aldıkları materyallerin listesinde materyal barkodlarını görmek isterlerse SHOW_BCODE değeri ile bir kullanıcı niteliği ve YES_NO yetkili değeri kurabilirsiniz.
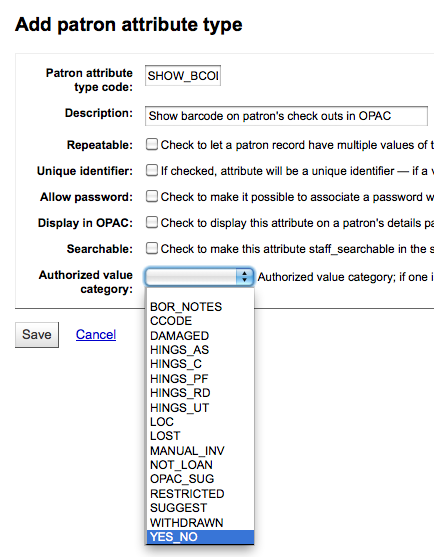
Ardından kullanıcının kaydı üzerinde SHOW_BCODE değerini evet olarak ayarlayın.

Bu, OPAC’da ödünç verme özetine kullanıcıların ödünç aldıkları materyallerin barkodlarını gösteren bir sütun ekleyecektir.
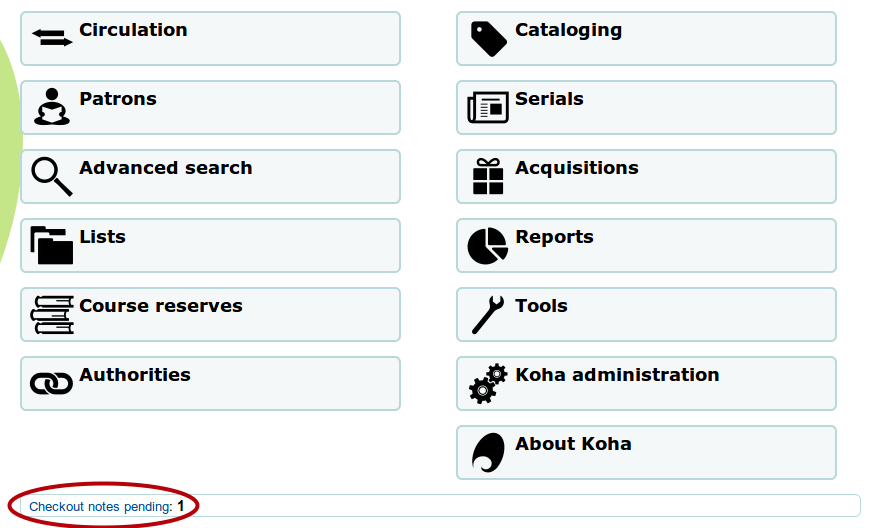
Kullanıcılarınızın ödünç aldıkları materyal üzerinde bir not bırakmalarını istiyorsanız:ref:allowcheckoutnotes tercihi izin ver olarak ayarlanmalıdır.
In the patron’s summary of checkouts, there will be an added column to allow the patron to leave a note (for example: missing first page, or DVD is scratched). This note once confirmed by the patron will appear to the staff at the bottom of the staff interface’s home page, and also when the item is checked in.
If their guarantee has allowed it via their privacy, or alternatively, if the staff is allowed to change this privacy setting in the staff interface with the AllowStaffToSetCheckoutsVisibilityForGuarantor system preference and this setting is turned on, when the guarantor logs in they will see a tab labeled “Relatives’ checkouts” on their summary tab.

‘Gecikmişler’ sekmesine tıklamak, yalnızca gecikmeye kalan materyalleri gösterecektir.
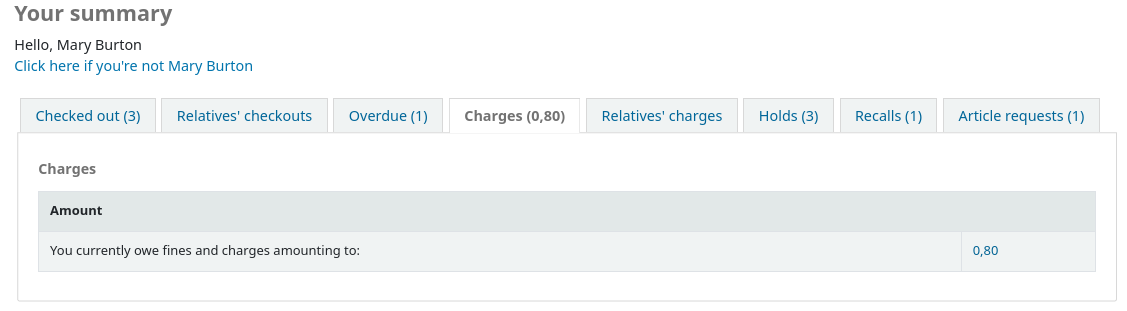
The ‘Fines’ tab will show just a total of what the patron owes. Clicking on the total will take them to the ‘your fines’ tab where they will see a complete breakdown of their fines and bills. If you don’t charge fines at your library you can turn the display of these tabs off by setting the OPACFinesTab preference to ‘Don’t allow.’
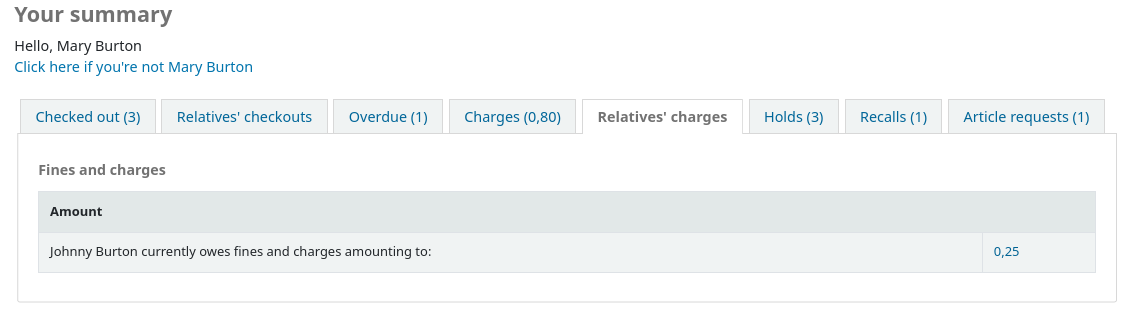
If their guarantee has allowed it via their privacy, or alternatively, if the staff is allowed to change this privacy setting in the staff interface with the AllowStaffToSetFinesVisibilityForGuarantor system preference and this setting is turned on, when the guarantor logs in they will see a tab labeled “Relatives’ charges” on their summary tab.
The ‘Holds’ tab shows the patron the status of all of the items they have on hold.
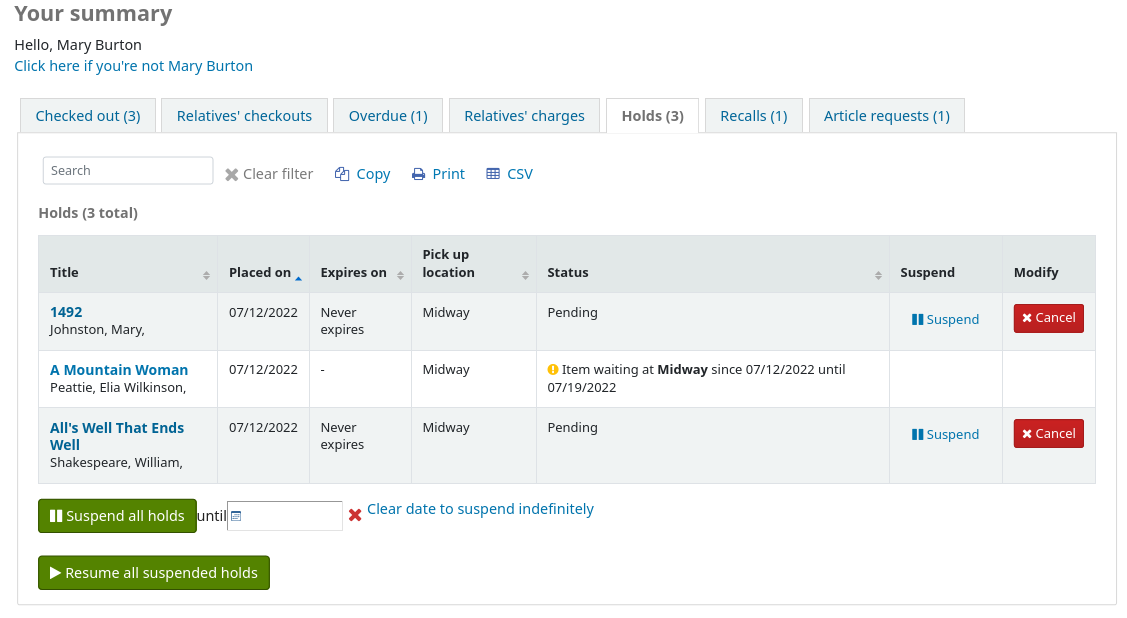
Kullanıcılar yaptıkları ayırtmaları (SuspendHoldsOpac sistem tercihinizdeki değerlere bağlı olarak) artık kendileri için beklemede ya da aktarımda değilse, iptal edebilirler ya da askıya alabilirler. Kullanıcılar ‘Askıya al’ butonunu tıkladıklarında, ayırtmanın yeniden devam ettirilmesi için bir tarih seçme opsiyonu karşılarına gelecektir.
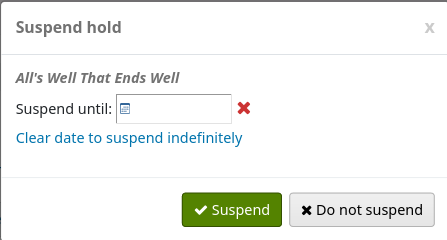
Aynı zamanda sayfanın en altında yer alan askıya alma seçeneklerini doldurarak tüm ayırmalarını süresiz olarak ya da belirli bir tarihe kadar askıya alabilirler.
Not
AutoResumeSuspendedHolds tercihi ‘İzin verme’ olarak ayarlıysa, bu sefer beklemede olan bir ayırma üzerine bir bitiş tarihi koyma seçeneğiniz olmayacaktır.
If your library allows recalls, the patron can see the recalls they have requested and their various statuses in the ‘Recalls’ tab.
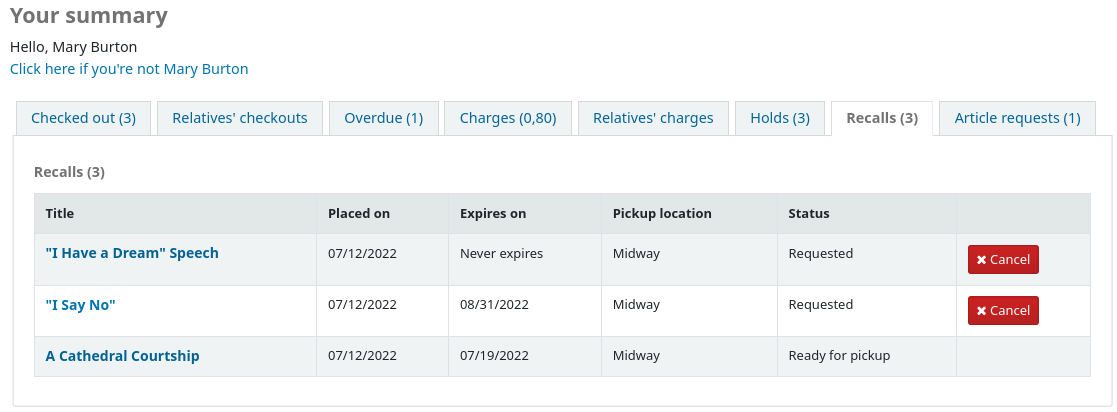
The patron can cancel a recall by clicking the ‘Cancel’ button, provided that it is not already awaiting pickup.
Patron flags
kullanıcınızın hesabını işaretlediyseniz bu kullanıcılar hesaplarının en üstünde aşağıdaki hata iletilerinden birisini görebilirler.
Kart kayıp olarak işaretlendi

Kullanıcı adresinin doğruluğu şüpheli
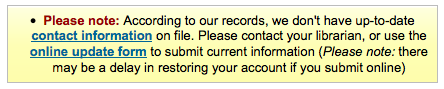
Not
Eğer OPACPatronDetails tercihi ‘İzin verme’ olarak ayarlı ise, bu hata mesajı güncelleme formuna bir bağlantı içermeyecektir
Kısıtlanmış olarak işaretli kullanıcı

Your fines
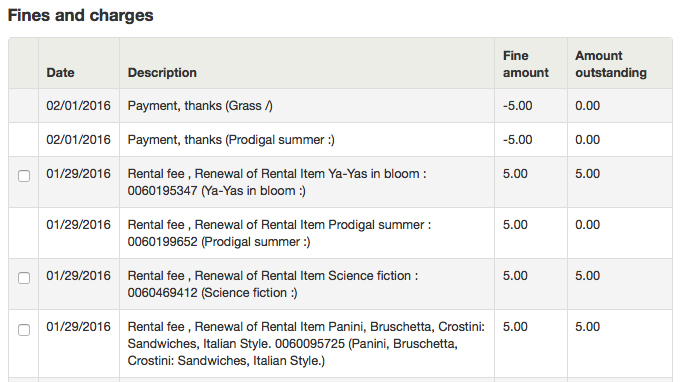
If your library charges fines the next tab on the left is ‘your fines’. Opening this tab will show the patron an entire history of their accounting at the library.

If you are allowing patrons to pay their fines using PayPal with the EnablePayPalOpacPayments preference there will be checkboxes to the left of each fine with an outstanding amount.
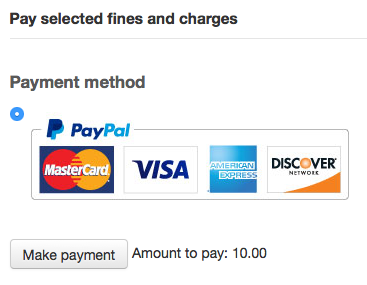
Alt kısımda kullanıcının ödünç aldığı materyaller için PayPal ile ödeme yapma seçeneği göreceksiniz.
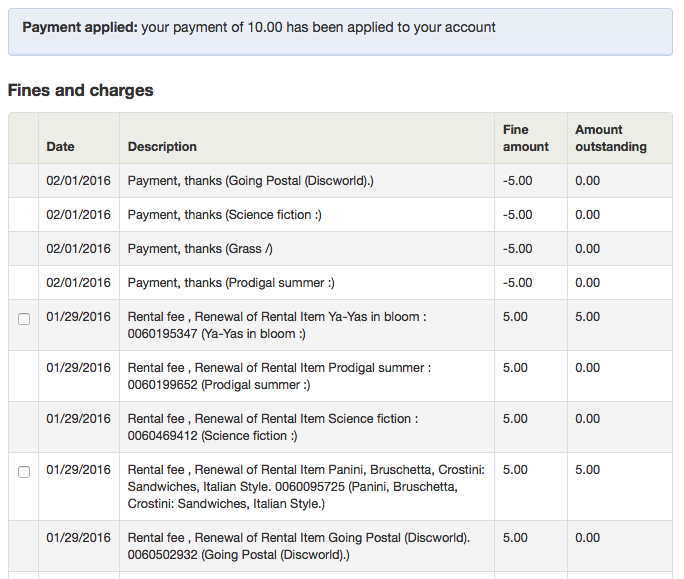
Ödemeyi yaptıktan sonra bir onay sunulacak
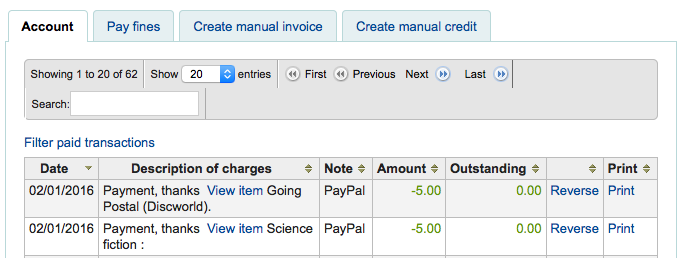
Ayrıca personel kısmında cezanın PayPal kullanılarak ödendiğini göreceksiniz.
Your personal details
If you have your OPACPatronDetails preference set to ‘Allow’, your patrons will see a form filled in with their contacting information by clicking on the ‘Your personal details’ tab. You can control what fields patrons see and can modify via the OPAC by setting the PatronSelfRegistrationBorrowerMandatoryField PatronSelfRegistrationBorrowerUnwantedField preferences.
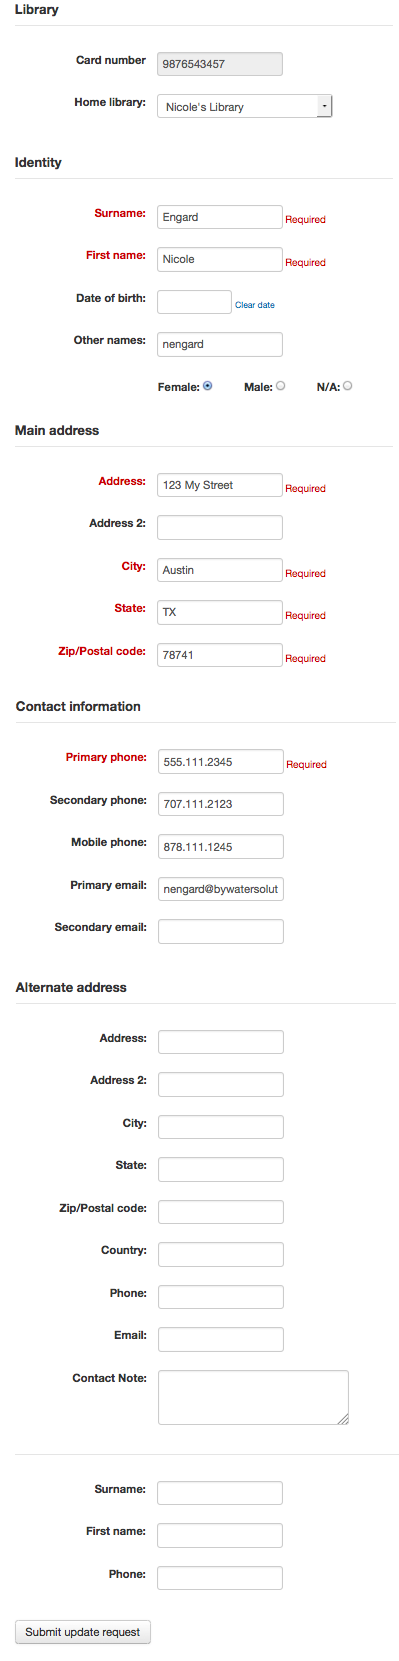
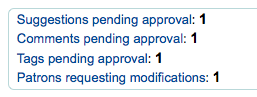
Patrons can edit their details in this form and click ‘Submit changes’ to have their edits sent to the library for review before their record is updated. Staff will see all patrons requesting modification to their record listed below the modules on the main dashboard along with anything else awaiting library attention.
OPACPatronDetails tercihi ‘İzin verme’ olarak ayarlanmışsa, kullanıcılar yalnızca kendi ayrıntılarını ve değişiklik yapmak için kütüphane ile iletişime geçmelerini bildiren bir mesaj göreceklerdir.

Your tags
If your library has TagsEnabled set to ‘Allowed’ then the next tab on the left will be ‘your tags’. This tab will show patrons all of the tags in the system as a cloud and then all of the tags they have applied in a list format. From here patrons have the ability to remove tags that they have added if they want.

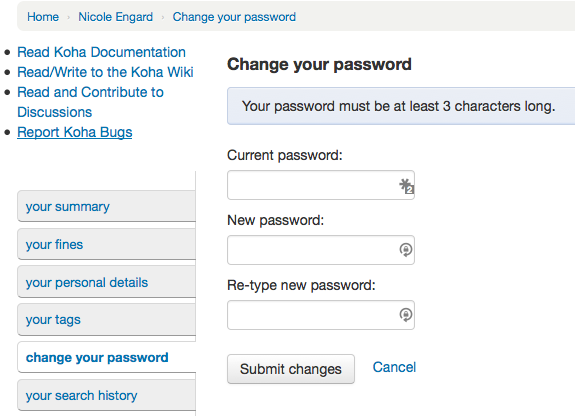
Change your password
Next, if you have OpacPasswordChange set to ‘Allow’ the next tab will be ‘change your password,’ where patrons can change their password for logging into the OPAC. Patrons will be presented with a standard form asking them to enter their old password and then their new password twice.
Your search history
If you have your EnableOpacSearchHistory preference set to ‘Allow’ then your patrons can access their search history via the ‘your search history’ tab.
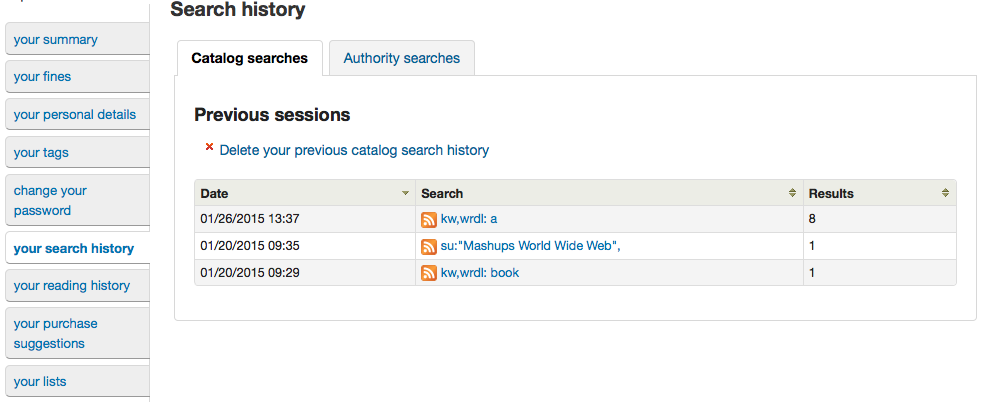
Arama geçmişi kullanıcılar tarafından yapılan tüm aramaların bir kaydıdır. Herhangi bir arama ifadesi üzerine tıklamak o aramayı kullanıcı için yeniden yapacaktır. Arama geçmişi, kullanıcılar tarafından bu sekmenin en üstündeki ‘Arama geçmişinizi silin’ bağlantısını tıklayarak ya da OPAC’ta en sağ üstte yer alan ‘Arama geçmişi’ bağlantısının yanındaki kırmızı renkli küçük ‘x’ işaretine tıklayarak istenildiği zaman silinebilir.

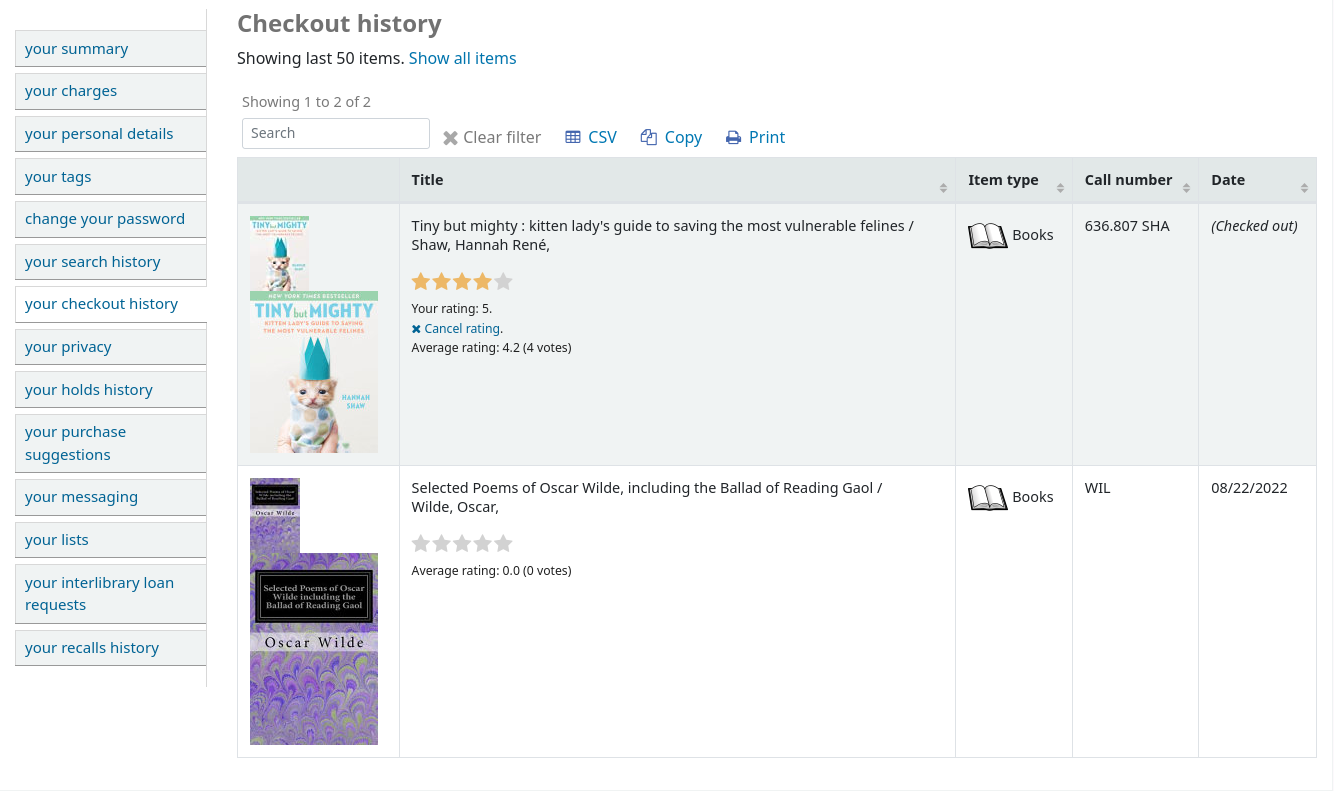
Your checkout history
Depending on your library’s setting for opacreadinghistory your patrons may see the ‘your checkout history’ tab next. This will show the patron their entire borrowing history unless they have asked the library to not keep that information via the ‘your privacy’ tab which will appear if you have the OPACPrivacy preference set to ‘Allow.’
Your privacy
The ‘your privacy’ tab will appear if you have both the opacreadinghistory and the OPACPrivacy preferences set to ‘Allow.’ This tab will allow the patrons to decide how the library keeps their circulation history data.
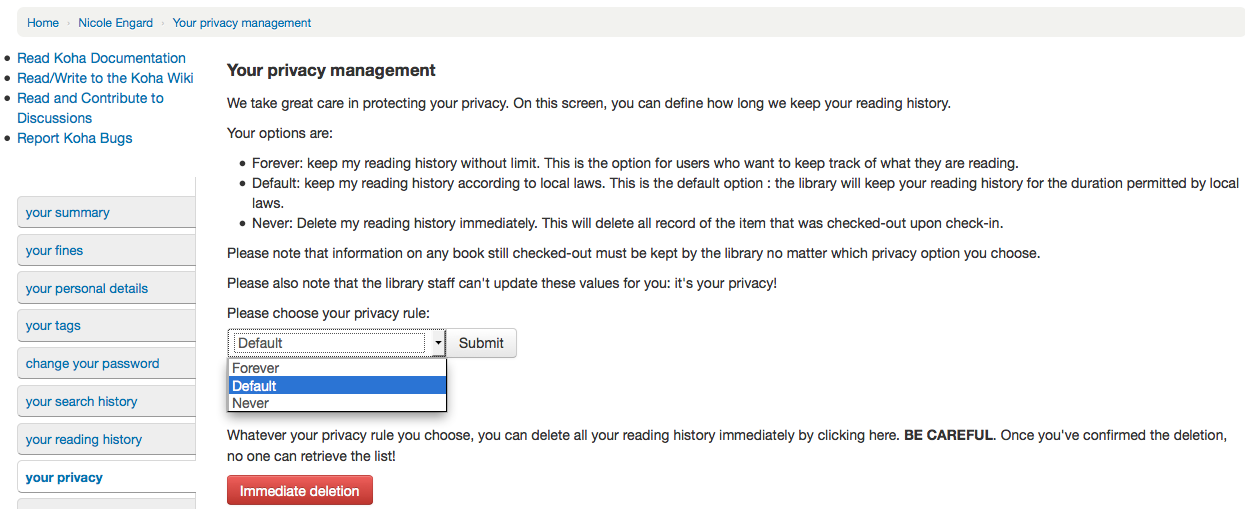
Kullanıcı üç seçenek arasından seçim yapabilir:
Devamlı : okuma geçmişimi limitsiz olarak saklayın : Bu seçenek, ne okumakta olduğunu izlemek isteyen kullanıcılar içindir.
Varsayılan: yerel yasalar uyarınca okuma geçmişimi saklayın. Bu varsayılan seçenektir : Kütüphane okuma geçmişinizi saklamaya, yerel yasalar tarafından izin verilen süre içerisinde devam edecektir.
Asla: Okuma geçmişimi hemen sil. Bu ödünç verme esnasında kontrol çıkışı olan materyalin tüm kayıtlarını siler.
Depending on the patron’s suggestions the contents of the ‘Your reading history’ tab and the ‘Circulation History’ tab in the staff client may change.
Kullanıcının seçimi ne olursa olsun kullanıcılar ‘Çabuk silme’ butonuna tıklayarak istedikleri zaman kendi okuma geçmişlerini toplu olarak silebilirler.
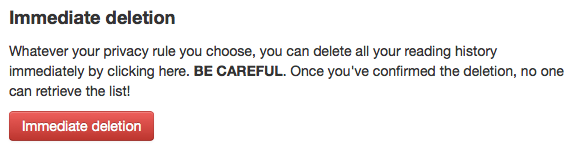
Bu butona tıklamak mevcut durumda ödünç verilmiş materyalleri silmeyecek, ancak kullanıcının okuma geçmişini silecektir.
Önemli
Kullanıcıların kendi okuma geçmişlerini silebilmeleri için AnonymousPatron tercihini ayarlamış olmanız gereklidir.
Kefillerin garantörlerine güncel ödünç alma bilgilerini görmelerine izin vermelerine AllowPatronToSetCheckoutsVisibilityForGuarantor tercihi ile izin veriyorsanız bu ekranda o seçeneği göreceklerdir.

Garantörler oturum açtığında, özet sekmelerinde “Yakınların” ödünç alma işlemleri etiketli bir sekme görürler.
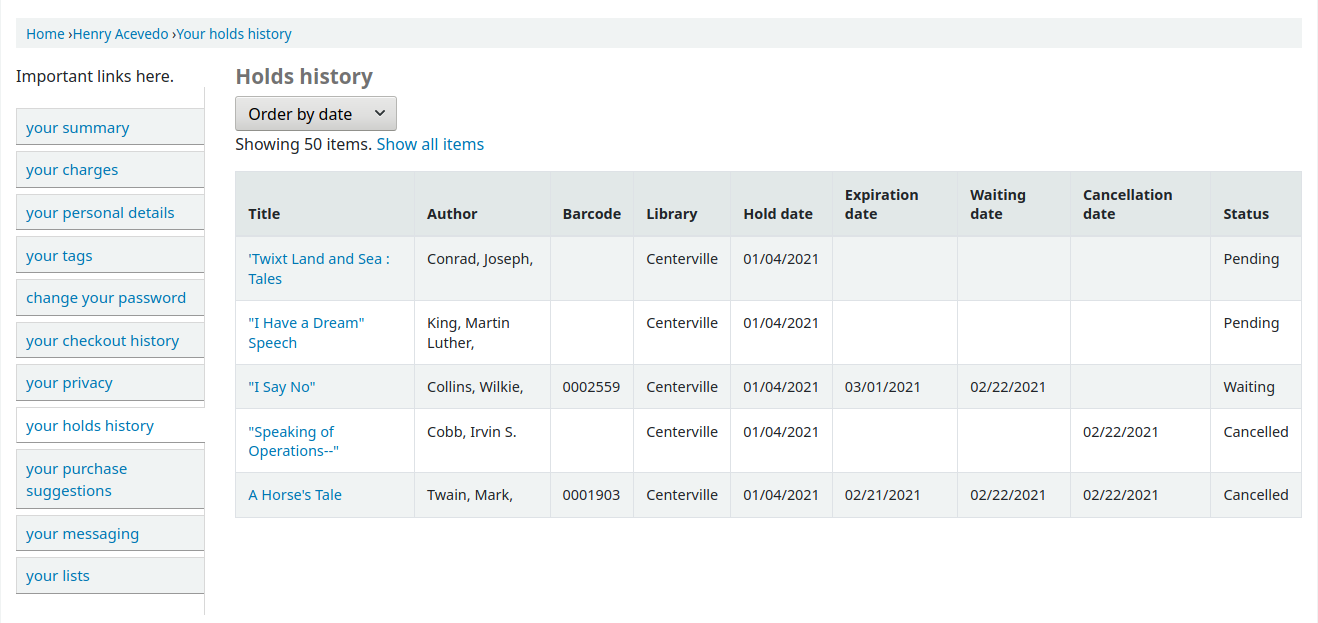
Your holds history
If the OPACHoldsHistory system preference is set to ‘Allow’, patrons will be able to see all their current and past holds.
Your purchase suggestions
Kütüphaneniz kullanıcıların satın alma önerileri yapmalarına izin veriyorsa bir sonraki sekme kullanıcıların kütüphaneye yapmış oldukları öneriler ve durumlarını gösterecektir. Bu sekmeyi ve öneri işlevselliğini devre dışı bırakmak için öneri tercihini ‘İzin verme’ olarak ayarlayın.
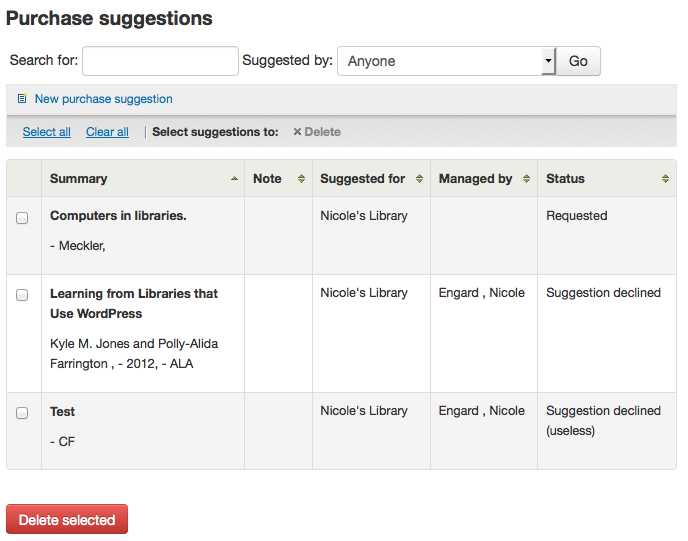
OPACViewOthersSuggestions sistem tercihini ‘Göster’ olarak ayarladıysanız, kullanıcılar bu listenin en üzerinden öneriler için arama yapabileceklerdir.
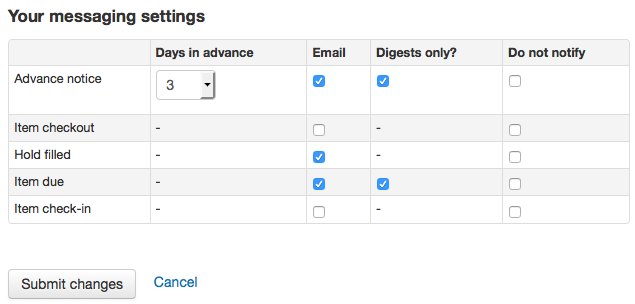
Your messaging
Kütüphanenizde EnhancedMessagingPreferences ve EnhancedMessagingPreferencesOPAC tercihleri ‘İzin ver’ olarak ayarladıysa kullanıcılarınız kütüphaneden hangi mesajları alacaklarını seçebilirler (kütüphanenin denetiminde olan gecikme bildirimleri haricinde).
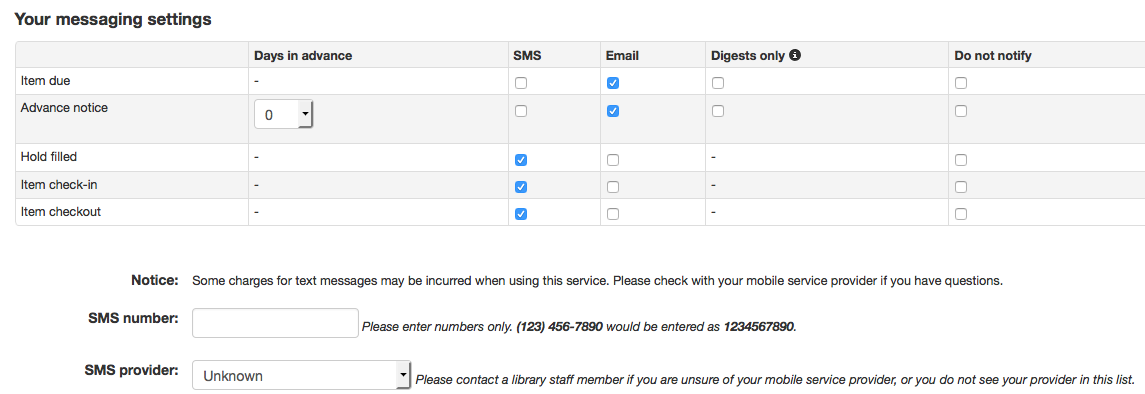
If you use an outside driver for sending text messages set with the SMSSendDriver preference, you will see an additional column to receive these messages as SMS (or text messages) and a field for a cell (or SMS) number.
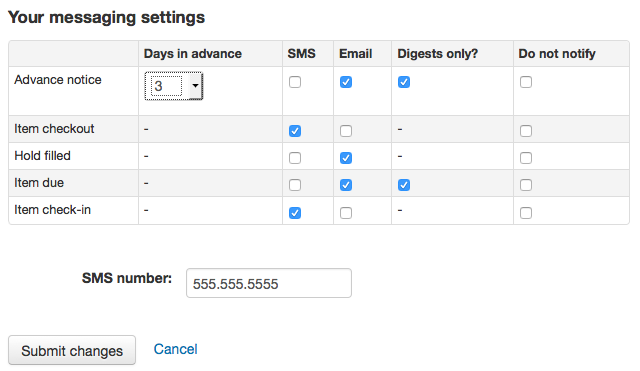
If you are using the Email protocol for sending text messages set with the SMSSendDriver preference, you will see an additional column to receive these messages as SMS (or text messages), a field for a cell (or SMS) number, and a pull down listing cellular providers entered in administration.
Itiva Talking Tech hizmetini kullanıyorsanız bu mesajları via Phone üzerinden almak için ilave bir sütun göreceksiniz.
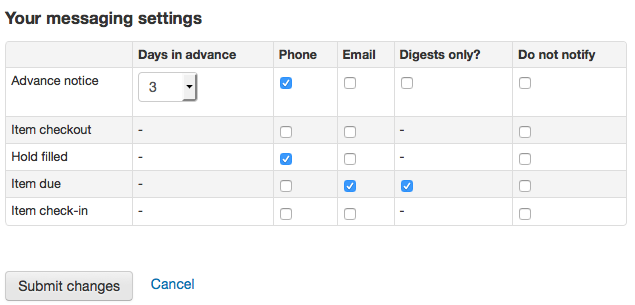
Bu bildirimler:
Advanced notice: A notice in advance of the patron’s items being due (The patron can choose the number of days in advance)
Item checkout: A notice that lists all the of the items the patron has just checked out and/or renewed, this is an electronic form of the checkout receipt
Hold filled: A notice when you have confirmed the hold is waiting for the patron
Item due: A notice on the day and item is due back at the library
Item check-in: A notice that lists all the of the items the patron has just checked in
Kullanıcılar ‘Yalnızca Özet’ kutusunu işaretleyerek teslimat yöntemi ile birlikte bildirimlerini özet olarak almayı seçebilirler. Bir özet, her uyarıyı ayrı ayrı e-posta göndermek yerine bu türdeki tüm iletilerin tek e-posta ile gönderilen kombinasyonudur (böylece iade tarihine 3 gün kalan materyallerin uyarıları yalnızca bir e-posta ile gönderilir).
If the TranslateNotices preference is set to Allow the patron will also see an option to choose ‘Preferred language for notices’ with a dropdown list of available languages.
Önemli
You must choose a delivery method (SMS or email or phone) along with ‘Digest only?’ if you would like to receive a digest of the messages.
Your lists
If your library has the virtualshelves set to ‘Allow’ they will see the ‘your lists’ tab. From here your patrons can review public lists and create or edit their own private lists.
Ask for a discharge
useDischarge tercihini etkinleştirdiyseniz, kullanıcılar OPAC aracılığıyla ilişik kesme talebinde bulunabilecektir.
Buradan kullanıcılar ilişik kesme isteğinde bulunabilirler
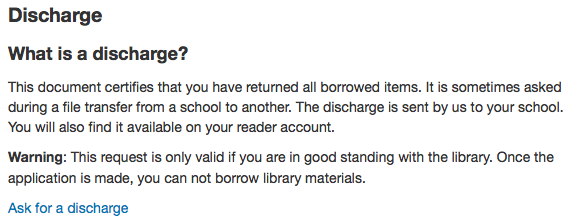
ve istekleri için bir onay alacaklardır.

Your routing lists
If you are named as a recipient on any serial routing lists you will see them listed here. The following note is displayed “You are subscribed to the routing lists for following serial titles. If you wish to make changes, please contact the library”.
Your interlibrary loan requests
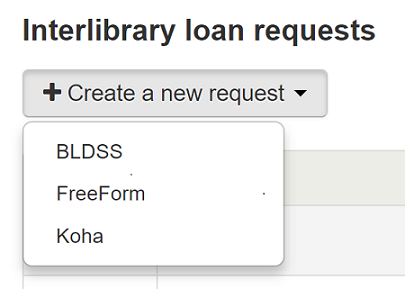
If your library has the ILLModule preference set to ‘Enable’ patrons will have the option to make ILL requests when logged in to their OPAC account. From here they can view their existing requests and place new ones.
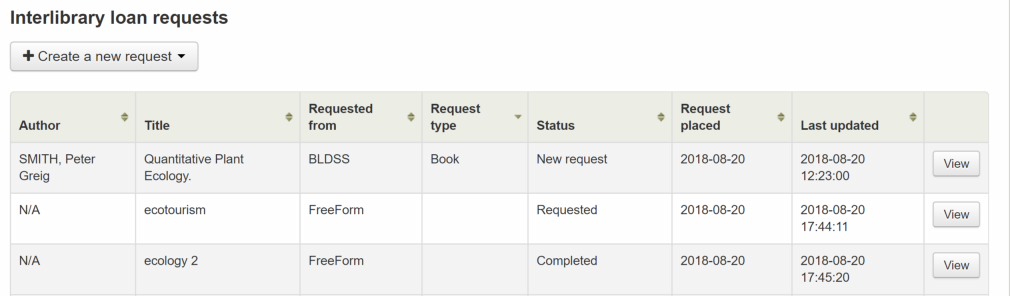
To place a new interlibrary loan request click on ‘Create a new request’ and choose a request form.
Not
The options displayed are dependent on your ILL configuration. See the ILL backends wiki page at https://wiki.koha-community.org/wiki/ILL_backends further explanation.
Not
If you have entered copyright text in the ILLModuleCopyrightClearance preference the text displays here and you need to click ‘Yes’ to accept before continuing.
Complete the publication details as fully as possible. Depending on the form in use you may see the option to add Custom fields for additional information such as notes. Destination branch is a required field, this is the branch you would like the request to be sent to.

Click on ‘Create’ to submit your request to the library for processing.
Your submitted request will be listed with a status of ‘New request’. Once processed the status will be updated to ‘Requested’.
Click on ‘View’ to make changes or cancel your request.
You cannot edit the form details but you can add a note to request a modification and then click on ‘Submit modifications’ at the bottom of the screen. Your modification will be sent to the library for processing.
For new requests you will also have the option to ‘Request cancellation’. Your request will be updated with the status ‘Cancellation requested’ and can then be removed by library staff.
Your recalls history
If your library allows recalls, the patron can see all their past and current recalls they have requested and their various statuses in the ‘your recalls history’ tab.
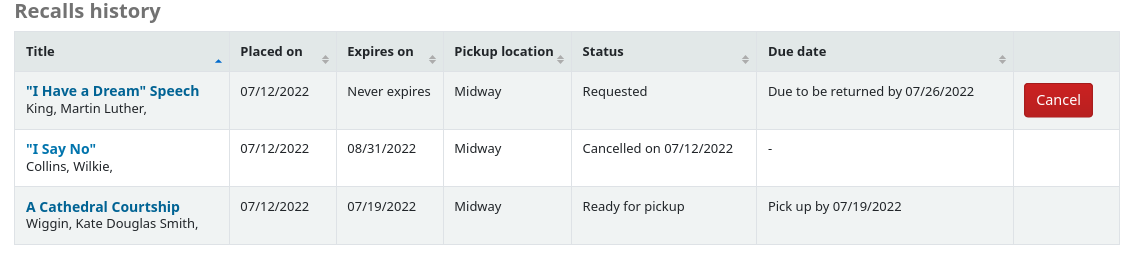
The patron can cancel a recall by clicking the ‘Cancel’ button, provided that it is not already awaiting pickup.
Purchase suggestions
If your library has the suggestion preference set to ‘Allow’, patrons will have the option to make purchase suggestions in several areas in the OPAC.
If you are allowing everyone to see the purchase suggestions made by others with the OPACViewOthersSuggestions preference, there will be a link at the top of your OPAC under the search box.

Kullanıcılar yaptıkları arama sonucunda hiç bir şey bulamadıklarında bir bağlantı olacaktır.

There will be a ‘Suggest for purchase’ option in the detailed view of a bibliographic record.
And there will be a link in the Your purchase suggestions tab in the patron’s account.

Bu bağlantılardan her hangi birisine tıklayınca satın alma önerisi formu açılacaktır.

The informational text at the top of the form can be replaced using the HTML customizations tool, display location OpacSuggestionInstructions.
From the form only the ‘Title’ is required by default.
Mandatory fields can be set using the OPACSuggestionMandatoryFields system preference.
The OPACSuggestionUnwantedFields system preference can be used to hide unnecessary fields.
The item type list can be edited by editing the SUGGEST_FORMAT authorized value list.
The ‘Reason for suggestion’ list can be edited by editing the OPAC_SUG authorized value list.
You can change the text at the top of the form using the HTML customizations tool
Once the form is submitted the purchase suggestion will appear in the acquisitions module for the librarians to manage.
If a purchase suggestion has been ordered through the acquisitions module, the patron’s purchase suggestion title will be clickable and bring the patron directly to the ordered record in the OPAC.
Yorumlar
Patrons can leave comments in the OPAC if you have the OPACComments preference set to allow this. Each bibliographic record has a comments tab below the bibliographic information.
Kullanıcı sistemde oturum açmış ise materyale yorum eklemek için bir bağlantı görecektir. Bu bağlantı üzerine tıklayınca yorumlar için bir kutu ile birlikte bir açılır menü penceresi ekrana gelecektir.
Yorumun yazılması tamamlandıktan sonra ve ‘Gönder’ butonu tıklandıktan sonra kullanıcı kendi yorumunu beklemede olarak görecek ve diğer kullanıcılar materyal üzerinde henüz her hangi bir yorum görmeyeceklerdir.
Once the comment is approved the patron will see the number of comments on the ‘Comments’ tab and their comment labeled among the other comments. If you have set your ShowReviewerPhoto preference to ‘Show’ then you’ll see the patron’s photo pulled from the Libravatar library.
Diğer kullanıcılar yorumu, yorumu yapan kullanıcının adı ile birlikte göreceklerdir (:ref:`ShowReviewer ` tercihi sizin tarafınızdan kullanıcı adları görünmeyecek şekilde ayarlanmadıkça)
OpacShowRecentComments tercihini göster olarak ayarladıysanız, o sayfada onaylanmış yorumları göreceksiniz.
Bu sayfa üzerinden kullanıcılar istedikleri takdirde RSS kullanan güncel yorumlara abone olabilirler.