Araçlar
Koha’daki araçların hepsi bir tür işlem gerçekleştirir. Çoğunlukla Koha’nın Araçları altında listelenen birçok materyale, diğer kütüphane yönetim sistemlerinde ‘Raporlar’ şeklinde değinilmektedir.
Gidiş yolu: Daha fazla > Araçlar
Patrons and circulation
Kullanıcı listeleri
Get there: More > Tools > Patrons and circulation > Patron lists
Kullanıcı listeleri, bir kullanıcı grubu üzerinde kullanıcı toplu modifikasyon aracı veya raporlama ile kolaylıkla değişiklik yapabilmek için bir saklama yöntemidir.
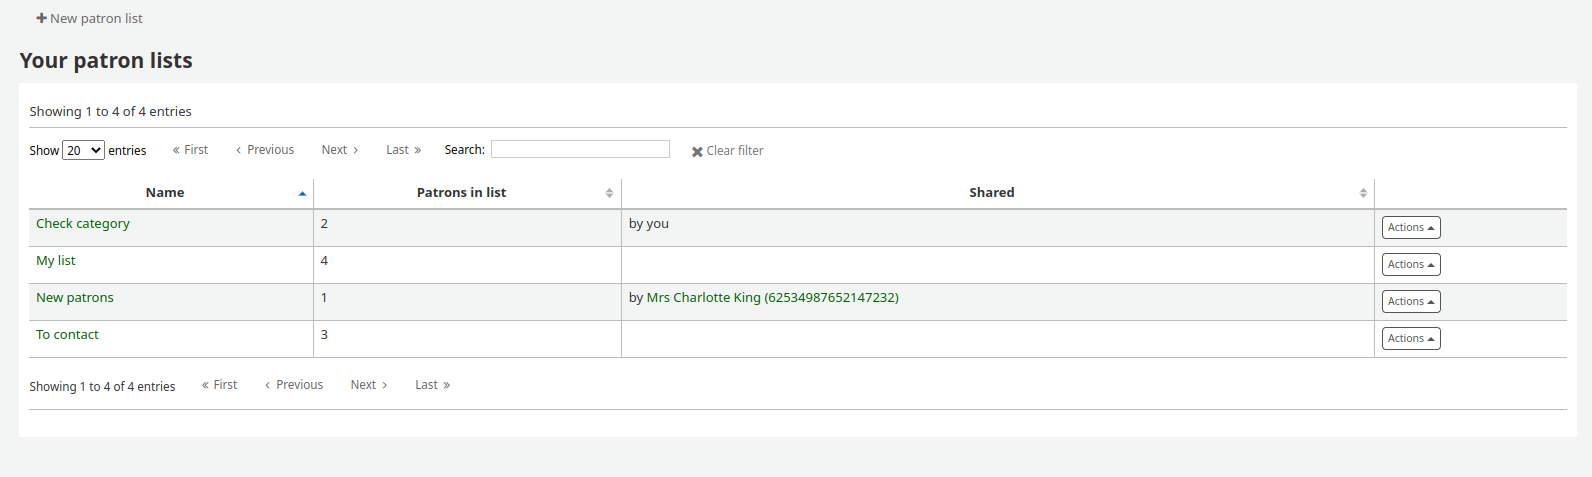
Yeni bir kullanıcı listesi oluşturmak için ‘Yeni Kullanıcı Listesi’ butonuna tıklayın
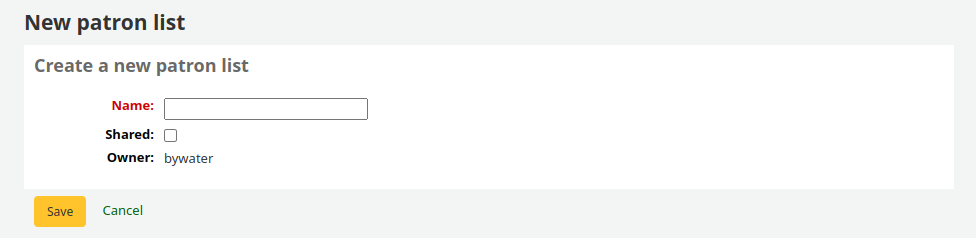
Enter a list name.
Checking the ‘Shared’ box will make this list visible to all users with the manage_patron_lists permission.
Save the list.
Her listenin, daha fazla liste seçeneği olan bir ‘Eylemler’ menüsü vardır.
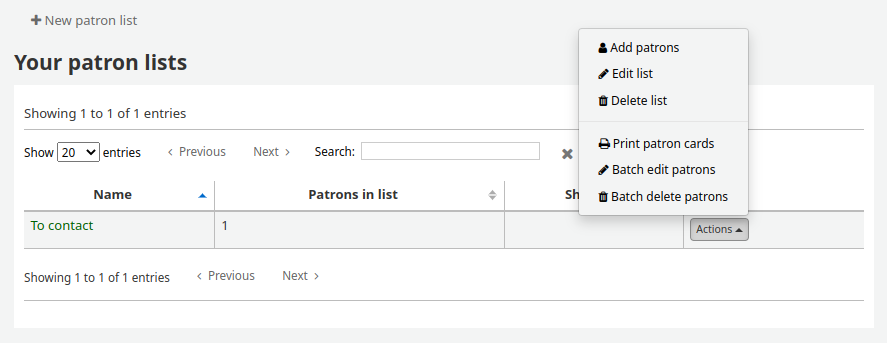
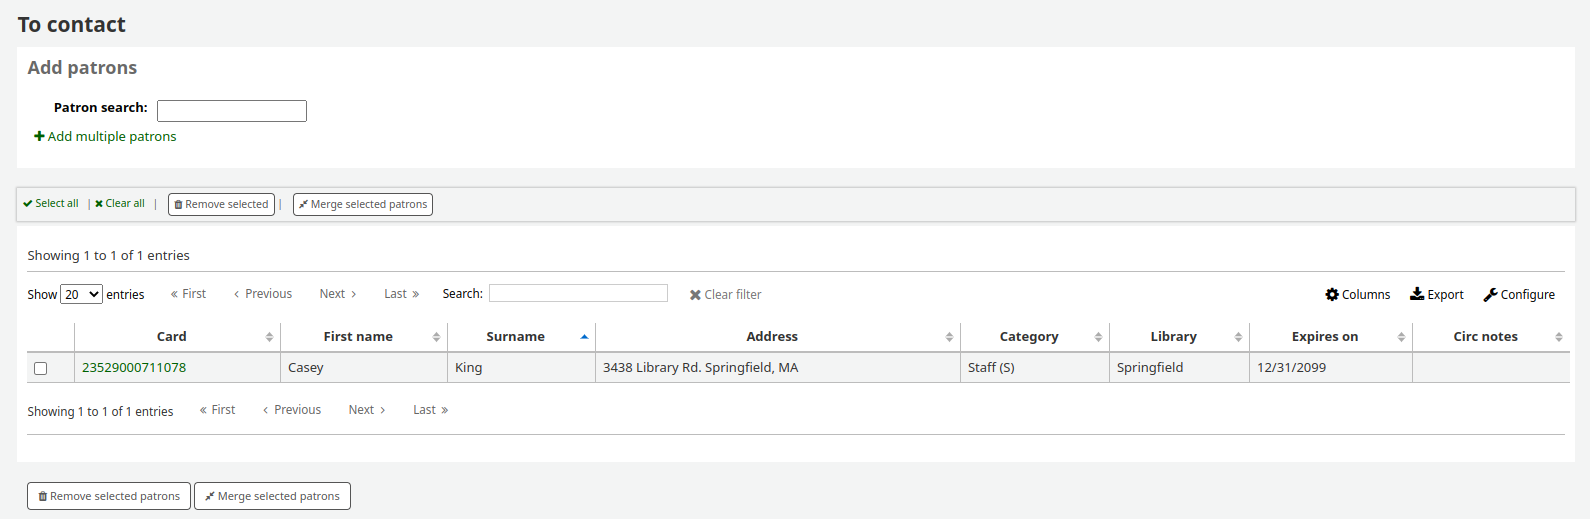
Kullanıcıları listeye eklemek için ‘Eylemler’ menüsündeki ‘Kullanıcıları ekle’ bağlantısını tıklayın.
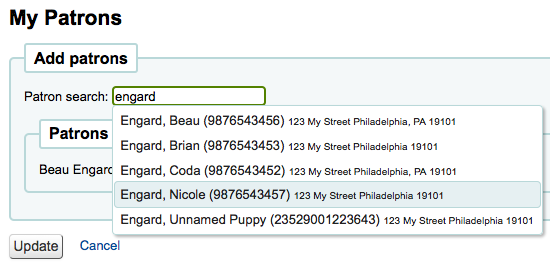
Arama kutusuna kullanıcının ismi ya da kart numarasını girin ve kullanıcıyı eklemek için sağdaki sonuca tıklayın.
Alternatively, you can click on the ‘Enter multiple card numbers’ link and scan (or type in) barcodes in the box.
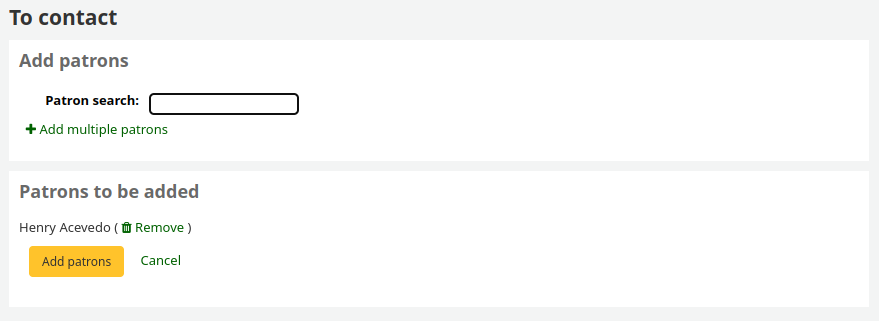
Eklemek istediğiniz kullanıcıların hepsine sahip olduğunuzda, bunları listeye kaydetmek için ‘Kullanıcıları ekle’ düğmesini tıklayabilirsiniz.
Not
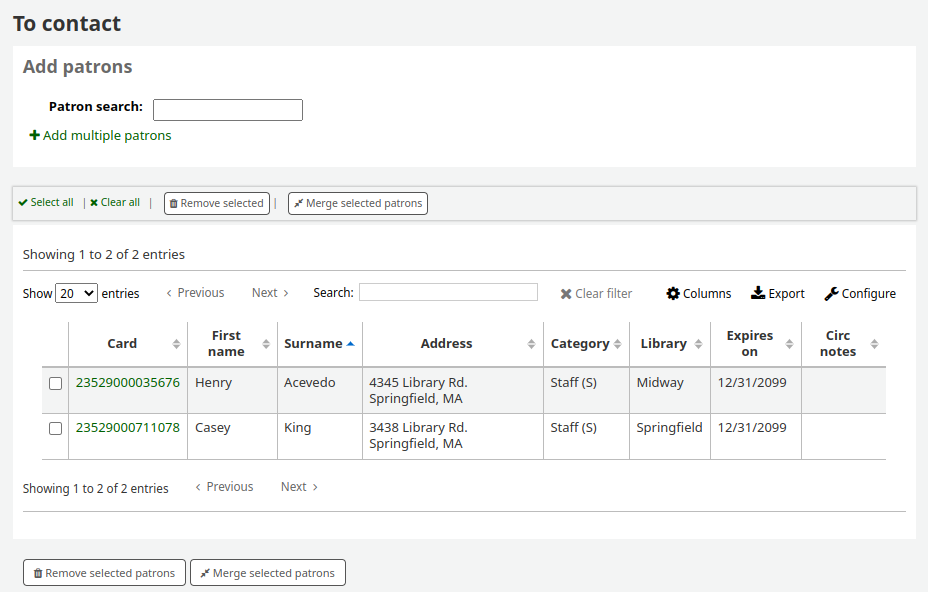
You can customize the columns of this table in the ‘Table settings’ section of the Administration module (table id: patron-list-table).
Kullanıcı club’ları
Get there: More > Tools > Patrons and circulation > Patron clubs
Patron clubs create clubs in which patrons may be enrolled. It is useful for tracking summer reading programs, book clubs and other such clubs.
Önemli
Staff will need the clubs permissions to edit clubs, templates and enroll patrons. To learn how to set patron permissions, go to the patron permissions section of this manual.
Creating a new club template
Click on the ‘New club template’ button. Here you can add fields that can be filled out at the time a new club is created based on the template, or a new enrollment is created for a given club based on the template.
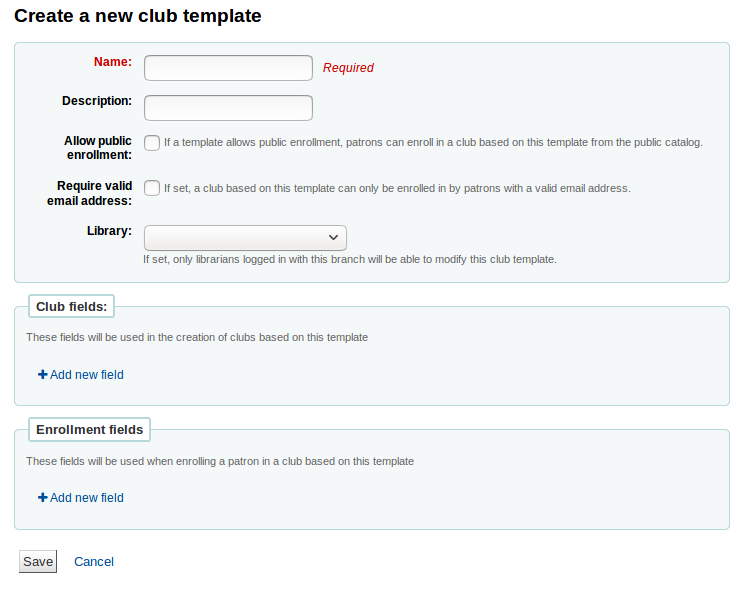
The name is required. This could be something like ‘Adult book club’, ‘Children’s book club’ or ‘Summer reading program’. Remember these templates will be starting point for each club you create.
The description can be any additional information.
Allow public enrollment: if this box is checked it will allow patrons to enroll in a club based on this template from the OPAC.
Require valid email address: if this box is checked only patrons with a valid email address can enroll. So they will need a email address to enroll.
The library drop down gives you the flexibility to let staff from specific branches create clubs with this template. If you let it set to blank, staff from any branch will be able to create a new club using this template.
Club fields: these fields will be used when creating a club based on this template. For example, this can be the name of the club, the name of the animator, the theme, etc.
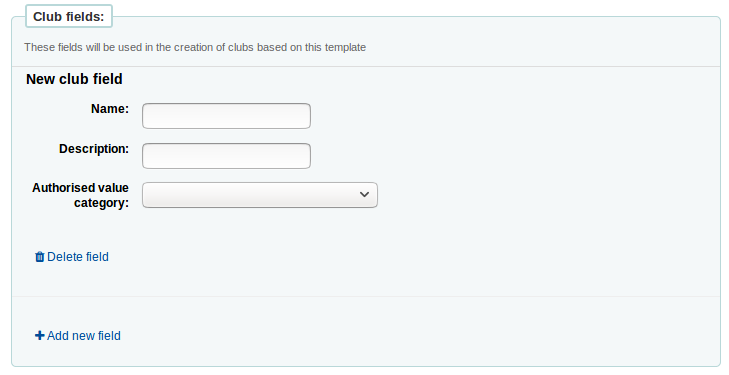
‘Name’ is the label of the field
‘Description’ is additional information about this field.
You can connect authorized values here.
Enrollment fields: you can add any additional fields you want to have filled out by your patrons when they enroll in a club base on this template.
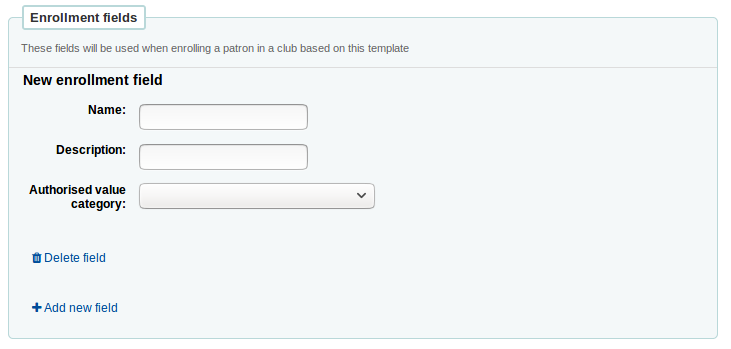
‘Name’ is the label of the field
‘Description’ is additional information about this field.
You can connect authorized values here.
Creating a new club based on a template
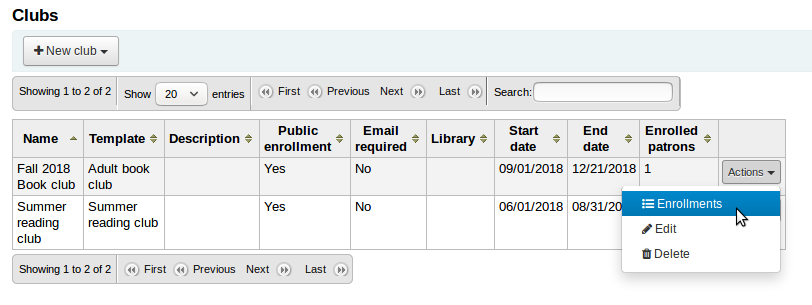
Click on the ‘New club’ dropdown menu and select the template you want to use. Here you can add information about a new club using a template you created.
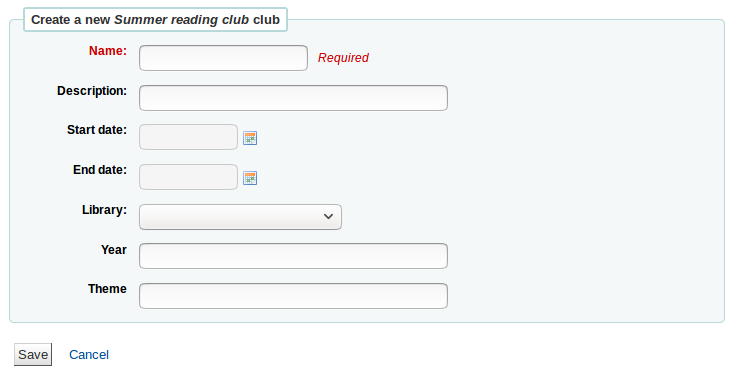
The name is required, this will be the name of the specific club using the template you created. For example, ‘Summer 2018 reading club’.
The description can be any additional information.
Start and End date will depict when this club runs, the entire duration of the club. Once the club expires, enrollment will not be possible.
The library drop down gives you the flexibility to enroll patrons from specific branches. If you let it set to blank, patrons from any branch will be able to enroll.
Enrolling a patron in a club from the staff interface
To enroll a patron in a club from the staff client, go to the patron’s account.
On the ‘Details’ page or the ‘Check out’ page, click on the ‘Clubs’ tab. All ongoing clubs will be displayed in this tab.

Click on the ‘Enroll’ button and fill in the fields.
You can also cancel enrollment by clicking on the cancel enrollment.
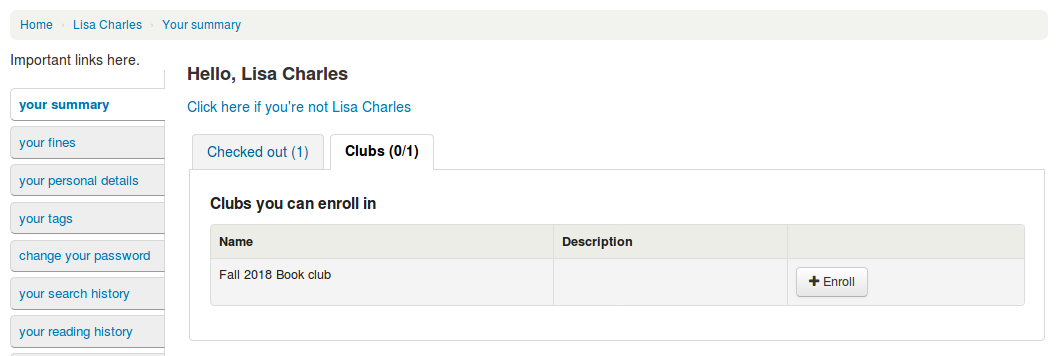
Enrolling a patron in a club from the OPAC
If you allow public enrollment, the club will be visible on the OPAC.
Patrons have to sign into their account. In the ‘Your summary’ section, they will be able to click on the ‘Clubs’ tab and enroll.
Viewing enrollments
You can monitor the enrollments in each club by going to the ‘Patron clubs’ tool page and choosing ‘Enrollment’ from the ‘Actions’ button.
Placing a hold for a patron club
You can place holds for a patron club - holds are placed for club members in a random order.
To place a hold for a patron club:
Go to the patron clubs tool (‘Home > Tools > Patron clubs’).
Click the ‘Actions’ button for the club and select ‘Search to hold’.
Search for a title and select a record.
Select ‘Place hold for [CLUBNAME]’ from either the action links for the record, or from the ‘Place hold’ action in the menu bar.
The place holds page is displayed and lists the club members.
Click the ‘Place hold’ button.
Result: Holds are placed for all club members.
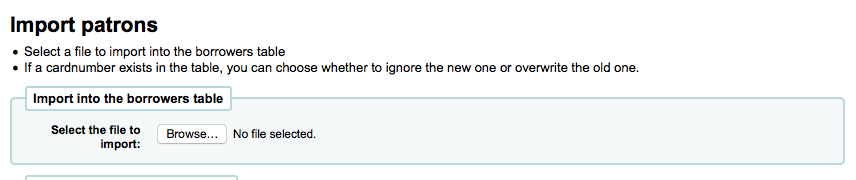
Patron import
Get there: More > Tools > Patrons and circulation > Import patrons
Kullanıcı içe aktarım aracı kullanıcıları her hangi bir zamanda toplu halde eklemek için kullanılabilir. Bu araç yeni öğrencilerin toplu kaydı için üniversitelerde ve okullarda yaygın olarak kullanılmaktadır.
Creating a patron import file
You can download a blank CSV file with a header from the start page of the patron import tool that you can use as a template for your patron import. The header contains all fields that can be used with the patron import tool. You can delete fields and columns you don’t need with the exception of a few mandatory ones. When overlaying, if your new .csv includes blank columns, any existing values in patron records will be overwritten with blanks. It is best to remove any blank columns in a .csv to ensure no existing data is removed.
Önemli
cardnumber, surname, and all fields you have defined in the BorrowerMandatoryField preference are required and must match valid entries in your database.
Önemli
‘parola’ düz metin olarak muhafaza edilmelidir, ve bir Bcrypt karmaya dönüştürülecektir.
Şifreleriniz henüz şifrelenmişse, seçeneklerle ilgili sistemler yöneticinizle görüşün.
Önemli
Date formats should match your dateformat system preference, and must be zero-padded, e.g. ‘01/02/2008’. Alternatively you can supply dates in ISO format (e.g. ‘2008-12-01’).
Önemli
If your data contains special characters or diacritics, make sure your file is encoded in UTF-8. Otherwise, the special characters will not be imported correctly.
Not
Eğer kullanıcı öznitelikleri yükleniyorsa, ‘patron_attributes’ alanı nitelik türleri ve değerlerinin virgülle ayrılmış listesini içermelidir.
Öznitelik türü ve kodu her değerin önüne gelmelidir.
Örneğin: “INSTID:12345,BASEBALL:Cubs”
Birden çok değer tanımlı ise bu alan tırnak işaretleri içine alınmalıdır.
Değerler boşluk içerebileceği için, ilave çift-tırnak gerekli olabilir:
“INSTID:12345,BASEBALL:Cubs,””BASEBALL:White Sox””
Not
It’s possible to set restrictions using the patron import tool. If the expiration date and comment match an existing restriction, the one in the import file will be skipped. So a patron import can be repeated multiple times without creating duplicate restrictions. But if one of the criteria is different, a new restriction will be added.
Importing patrons
Once you have created your file, you can use the patron import tool to bring the data into Koha.
CSV dosyanızı seçin
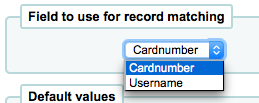
Choose to match on ‘cardnumber’ or ‘username’ to prevent adding of duplicate card numbers to the system. Additional matchpoints can be set up using patron attributes marked as unique.
Sonra içe aktardığınız tüm kullanıcılara uygulayacağınız varsayılan değerleri seçebilirsiniz
For example, if you’re importing patrons specific to one branch you can use the field on the import form to apply the branch code to all those you are importing.
Finally, you need to decide on what data you want to replace if there are duplicates.
Eşleme kaydı, seçtiğiniz alanda kullandığınız eşleme kriterinin çoğaltılmasını önlemek üzere bulunmaktadır.

When using patron attributes in your installation, you can choose how they are handled on import. You can either decide to always overlay all patron attributes or you choose to only replace patron attributes included in your import file. This will leave other attributes untouched.

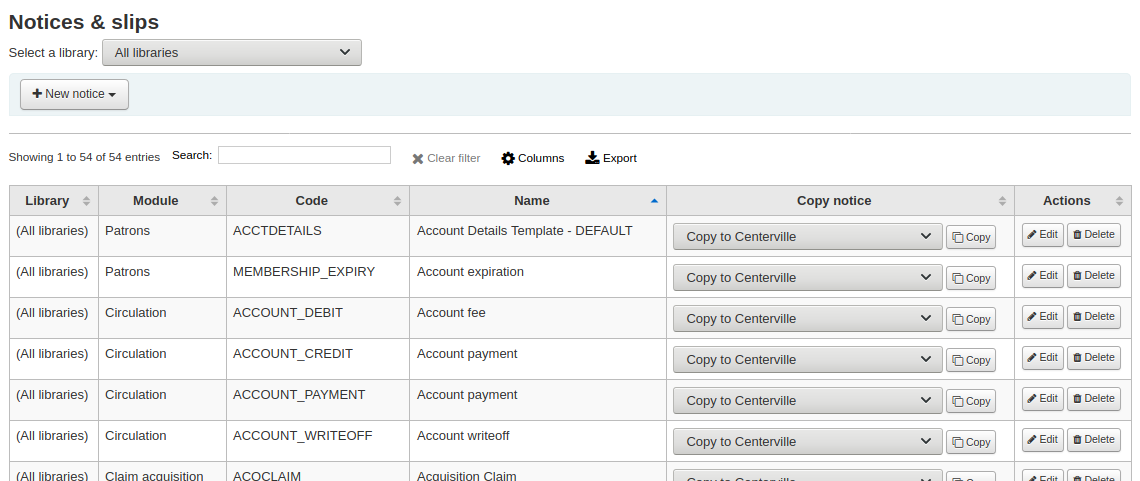
Notices & slips
Get there: More > Tools > Patrons and circulation > Notices & slips
All notices and circulation receipts (or slips) generated by Koha can be customized using the Notices & slips tool. The system comes with several predefined templates that will appear when you first visit this tool.
Not
You can customize the columns of this table in the ‘Table settings’ section of the Administration module (table id: lettert).
Her uyarı düzenlenebilir fakat sadece birkaçı silinebilir. Bu işlem, her hangi bir mesaj şablonsuz yollanmaya çalışılırsa, sistem hatalarını önlemek için kullanılır. Her uyarı ve slip her bir kütüphane bazında düzenlenebilir, varsayılanda tüm kütüphaneler için uyarılar göreceksiniz.
If you have a style you’d like applied to all slips you can point the SlipCSS preference to a stylesheet. The same is true for notices, using the NoticeCSS preference to define a stylesheet.
You will also want to review the Customising notices and slips wiki page for more information on formatting these notices.
Adding notices and slips
Yeni bir bildirim yada slip eklemek için
Click ‘New notice’
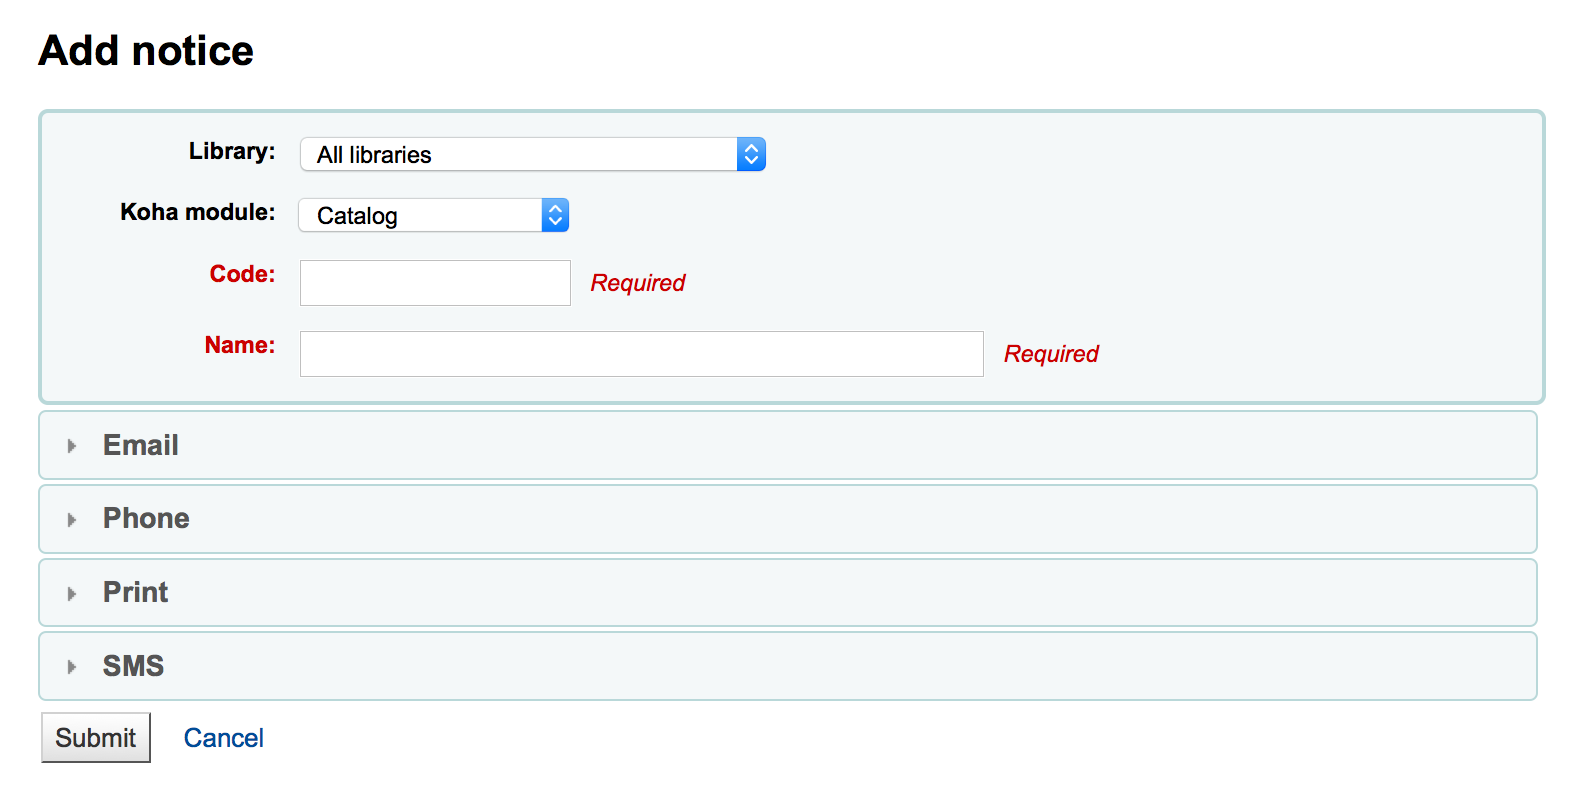
Bu uyarının ya da notun hangi kütüphane için olduğunu seçin
Önemli
Not all notices can be branch specific for more information review the Customising notices and slips wiki page.
Bu modülle ilgili uyarıyı seçin.
Kod 20 karakterle sınırlıdır
Kodlamanız üzerinde genişletme yapmak için ad alanını kullanın
Not
Gecikme bildirimlerinde açıklama içerisinde birim adını da yazdığınızdan emin olun, böylece tetikleyiciler tercihinizi ayarlarken görünür olacaklardır.
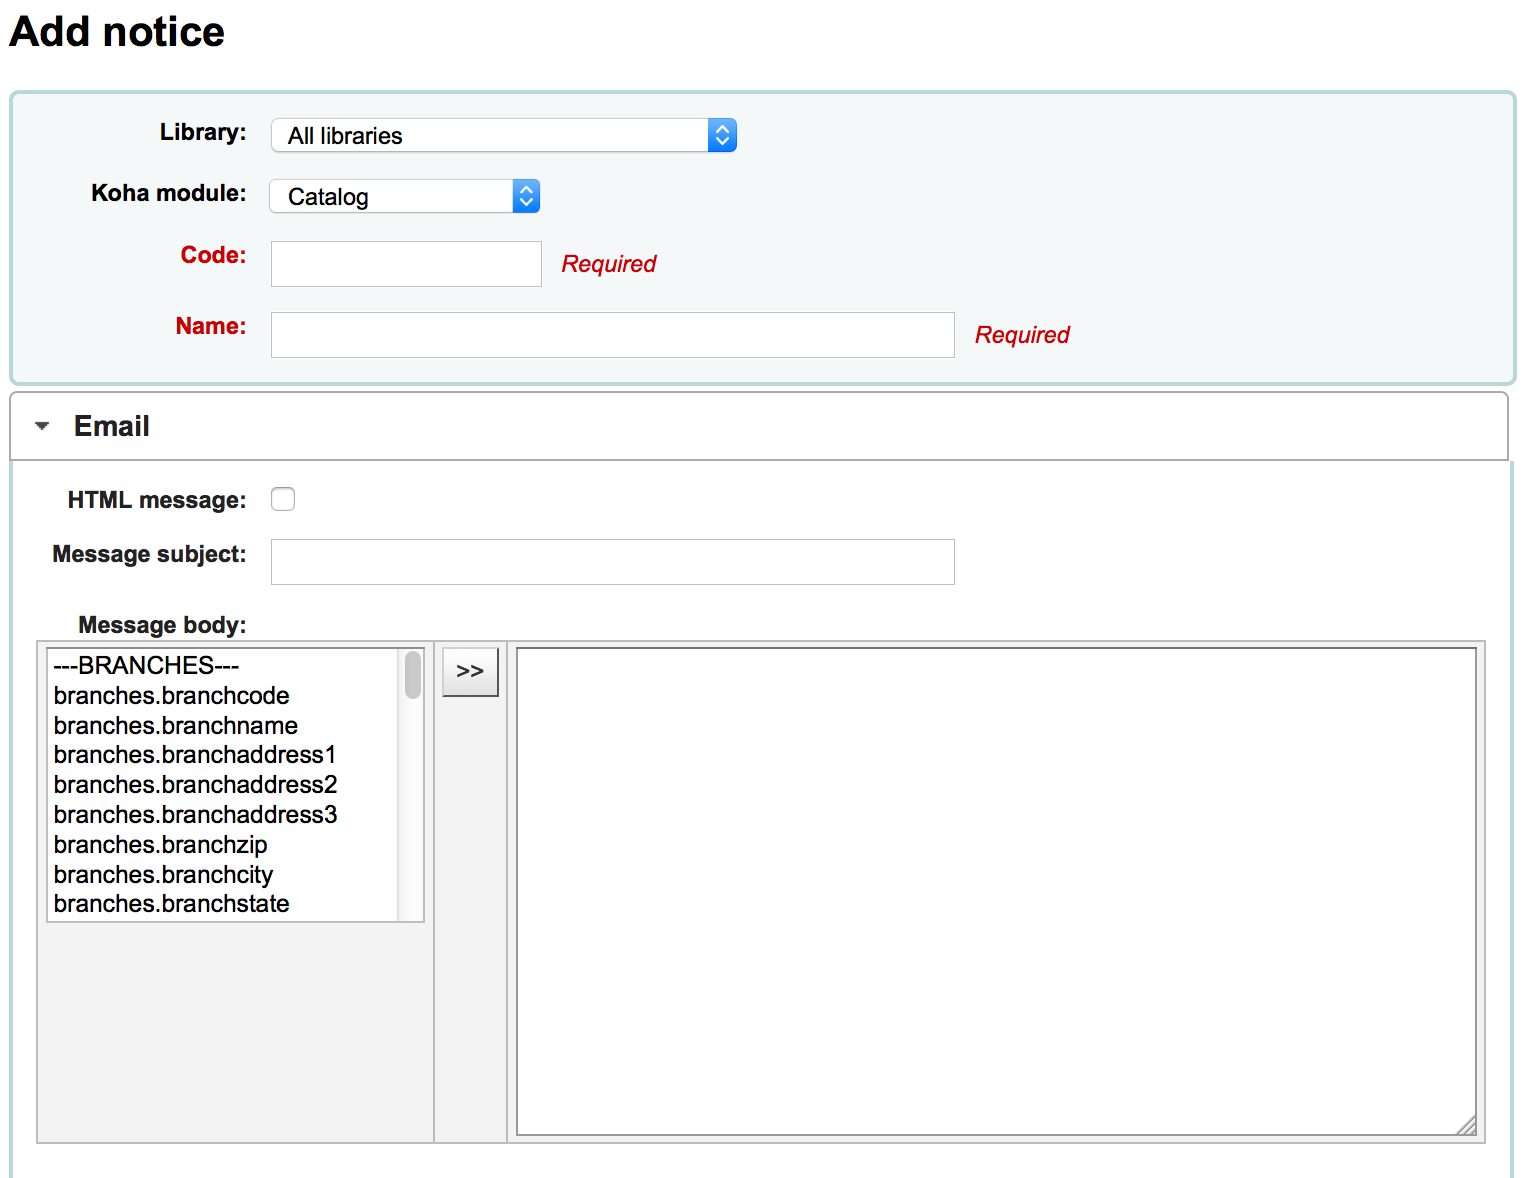
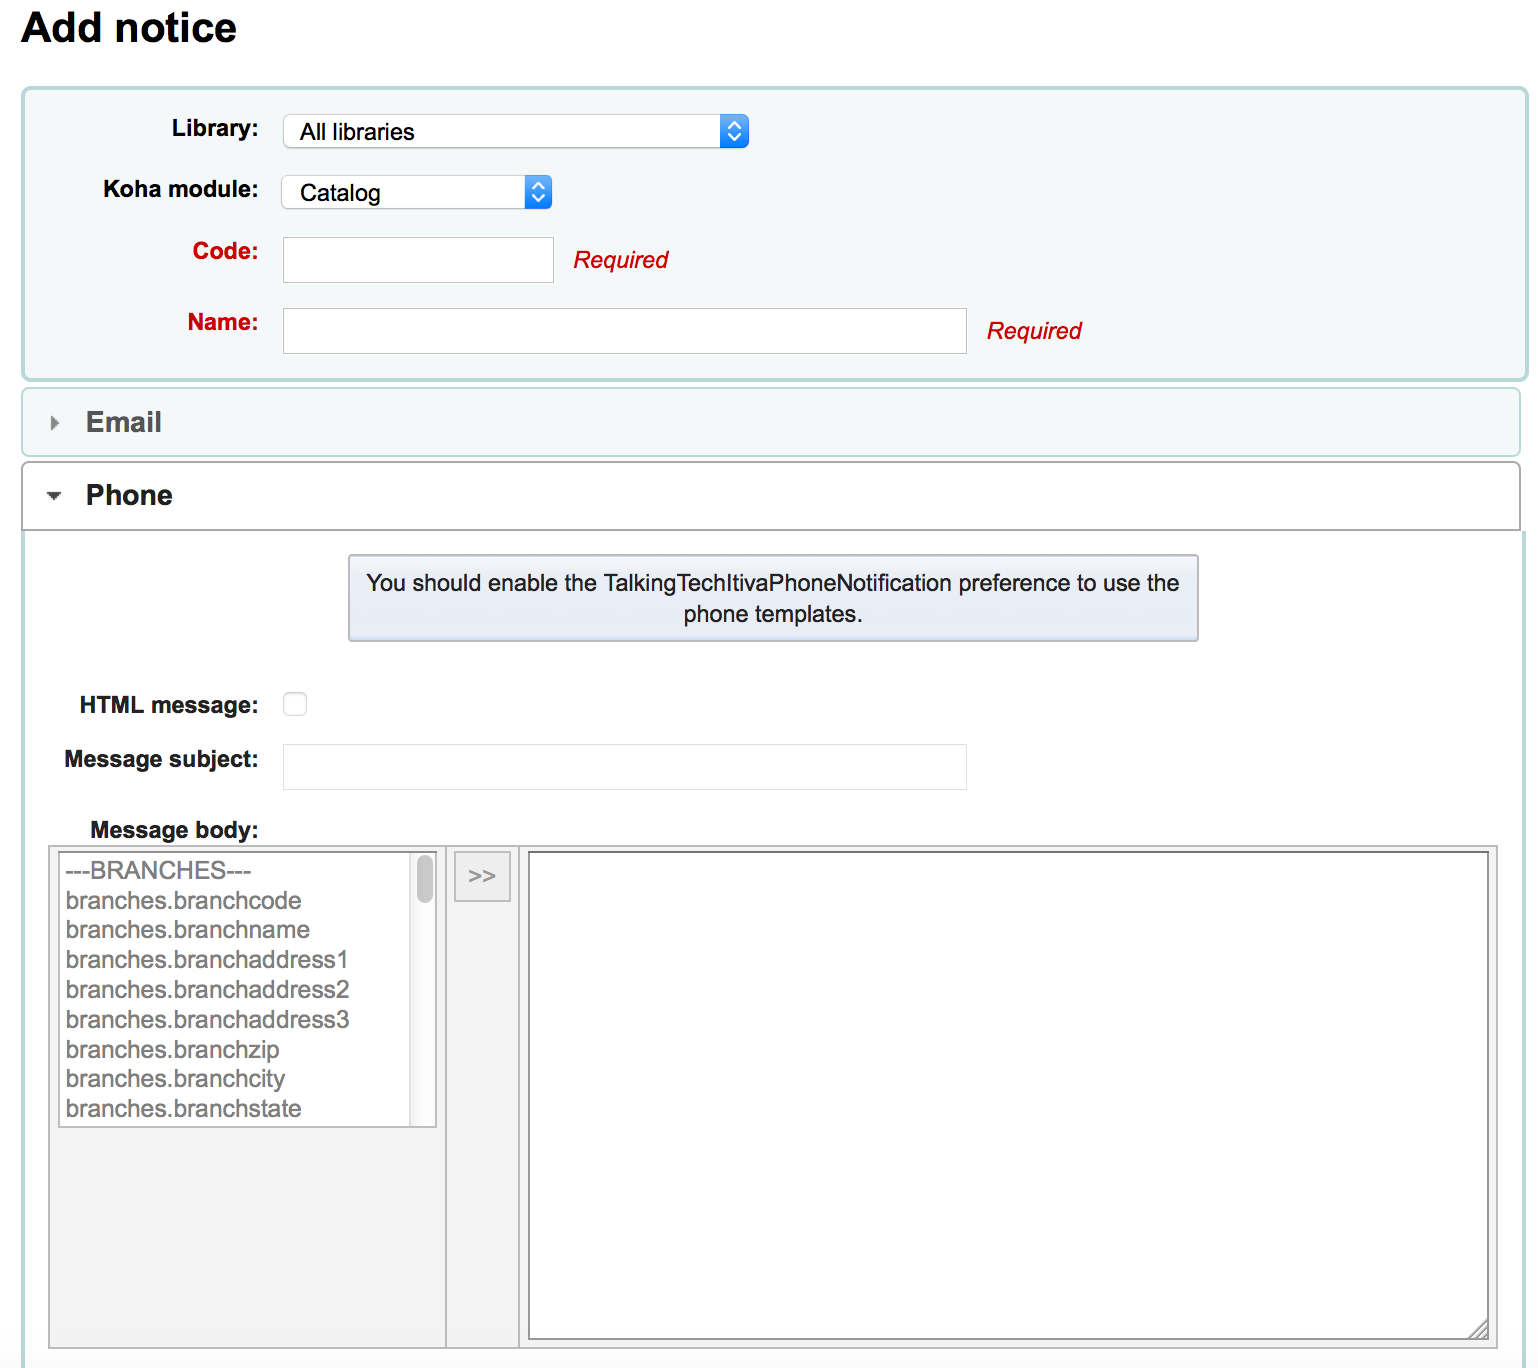
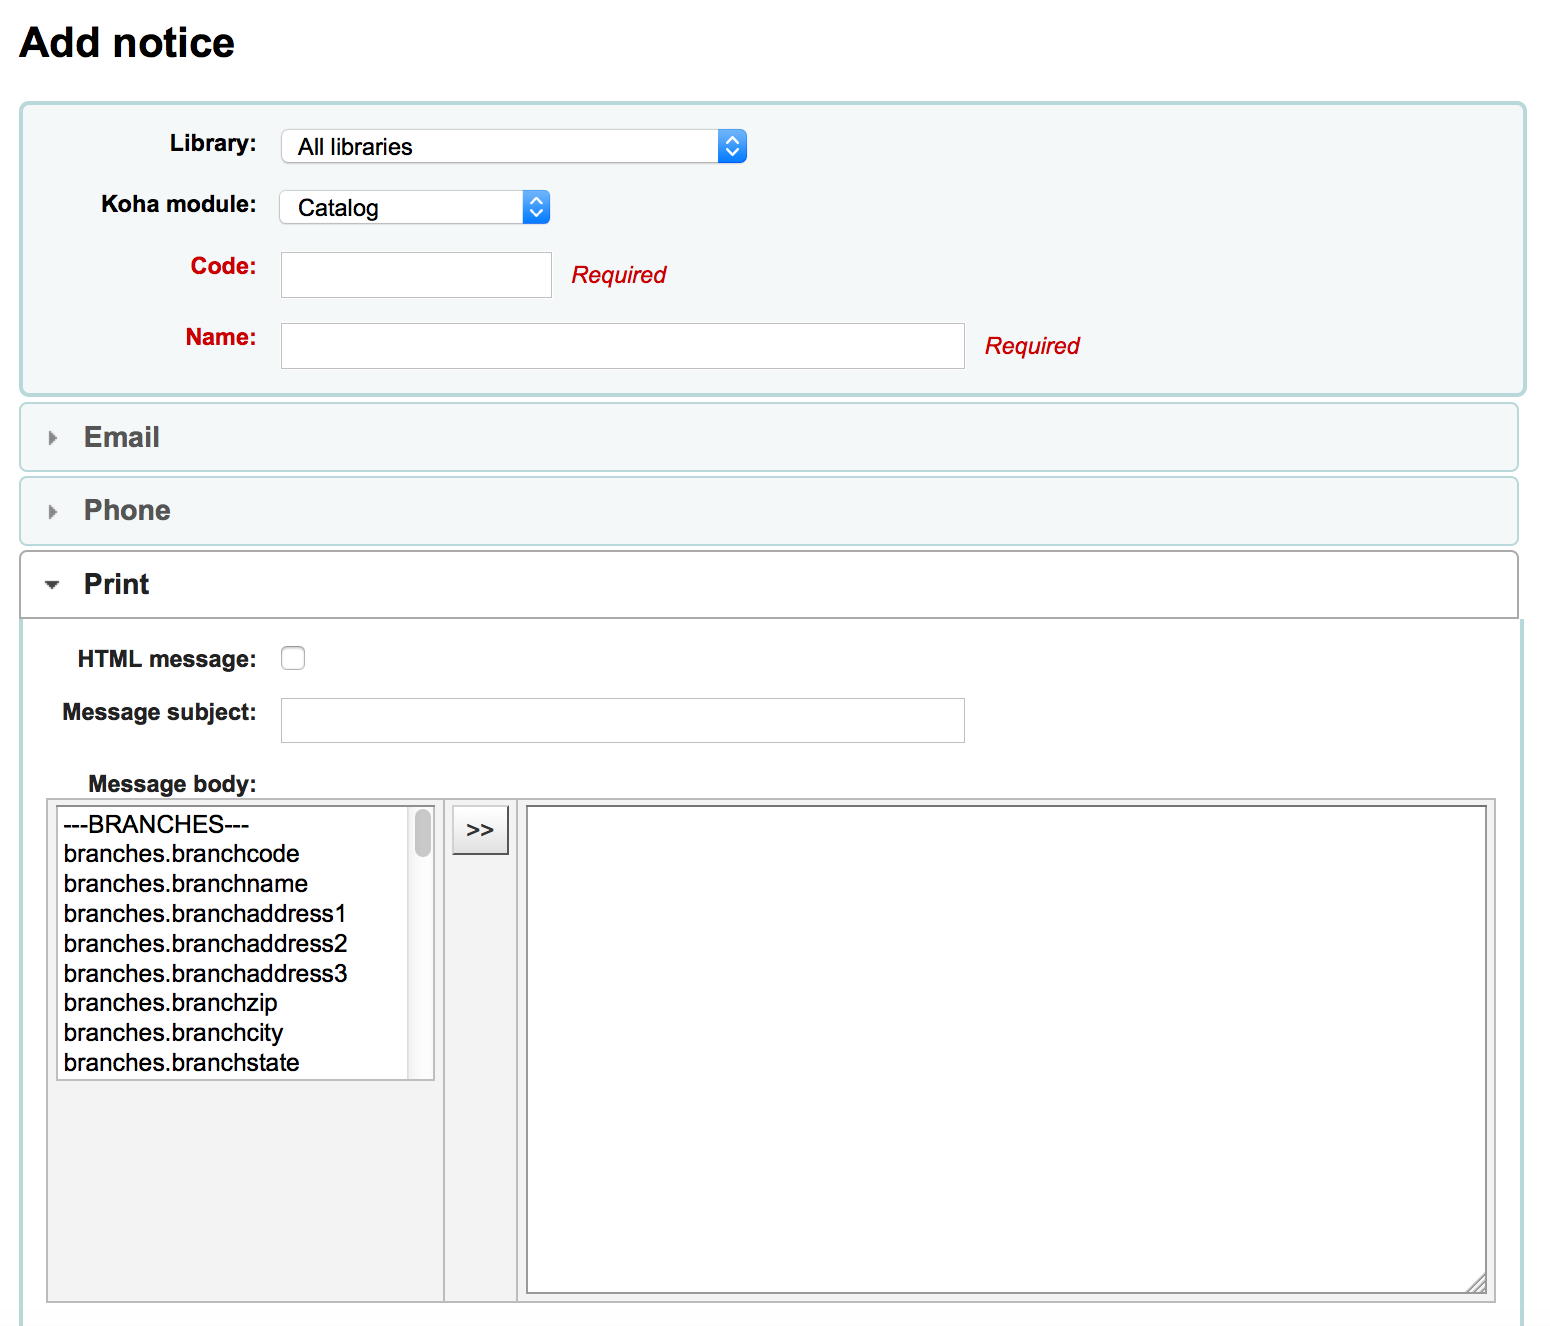
Daha sonra mümkün olan her teslimat yöntemi için bildirimi özelleştirebilirsiniz
Her bildirimin kendisi için ayarlanmış bir E-posta şablonu olması gerekir
If you’re using the TalkingTechItivaPhoneNotification service you can set up a Phone notification
Bu bildirimi yazdırmayı planlıyorsanız, yayındaki Yazdırma şablonunu ayarlayabilirsiniz
If you have enabled SMS notices with the SMSSendDriver preference you can set the text for your SMS notices next
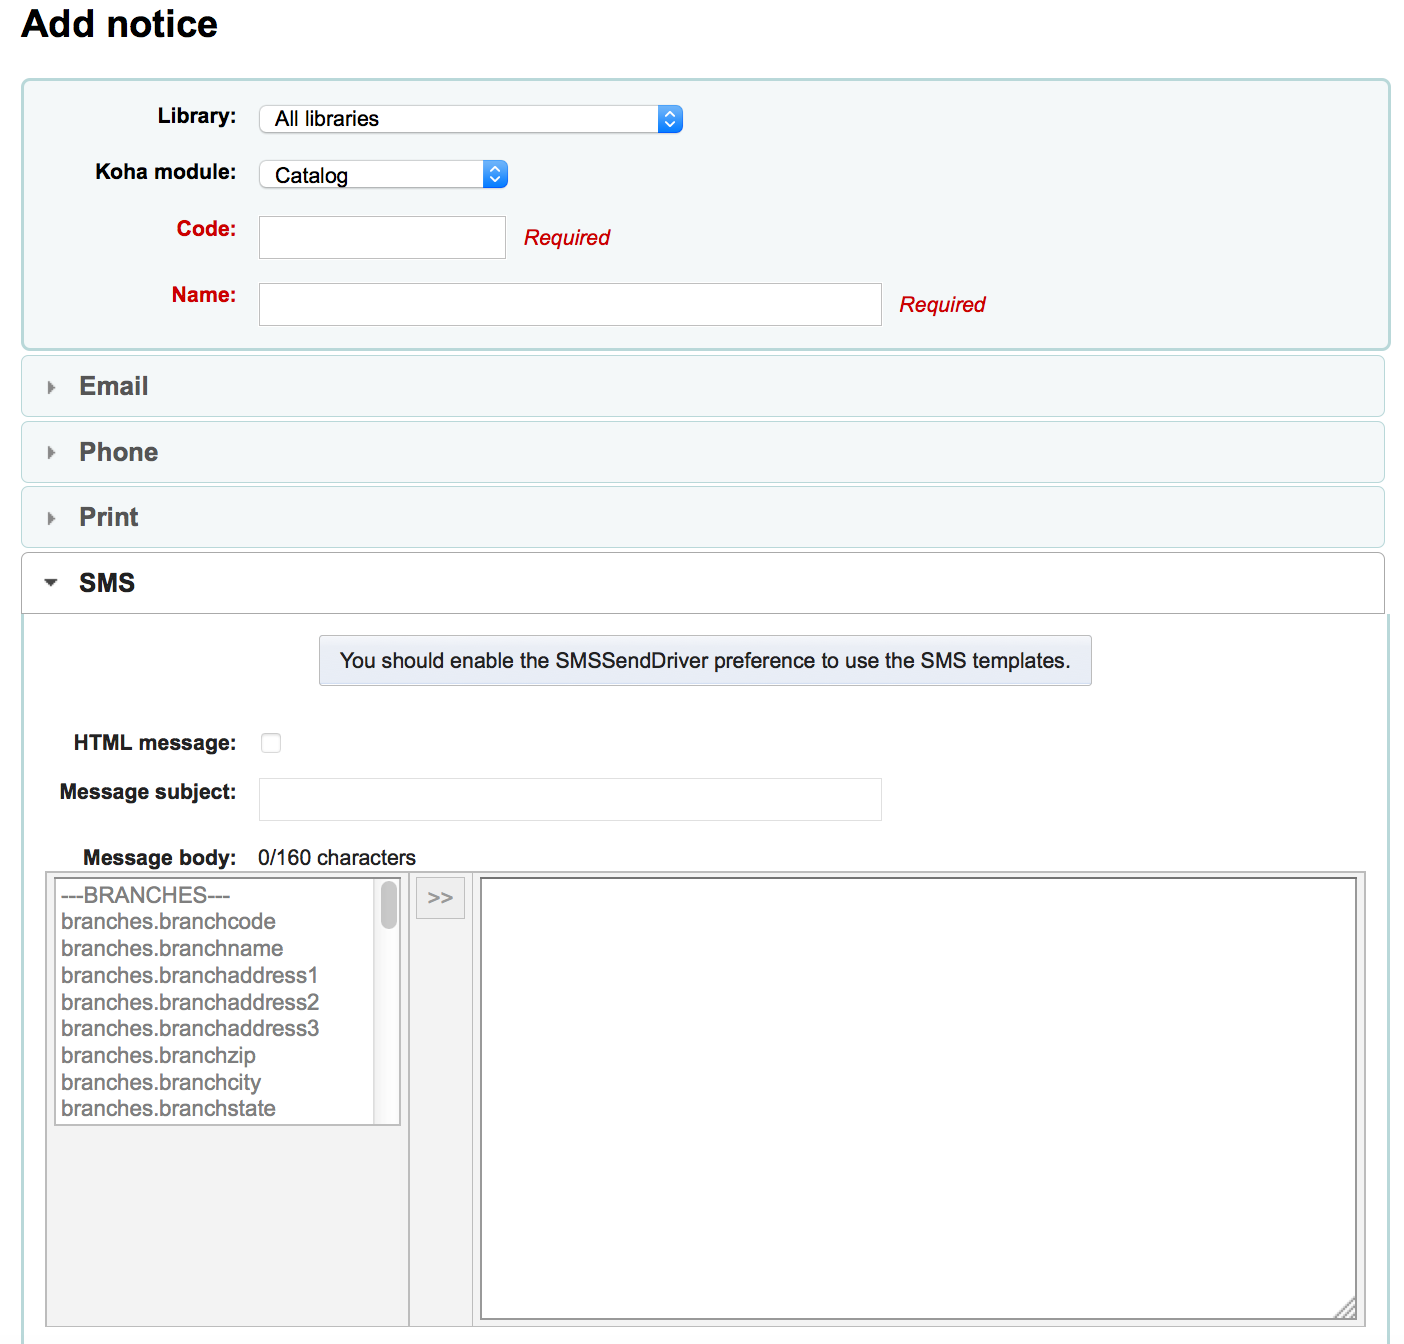
Her bildirim size aynı seçenekleri sunar
If you plan on writing the notice or slip in HTML check the ‘HTML message’ box, otherwise the content will be generated as plain text
Message subject is what will appear in the subject line of the email
İleti gövdesinde sizin için en iyi olduğunu düşündüğünüz her türlü iletiyi yazmaktan çekinmeyin, veri tabanından bireyselleştirilmiş veri girmek için sol taraftaki alanları kullanın.
Not
Review the Customising notices and slips wiki page for more information.
Önemli
Overdue notices can use <<items.content>> tags by themselves, or use <item></item> to span all of the tags. Learn more about the Overdue notice markup
Gecikme uyarılarında gecikmiş tüm materyallerle ilgili verilerin çıktısını almak için <<items.content>> tag’ini kullandığınızdan emin olun.
The other option, only for overdue notices, is to use the <item></item> tags to span the line so that it will print out multiple lines. One example for the <item></item> tag option is:
<item>”<<biblio.title>>” by <<biblio.author>>, <<items.itemcallnumber>>, Barcode: <<items.barcode>> , Checkout date: <<issues.issuedate>>, Due date: <<issues.date_due>> Fine: <<items.fine>> </item>
Önemli
Yalnızca gecikme bildirimleri <item></item> faydalanırlar, materyalleri referanslayan diğer tüm bildirimler <<items.content>> kullanmalıdırlar
Not
Bugünün tarihini eklemek için <<today>> söz dizimini kullanabilirsiniz
Not
İşlem fişlerinin veya bildirimlerin üzerine kullanıcının tam adını basmak istemiyorsanız Diğer ad ya da ismin baş harfleri alanına her kullanıcı için veri girip tam ad yerine bu değerleri kullanabilirsiniz.
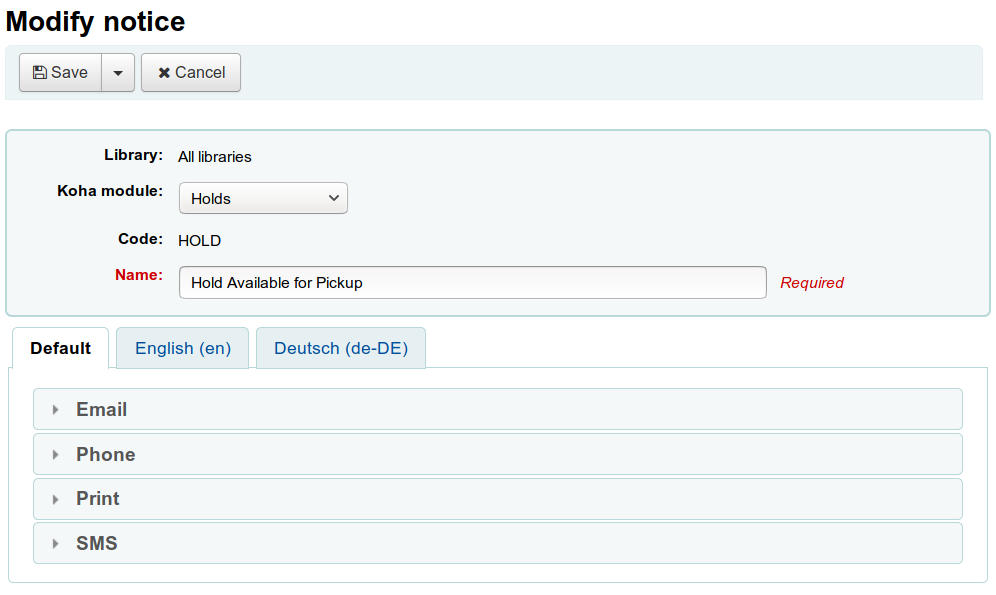
The system preference TranslateNotices will add tabs for each installed language to the notices editor. The notice defined in the ‘Default’ tab will be used if there is no preferred language set for a patron.
Preview notice templates
For some notices it is possible to preview the notice template showing how it would look to a specified patron for a particular item or record.
If a notice template is previewable the notice template header will contain a field to enter preview data
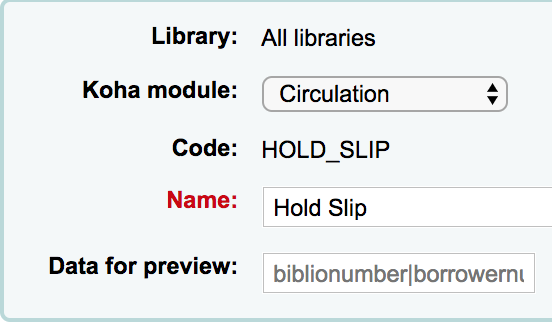
Fill in the necessary information for the template then click the Preview button below the message body. The preview dialog will indicate if there are any problems generating the notice template preview.
Overdue notice markup
When creating your overdue notices there are two tags in addition to the various database fields that you can use in your notices. You will also want to review the Customising notices and slips wiki page for information on formatting item information in these notices.
Önemli
Bu yeni tag’ler yalnızca gecikme bildirimlerinde çalışır, şu an için dolaşımla ilgili diğer bir bildirim yoktur.
Bu tag’ler biblio, biblioitems ve materyal tablolarından tüm alanları kapsaması gereken <item> ve </item>’dir.
Bu iki etiketi bir uyarı şablonunda kullanma örneği şu şekilde olabilir:
The following item(s) is/are currently overdue:

<item>"<<biblio.title>>" by <<biblio.author>>, <<items.itemcallnumber>>, Barcode: <<items.barcode>> Fine: <<items.fine>></item>
İki materyalin süresinin geçtiğini varsayarak şu şekilde bir uyarı ortaya çıkabilir:
The following item(s) is/are currently overdue:

"A Short History of Western Civilization" by Harrison, John B, 909.09821 H2451, Barcode: 08030003 Fine: 3.50
"History of Western Civilization" by Hayes, Carlton Joseph Huntley, 909.09821 H3261 v.1, Barcode: 08030004 Fine: 3.50
Existing notices and slips
Among the default notices are notices for several common actions within Koha. All of these notices can be customized by altering their text via the Notices and slips tool and their style using the NoticeCSS system preference to define a stylesheet.
Tüyo
Review the Customising notices and slips wiki page for information on formatting item information in these notices.
Here are some of what those notices do:
2FA_DISABLE
This notice is sent to a staff user when they disable the two-factor authentication on their account.
2FA_ENABLE
This notice is sent to a staff user when they enable the two-factor authentication on their account.
2FA_OTP_TOKEN
This notice is used to send a time-based one-time password to a staff user for them to use to log into the staff interface if they have enabled the two-factor authentication on their account.
KABUL EDİLDİ
This notice is sent to the patron when their purchase suggestion is accepted.
Not
If you don’t want to send this notice, simply delete it.
ACCOUNT_PAYMENT
This notice is sent for each payment transaction in a patron’s account if the UseEmailReceipts system preference is set to ‘Send’.
ACCOUNT_WRITEOFF
This notice is sent for each writeoff transaction in a patron’s account if the UseEmailReceipts system preference is set to ‘Send’.
ACQCLAIM (Acquisition claim)
Used for claiming orders in the aquisitions module.
ACQCLAIM is the code of the sample notice, but it’s possible to define several notices choosing any code. Only the module ‘Claim acquisition’ will be taken into account. All notices with this module will appear in the pull down on the late orders page.
This notice is sent if several criteria are met:
The staff patron triggering the email has a valid email address.
The vendor contact marked as ‘Contact about late orders?’ has a valid email address.
ACQORDER (Acquisition order)
Used in the acquisitions module to send order information to the vendor
The notice is triggered manually from the basket summary page using the ‘Email order’ button in the toolbar.
This notice is sent if several criteria are met:
The staff patron triggering the email has a valid email address.
The vendor contact marked as ‘Primary acquisitions contact’ and ‘Contact when ordering’ has a valid email address.
ACQ_NOTIF_ON_RECEIV
Used in the acquisition module to inform patrons on receiving orders they have been added to.
AR_CANCELED
This notice is sent to the patron when an article request is cancelled by staff.
AR_COMPLETED
This notice is sent to the patron when an article request is marked as completed by staff.
AR_PENDING
This notice is sent to the patron when an article request is changed to ‘pending’ status
AR_PROCESSING
This notice is sent to the patron when an article request is marked as being processed by staff.
AR_REQUESTED
This notice is sent to the patron when an article request has been made in order to confirm the request.
AUTO_RENEWALS
This notice is sent to the patron if automatic renewals are enabled and the patron has chosen to receive it in their messaging preferences.
In order to send this notice, you must set the AutoRenewalNotices system preference to “according to patron messaging preferences”.
This notice is set so that, depending on the result of the renewal, whether is was successful or not, the message will be different.
AUTO_RENEWALS_DGST
This notice is sent to the patron if automatic renewals are enabled and the patron has chosen to receive the digest in their messaging preferences.
In order to send this notice, you must set the AutoRenewalNotices system preference to “according to patron messaging preferences”.
This notice is set so that, depending on the result of the renewal, whether is was successful or not, the message will be different.
AVAILABLE
This notice is sent to the patron who made a purchase suggestion, when the order created from the suggestion is received.
Not
If you don’t want to send this notice, simply delete it.
CART
This notice is used when sending the cart by email from the OPAC or when sending the cart by email from the staff interface.
CANCEL_HOLD_ON_LOST
This notice is sent to a patron who placed a hold on an item and staff marked this items as lost from the ‘Holds to pull’ list.
This notice is sent if the CanMarkHoldsToPullAsLost system preference is set to ‘Allow to mark items as lost and notify the patron’.
İADE
Bu bildirim, iade alınmış tüm materyaller için ‘İade’ bildirimi olarak gönderilir
İki kriter yerine geldiği takdirde bu duyuru kullanılır:
The EnhancedMessagingPreferences is set to ‘Allow’
Kullanıcı bu duyuruyu almayı talep etti
If EnhancedMessagingPreferencesOPAC is set to ‘Show’, patrons will be able to choose their messaging preferences in their online account in the Messaging tab.
Staff can select this notice for a patron in their messaging preferences.
ÖDÜNÇ
Bu bildirim, ödünç verilmiş tüm materyaller için ‘Ödünç verme’ bildirimi olarak gönderilir
İki kriter yerine geldiği takdirde bu duyuru kullanılır:
The EnhancedMessagingPreferences is set to ‘Allow’
Kullanıcı bu duyuruyu almayı talep etti
If EnhancedMessagingPreferencesOPAC is set to ‘Show’, patrons will be able to choose their messaging preferences in their online account in the Messaging tab.
Staff can select this notice for a patron in their messaging preferences.
CHECKOUT_NOTE
This notice is sent to the system administration (the email address in KohaAdminEmailAddress) to alert them that a patron added a checkout note from their checkouts list on the OPAC.
DISCHARGE
This notice is used to generate a PDF to document a successful discharge request
The PDF can either be downloaded by the patron from their patron account or from the staff interface when discharging a patron
The discharge feature is controlled by the useDischarge system preference.
İADE TARİHİ
This notice is sent as the ‘Item due’ notice for an checked out item that is due today.
İki kriter yerine geldiği takdirde bu duyuru kullanılır:
The EnhancedMessagingPreferences is set to ‘Allow’
Kullanıcı bu duyuruyu almayı talep etti
If EnhancedMessagingPreferencesOPAC is set to ‘Show’, patrons will be able to choose their messaging preferences in their online account in the Messaging tab.
Staff can select this notice for a patron in their messaging preferences.
DUEDGST
This notice is sent as the ‘Item due’ notice for all checked out items that are due today (digest option).
İki kriter yerine geldiği takdirde bu duyuru kullanılır:
The EnhancedMessagingPreferences is set to ‘Allow’
Kullanıcı bu bildirimi bir özet olarak almak istedi.
If EnhancedMessagingPreferencesOPAC is set to ‘Show’, patrons will be able to choose their messaging preferences in their online account in the Messaging tab.
Staff can select this notice for a patron in their messaging preferences.
HOLD (Hold available for pickup)
This notice is sent to the patron when their hold is ready for pickup.
İki kriter yerine geldiği takdirde bu duyuru kullanılır:
The EnhancedMessagingPreferences is set to ‘Allow’
Kullanıcı bu bildirimi bir özet olarak almak istedi.
If EnhancedMessagingPreferencesOPAC is set to ‘Show’, patrons will be able to choose their messaging preferences in their online account in the Messaging tab.
Staff can select this notice for a patron in their messaging preferences.
Bu uyarı şubeler tablosunu referans verdiğinde, alınacak kütüphanenin şube bilgisinden bahsetmektedir.
HOLD_CHANGED
This notice is sent to library staff (either the email address in ExpireReservesAutoFillEmail), or the library’s reply-to address, to alert them that a hold has been canceled, the item filled the next hold and is now waiting for another patron.
This notice is only sent if ExpireReservesAutoFill is set to ‘Do’.
HOLD_REMINDER
This notice is sent to the patron when their hold has been waiting for pickup for more than a number of days
If EnhancedMessagingPreferencesOPAC is set to ‘Show’, patrons will be able to choose their messaging preferences in their online account in the Messaging tab. The notice is ‘Hold reminder’.
Staff can select this notice for a patron in their messaging preferences. The notice is ‘Hold reminder’.
The holds_reminder.pl cron job is required to generate this notice.
HOLDPLACED
This notice is sent to the library staff when a hold has been placed.
This notice requires the emailLibrarianWhenHoldIsPlaced system preference to be set to ‘Enable’.
When this notice references the branches table it is referring to the pickup library information.
ILL_PARTNER_REQ
This notice is used by the ILL module to send requests to partner libraries.
ILL_PICKUP_READY
This notice is sent to the patron when the inter-library loan they requested has been fulfilled and is now ready for pickup.
Staff can select this notice for a patron in their messaging preferences. The notice is ‘Interlibrary loan ready’.
Not
The option will only appear in the messaging preferences if the ILLModule system preference is enabled.
If EnhancedMessagingPreferencesOPAC is set to ‘Show’, patrons will be able to choose their messaging preferences in their online account in the Messaging tab. The notice is ‘Interlibrary loan ready’.
Not
The option will only appear in the messaging preferences if the ILLModule system preference is enabled.
ILL_REQUEST_CANCEL
This notice is sent to library staff when a patron cancels their inter-library loan request from their account in the OPAC.
ILL_REQUEST_MODIFIED
This notice is sent to library staff when a patron modifies their inter-library loan request from their account in the OPAC.
ILL_REQUEST_UNAVAIL
This notice is sent to the patron when the inter-library loan they requested has been cancelled because it was unavailable.
Staff can select this notice for a patron in their messaging preferences. The notice is ‘Interlibrary loan unavailable’.
Not
The option will only appear in the messaging preferences if the ILLModule system preference is enabled.
If EnhancedMessagingPreferencesOPAC is set to ‘Show’, patrons will be able to choose their messaging preferences in their online account in the Messaging tab. The notice is ‘Interlibrary loan unavailable’.
Not
The option will only appear in the messaging preferences if the ILLModule system preference is enabled.
ILL_REQUEST_UPDATE
This notice is sent to the patron to alert them that their inter-library loan request has been updated.
Staff can select this notice for a patron in their messaging preferences. The notice is ‘Interlibrary loan updated’.
Not
The option will only appear in the messaging preferences if the ILLModule system preference is enabled.
If EnhancedMessagingPreferencesOPAC is set to ‘Show’, patrons will be able to choose their messaging preferences in their online account in the Messaging tab. The notice is ‘Interlibrary loan updated’.
Not
The option will only appear in the messaging preferences if the ILLModule system preference is enabled.
LIST
This notice is used when sending a list by email from the OPAC or when sending a list by email from the staff interface.
MEMBERSHIP_EXPIRY
Bu bildirim, kullanıcılara, kartlarının kısa süre içinde dolacağını bildirmek üzere gönderilebilir.
Requires that you have the MembershipExpiryDaysNotice set and the related cron job set.
NEW_CURBSIDE_PICKUP
This notice is sent to the patron when a curbside pickup is scheduled.
In order to send this notice,
The patron must have chosen to receive the ‘Hold filled’ notice by email.
Staff can select this notice for a patron in their messaging preferences
If EnhancedMessagingPreferencesOPAC is set to ‘Show’, patrons will be able to choose their messaging preferences in their online account in the Messaging tab.
NEW_SUGGESTION
This notice is sent to library staff when the EmailPurchaseSuggestions system preference is enabled.
NOTIFY_MANAGER
This notice is sent to a staff member when they are assigned as manager of a suggestion in the acquisitions module.
ODUE (Overdue notice)
This notice is used to send overdue notices to patrons
ODUE is the code of the sample notice, but it’s possible to use any code and define multiple different messages for different patron categories and notice levels
Requires that you set Overdue notice/status triggers
OPAC_REG
This notice is sent to library staff when the EmailPatronRegistrations system preference is enabled and a patron registers through the OPAC.
OPAC_REG_VERIFY
This notice is sent to the patron who registered through the OPAC if the PatronSelfRegistrationVerifyByEmail system preference is enabled.
ORDERED
This notice is sent to the patron who made a suggestion, when the ‘from a suggestion’ option is used to create an order from it.
Not
If you don’t want to send this notice, just delete it.
PASSWORD_CHANGE
This notice is sent to a patron whose password was changed, if the NotifyPasswordChange system preference is enabled.
PASSWORD_RESET
This notice is sent when a patron requests a new password from the OPAC in order to validate the email address.
The password reset feature is controlled by the OpacResetPassword system preference.
PICKUP_RECALLED_ITEM
This notice is sent to the patron who has requested a recall when the item is ready for them to pick up.
PREDUE
This notice is sent as the ‘Advanced notice’ when an item is due
İki kriter yerine geldiği takdirde bu duyuru kullanılır:
The EnhancedMessagingPreferences is set to ‘Allow’
Kullanıcı bu duyuruyu almayı talep etti
If EnhancedMessagingPreferencesOPAC is set to ‘Show’, patrons will be able to choose their messaging preferences in their online account in the Messaging tab.
Staff can select this notice for a patron in their messaging preferences.
PREDUEDGST
This notice is sent as the ‘Advanced notice’ digest for all items that are due
İki kriter yerine geldiği takdirde bu duyuru kullanılır:
The EnhancedMessagingPreferences is set to ‘Allow’
Kullanıcı bu bildirimi bir özet olarak almak istedi.
If EnhancedMessagingPreferencesOPAC is set to ‘Show’, patrons will be able to choose their messaging preferences in their online account in the Messaging tab.
Staff can select this notice for a patron in their messaging preferences.
PROBLEM_REPORT
This notice is sent to the email address in the KohaAdminEmailAddress system preference, or the library’s email address when a patron reports a problem on the OPAC.
RECEIPT
Used to send a payment receipt by email from the point of sale module.
REDDEDİLDİ
This notice is sent when a patron’s purchase suggestion is rejected.
Not
If you don’t want to send this notice, just delete it.
RENEWAL
This notice is sent as the ‘Item checkout and renewal’ notice for all items that are renewed
Üç kriter yerine getirildiği takdirde bu bildirim kullanılır:
The EnhancedMessagingPreferences is set to ‘Allow’
The RenewalSendNotice system preference is set to ‘Send’
Kullanıcı bu duyuruyu almayı talep etti
If EnhancedMessagingPreferencesOPAC is set to ‘Show’, patrons will be able to choose their messaging preferences in their online account in the Messaging tab.
Staff can select this notice for a patron in their messaging preferences.
RETURN_RECALLED_ITEM
This notice is sent to the patron who currently has an item in their possession that has been recalled. It serves to notify them of the new due date for the checked out item.
SERIAL_ALERT (New serial issue)
Notice used in the serials module to notify patrons/staff of new issues of a serial. SERIAL_ALERT (RLIST in older versions) is provided as a sample notice, but the notice code can be chosen freely as only the module is taken into account. Multiple notices can also be managed.
You have the option to select the notice used to inform the patron about a received serial issue when adding or editing a subscription. Choose from the ‘Patron notification’ drop down menu.
If a notice has been selected for a subscription, patrons can subscribe to the email notification from the subscription tab in the detail view in the OPAC.
Not
Notice also that if you’d like to notify patrons of new serial issues, you can click on ‘define a notice’ which will take you to the ‘Notices’ tool.
SHARE_ACCEPT
Diğer bir kullanıcı paylaşılan listesini kabul ettiğinde bir kullanıcıyı bildirmek için kullanılır.
Requires that the OpacAllowSharingPrivateLists system preference be set to ‘Allow’.
See Managing lists for more information about sharing lists.
SHARE_INVITE
Başka bir kullanıcının kendisiyle bir liste paylaşmak istediğini diğer kullanıcıya bildirmek için kullanılır.
Requires that the OpacAllowSharingPrivateLists system preference be set to ‘Allow’.
See Managing lists for more information about sharing lists.
SR_SLIP
Used to notify library staff from a particular library branch of items that should be transferred to another library in the context of stock rotation.
Requires the stockrotation.pl cron job.
STAFF_PASSWORD_RESET
This notice is sent when a staff member sends a password reset email to a patron.
The password reset feature is controlled by the OpacResetPassword system preference.
TICKET_ACKNOWLEDGE
This notice is sent to the reporter of a catalog concern when they report a concern through the staff interface, or when they report a concern through the OPAC, to acknowledge that the concern report was received.
The concern report feature is enabled in the staff interface by the CatalogConcerns system preference and in the OPAC by the OpacCatalogConcerns system preference.
TICKET_NOTIFY
This notice is sent to the cataloging team, to the email address in the CatalogerEmails system preference, to notify them that a concern was reported about a bibliographic record.
The concern report feature is enabled in the staff interface by the CatalogConcerns system preference and in the OPAC by the OpacCatalogConcerns system preference.
TICKET_RESOLVE
This notice is sent to the reporter of a catalog concern when the concern is marked as resolved with the ‘Notify’ flag.
The concern report feature is enabled in the staff interface by the CatalogConcerns system preference and in the OPAC by the OpacCatalogConcerns system preference.
TICKET_UPDATE
This notice is sent to the reporter of a catalog concern when the concern is updated with the ‘Notify’ flag.
The concern report feature is enabled in the staff interface by the CatalogConcerns system preference and in the OPAC by the OpacCatalogConcerns system preference.
TO_PROCESS
Bir satın alma önerisinin, yönettikleri fona taşınması durumunda personele bildirimde bulunur
Requires the notice_unprocessed_suggestions cron job
WELCOME
Sent to patrons when their account is set up if the AutoEmailNewUser preference is set to ‘Send’
Not
For security reasons, it is not possible to send the patron’s password in a notice.
There are also a set of predefined slips (or receipts) listed on this page. All of these slips can be customized by altering their text via the Notices & slips tool and their style using the SlipCSS preference to define a stylesheet. Here is what those slips are used for:
ACCOUNT_CREDIT
Used to print a receipt for a credit (either a payment, writeoff or other credit).
The slip or receipt can be printed manually with the ‘Print’ button next to a credit type account line in the patron’s accounting tab.
The slip or receipt can also be printed semi-automatically when paying or writing off a charge if the FinePaymentAutoPopup system preference is enabled.
Not
It is possible to set specific notices for different credit types. To do so, create a new notice with the code CREDIT_ followed by the credit type code.
For example, to have a specific slip for writeoffs, create a new notice with the code CREDIT_WRITEOFF.
ACCOUNT_DEBIT
Used to print an invoice for a debit (any type of charge, such as a lost item fee, or overdue fine).
The slip or invoice can be printed manually with the ‘Print’ button next to a debit type account line in the patron’s accounting tab.
Not
It is possible to set specific notices for different debit types. To do so, create a new notice with the code DEBIT_ followed by the debit type code.
For example, to have a specific slip for lost items, create a new notice with the code DEBIT_LOST.
ACCOUNTS_SUMMARY
Used to print a summary of outstanding charges and unused credits in the patron’s account.
The slip can be printed manually with the ‘Print account balance’ option in the ‘Print’ button at the top of the patron’s details page.
AR_SLIP
Used to print a slip for an article request
The slip or receipt can be printed manually when managing article requests from the staff interface.
Get there: Circulation > Article requests > Actions > Print slip
CHECKINSLIP
This slip lists all items that were checked in today for this patron
To print this slip, click Print > Print checkin slip from the patron file
You can also print this slip from the Check in page
ISSUEQSLIP
Hızlı rapor yalnızca bugün ödünç verilen materyalleri listeleyecektir.
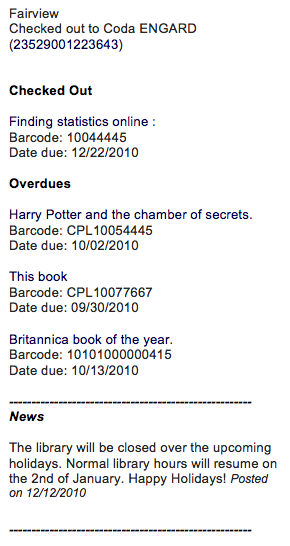
ISSUESLIP
Used to print a full slip in circulation
Dolaşım fişleri ya da alındılar halen ödünçte olan materyalleri gösterdiği gibi bugün ödünç verilen materyalleri de gösterecektir.
HOLD_SLIP
Ayırma slipini yazdırmak için kullanılır
The holds slip is generated when a hold is confirmed and set to waiting.
OVERDUE_SLIP
Used to print an overdues slip
The overdues slip can be generated manually using the ‘print’ menu in the patron account in the staff interface. It will show all items overdue.
RECALL_REQUESTER_DET
Used to print the details of the patron who has requested a recall on an item, when receiving the recall.
RECEIPT
Used to print a payment receipt in the point of sale module.
TRANSFERSLIP
Aktarım slipini yazdırmak için kullanılır
Sisteminizde bir şubeden diğerine transfer işlemini onayladığınızda transfer fişi yazdırılır
This tool also allows you to modify database entries for some specific purposes. So far, only the overdue fine description is available.
OVERDUE_FINE_DESC
This template is used to generate the description for overdue fines in a patron’s account.
Not
The information available to this customization come from the checkouts (issues), items and patrons (borrowers).
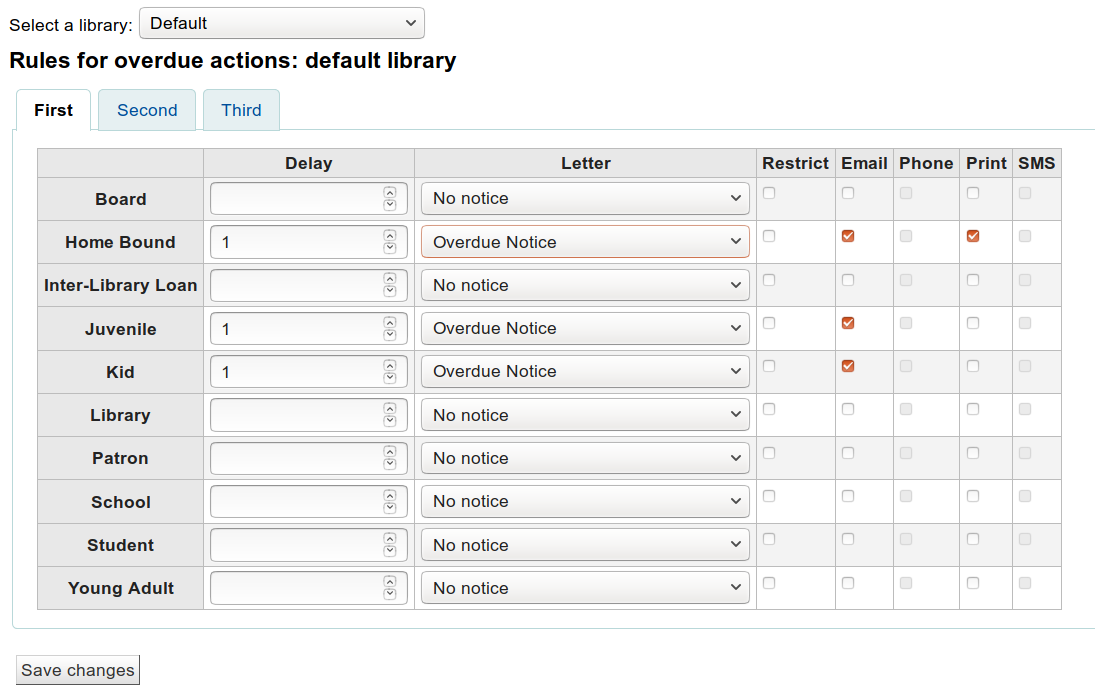
Overdue notice/status triggers
Get there: More > Tools > Patrons and circulation > Overdue notice/status triggers
In order to send the overdue notices that you defined using the Notices & slips tool, you need to first set the triggers to have these messages.
Önemli
Gecikme bildirimlerinin kullanıcılarınıza gönderilmesi için gecikme bildirimlerinin gönderileceği kullanıcı kategorisini gecikme bildirimlerini isteyecek şekilde ayarlamalısınız.
Önemli
Depending on the value of your OverdueNoticeCalendar preference the delay may or may not include days the library is closed based on the holiday calendar.
The Overdue notice/status triggers tool gives the librarian the power to send up to three notices to each patron type notifying them of overdue items
Erteleme, bir eylemin tetiklenmesinden önce bir süreli yayın sayısının gecikmeye kalmasından sonraki günlerin sayısıdır.
Önemli
Koha’nın bir eylemi tetiklemesini istiyorsanız (posta gönderme ya da üyeyi kısıtlama gibi), bir erteleme değeri gereklidir.
Ek bildirimler göndermek için, ‘İkinci’ ve ‘Üçüncü’ bildirim için sekmeler üzerine tıklayın
Bir kullanıcının üzerindeki gecikmiş materyallerden dolayı yeni materyal ödünç almasını engellemek istiyorsanız ‘Kısıtla’ kutusunu işaretleyin, bu işlem, ödünç alma esnasında kullanıcının hesabına kütüphaneciyi kullanıcının üzerindeki gecikmiş materyallerden dolayı ödünç alamayacağı doğrultusunda bilgilendiren bir uyarı koyacaktır.
If you choose to restrict a patron in this way you can also have Koha automatically remove that restriction with the AutoRemoveOverduesRestrictions preference.
Next you can choose the delivery method for the overdue notice. You can choose from Email, Phone (if you are using the i-tiva Talking Tech service), Print and SMS (if you have set your SMSSendDriver).
Patron card creator
Get there: More > Tools > Patron card creator
The patron card creator allow you to use layouts and templates which you design to print your custom patron cards on your printer. Here are some of the features of the patron card creator module:
Koha kullanıcı verilerinden alınan metinle kullanıcı kartı düzenlerini özelleştirin
Basılı kullanıcı kartları için özel kart şablonları tasarlayın (etiket sayfalarıyla eşleştirmek için)
Yazdırmak için kullanıcı kartı toplulukları oluştur ve yönet
Tek veya çoklu iş gruplarını yazdırmak için dışa aktar (PDF olarak)
Bir grup içinden tek veya çoklu olarak kullanıcı kartlarını dışa aktar (PFD olarak)
Sayfa düzenleri
Get there: More > Tools > Patron card creator > Manage > Layouts
Yerleşim düzeni, kartın üzerine basılacak metin ve görüntüleri ve bunların nerede görüneceğini tanımlar.
Not
Üç satıra kadar metin, barkod gösteriminde kullanıcı numarası ve en fazla iki resim kart üzerine basılabilir.
Add a layout
Eğer tanımlanmış bir düzeniniz yoksa, ‘Yeni’ butonuna tıklayarak ve ‘Düzen’ seçeneğini seçerek yeni bir düzen ekleyebilirsiniz.
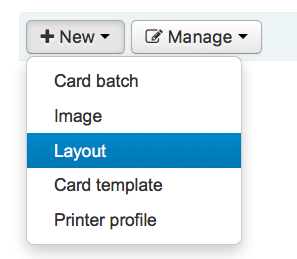
Ayrıca sol taraftaki ‘Düzenleri yönet’ butonuna basmayı seçebilirsiniz. Burada düzenleme için seçebileceğiniz kullanılabilir düzenler listesi sunulmaktadır. Ancak sayfanın üst kısmında ‘Yeni düzen’ butonu yine de olacaktır.
Yerleşime atadığınız isim sizin yararınızadır, bu yerleşimi daha sonraki bir tarihte kolayca tanımlanacak şekilde adlandırın.
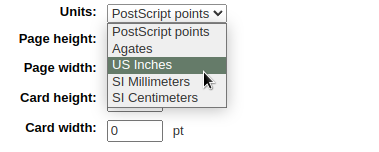
Birimler açılır menüsü, sayfa düzeninizde hangi ölçek skalasını kullanacağınızı tanımlamak için kullanılır.
Not
A Postscript Point is 1/72”, an Adobe Agate is 1/64”, an Inch is 25.4 SI Millimeters
Next, note if this layout is for the front or the back of the patron card
Not
Eğer 2-taraflı kütüphane kartınız varsa kartınızın hem ön hem de arkası için bir düzene ihtiyacınız olacaktır, bu seçenek iki taraflı kart yazdırmanıza izin vermez, yalnızca kartın hangi tarafını tasarladığınızı izlemenizi sağlar.
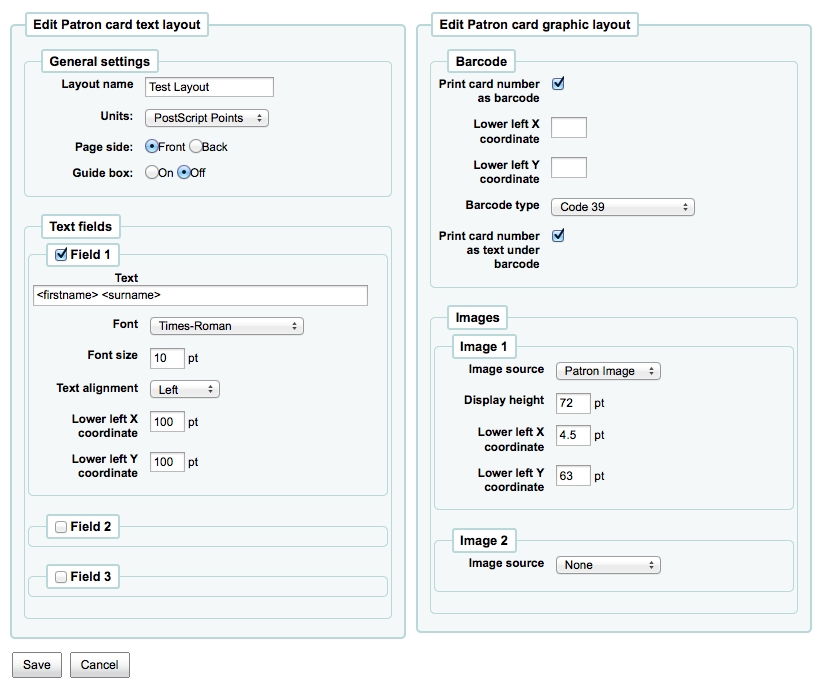
Kartınıza 3 satıra kadar metin ekleme seçeneğiniz mevcut. Metniniz sizin seçiminizle ve/veya kullanıcı kaydından alanlarla statik metin olabilir. Kullanıcı kaydından alan çıktısı almak istiyorsanız, alan isimlerini parantez içinde şu şekilde yerleştiriniz - <firstname>
Not
Alan adlarının tam bir listesi http://schema.koha-community.org adresindeki veri tabanı şemasında bulunabilir
Metnin her satırını, alt X ve Y koordinatlarını kullanarak yazı tipinizi, yazı boyutunuzu ve karttaki metnin konumunu seçebilirsiniz.
In order to show the barcode and the patron card number you will need to check the ‘Print card number as barcode’ option. This will turn the patron card number into a barcode. If you want the number to print in human readable format you will need to check the ‘Print card number as text under barcode’ option.
Son olarak kart üzerine yazdırmak için iki resime kadar resim seçebilirsiniz.
Bir tanesi, ihtiyaçlarınızı karşılayacak şekilde yeniden boyutlandırabileceğiniz kullanıcı resmi olabilir.
The other image can be something like a library logo or symbol that you uploaded using the ‘manage images’ module of the patron card creator Tool.
Önemli
Metin satırlarını, barkodları ve resimleri birbirinin üzerine gelmeyecek şekilde tanımlamak tasarımcının sorumluluğundadır.
Kaydettikten sonra, düzenleriniz ‘Düzenleri yönet’ sayfasında görünecektir.

Şablonlar
Get there: More > Tools > Patron card creator > Manage > Card templates
Bir şablon, kullandığınız etiket sayfası/kart stoğundaki etiketlerin düzenini tanımlar. Bunlar için birkaç örnek verirsek adres etiketleri için Avery 5160, sırt etiketleri için Gaylord 47-284 veya kullanıcı kartlarınız için Avery 28371 olabilir. Bir şablon oluşturmak için ihtiyacınız olan tüm bilgiler ambalajda olabilir ve eğer değilse tedarikçinin web sitesinde bulunabilir veya bir örnek sayfadan ölçülebilir.
Add a template
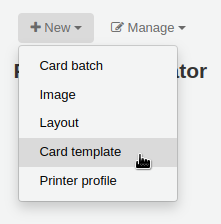
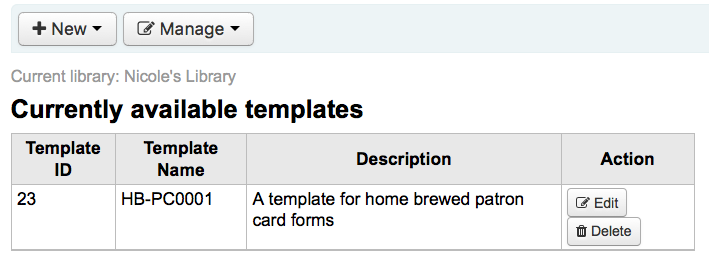
Yeni bir şablon eklemek için sayfanın üst kısmındaki sizi hemen şablon düzenleme formuna götürecek olan ‘Yeni şablon’ butonuna basın. Aynı zamanda sol taraftaki ‘Şablonları yönet’ butonuna basmayı da seçebilirsiniz. Burada karşınıza düzenlemek için seçebileceğiniz mevcut şablonların bir listesi gelecektir. Ancak sayfanın üst kısmında ‘Yeni şablon’ butonu yine de olacaktır.
Using the form that appears after pressing either ‘Edit’ or ‘New template’ you can define the template for your sheet of labels or cards.
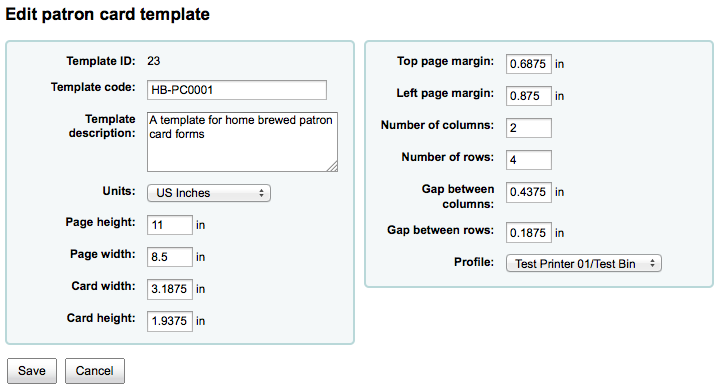
Şablon kimliği sadece sistem tarafından oluşturulan özgün bir kimliktir
Template code should be the name of this template to identify it on a list of templates
You can use the template description to add additional information about the template
Birimler açılır menüsü, şablonunuz için hangi ölçek skalasını kullanacağınızı tanımlamak için kullanılır.
Not
A Postscript Point is 1/72”, an Adobe Agate is 1/64”, an Inch is 25.4 SI Millimeters
Ölçümler (sayfa uzunluğu, sayfa genişliği, kart genişliği, kart uzunluğu) paket üzerinde olabilir, eğer yoksa genellikle sağlayıcının web sayfasında bulunabilir veya bir örnek sayfadan ölçülebilir.
Bir profil, belirli bir şablon için benzersiz ve kendine özgü anomalileri dengeleyen ve yazdırmadan önce belirli bir yazıcı için (profilin atandığı) uygulayan “ayarlar” kümesidir.
Bir profil seçmeden önce birkaç kart örneği yazdırmayı deneyin, böylece yazıcı/ şablon kombinasyonu için doğru ayarlamalar yapmak için bir profil tanımlamak için ölçümler alabilirsiniz.
Yazdırılan belgede herhangi bir anomali bulduktan sonra, bir profil oluşturun ile bir profil oluşturabilir ve bunu şablona atayabilirsiniz.
Önemli
Gerekli olmadıkça bir profil belirtmeyin, yani bir yazıcı profili belirle üzerine tıklamayın. Bir profili bir şablondan kaldırmak mümkün değildir ancak başka bir profile geçiş yapabilirsiniz.
Not
Farklı yazıcılar kullanıyorsanız, sadece belirtilen farklı profillere özdeş birkaç şablon tanımlamanız gerekebilir.
Kaydettikten sonra, şablonlarınız ‘Şablonları Yönet’ sayfasında görünecektir.
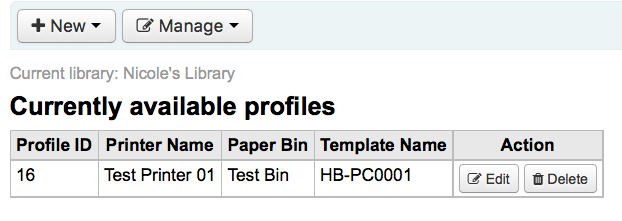
Profiller
Get there: More > Tools > Patron card creator > Manage > Profiles
Bir profil, belirli bir şablon için benzersiz ve kendine özgü anomalileri dengeleyen ve yazdırmadan önce belirli bir yazıcı için (profilin atandığı) uygulayan “ayarlar” kümesidir. Bu, şu anlama gelir. Bir şablon ayarlayıp daha sonra örnek bir veri kümesi yazdırıyorsanız ve materyallerinin hepsinin her kartta aynı hizada olmadığını görüyorsanız, yazdırma stilleri farklılıklarını telafi etmek için her yazıcı için bir profil kurmanız gerekir, metnin sol, sağ, üst veya en alta kaydırılması gibi.
Kartlarınız istediğiniz şekilde çıktı alıyorsa, profile ihtiyacınız yoktur.
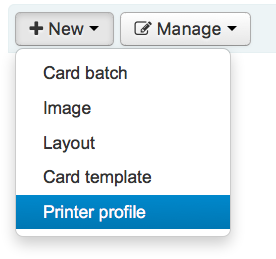
Add a profile
To add a new profile, you want to click on the ‘Profiles’ button at the top of your page and choose ‘New profile’
To add a new profile, you want to click on the ‘New profile’ button at the top of your page. Using the form that appears you can define the values to correct the card misalignment on your label sheet. You may also choose ‘Manage profiles’ on the left side and select one of the currently available profiles for editing.
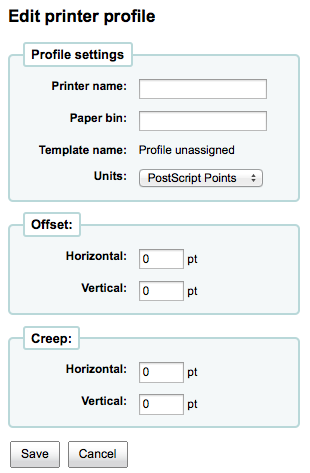
The Printer name and Paper bin do not have to match your printer exactly, they are for your reference so you can remember what printer you have set the profile for.
Not
Örneğin: Yazıcı adı olarak yazıcı model numarasını kullanmak istiyorsanız bunu yapabilirsiniz, veya bu yazıcıyı ‘masamdaki yazıcı’ olarak adlandırabilirsiniz
Şablon, bir kez şablon düzenleme formu üzerinde profili hangi şablonun uygulayacağını seçtikten sonra doldurulacaktır.
Birimler açılır menüsü şablonda hangi ölçüm ayarını kullanacağınızı tanımlamak için kullanılır.
Not
A Postscript Point is 1/72”, an Adobe Agate is 1/64”, an Inch is 25.4 SI Millimeters
Tüm görüntü dikey veya yatay olarak ortalanmadığında ofset kullanılmalıdır. Creep, etiketler arasındaki mesafenin sayfada veya sayfanın üstünde ve altında değişen bir koşulunu açıklar
Ofset ve krip değeri için, negatif sayılar basılı bilgileri baskı sayfasında yukarı ve sola doğru, pozitif sayılar aşağı ve sağa doğru taşır
Örnek: Metin, ilk etiketin sol kenarından 0,25 “, ikinci etiketin sol kenarından 0,28” ve üçüncü etiketin sol kenarından 0,31 “yazdırılır Bu, yatay sürünme’nin bu farkı telafi etmek için (eksi) -0.03 “olarak ayarlanması anlamına gelir.
After saving, your profiles will appear on the ‘Manage printer profiles’ page.
Yeni profilinizi kaydettiğinizde, şablonlar listesine dönebilir ve bu profil için olan şablonu düzenlemeyi seçebilirsiniz.
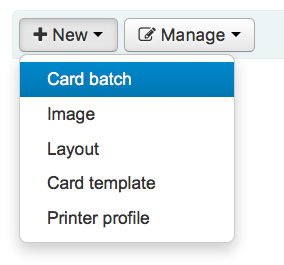
Toplu dosyalar
Get there: More > Tools > Patron card creator > Manage > Card batches
Toplu dosya, kartlarını oluşturmak istediğiniz kullanıcıların topluluğudur.
Add a batch
Yeni bir grup eklemek için sayfanızın üst kısmındaki ‘Yeni gruplar’ butonuna tıklayın. Soldaki ‘Grupları yönet’ menü öğesini seçerseniz daha önce tanımlanmış olan gruplar görüntülenir. Bu ekranda yeni bir grup ekleyebilir ya da düzenlemek için bir grup seçebilirsiniz.
Yeni bir grup için bir mesaj açılır ve bu grupta işlenecek kullanıcıları seçmek için sizi yönlendirir.
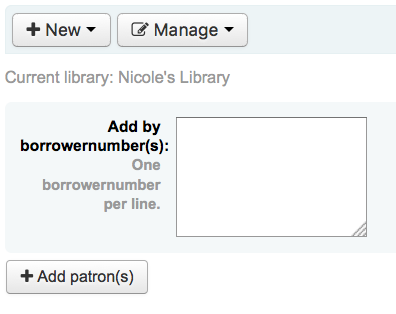
After choosing the ‘Add patron(s)’ button the Patron Search window pops up.
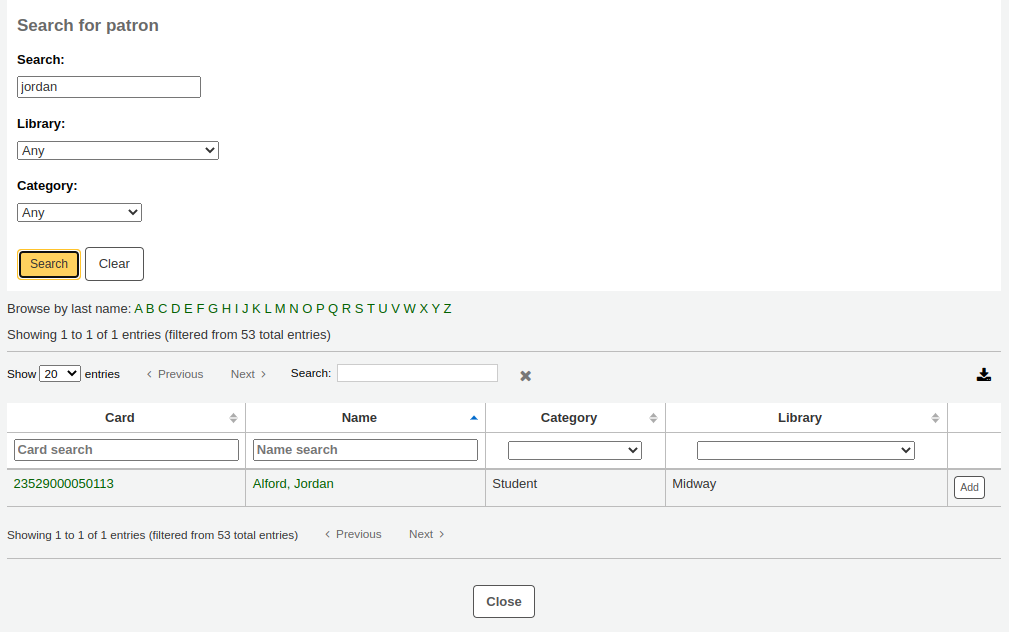
Buradan grubunuza eklemek için adlarının bir kısmı, kategorileri ve/veya kütüphaneleri ile kullanıcı araması yapabilirsiniz, Arama kutusuna * işareti girmek tüm kullanıcıları gösterecektir.
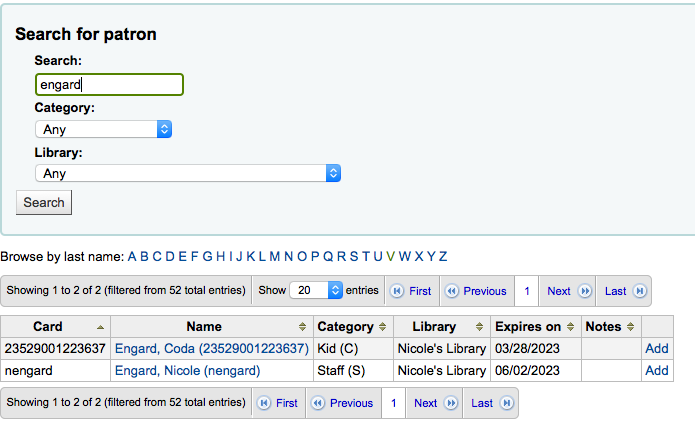
Sonuçlardan ‘Ekle’ butonuna tıklayarak kullanıcıları gruba ekleyebilirsiniz. Sonuçlardan kullanıcıları ekledikten sonra başa dönüp başka bir arama yapabilir ya da işleminizin bittiğini belirtmek için ekranın en altındaki ‘Kapat’ butonuna tıklayabilirsiniz. Bundan sonra karşınıza kullanıcıları eklemiş olduğunuz grup gelecektir.
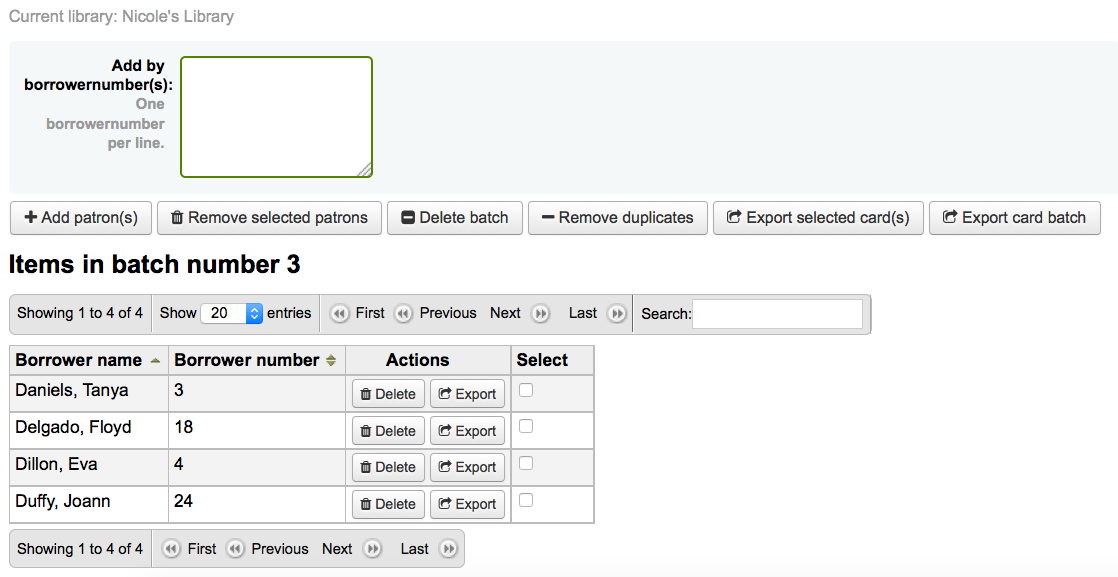 Grubunuzdan memnun iseniz dışa aktarma işlemine devam edebilirsiniz. Eğer bu grup üzerinde düzeltme yapmak, hatta silmek isterseniz bunu yapabileceğiniz butonları ekranınızın üstünde bulabilirsiniz. ‘Yönet > Kart toplulukları’ butonu aracılığıyla her zaman buraya geri gelebilirsiniz.
Tüm kullanıcı kartlarınızı dışa aktarmak isterseniz ‘Kartları toplu olarak dışa aktar’ butonuna tıklayabilirsiniz, aksi takdirde kartlarını yazdırmak istediğiniz belirli kullanıcılar için isimlerinin sağındaki onay kutusunu işaretleyip, daha sonra üst kısımda bulunan ‘Seçili kartları dışa aktar’ opsiyonunu seçebilirsiniz.
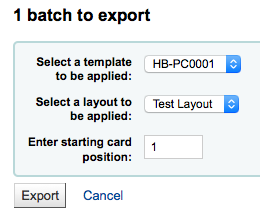
Dışa aktar menüsü sizden bir şablon, sayfa düzeni ve başlangıç pozisyonu seçmenizi isteyecektir (yazdırma işleminin başlaması gereken sayfa üzerinde).
Not
İlk 6 etiket zaten sayfanızda kullanılmışsa, başlangıç pozisyonunu yazdırmaya sayfa üzerinde pozisyon 7 etiketinden başlatabilirsiniz. Etiketler üstten alta, soldan sağa doğru numaralandırılır.
‘Dışa Aktar’ı tıkladıktan sonra, yazdırmak için etiketlerinizin bir PDF’si karşınıza gelecektir.
PDF dosyasını açınca yazdırılacak kartları göreceksiniz

Yukarıdaki görüntü iki metin satırından oluşan bir düzeni göstermektedir. İlk satır sadece düz metindir, ikinci satır ise <firstname><surname> alanlarından oluşmaktadır. Kod 39’da bir kullanıcı resmi (varsa) basılır ve kullanıcı numarasının barkodu gösterilir. Tüm bunlar burada pozisyon 1-3 kullanarak 8 satır ve üç sütun içeren bir şablon üzerine basılır. Bu PDF’i yazdırırken yazıcınızın PDF’i yeniden ölçeklendirmemesine dikkat ediniz (örneğin, kağıt boyutuna sığdırmayın), aksi takdirde yazıcının şablonlarınız için doğru yere yazdırması mümkün olmayacaktır.
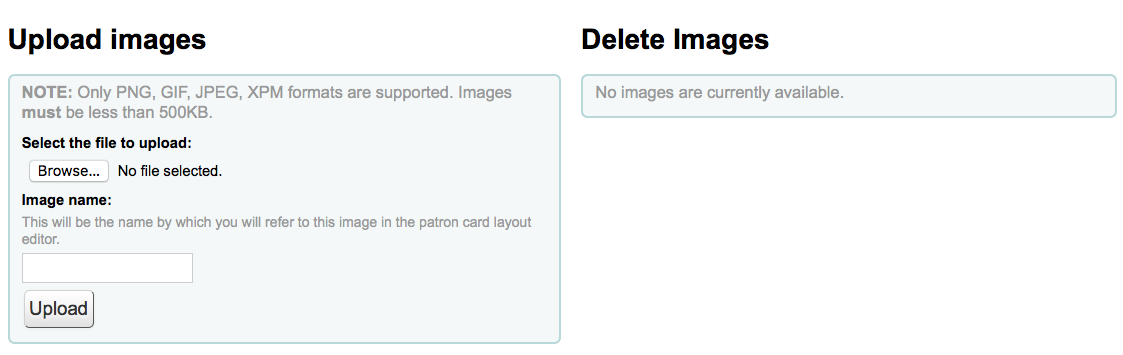
Manage images
Get there: More > Tools > Patron card creator > Manage > Images
Images uploaded using this tool will appear on the menu when creating patron card layouts. You are limited in how many images you can upload (not counting patron images) by the ImageLimit system preference.
Önemli
Görüntü boyutu 500 kb altında olmalıdır.
Not
Bu araçla yüklenen fotoğrafların en az 300dpi olması gerekir. Bu değer çıktısı alınabilir bir resmin minimum kalitesidir.
Ekranın ortasında basit bir yükleme formu var, dosyayı bilgisayarınızdan tarayın ve daha sonra hatırlayacağınız bir isim verin.
Dosya yüklendiğinde, size bir onay mesajı sunulacaktır.
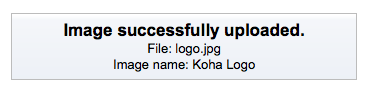
Ve görüntü, sizin diğer görüntülerinizle sayfanın sağ tarafında listelenecektir.
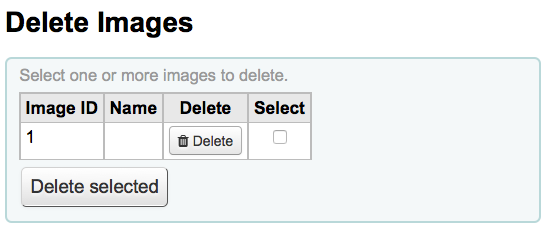
Bu görüntülerin bir ya da bir çoğunu silmek için silmek istediğiniz ger görüntünün sağındaki onay kutusuna tıklayın ve sil butonuna tıklayın.
Batch patron deletion/anonymization
Get there: More > Tools > Patrons and circulation > Batch patron deletion/anonymization
Bu araç toplu olarak kullanıcı kaydı silmede, toplu olarak ödünç geçmişini anonimleştirme olanağı sağlar. Bu, eski ödünç almalarla ilgili materyaller arasında bağın korunduğu, ancak ödünç alan üyelerle bağın kesildiği anlamını taşır. (sistemden kalıcı olarak siler)
Önemli
Gecikme cezası bulunan kullanıcılar ya da ödünç verilmiş materyaller kaydedilmezler. Bunlar sistemden tamamen kaldırılmazlar (yalnızca delete_borrowers tablosuna taşınırlar), ancak bu araç istenilen miktarda denetim sağlamayabilir.
Önemli
Bu aracı kullanmadan önce veri tabanınızı yedeklemeniz önerilir. Burada yapılan değişiklikler kalıcı olacaktır.
Önemli
The anonymization will fail quietly if AnonymousPatron preference does not contain a valid value.
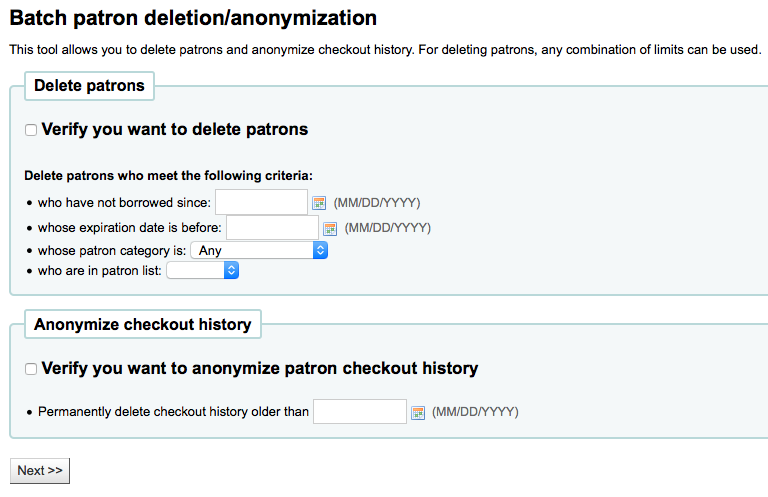
Kullanıcıları silmek ya da anonimleştirmek için
Check the ‘Verify’ box on the task you would like to complete (delete or anonymize)
Değiştirmek istediğiniz veriden önce tarih girin.
Kullanıcıları siliyorsanız, aynı zamanda şu özellikteki kullanıcıları da seçebilirsiniz
belirli bir tarihten beri ödünç almamış
Belirli bir tarihe kadar süresi dolacak hesaplara sahip olan
belirli bir kullanıcı kategorisi içindedir
kullanıcı listesi içindedir
‘İleri’ ye tıklayınız
Ekranda işleminizle ilgili bir onay mesajı belirecektir.
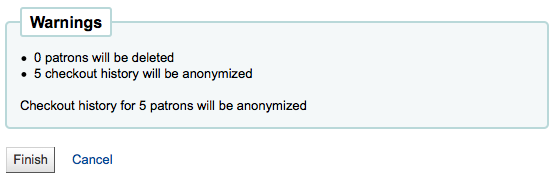
‘Bitir’e tıklamak verinizi siler ya da anonimleştirir.

Toplu kullanıcı modifikasyonu
Get there: More > Tools > Patrons and circulation > Batch patron modification
Bu araçla kullanıcı kayıtları üzerinde toplu bir düzenleme yapabilirsiniz. Bir cardnumbers (her satırda bir tane) yükleyin ve kullanıcılar listesi içerisinden seçin ya da kullanıcı kart numaralarını ekrana getirilen kutu içerisine tarayın.
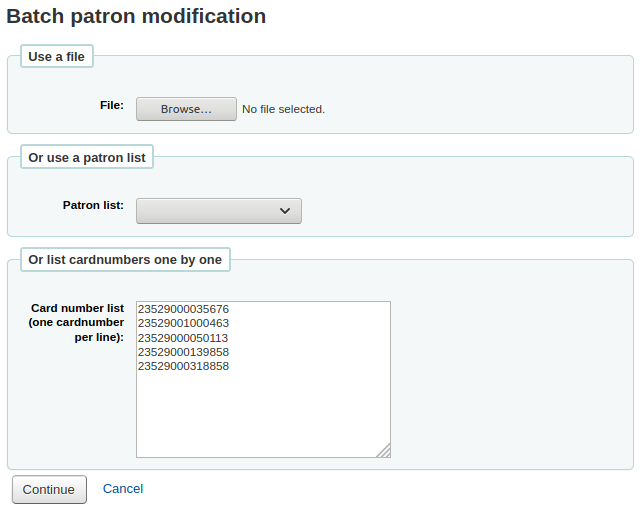
Dosyanızı yüklettiğiniz ya da barkodlarınızı okuttuğunuzda ‘Devam et’e tıklayınız. Ekranda kullanıcı listesi ve yapabileceğiniz değişiklikler çıkacak.
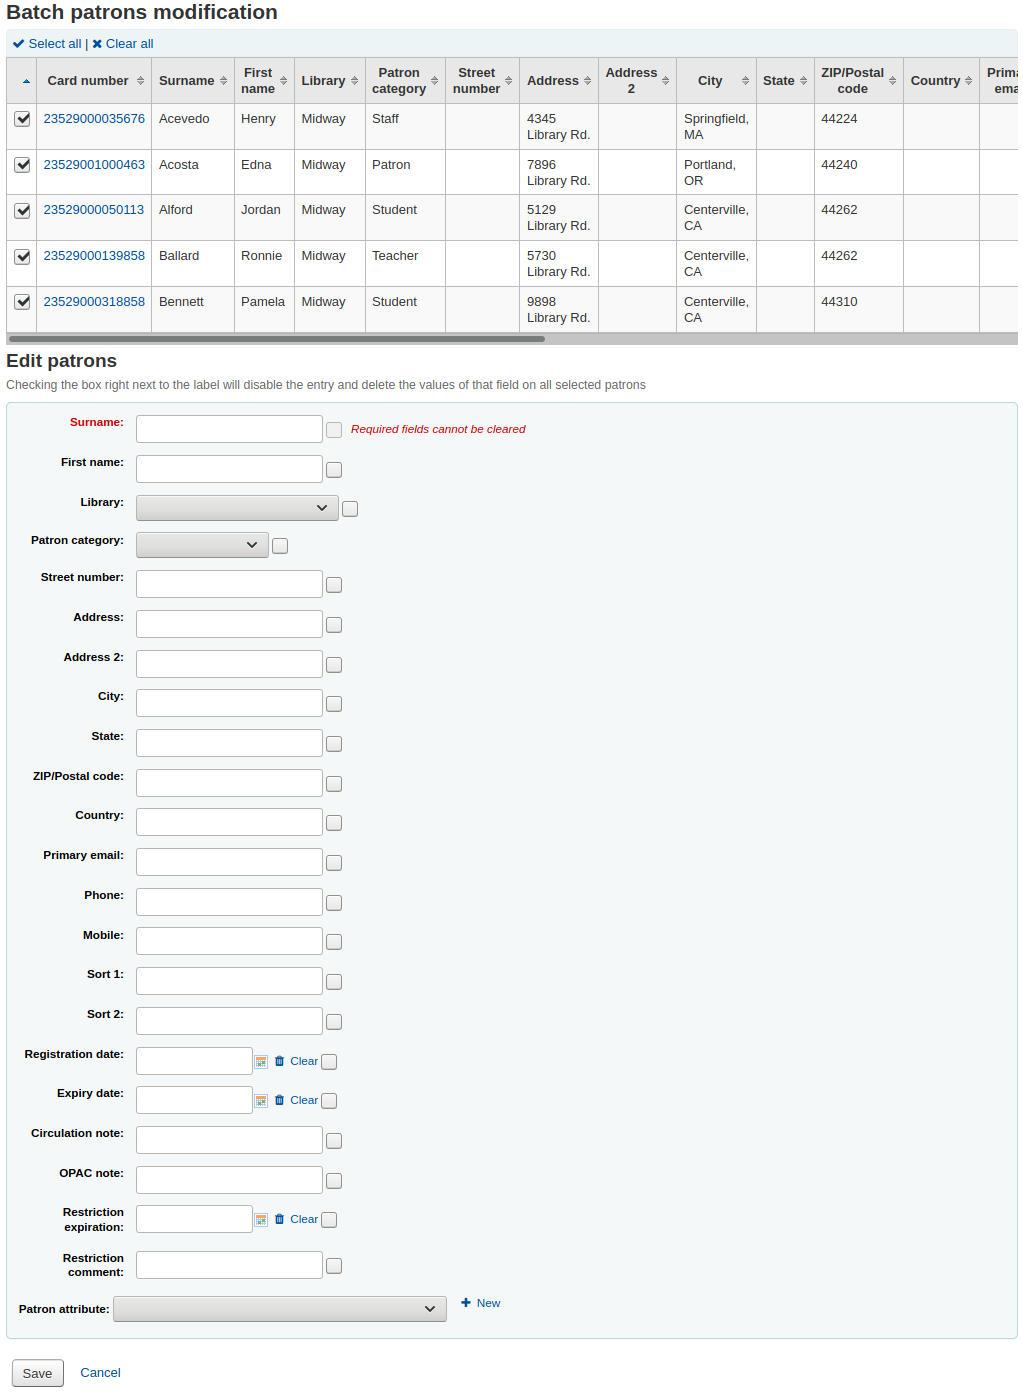
Her bir metin kutusunun solunda onay kutusu mevcuttur. Bu onay kutusuna tıklamak alan değerlerini silecektir.
Önemli
Alan zorunlu ise içerisindeki değeri silmeniz mümkün olmayacaktır.
If you have multiple patron attributes you can change them all by using the ‘+ New’ link to the right of the text box. This will allow you to add another attribute value.
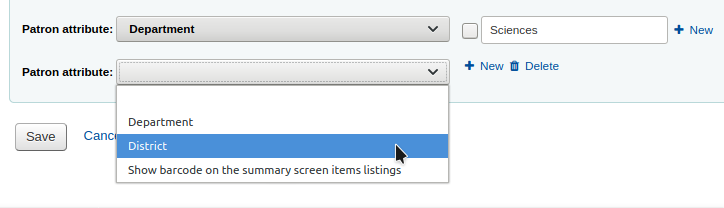
İstediğiniz değişiklikleri yaptıktan sonra, ‘Kaydet’e tıklayabilirsiniz ve Koha size değiştirilmiş kullanıcı kayıtlarını sunacaktır.
Batch extend due dates
Get there: More > Tools > Patrons and circulation > Batch extend due dates
This tool allows you to update due dates in bulk, this can be useful if a library needs to close unexpectedly and cannot accept returns.
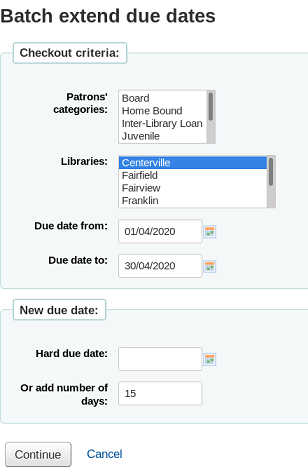
You can filter the selection of checkouts based on patron category, library or a combination of both. You can select multiple options in the dropdown lists if needed.
Next, specify a date range for the current due date of the materials on loan. For example, you may want to extend the due dates for recent checkouts but exclude long overdue loans.
Choose to extend the due dates either to a new hard due date or by a number of days. Using the number of days option can prevent large numbers of loans being due on the same date.
You can choose whether to preview the results of your selections.
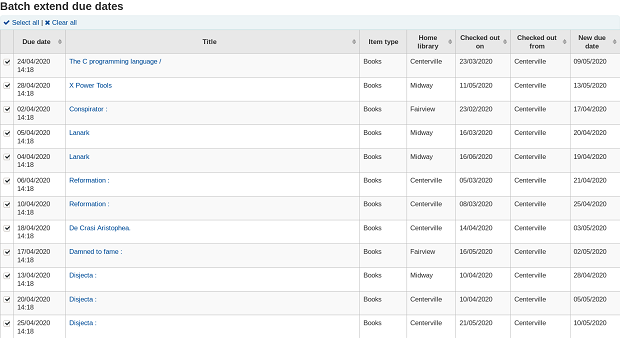
If you preview the results you will see a table which shows you the current due date and the new due date so that you can check your selections. You can untick checkouts if they are incorrect or go back and change your selection.
Click on the Modify selected checkouts button to see a confirmation screen showing the checkouts that have been modified.
Not
Access to this tool requires the Tools permission batch_extend_due_dates.
Tag moderation
Get there: More > Tools > Patrons and circulation > Tags
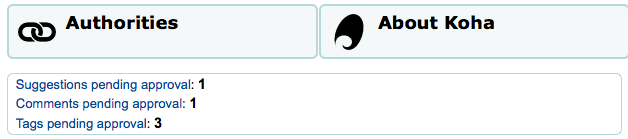
Depending on your tagging system preferences, librarians may need to approve tags before they are published on the OPAC. This is done via the tag moderation tool. If there are tags awaiting moderation they will be listed on the main staff dashboard under the module labels:
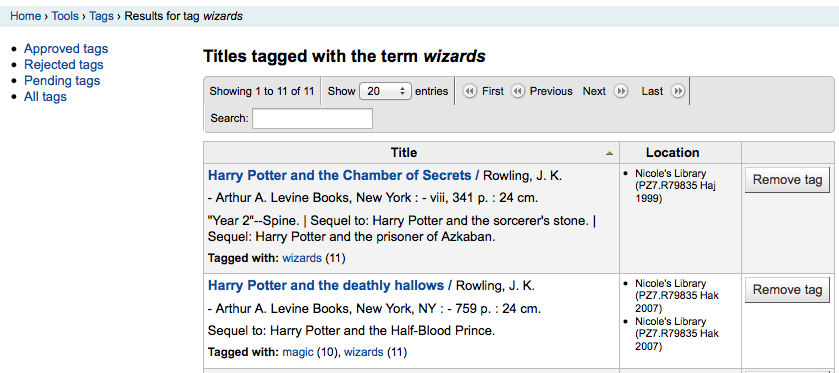
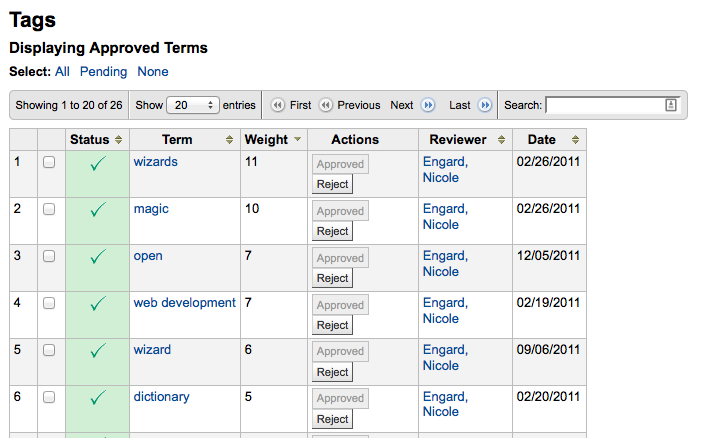
Etiketleri denetlemek için, etiketler aracını ziyaret ediniz. Aracı ilk ziyaret ettiğinizde, ekranda kütüphaneci tarafından onaylanmayı ya da reddetmeyi bekleyen etiketler listesi çıkacak
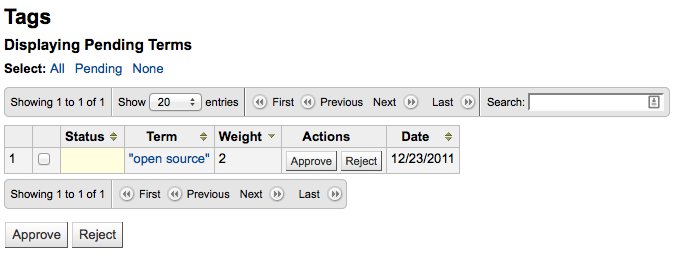
Başlıkların tümünü görmek için, bu etiket eklenmiştir ve buradan terimin üzerine tıklanabilir
Bu başlık listesinden bir tag’i, başlığın sağında bulunan ‘Tag’i Kaldır’ butonuna tıklayarak daha sonraki zamanlarda kullanılmasını tamamen reddetmeden kaldırabilirsiniz.
Bir etiketi onaylamak için ‘Onayla’ butonuna satır içinde terim ile tıklayabilirsiniz ya da onaylamak istediğiniz tüm terimleri işaretleyip tablonun altında ‘Onayla’ya tıklarsınız.
To reject a tag, you can either click the ‘Reject’ button in line with the term, or check all terms you want to reject and click ‘Reject’ below the table.
Bir etiket onaylanmışsa ya da reddedilmişse, uygun etiketler listesine taşınacaktır. Tüm etiketlerin özeti ekranın sağında gözükecektir.
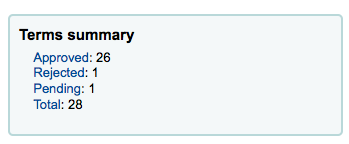
Bir tag onaylanmış veya reddedilmiş olsa da, yine de başka bir listeye taşınabilir. Onaylanmış tag’ler görüntülenirken her tag için reddetme seçeneği vardır:
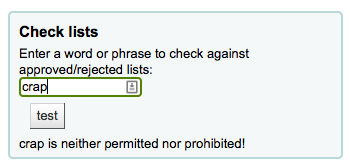
Onaylanmış ve reddedilmiş listelere mukabil terimleri kontrol etmek için (muhtemelen tag denetimi için atadığınız sözlüğe mukabil), ekranın en alt sağında yer alan arama kutusuna durumunu görmek istediğiniz terimi girmeniz yeterlidir
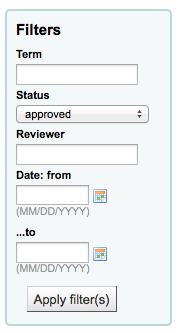
Son olarak soldaki filtreleri kullanarak tag’leri bulabilirsiniz.
Upload patron images
Get there: More > Tools > Patrons and circulation > Upload patron images
allowing patron images kullanıcı resimlerinin kullanıcı kayıtlarına eklenmesine izin veriyorsanız kullanıcı resimlerini toplu olarak yükleyebilirsiniz. Bu resimler aynı zamanda kullanıcı kartları oluşturulurken de kullanılabilir.
Txt dosyası oluştur ve bu dosyayı “DATALINK. TXT” ya da “IDLINK. TXT” olarak adlandır.
Metin dosyasının her satırında virgül (veya etiketi) takiben kullanıcı kart numarasını girin ve ardından resim dosyasının adını girin
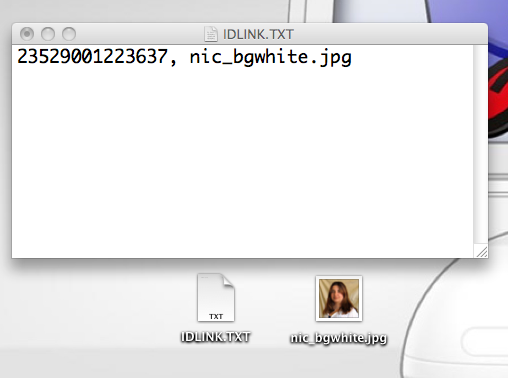
TXT dosyanızın RTF değil, düz metin belgesi olduğundan emin olun.
Metin dosyasını ve resim dosyalarını sıkıştır
Go to the Upload patron images tool
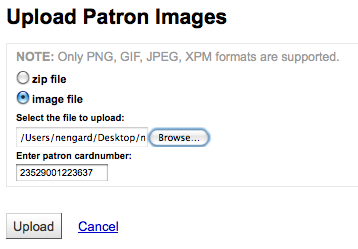
Tek bir resim için, resim dosyası seçeneğine gelin ve sonra kullanıcı kimlik numarasını girin.
Çoklu resimler için, zip dosyası yüklemeyi seçin.
Karşıya yükleme işlemi bittikten sonra karşınıza bir onay ekranı gelecek

Önemli
Yüklenen resmin boyutu için 100k sınırı vardır ve görüntünün 200x300 piksel olması önerilir, ancak daha küçük resimler de çalışacaktır.
Rotating collections
Get there: More > Tools > Catalog > Rotating collections
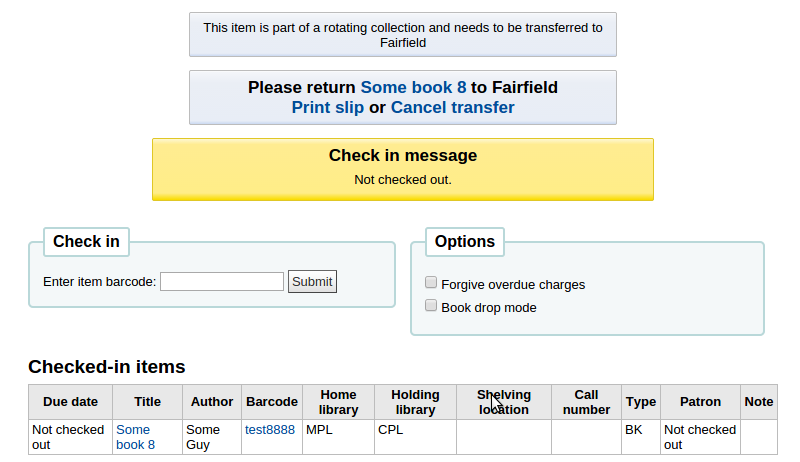
Rotating collections is a tool for managing collections of materials that frequently get shifted from library to library. It adds the ability to store not only an item’s home library and current location but also information about where it is supposed to be transferred to next to ensure that all items in the collection are sent to the correct library. When an item in a rotating collection is checked in, library staff is notified that the item is part of a rotating collection and which branch it should be sent to if it is not at the correct one.
Önemli
The AutomaticItemReturn system preference must be set to “Don’t automatically transfer items to their home library when they are returned” for rotating collections to function properly.
To create a new rotating collection, click the “New collection” button, fill in the title and description, and click “Submit”. Once submitted you’ll see “Collection name added successfully”; click “Return to rotating collections home” to return to the main Rotating collections management page (or click Rotating collections in the sidebar).
To add items to a collection, click “Actions” and choose “Add or remove items” next to the collection’s name in the list of collections. Under “Add or remove items” scan or type in the barcode of the item you wish to add to the collection, and hit enter or click ‘Submit’ if necessary.
To remove an item from a collection, either click ‘Remove’ next to the item’s barcode in the list of items within the collection or check the “Remove item from collection” box next to the Barcode text box under “Add or remove items”, and scan or type in the barcode, clicking “Submit” or hitting Enter if necessary. Note: The “Remove item from collection” checkbox will remain checked as long as you are on the “Add or remove items” page, unless you uncheck it, to facilitate quickly removing a number of items at a time by scanning their barcodes.
Transfer a rotating collection
Bir koleksiyonu aktarmak:
Bu koleksiyon içindeki materyallerin mevcut konumunu aktarılacağı kütüphane ile değiştirin
Özgün geçerli konum/ayırtma kütüphanesinden aktarılacağı mevcut konum/ayırtma kütüphanesine bir aktarım başlatın. Kütüphane koleksiyonu aldığını zaman aktarımı tamamlamak için tüm materyallerin kaydını yapmalıdır.
Bir koleksiyonu iki yoldan birisi ile aktarabilirsiniz:
From the main Rotating collections page, click on “Actions” and choose “Transfer” next to the title of the collection you wish to transfer; choose the library you wish to transfer the collection to and click “Transfer collection”.
Or, from the “add or remove items” page for a collection, you can click the “Transfer” button, choose the library you wish to transfer the collection to and click “Transfer Collection”.
Önemli
Aktarım işlemini tamamlamak için dönüşümlü koleksiyonu alan kütüphane, materyalleri alırken koleksiyonda bulunan tüm materyallerin kaydını yapmalıdır. Bu işlem aktarımı temizleyecek ve böylece materyaller daha fazla “aktarımda” olarak gösterilmeyecektir.
Dönüşümlü koleksiyonda yer alan bir materyal aktarılacağı kütüphaneden başka bir kütüphaneye iade edilmiş ise, materyalin dönüşümlü koleksiyonun bir parçası olduğu ve bununla birlikte materyalin nereye gönderilmesi gerektiği konusunda kütüphane personelini uyaran bir uyarı ekrana gelecektir.
Additional tools
Takvim
Get there: More > Tools > Additional tools > Calendar
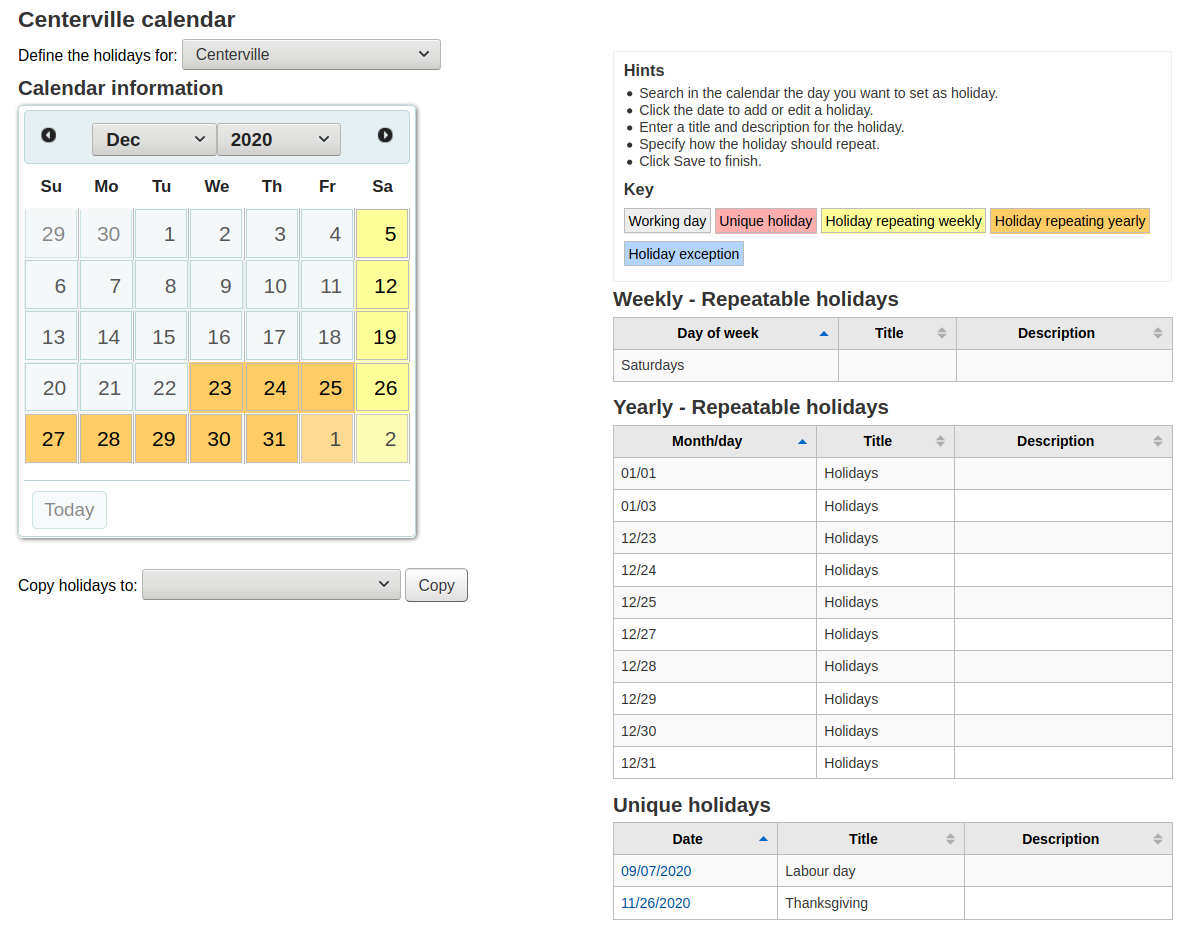
Libraries can define library closings and holidays to be used when calculating due dates. You can make use of the calendar by turning on the proper system preferences:
useDaysMode: Choose the method for calculating due date - either include days the library is closed in the calculation or don’t include them
finescalendar: This will check the holiday calendar before charging fines
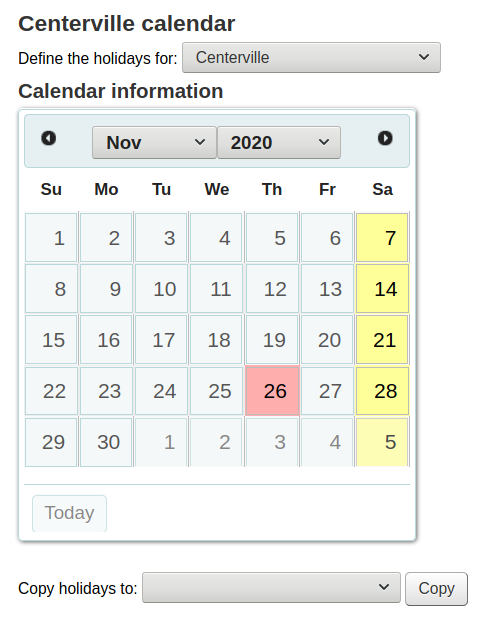
Adding events
Olayları eklemeye başlamadan önce kapanışların uygulanacağı kütüphaneyi seçin. Bir olay eklerken, bu olayı bir birime veya tüm birimlere uygulamak isteyip istemediğiniz sorulacaktır. Olay eklemek için sadece
Kapatma istediğinizi uygulamak istediğiniz tarihi takvim üzerinde tıklayın
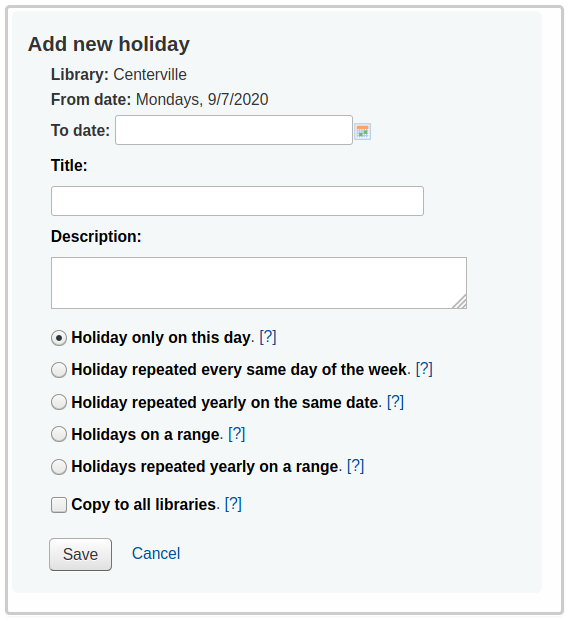
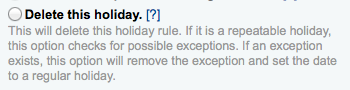
Takvim üzerinde görünen form içerisine kapanış bilgilerini girin (Her seçenek hakkında daha fazla bilgi almak için seçeneğin sağ tarafında bulunan soru işareti üzerine [?] tıklayın)
Sayfanın en üstündeki çek menüden seçtiğiniz kütüphaneye bağlı olarak kütüphane otomatik olarak doldurulacaktır.
Gün bilgisi aynı zamanda takvimdeki tıkladığınız tarihe bağlı olarak otomatik bir şekilde de doldurulacaktır.
If this holiday extends on more than one day, enter the end date in ‘To date’
In the ‘title’ enter the name of the holiday or the reason for the closing
In the ‘description’ enter more information about this holiday
Sonra bu olayın bir kereye mahsus veya yinelenebilir olup olmadığını seçebilirsiniz.
‘Holiday only on this day’: this is a one day holiday
‘Holiday repeated every same day of the week’: this is a weekly closing (if you’re closed every Sunday, for example)
‘Holiday repeated yearly on the same date’: this is an annual holiday closing (if you’re closed on January 1st each year, for example)
‘Holiday on a range’: this is a holiday that extends on several days
Not
Make sure to enter a ‘To Date’ at the top if you choose ‘Holiday on a range’
‘Holiday repeated yearly on a range’: this is a holiday that extends on several days each year (such as summer holidays for schools)
Not
Make sure to enter a ‘To Date’ at the top if you choose ‘Holiday repeated yearly on a range’
Son olarak bu olayın tüm kütüphaneler için mi yoksa yalnızca özgün olarak seçtiğiniz kütüphane için mi uygulanacağına karar verin
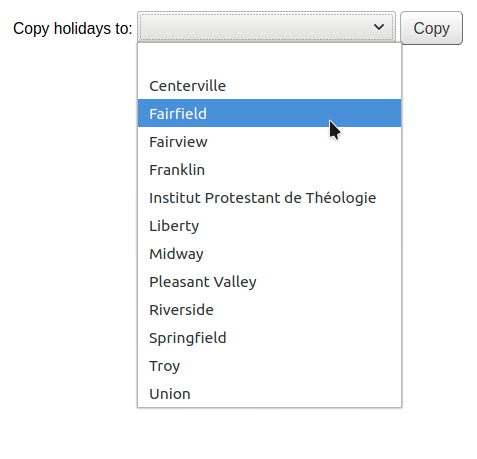
Eğer tüm tatilleri girmeyi ve hepsini bir seferde başka bir branşa kopyalamayı tercih ederseniz takvimin altındaki kopya menüsünü kullanabilirsiniz
Kaydettikten sonra, takvimin sağındaki özette listelenmiş işlemi göreceksiniz.
Editing events
Olayları düzenlemek için
Değişiklik yapmak istediğiniz takvim üzerindeki etkinliğe tıklayınız (bunu takvim üzerindeki tarihe tıklayarak yapınız, özet olarak listelenen etkinlik üzerine değil)
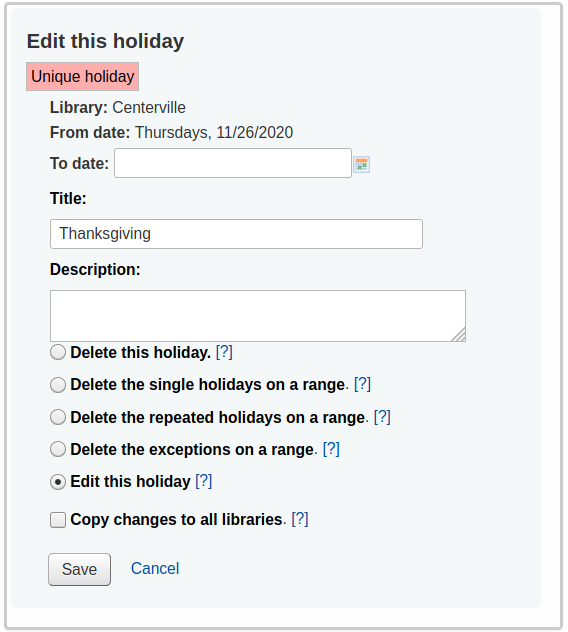
Bu form üzerinden tatiller üzerinde düzenleme yapabilir ya da tatili tamamen silebilirsiniz.
Tüm eylemler değişiklik yapmadan önce ‘Kaydet’e tıklamanızı gerektirir.
Tekrarlanabilir olaylar üzerine tıklamak biraz daha farklı seçenekler sunacaktır

In the form above you will note that there is now an option to ‘Generate an exception for this repeated holiday’ and ‘Generate exceptions on a range of dates’ choosing one of these options will allow you to make it so that this date is not closed even though the library is usually closed on this date.
Tüm eylemler değişiklik yapmadan önce ‘Kaydet’e tıklamanızı gerektirir.
Additional help
Olay eklerken ya da düzenlerken, formdaki değişik seçeneklerin yanında yer alan soru işaretine tıklayarak ek yardım alabilirsiniz.
CSV profiles
Get there: More > Tools > Additional tools > CSV profiles
CSV profiles are created to define how you would like your cart or list to export.
Add CSV profiles
To add a CSV profile
Click on ‘New CSV profile’
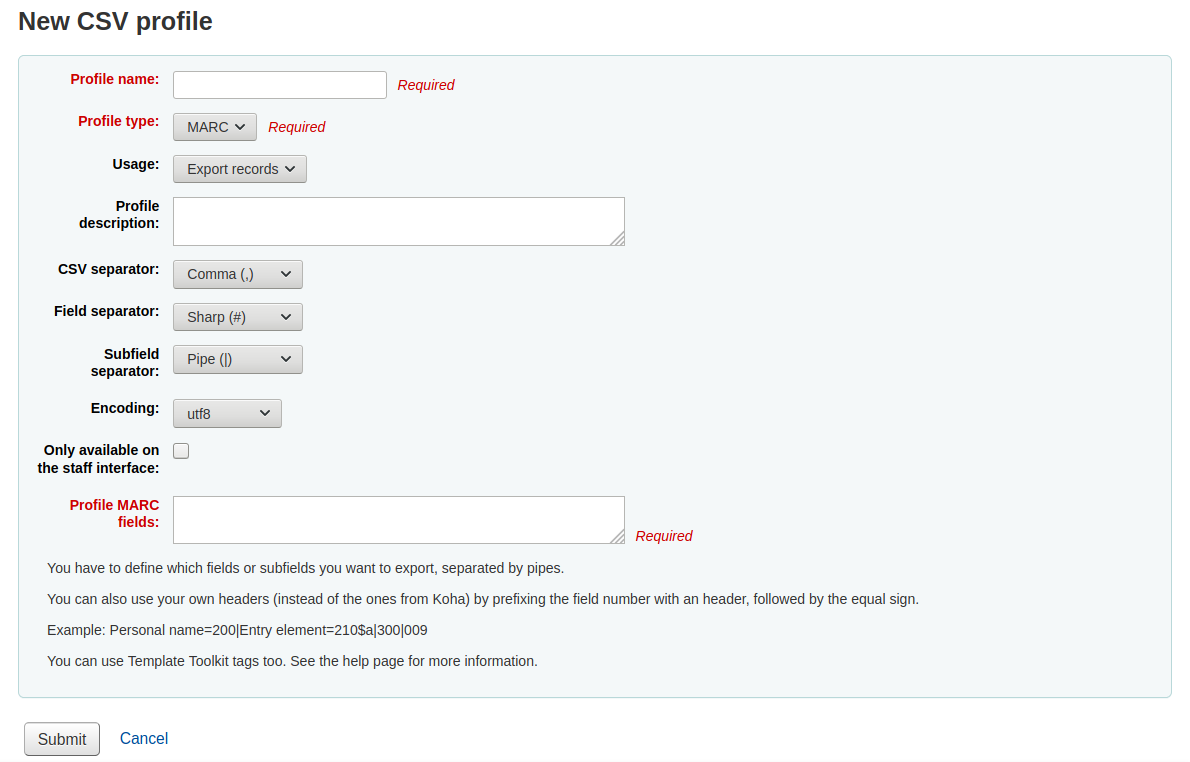
‘Profil ismi’ kartınızdan ya da listenizden ‘İndir’i seçerken dış aktarım çekme menüde gözükecektir.
‘Profil türü’ profilinizi tanımlamak için hangi alan türlerini (MARC veya SQL) kullanmayı planladığınızı belirler
MARC’ı seçerseniz MARC alanları girmeniz gerekir
Eğer SQL’i seçerseniz SQL veritabanı alanlarını girmeniz gerekir
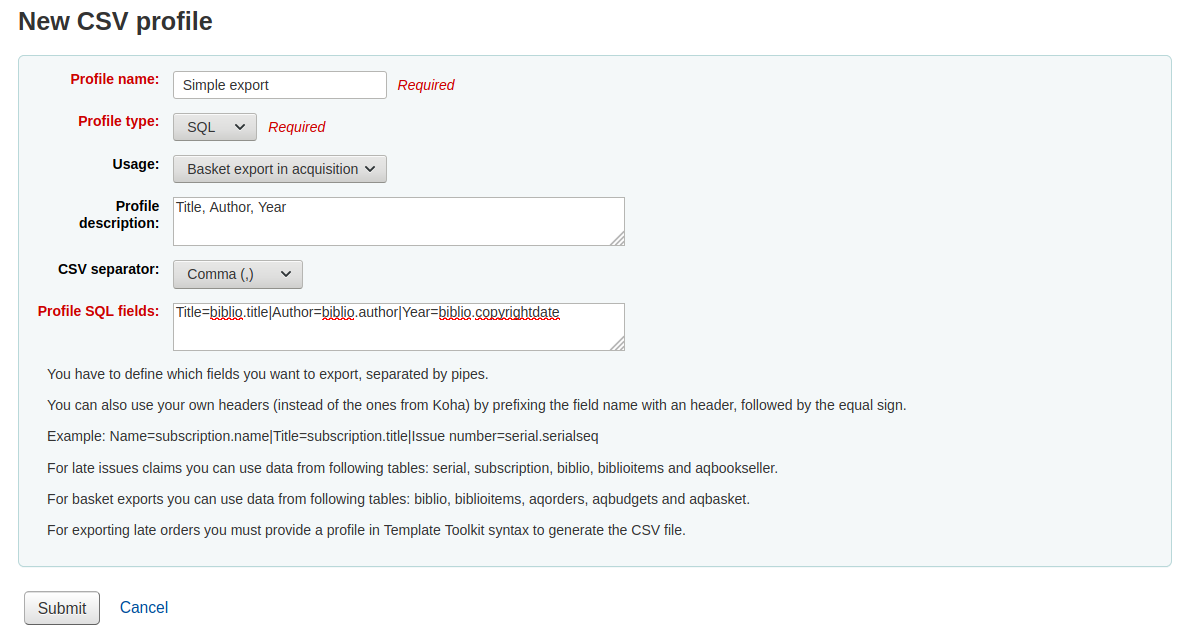
The ‘Usage’ field is used to indicate what type of report this CSV profile is used with
‘Export records’ (only available with MARC profile type): this is used to export records from your cart or lists
‘Late serial issues claims’ (only available with SQL profile type): this is used to export late issues of serial subscriptions
‘Export late orders’ (only available with SQL profile type): this is used to export late orders in the acquisitions module
- ‘Basket export in acquisition’ (only available with SQL profile
type): this is used to download records from acquisitions baskets
- ‘Export lost items in report’ (only available with SQL profile
type): this is used to export a CSV from the lost items report
The ‘Profile description’ is for your own benefit, but will also appear in the OPAC when patrons download content, so make sure it’s clear for your patrons as well
‘CSV ayırıcısı’ değerleri ve değer gruplarını ayırmak için kullanılan karakterdir.
Not
Buradaki en yaygın seçenek virgüldür çünkü çoğu elektronik tablo uygulamaları virgülle dosya bölmesini açar.
‘Alan ayırıcı’ mükerrer alanları ayırmak için kullanılan karakterdir
Örnek: 650’den çok alanınız olabilir ve sütundaki her bir alan arasında gözükecek özellik budur

‘Alt alan ayırıcı’ mükerrer alt alanları ayırmak için kullanılan karakterdir
Örnek: Bir alanda çoklu $a alt alanınız olabilir.
‘Kodlama’ alanı, dosyayı kaydederken kullanılan kodlamayı tanımlamanıza imkan sunar.
The ‘Only available on the staff interface’ checkbox (only for MARC profile types) lets you limit this CSV profile to staff interface only, meaning patrons will not be able to use this profile to export their cart or lists from the OPAC
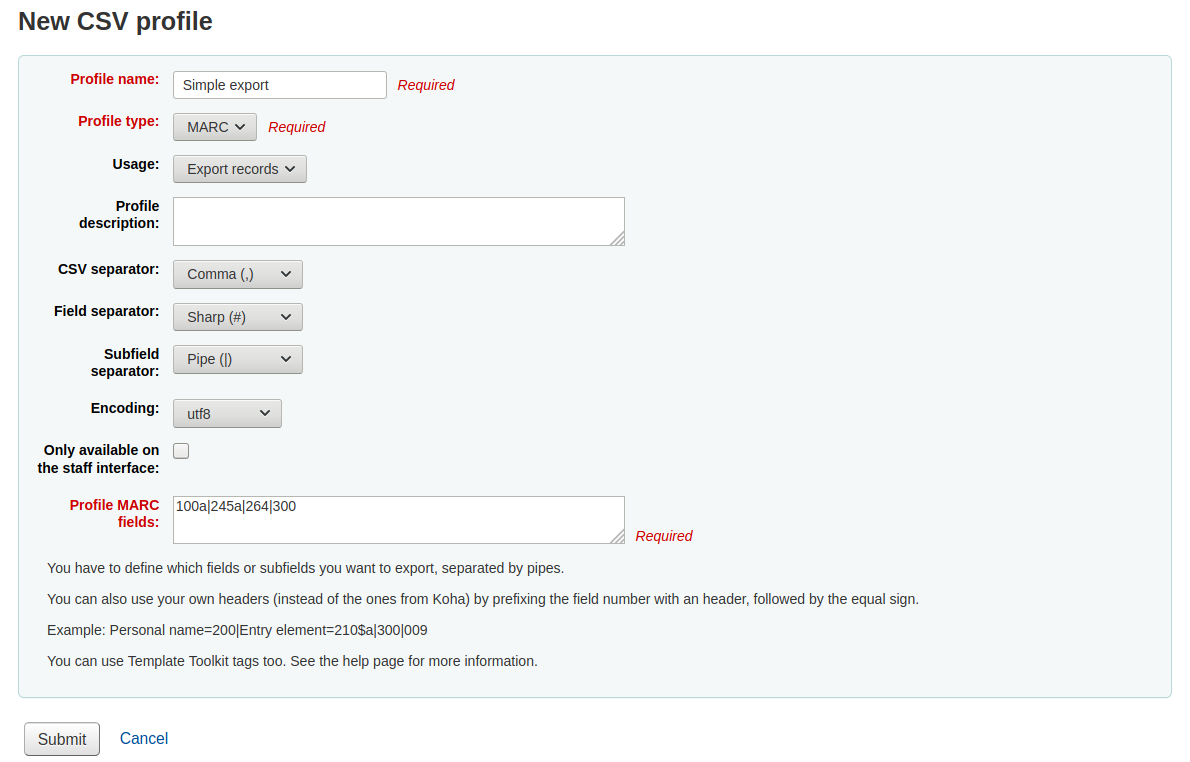
Finally format your CSV file using the ‘Profile MARC fields’ or ‘Profile SQL fields’ box
Define which fields or subfields you want to export, separated by pipes. Example : 200|210$a|301 for MARC or biblio.title|biblio.author for SQL
Not
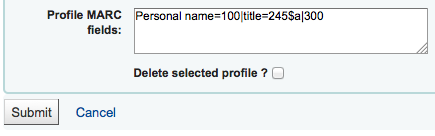
You can also use your own headers (instead of the ones from Koha) by prefixing the field number with a header, followed by the equal sign. Example: Personal name=100|title=245$a|300
When you have entered in all of the information for your profile, simply click ‘Submit’ and you will be presented with a confirmation that your profile has been saved.

Modify CSV profiles
Once you have created at least one CSV profile an ‘Edit profile’ tab will appear next to the ‘New profile’ button.
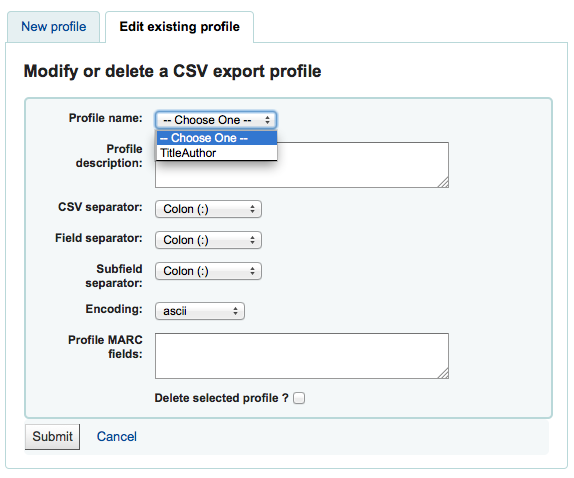
Düzenleme ve gerekli alanları değiştirmek istediğiniz profili seçin.
Değişikliklerinizi gönderdikten sonra, ekranın üst kısmında bir onay mesajı sunulacak

Bir profili silmek için ‘Sorguyu gir’e tıklamdan önce ‘Seçilmiş Profili Sil’ seçeneğini işaretleyin.
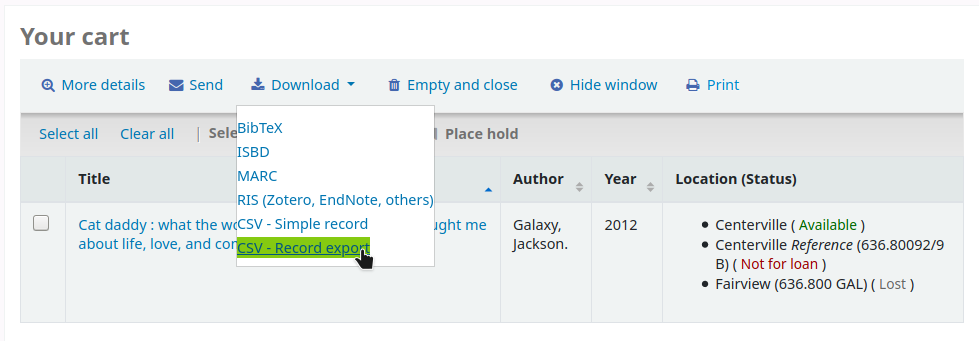
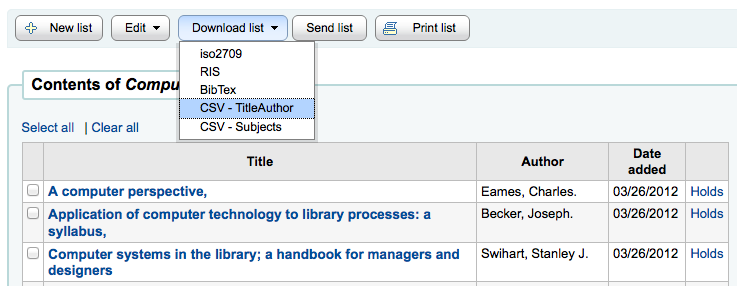
Using CSV profiles
Your CSV profiles will appear on the export list or cart menu under the ‘Download’ button in both the staff client and the OPAC
Log viewer
Get there: More > Tools > Additional tools > Log viewer
Actions within the Koha system are tracked in log files. Your system preferences can be changed to prevent the logging of different actions. These logs can be viewed using the log viewer.
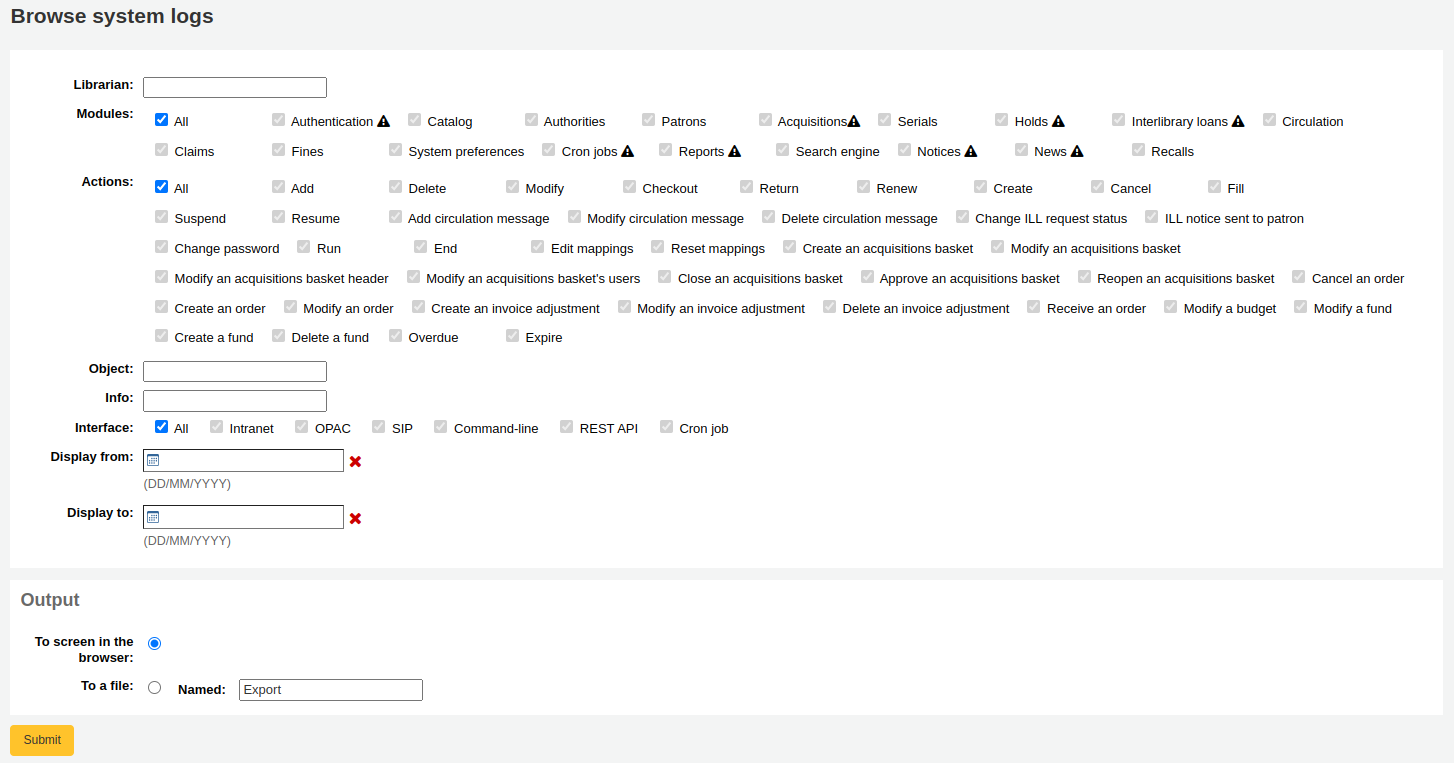
Not
The warning sign next to a module name indicates that the actions in this module are not logged. Change your logs preferences to log actions from a module.
Menü seçeneklerinin farklı kombinasyonlarını seçmek o sorgulama için günlük dosyası oluşturacaktır.
A query for all logs related to the Circulation module produces a result
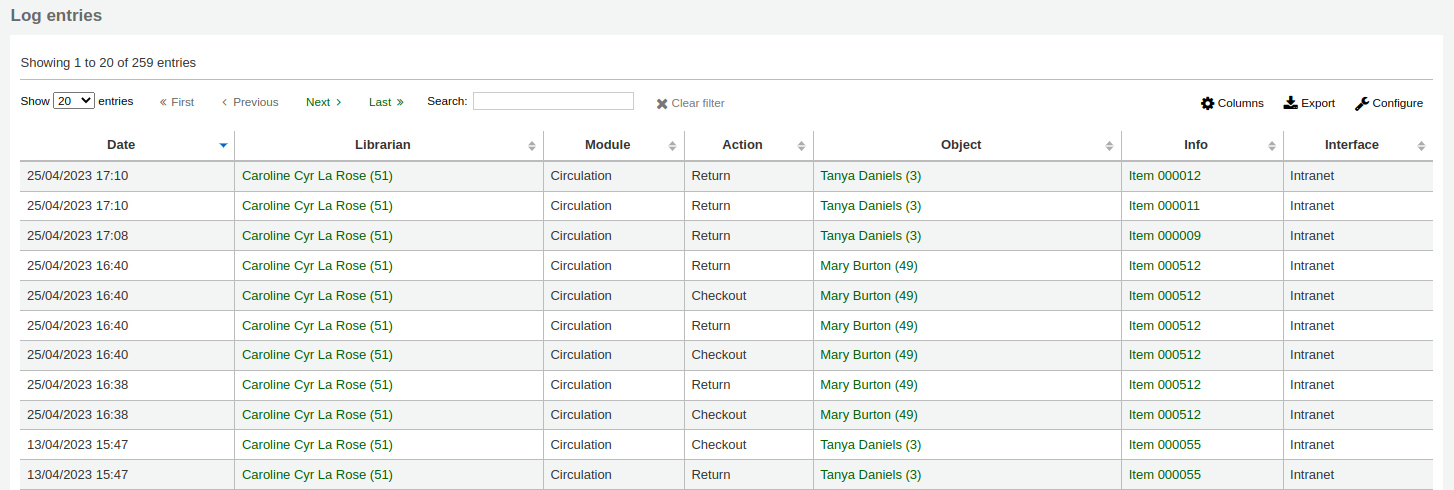
Not
You can customize the columns of this table in the ‘Table settings’ section of the Administration module (table id: logst).
Haberler
Get there: More > Tools > Additional tools > News
Koha’nın haberler modülü kütüphanecilerin OPAC’a, personel arayüzüne ve dolaşım alındılarına haber yollamasına izin verir.
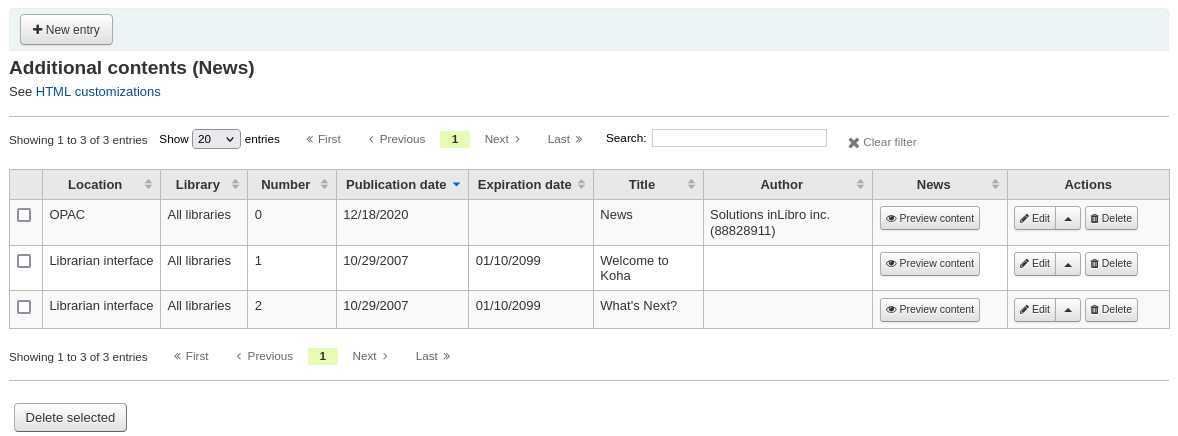
To add news to either the OPAC, the staff interface or a circulation receipt:
Click ‘New entry’
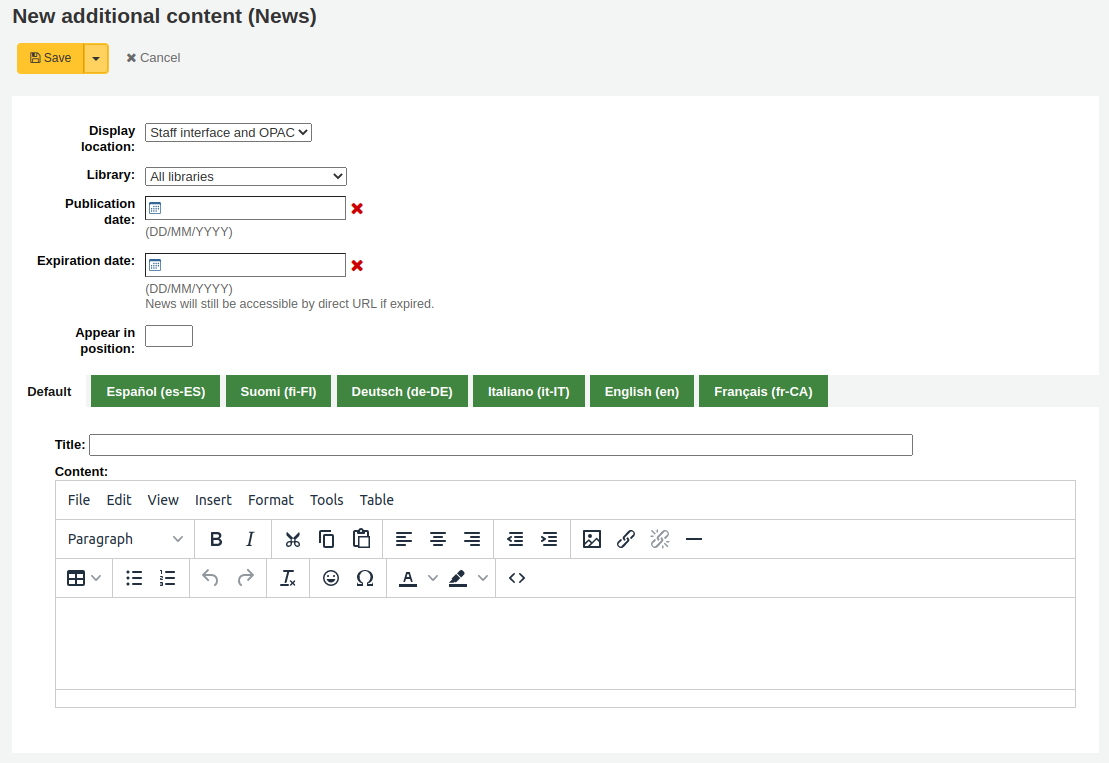
Code: enter a unique code for this news item
Display location: choose where to put the news

Librarian and OPAC interfaces: content will appear on the staff interface main page as well as in the news block on the OPAC
Librarian interface: content will appear on the staff interface main page
OPAC: content will appear in the top middle part of the OPAC page
Below the news in the OPAC there will be an RSS icon allowing you and your users to subscribe to library news
You can allow your users to choose to see branch-specific news with the OpacNewsLibrarySelect system preference
Slip: content will appear on the circulation receipts
Not
This can be activated or deactivated in the Notices & slips tool
Library: choose the library for which this news item will be shown
Prior to end users logging in to the OPAC only news items listed to appear for ‘All libraries’ will display unless your system administrator has configured an ‘OPAC_BRANCH_DEFAULT’ override in virtual host configuration. See installation for details.
Publication date: use the publication date field to control from which date your news item appears
Examples: (these assume today’s date as 7 May 2019)
Publish on current date: set publication date as 7 May 2019
Schedule for publishing in future: set date later than 7 May 2019
Backdate the news item: set date earlier than 7 May 2019
Expiration date: use the expiration date field to automatically stop showing the news item when it is no longer relevant.
If this field is empty the news item will be shown until you remove it manually
Appear in position: you decide in what order your news items appear
If the field is left empty, the news will appear from newest to oldest
In this field, 0 is the top-most position; the larger the number, the lower in the list the news will appear
You can enter the news title and text for each language installed
Not
You can choose which type of editor to use here (either a text editor or a WYSIWYG (what you see is what you get) editor) with the AdditionalContentsEditor system preference.
After filling in all of the fields, click ‘Save’ at the top of the page.
Alternatively, click the arrow next to the ‘Save’ button and choose ‘Save and continue editing’ if you need to stay on this page to continue editing the news item.
Depending on your choice for the NewsAuthorDisplay system preference, you will also see the person who created the news item (this uses the logged in person).
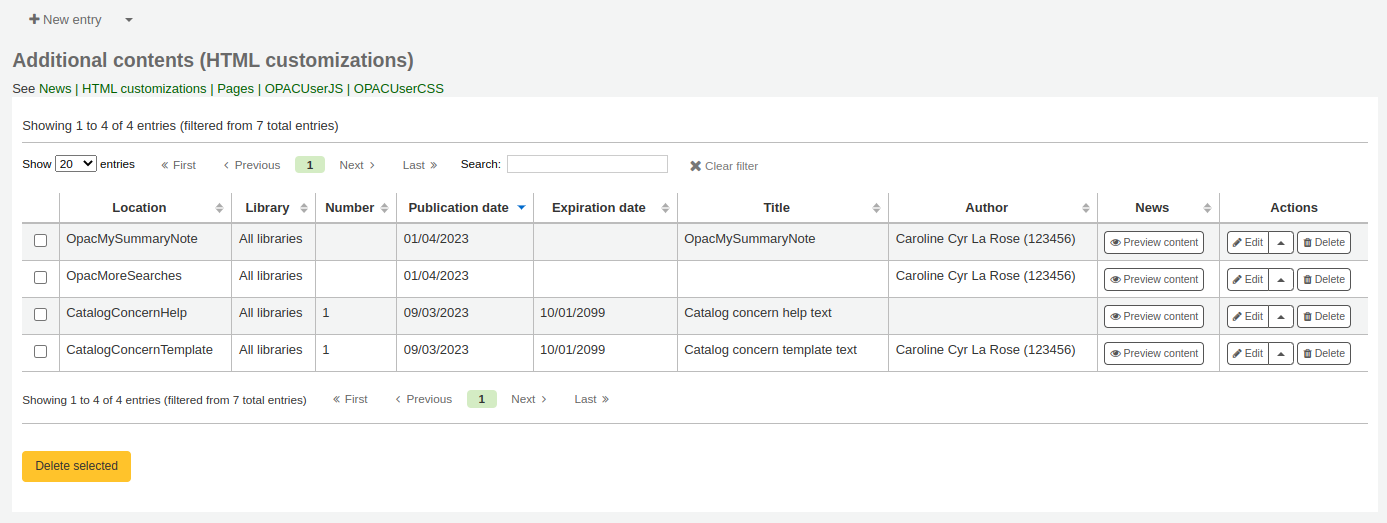
HTML customizations
Get there: More > Tools > Additional tools > HTML customizations
Koha’s HTML customizations tool allows staff to post content to the OPAC.
To add content to the OPAC:
Click ‘New entry’
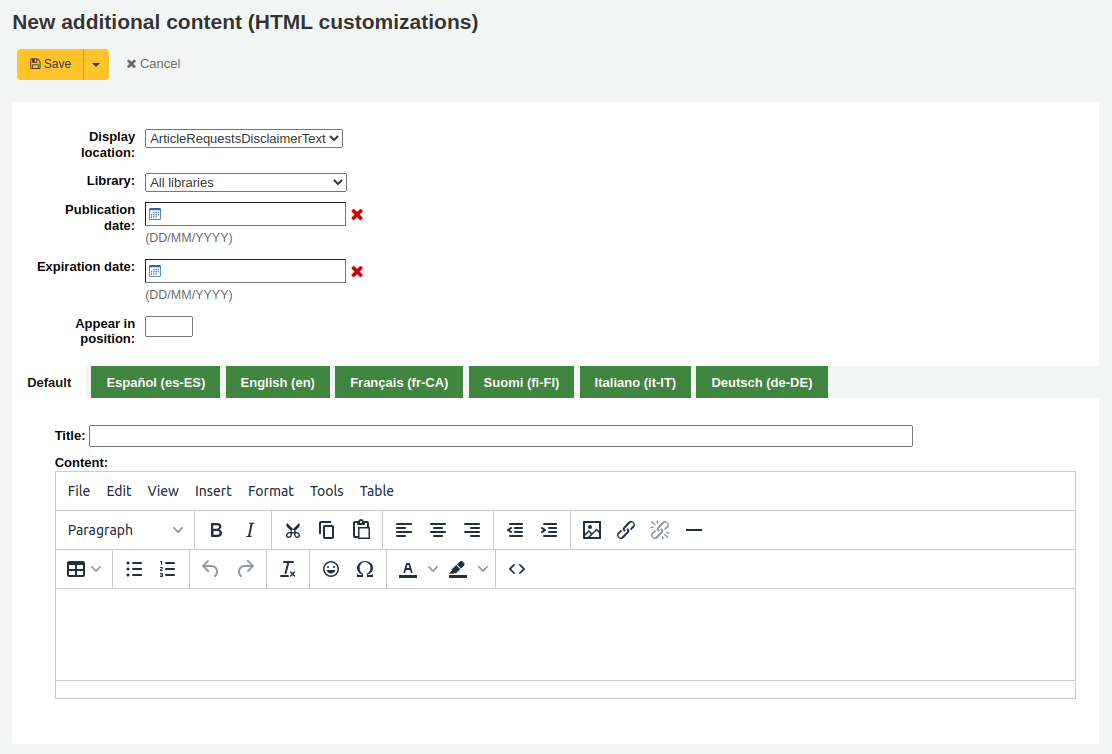
Code: enter a unique code for this additional content item
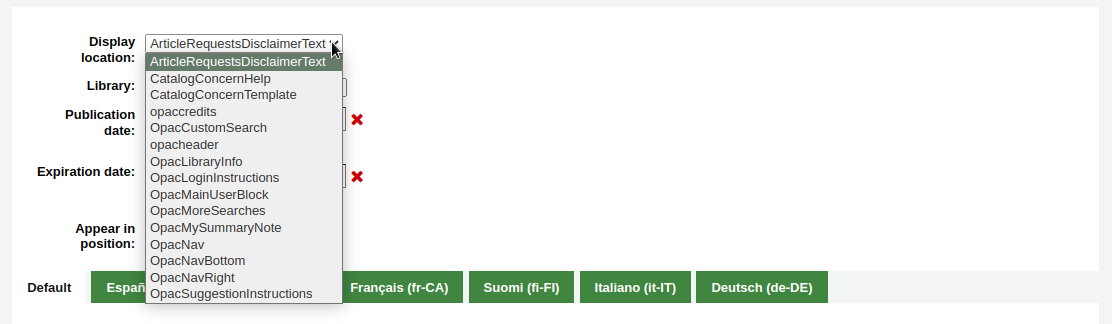
Display location: choose where to put the content
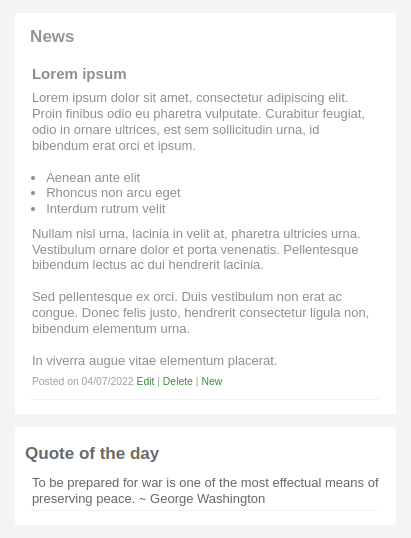
The following image shows where each block is displayed on the OPAC’s main page
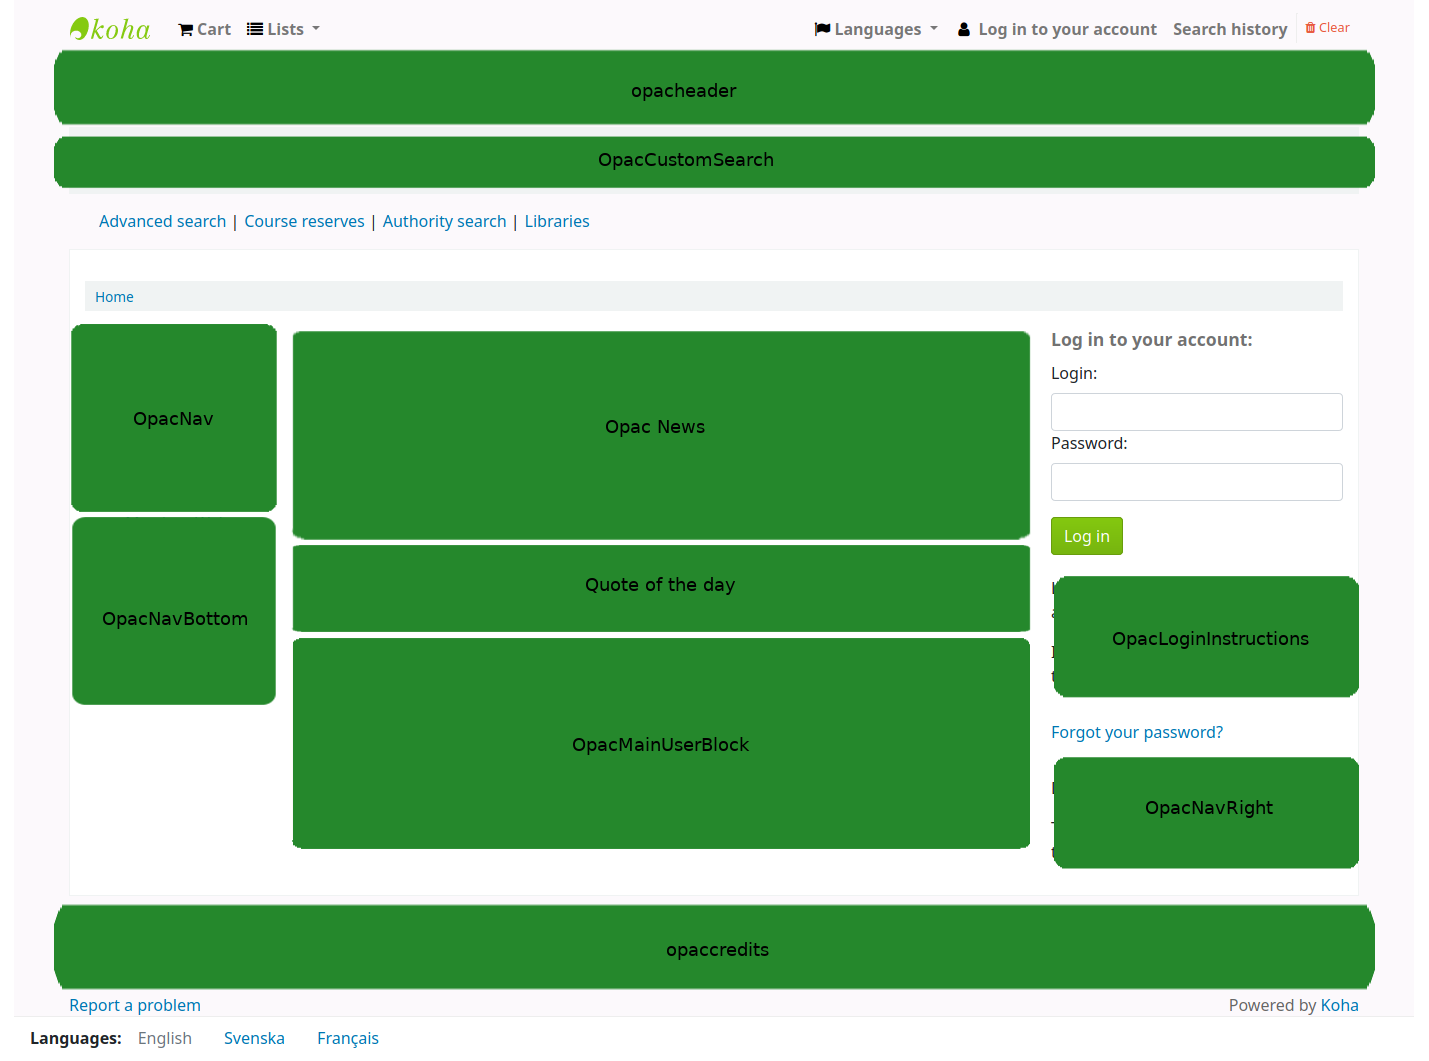
Not
The Quote of the day feature is found in the tools module, and the news are managed in the news tool. The rest of the customizable blocks are managed in the HTML customizations tool.
ArticleRequestsDisclaimerText: content will appear and patron will have to accept before they can continue to the article request form; use for any copyright/disclaimer patrons need to be aware of regarding photocopies or scans of articles or chapters
CatalogConcernHelp: content will appear at the bottom of catalog concern form when reporting a concern in the OPAC, or reporting a concern in the staff interface. The default text is “Please describe your concern clearly and the library will try to deal with it as quickly as possible”.
CatalogConcernTemplate: content will appear in the main text area of the catalog concern form when reporting a concern in the OPAC, or reporting a concern in the staff interface. The default text is
**Describe the concern**

A clear and concise description of what the concern is.

**To Reproduce**

Steps to reproduce the behavior:
1. Go to '...'
2. Click on '....'
3. Scroll down to '....'
4. See error

**Expected behavior**

A clear and concise description of what you expected to happen.
Tüyo
Since this will be in a text field, there is no way to add formatting. Make sure to use the text editor, not the WYSIWYG editor, in order to have line breaks in your text.
opaccredits: content will appear at the bottom of the page
OpacCustomSearch: content will replace the simple search bar at the top of the page
opacheader: content will appear at the top of the OPAC page
OpacLibraryInfo: content will appear in the ‘Libraries’ page in the OPAC, as well as in the holdings table in the OPAC
OpacLoginInstructions: content will appear under the login box on the OPAC’s main page
OpacMainUserBlock: content will appear in the middle of the OPAC’s main page
OpacMoreSearches: content will appear under the search box at the top of the OPAC. By default (and depending on system preferences) there is a link for Advanced Search, Course reserves, Authority search, and Tag cloud. Any new searches will be added to the right of the already present links.
OpacMySummaryNote: content will appear above the patron’s summary and below the welcome message when the patron logs in to the OPAC and views their ‘your summary’ tab.

OpacNav: content will appear on the left hand column of the main page and patron account on the OPAC. When on the patron account page, the content in OpacNav will appear before the account tabs (summary, charges, personal details, etc.)
OpacNavBottom: content will appear on the left hand column of the main page and patron account on the OPAC. When on the patron account page, the content in OpacNavBottom will appear after the account tabs (summary, charges, personal details, etc.). On the main page, the content in OpacNavBottom appears right below the content in OpacNav.
OpacNavRight: content will appear on the right side of the OPAC page
OpacSuggestionInstructions: content will replace the text at the top of the purchase suggestion form on the OPAC
Library: choose the library for which this content will be shown
Prior to end users logging in to the OPAC only content blocks listed to appear for ‘All libraries’ will display unless your system administrator has configured an ‘OPAC_BRANCH_DEFAULT’ override in virtual host configuration.
Publication date: use the publication date field to control from which date your content appears
Examples: (these assume today’s date as 7 May 2019)
Publish on current date: set publication date as 7 May 2019
Schedule for publishing in future: set date later than 7 May 2019
Backdate the news item: set date earlier than 7 May 2019
Expiration date: use the expiration date field to automatically stop showing the content when it is no longer relevant.
If this field is empty the content will be shown until you remove it manually
Appear in position: you decide in what order your content appear, when there is more than one in the same display location
If the field is left empty, the content will appear from oldest to newest
In this field, 0 is the top-most position; the larger the number, the lower in the list the content will appear
You can enter the content title and text for each language installed
Not
The title is not shown for additional content. It mostly serves to know at a glance what the content is about when looking at the list of additional content items. If you want a title to appear, you must add it in the text portion.
Not
You can choose which type of editor to use here (either a text editor or a WYSIWYG (what you see is what you get) editor) with the AdditionalContentsEditor system preference.
After filling in all of the fields, click ‘Save’ at the top of the page.
Alternatively, click the arrow next to the ‘Save’ button and choose ‘Save and continue editing’ if you need to stay on this page to continue editing the news item.
Pages
Get there: More > Tools > Additional tools > Pages
The pages tool is a tool to create custom additional pages in the OPAC and in the staff interface. It is based on the same tool as the news and the HTML customizations, therefore it works in the same way.
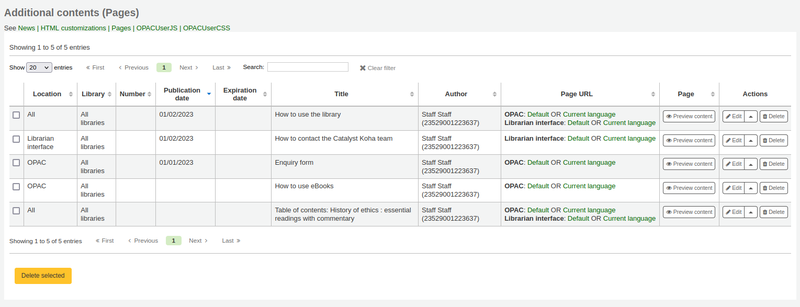
To add a new page:
Click ‘New entry’
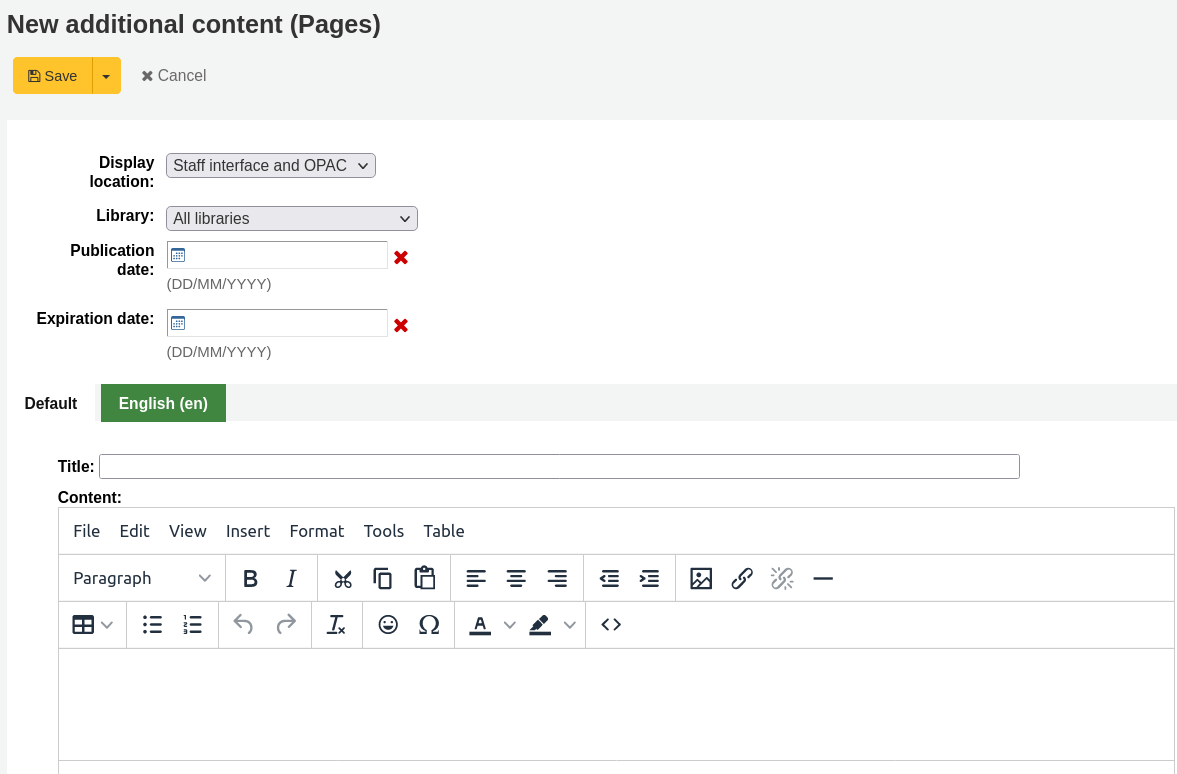
Display location: choose the interface from which this page should be accessed
Librarian and OPAC interfaces: two links will be created, one for the OPAC and one for the staff interface
Librarian interface: a link for the staff interface will be created
OPAC: a link for the OPAC will be created
Library: choose the library for which this page will be available
If an OPAC page is limited to a library, only logged in users whose home library matches the page library will be able to access the page.
Pages limited to a library will not be accessible to OPAC users who are not logged in, unless your system administrator has configured an ‘OPAC_BRANCH_DEFAULT’ override in virtual host configuration.
If a staff interface page is limited to a library, only staff logged into that library will be able to access the page.
Publication date: use the publication date field to control from which date your page is accessible, if it should only be accessed at a future date.
Expiration date: use the expiration date field to remove the page after a specific date.
If this field is empty the page will be available until you remove it manually
You can enter the page title and content for each language installed
Not
You can choose which type of editor to use here (either a text editor or a WYSIWYG (what you see is what you get) editor) with the AdditionalContentsEditor system preference.
After filling in all of the fields, click ‘Save’ at the top of the page.
Alternatively, click the arrow next to the ‘Save’ button and choose ‘Save and continue editing’ if you need to stay on this page to continue editing the news item.
In the table, a link will be generated for the OPAC or the staff interface or both. Use this link in HTML customizations, news or system preferences such as IntranetNav or IntranetmainUserBlock so that the patrons or staff members can access the new page.
Not
To link to a specific page, use the code in the URL with the
code=parameter. For example:OPACBASEURL/cgi-bin/koha/opac-page.pl?code=staff_and_opac_42 STAFFCLIENTBASEURL/cgi-bin/koha/tools/page.pl?code=staff_and_opac_42
In multi-language installations, use the
language=parameter followed by the language code to link to the page in a specific language. For example:OPACBASEURL/cgi-bin/koha/opac-page.pl?code=staff_and_opac_42&language=fr-CA STAFFCLIENTBASEURL/cgi-bin/koha/tools/page.pl?code=staff_and_opac_42&language=fr-CA
To use a custom page
Once the page has been developed and saved, you will see a summary table of all custom pages. This table also displays the generated links to access these custom pages. The links will be available in both the default language, and the installed language currently in use by the logged in staff member.
There is a button to preview the created page. This is helpful to check how the page looks and functions before it is deployed.
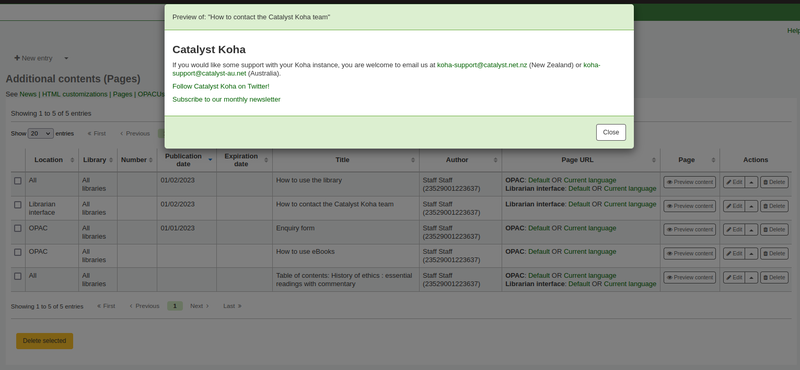
Now the page has been created, there are a number of ways to make the page accessible to your patrons in the Koha OPAC.
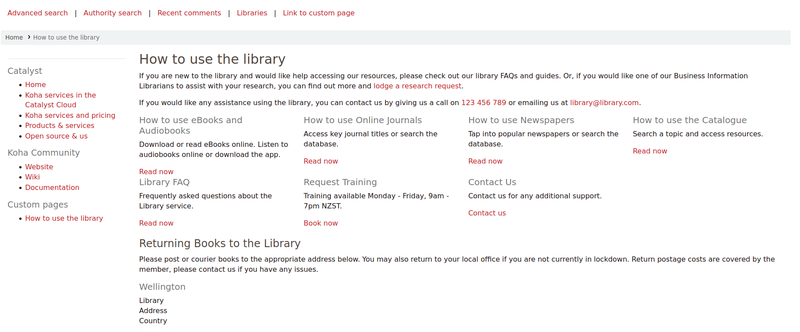
One option is to use an HTML customisation to add the link to the page to a section of the OPAC. The page can be added as a navigation link (in OpacNav, OpacNavBottom, or OpacNavRight). Depending on the page, it may be more suitable in the header (opacheader), footer (opaccredits), or main section of the homepage (OpacMainUserBlock).
HTML customizations are only displayed on the OPAC, so News items would be the appropriate tool to add the link to the main landing page of the staff interface.
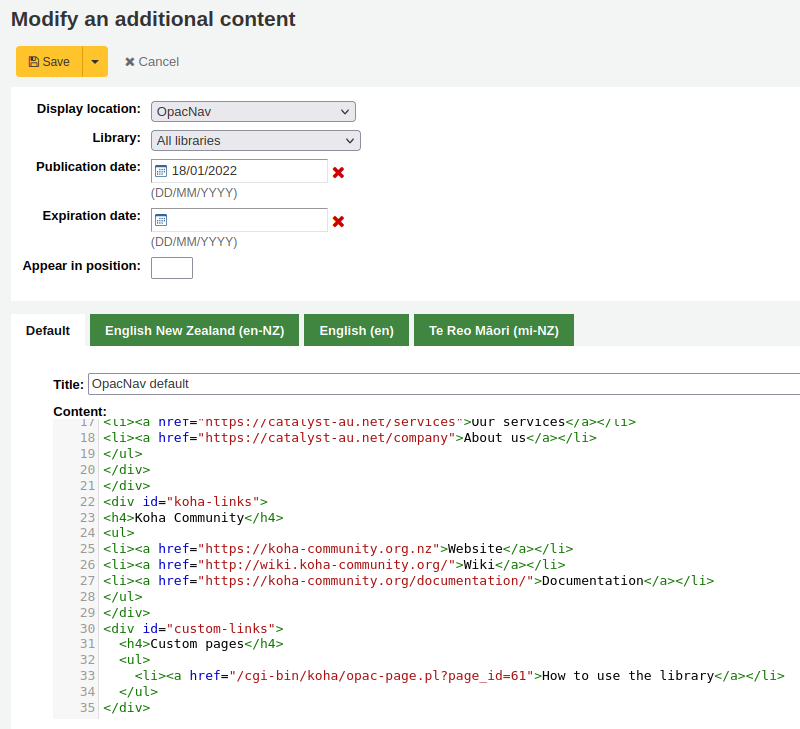
The benefit of putting the page link in an HTML customization or News item is that you can use the WYSIWYG editor, instead of writing code. However, there is always the option to write the content in the HTML text editor too, if you prefer.
Those more proficient in writing code could use jQuery (Javascript) to insert their page link anywhere in the OPAC or staff interface.
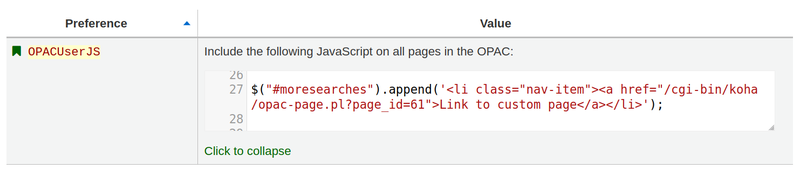
Using jQuery, the pages could be added to either interface as simple text links, or as more advanced button links or image links. Add code to the OPACUserJS system preference to apply jQuery to the OPAC, or to the IntranetUserJS system preference to apply jQuery to the staff interface.
Clever ways to use custom pages:
There are many interesting ways to use custom pages in a Koha library. We’ve heard discussion of pages being used for tables of contents, frequently asked questions pages for the library, and enquiry forms.
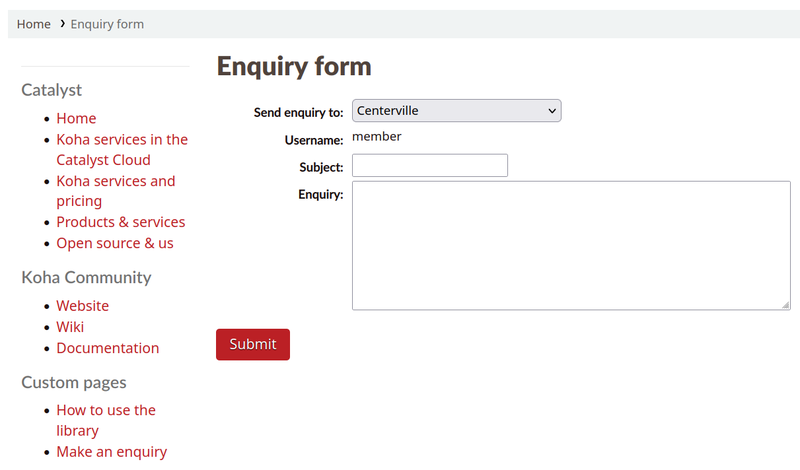
Another way to make custom Koha page content accessible for users, would be to catalogue those pages so they pop in in Koha search results, for example library tutorials that patrons may be looking for.
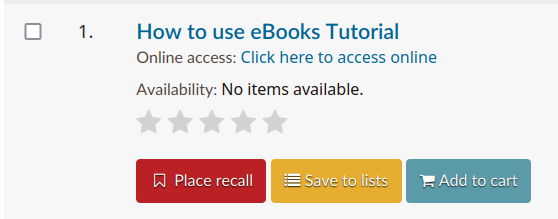
Once the page has been created, it can be catalogued in the URI field of a record (856$u). Alternatively, it could be catalogued in the URI field of an item attached to a record (952$u). Both of these fields get converted into hyperlinks by Koha. If catalogued in a record or item, it would then be indexed and become searchable.
Once catalogued, these pages could be used in other ways that are typically reserved for books and other records. The records representing pages can be added to lists, or stored in virtual collections or locations that make them easier to find in the catalogue. They could even be captured and displayed in carousels!
Task scheduler
Get there: More > Tools > Additional tools > Task scheduler
Görev zamanlayıcısı istediğiniz zaman çalıştırmak üzere, raporları zamanlamanın bir yöntemidir.
To schedule a task, visit the task scheduler and fill in the form
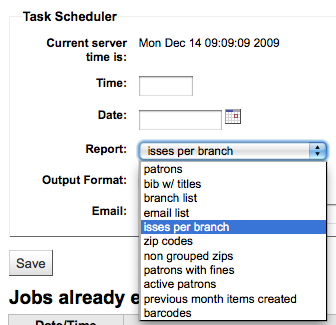
Mevcut sunucu saati, sunucunuzun saatini gösterir (tüm raporlarınızı bu saat üzerinde çalışacak şekilde zamanlayın - yerel saatinize göre değil)
Zaman ss:dd olarak girilmelidir (2 haneli saat, 2 haneli dakika)
Tarih, açılır takvim kullanılarak girilmelidir
Rapordan, listesini yapmak istediğiniz raporu seçin
Metni veya sonuç bağlantısını almayı seçin
E-posta alanına raporunuzu almasını istediğiniz kişinin e-posta adresini girin.
Görev Zamanlayıcı formun altında zamanlanan raporlar listesi vardır

‘Zamanla’ bağlantısına tıklayarak, raporları direkt olarak kaydedilmiş raporlar listesinden de zamanlayabilirsiniz.
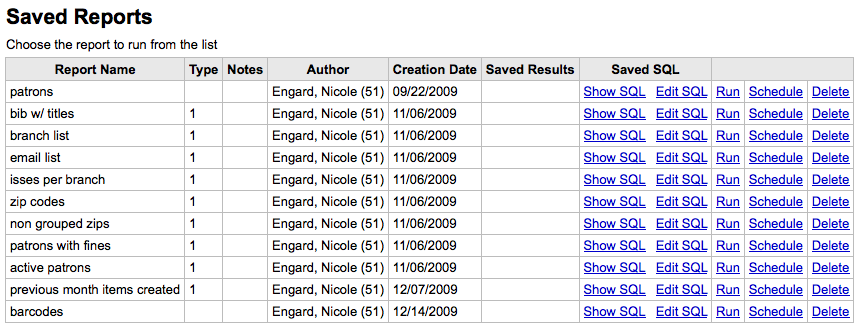
Sorun giderme
Web sunucusu çalışıyorsa ve kullanıcının onu kullanmaya izni yoksa, görev zamanlayıcısı çalışmayacaktır. Doğru kullanıcının gerekli izinlerinin olup olmadığını bulmak için, kontrol edin /etc/at.allow hangi kullanıcıların dahil olduğunu göremek için izin verin. Bu dosya mevcut değilse , kontrol edin etc/at.deny. at.engelle varsa fakat boşsa, bunu her kullanıcı kullanabilir. Zaman ayarlayıcısını çalıştırmak üzere kullanıcıyı doğru yere eklemek için sistem yöneticinizle konuşun.
Quote editor
Get there: More > Tools > Additional Tools > Quote editor
This tool will allow you to add and edit quotes to show on the OPAC or the staff interface.
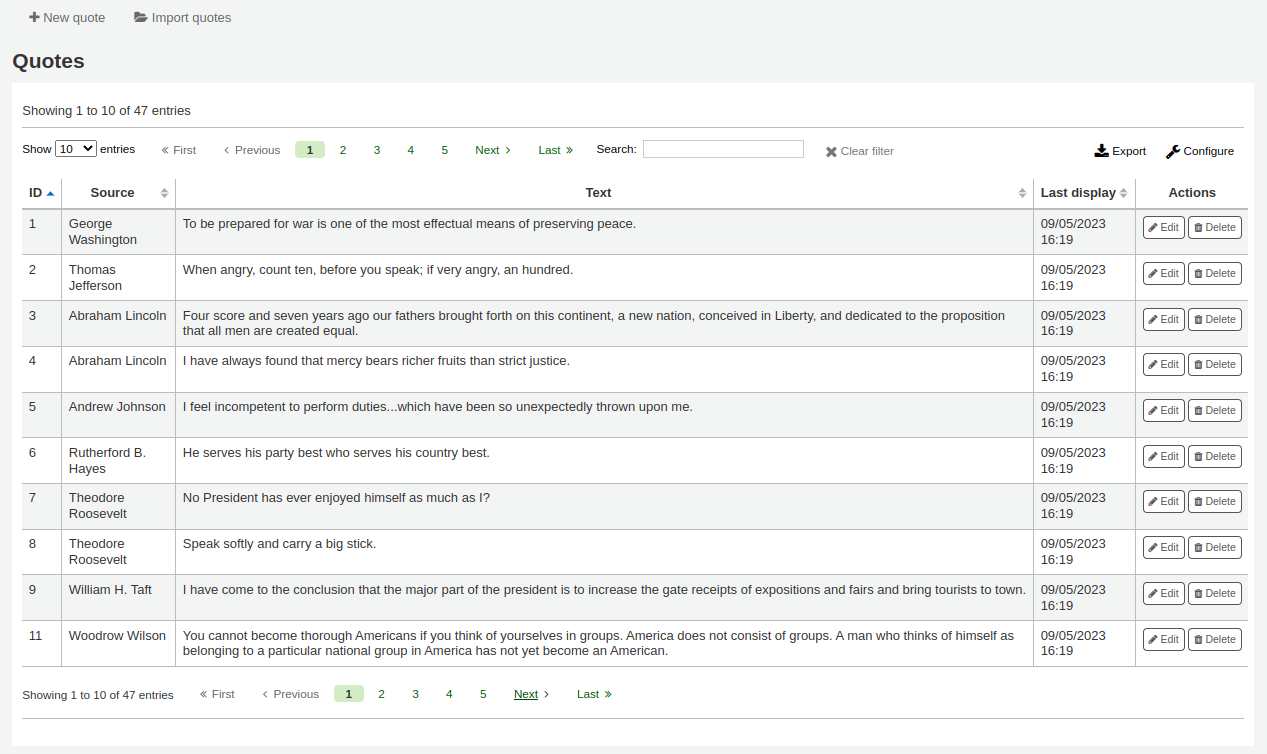
To turn this feature on set the QuoteOfTheDay system preference to either ‘OPAC’, ‘staff interface’, or both, and add at least one quote using this tool.
In the OPAC, the quotes will appear above the ‘OpacMainUserBlock’ news block.
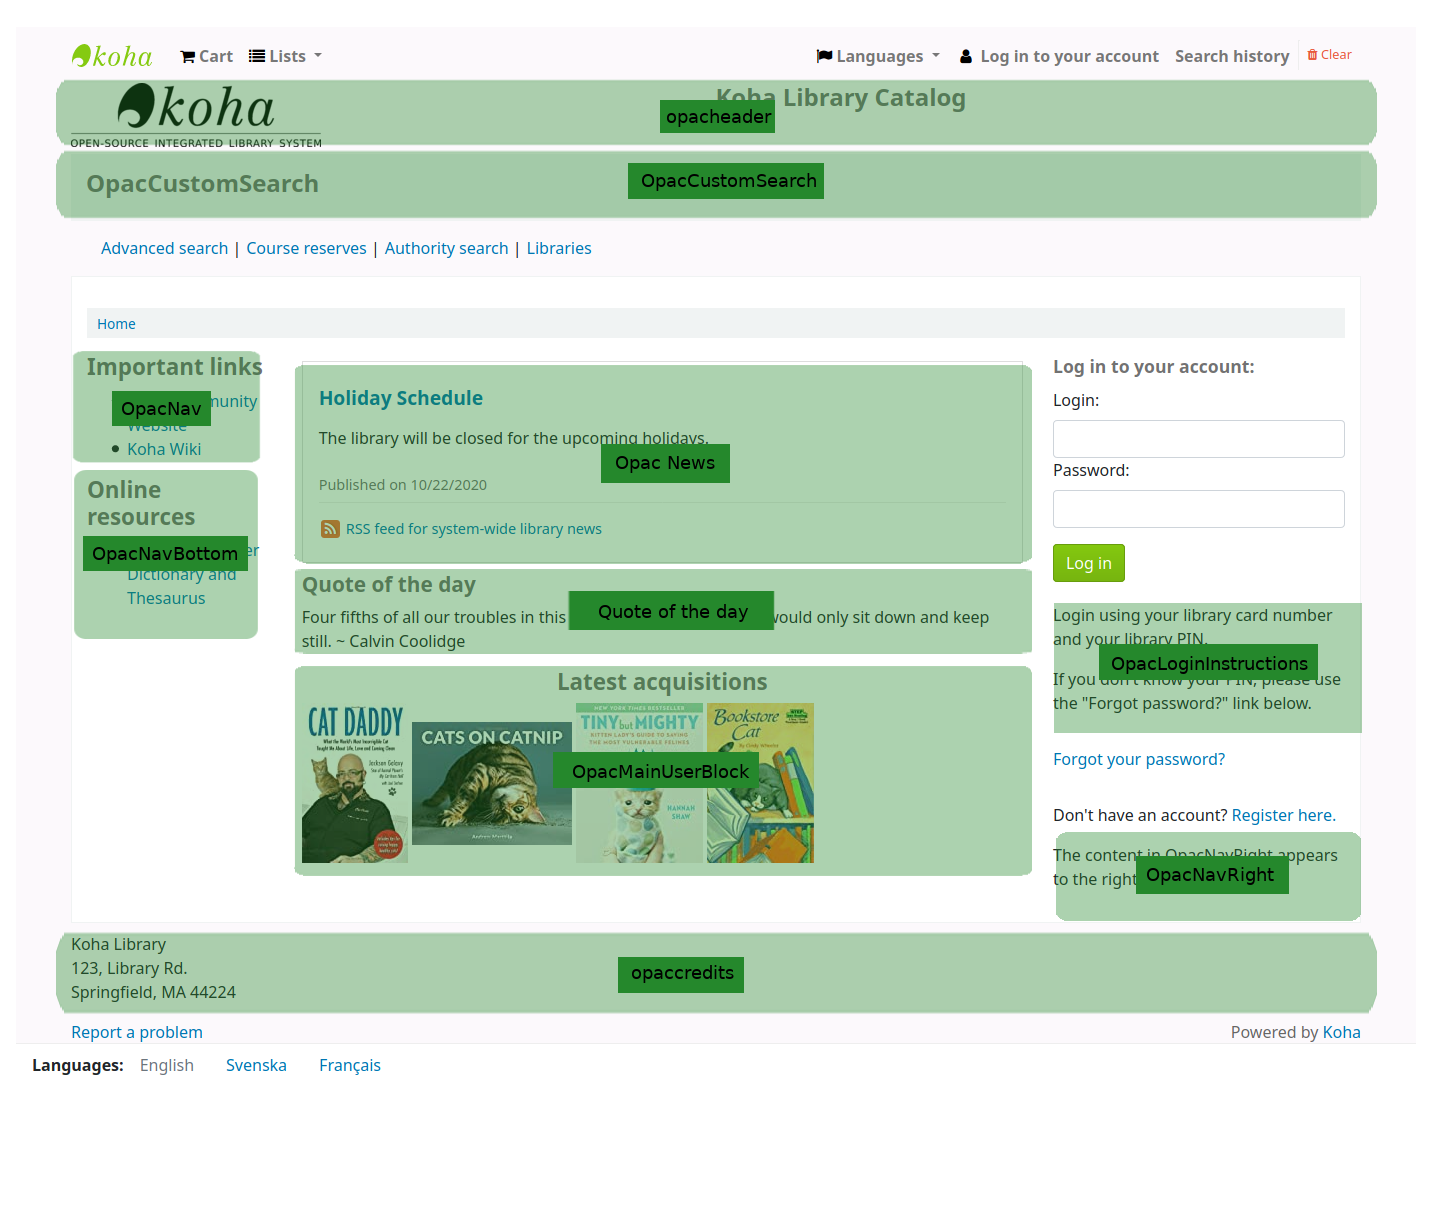
In the staff interface, the quotes will appear under the news on the left side.
Adding a quote
Bir alıntı eklemek için:
Click the ‘New quote’ button in the toolbar at the top of the page.
Fill out the form.

Source: enter the source of the quote, e.g. the name of the person who said the quote
Text: enter the text of the quote
Uyarı
Yeni bilgiyi kaydetmek için ‘Kaynak’ ve ‘Metin’ alanlarının ikisi de doldurulmalıdır.
Click ‘Submit’ to save the new quote.
The new quote should now be visible in the list.
Importing quotes
You can import a batch of quotes as a CSV file. Your file must contain two columns in the form: “source”,”text” with no header row.
Not
Size 512KB’den daha büyük dosyaların yüklenmesinin onaylanması hatırlatılacak.
To start the import process click the ‘Import quotes’ button at the top of the screen.
Bir kez alıntıları içe aktar ekranına geldikten sonra aktarmak istediğiniz dosya için bilgisayarınızda arama yapabilirsiniz
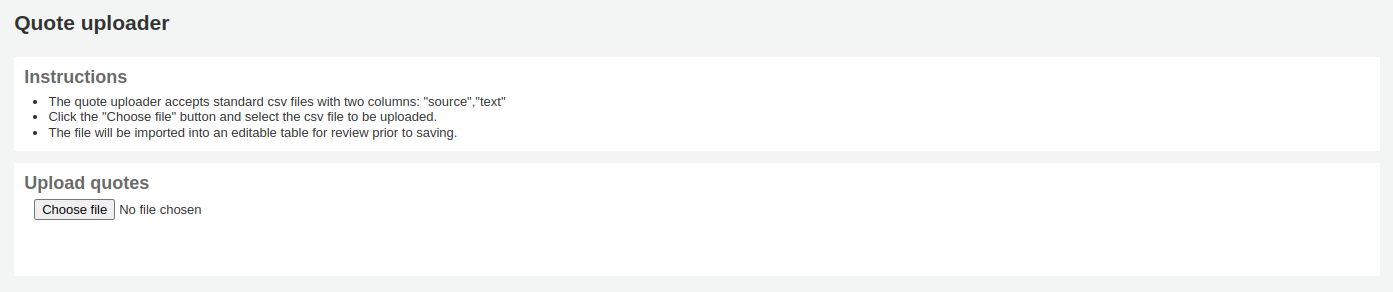
CSV dosyasını seçtikten sonra, ‘Aç’ düğmesine tıklayın ve dosya geçici bir düzenleme tablosuna yüklenecektir.
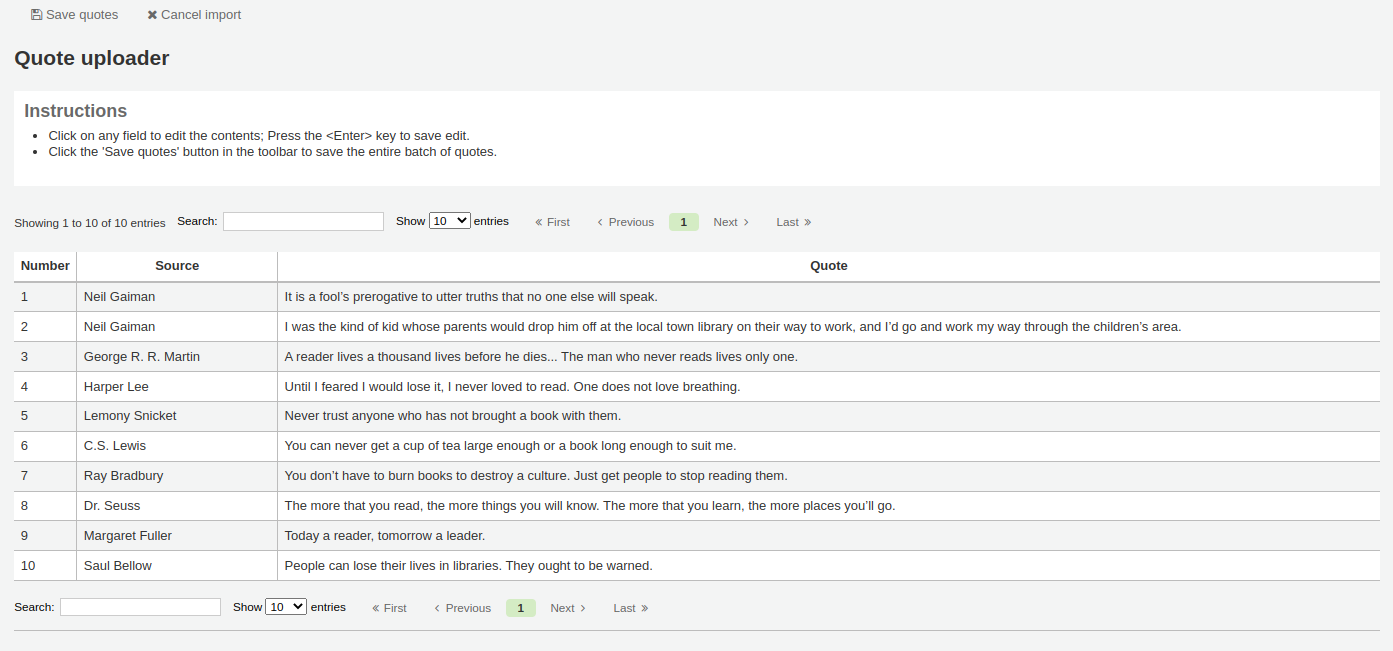
Listeden istediğiniz alana tıklayarak ‘Kaynak’ veya ‘Metin’ alanlarını düzenleyebilirsiniz. Bir alanda düzenlemeyi tamamladığınızda, değişiklikleri kaydetmek için klavyenizdeki <Enter> tuşuna basın.

Alıntılardan emin olduğunuzda, araç çubuğunun en üstündeki ‘Alıntı Kaydet’ butonuna tıklayın ve alıntılar kaydedilecektir.
Editing a quote
To edit a quote, click on the ‘Edit’ button to the right of the quote.
Edit either the ‘Source’ or ‘Text’ fields.
Click ‘Submit’ to save the quote.
Deleting a quote
To delete a quote, click on the ‘Delete’ button to the right of the quote.
Confirm the deletion by clicking ‘Delete’.
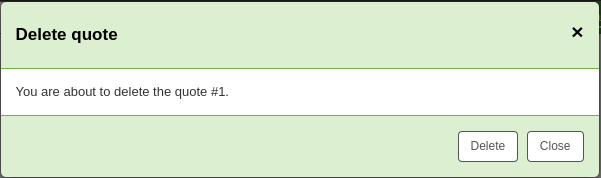
Tool plugins
This tool is used to view, manage and configure plugins used as tools.
This section will only be visible once you have uploaded tool-type plugins in the plugin administration page.
Get there: More > Tools > Additional Tools > Tool plugins
From this page, you will see only tool-type plugins.
See the managing plugins section of this manual to learn how to manage your tool-type plugins.
Yükle
Gidiş yolu: Daha fazla > Araçlar > Ek Araçlar > Karşıya Yükle
Bu araç, Kataloglama formundan seçim yapmak için Koha sisteminize dosya yüklemenizi sağlayacaktır.
Upload files
Yükleme aracını ilk ziyaret ettiğinizde, kategori eksikliği konusunda bir uyarı görebilirsiniz.
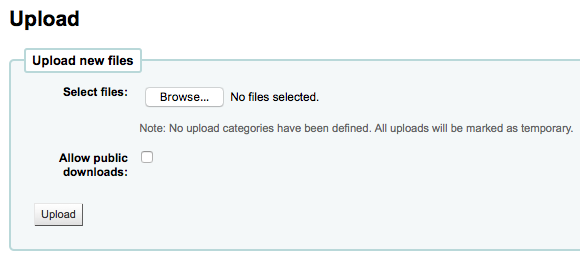
Kategoriler, UPLOAD kategorisinde <authorized-values-label>’de tanımlanmıştır. Yükleme kategoriniz yoksa, dosyalarınız geçici olur ve bir dahaki sefer sunucu yeniden başlatıldığında silinir. UPLOAD yetkili değer kategorisinde bir değer elde ettiğinizde, ‘Gözat’ düğmesinin altında bir kategori açılır menüsü göreceksiniz.
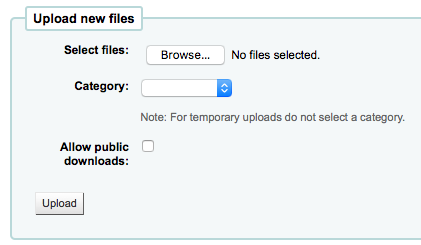
Bilgisayarınıza bir dosya olup olmadığına göz atın, bir kategori seçin ve genel kullanıcıların OPAC aracılığıyla bu dosyayı indirip indiremeyeceğine karar verin. Dosyanız yüklendikten sonra size bir onay verilecektir.

Search files
Yüklenen tüm dosyalar yükleme formunun altından aranabilir. Formu kullanarak dosya adının ve/veya Hashvalue.Search’in yüklediği dosyaların herhangi bir bölümünü arayabilirsiniz
You will be presented with the results of your search.
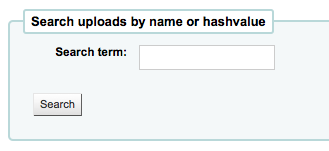
Access files
Get there: More > Tools > Additional Tools > Access files
This option allows access to files stored on the server from the staff interface. The directories where the files are stored need to be defined in the koha-conf.xml file. In order to be able to access the tool, a staff patron requires the superlibrarian or access_files patron permission
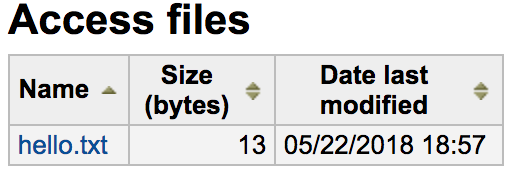
OPAC problem reports
Get there: More > Tools > Additional tools > OPAC problem reports
This tool is used to manage the problem reports sent by patrons via the OPAC.
Not
This tool only appears if the OPACReportProblem system preference is enabled.
From this tool, you will see all the problems that were reported by patrons on the OPAC.
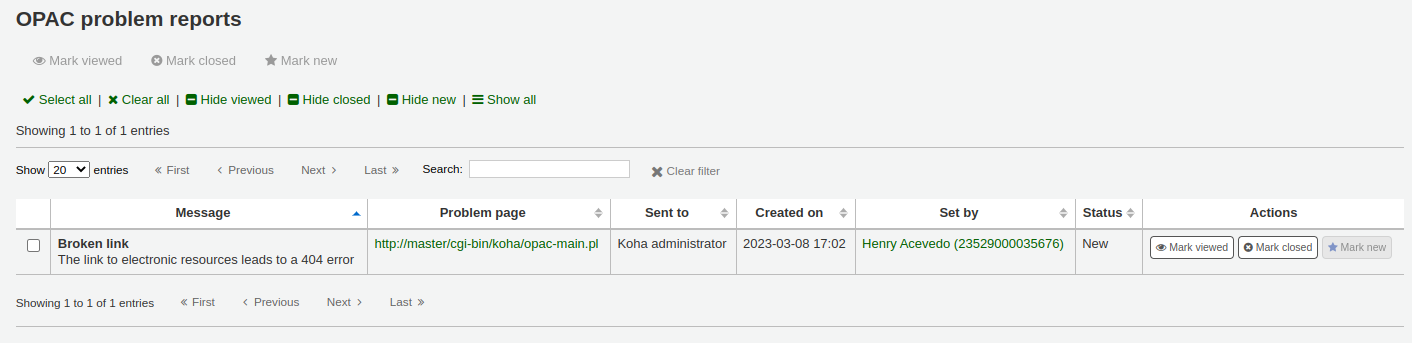
From the ‘Actions’ column, you can
‘Mark viewed’: mark this problem report as viewed, this will change the status of the problem report to ‘Viewed’
‘Mark closed’: close this problem report, this will change the status of the problem report to ‘Closed’
‘Mark new’: mark this problem as new (i.e. not viewed), this will revert the status back to ‘New’.
You can also batch change statuses by checking the boxes next to the problem reports you want to change and use the button at the top of the page.
Cash management
Koha includes a number of options for dealing with monetary transactions and actions to allow for fine grained tracking of these processes for audit and analytic processes.
Cash registers
Cash registers can be used to track transactions to a specific location in your library. This can be especially helpful for detailing where cash has been taken for payments and then when this cash is subsequently removed and taken to the bank.
Setup
To enable the use of cash registers, you must turn on the UseCashRegisters system preference.
You can then configure cash registers for your library from the cash registers page in the administration module.
Cashup
The action of ‘cashing up’ can be recorded against a cash register from both the library details and register details pages.
Clicking the Record cashup button will simply record the date and time that the action has taken place and is intended to allow the regular record of when money is collected from the cash register and taken to the bank.
Both of the above pages utilize the cashup record to limit the display of transactions/summaries to only pertinent information, since the last cashup.
Once a cashup has taken place, a summary of the transactions taken during that cashup period is available for display, and printing, via the Summary link found next to the last cashup date on the register details page.
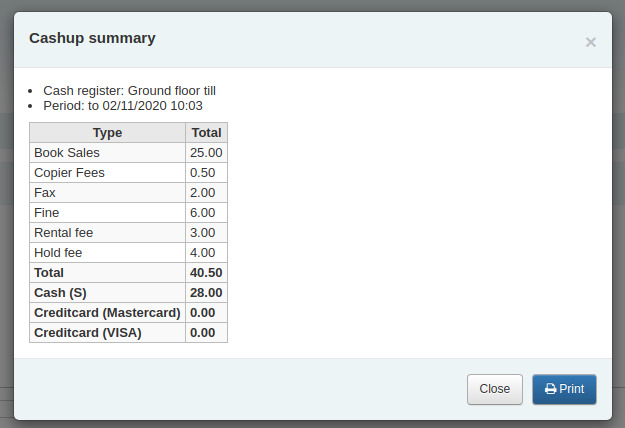
Cash summary for library
Get there: Home > Tools > Cash summary for library
A summary of transaction amounts associated to a libraries cash registers can be found under the ‘Cash summary for library’ page tool.
The summary will list registers associated with your logged in branch alongside information about how much money should be found in each register, what is available to take to the bank and a breakdown of income vs outgoings.
Note: You can also access this page from the left hand menu available on the Point of sale page when that module is enabled.
Transaction history for register
Get there: Home > Tools > Cash management > Transaction history for register
A list of all transactions to have taken place at a register is available by clicking on the cash register name from the library details page.
If you have the correct permissions, you can re-print receipts, issue refunds and record cashups from this page.
Note: You can also access this page from the left hand menu available on the Point of sale page when that module is enabled.
Yorumlar
Get there: More > Tools > Patrons and circulation > Comments
Kullanıcılar tarafından bibliyografik kayıtlara OPAC vasıtasıyla eklenmiş olan tüm yorumların bir kütüphaneci tarafından denetlenmesi gereklidir. Denetim bekleyen yorumlar varsa bunlar personel istemci ana sayfasında modül listesi altında listelenir:
and next to the Comments tool on the Tools page
To moderate comments click on the notification on the main dashboard or go directly to the Comments tool and click ‘Approve’ or ‘Delete’ to the right of the comments awaiting moderation.
Düzeltilecek bir yorum yoksa sadece şunu… belirten bir mesaj göreceksiniz.
‘Onaylanmış yorumlar’ sekmesini seçerek, daha önce onaylamış olduğunuz yorumları da gözden geçirebilir ve bu yorumların onayını kaldırabilirsiniz.