Course reserves
Koha içerisinde yer alan ayrılmış ders materyalleri modülü, materyalleri geçici olarak ‘rezerv’ içerisine taşımaya ve bu materyaller özel bir ders için kullanılırken farklı dolaşım kurallarının kendilerine atanabilmesine olanak sağlar.
Course reserves setup
Before using course reserves you will need to do some set up.
First you will need to enable course reserves by setting the UseCourseReserves preference to ‘Use’.
Daha sonra tüm ders eğitmenlerini kullanıcılar olarak eklemelisiniz kullanıcı olarak eklenmiş <add-a-new-patron-label>.
Daha sonra Bölümler ve Şartlar için bir çift yetkili değer eklemeniz gerekiyor.
You may also want to create new item types, collection codes and/or shelving locations to make it clear that the items are on reserve to your patrons. You will also want to be sure to confirm that your circulation and fines rules are right for your new item types (whether they be hourly or daily loans).
Adding courses
Once you have completed your set up for course reserves you can start creating courses and adding titles to the reserve list.

Ders materyalleri ana sayfasının sol üst kısmındaki ‘Yeni ders’ butonuna tıklayarak yeni bir ders ekleyebilirsiniz.
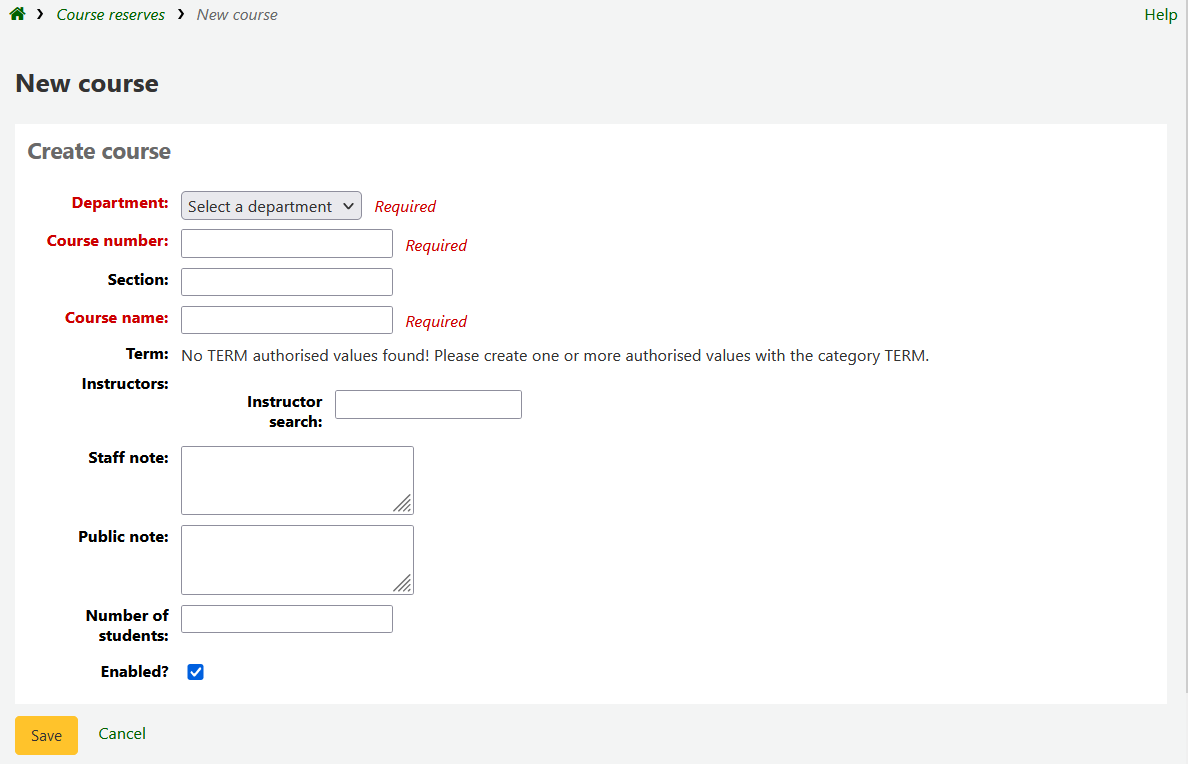
Your new course will need a department, number and name at the bare minimum. You can also add in additional details like course section number and term. To link an instructor to this course simply start typing their name and Koha will search your patron database to find you the right person.

İstediğiniz eğitmen göründüğünde sadece adı üzerine tıklayın ve onlar eklenecektir. Bu dersteki tüm eğitmenler için bu işlemi tekrarlayabilirsiniz. Her eğitmen, arama kutusunun üzerinde görünür ve adlarının sağındaki ‘Kaldır’ bağlantısı tıklanarak kaldırılabilir.

Eğer dersinizin herkes tarafından görülmesini istiyorsanız, yeni dersinizi kaydetmeden önce ‘Etkinleştirilsin mi?’ kutusunun işaretli olduğundan emin olun.
Dersiniz kaydedildikten sonra ayrılmış ders materyalleri ana sayfasında görünecektir ve ders içerisinde yer alan her hangi bir alanda aranabilir olacaktır.

Note
You can customize the columns of this table in the ‘Table settings’ section of the Administration module (table id: courses page, course_reserves_table).
Adding reserve materials
Rezerv materyallerini eklemeden önce, onlara eklemek üzere ez az bir derse ihtiyacınız olacak. Materyaller eklemek için Ayrılmış ders materyalleri modülünü ziyaret edin.

Materyal eklemek istediğiniz dersin başlığına tıklayınız.
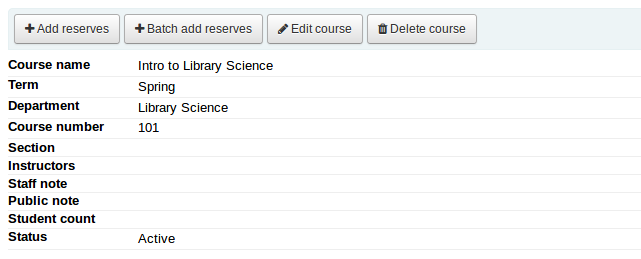
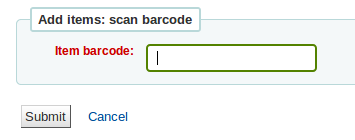
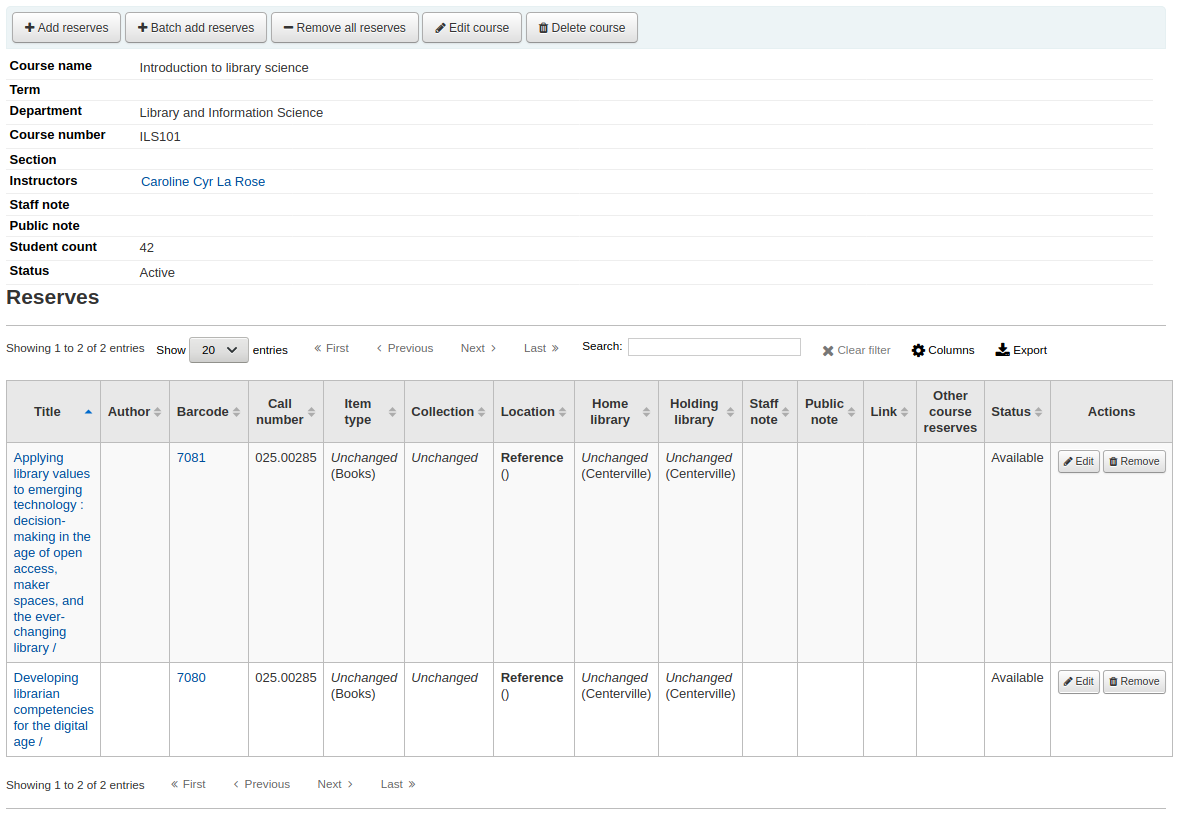
Bu rezerv listesine eser adı eklemek için, ders açıklamasının en üstündeki ‘Rezerv ekle’ butonuna tıklayınız. Reserv materyalin barkodunu girmeniz istenecektir.
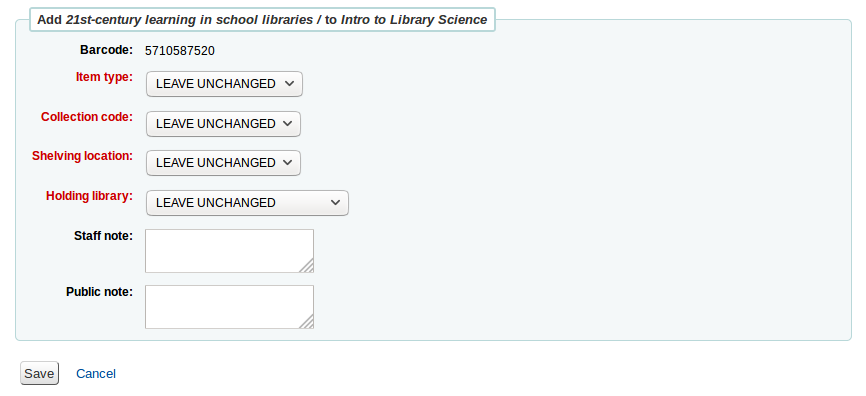
For each item, you can change the item type, collection code, shelving location or holding library. These changes will only apply while the course is active. When you deactivate the course, the items will go back to their original settings.
Barkod okutmanız bittikten sonra ve kursa ekledikten sonra bu materyalleri kurs sayfasında görebilirsiniz
Note
You can customize the columns of this table in the ‘Table settings’ section of the Administration module (table id: reserves page, course_reserves_table).
You also have the possibility of adding several items at the same time. Click on ‘Batch add reserves’.
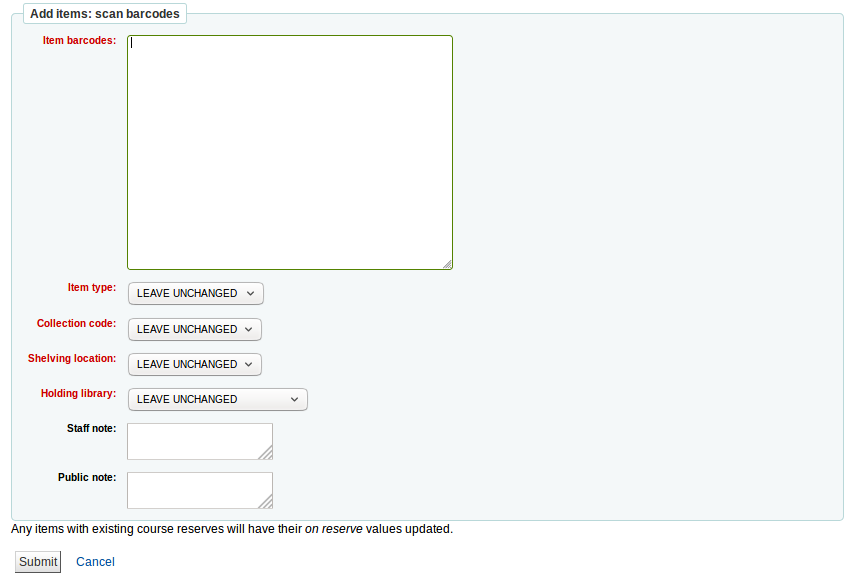
Scan the barcodes of the items you want to add to the reserve and change the item type, collection code, shelving location or holding library, if needed.
Course reserves in the OPAC
Once you have enabled course reserves and added courses you will see a link to course reserves below your search box in the OPAC.

Bu bağlantıya tıklamak size etkin kurslarınızın listesini gösterecektir (Eğer bir kursunuz varsa, yalnızca o kursun içeriğini göreceksiniz).

Note
You can customize the columns of this table in the ‘Table settings’ section of the Administration module (table id: course_reserves_table).
Ders rezervlerini, ders rezervleri listesinde görünen herhangi bir alandan arayabilirsiniz (ders numarası, ders adı, eğitmen adı, bölüm). Bir ders adına tıkladığınızda ayrıntıları ve rezerv materyallerini göreceksiniz.
image737|
Note
You can customize the columns of this table in the ‘Table settings’ section of the Administration module (table id: course-items-table).