Yönetim
Basic parameters
Gidiş yolu: Daha fazla > Yönetim
Önemli
Tüm ‘Parametreleri’ göründükleri sıraya göre yapılandırın.
Kütüphaneler
Koha sistemini ayarlarken, sisteminizi paylaşan her kütüphane için bilgi ekleyebilirsiniz. Bu veri Koha’nın birkaç alanında kullanılmaktadır.
Get there: More > Administration > Basic parameters > Libraries
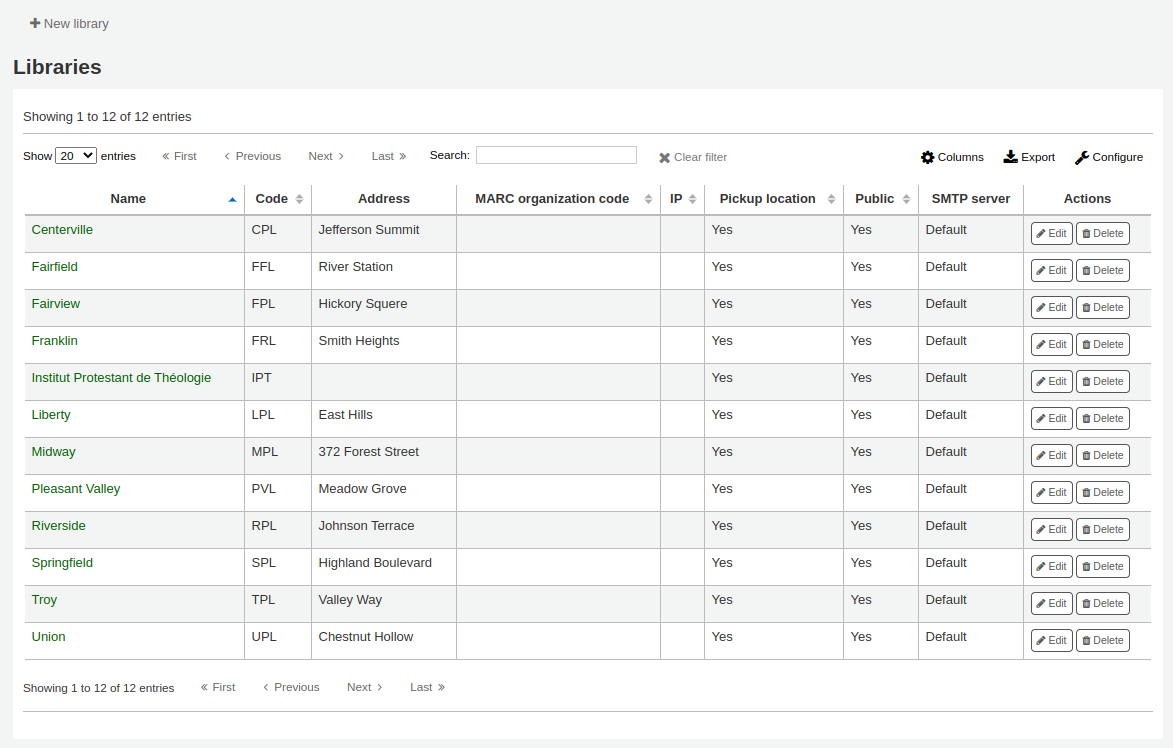
When visiting this page you are presented with a list of the libraries that have already been added to the system.
Not
You can customize the columns of this table in the ‘Table settings’ section of the Administration module (table id: libraries).
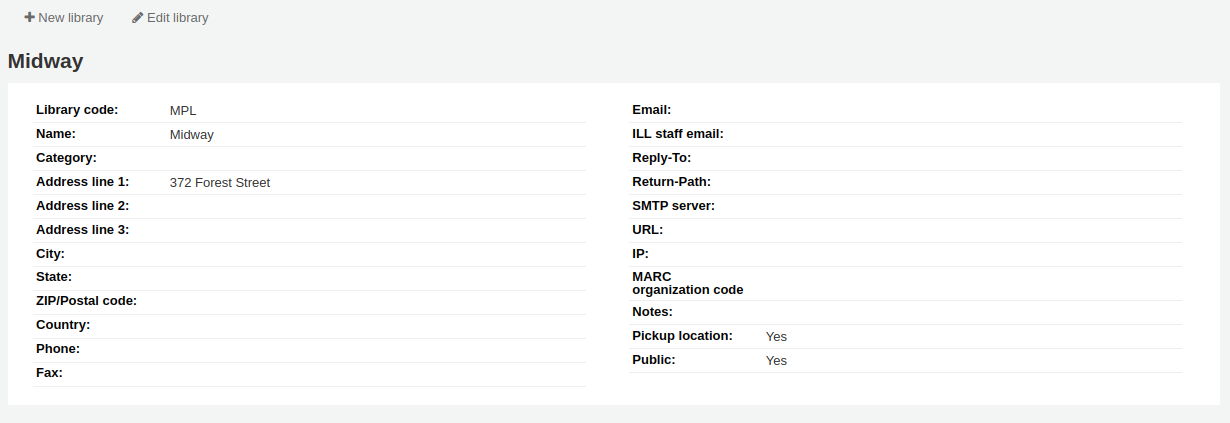
Clicking on the library’s name will bring you to a detailed view of the library’s information.
Adding a library
Yeni bir kütüphane eklemek için:
Click ‘New library’
Formun üst kısmında kütüphane hakkında bazı temel bilgiler sorulmaktadır

Library code (required): the code should not contain any spaces or hyphens and be 10 or fewer characters. This code will be used as a unique identifier in the database.
Name (required): the name will be displayed on the OPAC and staff interface wherever the library name displays, and should be a name that makes sense to your patrons and staff.
Sonra birim ile ilgili temel iletişim bilgilerinizi girebilirsiniz

Address, city, state, zip/postal code, country, phone, fax: the address and contact fields can be used to make notices custom for each library, they will also be displayed in the ‘Libraries’ page of the OPAC, if this library is set as ‘Public’
Email: the email address field is not required, but it should be filled for every library in your system
Not
Uyarıların gönderildiğinden ve doğru adresten gönderildiğinden emin olmak için kütüphane e-posta adresini girdiğinizden emin olun
Not
If no email address is entered here, the address in the KohaAdminEmailAddress system preference will be used to send notices from this library
ILL staff email: if this library uses a specific email address for interlibrary loan management, enter it here
Not
If no email address is entered here, the address in the ILLDefaultStaffEmail system preference will be used to receive ILL requests to this library
Reply-To: you can enter a different ‘Reply-To’ email address. This is the email address that all replies will go to.
Not
If no email address is entered here, the address in the ReplytoDefault system preference will be used to receive replies to this library
Return-Path: you can enter a different ‘Return-Path’ email address. This is the email address that all bounced messages will go to.
Not
If no email address is entered here, the address in the ReturnpathDefault system preference will be used to receive bounced messages from this library.
SMTP server: if this library uses a different SMTP server from the default, specify it here.
URL: if this field is populated, the library name will be linked in the holdings table on the OPAC
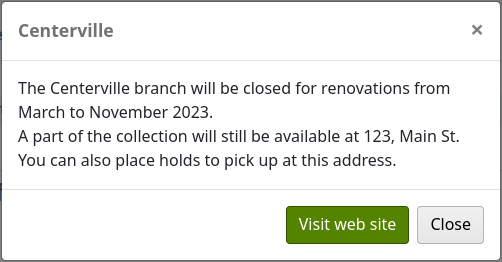
OPAC info: this leads to the HTML customization tool, so that you can add additional information about the library. This information will appear in the ‘Libraries’ page in the OPAC, as well as in the holdings table in the OPAC.
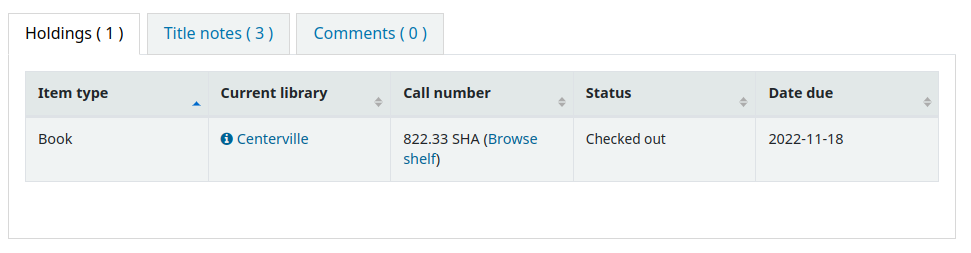
Clicking on the library name that has a small ‘i’ icon next to it will open a pop-up with the information.
IP: this field does not have be filled in unless you plan on limiting access to the staff interface to a specific IP address
Uyarı
An IP address is required if you have enabled AutoLocation
MARC organization code: if this library has a specific MARC organization code, you can enter it here.
Not
If left blank, the code entered in the MARCOrgCode system preference will be used for this library.
Notes: if you have any notes you can put them here. These will not show in the OPAC.
Pickup location: choose whether this library will display as an available pickup location for holds.
Public: choose whether this library will appear in the ‘Libraries’ page on the OPAC, as well as as a limit option in the OPAC advanced search.
Editing/deleting a library
From the libraries table, click ‘Edit’ or ‘Delete’ to edit or delete a library.
Uyarı
You will be unable to edit the ‘Library code’.
Uyarı
Kullanıcısı olan ya da materyal eklenmiş her hangi bir kütüphaneyi silemeyeceksiniz.

Library groups
Library groups can serve various purposes: to limit access to patron data, to limit item modification, to limit OPAC or staff interface searches, or to define holds behavior.
Get there: More > Administration > Basic parameters > Library groups
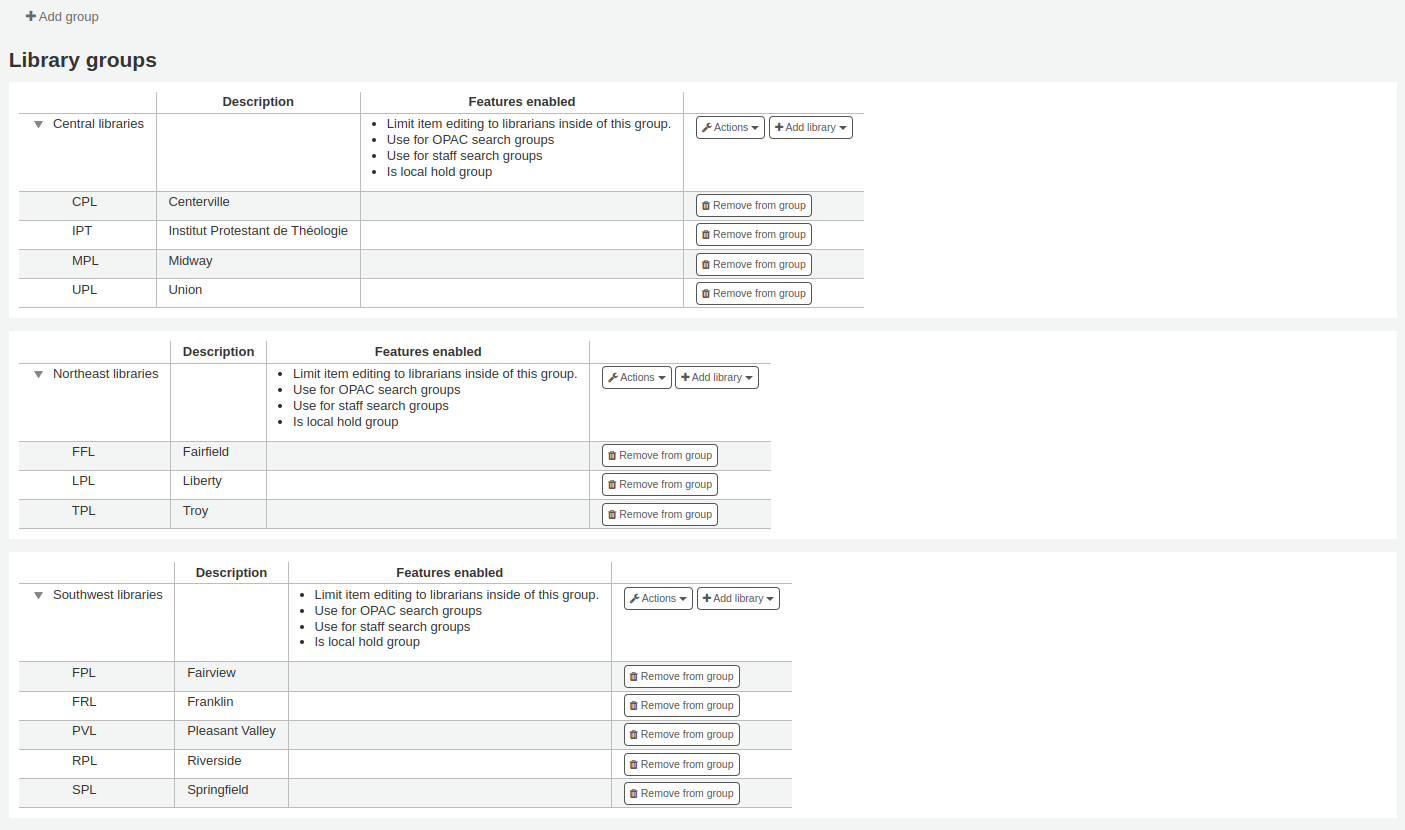
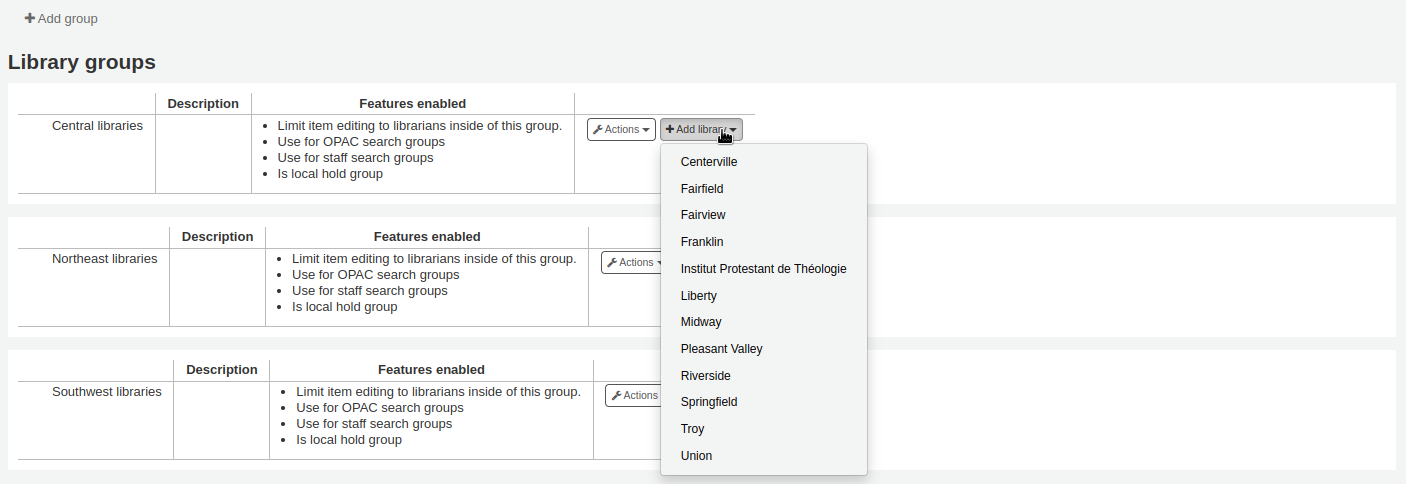
When visiting this page you are presented with a list of the groups that have already been added to the system.
Grup ekleniyor
To create a new library group,
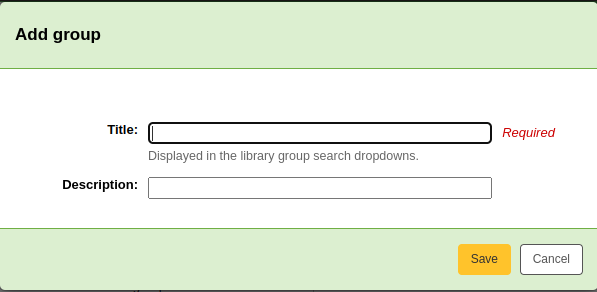
Click the ‘Add group’ button at the top of the screen.
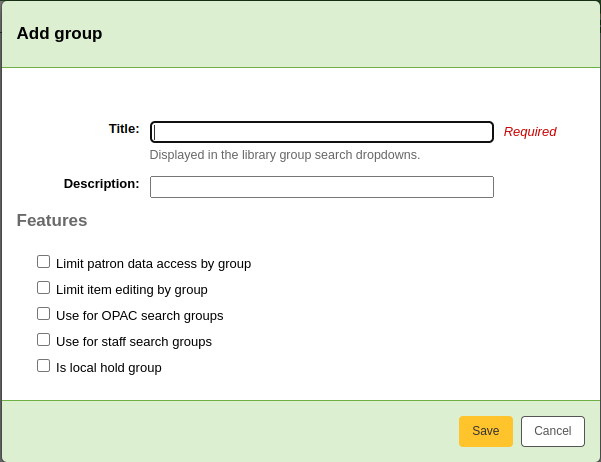
Title (required): give the group a title. This title will be displayed in the advanced search limit dropdown.
Description: optionally, enter a description for this group. The description is only used in this page to give an idea of what the group is used for.
Features: check the use of this group
Limit patron data access by group: this will limit staff members from seeing other groups’ patrons.
Not
This can be overridden with the user permission view_borrower_infos_from_any_libraries (or the superlibrarian permission).
Limit item editing by group: this will limit staff members from editing items from other groups’ libraries.
Not
This can be overridden with the user permission edit_any_item (or the superlibrarian permission).
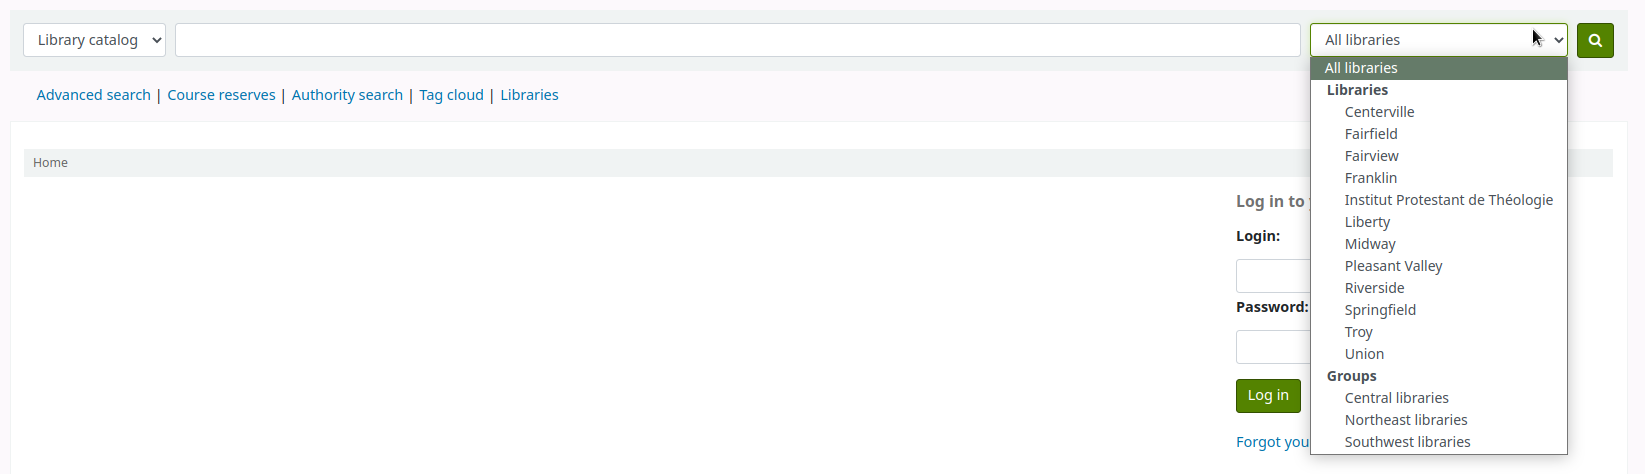
Use for OPAC search groups: this will make the group visible in the library dropdown menu at the top of the OPAC (when the OpacAddMastheadLibraryPulldown system preference is set to ‘Add’) and on the advanced search page.
Use for staff search groups: this will make the group visible in the library dropdown menu in the staff interface advanced search.

Is local hold group: this will make this group a local hold group, which can be used to add hold policies in the circulation rules to limit patrons to placing holds on items within the group only.
Click ‘Save’ to create the group.
Adding a library to a group
Click on the ‘Add library’ button next to the group to add a library to this group. You will be presented with a list of the libraries that are not already in the group.
Adding a sub-group
If your system is very large, you can create sub-groups. Click on the ‘Actions’ button next to the group and select the ‘Add a sub-group’ option.

Fill in the title and the description (optional) of the sub-group. The features will be inherited from the parent group.
Deleting a group
To delete a group, click on the ‘Actions’ button next to the group and select the ‘Delete’ option.
The system will ask to confirm the deletion.
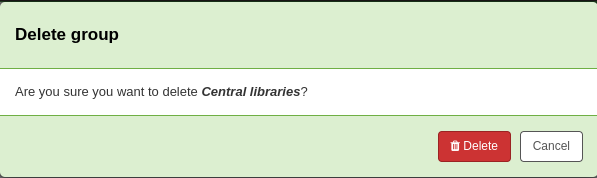
Click ‘Delete’ to confirm and delete the group.
Circulation desks
Koha allows you to define several circulation desks within a single library. For example, if you have an adult circulation desk and a children’s circulation desk, or if you have a different desk for each floor or each department.
Make sure to enable the UseCirculationDesks system preference to use this functionality.
Get there: More > Administration > Basic parameters > Desks
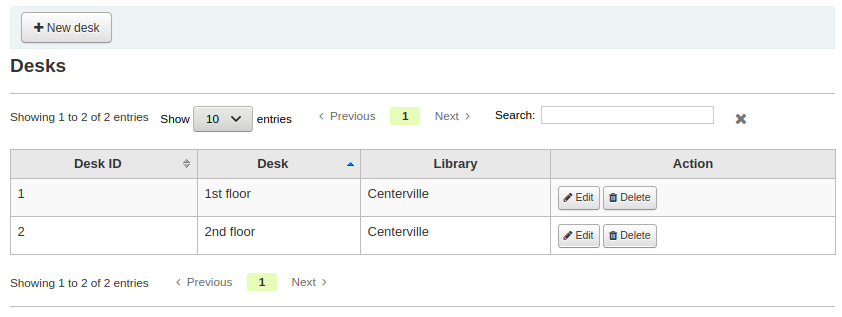
Adding circulation desks
To add a new circulation desk, click on the ‘New desk’ button at the top of the page.
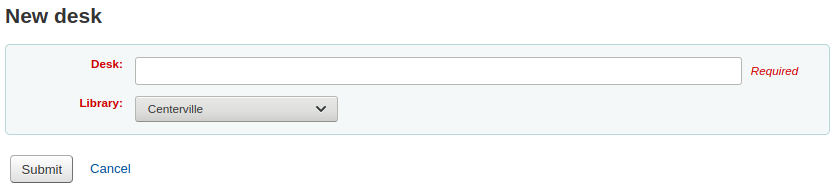
In the ‘Desk’ field, enter a name for your desk.
Choose the library in which this desk is.
Click ‘Submit’.
Editing a circulation desk
To edit an existing circulation desk, click on the ‘Edit’ button to the right of the desk to modify.
From there, you can change the name and/or the library of the desk.
Deleting a circulation desk
To delete an existing circulation desk, click on the ‘Delete’ button to the right of the desk to remove.
Item types
Koha, koleksiyonunuzu materyal türleri ve koleksiyon kodlarına göre organize etmenizi sağlar.
Get there: More > Administration > Basic parameters > Item types
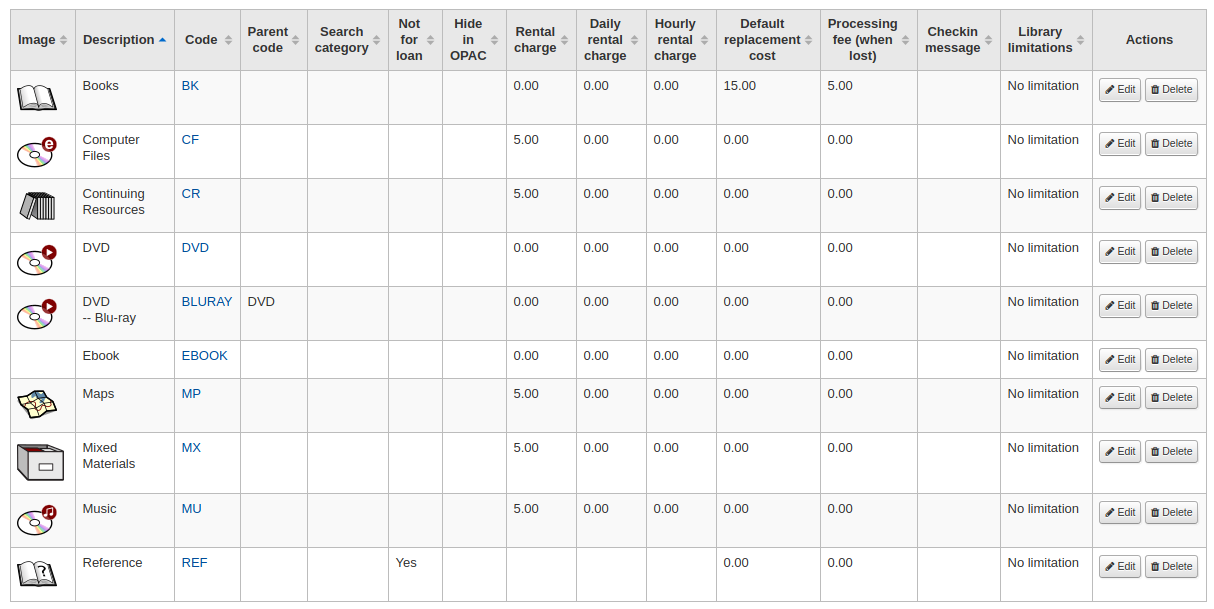
Item types typically refer to the material type (Book, CD, DVD, etc), but can be used in any way that works for your library.
Not
You can customize the columns of this table in the ‘Table settings’ section of the Administration module (table id: table_item_type).
Adding item types
To add a new item type, simply click the ‘New item type’ button at the top of the Item types page.
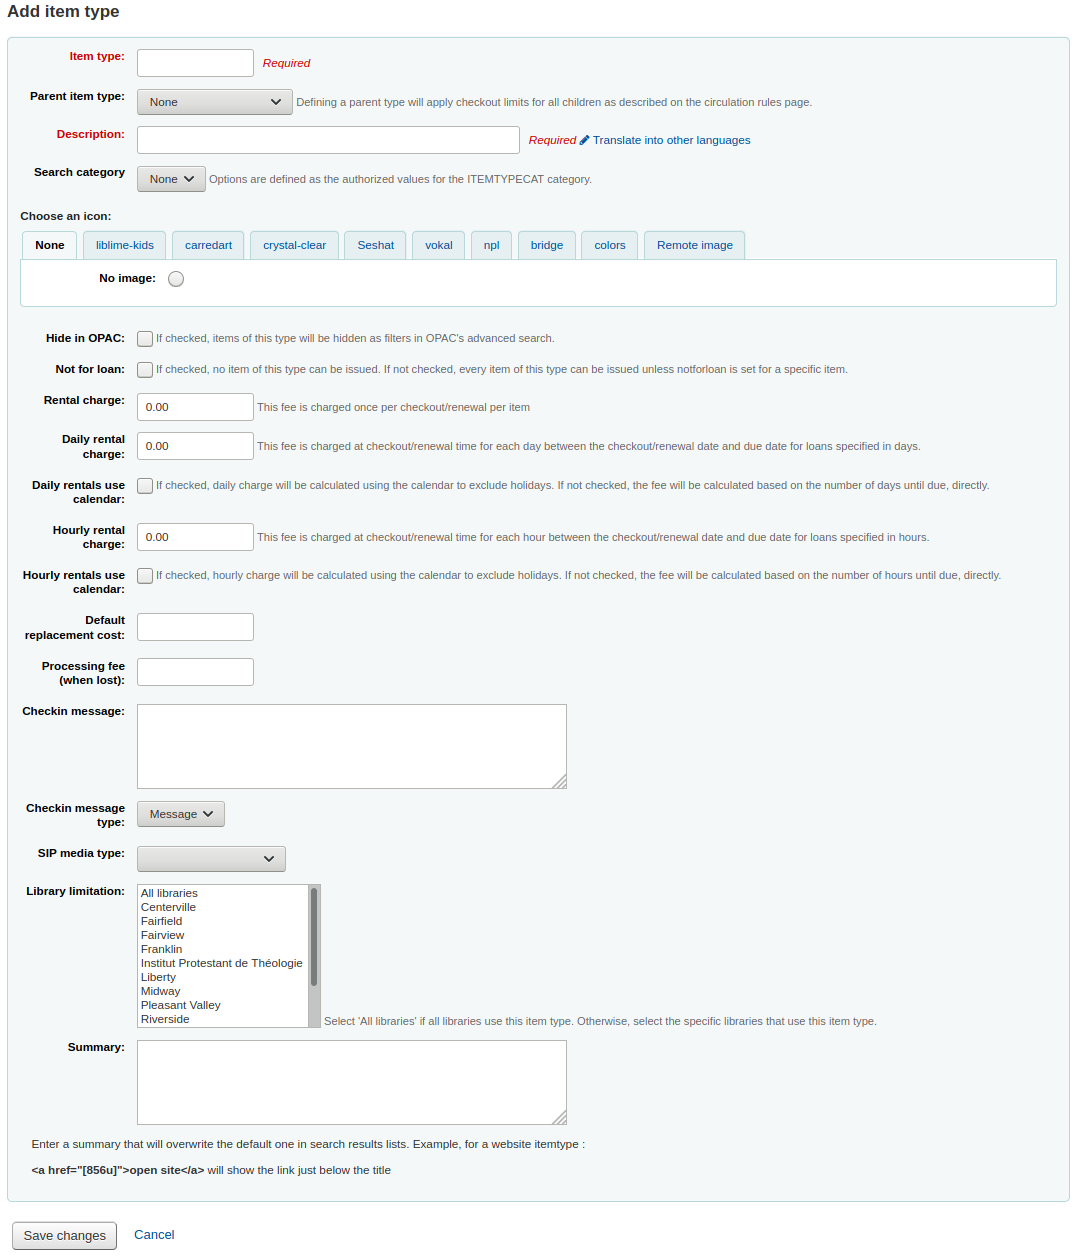
In the ‘Item type’ field, enter a short code for your item type (maximum of 10 characters)
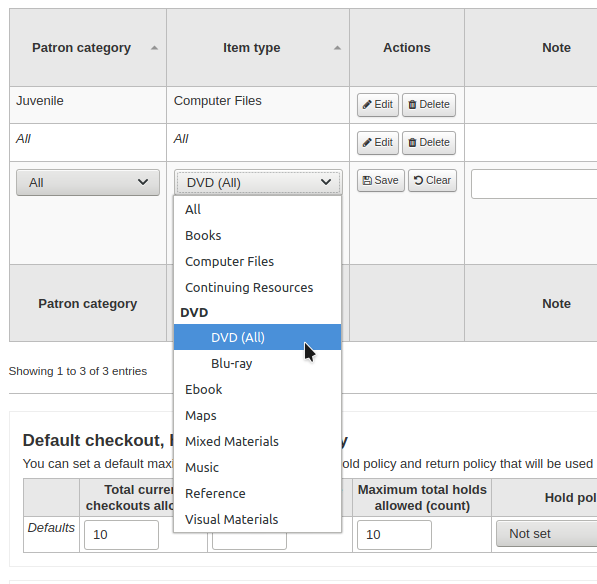
The the ‘Parent item type’ field, you can choose an item type that will act as a parent category for this item type. You can then define circulation rules based on those parent item types.
For example, you could have DVD and Blu-ray item types, and the DVD would be the parent of the Blu-ray item type.
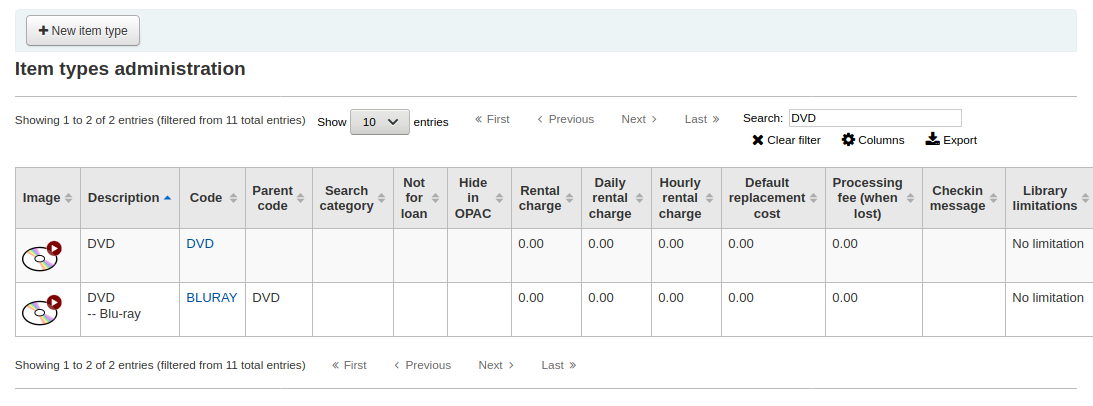
You can then create a circulation rule for either Blu-ray only or DVD and Blu-ray (DVD (All))
Açıklama, materyal türünün düz metin tanımıdır (çoklu dil yüklü olanlar için, ‘Diğer dillere çevir’ bağlantısını kullanarak materyal türü açıklamalarının tümünü bu dillerin tümüne çevirebilirsiniz)
Item types can be grouped together for searching at the same time. For example you can put DVDs and Blu-rays in to a group called Movie and then they can be searched together. These groups are defined in the ITEMTYPECAT authorized value category.
Materyal türü ile ilgili bir resim seçebilirsiniz
Görüntü koleksiyonlar serisinden seçim yapabilirsiniz.
Uzak bir resme bağlantı kurabilirsiniz
Ya da materyal türüyle ilgili resminiz olmayabilir.
Uyarı
If this option is not enabled, you can change the setting of the noItemTypeImages or OPACNoItemTypeImages.
Not
To have your item type images appear in the OPAC you need to set OPACnoItemTypeImages to ‘Show’.
OPAC’dan bastırdığınız materyaller için materyal türlerinin OPAC’da aranmasını gizleyebilirsiniz
Note This will not prevent those items to appear in search results, it will simply remove the item type from the advanced search form.
If you want to completely hide items from a certain item type, let’s say that you have a professional library with books reserved for staff and you don’t want those to appear in the OPAC, use the OpacHiddenItems system preference.
Dolaşımda yer almasını istemediğiniz materyalleri için ‘Ödünç verilmez’ seçeneğini işaretleyin
‘Ödünç verilmez’ işaretli materyaller katalogda gözükecektir fakat bu materyaller kullanıcılara ödünç verilemeyecektir.
For items that are not physical, but for which you still have circulation rules, such as museum passes or ebooks, you can set up automatic checkins.
Check the ‘Automatic checkin’ box
Schedule the cronjob misc/cronjobs/automatic_checkin.pl.
For items that you charge a rental fee for, there are several ways that rental fees can be charged to a patron by item type. A flat rental charge (process fee) or a daily/hourly rental charge.
For items that a library would charge a flat rental charge (process fee) for, enter the total fee you charge in the ‘Rental charge’ field. This will charge the patron on checkout (and renewal).
For items that a rental charge will be charged by the number of days the item is checked out for, enter the daily fee in the ‘Daily rental charge’. This will be charged to the patron upon checkout - the cost per day and how many days this item can be checked out to the patron. This daily rental charge will also be applied if/when a renewal occurs.
Check the ‘Daily rentals use calendar’, to exclude holidays from the rental fee calculation.
For items that are loaned out hourly, enter the cost per hour in ‘Hourly rental charge’. Again, the total (hourly cost * number of hours loaned) will be charged to the patron upon checkout and renewal.
Check the ‘Hourly rentals use calendar’, to exclude holidays from the rental fee calculation.
Each amount will charge the patron on checkout.
Önemli
Bu alana sembol girmeyin, yalnızca sayılar ve ondalık ayırıcılar girin (ör. $5.00, 5 ya da 5.00 olarak girilmelidir)
You can add a default replacement cost for this type of item. This is the amount that will be charged to the patron when lost if the item doesn’t have a replacement cost. If the item has a replacement cost, that is the amount that will be charged to the patron.
Önemli
Bu alana sembol girmeyin, yalnızca sayılar ve ondalık ayırıcılar girin (ör. $5.00, 5 ya da 5.00 olarak girilmelidir)
You can also add a processing fee that will be added to the replacement cost.
Önemli
Bu alana sembol girmeyin, yalnızca sayılar ve ondalık ayırıcılar girin (ör. $5.00, 5 ya da 5.00 olarak girilmelidir)
Bu tür materyaller ödünç verildiğinde bir uyarı ya da ileti almak istiyorsanız almak istediğiniz uyarı ya da iletiyi ‘Ödünç verme mesajı’ kutusu içine girebilirsiniz
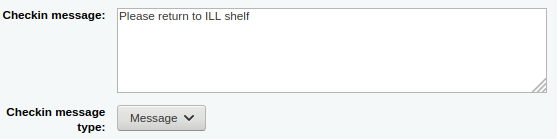
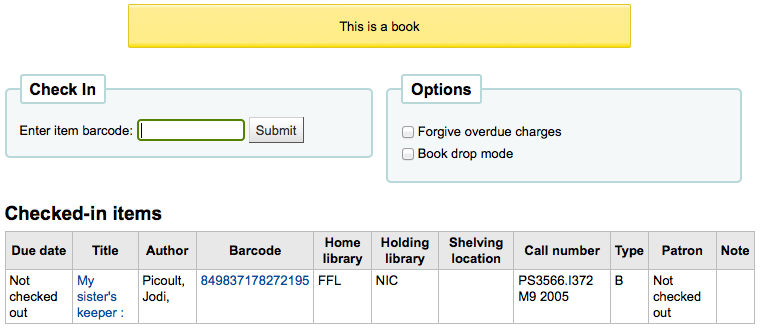
The check-in message type can be a ‘message’ or an ‘alert’. The only difference between these two is the styling. By default a message is blue
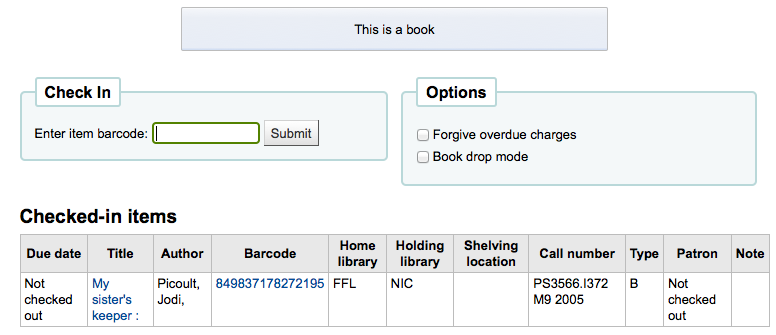
and an alert is yellow.
Some SIP devices need you to use a SIP-specific media type instead of Koha’s item type (usually lockers and sorters need this media type). If you use a device like this you’ll want to enter the SIP media type.
If this item type is only to be used in certain libraries, you can select them here. Select ‘All libraries’ if this item type is used across the library system.
Not
If this is left blank, ‘All libraries’ is assumed.
Not
To select more than one library, hold the ‘Ctrl’ key while selecting the libraries.
When finished, click ‘Save changes’
Not
All fields, with the exception of the ‘Item type’ will be editable from the item types list
Yeni materyal türünüz şimdi listede görünecektir

Editing item types
Each item type has an Edit button beside it. To edit an item simply click the ‘Edit’ button.
Önemli
You will not be able to edit the code you assigned as the ‘Item type’ but you will be able to edit the description for the item.
Deleting item types
Each item has a Delete button beside it. To delete an item type, simply click the ‘Delete’ button.
Önemli
Sisteminizde materyaller tarafından kullanılmakta olan materyal türlerini silemeyeceksiniz.

Authorized values
Authorized values can be used in several areas of Koha. They are lists of controlled terms, phrases or codes.
For example, one reason you would add an authorized value category would be to control the values that can be entered into MARC fields by catalogers.
Get there: More > Administration > Basic parameters > Authorized values
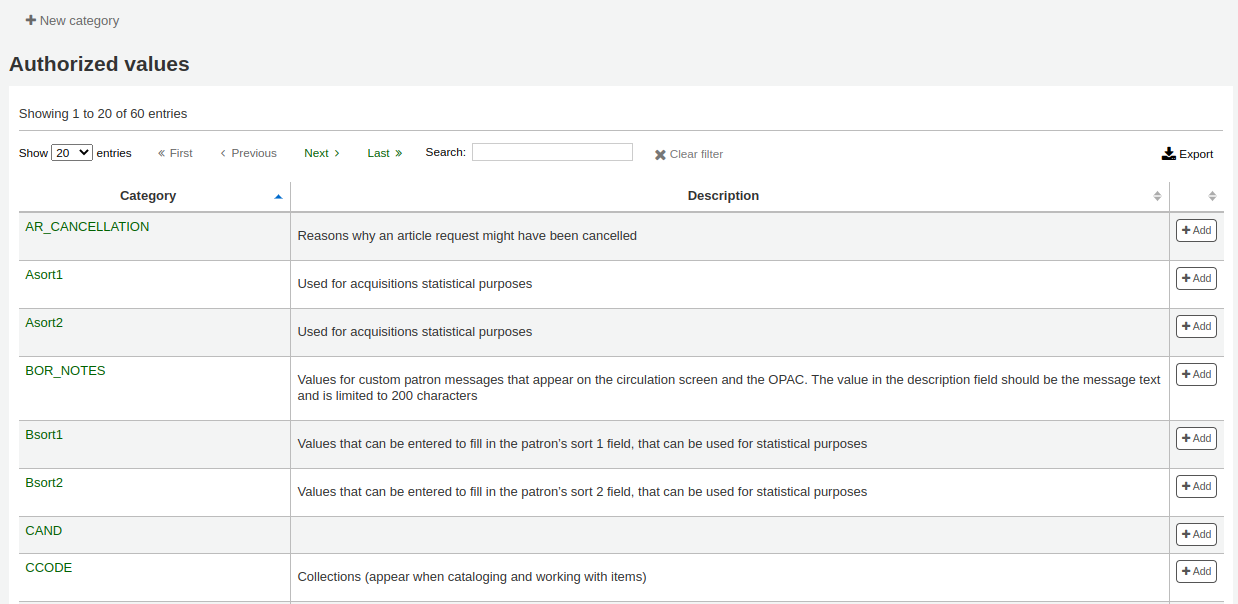
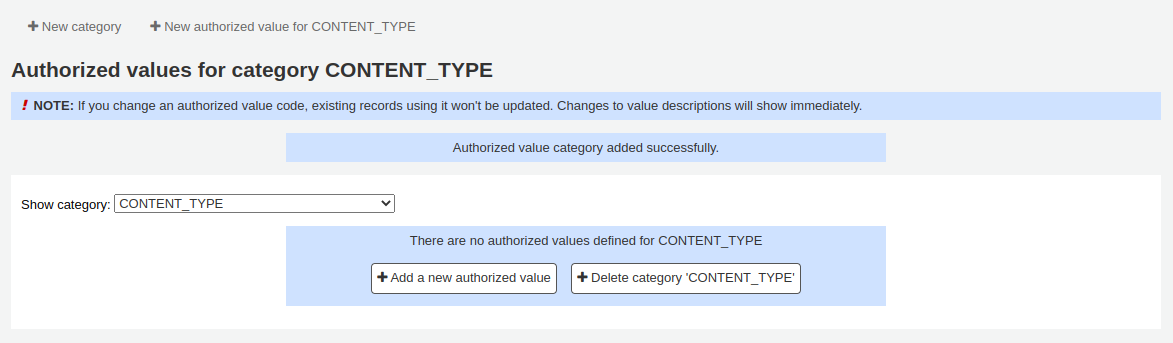
Existing authorized values categories
Koha installs with pre-defined authorized values categories that your library is likely to use or that are used by the system.
AR_CANCELLATION
Reasons why an article request might have been cancelled
If you chose to install the default values for this category, you will have
Item could not be located on shelves (NOT_FOUND)
Item was found to be too damaged to fill article request (DAMAGED)
Cancelled from the OPAC user page (OPAC)
You can change those to suit your organization’s needs.
Asort1
Used for acquisitions statistical purposes. You can use this as statistical categories when creating a fund in acquisitions.
Asort2
Used for acquisitions statistical purposes. You can use this as statistical categories when creating a fund in acquisitions.
BOR_NOTES
Values for pre-defined patron messages and circulation messages that appear on the circulation screen and the patron’s account on the OPAC.
Write the message you want to appear in the ‘Description’ field.
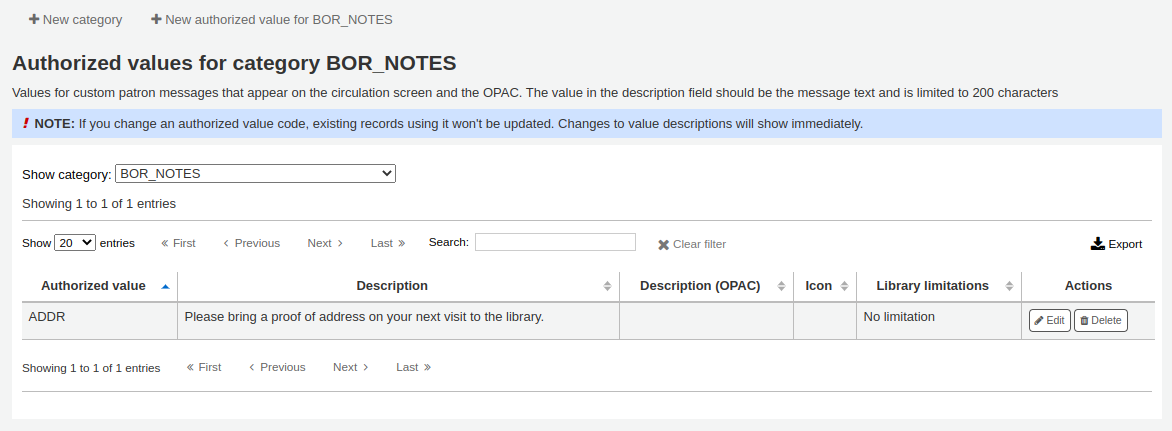
Note that this field is limited to 200 characters. However, the message field in the patron record can hold more than that. Write the first 200 characters in the description and write the rest when adding the message.
Bsort1
Values that can be entered to fill in the patron’s sort 1 field
Bsort2
Values that can be entered to fill in the patron’s sort 2 field
CAND
A list used in UNIMARC
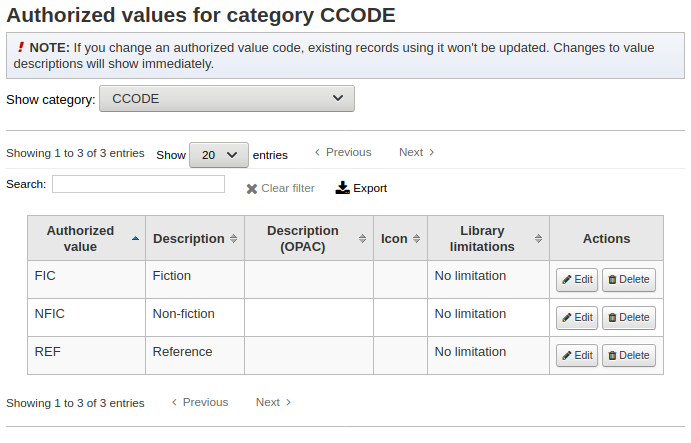
CCODE
Collection codes (appears when cataloging and working with items)
This is normally mapped to items.ccode in the Koha database.
If you chose to install the default values for this category, you will have
Fiction (FIC)
Non-fiction (NFIC)
Reference (REF)
You can change those to suit your organization’s needs.
Uyarı
For best results when searching, avoid using hyphens in location codes.
CONTROL_NUM_SEQUENCE
Used to generate control numbers in the advanced cataloging editor. Enter a string ending with a number as the authorized value and use the description to describe the type of number. For example: ‘sprLib0001’ ‘Springfield library’. In the advanced editor this will activate a new widget that will allow you to choose the type of number and generate the next number in the sequence.
COUNTRY
A list of country names used in UNIMARC 102 $a
HASARLI
Descriptions for items marked as damaged (appears when cataloging and working with items).
This is normally mapped to items.damaged in the database.
If you chose to install the default values for this category, you will have
Damaged (1)
You can change those to suit your organization’s needs, but the values must be numerical.
Uyarı
The authorized values for DAMAGED must be numerical.
DEPARTMAN
Departments are required by and are used in the course reserves module
ERM_AGREEMENT_STATUS
Used to describe the status of an agreement record in the e-resources management module.
Can also be used in reporting.
Default values are
Active (active)
In negotiation (in_negotiation)
Closed (closed)
Uyarı
Do not change the authorized value for ‘Closed’ (the description can be changed), it is used to activate the ‘Closure reason’ drop-down menu.
ERM_AGREEMENT_CLOSURE_REASON
Used to describe the closure reason for an agreement record once the has been marked as Closed in the e-resources management module.
Can also be used in reporting.
Default values are
Expired (expired)
Cancelled (cancelled)
ERM_AGREEMENT_RENEWAL_PRIORITY
Used to describe the renewal priority for an agreement record in the e-resources management module, in order to flag up how important the renewal of that agreement is.
Can also be used in reporting.
Default values are
For review (for_review)
Renew (renew)
Cancel (cancel)
ERM_AGREEMENT_USER_ROLES
Used to describe the role of a staff user who is attached to an agreement or license record in the e-resources management module.
Default values are
ERM librarian (librarian)
Subject specialist (subject_specialist)
ERM_LICENSE_TYPE
Used to describe the type of license in the e-resources management module.
Can also be used in reporting.
Default values are
Local (local)
Consortial (consortial)
National (national)
Alliance (alliance)
ERM_LICENSE_STATUS
Used to describe the status of a license record in the e-resources management module. Helps staff flag up licenses in their life cycle. Can also be used in reporting.
Can also be used in reporting.
Default values are
In negotiation (in_negotiation)
Not yet active (not_yet_active)
Active (active)
Rejected (rejected)
Expired (expired)
ERM_AGREEMENT_LICENSE_STATUS
Used to describe the status of a license linked to an agreement record in the e-resources management module. Helps staff flag licenses in their life cycle.
Can also be used in reporting.
Default values are
Controlling (controlling)
Future (future)
Historic (historic)
ERM_AGREEMENT_LICENSE_LOCATION
Used to describe the physical location of an license record in the case where you may still have a paper copy of the license (rather than electronic)
Default values are
Filing cabinet (filing cabinet)
Cupboard (cupboard)
ERM_PACKAGE_TYPE
Used to describe the types of package in the e-resources management module.
For local packages only
Default values are
Local (local)
Complete (complete)
ERM_PACKAGE_CONTENT_TYPE
Used to describe the types of material found in a local package in the e-resources management module.
For local packages only
Default values are
Aggregated full (AggregatedFullText)
Abstract and index (AbstractAndIndex)
E-book (EBook)
E-journal (EJournal)
Mixed content (MixedContent)
Online reference (OnlineReference)
Print (Print)
Streaming media (StreamingMedia)
Unknown (Unknown)
ERM_TITLE_PUBLICATION_TYPE
Used to describe the type of material of a title in the e-resources management module.
For local titles only
Default values are
AudioBook (audiobook)
Book (book)
Bookseries (bookseries)
Database (database)
E-book (ebook)
Journal (journal)
Newsletter (newsletter)
Newspaper (newspaper)
Proceedings (proceedings)
Report (report)
Streaming audio (streamingaudio)
Streaming video (streamingvideo)
Thesis/Dissertation (thesisdissertation)
Unspecified (unspecified)
Website (website)
ETAT
Used in French UNIMARC installations in field 995 $o to identify item status. Similar to NOT_LOAN
HINGS_AS
General holdings: acquisition status designator :: This data element specifies acquisition status for the unit at the time of the holdings report.
HINGS_C
General holdings: completeness designator
HINGS_PF
Physical form designators
HINGS_RD
General holdings: retention designator :: This data element specifies the retention policy for the unit at the time of the holdings report.
HINGS_UT
General holdings: type of unit designator
HOLD_CANCELLATION
Reasons why a hold might have been canceled. These are used when cancelling holds.
If you chose to install the default values for this category, you will have
Item could not be located on shelves (NOT_FOUND)
Item was found to be too damaged to fill hold (DAMAGED)
You can change those to suit your organization’s needs.
HSBND_FREQ
Delivery frequencies used by the housebound module. They are displayed on the housebound tab in the patron’s account in the staff interface.
If you chose to install the default values for this category, you will have
Every week (EW)
You can change those to suit your organization’s needs.
ILL_STATUS_ALIAS
Interlibrary loan (ILL) request statuses used in the ILL module.
ITEMTYPECAT
Search categories for item types. These values allow multiple item types to be searched at the same time.
To combine item types in categories, choose the category in the item type settings.
For example, an ITEMTYPECAT value could be ‘NEW’. This search category could be set for the item types ‘NEW BOOKS’ and ‘NEW DVDS’. This will replace NEW BOOKS and NEW DVDS item types in the advanced search form by ‘NEW’. When a patron chooses the searched for the category ‘NEW’, they will search multiple item types with a single search.
LANG
A list of ISO 639-2 standard language codes.
LOC
Shelving locations (usually appears when adding or editing an item).
This is normally mapped to items.location in the Koha database.
If you chose to install the default values for this category, you will have
Audio visual (AV)
Book cart (CART)
CART is used by UpdateItemLocationOnCheckin
Children’s area (CHILD)
Fiction (FIC)
General stacks (GEN)
New materials shelf (NEW)
On display (DISPLAY)
Processing center (PROC)
PROC can be used with NewItemsDefaultLocation and UpdateItemLocationOnCheckin.
Reference (REF)
Staff office (STAFF)
You can change those to suit your organization’s needs.
Uyarı
For best results when searching, avoid using hyphens in location codes.
KAYIP
Descriptions for the items marked as lost (appears when adding or editing an item).
This is normally mapped to items.itemlost in the Koha database.
If you chose to install the default values for this category, you will have
Lost (1)
Long overdue (lost) (2)
Lost and paid for (3)
Missing (4)
Missing from bundle (5)
You can change those to suit your organization’s needs, but the values must be numerical.
Uyarı
The authorized values for LOST must be numerical.
OPAC_SUG
A list of reasons displayed in the suggestion form on the OPAC.
If you chose to install the default values for this category, you will have
The copy on the shelf is damaged (damaged)
Upcoming title by popular author (bestseller)
You can change those to suit your organization’s needs.
NOT_LOAN
Reasons why a title is not for loan (appears when adding or editing an item)
This is normally mapped to items.notforloan in the Koha database.
If you chose to install the default values for this category, you will have
On order (-1)
Not for loan (1)
Staff collection (2)
Added to bundle (3)
You can change those to suit your organization’s needs, but the values must be numerical.
Uyarı
The authorized values for NOT_LOAN must be numerical.
Negative number values will still allow holds (use for ‘on order’ statuses, for example)
Positive numbers will not allow holds or checkouts.
A value of 0 means ‘for loan’.
ORDER_CANCELLATION_REASON
Reasons why an order might have been canceled, used in acquisitions
If you chose to install the default values for this category, you will have
No reason provided (0)
Out of stock (1)
Restocking (2)
You can change those to suit your organization’s needs.
PA_CLASS
Values used to group patron attributes together in the patron add form
PAYMENT_TYPE
Populates a dropdown list of custom payment types when paying fines
If you chose to install the default values for this category, you will have
Cash via SIP2 (SIP00)
Visa via SIP2 (SIP01)
Creditcard via SIP2 (SIP02)
You can change those to suit your organization’s needs.
qualif
Function codes (author, editor, collaborator, etc.) used in UNIMARC 7XX $4 (French)
RELTERMS
French terms of relations
REPORT_GROUP
A way to sort and filter your reports. These will appear as tabs in the saved reports page.
If you chose to install the default values for this category, you will have
Account (ACC)
Acquisitions (ACQ)
Catalog (CAT)
Circulation (CIRC)
Patrons (PAT)
Serials (SER)
You can change those to suit your organization’s needs.
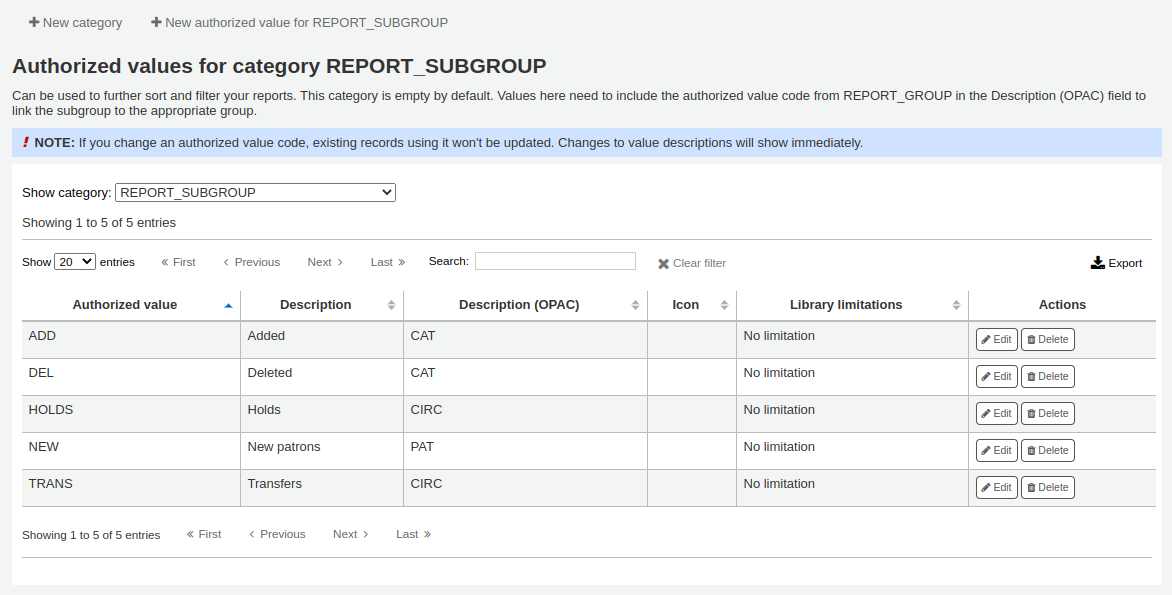
REPORT_SUBGROUP
These values can be used to further sort and filter your reports.
Values here need to include the authorized value code from REPORT_GROUP in the Description (OPAC) field to link the subgroup to the appropriate group.
KISITLANMIŞ
Restricted status of an item (appears when adding or editing an item)
This is normally mapped to items.restricted in the Koha database.
If you chose to install the default values for this category, you will have
Restricted access (1)
You can change those to suit your organization’s needs, but the values must be numerical.
Uyarı
The authorized values for this category must be numerical.
RETURN_CLAIM_RESOLUTION
Reasons why a return claim has been resolved
If you chose to install the default values for this category, you will have
Returned by patron (RET_BY_PATRON)
Found in library (FOUND_IN_LIB)
You can change those to suit your organization’s needs.
YOL TÜRÜ
Road types to be used in patron addresses (‘street type’ field in the patron form)
SIP_MEDIA_TYPE
Lockers ve sorters gibi cihazlar için bir SIP spesifik ortam türü atamak için bir ortam türü oluşturulurken <adding-item-types-label> ya da düzenleme <editing-item-types-label> yapılırken kullanılır.
If you chose to install the default values for this category, you will have
Other (000)
Book (001)
Magazine (002)
Bound journal (003)
Audio tape (004)
Video tape (005)
CD/CDROM (006)
Diskette (007)
Book with diskette (008)
Book with CD (009)
Book with audio tape (010)
Uyarı
SIP media types are limited to 3 characters. Make sure your authorized values for SIP_MEDIA_TYPE do not have more than 3 characters.
STACK
Shelving control number (appears when adding or editing an item)
This is normally mapped to items.stack in the Koha database.
Uyarı
The authorized values for this category must be numerical.
SUGGEST
Reasons for acceptance or rejection of suggestions in acquisitions (appears when managing suggestions)
If you chose to install the default values for this category, you will have
Available via ILL (AVILL)
Bestseller (BSELL)
Document not corresponding to our acquisition policy (Poldoc)
Document too expensive (Expensive)
Insufficient budget (Budget)
Library copy lost (LCL)
Shelf copy damaged (SCD)
You can change those to suit your organization’s needs.
SUGGEST_FORMAT
List of item types to display in a drop down menu on the suggestion form on the OPAC.
If you chose to install the default values for this category, you will have
Audiobook (AUDIOBOOK)
Book (BOOK)
EBook (EBOOK)
DVD (DVD)
Large print (LP)
You can change those to suit your organization’s needs.
Uyarı
Suggestion format types are limited to 30 characters. Make sure your authorized values for this category do not have more than 30 characters.
SUGGEST_STATUS
A list of additional custom status values for suggestions that can be used in addition to the default values.
Uyarı
The suggestion status is limited to 10 characters. Make sure your authorized value does not have more than 10 characters.
DÖNEM
Terms to be used in Course Reserves module. Enter terms that will show in the drop down menu when setting up a Course reserve. (For example: Spring, Summer, Winter, Fall).
UPLOAD
Categories to be assigned to file uploads. Without a category, an upload is considered temporary and may be removed during automated cleanup.
VENDOR_INTERFACE_TYPE
Values used as types of interfaces for vendor interfaces in the acquisitions module.
VENDOR_TYPE
Values used to categorize vendors in the acquisitions module.
WITHDRAWN
Description of a withdrawn item (appears when adding or editing an item)
This is normally mapped to items.withdrawn in the Koha database.
If you chose to install the default values for this category, you will have
Withdrawn (1)
You can change those to suit your organization’s needs, but the values must be numerical.
Uyarı
The authorized values for this category must be numerical.
YES_NO
Basit bir evet/hayır açılır menüsüne gereksinim duyduğunuz her yerde kullanabileceğiniz bir genel otorize değer alanı.
If you chose to install the default values for this category, you will have
Yes (1)
No (0)
Uyarı
In general, binary fields require a 1 or 0 value. If you change these values, make sure the field you intend to attach it to can take other values than 0 or 1.
Adding new authorized value categories
In addition to the existing categories that come by default with Koha, librarians can add their own authorized value categories to control data that is entered into the system.
To add a new category:
Click ‘New category’

Limit your category code to 32 characters (something short to make it clear what the category is for)
Uyarı
A category code cannot have spaces or special characters other than underscores and hyphens in it.
Proceed to add a new authorized value to the category.
Adding new authorized values
New authorized values can be added to any existing or new category.
To add a value:
From the categories list, click the ‘Add’ button on the right of the category
Alternatively, click on the category name, and then click ‘New authorized value for …’
If the category has no values yet, click on the ‘Add a new authorized value’ button at the bottom of the page
Fill out the form
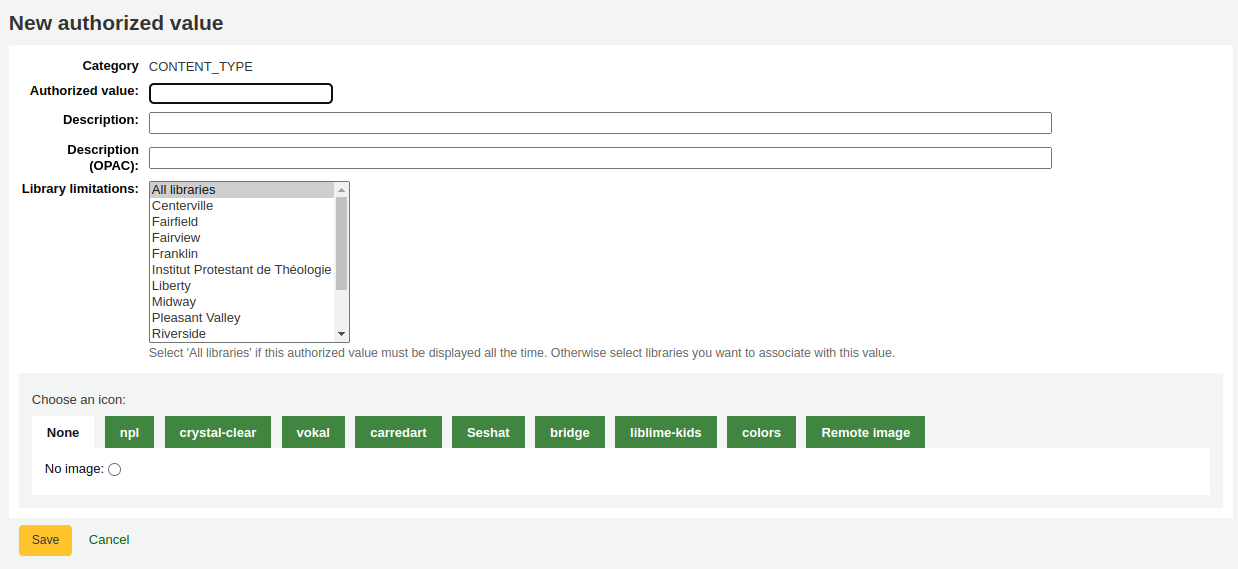
Authorized value: enter a code for your authorized value
Not
Otorize değer 80 karakterle sınırlıdır ve içerisinde çizgi ve tire dışında boşluk veya özel karakterler olamaz.
Some categories, such as SUGGEST_STATUS, may have stricter limits. Refer to the Existing authorized values categories section above for specifid limits.
Description: use this field for the actual value that will be displayed.
Description (OPAC): if you want a different description to show in the OPAC, enter it here. If this field is empty, the ‘Description’ will be used in both the staff interface and the OPAC.
Library limitations: if you would like to limit this authorized value to only specific libraries, you can choose them from this menu. To have it available to all libraries just choose ‘All libraries’ at the top of the list.
Choose an icon: you can choose an image that will appear next to the value in the staff interface and OPAC.
Not
This feature doesn’t work everywhere. It’s mostly for item locations (LOC) and collections (CCODE) in the advanced search.
‘Kaydet’e tıklayın
Yeni değer mevcut değerlerle birlikte listede gözükecektir
Deleting authorized values
To delete an authorized value, click on the ‘Delete’ button at the right of the authorized value.
Once there are no authorized values left in an authorized value category, you can delete the category.
Patrons and circulation
Dolaşım ve kullanıcı bilgilerini denetlemek için ayarlar.
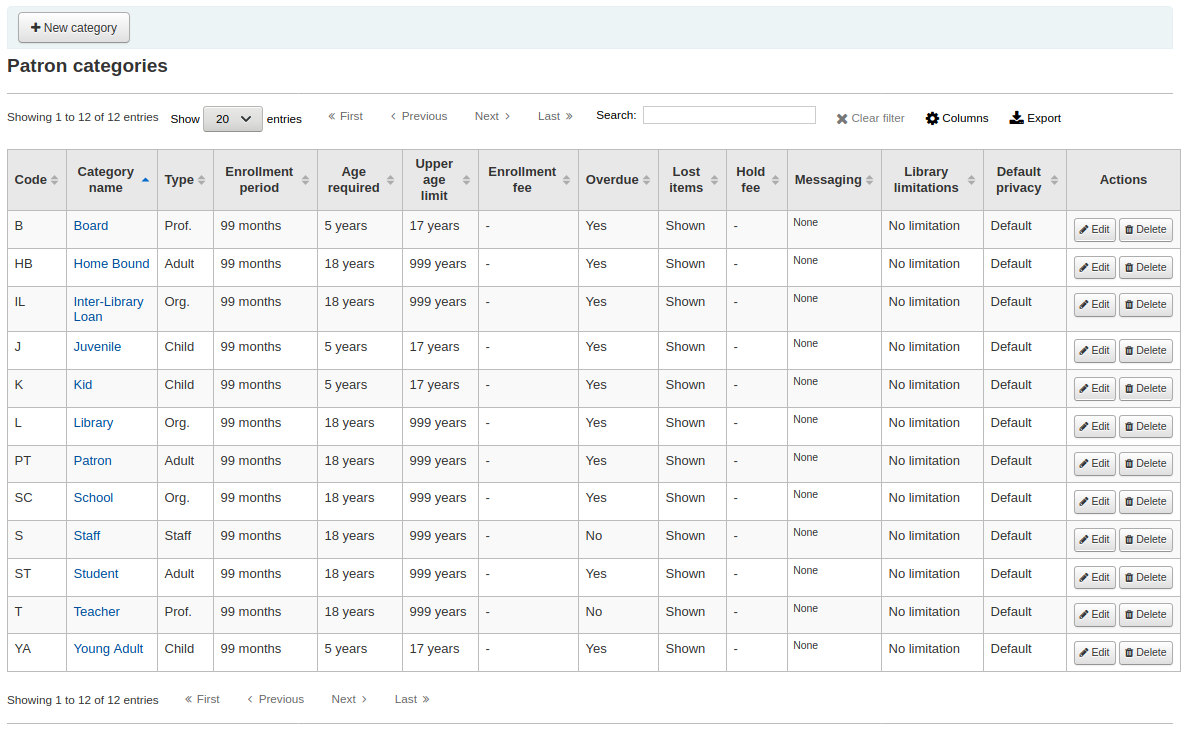
Patron categories
Kullanıcı kategorileri kullanıcılarınızı farklı görevlerde, yaş gruplarında ve kullanıcı türlerinde düzenlemenize imkan sunar.
Get there: More > Administration > Patrons and circulation > Patron categories
Not
You can customize the columns of this table in the ‘Table settings’ section of the Administration module (table id: patron_categories).
Kullanıcı kategorisi ekleniyor
To add a new patron category click ‘New category’ at the top of the page
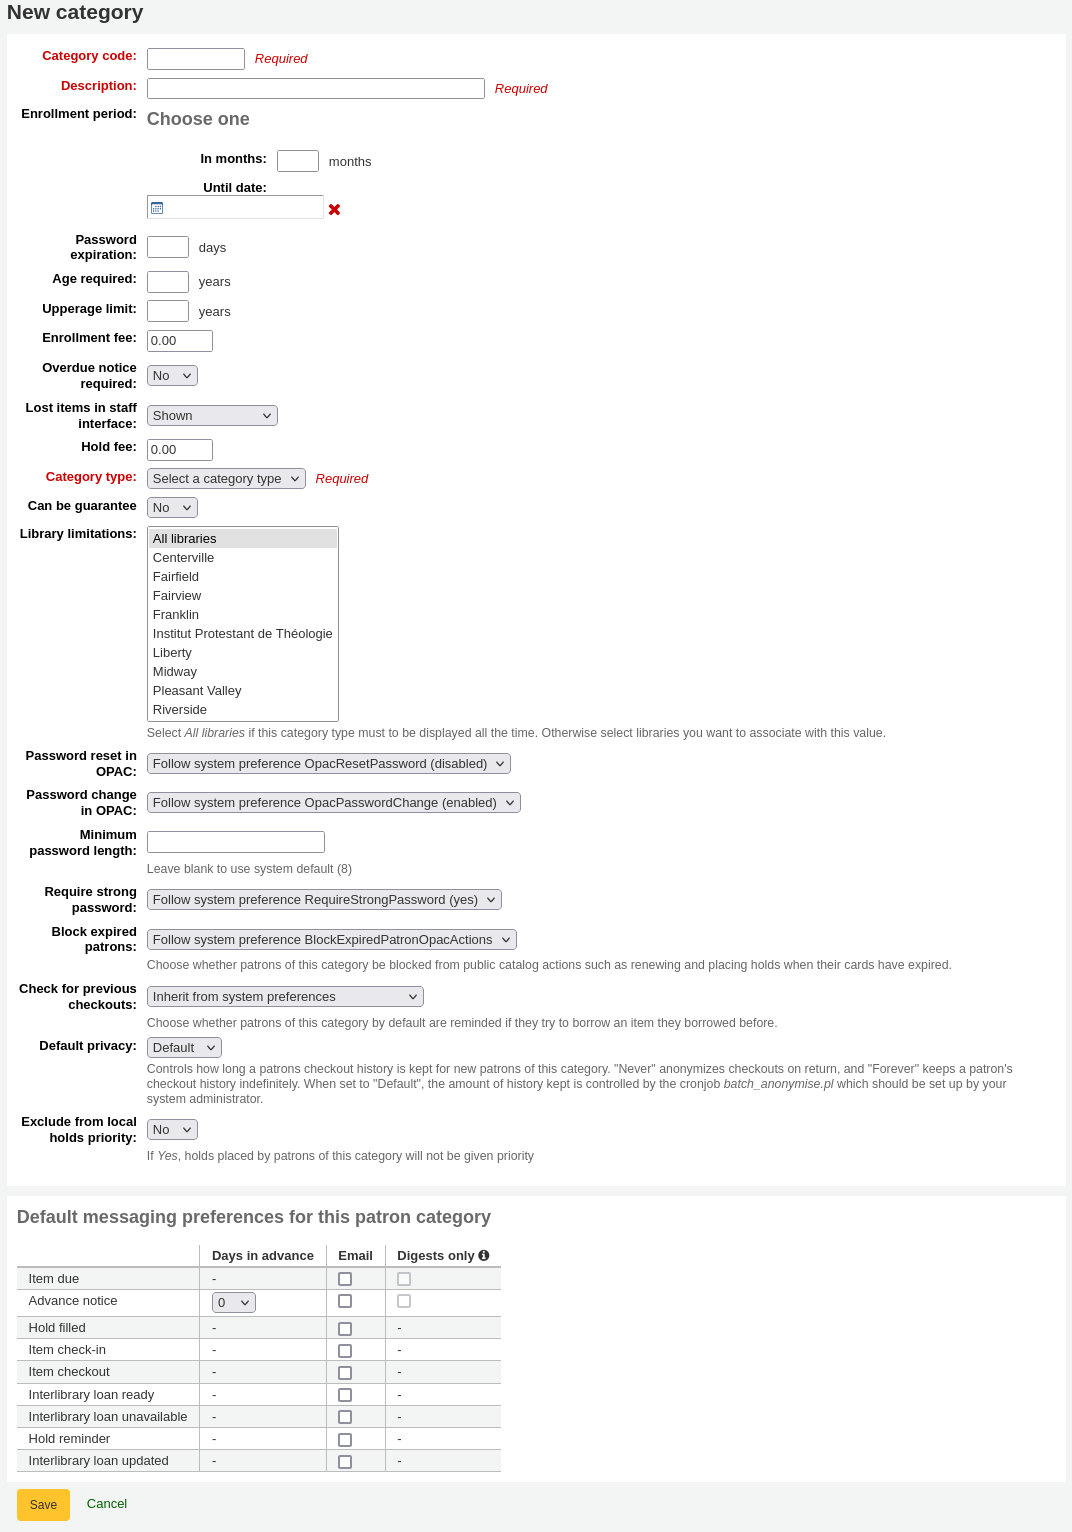
Category code: an identifier for your new category.
The category code is limited to 10 characters (numbers and letters) and must be unique.
Bu alan kullanıcı kategorinizi kaydetmek için gereklidir. Boş bırakılırsa bir hata ile karşılaşırsınız.
Description: a plain text version of the category.
The description will be visible throughout Koha.
Bu alan kullanıcı kategorinizi kaydetmek için gereklidir. Boş bırakılırsa bir hata ile karşılaşırsınız.
Enrollment period:
In months: should be filled in if you have a limited enrollment period for your patrons. For example, student cards expire after 9 months
Until date: you can choose a date when the cards will expire
Bu alan kullanıcı kategorinizi kaydetmek için gereklidir. Boş bırakılırsa bir hata ile karşılaşırsınız.
Uyarı
You cannot enter both a month limit and a date until for one category. Choose to enter either one or the other.
Password expiration: enter the number of days after which a patron has to change their password.
Age required: minimum age (in years) requirement associated with the category. For example, an ‘Adult’ patron category could have a minimum age of 18 years; this means patrons must be at least 18 to be in the patron category.
When creating or updating a patron, a warning will appear if the patron is too young for this category.

This value is used by the update_patrons_category.pl cron job to change the category of patrons who are too young.
Upper age limit: maximum age (in years) associated with the category. For example, a ‘Children’ patron category could have an upper age limit of 18, meaning patrons can have children cards until they turn 18.
When creating or updating a patron, a warning will appear if the patron is too old for this category.
This value is used by the update_patrons_category.pl cron job to change the category of patrons who are too old.
Enrollment fee: enter the amount if you charge a membership fee for your patrons (such as those who live in another region).
Uyarı
Only enter numbers and decimals in this field.
Not
Depending on your value for the FeeOnChangePatronCategory system preference, this fee will be charged on patron renewal as well as when they are first enrolled.
Overdue notice required: choose ‘Yes’ if you want patrons from this category to receive overdue notices. This will enable you to set the overdue notice triggers in the Tools module.
Lost items in staff interface: decide on a patron category basis if lost items are shown in the staff interface.
Shown: lost items are shown in the staff interface.
Hidden by default: lost items are hidden, but staff members can click ‘Show all items’ to see them.
Not
This is only applicable in the staff interface, so changing this value on patron categories who do not have access to the staff interface won’t make any difference.
Hold fee: enter the fee amount if you charge patrons from this category a fee for placing holds on items.
Uyarı
Only enter numbers and decimals in this field.
Category type: choose one of the six main parent categories
Adult: most common patron type, usually used for a general ‘Patron’ category.
Child: another common patron type.
Staff: library staff
Organizational: organizations can be used as guarantors for Professional patrons.
Professional: professional patrons can be linked to Organizational patrons.
Statistical: this patron type is used strictly for statistical purposes, such as in-house use of items.
Bu alan kullanıcı kategorinizi kaydetmek için gereklidir. Boş bırakılırsa bir hata ile karşılaşırsınız.
Can be guarantee: if the patrons of this category can have guarantors, choose yes. This will make the ‘Patron guarantor’ and ‘Non-patron guarantor’ sections appear in the patron form.
Branch limitations: if necessary, limit this patron category to only some branches in your library system. Select ‘All branches’ if you would like any library to be able to use this category.
To select more than one branch, hold the Ctrl key while making your selection.
Password reset in OPAC: decide whether patrons of this category are allowed to reset their password through the OPAC’s ‘Forgotten password’ function. By default, it will follow the rule set in the OpacResetPassword system preference.
Follow system preference OpacResetPassword.
Allowed: patrons of this category will be able to reset their password through the OPAC regardless of the setting in OpacResetPassword.
Not allowed: patrons of this category will not be able to reset their password through the OPAC regardless of the setting in OpacResetPassword.
Password change in OPAC: decide whether patrons of this category are allowed to change their password through the OPAC. By default, it will follow the rule set in the OpacPasswordChange system preference.
Follow system preference OpacPasswordChange.
Allowed: patrons of this category will be able to change their password through the OPAC regardless of the setting in OpacPasswordChange.
Not allowed: patrons of this category will be not able to change their password through the OPAC regardless of the setting in OpacPasswordChange.
Minimum password length: enter the minimum password length for patrons of this category. Leave blank to use the default length set in the minPasswordLength system preference.
Require strong password: decide whether to enforce a strong password policy (at least one uppercase letter, one lowercase letter and one digit) for patrons of this category. By default, it will follow the rule set in the RequireStrongPassword system preference.
Follow the system preference RequireStrongPassword.
Yes: patrons of this category will be required to have a strong password regardless of the setting in RequireStrongPassword.
No: patrons of this category will not be required to have a strong password regardless of the setting in RequireStrongPassword.
Block expired patrons: decide if this patrons from this category are blocked from performing actions in the OPAC if their card is expired. By default it will follow the rule set in the BlockExpiredPatronOpacActions preference.
Follow the system preference BlockExpiredPatronOpacActions.
Block: patrons of this category whose membership has expired will be blocked from renewing and placing holds in the OPAC, regardless of the setting in BlockExpiredPatronOpacActions.
Don’t block: patrons of this category whose membership has expired will not be blocked from renewing and placing holds in the OPAC, regardless of the setting in BlockExpiredPatronOpacActions.
Check for previous checkouts: if the CheckPrevCheckout system preference is set to either ‘Unless overridden by patron category’ options, you will be able to set the value for this particular patron category here.
Yes and try to override system preferences: Koha will check if the patron already checked out this item, unless the patron’s personal settings prevent it.
No and try to override system preferences: Koha will not check in the patron already checked out this item, unless the patron’s personal settings permit it.
Inherit from system preferences: the setting of the CheckPrevCheckout system preference will be followed.
Default privacy: choose the default privacy settings for patrons of this category.
Default: checkout history will be kept indefinitely, until either the batch_anonymize.pl script is run or there is a manual batch anonymization which is performed.
Never: checkout history is anonymized upon return. Statistics are kept, but the link between the checkout, the item and the patron is removed.
Forever: checkout history is never anonymized for patrons of this category, regardless of the cron job or manual anonymization.
This setting can be edited by the patron via the OPAC if you allow it with the OPACPrivacy system preference.
Exclude from local holds priority: choose whether holds for patrons of this category are given a priority.
Yes: holds for patrons of this category are not given special priority, regardless of the setting in LocalHoldsPriority.
No: holds for patrons of this category are subjected to the setting in LocalHoldsPriority.
Default messaging preferences for this patron category: assign advanced messaging preferences by default to the patron category
These default preferences can be changed on an individual basis for each patron. This setting is just a default to make it easier to set up messages when creating new patrons.
Not
This requires that you have EnhancedMessagingPreferences system preference set to ‘Allow’.
Uyarı
These defaults will only be applied to new patrons that are added to the system. They will not edit the preferences of the existing patrons.
If you need to apply the default preferences to existing patrons, you can force those changes by running the borrowers-force-messaging-defaults script found in the misc/maintenance folder. Ask your system administrator for assistance with this script.
Circulation and fines rules
These rules define how your items are circulated, how and when fines are calculated and how holds are handled.
Get there: More > Administration > Patrons and circulation > Circulation and fines rules
Kurallar şu sırayı kullanarak en özelden daha az özele doğru uygulanır:
same library, same patron category, same item type
same library, same patron category, all item types
same library, all patron categories, same item type
same library, all patron categories, all item types
default (all libraries), same patron category, same item type
default (all libraries), same patron category, all item types
default (all libraries), all patron categories, same item type
default (all libraries), all patron categories, all item types
The CircControl and HomeOrHoldingBranch also come in to play when figuring out which circulation rule to follow.
If CircControl is set to “the library you are logged in at” circulation rules will be selected based on the library you are logged in at
If CircControl is set to “the library the patron is from” circulation rules will be selected based on the patron’s library
If CircControl is set to “the library the item is from” circulation rules will be selected based on the item’s library where HomeOrHoldingBranch chooses if the item’s home library or its holding library is used.
If IndependentBranches is set to ‘Prevent’ then the value of HomeOrHoldingBranch is used in figuring out if the item can be checked out. If the item’s home library does not match the logged in library, the item cannot be checked out unless you are a superlibrarian.
Önemli
At the very least you will need to set a default circulation rule. This rule should be set for all item types, all libraries and all patron categories. That will catch all instances that do not match a specific rule. When checking out if you do not have a rule for all libraries, all item types and all patron categories then you may see patrons getting blocked from placing holds.
Defining circulation rules
Using the issuing rules matrix you can define rules that depend on patron category/item type combos.
Not
The matrix being very wide, you can export the existing rules in Microsoft Excel or CSV format, to look at them, using the ‘Export’ button at the top of the table.
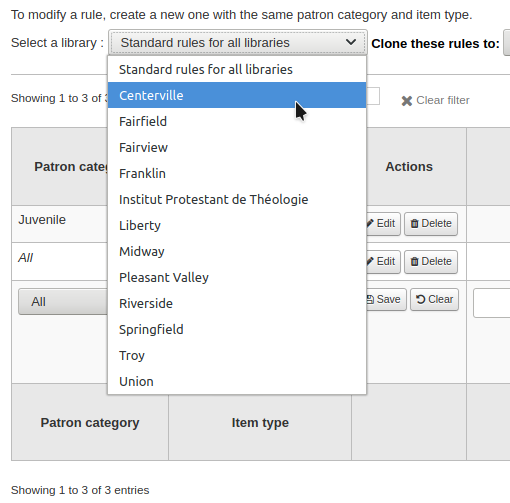
To set your rules, choose a library from the pull down (or ‘Standard rules for all libraries’ if you want to apply these rules to all branches):
Matristen, kullanıcı kategorilerinden ve materyal türlerinden her hangi bir kombinasyonu kuralları uygulamak için seçebilirsiniz.

Öncelikle kuralı hangi kullanıcı kategorisine uygulamak istediğinizi seçin. Bunu ‘Hepsi’ şeklinde bırakırsanız, bu kural tüm kullanıcı kategorilerine uygulanacaktır.
Choose the item type you would like this rule to apply to. If you leave this to ‘All’ it will apply to all item types for this patron category
If an item type has a parent item type, the rule will be displayed as Parent -> Child. The number of current checkouts will be limited to either the maximum for the parent (including sibling types) or the specific type’s rule, whichever is less.
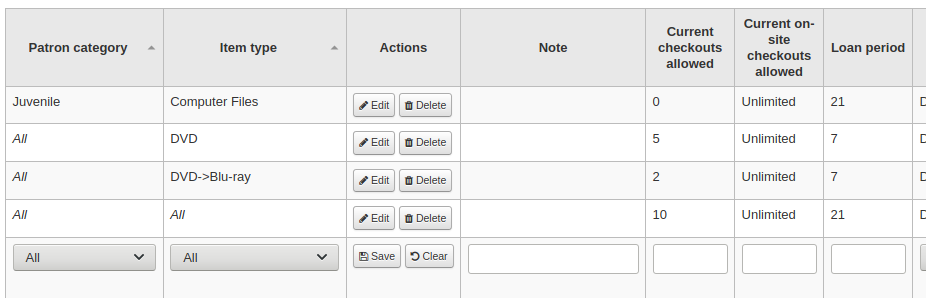
In the example above, there is a rule for the DVD item type with a maximum of 5 checkouts and a rule for Blu-ray, a child of DVD, with a maximum of 2 checkouts. A patron at this library will be able to check out a maximum of 2 Blu-rays in a total of 5 items of either DVD or Blu-ray types.
To summarize, a patron at this library would be able to take either : - 0 Blu-ray and a maximum of 5 DVDs - 1 Blu-ray and a maximum of 4 DVDs - 2 Blu-ray and a maximum of 3 DVDs
Add notes about your circulation rule into the notes field. This can be helpful to remember why and when something was last changed.
Limit the number of items of this type a patron of this category can have checked out at the same time by entering a number in the ‘Current checkouts allowed’ field.
If you’re allowing on-site checkouts then you may also want to set a limit on the number of items of this type patrons of this category can have on-site.
Not
This setting also depends on the ConsiderOnSiteCheckoutsAsNormalCheckouts preference
Define the period of time an item of this type can be checked out to a patron of this category by entering the number of units (days or hours) in the ‘Loan period’ box.
Define if the loan period should include closed days or not in the ‘Days mode’ column. The option chosen here will override the useDaysMode system preference for this particular rule.
The ‘Default’ option will take the option defined in the useDaysMode system preference
Choose the ‘Calendar’ option if you want to use the calendar to skip the days when the library is closed
Choose the ‘Datedue’ option if you want to push the due date to the next open day
Choose the ‘Days’ option if you want to ignore the calendar and calculate the due date directly
Choose the ‘Dayweek’ option if you want to use the calendar to push the due date to the next open matching weekday for weekly loan periods, or the next open day otherwise
Choose which unit of time, days or hours, that the loan period and fines will be calculated in in the ‘Unit’ column
You can also define a hard due date for a specific patron category and item type. The hard due date offers three options:
Exactly on: The due date of any item checked out with this rule will be set to the hard due date.
Before: Koha will calculate the normal loan period. If the calculated due date would be after or on the hard due date, the hard due date will be used instead.
After: Koha will calculate the normal loan period. If the calculated due date would be before the hard due date, the hard due date will be used instead.
‘Fine amount’ should have the amount you would like to charge for overdue items.
Önemli
Sadece sayılar ve ondalık ayırıcıları girin (para birimi simgeleri girmeyin).
Enter the ‘Fine charging interval’ in the unit you set (ex. charge fines every 1 day, or every 2 hours). The finesCalendar system preference controls whether the days the library is closed will be taken into account or not.
‘Tahsil etme zamanı’ ceza tahsil etme aralığı 1 günden fazla olan kütüphaneler için çok kullanışlıdır.
End of interval: Given a grace period of 2 days and a fine interval of 7 days, the first fine will appear 7 days after the due date, it will always take one fine interval (7 days), before the first fine is charged.
Start of interval: Given a grace period of 2 days and a fine interval of 7 days, the first fine will appear 2 days after the due date and the second fine 7 days after the due date.
The ‘Fine grace period’ is the period of time an item can be overdue before you start charging fines. The FinesIncludeGracePeriod system preference controls if the grace period will be included when calculating the fine or not.
Önemli
This can only be set for the ‘Day’ unit, not in ‘Hours’
The ‘Overdue fines cap’ is the maximum fine per item for this patron and item type combination.
Önemli
If this field is left blank then Koha will not put a limit on the fines this item will accrue. A maximum fine amount for all overdues can be set using the MaxFine system preference.
Kullanıcıların kayıp materyaller üzerinden fazla ücretlendirilmesini önlemek isterseniz, ‘Yenileme fiyatı üst sınırı’ başlığının altındaki kutuyu işaretleyebilirsiniz. Bu, kullanıcıların para cezalarının materyal üzerindeki yenileme fiyatının üzerine çıkmasını önleyecektir.
Not
‘Gecikme cezaları sınırı’ da ayarlanırsa para cezası, eğer her ikisi de verilen gecikme zamanı için geçerliyse, ikisinden de daha az olacaktır.
If your library ‘fines’ patrons by suspending their account you can enter the number of days their fine should be suspended in the ‘Suspension in days’ field.
Önemli
This can only be set for the ‘Day’ unit, not in ‘Hours’
Aynı zamanda ‘Maksimum suspansiyon süresi’ ayarında bir kullanıcının askıya alınacağı maksimum gün sayısını tanımlayabilirsiniz
The ‘Suspension charging interval’ option is just like the ‘Fin charging interval’. For example, you could ‘fine’ a patron one day suspension for every two days overdue.
Next decide if the patron can renew this item type and if so, enter how many times they can renew it in the ‘Renewals allowed’ box.
If you allow unseen renewals (see UnseenRenewals), enter how many ‘unseen’ renewals patrons can make. This is not in addition to the regular renewals, but rather how many ‘unseen’ renewals can be made among the total number of renewals.
If you’re allowing renewals you can control how long the renewal loan period will be (in the units you have chosen) in the ‘Renewal period’ box.
Süre uzatmaya izin veriyorsanız, kullanıcıların iade tarihinden kaç gün önce ödünç aldıkları materyallerin süresini uzatabileceklerini ‘No renewals before’ kutusundan denetleyebilirsiniz.
Bu değer boş bırakılırsa materyallerin süresi istenilen her hangi bir zaman uzatılabilir. Aksi halde materyallerin süresi yalnızca materyal bu kutuya girdiğiniz sayı birimleri (gün/saat) sonrası gecikmeye kalırsa uzatılabilir.
To control this value on a more granular level please set the NoRenewalBeforePrecision preference.
You can enable automatic renewals for certain items/patrons if you’d like. This will renew automatically following your circulation rules unless there is a hold on the item.
Önemli
You will need to enable the automatic renewal cron job for this to work.
Önemli
This feature needs to have the “no renewal before” column filled in or it will auto renew every day after the due date.
If you are using automatic renewals, you can use the ‘No automatic renewals after’ to limit the time a patron can have the item. For example: don’t allow automatic renewals after a checkout period of 80 days.
Similar to the hard due date setting, you can also stop automatic renewals after a specific date using the ‘No automatic renewal after (hard limit)’ setting.
If patrons of this category can place holds on items of this type, enter the total numbers of items (of this type) that can be put on hold in the ‘Holds allowed’ field.
Leave empty to have unlimited holds.
If you’d rather put a hold limit per patron category, independent of the item type, see the default checkout and hold policy by patron category section below.
If you want to have a hard hold limit, independent of patron category and item type, for this particular library, see the Default checkout, hold, and return policy section below.
If you want to have a hard hold limit, independent of patron category, item type, and across all libraries, see the maxreserves system preference.
You can also set a daily limit on the number of holds a patron can place.
While the two settings before limit the holds that can be placed across various records, the next setting is used to limit the number of holds that can be placed on one record at the same time. For example, for fiction books you might want to allow only one item to be placed on hold at the same time by the same user. But for serials where items represent different issues more than one hold at the same time is fine.
Not
If this is set to a number that is greater than 1, but not Unlimited, then staff will have the option of placing multiple holds at once when placing a hold on the next available item in the staff interface
Next you can decide how the availability of items influences the ability to place a hold. The ‘On shelf holds allowed’ option has three settings:
Yes: This will allow to place holds on items at all times. It doesn’t matter if they are available or checked out.
If any unavailable: This will allow to place a hold as soon as one or more items of the record are checked out. It doesn’t matter if there are still one or more items available on the shelf.
If all unavailable: This will allow to place a hold as soon as all items on the record are checked out that could fill the hold. This is especially useful for libraries that don’t offer the service of getting items placed on hold off the shelf for patrons.
Under ‘OPAC item level hold’ you can decide if patrons are allowed to place item specific holds on the item type in question. The options are:
Allow: Will allow patrons the option to choose next available or a specific item.
Don’t allow: Will only allow patrons to choose next available item.
Force: Will only allow patrons to choose a specific item.
If you want to allow patrons of this category to be able to place article requests on items of this type, choose an option in the ‘Article requests’ column
No: patrons of this category will not be able to place article requests on items of this type
Yes: patrons of this category will be able to place article requests on items of this type, either on specific items (for example in the case of serial issues) or on entire records (for example in the case of monographs)
Record only: patrons of this category will be able to place article requests on records of this type, but not on specific items
Item only: patrons of this category will be able to place article requests on items of this type, but not on entire records
Uyarı
This column will only appear if the ArticleRequests system preference is enabled.
If you want to use the article request functionality you need to enable it using the ArticleRequests system preference and configure the form using the other related preferences.
If you charge a rental fee for the item type and want to give this specific patron category a discount on that fee, enter the percentage discount (without the % symbol) in the ‘Rental discount’ field
If the UseRecalls system preference is enabled, you will have several options to control recalls.
Recalls allowed (total): enter the number of current recalls a patron of this category can have on items or records of this item type.
Recalls per record (count): enter the number of current recalls a patron of this category can have on any one record of this item type.
On shelf recalls allowed: choose if patrons can recall items on records that have available items
If any unavailable: if a record has more than one item and at least one is unavailable, the patron will be able to recall items from this record
If all unavailable: all items of a record must be unavailable in order for a patron to recall an item from this record
Recall due date interval (day): enter the number of days a patron has to return an item that has been recalled
Recall overdue fine amount: enter the fine amount a patron will be charged if they don’t return the recalled item by the due date
Recall pickup period: enter the number of days a patron has to come pick up the item they have recalled, once it has been marked as awaiting pickup.
Not
This value supercedes the value in the RecallsMaxPickUpDelay system preference.
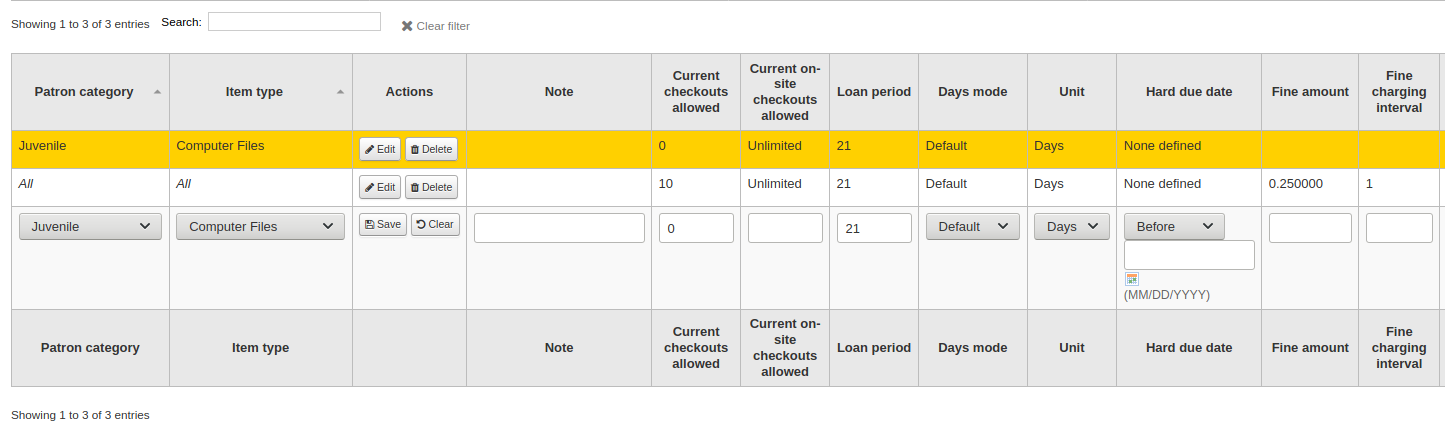
When finished, click ‘Save’ to save your changes. To modify a rule, simply click the ‘Edit’ button either at the beginning or at the end of the row. The row of the rule being edited will be highlighted in yellow and the values will appear filled in at the bottom of the table. Edit the values at the bottom and click save.
Not
If, while editing a rule, you change either the patron category or the item type, it will create a new rule. You can do this to duplicate rules instead of creating new ones if the values are similar.
Alternatively, you can create a rule with the same patron category and item type and it will edit the existing one, as there can only be one rule per library- patron category-item type combination.
If you would like to delete your rule, click the ‘Delete’ button at the beginning or at the end of the rule row.
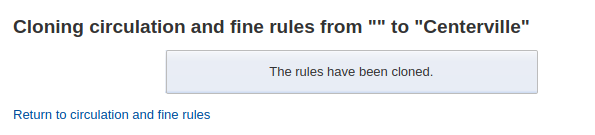
To save time you can clone rules from one library to another by choosing the clone option above the rules matrix. Please note that this will overwrite all rules already configured for that library.

Klonlamayı seçtikten sonra size bir onay mesajı sunulacak.
Default checkout, hold, and return policy
You can set a default maximum number of checkouts, a default maximum number of holds and a hold policy that will be used if none is defined below for a particular item type or category. This is the fall back rule for defaults.

Başka diğer bir seçenek aşağıdaki formlarda ayarlı değilse bu menüden kütüphanedeki tüm materyal türleri ve kullanıcılara uygulamak için bir varsayılan ayarlayabilirsiniz.
‘İzin verilen mevcut ödünç alma’ içine kullanıcıların bir defada ödünç alabilecekleri toplam miktarı girin
In ‘Total current on-site checkouts allowed’ enter the total number of items patrons can have checked out on site at a time (OnSiteCheckouts needs to be set to ‘Enable’)
In ‘Maximum total holds allowed (count)’ enter the total number of pending holds patrons can have at the same time.
Kullanıcıların ‘Ayırma Politikası’ menüsü kullanarak nerede ayırma yapabileceklerini denetleyin
Herhangi bir kütüphaneden: Kullanıcılar bu materyali herhangi bir kütüphaneden ayırtanilirler. (her hangi bir tanım yapılmamışsa varsayılan değeri kullanın)
From Local Hold Group: Only patrons from a library in the item home library’s local hold group may put this book on hold.
Ana kütüphaneden: Sadece ana kütüphanenin kullanıcıları bu kitabı ayırtabilir.
Hiçbir Ayırmaya İzin Verilmedi: Hiçbir kullanıcı bu kitabı ayıramaz.
Control where patron can pick up holds using the “Hold Pickup Library Match” menu
herhangi bir kütüphane
item’s hold group
patron’s hold group
materyalin ana kütüphanesi
materyalin ayırtma kütüphanesi
Materyalin iade edildikten sonra nereye döneceğini denetleyin
Materyal kütüphaneye iade ediliyor
Materyal ödünç verme birimine geri döner
Kayıp materyaller
Materyal askıdayken iade alındığı yerde kalır ve hiçbir zaman ‘ana kütüphaneye’ iade edilmez.
Kuralınızı belirlediğinizde, bu kuralı yine kuralın sağındaki ‘Geri al’ bağlantısına tıklayarak geri alabilirsiniz.
Default checkout and hold policy by patron category
For this library, you can specify the maximum number of checkouts, on-site checkouts and holds that a patron of a given category can have, regardless of the item type.

Not
If the total amount of checkouts, on-site checkout and holds for a given patron category is left blank, no limit applies, except possibly for a limit you define in the circulation rules above.
Örneğin, matris içinde yönetim kurulundaki kullanıcıların 10 kitap ve 5 DVD alabilmelerine izin veren bir kural var, ancak siz yönetim kurulundaki kullanıcıların bir defada sadece 12 materyal ödünç almalarının mümkün olmasını istiyorsunuz. Buraya 12 girerseniz ve kullanıcının üzerinde zaten 10 tane kitap varsa, izin verilen 12 toplamına eşit olarak yalnızca 2 adet DVD ödünç almalarına izin verilecektir.
Default waiting hold cancellation policy
For this library, you can specify if patrons can cancel holds that are already awaiting pickup.

For each patron category and item type combination, choose if these patrons can cancel holds that are already waiting for pickup.
Just like the circulation rules, the more specific rules will apply before the more generic rules (i.e. the “all” patron categories / “all” item types rule will apply only if no other rule exists for this combination).
Default open article requests limit
If ArticleRequests is enabled, you can set a maximum number of open article requests a patron of a category can have at one time.

Not
This will only appear if the ArticleRequests system preference is enabled.
Choose the patron category you want to limit.
Enter the number of open article requests a patron of this category can have at one given time
Click ‘Add’
Default article request fees
If ArticleRequests is enabled, you can set the fee a patron from a given category (or any category) needs to pay in order to request the article.

Not
This will only appear if the ArticleRequests system preference is enabled.
Choose the patron category for which you want to add a fee, or choose ‘All’ to set an overall fee for all patrons
Not
The fee specific to a patron category will supercede the fee for all categories.
For example, if you set a fee for all categories to 2$ and a fee for Faculty to 3$, Faculty members will be charged 3$ and any other patron will be charged 2$.
Enter the fee amount (use a period as the decimal and don’t enter any symbols, e.g. enter 5.00 for 5$)
Click ‘Add’
The fee is charged to the patron when the request is placed.
When placing the request, either through the staff interface or the OPAC, a message appears to inform the staff member or the patron that the patron will be charged for every request and the amount of the fee.
Default lost item fee refund on return policy
Here, you can specify the default policy for lost item fees on return.

Refund lost item replacement fee: choose whether or not the item’s replacement cost is refunded when the lost item is returned.
Refund lost item charge: the replacement cost is refunded. This might create a credit to be paid out to the patron if they had already paid the fee.
Refund lost item charge (only if unpaid): the replacement cost is refunded only if it hasn’t yet been paid.
Refund lost item charge and charge new overdue fine: the replacement cost is refunded and overdue fines are calculated as of today.
Refund lost item charge and restore overdue fine: the replacement cost is refunded and fines are restored as of the day the item was declared lost.
Leave lost item charge: the replacement cost stays in the patron’s account.
Refund lost item processing fee: choose whether or not the item’s processing fee is refunded when the lost item is returned.
Refund lost item processing charge: the processing fee is refunded. This might create a credit to be paid out to the patron if they had already paid the fee.
Refund lost item processing charge (only if unpaid): the processing fee is refunded only if it hasn’t yet been paid.
Leave lost item processing charge: the processing fee stays in the patron’s account.
This policy will apply to this library. This rule is to be used with the RefundLostOnReturnControl system preference.
You can limit the number of days during which a lost item is refundable using the NoRefundOnLostReturnedItemsAge system preference.
Default holds policy by item type
Bu kütüphane için, belirli bir materyal türü için kullanıcı kategorisi ne olursa olsun ayırma ve iade politikalarını düzenleyebilirsiniz.

The various hold policies have the following effects:
From any library: Patrons from any library may put this item on hold. (default if none is defined)
From local hold group: Only patrons from libraries in the same item’s home library hold groups may put this book on hold.
From home library: Only patrons from the item’s home library may put this book on hold.
No holds allowed: No patron may put this book on hold.
Önemli
Note that if the system preference AllowHoldPolicyOverride set to ‘allow’, these policies can be overridden by your circulation staff.
Önemli
These policies are applied based on the ReservesControlBranch system preference.
Control where patron can pick up holds using the “Hold Pickup Library Match” menu
herhangi bir kütüphane
item’s hold group
patron’ hold group
materyalin ana kütüphanesi
materyalin ayırtma kütüphanesi
The various return policies have the following effects:
Materyal ana kütüphaneye dönecek: Kütüphanecinin materyali ait olduğu ana kütüphaneye transfer etmesi istenecektir
Önemli
If the AutomaticItemReturn preference is set to automatically transfer the items home, then a prompt will not appear
Materyal ödünç verildiği birime dönecek: Kütüphanecinin materyali ödünç verildiği kütüphaneye transfer etmesi istenecektir
Önemli
If the AutomaticItemReturn preference is set to automatically transfer the items home, then a prompt will not appear
Item floats: Materyal ödünç verildiği birimden transfer edilmeyecek, bunun yerine manuel olarak transfer edilene ya da başka bir birimde ödünç verilene kadar orada kalacaktır.
Örneğin kütüphanelerinizde ayırtma işlemi yapılmasına izin veriyorsunuz fakat yeni materyallere veya DVD’lere diğer alt gruplar tarafından ayırtma yapılmasını istemiyorsunuz, bu sebeple ‘Ayırtma Politikası’nı ‘Ana kütüphaneden’ olarak ayarlayabilirsiniz ve böylece bu materyaller üzerinde sadece ‘kütüphane ve kullanıcının ana kütüphanesi aynı’ ise ayırtma yapılabilir. Ayrıca bu formdan belirli materyaller üzerinde ayırtma yapılmasını tamamen engelleyebilirsiniz. Aynı zamanda floating materyal türlerini ve ana kütüphaneleri ile kalan türleri bu şekilde ayarlayabilirsiniz.
Not
The library whose return policy is used is determined by the CircControlReturnsBranch system preference.
Patron attribute types
Get there: More > Administration > Patrons and circulation > Patron attribute types
Patron attributes can be used to define custom fields to associate with your patron records. In order to enable the use of custom fields you need to set the ExtendedPatronAttributes system preference.
Bu alanın yaygın kullanımı öğrenci kimlik numarası ya da ehliyet ile olacaktır.

Adding patron attribute types
To add a new patron attribute type, click the ‘New patron attribute type’ button at the top of the page
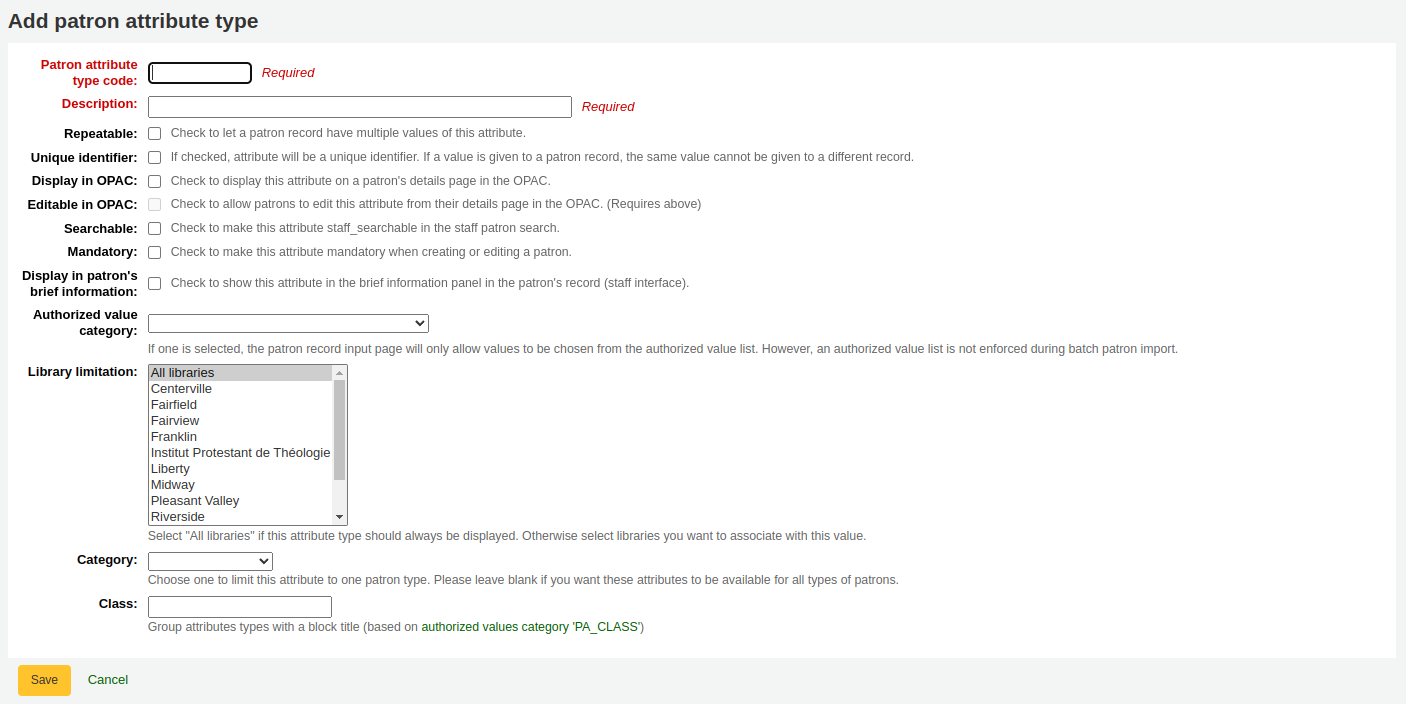
Patron attribute type code: enter a short code to identify this field
Uyarı
Bu alan 10 karakter ile sınırlıdır (yalnızca rakamlar ve harfler)
Uyarı
Bir nitelik tanımlandıktan sonra bu ayar değiştirilemez
Description: enter a longer (plain text) explanation of what this field will contain
Repeatable: check this box if a patron record can have multiple values of this attribute.
Uyarı
Bir nitelik tanımlandıktan sonra bu ayar değiştirilemez
Unique identifier: check this box if a value is given to a patron record, the same value cannot be given to a different record.
Özgün öznitelikler kullanıcı içe aktarma aracında eşleştirme noktaları olarak kullanılabilirler
Uyarı
Bir nitelik tanımlandıktan sonra bu ayar değiştirilemez
Display in OPAC: check this box to display this attribute on a patron’s details page in the OPAC.
Editable in OPAC: check this box to enable patrons to edit this information in the OPAC.
Searchable: check this box to make this attribute searchable in the staff interface’s patron search.
Mandatory: check this box if the attribute must be filled for every patron
Display in patron’s brief information: check this box to make this attribute visible in the patron’s short detail display on the left of the checkout screen and other patron pages
Authorized value category: if one is selected, the patron record input page will only allow values to be chosen from the authorized value list.
You will first need to add an authorized value list for it to appear in this menu
Uyarı
An authorized value list is not enforced during batch patron import.
Library limitations: if you would like this attribute to only be used by specific branches you can choose those branches from this list. Choose ‘All branches’ to show it for all libraries.
Uyarı
Patrons with attributes already set for them will not be altered. The branch limitation only limits the field based on the library at which the current staff is logged in.
If an attribute is set for a patron, it will be displayed in their file to all staff. However, only staff from the selected branches will be able to edit it.
Category: if you’d like to only show this attribute on patrons of one type choose that patron category here
Class: if you have a lot of attributes it might be handy to group them so that you can easily find them for editing. If you create an authorized value for PA_CLASS it will show in the ‘Class’ drop-down menu and you can then change your attributes page to have sections of attributes
Click ‘Save’ to save your new attribute.
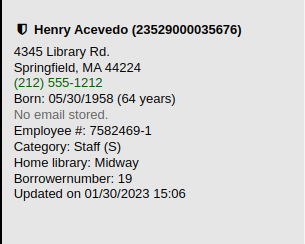
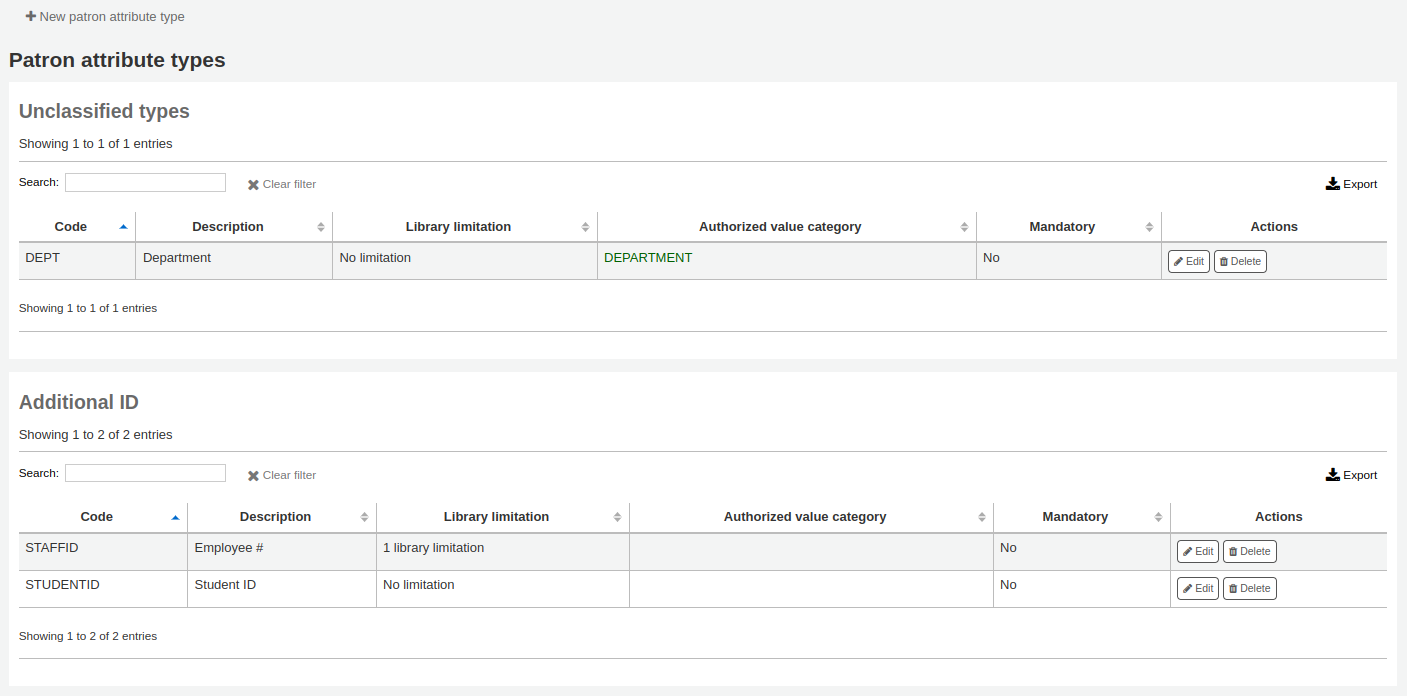
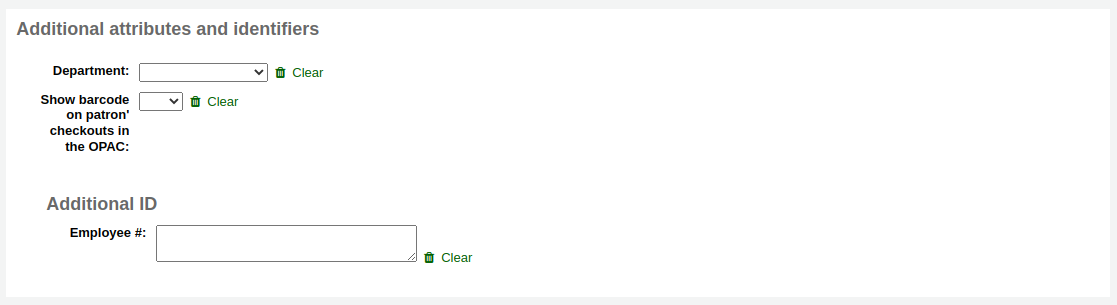
Once added, your attribute will appear on the list of attributes and also on the patron record add/edit form
Editing/deleting patron attribute types
Each patron attribute has an edit and a delete button beside it on the list of attributes.
Nitelikteki bazı alanlar oluşturulduğunda silinmeyecektir.
Kullanıcı nitelik tür kodu:
Tekrarlanabilir
Tek tanımlayıcı:
Kullanımda ise, nitelik silmeniz mümkün olmayacaktır.

Library transfer limits
Kütüphane gönderme ve kütüphane kabul ve koleksiyon kodlarıyla ilişkiye dayanan kütüphaneler arasında transfer yeteneğini kısıtlayın.
Get there: More > Administration > Patrons and circulation > Library transfer limits
These rules only go into effect if the preference UseBranchTransferLimits is set to ‘enforce’.
Lütfen başlamak için bu limitleri hangi kütüphane için ayarladığınızı seçin.

Transfer limits are set based on the collections codes you have applied via the Authorized values administration area.
Koleksiyon kodları onay kutuları üzerinde sekmeler olarak görünecektir:
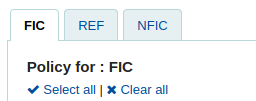
Check the boxes for the libraries you allow your items to be transferred to for the collection code you have selected at the top (in the example below - FIC)
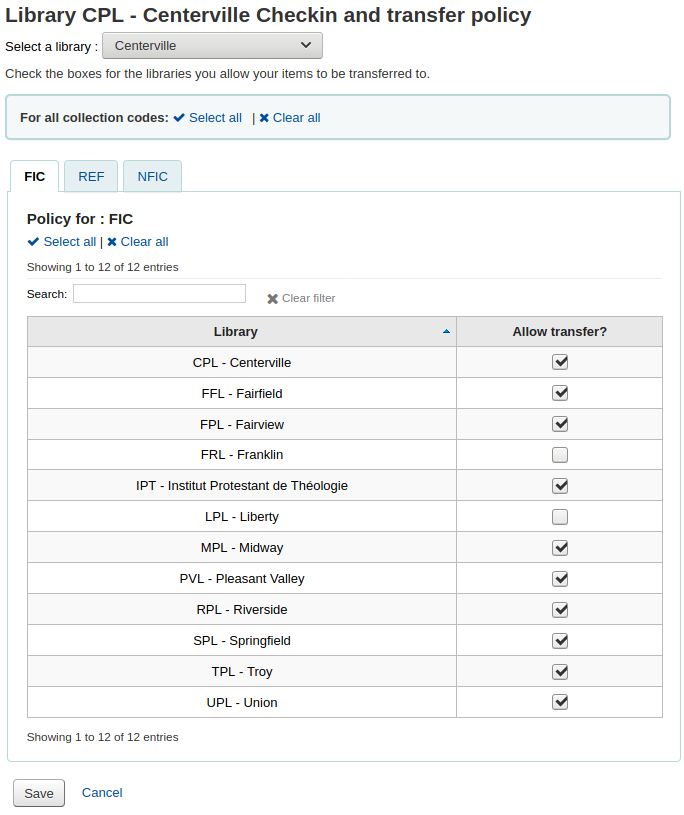
In the above example, Centerville library will allow patrons from all libraries except Liberty and Franklin to request items from their branch.
Ulaştırma maliyet matrisi
The transport cost matrix lets a library system define relative costs to transport books to one another. In order for the system to use this matrix you must first set the UseTransportCostMatrix preference to ‘Use’.
Önemli
The transport cost matrix takes precedence in controlling where holds are filled from, if the matrix is not used then Koha checks the StaticHoldsQueueWeight.
Tutarlar, isteğe göre maksimum değer (örneğin 1 ya da 100) ile minimum tutar olan 0 arasında olan ondalık değerlerdir. Örneğin, bunların aktarma tutarı tam olarak karşılık gelirse, her bir kütüphane arasındaki uzaklığı mil cinsinden ‘tutarınız’ olarak kullanabilirsiniz. Belki de postaneler daha iyi bir ölçü olacaktır. Postaneyi paylaşan kütüphaneler 1 tutarları olacaktır, yakın postanelerin 2 tutarları olacaktır, vs.
Kargo bedellerini girmek için, değiştirmek istediğiniz birime tıklayınız, ‘Devre dışı bırak’ kutusunun onayını kaldırınız ve ‘fiyatınızı’ giriniz.
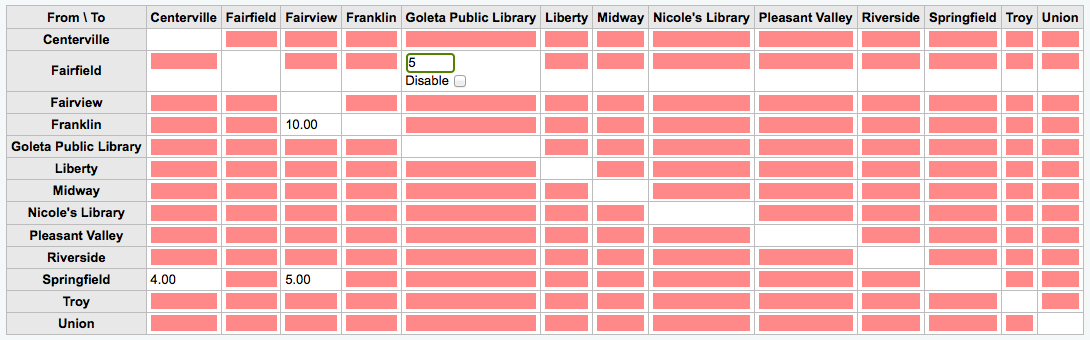
Maliyetlerinizi girdikten sonra klavyenizdeki ‘Enter’ tuşuna basın veya değişikliklerinizi kaydetmek için matris altındaki ‘Kaydet’ düğmesini tıklayın.
Not
Bir NULL değer, From ve To kütüphaneleri aynı kütüphanede olduğunda bir fark meydana getirmez. Bununla birlikte en iyi uygulama olarak oraya bir 0 koymalısınız. Diğer tüm To/From kombinasyonları için NULL değeri bu ilişkinin devre dışı bırakılmış gibi hareket etmesine neden olur. Yani özetle, herhangi bir değeri boş bırakmayın. Her zaman bir numara koymak en iyisidir (To/From seçeneğini devre dışı bırakmayı seçmiş olsanız bile).
Item circulation alerts
Kütüphaneler kullanıcıları dolaşım olayları hakkında otomatik olarak bilgilendirmek isterlerse karar verebilirler. (iadeler ve ödünçler).
Get there: More > Administration > Patrons and circulation > Item circulation alerts
Bu tercihler kullanıcı türleri ve materyal türleri temel alınarak ayarlanır
Önemli
Bu tercih kullanıcının kişisel mesaj ayarlarındaki değişiklikler ile geçersiz kılınabilir.
Dolaşım uyarıları ayarlamak için:
Ekranın üstündeki açılır menüden kütüphanenizi seçin

Tercihleri tüm kütüphaneler için ayarlamak için, menüyü ‘Varsayılan’a ayarlanmış olarak tutun
Varsayılan olarak tüm materyal türleri ve tüm kullanıcılar ödünç alma ve iade etme işlemleri hakkında bilgilendirilirler. Bunu değiştirmek için bildirimleri durdurmak istediğiniz materyal/kullanıcı türü karma menüsü üzerine tıklayın.
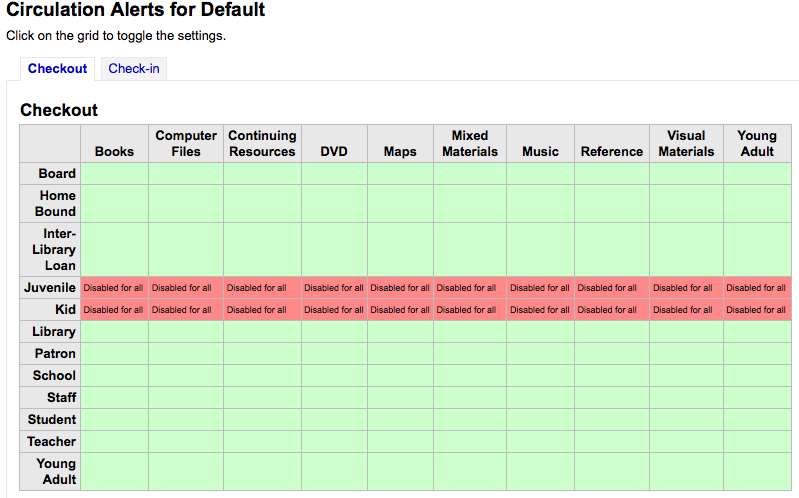
Yukarıdaki örnekte, Gençler ve Çocuklar ödünç alma bildirimleri almayacaktır.
Cities and towns
Kullanıcı girdisini standartlaştırmak için, bölgenizdeki şehirleri ya da kasabaları tanımlayabilirsiniz, böylelikle yeni kullanıcılar eklendiğinde kütüphaneciler şehir ve posta kodu bilgisini girmek yerine sadece bir listeden şehri seçeceklerdir.
Get there: More > Administration > Patrons and circulation > Cities and towns
Adding a city
To add a new city, click the ‘New city’ button at the top of the page and enter the city name, state, zip/postal code and country.
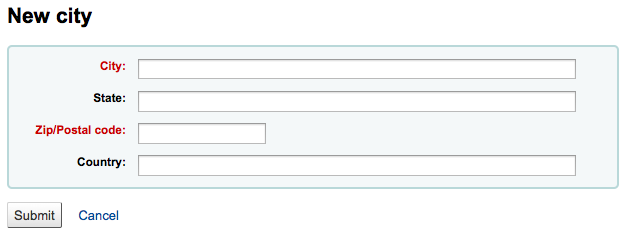
One you click Submit, your city will be saved and will be listed on the Cities and towns page
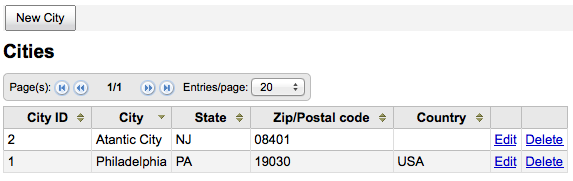
Şehir/İlçe/Semt her hangi bir zaman diliminde değiştirilebilir ya da silinebilir.
Viewing cities on patron add form
If you have defined local cities using the ‘New city’ form, then when adding or editing a patron record you will see those cities in a pull down menu to make city selection easy.
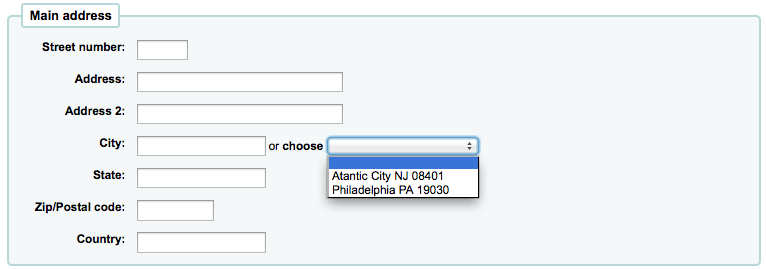
Bu, potansiyel yazım hataları veya yanlış posta kodları riski olmadan yerel şehirleri kullanıcı kaydına kolayca girmeye izin verecek.
Curbside pickup
The curbside pickup feature is used to set up appointments with patrons for them to pick up their holds. This section is used to configure the pickup windows
Get there: More > Administration > Patrons and circulation > Curbside pickup
Not
In order to use this module, you must enable it with the CurbsidePickup system preference.
Setting up curbside pickup
From the configuration page, click the tab corresponding to the library for which you’re setting up curbside pickup
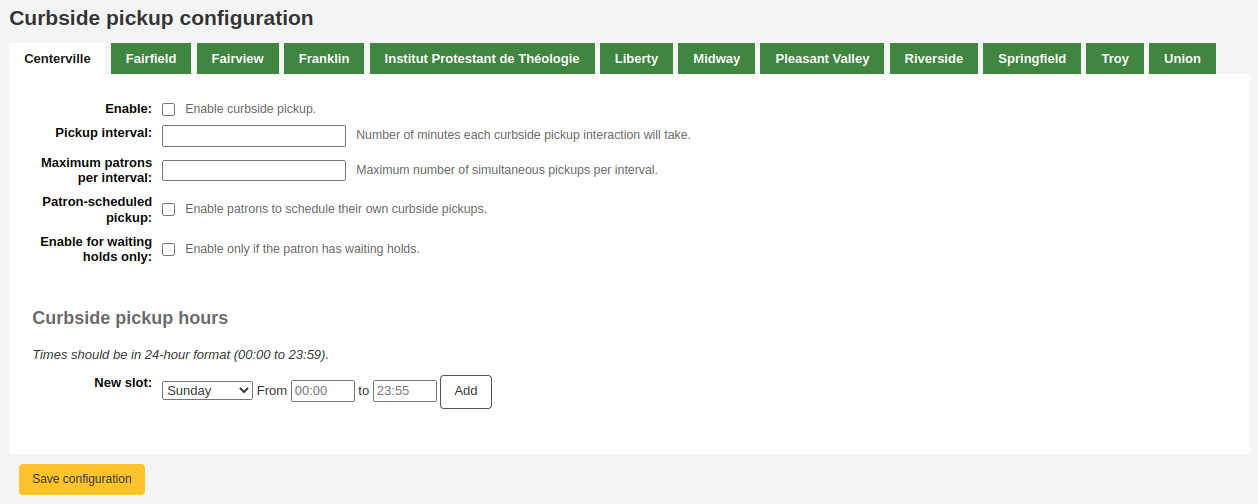
Fill out the form
Enable: check this box to enable curbside pickup at this library
Pickup interval: enter the number of minutes each curbside pickup interaction will take
Maximum patrons per interval: enter the number of patrons who can pickup in the same interval
Patron-scheduled pickup: check this box if you want to allow patrons to set up their own curbside pickup appointment through the OPAC
Enable for waiting holds only: check this box if curbside pickup should be limited to patrons who have holds awaiting pickup
Create curbside pickup slots
For each slot, enter the day of the week, the starting and ending hours of the time slot in which patrons can come
these can be your opening hours, if you allow curbside pickup throughout the day, or specific time slots in which you allow patrons to come by
For the hours, the format must be XX:XX (numbers with a colon) and it must be in 24-hour format (e.g. 1 PM is 13:00)
Click ‘Add’
Click ‘Save configuration’
Do this for every library that offers curbside pickup.
Patron restrictions
If you are using patron restrictions, you can manage the restriction types available from here.
Patron restrictions are enabled by the PatronRestrictionTypes system preference.
Not
The manage_restrictions (or superlibrarian) permission is required to access this page.
Get there: More > Administration > Patrons and circulation > Patron restrictions
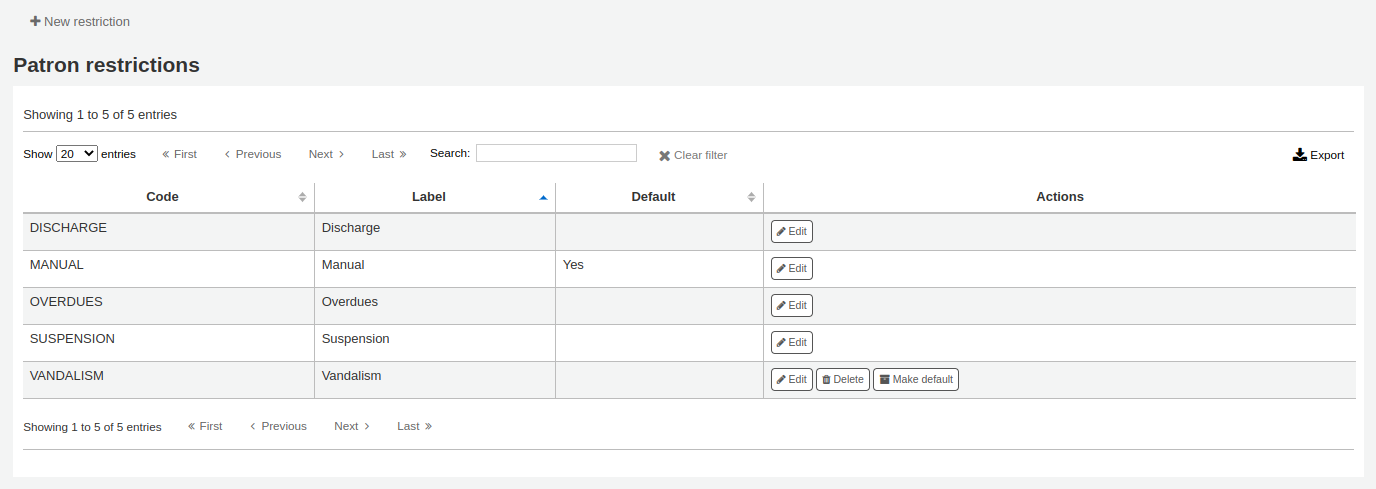
Adding a restriction type
To add a new restriction type, click the ‘New restriction’ button at the top of the page.

Code: enter a code for the restriction. Codes are limited to 50 characters and should not contain spaces, diacritics, or special characters.
Name: enter the name for the restriction. The name will be the one displayed throughout Koha.
Once you click ‘Save’, your restriction will be saved and will be listed in the table of restriction types.
Locally created restriction types can be set to set as the default restriction type to use when manually adding a restriction to a patron account. This can be achieved using the ‘Make default’ button.
You can also delete any locally created restriction types using the ‘Delete’ so long as they have not been assigned as the default.
Accounting
Get there: More > Administration > Accounting
This section deals with the parameters used in managing the patron accounts.
Debit types
Get there: More > Administration > Accounting > Debit types
This is where you define the manual fees you can charge patrons.
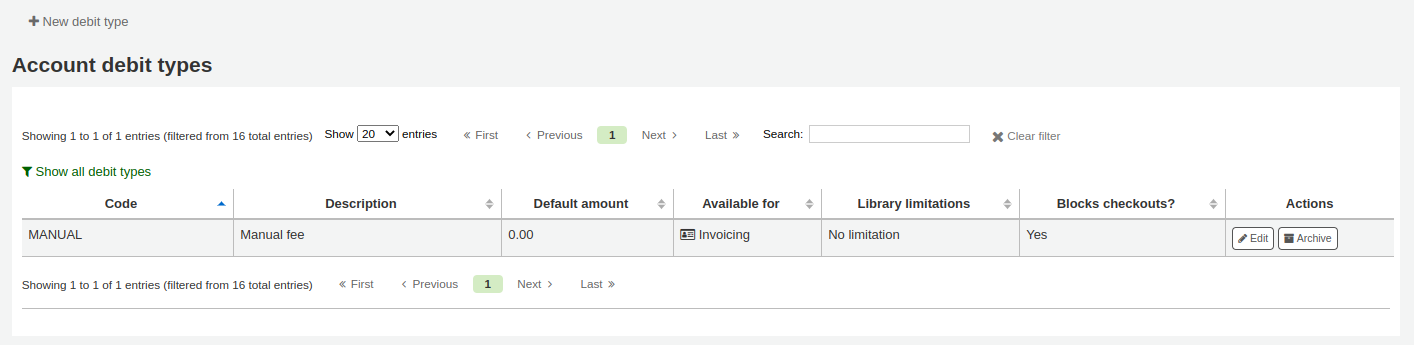
When you first get to the page, you will only see the manual fees that are already defined in your system.
You can see the default system fees by clicking “Show all debit types”.
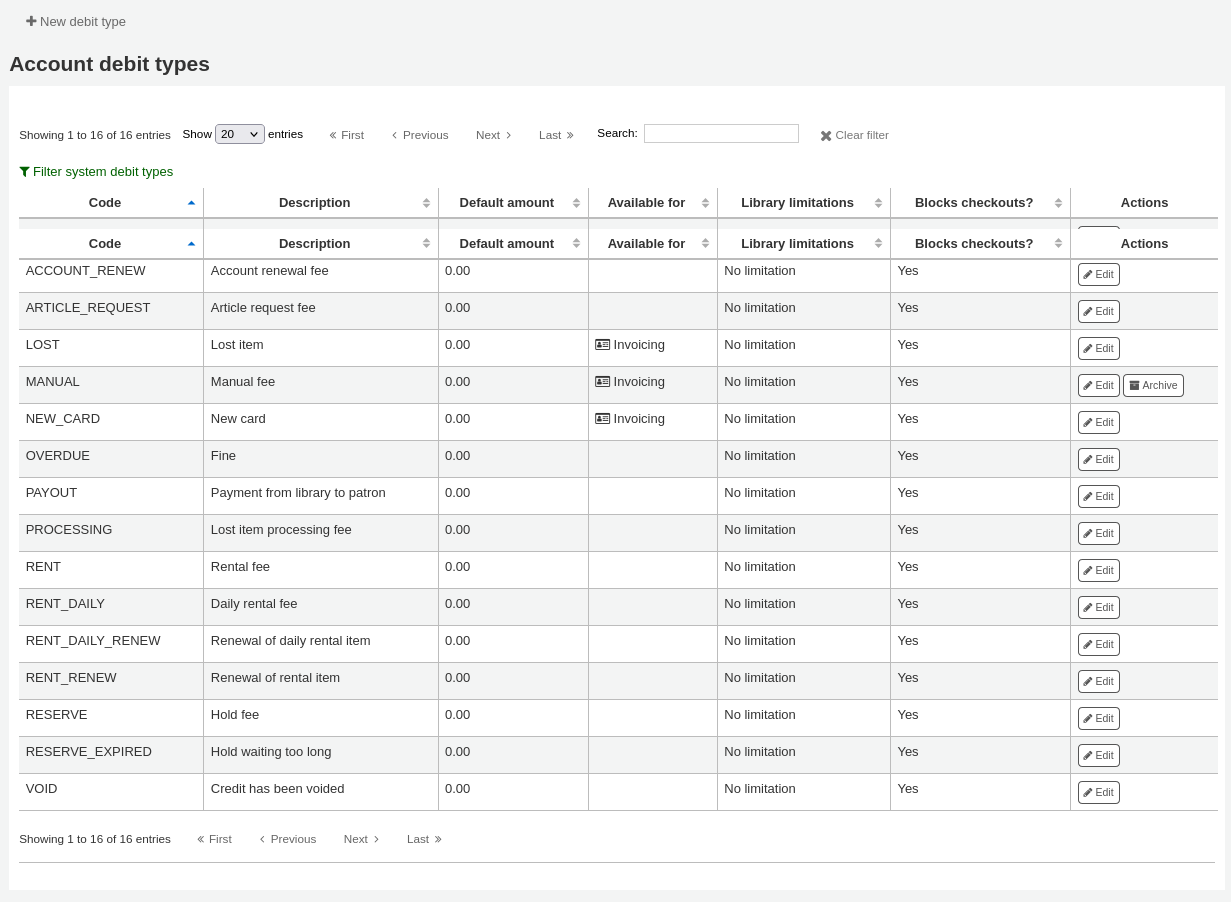
You can go back to seeing only the manual fees by clicking “Filter system debit types”.
System debit types
Several debit types come installed with Koha. Most of them are automatic fees that are added according to the policies you set up elsewhere in Koha.
ACCOUNT (Account creation fee): this is charged to the patron’s account upon registration. The fee can be changed in the patron category settings under ‘Enrollment fee’.
ACCOUNT_RENEW (Account renewal fee): this is charged to the patron’s account when their account is renewed. Like the ACCOUNT debit type above, this can be changed in the patron category settings under ‘Enrollment fee’.
LOST (Lost item): this is charged to the patron’s account when an item in their file is declared lost. The amount depends on the item’s ‘replacement cost’ field or on the item type’s default replacement cost. It can also be added manually in the manual invoices tab.
MANUAL (Manual fee): this is the default manual fee installed with Koha. This is not charged automatically by Koha, but can be added to a patron’s account manually in the manual invoices tab.
NEW_CARD (New card fee): this is another default manual fee installed with Koha. This will not be charged automatically by Koha, but can be added to a patron’s account manually in the manual invoices tab.
OVERDUE (Overdue fine): this is charged automatically to the patron’s account when they have overdue items. The amount for overdue fines are set in the circulation and fines rules.
PAYOUT (Payment from library to patron): this is used when the library reimburses the patron (for an over payment for example).
PROCESSING (Lost item processing fee): this is charged automatically to the patron’s account when an item in their file is declared lost. The amount is set by item type under ‘Processing fee (when lost)’.
RENT (Rental fee): this is charged automatically to the patron’s account upon checkout if the item type has a rental charge.
RENT_DAILY (Daily rental fee): this is charged automatically to the patron’s account upon checkout if the item type has a daily rental charge.
RENT_DAILY_RENEW (Renewal of daily rental item): this is charged automatically to the patron’s account upon renewal if the item type has a daily rental charge.
RENT_RENEW (Renewal of rental item): this is charged automatically to the patron’s account upon renewal if the item type has a rental charge.
RESERVE (Hold fee): this is charged automatically to the patron’s account upon placing a hold. The amount depends on the ‘Hold fee’ amount in the patron’s category settings.
RESERVE_EXPIRED (Hold waiting too long): this is charged automatically to the patron’s account if they haven’t picked up their hold after the number of days defined in the ExpireReservesMaxPickUpDelay system preference. The amount is set in the ExpireReservesMaxPickUpDelayCharge system preference.
Adding a new debit type
To add a new debit type:
Click ‘New debit type’
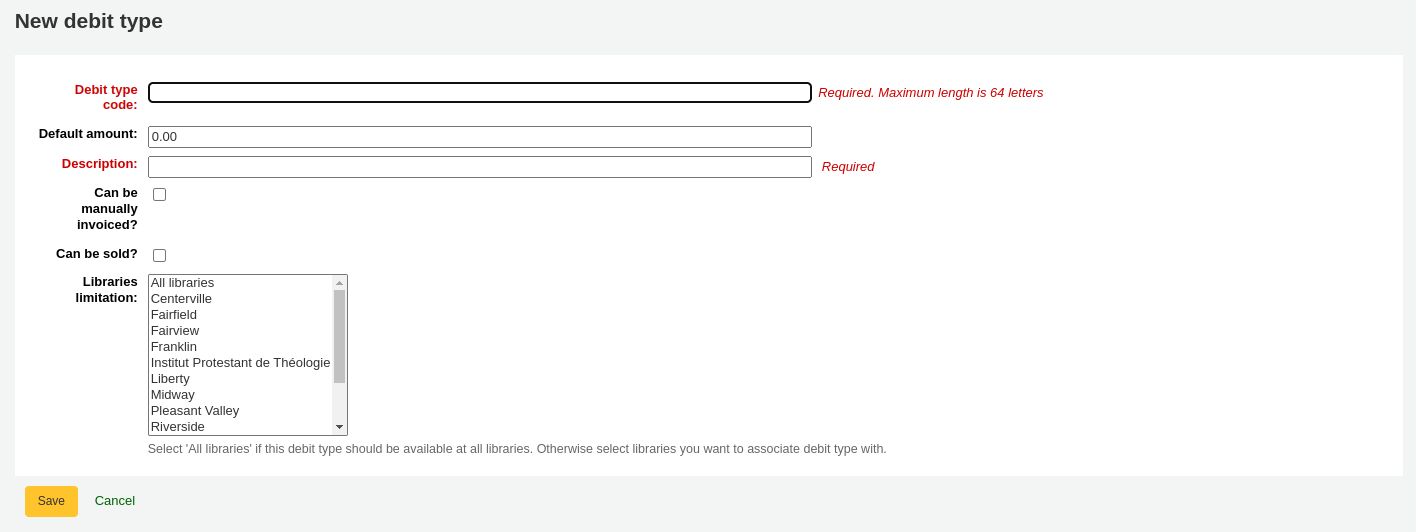
Debit type code: enter a code (limited to 64 letters).
Uyarı
Codes should be limited to letters, numbers, and underscores (_).
Avoid spaces, diacritics, and special characters.
Default amount: enter the default amount.
Not
Staff will be able to change this amount when adding the charge to the patron’s account, if necessary.
Önemli
Do not enter currency symbols. Only write the amount with a decimal point (for example, 5 or 5.00 instead of $5).
Description: write a description, this description will be used in the drop-down menu when adding a new charge to a patron’s account or when making a sale in the point of sale as well as in their transaction history.
Can be manually invoiced: check this box if this debit type can be added manually by staff to a patron’s account via the manual invoices.
Can be sold: check this box if this debit type can be used in the point of sale.
Included in noissuescharge: check this box if this debit type should be included when calculating the amount owed by the patron for the noissuescharge system preference. This system preference is used to block checkouts when a patron owes over a certain amount of money to the library.
Libraries limitation: if necessary, select the libraries where this debit type can be used. Choosing ‘All libraries’ will make the debit type available everywhere.
Not
You can select more than one library by pressing the ‘Ctrl’ key while selecting.
‘Kaydet’e tıklayın
Editing an existing debit type
You can only modify the debit types you have added, as well as the ‘Manual fee’.
To edit a debit type:
Click the ‘Edit’ button to the right of the debit type
Modify any field
‘Kaydet’e tıklayın
Archiving a debit type
If there is a debit type you don’t need anymore, you can archive it.
Not
There is no way to delete a debit type since they are used in the patron’s accounting section.
To archive a debit type, simply click the ‘Archive’ button to the right of the debit type.
Restoring an archived debit type
If you need to use an archived debit type again, simply click on the ‘Restore’ button to the right of the debit type.
This will make it available again.
Credit types
Get there: More > Administration > Accounting > Credit types
This is where you define the manual credits you can give patrons.
When you first get to the page, you will only see the credits that are already defined in your system.
You can see the default system credit types by clicking “Show all credit types”.
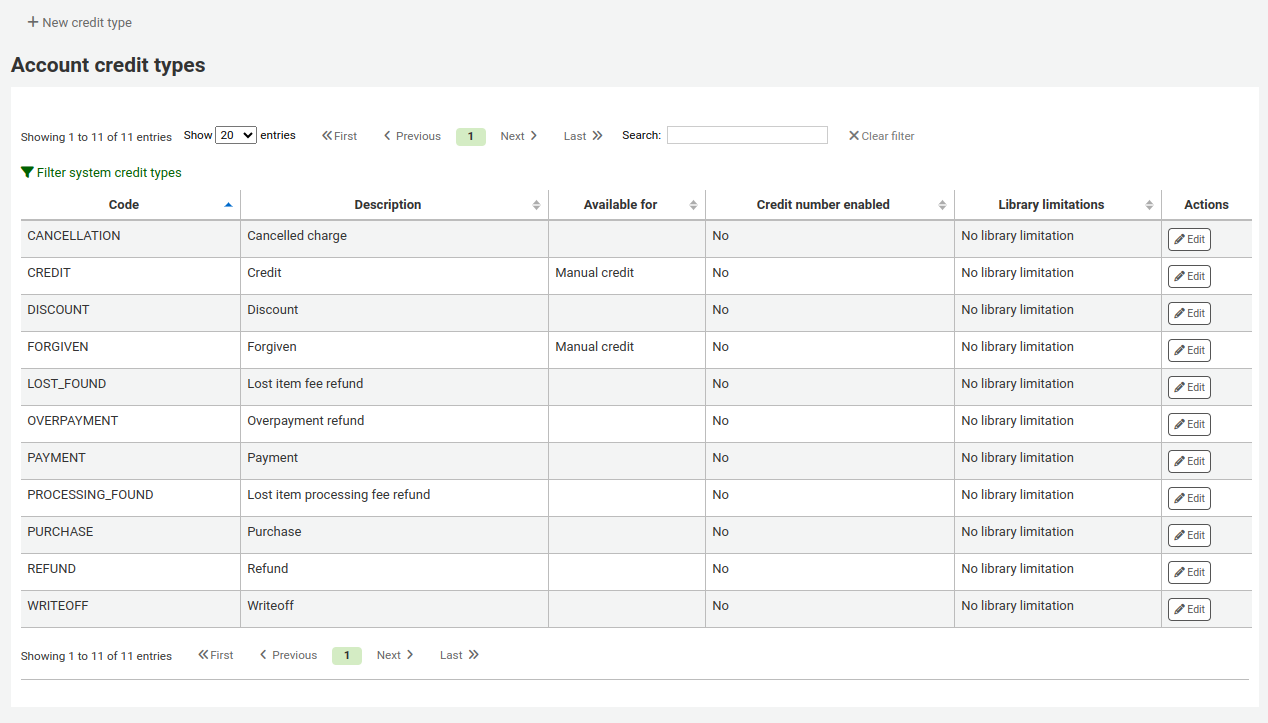
You can go back to seeing only the manual credit types by clicking “Filter system credit types”.
System credit types
Several credit types come installed with Koha. Most of them are automatic credits that are added according to the policies you set up elsewhere in Koha. They can not be deleted.
CANCELLATION (Canceled charge): this is used when cancelling a charge in a patron’s account
CREDIT (Credit): this is used for manual credits to give to your patrons.
DISCOUNT (A discount applied to a patrons fine): this is used to discount fines and charges.
FORGIVEN (Forgiven): this is used for manual credits to give to your patrons.
LOST_FOUND (Lost item fee refund): this is used when a previously lost item is returned. If you refund the lost fees (see Default lost item fee refund on return policy), this credit will be applied to refund the fee.
OVERPAYMENT (Over payment refund): this is automatically applied to a patron’s account when they paid too much for a fee. This is mostly used when backdating check-ins where the patron has already paid the full fine.
PAYMENT (Payment): as the name states, this is used to indicate fee payments.
PURCHASE (Purchase): this is used when a payment is made through the point of sale module.
REFUND (A refund applied to a patrons fine): this is used when refunding the payment of a fine or charge.
WRITEOFF (Writeoff): this is used when writing off a fine or charge.
Adding a new credit type
To add a new credit type:
Click ‘New credit type’

Enter a code (limited to 64 letters)
Uyarı
Codes should be limited to letters, numbers, and underscores (_).
Avoid spaces, diacritics, and special characters.
Write a description
This description will be used in the drop-down menu when adding a new credit to a patron’s account as well as in their transaction history
If this credit type can be added manually by staff to a patron’s account via the manual credit, check the ‘Can be added manually?’ check box
If you need this credit type to be sequentially numbered, check the ‘Enable credit number’. The format of the number is defined in the AutoCreditNumber system preference.
If this credit type is only to be used in specific branches, you can select the libraries in ‘Libraries limitation’
Not
You can select more than one library by pressing the ‘Ctrl’ key while selecting.
‘Kaydet’e tıklayın
Editing an existing credit type
You can only modify the credit types you have added.
To edit a credit type:
Click the ‘Edit’ button to the right of the credit type
Modify any field
‘Kaydet’e tıklayın
Archiving a credit type
If there is a credit type you don’t need anymore, you can archive it.
Not
There is no way to delete a credit type since they are used in the patron’s accounting section.
To archive a credit type, simply click the ‘Archive’ button to the right of the credit type.
Restoring an archived credit type
If you need to use an archived credit type again, simply click on the ‘Restore’ button to the right of the credit type.
This will make it available again.
Cash registers
Get there: More > Administration > Accounting > Cash registers
This feature is enabled through the UseCashRegisters system preference.
If you have no cash registers already defined, you will be invited to create one.
Otherwise, you will see the list of all your cash registers.
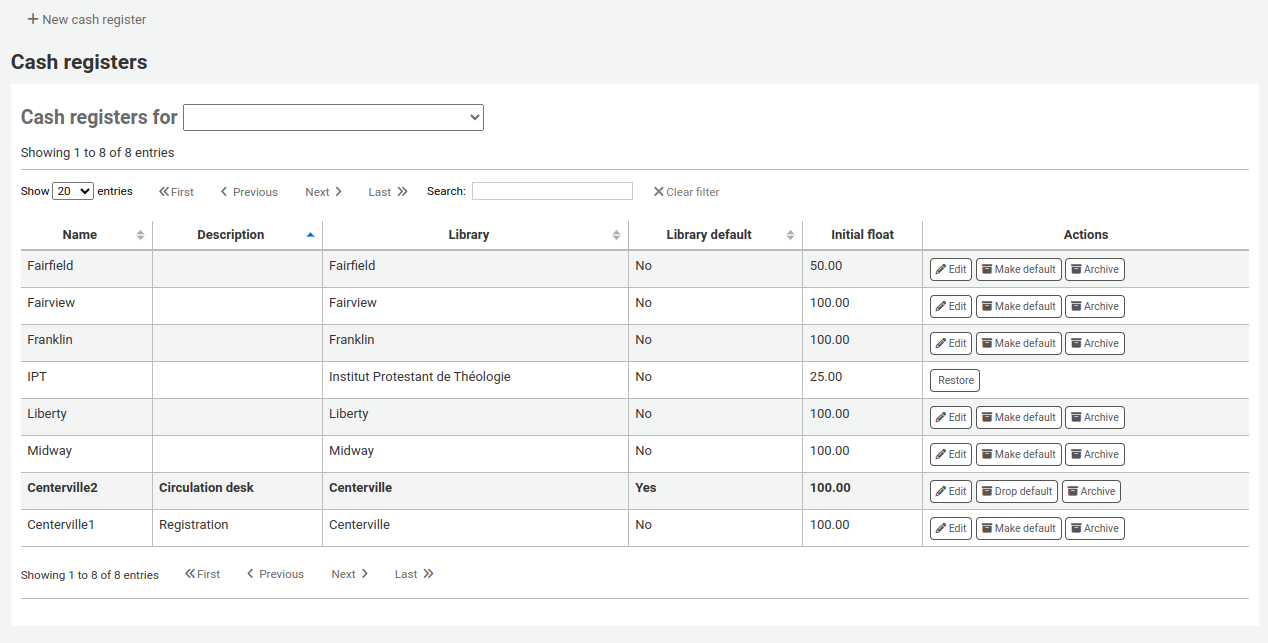
In the ‘Actions’ columns, you can choose to edit your cash registers, make one of them default or remove the default status, and archive or restore an archived register.
The default status is only useful in libraries that have more than one register per branch. The default register will be pre-selected when entering a payment. If there is only one cash register per branch, the branch’s cash register will be selected when paying.
Adding a new cash register
Click on ‘New cash register’

Give your cash register a name
Optionally you can also add a description
Choose in which library this cash register is located
And finally, enter the initial float, i.e. the amount in the cash register
Click ‘Add’
Plugins
This section is used to manage all types of plugins.
Önemli
Before using plugins, make sure that they are enabled in the configuration file.
See also the tool plugins and report plugins sections.
Get there: More > Administration > Plugins
Managing plugins
This section is used to view, manage and configure all types of plugins.
The page will show all currently installed plugins.
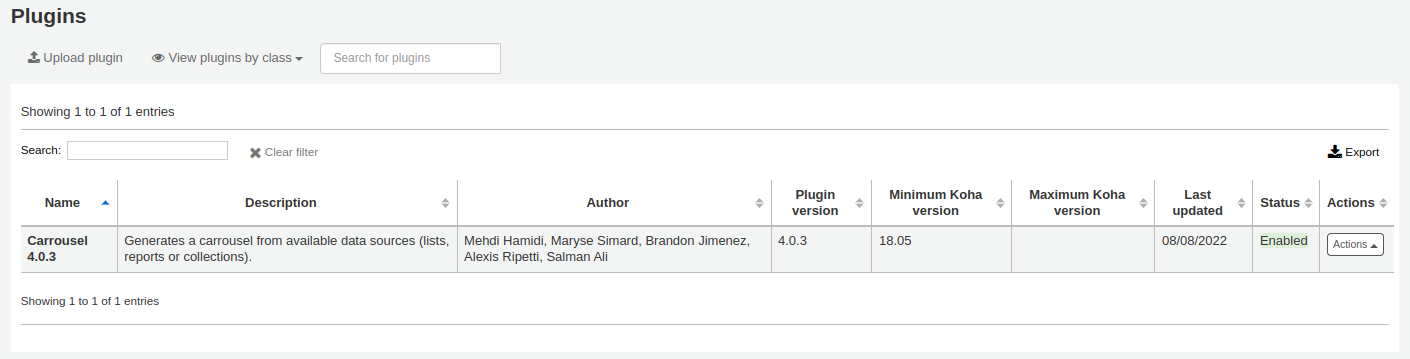
If you have a lot of plugins, you can view a subset by clicking ‘View plugins by class’.
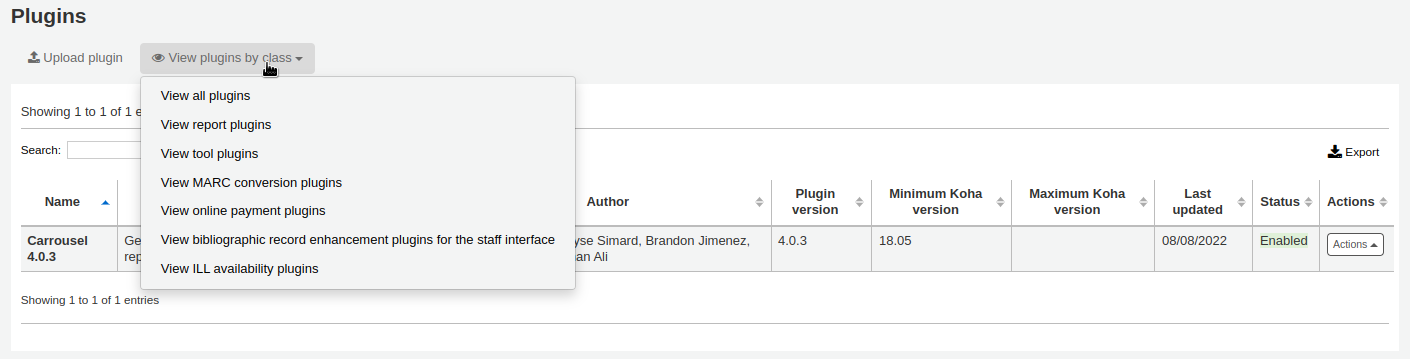
Installing a plugin
To install a new plugin manually,
Click ‘Upload plugin’.

Choose the KPZ file on your computer and click ‘Upload’.
If you configured external plugin repositories, you will have a search box at the top of the page to search these repositories and install directly from there without having to download and upload the KPZ file. To install a plugin from a repository,
Enter a search term in the search box.
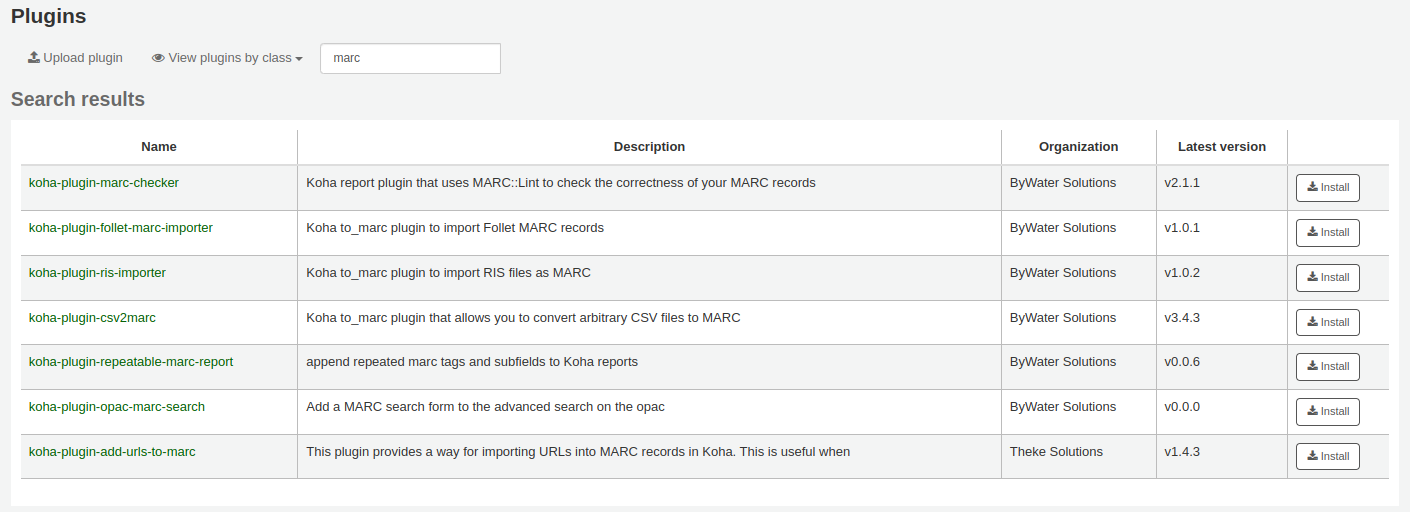
Click ‘Install’ to the right of the plugin.
Some plugins might need to be enabled before usage.
To enable a plugin,
Click the ‘Actions’ button to the right of the plugin and choose ‘Enable’
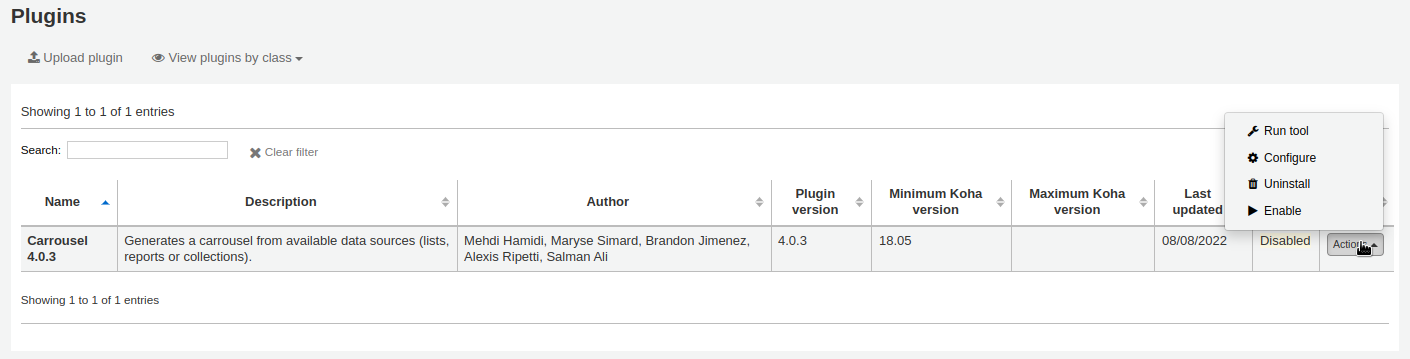
Using a plugin
All plugins are different. Some might need configuration before usage, others are simply run.
Click the ‘Actions’ button and choose ‘Configure’ or ‘Run’.
Follow the instructions issued by the plugin’s creator.
Disabling a plugin
If you need to temporarily stop the plugin from taking effect, you can disable it.
Click the ‘Actions’ button to the right of the plugin and choose ‘Disable’
This will not uninstall the plugin. It will remain installed, but will not have any effect on your Koha installation.
Deleting a plugin
To delete or uninstall a plugin,
Click the ‘Actions’ button to the right of the plugin and choose ‘Delete’
This will remove the plugin from your Koha installation. Any action or effect it had will stop. If you need to, you can reinstall it later, provided it is still available.
Jobs
This section is used to manage background jobs. Jobs are tasks that are queued in the system to be treated when the server has the resources to do it, such as batch record modification and others.
Get there: More > Administration > Jobs
Not
This section will only be available to staff members with the manage_background_jobs (or superlibrarian) permission.
Managing jobs
By default, when accessing the page, you will only see current jobs and jobs enqueued in the last hour.
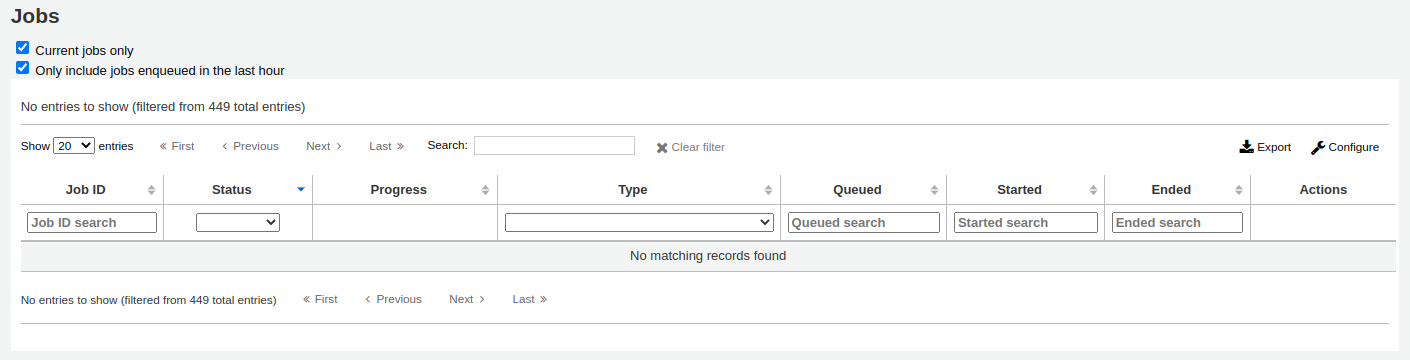
To see all jobs, uncheck the boxes at the top of the page.
Current jobs only: uncheck this to include finished jobs
Only include jobs enqueued in the last hour: uncheck this to include jobs enqueued earlier
You can search for jobs using the search boxes under the table headings.
To the right of each job, there are action buttons.
View: this will display the details of the job, including, but not limited to:
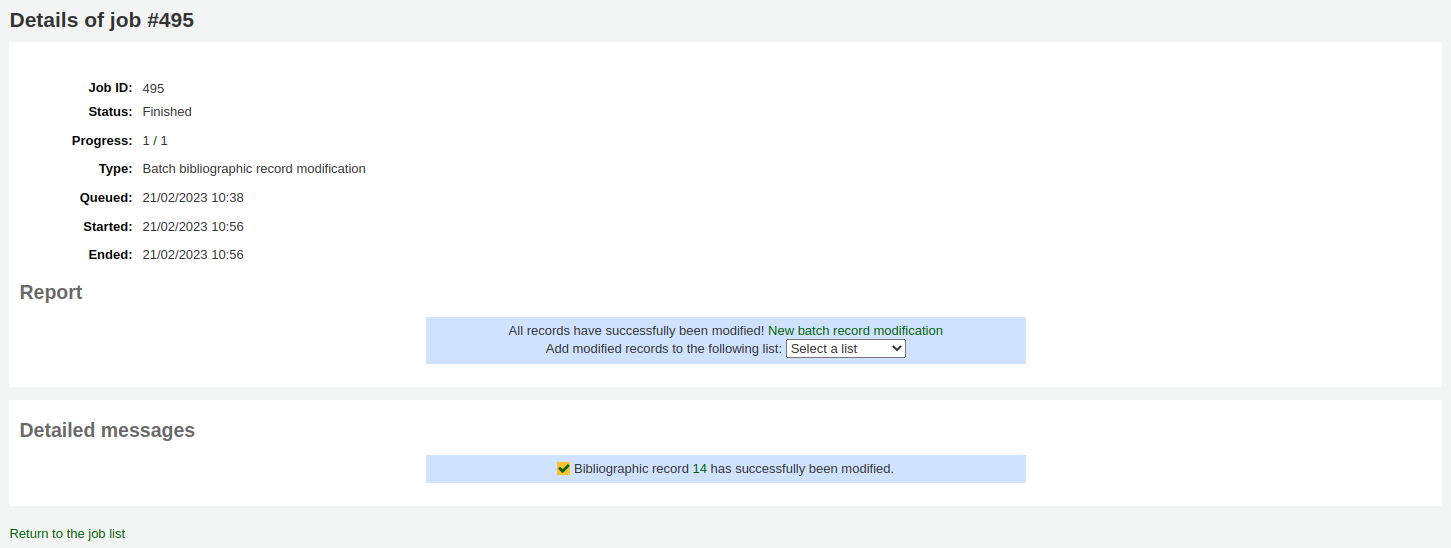
Job ID: this is the identifier of the job in the Koha database, an incremental number
Status: the status of the job
New: the job has been queued
Cancelled: the job was cancelled by a user
Finished: the job was successfully carried out
Started: the job was started, but it is not yet finished
Running: the job is currently being executed
Failed: the job was started, but failed for some reason
Progress: indicates how much of the job is done
Type: indicates the type of job
Batch bibliographic record modification: batch of bibliographic records to be modified.
Batch bibliographic record deletion: batch of bibliographic records to be deleted.
Batch authority record modification: batch of authority records to be modified.
Batch authority record deletion: batch of authority records to be deleted.
Batch item record modification: batch of items to be modified.
Batch item record deletion: batch of items to be deleted.
Batch hold cancellation: a batch of holds to be cancelled (when using the ‘Cancel selected’ button).
Create eHoldings titles: titles to be created from a list in the ERM module.
Update Elasticsearch index: bibliographic or autority records, or items to be updated in the Elasticsearch index. Any changes to a bibliographic or authority record, or item trigger an update of the index, including changes in circulation status.
Holds queue update: when the RealTimeHoldsQueue system preference is enabled, changes to holds trigger an update of the holds queue.
Staged MARC records for import: bibliographic or authority records to be staged for import.
Import MARC records: staged bibliographic or authority records to be imported in the catalog.
Revert import MARC records: imported bibliographic or authority records to be unimported.
Queued: date and time when the job was queued
Started: date and time when the job was started
Ended: date and time when the job was finished
Report: this section will contain messages specific to the type of job (for example, number of records modified, in the case of batch record modification)
Detailed messages: this section will contain messages specific to the type of job (for example, which records were modified, in the case of batch record modification)
Cancel: for jobs that are still new or have started, it’s possible to cancel them
Catalog administration
Kataloglamaya başlamadan önce Koha sisteminizde bu kontrolleri ayarlayın.
Gidiş yolu: Daha fazla > Yönetim > Katalog
MARC bibliographic frameworks
Think of frameworks as templates for creating new bibliographic records. Koha comes with some predefined frameworks that can be edited or deleted, and librarians can create their own frameworks for content specific to their libraries.
Get there: More > Administration > Catalog > MARC bibliographic frameworks
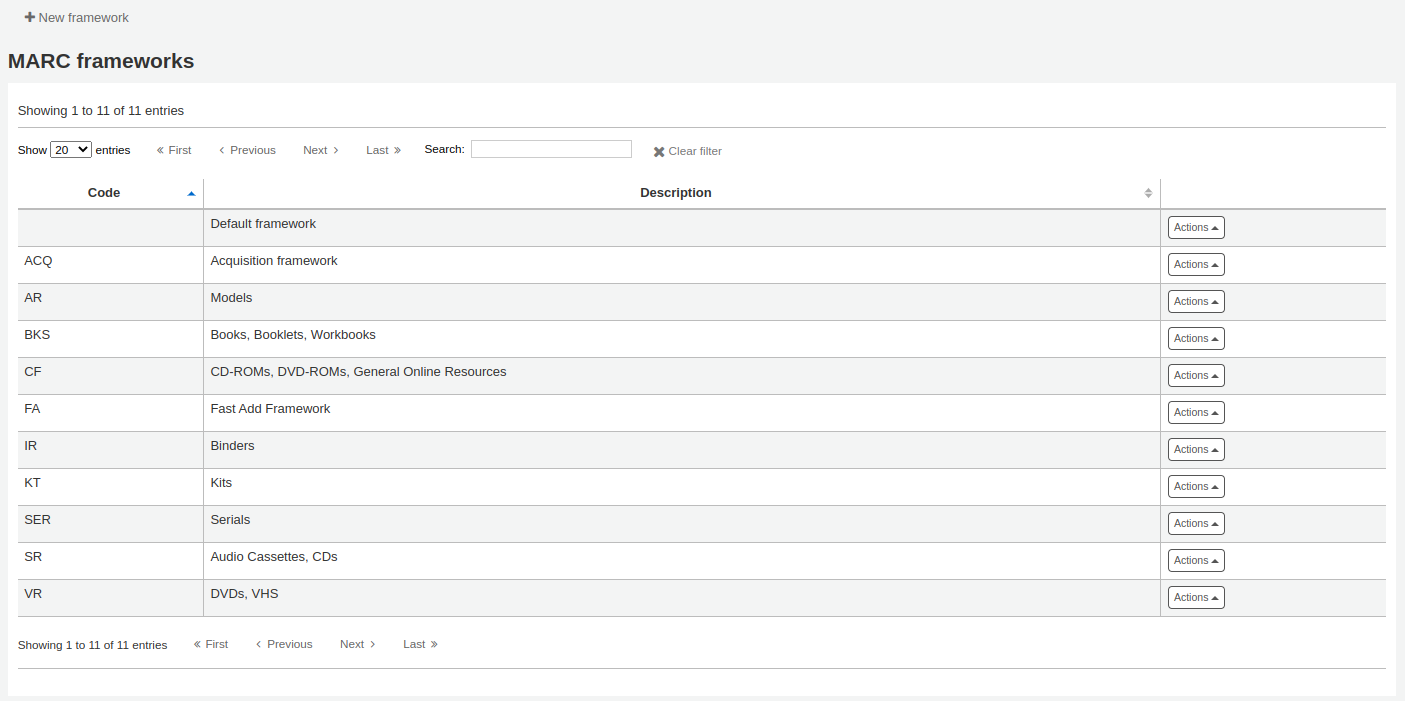
Önemli
Do not delete or edit the Default framework since this will cause problems with your cataloging records - always create a new template based on the Default framework, or alter the other frameworks.
Not
This section will only be available to staff members with the manage_marc_frameworks (or superlibrarian) permission.
Adding a new framework
Yeni bir çerçeve eklemek için
Click ‘New framework’

Code: enter a code of 4 or fewer characters, avoiding spaces, diacritics, or other special characters.
Description: enter a more detailed definition of your framework, this is what will be displayed in Koha.
‘Onayla’ya’ tıkla
Once your framework is added click ‘Actions’ to the right of it on the list of frameworks and choose ‘MARC structure’
You will be asked to choose a framework to base your new framework on, this will make it easier than starting from scratch

Once your framework appears on the screen you can edit or delete each field by following the instructions for editing fields and subfields
Editing existing frameworks
Clicking ‘Actions’ and then ‘Edit’ to the right of a framework will only allow you to edit the description for the framework.

Editing framework fields and subfields
Frameworks are made up of MARC fields (tags) and subfields. To make edits to the fields and subfields associated with the framework you must click on ‘Actions’ and then ‘MARC structure’.
Önemli
Whenever you make changes to the framework fields and subfields, make sure to run the MARC bibliographic framework test.
Editing a MARC field (tag)
After clicking on ‘MARC structure’ you will be taken to a screen listing all the available tags for that framework and you can search for the tag you need. To make edits to a MARC field click on ‘Actions’ on the right of the field and choose ‘Edit tag’.
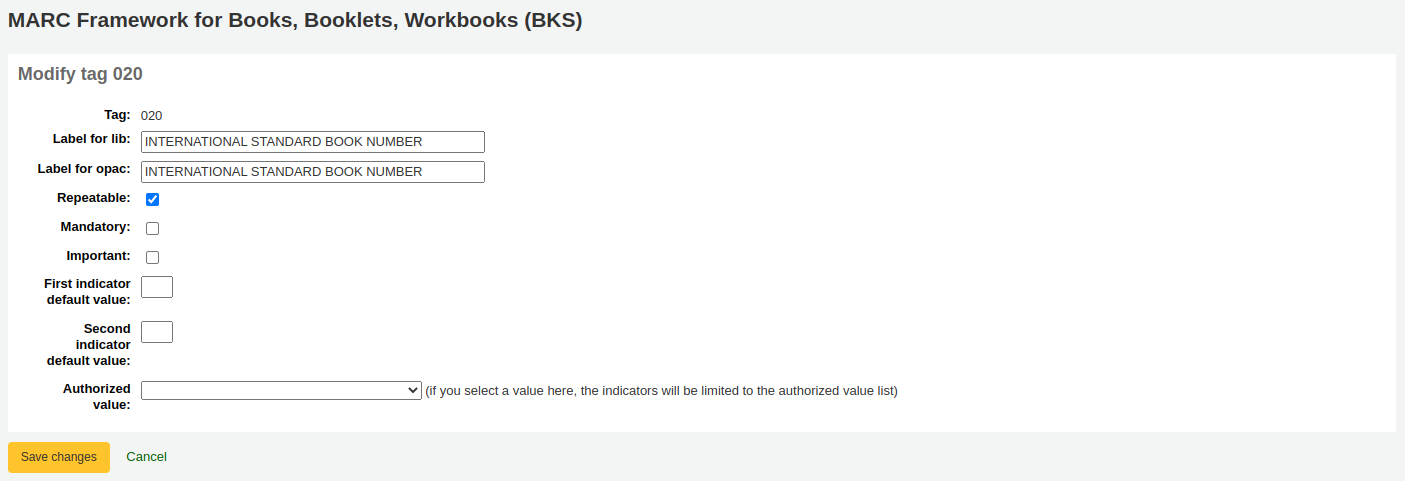
The next screen shows details of the tag.
Tag: the MARC tag, or field number, is uneditable.
Label for lib: text that will show in the staff interface MARC view, and in the basic editor if the advancedMARCeditor system preference is set to display labels.
Not
If you use XSLT (see the XSLTDetailsDisplay system preference), the labels for the ‘Normal’ view are defined in the XSLT stylesheet.
This will not affect the ‘Normal’ view unless you don’t use XSLT.
Label for OPAC: text that will show on the MARC view in the OPAC.
Not
If you use XSLT (see the OPACXSLTDetailsDisplay system preference), the labels for the ‘Normal’ view are defined in the XSLT stylesheet.
This will not affect the ‘Normal’ view unless you don’t use XSLT.
Repeatable: when checked, the field will have an icon next to it in the basic editor, allowing you to add multiples of that tag.
Mandatory: when checked, the record cannot be saved unless the field has a value. In the basic editor, a ‘Required’ flag will display as a prompt.
Important: when checked, the field will generate a warning if it is not filled, but unlike ‘Mandatory’, you will still be able to save your record nonetheless. In the basic editor, an ‘Important’ flag will display as a prompt.
Indicator default values: add default values for indicators here so that they will be pre-filled to save time when cataloging, but can still be edited if required.
Authorized value: define an authorized value pull down list for the catalogers
Uyarı
The authorized value option at field level does not work.
Click ‘Save changes’ to save any modification.
Editing a MARC subfield
To edit the subfields associated with the tag, click ‘Actions’ then ‘Edit subfields’ to the right of the tag on the framework field list. Each subfield has its own tab which contains three sections - Basic constraints, Advanced constraints and Other options.
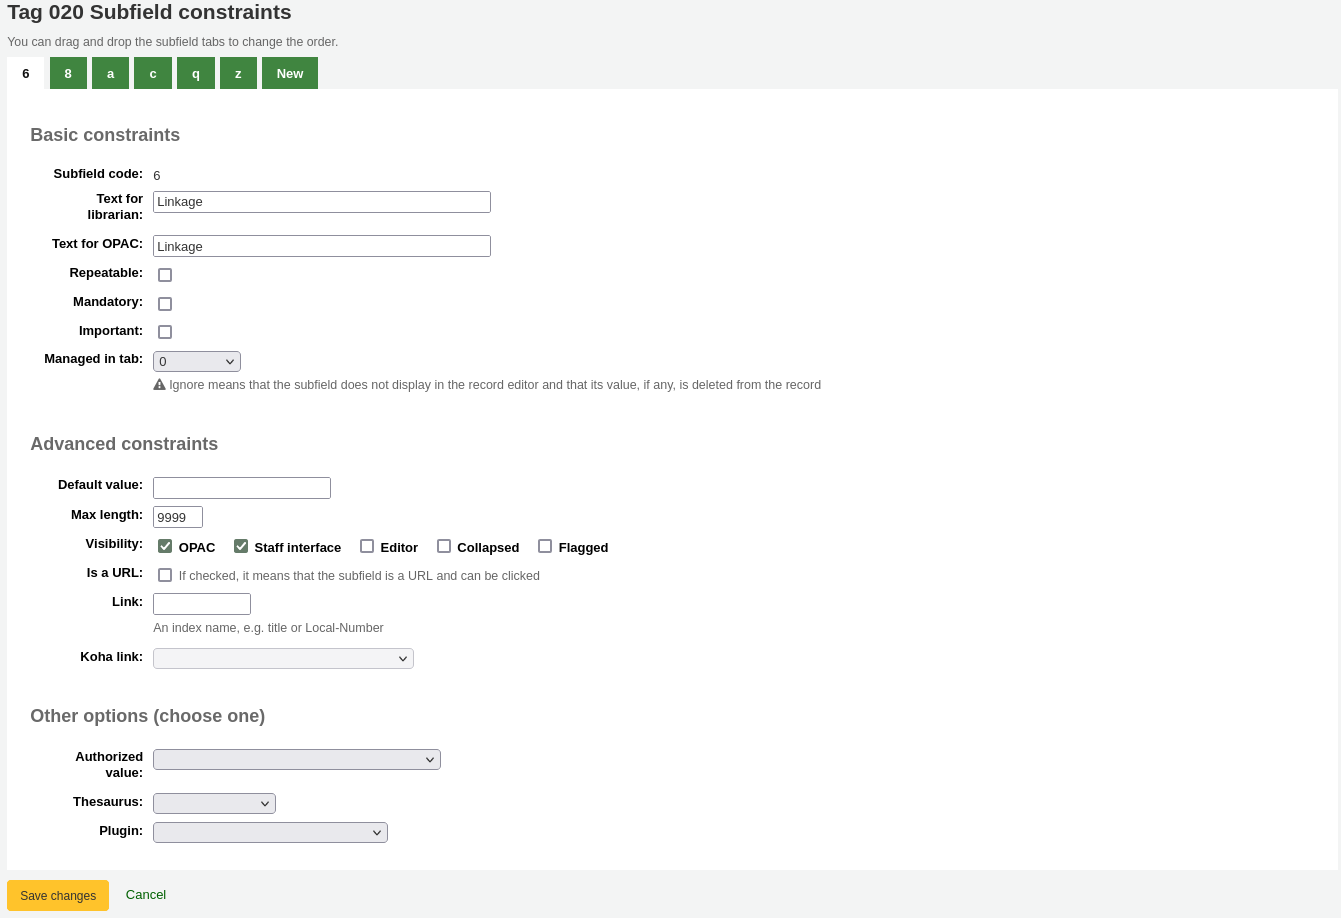
For each subfield you can set the following basic constraint options
Subfield code: this is the MARC subfield code, this wouldn’t normally be changed.
Text for librarian: text that will show in the staff interface MARC view, and in the basic editor if the advancedMARCeditor system preference is set to display labels.
Not
If you use XSLT (see the XSLTDetailsDisplay system preference), the labels for the ‘Normal’ view are defined in the XSLT stylesheet.
This will not affect the ‘Normal’ view unless you don’t use XSLT.
Text for OPAC: text that will show on the MARC view in the OPAC.
Not
If left empty, the ‘Text for librarian’ is used instead
Not
If you use XSLT (see the OPACXSLTDetailsDisplay system preference), the labels for the ‘Normal’ view are defined in the XSLT stylesheet.
This will not affect the ‘Normal’ view unless you don’t use XSLT.
Repeatable: when checked, the field will have an icon next to it in the basic editor, allowing you to add multiples of this subfield.
Mandatory: when checked, the record cannot be saved unless the subfield has a value. In the basic editor, a ‘Required’ flag will display as a prompt.
Important: when checked, the field will generate a warning if it is not filled, but unlike ‘Mandatory’, you will still be able to save your record nonetheless. In the basic editor, an ‘Important’ flag will display as a prompt.
Managed in tab: defines the tab where the subfield is shown.
Önemli
All subfields of a given field must be in the same tab or ignored. Ignore means that the subfield is not managed.
Uyarı
When importing records, or editing existing records, subfields that are managed in tab ‘ignore’ will be deleted. If you still wish to keep the subfields, but hide them, use the ‘Visibility’ options below.
For each subfield you can set the following advanced constraint options
Default value: defines what you want to appear in the field by default, this will be editable, but it saves time if you use the same text over and over or the same value in a field often.
Not
There are several values that you can use here that will be replaced automatically when a new record is created:
<<MM>> - the current month, 2 digits
<<DD>> - the current day of month, 2 digits
<<YY>> - the current year, 2 digits
<<YYYY>> - the current year, 4 digits
<<USER>> - the username of the currently logged in user
For example: a default of “<<MM>>/<<DD>>/<<YYYY>>” (without quotes) will print the current date in the form of “01/21/2021”
Not
When those default values are filled depends on the ApplyFrameworkDefaults system preference.
Max length: enter a value here to limit the number of characters that can be entered in the subfield.
Visibility: allows you to select from where this subfield is visible or hidden. Check the boxes where you would like the field to show, and uncheck the boxes where you would like it hidden.
OPAC: when checked, this will make the subfield available for display in the OPAC. For non-XSLT views, the field will be displayed. For XSLT views, it will depend on the stylesheet.
Staff interface: when checked, this will make the subfield available for display in the staff interface. For non-XSLT views, the field will be displayed. For XSLT views, it will depend on the stylesheet.
Editor: when checked, this will make the subfield available for modification in the basic editor.
Collapsed: when checked, the subfield will be hidden in the basic editor, but will display when the field label is clicked to expand all subfields.
Flagged: when checked, the subfield will be unavailable and hidden from all views (equivalent to all boxes being unchecked).
Is a URL: if checked, it means that the subfield is a URL and can be clicked.
Link: if you enter an index name here, a link appears after the subfield in the MARC detail view in the staff interface. If the librarian clicks on the link, a catalog search is done using the index and the content of the subfield.
Koha link: this field is used to create a link between the MARC subfield and a column in the items, biblioitems, and biblio database tables. The mappings can be changed from the Koha to MARC mapping page.
Her alt alan için aşağıdakileri diğer seçenek değerlerini ayarlayabilirsiniz
Authorized value: means the value must be chosen from a drop-down menu generated from the authorized value list.
In the example below, the LANG authorized value category has been set to 041$a.

This creates a drop-down menu in the basic editor.
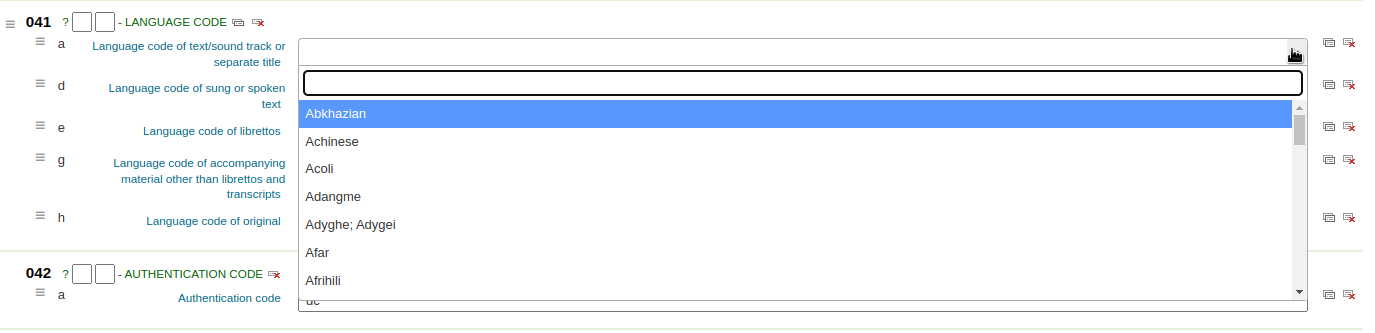
Thesaurus: means that the value is linked to the authority catalog of the selected category. Authority categories are managed in the Authority types section.
Plugin: means the value is calculated or managed by a cataloguing plugin. Cataloguing plugins, or value builders, can do almost anything.
Örnekler:
For call numbers there is an option to add a call number browser next to the call number subfield so that you can identify which call numbers are in use and which are not. Simply choose the cn_browser.pl plugin. Learn more in the cataloging section of this manual.
Kataloglamayla dosya yüklemelerine izin vermek isterseniz upload.pl eklentisini seçebilirsiniz ve bu, kayıtlarınıza bağlamak için dosyaları :ref:`Koha’ya yüklemenizi <attaching-files-to-records-label> sağlayacaktır.
UNIMARC’da kodlu alanların her bir 1XX alanı için eklentiler mevcuttur. Bu eklentiler katalogçu için vazgeçilmez bir yardımcıdır. Aynı zamanda iki eklenti de mevcuttur (editörü ISBN’den ve editör için koleksiyon listesini “hızlı bir şekilde” bulabilen unimarc_plugin_210c ve unimarc_plugin_225a)
If you would like to enable an autocomplete search for publishers in 260b and 264b you can set the plugin to marc21_field_260b.pl. When you start typing in a publisher name you will be given search results based on publisher names already in the catalog.
To save your changes, click ‘Save changes’.
Tüyo
You can drag and drop the subfield tabs to change the order in which they appear when cataloging with the basic editor.
By default, they will appear in alphanumeric order (0-9, then a-z).
Adding fields to frameworks
If a framework doesn’t contain a field that you require, you may need to add it. To add a field to a framework click the ‘New tag’ button at the top of the framework definition.
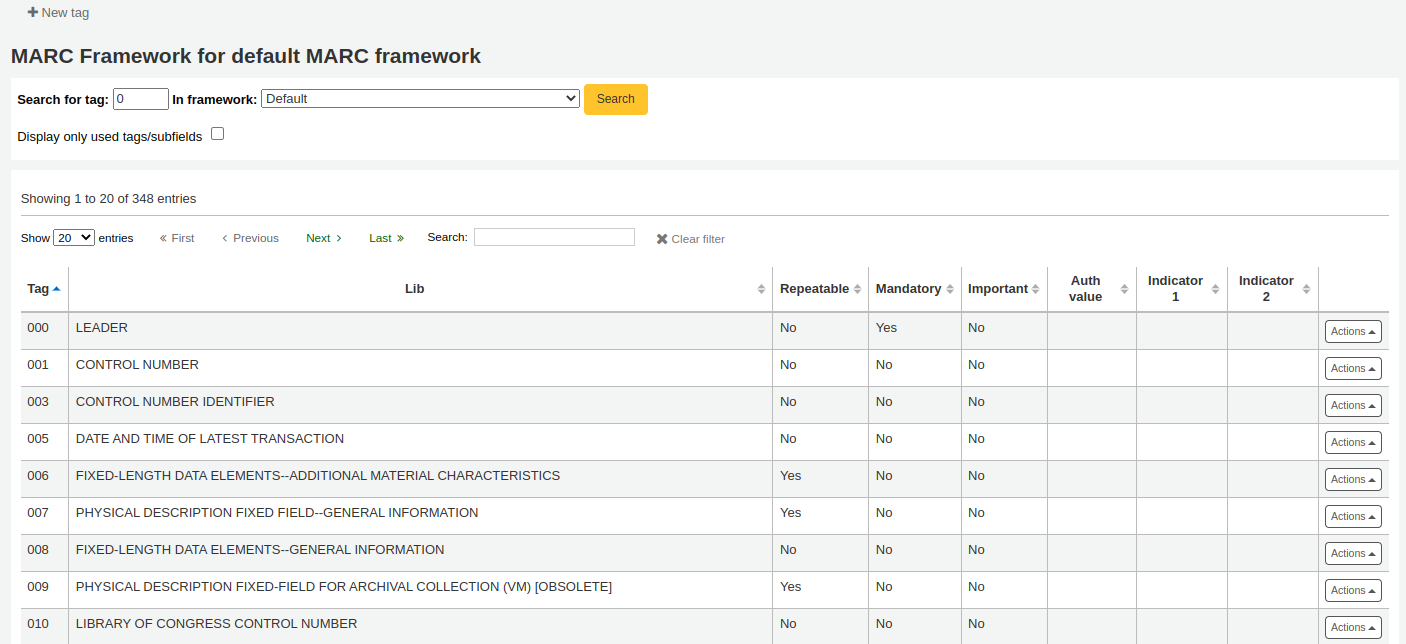
Bu MARC alanda veri girişi için boş bir form açacaktır
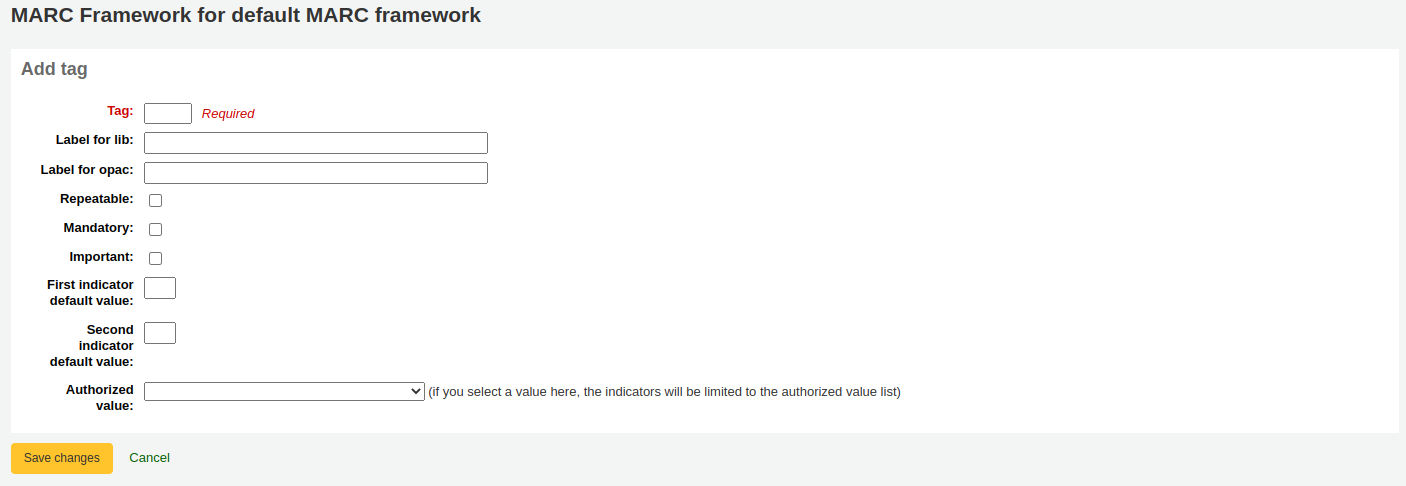
Enter the field number for your new tag. The process for entering the remainder of the settings for the new tag is the same as those found in the editing fields and subfields in frameworks section of this manual.
When you’re finished, click ‘Save changes’ and your new tag will be displayed in the framework field list.
You will need to add at least one subfield to your new tag before it will appear in your framework when you are cataloging.
Click on the ‘Actions’ button for your new tag and then ‘Edit subfields’. Click on the ‘New’ tab and enter your subfield code. The process for entering the remainder of the settings for the new subfield is the same as those found in the editing fields and subfields in frameworks section of this manual.
Importing and exporting frameworks
Her çerçevenin yanında çerçeveyi içe ya da dışa aktarmak için bir bağlantı bulunmaktadır.
Export framework
To export a framework, click the ‘Export’ option in the ‘Actions’ button to the right of the framework title.
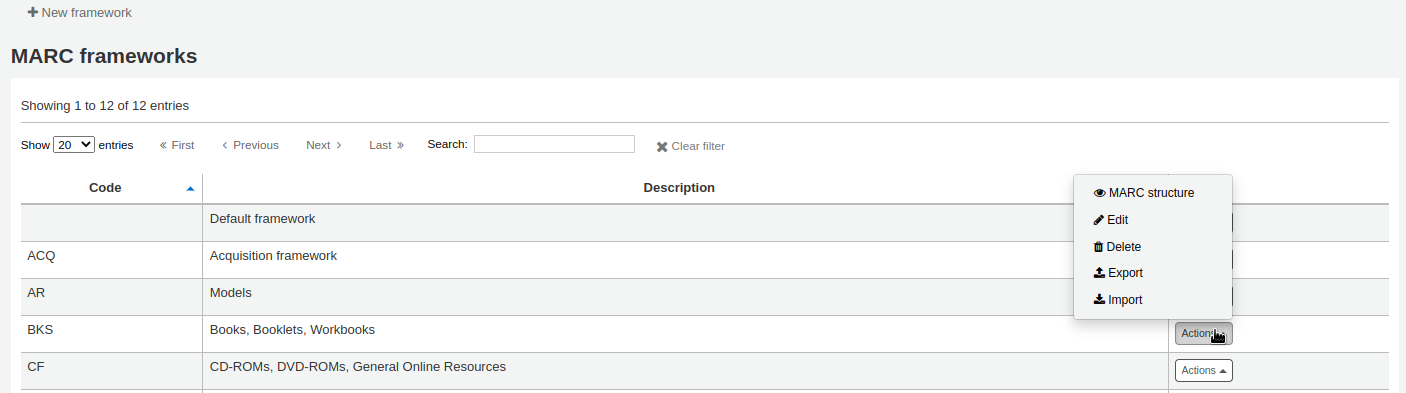
‘Dışa aktar’ bağlantısını tıkladığınızda dosyayı içe aktarmak istediğiniz formatı seçmeniz istenecektir.
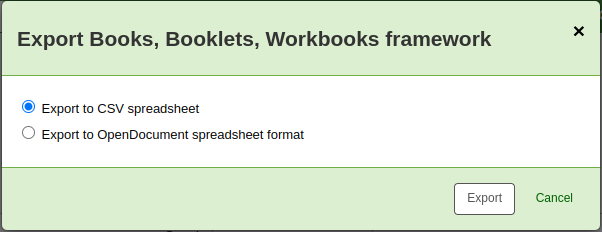
Bu şekilde içe aktarılan bir çerçeve, çerçeveyi içe aktar seçeneği kullanılarak diğer bir Koha kurulumuna aktarılabilir.
Import framework
Yeni bir çerçeve oluşturmanın kolay bir yolu da sizin için ya da başka bir Koha kurulumu için oluşturulmuş bir çerçeveden içe aktarmaktır. Bu çerçevenin burada içe aktarılabilmesi için yukarıdaki talimatlar kullanılarak diğer sistemden dışa aktarılmış olması gerekecektir.
To import a framework you first need to create a new framework. Once you have that framework, click ‘Actions’ then ‘Import’ to the right of the new framework.
Sizden çerçeveyi içine aktarmak için bilgisayarınızda bir dosya bulmanız istenecektir.
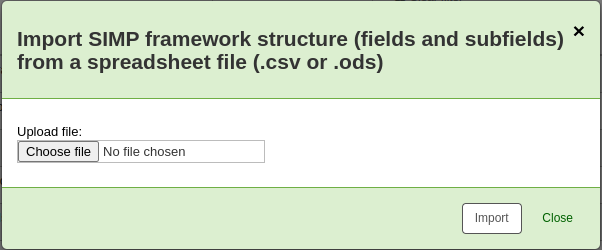
Dosyaların içe aktarılmasından önce işlemlere onay vermeniz istenecektir.
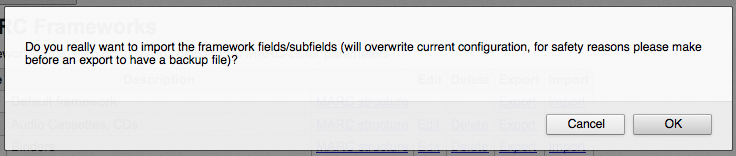
As your file is uploaded, you will see a spinning icon to indicate that the system is working.
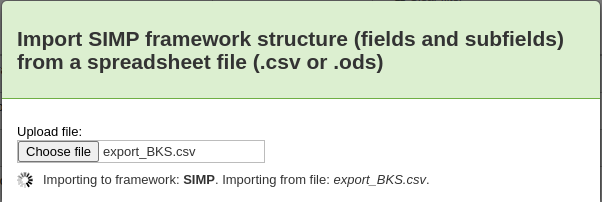
Once your import is complete you will be brought to the framework edit tool where you can make any changes you need to the framework you imported.
Koha to MARC mapping
While Koha stores the entire MARC record, it also stores common fields for easy access in various tables in the database (mainly the items, biblioitems, and biblio tables). Koha to MARC mapping is used to tell Koha where to find these values in the MARC record. Whenever a record is added or changed, this mapping will be used to update the linked database column. The information from the database columns is used as a way to quickly look up important information without having to parse the full MARC record. It is used for displaying information in a lot of pages and can also be used in reports.
In many cases, you will not have to change the default values set at the time of the installation, but it is important to know that the tool is here and can be used at any time.
Uyarı
If you change mappings after data has been added to your catalog, ask your system administrator to run misc/batchRebuildBiblioTables.pl. This will update the values in the database columns for all your records.
Get there: More > Administration > Catalog > Koha to MARC mapping
Not
This section will only be available to staff members with the manage_marc_frameworks (or superlibrarian) permission.
The table shows all the database fields that can be mapped to MARC fields.
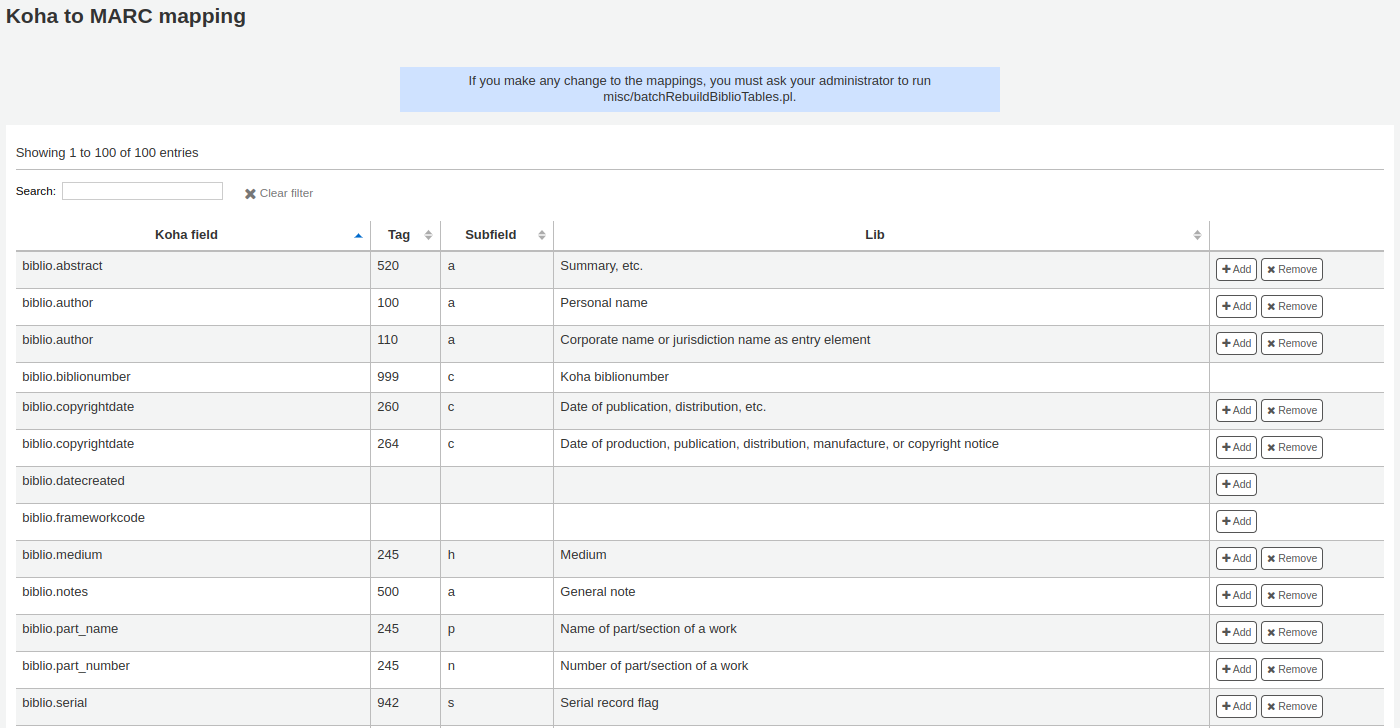
To add a new mapping, click on the ‘Add’ button to the right of the appropriate field.
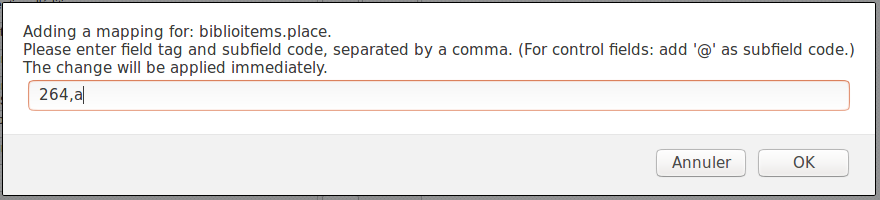
Write in the MARC field and subfield you would like to map, separated by a comma, to this Koha field (for example, “264,a”) and click the ‘OK’ button.
Not
It is possible to link more than one MARC field to a database field. For example, you could link both 260$a and 264$a to the biblioitems.place field.
If you would like to clear the mapping for a database field, click the ‘Remove’ button.
Not
All changes are immediate. Records created or edited after the change will immediately have the new mappings. However, if you want to update the mappings for records already in the catalog, ask your system administrator to run misc/batchRebuildBiblioTables.pl. This will update the values in the database columns for all your records.
MARC bibliographic framework test
The tool checks the MARC structure of bibliographic frameworks.
Get there: More > Administration > Catalog > MARC bibliographic framework test
Not
This section will only be available to staff members with the manage_marc_frameworks (or superlibrarian) permission.
If you change your MARC bibliographic framework, it’s recommended that you run this tool to test for errors in your definition.
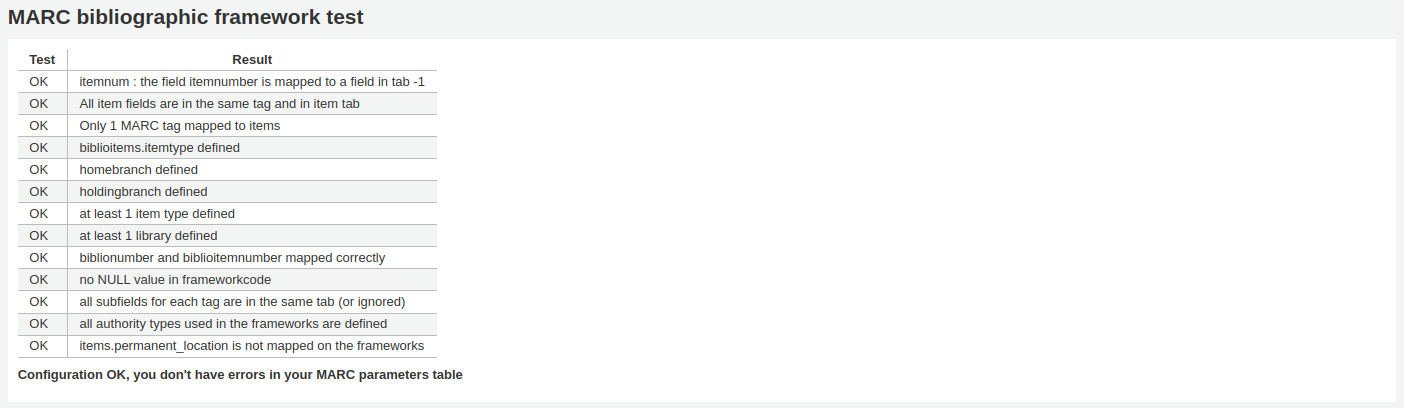
Classification sources
Source of classification or shelving scheme are mapped to field 952$2 and 942$2 in Koha’s MARC bibliographic frameworks and stored in the items.cn_source and biblioitems.cn_source fields in the database.
Gidiş yolu: Daha fazla > Yönetim > Katalog > Sınıflama kaynakları
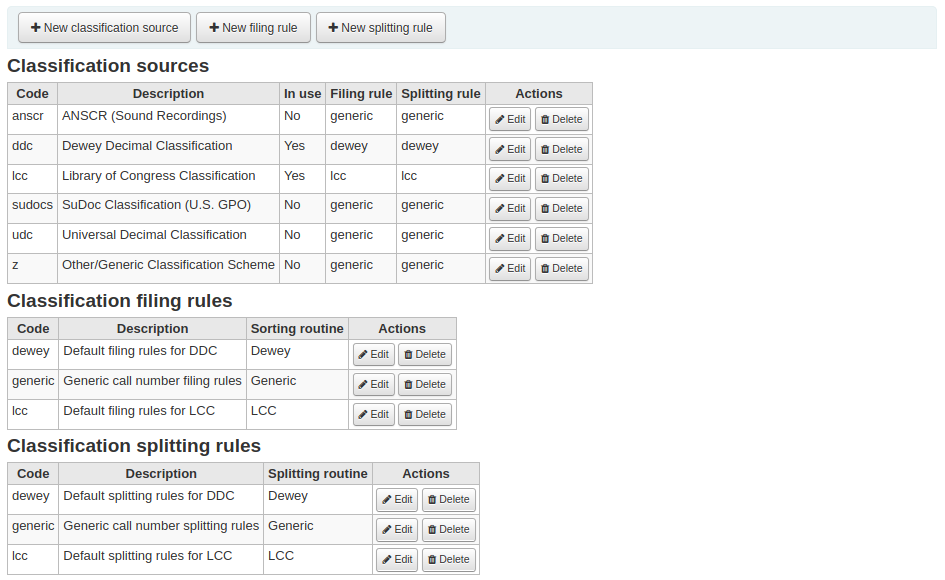
Commonly used classification sources are:
ddc- Dewey Ondalık Sınıflama
lcc- Kongre Kütüphanesi Sınıflandırma Sistemi
Koha’nın kurulumu esnasında sınıflama kaynaklarını kurmayı seçerseniz, diğer değerleri de göreceksiniz:
ANSCR (ses kayıtları)
SuDOC sınıflama
Evrensel Onlu Sınıflama
Diğer/Genel Sınıflandırma
Adding/editing classification sources
You can add your own source of classification by using the ‘New classification source’ button. To edit use the ‘Edit’ button.
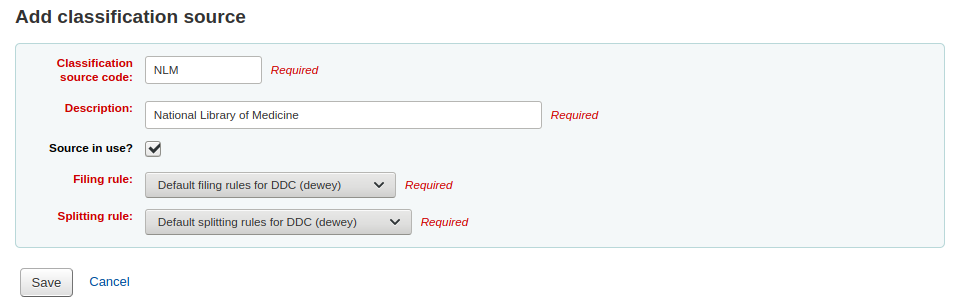
Oluştururken ya da düzenlerken:
Enter a code. The code is limited to 10 characters and must be unique.
Not
The code is not editable once it has been created.
Enter a description. The description is used in the drop-down lists in the cataloging module.
Check the ‘Source in use?’ checkbox if you want the value to appear in the drop-down list for this category.
Select the appropriate filing rule from the drop-down list.
Select the appropriate splitting rule from the drop-down list.
Classification filing rules
Filing rules determine the order in which items are placed on shelves. Filing rules normalize call numbers in order for Koha to be able to compare them and sort them in the right order.
For example, a Dewey call number such as ‘636.8/07 SHAW’ will become ‘636_800000000000000_07_SHAW’ in order to be sorted.
The sorted call number is saved in the items.cn_sort or biblioitems.cn_sort fields in the database
Koha içinde önceden yapılandırılmış değerler şunlardır:
Dewey
LCC
Genel
Filing rules are mapped to Classification sources. You can setup new filing rules by using the ‘New filing rule’ button. To edit, use the ‘Edit’ button.
Oluştururken ya da düzenlerken:
Enter a code. The code is limited to 10 characters and must be unique.
Not
The code is not editable once it has been created.
Enter a description. The description is used in the drop-down list when creating or editing a classification source.
Uygun bir dosyalama yordamı seçin - dewey, generic ya da lcc
The Dewey filing routine generates a sorted call number by following these rules:
Concatenates classification and item parts.
Converts to uppercase.
Removes any leading or trailing white spaces, and forward slashes (/)
Separates alphabetic prefix from the rest of the call number
Splits into tokens on white spaces and periods.
Leaves first digit group as is.
Converts second digit group to 15-digit long group, padded on right with zeroes.
Converts each whitespace to an underscore.
Removes any remaining non-alphabetical, non-numeric, non-underscore characters.
The generic filing routine generates a sorted call number by following these rules:
Concatenates classification and item parts.
Removes any leading or trailing white spaces.
Converts each whitespace to an underscore.
Converts to uppercase.
Removes non-alphabetical, non-numeric, non-underscore characters.
The LCC filing routine generates a sorted call number by following these rules:
Classification splitting rules
Splitting rules determine how call numbers are split when printed on a spine label.
Not
Splitting rules are only used if your label layout specifies to split call numbers.
For example, a Dewey call number such as ‘636.8/07 SHAW’ will become
636.807
SHAW
once printed on a spine label.
Koha içinde önceden yapılandırılmış değerler şunlardır:
Dewey
LCC
Genel
Splitting rules are mapped to Classification sources. You can setup new splitting rules by using the ‘New splitting rule’ button. To edit, use the ‘Edit’ button.
Oluştururken ya da düzenlerken:
Enter a code. The code is limited to 10 characters and must be unique.
Not
The code is not editable once it has been created.
Enter a description. The description is used in the drop-down list when creating or editing a classification source.
Choose an appropriate splitting routine - Dewey, Generic, LCC or RegEx
The Dewey splitting routine looks for the three digits and the decimal, puts it on one line with the other parts (Cutter, prefix, etc.) each on a separate line (generally split on spaces).
The Generic splitting routine splits on spaces.
The LCC splitting routine puts each component on a separate line.
The RegEx splitting routine allows you to create a custom splitting routine.
Some examples of RegEx splitting routines:
Split on spaces:
s/\s/\n/g
Split on equal signs (=):
s/(\s?=)/\n=/g
Split on forward slashes (/):
s/(\s?\/)/\n/g
Remove first split if call number starts with J or K:
s/^(J|K)\n/$1 /
Cut after 9 characters:
s/(^.{9})/$1\n/
It is possible to mix and match RegEx splitting routines by clicking the ‘New’ link just under the RegEx input box.
For example, if you want to cut after nine characters AND split on spaces, you can write both and the call number ‘971.42805092 C669r’ will be split
971.42805
092
C669r
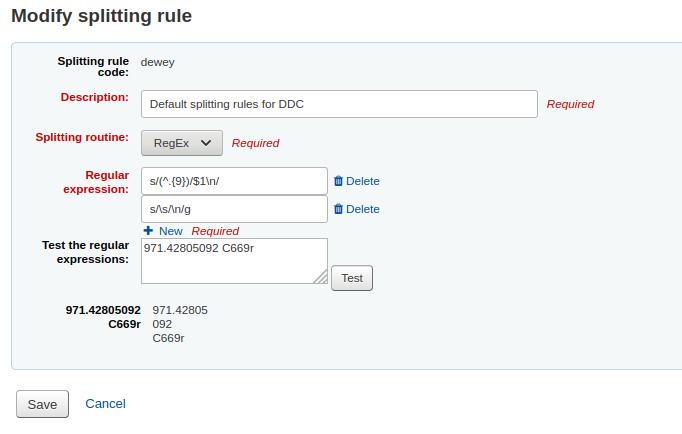
Record matching rules
MARC kayıtları Koha’ya aktarılırken kayıt eşleştirme kuralları kullanılır.
Get there: More > Administration > Catalog > Record matching rules
The rules that you set up here will be referenced with you Stage MARC records for import.
It is important to understand the difference between ‘Match points’ and ‘Match checks’ before adding new matching rules to Koha.
Match points are the criteria that you enter that must be met in order for an incoming record to match an existing MARC record in your catalog. You can have multiple match points on an import rule each with its own score. An incoming record will be compared against your existing records (‘one record at a time’) and given a score for each match point. When the total score of the match points matches or exceeds the threshold given for the matching rule, Koha assumes a good match and imports/overlays according your specifications in the import process. An area to watch out for here is the sum of the match points. Double check that the matches you want will add up to a successful match.
Örnek:
1000 eşiği
Match point on 020$a 1000
Match point on 022$a 1000
Match point on 245$a 500
Match point on 100$a 100
Yukarıdaki örnekte, 020$a veya 022$a alanları üzerindeki eşleşme başarılı bir şekilde sonuçlanacaktır. 245#a başlık ve 100$a yazar alanları (ve 020$a veya 022$a alanları üzerinde değil) yalnızca 600 ile toplanacak ve eşleşme olmayacaktır. Ve 020$a ve 245$a alanları üzerinde bir eşleşme 1500 ile sonuçlanacak ve bu başarılı bir eşleşme iken, 245$a başlık eşleşmesi için ekstra 500 puan fazladan olacaktır. Gelen kayıt 020$a üzerinde 245$a eşleşmesine gerek olmadan başarıyla eşleşmiştir. Bununla birlikte 100$a Eşleşme Puanına 500 skorunu atadıysanız, 245$a başlık ve 100$a yazar alanları, 020$a başarılı bir eşleşme olmasa bile başarılı bir eşleşme olarak (toplam 1000) nitelendirilecektir.
Match checks are not commonly used in import rules. However, they can serve a couple of purposes in matching records. First, match checks can be used as the matching criteria instead of the match points if your indexes are stale and out of date. The match checks go right for the data instead of relying on the data in the indexes. (If you fear your indexes are out of date, a rebuild of your indexes would be a great idea and solve that situation!) The other use for a match check is as a ‘double check’ or ‘veto’ of your matching rule. For example, if you have a matching rule as below:
1000 eşiği
Match point on 020$a 1000
Match check on 245$a
Koha ilk olarak gelmekte olan kaydın mevcut bir kayıtla eşleşip eşleşmediğini görmek için 020$a tag/alt alanına bakacaktır. Eğer ‘eşleşiyorsa’ Eşleşme Kontrolüne geçecek ve doğrudan gelmekte olan veri içindeki 245$a değerine bakacak ve bu değeri kataloğunuzdaki mevcut ‘eşleşen’ kaydın 245$a alanı ile karşılaştıracaktır. Eğer 245$a eşleşiyorsa Koha, eşleştirme başarılı olduğu şekilde devam edecektir. Eğer 245$a eşleşmiyorsa, bu durumda Koha iki kaydın hiç bir şekilde eşleşmediği sonucuna varacaktır. Eşleşme Kontrolleri doğru eşleştirmeleri onaylamak için gerçekten kullanışlı bir araçtır.
Otorite kayıtlarınız için eşleştirme kuralları oluşturmak için arama yapılırken aşağıdaki dizinler kullanılacaktır:
Dizin adı |
Matches MARC tag |
|---|---|
LC-kart numarası |
010$a |
Personal-name |
100$a |
Kurum-adı-başlığı |
110$a |
Toplantı-adı |
111$a |
Başlık-tek biçim |
130$a |
Kronolojik-terim |
148$a |
Konu-topikal |
150$a |
Ad-coğrafi |
151$a |
Dönem-tarz-biçim |
155$a |
Table: Authority indexes
Adding matching rules
Yeni bir eşleme kuralı oluşturmak için :
Click ‘New record matching rule’
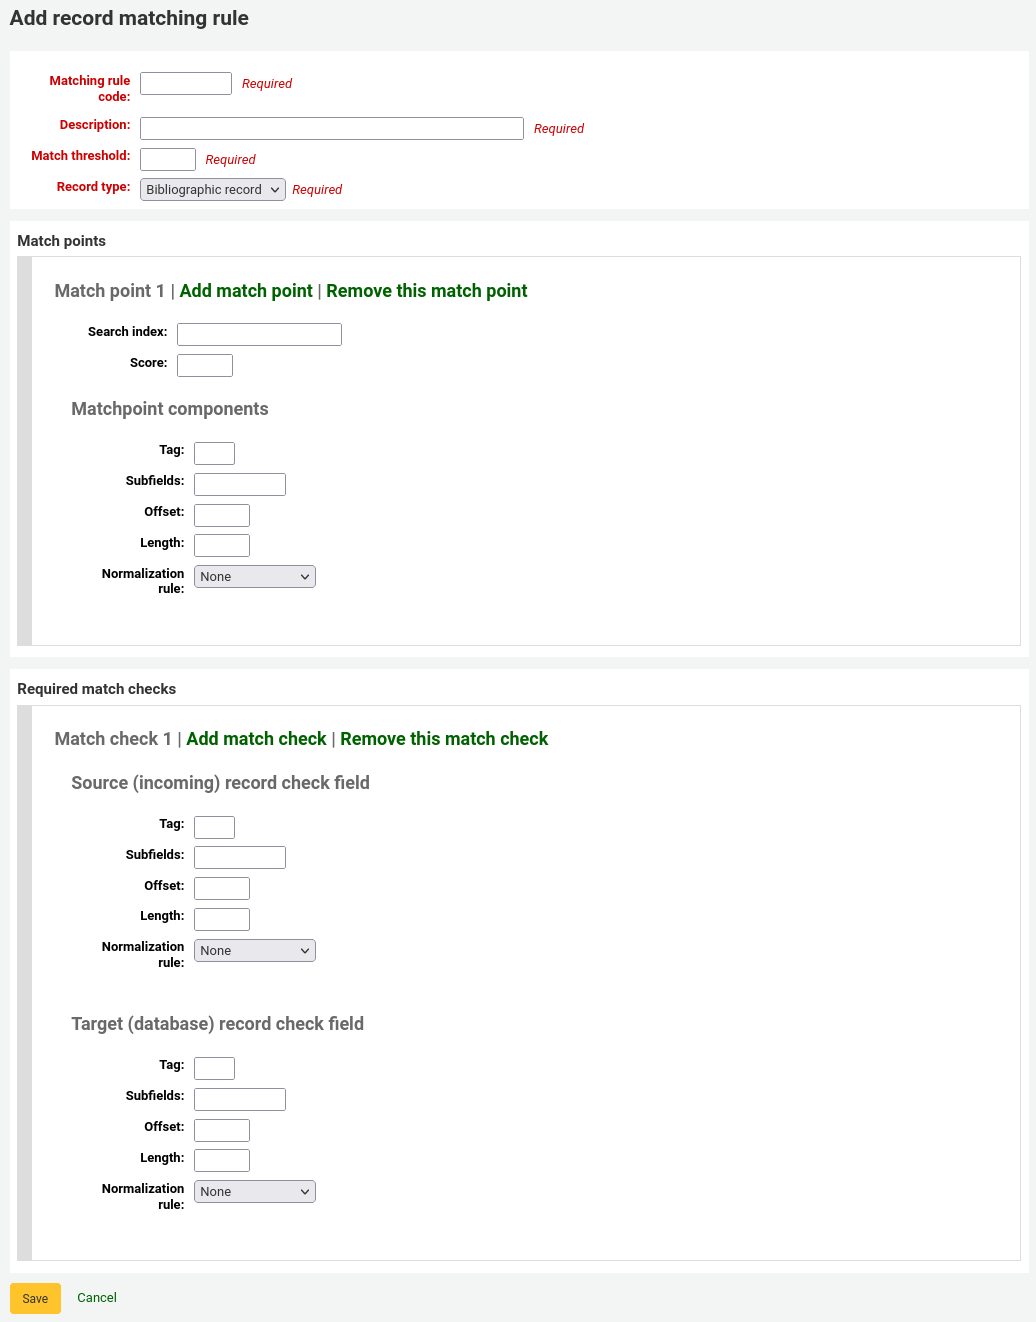
Farklı bir isim seçin ve ‘Eşleme kural kodu’ alanına girin
‘Açıklama’ seçtiğiniz kuralı belirlemekte kullandığınız her hangi bir şey olabilir
‘Eşleşme eşiği’ bir bibliyo’nun ‘eşleşme’ olarak dikkate alınması için kazanması gereken ‘puanların’ toplam sayısıdır
‘Kayıt türü’ bu kuralın kullanılacağı içe aktarma türüdür - otorite ya da bibliyografik
Noktaları eşleştir hangi alanların eşleştirileceğini belirlemek üzere ayarlanır
‘Search index’ can be found by looking at the index configuration on your system. For Zebra you might find the right index names in your ccl.properties file. You can also find useful information in the Koha search indexes chapter of this manual.
‘Score’ - The number of ‘points’ a match on this field is worth. If the sum of each score is equal or greater than the match threshold, the incoming record is a match to the existing record.
Enter the MARC tag you want to match on in the ‘Tag’ field.
Enter the MARC tag subfield you want to match on in the ‘Subfields’ field. For matching on controlfields like 001 the subfields input field can be left empty.
‘Ofset’ – Kontrol alanları kullanımı için, 001-009
‘Uzunluk’ – Kontrol alanları kullanımı için, 001-009
There are currently several options for ‘Normalization rules’:
None - no normalization rule will be applied
Remove spaces
Uppercase
Lowercase
Legacy default - this option was added to maintain the behavior form before the other normalization rules became available.
ISBN - using this option will improve matching on ISBN. If your incoming records ISBN fields contain extra text, like ‘9780670026623 (alk. paper)’, they will still match correctly.
‘Required match checks’ - While match points work on the search index, match checks work directly on the data and can be used as the matching criteria instead of the match points or in addition to them to confirm true matches.
Sample bibliographic record matching rule: Control number
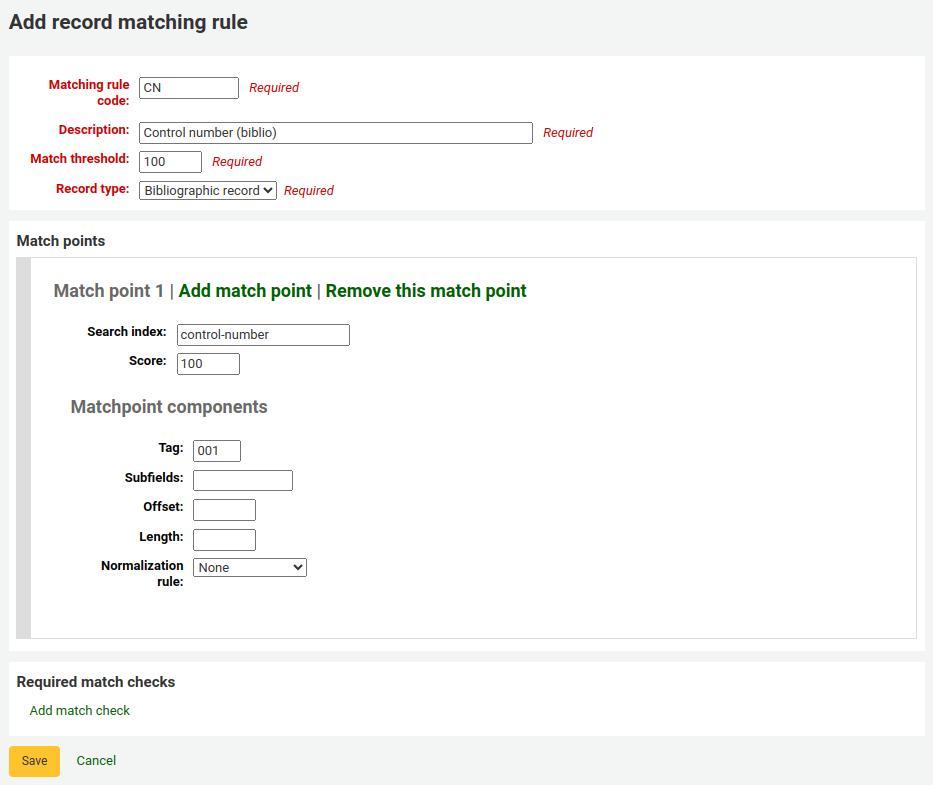
Değeri eşleştir: 100
Record type: Bibliographic record
Not
In order to match on the 001 in authority records, you will need to create a second rule, repeating all of these values and change just the record type to ‘Authority record’.
Nokta eşleştirmeleri (sadece biri):
Search index: control-number
Score: 100
Tag: 001
Not
In MARC21, this field is for the control number assigned by the organization creating, using, or distributing the record.
Subfields: empty
Offset: 0 or empty
Length: 0 or empty
Normalization rule: None
Required match checks: none (click ‘Remove this match check’)
Record overlay rules
Record overlay rules allow for defining rules for how incoming and original MARC records should be merged on a field tag and context basis when a MARC record is updated.
Contexts
Let’s first focus on understanding the concept of contexts.
Contexts are defined by “module” and “filter” enabling separate rule sets for different contexts.
By setting different filter values for these modules, rules are applied only when the filter value matches for a particular module. A wildcard; “*”, can be used to match all possible filter values.
There are three different context modules:
- borrower
Allows for defining rules that will be applied if the currently logged in user’s borrower number matches the filter condition.
- categorycode
Allows for defining rules that will be applied if the currently logged in users’s category code matches the filter condition.
- source
Allows for defining rules that will be applied if the record is updated in a particular part of Koha. The following update methods are supported:
batchimport
z39.50
intranet
bulkmarcimport
import_lexile
batchmod
A context is really nothing but a module and filter combination. Every time a record is updated i Koha, a context is set an filter values populated with context dependent values.
Examples of two different contexts are saving record in the staff client or the currently logged in user having a particular borrower number, for example “12”.
These two contexts are define as:
Module: source, filter: intranet
Module: borrower, filter: 12
Only the rules of one context, that is a module and filter combination, are applied. If multiple contexts matches they are not merged together.
If we have the following rules:
Module: source, filter: *, tag: 650, preset: Protect
Module: source, filter: *, tag: 500, preset: Protect
Module: borrower, filter: 12, tag: *, preset: Overwrite
And the context of the update where the rules are applied is:
source => "intranet" (wildcard match)
borrower => 1 (no match)
Only the first two rules will be applied.
If instead the context of rule evaluation was:
source => "intranet" (wildcard match)
borrower => 12 (an exact match, which is considered more specific than a wildcard match)
Only the second rule would be applied, even though the first two rules also matches they will be discarded since the context match of that rule set is of lower specificity because of the wildcard.
Context specificity is ranked in the following way:
First all the rules are grouped into rule sets identified by a unique filter and module combination.
If one or more contexts have a non wildcard filter condition match, the rule set of the context with the module of highest specificity is selected. (The modules are listed in order of specificity above).
If no exact context match is found, but one or more wildcard matches are, the rule set of the context with the module of highest specificity is selected.
If no context matches the default behavior is to overwrite, the original record with the incoming record.
Rules
A rule consists of a three different parts:
- Context
A module and filter to match against as described above.
- Tag
A field tag expression for defining which tag(s) the rule should be applied on. Three different tag expressions are supported:
An exact tag, for example “650”.
A regular expression, for example “6..” matching all 6XX tags.
A wildcard, “*”, matching all tags
When rules for a specific context are evaluated, the most specific match is selected. The tag expressions above are listed in order of specificity.
- Actions
Each rule defines a set of actions to take depending on the type of update. There are four types of update events: Added, Appended, Removed and Deleted. For each event an action is specified, whether to perform the update, or to skip it.
By enabling/disabling updates for these different events 16 different update behaviours can be defined. There are presets available for the most common/useful combinations:
Preset |
Added |
Appended |
Removed |
Deleted |
|---|---|---|---|---|
Protect |
Skip |
Skip |
Skip |
Skip |
Overwrite |
Add |
Append |
Remove |
Delete |
Add new |
Add |
Skip |
Skip |
Skip |
Add and append |
Add |
Append |
Skip |
Skip |
Protect from deletion |
Add |
Append |
Remove |
Delete |
Protect
Added: Skip, Appended: Skip, Removed: Skip, Deleted: Skip
The “Protect” preset will prevent all updates on matching fields, protecting them from being overwritten.
Given this rule:
Module: source, filter: *, Tag: 650, Preset: Protect
And the following original and incoming records:
100 1#$aTerrace, Vincent,$d1948-
650 #0$aTelevision serials$zUnited States$vCatalogs.
100 1#$aTerrace, Vincent,$d1948-
500 ##$aIncludes index.
650 #0$aTelevision pilot programs$zUnited States$vCatalogs.
The 650 field of the original record will retain its original value after the update (but since the default behaviour if no rule matches is to overwrite, the 500 field will be added):
100 1#$aTerrace, Vincent,$d1948-
500 ##$aIncludes index.
650 #0$aTelevision serials$zUnited States$vCatalogs.
Overwrite
Added: Add, Appended: Append, Removed: Remove, Deleted: Delete
The “Overwrite” preset will allow all updates on matching fields.
Since the default behavior is to overwrite if no rule matches, adding a rule with the overwrite preset only makes sense if there is some other rule with a lower tag specificity with a different behavior, for example a wildcard tag rule.
So given these two rules:
Module: source, filter: *, Tag: *, Preset: Protect
Module: source, filter: *, Tag: 650, Preset: Overwrite
And the following original and incoming records:
500 ##$aIncludes index.
650 #0$aTelevision serials$zUnited States$vCatalogs.
Incoming record:
100 1#$aTerrace, Vincent,$d1948-
500 ##$aIncludes index.
650 #0$aTelevision pilot programs$zUnited States$vCatalogs.
All fields but 650 will be protected on the original record, and the resulting record will be:
500 ##$aIncludes index.
650 #0$aTelevision pilot programs$zUnited States$vCatalogs.
Add new
Added: Add, Appended: Skip, Removed: Skip, Deleted: Skip
The “Add new” allow updates only if the incoming field is new, that is there exists no fields with this tag in the original record.
Given this rule:
Module: source, filter: *, Tag: 650, Preset: Add
And the following original and incoming records:
100 1#$aTerrace, Vincent,$d1948-
650 #0$aTelevision serials$zUnited States$vCatalogs.
100 1#$aTerrace, Vincent,$d1948-
500 ##$aIncludes index.
650 #0$aTelevision pilot programs$zUnited States$vCatalogs.
The 650 in the incoming record will not overwrite the 650 field in the original record since the original record contains one or more 650 fields. The 500 field will be added since the default rule is to overwrite. The resulting record will be:
100 1#$aTerrace, Vincent,$d1948-
500 ##$aIncludes index.
650 #0$aTelevision serials$zUnited States$vCatalogs.
On the other hand, if the original record was:
100 1#$aTerrace, Vincent,$d1948-
The resulting record will be:
100 1#$aTerrace, Vincent,$d1948-
500 ##$aIncludes index.
650 #0$aTelevision pilot programs$zUnited States$vCatalogs.
This is because there were no 650 fields in the original record, so adding new ones is permitted.
Add and append
Added: Add, Appended: Append, Removed: Skip, Deleted: Skip
In the “Add and append” preset, appending is also permitted, but not removing or deleting.
So if we have the following rule:
Module: source, filter: *, Tag: 650, Preset: Add and append
And the following original and incoming records:
100 1#$aTerrace, Vincent,$d1948-
650 #0$aTelevision serials$zUnited States$vCatalogs.
100 1#$aTerrace, Vincent,$d1948-
500 ##$aIncludes index.
650 #0$aTelevision pilot programs$zUnited States$vCatalogs.
The resulting record will be:
100 1#$aTerrace, Vincent,$d1948-
500 ##$aIncludes index.
650 #0$aTelevision serials$zUnited States$vCatalogs.
650 #0$aTelevision pilot programs$zUnited States$vCatalogs.
Note that the “old” 650 field from the original record was not removed since we only allow adding or appending new values.
If we instead used the “Overwrite” preset the resulting record would instead be:
100 1#$aTerrace, Vincent,$d1948-
500 ##$aIncludes index.
650 #0$aTelevision pilot programs$zUnited States$vCatalogs.
with the 650 field of the original record removed.
Protect from deletion
Added: Add, Appended: Append, Removed: Remove, Deleted: Skip
The preset “Protect from deletion” will allow all update operations except deletion. Deletion is defined as when there are no fields of the matching tag in the incoming record so that all of the fields with this tag would be removed on the original record.
So given the following rule:
Module: source, filter: *, Tag: 650, Preset: Protect from deletion
And the following original and incoming records:
100 1#$aTerrace, Vincent,$d1948-
650 #0$aTelevision serials$zUnited States$vCatalogs.
100 1#$aTerrace, Vincent,$d1948-
500 ##$aIncludes index.
650 #0$aTelevision pilot programs$zUnited States$vCatalogs.
The resulting record will be:
100 1#$aTerrace, Vincent,$d1948-
500 ##$aIncludes index.
650 #0$aTelevision pilot programs$zUnited States$vCatalogs.
On the other hand, if the incoming record was:
100 1#$aTerrace, Vincent,$d1948-
500 ##$aIncludes index.
In this case the deletion of 650 would not be permitted and the value of the field on the original record would be protected. The resulting record would instead be:
100 1#$aTerrace, Vincent,$d1948-
500 ##$aIncludes index.
650 #0$aTelevision serials$zUnited States$vCatalogs.
Custom presets
To work with custom presets, a more complete understanding of the update events is required:
- Added
For a matching rule with a tag, the action configured for the “Added” event is applied for new fields in the incoming record if the original record has no fields with that tag. If the action is “Add” they will be added to the original record, if “Skip” they will be thrown away.
- Appended
If the two record have common fields with the rule tag, that is one or more fields with identical subfield and identifier values, the action configured for the “Appended” event is applied for fields found in incoming record but not in original record. If the action is “Append” they will be added to the original record, if “Skip” they will be thrown away.
- Removed
If the two records have common fields with the rule tag, the action configured for the “Removed” action is applied for fields found in original record but not in incoming record. If the action is “Remove” they will removed from the original record, if “Skip” they will be kept.
- Deleted
If the original record have fields with the rule tag, but no fields with this tag is found in the incoming record, the action configured for the “Deleted” event is applied for the fields in the incoming record. If the action is “Delete” the fields will be removed from the original record, if “Skip” they will be kept.
OAI sets configuration
Bu sayfada OAI-PMH ayarlarını oluşturabilir, değiştirebilir ve silebilirsiniz.
Yeni bir ayar oluştur
Bir ayar oluşturmak için:
‘Yeni ayar ekle’ bağlantısına tıkla
‘Özel düzenle’ ve ‘İsim düzenle’ zorunlu alanlarını doldurun.
Bu ayar için ek tanımlar ekleyebilirsiniz. Bu işlemi yapmak için, ‘Tanım ekle’ ye tıklayınız ve yeni oluşturulmuş metin kutusunu doldurunuz. İstediğiniz kadar tanım ekleyebilirsiniz.
‘Kaydet’ butonuna tıklayın
Modify/delete a set
Bir ayarı değiştirmek için, değiştirmek istediğiniz ayarın satırındaki ‘Değiştir’ bağlantısına tıklayınız. Daha sonra, ayar oluşturma formuna benzer bir form ekrana gelecektir ve size setSpec, isim ve tanım ayarlarını değiştirmenize imkan verecektir.
Bir seti silmek için silmek istediğiniz set ile aynı satırda bulunan ‘sil’ bağlantısına tıklayın.
Eşlemeleri tanımla
Here you can define how a set will be build (what records will belong to this set) by defining mappings. Mappings are a list of conditions on record content.
‘Alan’, ‘Alt Alan’ ve ‘Değer’ alanlarını doldurun. Örneğin, ‘XXX’e eşit 999$9 olan tüm kayıtları bu küme içerisinde dahil etmek istiyorsanız. ‘Alan’ içini 999 ile, ‘Alt Alan’ içini 9 ile ve ‘Değer’ içini XXX ile doldurun.
If you want to add another condition, click on ‘Add’ button and repeat step 1. You can choose between ‘and’ or ‘or’ Boolean operators to link your conditions.
‘Kaydet’e tıklayın
Bir koşulu silmek için, en az bir ‘Alan’, ‘Alt alan’ veya ‘Değer’ boş bırakın ve ‘Kaydet’ üzerine tıklayın.
Not
Aslında bir durum ilgili alt alandaki değer, ‘Değer’ içinde tanımlananla kesinlikle eşitse doğrudur. 999+9 = ‘XXX YYY’ ile bir kayıt, durumun 999$9 = ‘XXX’ olduğu bir kümeye ait olmayacaktır.
Ve büyük-küçük harfe duyarlıdır: 999$9 olan bir kayıt = ‘xxx’, durumun 999$9 = ‘XXX’ olduğu ayara ait olmayacaktır.
Ayar oluştur
Tüm ayarlarınızı yapılandırdığınızda, ayarlarınızı oluşturmanız gerekir. Bu, misc/migration_tools/build_oai_sets.pl. komut dizisi çağırılarak yapılır.
Materyal arama alanları
Buradan, personel istemcideki materyal aramaya <item-searching-label> özel arama alanları ekleyebilirsiniz.
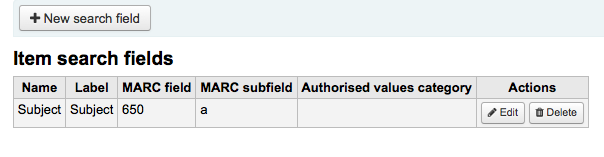
Yeni bir arama terimi eklemek için, ‘Yeni arama alanı’ düğmesini tıklamanız yeterlidir
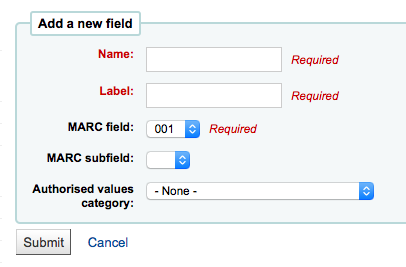
İsim, arama terimini tanımlamanız için bir alandır
Etiket, materyal arama sayfasında görünecek olandır
MARC alanı, içinde arama yapmak istediğiniz alanı seçmenizi sağlar
MARC alt alanı içinde arama yapmak istediğiniz alt alandır
Authorized values category can be used to turn this search field in to a pull down instead of a free text field
Alanınız bir kez eklendikten sonra bu sayfanın en üstünde ve materyal arama sayfasında görünür olacaktır
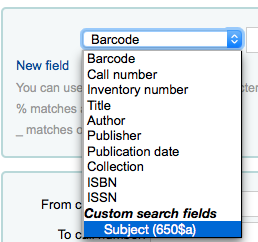
Search filters
Search filters are custom searches or filters that can be applied to search results.
This functionality is enabled on using the SavedSearchFilters system preference.
Not
This section will only be visible if the SavedSearchFilters system preference is enabled and you have the manage_search_filters (or superlibrarian) permission.
Search filters are added by searching the catalog through the staff interface.
This page is used to manage existing search filters.

You can make changes to each search filter by clicking on the action buttons on the right.
Edit filter: change the name of the filter, and its availability in the OPAC or staff interface
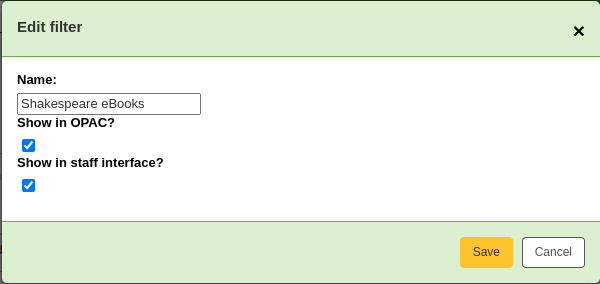
Edit search: clicking this button will bring you to the advanced search form, with the filter already applied. You can change the search parameters, and click ‘Save filter’ at the top of the page.
Delete: clicking this button will delete the filter.
Uyarı
There is no confirmation when deleting a search filter. Once you click ‘Delete’, the filter will be deleted immediately.
Not
Search filters can be used as pre-defined search URLs that you can use on your website or in HTML customizations.
Search filters are available through relatively short links.
<OPACBaseURL>/cgi-bin/koha/opac-search.pl?limit=search_filter:<Id of filter>
Use this URL anywhere to link directly to the search.
Search engine configuration
Once you have switched to Elasticsearch in your SearchEngine system preference, you’ll see a new link for Search engine configuration in the Catalog section of Administration. Here you will manage indexes, facets, and their mappings to MARC fields and subfields.
Sağlama
Koha sağlama modülü, kütüphanenin sağlayıcılardan sipariş ettiklerini kaydedebileceği ve satın alma bütçelerini yönetebileceği bir yöntem sağlar.
Sağlama Modülü tercihini kullanmadan önce tüm kurulumu tamamladığınızdan emin olmalısınız.
Gidiş yolu: Daha fazla > Yönetim > Sağlama
Currencies and exchange rates
Birden fazla ülkeye sipariş verirseniz, sağlama modülünüzün toplam tutarı tam olarak hesaplaması için döviz oranlarını gireceksiniz.
Get there: More > Administration > Acquisitions > Currencies and exchange rates
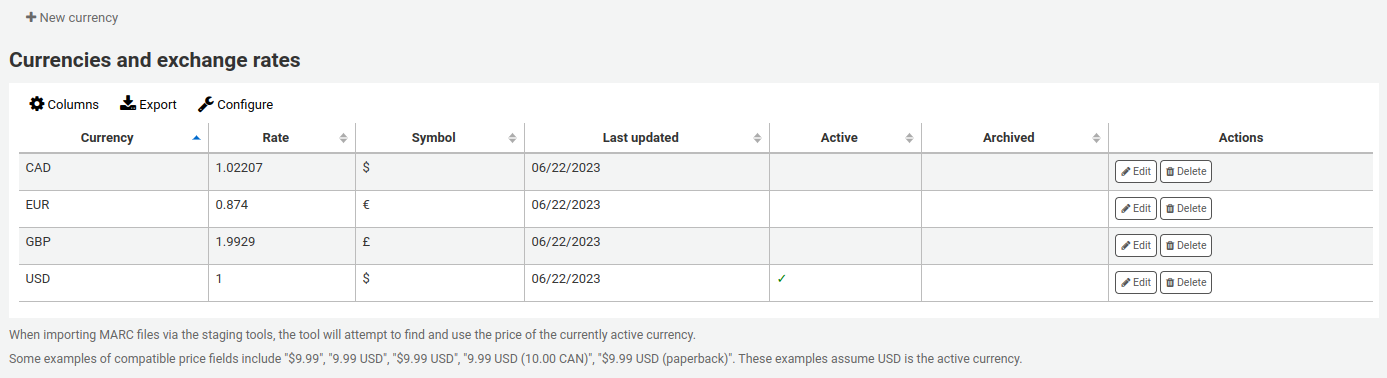
Not
You can customize the columns of this table in the ‘Table settings’ section of the Administration module (table id: currency).
Currency: this is the code for the currency. For default currencies, the ISO code is used as currency code (for example ‘USD’ for the US dollar). The ISO code will be used when importing MARC files via the staging tools. The tool will attempt to find and use the price of the currently active currency.
Rate: the rate will be used to calculate the price in the active currency.
Not
Bu veriler otomatik olarak güncelleştirilmez, bu nedenle hesabınızın doğru tutulması için güncel olduklarından emin olun.
Symbol: this is the symbol for the currency (for example, $ for USD, or € for EUR).
Last updated: this is the date when the currency was last updated in Koha.
Active: the active currency is the main currency you use in your library. The active currency will have a check mark in the ‘Active’ column. If you don’t have an active currency you will see an error message telling you to choose an active currency.

The active currency must have a rate of 1. There can only be one active currency.
Archived: archived currencies will have ‘Yes’ in this column. Archived currencies cannot be used in the acquisitions module.
Not
It is currently not possible to manually archive currencies. Currencies will be archived if Koha is updated and a currency that was used previously in the acquisitions module was deleted.
Actions: use the buttons to edit or delete currencies.
Not
If a currency was used at least once, it will not be possible to delete it.
Adding a new currency
If a currency that you use is not already in your system, you can create it.
Click ‘New currency’.
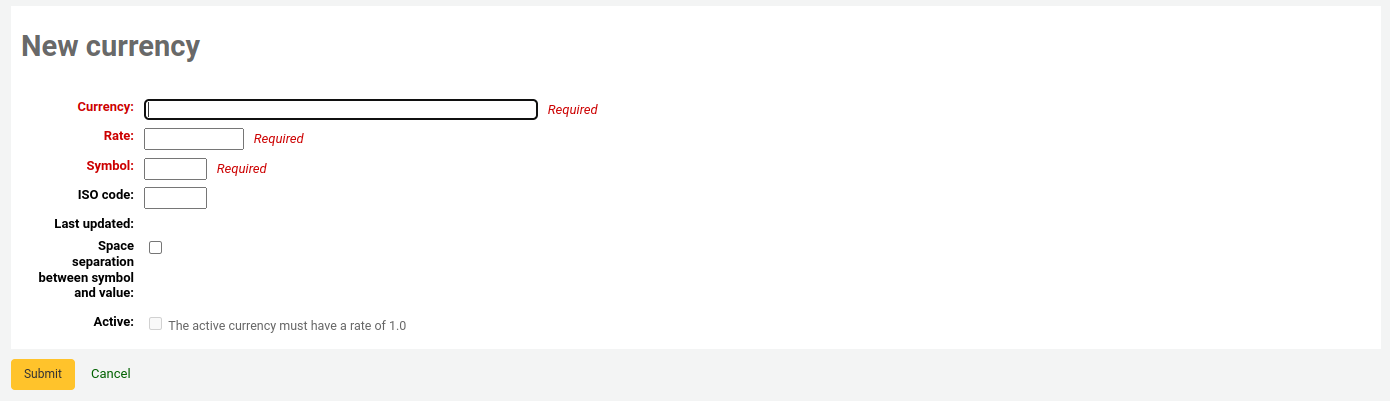
Fill out the form.
Currency: enter a code for the currency, this can be the ISO code, or another code. This is what will be displayed in the acquisitions module.
Not
If you decide to use a custom code here, make sure to fill out the ISO code with the correct code for the currency. This will ensure that prices are calculated according to the rate.
Not
This field is limited to 10 characters.
Rate: enter the rate of this currency relative to your active currency.
Symbol: enter the symbol for the currency (for example, $ for USD, or € for EUR).
ISO code: enter the ISO code for the currency (for example ‘USD’ for the US dollar). This field is optional. If this field is empty, Koha will use the currency code (above) as the ISO code for price calculations.
Last updated: this will be filled automatically with today’s date, it is not possible to manually change this date.
Space separation between symbol and value: if checked, Koha will display the price with a space before the currency symbol (for example, 10.99 $ rather than 10.99$).
Active: check this box if this currency is the default currency used in the acquisitions module. Note that there can only be one active currency and that the active currency’s rate must be 1.
Click ‘Submit’.
Editing a currency
If you often order from other countries, it will be necessary to update the exchange rate regularly in order to calculate the prices precisely.
To edit an existing currency,
Click the ‘Edit’ button to the right of the currency in the currencies table.
Change the rate, or other value.
Not
Note that the currency code and the last updated date cannot be edited.
Click ‘Submit’.
Deleting a currency
If there are currencies that you never use, it is possible to delete them.
From the currencies table, click the ‘Delete’ button to the right of the currency.
Uyarı
Currencies that have been used at least once in the acquisitions module cannot be deleted.
Bütçeler
Budgets are used for tracking accounting values related to acquisitions. For example you could create a budget for the current year (ex. 2015) and then break that into funds for different areas of the library (ex. Books, Audio, etc).
Gidiş yolu:* Daha fazla > Yönetim > Sağlama > Bütçeler
Ana bütçe yönetimini ziyaret ettiğinizde, iki tane sekme göreceksiniz; bunlardan biri aktif diğeri de aktif olmayan bütçelerdir.
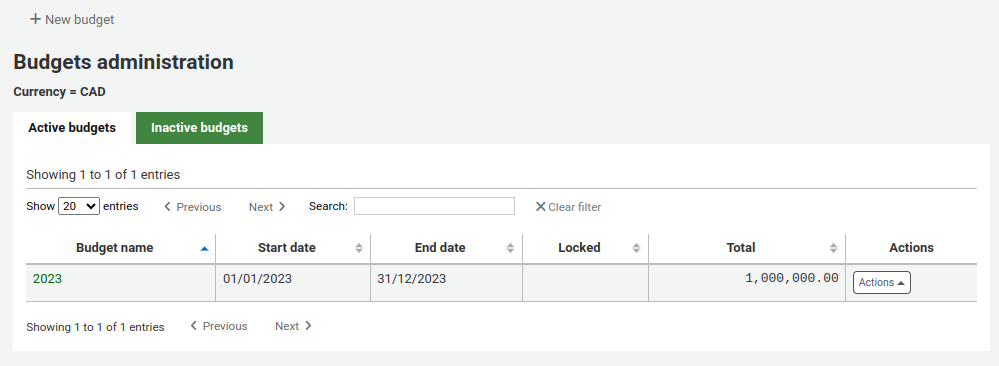
Bütçe eklemek
Budgets can either be created from scratch or by duplicating the previous year’s budget.
Adding a new budget
If you haven’t used Koha before for acquisitions, you’ll need to start fresh with a new budget.
To add a new budget,
Click the ‘New budget’ button.
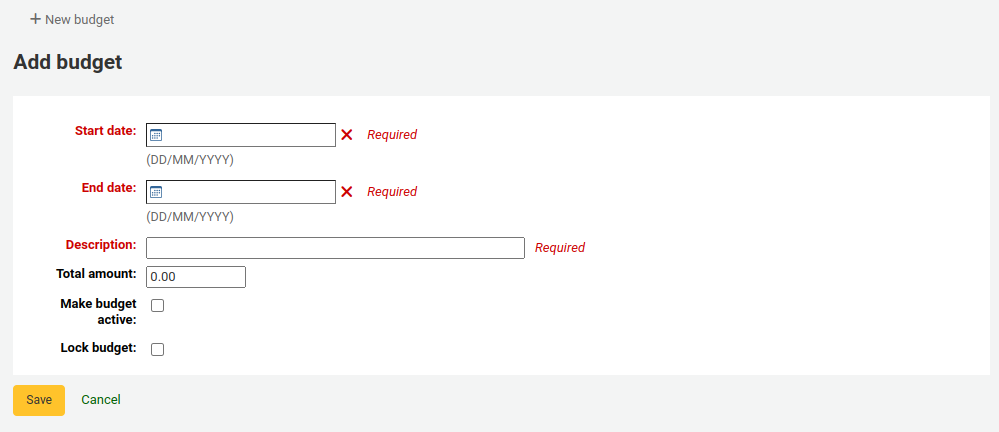
Fill out the form:
Start date (mandatory): choose the starting date for the time period this budget is for. This can be the start of the calendar year, fiscal year, academic year, quarter, etc.
End date (mandatory): choose the ending date for the time period this budget is for.
Description (mandatory): enter a description for this budget. The description should be something that will help you identify the budget when ordering.
Total amount: enter the amount for the budget. Do not use any symbols, simply enter the amount of the budget with numbers and decimals.
Make budget active: marking a budget as active makes it usable when placing orders in the acquisitions module, even if the order is placed after the budget end date. This will allow you to record orders that were placed in a previous budget period.
Lock budget: locking a budget means that you will not be able to add funds or add sub funds to this budget, and you will not be able to plan spending. Lock the budget once it is set as you wish.
Click ‘Save’.
You will be brought back to the list of existing budgets.
Proceed to add funds to the budget.
Duplicating a budget
At the end of the year, or the end of your budget period, you can duplicate the current budget. This will also duplicate all funds, so you don’t have to start from scratch each year or period.
To duplicate a budget,
From the list of budgets, click the ‘Actions’ button on the right.
Choose ‘Duplicate’.
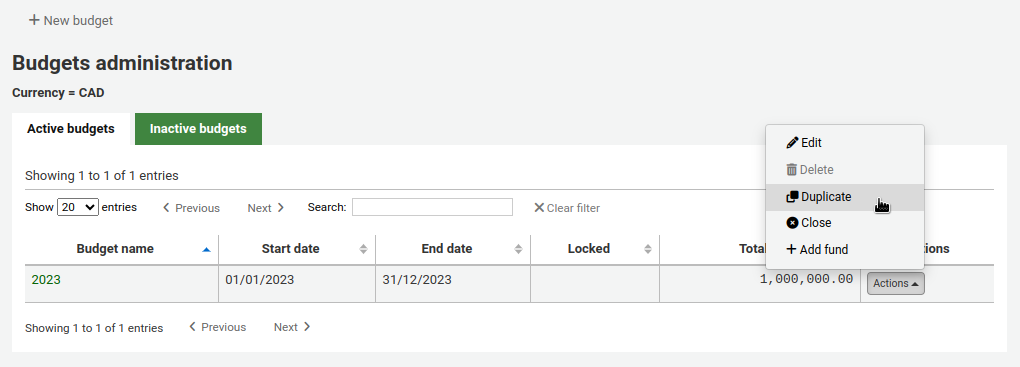
Alternatively,
From the list of budgets, click on the budget name.
On the screen listing the budget breakdown, click the ‘Edit’ button at the top and choose to ‘Duplicate budget’.
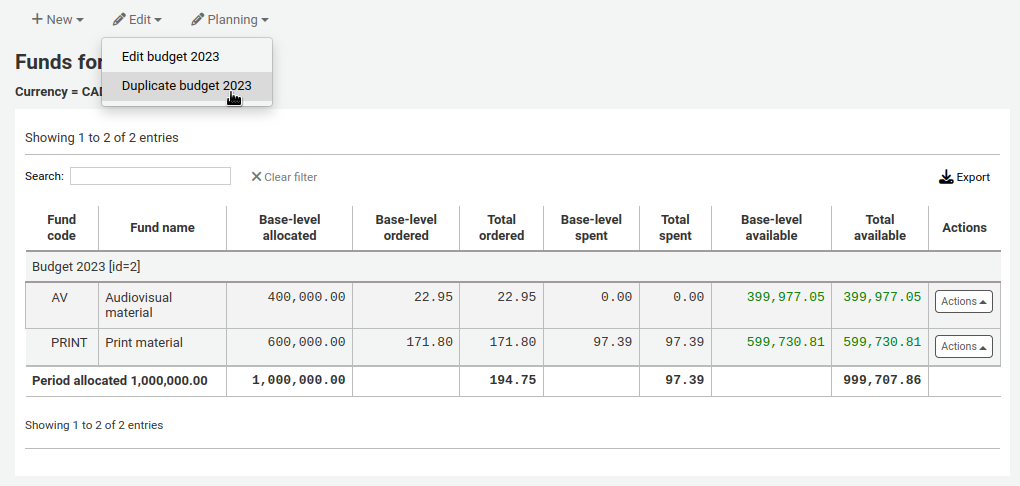
In both cases, you will be presented with a form to duplicate the budget.
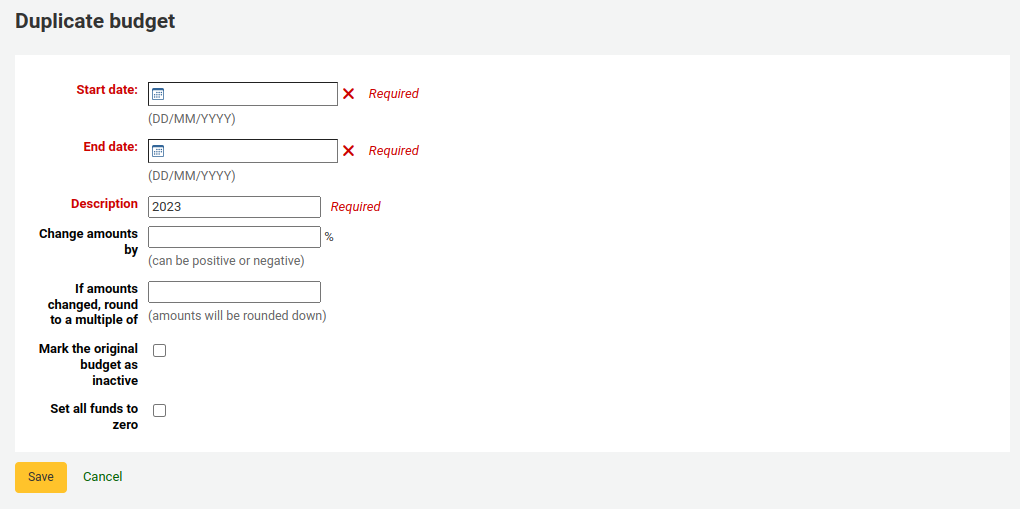
Start date (mandatory): choose the starting date for the time period this new budget is for.
End date (mandatory): choose the ending date for the time period this budget is for.
Description (mandatory): enter a description for this new budget.
Change amounts by: by default, the total amount from the duplicated budget and the original amounts for each fund will be used. However, if needed, you can indicate to change the amounts by a percentage, that can be positive or negative. For example, if your new budget was increased by 2%, enter 2. Inversely, if your new budget was decreased by 2%, enter -2.
If amounts changed, round to a multiple of: if you entered a value in ‘Change amounts by’, Koha will calculate the amounts automatically. You can force it to round down the amounts. For example, entering ‘100’, will round down the amounts to the hundreds (5542 will become 5500).
Mark the original budget as inactive: check this box if the original budget should no longer be used, effective immediately. You can always edit the budget later to make it inactive.
Set all funds to zero: check this box if you wish the new budget to contain all the same fund structures as the previous budget but no allocations until you manually enter an amount in the fund.
This will not only duplicate the budget, but all of the funds associated with that budget so that you can reuse budgets and funds from year to year.
When the time comes, you can close the previous budget to move unreceived orders, and, if desired, unspent funds to the new budget.
Editing a budget
You can edit existing budgets to make them inactive or lock them to prevent fund changes, for example.
To edit a budget,
From the list of budgets, click the ‘Actions’ button on the right.
Choose ‘Edit’.
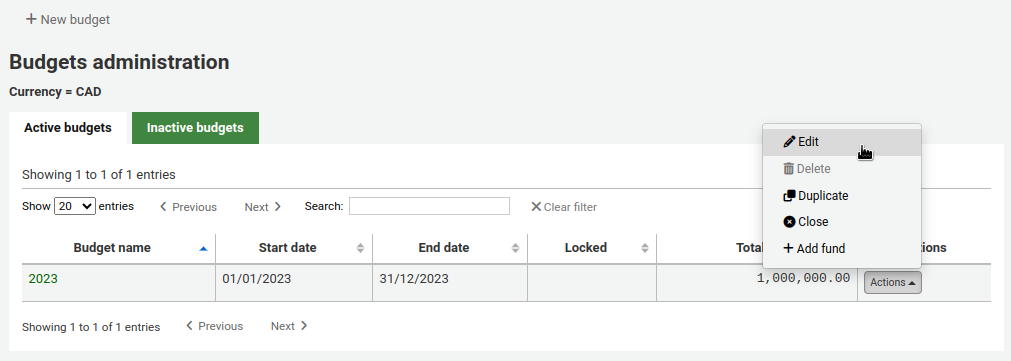
Alternatively,
From the list of budgets, click on the budget name.
On the screen listing the budget breakdown, click the ‘Edit’ button at the top and choose to ‘Edit budget’
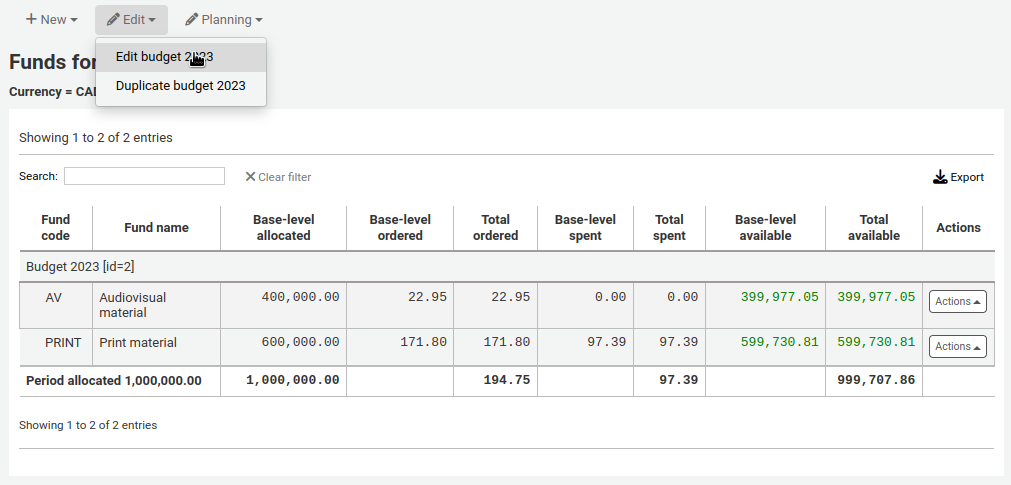
In both cases, you will be presented with a form to duplicate the budget.
Make your changes (see the field descriptions above).
Click ‘Save’.
Closing a budget
Teslim alınmayan siparişleri kapatmak ya da uzatmak için ve eğer isterseniz harcanmamış fonları bir önceki bütçeden yeni bütçeye taşımak için bütçeyi kapatın. Bütçenizi kapatmadan önce bir önceki yılın bütçesini çoğaltmak isteyebilirsiniz, böylece teslim alınmayan siparişlerin uzatılması için bir yeriniz olur.
To close a budget,
From the list of budgets, click the ‘Actions’ button on the right.
Choose ‘Close’
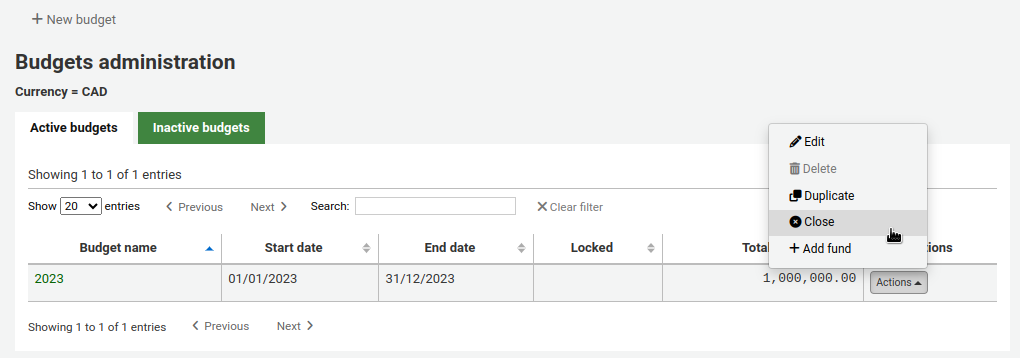
Not
Budgets without unreceived orders cannot be closed.

Fill out the form.
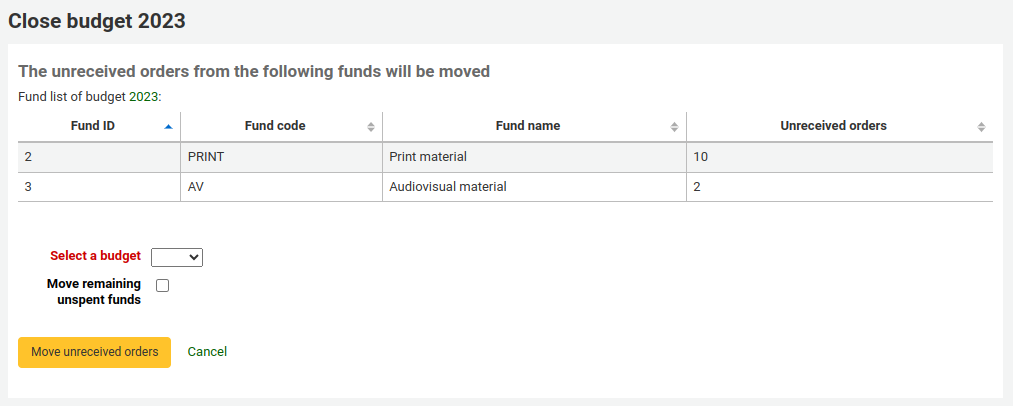
Select a budget: choose the new budget for the unreceived orders from the dropdown.
Not
In order for the unreceived orders to be automatically moved to the new budget, the fund structures in the previous budget must exist in the new budget.
Move remaining unspent funds: check this box to move the unspent amounts from the funds of the budget being closed to the selected budget.
Click the ‘Move unreceived orders’ button.
You will be presented with a dialog box that says ‘You have chosen to move all unreceived orders from ‘Budget X’ to ‘Budget Y’. This action cannot be reversed. Do you wish to continue?’ Budget X is the budget to be closed and Budget Y is the selected budget.
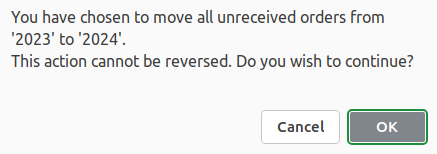
Her şey doğru görünüyorsa ‘TAMAM’ üzerine tıklayın ve teslim alınmamış siparişler ve eğer seçilmişse harcanmamış fonlar taşınacaktır.
‘Teslim alınmayan siparişlerin X bütçesinden Y bütçesine taşınmasından sonra rapor ver’ ekranda görüntülene kadar bekleyin. Bu, etkilenen sipariş numaralarını (fona göre gruplandırılan) listeleyecek ve eğer teslim alınmayan siparişler taşınmış ise ya da bir problem ortaya çıkmış ise ayrıntılı bilgi verecektir. Örneğin, yeni bütçe önceki bütçeyle aynı isimde bir fon içermiyorsa sipariş taşınmayacaktır.
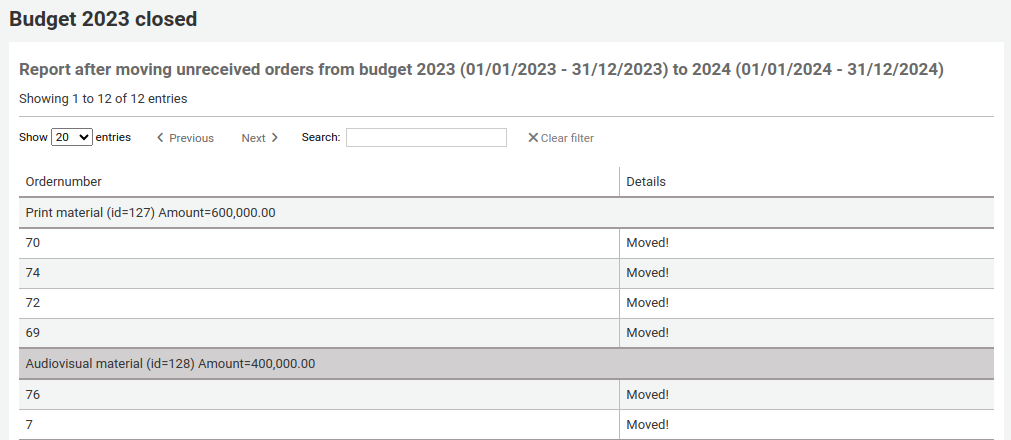
Deleting a budget
In order to delete a budget, it must not have funds. Start by deleting the funds.
Uyarı
This cannot be undone. Make sure you are certain this budget needs to be deleted. You can make it inactive or close it, instead.
To delete a budget,
From the list of budgets, click the ‘Actions’ button on the right.
Choose ‘Delete’.
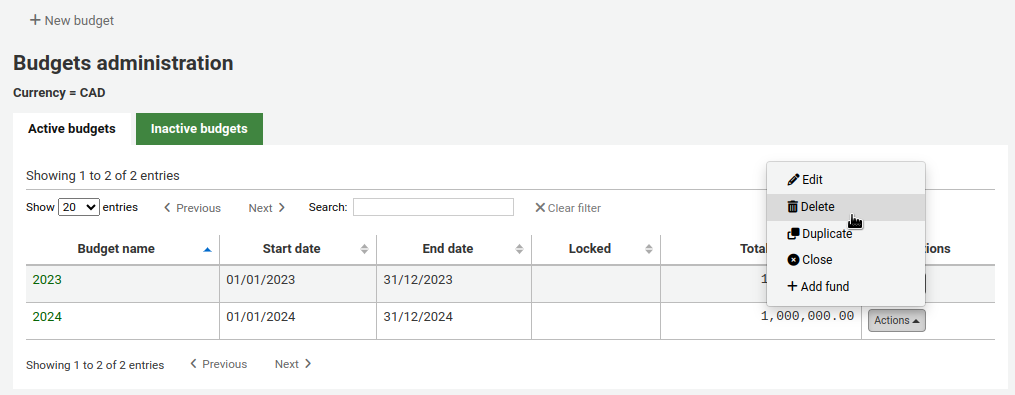
Click ‘Yes, delete’.

Fonlar
Funds are divisions of a budget. For example you could have a budget for the current year (ex. 2015) and then break that into funds for different areas of the library (ex. Books, Audio, etc).
Gidiş yolu:* Daha fazla >Yönetim > Sağlama > Fonlar
Adding a fund to a budget
A fund is added to a budget. Make sure to add a budget before adding funds.
Not
If a budget is locked, it will not be possible to add funds.
To add a new fund,
From the list of budgets, click the ‘Actions’ button on the right.
Choose ‘Add fund’.
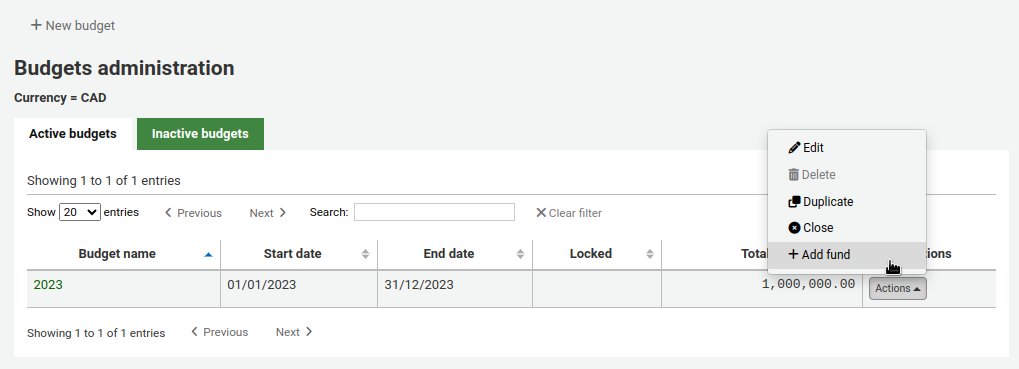
Alternatively,
From the list of budgets, click on the budget name.
On the screen listing the budget breakdown, click the ‘New’ button at the top and choose the ‘New fund for…’ option.
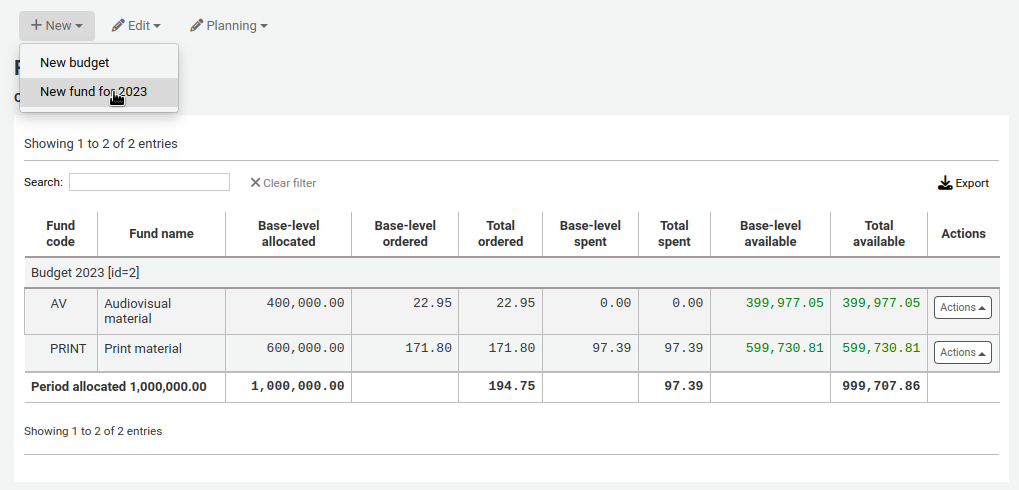
In both cases, you will be presented with a form to create the new fund.
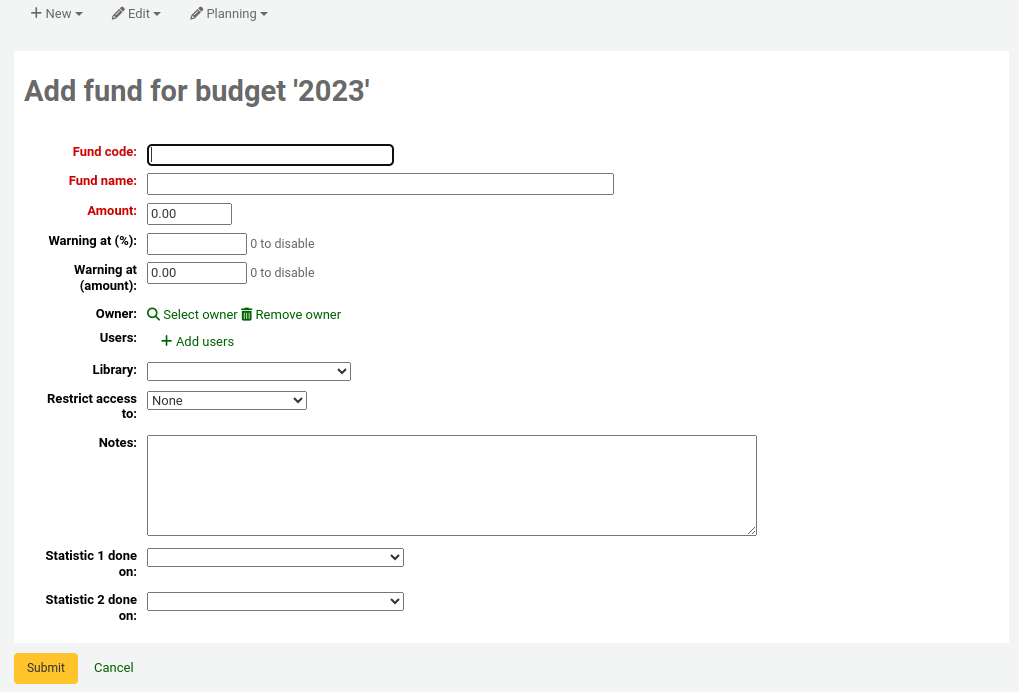
Fund code (mandatory): enter a unique identifier for your fund.
Fund name (mandatory): enter a name for the fund. This should be something that staff will understand, as this is what will be displayed when ordering.
Amount (mandatory): enter the amount with only numbers and decimals, no other characters.
Warning at (%): enter a percentage value to have Koha warn you when you have spent this percentage of the fund, to prevent overspending. For example, if you enter 90%, Koha will warn you for each order after 90% of the fund is spent.
Warning at (amount): same as above but for a specific amount of money spent. For example, if you enter 5000, Koha will warn you for each order after 5000 is spent in the fund.
Owner: you can choose to assign this fund to a staff member.
Click ‘Select owner’.
Search for the staff member in the patron search form.
Not
Only staff with superlibrarian or acquisitions permissions (or budget_modify permission if granular permissions are enabled) are returned in the search results.
Click ‘Select’ to the right of the staff member’s result.
Not
A fund can only have one owner.
Not
In order to limit the use of this fund to the owner, you must choose either ‘Owner’, ‘Owner and users’ or ‘Owner, users and library’ in the ‘Restrict access to’ field below. Otherwise, adding users will not have any restricting effect.
Not
Staff members with the order_manage_all permission will be able to use funds regardless of restrictions.
Make sure your staff doesn’t have that permission if you want to restrict access to funds.
Users: you can also add users who will be able to spend in that fund.
Not
In order to limit the use of this fund to the users, you must choose either ‘Owner and users’ or ‘Owner, users and library’ in the ‘Restrict access to’ field below. Otherwise, adding users will not have any restricting effect.
Not
Staff members with the order_manage_all permission will be able to use funds regardless of restrictions.
Make sure your staff doesn’t have that permission if you want to restrict access to funds.
Click ‘Add users’
Search for the staff member in the patron search form.
Not
Only staff with superlibrarian or acquisitions permissions (or budget_modify permission if granular permissions are enabled) are returned in the search results.
Click ‘Add’ to the right of the staff member’s result.
Not
You can add as many users as you need.
Click ‘Close’ once all the users have been added.
Library: If this fund is for a specific library, choose it here.
Not
In order to limit the use of this fund to the library, you must choose ‘Owner, users and library’ in the ‘Restrict access to’ field below. Otherwise, choosing a library will not have any restricting effect.
Not
Staff members with the order_manage_all permission will be able to use funds regardless of restrictions.
Make sure your staff doesn’t have that permission if you want to restrict access to funds.
Restrict access to: you can restrict who can order from this fund by choosing either the ‘owner’, ‘owner and users’ or ‘owner, users and library’.
Uyarı
Without an owner, the access restriction will be ignored, be sure to enter an owner as well as choose a restriction.
Not
Staff members with the order_manage_all permission will be able to use funds regardless of restrictions.
Make sure your staff doesn’t have that permission if you want to restrict access to funds.
Notes: any descriptive notes about this fund.
Not
Notes will only appear on this screen (when editing the fund).
Statistic 1 done on: this is used for statistical purposes. Choose an authorized value category from which to choose values when placing orders using this fund. You will then be able to plan spending and report on spending according to those categories. The default authorized value category Asort1 is created specifically for this purpose, but you can use any authorized value category in this field (CCODE for example to plan spending according to collections).
Statistic 2 done on: same as above, for a second statistical category. The default authorized value category Asort2 is created specifically for this purpose, but you can use any authorized value category.
Not
To learn more about planning categories, check out the Planning category FAQ.
Click ‘Submit’.
You will be brought to a list of all of the funds for the budget.
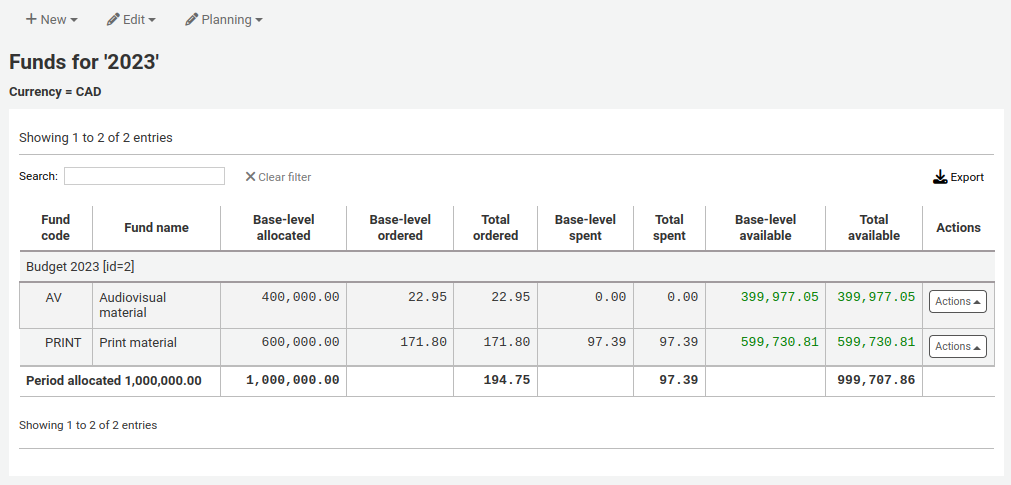
Fon tablosundaki mali sütunlar aşağıdaki gibi listelenir:
Base-level allocated is the ‘Amount’ value you defined when creating the fund
Sipariş edilmiş temel düzey bu fon için sipariş edilen miktardır (alt fon olmadan)
Toplam sipariş edilen, bu fon ve tüm alt fonları için temel düzey sipariş edilendir
Temel düzey harcanan, bu fon için harcanmış miktardır (alt fonlar olmadan)
Toplam harcanan, bu fon ve tüm alt fonları için temel düzey harcanan miktardır
Kullanılabilir temel düzey 1 - 2
Toplam kullanılabilir 1 - 3
To the right of each fund you will find the ‘Actions’ button under which you will find the ‘Edit,’ ‘Delete,’ and ‘Add sub fund’ options.
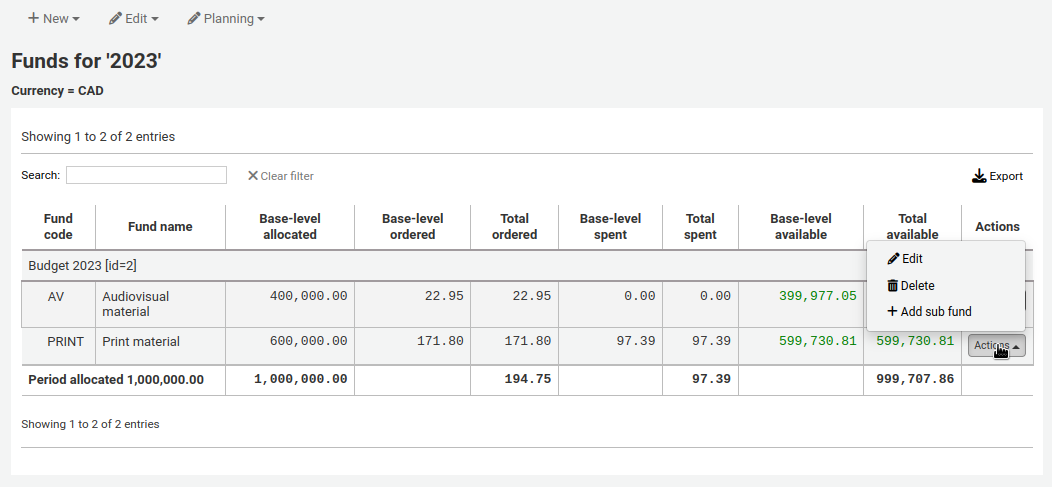
Adding a sub fund
A sub fund is a more granular division of the fund. An example would be to have a fund for ‘Fiction’ and under that have a fund for ‘New releases’ and a fund for ‘Science Fiction.’ It is an optional way to further organize your finances.
Not
If a budget is locked, it will not be possible to add sub funds.
To add a sub fund to a fund,
From the list of all funds, or from the list of funds of a specific budget, click the ‘Actions’ button on the right.
Choose ‘Add sub fund’.
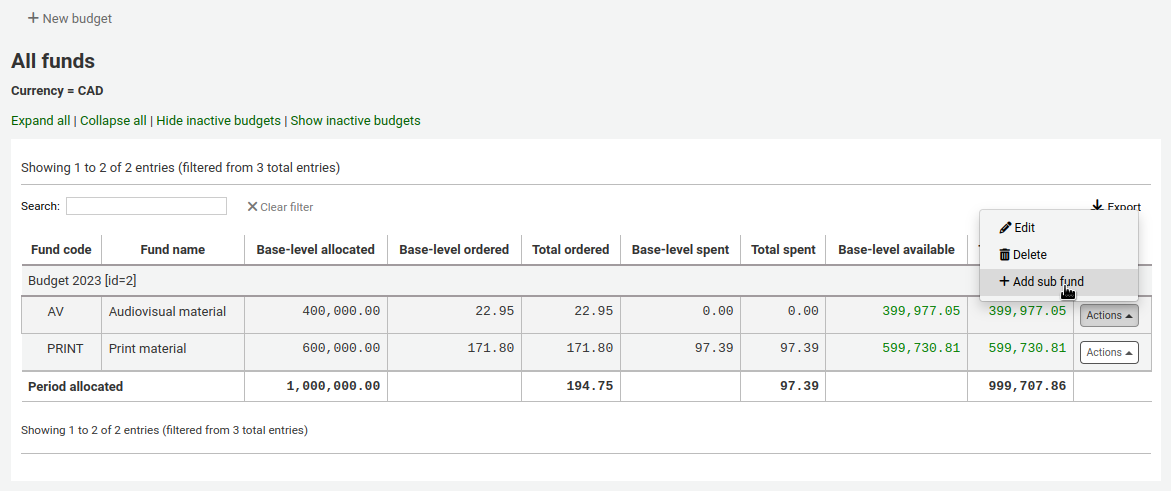
Fill out the new sub fund form. Fields are the same as for adding a new fund. The only difference is that the form will state the ‘parent’ fund.
Click ‘Submit’.
Funds with sub funds will show with a small arrow to the left. Clicking that will show you the sub funds.
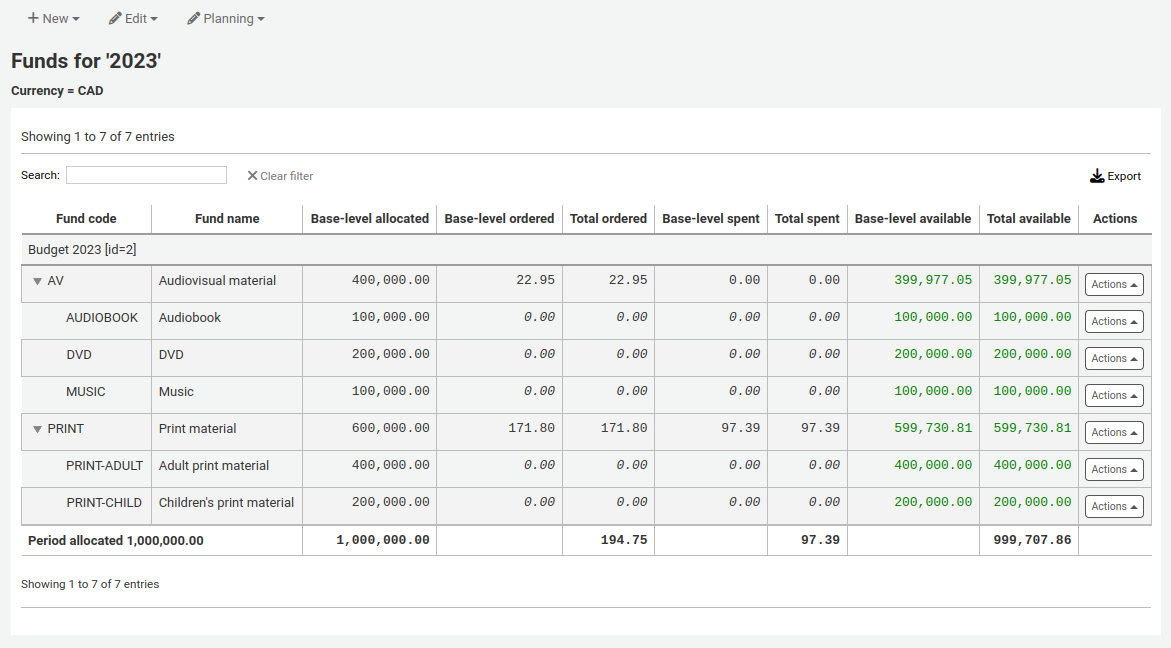
Deleting funds
It is possible to delete funds, if necessary.
Uyarı
Deleting a fund in which there are orders will delete those orders. Only delete funds if you are certain it needs to be deleted. It is not possible to undo this.
To delete a fund,
From the list of all funds, or from the list of funds of a specific budget, click the ‘Actions’ button on the right.
Choose ‘Delete’.
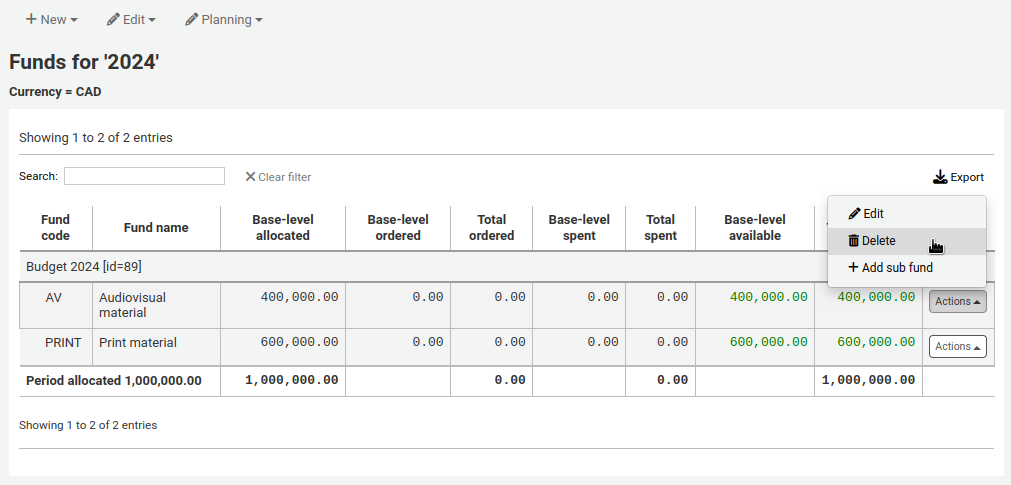
Click ‘Yes, delete this fund’ in the warning message.
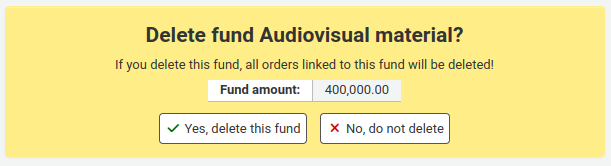
Budget planning
Fon listesini görüntülerken, ‘Planlama’ butonuna tıklayınız ve bütçenizi nasıl harcamak istediğinizi seçiniz.

If you choose ‘Plan by months’ you will see the budgeted amount broken down by months.
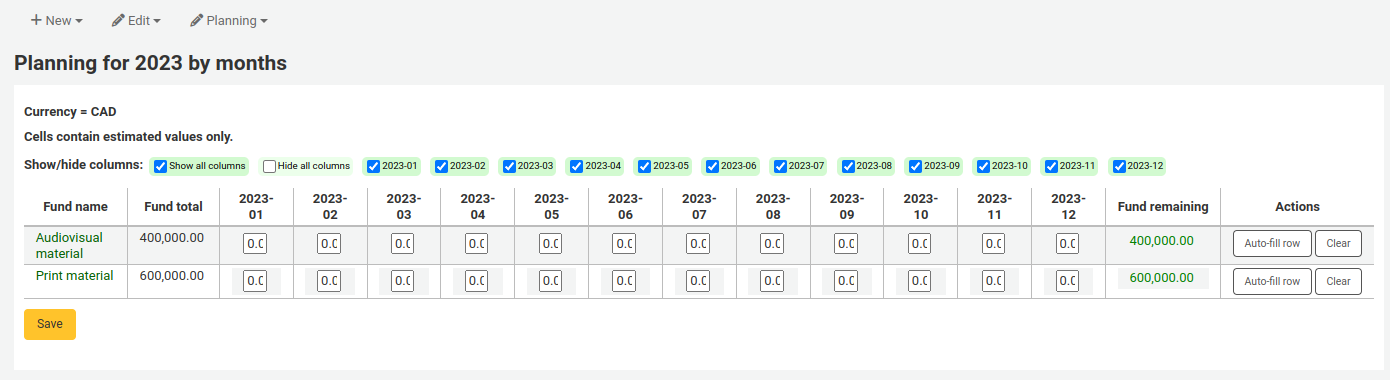
On the left are filters that can be used to limit what is shown in the table.
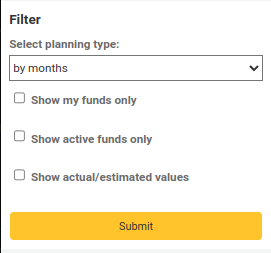
Select planning type: choose to plan by months, libraries, itemtypes, or any authorized value category used as statistic 1 or 2 in the funds.
Show my funds only: this will filter out funds of which you are not the owner.
Show active funds only: this will filter out funds that have not been used (no ordered amount).
Show actual/estimated values: this will alter the table to show the ordered amounts as well.
To hide some of the columns, uncheck the boxes at the top of the table.
From here, you can plan your budget spending by manually entering values or by clicking the ‘Auto-fill row’ button. If you choose to auto-fill the form the system will try to divide the amount accordingly, you may have to make some edits to split things more accurately.
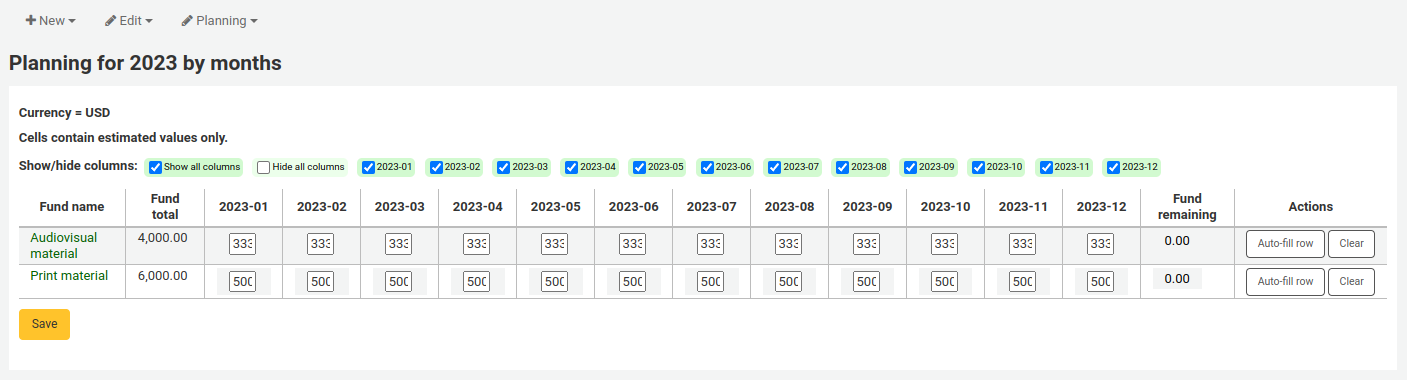
Once your changes are made, click the ‘Save’ button.
Not
If a budget is locked, it will not be possible to edit the values.
To export your data as a CSV file, enter a file name in the ‘Output to a file named’ field, in the ‘Export’ section on the left, and click the ‘Submit’ button.
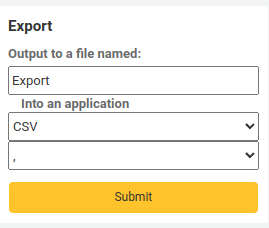
EDI accounts
Buradan, sağlama tedarikçilerinize bağlanmak için gerekli bilgileri ayarlayabilirsiniz.
Not
Başlamadan önce en az bir :ref:Sağlayıcının Satın Almalar’da kurulması <add-a-vendor-label>` gerekir.
Yeni bir hesap bilgisi eklemek için ‘Yeni hesap’ butonuna tıklayın.
Görüntülenen forma satıcı bilgilerinizi gireceksiniz.
See the EDI questions for vendors section of the acquisitions module chapter for a description of each field.
Her sağlayıcının bir hesabı olacaktır.
Kütüphane EAN’ları
Bir kütüphane EAN’ı sağlayıcının kütüphaneye kendilerine geri göndermesi için verdiği bir tanımlayıcıdır, böylece sağlayıcı faturalamada hangi hesabın kullanacağını bilecektir. Bir EDI hesabının birden çok EAN’ı olabilir.
Bir EAN eklemek için ‘Yeni EAN’ düğmesine tıklayın.
Görüntülenen forma satıcınız tarafından sağlanan bilgileri girin.
See the EDI questions for vendors section of the acquisitions module chapter for a description of each field.
Additional parameters
Get there: More > Administration > Additional parameters
Identity providers
This section is used to define and manage external identity providers for Koha users. This is used when your users come from an external source, such as student management system, active directory, or other similar databases.
Get there: More > Administration > Additional parameters > Identity providers
Adding an identity provider
To add an identity provider, click the ‘New identity provider’ button.
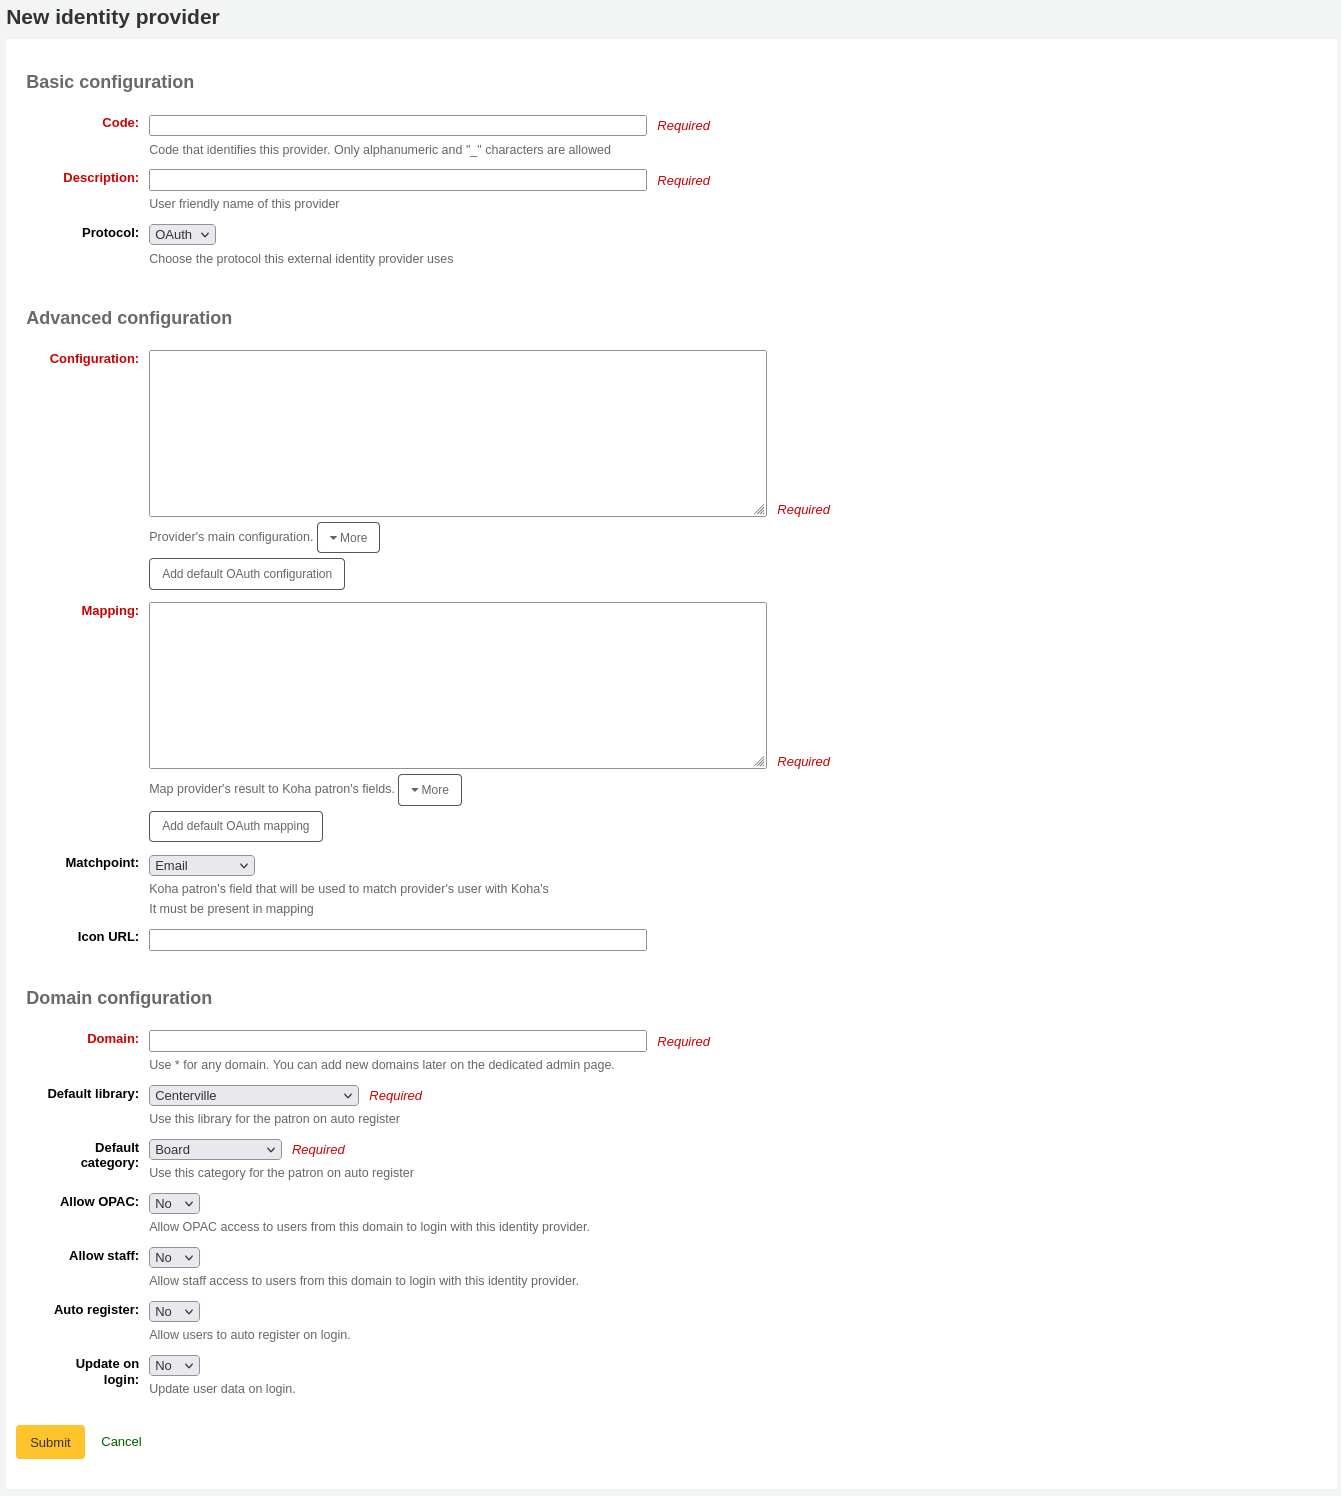
Basic configuration
Code: enter a code for this provider.
Not
The code for the identity provider is limited to 20 characters and can only be composed of letters, numbers, and underscore (_).
Description: enter a name for this provider. This is what you will see in the interface.
Protocol: choose which protocol this identity provider uses.
OAuth
OIDC
Advanced configuration
Configuration: Use this field to enter the configuration specific to the protocol chosen above.
You can click on the ‘Add default OAuth configuration’ button or the ‘Add default OIDC configuration’ button to prefill the field with some default values, which you can change for your own values.
The default OAuth configuration is:
{
 "key": "<enter client id>",
 "secret": "<enter client secret>",
 "authorize_url": "<enter authorization endpoint>",
 "token_url": "<enter token endpoint>",
 "userinfo_url": "<enter user info endpoint (optional)>",
 "scope": "email"
}
The default OIDC configuration is:
{
 "key": "<enter client id>",
 "secret": "<enter client secret>",
 "well_known_url": "<enter openid configuration endpoint>",
 "scope": "openid email"
}
Mapping: Use this field to define the field mappings from the external database to the Koha borrower fields.
The key is the Koha field from the borrowers table, and the value is the external field.
Not
You can find all fields of the borrowers table in the database schema.
You can click on the ‘Add default OAuth mapping’ button or the ‘Add default OIDC mapping’ button to prefill the field with some default values, which you can change for your own values.
Both the default OAuth mapping and default OIDC mapping are:
{
 "email": "email",
 "firstname": "given_name",
 "surname": "family_name"
}
If the external fields are nested, you can use periods to separate the levels.
For example, if the firstname is nested like so:
<user>
   <given_name>First name</given_name>
   <family_name>Family name</family_name>
   <email>Email address</email>
</user>
Use:
"firstname": "user.0.given_name"
This will fetch the “given_name” field in the first “user” field (0 = first).
Önemli
If you plan on using the auto register function (see below), make sure either “userid” or “cardnumber” are present in the mappings.
Önemli
Make sure the field for the matchpoint (see below) is included in the mappings.
Matchpoint: choose which field is used to match incoming users to existing users.
Not
The field chosen here must be included in the mappings (see above).
Icon URL: if you want an icon to show on the login screen for this provider, enter the URL to the image file here.
Domain configuration
Not
Enter at least one domain for this provider. Once it is saved, you will be able to add more domains to this provider.
Domain: enter the email domain for incoming users.
Not
Enter an asterisk (*) to include all domains.
Default library: if auto register is enabled, choose at which library new users will be registered.
Default category: if auto register is enabled, choose which patron category will be assigned to new users.
Allow OPAC: choose if patrons of this domain can log into the OPAC with their credentials from this identity provider.
Allow staff: chose if staff members of this domain can log into the staff interface with their credentials from this identity provider.
Auto register: choose whether or not a new patron account is created in Koha when a user from this domain logs in for the first time with their credentials from this identity provider.
Not
If auto register is enabled, make sure the “userid” or “cardnumber” fields are included in the mappings (see above).
Also make sure the default library and default category are set correctly for new patrons. These will be assigned to the new patrons.
Update on login: choose whether or not the patron account in Koha is updated with the external information when a user from this domain logs in with their credentials from this identity provider.
Uyarı
Information may be lost if you change it directly in Koha.
Once the form is completed, click ‘Submit’ to save the new identity provider.
You will need to restart Koha once the identity provider is added.
Adding an email domain to an existing identity provider
You will need to add at least one email domain when creating a new identity provider. You can add more by clicking the ‘Manage domains’ button to the right of the identity provider from the main identity providers page, and clicking ‘New email domain’.
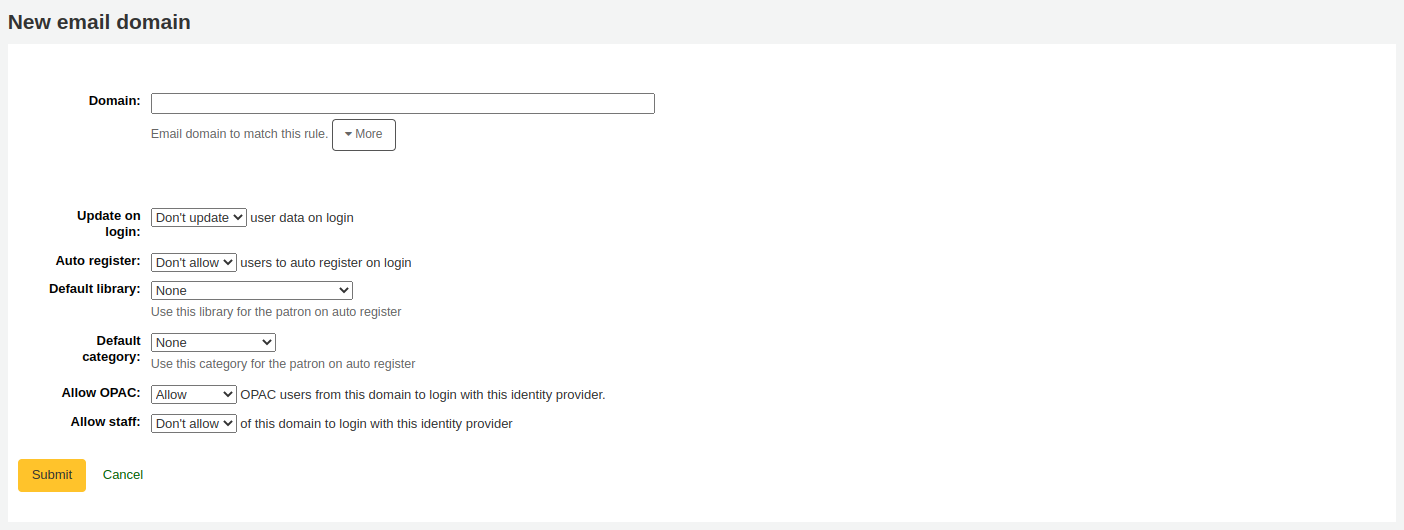
Domain: enter the email domain for incoming users.
Not
Enter an asterisk (*) to include all domains.
Update on login: choose whether or not the patron account in Koha is updated with the external information when a user from this domain logs in with their credentials from this identity provider.
Uyarı
Information may be lost if you change it directly in Koha.
Auto register: choose whether or not a new patron account is created in Koha when a user from this domain logs in for the first time with their credentials from this identity provider.
Not
If auto register is enabled, make sure the “userid” or “cardnumber” fields are included in the mappings of the identity provider.
Also make sure the default library and default category are set correctly for new patrons. These will be assigned to the new patrons.
Default library: if auto register is enabled, choose at which library new users will be registered.
Default category: if auto register is enabled, choose which patron category will be assigned to new users.
Allow OPAC: choose if patrons of this domain can log into the OPAC with their credentials from this identity provider.
Allow staff: chose if staff members of this domain can log into the staff interface with their credentials from this identity provider.
Once the form is completed, click ‘Submit’ to save the new email domain.
Z39.50/SRU sunucuları
Z39.50, arama yapmak ve uzak bilgisayar veritabanlarından bilgi almak için bir istemci-sunucu protokolüdür, kısacası kataloglama kopyalamak için kullanılan bir araçtır.
SRU- Search/Retrieve via URL - arama sorguları için standart bir XML tabanlı protokoldur, utilizing CQL - Contextual Query Language - sorguları izafeten standart bir sözdizimidir.
Koha kullanarak genel kullanıma açık ya da oturum açma bilgilerine sahip olduğunuz her hangi Z39.50 ya da SRU hedefine bağlanabilir ve o kaynaktan bibliyografik ve otorite kayıtların her ikisini de kopyalayabilirsiniz.
Get there: More > Administration > Additional parameters > Z39.50/SRU servers
Koha beraberinde, ekleyebileceğiniz, düzenleyebileceğiniz veya silebileceğiniz Z39.50/SRU hedefleri kurulumlarının bir varsayılan listesi ile gelmektedir
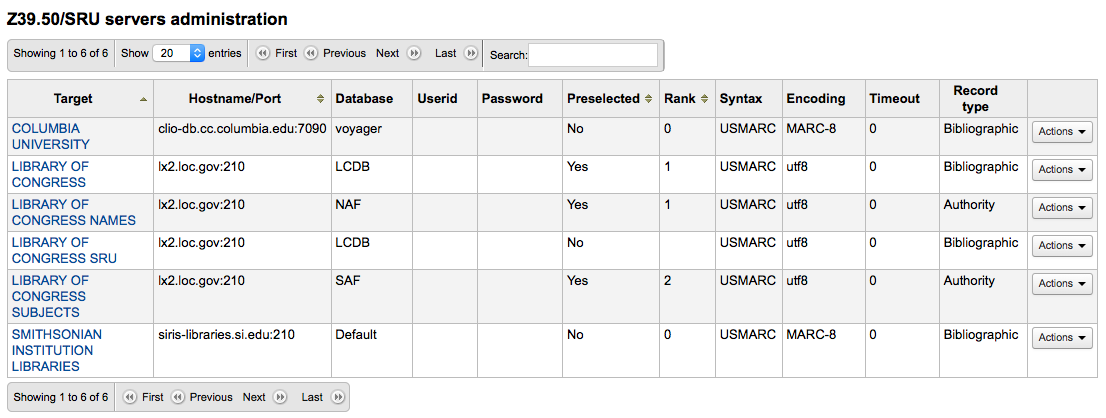
To find additional Z39.50 targets you use IndexData’s IRSpy: http://irspy.indexdata.com or the Library of Congress’s list of targets http://www.loc.gov/z3950/
Add a Z39.50 target
From the main Z39.50 page, click ‘New Z39.50 server’
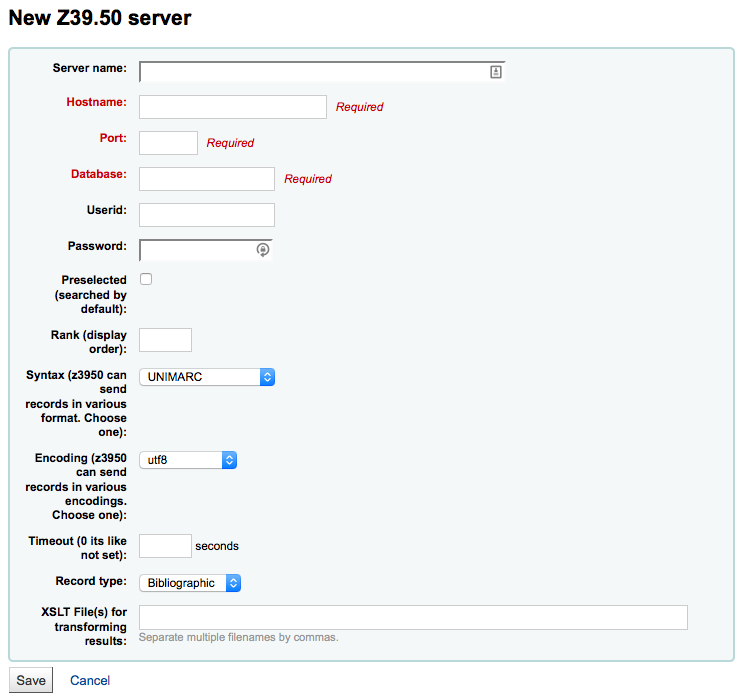
Z39.50 sunucusu’ kaynağı tanımlamaya yardımcı olacak bir isimle doldurulmalıdır (kütüphane ismi gibi).
‘Ana bilgisayar adı’ Z39.50 hedef adresi olacaktır.
‘Bağlantı noktası’ Koha’ya bu hedeften sonuçlar almak için hangi bağlantı noktasını dinleyeceğini söyler.
‘Kullanıcı adı’ ve ‘Parola’ sadece parola korumalı sunucular için gereklidir.
Bu hedefin her zaman varsayılan olarak seçili olmasını istiyorsanız, ‘Preselected’ kutusunu işaretleyin.
‘Rank’ bu hedefi, listenin içinde nerede görünmesini istiyorsanız oraya girmenizi sağlar.
Bu boş bırakılırsa hedefler alfabetik düzende olacaktır.
‘Attributes’ lets you define PQF attributes to be added to all queries.
Sözdizimi’ kullandığınız MARC niteliğidir.
‘Kodlama’ sisteme özel karakterleri nasıl okuyacağını anlatır.
‘Zamanaşımı’ uzun sürecek hedefler için yardımcıdır. Sonuçlar makul bir zaman dilimi içinde bulunmuyorsa, hedefi denemeye devam etmemesi için zamanaşımını ayarlayabilirsiniz.
‘Kayıt türü’ bunun bibliyografik ya da otorite hedef olup olmadığını tanımlamanıza imkan sağlar.
‘XSLT dosya(ları)’ arama sonuçları üzerinde uygulamak istediğiniz bir veya daha fazla (virgülle ayrılmış) XSLT dosya adlarını girmenizi sağlar.
Dış hedeflerden kayıtları çekerken bu kayıtlar için bazı değişiklikleri otomatikleştirmek isteyebilirsiniz. XSLT bunu yapmanızı sağlar. Koha /koha-tmpl/intranet-tmpl/prog/en/xslt/ dizini içinde kullanıma hazır bazı örnek XSLT dosyaları ile gelir:
Del952.xsl: Materyalleri kaldır (MARC21/NORMARC)
Del995.xsl: Materyalleri kaldır (UNIMARC)
Del9LinksExcept952.xsl: $9 bağlantılarını kaldır. Materyal alanlarını atla (MARC21/NORMARC)
Del9LinksExcept995.xsl: $9 bağlantılarını kaldır. Materyal alanlarını atla (UNIMARC)
Suggested bibliographic Z39.50 targets
Z39.50 hedefi açık Koha kütüphaneleri Koha wiki üzerinde bağlantı bilgilerini bulabilir ve paylaşabilirler: `http://wiki.koha-community.org/wiki/Koha_Open_Z39.50_Sources. Aynı zamanda IRSpy sayfasını ziyaret ederek açık Z39.50 hedeflerini bulabilirsiniz: `http://irspy.indexdata.com.
Aşağıdaki hedefler diğer Koha kütüphaneleri tarafından (Amerikalılarda) başarılı bir şekilde kullanılmıştır.
ACCESS PENNSYLVANIA 205.247.101.11:210 INNOPAC
CUYAHOGA COUNTY PUBLIC webcat.cuyahoga.lib.oh.us:210 INNOPAC
GREATER SUDBURY PUBLIC 216.223.90.51:210 INNOPAC
HALIFAX PUBLIC catalog.halifaxpubliclibraries.ca:210 horizon
HALTON HILLS PUBLIC cat.hhpl.on.ca:210 halton_hills
LIBRARY OF CONGRESS lx2.loc.gov: 210 LCDB
LONDON PUBLIC LIBRARY catalog.londonpubliclibrary.ca:210 INNOPAC
MANITOBA PUBLIC library.gov.mb.ca:210 horizon (MANITOBA HALK kütüphanesi)
MILTON PL cat.mpl.on.ca:210 horizon
GALLER ULUSAL KÜTÜPHANESİ cat.llgc.org.uk:210 varsayılan
NHUPAC 199.192.6.130:211 nh_nhupac
OCEAN STATE LIBRARIES (RI) catalog.oslri.net:210 INNOPAC
OHIOLINK olc1.ohiolink.edu:210 INNOPAC
PUBCAT prod890.dol.state.vt.us:2300 unicorn
SAN JOAQUIN VALLEY PUBLIC LIBRARY SYSTEM (CA) hip1.sjvls.org:210 ZSERVER
SEATTLE PUBLIC LIBRARY ZSERVER.SPL.ORG:210 HORIZON
TORONTO HALK senfonisi.torontopubliclibrary.ca:2200 unicorn
TRI-UNI 129.97.129.194:7090 voyager
VANCOUVER PUBLIC LIBRARY z3950.vpl.ca:210 Horizon
Add a SRU target
From the main Z39.50/SRU page, click ‘New SRU server’
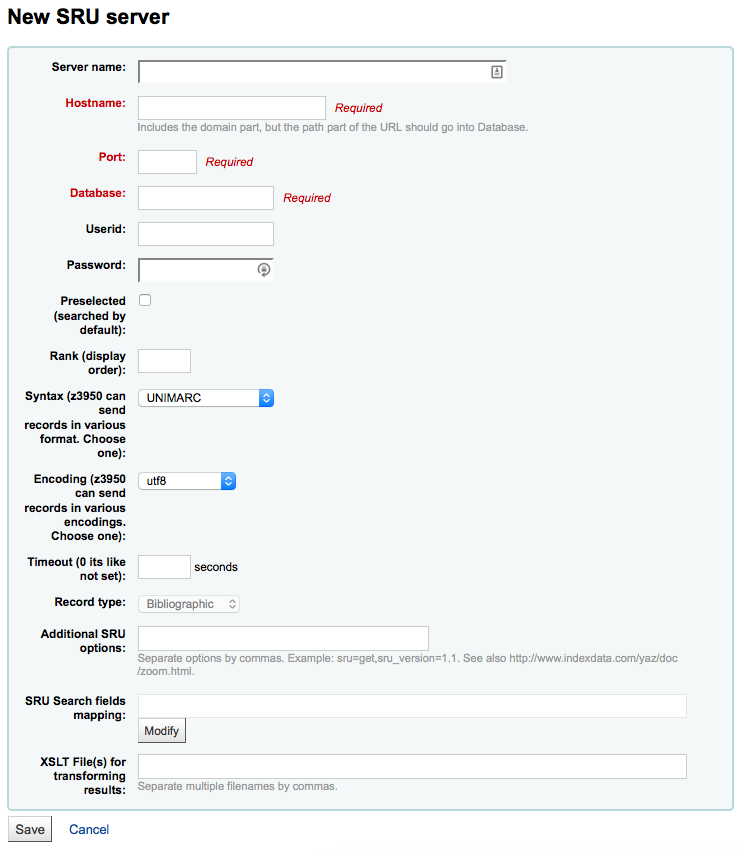
‘Sunucu adı’ kaynağı tanımlamanıza yardımcı olacak bir isimle doldurulmalıdır (kütüphane adı gibi).
‘Ana bilgisayar adı’ Z39.50 hedef adresi olacaktır.
‘Bağlantı noktası’ Koha’ya bu hedeften sonuçlar almak için hangi bağlantı noktasını dinleyeceğini söyler.
‘Kullanıcı adı’ ve ‘Parola’ sadece parola korumalı sunucular için gereklidir.
Bu hedefin her zaman varsayılan olarak seçili olmasını istiyorsanız, ‘Preselected’ kutusunu işaretleyin.
‘Rank’ bu hedefi, listenin içinde nerede görünmesini istiyorsanız oraya girmenizi sağlar.
Bu boş bırakılırsa hedefler alfabetik düzende olacaktır.
Sözdizimi’ kullandığınız MARC niteliğidir.
‘Kodlama’ sisteme özel karakterleri nasıl okuyacağını anlatır.
‘Zamanaşımı’ uzun sürecek hedefler için yardımcıdır. Sonuçlar makul bir zaman dilimi içinde bulunmuyorsa, hedefi denemeye devam etmemesi için zamanaşımını ayarlayabilirsiniz.
‘Ek SRU seçenekleri’ dış sunucunun ilave seçeneklerini girebileceğiniz yerdir, sru_version=1.1 ya da schema=marc21, vb. gibi. Bu seçeneklerin sunucu bağımlı olduğunu unutmayın.
‘SRU Arama alanı eşleştirme’ Koha arama formu üzerindeki mevcut alanlardan belirli sunucu bağımlı dizin adlarına eşleştirmeler eklemenizi ya da güncellemenizi sağlar.
Aramalarınızı daha da geliştirmek için SRU arama alanı eşleşmelerine aşağıdaki dizin adlarını ekleyebilirsiniz. Bunu yapmak için sunucuyu düzenleyin ve bu alanın yanındaki Değiştir butonuna tıklayın.
Eser Adı
dc.title
ISBN
bath.isbn
Herhangi bir
cql.anywhere
Yazar
dc.author
ISSN
bath.issn
Konu
dc.subject
Standart kimliği
bath.standardIdentifier
Table: SRU mapping
‘XSLT dosya(ları)’ arama sonuçları üzerinde uygulamak istediğiniz bir veya daha fazla (virgülle ayrılmış) XSLT dosya adlarını girmenizi sağlar.
Dış hedeflerden kayıtları çekerken bu kayıtlar için bazı değişiklikleri otomatikleştirmek isteyebilirsiniz. XSLT bunu yapmanızı sağlar. Koha /koha-tmpl/intranet-tmpl/prog/en/xslt/ dizini içinde kullanıma hazır bazı örnek XSLT dosyaları ile gelir:
Del952.xsl: Materyalleri kaldır (MARC21/NORMARC)
Del995.xsl: Materyalleri kaldır (UNIMARC)
Del9LinksExcept952.xsl: $9 bağlantılarını kaldır. Materyal alanlarını atla (MARC21/NORMARC)
Del9LinksExcept995.xsl: $9 bağlantılarını kaldır. Materyal alanlarını atla (UNIMARC)
SMTP servers
Get there: More > Administration > Additional parameters > SMTP servers
This section is used to configure SMTP servers to send emails through Koha.
Not
This section is only available to staff members with the manage_smtp_servers (or superlibrarian) permission.
The default STMP configuration is set in the koha-conf.xml file. But this section allows you to add additional servers.

To add a new server,
Click ‘New SMTP server’
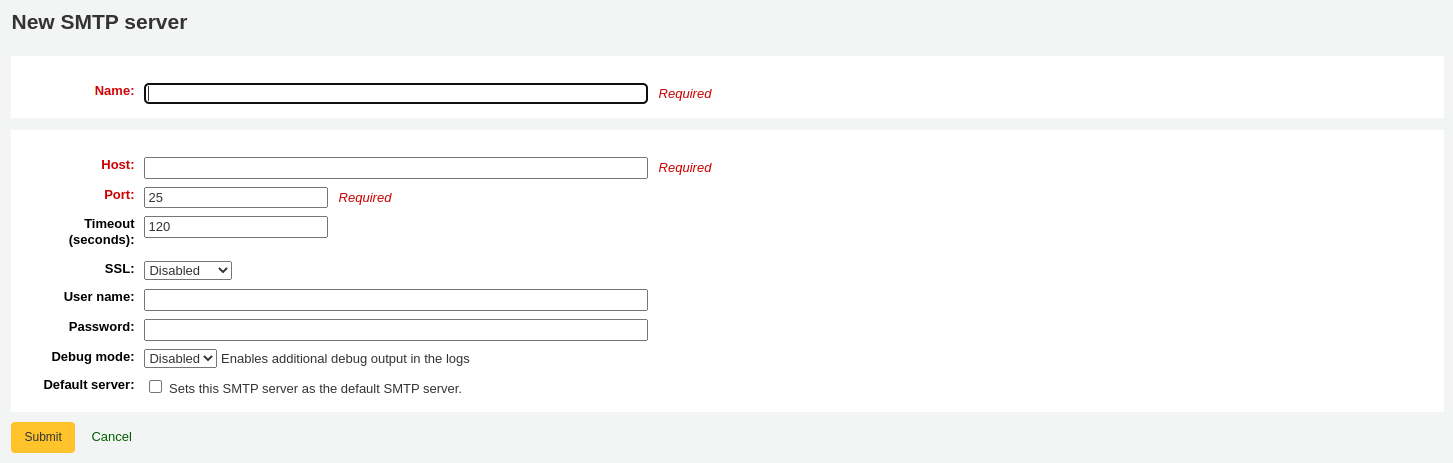
Name (required): give the server a significant name, this is the name that will be displayed in Koha
Host (required): enter the host name or IP address of the server
Port (required): enter the port number provided by your administrator
Timeout (seconds): enter the number of seconds after which an unsent email will result in an error
SSL: choose the security protocol provided by your administrator
Disabled: no security (not recommended)
SSL
STARTTLS
Username: enter the username provided by your administrator
Password: enter the password provided by your administrator
Debug mode: choose whether to enable the debug mode to send additional output to the logs
Default server: choose whether this server is the default one to be used by all libraries
‘Onayla’ya’ tıkla
Once the server is added, you can select it in the library’s details.
Bunu mu demek istediniz?
Get there: More > Administration > Additional parameters > Did you mean?
Koha, aramalarınızda otoriteler içerisindeki değerlerinizi esas alarak ‘Bunu mu demek istediniz?’ seçeneğini sunabilir.
Önemli
Did you mean? only works in the OPAC at this time. The intranet options are here for future development.
Bu sayfayı kullanarak KOHA’nın kullanıcılara arama sonuçlarında hangi seçenekleri sunacağını kontrol edebilirsiniz.
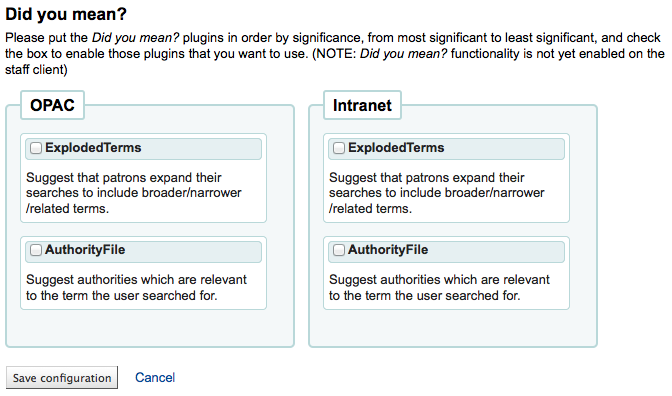
‘Bunu mu demek istediniz?’ çubuğunu arama sonuçlarında açmak için kullanmak istediğiniz her bir eklentinin yanındaki kutuyu onaylamanız gerekir. Seçmeniz gereken iki eklenti şunlardır:
Ayrılmış Terimler eklentisi kullanıcının daha geniş/daha dar/ verilen aramayla ilgili terimlerini belirtir (örneğin bir kullanıcı aynı zamanda “New York (Şehir)” ile de ilgileniyorsa “New Yorku (Eyalet)” arıyorken daha dar terimlere tıklayacaktır ). Bu sadece yüksek hiyerarşik otorite verili kütüphaneler ile ilgilidir.
Otorite dosya eklentisi otorite dosyasını araştırır ve kullanıcıya ilgilenebileceği en çok tercih edilen 5 otoriteye bağlı bibliyografik kayıtları önerir
Bir eklentinin diğerinden önce gelmesini istiyorsanız, o eklentiyi bir diğerinin üstüne sürükleyiniz.
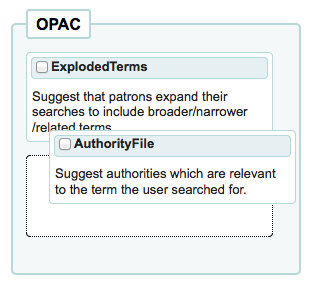
Her iki eklentiyi de seçerseniz arama sonuçlarınızın üst kısmında çeşitli seçenekler göreceksiniz
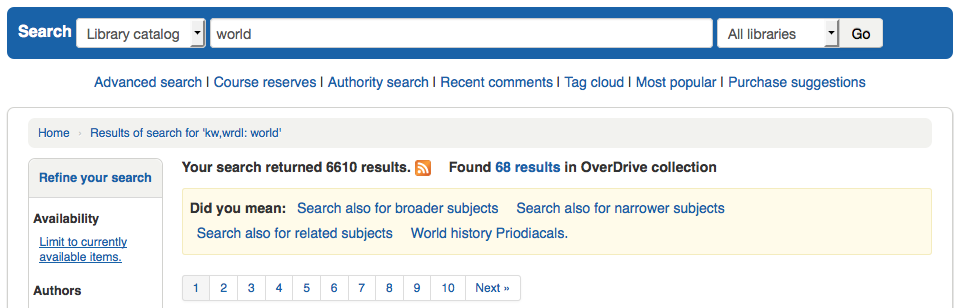
Sadece AuthorityFile seçerseniz sadece otoriteleri görürsünüz.
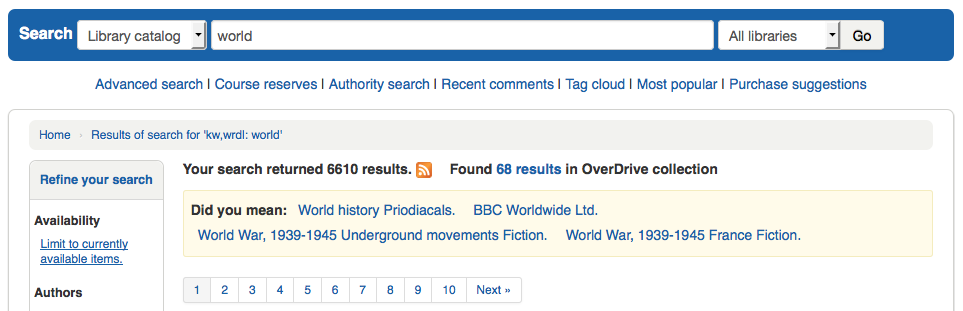
Table settings
This administration area will help you hide or display columns on fixed tables throughout the staff interface and OPAC.
Get there: Administration > Additional parameters > Table settings
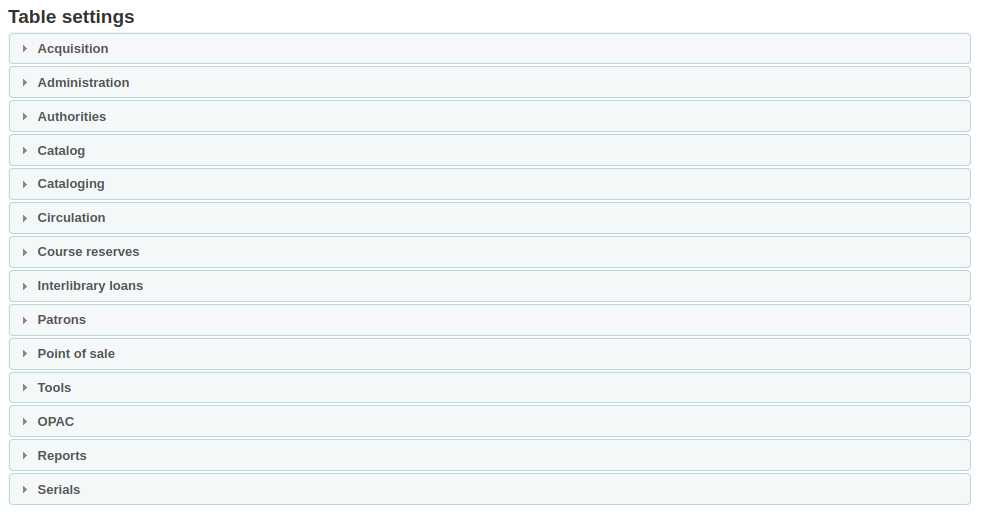
Tablolarını düzenlemek istediğiniz modül üzerine tıklamak size kullanabileceğiniz seçenekleri gösterir.
Bu alan söz konusu tablo içinde gösterilen sütunları kontrol etmenizi sağlar. Hiç bir şey gizli değilse ‘varsayılan olarak gizli’ sütununda hiç bir onay işareti görmeyeceksiniz.
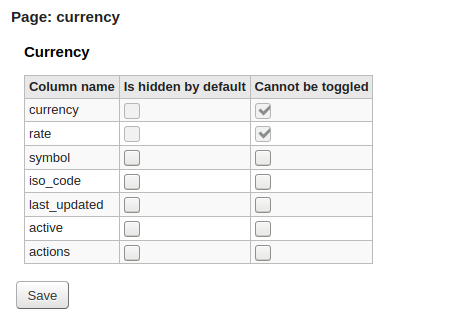
Ve tabloyu düzenli sayfasında görüntülerken tüm sütunları göreceksiniz.
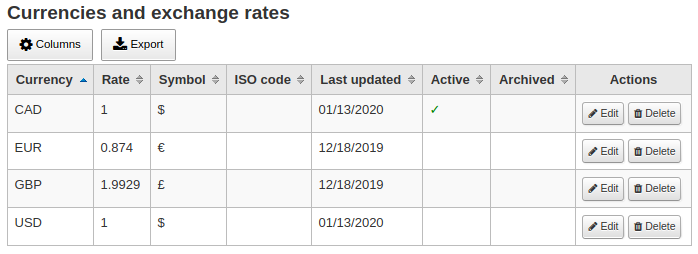
Eğer sütunlar gizli ise ‘varsayılan olarak gizli’ sütununa onay işaretleri konulacaktır.
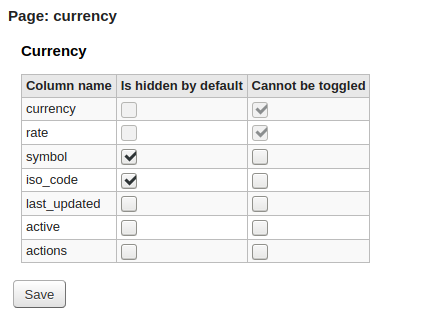
Ve tabloyu görüntülerken gizlenecektir.
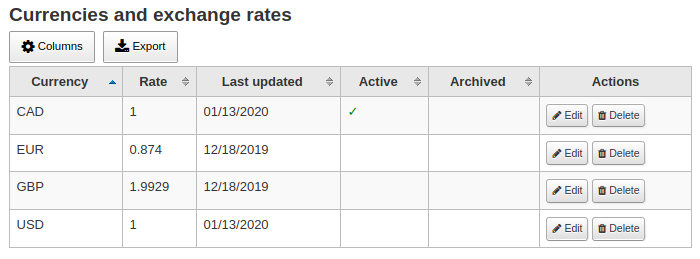
The ‘Cannot be toggled’ column is used to prevent individual users from showing or hiding this column when viewing the table.
Individual users can toggle columns using the ‘Columns’ button at the top of the table.

For example, in the Currencies table, the ‘Currency’ and ‘Rate’ columns cannot be toggled. When the user clicks on the ‘Columns’ button, they are not able to choose whether these two columns are hidden or visible.
Note that using the ‘Columns’ button show or hide columns will only toggle them for the current user and session. Once the user logs out, the columns will go back to their default settings as set in the table settings administration page. It will not affect any other user.
Module |
Tables |
|---|---|
Sağlama |
|
Yönetim |
|
Authorities |
There aren’t any tables that can be configured from the Authorities module. |
Catalog |
|
Cataloging |
|
Circulation |
|
Course reserves |
|
Interlibrary loans |
|
Patrons |
|
Point of sale |
|
Tools |
|
OPAC |
|
Reports |
|
Serials |
|
Not
Patrons in the OPAC can’t toggle column visibility. For OPAC tables this feature only allows to control the visibility of columns.
Not
Any tables with columns listed here also have the option to export to Excel, export to CSV, copy, or print within the table header.
Sesli uyarılar
If you have your AudioAlerts preference set to ‘Enable’ you will be able to control the various alert sounds that Koha uses from this area.
Get there: More > Administration > Additional parameters > Audio alerts
Koha’daki her iletişim kutusunun bir ses için seçici olarak kullanılabilecek atanmış bir CSS sınıfı vardır.
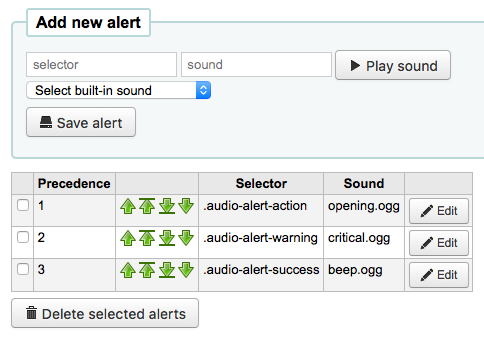
Her uyarının sağında bulunan ‘Düzenle’ butonuna tıklayarak varsayılanları düzenleyebilirsiniz
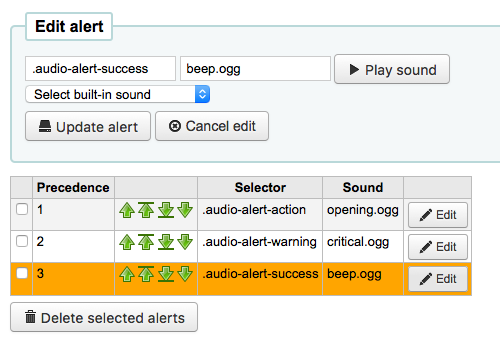
Seçme kutusuna bu bilgileri girerek uyarıları Koha’daki diğer CSS sınıflarına atayabilirsiniz. Örneğin eğer şunu girerseniz
body:contains('Check in message')
Then when you visit the check-in page you will hear an alert.
Koha’daki her sayfada, bir sesi belirli bir sayfayla sınırlamak için kullanılabilen gövde etiketinde benzersiz bir kimlik bulunur
Herhangi bir kimlik seçici (burada html, id= “name_of_id” i içerir) şu şekilde tetiklenebilir: #name_of_selector
SMS hücresel sağlayıcılar
Önemli
- This option will only appear if the
SMSSendDriver preference is set to ‘Email’.
Not
Many mobile providers have deprecated support for the SMS::Send::Email feature. It is not recommended for use unless you have a dedicated SMS to Email gateway.
Buradan, e-posta protokolünü kullanarak kullanıcılara SMS bildirimleri göndermek için ihtiyaç duyduğunuz sayıda hücresel sağlayıcıyı girebilirsiniz.

ABD’de ki bazı örnekler şunlardır:
Mobile carrier |
SMS gateway domain |
|---|---|
Alltel |
sms.alltelwireless.com |
AT&T |
txt.att.net |
Boost Mobile |
sms.myboostmobile.com |
Project Fi |
msg.fi.google.com |
Republic Wireless |
text.republicwireless.com |
Sprint |
messaging.sprintpcs.com |
T-Mobile |
tmomail.net |
U.S. Cellular |
email.uscc.net |
Verizon Wireless |
vtext.com |
Virgin Mobile |
vmobl.com |
Table: SMS provider examples
Yeni sağlayıcılar eklemek için ayrıntıları forma girin ve kaydetmek için ‘Yeni ekle’yi tıklayın.
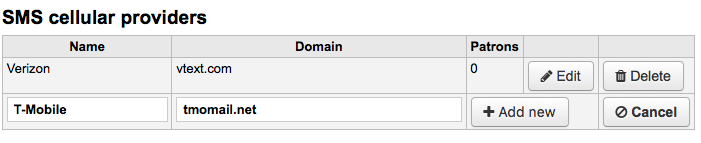
These options will appear in the OPAC for patrons to choose from on the messaging tab if you have EnhancedMessagingPreferences enabled.
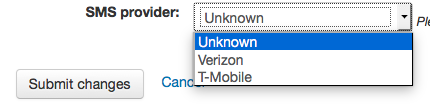
Share your usage statistics
You can share your Koha usage statistics with the Hea community. Sharing your usage statistics helps with the development of Koha as the community regularly checks these statistics to make decisions.
Note that statistics are anonymized and no patron information is shared.
Worldwide statistics can be viewed at https://hea.koha-community.org/

Share my Koha usage statistics:
The default choice is ‘Undecided’, this make the message appear on the administration main page.
Choose ‘yes’ if you want to share your usage statistics
Choose ‘no’ if you don’t want to share your statistics and you don’t want to see the message on the administration page
Your country: choose the country where your library is located
Library name: enter your library’s name
Library type: choose your library’s type
Library URL: enter your library’s Web site URL
Last update: here your will see the last date when your data was uploaded to the Hea website
Geolocation: use the map on the right to put the marker where your main library is situated. The coordinates will appear in the Geolocation field.
Libraries information: if you have more than one branch, you can choose ‘yes’ here to put all your branches on the map
See your public page: this is the URL to your information on the Hea website.
Click ‘Update your statistics usage’ to save the information.
Share content with Mana KB
Mana KB is a worldwide knowledge base used to share content specific to libraries. Koha is currently connected to Mana Kb in order to share serial subscription models and reports. This section is used to configure your connexion with Mana KB.
Get there: More > Administration > Additional parameters > Share content with Mana KB

In the form, choose whether you want to use Mana KB to share content or not. The default is “No, let me think about it”. If you do want to use Mana KB, change the option to “Yes”. If you do not want to share with Mana KB, choose “No”, this will remove the blue rectangle from the Administration home page.
The rest of this section assumes you chose “Yes”.
Choose whether you want to share your subscription models automatically. This means that every time you create a subscription in the serials module, it will be automatically shared with Mana KB and other libraries will be able to copy it.
In order to configure Mana KB, you must get a Mana KB token to authenticate your Koha installation on the Mana KB server.
Enter your name or your organization’s name in the “Your name” field.
Enter your email in the “Email” field. Make sure you have access to this email inbox since you will receive further information by email.
Once you send your information to Mana KB, you will get a Mana KB token.
In the email your receive, click on the confirmation link and confirm you are not a robot to finish the Mana KB setup.
Additional fields
This section is used to add custom fields to order baskets, invoice, serial subscriptions, and accountlines.
To add a new field, first choose which table you want to add it to.
Order baskets (aqbasket): a field added to aqbasket will appear upon the creation of a new order basket or the modification of an existing order basket in the acquisitions module.
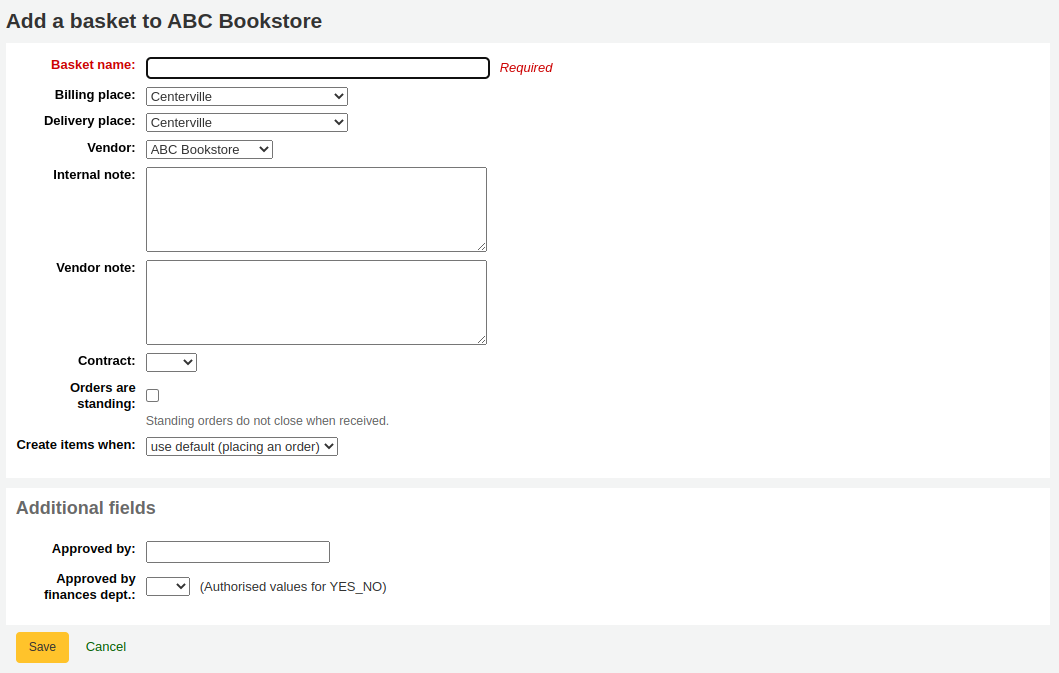
Order lines (aqorders): a field added to aqorders will appear when adding orders to a basket or editing orders in open baskets.
Invoices (aqinvoices): a field added to aqinvoices will appear when viewing an invoice in the acquisitions module.
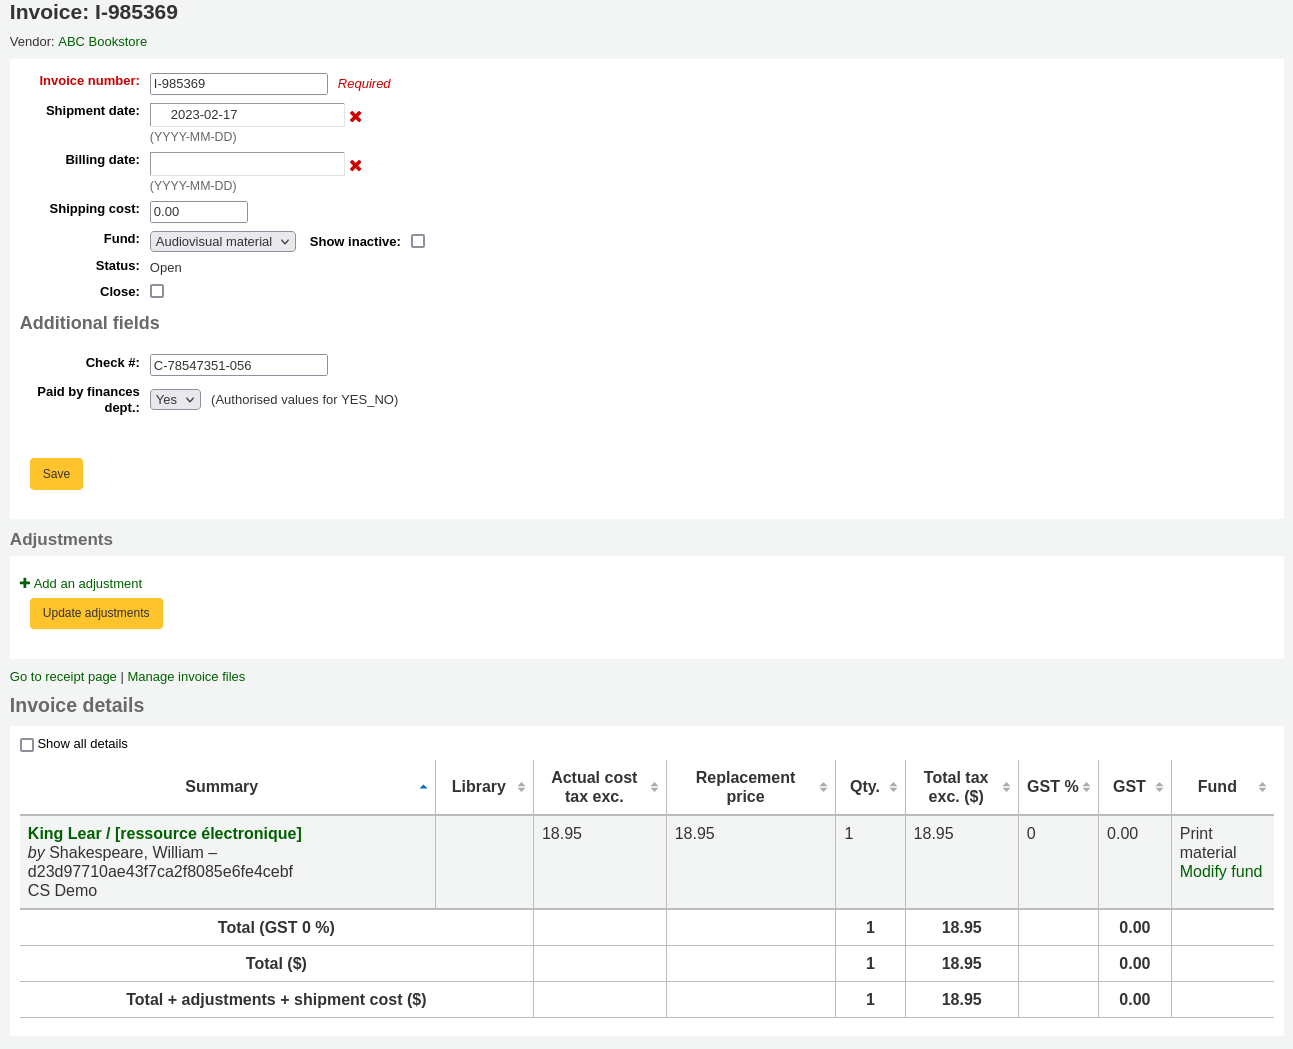
Subscriptions (subscription): a field added to subscription will appear when creating a new subscription or when editing an existing subscription in the serials module.
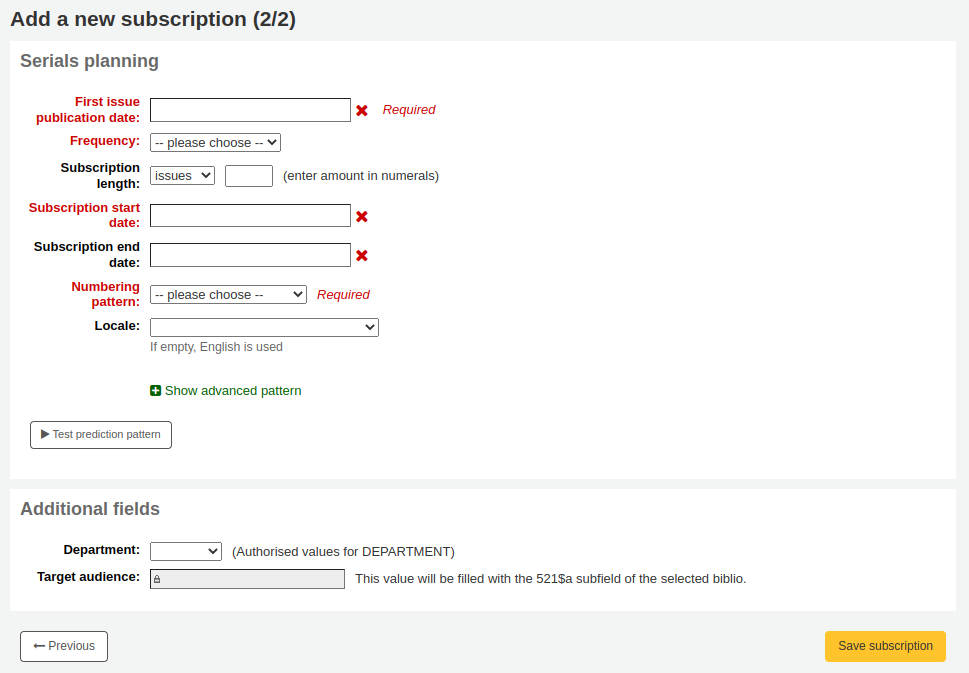
Account lines (credit) (accountlines:credit): a field added to account line credits will appear when paying or writing off charges in a patron’s account or when creating manual credits.
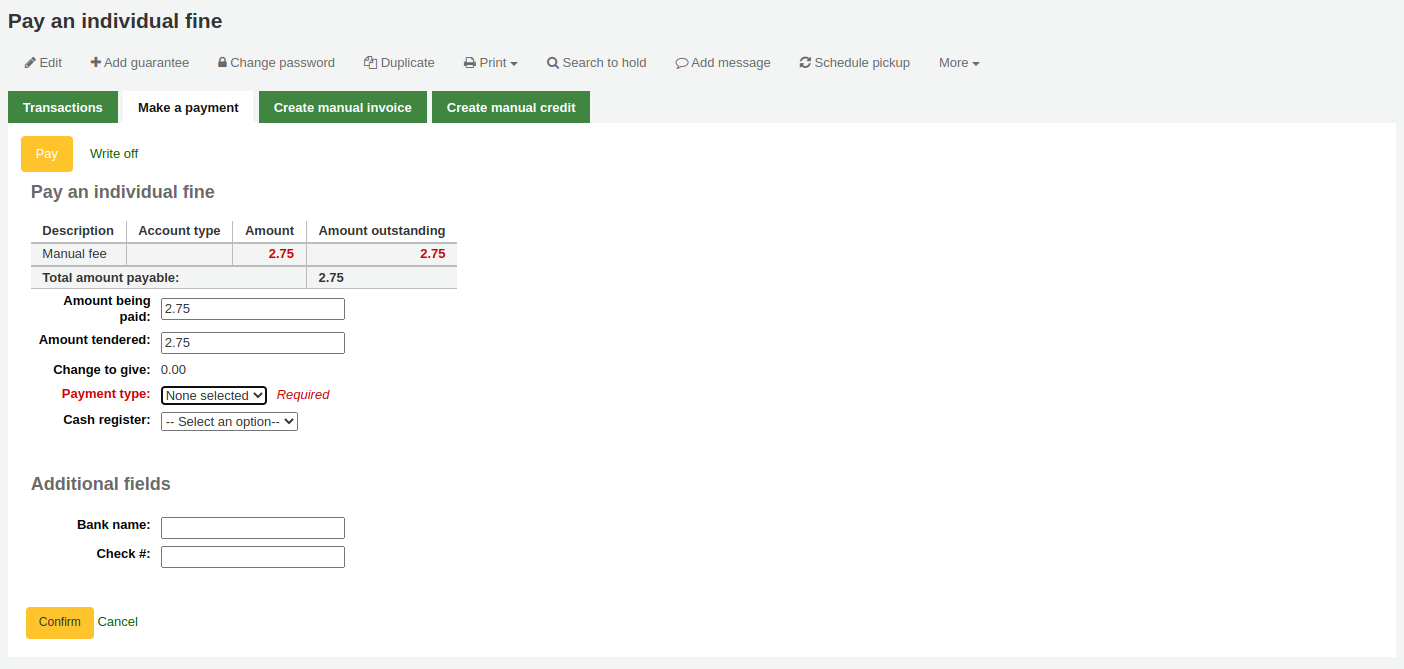
Account lines (debit) (accountlines:debit): a field added to account line debit will appear when creating a manual invoice
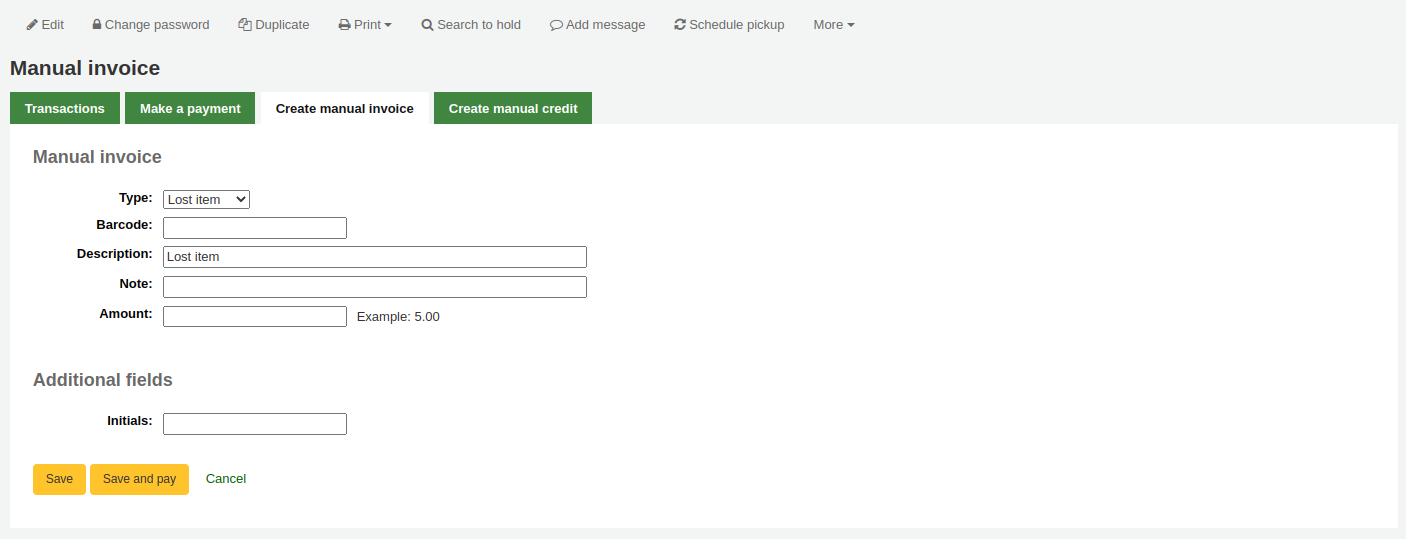
Click on “Create field”
Fill out the form

Name: this is the name of the field as you want it to appear.
Authorized value category: if you want to add a drop-down menu to the field choose an authorized value category here (you can also create a new authorized value category if you need to).
MARC field: for additional subscription fields, it is possible to link the field to a MARC field. The additional field will be automatically populated with the corresponding record’s value for this MARC field.
Not
You can only choose one of the two options (authorized value OR MARC field)
Uyarı
If you choose the MARC field, make sure you enter it in this format: field$subfield
For example: 590$a
Searchable: check this box if you want to be able to search baskets or subscriptions based on this field
Order basket searchable additional fields will be available in the orders advanced search form
Invoice searchable additional fields will be available in the invoice search form
Subscription searchable additional fields will be available in the subscription advanced search form
Examples of additional fields
Example 1: Additional subscription field using authorized values
You might want to track which department you’re ordering this serial for
In the ‘Name’ field, enter ‘Department’
In the ‘Authorized value category’ field, choose DEPARTMENT
Check the ‘Searchable’ box

When you are adding a subscription, the field will be in the ‘Additional fields’ section with its authorized values drop-down menu.
When you view the subscription, the field will appear under ‘Additional fields’.
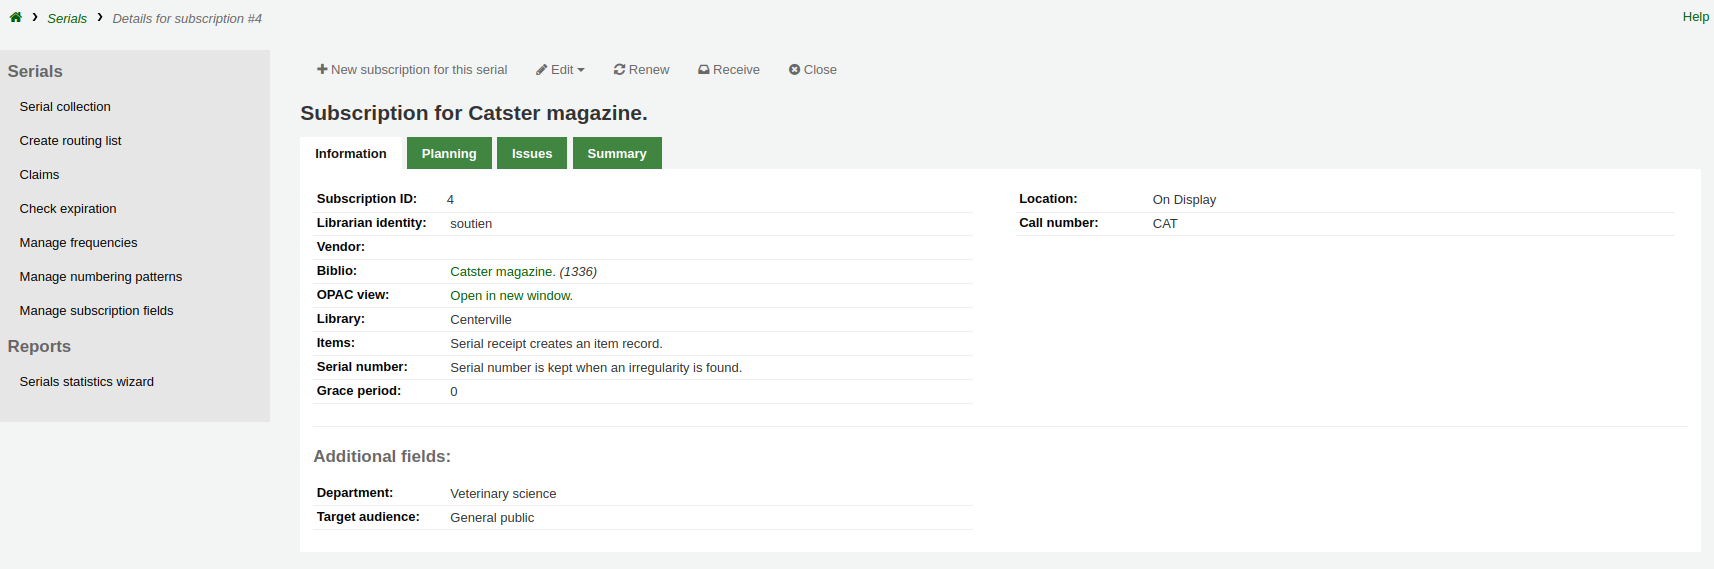
Because we made the field searchable, it will also be in the serials subscription search.
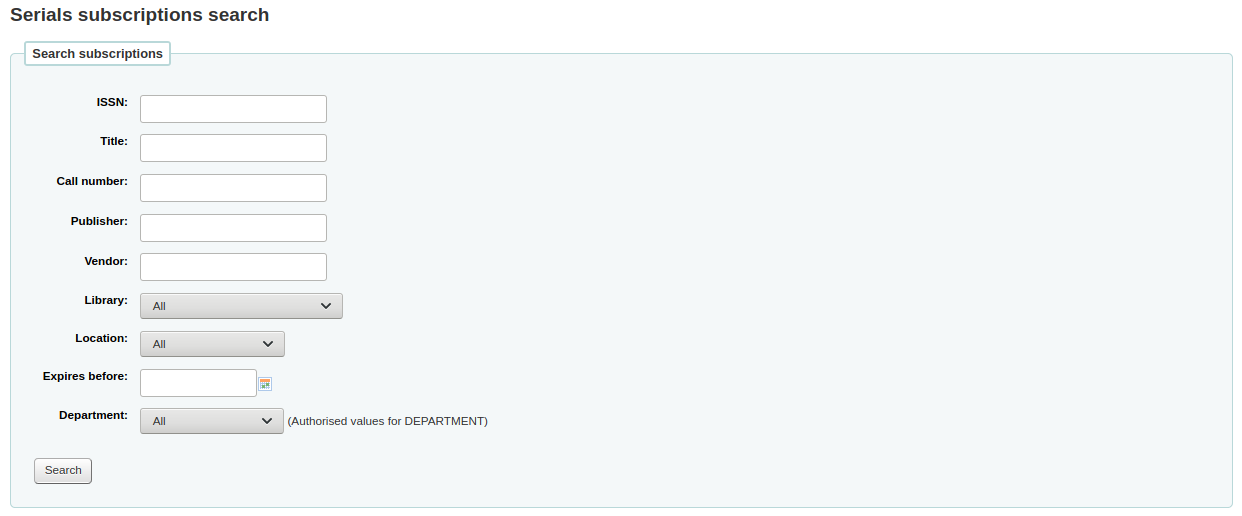
Example 2: Additional subscription field using MARC field
This is particularly useful if you want to view bibliographic information in the subscription detail page. In this example, we will add the 521$a field, which is, in MARC21, the target audience note.
In the ‘Name’ field, enter ‘Target audience’
In the ‘MARC field’ field, enter ‘521$a’

Not
You will not be able to edit this field from the subscription form. If you need to add or change the value in this field, you must go through the cataloging module.
When you view the subscription, the field and the information from the bibliographic record will appear under ‘Additional fields’.
Example 3: Free text invoice additional field
If you need to enter additional information in invoices, such as the number of the check used to pay for the invoice, you can choose not to use an authorized value at all.
In the ‘Name’ field, enter ‘Check #’
Check the ‘Searchable’ box

The new fields will be displayed when viewing the invoice in the acquisitions module.
Because we made the field searchable, it will also be in the invoice search.