Introduction to the Koha installation process
This is the Koha installation manual.
The Koha installation process uses 2 tools:
網頁安裝器
使用者導引工具
本文件將會對這兩項工具做說明。
什麼是 Koha 網頁安裝器呢?
透過網頁安裝器能設定資料庫表單,用以儲存所有您在Koha系統裡會用到的資料,其中包括分館、讀者與館藏的資訊。
網頁安裝器以鍵入資料庫管理帳號的登入畫面為起點。
The installer will then create the tables and fill the tables with data. The next step in the process is to set up a few mandatory first use settings, via the onboarding tool.
What is the Koha onboarding tool?
使用者導引工具確保在啟用 Koha 前,系統內至少有一個圖書館、讀者類型、讀者、館藏類型及流通規則。
如果您已先選擇安裝圖書館,讀者類別,館藏類別的範例資料,那以下的安裝過程就會跳過對應這些資料的建立步驟。
然而,在每次安裝時,您必須建立一個讀者與其帳密 (在使用者導引工具安裝過程的最後,再次登入館員介面時,需要使用到) ,以及一個流通規則。
網頁安裝器
網頁安裝器-登入
Web installer login
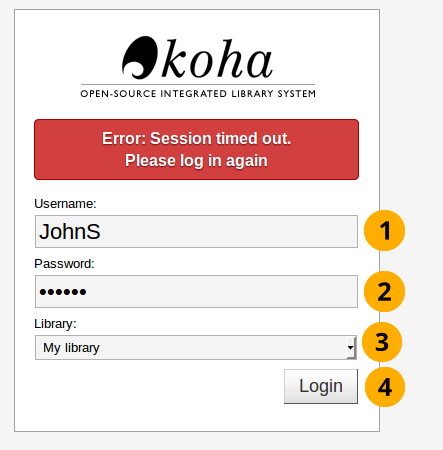
安裝 Koha 時,首先出現的是登入畫面。
網頁安裝器-登入
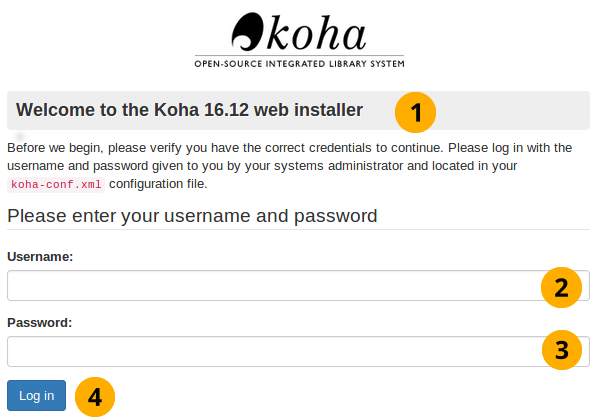
Koha 版本名稱:顯示安裝的 Koha 版本編號。
使用者名稱:koha_kohadev 為預設的資料庫管理者名稱。
密碼:password 為預設的資料庫管理密碼。
登入:點選此按鈕來登入
語言選擇
Installer start screen
這是網頁安裝器的第一個畫面。
網頁安裝器起始畫面
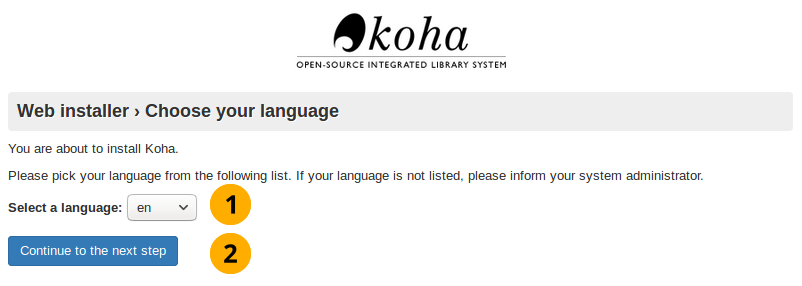
語言選擇 下拉選單:在此指定 Koha系統所使用的語文。
備註
以安裝器去安裝另個語言 (如 zh_TW、zh_CN) ,就能在網頁安裝器使用該等語言。
按 繼續下個步驟 載入網頁安裝器的下一個步驟。
Installer perl modules installed
此畫面顯示安裝器已取得必要的相依套件,並於下個畫面新增資料庫。
已安裝的 Perl 模組
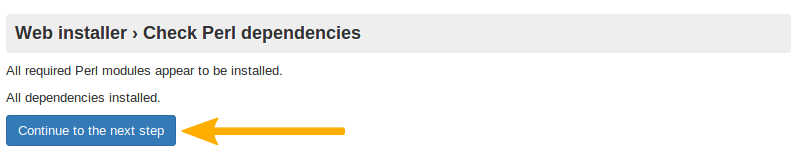
按 繼續下個步驟 鈕載入網頁安裝器的下一個步驟。
資料庫設定
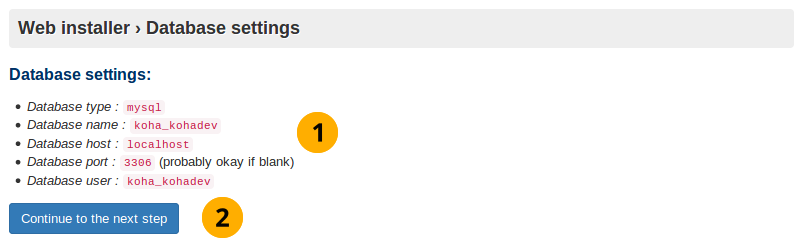
此畫面會列出資料庫的設定值,並請您按下*繼續下個步驟* 代表確認設定值無誤。
備註
這些設定對大多數使用者來說是不會有問題的,否則您應請求支援。
資料庫設定
Database settings: Check these database settings are correct.
按 繼續下個步驟 以完成確認資料庫的設定
Connection established
按了 下一步 將確立資料庫的連結:
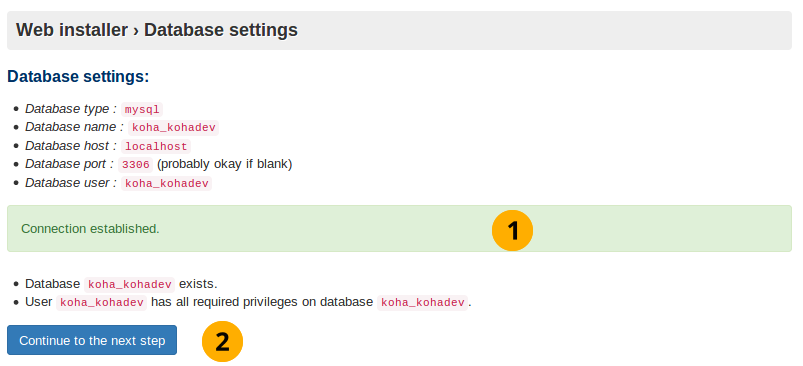
資料庫連結已建立
連結建立訊息: 此訊息代表您已成功地建立資料庫。
按 繼續下個步驟 鈕以載入下個階段
備註
若資料庫有連結上的困難,安裝器的設定將暫停於此。請再次檢查 koha-conf.xml 檔案的連結資訊,並確認資料庫本身的權限及認證的正確性。
準備於資料表單內填入資料
此畫面代表一切已就緒,您可於下個畫面新增資料庫表單。
資料庫等待接收資料

按 繼續下個步驟 鈕以載入下個階段
備註
完成此步驟需要花一點時間。請耐心等待。
新增資料庫表
新增資料庫表
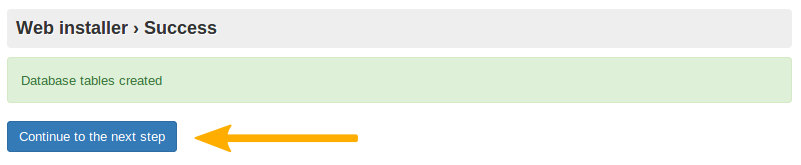
按 繼續下個步驟
準備進行基本設定
此畫面導向並進行Koha操作時所必備的設置。
準備進行基本設定

按 繼續下個步驟
選擇您的 MARC 類型
必須在此畫面選擇 MARC 類型 (儲存於資料庫的書目 (目錄) 紀錄格式):
選擇您的 MARC 類型
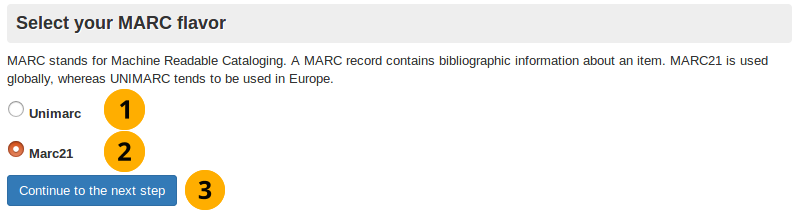
Unimarc: 義大利等歐洲國家 (不含英國) 慣用的格式。
MARC 21: 預選的格式,受美國文化影響的地區常使用它。
按 繼續下個步驟 確認您的選擇
MARC21 與 UNIMARC 的設定
備註
剛才是選擇 MARC 21 或 UNIMARC 做為 MARC 的格式。此頁面則列出這兩種格式的細節資訊。
MARC 21 設定
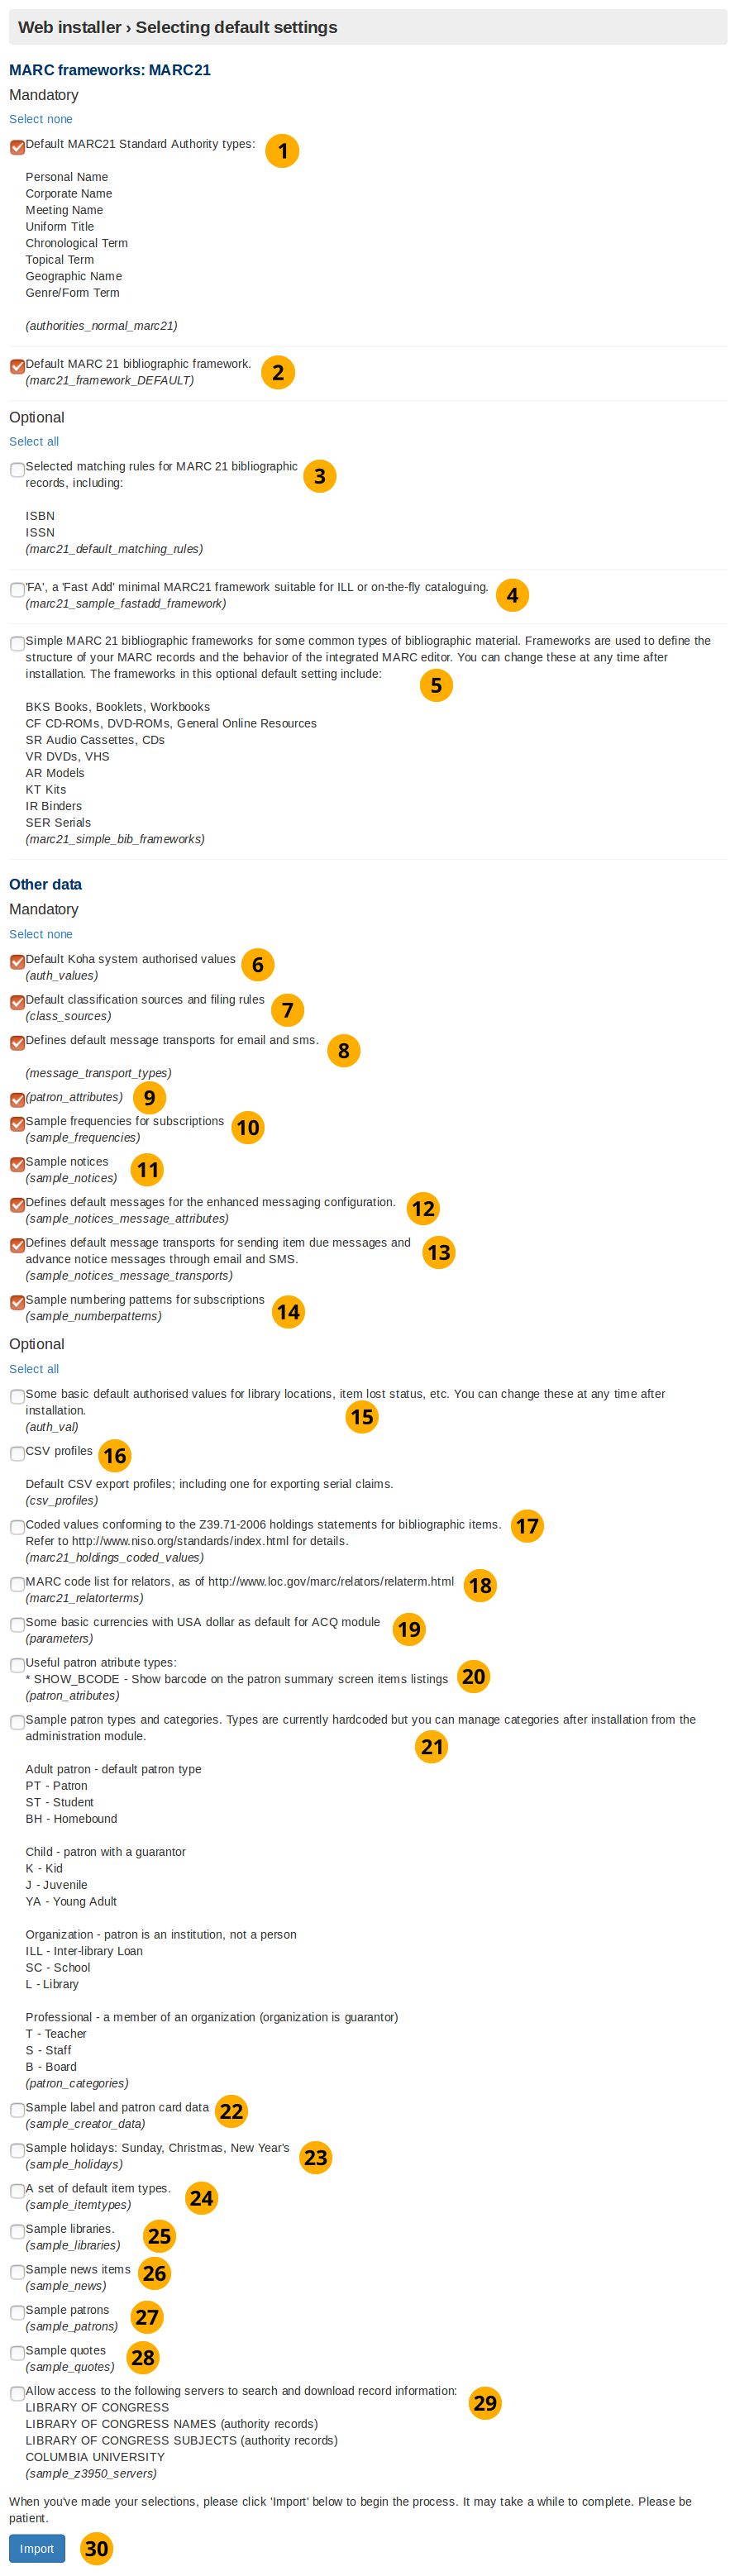
MARC 21 設定
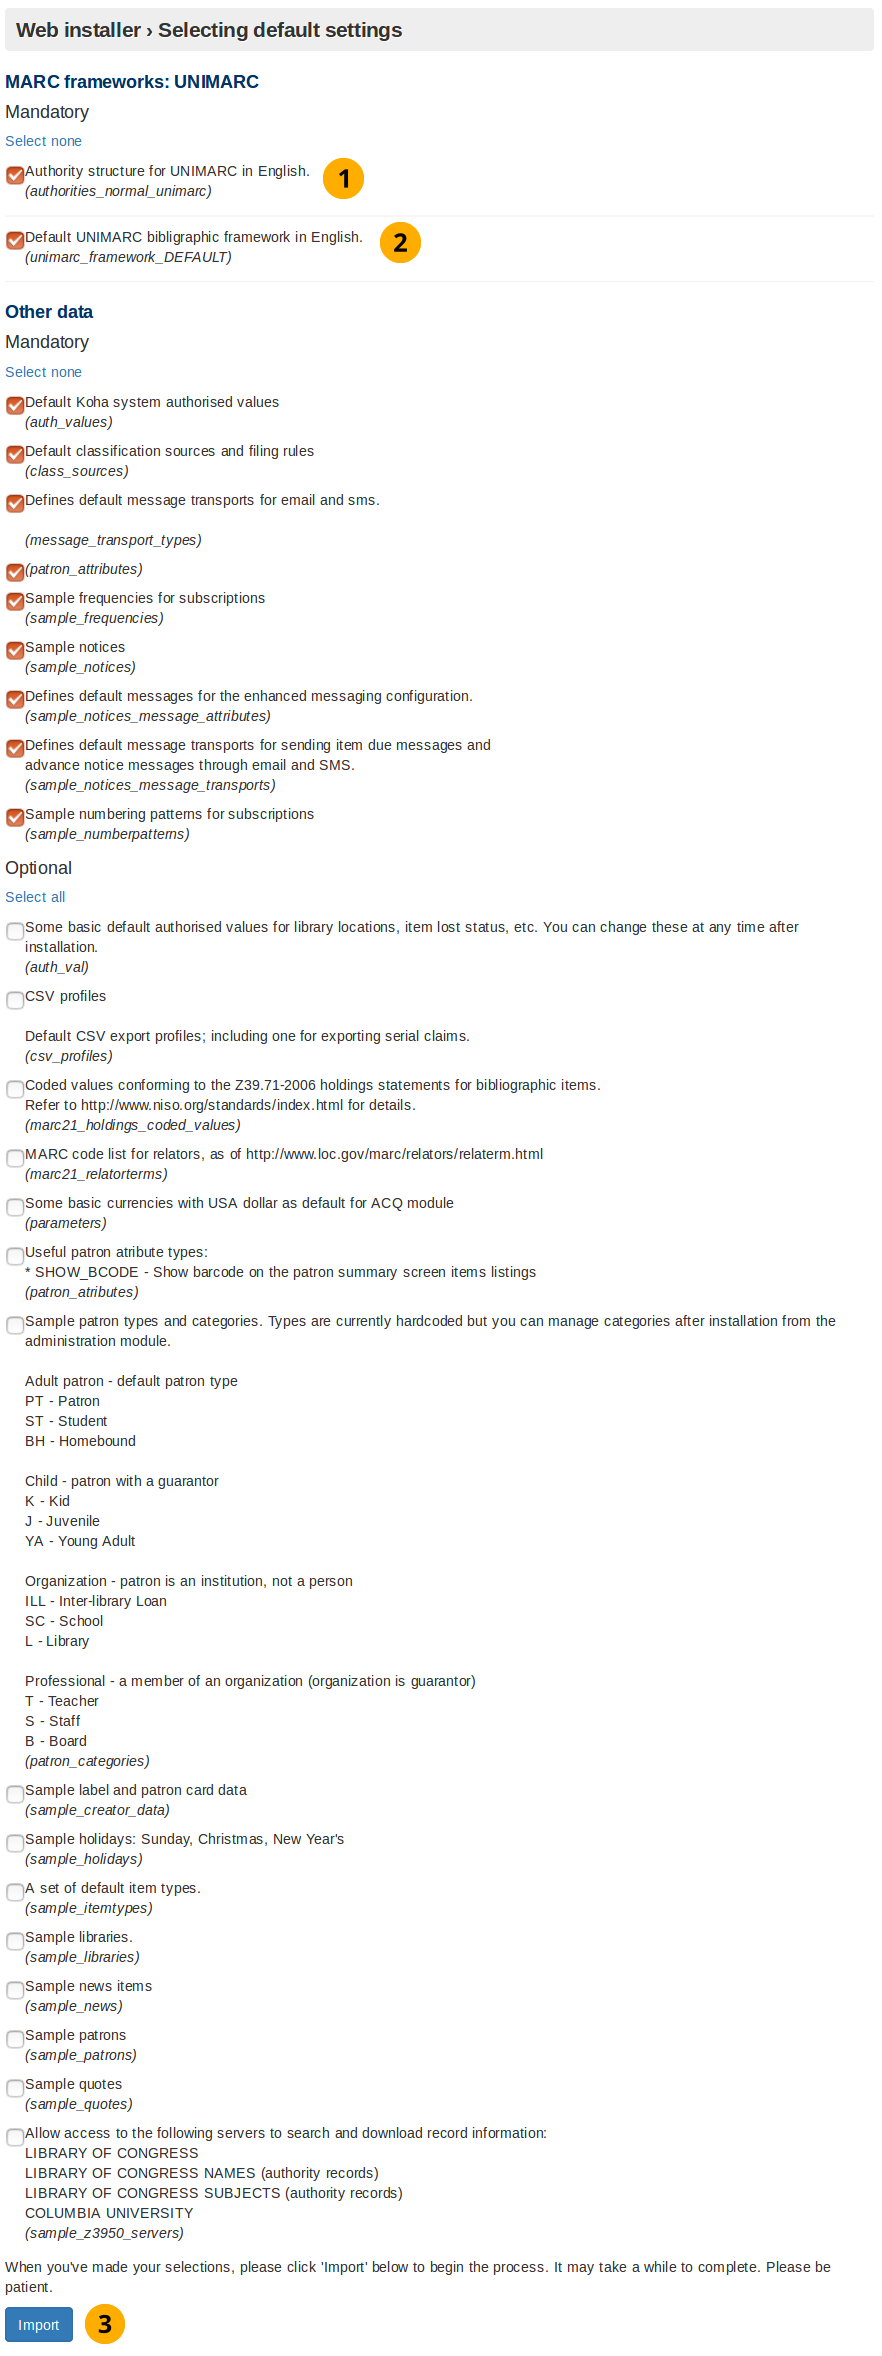
Default MARC21 standard authority types: An authority type is a template of an authority record (stores the search fields used to search an institutions catalog for an item). This option will install sample authority types.
Default MARC21 bibliographic framework: Following on from the MARC21 selection in the previous screen selecting this checkbox (and the Import button) will actually setup the MARC21 bibliographic framework as the desired MARC flavour.
選擇 MARC 21 書目紀錄的對映規則: MARC 21 對應規則係用來搜尋權威類型時,找出特定書目紀錄的所有資訊。
『FA』, a 『fast add』 minimal MARC21 framework suitable for ILL, or on the fly cataloging: The FA MARC framework displays fewer fields, and allows for faster cataloguing on the fly. Select this checkbox to install this minimal framework.
書目資料常用類型的範例 MARC 21 書目框架: 安裝此框架模板供新增館藏用。
Koha 預設的容許值: 安裝 Koha 時,所必備的容許值。
預設分類法來源與排序規則: 插入杜威分類法等常用的圖書館分類法。
Defines default message transports for email and SMS: This provides the option to the user of being able to change how the library contacts them. They can choose from the following: email address, printed message, SMS, or phone call. Notices will not work without these.
讀者屬性: 並不會安裝任何資料,且此項目需被移除。
Defines default messages for the enhanced messaging configuration: The enhanced messaging configuration lets the user choose what messages they receive from the institution. Selecting this will insert sample message types for the due, predue, and advance notice message types.
**設定給逾期與其他進階通知的電子郵件與 SMS 的預設訊息:**搜入 SMS 與電子郵件類王。選定經由電子郵件或 SMS 發送通知後即為必備。
卷期範例: 此選項會安裝卷期範例,以節省鍵入的人工。
圖書館位置等的容許值範例。安裝後隨時可改: 安裝的容許值,可以篩選使用者的輸入,使其符合圖書館及其他物件的要求。
CSV profiles: Using Koha you can export items. The CSV profile defines how you want to export the item(s). CSV/tab exports will not work without these.
書目館藏的記錄代碼符合 Z39.71-2006 的值: 不是 Koha 的必備。館藏敘述告知使用者圖書館是否典藏及該藏的位置。選定後將安裝館藏敘述的代碼值。
MARC code list for relators: Not required to use Koha. A relator is a person who was involved in the development of the item (e.g. author). Selecting this will insert sample relator records into the database.
Some basic currencies with USA dollar as default for ACQ module: Install US dollar, Great British Pound, Canadian Dollar and Euro currencies. Set the US dollar as the default acquisition currency. Not installing these will mean that a currency will need to be defined before acquisitions can be used.
Useful patron attribute types: Not required to use Koha. Patrons have a barcode which identifies them. By clicking this checkbox you are making sure that this patron barcode is displayed on the patron summary screen.
Sample patron types and categories: Not required to use Koha. Selecting this will install sample patron categories into the database. This will mean the create patron category step in the onboarding tool is skipped.
標籤與讀者證資料範例: 不是 Koha 的必備,但建議安裝。選定後安裝書標與讀者證的範例資料節省未來新增書標與讀者證的辛勞。
行事曆樣本:星期日、聖誕節、新年 不是 Koha 的必備。選定後於資料庫安裝重複的假期 (聖誕節等) 樣本。
A set of default item types: Not required for Koha. Selecting this will insert sample item type data into the database, meaning the create item type step in the onboarding tool will be skipped.
Sample libraries: Not required for Koha. Selecting this will insert sample libraries into the database. Developers will often want this for demo or development purposes. Selecting this means the create library step in the onboarding tool will be skipped.
最新消息範例: 此為非必要項目。選擇此項目後,OPAC(線上公用目錄)、館員資料庫首頁上將會出現預設的最新消息。
讀者範例: 此為非必要項目。讀者係指使用 Koha 圖書館管理系統者,例如: 圖書館使用者與館員。選擇此項目後,資料庫中將會有數個預設的讀者範例。 開發者通常藉此項目做功能示範或者開發目的之用。
引言範例: 此為非必要項目。 每日引言會出現在OPAC(線上公用目錄)上向圖書館使用者公告。選擇此項目後將會增添一些圖書館相關的引言。
允許近用以下的伺服器搜尋與下載紀錄資訊: 此為非必要項目,但建議安裝。以此組態 Koha 可以近用 Z39.50 伺服器,搜尋並匯入 MARC 21 紀錄。可以避免人工輸入所有紀錄,且加快處理流程。
按 匯入 鈕安裝預設及選定的資料。
UNIMARC setup
There are only two data values in the UNIMARC advanced setup which are unique:
Authority structure for UNIMARC in English
預設的 UNIMARC 英文書目框架
備註
Optional values are the same for both UNIMARC and MARC21, therefore their definition will not be repeated.
UNIMARC setup
Authority structure for UNIMARC in English: Authority records store the search terms used to find items in the database. Unlike MARC21, when using UNIMARC the authority structure needs to be compatible with UNIMARC. Selecting this option makes it compatible.
Default UNIMARC bibliographic framework in English: In the previous screen you clicked to use the UNIMARC flavour, now by selecting this option you are confirming you want to use that framework.
按 匯入 鈕安裝資料樣本
選定新增的資料
After you have clicked the Import button in either the MARC21 or UNIMARC setup screen this screen will appear. It shows you if the selected/default data values were successfully inserted into the database.
選定新增的資料
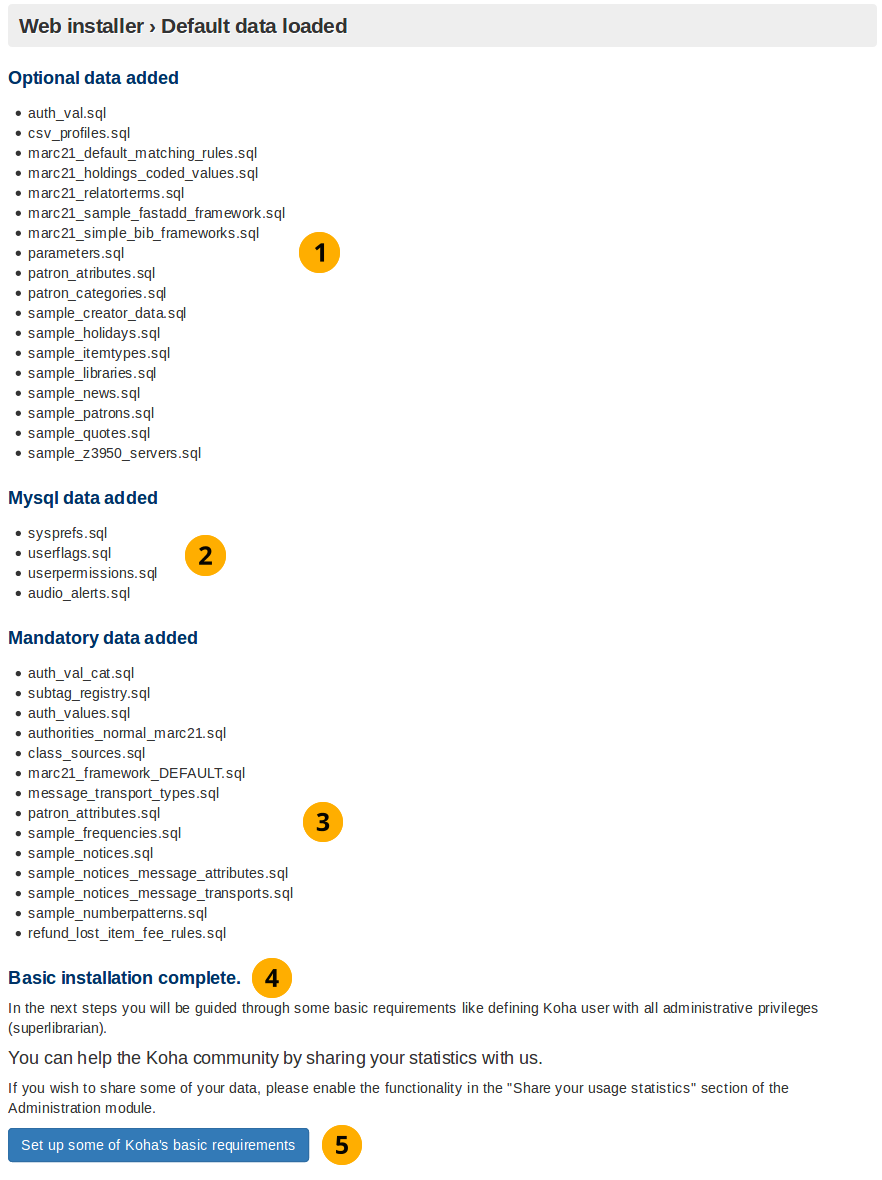
新增選用資料: 勾取的選用資料將顯示在此。若未勾選則不會顯示 新增選用資料。
MySQL data added: These data values will always be installed and consequently displayed on this screen.
新增必備資料: 如上。
安裝訊息: 告知 Koha 資料已安裝妥當可續使用新手工具。
按 設定 Koha 基本要求 鈕進入另個畫面,帶進新手工具。
進入新手工具
10秒後轉至新手工具啟始畫面。
進入新手工具

備註
若未轉至其他畫面請依箭頭指示點選。
使用者導引工具
新增圖書館
若未安裝樣本圖書館,安裝器將提示新增第一個圖書館或分館。
Koha 裡的圖書館代表一個 「實體的」 地方。可以從管理 -> 圖書館與群組加入更多圖書館。
新增圖書館
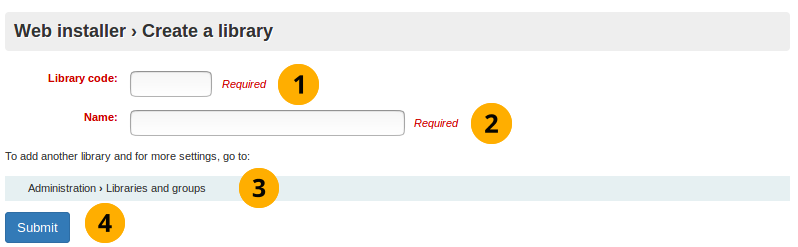
圖書館代碼: 最多 10 個字母。
名稱: 圖書館的官方名稱,通常選廣為人知者。
Create more libraries: If more libraries are required, or changes need to be made to this freshly created library, go to Administration -> Libraries and groups
按 送出 鈕就能新增圖書館。
範例:
新增樣本圖書館
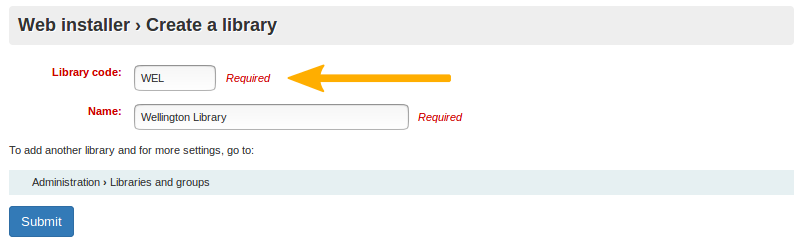
圖書館代碼: 為了簡化工作,圖書館代碼最多 10 個字母。
新增讀者屬性
Koha 的讀者必定屬於一個類型。就像一個模子出來的;同個類型的讀者共享相同的特徵,包括流通規則、通知頻率、預約權限及其他。至少應設定一個讀者類型。
必備一個讀者類型:
範圍代碼
說明
必備逾期通知
類別
預設隱私
註冊期間:月數或到期日
新增讀者屬性
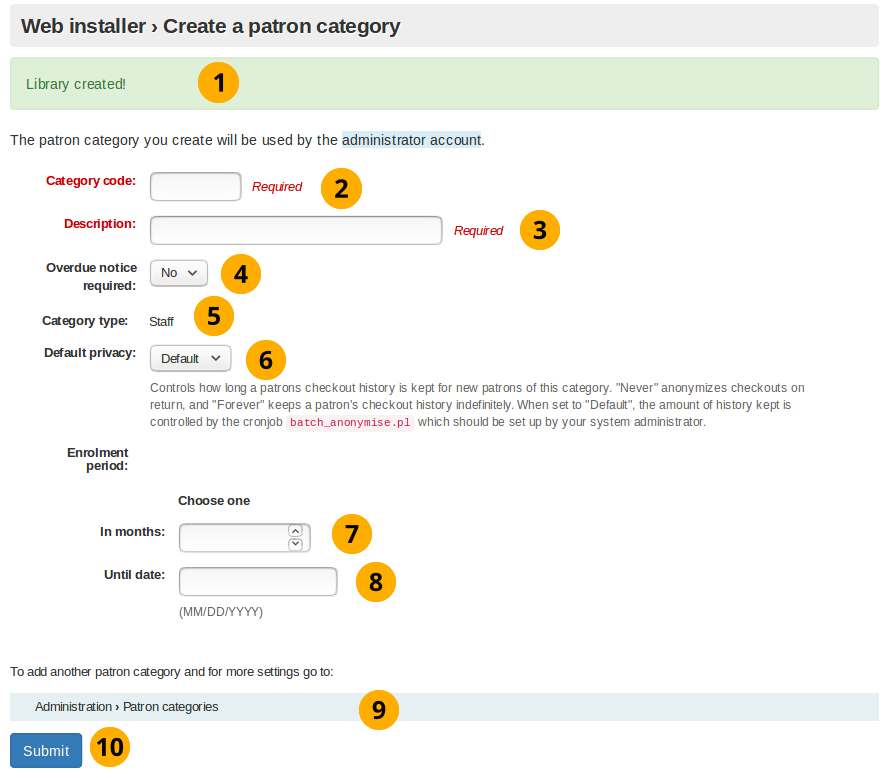
Library creation message: Indicates whether the library was created successfully.
類型代碼: 最多 10 個字母。
說明: 描述此讀者類型的作用。
Overdue notice required dropdown button: Set by default to 『no』. This specifies if you want the patron category to receive overdue notices.
類型: 由館員新增類型。
Default privacy: Set by default to 『default』. The Default privacy controls the amount of time that the reading history of the patron is stored for.
Enrolment period - in months: This is the number of months that the patrons created from this patron category are enrolled for.
Enrolment period - until date: Select a date from the interactive datepicker calendar icon which appears when you click on this input box. The date you choose will be the enrolment end date for patrons created from this patron category.
Path to create patron category: More patron categories can be created or altered by going to Administration -> Patron categories.
按 送出 鈕新增讀者類型。
範例:

新增讀者
完成新手程序後,超級圖書館員必須登入館員介面。
備註
在此紀錄使用者帳號及密碼,以便登入為 Koha 管理者 (超級圖書館員)。
必須匯入/選擇:
姓氏
First name
讀者證號碼
圖書館
讀者證類型
使用者名稱
密碼
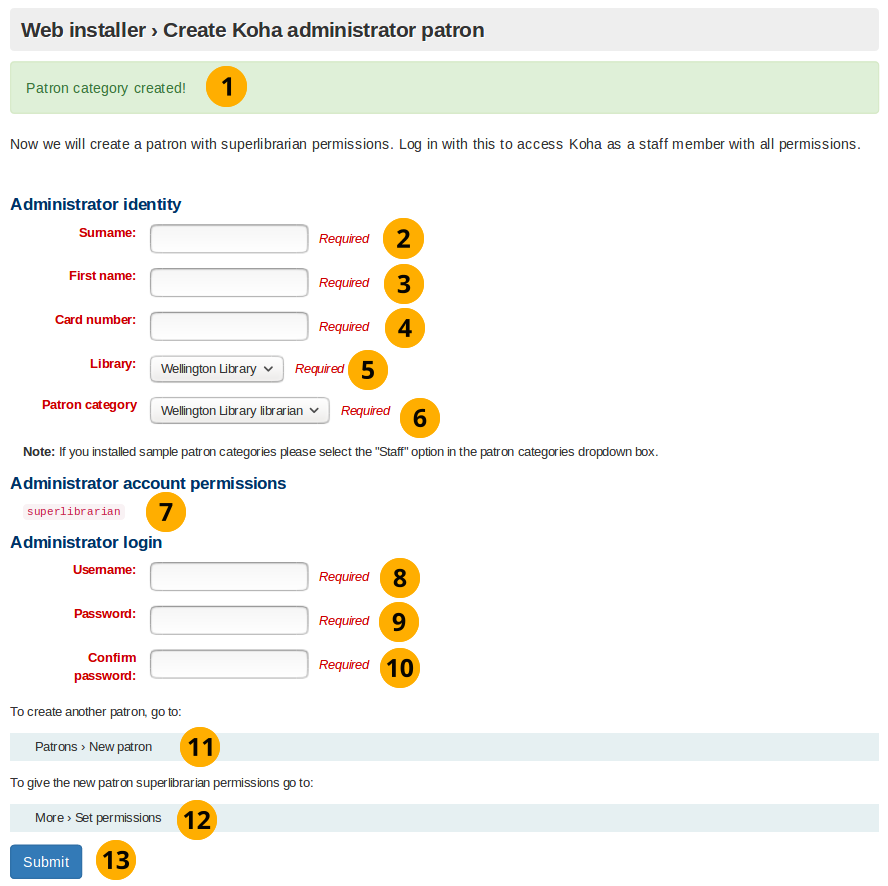
新增讀者
新增讀者類型訊息: 表示新增讀者類型成功。
姓: 姓或說明
名: 名,或說明
Card number: This number must be unique
圖書館 下拉選單:以新手工具新增的圖書館,將是唯一選項。否則將被網頁安裝器從樣本圖書館隨機選取。
讀者類型 下拉選單:以新手工具新增的讀者類型,將是唯一選項。否則將選取 館員 讀者類型。
超級圖書館員權限: 可以從館員介面近用所有的圖書館員及網頁功能,且不必編輯。它是 Koha 內最有權限的使用者,小心保管密碼。
帳號: 以帳號登入館員介面及 OPAC (線上公用目錄,Online Patron Access Catalogue)。
密碼: 包括字母、數字與空格,不能超過 8 個字元。
確認密碼: 重複鍵入密碼
按 送出 鈕新增讀者帳號
Path to create patron: Patron’s can be created or altered by going to Patrons -> New patron
Assign patron permissions: After creating a patron go More -> Set permissions to assign permissions.
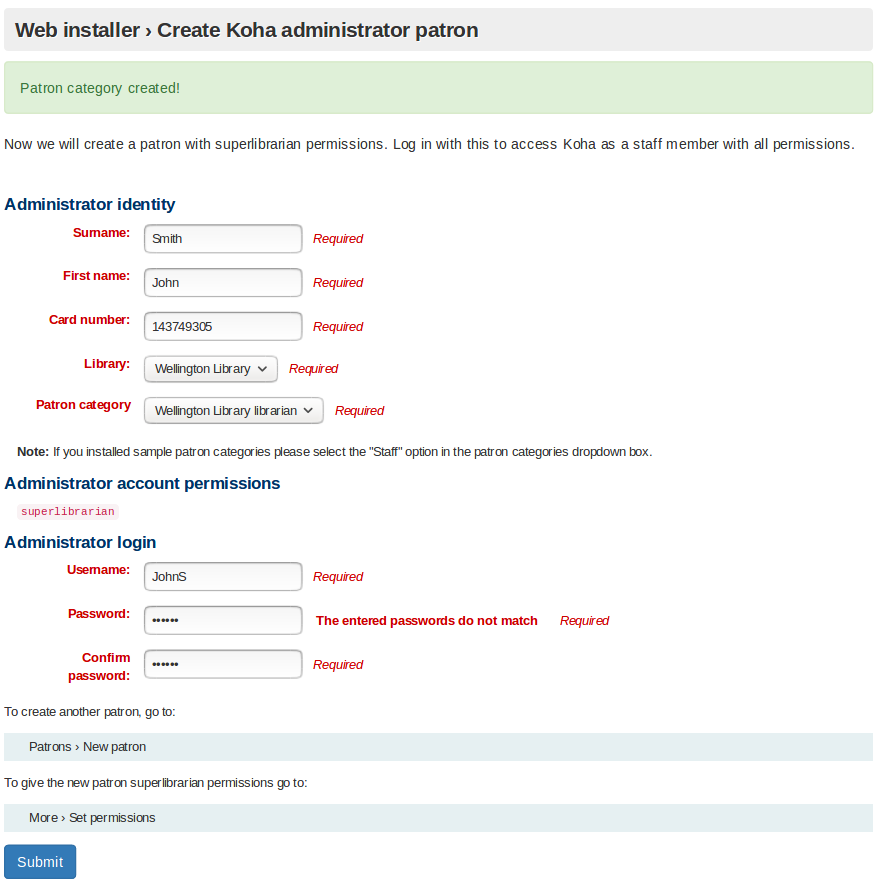
範例:
新增範本讀者
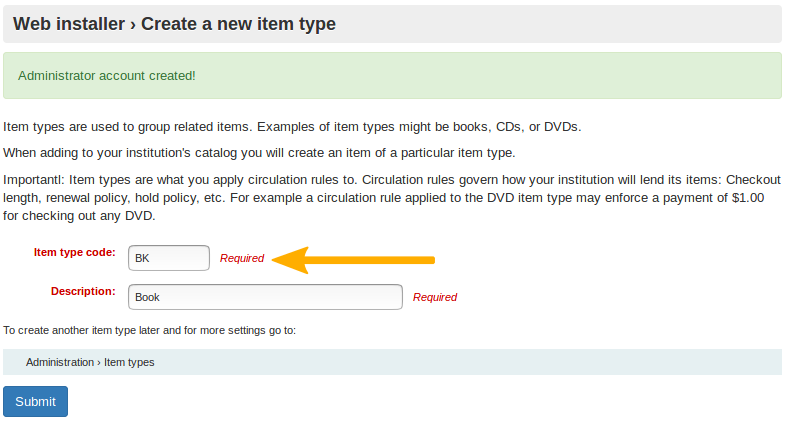
Create an item type
若未於網頁安裝器安裝館藏類型範本,將顯示本畫面。
如同讀者類型,館藏類型也是一種模板,用於聚集相同性質的館藏。
您需鍵入:
館藏類型代碼
說明
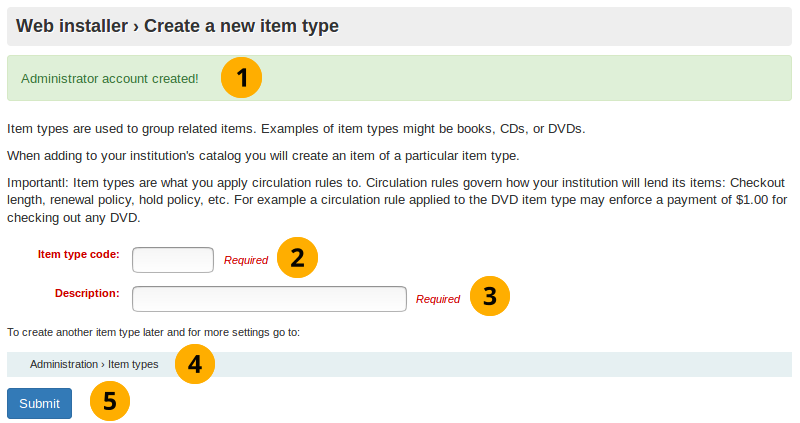
新增館藏類型
新增管理者帳號訊息: 表示新增管理者成功
館藏類型代碼: 最多 10 個字元
說明: 描述館藏類型的內容。
新增館藏屬性的路徑: 從管理 -> 館藏類型可以新增或編修館藏類型
按 送出 鈕完成新增館藏類型
範例:
新增館藏類型樣本
備註
The regular expression filtering item type code input will only accept letters.
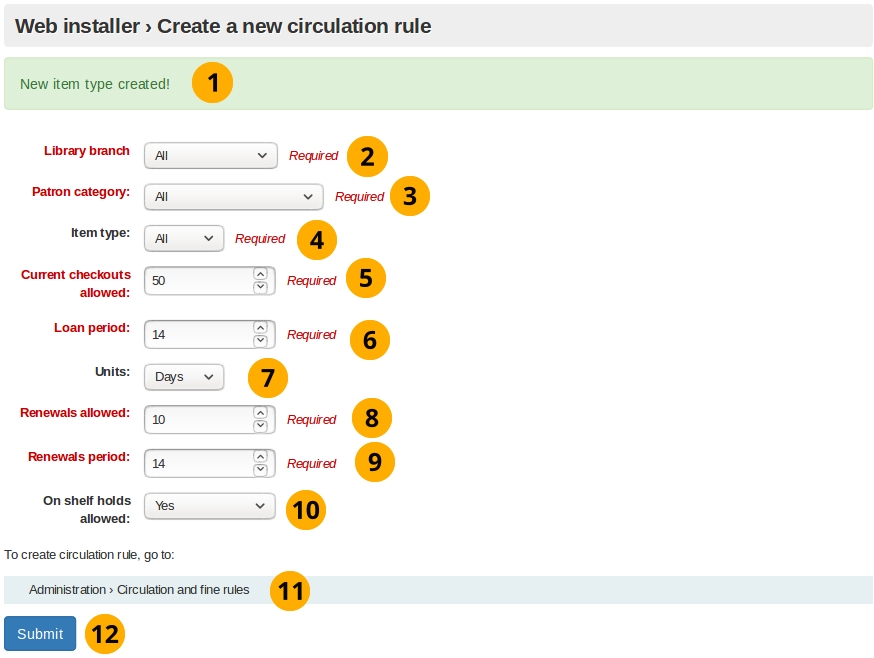
Create a circulation rule
此螢幕顯示從網頁安裝器安裝的樣本資料。
根據圖書館對讀者借閱館藏的限制,新增流通規則。
新增流通規則
備註
此表單只能輸入數字。
新增館藏類型訊息: 表示新增館藏類型成功
Library branch dropdown box: This is the library (or libraries) you want to apply the circulation rule to. By default it is set to all, however you can select a singular library to apply the rule to from the dropdown box.
Patron categories dropdown box: This is the patron categories you want to apply the circulation rule to. As with library branch it is set to all by default but more options are avaliable.
Item type dropdown box: This is the item types that you want the circulation rule to apply to. Again more options are avaliable than the default selected all option.
借閱冊數: 從指定圖書館、指定讀者類型、與指定館藏類型可借出的冊數。預設為 50。
借閱期限: 允許借閱的日數或小時。預設為 14。
Units dropdown box: Set by default to aays, the unit selecting in this field is applied to the numerical values written into loan period and renewals period
Renewals allowed: Number of times a item can be renewed. Set to 10 by default.
Renewals period: Number of days or hours that a renewal lasts for. Set to 14 by default.
允許架上預約 下拉選單:允許預約仍在館內的館藏。
Path to create circulation rule: Circulation rules can be created or altered by going to Administration -> Circulation and fines rules
Click the submit button to create the circulation rule.
新手工具完成
此頁告知新增流通規則完成,Koha 的安裝結束
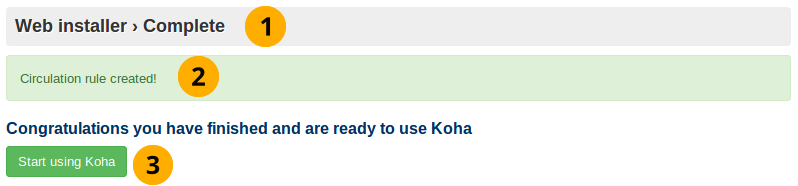
網頁安裝訊息: 表示網頁安裝完成
新增流通規則訊息: 表示新增流通規則成功。
啟用 Koha: 點選登入 Koha,使用新手工具新增的管理者帳號。
登入館員介面
完成新手工具的作業,可以使用新手工具新增的讀者帳號登入館員介面
登入畫面
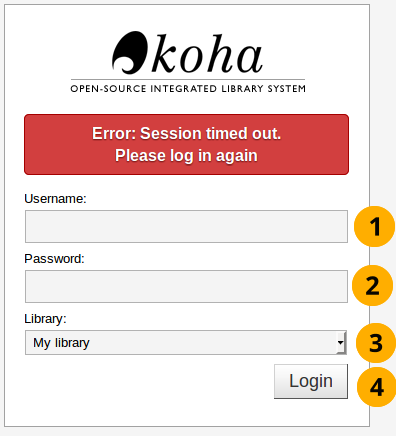
使用者名稱: 輸入新增給讀者的使用者名稱
密碼: 輸入新增的密碼
Library: This is the library staff interface you want to log into. The options are either: my library or the library you installed/created. Leaving the default selected option of my library is fine to log in with first time.
Click the login button to access the staff interface
範例:
登入樣本
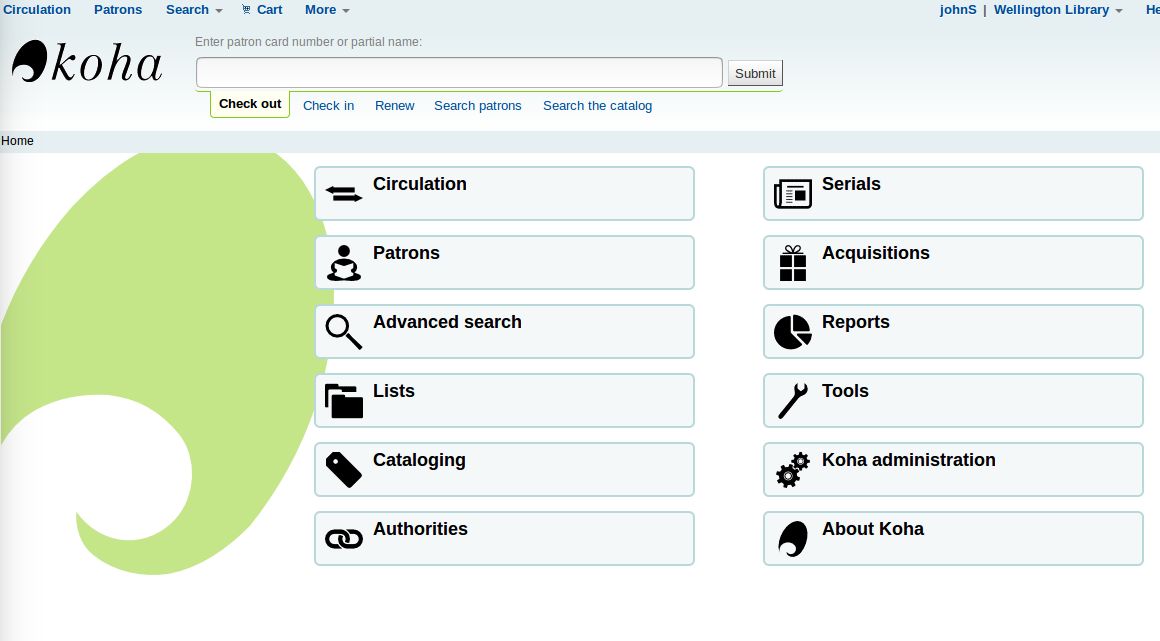
館員介面
現在應出現館員介面
館員介面
也參考
館員介面詳情,請參見 https://koha-community.org/documentation/
Advanced configurations
VirtualHost overrides
Koha allows for the override of some system settings at a VirtualHost level.
OPAC_BRANCH_DEFAULT
The OPAC_BRANCH_DEFAULT directive can be used to specify the default branch for anonymous users of the OPAC.
SetEnv OPAC_BRANCH_DEFAULT "CPL"
RequestHeader add X-Koha-SetEnv "OPAC_BRANCH_DEFAULT CPL"
Note: This override affects which News and HTML Customisation blocks a user will see prior to logging in to the OPAC.