उपकरण
कोहा सभी में उपकरण कार्रवाई के कुछ प्रकार प्रदर्शन करते हैं। अक्सर कोहा में उपकरण के तहत सूचीबद्ध आइटम के कई अन्य पुस्तकालय प्रबंधन प्रणालियों में 'रिपोर्ट' के रूप में भेजा जाता है।
Get there: More > Tools
संरक्षक और सर्कुलेशन
संरक्षक सूचियों
टिप्पणी
Only staff with the manage_patron_lists permission (or the superlibrarian permission) will have access to this tool.
Get there: More > Tools > Patrons and circulation > Patron lists
Patron lists are a way to store a group of patrons for modifying patrons in batches, deleting patrons in batches, merging patrons, printing patron card batches, or reporting.
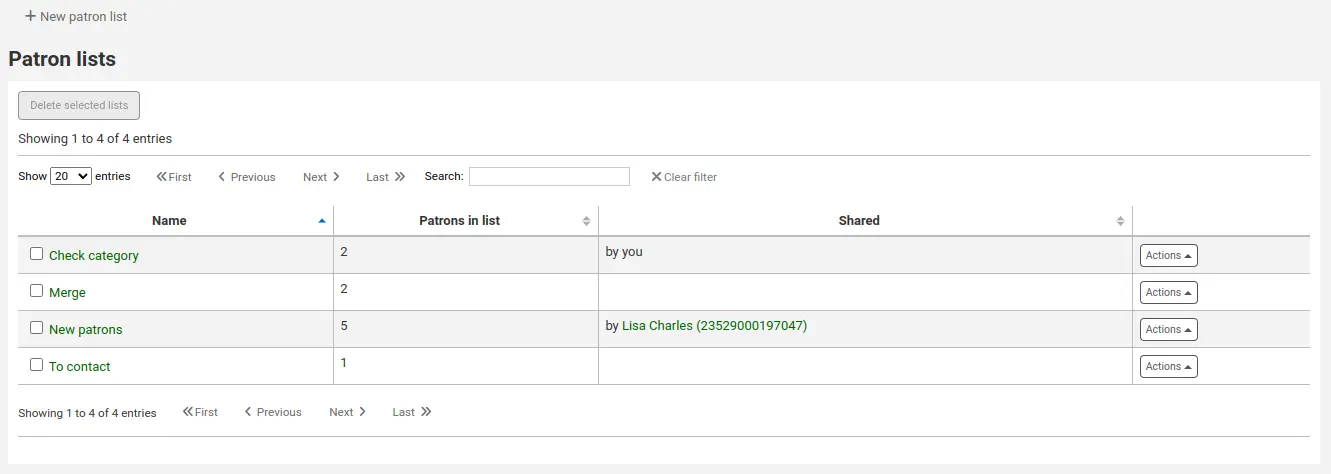
To create a new list of patrons click the 'New patron list' button.
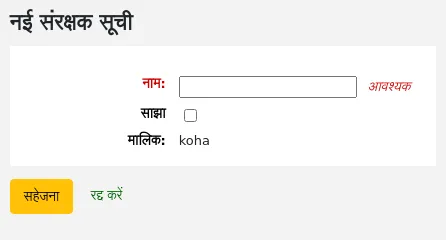
Name: enter a list name.
Shared: checking the 'Shared' box will make this list visible to all users with the manage_patron_lists permission.
क्लिक करें सहेजें
प्रत्येक सूची में अधिक सूची विकल्पों के साथ 'क्रियाएं' मेनू होता है।
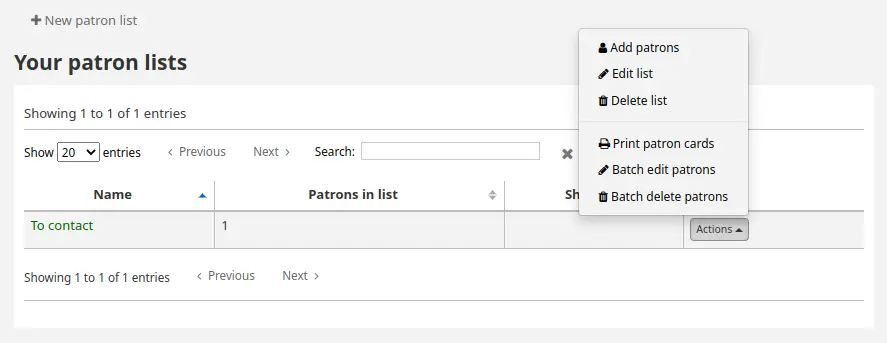
Add patrons: add patrons to the list
Edit list: edit the list name, or shared status
Delete list: delete the list (but not the patrons)
Print patron cards: send the patrons in the list to the patron card creator
Batch edit patrons: send the patrons in the list to the batch patron modification tool
Batch delete patrons: send the patrons in the list to the batch patron deletion tool
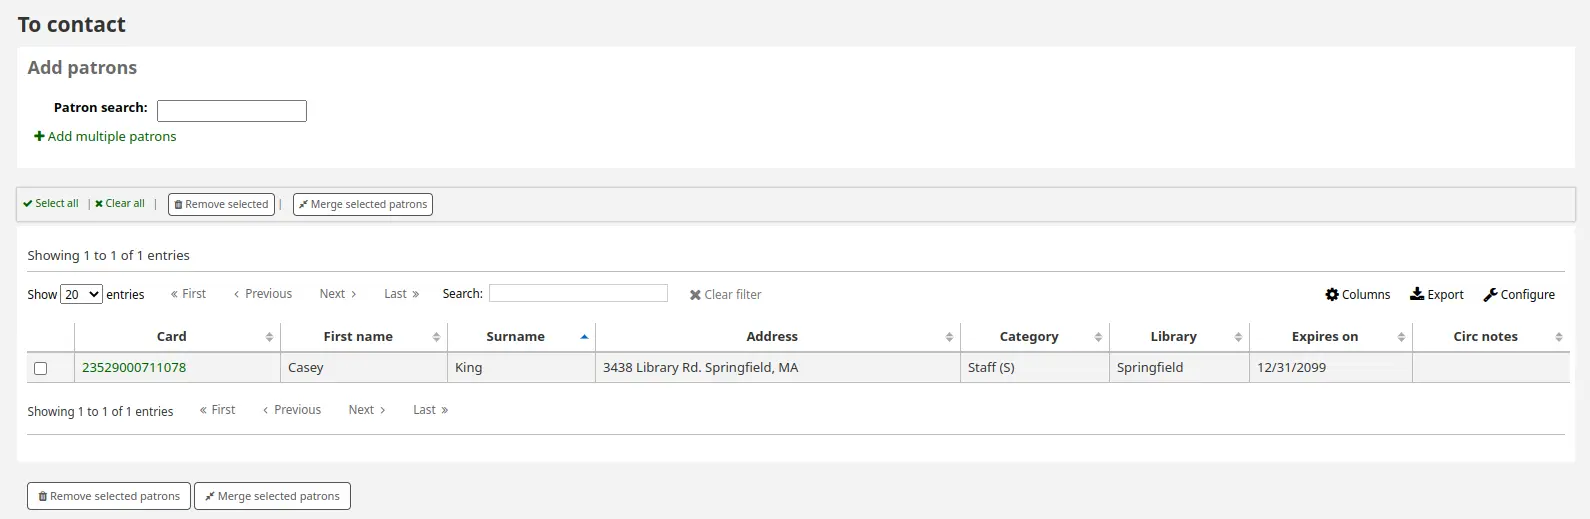
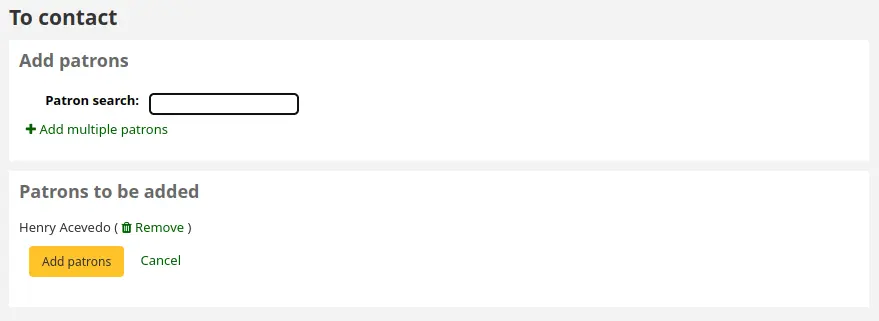
To add patrons to the list, click the 'Add patrons' link in the 'Actions' menu, or click the list name.
Enter the patron's name or card number in the search box and click on the right result to add the patron.
When you have found all the patrons to add, click the 'Add patrons' button to save them to the list.
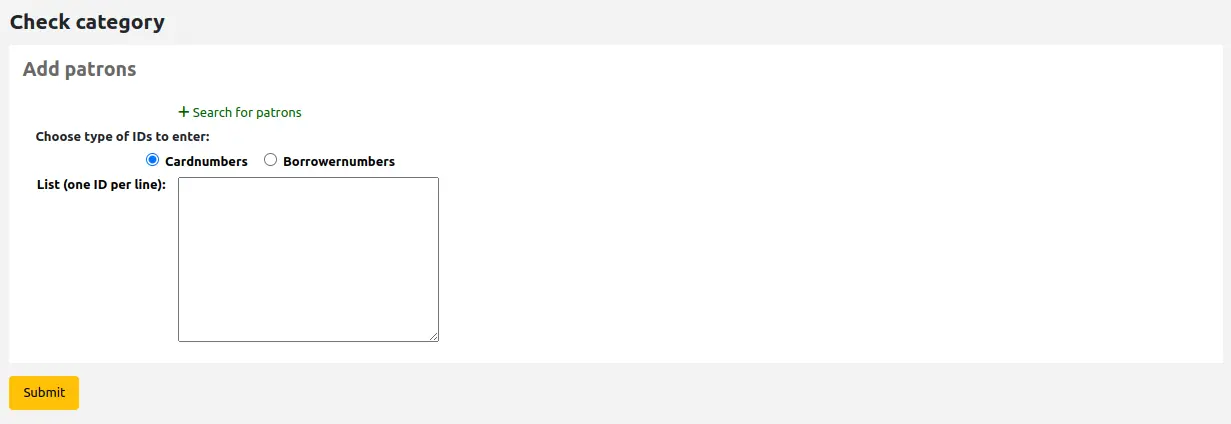
Alternatively, you can click on the 'Add multiple patrons' link and scan (or type in) card numbers in the box. Then click the 'Submit' button to save them to the list.
It is also possible to add patrons to a list from the patron search or from the patron lists tab in the patron record.
The added patrons will be displayed in the list table.
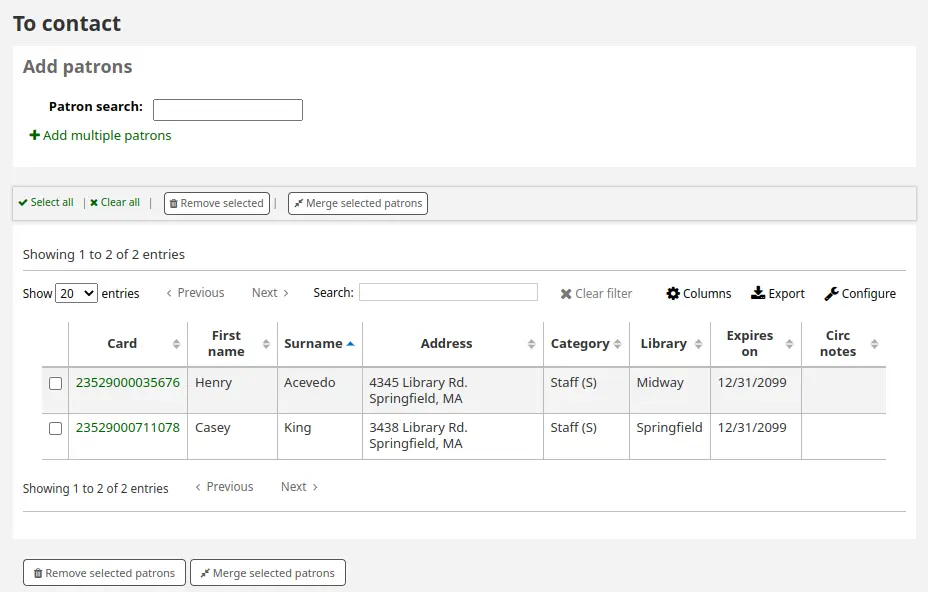
टिप्पणी
You can customize the columns of this table in the Table settings section of the Administration module (table id: patron-list-table).
किसी सूची को हटाने के लिए, 'क्रियाएं' बटन पर क्लिक करें और 'डिलीट लिस्ट' विकल्प चुनें।
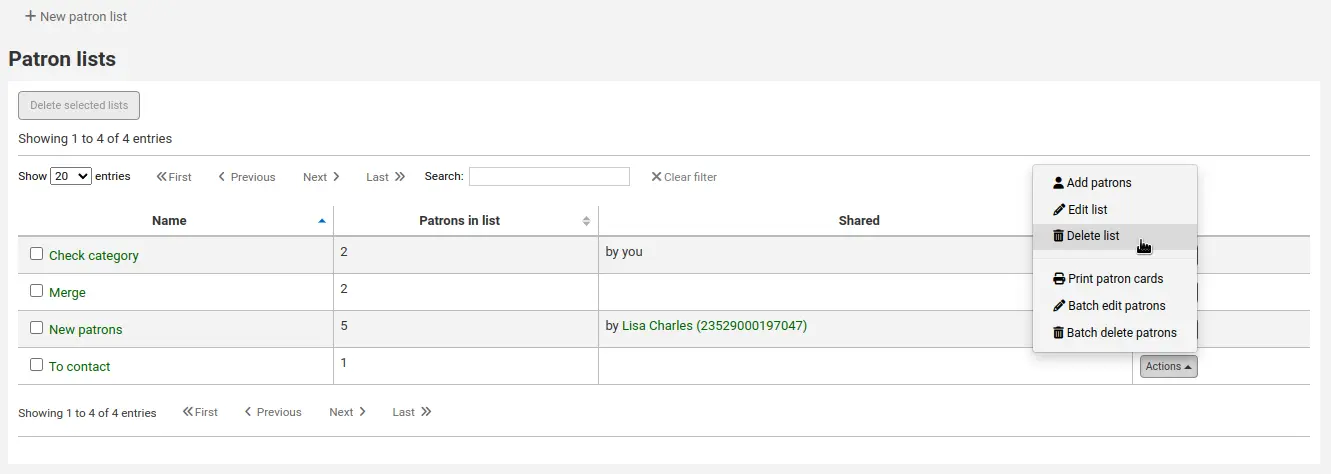
एक बार में कई सूचियों को हटाने के लिए, सूचियों का चयन करें और तालिका के शीर्ष पर 'चयनित सूचियों को हटाएं' बटन पर क्लिक करें।
संस्करण
एक बार में एकाधिक सूचियों को हटाने का विकल्प कोहा संस्करण 23.11 में जोड़ा गया था।।
संरक्षक क्लब
Get there: More > Tools > Patrons and circulation > Patron clubs
संरक्षक क्लब ऐसे क्लब बनाते हैं जिनमें संरक्षक का नामांकन हो सकता है। यह समर रीडिंग प्रोग्राम, बुक क्लब और ऐसे अन्य क्लबों पर नज़र रखने के लिए उपयोगी है।
महत्त्वपूर्ण
Staff will need the clubs permission or sub-permissions to edit clubs, templates and enroll patrons.
एक नया क्लब टेम्पलेट बनाना
टिप्पणी
Only staff with the edit_templates permission (or the superlibrarian permission) will be able to create or edit club templates.
एक क्लब टेम्पलेट एक टेम्पलेट है जिसका उपयोग क्लब बनाने के लिए किया जाएगा। आप उन क्षेत्रों को जोड़ सकते हैं जो उस समय भरे जा सकते हैं जब एक नया क्लब टेम्पलेट के आधार पर बनाया जाता है, या टेम्पलेट के आधार पर किसी दिए गए क्लब के लिए एक नया नामांकन बनाया जाता है।
एक नया क्लब टेम्पलेट बनाने के लिए:
'न्यू क्लब टेम्पलेट' बटन पर क्लिक करें।
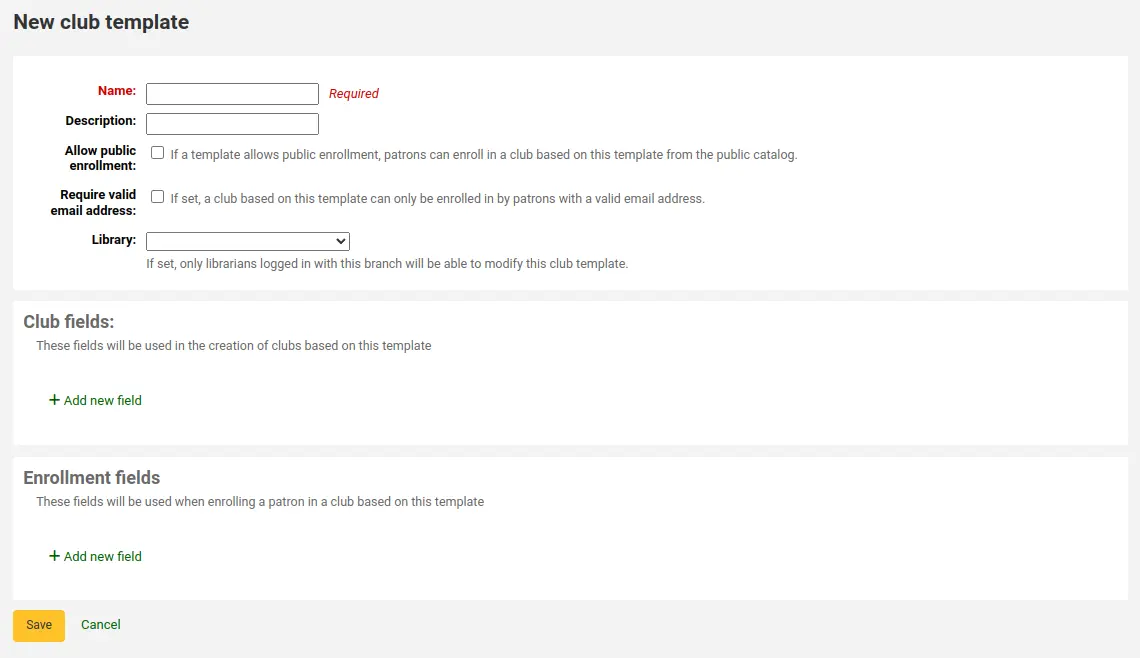
फॉर्म को भरें:
नाम (आवश्यक): क्लब टेम्पलेट के लिए एक नाम दर्ज करें। यह 'एडल्ट बुक क्लब', 'चिल्ड्रन बुक क्लब' या 'समर रीडिंग प्रोग्राम' जैसा कुछ हो सकता है। याद रखें, ये टेम्प्लेट आपके द्वारा बनाए गए प्रत्येक क्लब के लिए शुरुआती बिंदु होंगे।
विवरण: कोई अतिरिक्त जानकारी दर्ज करें।
सार्वजनिक नामांकन की अनुमति दें: यदि यह बॉक्स चेक किया गया है तो यह ओपेक से इस टेम्पलेट के आधार पर संरक्षक को क्लब में नामांकन करने की अनुमति देगा
मान्य ईमेल पते की आवश्यकता है: यदि इस बॉक्स की जाँच की जाती है तो केवल वैध ईमेल पते वाले संरक्षक ही नामांकन कर सकते हैं। इसलिए उन्हें नामांकन करने के लिए एक ईमेल पते की आवश्यकता होगी।
लाइब्रेरी: एक विशिष्ट लाइब्रेरी से कर्मचारियों को इस टेम्पलेट के उपयोग को सीमित करने के लिए एक लाइब्रेरी चुनें। यदि आप इसे खाली छोड़ देते हैं, तो किसी भी लाइब्रेरी के कर्मचारी इस टेम्पलेट का उपयोग करके एक नया क्लब बनाने में सक्षम होंगे।
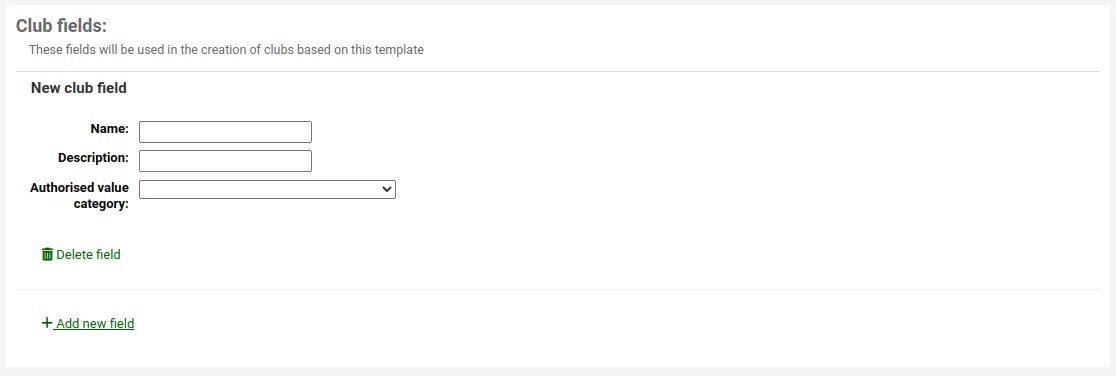
क्लब फील्ड्स: इस टेम्पलेट के आधार पर एक क्लब बनाते समय इन क्षेत्रों का उपयोग किया जाएगा। उदाहरण के लिए, यह क्लब का नाम, एनिमेटर, थीम आदि का नाम हो सकता है, एक क्लब फ़ील्ड जोड़ने के लिए, 'नए फ़ील्ड जोड़ें' पर क्लिक करें।
नाम: उस पाठ को दर्ज करें जिसका उपयोग फ़ील्ड के लेबल के रूप में किया जाएगा।
विवरण: इस क्षेत्र के बारे में कोई अतिरिक्त जानकारी दर्ज करें।
अधिकृत मान श्रेणी: यदि आप चाहते हैं कि फ़ील्ड एक ड्रॉपडाउन मेनू हो, तो यहां एक अधिकृत मान श्रेणी चुनें। यदि यह खाली छोड़ दिया जाता है, तो क्षेत्र एक साधारण पाठ क्षेत्र होगा।।
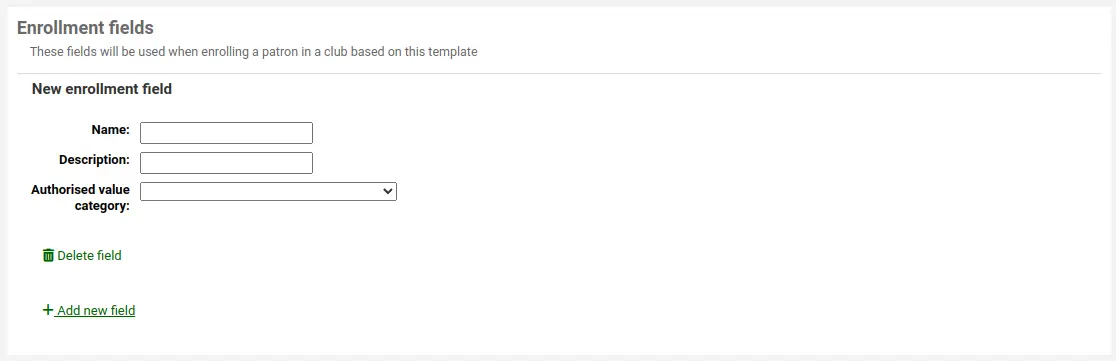
Enrollment fields: you can add any additional fields you want patrons to fill when they enroll in a club based on this template. To add an enrollment field, click on 'Add new field'.
नाम: उस पाठ को दर्ज करें जिसका उपयोग फ़ील्ड के लेबल के रूप में किया जाएगा।
विवरण: इस क्षेत्र के बारे में कोई अतिरिक्त जानकारी दर्ज करें।
अधिकृत मान श्रेणी: यदि आप चाहते हैं कि फ़ील्ड एक ड्रॉपडाउन मेनू हो, तो यहां एक अधिकृत मान श्रेणी चुनें। यदि यह खाली छोड़ दिया जाता है, तो क्षेत्र एक साधारण पाठ क्षेत्र होगा।।
क्लिक करें सहेजें
एक टेम्पलेट के आधार पर एक नया क्लब बनाना
टिप्पणी
Only staff with the edit_clubs permission (or the superlibrarian permission) will be able to create or edit clubs.
एक बार टेम्पलेट बनाया जाता है, तो आप वास्तविक क्लब बना सकते हैं।।
'न्यू क्लब' ड्रॉपडाउन मेनू पर क्लिक करें और उस टेम्पलेट का चयन करें जिसका आप उपयोग करना चाहते हैं।
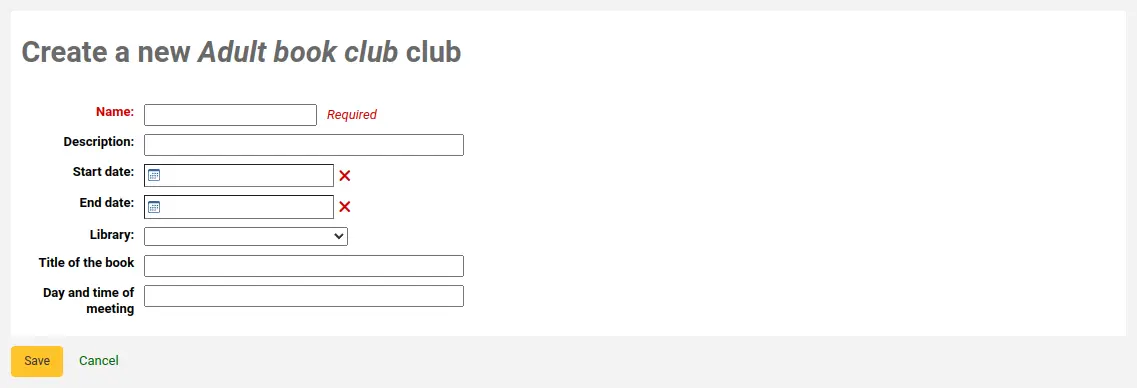
क्लब की जानकारी के साथ फॉर्म भरें:
नाम (आवश्यक): आपके द्वारा बनाए गए विशिष्ट क्लब का नाम दर्ज करें। यह वह नाम है जिसे कर्मचारी और संरक्षक नामांकन करते समय देखेंगे। उदाहरण के लिए, 'समर 2018 रीडिंग क्लब'।
विवरण: क्लब के बारे में कोई अतिरिक्त जानकारी दर्ज करें।
प्रारंभ तिथि: नामांकन अवधि की आरंभ तिथि चुनें। स्टाफ और संरक्षक प्रारंभ तारीख से पहले क्लब में दाखिल करने में सक्षम नहीं होंगे।।
अंतिम तिथि: नामांकन अवधि की अंतिम तिथि चुनें। एक बार क्लब समाप्त होने के बाद, नामांकन संभव नहीं होगा।
लाइब्रेरी: यदि यह क्लब एक विशिष्ट लाइब्रेरी तक सीमित है, तो इसे यहां चुनें। इस विशिष्ट पुस्तकालय के केवल संरक्षक ही नामांकन कर पाएंगे। यदि आप इसे खाली छोड़ देते हैं, तो किसी भी पुस्तकालय के संरक्षक नामांकन कर पाएंगे।
यदि वहाँ थे 'क्लब फ़ील्ड्स' टेम्पलेट में, वे फॉर्म के नीचे दिखाई देंगे।
क्लिक करें सहेजें
स्टाफ इंटरफ़ेस से एक क्लब में एक संरक्षक का नामांकन
टिप्पणी
Only staff with the enroll permission (or the superlibrarian permission) will be able to enroll patrons in clubs.
स्टाफ इंटरफ़ेस से एक क्लब में एक संरक्षक का नामांकन करने के लिए:
संरक्षक के खाते में जाओ।।
'विवरण' पृष्ठ या 'चेक आउट' पेज पर, 'क्लब' टैब. पर क्लिक करें। सभी चल रहे क्लबों को इस टैब में प्रदर्शित किया जाएगा।
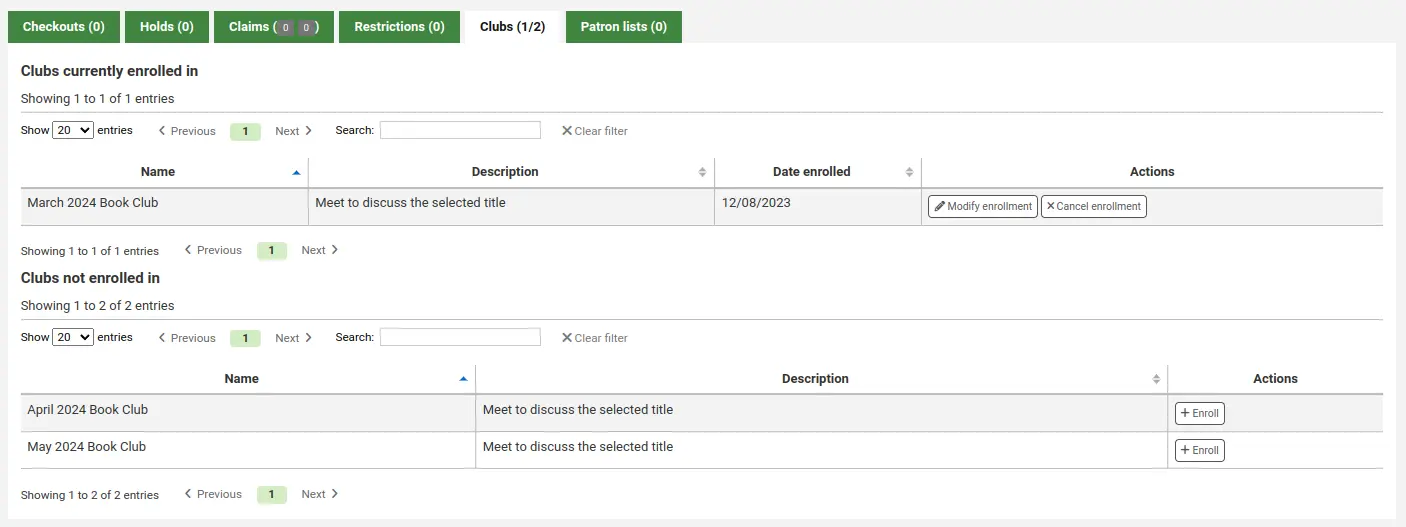
'Enroll' बटन पर क्लिक करें।।
यदि कोई हो 'नामांकन फ़ील्ड' क्लब टेम्पलेट में, वे यहां दिखाई देंगे।।
'फिनिश नामांकन' पर क्लिक करें।।
आप 'संशोधित नामांकन' बटन पर क्लिक करके नामांकन को संशोधित भी कर सकते हैं, या 'कैंसेल नामांकन' बटन पर क्लिक करके नामांकन रद्द कर सकते हैं।।
ओपेक के एक क्लब में संरक्षक का नामांकन
यदि आप सार्वजनिक नामांकन की अनुमति देते हैं, तो ओपेक पर क्लब दिखाई देगा।
संरक्षक को अपने खाते में साइन इन करना पड़ता है।।
में 'आपका सारांश' अनुभाग, वे 'क्लब' टैब पर क्लिक करने में सक्षम होंगे और नामांकन के लिए 'एनरोल' बटन पर क्लिक करेंगे।
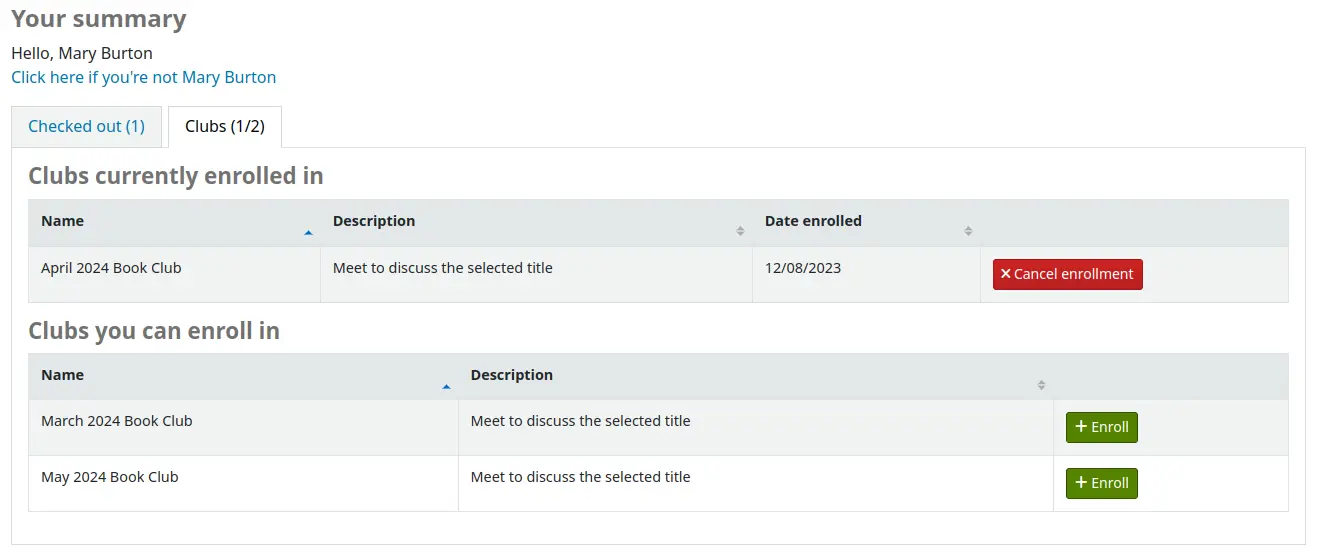
यदि कोई हो 'नामांकन फ़ील्ड' क्लब टेम्पलेट में, वे यहां दिखाई देंगे।।
फिर वे 'Finish enrollment' पर क्लिक कर सकते हैं।।
संरक्षक भी 'कैंसेल नामांकन' बटन पर क्लिक करके एक क्लब के लिए अपनी नामांकन रद्द कर सकते हैं।।
नामांकन देखना
आप प्रत्येक क्लब में नामांकन की निगरानी कर सकते हैं, जो 'संरक्षक क्लब' टूल पेज पर जा सकते हैं और क्लब के बगल में 'एक्शन' बटन से 'नामांकन' चुन सकते हैं।
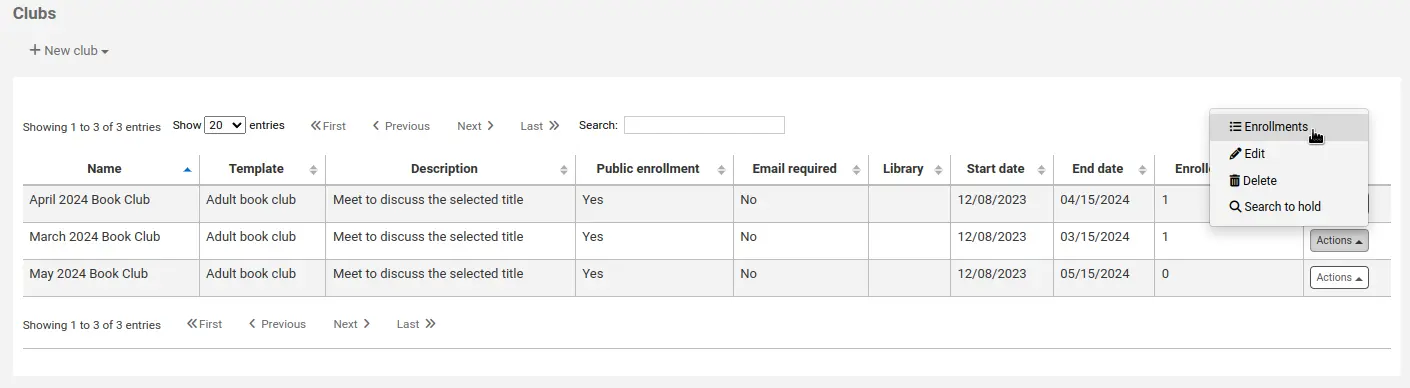
इस पृष्ठ पर, आप देखेंगे कि संरक्षक इस क्लब में दाखिल हुए हैं, साथ ही साथ नामांकन क्षेत्रों के उनके उत्तर भी।।

संस्करण
क्लब नामांकन क्षेत्रों के मूल्यों कोहा संस्करण 23.11 से इस पृष्ठ पर दिखाई देते हैं।।
In prior versions, you need to create an SQL report to get the values. See this example in the Koha SQL reports library.
एक संरक्षक क्लब के लिए एक होल्ड रखना
आप एक संरक्षक क्लब के लिए रख सकते हैं। होल्ड को एक यादृच्छिक क्रम में क्लब के सदस्यों के लिए रखा जाता है।
क्लब पेज से संरक्षक क्लब के लिए एक होल्ड रखने के लिए:
संरक्षक क्लब टूल ('होम> टूल> पैट्रन क्लब') पर जाएं।
क्लब के लिए 'कार्य' बटन पर क्लिक करें और 'सर्च टू होल्ड' चुनें।

एक शीर्षक के लिए खोजें और एक रिकॉर्ड का चयन करें।
रिकॉर्ड के लिए एक्शन लिंक से 'Place Hold for [CLUBNAME]' का चयन करें,

या मेनू बार में 'प्लेस होल्ड' एक्शन से।।
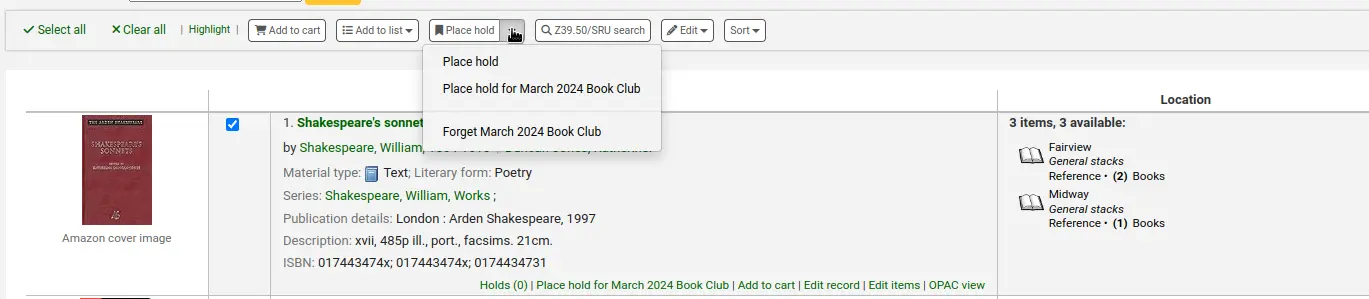
स्थान होल्ड पृष्ठ प्रदर्शित किया जाता है और क्लब के सदस्यों को सूचीबद्ध करता है।
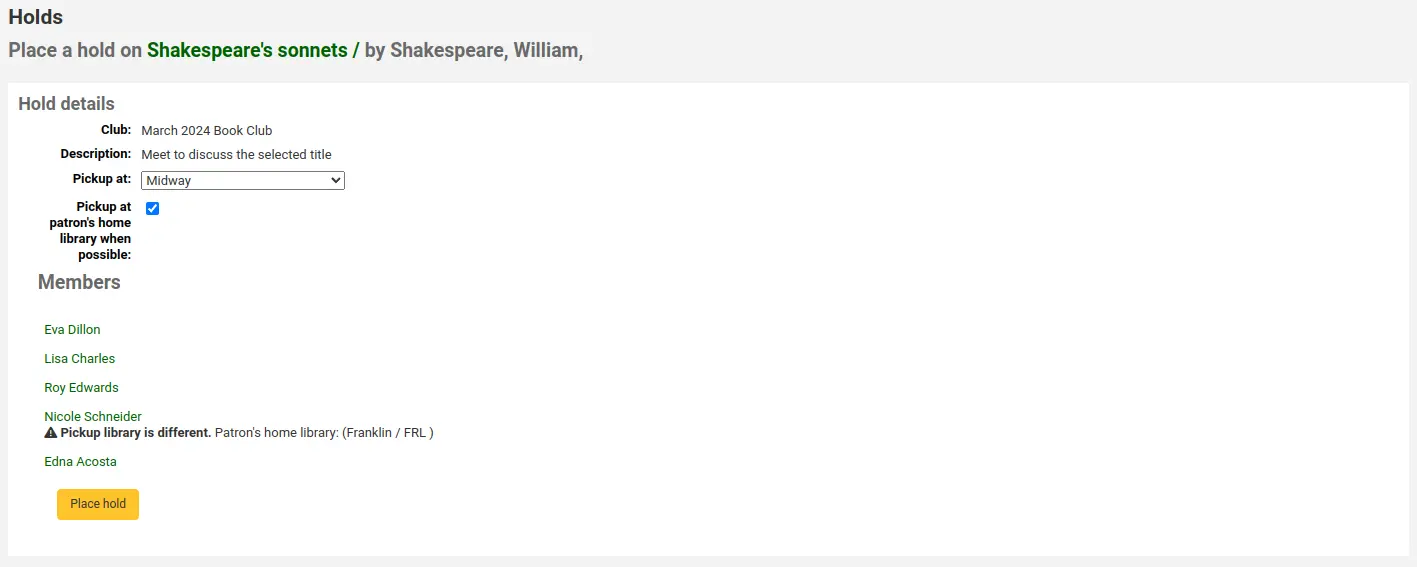
'प्लेस होल्ड' बटन पर क्लिक करें।
एक बार में सभी क्लब सदस्यों के लिए होल्ड्स को एक यादृच्छिक प्राथमिकता आदेश में रखा जाता है।
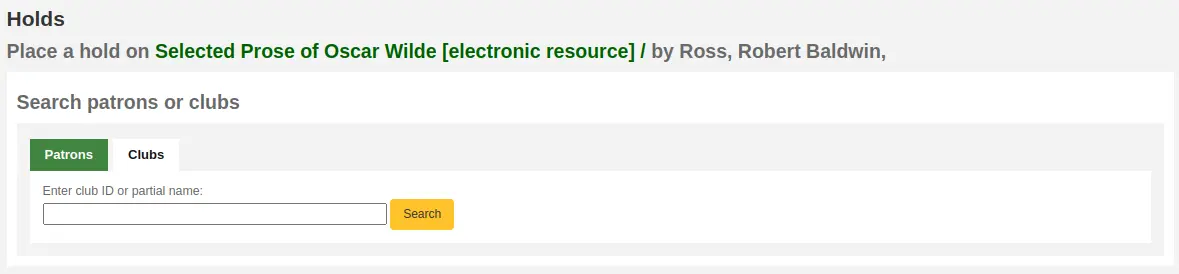
You can also place a hold for a patron club from the bibliographic record. When placing the hold, click on the 'Clubs' tab and search for the club's name. Then click the place hold button.
संरक्षक आयात
टिप्पणी
Only staff with the import_patrons permission (or the superlibrarian permission) will have access to this tool.
वहां जाएं: अधिक> उपकरण> संरक्षक और परिसंचरण> संरक्षक आयात करें
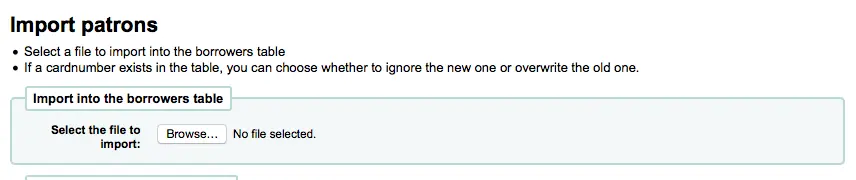
संरक्षक आयात उपकरण थोक में संरक्षक को जोड़ने के लिए किसी भी समय किया जा सकता है। यह आमतौर पर विश्वविद्यालयों और स्कूलों में प्रयोग किया जाता है, जब छात्रों का एक नया बैच रजिस्टरों है।
संरक्षक आयात फ़ाइल बनाना
आप संरक्षक आयात उपकरण के प्रारंभ पृष्ठ से एक हेडर के साथ एक रिक्त CSV फ़ाइल डाउनलोड कर सकते हैं जिसे आप अपने संरक्षक आयात के लिए टेम्पलेट के रूप में उपयोग कर सकते हैं। शीर्ष लेख में सभी फ़ील्ड होते हैं जिनका उपयोग संरक्षक आयात उपकरण के साथ किया जा सकता है। आप उन फ़ील्ड्स और कॉलम को हटा सकते हैं जिनकी आपको कुछ अनिवार्यताओं के अपवाद की आवश्यकता नहीं है। ओवरलेइंग करते समय, यदि आपके नए .csv में रिक्त कॉलम शामिल हैं, तो संरक्षक रिकॉर्ड में कोई भी मौजूदा मान रिक्त स्थान के साथ ओवरराइट हो जाएगा। किसी भी मौजूदा डेटा को हटाने के लिए .csv में किसी भी खाली कॉलम को निकालना सबसे अच्छा है।
महत्वपूर्ण
cardnumber, surname, and all fields you have defined in the BorrowerMandatoryField preference are required and must match valid entries in your database.
महत्वपूर्ण
यह 'पासवर्ड' प्लेन में संग्रहित किया जाना चाहिए, और एक Bcrypt हैश करने के लिए परिवर्तित किया जाएगा।
अपने पासवर्ड को पहले से ही एन्क्रिप्टेड रहे हैं, तो विकल्प के बारे में अपने सिस्टम व्यवस्थापक से बात करें
महत्वपूर्ण
दिनांक प्रारूपों को अपने से मिलान करना चाहिएr DateFormat प्रणाली वरीयता, और शून्य-गद्देदार होना चाहिए, उदा.01/02/2008' वैकल्पिक रूप से आप आईएसओ प्रारूप (जैसे '2008-12-01') में तारीखों की आपूर्ति कर सकते हैं।
महत्वपूर्ण
यदि आपके डेटा में विशेष वर्ण या डायक्रिटिक्स हैं, तो सुनिश्चित करें कि आपकी फ़ाइल UTF-8 में एन्कोडेड है। अन्यथा, विशेष वर्ण सही ढंग से आयात नहीं किए जाएंगे।
नोट
If loading patron attributes, the 'patron_attributes' field should contain a comma-separated list of attribute types and values.
विशेषता प्रकार कोड और एक पेट के प्रत्येक मान के पूर्व में होना चाहिए।
उदाहरण के लिए: "INSTID: 12345, बेसबॉल: शावक"
इस क्षेत्र उद्धरण में लिपटे किया जाना चाहिए अगर एकाधिक मानों परिभाषित कर रहे हैं।
चूंकि मूल्यों रिक्त स्थान शामिल कर सकते हैं, अतिरिक्त दोगुनी-उद्धरण आवश्यक हो सकता है:
"INSTID:12345,BASEBALL:Cubs,""BASEBALL:White Sox""
नोट
संरक्षक आयात उपकरण का उपयोग करके प्रतिबंध लगाना संभव है। यदि समाप्ति तिथि और टिप्पणी मौजूदा प्रतिबंध से मेल खाती है, तो आयात फ़ाइल में से एक को छोड़ दिया जाएगा। इसलिए डुप्लिकेट प्रतिबंध बनाए बिना कई बार एक संरक्षक आयात दोहराया जा सकता है। लेकिन यदि कोई मापदंड अलग है, तो एक नया प्रतिबंध जोड़ा जाएगा।
संरक्षक आयात करते हैं
एक बार जब आप अपनी फ़ाइल बना लेते हैं, तो आप कोहा में डेटा लाने के लिए संरक्षक आयात उपकरण का उपयोग कर सकते हैं।
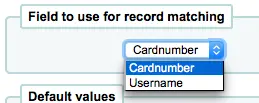
अपनी सीएसवी फ़ाइल चुनें
Choose to match on 'card number' or 'username' to prevent adding of duplicate card numbers to the system. Additional matchpoints can be set up using patron attributes marked as unique.
आप सभी संरक्षक आप आयात कर रहे हैं करने के लिए लागू करने के लिए अगले मूलभूत मूल्यों चुन सकते हैं
उदाहरण के लिए, यदि आप एक शाखा के लिए विशिष्ट संरक्षक आयात कर रहे हैं, तो आप उन सभी को शाखा कोड लागू करने के लिए आयात फ़ॉर्म पर फ़ील्ड का उपयोग कर सकते हैं जो आप आयात कर रहे हैं।
अंत में, आपको यह तय करने की आवश्यकता है कि यदि आप डुप्लिकेट हैं, तो आप किस डेटा को बदलना चाहते हैं।
एक मेल रिकॉर्ड क्षेत्र आप दोहराव को रोकने के लिए मानदंडों से मिलान करने के लिए चुना है का उपयोग करते हुए पाया जाता है

अपनी स्थापना में संरक्षक विशेषताओं का उपयोग करते समय, आप यह चुन सकते हैं कि उन्हें आयात पर कैसे संभाला जाए। आप या तो हमेशा सभी संरक्षक विशेषताओं को ओवरले करने का निर्णय ले सकते हैं या आप केवल अपने आयात फ़ाइल में शामिल संरक्षक विशेषताओं को बदल सकते हैं। यह अन्य विशेषताओं को अछूता छोड़ देगा।

Notices and slips
टिप्पणी
Only staff with the edit_notices permission (or the superlibrarian permission) will have access to this tool.
Get there: More > Tools > Patrons and circulation > Notices and slips
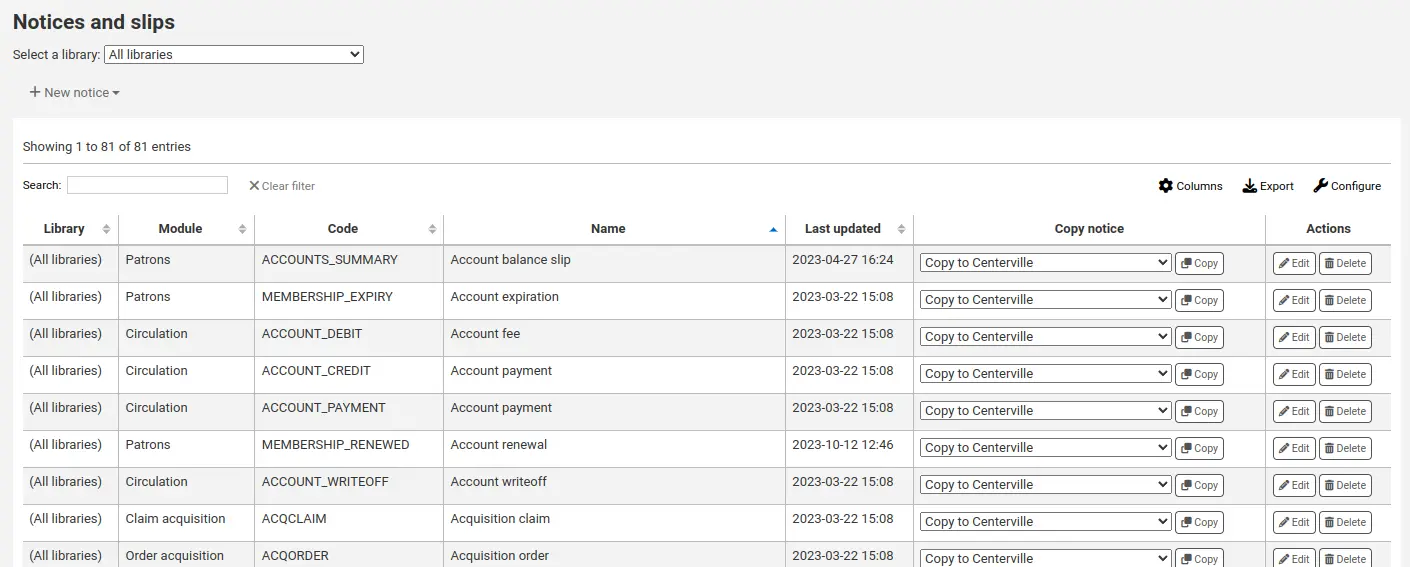
All notices and circulation receipts (or slips) generated by Koha can be customized using the Notices and slips tool. The system comes with several predefined templates that will appear when you first visit this tool.
टिप्पणी
You can customize the columns of this table in the Table settings section of the Administration module (table id: lettert).
प्रत्येक सूचना संपादित किया जा सकता है, लेकिन केवल कुछ ही नष्ट किया जा सकता है, यह एक संदेश एक टेम्पलेट के बिना भेजने के लिए प्रयास करना चाहिए, सिस्टम में त्रुटियाँ रोकने के लिए है। प्रत्येक सूचना और पर्ची, एक प्रति पुस्तकालय के आधार पर संपादित किया जा सकता डिफ़ॉल्ट रूप से आप सभी पुस्तकालयों के लिए नोटिस देखेंगे।
यदि आपके पास एक शैली है जिसे आप सभी पर्ची पर लागू करना चाहते हैं, तो आप the को इंगित कर सकते हैं SlipCSS एक स्टाइलशीट के लिए वरीयता। नोटिस के लिए भी यही सच है, the का उपयोग करना NoticeCSS एक स्टाइलशीट को परिभाषित करने के लिए वरीयता।
You will also want to review the Customising notices and slips wiki page for more information on formatting these notices.
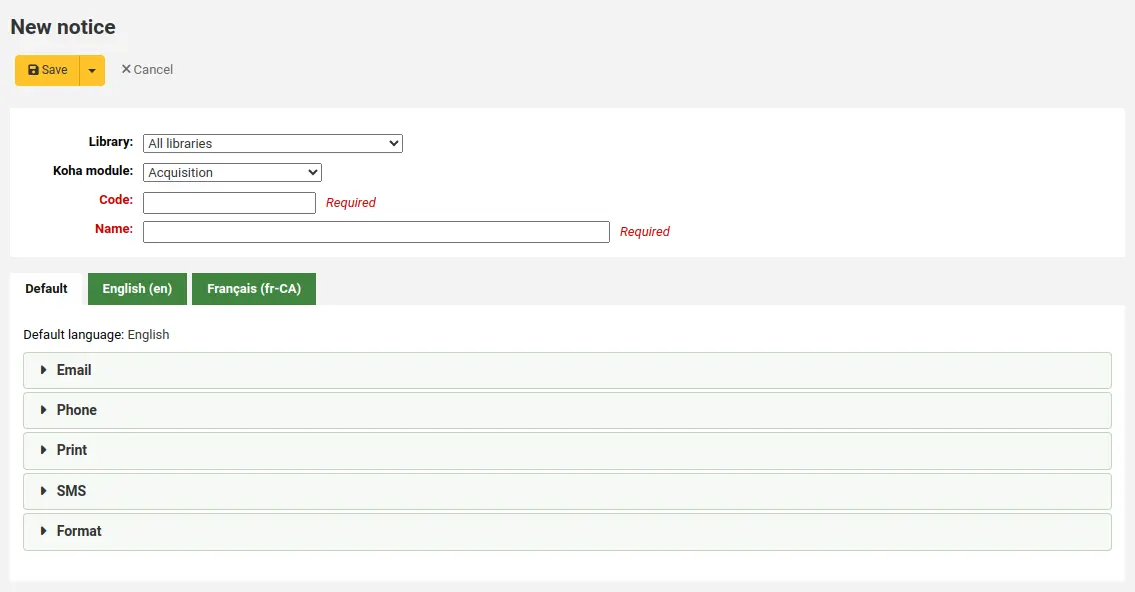
नोटिस और स्लिपस जोड़ना
एक नया नोटिस या पर्ची को जोड़ने के लिए
क्लिक करें 'नई सूचना'
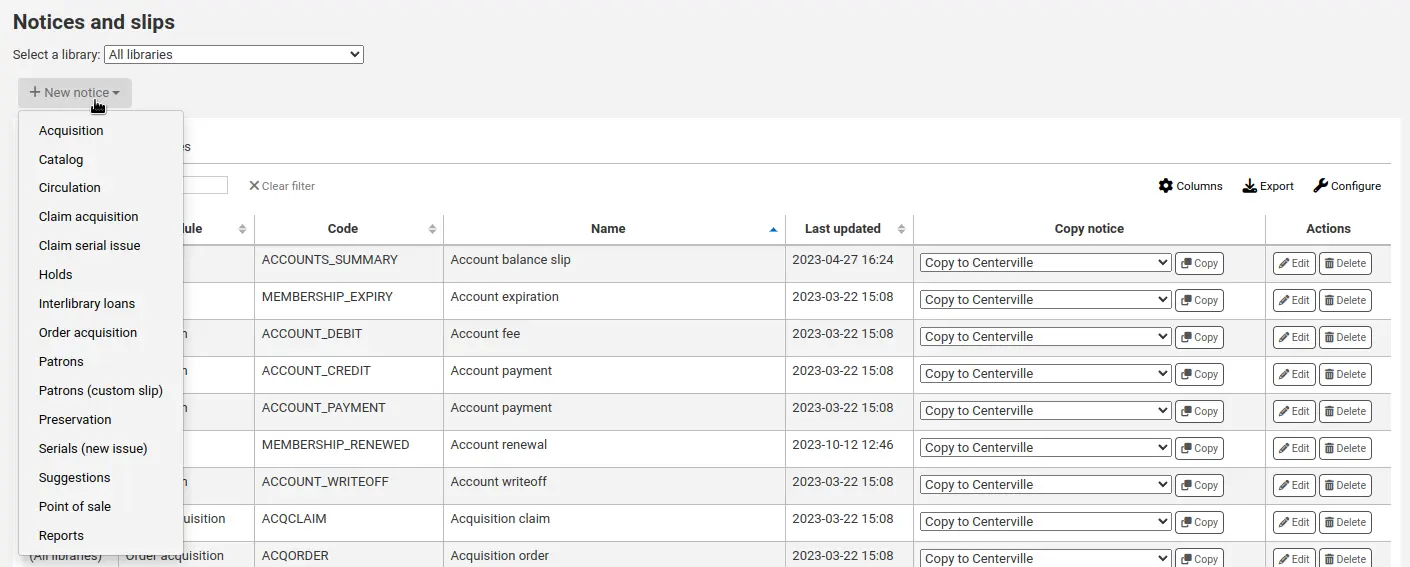
Choose the type of notice, or module this notice is related to
Acquisition: notice to be used in the acquisitions module
Bookings: notice to be used in the bookings process
संस्करण
This type of notice was first introduced in version 24.11 of Koha.
कैटलॉग: सूची में इस्तेमाल होने की सूचना
परिसंचरण: परिसंचरण के लिए इस्तेमाल किए जाने वाले नोटिस या पर्ची (जैसे अतिदेय नोटिस)
दावा अधिग्रहण: जब इस्तेमाल किया जाना है तो नोटिस देर से आदेशों का दावा करना में अधिग्रहण मॉड्यूल
सीरियल इश्यू का दावा करें: जब इस्तेमाल किया जाए तो नोटिस देर से सीरियल इश्यू का दावा करना में सीरियल मॉड्यूल
Holds: notice or slip to be used in the holds process
इंटरलाइब्रेरी लोन: नोटिस में इस्तेमाल किया जाना ILL अनुरोध प्रक्रिया
Lists: notice to be used with the lists
संस्करण
This type of notice was added to Koha in version 24.11.
Previously, notices related to lists were categorized under Patrons.
आदेश अधिग्रहण: जब उपयोग किया जाना है तो नोटिस आदेश अधिग्रहण
Patrons: notice or slip to be used in patron accounts
संरक्षक (कस्टम स्लिप): स्लिप में इस्तेमाल किया जाना संरक्षक खाते
संस्करण
इस प्रकार की सूचना कोहा संस्करण 23.11 में जोड़ा गया था।।
Patrons (custom message): notice to be used when sending a custom email to a patron.
संस्करण
This type of notice was added to Koha in version 24.05.
Preservation: notice or slip to be used in the preservation process
संस्करण
इस प्रकार की सूचना कोहा संस्करण 23.11 में जोड़ा गया था।।
सीरियल (नए इश्यू): एक नए धारावाहिक इश्यू के आगमन के संरक्षक को सूचित करने के लिए इस्तेमाल किया जाने वाला नोटिस
Suggestions: notice to be used in the purchase suggestion process
Point of sale: notice or slip to be used in the point of sale module
रिपोर्ट: प्रारूप करने के लिए नोटिस ग्राहक रिपोर्ट परिणाम
संस्करण
इस प्रकार की सूचना कोहा संस्करण 23.11 में जोड़ा गया था।।
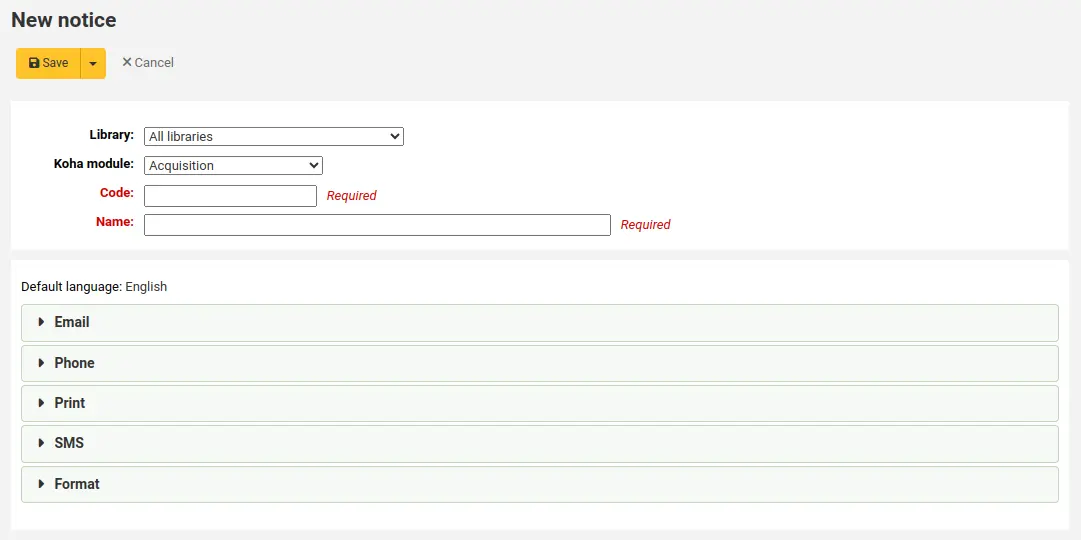
Fill out the notice information
Library: choose which library this notice or slip is for.
महत्त्वपूर्ण
Not all notices can be library specific. For more information review the Customising notices and slips wiki page.
कोहा मॉड्यूल: यदि आपने पहले सही मॉड्यूल या नोटिस के प्रकार का चयन नहीं किया है, तो आप इसे यहां बदल सकते हैं।।
Code: enter a unique alphanumeric code for this notice.
महत्त्वपूर्ण
Note that codes are limited to 20 characters.
नाम: नोटिस के लिए एक वर्णनात्मक नाम दर्ज करें।।
टिप्पणी
For overdue notices, be sure to put your library name in the description, so that it will be visible when setting up your triggers.
Next, you can customize the notice for every possible delivery method.
Every notice should have an email template set for it.

यदि PhoneNotification सिस्टम वरीयता सक्षम है, तो आपके पास एक फोन टेम्पलेट जोड़ने का विकल्प होगा।।
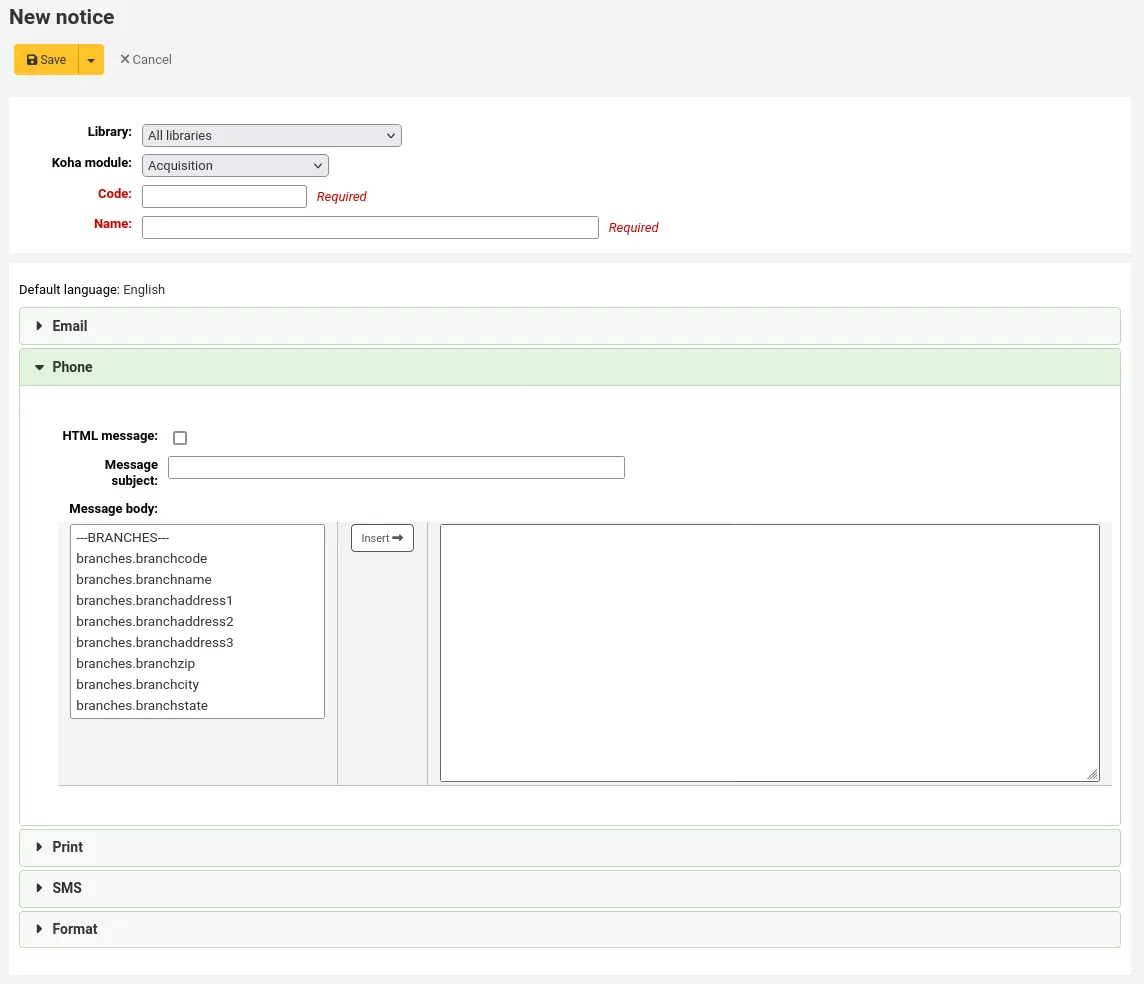
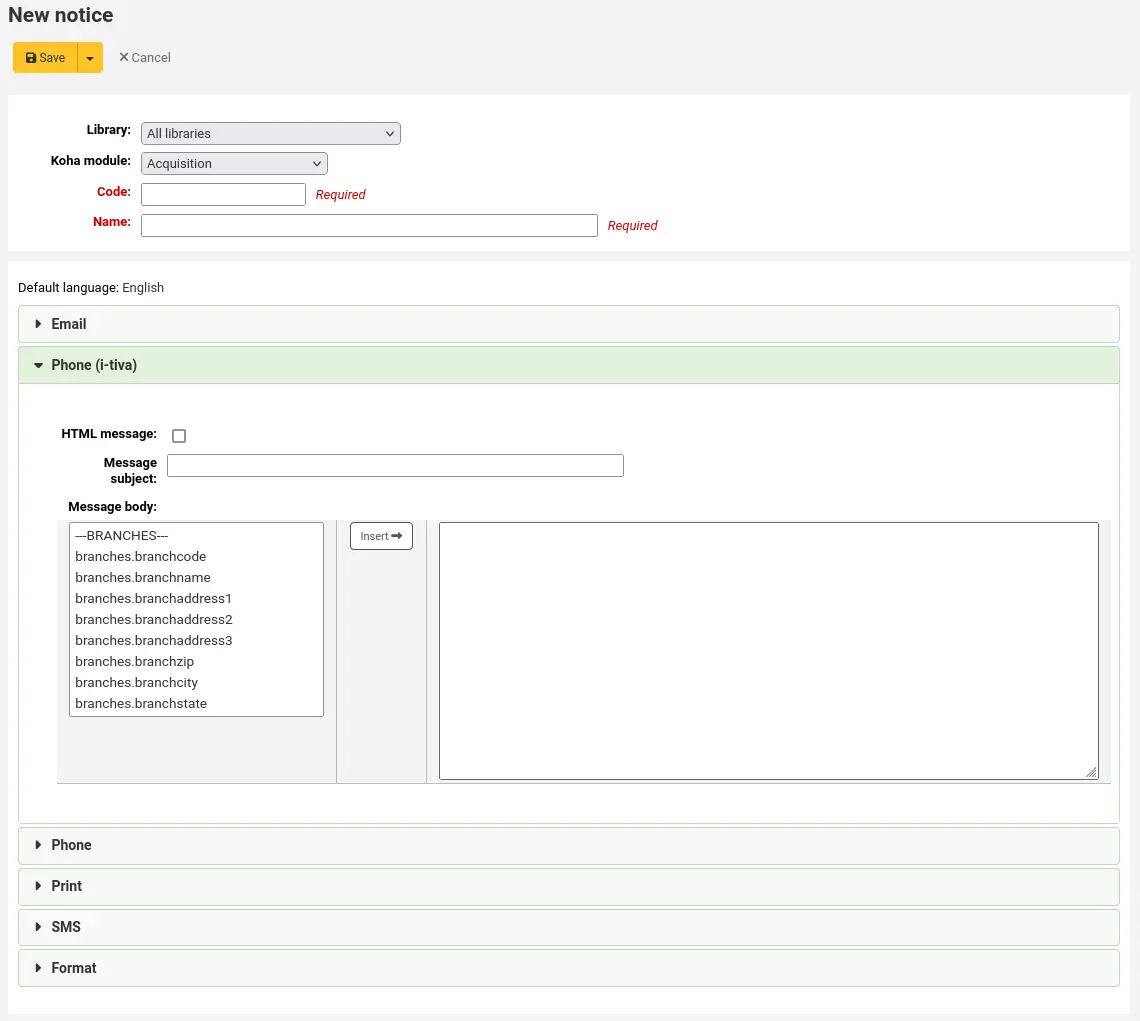
If you're using the TalkingTechItivaPhoneNotification service you can set up a notification specific to that service.
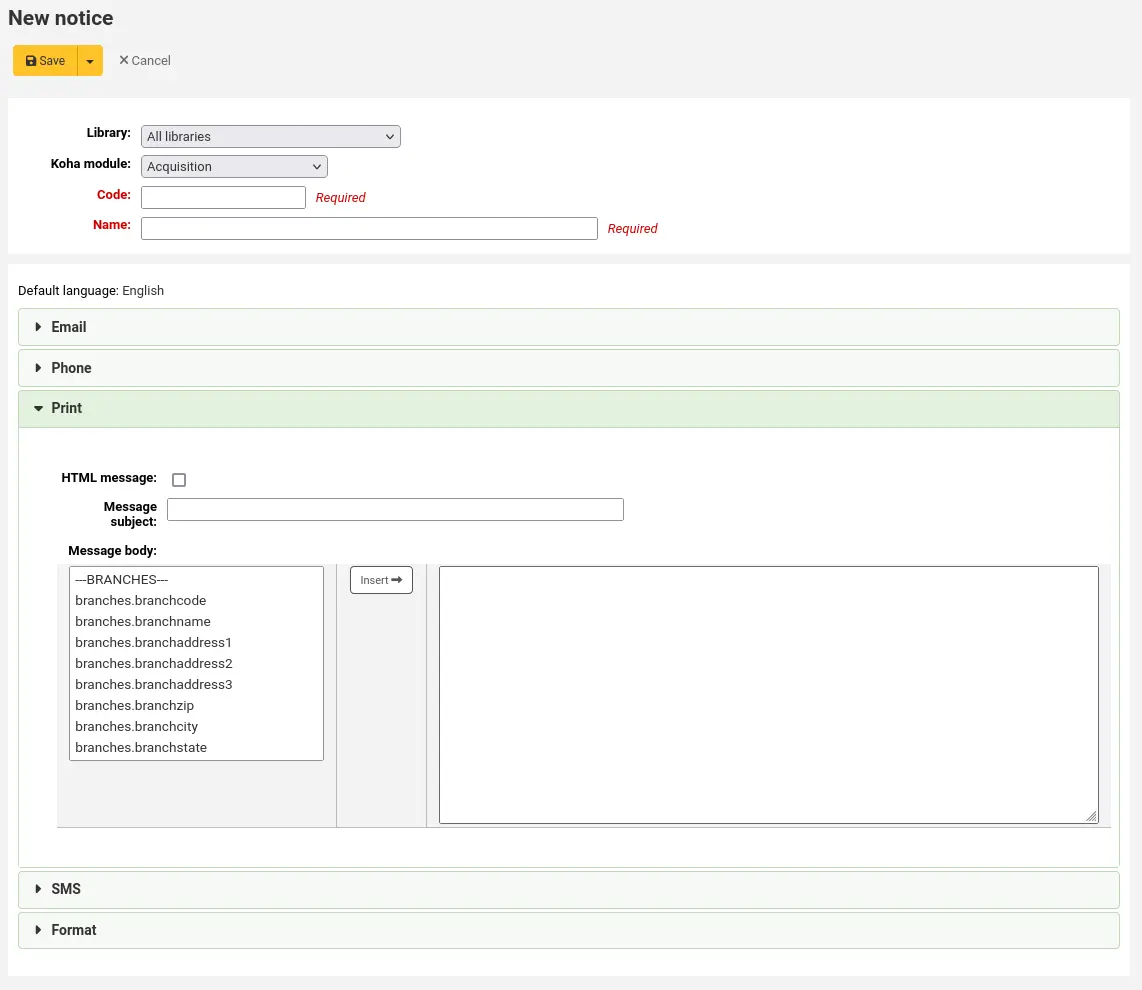
If you plan on printing this notice, you can set the print template
If you have enabled SMS notices with the SMSSendDriver system preference, you can set the text for your SMS notices
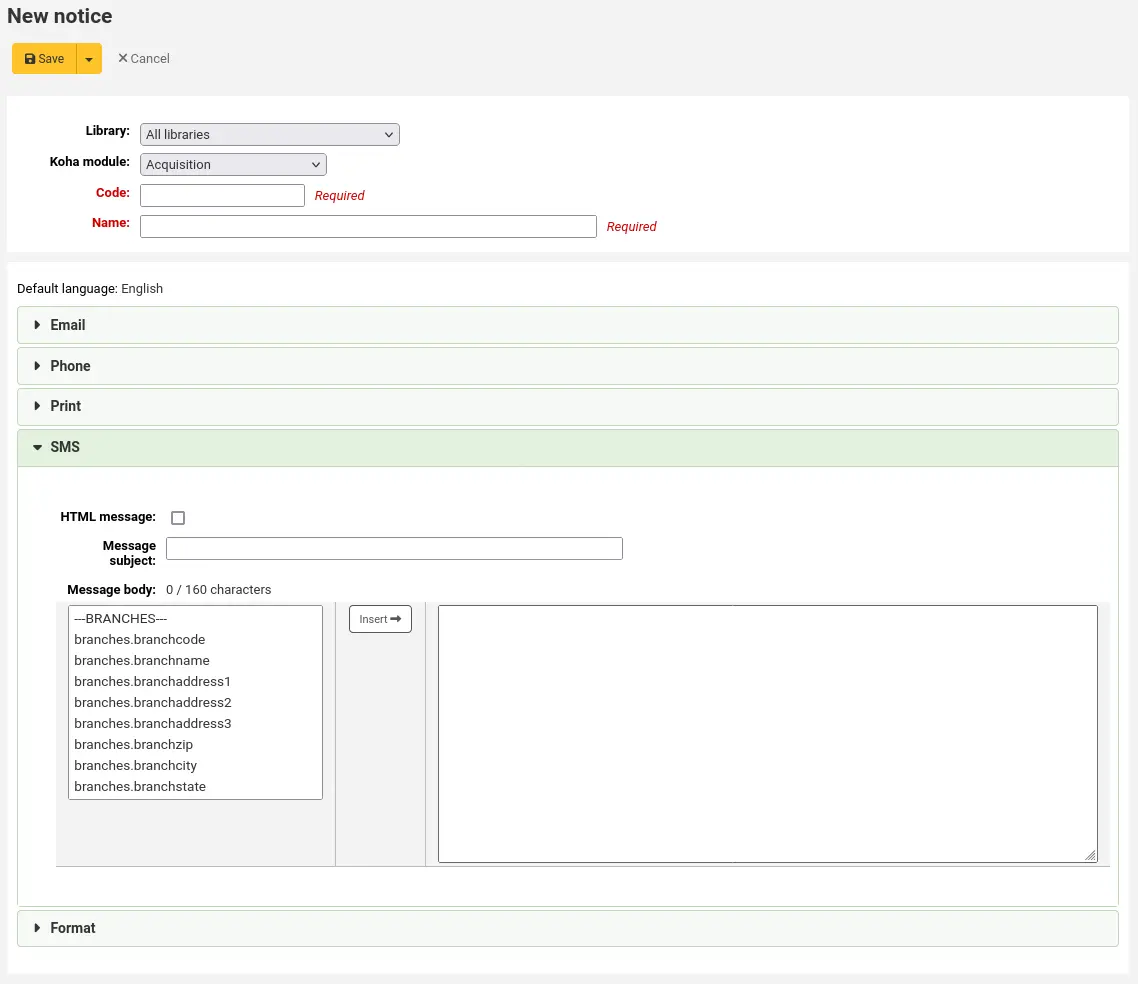
महत्त्वपूर्ण
पाठ संदेश 1600 वर्ण तक सीमित हैं। संदेश को छोटा रखने के लिए सुनिश्चित करें और उन चरों को जोड़ने से बचें जो बहुत लंबे हो सकते हैं (जैसे कि देय वस्तुओं की सूची, उदाहरण के लिए)।।
The 'Format' tab is used to add formatting to the print notice.
संस्करण
This option was added to Koha in version 24.05.
Click the links under 'Insert selectors to apply styles to' to automatically insert all the relevant selectors for either the headings, the tables, or all the text.
सलाह
Use the links to insert the selectors and then remove the unnecessary ones if needed. For example, if you want to apply styling to the first level headings, click 'Headings' and then remove everything except
#slip h1and#receipt h1.Remove the text
// insert CSS herein the 'Style (CSS)' field and replace it with the formatting required.If this formatting is applicable to all print notices, check the 'Apply format settings to all notices' box. This will overwrite the styling in other notices, if any.
Each notice offers the same options
HTML message: if you plan on writing the notice or slip in HTML check the 'HTML message' box, otherwise the content will be generated as plain text
Message subject: for emails, this is what will appear in the subject line of the email
Message body: feel free to type whatever message you feel is best, use the fields on the left hand side to enter individualized data from the from database.
You can also use Template toolkit syntax for more flexibility. See the Notices with Template Toolkit wiki page for more information.
टिप्पणी
Review the Customising notices and slips wiki page for more information.
महत्त्वपूर्ण
Overdue notices can use
<<items.content>>tags by themselves, or use<item></item>to span all of the tags. Learn more about the Overdue notice markup.On overdue notices make sure to use
<<items.content>>tags to print out the data related to all items that are overdue.The other option, only for overdue notices, is to use the
<item></item>tags to span the line so that it will print out multiple lines. One example for the<item></item>tag option is:
<item>"<<biblio.title>>" by <<biblio.author>>,
<<items.itemcallnumber>>, Barcode: <<items.barcode>> ,
Checkout date: <<issues.issuedate>>, Due date:
<<issues.date\_due>> Fine: <<items.fine>> </item>
महत्त्वपूर्ण
Only the overdue notices take advantage of the
<item></item>tags, all other notices referencing items need to use<<items.content>>.सलाह
To add today's date you can use the
<<today>>tag.सलाह
यदि आप अपने फिसल जाता है पर संरक्षक का पूरा नाम मुद्रित नहीं करना चाहते हैं या नोटिस यदि आप अन्य नाम या प्रत्येक संरक्षक के लिए प्रथमाक्षर क्षेत्र में डेटा दर्ज और इसके बजाय कि मूल्य का उपयोग कर सकते हैं।
View default: the 'view default' button allows you to display the default sample notice in a popup modal and even reset the notice to that default. This is available for the notices and slips that come with Koha.
संस्करण
This option was added to Koha in version 24.11.
The system preference TranslateNotices will add tabs for each installed language to the notices editor. The notice defined in the 'Default' tab will be used if there is no preferred language set for a patron ('Preferred language for notices' field in the patron file).
पूर्वावलोकन नोटिस टेम्पलेट
कुछ नोटिस के लिए नोटिस टेम्पलेट का पूर्वावलोकन करना संभव है कि यह किसी विशेष आइटम या रिकॉर्ड के लिए निर्दिष्ट संरक्षक को कैसे देखेंगे।
यदि कोई नोटिस टेम्पलेट पूर्वावलोकन योग्य है तो नोटिस टेम्पलेट हेडर में पूर्वावलोकन डेटा दर्ज करने के लिए एक फ़ील्ड होगा
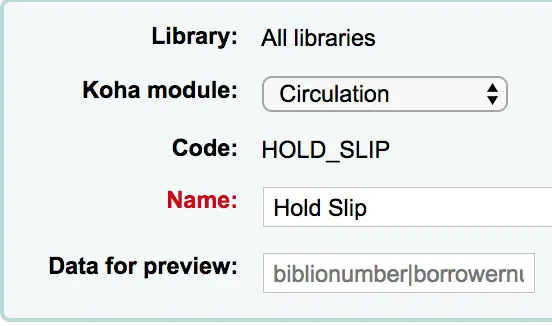
टेम्पलेट के लिए आवश्यक जानकारी भरें, फिर संदेश निकाय के नीचे पूर्वावलोकन बटन पर क्लिक करें। पूर्वावलोकन संवाद इंगित करेगा कि नोटिस टेम्पलेट पूर्वावलोकन उत्पन्न करने में कोई समस्या है या नहीं।
अतिदेय नोटिस मार्कअप
When creating your overdue notices there are two tags in addition to the various database fields that you can use in your notices. You will also want to review the Customising notices and slips wiki page for information on formatting item information in these notices.
महत्त्वपूर्ण
इन नए टैग केवल अतिदेय नोटिस, इस समय नहीं अन्य संचलन संबंधित सूचनाओं पर काम करते हैं।
ये टैग <item> और </item> हैं जो सभी फ़ील्ड को बाइबिलियो, बाइबिलियोइटम्स और आइटम टेबल से जोड़ना चाहिए।
एक नोटिस टेम्पलेट में इन टैग का उपयोग कर की तरह हो सकता का एक उदाहरण:
The following item(s) is/are currently overdue:

<item>"<<biblio.title>>" by <<biblio.author>>, <<items.itemcallnumber>>, Barcode: <<items.barcode>> Fine: <<items.fine>></item>
कौन सा है, यह सोचते दो मदों से जुर्माना थे, एक नोटिस में नतीजा होगा जैसे:
The following item(s) is/are currently overdue:

"A Short History of Western Civilization" by Harrison, John B, 909.09821 H2451, Barcode: 08030003 Fine: 3.50
"History of Western Civilization" by Hayes, Carlton Joseph Huntley, 909.09821 H3261 v.1, Barcode: 08030004 Fine: 3.50
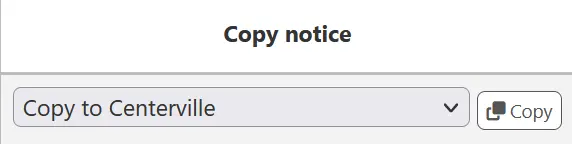
Copying notices and slips
आप पुस्तकालय का चयन करके किसी अन्य पुस्तकालय को एक मौजूदा नोटिस भी कॉपी कर सकते हैं जिसे आप इसे कॉलम "कॉपी नोटिस" में कॉपी करना चाहते हैं और फिर "कॉपी" बटन पर क्लिक कर सकते हैं।।
मौजूदा सूचनाएँ एंव स्लिपस
Among the default notices are notices for several common actions within Koha. All of these notices can be customized by altering their text via the Notices and slips tool and their style using the NoticeCSS system preference to define a stylesheet.
महत्त्वपूर्ण
New notices are only included by default in new installations. If you have upgraded from a previous version and need a new notice that was only added in the newer version you have upgraded to, you will have to manually add that notice.
सलाह
Review the Customising notices and slips wiki page for information on formatting item information in these notices.
यहाँ उनमें से कुछ हैं जो नोटिस करते हैं:
2FA_DISABLE
This notice is sent to a staff user when they disable the two-factor authentication on their account.
2FA_ENABLE
This notice is sent to a staff user when they enable the two-factor authentication on their account.
2FA_OTP_TOKEN
This notice is used to send a time-based one-time password to a staff user for them to use to log into the staff interface if they have enabled the two-factor authentication on their account.
स्वीकृत
This notice is sent to the patron when their purchase suggestion is accepted.
टिप्पणी
If you don't want to send this notice, simply delete it.
ACCOUNT_PAYMENT
This notice is sent for each payment transaction in a patron's account if the AutomaticEmailReceipts system preference is set to 'Send'.
This is also the notice sent for payment transactions in a patron's account if the staff member manually sends the receipt by email using the 'Email' button on the transaction line.
ACCOUNT_WRITEOFF
This notice is sent for each writeoff transaction in a patron's account if the AutomaticEmailReceipts system preference is set to 'Send'.
This is also the notice sent for writeoff transaction in a patron's account if the staff member manually sends the receipt by email using the 'Email' button on the transaction line.
ACQCLAIM (अधिग्रहण दावा)
Used for claiming orders in the aquisitions module.
ACQCLAIM is the code of the sample notice, but it's possible to define several notices choosing any code. Only the module 'Claim acquisition' will be taken into account. All notices with this module will appear in the pull down on the late orders page.
यह नोटिस भेजा जाता है यदि कई मानदंडों को पूरा किया जाता है:
ईमेल को ट्रिगर करने वाले स्टाफ संरक्षक के पास एक वैध ईमेल पता है।
The vendor contact marked as 'Contact about late orders?' has a valid email address.
ACQORDER (अधिग्रहण आदेश)
Used in the acquisitions module to send order information to the vendor
The notice is triggered manually from the basket summary page using the 'Email order' button in the toolbar.
यह नोटिस भेजा जाता है यदि कई मानदंडों को पूरा किया जाता है:
ईमेल को ट्रिगर करने वाले स्टाफ संरक्षक के पास एक वैध ईमेल पता है।
The vendor contact marked as 'Primary acquisitions contact' and 'Contact when ordering' has a valid email address.
ACQ_NOTIF_ON_RECEIV
Used in the acquisition module to inform patrons on receiving orders they have been added to.
AR_CANCELED
This notice is sent to the patron when an article request is canceled by staff.
AR_COMPLETED
This notice is sent to the patron when an article request is marked as completed by staff.
AR_PENDING
This notice is sent to the patron when an article request is changed to 'pending' status
AR_PROCESSING
This notice is sent to the patron when an article request is marked as being processed by staff.
AR_REQUESTED
This notice is sent to the patron when an article request has been made in order to confirm the request.
AUTO_RENEWALS
यह नोटिस संरक्षक को भेजा जाता है यदि स्वत: नवीनीकरण सक्षम है और संरक्षक ने इसे अपने मैसेजिंग वरीयताओं में प्राप्त करना चुना है।
इस नोटिस को भेजने के लिए, आपको the सेट करना होगा AutoRenewalNotices सिस्टम वरीयता " पैट्रन मैसेजिंग वरीयताओं के अनुसार "।
यह नोटिस इसलिए सेट किया गया है, ताकि नवीनीकरण के परिणाम के आधार पर, सफल रहा या नहीं, संदेश अलग होगा।
AUTO_RENEWALS_DGST
यह नोटिस संरक्षक को भेजा जाता है यदि स्वत: नवीनीकरण सक्षम है और संरक्षक ने अपने मैसेजिंग वरीयताओं में डाइजेस्ट प्राप्त करना चुना है।
इस नोटिस को भेजने के लिए, आपको the सेट करना होगा AutoRenewalNotices सिस्टम वरीयता " पैट्रन मैसेजिंग वरीयताओं के अनुसार "।
यह नोटिस इसलिए सेट किया गया है, ताकि नवीनीकरण के परिणाम के आधार पर, सफल रहा या नहीं, संदेश अलग होगा।
उपलब्ध
This notice is sent to the patron who made a purchase suggestion, when the order created from the suggestion is received.
टिप्पणी
If you don't want to send this notice, simply delete it.
BOOKING_CANCELLATION
This notice is sent to a patron when library staff cancel their booking.
संस्करण
The BOOKING_CANCELLATION notice was first introduced in version 24.11 of Koha.
BOOKING_CONFIRMATION
This notice is sent to a patron when library staff place a booking on their behalf.
संस्करण
The BOOKING_CONFIRMATION notice was first introduced in version 24.11 of Koha.
BOOKING_MODIFICATION
This notice is sent to a patron when library staff update their booking's pickup library, start date or end date.
संस्करण
The BOOKING_MODIFICATION notice was first introduced in version 24.11 of Koha.
CART
This notice is used when sending the cart by email from the OPAC or when sending the cart by email from the staff interface.
CANCEL_HOLD_ON_LOST
This notice is sent to a patron who placed a hold on an item and staff marked this items as lost from the 'Holds to pull' list.
This notice is sent if the CanMarkHoldsToPullAsLost system preference is set to 'Allow to mark items as lost and notify the patron'.
चेकइन
यह सूचना सभी आइटम है कि चैक आउट कर रहे हैं के लिए 'चैक आउट करें' नोटिस के रूप में भेजा जाता है
इस नोटिस प्रयोग किया जाता है, तो दो मानदंड से मुलाकात कर रहे हैं:
यह EnhancedMessagingPreferences 'अनुमति' के लिए सेट है
संरक्षक इस नोटिस प्राप्त करने के लिए अनुरोध किया है
If EnhancedMessagingPreferencesOPAC is set to 'Show', patrons will be able to choose their messaging preferences in their online account in the Messaging tab.
Staff can select this notice for a patron in their messaging preferences.
चेकआउट
यह सूचना सभी आइटम है कि नए सिरे से कर रहे हैं के लिए 'चैक आउट करें' नोटिस के रूप में भेजा जाता है
इस नोटिस प्रयोग किया जाता है, तो दो मानदंड से मुलाकात कर रहे हैं:
यह EnhancedMessagingPreferences 'अनुमति' के लिए सेट है
संरक्षक इस नोटिस प्राप्त करने के लिए अनुरोध किया है
If EnhancedMessagingPreferencesOPAC is set to 'Show', patrons will be able to choose their messaging preferences in their online account in the Messaging tab.
Staff can select this notice for a patron in their messaging preferences.
CHECKOUT_NOTE
This notice is sent to the system administration (the email address in KohaAdminEmailAddress) to alert them that a patron added a checkout note from their checkouts list on the OPAC.
DISCHARGE
यह नोटिस एक सफल निर्वहन अनुरोध दस्तावेज करने के लिए पीडीएफ उत्पन्न करने के लिए प्रयोग किया जाता है
पीडीएफ या तो संरक्षक द्वारा अपने संरक्षक खाते से या कर्मचारियों के इंटरफ़ेस से संरक्षक द्वारा डाउनलोड किया जा सकता है
निर्वहन सुविधा को नियंत्रित किया जाता है useDischarge सिस्टम वरीयता।
देय
This notice is sent as the 'Item due' notice for an checked out item that is due today.
इस नोटिस प्रयोग किया जाता है, तो दो मानदंड से मुलाकात कर रहे हैं:
यह EnhancedMessagingPreferences 'अनुमति' के लिए सेट है
संरक्षक इस नोटिस प्राप्त करने के लिए अनुरोध किया है
If EnhancedMessagingPreferencesOPAC is set to 'Show', patrons will be able to choose their messaging preferences in their online account in the Messaging tab.
Staff can select this notice for a patron in their messaging preferences.
DUEDGST
This notice is sent as the 'Item due' notice for all checked out items that are due today (digest option).
इस नोटिस प्रयोग किया जाता है, तो दो मानदंड से मुलाकात कर रहे हैं:
यह EnhancedMessagingPreferences 'अनुमति' के लिए सेट है
संरक्षक एक डाइजेस्ट के रूप में इस सूचना प्राप्त करने के लिए अनुरोध किया है
If EnhancedMessagingPreferencesOPAC is set to 'Show', patrons will be able to choose their messaging preferences in their online account in the Messaging tab.
Staff can select this notice for a patron in their messaging preferences.
होल्ड (होल्ड पिकअप के लिए उपलब्ध है)
This notice is sent to the patron when their hold is ready for pickup.
इस नोटिस प्रयोग किया जाता है, तो दो मानदंड से मुलाकात कर रहे हैं:
यह EnhancedMessagingPreferences 'अनुमति' के लिए सेट है
संरक्षक एक डाइजेस्ट के रूप में इस सूचना प्राप्त करने के लिए अनुरोध किया है
If EnhancedMessagingPreferencesOPAC is set to 'Show', patrons will be able to choose their messaging preferences in their online account in the Messaging tab.
Staff can select this notice for a patron in their messaging preferences.
इस नोटिस के संदर्भ जब शाखाओं तालिका यह पिक शाखा जानकारी का जिक्र है।
HOLD_CHANGED
This notice is sent to library staff (either the email address in ExpireReservesAutoFillEmail), or the library's reply-to address, to alert them that a hold has been canceled, the item filled the next hold and is now waiting for another patron.
This notice is only sent if ExpireReservesAutoFill is set to 'Do'.
HOLD_REMINDER
This notice is sent to the patron when their hold has been waiting for pickup for more than a number of days
If EnhancedMessagingPreferencesOPAC is set to 'Show', patrons will be able to choose their messaging preferences in their online account in the Messaging tab. The notice is 'Hold reminder'.
Staff can select this notice for a patron in their messaging preferences. The notice is 'Hold reminder'.
The holds_reminder.pl cron job is required to generate this notice.
HOLDDGST
संस्करण
This notice was added to Koha in version 23.11.
This notice is sent as the 'Hold filled' notice for holds waiting for pickup (digest option).
इस नोटिस प्रयोग किया जाता है, तो दो मानदंड से मुलाकात कर रहे हैं:
The EnhancedMessagingPreferences system preference is set to 'Allow'.
The patron has requested to receive this notice as a digest.
If the EnhancedMessagingPreferencesOPAC system preference is set to 'Show', patrons will be able to choose their messaging preferences in their online account in the Messaging tab.
Staff can select this notice for a patron in their messaging preferences.
HOLDPLACED
This notice is sent to the library staff when a hold has been placed.
This notice requires the emailLibrarianWhenHoldIsPlaced system preference to be set to 'Enable'.
When this notice references the branches table it is referring to the pickup library information.
HOLDPLACED_PATRON
This notice is sent to the patron who placed a hold.
This notice requires that the EmailPatronWhenHoldIsPlaced system preference be set to 'Email'.
संस्करण
This notice was added to Koha in version 23.11, along with the corresponding system preference.
ILL_PARTNER_REQ
This notice is used by the ILL module to send requests to partner libraries.
ILL_PICKUP_READY
This notice is sent to the patron when the inter-library loan they requested has been fulfilled and is now ready for pickup.
Staff can select this notice for a patron in their messaging preferences. The notice is 'Interlibrary loan ready'.
टिप्पणी
The option will only appear in the messaging preferences if the ILLModule system preference is enabled.
If EnhancedMessagingPreferencesOPAC is set to 'Show', patrons will be able to choose their messaging preferences in their online account in the Messaging tab. The notice is 'Interlibrary loan ready'.
टिप्पणी
The option will only appear in the messaging preferences if the ILLModule system preference is enabled.
ILL_REQUEST_CANCEL
This notice is sent to library staff when a patron cancels their inter-library loan request from their account in the OPAC.
ILL_REQUEST_MODIFIED
This notice is sent to library staff when a patron modifies their inter-library loan request from their account in the OPAC.
ILL_REQUEST_UNAVAIL
This notice is sent to the patron when the inter-library loan they requested has been canceled because it was unavailable.
Staff can select this notice for a patron in their messaging preferences. The notice is 'Interlibrary loan unavailable'.
टिप्पणी
The option will only appear in the messaging preferences if the ILLModule system preference is enabled.
If EnhancedMessagingPreferencesOPAC is set to 'Show', patrons will be able to choose their messaging preferences in their online account in the Messaging tab. The notice is 'Interlibrary loan unavailable'.
टिप्पणी
The option will only appear in the messaging preferences if the ILLModule system preference is enabled.
ILL_REQUEST_UPDATE
This notice is sent to the patron to alert them that their inter-library loan request has been updated.
Staff can select this notice for a patron in their messaging preferences. The notice is 'Interlibrary loan updated'.
टिप्पणी
The option will only appear in the messaging preferences if the ILLModule system preference is enabled.
If EnhancedMessagingPreferencesOPAC is set to 'Show', patrons will be able to choose their messaging preferences in their online account in the Messaging tab. The notice is 'Interlibrary loan updated'.
टिप्पणी
The option will only appear in the messaging preferences if the ILLModule system preference is enabled.
LIST
This notice is used when sending a list by email from the OPAC or when sending a list by email from the staff interface.
MEMBERSHIP_EXPIRY
इस नोटिस संरक्षक के लिए भेजा जा सकता है उन्हें चेतावनी दी है कि उनके कार्ड जल्द ही समाप्त हो रहा है।
Requires that you have the MembershipExpiryDaysNotice set and the related cron job set.
MEMBERSHIP_RENEWED
This notice can be sent to patrons to notify them that their library membership has been renewed.
The notice is generated by the membership_expiry.pl cronjob when it is called with the
--renewparameter.
NEW_CURBSIDE_PICKUP
This notice is sent to the patron when a curbside pickup is scheduled.
In order to send this notice,
The patron must have chosen to receive the 'Hold filled' notice by email.
Staff can select this notice for a patron in their messaging preferences
If EnhancedMessagingPreferencesOPAC is set to 'Show', patrons will be able to choose their messaging preferences in their online account in the Messaging tab.
NEW_SUGGESTION
This notice is sent to library staff when the EmailPurchaseSuggestions system preference is enabled.
NOTIFY_MANAGER
This notice is sent to a staff member when they are assigned as manager of a suggestion in the acquisitions module.
ODUE (अतिदेय नोटिस)
इस नोटिस का उपयोग संरक्षक को अतिदेय नोटिस भेजने के लिए किया जाता है
ODUE नमूना नोटिस का कोड है, लेकिन किसी भी कोड का उपयोग करना और विभिन्न संरक्षक श्रेणियों और नोटिस स्तरों के लिए कई अलग-अलग संदेशों को परिभाषित करना संभव है
Requires that you set Overdue notice/status triggers
OPAC_REG
This notice is sent to library staff when the EmailPatronRegistrations system preference is enabled and a patron registers through the OPAC.
OPAC_REG_VERIFY
This notice is sent to the patron who registered through the OPAC if the PatronSelfRegistrationVerifyByEmail system preference is enabled.
आदेशित
This notice is sent to the patron who made a suggestion, when the 'from a suggestion' option is used to create an order from it.
टिप्पणी
If you don't want to send this notice, just delete it.
PASSWORD_CHANGE
This notice is sent to a patron whose password was changed, if the NotifyPasswordChange system preference is enabled.
PASSWORD_RESET
This notice is sent when a patron requests a new password from the OPAC in order to validate the email address.
पासवर्ड रीसेट फीचर को OpacResetPassword सिस्टम वरीयता द्वारा नियंत्रित किया जाता है।
PICKUP_RECALLED_ITEM
This notice is sent to the patron who has requested a recall when the item is ready for them to pick up.
PREDUE
This notice is sent as the 'advance notice' when an item is due
इस नोटिस प्रयोग किया जाता है, तो दो मानदंड से मुलाकात कर रहे हैं:
यह EnhancedMessagingPreferences 'अनुमति' के लिए सेट है
संरक्षक इस नोटिस प्राप्त करने के लिए अनुरोध किया है
If EnhancedMessagingPreferencesOPAC is set to 'Show', patrons will be able to choose their messaging preferences in their online account in the Messaging tab.
Staff can select this notice for a patron in their messaging preferences.
PREDUEDGST
This notice is sent as the 'advance notice' digest for all items that are due
इस नोटिस प्रयोग किया जाता है, तो दो मानदंड से मुलाकात कर रहे हैं:
यह EnhancedMessagingPreferences 'अनुमति' के लिए सेट है
संरक्षक एक डाइजेस्ट के रूप में इस सूचना प्राप्त करने के लिए अनुरोध किया है
If EnhancedMessagingPreferencesOPAC is set to 'Show', patrons can choose their messaging preferences in their online account in the Messaging tab.
Staff can select this notice for a patron in their messaging preferences.
PRES_TRAIN_ITEM
This notice is the default slip used in the Preservation module to print a list of items in a train.
संस्करण
The PRES_TRAIN_ITEM notice was introduced in version 23.11 of Koha.
PROBLEM_REPORT
This notice is sent to the email address in the KohaAdminEmailAddress system preference, or the library's email address when a patron reports a problem on the OPAC.
RECEIPT
Used to send a payment receipt by email from the point of sale module.
अस्वीकृत
This notice is sent when a patron's purchase suggestion is rejected.
टिप्पणी
If you don't want to send this notice, just delete it.
नवीनीकरण
This notice is sent as the 'Item checkout and renewal' notice for all items that are renewed
इस नोटिस प्रयोग किया जाता है, तो तीन मानदंडों से मुलाकात कर रहे हैं:
यह EnhancedMessagingPreferences 'अनुमति' के लिए सेट है
The RenewalSendNotice system preference is set to 'Send'
संरक्षक इस नोटिस प्राप्त करने के लिए अनुरोध किया है
If EnhancedMessagingPreferencesOPAC is set to 'Show', patrons will be able to choose their messaging preferences in their online account in the Messaging tab.
Staff can select this notice for a patron in their messaging preferences.
RETURN_RECALLED_ITEM
This notice is sent to the patron who currently has an item in their possession that has been recalled. It serves to notify them of the new due date for the checked out item.
SERIAL_ALERT (नए सीरियल इश्यू)
एक सीरियल के नए इश्यू के संरक्षक / कर्मचारियों को सूचित करने के लिए धारावाहिक मॉड्यूल में उपयोग की जाने वाली सूचना। SERIAL_ALERT (पुराने कथन में आरआईएलटीटी) नमूना नोटिस के रूप में प्रदान किया जाता है, लेकिन नोटिस कोड को स्वतंत्र रूप से चुना जा सकता है क्योंकि केवल मॉड्यूल को ध्यान में रखा जाता है। एकाधिक नोटिस भी प्रबंधित किया जा सकता है।
You have the option to select the notice used to inform the patron about a received serial issue when adding or editing a subscription. Choose from the 'Patron notification' drop down menu.
If a notice has been selected for a subscription, patrons can subscribe to the email notification from the subscription tab in the detail view in the OPAC.
टिप्पणी
Notice also that if you'd like to notify patrons of new serial issues, you can click on 'define a notice' which will take you to the 'Notices' tool.
SHARE_ACCEPT
एक संरक्षक सूचित करने के लिए जब एक और संरक्षक अपने साझा सूची स्वीकार कर लिया है इस्तेमाल किया।
Requires that the OpacAllowSharingPrivateLists system preference be set to 'Allow'.
See Managing lists for more information about sharing lists.
SHARE_INVITE
एक संरक्षक है कि एक और संरक्षक उनके साथ एक सूची साझा करना चाहते हैं सूचित करने के लिए इस्तेमाल किया।
Requires that the OpacAllowSharingPrivateLists system preference be set to 'Allow'.
See Managing lists for more information about sharing lists.
SR_SLIP
Used to notify library staff from a particular library branch of items that should be transferred to another library in the context of stock rotation.
Requires the stockrotation.pl cron job.
STAFF_PASSWORD_RESET
This notice is sent when a staff member sends a password reset email to a patron.
पासवर्ड रीसेट फीचर को OpacResetPassword सिस्टम वरीयता द्वारा नियंत्रित किया जाता है।
TICKET_ACKNOWLEDGE
This notice is sent to the reporter of a catalog concern when they report a concern through the staff interface, or when they report a concern through the OPAC, to acknowledge that the concern report was received.
The concern report feature is enabled in the staff interface by the CatalogConcerns system preference and in the OPAC by the OpacCatalogConcerns system preference.
TICKET_ASSIGNED
This notice is sent to the assignee of a catalog concern, when a ticket is assigned to them.
The concern report feature is enabled in the staff interface by the CatalogConcerns system preference and in the OPAC by the OpacCatalogConcerns system preference.
TICKET_NOTIFY
This notice is sent to the cataloging team, to the email address in the CatalogerEmails system preference, to notify them that a concern was reported about a bibliographic record.
The concern report feature is enabled in the staff interface by the CatalogConcerns system preference and in the OPAC by the OpacCatalogConcerns system preference.
TICKET_RESOLVE
This notice is sent to the reporter of a catalog concern when the concern is marked as resolved with the 'Notify' flag.
The concern report feature is enabled in the staff interface by the CatalogConcerns system preference and in the OPAC by the OpacCatalogConcerns system preference.
TICKET_UPDATE
This notice is sent to the reporter of a catalog concern when the concern is updated with the 'Notify' flag.
The concern report feature is enabled in the staff interface by the CatalogConcerns system preference and in the OPAC by the OpacCatalogConcerns system preference.
TO_PROCESS
एक खरीद सुझाव के एक स्टाफ सदस्य को सूचित किया निधि वे प्रबंधन करने के लिए ले जाया गया है
की आवश्यकता है notice_unprocessed_suggestions क्रॉन जॉब
TRANSFER_OWNERSHIP
Sent to the patron to whom a list was transferred.
संस्करण
This notice was added to Koha in version 24.11.
सलाह
If you have upgraded from a previous version and need this notice, add the new notice, making sure to select the 'Lists' module and making sure to use the code TRANSFER_OWNERSHIP.
If you want the default text, you can use the 'View default' button and the 'Copy to template' button. This will copy the default text to your notice.
स्वागत
जब उनके खाते की स्थापना की जाती है तो संरक्षक को भेजा जाता है यदि AutoEmailOPACUser वरीयता' भेजें 'पर सेट है
टिप्पणी
सुरक्षा कारणों से, एक नोटिस में संरक्षक का पासवर्ड भेजना संभव नहीं है।
There are also a set of predefined slips (or receipts) listed on this page. All of these slips can be customized by altering their text via the Notices and slips tool and their style using the SlipCSS preference to define a stylesheet. Here is what those slips are used for:
ACCOUNT_CREDIT
Used to print a receipt for a credit (either a payment, writeoff or other credit).
The slip or receipt can be printed manually with the 'Print' button next to a credit type account line in the patron's accounting tab.
The slip or receipt can also be printed semi-automatically when paying or writing off a charge if the FinePaymentAutoPopup system preference is enabled.
टिप्पणी
It is possible to set specific notices for different credit types. To do so, create a new notice with the code CREDIT_ followed by the credit type code.
For example, to have a specific slip for writeoffs, create a new notice with the code CREDIT_WRITEOFF.
ACCOUNT_DEBIT
Used to print an invoice for a debit (any type of charge, such as a lost item fee, or overdue fine).
The slip or invoice can be printed manually with the 'Print' button next to a debit type account line in the patron's accounting tab.
टिप्पणी
It is possible to set specific notices for different debit types. To do so, create a new notice with the code DEBIT_ followed by the debit type code.
For example, to have a specific slip for lost items, create a new notice with the code DEBIT_LOST.
ACCOUNTS_SUMMARY
Used to print a summary of outstanding charges and unused credits in the patron's account.
The slip can be printed manually with the 'Print account balance' option in the 'Print' button at the top of the patron's details page.
AR_SLIP
Used to print a slip for an article request
The slip or receipt can be printed manually when managing article requests from the staff interface.
Get there: Circulation > Article requests > Actions > Print slip
CHECKINSLIP
यह पर्ची उन सभी आइटमों की सूची देती है जिन्हें इस संरक्षक के लिए आज चेक इन किया गया था
To print this slip, click Print > Print checkin slip from the patron file
आप इस पर्ची को यहां से भी प्रिंट कर सकते हैं चेक इन पेज
ISSUEQSLIP
त्वरित पर्ची केवल शामिल आइटम है कि आज चैक आउट कर रहे थे
ISSUESLIP
Used to print a full slip in circulation
पर्ची या रसीद आइटम दिखाएगा आज चैक आउट आइटम है कि अभी भी चैक आउट कर रहे हैं और साथ ही
HOLD_SLIP
मुद्रित करने के लिए एक पर्ची होल्ड प्रयुक्त
The holds slip is generated when a hold is confirmed and set to waiting.
OVERDUE_SLIP
एक अतिदेय पर्ची मुद्रित करने के लिए प्रयुक्त होता है
The overdues slip can be generated manually using the 'print' menu in the patron account in the staff interface. It will show all items overdue.
RECALL_REQUESTER_DET
Used to print the details of the patron who has requested a recall on an item, when receiving the recall.
RECEIPT
Used to print a payment receipt in the point of sale module.
TRANSFERSLIP
एक हस्तांतरण पर्ची मुद्रित करने के लिए प्रयुक्त
हस्तांतरण पर्ची मुद्रित किया जाता है जब आप अपने सिस्टम में एक और एक शाखा से एक हस्तांतरण की पुष्टि
In addition to managing and customizing notices and slips, the "Notices and slips" tool contains some additional templates which allow you to customize database entries for some specific purposes. So far, the only template available for this purpose is to modify the overdue fine description. Some more may be added in the future.
OVERDUE_FINE_DESC
This template is used to generate the description for overdue fines in a patron's account.
टिप्पणी
The information available to this customization come from the checkouts (issues), items and patrons (borrowers).
अतिदेय नोटिस/स्थिति triggers
टिप्पणी
Only staff with the edit_notice_status_triggers permission (or the superlibrarian permission) will have access to this tool.
Get there: More > Tools > Patrons and circulation > Overdue notice/status triggers
In order to send the overdue notices that you defined using the Notices and slips tool, you need to first set the triggers to have these messages.
महत्त्वपूर्ण
In order to have overdue notices sent to your patrons, you need to set that patron category to require overdue notices.
महत्त्वपूर्ण
आपके मान के आधार पर OverdueNoticeCalendar वरीयता देरी हो सकती है या उन दिनों को शामिल नहीं कर सकता है जब लाइब्रेरी को बंद कर दिया जाता है हॉलिडे कैलेंडर।
ओवरड्यू नोटिस / स्थिति ट्रिगर टूल लाइब्रेरियन को प्रत्येक संरक्षक प्रकार को तीन नोटिस तक भेजने की शक्ति देता है जो उन्हें अतिदेय वस्तुओं को सूचित करता है।
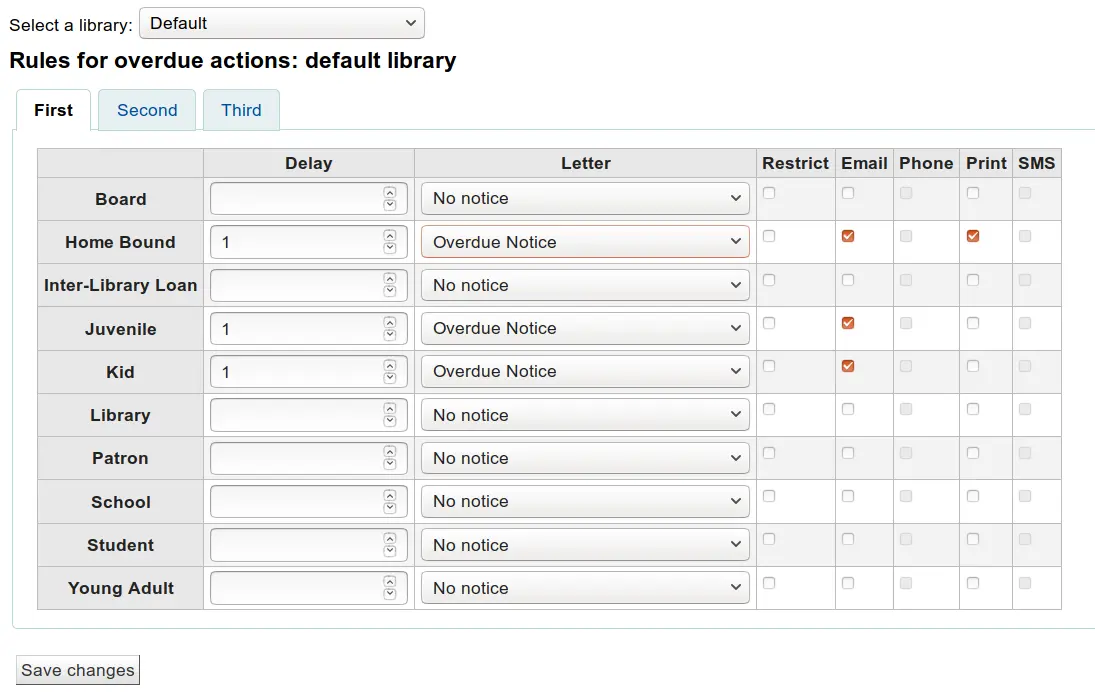
देरी एक मुद्दे के बाद दिनों की संख्या में एक कार्रवाई पहले कारण है ट्रिगर है.
महत्त्वपूर्ण
आप Koha एक कार्रवाई को गति (एक पत्र भेज सकते हैं या एक सदस्य को प्रतिबंधित) चाहते हैं, एक देरी मूल्य की आवश्यकता है।
अतिरिक्त नोटिस भेजने के लिए, 'दूसरा' और 'तीसरा' सूचना के लिए टैब पर क्लिक करें
आप अपने अतिदेय आइटम की वजह से बाहर आइटम की जाँच से एक संरक्षक को रोकने के लिए, 'प्रतिबंधित' बॉक्स की जांच चाहते हैं, तो यह एक नोटिस संरक्षक के रिकॉर्ड पर जांच में लाइब्रेरियन कि संरक्षक अतिदेय आइटम के कारण बाहर की जाँच नहीं कर सकते हैं बताए रखा जाएगा।
यदि आप इस तरह से एक संरक्षक को प्रतिबंधित करना चुनते हैं, तो आप भी कोहा को भी उस प्रतिबंध को हटा सकते हैं AutoRemoveOverduesRestrictions वरीयता।
Next you can choose the delivery method for the overdue notice. You can choose from Email, Phone (if you are using the i-tiva Talking Tech service), Print and SMS (if you have set your SMSSendDriver).
संरक्षक कार्ड निर्माता
टिप्पणी
Only staff with the label_creator permission (or the superlibrarian permission) will have access to this tool.
Get there: More > Tools > Patron card creator
संरक्षक कार्ड निर्माता आपको लेआउट और टेम्पलेट का उपयोग करने की अनुमति देता है जिसे आप अपने प्रिंटर पर अपने कस्टम संरक्षक कार्ड प्रिंट करने के लिए डिज़ाइन करते हैं। यहाँ संरक्षक कार्ड निर्माता मॉड्यूल की कुछ विशेषताएं हैं:
Koha संरक्षक डेटा से लिया गया पाठ के साथ संरक्षक कार्ड लेआउट अनुकूलित
मुद्रित संरक्षक कार्ड के लिए डिजाइन कस्टम कार्ड टेम्पलेट्स (लेबल शीट मैच के लिए)
निर्माण और प्रिंट संरक्षक कार्ड के बैच का प्रबंधन
निर्यात (पीडीएफ) के रूप में प्रिंट करने के लिए एक या कई बैचों
निर्यात (पीडीएफ के रूप में) एक बैच के भीतर से एक या कई संरक्षक कार्ड
लेआउट
Get there: More > Tools > Patron card creator > Manage > Layouts
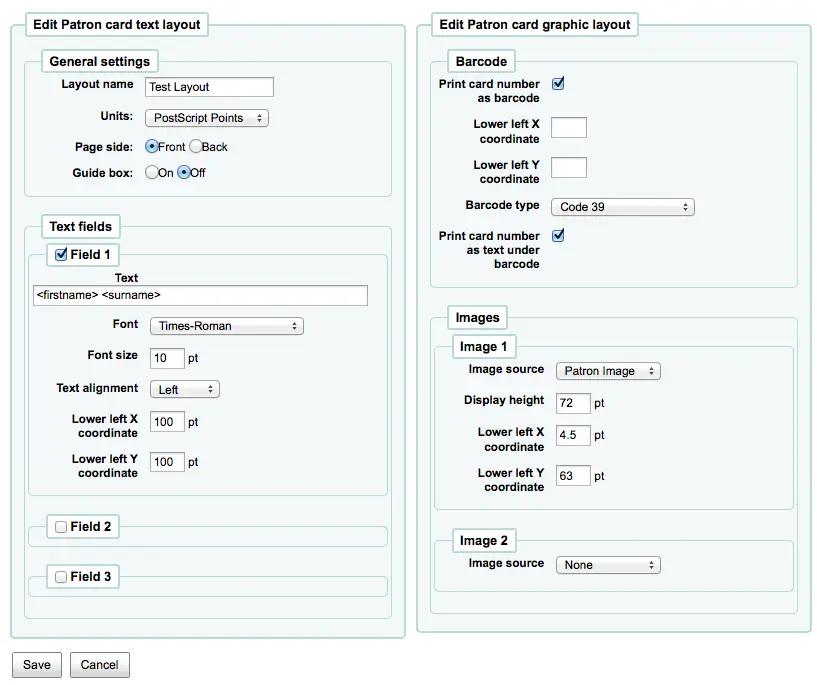
एक लेआउट पाठ और छवियों है कि कार्ड और जहां यह दिखाई देगा पर मुद्रित किया जाएगा परिभाषित करता है।
नोट
पाठ के तीन लाइनों को, बारकोड प्रतिनिधित्व में और दो छवियों के लिए संरक्षक की नंबर कार्ड पर मुद्रित किया जा सकता है।
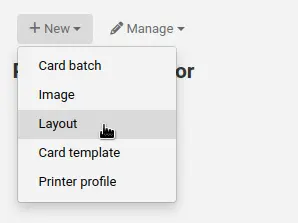
एक लेआउट जोड़े
आप कोई लेआउट में परिभाषित किया है, तो आप 'नई' बटन पर क्लिक करें और 'लेआउट' का चयन करके एक नए लेआउट जोड़ देगा।
तुम भी बाईं ओर प्रेस 'लेआउट का प्रबंधन' के लिए चुन सकते हैं। यहाँ आप उपलब्ध लेआउट आप संपादन के लिए चयन कर सकते हैं की एक सूची पेशकश कर रहे हैं। लेकिन पेज के शीर्ष पर वहाँ अभी भी 'नए लेआउट' बटन है।
नाम आप लेआउट के लिए आवंटित अपने लाभ के लिए है, यह कुछ एक बाद की तारीख में पहचान करने के लिए है कि आसान हो जाएगा नाम
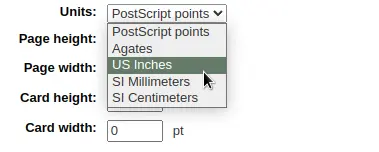
इकाइयों नीचे खींच क्या माप पैमाने आप अपने लेआउट के लिए उपयोग किया जा रहे हैं परिभाषित करने के लिए प्रयोग किया जाता है।
नोट
पोस्टस्क्रिप्ट अंक हैं 1/72" एकएडोब एजेन्टस हैं 1/64", एक इंच हैं 25.4 एसआई सेंटीमीटर
अगला, ध्यान दें कि यह लेआउट संरक्षक कार्ड के सामने या पीछे के लिए है
नोट
यदि आप 2-तरफा पुस्तकालय कार्ड है तो आप दोनों के सामने और अपने कार्ड के पीछे के लिए एक लेआउट की आवश्यकता होगी, इस विकल्प को आप दो तरफा कार्ड मुद्रित करने की अनुमति नहीं है, बस आप कार्ड आप डिजाइन कर रहे हैं के पक्ष में ट्रैक कर सकते हैं।
आपके पास अपने कार्ड पर टेक्स्ट की 3 पंक्तियों को जोड़ने का विकल्प है। आपका टेक्स्ट संरक्षक रिकॉर्ड से आपके चयन और / या फ़ील्ड का स्थिर टेक्स्ट हो सकता है। यदि आप संरक्षक रिकॉर्ड से फ़ील्ड प्रिंट करना चाहते हैं तो आप फ़ील्ड नामों को ब्रैकेट में रखना चाहते हैं - <firstname>
नोट
A full list of field names can be found in the database structure at https://schema.koha-community.org
पाठ की प्रत्येक पंक्ति के लिए, आप अपने फॉन्ट, फॉन्ट आकार और कम एक्स और वाई निर्देशांक का उपयोग कार्ड पर पाठ के स्थान का चयन कर सकते हैं
बारकोड और संरक्षक कार्ड नंबर दिखाने के लिए आपको 'प्रिंट कार्ड नंबर बारकोड के रूप में' विकल्प की जांच करनी होगी। यह संरक्षक कार्ड नंबर को बारकोड में बदल देगा। यदि आप मानव पठनीय प्रारूप में प्रिंट करने के लिए संख्या चाहते हैं, तो आपको 'बारकोड के तहत पाठ के रूप में प्रिंट कार्ड नंबर' की जांच करनी होगी।
अंत में आप कार्ड पर मुद्रित करने के लिए दो छवियों के लिए चुन सकते हैं।
One can be the patron image which you can resize to meet your needs.
The other image can be something like a library logo or symbol that you uploaded using the 'manage images' module of the patron card creator Tool.
महत्वपूर्ण
यह डिजाइनरों पाठ लाइनों, बारकोड और छवियों है कि इस तरह ओवरलैप बचा है परिभाषित करने के लिए जिम्मेदारी है।
सहेजने के बाद, अपने लेआउट 'प्रबंधित लेआउट' पृष्ठ पर दिखाई देगा।

टेम्पलेट्स
वहां जाएं: अधिक> टूल्स> संरक्षक कार्ड निर्माता> प्रबंधित करें> कार्ड टेम्पलेट्स
एक टेम्पलेट लेबल पत्र / कार्ड स्टॉक आप उपयोग कर रहे हैं पर लेबल की व्यवस्था का वर्णन है। इस रीढ़ लेबल या अपने संरक्षक कार्ड के लिए एवरी 28371 के लिए पता लेबल के लिए एवरी 5160, जेराल्ड 47-284 हो सकता है, सिर्फ उदाहरण के एक जोड़े को देने के लिए। आप जानकारी के सब एक टेम्पलेट की स्थापना पैकेजिंग पर हो सकता है के लिए की आवश्यकता होगी, और यदि नहीं यह आमतौर पर विक्रेता की वेबसाइट पर पाया जा सकता है या एक नमूना चादर से मापा जा सकता है।
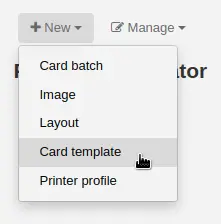
एक टेम्पलेट जोड़ें
जो तुरंत संपादित टेम्पलेट प्रपत्र के लिए लाता है अपने पृष्ठ के शीर्ष पर 'नया टेम्पलेट' बटन पर एक नया टेम्पलेट क्लिक करें जोड़ने के लिए। आप भी दबा बाईं ओर 'टेम्पलेट्स प्रबंधित करें' चुन सकते हैं। यहाँ आप उपलब्ध टेम्पलेट्स आप संपादन के लिए चयन कर सकते हैं की एक सूची पेशकश कर रहे हैं। लेकिन पेज के शीर्ष में वहाँ अभी भी 'नई टेम्पलेट' बटन है।
'एडिट' या 'न्यू टेम्प्लेट' को दबाने के बाद दिखाई देने वाले फॉर्म का उपयोग करके आप अपनी शीट या कार्ड की शीट के लिए टेम्पलेट को परिभाषित कर सकते हैं।
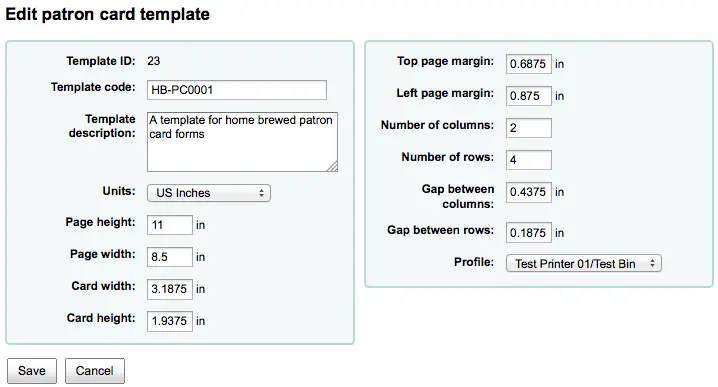
टेम्पलेट ID बस एक प्रणाली अद्वितीय पहचान उत्पन्न है
टेम्प्लेट की सूची पर इसे पहचानने के लिए टेम्प्लेट कोड इस टेम्प्लेट का नाम होना चाहिए
आप टेम्पलेट के बारे में अतिरिक्त जानकारी जोड़ने के लिए टेम्पलेट विवरण का उपयोग कर सकते हैं
इकाइयों नीचे खींच क्या माप पैमाने आप टेम्पलेट के लिए उपयोग किया जा रहे हैं परिभाषित करने के लिए प्रयोग किया जाता है।
नोट
पोस्टस्क्रिप्ट अंक हैं 1/72" एकएडोब एजेन्टस हैं 1/64", एक इंच हैं 25.4 एसआई सेंटीमीटर
माप (पेज ऊंचाई, चौड़ाई पेज, कार्ड चौड़ाई, ऊंचाई कार्ड) पैकेजिंग पर हो सकता है, और यदि नहीं यह आमतौर पर विक्रेता की वेबसाइट पर पाया जा सकता है या एक नमूना चादर से मापा जा सकता है।
एक प्रोफ़ाइल "समायोजन" बस मुद्रण जो अद्वितीय है और एक दिया प्रिंटर (जो करने के लिए प्रोफाइल सौंपा है) के लिए अजीब विसंगतियों के लिए क्षतिपूर्ति करने से पहले एक दिया टेम्पलेट के लिए लागू की एक सेट है।
एक प्रोफाइल इतना है कि आप माप लेने के लिए अपने प्रिंटर / टेम्पलेट संयोजन के लिए सही समायोजन करने के लिए एक प्रोफाइल को परिभाषित करने के लिए कर सकते हैं कुछ नमूना कार्ड मुद्रण का प्रयास परिभाषित करने से पहले।
After finding and documenting any anomalies in the printed document, then you can create a profile and assign it to the template.
महत्वपूर्ण
एक प्रोफाइल जब तक जरूरत को निर्दिष्ट नहीं है, यानी एक प्रिंटर प्रोफाइल को परिभाषित करने के लिए क्लिक न करें। यह एक टेम्पलेट से एक प्रोफाइल को हटाने के लिए संभव नहीं है, लेकिन यदि आप किसी अन्य प्रोफ़ाइल के लिए स्विच कर सकते हैं।
नोट
आप अलग अलग प्रिंटर का उपयोग कर रहे हैं, तो आप कई टेम्पलेट्स है कि समान ही अलग प्रोफाइल निर्दिष्ट कर रहे हैं परिभाषित करने के लिए आवश्यक हो सकता है।
सहेजने के बाद, अपने टेम्पलेट्स 'टेम्पलेट्स प्रबंधित करें' पृष्ठ पर दिखाई देगा।

प्रोफ़ाइल:
वहां जाएं: अधिक> टूल्स> संरक्षक कार्ड निर्माता> प्रबंधित करें> प्रोफाइल
A profile is a set of "adjustments" applied to a given template just prior to printing which compensates for anomalies unique and peculiar to a given printer. This means if you set a template up and then print a sample set of data and find that the items are not all aligned the same on each card, you need to set up a profile for each printer (or even different tray selections on the same printer) to make up for the differences in printing styles, such as the shifting of text to the left, right, top or bottom.
अपने पत्ते अभी जिस तरह से आप चाहते हैं मुद्रण कर रहे हैं, तो आप एक प्रोफाइल की जरूरत नहीं होगी।
एक प्रोफ़ाइल जोड़ें
नई प्रोफ़ाइल जोड़ने के लिए, आप अपने पृष्ठ के शीर्ष पर स्थित 'प्रोफ़ाइल' बटन पर क्लिक करना चाहते हैं और 'नई प्रोफ़ाइल' चुनना चाहते हैं
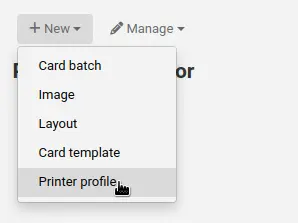
एक नया प्रोफाइल को जोड़ने के लिए, आप अपने पृष्ठ के शीर्ष पर 'नई रूपरेखा' बटन पर क्लिक करने के लिए चाहते हैं। प्रपत्र प्रतीत होता है कि आप अपने लेबल पत्रक पर कार्ड misalignments सही करने के लिए मूल्यों को परिभाषित कर सकते हैं का उपयोग करना। आप यह भी चुन बाईं ओर 'प्रोफाइल प्रबंधित करें' और संपादन के लिए वर्तमान में उपलब्ध प्रोफाइलों में से एक चुन सकते हैं।
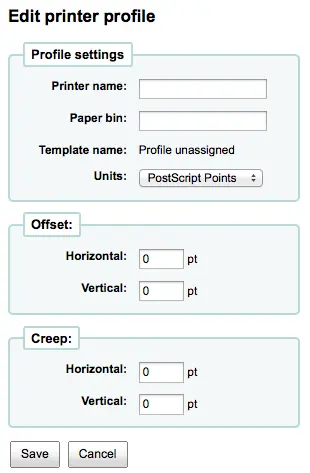
प्रिंटर नाम और पेपर बिन को आपके प्रिंटर से बिल्कुल मेल नहीं खाता है, वे आपके संदर्भ के लिए हैं ताकि आप याद रख सकें कि आपने किस प्रिंटर के लिए प्रोफ़ाइल सेट किया है।
नोट
उदाहरण के लिए: आप प्रिंटर नाम पर प्रिंटर मॉडल संख्या आप कर सकते हैं का उपयोग करना चाहते हैं, या अगर आप इसे 'मेरी मेज पर प्रिंटर' कॉल कर सकते हैं
Template will be filled in once you have chosen which template to apply the profile to on the template edit form
इकाइयों नीचे खींच क्या माप पैमाने आप अपने प्रोफ़ाइल के लिए उपयोग किया जा रहे हैं परिभाषित करने के लिए प्रयोग किया जाता है।
नोट
पोस्टस्क्रिप्ट अंक हैं 1/72" एकएडोब एजेन्टस हैं 1/64", एक इंच हैं 25.4 एसआई सेंटीमीटर
ऑफसेट इस्तेमाल किया जाना चाहिए जब पूरी छवि तो खड़ी या क्षैतिज केंद्र बंद है। कमीना या ऊपर और नीचे पृष्ठ जहां एक की हालत लेबल के बीच की दूरी पेज भर में परिवर्तन का वर्णन
ऑफसेट और रेंगना मूल्यों के लिए, नकारात्मक संख्या मुद्रित पत्र पर ऊपर और बाईं ओर मुद्रित जानकारी के लिए कदम और सकारात्मक संख्या नीचे ले जाने और सही करने के लिए
उदाहरण:। पाठ मुद्रित किया जाता है 0 .25 "पहले लेबल के बाएँ किनारे से, 0 .28" दूसरा लेबल के बाएँ किनारे और 0.31 "तीसरे लेबल के बाएँ किनारे से इस क्षैतिज रेंगना का मतलब (ऋण) -0.03 "इस अंतर के लिए बनाने के लिए स्थापित किया जाना चाहिए।
सहेजने के बाद, आपके प्रोफ़ाइल 'प्रिंटर प्रोफाइल प्रबंधित करें' पेज पर दिखाई देंगे।

एक बार जब आप अपने नए प्रोफ़ाइल को बचाया है, आप टेम्पलेट की सूची में लौटने और है कि इस प्रोफ़ाइल के लिए है टेम्पलेट को संपादित करने के लिए चुन सकते हैं।
बैच
वहां जाएं: अधिक> टूल्स> संरक्षक कार्ड निर्माता> प्रबंधित करें> कार्ड बैच
एक बैच संरक्षक जिनके लिए आप कार्ड पैदा करना चाहते का एक संग्रह है।
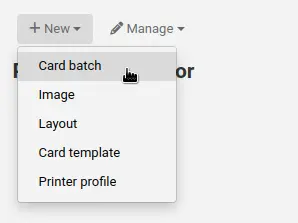
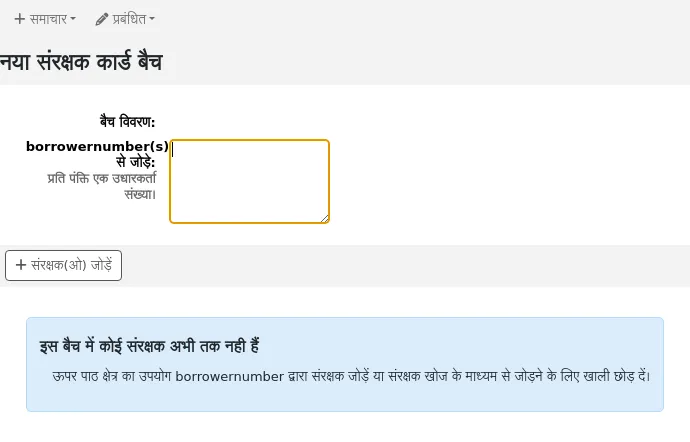
एक बैच जोड़े
एक नए बैच को जोड़ने के लिए, आप अपने पृष्ठ के शीर्ष पर 'नए बैच' बटन पर क्लिक करने के लिए चाहते हैं। मेनू आइटम का चयन 'प्रबंधित बैचों' छोड़ दिया है पहले से ही परिभाषित बैचों की एक सूची पर प्रदर्शित किया जाता है। इस प्रदर्शन में या तो आप संपादन के लिए एक बैच का चयन करें या एक नया बैच जोड़ सकते हैं।
एक नए बैच के लिए एक संदेश चबूतरे और संरक्षक इस बैच में संसाधित करने के लिए चयन करने के लिए निर्देश देता है।
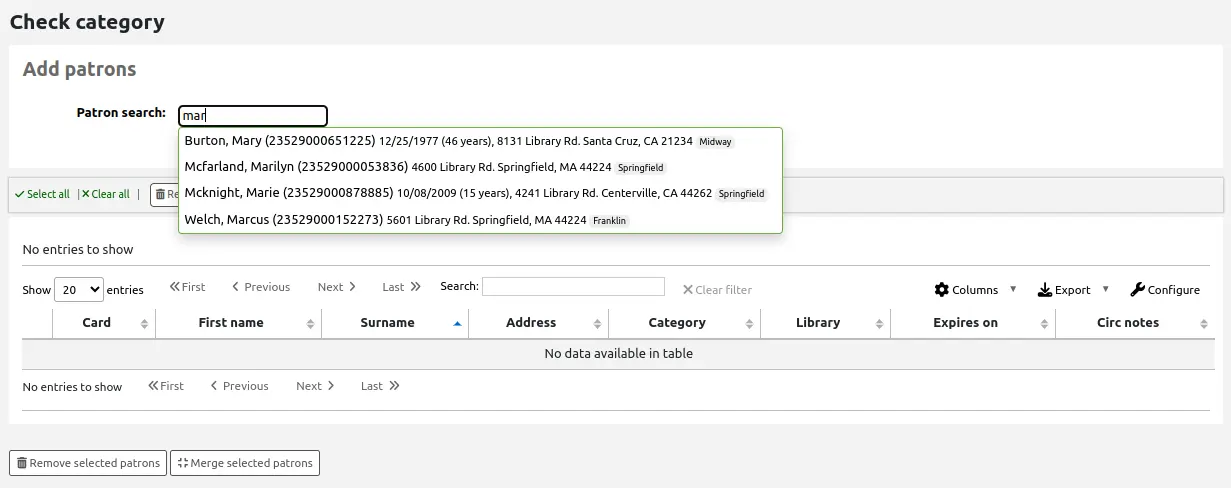
'Add patron(s)' बटन चुनने के बाद पैट्रन सर्च विंडो पॉप अप हो जाती है।
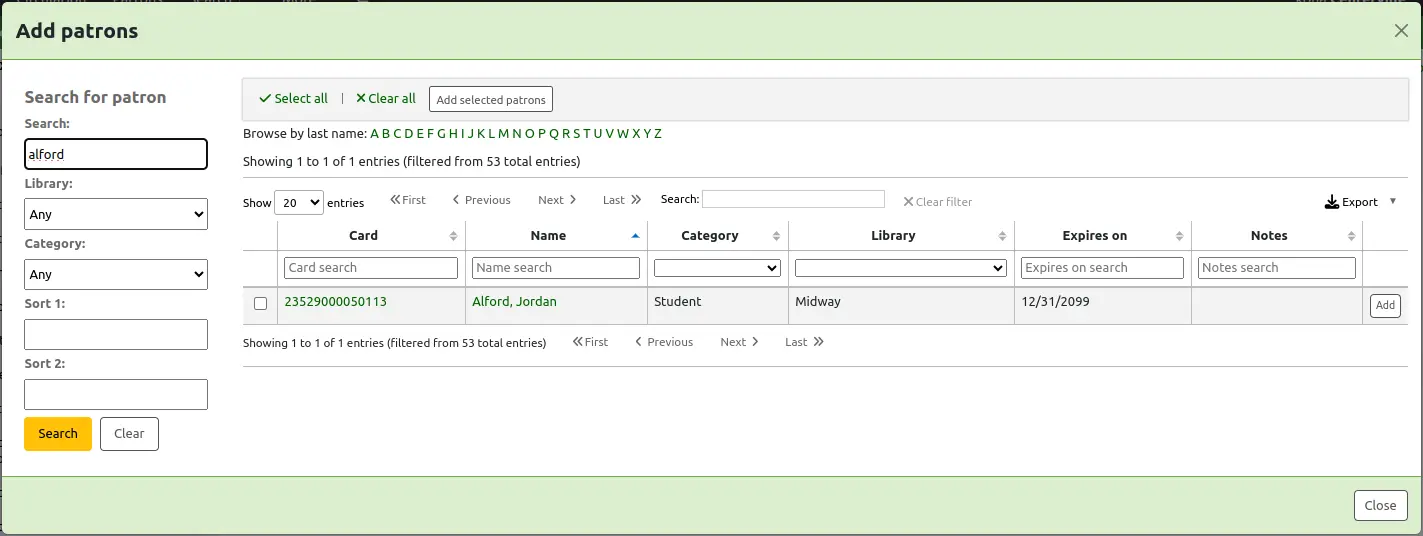
यहां से आप अपने नाम, उनकी श्रेणी और / या पुस्तकालय के किसी भी हिस्से से अपने बैच में जोड़ने के लिए संरक्षक खोज सकते हैं। खोज बॉक्स में * दर्ज करना सभी संरक्षक प्रदर्शित करेगा।
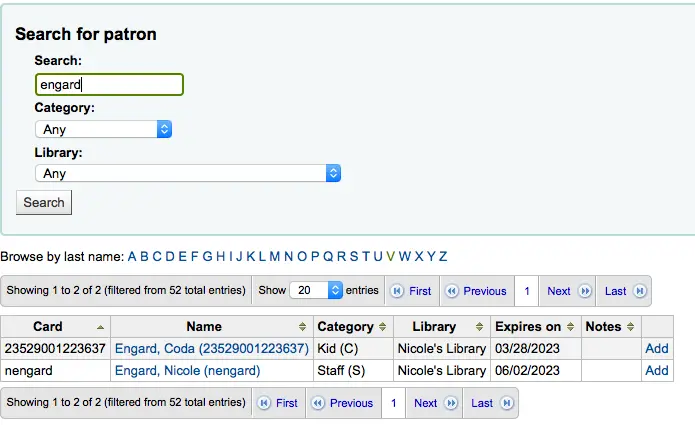
परिणाम से आप 'जोड़ें' बटन पर क्लिक करके बैच के संरक्षक जोड़ सकते हैं। परिणामों से संरक्षक जोड़ने के बाद तुम पर शुरू और एक अन्य खोज प्रदर्शन या 'बंद' स्क्रीन के तल पर संकेत मिलता है कि आप कर रहे हैं क्लिक कर सकते हैं। तब आप अपने बैच के साथ प्रस्तुत किया जाएगा।
Alternatively, you can use a custom report to create a batch. A report that contains borrowernumbers will have the option to send the report results to the patron card creator.
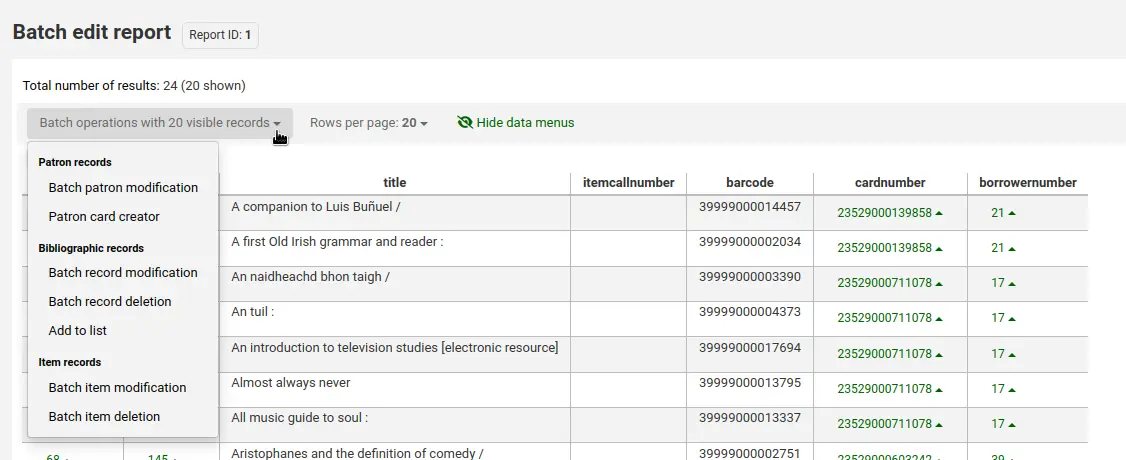
संस्करण
The option to send report results to the patron card creator was added to Koha version 23.11.
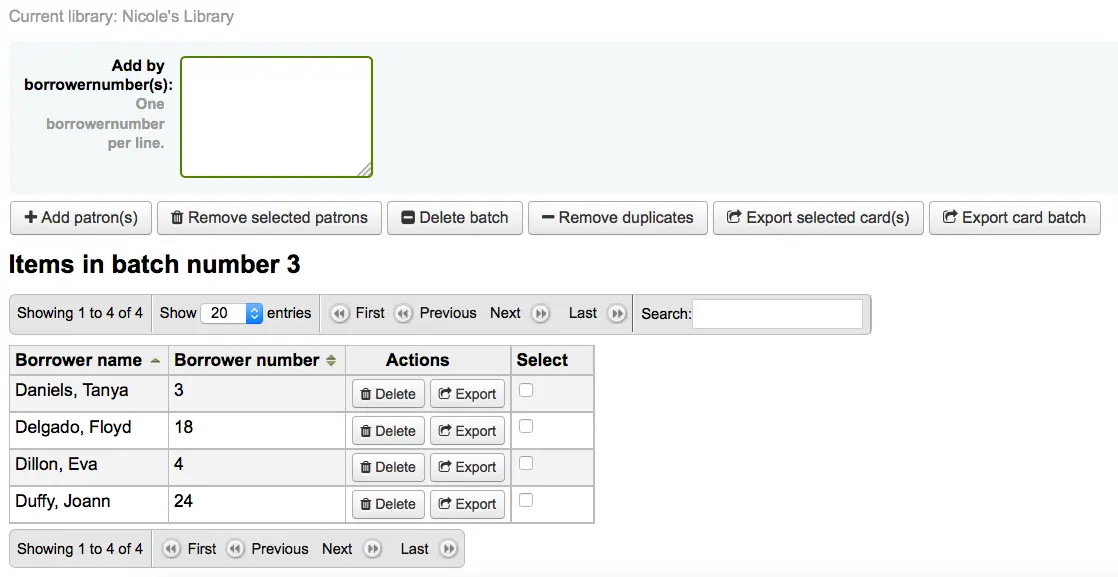
If you are satisfied with your batch you can proceed to export. If you want to correct or even delete that batch the buttons to do so can be found at the top of your screen. You can always come back here through the 'Manage > Card batches' button.
आप क्लिक कर सकते हैं आप सभी संरक्षक कार्ड का निर्यात करना चाहते है तो 'निर्यात कार्ड बैच' अन्यथा आप उनके नाम का सही करने के लिए बॉक्स को चेक करके के लिए कार्ड प्रिंट और फिर चयन करने के लिए विशिष्ट संरक्षक चुन सकते हैं 'निर्यात चयनित कार्ड (s)' पर ऊपर का।
निर्यात मेनू आप एक टेम्पलेट, एक लेआउट और शुरू करने की स्थिति में (जहां चादर पर छपाई शुरू करना चाहिए) का चयन करने के लिए कहेगा।
नोट
शुरू करने की स्थिति के लिए यदि पहले 6 लेबल के पहले से ही अपने शीट पर इस्तेमाल किया गया है आप शीट पर स्थिति 7 में लेबल पर छपाई शुरू कर सकते हैं। लेबल के ऊपर से नीचे तक सही करने के लिए छोड़ दिया गिने जा रहे हैं।
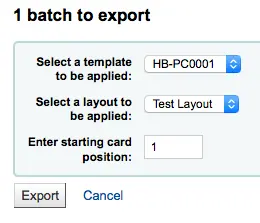
एक बार जब आप 'निर्यात' पर क्लिक करें आप मुद्रण के लिए अपने लेबल के एक पीडीएफ के साथ प्रस्तुत किया जाएगा

जब आप पीडीएफ खोलने आप मुद्रण के लिए कार्ड देखेंगे

The above image shows a layout that is made up of two text lines. The first one is just plain text, the second one is composed of the <firstname> <surname> fields. A patron image is printed (if available) and the barcode of patrons number is displayed in code 39. All this is printed on a template with three columns and 8 rows using position 1-3 here. When printing this PDF please take care that your printer doesn't rescale the PDF (e.g do not fit to paper size) otherwise the printer will not be able to print to the right place per your templates.
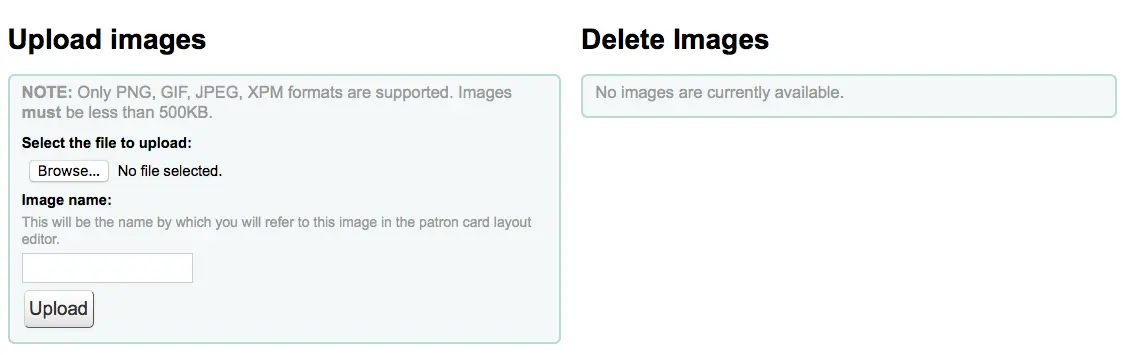
छवियों का प्रबंधन
Get there: More > Tools > Patron card creator > Manage > Images
Images uploaded using this tool will appear on the menu when creating patron card layouts. You are limited in how many images you can upload (not counting patron images) by the ImageLimit system preference.
महत्वपूर्ण
छवियाँ आकार में 500K की सीमा में होना चाहिए।
नोट
इस उपकरण के साथ अपलोड चित्र कम से कम 300dpi जो एक मुद्रण योग्य छवि के लिए न्यूनतम गुणवत्ता है होना चाहिए।
स्क्रीन के केंद्र में, एक सरल अपलोड फार्म है बस अपने कंप्यूटर पर फ़ाइल के लिए ब्राउज़ करें और इसे एक नाम आप बाद में स्पष्ट रूप से दिखता दे।
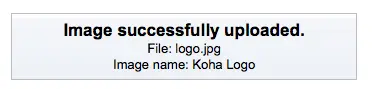
एक बार फाइल अपलोड की गई है तो आपको एक पुष्टिकरण संदेश के साथ प्रस्तुत किया जाएगा।
और छवि पेज के दाहिने हाथ की ओर अपने दूसरों के सभी के साथ सूचीबद्ध किया जाएगा।
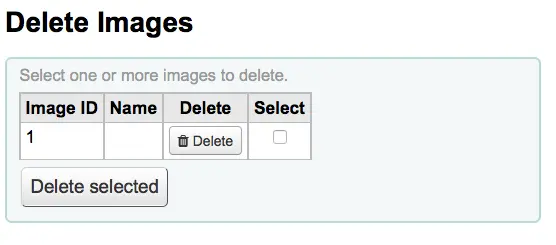
इन चित्रों में से एक या एकाधिक हटाने के लिए, प्रत्येक छवि आप हटाना और 'डिलीट' बटन पर क्लिक करना चाहते हैं की सही करने के लिए चेकबॉक्स क्लिक करें।
Batch patron deletion and anonymization
टिप्पणी
Only staff with the delete_anonymize_patrons permission (or the superlibrarian permission) will have access to this tool.
वहां जाएं: अधिक> उपकरण> संरक्षक और परिसंचरण> बैच संरक्षक विलोपन/अनामीकरण
यह उपकरण थोक एनॉनिमाइज़ परिसंचरण के इतिहास को करने के लिए आपको अनुमति देता है (इसका मतलब है कि आप कितनी बार आइटम चैक आउट कर रहे थे का रिकॉर्ड रखने - नहीं, बल्कि संरक्षक जो आइटम चैक आउट) या थोक संरक्षक हटाना (सिस्टम को पूरी तरह से उन्हें निकालने के लिए)।
महत्त्वपूर्ण
It is recommended that you backup your database before using this tool. Changes made here are permanent.
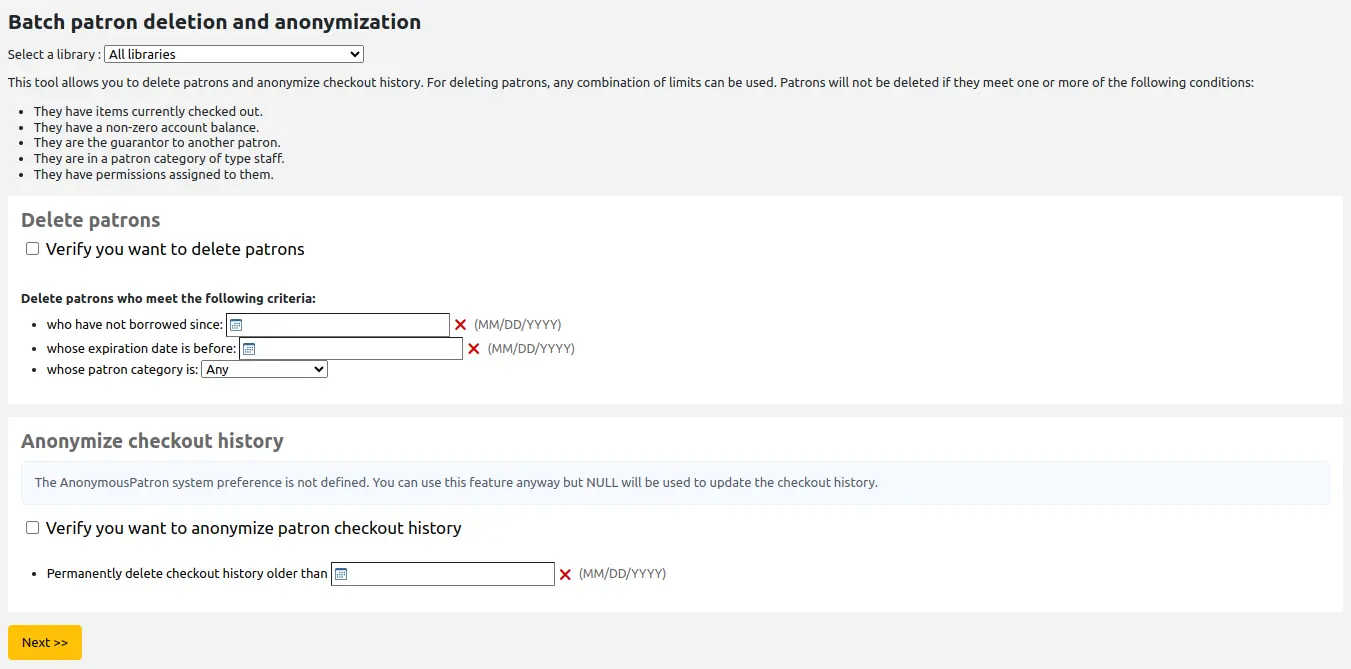
Batch deleting patrons
महत्त्वपूर्ण
Patrons who meet one or more of these conditions will not be deleted:
They have items currently checked out.
They have a non-zero account balance.
They are the guarantor to another patron.
They are in a patron category of type staff.
They have permissions assigned to them.
To delete patrons,
If necessary, choose the library at the top of the page to limit the batch action to patrons from that library.
Check the 'Verify you want to delete patrons' box
Choose the criteria to select the patrons to delete
एक विशिष्ट तारीख के बाद से उधार नहीं लिया है
ऐसे खाते हैं जो एक विशिष्ट तिथि से पहले समाप्त हो जाएंगे
एक विशिष्ट में हैं संरक्षक श्रेणी
एक में हैं संरक्षक सूची
'अगला' पर क्लिक करें
A confirmation will appear showing the number of patrons to be deleted and a choice of deletion.
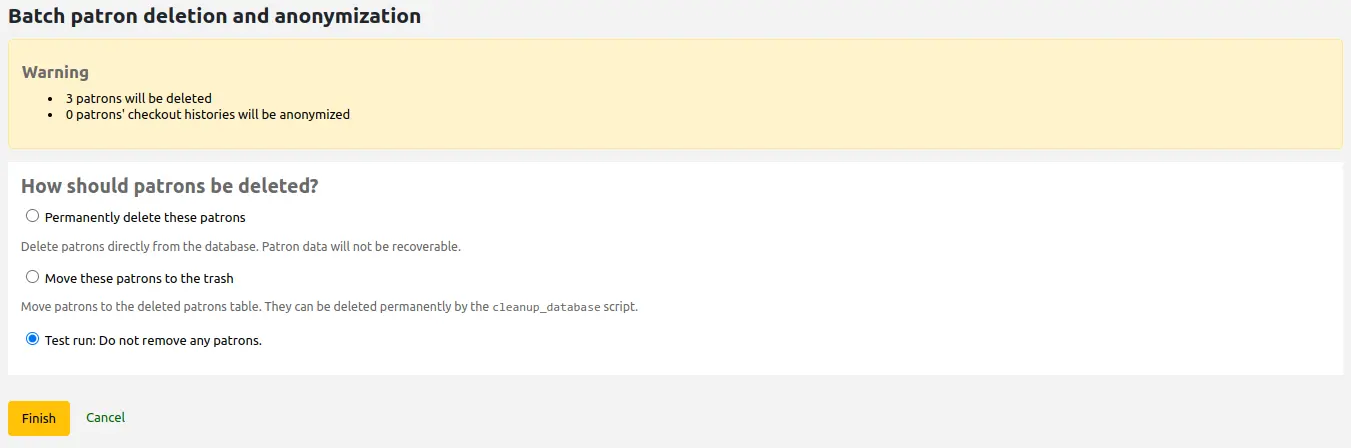
Choose the type of deletion:
Permanently delete these patrons: this will delete patrons directly from the database. Patron data will not be recoverable.
Move these patrons to the trash: this will move patrons to the deletedborrowers table. They can be deleted permanently with the cleanup_database.pl script (with the
--deleted-patronsparameter).Test run: Do not remove any patrons: this will not delete any patrons.
Click 'Finish'
Batch anonymizing patrons' checkout histories
Anonymizing checkout history will replace the patron's borrowernumber from the checkout history. It will still be possible to see how many times a particular item was checked out, but not by whom.
महत्त्वपूर्ण
Make sure to set the AnonymousPatron system preference before anonymizing checkout histories. An invalid or empty value will cause an error.
To anonymize checkout histories,
If necessary, choose the library at the top of the page to limit the batch action to patrons from that library.
Check the 'Verify you want to anonymize patron checkout history' box
एक तारीख दर्ज करें जो इससे पहले कि आप डेटा को बदलने के लिए चाहते हैं
A confirmation will appear with the number of checkout histories that will be anonymized.
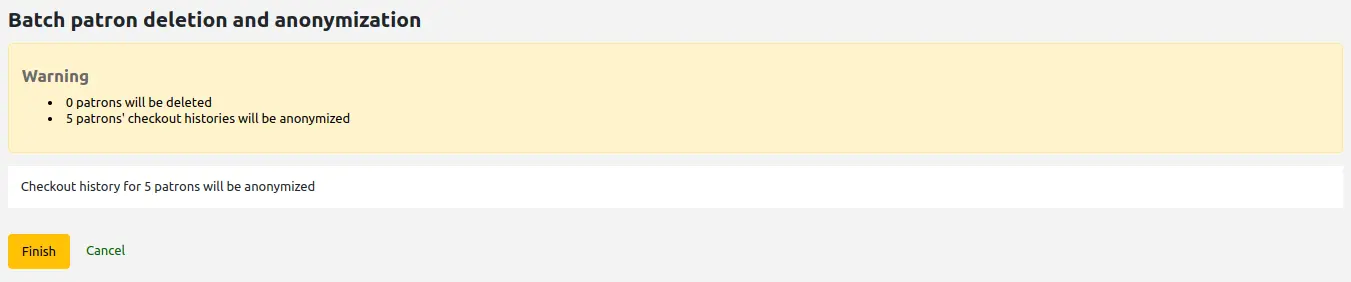
Click 'Finish'
A confirmation message will be displayed showing the number of histories that were actually anonymized.

बैच संरक्षक सँशोधन
टिप्पणी
Only staff with the edit_patrons permission (or the superlibrarian permission) will have access to this tool.
वहां जाएं: अधिक> उपकरण> संरक्षक और परिसंचरण> बैच संरक्षक संशोधन
With this tool you can make edits to a batch of patron records. Simply load in a file of card numbers (one per line), choose from a list of patrons or scan patron card numbers in to the box provided.
All options are also available for use with borrowernumbers instead of card numbers.
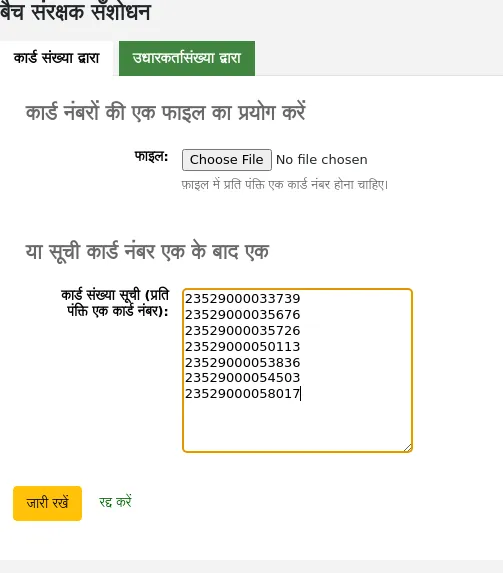
Once you have the file loaded or the card numbers or borrowernumbers entered click 'Continue.' You will be presented with a list of the patrons and the changes you can make.
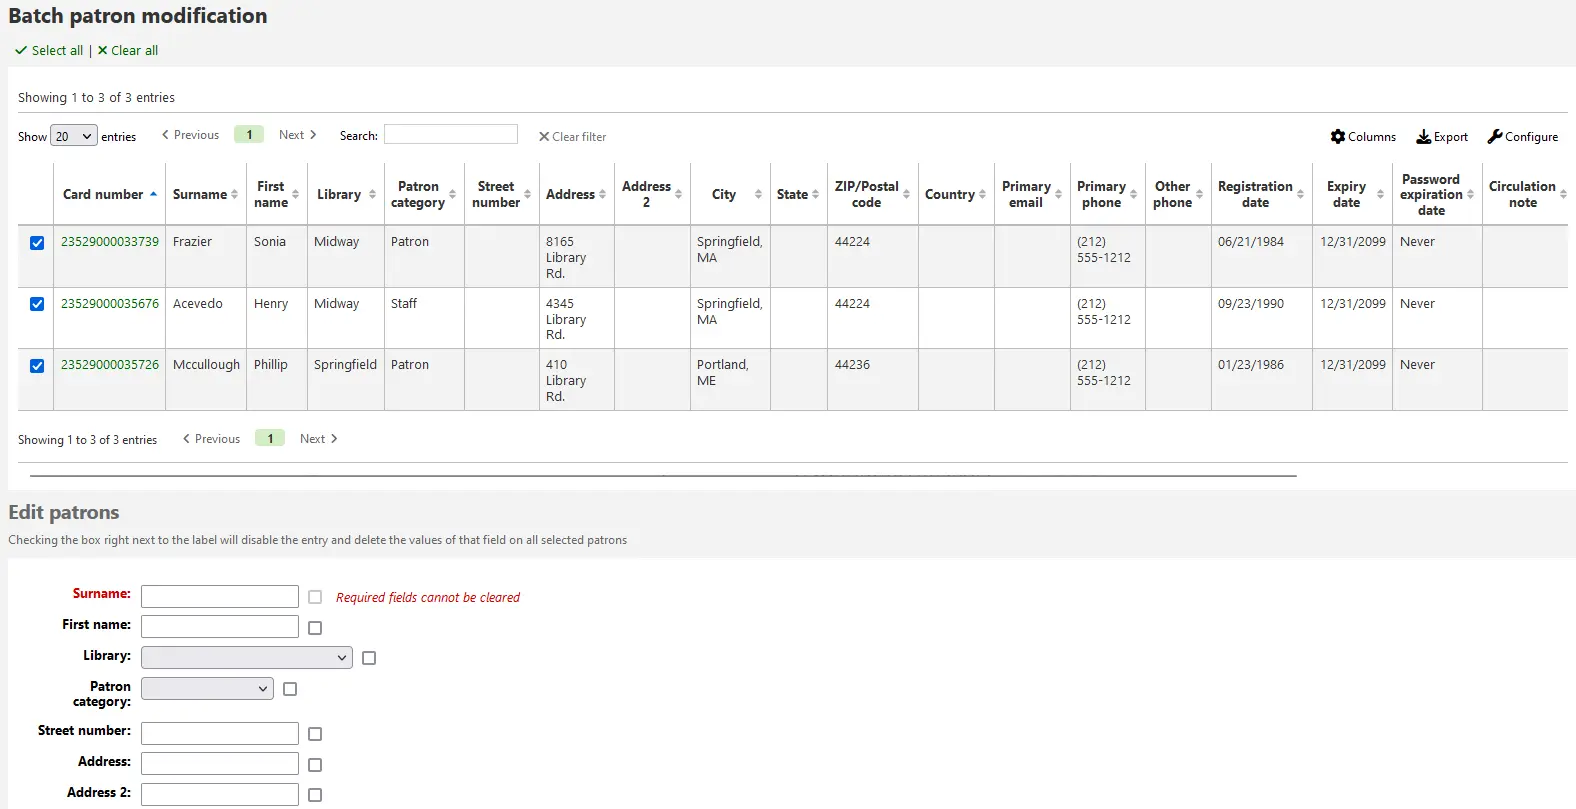
To the right of each text box there is a checkbox. Clicking that checkbox will clear our the field values.
महत्त्वपूर्ण
यदि फ़ील्ड अनिवार्य है कि आप इसे में मूल्य स्पष्ट करने में सक्षम नहीं होगा।
यदि आपके पास कई संरक्षक गुण हैं, तो आप टेक्स्ट बॉक्स के दाईं ओर '+ नया' लिंक का उपयोग करके उन सभी को बदल सकते हैं। यह आपको एक और विशेषता मान जोड़ने की अनुमति देगा।

Once you have made the changes you want, you can click 'Save' and the job will be enqueued.
बैच नियत तारीखों का विस्तार करते हैं
टिप्पणी
Only staff with the batch_extend_due_dates permission (or the superlibrarian permission) will have access to this tool.
वहां जाएं: अधिक> उपकरण> संरक्षक और परिसंचरण> बैच नियत तारीखों का विस्तार करते हैं
यह टूल आपको बल्क में नियत तारीखों को अपडेट करने की अनुमति देता है, यह उपयोगी हो सकता है यदि किसी पुस्तकालय को अप्रत्याशित रूप से बंद करने की आवश्यकता हो और रिटर्न स्वीकार न कर सके।
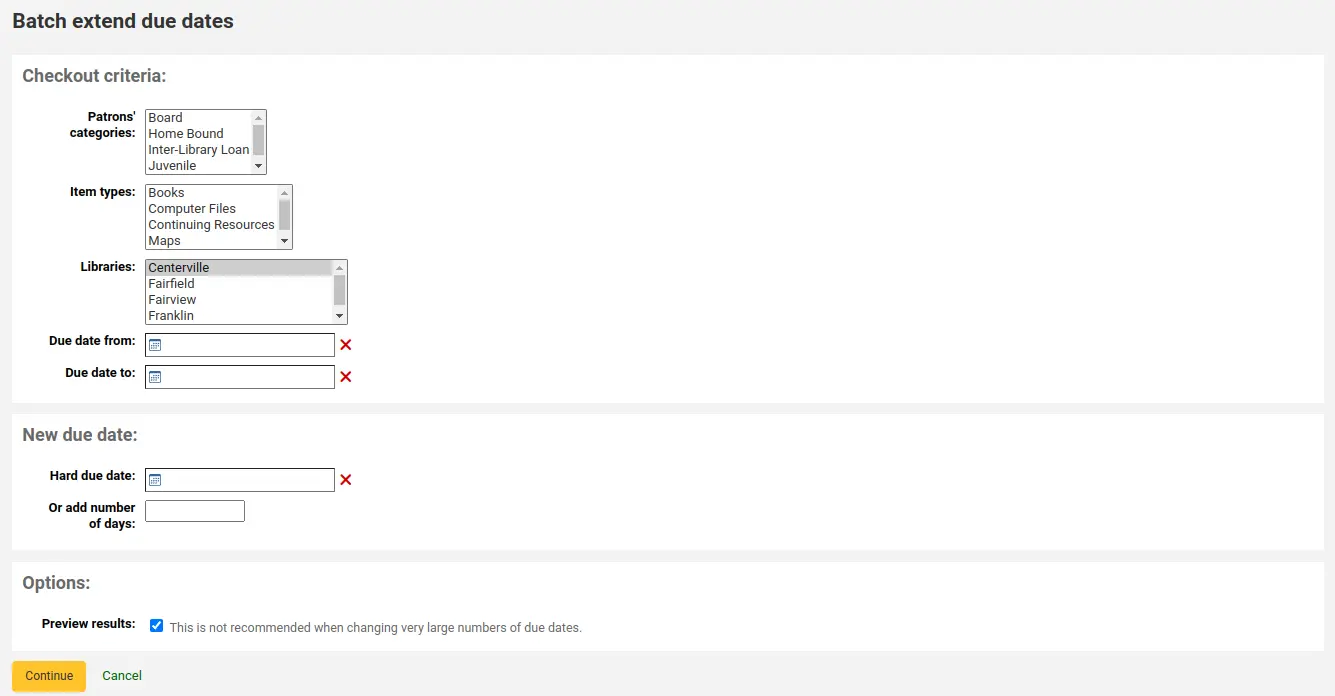
You can filter the selection of checkouts based on patron category, item types, library or a combination.
सलाह
If needed, you can select multiple options in the dropdown lists by holding the CTRL key while selecting the options.
संस्करण
The option to filter by item type is available from Koha version 23.11.
Next, specify a date range for the current due date of the materials on loan. For example, you may want to extend the due dates for recent checkouts but exclude long overdue loans.
Choose to extend the due dates either to a new hard due date or by a number of days. Using the number of days option can prevent large numbers of loans being due on the same date.
आप चुन सकते हैं कि अपने चयन के परिणामों का पूर्वावलोकन करें या नहीं।
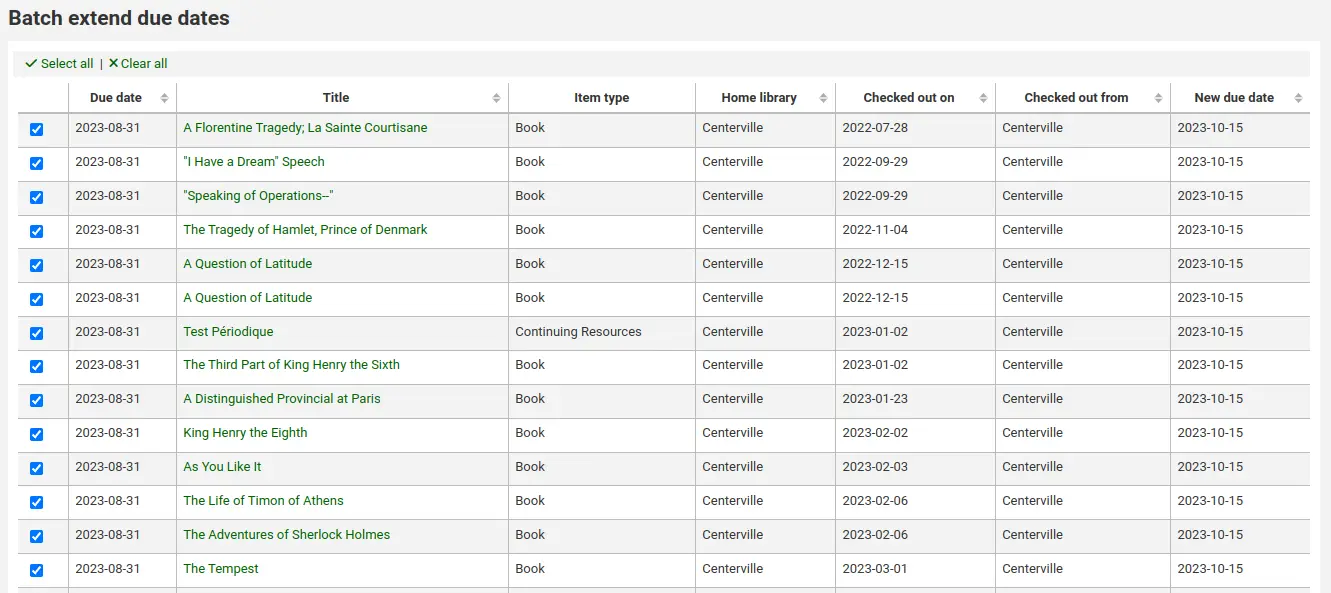
If you preview the results, you will see a table which shows you the current due date and the new due date so that you can check your selections. You can untick checkouts if they are incorrect or go back and change your selection.
Click on the 'Modify selected checkouts' button to see a confirmation screen showing the checkouts that have been modified.
टैग मॉडरेशन
टिप्पणी
Only staff with the moderate_tags permission (or the superlibrarian permission) will have access to this tool.
वहां जाएं: अधिक> उपकरण> संरक्षक और परिसंचरण> टैग
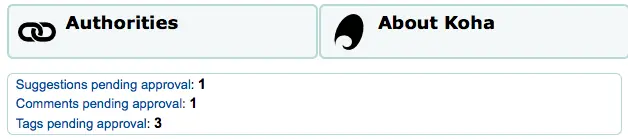
Depending on your tagging system preferences, librarians may need to approve tags before they are published on the OPAC. This is done via the tag moderation tool. If there are tags awaiting moderation they will be listed on the main staff dashboard under the module labels:
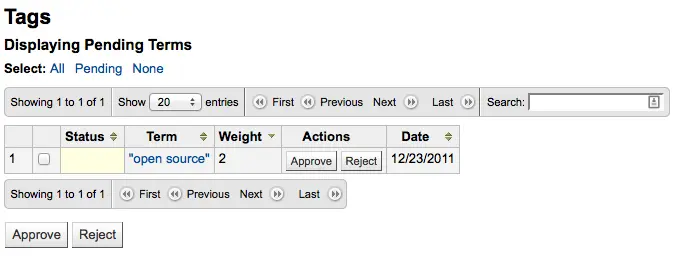
मॉडरेट करने के लिए टैग टैग टूल पर जाएं। पहला उपकरण में यात्रा के दौरान, आपको लगता है कि एक लाइब्रेरियन द्वारा अनुमोदन या अस्वीकृति लंबित हैं टैग की एक सूची के साथ प्रस्तुत किया जाएगा
खिताब इस टैग को जोड़ा गया है के सभी को देखने के लिए बस अवधि पर क्लिक करें
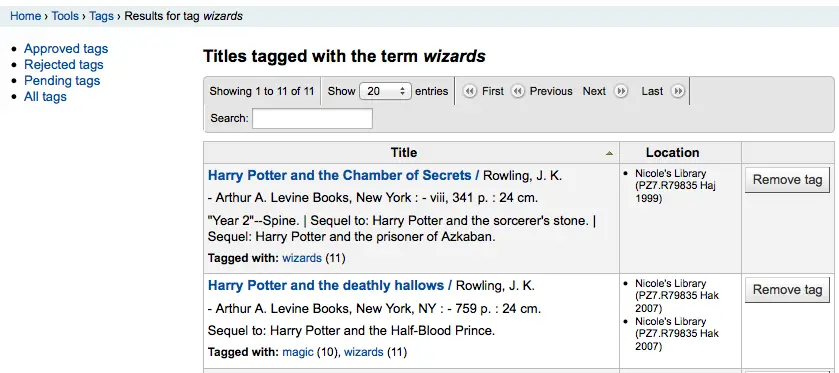
शीर्षक की इस सूची से आप एकमुश्त शीर्षक के अधिकार के लिए 'टैग निकालें' बटन पर क्लिक करके भविष्य में इस्तेमाल किया जा रहा से इसे खारिज करने के बिना एक टैग हटा सकते हैं।
एक टैग को स्वीकार करने के लिए, आप इस शब्द के साथ लाइन में 'स्वीकृत' बटन पर क्लिक करें, या सभी शर्तों आप को मंजूरी और मेज के नीचे 'स्वीकृत' पर क्लिक करना चाहते हैं तो जांच कर सकते हैं।
किसी टैग को अस्वीकार करने के लिए, आप या तो शब्द के अनुसार 'अस्वीकार' बटन पर क्लिक कर सकते हैं, या उन सभी शब्दों को जांच सकते हैं जिन्हें आप अस्वीकार करना चाहते हैं और तालिका के नीचे 'अस्वीकार' पर क्लिक करें।
एक बार एक टैग अनुमोदित या अस्वीकृत कर दिया गया है यह टैग की उचित सूची में ले जाया जाएगा। सभी टैग का एक सारांश स्क्रीन के अधिकार पर दिखाई देगा।
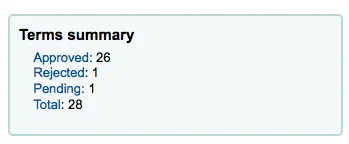
हालांकि एक और टैग को मंजूरी दे दी है या अस्वीकार कर दिया है, यह अभी भी एक और सूची के लिए ले जाया जा सकता है। अनुमोदित टैग देखते समय हर टैग अस्वीकार करने का विकल्प है:
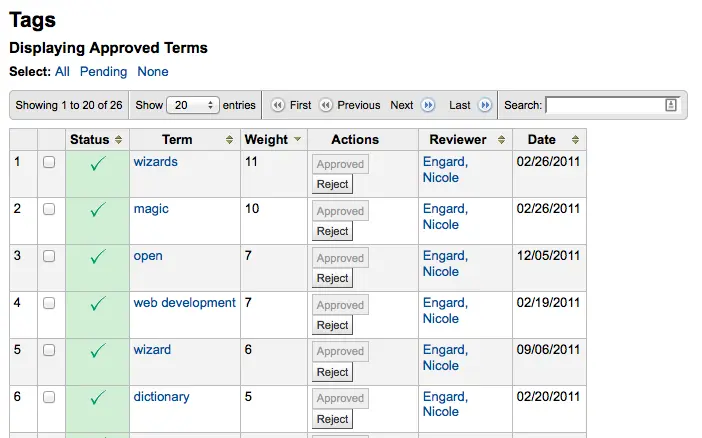
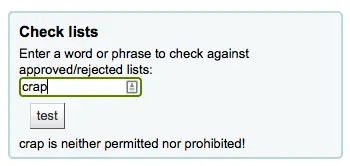
To check terms against the approved and rejected lists (and possibly against the dictionary you have assigned for tag moderation) simply enter the term into the search box on the bottom right of the screen to see the status of the term
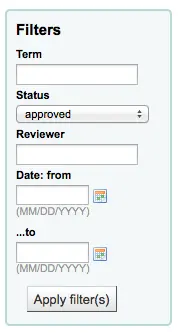
अंत में आप बाईं तरफ के फिल्टर का उपयोग करके टैग पा सकते हैं।
अपलोड संरक्षक छवियाँ
टिप्पणी
This section will only be visible if the patronimages system preference is set to 'Allow'.
टिप्पणी
Only staff with the batch_upload_patron_images permission (or the superlibrarian permission) will have access to this tool.
वहां जाएं: अधिक> उपकरण> संरक्षक और परिसंचरण> संरक्षक छवियां अपलोड करें
Patron images can be uploaded in bulk if you are allowing patron images to be attached to patron records. These images can also be used when creating patron cards.
एक txt फ़ाइल और यह शीर्षक "DATALINK.TXT" या "IDLINK.TXT" बनाएँ
प्रत्येक पंक्ति पाठ फ़ाइल में संरक्षक के कार्ड अल्पविराम (या टैब) के बाद नंबर दर्ज करें और तो छवि फ़ाइल नाम पर
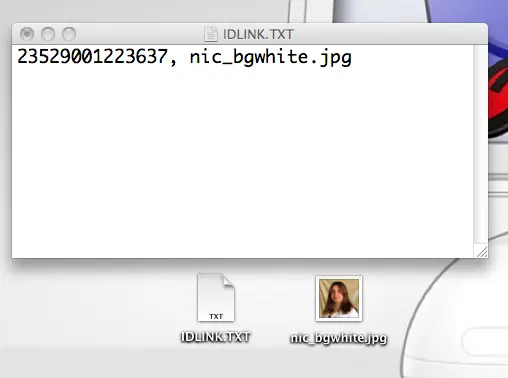
सुनिश्चित करें कि आपके TXT फ़ाइल एक सादा पाठ दस्तावेज़, नहीं आरटीएफ है सुनिश्चित करें।
पाठ फ़ाइल और छवि फ़ाइलों को ज़िप
अपलोड संरक्षक छवियाँ टूल पर जाएं
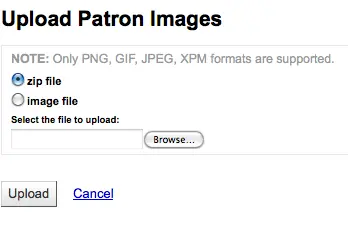
एक एकल छवि के लिए, बस छवि फ़ाइल को इंगित और संरक्षक कार्ड नंबर दर्ज
एकाधिक छवियों के लिए, एक ज़िप फ़ाइल अपलोड करने के लिए चुनें
अपलोड करने के बाद आप एक पुष्टि के साथ प्रस्तुत किया जाएगा
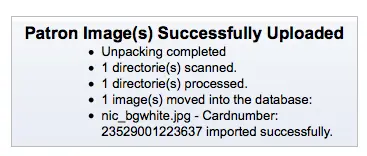
महत्वपूर्ण
चित्र अपलोड के आकार पर 100K की एक सीमा होती है और यह सिफारिश की है कि छवि 200x300 पिक्सल हो, लेकिन छोटे छवियों के रूप में अच्छी तरह से काम करेगा.
संग्रह घूर्णन
टिप्पणी
Only staff with the rotating_collections permission (or the superlibrarian permission) will have access to this tool.
Get there: More > Tools > Catalog > Rotating collections
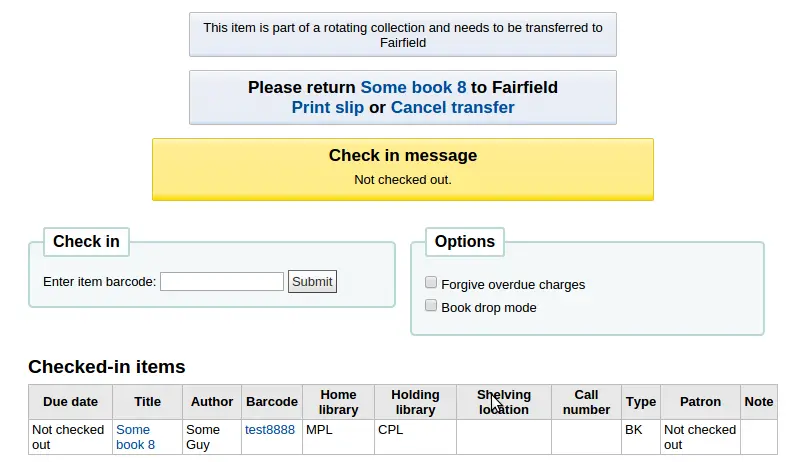
संग्रह घूर्णन सामग्री है कि अक्सर पुस्तकालय के लिए पुस्तकालय से स्थानांतरित हो के संग्रह के प्रबंधन के लिए एक उपकरण है। यह न केवल एक आइटम के घर पुस्तकालय और वर्तमान स्थान भी है लेकिन जहां यह अगले करने के लिए स्थानांतरित किया जा सुनिश्चित करने के लिए कि संग्रह में सभी वस्तुओं को सही पुस्तकालय के लिए भेजा जाता है माना जाता है के बारे में जानकारी स्टोर करने की क्षमता कहते हैं। जब एक घूर्णन संग्रह में एक आइटम में जाँच की है, पुस्तकालय स्टाफ को सूचित किया जाता है कि आइटम एक घूर्णन संग्रह और जो शाखा अगर यह सही एक पर नहीं है करने के लिए भेजा जाना चाहिए का हिस्सा है।
चेतावनी
The rotating collections tool will override all system preferences and circulation rules.
एक नया घूर्णन संग्रह बनाने के लिए, "नया संग्रह" बटन पर क्लिक करें, शीर्षक और विवरण भरें, और "सबमिट करें" पर क्लिक करें। प्रस्तुत करने के बाद आप "संग्रह का नाम सफलतापूर्वक जोड़ा गया" देखेंगे; मुख्य घूर्णन संग्रह प्रबंधन पृष्ठ पर वापस जाने के लिए "" घूर्णन संग्रह घर लौटें "पर क्लिक करें (या साइडबार में घूर्णन संग्रह पर क्लिक करें)।
किसी संग्रह में आइटम जोड़ने के लिए, "क्रियाएँ" पर क्लिक करें और संग्रह की सूची में संग्रह के नाम के आगे "आइटम जोड़ें या निकालें" चुनें। "आइटम जोड़ें या निकालें" के तहत, उस आइटम के बारकोड में स्कैन या टाइप करें जिसे आप संग्रह में जोड़ना चाहते हैं, और यदि आवश्यक हो तो एंटर या हिट दर्ज करें पर क्लिक करें।
एक संग्रह से एक आइटम निकालने के लिए, या तो संग्रह के भीतर वस्तुओं की सूची में आइटम के बारकोड करने के लिए अगले निकालें क्लिक करें या "जोड़ें या आइटम को हटाने के तहत बारकोड टेक्स्ट बॉक्स के आगे" संग्रह से निकालें आइटम "बॉक्स की जांच, और स्कैन या बारकोड में टाइप सबमिट क्लिक करने या यदि आवश्यक हो तो नोट दर्ज मार:। "संग्रह से निकालें आइटम" चेकबॉक्स रूप में लंबे समय के रूप में आप "जोड़ें या आइटम को हटा दें" पृष्ठ पर कर रहे हैं जब तक आप इसे अचयनित, जल्दी की सुविधा को हटाने के लिए जाँच रहेगा, उनकी बारकोड को स्कैन करके एक समय में एक आइटम नंबर।
एक घूर्णन संग्रह स्थानांतरण
एक संग्रह के हस्तांतरण होगा:
पुस्तकालय के लिए है कि संग्रह में आइटम की वर्तमान स्थान परिवर्तन यह करने के लिए स्थानांतरित किया जा रहा है
अपने मूल वर्तमान स्थान से स्थानांतरित करना शुरू / वर्तमान स्थान के पुस्तकालय पकड़े / पुस्तकालय पकड़े इसे करने के लिए घुमाया जा रहा है। एक पुस्तकालय एक संग्रह प्राप्त करता है जब वे मदों में जांच करने के हस्तांतरण को पूरा करने की आवश्यकता होगी।
आप दो तरीकों में से एक में एक संग्रह हस्तांतरण कर सकते हैं
मुख्य घूर्णन संग्रह पृष्ठ से, "कार्रवाई" पर क्लिक करें और उस संग्रह के शीर्षक के बगल में "स्थानांतरण" चुनें जिसे आप स्थानांतरित करना चाहते हैं; उस लाइब्रेरी को चुनें जिसे आप संग्रह को स्थानांतरित करना चाहते हैं और "स्थानांतरण संग्रह" पर क्लिक करें।
या, से एक संग्रह के लिए पेज "को जोड़ने या हटाने के आइटम", आप हस्तांतरण बटन क्लिक कर सकते हैं, आप के लिए पुस्तकालय संग्रह हस्तांतरण और क्लिक करें "स्थानांतरण संग्रह" करना चाहते हैं चुनें।
महत्वपूर्ण
हस्तांतरण की प्रक्रिया को पूरा करने के लिए, पुस्तकालय घूर्णन संग्रह संग्रह से सभी मदों में जांच होनी चाहिए, क्योंकि वे उन्हें प्राप्त प्राप्त। इतना है कि आइटम नहीं रह गया है "पारगमन में" होने के रूप में दिखाया गया है इस हस्तांतरण साफ हो जाएगा।
एक घूर्णन संग्रह में एक आइटम एक से दूसरे में एक पुस्तकालय में जाँच की है, तो यह करने के लिए स्थानांतरित किया जा करने के लिए माना जाता है, एक अधिसूचना पुस्तकालय के कर्मचारियों कि आइटम एक घूर्णन संग्रह का हिस्सा है अधिसूचित दिखाई देगा, यह भी उन्हें दे जहां मद की जरूरत है पता भेजा जाना।
अतिरिक्त उपकरण
कैलेंडर
टिप्पणी
Only staff with the edit_calendar permission (or the superlibrarian permission) will have access to this tool.
Get there: More > Tools > Additional tools > Calendar
नियत तिथियों की गणना करते समय उपयोग की जाने वाली लाइब्रेरी को बंद करने और छुट्टियों को लाइब्रेरी परिभाषित कर सकती है। आप उचित सिस्टम वरीयताओं को चालू करके कैलेंडर का उपयोग कर सकते हैं:
useDaysMode: नियत तारीख की गणना के लिए विधि चुनें - या तो उन दिनों को शामिल करें जो कि गणना में पुस्तकालय बंद है या उन्हें शामिल नहीं करें
finescalendar: यह जुर्माना लगाने से पहले छुट्टी कैलेंडर की जाँच करेगा
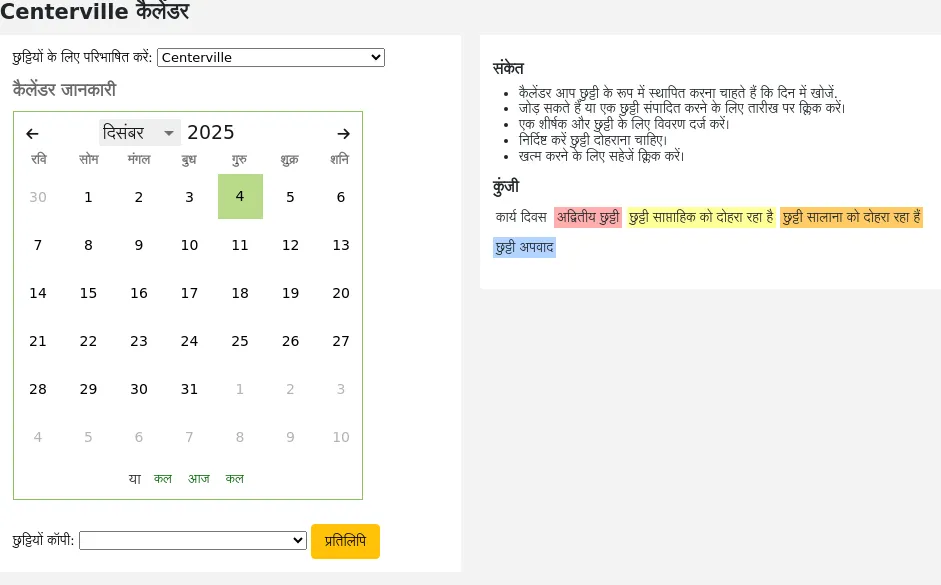
घटनाओं को जोड़ना
घटनाओं को जोड़ने से पहले, पुस्तकालय आप closings के लिए आवेदन करना चाहते हैं चुनें। जब आप अगर आप एक शाखा या सभी शाखाओं को घटना लागू करना चाहते हैं यह पूछे जाने पर की घटनाओं जोड़ दिया जाएगा। घटनाओं को जोड़ने के लिए, बस
कैलेंडर पर तारीख पर क्लिक करें कि आप को समापन लागू करना चाहते हैं
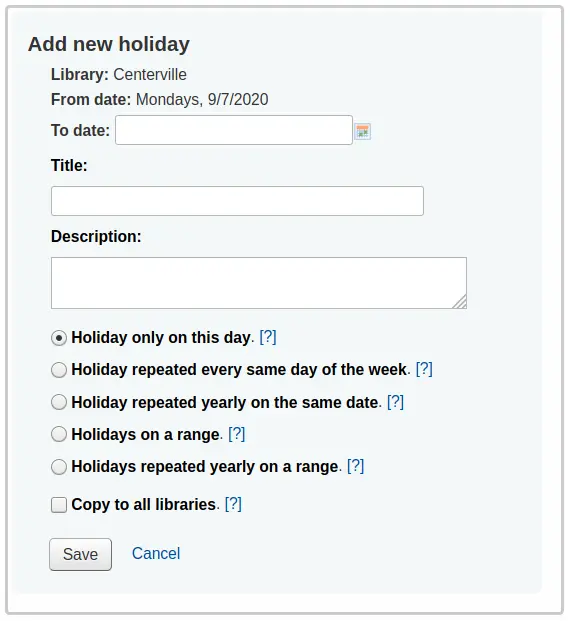
फार्म का है कि कैलेंडर के ऊपर प्रकट होता है, समापन जानकारी दर्ज (प्रत्येक विकल्प के बारे में अधिक जानकारी के लिए विकल्प के अधिकार के लिए क्लिक करें सवालिया निशान [?])
लाइब्रेरी स्वचालित रूप से पुस्तकालय आप नीचे खींच से चुना पेज के शीर्ष पर के आधार पर भरा जाएगा
दिन के बारे में जानकारी भी स्वतः ही में भरा जाएगा तारीख आप कैलेंडर पर क्लिक के आधार पर
यदि यह अवकाश एक दिन से अधिक हो, तो अंतिम तिथि 'टू डेट' में दर्ज करें।
'शीर्षक' में छुट्टी का नाम या समापन का कारण दर्ज करें
'विवरण' में इस छुट्टी के बारे में अधिक जानकारी दर्ज करें
अगले आप चुन सकते हैं, तो इस घटना को एक एक है समय घटना या यदि यह repeatable है।
'इस दिन केवल छुट्टी': यह एक दिन की छुट्टी है
'सप्ताह के हर एक दिन छुट्टी मनाई जाती है': यह एक साप्ताहिक समापन है (यदि आप प्रत्येक रविवार को बंद रहते हैं, उदाहरण के लिए)
'एक ही तिथि पर वार्षिक अवकाश': यह एक वार्षिक अवकाश समापन है (यदि आप प्रत्येक वर्ष 1 जनवरी को बंद हो जाते हैं, उदाहरण के लिए)
'एक सीमा पर अवकाश': यह एक छुट्टी है जो कई दिनों तक चलती है
नोट
यदि आप 'एक सीमा पर अवकाश' चुनते हैं, तो शीर्ष पर 'दिनांक' दर्ज करना सुनिश्चित करें
'एक सीमा पर वार्षिक रूप से बार-बार छुट्टी': यह एक छुट्टी है जो हर साल कई दिनों तक बढ़ती है (जैसे कि स्कूलों के लिए गर्मी की छुट्टियां)
नोट
यदि आप 'बार-बार किसी सीमा पर अवकाश' चुनते हैं, तो शीर्ष पर 'दिनांक' दर्ज करना सुनिश्चित करें
अंत में अगर इस घटना के सभी पुस्तकालयों या सिर्फ एक को लागू किया जा shoulds आप-है मूल रूप से चयनित तय
आप बल्कि तब सब छुट्टियों में प्रवेश हम देख रहे हैं और सभी उन्हें एक और शाखा सभी को एक बार कॉपी करने के लिए यदि आप कैलेंडर नीचे प्रतिलिपि मेनू का उपयोग कर सकते हैं
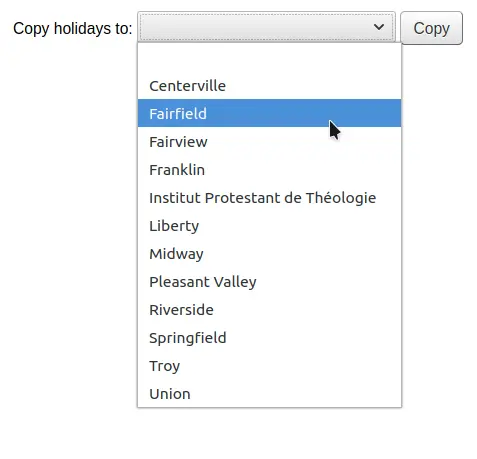
सहेजने के बाद आप सही कैलेंडर के सारांश में सूचीबद्ध घटना देखेंगे
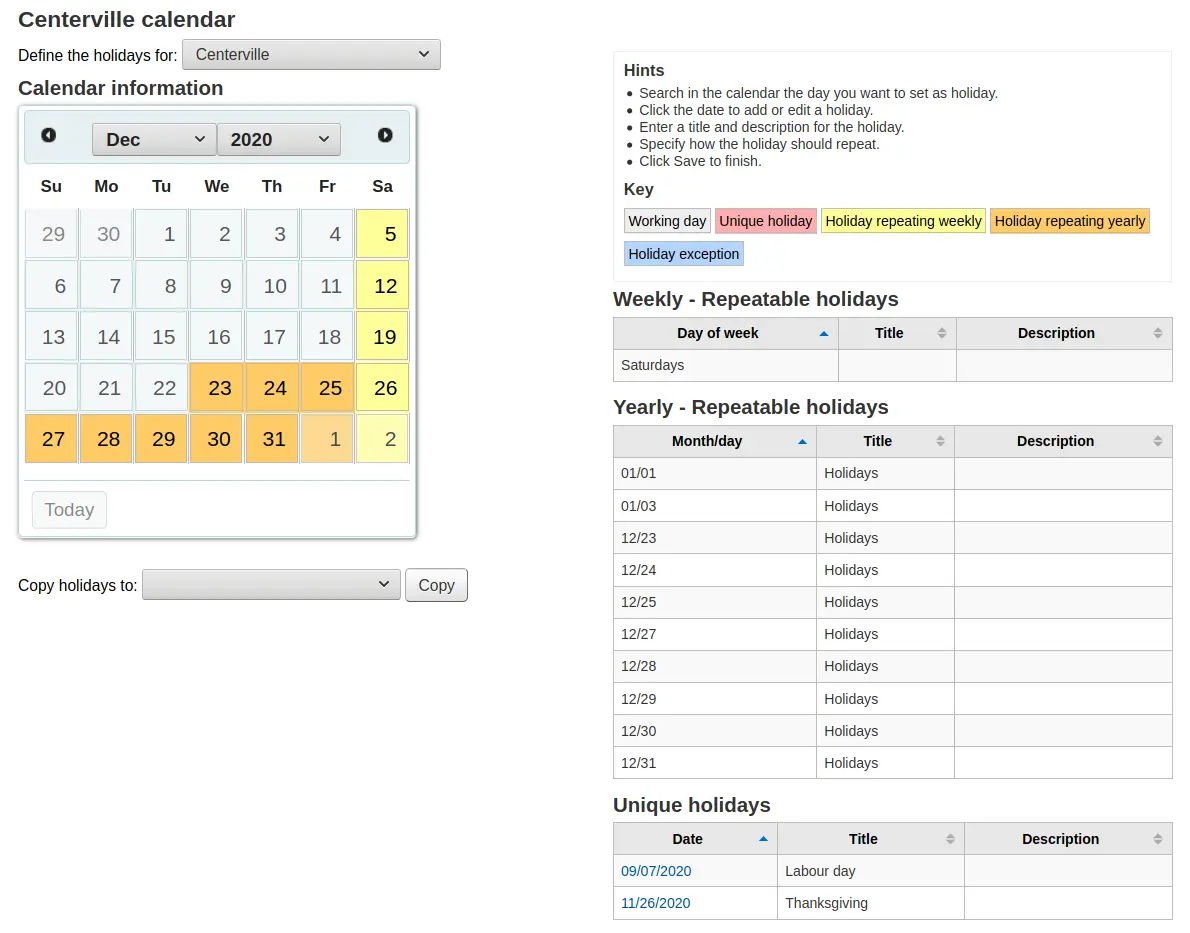
घटनाओं का संपादन
घटनाओं संपादित करने के लिए
कैलेंडर है कि आप बदलना चाहते हैं पर घटना पर क्लिक करें (कैलेंडर पर तारीख पर क्लिक करके इस करते हैं, न सारांश में सूचीबद्ध घटना)
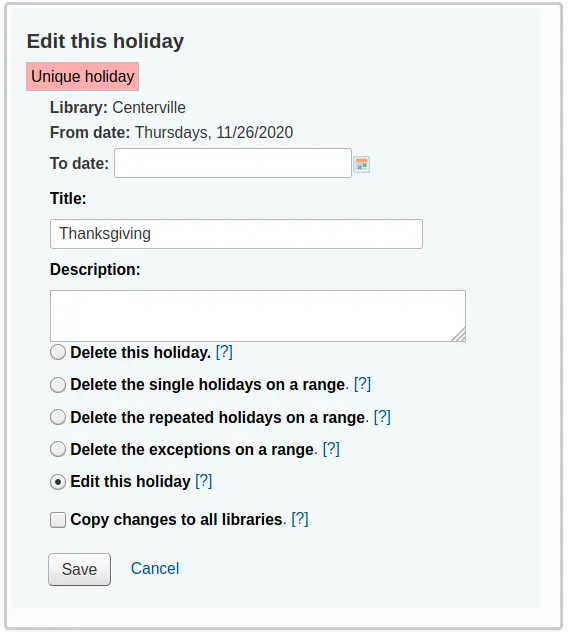
इस रूप से आप छुट्टी के लिए संपादन करने या पूरी तरह से छुट्टी हटा सकते हैं।
सभी कार्यों कि तुम 'सहेजें' क्लिक परिवर्तन कराया जाएगा से पहले की आवश्यकता होती है।
प्रत्येक संरक्षक प्रकार से थोड़ा अलग विकल्प होगा.
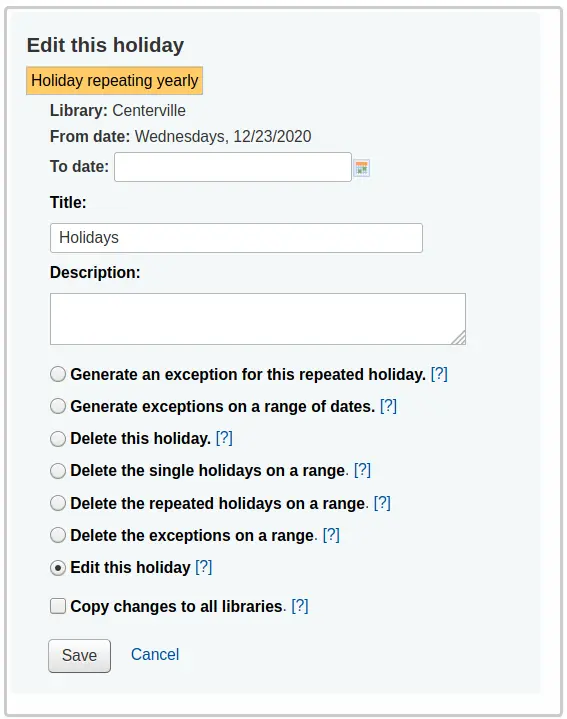
ऊपर दिए गए फॉर्म में आप ध्यान देंगे कि अब 'इस बार-बार की छुट्टी के लिए एक अपवाद उत्पन्न करने' और 'तारीखों की एक सीमा पर अपवादों को उत्पन्न करने' का विकल्प है, इनमें से किसी एक विकल्प को चुनने से आप इसे बना पाएंगे, ताकि यह तिथि न हो भले ही पुस्तकालय आमतौर पर इस तिथि पर बंद हो।
सभी कार्यों कि तुम 'सहेजें' क्लिक परिवर्तन कराया जाएगा से पहले की आवश्यकता होती है।
अतिरिक्त सहायता
जब ईवेंट जोड़ने या संपादित आप फार्म पर विभिन्न विभिन्न विकल्पों के बगल में प्रश्न चिह्न पर क्लिक करके अतिरिक्त मदद मिल सकती है

सीएसवी प्रोफ़ाइल:
टिप्पणी
Only staff with the manage_csv_profiles permission (or the superlibrarian permission) will have access to this tool.
Get there: More > Tools > Additional tools > CSV profiles
सीएसवी प्रोफाइल यह परिभाषित करने के लिए बनाई गई है कि आप अपनी कार्ट या सूची को कैसे निर्यात करना चाहते हैं।
CSV profiles are also used in the acquisitions module to export baskets and late orders, in the serials module to export late issues, and in the reports module to export the list of lost items.
Adding a CSV profile
To add a CSV profile,
'न्यू सीएसवी प्रोफाइल' पर क्लिक करें
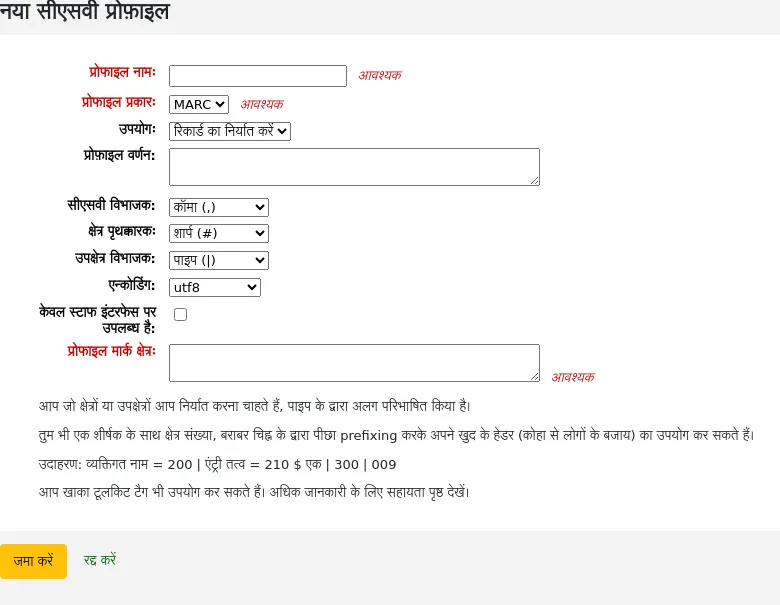
Profile name: enter a unique and meaningful name for the profile. This name will appear on the export pull down list when choosing 'Download' from your cart or list, or when choosing the profile in the acquisitions, serials or reports module to export baskets, late orders, etc.
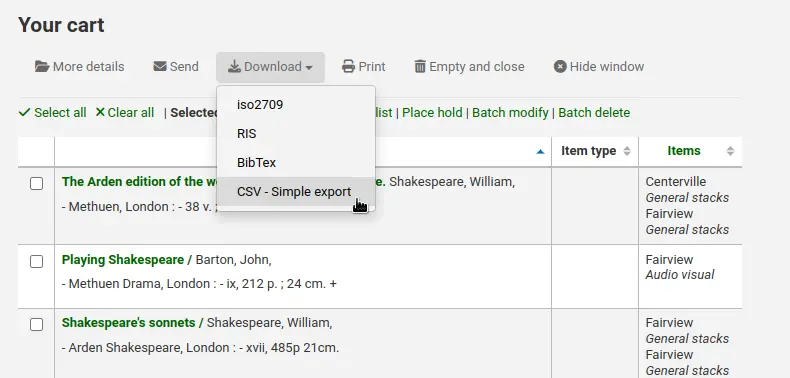
Profile type: this determines what type of fields you plan to use (MARC or SQL) to define your profile; it will also affect the 'Usage' options below.
If you choose MARC, you will need to enter MARC fields.
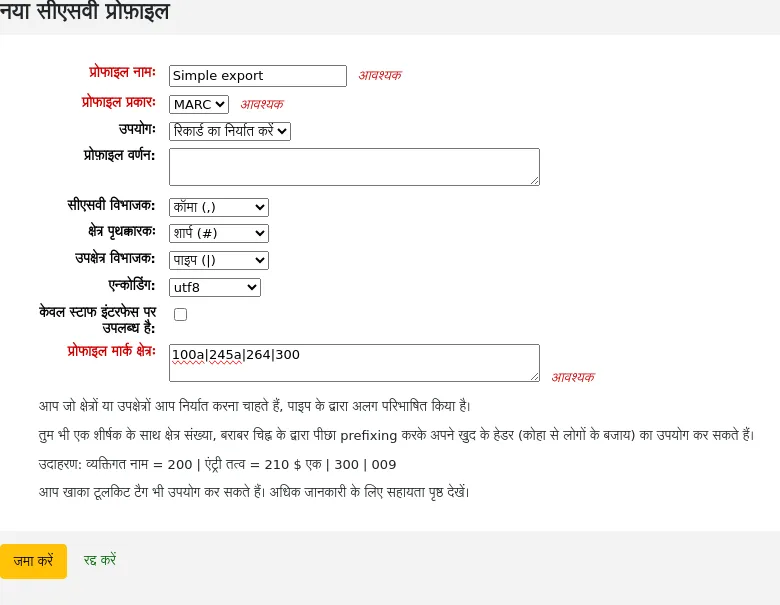
If you choose SQL, you will need to enter SQL database fields.
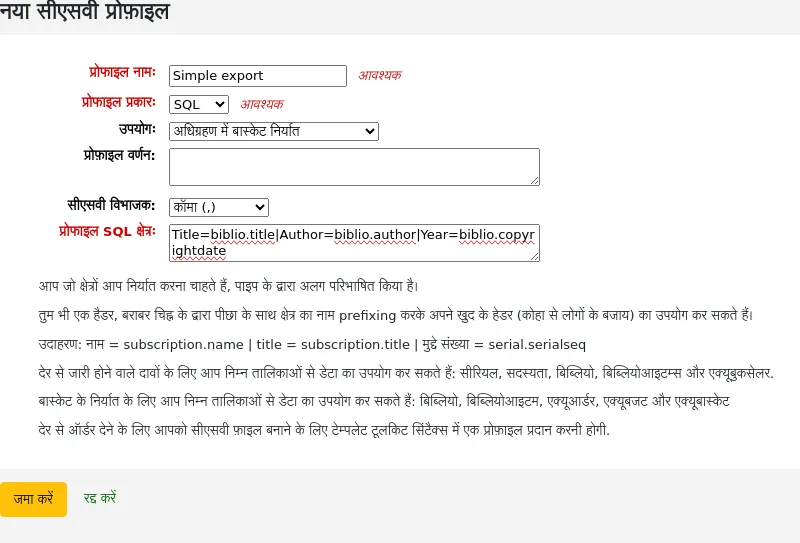
Usage: this field is used to indicate what type of report this CSV profile is used with:
Export records (only available with MARC profile type): this is used to export records from your cart or lists.
Late serial issues claims (only available with SQL profile type): this is used to export late issues of serial subscriptions
Export late orders (only available with SQL profile type): this is used to export late orders in the acquisitions module.
Basket export in acquisition (only available with SQL profile type): this is used to download records from acquisitions baskets.
Export lost items in report (only available with SQL profile type): this is used to export a CSV from the lost items report.
Profile description: you can use this field to expand the profile name. The description will also appear in the OPAC when patrons download content, so make sure it's clear for your patrons as well.
CSV separator: this is the character used to separate values and value groups.
टिप्पणी
सबसे आम विकल्प यहाँ अल्पविराम है, क्योंकि ज्यादातर स्प्रेडशीट अनुप्रयोग जानते हैं कि कैसे अल्पविराम द्वारा विभाजित फाइलों को खोलने के लिए।
Field separator (only available with MARC profile type): this is the character used to separate duplicate fields.
For example, you may have multiple 650 fields and this is the character that will appear in between each one in the column.

Subfield separator (only available with MARC profile type): this is the character used to separate duplicate subfields.
For example, you may have multiple $a subfields in a field.
Encoding: use this field to define the character encoding used when saving the file.
Only available on the staff interface (only available with MARC profile type): check this box to limit this CSV profile to the staff interface only, meaning patrons will not be able to use this profile to export their cart or lists from the OPAC.
Profile MARC fields (only available with MARC profile type): enter the fields or subfields to export, separated by pipes.
For example:
200\|210$a\|301
टिप्पणी
You can use the dollar sign ($) to separate the field number and subfield code, or simply write the field number and subfield code together.
For example:
200\|210$a\|301
Or without the dollar sign:
200\|210a\|301
सलाह
You can use your own headers (instead of the ones from Koha) by prefixing the field number with a header, followed by the equal sign.
For example:
Personal name=100\|title=245$a\|300
टिप्पणी
You can customize further the profile with Template Toolkit syntax.
See Using Template Toolkit in MARC CSV profile below for more information and examples.
Profile SQL fields (only available with SQL profile type): enter the database fields to export, including the table name, separated by pipes.
For example:
biblio.title\|biblio.author
सलाह
You can use your own headers (instead of the ones from Koha) by prefixing the field with a header, followed by the equal sign.
For example:
Title=biblio.title\|Author=biblio.author
महत्त्वपूर्ण
For late issues claims you can use data from following tables:
serial
subscription
biblio
biblioitems
aqbookseller
For basket exports you can use data from following tables:
biblio
biblioitems
aqorders
aqbudgets
aqbasket
महत्त्वपूर्ण
Exporting late orders requires a profile using the Template Toolkit syntax (the same syntax as the notices and slips).
There is a default profile that comes with Koha that you can use as an example.
Title[% separator %]Author[% separator %]Publication year[% separator %]ISBN[% separator %]Quantity[% separator %]Number of claims
[%~ SET biblio = order.biblio ~%]
"[% biblio.title %]"[% separator ~%]
"[% biblio.author %]"[% separator ~%]
"[% bibio.biblioitem.publicationyear %]"[% separator ~%]
"[% biblio.biblioitem.isbn %]"[% separator ~%]
"[% order.quantity%]"[% separator ~%]
"[% order.claims.count%][% IF order.claims.count %]([% FOR c IN order.claims %][% c.claimed_on | $KohaDates %][% UNLESS loop.last %], [% END %][% END %])[% END %]"
[% END %]
Click 'Submit' to save the new profile.
Using Template Toolkit in MARC CSV profiles
Template Toolkit syntax can be used to build complex CSV files.
For MARC information, you have to use the 'fields' variables to access the field list of the current record.
Start with the column heading, equal sign, and the TT variable. Always separate CSV columns with a pipe (|).
For example, this will return a two-column CSV file, with the first column titled "Title" and the second column titled "Author". The first column will contain 245$a and the second column will contain 100$a:
Title=[% fields.245.0.a.0 %]|Author=[% fields.100.0.a.0 %]
महत्त्वपूर्ण
It's not possible to display an entire field (e.g. all of 245) you need to list the subfields you want to display.
The '0' indicate which field or subfield to print if there are more than one. For example, this will fetch the first subfield 'a' of the first '245' field it finds in the record:
[% fields.245.0.a.0 %]
Single subfield
This is the syntax to get a single subfield from a MARC field.
For example, to get 245$a:
[% fields.245.0.a.0 %]
Multiple subfields in the same column
To concatenate multiple subfields in one column, you'll need to use
[% FOREACH %]. Remember to always define the end of the FOREACH loop
with [% END %].
For example, to get both 245$a and 245$b in the same column:
[% FOREACH field IN fields.245 %][% field.a.0 %][% field.b.0 %][% END %]
Multiple subfield values
The previous examples only fetched the first occurrence of the subfield. In some
cases, a field might contain more than one subfield of the same code in a field.
In that case, you'll need to use the join() key. The parentheses contain
the separator character.
For example, to get 260$a, $b, and $c, in a case where there might be more than one of each subfield, they will be separated by a semicolon followed by a space:
[% FOREACH field IN fields.260 %][% field.a.join('; ') %][% field.b.join('; ') %][% field.c.join('; ') %][% END %]
Indicator values
The indicators can be accessible using the indicator key.
For example, to get the value of the second indicator of the 245 field:
[% fields.245.0.indicator.2 %]
Fixed-length data field values
You can use substr() (substring) to get values from specific positions in
fixed-length data fields.
For example, to get the language from the 008 field (positions 35-37):
[% fields.008.0.substr(35,3) %]
Using conditions
Template Toolkit allows to add conditions, with [% IF %],
[% ELSIF %], and [% ELSE %]. Remember to always define the end
of the condition with [% END %].
For example, to get 650$a if indicator 2 for 650 is set:
Subject=[% FOREACH field IN fields.650 %][% IF field.indicator.2 %][% field.a.0 %][% END %][% END %]
सलाह
If you find you have extra spaces in your CSV, you can add tildes (~) inside the TT variables to remove extra whitespaces.
For example, the following code might replace the FOREACH variable with a space, making the title column start with a space:
Title=[% FOREACH field IN fields.245 %][% field.a.join(' ') %][% field.b.join(' ') %][% END %]
To correct this, add tildes at the beginning and end of the FOREACH variable:
Title=[%~ FOREACH field IN fields.245 ~%][% field.a.join(' ') %][% field.b.join(' ') %][% END %]
Modifying CSV profiles
To modify a CSV profile, click the 'Edit' button next to the profile.
Alter the necessary fields and click 'Submit'.
To delete a profile, click the 'Delete' button next to the profile.
सीएसवी प्रोफाइल का उपयोग करना
MARC CSV profiles will appear on the export list or cart menu under the 'Download' button in both the staff interface and the OPAC.
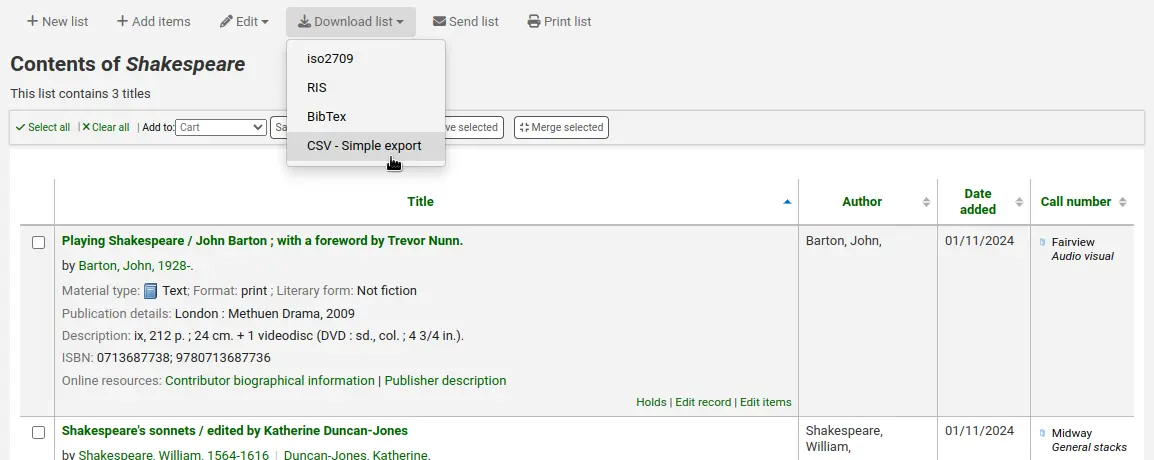
SQL CSV profiles will be available in various Koha modules in the staff interfaces depending on their usage.
'Late serial issues claims' CSV profiles will appear at the bottom of the late issues table in the serials module.
- 'Export late orders' CSV profiles will appear at the bottom of the
late orders table in the acquisitions module.
- 'Basket export in acquisition' CSV profiles will appear in the 'Download'
button in acquisitions baskets.
'Export lost items in report' CSV profiles will appear in the lost items report.
प्रवेश करें दर्शक
टिप्पणी
Only staff with the view_system_logs permission (or the superlibrarian permission) have access to the log viewer.
Get there: More > Tools > Additional tools > Log viewer
Actions in Koha are tracked in log files. The log system preferences determine what actions are logged. These logs are viewed using the log viewer.
Some actions are tracked by default, such as changes to system preferences and search engine mappings.
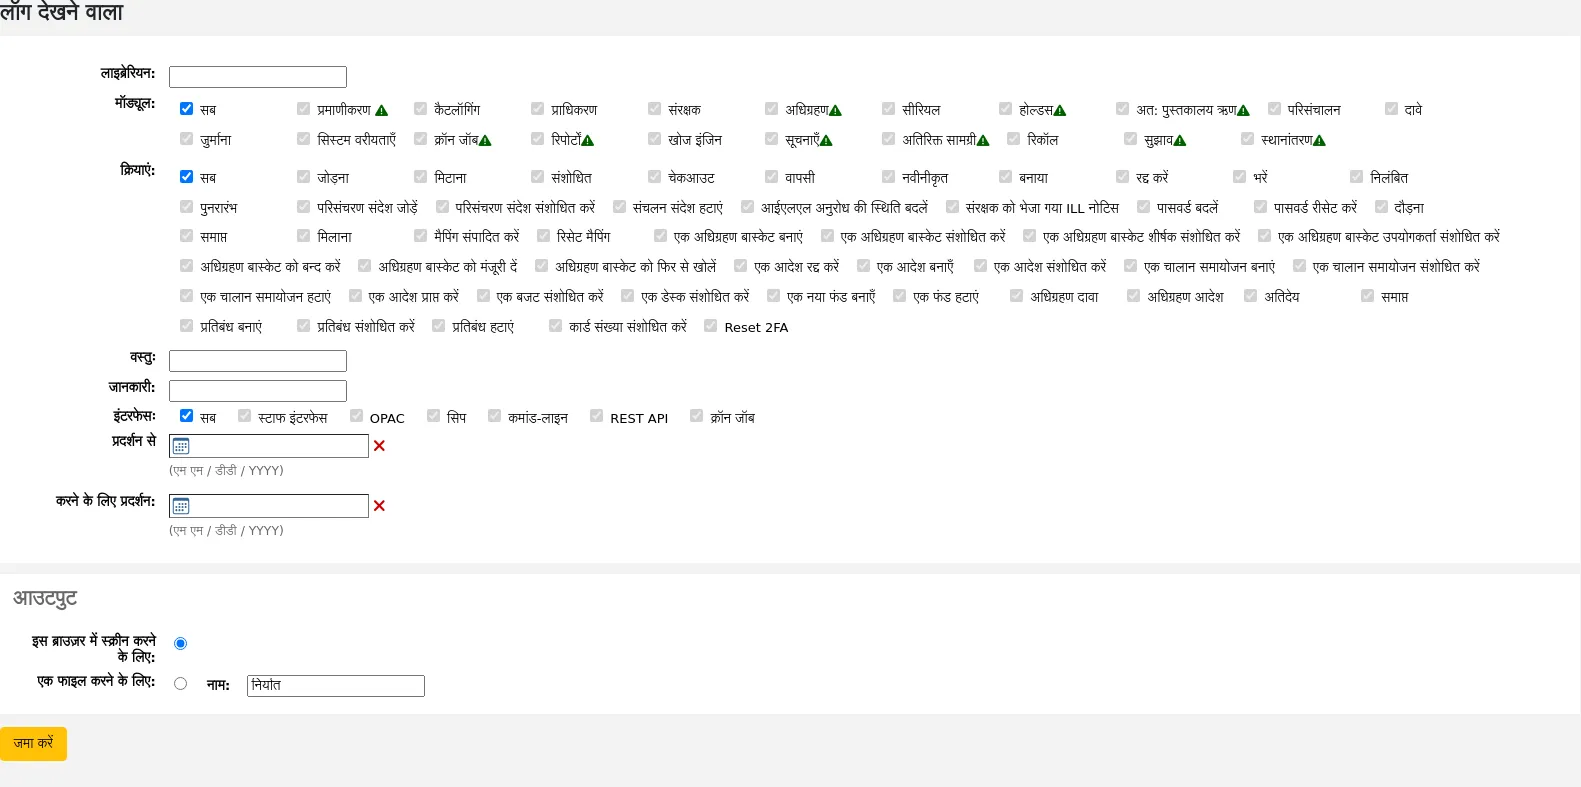
टिप्पणी
The warning sign next to a module name indicates that the actions in this module are not logged. Change your logs preferences to log actions from a module.
Use the log viewer options to filter the log entry results:
- Librarian:
a staff member that performed an action (0 if done by Koha)
- Modules:
select a specific module
- Actions:
the type of action, such as modify and add
- Object:
the identifier for the object the action was performed on, for example the biblionumber, itemnumber, or borrowernumber
- Info:
additional information about an action, such as a system preference name (or partial name) or a barcode
- Interface:
where the action originated from, such as the staff interface, REST API, or SIP
- Display from:
show log entries from this date
- Display to:
show log entries to this date
The values for actions, object, and info depend on the module. The action logs table in the wiki lists some of the available values.
Example of the log viewer results for the circulation module:
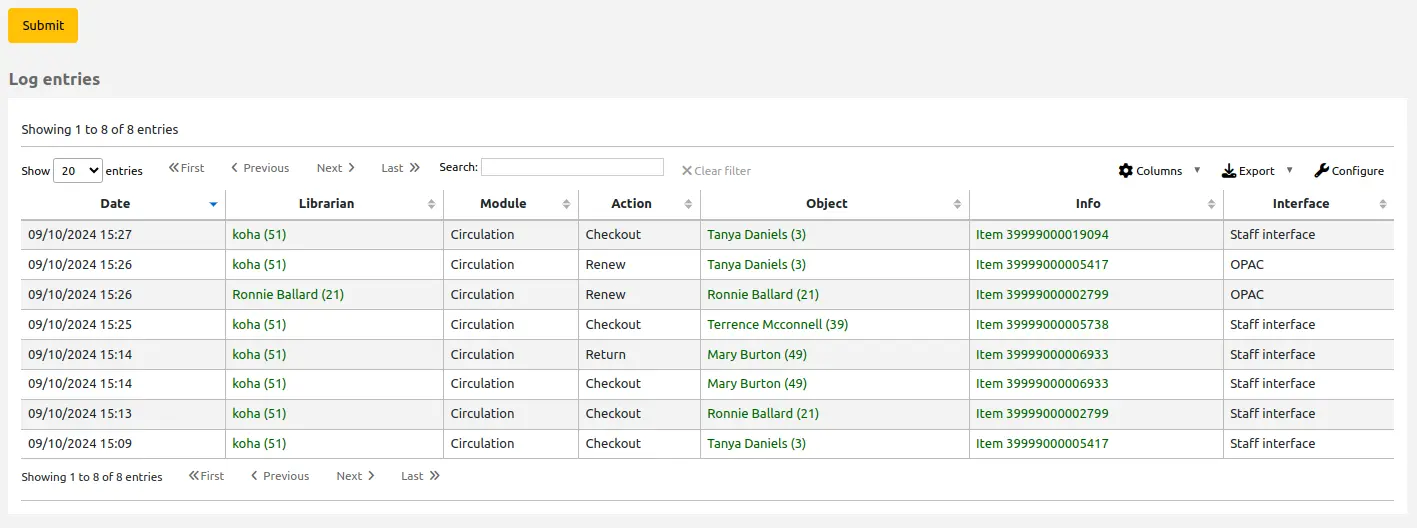
टिप्पणी
You can customize the columns of this table in the Table settings section of the Administration module (table id: logst).
समाचार
टिप्पणी
Only staff with the edit_additional_contents permission (or the superlibrarian permission) will have access to this tool.
Get there: More > Tools > Additional tools > News
कोहा का समाचार मॉड्यूल पुस्तकालयाध्यक्षों को ओपेक, स्टाफ इंटरफेस और संचलन प्राप्तियों को समाचार पोस्ट करने की अनुमति देता है।
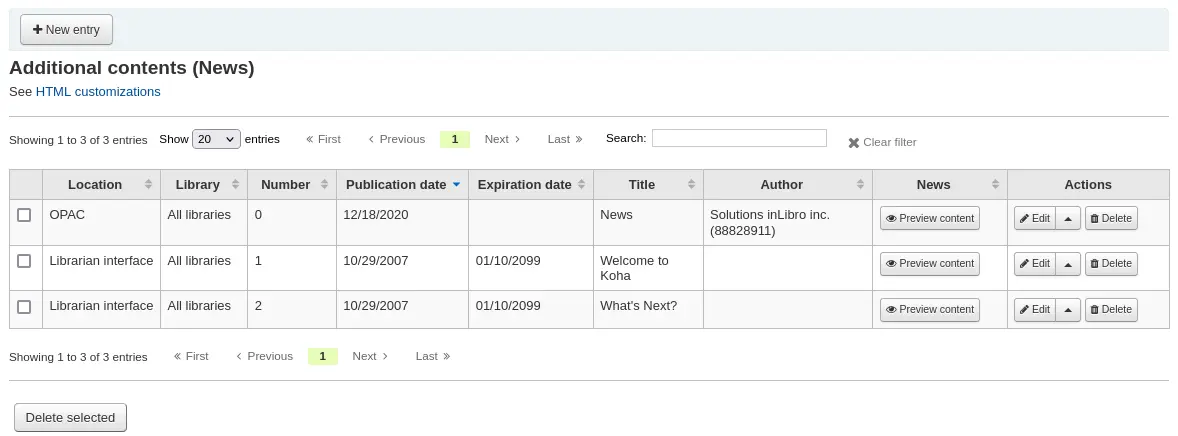
या तो ओपेक, स्टाफ इंटरफेस या सर्कुलेशन रसीद में समाचार जोड़ने के लिए:
क्लिक करें 'नई एंट्री'
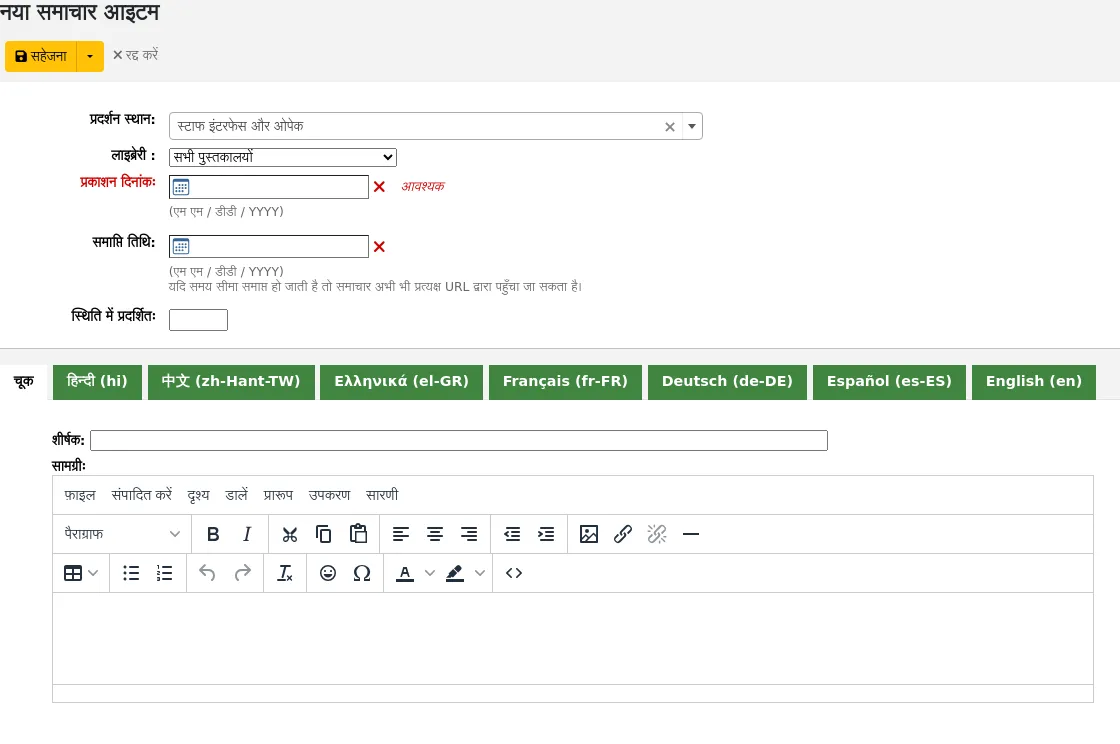
कोड: इस समाचार के लिए एक अद्वितीय कोड दर्ज करें
प्रदर्शन स्थान: चुनें कि समाचार कहाँ रखा जाए

लाइब्रेरियन और ओपेक इंटरफेस: सामग्री स्टाफ इंटरफेस के मुख्य पृष्ठ के साथ-साथ ओपेक पर समाचार ब्लॉक में भी दिखाई देगी
लाइब्रेरियन इंटरफ़ेस: सामग्री स्टाफ इंटरफ़ेस मुख्य पृष्ठ पर दिखाई देगी
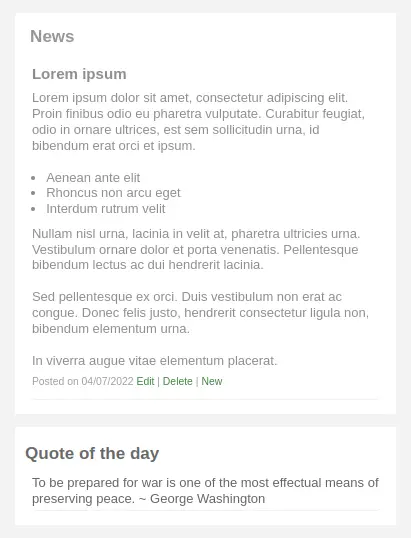
ओपेक: सामग्री ओपेक पृष्ठ के शीर्ष मध्य भाग में दिखाई देगी
ओपेक में समाचार के नीचे एक आरएसएस आइकन होगा जो आपको और आपके उपयोगकर्ताओं को पुस्तकालय समाचार की सदस्यता लेने की अनुमति देगा
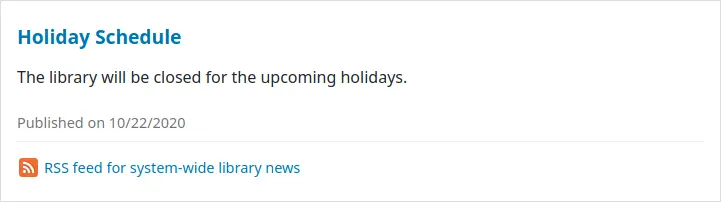
आप अपने उपयोगकर्ताओं को शाखा-विशिष्ट समाचार देखने का चयन करने की अनुमति दे सकते हैं के साथ OpacNewsLibrarySelect सिस्टम वरीयता
स्लिप: कंटेंट परिसंचरण प्राप्तियों पर दिखाई देगा
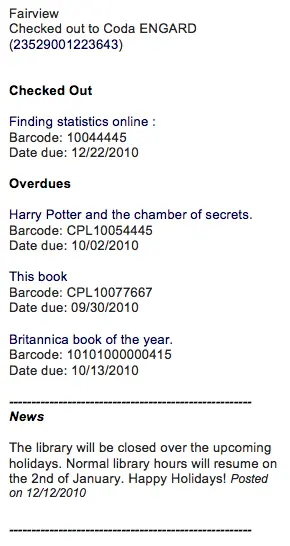
टिप्पणी
This can be activated or deactivated in the Notices and slips tool
पुस्तकालय: वह पुस्तकालय चुनें जिसके लिए यह समाचार दिखाया जाएगा
Prior to end users logging in to the OPAC only news items listed to appear for 'All libraries' will display unless your system administrator has configured an 'OPAC_BRANCH_DEFAULT' override in virtual host configuration. See installation for details.
प्रकाशन दिनांक: प्रकाशन दिनांक फ़ील्ड का उपयोग करके नियंत्रित करें कि आपका समाचार किस दिनांक से प्रदर्शित होता है
उदाहरण: (ये आज की तारीख को 7 मई 2019 मान लेते हैं)
वर्तमान तिथि पर प्रकाशित करें: प्रकाशन तिथि को 7 मई 2019 तक निर्धारित करें
भविष्य में प्रकाशन के लिए अनुसूची: 7 मई 2019 के बाद की तारीख निर्धारित करें
समाचार आइटम का बैकडेट करें: दिनांक 7 मई 2019 से पहले निर्धारित करें
समाप्ति तिथि: समाप्ति तिथि फ़ील्ड का उपयोग स्वचालित रूप से समाचार आइटम को दिखाना बंद करने के लिए करें जब वह अब प्रासंगिक न हो।
यदि यह फ़ील्ड खाली है तो समाचार आइटम तब तक दिखाया जाएगा जब तक आप इसे मैन्युअल रूप से हटा नहीं देते
स्थिति में दिखाई दें: आप तय करते हैं कि आपके समाचार किस क्रम में प्रदर्शित होते हैं
यदि फ़ील्ड खाली छोड़ दिया जाता है, तो समाचार नवीनतम से सबसे पुराने में दिखाई देगा
इस क्षेत्र में, 0 सबसे शीर्ष स्थान है; संख्या जितनी बड़ी होगी, सूची में उतनी ही कम खबरें दिखाई देंगी
आप स्थापित प्रत्येक भाषा के लिए समाचार शीर्षक और पाठ दर्ज कर सकते हैं
टिप्पणी
आप चुन सकते हैं कि यहां किस प्रकार के संपादक का उपयोग करना है (या तो टेक्स्ट एडिटर या WYSIWYG (जो आप देखते हैं वही आपको मिलता है) संपादक) AdditionalContentsEditor सिस्टम वरीयता के साथ।
After filling in all of the fields, click 'Save' at the top of the page.
Alternatively, click the arrow next to the 'Save' button and choose 'Save and continue editing' if you need to stay on this page to continue editing the news item.
NewsAuthorDisplay सिस्टम वरीयता के लिए आपकी पसंद के आधार पर, आप उस व्यक्ति को भी देखेंगे जिसने समाचार आइटम बनाया है (यह लॉग इन व्यक्ति का उपयोग करता है)।
एचटीएमएल अनुकूलन
टिप्पणी
Only staff with the edit_additional_contents permission (or the superlibrarian permission) will have access to this tool.
Get there: More > Tools > Additional tools > HTML customizations
कोहा का एचटीएमएल अनुकूलन उपकरण कर्मचारियों को ओपेक में सामग्री पोस्ट करने की अनुमति देता है।
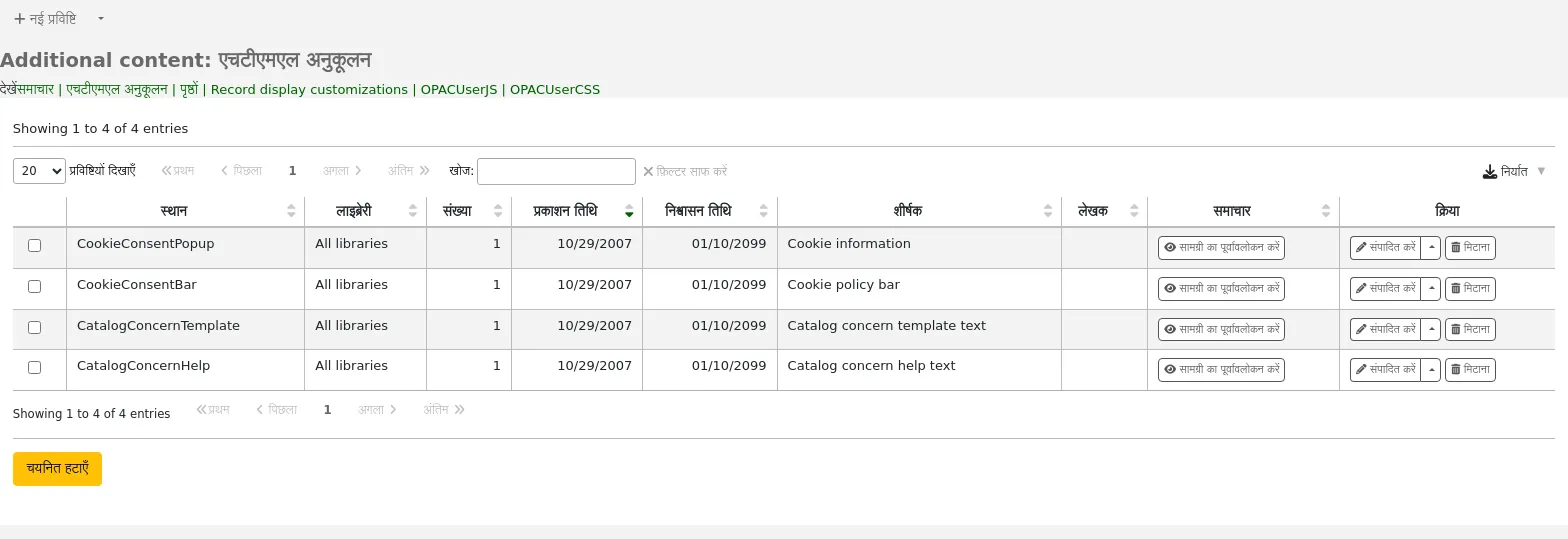
Add a new HTML customization
To add content:
क्लिक करें 'नई एंट्री'
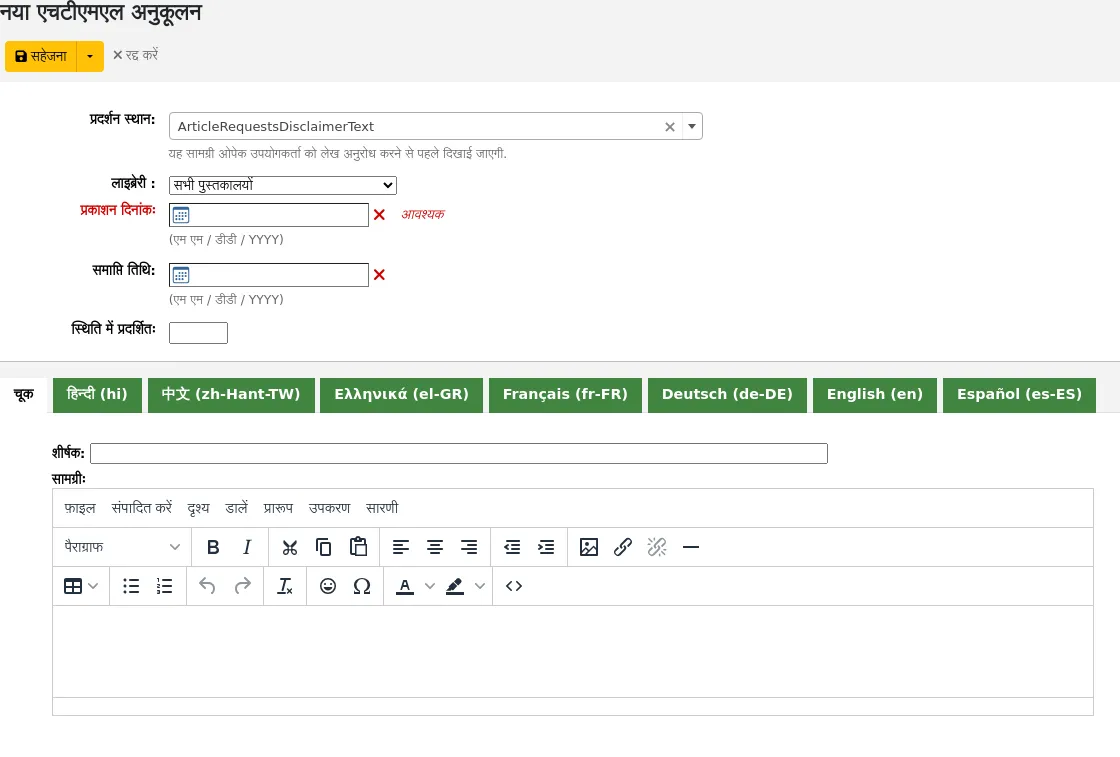
कोड: इस अतिरिक्त सामग्री आइटम के लिए एक अद्वितीय कोड दर्ज करें
Display location: choose where to put the content.
See the list of all display locations below for details about each one.

पुस्तकालय: वह पुस्तकालय चुनें जिसके लिए यह सामग्री दिखाई जाएगी
ओपेक में प्रवेश करने वाले अंतिम उपयोगकर्ताओं से पहले केवल 'सभी पुस्तकालयों' के लिए सूचीबद्ध सामग्री ब्लॉक तब तक प्रदर्शित होंगे जब तक कि आपके सिस्टम व्यवस्थापक ने वर्चुअल होस्ट कॉन्फ़िगरेशन में 'OPAC_BRANCH_DEFAULT' ओवरराइड कॉन्फ़िगर नहीं किया हो।
प्रकाशन दिनांक: आपकी सामग्री किस दिनांक से प्रदर्शित होती है, इसे नियंत्रित करने के लिए प्रकाशन दिनांक फ़ील्ड का उपयोग करें
उदाहरण: (ये आज की तारीख को 7 मई 2019 मान लेते हैं)
वर्तमान तिथि पर प्रकाशित करें: प्रकाशन तिथि को 7 मई 2019 तक निर्धारित करें
भविष्य में प्रकाशन के लिए अनुसूची: 7 मई 2019 के बाद की तारीख निर्धारित करें
समाचार आइटम का बैकडेट करें: दिनांक 7 मई 2019 से पहले निर्धारित करें
समाप्ति तिथि: समाप्ति तिथि फ़ील्ड का उपयोग सामग्री के अब प्रासंगिक नहीं होने पर स्वचालित रूप से दिखाना बंद करने के लिए करें।
यदि यह फ़ील्ड खाली है तो सामग्री तब तक दिखाई जाएगी जब तक आप इसे मैन्युअल रूप से हटा नहीं देते
स्थिति में प्रकट होना: आप तय करते हैं कि आपकी सामग्री किस क्रम में प्रदर्शित होगी, जब एक ही प्रदर्शन स्थान में एक से अधिक हों
यदि फ़ील्ड खाली छोड़ दिया जाता है, तो सामग्री सबसे पुरानी से नवीनतम तक दिखाई देगी
इस क्षेत्र में, 0 सबसे शीर्ष स्थान है; संख्या जितनी बड़ी होगी, सूची में सामग्री उतनी ही कम दिखाई देगी
आप स्थापित प्रत्येक भाषा के लिए सामग्री शीर्षक और पाठ दर्ज कर सकते हैं
टिप्पणी
अतिरिक्त सामग्री के लिए शीर्षक नहीं दिखाया गया है। यह ज्यादातर एक नज़र में यह जानने का काम करता है कि अतिरिक्त सामग्री आइटम की सूची को देखते समय सामग्री किस बारे में है। यदि आप एक शीर्षक दिखाना चाहते हैं, तो आपको इसे टेक्स्ट भाग में जोड़ना होगा।
टिप्पणी
आप चुन सकते हैं कि यहां किस प्रकार के संपादक का उपयोग करना है (या तो टेक्स्ट एडिटर या WYSIWYG (जो आप देखते हैं वही आपको मिलता है) संपादक) AdditionalContentsEditor सिस्टम वरीयता के साथ।
After filling in all of the fields, click 'Save' at the top of the page.
Alternatively, click the arrow next to the 'Save' button and choose 'Save and continue editing' if you need to stay on this page to continue editing the news item.
Display locations
OPAC locations
The following image shows where each block is displayed on the OPAC's main page, for the blocks that are displayed on the main page.
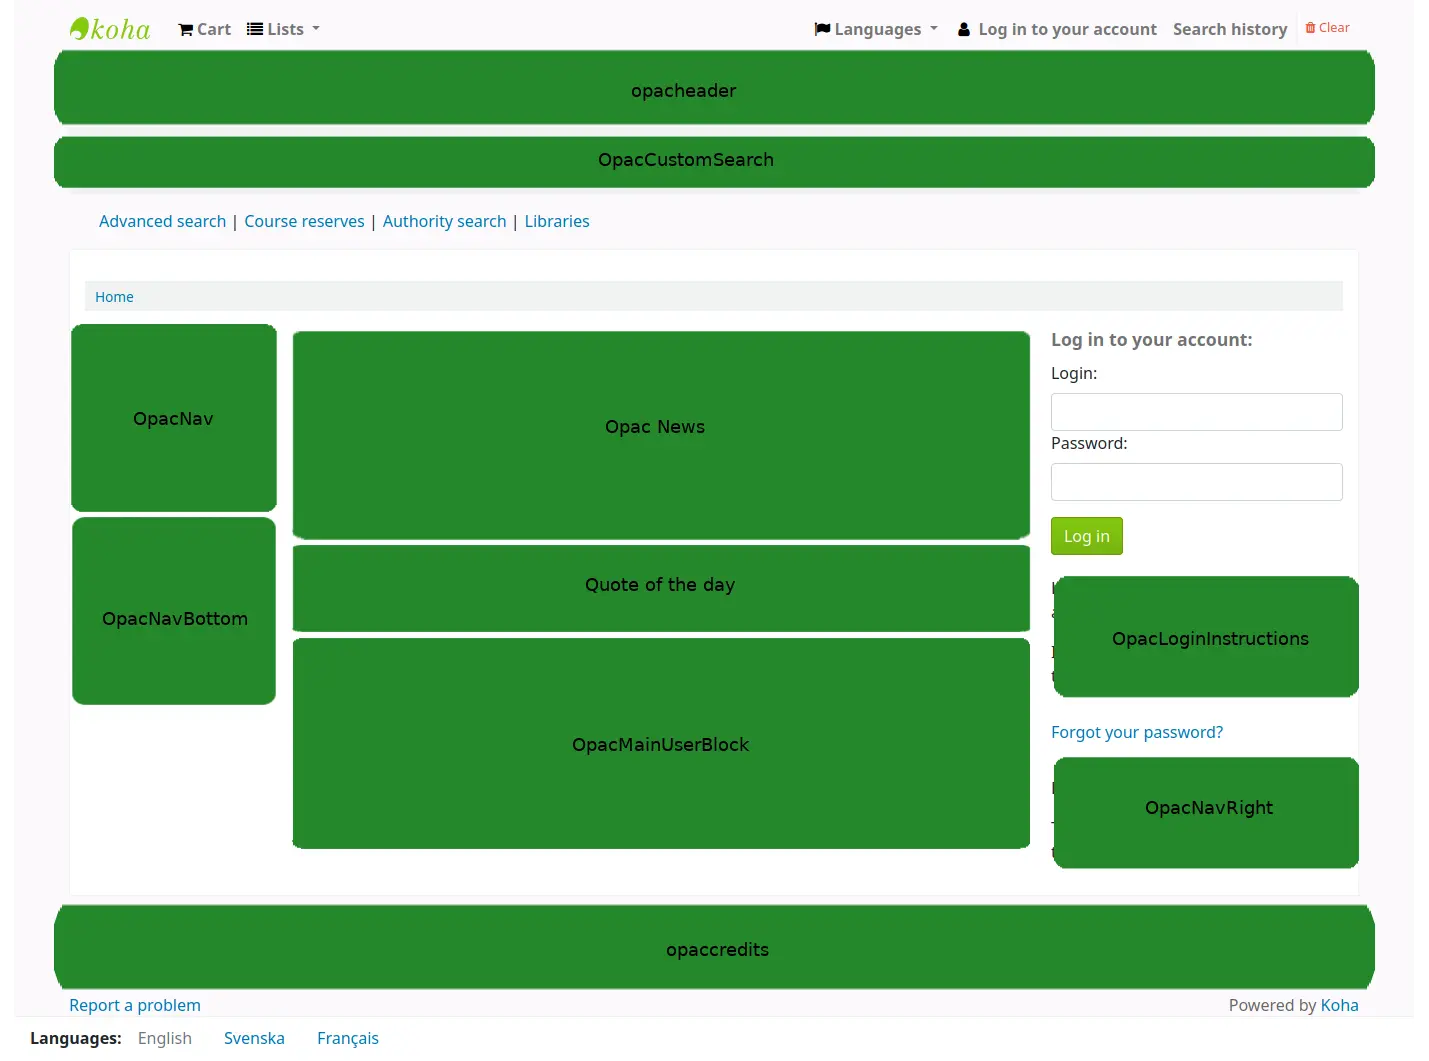
टिप्पणी
The Quote of the day feature is found in the tools module, and the news are managed in the news tool. The rest of the customizable blocks are managed in the HTML customizations tool.
ArticleRequestDisclaimerText: सामग्री दिखाई देगी और संरक्षक को लेख अनुरोध फ़ॉर्म को जारी रखने से पहले स्वीकार करना होगा; किसी भी कॉपीराइट/अस्वीकरण के लिए उपयोग करने वाले संरक्षकों को फोटोकॉपी या लेखों या अध्यायों के स्कैन के बारे में पता होना चाहिए
CatalogConcernHelp: content will appear at the bottom of catalog concern form when reporting a concern in the OPAC, or reporting a concern in the staff interface. The default text is "Please describe your concern clearly and the library will try to deal with it as quickly as possible".
CatalogConcernTemplate: content will appear in the main text area of the catalog concern form when reporting a concern in the OPAC, or reporting a concern in the staff interface. The default text is
**Describe the concern**

A clear and concise description of what the concern is.

**To Reproduce**

Steps to reproduce the behavior:
1. Go to '...'
2. Click on '....'
3. Scroll down to '....'
4. See error

**Expected behavior**

A clear and concise description of what you expected to happen.
सलाह
Since this will be in a text field, there is no way to add formatting. Make sure to use the text editor, not the WYSIWYG editor, in order to have line breaks in your text.
CookieConsentBar: content will appear on the banner displayed when the CookieConsent system preference is enabled.
संस्करण
The CookieConsentBar display location was added in version 23.11 of Koha.
टिप्पणी
The CookieConsentBar content will appear on the cookie banner in both the OPAC and the staff interface.
CookieConsentPopup: content will be used as the main body for the Cookies policy that pops up when clicking 'More information' on the cookie banner.
Choices for non-essential cookies are added to the Cookies policy via the CookieConsentedJS system preference.
संस्करण
The CookieConsentPopup display location was added in version 23.11 of Koha.
टिप्पणी
The CookieConsentPopup content is used in both the OPAC and the staff interface.
ILLModuleCopyrightClearance: content will appear when creating an interlibrary loan request on the OPAC.
संस्करण
The ILLModuleCopyrightClearance display location was added to Koha in version 24.05. In prior versions, it was a system preference by the same name: ILLModuleCopyrightClearance.
opaccredits: सामग्री पृष्ठ के नीचे दिखाई देगी
OpacCustomSearch: सामग्री पृष्ठ के शीर्ष पर सरल खोज बार को बदल देगी
opacheader: सामग्री ओपेक पृष्ठ के शीर्ष पर दिखाई देगी
OpacLibraryInfo: content will appear in the 'Libraries' page in the OPAC, as well as in the holdings table in the OPAC
OpacLoginInstructions: सामग्री ओपेक के मुख्य पृष्ठ पर लॉगिन बॉक्स के नीचे दिखाई देगी
OpacMaintenanceNotice: content will replace the default maintenance message when the OpacMaintenance system preference is set to 'Show'.
संस्करण
Prior to Koha version 23.11, this was a system preference. See OpacMaintenanceNotice for more information.
OpacMainUserBlock: सामग्री ओपेक के मुख्य पृष्ठ के मध्य में दिखाई देगी
OpacMoreSearches: content will appear under the search box at the top of the OPAC. By default (and depending on system preferences) there is a link for Advanced search, Course reserves, Authority search, and Tag cloud. Any new searches will be added to the right of the already present links.
OpacMySummaryNote: content will appear above the patron's summary and below the welcome message when the patron logs in to the OPAC and views their 'your summary' tab.

OpacNav: content will appear on the left hand column of the main page and patron account on the OPAC. When on the patron account page, the content in OpacNav will appear before the account tabs (summary, charges, personal details, etc.)
OpacNavBottom: content will appear on the left hand column of the main page and patron account on the OPAC. When on the patron account page, the content in OpacNavBottom will appear after the account tabs (summary, charges, personal details, etc.). On the main page, the content in OpacNavBottom appears right below the content in OpacNav.
OpacNavRight: सामग्री ओपेक पृष्ठ के दाईं ओर दिखाई देगी
OPACResultsSidebar: content will appear on the search results page below the list of facets on the left side of the screen.
संस्करण
Prior to Koha version 23.11, this was a system preference. See OPACResultsSidebar for more information.
OpacSuggestionInstructions: सामग्री ओपेक पर सुझाव प्रपत्र खरीदें के शीर्ष पर पाठ को प्रतिस्थापित करेगी
OpacSuppressionMessage: content will appear on the OPAC when a record is blocked. (See the OpacSuppression system preference for more information.)
संस्करण
Prior to Koha version 23.11, this was a system preference. See OpacSuppressionMessage for more information.
PatronSelfRegistrationAdditionalInstructions: content will be displayed after the patron successfully creates a library account via the OPAC.
संस्करण
Prior to Koha version 23.11, this was a system preference. See PatronSelfRegistrationAdditionalInstructions for more information.
टिप्पणी
Note that this only appears after the patron has registered.
SCOMainUserBlock: content will appear in the center of the main page of the self check-out screen.
संस्करण
Prior to Koha version 23.11, this was a system preference. See SCOMainUserBlock for more information.
SelfCheckHelpMessage: content will appear above the existing help message when clicking the 'Help' link in the top right of the self check-out interface.
संस्करण
Prior to Koha version 23.11, this was a system preference. See SelfCheckHelpMessage for more information.
SelfCheckInMainUserBlock: content will appear in the center of the main page of the self check-in screen.
संस्करण
Prior to Koha version 23.11, this was a system preference. See SelfCheckInMainUserBlock for more information.
Staff interface locations
IntranetmainUserblock: content will appear at the bottom of the staff interface homepage, underneath the module icons.
संस्करण
Prior to Koha version 24.11, this was a system preference. See IntranetmainUserblock for more information.
RoutingListNote: content will appear below the routing list information.
संस्करण
Prior to Koha version 25.05, this was a system preference. See RoutingListNote for more information.
StaffAcquisitionsHome: content will appear at the bottom of the Acquisitions module main page.
StaffAuthoritiesHome: content will appear at the bottom of the Authorities main page.
StaffCataloguingHome: content will appear at the bottom of the Cataloguing module main page.
StaffListsHome: content will appear at the bottom of the Lists main page.
StaffLoginInstructions: content will appear above the login form of the staff interface.
संस्करण
Prior to Koha version 25.05, this was a system preference. See StaffLoginInstructions for more information.
StaffPatronsHome: content will appear at the bottom of the Patrons module main page.
StaffPOSHome: content will appear at the bottom of the Point of sale main page.
StaffReportsHome: content will appear at the bottom of the Reports main page.
संस्करण
Prior to Koha version 25.11, this was a system preference. See IntranetReportsHomeHTML for more information.
StaffSerialsHome: content will appear at the bottom of the Serials module main page.
पृष्ठों
टिप्पणी
Only staff with the edit_additional_contents permission (or the superlibrarian permission) will have access to this tool.
Get there: More > Tools > Additional tools > Pages
The pages tool is a tool to create custom additional pages in the OPAC and in the staff interface. It is based on the same tool as the news and the HTML customizations, therefore it works in the same way.
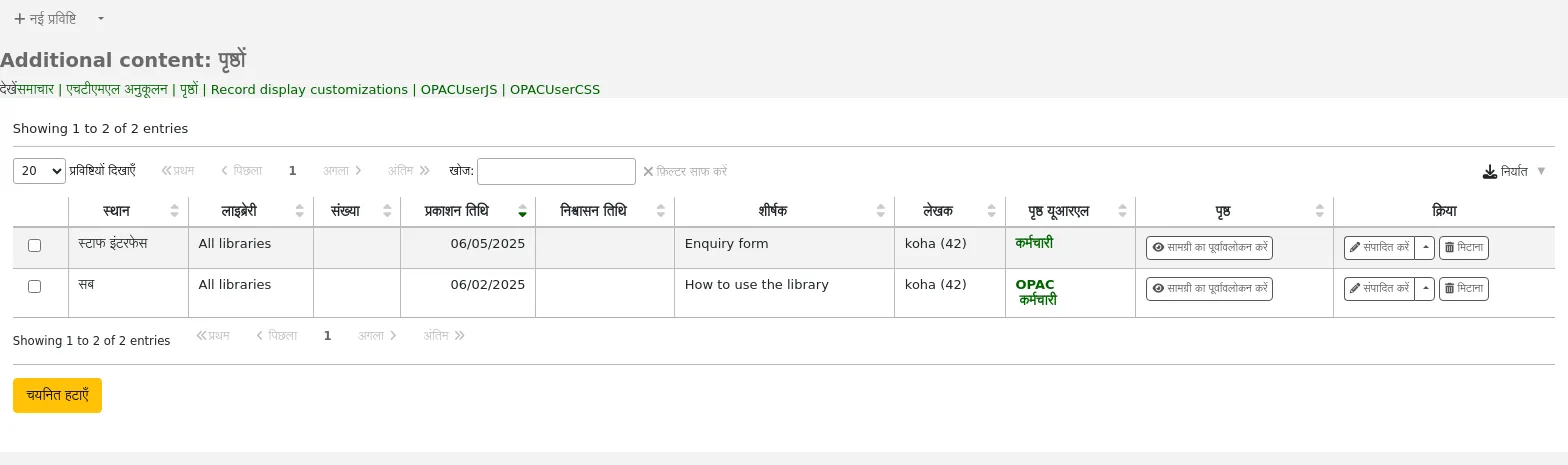
एक नया पृष्ठ जोड़ने के लिए:
क्लिक करें 'नई एंट्री'

प्रदर्शन स्थान: वह इंटरफ़ेस चुनें जिससे यह पृष्ठ एक्सेस किया जाना चाहिए
लाइब्रेरियन और ओपेक इंटरफेस: दो लिंक बनाए जाएंगे, एक ओपेक के लिए और एक स्टाफ इंटरफ़ेस के लिए
लाइब्रेरियन इंटरफ़ेस: स्टाफ इंटरफ़ेस के लिए एक लिंक बनाया जाएगा
ओपेक: ओपेक के लिए एक लिंक बनाया जाएगा
लाइब्रेरी: लाइब्रेरी चुनें जिसके लिए यह पेज उपलब्ध होगा
यदि एक ओपेक पेज एक लाइब्रेरी तक सीमित है, तो केवल उन उपयोगकर्ताओं में लॉग इन किया जाता है जिनके होम लाइब्रेरी से मेल खाता है पेज लाइब्रेरी पेज तक पहुंचने में सक्षम होगी।
एक लाइब्रेरी तक सीमित पेज ओपेक उपयोगकर्ताओं के लिए सुलभ नहीं होंगे, जो लॉग इन नहीं हैं, जब तक कि आपके सिस्टम एडमिनिस्ट्रेटर ने वर्चुअल होस्ट कॉन्फ़िगरेशन में 'OPAC_BRANCH_DEFAULT' ओवरराइड को कॉन्फ़िगर नहीं किया है।
यदि कोई स्टाफ इंटरफ़ेस पेज एक लाइब्रेरी तक सीमित है, तो केवल उस लाइब्रेरी में लॉग इन करने वाले कर्मचारी केवल पेज तक पहुंचने में सक्षम होंगे।
प्रकाशन तिथि: प्रकाशन तिथि फ़ील्ड का उपयोग करें कि आपका पृष्ठ किस तिथि से सुलभ है, यदि इसे केवल भविष्य की तारीख में एक्सेस किया जाना चाहिए।
समाप्ति तिथि: किसी विशिष्ट तिथि के बाद पृष्ठ को हटाने के लिए समाप्ति तिथि फ़ील्ड का उपयोग करें।
यदि यह फ़ील्ड खाली है तो पृष्ठ तब तक उपलब्ध होगा जब तक आप इसे मैन्युअल रूप से हटाते हैं
आप स्थापित प्रत्येक भाषा के लिए पृष्ठ शीर्षक और सामग्री दर्ज कर सकते हैं
टिप्पणी
आप चुन सकते हैं कि यहां किस प्रकार के संपादक का उपयोग करना है (या तो टेक्स्ट एडिटर या WYSIWYG (जो आप देखते हैं वही आपको मिलता है) संपादक) AdditionalContentsEditor सिस्टम वरीयता के साथ।
After filling in all of the fields, click 'Save' at the top of the page.
Alternatively, click the arrow next to the 'Save' button and choose 'Save and continue editing' if you need to stay on this page to continue editing the news item.
In the table, a link will be generated for the OPAC or the staff interface or both. Use this link in HTML customizations, news or system preferences such as IntranetNav or IntranetmainUserBlock so that the patrons or staff members can access the new page.
टिप्पणी
To link to a specific page, use the code in the URL with the
code=parameter. For example:OPACBASEURL/cgi-bin/koha/opac-page.pl?code=staff_and_opac_42 STAFFCLIENTBASEURL/cgi-bin/koha/tools/page.pl?code=staff_and_opac_42
In multi-language installations, use the
language=parameter followed by the language code to link to the page in a specific language. For example:OPACBASEURL/cgi-bin/koha/opac-page.pl?code=staff_and_opac_42&language=fr-CA STAFFCLIENTBASEURL/cgi-bin/koha/tools/page.pl?code=staff_and_opac_42&language=fr-CA
To use a custom page
Once the page has been developed and saved, you will see a summary table of all custom pages. This table also displays the generated links to access these custom pages. The links will be available in both the default language, and the installed language currently in use by the logged in staff member.
There is a button to preview the created page. This is helpful to check how the page looks and functions before it is deployed.
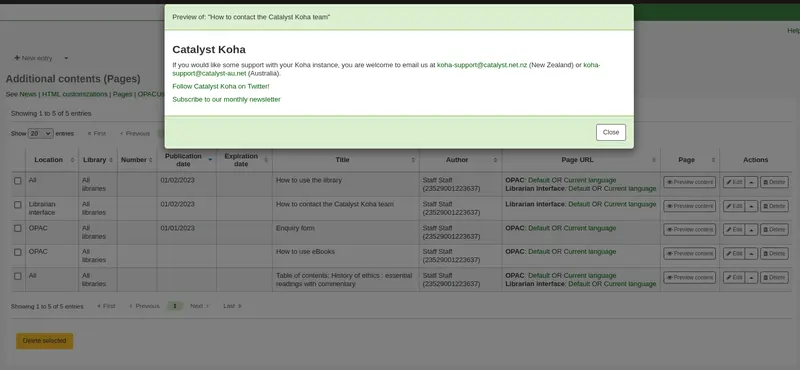
Now the page has been created, there are a number of ways to make the page accessible to your patrons in the Koha OPAC.
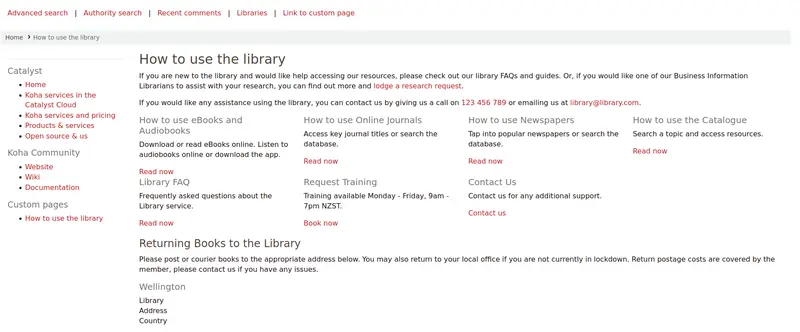
One option is to use an HTML customization to add the link to the page to a section of the OPAC. The page can be added as a navigation link (in OpacNav, OpacNavBottom, or OpacNavRight). Depending on the page, it may be more suitable in the header (opacheader), footer (opaccredits), or main section of the homepage (OpacMainUserBlock).
HTML customizations are only displayed on the OPAC, so News items would be the appropriate tool to add the link to the main landing page of the staff interface.
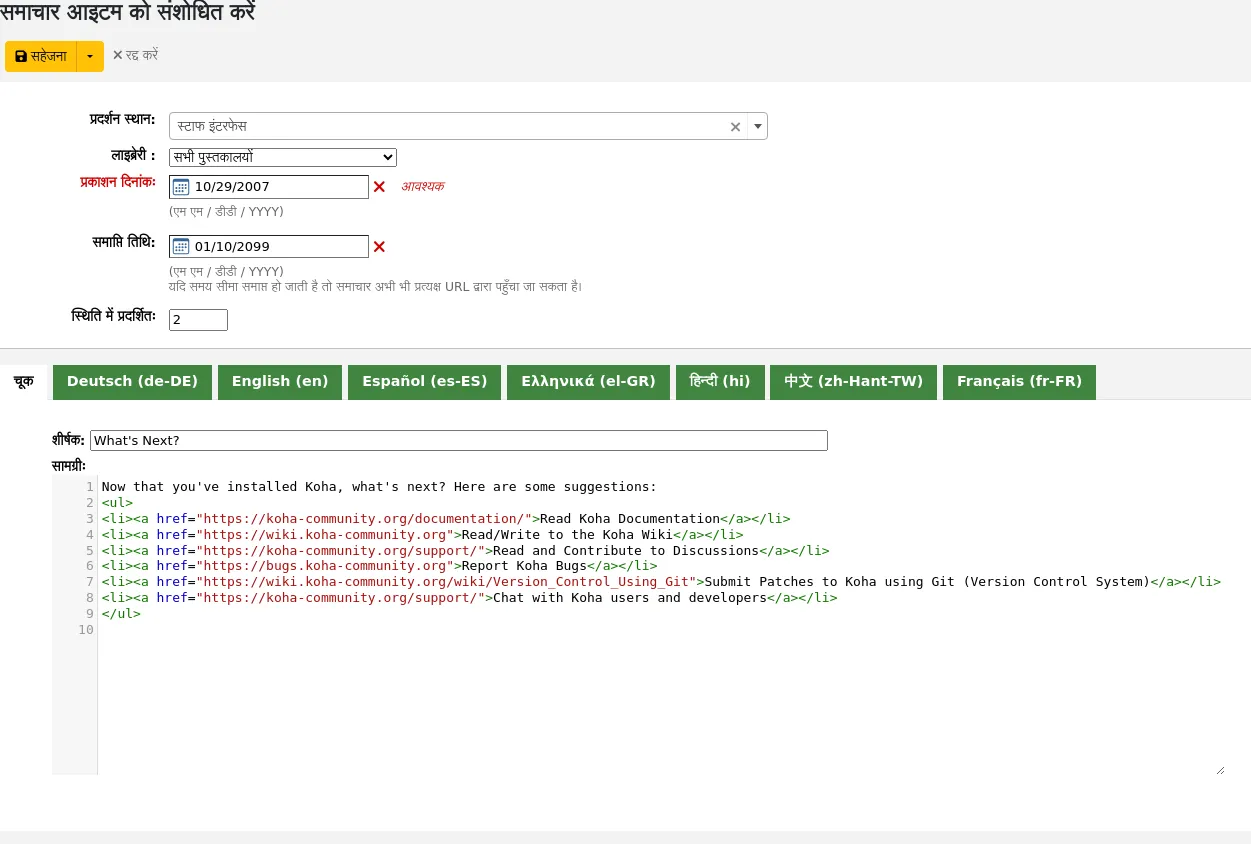
The benefit of putting the page link in an HTML customization or News item is that you can use the WYSIWYG editor, instead of writing code. However, there is always the option to write the content in the HTML text editor too, if you prefer.
Those more proficient in writing code could use jQuery (Javascript) to insert their page link anywhere in the OPAC or staff interface.
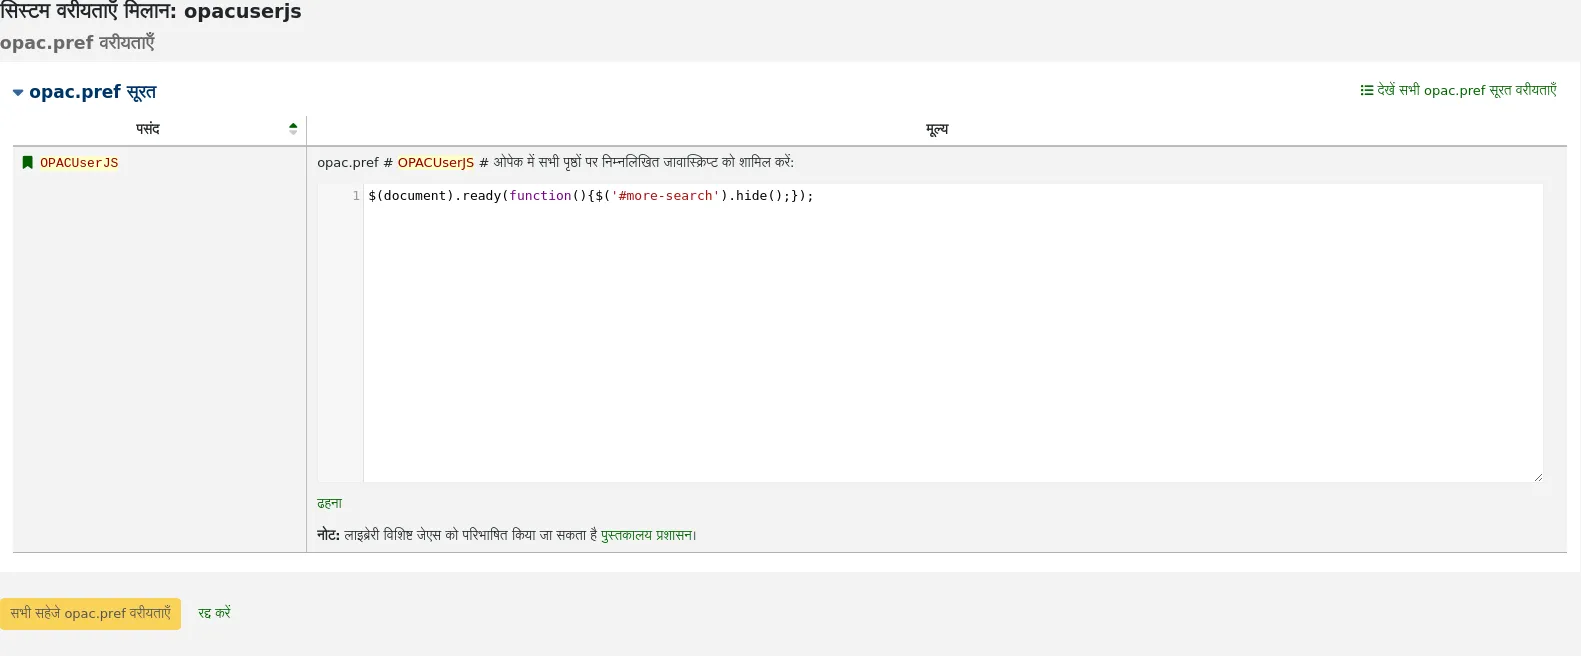
Using jQuery, the pages could be added to either interface as simple text links, or as more advanced button links or image links. Add code to the OPACUserJS system preference to apply jQuery to the OPAC, or to the IntranetUserJS system preference to apply jQuery to the staff interface.
Clever ways to use custom pages:
There are many interesting ways to use custom pages in a Koha library. We’ve heard discussion of pages being used for tables of contents, frequently asked questions pages for the library, and enquiry forms.
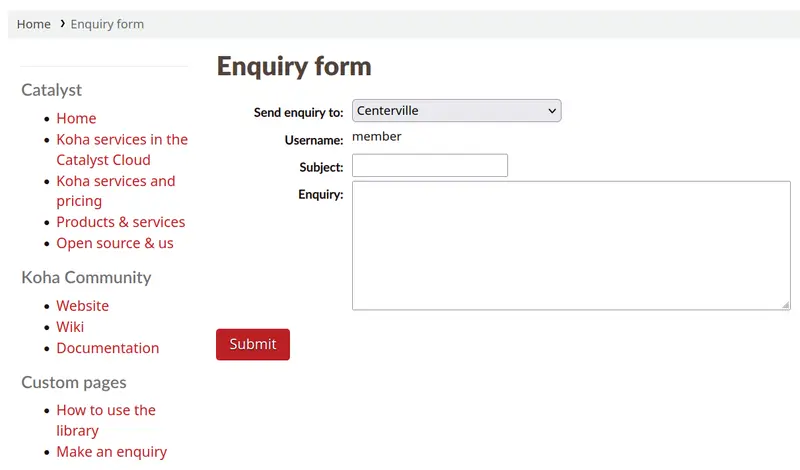
Another way to make custom Koha page content accessible for users, would be to catalog those pages so they pop in in Koha search results, for example library tutorials that patrons may be looking for.
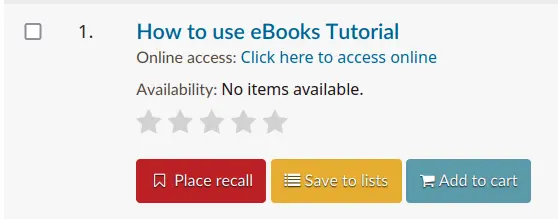
Once the page has been created, it can be cataloged in the URI field of a record (856$u). Alternatively, it could be cataloged in the URI field of an item attached to a record (952$u). Both of these fields get converted into hyperlinks by Koha. If cataloged in a record or item, it would then be indexed and become searchable.
Once cataloged, these pages could be used in other ways that are typically reserved for books and other records. The records representing pages can be added to lists, or stored in virtual collections or locations that make them easier to find in the catalog. They could even be captured and displayed in carousels!
Record display customizations
संस्करण
This feature was first introduced in version 25.11 of Koha.
टिप्पणी
Only staff with the edit_additional_contents permission (or the superlibrarian permission) will have access to this tool.
Get there: More > Tools > Additional tools > Record display customizations
This tool allows you to make changes to the way records are displayed in the staff interface or in the OPAC using custom Template Toolkit code. With this tool, you can easily display custom additional fields in the detail view of a MARC record without having to make changes in an XSLT stylesheet.
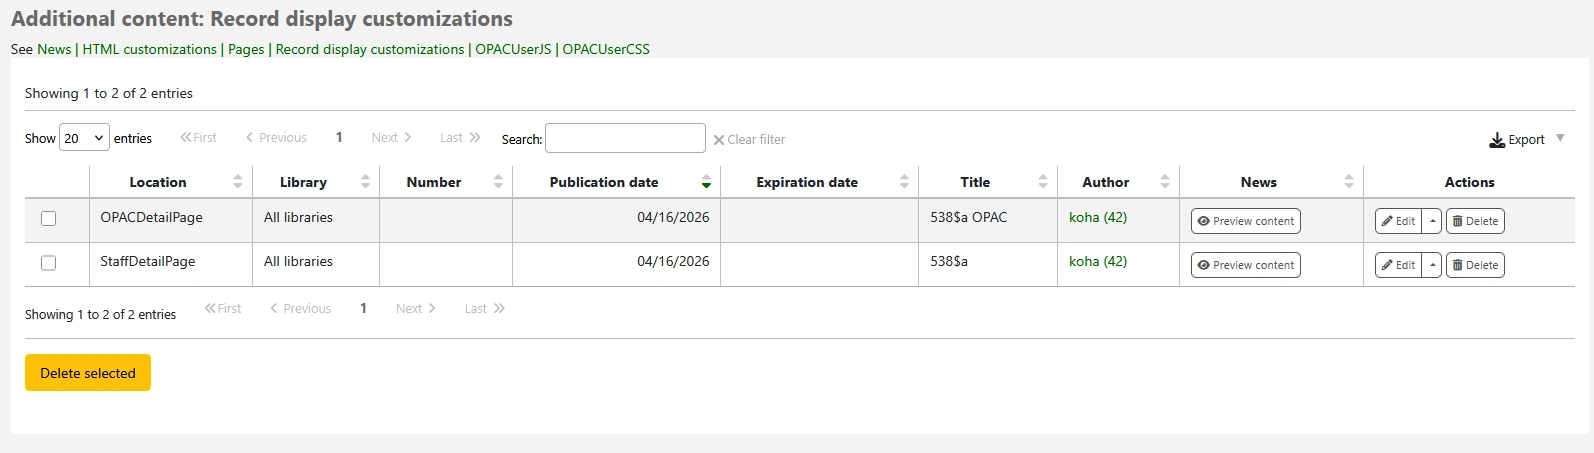
To add a new record display customization:
क्लिक करें 'नई एंट्री'
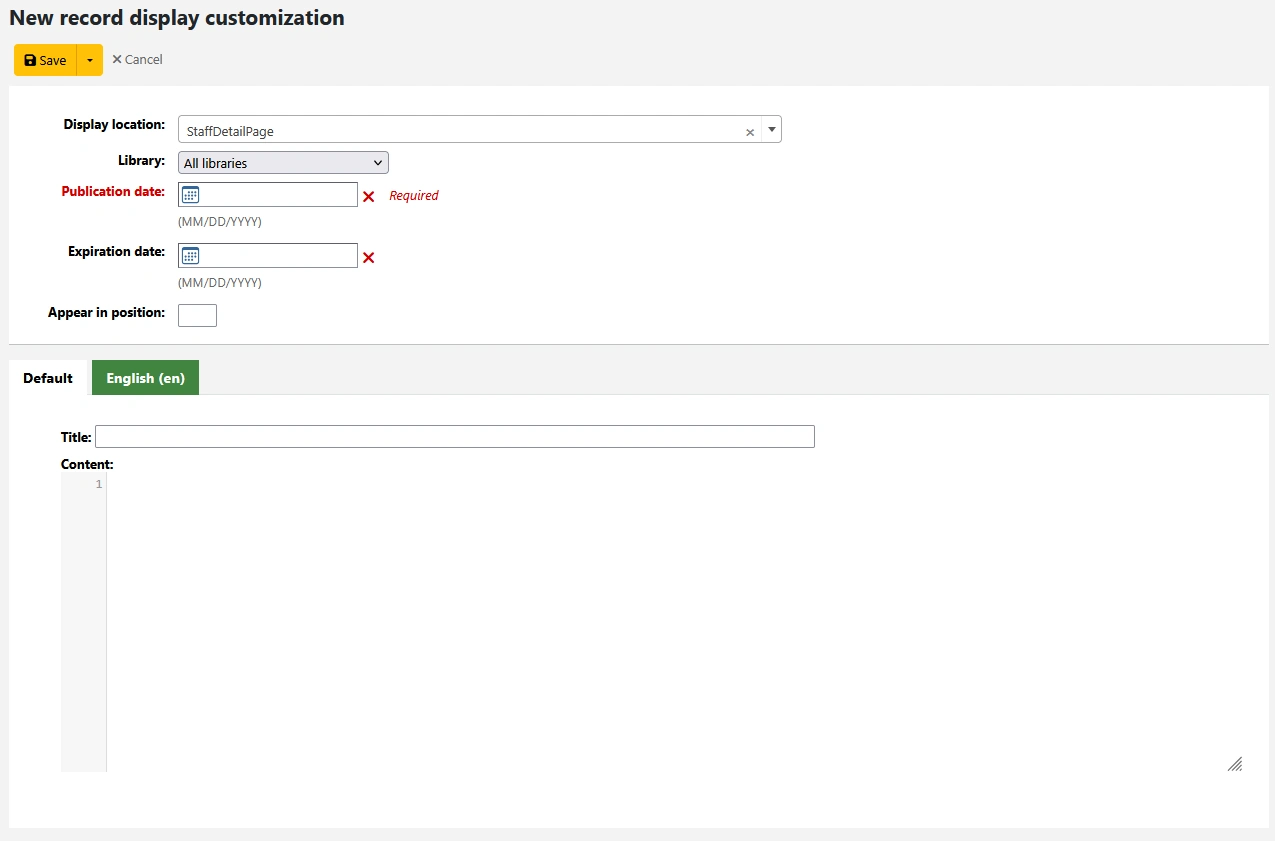
Display location: choose the page that you want the customization to be displayed on.
StaffDetailPage: the record customization will be displayed in the staff interface on the bibliographic record's detail page.
StaffListPage: the record customization will be displayed in the staff interface in lists of records.
StaffResultsPage: the record customization will be displayed in the staff interface in the results list of a search.
OPACDetailPage: the record customization will be displayed in the OPAC on the bibliographic record's detail page.
OPACListPage: the record customization will be displayed in the OPAC in both public and private lists of records.
Library: choose the library for which this record customization will be shown.
If a record customization for the staff interface is limited to a library, only staff logged into that library will see the customization.
If a record customization for the OPAC is limited to a library, only logged in OPAC users whose home library is the selected one will see the customization.
OPAC record customizations limited to a library will not be accessible to OPAC users who are not logged in unless your system administrator has configured an 'OPAC_BRANCH_DEFAULT' override in virtual host configuration.
Publication date: use the publication date field to control from which date the record customization should be shown, if it should only be shown at a future date.
If the publication date is set to today, before today or is left blank, the record customization will be shown immediately.
If the publication date is set in the future, the record customization will only be shown at that date or later.
Expiration date: use the expiration date field to remove the customization after a specific date.
If this field is empty, the record customization will be shown until you remove it manually.
Appear in position: this field is not currently in use.
Enter your title and content for the record customization.
सलाह
See the wiki page Record customizations with Template Toolkit for some record customization examples.
You can enter record customization contents separately for each language installed in Koha.
After filling in all of the fields, click 'Save' at the top of the page.
Alternatively, click the arrow next to the 'Save' button and choose 'Save and continue editing' if you need to stay on this page to continue editing the record customization.
टास्क शेड्यूलर
टिप्पणी
Only staff with the schedule_tasks permission (or the superlibrarian permission) will have access to this tool.
Get there: More > Tools > Additional tools > Task scheduler
कार्य अनुसूचक चलाने के लिए जब भी आप चाहते हैं रिपोर्टों अनुसूची करने के लिए एक रास्ता है।
किसी कार्य को शेड्यूल करने के लिए, कार्य शेड्यूलर पर जाएं और फ़ॉर्म भरें
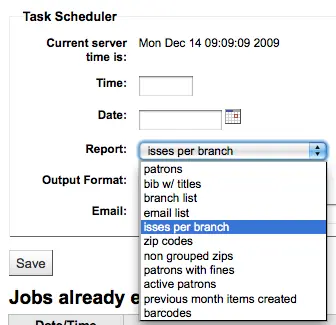
मौजूदा सर्वर समय अपने सर्वर पर समय से पता चलता (अनुसूची अपनी रिपोर्ट उस समय के आधार पर चलाने के लिए के सब - नहीं, अपने स्थानीय समय पर)
समय hh:mm के रूप में दर्ज किया जाना चाहिए: (2 अंकों घंटे, 2 अंकों मिनट)
दिनांक कैलेंडर पॉप अप का उपयोग कर दर्ज किया जाना चाहिए
रिपोर्ट से रिपोर्ट का चयन आप शेड्यूल करना चाहते हैं
चुनें परिणामों के पाठ या एक लिंक प्राप्त करने के लिए है कि क्या
ईमेल में दायर व्यक्ति आप अपनी रिपोर्ट प्राप्त करना चाहते हैं के ईमेल दर्ज
कार्य अनुसूचक फार्म के नीचे, वहाँ अनुसूचित रिपोर्ट की एक सूची है

You can also schedule reports directly from the list of saved reports by clicking the small arrow next to the 'Run' button and selecting the 'Schedule' option.
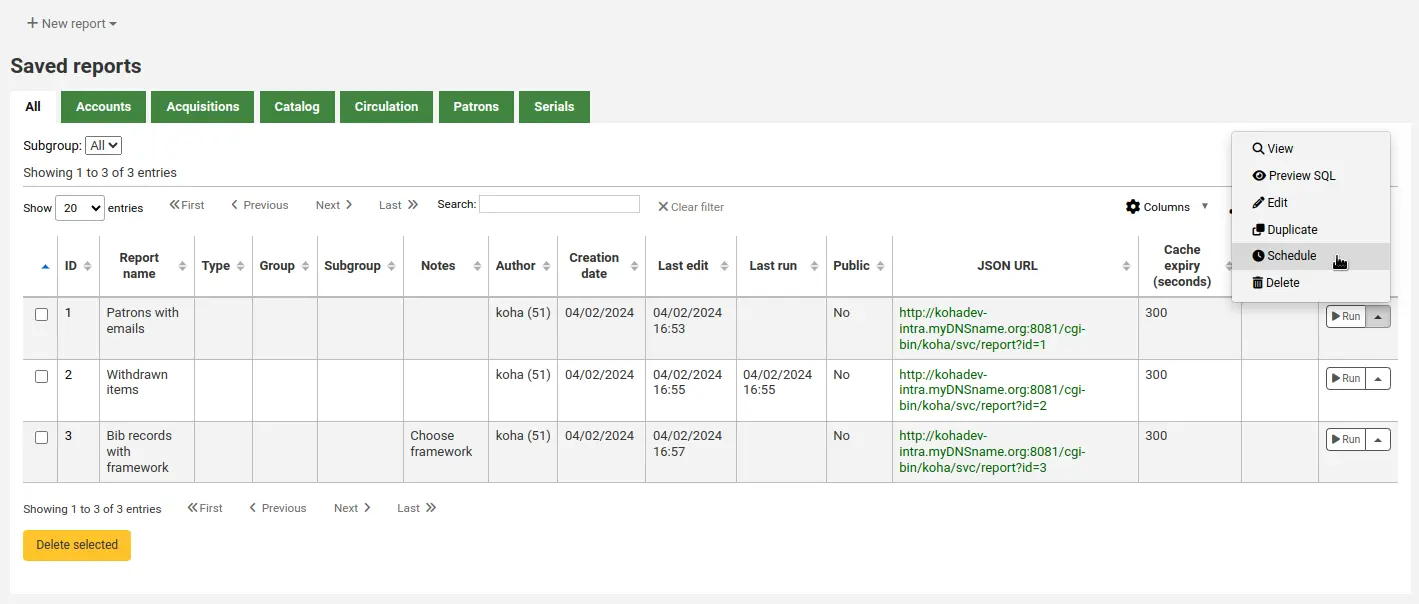
समस्या निवारण
यदि उपयोगकर्ता वेब सर्वर के रूप में चलाता है इसका इस्तेमाल करने की अनुमति नहीं है टास्क समयबद्धक काम नहीं करेगा। सही उपयोगकर्ता आवश्यक अनुमति है यदि पता लगाने के लिए, क्या उन यह कर रहे हैं देखने के लिए /etc/at.allow की जाँच करें। आप उस फ़ाइल नहीं है, तो जाँच आदि / at.deny। at.deny मौजूद है, लेकिन खाली है, तो हर उपयोगकर्ता इसका इस्तेमाल कर सकते हैं। सही जगह कार्य अनुसूचक काम करने के लिए उपयोगकर्ता जोड़ने के बारे में अपने सिस्टम व्यवस्थापक से बात करें।
Quote editor
टिप्पणी
Only staff with the edit_quotes permission (or the superlibrarian permission) will have access to this tool.
Get there: More > Tools > Additional Tools > Quote editor
यह उपकरण आपको ओपेक या स्टाफ इंटरफ़ेस पर दिखाने के लिए उद्धरण जोड़ने और संपादित करने की अनुमति देगा।
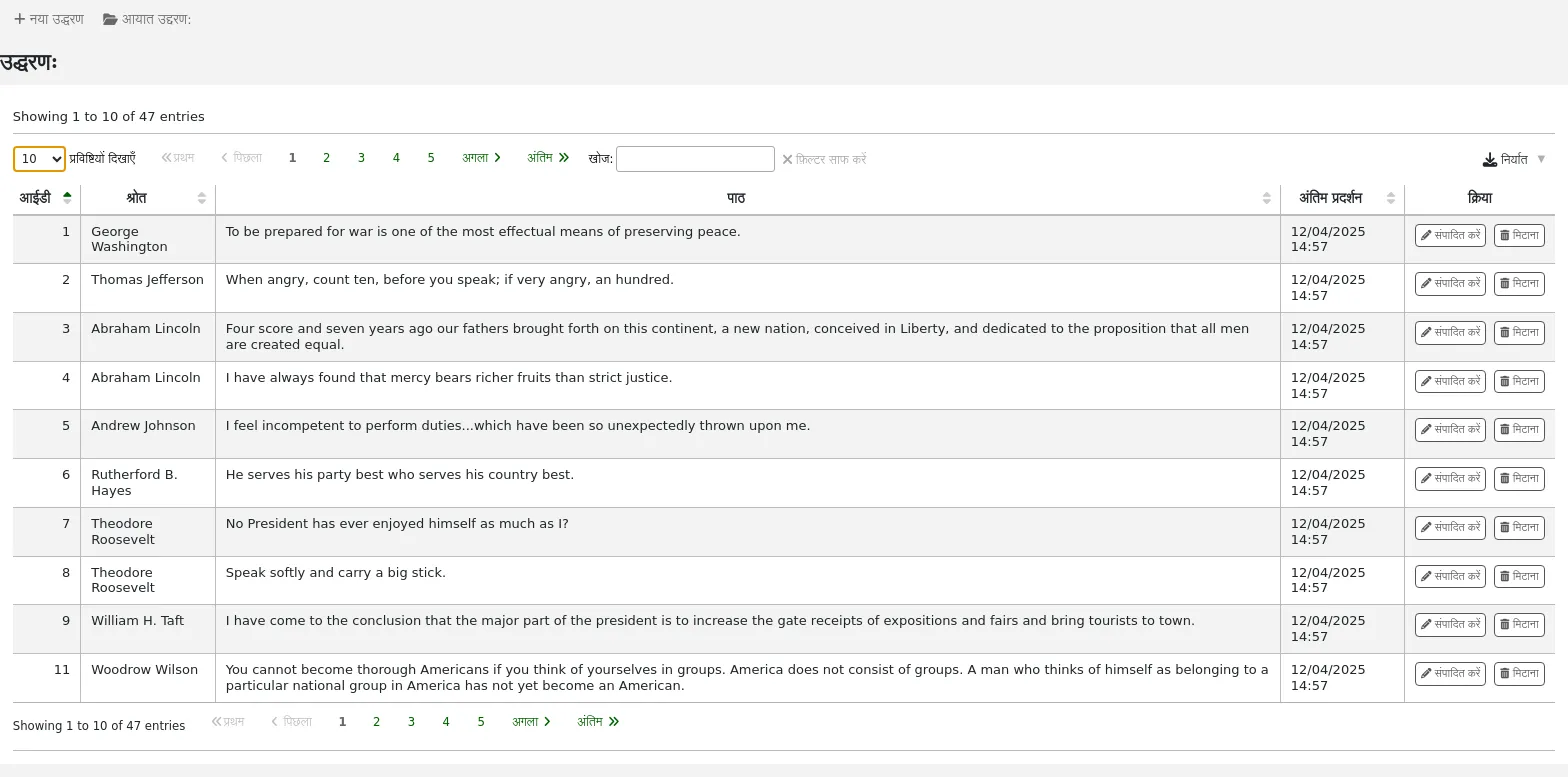
इस सुविधा को सेट QuoteOfTheDay सिस्टम वरीयता या तो 'OPAC', 'स्टाफ इंटरफ़ेस', या दोनों में बदलने के लिए, और इस टूल का उपयोग करके कम से कम एक उद्धरण जोड़ें।
In the OPAC, the quotes will appear above the 'OpacMainUserBlock' news block.
स्टाफ इंटरफ़ेस में, उद्धरण बाईं ओर की खबर के नीचे दिखाई देंगे।
Adding a quote
एक उद्धरण जोड़ने के लिए:
Click the 'New quote' button in the toolbar at the top of the page.
फॉर्म को भरें
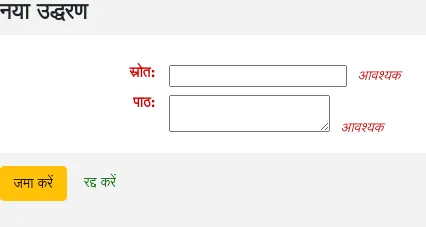
स्रोत: उद्धरण का स्रोत दर्ज करें, उदा. उद्धरण कहने वाले व्यक्ति का नाम
पाठ: उद्धरण का पाठ दर्ज करें
चेतावनी
दोनों 'स्रोत' और 'पाठ' के क्षेत्र आदेश नई बोली को सेव करने के लिए में भरा जाना चाहिए।
नई बोली को सहेजने के लिए 'सबमिट' पर क्लिक करें।
नया उद्धरण अब सूची में दिखाई देना चाहिए।
Importing quotes
आप सीएसवी फ़ाइल के रूप में उद्धरणों का एक बैच आयात कर सकते हैं। आपकी फ़ाइल में फ़ॉर्म में दो कॉलम होने चाहिए: "स्रोत", "टेक्स्ट" जिसमें कोई हेडर पंक्ति न हो।
टिप्पणी
आप 512KB से अधिक फाइल के अपलोड पुष्टि करने के लिए प्रेरित किया जाएगा।
To start the import process click the 'Import quotes' button at the top of the screen.
एक बार आयात उद्धरण स्क्रीन पर आप फ़ाइल आप आयात करना चाहते हैं के लिए अपने कंप्यूटर ब्राउज़ कर सकते हैं
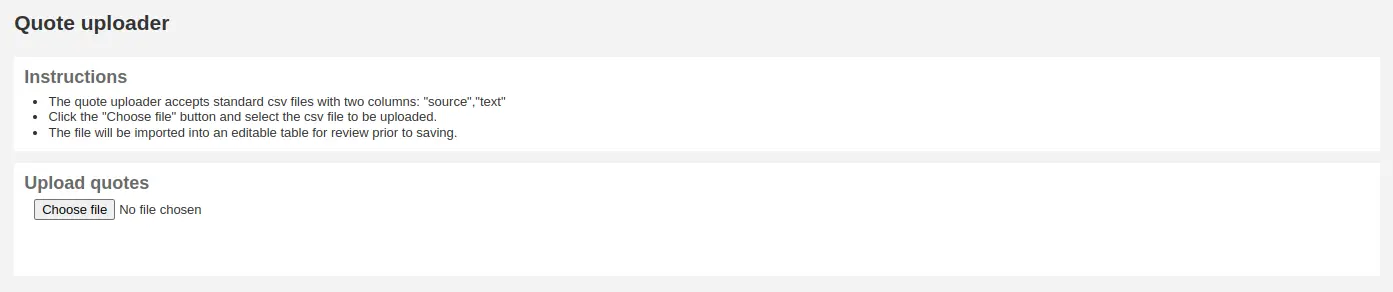
सीएसवी फ़ाइल चुनने के बाद, बटन 'ओपन' पर क्लिक करें और फाइल एक अस्थायी संपादन तालिका में अपलोड किया जाएगा।
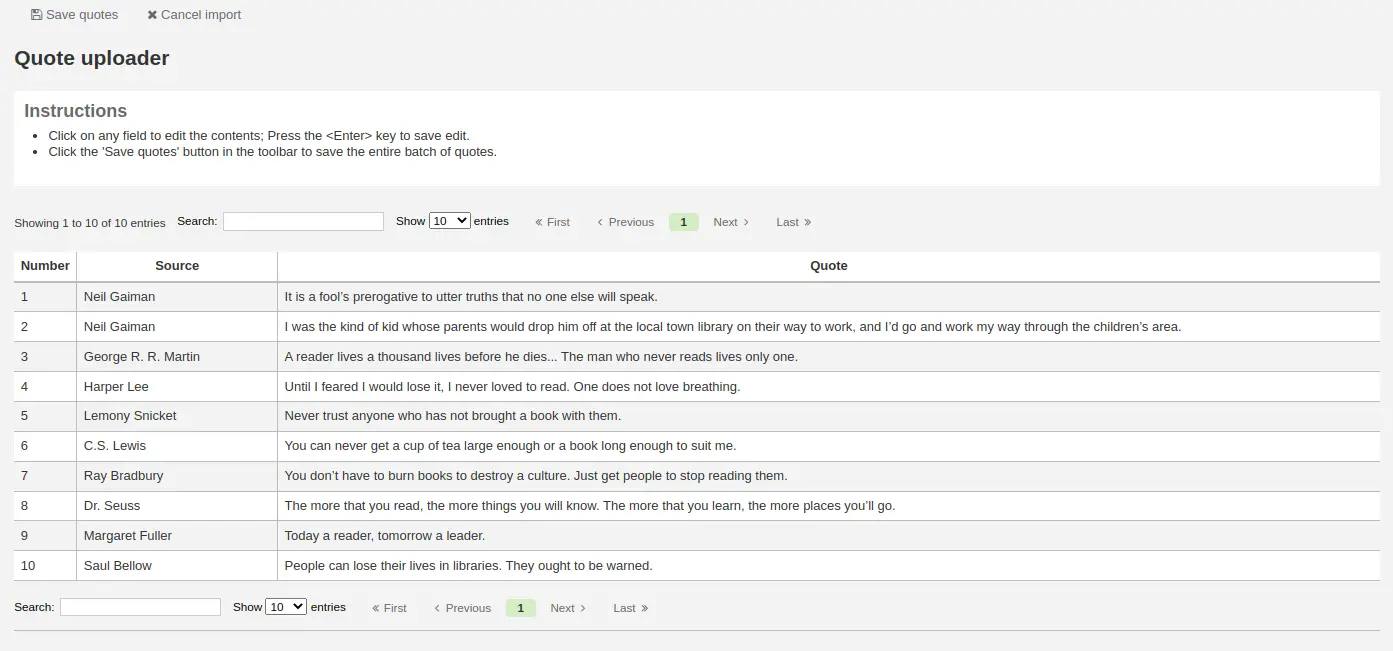
लिस्टिंग से आप वांछित फ़ील्ड पर क्लिक करके 'स्रोत' या 'टेक्स्ट' फ़ील्ड को संपादित कर सकते हैं। जब आप किसी फ़ील्ड को संपादित करना समाप्त कर लें, तो परिवर्तनों को सहेजने के लिए अपने कीबोर्ड पर <Enter> कुंजी दबाएं।

एक बार जब आप उद्धरण के साथ संतुष्ट हैं, शीर्ष पर उपकरण पट्टी में 'उद्धरण सहेजें' बटन पर क्लिक करें और उद्धरण बचाया जाएगा।
Editing a quote
किसी उद्धरण को संपादित करने के लिए, उद्धरण के दाईं ओर स्थित 'संपादित करें' बटन पर क्लिक करें।
या तो 'स्रोत' या 'टेक्स्ट' फ़ील्ड संपादित करें।
कोटेशन को सेव करने के लिए 'सबमिट' पर क्लिक करें।
Deleting a quote
किसी उद्धरण को हटाने के लिए, उद्धरण के दाईं ओर स्थित 'हटाएं' बटन पर क्लिक करें।
'डिलीट' पर क्लिक करके डिलीट की पुष्टि करें।
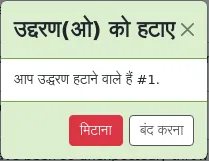
Tool plugins
This tool is used to view, manage and configure plugins used as tools.
This section will only be visible once you have uploaded tool-type plugins in the plugin administration page.
Get there: More > Tools > Additional Tools > Tool plugins
टिप्पणी
Only staff with the tool permission (or the superlibrarian permission) will be able to access tool plugins.
From this page, you will see only tool-type plugins.
See the managing plugins section of this manual to learn how to manage your tool-type plugins.
अपलोड करें
टिप्पणी
Only staff with the upload_general_files permission (or the superlibrarian permission) will have access to this tool.
Get there: More > Tools > Additional Tools > Upload
यह टूल आपको चयन के लिए अपने कोहा सिस्टम में फ़ाइलों को अपलोड करने की अनुमति देगा कैटलॉग फॉर्म.
फ़ाइल अपलोड करें
जब आप पहली बार अपलोड टूल पर जाते हैं तो आपको किसी श्रेणी को खोने के बारे में एक चेतावनी दिखाई दे सकती है।
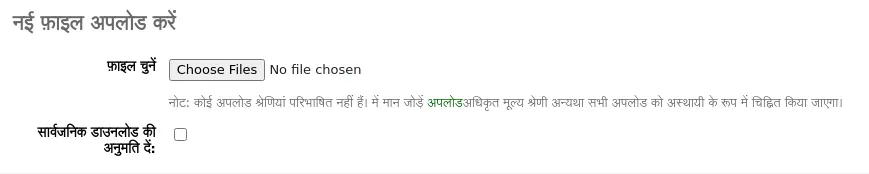
Categories are defined in the authorized value in the UPLOAD category. If you do not have upload categories then your files will be temporary and will be deleted the next time the server is rebooted. Once you have a value in the UPLOAD authorized value category you will see a Category pull down below the 'Browse' button.
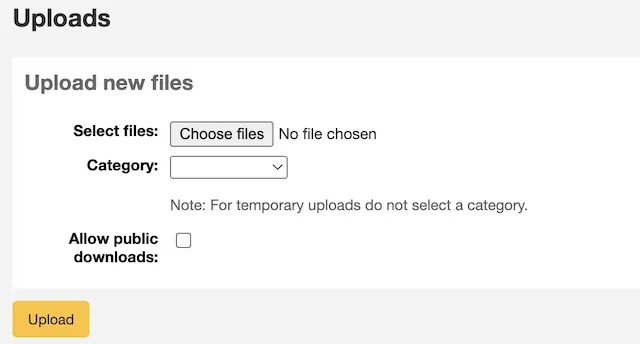
अपने कंप्यूटर को एक फाइल ब्राउज़ करें, एक श्रेणी चुनें और फैसला करें कि क्या जनता ओपीएसी के माध्यम से इस फाइल को डाउनलोड करने में सक्षम होगी। एक बार आपकी फ़ाइल अपलोड हो जाने के बाद आपको एक पुष्टिकरण प्रस्तुत किया जाएगा।

फाइल खोजें
सभी अपलोड की गई फाइल अपलोड फॉर्म के नीचे से खोजने योग्य हैं। फॉर्म का उपयोग करके आप फ़ाइल नाम और/या हैशवाल्यू के किसी भी भाग को खोज सकते हैं। अपलोड की गई फाइलों की खोज करें
आपको आपकी खोज के परिणामों के साथ प्रस्तुत किया जाएगा।

फ़ाइलों तक पहुंचें
टिप्पणी
Only staff with the access_files permission (or the superlibrarian permission) will have access to this tool.
Get there: More > Tools > Additional Tools > Access files
This option allows access to files stored on the server from the staff interface. The directories where the files are stored need to be defined in the koha-conf.xml file.
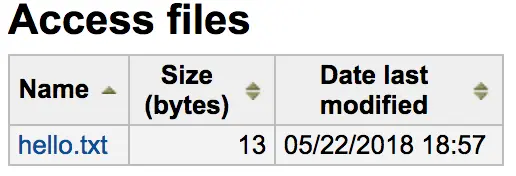
ओपेक समस्या रिपोर्ट
Get there: More > Tools > Additional tools > OPAC problem reports
इस उपकरण का उपयोग ओपेक के माध्यम से संरक्षक द्वारा भेजी गई समस्या रिपोर्ट का प्रबंधन करने के लिए किया जाता है।
टिप्पणी
This tool only appears if the OPACReportProblem system preference is enabled.
इस उपकरण से, आपको ओपेक पर संरक्षक द्वारा बताई गई सभी समस्याएं दिखाई देंगी।
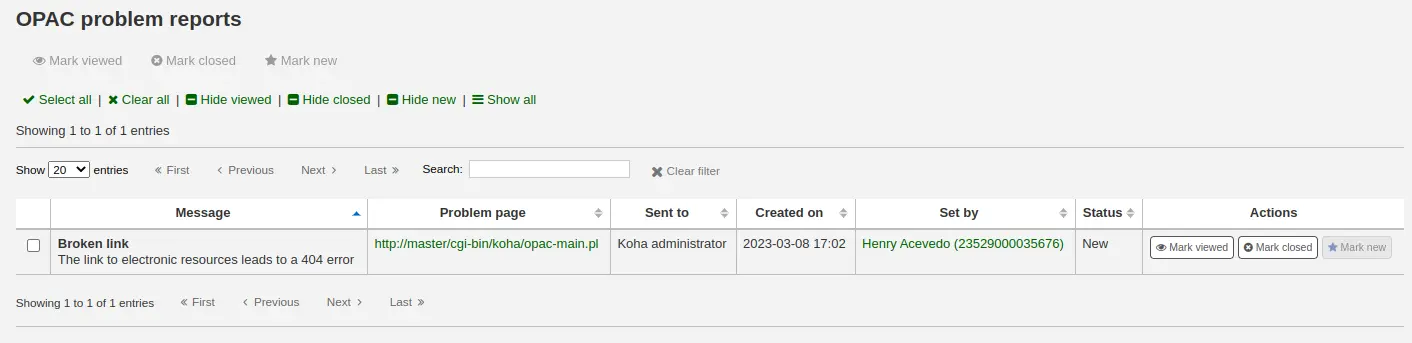
'क्रियाएँ' कॉलम से, आप कर सकते हैं
'मार्क देखा गया': इस समस्या रिपोर्ट को देखे जाने के रूप में चिह्नित करें, इससे समस्या रिपोर्ट की स्थिति 'दृश्य' में बदल जाएगी
'मार्क बंद': इस समस्या रिपोर्ट को बंद करें, इससे समस्या रिपोर्ट की स्थिति 'बंद' हो जाएगी
'नया निशान': इस समस्या को नए के रूप में चिह्नित करें (यानी देखा नहीं गया), इससे स्थिति 'नई' पर वापस आ जाएगी।
आप जिस समस्या रिपोर्ट को बदलना चाहते हैं, उसके बगल में स्थित बक्सों को चेक करके और पृष्ठ के शीर्ष पर स्थित बटन का उपयोग करके आप स्थिति को बैच सकते हैं।
नगदी प्रबंधन
कोहा में मौद्रिक लेनदेन और कार्यों से निपटने के लिए कई विकल्प शामिल हैं जो लेखापरीक्षा और विश्लेषणात्मक प्रक्रियाओं के लिए इन प्रक्रियाओं के ठीक दाने वाले ट्रैकिंग की अनुमति देते हैं।
नगदी रजिस्टर
कैश रजिस्टर का उपयोग आपकी लाइब्रेरी में किसी विशिष्ट स्थान पर लेनदेन को ट्रैक करने के लिए किया जा सकता है। यह उन विवरणों के लिए विशेष रूप से उपयोगी हो सकता है जहां भुगतान के लिए नकद लिया गया है और फिर जब बाद में इस नकदी को हटा दिया जाता है और बैंक में ले जाया जाता है।
सेटअप
कैश रजिस्टर के उपयोग को सक्षम करने के लिए, आपको UseCashRegisters सिस्टम वरीयता को चालू करना होगा।
फिर आप अपने पुस्तकालय के लिए कैश रजिस्टर को कैश रजिस्टर पृष्ठ से प्रशासन मॉड्यूल में कॉन्फ़िगर कर सकते हैं।
कैशअप
टिप्पणी
Only staff with the cashup permission (or the superlibrarian permission) will be able to perform cashups.
The action of 'cashing up' can be recorded against a cash register from both the library details and register details pages.
रिकॉर्ड कैशअप बटन पर क्लिक करने से बस उस दिनांक और समय को रिकॉर्ड किया जा सकेगा जो कार्रवाई की गई है और यह इरादा है कि जब कैश रजिस्टर से पैसे एकत्र किए जाएं और बैंक में ले जाए जाएं, तो नियमित रिकॉर्ड की अनुमति दें।
उपरोक्त दोनों पृष्ठ पिछले कैशअप के बाद से केवल प्रासंगिक जानकारी के लिए लेनदेन/सारांश के प्रदर्शन को सीमित करने के लिए कैशअप रिकॉर्ड का उपयोग करते हैं।
एक बार कैशअप हो जाने के बाद, रजिस्टर विवरण पृष्ठ पर अंतिम कैशअप तिथि के बगल में पाए गए 'सारांश' लिंक के माध्यम से, उस कैशअप अवधि के दौरान किए गए लेनदेन का सारांश प्रदर्शन, और मुद्रण के लिए उपलब्ध है।
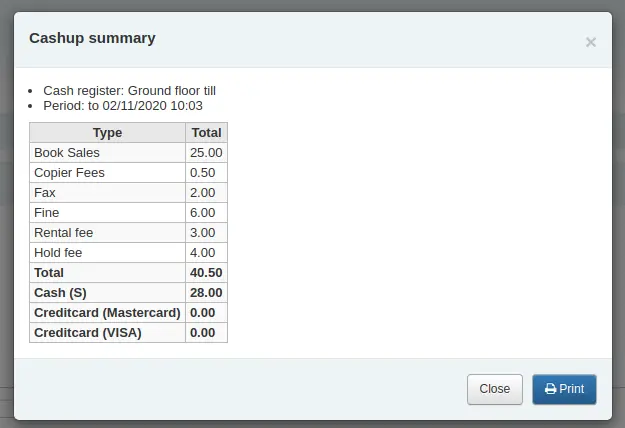
पुस्तकालय के लिए नकद सारांश
वहाँ जाओ: होम > टूल्स > लाइब्रेरी के लिए नकद सारांश
एक पुस्तकालय नकद रजिस्टर से जुड़े लेनदेन राशि का सारांश 'कैश सारांश फॉर लाइब्रेरी' पेज टूल के तहत पाया जा सकता है।
सारांश आपकी लॉग इन शाखा से जुड़े रजिस्टरों को सूचीबद्ध करेगा, साथ ही प्रत्येक रजिस्टर में कितना पैसा मिलना चाहिए, बैंक को लेने के लिए क्या उपलब्ध है और आय बनाम आउटगोइंग का टूटना।
Note: You can also access this page from the left hand menu available on the Point of sale page when that module is enabled.
रजिस्टर के लिए लेन-देन इतिहास
वहीं जाएं: होम > टूल्स > नकद प्रबंधन > रजिस्टर के लिए लेन-देन इतिहास
एक रजिस्टर पर होने वाले सभी लेनदेन की एक सूची पुस्तकालय विवरण पृष्ठ से नकद रजिस्टर नाम पर क्लिक करके उपलब्ध है।
यदि आपके पास सही अनुमति है, तो आप रसीदें फिर से प्रिंट कर सकते हैं, रिफंड और रिकॉर्ड जारी कर सकते हैं: इस पृष्ठ से कैशअप।
Note: You can also access this page from the left hand menu available on the Point of sale page when that module is enabled.
टिप्पणियाँ
टिप्पणी
Only staff with the moderate_comments permission (or the superlibrarian permission) will have access to this tool.
वहां जाएं: अधिक> उपकरण> संरक्षक और परिसंचरण> टिप्पणियां
ग्रंथ सूची रिकॉर्ड करने के लिए ओपेक के माध्यम से संरक्षक द्वारा जोड़ा सभी टिप्पणियों पुस्तकालय द्वारा संयम की आवश्यकता होती है। अगर कोई टिप्पणी मॉडरेशन का इंतजार कर रहे हैं कि वे मॉड्यूल सूची के नीचे के कर्मचारियों ग्राहक के मुख्य पृष्ठ पर सूचीबद्ध किया जाएगा:
और उपकरण पृष्ठ पर टिप्पणियाँ उपकरण के बगल में
टिप्पणियों को मॉडरेट करने के लिए मुख्य डैशबोर्ड पर अधिसूचना पर क्लिक करें या सीधे टिप्पणी टूल पर जाएं और मॉडरेशन की प्रतीक्षा कर रहे टिप्पणियों के दाईं ओर 'स्वीकृत करें या हटाएं' पर क्लिक करें।
उदार करने के लिए कोई टिप्पणी कर रहे हैं, तो आप एक संदेश है कि बस कह देखेंगे
तुम भी समीक्षा कर सकते हैं और स्वीकृति हटाने टिप्पणी आप 'स्वीकृत टिप्पणियां' टैब का चयन करके अतीत में मंजूरी दे दी है