Werkzeuge
Werkzeuge in Koha dienen einer bestimmten Funktion. Viele der Funktionen aus den Werkzeugen, werden in anderen Bibliothekssystemen bei Reports aufgelistet.
Pfad in Koha: Mehr > Werkzeuge
Benutzer*innen und Ausleihe
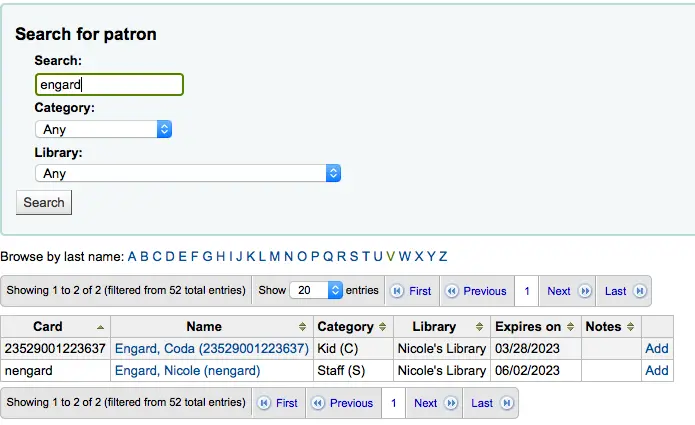
Benutzerlisten
Bemerkung
Nur Bibliothekspersonal mit der Berechtigung manage_patron_lists (oder der superlibrarian-Berechtigung) hat Zugriff auf dieses Werkzeug.
Pfad in Koha: Mehr > Werkzeuge > Benutzer und Ausleihe > Benutzerlisten
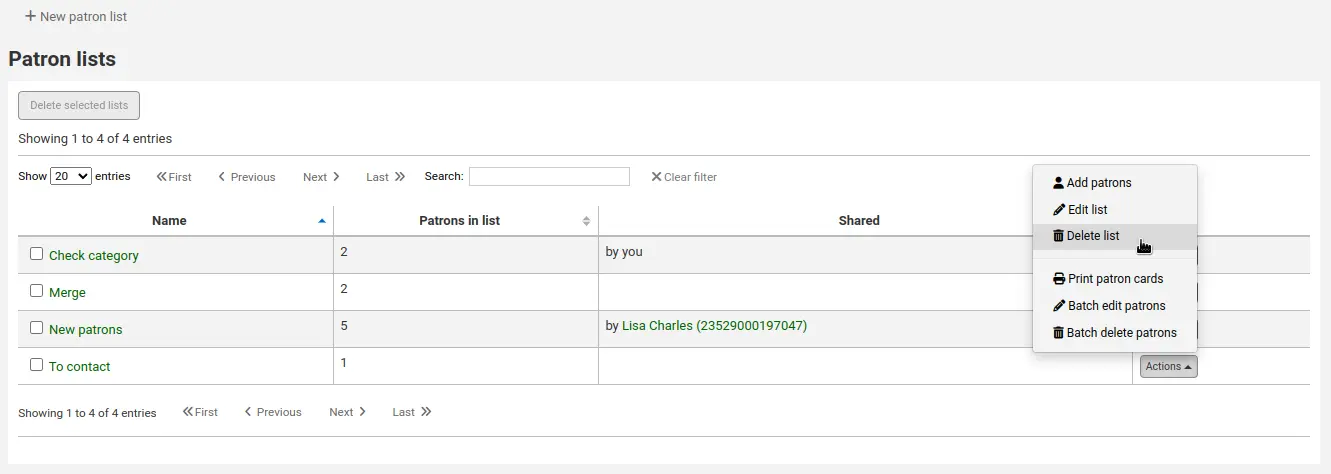
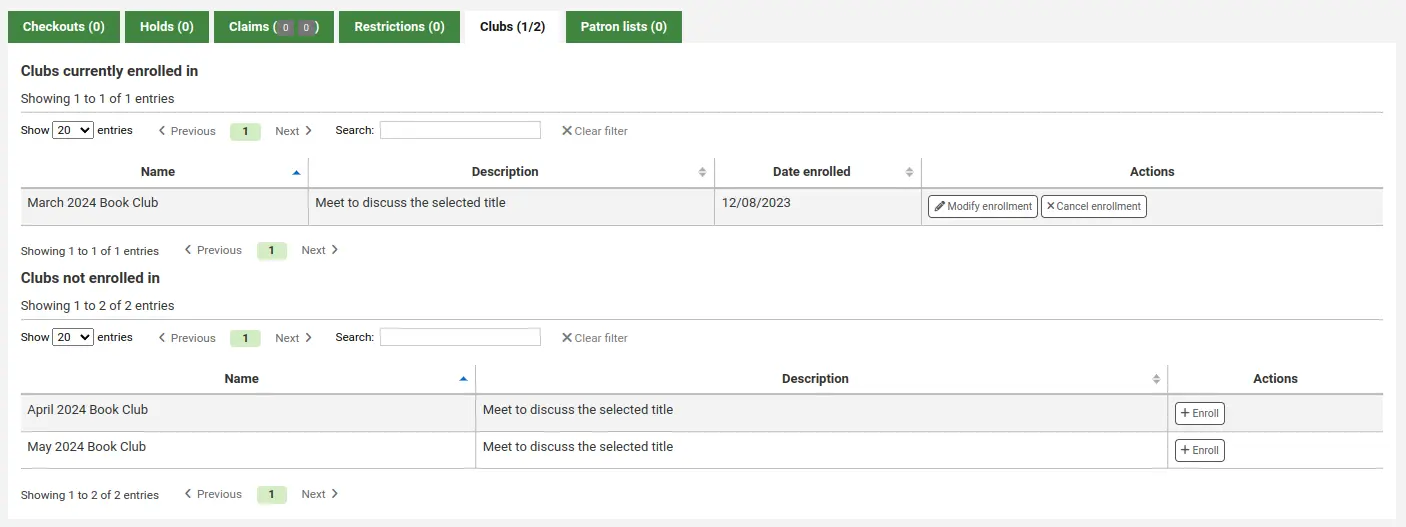
Benutzerlisten sind eine Möglichkeit, eine Gruppe von Benutzern für die Benutzerstapelbearbeitung, Benutzerstapellöschung, Verschmelzen von Benutzern, Benutzerausweisdruck oder für Reports zu speichern.
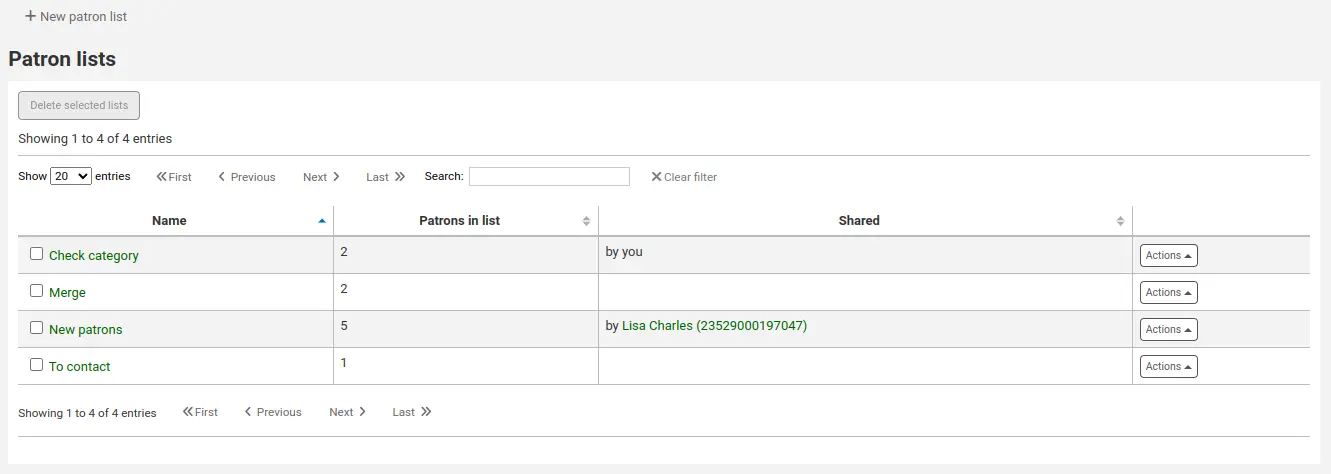
Über einen Klick auf die Schaltfläche „Neue Benutzerliste“ können Sie eine neue Benutzerliste anlegen.
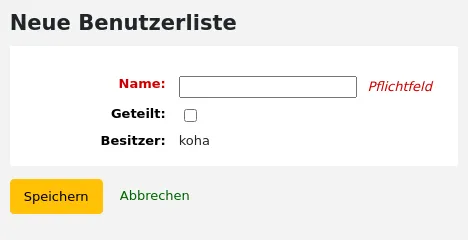
Name: Geben Sie einen Listennamen ein.
Wenn Sie die Checkbox „Geteilt“ anklicken, macht dies die Liste für alle Benutzer*innen mit der Berechtigung manage_patron_lists sichtbar.
Klicken Sie auf „Speichern“.
Jede Liste hat eine Schaltfläche ‚Aktionen‘, welche mehrere Optionen anbietet.
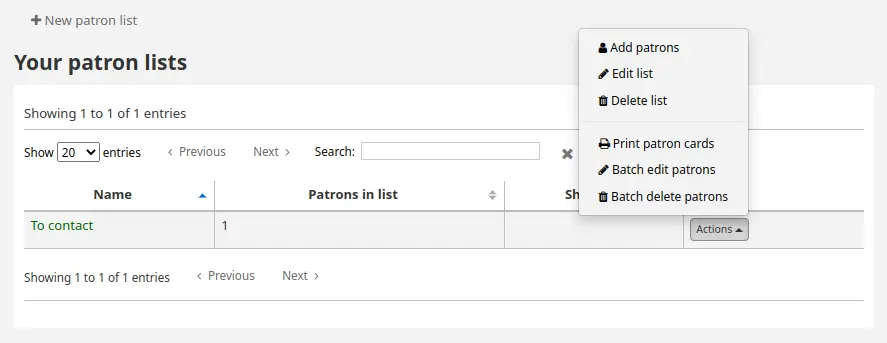
Benutzer*innen hinzufügen: Benutzer*innen zur Liste hinzufügen
Liste bearbeiten: den Listennamen anpassen oder den Status des Teilens
Liste löschen: die Liste löschen (aber nicht die Benutzer)
Benutzerkarten drucken: die Benutzer*innen in der Liste an den Benutzerausweisdruck senden
Stapelbearbeitung von Benutzern: schicken Sie die Benutzerinnen in der Liste an die Benutzerstapelbearbeitung
Stapellöschung von Benutzenden: die Benutzer*innen in der Liste an Benutzerstapellöschung senden
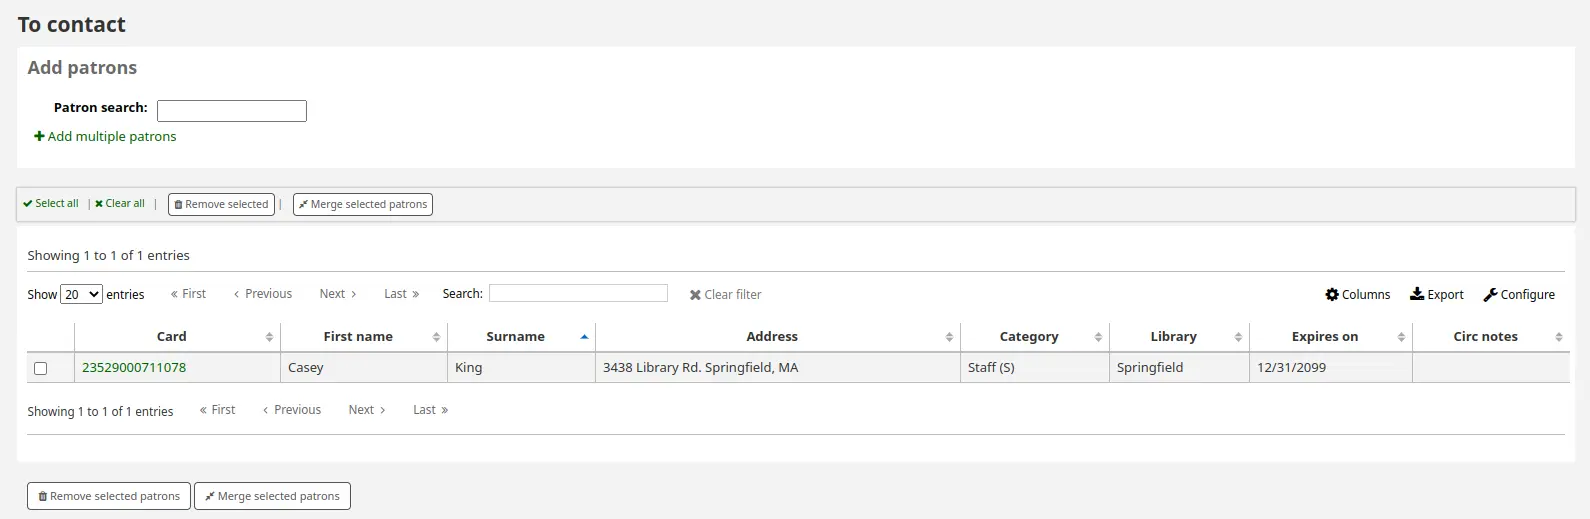
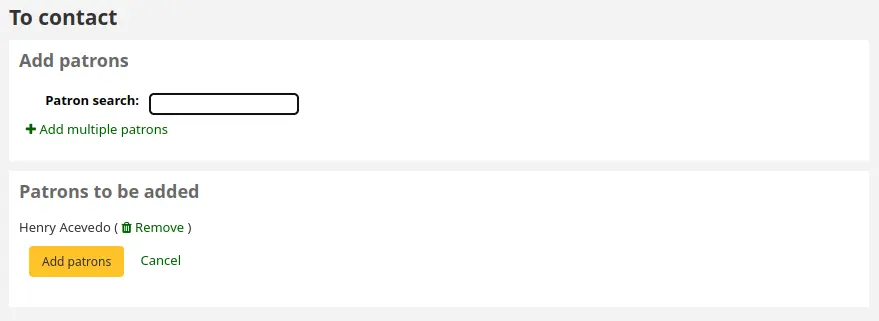
Klicken Sie auf „Benutzer hinzufügen“ im Menü „Aktionen“ oder klicken Sie auf den Listennamen, um Benutzer*innen zur Liste hinzuzufügen.
Geben Sie den Namen oder die Ausweisnummer des/der Benutzer*in in das Suchfeld ein und klicken Sie auf das richtige Ergebnis, um den/die Benutzer*in hinzuzufügen.
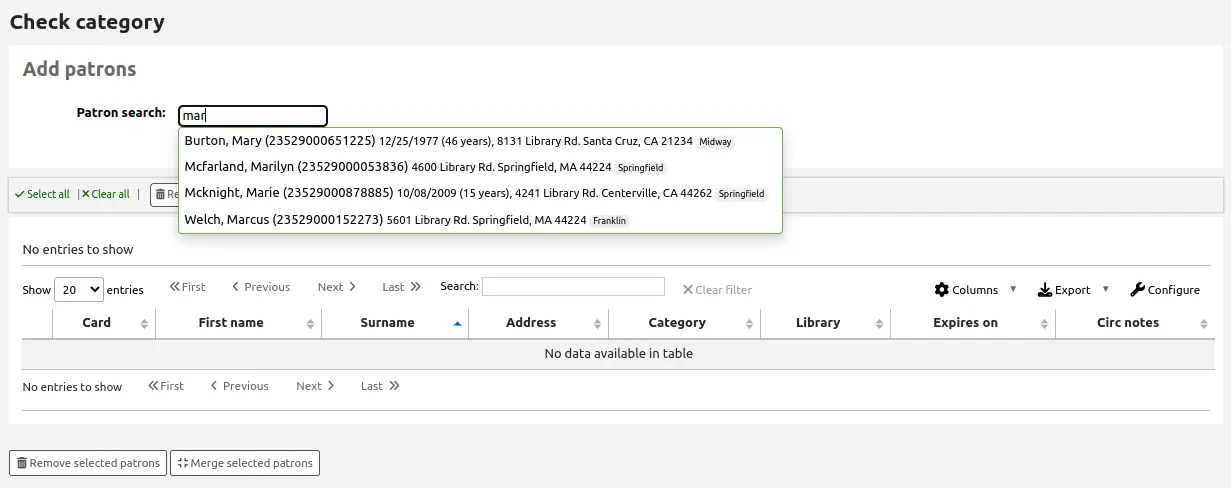
Wenn Sie alle Benutzer*innen gefunden haben, die Sie hinzufügen möchten, klicken Sie auf die Schaltfläche „Benutzer hinzufügen“, um sie in der Liste zu speichern.
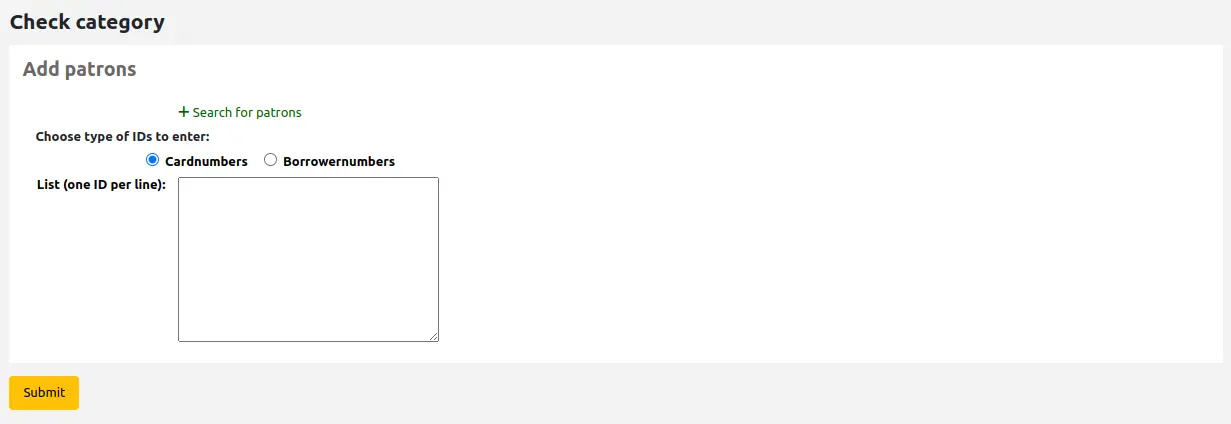
Alternativ können Sie auch auf den Link ‚Mehrere BenutzerInnen hinzufügen‘ klicken und die Ausweisnummern einscannen (oder eingeben). Klicken Sie dann auf die Schaltfläche „Bestätigen“, um die Liste zu speichern.
Es ist auch möglich, Benutzer*innen aus der Benutzersuche oder dem Reiter Benutzerlisten im Konto zu einer Liste hinzuzufügen.
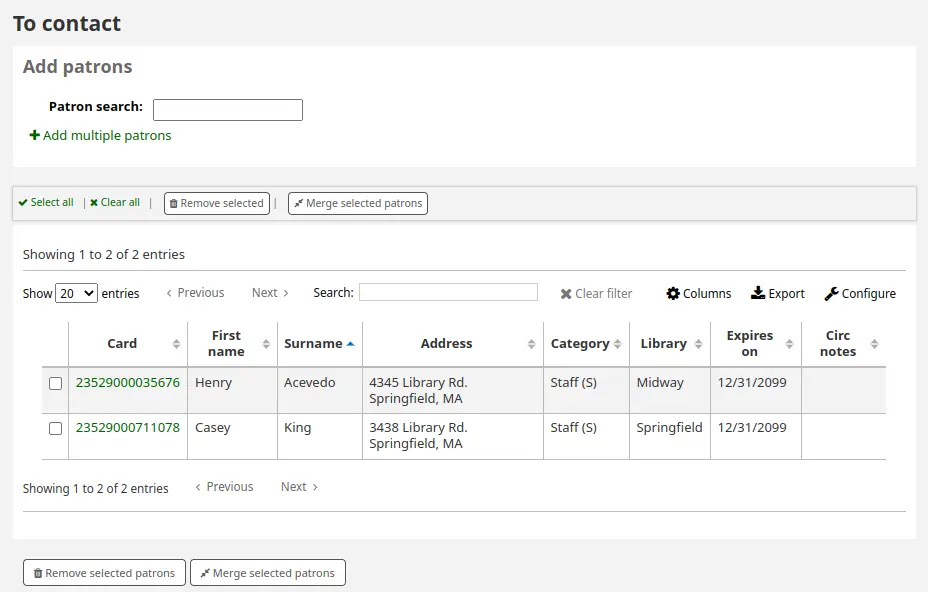
Die hinzugefügten BenutzerInnen werden in der Listentabelle angezeigt.
Bemerkung
You can customize the columns of this table in the Table settings section of the Administration module (table id: patron-list-table).
Um eine Liste zu löschen, klicken Sie auf die Schaltfläche „Aktionen“ und wählen Sie die Option „Liste löschen“.
Um mehrere Listen auf einmal zu löschen, wählen Sie die entsprechenden Listen aus und klicken Sie auf die Schaltfläche „Ausgewählte Listen löschen“ oben in der Tabelle.
Version
Die Option, mehrere Listen auf einmal zu löschen, wurde in Koha-Version 23.11 hinzugefügt.
Clubs
Pfad in Koha: Mehr > Werkzeuge > Benutzer und Ausleihe > Clubs
Hier können Clubs erstellt werden, in denen die Benutzer*innen eingeschrieben sind. Dies ist sinnvoll um Sommerleseprogramme ausfindig zu machen oder für Buchclubs.
Wichtig
Bibliothekspersonal benötigt die Berechtigung clubs oder untergeordnete Rechte um Clubs und Vorlagen bearbeiten und Benutzer*innen einschreiben zu können.
Ein neues Club Template erstellen
Bemerkung
Nur Bibliothekspersonal mit der Berechtigung edit_templates (oder der superlibrarian-Berechtigung) kann Club-Vorlagen erstellen oder bearbeiten.
Ein Club Template ist eine Vorlage zur Erstellung von Clubs. Sie können Felder hinzufügen, die ausgefüllt werden können, wenn ein neuer Club auf Grundlage des Templates erstellt wird oder wenn eine neue Anmeldung für einen bestimmten Club auf Grundlage des Templates erstellt wird.
Um ein neues Club Template zu erstellen:
Klicken Sie auf die Schaltfläche „Neues Club-Template“.
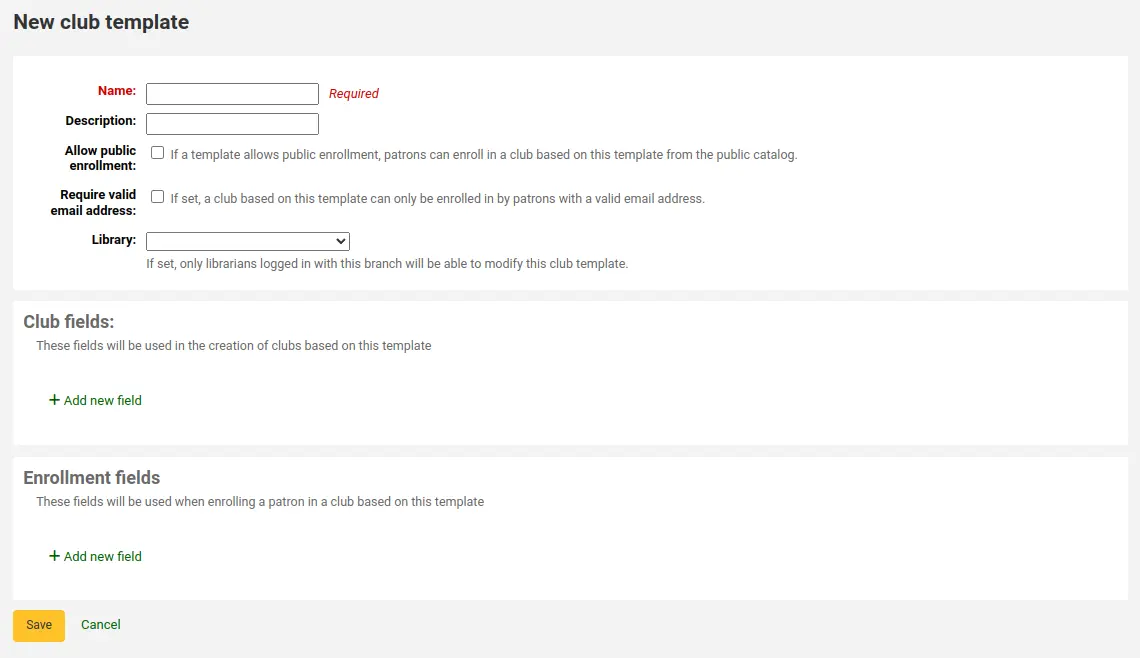
Füllen Sie das Formular aus:
Name (Pflichtfeld): Geben Sie einen Namen für das Club-Template ein, z. B. „Buchclub für Erwachsene“, „Kinderbuchclub“ oder „Sommerleseprogramm“. Denken Sie daran, dass diese Templates die Grundlage für jeden Club sind, den Sie erstellen.
Beschreibung: geben Sie zusätzliche Informationen ein.
Öffentliche Anmeldungen erlauben: ist die Checkbox markiert, können sich Benutzer*innen über den OPAC für einen Club anmelden, der auf diesem Template basiert.
Gültige E-Mail-Adresse verlangen: ist dieses Kästchen angehakt, können sich nur Teilnehmende mit einer gültigen E-Mail-Adresse anmelden. Sie benötigen also eine E-Mail-Adresse, um sich anzumelden.
Bibliothek: Wählen Sie eine Bibliothek, um die Nutzung dieses Templates auf Mitarbeitende einer bestimmten Bibliothek zu beschränken. Wenn Sie dieses Feld leer lassen, können Mitarbeitende aller Bibliotheken einen neuen Club mit diesem Template erstellen.
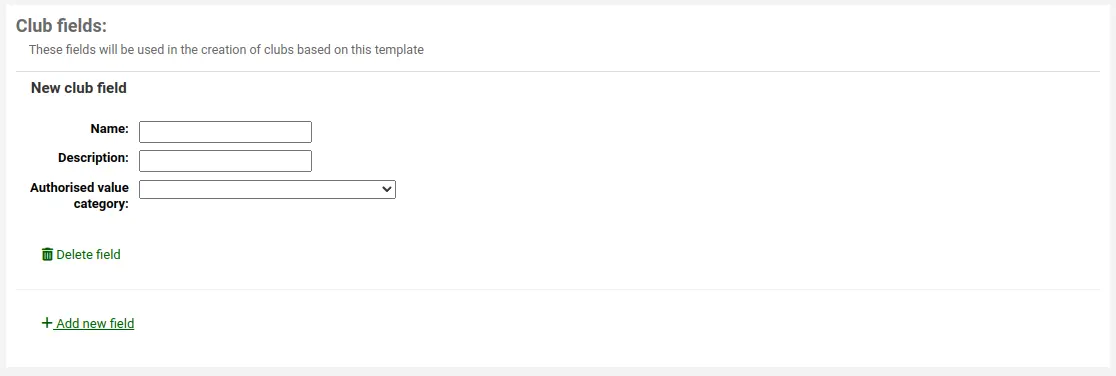
Club-Felder: Diese Felder werden verwendet, wenn ein Clubs auf Grundlage dieses Templates erstellt wird. Dies kann zum Beispiel der Name des Clubs, der Name des Animateurs, das Thema usw. sein. Um ein Club-Feld hinzuzufügen, klicken Sie auf „Neues Feld hinzufügen“.
Name: geben Sie den Text ein, der als Bezeichnung für das Feld verwendet werden soll.
Beschreibung: geben Sie zusätzliche Informationen zu diesem Feld ein.
Kategorie für normierte Werte: Wenn Sie möchten, dass das Feld ein Drop-down-Menü ist, wählren Sie hier eine Kategorie für normierte Werte. Wenn sie es leer lassen wird das Feld ein einfaches Textfeld sein.
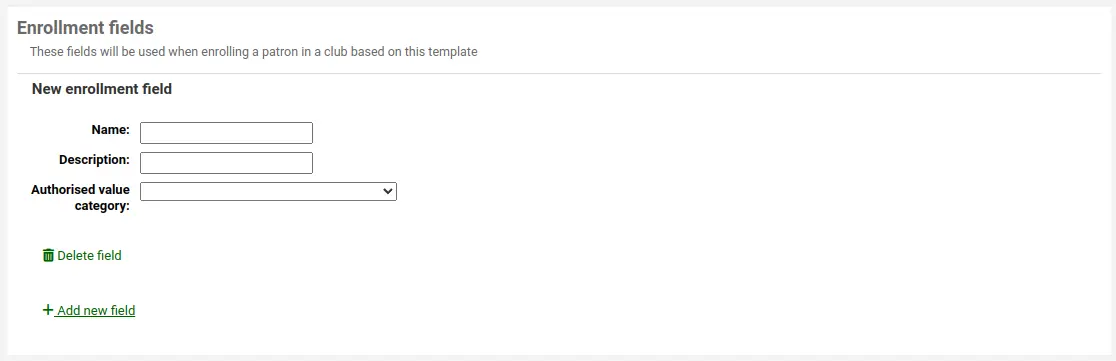
Anmeldefelder: Sie können zusätzliche Felder hinzufügen, die von Benutzer*innen ausgefüllt werden sollen, wenn sie sich bei einem Club anmelden, dem dieses Template zugrundeliegt. Um ein Anmeldefeld hinzuzufügen, klicken Sie auf „Neues Feld hinzufügen“.
Name: geben Sie den Text ein, der als Bezeichnung für das Feld verwendet werden soll.
Beschreibung: geben Sie zusätzliche Informationen zu diesem Feld ein.
Kategorie für normierte Werte: Wenn Sie möchten, dass das Feld ein Drop-down-Menü ist, wählren Sie hier eine Kategorie für normierte Werte. Wenn sie es leer lassen wird das Feld ein einfaches Textfeld sein.
Klicken Sie auf „Speichern“.
Ein neues Club Template erstellen
Bemerkung
Nur Bibliothekspersonal mit der Berechtigung edit_clubs (oder der superlibrarian-Berechtigung) kann Clubs erstellen oder bearbeiten.
Sobald die Templates erstellt wurden, können Sie Clubs erstellen.
Klicken Sie auf das Dropdown-Menü „Neuer Club“ und wählen Sie das gewünschte Template aus.

Füllen Sie das Formular mit den Informationen zum Club aus:
Name (Pflichtfeld): geben Sie den Namen des Clubs ein, den Sie erstellen. Diesen Namen sehen Mitarbeiter*innen und Benutzer*innen bei der Anmeldung. Zum Beispiel: „Sommerleseclub 2018“.
Beschreibung: geben Sie zusätzliche Informationen über den Club ein.
Startdatum: Wählen Sie das Startdatum des Anmeldezeitraums. Mitarbeiter*innen und Benutzer*innen können sich vor dem Startdatum nicht für den Club einschreiben.
Enddatum: geben Sie das Enddatum des Anmeldezeitraums an. Sobald der Club ausläuft, ist eine Anmeldung nicht mehr möglich.
Bibliothek: wenn dieser Club auf eine bestimmte Bibliothek beschränkt ist, wählen Sie diese hier aus. Nur Benutzer*innen dieser Bibliothek können sich anmelden. Wenn Sie das Feld leer lassen, können sich Benutzer*innen aus allen Bibliotheken anmelden.
Falls ‚Club fields‘ in the template, erscheinen diese am Ende des Formulars.
Klicken Sie auf „Speichern“.
Benutzer*innen über die Dienstoberfläche in Clubs anmelden
Bemerkung
Nur Bibliothekspersonal mit der Berechtigung enroll (oder der superlibrarian-Berechtigung) kann Benutzer*innen in den Club einschreiben.
Um eine*n Benutzer*in über die Dienstoberfläche bei einem Club anzumelden:
Rufen Sie das Konto des/der Benutzer*in auf.
Klicken Sie auf der Seite „Details“ oder „Ausleihe“ auf die Registerkarte „Clubs“. Alle aktuellen Clubs werden in dieser Registerkarte angezeigt.
Klicken Sie auf die Schaltfläche „Anmelden“.
Falls ‚Enrollment fields‘ in der Club-Vorlage vorhanden sind, erscheinen diese hier.
Klicken Sie auf „Anmeldung beenden“.
Sie können eine Einschreibung auch ändern, indem Sie auf die Schaltfläche „Einschreibung ändern“ klicken, oder eine Einschreibung stornieren, indem Sie auf die Schaltfläche „Einschreibung stornieren“ klicken.
Benutzer*innen im OPAC in Clubs anmelden
Erlauben Sie öffentliche Anmeldungen, so wird der Club im OPAC angezeigt.
Benutzer*innen müssen sich in ihrem Konto anmelden.
Im Bereich „Ihre Kontoübersicht“ können sie auf den Reiter „Clubs“ und auf die Schaltfläche „Einschreiben“ klicken, um sich anzumelden.
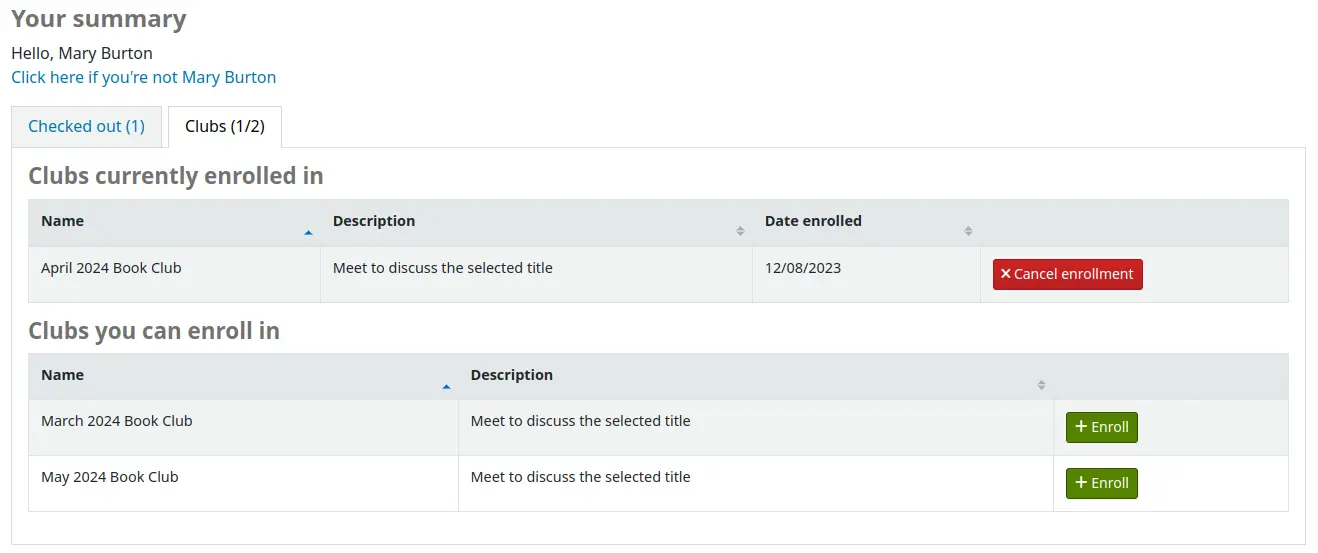
Falls ‚Enrollment fields‘ in der Club-Vorlage vorhanden sind, erscheinen diese hier.
Sie können dann auf „Einschreibung fertigstellen“ klicken.
Benutzer*innen können Anmeldungen auch stornieren, wenn Sie auf „Anmeldung stornieren“ klicken.
Anmeldungen ansehen
Sie können die Anmeldungen für jeden Club beobachten, indem Sie im Modul ‚Werkzeuge‘ auf die Seite der Clubs gehen und dort über die Schaltfläche ‚Aktionen‘ die Anmeldungen auswählen.
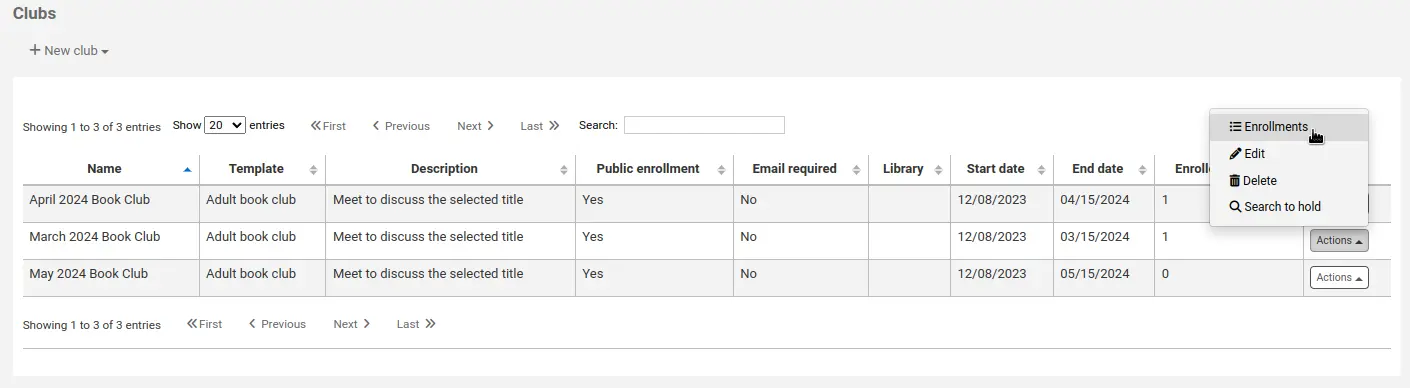
Auf dieser Seite sehen Sie die im Club eingeschriebenen Benutzer*innen sowie deren Antworten auf die Anmeldefelder.

Version
Die Werte der Einschreibefelder sind ab Koha-Version 23.11 auf dieser Seite sichtbar.
In früheren Versionen müssen Sie create an SQL report um die Werte zu erhalten. Siehe dieses Beispiel in der Koha-SQL-Reports-Bibliothek <https://wiki.koha-community.org/wiki/SQL_Reports_Patrons#Enrollment_Questions_Answers_for_All_Patrons_in_Club>`_.
Eine Vormerkung für einen Club eintragen
Sie können Vormerkungen für einen Benutzerclub eintragen. Vormerkungen werden für Club-Mitglieder in zufälliger Reihenfolge erstellt.
Um eine Vormerkung für einen Benutzerclub von der Club-Seite aus einzutragen:
Gehen Sie zu Werkzeuge > Clubs.
Klicken Sie auf die Schaltfläche „Aktionen“ für den Club und wählen Sie „Vormerkung suchen“ aus.

Suchen Sie nach einem Titel und wählen Sie den Datensatz aus.
Wählen Sie „Vormerkung für [CLUBNAME]“ entweder aus den Links im Datensatz,

oder von der „Vormerken“-Aktion in der Menüleiste.
Es wird die Vormerkseite angezeigt und eine Liste der Clubmitglieder.
Klicken Sie auf die Schaltfläche „Vormerken“.
Vormerkungen werden für alle Clubmitglieder gleichzeitig und in zufälliger Reihenfolge vorgenommen.
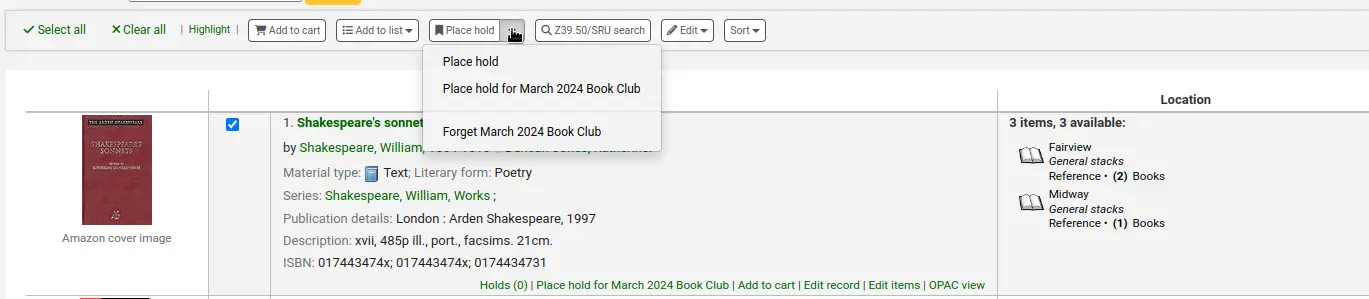
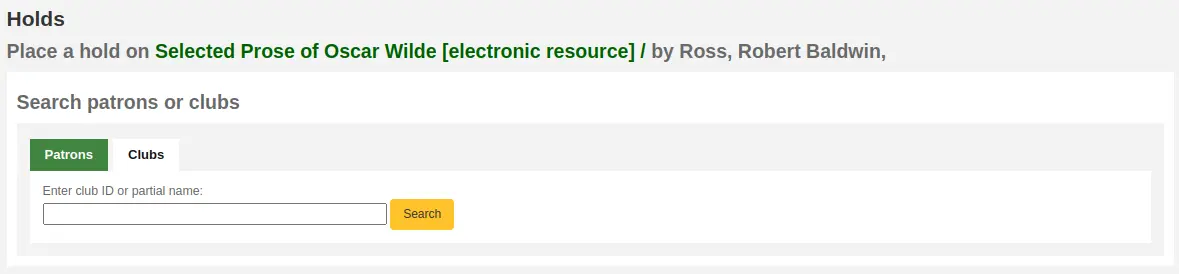
Sie können auch vom bibliographischen Datensatz aus eine Vormerkung für einen Club vornehmen. Wenn placing the hold, klicken Sie auf den Reiter „Clubs“ und suchen Sie nach dem Namen des Clubs. Drücken Sie dann die Schaltfläche „Vormerken“.
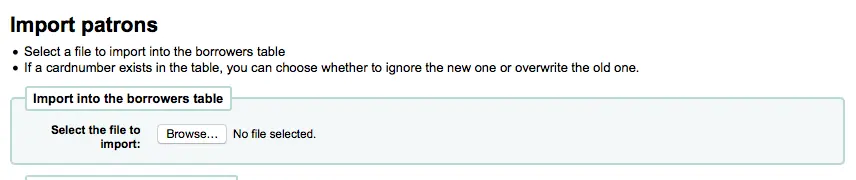
Benutzerdatenimport
Bemerkung
Nur Bibliothekspersonal mit der Berechtigung import_patrons (oder der superlibrarian-Berechtigung) hat Zugriff auf dieses Werkzeug.
Pfad in Koha: Mehr > Werkzeuge > Benutzer und Ausleihe > Benutzer importieren
Das Werkzeug für den Benutzerdatenimport kann jederzeit verwendet werden, um weitere Benutzer*innen hinzuzufügen. Es wird häufig in Hochschulen und Schulen eingesetzt, wenn ein neuer Jahrgang von Studenten oder Schüler*innen beginnt.
Benutzerimportdatei erstellen
Sie können eine leere CSV-Datei mit Kopfzeile von der Startseite des Benutzerimport-Werkzeugs herunterladen, welche Sie als Template für Ihren Benutzerimport verwenden können. Die Kopfzeile enthält alle Felder, die mit dem Werkzeug Benutzerimport verwendet werden können. Felder und Spalten, die Sie nicht benötigen, können gelöscht werden mit Ausnahme einiger Pflichtfelder. Beim Überschreiben vorhandener Datensätze ist es wichtig zu beachten, dass leere Spalten vorhandene Inhalten in diesen Feldern löschen. Daher ist es ggf. gut, alle leeren Spalten aus der .csv zu löschen, so dass keine vorhandenen Daten gelöscht werden.
Wichtig
Die Felder ‚Ausweisnummer‘, ‚Nachname‘ und alle Felder, die Sie im Systemparameter BorrowerMandatoryField konfiguriert haben sind Pflichtfelder und müssen mit der Konfiguration in Ihrer Datenbank übereinstimmen.
Wichtig
Das Passwort sollte im Klartext importiert werden und wird beim Import mit Bcrypt hash verschlüsselt.
Sprechen Sie mit Ihrem Systemadministrator über mögliche Optionen, wenn Ihre Passwörter bereits verschlüsselt vorliegen
Wichtig
Das Datumsformat sollte mit dem gewählten Format im Systemparameter DateFormat übereinstimmen und darf keine Leerzeichen enthalten, zum Beispiel ‚01/02/2008‘. Alternativ können Sie das Datum auch im ISO-Format (‚2008-12-01‘) darstellen.
Wichtig
Wenn Ihre Daten Sonderzeichen oder diakritische Zeichen enthalten können, dann stellen Sie sicher, dass die Datei in UTF-8 codiert ist, damit diese korrekt importiert werden.
Hinweis
Beim Laden von Benutzerattributen sollte das Feld Benutzerattribute ‚patron_attributes‘ eine komma-getrennte Liste von Attributtypen und Werten enthalten.
Der Benutzerattributcode und ein Doppelpunkt sollten jedem Wert vorangestellt werden.
Zum Beispiel: „INSTID:12345,BASEBALL:Cubs“
Anführungszeichen sind notwendig, wenn mehrere Werte definiert werden.
Werte mit Leerzeichen müssen in Anführungszeichen gesetzt werden:
„INSTID:12345,BASEBALL:Cubs,““BASEBALL:White Sox““
Hinweis
Es ist möglich Beschränkungen einzurichten, wenn man das Werkzeug Benutzerimport benutzt. Wenn das Ablaufdatum und der Kommentar der Sperre mit einer bestehenden Sperre übereinstimmen, wird die Sperre in der Importdatei übersprungen. So kann ein Benutzerdatenimport mehrfach durchgeführt werden, ohne dass doppelte Sperren angelegt werden. Stimmt allerdings eines der Kriterien nicht überein, wird eine neue Sperre hinzugefügt.
Benutzer*innen importieren
Wenn Sie Ihre Datei erstellt haben, können Sie die Daten über das Werkzeug für den Benutzerdatenimport nach Koha importieren.
Wählen Sie Ihre CSV-Datei aus
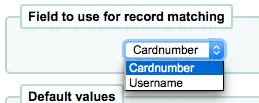
Choose to match on ‚card number‘ or ‚username‘ to prevent adding of duplicate card numbers to the system. Additional matchpoints can be set up using patron attributes marked as unique.
Als nächstes können Sie Standardwerte festlegen, die in allen importierten Benutzerdatensätzen eingetragen werden
Wenn Sie zum Beispiel Benutzer*innen für eine Bibliothek importieren, können Sie das Feld ‚branchcode‘ verwenden, um den korrekten Standort für alle importierten Benutzer*innen zu setzen.
Sie müssen entscheiden, welche Aktion Sie durchführen möchten, wenn ein passender Datensatz in der Datenbank gefunden wird.
Vorhandene Datensätze werden anhand des Feldes, das zum Abgleich angegeben wurde, gefunden, um Dubletten zu vermeiden

Wenn Sie in Ihrer Installation Benutzerattribute verwalten, können Sie beim Import auswählen, wie diese behandelt werden sollen. Sie können entweder entscheiden alle Benutzerattribute zu überschreiben, oder nur die mit Ihrer Importdatei gelieferten Attribute. Dies lässt andere Benutzerattribute unberührt.

Benachrichtigungen und Quittungen
Bemerkung
Nur Bibliothekspersonal mit der Berechtigung edit_notices (oder der superlibrarian-Berechtigung) hat Zugriff auf dieses Werkzeug.
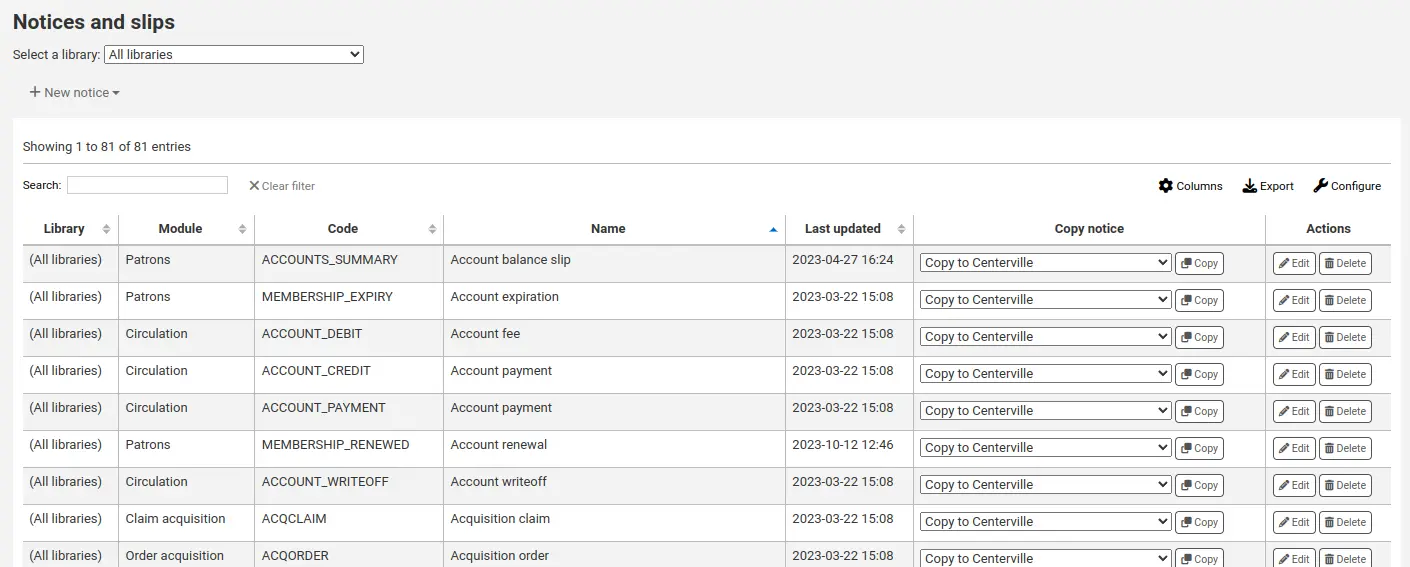
Get there: More > Tools > Patrons and circulation > Notices and slips
All notices and circulation receipts (or slips) generated by Koha can be customized using the Notices and slips tool. The system comes with several predefined templates that will appear when you first visit this tool.
Bemerkung
You can customize the columns of this table in the Table settings section of the Administration module (table id: lettert).
Jede Benachrichtigung kann bearbeitet, aber nur einige wenige können endgültig gelöscht werden. Damit werden Fehler vermieden beim Versuch des Systems, eine Benachrichtigung ohne hinterlegtes Template zu generieren. Jede Benachrichtigung kann für jede Bibliothek bearbeitet werden. Standardmässig werden alle Benachrichtigungen für alle Bibliotheken angezeigt.
Sie können das Erscheinungsbild aller Quittungen global ändern, indem Sie im Systemparameter SlipCSS ein Stylesheet angeben. Dasselbe gilt für Benachrichtigungen, indem Sie im Systemparameter NoticeCSS ein Stylesheet definieren.
Sie können auch die Seite des Wiki Customising notices and slips prüfen, um weitere Informationen zu erhalten, wie diese Benachrichtigungen konfiguriert werden können.
Benachrichtigungen und Quittungen anlegen
Eine neue Benachrichtigung oder Quittung erstellen
‚Neue Benachrichtigung‘ anklicken
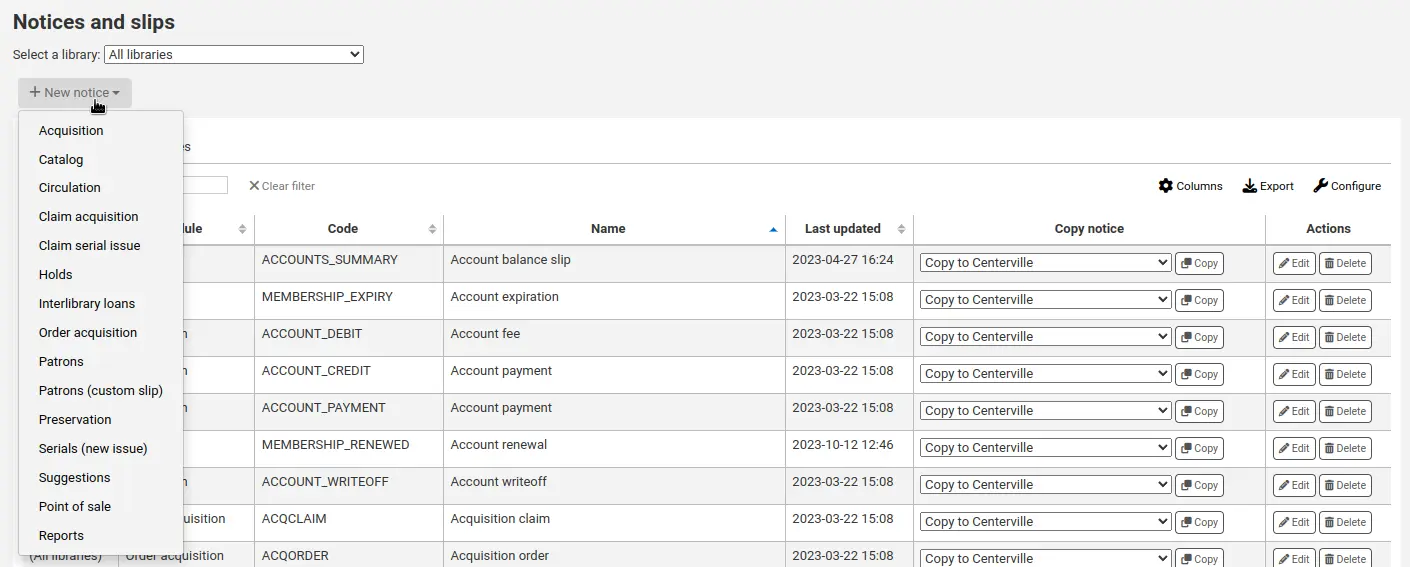
Wählen Sie die Art der Benachrichtigung oder das Modul, auf das sich diese Benachrichtigung bezieht
Erwerbung: Benachrichtigung zur Nutzung im Erwerbungsmodul
Bookings: notice to be used in the bookings process
Version
This type of notice was first introduced in version 24.11 of Koha.
Katalog: Benachrichtigung zu Verwendung im Katalog
Ausleihe: Benachrichtigung oder Quittung für die Ausleihe (z. B. Mahnbescheide)
Erwerbungsreklamation: Benachrichtigung für claiming late orders im acquisitions module
Zeitschriftenreklamation: Benachrichtigung für claiming late serial issues im serials module
Holds: notice or slip to be used in the holds process
Fernleihen: Benachrichtigung für ILL request process
Listen: Benachrichitgung für die Verwendung mit Listen
Version
This type of notice was added to Koha in version 24.11.
Previously, notices related to lists were categorized under Patrons.
Bestellung Erwerbung: Benachrichtigung für ordering acquisitions
Benutzende: Benachrichtigung oder Quittung, die in Benutzerkonten genutzt werden
Benutzer (benutzerdefinierte Quittung): Quittung für patron accounts
Version
Diese Art von Benachrichtigung wurde in Koha-Version 23.11 hinzugefügt.
Benutzer (benutzerdefinierte Nachricht): Benachrichtigung, die verwendet wird, wenn eine benutzerdefinierte E-Mail an eine*n Benutzer*in gesendet wird.
Version
Diese Art von Benachrichtigung wurde in Koha-Version 24.05 hinzugefügt.
Bewahrung: Nachricht oder Quittung für preservation process
Version
Diese Art von Benachrichtigung wurde in Koha-Version 23.11 hinzugefügt.
Zeitschriften (neues Heft): Benachrichtigung von Benutzern über die Bereitstellung eines neuen Zeitschriftenhefts
Vorschläge: Benachrichtigung, die im Workflow für Anschaffungsvorschläge verwendet wird
Verkauf: Nachricht oder Quittung für point of sale module
Reports: Benachrichtigung zu Format custom report results
Version
Diese Art von Benachrichtigung wurde in Koha-Version 23.11 hinzugefügt.
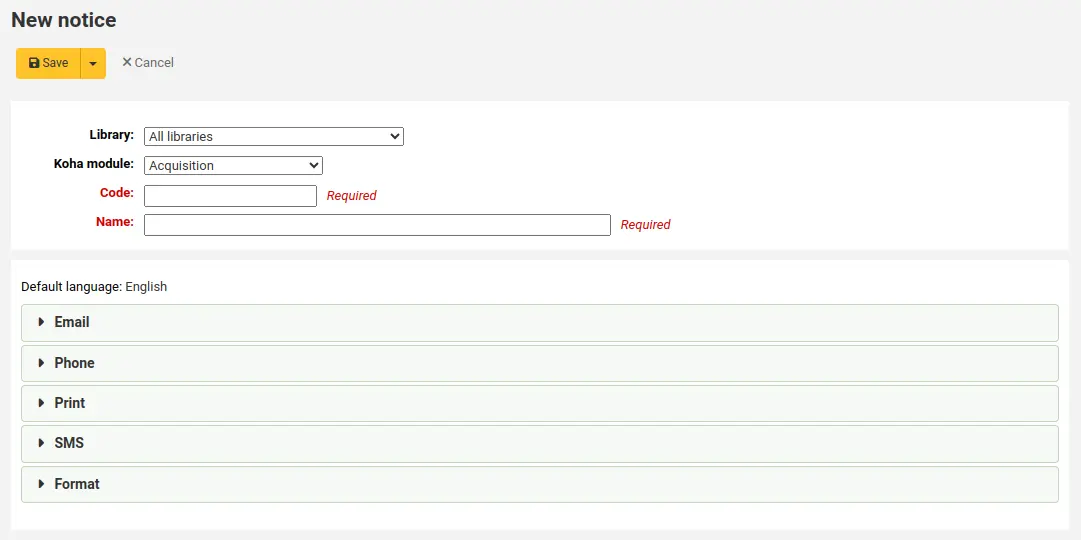
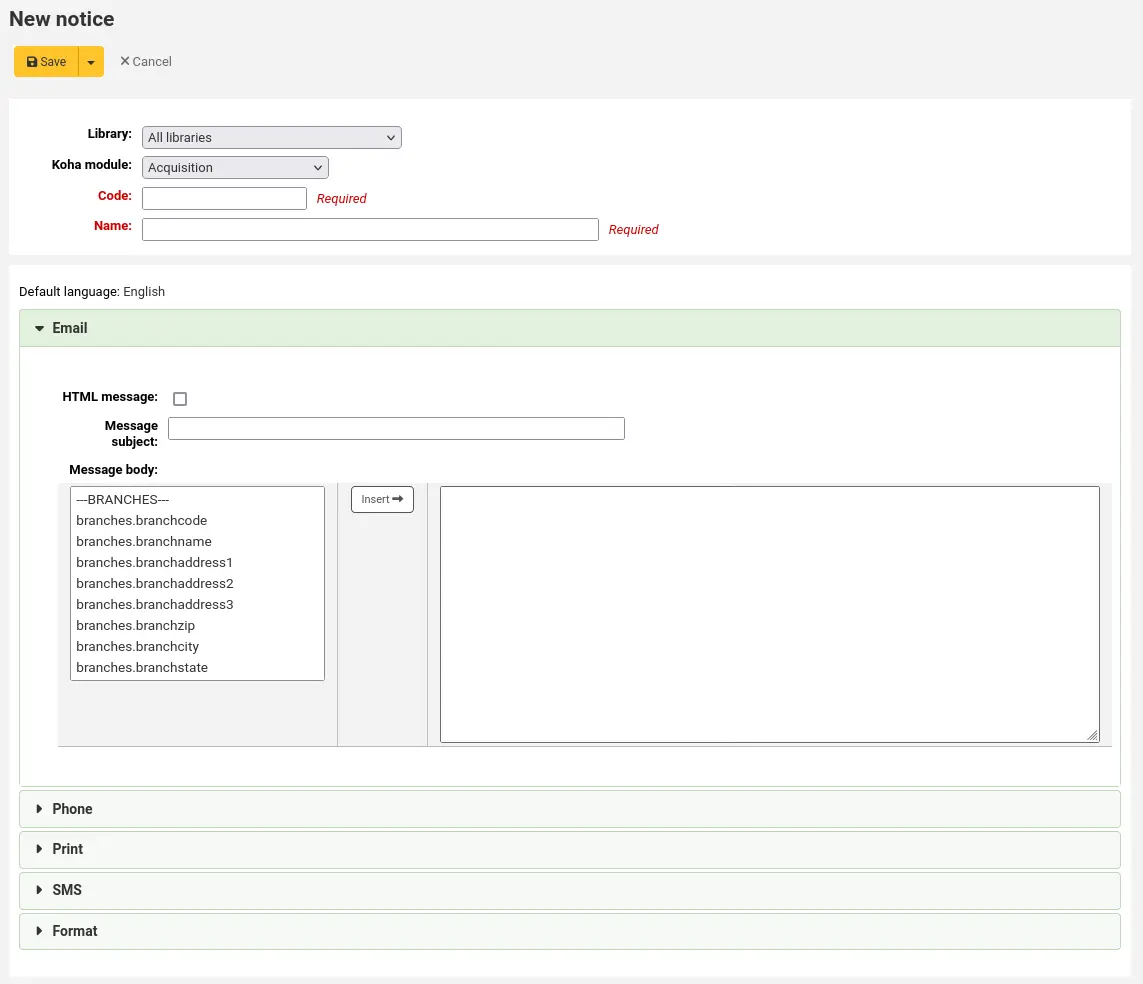
Füllen Sie die Benachrichtigungsinformationen aus
Bibliothek: Wählen Sie, für welche Bibliothek diese Benachrichtigung oder Quittung ist.
Wichtig
Nicht alle Benachrichtigungen können bibliotheksspezifisch sein. Weitere Informationen finden Sie unter Anpassen von Benachrichtigungen und Quittungen wiki page.
Koha-Modul: Wenn Sie zuvor nicht das richtige Modul oder die richtige Art der Benachrichtigung gewählt haben, können Sie dies hier ändern.
Code: Geben Sie einen einmaligen alphanumerischen Code für diese Benachrichtigung ein.
Wichtig
Beachten Sie, dass Code auf 20 Zeichen begrenzt sind.
Name: Geben Sie einen beschreibenden Namen für die Benachrichtigung ein.
Bemerkung
Geben Sie bei Mahnungen den Namen Ihrer Bibliothek in der Beschreibung an, damit er beim Einrichten der Mahntrigger sichtbar ist.
Anschließend können Sie die Benachrichtigung für jede mögliche Zustellungsart anpassen.
Für jede Benachrichtigung sollte eine E-Mail-Vorlage erstellt werden.
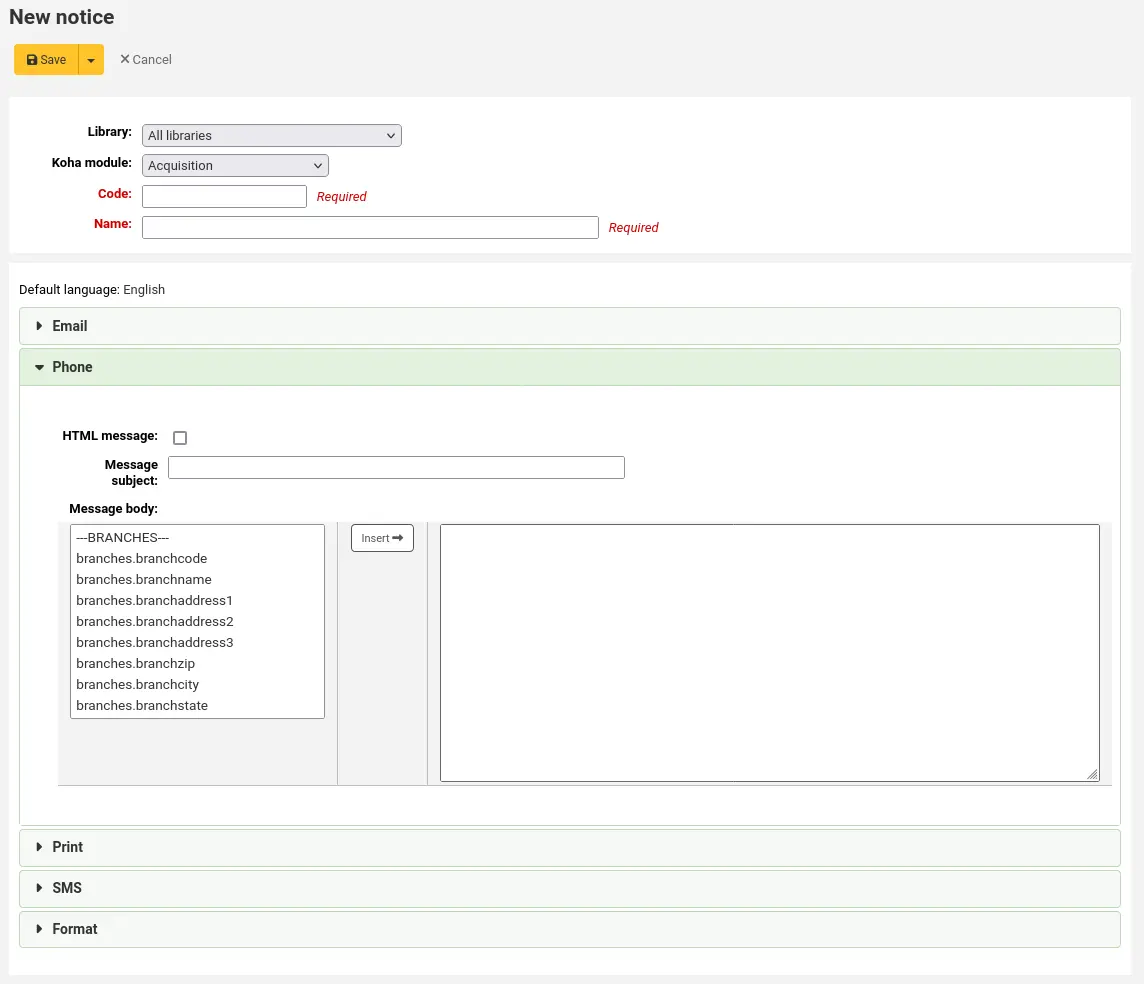
Wenn der Parameter PhoneNotification aktiviert ist, haben Sie die Möglichkeit, ein Telefontemplate zu nutzen.
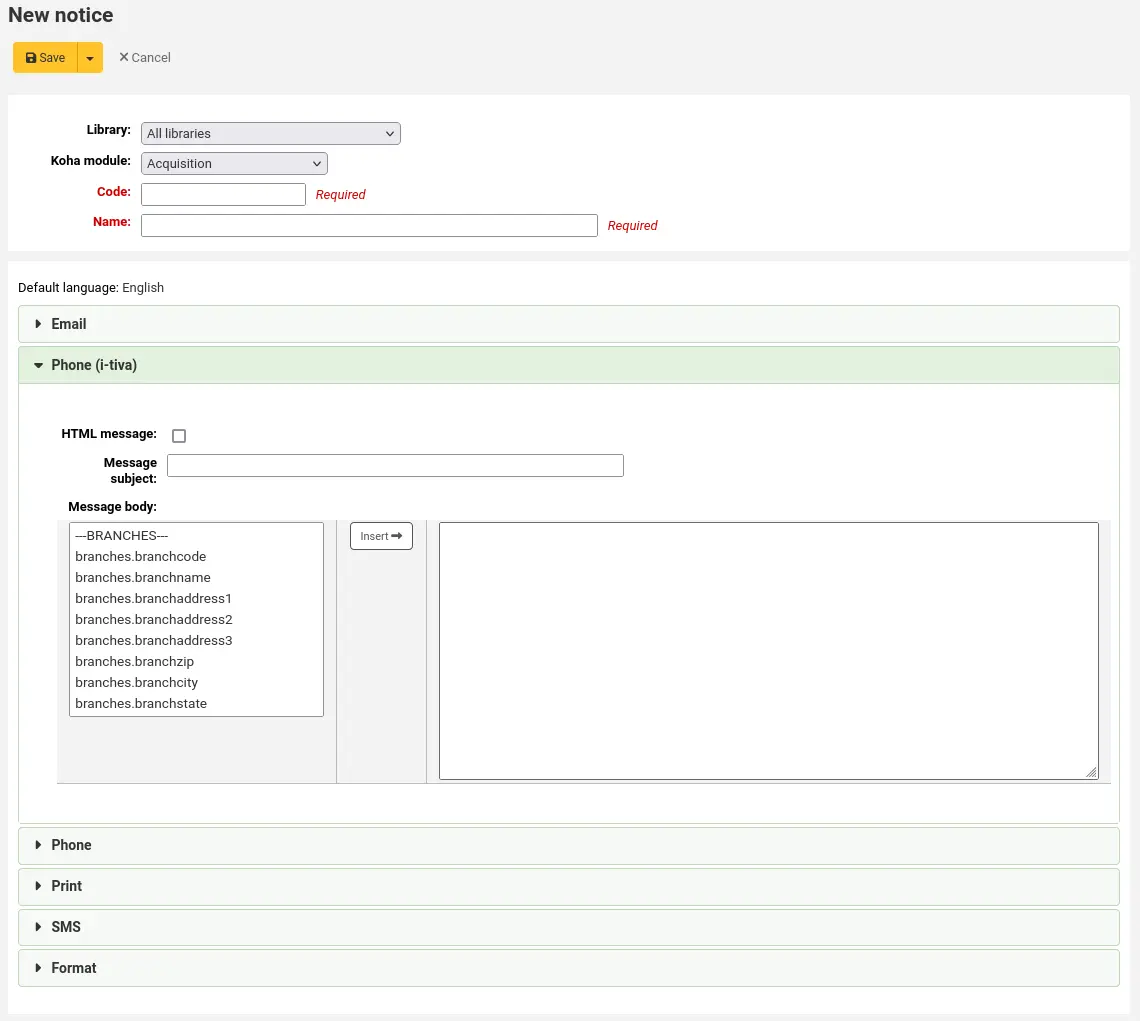
Wenn der TalkingTechItivaPhoneNotification Dienst verwendet wird, kann eine Benachrichtigung spezifisch für diesen Dienst definiert werden.
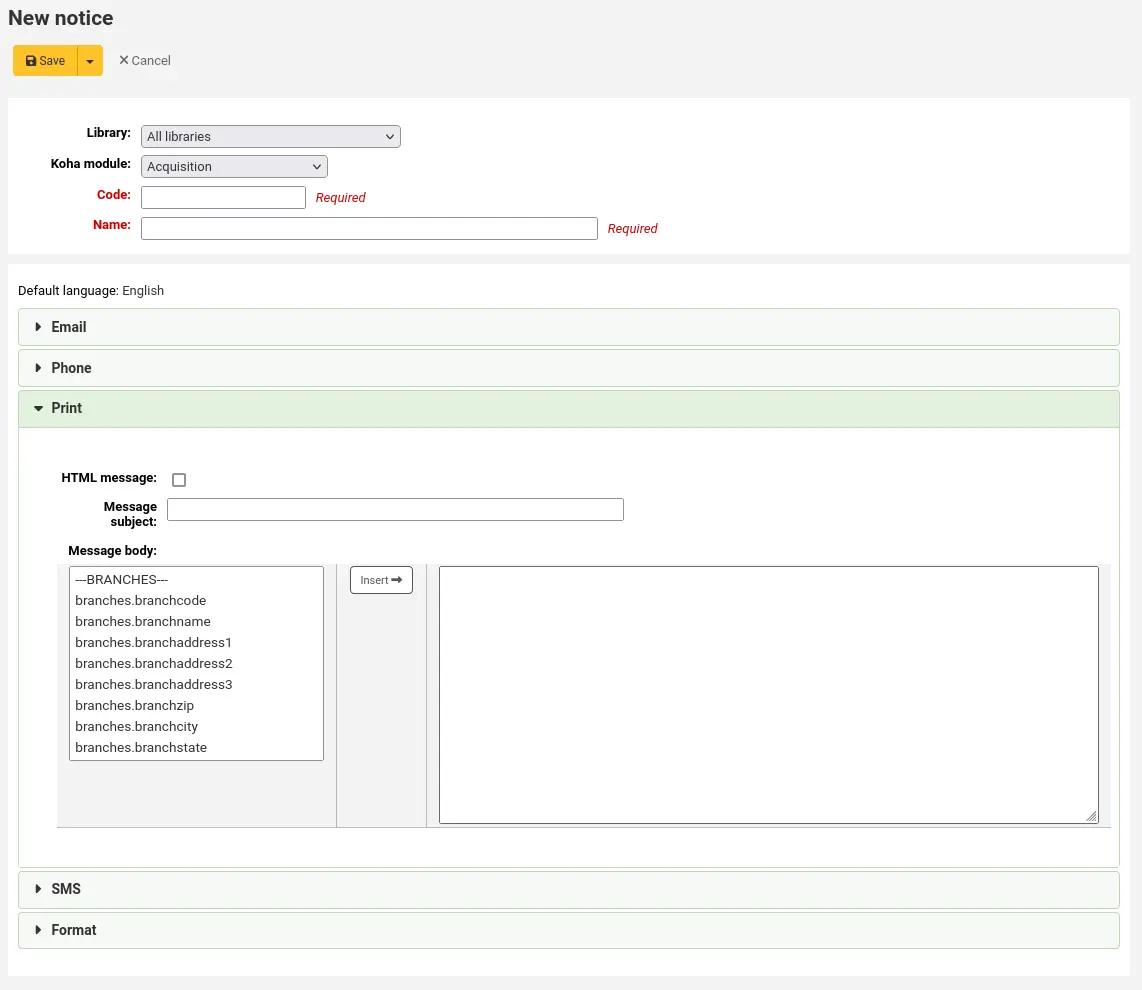
Wenn Sie diese Benachrichtigung ausdrucken möchten, können Sie die Druckvorlage einstellen
Wenn SMS-Benachrichtigungen über den Systemparameter SMSSendDriver aktiviert wurden, kann auch der Text für SMS-Benachrichtigungen konfiguriert werden

Wichtig
Textnachrichten sind auf 1600 Zeichen begrenzt. Stellen Sie sicher, dass Nachrichten kurz gehalten sind und vermeiden Sie, Variablen hinzuzufügen, die sehr lang sein können (wie beispielsweise die Liste der fälligen Exemplare).
Der Reiter „Format“ dient dazu, den Benachrichtigungsdruck zu formatieren.
Version
Dieses Feature gibt es in Koha seit Version 24.05.
Klicken Sie auf die Links unter „Selektoren einfügen, um Stile anzuwenden“, um automatisch alle relevanten Selektoren entweder für die Überschriften, die Tabellen oder den gesamten Text einzufügen.
Tipp
Verwenden Sie die Links, um die Selektoren einzufügen, und entfernen Sie dann bei Bedarf die nicht benötigten Selektoren. Wenn Sie z. B. die Überschriften der ersten Ebene formatieren möchten, klicken Sie auf „Überschriften“ und entfernen Sie dann alles außer
#slip h1und#receipt h1.Entfernen Sie den Text
// insert CSS hereim Feld ‚Style (CSS)‘ und ersetzen Sie durch die benötigte Formatierung.Wenn diese Formatierung für alle gedruckten Benachrichtigungen gelten soll, markieren Sie das Kästchen „Formateinstellungen für alle Mitteilungen übernehmen“. Dadurch wird die Formatierung in anderen Mitteilungen (falls vorhanden) überschrieben.
Jede Benachrichtigung bietet die selben Optionen
HTML-Benachrichtigung: Wenn Sie eine Benachrichtigung oder eine Quittung mit HTML formatieren möchten, markieren Sie die entsprechende Checkbox „HTML-Benachrichtigung“. Andernfalls wird der Inhalt als Text ausgegeben
Betreff: Der Betreff für die Benachrichtigungen wird in der Betreffzeile der E-Mail ausgegeben
Benachrichtigungstext: Innerhalb der Benachrichtigung können Sie den Text frei formulieren. Verwenden Sie die Felder auf der linken Seite um individualisierte Felder aus der Datenbank in Ihren Text einzufügen.
Für mehr Flexibilität können Sie auch die Syntax des Template Toolkits verwenden. Weitere Informationen finden Sie auf der Wiki-Seite Notices with Template Toolkit.
Bemerkung
Für weitere Informationen prüfen Sie die Wiki-Seite Customising notices and slips wiki.
Wichtig
Mahnbenachrichtungen können
<<items.content>>Tags oder<item></item>verwenden, die alle Tags umfassen. Lesen Sie mehr darüber in Markup für Mahnungen.Bei Mahnbenachrichtigungen sollten Sie die Tags
<<items.content>>verwenden, um die Daten für alle überfälligen Exemplare auszudrucken.Die andere Option, die nur für Mahnbenachrichtigungen gilt, ist
<item></item>Tags zu verwenden, um die Zeile zu umfassen, so dass mehrere Zeilen ausgedruckt werden können. Ein Beispiel für die<item></item>Tag Option ist:
<item>"<<biblio.title>>" by <<biblio.author>>,
<<items.itemcallnumber>>, Barcode: <<items.barcode>> ,
Checkout date: <<issues.issuedate>>, Due date:
<<issues.date\_due>> Fine: <<items.fine>> </item>
Wichtig
Nur die Mahnbenachrichtigungen nutzen die
<item></item>-Tags, alle anderen Benachrichtigungen, die sich auf Exemplare beziehen, müssen<<items.content>>verwenden.Tipp
Um das heutige Datum einzufügen, können Sie die Syntax
<<today>>verwenden.Tipp
Wenn Sie nicht den vollen Benutzername auf Ihre Quittung oder Benachrichtigung schreiben möchten, können Sie das Feld Initialen ausfüllen und stattdessen den Wert verwenden.
View default: the ‚view default‘ button allows you to display the default sample notice in a popup modal and even reset the notice to that default. This is available for the notices and slips that come with Koha.
Version
This option was added to Koha in version 24.11.
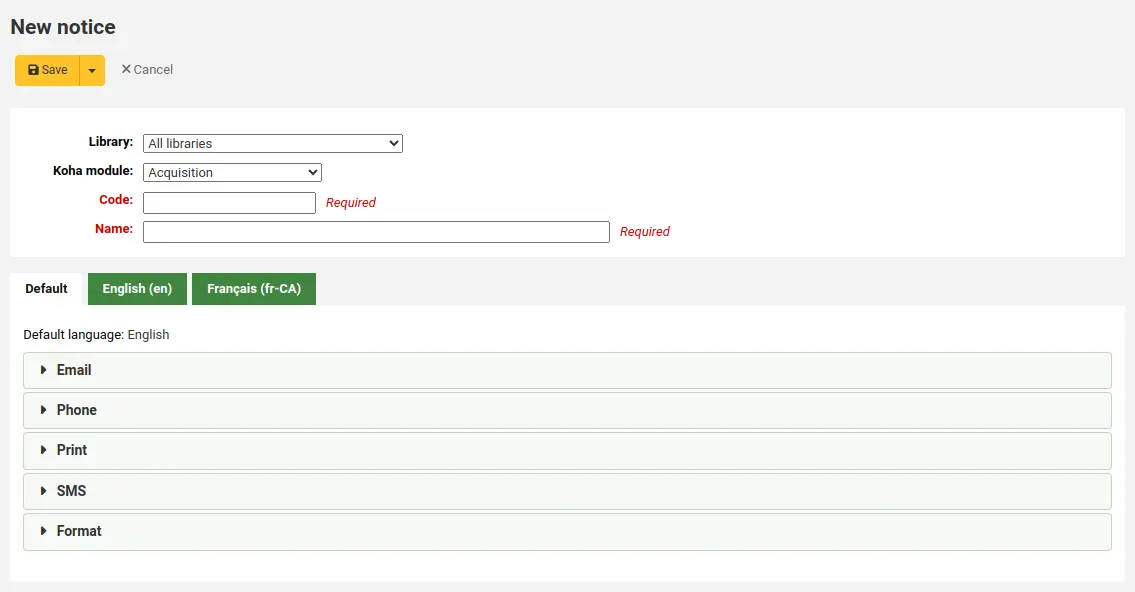
Der Systemparameter TranslateNotices fügt Reiter für jede installierte Sprache im Benachrichtigungseditor hinzu. Es wird die Standardeinstellung genommen, wenn keine bevorzugte Sprache für den/die Benutzer*in hinterlegt ist (Feld „Bevorzugte Sprache für Benachrichtigungen“ im Benutzerdatensatz).
Vorschau von Benachrichtigungstemplates
Für einige Benachrichtigungen ist es möglich das Benachrichtigungstemplate zu verwenden um zu sehen, wie es für einen speziellen Benutzer mit einem besonderen Exemplar oder Datensatz aussieht.
Wird ein Template für Benachrichtigungen angzeigt, enthält die Kopfzeile des Templates ein Feld, wo die Daten eingetragen werden
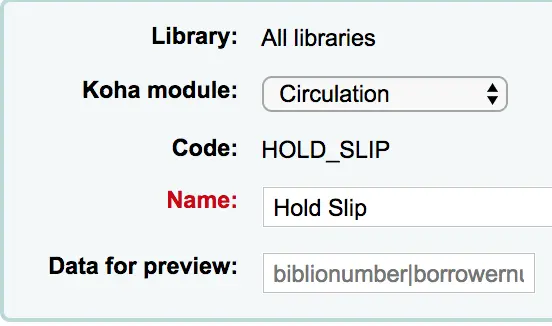
Geben Sie die notwendigen Informationen für das Template ein und bestätigen Sie mit ‚Speichern‘. Es wird angezeigt, ob Probleme beim Generieren der Vorschau aufgetreten sind.
Formatierung von Mahnbenachrichtigungen
Es gibt zwei zusätzliche Tags für die verschiedenen Datenbankfelder, die Sie für Ihre Benachrichtigungen in Koha verwenden können. Sie können die Wiki-Seite Customising notices and slips wiki aufrufen, um Informationen zur Formatierung von Exemplaren in diesen Benachrichtigungen zu erhalten.
Wichtig
Diese neuen Tags funktionieren nur in den Mahnbenachrichtigungen, nicht aber in anderen ausleihrelevanten Benachrichtigungen.
Diese Tags sind <item> und </item> und sie sollten alle Felder aus den Tabellen biblio, biblioitems und items umschließen.
Ein Beispiel für die Verwendung dieser Tags in einer Benachrichtigung wäre:
The following item(s) is/are currently overdue:

<item>"<<biblio.title>>" by <<biblio.author>>, <<items.itemcallnumber>>, Barcode: <<items.barcode>> Fine: <<items.fine>></item>
Wenn zwei Exemplare überfällig sind, könnte die Mahnung so aussehen:
The following item(s) is/are currently overdue:

"A Short History of Western Civilization" by Harrison, John B, 909.09821 H2451, Barcode: 08030003 Fine: 3.50
"History of Western Civilization" by Hayes, Carlton Joseph Huntley, 909.09821 H3261 v.1, Barcode: 08030004 Fine: 3.50
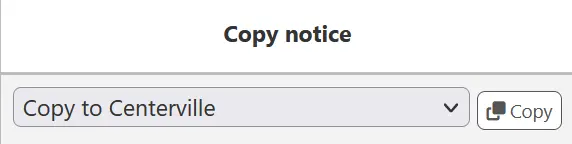
Benachrichtigungen und Quittungen kopieren
Sie können auch eine vorhandene Benachrichtigung an eine andere Bibliothek kopieren, indem Sie in der Spalte „Benachrichtigung kopieren“ die Bibliothek auswählen, an die Sie sie kopieren möchten, und dann auf die Schaltfläche „Kopieren“ klicken.
Vorhandene Benachrichtigungen & Quittungen
Zu den Standard-Benachrichtigungen gehören Benachrichtigungen für verschiedene gängige Aktionen in Koha. Alle diese Benachrichtigungen können angepasst werden, indem ihr Text mit dem Werkzeug „Benachrichtigungen und Quittungen“ und ihr Layout mit der Systemeinstellung NoticeCSS zur Definition eines Stylesheets geändert wird.
Wichtig
New notices are only included by default in new installations. If you have upgraded from a previous version and need a new notice that was only added in the newer version you have upgraded to, you will have to manually add that notice.
Tipp
Sie können auch die Seite des Wiki Customising notices and slips prüfen, um weitere Informationen zu erhalten, wie diese Benachrichtigungen konfiguriert werden können.
Im Folgenden werden einige dieser Benachrichtigungen vorgestellt:
2FA_DISABLE
Diese Benachrichtigung wird an eine*n Mitarbeiter*in gesendet, wenn sie die Zwei-Faktor-Authentifizierung in ihrem Konto deaktivieren.
2FA_ENABLE
Diese Benachrichtigung wird an eine*n Mitarbeiter*in gesendet, wenn er die 2-Faktor-Authentifizierung in seinem Konto aktiviert.
2FA_OTP_TOKEN
Mit dieser Benachrichtigung wird einem Mitarbeitenden ein zeitbasiertes Einmalpasswort gesendet, mit dem sich dieser in der Dienstoberfläche anmelden kann, wenn er die two-factor authentication in seinem Konto aktiviert hat.
ACCEPTED
Diese Benachrichtigung wird an eine*n Benutzer*in verschickt, wenn sein Anschaffungsvorschlag angenommen wird.
Bemerkung
Wenn Sie diese Benachrichtigung nicht senden möchten, löschen Sie sie einfach.
ACCOUNT_PAYMENT
This notice is sent for each payment transaction in a patron’s account if the AutomaticEmailReceipts system preference is set to ‚Send‘.
This is also the notice sent for payment transactions in a patron’s account if the staff member manually sends the receipt by email using the ‚Email‘ button on the transaction line.
ACCOUNT_WRITEOFF
This notice is sent for each writeoff transaction in a patron’s account if the AutomaticEmailReceipts system preference is set to ‚Send‘.
This is also the notice sent for writeoff transaction in a patron’s account if the staff member manually sends the receipt by email using the ‚Email‘ button on the transaction line.
ACQCLAIM (Reklamationen in der Erwerbung)
Wird für claiming orders im aquisitions module genutzt.
ACQCLAIM ist der Code der Reklamationsbenachrichtigung, aber es ist möglich, mehrere Reklamationen zu definieren, indem Sie einen beliebigen Code wählen. Es wird nur das Modul ‚Erwerbungsreklamation‘ berücksichtigt. Alle Benachrichtigungen dieses Moduls werden im Auswahlmenü auf der Seite Verspätete Bestellungen angezeigt.
Diese Benachrichtigung wird verschickt, wenn verschiedene Kriterien zutreffen:
Es muss eine gültige E-Mail-Adresse angegeben sein.
Der Lieferantenkontakt, der als ‚Kontakt für verspätete Bestellungen?‘ angegeben ist, hat eine gültige E-Mail-Adresse.
ACQORDER (Bestellung Erwerbung)
Wird im Erwerbungsmodul genutzt, um Bestellinformationen an den Lieferant zu schicken
Die Benachrichtigung wird manuell von der Korbzusammenfassungsseite über die Schaltfläche „E-Mail-Bestellung“ in der Werkzeugleiste ausgelöst.
Diese Benachrichtigung wird verschickt, wenn verschiedene Kriterien zutreffen:
Es muss eine gültige E-Mail-Adresse angegeben sein.
Der Lieferantenkontakt, der als ‚Primärer Erwerbungskontakt‘ und ‚Kontakt bei Bestellung‘ gekennzeichnet ist, hat eine gültige E-Mail-Adresse.
ACQ_NOTIF_ON_RECEIV
Wird im Erwerbungsmodul verwendet, um Benutzer*innen über den Eingang von Bestellungen zu informieren, zu denen sie hinzugefügt worden sind.
AR_CANCELLED
This notice is sent to the patron when an article request is canceled by staff.
AR_COMPLETED
Diese Benachrichtigung wird an den/die Benutzer*innen gesendet, wenn eine Artikelbestellung vom Bibliothekspersonal als abgeschlossen markiert wurde.
AR_PENDING
Diese Benachrichtigung wird verschickt, wenn eine Artikelbestellung auf den Status „ausstehend“ geändert wird
AR_PROCESSING
Diese Benachrichtigung wird an den/die Benutzer*in verschickt, wenn eine Artikelbestellung auf den Status „in Bearbeitung“ geändert wird.
AR_REQUESTED
Diese Benachrichtigung wird an den/die Benutzer*in verschickt, wenn eine Artikelbestellung vorgenommen wurde, um die Anfrage zu bestätigen.
AUTO_RENEWALS
Diese Benachrichtigung wird an Benutzer*innen verschickt, wenn automatische Verlängerungen aktiviert sind und sie in den Benachrichtigungseinstellungen aktiviert wurde.
Um diese Benachrichtigung zu verschicken, muss der Systemparameter AutoRenewalNotices auf „ensprechend der Benachrichtigungseinstellungen“ gesetzt werden.
Die Benachrichtigung ist so eingerichtet, dass der Inhalt der Benachrichtigung unterschiedlich ist, je nachdem ob die Verlängerung erfolgreich war oder nicht.
AUTO_RENEWALS_DGST
Diese Benachrichtigung wird an Benutzer*innen verschickt, wenn automatische Verlängerungen aktiviert sind und in den Benachrichtigungseinstellungen die Sammelmail aktiviert wurde.
Um diese Benachrichtigung zu verschicken, muss der Systemparameter AutoRenewalNotices auf „ensprechend der Benachrichtigungseinstellungen“ gesetzt werden.
Die Benachrichtigung ist so eingerichtet, dass der Inhalt der Benachrichtigung unterschiedlich ist, je nachdem ob die Verlängerung erfolgreich war oder nicht.
AVAILABLE
Diese Benachrichtigung wird an eine*n Benutzer*in verschickt, der einen Anschaffungsvorschlag gemacht hat, wenn die Bestellung aus diesem Anschaffungsvorschlag eingetroffen ist.
Bemerkung
Wenn Sie diese Benachrichtigung nicht senden möchten, löschen Sie sie einfach.
BOOKING_CANCELLATION
This notice is sent to a patron when library staff cancel their booking.
Version
The BOOKING_CANCELLATION notice was first introduced in version 24.11 of Koha.
BOOKING_CONFIRMATION
This notice is sent to a patron when library staff place a booking on their behalf.
Version
The BOOKING_CONFIRMATION notice was first introduced in version 24.11 of Koha.
BOOKING_MODIFICATION
This notice is sent to a patron when library staff update their booking’s pickup library, start date or end date.
Version
The BOOKING_MODIFICATION notice was first introduced in version 24.11 of Koha.
CART
Diese Benachrichtigung wird verwendet, wenn sending the cart by email from the OPAC oder wenn sending the cart by email from the staff interface.
CANCEL_HOLD_ON_LOST
Diese Benachrichtigung wird an eine*n Benutzer*in verschickt, der ein Exemplar vorgemerkt hat, wenn dieses von einem/einer Mitarbeiter*in auf der Seite“Zu erledigende Vormerkungen“ als verloren markiert wird.
Diese Benachrichtigung wird gesendet, wenn für den Parameter CanMarkHoldsToPullAsLost ‚Erlaube, Exemplare als verloren zu markieren und den Benutzer zu informieren‘ ausgewählt ist.
CHECKIN
Diese Benachrichtigung wird als ‚Rückgabequittung‘ für alle zurückgegebenen Exemplare verschickt
Diese Benachrichtigung wird verwendet, wenn zwei Kriterien zutreffen:
Der Systemparameter EnhancedMessagingPreferences ist auf ‚Erlaube‘ gesetzt
Der/die Benutzer*in hat angegeben, dass er diese Benachrichtigung erhalten möchte
Wenn EnhancedMessagingPreferencesOPAC auf ‚Erlaube‘ steht, können Benutzer*innen in ihrem Benutzerkonto ihre Benachrichtigungseinstellungen im Reiter Benachrichtigungen selbst verwalten.
Bibliothekspersonal kann diese Benachrichtigung für eine*n Benutzer*in in seinen Benachrichtigungseinstellungen auswählen.
CHECKOUT
Diese Benachrichtigung wird als ‚Ausleihquittung‘ für alle Exemplare verschickt, die ausgeliehen wurden
Diese Benachrichtigung wird verwendet, wenn zwei Kriterien zutreffen:
Der Systemparameter EnhancedMessagingPreferences ist auf ‚Erlaube‘ gesetzt
Der/die Benutzer*in hat angegeben, dass er diese Benachrichtigung erhalten möchte
Wenn EnhancedMessagingPreferencesOPAC auf ‚Erlaube‘ steht, können Benutzer*innen in ihrem Benutzerkonto ihre Benachrichtigungseinstellungen im Reiter Benachrichtigungen selbst verwalten.
Bibliothekspersonal kann diese Benachrichtigung für eine*n Benutzer*in in seinen Benachrichtigungseinstellungen auswählen.
CHECKOUT_NOTE
Diese Benachrichtigung wird an die Systemadministration (die in KohaAdminEmailAddress hinterlegte E-Mail-Adresse) gesendet, um darauf aufmerksam zu machen, dass ein*e Benutzer*in im Reiter „Ausgeliehen“ in seiner OPAC-Kontoübersicht eine Ausleihnotiz hinzugefügt hat.
DISCHARGE
Diese Benachrichtigung wird verwendet um ein PDF zu generieren für eine erfolgreiche Entlastungsanfrage
Das PDF kann entweder vom/von der Benutzer*in über sein Benutzerkonto heruntergeladen werden, oder über die Dienstoberfläche, wenn ein*e Benutzer*in entlastet wird
Die Entlastungsfunktion wird durch den Systemparameter useDischarge gesteuert.
DUE
Diese Benachrichtigung wird als „Erinnerungsbenachrichtigung“ über ausgeliehene, heute fällige Exemplare versendet.
Diese Benachrichtigung wird verwendet, wenn zwei Kriterien zutreffen:
Der Systemparameter EnhancedMessagingPreferences ist auf ‚Erlaube‘ gesetzt
Der/die Benutzer*in hat angegeben, dass er diese Benachrichtigung erhalten möchte
Wenn EnhancedMessagingPreferencesOPAC auf ‚Erlaube‘ steht, können Benutzer*innen in ihrem Benutzerkonto ihre Benachrichtigungseinstellungen im Reiter Benachrichtigungen selbst verwalten.
Bibliothekspersonal kann diese Benachrichtigung für eine*n Benutzer*in in seinen Benachrichtigungseinstellungen auswählen.
DUEDGST
Diese Benachrichtigung wird als „Erinnerungsbenachrichtigung“ für alle ausgeliehenen Exemplare versendet, die heute fällig sind (Option einer Zusammenfassung).
Diese Benachrichtigung wird verwendet, wenn zwei Kriterien zutreffen:
Der Systemparameter EnhancedMessagingPreferences ist auf ‚Erlaube‘ gesetzt
Der/die Benutzer*in hat angegeben, dass er diese Benachrichtigung als Sammelmail erhalten möchte
Wenn EnhancedMessagingPreferencesOPAC auf ‚Erlaube‘ steht, können Benutzer*innen in ihrem Benutzerkonto ihre Benachrichtigungseinstellungen im Reiter Benachrichtigungen selbst verwalten.
Bibliothekspersonal kann diese Benachrichtigung für eine*n Benutzer*in in seinen Benachrichtigungseinstellungen auswählen.
HOLD (Vormerkung steht zur Abholung bereit)
Diese Benachrichtigung wird an den Benutzer/die Benutzerin verschickt, wenn ein vorgemerktes Exemplar zur Abholung bereitgestellt wurde.
Diese Benachrichtigung wird verwendet, wenn zwei Kriterien zutreffen:
Der Systemparameter EnhancedMessagingPreferences ist auf ‚Erlaube‘ gesetzt
Der/die Benutzer*in hat angegeben, dass er diese Benachrichtigung als Sammelmail erhalten möchte
Wenn EnhancedMessagingPreferencesOPAC auf ‚Erlaube‘ steht, können Benutzer*innen in ihrem Benutzerkonto ihre Benachrichtigungseinstellungen im Reiter Benachrichtigungen selbst verwalten.
Bibliothekspersonal kann diese Benachrichtigung für eine*n Benutzer*in in seinen Benachrichtigungseinstellungen auswählen.
Wenn in dieser Benachrichtigung Felder für die Bibliothek verwendet werden, ist die Abholbibliothek gemeint.
HOLD_CHANGED
Diese Benachrichtigung wird an Mitarbeiter*innen gesendet (entweder an die E-Mail-Adresse in ExpireReservesAutoFillEmail) oder an die reply-to-Email-Adresse der Bibliothek, um darüber zu informieren, dass eine Vormerkung storniert wurde und die nächste Vormerkung für dieses Exemplar greift.
Die Benachrichtigung wird nur gesendet wenn ExpireReservesAutoFill auf „Ausführen“ steht.
HOLD_REMINDER
Diese Benachrichtigung wird an den/die Benutzer*in verschickt, wenn eine Vormerkung länger als eine festgelegte Anzahl von Tagen zur Abholung bereitlag
Falls EnhancedMessagingPreferencesOPAC auf „Erlaube“ steht, können Benutzer*innen ihre Benachrichtigungseinstellungen in ihrem Online-Konto im Reiter Benachrichtigungen auswählen. Die Benachrichtigung ist „Abholerinnerung für Vormerkung“.
Mitarbeiter*innen können diese Benachrichtigung für eine*n Benutzer*in in seinen Benachrichtigungseinstellungen auswählen. Die Benachrichtigung ist „Abholerinnerung für Vormerkung“.
Der holds_reminder.pl-Cronjob wird benötigt um diese Benachrichtigung zu generieren.
HOLDDGST
Version
Diese Benachrichtigung wurde in Koha-Version 23.11 hinzugefügt.
Diese Benachrichtigung wird als Benachrichtigung „Vormerkung erfüllt“ für Vormerkungen, die zur Abholung bereitliegen, versandt (Sammelmail).
Diese Benachrichtigung wird verwendet, wenn zwei Kriterien zutreffen:
Der Systemparameter EnhancedMessagingPreferences ist auf „Zulassen“ gesetzt.
Der/die Benutzer*in hat angegeben, dass er diese Benachrichtigung als Zusammenfassung erhalten möchte.
Wenn der Systemparameter EnhancedMessagingPreferencesOPAC auf „Anzeigen“ steht, können Benutzer*innen ihre Nachrichtenpräferenzen in ihrem Online-Konto in tabReiter Benachrichtigungen auswählen.
Bibliothekspersonal kann diese Benachrichtigung für eine*n Benutzer*in in seinen Benachrichtigungseinstellungen auswählen.
HOLDPLACED
Diese Benachrichtigung wird an das Personal versandt wenn eine Vormerkung vorgenommen wurde.
Die Benachrichtigung erfordert, dass der Systemparameter emailLibrarianWhenHoldIsPlaced auf „Aktiviert“ gesetzt ist.
Wenn in dieser Benachrichtigung auf die Tabelle branches verwiesen wird, bezieht sich dies auf die Informationen der Abholbibliothek.
HOLDPLACED_PATRON
Diese Benachrichtigung wird an den/die Benutzer*in versandt, der eine Vormerkung vorgenommen hat.
Diese Benachrichtigung erfordert, dass der Systemparameter EmailPatronWhenHoldIsPlaced auf „E-Mail“ gesetzt ist.
Version
Diese Benachrichtigung wurde in Koha-Version 23.11 hinzugefügt, zusammen mit den entsprechenden Systemparametern.
ILL_PARTNER_REQ
Die Benachrichtigung wird vom Fernleihmodul zum Versand von Anfragen an gebende Bibliotheken genutzt.
ILL_PICKUP_READY
Diese Benachrichtigung wird an den Benutzer/die Benutzerin verschickt, wenn die angeforderte Fernleihe erfüllt wurde und zur Abholung bereitsteht.
Mitarbeiter*innen können diese Benachrichtigung für eine*n Benutzer*in in seinen Benachrichtigungseinstellungen auswählen. Die Benachrichtigung ist „Fernleihe erfüllt“.
Bemerkung
Die Option erscheint in den Nachrichtenpräferenzen nur wenn die Systemeinstellung ILLModule aktiviert ist.
Wenn EnhancedMessagingPreferencesOPAC auf „Anzeigen“ gesetzt ist, können Benutzer*innen ihre Nachrichtenpräferenzen in ihrem Online-Konto in Reiter Benachrichtigungen auswählen. Die Benachrichtigung ist „Fernleihe steht bereit“.
Bemerkung
Die Option erscheint in den Nachrichtenpräferenzen nur wenn die Systemeinstellung ILLModule aktiviert ist.
ILL_REQUEST_CANCEL
Die Benachrichtigung wird an das Bibliothekspersonal gesendet, wenn ein*e Benutzer*in seine Fernleihanfrage in seinem Online-Konto storniert.
ILL_REQUEST_MODIFIED
Die Benachrichtigung wird an das Bibliothekspersonal gesendet, wenn ein*e Benutzer*in seine/ihre Fernleihanfrage in seinem/ihre Online-Konto storniert.
ILL_REQUEST_UNAVAIL
This notice is sent to the patron when the inter-library loan they requested has been canceled because it was unavailable.
Bibliothekspersonal kann diese Benachrichtigung für eine*n Benutzer*in in seinen Benachrichtigungseinstellungen auswählen. Die Benachrichtigung ist „Fernleihe nicht verfügbar“.
Bemerkung
Die Option erscheint in den Nachrichtenpräferenzen nur wenn die Systemeinstellung ILLModule aktiviert ist.
Wenn EnhancedMessagingPreferencesOPAC auf „Anzeigen“ gesetzt ist, können Benutzer*innen ihre Nachrichtenpräferenzen in ihrem Online-Konto in Reiter Benachrichtigungen auswählen. Die Benachrichtigung ist „Fernleihe nicht verfügbar“.
Bemerkung
Die Option erscheint in den Nachrichtenpräferenzen nur wenn die Systemeinstellung ILLModule aktiviert ist.
ILL_REQUEST_UPDATE
Diese Benachrichtigung wird an den/die Benutzer*in verschickt, um ihn darauf aufmerksam zu machen, dass seine/ihre Fernleihanfrage aktualisiert wurde.
Bibliothekspersonal kann diese Benachrichtigung für eine*n Benutzer*in in seinen Benachrichtigungseinstellungen auswählen. Die Benachrichtigung ist „Fernleihe aktualisiert“.
Bemerkung
Die Option erscheint in den Nachrichtenpräferenzen nur wenn die Systemeinstellung ILLModule aktiviert ist.
Wenn EnhancedMessagingPreferencesOPAC auf „Anzeigen“ gesetzt ist, können Benutzer*innen ihre Nachrichtenpräferenzen in ihrem Online-Konto in Reiter Benachrichtigungen auswählen. Die Benachrichtigung ist „Fernleihe aktualisiert“.
Bemerkung
Die Option erscheint in den Nachrichtenpräferenzen nur wenn die Systemeinstellung ILLModule aktiviert ist.
LIST
Diese Benachrichtigung wird genutzt wenn sending a list by email from the OPAC oder wenn sending a list by email from the staff interface.
MEMBERSHIP_EXPIRY
Diese Benachrichtigung kann als Warnung an den/die Benutzer*in verschickt werden, dass sein/ihr Benutzerausweis bald abläuft.
Dies setzt voraus, dass Sie den Systemparameter MembershipExpiryDaysNotice aktiviert haben und der zugehörgie Crojob eingerichtet ist.
MEMBERSHIP_RENEWED
Diese Benachrichtigung kann an den/die Benutzer*in verschickt werden, um ihn darüber zu informieren, dass seine/ihre Mitgliedschaft verlängert wurde.
Die Benachrichtigung wird von membership_expiry.pl cronjob erzeugt wenn er mit dem Parameter
--renewaufgerufen wird.
NEW_CURBSIDE_PICKUP
Diese Benachrichtigung wird an den/die Benutzer*in versandt wenn eine Abholung vereinbart wurde.
Um diese Benachrichtigung zu senden,
Der/die Benutzer*in muss ausgewählt haben, dass er/sie die Benachrichtigung „Vormerkung erfüllt“ via E-Mail erhalten möchte.
Das Bibliothekspersonal kann diese Benachrichtigung in den Benachrichtigungseinstellungen für eine*n Benutzer*in auswählen
Wenn EnhancedMessagingPreferencesOPAC auf ‚Erlaube‘ steht, können Benutzer*innen in ihrem Benutzerkonto ihre Benachrichtigungseinstellungen im Reiter Benachrichtigungen selbst verwalten.
NEW_SUGGESTION
Diese Benachrichtigung wird an die Mitarbeiter*innen der Bibliothek gesandt, wenn der Systemparameter EmailPurchaseSuggestions aktiviert ist.
NOTIFY_MANAGER
Diese Benachrichtigung wird an den Mitarbeitenden in der Bibliothek geschickt, der als BearbeiterIn eines Anschaffungsvorschlags im Erwerbungsmodul zugewiesen wurde.
ODUE (Mahnbenachrichtigung)
Diese Benachrichtigung wird verwendet, um Mahnungen an Benutzer*innen zu verschicken
ODUE ist der Code für die Beispielbenachrichtigung, aber es ist möglich andere Codes zu benutzen, um verschiedene Benachrichtigungen für verschiedene Benutzertypen und Benachrichtigungslevels zu konfigurieren
Stellen Sie sicher, dass Sie Mahntrigger aktiviert haben
OPAC_REG
Die Benachrichtigung wird an Mitarbeitende gesendet wenn die Systemeinstellung EmailPatronRegistrations aktiviert ist und ein patron registers through the OPAC.
OPAC_REG_VERIFY
Diese Benachrichtigung wird an patron who registered through the OPAC gesendet wenn der Systemparameter PatronSelfRegistrationVerifyByEmail aktiviert ist.
ORDERED
Diese Benachrichtigung wird an den/die Benutzer*in versandt, der/die einen Anschaffungsvorschlag gemacht hat, wenn die Option „aus einem Anschaffungsvorschlag“ genutzt wird, um eine Bestellung zu erstellen.
Bemerkung
Wenn Sie diese Benachrichtigung nicht versenden möchten, dann löschen Sie sie einfach.
PASSWORD_CHANGE
Diese Benachrichtigung wird an eine*n Benutzer*in versandt, dessen Passwort geändert wurde, wenn der Systemparameter NotifyPasswordChange aktiviert ist.
PASSWORD_RESET
Diese Benachrichtigung wird verschickt, um die E-Mail-Adresse zu überprüfen, wenn ein*e Benutzer*in über die Passwort-Vergessen-Funktion im OPAC ein neues Passwort erfragt.
Die Funktion des Passwortzurücksetzens wird über den Systemparameter OpacResetPassword gesteuert.
PICKUP_RECALLED_ITEM
Diese Benachrichtigung wird an den/die Benutzer*in versandt, der/die einen Rückruf angefordert hat, wenn das Exemplar für ihn/sie zur Abholung bereit steht.
PREDUE
This notice is sent as the ‚advance notice‘ when an item is due
Diese Benachrichtigung wird verwendet, wenn zwei Kriterien zutreffen:
Der Systemparameter EnhancedMessagingPreferences ist auf ‚Erlaube‘ gesetzt
Der/die Benutzer*in hat angegeben, dass er diese Benachrichtigung erhalten möchte
Wenn EnhancedMessagingPreferencesOPAC auf ‚Erlaube‘ steht, können Benutzer*innen in ihrem Benutzerkonto ihre Benachrichtigungseinstellungen im Reiter Benachrichtigungen selbst verwalten.
Bibliothekspersonal kann diese Benachrichtigung für eine*n Benutzer*in in seinen Benachrichtigungseinstellungen auswählen.
PREDUEDGST
This notice is sent as the ‚advance notice‘ digest for all items that are due
Diese Benachrichtigung wird verwendet, wenn zwei Kriterien zutreffen:
Der Systemparameter EnhancedMessagingPreferences ist auf ‚Erlaube‘ gesetzt
Der/die Benutzer*in hat angegeben, dass er diese Benachrichtigung als Sammelmail erhalten möchte
If EnhancedMessagingPreferencesOPAC is set to ‚Show‘, patrons can choose their messaging preferences in their online account in the Messaging tab.
Bibliothekspersonal kann diese Benachrichtigung für eine*n Benutzer*in in seinen Benachrichtigungseinstellungen auswählen.
PRES_TRAIN_ITEM
Diese Benachrichtigung ist die Standardquittung, die im Modul „Erhaltung“ zum Druck einer Liste von items in a train genutzt wird.
Version
Die Benachrichtigung PRES_TRAIN_ITEM wurde in Koha-Version 23.11 eingeführt.
PROBLEM_REPORT
Die Benachrichtigung wird an die E-Mail-Adresse im Systemparameter KohaAdminEmailAddress gesendet, oder an die E-Mail-Adresse der library wenn ein*e Benutzer*in reports a problem on the OPAC.
RECEIPT
Wird verwendet, um eine Zahlungsquittung per E-Mail vom point of sale module zu versenden.
REJECTED
Diese Benachrichtigung wird verschickt, wenn ein Anschaffungsvorschlag eines Benutzers abgelehnt wurde.
Bemerkung
Wenn Sie diese Benachrichtigung nicht versenden möchten, dann löschen Sie sie einfach.
RENEWAL
Diese Benachrichtigung wird als ‚Verlängerungsquittung‘ für alle verlängerten Exemplare verschickt
Diese Benachrichtigung wird verwendet, wenn drei Kriterien zutreffen:
Der Systemparameter EnhancedMessagingPreferences ist auf ‚Erlaube‘ gesetzt
Der Systemparameter RenewalSendNotice ist auf „Sende“ gesetzt
Der/die Benutzer*in hat angegeben, dass er diese Benachrichtigung erhalten möchte
Wenn EnhancedMessagingPreferencesOPAC auf ‚Erlaube‘ steht, können Benutzer*innen in ihrem Benutzerkonto ihre Benachrichtigungseinstellungen im Reiter Benachrichtigungen selbst verwalten.
Bibliothekspersonal kann diese Benachrichtigung für eine*n Benutzer*in in seinen Benachrichtigungseinstellungen auswählen.
RETURN_RECALLED_ITEM
Diese Benachrichtigung wird an den Benutzer/die Benutzerin verschickt, der/die aktuell ein zurückgerufenes Exemplar entliehen hat. Sie benachrichtigt über das neue Fälligkeitsdatum für die Ausleihe.
SERIAL_ALERT (Neues Zeitschriftenheft)
Diese Benachrichtigung wird im Zeitschriftenmodul verwendet, um Benutzer*innen und Bibliothekspersonal über das Eintreffen neuer Hefte zu informieren. SERIAL_ALERT (RLIST in älteren Versionen) ist eine Beispielbenachrichtigung, aber der Code der Benachrichtigung kann frei gewählt werden. Mehrere Benachrichtigungen können ebenfalls verwaltet werden.
Sie haben beim Hinzufügen oder Bearbeiten eines Abonnements die Option, eine Benachrichtigung auszuwählen, die die Benutzer*innen informiert, dass Zeitschriftenhefte zu einem bestimmten Abonnement angekommen sind. Wählen Sie diese Option ausgehend vom Drop-down-Menü „Benutzerbenachrichtigung“.
Haben Sie eine Benachrichtigung für ein Abonnement ausgewählt, so können sich Benutzer*innen ausgehend vom Reiter Abonnement in der Detailansicht im OPAC für die Email-Benachrichtigung anmelden.
Bemerkung
Wenn Sie die Benutzer*innen über neu eingetroffene Zeitschriftenhefte informieren möchten, können Sie auf „Benachrichtigung definieren“ klicken und in das Werkzeug „Benachrichtigungen“ wechseln.
SHARE_ACCEPT
Wird verwendet, wenn ein*e Benutzer*in eine Einladung zum Teilen einer Liste akzeptiert hat.
Erfordert, dass Sie OpacAllowSharingPrivateLists auf „Zulassen“ setzen.
Siehe Managing lists für weitere Informationen über das Teilen von Listen.
SHARE_INVITE
Wird verwendet, um eine*n Benutzer*in zu benachrichtigen, dass ein*e andere*r Benutzer*in eine Liste mit ihm/ihr teilen möchte.
Erfordert, dass Sie OpacAllowSharingPrivateLists auf „Zulassen“ setzen.
Siehe Managing lists für weitere Informationen über das Teilen von Listen.
SR_SLIP
Informiert das Bibliothekspersonal einer bestimmten Zweigstelle über Exemplare, die an eine andere Bibliothek im Rahmen der Bestandsrotation transportiert werden müssen.
Erfordert den Cronjob stockrotation.pl.
STAFF_PASSWORD_RESET
Diese Benachrichtigung wird versandt, wenn ein*e Mitarbeiter*in eine E-Mail für die Passwortrücksetzung an eine*n Benutzer*in versendet.
Die Funktion des Passwortzurücksetzens wird über den Systemparameter OpacResetPassword gesteuert.
TICKET_ACKNOWLEDGE
Diese Benachrichtigung wird an den Melder eines Katalogproblems gesendet, wenn er report a concern through the staff interface oder wenn er report a concern through the OPAC, um zu bestätigen, dass der Problembericht eingegangen ist.
Die Funktion „Problembericht“ wird in der Dienstoberfläche durch den Systemparameter CatalogConcerns und im OPAC durch den Systemparameter OpacCatalogConcerns aktiviert.
TICKET_ASSIGNED
Diese Benachrichtigung wird an den Empfänger einer Kataloganforderung gesendet, wenn ihm ein Ticket zugewiesen wird.
Die Funktion „Problembericht“ wird in der Dienstoberfläche durch den Systemparameter CatalogConcerns und im OPAC durch den Systemparameter OpacCatalogConcerns aktiviert.
TICKET_NOTIFY
Die Benachrichtigung wird an das Katalogisierungsteam gesendet, an die im Systemparameter CatalogerEmails hinterlegte E-Mail-Adresse, um diese darüber zu informieren, dass a concern was reported about a bibliographic record.
Die Funktion „Problembericht“ wird in der Dienstoberfläche durch den Systemparameter CatalogConcerns und im OPAC durch den Systemparameter OpacCatalogConcerns aktiviert.
TICKET_RESOLVE
Diese Benachrichtigung wird an den Melder eines Katalogproblems gesendet, wenn the concern is marked as resolved with the ‚Notify‘ flag.
Die Funktion „Problembericht“ wird in der Dienstoberfläche durch den Systemparameter CatalogConcerns und im OPAC durch den Systemparameter OpacCatalogConcerns aktiviert.
TICKET_UPDATE
Diese Benachrichtigung wird an den Melder eines Katalogproblems gesendet, wenn the concern is updated with the ‚Notify‘ flag.
Die Funktion „Problembericht“ wird in der Dienstoberfläche durch den Systemparameter CatalogConcerns und im OPAC durch den Systemparameter OpacCatalogConcerns aktiviert.
TO_PROCESS
Wird benutzt um Bibliothekspersonal anzumelden, wenn ein Anschaffungsvorschlag zum Etat verschoben wird, den dieses Bibliothekspersonal verwaltet
Erfordert den Cronjob notice_unprocessed_suggestions
TRANSFER_OWNERSHIP
Sent to the patron to whom a list was transferred.
Version
This notice was added to Koha in version 24.11.
Tipp
If you have upgraded from a previous version and need this notice, add the new notice, making sure to select the ‚Lists‘ module and making sure to use the code TRANSFER_OWNERSHIP.
If you want the default text, you can use the ‚View default‘ button and the ‚Copy to template‘ button. This will copy the default text to your notice.
WELCOME
Wird an Benutzer*innn verschickt, wenn das Bibliothekskonto angelegt wird und der Systemparameter AutoEmailOPACUser aktiviert ist
Bemerkung
Aus Sicherheitsgründen ist es nicht möglich Passwörter in einer Benachrichtigung zu versenden.
There are also a set of predefined slips (or receipts) listed on this page. All of these slips can be customized by altering their text via the Notices and slips tool and their style using the SlipCSS preference to define a stylesheet. Here is what those slips are used for:
ACCOUNT_CREDIT
Wird verwendet, um eine Quittung für eine Gebühr zu drucken (entweder für die Bezahlung, den Erlass oder eine andere Gebühr).
Diese Quittung kann manuell über die Schaltfläche „Drucken“ neben der Zeile einer Gebührenart im Konto in patron’s accounting tab gedruckt werden.
Die Quittung kann auch semi-automatisiert gedruckt werden wenn paying or writing off a charge falls der Systemparameter FinePaymentAutoPopup aktiviert ist.
Bemerkung
Es ist möglich, spezifische Benachrichtigungen für unterschiedliche Geührbenarten festzulegen. Um dies zu tun, create a new notice mit dem Code CREDIT_ gefolgt von credit type code.
Um beispielsweise eine spezifische Quittung für den Erlass zu haben, create a new notice mit dem Code CREDIT_WRITEOFF.
ACCOUNT_DEBIT
Wird verwendet, um eine Rechnung für eine Gebühr zu drucken (jegliche Art von Gebühr wie z.B. eine Gebühr für Verlust oder Überfälligkeit).
Die Quittung oder Rechnung kann manuell über die Schaltfläche „Drucken“ neben der Zeile einer Gebührenart im Konto in patron’s accounting tab gedruckt werden.
Bemerkung
Es ist möglich, spezifische Benachrichtigungen für unterschiedliche Gebührenarten festzulegen. Um dies zu tun, create a new notice mit dem Code DEBIT_ gefolgt von debit type code.
Um beispielsweise eine spezifische Quittung für verlorene Exemplare zu haben, create a new notice mit dem Code DEBIT_LOST.
ACCOUNTS_SUMMARY
Zum Ausdrucken einer Zusammenfassung der ausstehenden Gebühren und der nicht genutzten Guthaben auf dem Benutzerkonto.
Der Quittungsdruck kann manuell durch einen Klick auf „Kontostand drucken“ im ‚Print‘ button in der Werkzeugleiste der Detailseite des Benutzers ausgelöst werden.
AR_SLIP
Wird verwendet, um eine Quittung für eine Artikelbestellung zu drucken
Die Quittung kann manuell ausgedruckt werden, wenn Aufsatzanfragen über die Dienstoberfläche verwaltet werden.
Pfad in Koha: Ausleihe > Aufsatzanfragen > Aktionen > Quittungsdruck
CHECKINSLIP
Diese Quittung listet alle Exemplare auf, die heute vom Benutzer/von der Benutzerin zurückgegeben wurden
Klicken Sie Drucken > Rückgabequittung drucken im Benutzerkonto, um diese Quittung zu drucken
Sie können diese Quittung auch von der Rückgabeseite aus drucken
ISSUEQSLIP
Wird verwendet um eine Kurzquittung in der Ausleihe zu drucken
Die Kurzquittung listet nur heute entliehene Exemplare auf
ISSUESLIP
Wird verwendet um eine vollständige Quittung in der Ausleihe zu drucken
Die Quittung zeigt nicht nur heute entliehene, sondern alle aktuell entliehenen Exemplare
HOLD_SLIP
Wird verwendet um eine Vormerkquittung zu drucken
Die Vormerkquittung wird generiert, wenn eine Vormerkung bestätigt und auf wartend gesetzt wird.
OVERDUE_SLIP
Wird verwendet um eine Quittung für überfällige Medien zu drucken
Die Quittung für überfällige Medien kann manuell generiert werden, indem Sie in der Dienstoberfläche im Benutzerkonto das Druckmenü benutzen. Alle überfälligen Exemplare werden angezeigt.
RECALL_REQUESTER_DET
Wird verwendet, um Angaben zum Benutzer/zur Benutzerin, die einen Rückruf für ein Exemplar ausgelöst hat, zu drucken, wenn ein Rückruf eintrifft.
RECEIPT
Wird verwendet, um einen Zahlungsbeleg im point of sale module zu drucken.
TRANSFERSLIP
Wird verwendet um eine Transportquittung zu drucken
Die Transportquittung wird gedruckt, wenn ein Transport von einer Bibliothek zu einer anderen bestätigt wird
In addition to managing and customizing notices and slips, the „Notices and slips“ tool contains some additional templates which allow you to customize database entries for some specific purposes. So far, the only template available for this purpose is to modify the overdue fine description. Some more may be added in the future.
OVERDUE_FINE_DESC
Dieses Template wird verwendet, um die Beschreibung für Mahngebühren in einem patron’s account zu erstellen.
Bemerkung
Die Informationen, die für diese Anpassung zur Verfügung stehen, stammen von den Ausleihen (Hefte), den Exemplaren und den Benutzern (Entleiher*innen).
Mahntrigger
Bemerkung
Nur Bibliothekspersonal mit der Berechtigung edit_notice_status_triggers (oder der superlibrarian-Berechtigung) hat Zugriff auf dieses Werkzeug.
Pfad in Koha: Mehr > Werkzeuge > Benutzer und Ausleihe > Mahntrigger
In order to send the overdue notices that you defined using the Notices and slips tool, you need to first set the triggers to have these messages.
Wichtig
Wenn Sie Mahnbenachrichtigungen an Ihre Benutzer*innen verschicken möchten, muss dies im Benutzertyp Benutzertypen aktiviert sein.
Wichtig
Abhängig von dem Wert, der im Systemparameter OverdueNoticeCalendar festgelegt ist, werden Schließtage bei der Berechnung des Versandzeitpunkts mit berücksichtigt, oder nicht. Auch der Schließtagekalender wird in dieser Berechnung berücksichtigt.
Das Werkzeug ‚Mahntrigger‘ gibt der Bibliothek die Möglichkeit bis zu drei Benachrichtigungen je Benutzertyp zur Erinnerung an überfällige Exemplare zu verschicken
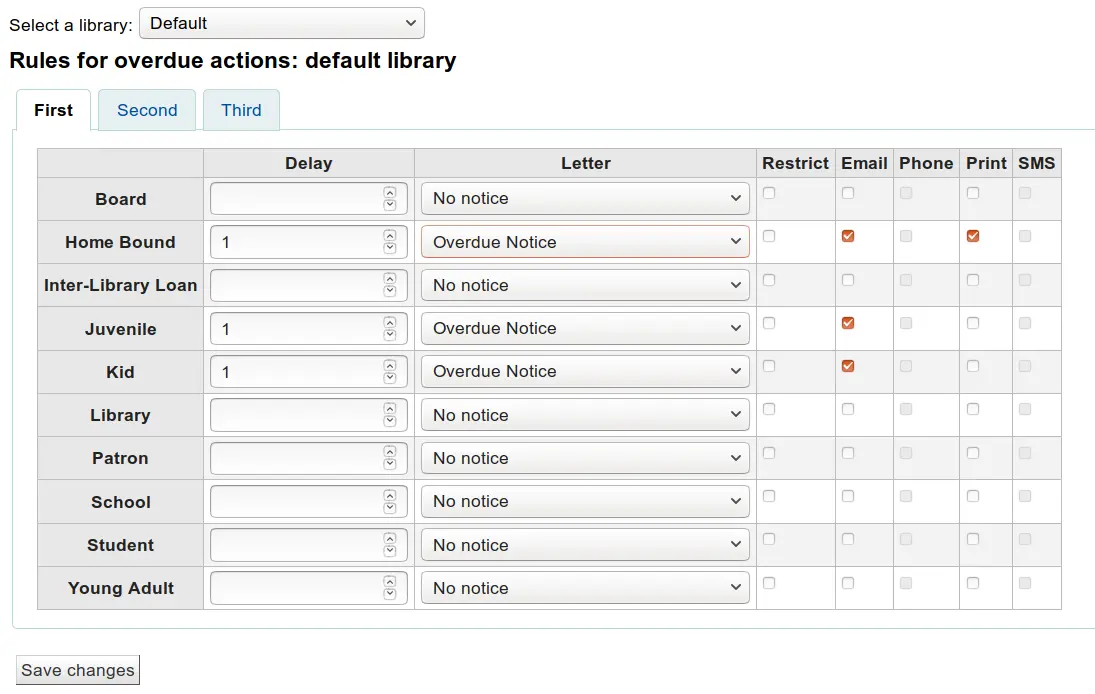
Karenz ist die Anzahl der Tage, bevor eine Aktion durch eine überfällige Ausleihe ausgelöst wird.
Wichtig
Wenn Sie wollen, dass Koha eine Aktion (eine Benachrichtigung schicken oder eine*n Benutzer*in sperren) auslöst, dann ist ein Karenzwert erforderlich.
Um weitere Benachrichtigungen zu verschicken, klicken Sie auf die Reiter ‚Zweite‘ und ‚Dritte‘ Benachrichtigung
Wenn Sie möchten, dass ein*e Benutzer*in mit überfälligen Medien keine neuen Medien mehr entleihen kann, setzen Sie das Häkchen bei ‚Gesperrt‘. Dies erzeugt eine Nachricht im Benutzerdatensatz, die dem Bibliothekspersonal an der Ausleihtheke anzeigt, dass der/die Benutzer*in wegen überfälliger Medien nichts mehr entleihen darf.
Wenn Sie entscheiden eine*n Benutzer*in auf diese Weise zu sperren, kann Koha die Sperre automatisch wieder aufheben, wenn der Systemparameter AutoRemoveOverduesRestrictions entsprechend gesetzt ist.
Als nächstes können Sie die Versandart der Mahnungbenachrichtigung festlegen. Sie können zwischen E-Mail, Telefon (wenn Sie den iTiva Talking Tech Service verwenden), Druck und SMS (wenn SMSSendDriver konfiguriert ist) auswählen.
Benutzerausweisdruck
Bemerkung
Nur Bibliothekspersonal mit der Berechtigung label_creator (oder der superlibrarian-Berechtigung) hat Zugriff auf dieses Werkzeug.
Pfad in Koha: Mehr > Werkzeuge > Benutzerausweisdruck
Mit dem Modul Benutzerausweisdruck können unter Verwendung von Layouts und Templates Benutzerausweise gestaltet und gedruckt werden. Einige Features des Moduls sind:
Layouts für Benutzerausweise können mit einem Text angepasst werden, der im Koha Benutzerdatensatz abgefragt wird
Entwerfen Sie benutzerdefinierte Templates für den Druck von Benutzerausweisen
Stapel für den Druck von Benutzerausweisen erstellen und verwalten
Einen oder mehrere Stapel exportieren (als PDF) um diese zu drucken
Exportieren Sie (als PDF) einen einzelnen oder mehrere Benutzerausweise aus einem Stapel
Layouts
Pfad in Koha: Mehr > Werkzeuge > Benutzerausweisdruck > Verwalte > Layouts
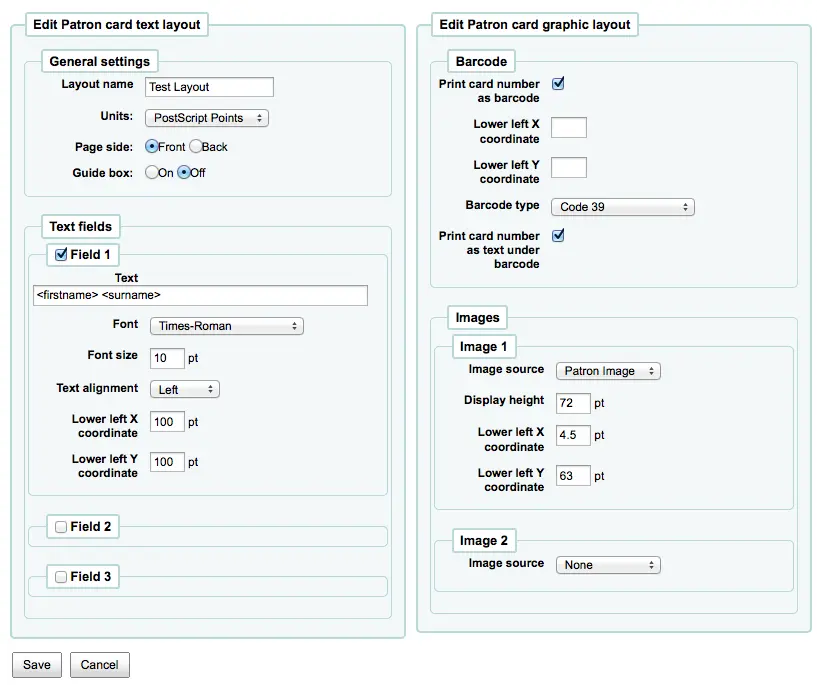
Das Layout definiert den Text und die Bilder und an welcher Stelle sie auf dem Benutzerausweis gedruckt werden.
Hinweis
Bis zu drei Zeilen Text, der Benutzernummer als Barcode und bis zu zwei Bildern können auf dem Ausweis gedruckt werden.
Neues Layout
Haben Sie noch keine Layouts konfiguriert, können Sie über die Schaltfläche ‚Neu‘ ein neues Layout hinzufügen.
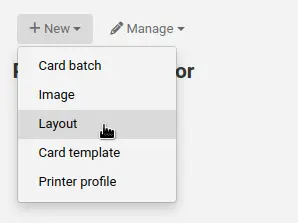
Sie können auch die Schaltfläche ‚Verwalte‘ klicken. Hier bekommen Sie eine Liste der aktuell verfügbaren Layouts angezeigt, die Sie bearbeiten können. Oben auf der Seite bekommen Sie aber immer die Schaltfläche ‚Neu‘ angezeigt.
Der Name, den Sie dem Layout geben, dient Ihrer eigenen Orientierung. Benennen Sie es so, dass Sie es zu einem späteren Zeitpunkt einfach identifizieren können
In der Auswahlliste für die ‚Einheiten‘ können Sie die Maßskala für das Layout festlegen.

Hinweis
Ein Postscript Point sind 1/72“, ein Adobe Agate sind 1/64“, ein Inch sind 25.4 SI Millimeter
Als nächstes legen Sie fest, ob das Layout für die Vorder- oder Rückseite des Benutzerausweises verwendet werden soll
Hinweis
Wenn Sie zweiseitige Bibliotheksausweise verwenden möchten, müssen Sie ein Layout für die Vorder- und eines für die Rückseite definieren. Diese Option erlaubt Ihnen nicht doppelseitige Ausweise zu drucken. Aber Sie können nachverfolgen, welche Seite des Ausweises Sie gestalten.
Sie können bis zu 3 Zeilen Text auf der Karte ausgeben. Es kann sich dabei um statischen Text oder Felder aus dem Benutzerdatensatz handeln. Wenn Sie Felder aus dem Benutzerdatensatz verwenden möchten, müssen Sie die Feldnamen in spitzen Klammern angeben, wie zum Beispiel - <firstname>
Hinweis
A full list of field names can be found in the database structure at https://schema.koha-community.org
Für jede Zeile Text können Sie die Schriftart, Schriftgröße und Position auf der Karte durch die Angabe der X- und Y-Koordinaten angeben
Wenn Sie Barcode und Ausweisnummer anzeigen möchten, müssen Sie die Option ‚Benutzernummer als Barcode drucken‘ aktivieren. Dann wird die Ausweisnummer als Barcode gedruckt. Wenn sie die Nummer in lesbarer Form drucken möchten, aktivieren Sie die Option ‚Ausweisnummer als Text unter Barcode drucken‘.
Zum Abschluss können Sie noch bis zu zwei Bilder auswählen, die auf den Ausweis gedruckt werden sollen.
Eines kann ein Benutzerfoto sein, dessen Größe Sie an Ihre Bedürfnisse anpassen können.
Das andere Bild kann zum Beispiel ein Bibliothekslogo oder Symbol sein, das Sie mit dem Werkzeug ‚Bilder verwalten‘ im Modul für den Benutzerausweisdruck hochgeladen haben.
Wichtig
Es liegt in der Verantwortung des Designers, Textzeilen, Barcodes und Bilder so zu konfigurieren, dass eine Überlagerung vermieden wird.
Nach dem Speichern werden Ihre Layouts auf der Seite ‚Layouts verwalten‘ angezeigt.

Templates
Pfad in Koha: Mehr > Werkzeuge > Benutzerausweisdruck > Verwalte > Templates
Ein Template ist das Etiketten- bzw. Kartenformat, das Sie verwenden. Das kann z.B. Avery 5160 für Adressetiketten, Gaylord 47-284 für Signaturschilder oder Avery 28371 für Benutzerausweise sein, um nur einige Beispiele aufzuführen. Bei diesen Etiketten bzw. Druckvorlagen sind die Informationen, die Sie für die Konfiguration in Koha brauchen auf der Verpackung oder auch auf der Webseite des Herstellers angegeben.
Neues Template
Um ein neues Template zu erstellen, klicken Sie auf die Schaltfläche ‚Neu > Template‘ oben auf der Seite. Dies leitet Sie sofort auf die Seite ‚Neues Ausweistemplate‘ weiter. Sie können auch auf die Schaltfläche ‚Verwalte > Templates‘ klicken. Hier erhalten Sie eine Liste aller aktuell verfügbaren Templates, die Sie zum Bearbeiten auswählen können. Oberhalb der Liste wird trotzdem noch die Schaltfläche ‚Neu‘ angezeigt.
Mit der angezeigten Maske ausgehend von der Schaltfläche ‚Bearbeiten‘ oder ‚Neues Template‘, können Sie das Template für Ihre Etiketten- oder Ausweisdruckvorlage definieren.
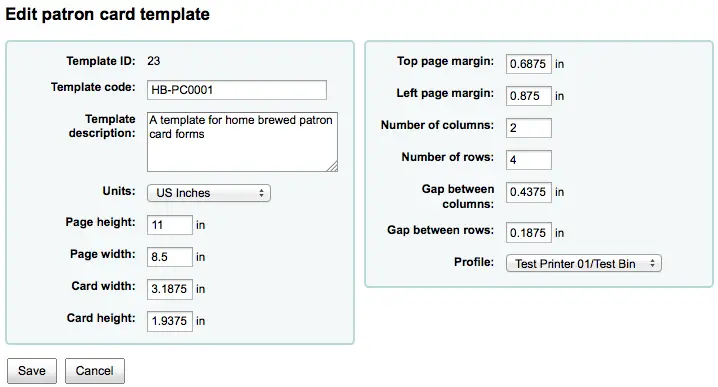
Die Template-ID wird automatisch beim Abspeichern generiert. Es handelt sich um eine systeminterne einmalige Identnummer
Der Templatecode sollte einen eindeutigen Namen haben, anhand dessen Sie Ihr Template in einer Liste von Templates identifizieren können
Sie können das Feld Templatebeschreibung verwenden um zusätzliche Informationen über das Template zu hinterlegen
Die Auswahlliste ‚Einheiten‘ wird verwendet um festzulegen, welche Maßeinheit Sie für Ihr Template verwenden.
Hinweis
Ein Postscript Point sind 1/72“, ein Adobe Agate sind 1/64“, ein Inch sind 25.4 SI Millimeter
Die Maße (Seitenhöhe, Seitenbreite, Kartenhöhe, Kartenbreite) können auf der Packung verzeichnet sein, oder auf der Webseite des Herstellers oder die Maße können von einem Probeexemplar genommen werden.
Ein Profil ist ein Satz von „Einstellungen“, das einem bestehenden Template vor dem Druck zugeordnet wird, um Eigenschaften eines bestimmten Druckers auszugleichen (dem das Profil zugeordnet ist).
Drucken Sie versuchsweise ein paar Ausweiskarten, bevor Sie ein Profil auswählen. So können Sie einfach ein Profil finden, das richtig für Ihre Kombination von Drucker und Template ist.
Wenn Sie Unregelmäßigkeiten auf dem gedruckten Dokument gefunden haben, können sie ein Profil create a profile erstellen und es dem Template zuweisen.
Wichtig
Definieren Sie kein Profile, wenn es nicht nötig ist, zum Beispiel kein Druckprofil definieren. Es ist nicht möglich ein Profil von einem Template zu entfernen, aber Sie können zu einem anderen Profil wechseln.
Hinweis
Benutzen Sie verschiedene Drucker kann es erforderlich sein verschiedene Templates zu definieren.
Nach dem Speichern werden Ihre Templates auf der Seite ‚Templates verwalten‘ angezeigt.

Profile
Pfad in Koha: Mehr > Werkzeuge > Benutzerausweisdruck > Verwalte > Druckerprofile
Ein Profil ist ein Set von „Anpassungen“, das einem bestehenden Template vor dem Druck zugeordnet wird, um Eigenschaften eines bestimmten Druckers auszugleichen. Das bedeutet, wenn Sie nach der Gestaltung eines Templates Beispieldaten ausdrucken und feststellen, dass die Daten nicht auf allen Etiketten gleich ausgerichtet sind, können Sie ein Profil für jeden Drucker erstellen, um die Unterschiede in den Druckeigenschaften auszugleichen, wie zum Beispiel die Verschiebung des Texts nach links, rechts, oben oder unten.
Wenn Ihre Ausweise bereits so gedruckt werden, wie Sie es möchten, benötigen Sie kein Profil.
Neues Profil
Klicken Sie auf die Schaltfläche ‚Neu‘ am Anfang der Seite und wählen Sie ‚Druckerprofil‘ um ein neues Profil zu erstellen
Um ein neues Profil zu erstellen, klicken Sie auf die Schaltfläche „Neues Profil“ am Anfang der Seite. Im angezeigten Formular können Sie Werte angeben, um eine falsche Positionierung auf dem Etikettenblatt zu korrigieren. Sie können auch auf die Schaltfläche „Profile verwalten“ auf der linken Seite verwenden um eines der aktuellen Profile zur Bearbeitung auszuwählen.
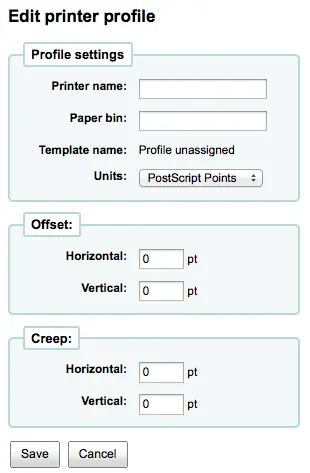
Der Druckername und das Papierfach müssen nicht exakt denen Ihres Druckers entsprechen. Sie dienen Ihrer eigenen Orientierung, so dass Sie sehen können, für welchen Drucker Sie dieses Profil erstellt haben.
Hinweis
Sie können beispielsweise die Druckermodelnummer als Druckername benutzen, oder Sie können ihn ‚Drucker auf meinem Schreibtisch‘ nennen
Das Template wird ausgefüllt, sobald Sie ein Template festgelegt haben, für das dieses Profil verwendet werden soll Template Bearbeitungsform
Die Auswahlliste Maße wird verwendet um festzulegen welche Maßeinheit Sie für Ihr Profil verwenden.
Hinweis
Ein Postscript Point sind 1/72“, ein Adobe Agate sind 1/64“, ein Inch sind 25.4 SI Millimeter
Offset beschreibt was geschieht, wenn ein Bild leicht horizontal oder vertikal zum Mittelpunkt verschoben ist. Die Fließdehnung beschreibt einen Zustand, bei dem der Abstand zwischen den Etiketten auf einer Seite nach oben oder unten variiert
Für Offset und Fließdehnungs-Werte bewegen negative Werte die Druckinformation nach oben und links auf dem ausgedruckten Blatt und positive Zahlen bewegen die Druckinformation nach unten und rechts
Beispiel: der Text ist 0.25‘‘ von der linken Ecke des ersten Etiketts, 0.28“ von der linken Ecke des zweiten Etiketts und 0.31“ von der linken Ecke des dritten Etiketts entfernt. Das bedeutet die horizontale Fließdehnung sollte -0.03“ sein, um die Differenz auszugleichen.
Nach dem Speichern werden Ihre Profile auf der Seite ‚Druckerprofile verwalten‘ angezeigt.

Nachdem Sie Ihr neues Profil gespeichert haben, können Sie zu der Liste der Templates zurückkehren und das Template für dieses Profil bearbeiten.
Stapel
Pfad in Koha: Mehr > Werkzeuge > Benutzerausweisdruck > Verwalte > Batches
Ein Stapel ist eine Sammlung an Benutzern, für die Sie Benutzerausweise drucken möchten.
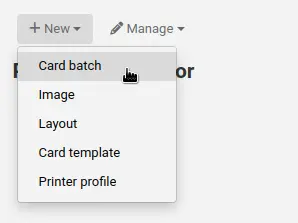
Neuer Stapel
Um einen neuen Stapel hinzuzufügen, können Sie auf die Schaltfläche ‚Neu‘ oben auf der Seite klicken und dann ‚Batch‘ auswählen. Klicken Sie auf die Schaltfläche ‚Verwalte > Batch‘ werden Ihnen bereits definierte Stapel angezeigt. In dieser Ansicht können entweder einen Stapel zum Bearbeiten auswählen, oder einen neuen Stapel hinzufügen.
Für einen neuen Stapel erscheint eine Nachricht, die besagt, dass Sie Benutzer*innen zum Bearbeiten diesem Stapel hinzufügen können.
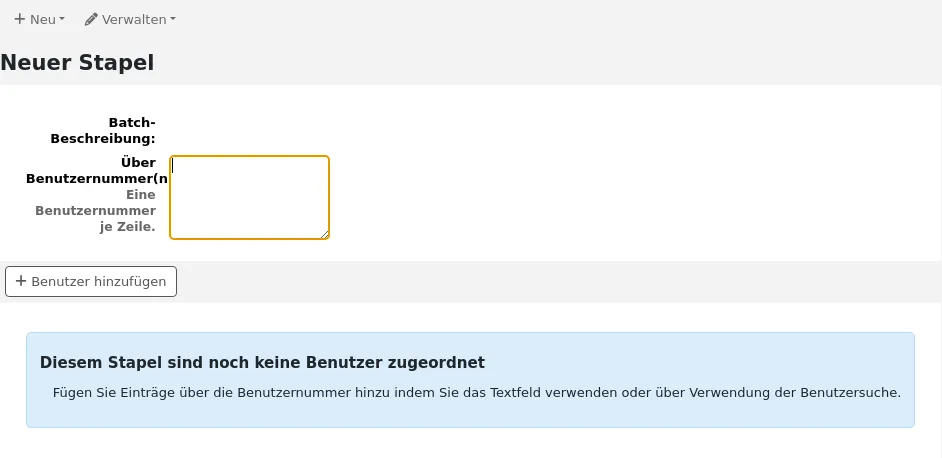
Nachdem Sie die Schaltfläche ‚Benutzer hinzufügen‘ angeklickt haben, öffnet sich ein neues Fenster für die Benutzersuche.
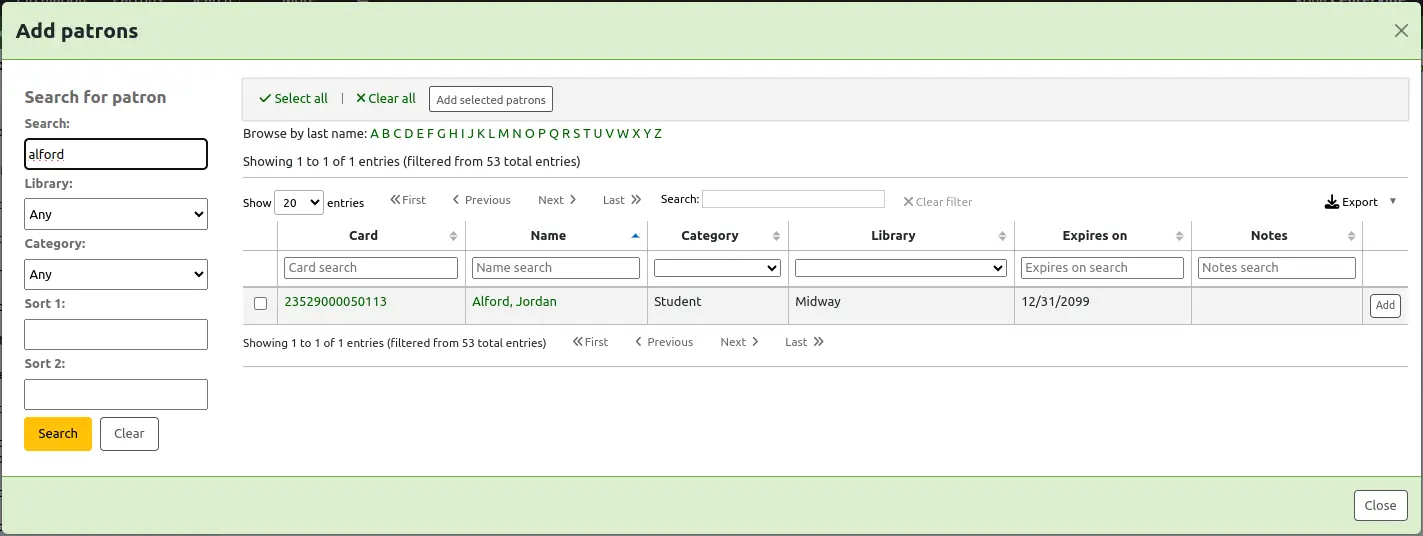
Von hier aus können Sie nach den Benutzer*innen suchen, die Sie Ihrem Stapel hinzufügen möchten, indem Sie nach ihrem Namen, dem Benutzertyp und/oder der Bibliothek suchen. Wenn Sie * in die Suchzeile eingeben, werden Ihnen alle Benutzer*innen angezeigt.
Ausgehend von der Trefferliste können Sie über die Schaltfläche ‚Hinzufügen‘ Benutzer*innen dem Stapel hinzufügen. Haben Sie Benutzer*innen hinzugefügt, können Sie eine neue Suche starten, oder die Aktion durch ‚Schließen‘ beenden. Ihr Stapel wird Ihnen angezeigt.
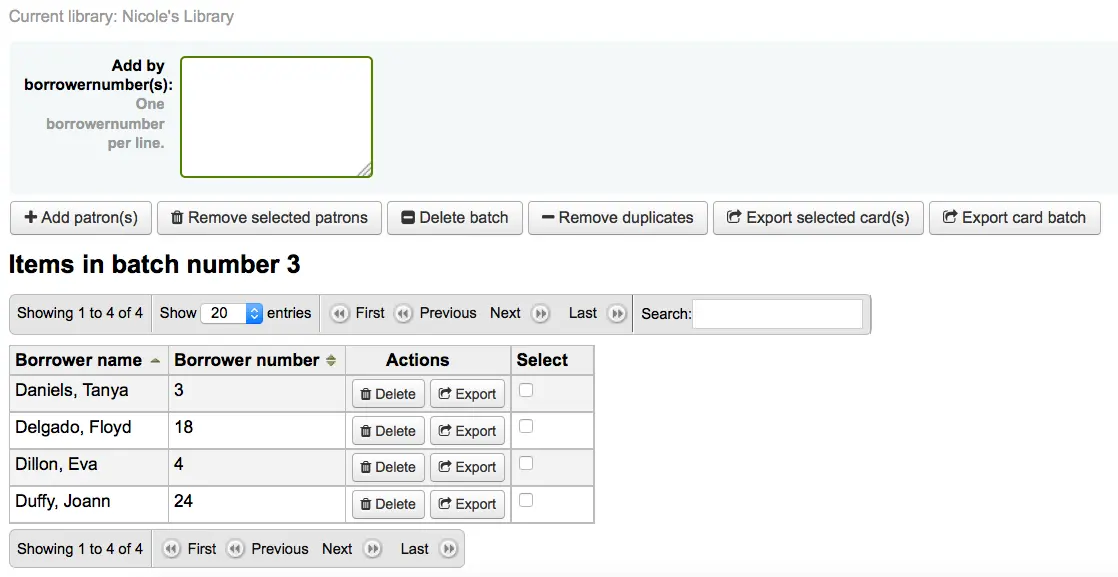
Alternativ können Sie auch benutzerdefinierte Reports zur Erstellung eines Stapels nutzen. Ein Bericht, der Benutzernummern enthält, hat die Option Reportergebnisse an den Benutzerausweisdruck zu versenden.
Version
Die Option, Berichte an den Benutzerkartenersteller zu senden wurde in Koha-Version 23.11 hinzugefügt.
Wenn Sie mit Ihrem Stapel zufrieden sind, können Sie mit dem Export fortfahren. Wenn Sie den Stapel korrigieren oder sogar löschen möchten, finden Sie die entsprechenden Schaltflächen oben auf Ihrem Bildschirm. Sie können jederzeit über die Schaltfläche „Verwalten > Kartenstapel“ hierher zurückkehren.
Wenn Sie alle Benutzerausweise exportieren möchten, dann klicken Sie auf ‚Batch exportieren‘. Andernfalls können Sie auch ausgewählte Benutzer*innen nehmen und deren Benutzerausweise drucken, indem Sie die Checkbox rechts des Namens im Feld ‚Auswählen‘ markieren und dann die Schaltfläche ‚Markierte exportieren‘ bedienen.
In der Maske zum Exportieren von Benutzerausweisen müssen Sie ein Template, ein Layout und eine Startposition (Position des ersten Ausweises) auswählen.
Hinweis
Für das Feld Startposition gilt: wenn die ersten 6 Etiketten bereits genutzt werden, können Sie bei Position 7 mit dem Etikettendruck beginnen. Die Etiketten sind von links nach recht und von oben nach unten nummeriert.
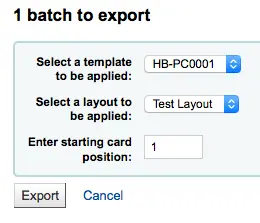
Wenn sie ‚Exportieren‘ auswählen, bekommen Sie ein PDF Ihres Etiketts angezeigt, welches Sie drucken möchten
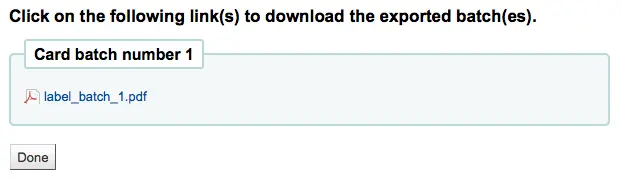
Öffnen Sie das PDF sehen Sie alle Ausweise, die Sie drucken möchten

Das obere Bild zeigt ein Layout, das aus zwei Textzeilen zusammengestellt ist. Das erste ist nur Text, das zweite ist zusammengesetzt aus den Feldern <firstname> <surname>. Ein Benutzerfoto wird gedruckt (wenn verfügbar) und der Barcode der Benutzernummer wird im Code 39 angezeigt. Dies wird mit einem Template mit 3 Spalten und 8 Zeilen gedruckt und es sollte Position 1-3 gewählt werden. Wenn Sie dieses PDF drucken, geben Sie Acht, dass Ihr Drucker nicht den Maßstab des PDF ändert, andernfalls kann der Drucker Ihr Template nicht richtig ausdrucken.
Bilder verwalten
Pfad in Koha: Mehr > Werkzeuge > Benutzerausweisdruck > Verwalte > Bilder
Bilder, die über dieses Werkzeug hochgeladen wurden, erscheinen in der Auswahlliste, wenn Sie Layouts für Benutzerausweise erstellen. Die Anzahl der Bilder, die Sie hochladen können wird durch den Systemparamter ImageLimit begrenzt (die Zahl der Benutzerfotos nicht eingeschlossen).
Wichtig
Die Dateigröße der Bilder muss unter 500k liegen.
Hinweis
Bilder, die mit diesem Werkzeug hochgeladen werden, sollten mindestens eine Qualität von 300dpi haben. Das ist das Minmum für Bilder, die gedruckt werden sollen.
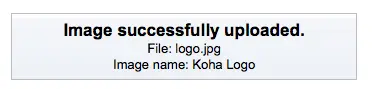
In der Mitte der Seite ist ein einfaches Upload-Formular. Suchen Sie nach der Datei auf Ihrem Computer und geben Sie ihr einen Namen, den Sie später leicht erkennen.

Nachdem die Datei hochgeladen wurde, werden Sie aufgefordert den Upload zu bestätigen.
Alle hochgeladenen Bilder werden im rechten Bereich der Seite aufgelistet.
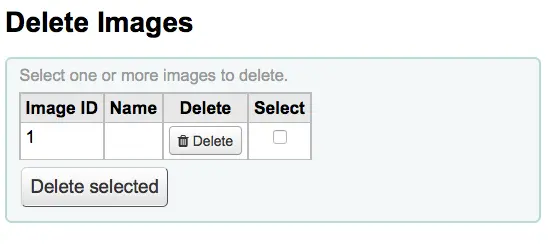
Um eines oder mehrere dieser Bilder zu löschen, klicken Sia auf die Auswahlbox rechts neben jedem Bild, das Sie löschen möchten, und klicken Sie auf den Schalter ‚Löschen‘.
Stapellöschung und -anonymisierung von Benutzern
Bemerkung
Nur Bibliothekspersonal mit der Berechtigung delete_anonymize_patrons (oder der superlibrarian-Berechtigung) hat Zugriff auf dieses Werkzeug.
Pfad in Koha: Mehr > Werkzeuge > Benutzer und Ausleihe > Benutzerstapellöschung und -anonymisierung
Mit diesem Werkzeug können Sie Benutzerausleihhistorien anonymisieren (dies bedeutet, dass die Exemplarausleihhistorie erhalten bleibt, aber die Verknüpfung zum/zur Benutzer*in gelöscht wird) oder Benutzerdaten löschen (komplett aus dem System entfernen).
Wichtig
Vor der Verwendung dieses Werkzeugs ist es empfehlenswert, ein Backup der Datenbank zu erstellen. Hier vorgenommene Änderung sind permanent.
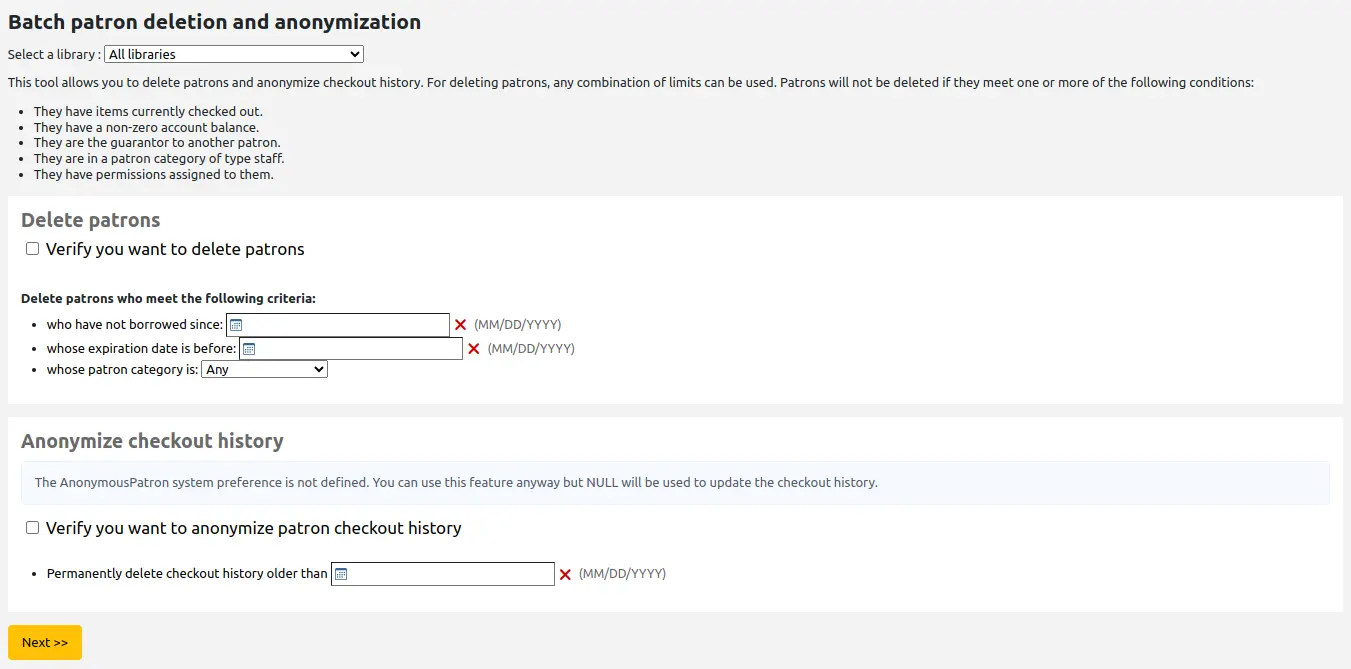
Stapellöschung von Benutzern
Wichtig
Benutzer, die eine oder mehrere dieser Bedingungen erfüllen, werden nicht gelöscht:
Sie haben derzeit Exemplare ausgeliehen.
Sie haben ein nicht ausgeglichenes Konto.
Sie sind Bürge für einen anderen Benutzer.
Sie gehören zum Benutzertyp Bibliothekspersonal.
Ihnen wurden Berechtigungen zugewiesen.
Um Benutzer*innen zu löschen,
Wählen Sie gegebenenfalls die Bibliothek im oberen Bereich der Seite aus, um die Stapelaktion auf die Benutzer*innen dieser Bibliothek zu beschränken.
Markieren Sie die Checkbox „Bestätigen Sie, dass die Benutzer gelöscht werden sollen“
Wählen Sie die Kriterien, anhand derer Benutzer*innen gelöscht werden sollen
seit einem bestimmten Datum nicht mehr ausgeliehen haben
Benutzerkonten haben, die zu einem bestimmten Datum ablaufen werden
bestimmten Benutzertypen angehören
auf einer Benutzerliste stehen
Klicken Sie auf ‚Weiter‘
Es erscheint eine Warnung, die die Anzahl der zu löschenden Besucher angibt und Auswahlmöglichkeiten für die Löschung.
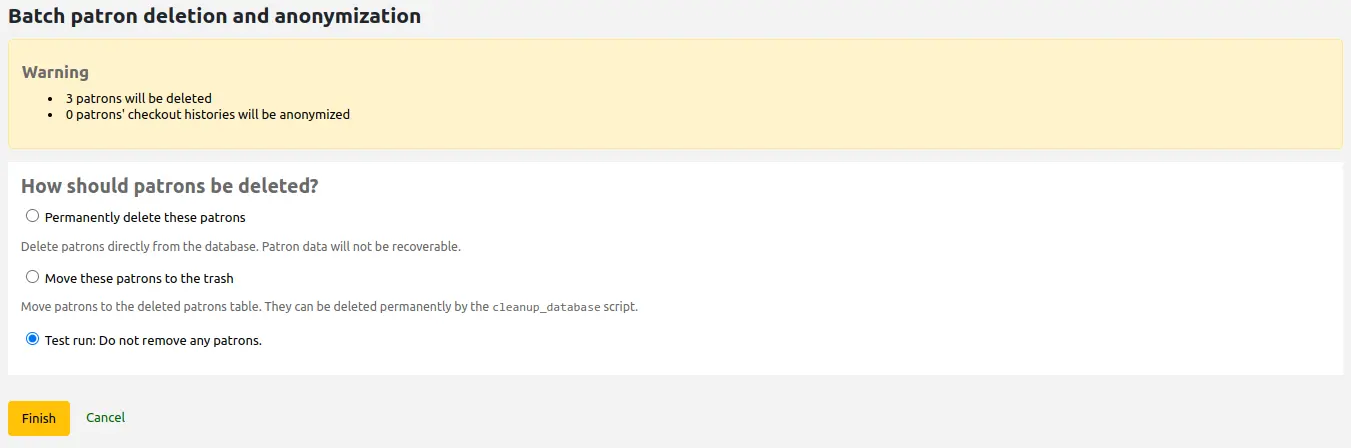
Wählen Sie die Art der Löschung:
Diese Benutzer*innen endgültig löschen: Dadurch werden die Benutzer*innen direkt aus der Datenbank gelöscht. Die Daten der Benutzer*innen sind nicht wiederherstellbar.
Diese Benutzer*innen in den „Papierkorb“ verschieben: Die Benutzer*innen werden in die Tabelle deletedborrowers verschoben. Sie können mit dem cleanup_database.pl script (mit dem Parameter
--deleted-patrons) endgültig gelöscht werden.Testlauf: Es werden keine Benutzer*innen gelöscht.
Klicken Sie auf „Beenden“
Stapelanonymisierung der Benutzerausleihhistorie
Durch die Anonymisierung der Ausleihhistorie wird die Benutzernummer in der Ausleihhistorie ersetzt. Es wird immer noch möglich sein zu sehen, wie oft ein bestimmtes Exemplar ausgeliehen wurde, aber nicht von wem.
Wichtig
Stellen Sie sicher, dass Sie den Systemparameter AnonymousPatron setzen, bevor Sie die Ausleihhistorie anonymisieren. Ein ungültiger oder leerer Wert wird einen Fehler verursachen.
Zur Anonymisierung der Ausleihhistorie,
Wählen Sie gegebenenfalls die Bibliothek im oberen Bereich der Seite aus, um die Stapelaktion auf die Benutzer*innen dieser Bibliothek zu beschränken.
Markieren Sie die Checkbox „Bestätigen Sie, dass die Ausleihhistorie anonymisiert werden soll“
Geben Sie das Datum an, vor dem Sie die Daten ändern möchten
Es erscheint eine Bestätigung mit der Angabe, wie viele Ausleihhistorien anonymisiert werden.
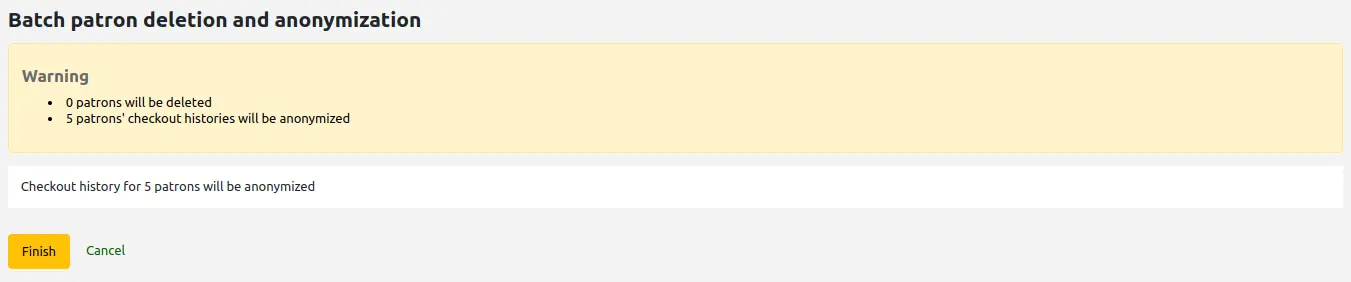
Klicken Sie auf „Beenden“
Es wird eine Bestätigungsmeldung mit der Anzahl der tatsächlich anonymisierten Historien angezeigt.

Stapelbearbeitung von Benutzerdaten
Bemerkung
Nur Bibliothekspersonal mit der Berechtigung edit_patrons (oder der superlibrarian-Berechtigung) hat Zugriff auf dieses Werkzeug.
Pfad in Koha: Mehr > Werkzeuge > Benutzer und Ausleihe > Stapelbearbeitung von Benutzerdaten
With this tool you can make edits to a batch of patron records. Simply load in a file of card numbers (one per line), choose from a list of patrons or scan patron card numbers in to the box provided.
All options are also available for use with borrowernumbers instead of card numbers.
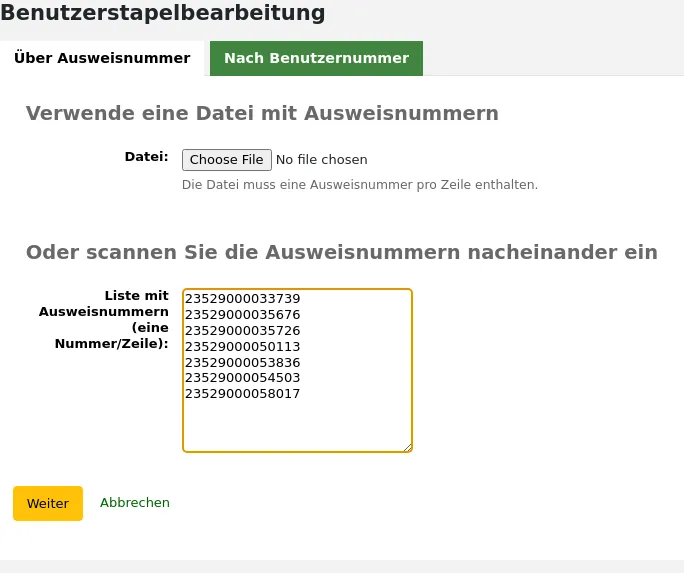
Once you have the file loaded or the card numbers or borrowernumbers entered click ‚Continue.‘ You will be presented with a list of the patrons and the changes you can make.
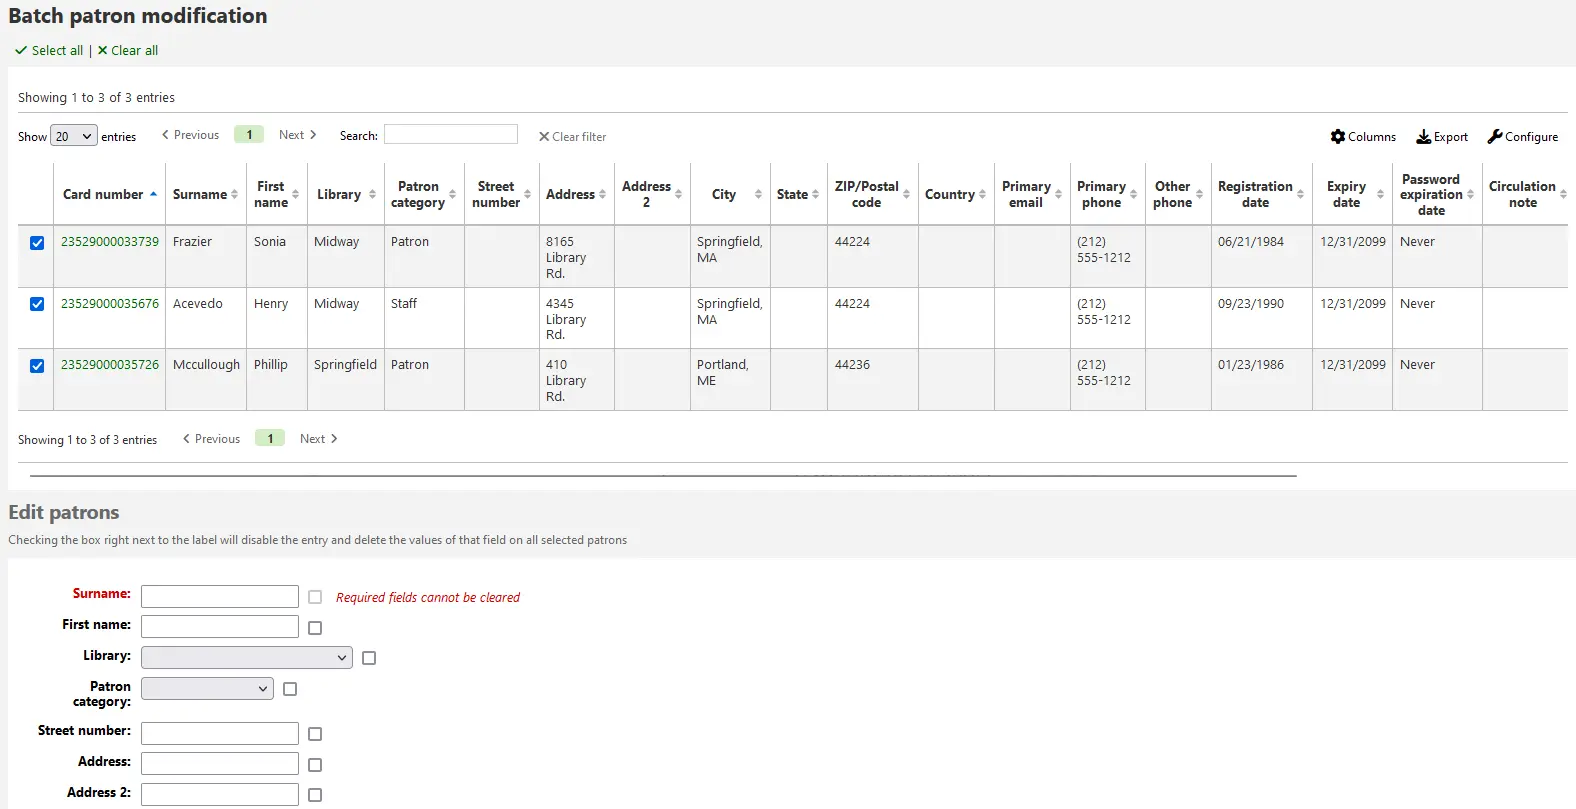
Auf der rechten Seite jedes Eingabefeldes ist eine Checkbox. Wenn Sie die Checkbox aktivieren, werden die Werte aus dem Feld gelöscht.
Wichtig
Wenn das Feld ein Pflichtfeld ist, können Sie es nicht leeren.
Wenn ein Benutzerattribut als wiederholbar definiert ist, kann ein weiteres Feld über das Pluszeichen (+) neben dem Feld hinzugefügt werden.
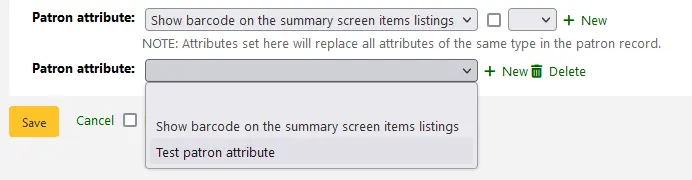
Nachdem Sie die Änderungen durchgeführt haben, klicken Sie auf ‚Speichern‘ und der Job wird in die Warteschlange gestellt.
Stapelbearbeitung von Fälligkeiten
Bemerkung
Nur Bibliothekspersonal mit der Berechtigung batch_extend_due_dates (oder der superlibrarian-Berechtigung) hat Zugriff auf dieses Werkzeug.
Pfad in Koha: Mehr > Werkzeuge > Benutzer und Ausleihe > Stapelbearbeitung von Benutzerdaten
Dieses Werkzeug erlaubt es Fälligkeitsdaten im Stapel zu bearbeiten. Dies kann nützlich sein, wenn eine Bibliothek ungeplant schließen muss und keine Rückgaben erfolgen können.
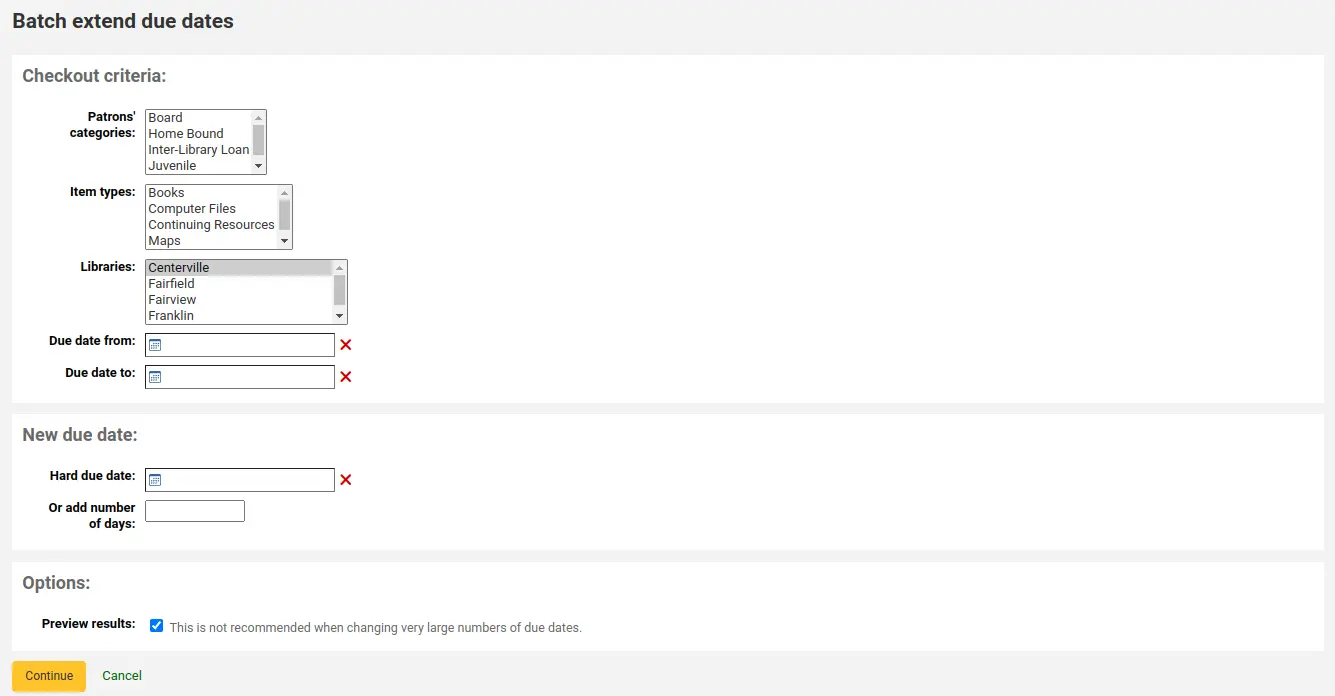
Sie können die Auswahl der Ausleihen nach dem Benutzertyp, dem Exemplartyp, der Bibliothek oder einer Kombination filtern.
Tipp
Bei Bedarf können Sie mehrere Einträge in den Auswahllisten markieren, indem Sie die STRG-Taste gedrückt halten, während Sie die Einträge auswählen.
Version
Die Möglichkeit nach Exemplartyp zu filtern ist ab Koha-Version 23.11 verfügbar.
Als nächstes geben Sie einen Datumsbereich für die aktuellen Fälligkeiten der entliehenen Exemplare an. Zum Beispiel: Sie wollen die Fälligkeit für die vor kurzem ausgeliehenen Medien verlängern, allerdings nicht für die bereits lange überfälligen.
Entscheiden Sie, ob Sie die Fälligkeiten auf ein bestimmts neues Datum setzen möchten oder um eine bestimmte Anzahl Tage verlängern möchten. Wenn Sie die Option mit Tagen verwenden, kann dies verhindern, dass eine große Anzahl an Ausleihen am gleichen Tag fällig wird.
Sie können entscheiden, ob Sie das Ergebnis Ihrer Auswahl anzeigen lassen möchten.
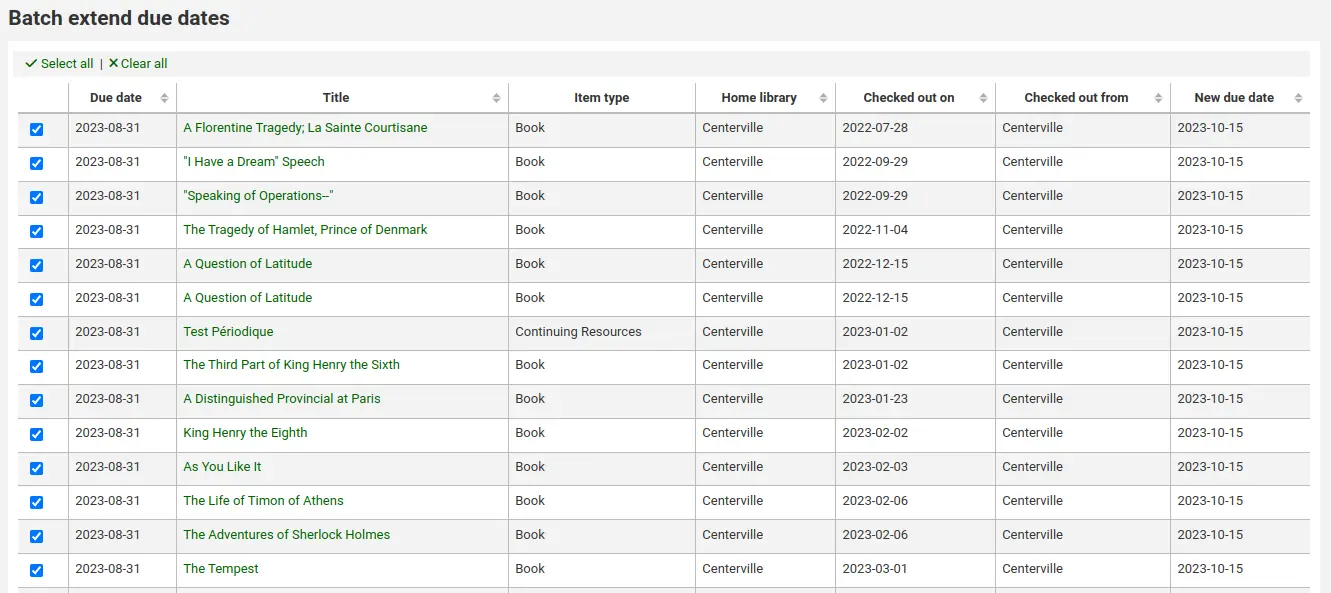
Wenn Sie die Ergebnisse anzeigen lassen, dann sehen Sie eine Tabelle mit dem aktuellen Fälligkeitsdatum und dem neuen Fälligkeitsdatum, so dass Sie Ihre Angaben nochmals überprüfen können. Sie können einzelne Ausleihen abwählen wenn sie nicht korrekt sind und Ihre Auswahl anpassen.
Klicken Sie auf die Schaltfläche „Ausgewählte Ausleihen bearbeiten“ und eine Bestätigung mit den bearbeiteten Ausleihen wird angezeigt.
Tag-Moderation
Bemerkung
Nur Bibliothekspersonal mit der Berechtigung moderate_tags (oder der superlibrarian-Berechtigung) hat Zugriff auf dieses Werkzeug.
Pfad in Koha: Mehr > Werkzeuge > Benutzer und Ausleihe > Tag-Moderation
Abhängig von der Konfiguration der Systemparameter tagging system preferences, müssen Tags von den Bibliotheksmitarbeiter*innen zunächst geprüft werden, bevor Sie im OPAC veröffentlicht werden. Dies wird im Werkzeug ‚Tag-Moderation‘ gemacht. Wenn neue Tags auf Moderation warten, wird dies unterhalb der Schaltflächen zu den Modulen auf der Intranetstartseite angezeigt:
Wenn Sie das Werkzeug zum ersten mal verwenden, sehen Sie eine Liste der Tags, die darauf warten von einem/einer Mitarbeiter*in zugelassen oder abgelehnt zu werden
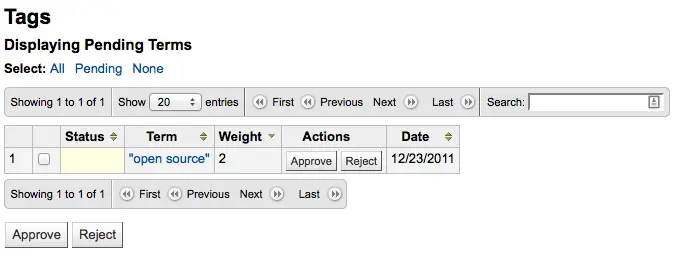
Klicken Sie auf den Begriff um alle Titel zu sehen, die mit diesem Begriff getaggt wurden
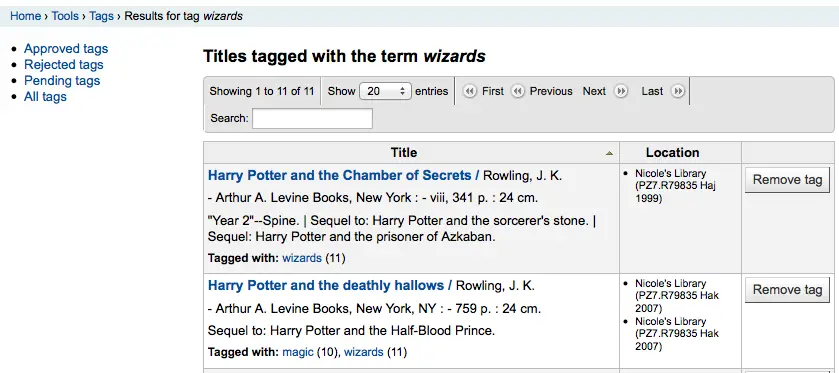
Ausgehend von dieser Liste können Sie einen Tag, ohne ihn gänzlich für die Zukunft abzulehnen, entfernen. Verwenden Sie hierfür die Schaltfläche ‚Ablehnen‘ rechts neben dem Titel.
Um ein Tag zuzulassen, können Sie entweder auf ‚Akzeptieren‘ in der Zeile mit dem Wort klicken oder Sie markieren alle Wörter, die Sie freigeben möchten und klicken auf ‚Akzeptieren‘ am Ende der Tabelle.
Um ein Tag abzulehnen, können Sie entweder auf ‚Ablehnen‘ in der Zeile mit dem Begriff klicken oder die Begriffe markieren und ‚Ablehnen‘ unterhalb der Tabelle anklicken.
Nachdem ein Tag zugelassen oder abgelehnt wurde wird es auf die entsprechende Liste gesetzt. Eine Zusammenfassung aller Tags erscheint auf der rechten Seite des Bildschirms.

Auch wenn ein Tag akzeptiert oder abgelehnt wurde, kann er immer noch auf eine andere Liste verschoben werden. In der Liste der akzeptierten Tags finden Sie eine Option diese abzulehnen:
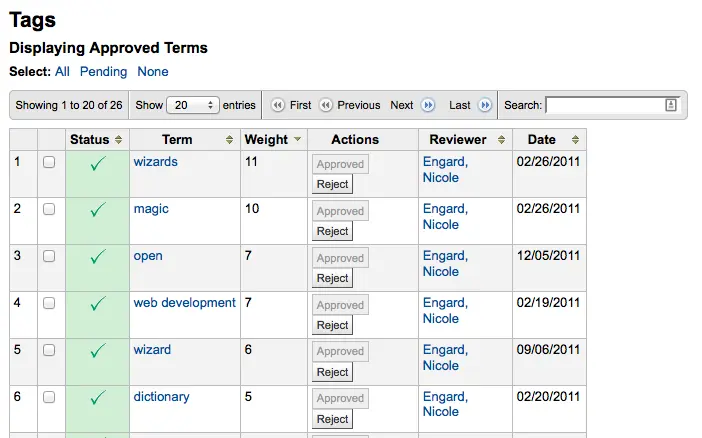
Um einen Begriff gegen die Listen akzeptierter und abgelehnter Tags zu überprüfen (und unter Umständen auch gegen das Wörterbuch the dictionary, das Sie für die Tag-Moderation konfiguriert haben) geben Sie den Begriff einfach in das Suchfeld rechts unten ein
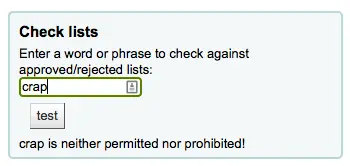
Sie können auch Tags durch Nutzung der Filter auf der linken Seite finden.
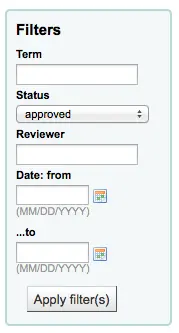
Benutzerfoto hochladen
Bemerkung
Dieser Bereich ist nur sichtbar, wenn Sie den Systemparameter patronimages auf „Zulassen“ gesetzt haben.
Bemerkung
Nur Bibliothekspersonal mit der Berechtigung batch_upload_patron_images (oder der superlibrarian-Berechtigung) hat Zugriff auf dieses Werkzeug.
Pfad in Koha: Mehr > Werkzeuge > Benutzer und Ausleihe > Benutzerfoto hochladen
Benutzerfotos können auch über eine Stapelfunktion hochgeladen werden, wenn Sie den Upload von Benutzerfotos allowing patron images in der Konfiguration grundsätzlich erlaubt haben. Diese Bilder können dann verwendet werden, wenn neue Benutzerausweise patron cards angelegt werden.
Erstellen Sie eine Textdatei mit dem Namen „DATALINK.TXT“ oder „IDLINK.TXT“
Geben Sie in jeder Zeile der Textdatei die Ausweisnummer gefolgt von einem Komma (oder Tabulator) ein und danach den Dateinamen
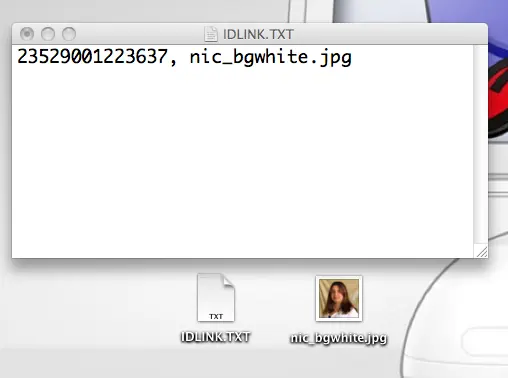
Stellen Sie sicher, dass Ihre TXT-Datei nur Klartext enthält und kein RTF.
Packen Sie die Text- und Grafikdateien
Wechseln Sie in das Werkzeug zum Hochladen von Benutzerfotos
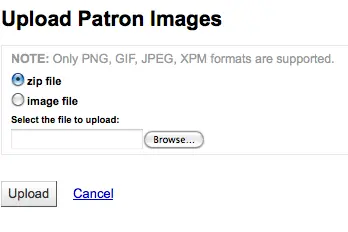
Für ein einzelnes Foto können Sie einfach die Datei auswählen und die Ausweisnummer angeben
Für mehrere Bilder können Sie eine zip-Datei hochladen
Nach dem Upload werden Sie aufgefordert, diesen zu bestätigen
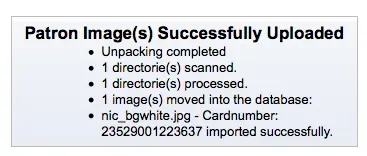
Wichtig
Es gibt ein Limit von 100K für die Größe eines hochgeladenen Bildes, und es wird eine Bildgröße von 200x300 Pixeln empfohlen. Aber auch kleinere Bildern werden angezeigt.
Rotationsbestände
Bemerkung
Nur Bibliothekspersonal mit der Berechtigung rotating_collections (oder der superlibrarian-Berechtigung) hat Zugriff auf dieses Werkzeug.
Pfad in Koha: Mehr > Werkzeuge > Katalog > Rotationsbestände
Mit „Rotationsbestände“ können Sammlungen verwaltet werden, die oft zwischen Bibliotheken ausgetauscht werden. Nicht nur die Heimatbibliothek und die Standortbibliothek einer Sammlung werden verwaltet, sondern auch Informationen über einen auszuführenden Transfer. Damit wird sichergestellt, dass alle Exemplare zur Zielbibliothek gelangen. Wenn ein zu einer entsprechenden Sammlung gehörendes Exemplar zurückgegeben wird, erscheint eine Mitteilung mit der Aufforderung, dieses an den neuen Standort der Sammlung zu senden.
Warnung
Das Werkzeug für rotierende Sammlungen setzt alle Systemparameter und Umlaufregeln außer Kraft.
Um eine neue Sammlung zu erstellen, klicken Sie auf die Schaltfläche „Neue Sammlung“, erfassen Titel und Beschreibung und klicken auf „Bestätigen“. Sie erhalten eine Erfolgsmeldung, von der aus Sie wieder zurück zum Werkzeug für Rotationsbestände geleitet werden.
Um Exemplare einer Sammlung hinzuzufügen, klicken Sie beim Namen der Sammlung auf ‚Aktionen‘ und wählen Sie ‚Exemplar hinzufügen/löschen‘ aus. Auf der Folgeseite können Sie die Barcodes der Sammlung scannen bzw. eintippen und wenn notwendig mit der Eingabetaste oder der Schaltfläche „Bestätigen“ speichern.
Um ein Exemplar aus einer Sammlung zu löschen, können Sie entweder in der Liste den Link „Entfernen“ anklicken oder neben der Barcode-Eingabe ein Häckchen bei „Exemplar aus der Sammlung entfernen“ setzen und den Barcodes scannen bzw. eintippen und wenn notwendig mit der Eingabetaste oder der entsprechenden Schaltfläche bestätigen. Hinweis: Für die effiziente Entfernung von mehreren Exemplaren bleibt das Häckchen gesetzt so lange Sie sich auf dieser Seite befinden. Für eine einfache und schnelle Löschung einer Anzahl von Exemplaren, scannen Sie die Barcodes ein.
Einen Rotationsbestand transferieren
Der Transfer einer Sammlung löst Folgendes aus:
Aktuellen Standort der Exemplare auf Zielbibliothek des Transfers setzen
Einen Transfer von der Standort- zur Zielbibliothek auslösen. Wenn eine Bibliothek eine Sammlung empfängt muss sie für alle Exemplare eine „Rückgabe“ ausführen um den Transfer abzuschliessen.
Es gibt zwei Methoden um Sammlungen zu transferieren:
Auf der Seite „Rotationsbestände“ klicken Sie auf ‚Aktionen‘ > Transfer‘ neben dem entsprechenden Titel, den Sie transferieren möchten und wählen Sie die Zielbibliothek und klicken Sie auf ‚Sammlung verlagern‘.
Sie können auch auf der Seite „Exemplare hinzufügen/löschen“ die Schaltfläche „Transfer“ benutzen, die Zielbibliothek auswählen und auf „Sammlung verlagern“ klicken.
Wichtig
Um den Transfer abzuschliessen, muss die Zielbibliothek beim Empfang der Sammlung für alle Exemplare eine „Rückgabe“ ausführen. Dies wird den Status „Unterwegs“ zurücksetzen.
Wenn ein Exemplar bei einer anderen Bibliothek als dem aktuellen Standort der Sammlung zurückgegeben wird, erscheint ein entsprechender Hinweis mit der Aufforderung, das Exemplar an die aktuelle Standortbibliothek der Sammlung zu senden.
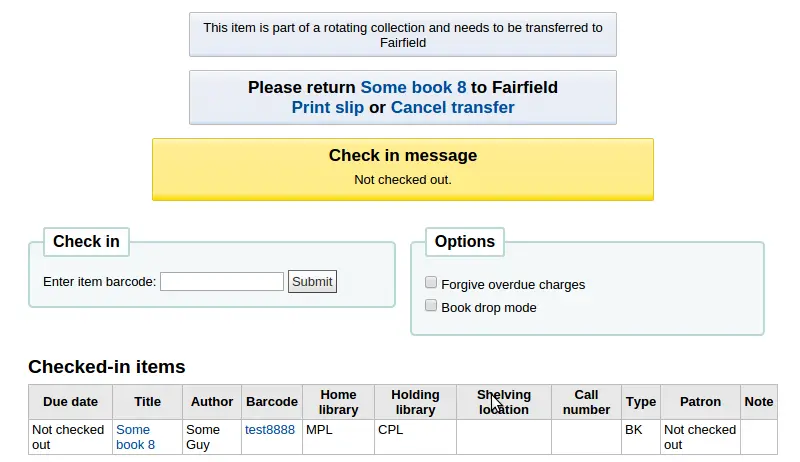
Weitere Werkzeuge
Kalender
Bemerkung
Nur Bibliothekspersonal mit der Berechtigung edit_calendar (oder der superlibrarian-Berechtigung) haben Zugriff auf dieses Werkzeug.
Pfad in Koha: Mehr > Werkzeuge > Weitere Werkzeuge > Kalender
Bibliotheken können Schließtage und Feiertage definieren, die bei der Berechnung von Fälligkeiten berücksichtigt werden. Sie können den Kalender verwenden, indem Sie die entsprechenden Systemparameter aktivieren:
useDaysMode: Wählen Sie die Methode, nach der das Fälligkeitsdatum berechnet werden soll - entweder werden Tage, an denen die Bibliothek geschlossen ist, eingerechnet oder nicht
finescalendar: Dies sorgt dafür, dass der Kalender bei der Berechnung von Gebühren berücksichtigt wird
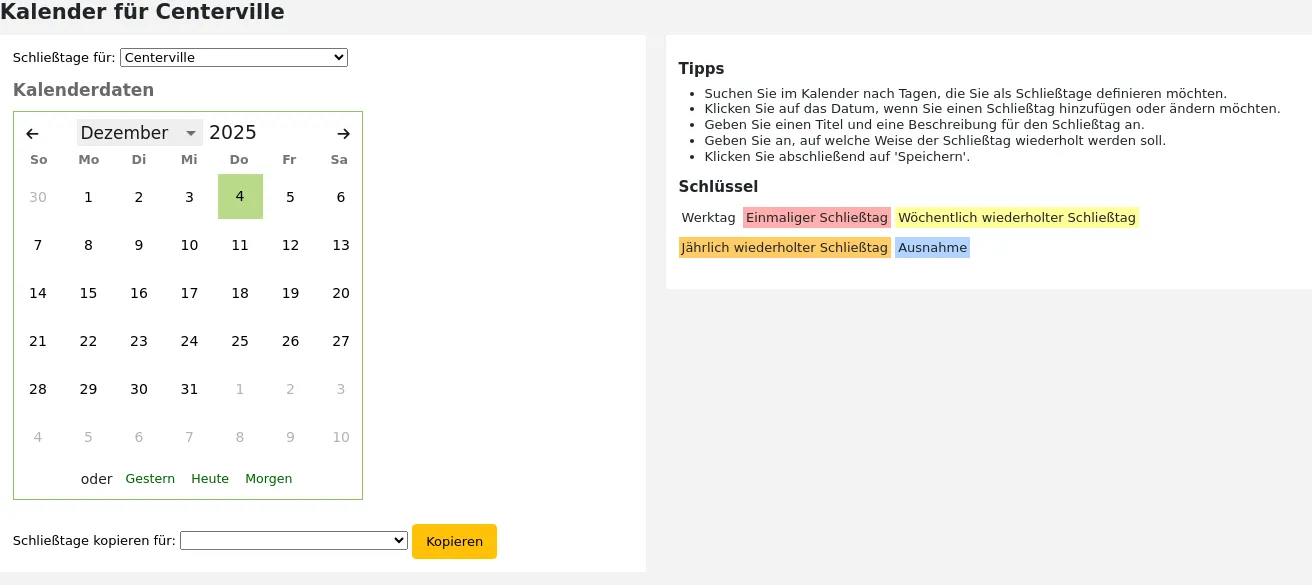
Schließtage eintragen
Wählen Sie vor dem Hinzufügen von Schließtagen den Standort, für den sie gelten sollen. Bei der Eingabe werden Sie gefragt, ob ein Schließtag für einen oder alle Standorte gültig sein soll. Um den Schließtag hinzuzufügen, einfach
Klicken Sie auf das Datum im Kalender, an dem Sie den Schließtag eintragen möchten
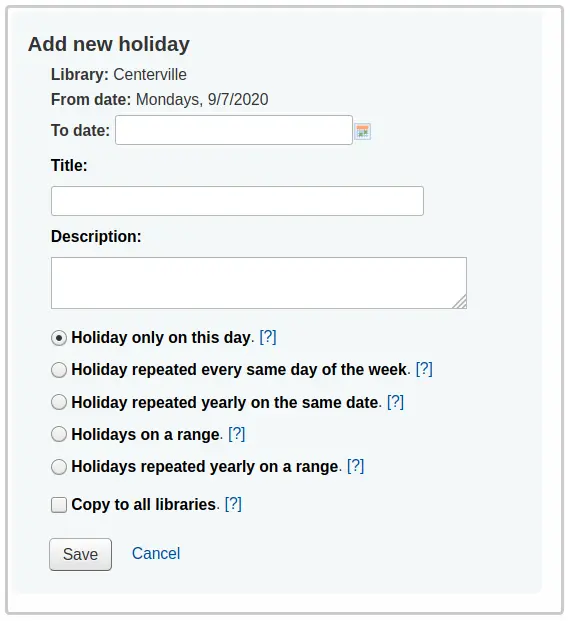
in der Form, die oberhalb des Kalenders eingeblendet wird, indem Sie die Informationen zum Schließtag im Formular eingeben. (Klicken Sie auf das Fragezeichen [?] rechts neben den Optionen für weitere Informationen)
Die Bibliothek wird automatisch ausgefüllt, abhängig von der Bibliothek, die Sie am Anfang der Seite aus der Auswahlliste gewählt haben
Der Wochentag wird ebenfalls automatisch ausgefüllt, basierend auf dem Datum, das Sie im Kalender angeklickt haben
Wenn die Schließzeit länger als einen Tag ist, geben Sie das Enddatum bei „Bis“ an
Geben Sie bei „Titel“ den Namen des Feiertags oder den Grund für die Schließung an
Unter „Beschreibung“ können Sie weitere Informationen zu diesem Schließtag angeben
Legen Sie fest, ob es sich um einen einmaligen oder wiederholbaren Schließtag handelt.
„Schließtag nur an diesem Tag“: dies ist einmaliger Schließtag
„Schließtag, der sich jede Woche an diesem Tag wiederholt“: dies ist ein wöchentlicher Schließtag (z.B. Sonntag)
„Schließtag, der jedes Jahr auf das gleiche Datum fällt“: dies ist ein jährlicher Schließtag (z.B. 1. Januar)
„Schließzeitraum“: dies ist eine mehrtägige Schließung
Hinweis
Stellen Sie sicher, dass Sie ein „Bis“-Datum eingeben, wenn Sie „Schließzeitraum“ gewählt haben
„Jährlich wiederholter Schließzeitraum“: dies ist eine mehrtägige Schließzeit, die in jedem Jahr auf die gleichen Daten fällt (z.B. Sommerferien)
Hinweis
Stellen Sie sicher, dass Sie ein „Bis“-Datum eingeben, wenn Sie „Jährlich wiederholter Schließzeitraum“ gewählt haben
Entscheiden Sie zum Schluss, ob der Schließtag für alle Bibliotheken eingetragen werden soll oder nur für die Bibliothek, die Sie zu Beginn ausgewählt haben
Wenn Sie alle Schließtage eingeben und dann für einen anderen Standort kopieren möchten, verwenden Sie die Kopierfunktion unterhalb des Kalenders
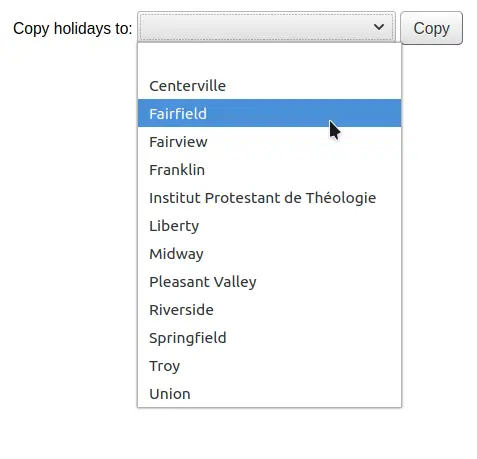
Nach dem Speichern wird der Schließtag auf der rechten Seite des Kalenders angezeigt
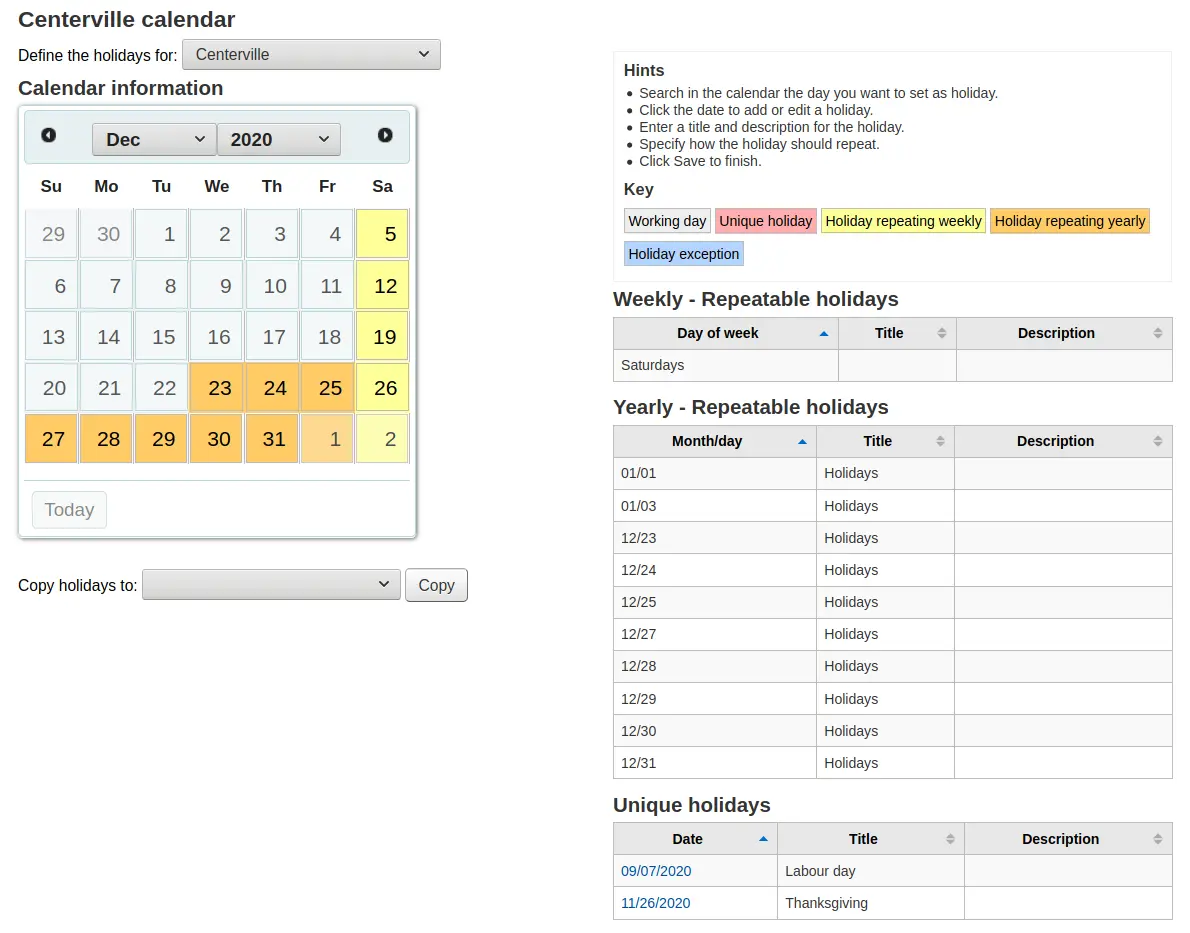
Schließtage bearbeiten
Schließtage bearbeiten
Klicken Sie auf den Schließtag im Kalender, den Sie ändern möchten (klicken Sie dabei auf das Datum im Kalender, nicht auf den Schließtag in der Zusammenfassung)
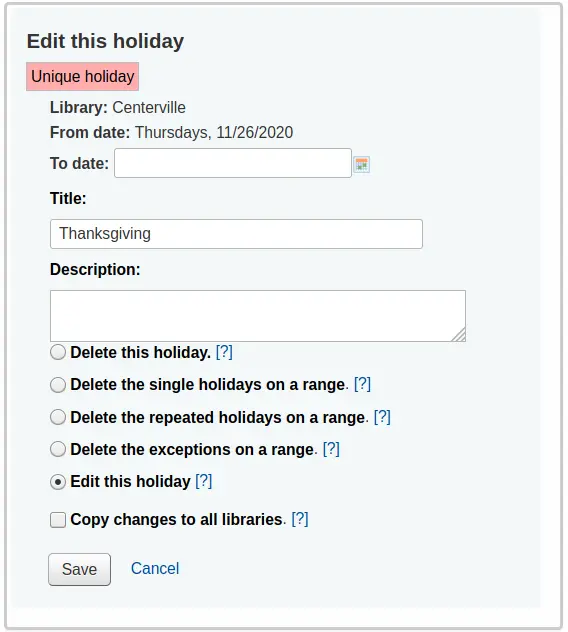
In diesem Formular können Sie Schließtage bearbeiten oder komplett löschen.
Alle Aktionen erfordern, dass Sie auf „Speichern“ klicken, damit die Änderung durchgeführt wird.
Für wiederholbare Schließtage werden etwas andere Optionen angeboten
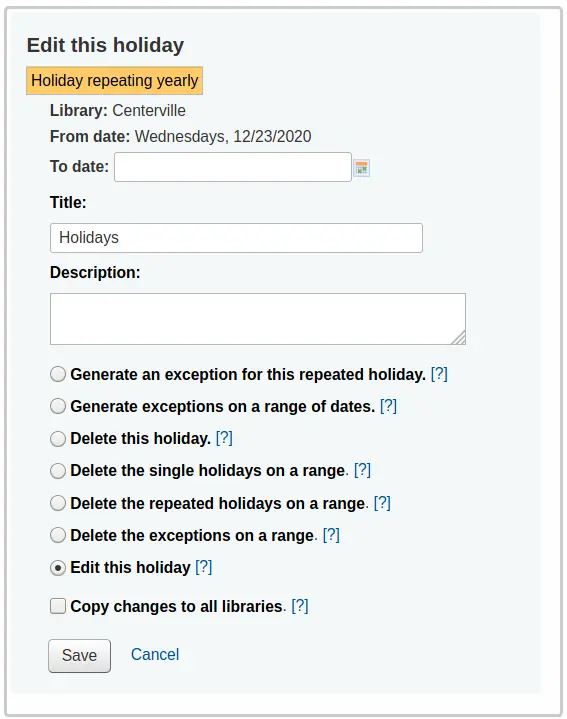
Im Formular darüber sehen Sie die Optionen „Eine Ausnahme für diesen Schließtag erstellen“ und „Ausnahmen für einen Datumsbereich erstellen“ über die Sie festlegen können, dass die Bibliothek geöffnet ist, auch wenn Sie normalerweise an diesem Datum geschlossen wäre.
Alle Aktionen erfordern, dass Sie auf „Speichern“ klicken, damit die Änderung durchgeführt wird.
Zusätzliche Hilfe
Wenn Sie Schließtage hinzufügen erhalten Sie zusätzliche Hilfestellung, indem Sie auf das Fragezeichen neben der jeweiligen Option klicken, um zusätzliche Hinweise zu erhalten
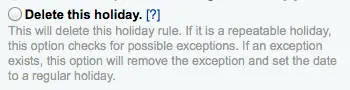
CSV-Profile
Bemerkung
Nur Bibliothekspersonal mit der Berechtigung manage_csv_profiles (oder der superlibrarian-Berechtigung) hat Zugriff auf dieses Werkzeug.
Pfad in Koha: Mehr > Werkzeuge > Weitere Werkzeuge > CSV-Profile
CSV-Profile werden verwendet, um zu definieren, wie Daten von Listen oder Korb exportiert werden.
CSV-Profile werden auch im acquisitions module verwendet, um baskets und late orders zu exportieren, im serials module, um late issues zu exportieren und im reports module, um list of lost items zu exportieren.
Ein CSV-Profil hinzufügen
Um ein CSV-Profil hinzuzufügen,
„Neues CSV-Profil“ anklicken
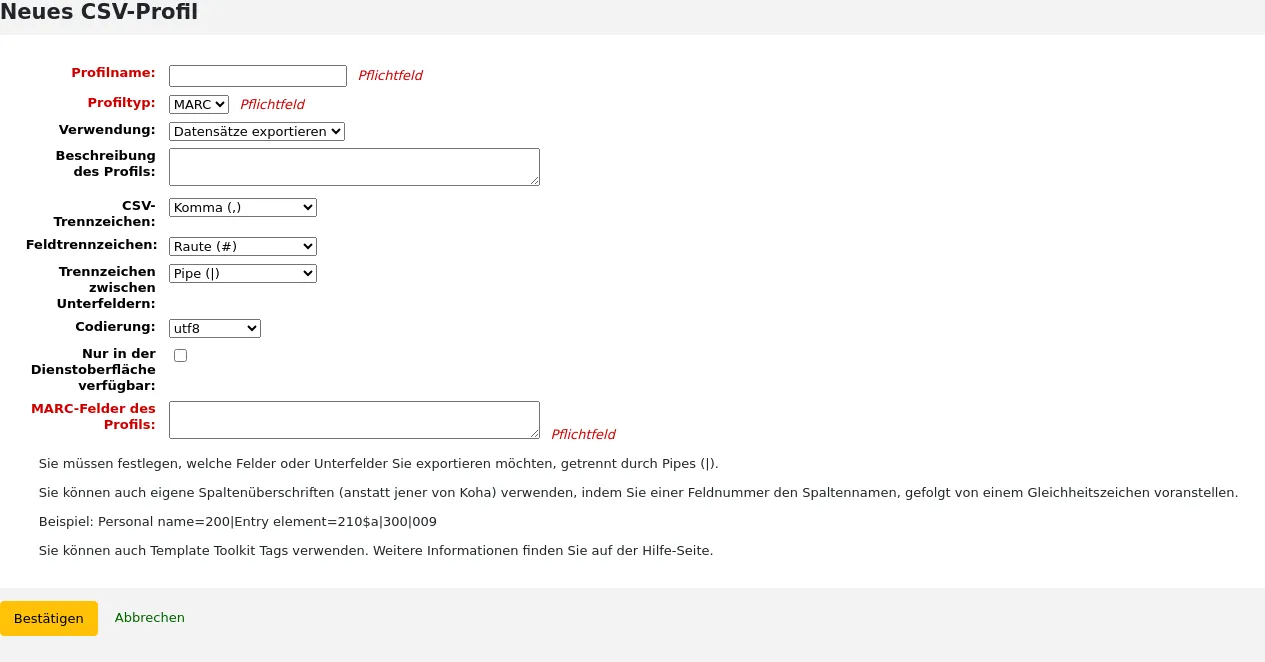
Profilname: Geben Sie einen eindeutigen und aussagekräftigen Namen für das Profil ein. Dieser Name erscheint in der Export-Auswahlliste, wenn Sie bei cart or list auf „Download“ klicken, oder wenn Sie das Profil im acquisitions, serials oder reports-Modul wählen, um Körbe, verspätete Bestellungen usw. zu exportieren.
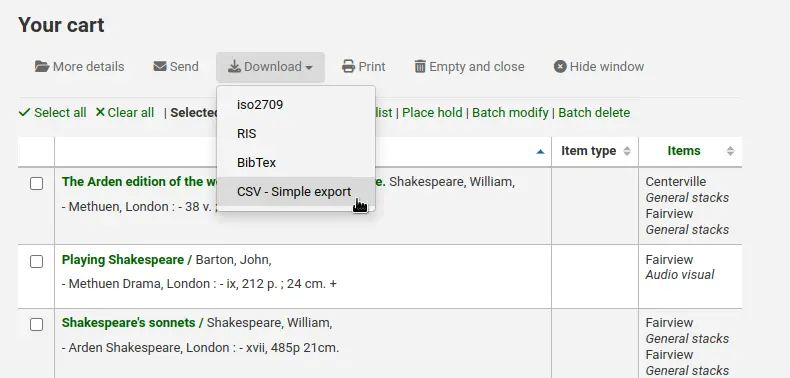
Profiltyp: Dieser bestimmt, welchen Feldtyp Sie nutzen möchten (MARC oder SQL) um Ihr Profil zu definieren; er beeinflusst ebenfalls die „Nutzungs“-Optionen unten.
Wenn Sie MARC auswählen, dann müssen Sie MARC-Felder eingeben.
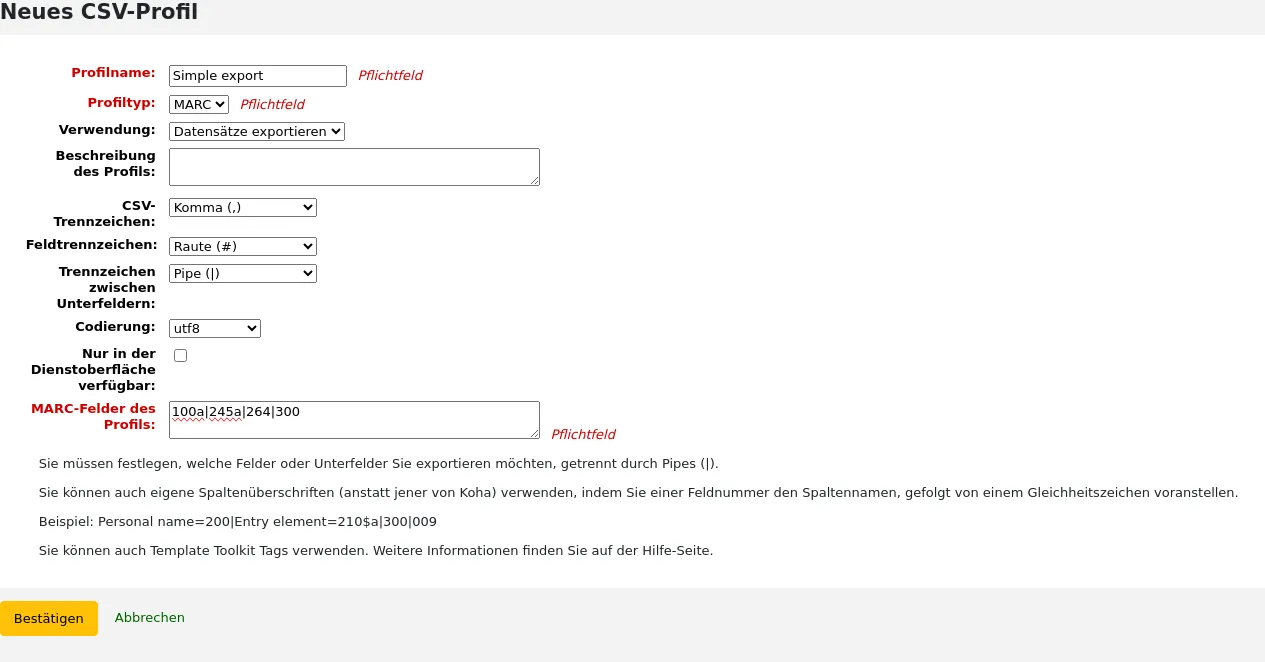
Wenn Sie SQL auswählen, müssen Sie SQL Datenbankfelder eingeben.

Im Feld „Verwendung“ wird angegeben, für welche Funktion dieses CSV-Profil verwendet wird:
„Titel exportieren“ (nur für den Profiltyp MARC verfügbar): dies wird für den Export von Titelsätzen aus Körben und Listen verwendet.
„Reklamation von verspäteten Heften“ (nur für den Profiltyp SQL verfügbar): wird für den Export verspäteter Zeitschriftenhefte verwendet
Export für verspätete Bestellungen (nur für den Profiltyp SQL verfügbar): wird für den Export verspäteter Bestellungen im Erwerbungsmodul verwendet.
Korbexport im Erwerbungsmodul (nur für den Profiltyp SQL verfügbar): dies wird für den Download von Datensätzen aus Körben im Erwerbungsmodul verwendet.
Export verlorener Exemplare in einem Report (nur für den Profiltyp SQL verfügbar): dies wird verwendet, um ein CSV aus dem Report Vermisste Exemplare zu exportieren.
Profilbeschreibung: Sie können dieses Feld nutzen um den Profilnamen zu erweitern. Die Beschreibung wird auch im OPAC angezeigt wenn Benutzer*innen Inhalte herunterladen und Sie sollten daher auch sicherstellen, dass Sie für Ihre Benutzer*innen verständlich ist.
CSV-Trennzeichen: Dies ist das Zeichen, das verwendet wird um Werte und Wertegruppen voneinander zu trennen.
Bemerkung
Die am häufigsten verwendete Option an dieser Stelle ist das Komma, da die meisten Tabellenverarbeitungsprogramme Dateien mit kommagetrennten Werten öffnen können.
Feldtrenner (nur für den MARC-Profiltyp verfügbar): Dies ist das Zeichen, das verwendet wird, um doppelte Felder voneinander zu trennen.
Beispiel: Wenn mehrere 650-Felder vorhanden sind, wird dieses Zeichen als Trennzeichen zwischen den einzelnen Feldern in der Spalte verwendet.

Unterfeldtrenne: (nur für den MARC-Profiltyp verfügbar): Dies ist das Zeichen, das verwendet wird um doppelte Unterfelder zu trennen.
Beispiel: Sie können mehrere Unterfelder $a in einem Feld haben.
Zeichensatz: In diesem Feld können Sie den für Ihre Datei verwendeten Zeichensatz auswählen.
Nur in der Dienstoberfläche verfügbar (nur für den MARC-Profiltyp verfügbar): Markieren Sie diese Checkbox an, um ein CSV-Profil auf die Dienstoberfläche zu beschränken, so dass Benutzer*innen das Profil beim Export von Korb oder Liste im OPAC nicht nutzen können.
Profil MARC-Felder (nur für den Profiltyp MARC verfügbar): Geben Sie zu exportierende Felder oder Unterfelder, getrennt durch Pipes, ein.
For example:
200\|210$a\|301
Bemerkung
Sie können das Dollarzeichen ($) verwenden, um die Feldnummer und den Unterfeldcode zu trennen, oder Sie schreiben die Feldnummer und den Unterfeldcode einfach zusammen.
For example:
200\|210$a\|301
Or without the dollar sign:
200\|210a\|301
Tipp
Sie können auch eigene Spaltenüberschriften angeben (anstelle der von Koha automatisch generierten), indem Sie einer Feldnummer den Spaltennamen gefolgt von einem Gleichheitszeichen voranstellen.
For example:
Personal name=100\|title=245$a\|300
Bemerkung
Sie können das Profil mit der Template Toolkit-Syntax weiter anpassen.
Sehen Sie untenstehend Using Template Toolkit in MARC CSV profile für weitere Informationen und Beispiele.
SQL-Felder des Profils (nur bei Profiltyp SQL): Geben Sie die zu exportierenden Datenbankfelder, getrennt durch Pipes, einschließlich des Tabellennamens ein.
For example:
biblio.title\|biblio.author
Tipp
Sie können auch eigene Spaltenüberschriften angeben (anstelle der von Koha automatisch generierten), indem Sie einer Feldnummer den Spaltennamen gefolgt von einem Gleichheitszeichen voranstellen.
For example:
Title=biblio.title\|Author=biblio.author
Wichtig
Für die Reklamation verspäteter Hefte können Sie Daten aus folgenden Tabellen nutzen:
serial
Subskription
biblio
biblioitems
aqbookseller
Für den Export von Körben können Sie Daten aus den folgenden Tabellen verwenden:
biblio
biblioitems
aqorders
aqbudgets
aqbasket
Wichtig
Der Export verspäteter Bestellungen erfordert ein Profil unter Verwendung der Template Toolkit-Syntax (dieselbe Syntax wie für Benachrichtigungen und Quittungen).
Es gibt ein Standardprofil, das mit Koha geliefert wird und das Sie als Beispiel verwenden können.
Title[% separator %]Author[% separator %]Publication year[% separator %]ISBN[% separator %]Quantity[% separator %]Number of claims
[%~ SET biblio = order.biblio ~%]
"[% biblio.title %]"[% separator ~%]
"[% biblio.author %]"[% separator ~%]
"[% bibio.biblioitem.publicationyear %]"[% separator ~%]
"[% biblio.biblioitem.isbn %]"[% separator ~%]
"[% order.quantity%]"[% separator ~%]
"[% order.claims.count%][% IF order.claims.count %]([% FOR c IN order.claims %][% c.claimed_on | $KohaDates %][% UNLESS loop.last %], [% END %][% END %])[% END %]"
[% END %]
Klicken Sie auf „Absenden“, um das neue Profil zu speichern.
Anwendung von Template Toolkit in MARC CSV-Profilen
Die Template Toolkit-Syntax kann zur Erstellung komplexer CSV-Dateien verwendet werden.
Für MARC-Informationen müssen Sie die Variablen „Felder“ verwenden, um auf die Feldliste des aktuellen Datensatzes zuzugreifen.
Beginnen Sie mit der Spaltenüberschrift, dem Gleichheitszeichen und der TT-Variable. Trennen Sie CSV-Spalten immer mit Pipe (|).
For example, this will return a two-column CSV file, with the first column titled „Title“ and the second column titled „Author“. The first column will contain 245$a and the second column will contain 100$a:
Title=[% fields.245.0.a.0 %]|Author=[% fields.100.0.a.0 %]
Wichtig
Es ist nicht möglich, ein komplettes Feld anzuzeigen (z. B. alles aus 245). Sie müssen die Unterfelder auflisten, die Sie anzeigen lassen möchten.
The ‚0‘ indicate which field or subfield to print if there are more than one. For example, this will fetch the first subfield ‚a‘ of the first ‚245‘ field it finds in the record:
[% fields.245.0.a.0 %]
Einzelnes Unterfeld
Dies ist die Syntax, um ein einzelnes Unterfeld aus einem MARC-Feld zu erhalten.
For example, to get 245$a:
[% fields.245.0.a.0 %]
Mehrere Unterfelder in der gleichen Spalte
Um mehrere Unterfelder in einer Spalte zu verknüpfen, müssen Sie [% FOREACH %] verwenden. Denken Sie daran, das Ende der FOREACH-Schleife immer mit [% END %] anzugeben.
For example, to get both 245$a and 245$b in the same column:
[% FOREACH field IN fields.245 %][% field.a.0 %][% field.b.0 %][% END %]
Mehrere Unterfeldwerte
In den vorangegangenen Beispielen wurde nur der erste Eintrag des Unterfelds berücksichtigt. In manchen Fällen kann ein Feld mehr als ein Unterfeld desselben Codes in einem Feld enthalten. In diesem Fall müssen Sie join() verwenden. Die Klammern enthalten das Trennungszeichen.
For example, to get 260$a, $b, and $c, in a case where there might be more than one of each subfield, they will be separated by a semicolon followed by a space:
[% FOREACH field IN fields.260 %][% field.a.join('; ') %][% field.b.join('; ') %][% field.c.join('; ') %][% END %]
Indikatorwerte
Die Indikatoren können mit indicator aufgerufen werden.
For example, to get the value of the second indicator of the 245 field:
[% fields.245.0.indicator.2 %]
Datenfeldwerte mit fester Länge
Sie können substr() (substring) verwenden, um Werte von bestimmten Positionen in Datenfeldern mit fester Länge zu erhalten.
For example, to get the language from the 008 field (positions 35-37):
[% fields.008.0.substr(35,3) %]
Gebrauch von Bedingungen
Template Toolkit ermöglicht das Hinzufügen von Bedingungen mit [% IF %], [% ELSIF %], und [% ELSE %]. Denken Sie daran, das Ende der Bedingung immer mit [% END %] zu definieren.
For example, to get 650$a if indicator 2 for 650 is set:
Subject=[% FOREACH field IN fields.650 %][% IF field.indicator.2 %][% field.a.0 %][% END %][% END %]
Tipp
Wenn Sie feststellen, dass Ihre CSV-Datei zusätzliche Leerzeichen enthält, können Sie innerhalb der TT-Variablen Tilden (~) hinzufügen, um zusätzliche Leerzeichen zu entfernen.
For example, the following code might replace the FOREACH variable with a space, making the title column start with a space:
Title=[% FOREACH field IN fields.245 %][% field.a.join(' ') %][% field.b.join(' ') %][% END %]
To correct this, add tildes at the beginning and end of the FOREACH variable:
Title=[%~ FOREACH field IN fields.245 ~%][% field.a.join(' ') %][% field.b.join(' ') %][% END %]
CSV-Profile bearbeiten
Um ein CSV-Profil zu bearbeiten, klicken Sie auf die Schaltfläche „Bearbeiten“ neben dem Profil.
Passen Sie die erforderlichen Felder an und klicken Sie auf „Bestätigen“.
Um ein Profil zu löschen, klicken Sie auf die Schaltfläche „Löschen“ neben dem Profil.
CSV-Profile verwenden
MARC-CSV-Profile werden bei den Downloadmöglichkeiten für Korb und Listen in der Dienstoberfläche und im OPAC angezeigt.
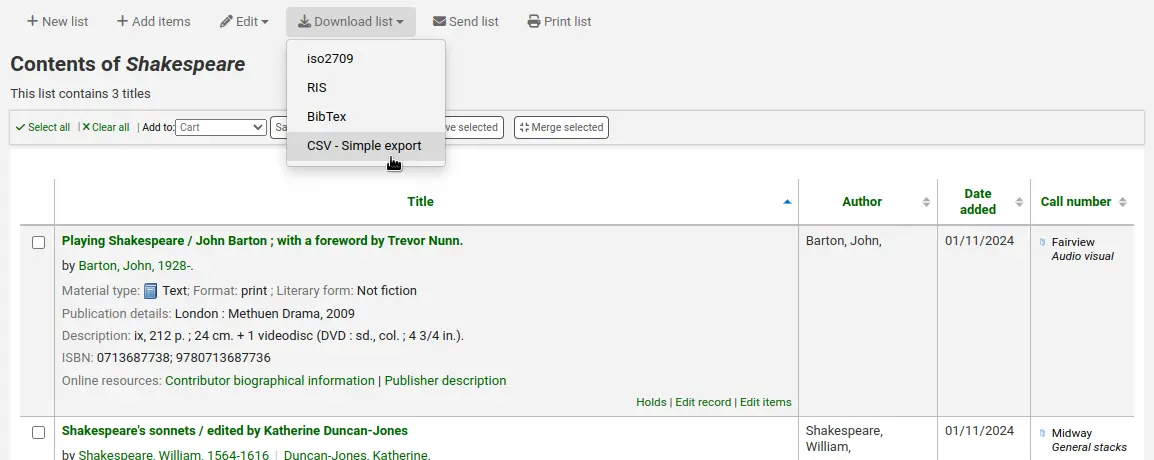
SQL-CSV-Profile werden in verschiedenen Koha-Modulen in der Dienstoberfläche, je nach ihrer Verwendung, verfügbar sein.
Die CSV-Profile für „Reklamationen auf verspätete Zeitschriftenhefte“ erscheinen am unteren Ende der Tabelle verspätete Hefte im Zeitschriftenmodul.
- CSV-Profile für den „Export verspäteter Bestellungen“ erscheinen am unteren Seitenrand der
late orders-Tabelle im Erwerbungsmodul.
- CSV-Profile für den „Export von Körben im Erwerbungsmodul“ erscheinen unter „Download“
Schaltfläche in Körben im Erwerbungsmodul.
Die CSV-Profile für den „Export von verlorenen Exemplaren“ erscheinen im Report Vermisste Exemplare.
Loganzeige
Bemerkung
Only staff with the view_system_logs permission (or the superlibrarian permission) have access to the log viewer.
Pfad in Koha: Mehr > Werkzeuge > Weitere Werkzeuge > Loganzeige
Actions in Koha are tracked in log files. The log system preferences determine what actions are logged. These logs are viewed using the log viewer.
Some actions are tracked by default, such as changes to system preferences and search engine mappings.
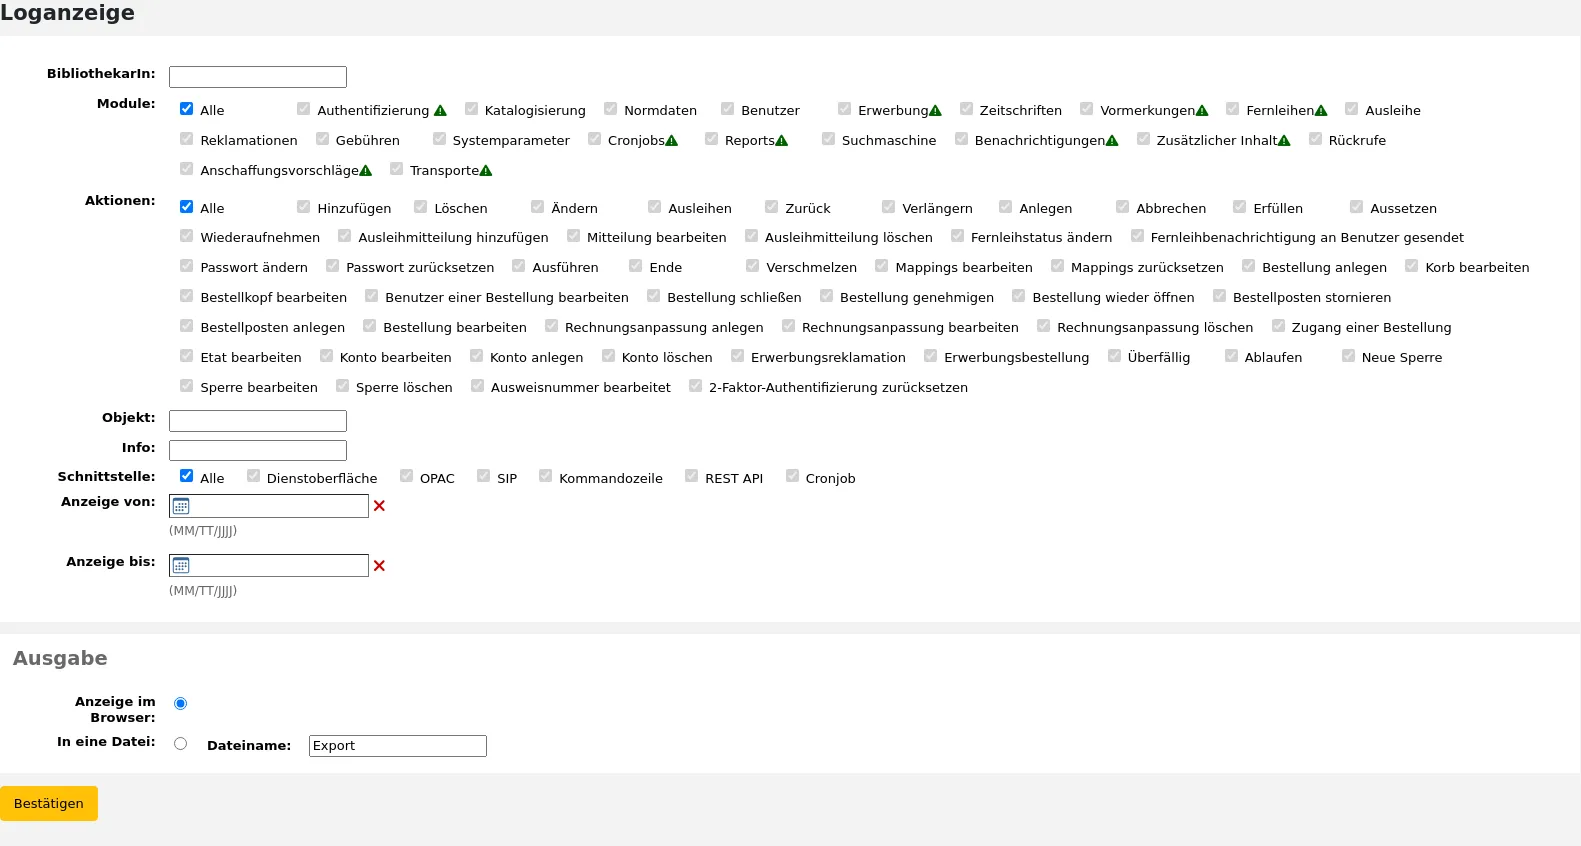
Bemerkung
The warning sign next to a module name indicates that the actions in this module are not logged. Change your logs preferences to log actions from a module.
Use the log viewer options to filter the log entry results:
- Bibliothekar*in:
a staff member that performed an action (0 if done by Koha)
- Module:
select a specific module
- Actions:
the type of action, such as modify and add
- Object:
the identifier for the object the action was performed on, for example the biblionumber, itemnumber, or borrowernumber
- Info:
additional information about an action, such as a system preference name (or partial name) or a barcode
- Interface:
where the action originated from, such as the staff interface, REST API, or SIP
- Display from:
show log entries from this date
- Display to:
show log entries to this date
The values for actions, object, and info depend on the module. The action logs table in the wiki lists some of the available values.
Example of the log viewer results for the circulation module:

Bemerkung
You can customize the columns of this table in the Table settings section of the Administration module (table id: logst).
Nachrichten
Bemerkung
Nur Bibliothekspersonal mit der Berechtigung edit_additional_contents (oder der superlibrarian-Berechtigung) hat Zugang zu diesem Werkzeug.
Pfad in Koha: Mehr > Werkzeuge > Weitere Werkzeuge > Nachrichten
Mit dem Nachrichten-Modul können Mitarbeiter*innen Inhalte und Nachrichteneinträge im OPAC, der Dienstoberfläche und auf Quittungen veröffentlichen.
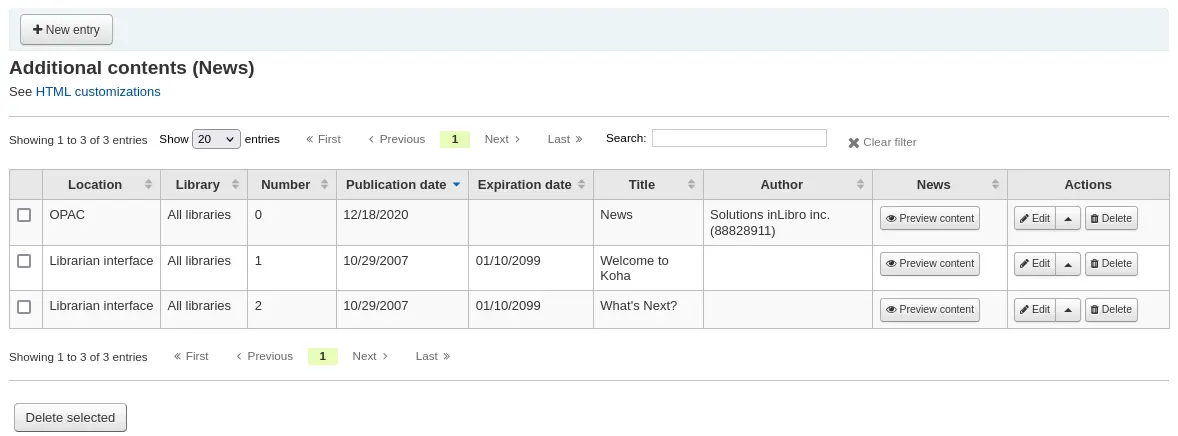
Nachrichten für den OPAC, die Dienstoberfläche oder einen Quittungsdruck zu erfassen:
Klicken Sie auf ‚Neuer Eintrag‘
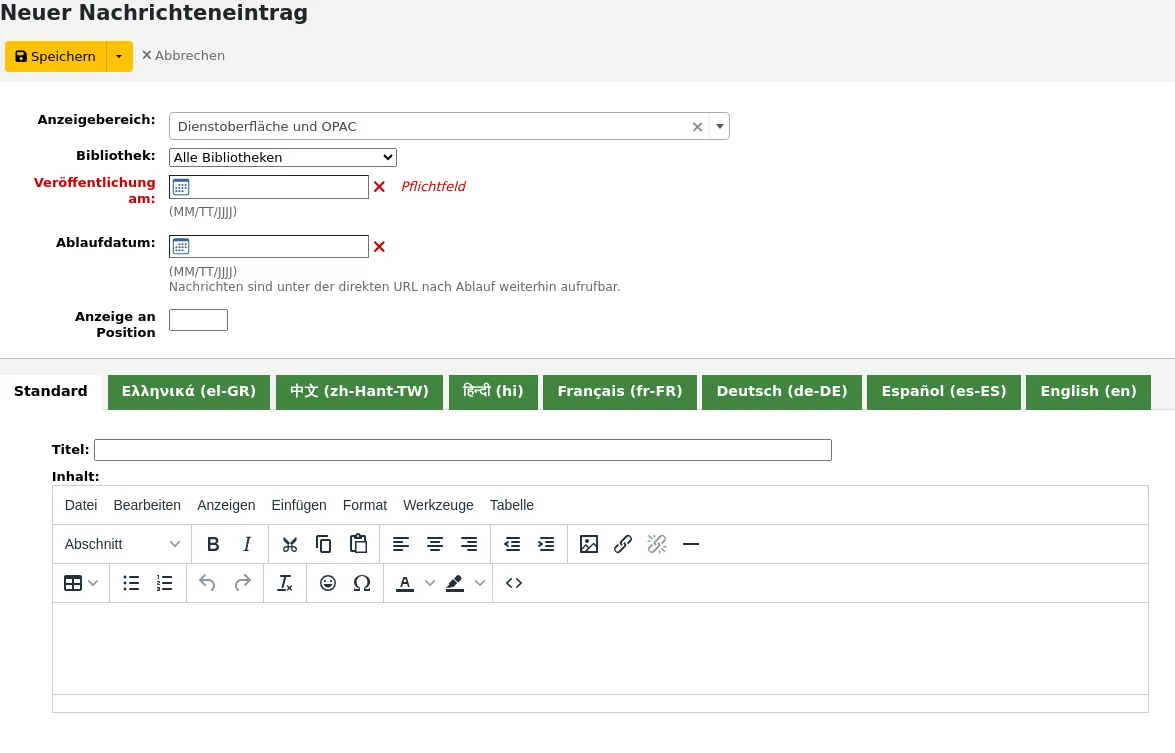
Code: geben Sie einen einmaligen Code für diesen Nachrichteneintrag an
Anzeigebereich: wählen Sie aus, wo die Nachricht angezeigt werden soll

Dienstoberfläche und OPAC: die Inhalte werden auf der Startseite der Dienstoberfläche und im Nachrichtenbereich im OPAC angezeigt
Dienstoberfläche: Der Inhalt wird auf der Startseite der Dienstoberfläche angezeigt
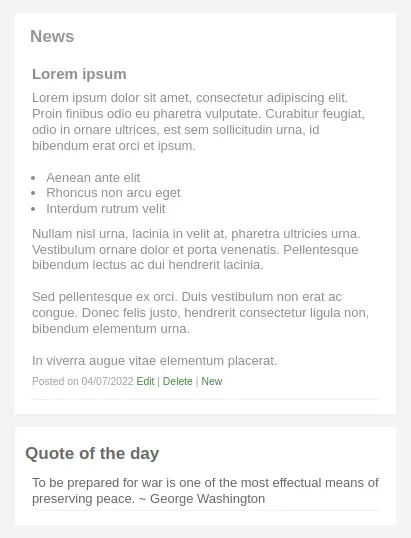
OPAC: Inhalte werden im Nachrichtenblock auf der OPAC-Startseite angezeigt
Unter den Nachrichten im OPAC wird ein RSS-Icon angezeigt, welches den Nutzer*innen erlaubt, Nachrichten der Bibliothek zu abonnieren
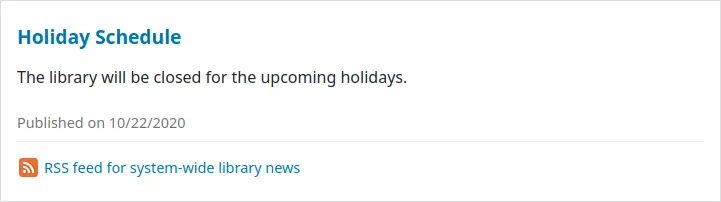
Sie können über den Systemparameter OpacNewsLibrarySelect festlegen, ob bibliotheksspezifische Nachrichten ausgewählt werden können
Quittung: Der Inhalt wird auf den Quittungsdrucken in der Ausleihe angezeigt
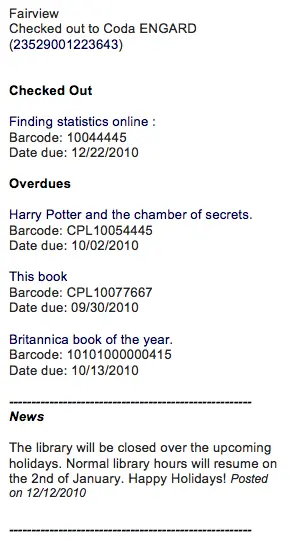
Bemerkung
This can be activated or deactivated in the Notices and slips tool
Bibliothek: Sie, für welche Bibliothek diese Nachricht angezeigt werden soll
Bevor die Benutzer*innen sich im OPAC anmelden, werden nur die Nachrichteneinträge angezeigt, die für „Alle Bibliotheken“ angelegt wurden, es sei denn, es wurde in der Systemadministration „OPAC_BRANCH_DEFAULT“ angelegt, um die Virtual Host Konfiguration zu überschreiben. Weitere Details unter Installation.
Veröffentlichungsdatum: Verwenden Sie dieses Datumsfeld um festzulegen, wann der Nachrichteneintrag sichtbar wird
Beispiele: (diese gelten für das heutige Datum als 7. Mai 2020)
Heute veröffentlichen: Veröffentlichungsdatum ist 7.5.2020
In der Zukunft veröffentlichen: Veröffentlichungsdatum nach dem 7.5.2020
Zurückdatieren einer Nachricht: Veröffentlichungsdatum vor dem 7.5.2020
Ablaufdatum: Verwenden Sie diese Feld um festzulegen, wann ein Nachrichteneintrag nicht länger relevant ist und automatisch ausgeblendet wird.
Wenn dieses Feld leer ist, wird der Nachrichteneintrag angezeigt, bis er manuell entfernt wird
Erscheint an Position: ermöglicht es, die Reihenfolge der Nachrichteneinträge festzulegen
Wenn das Feld leer ist, werden die Nachrichteneinträge in der Reihenfolge von neu nach alt angezeigt
In diesem Feld ist 0 die oberste Position; je größer die gewählte Nummer ist, desto weiter unten erscheint der Nachrichteneintrag in der Liste
Sie können den Titel und Text für jede installierte Sprache erfassen
Bemerkung
Sie können selbst entscheiden, welche Art von Editor Sie verwenden möchten, entweder einen Texteditor oder einen WYSIWYG-Editor (What-you-see-is-what-you-get) und die Voreinstellung über den Systemparameter AdditionalContentsEditor festlegen.
Nachdem Sie alle Felder ausgefüllt haben, klicken Sie auf „Speichern“ oben auf der Seite.
Klicken Sie alternativ auf den Pfeil neben der Schaltfläche „Speichern“ und wählen Sie „Speichern und fortfahren“, wenn Sie auf dieser Seite bleiben möchten, um die Bearbeitung der Nachricht fortzusetzen.
Abhängig von der Einstellung, die Sie im Systemparameter NewsAuthorDisplay gewählt haben, wird Ihnen auch der Name der Person angezeigt, die die Nachricht erstellt hat (hierzu wird der angemeldete Nutzer verwendet).
HTML-Anpassungen
Bemerkung
Nur Bibliothekspersonal mit der Berechtigung edit_additional_contents (oder der superlibrarian-Berechtigung) hat Zugang zu diesem Werkzeug.
Pfad in Koha: Mehr > Werkzeuge > Weitere Werkzeuge > HTML-Anpassungen
Kohas HTML-Anpassungen erlauben es den Mitarbeiter*innen Inhalte im OPAC zu veröffentlichen.
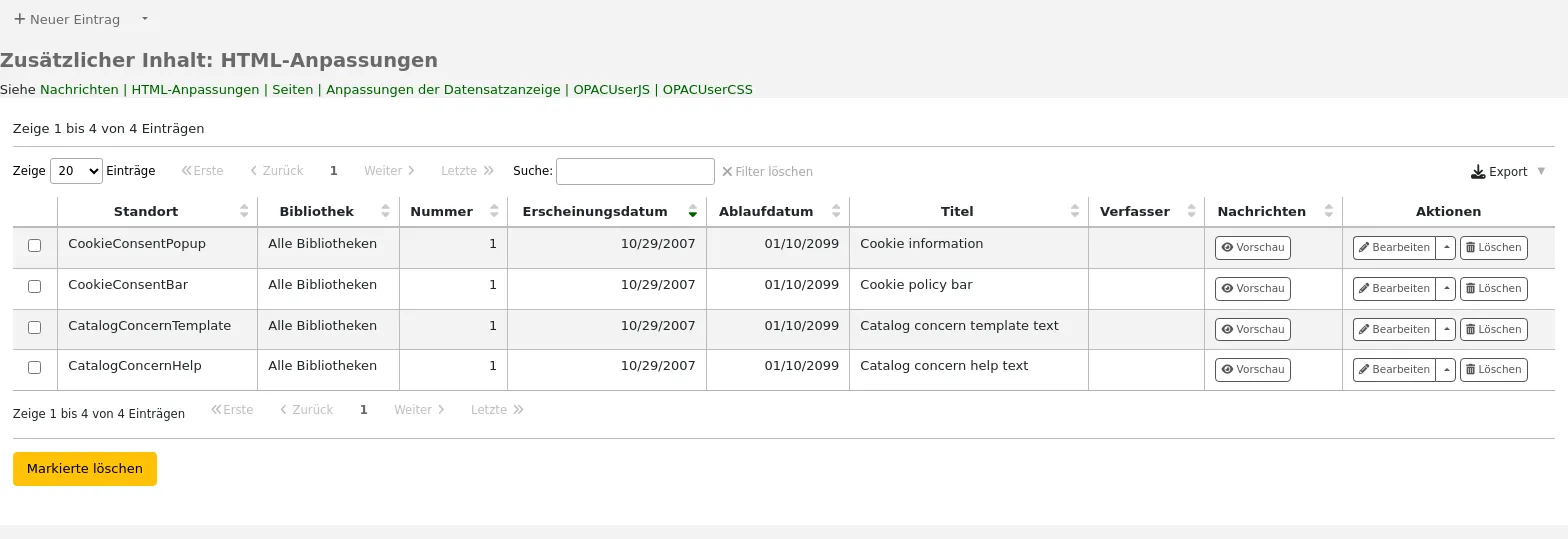
Eine neue HTML-Anpassung hinzufügen
Um Inhalt hinzuzufügen:
Klicken Sie auf ‚Neuer Eintrag‘
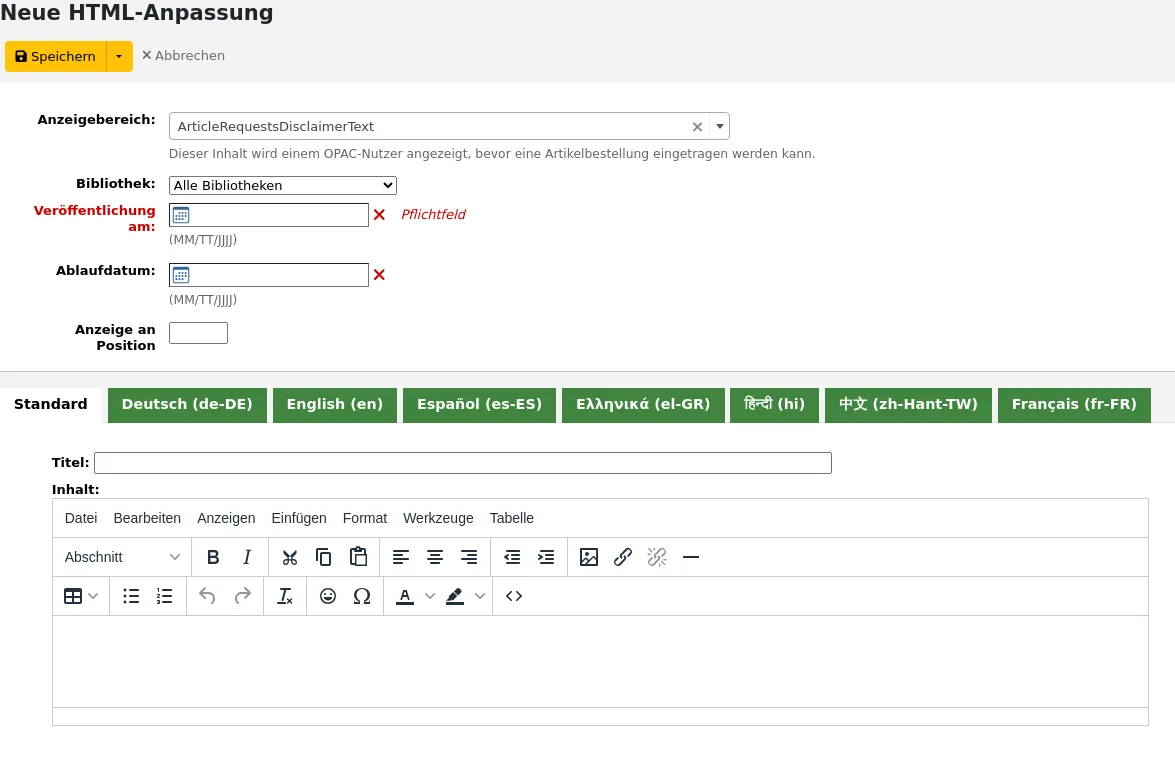
Code: geben Sie einen einmaligen Code für diesen Nachrichteneintrag an
Anzeigebereich: wählen Sie aus, wo der Inhalt angezeigt werden soll.
Untenstehend finden Sie eine Liste aller display locations mit Details.
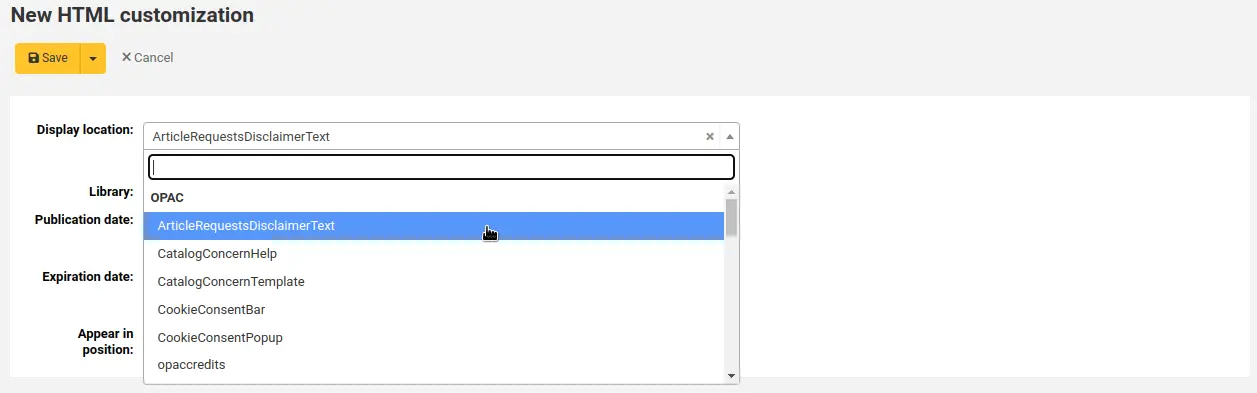
Bibliothek: wählen Sie die Bibliothek aus, für welche dieser Inhalt angezeigt werden soll
Bevor die Benutzer*innen sich im OPAC anmelden, werden nur die Inhalte angezeigt, die für „Alle Bibliotheken“ angelegt wurden, es sei denn, es wurde in der Systemadministration „OPAC_BRANCH_DEFAULT“ angelegt, um die Virtual Host Konfiguration zu überschreiben.
Veröffentlichungsdatum: Verwenden Sie dieses Datumsfeld um festzulegen, wann der Inhalt sichtbar wird
Beispiele: (diese gelten für das heutige Datum als 7. Mai 2020)
Heute veröffentlichen: Veröffentlichungsdatum ist 7.5.2020
In der Zukunft veröffentlichen: Veröffentlichungsdatum nach dem 7.5.2020
Zurückdatieren einer Nachricht: Veröffentlichungsdatum vor dem 7.5.2020
Ablaufdatum: Verwenden Sie diese Feld um festzulegen, wann ein Inhalt nicht länger relevant ist und automatisch ausgeblendet wird.
Wenn dieses Feld leer ist, wird der Inhalt angezeigt, bis er manuell entfernt wird
Anzeigeposition: legen Sie fest, in welcher Reihenfolge die Inhalte angezeigt werden, wenn es mehr als einen Inhalt für den selben Anzeigebereich gibt
Wenn das Feld leer ist, werden die Inhalte in der Reihenfolge von neu nach alt angezeigt
In diesem Feld ist 0 die oberste Position; je größer die gewählte Nummer ist, desto weiter unten erscheint der Inhalt in der Liste
Sie können den Titel und Text für jede installierte Sprache erfassen
Bemerkung
Der Titel wird für zusätzliche Inhalte nicht angezeigt. Er dient eher dazu auf einen Blick zu sehen, worum es sich bei dem Inhalt handelt, wenn man die Liste der Inhalte vor sich hat. Wenn Sie einen Titel anzeigen möchten, müssen Sie ihn in den Text einfügen.
Bemerkung
Sie können selbst entscheiden, welche Art von Editor Sie verwenden möchten, entweder einen Texteditor oder einen WYSIWYG-Editor (What-you-see-is-what-you-get) und die Voreinstellung über den Systemparameter AdditionalContentsEditor festlegen.
Nachdem Sie alle Felder ausgefüllt haben, klicken Sie auf „Speichern“ oben auf der Seite.
Klicken Sie alternativ auf den Pfeil neben der Schaltfläche „Speichern“ und wählen Sie „Speichern und fortfahren“, wenn Sie auf dieser Seite bleiben möchten, um die Bearbeitung der Nachricht fortzusetzen.
Bildschirmbereiche
OPAC
Das nachfolgende Bild zeigt, wo die einzelnen Inhalte auf der Startseite des OPACs angezeigt werden, und zwar für die Blöcke, die auf der Hauptseite angezeigt werden.
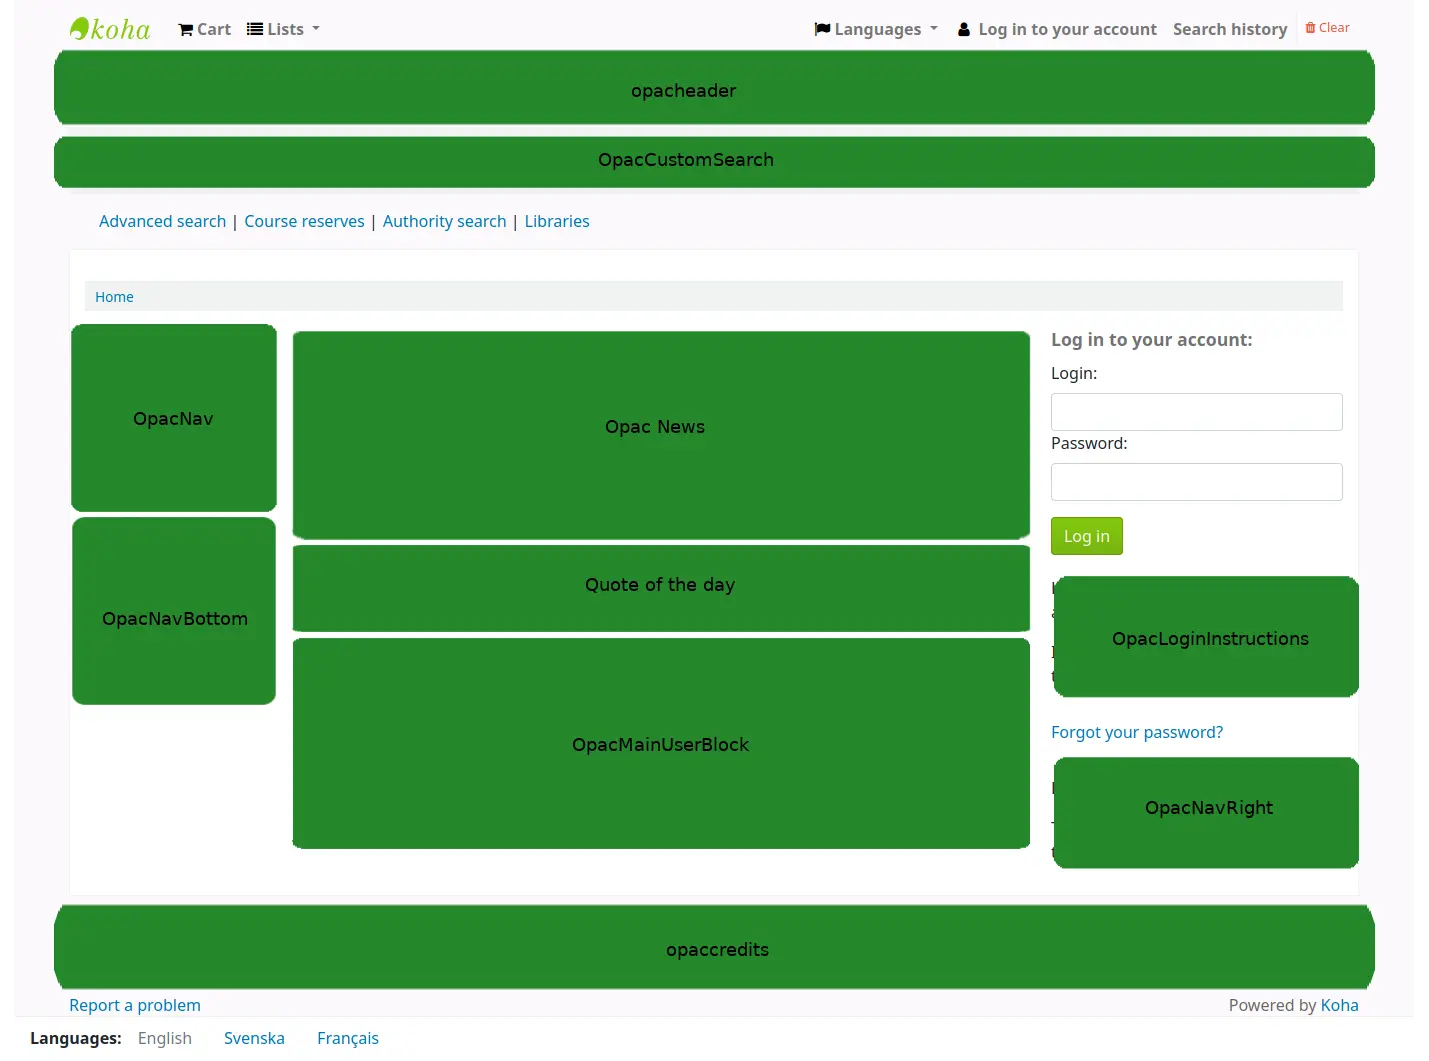
Bemerkung
Das Zitat des Tages befindet sich im Modul Werkzeuge, und die News werden im Werkzeug Nachrichten verwaltet. Der Rest der anpassbaren Blöcke wird im Werkzeug HTML-Anpassungen verwaltet.
ArticleRequestsDisclaimerText: der Inhalt wird angezeigt und der Benutzer/die Benutzerin muss akzeptieren, bevor das Artikelformular abgeschickt werden kann; dies kann für Copyright- und Haftungshinweise verwendet werden, über welche die Benutzer*innen hinsichtlich Kopien und Scans von Artikeln und Kapiteln informiert werden müssen
CatalogConcernHelp: Inhalt wird am unteren Rand des Formulars für Katalogprobleme erscheinen wenn reporting a concern in the OPAC, oder reporting a concern in the staff interface. Der Standardtext ist „Bitte beschreiben Sie Ihr Problem genau, und die Bibliothek wird versuchen, es so schnell wie möglich zu bearbeiten“.
CatalogConcernTemplate: Inhalt wird im Haupttextbereich des Formulars für Katalogprobleme erscheinen wenn ein Problem im OPAC gemeldet wird, oder ein Problem in der Dienstoberfläche gemeldet wird. Der Standardtext ist
**Describe the concern**

A clear and concise description of what the concern is.

**To Reproduce**

Steps to reproduce the behavior:
1. Go to '...'
2. Click on '....'
3. Scroll down to '....'
4. See error

**Expected behavior**

A clear and concise description of what you expected to happen.
Tipp
Da es sich um ein Textfeld handelt, gibt es keine Möglichkeit, Formatierungen hinzuzufügen. Stellen Sie sicher, dass Sie den Texteditor und nicht den WYSIWYG-Editor verwenden, um Zeilenumbrüche in Ihrem Text zu erhalten.
CookieConsentBar: Der Inhalt erscheint auf dem Banner, das angezeigt wird, wenn der CookieConsent system preference aktiviert ist.
Version
Der Bereich CookieConsentBar wurde in Koha-Version 23.11 hinzugefügt.
Bemerkung
Der Inhalt der CookieConsentBar erscheint auf dem Cookie-Banner sowohl im OPAC als auch in der Dienstoberfläche.
CookieConsentPopup: Der Inhalt wird als Haupttext für die Cookie-Richtlinie verwendet, die beim Anklicken von „Weitere Informationen“ auf dem Cookie-Banner angezeigt wird.
Über den Systemparameter CookieConsentedJS werden der Cookie-Richtlinie Auswahlmöglichkeiten für nicht essentielle Cookies hinzugefügt.
Version
Der Bereich CookieConsentPopup wurde in Koha-Version 23.11 hinzugefügt.
Bemerkung
Der Inhalt von CookieConsentPopup wird sowohl im OPAC als auch in der Dienstoberfläche verwendet.
ILLModuleCopyrightClearance: Der Inhalt wird angezeigt wenn creating an interlibrary loan request on the OPAC.
Version
Der Bereich ILLModuleCopyrightClearance wurde in Koha-Version 24.05 hinzugefügt. In früheren Versionen gab es einen Parameter mit demselben Namen: ILLModuleCopyrightClearance.
opaccredits: Inhalte werden am unteren Seitenrand der OPAC-Seiten angezeigt
OpacCustomSearch: Inhalte ersetzen die einfache Suche am oberen Seitenrand
opacheader: Inhalte werden zu Beginn jeder OPAC-Seite angezeigt
OpacLibraryInfo: Der Inhalt erscheint auf der Seite „Bibliotheken“ im OPAC sowie in der Tabelle der Vormerkungen im OPAC
OpacLoginInstructions: Inhalte werden unter des Anmeldeformulars im OPAC angezeigt
OpacMaintenanceNotice: Der Inhalt ersetzt die Standard-Wartungsmeldung, wenn der Parameter OpacMaintenance auf ‚Zeige‘ gesetzt ist.
Version
Vor Koha-Version 23.11 war dies ein Parameter. Siehe OpacMaintenanceNotice für weitere Informationen.
OpacMainUserBlock: Inhalte werden in der Mitte auf der Startseite des OPACs angezeigt
OpacMoreSearches: Der Inhalt wird unter dem OPAC-Suchfeld angezeigt. Standardmäßig (und abhängig von den Parametern) gibt es einen Link Erweiterte Suche, Semesterapparate, Suche in Normdaten und Tag Cloud. Jeder neue Link wird rechts neben den bereits vorhandenen Links eingefügt.
OpacMySummaryNote: Der Inhalt erscheint über der Kontoübersicht und unter der Begrüßungsnachricht, wenn sich der Kunde im OPAC anmeldet und den Reiter ‚your summary‘ tab ansieht.

OpacNav: Der Inhalt erscheint in der linken Spalte der Hauptseite und des Benutzerkontos im OPAC. Im Benutzerkonto erscheint der Inhalt vor den Reitern des Kontos (Zusammenfassung, Gebühren, Persönliche Daten usw.)
OpacNavBottom: Der Inhalt wird in der linken Spalte der Hauptseite und des Benutzerkontos im OPAC angezeigt. Im Benutzerkonto erscheint der Inhalt unterhalb der Reiter (Zusammenfassung, Gebühren, Persönliche Daten usw.). Auf der Hauptseite erscheint der Inhalt von OpacNavBottom direkt unter dem Inhalt von OpacNav.
OpacNavRight: Der Inhalt wird auf der rechten Seite im OPAC angezeigt
OPACResultsSidebar: Der Inhalt erscheint auf der Seite search results unterhalb der list of facets auf der linken Seite des Bildschirms.
Version
Vor Koha-Version 23.11 war dies ein Parameter. Siehe OPACResultsSidebar für weitere Informationen.
OpacSuggestionInstructions: der Inhalt ersetzt den Text am Anfang des Anschaffungsformulars im OPAC
OpacSuppressionMessage: Inhalt, der im OPAC erscheint, wenn ein Datensatz unterdrückt wird (siehe Parameter OpacSuppression für weitere Informationen.)
Version
Vor Koha-Version 23.11 war dies ein Systemparameter. Siehe OpacSuppressionMessage für weitere Informationen.
PatronSelfRegistrationAdditionalInstructions: Der Inhalt wird angezeigt, nachdem der Besucher erfolgreich creates a library account via the OPAC.
Version
Vor Koha-Version 23.11 war dies ein Parameter. Siehe PatronSelfRegistrationAdditionalInstructions für weitere Informationen.
Bemerkung
Beachten Sie! Dies erscheint erst nach der Registrierung des Benutzers.
SCOMainUserBlock: Der Inhalt wird in der Mitte der Hauptseite des Bildschirms der Selbstverbuchung erscheinen.
Version
Vor Koha-Version 23.11 war dies ein Parameter. Siehe SCOMainUserBlock für mehr Informationen.
SelfCheckHelpMessage: Der Inhalt wird über der bestehenden Hilfemeldung angezeigt, wenn Sie auf den Link „Hilfe“ oben rechts auf der Selbstausleihe-Oberfläche klicken.
Version
Vor Koha-Version 23.11 war dies ein Parameter. Siehe SelfCheckHelpMessage für weitere Informationen.
SelfCheckInMainUserBlock: Der Inhalt erscheint in der Mitte der Hauptseite des Bildschirms self check-in.
Version
Vor Koha-Version 23.11 war dies ein Parameter. Siehe SelfCheckInMainUserBlock für weitere Informationen.
Dienstoberflächenbereiche
IntranetmainUserblock: content will appear at the bottom of the staff interface homepage, underneath the module icons.
Version
Vor Koha-Version 24.11 war dies ein Systemparameter. Siehe IntranetmainUserblock für mehr Informationen.
RoutingListNote: der Inhalt wird unterhalb der Umlaufliste angezeigt.
Version
Vor Koha-Version 25.05 war dies ein Systemparameter. Siehe RoutingListNote für weitere Details.
StaffAcquisitionsHome: Der Inhalt erscheint unten auf der Hauptseite des Acquisitions module.
StaffAuthoritiesHome: Der Inhalt erscheint am unteren Rand der Hauptseite Normdaten.
StaffCataloguingHome: Der Inhalt erscheint am Ende der Hauptseite des Cataloguing module.
StaffListsHome: Der Inhalt erscheint am unteren Rand der Hauptseite Listen.
OpacLoginInstructions: Inhalte werden unter des Anmeldeformulars im OPAC angezeigt.
Version
Vor der Koha-Version 25.05 war dies ein Systemparameter. Siehe StaffLoginInstructions für weitere Details.
StaffPatronsHome: Der Inhalt erscheint am unteren Rand der Hauptseite des Benutzer-Moduls.
StaffPOSHome: Der Inhalt erscheint am unteren Rand der Hauptseite des Point of sale.
StaffReportsHome: der Inhalt wird im unteren Bereich der Startseite des Moduls Reports angezeigt.
Version
Vor der Koha-Version 25.11 war dies ein Systemparameter. Siehe IntranetReportsHomeHTML für weitere Details.
StaffSerialsHome: Der Inhalt erscheint am unteren Rand der Hauptseite des Zeitschriften-Moduls.
Seiten
Bemerkung
Nur Bibliothekspersonal mit der Berechtigung edit_additional_contents (oder der superlibrarian-Berechtigung) hat Zugang zu diesem Werkzeug.
Pfad in Koha: Mehr > Werkzeuge > Weitere Werkzeuge > Seiten
The pages tool is a tool to create custom additional pages in the OPAC and in the staff interface. It is based on the same tool as the news and the HTML customizations, therefore it works in the same way.
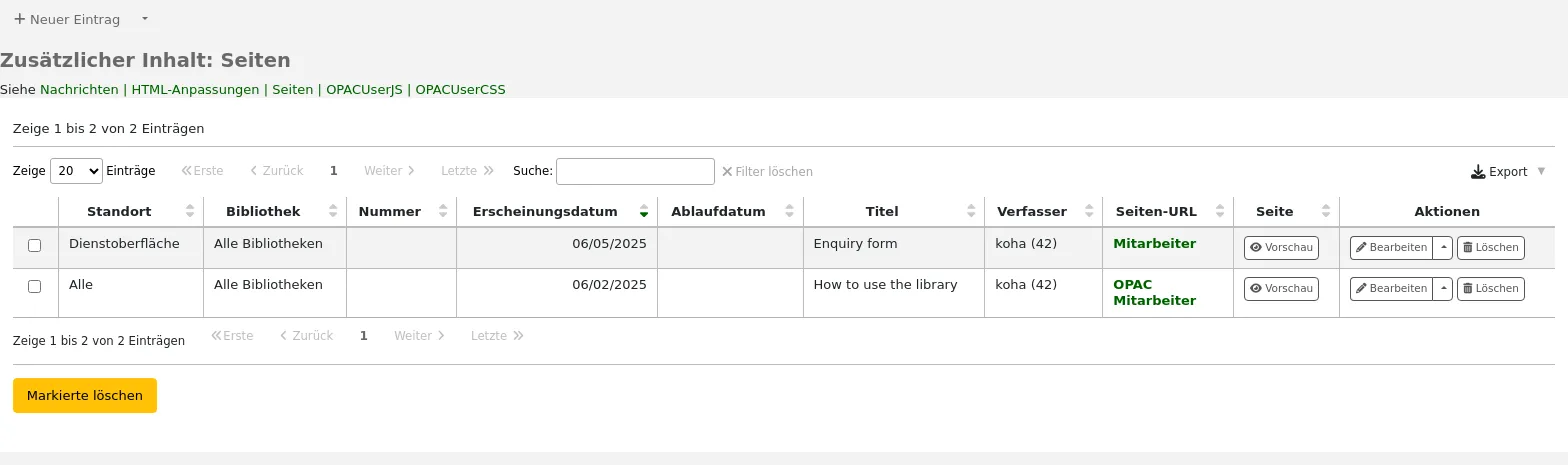
Um eine neue Seite anzulegen:
Klicken Sie auf ‚Neuer Eintrag‘

Anzeigebereich: wählen Sie aus, wo die Seite angezeigt werden soll
Dienstoberfläche und OPAC: Es werden zwei Links erstellt, einer für den OPAC und einer für die Dienstoberfläche
Dienstoberfläche: es wird ein Link für die Dienstoberfläche erstellt
OPAC: es wird ein Link für den OPAC erstellt
Bibliothek: wählen Sie die Bibliothek aus, für welche diese Seite angezeigt werden soll
Wenn eine OPAC-Seite auf eine Bibliothek beschränkt wurde, können nur angemeldete Benutzer*innen mit dieser Heimatbibliothek auf die Seite zugreifen.
Seiten die auf eine Bibliothek beschränkt wurden sind im OPAC für nicht angemeldete Benutzer*innen nicht zugreifbar, außer wenn Ihr Systemadministrator eine ‚OPAC_BRANCH_DEFAULT‘ Überschreibung in der Virtual-Host-Konfiguration eingerichtet hat.
Wenn eine Seite für die Dienstoberfläche auf eine Bibliothek beschränkt ist, kann nur Bibliothekspersonal, welches unter dieser Bibliothek angemeldet ist auf die Seite zugreifen.
Veröffentlichungsdatum: Verwenden Sie dieses Datumsfeld um festzulegen, ab welchem Datum diese Seite zugreifbar ist, wenn diese erst ab einem zukünftigem Datum zur Verfügung stehen soll.
Ablaufdatum: Verwenden Sie dieses Feld um eine Seite nach einem bestimmten Datum zu sperren.
Wenn dieses Feld leer ist, wird die Seite angezeigt bis sie manuell entfernt wird
Sie können den Seitentitel und Inhalt für jede installierte Sprache erfassen
Bemerkung
Sie können selbst entscheiden, welche Art von Editor Sie verwenden möchten, entweder einen Texteditor oder einen WYSIWYG-Editor (What-you-see-is-what-you-get) und die Voreinstellung über den Systemparameter AdditionalContentsEditor festlegen.
Nachdem Sie alle Felder ausgefüllt haben, klicken Sie auf „Speichern“ oben auf der Seite.
Klicken Sie alternativ auf den Pfeil neben der Schaltfläche „Speichern“ und wählen Sie „Speichern und fortfahren“, wenn Sie auf dieser Seite bleiben möchten, um die Bearbeitung der Nachricht fortzusetzen.
In the table, a link will be generated for the OPAC or the staff interface or both. Use this link in HTML customizations, news or system preferences such as IntranetNav or IntranetmainUserBlock so that the patrons or staff members can access the new page.
Bemerkung
To link to a specific page, use the code in the URL with the
code=parameter. For example:OPACBASEURL/cgi-bin/koha/opac-page.pl?code=staff_and_opac_42 STAFFCLIENTBASEURL/cgi-bin/koha/tools/page.pl?code=staff_and_opac_42
In multi-language installations, use the
language=parameter followed by the language code to link to the page in a specific language. For example:OPACBASEURL/cgi-bin/koha/opac-page.pl?code=staff_and_opac_42&language=fr-CA STAFFCLIENTBASEURL/cgi-bin/koha/tools/page.pl?code=staff_and_opac_42&language=fr-CA
Eine benutzerdefinierte Seite verwenden
Sobald die Seite entwickelt und gespeichert wurde, sehen Sie eine Übersichtstabelle mit allen benutzerdefinierten Seiten. In dieser Tabelle werden auch die generierten Links für den Zugriff auf diese Seiten angezeigt. Die Links sind sowohl in der Standardsprache als auch in der installierten Sprache verfügbar, die der/die angemeldete Mitarbeiter*in derzeit verwendet.
Es gibt eine Schaltfläche zur Vorschau der erstellten Seite. Dies ist hilfreich, um zu prüfen, wie die Seite aussieht und funktioniert, bevor sie bereitgestellt wird.
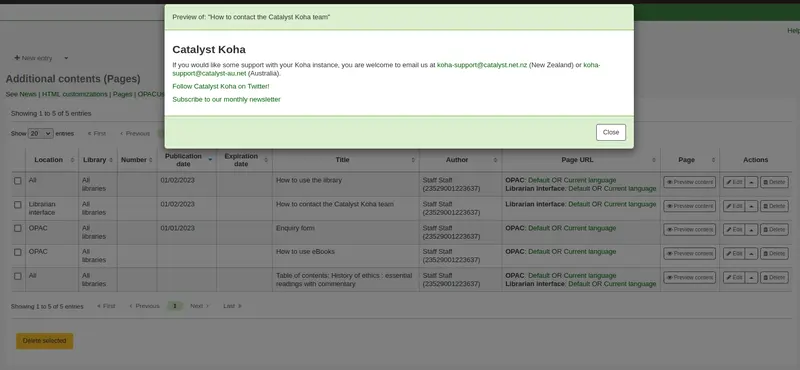
Nachdem die Seite erstellt wurde, gibt es mehrere Möglichkeiten, die Seite im Koha-OPAC für Ihre Benutzer*innen zugänglich zu machen.

One option is to use an HTML customization to add the link to the page to a section of the OPAC. The page can be added as a navigation link (in OpacNav, OpacNavBottom, or OpacNavRight). Depending on the page, it may be more suitable in the header (opacheader), footer (opaccredits), or main section of the homepage (OpacMainUserBlock).
HTML-Anpassungen werden nur im OPAC angezeigt, so dass Nachrichteneinträge das geeignetere Werkzeug wären, um den Link zur Startseite der Dienstoberfläche hinzuzufügen.
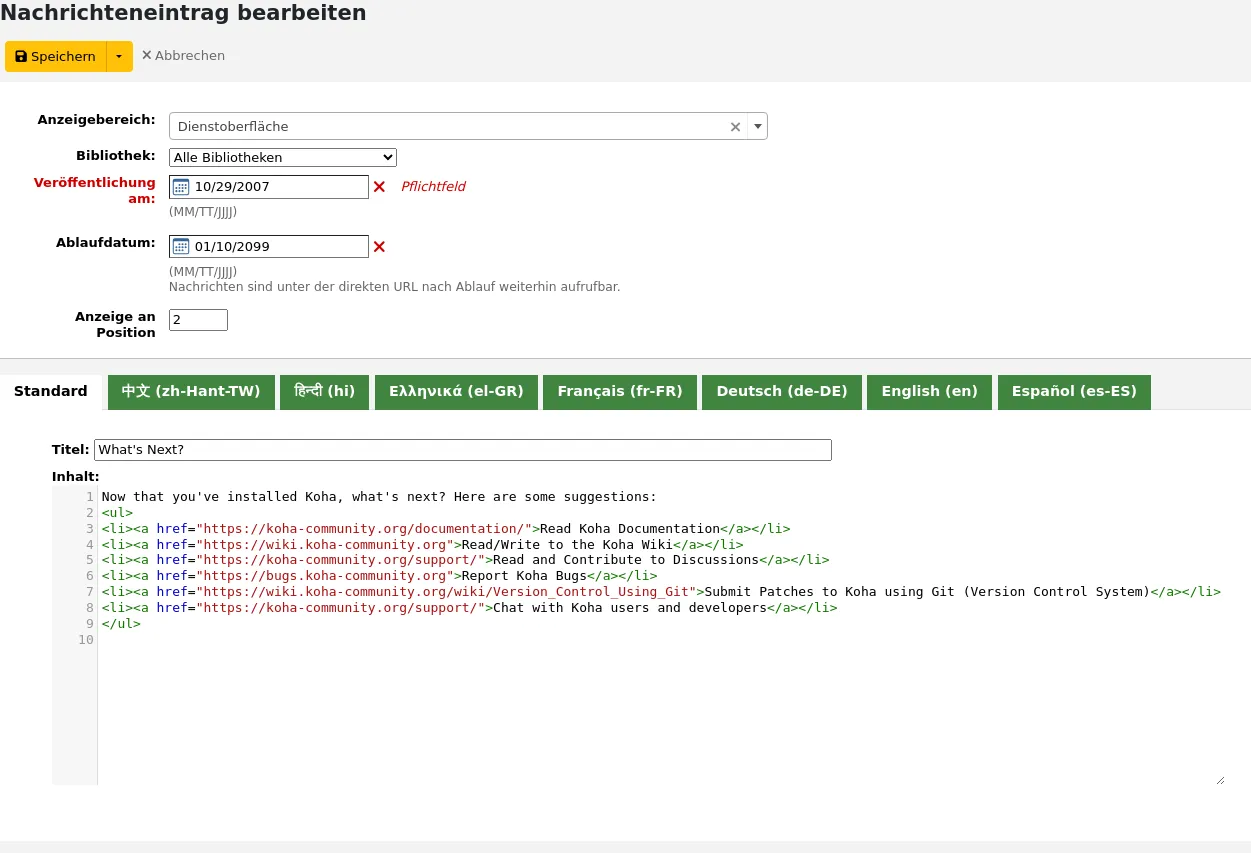
Der Vorteil, den Seitenlink in eine HTML-Anpassung oder einen Nachrichteneintrag einzufügen, besteht darin, dass Sie den WYSIWYG-Editor verwenden können, anstatt Code schreiben zu müssen. Es besteht jedoch immer die Möglichkeit, den Inhalt auch im HTML-Texteditor zu schreiben, wenn Sie dies bevorzugen.
Wenn Sie sich mit dem Schreiben von Code besser auskennen, können Sie jQuery (Javascript) verwenden, um ihren Seitenlink an einer beliebigen Stelle im OPAC oder in der Dienstoberfläche einzufügen.
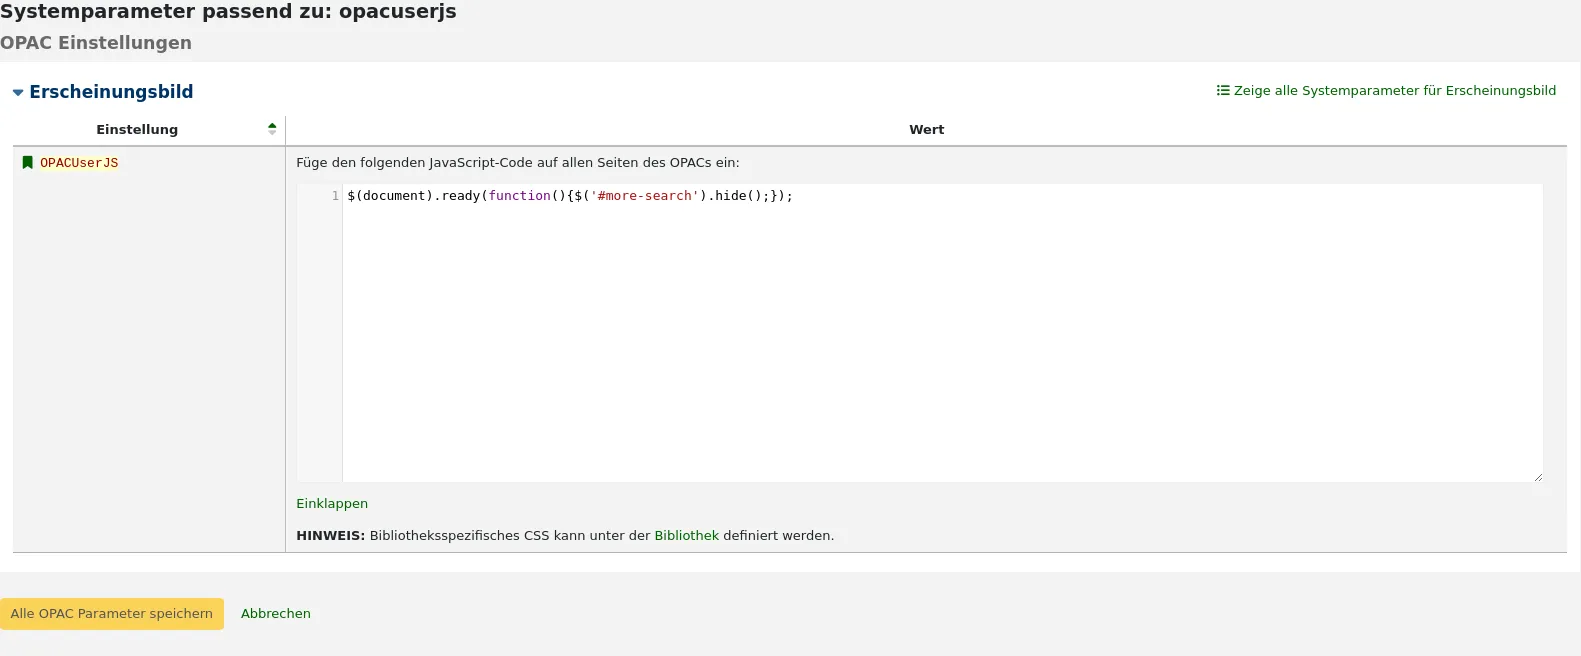
Mithilfe von jQuery können die Seiten den beiden Oberflächen als einfache Textlinks oder als Schaltflächen- oder Bildlinks hinzugefügt werden. Fügen Sie dem Parameter OPACUserJS Code hinzu, um jQuery auf den OPAC anzuwenden, oder dem Parameter IntranetUserJS, um jQuery auf die Dienstoberfläche anzuwenden.
Clevere Möglichkeiten zur Verwendung benutzerdefinierter Seiten:
Es gibt viele interessante Möglichkeiten, benutzerdefinierte Seiten in einer Koha-Bibliothek zu verwenden. Wir haben von Seiten gehört, die als Inhaltsverzeichnisse, FAQs und Anfrageformulare verwendet werden.
Another way to make custom Koha page content accessible for users, would be to catalog those pages so they pop in in Koha search results, for example library tutorials that patrons may be looking for.
Once the page has been created, it can be cataloged in the URI field of a record (856$u). Alternatively, it could be cataloged in the URI field of an item attached to a record (952$u). Both of these fields get converted into hyperlinks by Koha. If cataloged in a record or item, it would then be indexed and become searchable.
Sind sie erst einmal katalogisiert, können Seiten auf eine Art genutzt werden, wie normalerweise nur Bücher und andere Datensätze. Datensätze, welche die Seiten repräsentieren, können zu Listen hinzugefügt, in virtuellen Sammlungen oder an Orten gespeichert werden, an denen sie im Katalog leichter zu finden sind. Sie könnten sogar erfasst und in Karussells angezeigt werden!
Record display customizations
Version
This feature was first introduced in version 25.11 of Koha.
Bemerkung
Nur Bibliothekspersonal mit der Berechtigung edit_additional_contents (oder der superlibrarian-Berechtigung) hat Zugang zu diesem Werkzeug.
Get there: More > Tools > Additional tools > Record display customizations
This tool allows you to make changes to the way records are displayed in the staff interface or in the OPAC using custom Template Toolkit code. With this tool, you can easily display custom additional fields in the detail view of a MARC record without having to make changes in an XSLT stylesheet.
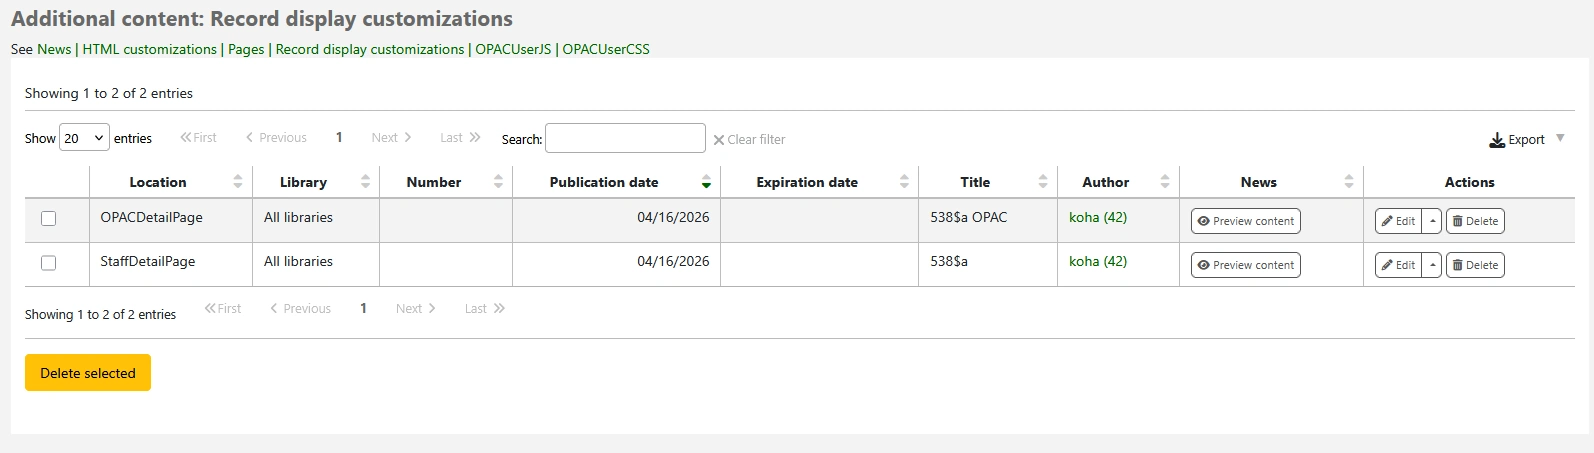
Eine neue HTML-Anpassung hinzufügen:
Klicken Sie auf ‚Neuer Eintrag‘

Display location: choose the page that you want the customization to be displayed on.
StaffDetailPage: the record customization will be displayed in the staff interface on the bibliographic record’s detail page.
StaffListPage: the record customization will be displayed in the staff interface in lists of records.
StaffResultsPage: the record customization will be displayed in the staff interface in the results list of a search.
OPACDetailPage: the record customization will be displayed in the OPAC on the bibliographic record’s detail page.
OPACListPage: the record customization will be displayed in the OPAC in both public and private lists of records.
Library: choose the library for which this record customization will be shown.
If a record customization for the staff interface is limited to a library, only staff logged into that library will see the customization.
If a record customization for the OPAC is limited to a library, only logged in OPAC users whose home library is the selected one will see the customization.
OPAC record customizations limited to a library will not be accessible to OPAC users who are not logged in unless your system administrator has configured an ‚OPAC_BRANCH_DEFAULT‘ override in virtual host configuration.
Publication date: use the publication date field to control from which date the record customization should be shown, if it should only be shown at a future date.
If the publication date is set to today, before today or is left blank, the record customization will be shown immediately.
If the publication date is set in the future, the record customization will only be shown at that date or later.
Expiration date: use the expiration date field to remove the customization after a specific date.
If this field is empty, the record customization will be shown until you remove it manually.
Appear in position: this field is not currently in use.
Enter your title and content for the record customization.
Tipp
See the wiki page Record customizations with Template Toolkit for some record customization examples.
You can enter record customization contents separately for each language installed in Koha.
Nachdem Sie alle Felder ausgefüllt haben, klicken Sie auf „Speichern“ oben auf der Seite.
Alternatively, click the arrow next to the ‚Save‘ button and choose ‚Save and continue editing‘ if you need to stay on this page to continue editing the record customization.
Aufgabenplaner
Bemerkung
Nur Bibliothekspersonal mit der Berechtigung schedule_tasks (oder der superlibrarian-Berechtigung) hat Zugriff auf dieses Werkzeug.
Pfad in Koha: Mehr > Werkzeuge > Weitere Werkzeuge > Aufgabenplaner
Der Aufgabenplaner ist ein Werkzeug um Reports zu bestimmten Zeitpunkten automatisch laufen zu lassen.
Um einen Aufgabe automatisch laufen zu lassen, verwenden Sie den Aufgabenplaner und füllen dort das Formular aus
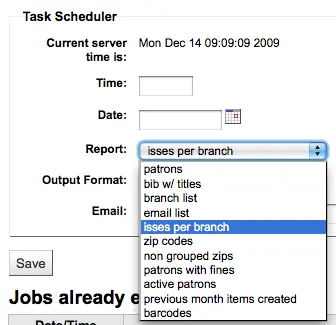
Aktuelle Serverzeit zeigt die Zeit auf Ihrem Server (planen Sie alle Ihre Reports nach dieser Zeit, nicht nach Ihrer lokalen Zeit)
Zeitangaben sollten in der Form hh:mm (jeweils zwei Ziffern für Stunden und Minuten) eingegeben werden
Das Datum sollte mit dem Kalender-Plugin eingetragen werden
Wählen Sie aus den Reports den Report den Sie planen möchten
Entscheiden Sie, ob Sie Text oder einen Link zu den Ergebnissen erhalten möchten
Im Feld Email geben Sie die E-Mail-Adresse der Person an, die den Report erhalten soll
Unter dem Formular des Aufgabenplaners ist eine Liste der geplanten Reports

Sie können Reports auch aus der Liste der gespeicherten Reports heraus für einen festen Zeitpunkt einplanen, indem Sie auf den kleinen Pfeil neben „Ausführen“ klicken und die Option „Termin einplanen“ auswählen.
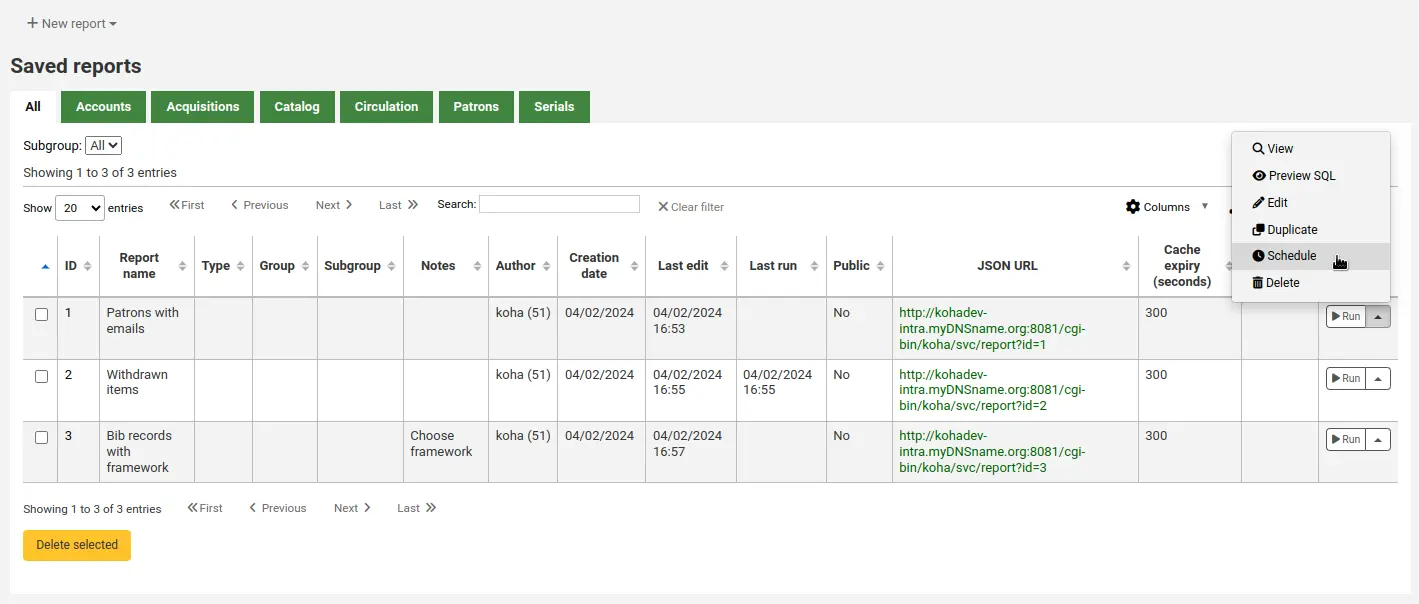
Problembehebung
Der Aufgabenplaner wird nicht korrekt arbeiten, wenn der User, unter dem der Webserver läuft, nicht die notwendigen Rechte hat, ihn auszuführen. Um herauszufinden, ob der/die Benutzer*in die benötigten Rechte hat, überprüfen Sie /etc/at.allow um zu sehen, welche Benutzer*innen dort eingetragen sind. Wenn diese Datei bei Ihnen nicht vorhanden ist, überprüfen Sie etc/at.deny. Wenn at.deny existiert, aber leer ist, dann kann jede*r Benutzer*in das Werkzeug verwenden. Sprechen Sie mit Ihrem Systemadministrator, um den/die Benutzer*in an den richtigen Stellen hinzuzufügen, so dass der Aufgabenplaner funktioniert.
Zitat-Editor
Bemerkung
Nur Bibliothekspersonal mit der Berechtigung edit_quotes (oder der superlibrarian-Berechtigung) hat Zugriff auf dieses Werkzeug.
Pfad in Koha: Mehr > Werkzeuge > Weitere Werkzeuge > Zitat-Editor
Dieses Werkzeug erlaubt Ihnen Zitate, die im OPAC angezeigt werden, hinzuzufügen und zu bearbeiten.
Aktivieren Sie die Funktion, indem Sie den Systemparameter QuoteOfTheDay auf „OPAC“, „Dienstoberfläche“ oder „beides“ setzen und mindestens ein Zitat anlegen.
Im OPAC werden die Zitate oberhalb des Bereichs für „OpacMainUserBlock“ aus den Nachrichten angezeigt.
In der Dienstoberfläche werden die Zitate unter den Nachrichteneinträgen auf der linken Seite angezeigt.
Ein Zitat hinzufügen
Zitat hinzufügen:
Klicken Sie auf die Schaltfläche „Neues Zitat“ in der Werkzeugleiste oben auf der Seite.
Füllen Sie das Formular aus.
Quelle: geben Sie die Quelle des Zitats an, z.B. den Namen der Person, von der das Zitat stammt
Text: geben Sie den Text des Zitats an
Warnung
Sowohl die ‚Quelle‘ als auch der ‚Text‘ müssen ausgefüllt sein, um ein neues Zitat zu speichern.
Klicken Sie auf „Absenden“, um das neue Zitat zu speichern.
Das neue Zitat wird nun in der Liste angezeigt.
Zitate importieren
Sie können auch mehrere Zitate als CSV-Datei importieren. Ihre Datei muss zwei Spalten in der folgenden Form enthalten: „Quelle“,“Text“, ohne Kopfzeile mit den Spaltennamen.
Bemerkung
Sie werden aufgefordert, das Hochladen einer Datei, die größer als 512KB ist, zu bestätigen.
Um den Import zu starten klicken Sie auf die Schaltfläche ‚Zitate importieren‘ oben auf dem Bildschirm.
Auf dem Bildschirm ‚Zitate hochladen‘ können Sie Ihren Computer nach der Datei durchsuchen, die Sie importieren möchten
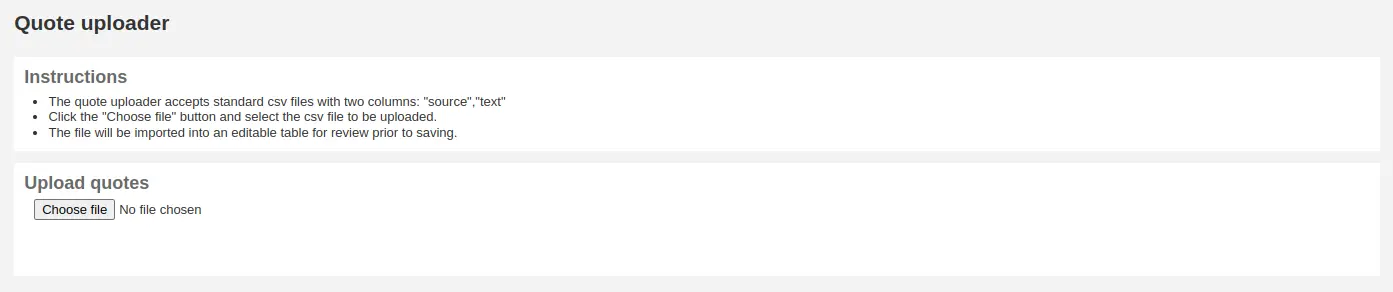
Nach der Auswahl der CSV-Datei wird diese durch die Schaltfläche ‚Öffnen‘ in eine temporäre Tabelle geladen, die Sie nun bearbeiten können.
Ausgehend von der Auflistung können Sie das ‚Quellen‘ oder das ‚Text‘ Feld bearbeiten, indem Sie auf das gewünschte Feld klicken. Wenn die Bearbeitung abgeschlossen ist, klicken Sie die <Enter> Taste auf Ihrer Tastatur um die Änderungen zu speichern.

Wenn Sie mit den Zitaten zufrieden sind, klicken Sie die Schaltfläche ‚Zitate speichern‘ in der Werkzeugleiste und die Zitate werden gespeichert.
Ein Zitat bearbeiten
Über die Schaltfläche „Bearbeiten“ auf der rechten Seite des Zitats können Sie dieses bearbeiten.
Bearbeiten Sie die Felder für „Quelle“ oder „Text“.
Klicken Sie auf „Bestätigen“, um das Zitat zu speichern.
Ein Zitat löschen
Klicken Sie auf die Schaltfläche „Löschen“ auf der rechten Seite des Zitats, um dieses zu löschen.
Bestätigen Sie den Vorgang durch Klicken auf „Löschen“.
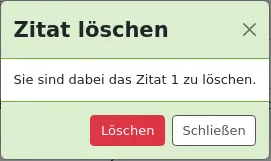
Werkzeug plugins
Mit diesem Werkzeug können Sie die als Werkzeuge verwendeten Plugins anzeigen, verwalten und konfigurieren.
Dieser Bereich ist nur sichtbar, wenn Sie Plugins des Typs „Werkzeug“ auf der plugin administration page hochgeladen haben.
Pfad in Koha: Mehr > Werkzeuge > Weitere Werkzeuge > Werkzeug-Plugins
Bemerkung
Nur Bibliothekspersonal mit der Berechtigung tool (oder der superlibrarian-Berechtigung) kann auf Werkzeug-Plugins zugreifen.
Auf dieser Seite sehen Sie nur Plugins vom Typ Werkzeug.
Lesen Sie den Bereich managing plugins section in diesem Handbuch, um zu erfahren, wie Sie Ihre Werkzeug-Plugins verwalten können.
Hochladen
Bemerkung
Nur Bibliothekspersonal mit der Berechtigung upload_general_files (oder der superlibrarian-Berechtigung) hat Zugriff auf dieses Werkzeug.
Pfad in Koha: Mehr > Werkzeuge > Weitere Werkzeuge > Upload
Diese Werkzeug erlaubt Ihnen Dateien in Ihr Koha System hochzuladen um aus der Cataloging form auszuwählen.
Dateien hochladen
Wenn Sie zum ersten Mal das Upload-Werkzeug öffnen, könnte es sein, dass Sie eine Warnung angezeigt bekommen, dass eine Kategorie fehlt.

Kategorien werden in den Normierten Werten definiert in der Kategorie ‚UPLOAD‘. Haben Sie keine Upload-Kategorien definiert, sind Ihre Dateien zeitlich begrenzt und werden beim nächsten Server-Reboot gelöscht. Haben Sie einen Wert in der Kategorie ‚UPLOAD‘ definiert, bekommen Sie ein PullDown-Menü von Kategorien unter der ‚Durchsuchen‘ Schaltfläche angezeigt.
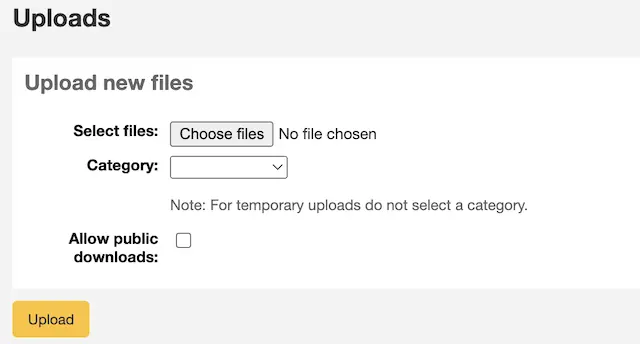
Durchsuchen Sie Ihre Dateien, wählen Sie eine Kategorie und entscheiden Sie, ob Sie öffentliche Downloads im OPAC erlauben möchten. Ist Ihre Datei hochgeladen, bekommen Sie vom System eine Bestätigung angezeigt.

Dateien suchen
Alle Upload-Dateien sind suchbar unterhalb des Upload-Formulars. Sie können nach dem Upload-Namen suchen und/oder mit einem Hashvalue. Betätigen Sie dann die Schaltfläche ‚Suche‘
Die Ergebnisse Ihrer Suche werden Ihnen dann angezeigt.

Dateizugriff
Bemerkung
Nur Bibliothekspersonal mit der Berechtigung access_files (oder der superlibrarian-Berechtigung) hat Zugriff auf dieses Werkzeug.
Pfad in Koha: Mehr > Werkzeuge > Weitere Werkzeuge > Dateizugriff
Diese Option erlaubt Ihnen in der Dienstoberfläche den Zugriff auf abgelegte Dateien auf dem Server. Die Verzeichnisse, wo die Dateien untergebracht sind, müssen in der koha-conf.xml definiert sein.
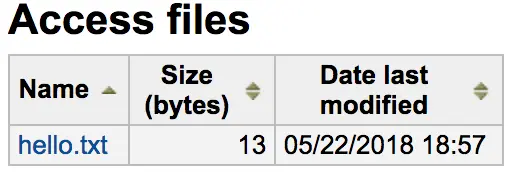
Problemmeldungen im OPAC
Pfad in Koha: Mehr > Werkzeuge > Weitere Werkzeuge > Problemmeldungen im OPAC
Dieses Werkzeuge wird für die Verwaltung der Problemberichte verwendet, die Benutzer*innen über den OPAC erfasst haben.
Bemerkung
Dieses Werkzeug ist nur sichtbar, wenn Sie den Systemparameter OPACReportProblem aktiviert haben.
In diesem Werkzeuge sehen Sie alle Problemberichte, die über den OPAC erfasst wurden.
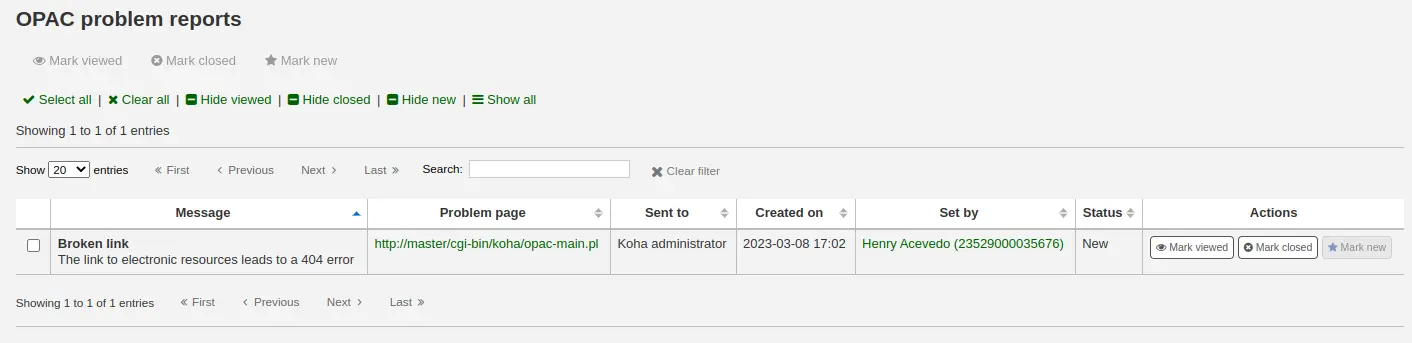
In der Spalte „Aktionen“ können Sie
„Gesehen markieren“: markieren Sie einen Problembericht als gesehen, um den Status auf „Gesehen“ zu ändern
„Geschlossen markieren“: markieren Sie einen Problembericht als geschlossen, um den Status auf „Geschlossen“ zu ändern
„Als neu markieren“: markieren Sie den Problembericht als neu (nicht gesehen), um den Status zurück auf „Neu“ zu setzen.
Sie können auch mehrere Status auf einmal verändern, indem Sie die Problemberichte über die Checkboxen markieren und die Schaltfläche am Anfang der Seite verwenden.
Kassenführung
Koha verfügt über eine Reihe von Funktionen für den Umgang mit Finanztransaktionen und erlaubt es diese Prozesse für Audits und Statistik feingranular zu protokollieren und nachzuverfolgen.
Kassen
Kassen können dazu verwendet werden Transaktionen zu einem bestimmten Standort in der Bibliothek nachzuverfolgen. Dies kann besonders hilfreich sein, wenn Bargeldeinzahlungen erfolgen und daher Gelder regelmäßig entnommen und bei der Bank eingezahlt werden müssen.
Konfiguration
Die Verwendung von Kassen, wird durch den Systemparameter UseCashRegisters aktiviert.
Sie können die Kassen für Ihre Bibliothek im Administrationsmodul unter Kassen konfigurieren.
Kassenabschluss
Bemerkung
Nur Bibliothekspersonal mit der Berechtigung cashup (oder der superlibrarian-Berechtigung) kann Kassenabschlüsse vornehmen.
Die Aktion der „Kassenabschluss“ kann für eine Kasse sowohl von den Bibliotheksdetails als auch von den Kassendetails ausgehend ausgeführt werden.
Wenn Sie auf die Schaltfläche „Abrechnung aufzeichnen“ klicken, werden das Datum und die Uhrzeit der Aktion aufgezeichnet, um ein Nachverfolgen der Entnahmen aus der Kasse zu erlauben.
Beide der zuvor genannten Seiten verwenden die Aufzeichnung der Abrechnung um die angezeigten Transaktionen/Zusammenfassungen auf die seit der letzten Abrechnung zu begrenzen.
Sobald eine Abrechnung erfolgt ist, kann eine Zusammenfassung der Transaktionen während des Abrechnungszeitraums über den Link „Zusammenfassung“ neben dem Abrechnungsdatum angezeigt und gedruckt werden.
Abrechnung für Bibliothek
Pfad in Koha: Mehr > Werkzeuge > Zusammenfassung Kassenabschluss für Bibliothek
Eine Zusammenfassung der Transaktionen und Summen für die Kassen einer Bibliothek kann unter „Zusammenfassung Kassenabschlüss für Bibliothek“ eingesehen werden.
Die Zusammenfassung listet die Kassen auf, die der angemdeldeten Bibliothek zugeordnet sind und beinhaltet Informationen dazu, wie viel Geld in jeder Kasse enthalten sein sollte, was entnommen werden kann und eine Zusammenfassung der Ein- und Ausgänge.
Hinweis: Sie können diese Seite auch über die Navigation links auf der Seite Verkauf aufrufen, wenn dieses Modul aktiviert ist.
Transaktionshisorie für Kasse
Pfad in Koha: Mehr > Werkzeuge > Kassenführung > Transaktionshistorie für Kasse
Eine Liste aller Transaktionen, die an einer Kasse durchgeführt wurden, kann über einen Klick auf den Kassennamen von der Seite Bibliotheksdetails aufgerufen werden.
Wenn Sie die erforderlichen Berechtigungen haben können Sie von dieser Seite aus Quittungen erneut ausdrucken, Rückerstattungen durchführen und Abrechnungen ausführen.
Hinweis: Sie können diese Seite auch über die Navigation links auf der Seite Verkauf aufrufen, wenn dieses Modul aktiviert ist.
Kommentare
Bemerkung
Nur Bibliothekspersonal mit der Berechtigung moderate_comments (oder der superlibrarian-Berechtigung) hat Zugriff auf dieses Werkzeug.
Pfad in Koha: Mehr > Werkzeuge > Benutzer und Ausleihe > Kommentare
Alle Kommentare, die von Benutzern im OPAC verfasst werden, müssen durch einen Bibliotheksmitarbeiter kontrolliert werden. Wenn es im System Kommentare gibt, die auf Moderation warten, werden diese auf der Startseite unterhalb der Module angezeigt:
nach den Kommentaren im Modul ‚Werkzeuge‘
Um Kommentare zu verfassen klicken Sie auf die Beschreibung auf der Hauptseite oder gehen Sie direkt in das Modul ‚Werkzeuge‘ > Kommentare und klicken hier auf ‚Akzeptieren‘ oder ‚Löschen‘ auf der rechten Seite des jeweiligen Kommentars.
Wenn es keine Kommentare zu moderieren gibt, erhalten Sie eine Textmeldung mit dieser Information
Mit der Schaltfläche ‚Freigegebene Kommentare‘ können früher freigegebene Kommentare moderiert und gegebenenfalls die Freigabe wieder zurückgezogen werden