Catalogação
Vá: Mais > Catalogação
Antes de começar a catalogar no Koha, você precisa fazer algumas configurações básicas. Consulte o Checklist de implementação para a lista completa. O mais importante é garantir que suas planilhas bibliográficas MARC estejam definidas exatamente como você deseja. Uma vez no módulo de catalogação, não será possível adicionar ou remover campos e subcampos; portanto, suas planilhas devem estar prontas antes de começar a catalogação.
Você também pode usar serviços de catalogação da OCLC, como WorldShare Record Manager e Connexion, para enviar registros diretamente ao Koha. Para mais informações, veja Serviços de catalogação OCLC.
Registros bibliográficos
No Koha, o registro bibliográfico contém as informações principais relativas ao material, como título, autor, ISBN etc. Essas informações são armazenadas no Koha em MARC. Por padrão, a página de detalhes do registro é exibida na aba ‘Normal’ e mostra os detalhes mais importantes do registro.
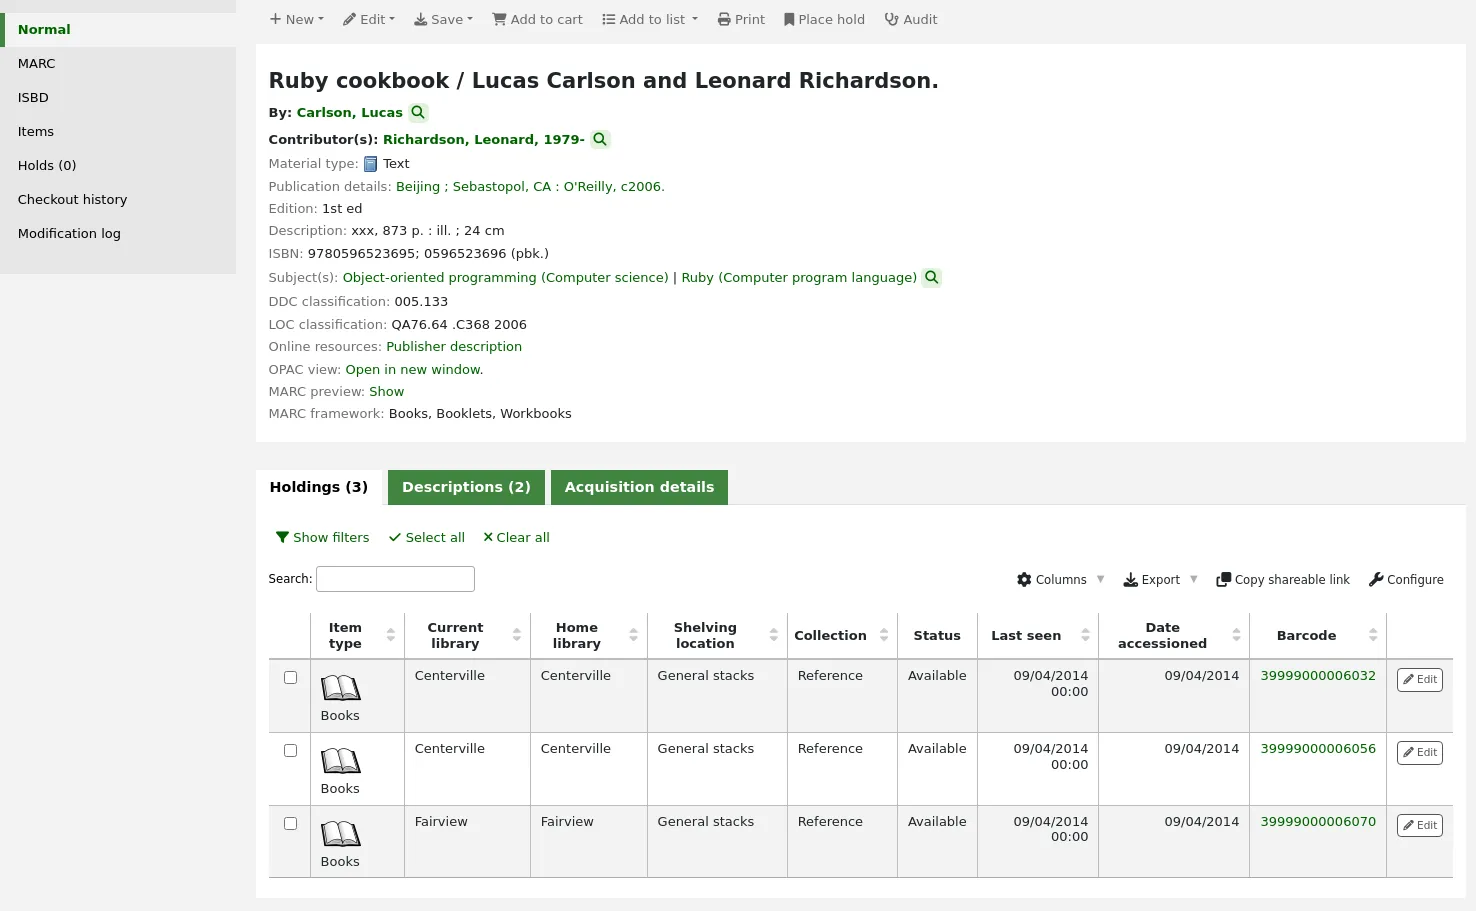
Nota
A aba ‘Normal’ da página de detalhes do registro também mostra qual planilha bibliográfica MARC foi usada para adicionar o registro.

Nota
O Koha suporta MARC21 e UNIMARC.
Depois que essas informações forem salvas, registros de item podem ser anexados ao registro bibliográfico.
Adicionar registros
Registros podem ser adicionados ao Koha via catalogação original ou por cópia. Você também pode optar por usar a interface de catalogação básica ou avançada para todo o seu trabalho.
Nota
Os funcionários devem ter a permissão edit_catalogue (ou a permissão superlibrarian) para poder adicionar registros bibliográficos.
Para catalogar um registro usando um modelo em branco no editor básico:
Clique em ‘New record’

Nota
O botão ‘New record’ abrirá a planilha bibliográfica padrão. Se você quiser usar outra planilha, clique na pequena seta à direita do botão ‘New record’ e escolha a planilha.
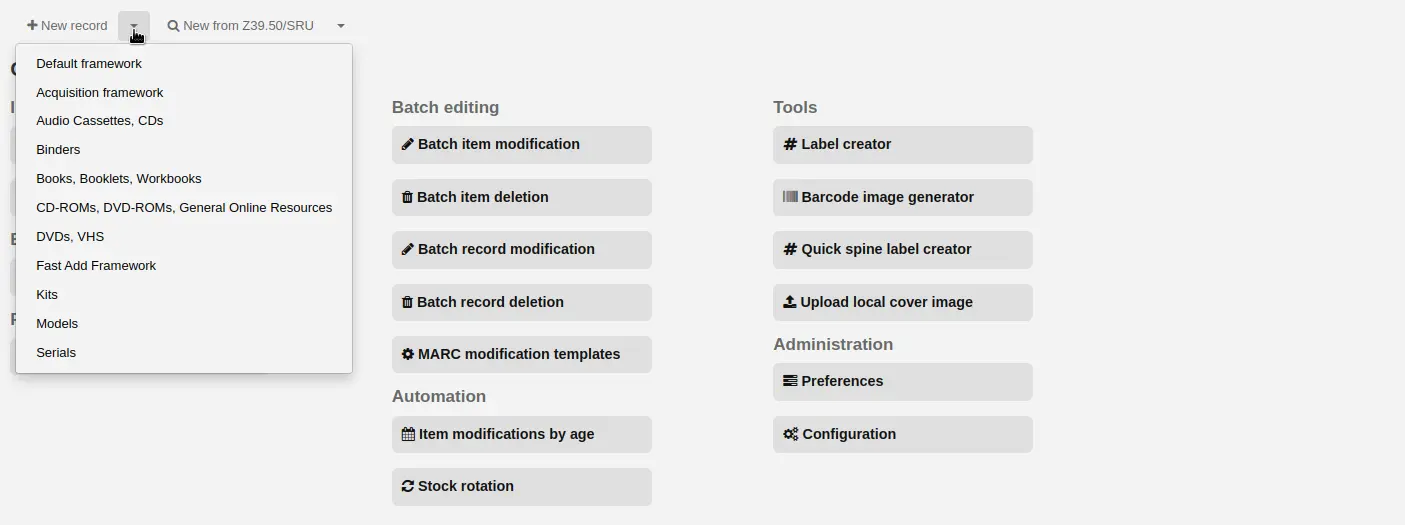
Nota
Você pode criar ou modificar planilhas no módulo Administração.
Para catalogar um registro usando um modelo em branco no editor avançado:
Ative a preferência do sistema EnableAdvancedCatalogingEditor
Clique no botão ‘Advanced editor’
Para catalogar um registro com base em um registro existente em outra biblioteca, no editor básico ou avançado:
Clique em ‘New from Z39.50/SRU’
Nota
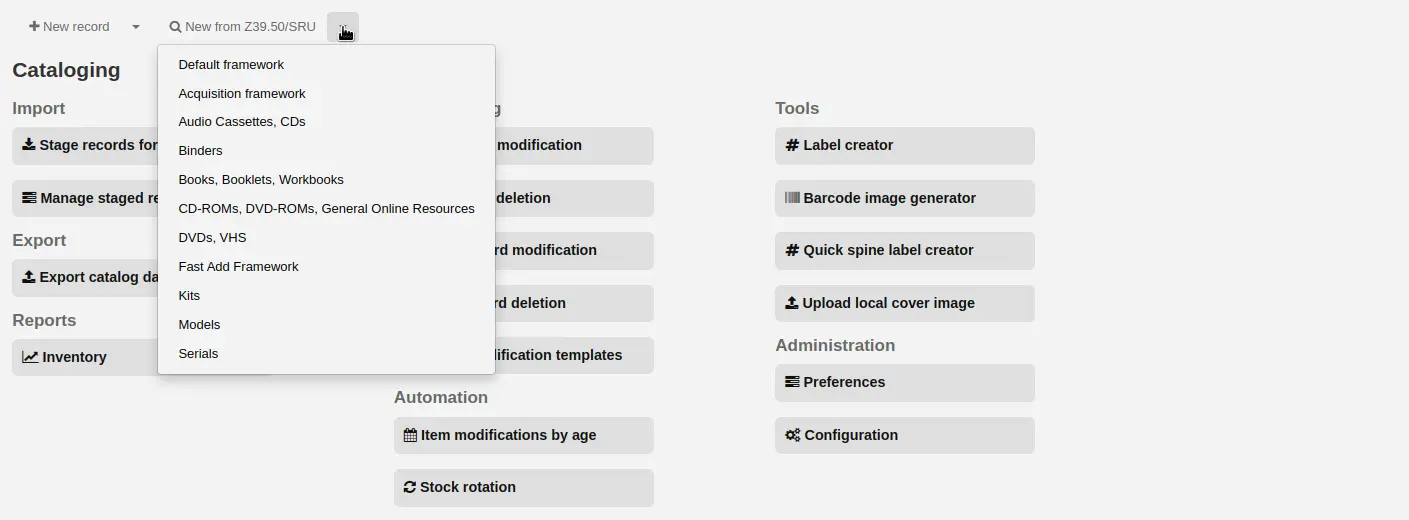
O botão ‘New from Z39.50/SRU’ importará o registro para a planilha bibliográfica padrão. Se você quiser usar outra planilha, clique na pequena seta à direita do botão ‘New from Z39.50/SRU’ e escolha a planilha.
Pesquisar pelo material que você quer catalogar
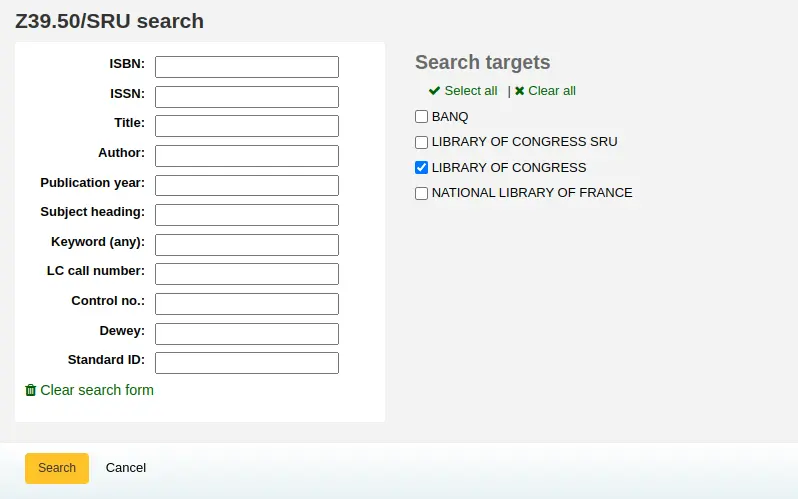
Nota
Se não obteve nenhum resultado, opte por pesquisar em poucos campos, nem todos os servidores Z39.50 permitem pesquisar em todos os campos abaixo.
Nota
Os servidores de pesquisa podem ser editados usando a seção Servidores Z39.50/SRU do módulo Administração.
Nota
A exibição de campos e subcampos MARC extras pode ser configurada pela preferência do sistema AdditionalFieldsInZ3950ResultSearch.
Clicar no botão de seta ao lado de um resultado (ou em qualquer lugar da linha do resultado) exibirá opções de pré-visualização e importação.
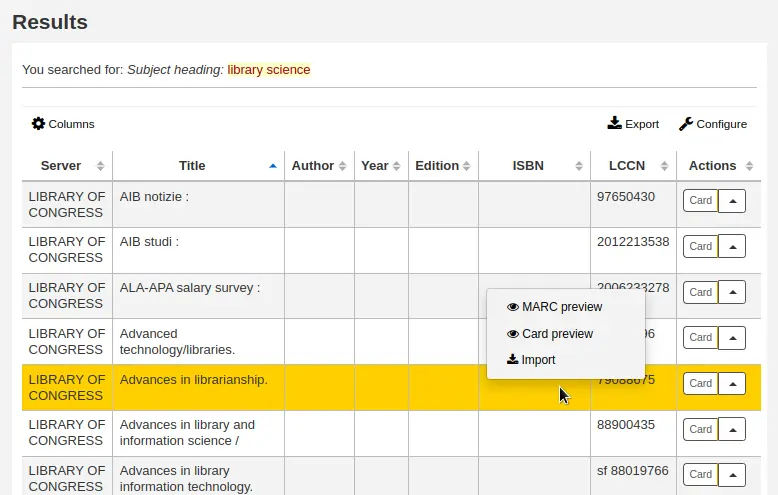
Nota
A opção padrão no botão ao lado de um resultado é a última opção usada. Na captura de tela acima, a última opção usada foi ‘Card preview’, portanto o botão está configurado para abrir a pré-visualização em ficha por padrão.
Nota
Você pode personalizar as colunas desta tabela na seção Configurações de tabela do módulo Administração (table id: resultst).
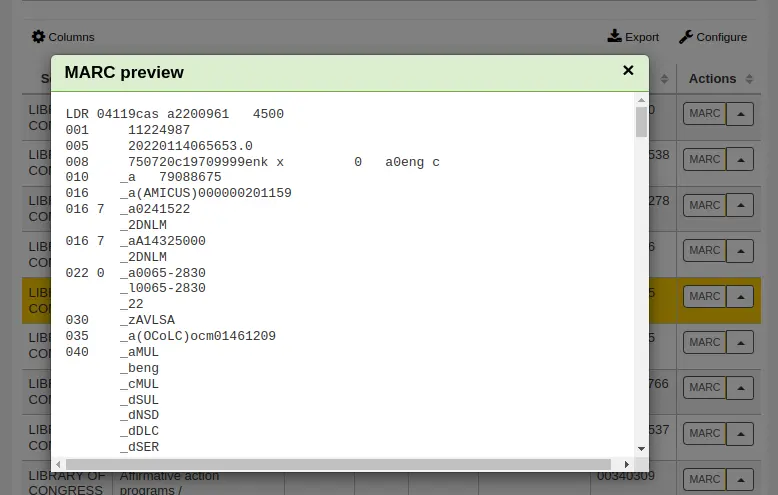
MARC preview: esta opção abrirá o registro no formato MARC simples.
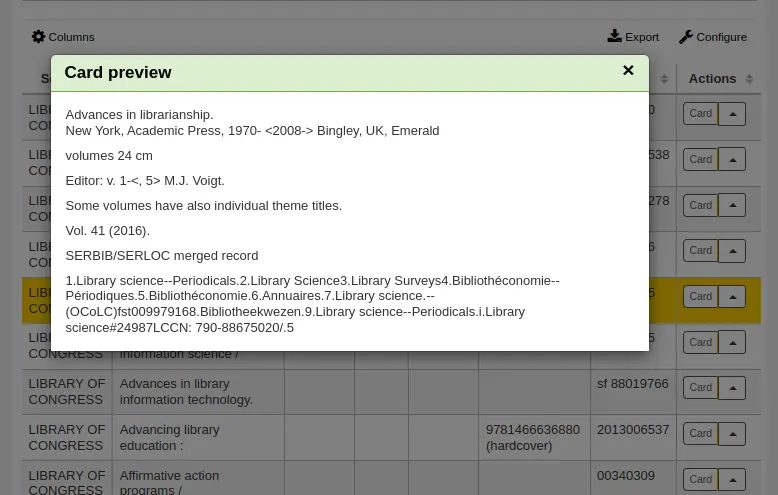
Card preview: esta opção abrirá o registro formatado como uma ficha de catálogo.
Import: esta opção abrirá o registro no editor de catalogação do Koha, para que você possa modificá-lo e salvá-lo no seu próprio catálogo.
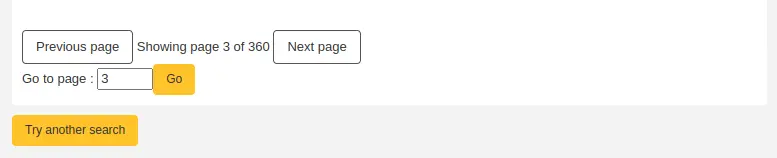
Se você não encontrar o título desejado nos resultados de pesquisa Z39.50, pode clicar no botão ‘Try another search’ na parte inferior esquerda dos resultados
Catalogação no editor básico
No editor básico, depois de abrir uma planilha em branco ou importar um registro via Z39.50, será exibido o formulário para continuar a catalogação
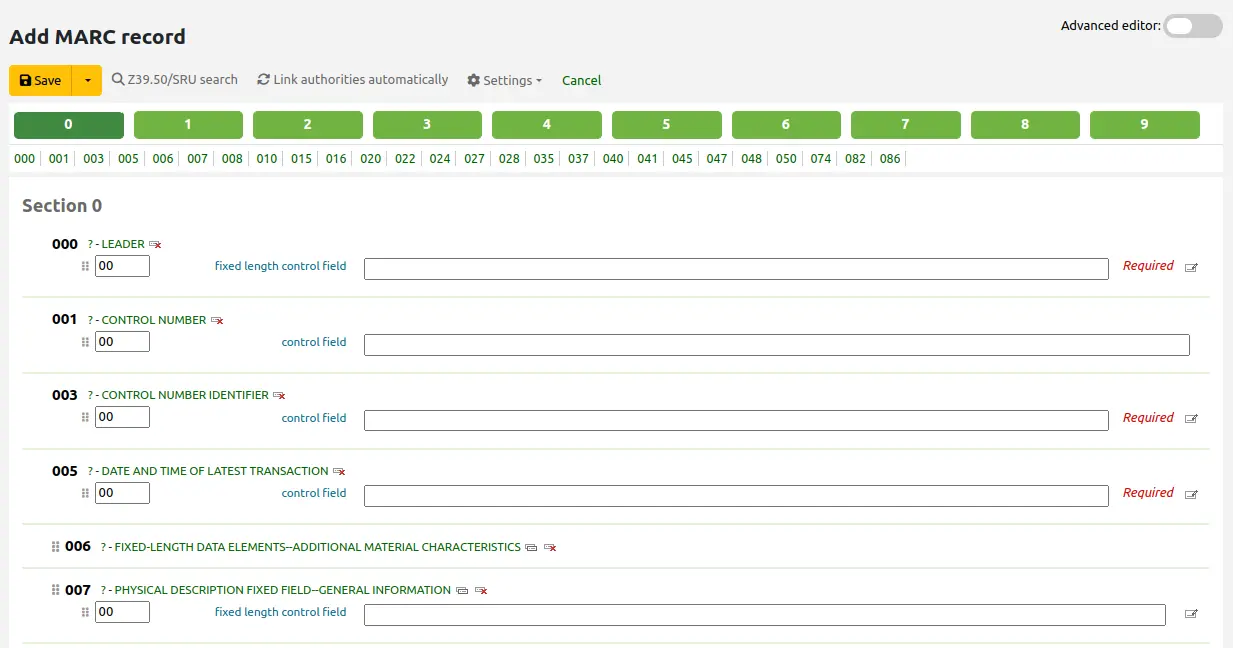
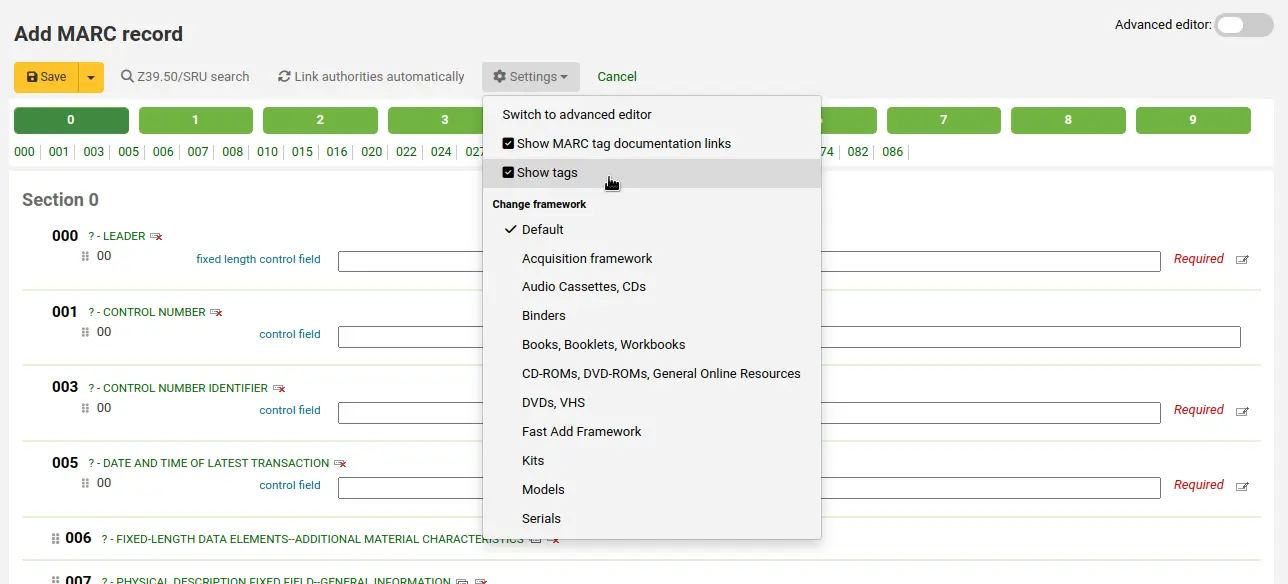
Se preferir não ver os números das tags MARC, você pode alterar o valor na preferência do sistema hide_marc, ou cada usuário pode marcar a caixa ao lado de ‘Show tags’, encontrada em ‘Settings’.
Para expandir ou ocultar uma tag, clique na descrição da tag
Para obter ajuda da Library of Congress sobre uma tag MARC, clique no ponto de interrogação (?) à direita de cada número de campo
É possível alterar a fonte da documentação MARC usando a preferência do sistema MARCFieldDocURL
Se você achar que isso deixa a tela poluída, pode ocultar os pontos de interrogação desmarcando a caixa ao lado de ‘Show MARC tag documentation links’, encontrada em ‘Settings’
Às vezes, os campos podem não ser editáveis devido ao valor da sua preferência do sistema RequireChoosingExistingAuthority. Se essa preferência estiver definida como “require”, você verá um símbolo de cadeado à esquerda do campo.

Se este ícone aparecer, você precisará clicar no icone no lado direito do campo para buscar por uma autoridade existente.
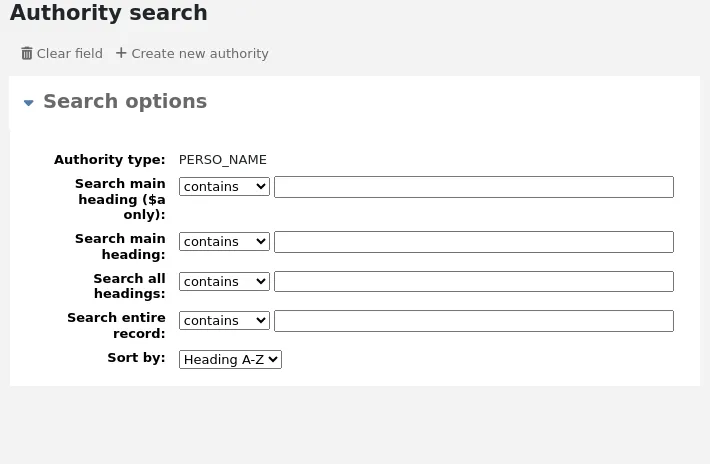
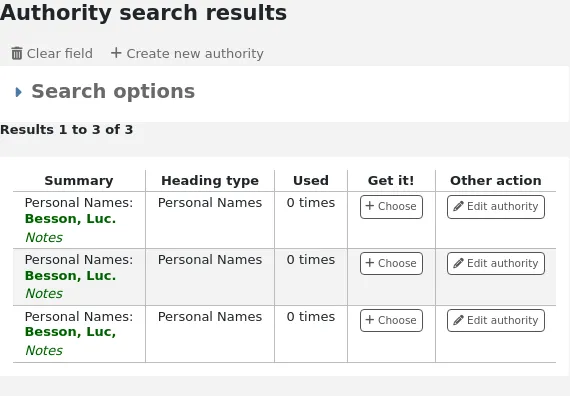
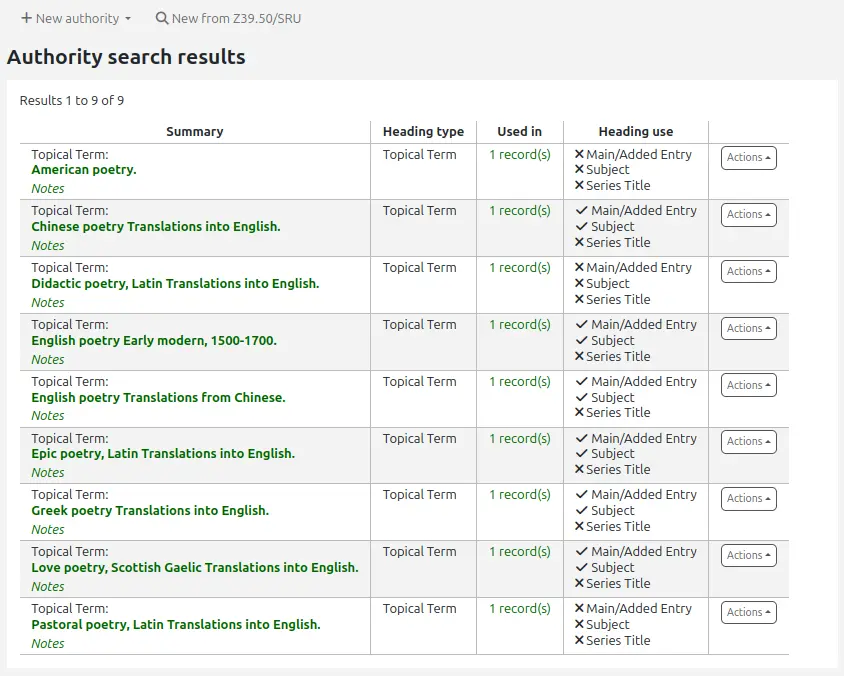
Na lista de resultados, clique ‘Escolher autoridade’ para trazer estas informações para o registro no catálogo
Nota
Em sistemas MARC21, se a preferência do sistema ShowHeadingUse estiver ativada, haverá uma coluna adicional mostrando o uso apropriado do registro de autoridade em entradas principais ou secundárias, cabeçalhos de assunto ou títulos de série.
Para duplicar um campo, clique no ícone ‘repeat this tag’ à direita da tag

Para mover os subcampos para a ordem correta, arraste e solte os subcampos usando as alças à direita
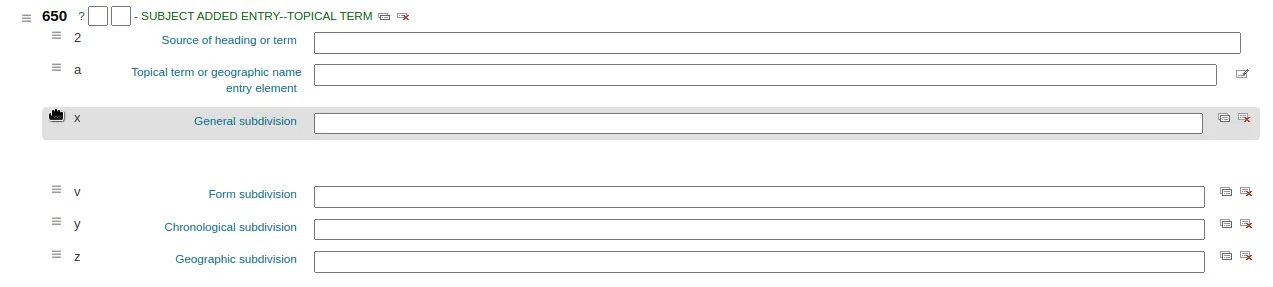
Nota
Você pode alterar a ordem padrão dos subcampos na planilha bibliográfica arrastando e soltando as abas de subcampo ao editar subcampos.
Para duplicar um subcampo clique no ícone de clonagem (para remover um campo copiado, clique no ícone de exclusão de clonagem) à direita do campo
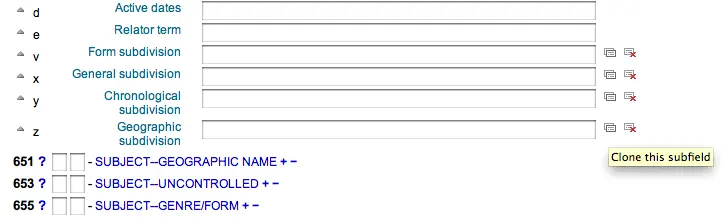
Para remover um subcampo (se tiver mais que um do mesmo tipo), clique no sinal de subtração (-) à direita do campo
Para usar um plugin, clique no ícone à direita do campo
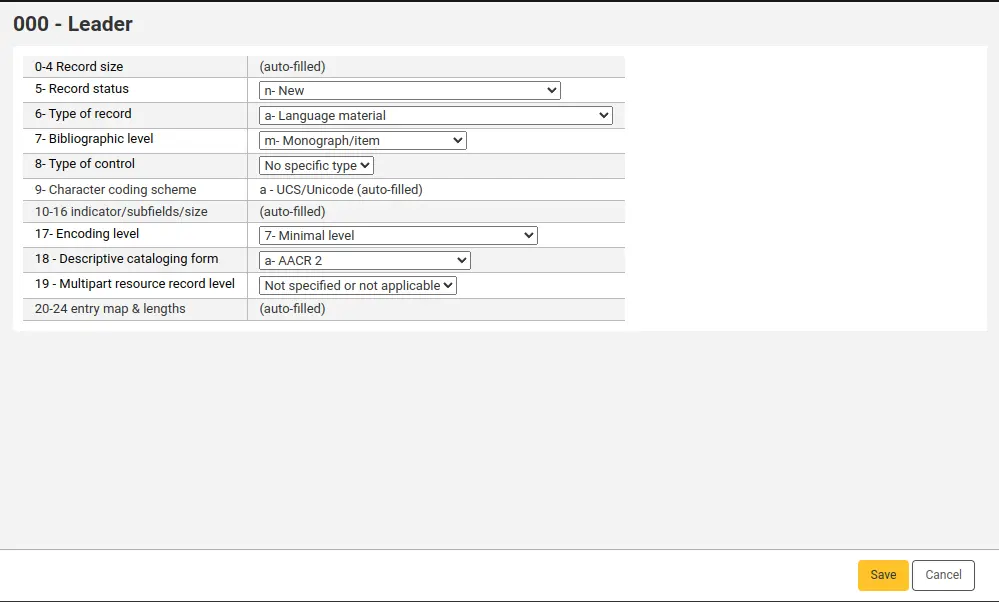
Alguns campos fixos possuem informações que mudam com base no tipo de material que você está catalogando (por exemplo os campos 006 e 008)
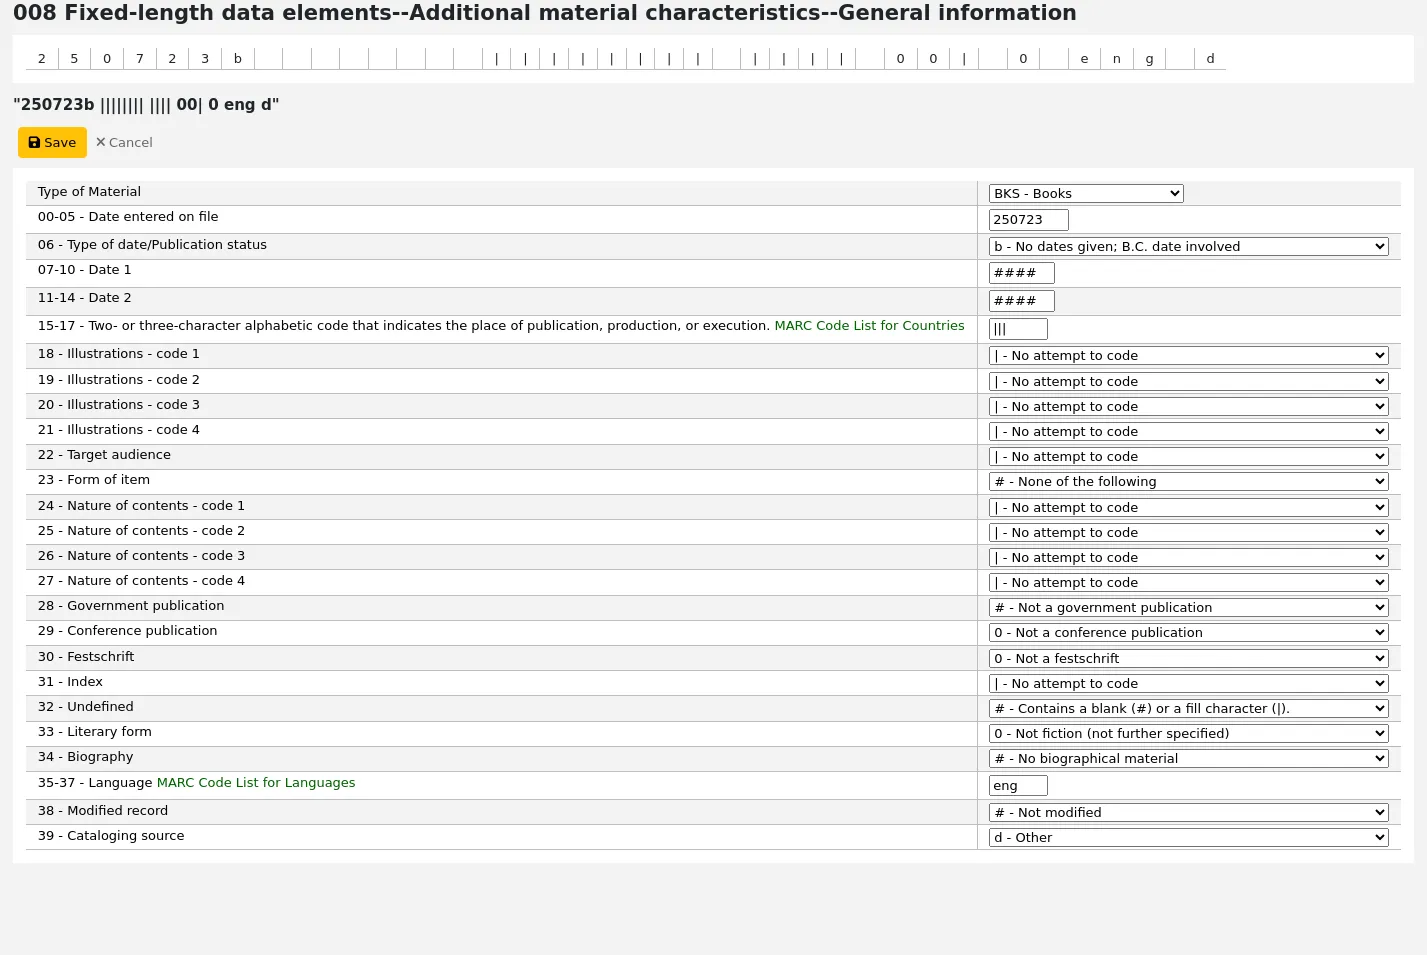
Nota
O ‘Type of material’ no campo 008 é determinado pelo valor em leader/06.
Ao terminar, clique no botão ‘Save’ na parte superior e escolha se deseja salvar e visualizar o registro bibliográfico criado, ou continuar para adicionar/editar itens anexados ao registro
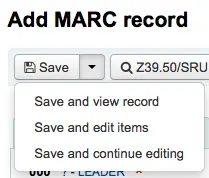
Escolher ‘Save and view record’ o levará diretamente ao registro que você acabou de catalogar
Escolher ‘Save and edit items’ o levará ao formulário de adicionar/editar item após salvar o registro bibliográfico, para que você possa anexar exemplares
Escolher ‘Save and continue editing’ permitirá salvar o trabalho feito até o momento e permanecer no editor para continuar trabalhando
Se você está para adicionar um registro duplicado no sistema, você será avisado sobre isto antes de salvar
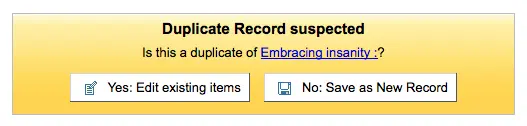
Nota
Para encontrar possíveis duplicatas, o sistema pesquisa pelo ISBN e, se não houver ISBN, pesquisa pela mesma combinação de título e autor.
Se campos ou subcampos obrigatórios ou importantes não forem preenchidos, o sistema exibirá um aviso. Clique em ‘Go to field’ para ir ao campo problemático e corrigi-lo.
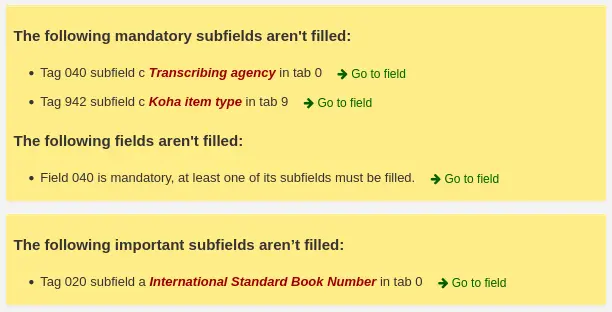
Se você rolou a tela e precisa ver o aviso novamente, clique no botão ‘Errors’ à direita da barra de ferramentas.

Nota
Campos ou subcampos importantes não impedem que o registro seja salvo.
Somente campos ou subcampos obrigatórios impedem o salvamento.
Catalogação no editor avançado
Para usar o editor de catalogação avançado, você precisa ativar a preferência do sistema EnableAdvancedCatalogingEditor.
Nota
Os funcionários devem ter a permissão advanced_editor, além da permissão edit_catalogue (ou a permissão superlibrarian), para poder usar o editor avançado.
Nota
Este recurso atualmente não oferece suporte a campos fixos do UNIMARC.
Para catalogar com o editor avançado, clique no botão ‘Advanced editor’ na página principal de catalogação, ou use o alternador no canto superior direito da tela do editor básico.
Depois de abrir uma planilha em branco ou importar um registro via Z39.50 no editor avançado, será exibido o formulário para continuar a catalogação.
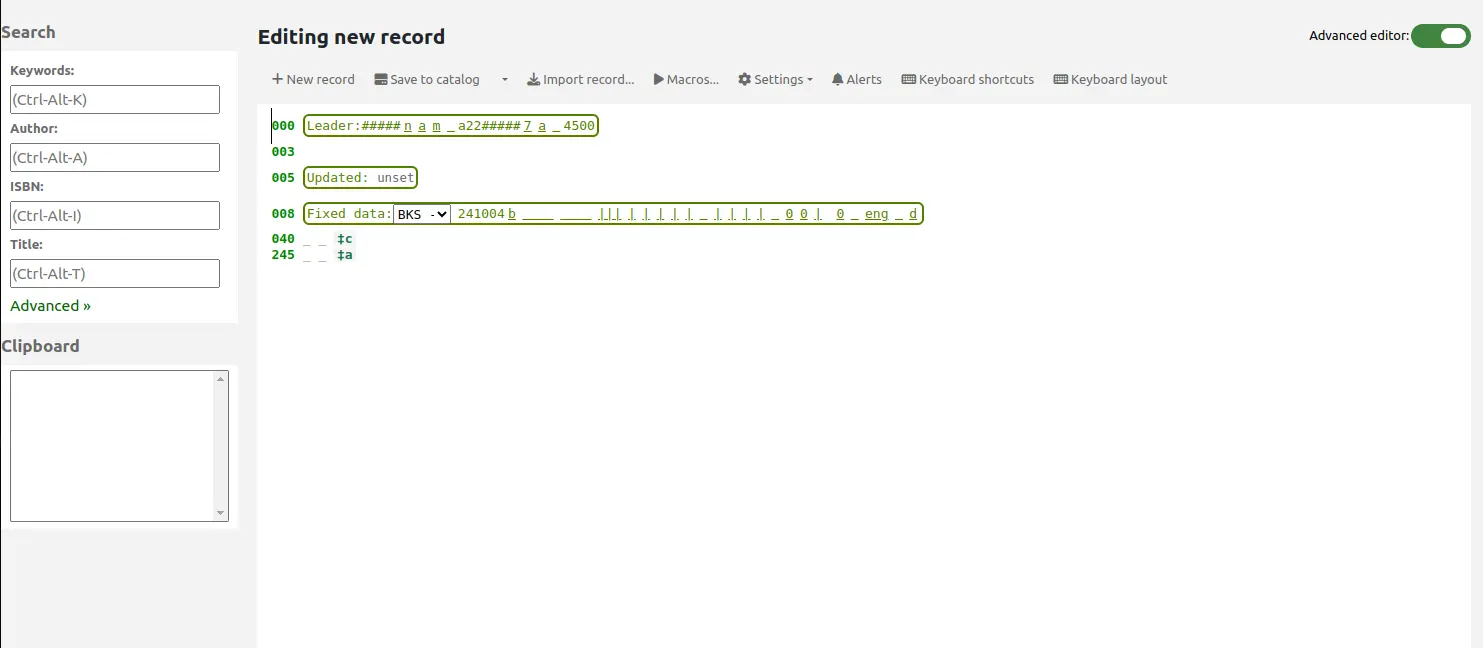
Usando as caixas de pesquisa à esquerda, você pode realizar pesquisas Z39.50.
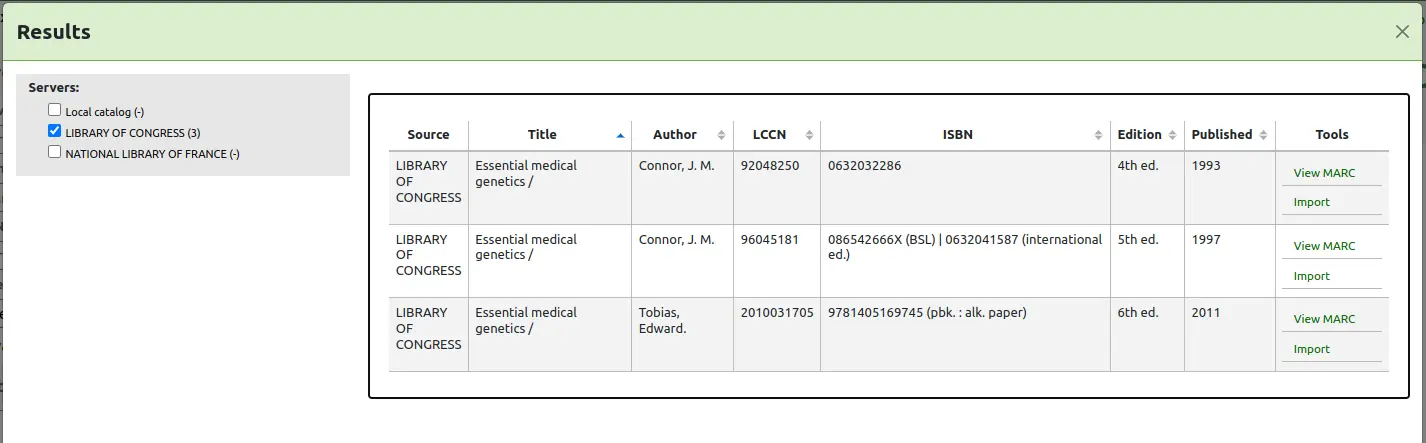
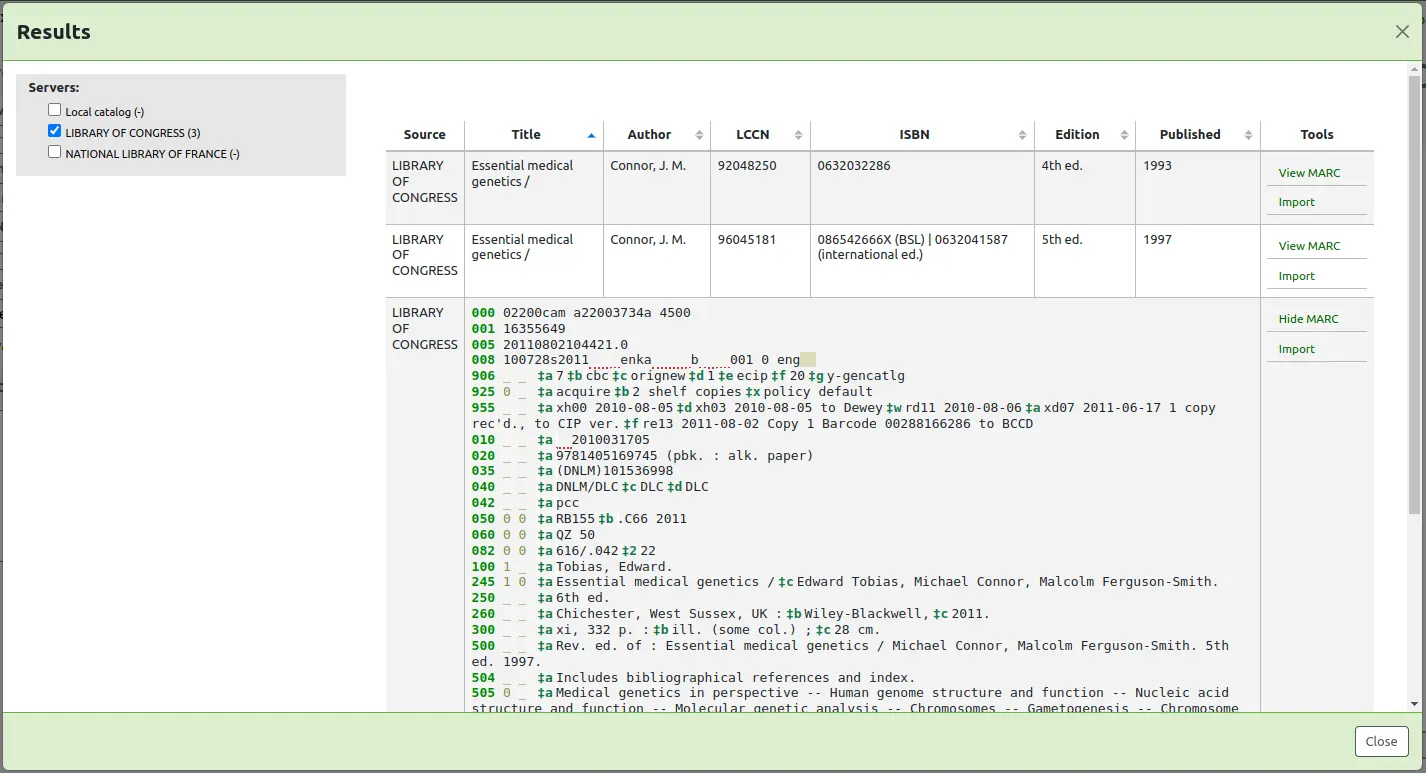
A partir desses resultados Z39.50, você pode visualizar o registro MARC clicando no link à direita
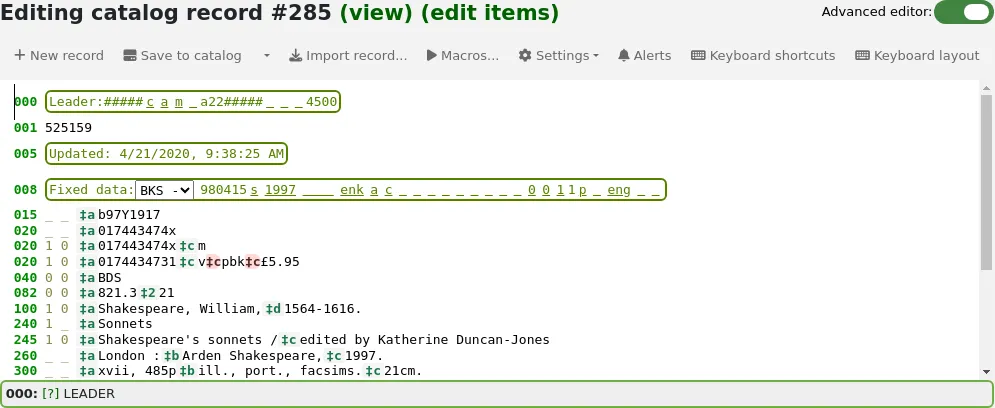
Clicar em ‘Import’ trará o registro para o editor, onde você pode fazer suas edições.
Nota
Ao adicionar um novo campo no editor avançado, você precisa digitar sublinhados para um indicador em branco, e cercar os indicadores com espaços.
Nota
Você precisa digitar um espaço antes do primeiro delimitador de subcampo, mas não antes ou depois dos demais delimitadores de subcampo no campo.
Na parte inferior do editor, você verá a ajuda da Library of Congress (ou a documentação de MarcFieldDocURL) referente ao campo em que você está.
Nos casos em que seu MARC estiver inválido, você verá um destaque em vermelho.
O botão ‘Keyboard shortcuts’ mostra os comandos necessários para editar o registro usando apenas o teclado.
Uma área de transferência está disponível para copiar e colar texto entre campos. Veja a tabela abaixo para os atalhos usados com a área de transferência.
Atalhos de teclado da catalogação avançada
Os seguintes atalhos de teclado podem ser usados no editor de catalogação avançado para economizar tempo e cliques.
Atalho |
Comportamento |
|---|---|
Ctrl-Alt-C |
Copiar campo atual |
Shift-Ctrl-C |
Copiar subcampo atual |
Ctrl-X |
Excluir campo atual e copiar para a ‘área de transferência’ |
Shift-Ctrl-X |
Excluir subcampo atual e copiar para a ‘área de transferência’ |
Alt-C |
Inserir símbolo de copyright (©) |
Alt-P |
Inserir símbolo de copyright (℗) (gravações sonoras) |
Ctrl-D |
Inserir delimitador (‡) |
Ctrl-I |
Copiar campo atual na próxima linha |
Shift-Enter |
Inserir quebra de linha |
Shift-Ctrl-L |
Vincular campo a autoridades |
Enter |
Novo campo na próxima linha |
Aba |
Mover para a próxima posição |
Ctrl-P |
Colar seleção da ‘área de transferência’ |
Shift-Tab |
Mover para a posição anterior |
Ctrl-H |
Obtenha ajuda no subcampo atual |
Shift-Ctrl-K |
Alternar teclado |
Ctrl-S |
Salvar registro (não pode ser remapeado) |
Atenção
O atalho padrão para copiar o campo atual mudou na versão 24.11 do Koha. Em versões anteriores, era Ctrl-C.
É possível alterar os atalhos de teclado, caso os padrão não se adequem ao seu fluxo de trabalho, clicando em ‘Redefine shortcuts’. Isso o levará à página de administração de atalhos de teclado.
Teclado virtual da catalogação avançada
Um teclado virtual está disponível para adicionar acentos e símbolos. Use o atalho Shift-Ctrl-K para exibir o teclado.
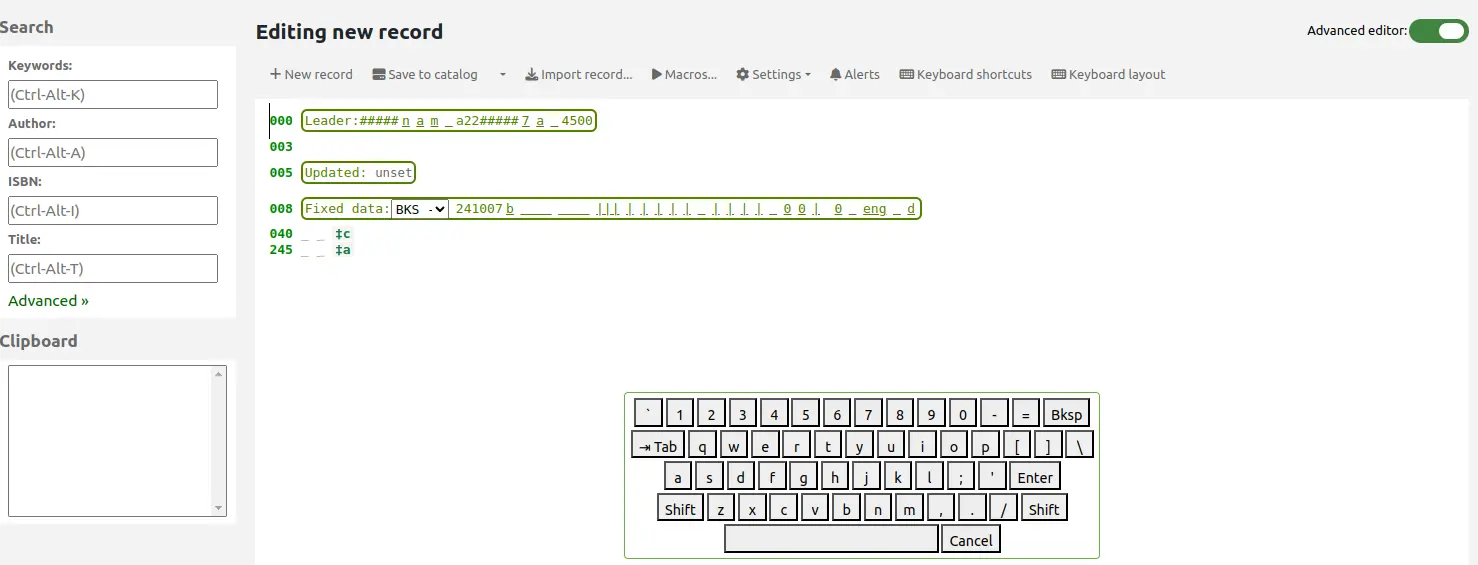
Um botão ‘Keyboard layouts’ será exibido na parte superior do editor avançado, permitindo definir o layout do teclado virtual para diferentes idiomas.
Macros na catalogação avançada
As macros podem ser usadas para inserir informações repetitivas em registros.
Nota
Os funcionários devem ter a permissão create_shared_macros (ou a permissão superlibrarian) para poder criar macros para o editor avançado.
Os funcionários devem ter a permissão delete_shared_macros (ou a permissão superlibrarian) para poder excluir macros existentes do editor avançado.
Para gravar uma nova macro:
Clique no botão ‘Macros…’.
Na janela pop-up, clique no botão ‘New macro…’.
Informe o nome da nova macro na caixa pop-up e clique em ‘OK’.
Agora clique à direita do pequeno número 1 e informe a primeira linha da sua macro (veja a sintaxe abaixo). Para uma macro com várias linhas ou campos, pressione Enter para que apareça um pequeno número 2, e informe a segunda linha/campo, e assim por diante.
Suas macros serão salvas automaticamente. Ao terminar, você pode selecionar o “x” para fechar a janela, selecionar uma macro para executar no registro que está editando, ou selecionar outra macro para executar.
Para editar uma macro existente:
Clique no botão ‘Macros…’.
Na janela pop-up, selecione a macro que deseja editar e faça suas alterações.
Seu trabalho será salvo automaticamente e, ao terminar, você pode selecionar o “x” para fechar a janela, selecionar uma macro para executar no registro que está editando, ou selecionar outra macro para executar.
Para executar uma macro:
Clique no botão ‘Macros…’.
Na janela pop-up, selecione a macro que deseja executar
Clique em ‘Run macro’
A sintaxe básica da linguagem de macro:
new 500=‡aEdited with Rancor
Cria um novo 500 com um subcampo ‡a e o define como “Edited with Rancor”.
245c= by J.K. Rowling.
Define o primeiro subcampo ‡c da primeira tag 245 do registro como ‘ by J.K. Rowling’, criando-o se necessário.
082a={084a}
Define o subcampo ‡a da primeira tag 082 (criando o subcampo se necessário) com o conteúdo do primeiro 084‡a.
indicators=_1
Define os indicadores da última tag mencionada (neste caso, 082) como “_” e “1”.
new 090a=Z674.75.W67
Cria um novo subcampo ‡a no primeiro 090 (mas somente se esse campo já existir) e o define como “Z674.75.W67”.
new 090a at end=Z674.75.W67
O mesmo que acima.
new 245b after a= a tale of might and magic /`
Cria um novo ‡b após o primeiro subcampo a e o define como “ a tale of might and magic /”.
delete 245b
Exclui o primeiro subcampo ‡b da primeira tag 245.
Importar registros
É possível importar arquivos de registro MARC bibliográficos e de autoridade no Koha. Os arquivos a importar podem estar no formato MARC ou MARCXML.
A importação de registros no Koha envolve duas etapas.
A primeira é preparar os registros para importação, o que os prepara e os importa para o reservatório.
A segunda etapa é importar os arquivos preparados, ou “staged”, do reservatório para o catálogo.
Preparar registros para importação
Nota
Somente funcionários com a permissão stage_marc_import (ou a permissão superlibrarian) terão acesso a esta ferramenta.
Vá: Mais > Catalogação > Import > Stage records for import
Primeiro, localize o arquivo MARC no seu computador
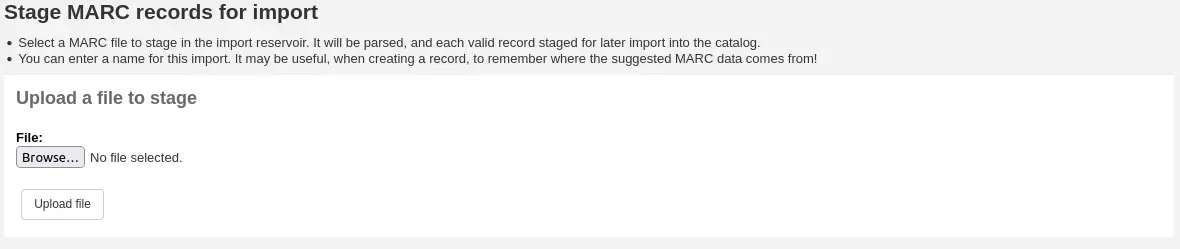
- Em seguida, serão exibidas opções de correspondência de registros e
importação de itens
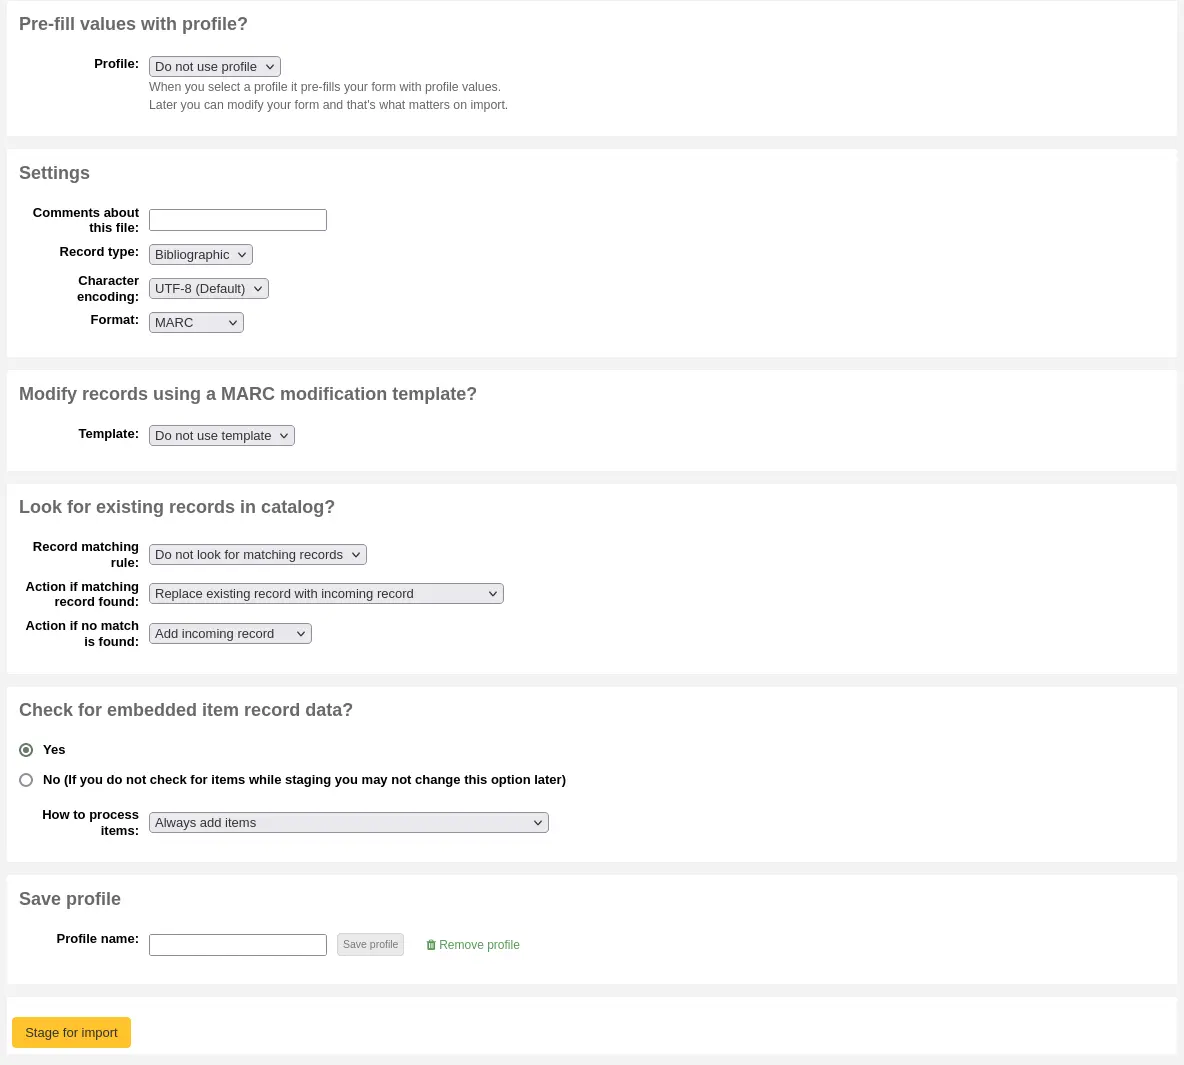
Prefill values with profile: se você já tiver perfis de preparação configurados, pode escolher o perfil apropriado na lista suspensa
Os perfis são usados para pré-preencher o restante do formulário de configurações de preparação.
Você pode criar um perfil escolhendo as diversas configurações nas seções abaixo e informando um nome de perfil no fim do formulário. Da próxima vez que você preparar registros, o perfil estará disponível.
Comments about this file: informe comentários para identificar seu envio ao acessar a ferramenta ‘Gerenciar registros preparados’
Record type: escolha qual tipo de registro há neste arquivo, bibliográfico ou de autoridade

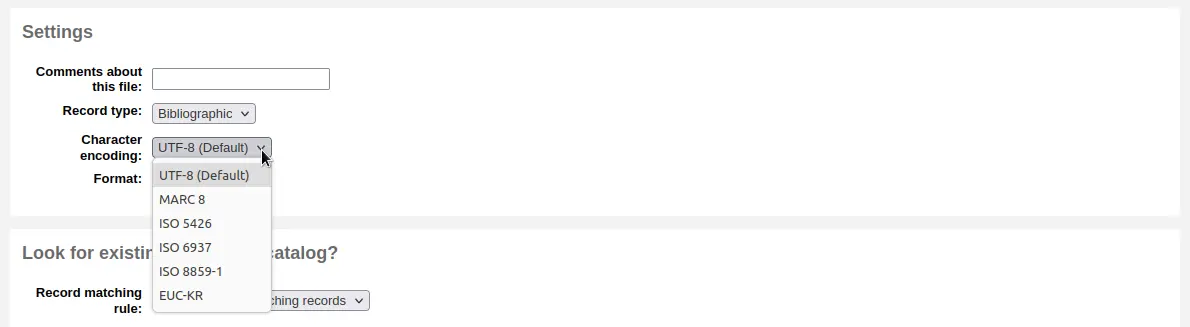
Character encoding: escolha a codificação de caracteres do seu arquivo
Format: escolha o formato MARC do seu arquivo
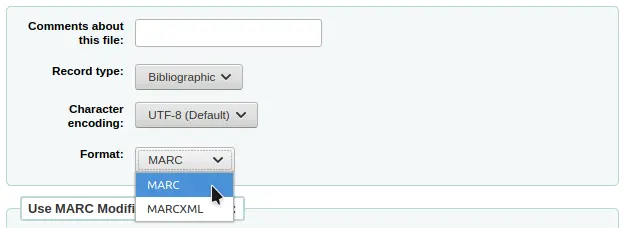
Modify record using a MARC modification template: escolha se deseja usar um modelo de modificação MARC para alterar os dados que está prestes a importar

Escolha se deseja ou não procurar registros correspondentes

Record matching rule: escolha quais regras usar para verificar no seu catálogo se esses registros já existem.

Nota
Você pode configurar regras de correspondência de registros na área de administração
Nota
Ao usar a regra de correspondência por ISBN, o Koha encontrará apenas correspondências exatas. Se você achar que a correspondência por ISBN não está funcionando a contento, pode alterar a preferência AggressiveMatchOnISBN para ‘Do’ e executar a importação novamente.
Action if matching record found: escolha o que fazer com os registros correspondentes, caso sejam encontrados
Replace existing record with incoming record: escolha esta opção se estiver importando registros mais completos do que os já existentes, ou se tiver feito alterações usando uma ferramenta externa (por exemplo, o MarcEdit)
Add incoming record: isso manterá o registro existente e adicionará o registro em importação, podendo resultar em duplicatas
Ignore incoming record (its items may still be processed): escolha esta opção se não quiser substituir os registros existentes
Action if no match is found: escolha o que fazer com registros que são únicos
Add incoming record: escolha esta opção se quiser importar registros que ainda não estão no seu catálogo (por exemplo, títulos novos)
Ignore incoming record: escolha esta opção se não quiser importar registros que ainda não estão no seu catálogo (por exemplo, se estiver apenas substituindo registros existentes e não quiser adicionar nada)
Check for embedded item record data?: escolha se deseja importar os dados de item (campo 952) encontrados nos registros MARC (se o arquivo carregado for um arquivo bibliográfico)
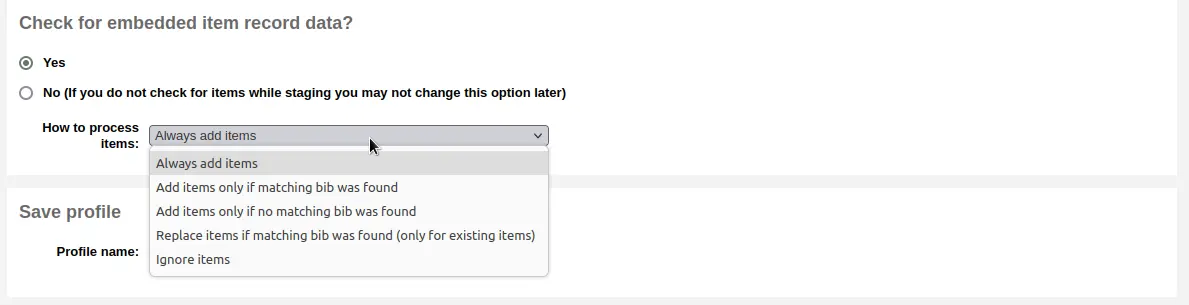
Always add items: sempre adiciona itens, independentemente do status de correspondência
Add items only if matching bib was found: adicionará itens apenas a registros existentes no seu catálogo
Add items only if no matching bib was found: adicionará itens apenas aos novos registros que você está importando, não aos já existentes
Replace items if a matching bib was found: a correspondência verificará os números de item e códigos de barras dos itens e substituirá apenas os itens existentes.
Nota
Os números de item têm precedência sobre os códigos de barras
Ignore items: não adicionará nenhum item
Save profile: você pode optar por salvar as configurações escolhidas em um perfil, para usar novamente depois

Clique em ‘Stage for import’
A preparação dos registros será tratada como uma tarefa em segundo plano. Uma barra de progresso mostrará o andamento da tarefa.

Clique em ‘View detail of the enqueued job’ para ver o resumo da preparação
Será exibida uma confirmação da sua importação MARC
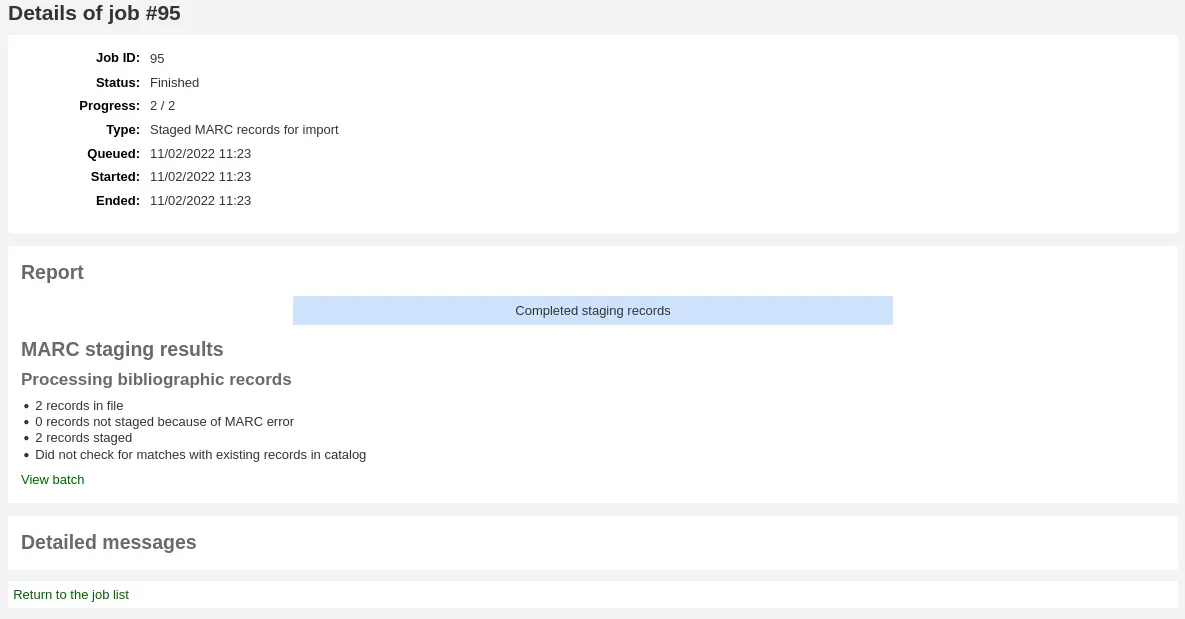
Número de registros no arquivo
Número de registros com erros de MARC
Número de registros preparados
Número de registros correspondentes a registros existentes no catálogo
Número de itens preparados
Para concluir o processo, acesse a ferramenta Gerenciar registros preparados clicando no link ‘View batch’.
Se esses registros forem usados em Aquisições, você pode parar aqui e adicioná-los a uma cesta fazendo um pedido a partir de um arquivo preparado
Gerenciar registros preparados
Nota
Somente funcionários com a permissão manage_staged_marc (ou a permissão superlibrarian) terão acesso a esta ferramenta.
Vá: Mais > Catalogação > Import > Manage staged records
Depois de preparar seus registros para importação, você pode concluir a importação usando esta ferramenta.
Na lista de arquivos preparados, clique no nome do arquivo cuja importação deseja concluir
Observe que os registros já importados indicarão isso em ‘Status’
Nota
Se você vier diretamente da ferramenta Preparar registros para importação, não verá esta lista de arquivos preparados; será levado automaticamente ao resumo correto do arquivo
Um resumo do seu arquivo preparado aparecerá, junto com a opção de alterar suas regras de correspondência

Abaixo do resumo, há a opção de importar o lote de registros usando uma planilha específica
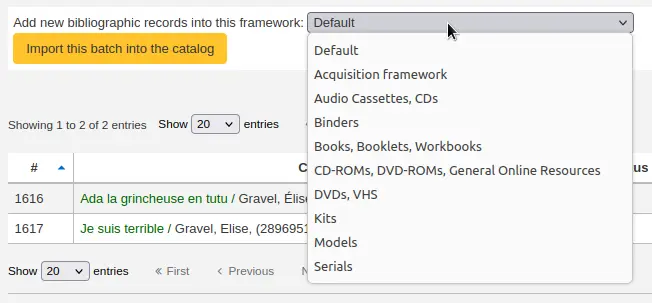
Escolher uma planilha diferente de ‘Default’ não é necessário, mas ajuda na geração de relatórios.
Abaixo da seleção de planilha, haverá uma lista dos registros que serão importados
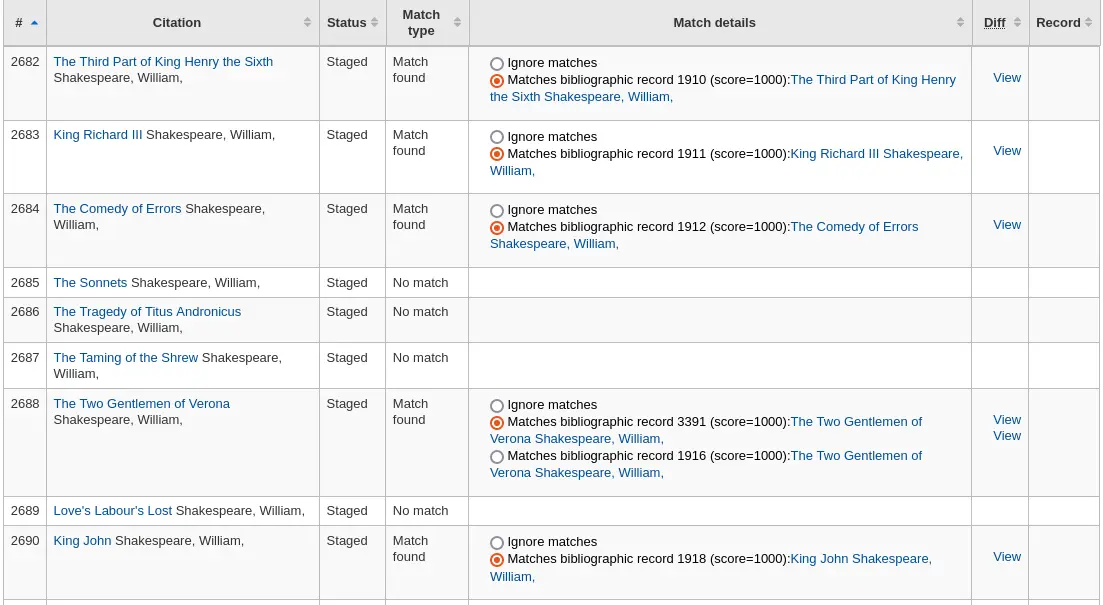
Revise o resumo antes de concluir a importação, para garantir que sua regra de correspondência funcionou e que os registros aparecem como esperado
As correspondências aparecerão com informações na coluna ‘Match details’

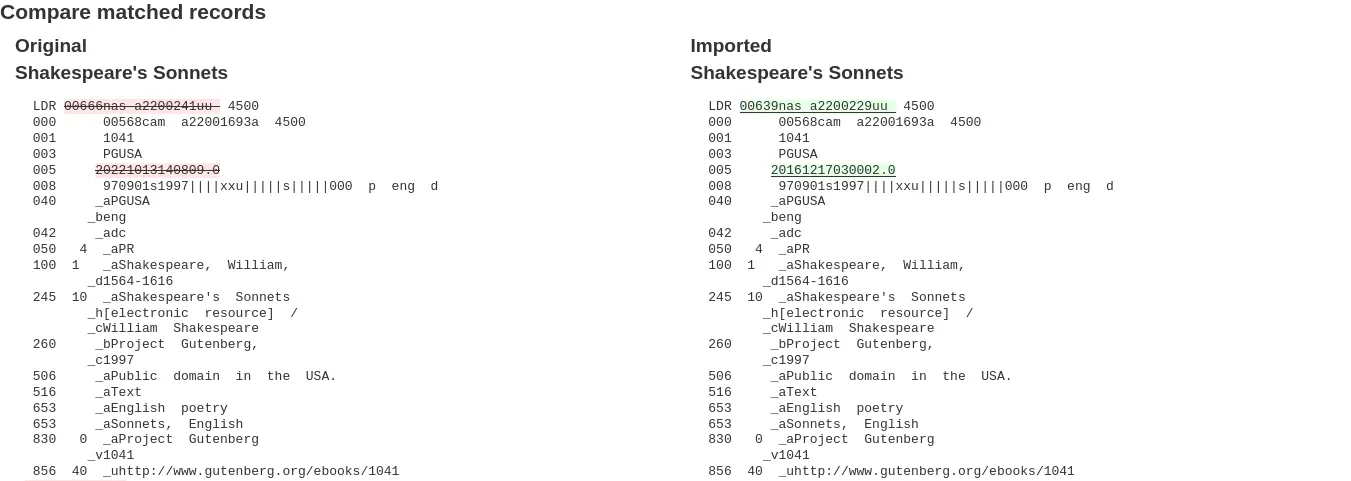
e, ao clicar no link ‘View’ em ‘Diff’, você pode ver a diferença entre as versões.
Para cada correspondência, você pode optar por ignorá-la selecionando o botão de opção ‘Ignore matches’. Se mais de um registro correspondente for encontrado, todos serão listados, e você pode escolher com qual associar o registro em importação.

Se ‘Ignore matches’ for selecionado, a ação escolhida em ‘Action if no match is found’ na etapa de preparação será aplicada.
Nota
Veja os diferentes comportamentos, dependendo da escolha de ‘Action if matching record found’ na etapa de preparação, e se uma correspondência é selecionada ou se ‘Ignore matches’ é selecionado.
Ação se for encontrado um registro correspondente
Correspondência selecionada
‘Ignore matches’ selecionado
Substituir o registro existente pelo registro em importação
O registro em importação substitui o registro correspondente selecionado
‘Action if no match is found’ é aplicado
Adicionar o registro em importação
O registro em importação é adicionado
O registro em importação é adicionado
Ignorar o registro em importação
O registro em importação é ignorado
‘Action if no match is found’ é aplicado
Clique em ‘Import this batch into the catalog’ para concluir a importação
A importação dos registros será tratada como uma tarefa em segundo plano.

Será exibida uma confirmação da sua importação MARC
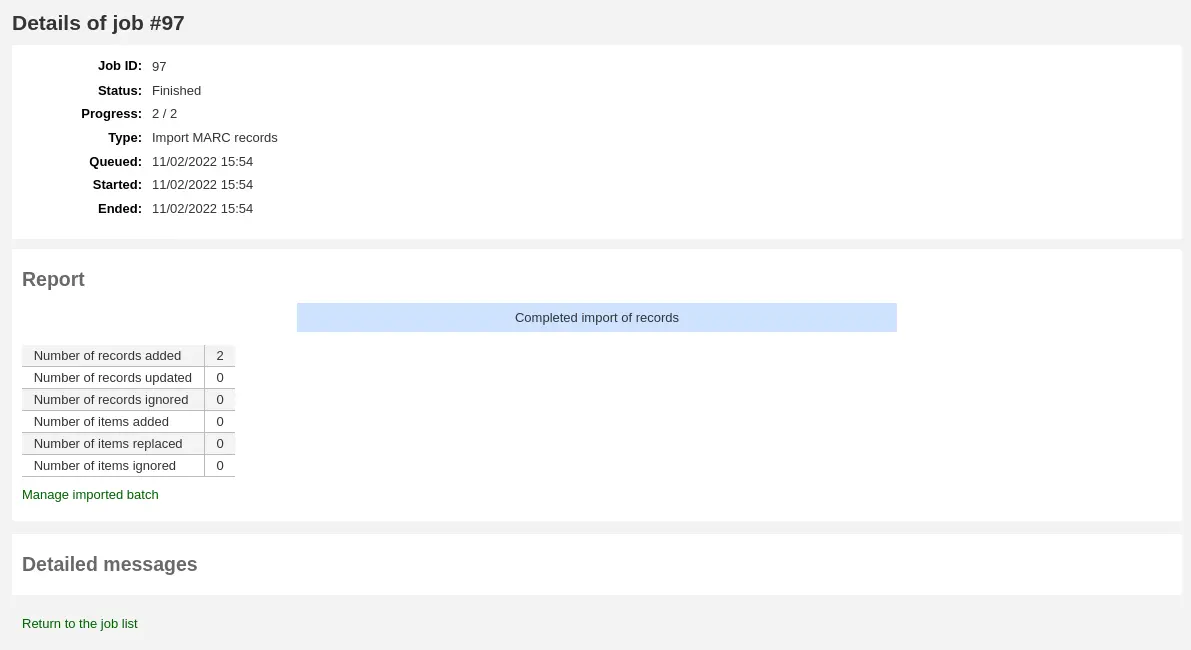
Number of records added: novos registros adicionados
Number of records updated: registros existentes substituídos pelos em importação
Number of records ignored: registros ignorados devido à regra de correspondência
Number of items added: novos itens adicionados
Number of items replaced: itens existentes atualizados com os em importação
Number of items ignored because of duplicate barcode: itens ignorados porque o código de barras já existe no banco de dados
Depois que a importação for concluída, um link para os novos registros aparecerá à direita de cada título importado
Você pode desfazer sua importação clicando no botão ‘Undo import into catalog’
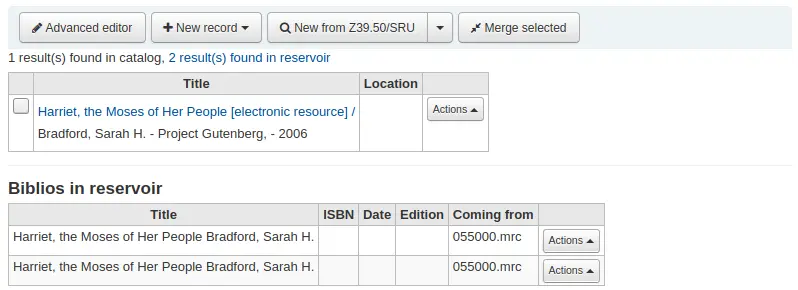
Os registros importados com esta ferramenta permanecem no ‘reservatório’ até serem limpos, seja pelo botão ‘Clean’ na página principal de gerenciamento de registros MARC preparados (veja abaixo), seja pelo cronjob cleanup_database. Os registros do reservatório aparecem ao pesquisar o catálogo pelo módulo de Catalogação
Para limpar itens manualmente do ‘reservatório’:
Acesse a tela principal da ferramenta de gerenciamento de registros MARC preparados

Para limpar um lote, clique no botão ‘Clean’ à direita
Será exibida uma mensagem de confirmação
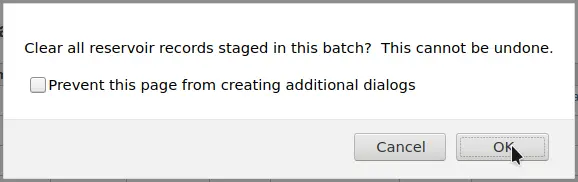
Aceite a exclusão, e os registros serão removidos do reservatório, com o status alterado para ‘cleaned’
Adicionar registros analíticos
Algumas bibliotecas usam a catalogação analítica para tornar mais acessíveis aos usuários artigos de periódicos e conteúdos de monografias e publicações seriadas. A catalogação analítica cria registros bibliográficos separados para artigos, capítulos, seções etc. contidos em um recurso maior, como um livro, um artigo de periódico, um jornal ou uma publicação seriada. Embora seja criado um registro bibliográfico separado para o título, ele não é fisicamente separado do exemplar hospedeiro. Saiba mais sobre catalogação analítica no capítulo 13 da AACR2.
Se você quiser catalogar registros analíticos, há duas opções. Uma é usar a função Easy Analytics; a outra é o fluxo de trabalho avançado de analíticos.
Catalogação analítica simples
O recurso de catalogação analítica simples facilita a vinculação de registros analíticos. Primeiro, defina a preferência do sistema EasyAnalyticalRecords como ‘Exibir’ e a preferência do sistema UseControlNumber como ‘Não usar.’
Depois de catalogar seu registro analítico (veja adicionar registros para mais sobre criar registros), clique em ‘Edit’ na visualização normal e escolha ‘Link to host item’
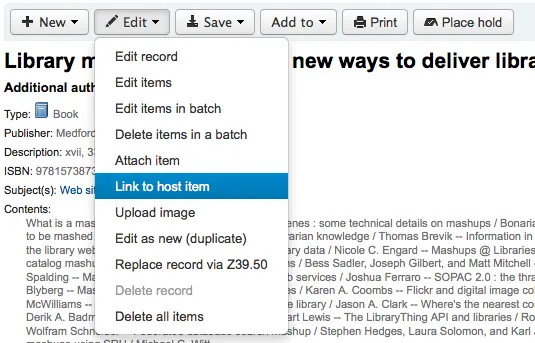
Será solicitado um código de barras para o exemplar ao qual este registro deve ser ligado.
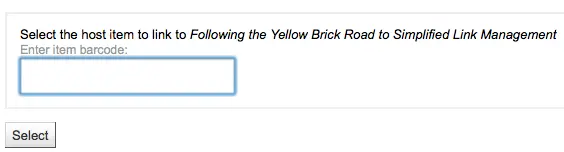
Após inserir o código de barras do exemplar e clicar em “Selecionar”, você receberá uma mensagem de confirmação.

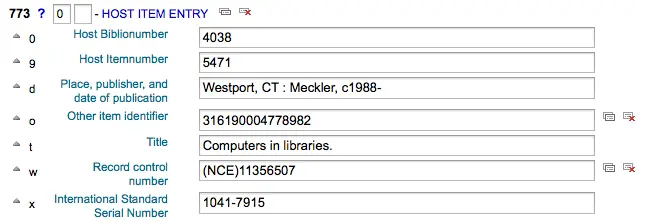
O registro agora terá o campo 773 devidamente preenchido para completar o link.
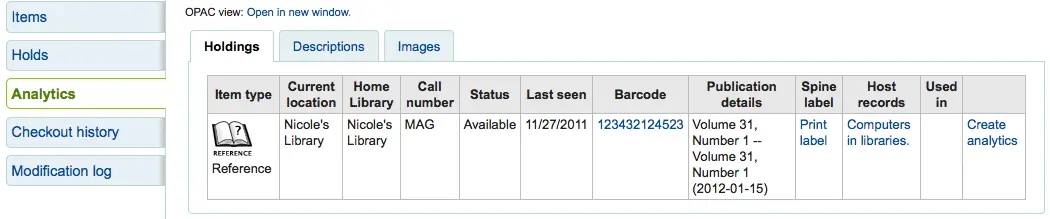
Para ver todos os itens vinculados ao registro hospedeiro, pesquise o registro, clique na aba ‘Analytics’ à esquerda; os analíticos vinculados a cada código de barras serão exibidos na coluna ‘Used in’.

Nota
Também é possível criar registros analíticos nesta tela clicando em ‘Create analytics’
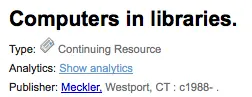
Você também pode ver os analíticos anexados a este registro clicando no link ‘Show analytic’ próximo à parte superior do registro, na visualização normal.
Ao visualizar o registro analítico, você também verá um link para o item hospedeiro na coluna ‘Host records’ da tabela de exemplares, ao acessar a aba ‘Analytics’.
Fluxo de trabalho avançado de analíticos
Para usar o método de fluxo de trabalho avançado para adicionar analíticos, a primeira coisa a fazer é definir a preferência EasyAnalyticalRecords como ‘Don’t show’ e a preferência UseControlNumber como ‘Use’.
Depois de catalogar o registro original (consulte adicionar registros para saber mais sobre a criação de registros), clique em ‘Novo’ na visualização normal e escolha ‘Novo registro filho.’
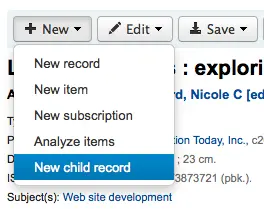
Isso abrirá um novo registro em branco para catalogação. O registro em branco terá o campo 773 devidamente preenchido para completar o vínculo assim que o registro for salvo.
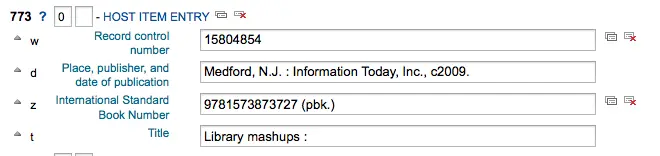
O link ‘Show analytics’ do registro hospedeiro agora usará o número de controle (001) do registro hospedeiro para pesquisar todos os registros do sistema do tipo ‘monographic component part’ ou ‘serial component part’ (posição 7 do leader) com um subcampo 773 w que contenha o número de controle do registro hospedeiro.
Editar analíticos
Se você vinculou um registro analítico incorretamente, pode remover esse vínculo editando o registro analítico (não o registro hospedeiro).
Para fazer isso, vá até o registro analítico e clique no botão ‘Edit’. Para UseControlNumber, basta editar ou remover o 773 correspondente.
Se estiver usando EasyAnalytics, escolha ‘Edit items’; à esquerda de cada item você verá duas opções.

Clicar em ‘Edit in host’ permitirá editar o item no registro hospedeiro.
Clicando ‘Delink’ irá remover o campo 773 e o relacionamento entre o analítico e o hóspede.
Exibir volumes
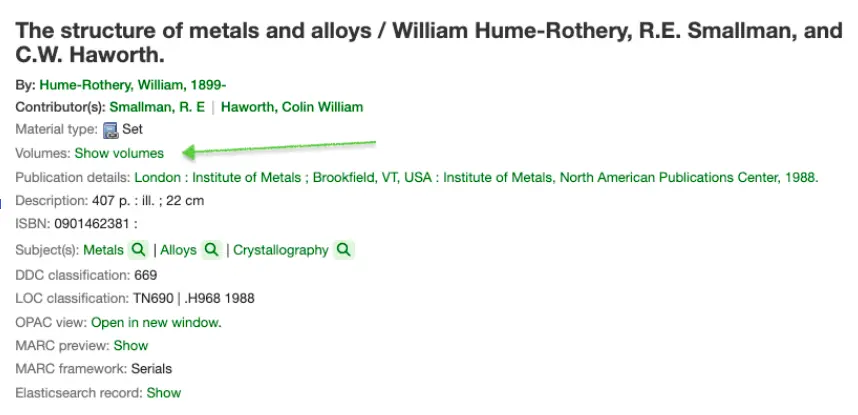
Ao catalogar um conjunto com volumes, o Koha exibirá um rótulo ‘Volumes:’ e um link para os itens na visualização de detalhes bibliográficos.
Configuração:
Ao catalogar um conjunto com volumes, a planilha usada precisará ter os campos MARC 773$w e 830$w disponíveis.
Defina a preferência do sistema UseControlNumber como ‘Não usar.’
Nota
Defina a preferência do sistema UseControlNumber como ‘Don’t use’, para que o rótulo ‘In’ seja substituído pelo rótulo e link ‘Volumes: Show volumes’ no registro pai. Os registros filhos não exibirão o link ‘Show volumes’. Se ‘UseControlNumber’ estiver definido como ‘Use’, o rótulo e link ‘In’ serão exibidos.
Catalogue o registro pai. Anote o número de controle 001.
Exemplo:
000 LDR, pos. 19 = a - Set
001 xxx
773 _ _ $a  volume set title
Catalogue o registro filho. Informe o número de controle do registro pai no subcampo w da tag 773.
000 LDR, pos. 7 = m - Monograph/Item
000 LDR, pos. 19 = c - Part with dependent title
773 _  _ $a  volume set title $w xxx
O registro pai exibirá o rótulo ‘Volumes:’ com o link ‘Show volumes’. Clicar no link levará o usuário ao registro filho ou a uma página de resultados de pesquisa dos registros filhos.
Editar registros
Nota
Os funcionários devem ter a permissão edit_catalogue (ou a permissão superlibrarian) para poder editar registros bibliográficos.
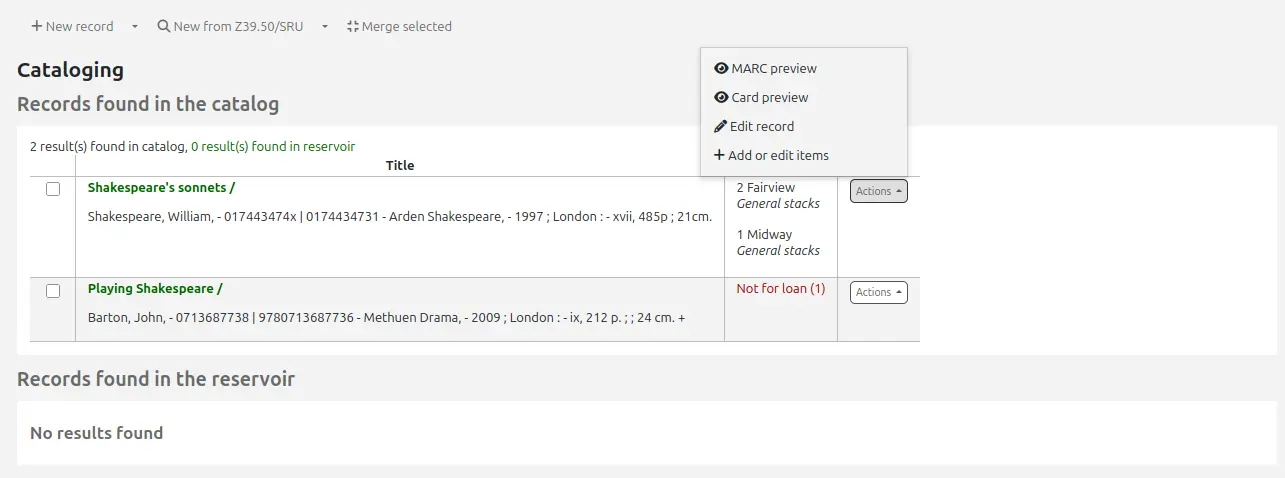
Para editar um registro, você pode clicar no botão ‘Actions’ e escolher ‘Edit record’ nos resultados de pesquisa da página de pesquisa de catalogação.
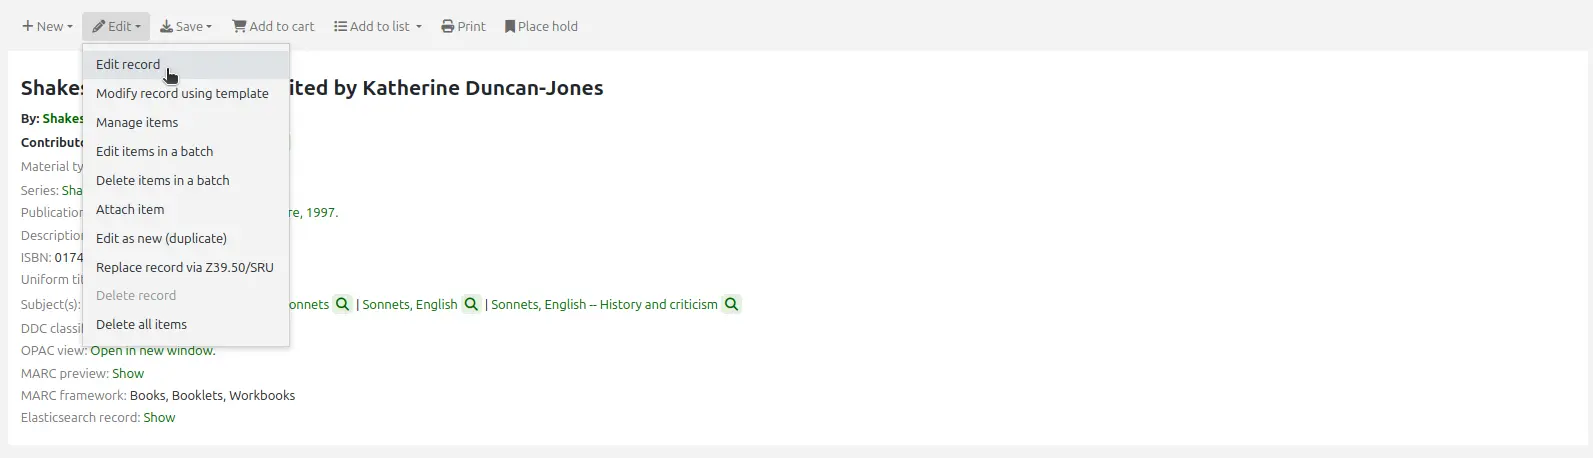
Ou clique no botão ‘Edit’ na página de detalhes do registro e escolha ‘Edit record’.
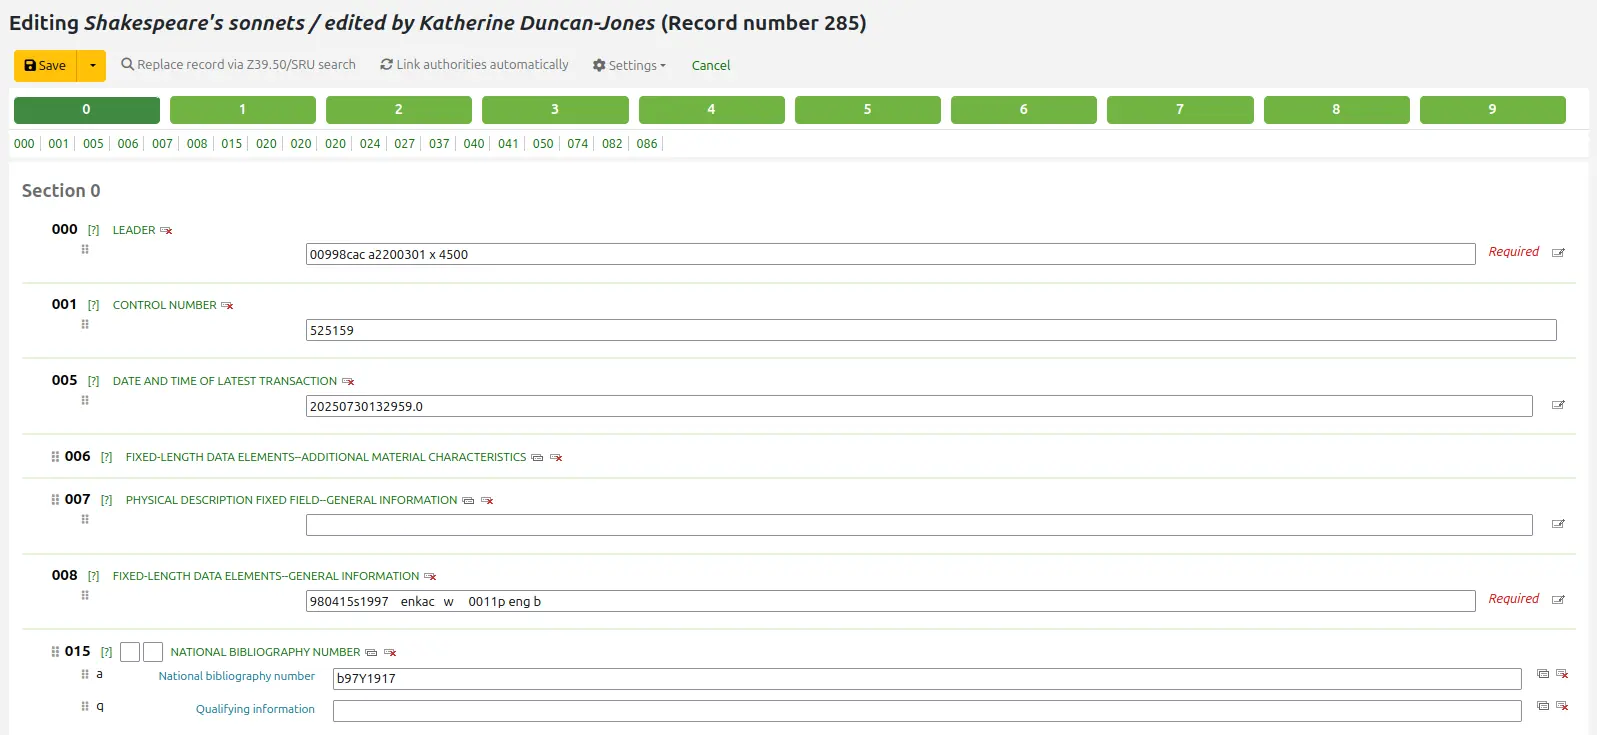
O registro será aberto no editor de catalogação básico.
A alternativa é pesquisar via Z39.50 para sobrepor seu registro com um registro mais completo encontrado em outra biblioteca. Você pode fazer isso escolhendo ‘Replace record via Z39.50/SRU’ no menu ‘Edit’.
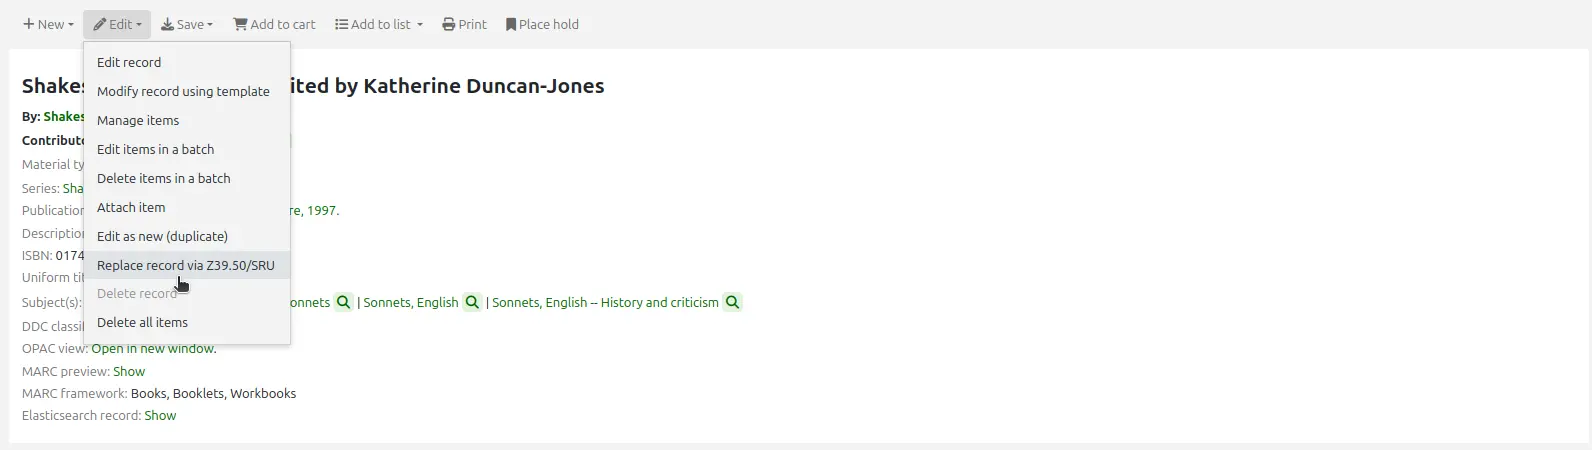
Ao escolher essa opção, você será levado a uma janela de pesquisa Z39.50 para procurar o registro em questão em outras bibliotecas.
Quando você tiver feito todas as edições, você pode clicar em ‘Salvar’ no topo do editor.
Modificação em lote de registros
Nota
Somente funcionários com a permissão records_batchmod (ou a permissão superlibrarian) terão acesso a esta ferramenta.
Vá para: Mais > Catalogação > Edição em lote > Modificação de registros em lote
Esta ferramenta é usada para editar lotes de registros bibliográficos e de autoridade usando modelos de modificação MARC. Antes de acessar esta ferramenta, você precisará configurar pelo menos um modelo de modificação MARC.
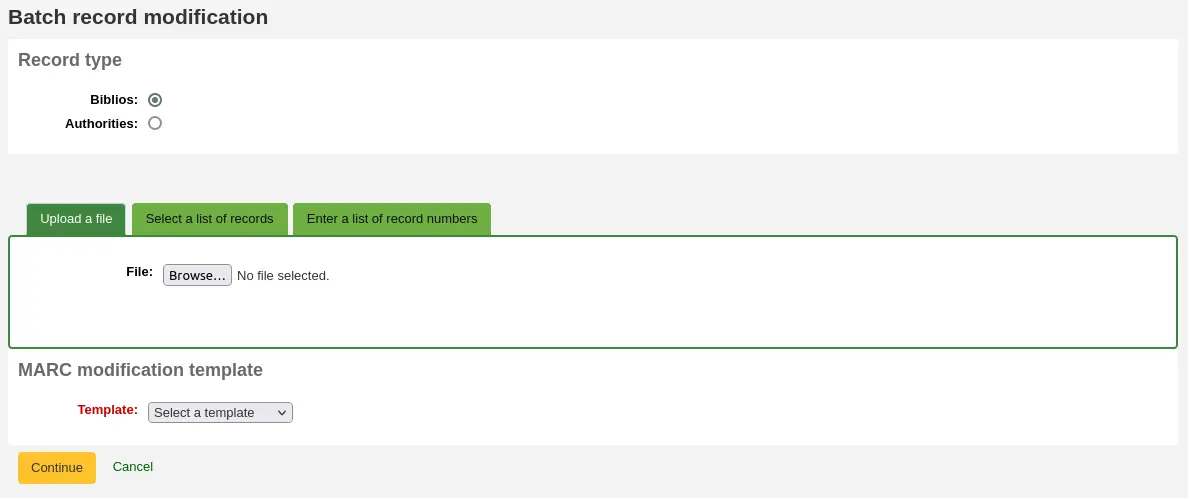
Record type: escolha se você está editando registros bibliográficos ou de autoridade
Informe os biblionumbers ou authids dos registros a editar, de uma das três formas
Envie um arquivo de biblionumbers ou authids
Use uma lista;
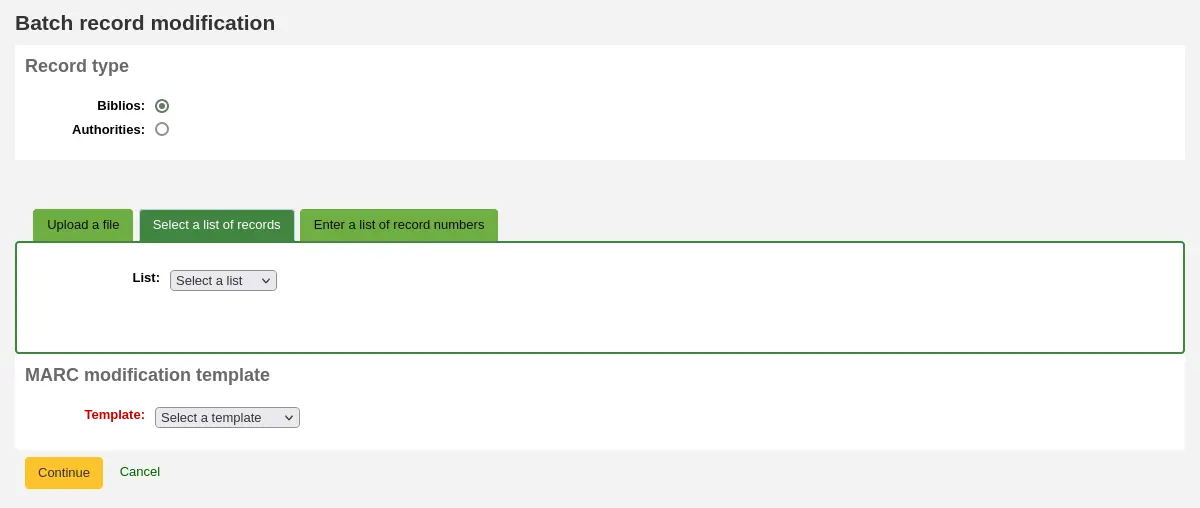
Ou informe os números (um por linha) na caixa fornecida.
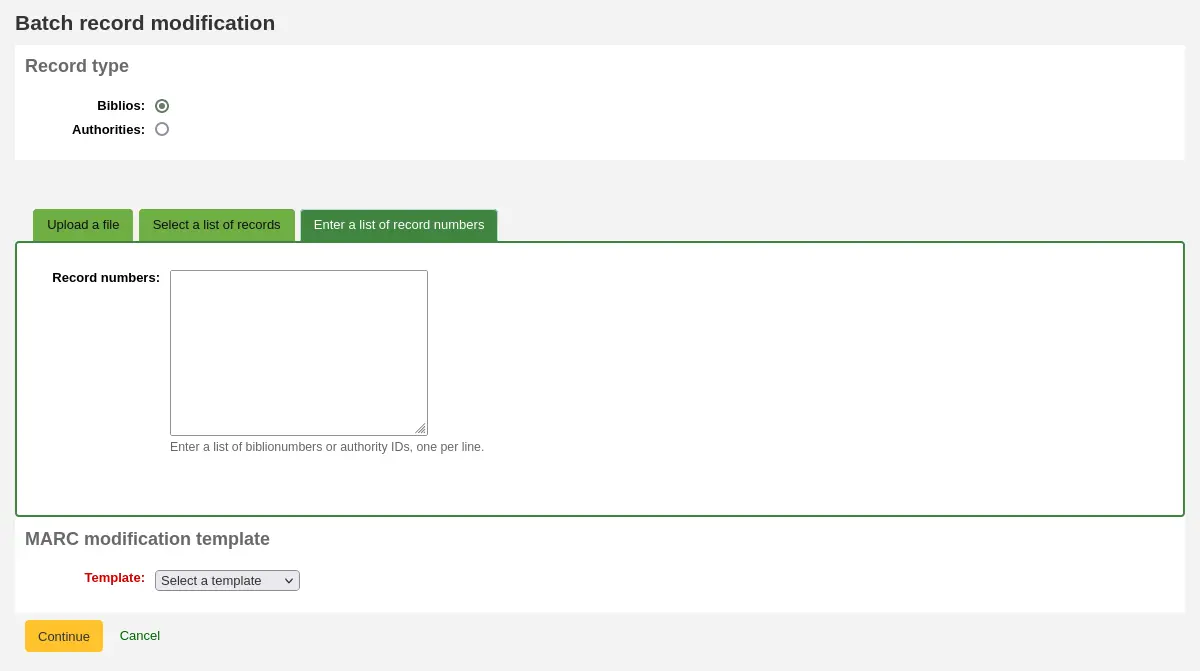
MARC modification template: por fim, escolha o modelo de modificação MARC a usar para editar esses registros.
Depois de informar seus critérios, clique em ‘Continue’
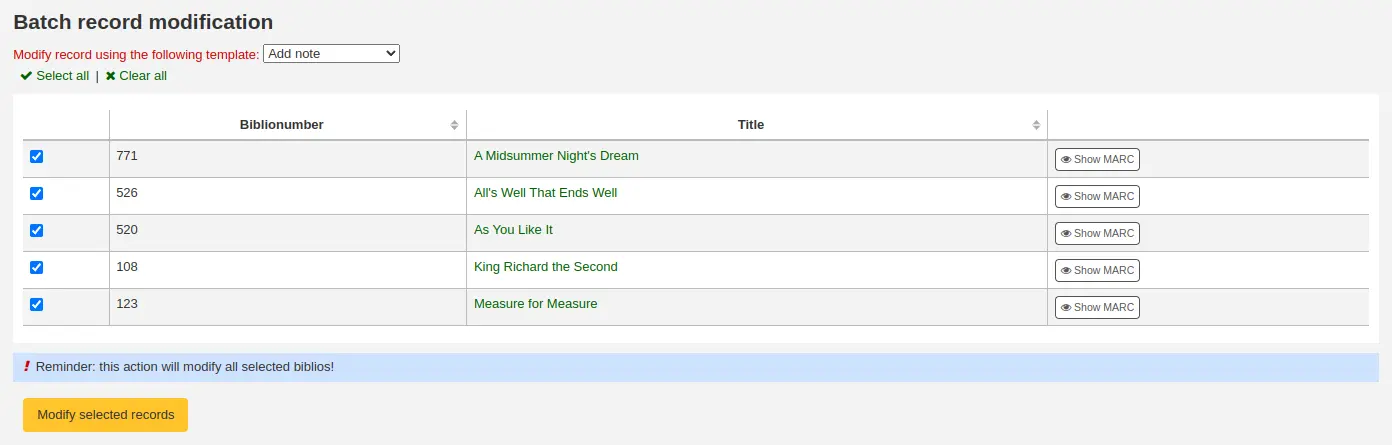
Será exibida a lista de registros que serão editados. Ao lado de cada um há uma caixa de seleção, para que você possa desmarcar registros que prefere não editar agora.
Clicar em ‘Preview MARC’ permitirá ver quais edições serão feitas ao finalizar a edição.
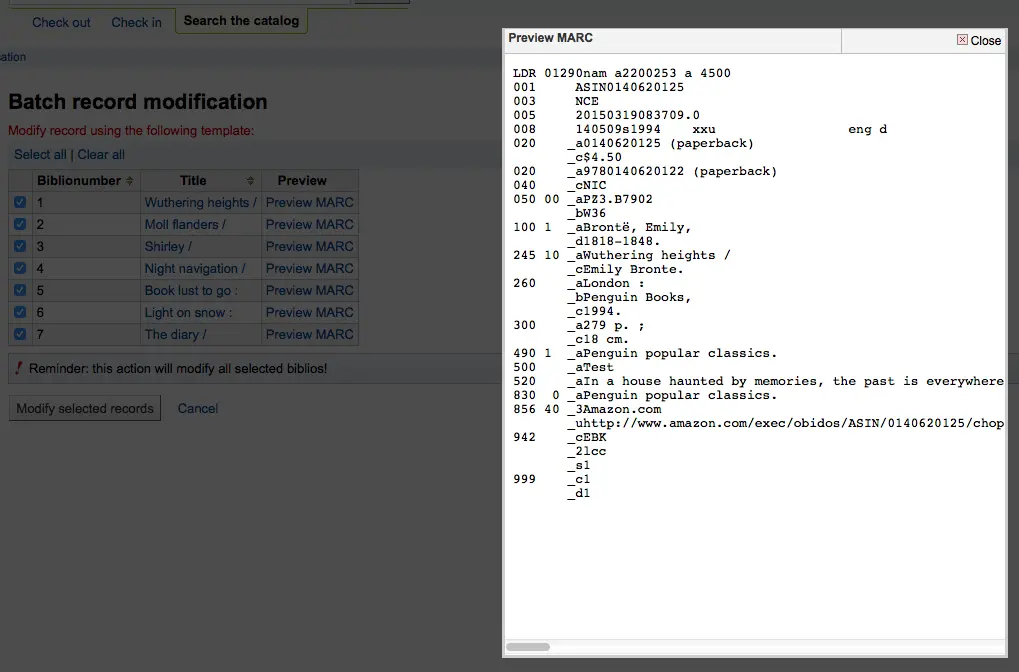
Depois de confirmar que tudo está como deseja, clique no botão ‘Modify selected records’, e seus registros serão modificados.
Modelos de modificação MARC
Nota
Somente funcionários com a permissão marc_modification_templates (ou a permissão superlibrarian) terão acesso a esta ferramenta.
Vá para: Mais > Catalogação > Edição em lote > Modelos de modificação MARC
O sistema de modelos de modificação MARC permite que usuários do Koha façam alterações automáticas em registros MARC ao preparar registros MARC para importação ou ao fazer modificações em lote de registros.
Esta ferramenta é útil para alterar registros MARC de vários fornecedores ou fontes. Basicamente, o sistema permite criar um script básico usando ações para copiar, mover, adicionar, atualizar e excluir campos.
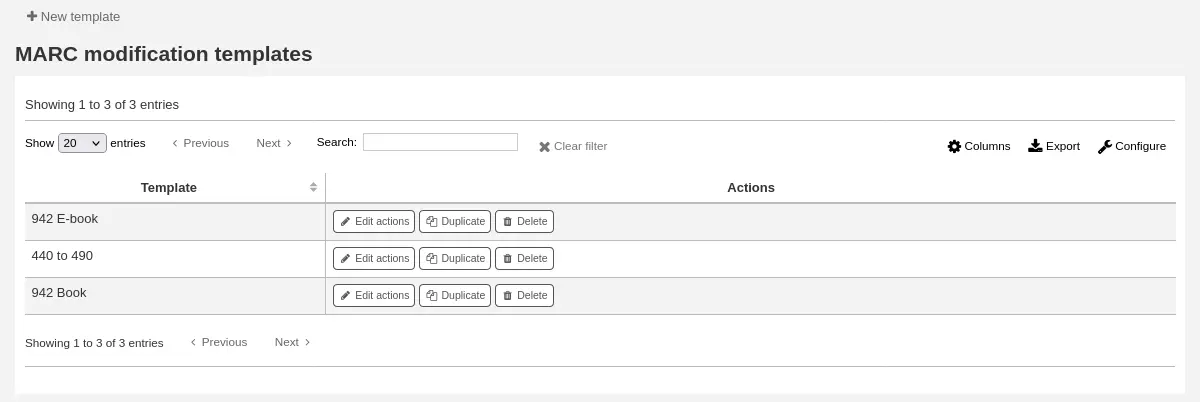
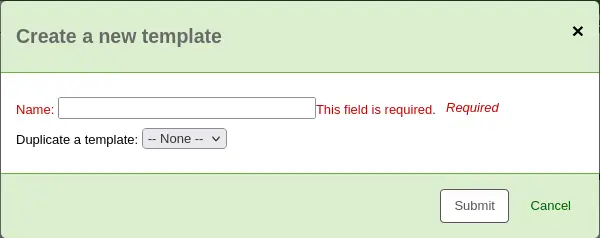
Clique em ‘New template’ (um modelo pode ser composto por uma ou mais ações), informe um nome e clique em ‘Submit’.
Opcionalmente, você pode copiar um modelo existente escolhendo-o no menu suspenso ‘Duplicate a template’.
Em seguida, você pode adicionar ações ao modelo. Clique em ‘New action’.
Aparecerá uma caixa ‘Add a new action’ que você pode usar para especificar exatamente o que deseja fazer.
Por exemplo, se você estiver carregando um lote de arquivos do seu fornecedor de e-books, pode querer adicionar o tipo de material bibliográfico EBOOK ao campo 942$c.
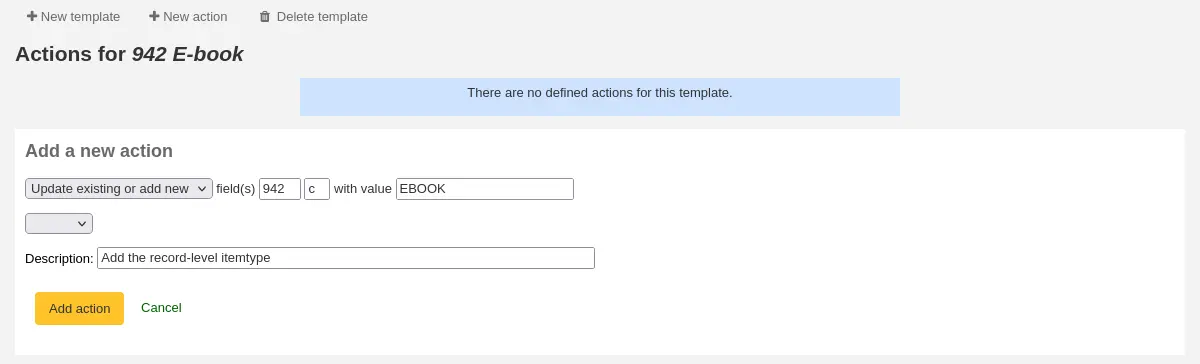
Escolha ‘Add new’
Informe o campo 942 e o subcampo c
Informe o valor ‘EBOOK’ (ou o código do seu tipo de material de e-book)
Forneça uma descrição para identificar esta ação depois
Clique em ‘Add action’
Nota
Se você quiser atualizar os valores de um campo existente, escolha a opção ‘Update existing or add new’. Isso atualizará os valores existentes onde encontrados, e adicionará um novo campo caso não exista.
Cada ação também pode ter uma condição opcional para verificar o valor ou a existência de outro campo. Por exemplo, você pode querer adicionar o número de chamada ao registro de item caso ainda não exista.
Nota
A edição de campos de item só funciona ao usar o modelo durante a preparação de registros. Depois que os registros estão no Koha, o item fica ‘separado’ do registro e só pode ser editado com a ferramenta de modificação em lote de item

Escolha ‘Copy’
Decida se deseja copiar a primeira ocorrência ou todas as ocorrências do campo
Informe o campo 090 (ou outro campo bibliográfico de número de chamada) e o subcampo a a copiar
Informe o campo 952 e o subcampo o para o qual copiar
Escolha ‘if’
Informe o campo 952 e o subcampo o
Escolha “doesn’t exist”
Forneça uma descrição para identificar esta ação depois
Clique em ‘Add action’
As ações mover, copiar e copiar e substituir suportam expressões regulares, que podem ser usadas para modificar automaticamente os valores dos campos durante a cópia ou movimentação. Um exemplo seria remover o caractere ‘$’ do campo 020$c.

Escolha ‘Copy and replace’
Decida se deseja copiar a primeira ocorrência ou todas as ocorrências do campo
Informe o campo 020 e o subcampo c a copiar
Informe o campo 020 e o subcampo c para o qual copiar
Marque a caixa ‘RegEx’ e informe sua expressão regular (neste caso, s/\$// )
Escolha ‘if’
Informe o campo 020 e o subcampo c
Escolha “matches”
Marque a caixa ‘RegEx’ e informe sua expressão regular (neste caso, m/^\$/ )
Forneça uma descrição para identificar esta ação depois
Clique em ‘Add action’
Nota
O valor de uma atualização pode incluir variáveis que mudam a cada uso do modelo. Atualmente, o sistema suporta duas variáveis: __BRANCHCODE__, substituída pelo código de biblioteca (branchcode) da biblioteca que está usando o modelo, e __CURRENTDATE__, substituída pela data atual no formato ISO (AAAA-MM-DD).
Você também pode usar expressões regulares para adicionar a URL de proxy da sua biblioteca antes dos links no seu registro MARC.

Escolha ‘Copy and replace’
Decida se deseja copiar a primeira ocorrência ou todas as ocorrências do campo
Informe o campo 856 e o subcampo u a copiar
Informe o campo 856 e o subcampo u para o qual copiar
Marque a caixa ‘RegEx’ e informe sua expressão regular (neste caso, s/^/PROXY_URL/ )
Forneça uma descrição para identificar esta ação depois
Clique em ‘Add action’
Ao escolher entre ‘Copy’ e ‘Copy and replace’, tenha em mente o seguinte exemplo:
245 _aThe art of computer programming _cDonald E. Knuth.
300 _aA_exists _bB_exists
Se aplicarmos a ação (a) Copiar o campo 245 inteiro para 300, obtemos:
245 _aThe art of computer programming _cDonald E. Knuth.
300 _aA_exists _bB_exists
300 _aThe art of computer programming _cDonald E. Knuth.
Se aplicarmos a ação (b) Copiar o subcampo 245$a para 300$a, obtemos:
245 _aThe art of computer programming _cDonald E. Knuth.
300 _aThe art of computer programming _bB_exists
Depois que suas ações forem salvas, você pode visualizá-las na parte superior da tela. As ações podem ser reordenadas usando as setas à esquerda delas.

As ações serão executadas na ordem em que aparecem. Dependendo das suas ações, a ordem pode ser muito importante. Por exemplo, você não quer excluir um campo antes de copiá-lo para outro. Você pode usar as setas para mover ações para cima ou para baixo na lista
A seta para cima moverá a ação uma posição acima
A seta para cima com uma linha no topo moverá a ação para a primeira posição
A seta para baixo com uma linha na base moverá a ação para a última posição
A seta para baixo moverá a ação uma posição abaixo
Depois que seu modelo for salvo, você poderá escolhê-lo ao usar a ferramenta Preparar registros MARC para importação ou a ferramenta de modificação em lote de registros.
Duplicar registros
Às vezes, uma cópia do registro que você precisa catalogar não é encontrada via Z39.50. Nesses casos, você pode criar uma duplicata de um registro semelhante e editar as partes necessárias para criar um novo registro. Para duplicar um registro existente, clique em ‘Edit as new (duplicate)’ no menu ‘Edit’ do registro bibliográfico.
Nota
Os funcionários devem ter a permissão edit_catalogue (ou a permissão superlibrarian) para poder duplicar registros bibliográficos.
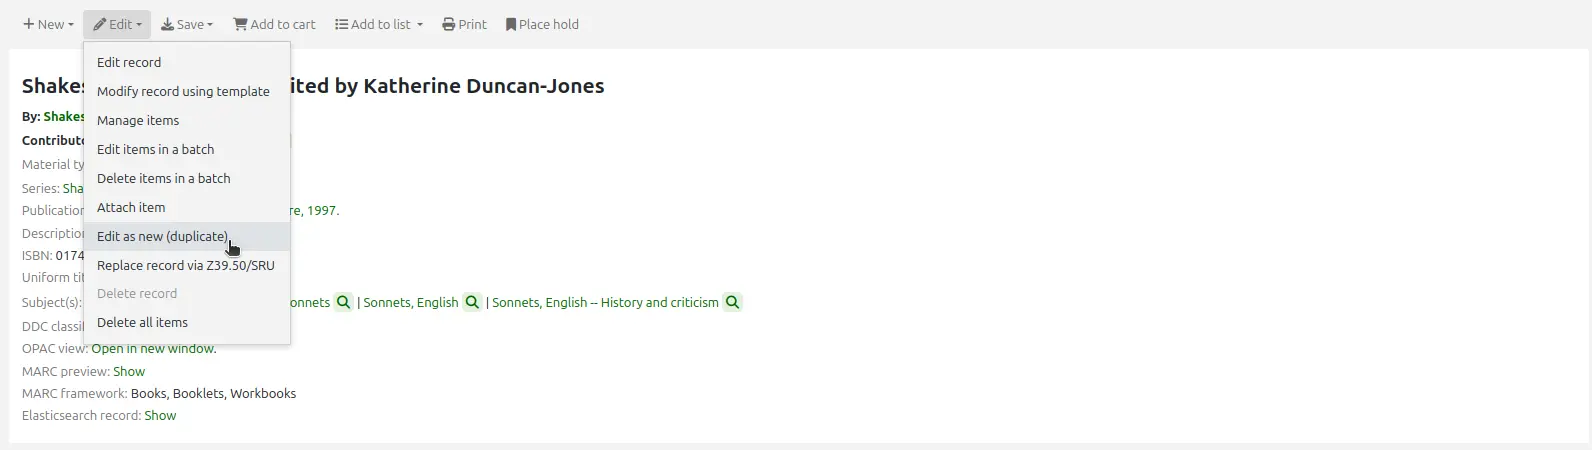
Isso abrirá um novo registro MARC com os campos preenchidos com os valores do registro bibliográfico original.
Edite conforme necessário e salve.
Nota
Isso não alterará o registro original.
Anexar arquivos a registros
Se você quiser enviar arquivos ao Koha, pode fazer isso com algumas configurações.
Você precisará pedir ao administrador do sistema para definir a variável de configuração ‘upload_path’ apontando para onde os arquivos serão armazenados
Você pode verificar se o caminho de upload está configurado corretamente acessando About Koha > System information. Se houver um erro, ele aparecerá lá.
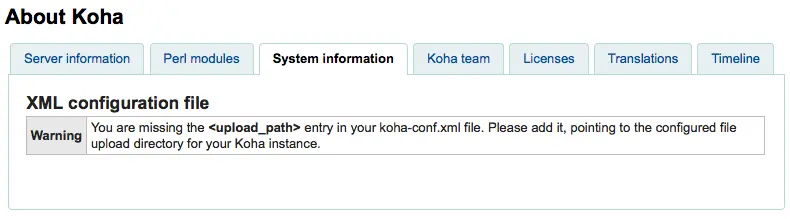
Certifique-se de que sua preferência do sistema OPACBaseURL esteja configurada corretamente
Você vai querer adicionar o plugin upload.pl ao subcampo 856$u em uma (ou várias) de suas planilhas
Depois de tudo configurado, você pode continuar catalogando normalmente. Verá um ícone de plugin ao lado do 856$u, que abrirá a janela de envio e/ou pesquisa
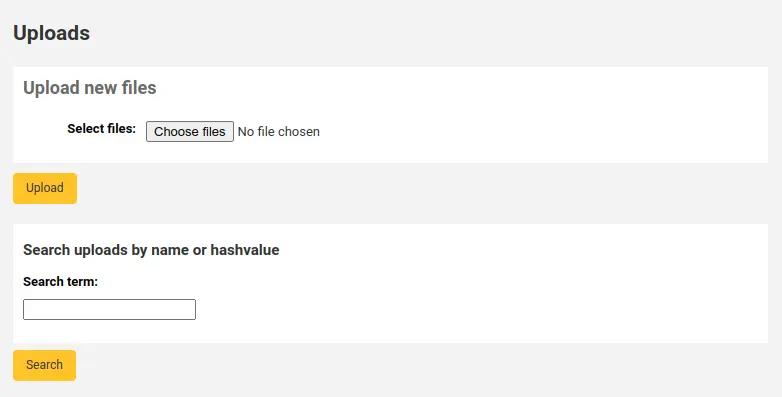
Neste menu, você pode clicar em procurar para localizar um arquivo e anexá-lo, ou pesquisar arquivos já enviados anteriormente usando a caixa de pesquisa. A partir dos resultados, você pode escolher qual arquivo anexar.
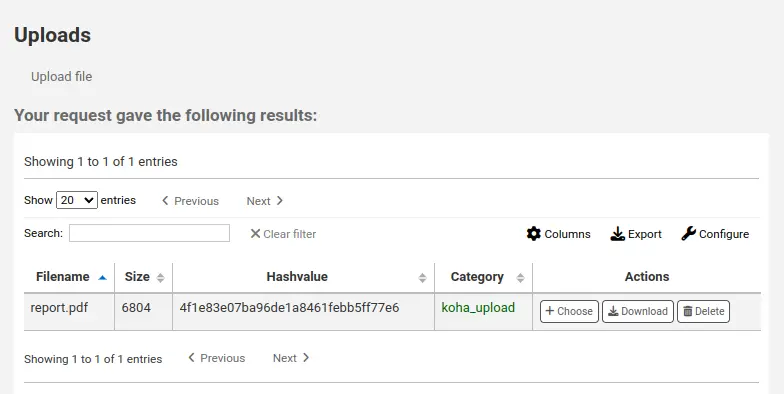
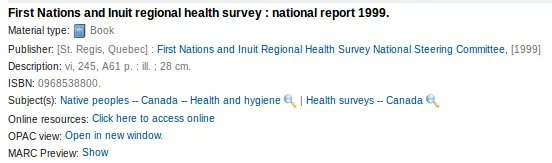
Depois que o arquivo for escolhido, ele aparecerá como um link no registro MARC e na exibição de detalhes.
Nota
Se o arquivo for um PDF, ele será aberto diretamente no navegador do usuário; se for uma imagem ou outro tipo de arquivo, o usuário será solicitado a baixá-lo.
Adicionar imagens de capa
Vários serviços gratuitos e pagos estão integrados ao Koha para fornecer imagens de capa ao seu catálogo, como Amazon, Google books, NovelList Select, Open Library e Syndetics. Verifique as preferências do sistema correspondentes para ativar o serviço escolhido.
Há outras opções, como um servidor de cache de imagens Coce, ou imagens de capa remotas com URLs personalizadas.
Aviso
Se você ativar mais de um serviço, terá várias imagens de capa nos seus registros.
A maioria desses serviços usa o ISBN do registro para buscar a imagem de capa no provedor.
Por fim, você pode enviar suas próprias imagens para os registros, usando o que o Koha chama de imagens de capa locais.
Aviso
Certifique-se de respeitar os direitos autorais ao usar imagens.
Adicionar uma única imagem de capa local
Antes de adicionar imagens de capa locais, certifique-se de que a preferência do sistema OPACLocalCoverImages e/ou LocalCoverImages esteja definida como ‘Show’.
Nota
Somente funcionários com a permissão upload_local_cover_images (ou a permissão superlibrarian) poderão gerenciar imagens de capa locais.
Em um registro bibliográfico, escolha ‘Upload image’ no menu de edição para adicionar sua imagem de capa.
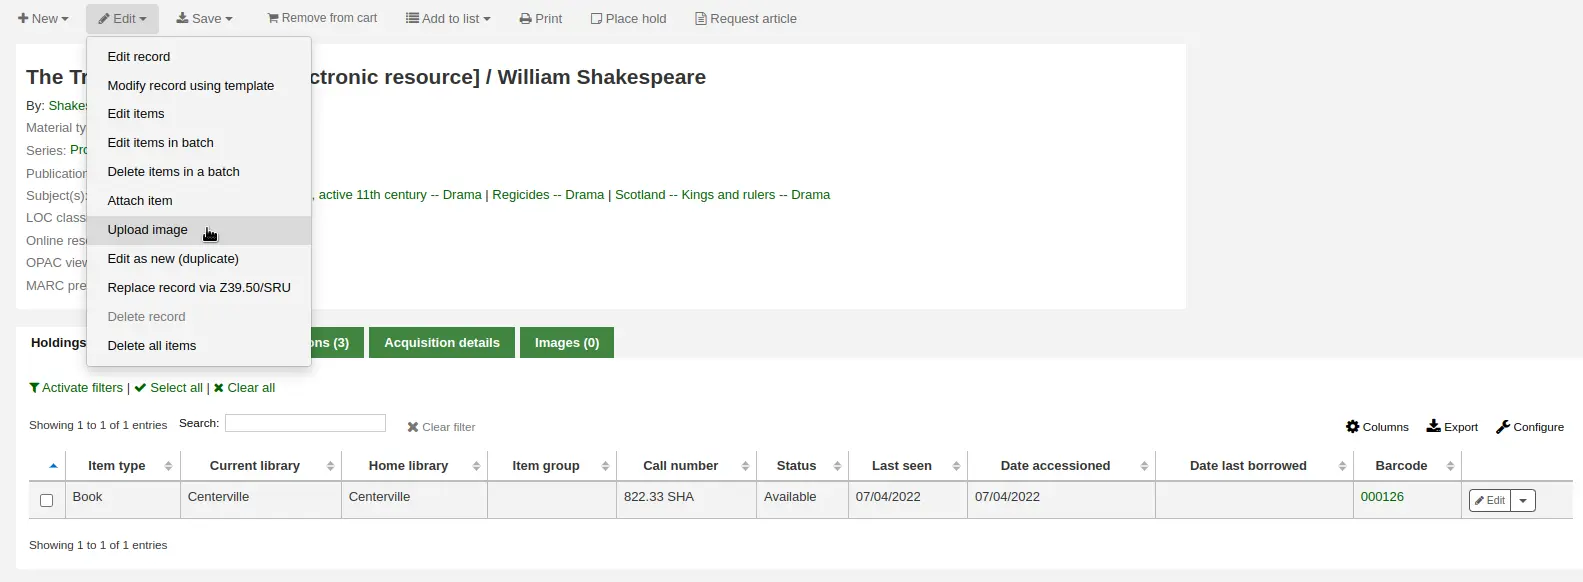
Arraste e solte a imagem na área, ou clique em ‘Drop files here or click to select a file’ e selecione o arquivo de imagem no seu computador.

Aviso
O Koha não tem um limite máximo de tamanho de arquivo para esta ferramenta, mas o servidor web (como o Apache) pode limitar o tamanho máximo de envios (pergunte ao administrador do sistema).
Se a preferência do sistema AllowMultipleCovers estiver definida como ‘Allow’, você terá a opção de substituir ou não as capas existentes. Se a preferência estiver definida como “Don’t allow”, a imagem substituirá as imagens de capa existentes deste registro.
Nota
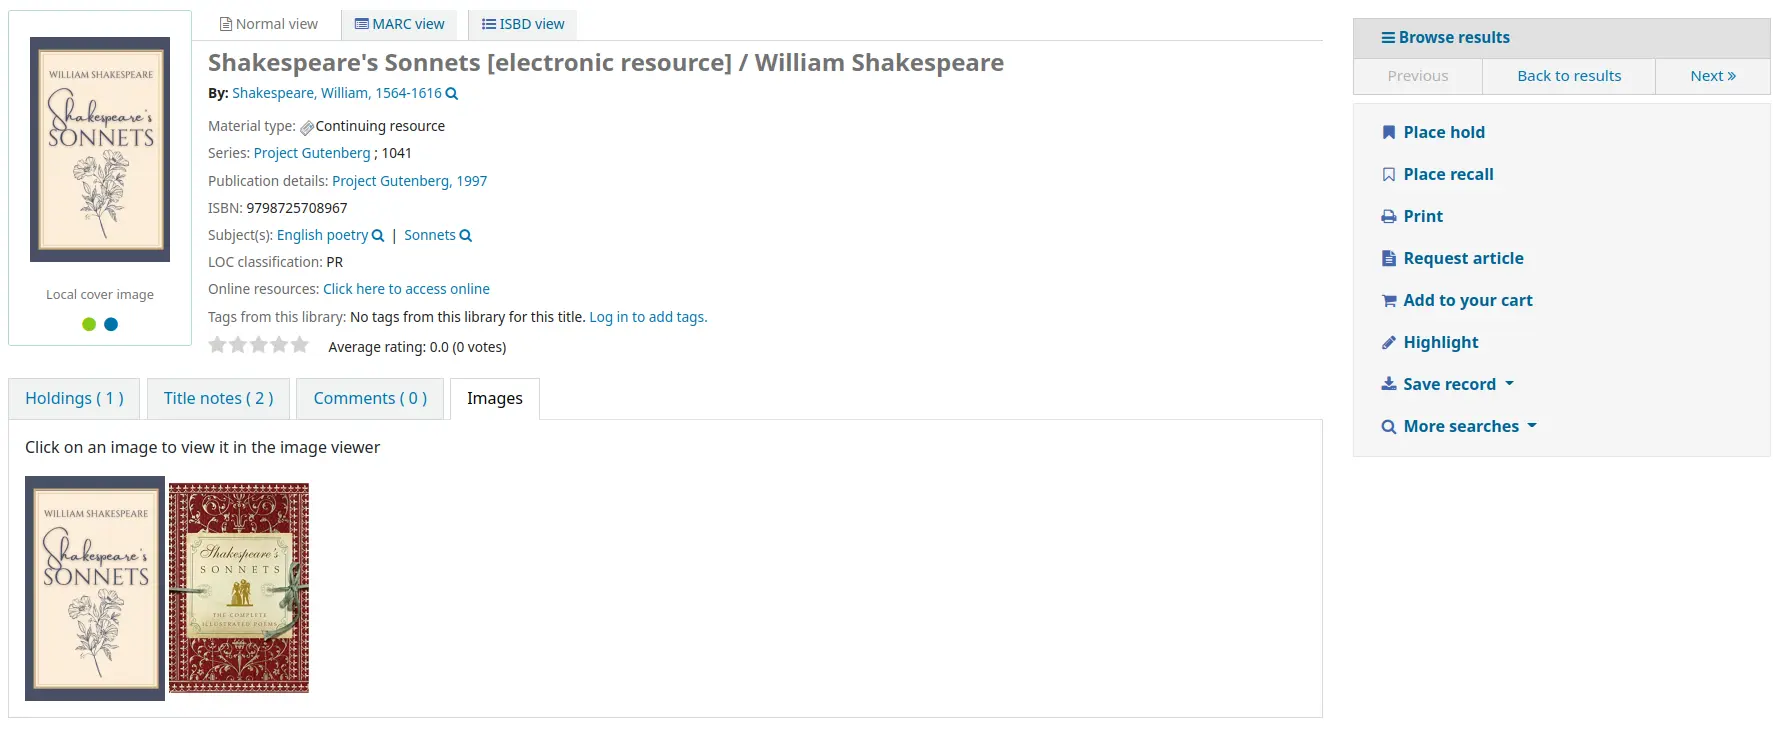
Quando há várias imagens para um registro, elas são exibidas da esquerda para a direita (depois de cima para baixo, dependendo do tamanho da tela) na ordem em que foram enviadas. A imagem à esquerda (a primeira enviada) é usada como miniatura de capa nos resultados de pesquisa e na página de detalhes. Não há como reordenar imagens de capa enviadas dessa forma, então envie-as na ordem em que deseja que apareçam.
Clique em ‘Process images’
Alternativamente, você pode acessar diretamente a ferramenta de envio de imagem de capa em Cataloging > Tools > Upload local cover image. Nesse caso, você precisará especificar o biblionumber do registro para o qual está enviando a imagem.

Nota
O biblionumber, ou número do registro bibliográfico, não é o mesmo que o código de barras; é o número gerado pelo sistema, atribuído pelo Koha a cada registro bibliográfico. Você pode encontrar o biblionumber em vários lugares, entre eles:
No fim da URL, na barra de endereço do navegador, ao acessar a página de detalhes do registro. A URL será algo como
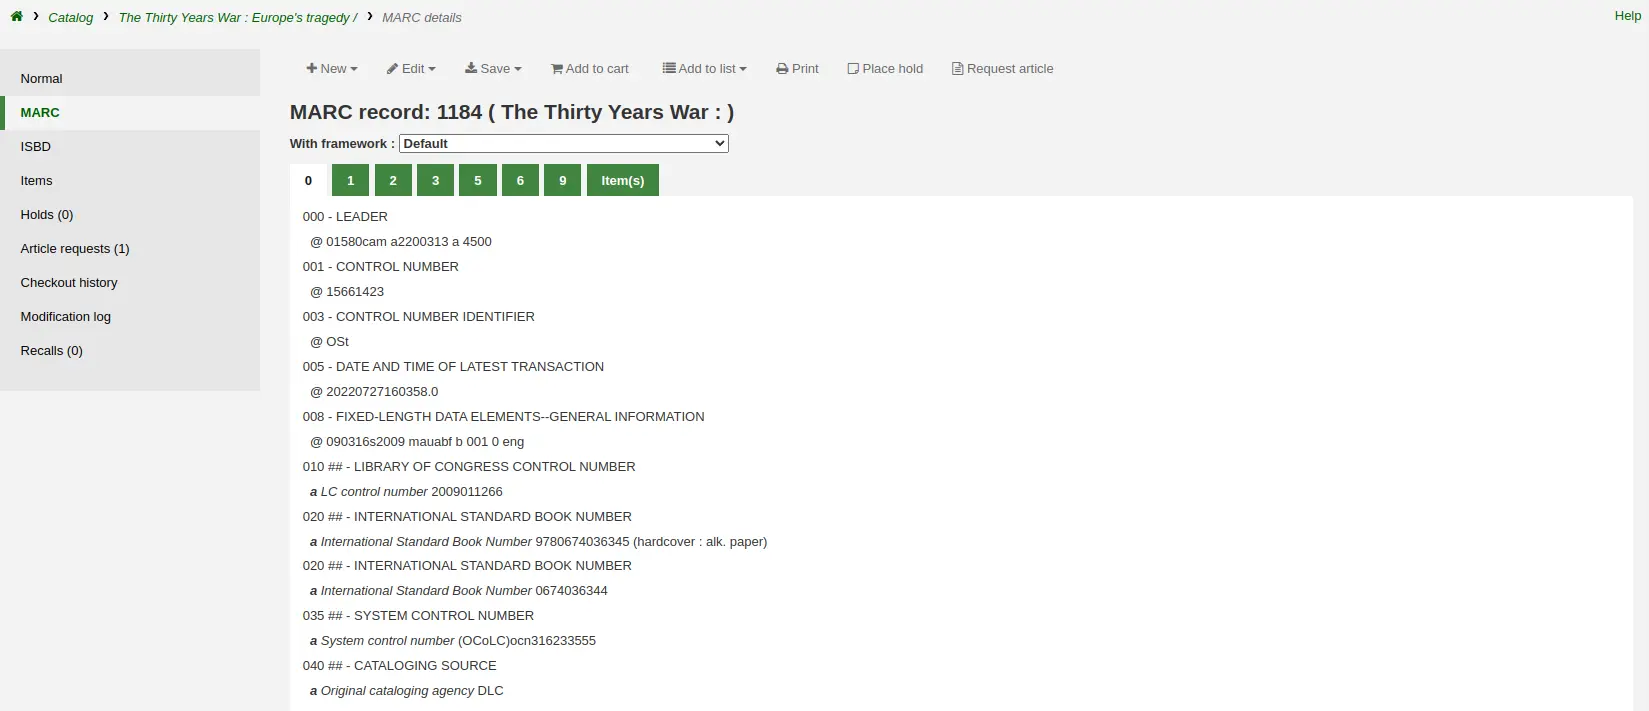
Na aba MARC da página de detalhes do registro, na interface administrativa
Adicionar um lote de imagens de capa
Nota
Somente funcionários com a permissão upload_local_cover_images (ou a permissão superlibrarian) poderão enviar lotes de imagens de capa locais.
A ferramenta de envio de imagens de capa também permite enviar lotes de imagens em um arquivo ZIP.
Para enviar um lote de imagens:
Crie uma pasta com as imagens a enviar
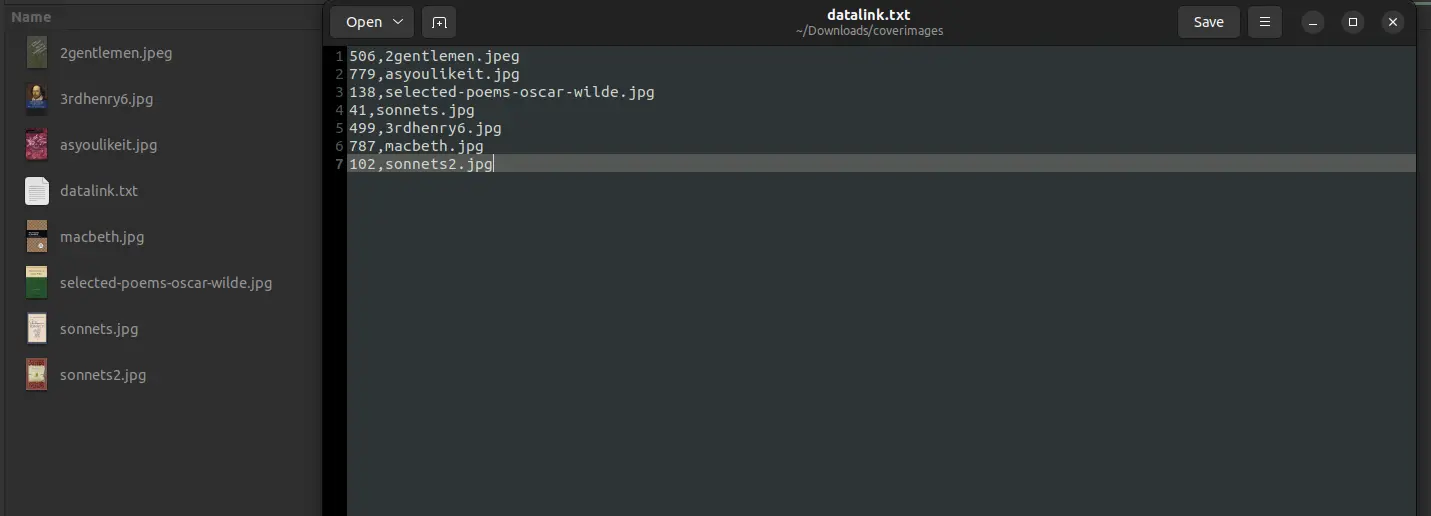
Crie um arquivo de texto (*.txt) chamado datalink.txt ou idlink.txt, listando o biblionumber seguido do nome da imagem para cada imagem, um por linha. Por exemplo:
- ::
506,2gentlemen.jpeg 779,asyoulikeit.jpg 138,selected-poems-oscar-wilde.jpg 41,sonnets.jpg 499,3rdhenry6.jpg 787,macbeth.jpg 102,sonnets2.jpg
Aviso
Certifique-se de que não há linhas ou caracteres extras no arquivo de texto.
Crie um arquivo ZIP que inclua todas as imagens a enviar e o arquivo de texto
Na interface administrativa do Koha, acesse a ferramenta de envio de imagem de capa em Cataloging > Tools > Upload local cover image, e arraste e solte, ou selecione, o arquivo ZIP do seu computador
O tipo de arquivo ‘ZIP file’ deve estar selecionado
Se a preferência do sistema AllowMultipleCovers estiver definida como ‘Allow’, você terá a opção de substituir ou não as capas existentes. Se a preferência estiver definida como “Don’t allow”, a imagem substituirá as imagens de capa existentes deste registro.
Clique em ‘Process images’
Será exibido um resumo do envio

Nota
A imagem de origem é usada para gerar uma miniatura de 140 x 200 px e uma imagem em tamanho completo de 600 x 800 px. O tamanho original da imagem enviada não é mantido pelo Koha.
Na interface administrativa, as imagens de capa aparecem nos resultados de pesquisa, na página de detalhes do registro à direita do título, e na aba ‘Images’ da tabela de exemplares, na parte inferior.
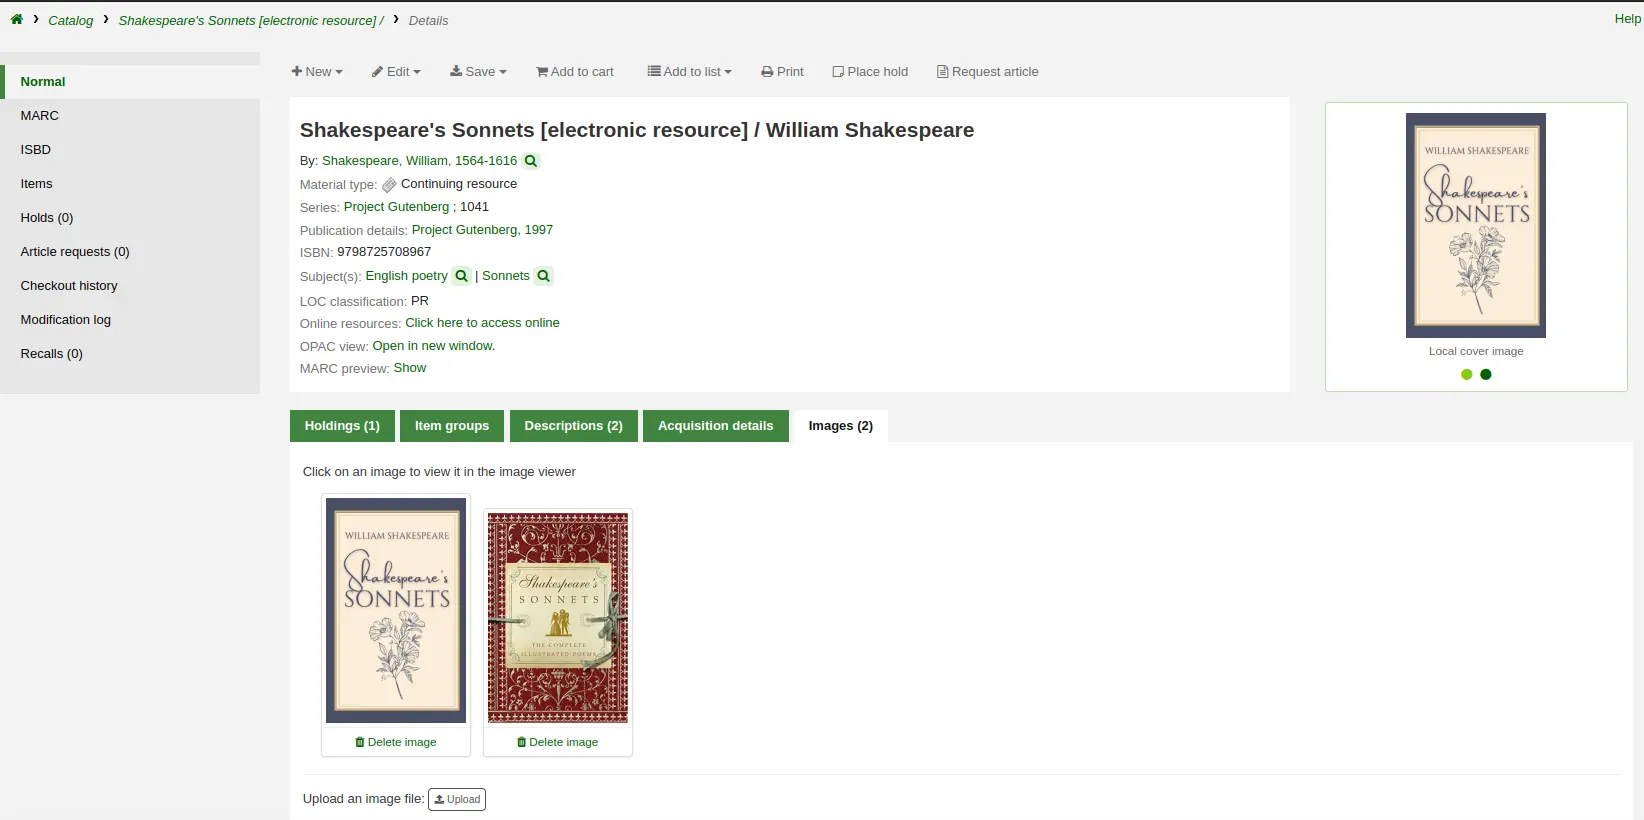
No OPAC, as imagens de capa aparecem nos resultados de pesquisa, na página de detalhes do registro à esquerda do título, e na aba ‘Images’ da tabela de exemplares, na parte inferior.
Excluir uma imagem de capa local
Nota
Somente funcionários com a permissão upload_local_cover_images (ou a permissão superlibrarian) poderão excluir imagens de capa locais.
Clique em ‘Delete image’ abaixo da imagem, na aba ‘Images’ da interface administrativa.
Unir registros
Nota
Os funcionários devem ter a permissão edit_catalogue (ou a permissão superlibrarian) para poder unir registros bibliográficos.
Para unir registros bibliográficos,
Faça uma pesquisa no catálogo para localizar os registros que precisam ser unidos.
Marque as caixas ao lado das duplicatas para selecioná-las.
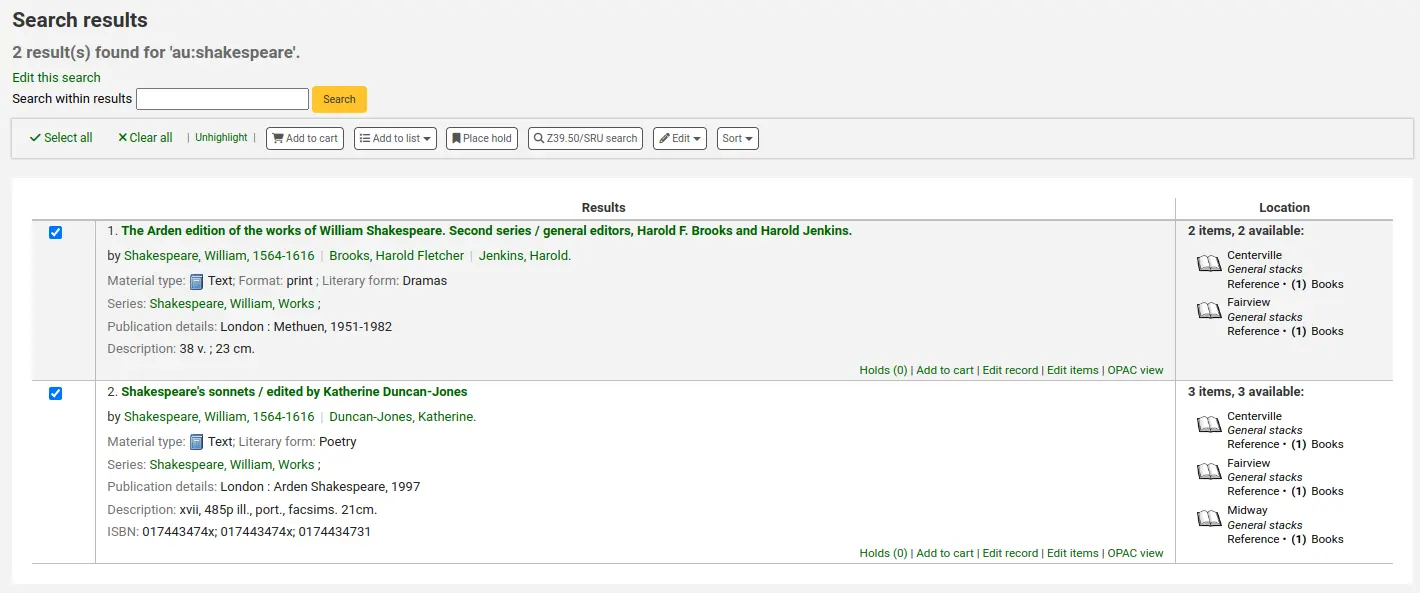
Clique em “Edit” e escolha a opção “Merge records”
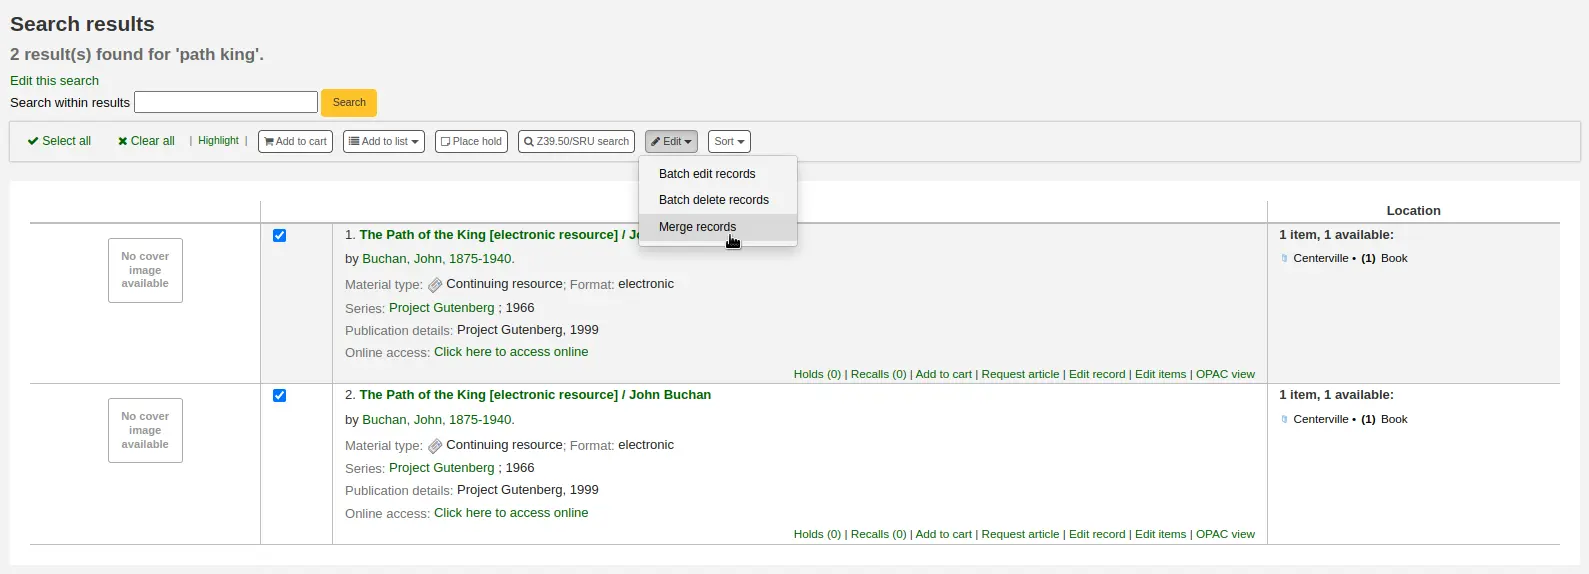
Nota
Alternativamente, você pode usar o módulo de Catalogação para unir registros bibliográficos.
Depois de pesquisar os registros na pesquisa de catalogação e selecionar os registros a unir, clique no botão ‘Merge selected’ na parte superior da lista.
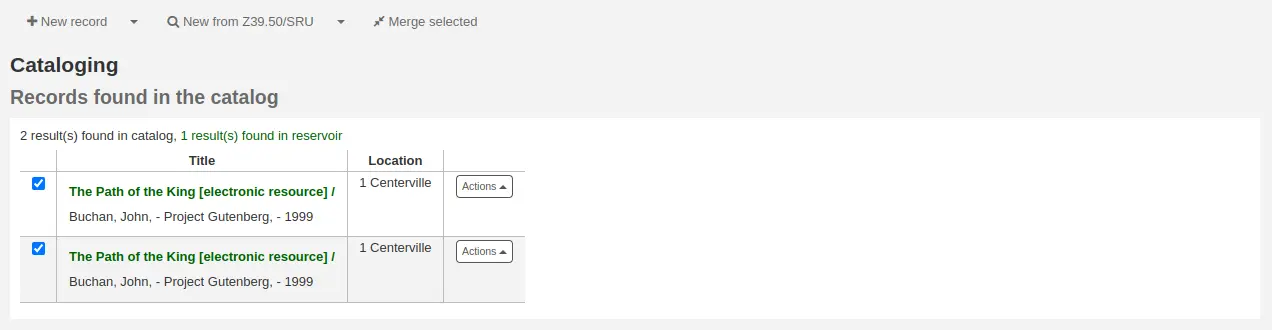
Escolha qual registro manter como principal; os demais serão excluídos após a união
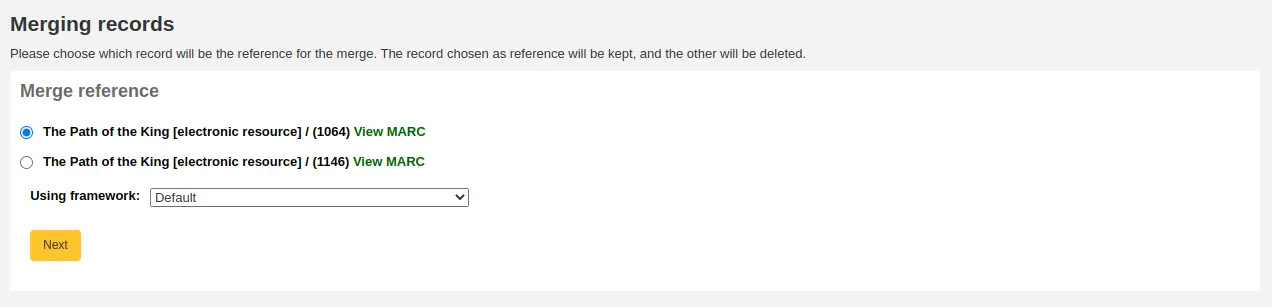
Escolha qual planilha usar para o registro recém-unido
Será exibido o MARC de todos os registros, cada um acessível por uma aba rotulada com o biblionumber daquele registro. Por padrão, o primeiro registro inteiro será selecionado.
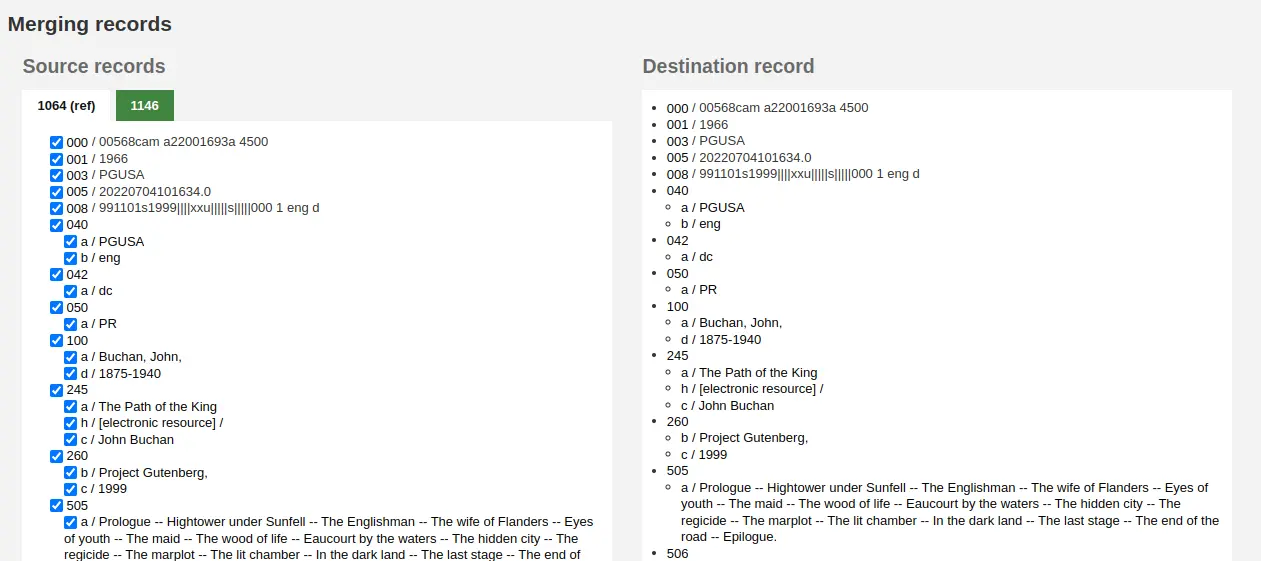
Desmarque, em cada registro de origem, os campos que você não quer no registro final (de destino)
Marque os campos que deseja adicionar no registro final (de destino)
Nota
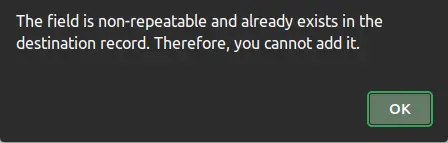
Se você tentar adicionar um campo não repetível duas vezes (como escolher o campo 245 de ambos os registros), será exibido um erro
Nota
Se campos obrigatórios estiverem faltando no registro de destino, o Koha não unirá os registros. Você deve selecionar um valor para os campos obrigatórios.
Se campos importantes estiverem faltando no registro de destino, o Koha avisará, mas ainda assim unirá os registros.
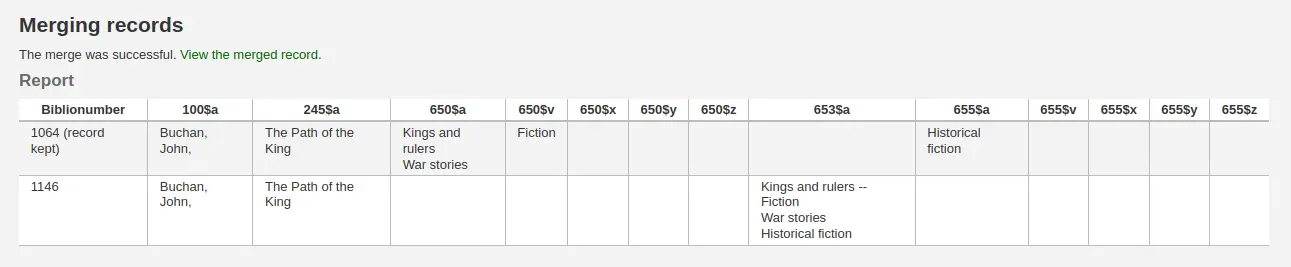
Abaixo dos registros que você está unindo, há uma opção para informar campos a relatar. Isso permite controlar quais campos você vê na página de confirmação da união:

Se você não informar nada, será exibida uma confirmação apenas com os biblionumbers

Se você informar campos, eles aparecerão na página de confirmação.
Nota
Você pode definir padrões para este relatório com a preferência do sistema MergeReportFields.
Depois de concluir suas seleções, clique no botão ‘merge’.
O registro principal agora conterá os dados escolhidos para ele, além de todos os itens e informações de aquisição de ambos os registros bibliográficos, e o segundo registro será excluído.
Unir registros bibliográficos com listas
Outra forma de unir registros bibliográficos duplicados é adicioná-los a uma lista e usar a ferramenta de união a partir dela.
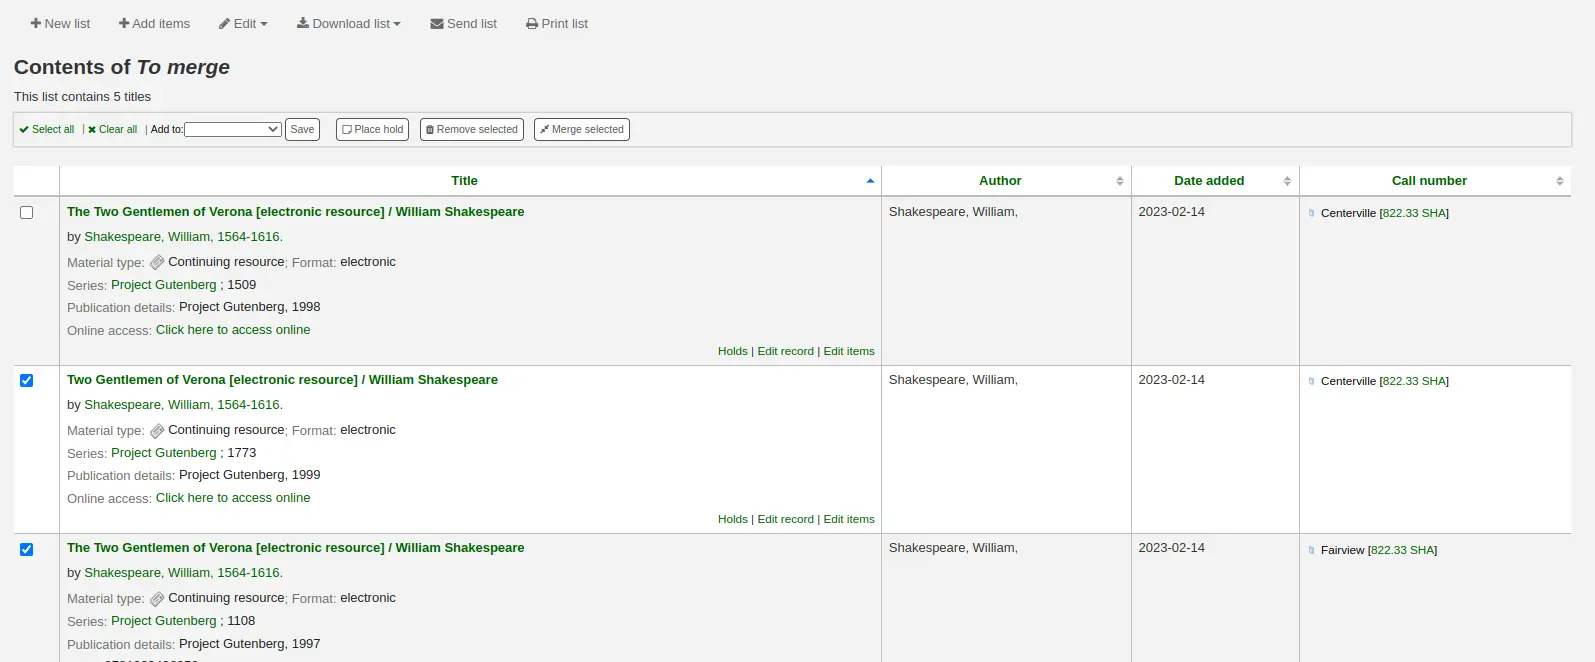
Vá até Lists e clique no título da lista para visualizá-la
Selecione os registros a unir
Clique no botão ‘Merge selected’ na parte superior da lista
Depois de selecionar os registros a unir, o processo é o mesmo de unir via catalogação.
Excluir registros
Nota
Os funcionários devem ter a permissão edit_catalogue (ou a permissão superlibrarian) para poder excluir registros bibliográficos.
Para excluir um registro bibliográfico, clique no botão ‘Edit’ e escolha ‘Delete record’.
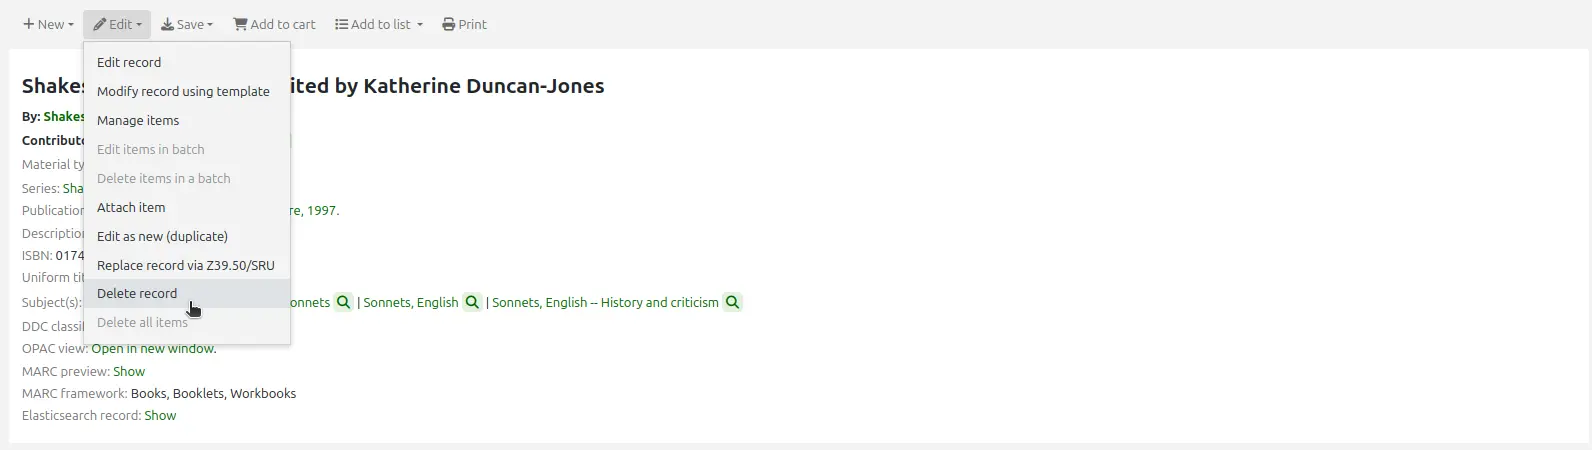
Registros bibliográficos só podem ser excluídos depois que todos os itens forem excluídos. Se você tentar excluir um registro bibliográfico com itens ainda anexados, verá que a opção de exclusão fica esmaecida. (Veja a seção Excluir itens deste manual para saber como excluir itens.)
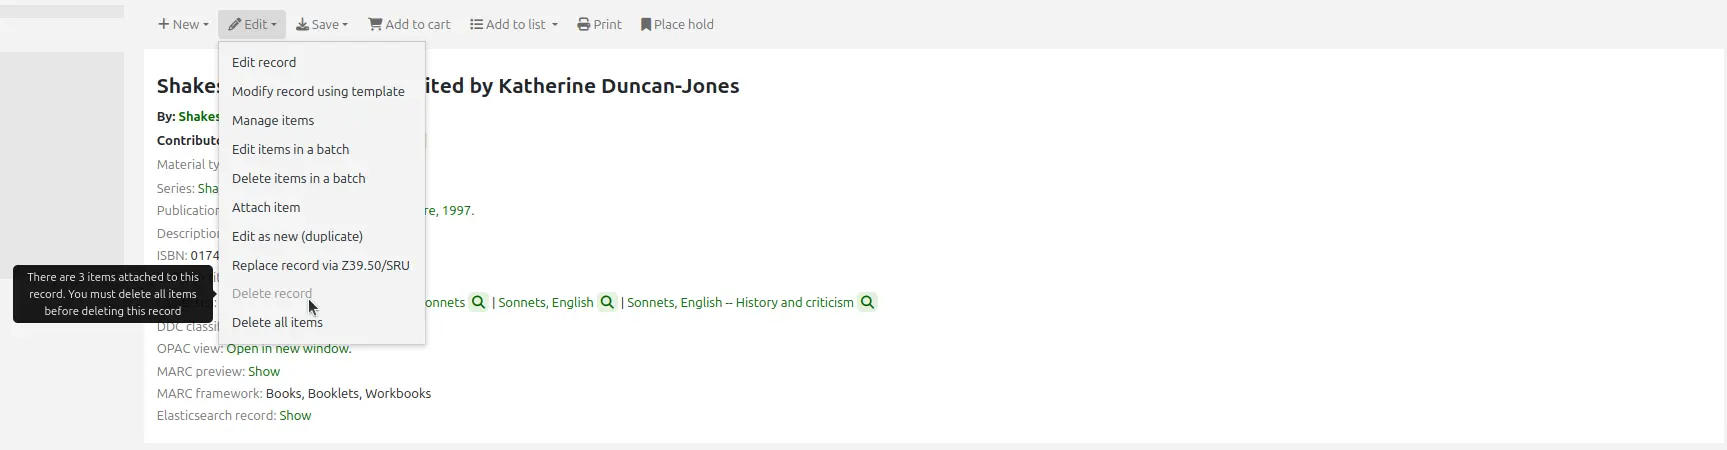
Excluir registros em lote
Nota
Somente funcionários com a permissão records_batchdel (ou a permissão superlibrarian) terão acesso a esta ferramenta.
Vá para: Mais > Catalogação > Edição em lote > Exclusão de registros em lote
Esta ferramenta recebe um lote de números de registro, bibliográficos ou de autoridade, e exclui todos esses registros e quaisquer itens anexados a eles em lote.
Primeiro, você precisa informar à ferramenta se está excluindo registros bibliográficos ou de autoridade.
Em seguida, você pode:
carregar um arquivo com biblionumbers ou authids;
usar uma lista;
ou informar a lista de números na caixa fornecida.
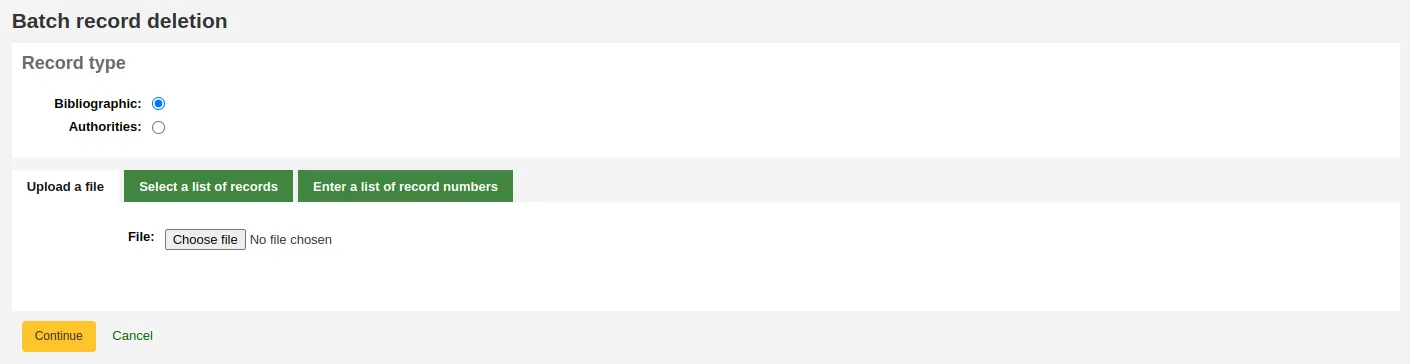
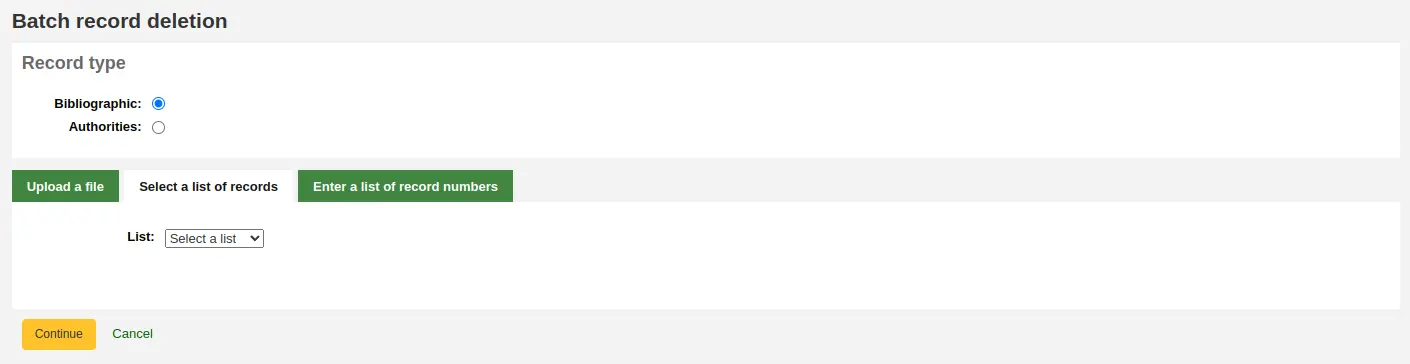
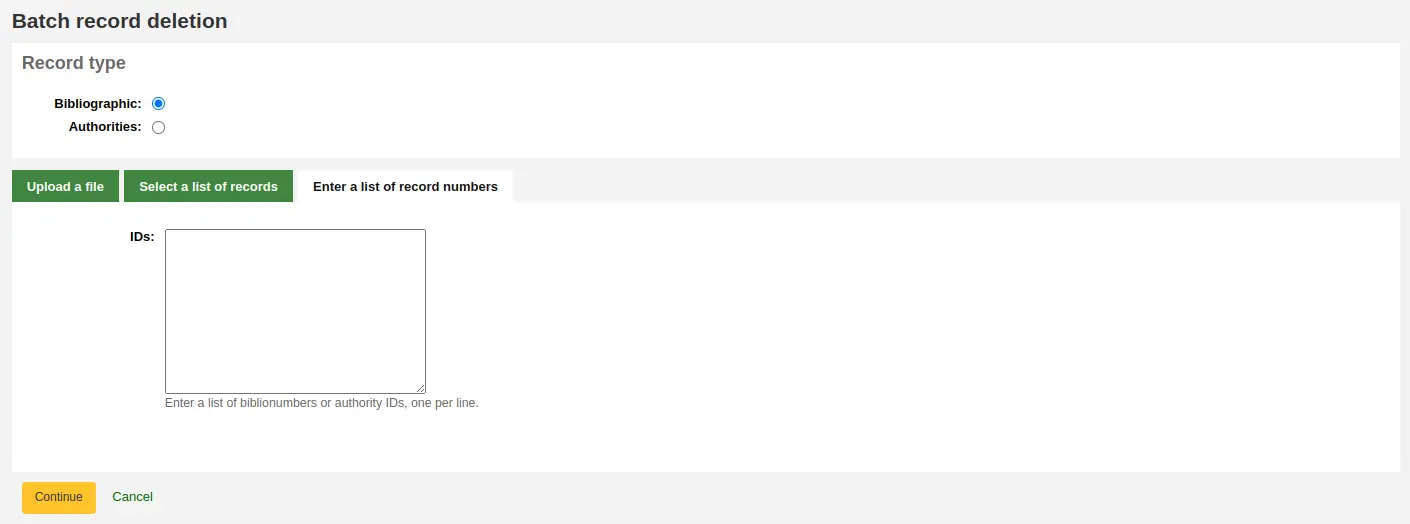
Ao enviar o formulário, será exibido um resumo dos registros que você está tentando excluir.
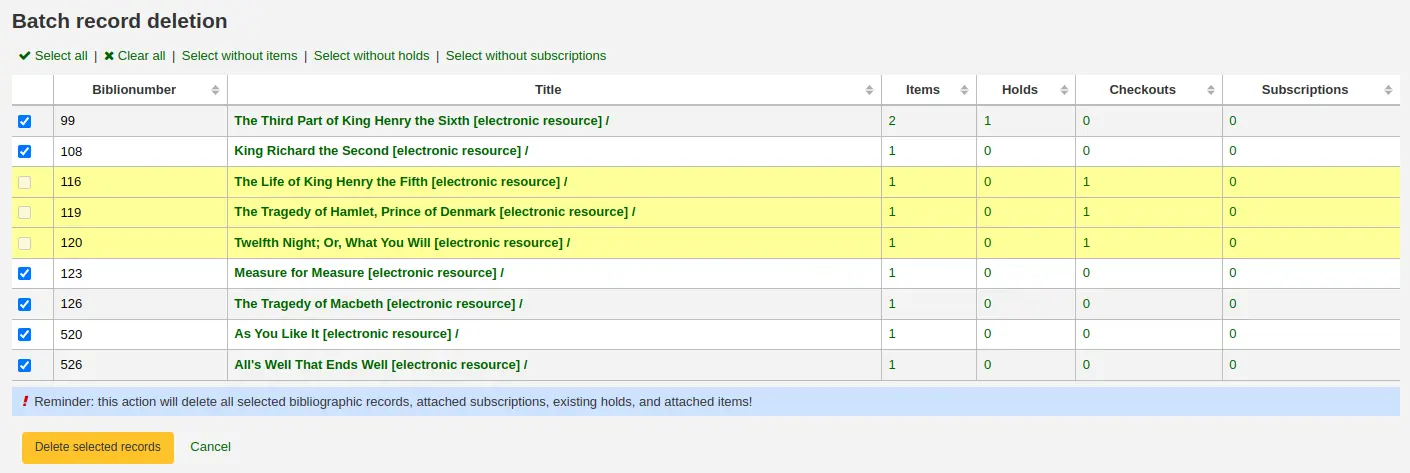
Se um registro que você quer excluir não puder ser excluído, ele será destacado.
Marque os registros que deseja excluir e clique no botão ‘Delete selected records’ para concluir o processo.
Você também pode usar os links na parte superior da tabela para selecionar apenas registros sem itens, reservas ou assinaturas.
Auditar registros
Versão
Este recurso foi introduzido no Koha na versão 26.05.
Um botão ‘Audit’ está disponível na página de detalhes do registro bibliográfico, para verificar diversos erros críticos no registro e nos itens.
Clicar no botão ‘Audit’ mostrará se há erros de dados.
Atualmente, as verificações implementadas são:
O registro não tem um tipo de material
O registro tem um tipo de material, mas não é um tipo de material válido
O item não tem uma biblioteca de origem
O item não tem uma biblioteca de guarda
O item não tem um tipo de material
O item tem um tipo de material, mas não é um tipo de material válido
O registro ou os itens têm valores inválidos em campos onde a planilha usa valores autorizados
Se o seu registro ou itens tiverem erros, edite o registro ou edite os itens com problema para corrigir os erros.
Ocorrências de catálogo
Relatar ocorrências sobre registros bibliográficos
Se a preferência do sistema CatalogConcerns estiver ativada, os funcionários poderão relatar ocorrências sobre registros bibliográficos específicos.
Para relatar uma nova ocorrência,
Na página de detalhes do registro bibliográfico, clique no botão ‘New’ e escolha ‘New catalog concern’.
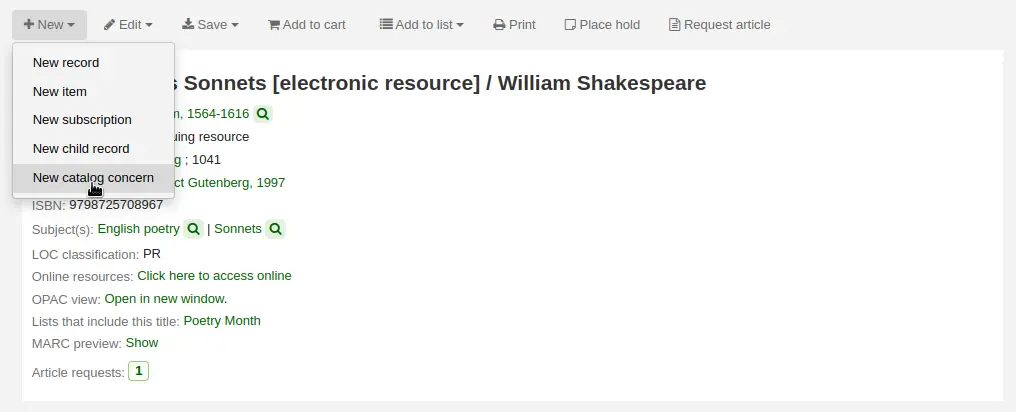
Preencha o formulário de ocorrência.
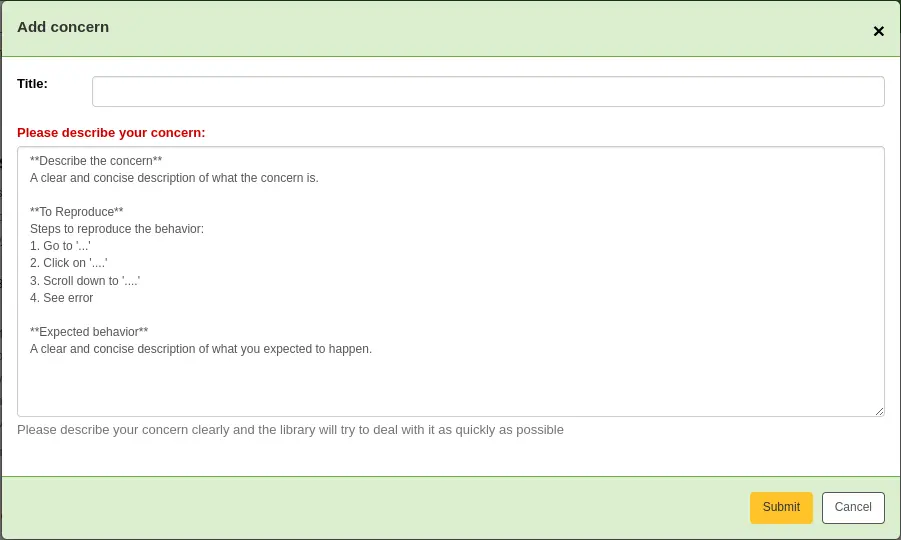
Title: informe um título descrevendo o problema de forma sucinta.
Please describe your concern: informe detalhes sobre o problema, sendo o mais descritivo possível, para que o funcionário que receber a ocorrência consiga reproduzir e ver o problema.
Um exemplo do que é esperado na descrição é fornecido no campo:
**Describe the concern**

A clear and concise description of what the concern is.

**To Reproduce**

Steps to reproduce the behavior:
1. Go to '...'
2. Click on '....'
3. Scroll down to '....'
4. See error

**Expected behavior**

A clear and concise description of what you expected to happen.
Nota
Este texto é personalizável na ferramenta de personalizações HTML, alterando a entrada ‘CatalogConcernTemplate’.
O texto na parte inferior do formulário (“Please describe your concern clearly…”) também é personalizável na ferramenta de personalizações HTML, alterando a entrada ‘CatalogConcernHelp’.
Clique em ‘Enviar’.
Isso enviará um e-mail à equipe de catalogação para notificá-la de que uma nova ocorrência foi criada. O e-mail será enviado ao endereço definido na preferência do sistema CatalogerEmails. O e-mail enviado é o aviso TICKET_NOTIFY, que pode ser personalizado na ferramenta de avisos e recibos.
Um e-mail também será enviado ao autor da ocorrência para notificá-lo de que ela foi recebida. O e-mail enviado é o aviso TICKET_ACKNOWLEDGE, que pode ser personalizado na ferramenta de avisos e recibos.
As ocorrências relatadas sobre este registro ficam visíveis na aba ‘Concerns’.
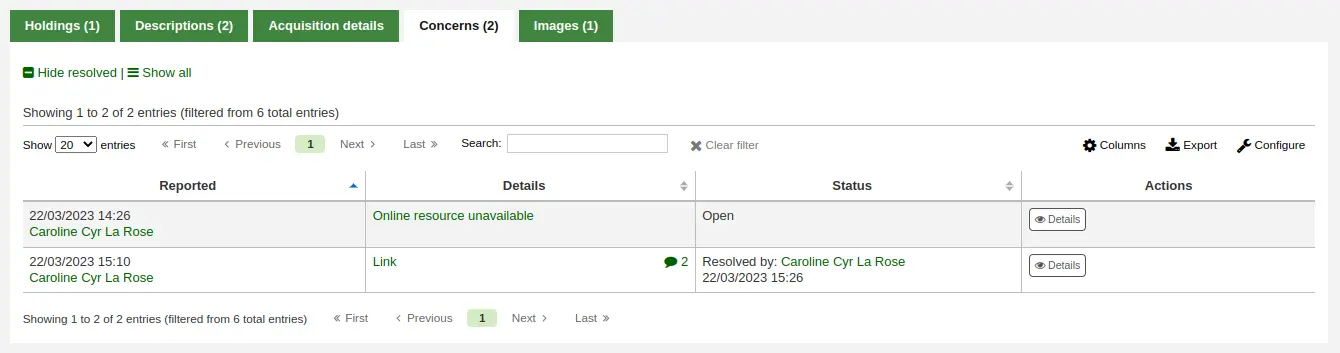
Todos os chamados de ocorrência ficarão visíveis no relatório de ocorrências de catálogo.
Relatórios de ocorrência recém-abertos também aparecerão na seção de notificações na parte inferior da página principal da interface administrativa.
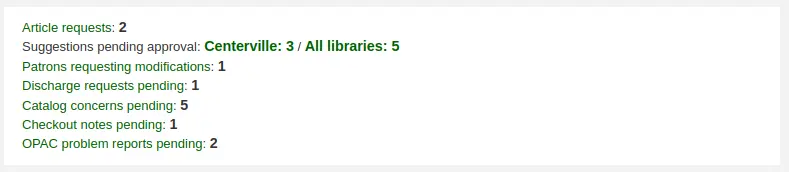
Gerenciar ocorrências de catálogo
Quando funcionários ou usuários relatam ocorrências sobre registros bibliográficos, todas ficam acessíveis por meio do relatório de ocorrências de catálogo.
Vá para: Mais > Catalogação > Relatórios > Problemas no catálogo
Nota
Este relatório só ficará visível se a preferência do sistema CatalogConcerns ou OpacCatalogConcerns estiver ativada.
Nota
Somente funcionários com a permissão edit_catalogue (ou a permissão superlibrarian) terão acesso a esta página.
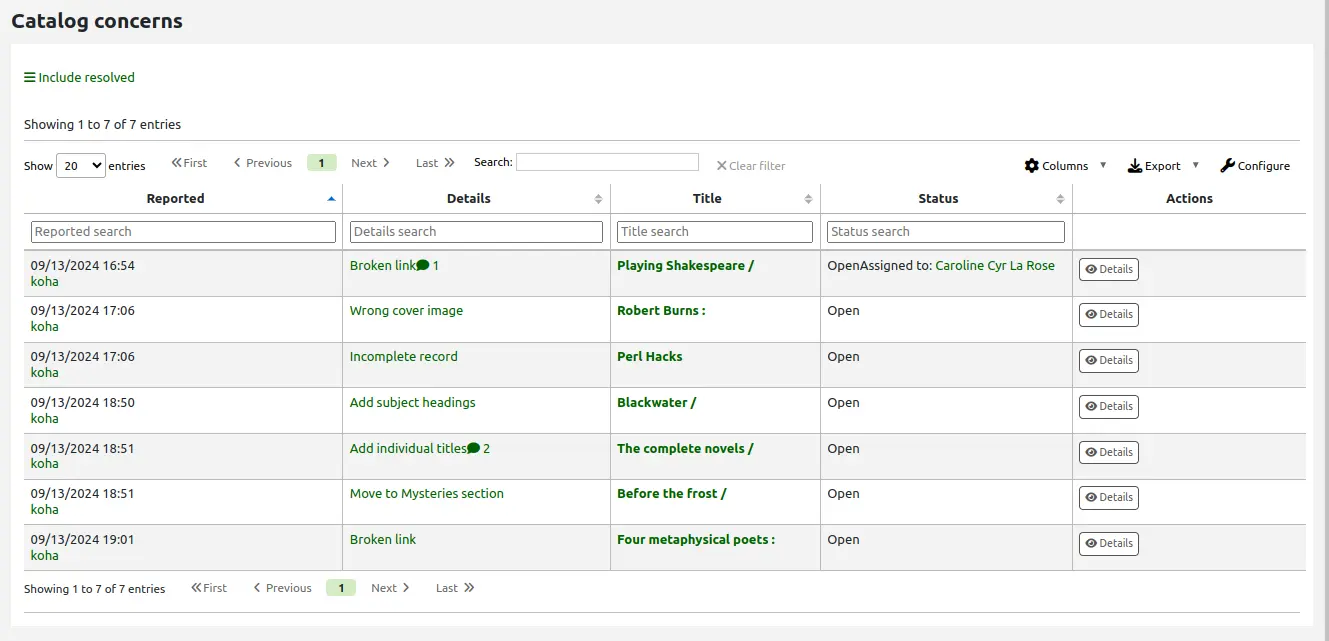
Neste relatório, você pode ver todas as ocorrências, ordenadas por data, com o nome do autor, os detalhes da ocorrência, o título do registro bibliográfico, o status, o responsável, se houver, e, caso resolvida, a data e o nome do funcionário que a tratou.
Nota
Na versão 24.05 e posteriores, apenas as ocorrências atuais são exibidas por padrão. Se necessário, clique no botão ‘Include resolved’ na parte superior da página para exibir também as ocorrências já resolvidas. Clique em ‘Filter resolved’ para ocultá-las novamente.
Para ver os detalhes de uma ocorrência, clique no texto da coluna ‘Details’, ou no botão ‘Details’ na coluna ‘Actions’.
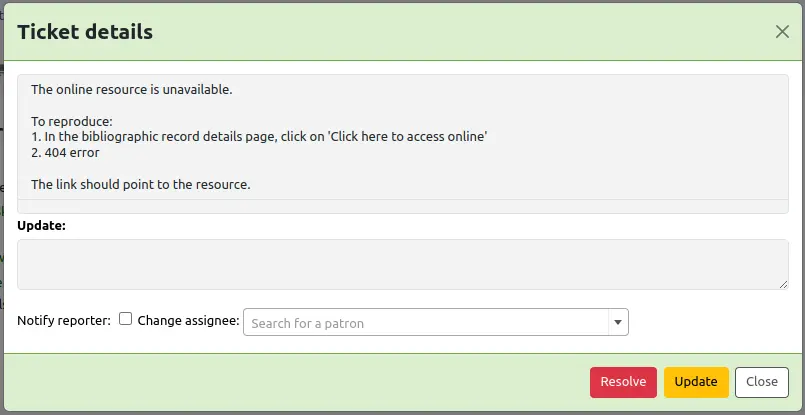
Nesta visualização, você pode informar um comentário no campo ‘Update’.
Para simplesmente adicionar o comentário como uma atualização, clique no botão ‘Update’.
Nota
Se houver valores autorizados na categoria TICKET_STATUS, o botão ‘Update’ oferecerá opções de status com seus status personalizados.
Versão
Este recurso foi adicionado ao Koha na versão 24.05.
Para atribuir esta ocorrência a um funcionário, pesquise o nome do usuário no campo ‘Change assignee’ e clique em ‘Update’. Ele receberá um e-mail baseado no aviso TICKET_ASSIGNED, que pode ser personalizado na ferramenta de avisos e recibos.
Se esta ocorrência estiver resolvida, clique no botão ‘Resolve’.
Nota
Se houver valores autorizados na categoria TICKET_RESOLUTION, o botão ‘Resolve’ oferecerá opções de resolução com seus status personalizados.
Versão
Este recurso foi adicionado ao Koha na versão 24.05.
Se ‘Notify’ estiver marcado, o autor da ocorrência receberá um e-mail informando que ela foi atualizada. O e-mail enviado para uma atualização é o aviso TICKET_UPDATE, e o enviado quando a ocorrência é resolvida é o aviso TICKET_RESOLVE, ambos personalizáveis na ferramenta de avisos e recibos.
Registros de item
No Koha, cada registro bibliográfico pode ter um ou mais itens anexados. Esses itens às vezes são chamados de exemplares. Cada item inclui informações sobre a cópia física que a biblioteca possui.
Adicionar itens
Nota
Os funcionários devem ter a permissão edit_items (ou a permissão superlibrarian) para poder adicionar itens.
Depois de salvar um novo registro bibliográfico, você será redirecionado a um registro de item em branco para que possa anexar um item ao registro bibliográfico.
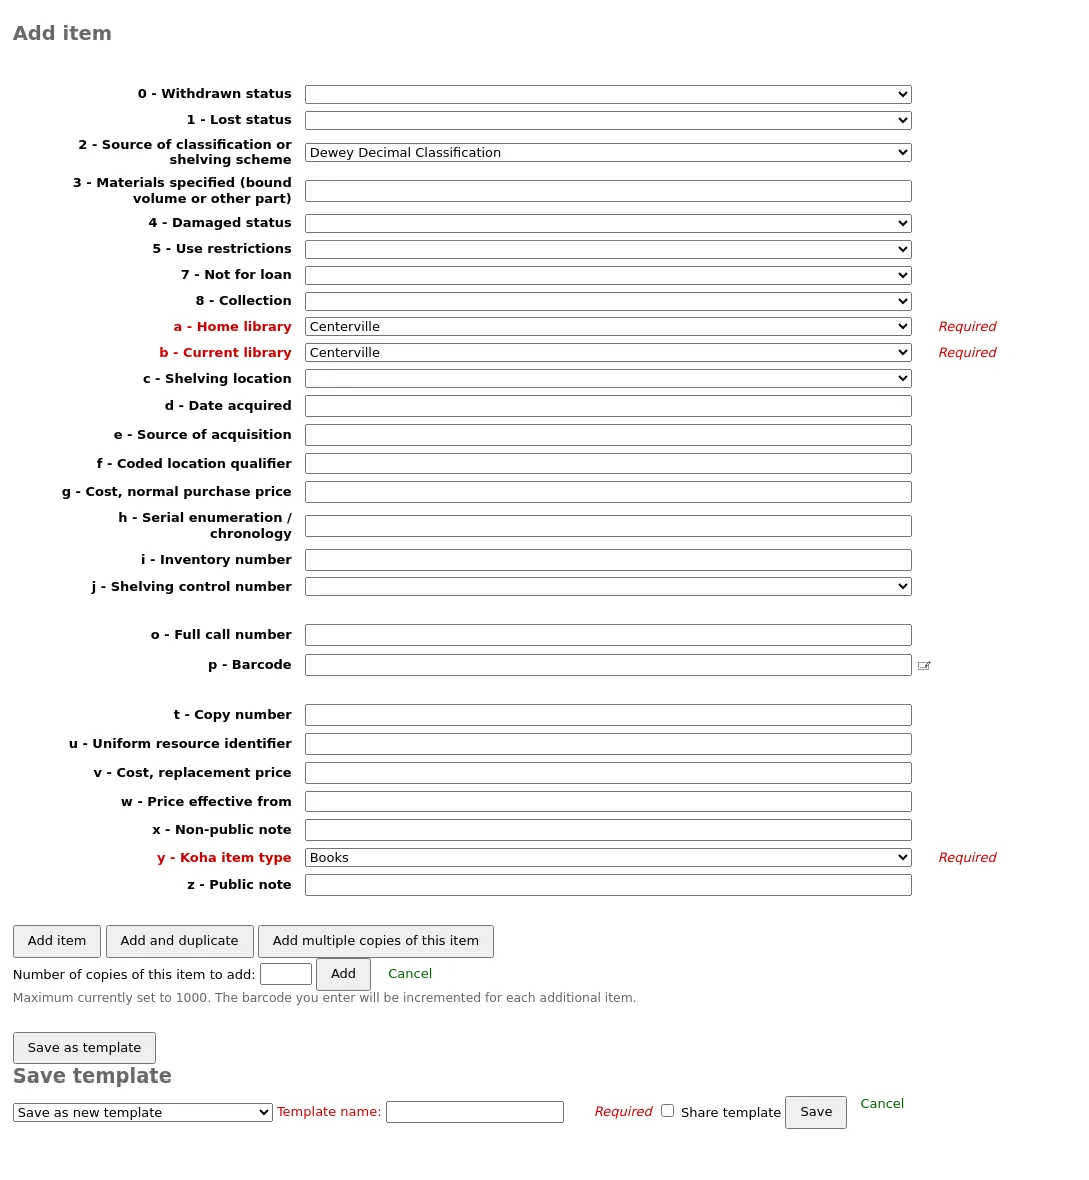
Outras formas de adicionar um item a um registro:
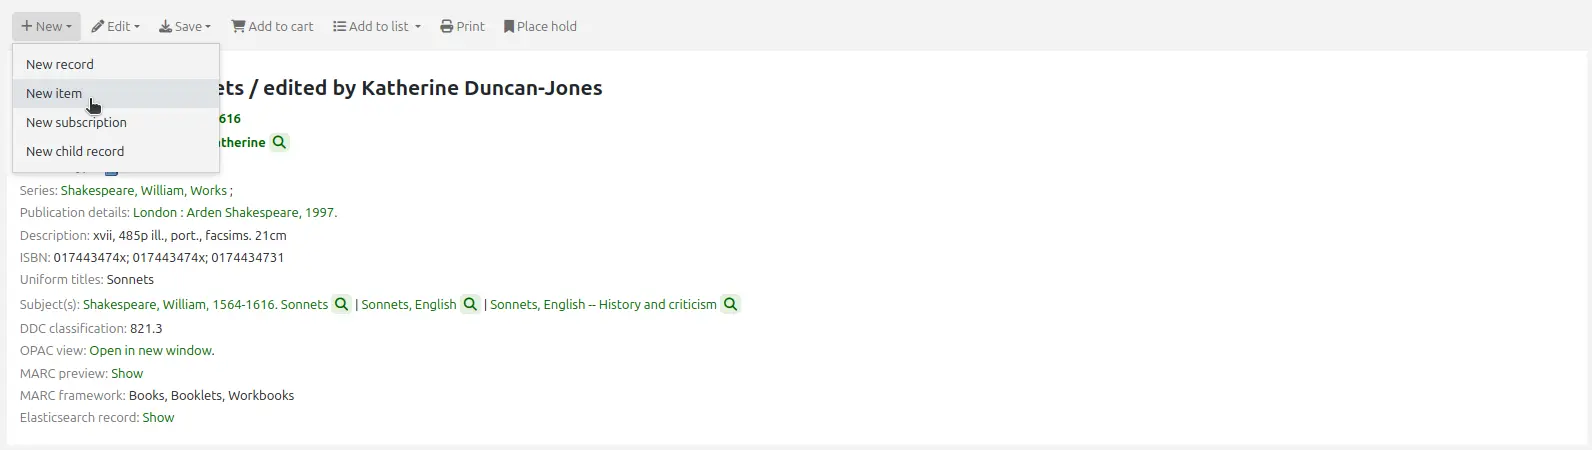
Na página de detalhes de um registro, clique em ‘New’ e escolha ‘New item’.
Nos resultados de pesquisa de catalogação, clique em ‘Actions’ e escolha ‘Add or edit items’.
Se você já tiver modelos de item, pode escolher o modelo a aplicar e clicar em ‘Apply template’. Isso pré-preencherá o formulário de item com os valores do modelo.
No mínino os seguintes campos devem ser preenchidos para novos materiais:
o - Número de chamada completo
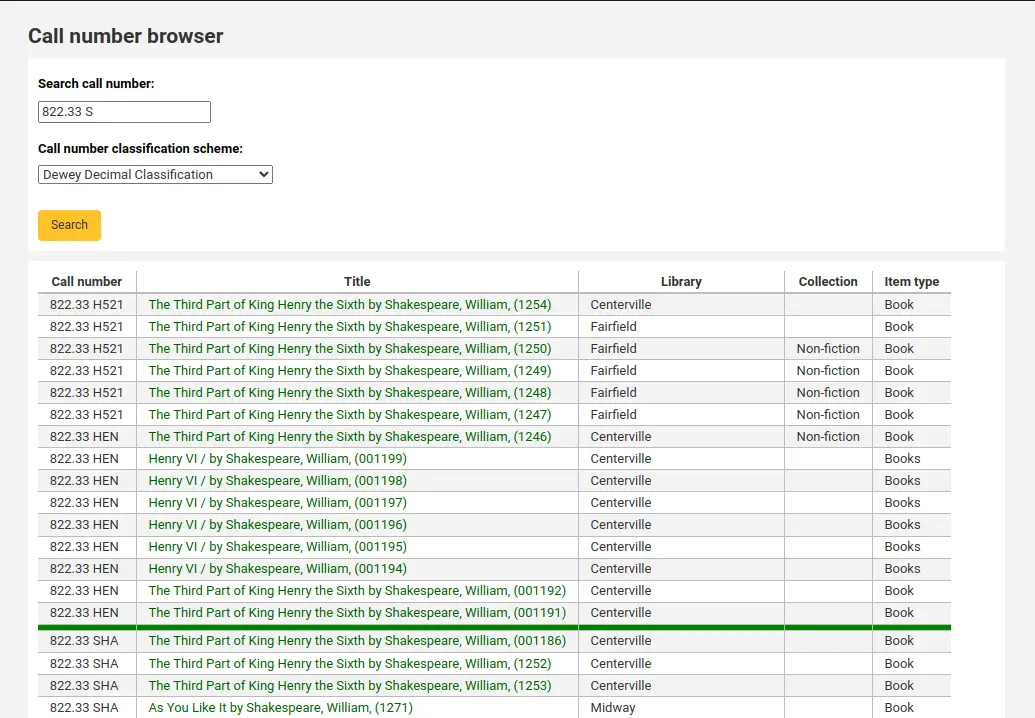
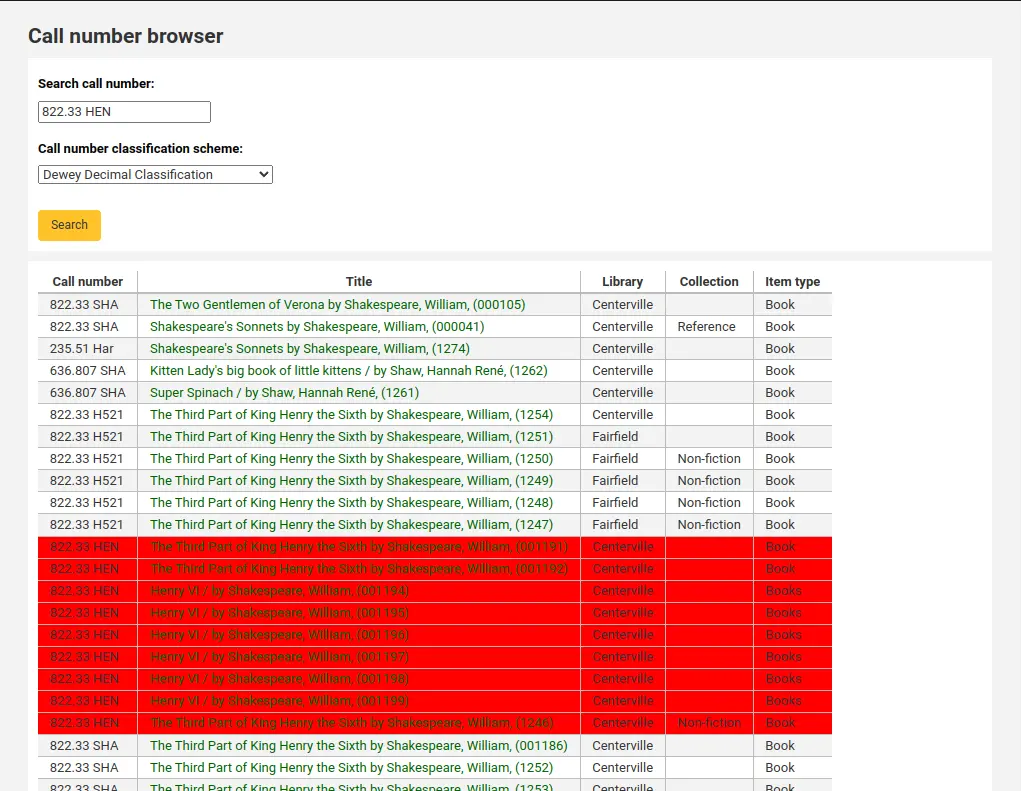
Se desejar, você pode usar o plugin de catalogação ‘call number browser’ (cn_browser.pl) para este campo. Se estiver ativado, você verá um … à direita do campo. Ao clicar, abrirá uma janela de navegador de número de chamada; se a linha estiver destacada em vermelho, o número de chamada está em uso; se houver uma fina linha verde, o número de chamada pode ser usado.
-
Este valor será cobrado dos usuários quando você marcar como ‘Lost’ um item que eles têm emprestado
Para garantir que esses valores sejam preenchidos, você pode marcá-los como obrigatórios na planilha que está usando; eles aparecerão em vermelho com um rótulo ‘required’. O item não será salvo até que os campos obrigatórios sejam preenchidos.

Nota
Para tornar subcampos de item obrigatórios em uma planilha, edite o campo 952 no editor de planilha.
Você pode adicionar um novo valor autorizado diretamente na tela de adicionar/editar item, para qualquer campo vinculado a categorias de valores autorizados, como Shelving location (subcampo $c) ou Collection code (subcampo $8).
Comece a digitar a descrição do valor autorizado; se nenhuma correspondência for encontrada, você verá a opção ‘(Select to create)’.
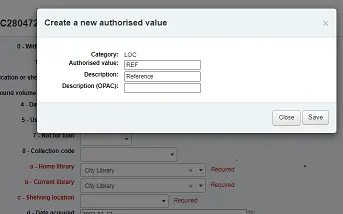
Clique nessa opção para exibir uma janela pop-up onde você pode criar seu novo valor autorizado.
A categoria de valores autorizados será pré-preenchida com base no campo que você está usando, por exemplo, LOC para Shelving location, CCODE para Collection code. Tenha cuidado ao escolher o código do valor autorizado. Consulte as notas sobre adicionar novos valores autorizados para o formato correto desses códigos. Use o campo Description para o valor propriamente dito que será exibido
Você pode adicionar valores autorizados da mesma forma a partir de registros bibliográficos e de autoridade.
Nota
Somente funcionários com a permissão manage_auth_values (ou a permissão superlibrarian) poderão adicionar valores autorizados a partir da catalogação.
Abaixo do formulário de adição, há 3 botões para adicionar o item.

‘Add item’ adicionará apenas este item
‘Add & duplicate’ adicionará o item e preencherá um novo formulário com os mesmos valores, para você alterar
‘Add multiple copies of this item’ perguntará quantas cópias e adicionará esse número de itens, somando +1 ao código de barras, para que cada um seja exclusivo

‘Save as template’ salvará este item como um modelo de item para reutilizar depois.
Aviso
Salvar como modelo não salvará o item. Isso apenas criará o modelo.
Os exemplares que você adicionou aparecerão acima do formulário de inserção uma vez que ele forem salvos

Nota
Você pode personalizar as colunas desta tabela na seção Configurações de tabela do módulo Administração (table id: Items Editor).
Seus itens também aparecerão abaixo dos detalhes bibliográficos na página de detalhes do registro, na aba ‘Holdings’.
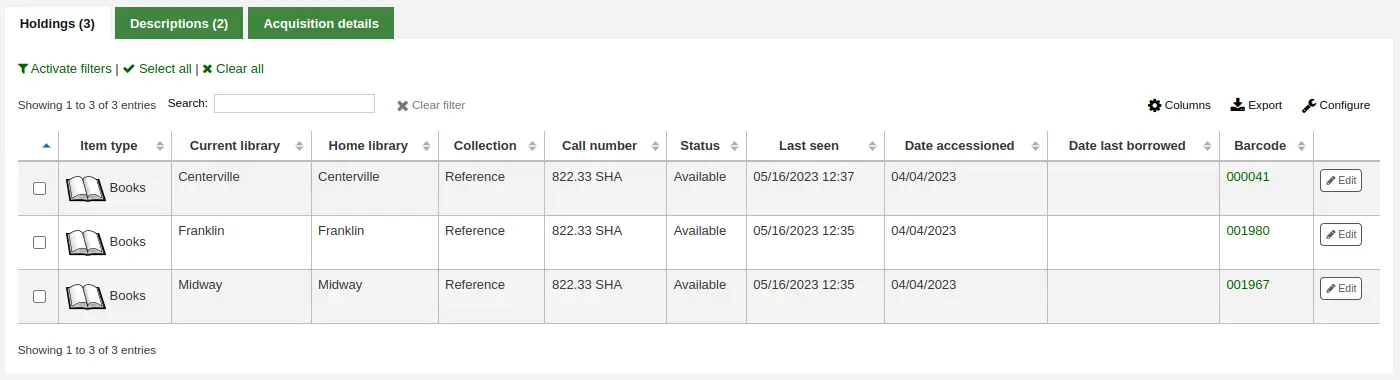
Se a preferência do sistema SpineLabelShowPrintOnBibDetails estiver definida como ‘Show’, haverá um botão para imprimir rapidamente uma etiqueta de lombada ao lado de cada item.
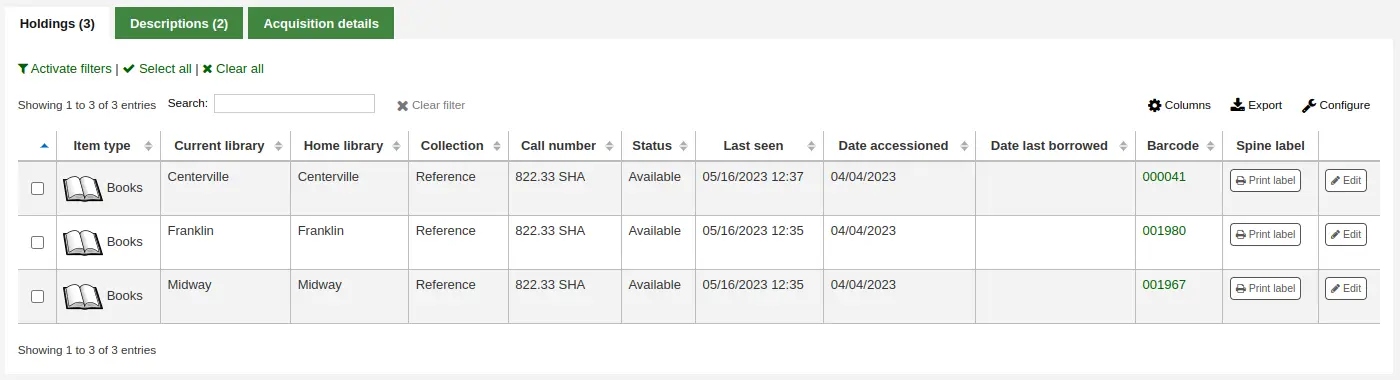
Você também pode filtrar o conteúdo da tabela de exemplares clicando nos links ‘Activate filters’. Isso exibirá uma linha na parte superior onde você pode digitar em qualquer coluna para filtrar os resultados da tabela.
Adicionar e usar modelos de item
Você pode criar modelos de item para compartilhar e reutilizar, facilitando o preenchimento do formulário de novo item.
Nota
Qualquer pessoa com a permissão edit_items pode criar e compartilhar modelos de item, e excluir seus próprios modelos.
No entanto, os funcionários devem ter a permissão manage_item_editor_templates (ou a permissão superlibrarian) para gerenciar modelos de item criados por outros.
Criar um novo modelo de item
Para criar um modelo de item,
Vá para adicionar um novo item
Preencha o formulário de item com os valores que deseja adicionar ao modelo
Em vez de salvar o item, clique no botão ‘Save as template’

Escolha ‘Save as new template’
Informe um nome para o modelo
Escolha se deseja compartilhar este modelo com todos os outros catalogadores
Clique ‘Salvar’
Atualizar um modelo existente
Para editar um modelo existente,
Vá para adicionar um novo item
Escolha o modelo a atualizar na parte superior do formulário

Clique em ‘Apply template’
Altere os valores conforme necessário
Clique no botão ‘Save as template’.
Escolha o modelo a atualizar
Escolha se deseja compartilhar este modelo com todos os outros catalogadores
Clique ‘Salvar’
Usar um modelo
Para usar um modelo,
Vá para adicionar um novo item
Escolha o modelo a atualizar na parte superior do formulário
Clique em ‘Apply template’
Se marcar ‘For session’, todos os novos itens serão baseados neste modelo, a menos que especificado de outra forma
Altere os valores conforme necessário
Salve o item
Excluir um modelo
Para excluir um modelo,
Vá para adicionar um novo item
Escolha o modelo a excluir na parte superior do formulário
Clique em ‘Delete template’
Editar itens
Nota
Os funcionários devem ter a permissão edit_items (ou a permissão superlibrarian) para poder editar itens.
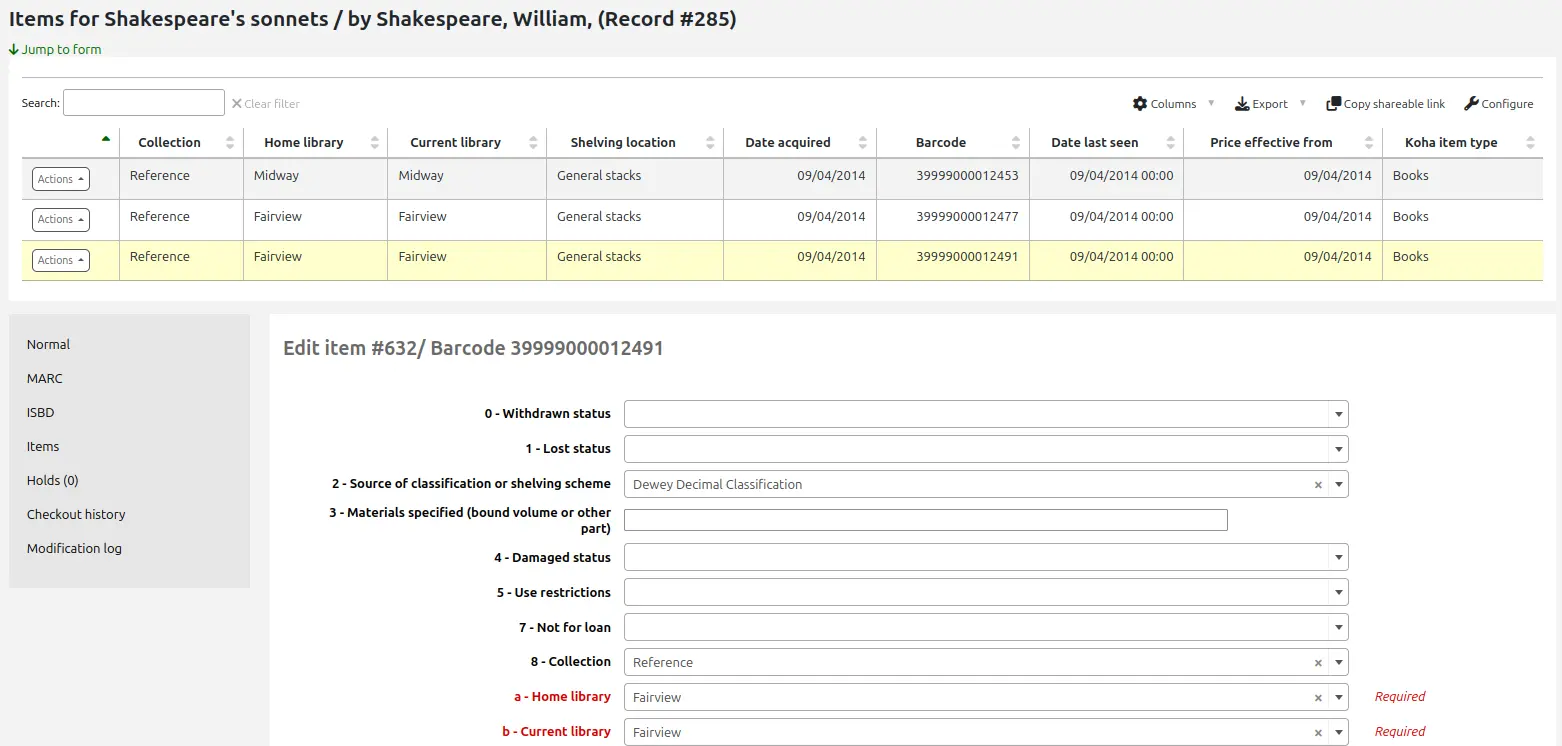
Itens podem ser editados de diversas maneiras.
Clicando em ‘Edit’ e depois em ‘Manage items’ no registro bibliográfico.
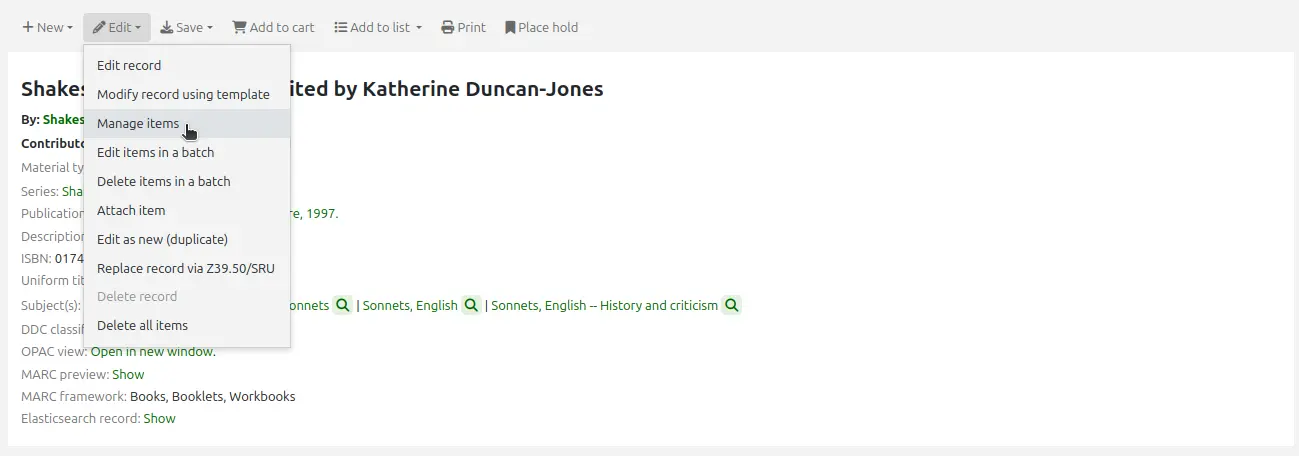
Isso abrirá uma lista de itens, onde você pode clicar no botão ‘Actions’ à esquerda do item específico que deseja editar e escolher ‘Edit’.
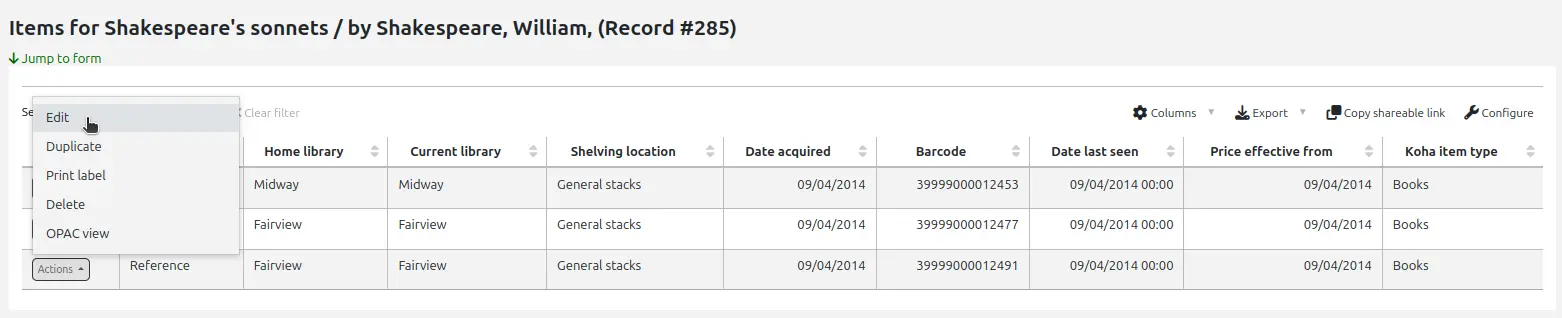
Isso abrirá o item no formulário abaixo da lista de itens, onde você poderá editar as informações do item.
Clicando em ‘Edit items’ ao lado do item, na aba ‘Items’.
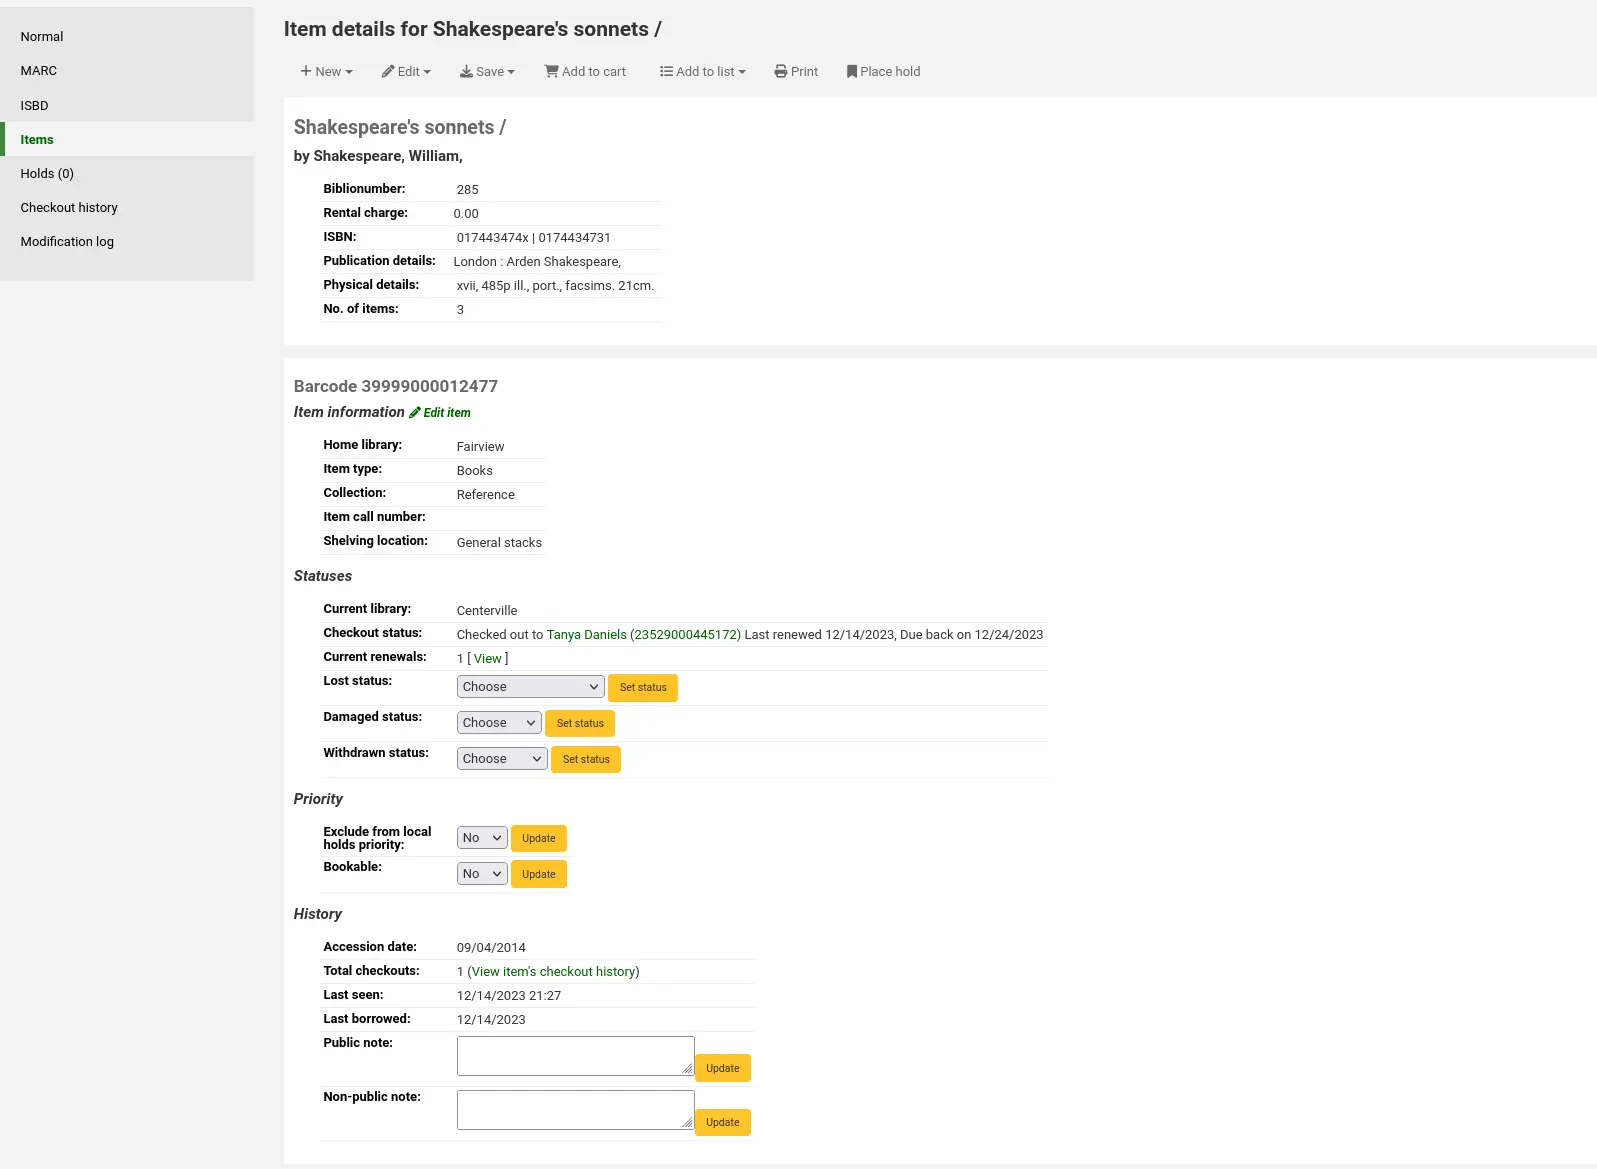
Isso abrirá o editor no item a editar.
Clicando em ‘Edit’ e depois em ‘Edit items in a batch’.
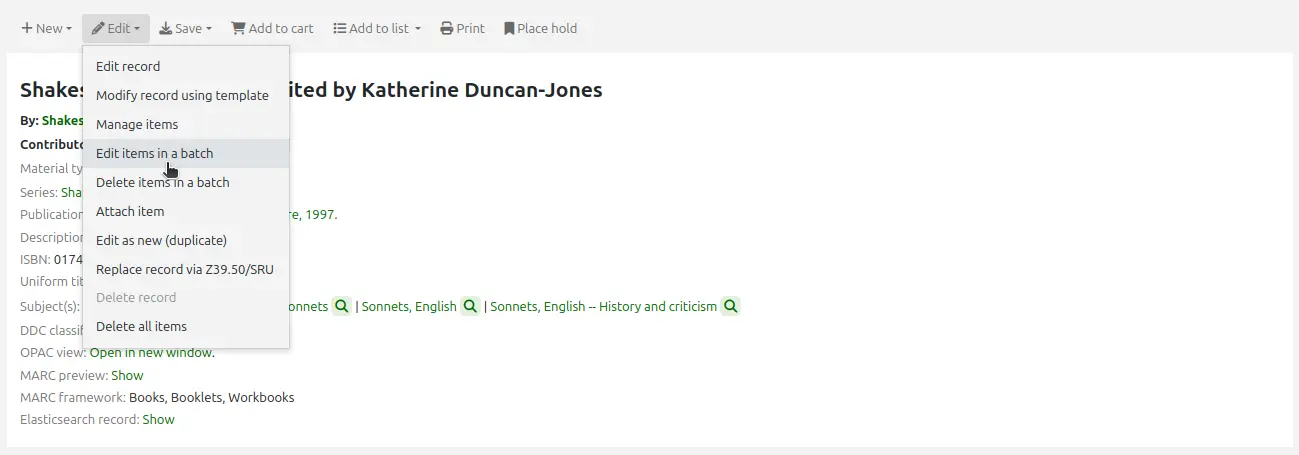
Isso abrirá a ferramenta de modificação em lote de item, onde você pode editar todos os itens deste registro em lote.
Você pode marcar os itens que deseja editar e clicar em ‘Modify selected items’ na parte superior da lista.
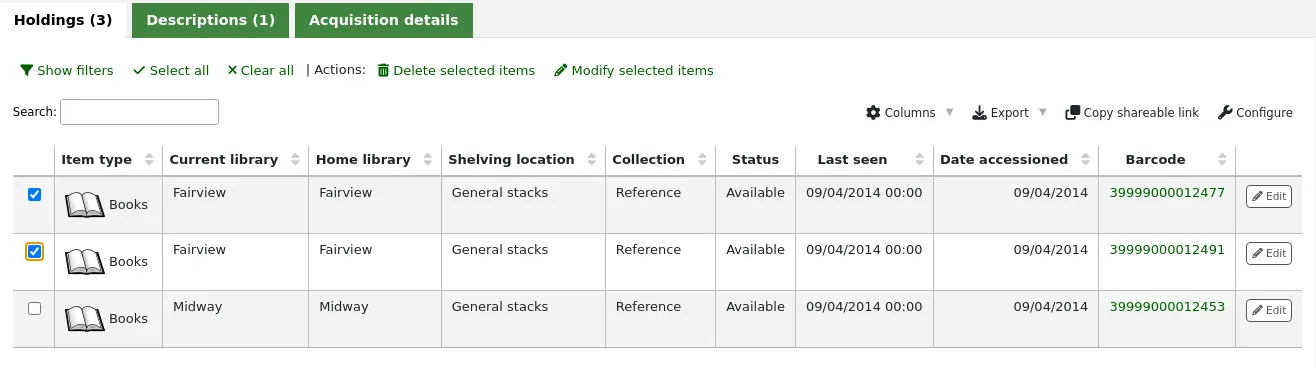
Isso abrirá a ferramenta de modificação em lote de item, onde você poderá editar todos os itens selecionados em lote.
Você pode clicar em ‘Edit’ à direita de cada item, na aba ‘Holdings’.
Também há um link ‘Edit items’ abaixo de cada resultado de pesquisa, na interface administrativa.

Isso abrirá uma lista de itens, onde você pode clicar no botão ‘Actions’ à esquerda do item específico a editar e escolher ‘Edit’.
Por fim, você pode usar a ferramenta de modificação em lote de item.
Atualizações rápidas do status de item
É comum que os funcionários da circulação precisem alterar o status de um item para Lost ou Damaged. Isso não requer editar o registro do item inteiro. Em vez disso, clicar no código de barras do item no resumo de empréstimo ou no histórico de devoluções leva a um resumo de item. Você também pode acessar o resumo de item clicando na aba Items à esquerda da página de detalhes do registro bibliográfico.
Nesta visualização, você pode marcar um item como perdido escolhendo um status de perdido no menu suspenso e clicando no botão ‘Set status’. O mesmo se aplica aos status danificado e descartado.

Nota
Se a preferência do sistema PreventWithdrawingItemsStatus estiver ativada, os funcionários não poderão descartar itens que estejam emprestados ou em trânsito.
Duplicar itens
Você pode duplicar facilmente um item clicando no botão ‘Actions’ à esquerda de cada item na tela de gerenciamento de itens e escolhendo ‘Duplicate’.

Isso preencherá o formulário com os valores do item escolhido.
Editar itens em lote
Nota
Somente funcionários com a permissão items_batchmod (ou a permissão superlibrarian) terão acesso a esta ferramenta.
Vá para: Mais > Catalogação > Edição em lote > Modificação de exemplares em lote
Esta ferramenta permite modificar um lote de registros de item no Koha.
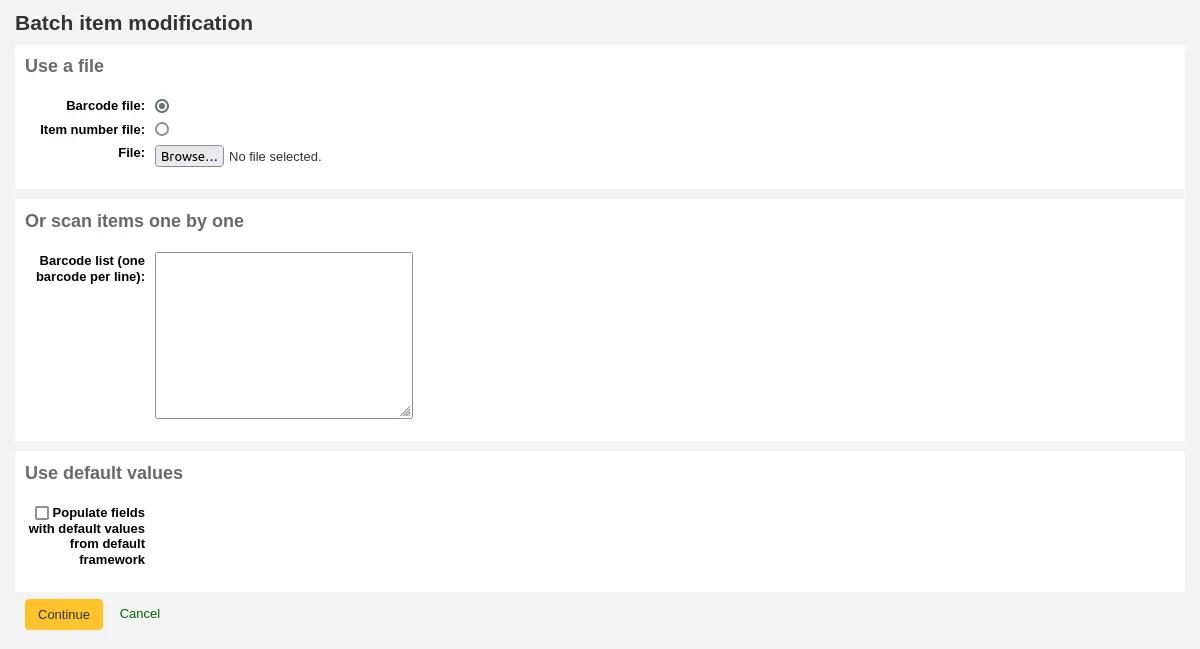
Na ferramenta, escolha enviar um arquivo de códigos de barras ou números de item, ou digitalizar os códigos de barras um a um na caixa abaixo da ferramenta de envio. Você também pode decidir se os itens editados devem ser preenchidos com os valores padrão definidos na planilha padrão.
Depois que o arquivo for enviado ou os códigos de barras forem listados, clique em ‘Continuar.’
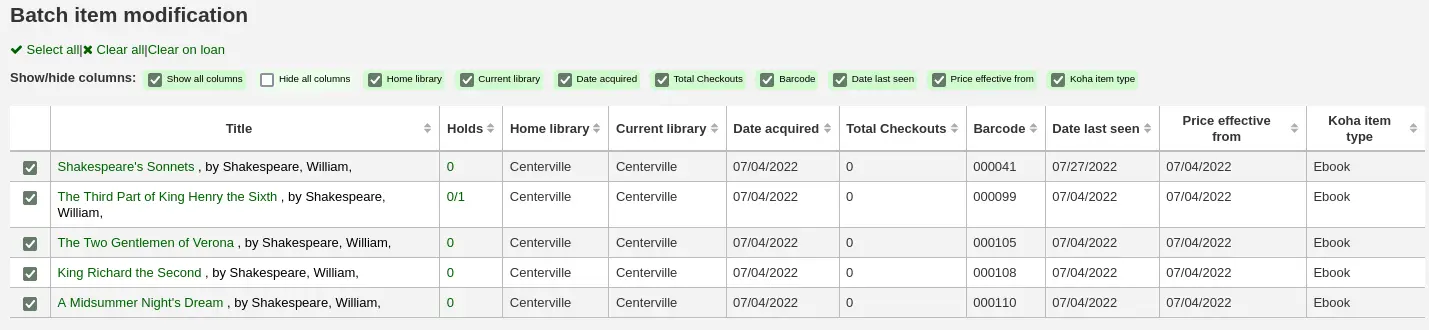
Será exibido um resumo dos itens que você quer modificar. A partir daqui, você pode desmarcar os itens que não quer modificar antes de fazer alterações no formulário abaixo. Você também pode ocultar colunas desnecessárias para evitar rolar de um lado para outro para ver toda a tabela de itens. A coluna de reservas mostra a contagem de reservas atuais do item.
Nota
Para desmarcar todos os itens atualmente emprestados, clique no link ‘Clear on loan’ na parte superior do formulário.
No formulário de edição, escolha quais campos editar. Marcando a caixa de seleção à direita de cada campo, você pode limpar os valores desse campo para os itens que está modificando.
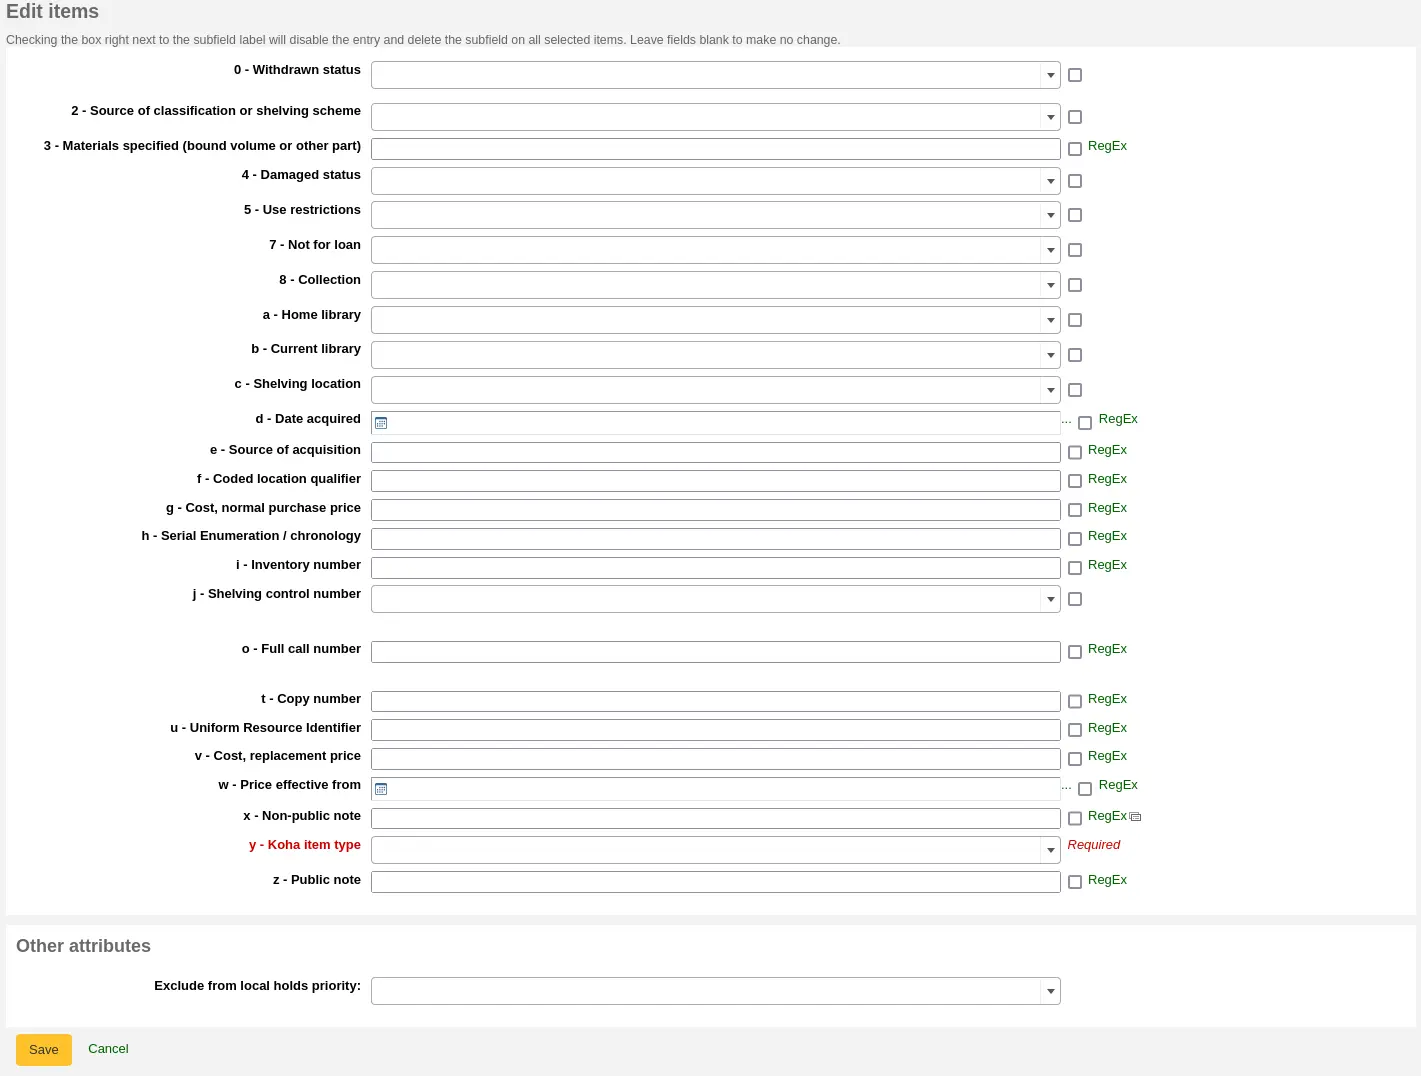
Você também pode clicar no link ‘RegEx’ para transformar o campo de texto em uma substituição por expressão regular. Isso é usado para alterar apenas parte de uma cadeia de texto.

Nota
Se a preferência do sistema PreventWithdrawingItemsStatus estiver ativada, não será possível descartar itens emprestados ou em trânsito usando o editor de itens em lote.
Depois de feitas as alterações, a tarefa será colocada na fila de tarefas em segundo plano.

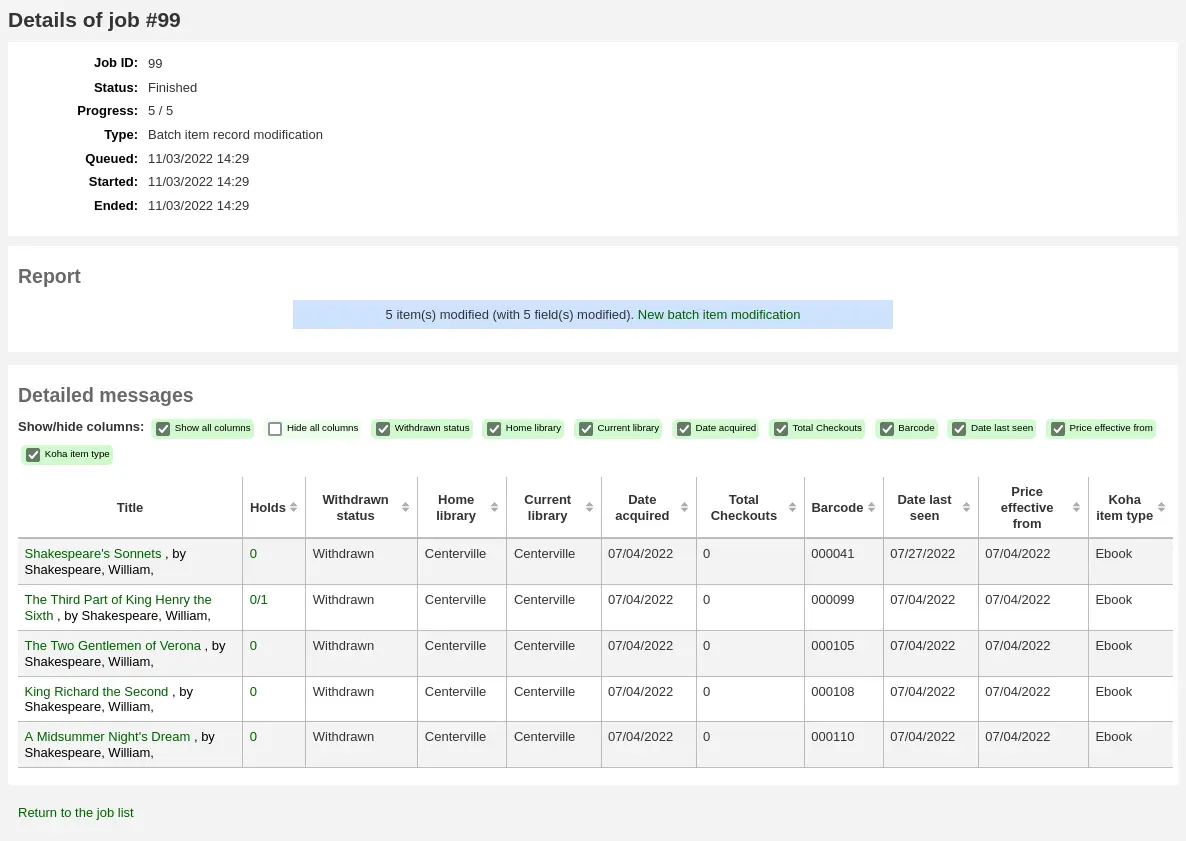
Para ver os itens editados, clique em ‘View detail of the enqueued job’.
Editar itens em lote a partir do registro bibliográfico
Você também pode editar em lote os itens de um registro bibliográfico acessando o registro e clicando em Edit > Edit items in batch.
Isso o levará à mesma ferramenta de modificação em lote de item mencionada acima.
Editar itens em lote a partir de um relatório
A ferramenta de modificação em lote de item também está disponível a partir de resultados de relatórios quando eles contêm números de item.
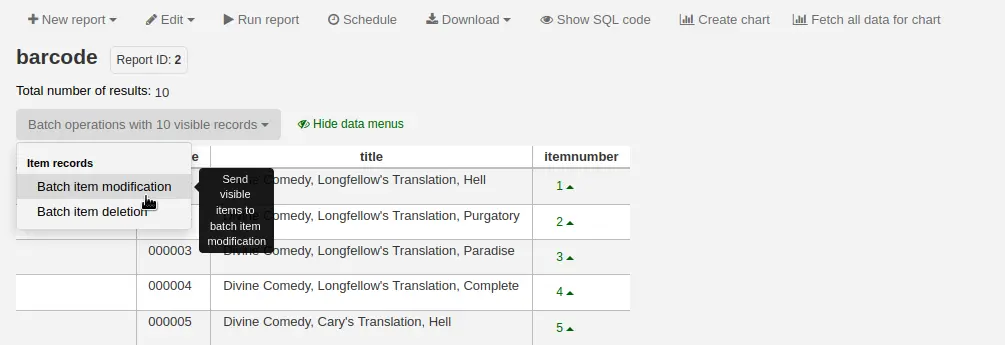
Quando o relatório contém o número de item, a opção ‘Batch operations with X visible records’ aparece automaticamente. Essa opção inclui modificação e exclusão em lote de item.
Por padrão, apenas 20 resultados são exibidos ao executar relatórios; portanto, a modificação em lote será feita apenas em 20 resultados. Se você tiver mais resultados que deseja editar em lote, altere o número de resultados por página antes de escolher a operação em lote.
Editar itens em lote a partir da pesquisa de item
A ferramenta de modificação em lote de item também está disponível a partir dos resultados da pesquisa de item.
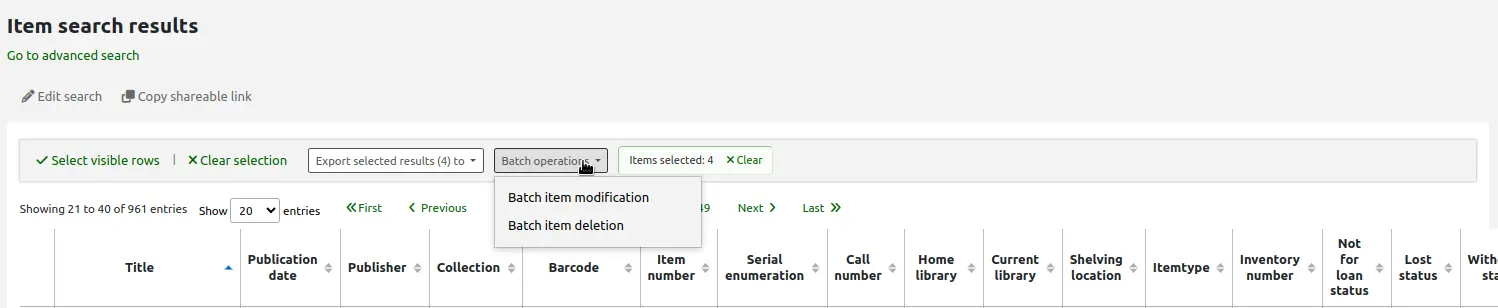
Basta selecionar os itens a editar na lista de resultados, clicar em ‘Batch operations’ e escolher ‘Batch item modification’.
Agrupar itens
Você pode agrupar itens para fazer reservas em um subconjunto de itens de um registro bibliográfico, em vez de um item específico ou do próximo item disponível. Por exemplo, se você tiver um registro bibliográfico de uma série, com vários itens para cada volume, pode agrupar os itens por volume e fazer reservas no próximo item disponível de “Vol. 4”.
Nota
Os funcionários devem ter a permissão manage_item_groups (ou a permissão superlibrarian) para criar, editar e excluir grupos de item.
Primeiro, você precisa ativar o recurso de grupos de item com a preferência do sistema EnableItemGroups.
Depois que a preferência do sistema estiver ativada, uma nova aba ‘Item groups’ aparecerá no registro detalhado, na interface administrativa.
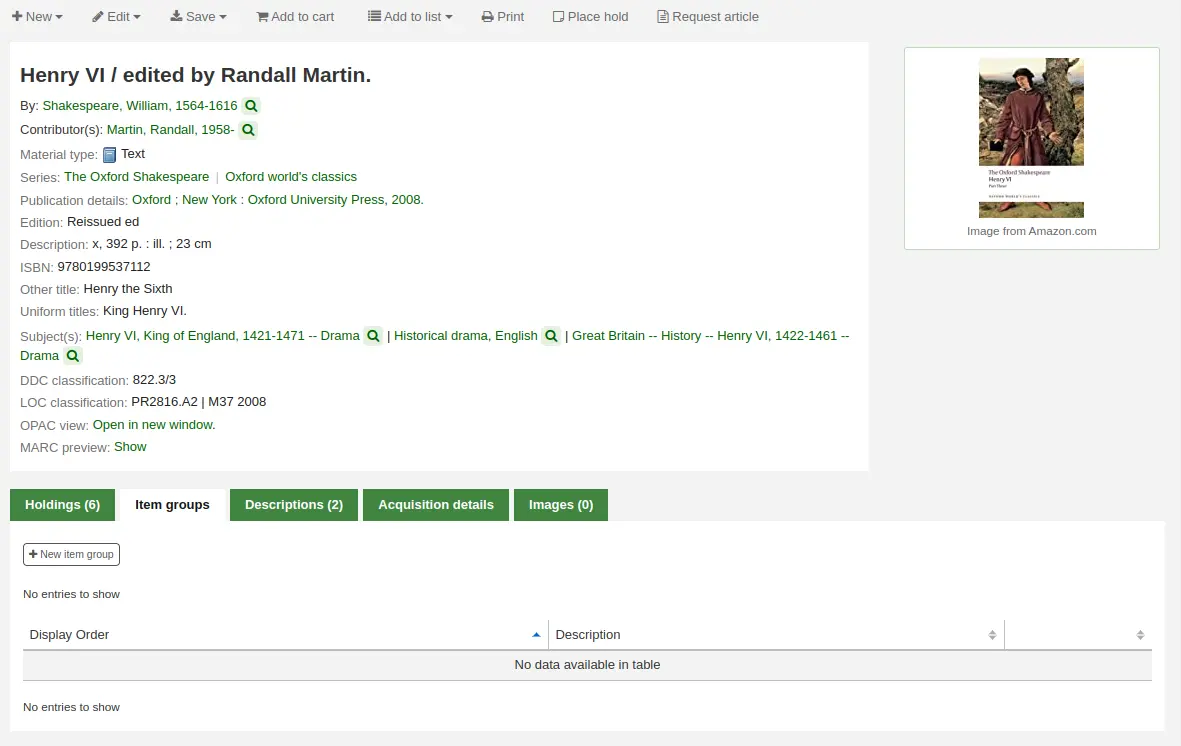
Clique no botão ‘New item group’
No formulário exibido,
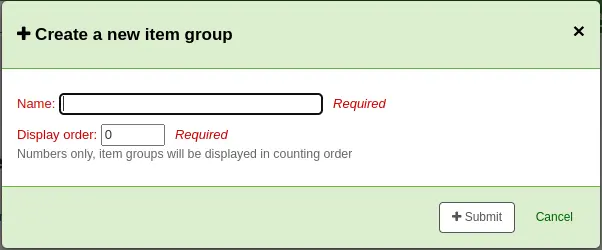
Name: informe um nome para o grupo; este nome ficará visível na interface administrativa e no OPAC
Display order: informe um número para a posição em que este grupo deve ser exibido em relação aos outros grupos do mesmo registro (por exemplo, se você tiver grupos com ordem de exibição 0, 1 e 2, o grupo 0 será exibido primeiro, o grupo 1 em segundo e o grupo 2 em terceiro. Você pode usar qualquer número; seus grupos podem ser 3, 11 e 27, e nesse caso 3 será exibido primeiro, depois 11 e por fim 27)
Clique em ‘Submit’ para criar o grupo
Depois de criado, você pode adicionar itens ao grupo.
Na aba ‘Holdings’, marque os itens que devem ser adicionados ao grupo
Na parte superior da tabela, haverá ações em lote; clique em ‘Add/move to item group’
Escolha a qual grupo os itens selecionados devem ser adicionados
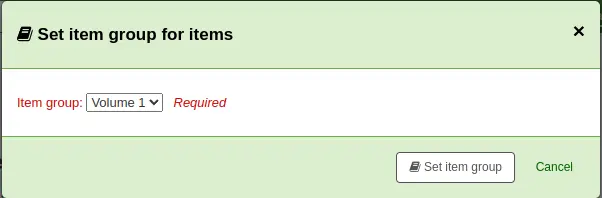
Clique em ‘Set item group’
O grupo de item ao qual cada item pertence será exibido na tabela ‘Holding’.
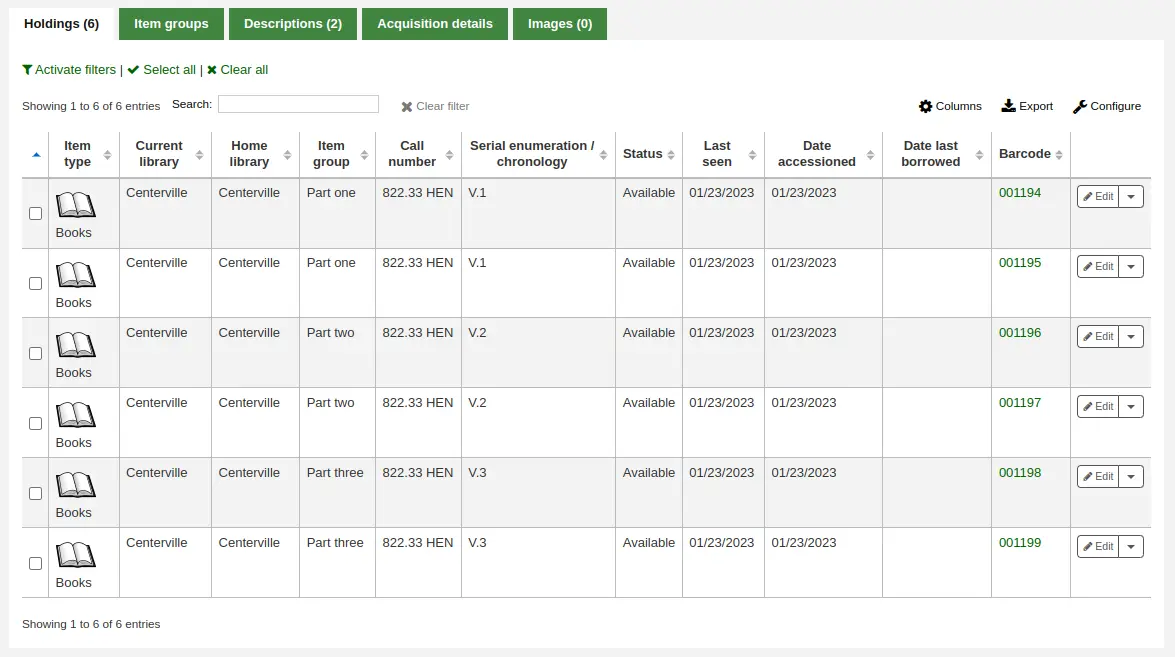
Para excluir um grupo de item, vá até a aba ‘Item groups’ e clique no botão ‘Delete’. Isso excluirá apenas o grupo; os itens permanecerão, mas desagrupados.
Informações do item
À esquerda de todo registro bibliográfico há uma aba para visualizar os itens.
Clicar nessa aba mostrará informações básicas sobre os itens.
A seção ‘Item information’ mostra informações básicas sobre o item, como biblioteca de origem, tipo de material, coleção, número de chamada, número do exemplar, localização na estante, custo de reposição e materiais acompanhantes.

A seção ‘Statuses’ mostra o status atual do item. Se o item estiver emprestado, os detalhes do empréstimo são exibidos. Se o item foi renovado, você pode clicar em ‘View’ para ver os detalhes de qualquer renovação, incluindo a data, o funcionário que renovou o empréstimo, e se foi feito manual ou automaticamente (pelo cronjob automatic_renewals.pl).
Você também pode visualizar e editar as informações de status nesta seção. Se um item estiver marcado como perdido, danificado ou descartado, você verá a data em que esse status foi aplicado.

A seção ‘Priority’ mostra se o item está excluído da prioridade de reservas locais e se é possível fazer uma reserva antecipada neste item.

A seção ‘Histórico’ mostra informações sobre o histórico de aquisição e empréstimo do exemplar. Se o exemplar foi solicitado pelo módulo de aquisições, esta seção incluirá a data do pedido, o fornecedor, a data de entrada (recebimento) e o número da fatura. Ao clicar na data do pedido ou da entrada, você será direcionado às informações de aquisição desse exemplar. A seção também mostra o número total de empréstimos (com um link para consultar o histórico de empréstimos), a data e a hora em que o exemplar foi visto pela última vez, a data do último empréstimo, o último usuário ou os últimos usuários que devolveram o exemplar (se a preferência do sistema StoreLastBorrower estiver ativada), os três últimos usuários que tomaram o exemplar emprestado, se o exemplar foi pago pelo usuário, as informações de volume ou número do periódico e as notas públicas e não públicas.
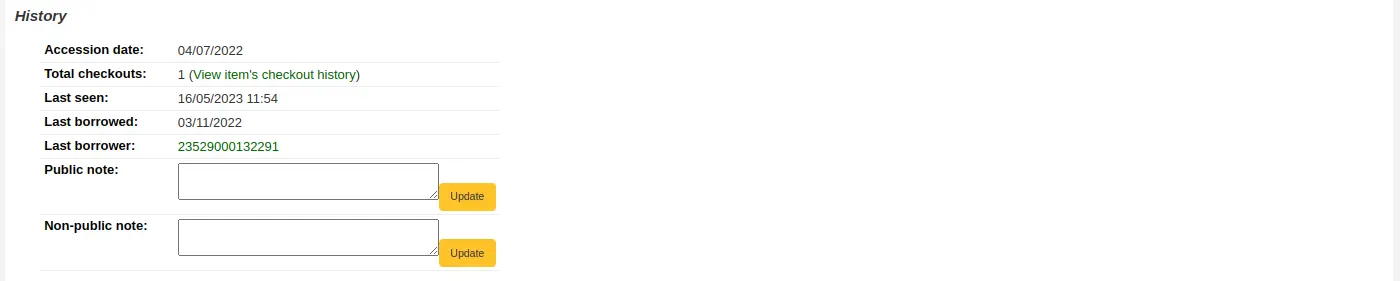
Adicionar imagens de capa para itens
Nota
Somente funcionários com a permissão upload_local_cover_images, além da permissão edit_items (ou a permissão superlibrarian), poderão adicionar imagens de capa a itens.
Se você tiver OPACLocalCoverImages ou LocalCoverImages definida como ‘Show’, você pode enviar imagens de capa para registros de item individuais pela opção ‘Upload image’ do botão Edit à direita da tabela de exemplares.
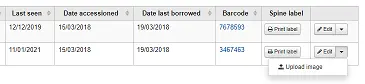
Clique em Choose file para localizar o arquivo de imagem no seu computador e depois em Upload file.
Na tela seguinte, você tem a opção de substituir imagens existentes. Em seguida, clique em Process images.
A imagem será exibida em uma coluna Cover image na exibição de exemplares.
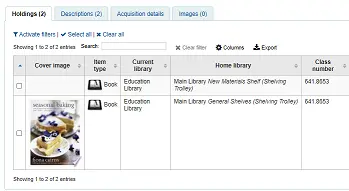
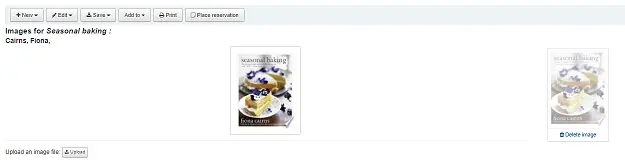
Para excluir uma imagem, clique nela na exibição de exemplares. Você verá uma cópia esmaecida da imagem com a opção de excluir.
Mover itens
Nota
Os funcionários devem ter a permissão edit_items (ou a permissão superlibrarian) para poder mover itens.
Os itens podem ser movidos de um registro bibliográfico para outro usando a opção ‘Attach item’.
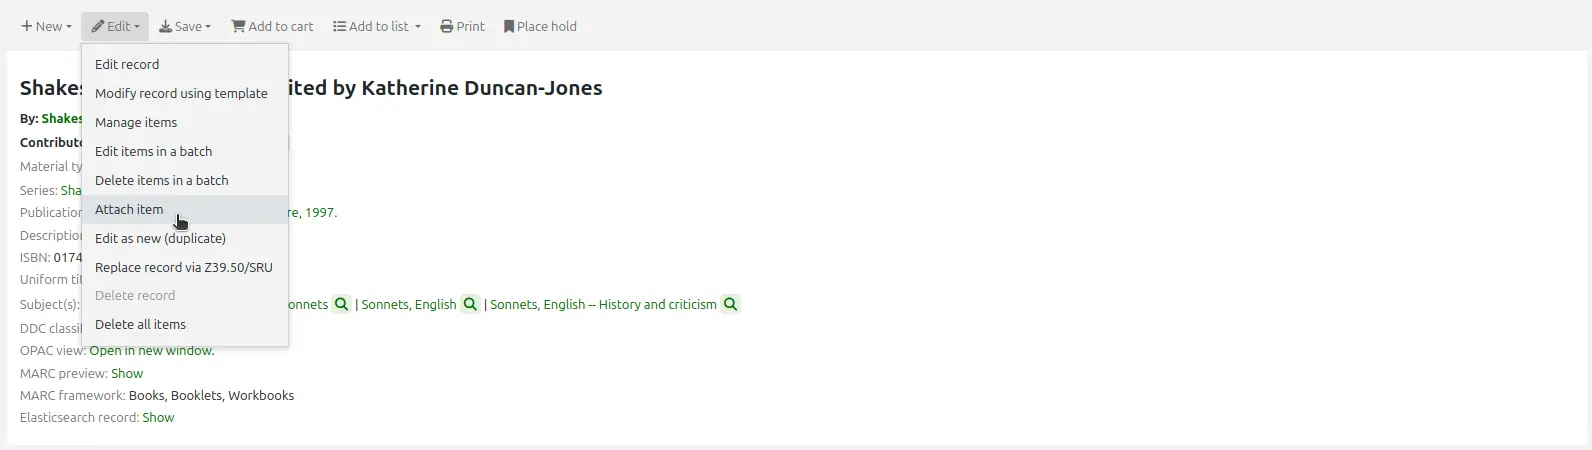
Acesse o registro bibliográfico ao qual deseja anexar o item e escolha ‘Attach item’ no menu ‘Edit’.
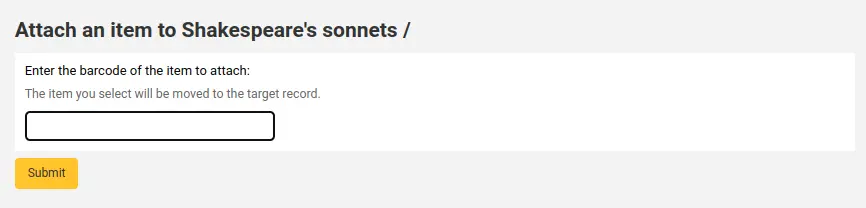
Basta informar o código de barras do item que deseja mover e clicar em ‘Submit’.
Se este for o último item restante anexado a um registro bibliográfico, será exibido um botão para excluir o registro hospedeiro original.

Se você quiser mover todos os itens para um novo registro, criando apenas um registro bibliográfico, pode usar a ferramenta de unir registros em vez disso.
Excluir itens
Nota
Os funcionários devem ter a permissão edit_items (ou a permissão superlibrarian) para poder excluir itens.
Há várias formas de excluir registros de item.
Se você só precisar excluir um item, pode ir até a página de detalhes do registro, clicar no botão ‘Edit’ na parte superior e escolher ‘Manage items’.
Clique no botão ‘Actions’ ao lado do item a excluir e escolha a opção ‘Delete’. Se o item não estiver emprestado, ele será excluído.

Se nenhum dos itens anexados ao registro estiver emprestado no momento, na página de detalhes do registro, clique no botão ‘Edit’ na parte superior e escolha ‘Delete all items’. Isso excluirá todos os itens do registro.
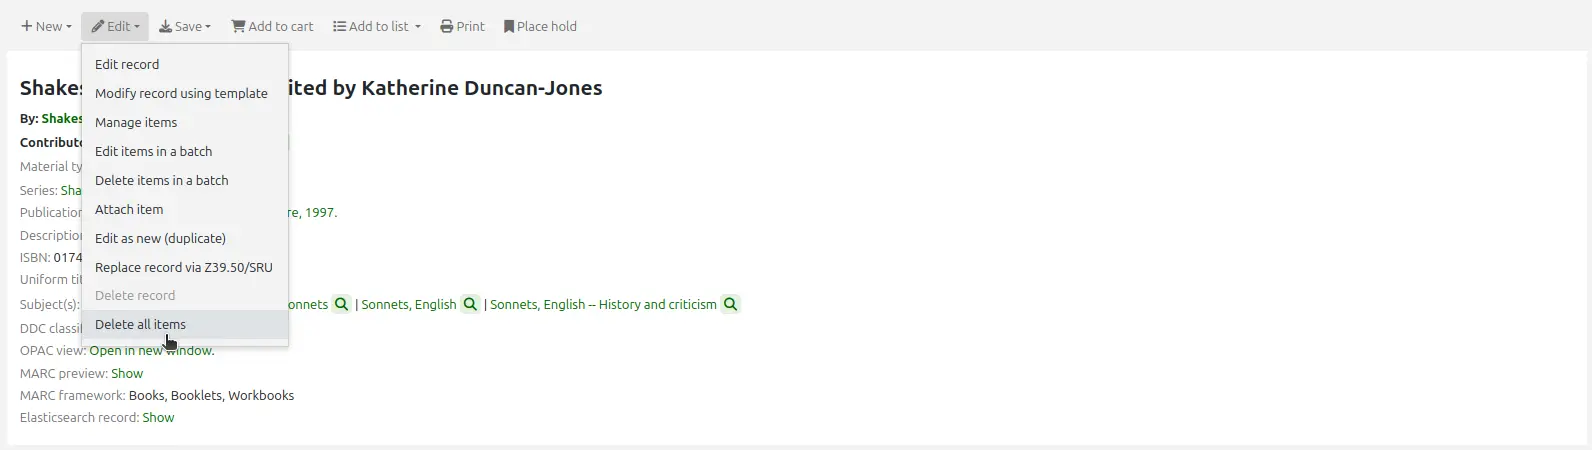
Nota
Os funcionários devem ter a permissão delete_all_items (ou a permissão superlibrarian) para poder excluir todos os itens de um registro.
Você também pode escolher a opção ‘Delete items in a batch’, no mesmo botão ‘Edit’, para excluir todos os itens do registro.
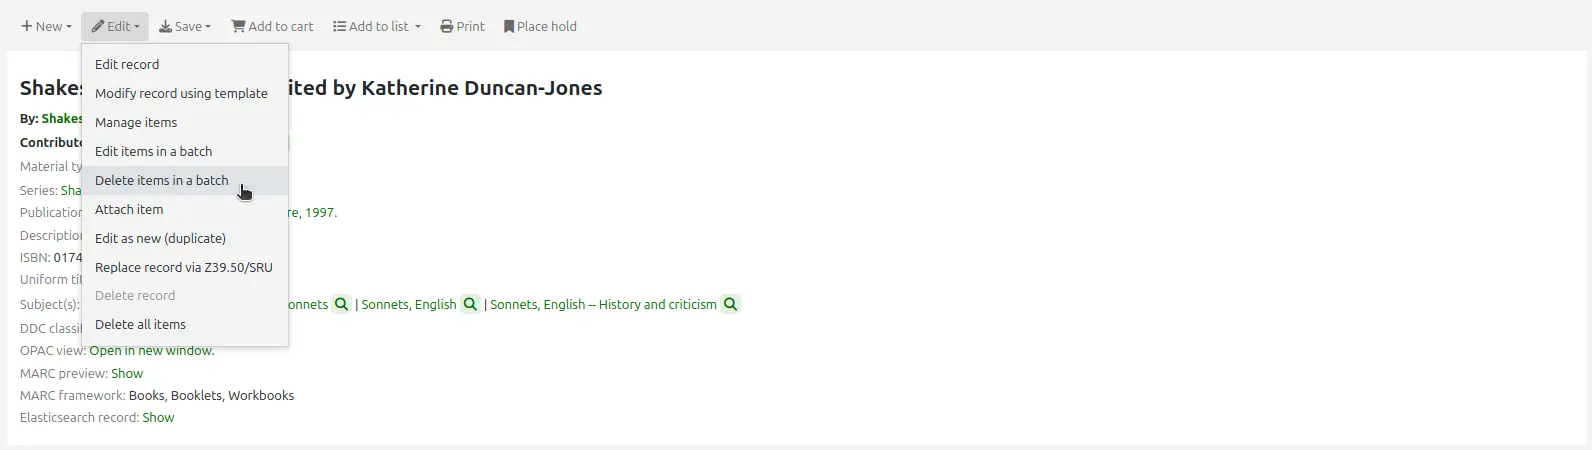
Isso abrirá a ferramenta de exclusão em lote de item, onde você poderá excluir todos os itens do registro em lote.
Para excluir vários itens de um registro, mas não necessariamente todos, você pode marcar os itens a excluir e clicar em ‘Delete selected items’ na parte superior da lista.
Isso abrirá a ferramenta de exclusão em lote de item, onde você poderá excluir todos os itens selecionados em lote.
Por fim, você pode usar a ferramenta de exclusão em lote para excluir um lote de itens de diferentes registros.
Excluir itens em lote
Nota
Somente funcionários com a permissão items_batchdel (ou a permissão superlibrarian) terão acesso a esta ferramenta.
Vá para: Mais > Catalogação > Edição em lote > Exclusão de exemplares em lote
Esta ferramenta permite excluir um lote de registros de item do Koha.
Na ferramenta, escolha enviar um arquivo de códigos de barras ou números de item, ou digitalizar os códigos de barras um a um na caixa abaixo da ferramenta de envio.
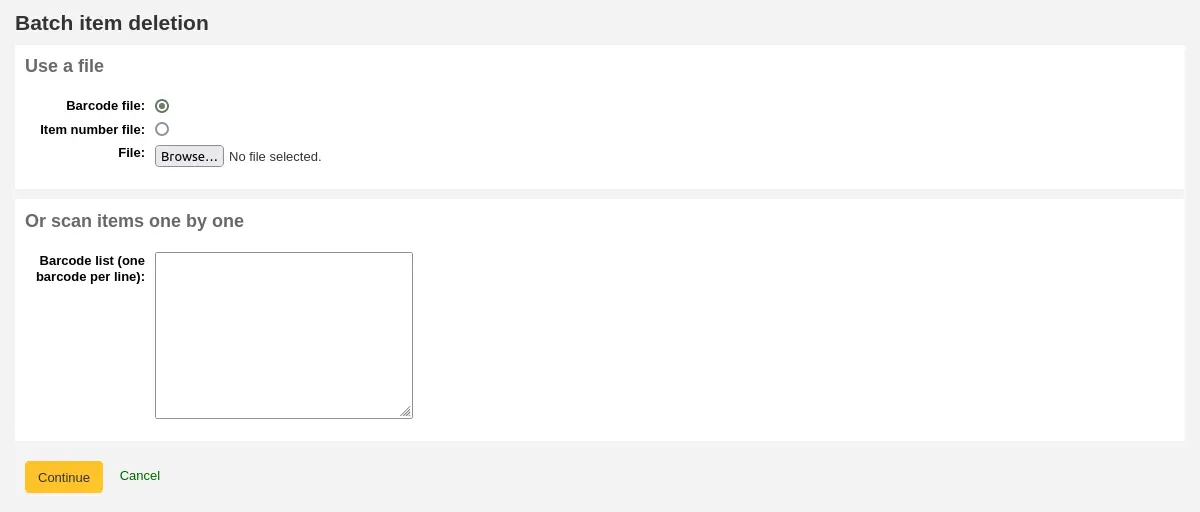
Depois que o arquivo for enviado ou os códigos de barras forem listados, clique em ‘Continuar.’
Será exibida uma tela de confirmação. A partir daqui, você pode desmarcar os itens que não deseja excluir. Você pode marcar a caixa ‘Delete records if no items remain’ para excluir o registro bibliográfico caso o último item esteja sendo excluído.
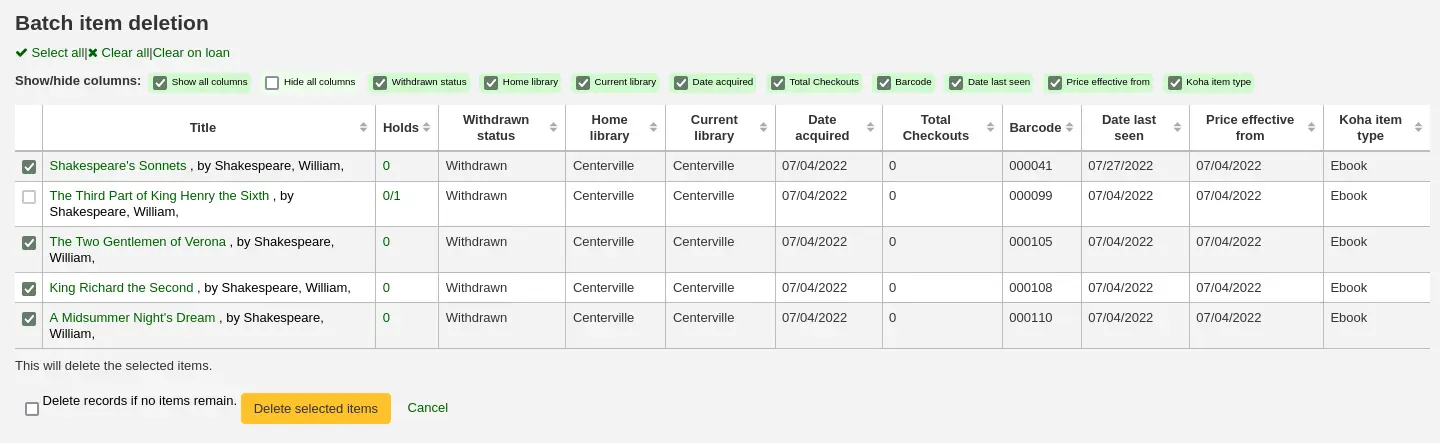
Nota
Itens que são o último item anexado a um registro bibliográfico com uma ou mais reservas em nível de registro serão desmarcados automaticamente. Você precisará excluir a reserva antes de excluir o item.
Itens que estão emprestados também serão desmarcados automaticamente. Eles precisarão ser devolvidos antes de poderem ser excluídos.
Se seu arquivo (ou lista de códigos de barras digitalizados) tiver mais de 1000 códigos de barras, o Koha não conseguirá exibir uma lista dos itens. Você ainda poderá excluí-los, mas não poderá escolher especificamente quais itens excluir, nem excluir os registros bibliográficos.

Clique em ‘Delete selected items.’
Nota
Se os itens estiverem emprestados, não serão excluídos.
A tarefa de exclusão será colocada na fila de tarefas em segundo plano.

Para ver os detalhes da exclusão, clique em ‘View detail of the enqueued job’.
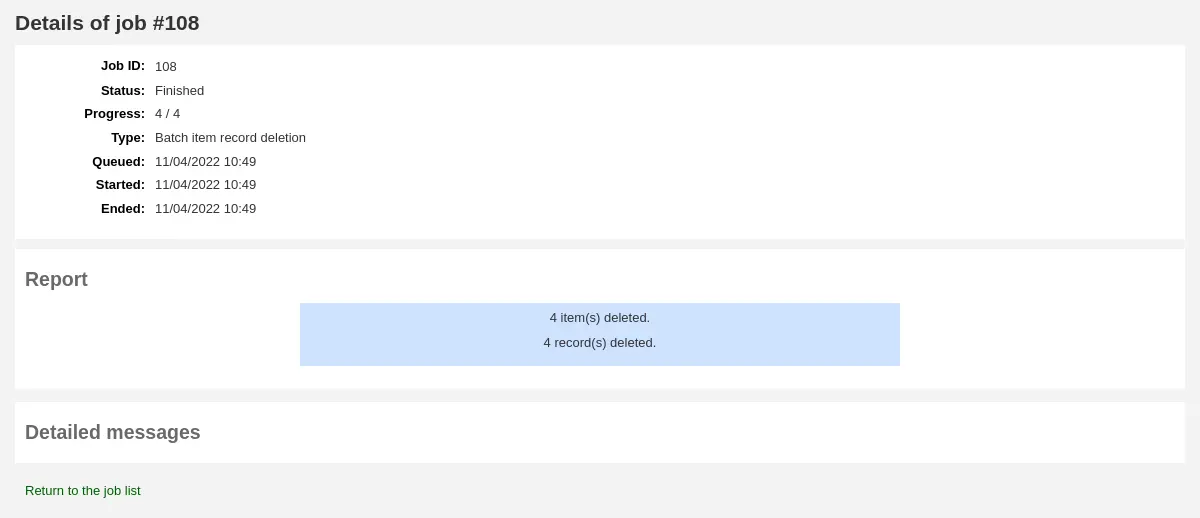
Para excluir um novo lote de itens, clique em ‘New batch item deletion’.
Excluir itens em lote a partir do registro bibliográfico
A ferramenta de exclusão em lote de item também está disponível na página de detalhes do registro bibliográfico.
Na página de detalhes do registro bibliográfico, clique no botão ‘Edit’ e escolha a opção ‘Delete items in a batch’.
Isso abrirá a ferramenta de exclusão em lote de item para os itens do registro específico.
Excluir itens em lote a partir de um relatório
A ferramenta de exclusão em lote de item também está disponível a partir de resultados de relatórios quando eles contêm números de item.
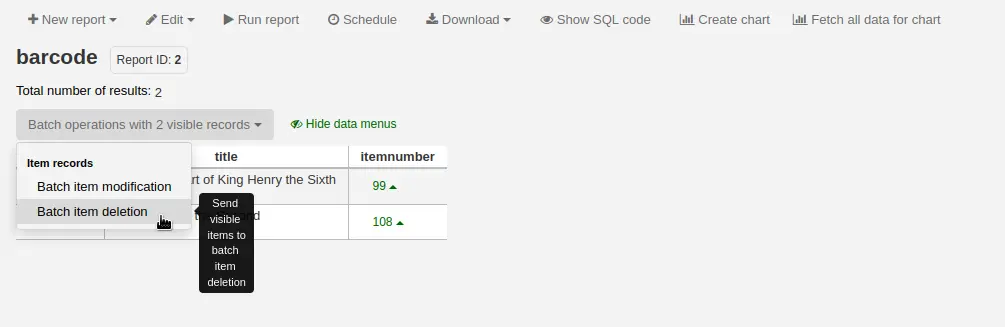
Quando o relatório contém o número de item, a opção ‘Batch operations with X visible records’ aparece automaticamente. Essa opção inclui modificação e exclusão em lote de item.
Por padrão, apenas 20 resultados são exibidos ao executar relatórios; portanto, a exclusão em lote será feita apenas em 20 resultados. Se você tiver mais resultados que deseja excluir em lote, altere o número de resultados por página antes de escolher a operação em lote.
Excluir itens em lote a partir da pesquisa de item
A ferramenta de exclusão em lote de item também está disponível a partir dos resultados da pesquisa de item.
Basta selecionar os itens a excluir na lista de resultados, clicar em ‘Batch operations’ e escolher ‘Batch item deletion’.
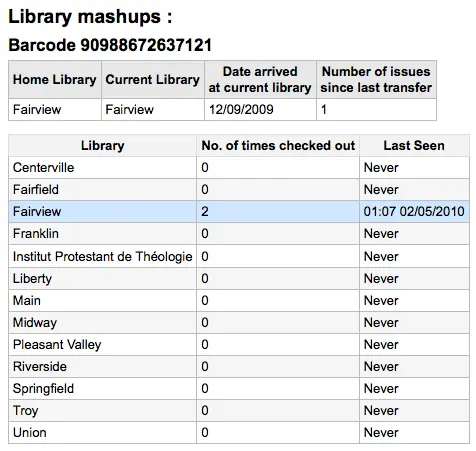
Histórico de circulação específico do item
Cada registro bibliográfico mantem um histórico de circulação (com ou sem a informação de usuário de acordo com suas configurações), mas cada item também tem sua página de histórico. Para vê-la, clique na aba ‘Itens’a esquerda do registro que estiver visualizando.
Abaixo do cabeçalho ‘Histórico’ há um link ‘Ver histórico de empréstimos’, clicando neste link é aberto um histórico do exemplar ligeiramente diferente do que aparece na página de histórico do registro bibliográfico.
Modificações de item por idade
Vá para: Mais > Catalogação > Automação > Modificações automáticas de exemplares por idade
Esta ferramenta permite atualizar campos específicos de item quando um item atinge uma determinada idade.
Nota
Somente funcionários com a permissão items_batchmod (ou a permissão superlibrarian) terão acesso a esta ferramenta.
Nota
As configurações desta ferramenta serão aplicadas pelo cron job correspondente.
Se você ainda não criou nenhuma regra, verá a opção ‘Add rules’ na página. Clique nesse botão para criar regras.

Se você já tiver regras, haverá um botão dizendo ‘Edit rules’. Para criar uma nova regra, clique no botão ‘Edit rules’ na parte superior da página.

Você será levado a uma página onde pode editar regras existentes ou criar uma nova.

Clique em ‘Add rule’.
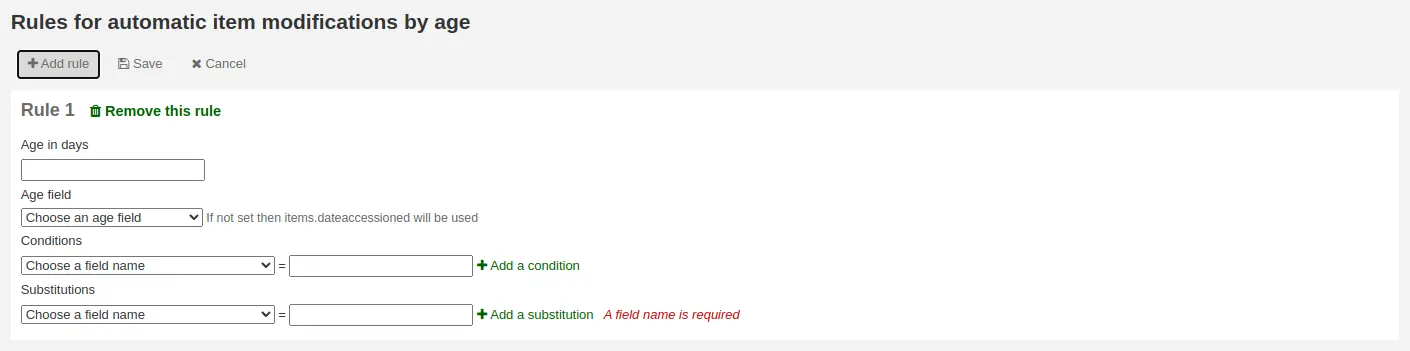
Preencha o formulário exibido para definir a nova regra:
Age in days: a idade em dias na qual o item será atualizado
Age field: o campo no qual a idade é baseada
items.dateaccessioned (padrão): data de aquisição do item; no MARC21, normalmente é mapeado para 952$d
items.replacementpricedate: data a partir da qual o custo de reposição é válido; no MARC21, normalmente é mapeado para 952$w
items.datelastborrowed: data do último empréstimo do item; no MARC21, normalmente é mapeado para 952$s (não editável manualmente)
items.datelastseen: data da última transação feita no item; no MARC21, normalmente é mapeado para 952$r (não editável manualmente)
items.damaged_on: data em que o status danificado foi definido (não editável manualmente)
items.lost_on: data em que o status perdido foi definido (não editável manualmente)
items.withdrawn_on: data em que o status descartado foi definido (não editável manualmente)
Conditions: quais critérios são necessários para acionar a atualização
Escolha o campo a verificar no menu suspenso
Informe o valor que o campo deve ter para acionar a atualização
Se você precisar de mais de uma condição, clique em ‘Add a condition’
Substitutions: quais alterações são feitas quando o script é executado
Escolha o campo a alterar no menu suspenso
Informe o valor que o campo deve ter após a atualização
Se você precisar fazer mais de uma alteração, clique em ‘Add a substitution’
Ao terminar, clique no botão ‘Save’ para salvar a regra e voltar à página principal, ou clique em ‘Add rule’ novamente para adicionar outra regra.
Rotação de acervo
Vá: Mais > Catalogação > Automation > Stock rotation
Nota
Esta ferramenta só estará disponível se a preferência do sistema StockRotation estiver ativada.
Nota
Somente funcionários com a permissão stockrotation ou subpermissões (ou a permissão superlibrarian) terão acesso a esta ferramenta.
A rotação de acervo ajuda a distribuir os recursos de forma mais equilibrada entre as unidades da biblioteca e permite que os usuários vejam uma variedade maior de títulos.
Os itens são populares enquanto são novidade em uma determinada unidade. No entanto, seu uso geralmente diminui com o tempo. Esta ferramenta permite que os bibliotecários automatizem a movimentação de itens para outra unidade antes que o uso caia, prolongando assim a vida útil dos itens.
Os funcionários da biblioteca criam planos de rotação (escalas) e depois atribuem itens a eles. Um cronjob é então usado para fazer esses itens circularem pelas bibliotecas especificadas no plano de rotação, movendo-os para a próxima etapa depois que o período determinado tiver passado na etapa atual.
Nota
Para que esta ferramenta funcione como pretendido, o cron job stockrotation.pl precisa ser configurado para ser executado diariamente.
Avisos por e-mail podem ser usados para fornecer às bibliotecas uma lista de itens na estante a serem colocados em trânsito para a próxima biblioteca. Se um item estiver emprestado no momento em que deveria ser transferido, um alerta será exibido na próxima devolução.
Nota
O aviso utilizado é o SR_SLIP. Ele pode ser personalizado com a ferramenta Avisos e comprovantes.
Na página de rotação de acervo, você pode adicionar novos planos de rotação (rotas) e consultar um resumo das rotas configuradas. Para cada rota existente, há botões para editar, gerenciar etapas e exemplares, ativar ou desativar e excluir.
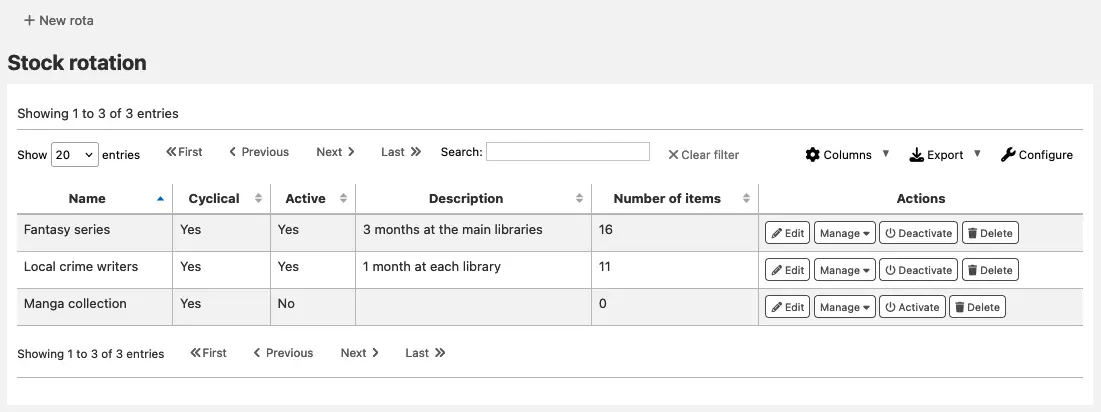
Nota
Você pode personalizar as colunas desta tabela na seção Configurações de tabelas do módulo Administração (ID da tabela: stock_rotation).
Criar uma nova rota
Nota
Somente membros da equipe com a permissão manage_rotas (ou a permissão superlibrarian) poderão criar novas rotas.
Para criar uma nova rota (plano de rotação), clique no botão ‘Nova rota’ na página principal de rotação de acervo.
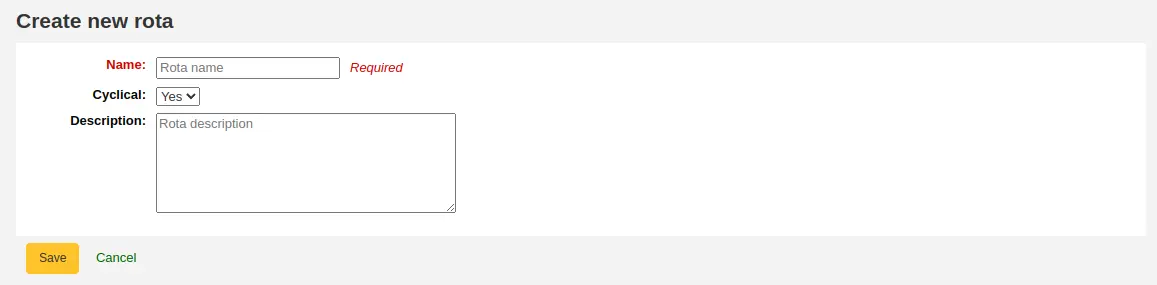
Nome: informe um nome ou código para identificar a rota
Cíclica:
Não: ao chegar ao fim da rota, os exemplares permanecerão na última biblioteca do plano de rotação
Sim: os exemplares continuarão circulando. Depois de permanecerem pelo período previsto na última biblioteca, retornarão à primeira biblioteca do plano de rotação e seguirão circulando indefinidamente, até serem removidos manualmente da rota
Descrição: opcionalmente, acrescente uma descrição detalhada da rota para exibição nas telas de resumo
Quando a rota estiver completa, com etapas e exemplares, ative-a para iniciar a circulação dos exemplares. No resumo da rotação de acervo, clique no botão ‘Ativar’ ao lado da rota.
Adicionar etapas a uma rota
Nota
Somente membros da equipe com a permissão manage_rotas (ou a permissão superlibrarian) poderão adicionar etapas às rotas.
Depois de criar a rota, você poderá adicionar etapas. Cada etapa define o período durante o qual um exemplar permanecerá em determinada biblioteca antes de seguir adiante.
Na página de resumo da rotação de acervo, clique no botão ‘Gerenciar’ e escolha a opção ‘Etapas’.
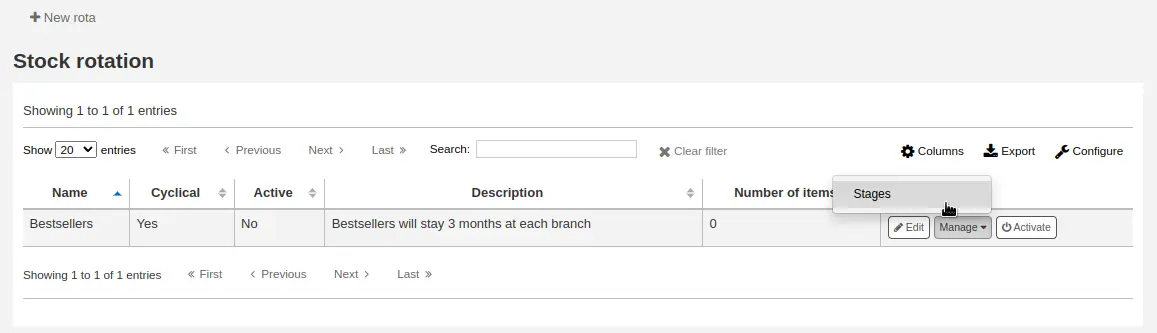
Clique no botão ‘Adicionar etapa’.

Biblioteca: escolha a biblioteca correspondente a esta etapa
Duração: informe o número de dias durante os quais o exemplar deverá permanecer nesta biblioteca antes de seguir adiante
Clique em ‘Save’.

Depois de adicionar todas as etapas, use as alças à esquerda para movê-las e alterar sua ordem.
Adicionar exemplares a uma rota
Nota
Somente membros da equipe com a permissão manage_rota_items (ou a permissão superlibrarian) poderão adicionar exemplares às rotas existentes.
Quando uma rota tiver etapas, será possível adicionar exemplares a ela.
Na página de resumo da rotação de acervo, clique no botão ‘Gerenciar’ e escolha a opção ‘Exemplares’.
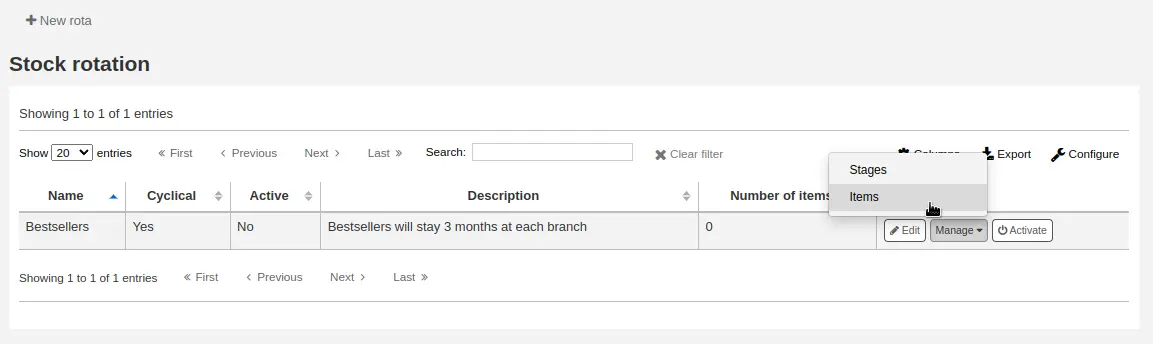
Clique no botão ‘Adicionar exemplares’.
Os exemplares podem ser adicionados individualmente, pelo código de barras, ou em lote, mediante o envio de um arquivo com um código de barras por linha.
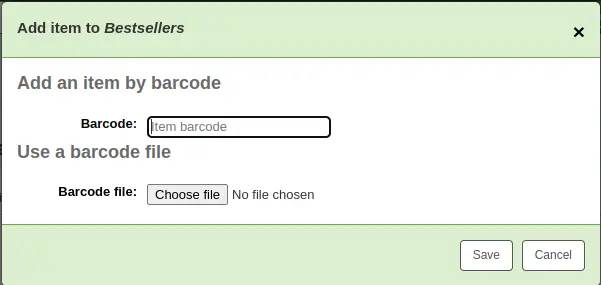
Os exemplares também podem ser adicionados a uma rota pelo catálogo da interface administrativa, na aba ‘Rota’ à esquerda da visualização detalhada do registro.
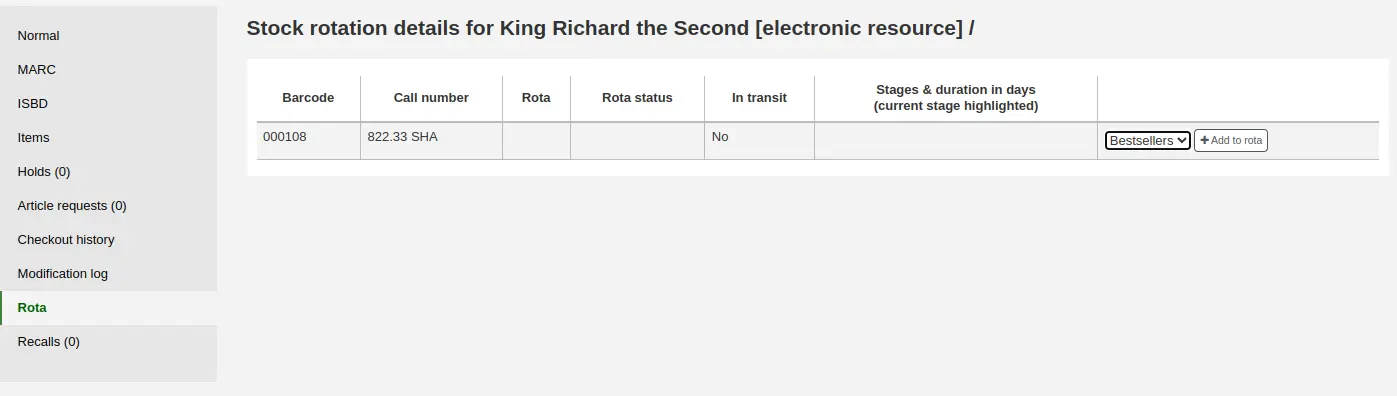
Escolha a rota à qual deseja adicionar o exemplar e clique em ‘Adicionar à rota’.
Os exemplares também podem ser adicionados automaticamente às rotas durante a aquisição por meio do campo LRP (Library Rotation Plan) em EDI.
Na página Gerenciar > Exemplares, será exibido um resumo de todos os exemplares da rota e de suas localizações atuais. Você poderá fazer os exemplares avançarem imediatamente, marcá-los como ‘Em alta demanda’ ou removê-los da rotação.
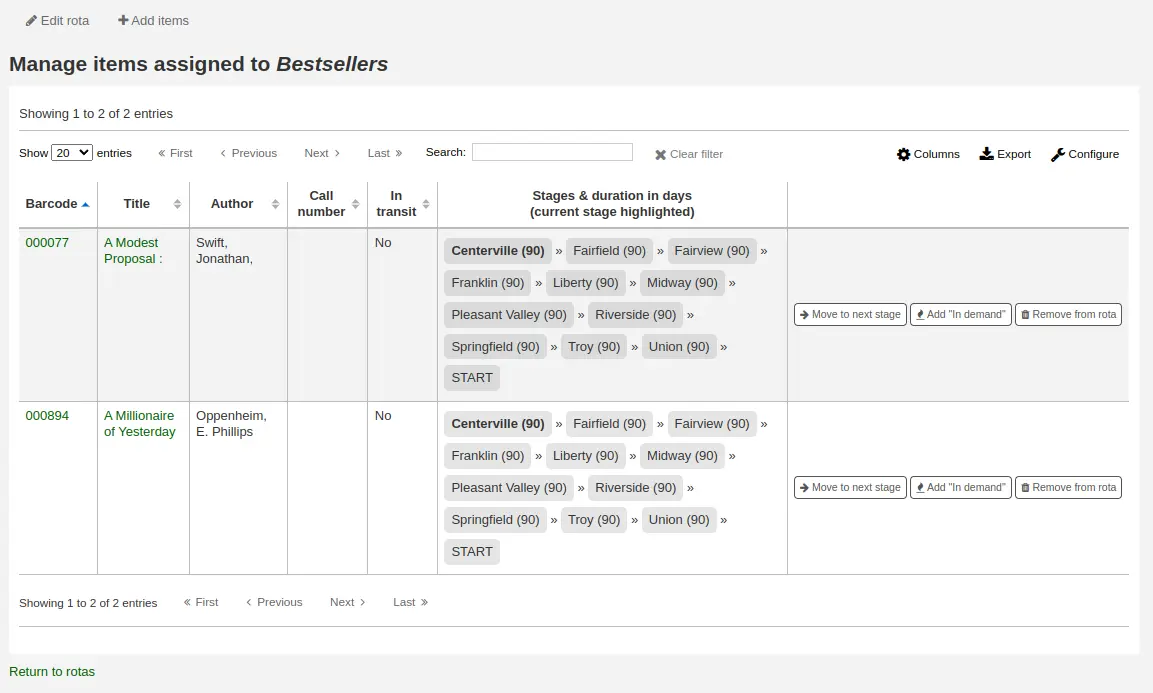
Nota
Você pode personalizar as colunas desta tabela na seção Configurações de tabelas do módulo Administração (ID da tabela: stock_rotation_manage_items).
Mover para a próxima etapa: encaminha o exemplar diretamente para a etapa seguinte, mesmo que o período da etapa atual ainda não tenha terminado.
Adicionar ‘Em alta demanda’: dobra o período durante o qual o exemplar permanecerá na etapa atual em relação ao definido na rota. Essa opção costuma ser usada para exemplares que se tornam inesperadamente populares em determinada biblioteca.
Remover da rota: remove o exemplar da rota.
Exemplares individuais também podem ser gerenciados pelo catálogo da interface administrativa, na aba ‘Rota’.
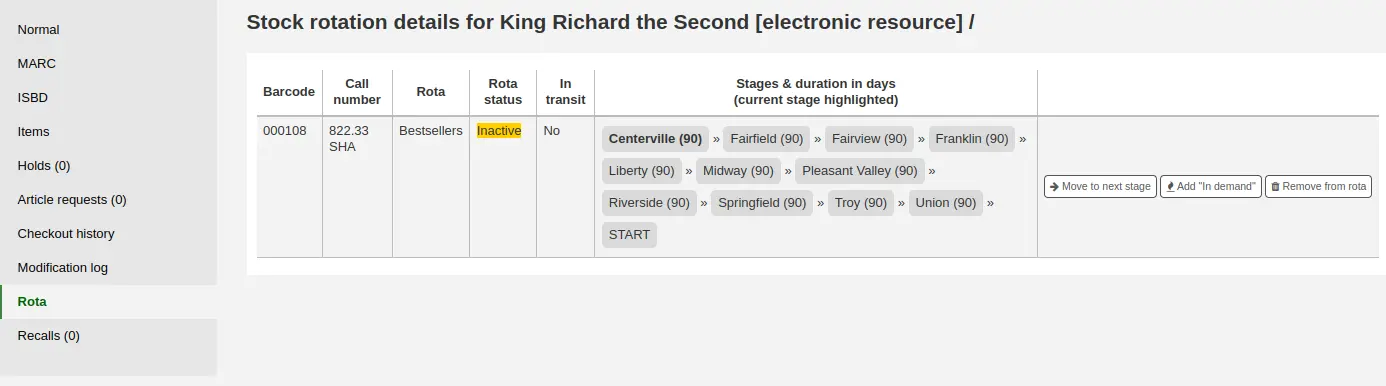
Criar etiquetas
Nota
Somente membros da equipe com a permissão label_creator (ou a permissão superlibrarian) terão acesso a esta ferramenta.
Vá para: Mais > Catalogação > Ferramentas > Criador de etiquetas
A ferramenta de criação de etiquetas permite usar leiautes e modelos elaborados por você para imprimir uma variedade praticamente ilimitada de etiquetas, inclusive códigos de barras. Alguns dos recursos da ferramenta são:
Personalizar leiautes de etiquetas
Criar modelos personalizados para etiquetas impressas
Criar e gerenciar lotes de etiquetas
Exportar um ou vários lotes
Exportar uma ou várias etiquetas de um lote
Exportar os dados das etiquetas em um destes três formatos:
PDF — pode ser lido por qualquer leitor de PDF comum, permitindo imprimir as etiquetas diretamente em uma impressora
CSV — exporta os dados das etiquetas depois da aplicação do leiaute escolhido, permitindo importar as etiquetas em diversos aplicativos
XML — incluído como formato alternativo de exportação
Leiautes de etiquetas
Vá para: Mais > Catalogação > Ferramentas > Criador de etiquetas > Gerenciar > Leiautes
Um leiaute define os campos que serão exibidos nas etiquetas.
Adicionar um leiaute
Para adicionar um novo leiaute, clique no botão ‘Novo’ na parte superior da ferramenta de criação de etiquetas e escolha ‘Leiaute’.
No formulário exibido, defina o que aparecerá nas etiquetas.
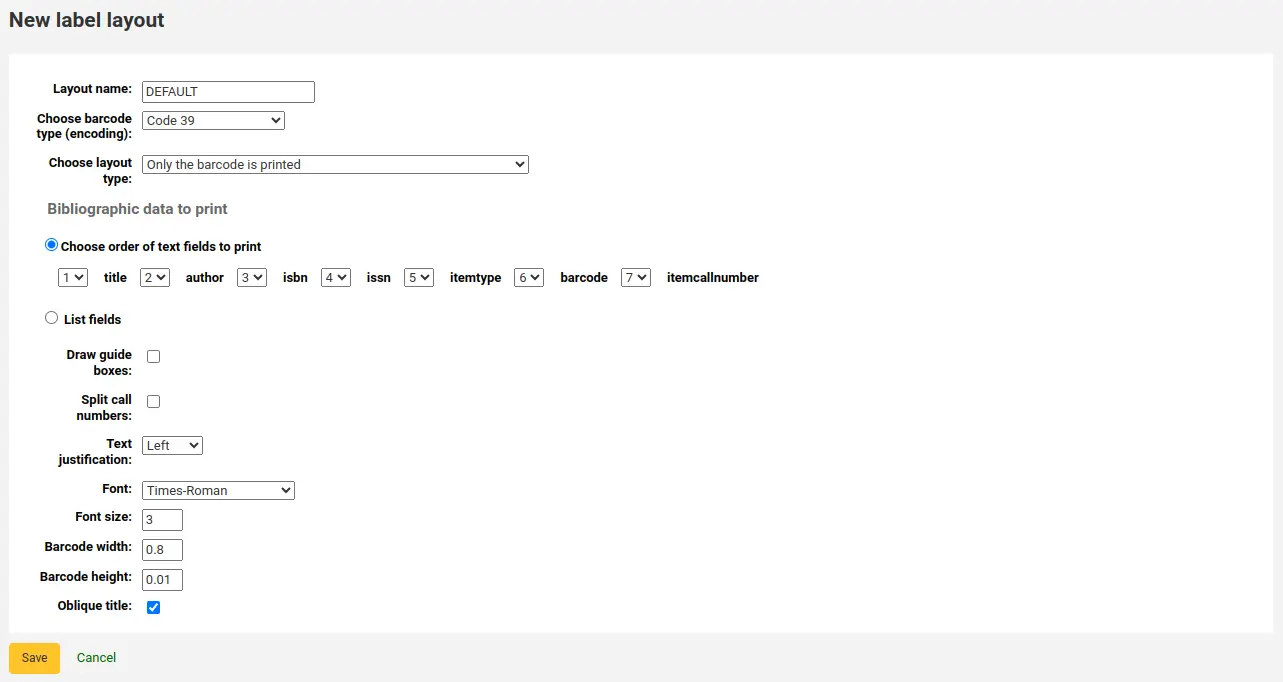
‘Nome do leiaute’: informe um nome que permita identificar o leiaute posteriormente.
‘Escolha o tipo de código de barras (codificação)’: se esta for uma etiqueta de código de barras, escolha a codificação (o Código 39 é o mais comum)
‘Escolha o tipo de leiaute’: escolha o tipo de informação que será impresso na etiqueta.
Somente os dados bibliográficos são impressos: apenas as informações bibliográficas serão exibidas na etiqueta; esta opção pode ser usada, por exemplo, para etiquetas de lombada
Nota
Os dados bibliográficos incluem qualquer campo de dados que possa ser mapeado para as planilhas MARC.
O código de barras precede os dados bibliográficos: o código de barras será exibido na parte superior da etiqueta e as informações bibliográficas, abaixo dele
Os dados bibliográficos precedem o código de barras: as informações bibliográficas serão exibidas na parte superior da etiqueta e o código de barras, abaixo delas
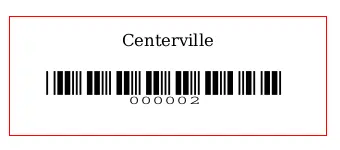
O código de barras e os dados bibliográficos são impressos em etiquetas alternadas: as informações bibliográficas serão exibidas em uma etiqueta e o código de barras na etiqueta seguinte, alternadamente para cada exemplar
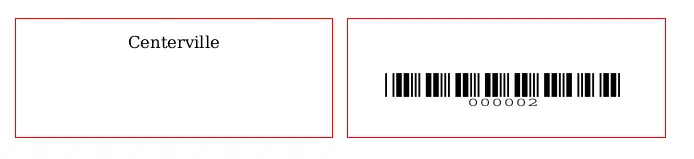
Somente o código de barras é impresso: apenas o código de barras será exibido na etiqueta
‘Dados bibliográficos a imprimir’: se você optou por imprimir dados bibliográficos na etiqueta, escolha na lista predefinida os campos que deverão aparecer e a ordem deles. Como alternativa, clique em ‘Listar campos’ e informe seus próprios dados.

Nota
Em ‘Listar campos’, você pode especificar qualquer campo de banco de dados das tabelas a seguir. Consulte a estrutura do banco de dados em https://schema.koha-community.org para localizar os nomes dos campos:
items
biblioitems
biblio
bibliotecas
Também é possível especificar subcampos MARC por meio de uma sequência de quatro caracteres formada pela etiqueta e pelo subcampo, por exemplo, 254a para o campo de título no MARC21.
Também é possível colocar entre aspas duplas uma lista de campos separados por espaços para concatená-los em uma única linha, por exemplo, “099a 099b” ou “itemcallnumber barcode”.
Por fim, você pode adicionar sequências de texto estático entre aspas simples, por exemplo, ‘Algum texto estático aqui.’
‘Desenhar caixas-guia’: escolha se as linhas-guia serão impressas ao redor de cada etiqueta. Isso é útil durante a configuração inicial do criador de etiquetas para conferir o alinhamento com as folhas de etiquetas
‘Dividir números de chamada’: escolha se os números de chamada devem ser divididos; esta opção normalmente é usada em etiquetas de lombada
Nota
As regras de divisão do número de chamada são gerenciadas em Administração > Fontes de classificação.
‘Alinhamento do texto’: escolha o alinhamento do texto: à esquerda, centralizado ou à direita
‘Fonte’: escolha o tipo de fonte
Atualmente, as opções de fonte estão limitadas a:
Times-Roman (regular, negrito, itálico ou negrito e itálico): uma fonte com serifa
Courier (regular, negrito, oblíquo (itálico) ou negrito oblíquo (negrito e itálico)): uma fonte monoespaçada
Helvetica (regular, negrito, oblíquo (itálico) ou negrito oblíquo (negrito e itálico)): uma fonte sem serifa
‘Tamanho da fonte’: informe o tamanho da fonte em pontos
‘Largura do código de barras’: ao imprimir códigos de barras, informe a largura do código de barras como uma fração da largura da própria etiqueta. Por exemplo, 0,8 significa que o código de barras ocupará 80% do comprimento da etiqueta.
- ‘Altura do código de barras’: ao imprimir códigos de barras, informe a altura do código de barras como
uma fração da altura da etiqueta.
‘Título oblíquo’: escolha se o título deve ser exibido em itálico
Clique em ‘Salvar’ para salvar o novo leiaute.
Depois de salvar, os leiautes serão exibidos em Gerenciar > Leiautes.
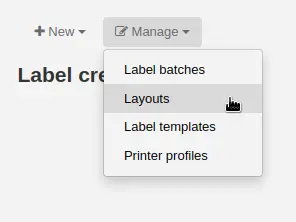
Editar um leiaute
Para editar um leiaute existente, clique no botão ‘Gerenciar’ na parte superior da ferramenta de criação de etiquetas e escolha ‘Leiaute’.
Na tabela de leiautes disponíveis, clique no botão ‘Editar’ ao lado do leiaute que deseja editar.
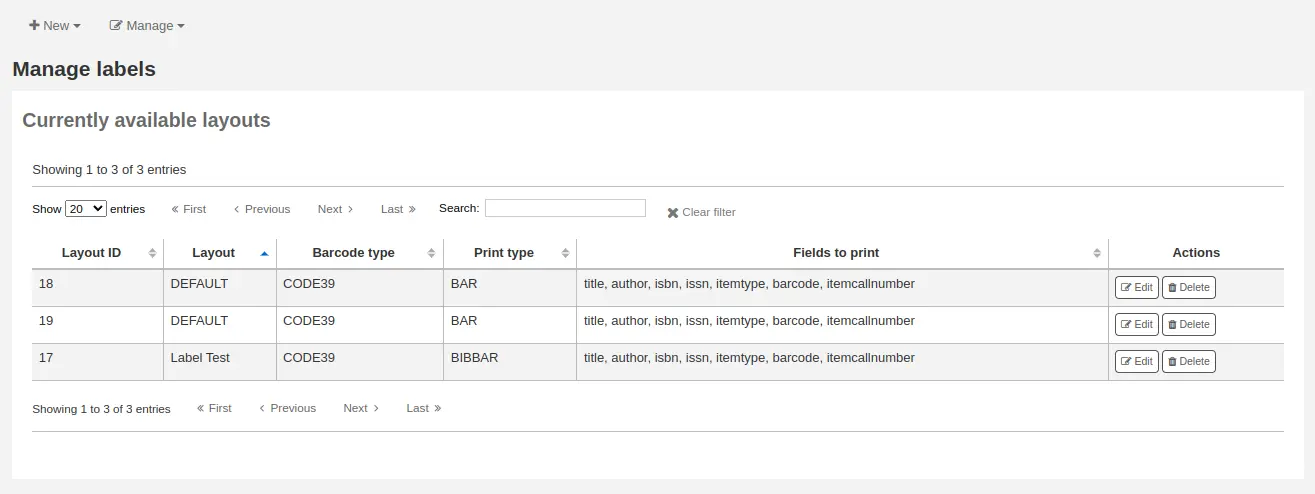
Altere os valores necessários e clique em ‘Salvar’.
Excluir um leiaute
Para excluir um leiaute existente, clique no botão ‘Gerenciar’ na parte superior da ferramenta de criação de etiquetas e escolha ‘Leiaute’.
Na tabela de leiautes disponíveis, clique no botão ‘Excluir’ ao lado do leiaute que deseja excluir e confirme a exclusão.
Modelos de etiquetas
Vá para: Mais > Catalogação > Ferramentas > Criador de etiquetas > Gerenciar > Modelos de etiquetas
Um modelo é definido com base na folha de etiquetas ou cartões utilizada. Alguns exemplos são Avery 5160 para etiquetas de endereço, Gaylord 47-284 para etiquetas de lombada e Avery 28371 para cartões de usuário. Esses produtos fornecem as informações necessárias para a configuração no Koha. Os dados podem estar na embalagem, no site do fornecedor ou podem ser medidos manualmente.
Adicionar um modelo
Para adicionar um novo modelo, clique no botão ‘Novo’ na parte superior da página de criação de etiquetas e escolha ‘Modelo de etiqueta’.
No formulário exibido, você pode definir o modelo da folha de etiquetas ou cartões.
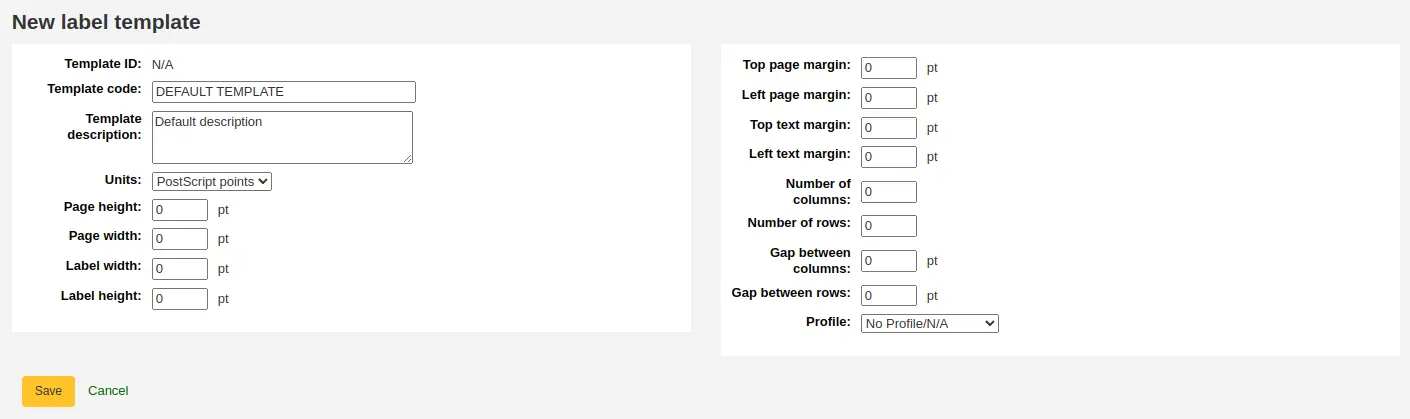
‘ID do modelo’: será gerado automaticamente depois que o modelo for salvo; trata-se apenas de um identificador exclusivo gerado pelo sistema
‘Código do modelo’: informe um código para o modelo que permita identificá-lo em uma lista de modelos
‘Descrição do modelo’: use este campo para adicionar informações complementares sobre o modelo
‘Unidades’: escolha a escala de medida que será usada no modelo. De preferência, ela deve corresponder à unidade de medida utilizada na descrição do modelo fornecida pelo fabricante do produto.
As medidas e as quantidades de colunas e linhas podem ser encontradas na embalagem ou no site do fabricante, ou podem ser obtidas manualmente.
Altura da página: altura da página
Largura da página: largura da página
Largura da etiqueta: largura da etiqueta
Altura da etiqueta: altura da etiqueta
Margem superior da página: distância entre a parte superior da página e a parte superior da primeira linha de etiquetas
Margem esquerda da página: distância entre o lado esquerdo da página e o lado esquerdo da primeira coluna de etiquetas
Margem superior do texto: distância entre a parte superior da etiqueta e a parte superior da primeira linha de texto
Margem esquerda do texto: distância entre o lado esquerdo da etiqueta e o início do texto
Nota
Se você não informar uma margem esquerda para o texto no modelo, será aplicada por padrão uma margem de 3/16” (13,5 pontos).
Número de colunas: quantidade de colunas de etiquetas em uma página ou quantidade de etiquetas por linha
Número de linhas: quantidade de linhas de etiquetas em uma página ou quantidade de etiquetas por coluna
Espaço entre colunas: distância entre duas colunas de etiquetas
Espaço entre linhas: distância entre duas linhas de etiquetas
Um perfil é um conjunto de “ajustes” aplicado a determinado modelo imediatamente antes da impressão para compensar anomalias específicas de uma impressora, à qual o perfil é atribuído.
Antes de escolher um perfil, tente imprimir algumas etiquetas de exemplo. Isso facilitará a definição de um perfil adequado à combinação de impressora e modelo.
Depois de identificar anomalias no documento impresso, crie um perfil e atribua-o ao modelo.
Clique em ‘Salvar’ para salvar o novo modelo.
Depois de salvar, os modelos serão exibidos em Gerenciar > Modelos de etiquetas.
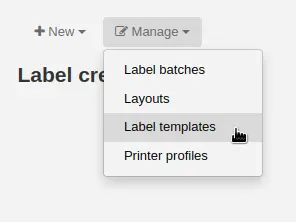
Editar um modelo
Para editar um modelo existente, clique no botão ‘Gerenciar’ na parte superior da página de criação de etiquetas e escolha ‘Modelo de etiqueta’.
Na tabela de modelos disponíveis, clique no botão ‘Editar’ ao lado do modelo que deseja editar.
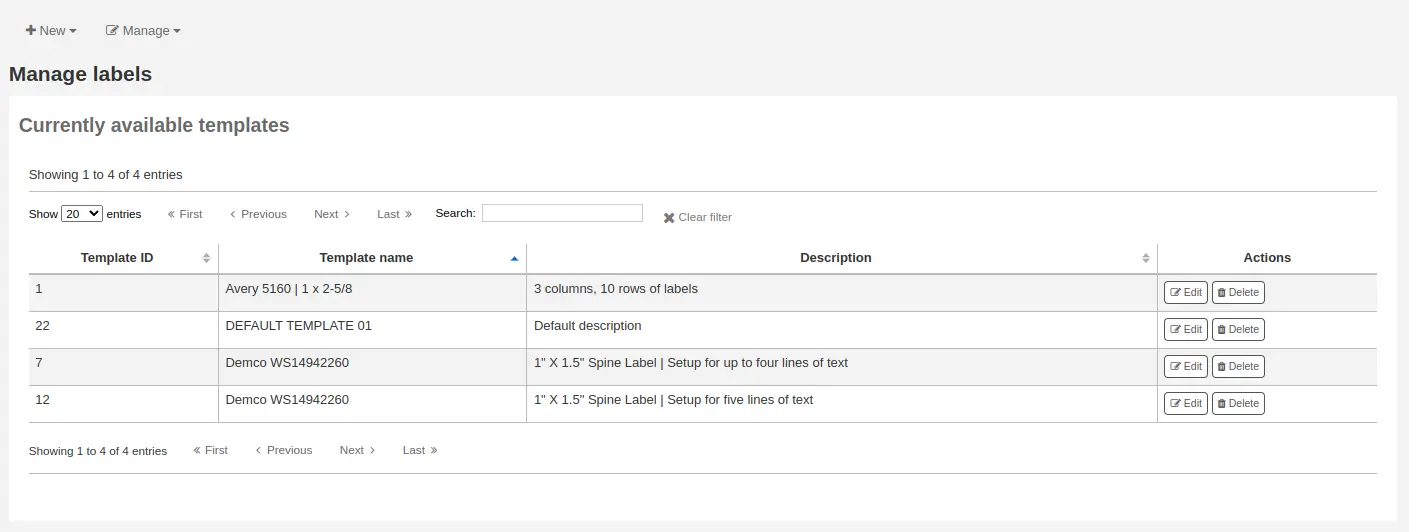
Altere os valores necessários e clique em ‘Salvar’.
Excluir um modelo
Para excluir um modelo existente, clique no botão ‘Gerenciar’ na parte superior da página de criação de etiquetas e escolha ‘Modelo de etiqueta’.
Na tabela de leiautes disponíveis, clique no botão ‘Excluir’ ao lado do leiaute que deseja excluir e confirme a exclusão.
Perfis de impressora
Vá para: Mais > Catalogação > Ferramentas > Criador de etiquetas > Gerenciar > Perfis de impressora
Um perfil é um conjunto de “ajustes” aplicado a determinado modelo imediatamente antes da impressão para compensar particularidades de uma impressora, à qual o perfil é atribuído. Isso significa que, se você configurar um modelo, imprimir uma amostra e perceber que o conteúdo não está alinhado da mesma forma em todas as etiquetas, deverá configurar um perfil para cada impressora a fim de compensar diferenças de impressão, como o deslocamento do texto para a esquerda, a direita, para cima ou para baixo.
Se as etiquetas já forem impressas exatamente como você deseja, não será necessário usar um perfil.
Adicionar um perfil de impressora
Para adicionar um novo perfil, clique no botão ‘Novo’ na parte superior da ferramenta de criação de etiquetas e escolha ‘Perfil de impressora’.
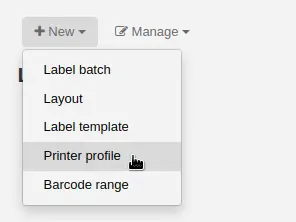
No formulário exibido, você pode criar um perfil para corrigir problemas de impressão do modelo.
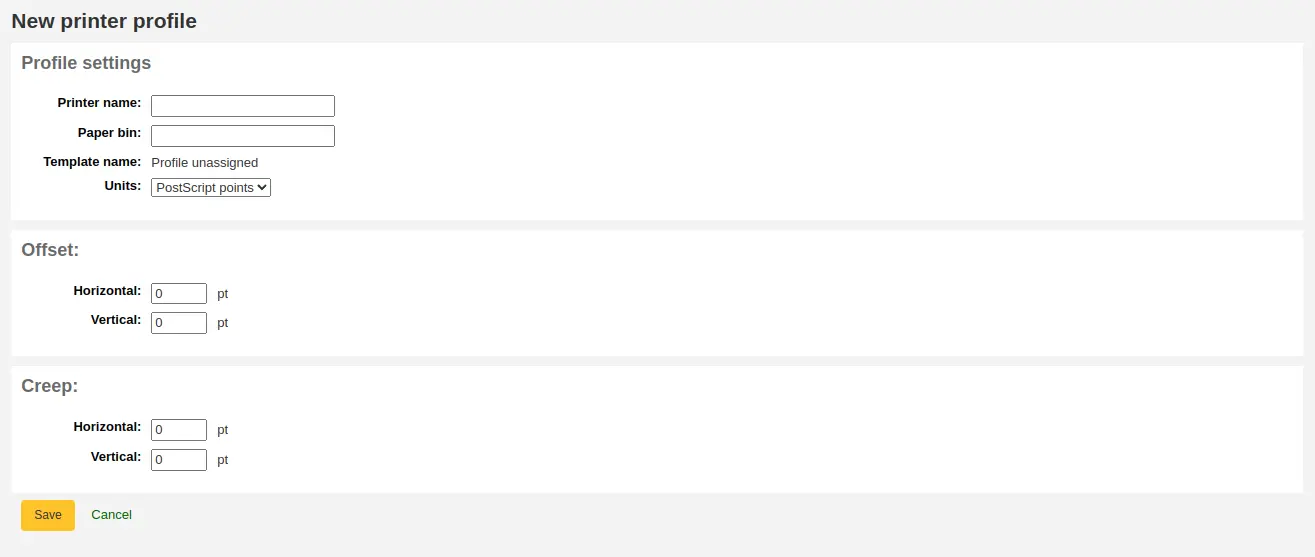
‘Nome da impressora’: informe um nome para a impressora. Ele não precisa corresponder exatamente ao nome real, pois serve apenas como referência no Koha. Você pode usar o número do modelo ou um nome como ‘a impressora da minha mesa’.
‘Bandeja de papel’: informe um nome para a bandeja de papel da impressora. Assim como o nome da impressora, ele serve apenas como referência.
O campo ‘Nome do modelo’ será preenchido depois que você escolher o modelo ao qual o perfil será aplicado no formulário de edição do modelo
‘Unidades’: defina a escala de medida usada no perfil.
As próximas seções são usadas para ajustar a impressão das etiquetas.
O deslocamento (offset) descreve o que ocorre quando toda a imagem fica fora do centro, na direção vertical ou horizontal
O desvio progressivo (creep) descreve a situação em que a distância entre as etiquetas se altera ao longo da página, horizontal ou verticalmente
Nota
Nesses valores, números negativos deslocam o erro para cima e para a esquerda; números positivos o deslocam para baixo e para a direita
Exemplo: o texto está a 0,25” da borda esquerda da primeira etiqueta, a 0,28” da borda esquerda da segunda e a 0,31” da borda esquerda da terceira. Nesse caso, o desvio progressivo horizontal deve ser definido como 0,03” para compensar a diferença.
Clique em ‘Salvar’ para salvar o novo perfil.
Depois de salvar, os perfis serão exibidos em Gerenciar > Perfis de impressora.
Depois de salvar o novo perfil, retorne à lista de modelos e edite o modelo ao qual o perfil se destina.
Editar um perfil de impressora
Para editar um perfil de impressora existente, clique no botão ‘Gerenciar’ na parte superior da página de criação de etiquetas e escolha ‘Perfis de impressora’.
Na tabela de perfis de impressora disponíveis, clique no botão ‘Editar’ ao lado do perfil que deseja editar.
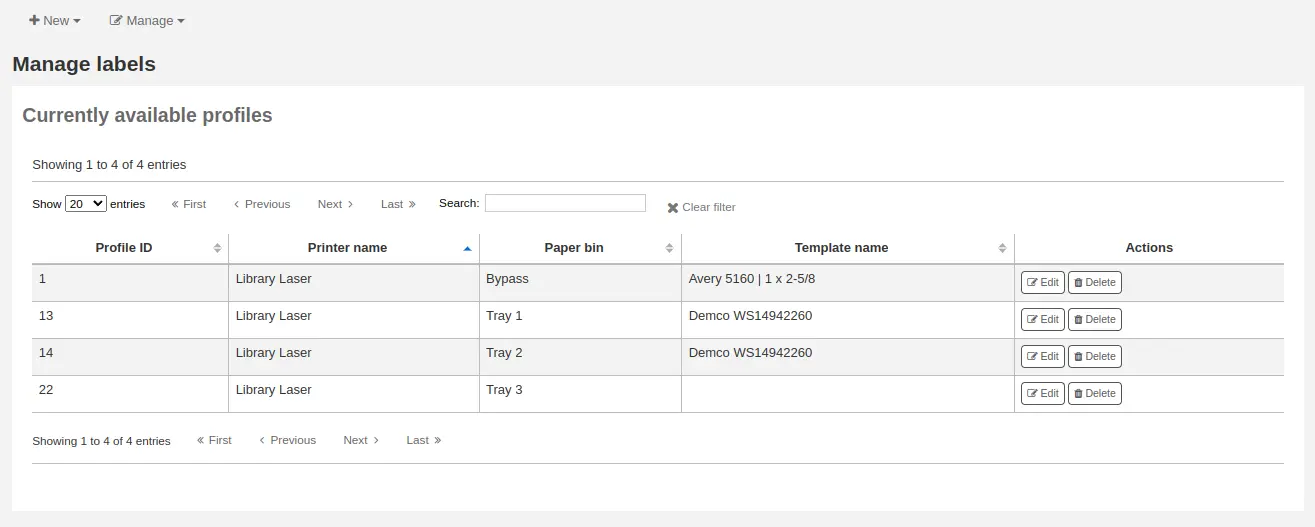
Altere os valores necessários e clique em ‘Salvar’.
Excluir um perfil de impressora
Para excluir um perfil de impressora existente, clique no botão ‘Gerenciar’ na parte superior da página de criação de etiquetas e escolha ‘Perfis de impressora’.
Na tabela de perfis disponíveis, clique no botão ‘Excluir’ ao lado do perfil que deseja excluir e confirme a exclusão.
Lotes de etiquetas
Vá para: Mais > Catalogação > Ferramentas > Criador de etiquetas > Gerenciar > Lotes de etiquetas
Os lotes são formados pelos exemplares para os quais você deseja imprimir etiquetas. Nesta ferramenta, é possível pesquisar os registros de exemplar cujas etiquetas deverão ser impressas.
Adicionar um lote de etiquetas
Os lotes podem ser criados de duas maneiras. A primeira é clicar no link ‘Criar lote de etiquetas’ na página Gerenciamento de registros MARC preparados.
A outra maneira é criar um novo lote pela ferramenta de criação de etiquetas
Será exibido um lote vazio, com uma caixa para digitalizar códigos de barras ou informar números internos de exemplares e um botão ‘Adicionar exemplar(es)’ na parte inferior da página.
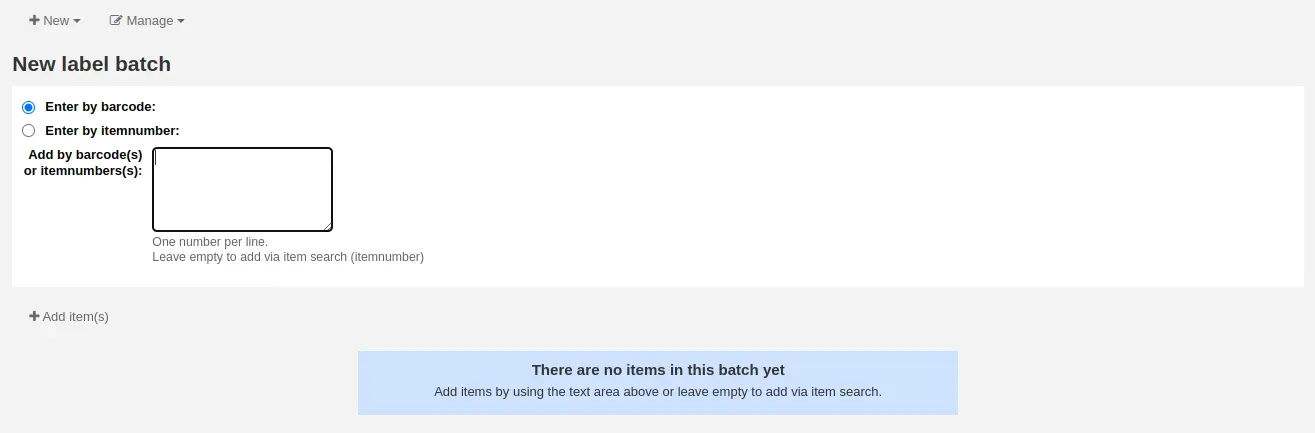
Você pode digitalizar os códigos de barras na caixa e clicar no botão ‘Adicionar exemplar(es)’, ou clicar nesse botão deixando a caixa vazia. Nesse caso, será aberta uma janela de pesquisa para localizar os exemplares que deseja adicionar ao lote.
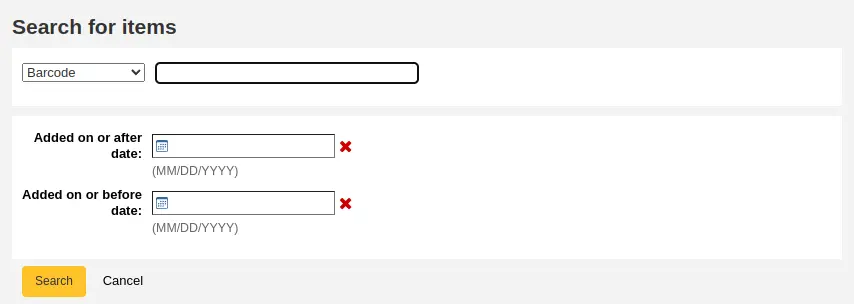
Nos resultados da pesquisa, marque a caixa ao lado dos exemplares que deseja adicionar ao lote e clique no botão ‘Adicionar marcados’. Também é possível adicionar os exemplares individualmente pelo link ‘Adicionar’, à esquerda de cada exemplar.
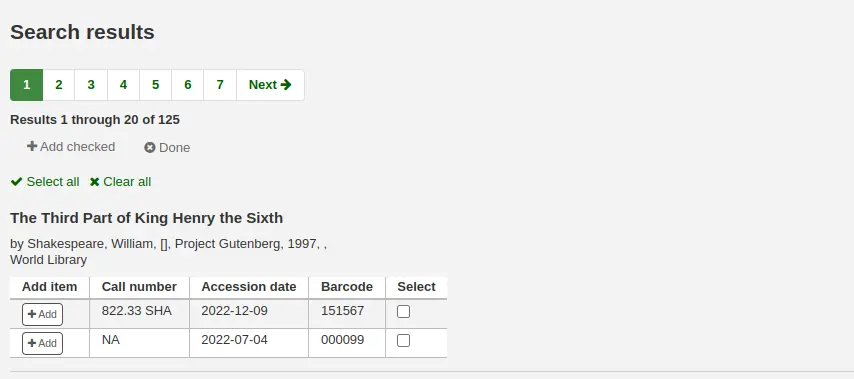
Depois de adicionar todos os exemplares, clique no botão ‘Concluído’. Em seguida, clique novamente em ‘Adicionar exemplar(es)’ para transferir os exemplares da caixa de códigos de barras para o lote. A página resultante listará os exemplares selecionados.
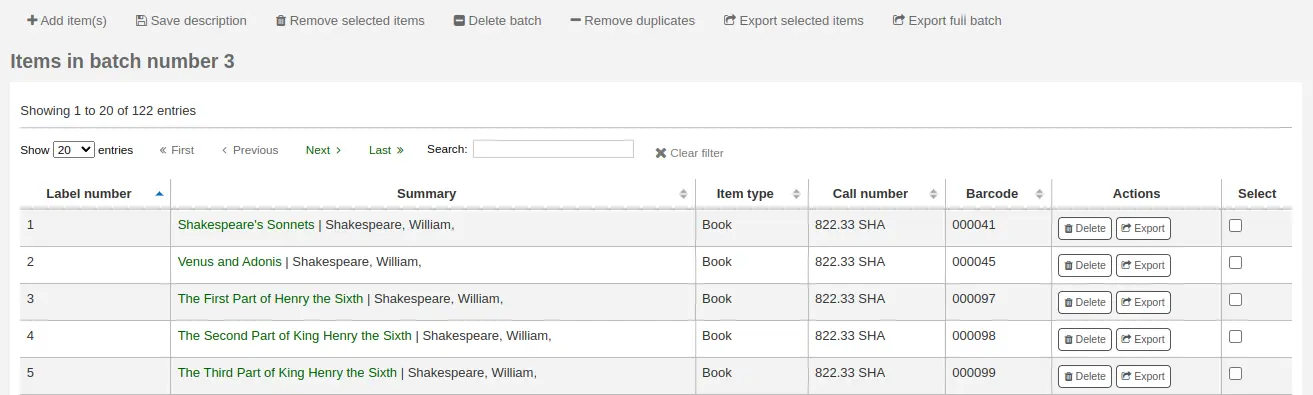
Se alguns exemplares tiverem sido adicionados mais de uma vez por engano, clique no botão ‘Remover duplicados’. Os códigos de barras serão verificados e as duplicidades serão removidas do lote.
Para remover exemplares do lote, marque as caixas à direita dos exemplares desejados e clique no botão ‘Remover exemplares selecionados’.
Opcionalmente, você pode adicionar uma descrição ao lote para facilitar sua localização posterior. Informe-a no campo ‘Descrição do lote’ e clique em ‘Salvar descrição’. A descrição será exibida na página ‘Lotes disponíveis’.
Para imprimir todas as etiquetas, clique no botão ‘Exportar lote completo’. Para imprimir apenas algumas, selecione os exemplares e clique em ‘Exportar exemplar(es) selecionado(s)’. Para imprimir uma única etiqueta do lote, clique no botão ‘Exportar’ à direita do exemplar. Em todos os casos, será exibida uma tela de confirmação na qual você poderá escolher o modelo e o leiaute. Se estiver usando uma folha de etiquetas incompleta, informe a etiqueta inicial; as etiquetas são contadas horizontalmente.
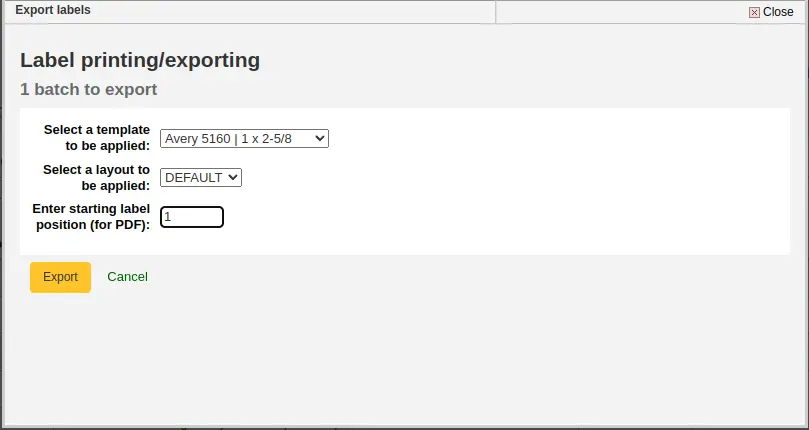
Em seguida, serão apresentadas três opções de download: PDF, CSV ou XML.
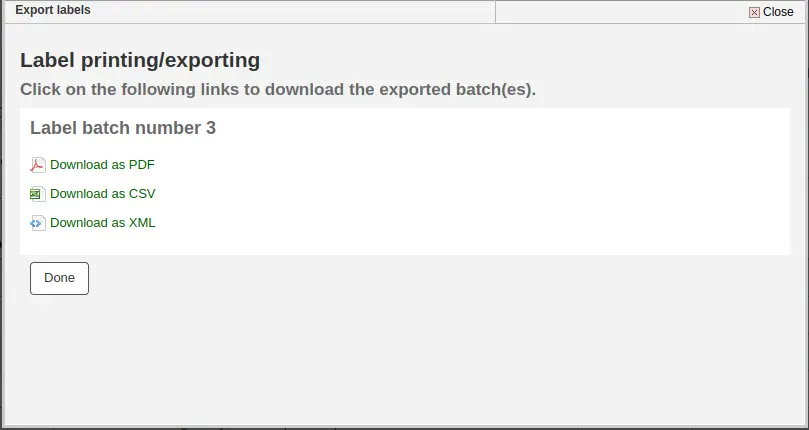
Depois de salvar o arquivo, imprima-o nas etiquetas em branco disponíveis na biblioteca.
O lote fica salvo para uso posterior, se necessário, e pode ser acessado em Gerenciar > Lotes de etiquetas.
Editar um lote de etiquetas
Para editar um lote de etiquetas existente, clique no botão ‘Gerenciar’ na parte superior da página de criação de etiquetas e escolha ‘Lotes de etiquetas’.
Você acessará os lotes disponíveis.
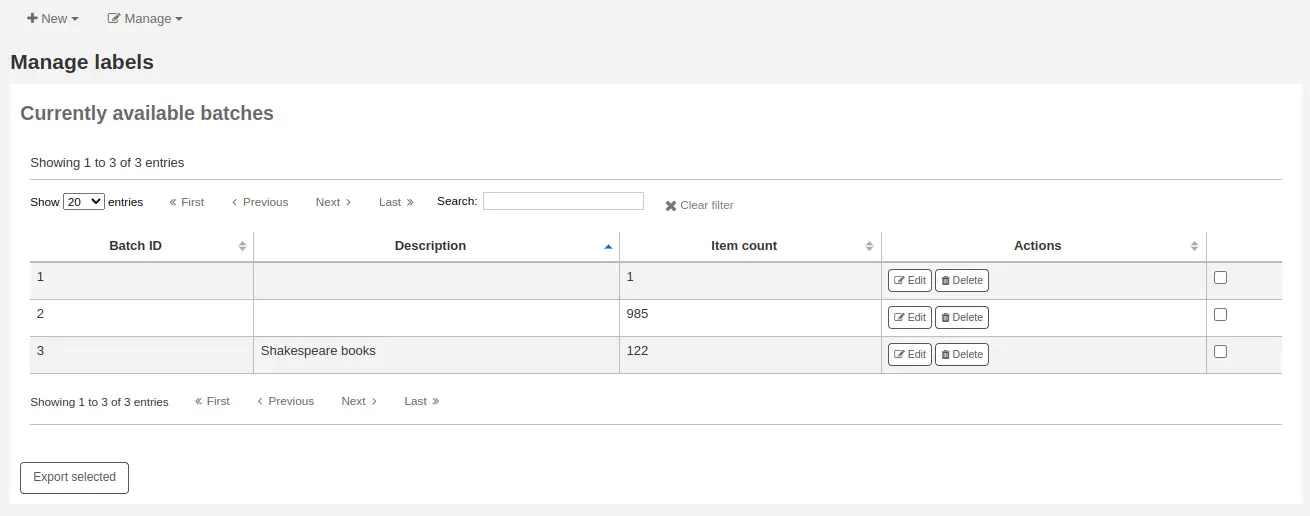
É possível imprimir um ou mais lotes diretamente desta página. Marque a caixa à direita do lote ou dos lotes desejados e clique em ‘Exportar selecionados’.
Para editar um lote, clique no botão ‘Editar’ ao lado do lote desejado.
Excluir um lote de etiquetas
Para excluir um lote de etiquetas existente, clique no botão ‘Gerenciar’ na parte superior da página de criação de etiquetas e escolha ‘Lotes de etiquetas’.
Você acessará os lotes disponíveis.
Clique no botão ‘Excluir’ ao lado do lote desejado e confirme a exclusão.
Também é possível excluir um lote na própria página do lote, clicando no botão ‘Excluir lote’ acima da tabela de exemplares.
Intervalo de códigos de barras
Vá para: Mais > Catalogação > Ferramentas > Criador de etiquetas > Novo > Intervalo de códigos de barras
Se quiser imprimir etiquetas de códigos de barras antecipadamente, antes mesmo de catalogar os exemplares, você pode adicionar um lote correspondente a um intervalo de códigos de barras.
Na ferramenta de criação de etiquetas, clique em ‘Novo’ e escolha ‘Intervalo de códigos de barras’.
Informe os códigos de barras inicial e final.

Aviso
A ferramenta de intervalo de códigos de barras não aceita zeros à esquerda. Se você informar 0001234, o código de barras impresso será 1234.
Clique em ‘Imprimir intervalo’.
Será exibida a tela de confirmação, na qual você poderá escolher o modelo e o leiaute e, caso esteja usando uma folha de etiquetas incompleta, informar a etiqueta inicial.
Nota
Para intervalos de códigos de barras, a única opção de download é PDF.
Salve o arquivo e imprima-o em uma folha de etiquetas em branco.
Gerador de códigos de barras
Nota
Somente membros da equipe com a permissão label_creator (ou a permissão superlibrarian) terão acesso a esta ferramenta.
Vá para: Mais > Catalogação > Ferramentas > Gerador de códigos de barras
O Koha oferece uma ferramenta de geração de códigos de barras que pode ser usada para criar imagens de códigos de barras para diversas finalidades, por exemplo, em avisos.
A ferramenta pode ser usada com vários tipos de códigos de barras e também com códigos QR.
Ela cria uma imagem com o código informado, no formato de código de barras escolhido, e também gera uma etiqueta HTML exclusiva que pode ser utilizada em qualquer lugar.
Para gerar uma nova imagem, preencha o formulário.
Tipo de código de barras: escolha o tipo de código de barras que será usado
Nota
A maioria dos tipos de código de barras aceita apenas caracteres numéricos.
Os seguintes tipos aceitam caracteres alfanuméricos:
Code39
NW7
QRcode
Alguns tipos de código de barras (EAN13, EAN8, UPCA e UPCE) exigem padrões específicos, que podem ser consultados em https://barcode.tec-it.com/en/, na seção EAN/UPC.
Ocultar texto: marque esta caixa se quiser que a imagem contenha apenas o código de barras. Se ela estiver desmarcada, o número será impresso abaixo do código de barras em caracteres legíveis por pessoas.
Altura do código de barras: informe, em pixels, a altura que a imagem do código de barras deverá ter
Código de barras: informe o código de barras que será impresso
Clique em ‘Exibir código de barras’.
A imagem do código de barras será exibida à direita da tela e poderá ser baixada ou impressa.
Abaixo da imagem há uma tag HTML ‘img’. Você pode copiar essa tag e colá-la onde precisar exibir o código de barras. Observe, porém, que ela está disponível apenas na interface administrativa.
Para um código QR, as opções são um pouco diferentes. No lugar de ‘Altura do código de barras’, há o campo ‘Tamanho do módulo do código QR’, que pode ser ajustado por um controle deslizante. O número representa, em pixels, o tamanho de cada quadrado preto ou branco do código, denominado módulo. Quanto maiores os módulos, maior será a imagem.
Um código QR pode conter não apenas caracteres alfanuméricos, mas qualquer informação textual, como uma URL ou até mesmo um texto curto.
Criador rápido de etiquetas de lombada
Nota
Somente membros da equipe com a permissão label_creator (ou a permissão superlibrarian) terão acesso a esta ferramenta.
Vá para: Mais > Catalogação > Ferramentas > Criador rápido de etiquetas de lombada
Nota
Esta ferramenta não usa os leiautes nem os modelos de etiquetas. Ela simplesmente imprime uma etiqueta de lombada na primeira posição da folha ou em uma etiqueta individual de uma impressora de etiquetas.
Defina os campos que deseja imprimir na etiqueta de lombada na preferência do sistema SpineLabelFormat.
Formate a impressão da etiqueta editando o arquivo spinelabel.css, localizado em koha-tmpl/intranet-tmpl/prog/en/css/, ou adicionando o CSS diretamente à preferência do sistema IntranetUserCSS.
Por exemplo, adicionar o código CSS a seguir em IntranetUserCSS alterará a fonte da etiqueta.
/* Modify the Quick Spine Label Creator Font etc */
.tools.labels #spinelabel {
           font-size:11.5pt;
           font-family:courier new;
           font-weight:bold;
  }

Para usar esta ferramenta, basta informar o código de barras do livro cuja etiqueta de lombada deseja imprimir e clicar em ‘Visualizar etiqueta de lombada’.
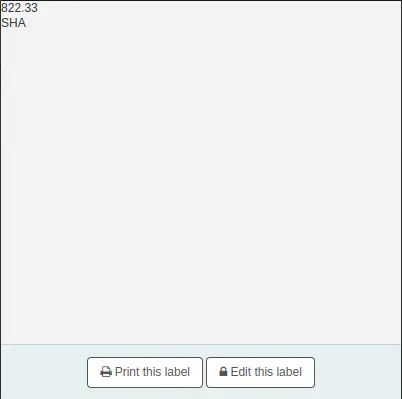
Na página exibida, clique em ‘Imprimir esta etiqueta’.
Se precisar alterar o número de chamada, clique em ‘Editar esta etiqueta’. O ícone de cadeado do botão será desbloqueado e você poderá clicar no número de chamada para editá-lo.
Autoridades
Registros de Autoridades são uma maneira de controlar campos nos seus registros MARC. Utilizar registros de Autoridades permite que você controle assuntos, cabeçalhos, nomes pessoais e lugares.
Adicionar autoridades
Nota
Somente membros da equipe com a permissão editauthorities (ou a permissão superlibrarian) poderão criar registros de autoridade.
Para adicionar um novo registro de autoridade, escolha o tipo de autoridade no botão ‘Nova autoridade’ ou pesquise em outra biblioteca clicando no botão ‘Nova a partir de Z39.50’.
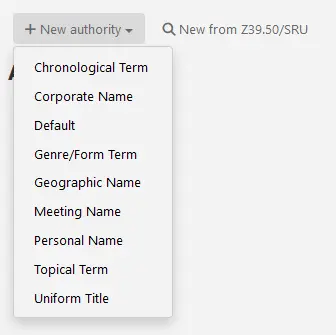
Se você quiser adicionar uma nova autoridade do princípio, o formulário que aparecerá permite que você insira todos os detalhes necessários relativos ao seu registro de autoridades.
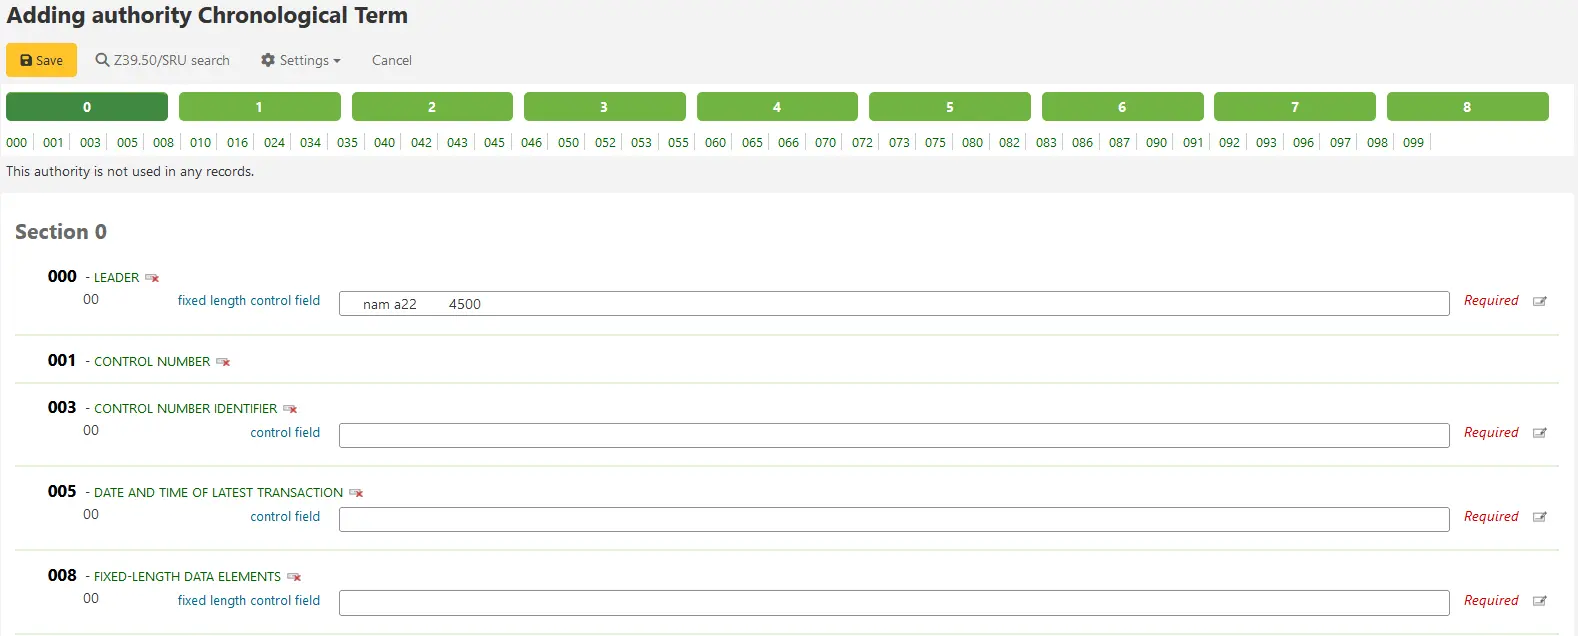
Também é possível alterar o tipo de autoridade do registro no menu ‘Configurações’, acima do formulário de catalogação.
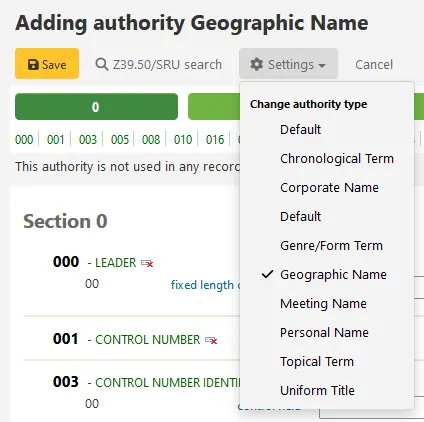
Para expandir valores colapsados, simplesmente clique no título e os subcampos aparecerão. Para duplicar um campo ou subcampo, clique no sinal de adição (+) ao lado do nome. Para utilizar plugins que auxiliam no preenchimento do campo, clique nas reticências (…) ao lado do campo.
Ao vincular autoridades a outros cabeçalhos, você pode usar o plugin de busca de autoridades clicando no botão ‘Editor de etiqueta’ à direita do campo.
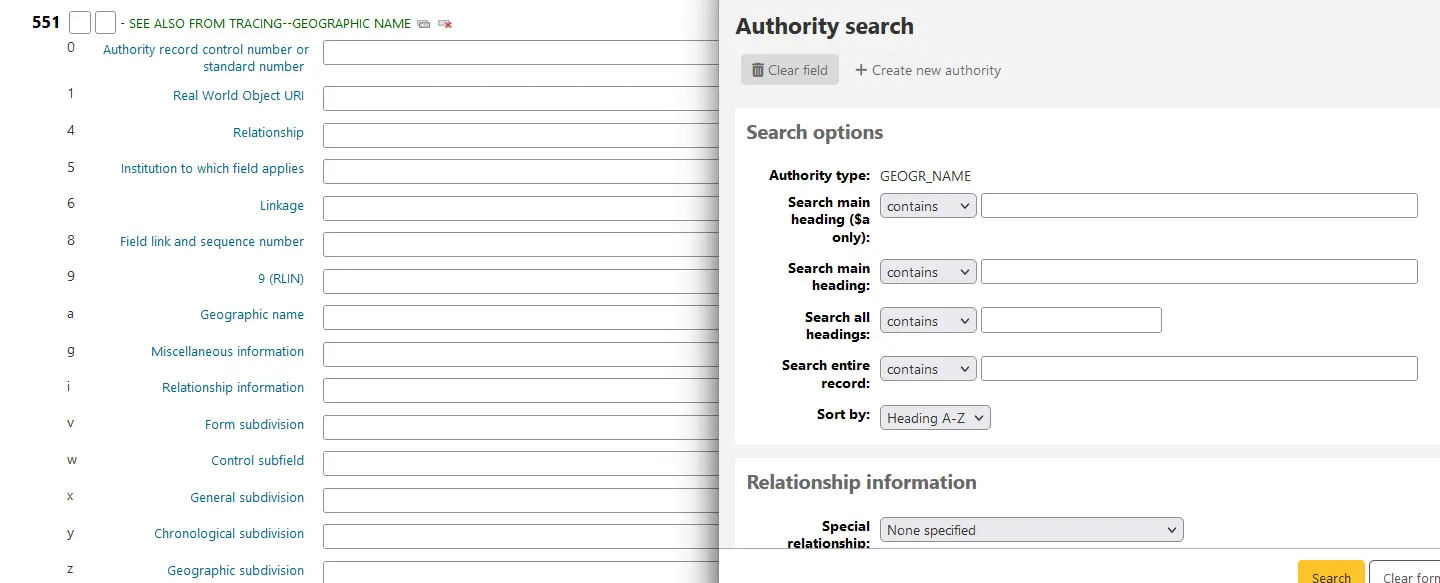
Aqui você pode pesquisar pelo arquivo de autoridades pela autoridade que deseja linkar. Se você não conseguir encontrar a autoridade, você pode clicar no botão ‘Criar nova’ e adicionar a autoridade que for preciso. Este plugin também permite estabelecer o relacionamento entre as autoridades.
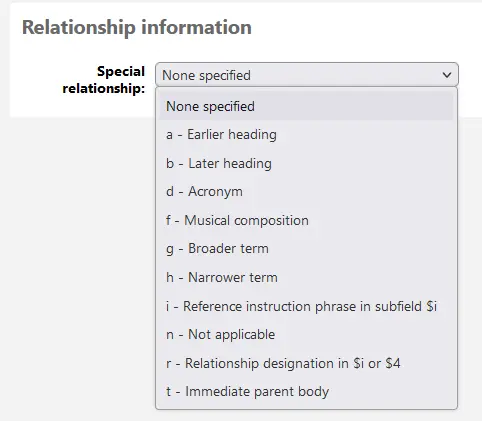
Você também pode importar um registro de autoridade clicando em ‘Pesquisa Z39.50/SRU’, acima do formulário de catalogação. O formulário de pesquisa Z39.50/SRU será aberto em uma nova janela.
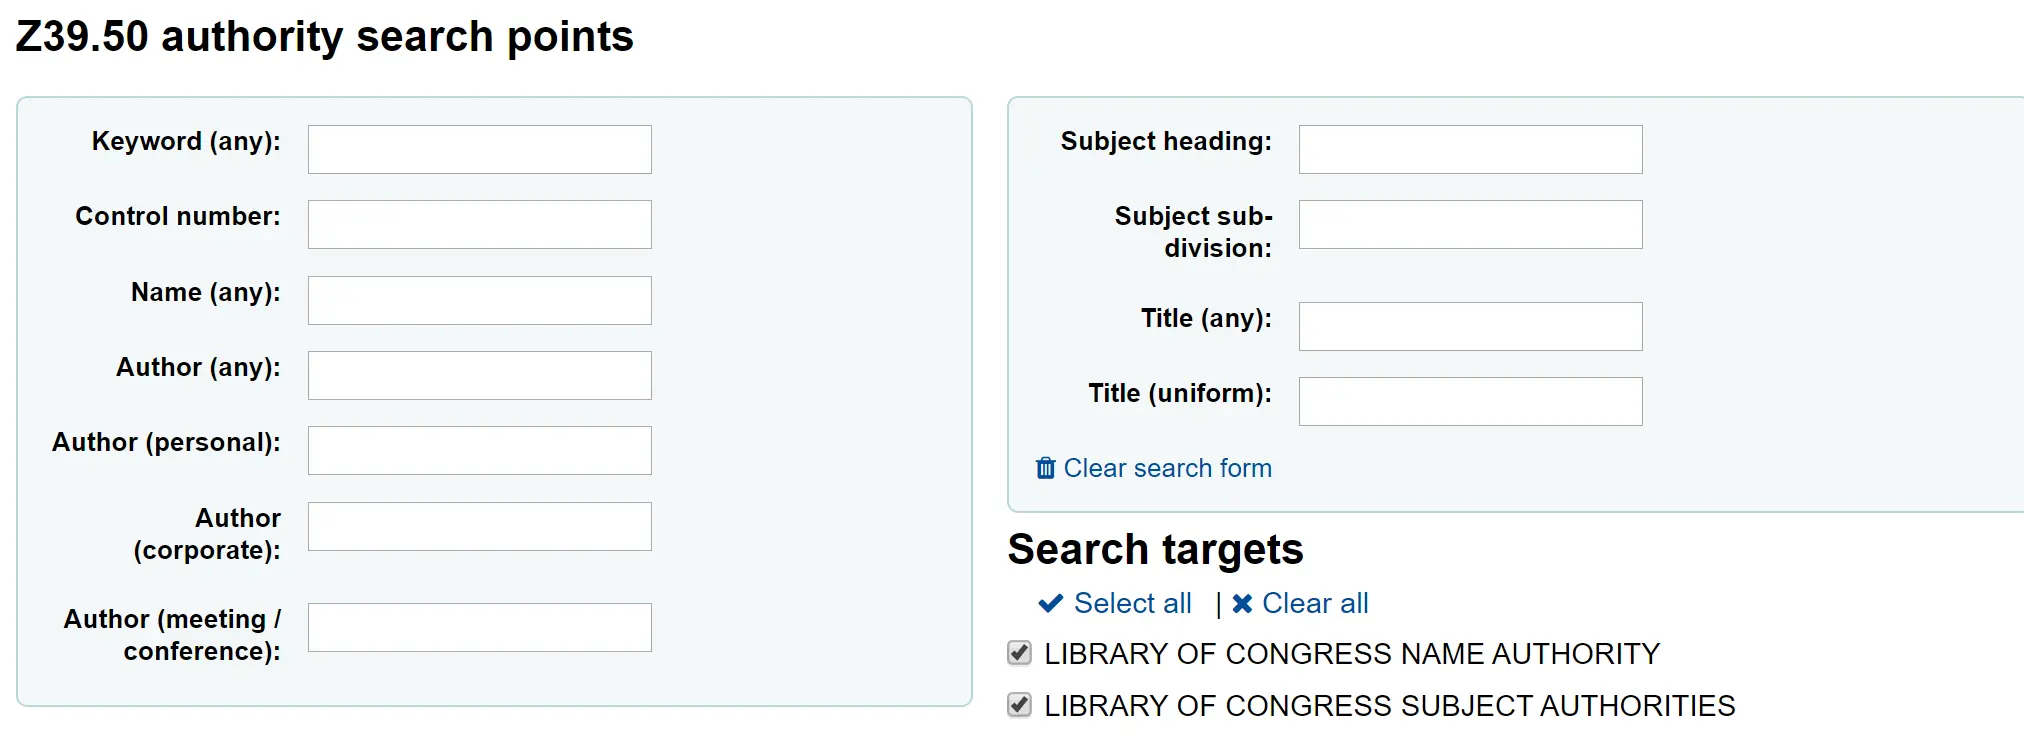
Nos resultados, use o menu ‘Ações’, à direita do registro que deseja adicionar ao Koha, e selecione ‘Importar’.
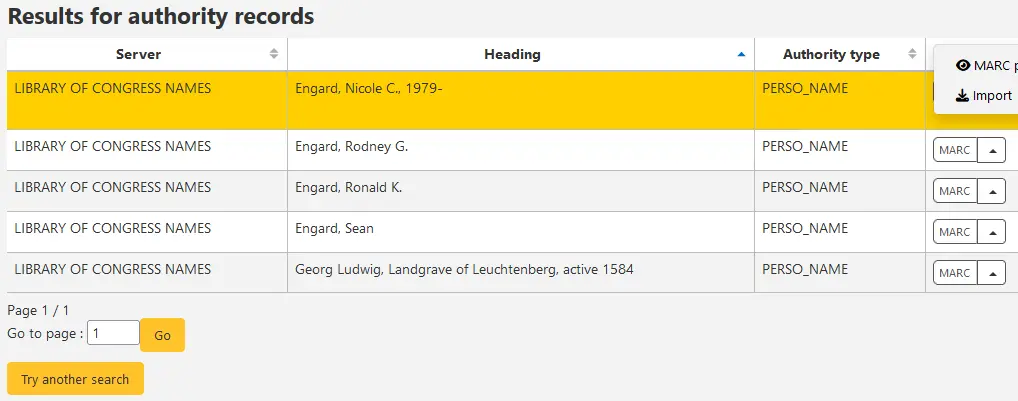
Em seguida, será exibido o formulário para editar a autoridade antes de salvá-la no sistema.
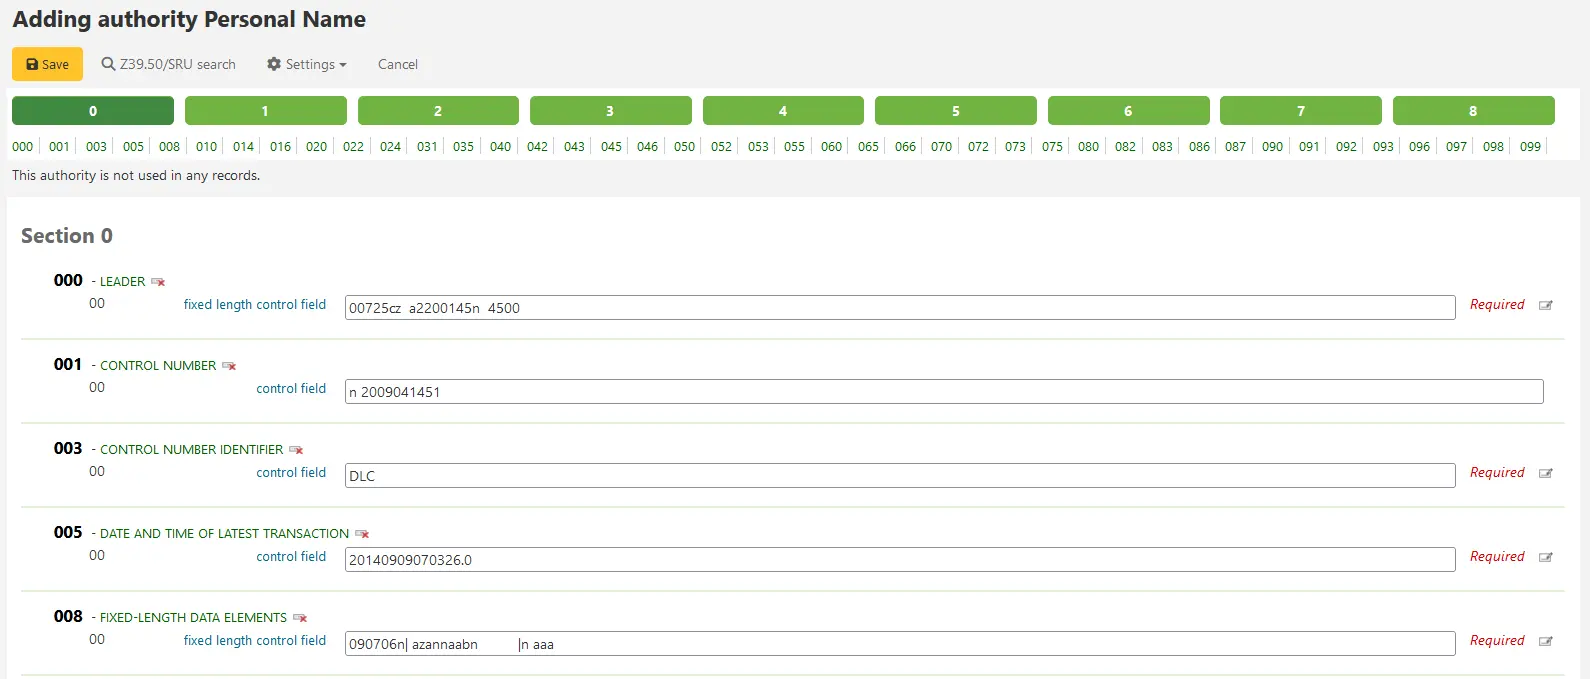
Pesquisar autoridades
A partir da página de autoridades, você pode pesquisar por termos existentes e pelos registros bibliográficos aos quais eles estão relacionados.

Nos resultados, serão exibidos o registro de autoridade, a quantidade de registros bibliográficos aos quais ele está vinculado e um menu ‘Ações’ com as opções de editar, mesclar e excluir (quando não houver registros bibliográficos vinculados).
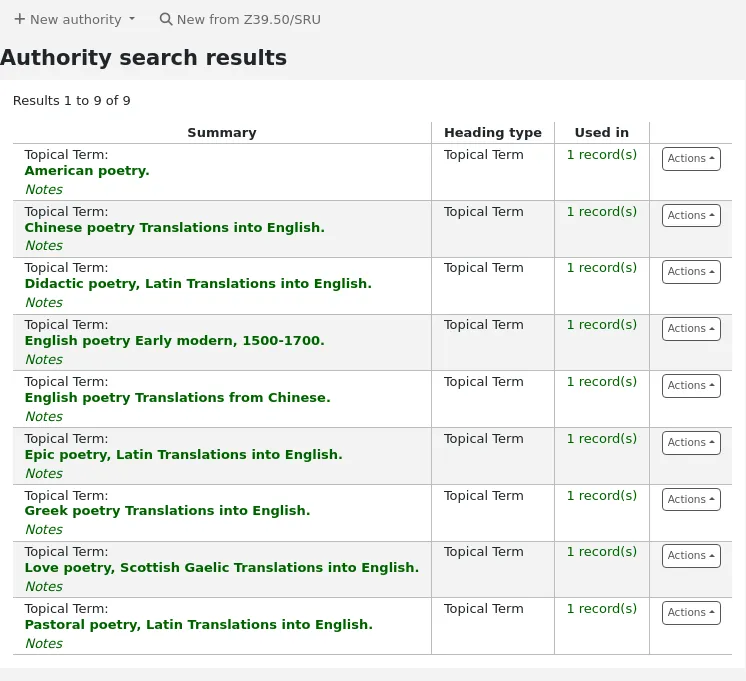
Nota
Em sistemas MARC21, se a preferência do sistema ShowHeadingUse estiver ativada, haverá uma coluna adicional mostrando o uso apropriado do registro de autoridade em entradas principais ou secundárias, cabeçalhos de assunto ou títulos de série.
Ao clicar no link ‘Detalhes’, à direita do resumo do registro de autoridade, serão abertos o registro completo e a opção de editá-lo.
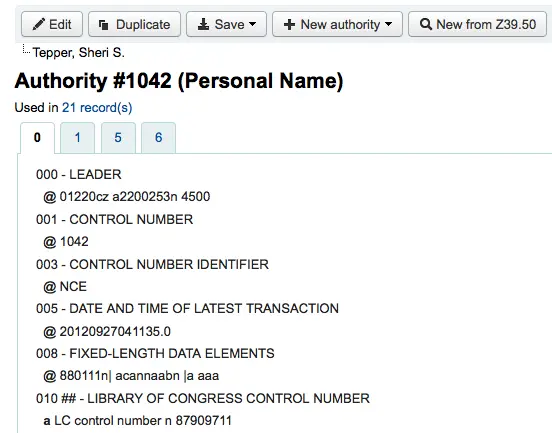
Se a autoridade contiver remissivas ‘Ver também’, elas serão exibidas separadamente nos resultados da pesquisa. Clique nos cabeçalhos vinculados para pesquisar o cabeçalho correspondente.
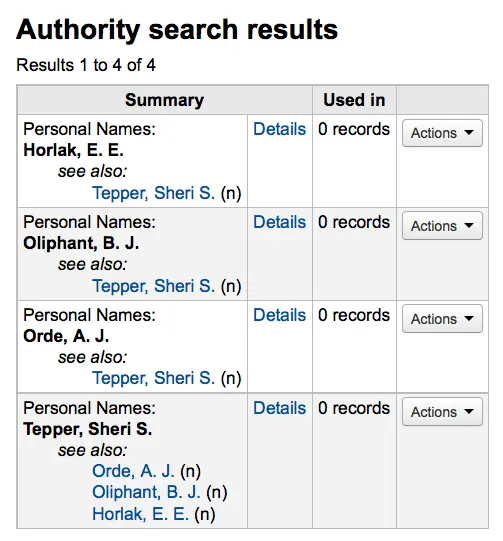
Editar autoridades
Nota
Somente membros da equipe com a permissão editauthorities (ou a permissão superlibrarian) poderão editar ou excluir registros de autoridade existentes.
Para editar uma autoridade, clique no resumo da autoridade nos resultados da pesquisa e depois no botão ‘Editar’, acima do registro. Também é possível clicar no link ‘Editar’, à esquerda da autoridade nos resultados.
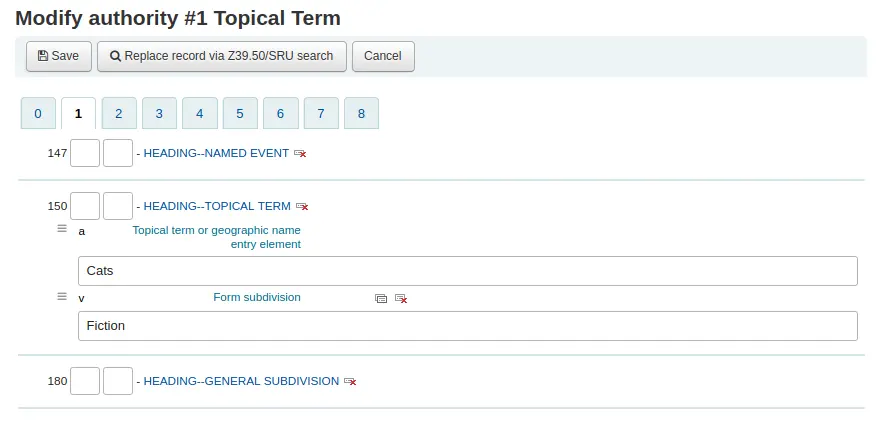
Depois de fazer as alterações necessárias, clique em ‘Salvar’.
Dependendo da quantidade de registros bibliográficos vinculados a este registro de autoridade, eles poderão ser atualizados imediatamente. Isso depende do valor definido na preferência do sistema AuthorityMergeLimit; o padrão é 50. Se a quantidade de registros bibliográficos for inferior ao valor de AuthorityMergeLimit, eles serão alterados imediatamente. Se a quantidade exceder o valor de AuthorityMergeLimit, os registros somente serão atualizados quando o script merge_authorities.pl for executado.
Para excluir um registro de autoridade você precisa primeiro verificar se ele não está ligado a nenhum registro bibliográfico. Se não estiver sendo utilizado por nenhum registro, um link ‘Excluir’ aparecerá à direita do registro na página de resultados de busca.
Mesclar autoridades
Nota
Somente membros da equipe com a permissão editauthorities (ou a permissão superlibrarian) poderão mesclar registros de autoridade.
Se houver registros de autoridade duplicados, você poderá mesclá-los clicando no link ‘Mesclar’ do menu Ações ao lado de dois resultados de uma pesquisa de autoridades.

Depois de clicar em ‘Mesclar’ no primeiro resultado, esse registro de autoridade será exibido no início dos resultados.
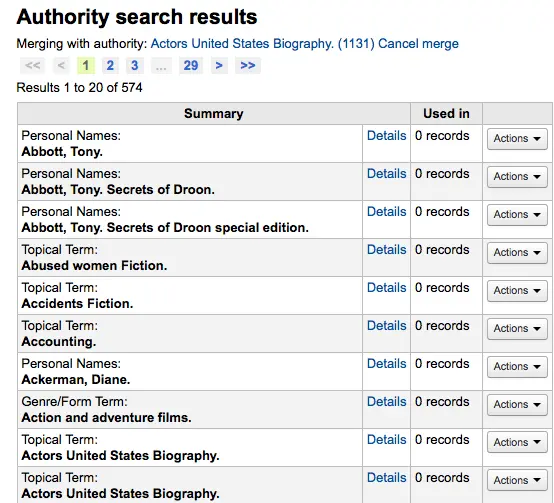
Em seguida, clique em ‘Mesclar’ ao lado do segundo resultado que deseja mesclar.
Você deverá escolher qual dos dois registros será mantido como registro principal e qual será excluído após a mesclagem.
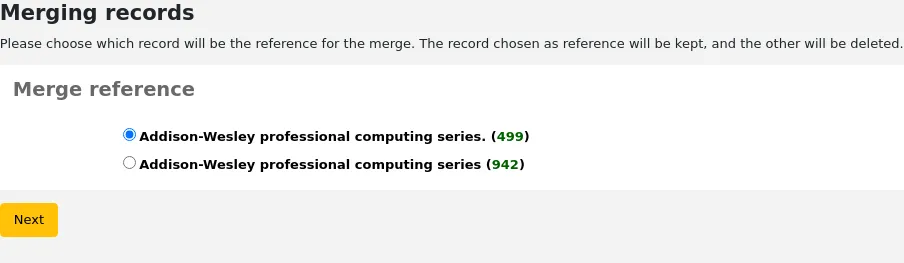
Você será presenteado com o MARC para ambos os registos (qualquer um acessível por separados marcados com o número de registo). Por padrão todo o primeiro registo vai ser selecionado, desmarque os campos que não deseja no registo final (destino) e depois vá ao segundo separado para escolher quais os campos que também devem estar no registo final.
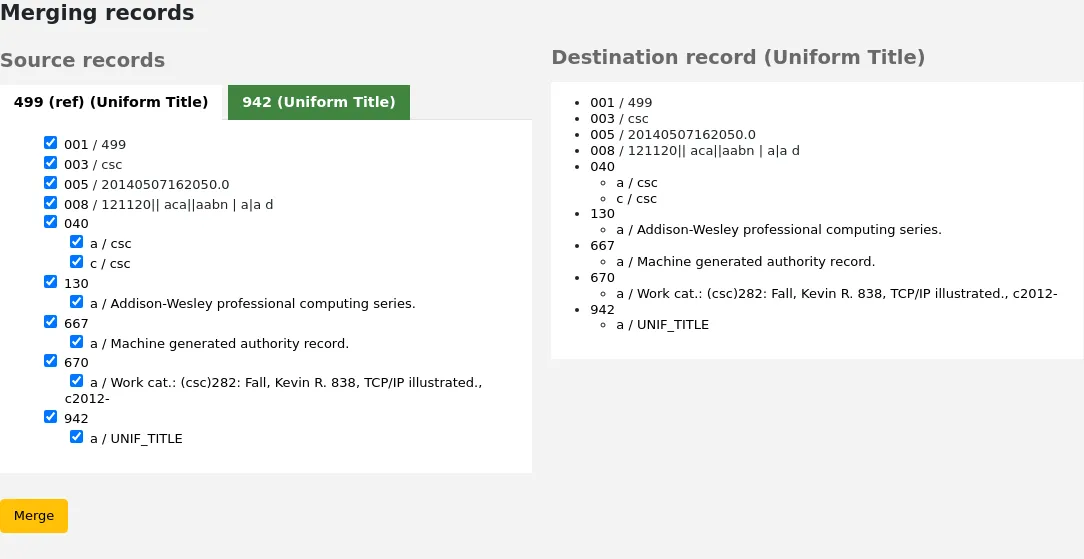
Depois de concluir as seleções, clique no botão ‘Mesclar’. O registro principal passará a conter os dados escolhidos, e o segundo registro será excluído.
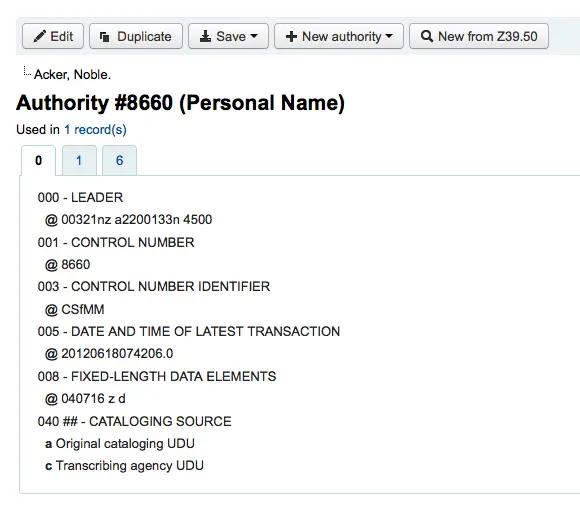
Se houver dois registros de autoridade para o mesmo cabeçalho em planilhas MARC diferentes, você poderá mesclá-los clicando no link ‘Mesclar’ do menu Ações ao lado de dois resultados de uma pesquisa de autoridades. Por exemplo, estes registros de autoridade que usam planilhas diferentes podem ser mesclados.
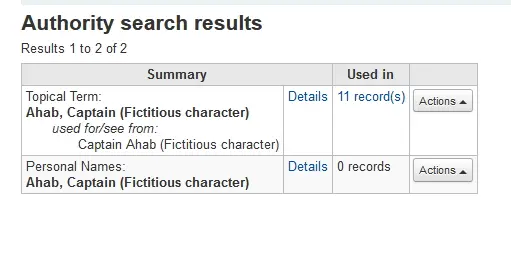
Selecione o link ‘Mesclar’ no menu Ações do primeiro registro.
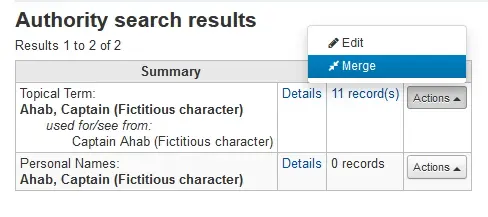
O registro de autoridade será exibido no início dos resultados.
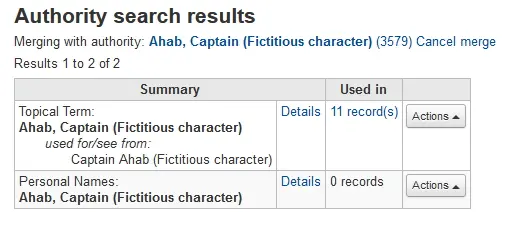
Em seguida, selecione ‘Mesclar’ ao lado do segundo resultado que deseja mesclar.
Você deverá escolher qual dos dois registros será mantido como registro principal e qual será excluído após a mesclagem. Use também o menu suspenso para escolher a planilha MARC.
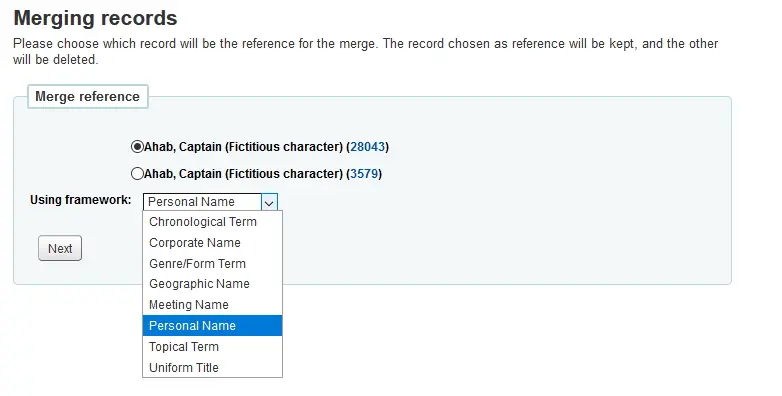
Os dados MARC dos dois registros serão exibidos em abas identificadas pelos respectivos números de autoridade. Por padrão, todo o primeiro registro estará selecionado. Desmarque os campos que não deseja incluir no registro final (de destino) e passe à segunda aba para escolher quais campos desse registro deverão ser incluídos no registro final.
O registro de referência, isto é, o registro principal, usará a planilha MARC escolhida:
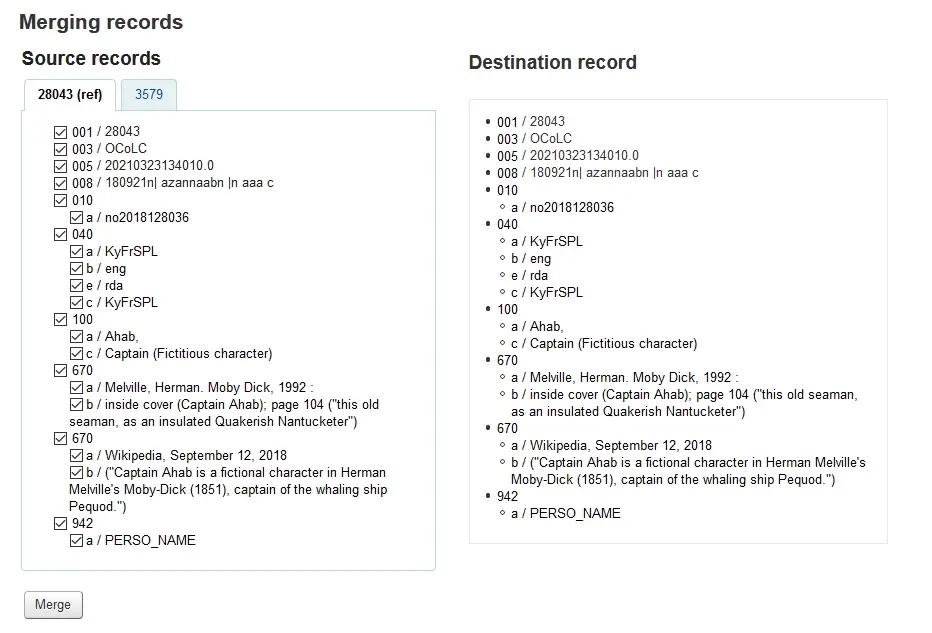
Depois de concluir as seleções, clique no botão ‘Mesclar’. O registro principal passará a conter os dados escolhidos, e o segundo registro será excluído.
A etiqueta MARC dos cabeçalhos vinculados será atualizada de acordo com a escolha.
Exportar dados
Nota
Somente membros da equipe com a permissão export_catalog e pelo menos uma das subpermissões editcatalogue (ou a permissão superlibrarian) terão acesso a esta ferramenta.
Vá para: Mais > Catalogação > Exportar > Exportar dados do catálogo
O Koha oferece uma ferramenta para exportar em lote registros bibliográficos, registros de exemplar e registros de autoridade. Ela pode ser usada para enviar registros a outras bibliotecas, organizações ou serviços, ou simplesmente para criar cópias de segurança.
Exportar registros bibliográficos
Na parte superior da tela, escolha os dados que serão exportados. Para exportar registros bibliográficos, com ou sem informações de exemplares, clique na aba ‘Exportar registros bibliográficos’.
Preencha o formulário para limitar os registros que serão exportados; todos os campos são opcionais
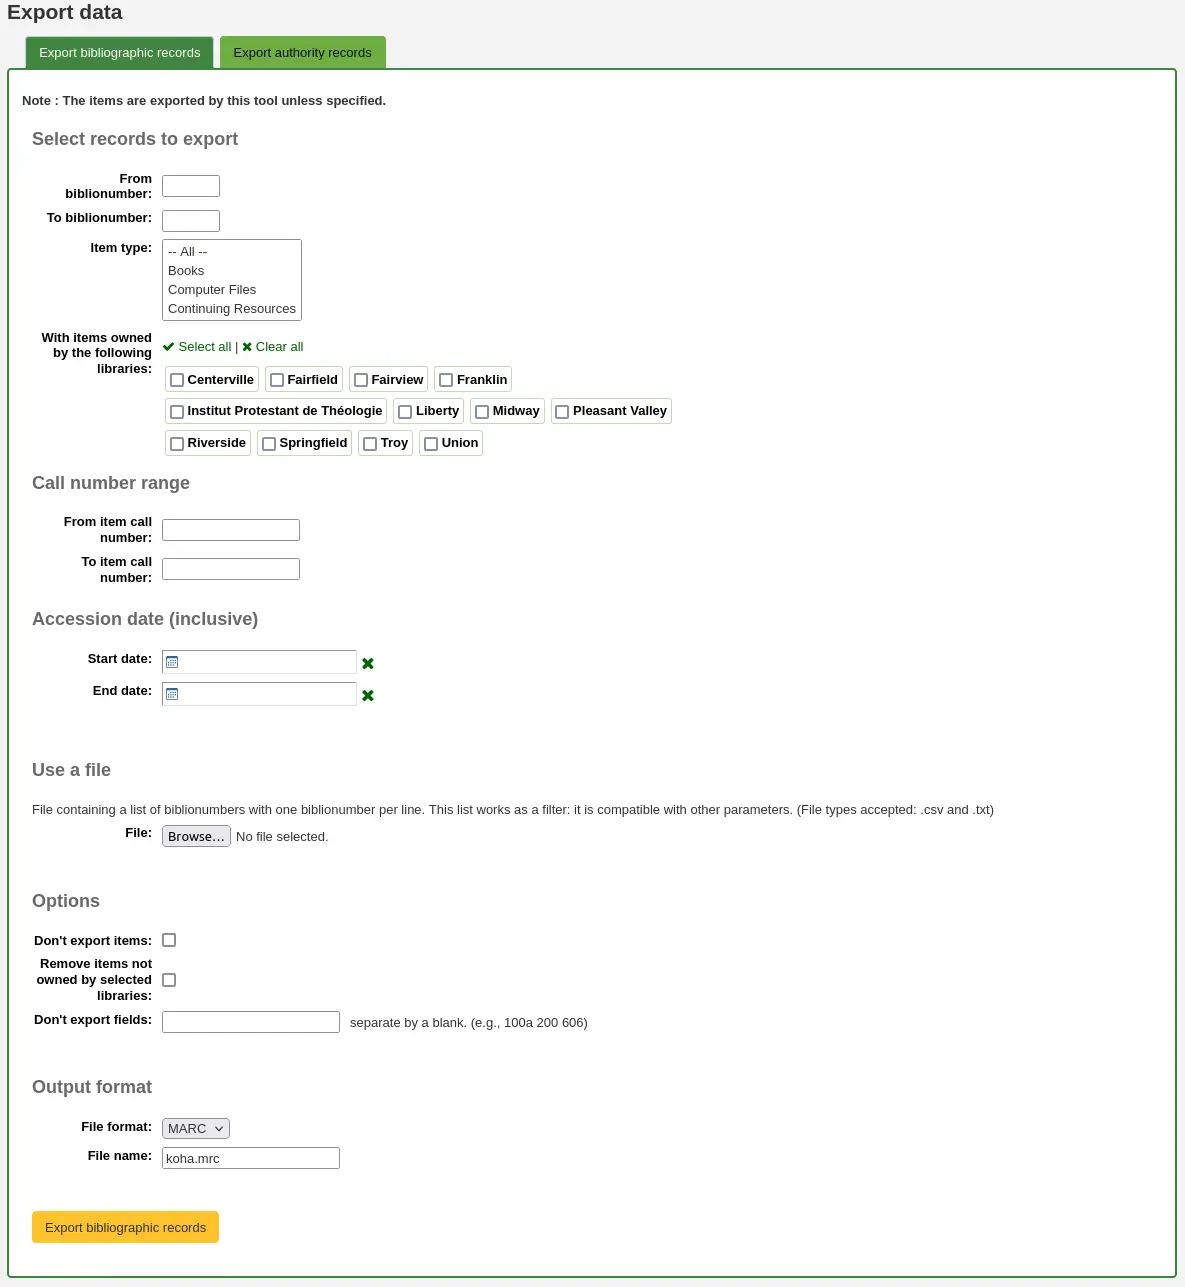
De biblionumber / Até biblionumber: limita a exportação a um intervalo de biblionumbers
Tipo de material: limita a um ou vários tipos de material específicos
Aviso
Esse limite usará o tipo de material definido na preferência do sistema item-level_itypes.
Se a preferência do sistema item-level_itypes estiver definida como ‘exemplar específico’ e não houver exemplares vinculados a um registro bibliográfico, esse registro não será exportado.
Para exportar todos os registros bibliográficos de determinado tipo, a preferência do sistema item-level_itypes deve estar definida como ‘registro bibliográfico’.
Com exemplares pertencentes às seguintes bibliotecas: limita a uma biblioteca específica ou a um grupo de bibliotecas
Aviso
Este é um filtro. Se ele permanecer com o valor padrão, todas as bibliotecas selecionadas, ou se uma ou mais bibliotecas forem selecionadas, os registros bibliográficos sem exemplares vinculados não serão exportados.
Para obter registros bibliográficos sem exemplares, use ‘Limpar tudo’ nas bibliotecas selecionadas, isto é, desmarque todas as bibliotecas.
Intervalo de números de chamada: limita a um intervalo de números de chamada
Data de entrada (inclusive): limita a um intervalo de datas de aquisição
Usar um arquivo: permite carregar um arquivo com os biblionumbers dos registros que serão exportados. O arquivo deve ser do tipo .csv ou .txt
Não exportar exemplares: por padrão, os exemplares serão exportados. Marque esta caixa para exportar somente os registros bibliográficos
Remover exemplares que não pertencem às bibliotecas selecionadas: marque esta caixa para limitar a exportação aos exemplares da biblioteca na qual você está conectado, se o campo ‘Com exemplares pertencentes às seguintes bibliotecas’ estiver definido como ‘Todas’, ou aos exemplares da biblioteca ou das bibliotecas selecionadas acima
Não exportar campos: informe os campos que não devem ser exportados, separados por espaços. Isso pode ser útil ao compartilhar dados, pois permite remover todos os campos locais antes de enviá-los a outra biblioteca
Formato do arquivo: escolha o tipo de arquivo, MARC ou MARCXML
Nome do arquivo: se necessário, informe um novo nome para o arquivo de exportação
Clique em ‘Exportar registros bibliográficos’
Exportar registros de autoridade
Na parte superior da tela, escolha os dados que serão exportados. Para exportar registros de autoridade, clique na aba ‘Exportar registros de autoridade’.
Preencha o formulário para limitar os registros que serão exportados; todos os campos são opcionais
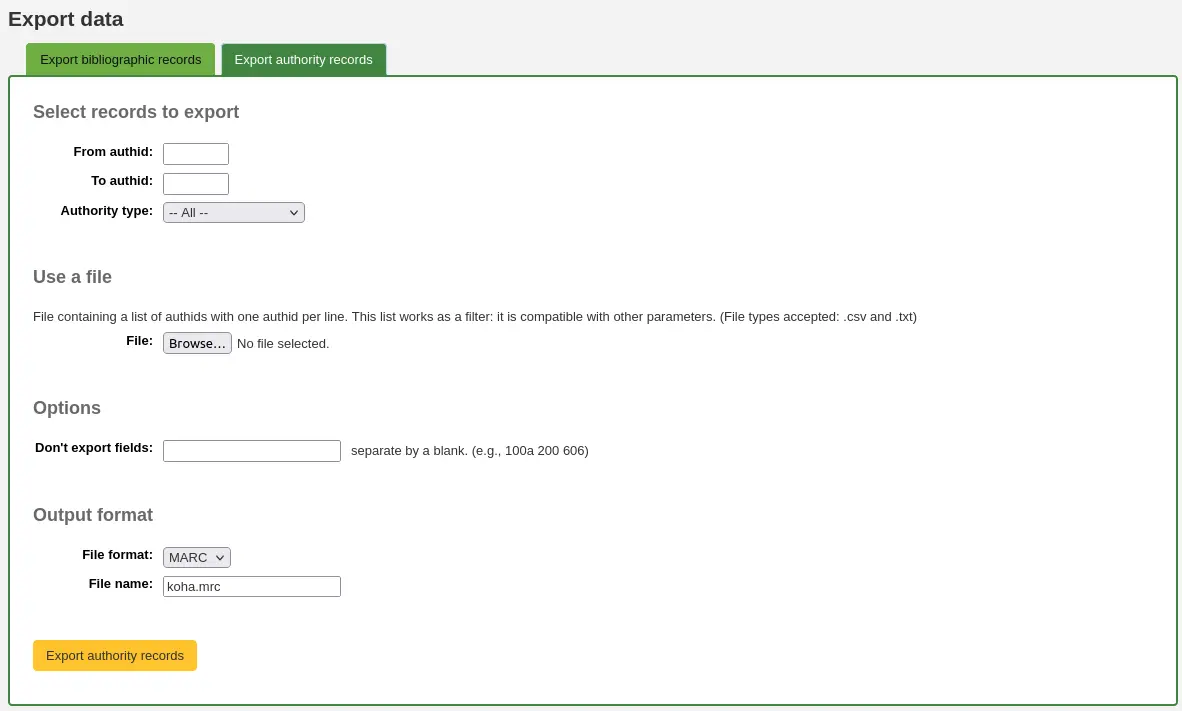
De authid / Até authid: limita a exportação a um intervalo de authids
Tipo de autoridade: limita a exportação a registros de um tipo de autoridade específico
Usar um arquivo: permite carregar um arquivo com os authids dos registros que serão exportados. O arquivo deve ser do tipo .csv ou .txt
Em seguida, informe os campos que deseja excluir da exportação, separados por espaços, sem vírgulas
Não exportar campos: informe os campos que não devem ser exportados, separados por espaços.
Para excluir todos os subcampos do campo 200, por exemplo, informe apenas 200.
Para excluir um subcampo específico, informe-o junto ao número do campo. Por exemplo, 100a excluirá somente o subcampo ‘a’ do campo 100.
Formato do arquivo: escolha o tipo de arquivo, MARC ou MARCXML
Nome do arquivo: se necessário, informe um novo nome para o arquivo de exportação
Clique em ‘Exportar registros de autoridade’.
Inventário
Nota
Somente membros da equipe com a permissão inventory (ou a permissão superlibrarian) terão acesso a esta ferramenta.
Vá para: Mais > Catalogação > Relatórios > Inventário
A ferramenta de inventário do Koha pode ser usada de três maneiras:
Criando uma lista de prateleira na qual os exemplares encontrados podem ser marcados;
Carregando códigos de barras coletados com um leitor portátil;
Comparando os códigos de barras coletados com um leitor portátil, ou digitalizados diretamente, com uma lista de prateleira gerada pelo sistema.
Criar uma lista de prateleira
Se não for possível usar o leitor de códigos de barras enquanto você percorre a biblioteca, gere uma lista de prateleira com base nos critérios informados. Depois, imprima-a para conferir o acervo ao percorrer a biblioteca ou use-a diretamente no Koha por meio de um dispositivo portátil.
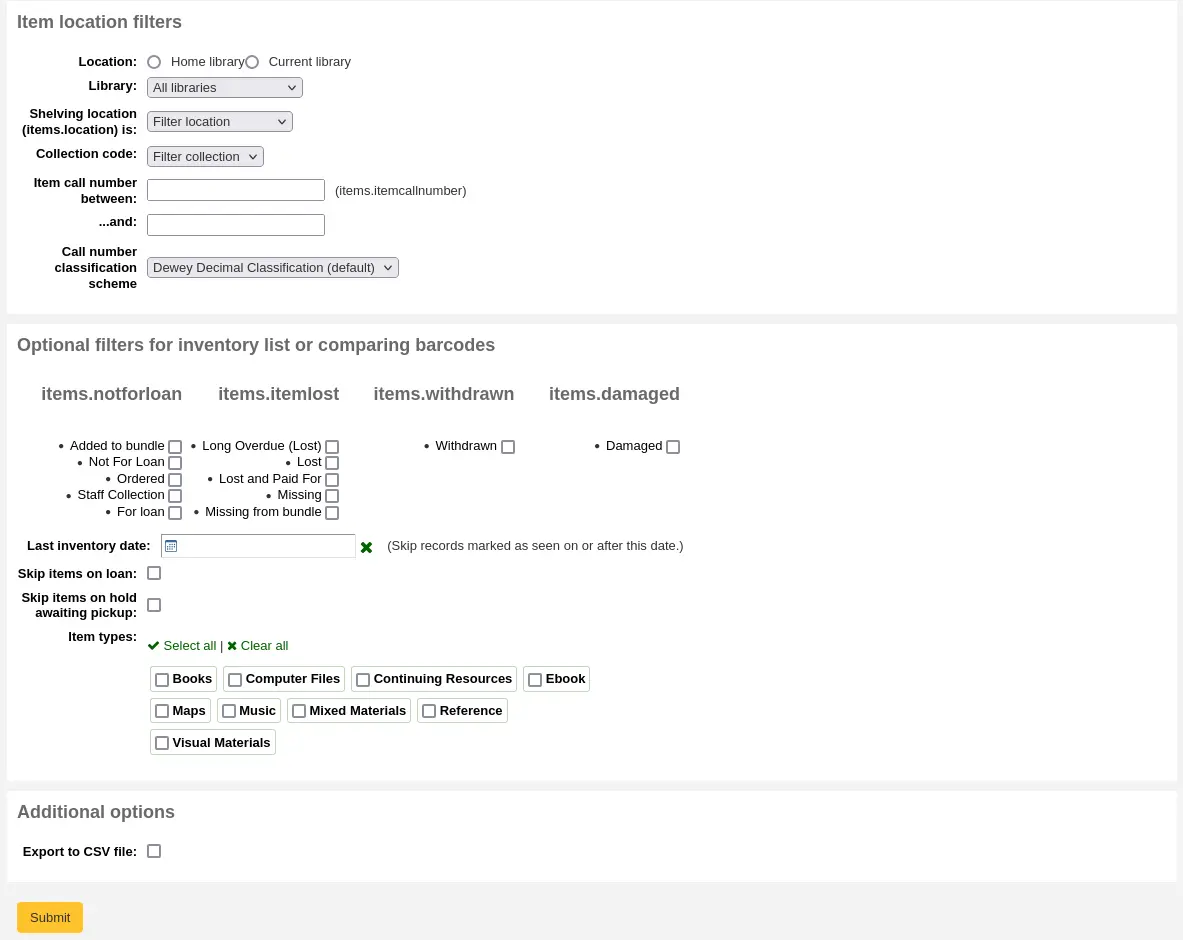
Primeiro, escolha os critérios dos exemplares que deverão constar na lista. Todos os parâmetros são opcionais, mas, se nenhum for selecionado, a lista resultante poderá ser muito extensa.
Biblioteca: escolha a unidade que deseja conferir e indique se ela corresponde à biblioteca de origem ou à biblioteca atual dos exemplares.
Localização na estante (items.location): permite filtrar pela localização.
Número de chamada do exemplar entre … e …: permite limitar a lista a um intervalo específico de números de chamada.
Esquema de classificação do número de chamada: ao filtrar pelo número de chamada, escolha o esquema de classificação correto
É possível refinar ainda mais o filtro usando as situações dos exemplares: não emprestável, perdido, baixado ou danificado. Marque as caixas correspondentes às situações que deseja incluir. Por exemplo, se a lista for usada para conferir a ordenação nas estantes, marque apenas a situação ‘emprestável’, pois os demais exemplares provavelmente não estarão nas estantes.
Data do último inventário: informe uma data para ignorar exemplares marcados como vistos recentemente.
Ignorar exemplares emprestados: marque esta caixa para remover da lista os exemplares emprestados.
Ignorar exemplares reservados que aguardam retirada: marque esta caixa para remover da lista os exemplares que aguardam retirada pelos usuários
Tipos de material: marque as caixas correspondentes aos tipos de material que deseja incluir na lista de prateleira
Exportar para arquivo CSV: marque esta caixa para gerar um arquivo CSV que poderá ser alterado em um aplicativo no computador. Se ela estiver desmarcada, a lista será exibida na tela.
Clique em ‘Enviar’ para gerar a lista de prateleira.
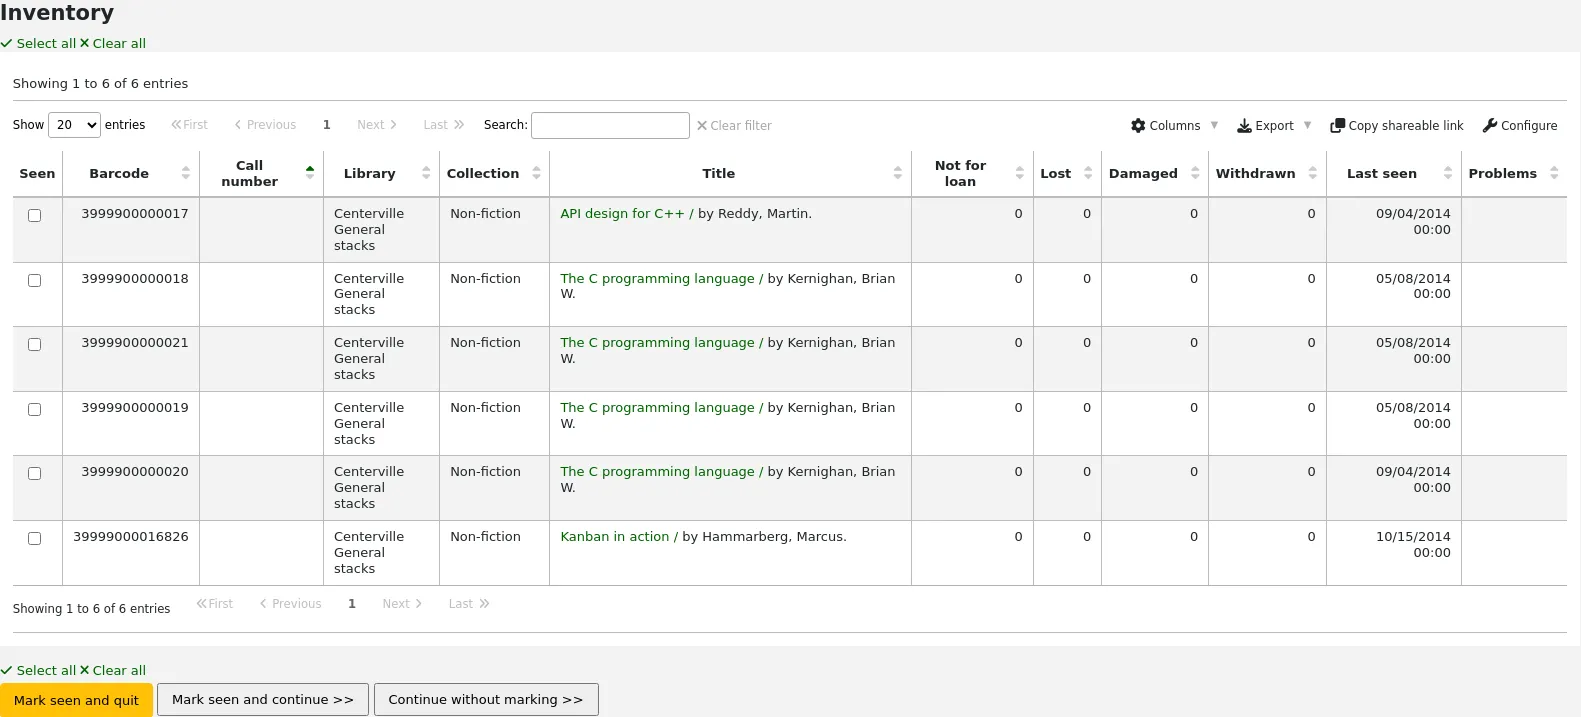
Depois de localizar os exemplares nas estantes, retorne à lista e marque as caixas ao lado dos exemplares encontrados. Em seguida, clique em um dos três botões para continuar:

Marcar como visto e sair: atualiza para o momento atual a data e a hora de ‘visto pela última vez’ dos exemplares selecionados e retorna à tela anterior.
Marcar como visto e continuar: atualiza para o momento atual a data e a hora de ‘visto pela última vez’ dos exemplares selecionados e exibe a próxima página da lista.
Continuar sem marcar: não atualiza nenhum exemplar desta página e exibe a próxima página da lista.
Carregar códigos de barras obtidos com um leitor
Se você tiver um leitor portátil, ou um notebook com leitor USB, poderá percorrer a biblioteca e digitalizar os códigos de barras encontrados. Em um notebook, digitalize-os para um arquivo de texto ou diretamente para a caixa de texto na tela. Ao terminar, carregue no Koha o arquivo de texto gerado pelo leitor.
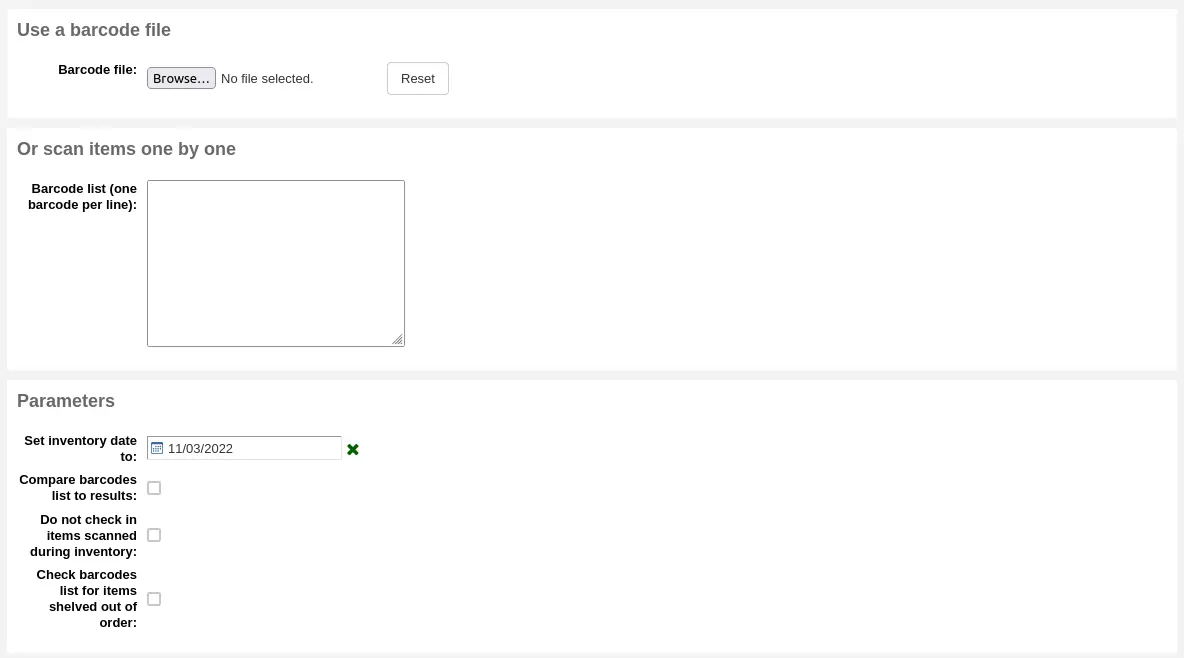
Definir data do inventário como: escolha a data que será registrada como a última vez em que todos os exemplares foram vistos.
Comparar a lista de códigos de barras com os resultados: desmarque esta opção para usar este método.
Não registrar a devolução do exemplar digitalizado durante o inventário: se esta opção não estiver marcada, o Koha registrará a devolução dos exemplares digitalizados, pois considera que, se estão na estante, não estão emprestados. Marque-a se não quiser registrar a devolução desses exemplares.
Verificar na lista de códigos de barras se há exemplares fora de ordem na estante: quando esta opção está marcada, o Koha compara os números de chamada e verifica se estão na ordem correta.
Clique em ‘Enviar’. A data de ‘visto pela última vez’ de todos os exemplares será atualizada para a data escolhida; a hora será definida como 00:00.
Depois de atualizar a data da última verificação de todos os exemplares digitalizados durante o inventário, você poderá usar relatórios para identificar os que não foram digitalizados e, portanto, podem ser considerados desaparecidos. A ferramenta de modificação de exemplares em lote pode ser usada para alterar a situação LOST desses exemplares. Há relatórios de exemplo disponíveis na Biblioteca de relatórios SQL do Koha.
Comparar códigos de barras digitalizados com uma lista de prateleira
Como alternativa, você pode combinar os dois métodos para comparar automaticamente uma lista de códigos de barras digitalizados com uma lista gerada pelo sistema.
Primeiro, carregue o arquivo de códigos de barras ou digitalize os códigos na caixa.
Definir data do inventário como: escolha a data que será exibida no campo ‘visto pela última vez’ dos exemplares; a hora será definida como 00:00.
Comparar a lista de códigos de barras com os resultados: esta opção deverá ser marcada automaticamente.
Não registrar a devolução dos exemplares digitalizados durante o inventário: marque esta opção se não quiser que a devolução dos exemplares digitalizados seja registrada automaticamente quando eles estiverem emprestados.
Escolha os filtros — biblioteca, localização na estante, números de chamada, situações ou tipos de material — para gerar a lista que será comparada aos códigos de barras. Clique em ‘Enviar’.
Nota
Dependendo da quantidade de códigos de barras comparados, o processo poderá levar alguns minutos. Não é recomendável comparar listas com mais de 1.000 códigos, pois a sessão poderá expirar.
Quando o Koha terminar de comparar o arquivo de códigos de barras com a lista gerada, exibirá a quantidade de exemplares atualizados e uma lista dos exemplares com problemas.
Nota
Diferentemente do que ocorre ao criar uma lista de prateleira, a lista apresentada aqui conterá somente os exemplares que o Koha identificou como problemáticos.
Ausente (não digitalizado): o exemplar está na lista gerada, mas não no arquivo de códigos de barras.
Encontrado no lugar errado: o exemplar está na lista de códigos de barras, mas não na lista gerada.
Ainda emprestado: o exemplar está emprestado, mas aparece na lista gerada. Sua devolução não foi registrada automaticamente.
Sem código de barras: o código de barras não existe.
Situação de não empréstimo desconhecida: o exemplar tem uma situação de ‘não empréstimo’ que não consta na categoria de valores autorizados NOT_LOAN
O exemplar pode estar fora de ordem na estante: o número de chamada está fora de ordem
Guias de catalogação
Guia rápido para catalogação de registros bibliográficos
Esta seção refere-se ao MARC21.
Tag |
Etiqueta |
Descrição |
Instruções |
|---|---|---|---|
000 |
LÍDER |
Descreve o registro, isto é, a representação: trata-se de um registro de monografia, de periódico ou de outro tipo de recurso? |
Clique neste campo para preenchê-lo. Em seguida, defina o ‘Nível bibliográfico’ como ‘a’ para artigos ou ‘s’ para periódicos. Nos demais casos, mantenha os valores existentes. O valor da posição 6 influencia o tipo de material no campo 008. |
001 |
NÚMERO DE CONTROLE |
Número de tombo. |
Informe aqui o número de tombo registrado no exemplar. Para artigos e exemplares sem número de tombo, deixe o campo em branco. Você pode usar a preferência do sistema autoControlNumber para preencher automaticamente este campo com o biblionumber do registro. |
003 |
IDENTIFICADOR DO NÚMERO DE CONTROLE |
O código MARC de sua organização |
Clique neste campo para preenchê-lo. Ele será preenchido automaticamente se a preferência MARCOrgCode estiver configurada. |
005 |
DATA E HORA DA ÚLTIMA TRANSAÇÃO |
Data e hora atuais. |
Clique neste campo para preenchê-lo. |
008 |
ELEMENTOS DE DADOS DE EXTENSÃO FIXA |
Campo que contém representações legíveis por computador de diversos tipos de informação. |
O tipo de material é definido automaticamente de acordo com a posição 06 do líder. Em geral, na posição 06, serão usadas apenas as opções ‘s’ (única) ou ‘m’ (múltiplas): use a primeira quando o material tiver sido publicado em um único ano e a segunda quando tiver sido publicado ao longo de vários anos. Se houver apenas uma data, informe-a somente no primeiro campo de data, posições 07 a 10. Informe o código de país de três caracteres nas posições 15 a 17 e acrescente espaços caso o código tenha menos de três caracteres. Se houver um índice, registre essa informação na posição 31. Informe o código de idioma de três letras nas posições 35 a 37. |
010 |
LCCN |
Número atribuído pela Library of Congress para identificar a obra de forma exclusiva. |
Procure esse número na página de direitos autorais do livro, se ele tiver sido publicado nos Estados Unidos, ou no catálogo da Library of Congress. Se não o encontrar, deixe o campo em branco. |
020 |
ISBN |
Número exclusivo usado pelas editoras para identificar livros. |
Se esse número não estiver indicado no livro, provavelmente não existe. |
022 |
ISSN |
Número exclusivo usado pelas editoras para identificar periódicos. |
Se esse número não estiver indicado no livro, provavelmente não existe. |
033 |
DATA/HORA DO EVENTO |
Usado para datas de leilões. Obrigatório em catálogos de leilão. |
Para leilões realizados em um único dia, informe a data no formato AAAAMMDD no subcampo ‘a’ e use ‘0’ no primeiro indicador. Para leilões realizados em dois dias consecutivos ou em qualquer quantidade de dias não consecutivos, crie um subcampo ‘a’ para cada dia, com a data no formato AAAAMMDD, e use ‘1’ no primeiro indicador. Para leilões realizados durante mais de dois dias consecutivos, crie um subcampo ‘a’, no formato AAAAMMDD, para o primeiro dia e outro subcampo ‘a’, também no formato AAAAMMDD, para o último dia, e use ‘2’ no primeiro indicador. |
040 |
FONTE DA CATALOGAÇÃO |
Identifica as bibliotecas que criaram e modificaram o registro. |
Em registros importados, adicione um subcampo ‘d’ contendo o código OCLC de sua instituição. Em registros novos, verifique se o subcampo ‘c’ contém esse código OCLC. |
041 |
CÓDIGO DE IDIOMA |
Identifica todos os idiomas usados no material quando houver dois ou mais idiomas. |
Para partes significativas de um texto em determinado idioma, deve haver um subcampo ‘a’ com o código desse idioma. Se houver apenas resumos em um idioma específico, crie um subcampo ‘b’ com o código correspondente. Para o idioma de texto cantado ou falado, use o subcampo ‘d’. |
100 |
ENTRADA PRINCIPAL — NOME PESSOAL |
Forma autorizada do nome do autor principal |
Consulte a folha de cabeçalhos autorizados e a AACR2. Em geral, o primeiro indicador deve ser ‘1’, para indicar que o sobrenome aparece primeiro. Porém, se o nome consistir apenas em um prenome, o primeiro indicador deverá ser ‘0’. |
110 |
ENTRADA PRINCIPAL — ENTIDADE COLETIVA |
Forma autorizada do nome da entidade coletiva autora principal. Obrigatória em catálogos de leilão. |
Catálogos de leilão devem usar o campo 110 em vez do campo 100. Consulte a folha de cabeçalhos autorizados e a AACR2. Defina o primeiro indicador como ‘2’. |
111 |
ENTRADA PRINCIPAL — EVENTO |
Forma autorizada do nome de um evento que funciona como entrada principal, por exemplo, em anais de congresso |
Consulte a folha de cabeçalhos autorizados e a AACR2. Defina o primeiro indicador como ‘2’. |
245 |
INDICAÇÃO DE TÍTULO |
Transcrição da indicação de título presente na página de rosto ou na fonte principal de informação |
Informe o título no subcampo ‘a’, o subtítulo no subcampo ‘b’ e a indicação de responsabilidade no subcampo ‘c’. Se estiver criando um registro para um único volume ou para uma parte de um recurso em várias partes, informe o número da parte no subcampo ‘n’ e o título da parte no subcampo ‘p’. Em catálogos de leilão, a data, no formato ‘MM/DD/AAAA’, deve ser indicada entre colchetes no subcampo ‘f’. Consulte a folha de pontuação ISBD. Defina o primeiro indicador como ‘0’ se não houver autor; caso contrário, use ‘1’. Defina o segundo indicador como a quantidade de caracteres que não participam da ordenação, isto é, os caracteres do artigo inicial mais o espaço. Por exemplo, para “The “, defina o segundo indicador como ‘4’. |
246 |
FORMA VARIANTE DO TÍTULO |
Forma alternativa do título para fins de pesquisa e ordenação |
Se o usuário puder procurar a obra por outro título, informe-o aqui. Não inclua artigos iniciais. O primeiro indicador deve ser ‘3’, a menos que o título seja apenas uma variante de grafia; nesse caso, use ‘1’. |
250 |
INDICAÇÃO DE EDIÇÃO |
Transcrição da indicação de edição presente na página de rosto ou na fonte principal de informação |
Transcreva a indicação de edição exatamente como aparece na página de rosto. Ela poderá ser abreviada se for muito extensa. |
260 |
PUBLICAÇÃO (IMPRENTA) |
Informações de publicação. |
Informe o local de publicação no subcampo ‘a’, a editora no subcampo ‘b’ e o ano, ou ano provável, no subcampo ‘c’. Consulte a folha de pontuação ISBD. |
264 |
PRODUÇÃO, PUBLICAÇÃO ETC. |
Produção, publicação, distribuição, fabricação e indicação de copyright. |
Informe o local de publicação no subcampo ‘a’, a editora no subcampo ‘b’ e o ano, ou ano provável, no subcampo ‘c’. Consulte a folha de pontuação ISBD. A etiqueta é definida dinamicamente pelo segundo indicador; portanto, em geral, ele deve ser definido como ‘1’ para Editora:. |
300 |
DESCRIÇÃO FÍSICA |
Descrição física |
Informe a paginação no subcampo ‘a’, uma breve descrição de conteúdos especiais, como ilustrações ou mapas, no subcampo ‘b’ — consulte a AACR2 — e as dimensões do material no subcampo ‘c’. Consulte a folha de pontuação ISBD. |
490 |
INDICAÇÃO DE SÉRIE |
Apresenta a indicação de série exatamente como aparece no recurso. |
Transcreva a indicação de série no subcampo ‘a’ e o número do volume no subcampo ‘v’. Consulte a folha de pontuação ISBD. Defina o primeiro indicador como ‘1’ quando usar um campo 830; como regra geral, recomenda-se fazê-lo. |
500 |
NOTA GERAL |
Notas que não se enquadram em nenhum outro campo. |
Registre as notas como frases completas e use um campo 500 separado para cada assunto distinto. |
501 |
NOTA “COM” |
Indica se a obra está encadernada com obras descritas em outros registros. |
Informe a descrição da relação no subcampo ‘a’. |
504 |
NOTA DE BIBLIOGRAFIA ETC. |
Indica se a obra inclui uma bibliografia. |
Se a obra incluir bibliografia e índice, informe no subcampo ‘a’ o texto “Inclui referências bibliográficas (p. XXX-XXX) e índice”. Se a obra não tiver índice, remova essa parte da frase. Se as referências estiverem dispersas pela obra e não reunidas em uma seção específica, remova a indicação entre parênteses. |
505 |
NOTA DE CONTEÚDO FORMATADA |
Lista de conteúdo apresentada em formato padronizado. O conteúdo não formatado pode ser registrado em um campo 500, Nota geral. |
Consulte a folha de pontuação ISBD. Defina o primeiro indicador como ‘0’. Se autores e títulos forem codificados separadamente, defina o segundo indicador como ‘0’; caso contrário, deixe-o em branco. |
518 |
NOTA DE DATA/HORA DO EVENTO |
Usado para datas de leilões. |
Em catálogos de leilão, informe a data do leilão no formato ‘2 de janeiro de 1984’ no subcampo ‘a’. |
520 |
NOTA DE RESUMO ETC. |
Breve resumo do livro ou artigo. |
Em geral, não é necessário elaborar um resumo. No entanto, ele pode ser apropriado para materiais que o usuário não consegue examinar facilmente, como livros impressos em papel muito ácido ou CD-ROMs. |
546 |
NOTA DE IDIOMA |
Nota que descreve os idiomas usados na obra |
Necessário apenas para obras em vários idiomas. Consulte a folha de pontuação ISBD. |
561 |
INFORMAÇÃO DE PROCEDÊNCIA |
Descreve a propriedade anterior do exemplar. |
Usado apenas para livros raros. |
563 |
INFORMAÇÃO DE ENCADERNAÇÃO |
Descreve a encadernação do exemplar. |
Usado apenas para livros raros. |
590 |
NOTA LOCAL |
Notas locais. Obrigatórias em catálogos de leilão. |
Usado em catálogos de leilão para indicar os tipos de moedas vendidos, como romanas, gregas etc. |
600 |
ENTRADA SECUNDÁRIA DE ASSUNTO — NOME PESSOAL |
Forma autorizada dos nomes pessoais das pessoas abordadas na obra |
Consulte a folha de cabeçalhos autorizados e a AACR2. Em geral, o primeiro indicador deve ser ‘1’, para indicar que o sobrenome aparece primeiro. Porém, se o nome consistir apenas em um prenome, o primeiro indicador deverá ser ‘0’. Se o nome foi localizado no arquivo de autoridades da Library of Congress, defina o segundo indicador como ‘0’; caso contrário, use ‘4’. |
610 |
ENTRADA SECUNDÁRIA DE ASSUNTO — ENTIDADE COLETIVA |
Forma autorizada dos nomes de entidades coletivas abordadas na obra |
Consulte a folha de cabeçalhos autorizados e a AACR2. Defina o primeiro indicador como ‘2’. Se o nome foi localizado no arquivo de autoridades da Library of Congress, defina o segundo indicador como ‘0’; caso contrário, use ‘4’. |
611 |
ENTRADA SECUNDÁRIA DE ASSUNTO — EVENTO |
Forma autorizada dos nomes de eventos abordados na obra |
Consulte a folha de cabeçalhos autorizados e a AACR2. Defina o primeiro indicador como ‘2’. Se o nome foi localizado no arquivo de autoridades da Library of Congress, defina o segundo indicador como ‘0’; caso contrário, use ‘4’. |
630 |
ENTRADA SECUNDÁRIA DE ASSUNTO — TÍTULO UNIFORME |
Forma autorizada dos títulos de outras obras abordadas na obra |
Consulte a folha de cabeçalhos autorizados e a AACR2. Defina o primeiro indicador como a quantidade de caracteres que não participam da ordenação, isto é, os caracteres do artigo inicial mais o espaço. Por exemplo, para “The “, use ‘4’. Se o nome foi localizado no arquivo de autoridades da Library of Congress, defina o segundo indicador como ‘0’; caso contrário, use ‘4’. |
650 |
ENTRADA SECUNDÁRIA DE ASSUNTO — TERMO TÓPICO |
Termos dos cabeçalhos de assunto da Library of Congress que descrevem o assunto da obra |
Consulte a folha de cabeçalhos autorizados e a AACR2. Se o nome foi localizado no arquivo de autoridades da Library of Congress, defina o segundo indicador como ‘0’; caso contrário, use ‘4’. |
651 |
ENTRADA SECUNDÁRIA DE ASSUNTO — NOME GEOGRÁFICO |
Termos geográficos dos cabeçalhos de assunto da Library of Congress que descrevem o assunto da obra |
Consulte a folha de cabeçalhos autorizados e a AACR2. Se o nome foi localizado no arquivo de autoridades da Library of Congress, defina o segundo indicador como ‘0’; caso contrário, use ‘4’. |
655 |
TERMO DE INDEXAÇÃO — GÊNERO/FORMA |
Descreve o que o recurso é, em oposição ao assunto de que ele trata. |
Usado, em geral, somente em catálogos de leilão, que devem conter o cabeçalho de gênero “Catálogos de leilão”; certifique-se de localizar o cabeçalho autorizado. Se o nome foi localizado no arquivo de autoridades da Library of Congress, defina o segundo indicador como ‘0’. Se estiver usando um termo de um tesauro específico, defina o segundo indicador como ‘7’ e informe o código do tesauro no subcampo ‘2’. Caso contrário, use ‘4’. |
690 |
ENTRADA SECUNDÁRIA LOCAL DE ASSUNTO — TERMO TÓPICO |
Usado para cabeçalhos provenientes de qualquer arquivo personalizado de autoridades de assunto. |
Se não houver um termo LCSH apropriado, use o campo 690 com cabeçalhos de assunto encontrados em outros materiais do catálogo. |
691 |
ENTRADA SECUNDÁRIA LOCAL DE ASSUNTO — NOME GEOGRÁFICO |
Usado para cabeçalhos provenientes de qualquer arquivo personalizado de autoridades de assunto. |
Se não houver um termo LCSH apropriado, use o campo 691 com cabeçalhos de assunto encontrados em outros materiais do catálogo. |
700 |
ENTRADA SECUNDÁRIA — NOME PESSOAL |
Usado para autores secundários e outras pessoas relacionadas à produção da obra. |
Consulte a folha de cabeçalhos autorizados e a AACR2. Em geral, o primeiro indicador deve ser ‘1’, para indicar que o sobrenome aparece primeiro. Porém, se o nome consistir apenas em um prenome, o primeiro indicador deverá ser ‘0’. |
710 |
ENTRADA SECUNDÁRIA — ENTIDADE COLETIVA |
Usado para entidades coletivas relacionadas à produção da obra, como editoras. |
Consulte a folha de cabeçalhos autorizados e a AACR2. Defina o primeiro indicador como ‘2’. |
711 |
ENTRADA SECUNDÁRIA — EVENTO |
Usado para eventos relacionados à produção da obra, como simpósios que contribuíram para ela. |
Consulte a folha de cabeçalhos autorizados e a AACR2. Defina o primeiro indicador como ‘2’. |
730 |
ENTRADA SECUNDÁRIA — TÍTULO UNIFORME |
Usado para títulos uniformes relacionados à produção da obra, como uma obra que inspirou a obra atual. |
Consulte a folha de cabeçalhos autorizados e a AACR2. Defina o primeiro indicador como a quantidade de caracteres que não participam da ordenação, isto é, os caracteres do artigo inicial mais o espaço. Por exemplo, para “The “, use ‘4’. |
773 |
ENTRADA DE DOCUMENTO-FONTE |
Descreve a unidade bibliográfica maior que contém a obra, por exemplo, o livro ou periódico que contém o artigo descrito no registro atual. |
Se a publicação-fonte tiver uma entrada principal de autor, informe a forma autorizada do nome do autor no subcampo ‘a’. Informe o título no subcampo ‘t’. Se a publicação-fonte for uma obra independente, registre as informações de publicação no subcampo ‘d’. Quando disponíveis, ISSN e ISBN devem sempre ser informados nos subcampos ‘x’ e ‘z’, respectivamente. As informações de relacionamento, como número do volume e número da página, são registradas no subcampo ‘g’. O subcampo ‘q’ contém uma representação codificada da localização do material: números de volume, fascículo e seção são separados por dois-pontos, e a primeira página é informada depois de um sinal ‘<’ no final do subcampo. Consulte a folha de pontuação ISBD. Defina o primeiro indicador como ‘0’. Para gerar a etiqueta “Em:”, deixe o segundo indicador em branco. Para exibir outro texto antes dos dados do campo 773, defina o segundo indicador como ‘8’ e adicione um subcampo ‘i’ com a etiqueta desejada no início do campo, por exemplo, “$iSeparata de:”. |
830 |
ENTRADA SECUNDÁRIA DE SÉRIE — TÍTULO UNIFORME |
Forma autorizada do nome da série transcrito no campo 490. Muitas vezes, será igual ao conteúdo do campo 490. |
Consulte a folha de cabeçalhos autorizados e a AACR2. Defina o segundo indicador como a quantidade de caracteres que não participam da ordenação, isto é, os caracteres do artigo inicial mais o espaço. Por exemplo, para “The “, use ‘4’. |
852 |
LOCALIZAÇÃO/NÚMERO DE CHAMADA |
Fornece o nome da seção para livros anteriores à adoção de códigos de barras, folhetos e alguns artigos e periódicos. |
Não informe nada neste campo ao catalogar um volume que terá apenas um registro e um código de barras. Se o exemplar não receber um código de barras, ou se você estiver criando um registro para um artigo contido em um volume, informe a seção no subcampo ‘a’ — consulte a documentação de catalogação ANS — e o número de chamada no subcampo ‘i’. Defina o primeiro indicador como ‘8’. |
856 |
ACESSO ELETRÔNICO |
Links para materiais disponíveis on-line. |
Informe a URL de cópias eletrônicas, resumos etc. no subcampo ‘u’ e um título para o link no subcampo ‘y’. Defina o primeiro indicador como ‘4’. |
942 |
ELEMENTOS DE ENTRADA SECUNDÁRIA (KOHA) |
Usado para dados específicos do Koha. |
Defina o subcampo ‘c’ com o tipo de material apropriado. |
Tabela: guia de catalogação
Campos específicos do Koha
O Koha usa três campos para armazenar informações específicas do sistema.
No nível do registro, os campos 942 (MARC21) ou 942 e 099 (UNIMARC) armazenam informações como o tipo de material, o número de chamada e o esquema de classificação em nível de registro.
As informações do exemplar são armazenadas no campo 952 (MARC21) ou 995 (UNIMARC).
Os números de controle do sistema Koha são armazenados no campo 999 (MARC21) ou nos campos 001 e 090 (UNIMARC).
Elementos de entrada secundária (942 / 099)
942$0 / 099$x - Empréstimos no Koha, todos os exemplares
MARC21: 942$0
UNIMARC: 099$x
Este campo contém o número total de empréstimos de todos os exemplares deste registro. Ele é preenchido pela tarefa cron update_totalissues.pl.
Mapeado para: biblioitems.totalissues
Indexado em: totalissues
Aviso
Este campo não deve ser editável nem alterado manualmente.
942$2 - Fonte de classificação ou esquema de ordenação na estante
MARC21: 942$2
UNIMARC: 942$2
Este campo contém a fonte de classificação usada pelo número de chamada do registro, 942$h e 942$i no MARC21.
É possível escolher entre as fontes de classificação definidas na administração. Se nenhum esquema de classificação for informado, o sistema usará o valor definido na preferência DefaultClassificationSource.
A fonte de classificação será usada em conjunto com o próprio número de chamada, 942$h e 942$i no MARC21, para criar o número de chamada normalizado usado na ordenação por número de chamada.
Mapeado para: biblioitems.cn_source
Indexado em: cn-bib-source
942$6 - Classificação normalizada pelo Koha para ordenação
MARC21: 942$6
UNIMARC: 942$6
Este campo contém o número de chamada normalizado usado na ordenação, com base no número de chamada em nível de registro, 942$h e 942$i no MARC21, e na fonte de classificação, 942$2.
Mapeado para: biblioitems.cn_sort
Indexado em: cn-bib-sort
Aviso
Este campo não deve ser editável nem alterado manualmente.
942$c - Tipo de material do Koha
MARC21: 942$c
UNIMARC: 942$c
Este campo contém o tipo de material em nível de registro.
O tipo de material em nível de registro é usado em vários pontos do Koha.
Ao adicionar um novo exemplar ao registro, o valor de 942$c é copiado como valor padrão para 952$y (MARC21) ou 995$r (UNIMARC).
O tipo de material em nível de registro pode ser usado nas regras de circulação quando a preferência do sistema item-level_itypes permitir. Essa preferência possibilita escolher, entre outras opções, se as regras usarão o tipo de material do registro ou do exemplar.
O tipo de material em nível de registro é indexado e usado na pesquisa, consulte também a preferência do sistema AdvancedSearchTypes, e nas facetas. Isso é útil para localizar registros sem exemplares, como registros de recursos on-line, livros eletrônicos, arquivos PDF etc.
O tipo de material em nível de registro é usado em reservas feitas no nível do registro ou para o próximo exemplar disponível.
O tipo de material em nível de registro é usado em solicitações de artigos feitas no nível do registro.
O tipo de material em nível de registro é exibido em várias tabelas da interface administrativa, inclusive no módulo de circulação. Colunas indesejadas podem ser ocultadas na seção Configurações de tabelas do módulo Administração.
Mapeado para: biblioitems.itemtype
Indexado em: itemtype (mc-itemtype), itype (mc-itype)
942$e - Edição
MARC21: 942$e
UNIMARC: não se aplica
Este campo contém as informações de edição.
942$h - Parte da classificação
MARC21: 942$h
UNIMARC: não se aplica
Este campo contém a parte de classificação do número de chamada. Ele é usado em conjunto com 942$2 e 942$i (MARC21) para criar o número de chamada normalizado, 942$6, usado na ordenação por número de chamada.
Mapeado para: biblioitems.cn_class
Indexado em: cn-class
942$i - Parte do exemplar
MARC21: 942$i
UNIMARC: não se aplica
Este campo contém a parte do exemplar do número de chamada. Ele é usado em conjunto com 942$2 e 942$h (MARC21) para criar o número de chamada normalizado, 942$6, usado na ordenação por número de chamada.
Mapeado para: biblioitems.cn_item
Indexado em: cn-item
942$k - Prefixo do número de chamada
MARC21: 942$k
UNIMARC: não se aplica
Este campo contém o prefixo do número de chamada.
Mapeado para: biblioitems.cn_prefix
Indexado em: cn-prefix
942$m - Sufixo do número de chamada
MARC21: 942$m
UNIMARC: não se aplica
Este campo contém o sufixo do número de chamada.
Mapeado para: biblioitems.cn_suffix
Indexado em: cn-suffix
942$n / 955$n - Ocultar no OPAC
MARC21: 942$n
UNIMARC: 955$n
Se a preferência do sistema OpacSuppression estiver definida como ‘ocultar’, este campo indicará se o registro deve ser ocultado no OPAC.
Neste campo, ‘1’ significa que o registro será ocultado no OPAC, enquanto ‘0’, ou o campo vazio, significa que ele ficará visível.
Você pode usar a categoria de valores autorizados YES_NO neste campo para não precisar memorizar os valores numéricos.
Indexado em: suppress
942$s / 099$s - Indicador de registro de periódico
MARC21: 942$s
UNIMARC: 099$s
Este campo é usado pelo módulo de periódicos para indicar se o registro está associado a uma assinatura.
Mapeado para: biblio.serial
Aviso
Este campo não deve ser editável nem alterado manualmente.
Localização e informações do exemplar (952)
O Koha usa o campo 952 para armazenar informações do exemplar no MARC21 e o campo 995 no UNIMARC.
952$0 / 995$0 - Situação de baixa
MARC21: 952$0
UNIMARC: 995$0
Usos
Este campo é usado para definir a situação de baixa ou desbaste do exemplar.
A situação de baixa pode ser usada para retirar exemplares do acervo sem excluir seus registros.
Nos resultados da pesquisa, o exemplar baixado será marcado como indisponível.
Efeitos na circulação
Um exemplar baixado não poderá ser emprestado.
A devolução de um exemplar baixado não poderá ser registrada, a menos que a preferência do sistema BlockReturnOfWithdrawnItems permita.
Valores
A situação de baixa é numérica: ‘0’, ou o campo vazio, significa ‘não baixado’; qualquer outro número significa ‘baixado’.
Por padrão, o campo está associado à categoria de valores autorizados WITHDRAWN, para que não seja necessário memorizar os valores numéricos. Os valores padrão dessa categoria WITHDRAWN são
1: Baixado
Exibição
Interface administrativa
Resultados da pesquisa; os exemplares baixados serão marcados como indisponíveis
Tabela de exemplares na página de detalhes do registro
Aba ‘Exemplares’ do registro bibliográfico, ‘Situação de baixa’ em ‘Situações’
OPAC
Resultados da pesquisa; os exemplares baixados serão marcados como indisponíveis
Tabela de exemplares na página de detalhes do registro
Para ocultar exemplares baixados no OPAC, use a preferência do sistema OpacHiddenItems.
Mapeado para: items.withdrawn
Indexado em: withdrawn
952$1 / 995$2 - Situação de perda
MARC21: 952$1
UNIMARC: 995$2
Usos
Este campo é usado para definir a situação de perda do exemplar.
A situação de perda pode ser usada para marcar exemplares como perdidos ou desaparecidos.
Nos resultados da pesquisa, o exemplar perdido será marcado como indisponível.
Marcar como perdido um exemplar que está emprestado pode lançar o custo de reposição, 952$v (MARC21) ou 995$g (UNIMARC), na conta do usuário, consulte WhenLostChargeReplacementFee, além de uma taxa de processamento, definida no nível do tipo de material.
A situação de perda pode ser alterada automaticamente após determinado número de dias de atraso pela tarefa cron longoverdue.pl.
Efeitos na circulação
A possibilidade de emprestar um exemplar perdido depende da preferência do sistema IssueLostItem.
A possibilidade de registrar a devolução de um exemplar perdido depende da preferência do sistema BlockReturnOfLostItems.
Valores
A situação de perda é numérica: ‘0’, ou o campo vazio, significa ‘não perdido’; qualquer outro número significa ‘perdido’.
Por padrão, o campo está associado à categoria de valores autorizados LOST, para que não seja necessário memorizar os valores numéricos. Os valores padrão dessa categoria LOST são
1: Perdido
2: Atraso prolongado (perdido)
3: Perdido e pago
4: Desaparecido
5: Ausente do conjunto
Exibição
Interface administrativa
Resultados da pesquisa; os exemplares perdidos serão marcados como indisponíveis
Tabela de exemplares na página de detalhes do registro
Aba ‘Exemplares’ do registro bibliográfico, ‘Situação de perda’ em ‘Situações’
OPAC
Resultados da pesquisa; os exemplares perdidos serão marcados como indisponíveis
Tabela de exemplares na página de detalhes do registro
É possível configurar o Koha para não exibir exemplares perdidos no OPAC por meio da preferência do sistema hidelostitems.
Mapeado para: items.itemlost
Indexado em: lost
952$2 / 995$4 - Fonte de classificação ou esquema de ordenação na estante
MARC21: 952$2
UNIMARC: 995$4
Usos
Este campo contém a fonte de classificação usada pelo número de chamada do exemplar, 952$o (MARC21) ou 995$k (UNIMARC).
A fonte de classificação será usada em conjunto com o próprio número de chamada, 952$o (MARC21) ou 995$k (UNIMARC), para criar o número de chamada normalizado, 952$6 (MARC21) ou 995$s (UNIMARC), usado na ordenação por número de chamada.
Valores
É possível escolher entre as fontes de classificação definidas na administração.
Se nenhum esquema de classificação for informado, o sistema usará o valor definido na preferência DefaultClassificationSource.
Exibição
Esta informação não é exibida no OPAC nem na interface administrativa. Ela está disponível apenas no formulário de edição do exemplar.
Mapeado para: items.cn_source
Indexado em: classification-source
952$3 / 995$l - Materiais especificados
MARC21: 952$3
UNIMARC: 995$l (L)
Usos
Este campo é usado para adicionar informações sobre materiais acompanhantes ou para especificar quantas peças compõem o exemplar.
Efeitos na circulação
Esta informação será exibida durante a circulação do exemplar, para que a equipe confira se todos os materiais acompanhantes estão presentes no empréstimo e continuam presentes no momento da devolução.

Valores
Este é um campo de texto livre, mas pode ser associado a uma categoria de valores autorizados na planilha MARC, transformando-se em um menu suspenso.
Exibição
Interface administrativa
Esta informação será exibida ao emprestar ou registrar a devolução de um exemplar.
Tabela de exemplares na página de detalhes do registro
Nota
Use Configurações de tabelas para ocultar essa coluna — Módulo: Catálogo — ID da tabela: holdings_table e/ou otherholdings_table — Coluna: holdings_materials ou otherholdings_materials
Aba ‘Exemplares’ do registro bibliográfico, ‘Materiais especificados’ em ‘Informações do exemplar’
OPAC
Tabela de exemplares na página de detalhes do registro; fica oculta por padrão
Nota
Use Configurações de tabelas para exibir essa coluna — Módulo: OPAC — ID da tabela: holdingst — Coluna: item_materials
Mapeado para: items.materials
Indexado em: materials-specified
952$4 / 995$1 - Situação de dano
MARC21: 952$4
UNIMARC: 995$1
Usos
Este campo é usado para definir a situação de dano do exemplar.
Nos resultados da pesquisa, o exemplar danificado será marcado como indisponível.
Efeitos na circulação
A situação de dano não afeta a possibilidade de emprestar nem de registrar a devolução de um exemplar.
A preferência do sistema AllowHoldsOnDamagedItems determina se exemplares danificados podem ser reservados.
Valores
A situação de dano é numérica: ‘0’, ou o campo vazio, significa ‘não danificado’; qualquer outro número significa ‘danificado’.
Por padrão, o campo está associado à categoria de valores autorizados DAMAGED, para que não seja necessário memorizar os valores numéricos. Os valores padrão dessa categoria DAMAGED são
1: Danificado
Exibição
Interface administrativa
Resultados da pesquisa; os exemplares danificados serão marcados como indisponíveis
Tabela de exemplares na página de detalhes do registro
Aba ‘Exemplares’ do registro bibliográfico, ‘Situação de dano’ em ‘Situações’
OPAC
Resultados da pesquisa; os exemplares danificados serão marcados como indisponíveis
Tabela de exemplares na página de detalhes do registro
Para ocultar exemplares danificados no OPAC, use a preferência do sistema OpacHiddenItems.
Mapeado para: items.damaged
Indexado em: damaged
952$5 / 995$3 - Restrições de uso
MARC21: 952$5
UNIMARC: 995$3
Usos
Este campo é usado para definir a situação de restrição do exemplar.
Nos resultados da pesquisa, o exemplar com restrição será marcado como disponível.
Efeitos na circulação
Um exemplar com restrição não poderá ser emprestado.
Valores
A situação de restrição é numérica: ‘1’ significa restrito e ‘0’, ou o campo vazio, significa sem restrição.
Nota
Diferentemente de outras situações, a de restrição só pode ser 0, não restrito, ou 1, restrito.
Por padrão, o campo está associado à categoria de valores autorizados RESTRICTED, para que não seja necessário memorizar os valores numéricos. Os valores padrão dessa categoria RESTRICTED são
1: Acesso restrito
Exibição
Interface administrativa
Resultados da pesquisa; os exemplares com restrição serão marcados como disponíveis
Tabela de exemplares na página de detalhes do registro
OPAC
Resultados da pesquisa; os exemplares com restrição serão marcados como disponíveis
Tabela de exemplares na página de detalhes do registro
Mapeado para: items.restricted
Indexado em: restricted
952$6 / 995$s - Classificação normalizada pelo Koha para ordenação
MARC21: 952$6
UNIMARC: 995$s
Aviso
Este campo não deve ser editável nem alterado manualmente.
Usos
Este campo contém o número de chamada normalizado usado na ordenação, com base no número de chamada do exemplar, 952$o (MARC21) ou 995$k (UNIMARC), e na fonte de classificação, 952$2 (MARC21) ou 995$4 (UNIMARC).
Exibição
Esta informação não é exibida no OPAC nem na interface administrativa; destina-se apenas ao uso interno do Koha.
Mapeado para: items.cn_sort
Indexado em: cn-sort
952$7 / 995$o - Situação de não empréstimo
MARC21: 952$7
UNIMARC: 995$o
Usos
Este campo é usado para definir a situação de não empréstimo do exemplar.
Nos resultados da pesquisa, o exemplar não emprestável será marcado como indisponível ou como disponível apenas para consulta local, consulte Reference_NFL_Statuses.
Efeitos na circulação
Exemplares com situação de não empréstimo não podem ser emprestados, a menos que AllowNotForLoanOverride permita.
Dependendo do valor, os exemplares poderão ou não ser reservados, conforme explicado abaixo.
Dependendo de TrapHoldsOnOrder e SkipHoldTrapOnNotForLoanValue, exemplares não emprestáveis podem ser usados para atender reservas.
A preferência do sistema UpdateNotForLoanStatusOnCheckin pode ser usada para alterar automaticamente os valores de não empréstimo no momento da devolução.
A preferência do sistema UpdateNotForLoanStatusOnCheckout pode ser usada para alterar automaticamente os valores de não empréstimo no momento do empréstimo.
Valores
A situação de não empréstimo é numérica: ‘0’, ou o campo vazio, significa disponível.
Valores negativos, menores que 0, significam que o exemplar não pode ser emprestado, mas pode ser reservado.
Valores positivos, maiores que 0, significam que o exemplar não pode ser emprestado nem reservado.
Por padrão, o campo está associado à categoria de valores autorizados NOT_LOAN, para que não seja necessário memorizar os valores numéricos. Os valores padrão dessa categoria NOT_LOAN são
-1: Encomendado
1: Não emprestável
2: Coleção da equipe
3: Adicionado ao conjunto
Exibição
Interface administrativa
Resultados da pesquisa; o exemplar não emprestável será marcado como indisponível ou como disponível apenas para consulta local, consulte Reference_NFL_Statuses
Tabela de exemplares na página de detalhes do registro
Aba ‘Exemplares’ do registro bibliográfico, ‘Situação de baixa’ em ‘Situações’
OPAC
Resultados da pesquisa; o exemplar não emprestável será marcado como indisponível ou como disponível apenas para consulta local, consulte Reference_NFL_Statuses
Tabela de exemplares na página de detalhes do registro
Para ocultar exemplares não emprestáveis no OPAC, use a preferência do sistema OpacHiddenItems.
Mapeado para: items.notforloan
Indexado em: notforloan
952$8 / 995$h - Coleção
MARC21: 952$8
UNIMARC: 995$h
Usos
Este campo é usado para definir a coleção do exemplar.
As coleções no Koha são usadas para agrupar exemplares por critérios diferentes de sua localização física, que pode ser armazenada em 952$c (MARC21) ou 995$e (UNIMARC). Um exemplo de coleção seria ‘Autores locais’.
As coleções também podem ser usadas para limitar transferências em sistemas com várias bibliotecas, consulte a seção Limites de transferência entre bibliotecas da administração, quando BranchTransferLimitsType estiver definido como ‘código de coleção’.
A coleção de um exemplar é usada na pesquisa, consulte a preferência do sistema AdvancedSearchTypes, e nas facetas.
Valores
Por padrão, o campo está associado à categoria de valores autorizados CCODE. Os valores padrão dessa categoria CCODE são
FIC: Ficção
NFIC: Não ficção
REF: Referência
Exibição
Interface administrativa
As coleções farão parte das facetas nos resultados da pesquisa.
Tabela de exemplares na página de detalhes do registro
Nota
Use Configurações de tabelas para ocultar essa coluna — Módulo: Catálogo — ID da tabela: holdings_table e/ou otherholdings_table — Coluna: holdings_ccode ou otherholdings_ccode
Tabela de empréstimos no cadastro do usuário
Nota
Use Configurações de tabelas para ocultar essa coluna — Módulo: Circulação e usuários — ID da tabela: issues-table — Coluna: collection
Muitos outros locais em todo o Koha
OPAC
Resultados da pesquisa, se OpacItemLocation permitir
As coleções farão parte das facetas nos resultados da pesquisa.
Tabela de exemplares na página de detalhes do registro
Nota
Use Configurações de tabelas para ocultar essa coluna — Módulo: OPAC — ID da tabela: holdingst — Coluna: item_ccode
Muitos outros locais em todo o OPAC
Mapeado para: items.ccode
Indexado em: collection-code
952$9 / 995$9 - Número interno do exemplar
MARC21: 952$9
UNIMARC: 995$9
Aviso
Este campo não deve ser editável nem alterado manualmente.
Usos
O itemnumber é o número interno atribuído pelo Koha a cada exemplar. Ele é exclusivo e não pode ser atribuído novamente, mesmo depois que o exemplar é excluído.
Exibição
Esta informação não é exibida no OPAC nem na interface administrativa; destina-se apenas ao uso interno do Koha.
Mapeado para: items.itemnumber
Indexado em: itemnumber
952$a / 995$b - Biblioteca de origem
MARC21: 952$a
UNIMARC: 995$b
Obrigatório
Usos
Este campo indica a biblioteca de origem do exemplar.
A biblioteca de origem é importante para muitas funções do Koha, incluindo, entre outras:
A biblioteca de origem de um exemplar é usada na pesquisa e nas facetas, consulte a preferência do sistema DisplayLibraryFacets.
Efeitos na circulação
Como mencionado anteriormente, as regras de circulação baseiam-se na biblioteca do exemplar, consulte a preferência do sistema HomeOrHoldingBranch.
Valores
As bibliotecas são definidas na seção Bibliotecas da página de administração.
Exibição
Interface administrativa
Dependendo da preferência do sistema DisplayLibraryFacets, a biblioteca de origem poderá fazer parte das facetas nos resultados da pesquisa.
Tabela de exemplares na página de detalhes do registro
Nota
Use Configurações de tabelas para ocultar essa coluna — Módulo: Catálogo — ID da tabela: holdings_table e/ou otherholdings_table — Coluna: holdings_homebranch ou otherholdings_homebranch
Esta informação é exibida na interface administrativa, na aba ‘Exemplares’ do registro bibliográfico, em ‘Biblioteca de origem’, dentro de ‘Informações do exemplar’.
Tabela de empréstimos no cadastro do usuário
Nota
Use Configurações de tabelas para ocultar essa coluna — Módulo: Circulação e usuários — ID da tabela: issues-table — Coluna: homebranch
Muitos outros locais em todo o Koha
OPAC
Resultados da pesquisa, se OpacItemLocation permitir
Dependendo da preferência do sistema DisplayLibraryFacets, a biblioteca de origem poderá fazer parte das facetas nos resultados da pesquisa.
Tabela de exemplares na página de detalhes do registro, se OpacLocationBranchToDisplay permitir
Nota
Use Configurações de tabelas para ocultar essa coluna — Módulo: OPAC — ID da tabela: holdingst — Coluna: item_home_location
Muitos outros locais em todo o OPAC
Mapeado para: items.homebranch
Indexado em: homelibrary
952$b / 995$c - Biblioteca atual
MARC21: 952$b
UNIMARC: 995$c
Obrigatório
Usos
Este campo indica a biblioteca atual, ou biblioteca detentora, do exemplar.
A biblioteca atual é importante para muitas funções do Koha, incluindo:
A biblioteca atual de um exemplar é usada na pesquisa e nas facetas, consulte a preferência do sistema DisplayLibraryFacets.
Efeitos na circulação
Como mencionado anteriormente, as regras de circulação baseiam-se na biblioteca do exemplar, consulte a preferência do sistema HomeOrHoldingBranch.
Valores
As bibliotecas são definidas na seção Bibliotecas da página de administração.
Exibição
Interface administrativa
Dependendo da preferência do sistema DisplayLibraryFacets, a biblioteca atual poderá fazer parte das facetas nos resultados da pesquisa.
Tabela de exemplares na página de detalhes do registro
Nota
Use Configurações de tabelas para ocultar essa coluna — Módulo: Catálogo — ID da tabela: holdings_table e/ou otherholdings_table — Coluna: holdings_holdingbranch ou otherholdings_holdingbranch
Esta informação é exibida na interface administrativa, na aba ‘Exemplares’ do registro bibliográfico, em ‘Biblioteca atual’, dentro de ‘Informações do exemplar’.
Muitos outros locais em todo o Koha
OPAC
Resultados da pesquisa, se OpacItemLocation permitir
Dependendo da preferência do sistema DisplayLibraryFacets, a biblioteca atual poderá fazer parte das facetas nos resultados da pesquisa.
Tabela de exemplares na página de detalhes do registro, se OpacLocationBranchToDisplay permitir
Nota
Use Configurações de tabelas para ocultar essa coluna — Módulo: OPAC — ID da tabela: holdingst — Coluna: item_current_location
Muitos outros locais em todo o OPAC
Mapeado para: items.holdingbranch
Indexado em: holdinglibrary
952$c / 995$e - Localização na estante
MARC21: 952$c
UNIMARC: 995$e
Usos
Este campo indica a localização do exemplar, isto é, seu local físico na biblioteca.
As localizações na estante no Koha são usadas para agrupar fisicamente os exemplares. Um exemplo seria ‘Seção infantil’.
A localização de um exemplar é usada na pesquisa, consulte a preferência do sistema AdvancedSearchTypes, e nas facetas.
A preferência do sistema UpdateItemLocationOnCheckin pode ser usada para alterar automaticamente os valores de localização no momento da devolução.
A preferência do sistema UpdateItemLocationOnCheckout pode ser usada para alterar automaticamente os valores de localização no momento do empréstimo.
Valores
Por padrão, o campo está associado à categoria de valores autorizados LOC. Os valores padrão dessa categoria LOC são
AV: Audiovisual
CART: Carrinho de livros
CHILD: Área infantil
FIC: Ficção
GEN: Estantes gerais
NEW: Estante de materiais novos
DISPLAY: Em exposição
PROC: Centro de processamento
REF: Referência
STAFF: Sala da equipe
O valor padrão para novos exemplares pode ser definido pela preferência do sistema NewItemsDefaultLocation.
Exibição
Interface administrativa
As localizações farão parte das facetas nos resultados da pesquisa.
Tabela de exemplares na página de detalhes do registro, abaixo da biblioteca de origem
Esta informação é exibida na interface administrativa, na aba ‘Exemplares’ do registro bibliográfico, em ‘Biblioteca de origem’, dentro de ‘Informações do exemplar’.
Tabela de empréstimos no cadastro do usuário
Nota
Use Configurações de tabelas para ocultar essa coluna — Módulo: Circulação e usuários — ID da tabela: issues-table — Coluna: location
Muitos outros locais em todo o Koha
OPAC
Resultados da pesquisa, se OpacItemLocation permitir
As localizações farão parte das facetas nos resultados da pesquisa.
Tabela de exemplares na página de detalhes do registro; a preferência do sistema OpacLocationOnDetail determina em qual coluna a informação será exibida
Nota
Use Configurações de tabelas para ocultar essa coluna — Módulo: OPAC
ID da tabela: holdingst
Coluna: item_shelving_location, se OpacLocationOnDetail estiver definida como ‘coluna separada’
Muitos outros locais em todo o OPAC
Mapeado para: items.location
Indexado em: location
952$d / 995$5 - Data de aquisição
MARC21: 952$d
UNIMARC: 995$5
Usos
Este campo é usado para informar a data de aquisição do exemplar.
A data de aquisição pode ser usada na pesquisa e na ordenação dos resultados.
Ao usar o módulo de Aquisições, este campo deverá ser preenchido automaticamente com a data de aquisição.
Valores
A data deve estar no formato AAAA-MM-DD; há um seletor de data que ajuda a garantir o formato correto.
Exibição
Interface administrativa
Tabela de exemplares na página de detalhes do registro
Nota
Use Configurações de tabelas para ocultar essa coluna — Módulo: Catálogo — ID da tabela: holdings_table e/ou otherholdings_table — Coluna: holdings_dateaccessioned ou otherholdings_dateaccessioned
Aba ‘Exemplares’ do registro bibliográfico, ‘Data de entrada’ em ‘Histórico’
Mapeado para: items.dateaccessioned
Indexado em: date-of-acquisition
952$e / 995$a - Fonte de aquisição
MARC21: 952$e
UNIMARC: 995$a
Usos
Este campo é usado para informar o fornecedor do qual o exemplar foi adquirido.
Ao usar o módulo de Aquisições, este campo deverá ser preenchido automaticamente com o fornecedor no momento do recebimento.
Valores
Este é um campo de texto livre.
Ao usar o módulo de Aquisições, o valor deste campo será o ID do fornecedor, e não seu nome.
Exibição
Esta informação não é exibida no OPAC nem na interface administrativa. Ela está disponível apenas no formulário de edição do exemplar.
Mapeado para: items.booksellerid
Indexado em: acqsource
952$f / 995$8 - Qualificador codificado de localização
MARC21: 952$f
UNIMARC: 995$8
Usos
Este campo é usado para informar um código de três caracteres que identifica fascículos específicos do exemplar localizados separadamente do acervo principal do mesmo material, equivalente ao MARC21 852$f.
Valores
Este é um campo de texto livre.
O campo no banco de dados está limitado a 10 caracteres.
Exibição
Esta informação não é exibida no OPAC nem na interface administrativa. Ela está disponível apenas no formulário de edição do exemplar.
Mapeado para: items.coded_location_qualifier
Indexado em: coded-location-qualifier
952$g / 995$p - Custo, preço normal de compra
MARC21: 952$g
UNIMARC: 995$p
Usos
Este campo é usado para informar o preço de compra do exemplar.
Ao usar o módulo de Aquisições, este campo deverá ser preenchido automaticamente com o preço de compra no momento do recebimento.
Valores
Este é um campo de texto livre.
O preço deve conter apenas algarismos, com ponto como separador decimal e sem símbolos monetários, por exemplo, 24.95.
O campo no banco de dados aceita no máximo duas casas decimais; por exemplo, 24.95 é válido, mas 24.94875 não.
Exibição
Esta informação não é exibida no OPAC nem na interface administrativa. Ela está disponível apenas no formulário de edição do exemplar.
Mapeado para: items.price
Indexado em: price
952$h / 995$v - Enumeração/cronologia do periódico
MARC21: 952$h
UNIMARC: 995$v
Usos
Este campo é usado para informar o número do fascículo de periódicos ou o número do volume de séries.
Ao usar o módulo de Periódicos, este campo deverá ser preenchido automaticamente com o número do fascículo.
Valores
Este é um campo de texto livre.
Exibição
Interface administrativa
Tabela de exemplares na página de detalhes do registro
Nota
Use Configurações de tabelas para ocultar essa coluna — Módulo: Catálogo — ID da tabela: holdings_table e/ou otherholdings_table — Coluna: holdings_enumchron ou otherholdings_enumchron
Aba ‘Exemplares’ do registro bibliográfico, ‘Enumeração do periódico’ em ‘Histórico’
OPAC
Tabela de exemplares na página de detalhes do registro
Nota
Use Configurações de tabelas para ocultar essa coluna — Módulo: OPAC — ID da tabela: holdingst — Coluna: item_enumchron
Mapeado para: items.enumchron
952$i / 995$j - Número de inventário
MARC21: 952$i
UNIMARC: 995$j
Usos
Este campo é usado para informar o número de inventário do exemplar.
Nota
O número de inventário não é o itemnumber interno do Koha, que é armazenado em 952$9 (MARC21) ou 995$9 (UNIMARC).
Valores
Este é um campo de texto livre.
O campo no banco de dados está limitado a 32 caracteres.
Exibição
Interface administrativa
Tabela de exemplares na página de detalhes do registro
Nota
Use Configurações de tabelas para ocultar essa coluna — Módulo: Catálogo — ID da tabela: holdings_table e/ou otherholdings_table — Coluna: holdings_stocknumber ou otherholdings_stocknumber
Mapeado para: items.stocknumber
Indexado em: number-local-acquisition
952$j / 995$q - Número de controle de estante
MARC21: 952$j
UNIMARC: 995$q
Usos
Este campo é usado para informar o número da estante na qual o exemplar está localizado.
Valores
O número da estante deve ser numérico.
Por padrão, o campo está associado à categoria de valores autorizados STACK, para que não seja necessário memorizar os valores numéricos. Não há valores padrão.
Exibição
Esta informação não é exibida no OPAC nem na interface administrativa. Ela está disponível apenas no formulário de edição do exemplar.
Mapeado para: items.stack
Indexado em: stack
952$l / 995$w - Total de empréstimos
MARC21: 952$l (L)
UNIMARC: 995$w
Aviso
Este campo não deve ser editável nem alterado manualmente.
Usos
Este campo contém o número total de empréstimos anteriores e atuais deste exemplar.
O número de empréstimos é usado para ordenar os resultados da pesquisa por popularidade.
O número de empréstimos de cada exemplar é usado para atualizar o total de empréstimos do registro, 942$0 (MARC21) ou 099$x (UNIMARC).
Exibição
Interface administrativa
Aba ‘Exemplares’ do registro bibliográfico, ‘Total de empréstimos’ em ‘Histórico’
Mapeado para: items.issues
Indexado em: issues
952$m / 995$x - Total de renovações
MARC21: 952$m
UNIMARC: 995$x
Aviso
Este campo não deve ser editável nem alterado manualmente.
Usos
Este campo contém o número total de renovações anteriores deste exemplar.
Exibição
Interface administrativa
Aba ‘Exemplares’ do registro bibliográfico, ‘Renovações atuais’ em ‘Situações’
Mapeado para: items.renewals
Indexado em: renewals
952$n / 995$t - Total de reservas
MARC21: 952$n
UNIMARC: 995$t
Aviso
Este campo não deve ser editável nem alterado manualmente.
Usos
Este campo contém o número total de reservas anteriores e atuais deste exemplar.
O número de reservas é usado para criar um feed RSS com os exemplares que receberam mais reservas.
Exibição
Esta informação não é exibida no OPAC nem na interface administrativa.
Mapeado para: items.reserves
Indexado em: reserves
952$o / 995$k - Número de chamada completo
MARC21: 952$o
UNIMARC: 995$k
Usos
Este campo é usado para armazenar o número de chamada do exemplar.
O número de chamada de um exemplar pode ser usado na pesquisa.
Valores
O número de chamada do registro pode ser copiado para o número de chamada do exemplar. A preferência do sistema itemcallnumber determina qual campo do registro será usado como fonte.
Exibição
Interface administrativa
Tabela de exemplares na página de detalhes do registro
Nota
Use Configurações de tabelas para ocultar essa coluna — Módulo: Catálogo — ID da tabela: holdings_table e/ou otherholdings_table — Coluna: holdings_itemcallnumber ou otherholdings_itemcallnumber
Aba ‘Exemplares’ do registro bibliográfico, ‘Número de chamada do exemplar’ em ‘Informações do exemplar’
Tabela de empréstimos no cadastro do usuário
Nota
Use Configurações de tabelas para ocultar essa coluna — Módulo: Circulação e usuários — ID da tabela: issues-table — Coluna: callno
Muitos outros locais em todo o Koha
OPAC
Resultados da pesquisa, se OpacItemLocation permitir
Tabela de exemplares na página de detalhes do registro
Nota
Use Configurações de tabelas para ocultar essa coluna — Módulo: OPAC — ID da tabela: holdingst — Coluna: item_callnumber
Tabela de empréstimos na conta on-line do usuário
Muitos outros locais em todo o OPAC
Mapeado para: items.itemcallnumber
Indexado em: local-classification
952$p / 995$f - Código de barras
MARC21: 952$p
UNIMARC: 995$f
Obrigatório para circulação
Usos
Este campo é usado para armazenar o código de barras do exemplar.
O código de barras de um exemplar pode ser usado na pesquisa.
Efeitos na circulação
O código de barras é essencial para a circulação dos exemplares.
Valores
Este é um campo de texto livre.
Nota
Os códigos de barras no Koha não diferenciam maiúsculas de minúsculas; portanto, ABC123 e abc123 são considerados o mesmo código.
O campo no banco de dados está limitado a 20 caracteres.
Exibição
Interface administrativa
Tabela de exemplares na página de detalhes do registro
Nota
Use Configurações de tabelas para ocultar essa coluna — Módulo: Catálogo — ID da tabela: holdings_table e/ou otherholdings_table — Coluna: holdings_barcode ou otherholdings_barcode
Aba ‘Exemplares’ do registro bibliográfico
Tabela de empréstimos no cadastro do usuário, na coluna de título
Mapeado para: items.barcode
Indexado em: barcode
952$q / 995$n - Data de devolução
MARC21: 952$q
UNIMARC: 995$n
Aviso
Este campo não deve ser editável nem alterado manualmente.
Usos
Quando o exemplar é emprestado, a data de devolução é armazenada neste campo, no formato AAAA-MM-DD.
Este campo é usado na opção ‘Limitar aos exemplares atualmente disponíveis’ das facetas.
Exibição
A data de devolução aparece em muitas páginas do módulo de circulação, mas corresponde à data proveniente do empréstimo, e não do registro do exemplar.
Mapeado para: items.onloan
Indexado em: onloan
952$r / 995$y - Data da última verificação
MARC21: 952$r
UNIMARC: 995$y
Aviso
Este campo não deve ser editável nem alterado manualmente.
Usos
Quando o exemplar é emprestado ou devolvido, inventariado ou envolvido em qualquer outra transação que o afete, a data e a hora são armazenadas neste campo, no formato AAAA-MM-DD HH:MM:SS.
Exibição
Interface administrativa
Tabela de exemplares na página de detalhes do registro
Nota
Use Configurações de tabelas para ocultar essa coluna — Módulo: Catálogo — ID da tabela: holdings_table e/ou otherholdings_table — Coluna: holdings_lastseen ou otherholdings_lastseen
Aba ‘Exemplares’ do registro bibliográfico, ‘Visto pela última vez’ em ‘Histórico’
Mapeado para: items.datelastseen
Indexado em: datelastseen
952$s / 995$m - Data do último empréstimo
MARC21: 952$s
UNIMARC: 995$m
Aviso
Este campo não deve ser editável nem alterado manualmente.
Usos
Quando o exemplar é emprestado, a data é armazenada neste campo, no formato AAAA-MM-DD.
Exibição
Interface administrativa
Tabela de exemplares na página de detalhes do registro
Nota
Use Configurações de tabelas para ocultar essa coluna — Módulo: Catálogo — ID da tabela: holdings_table e/ou otherholdings_table — Coluna: holdings_datelastborrowed ou otherholdings_datelastborrowed
Aba ‘Exemplares’ do registro bibliográfico, ‘Último empréstimo’ em ‘Histórico’
Mapeado para: items.datelastborrowed
Indexado em: datelastborrowed
952$t / 995$6 - Número da cópia
MARC21: 952$t
UNIMARC: 995$6
Usos
Este campo é usado para informar o número da cópia do exemplar.
Valores
Este é um campo de texto livre.
O campo no banco de dados está limitado a 32 caracteres.
Exibição
Interface administrativa
Tabela de exemplares na página de detalhes do registro
Nota
Use Configurações de tabelas para ocultar essa coluna — Módulo: Catálogo — ID da tabela: holdings_table e/ou otherholdings_table — Coluna: holdings_copynumber ou otherholdings_copynumber
Aba ‘Exemplares’ do registro bibliográfico, ‘Número da cópia’ em ‘Histórico’
OPAC
Tabela de exemplares na página de detalhes do registro
Nota
Use Configurações de tabelas para ocultar essa coluna — Módulo: OPAC — ID da tabela: holdingst — Coluna: item_copy
Mapeado para: items.copynumber
Indexado em: copynumber
952$u / 995$7 - URI
MARC21: 952$u
UNIMARC: 995$7
Usos
Este campo é usado para informar uma URL ou URN específica do exemplar.
Não é necessário informar uma URL aqui se já houver uma URL no campo 856$u em nível de registro, a menos que a URL do exemplar específico seja diferente daquela registrada em 856$u. Por exemplo, para um periódico on-line, você pode informar a URL do periódico em 856$u e a URL do fascículo específico em 952$u.
Valores
Exibição
Interface administrativa
Tabela de exemplares na página de detalhes do registro
Nota
Use Configurações de tabelas para ocultar essa coluna — Módulo: Catálogo — ID da tabela: holdings_table e/ou otherholdings_table — Coluna: holdings_uri ou otherholdings_uri
OPAC
Tabela de exemplares na página de detalhes do registro
Nota
Use Configurações de tabelas para ocultar essa coluna — Módulo: OPAC — ID da tabela: holdingst — Coluna: item_url
Mapeado para: items.uri
Indexado em: uri
952$v / 995$g - Custo, preço de reposição
MARC21: 952$v
UNIMARC: 995$g
Usos
Este campo é usado para informar o custo de reposição que será cobrado do usuário que perder o exemplar.
Ao usar o módulo de Aquisições, este campo deverá ser preenchido automaticamente com o preço de reposição no momento do recebimento.
Valores
Este é um campo de texto livre.
O preço deve conter apenas algarismos, com ponto como separador decimal e sem símbolos monetários, por exemplo, 24.95.
O campo no banco de dados aceita no máximo duas casas decimais; por exemplo, 24.95 é válido, mas 24.94875 não.
Exibição
Interface administrativa
Tabela de empréstimos no cadastro do usuário, na coluna de preço
Nota
Use Configurações de tabelas para ocultar essa coluna — Módulo: Circulação e usuários — ID da tabela: issues-table — Coluna: price
Aba ‘Exemplares’ do registro bibliográfico, ‘Preço de reposição’ em ‘Informações do exemplar’
Mapeado para: items.replacementprice
Indexado em: replacementprice
952$w / 995$i - Data de vigência do preço
MARC21: 952$w
UNIMARC: 995$i
Usos
Este campo é usado para informar a data de vigência do preço de reposição do exemplar.
Ao usar o módulo de Aquisições, este campo deverá ser preenchido automaticamente com a data de aquisição no momento do recebimento.
Se permanecer vazio, o valor padrão será a data de aquisição, 952$d (MARC21) ou 995$5 (UNIMARC).
Valores
A data deve estar no formato AAAA-MM-DD.
Exibição
Esta informação não é exibida no OPAC nem na interface administrativa. Ela está disponível apenas no formulário de edição do exemplar.
Mapeado para: items.replacementpricedate
Indexado em: replacementpricedate
952$x / 995$z - Nota não pública
MARC21: 952$x
UNIMARC: 995$z
Usos
Este campo é usado para registrar notas internas sobre o exemplar.
Valores
Este é um campo de texto livre.
Exibição
Interface administrativa
Tabela de exemplares na página de detalhes do registro
Nota
Use Configurações de tabelas para ocultar essa coluna — Módulo: Catálogo
ID da tabela: holdings_table e/ou otherholdings_table
Coluna: holdings_itemnotes_nonpublic ou otherholdings_itemnotes_nonpublic
Aba ‘Exemplares’ do registro bibliográfico, ‘Nota não pública’ em ‘Histórico’
Mapeado para: items.itemnotes_nonpublic
952$y / 995$r - Tipo de material do Koha
MARC21: 952$y
UNIMARC: 995$r
Obrigatório
Usos
Este campo contém o tipo de material em nível de exemplar.
O tipo de material em nível de exemplar é usado em vários pontos do Koha.
Em geral, o tipo de material do exemplar é usado nas regras de circulação, a menos que a preferência do sistema item-level_itypes esteja configurada para usar o tipo de material em nível de registro. Essa preferência possibilita escolher, entre outras opções, se as regras usarão o tipo de material do registro ou do exemplar.
O tipo de material em nível de exemplar é indexado e usado na pesquisa, consulte também a preferência do sistema AdvancedSearchTypes, e nas facetas.
Efeitos na circulação
O tipo de material serve como base para as regras de circulação e afeta a quantidade de exemplares que um usuário pode retirar simultaneamente, a quantidade de reservas etc.
Valores
Os valores são gerenciados em Tipos de material.
Exibição
Interface administrativa
Os tipos de material farão parte das facetas nos resultados da pesquisa.
Tabela de exemplares na página de detalhes do registro
Nota
Use Configurações de tabelas para ocultar essa coluna — Módulo: Catálogo — ID da tabela: holdings_table e/ou otherholdings_table — Coluna: holdings_itype ou otherholdings_itype
Aba ‘Exemplares’ do registro bibliográfico, ‘Tipo de material’ em ‘Informações do exemplar’
Tabela de empréstimos no cadastro do usuário
Nota
Use Configurações de tabelas para ocultar essa coluna — Módulo: Circulação e usuários — ID da tabela: issues-table — Coluna: item_type
Muitos outros locais em todo o Koha
OPAC
Os tipos de material farão parte das facetas nos resultados da pesquisa.
Tabela de exemplares na página de detalhes do registro
Nota
Use Configurações de tabelas para ocultar essa coluna — Módulo: OPAC — ID da tabela: holdingst — Coluna: item_itemtype
Muitos outros locais em todo o OPAC
Mapeado para: items.itype
Indexado em: itemtype (mc-itemtype), itype (mc-itype)
952$z / 995$u - Nota pública
MARC21: 952$z
UNIMARC: 995$u
Usos
Este campo é usado para registrar notas sobre o exemplar.
Valores
Este é um campo de texto livre.
Exibição
Interface administrativa
Tabela de exemplares na página de detalhes do registro
Nota
Use Configurações de tabelas para ocultar essa coluna — Módulo: Catálogo — ID da tabela: holdings_table e/ou otherholdings_table — Coluna: holdings_itemnotes ou otherholdings_itemnotes
Aba ‘Exemplares’ do registro bibliográfico, ‘Nota pública’ em ‘Histórico’
OPAC
Tabela de exemplares na página de detalhes do registro
Nota
Use Configurações de tabelas para ocultar essa coluna — Módulo: OPAC — ID da tabela: holdingst — Coluna: item_notes
Mapeado para: items.itemnotes
Indexado em: note
Números de controle do sistema (999)
O Koha armazena seus números de controle do sistema no campo 999 do MARC21 e nos campos 001 e 090 do UNIMARC.
Nota
O itemnumber é armazenado em 952$9 (MARC21) ou 995$9 (UNIMARC), conforme descrito acima.
999$c / 001 - Biblionumber
O biblionumber é o número interno atribuído pelo Koha a cada registro. Ele é exclusivo e não pode ser atribuído novamente, mesmo depois que o registro é excluído.
MARC21: 999$c
UNIMARC: 001
Mapeado para: biblio.biblionumber
Indexado em: local-number (sn, biblionumber)
Aviso
Este campo não deve ser editável nem alterado manualmente.
999$d / 090$a - Número interno do biblioitem
O biblioitemnumber é o número interno atribuído pelo Koha a cada registro. Ele é exclusivo e não pode ser atribuído novamente, mesmo depois que o registro é excluído.
MARC21: 999$d
UNIMARC: 090$a
Mapeado para: biblioitems.biblioitemnumber
Indexado em: biblioitemnumber
Aviso
Este campo não deve ser editável nem alterado manualmente.
Ícones XSLT de tipos de material do Koha
Quando alguma das preferências XSLT, OPACXSLTDetailsDisplay, OPACXSLTResultsDisplay, XSLTDetailsDisplay e/ou XSLTResultsDisplay, estiver ativada em conjunto com DisplayOPACiconsXSLT e DisplayIconsXSLT, serão exibidos ícones de tipo de material na tela correspondente.
Importante
Essas imagens são determinadas pelos valores do líder. Se o líder não estiver catalogado corretamente, pode ser preferível desativar a preferência DisplayOPACiconsXSLT, mantendo as demais preferências XSLT ativadas.

Livro [BK]
leader6 = a, e um dos valores de leader7 abaixo
leader7 = a
leader7 = c
leader7 = d
leader7 = m
leader6 = t
Arquivo de computador [CF]
leader6 = m

Recurso contínuo [CR]
leader7 = b
leader7 = i
leader7 = s

Mapa [MP]
leader6 = e
leader6 = f

Misto [MX]
leader6 = p
Som [MU]
leader6 = c
leader6 = d
leader6 = i
leader6 = j
Material visual [VM]
leader6 = g
leader6 = k
leader6 = r

Kit
leader6 = o
Gerenciamento de exemplares encomendados e reservas
Se você costuma importar os registros MARC quando o livro é encomendado, e não quando é recebido, e permite que os usuários façam reservas desses livros, talvez seja necessário adicionar registros de exemplar ao arquivo *.mrc antes da importação.
A maneira mais fácil de importar o pedido mais recente é primeiro processar os registros no MARCEdit. Baixe os registros MARC e salve-os na área de trabalho ou em outro local conhecido. Se o MARCEdit já estiver instalado, basta clicar duas vezes nos registros MARC para abri-los automaticamente no programa.
Importante
Este tutorial foi escrito usando o MARCEdit versão 5.2.3769.41641 no Windows XP. As instruções podem ser diferentes em outra versão ou sistema operacional.
O arquivo original será inserido automaticamente como entrada. Verifique se MarcBreaker está selecionado e clique em “Executar”.
Um resumo dos registros processados será exibido na parte inferior da tela.
Clique em ‘Editar registros’ para continuar e adicionar registros de exemplar.
A tela será substituída por uma tela maior contendo os registros MARC.
Clique em Ferramentas > Adicionar/Editar campo.
Insira as informações do exemplar específicas do Koha.
Na caixa Campo, digite 942.
Na caixa Dados do campo, digite \$c e o código do tipo de material, \$cBOOK neste exemplo.
Marque a opção ‘Inserir por último’.
Clique em ‘Adicionar campo’.
Insira os dados do registro de exemplar.
Na caixa Campo, digite 952.
Na caixa Dados do campo, digite $7ORDERED_STATUS$aPERM_LOC$bCURR_LOC$cSHELVING_LOCATION$eSOURCE_OF_ACQ$yITEM_TYPE
Exemplo: $7-1$aCPL$bCPL$cNEW$eBrodart$yBOOK
Em uma instalação padrão do Koha, -1 é o valor da situação Encomendado.
Considere outros subcampos que deseja preencher, por exemplo: alterar o código de coleção para colocar todos os exemplares na mesma coleção, subcampo 8; preencher automaticamente a data de aquisição, subcampo d; ou adicionar uma nota pública, subcampo z.
Use o símbolo $ para separar os subcampos. Adicionar cada subcampo em uma linha separada fará com que essa mesma quantidade de exemplares seja importada com o registro MARC; no exemplo acima, seriam quatro exemplares, cada um com apenas um dos subcampos preenchido.
Consulte Administração > Valores autorizados no Koha para inserir o código correto no campo.
Marque a opção ‘Inserir por último’.
Clique em ‘Adicionar campo’.
Feche a janela do editor de campos.
Clique em Arquivo > Compilar para MARC.
Escolha onde salvar o arquivo.
Em seguida, acesse o Koha e siga as instruções para importar registros MARC.
Depois que o exemplar chegar, acesse seu registro e altere individualmente o código de barras para o valor correto. Em seguida, mude manualmente a situação de Encomendado para a linha em branco no campo Não emprestável.
Nota
Se você adquirir registros de exemplar já catalogados, poderá solicitar ao fornecedor que inclua nos registros MARC as informações necessárias. Assim, será possível importar o arquivo editado pelo fornecedor, sobrescrever o registro atual e substituir automaticamente os dados pelos valores desejados.