Using third party software with Koha
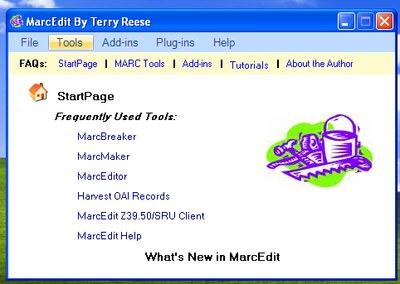
MarcEdit
Many libraries like to use MarcEdit for modifications or data cleanup. If you’d like to do this you will need to download it at: http://marcedit.reeset.net/
Importante
Many of the actions described in this chapter can be done in Koha using Marc Modification Templates, but this section is here for those who are used to MarcEdit.
Agregar un prefijo a las signaturas topográficas
Cuando quiera importar datos a Koha, probablemente quiera limpiarlos primero. Algo común entre los usuarios de Koha es añadir un prefijo a la signatura topográfica.
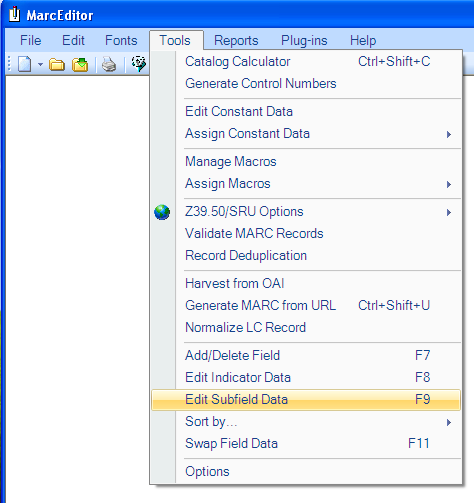
Abrir MarcEdit
Haga clic en “MarcEditor”
Ir a Tools > Edit Subfield Data
Para anteponer datos el carácter especial es: ^b Para anteponer simplemente datos al principio de un subcampo, agregar ^b al Campo de datos: cuadro de texto y los datos que se incluirán al dar a Replace
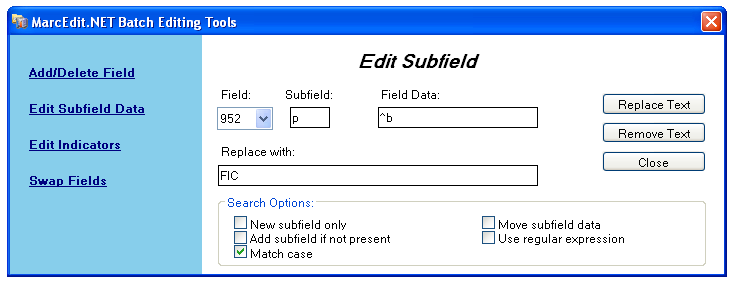
Para anteponer datos al principio del subcampo mientras sustituye una cadena de texto, agregue ^b[cadena a reemplazar] al cuadro de texto Field Data y los datos que se agregarán en el cuadro de texto Replace With.
Importando datos de Excel en Koha
Suponga que tiene registros de su biblioteca en formato de hoja de datos excel y quiere importarlos en Koha. Pero, ¿cómo se puede hacer esto? Koha no le permitirá importar archivos de Excel directamente. Bueno, aquí hay una solución muy simple para que usted le permitirá importar sus archivos de Excel en Koha fácilmente. En primer lugar, vamos a convertir el archivo de Excel en un archivo Marc y luego importarlo a Koha.
Siga los pasos que se indican para importar sus archivos de Excel en Koha
Convirtiendo desde el formato de Excel al formato .mrk
First, we will convert excel format into .mrk format. For this we will use MarcEdit. You can download it from http://marcedit.reeset.net/
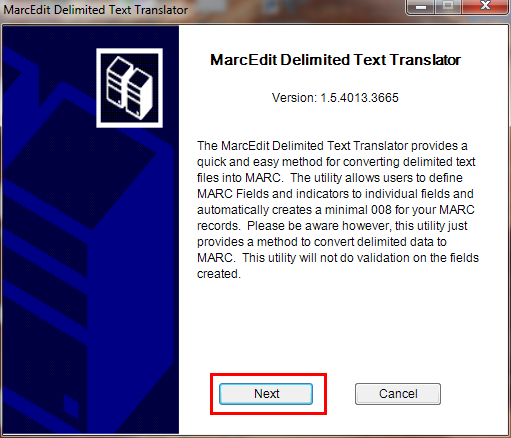
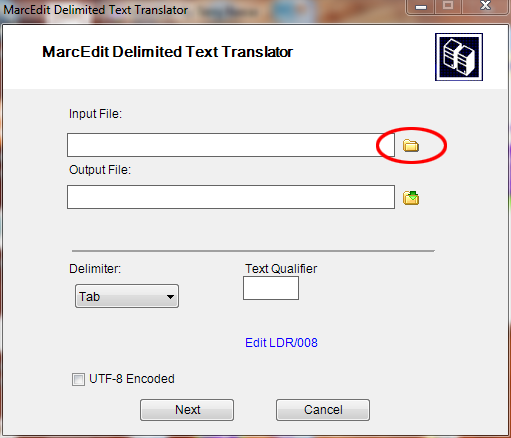
Ahora ábralo y seleccione Add-ins–>Delimited Text Translator.

Haga clic en Next cuando aparezca la siguiente ventana.
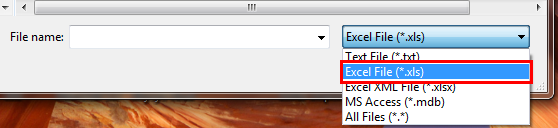
Busque su archivo Excel.
Locate your excel file by choosing the format Excel File(*.xls).
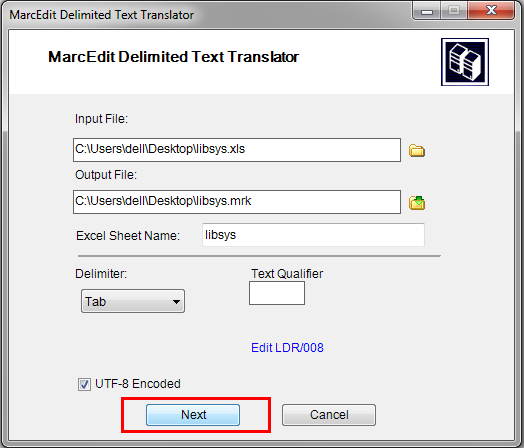
Del mismo modo, cumplimente el resto de entradas como Output File, Excel Sheet Name y marque codificación UTF-8 (si es necesario) y haga clic en Next.
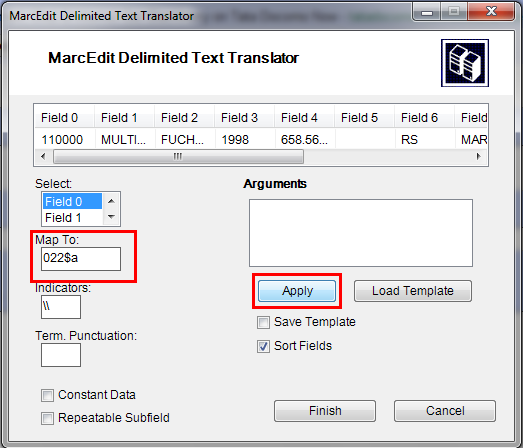
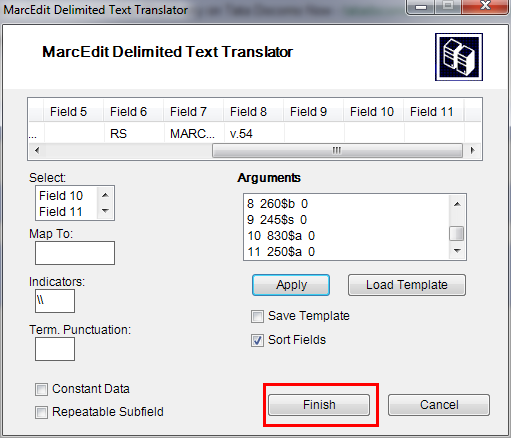
Ahora se le pedirá el mapeo de los campos con los campos de formato MARC estándar.
Suponga que para el Campo 0 que es la primera columna Mapee a: 022$a ( un ISSN válido para el recurso continuo) y luego haga clic en Apply.
Nota
Puede personalizar indicadores y las demás cosas, para más información del formato marc21 visite official library of congress site.
Del mismo modo mapee todos los demás campos y haga clic en Finalizar.
And then a window will appear indicating that your Marc Text File(*.mrk) has been created.
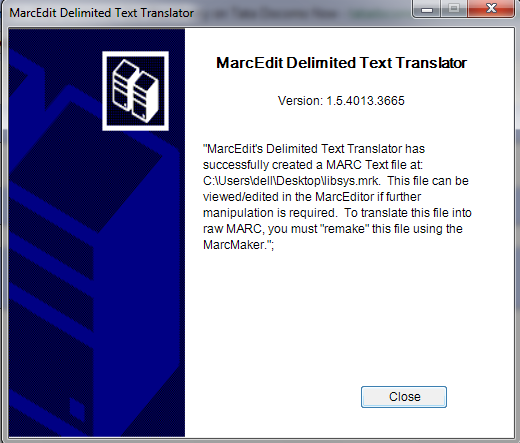
Haga clic en Cerrar y hemos creado un archivo. mrk de. xls en este paso. Puede ver el archivo haciendo doble clic sobre él.
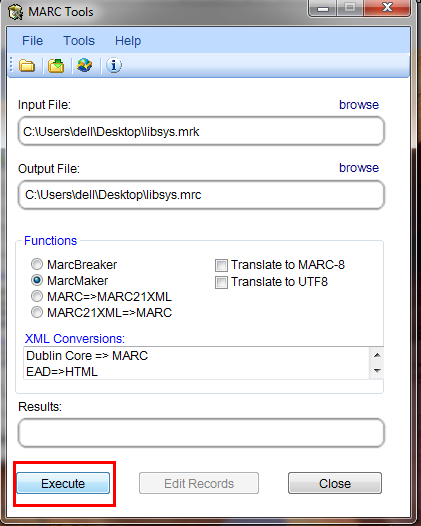
Convertir archivo .mrk a .mrc
Vamos a convertir el archivo .mrk que hemos creado en el paso anterior en formato Marc puro que se puede importar directamente en Koha.
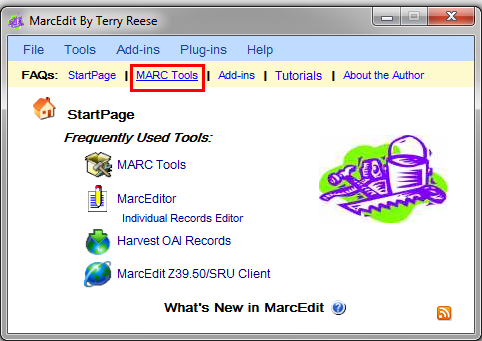
Para esto de nuevo abra MarcEdit y seleccione MARC Tools.
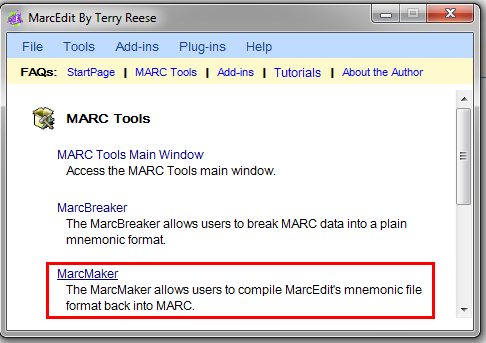
A continuación seleccione MarcMaker para convertir un archivo .mrk a uno con formato .mrc.
Localice el archivo de entrada y el nombre de archivo de salida. Luego haga clic en Execute.
Y se le mostrará el Resultado.
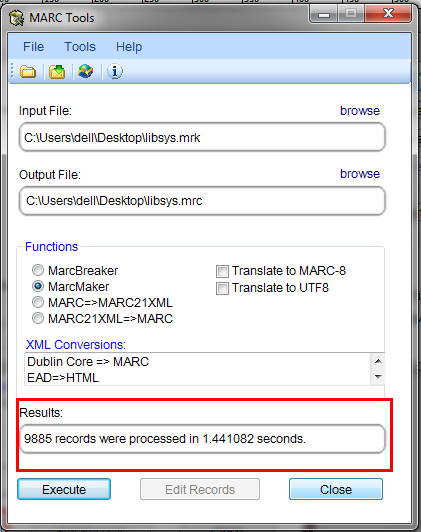
Haga clic en Cerrar y ahora tenemos registros MARC nativos ( archivos .mrc).
Importar .mrc a Koha
More information on importing records into Koha can be found in the Stage MARC records for import section of this manual.
Por último vamos a importar el archivo anterior .mrc a Koha.
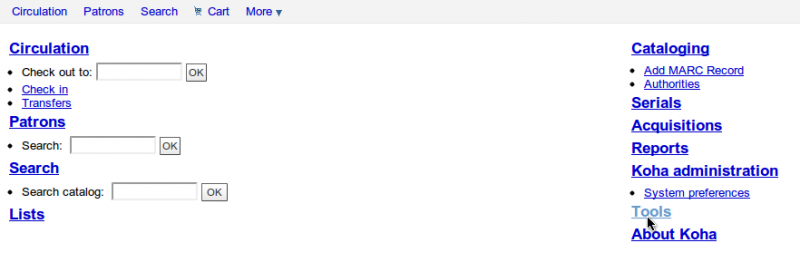
Haga clic en Herramientas en la interfaz de administración de Koha.
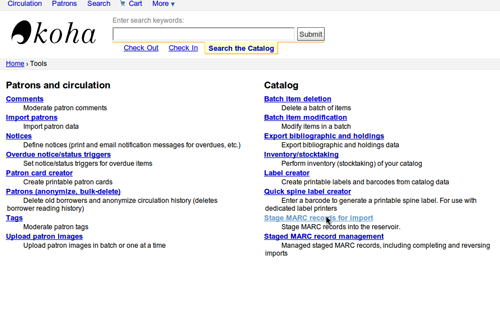
A continuación haga clic en Registros MARC preparados para importar
Después elija el archivo creado previamente .mrc y haga clic en Subir.
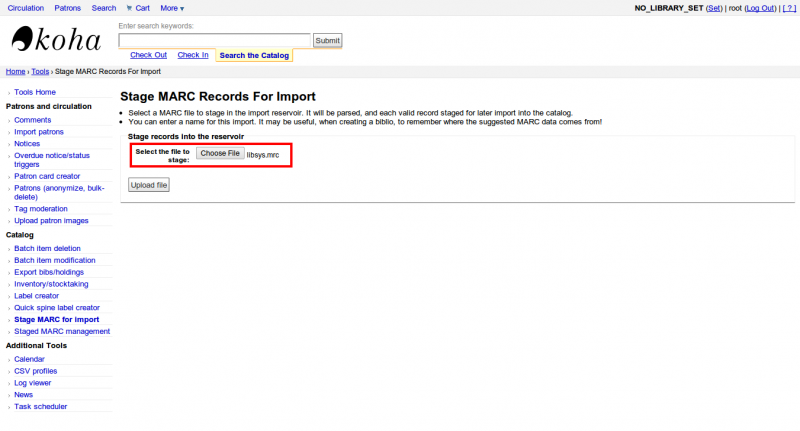
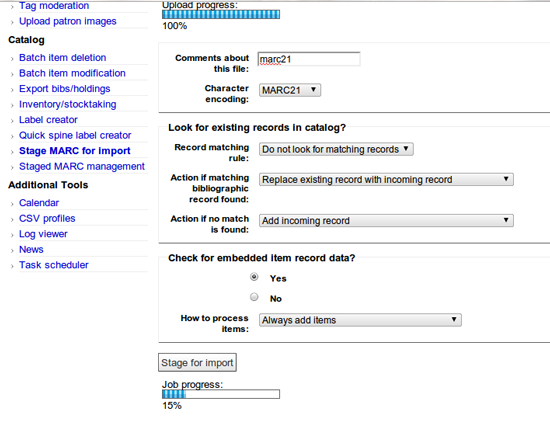
También puede agregar un comentario sobre del archivo y, finalmente, haga clic en Preparado para la importación.
Cuando la importación este hecha, obtendrá un resultado como este
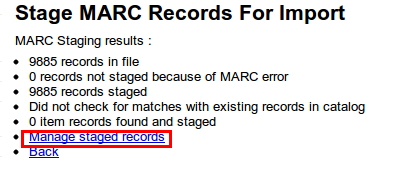
A continuación, haga clic en gestionar registros preparados.
Aquí usted puede incluso cambiar las reglas de la importación.
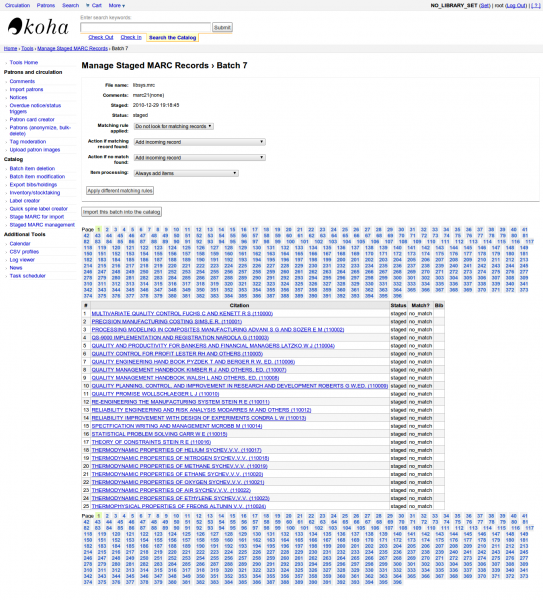
Haga clic en Importar por lotes a este catálogo cuando haya terminado.
Eso es todo. Después de que todos los registros se hayan importado, compruebe el estado y debería leerse «importado»
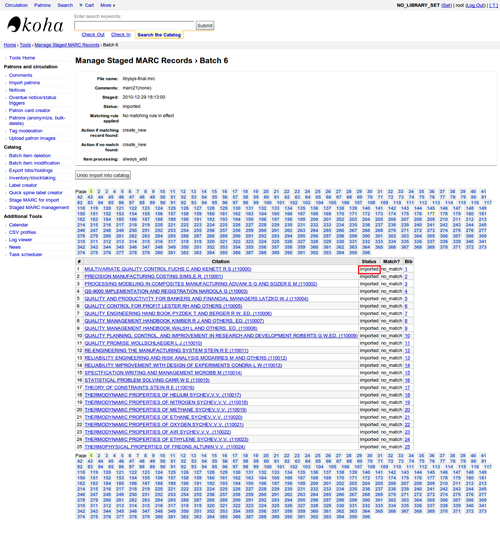
Incluso puede deshacer la operación de importación.
Y en algunos minutos, hemos importado alrededor de 10.000 registros a Koha
OCLC Connexion Gateway
Koha can be set to work with the OCLC Connexion Gateway. This allows libraries to use OCLC Connexion as their cataloging tool and simply send those records to Koha with a single click. The following instructions will help you set up the OCLC Connexion Gateway, if you have a system administrator you will want to consult with them on this process.
Configurando el servicio OCLC en Koha
Primeramente, necesitará crear un archivo en algún lugar de sus sistema con la información de configuración. Usted podrá colocar esto en cualquier lugar el cual será visible por la cuenta que ejecutará el servicio.
El archivo contiene 11 líneas. Las primeras 6 serán acerca de sus sistema Koha:
host: The IP address of your Koha server
port: The port you want to use for the Connexion service. This port must be different from your SIP port, or any other service
koha: The full URL of your staff client
log: The location (full file specification) of your log for the service
user: The default Koha username to use for importing
password: The password that goes with that username
Las líneas restantes describen cómo hacer la puesta en escena:
match: The name of the matching rule from your system to use
overlay_action: "replace", "create_new", or "ignore"-- what to do if there is a match
nomatch_action: "create_new" or "ignore"-- what to do if there is no match
item_action: "always_add","add_only_for_matches","add_only_for_new", or "ignore" -- what to do with embedded 952 item data
import_mode: "direct" or "stage"
Un archivo de ejemplo luciría como este:
host: 1.2.3.4
port: 8000
log: /home/koha/koha-dev/var/log/connexion.log
koha: http://kohastaff.myuniversity.edu
user: koha_generic_staff
password: password
match: 001
overlay_action: replace
nomatch_action: create_new
item_action: ignore
import_mode: direct
When choosing an “import_mode” if you use «direct» then the staged record will be immediately imported into Koha, and should be searchable after your indexes catch up. If you choose «stage», then the record will be placed in a staged batch for you to later go the Manage Staged MARC Records tool to finish the import.
Si importa múltiples registros, entrarán en el mismo lote, hasta que ese lote sea importado, a continuación se creará un nuevo lote.
En modo «direct», cada registro entrará en su propio lote.
Para iniciar el servicio, ejecute el script:
/location/of/connexion/import/daemon/connexion_import_daemon.pl -d -c /location/of/config/file.cnf
Configurar el cliente de escritorio de OCLC
Nota
La captura de pantalla muestra la OCLC Connexion Client v.2.50, Koha v.3.12
To set up the OCLC Connexion desktop client to connect to Koha, go to Tools > Options, then choose the Export tab.
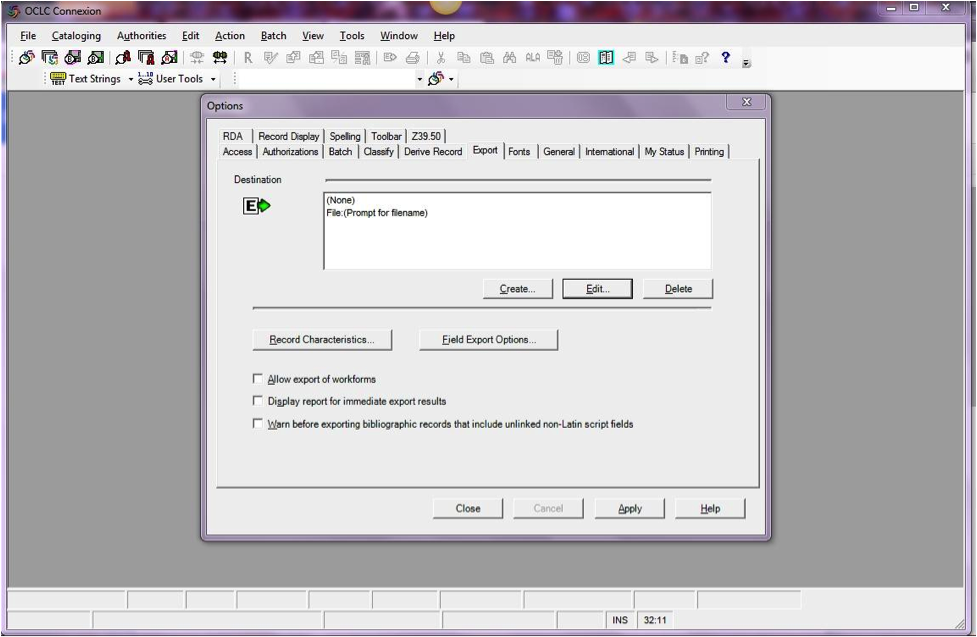
Haga clic en el botón «Crear …» para configurar un nuevo destino, a continuación, seleccione «Exportar Gateway OCLC» y haga clic en OK.
Ingrese la siguiente información:
«Host Name:» Your catalog’s appropriate IP address (from your config file above)
«Port:» Your catalog’s appropriate port number (from your config file above)
«Login ID:» El usuario Koha del catalogador
«Password:» La clave Koha del catalogador
«Notify Host Before Disconnect» = chequeado,
«Timeout» = 100, «Retries» = 3, «Delay» = 0 (cero),
«Send Local System Logon ID Password» = chequeado.
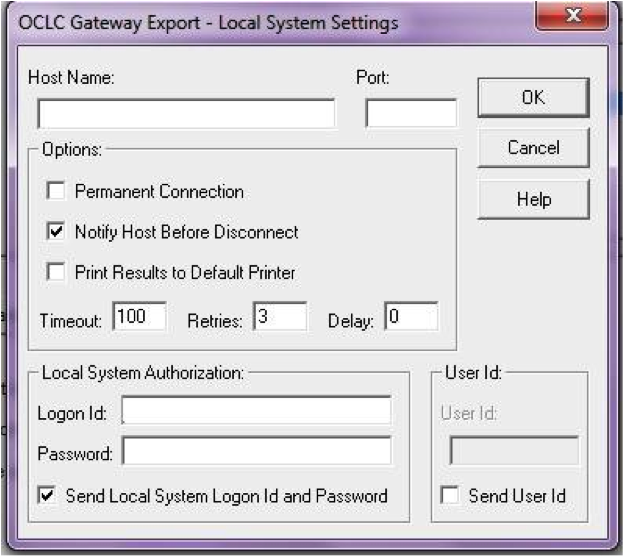
Seleccione «OK» cuando haya finalizado, y usted podrá ver su nueva opción «Gateway Export» listada (La dirección IP y el puerto están bloqueados en la siguiente captura de pantalla)
Gateway Export agregado
Haga clic en «Características del registro» y asegúrese que los registros bibliográficos utilizan MARC21, UTF-8 Unicode, y haga clic en Aceptar para guardar.
Características del registro
¡Usted ya debería estar preparado! Para exportar un registro desde el cliente de OCLC Connexion a Koha, solo tiene que presionar F5 mientras el registro está en la pantalla. El cuadro de diálogo de exportación se abrirá, y usted verá a OCLC Connexion intentando establecer conexión con Koha. Usted debe recibir un mensaje de que el registro fue añadido o superpuesto, incluyendo su número biblio, y una dirección URL que puede copiar en su navegador web para acceder directamente al registro.
Utilizando el OCLC Connexion Gateway
Los Registros pueden ser exportados desde el Connexion ya sea en lote o uno por uno.
Exportando registros uno por uno
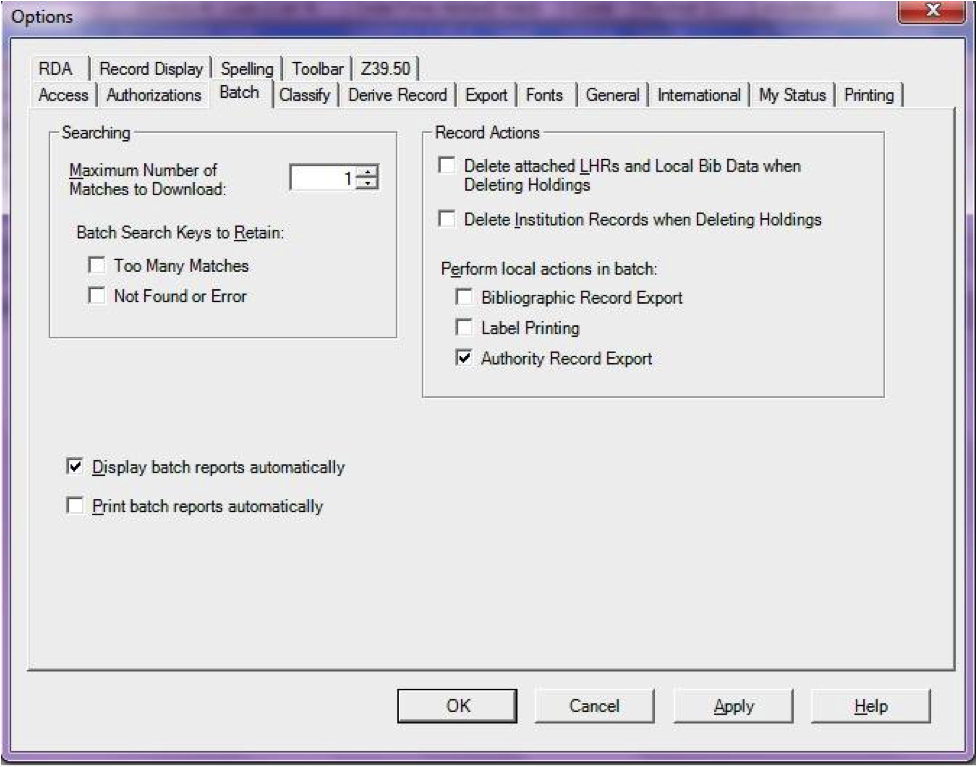
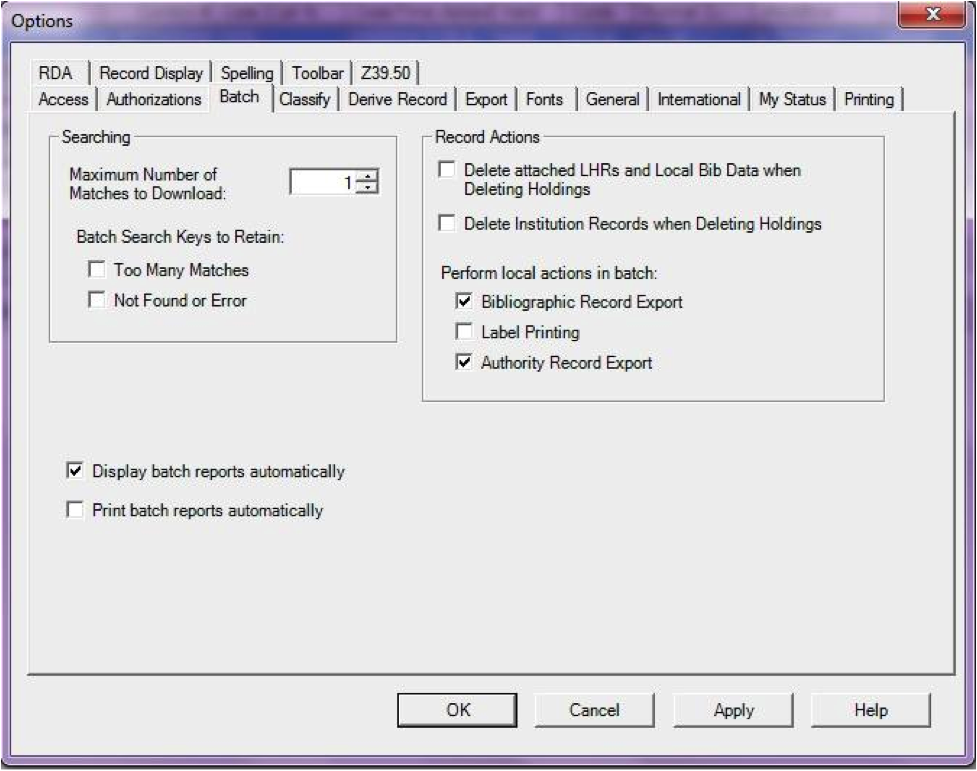
To export bibliographic records one by one, be sure your «Batch» options are correct: from the «Tools» menu, select «Options», and select the «Batch» tab. In the «Perform local actions in batch» area, «Bibliographic Record Export» should be unchecked
When ready to export, from the «Action» menu, select «Export» or use the F5 key. You will see a screen similar to the following if the import is successful and if the record is new to the Catalog; you may copy & paste the resulting URL into your Koha catalog to see the new record.
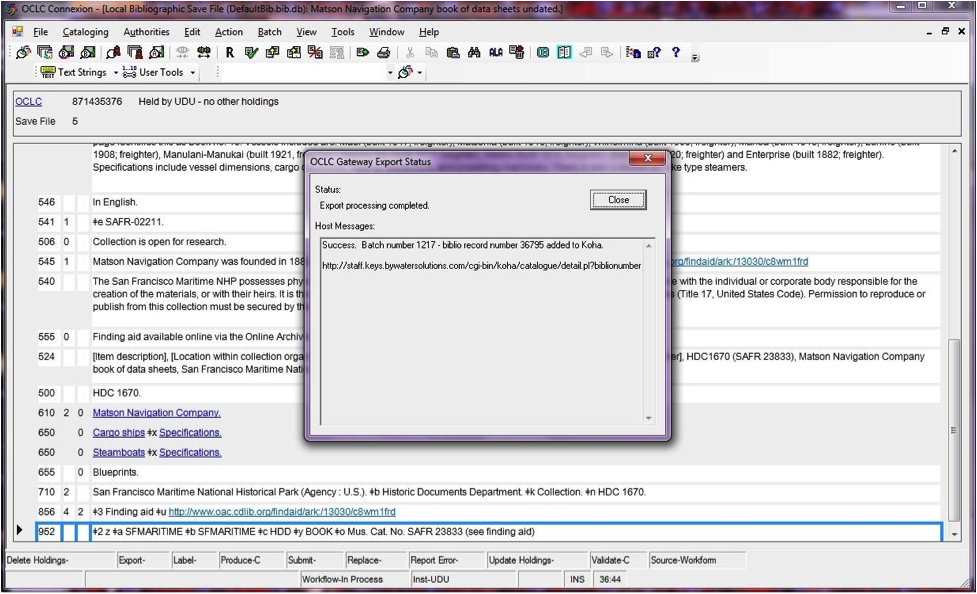
If the record was overlaid, you will see a message to that effect in the «OCLC Gateway Export Status» window
Exportando registro en lote
To export bibliographic records in a batch, be sure your «Batch» options are correct: from the «Tools» menu, select «Options», and select the «Batch» tab. In the «Perform local actions in batch» area, «Bibliographic Record Export» should be checked
Cuando un registro esta listo para ser exportado, desde el menú «Action», seleccione «Export» o utilice la tecla F5, y el estado de exportación debe estar en «ready».
When ready to export the batch, from the «Batch» menu, select «Process batch» and check the appropriate «Path» and «Export» boxes

The export will begin, and the bib records will be exported & imported into Koha one by one; you will see «OCLC Gateway Export Status» windows, as above, showing you the results of each export. That window will stay there until you select «Close,» and then the next record’s export/import will begin. The process will continue until all records in the batch are completed. Then you may or may not see the Connexion Client export report (depending on your Client options for that).
Ejemplares en OCLC
If you’d like to create your item records in OCLC you can do so by addding a 952 for each item to the bib record you’re cataloging. The location and item information cataloging guide will break down what subfields you can use in the 952, but at the minimum you want to have subfield 2, a, b, and y on your items.
952 \\$2CLASSIFICATION$aHOMEBRANCHCODE$bHOLDINGBRANCHCODE$yITEMTYPECODE
The subfield 2 holds the classification code. This can be ddc for Dewey or lcc for Library of Congress or z for Custom. Other classification sources can be found in the Classification Sources area in administration
Subfield a is your home library and needs to be the code for your home library, not the library name. You can find these codes in the Libraries administration area.
Subfield b is your holding library and needs to be the code for your holding library, not the library name. You can find these codes in the Libraries administration area.
Subfield y is your item type code. It needs to be the code, not the item type name. You can find these codes in the Item Types administration area.
952 \\$2ddc$aMAIN$bMAIN$yBOOK
In addition to these required fields you can enter any other subfield you’d like. Most libraries will enter a call number in subfield o and a barcode in subfield p as well. Review the Location and item information cataloging guide for a full list of subfields and values.
Talking Tech
Talking Tech i-tiva is a third party, proprietary, product that libraries can subscribe to. Learn more here: http://www.talkingtech.com/solutions/library.
Installation and setup instructions
Asegúrese de que ha ejecutado installer/data/mysql/atomicupdate/Bug-4246-Talking-Tech-itiva-phone-notifications.pl, requerido para instalar los paquetes de datos (new syspref, notice placeholders and messaging transport preferences)
To use, TalkingTechItivaPhoneNotification system preference must be turned on.
If you wish to process PREOVERDUE or RESERVES messages, you’ll need the EnhancedMessagingPreferences system preference turned on, and patrons to have filled in a preference for receiving these notices by phone.
For OVERDUE messages, overdue notice triggers must be configured under More > Tools > Overdue notice/status triggers. Either branch-specific triggers or the default level triggers may be used (script will select whichever is appropriate).
Sending notices file
Add the TalkingTech_itiva_outbound.pl script to your crontab
Add an FTP/SFTP or other transport method to send the output file to the i-tiva server
Si lo desea, guarde los archivos de avisos enviados en otro directorio después del envío.
Run TalkingTech_itiva_outbound.pl –help for more information
Receiving results file
Agregar un FTP/SFTP u otro método de transporte para enviar el archivo de resultados a un directorio conocido en su servidor Koha
Add the TalkingTech_itiva_inbound.pl script to your crontab, aimed at that directory
Si desea, guarde el archivo de resultados en otro directorio después de su procesamiento
Run TalkingTech_itiva_inbound.pl –help for more information