Informes
Los informes en Koha es una manera de reunir datos. Los informes se usan para generar estadísticas, listas de miembros, listas de ubicaciones, o cualquier listado de datos en su base de datos.
Ir a: Más > Informes
Custom reports
Koha’s data is stored in a MySQL database which means that librarians can generate nearly any report they would like by either using the guided reports wizard or writing their own SQL query.
Add custom report
Guided report wizard
El asistente de informes guiados lo llevará por un proceso de seis pasos para generar un informe.
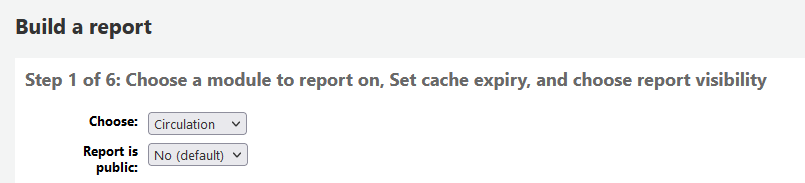
Paso 1: Elegir el módulo sobre el que desea elaborar el informe. Esto determinará qué tablas y campos están disponibles para que usted haga la consulta.
“Report is public” should be left to the default of “No” in most cases especially if the report contains patron or other sensitive information. A public report can be accessed using the JSON reports services by anyone and without authentication.
Nota
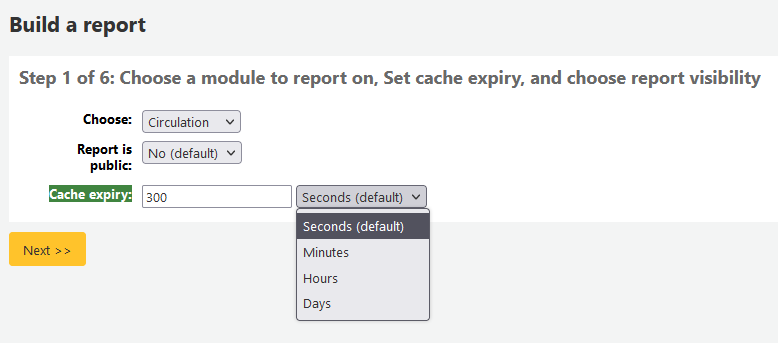
Si el administrador del sistema ha configurado la memcache en el servidor, usted verá una opción más para la expiración de la cache. Esto está relacionado con informes públicos. Si usted hace un informe público, entonces, constantemente esta ejecutándose y pude causar una gran carga en el sistema. Configurando este valor previene lo anterior.
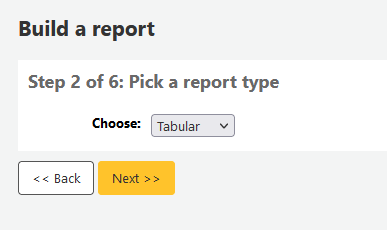
Paso 2: Elegir un tipo de informe. Por ahora, la única opción disponible es tabular.
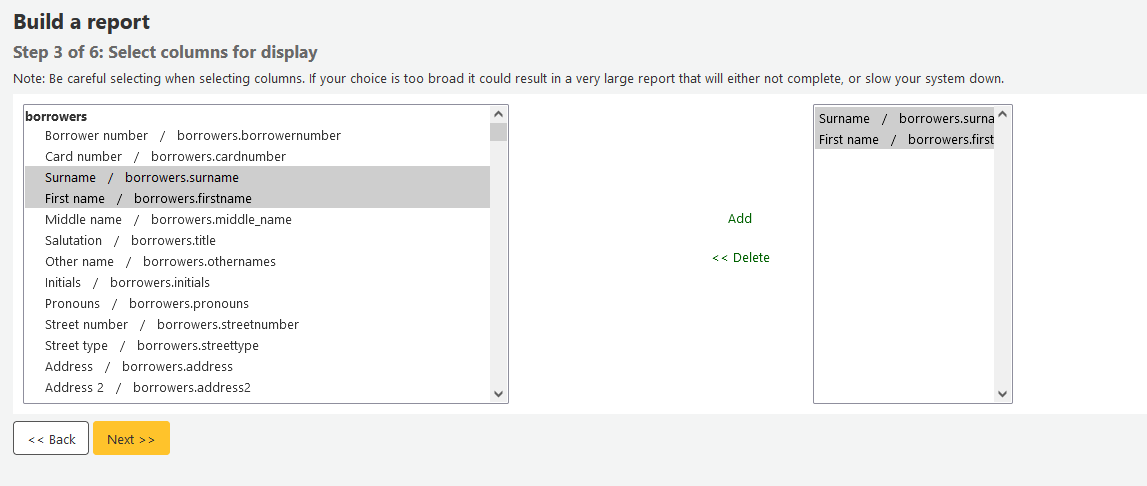
Step 3: Choose the fields you want in your report. You can select multiple fields and add them all at once by using CTRL+click on each item you want to add before clicking the Add button.
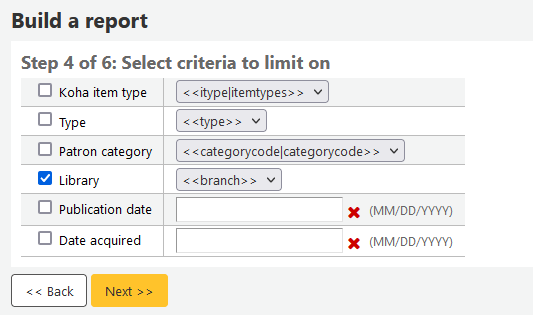
Step 4: Choose any limits you might want to apply to your report (such as item types or branches). If you don’t want to apply any limits, simply click “Next” instead of choosing an option.
Step 5: Perform math functions. If you don’t want to do any calculations, simply click “Next” instead of choosing an option.

Step 6: Choose data order. If you want the data to print out in the order it’s found in the database, simply click “Finish”.

When you are finished you will be presented with the SQL generated by the report wizard. From here you can choose to save the report by clicking “Finish” or copy the SQL and make edits to it by hand.

Si elige guardar el informe se le preguntará el nombre del informe, ordenarlo en grupos y subgrupos e ingresar cualquier nota sobre el.
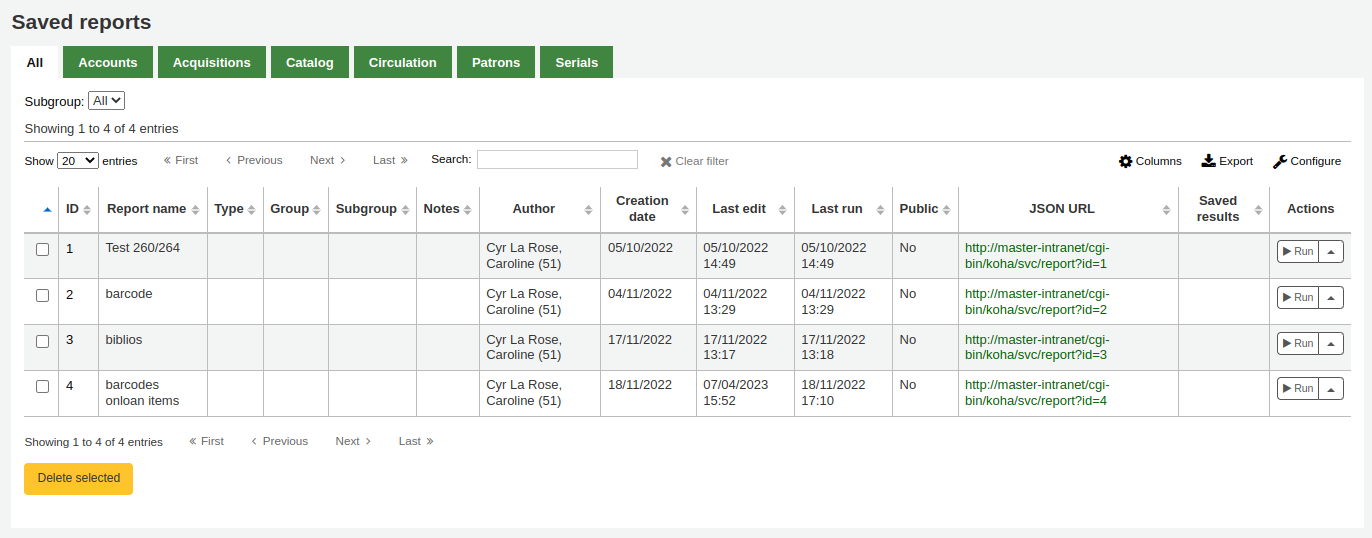
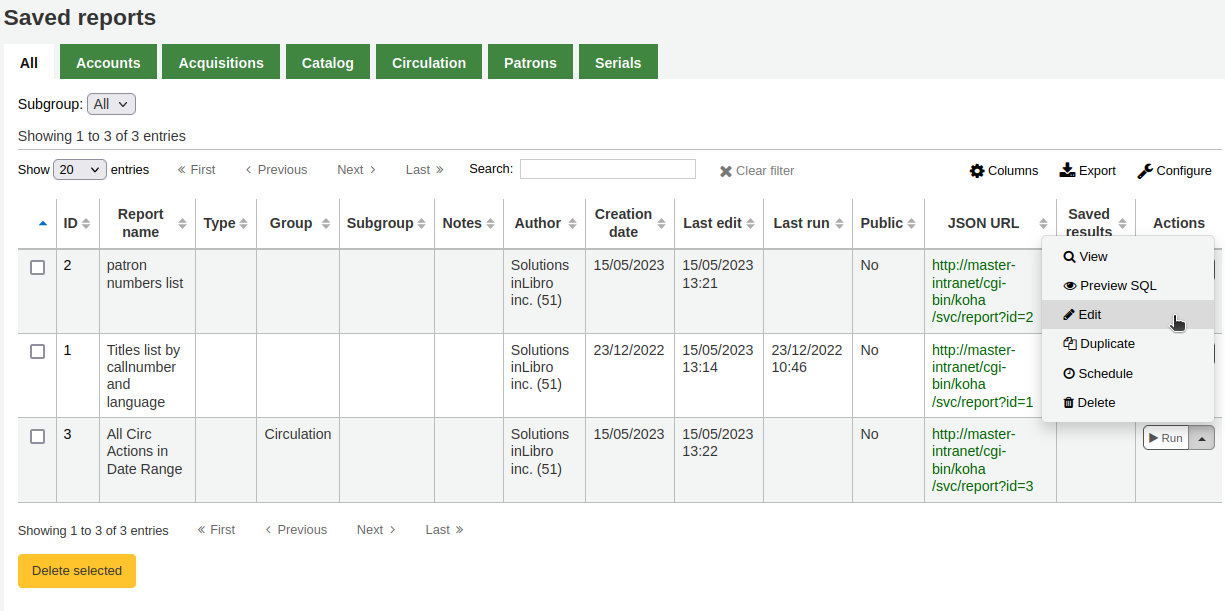
Once your report is saved it will appear on the “Use saved” page with all other saved reports.
Nota
You can customize the columns of this table in the “Table settings” section of the Administration module (table id: table_reports).
Desde aquí puede editar, ejecutar el informe, o planificar el momento de ejecución. Para encontrar el informe que ha creado puede ordenar por cualquiera de las columnas haciendo clic en el encabezado (fecha de creación es la mejor para encontrar el reporte más reciente). También puede filtrar sus resultados utilizando el menú a la izquierda o las pestañas para encontrar su informe basado en sus grupos personalizados.
Crear informe desde SQL
In addition to the report wizard, you have the option to write your own queries using SQL. To find reports written by other Koha users, visit the Koha wiki: http://wiki.koha-community.org/wiki/SQL_Reports_Library. You can also find your database structure in /installer/data/mysql/kohastructure.sql or online at: http://schema.koha-community.org.
To add your query, click the link to “Create from SQL” on the main reports module
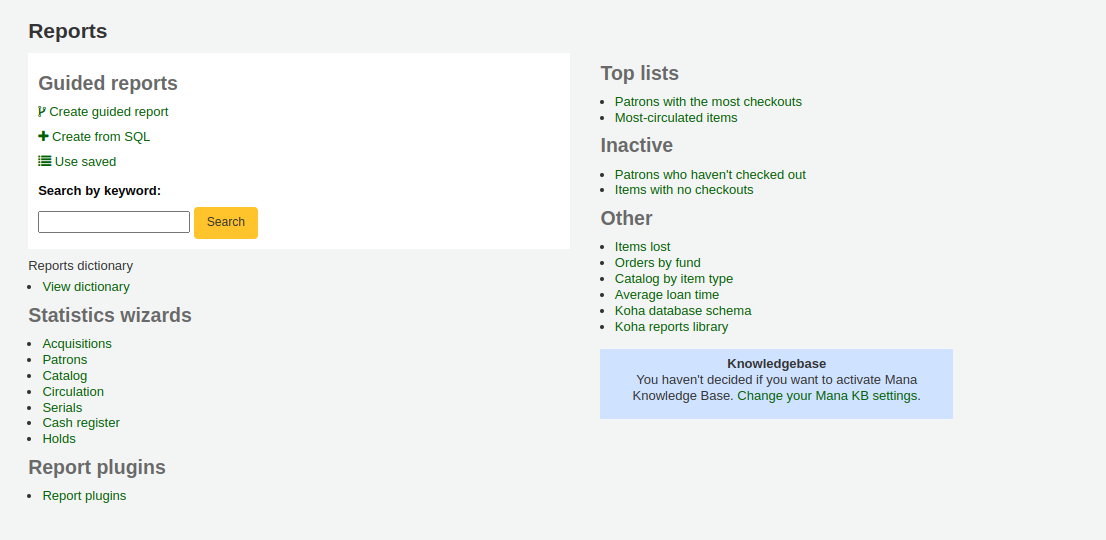
or the “New report” button at the top of the “Saved reports” page.

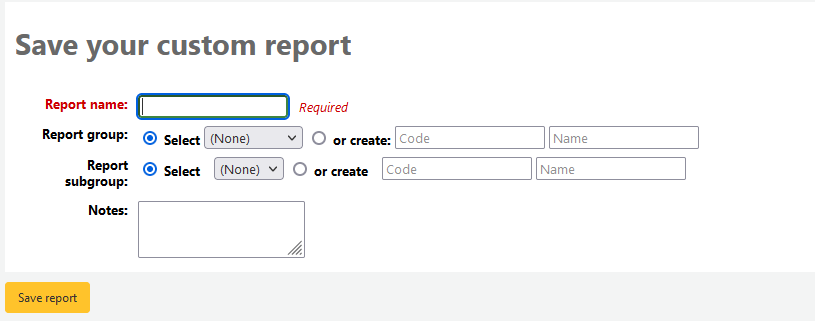
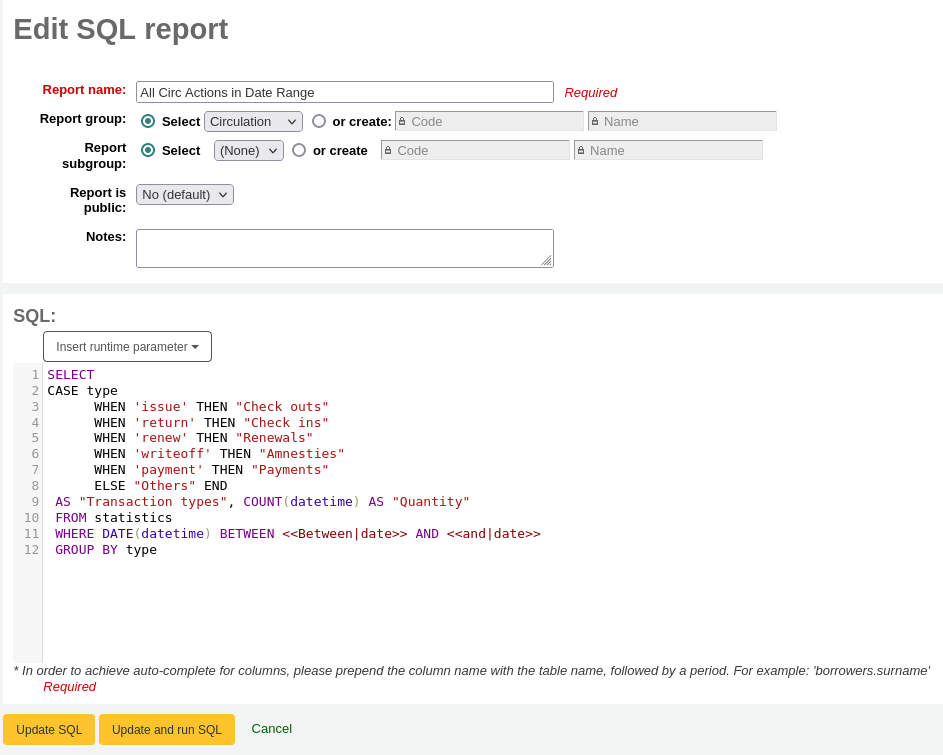
Rellene el formulario presentado
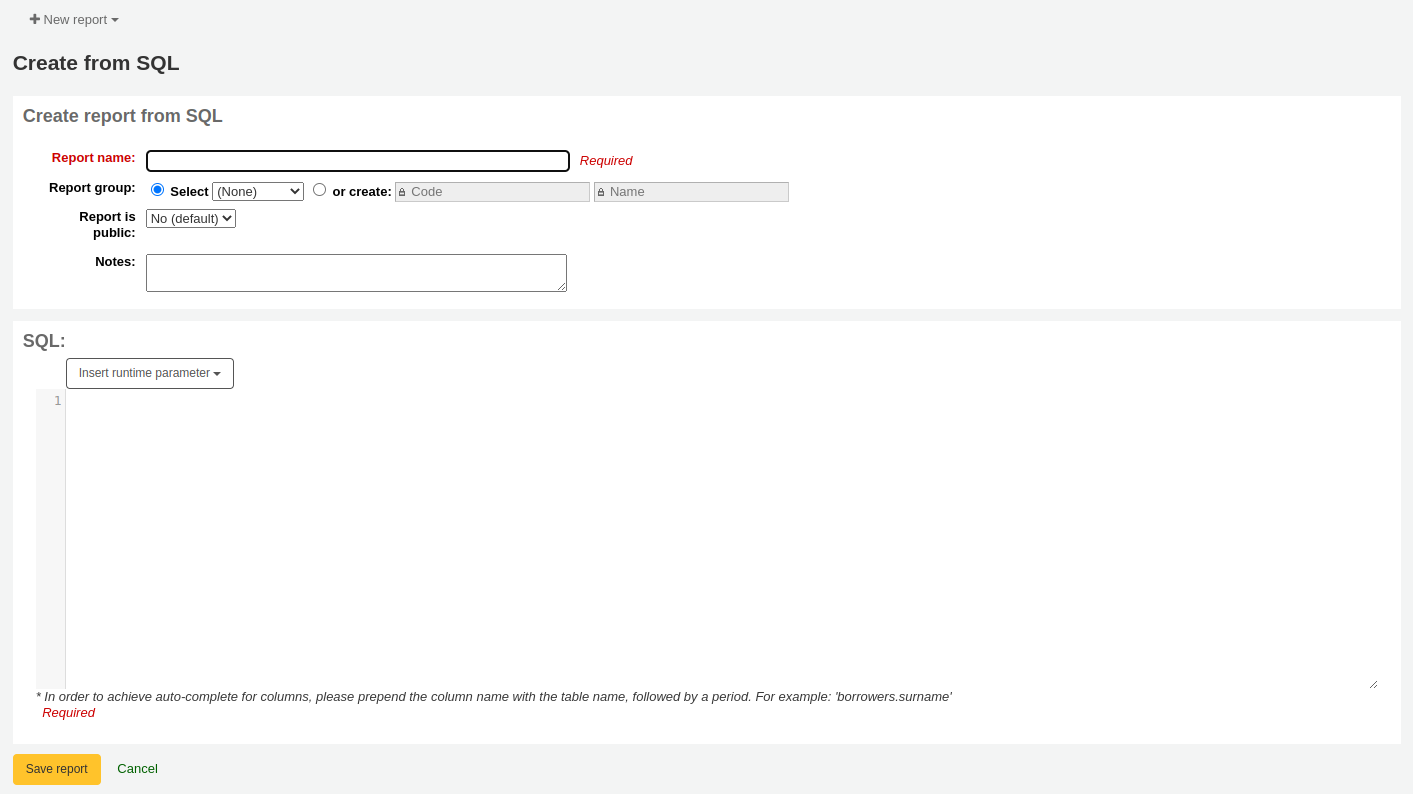
Report name: the name is what will appear on the “Saved reports” page to help you identify the report later. It will also be searchable using the filters found on the left of the “Saved reports” page.
Report group: you can use the “Report group” to organize your reports in tabs on the “Saved reports” page. You can choose from the list of existing groups, or create one on the fly by choosing the “or create” radio button.

Report groups are set in the REPORT_GROUP authorized value category.
Advertencia
If you’re adding a report group on the fly, the code should not include special characters or spaces.
Report subgroup: if you chose a report group, this field will appear to further organize your reports. Choose a subgroup from the list, or create one on the fly by choosing the “or create” radio button.
Report subgroups are set in the REPORT_SUBGROUP authorized value category.
Nota
Report subgroups need to have unique values in “Authorized value” and “Description”. The “Description (OPAC)” field needs to contain the authorized value for the report group that the subgroup falls under.
Advertencia
If you’re adding a report subgroup on the fly, the code should not include special characters or spaces.
Report is public: this should be left to the default of “No” in most cases, especially if the report contains patron or other sensitive information. A public report can be accessed using the JSON reports services by anyone and without authentication.
Cache expiry: this field will only appear if your system administrator has set up memcache on your server. This is related to public reports. If you make the report public, it’s constantly running and will cause a large load on your system. Setting this value prevents that.
Notes: notes will appear on the “Saved reports” page, and can be used to provide more details about the report or tips on how to enter values when it runs.
SQL: type or paste the SQL for the report (see report writing tips below).
Once everything is entered click the “Save report” button and you’ll be presented with options to run it. From here, you can also edit it, duplicate it, or schedule it to be run later.
Once a report is saved, you do not have to recreate it, it will appear on the “Saved reports” page with all other saved reports.
Nota
You can customize the columns of this table in the “Table settings” section of the Administration module (table id: table_reports).
From the “Saved reports” page, you can make edits, run the report, or schedule a time to run the report later. To find the report you created, you can sort by any of the columns by clicking on the column header (creation date is the best to find the report you just added). You can also filter your results using the filter menu on the left or use the tabs to find reports based on your custom groups.
Report writing tips
Autocomplete
When you start typing in the SQL field, autocomplete options will be displayed.
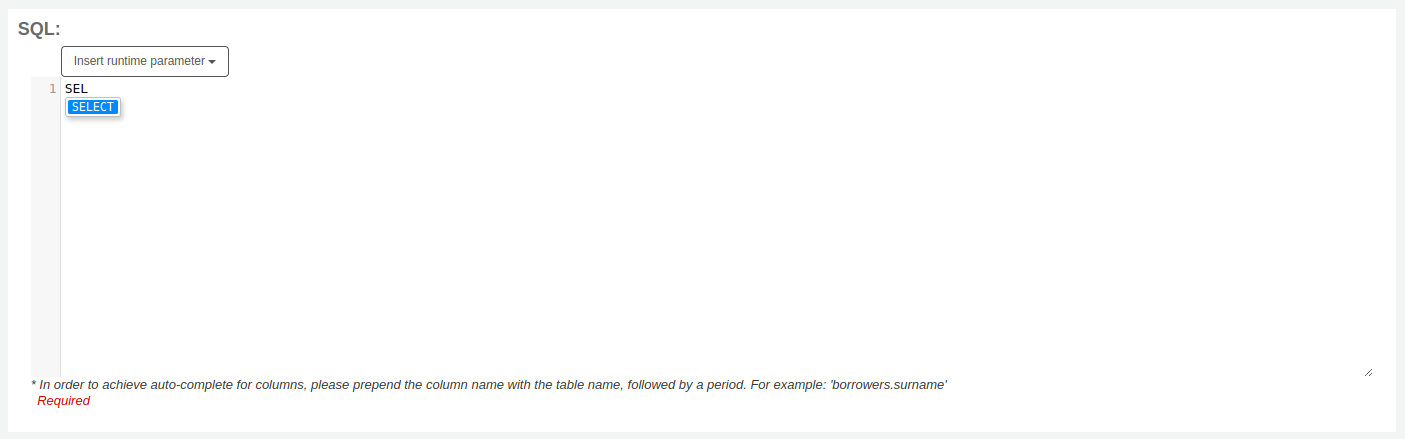
Use the arrows on your keyboard to choose the correct option and press “Enter” or “Tab” to insert it into your report, or simply click on the option to insert it.
Autocomplete options include:
SQL keywords such as SELECT, FROM, WHERE, etc.
table names
column names
Nota
To have suggestions for column names, you must type the table name first, followed by a period, then start typing the column name.
For example, to have the suggestion for
cardnumber, you must typeborrowers.ca.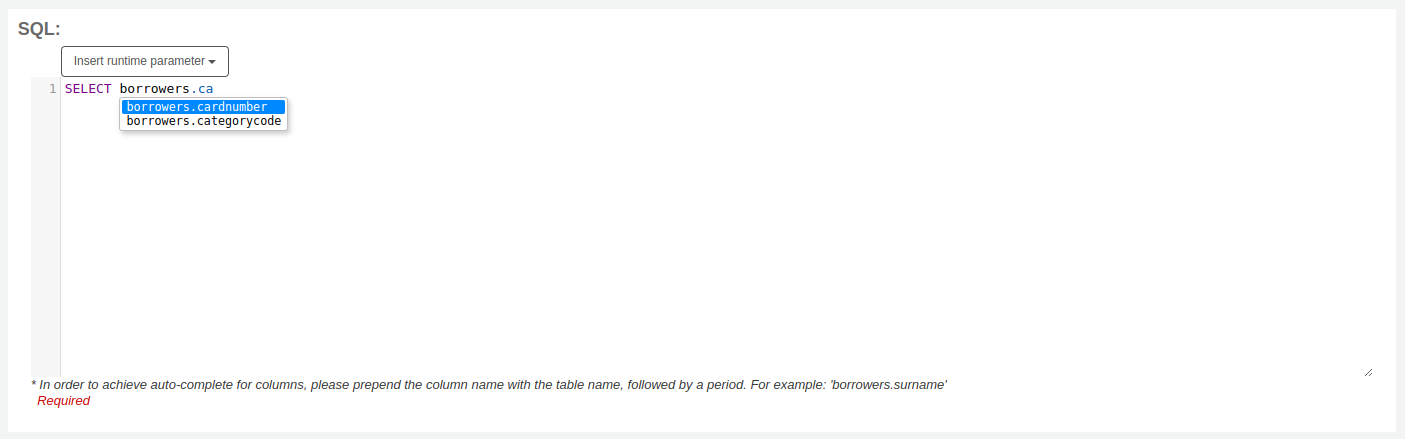
Runtime parameters
Si usted cree que su informe puede consumir demasiados recursos podría considerar el uso de parámetros de ejecución de la consulta. Los parámetros en tiempo de ejecución básicamente hacen que aparezca un filtro antes de que se ejecute el informe con el fin de ahorrar recursos a su sistema.
Click the button “Insert runtime parameter” and choose which parameter to add.
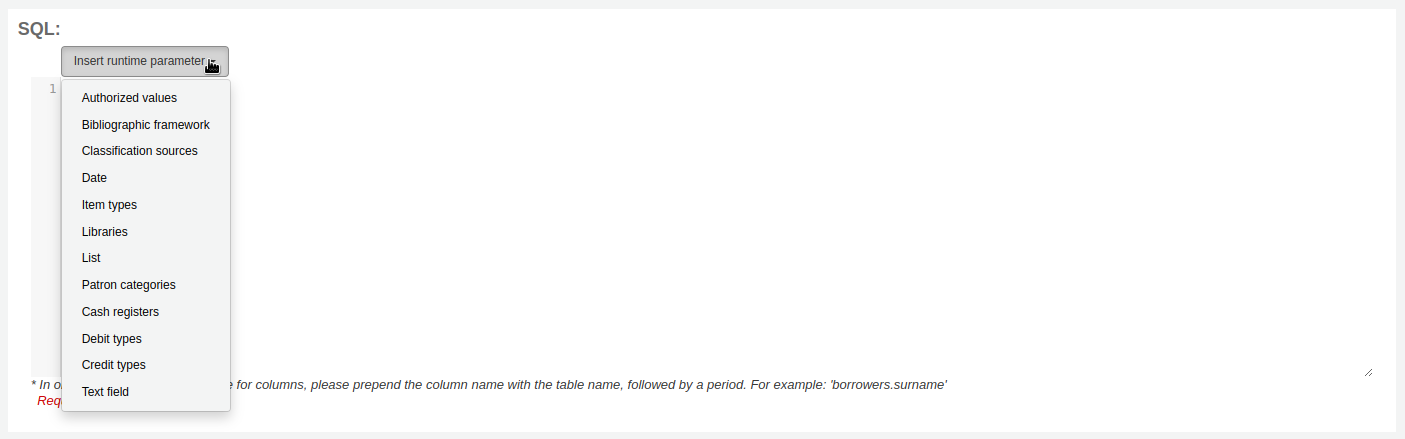
Authorized value: will display a drop down menu of the value descriptions from the chosen authorized value category. The authorized value code will be inserted in the report when it is run.
Bibliographic framework: will display a drop down menu of MARC bibliographic frameworks. The framework code will be inserted in the report when it is run.
Classification sources: will display a drop down menu of classification sources. The classification code will be inserted in the report when it is run.
Date: will display a calendar to pick a date. The date in YYYY-MM-DD format will be inserted in the report when it is run.
Item types: will display a drop down menu of item types. The item type code will be inserted in the report when it is run.
Libraries: will display a drop down menu of libraries. The library code (branchcode) will be inserted in the report when it is run.
List: will display a large text box in which the user can enter many values, one per line. Those values will be inserted in the report, separated by commas, when it is run.
Advertencia
In the case of the list parameter, users must write one value per line.
Patron categories: will display a drop down menu of patron categories. The category code will be inserted in the report when it is run.
Cash registers: will display a drop down menu of cash registers. The cash register’s internal id will be inserted in the report when it is run.
Debit types: will display a drop down menu of debit types. The debit type code will be inserted in the report when it is run.
Credit types: will display a drop down menu of credit types. The credit type code will be inserted in the report when it is run.
Text field: will display an empty text field in which the user can enter any text.
Nota
Debe poner «%» en la caja de texto y “dejarlo en blanco”. De otra manera, literalmente buscará «» (cadena vacía) como el valor para el campo.
For example entering nothing for: «title=<<Enter title>>» will display results with title=”” (no title).
If you want to have to have something not mandatory, use «title like <<Enter title>>» and enter a % at run time instead of nothing.
After you choose the type of runtime parameter, it will ask you for the parameter label. This is what the user will see as the label for the choice they have to make or text they have to enter.
The syntax inserted into the report is <<Label|authorized_value>>.
The << and >> are just delimiters to indicate the start and end of the runtime parameter.
The label will be displayed on the left of the choice or value to enter.
The authorized_value can be omitted if not applicable. If it is absent, a free text field will be displayed. If it contains an authorized code (see table below), a drop down of the values will be displayed.
Nota
You can write those in manually as well, you don’t have to go through the “Insert runtime parameter” button. As long as the syntax is correct, Koha will interpret it as a runtime parameter.
List of parameters that can be used in runtime parameters
Parameter |
What the user sees |
What gets inserted in query |
|---|---|---|
date |
date picker |
validly formatted date |
branches |
drop down of branch names |
branch code |
itemtypes |
drop down of item type names |
item type |
categorycode |
drop down of patron category descriptions |
borrower category code |
biblio_framework |
drop down of MARC bibliographic frameworks |
framework code |
list |
large text box |
comma separated values |
(auth-value-category) |
drop down of auth-value descriptions in category |
authorized value |
(nothing) |
text box |
entered text |
Nota
You can have more than one runtime parameter in a given SQL query.
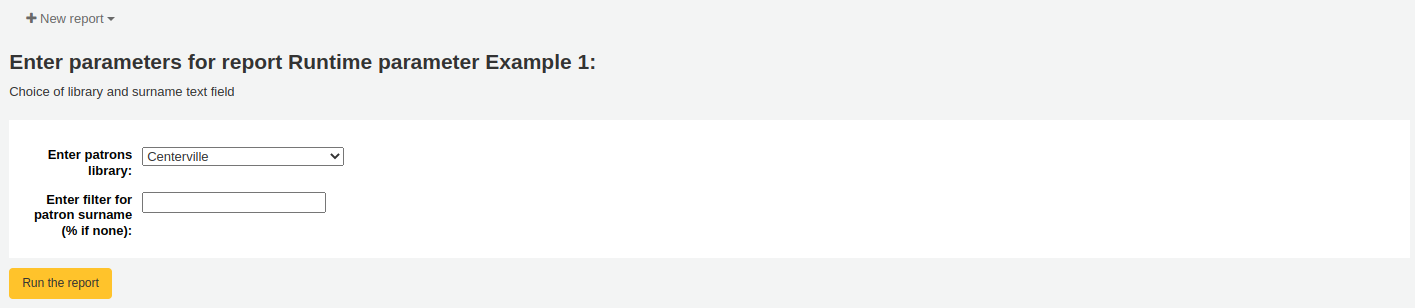
Example 1
SELECT surname,
       firstname
FROM borrowers
WHERE branchcode = <<Enter patrons library|branches>>
    AND surname LIKE <<Enter filter for patron surname (% if none)>>
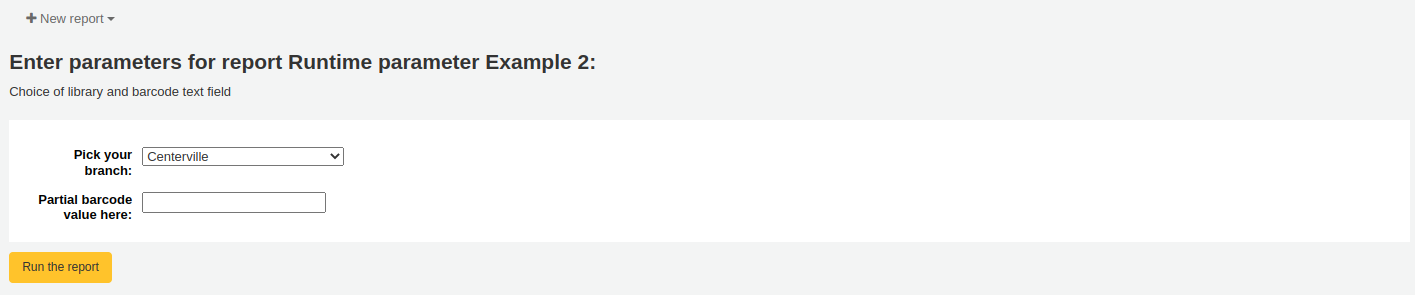
Example 2
SELECT *
FROM items
WHERE homebranch = <<Pick your branch|branches>>
    AND barcode LIKE <<Partial barcode value here>>
Example 3
SELECT title,
       author
FROM biblio
WHERE frameworkcode = <<Enter the frameworkcode|biblio_framework>>

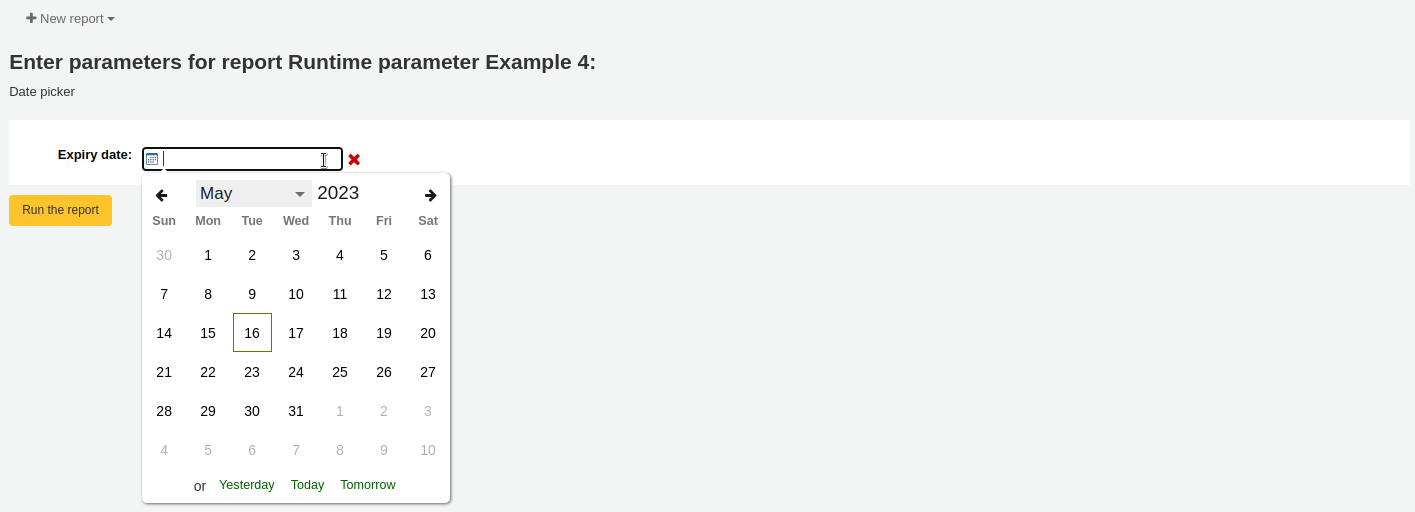
Example 4
SELECT cardnumber,
       surname,
       firstname
FROM borrowers
WHERE dateexpiry <= <<Expiry date|date>>
Example 5
SELECT *
FROM items
WHERE itemnumber IN <<List of itemnumbers (one per line)|list>>
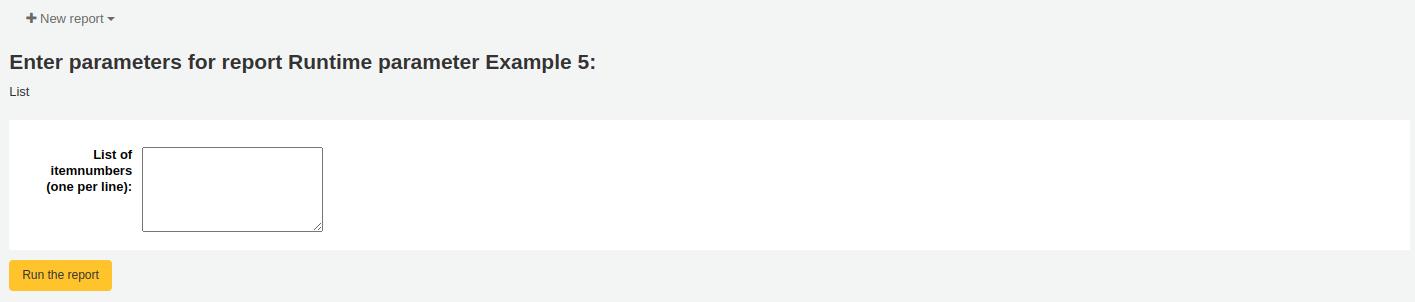
Advertencia
In the case of the list parameter, users must write one value per line.
SQL report from Mana
In the «Create report from SQL», you can search Mana KB for pre-made reports by clicking on «New report» and choosing «New SQL from Mana».
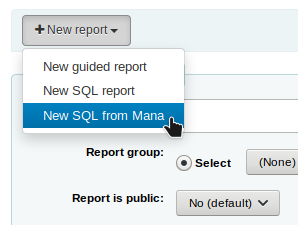
Nota
This option will only appear if you’ve configured Mana KB in the administration module.
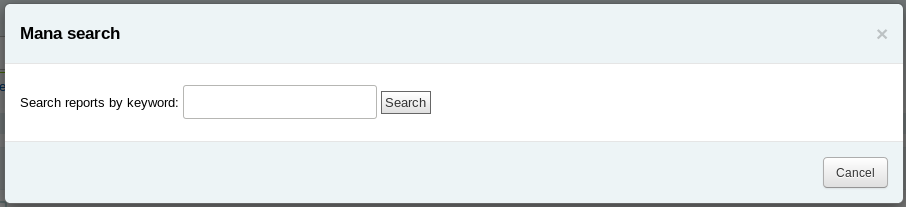
You will be prompted to enter keywords to search the knowledge base.
In the search results, you will see
the details of the report (name, notes and type)
how many people have used this entry (# of users)
when it was used for the last time (last import)
additional comments made by other Koha users (comments)
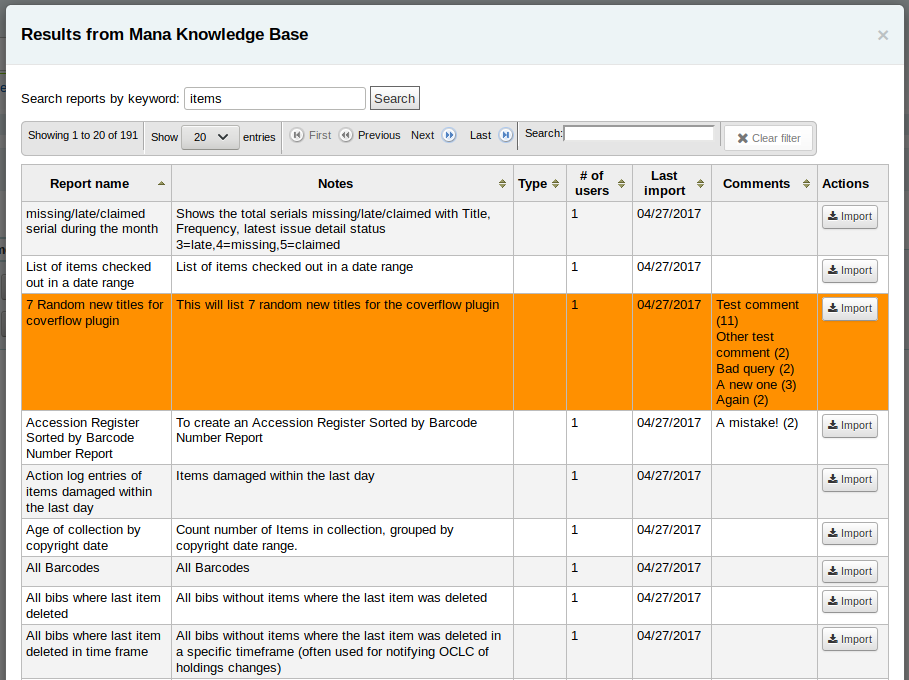
Click on «Import» to import a copy of the report in your own saved reports.
You can then edit it, duplicate it, delete it, run it as you would any of your own reports.
Duplicate report
Los informes también se pueden añadir mediante la duplicación de un informe existente. Visite la página de los “Informes guardados” para ver la relación de todos los informes en su sistema.
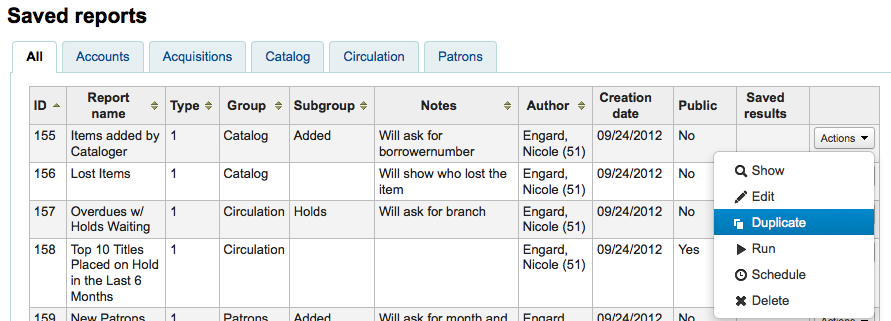
A la derecha de cada informe hay un desplegable “Acciones”. Haciendo clic en el enlace y escogiendo “Duplicar” para utilizar un informe existente como base para su nuevo informe. Esto llenará el formulario del nuevo informe con el código SQL existente para que fácilmente se pueda editar y re-guardar.
Edit custom reports
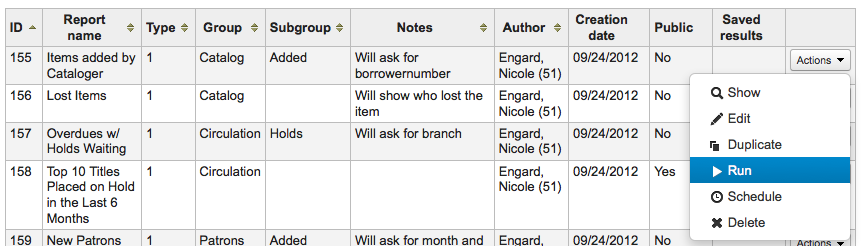
Every report can be edited from the reports lists. To see the list of reports already stored in Koha, click “Use saved.”
Nota
You can customize the columns of this table in the “Table settings” section of the Administration module (table id: table_reports).
Para encontrar el informe que desea editar puede ordenar por cualquiera de las columnas haciendo clic en la cabecera. Además puede filtrar sus resultados utilizando el menú de filtro a la izquierda o utilizar las pestañas para encontrar informes basados en sus grupos personalizados.
Desde esta lista se puede editar cualquier informe personalizado, haga clic en «Acciones» a la derecha del informe y seleccionando «Editar» en el menú que aparece.
The form to edit the report will appear. Use the «update button» to save your modifications or click on «update and run SQL» to save and display the report results.
Running custom reports
Una vez que el informe se guarda en Koha, puede ejecutarlo yendo a la página de Informes Guardados y haciendo clic en el botón “Acciones” a la derecha del informe y seleccionando “Ejecutar”.
Cuando se ejecuta el infome se le pedirá algunos valores
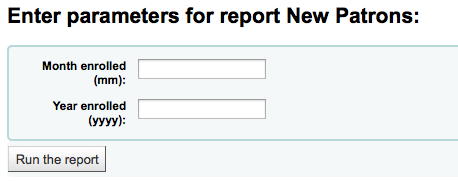
o verá los resultados enseguida
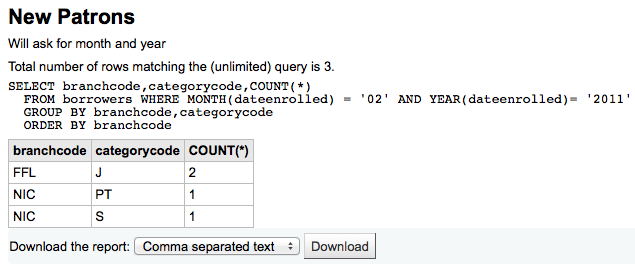
Desde los resultados puede seleccionar ejecutar el informe haciendo clic en “Ejecutar informe” en la parte superior, editar el informe haciendo clic en el botón “Editar” o iniciar creando un nuevo informe utilizando el botón “Nuevo”. También puede descargar sus resultados seleccionando un tipo de archivo en la parte inferior de los resultados al lado de la etiqueta “Descargar el informe” y haciendo clic en “Descargar.”
Nota
A comma separated text file is a CSV file and it can be opened by any spreadsheet application.
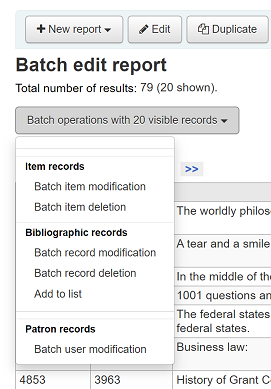
Send report output to batch modification tools
After running a report that contains itemnumbers, biblionumbers and/or patron cardnumbers the list of numbers can be imported directly into the relevant batch modification tool by clicking the “Batch operations with X visible records” button in the report results. The X depends on the number of records you have chosen to display on screen (up to 1000).
Statistics reports
Statistic reports will show you counts and sums. These reports are all about numbers and statistics, for reports that return more detailed data, use the guided report wizard. These reports are limited in what data they can look at, so it’s often recommended to use custom reports for official end of the year statistics.
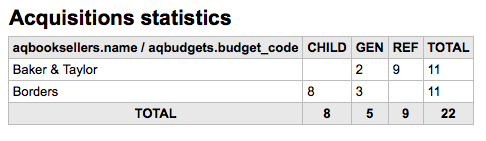
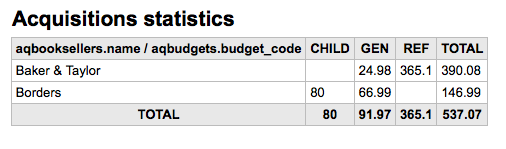
Acquisitions statistics
Nota
Estos informes están limitados en cuales datos pueden buscar, entonces es recomendable utilizar informes personalizados para las estadísticas de final de año.
Using the form provided, choose which value you would like to appear in the column and which will appear in the row.
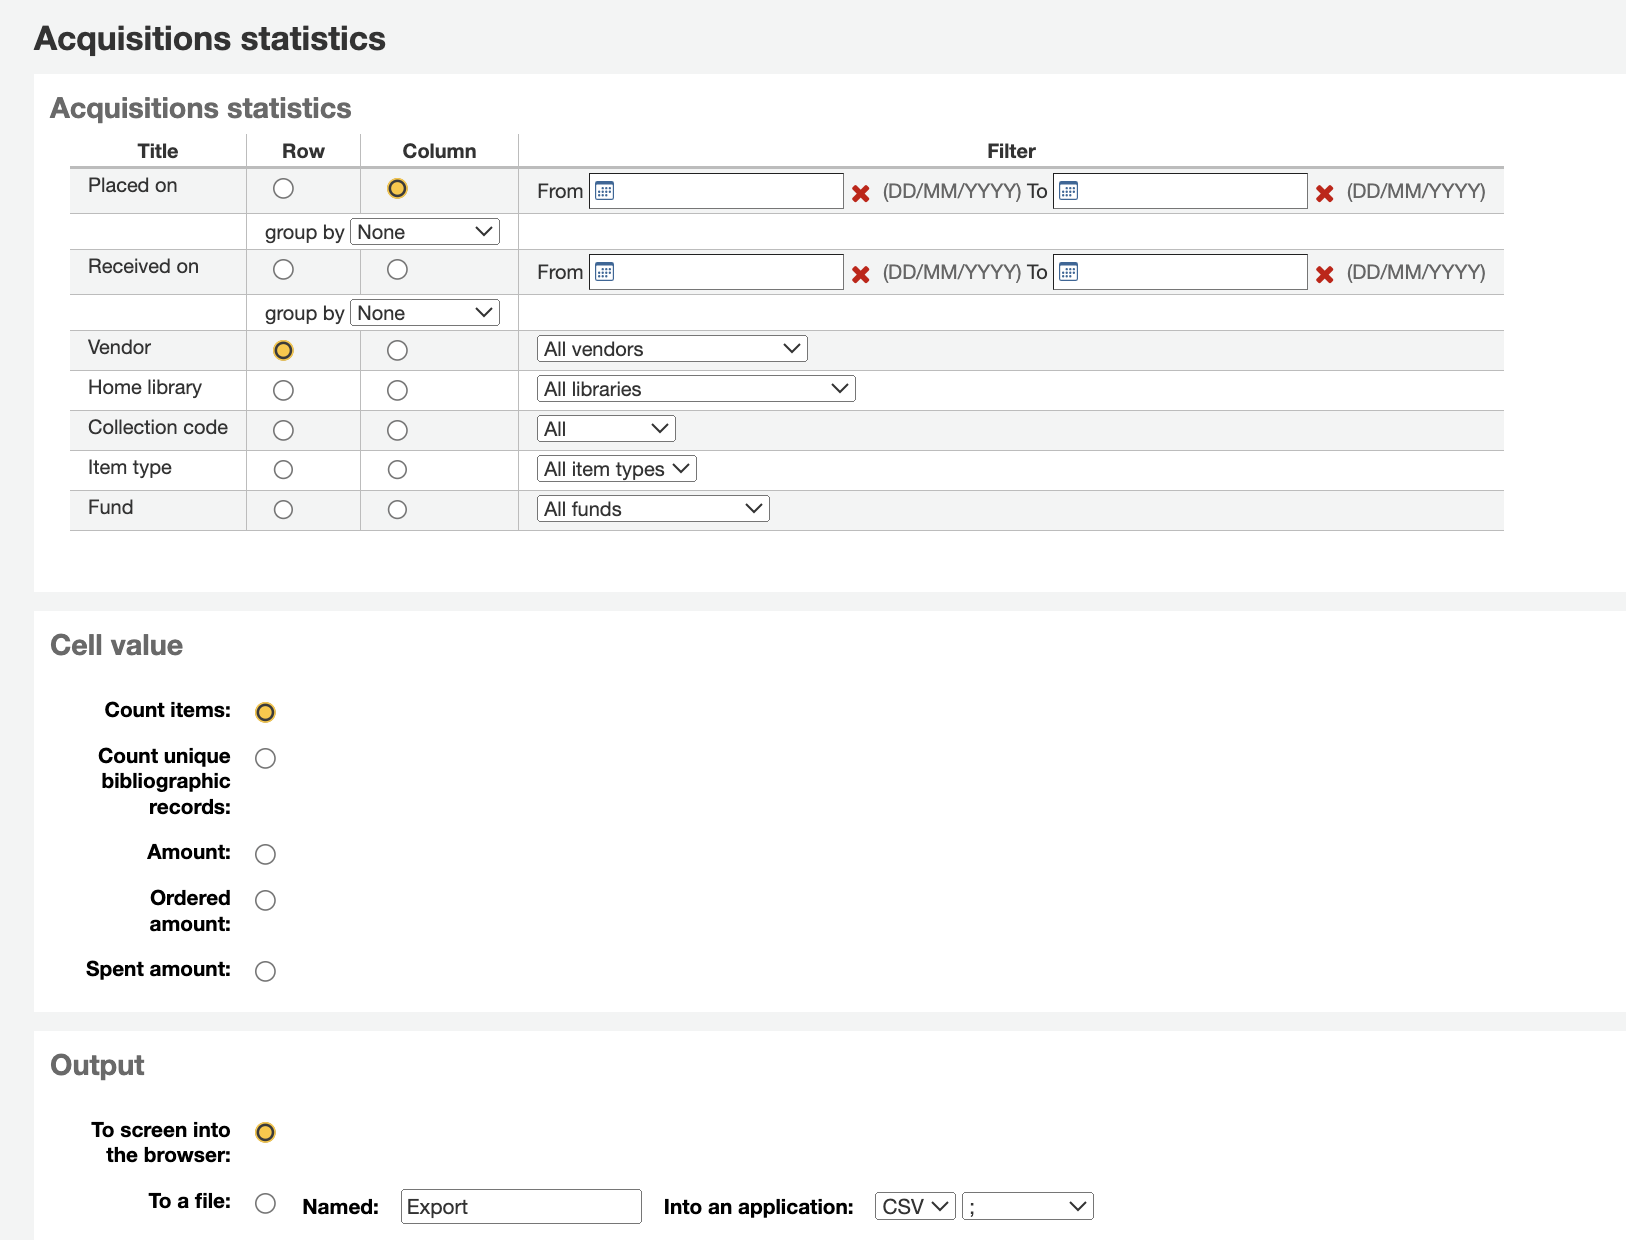
Si elige mostrar en el navegador sus resultados se verán en la pantalla.
También puede elegir exportar a un archivo que pueda manipular según sus necesidades.
Cuando genere un informe, note que deberá elegir entre contar o sumar los valores.
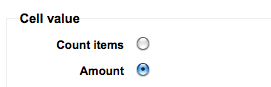
Seleccionando cantidad cambiará sus resultados de modo que aparezca como la suma de las cantidades gastadas.
Patron statistics
Nota
Estos informes están limitados en cuales datos pueden buscar, entonces es recomendable utilizar informes personalizados para las estadísticas de final de año.
Using the form provided, choose which value you would like to appear in the column and which will appear in the row.
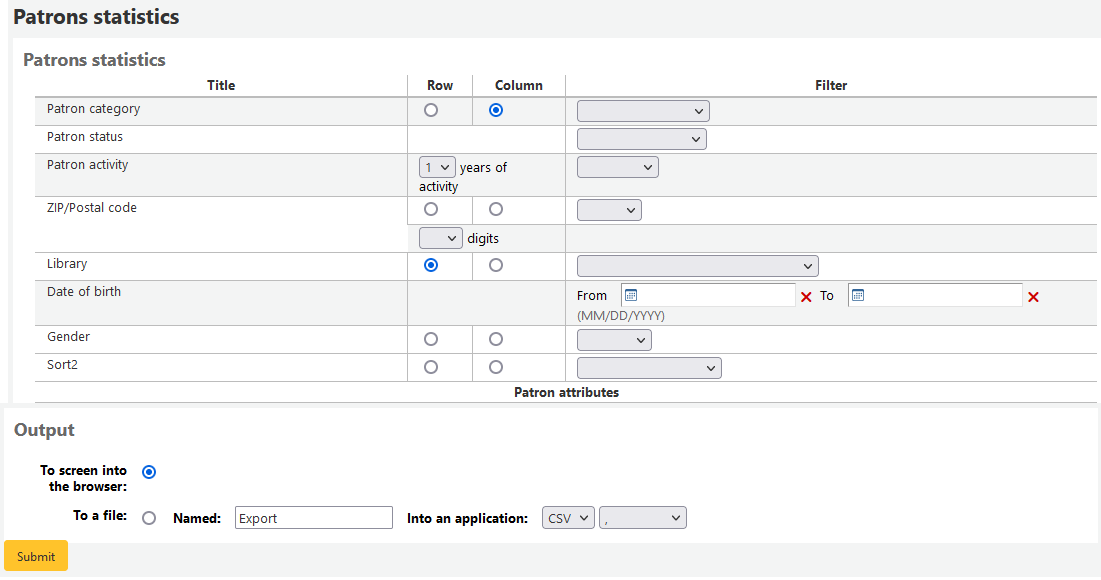
Si elige mostrar en el navegador sus resultados se verán en la pantalla.

Basado en sus selecciones, Usted puede ver alguna información de búsquedas sobre su tabla de resultados. Usted puede además elegir el exportarla a un archivo el cual pueda manipular de acuerdo a sus necesidades.
Catalog statistics
Nota
Estos informes están limitados en cuales datos pueden buscar, entonces es recomendable utilizar informes personalizados para las estadísticas de final de año.
Using the form provided, choose which value you would like to appear in the column and which will appear in the row.
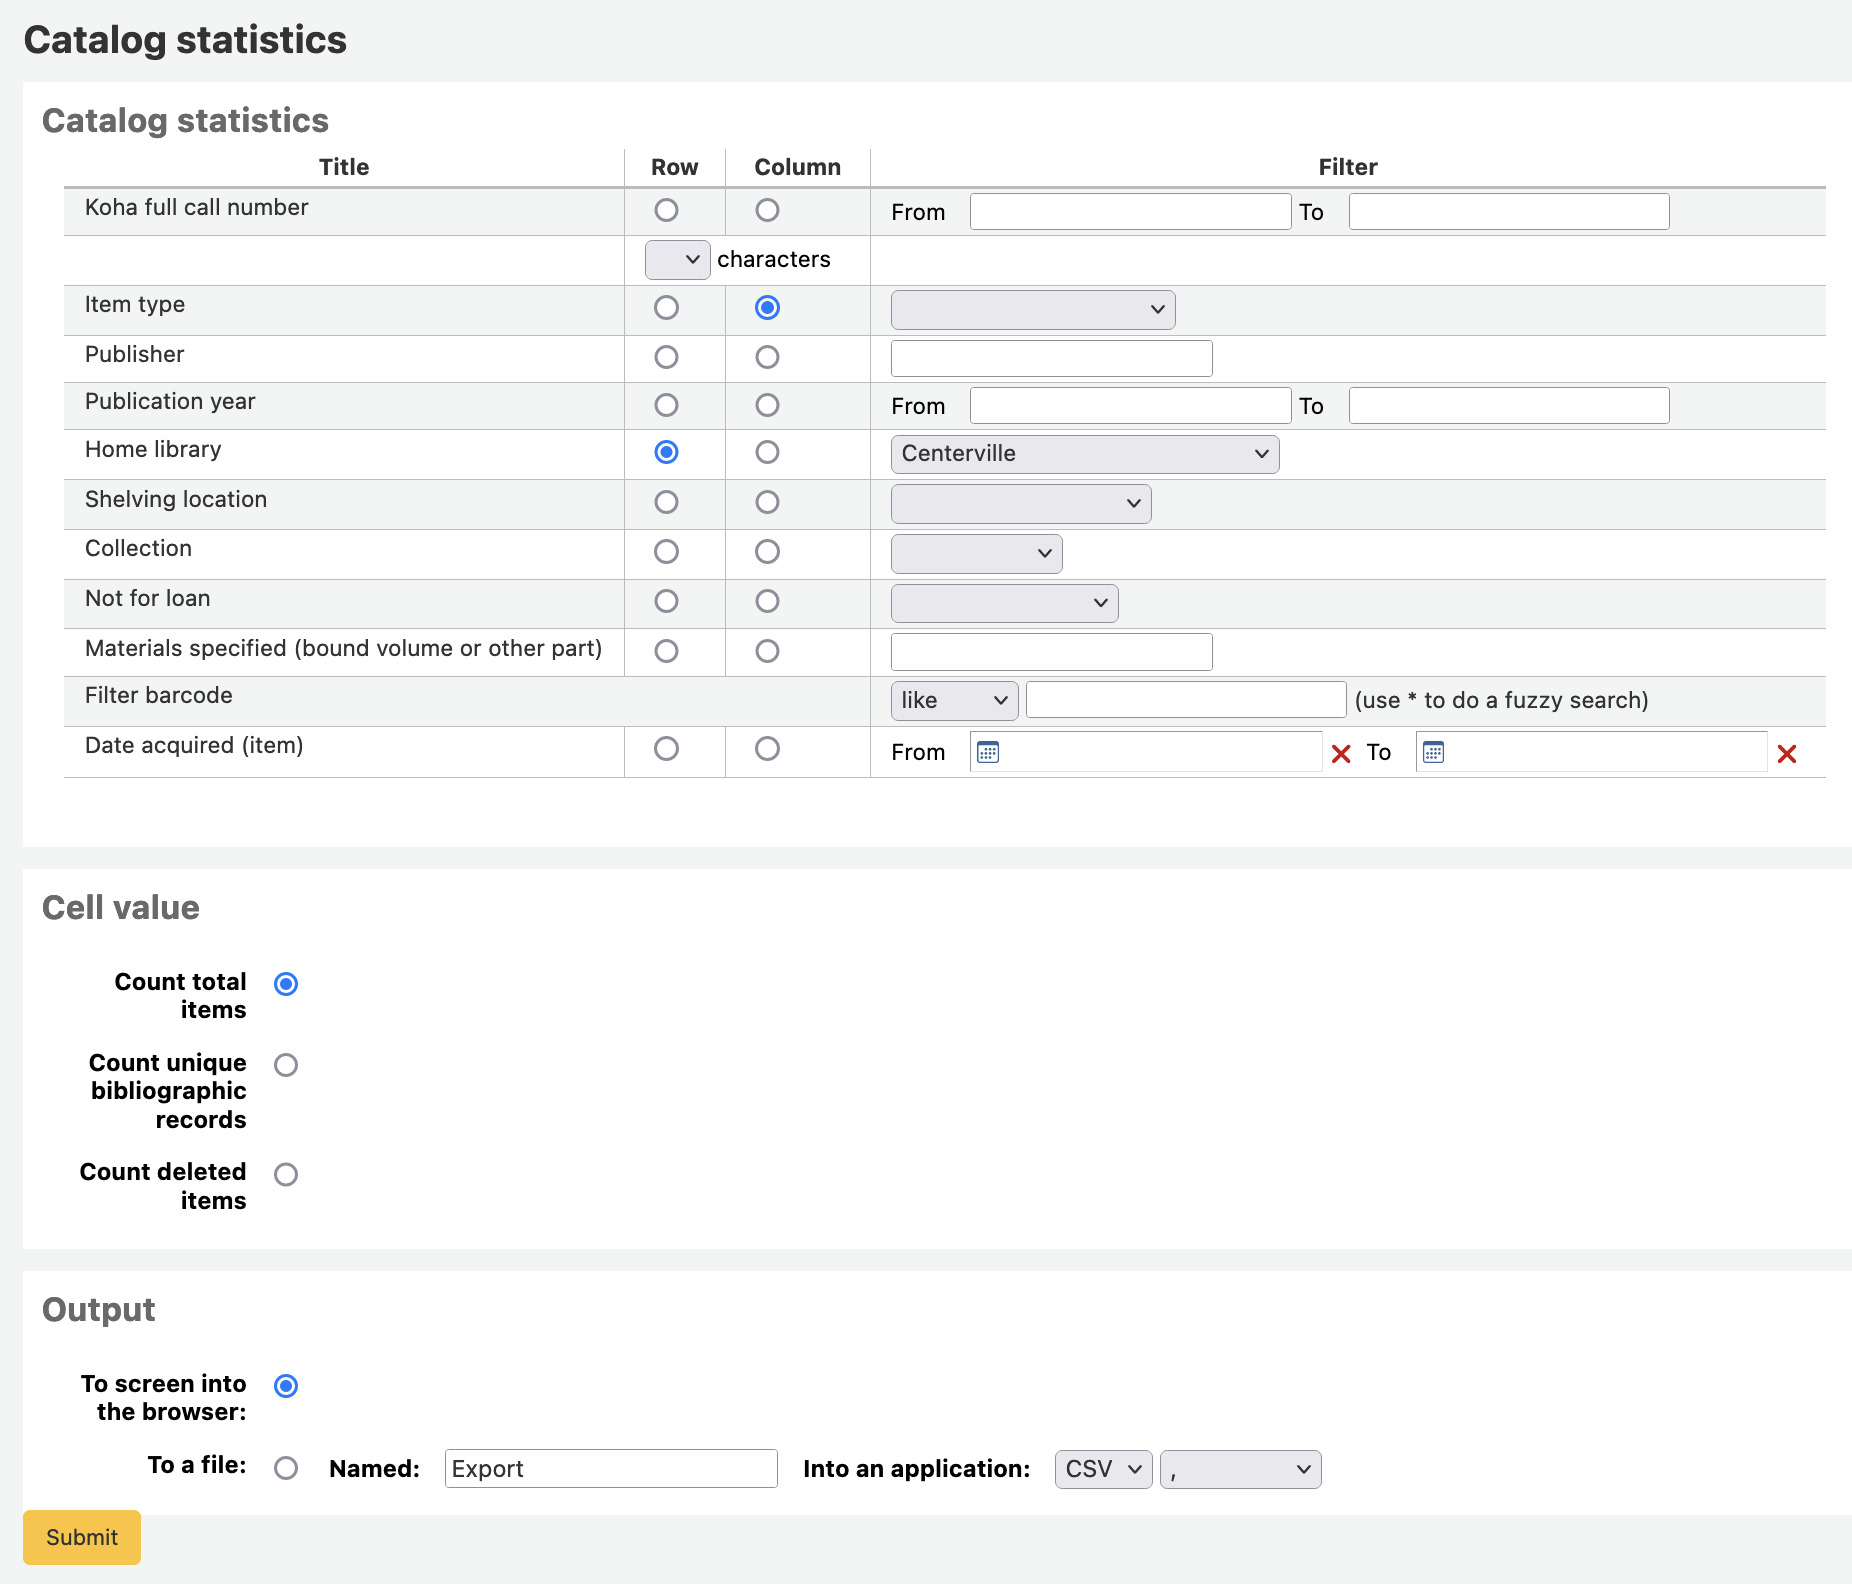
Si elige mostrar en el navegador sus resultados se verán en la pantalla.
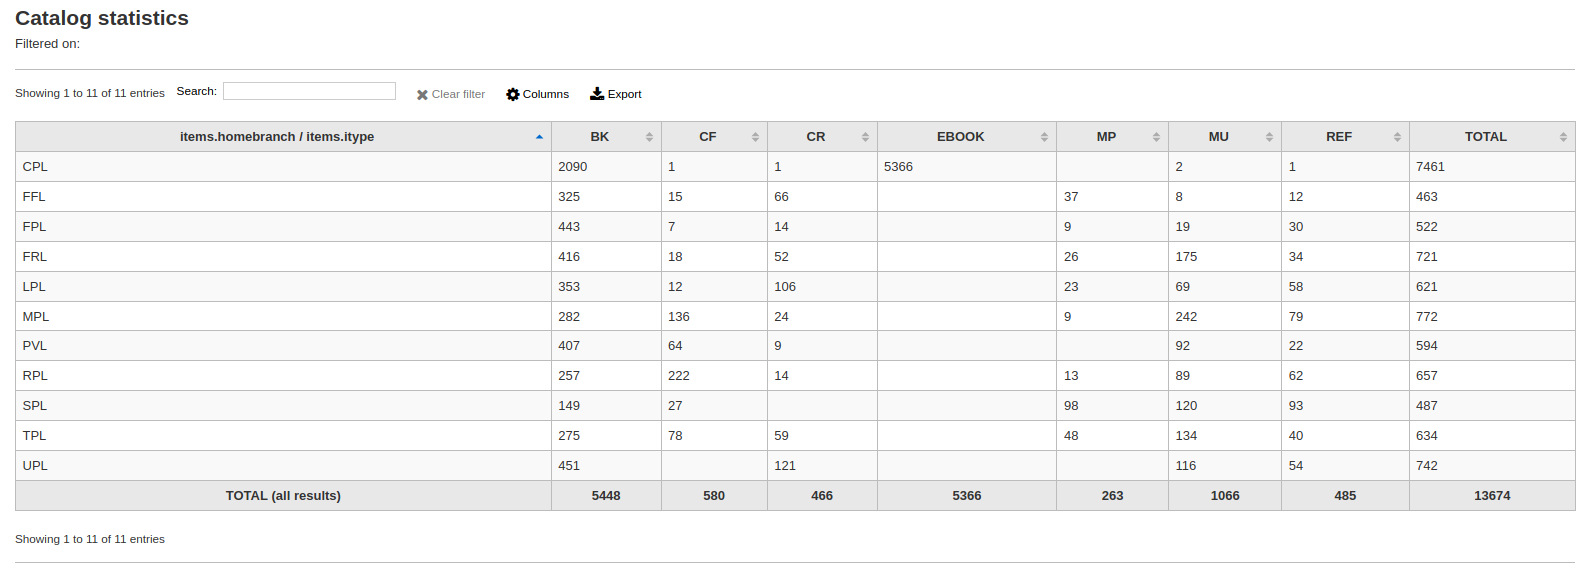
También puede elegir exportar a un archivo que pueda manipular según sus necesidades.
Circulation statistics
Nota
Estos informes están limitados en cuales datos pueden buscar, entonces es recomendable utilizar informes personalizados para las estadísticas de final de año.
Using the form provided, choose which value you would like to appear in the column and which will appear in the row.
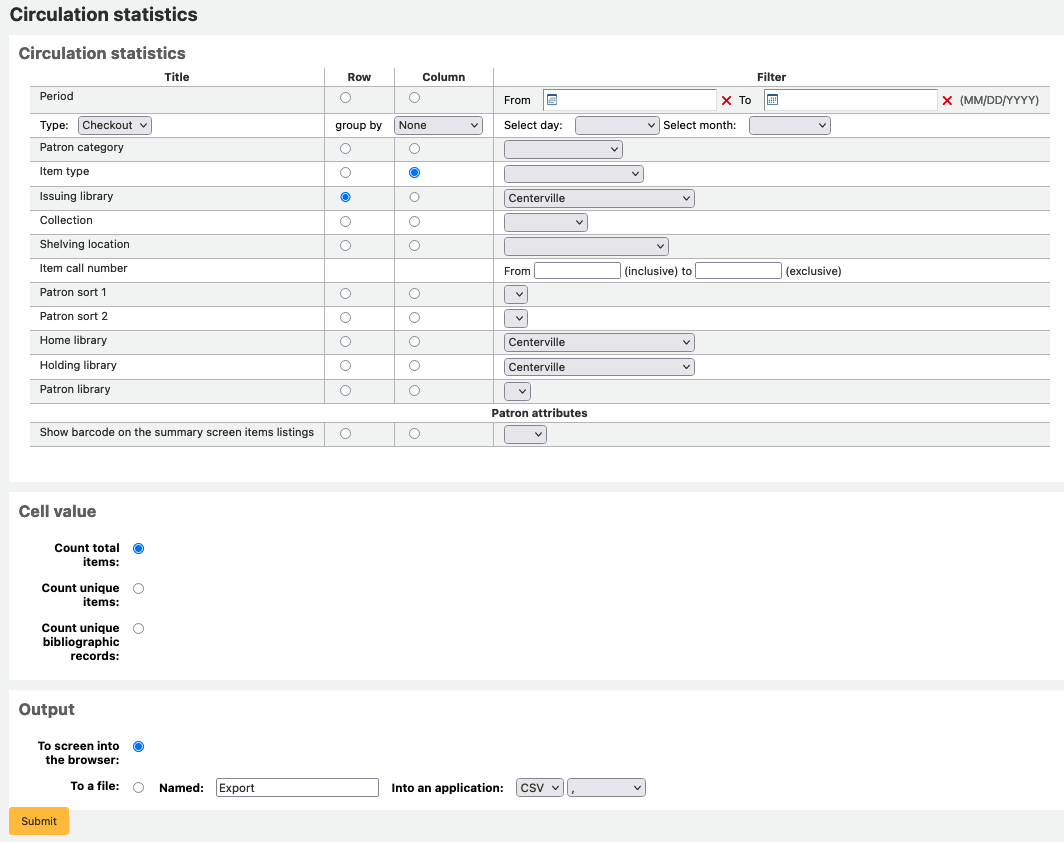
Si elige mostrar en el navegador sus resultados se verán en la pantalla.
También puede elegir exportar a un archivo que pueda manipular según sus necesidades.
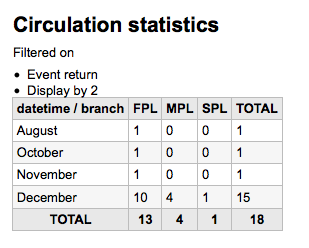
Nota
Para obtener una idea completa de la circulación mensual o diaria, puede ejecutar el informe dos veces, una para “Tipo” de “Préstamo” y otra para “Renovación”.
Este informe utiliza el filtro “Periodo” o fecha que permite limitar el informe a un mes con sólo seleccionar desde el primer día del primer mes hasta el primer día del mes siguiente. Por ejemplo, del 1/10 al 1/11 para encontrar las estadísticas para el mes de octubre.
Para encontrar estadísticas diarias, establezca el rango de fechas.</br> Ejemplo: «Deseo los datos de circulación comenzando en la fecha XXX hasta, pero no incluyendo, la fecha XXX.»
Durante todo un mes, un rango ejemplo sería: 11/01/2009 a 12/01/2009
Durante todo un año, un rango de ejemplo sería: 01/01/2009 a 01/01/2010
Para un solo día, un ejemplo sería: 11/15/2009 hasta 11/16/2009 para encontrar lo que circuló el día 15
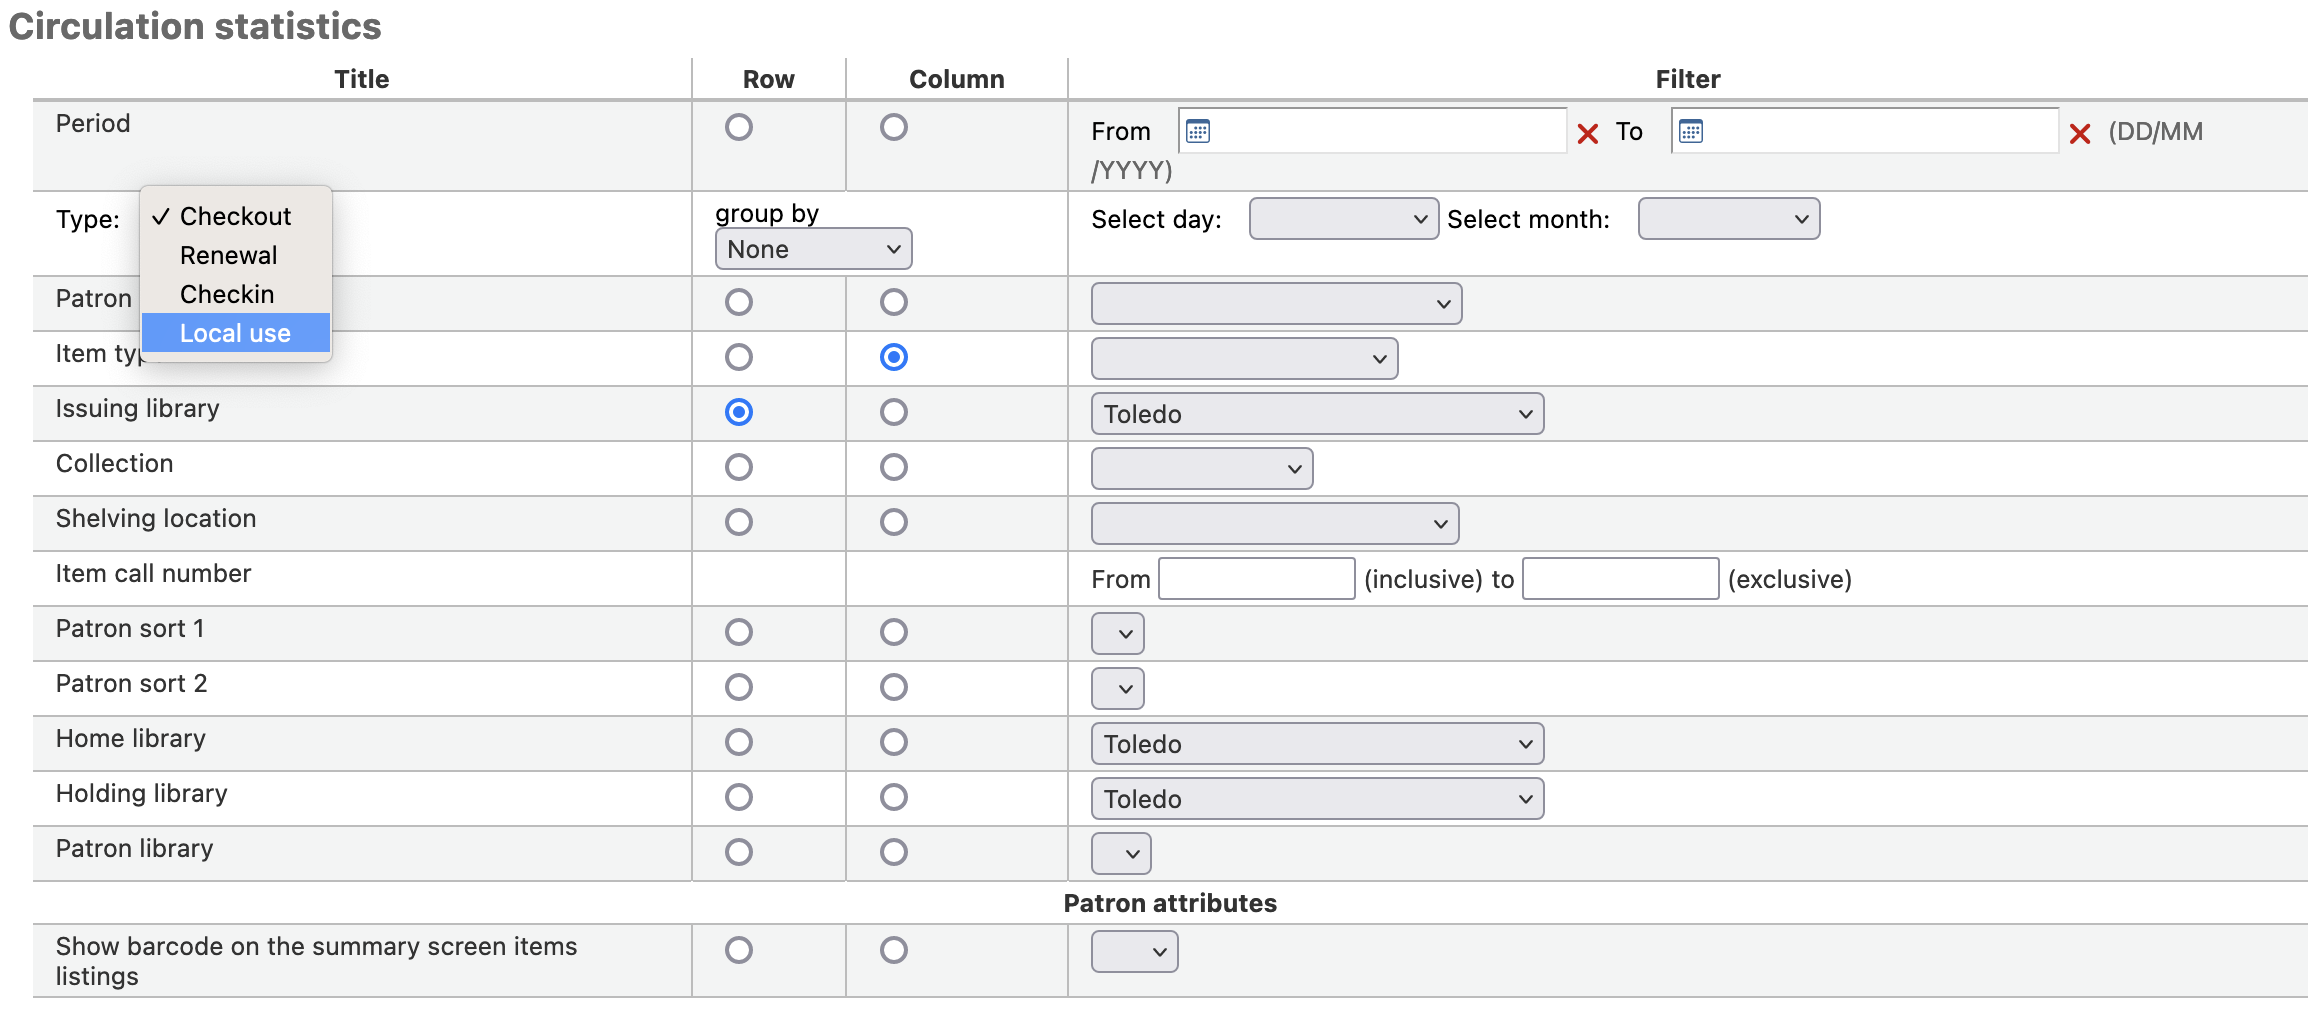
Seguimiento de préstamos en sala
Using the Circulation statistics reporting wizard you can run reports on in house usage of items simply by choosing “Local use” from the “Type” pull down:
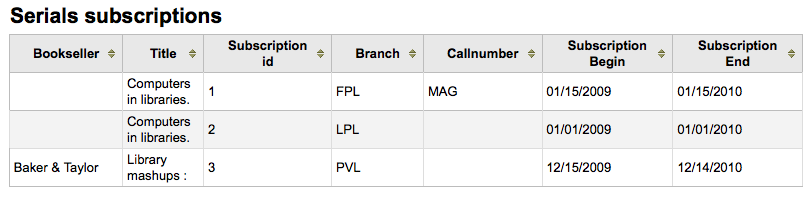
Serials statistics
Nota
Estos informes están limitados en cuales datos pueden buscar, entonces es recomendable utilizar informes personalizados para las estadísticas de final de año.
Utilizando el formulario provisto, elija como desea listar las publicaciones periódicas en su sistema.

Si elige mostrar en el navegador sus resultados se verán en la pantalla.
También puede elegir exportar a un archivo que pueda manipular según sus necesidades.
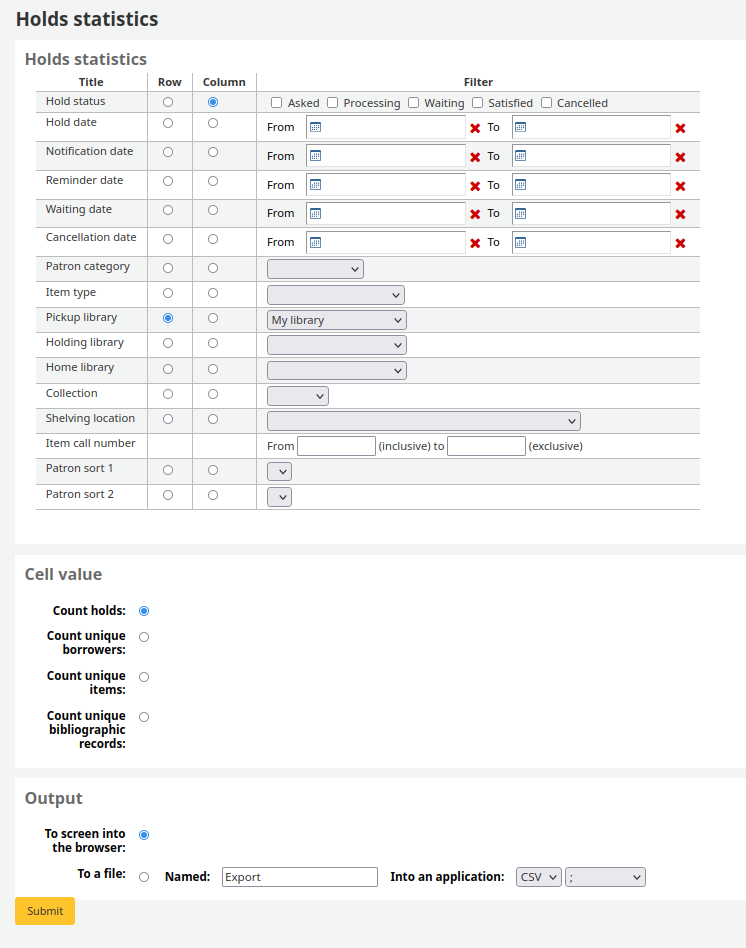
Holds statistics
Nota
Estos informes están limitados en cuales datos pueden buscar, entonces es recomendable utilizar informes personalizados para las estadísticas de final de año.
Utilizando el formulario provisto puede ver estadísticas de reservas hechas, completadas, canceladas y más en su biblioteca. Del formulario seleccione qué valor desea mostrar en la columna y qué valor en la fila. También puede seleccionar desde los filtros en extremo derecho del formulario.
Si elige mostrar en el navegador sus resultados se verán en la pantalla.

También puede elegir exportar a un archivo que pueda manipular según sus necesidades.
Usuarios con más préstamos
Este informe listará los usuarios que tienen más préstamos.

Si elige mostrar en el navegador sus resultados se verán en la pantalla.

También puede elegir exportar a un archivo que pueda manipular según sus necesidades.
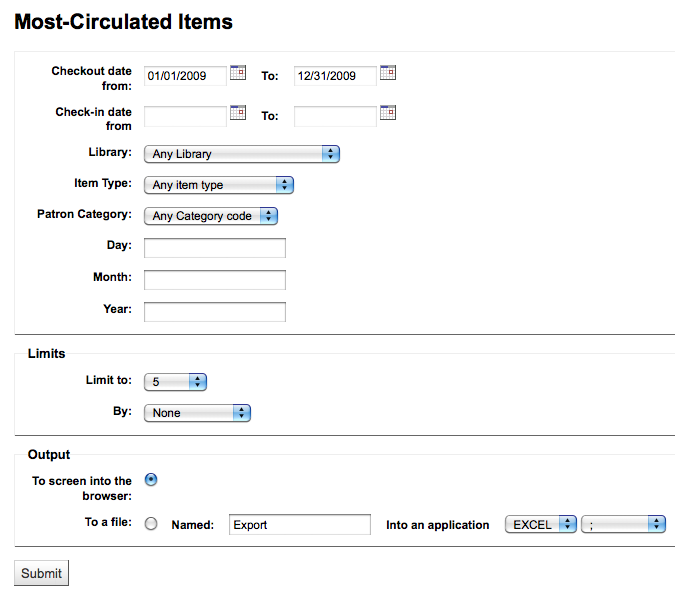
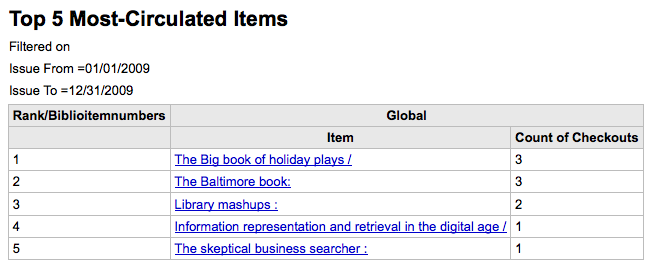
Most circulated items
Este informe listará los ítems que más se han prestado.
Si elige mostrar en el navegador sus resultados se verán en la pantalla.
También puede elegir exportar a un archivo que pueda manipular según sus necesidades.
Usuarios sin préstamos
Este informe listará los usuarios de su sistema a los que no se ha prestado ningún ítem.
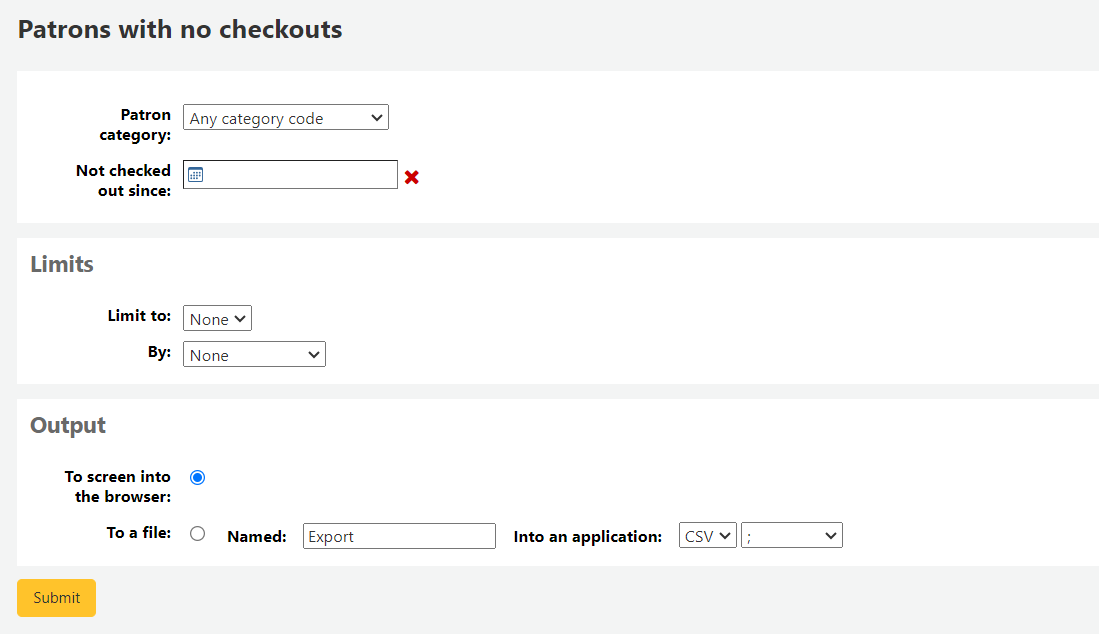
Si elige mostrar en el navegador sus resultados se verán en la pantalla.
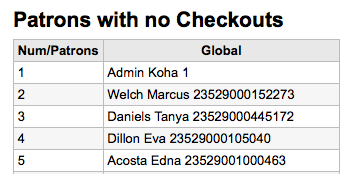
También puede elegir exportar a un archivo que pueda manipular según sus necesidades.
Ítems nunca prestados
Este informe mostrará los ítems de su colección que nunca se han prestado.

Si elige mostrar en el navegador sus resultados se verán en la pantalla.
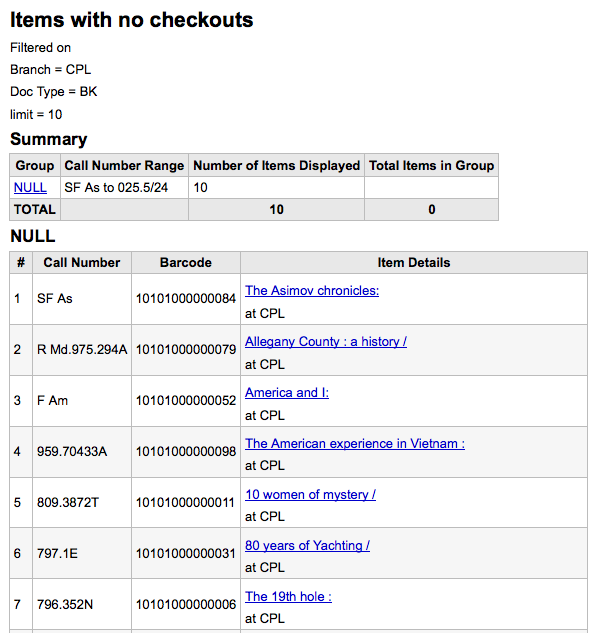
También puede elegir exportar a un archivo que pueda manipular según sus necesidades.
Catalog by item type
En este informe se lista el número total de ítems por cada tipo de ítem por sede.
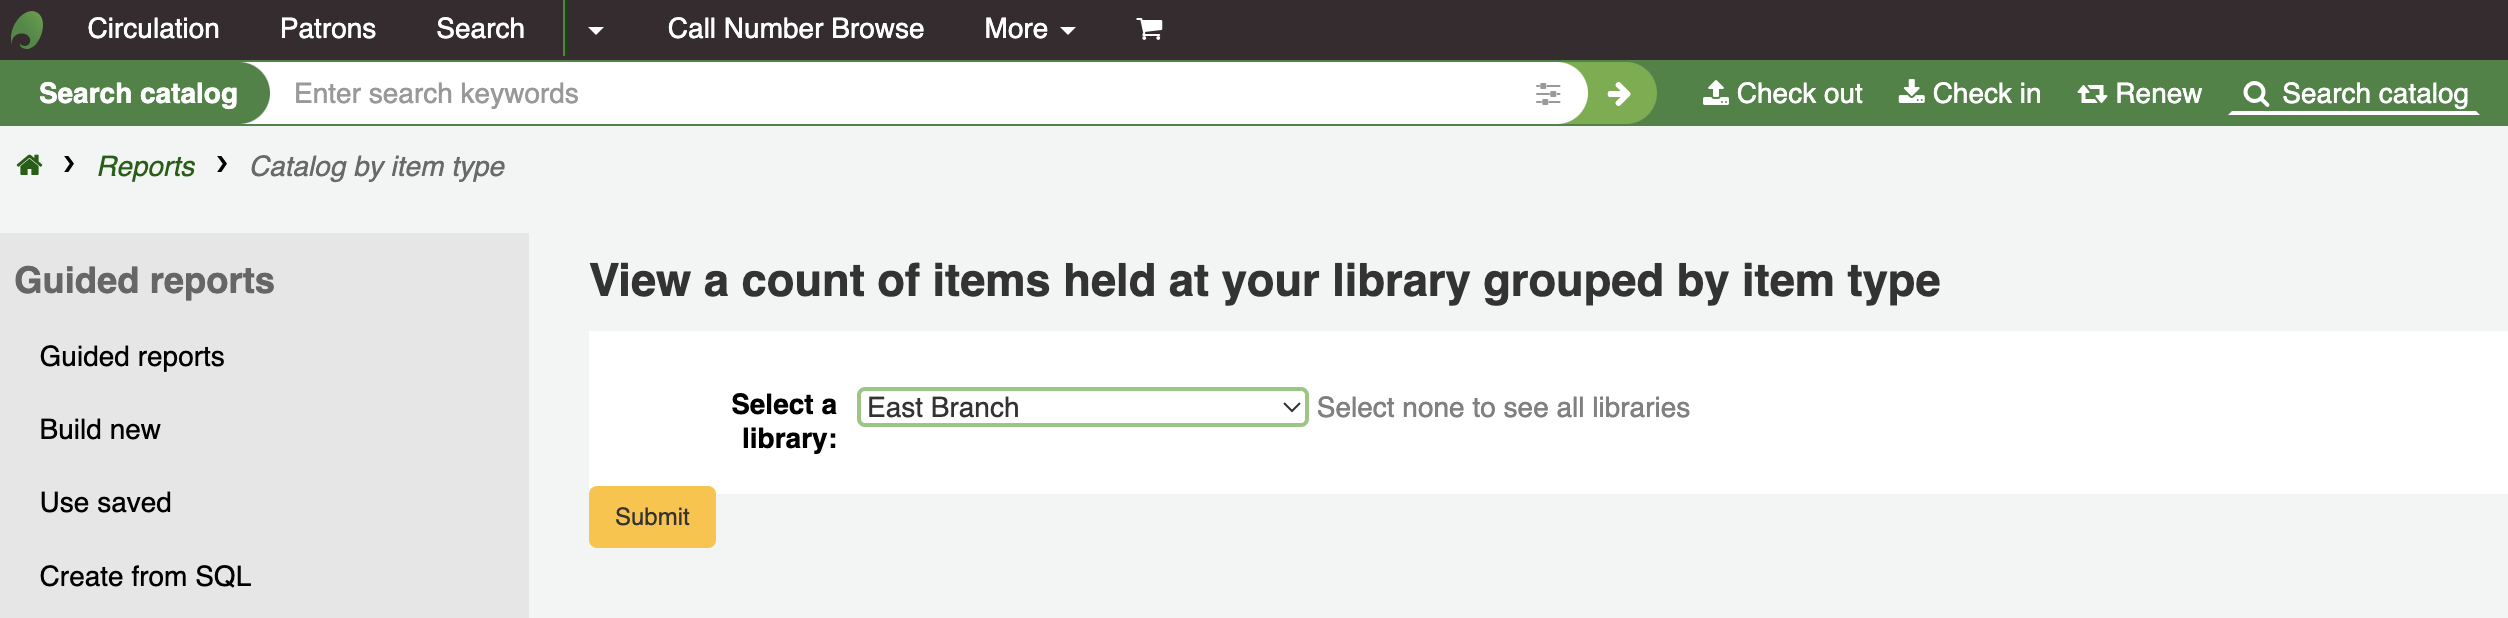
Si elige mostrar en el navegador sus resultados se verán en la pantalla.
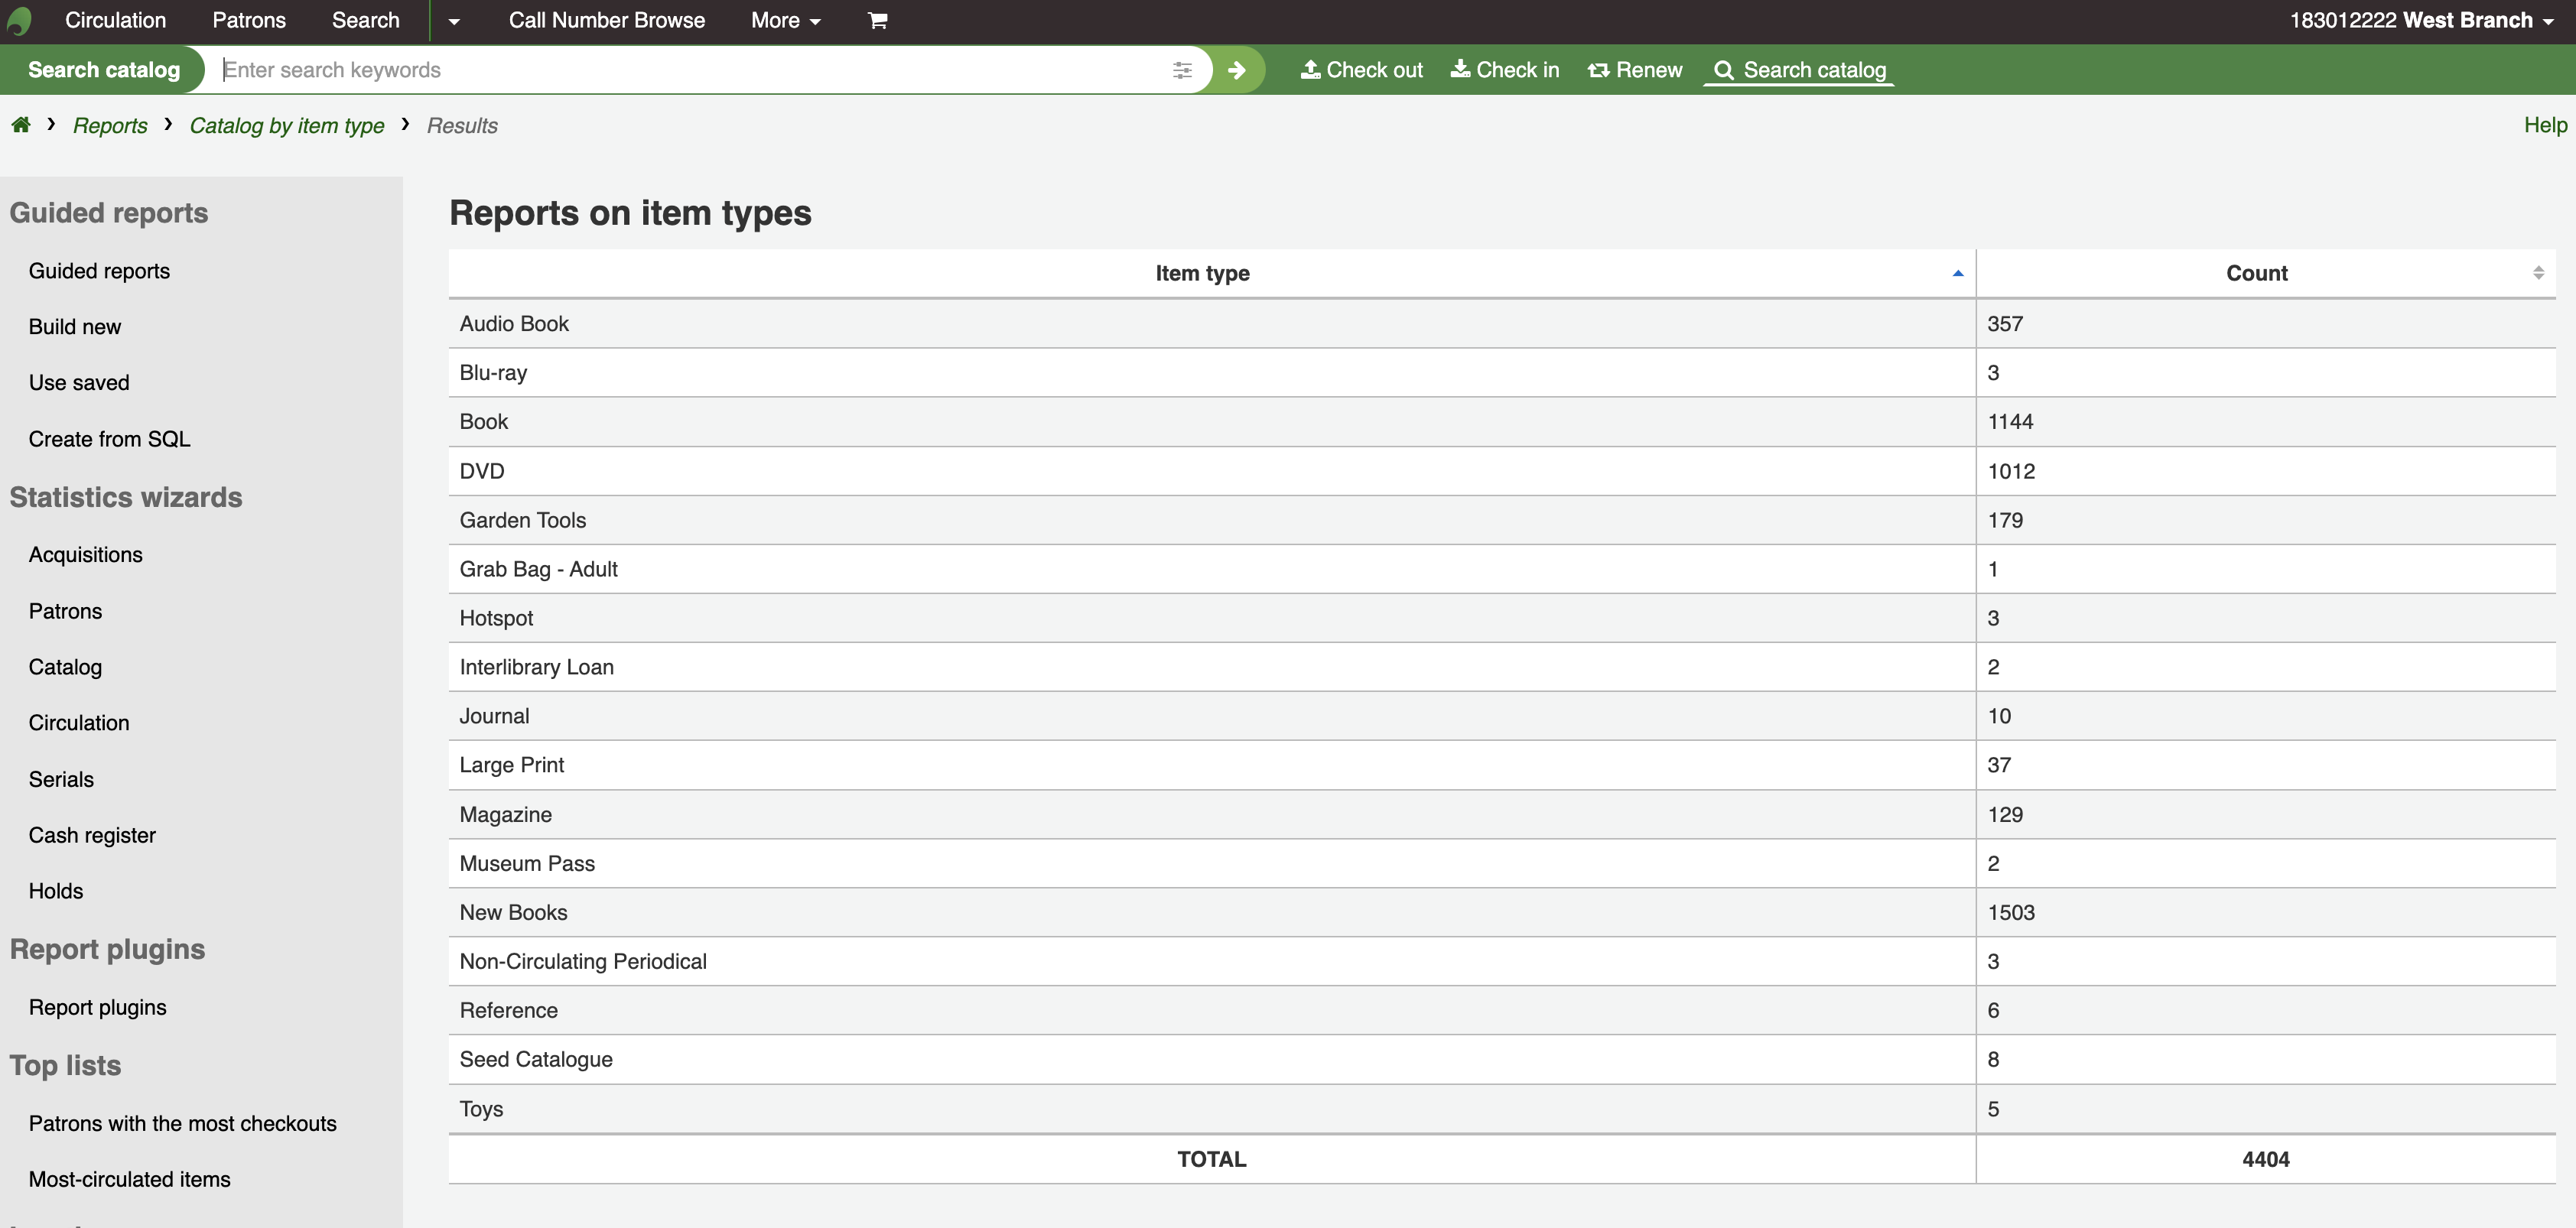
También puede elegir exportar a un archivo que pueda manipular según sus necesidades.
Lost items
Este informe le permitirá generar una lista de ítems que se han marcado como perdidos en el sistema
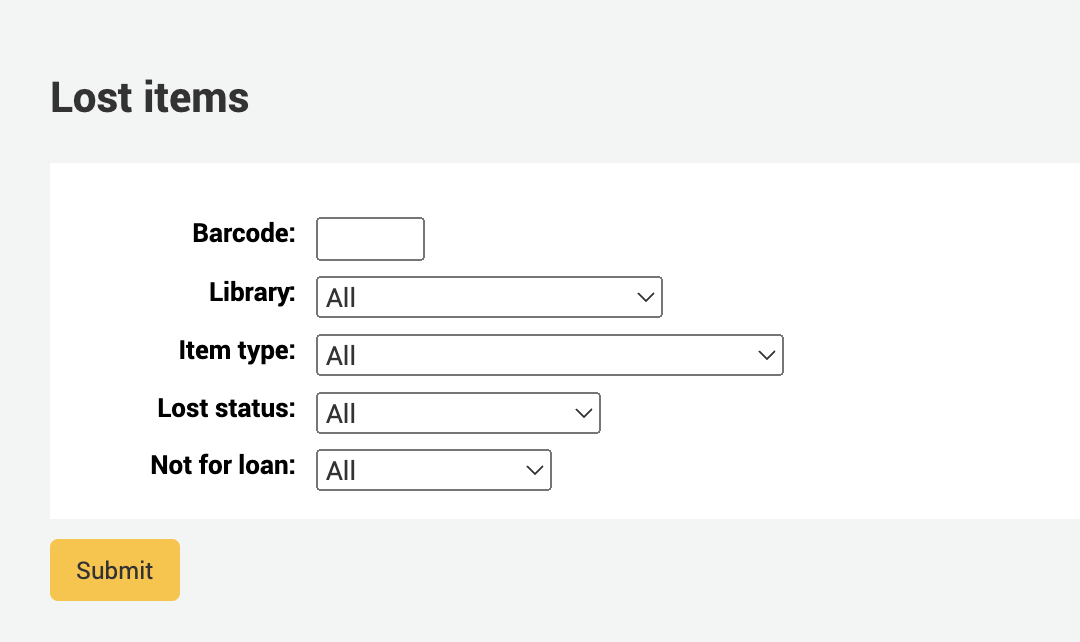
Once you have chosen parameters, you will see the corresponding list of items.
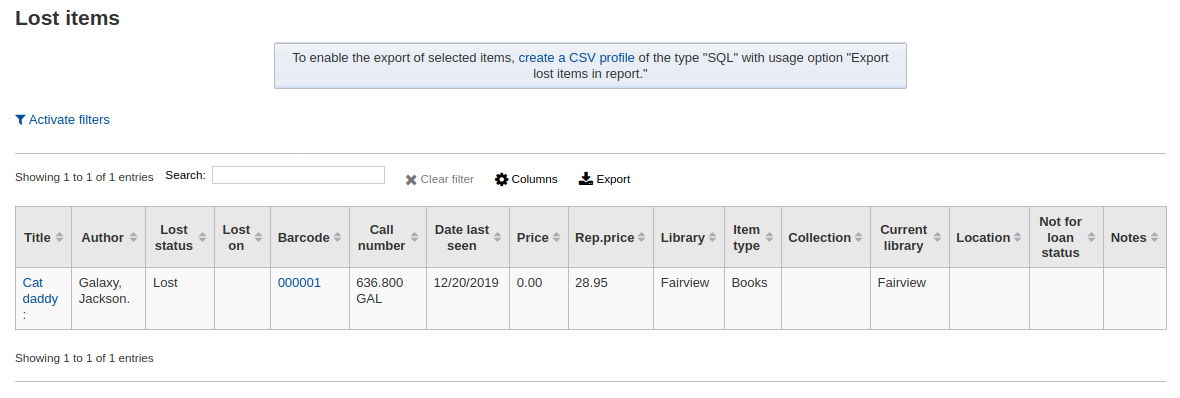
Nota
You can customize the columns of this table in the “Table settings” section of the Administration module (table id: lostitems-table).
Orders by fund
If you use the Acquisitions module, you will be able to see all the items that were ordered in each fund.
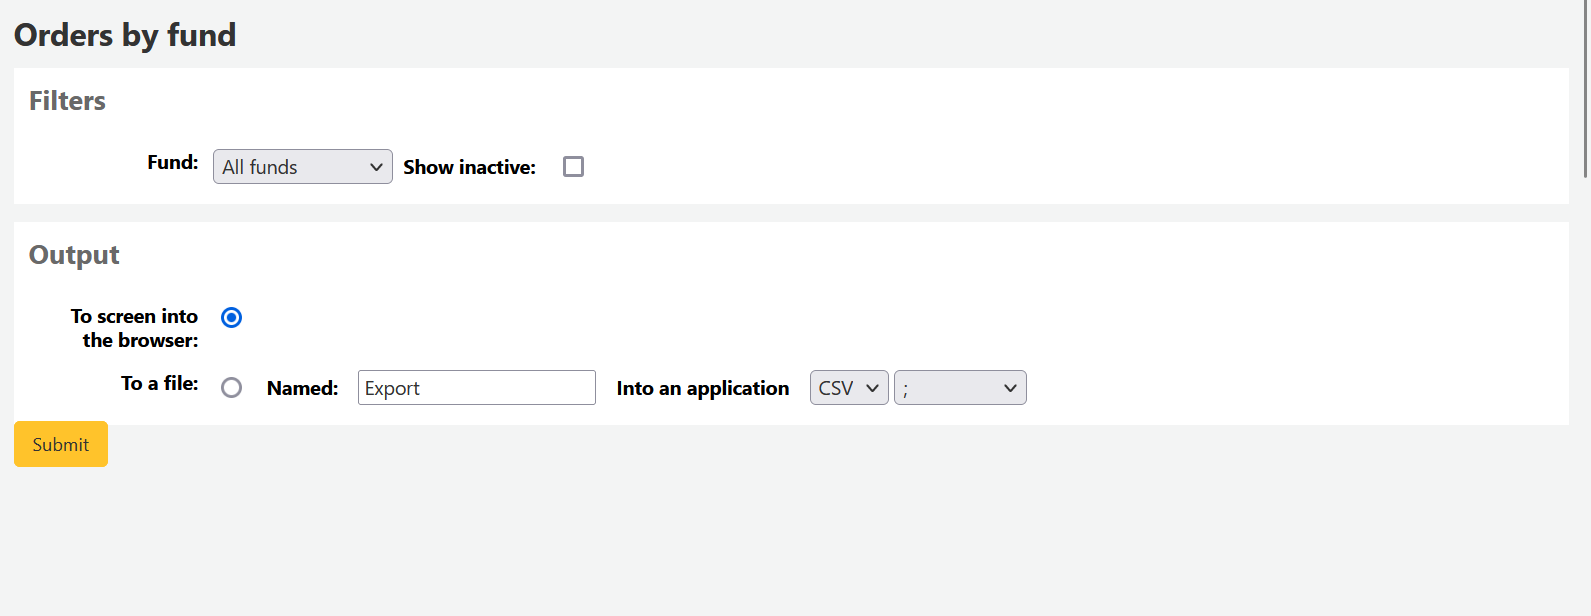
Once you choose the fund you wish to view, you can export the results or view them in the browser. If you choose to view them directly, you will be shown the list of orders.

Nota
You can customize the columns of this table in the “Table settings” section of the Administration module (table id: funds-table).
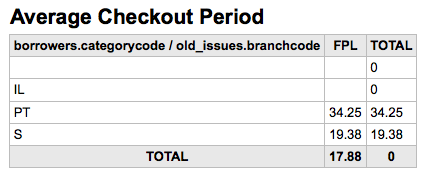
Average loan time
En este informe se listará el tiempo promedio que los ítems son prestados, basado en los criterios que usted proporcione:
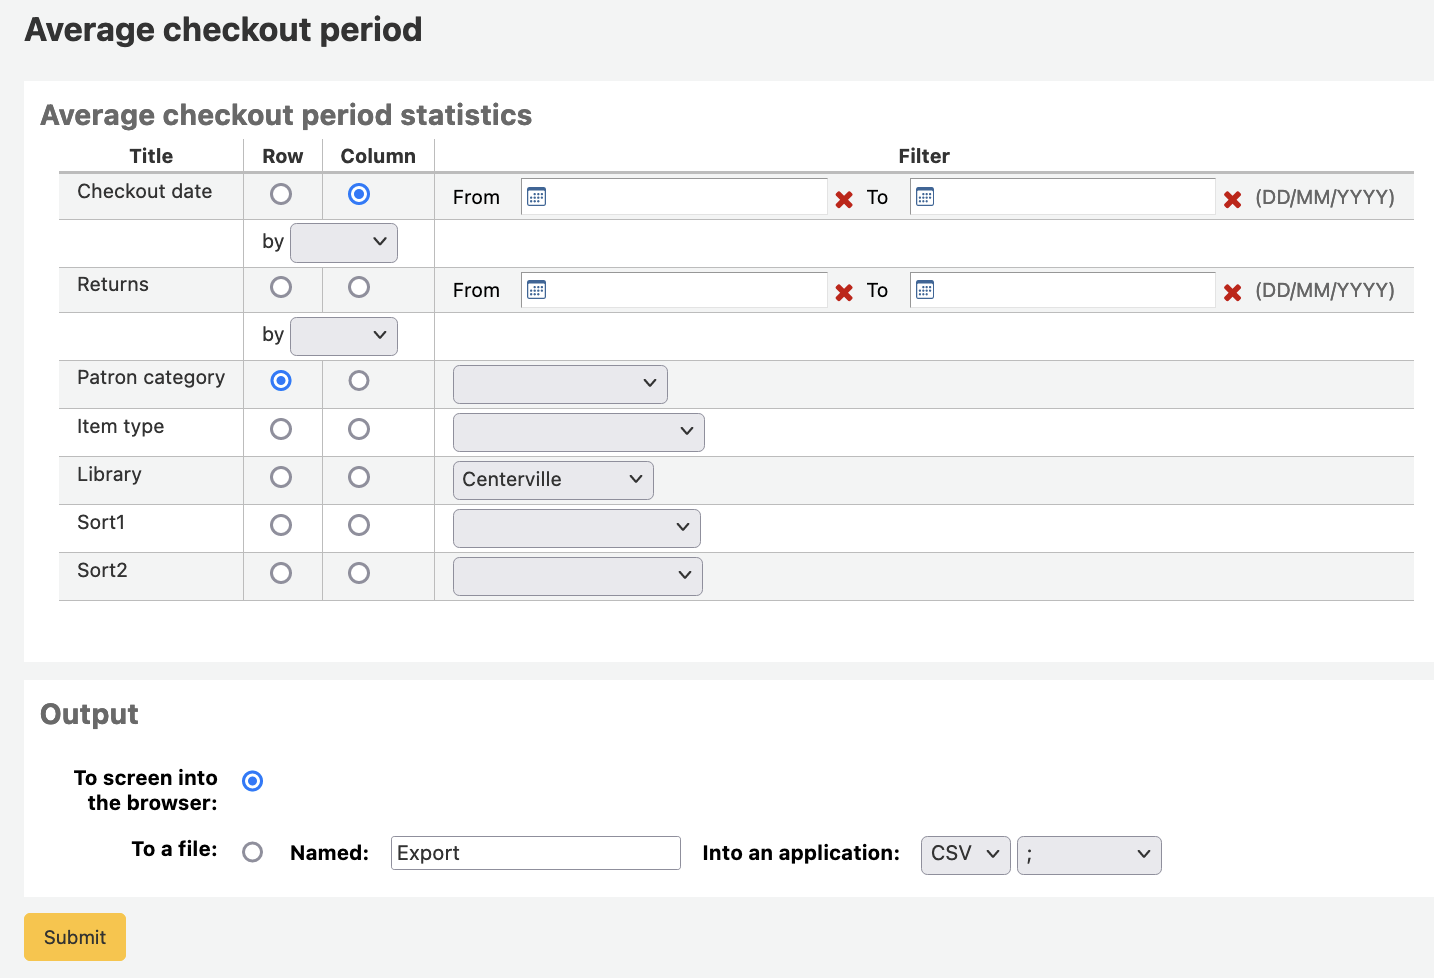
Si elige mostrar en el navegador sus resultados se verán en la pantalla.
También puede elegir exportar a un archivo que pueda manipular según sus necesidades.
Report dictionary
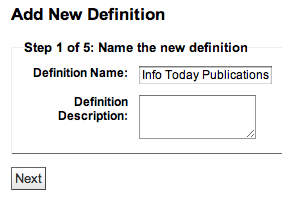
The report dictionary is a way to pre-define common filters you’d like to apply to your reports. This is a good way to add in filters that the report wizard doesn’t include by default. To add a new definition, or filter, click “New definition” on the reports dictionary page and follow the 4 step process.
Paso 1: Nombre la definición y provea una descripción de ser necesario
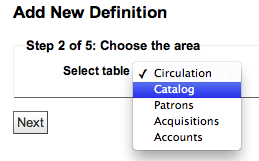
Paso 2: elegir el módulo que será consultado.
Paso 3: Seleccione las columnas a consultar desde las tablas presentas.

Paso 4: Seleccione los valores de los campos. Estos se llenarán automáticamente con opciones disponibles en su base de datos.
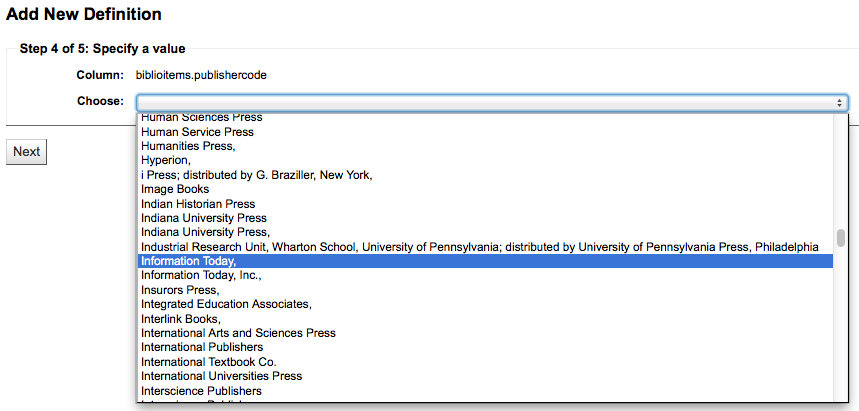
Confirme su selección para guardar la definición.
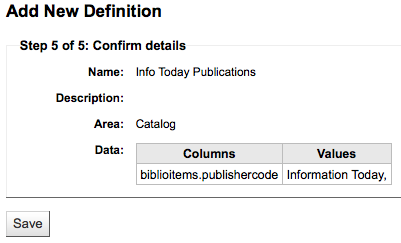
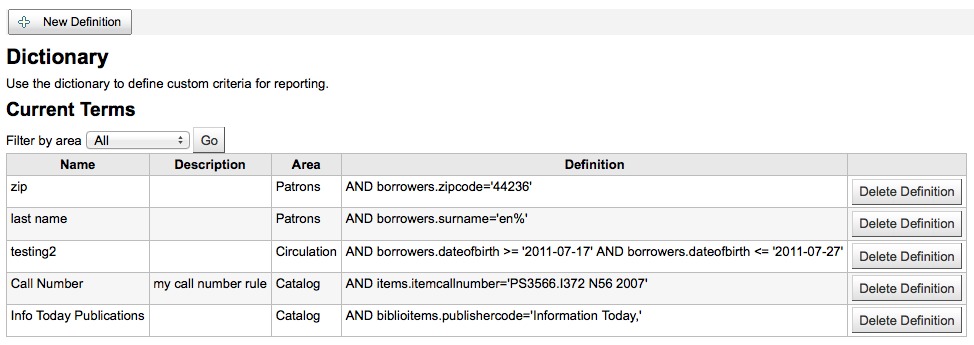
Sus definiciones aparecerán en la página Diccionario de Informes
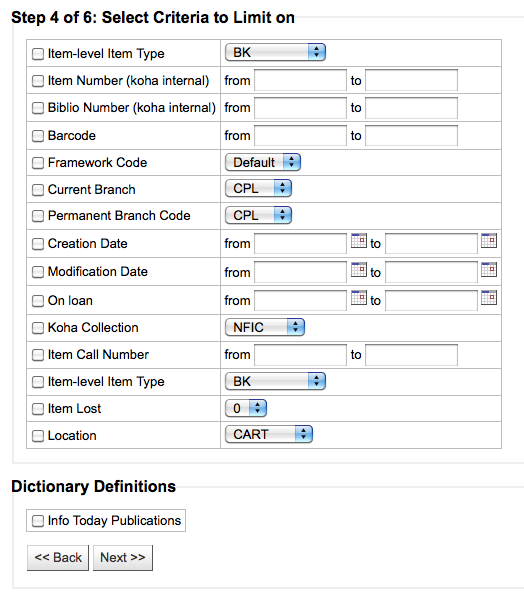
Entonces cuando genere informes en el módulo para el cual creo el valor verá una opción de limitar por la definición al final de los filtros usuales.
Report plugins
Some plugins that are available can be used to make or enhance reports.
Get there: More > Reports > Report plugins > Report plugins
From this page, you will see only report-type plugins.
See the managing plugins section of this manual to learn how to manage your report-type plugins.