OPAC
Search results
To search the OPAC you can either choose to enter your search words in the box at the top of the OPAC or click on the “Advanced search” link to perform a more detailed search.

Nota
For more on searching check the Searching chapter in this manual.
Results overview
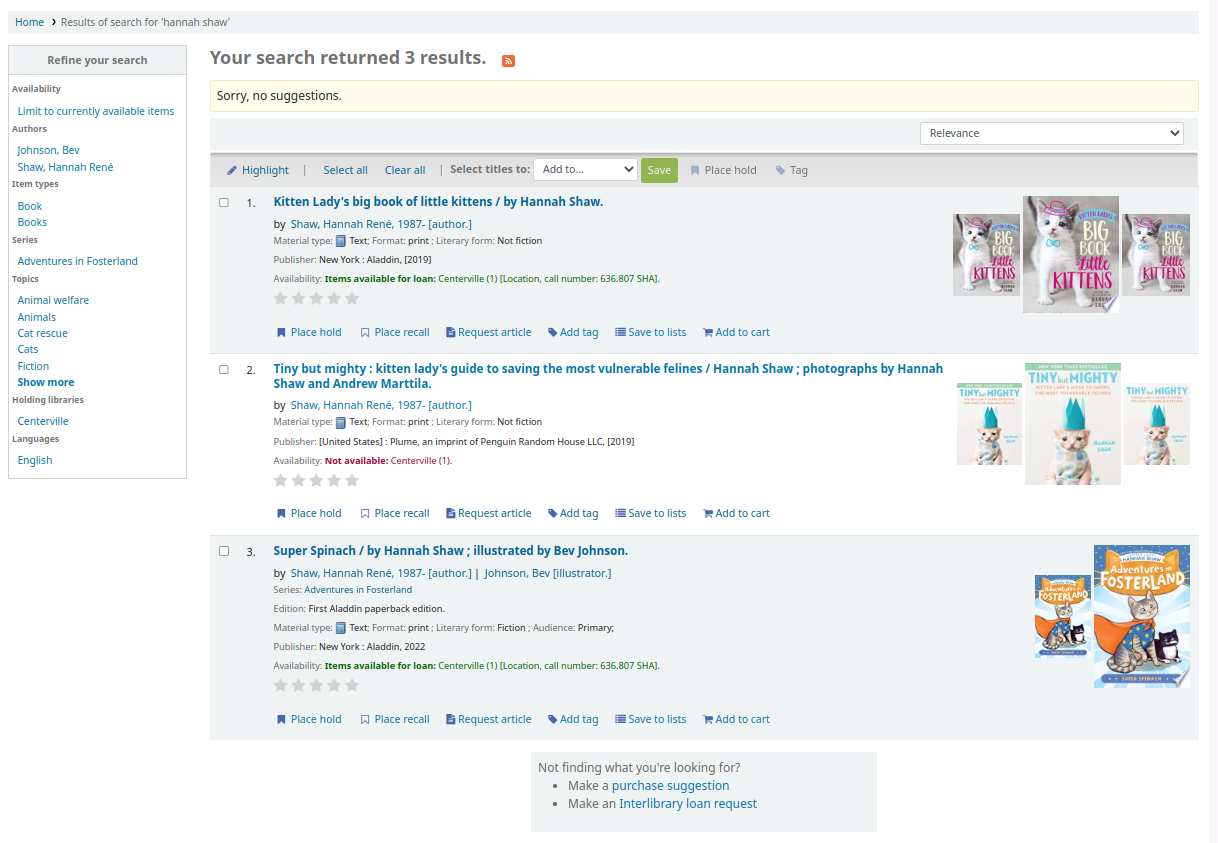
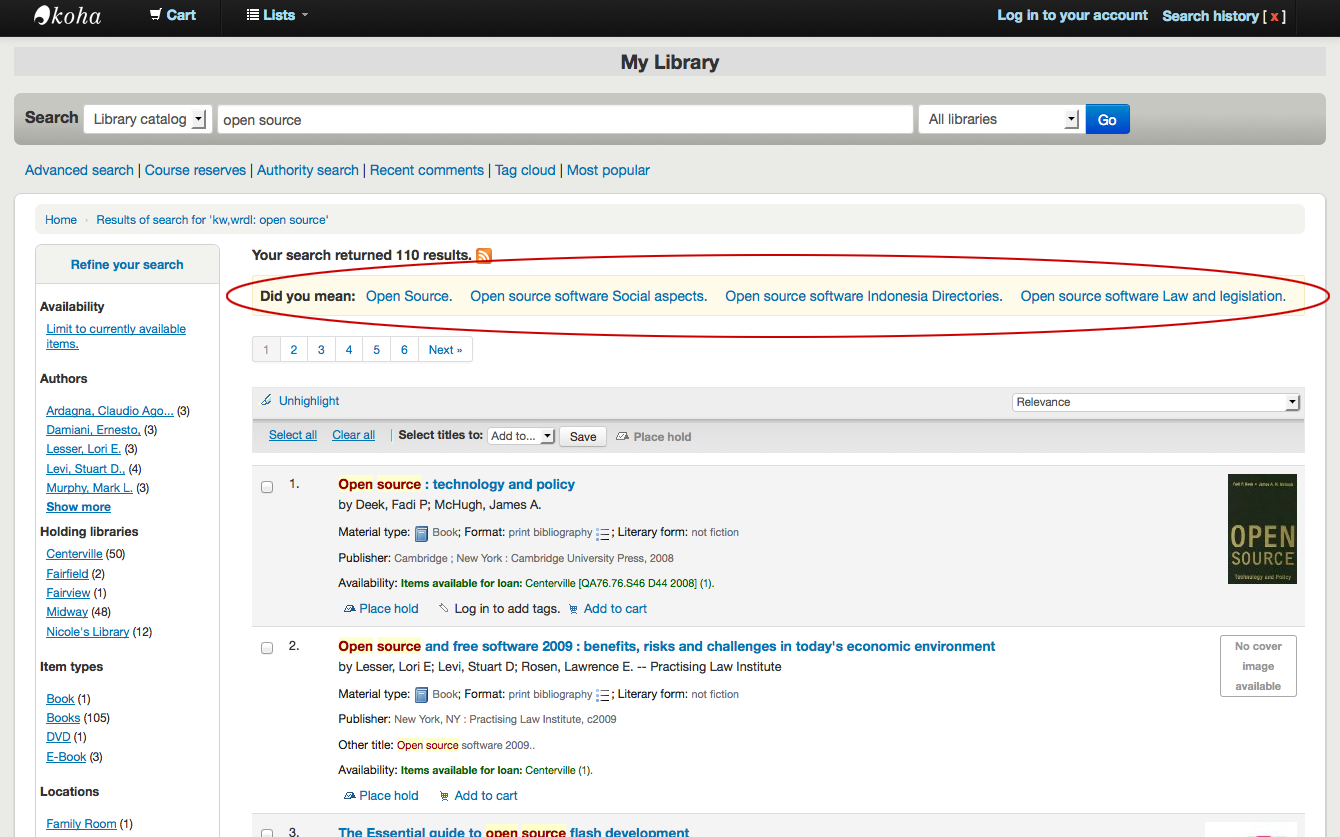
After performing a search, the number of results found for the search will appear above the results.
By default, the search results are sorted based on the OPACdefaultSortField and OPACdefaultSortOrder system preference values. To change the sort order of these results, you can choose another sorting method from the drop-down menu on the right.

Under each title in the results list, there will be a series of values from the record’s leader (field 000).

Nota
These values have nothing to do with the item types or collection codes you have applied to your records or items. This data is all pulled from the record’s control fields.
This can be turned on or off with the DisplayOPACiconsXSLT system preference.
Below each title, there will be the availability for the items attached to the record.
Nota
Even if you filtered on one library location, all locations that hold the item will appear on the search results.
Advertencia
An item’s hold status does not affect whether or not the item is “available” until the item is in “waiting” status. Items with on-shelf holds will show as available until a staff member has pulled them from the shelf and checked the item in make it show “waiting”.
If any enhanced content system preferences are turned on, there may be cover images next to the search results.
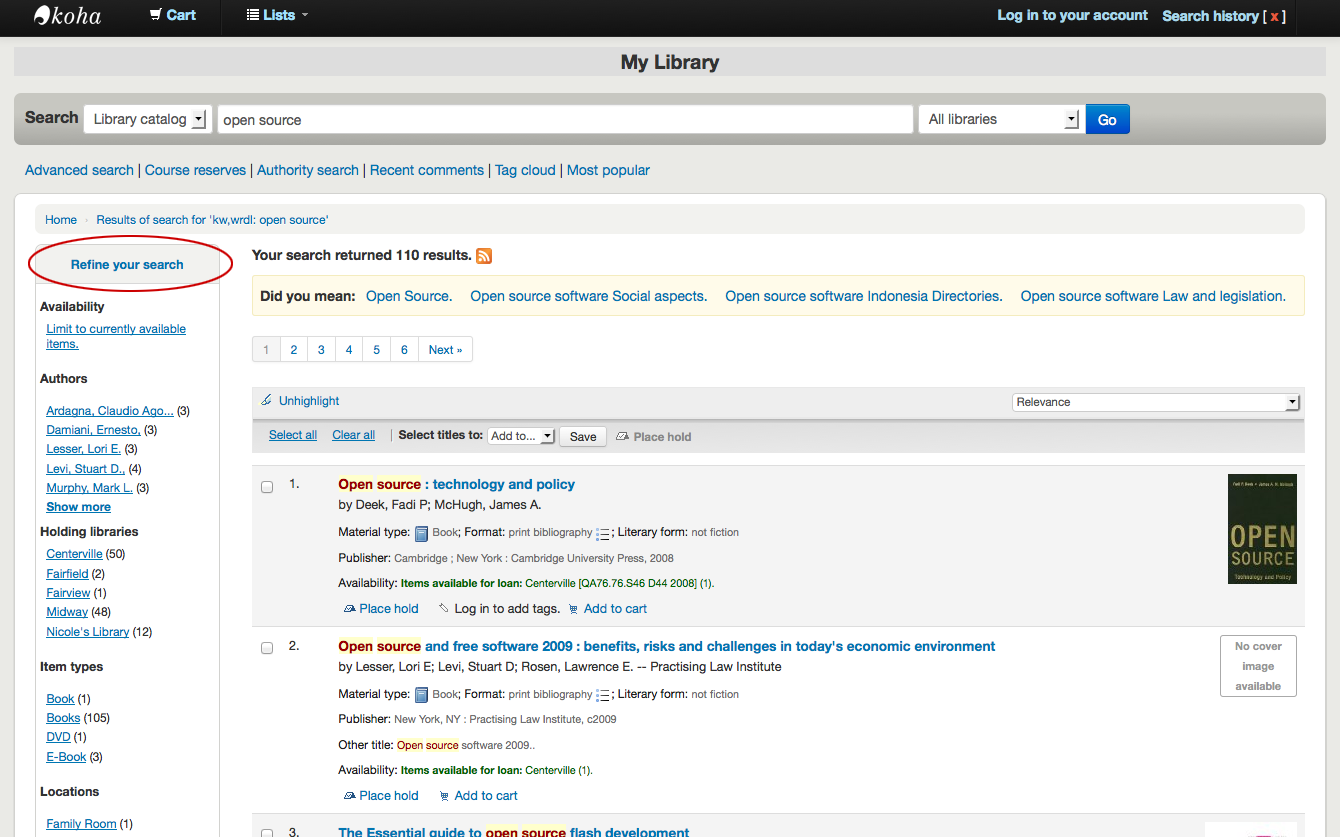
If Did you mean? options are set, there will be a yellow bar across the top of your results will other related searches.
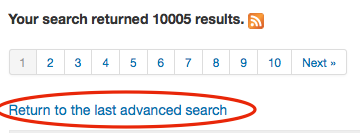
If you performed an advanced search you see an option to go back and edit your advanced search blow the list of results pages.
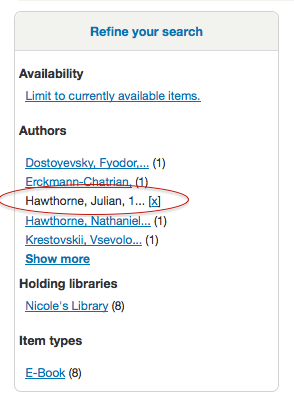
Filtros
To filter your results click on the links below the “Refine your search” menu on the left of your screen
Depending on your setting for the DisplayLibraryFacets system preference you will see filters for your home, holding or both libraries.

After clicking a facet you can remove that filter from your results by clicking the small “x” that appears to the right of the facet.
Search RSS feeds
Usted podrá suscribirse a sus resultados de búsqueda con un feed RSS haciendo clic en el icono de RSS en la barra de direcciones o al lado del número de resultados. Para obtener más información acerca de lo que son los feed RSS echa un vistazo a este video tutorial.
Suscribirse a los resultados de búsqueda con un feed RSS le permitirá ver cuando un nuevo ítem se agrega al catálogo en su área de interés.
Bibliographic record
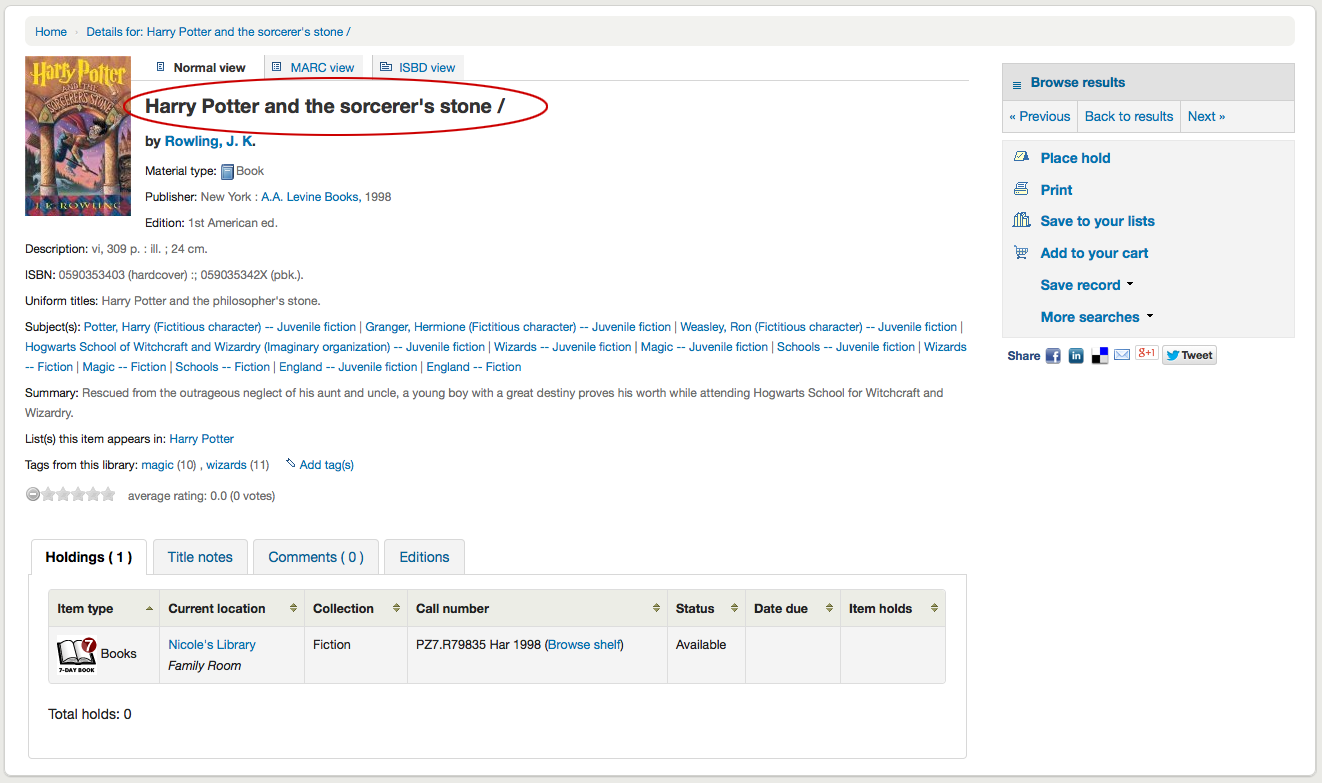
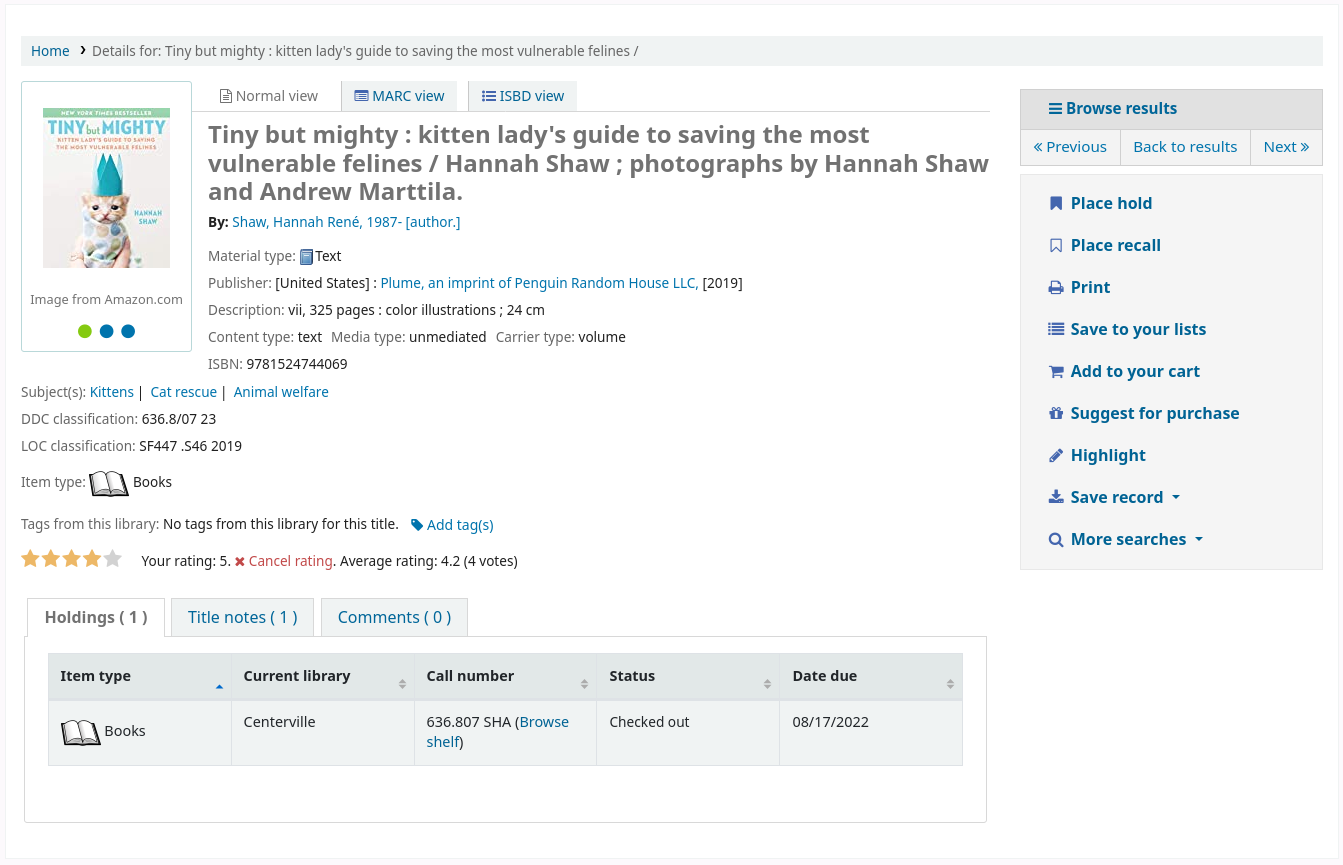
Al hacer clic en un título de los resultados de la búsqueda, es llevado a los detalles del registro bibliográfico. Esta página está dividida en varias áreas distintas.
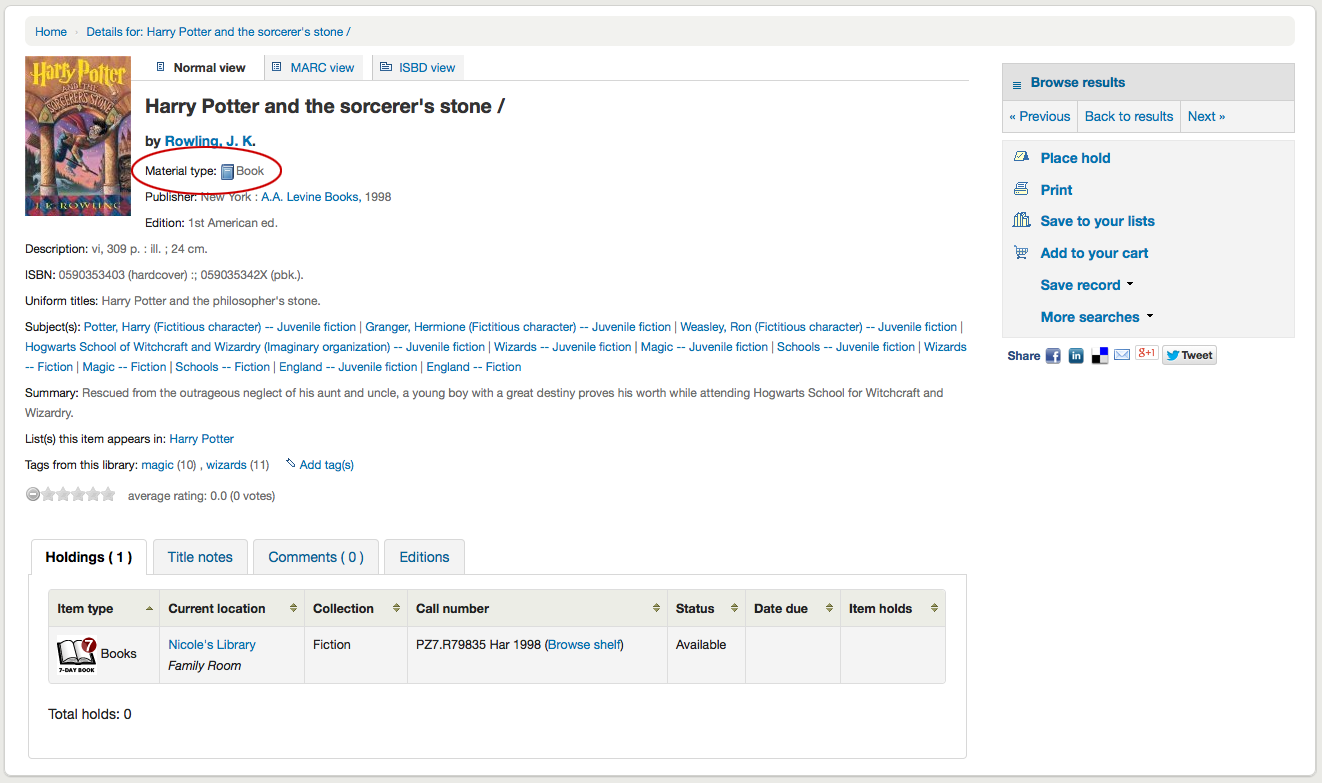
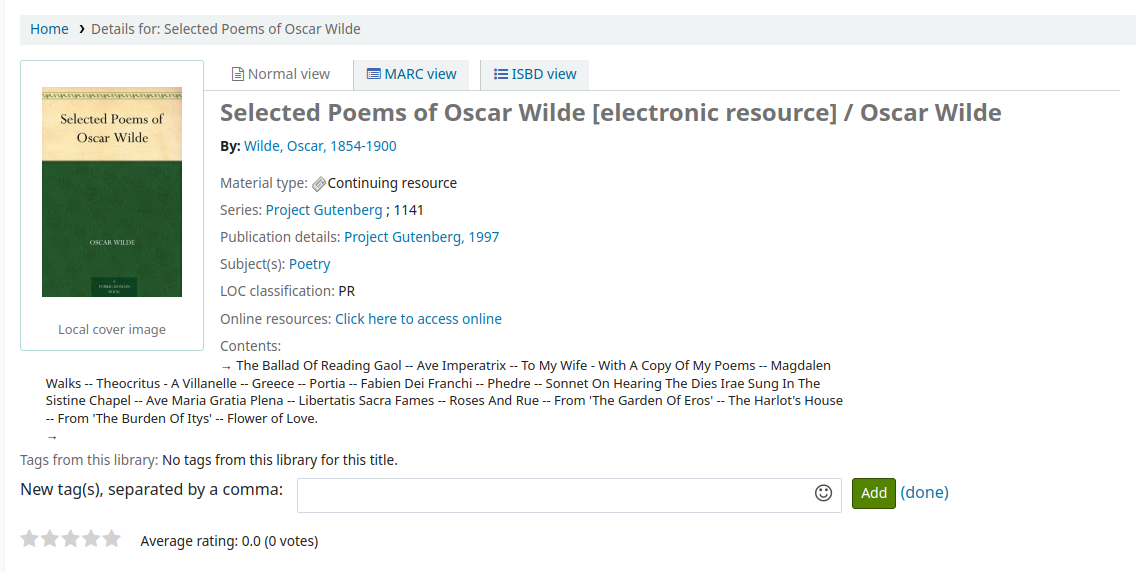
En la parte superior de la pantalla será el título y la GMD:
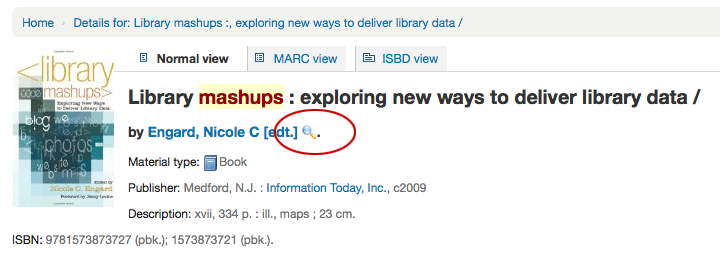
Bajo el título se listarán los autores. Esto proviene de sus campos 1xx y 7xx. Haciendo clic en el autor se buscarán otros títulos con ese autor.
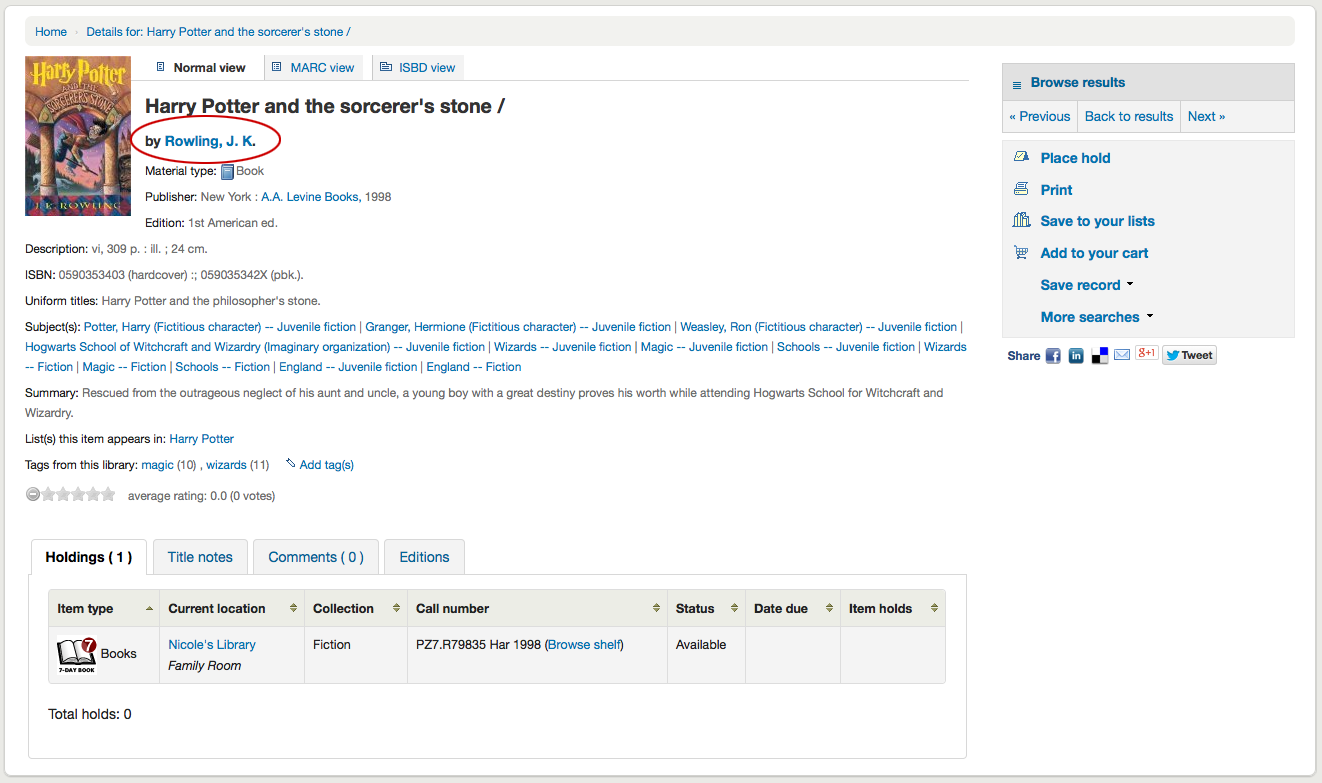
Si usted tiene un archivo de autoridad verá una lupa a la derecha de las autoridades de autor (o de otros). Al hacer clic en la lupa le llevará directamente al registro de autoridad.
If you have your DisplayOPACiconsXSLT preference set to “show” you will see a material type that is determined by values in your fixed fields (learn more in the XSLT material type icons cataloging guide.
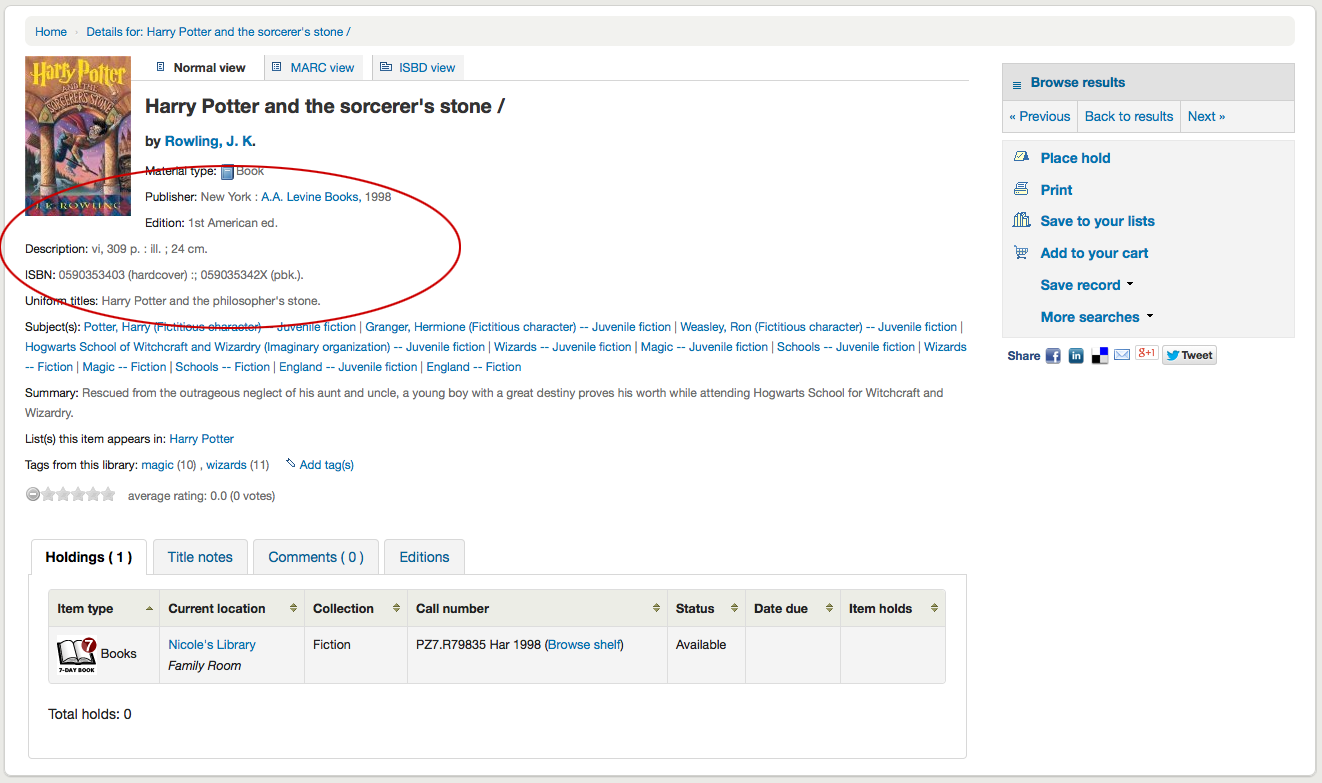
A continuación vamos a ver la descripción del registro que está viendo:
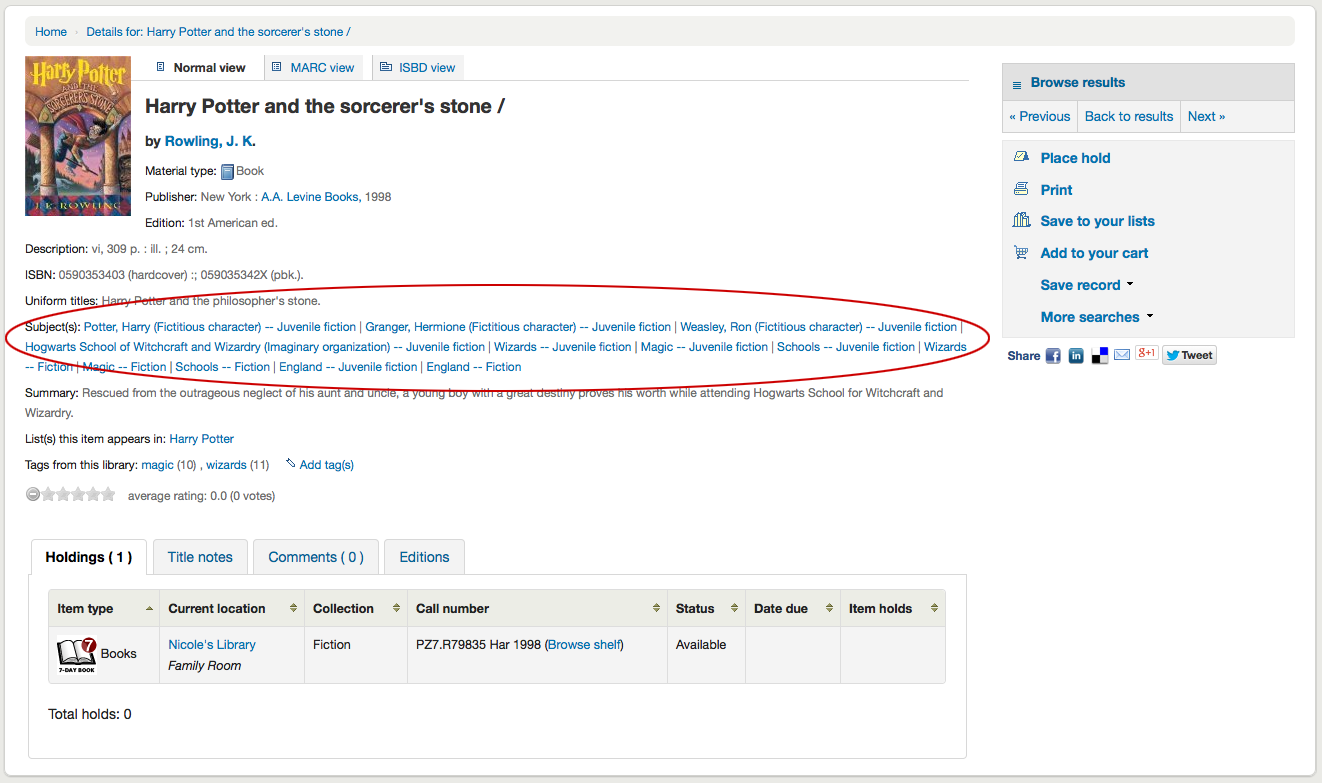
A continuación de esta información se encuentran los encabezamientos de materia, haciendo clic sobre ellos se pueden buscar otros títulos sobre temas similares
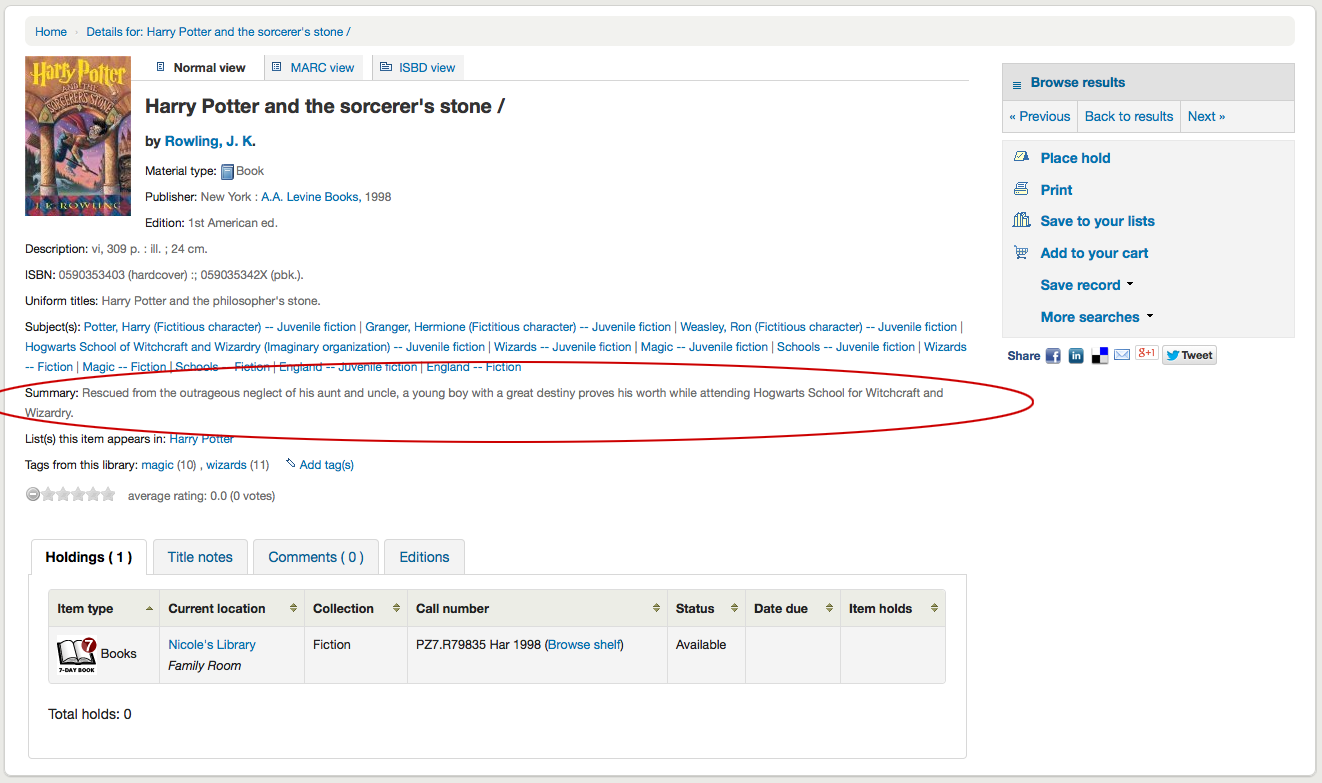
If your record has a table of contents or summary it will appear next to the “Summary” or “Table of contents” label
If your record has data in the 856 fields you’ll see the links to the right of the “Online resources” label
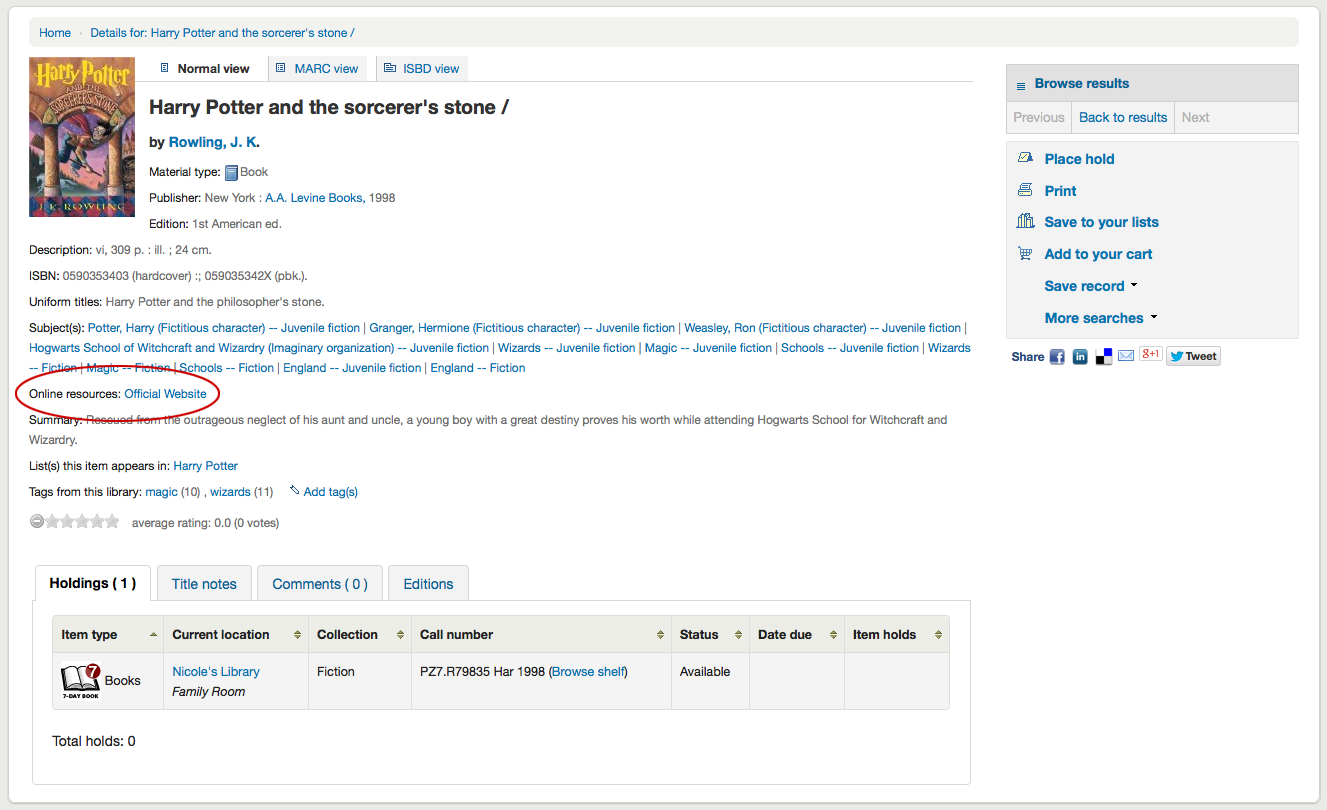
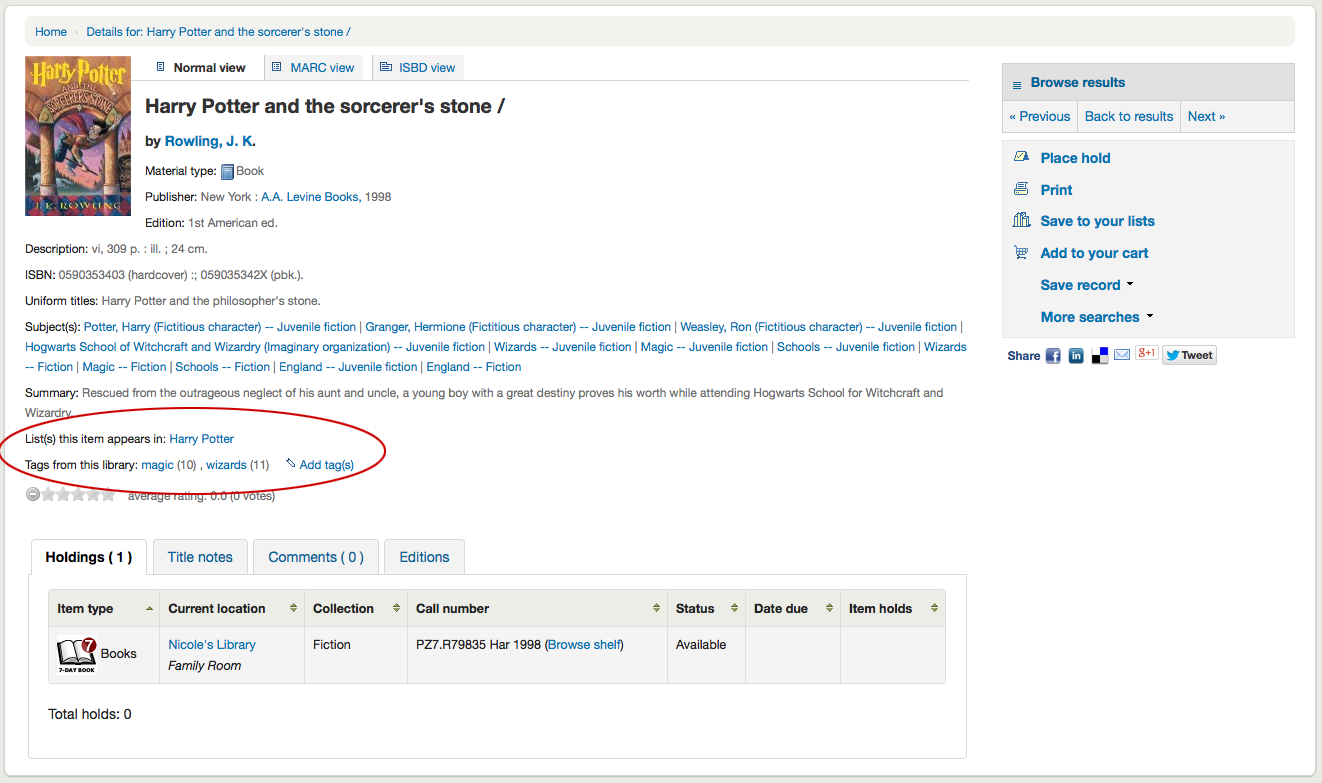
Si el título que está viendo se encuentra en una lista pública entonces usted verá una lista a la derecha de la etiqueta “Lista(s) en que aparece este ítem” y si tiene etiquetas aparecerán debajo de las etiquetas “etiquetas de esta biblioteca”
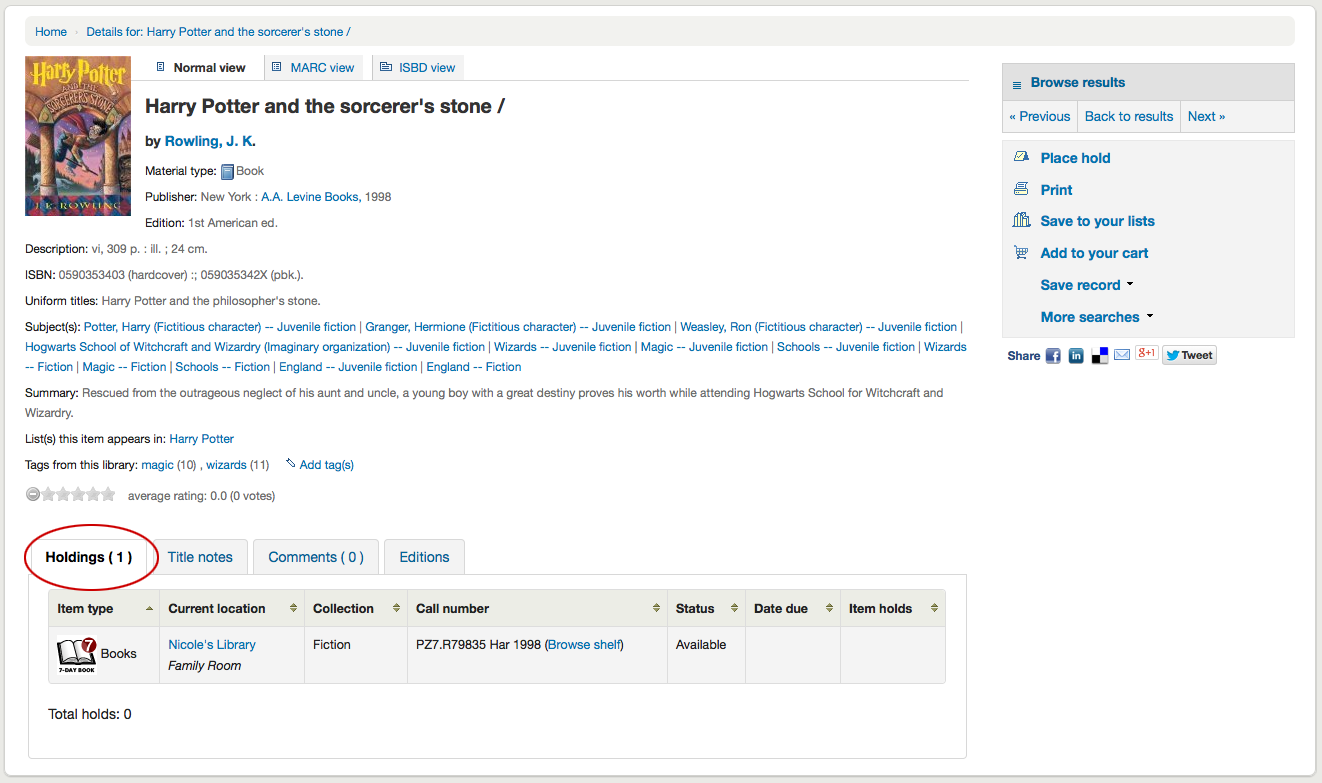
En las pestañas de abajo los detalles usted encontrará la información de ejemplares
Nota
You can customize the columns of this table in the “Table settings” section of the Administration module (table id: holdingst).
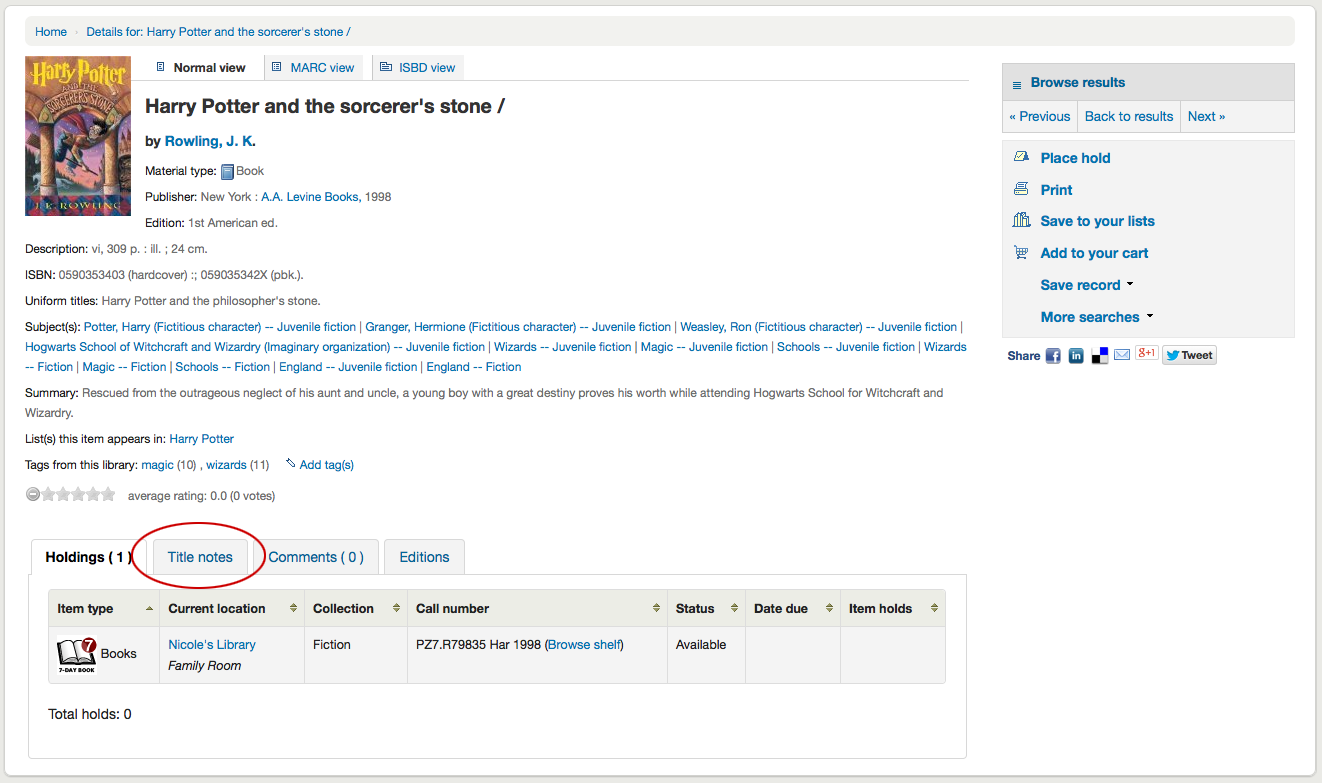
Any notes (5xx fields) that have been cataloged will appear under “Title notes”
If the bibliographic record is linked to a subscription in the Serials module, there will be a “Subscriptions” tab with the subscription and issues information.
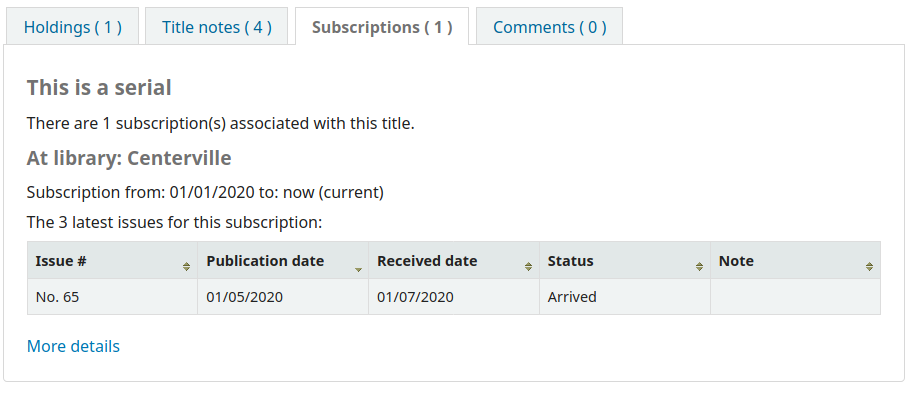
Nota
You can customize the columns of this table in the “Table settings” section of the Administration module (table id: subscriptionst).
Nota
If you chose a notice in the “Patron notification” field when adding the subscription, there will be a button patrons can click to be notified by email when a new issue is received.
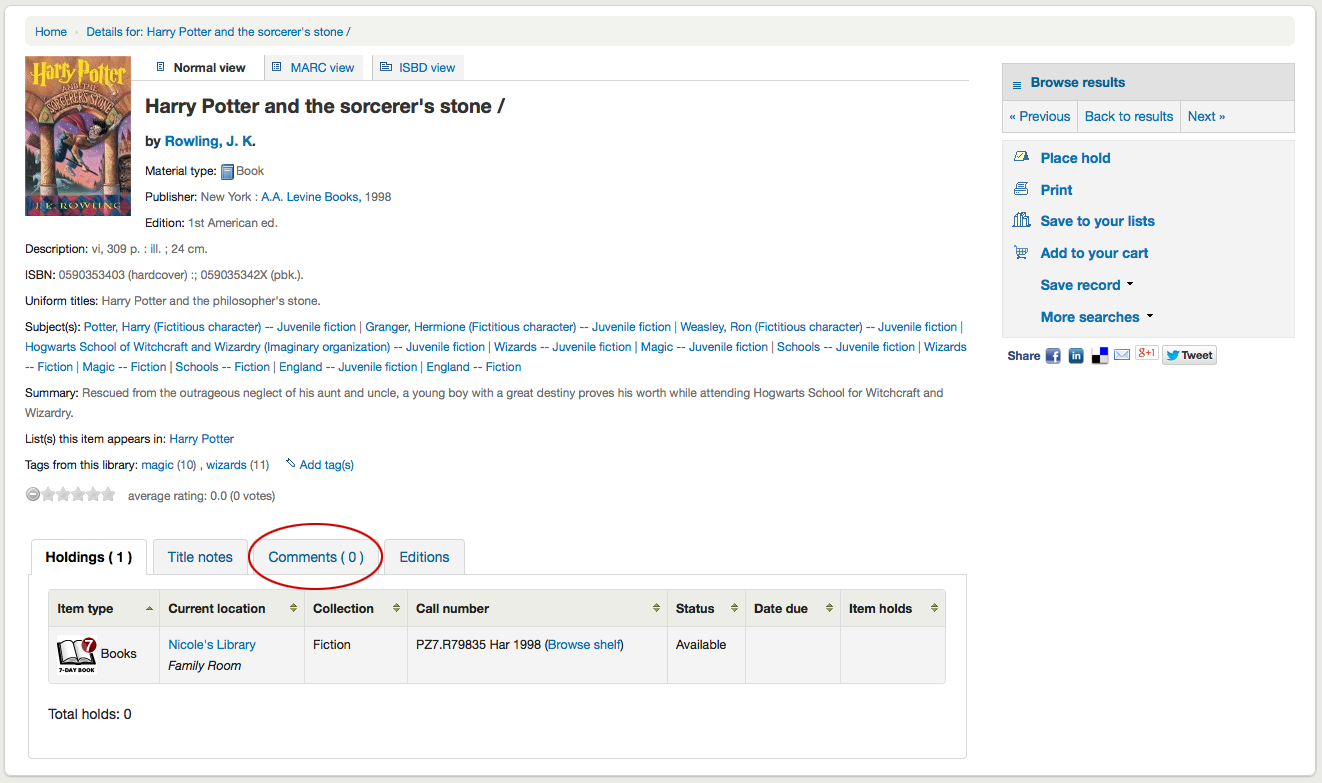
Si usted está permitiendo comentarios aparecerán en la siguiente pestaña
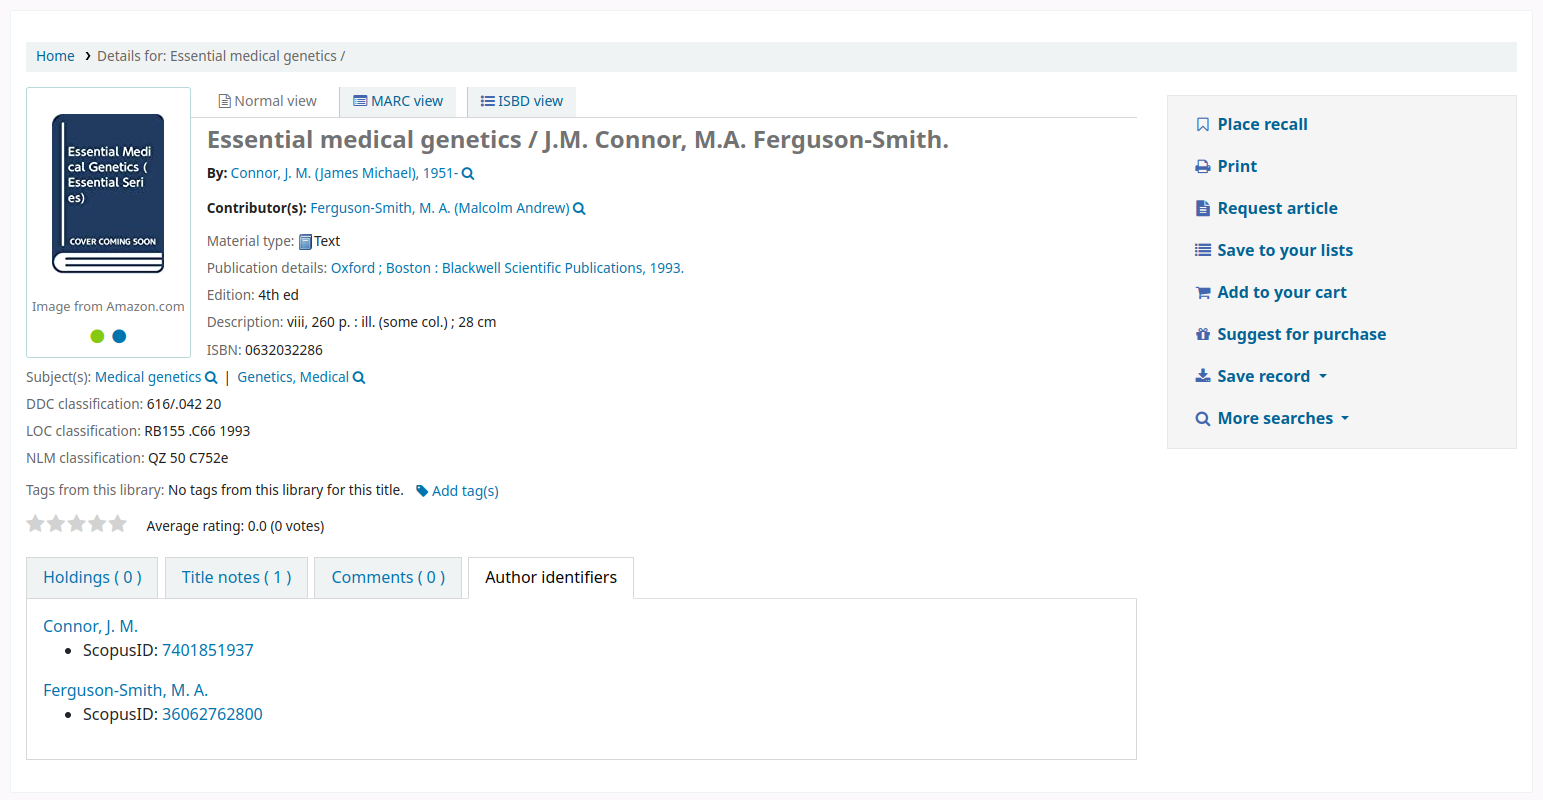
If the OPACAuthorIdentifiers system preference is turned on, and that your author authority records have standard identifiers, there will be an “Author identifiers” tab showing the identifiers with links to the author record on the source website.
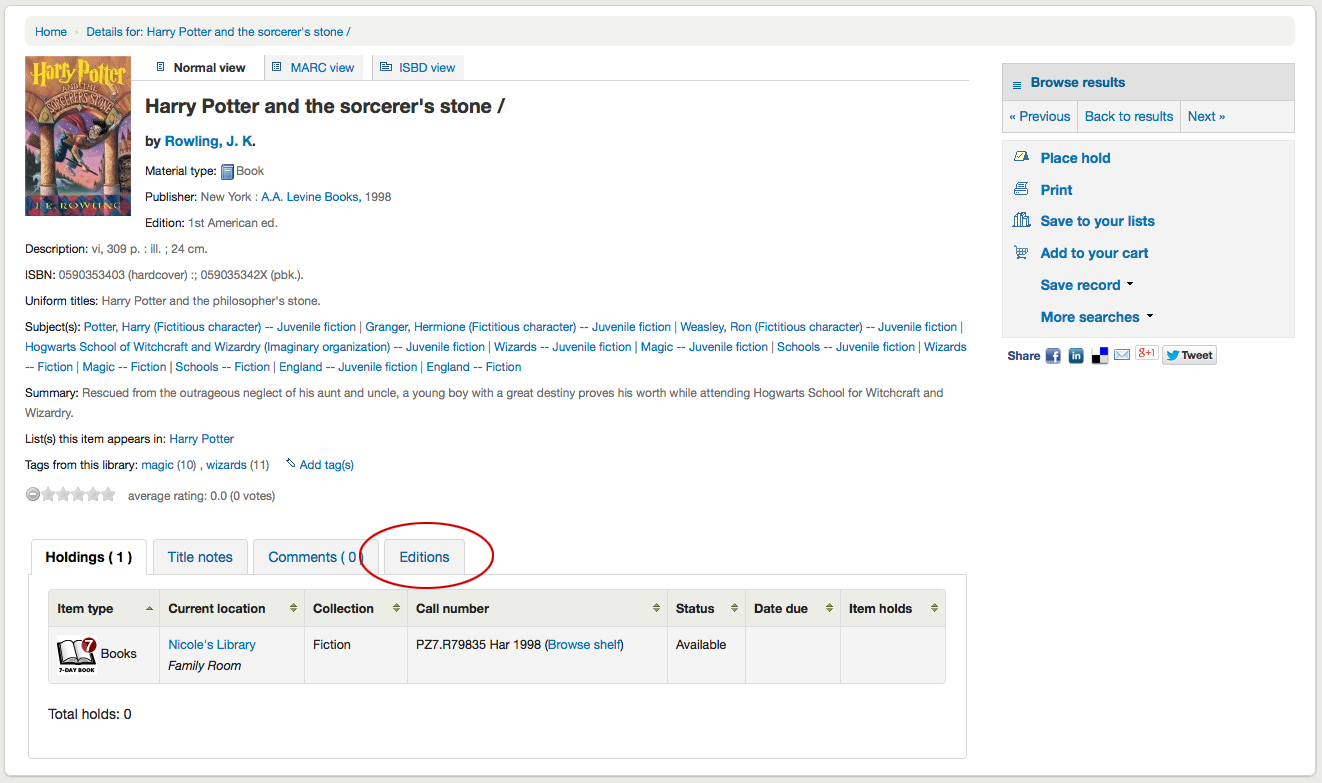
Y finalmente si ha habilitado FRBR y tiene otras ediciones del título de su colección verá la pestaña “Ediciones”.
A la derecha de los detalles encontrará una serie de recuadros. El primer recuadro es una lista de botones para ayudar a navegar en los resultados de la búsqueda. Desde allí se puede ver el resultado siguiente o anterior de su búsqueda o regresar a los resultados.
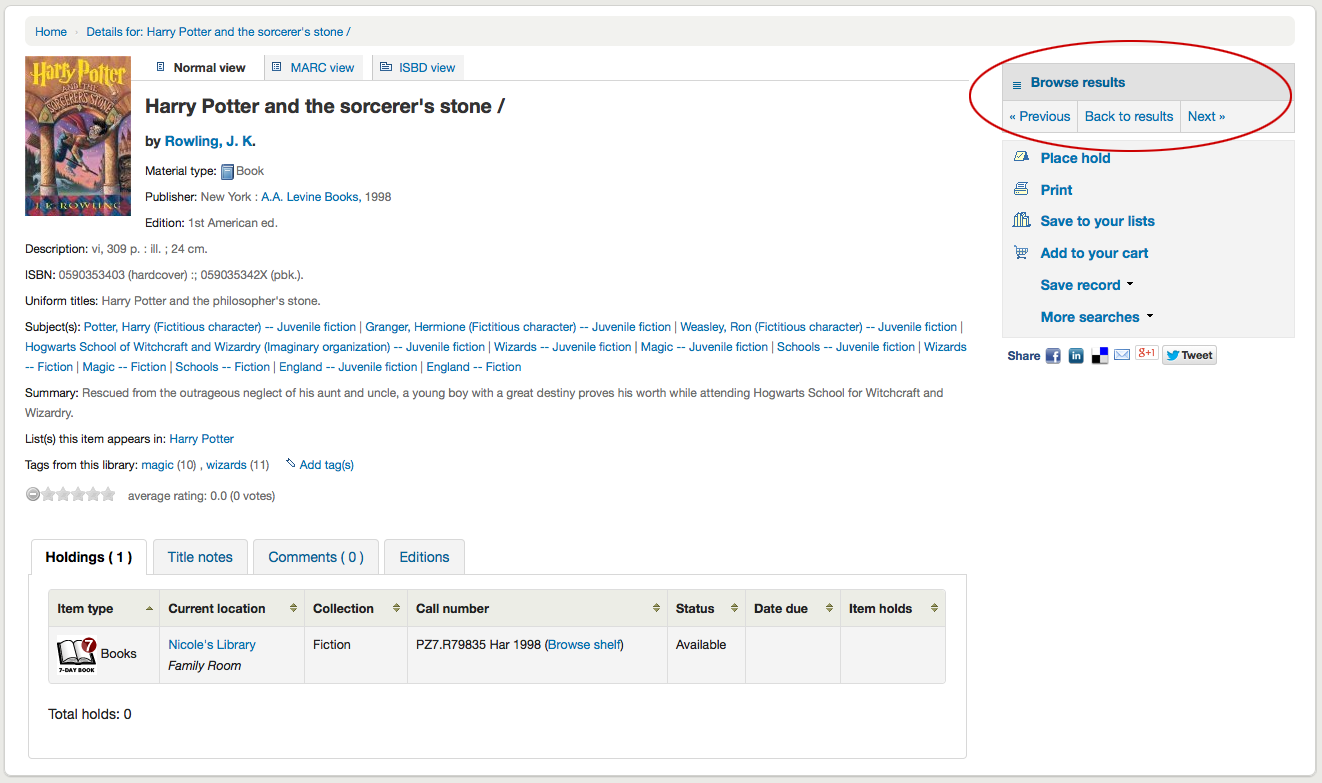
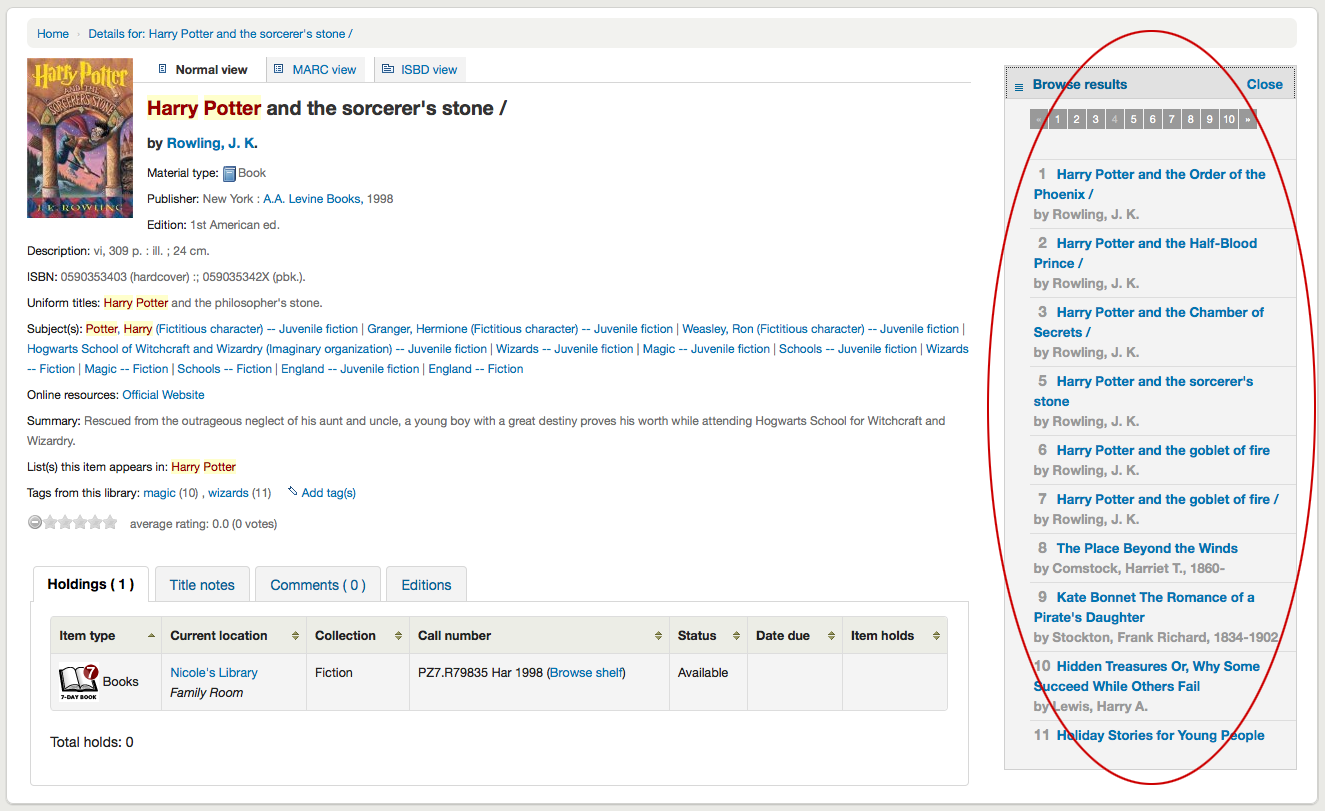
Clicking “Browse results” at the top of the right column will open up your search results on the detail page
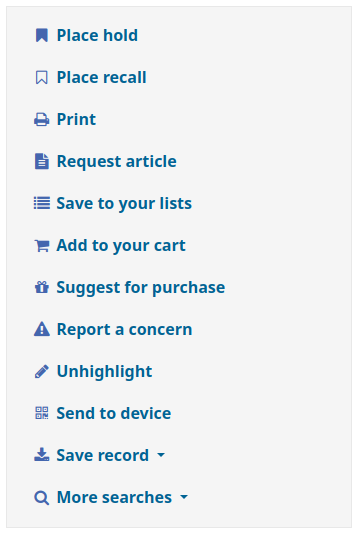
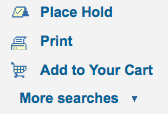
Below the search buttons you’ll find the links to place a hold, print the record, save the record to your lists, add it to your cart or send to a device (using a QR code).
Another option that will appear on this right hand side bar, if a library is allowing purchase suggestions (see the suggestion system preference), is the ability to “Suggest for Purchase”. Clicking this link will bring the user to the purchase suggestion form to fill out.
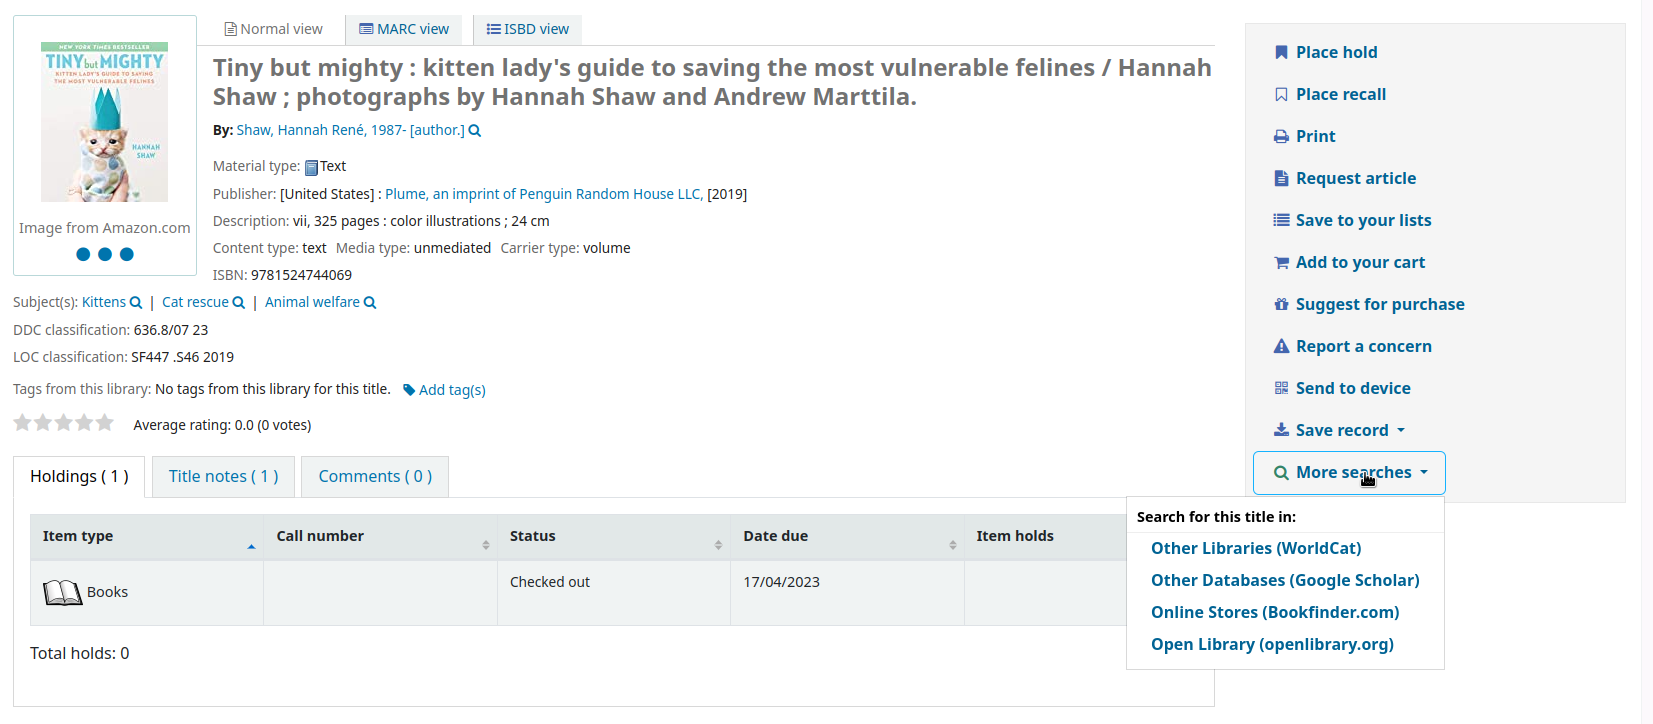
Clicking “More searches” will show the list of libraries you entered in your OPACSearchForTitleIn preference
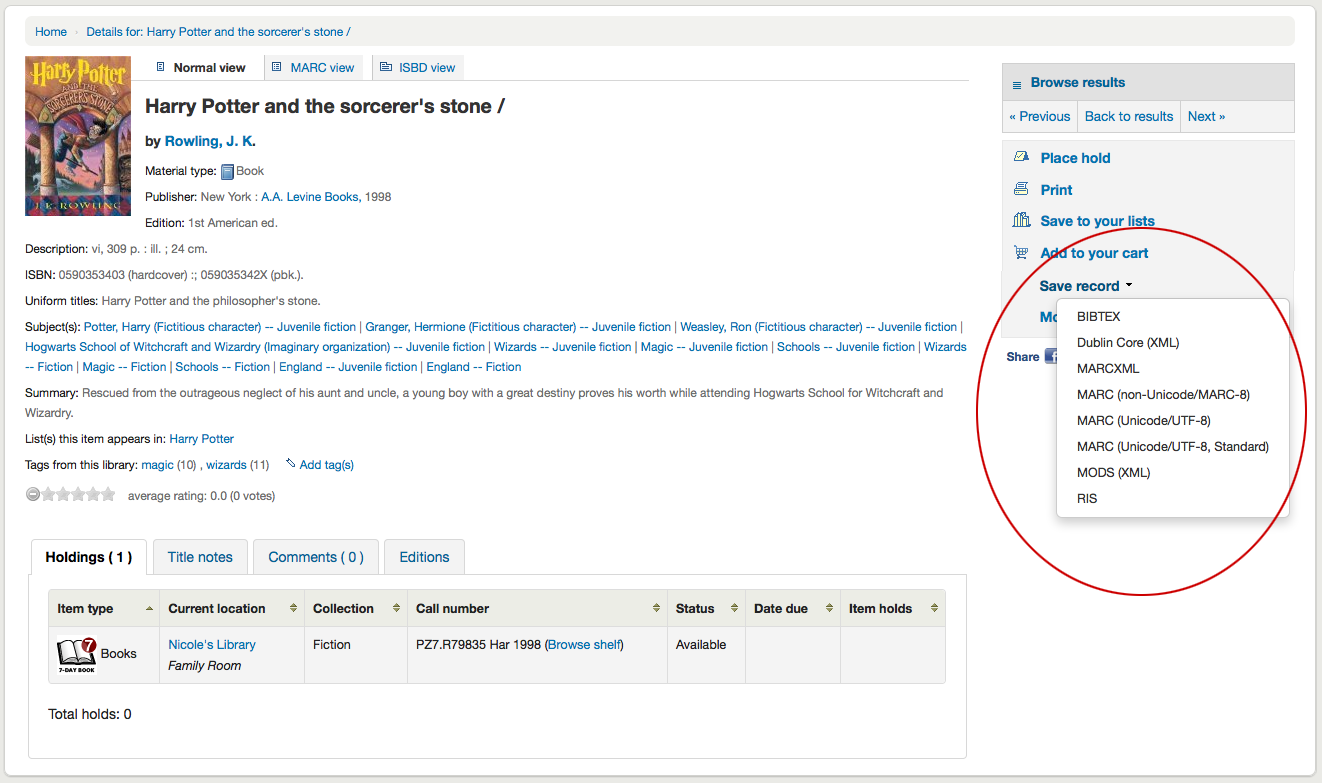
Under the “Save record” label you will find a series of file formats you can save the record as. This list can be customized by altering the OpacExportOptions system preference.
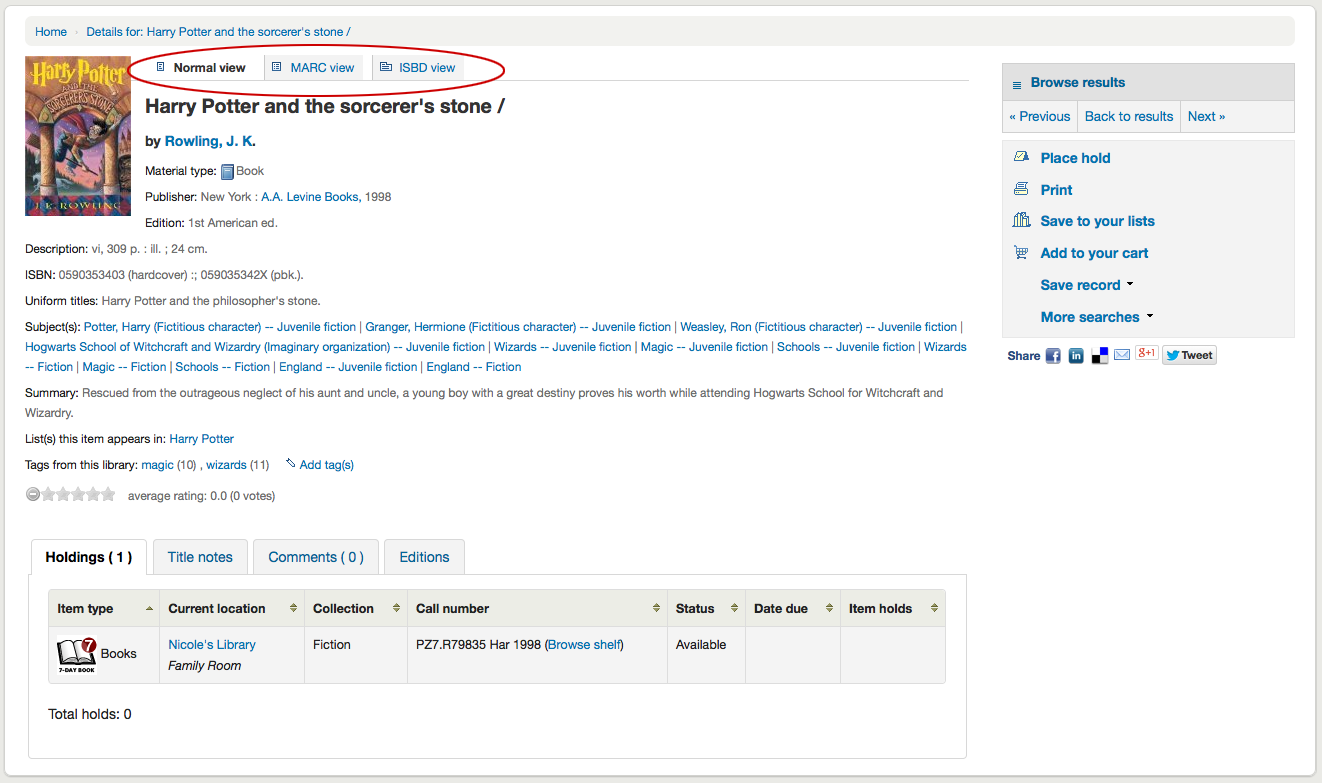
Si en algún momento desea cambiar la vista de “Normal” para ver el Marc o el ISBD puede hacer clic en las pestañas en la parte superior del registro
Reporting concerns about bibliographic records
If the OpacCatalogConcerns system preference is enabled, patrons will be able to report concerns regarding specific bibliographic records.
This is similar to the problem report feature but is linked to a specific bibliographic record, and there is the possibility to have a resolution.
To report a new concern,
In the bibliographic record’s detail page, click the “Report a concern” link in the options at the right side.
Nota
Patrons must be logged in to report a concern. If they are not logged in, the system will ask them for their login information.
Fill in the concern form.

Title: enter a title describing succinctly the problem.
Please describe your concern: enter details about the problem, being the more descriptive possible so that the staff member who receives this is able to replicate and see the problem.
An example of what is expected in the description is provided in the field:
**Describe the concern**

A clear and concise description of what the concern is.

**To Reproduce**

Steps to reproduce the behavior:
1. Go to '...'
2. Click on '....'
3. Scroll down to '....'
4. See error

**Expected behavior**

A clear and concise description of what you expected to happen.
Nota
This text is customizable in the HTML customizations tool, by changing the “CatalogConcernTemplate” entry.
The text at the bottom of the form («Please describe your concern clearly…») is also customizable in the HTML customizations tool, by changing the “CatalogConcernHelp” entry.
Click “Submit”.
This will send an email to the cataloging team to notify them that a new concern has been created. The email will be sent to the email address in the CatalogerEmails system preference. The email sent is the TICKET_NOTIFY notice, which can be customized in the Notices and slips tool.
An email will also be sent to the reporter to notify them that the concern has been received. The email sent is the TICKET_ACKNOWLEDGE notice, which can be customized in the Notices and slips tool.
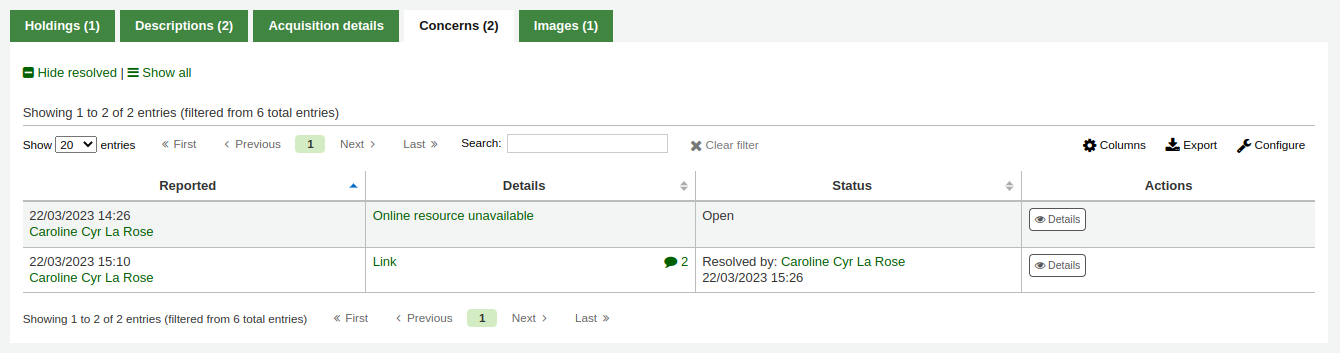
Concerns reported about this record are visible in the “Concerns” tab.
All concern tickets will be visible in the catalog concerns report.
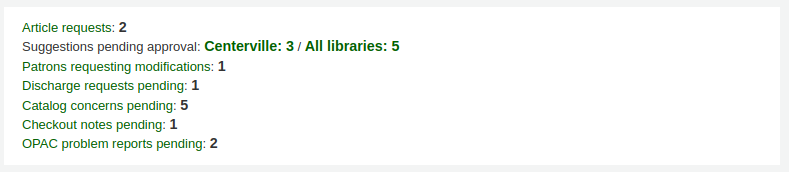
Newly opened concern reports will also appear in the notification section at the bottom of the staff interface main page.
Lists and the cart
A cart is a temporary holding place for records you’re interested in finding during this session. That means that once you log out of the OPAC or close the browser you lose the items in your cart.
A list is a more permanent location for saving items.
To learn more about lists, check the Lists and cart chapter of this manual, which deal with these features in the staff interface.
Listas
Patrons can manage their own private lists by visiting the “Lists” section of their account.
Creating lists
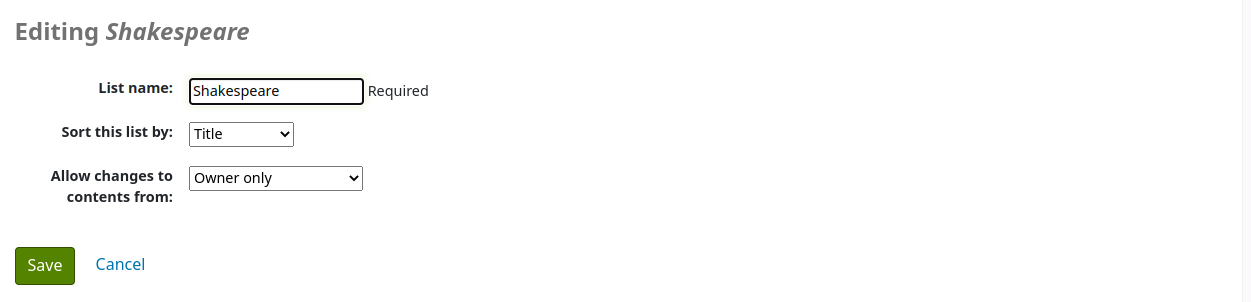
To create a list the patron simply needs to click the “New list” link and populate the form that appears.
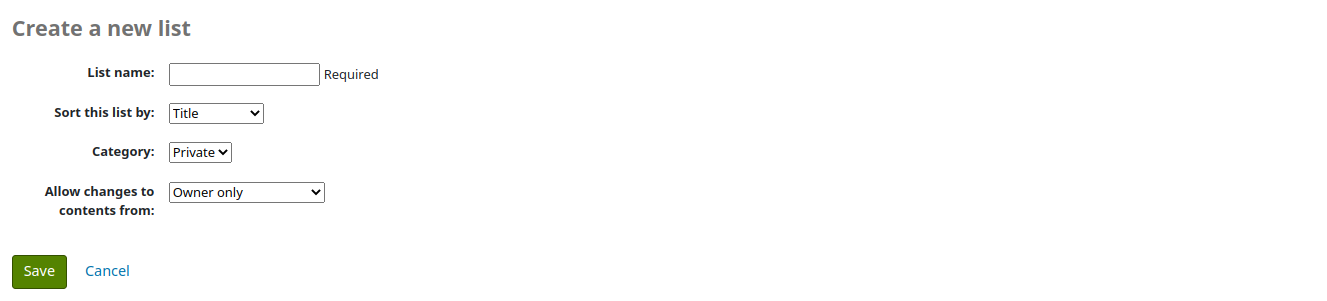
List name: the patron must enter a list name, it is the only required field
Sort this list by: the patron can choose how they want the list sorted (by title, author, publication year, call number or date added to the list).
Category: the patron can choose to keep this list private or make it public. A public list will be visible to all OPAC users.
Nota
This field will only appear if the OpacAllowPublicListCreation system preference is set to “Allow”. Otherwise all lists created by patrons will be private.
Allow changes to content from: the patron can choose who will be able to add or remove titles from the list.
Nobody: nobody, including the patron themselves will be able to add or remove titles.
Owner only: only the patron who created the list will be able to add or remove titles. If the list is public or shared, the OPAC users or sharers will not be able to change the list contents.
Anyone seeing this list: everyone who has access to the list will be able to add or remove titles. If the list is public, this means everyone. If the list is private, only the owner will have the ability to change the contents. And if the list is shared, the owner and sharers will have this ability.
Staff only: this option will only appear to staff members, to make the list editable by all staff members.
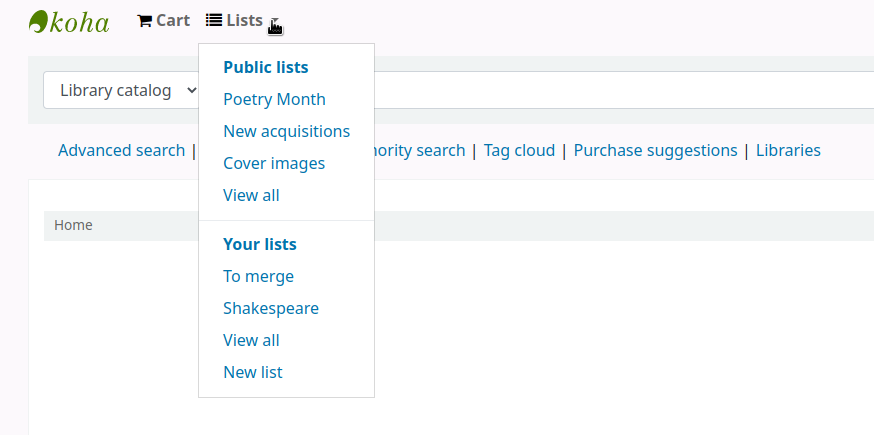
Lists can also be created by choosing the “New list” option in the “Add to” menu on the search results

Adding titles to lists
Titles can be added to lists from the search results or from the bibliographic record.
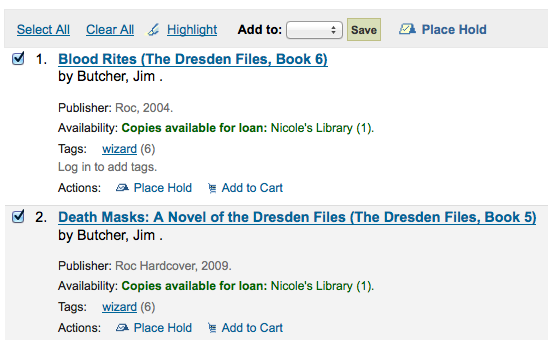
In the search results, the option to add items to the list appear below each result (“Save to lists” button)
and across the top of the results page, next to “Select titles to: Add to…”
To add a single title to a list, click the “Save to lists” option and then choose the list you’d like to add the title to. To add multiple titles to a list check the boxes on the left of the titles you want to add and then choose the list you want to add the titles to from the “Add too” pull down at the top of the screen.
From the bibliographic record, the option to save the title to a list is in the menu on the right.
Titles can also be added to a list from the cart.
Viewing lists contents
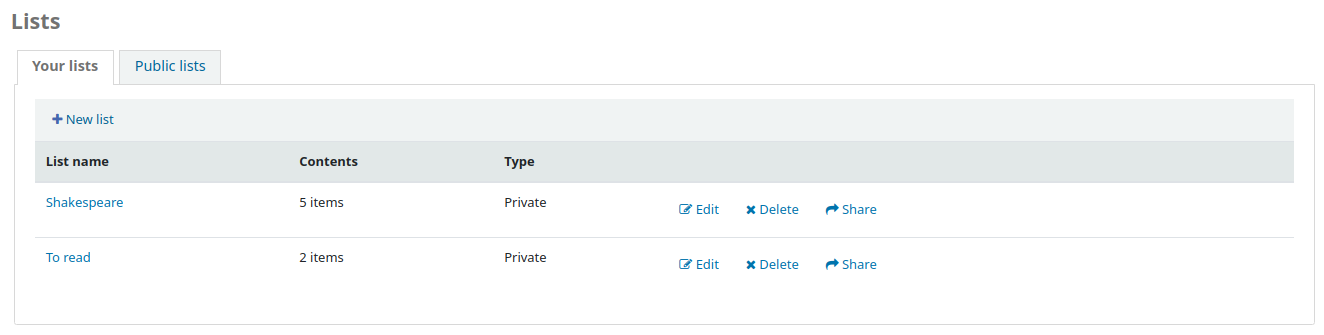
To view the contents of a list, click on the list name under the “Lists” button.
El contenido de la lista será similar a las páginas de resultados, excepto que habrá diferentes opciones de menú en la parte superior de la lista.
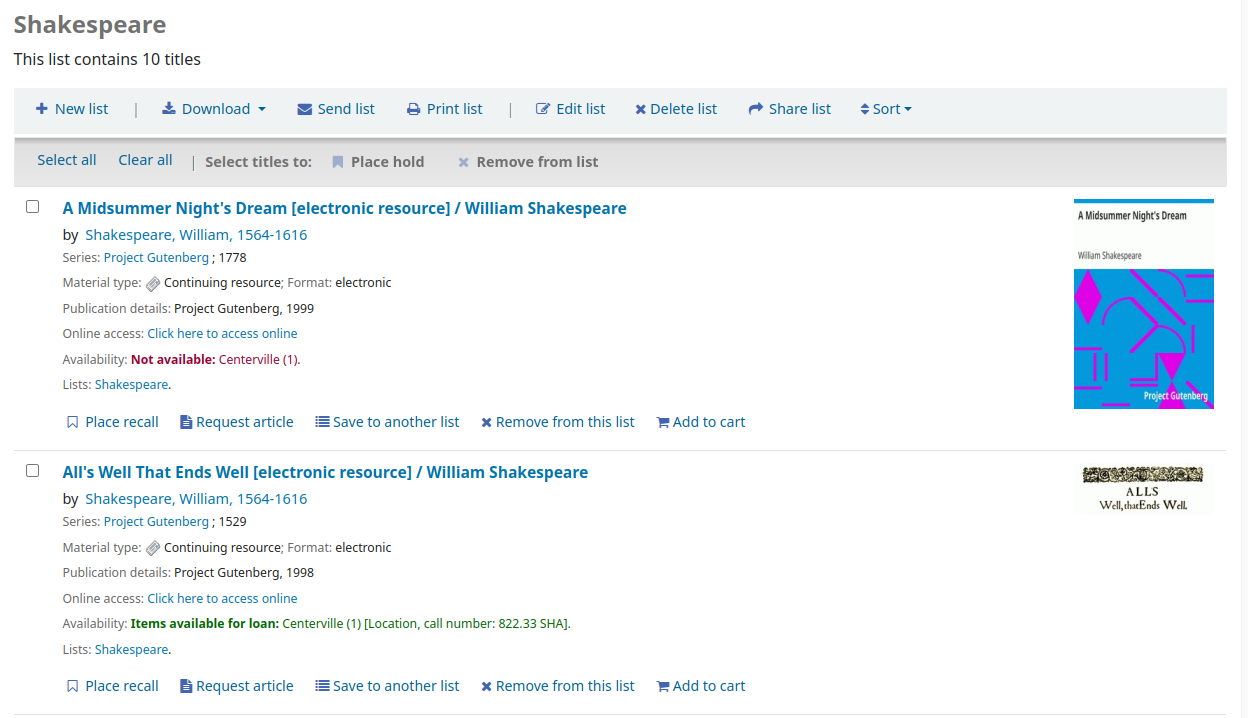
A la derecha del titulo de la lista hay un icono RSS que le permite suscribirse a actualizaciones de la lista.
Nota
The RSS icon only appears on public lists.
Usando el menú de opciones sobre la lista se pueden colocar varios ítems en reserva, descargar el contenido de la lista, enviar la lista por correo electrónico o imprimir la lista.
To place a hold on one or more list items check the box to the left of the item and click the “Place hold” link at the top
To download the list contents click the “Download list” link and choose the format you’d like to download the list in
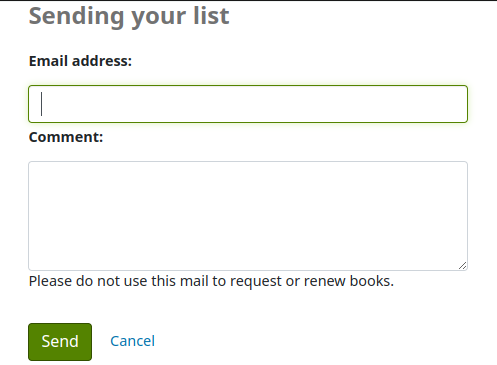
To email the list contents to someone, click the “Send list” link and enter in your email details in the form that pops up
Nota
The message sent when emailing the list is LIST, which can be customized in the Notices and slips tool.
To print the contents of your list out click the “Print list” link
Managing lists
Once the list is saved, patrons can begin adding items to it. From the “Lists” tab in their account, the patron can edit and delete the lists they have created by clicking the appropriate button to the right of the list name.
To edit the list’s title or sorting patrons click the “Edit” button to the right of the list description.
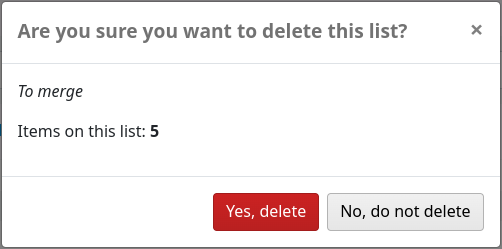
Al hacer clic en “Eliminar” al lado de una lista, se le pedirá que confirme que desea eliminar de la lista.
If the OpacAllowSharingPrivateLists system preference is set to “Allow”, patrons will see the “Share” button on the list of lists and the “Share list” button at the top of each individual list. Clicking this will ask you to enter the email address of a patron.

Una vez que el archivo es subido se presenta un mensaje de confirmación.

= prestar un ítem a un socio
Once the other patron accepts the shared list, the sharing patron will receive a confirmation.
Nota
The message sent to share the list is SHARE_INVITE and the message sent to the sharing patron to confirm the other patron has accepted the share is SHARE_ACCEPT. Both messages are customizable in the Notices and slips tool.
The other patron will see the shared list with their own private lists (the type will be “Shared” rather than “Private”). They will also have the option to remove the share, if they don’t want to have access to this list anymore.
The owner of the shared list will have the option to transfer the ownership of the list to one of the patrons with whom the list is shared.
If the TagsInputOnDetail system preference is enabled, patrons will have the possibility of adding tags to titles from the list view.
Carrito
Adding titles to the cart
Titles can be added to the cart from the search results or from the bibliographic record.
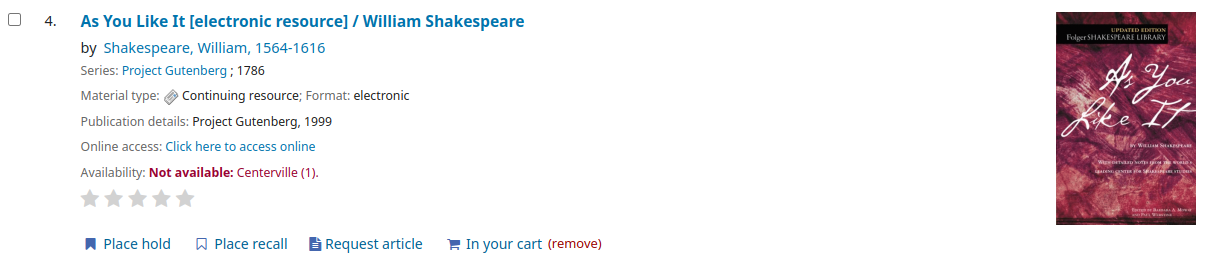
In the search results, the option to add items to the cart appear below each result (“Add to cart” button)
and across the top of the results page, next to “Select titles to: Add to…”
Clicking the “Add to cart” button under a single result will add the one title to your cart.
To add multiple titles at once, check the box to the left of each result and then choose “Cart” from the “Add to” pull down at the top of the screen. Once titles are added to the cart you will be presented with a confirmation at the top of the page.

From the results you will see which items are in your cart and will be able to remove those items by clicking “(remove)”.
From the bibliographic record, the option to add the title to the cart is in the menu on the right.
Managing the cart
Once there are titles in the cart, you can manage the contents by clicking on the “Cart” button usually found at the top of the screen. Your cart will open in a new window.
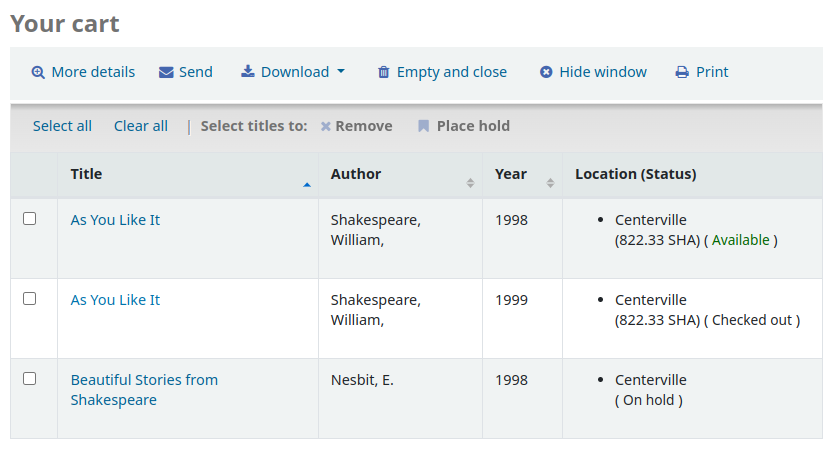
En esta ventana se presentan varias opciones. En la parte superior de la cesta hay varios botones.
More details: clicking this will show additional information about the titles in the cart (ISBNs, subjects, publisher info, notes and more).
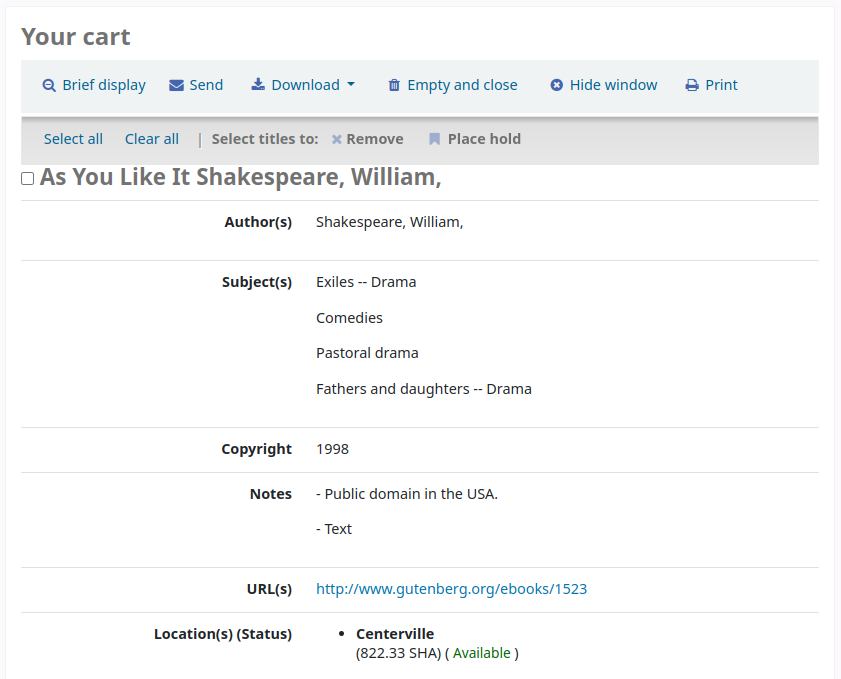
When clicked, tThe “More details” button will become “Brief display”. Clicking this will return to the default display in table form of the title, author, copyright date and item location and status.
Send: the option to send the contents of the cart to an email address. This is handy if you want to send the resources you found at the library to your home email account to refer to later or to send to a patron researching a specific topic. Clicking this link will open up a new window that asks for the email address and message to send.

Advertencia
The cart can only be emailed by logged in users. This will prevent the cart email function from being used for spamming.
Nota
The message sent when emailing the cart is CART, which can be customized in the Notices and slips tool.
Download: you can download the contents of the cart in several pre-defined formats or using a CSV profile that you defined in the tools module.

Empty and close: this will empty the cart and close the window.
Hide window: this will close the window, but the cart will not be emptied.
Print: this will print out the contents of the cart.
In addition to the various different ways to save the contents of the cart, there are ways to add value to the data in your cart.
Select one or more titles from the cart and choose one of the options:
Remove: this will remove the selected titles from the cart.
Add to a list: this will add the selected titles to a list
Place hold: this will place a hold on all selected titles
Tag: if the TagsInputOnDetail system preference is enabled, patrons will be able to add tags to selected titles.
Placing holds
Patrons can place holds on items via the OPAC if they’re logged in and you have the OPACHoldRequests preference set to “Allow”. If the item can be placed on hold the option to place it on hold will appear in several different places.
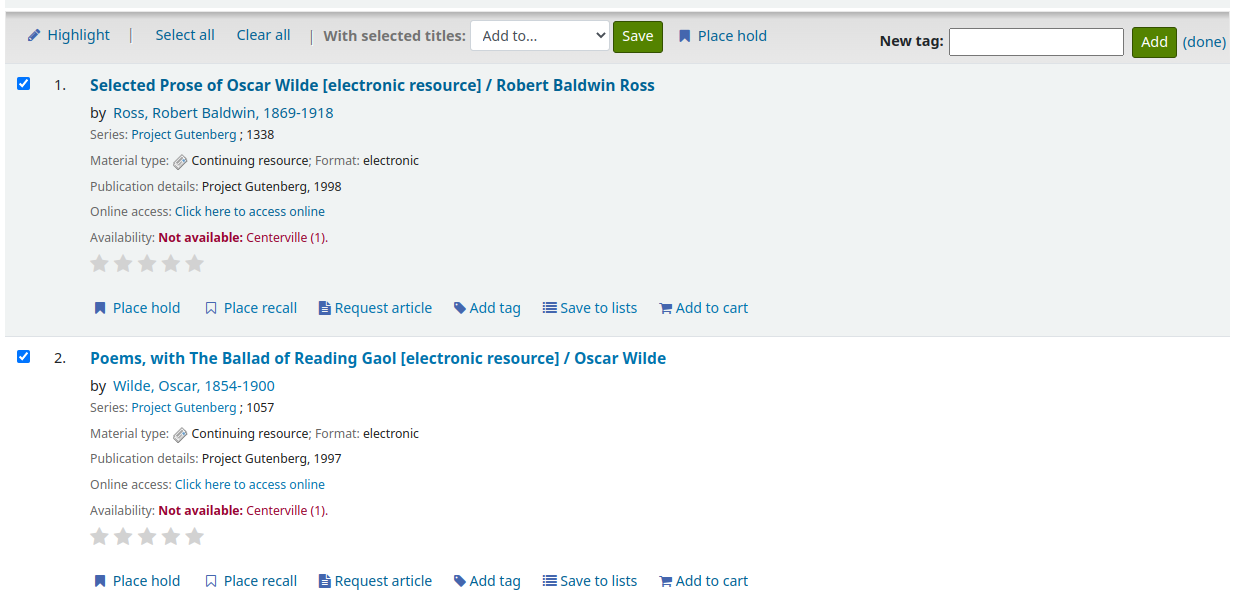
When viewing a list or search results page you’ll see the option to place hold on multiple items by checking the boxes to the left of the results and clicking “Place hold” at the top
Cuando está visualizando una lista o una página de resultados de búsqueda verá la opción de hacer una reserva por debajo de la información básica sobre el título
Cuando se visualiza un título individual verá la opción de hacer una reserva en la casilla en la parte derecha de la pantalla
No importa en cuál de los enlaces anteriores haga clic para hacer una reserva, se le redirigirá a la misma pantalla de reserva.
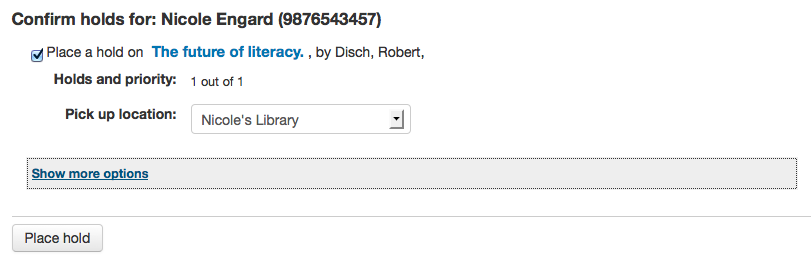
Marque la casilla a la izquierda de los ítems que desea reservar
El título incluye un enlace a la página de detalles del registro
La prioridad indica su posición en la cola de reservas
If allowed by your OPACAllowUserToChooseBranch preference the patron can choose where they’d like to pick up their hold. The list of available pickup locations will include all libraries that have “Pickup location” set to “Yes” on the library configuration page.
Si quieres ver más detalles puede marcar la casilla de verificación “Mostrar todos los detalles”
Place hold form with more options
If you have the AllowHoldItemTypeSelection preference set to “Allow” and the record had more than one item type attached you will see an option to choose to limit the hold to a specific item type

If allowed by your OPACAllowHoldDateInFuture preference, the “Hold starts on date” column will show. This field allows the patron to have their hold start on a future date.
By default holds placed in the system remain until canceled, but if the patron fills in a “Hold not needed after” date then the hold has an expiration date.
Importante
Expired holds are removed by the expired holds cron job, this is not an automatic process and must be set up by your system administrator
If allowed by the OpacHoldNotes preference then patrons can leave notes about their holds for the library by clicking the “Edit notes” button
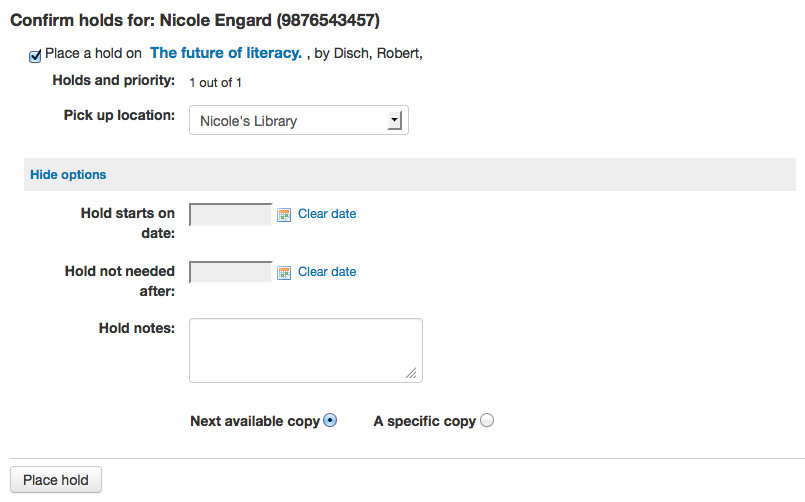
If the EnableItemGroupHolds system preference is set to “Enable” and the record has item groups, the patron can choose to place a hold on the next available item of a group, rather than the next available item on the whole record or a specific item.
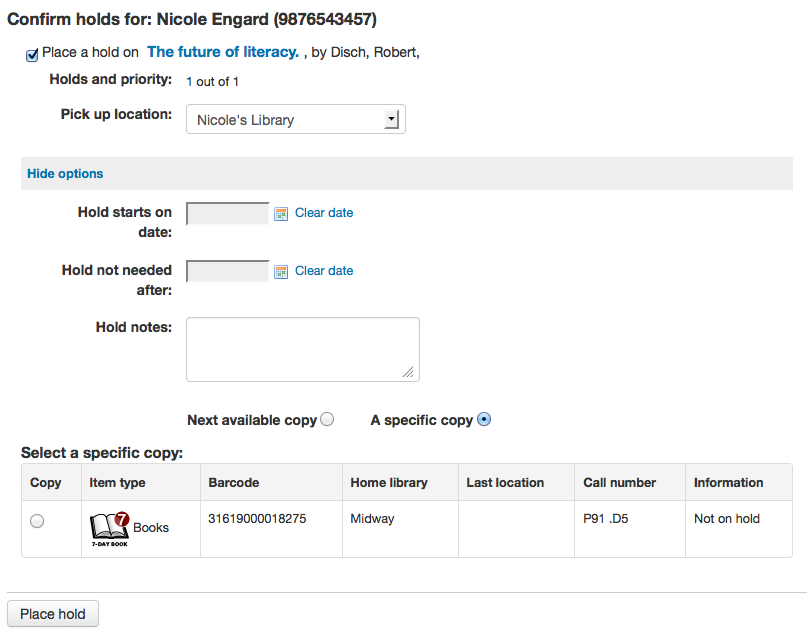
Depending on the rules you set regarding item specific holds in your circulation and fines rules the patron will be allowed to choose whether to place the hold on the next available copy and/or a specific copy.
After clicking the “Place hold” button the patron will be brought to their account page where they’ll see all of the items they have on hold.
Requesting recalls
If your library accepts recalls (see setting up recalls for more information), patrons will be able to place recalls on items.
The option to request a recall appears in various places in the OPAC:
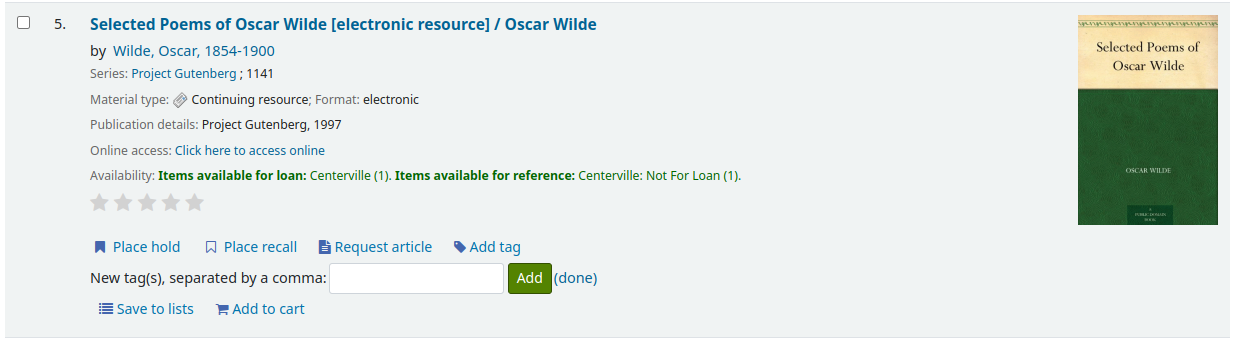
In the results list after a search, the “Place recall” option appears at the bottom of each recallable result.
In the detailed record. the “Place recall” option appears on the right side of the screen (or bottom in mobile view) in the options
Either of those links will lead to the recall form.
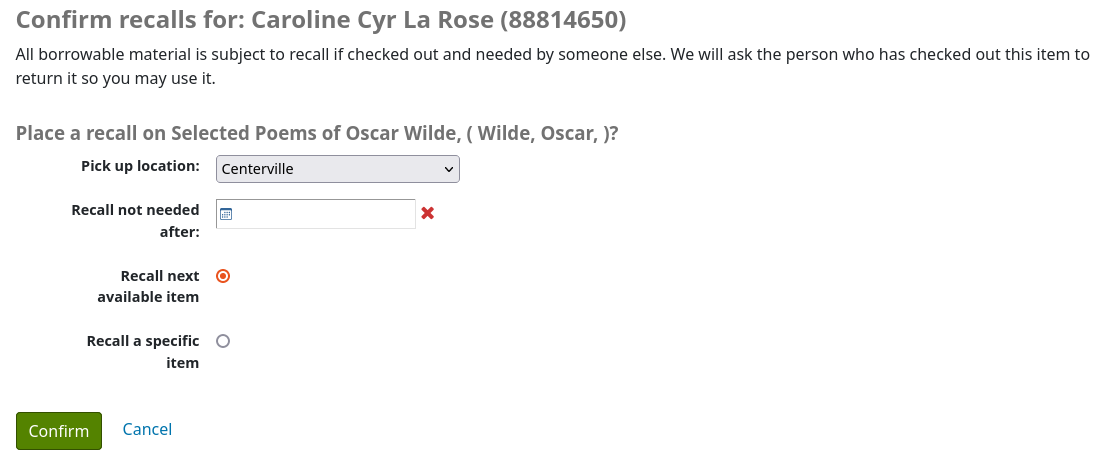
Pick up location: the patron can choose where they’d like to pick up their recalled item.
Recall not needed after: if the patron not need this item after a certain date, they can enter it here. The recall will be automatically expired (with the expire_recalls.pl cronjob) after that date.
Recall next available item or Recall a specific item: the patron can choose to recall any item or a specific one. If they choose “Recall a specific item”, they will be asked to select the item in the list.
Once the patron confirms their recall request, they will have get a message saying the the patron who currently has the item will be notified.
Nota
The notice sent to the patron who currently has the item is RETURN_RECALLED_ITEM. It can be edited in the Notices and slips tool.
The request will be added to the recalls tab in their account summary, as well as in their recall history list.
Enhanced content
Etiquetado
Depending on the settings for the TagsEnabled, TagsInputOnList and TagsInputOnDetail system preferences, patrons may be able to add tags to bibliographic records from the search results and/or from the bibliographic records” detail page.
If you are allowing patrons to add tags from the search results list (see TagsInputOnDetail), patron will see an “Add tag” button below each result and a “Tag” option at the top of the screen.
To add a tag to one item, click “Add tag”, type the tag or tags (separated by commas) in the “New tag” box and click “Add”. You will be presented with a confirmation of your tags being added.
En la página de resultados también puede etiquetar ítems en conjunto haciendo clic en las casillas de verificación de la izquierda y luego haciendo clic en el botón “Etiqueta” en la parte superior. Después de hacer clic el botón se cambiará a un cuadro de entrada que le permitirá agregar etiquetas a todos los títulos que ha seleccionado.
If the TagsInputOnDetail system preference is enabled, patrons will also have the possibility to add tags from a list and from the cart.
If the TagsInputOnDetail system preference is enabled, patrons will have the possibility of adding tags from the record detail page by clicking the “Add tag(s)” link. The link will be replaced by an input box.
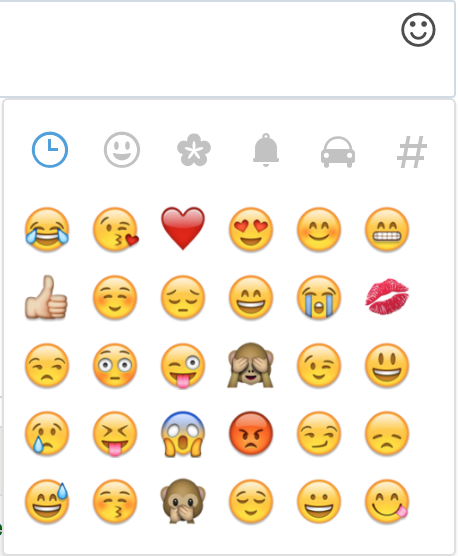
Emojis can also be included using the emoji picker when adding tags from the record detail page.
Zotero
Zotero is a Firefox add on that allows for the saving and generating of a bibliography. Learn more about and download Zotero at http://zotero.org.
Asegúrese que tiene instalado Zotero en su navegador Firefox. Podrá ver un icono de la carpeta a la derecha de la URL en la barra de direcciones. Al hacer clic en ese icono se abrirá la lista de títulos de la página para que usted escoja algunos para añadir a Zotero.
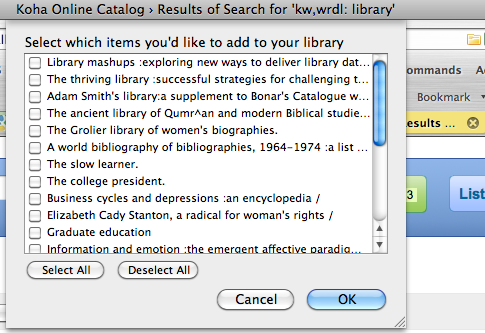
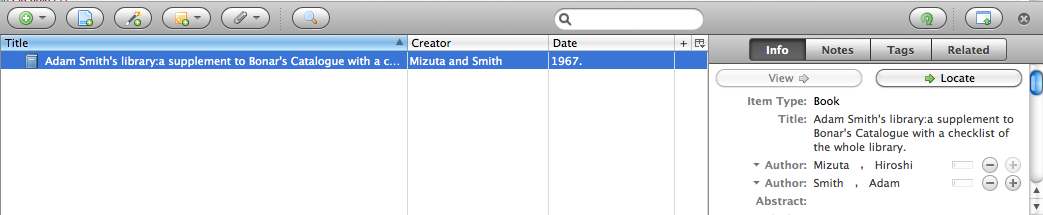
Seleccione los títulos que desee agregar a Zotero y luego haga clic en el botón “Aceptar”. Esto agregará los títulos seleccionados a Zotero. Usted puede ver los títulos abriendo su librería de Zotero.
Custom RSS feeds
Using the RSS feeds cron job you can generate an RSS feed for any SQL query (for example a new acquisitions RSS feed). The cron job is run on the command line to produce an RSS XML document.
El resultado debería ser colocado en un directorio accesible para la interfaz web del OPAC (o administrativo) para que los usuarios pueden descargar el feed RSS.
Un ejemplo de uso se puede encontrar en: misc/cronjobs/rss.pl lastAcquired.conf
Normally the RSS cron job should be run periodically (e.g., daily) to keep the feed up-to-date.
El archivo de configuración (por ejemplo, lastAcquired.conf) incluye
nombre del archivo de plantilla a utilizar
ruta del archivo de salida
consulta SQL
The RSS cron job runs the SQL query, then feeds the output of the query through the template to produce the output file.
Importante
To use custom RSS feeds you need to turn on the RSS cron job.
OPAC self registration
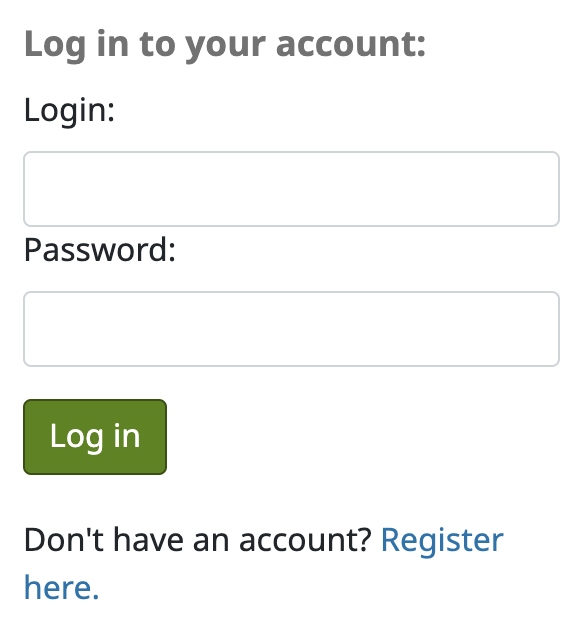
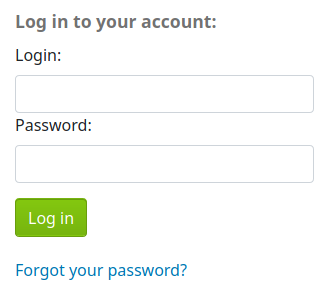
If you allow it, patrons can register for their own accounts via the OPAC. If you have the PatronSelfRegistration preference set to “Allow” then patrons will see a link to register below the log in box.
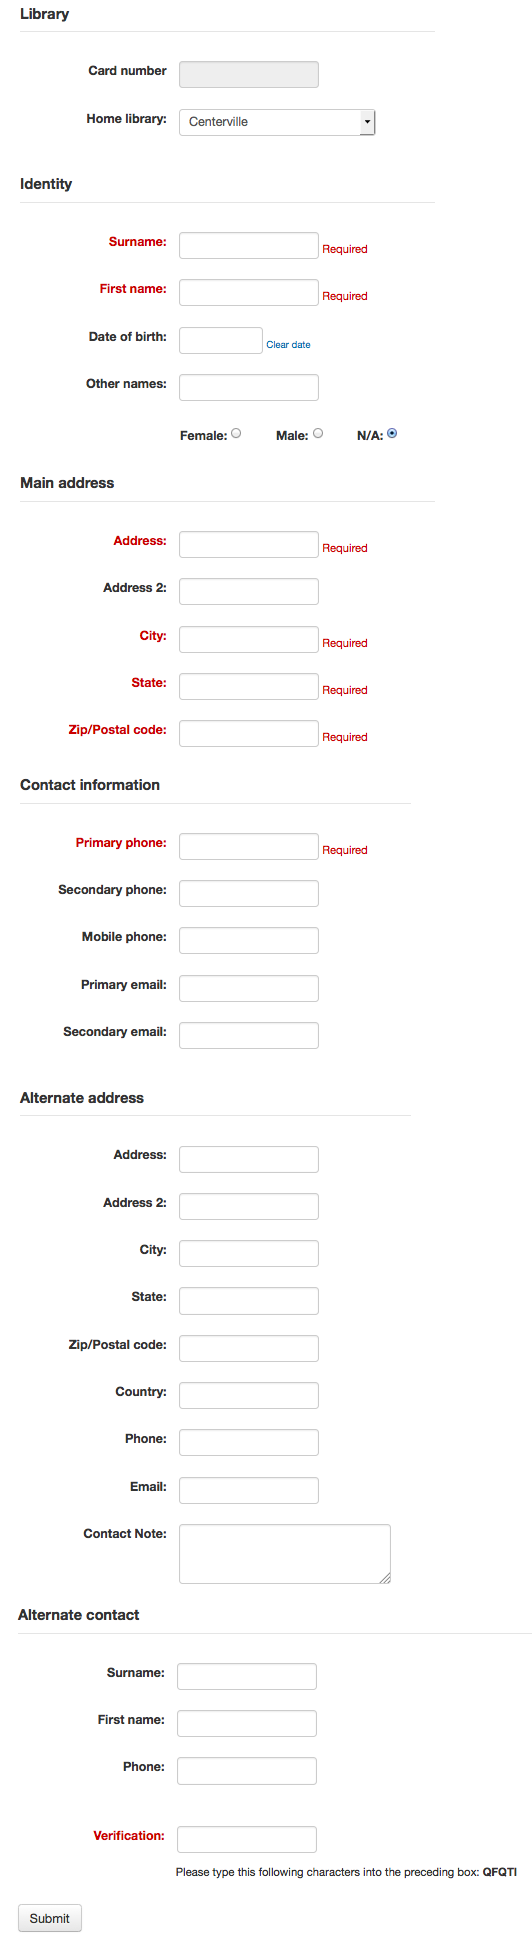
When the patron clicks the “Register here” link they will be brought to a registration page. The options on the registration page can be controlled by editing the PatronSelfRegistrationBorrowerMandatoryField and the PatronSelfRegistrationBorrowerUnwantedField preferences.
Once the patron has submitted their registration they will either be sent an email to confirm their account (if you have the PatronSelfRegistrationVerifyByEmail preference to require this) or presented with their new username and password. If the PatronSelfRegistrationPrefillForm system preference is set to “Show and prefill”, they will be presented with the prefilled login form.

To be notified when a patron registers via the OPAC, use the EmailPatronRegistrations system preference.
Los usuarios registrados de esta manera no tendrán un número de carné hasta que sea asignado por un bibliotecario, pero tendrá acceso a todas la funcionalidades del OPAC inmediatamente. Por esta razón se recomienda:
set up a provisional patron category for self registered patrons (such as “Self Registered) instead of using an existing patron category and set that value in the PatronSelfRegistrationDefaultCategory preference
give this patron category minimal circulation privileges in the circulation and fines rules (such as allowing a couple holds, but no check outs)
De ésta manera los usuarios tendrán que llegar a la biblioteca para verificar su identidad antes de proporcionar un número de carné y la habilidad de poder prestar algunos ítems; o la biblioteca tendrá que tomar políticas internas para la generación de números de carné antes proveerles a ellos el auto registro de usuarios. Una vez esto se ha efectuado, la biblioteca puede cambiar la categoría a una más apropiada (sea una adulta, residente, no residente, estudiante, etc.) y agregar un número de carné/código de barras.
Your account
If the opacuserlogin system preference is set to “Allow”, patrons can log in and access their account.
Once logged in patrons are brought to their account summary.
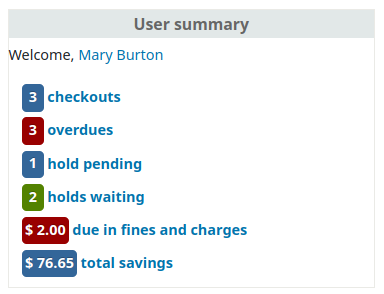
If patrons access the home page while logged in, and OPACUserSummary is set to “Show”, they will see a small summary of their account instead of the login fields.
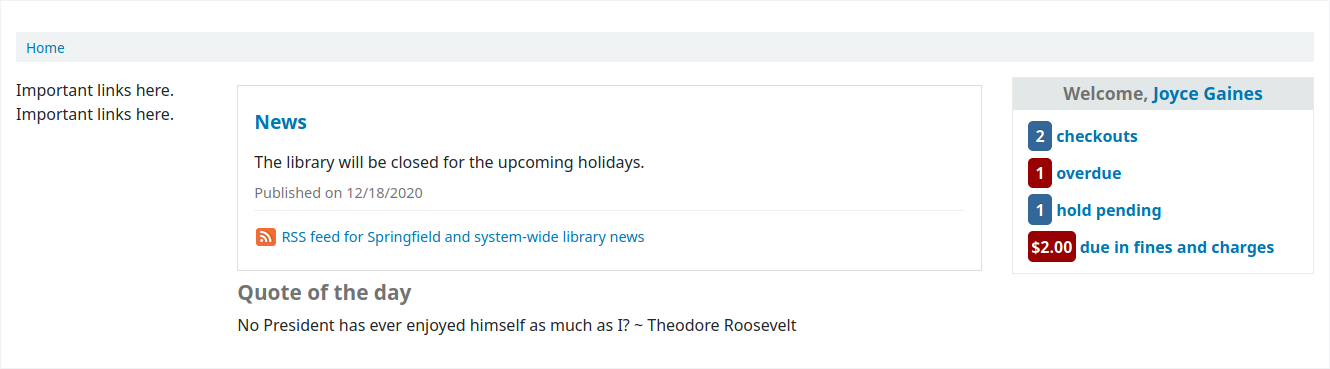
If OPACShowSavings is set to display savings in the summary box, this summary section will also contain the savings the patron made by using the library rather than purchasing the items.
From any page on the OPAC, clicking on their name at the top right of the page will bring a patron back to their account.
Resetting your password
If you have the OpacResetPassword system preference set to “Allow”, patrons can reset their password by clicking the “Forgot your password?” link found under the login box.
Once clicked, they will be presented with a form asking for their username and their email address.
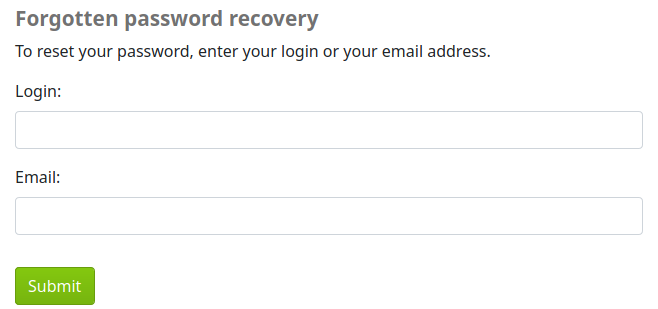
Advertencia
Patrons must have an email address on file to reset their password. If they don’t have an email address already in their file, they will get an error message

The system will then email the patron instructions for resetting their password.
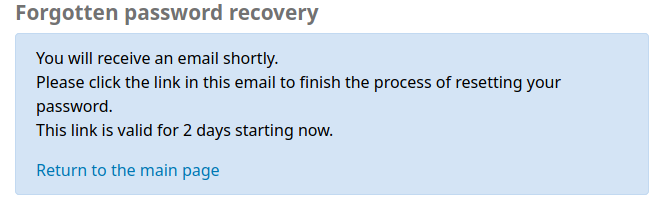
The content of the email can be customized with the Notices and slips tool. The code of the letter is PASSWORD_RESET.
If the NotifyPasswordChange system preference is enabled, the patron will receive a notification indicating their password was changed.
The content of that email can be customized with the Notices and slips tool. The code of the letter is PASSWORD_CHANGE.
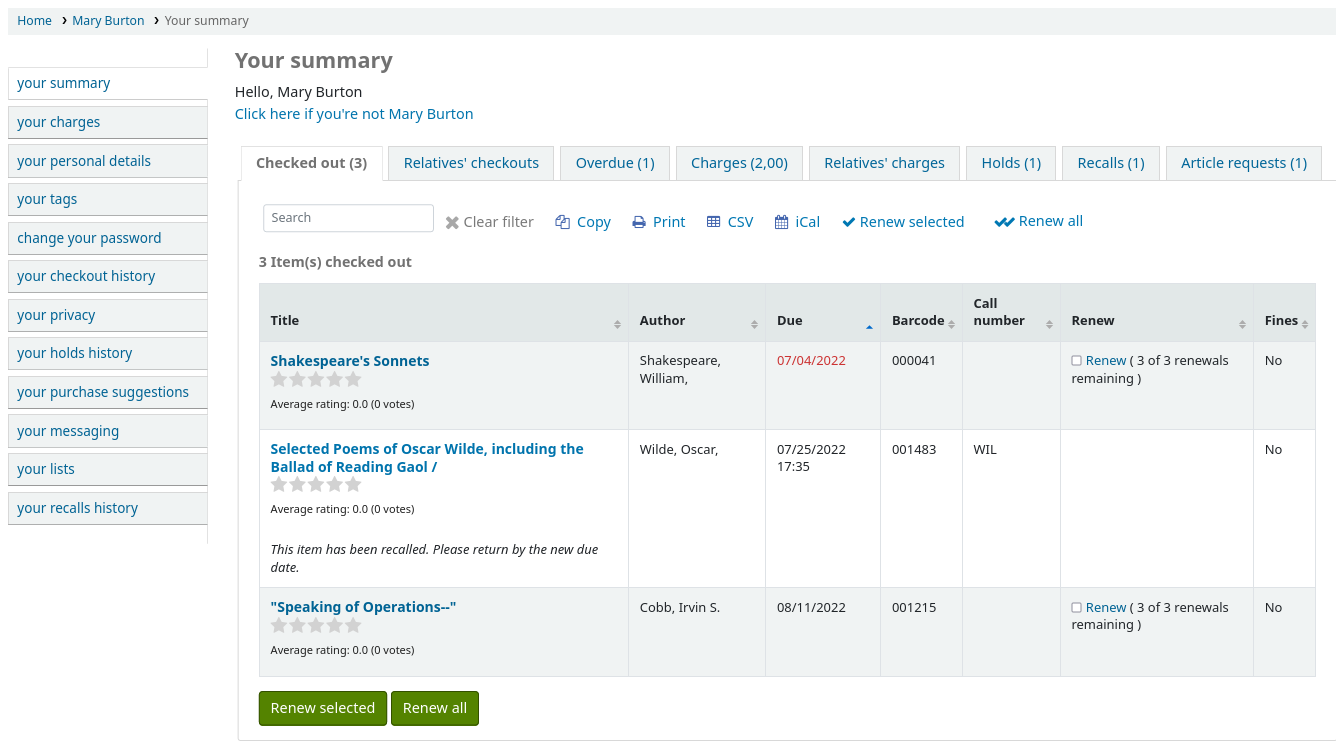
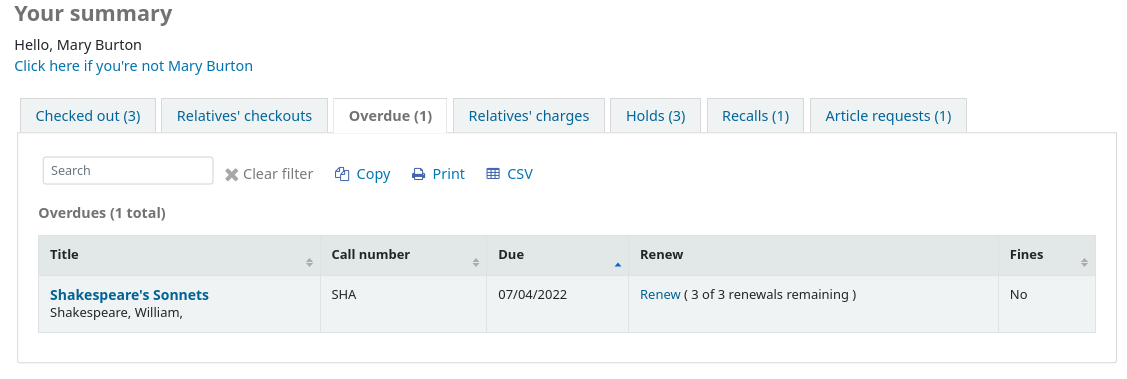
Your summary
From the “your summary” tab, patrons will see all of the items they have checked out with the overdue items highlighted in red.
OPAC messages and OPAC notes will be displayed at the top of this page. For OPAC messages, the patron will have the option to dismiss the message. This will hide the message from their OPAC account and mark it as read, but it will not delete the message.

You can add content to this page with the OpacMySummaryNote HTML customization location. Content added there will appear above the patron’s summary and below the welcome message.

If OPACShowSavings is set to display savings in the “your summary” page, this section will also contain the savings the patron made by using the library rather than purchasing the items.

If OpacRenewalAllowed set to “Allow”, patrons will be able to renew their checkouts from the OPAC.
If the patron has pending charges exceeding the value set in OPACFineNoRenewals, a note will display explaining that renewals cannot be made.

A note will display if the patron cannot place holds due to their charges exceeding the value set in the maxoutstanding system preference.

If AllowPatronToControlAutoRenewal is set to “Allow patrons”, patrons will be able to choose whether or not they want their checkouts to be renewed automatically. If they choose ‘Yes’, items for which automatic renewal is enabled in the circulation rules will renew as expected. If they choose ‘No’, the automatic renewals that would have applied to this patron’s checkouts will not take place.

If you have HTML entered in the OPACMySummaryHTML preference then you will see that to the right of the “Fines” column.
Truco
By default, the barcode is not displayed in the patron’s checkout table on the OPAC. If your patrons would like to see the items barcodes on their list of checked out items you can set up a patron attribute with the value of SHOW_BCODE and authorized value of YES_NO.
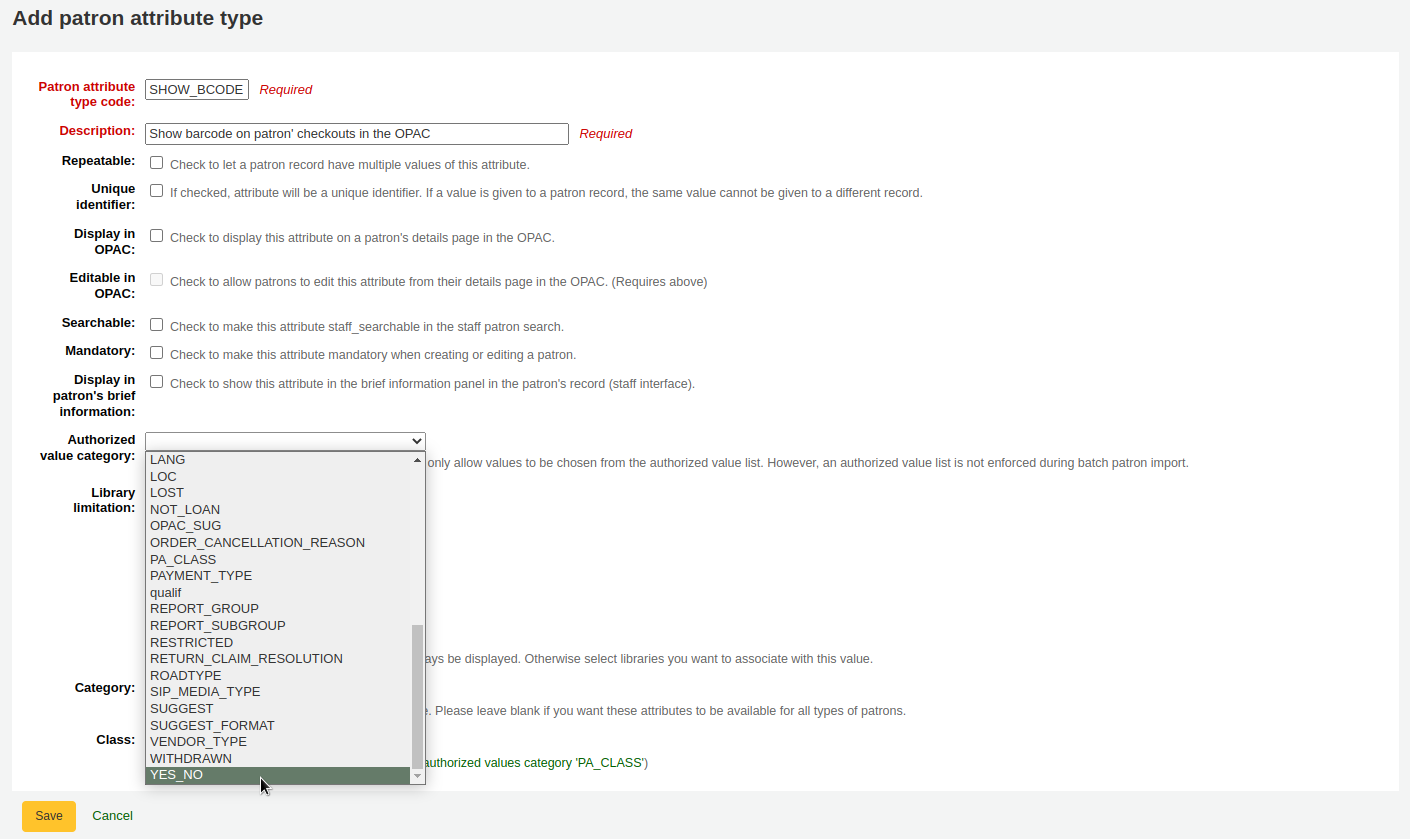
Then, on the patron’s record set the value for SHOW_BCODE to “Yes”.
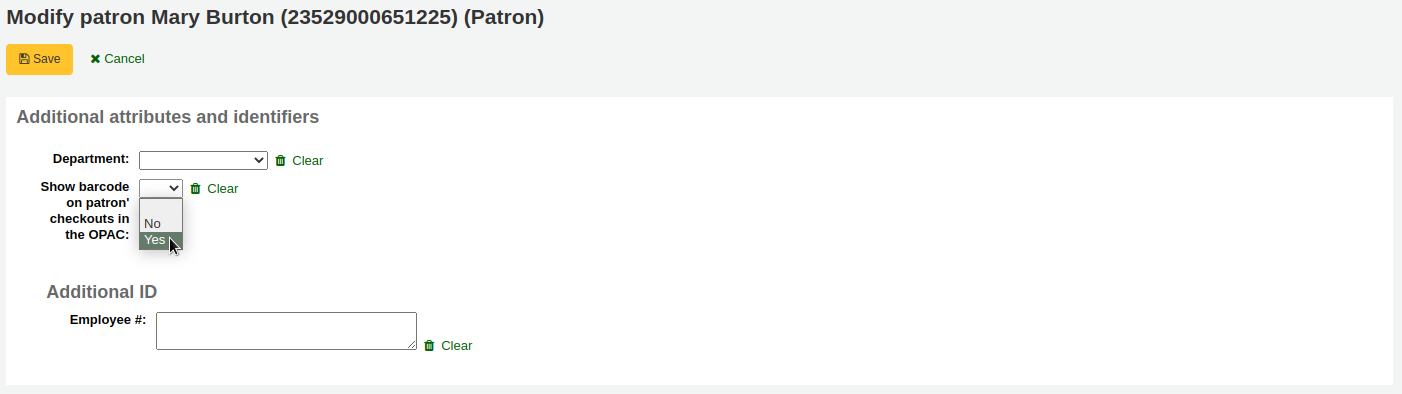
This will add a column to the checkout summary in the OPAC that shows the patron the barcodes of the items they have checked out.
If you would like your patrons to leave a note on an item they have checked out AllowCheckoutNotes preference must be set to allow.
In the patron’s summary of checkouts, there will be an added column to allow the patron to leave a note (for example: missing first page, or DVD is scratched).
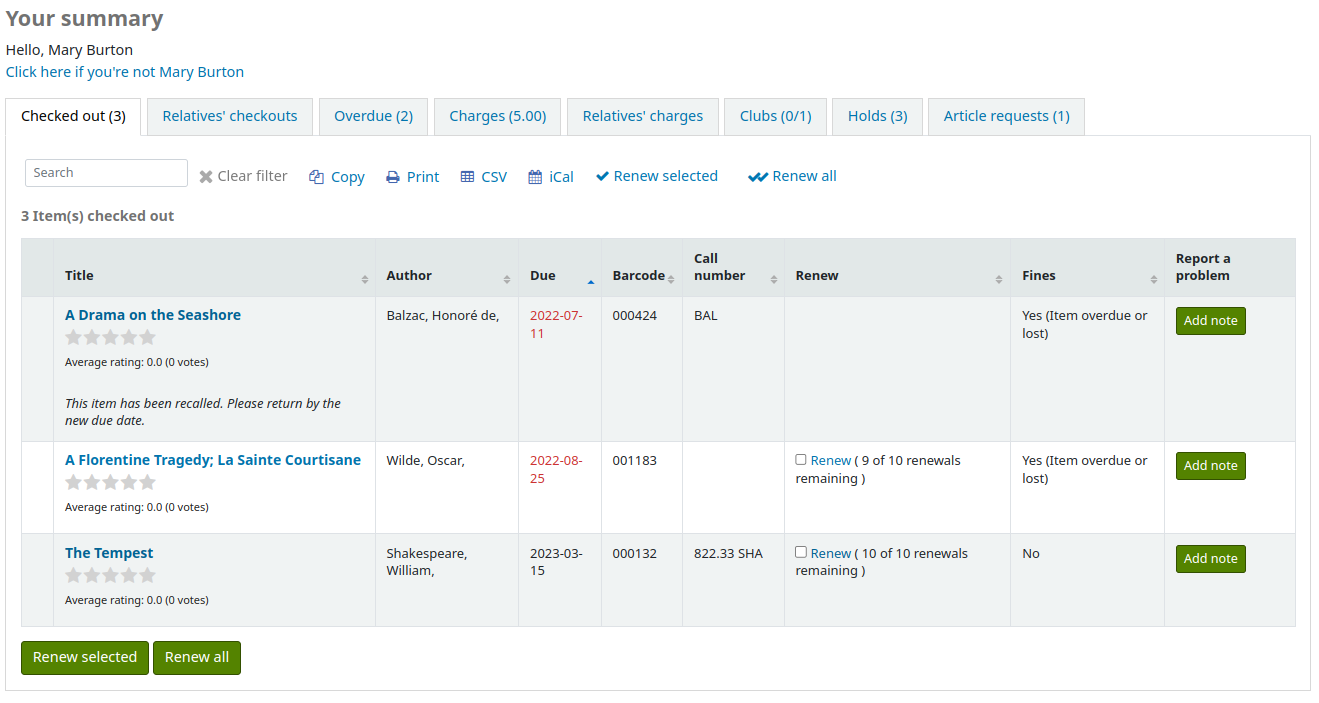
When the patron clicks on “Add note”, they will be able to write a note about this checkout.
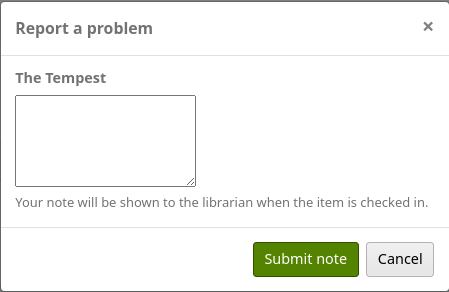
Staff will be able to see and manage checkout notes from the staff interface.
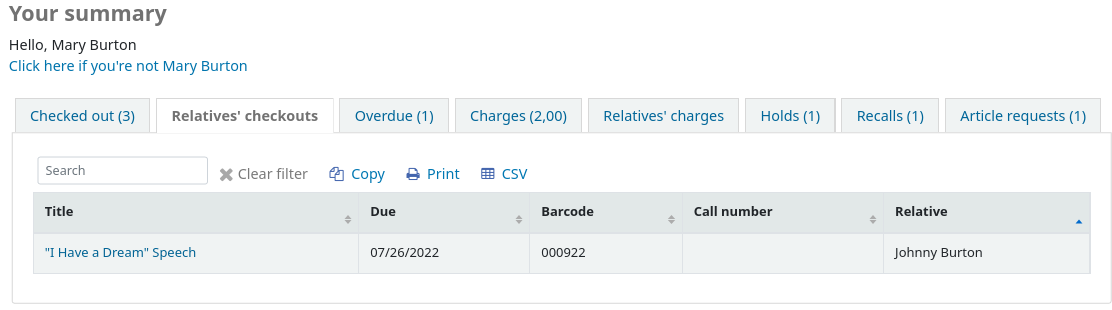
If their guarantee has allowed it via their privacy, or alternatively, if the staff is allowed to change this privacy setting in the staff interface with the AllowStaffToSetCheckoutsVisibilityForGuarantor system preference and this setting is turned on, when the guarantor logs in they will see a tab labeled «Relatives” checkouts» on their summary tab.
Al hacer clic en la pestaña “Atrasado” sólo se mostrarán los ítems que están atrasados.
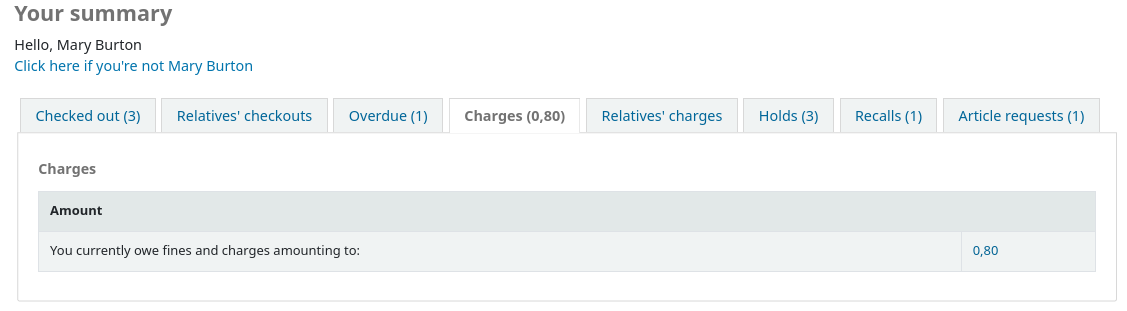
The “Fines” tab will show just a total of what the patron owes. Clicking on the total will take them to the “your fines” tab where they will see a complete breakdown of their fines and bills. If you don’t charge fines at your library you can turn the display of these tabs off by setting the OPACFinesTab preference to “Don’t allow.”
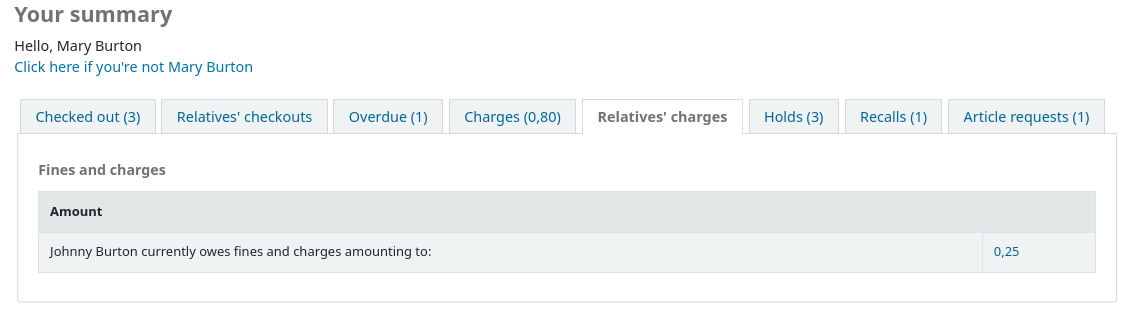
If their guarantee has allowed it via their privacy, or alternatively, if the staff is allowed to change this privacy setting in the staff interface with the AllowStaffToSetFinesVisibilityForGuarantor system preference and this setting is turned on, when the guarantor logs in they will see a tab labeled «Relatives” charges» on their summary tab.
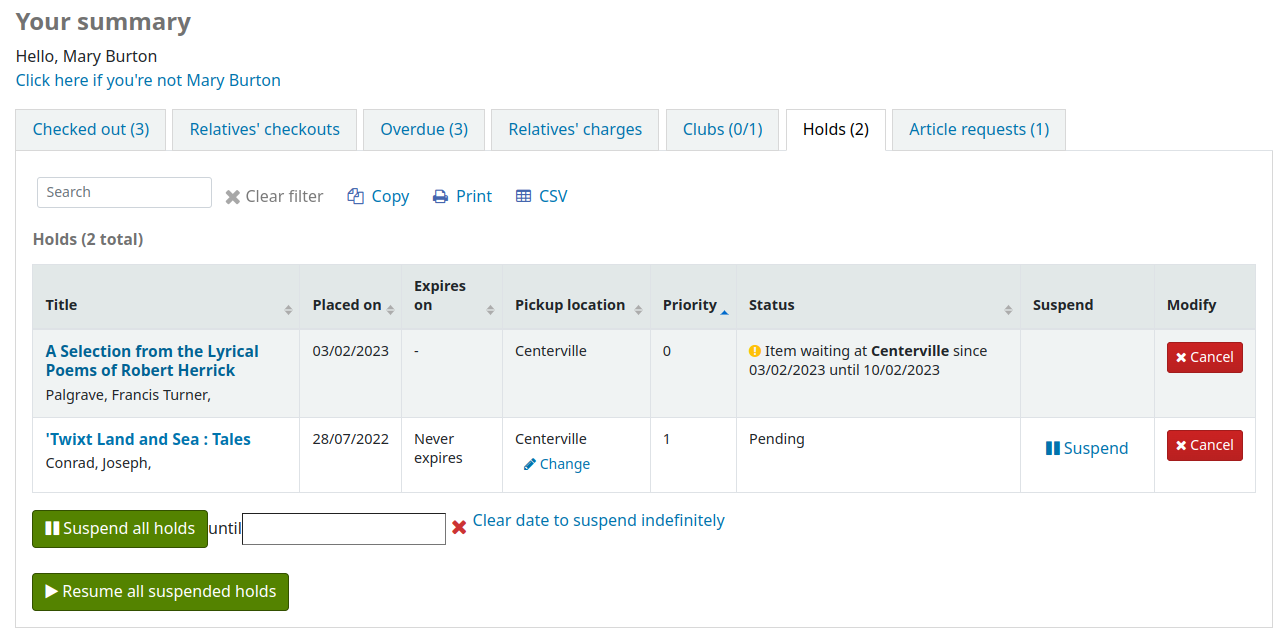
The “Holds” tab shows the patron the status of all of the items they have on hold.
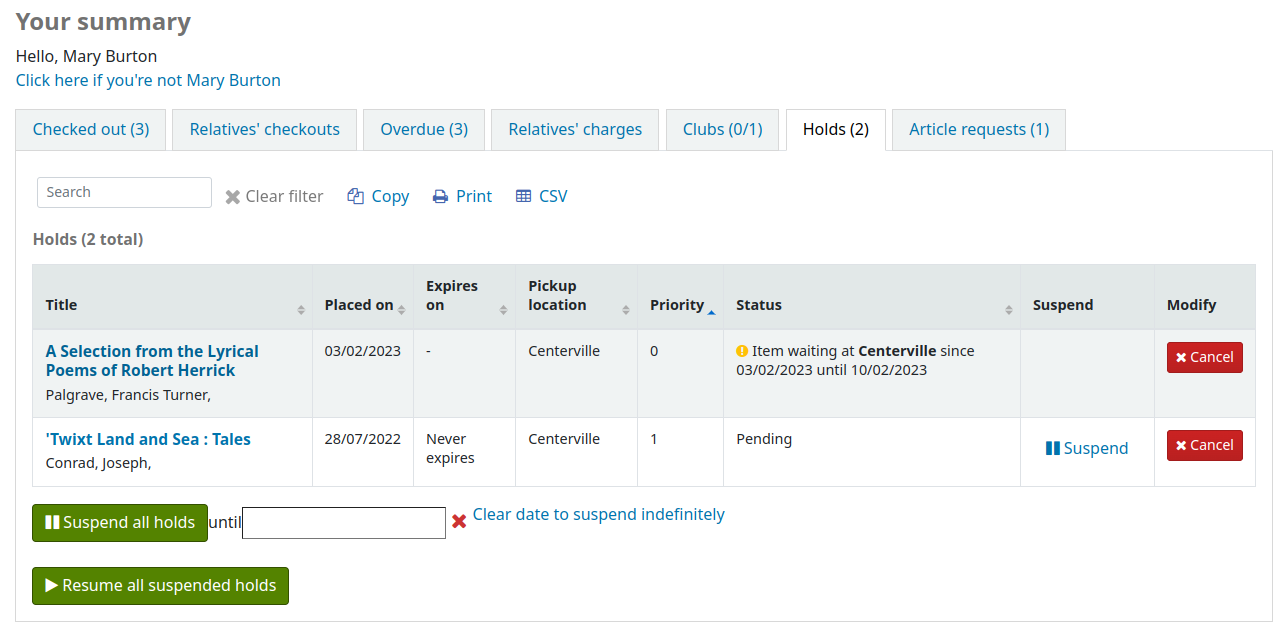
Depending on the value of the SuspendHoldsOpac system preference, patrons can suspend their own holds if they are not in transit or already waiting for them. When they click “Suspend” they will be presented with the option to choose a date for their hold to resume.
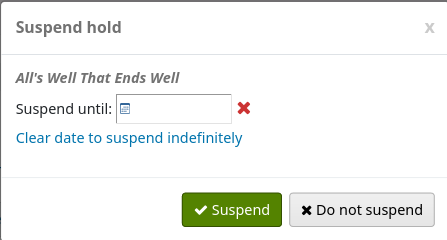
They can also suspend all of their holds indefinitely or until a specific date if they choose by filling in the suspend options at the bottom of the page.
Nota
If the AutoResumeSuspendedHolds system preference is set to «Don’t allow», patrons will not have the option to put an end date on the hold suspension.
From this tab, patrons can also cancel holds. Depending on the waiting hold cancellation policy, they may also be able to cancel holds that are already waiting for them.
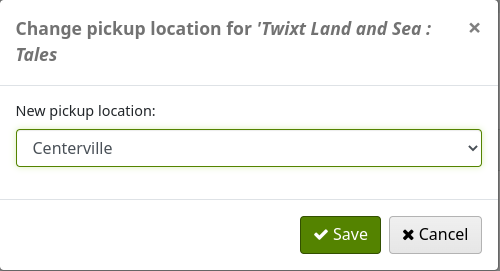
Depending on the value of the OPACAllowUserToChangeBranch system preference, the patron may be able to change the pickup library of holds. When one or more status is selected in the system preference, a “Change” link will appear under the current pickup library’s name for holds that have that status.
When the patron clicks on the “Change” link, there is a pop-up with a selection of libraries that allow hold pickups.
If your library allows recalls, the patron can see the recalls they have requested and their various statuses in the “Recalls” tab.
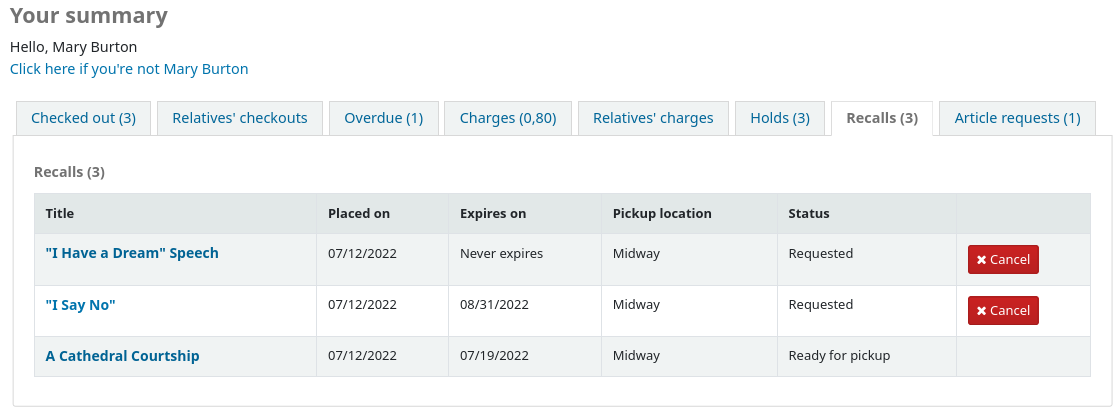
The patron can cancel a recall by clicking the “Cancel” button, provided that it is not already awaiting pickup.
Patron flags
If you have flagged your patron’s account they may see one of the following error messages at the top of their account.
Carnet marcado como perdido

Dirección de usuario dudosa
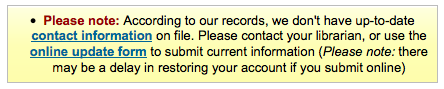
Nota
this error message will not include a link to the update form if you have OPACPatronDetails set to “Don’t allow”
Usuario marcado como no autorizado

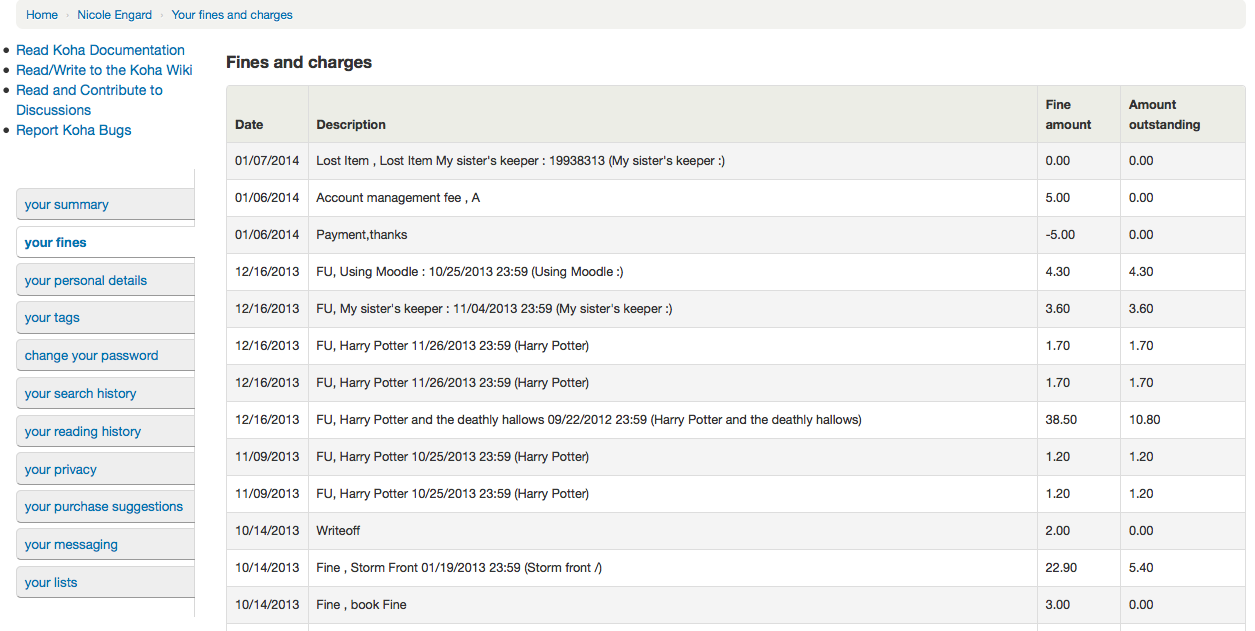
Your fines
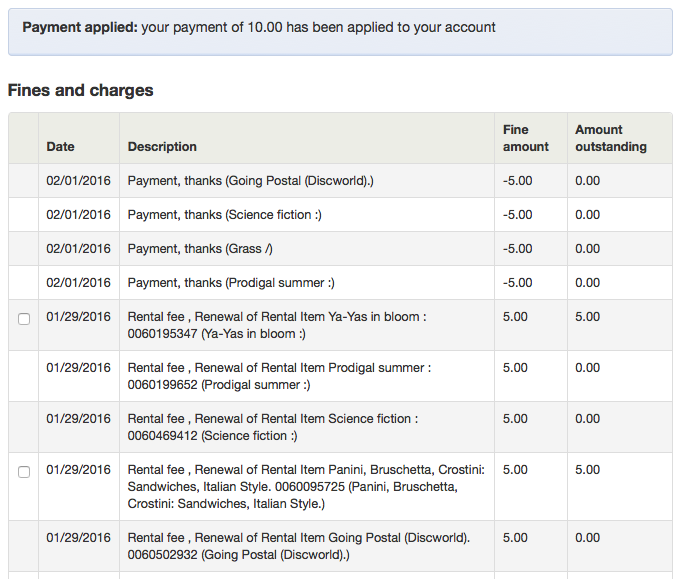
If your library charges fines the next tab on the left is “your fines”. Opening this tab will show the patron an entire history of their accounting at the library.
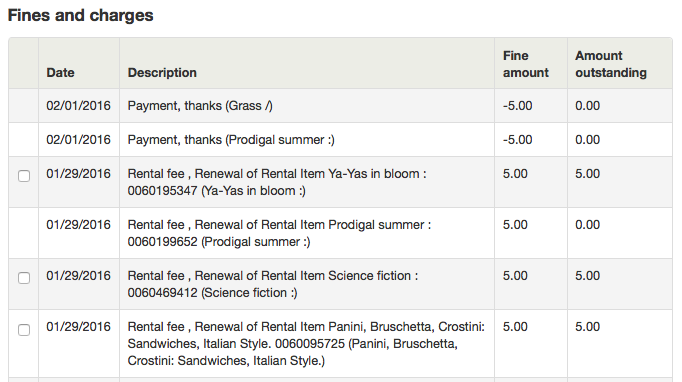
If you are allowing patrons to pay their fines using PayPal with the EnablePayPalOpacPayments preference there will be checkboxes to the left of each fine with an outstanding amount.
Después de hacer clic en el botón Reservar el usuario será conducido a su página de cuenta donde van a ver todos los ítems que tienen en reserva.
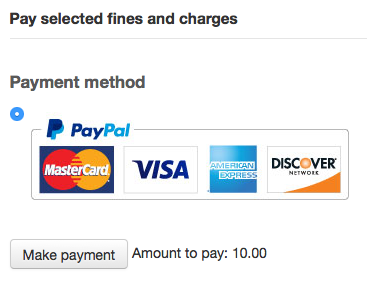
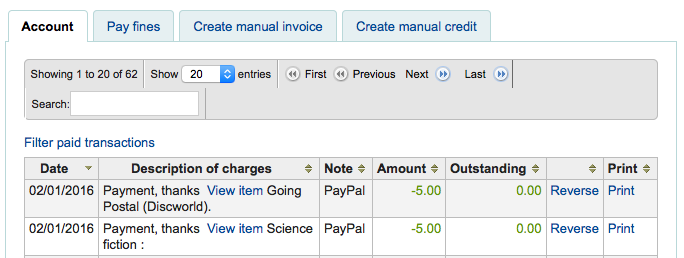
After paying they will be presented with a confirmation
And you will see that the fine was paid using PayPal on the staff side.
Your personal details
If you have your OPACPatronDetails preference set to “Allow”, your patrons will see a form filled in with their contacting information by clicking on the “Your personal details” tab. You can control what fields patrons see and can modify via the OPAC by setting the PatronSelfModificationBorrowerUnwantedField and PatronSelfModificationMandatoryField preferences.
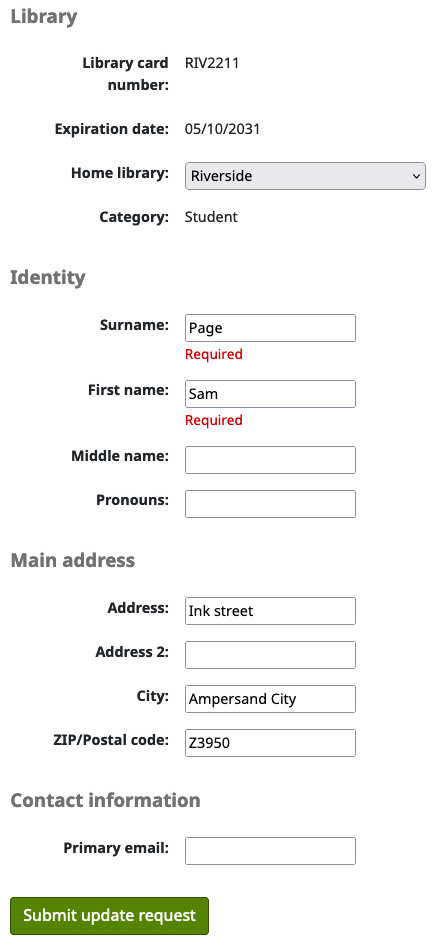
Patrons can edit their details in this form and click “Submit changes” to have their edits sent to the library for review before their record is updated. Staff will see all patrons requesting modification to their record listed below the modules on the main dashboard along with anything else awaiting library attention.
If the OPACPatronDetails preference is set to “Don’t allow” then patrons will simply see their details and a message stating that they should contact the library for changes.
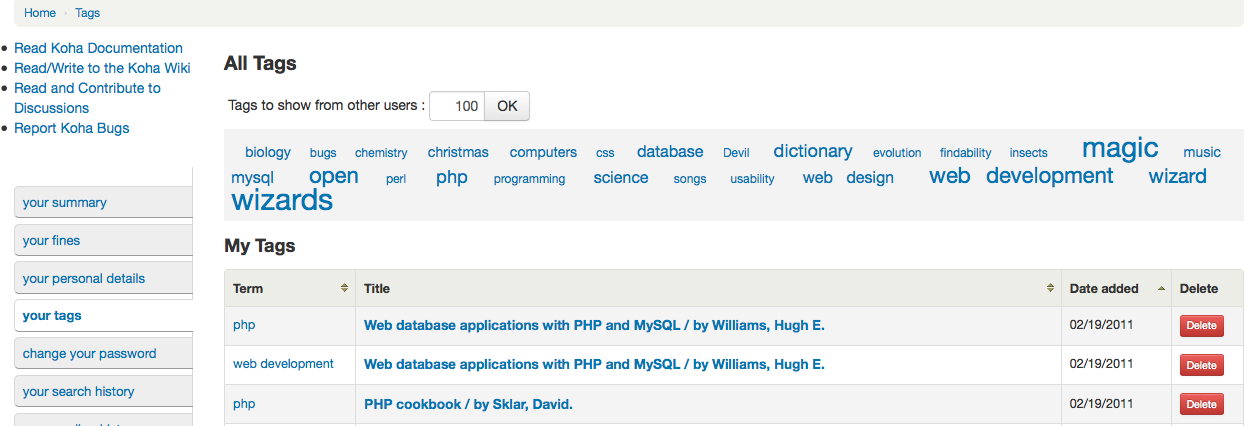
Your tags
If your library has TagsEnabled set to “Allow” then the next tab on the left will be “your tags”. This tab will show patrons all of the tags in the system as a cloud and then all of the tags they have applied in a list format. From here patrons have the ability to remove tags that they have added if they want.
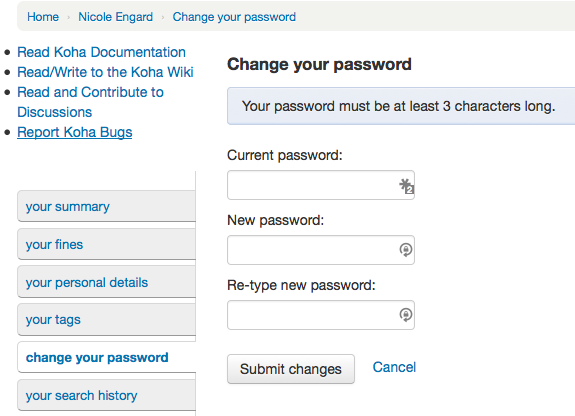
Change your password
Next, if you have OpacPasswordChange set to “Allow” the next tab will be “change your password,” where patrons can change their password for logging into the OPAC. Patrons will be presented with a standard form asking them to enter their old password and then their new password twice.
If the NotifyPasswordChange system preference is enabled, the patron will receive a notification indicating their password was changed.
The content of this email can be customized with the Notices and slips tool. The code of the letter is PASSWORD_CHANGE.
Your search history
If you have your EnableOpacSearchHistory preference set to “Keep” then your patrons can access their search history via the “your search history” tab.
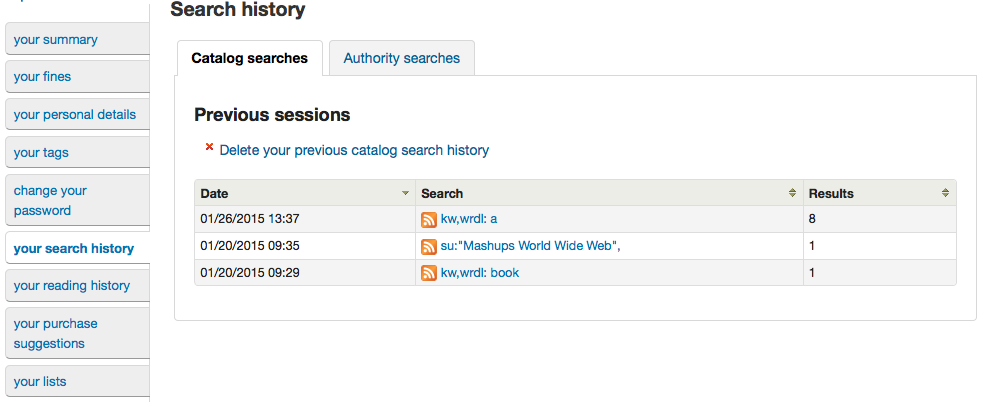
El historial de búsqueda es un registro de todas las búsquedas realizadas por el usuario. Al hacer clic en cualquiera de las frases de búsqueda volverá a ejecutar la búsqueda. El historial de búsquedas puede ser borrado por el socio en cualquier momento haciendo clic en el enlace “Borrar el historial de búsqueda” que se encuentra en la parte superior de esta pestaña o haciendo clic en el la pequeña “x” junto al vínculo «Historial de búsquedas» en la parte superior derecha del OPAC.

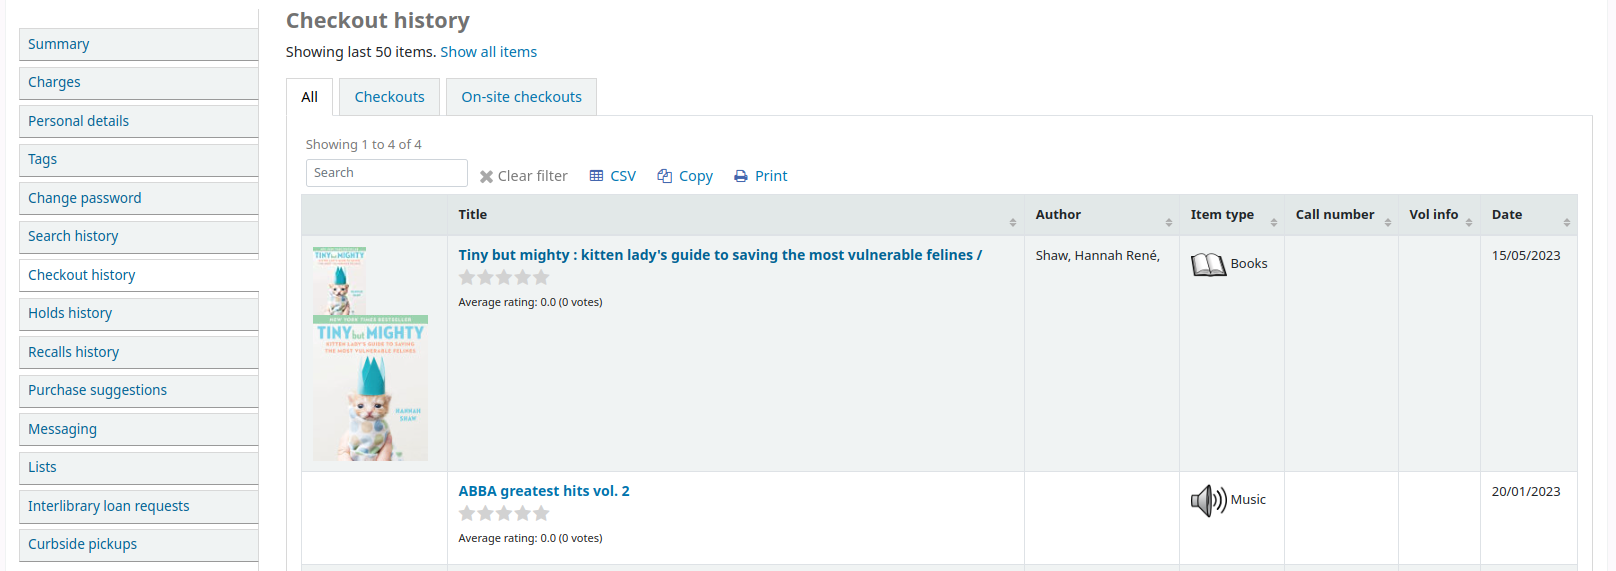
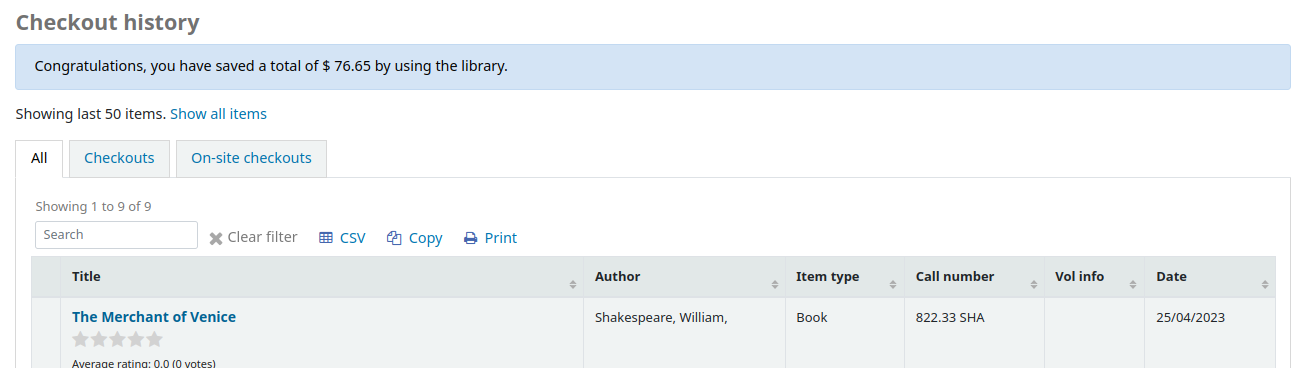
Checkout history
If the opacreadinghistory system preference is set to “Allow”, patrons will have access to the “Checkout history” tab. This will show the patron their entire borrowing history, unless they have asked the library to not keep that information via the “Privacy” tab.
If OPACShowSavings is set to display savings in the “your summary” page, this section will also contain the savings the patron made by using the library rather than purchasing the items.
Your privacy
The “your privacy” tab will appear if you have both the opacreadinghistory and the OPACPrivacy preferences set to “Allow.” This tab will allow the patrons to decide how the library keeps their circulation history data.
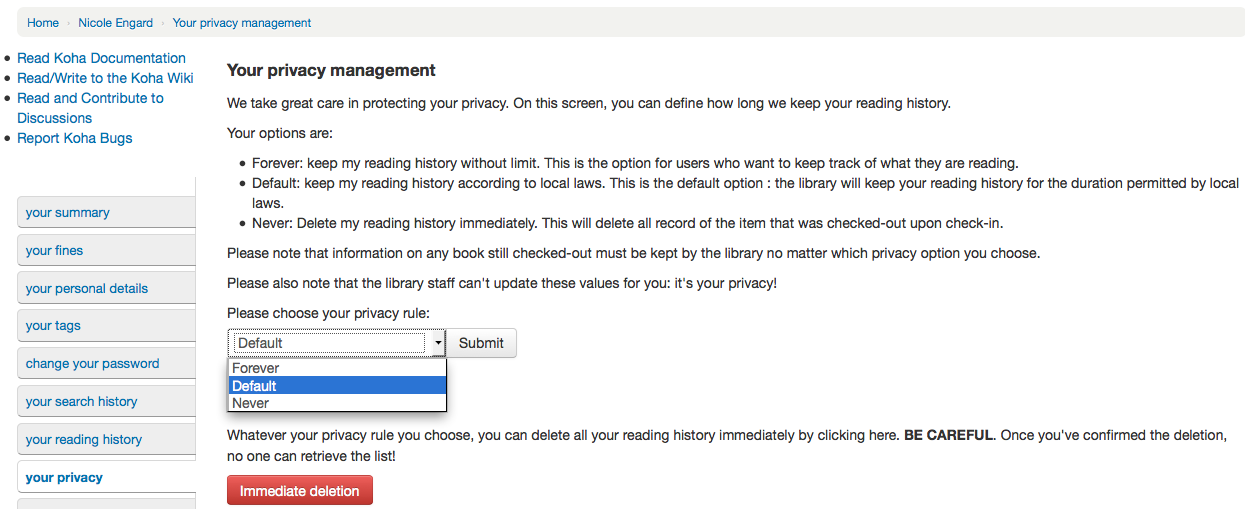
Los usuarios pueden elegir entre tres opciones:
Para siempre: almacenar mi historial de lecturas sin límite. Esta es la opción para usuarios que desean preservar qué están leyendo.
Predeterminado: guardar mi historial de lectura según leyes locales. Esta es la opción predeterminada: la biblioteca almacenará su historial de lectura durante el tiempo permitido por las leyes locales.
Nunca: Eliminar mi historial de lecturas inmediatamente. Esto eliminará todos registro de items prestados o devueltos.
Depending on the patron’s suggestions the contents of the “Your reading history” tab and the “Circulation History” tab in the staff client may change.
Independientemente de la elección del usuario se puede borrar en conjunto su historial de lectura en cualquier momento haciendo clic en el botón “borrado inmediato”.
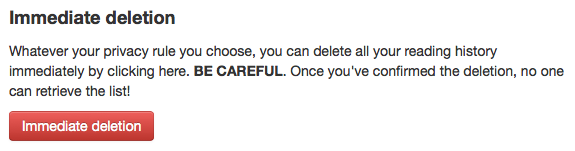
Al hacer clic en este botón no eliminará los ítems que actualmente están prestados, pero se borrará el historial de lectura pasado del usuario.
Importante
In order for the patron to be able to delete their reading history you must have the AnonymousPatron preference set.
If you’re allowing guarantees to grand permission to their guarantors to view their current checkouts with the AllowPatronToSetCheckoutsVisibilityForGuarantor preference they will see that option on this screen.
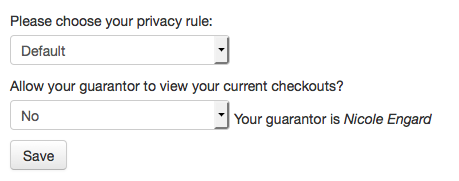
When the guarantor logs in they will see a tab labeled «Relatives” checkouts» on their summary tab.
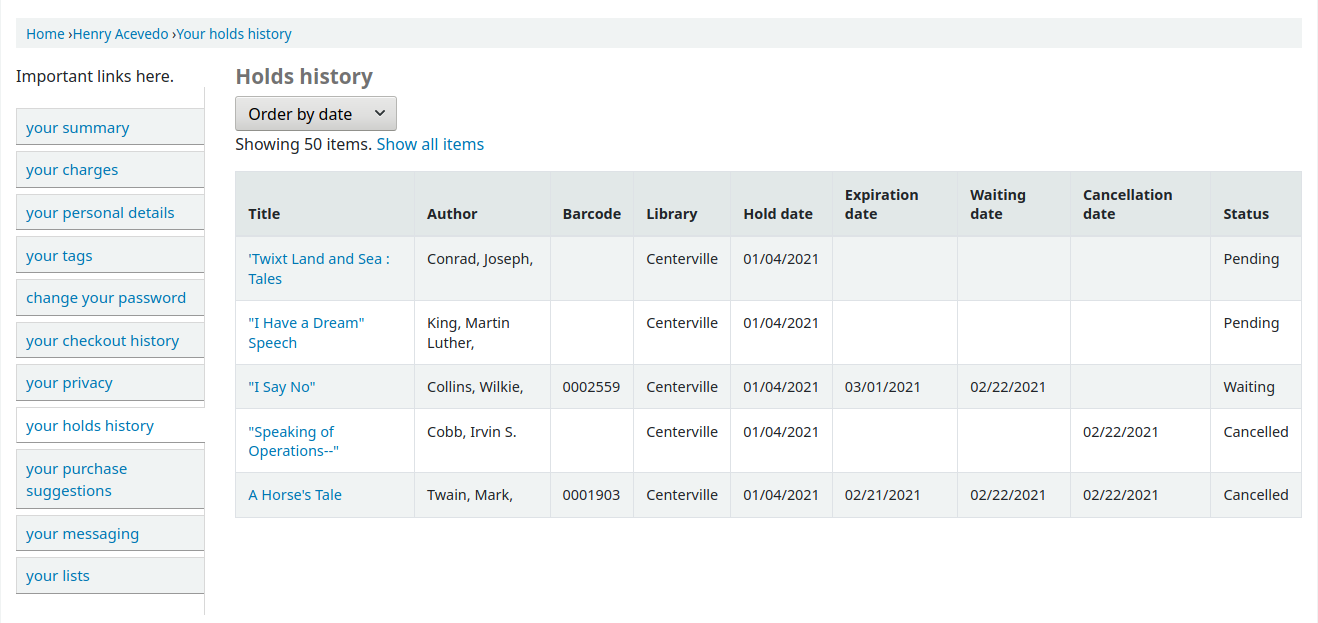
Your holds history
If the OPACHoldsHistory system preference is set to “Allow”, patrons will be able to see all their current and past holds.
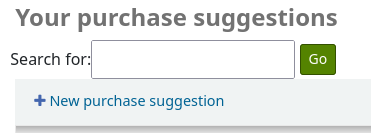
Your purchase suggestions
If your library allows patrons to make purchase suggestions the next tab will show all suggestions that the patron made to the library and their statuses. To disable this tab and the suggestion functionality set the suggestion preference to “Don’t allow.”
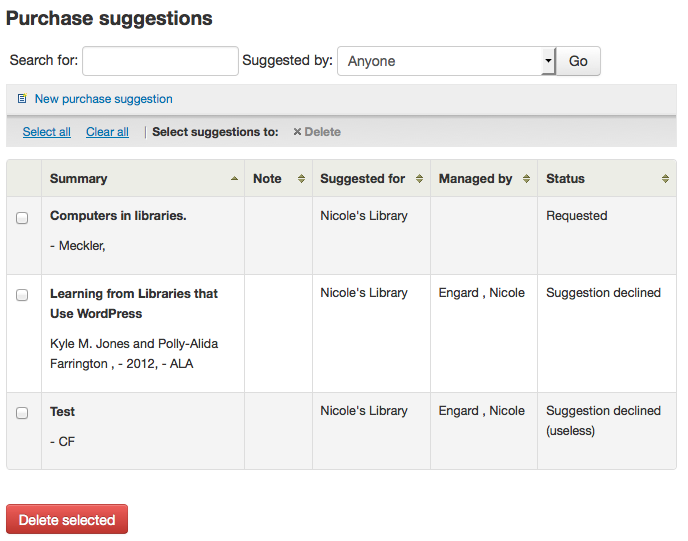
If you have OPACViewOthersSuggestions set to “Show” then patrons will be able to search suggestions from the top of this list.
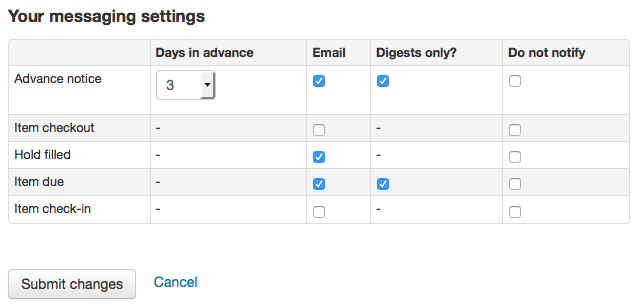
Messaging
If your library has the EnhancedMessagingPreferences and the EnhancedMessagingPreferencesOPAC preferences set to “Allow” then your patrons will be able to choose which messages they receive from the library (with the exception of overdue notices which the library controls).
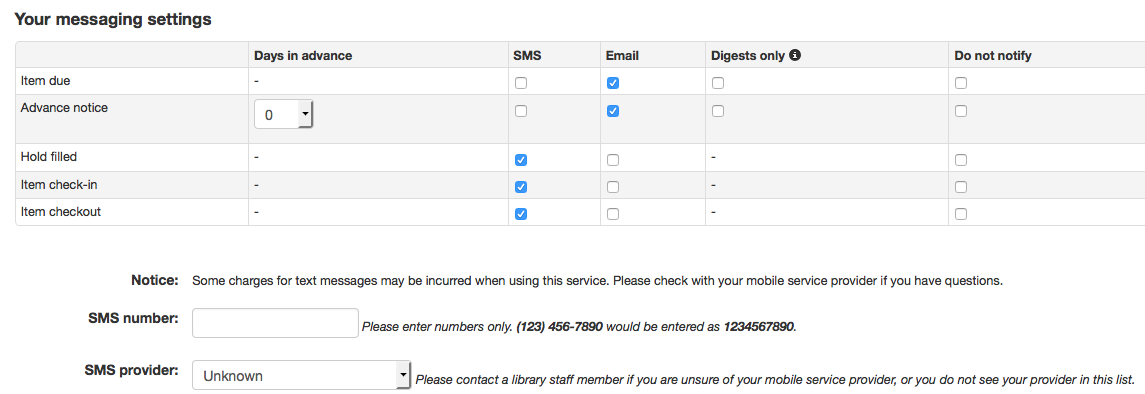
If you use an outside driver for sending text messages set with the SMSSendDriver preference, you will see an additional column to receive these messages as SMS (or text messages) and a field for a cell (or SMS) number.
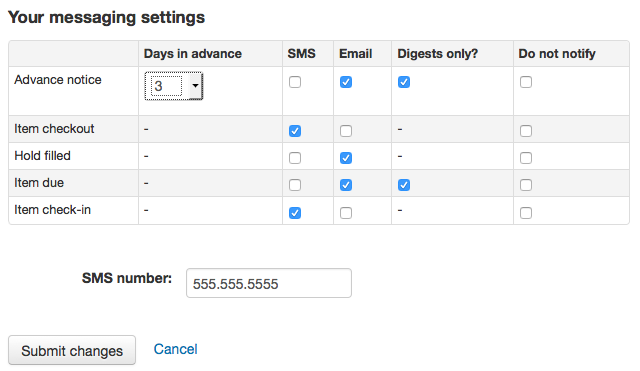
If you are using the Email protocol for sending text messages set with the SMSSendDriver preference, you will see an additional column to receive these messages as SMS (or text messages), a field for a cell (or SMS) number, and a pull down listing cellular providers entered in administration.
If you are using the i-tiva Talking Tech service you will see an additional column to receive these messages via Phone.
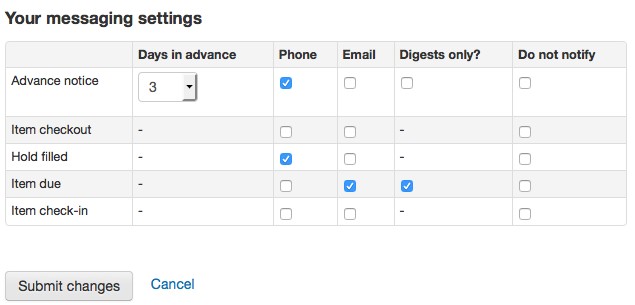
Estas notas son:
Advanced notice: A notice in advance of the patron’s items being due (The patron can choose the number of days in advance)
Item checkout: A notice that lists all the of the items the patron has just checked out and/or renewed, this is an electronic form of the checkout receipt
Hold filled: A notice when you have confirmed the hold is waiting for the patron
Item due: A notice on the day and item is due back at the library
Item check-in: A notice that lists all the of the items the patron has just checked in
Nota
This notice can be customized by editing the CHECKIN notice in the Notices and slips tool.
Item checkout: A notice that lists all the of the items the patron has just checked out and/or renewed, this is an electronic form of the checkout receipt
Nota
This notice can be customized by editing the CHECKOUT notice in the Notices and slips tool.
Auto renewal: A notice that notifies the patron that their checkouts have been automatically renewed, or if there was a problem with their automatic renewal.
Nota
This notice can be customized by editing the AUTO_RENEWAL or AUTO_RENEWAL_DGST notices in the Notices and slips tool.
This option will only appear if the AutoRenewalNotices is set to «according to patrons messaging preferences».
Los usuarios pueden elegir en recibir sus avisos como un resumen haciendo clic en la casilla “¿Solamente resumen?” junto con el método de entrega. Un resumen es una combinación de todos los mensajes de ese tipo (es decir, todos los ítems debidos en 3 días en un solo correo electrónico) en un correo electrónico en vez de múltiples correos electrónicos para cada aviso.
If the TranslateNotices preference is set to Allow the patron will also see an option to choose “Preferred language for notices” with a dropdown list of available languages.
Importante
You must choose a delivery method (SMS or email or phone) along with “Digest only?” if you would like to receive a digest of the messages.
Listas
If the virtualshelves system preference is set to “Allow”, patron will see a “Lists” tab.
From here, patrons can view public lists and create or edit their own private lists.
Ask for a discharge
If the useDischarge system preference is enabled, patrons will be able to request a discharge via the OPAC. A discharge is a certificate that says the patron has no current checkouts and no holds.
Patrons can request a discharge from the library by going to the “Ask for discharge” tab in their online account.
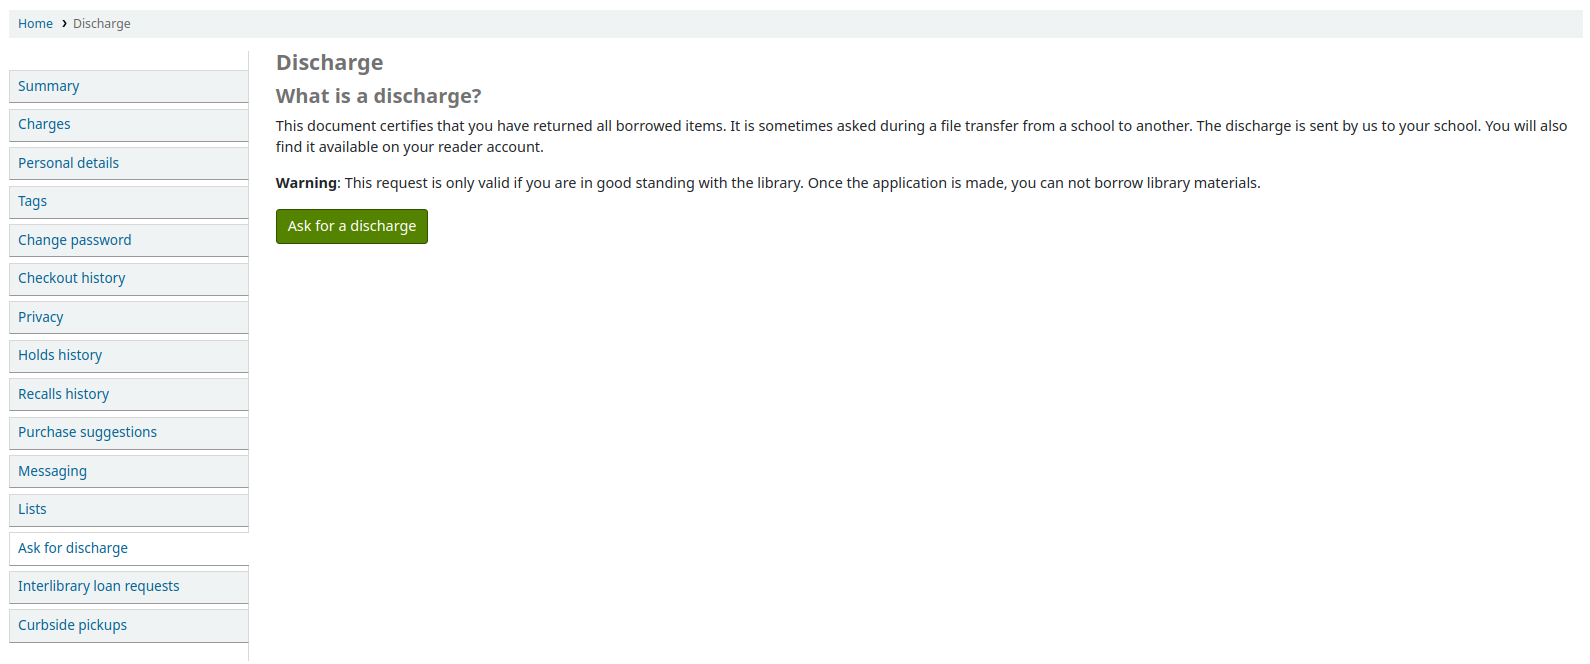
From here they can request a discharge by clicking the “Ask for a discharge” button. They will receive a confirmation of their request.
Once the discharge is approved by library staff, the patron will see a download link to download a PDF of their discharge.

Your routing lists
If you are named as a recipient on any serial routing lists you will see them listed here. The following note is displayed «You are subscribed to the routing lists for following serial titles. If you wish to make changes, please contact the library».
Your interlibrary loan requests
If your library has the ILLModule preference set to ‘Enable’ patrons will have the option to make ILL requests when logged in to their OPAC account. From here they can view their existing requests and place new ones.
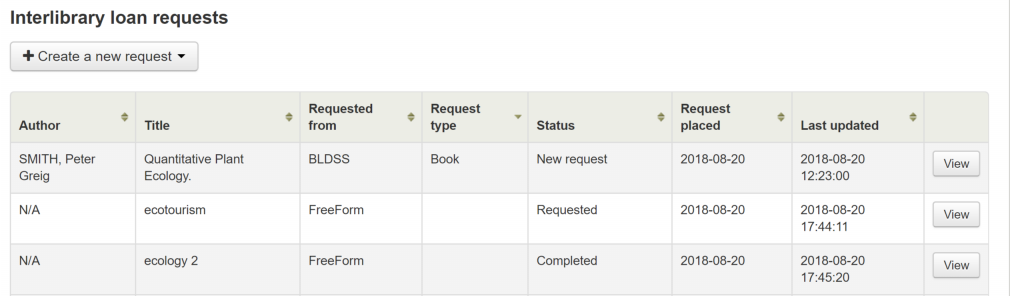
To place a new interlibrary loan request click on ‘Create a new request’ and choose a request form.
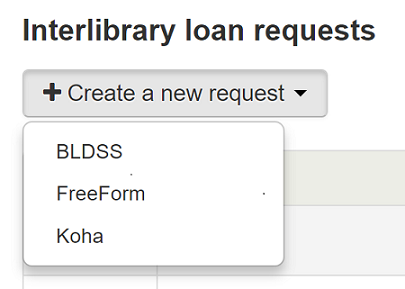
Nota
The options displayed are dependent on your ILL configuration. See the ILL backends wiki page at https://wiki.koha-community.org/wiki/ILL_backends further explanation.
Nota
If you have entered copyright text in the ILLModuleCopyrightClearance preference the text displays here and you need to click ‘Yes’ to accept before continuing.
Complete the publication details as fully as possible. Depending on the form in use you may see the option to add Custom fields for additional information such as notes. Destination branch is a required field, this is the branch you would like the request to be sent to.
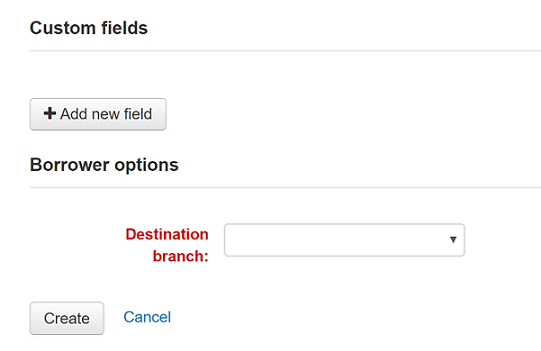
Click on “Create” to submit your request to the library for processing.
Your submitted request will be listed with a status of ‘New request’. Once processed the status will be updated to ‘Requested’.
Click on ‘View’ to make changes or cancel your request.
You cannot edit the form details but you can add a note to request a modification and then click on ‘Submit modifications’ at the bottom of the screen. Your modification will be sent to the library for processing.
Nota
When a patron modifies an inter-library loan request, an email is sent to library staff so that they can view the changes from the ILL module.
The email sent is based on the ILL_REQUEST_MODIFIED template. It can be customized in the Notices and slips tool.
For new requests you will also have the option to ‘Request cancellation’. Your request will be updated with the status ‘Cancellation requested’ and can then be removed by library staff.
Nota
When a patron cancels an inter-library loan request, an email is sent to library staff so that they can cancel it from the ILL module.
The email sent is based on the ILL_REQUEST_CANCEL template. It can be customized in the Notices and slips tool.
Your recalls history
If your library allows recalls, the patron can see all their past and current recalls they have requested and their various statuses in the “your recalls history” tab.
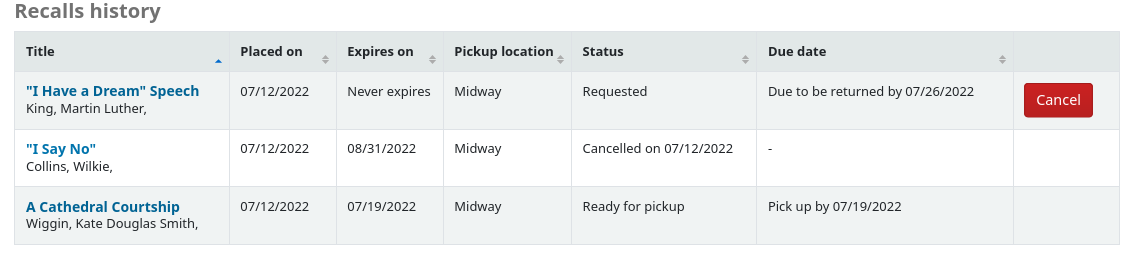
The patron can cancel a recall by clicking the “Cancel” button, provided that it is not already awaiting pickup.
Curbside pickups
If your library offers curbside pickup, the patron will be able to see their scheduled pickups under “Curbside pickups”.
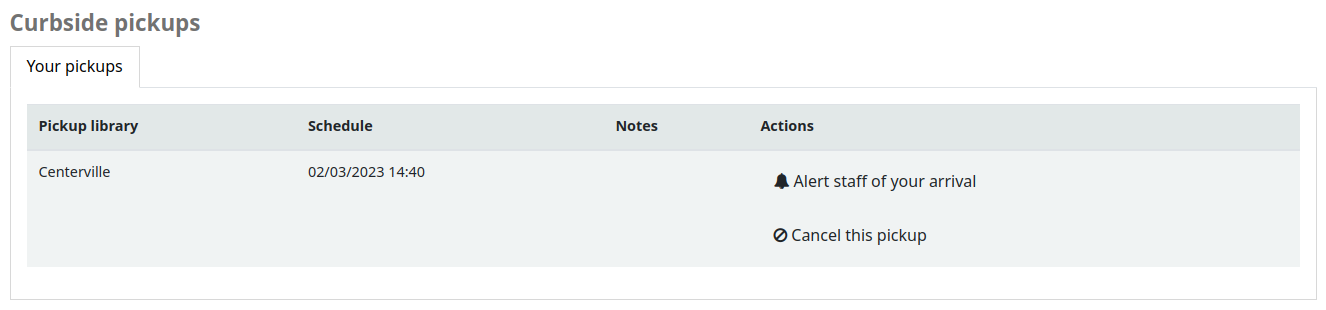
The patron has the option to indicate that they are outside the library by clicking “Alert staff of your arrival”.
The patron also has the option to cancel their scheduled pickup with the “Cancel this pickup” button.
If the “Patron-scheduled pickup” setting is turned on in the curbside pickup configuration, the patron will be able to schedule their own curbside pickup appointment.

The patron must first choose a library at which they want to pick up their items
Nota
Only libraries with curbside pickup enabled will be displayed in the drop-down menu.
Furthermore, if the “Enable for waiting holds only” setting is turned on, only the libraries at which the patron has waiting holds will be enabled.
The patron must then choose a date
Nota
Only dates with available time slots will be displayed.
The possible pickup times will be displayed, depending on the day of the week
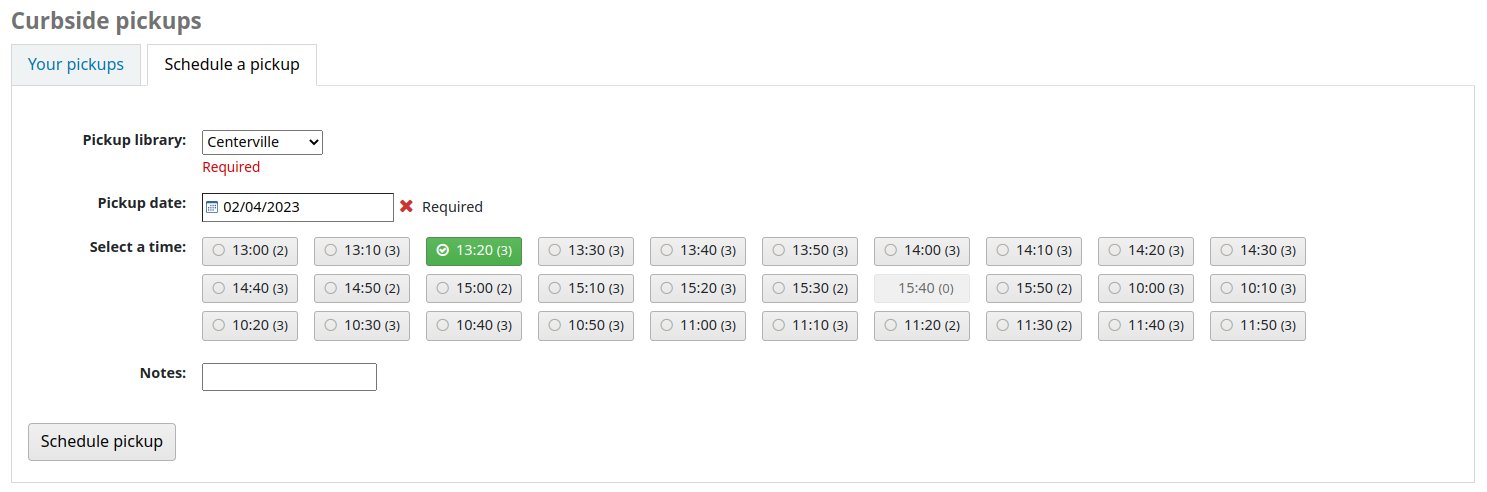
Nota
The number in parentheses under each time slot is the number of available appointments for that time. If the maximum number of appointments has been reached, based on the “Maximum patrons per interval” setting in the curbside pickup configuration, the time slot will be greyed out and the patron will not be able to select it.
The patron can optionally add a note about their pickup
The patron must then click “Schedule pickup” to save their appointment
Purchase suggestions
If your library has the suggestion preference set to “Allow”, patrons will have the option to make purchase suggestions in several areas in the OPAC.
If you are allowing everyone to see the purchase suggestions made by others with the OPACViewOthersSuggestions preference, there will be a link at the top of your OPAC under the search box.

Habrá un enlace cuando el usuario no encuentra nada en su búsqueda.

There will be a “Suggest for purchase” option in the detailed view of a bibliographic record.
And there will be a link in the Your purchase suggestions tab in the patron’s account.
Al hacer clic en cualquiera de estos enlaces se abrirá el formulario de sugerencias de compra.
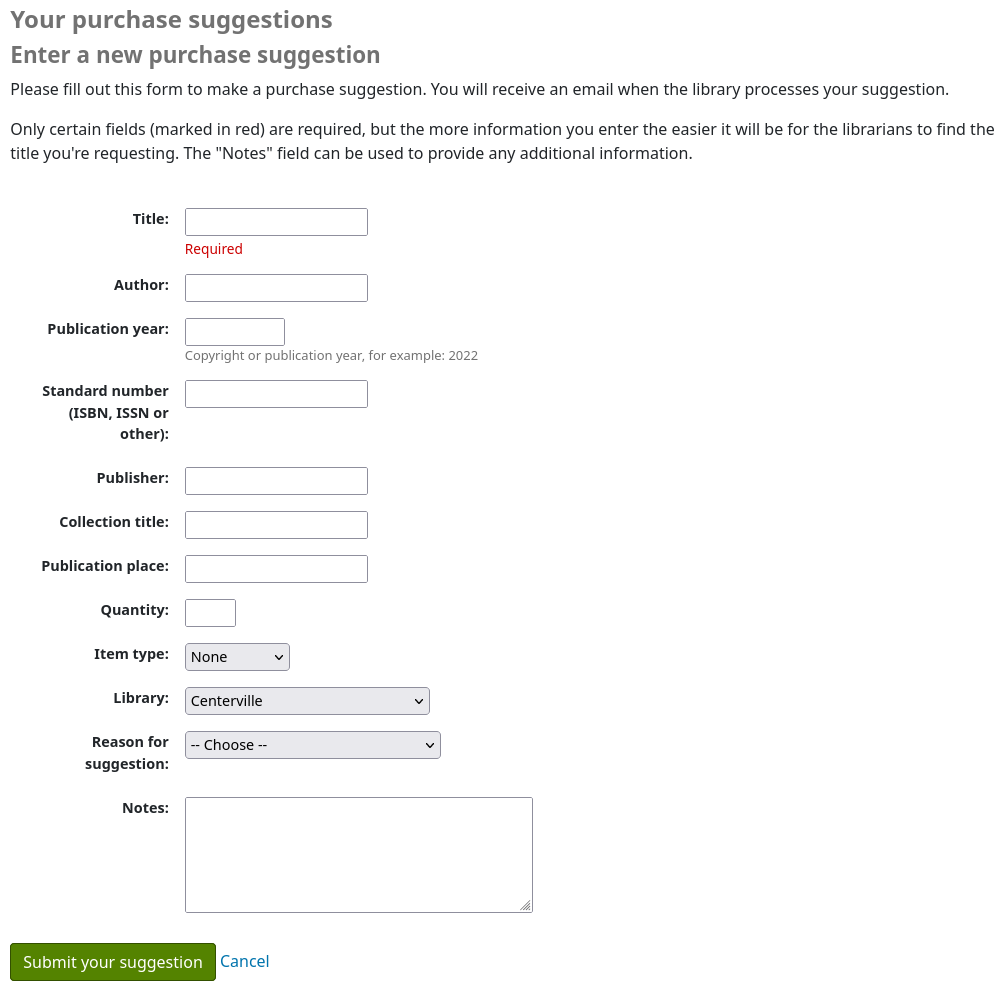
The informational text at the top of the form can be replaced using the HTML customizations tool, display location OpacSuggestionInstructions.
From the form only the “Title” is required by default.
Mandatory fields can be set using the OPACSuggestionMandatoryFields system preference.
The OPACSuggestionUnwantedFields system preference can be used to hide unnecessary fields.
The OPACSuggestionAutoFill system preference can be used to help patrons fill out the form using information from Google Books.
The item type list can be edited by editing the SUGGEST_FORMAT authorized value list.
The “Reason for suggestion” list can be edited by editing the OPAC_SUG authorized value list.
If the item already exists in the catalog, the patron will see a message with what Koha thinks is the corresponding title. Matches are made on the title/ author, ISBN or ISSN. If the title isn’t what the patron is trying to suggest, they can click “Confirm your suggestion”, to suggest it anyway.

Once the form is submitted the purchase suggestion will appear in the acquisitions module for the librarians to manage.
If a purchase suggestion has been ordered through the acquisitions module, the patron’s purchase suggestion title will be clickable and bring the patron directly to the ordered record in the OPAC.
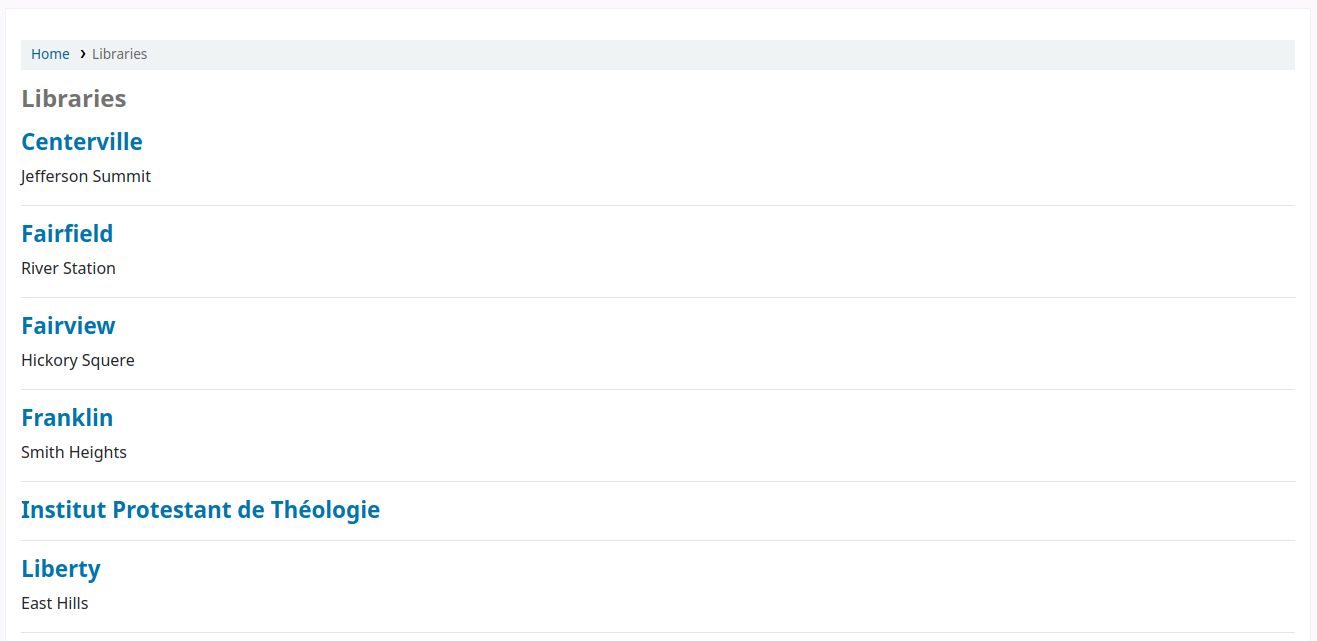
Libraries
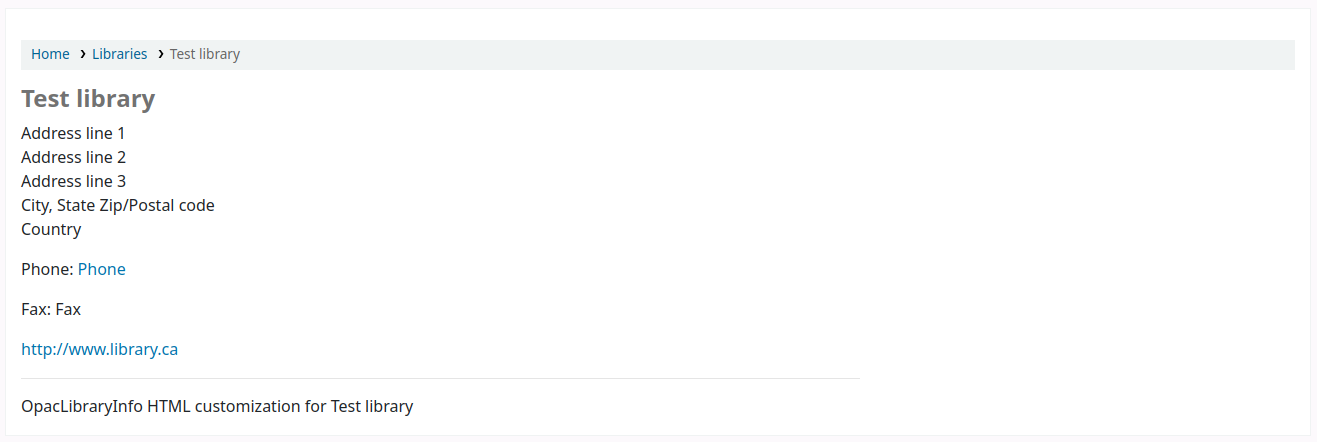
The “Libraries” page shows the contact information (address lines, city, state, zip/postal code, country, phone number, fax number, website) for libraries in the system that are set as “Public”.
The library name is a link to a specific page for this library. This second page also includes “OpacLibraryInfo” HTML customizations for this library.
Reporting problems
If the OPACReportProblem system preference is enabled, patrons will have the option to report problems on the OPAC (broken links or inaccurate information for example).
At the bottom of each page is a “Report a problem” link.
When the patron clicks on the link, they are brought to a form where they can specify what exactly is the problem.
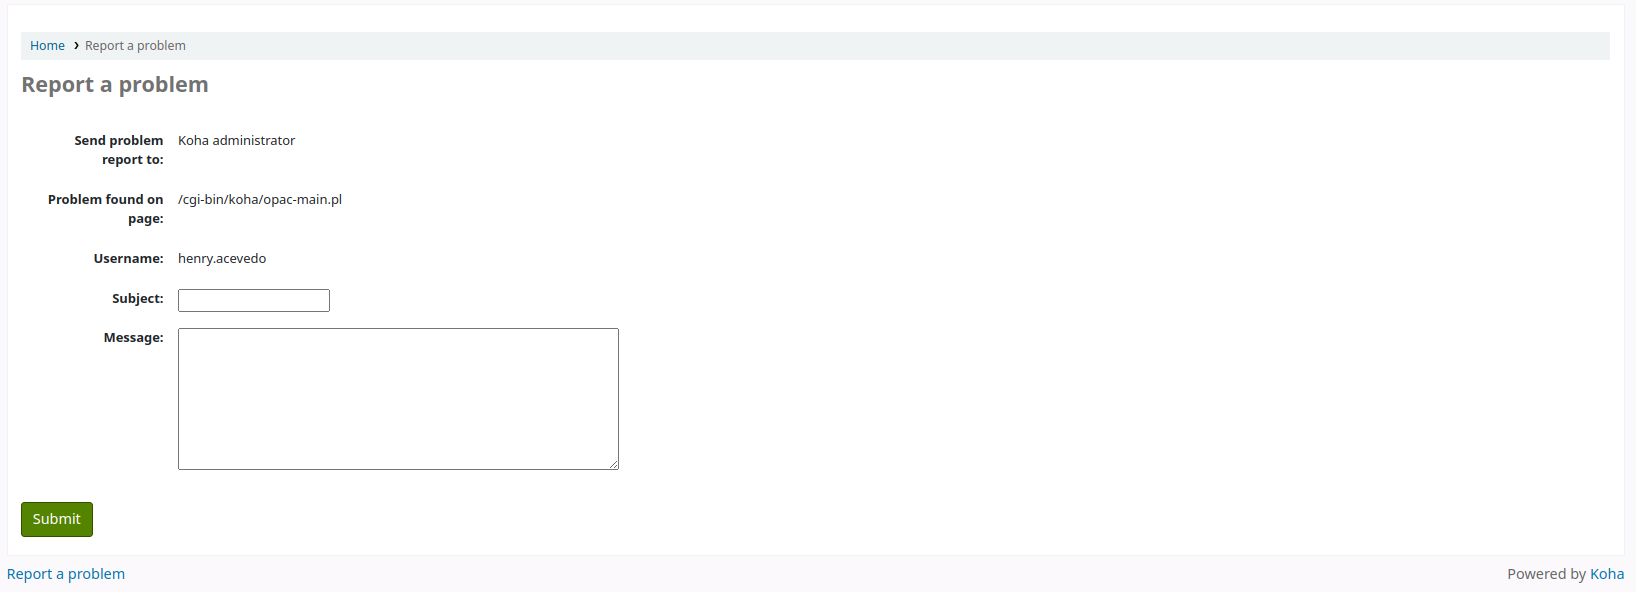
The problem report is sent to the Koha administrator by email (to the address in KohaAdminEmailAddress), and will appear in the OPAC problem reports tool. If the library has an email address, the patron will have the choice to either send the problem report to the library or to the administrator.
Nota
The notice sent by email is customizable in the Notices and slips tool. The letter code is PROBLEM_REPORT.
Comentarios
Patrons can leave comments in the OPAC if you have the OPACComments preference set to allow this. Each bibliographic record has a comments tab below the bibliographic information.
Si el usuario ha abierto sesión con su cuenta verá un enlace para agregar un comentario al registro. Al hacer clic en este enlace se abrirá una ventana con una caja para introducir sus comentarios.
Una vez que el comentario haya sido escrito y se haga clic en el botón “Enviar”, el usuario podrá ver su comentario como pendiente y los otros usuarios verán que no hay ningún comentario nuevo sobre el tema.
Once the comment is approved the patron will see the number of comments on the “Comments” tab and their comment labeled amongst the other comments. If the ShowReviewerPhoto system preference is set to “Show”, the patron’s photo pulled from the Libravatar library will be displayed next to their comment.
Other patrons will see the comment with the name of the patron who left the comment (unless you have set the ShowReviewer preference to not show patron names).
If you have your OpacShowRecentComments set to show then you’ll see the approved comments on that page.
Desde esta página los usuarios podrán suscribirse a los comentarios recientes utilizando RSS si así les parece.