Circulación
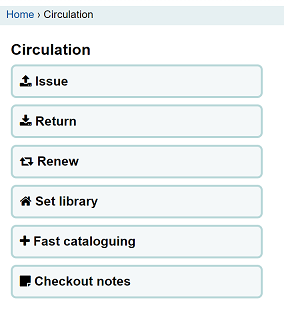
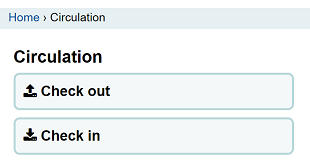
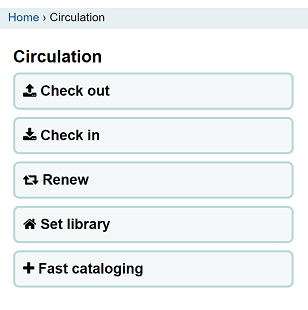
Las funciones de circulación pueden accederse de varias formas. En la página principal del cliente administrativo hay enlaces rápidos para prestar, devolver o transferir items. Para una lista completa de las funciones de circulación puede visitar la página de Circulación que está enlazada arriba a la izquierda de cualquier página o desde el centro de la página principal.
Before circulating your collection you will want to set your Global system preferences, Basic parameters and Patrons and circulation rules.
Mientras esté en Circulación puede saltar entre las pestañas en el cuadro de búsqueda rápida en las parte superior de la pantalla utilizando las siguientes teclas:
saltar a la búsqueda en el catálogo con Alt + Q
Saltar a prestamos con Alt + U
esto no funcionará para usuarios de Mac
saltar a préstamo con Alt + R
Nota
Los usuarios Mac utilizan el botón OPCIÓN en lugar de ALT
Check out (issuing)
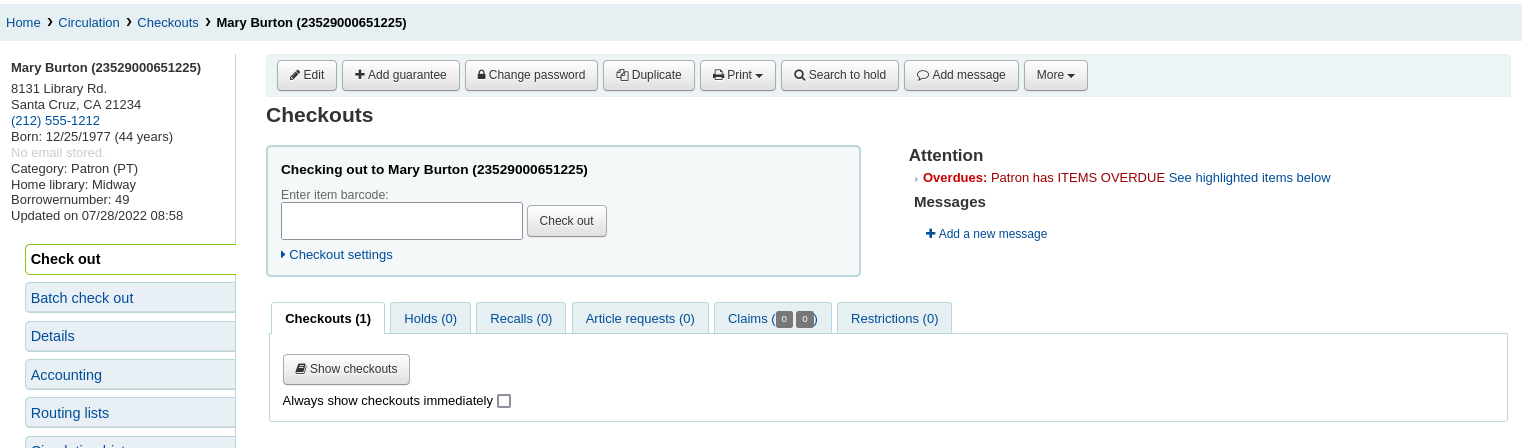
Para empezar el proceso de préstamo deberá introducir el código de barras del usuario o parte de su nombre. La opción de préstamo aparece en tres lugares principales:
Check out option in the search bar at the top of the staff interface’s main page

Check out option in the search bar at the top of the main circulation page

Those two options are essentially a patron search. If you only have one result, Koha will automatically go to the patron’s file, in the “Check out” tab.
If your search gives you more than one result, it will ask you to choose which patron to check out to.
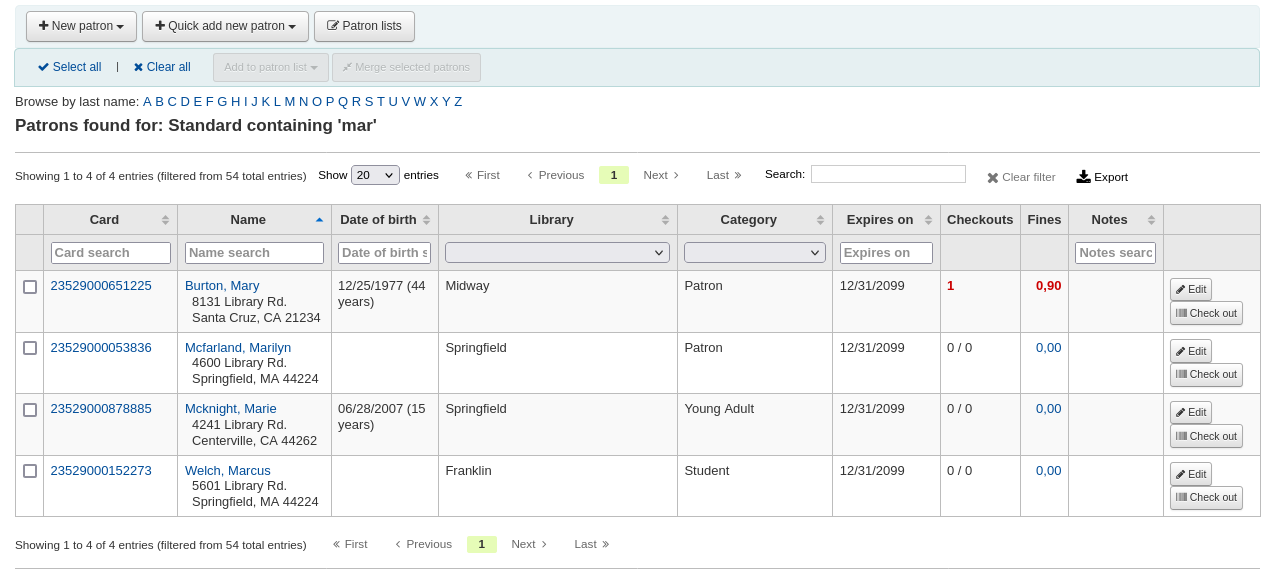
Nota
You can customize the columns of this table in the “Table settings” section of the Administration module, under the patrons tab (table id: memberresultst).
Clicking on a patron search result will bring you to the patron’s file, on the “Details” tab. Click the “Check out” tab to access the check out screen.
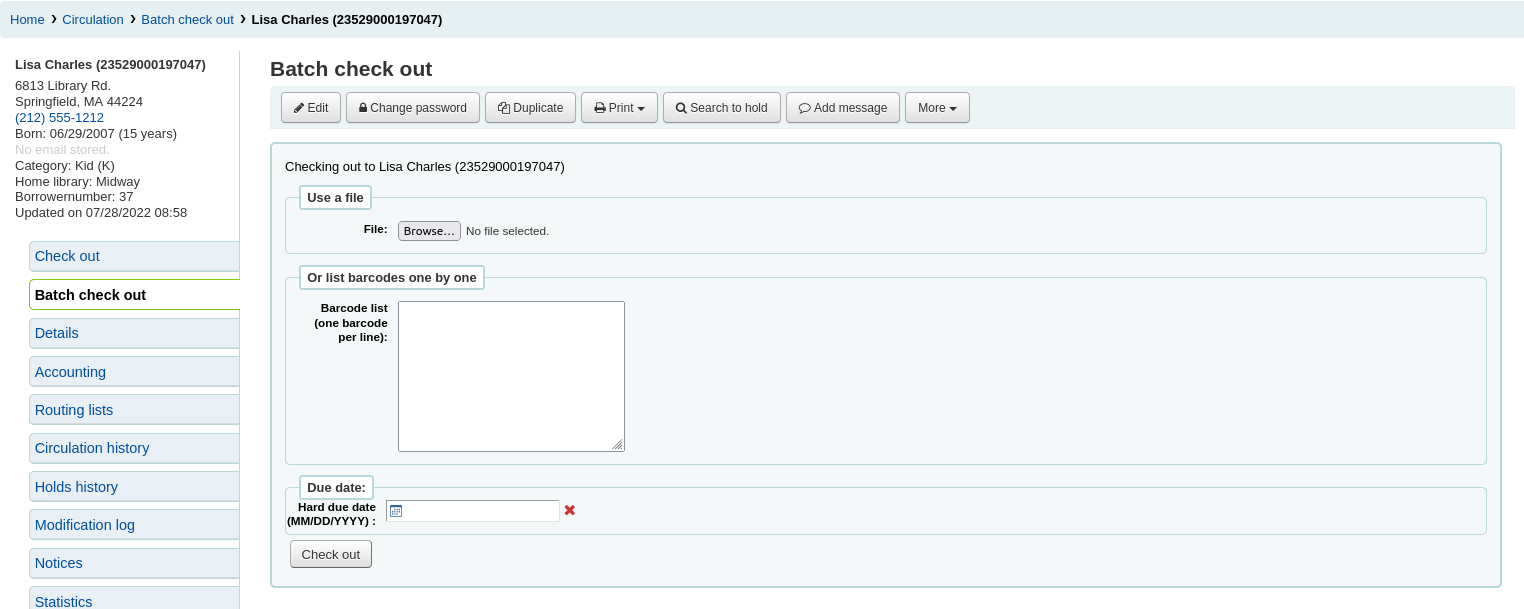
If you have enabled batch checkouts, click the batch check out tab on the patron record
Checking items out
Para prestar un ítem a un usuario, primero busque el usuario utilizando una de las varias opciones listadas anteriormente. Entonces, se le presentará la pantalla de préstamos.
If “Always show checkouts immediately” is checked, you will see the list of current checkouts below the check out box.
Nota
The previousIssuesDefaultSortOrder system preference controls in which order these previous checkouts appear (earliest to latest, or latest to earliest).
Nota
You can customize the columns of this table in the “Table settings” section of the Administration module, under the circulation tab (table id: issues-table).
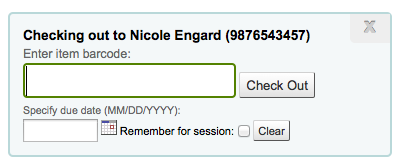
At the top of the check out screen is a field to type or scan the item’s barcode into.
Nota
Many modern barcode scanners will send a “return” to the browser, making it so that the “Check out” button is automatically clicked.
If the barcode is not found you will be prompted to use fast cataloging to add the item. Learn more about fast cataloging later in this manual.
If the itemBarcodeFallbackSearch system preference is set to “Enable”, you can enter a keyword search in this box instead of just a barcode (this will make it possible to check out using title and/or call number).
If the AutoSwitchPatron system preference is set to “Enable”, scanning a patron barcode here will take you to that patron’s file.
To see more checkout options click the “Checkout settings” link to expand the checkout area.
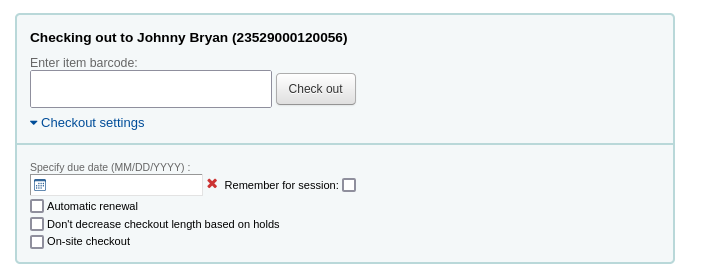
Specify due date: this option can be used to override the default due date for the item, as defined in the circulation and fines rules.
Nota
This option will only appear if the SpecifyDueDate system preference is set to allow staff to override the due date.
The red “X” is used to clear the date. If the “specify due date” field is empty, the default due date, as defined in the circulation and fines rules is used.
Remember for this session: check this box to use the same date for all checkouts. This will not only keep the specified due date for this patron but for all patrons, until you log out of the staff interface.
Automatic renewal: this option will allow this item to automatically be renewed
To use automatic renewals,
the automatic_renewals cron job must be running
the circulation and fines rules regarding automatic renewals must be defined
Just like regular renewals, the checkouts will not be automatically renewed if there is a hold on the item.
Don’t decrease checkout length based on holds: this option overrides the decreaseLoanHighHolds system preference.
Nota
This option will only appear if the decreaseLoanHighHolds system preference is enabled.
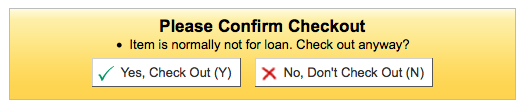
On-site checkout: this option indicates that this checkout is an on-site checkout.
Nota
This option will only appear if the checkout of items on site to patrons is allowed. These are usually items that are not for loan that you would like to check out for in-library use.
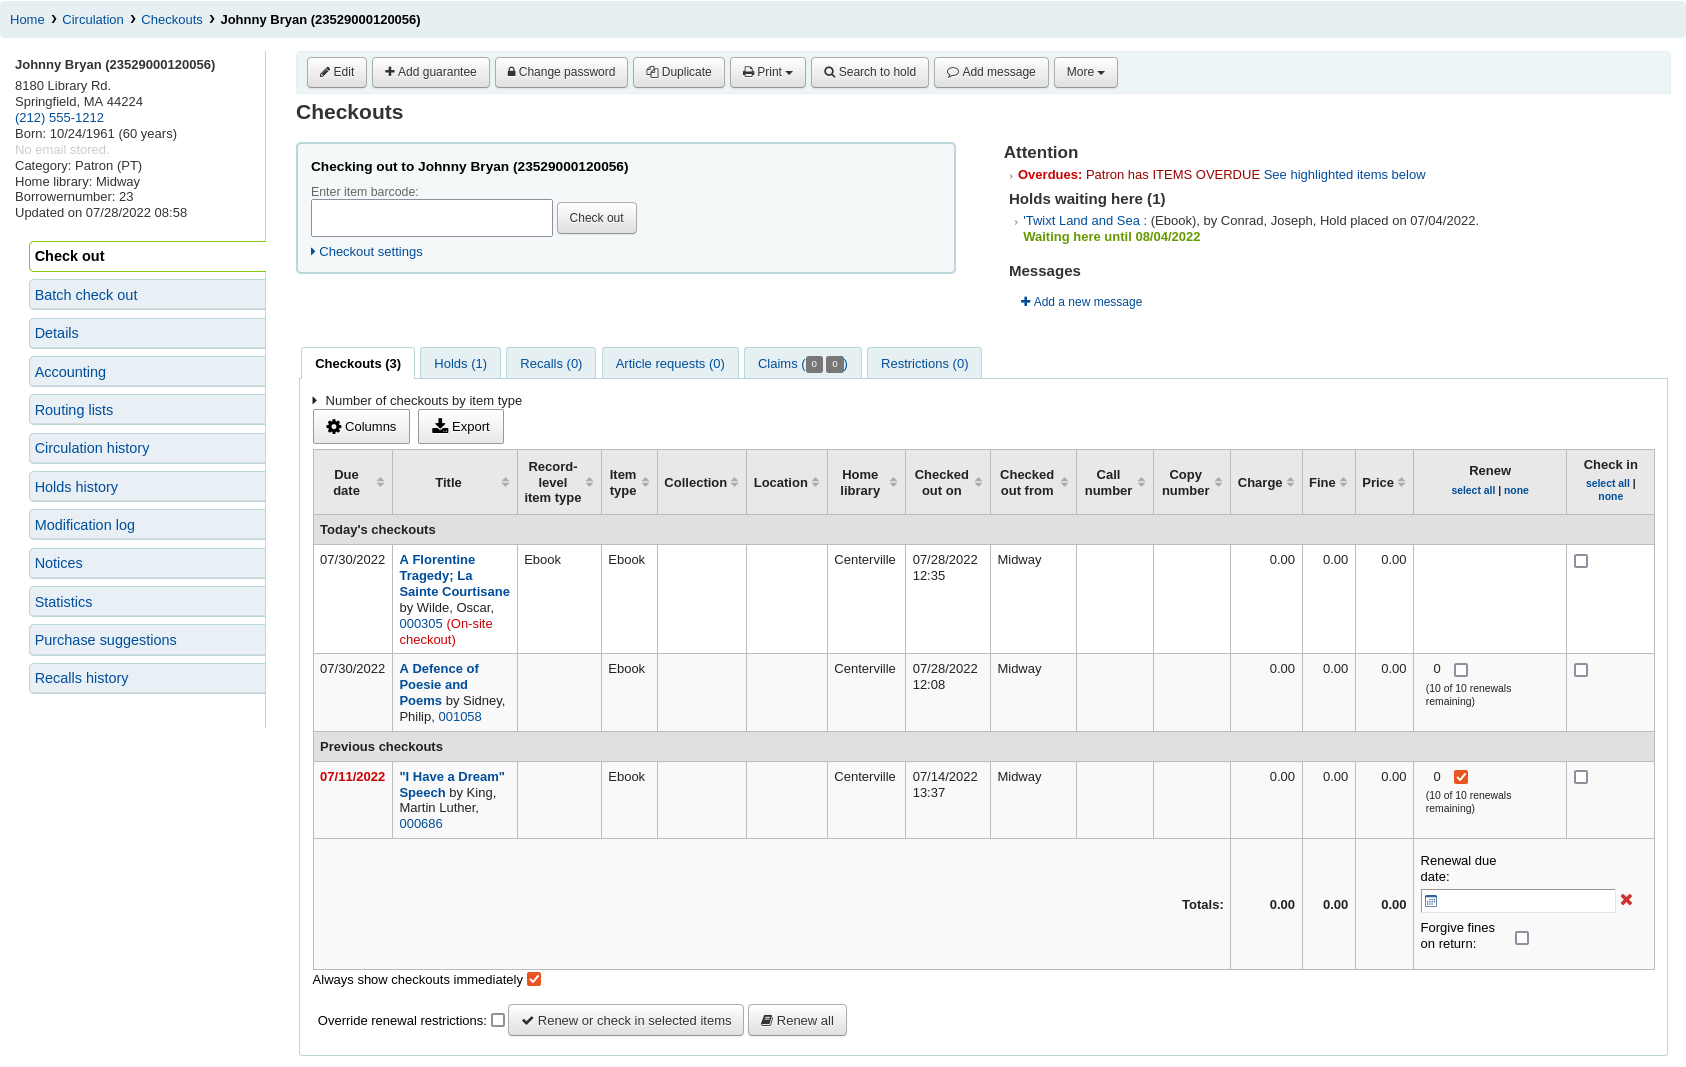
At the bottom of the page there is a summary of the patron’s current checked out items along with the due date (and time if the item is an hourly loan). Items checked out today will appear at the top, previously checked out items will be underneath.
Nota
The todaysIssuesDefaultSortOrder system preference controls in which order these new checkouts appear (earliest to latest, or latest to earliest).
Nota
Ítems que son prestados por hora incluirán el tiempo con la fecha de vencimiento.
If an item is checked out for on-site use, that information will be highlighted in red in the checkout summary.

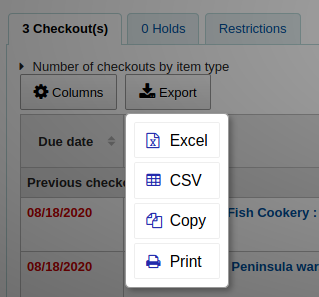
The “Export” button at the top of the table allows you to export the patron’s current checkouts in either Microsoft Excel or CSV format, or even copy or print their checkouts.
Si hay algunas notas en el expediente del usuario éstas aparecerán a la derecha de la caja de préstamo
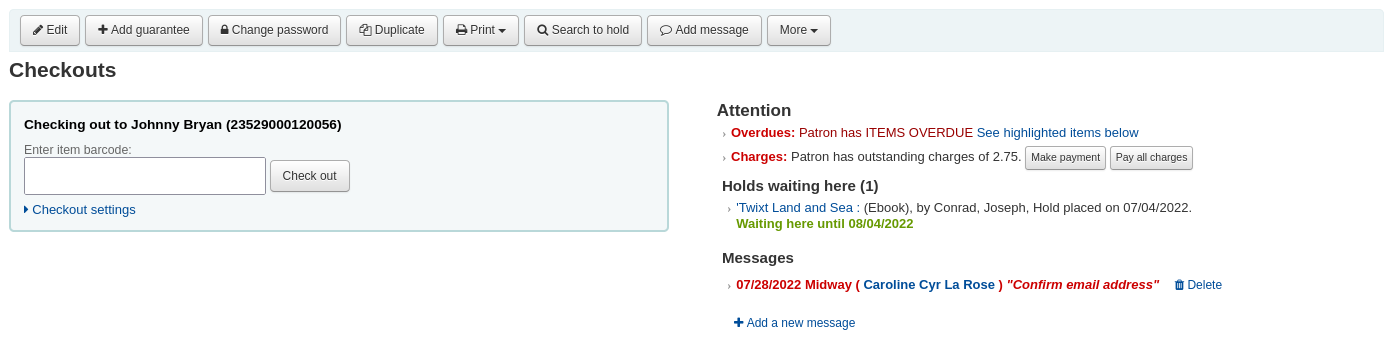
If the patron has a hold waiting at the library, that too will appear to the right of the check out box making it easy for the circulation staff to see that there is another item to give to the patron.
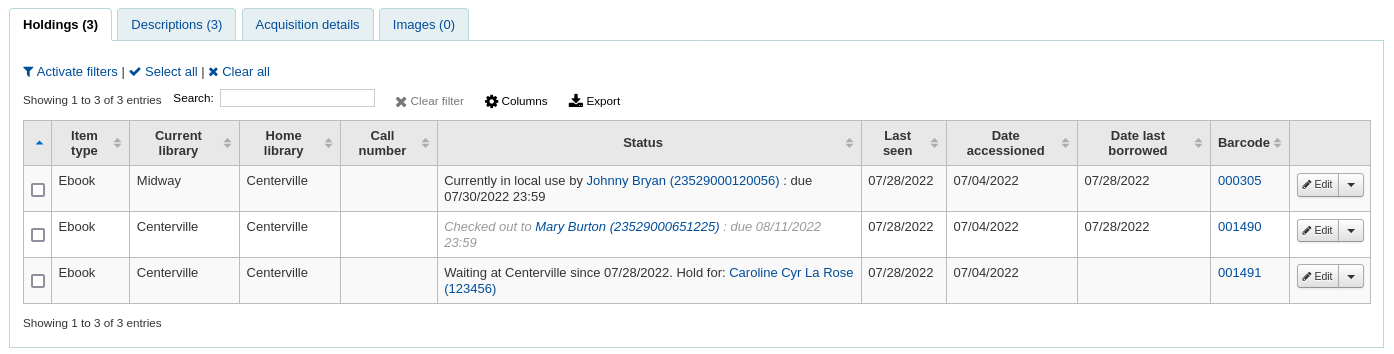
The details of the checkouts will appear on the record detail page in the staff interface as well.
Printing receipts
Una vez haya prestado todos los ítems al usuario puede imprimirle un recibo seleccionando uno de dos métodos.
If you have the CircAutoPrintQuickSlip preference set to “open a print quick slip window” you can simply hit enter on your keyboard or scan a blank piece of paper with your barcode scanner. The idea being that you’re «checking out» a blank barcode which triggers Koha to print the “Quick slip.”
También puede hacer clic en el botón Imprimir en el tope de la pantalla y seleccionar “Recibo” o “Recibo rápido”.
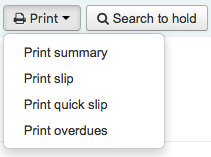
Si elige “Recibo” se imprimirán todos los ítems que el usuario tiene prestado, incluidos los que han sido prestados en una fecha anterior. Eligiendo “Recibo rápido” imprimirá sólo los ítems que se han prestado el día de la fecha.
“Imprimir resumen” generará una página completa de resumen para la información de circulación del usuario e “Imprimir retrasos” imprimirá un recibo que lista todos los ítems que están retrasados.
“Print checkin slip” will print out a slip that lists items that were checked in today.
What prints on the slips can be customized by altering the slip templates under the Notices & slips tool.
Clear patron information
When you’re done checking an item out if you have the DisplayClearScreenButton preference set to “Show” you can clear the current patron by clicking the X in the top right of the patron’s info to remove the current patron from the screen and start over.
If you have the CircAutoPrintQuickSlip preference set to “clear the screen” then you simply need to hit enter or scan a blank barcode and the screen will be cleared of the current patron.
Batch checkouts
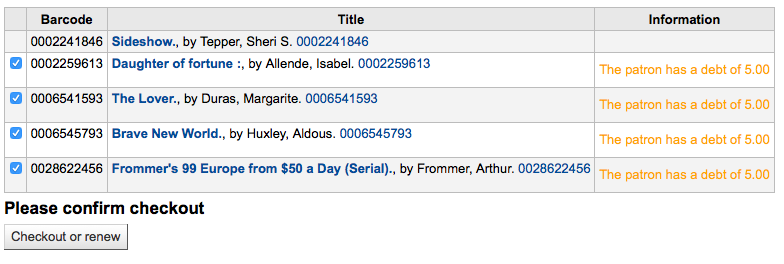
If you would like to perform a batch check out you can do so by turning on the BatchCheckouts system preference and assigning the proper patron categories via the BatchCheckoutsValidCategories system preference. This will allow you to use an RFID pad that reads multiple barcodes or perform a batch check out for training internal use.
From this screen you can scan several barcodes or load a file of barcodes.
If you have the SpecifyDueDate system preference enabled you will have the option to set a due date for the checkouts.
If the items cannot be checked out, a warning will be provided on the following screen, with the option to uncheck the items that are not to be checked out.
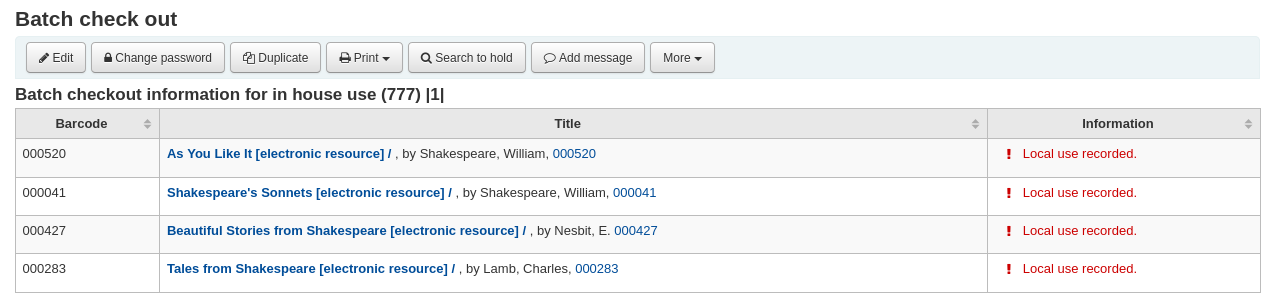
Si está utilizando un tipo de usuario estadístico, entonces, usted verá que ese uso local fue guardado para cada ítem que se escaneó.
Check out messages
Si está prestando un ítem que tiene múltiples piezas y ha catalogado esa información en el subcampo 3 del registro del ítem (en MARC21) aparecerá un mensaje cuando preste ese ítem indicándole cuantas piezas debería haber.

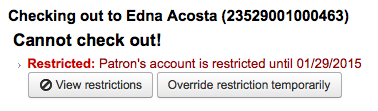
Hay momentos en que Koha evitará que el bibliotecario pueda prestar ítem a un usuario. Cuando esto suceda aparecerá una advertencia que notificará al bibliotecario por qué el usuario no puede tener préstamos.
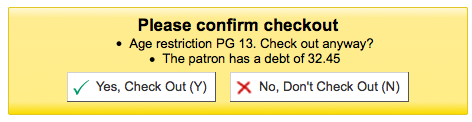
El usuario debe demasiado en multas

You can set the amount at which patron checkouts are blocked with the noissuescharge system preference
El usuario tiene una restricción en su cuenta

This can be set by the librarian editing a patron record and adding a restriction or by the Overdue/Notice Status Triggers
Si los miembros del personal/staff tienen los permisos correctos, ellos pueden anular la restricción temporalmente
El usuario debe confirmar su dirección
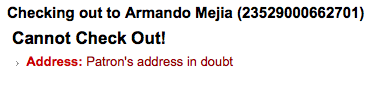
Esto se puede configurar por el bibliotecario editando un registro de usuario y añadiendo una marca
El usuario ha perdido su carnet de biblioteca
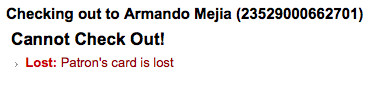
Esto se puede configurar por el bibliotecario editando un registro de usuario y añadiendo una marca
Check out warnings
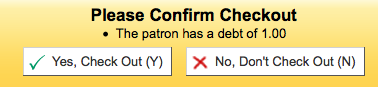
A veces, los préstamos harán que aparezcan mensajes de advertencia con un recuadro amarillo sobre el campo. Estas advertencias deben ser atendidas antes de seguir prestando ítems.
El usuario tiene multas pendientes
El ítem está reservado a otro usuario
El ítem debería estar en la estantería de reserva esperando por un usuario
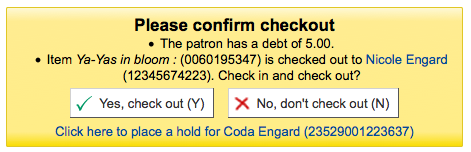
El ítem está prestado actualmente a este usuario

El artículo/ítem está prestado a otro usuario
Este mensaje de advertencia le permitirá colocar una reserva en el ítem para el usuario al que usted está intentando prestar.
El ítem no puede prestarse
Patron has too many things checked out and AllowTooManyOverride is set to “Allow”

Patron has too many things checked out and AllowTooManyOverride is set to «Don’t allow»

Este ítem no se puede renovar

This can be overridden with the AllowRenewalLimitOverride system preference
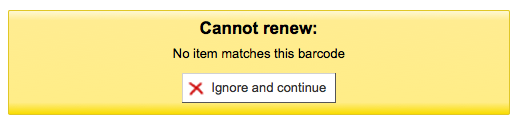
No se encuentra el código de barras

Learn more about fast cataloging later in this manual.
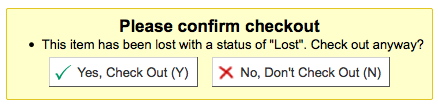
El ítem al ser prestado se marca como “perdido”
Depending on the value in your IssueLostItem preference, you may just see a warning

o un cuadro de confirmación
Elejemplar siendo prestado no es recomendado para usuarios de esa edad
Item being checked out meets the decreaseLoanHighHolds system preference criteria

Item has accompanying material (field 952$3, “Materials specified”, is filled)

If CircConfirmItemParts is set to “Require”, the staff member will have to confirm the checkout

Renovaciones
Checked out items can be renewed (checked out for another period of time) based on your circulation rules and renewal preferences.
If you allow it, patrons can renew their own items via the OPAC, but sometimes you’ll need to help them by renewing their items via the staff client.
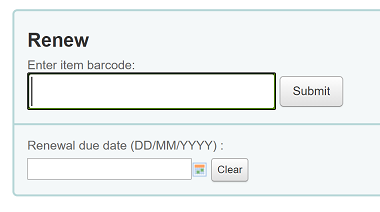
Para renovar un ítem prestado a un usuario, puede hacer una de dos cosas.
Lo primero, es visitar la página de detalles del usuario o la página de préstamo y revisar el sumario de préstamos al final de la página.

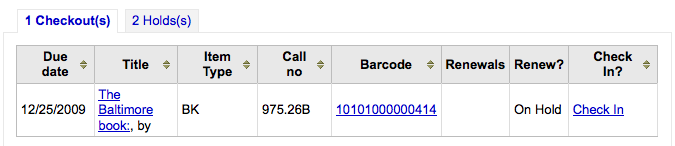
In the Renew column you will see how many times each item has been renewed and a checkbox to renew the item for the patron. Check the box of the items you would like to renew and click the “Renew or return checked items” button, or to renew all items checked out to the patron simply click the “Renew all” button.

Sometimes renewals will be blocked based on your circulation rules, to override this block you must have your AllowRenewalLimitOverride preference set to “Allow”. If you allow renewal limit overrides, you will see a checkbox at the bottom left of the circulation summary. Check that box and then choose the items you would like to renew.

Al marcar esa casilla se agregarán casillas de selección arriba en la columna de renovación donde antes el ítem no se podía renovar.
You can also mark a renewal as “unseen”, to differentiate between renewals where staff has actually seen the item, versus renewals where they didn’t see it (over the phone, for example). To do this, you must first enable the UnseenRenewals system preference. Once enabled, a checkbox will appear at the bottom left of the circulation summary. Check that box to mark the renewals as “unseen”. Then click either “Renew or check in selected items” or “Renew all”.

La página de Devolución en el menú de Circulación
Escanee o tipee el código de barras del ítem que desee transferir
Una vez que el archivo es subido se presenta un mensaje de confirmación.

Al seleccionar “Cerrar” se le presentará un formulario.
Una vez que el ejemplar se presta aparecerá bajo la información del usuario.
Check in (returning)
El préstamo de ítems puede hacerse desde diferentes lugares
La casilla de devolución en el tope de la interfaz principal del cliente administrativo

La opción de devolución de la barra de búsqueda rápida en la página de Circulación

El enlace de devolución en el resumen de préstamo del usuario (y en la página de resumen de préstamo)
La página de Devolución en el menú de Circulación
Koha also offers an automatic checkin feature, which can be set in item types.
Checking items in
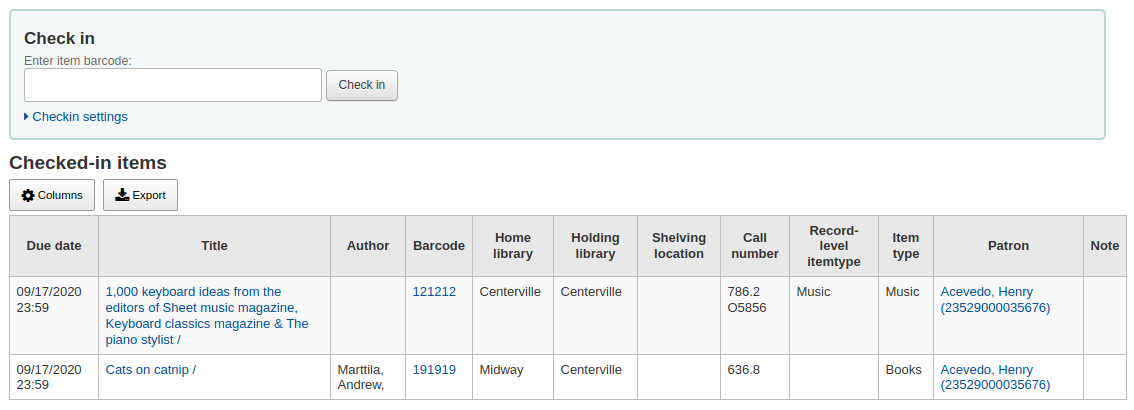
Para devolver un ítem escanee el código de barras para el ítem en el cuadro correspondiente. Un resumen de todos los ítem devueltos aparecerá debajo del cuadro devolver
Nota
You can customize the columns of this table in the “Table settings” section of the Administration module (table id: checkedintable).
Si está devolviendo ejemplares que fueron puestos en el buzón de devolución mientras la biblioteca estuvo cerrada usted puede marcar el “Modo buzón” antes de ingresar los ejemplares. Esto efectivamente hacer retroceder la fecha de devolución a la última fecha en que la biblioteca estaba abierta.
This requires that you have your closings added to the calendar tool
También puede optar por perdonar todos los cargos por mora de los ítem que está devolviendo marcando la casilla “Perdonar cargos por mora” antes de escanear ítems.
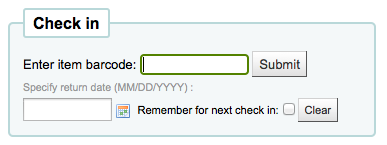
If you have the SpecifyReturnDate preference set to “Allow” you will be able to arbitrarily set the return date from below the check in box.
Check in messages
Hay varios mensajes que pueden aparecer cuando devuelva ítems:
Si usted recibe la devolución de un ítem en una biblioteca que no es la biblioteca de origen, aparecerá un mensaje pidiendo que usted transfiera el libro a la biblioteca original
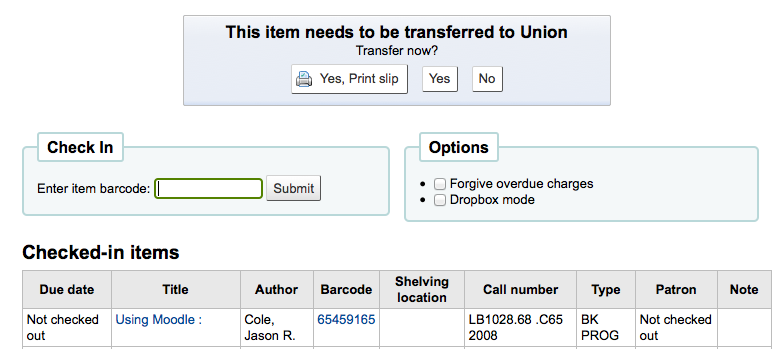
Después que este ítem sea devuelto el estado del ítem se cambiará en el catálogo a “en tránsito”

Para marcar un ítem como devuelto a la sucursal de origen, devuélvalo a la sucursal de origen

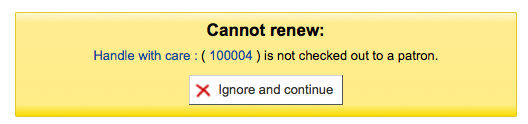
Aparecerá un mensaje indicando que el ítem no está prestado, pero el estado ahora dirá disponible en el catálogo. Este paso es necesario para marcar los ítems como recibidos por la sede de origen.
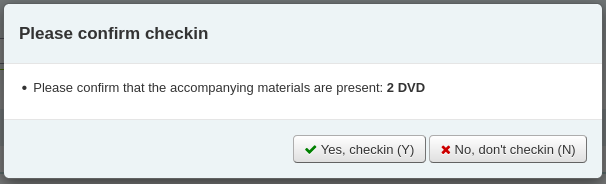
Si usted recibe un ítem que debe tener múltiples partes o piezas aparecerá un mensaje advirtiéndole acerca del número de piezas que debería tener en la mano
If CircConfirmItemParts is set to “Require”, the staff member will have to confirm the checkin
Si está devolviendo un ítem que está reservado, se le pedirá que confirme la reserva
Hacer clic en “Confirmar reserva” marcará ítem como en espera para ser recogido de la biblioteca

Clicking the “Print slip and confirm” button will mark the item as waiting for pickup at the library and present the library with a receipt to print and place on the book with the patron’s information
Ignorando la reserva dejará en suspenso el ítem, pero permanecerá su condición de disponible (no se cancelará la reserva)
Si está devolviendo un ítem que está reservado en otra sucursal, se le pedirá que confirme la reserva y la transfiera a la otra sucursal
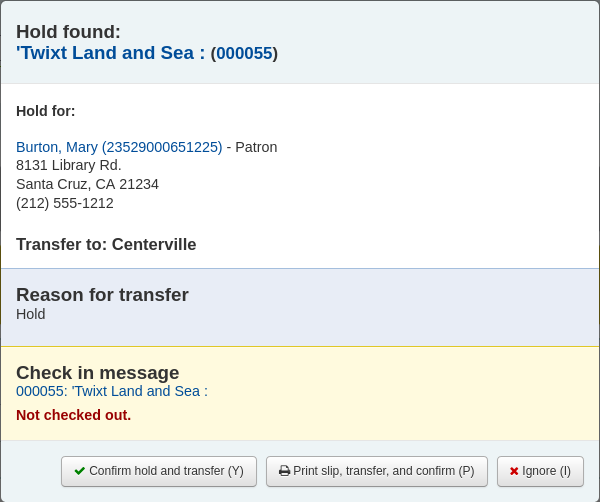
Clicking the “Confirm hold and transfer” button will mark the item as in transit to the library where the hold was placed

Clicking the “Print slip, transfer and confirm” button will mark the item as in transit to the library where the hold was placed and present the library with a receipt to print and place on the book with the patron’s information
Ignorando la reserva dejará en suspenso el ítem, pero permanecerá su condición de disponible (no se cancelará la reserva)
If you have the system showing you fines at the time of checkin (FineNotifyAtCheckin) you will see a message telling you about the fine and providing you a link to the payment page for that patron

Circulation messages
Los mensajes de circulación son mensajes cortos que los bibliotecarios pueden dejar, para los usuarios o sus colegas, que aparecerán al momento de la circulación.
Setting up messages
Circulation messages are set up as authorized values. To add or edit circulation messages you want to work with the BOR_NOTES value.
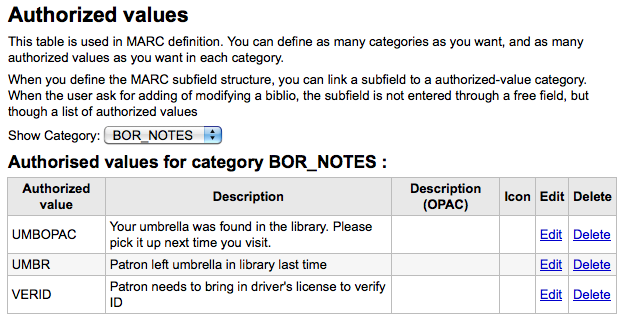
El campo de “Descripción” puede contener un mensaje enlatado que desee que aparezca en el registro del usuario.
Importante
El campo “Descripción” se limita a 80 caracteres, pero el campo de mensaje a usuario puede contener un número mayor. Introduzca hasta 80 caracteres en el campo “Descripción” y escriba el resto en el registro de usuario.
Adding a message
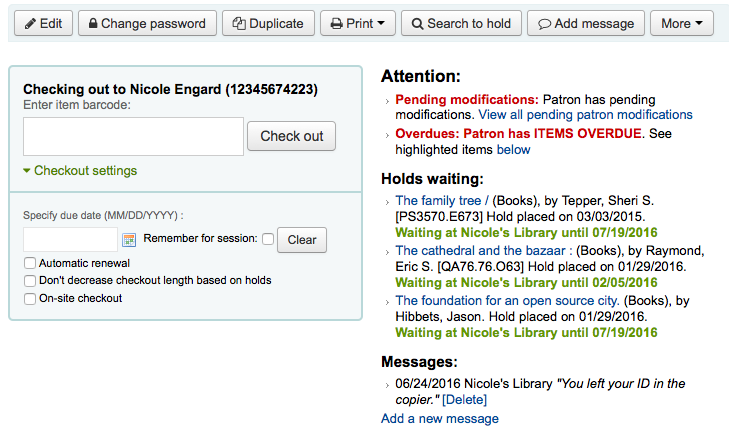
En la pestaña “Préstamo” del registro del socio se podrá ver un enlace a “Agregar un nuevo mensaje” a la derecha del cuadro de préstamo.
Al hacer clic en “Agregar un nuevo mensaje” se le pedirá que elija si el mensaje es para los bibliotecarios o para los usuarios y el mensaje que quiera dejar.
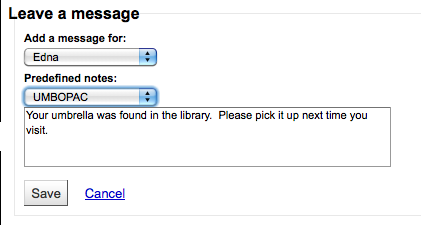
Nota
Un mensaje para un usuario también se mostrará al personal de la biblioteca.
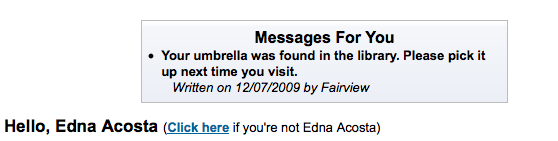
Viewing messages
Los mensajes de circulación para el personal y/o usuarios aparecerán en la pantalla de prestamos a la derecha de la casilla de prestamos. Los mensajes en negritas y color rojo solo se muestran al personal de la biblioteca, y los mensajes en fuente itálica normal para los usuarios y bibliotecarios.
Los mensajes de circulación para el usuario aparecerán cuando estos inician la sesión en el OPAC.
Reservas
Koha allows patrons to put things on hold. A “Hold” is a way to reserve an item. Depending on your circulation and fines rules and hold preference settings patrons will be able to place items on hold for pickup at the library at a later date/time.
Placing holds in staff client
There are several ways to place holds from the staff client. The most obvious is using the “Place hold” button at the top of any bibliographic record.

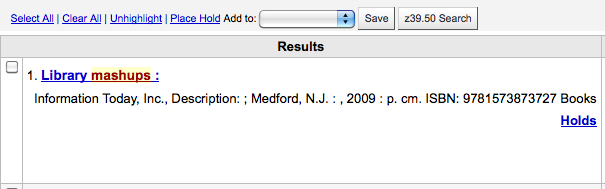
You can also click the smaller “Place hold” link found at the top of your catalog search results, or the “Holds” link found below each result.
Se le pedirá buscar el usuario por número o por cualquier parte de su nombre para iniciar el proceso de reserva.
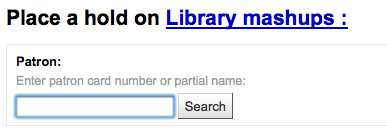
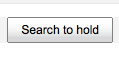
Si desea buscar primero el usuario y luego el registro de la reserva, puede abrir el registro del usuario y hacer clic en el botón “Buscar para Reservar” en el tope del registro del usuario.
Después de hacer clic en el botón será enviado a la búsqueda del catálogo donde podrá encontrar los libros que quiera reservar. Debajo de cada título de los resultados verá la opción de “Reservar para Usuario.”
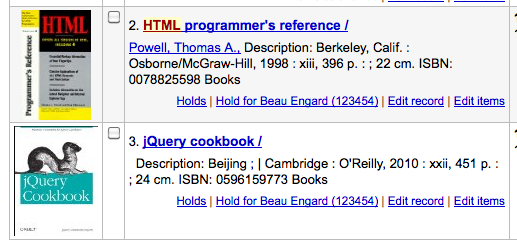
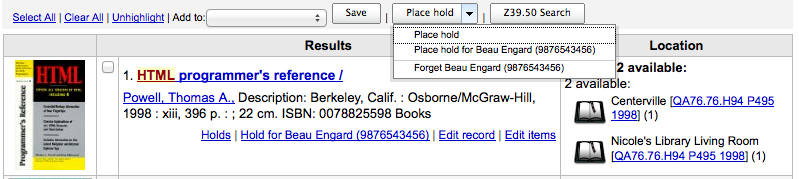
Si desea hacer una reserva de varios ítems, simplemente marque las casillas a la izquierda de ellos y haga clic en la flecha a la derecha del botón “Reservar”.
Dependiendo de cuantos ítems elija reservar a la vez verá un formulario diferente para hacer reservas. Si hace una reserva en un registro bibliográfico verá una lista de todos los ítems que puede reservar.

Ingrese cualquier nota que se aplique a esta reserva
Elija la biblioteca o sede donde el usuario recogerá el ítem
If you have the AllowHoldItemTypeSelection preference set to “Allow” and the record had more than one item type attached you will see an option to choose to limit the hold to a specific item type
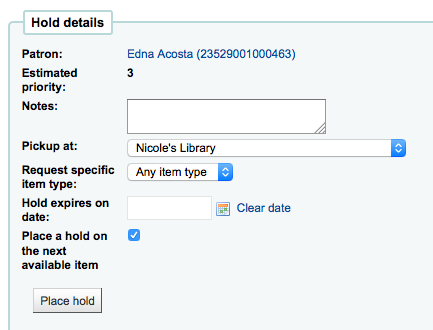
Si el usuario quiere iniciar la reserva en una fecha que no sea hoy, indíquelo en el campo “La reserva comienza el”
This option will only appear if the AllowHoldDateInFuture system preference is set to “Allow”
Si el usuario ha especificado que no quiere el ítem después de cierta fecha, o si hay límites en los tiempos de reserva, puede introducir una fecha de vencimiento de la reserva en el campo “La reserva expira el día”
To have expired holds cancelled automatically you will need to have the Expired holds cron job set to run on a regular basis.
A continuación elija si desea hacer una reserva en el siguiente ítem disponible o en un ítem específico haciendo clic en el botón radio al lado de un ítem individual.
If you are placing a hold for internal purposes, such as checking for missing pages or needing to add a sticker, you can place a “non-priority” hold. This type of hold will not prevent the patron who currently has the item to renew their checkout.
Si está reservando múltiples ítems se le presentará la primer opción disponible para todos los títulos. Si no hay ítems disponibles para reservar lo verá en la pantalla de confirmación.

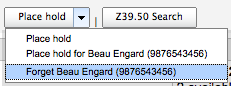
Once your hold is placed, if you’d like to have Koha forget that you used the “Search to hold” function, you can choose to have Koha “forget” the patron’s name by clicking the arrow to the right of the “Place hold” button on the search results and choosing the “Forget” option.
Managing holds
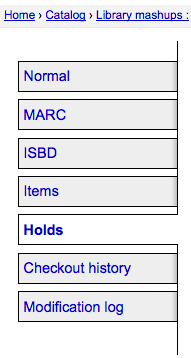
Holds can be altered and cancelled from the holds tab found on the left of the bibliographic record.
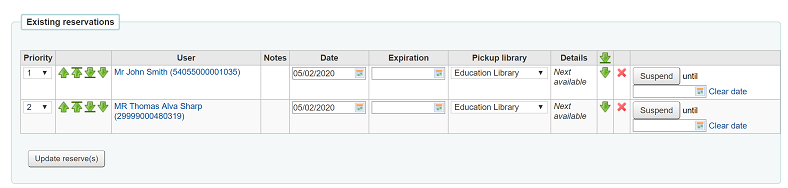
En la lista de reservas se puede cambiar el orden de las reservas, la ubicación para ser recogidas y/o cancelar la reserva.
Nota
If you have your AutoResumeSuspendedHolds preference set to «Don’t allow» then you will not have the option to put an end date on the hold suspension.
Nota
If you have your AllowHoldDateInFuture preference set to «Don’t allow» you will not have the option to edit the date the hold was placed (the column labelled Date).
Nota
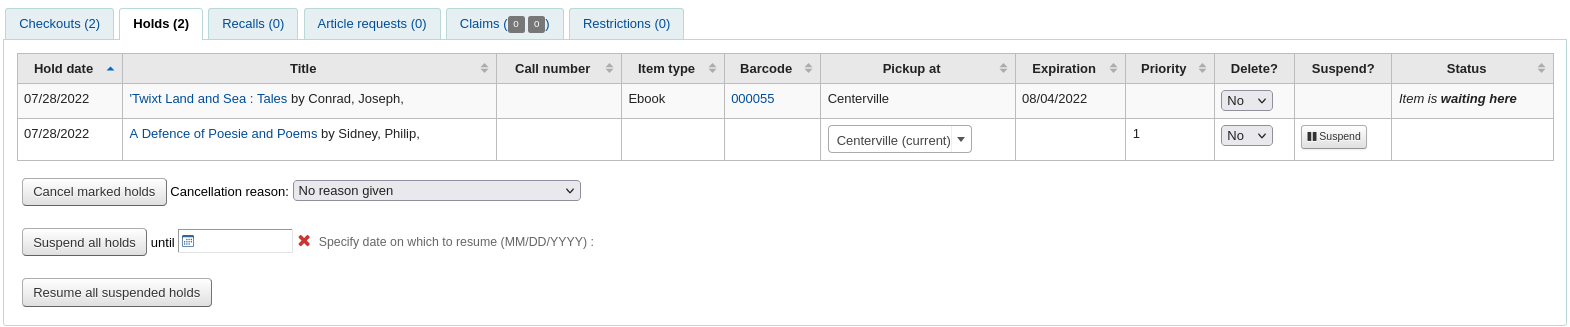
If you have the HoldsSplitQueue system preference set you will see the holds list split across different tables by either pickup library, itemtype or both.
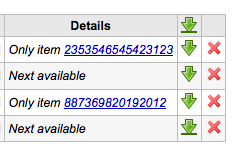
Nota
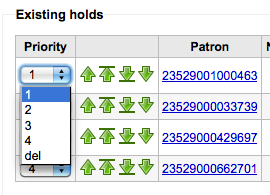
Depending on how you have your HidePatronName system preference set the list may show card numbers instead of names in the patron column like in the image above.
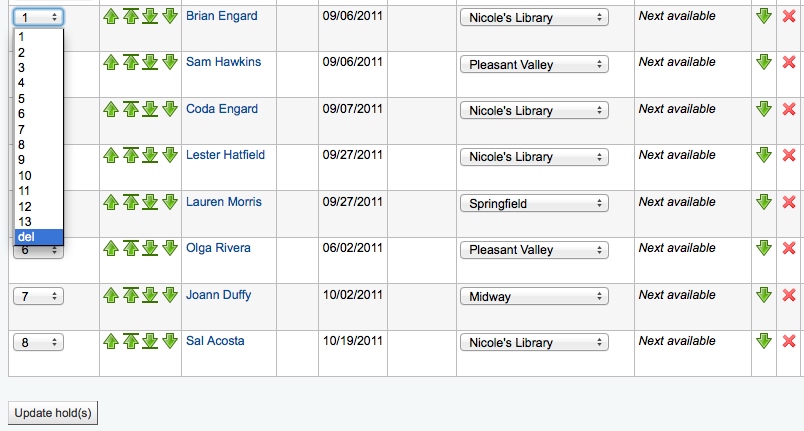
Para cambiar o eliminar reservas, seleccione simplemente desde el desplegable “Prioridad” o haga clic en las flechas a la derecha del desplegable prioridad.
Si utiliza el desplegable de prioridad para reordenar o eliminar reservas deberá hacer clic en “Actualizar reserva(s)” para guardar sus cambios.
Haciendo clic en la flecha hacia abajo a la derecha de la reserva la llevará al final de la lista aun si se hacen mas requerimientos.
Por ejemplo, la biblioteca tiene usuarios a los que se permite retener libros por meses. No sería justo para otros si estos usuarios pudieran retirar libros nuevos y retenerlos por meses. Por esta razón, el pedido de reserva para estos usuarios permanecerá al final de la cola hasta que cualquier otro que desee leer el libro lo haya hecho.
If a patron asks to have their hold suspended and you have the SuspendHoldsIntranet system preference set to “allow” you can do so by clicking the “Suspend” button to far right. If the patron gives you a date for the items to become unsuspended you can enter that in the date box and click the “Update hold(s)” button to save your changes.

Para eliminar o cancelar una reserva, haga clic en la “X” roja en la columna más a la derecha. Para eliminar o cancelar un grupo de reservas, puede elegir “borrar” desplegando hacia la izquierda de cada línea y después dando clic en “Actualizar Reservas” en la parte inferior de la lista.
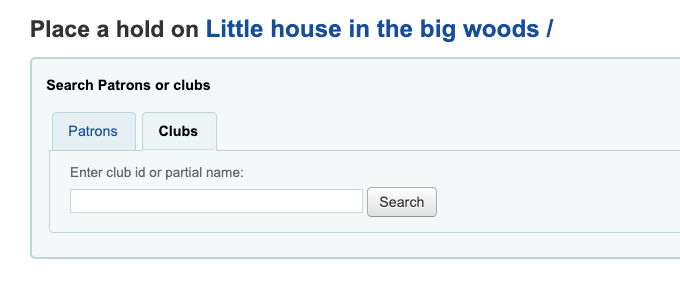
If your library uses the patron clubs feature, use the clubs tab to place a hold for a club. To place a hold for a club, click the clubs tab, search for and select the club name, and click the “Place hold” button.
Receiving holds
When items that are on hold are checked in or out the system will remind the circulation staff that the item is on hold and offer them options for managing the hold.
Cuando se devuelve un ítem que está reservado, el sistema le pedirá que confirme la reserva y lo transfiera
o simplemente que confirme la reserva
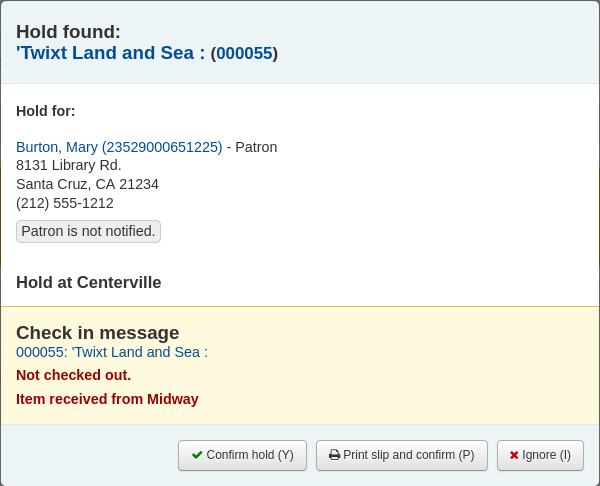
If the item needs to be transferred, clicking “Confirm and transfer” or “Print slip, transfer, and confirm” will mark the item as in transit to the proper library.
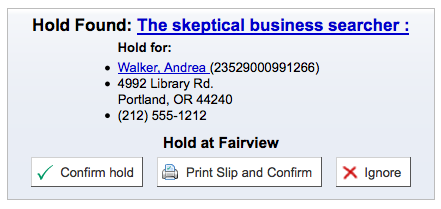
If the item is already at the pickup library, clicking the “Confirm” or the “Print slip and confirm” button will mark the item as ready for pickup by the patron.
Clicking “Ignore” will retain the hold, but allow the item to be checked out to another patron or change the status of the item (if it was returned damaged, for example).
The “Print slip and confirm” or “Print slip, transfer, and confirm” options will open a printable page that you can attach to the item with the necessary hold or transfer information.
Nota
The slip that is printed is the HOLD_SLIP notice. It can be modified with the Notices & slips tool.
When the hold is confirmed, if the patron is notified, the “hold filled” notice will be sent to them.
Nota
If the HoldsAutoFill system preference is enabled, the circulation staff will not have to confirm the hold, but they will have the option to print the hold or transfer slip.
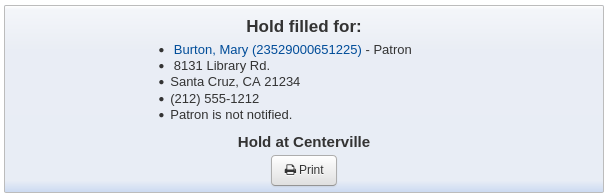
If the HoldsAutoFillPrintSlip system preference is enabled, the print window to print the hold or transfer slip will open automatically.
Once confirmed, the hold will show as “waiting” on the patron record and on the checkout screen under the “Holds” tab.
El registro del ítem mostrará que el ítem está reservado.

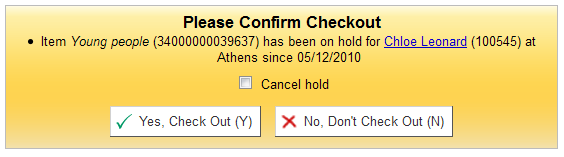
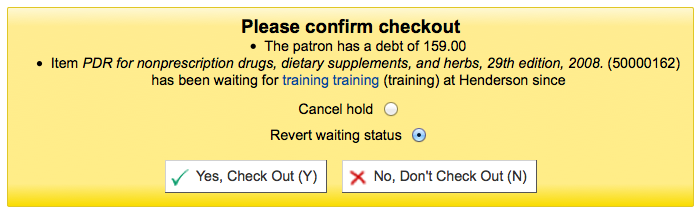
In some cases, a patron may come in to pick up a hold on behalf of someone else. In this case, make sure that the hold is cancelled when you check the item out to someone else. Alternatively, a check out might be attempted in error for an item that is already waiting for someone else. In this case you will be presented with a warning message.

Cancel hold: in combination with “Yes, check out”, this option will cancel the current hold and check the item out to the new patron.
Revert waiting status: in combination with “Yes, check out”, this option will revert the waiting status of the hold (the patron who placed the hold will be back in first position in the queue) and check the item out to the new patron.
Yes, check out: this option will check the item out to the current patron.
Don’t check out and print slip: this option will open the print window to print the hold slip, the check out will be cancelled and the hold will remain.
No, don’t check out: this option will cancel the check out, the hold will remain.
If you try to check in an item that is already waiting to be picked up, a pop up indicating that a hold was found and the item is already waiting will appear.
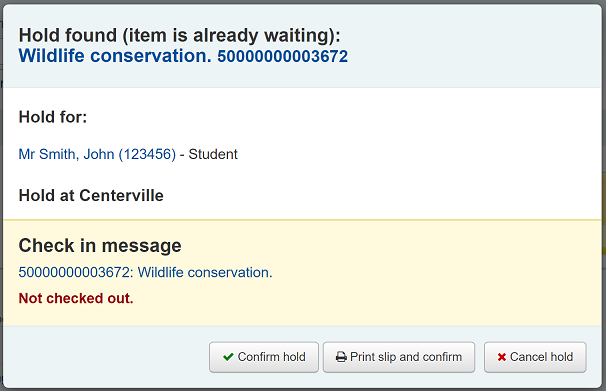
Confirm hold: this option will keep the existing hold.
Print slip and confirm: this option will open the print window to print the hold slip and keep the existing hold.
Cancel hold: this option will remove the hold.
If you cancel the hold and further holds exist for the item you will be presented with a new option to confirm the hold for the next patron.
Recalls
The recalls feature allows users to recall items that are currently checked out. Once the recall is confirmed, the borrower who currently has the item checked out will be notified that their due date has been adjusted and they need to return their item. Once recalled items are returned, the recall requester will be notified that their item is awaiting pickup at their specified pickup location.
See the requesting recalls section to learn how to place a recall in the OPAC.
Setting up recalls in Koha
To use this feature:
Enable the UseRecalls system preference
Set the RecallsMaxPickUpDelay system preference
Optionally, enable the RecallsLog system preference
Modify the following sections in the relevant circulation rules
Recalls allowed (count)
Recalls per record (count)
On shelf recalls allowed
Recall due date interval (day)
Recall overdue fine amount
Recall pickup period
Make sure all the staff member who will be managing recalls have the superlibrarian or manage_recalls permission
Schedule the recalls cronjobs
Review the recalls notices and slips to make sure they have all the information needed
Managing recalls
The recalls feature is relatively automated. Staff do not have a lot of manipulations to do to manage recalls.
Recall statuses
The possible statuses for recalls are the following:
Requested
A new recall request has been made and the item must be returned by the patron who currently has it
Requested recalls appear in
the recalls queue
the recalls to pull list, if an available item can fulfill the recall
the “Recalls” tab of the bibliographic record
the “Recalls” tab of the patron’s file (and its equivalent in the OPAC)
the “Recalls history” tab of a patron’s file (and its equivalent in the OPAC)
Waiting
A recalled item is awaiting pickup at the requester’s chosen branch
Waiting recalls appear in
In transit
An item has been assigned to a recall and is in transit to the requester’s chosen pickup branch
In transit recalls appear in
Overdue
A recalled item is overdue to be returned by the patron who currently has it
Overdue recalls appear in
Fulfilled
A recalled item has been checked out to the recall requester, and the recall is complete
Fulfilled recalls appear in
Expired
The recall was not completed before a defined expiration date or the recall requester failed to pick up their waiting recall within the pickup period defined in RecallsMaxPickUpDelay
Expired recalls appear in
Cancelled
The recall request was cancelled.
Cancelled recalls appear in
Receiving recalled items
Upon checkin in an item that has been recalled, a pop up will appear asking the staff member to confirm or ignore the recall.
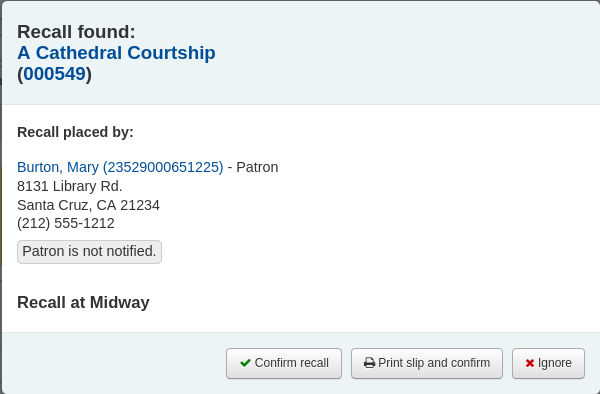
Confirm recall: this option will put the recall in “Waiting” status and, if the patron has an email address in their file, will notify them that their recalled item is now ready for pickup.
Nota
The notice sent is PICKUP_RECALLED_ITEM. You can modify it’s content in the notices and slips tool
Print slip and confirm: this option will print a slip you can attach to the item (similar to a hold slip) in addition to everything the “confirm recall” does (change the status and send the notice).
Nota
The slip is RECALL_REQUESTER_DET. You can modify it’s content in the notices and slips tool
Ignore: this option will check in the item, but the recall will not be set as awaiting pickup and the patron will not be notified.
If the patron asked to pick up their recalled item at a different library, a transfer will be triggered.
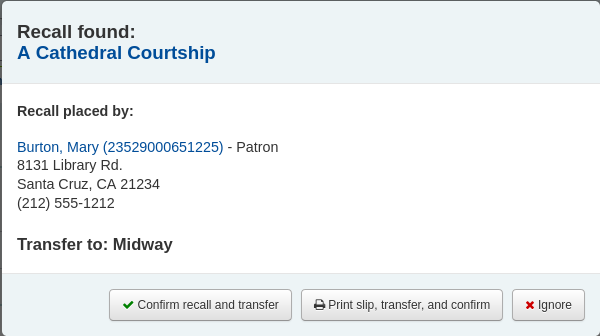
Confirm recall and transfer: this option will put the recall “In transit”.
Print slip, transfer, and confirm: this option will print a slip you can attach to the item (similar to a hold slip) in addition to setting the recall as “In transit”.
Ignore: this option will check in the item, but the recall will not be set as “In transit”
Nota
The patron will not be notified that their recall is ready for them with any of the above options.
Cancelling recalls
Nota
Only requested or overdue recalls can be cancelled.
It is not possible to cancel a recall that is currently awaiting pickup
Staff can cancel recalls from various screen in the staff interface.
Cancel from the recalls queue either individually by clicking the “Actions” button and selecting the “Cancel” option.
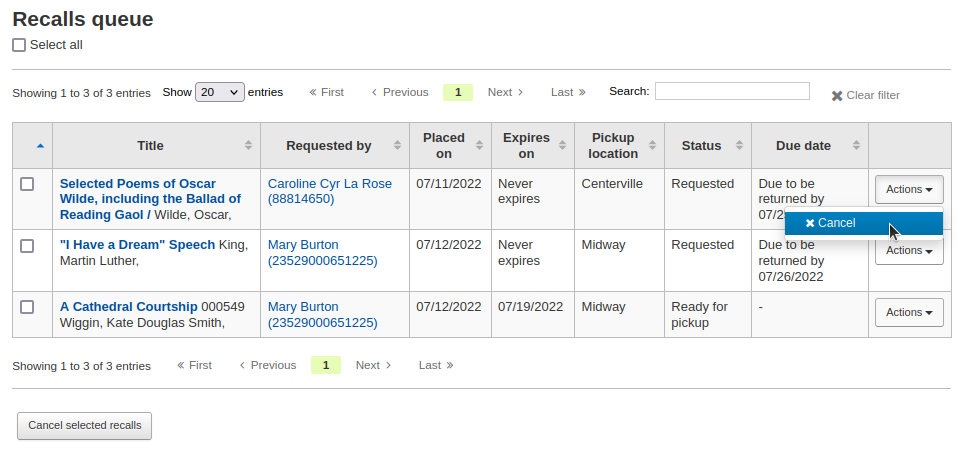
Or by selecting several recalls and clicking the “Cancel selected recalls” button at the bottom of the screen.
If the recalled item is currently in transit, the cancel option will also trigger a transfer back to the item’s home library.
Cancel from the recalls to pull by clicking the “Cancel recall” button on the right
If the recalled item is currently in transit, the cancel option will also trigger a transfer back to the item’s home library.
Cancel from the overdue recalls list either individually by clicking the “Actions” button and selecting the “Cancel” option.
Or by selecting several recalls and clicking the “Cancel selected recalls” button at the bottom of the screen.
Cancel from the “Recalls” tab of a bibliographic record by clicking the “Actions” button and selecting the “Cancel” option.
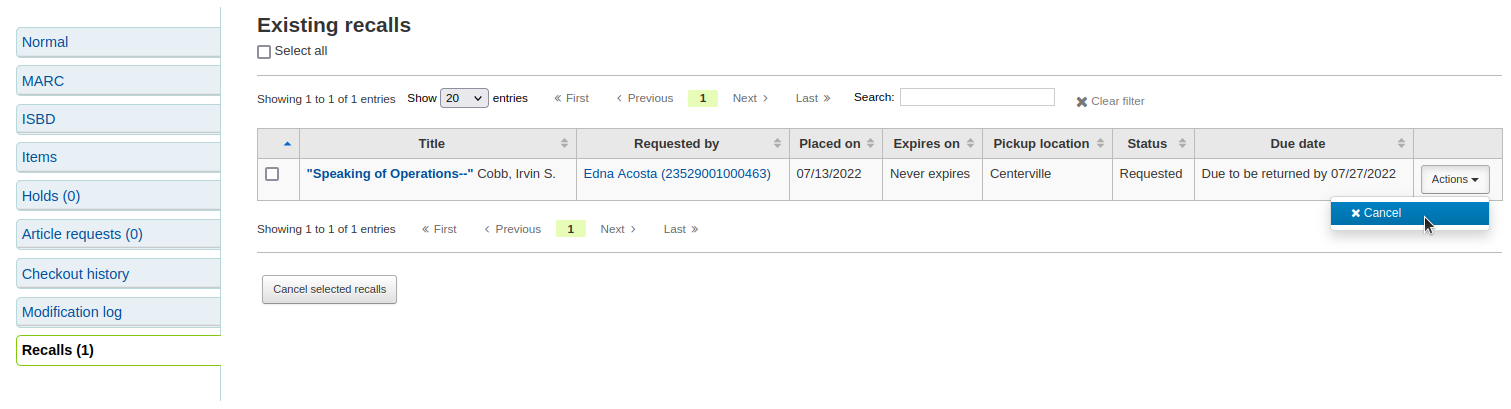
Or by selecting several recalls and clicking the “Cancel selected recalls” button at the bottom of the screen.
Cancel from the “Recalls” tab of a patron’s details page by clicking the “Actions” button and selecting the “Cancel” option.

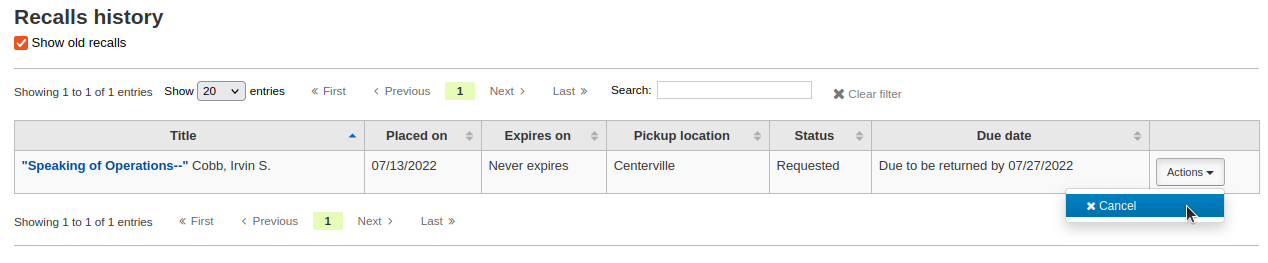
Cancel from the “Recalls history” tab of a patron’s file by clicking the “Actions” button and selecting the “Cancel” option.
Changing waiting recalls” status
If a recall is currently awaiting pickup and for some reason the staff needs to change this status (for example, the requesting patron called and they won’t be picking up the recall), it is possible to revert the waiting status.
Revert the status from the recalls queue by clicking the “Actions” button and selecting the “Revert waiting” option.
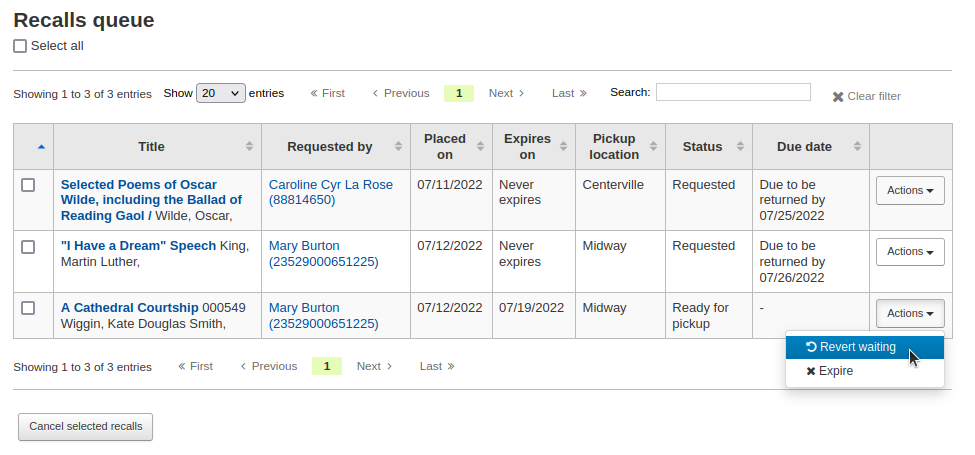
Revert the status from the Recalls awaiting pickup list by clicking the “Revert waiting status” button on the right.
Marking recalls as overdue
If a recall is not checked in by the new due date, it should be marked as overdue by the overdue_recalls cronjob. However, it is possible to mark recalls as overdue manually.
From the recalls queue, click the “Actions” button and selecting the “Mark as overdue” option.
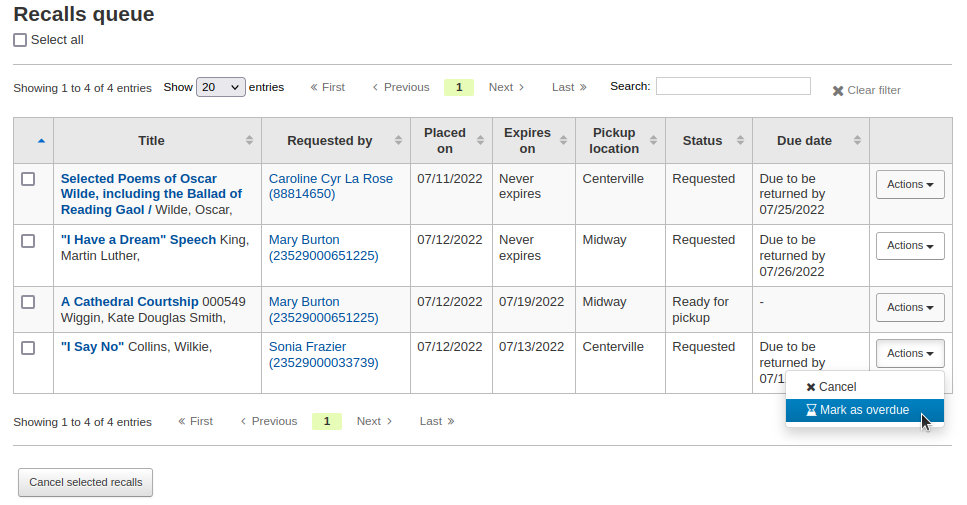
Overdue recalls appear in the Overdue recalls list.
Expiring recalls
If a recall as been awaiting pickup for longer than the allowed period defined in RecallsMaxPickUpDelay, it should be expired automatically by the expire_recalls cronjob. However, it is possible to expire recalls manually.
From the recalls awaiting pickup list, click the “Expire recall” button on the right.
Recalls reports
Once recalls are set up, new sections will appear in the circulation module.
Get there: Circulation > Recalls
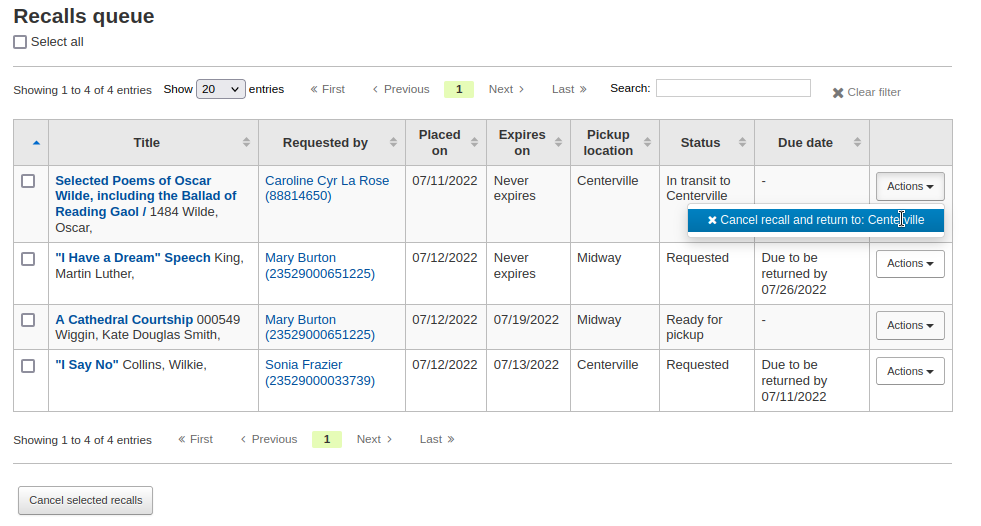
Recalls queue
The recalls queue shows all the current active recalls with their statuses.
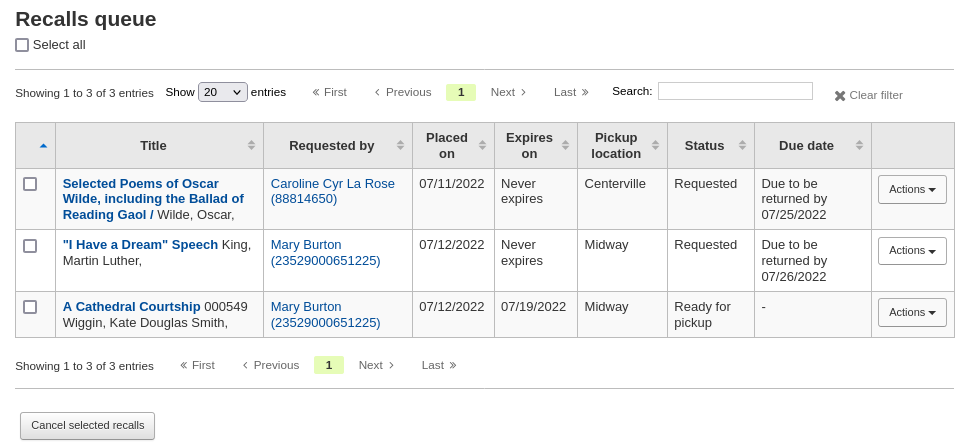
From the recalls queue, staff can cancel active recalls either individually by clicking the “Actions” button and selecting the “Cancel” option.
Or by selecting several recalls and clicking the “Cancel selected recalls” button at the bottom of the screen.
For recalls that are in transit, it is possible to cancel them and this will trigger a transfer back to their home library.
For recalls that are currently awaiting pickup, it is possible to revert the waiting status by clicking the “Actions” button and selecting the “Revert waiting” option.
For recalls that are overdue, it is possible to mark them as such from the recalls queue by clicking the “Actions” button and selecting the “Mark as overdue” option.
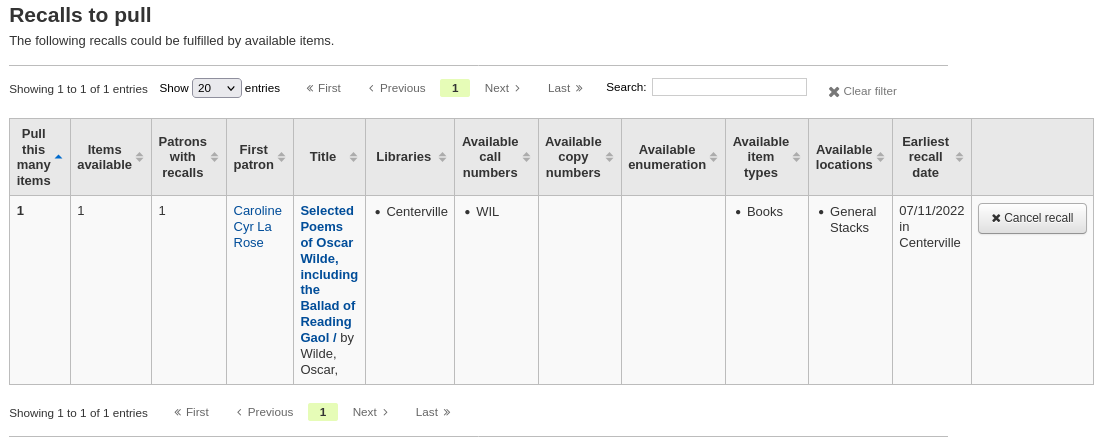
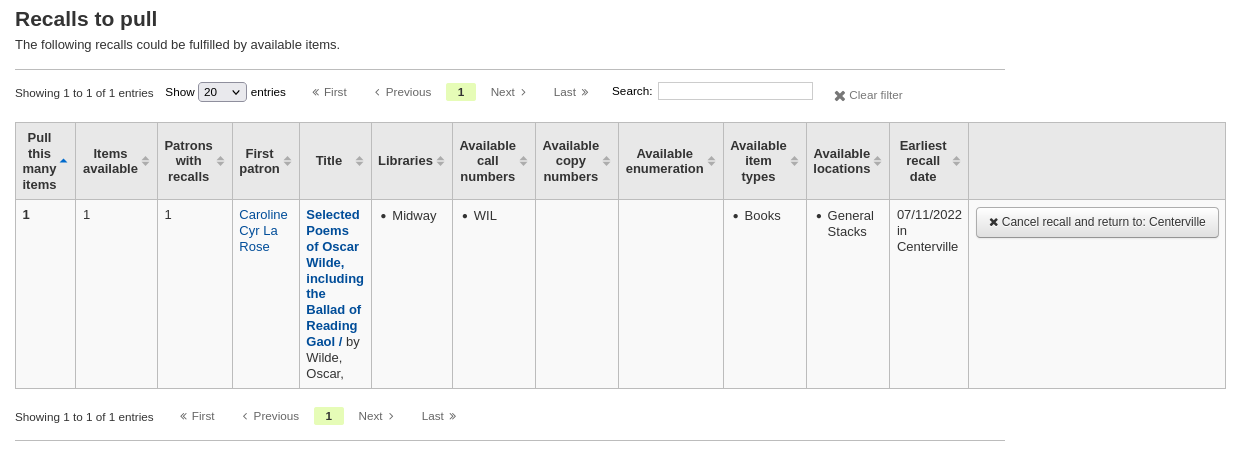
Recalls to pull
The recalls to pull list shows all the records that have been recalled but that have available items that could fulfill the request.
Staff can pick up these items from the shelves and check them in to fulfill the requests.
From the recalls to pull list, staff can cancel recalls if needed, by clicking the “Cancel recall” button on the right.
If the item is currently in transit, cancelling the recall will also trigger a transfer back the the item’s home library.
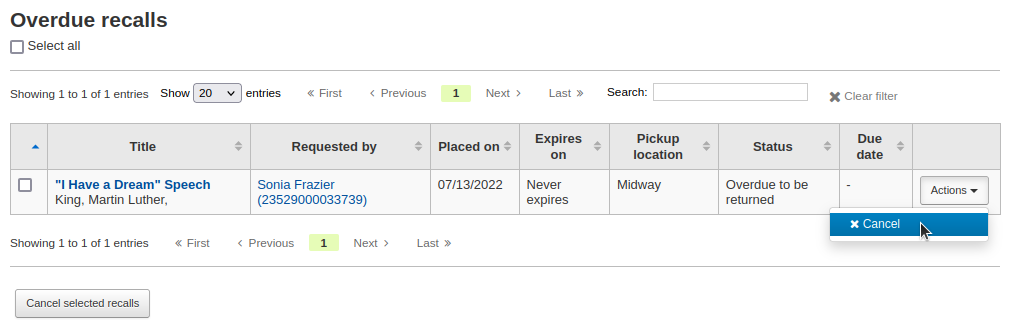
Overdue recalls
This list shows the items that have been recalled but have not been returned by the new due date.
Recalls can be marked as overdue automatically through the overdue_recalls cronjob or manually.
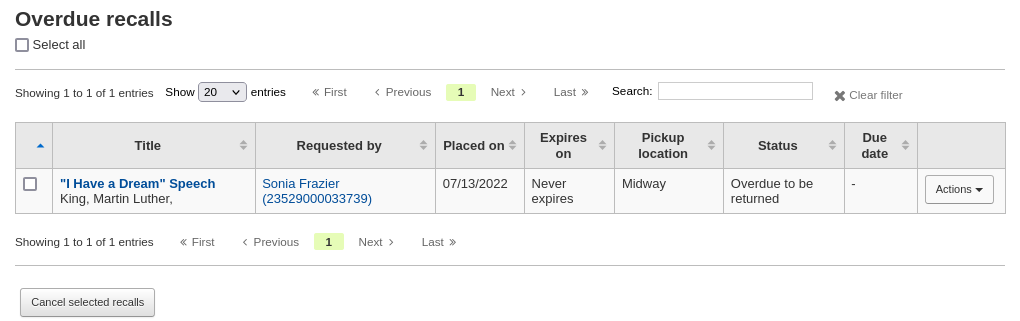
From this list, staff can cancel active recalls either individually by clicking the “Actions” button and selecting the “Cancel” option.
Or by selecting several recalls and clicking the “Cancel selected recalls” button at the bottom of the screen.
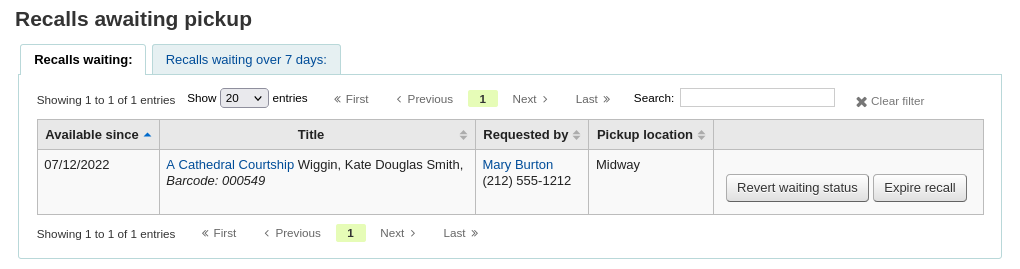
Recalls awaiting pickup
The recalls awaiting pickup list shows all the recalls that are currently waiting for the patron to come and get them.
This list is divided in two tabs:
Recalls waiting: shows all the recalls currently awaiting pickup.
Recalls waiting over x days: shows the recalls that have been waiting for more than the number of days specified in the RecallsMaxPickUpDelay system preference.
From this list, staff can revert waiting recalls by clicking on the “Revert waiting status” button on the right.
Staff can also manually expire recalls by clicking on the “Expire recall” button on the far right.
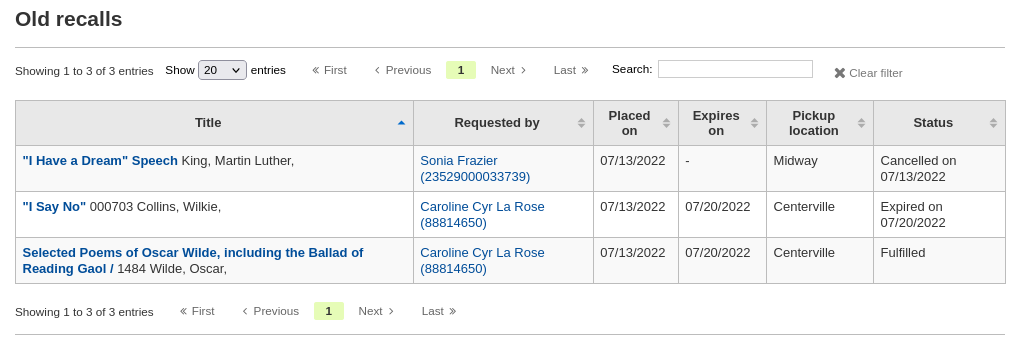
Old recalls
The old recalls list shows all the inactive recalls (completed, cancelled and expired).
Transferencias
Si usted trabaja en un sistema de múltiples sedes, puede transferir ítems de una biblioteca a otra mediante el uso de la herramienta de transferencia. Para transferir un ítem
Get there: Circulation > Transfer
Para transferir un ítem
Haga clic en “Transferir” en la página de Circulación
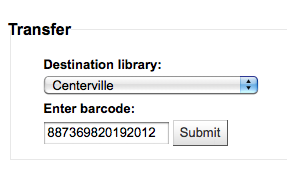
Ingrese la biblioteca a la que quiere transferir el ítem
Escanee o tipee el código de barras del ítem que desee transferir
Haga clic en “Enviar””

El ítem ahora está en tránsito

Cuando el ítem llega a la otra sucursal el bibliotecario deberá comprobar si el ítem ya no está en tránsito
El ítem no se moverá de forma permanente a la nueva biblioteca
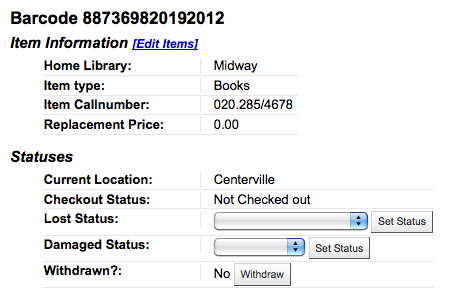
The item shows the same “Home library” but has updated the “Current location” to note where it resides at this time
Set library
By default you will enter the staff client as if you are at your home library. This library will appear in the top right of the staff client.

Esta es la biblioteca en la que todas las transacciones de circulación ocurrirán. Su está en otra biblioteca (o en un Libromovil) querrá establecer su biblioteca antes de comenzar a circular ítems. Para hacer esto puede hacer clic en “Establecer” arriba a la derecha en la página de Circulación.
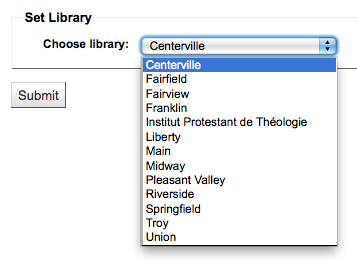
Una vez haya hecho sus cambios su nueva biblioteca aparecerá arriba a la derecha.
Fast add cataloging
Sometimes circulation librarians need to quickly add a record to the system for an item they are about to check out. This is called “Fast add”. To allow circulation librarians access to the Fast add cataloging tool, simply make sure they have the fast_cataloging permissions. There are two ways to add titles via fast add. If you know that you’re about to check out an item that isn’t in you catalog you can go to the Circulation module and click “Fast cataloging.”
La interfaz de catalogación se abrirá con la hoja de trabajo de catalogación rápida:
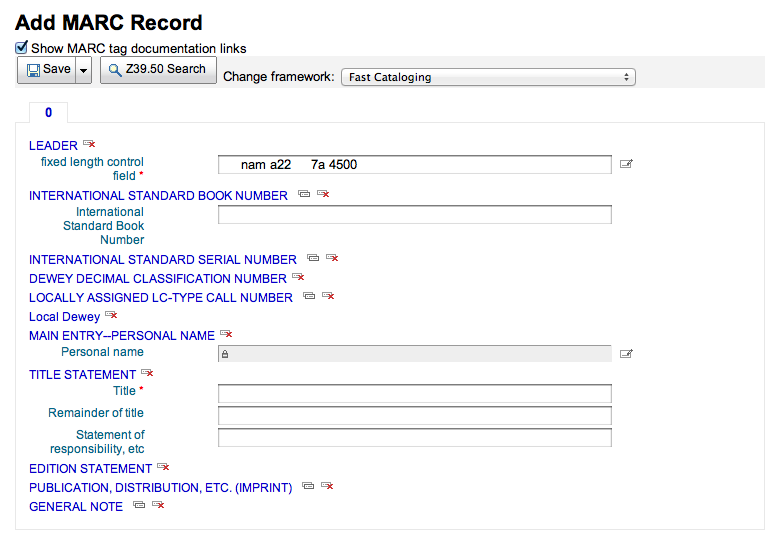
Luego de ingresar sus datos de catalogación se le pedirá ingresar datos de ítems. Ingrese los códigos de barra, código de colección, etc y guarde el ítem antes de prestarlo.
La otra forma de catalogación rápida es desde la pantalla de préstamo. Cuando ingresa al prestar un código de barras que Koha no puede encontrar, le consultará si desea utilizar catalogación rápida para agregar el ítem a Koha y prestarlo.
Hacer clic en “Catalogación rápida” lo llevará al formulario de catalogación rápida desde donde podrá ingresar información del título

Después de hacer click en «Guardar» Usted sera llevado al registro de items donde el código de barras ya estará llenado con el código de barras que Usted esta tratando de prestar.
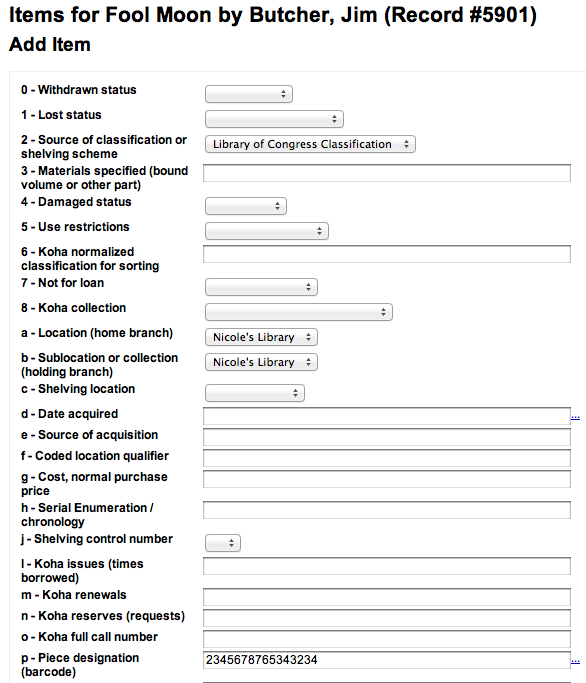
Después de hacer click en el botón «Agregar Item» el item automáticamente sera verificado o asignado al usuario al cual Usted estaba tratando de prestar el libro originalmente.

Circulation reports
La mayoría de informes pueden ser encontrados a través del módulo de Informes, pero algunos de los informes más comunes están disponibles por medio del módulo de Circulación.
Get there: Circulation > Circulation reports
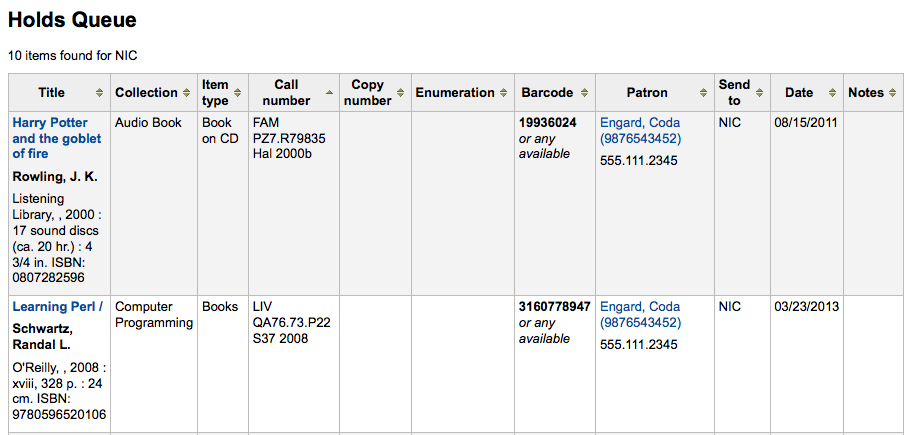
Holds queue
This report will show you all holds waiting to be pulled off the shelf at your library.
Nota
You can customize the columns of this table in the “Table settings” section of the Administration module (table id: holds-table).
To generate this report, you must have the Build holds queue cron job running. This cron job is a script that should be run periodically if your library system allows borrowers to place on-shelf holds. This script decides which library should be responsible for fulfilling a given hold request.
It’s behavior is controlled by the system preferences StaticHoldsQueueWeight, RandomizeHoldsQueueWeight and UseTransportCostMatrix.
If you do not want all of your libraries to participate in the on-shelf holds fulfillment process, you should list the libraries that *do* participate in the process here by inputting all the participating library’s branchcodes, separated by commas ( e.g. «MPL,CPL,SPL,BML» etc. ).
By default, the holds queue will be generated such that the system will first attempt to hold fulfillment using items already at the pickup library if possible. If there are no items available at the pickup library to fill a hold, build_holds_queue.pl will then use the list of libraries defined in StaticHoldsQueueWeight. If RandomizeHoldsQueueWeight is disabled (which it is by default), the script will assign fulfillment requests in the order the branches are placed in the StaticHoldsQueueWeight system preference.
For example, if your system has three libraries, of varying sizes ( small, medium and large) and you want the burden of holds fulfillment to be on larger libraries before smaller libraries, you would want StaticHoldsQueueWeight to look something like «LRG,MED,SML».
Si quiere que la carga de cumplimiento se extienda por igual por todas las bibliotecas del sistema, sólo tiene que activar RandomizeHoldsQueueWeight. Cuando esta preferencia del sistema está activada, el orden en el que las bibliotecas se les pedirá que satisfagan una reserva se asignará aleatoriamente cada vez que se vuelve a generar la lista.
An alternative to static and randomized is using the Tansport cost matrix. It takes precedence in controlling where holds are filled from and allows you to define the “cost” of transport between any two libraries. To use the Transport cost matrix simply set your UseTransportCostMatrix preference to “Use”.
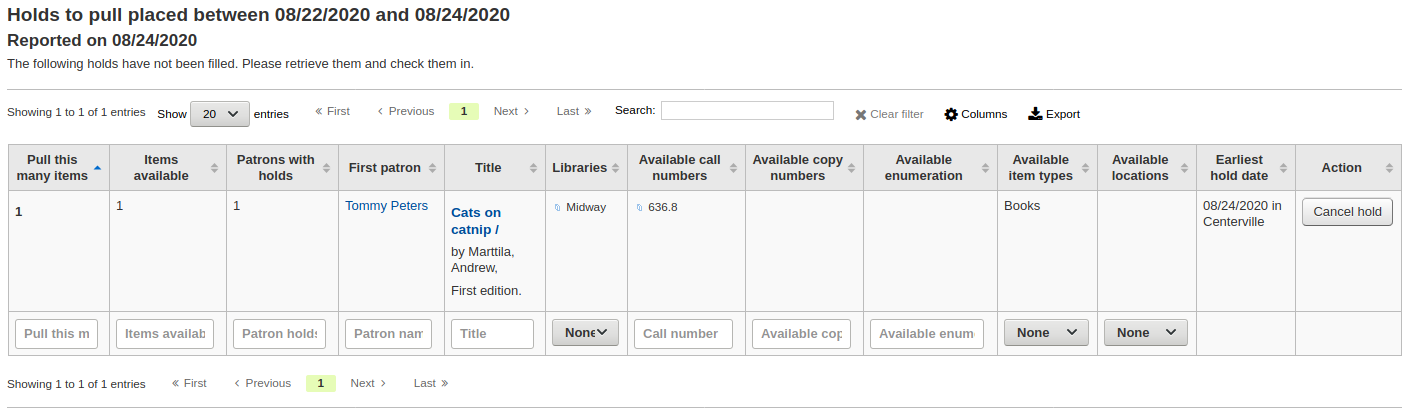
Reservas a preparar
This report will show you all of the items that have holds on them that are available at the library for pulling. If the items are available at multiple libraries then all libraries with that item available will see the hold to pull until one library triggers the hold.
If enabled, clicking the Mark item as lost button will mark item as lost and notify the requesting patron depending on the value of the CanMarkHoldsToPullAsLost system preference.
Nota
You can customize the columns of this table in the “Table settings” section of the Administration module (table id: holds-to-pull).
You can choose which LOST value to set the item to with the UpdateItemWhenLostFromHoldList system preference.
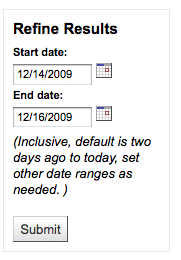
Puede limitar los resultados utilizando la casilla Refinar resultados en el lado izquierdo de la página:
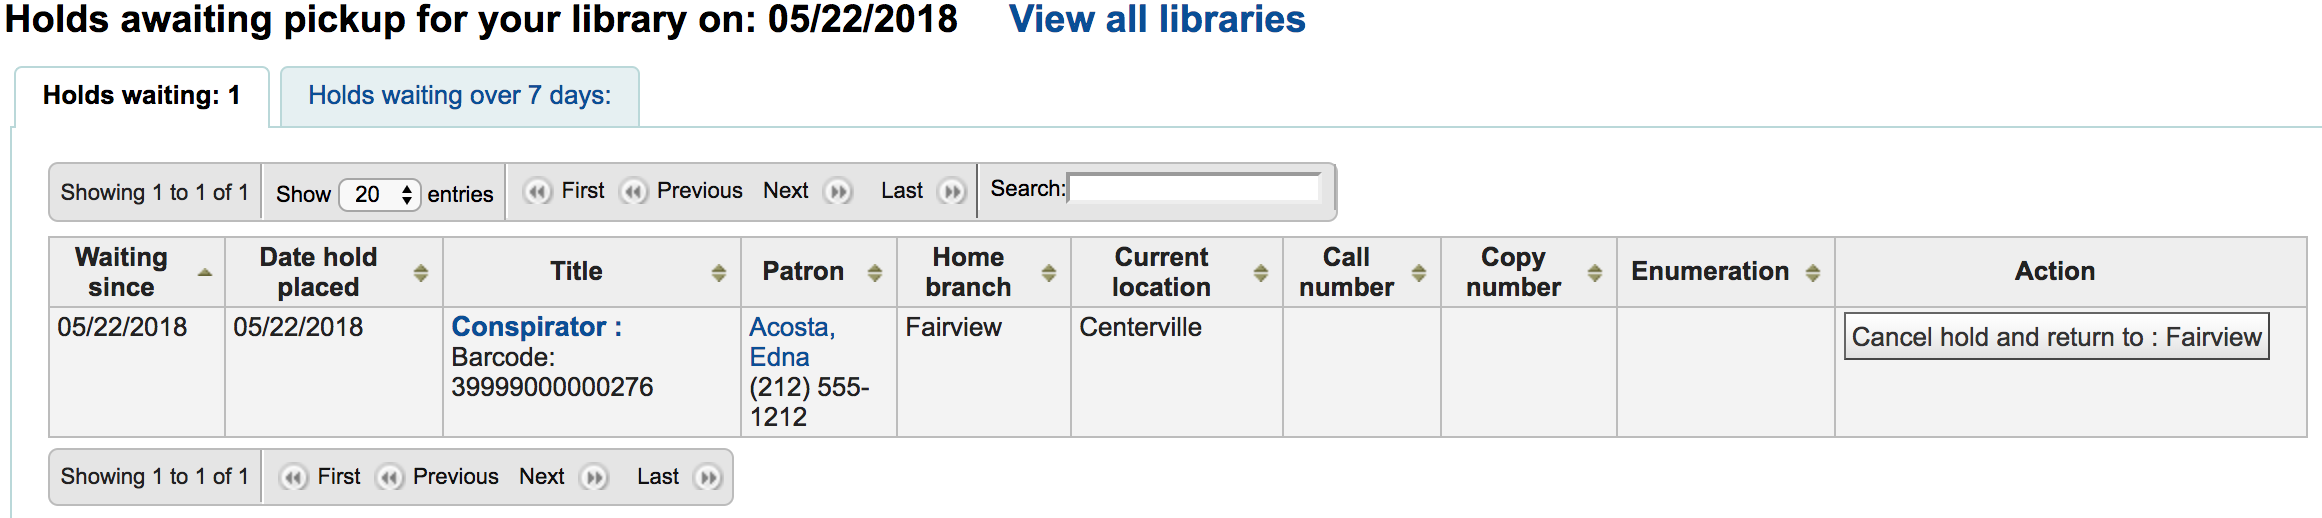
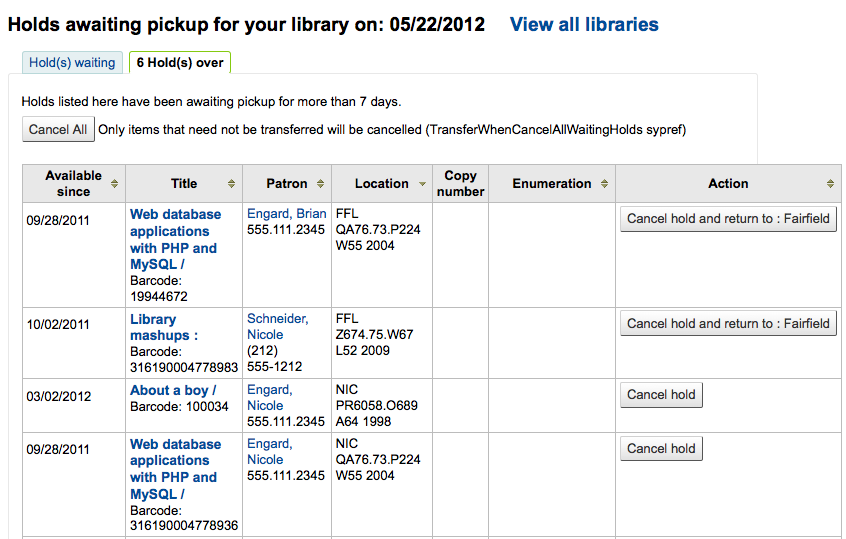
Reservas a retirar
Este informe mostrará todas las reservas que están a la espera de los usuarios para ser recogidas.
Nota
You can customize the columns of this table in the “Table settings” section of the Administration module (table id: holdst).
Items that have been on the hold shelf longer than you normally allow (based on the ReservesMaxPickUpDelay preference value) will appear on the “Holds over” tab, they will not automatically be cancelled unless you have set the cron job to do that for you, but you can cancel all holds using the button at the top of the list.
Nota
You can customize the columns of this table in the “Table settings” section of the Administration module (table id: holdso).
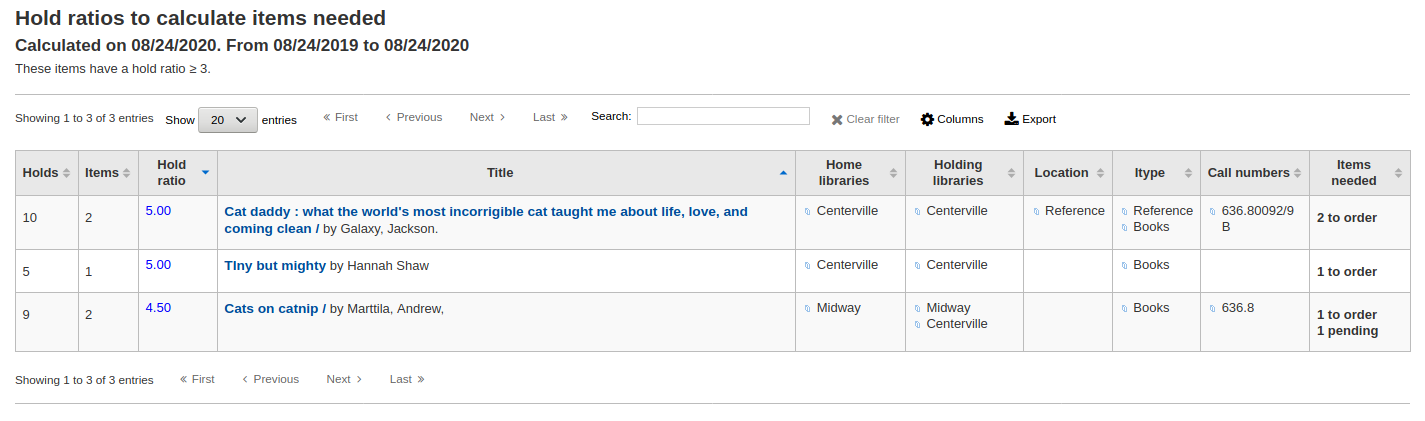
Proporción de reservas
La proporción de reservas es de ayuda para decisiones acerca del crecimiento de su colección. Usando este informe podrá ver el número de usuarios que tienen reservas y si usted debería comprar más. Por defecto se configurará que la biblioteca necesita 3 ítems por reserva. En el informe se le dirá cuántos ítem adicionales deben adquirirse para cumplir con esta cuota.
Nota
You can customize the columns of this table in the “Table settings” section of the Administration module (table id: holds-ratios).
Transferencias a recibir
Este informe una lista de todos ítems que Koha piensa que están en tránsito a su biblioteca.
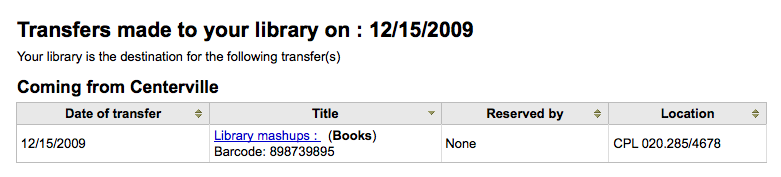
Si las transferencias se demoran en llegar a la biblioteca podrá ver un mensaje que indica qué cuan demorados están los ítems.
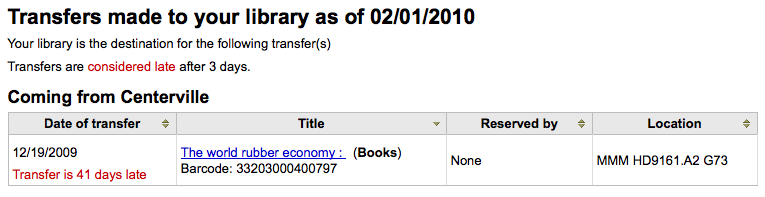
Importante
An item is considered late based on the number of days you have entered in the TransfersMaxDaysWarning system preference.
Article requests
Article requests are somewhat similar to holds, but are not requests for an item to check out. Instead, article requests are requests for a photocopy of a particular section of a book or an article from a serial issue. This is very common in academic libraries where researchers may request a copy of a single article found in a journal.
Setting up article requests
First, enable your system preference for ArticleRequests.
Set to “Enable” patrons to place article requests.
Next you will need to decide how your patrons will make requests, either record only, item only, or both record and item level.
You can set 3 different system preferences for mandatory fields to be filled in depending on how your records are requested.
ArticleRequestsMandatoryFields: make the following fields mandatory for records that are record level or item level requestable
ArticleRequestsMandatoryFieldsItemsOnly make the following fields mandatory for records that are only item level requestable
ArticleRequestsMandatoryFieldsRecordOnly make the following fields mandatory for records that are only record level requestable
The ArticleRequestsOpacHostRedirection system preference is used if you create analytical records. If enabled, it will redirect the patron from the child record to the host record in the OPAC.
The ArticleRequestsSupportedFormats system preference determines the various formats patrons can request their articles in (either photocopy or scan).
Next you will want to go into your circulation and fines rules matrix and select each rule for which you want to allow requests.
You can allow requests to be made at the record level, item level, yes (which means both) and no (which means no article requests may be placed).
You can also limit the number of open article requests a patron can have at one time by patron category in the Default open article requests limit section of the circulation rules page.
You can set up a fee for each article request in the Default article request fees section of the circulation rules page.
Placing article requests
Now you can place requests on both the staff client and OPAC.
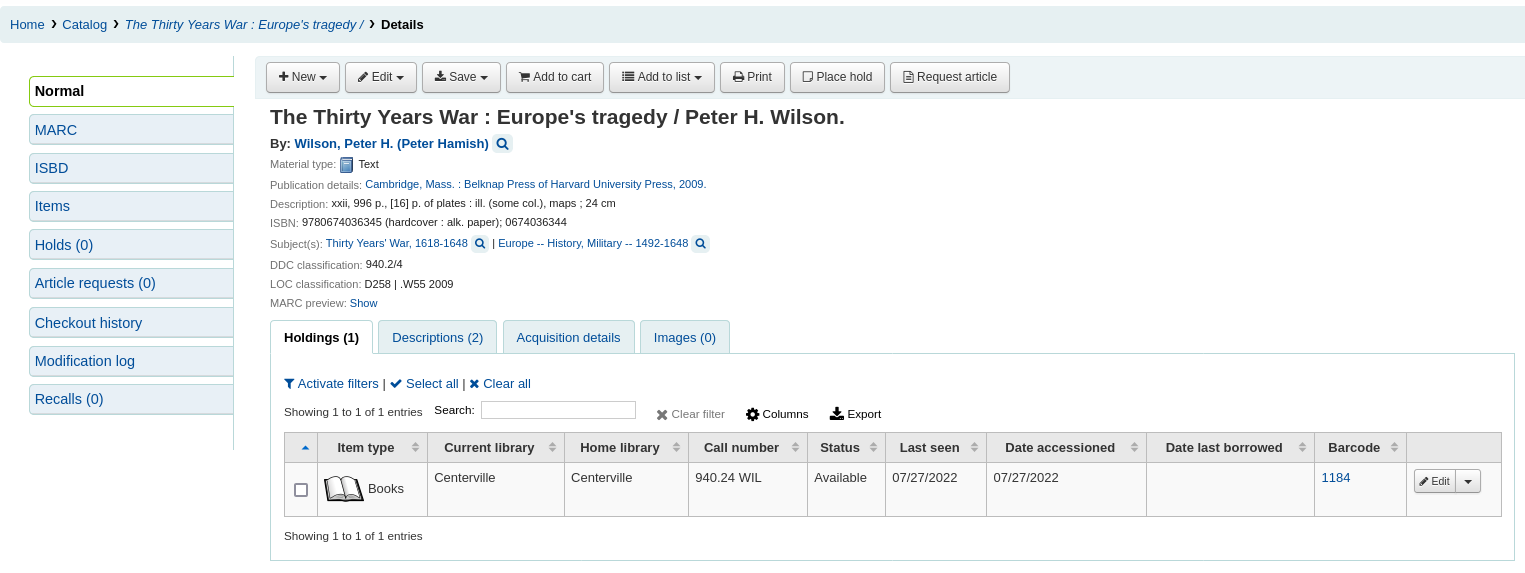
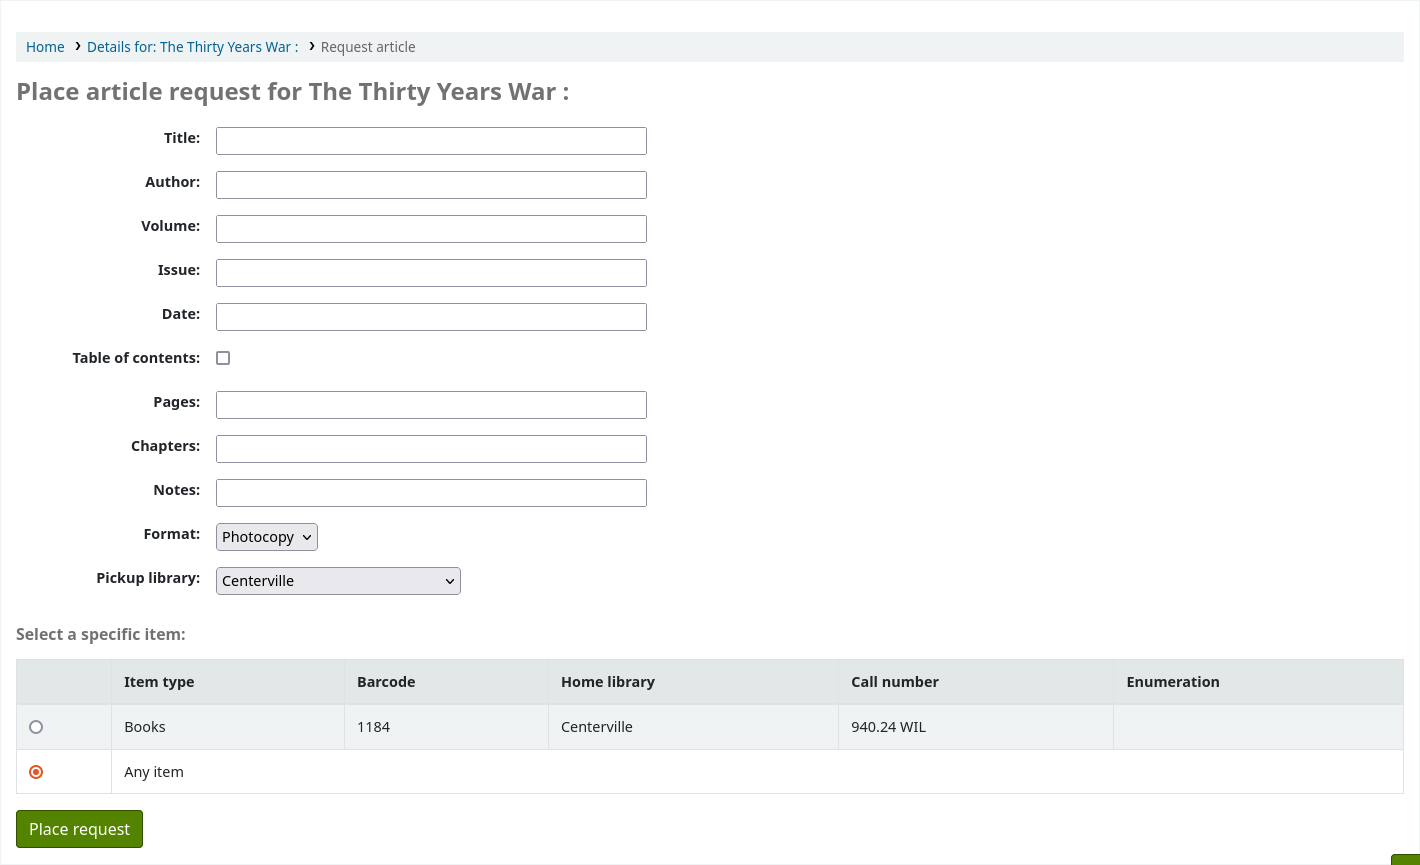
In the staff client, on the record details page, you will see a “Request article” button at the top and an “Article requests” tab to the left. The two options lead to the same page.
Just like a hold, you will be prompted to enter the patron’s card number or name.

If there is a fee, a message will appear to inform the staff member.

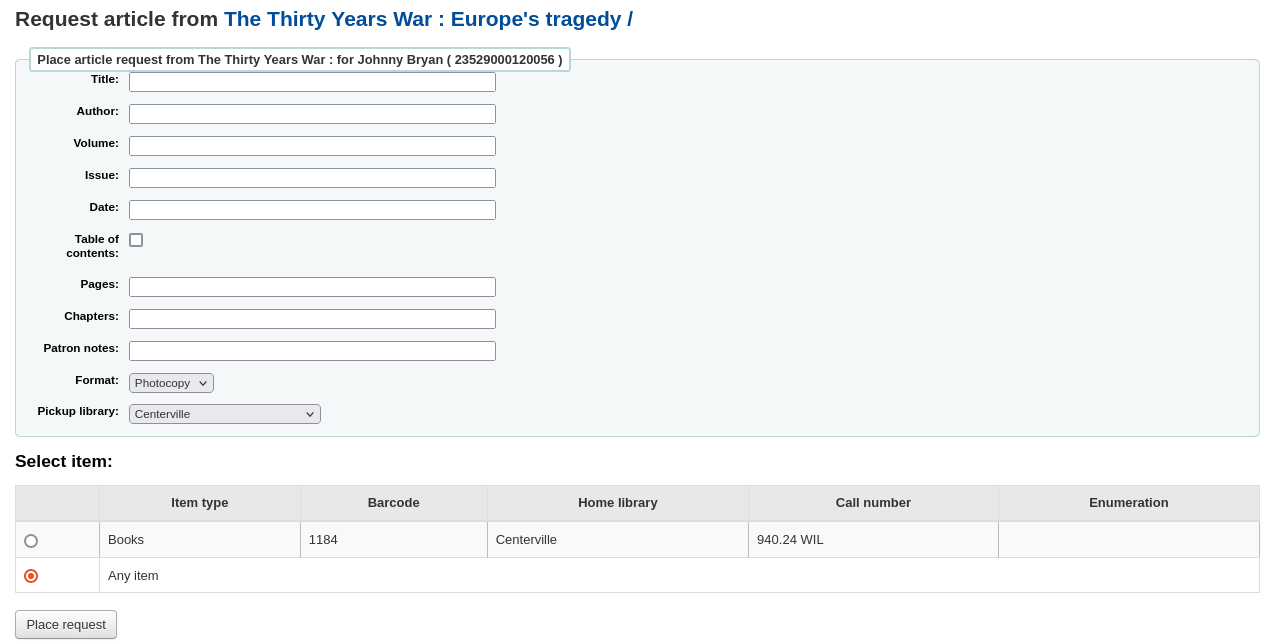
Fill in the form.
Nota
The mandatory fields are set through the three system preferences ArticleRequestsMandatoryFields, ArticleRequestsMandatoryFieldsItemsOnly, and ArticleRequestsMandatoryFieldsRecordOnly.
Title: enter the title of the requested article or chapter
Author: enter the author of the requested article or chapter
Volume: enter the volume in which this article or chapter is found
Issue: enter the issue in which this article is found
Date: enter the date of the issue in which this article is found
Table of contents: check to indicate the patron wants a copy of the table of contents
Pages: enter the pages to photocopy or scan
Chapters: enter the chapters to photocopy or scan
Patron notes: enter any relevant notes
Format: choose the format in which the patron wishes to receive this article or chapter
Nota
The possible formats are defined in the ArticleRequestsSupportedFormats system preference.
Pickup library: choose the library at which the patron wishes to pick up their photocopy
If allowed, choose the specific item to request.
Then, click on “Place request”.
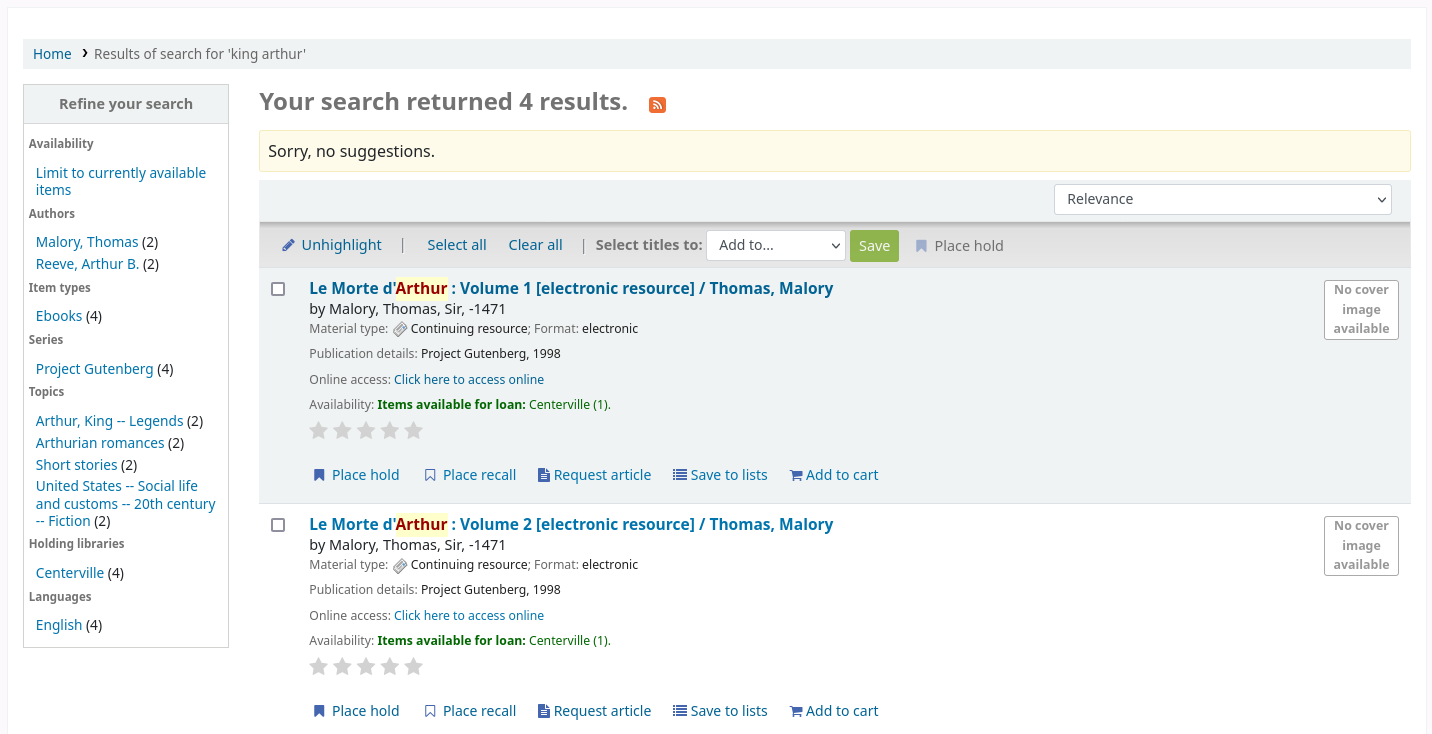
From the OPAC, patrons can place requests themselves either from the results list
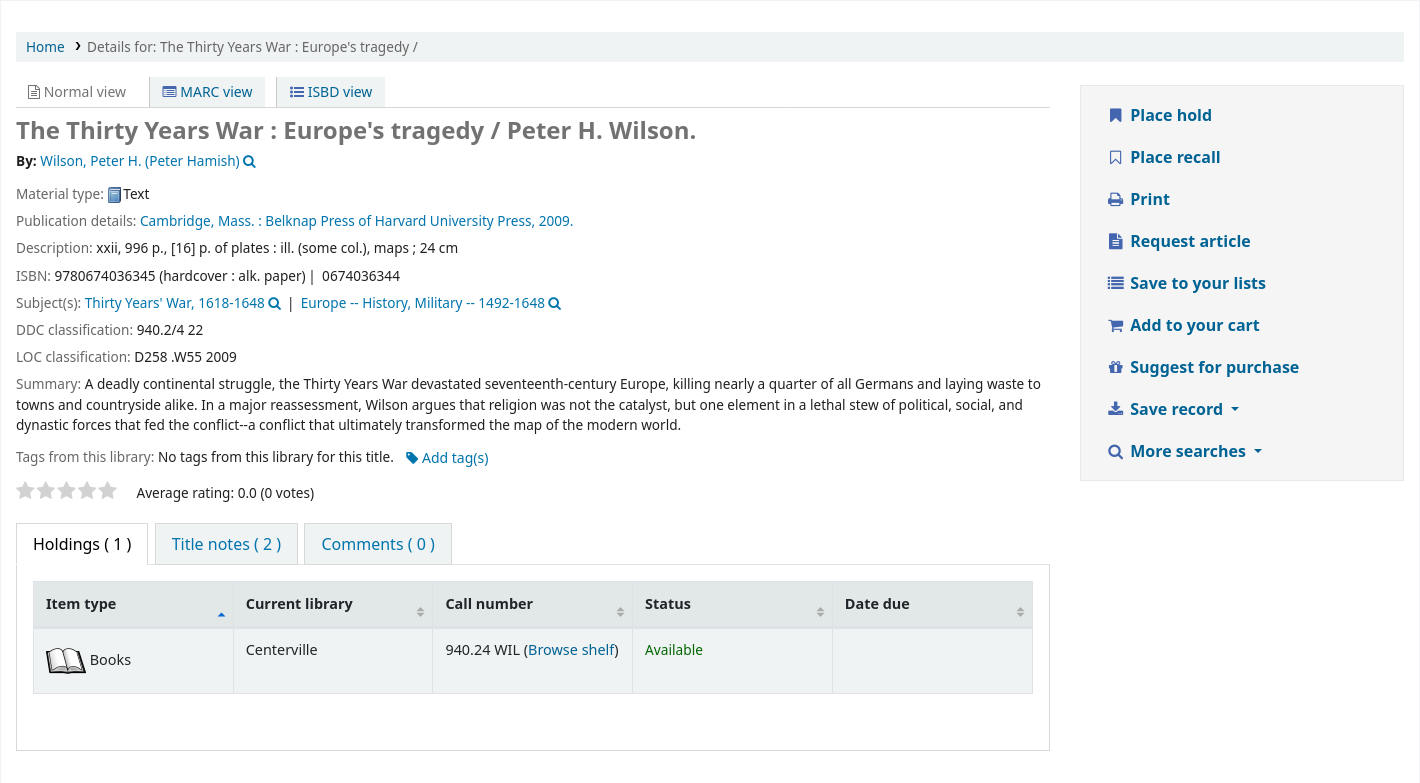
or by going to the detailed record.
As with a hold, if the patron is not logged in, they will be asked to do so.
The form is the same as the one in the staff interface.
If there is a fee, a message will appear to inform the patron.

If allowed, the patron can choose the specific item to request.
From their account, the patron will be able to follow the progress of their request from “new”

to “pending”, if necessary,

to “processing”.

The patron will also receive an email notification when the status of the request changes.
Once the request is completed the patron will receive an email notification and the article request will no longer appear in their account.
Email notifications can be customized in notices and slips.
Managing article requests
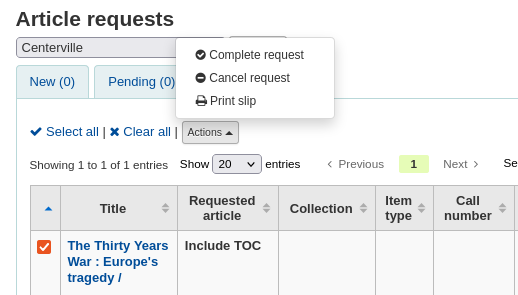
Once the article request has been placed, staff will see new requests at the bottom of the home page on the staff client. (In the same location as tags, comments and modifications).
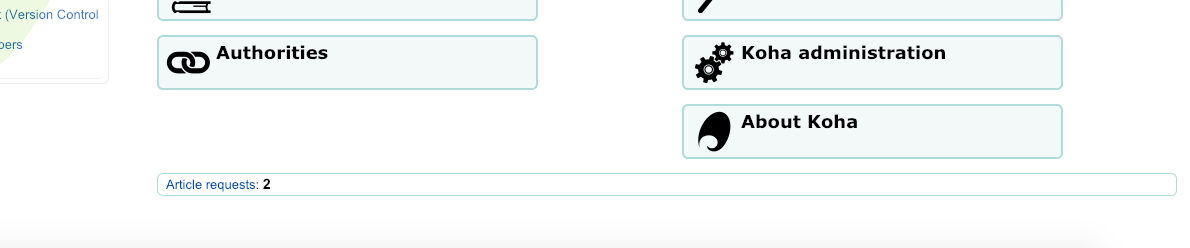
From there staff will be able to select requests to process.
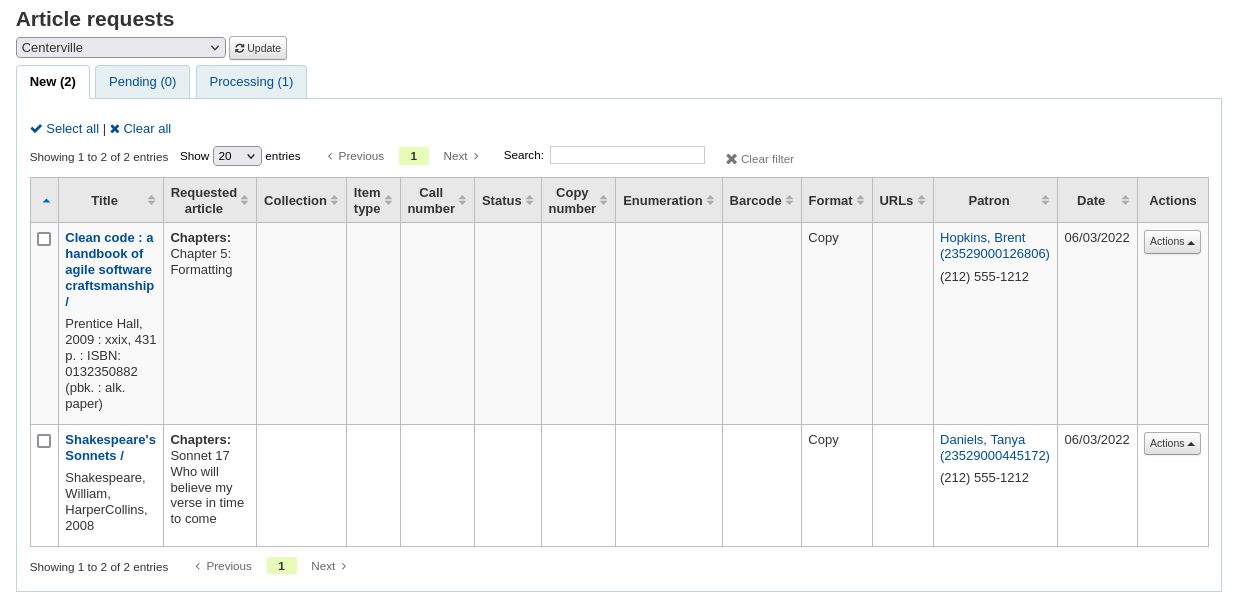
New requests are in the “New” tab.
The first step would be for a staff member to process the request, that moves the request to the processing tab and alerts other staff members that the request is in process. In the actions column, click on the dropdown menu and select “Process request”. This will move the request to the processing tab.
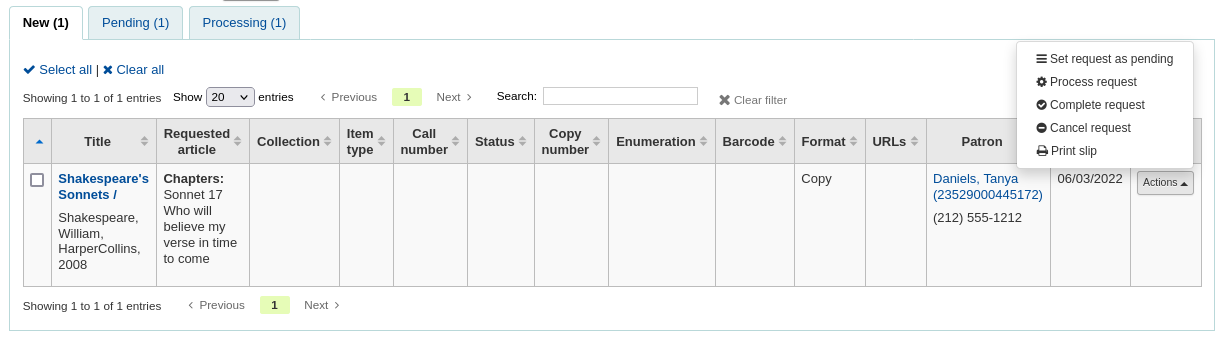
If for any reason, a request cannot be processed right away (for example, if the title is currently checked out), the status can be changed to “Pending”. This will send a notice to the patron indicating the request has been received and seen, but has yet to be processed.
Next staff will go to the shelf and make a copy of the requested article.
Once that is complete, staff can print the article request slip (this can be customized in notices and slips under AR_SLIP) and staple or paper clip it to the article. In the actions column, you can select the dropdown and select print slip.
Finally, staff will select the complete article request from the actions dropdown menu which will send a notice to the patron who made the request letting them know the request is ready for pickup.
This removes the article request from the processing tab.
Nota
Actions can also be made in bulk by checking the boxes next to the requests to process or by clicking “Select all”, and choosing the new status from the actions menu on top of the table.
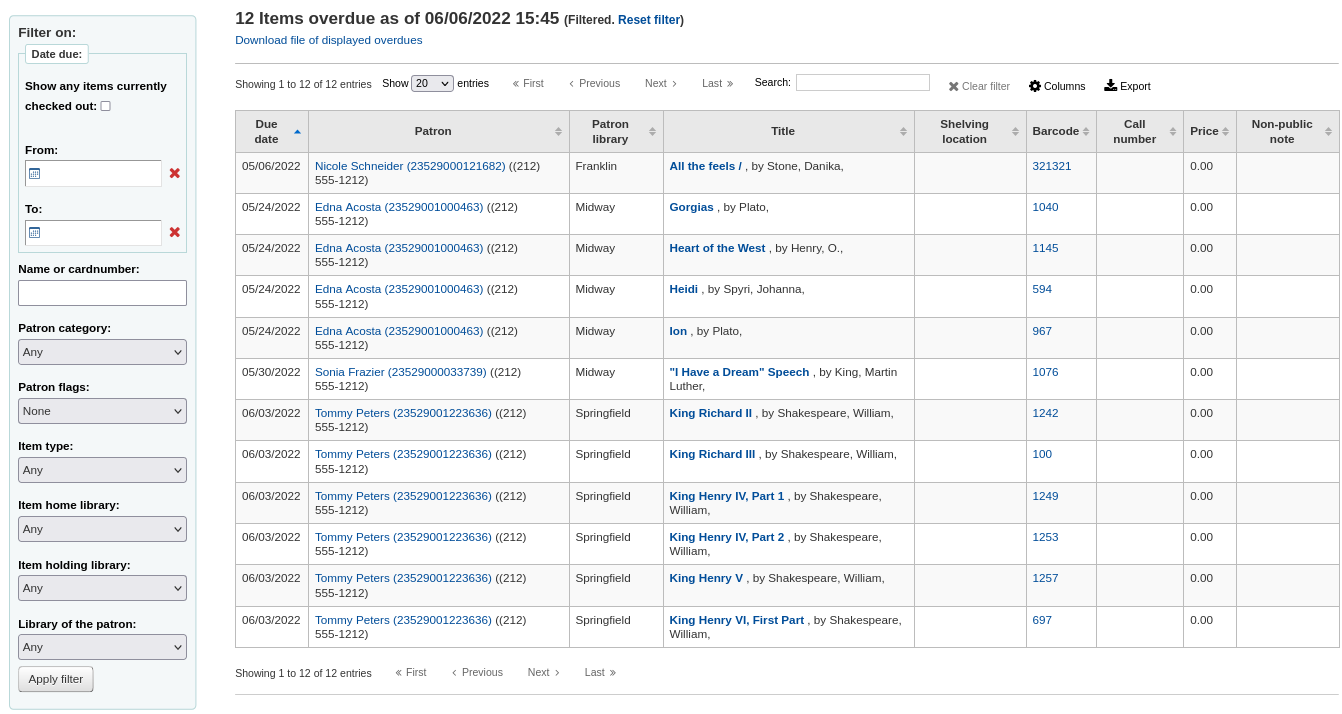
Retrasos
Este informe mostrará una lista de todos los ítems que están atrasados en su biblioteca.
Advertencia
Para las bibliotecas con una gran cantidad de usuarios, este informe puede llevar una cantidad significativa de tiempo para ejecutarse.
Large libraries can choose to filter the report before it runs by setting the FilterBeforeOverdueReport system preference to “Require”.
Nota
You can customize the columns of this table in the “Table settings” section of the Administration module (table id: circ-overdues).
El informe se puede filtrar usando las opciones de menú que se encuentran a la izquierda del informe.
Nota
La casilla de selección “Mostrar los ítems prestados” lo que hace básicamente es pasar de un informe de vencimientos a un informe de préstamos. Se mostrarán todos los títulos prestados, independientemente de la fecha de vencimiento.
The report result can be downloaded via the “Download file of displayed overdues” link or the “Export” button at the top of the table.
Retrasos con multas
Este informe mostrará cualquier retraso en su biblioteca que tenga multas pendientes en el.
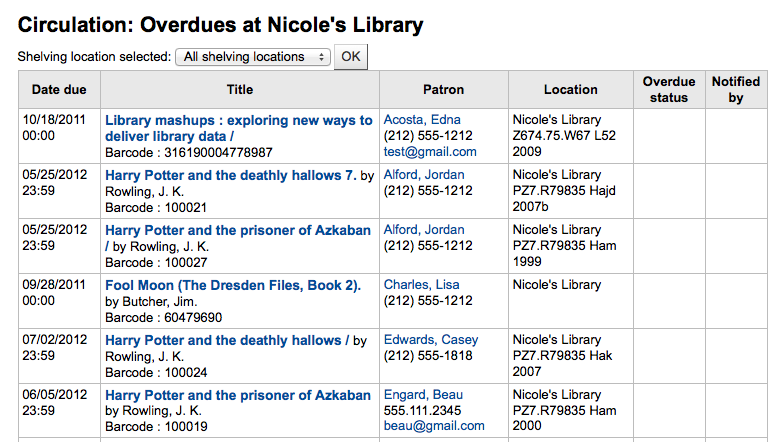
If you would like to limit the report you can use the pull down menu at the top to limit to a specific shelving location at your branch. To see overdues with fines at other branches you will have to change your branch or log in at that branch.
Importante
If you do not charge fines and/or don’t have the fines cron job running you will see no data on this report.
Préstamos in situ pendientes
If you are using the on site checkouts functionality (OnSiteCheckouts) then you’ll have a report to view all items that are currently checked out on site.
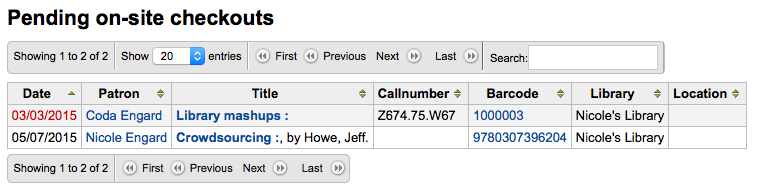
Esto mostrará una lista de la fecha de vencimiento (vencidos en rojo), quién tiene el ítem, la información del ítem y en qué biblioteca está el ítem.
Tracking in-house use
Muchas bibliotecas rastrean el uso de los ítems dentro de la biblioteca.
Nota
This is different from tracking on-site usage. In-house use is the use of items in the library by patrons without them having to check them out. On-site use is the use of items on site that must first be checked out. To learn more about on site usage please review the OnSiteCheckouts preference.
Tracking the use of items in the library without checking them out can be done in Koha one of two ways. The first is to create one or more Statistical Patrons. When collecting items that have been used within the library, you will want to check them out to your statistical patron:

En vez de marcar el ítem como “prestado”, el sistema registrará que el ejemplar ha sido utilizado a nivel interno:

Repita estos pasos para todos los ítems que se han prestado dentro de la biblioteca para disponer de estadísticas precisas del uso del ítem.
The other way to record local use of items is to set your RecordLocalUseOnReturn preference to “Record.” Then whenever you check an item in that is not checked out and not on hold a local use will be recorded.

Nota
If you have RecordLocalUseOnReturn set to “Record” you can still use your statistical patrons to record local use as well.
Self checkout
Koha comes with a very basic self checkout module. To enable this module you need to set the WebBasedSelfCheck system preference to “Enable.” To use this module you have to log in as a staff member with self_check permissions.
Nota
Create a staff patron specifically for this action so that you don’t leave a real staff client logged into a computer all day
There is no link to the Self checkout module, but a simple addition to the OPACUserJS system preference can add one.
$(document).ready(function(){
    $("#login .btn").parent().after("<p><a href=\"http://YOUR_KOHA_OPAC_URL/cgi-bin/koha/sco/sco-main.pl\" target=\"_blank\">Self-Checkout</a></p>");
});

**Important**

The code above has line breaks added to make it more readable,
please be sure to enter the above as one line in when putting it in
the system preference.
El enlace aparecerá entonces en la parte inferior de la página de ingreso:
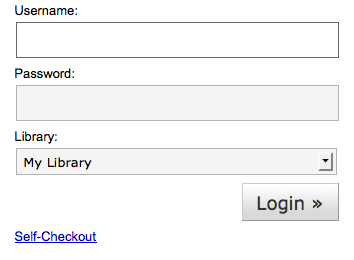
You can also access this module by going to: http://YOUR_KOHA_OPAC_URL/cgi-bin/koha/sco/sco-main.pl
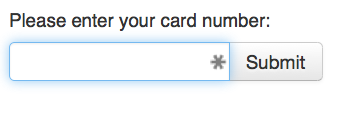
When on the self checkout page, depending on the value in your SelfCheckoutByLogin system preference you will be asked to enter your cardnumber
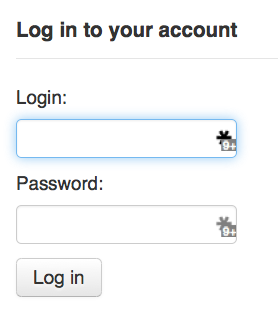
or your username and password
Una vez que introduce su número de socio, se le pedirán escanear los códigos de barras de los ítems que van a ser prestados
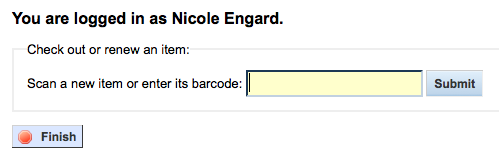
A medida que escanea los ítems éstos aparecerán debajo del cuadro de código de barras

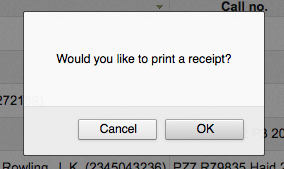
Cuando ha finalizado de escanear los ítems, es importante de hacer clic en el botón “Finalizar.” Esto le pedirá que imprima un recibo y finalice el módulo de auto-préstamo.
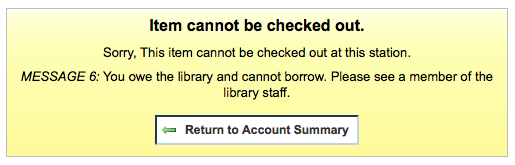
Al intentar prestar ítems hay algunos casos donde aparecerán mensajes de error y el usuario será dirigido al bibliotecario. Esto ocurrirá incluso si usted está permitiendo invalidar las funciones de circulación. Solo un bibliotecario puede invalidar un recuadro de circulación y por lo tanto los usuarios deben ir al bibliotecario que les ayude en estas situaciones.
Self check-in
In order to use the self check-in module, you must first set the :ref: SelfCheckInModule <selfscheckinmodule-label> system preference to “Enable”.
Then, you will have to create a patron with the self_checkin_module permission.
Nota
Create a staff patron specifically for this action so that you don’t leave a real staff client logged into a computer all day. You can give this patron only the aforementioned permission so it cannot be used for anything else.
Once this is done, you can head over to the self check-in page: http://YOUR_KOHA_OPAC_URL/cgi-bin/koha/sci/sci-main.pl
Log in with your staff patron with self check-in permissions
Once the computer or kiosk is set and the self check-in user logged in, patrons will be able to check-in their items themselves.
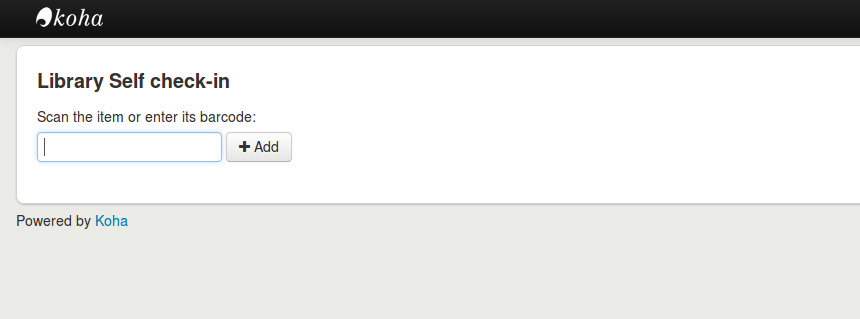
The patron will either scan the item’s barcode, if the computer is attached to a barcode scanner, or type in their item’s barcode in the box and click “Add” or press enter.
Nota
Most barcode scanners will automatically hit return after scanning.
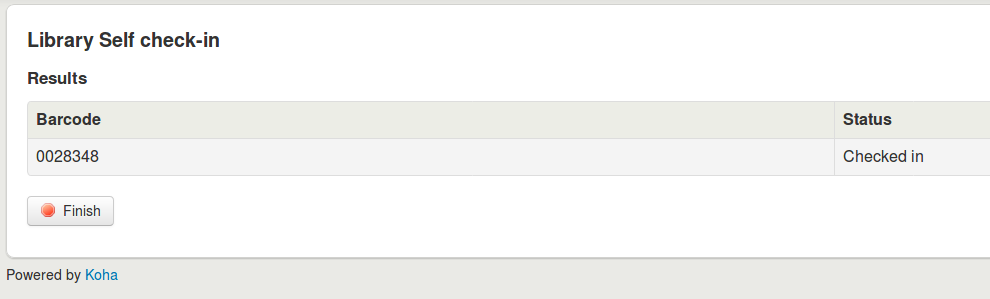
Once they have scanned or entered all their items” barcodes, they can click on the “Check-in” button to return all the items at once.
Importante
If the patron doesn’t click the “Check-in” button, the items will not be returned and will stay in their account.
Importante
The self check-in module will not warn user if the item is late, if they have fines, if the item is on hold for someone else, or if they have messages in their account.

They can then click “Finish” to return to the main self check-in page.
Nota
If the patron doesn’t click “Finish”, the screen will refresh after the timeout period specified in the SelfCheckInTimeout system preference.
Nota
Even if the patron doesn’t click “Finish” the item will still be checked in from their account.
You can customize the look of your self check-in screens by using the SelfCheckInUserCSS system preference or the SelfCheckInUserJS system preference.
You can add content, like instructions on how to use the self check-in system for example, by using the SelfCheckInMainUserBlock system preference.
Statistics about the transactions made through the self check-in module are logged into the action_logs table in the Koha database. You can therefore build a custom report to get the statistics you need.
Offline circulation utilities
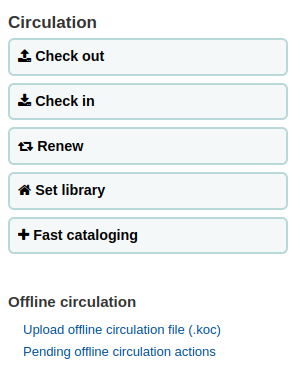
Koha le permite que continué las acciones de circulación mientras se encuentra fuera de línea, utilizando una de tres utilidades.
Offline circulation in Koha
If the AllowOfflineCirculation preference is set to “Enable” the library staff can continue to perform circulation actions within Koha when the system is offline. You will want to visit http://your-koha-staff-client-url/cgi-bin/koha/circ/offline.pl at least once while online and bookmark that page. That is the page you will go to when you are offline.
Importante
The offline interface uses HTML LocalStorage, which depending on the browser and user setting, is limited to 2.5MB or 5MB per domain. This means that larger systems will not be able to synchronize their data and are recommended to use either the Firefox or Windows application for offline circulation.
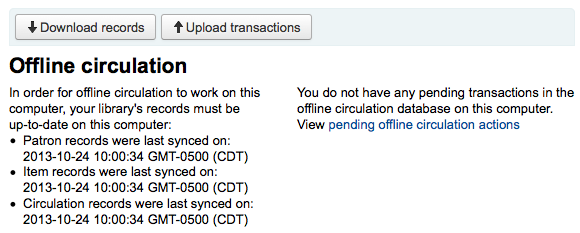
Configuración
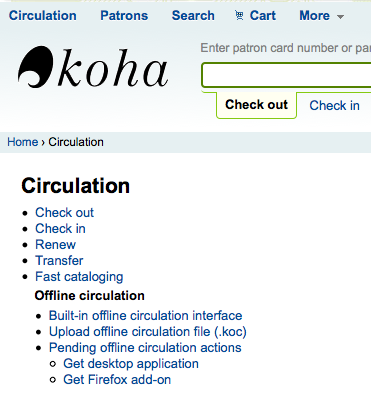
Antes de la primera vez que el sistema quede fuera de línea vaya a Circulación y seleccione “Interfaz integrada de circulación fuera de línea”
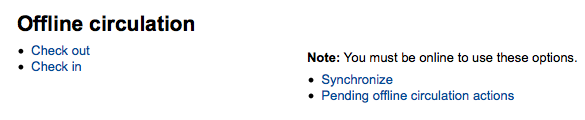
Y sincronice sus datos en cada computadora de circulación haciendo clic en el enlace “Sincronizar” a la derecha de la pantalla.
Importante
The offline interface uses HTML LocalStorage, which depending on the browser and user setting, is limited to 2.5MB or 5MB per domain. This means that larger systems will not be able to synchronize their data and are recommended to use either the Firefox or Windows application for offline circulation.
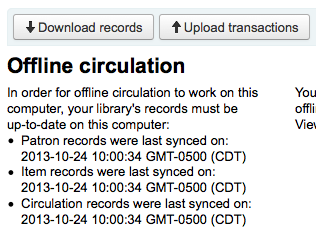
Esto le permitirá descargar una copia local de sus usuarios y datos de circulación. Haga clic en enlace “Descargar registros” en el tope de la página para sincronizar sus datos.
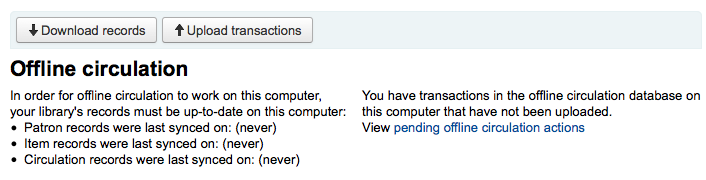
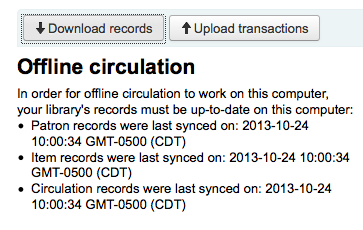
Una vez que los datos se han descargado verá la fechas en que sus datos fueron sincronizados por última vez a la derecha de cada conjunto de datos.
Esto debe hacerse de forma regular en preparación de una perdida de conexión inesperada.
Prestando
Cuando el sistema quede fuera de línea visite la página Circulación fuera de línea (http://your-koha-staff-client-url/cgi-bin/koha/circ/offline.pl) en Koha y haga clic en “Préstamo” o “Devolución” para realizar las acciones fuera de línea.
Se presta buscando el usuario por código de barras o nombre en el tope de la pantalla “Préstamo”. Luego de seleccionar el usuario se le presentará la información sincronizada del usuario, incluyendo multas y préstamos.
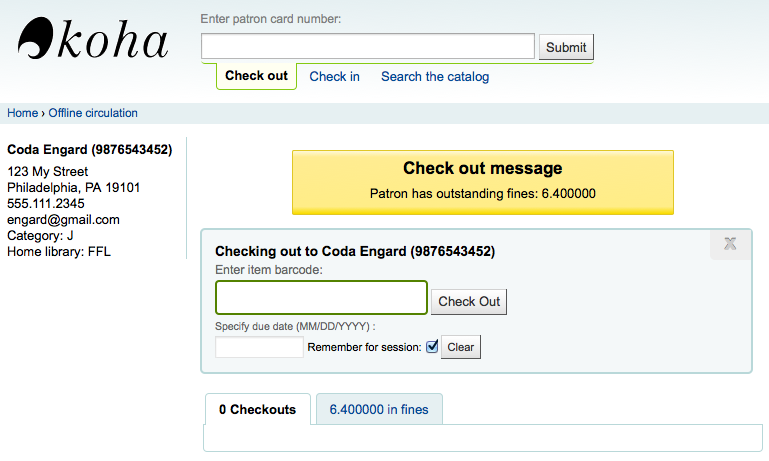
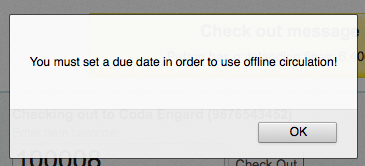
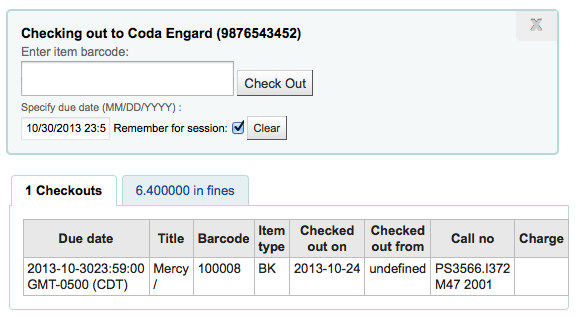
Escanee el código de barras del ítem que desea prestar e ingrese una fecha de devolución. Si no ingresa una fecha Koha le preguntará por una.
Una vez que el ítem se presta aparecerá por debajo de la información del usuario.
Koha offline uploading
Once the system is back online visit the “Synchronize” page on the Offline circulation module and click “Upload transactions”
Luego que los archivos se han subido puede hacer clic a la derecha en “Ver acciones pendientes de circulación fuera de línea” para procesar las acciones.
After clicking “View pending offline circulation actions” you will be brought to a summary of all of the actions you loaded in to Koha in your *.koc file.
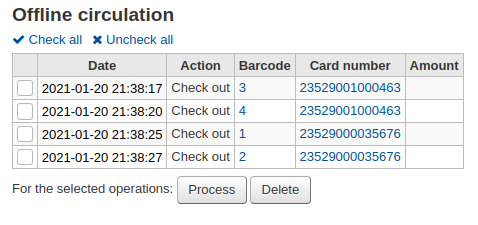
Una vez todos los logs de las computadoras de circulación estén cargados podrá verificarlos a todos o seleccionar aquellos que desee procesar en Koha.
Click on the “Process” button and Koha will record every stored transaction one by one. For each transaction, the status will change to:
«Éxito.» si la transacción fue procesada correctamente
«Usuario no encontrado.» si el número de carné del usuario es incorrecto
«Ítem no encontrado.» si el código de barras del ejemplar es incorrecto
«Ítem no prestado.» si recibe un ítem disponible
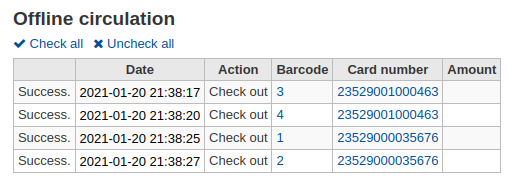
Una vez finalizado tendrá un resumen de todas sus transacciones
Firefox plugin
There is an offline circulation tool that you can add to your Firefox browser as an add-on. To do so, just go to https://addons.mozilla.org/en/firefox/addon/koct/ page and click on the «install now» button. You may have to confirm the installation, just click on «install now» and then restart Firefox to complete the installation.
Once you have installed the plugin and restarted Firefox, you will see the Koha logo in the download bar at the bottom right of Firefox.

Haciendo clic en el logotipo se abrirá la herramienta en su propia ventana.
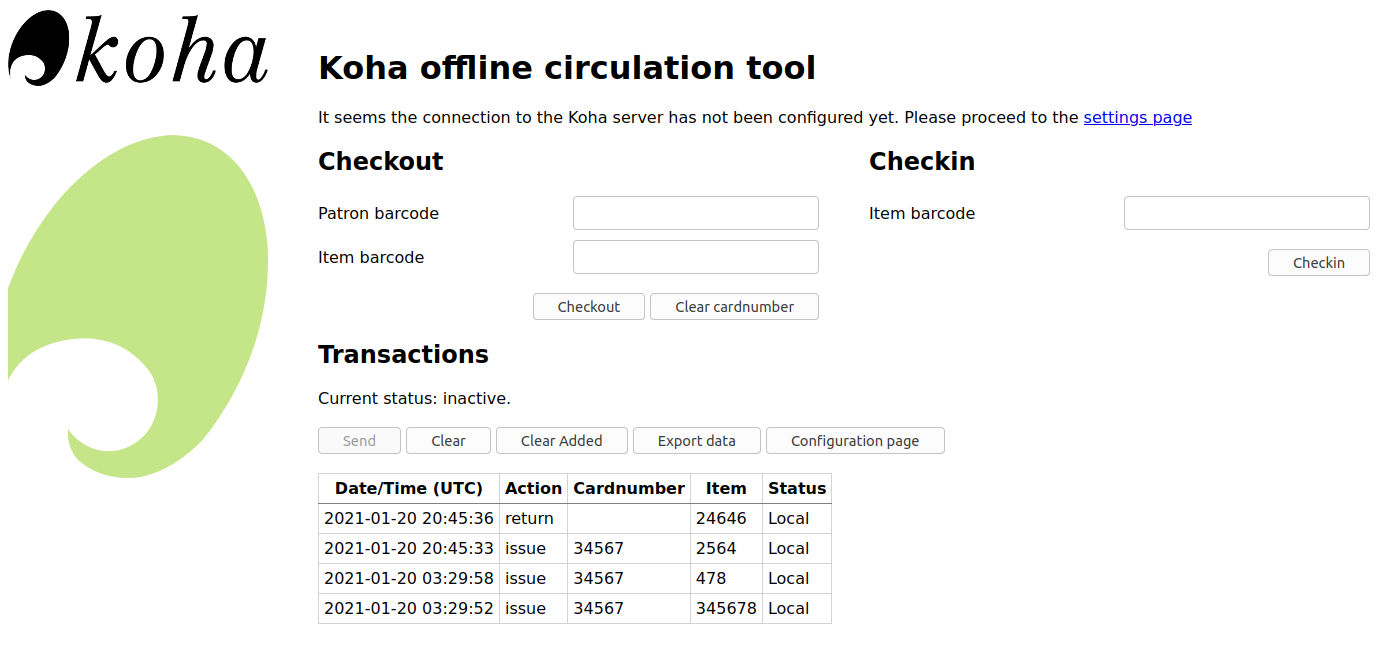
The plugin consists of three sections:
The “Check out” section is where you check out items
The “Check in” section is where you check in items
The ‘Transactions’ section is where you can track the transactions done while in offline mode
The transactions will keep information until you empty it.
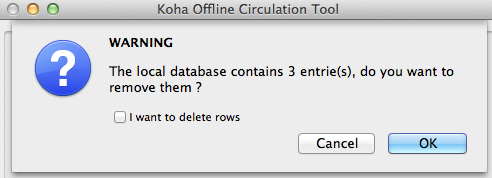
If you’d like to clear the transactions, click the “Clear” box before hitting the “OK” button.
The first thing you want to do then is to set up the plugin. Proceed to the settings page, linked in the top right of the page or under ‘Configuration page’ in the Transactions section.
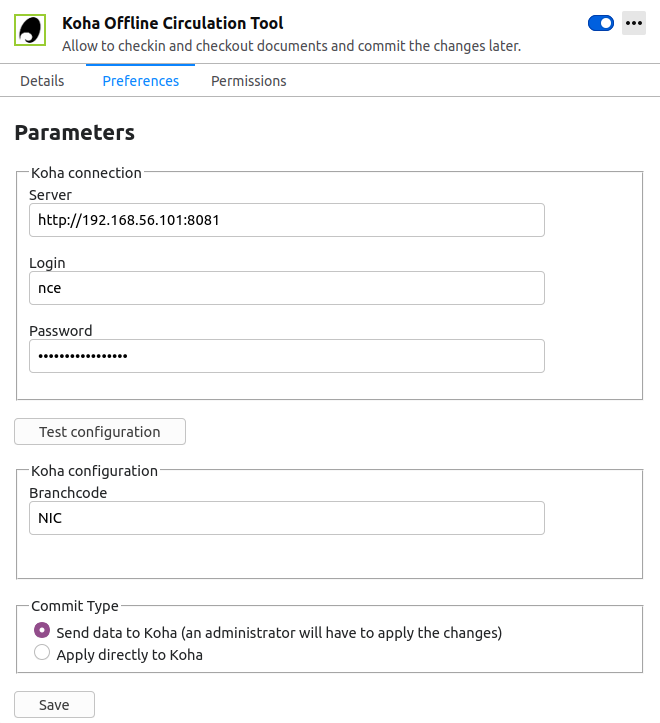
Answer the 5 questions presented:
Servidor = la URL de la interfaz de bibliotecario
Nombre de usuario = el nombre de acceso de su cuenta de bibliotecario
Password = contraseña de su cuenta personal
Branch code = the code for the branch where you are located
Commit Type = If you select ‘Send data to Koha’, your account will need to be approved by an administrator. If you select ‘Apply directly to Koha’, your account will not need to be approved.
Importante
Para guardar los ajustes, tendrá que cerrar la ventana del plugin y volver a abrirla haciendo clic de nuevo en el logo de Koha en la barra de complementos.
Nota
Puede crear una cuenta personal dedicado a la circulación fuera de línea. De tal manera que, no importa quien esté en el mostrador de circulación, todos pueden utilizar el mismo nombre de usuario. En ese sentido, se puede utilizar un nombre de usuario de grupo disponible ya para la circulación también.
Una vez tenga eso en su sitio usted puede comenzar a catalogar ítems por colores.
Préstamo:
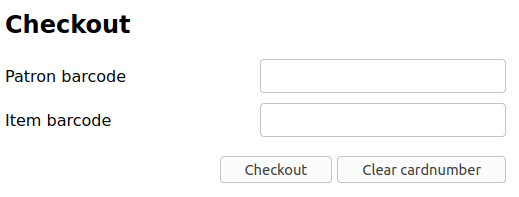
Under the “Checkout” heading
Escanee el código de barras del usuario
Escanee el código de barras del ítem
Click “Checkout”
Devolver:

Under the “Checkin” heading
Escanee el código de barras del ítem
Click “Checkin”
Each time, you check out or check in an item, a new transaction is recorded in the local plugin database. This is recorded in the Transactions section bellow.
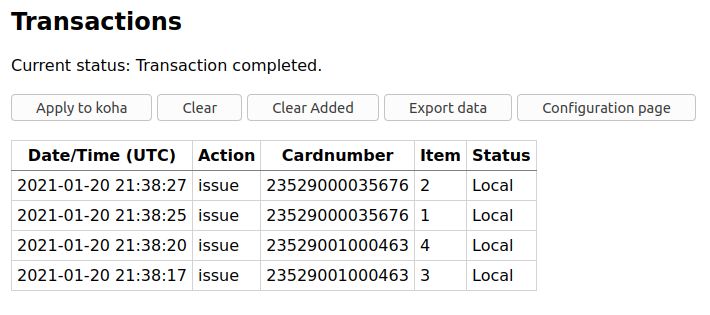
Nota
El estado será «Local.» mientras esté fuera de línea y no se procesarán las transacciones en Koha.
Cuando su conexión a internet se restaure, querrá tener esas transacciones en Koha. Antes de procesar estas transacciones, debe tener en cuenta algunos cuestiones.
Because you are not connected to your Koha database when using this plugin holds will need additional processing. If an item you check in while offline has a hold, the hold is kept on the item. Since, you can’t confirm holds found during the processing of every check in, the holds stay on the item and will need to be managed later. If you only checked in a few items you can just keep a record of them all. If you checked in a lot of items you can use the Holds queue once it rebuilds to see what holds made it to the shelf erroneously.
Del mismo modo, si un carnet de usuario ha expirado, la herramienta de circulación sin conexión no lo sabe, por lo que le dará préstamos al usuario sin importar si la cuenta del usuario está bloqueada.
Usted tiene dos opciones para agregar estos datos a Koha
Apply to Koha
If you checked in/out on more than one computer at the same time, what you want is to process every transaction consistently. Let’s say for instance that one patron checked a book out on one computer and then checked the same book in on another computer. To be consistent, you need to record the check out first and then the check in. Not the opposite! To do so, you need to group every transaction in one place, sort them all and then, process everything. So, you need to use the «Apply to Koha» option from every plugin/computer you worked with. This way, the log will go to Koha and be accessible from the Offline Circulation page.
Get there: Circulation > Pending offline circulation actions
Una vez todos los logs de las computadoras de circulación estén cargados podrá verificarlos a todos o seleccionar aquellos que desee procesar en Koha.
Haga clic en el botón Procesar y Koha grabará cada transacción almacenada una por una. Para cada transacción, el estado cambiará a:
«Éxito.» si la transacción fue procesada correctamente
«Usuario no encontrado.» si el número de carné del usuario es incorrecto
«Ítem no encontrado.» si el código de barras del ejemplar es incorrecto
«Ítem no prestado.» si recibe un ítem disponible
Una vez finalizado tendrá un resumen de todas sus transacciones
Aplicar directamente
Si ha realizado todas las acciones de circulación en un solo ordenador, entonces todo está arreglado para que pueda elegir «Aplicar directamente»
La columna de estado se actualizará para permitirle saber si se aplicaron las operaciones
«Éxito.» si la transacción fue procesada correctamente
«Usuario no encontrado.» si el número de carné del usuario es incorrecto
«Ítem no encontrado.» si el código de barras del ejemplar es incorrecto
«Ítem no prestado.» si recibe un ítem disponible
Offline circulation tool for Windows
The Offline circulation utility can be downloaded at: https://github.com/bywatersolutions/koha-offline-circulation/releases
To generate a borrowers.db file for loading in to the Windows tool you will need to run the file generator via a cron job.
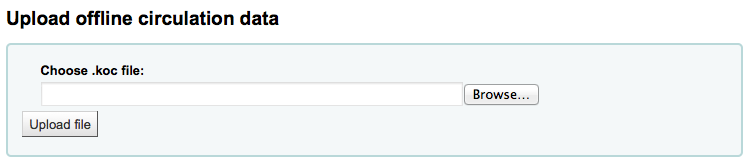
Upload offline circulation file
The offline circulation tool for Windows will generate a KOC file that you can upload into Koha once your system comes back up.
En el menú de circulación elegir “Cargar archivo de circulación fuera de línea (.koc)”
Browse your computer for the *.koc file
Una vez que el archivo se ha cargado, haga clic para procesar el archivo
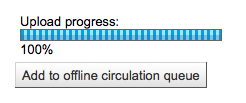
Cuando este aviso referencia la tabla de sedes (branches) se está refiriendo a la información de la sede de retiro.

After clicking “View pending offline circulation actions” you will be brought to a summary of all of the actions you loaded in to Koha in your *.koc file.
Una vez todos los logs de las computadoras de circulación estén cargados podrá verificarlos a todos o seleccionar aquellos que desee procesar en Koha.
Haga clic en el botón Procesar y Koha grabará cada transacción almacenada una por una. Para cada transacción, el estado cambiará a:
«Éxito.» si la transacción fue procesada correctamente
«Usuario no encontrado.» si el número de carné del usuario es incorrecto
«Ítem no encontrado.» si el código de barras del ejemplar es incorrecto
«Ítem no prestado.» si recibe un ítem disponible
Una vez finalizado tendrá un resumen de todas sus transacciones