Usuarios
Before importing or adding patrons be sure to set up your patron categories.
Agregar un nuevo usuario
Usuarios se agregan yendo al módulo “Usuarios”.
Get there: Patrons
Nota
Only staff with the edit_borrowers permission (or the superlibrarian permission) will be able to add patrons.
Una vez allí usted puede añadir un nuevo usuario.
Haga clic en “Nuevo usuario”

Nota
The fields that appear on the patron add form can be controlled by editing the BorrowerUnwantedField system preference.
Nota
Required fields are defined in the BorrowerMandatoryField system preference
First, enter the identifying information regarding your patron
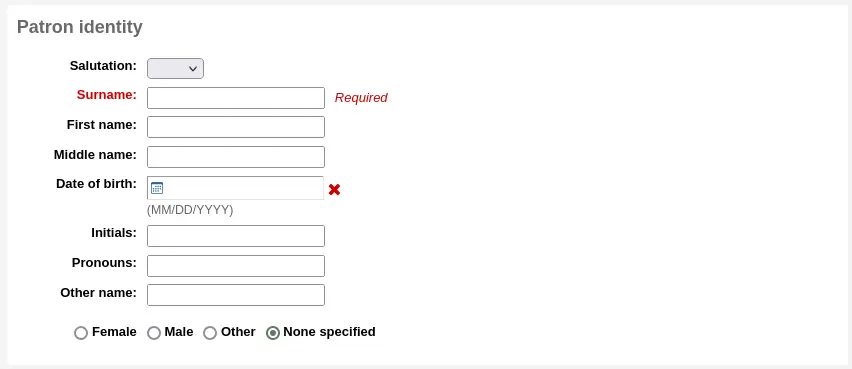
“Salutation” is populated by the BorrowersTitles system preference
Nota
If you’d like to prevent full names from printing on slips and you’re not using the Initials or Other name fields for anything else, you can use them for shortened versions of the name to then be printed on the slip.
Por ejemplo:
Firstname: Nicole C.
Surname: Engard
Initials: NCE
Then on the slip you can have it print the <<borrowers.initials>> instead of the full name (NCE).
O puede hacer algo como lo siguiente:
Firstname: Nicole
Surname: Engard
Initials: E
Then on the slip you can have it print the <<borrowers.initials>>, <<borrowers.firstname>> instead of the full name (E, Nicole).
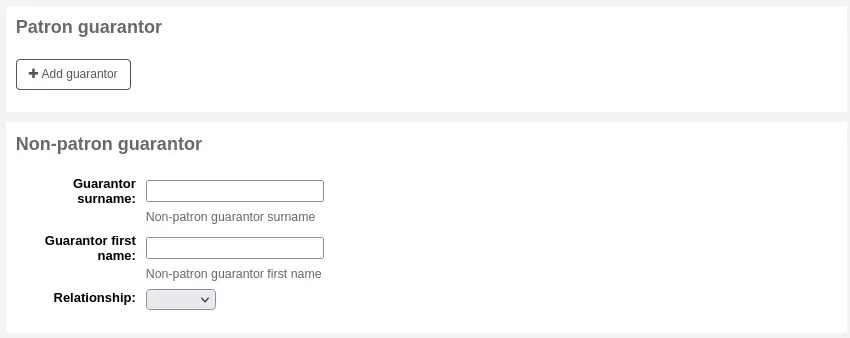
If this patron is a child, you will be asked to attach the child patron to an adult patron (guarantor)
Nota
Guarantors can only be attached to patrons whose category has “Can be guarantee” set to “Yes”.
Nota
This field can be made mandatory with the ChildNeedsGuarantor system preference.
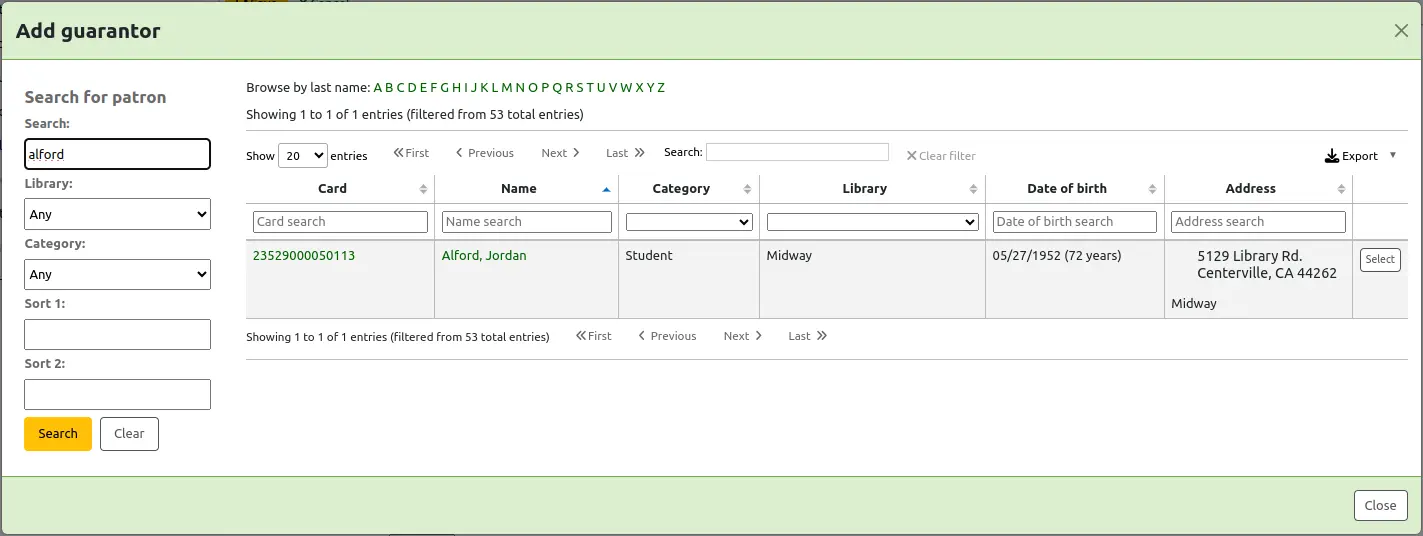
If the guarantor is a patron of the library, click “Add guarantor” to search your system for an existing patron
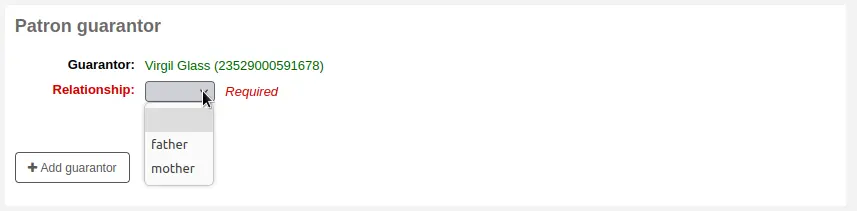
Click en “Seleccionar” para elegir el usuario
The relationships are set using the borrowerRelationship system preference
Nota
It is possible to add more than one guarantor to a patron account (both parents for example).
Advertencia
A patron who is a guarantee cannot be a guarantor to someone else and vice versa.
If the guarantor is not a patron, you can still add their information in the “Non-patron guarantor” section.
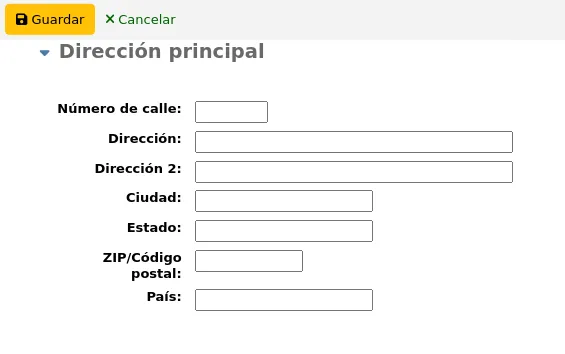
A continuación, introduzca la dirección principal y la información de contacto
Nota
The street type drop-down menu is populated by the ROADTYPE authorized value category.
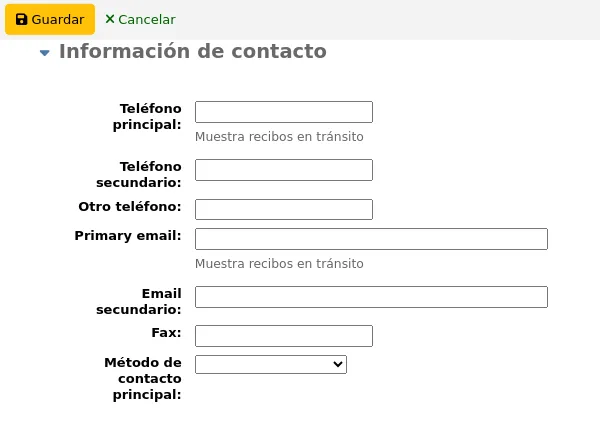
For contact information, note that the primary phone number and primary email address are the ones that appear on notices and slips printed during circulation (receipts, transfer slips and hold slips). The primary email is also the one that overdue notices and other messages go to.
The “Main contact method” can be used in reports and for staff to know which method to use first when trying to contact the patron.
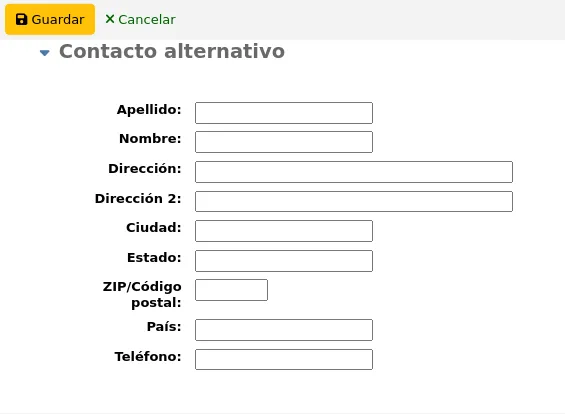
You can also record an alternate address for each patron. This could be used in an academic setting to store the patron’s home address for example.

Each patron can have an alternate contact. An alternate contact could be a parent or guardian, for example.
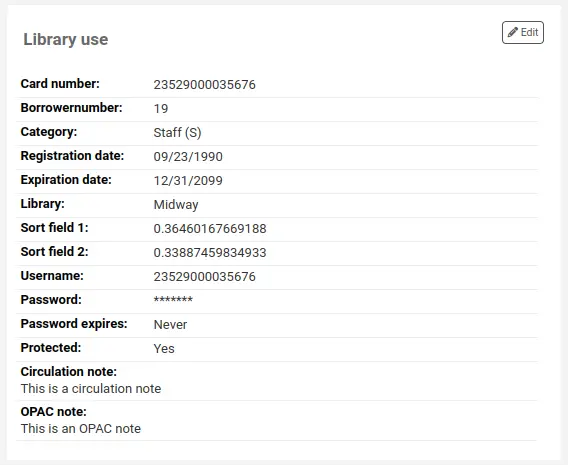
La sección de administración de biblioteca incluye datos que se utilizan dentro de la biblioteca
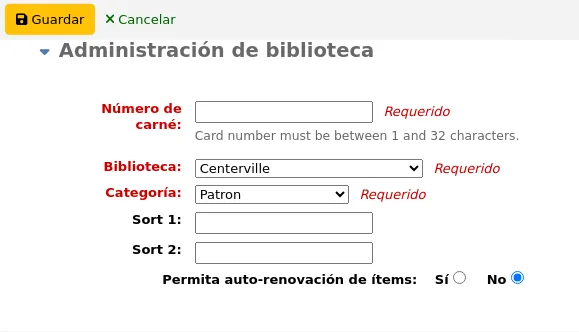
The card number field is automatically calculated if you have the autoMemberNum system preference set that way
Nota
For a newly installed system, this preference will start at 1 and increment by 1 each time after. To have it start with the starting number of your barcodes, enter the first barcode by hand in the patron record and save the patron. After that, the field will increment that number by 1.
Si usted accidentalmente elige al comienzo una categoría de usuario equivocada puede arreglarla aquí
Sort 1 and 2 son utilizados con propósitos estadísticos
You can create dropdown menus for these fields by adding authorized values in the Bsort1 authorized value category or the Bsort2 authorized value category
“Allow auto-renewal of items” is used to control whether this patron’s checkouts will be renewed according to the circulation rules. If set to ‘Yes’, items for which automatic renewal is enabled in the circulation rules will be automatically renewed. This requires the automatic_renewal cronjob to run daily. If set to ‘No’, items for which automatic renewal is enabled in the circulation rules will not be automatically renewed.
Protected: protected patrons cannot be deleted either manually or by batch. Use this for system patrons such as statistical patrons, SIP2 patrons, the self checkout user, or superlibrarians.
Version
The “Protected” option was added in version 23.11 of Koha.
“Check for previous checkouts” is used to set the patron’s personal preference regarding checking their circulation history to see if they have borrowed This item in the past. This overrides the setting of the patron category and of the CheckPrevCheckout system preference.
Preferred language for notices: if TranslateNotices is set to allow, you will be able to choose among the installed languages the language in which the patron would prefer to receive notices (such as overdue notices and advance notices).
Next, the library set-up section includes additional library settings
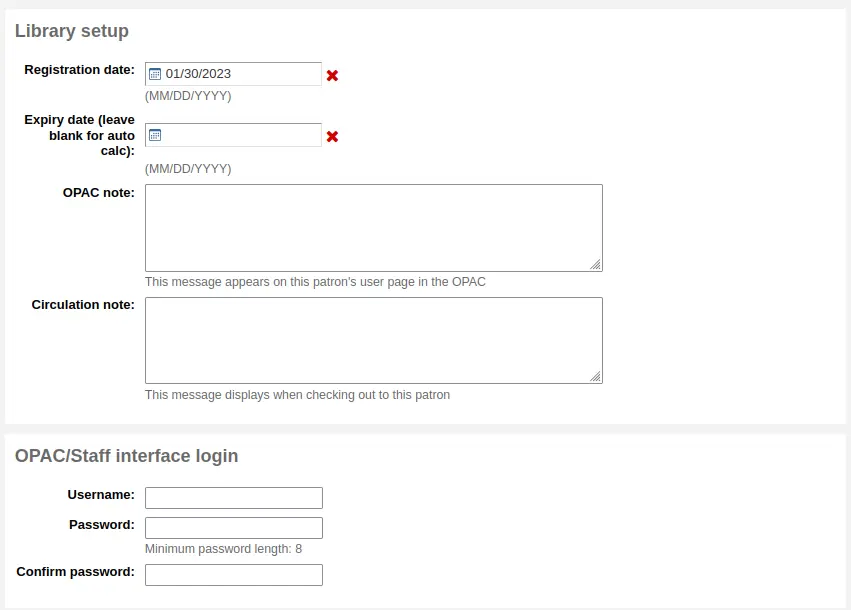
La fecha de registro automáticamente se rellena con la fecha de hoy
The expiry date will automatically be calculated based on your patron category settings
The OPAC note is a note for the patron, it will appear in the patron’s online account on the OPAC

Nota
See also OPAC messages
The Circulation note is meant solely for your library staff and will appear when the circulation staff goes to check an item out to the patron

The “OPAC/Staff interface login” section asks for the username and password to be used by the patron (or staff member) to log into their account in the OPAC and for staff to log in to the staff interface.
Staff will only be able to use this login information to log in to the staff interface if they have at least the catalogue permission.
If you have enabled the housebound module (with the HouseboundModule system preference), you will be able to choose a housebound role for this patron.

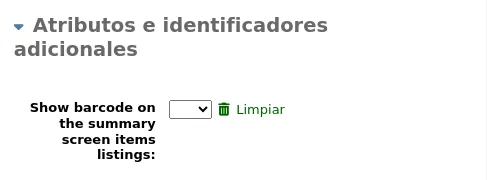
If you have set additional patron attributes in the administration module, these will appear next
Finally, if you have the EnhancedMessagingPreferences system preference set to “allow,” you can choose the messaging preferences for this patron.
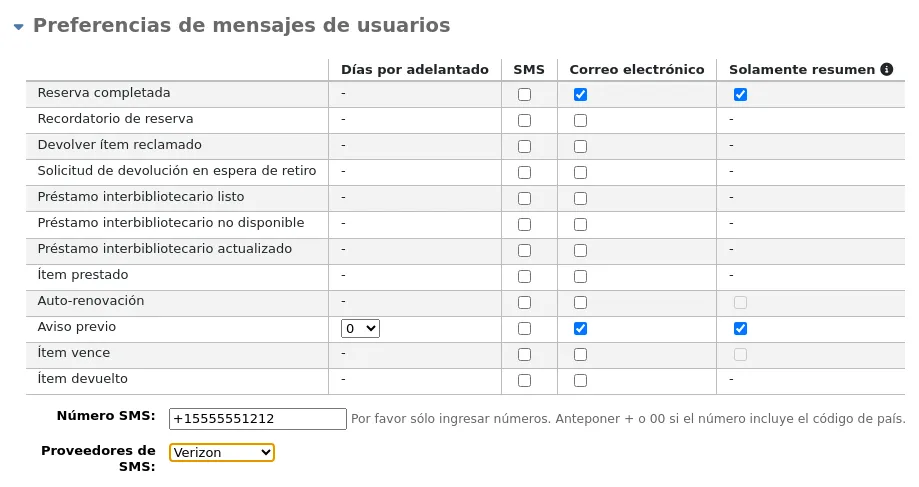
See the definition of each notice in the advance notices and hold notices section
Advertencia
Estas preferencias invalidarán cualquiera otra que haya establecido a través de las categorías de usuario
Advertencia
These preferences can be altered by the patron via the OPAC if the EnhancedMessagingPreferencesOPAC system preference is set to “show”.
Cuando haya finalizado, haga clic en “Guardar”
Si el sistema sospecha que este usuario es un duplicado de otro se lo advertirá.

Nota
See the PatronDuplicateMatchingAddFIelds system preference to see or change which fields are used to detect duplicate patrons. The default is the surname, the firstname and the date of birth.
Si ha establecido un límite de edad mínimo o máximo en la categoría de usuarios y exige que la fecha de nacimiento se cumplimente, Koha le avisará si el usuario que va a añadir es demasiado viejo o joven para la categoría de usuario seleccionada:

If the patron’s category has an enrollment fee, the fee will be charged to the patron’s account when the account is created. You can then manage the charge in the patron’s accounting tab.
Quick add a patron
Si su mostrador de circulación está muy ocupado y usted desea registrar un usuario rápidamente, puede utilizar la característica “agregar rápidamente”. Es una versión más corta del formulario para agregar usuarios con, solamente, un par de campos necesarios a ser rellenados.
This feature uses two system preferences: BorrowerMandatoryField and PatronQuickAddFields. These are the two system preferences that control which fields are in the quick add form.
To quick add a patron, go to the Patrons module
Get there: Patrons
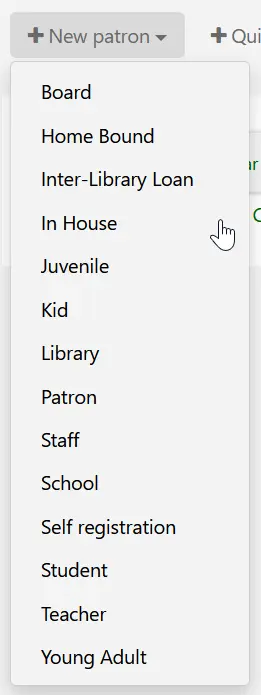
Click on the “Quick add new patron” button.
You will be asked to choose a patron category.
Then, you will be presented with a shortened form.
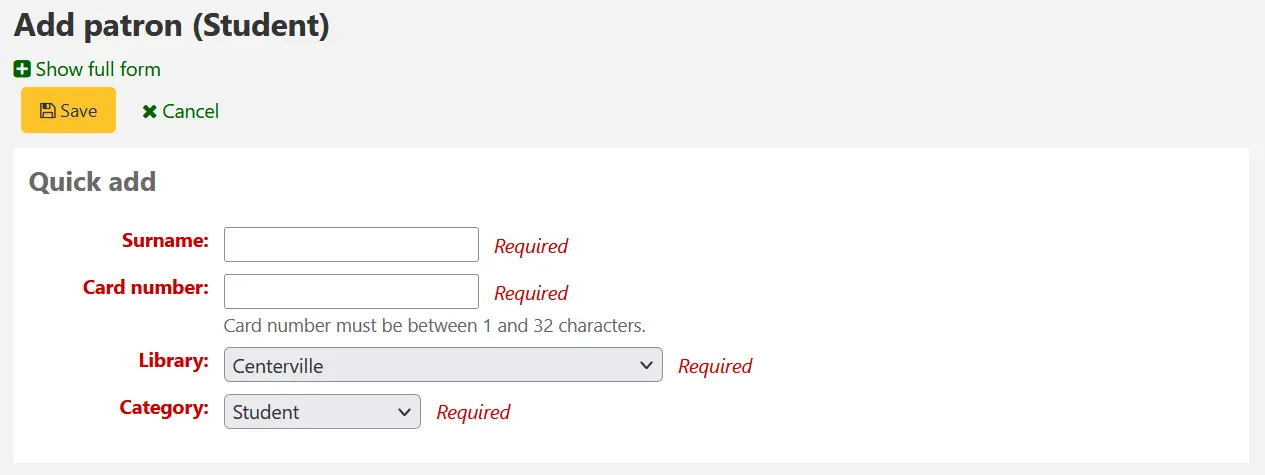
Once the form is filled out, click on “Save”.
If you need to access the full form, you can click on “Show full form” above the “Save” button.
Add a staff patron
All staff members must be entered into Koha as patrons of the “Staff” type. Follow the steps in Add a Patron to add a staff member. To give the staff member permissions to access the staff interface, follow the steps in patron permissions.
Importante
Recuerde que debe crear nombres de usuario y contraseñas seguras, ya que estos serán utilizados para iniciar la sesión del personal.
Add a statistical patron
One way to track use of in house items is to «check out» the materials to a statistical patron. The «check out» process doesn’t check the book out, but instead tracks an in house use of the item. To use this method for tracking in house use you first will need a patron category set up for your statistical patron.

Next, you will need to create a new patron of the statistical type.
Next, follow the steps put forth in the “Add a new patron” section of this manual. Since this patron is not a real person, simply fill in the required fields, the correct library and nothing else.
Para obtener información sobre otros métodos de seguimiento en sala visite la seccion Seguimiento de uso en sala de este manual.
Duplicate a patron
A veces, cuando va a añadir un nuevo familiar a su sistema y no quiere escribir la información de contacto una y otra vez. Koha permite que se pueda duplicar un usuario y cambiar solo las partes que desee (o necesita) cambiar.
Abra el usuario que desea utilizar como punto de partida (el usuario del cual desea duplicar la información)
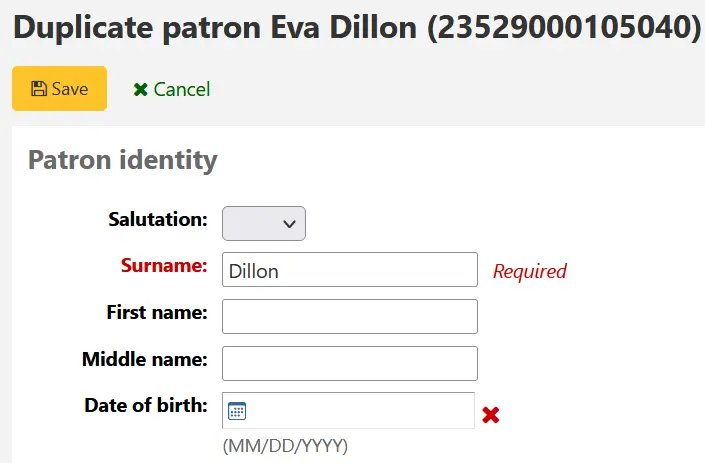
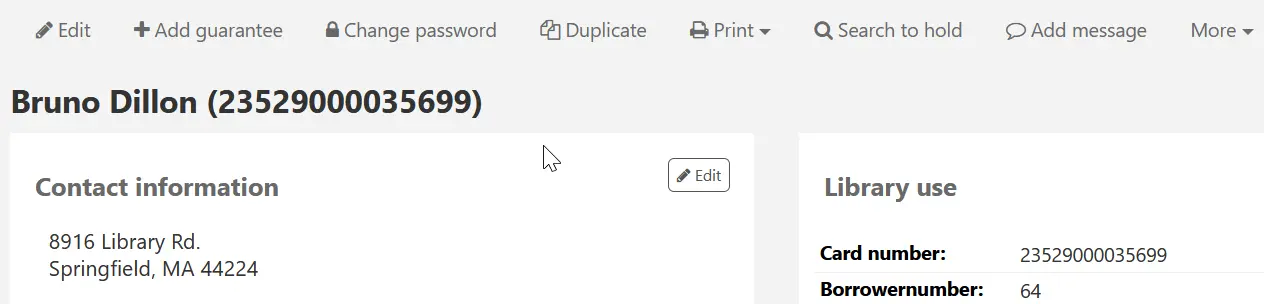
Haga clic en el botón “Duplicar” al inicio del registro

Todos los campos con la excepción del nombre, número de carnet, nombre de usuario y la contraseña han sido duplicados. Cumplimente los que faltan y haga clic en “Guardar”
Nota
Al hacer clic en el campo que ya está completado con datos se borrará toda la información del campo (lo que le hace más fácil a usted poder escribir algo diferente)
Usted será llevado a un nuevo usuario
Adding patron images
You can add patron pictures to help identify patrons. To enable this feature, you must first set the patronimages system preference to “Allow”.
If the preference is set to “Allow”, you will see a placeholder image under the patron’s name on the left of the screen.

Click the “Add” button on the placeholder image.

You have the option of either uploading an existing picture from the computer or taking a picture with the webcam.
To upload an existing image, click “Browse” or “Choose file” to find the image on your computer and click “Upload” to load the image in the patron’s file.
Advertencia
Existe un límite de 100K en el tamaño de la foto subida y es recomendado que la imágen sea de 200x300 pixeles, pero imágenes más pequeñas fuencionan correctametne.
To take a picture with the webcam, click the “Take photo” button once the webcam is facing the patron. The system will take a picture and present it to you for review. If you are satisfied, click “Upload”. If not, click “Retake photo” to take a new picture. You can also download the picture by clicking “Download photo”.
Para añadir imágenes de usuarios en lote, utilice la herramienta Subir imágenes de usuarios.
Editing patrons
Los usuarios pueden ser editados usando los botones de edición.
Nota
Only staff with the edit_borrowers permission (or the superlibrarian permission) will be able to edit patron files.
Para editar el registro completo del usuario simplemente haga clic en el botón «Editar» en la parte superior de dicho registro
To edit a specific section of the patron record (for example the “Library use” section) click the “Edit” button beside the section.
Edit the patron’s file and click “Save”.
Advertencia
Note that changing your own username will log you out of Koha.
Modifying patron passwords
Patron passwords are not recoverable.
The stars on the patron details page next to the password label are always there even if a password isn’t set.
If a patron forgets their password, or if a patron’s account is “locked” or “administratively locked” (see the FailedLoginAttempts and the LockExpiredDelay system preferences, respectively), the only option is to reset their password.
This can be done from the staff interface. To change the patron’s password, click the “Change password” button.
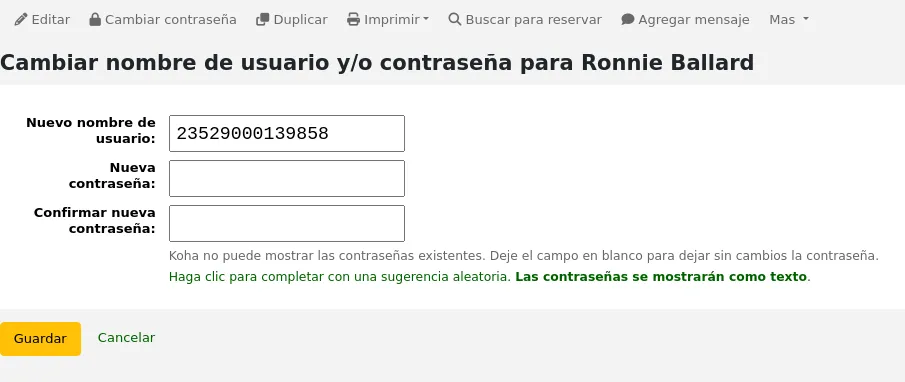
Koha cannot display existing passwords as they are encrypted in the database. Leave the field blank to leave password unchanged.
Este formulario puede generar automáticamente una contraseña aleatoria si hace clic en el enlace etiquetado “Haga clic para llenar con una sugerencia aleatoria. Las contraseñas de mostrarán como texto.»
Advertencia
Note that changing your own username here will log you out of Koha.
Changing the password through this form will also update the password expiry date, as set in the patron category.
If the NotifyPasswordChange system preference is enabled, the patron will receive a notification indicating their password was changed.
Nota
The content of this email can be customized with the Notices and slips tool. The code of the letter is PASSWORD_CHANGE.
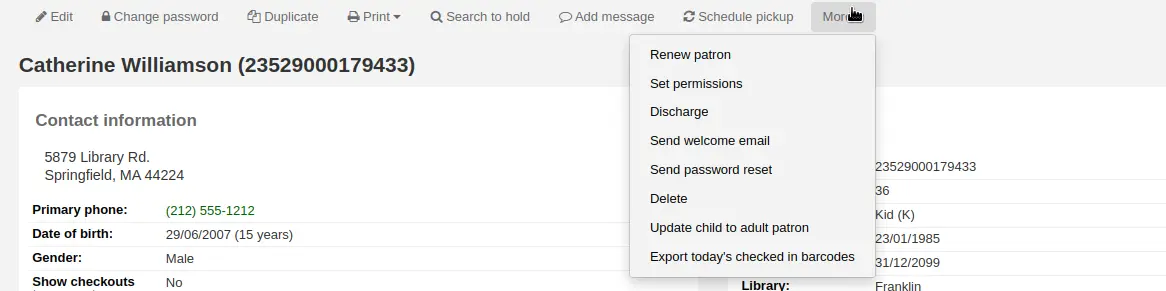
If the OpacResetPassword system preference is enabled, or if the patron category allows it, you can also send a password reset email to the patron by clicking on “More” and choosing “Send password reset”.
This will send a password reset email to the patron, similar to the one sent if they click on the “Forgot your password?” link on the OPAC. However, the reset link is set to expire after 5 days rather than 2 days when it is sent this way.
Nota
The content of the email can be customized with the Notices and slips tool. The code of the letter is STAFF_PASSWORD_RESET.
Only staff members with the superlibrarian permission can see and change the password expiry date manually. This date can be changed by clicking the “Edit” button at the top of the patron’s record, or the “Edit” button next to the “Library use” section.
Adding patron flags
Restrictions are used to prevent patrons from checking out.
Patrons can also be blocked from checking items out by setting patron flags.

If you would like your circulation staff to confirm a patron’s address before checking items out to the patron, set the “Gone no address” flag. This will create a warning when checking out.

If the patron reports that they have lost their card you can set the “Lost card” flag to prevent someone else from using that card to check items out.

If you would like to bar a patron from the library you can add a manual restriction.

Nota
This is the same as the restrictions tab at the bottom of the patrons details page.
Nota
A patron can automatically be restricted with the Overdue/notice status triggers
If you enter in a date and/or note related to the restriction, you will see that in the restricted message as well.

Adding notes and messages to a patron record
You can leave notes in a patron record. There are several ways to do this: you can either add a circulation note or an internal message. These will not show in the OPAC for the patron to see. If you want the patron to see the notes and messages, use OPAC notes and OPAC messages.
Circulation notes
Circulation notes are added to the patron’s file through the add patron form or the edit patron form, in the “Library set-up” section.
In the staff interface, circulation notes will be in the “Library use” section of the patron’s file.
Circulation messages
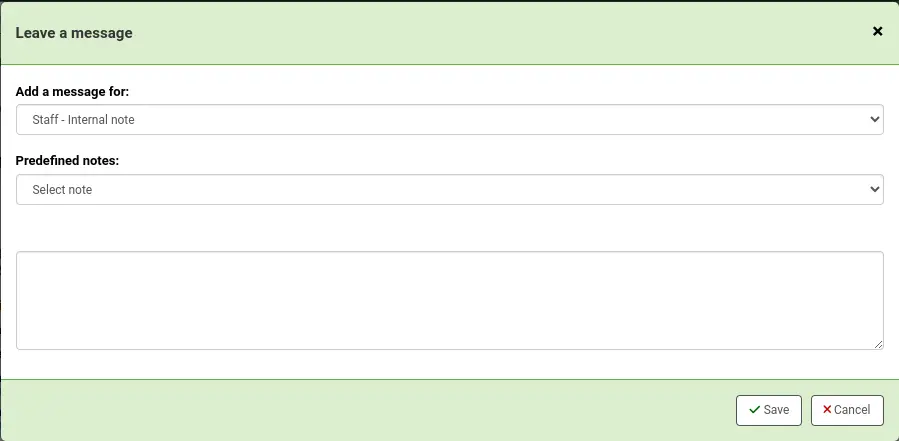
Internal messages are added to the patron’s file using the “Add message” button.
To leave an internal message, choose «Staff - Internal note» in the “Add a message for” field. Enter your message in the box, or choose a predefined message in the drop-down menu.
Nota
Predefined messages are added in the BOR_NOTES authorized value category.
Once saved, the internal message is shown in bold red on the patron’s detail page in the staff interface, at the top of the page just under the row of action buttons.

It will also appear on the checkout page, to the right of the checkout box.

If you need to edit the message, click the “Edit” button next to the message, edit the text and click “Save”.
Changing children to adults
Children patrons do not become adults automatically in Koha unless the update patron categories cron job is running.
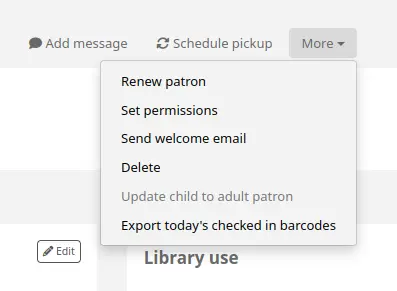
To upgrade a child patron to and adult patron category manually go to the “More” menu and choose “Update child to adult patron”.
You will then be presented with a pop up window asking which one of your adult patron categories this child should be updated to.
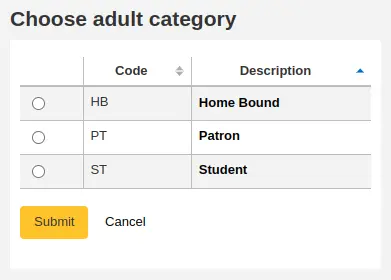
Nota
This list shows the patron categories that have the category type “adult”.
Renew patron account
When renewing a patron account you can either edit the the expiry date manually in the patron record or use the “Renew patron” option from the More menu in the toolbar at the top.
Using the latter the new expiry date will be calculated using the enrollment period configured for the patron category of the user. The system preference BorrowerRenewalPeriodBase determines if the new expiry date will be calculated from the current date or from the old expiry date.
One advantage of using the “Renew patron” option is that it will be logged as a membership renewal in the action_logs table and be visible as such when using the Log viewer or the Modificaton log from the patron account.
The renewal date of the patron account will be visible on the details tab.
If the patron is in a patron category with a membership fee, the charge will also be added upon renewal. You can then manage the charge in the patron’s accounting tab.
Eliminación de una cuenta de usuario
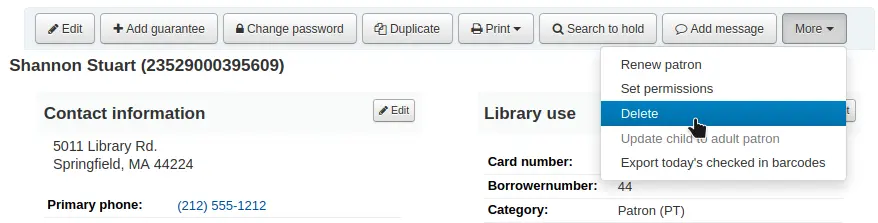
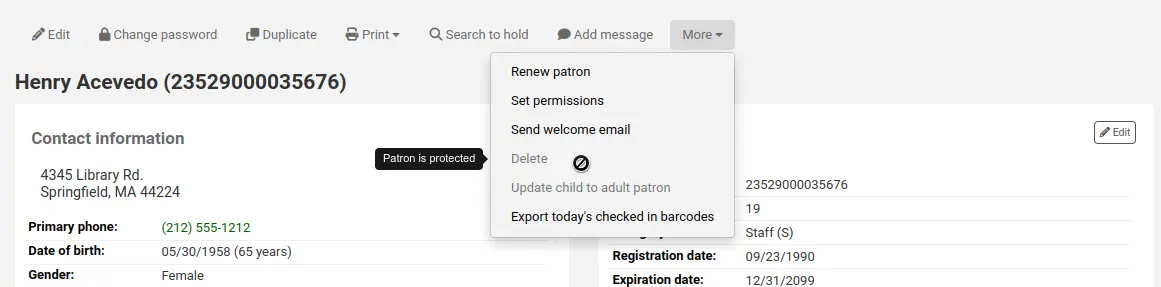
From the “More” drop-down, the patron account can be deleted.
Nota
Only staff with the delete_borrowers permission (or the superlibrarian permission) will be able to delete patrons.
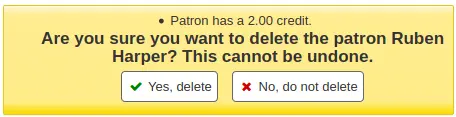
There will be an alert if the patron has checkouts, holds, fines or credits.
If a patron has current checkouts, the deletion will not be possible.

If a patron has outstanding fines, the deletion will not be possible.

If a patron has unused credits, the option to delete the patron is possible but there will be a warning.
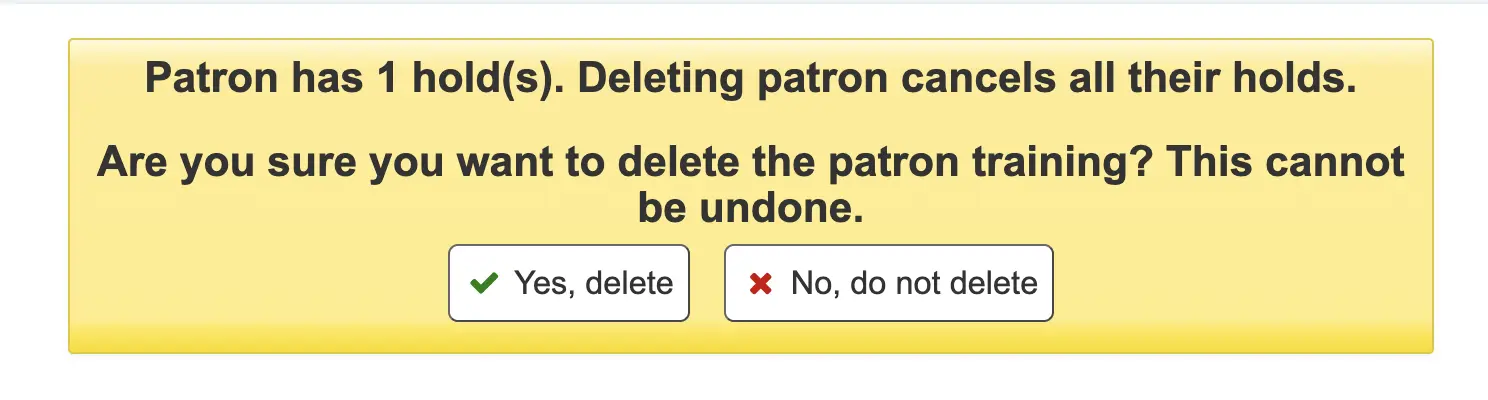
If a patron has existing holds on their account, the option to delete the patron is possible. The hold will be canceled and moved to the old_reserves table.
If a patron has public or shared lists, those will be deleted along with the patron, unless the ListOwnershipUponPatronDeletion system preference is set to “change owner of these lists”.
If a patron is protected, the “Delete” option will be disabled. To delete the patron anyway, edit the patron and choose “No” under “Protected” in the “Library management” section, save, and then delete.
Managing patron self edits
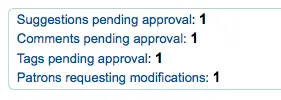
If you are allowing patrons to edit their accounts via the OPAC with the OPACPatronDetails preference then you will need to approve all changes via the staff interface before they’re applied. If there are patron edits awaiting action they will appear on the staff interface dashboard below the modules list (along with other items awaiting action).
Nota
Superbibliotecarios podrán ver modificaciones para cualquier sede, el resto del personal solo podrá ver modificaciones para usuarios que pertenezcan a su sede.
Cuando haga clic en el enlace “Usuarios que requieren modificaciones” se le mostrará una lista con los usuarios que han solicitado modificar sus datos.
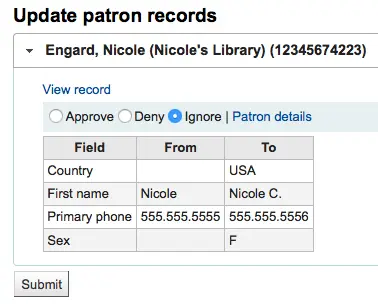
Desde aquí puede “Aprobar” y aplicar los cambios pendientes al registro del usuario. “Eliminar” y remover los cambios o “Ignorar” y dejar los cambios pendientes de una revisión posterior.
Si desea borrar su regla, haga clic en el enlace “Anular” a la derecha de la regla.
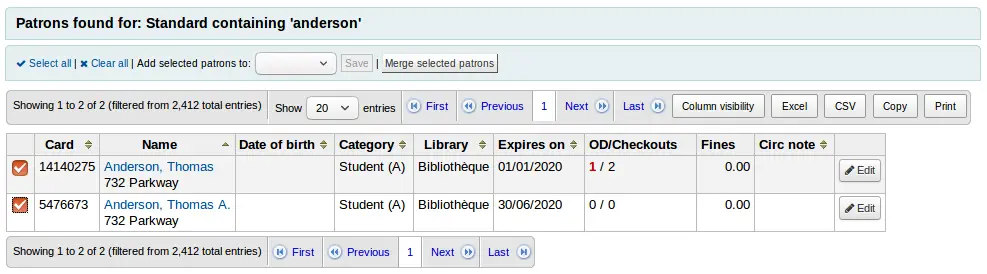
Merging patron records
If you accidentally end up with one patron with two cards it is possible to merge their records together so that you don’t lose their loan history or holds.
Nota
Merging patrons requires the merge_borrowers permission.
In the patron list, check the boxes next to the records you want to merge and click on the “Merge selected patrons” button.
Nota
It is possible to merge more than two records at a time.
Select the patron record you want to keep

If necessary, click the “Compare patrons” button to see the differences between the different accounts.
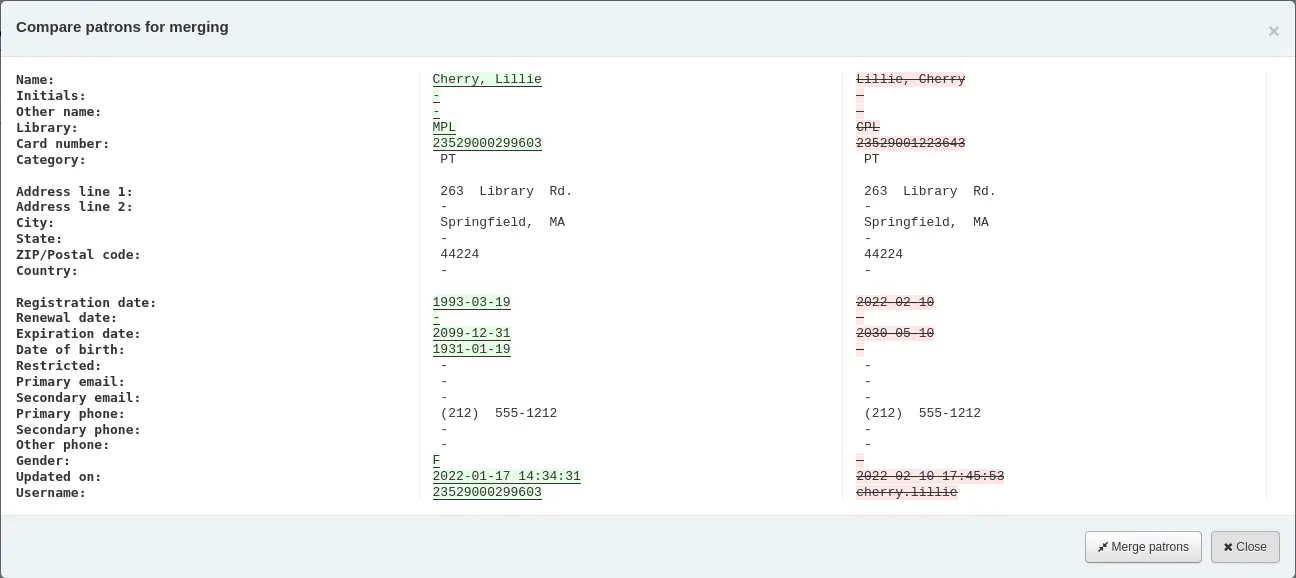
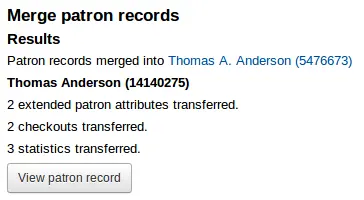
Click the “Merge patrons” button.
The checkouts and statistics will be transferred to the right record and the other one will be deleted.
Permisos de usuario
Patron permissions are used to allow staff members access to the staff interface.
Importante
In order for a staff member to log into the staff interface they must have (at the very least) the catalogue permission which allows them to view the staff interface.
Setting patron permissions
Nota
Only staff with the permissions permission (or the superlibrarian permission) will be able to set permissions for other staff members.
In addition to the permissions permission, only staff with the staffaccess permission will be able to set permission for other staff members whose category is of the “staff” type.
On the patron record, click “More” and choose “Set permissions” to alter the patron’s permissions.
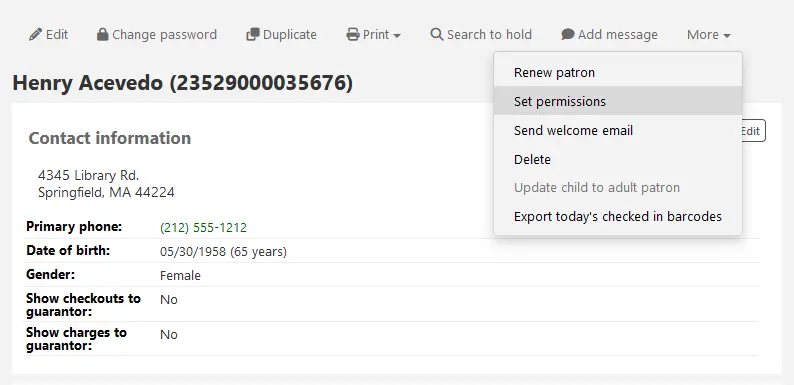
You will be presented with a list of preferences, some of which can be expanded by clicking the “Show details” link on the right title.
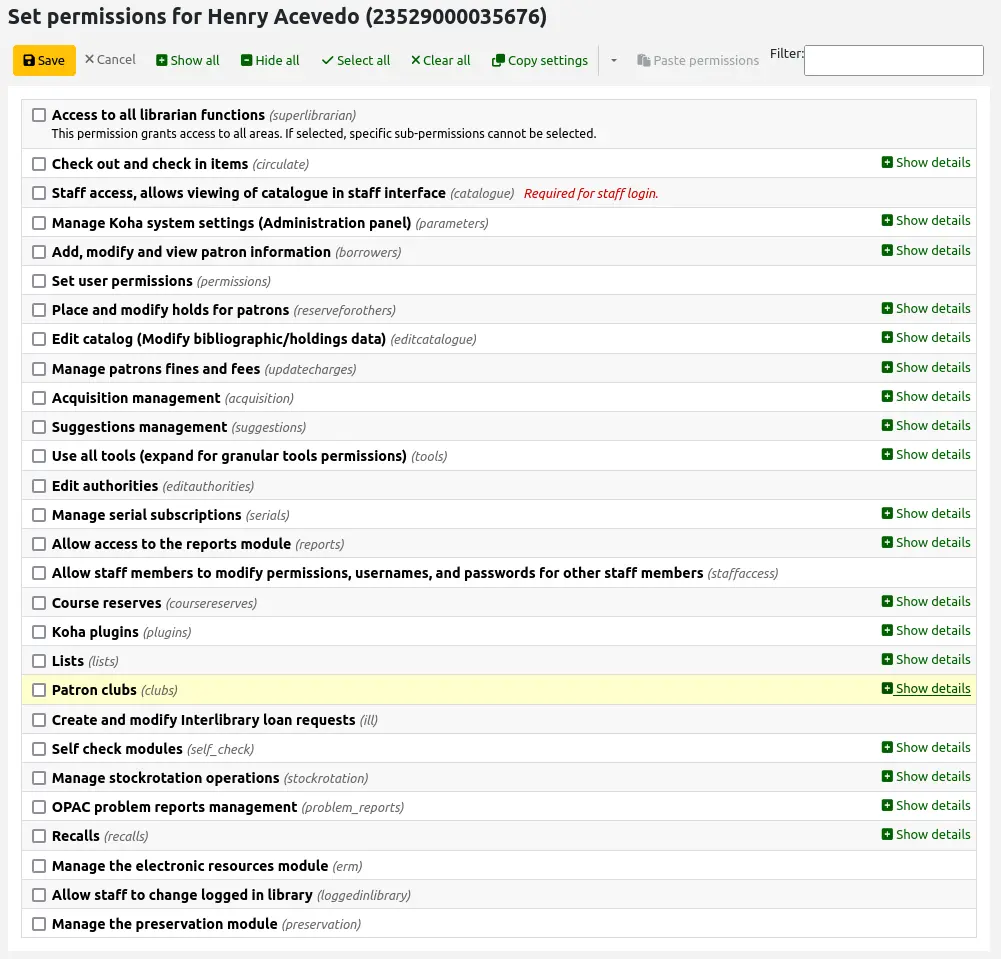
In all cases, if the parent permission is checked, the user has all the child permissions. If you want to set permissions on a more granular level, expand the section and only check the permissions you want that staff members to have.
To copy a patron’s permissions to another patron, click the “Copy settings” button, then go to the other patron’s permissions settings and click “Paste permissions”.
Click the arrow button next to the “Copy settings” and choose “Forget copied permissions” once you are done copying the permissions.
Version
The ability to copy permissions was added to Koha in version 24.05.
Patron permissions defined
This section describes the different permissions.
Access to all librarian functions (superlibrarian)
This permission grants access to everything in the Koha staff interface.
The superlibrarian permission also gives access to things that might otherwise be restricted by system preferences for example.
Nota
With this permission selected, there is no need to choose any other permission.
Check out and check in items (circulate)
The following permissions are used to give access to functions from the circulation module. Checking the circulate permission will give access to all functionalities. Click “Show details” to give specific permissions.
Permisos restantes de circulación (circulate_remaining_permissions)
This permission grants all circulation rights except those covered by permissions listed below.
Forzar préstamo si existe una limitación (force_checkout)
With this permission, a staff member will be allowed to override a check out restriction in the following cases:
restricción de edad
el ítem se prestó a otro usuario
el ítem no es para préstamo
el usuario tiene ítems retrasados
the patron is restricted
el ítem esta perdido
el ítem es un ítem de alta demanda
el ítem está en reserva
Manage item bookings (manage_bookings)
This permission allows staff to manage item bookings.
Marque las notas de préstamo como vistas/no vistas (manage_checkout_notes)
This permission allows staff to manage the checkout notes written by users through the OPAC.
Manage curbside pickups (manage_curbside_pickups)
This permission allows staff to manage patron curbside pickup appointments.
Administrar restricciones para las cuentas (manage_restrictions)
This permission allows staff to lift a restriction that might be on the patron’s record, or add a manual restriction.
Nota
Note that a staff member without manage_restrictions but who has force_checkout will be able to temporarily override a patron’s restriction in order to check out an item to them.
Ejecutar informe de atrasos (overdues_report)
This permission allows staff to run the overdues reports found under Circulation (Overdues and Overdues with fines).
Sobrescribir renovaciones bloqueadas (override_renewals)
This permission allows staff to override renewals restrictions.
Requires that the staff member also have circulate_remaining_permissions.
Staff access, allows viewing the catalog in staff interface (catalogue)
Importante
This permission must be given to all staff members to allow them to log into the staff interface
This permission allows access to the staff interface, with the possibility of
searching the catalog (simple search, advanced search and item search)
searching the authorities
viewing the checkout history of a title (no patron information is shown)
creating private or public lists, adding items to private lists and public lists, if the public list permission allows it, editing and deleting private lists
using the cart
viewing course reserves
Manage Koha system settings (Administration panel) (parameters)
The following permissions are used to give access to various pages from the administration module. Checking the parameters permission will give access to all pages. Click “Show details” to give access to specific pages only.
Administra los tipos de débito y crédito de la cuenta (manage_accounts)
This permission gives access to the debit types and credit types management sections.
Manage additional fields for baskets or subscriptions (manage_additional_fields)
This permission gives access to the additional fields management sections.
Importante
This permission requires that the staff member also have the corresponding permission for the particular additional fields.
Additional fields |
Corresponding permission |
|---|---|
Order baskets (aqbasket) |
Manage basket and order lines (order_manage) |
Order lines (aqorders) |
Manage basket and order lines (order_manage) |
Invoices (aqinvoices) |
Edit invoices (edit_invoices) |
Subscriptions (subscription) |
Editar una suscripción existente (edit_subscription) |
Account lines (credit) (accountlines:credit) |
Permisos restantes para la gestión de multas y costos (remaining_permissions) |
Account lines (debit) (accountlines:debit) |
Permisos restantes para la gestión de multas y costos (remaining_permissions) |
Gestionar alertas de audio (manage_audio_alerts)
This permission gives access to the audio alerts management section.
Manage background jobs (manage_background_jobs)
This permission gives access to the jobs management section.
Add, edit and archive cash registers (manage_cash_registers)
This permission gives access to the cash registers management section.
Gestionar reglas de circulación (manage_circ_rules)
This permission gives access to the circulation and fine rules management section.
Manage circulation rules from any library (manage_circ_rules_from_any_libraries)
This permission grants the right to manage circulation rules from any library.
If a staff member does not have this permission, but has the manage_circ_rules permission, they can only edit circulation rules from their own library.
Gestionar ciudades y pueblos (manage_cities)
This permission gives access to the cities and towns management section.
Gestionar las fuentes de clasificación y las reglas de ordenación (manage_classifications)
This permission gives access to the classification sources management section.
Gestionar la configuración de columna (manage_column_config)
This permission gives access to the table settings section.
Manage curbside pickups (manage_curbside_pickups)
This permission gives access to the curbside pickup management section.
This section is used to manage the pickup slots and other curbside pickup parameters. Circulation staff who manage the actual pickups need the manage_curbside_pickups permission under circulate.
Gestionar la configuración ¿Quizá quiso decir? (manage_didyoumean)
This permission gives access to the Did you mean? management section.
Manage authentication providers (manage_identity_providers)
This permission gives access to the identity providers management section.
Administrar alertas de circulación de ítems (manage_item_circ_alerts)
This permission gives access to the item circulation alerts management section.
Administrar campos de búsqueda de ítems (manage_item_search_fields)
This permission gives access to the item search fields management section.
Manage item types (manage_itemtypes)
This permission gives access to the item types management section.
Manage keyboard shortcuts for the advanced cataloging editor (manage_keyboard_shortcuts)
This permission gives access to the keyboard shortcuts management section.
Administrar bibliotecas y grupos de bibliotecas (manage_libraries)
This permission gives access to the libraries and library groups management sections.
Administrar el intercambio de contenido de Mana KB (manage_mana)
This permission gives access to the share content with Mana KB section.
Manage MARC overlay rules configuration (manage_marc_overlay_rules)
This permission gives access to the record overlay rules management section.
Manage record matching rules (manage_matching_rules)
This permission gives access to the record matching rules management section.
Gestionar conjuntos OAI (manage_oai_set)
This permission gives access to the OAI sets configuration section.
Manage extended patron attributes (manage_patron_attributes)
This permission gives access to the patron attribute types management section.
Manage patron categories (manage_patron_categories)
This permission gives access to the patron categories management section.
Manage patron restrictions (manage_patron_restrictions)
This permission gives access to the patron restriction types management section.
Manage record sources (manage_record_sources)
This permission gives access to the record sources management section.
Version
This permission, and the corresponding feature, were added in Koha in version 24.05.
Gestionar la configuración del motor de búsqueda (manage_search_engine_config)
This permission gives access to the search engine configuration section.
Nota
This section is only visible when the SearchEngine system preference is set to “Elasticsearch”.
Manage saved search filters (manage_search_filters)
This permission gives access to the search filters management section.
Administrar la configuración del servidor Z39.50 y SRU (manage_search_targets)
This permission gives access to the Z39.50/SRU servers management section.
Manage SMS cellular providers (manage_sms_providers)
This permission gives access to the SMS cellular providers management section.
Nota
This section will only be visible when the SMSSendDriver system preference is set to “Email”.
Manage SMTP servers (manage_smtp_servers)
This permission gives access to the SMTP servers management section.
Manage system preferences (manage_sysprefs)
This permission gives access to the system preferences.
Gestionar los límites de transferencia de la biblioteca y la matriz de costo de transporte (manage_transfers)
This permission gives access to the library transfer limits and the transport cost matrix management sections.
Gestionar la configuración de las estadísticas de uso (manage_usage_stats)
This permission gives access to the share your usage statistics section.
Remaining system parameters permissions (parameters_remaining_permissions)
This permission gives access to any remaining sections of the administration module not mentioned above.
Add, modify and view patron information (borrowers)
The following permissions are used to give access to functions from the patrons module. Checking the borrowers permission will give access to all functionalities. Click “Show details” to give specific permissions.
Delete patrons (delete_borrowers)
This permission grants the ability to delete patrons.
Agregar, modificar y ver información del usuario (edit_borrowers)
This permission gives access to the patrons module to view patron files, as well as adding new patrons and editing existing patrons.
Advertencia
Staff members with this permission, but without the list_borrowers permission will be able to access patron files directly (from a direct link, for example), but not search for patrons.
Search, list and view patrons (list_borrowers)
This permission gives access to the patrons module to search for and view patron files.
Advertencia
Staff members with this permission, but without the edit_borrowers permission will be able to view patrons, but not add new patrons or edit existing patrons.
Merge patrons (merge_borrowers)
This permission grants the right to merge patron records.
Send messages to patrons (send_messages_to_patrons)
Version
This permission, and its accompanying feature, was added to Koha in version 24.05.
This permission grants the right to send custom emails to patrons.
Nota
Without this permission, but with the edit_borrowers permission, staff will still be able to add and manage internal notes and OPAC messages.
View patron information from any libraries (view_borrower_infos_from_any_libraries)
This permission grants the right to access patron files from any library.
If a staff member does not have this permission, but has the edit_borrowers permission, they can only view patrons from their own library or library group.
Set user permissions (permissions)
This permission grants the ability to set permissions for other staff members.
Importante
Staff members with this permission will not be able to set permissions for patrons whose category is of the “staff” type unless they also have the staffaccess permission.
Place and modify holds for patrons (reserveforothers)
The following permissions are used to give access to holds options. Checking the reserveforothers permission will give access to all functionalities. Click “Show details” to give specific permissions.
Modificar la prioridad de reservas (modify_holds_priority)
This permission allows staff members to alter the holds priority (moving patrons up and down the queue).
Hacer reservas para usuarios (place_holds)
This permission allows staff members to place holds in the staff interface.
Edit catalog (Modify bibliographic/holdings data) (editcatalogue)
The following permissions are used to give access to functions from the cataloging module. Checking the editcatalogue permission will give access to all functionalities. Click “Show details” to give specific permissions.
Utilice el editor de catalogación avanzada (advanced_editor)
This permission grants the ability to use the advanced cataloging editor in the cataloging module.
Importante
Staff members with this permission also need to have the edit_catalogue permission.
Eliminar todos los ítems de una vez (delete_all_items)
This permission grants the ability to use the “Delete all items” option found under the “Edit” menu in cataloging, to delete all of a record’s items.
Edit any item including items that would otherwise be restricted (edit_any_item)
This permission grants the ability to edit items belonging to libraries from other library groups.
Importante
Staff members with this permission also need to have the edit_items permission.
Editar catálogo (modificar datos bibliográficos y de existencias) (edit_catalogue)
This permission grants the ability to add bibliographic records (including importing records through z39.50/SRU, and duplicating records), edit existing bibliographic records, merge existing bibliographic records, and delete bibliographic records.
Editar ítems (edit_items)
This permission grants the ability to add new items, edit items, and delete items, but not bibliographic records.
This permission also lets the staff member create and use item templates, but the manage_item_editor_templates permission is required to manage item templates created by other staff members.
Limit item modification to subfields defined in the SubfieldsToAllowForRestrictedEditing system preference (edit_items_restricted)
This permission limits the ability to edit items to subfields specified in the SubfieldsToAllowForRestrictedEditing system preference.
Importante
Staff members with this permission also need to have the edit_items permission.
Edit locked records (edit_locked_records)
This permission grants the ability to edit records that come from locked sources.
Version
This permission, and the corresponding feature, were added in Koha in version 24.05.
Catalogación rápida (fast_cataloging)
This permission grants the ability to catalog new records using the fast cataloging option found on the main circulation page and on the main cataloging page.
Create, update and delete item editor templates owned by others (manage_item_editor_templates)
This permission grants the ability to manage item templates created by other users.
Nota
Anyone who has the edit_items permission can create and share item templates, and delete their own templates.
Create, update and delete item groups, add or remove items from an item group (manage_item_groups)
This permission grants the ability to create, edit, and delete item groups.
Manage patrons fines and fees (updatecharges)
The following permissions are used to give access to functions from the accounting tab in the patron records. Checking the updatecharges permission will give access to all functionalities. Click “Show details” to give specific permissions.
Discount debits for patrons (discount)
This permission grants the ability to apply discounts to charges.
Importante
Staff members with this permission also need to have the remaining_permissions permission.
Add manual credits to a patron account (manual_credit)
This permission grants the ability to add manual credits to a patron’s account.
Importante
Staff members with this permission also need to have the remaining_permissions permission.
Add manual invoices to a patron account (manual_invoice)
This permission grants the ability to create manual invoices in a patron’s account.
Importante
Staff members with this permission also need to have the remaining_permissions permission.
Payout credits to patrons (payout)
This permission grants the ability to reimburse credits to patrons.
Importante
Staff members with this permission also need to have the remaining_permissions permission.
Refund payments to patrons (refund)
This permission grants the ability to refund payments that patrons have already made to the library.
Importante
Staff members with this permission also need to have the remaining_permissions permission.
Permisos restantes para la gestión de multas y costos (remaining_permissions)
This permission grants the ability to manage fines and fees other than the actions described in the other sub-permissions (discounts, payouts, refunds, and writeoffs).
This includes, but is not limited to:
the ability to access to the patrons” accounting tab;
the ability to pay existing charges;
the ability to cancel charges;
the ability to void payments; and
the ability to see the patron’s transaction history.
Write off fines and fees (writeoff)
This permission grants the ability to write off patron fees.
Importante
Staff members with this permission also need to have the remaining_permissions permission.
Acquisition management (acquisition)
The following permissions are used to give access to functions from the acquisitions module. Checking the acquisition permission will give access to all functionalities. Click “Show details” to give specific permissions.
Advertencia
All the acquisitions sub-permissions give access to the acquisitions home page. That means that staff who have one or more of the following permissions will be able to view the budgets, search and view vendor information, and view invoices.
Agregar y eliminar fondos (pero no puede modificar fondos) (budget_add_del)
This permission grants the ability to add funds and delete funds within a budget.
Importante
Staff members with this permission also need to have the budget_manage permission and the budget_modify permission.
Advertencia
Without the period_manage permission, staff members will only be able to add sub-funds, as they will not be able to access the budgets administration page to add first-level funds.
Gestionar fondos (budget_manage)
This permission grants the ability to access the fund administration page.
Note that this only gives viewing access to the page, you will need to give your staff the budget_add_del permission and the budget_modify permission if you want them to be able to make changes to the funds.
Gestionar todos los fondos (budget_manage_all)
This permission grants viewing access to all funds regardless of restrictions on them (owner, user or library restrictions).
Importante
Staff members with this permission also need to have the budget_manage permission.
Modificar fondos (no se pueden crear líneas, pero se pueden modificar las existentes) (budget_modify)
This permission grants the ability to edit fund information and amounts.
Importante
Staff members with this permission also need to have the budget_manage permission and the budget_add_del permission.
Gestionar contratos (contracts_manage)
This permission grants the ability to add, edit and delete contracts with vendors.
Gestionar monedas y tipo de cambio (currencies_manage)
This permission grants the ability to access the Currencies and exchange rates configuration page.
Delete baskets (delete_baskets)
This permission grants the ability to delete baskets.
Importante
Staff members with this permission also need to have the order_manage permission to be able to view the baskets in order to delete them.
Delete invoices (delete_invoices)
This permission grants the ability to delete invoices.
Administrar transmisiones EDIFACT (edi_manage)
This permission grants the ability to access the EDI account administration page, the library EANs administration page and access sent EDI messages.
Edit invoices (edit_invoices)
This permission grants the ability to edit invoices (modify invoice information such as the invoice number, billing or shipping date, add adjustments, etc.).
Importante
Staff members with this permission will not be able to receive orders against an invoice unless they have the order_receive permission as well.
Gestionar grupos de cestas (group_manage)
This permission grants the ability to create, edit, close and delete basket groups.
Manage vendor issues (issue_manage)
This permission grants the ability to create, edit, and delete vendor issues.
Version
This permission was introduced in version 23.11 of Koha.
Merge invoices (merge_invoices)
This permission grants the ability to merge invoices.
Gestionar cestas y líneas de pedidos (order_manage)
This permission grants the ability to place orders, including creating baskets, adding order lines, edit existing baskets, closing baskets, etc.
Importante
Staff members with this permission will not be able to order from a new file unless they also have the stage_marc_import permission.
Likewise, staff members will not be able to order from titles with highest hold ratios unless they also have the circulate_remaining_permissions permission.
Gestionar todas las líneas de pedidos y cestas, independientemente de las restricciones en ellos (order_manage_all)
This permission grants the ability to manage all baskets and orders even if they are restricted to the owner, users or library.
Importante
Staff members with this permission also need to have the order_manage permission.
Recepción de pedidos y gestión de envíos (order_receive)
This permission grants the ability to create invoices, receive orders, and claim late orders.
Gestionar presupuestos (period_manage)
This permission grants access to the budget administration page and the ability to create, duplicate, edit, and delete budgets.
Advertencia
Without the budget_manage permission, budget_add_del permission, and the budget_modify permission, staff will not be able to add or edit budget funds.
Gestionar planificación de presupuestos (planning_manage)
This permission grants the ability to access the budget planning page.
Importante
Staff members with this permission also need to have the budget_manage permission, and the period_manage permission.
Reopen closed invoices (reopen_closed_invoices)
This permission grants the ability to reopen closed invoices.
Gestionar proveedores (vendors_manage)
This permission grants the ability to add, edit, and delete vendors.
Note that vendors are used in the acquisition module, the serials module, and the e-resource management module.
Suggestions management (suggestions)
The following permissions are used to give access to purchase suggestion management functions of the acquisitions module. There is currently only one sub-permission. Checking either suggestions or suggestion_manage will have the same effect.
Create purchase suggestions (suggestions_create)
This permission grants the ability to create purchase suggestions for patrons and view a patron’s existing purchase suggestions.
Version
This permission was added to Koha in version 24.11. In prior versions, the permission suggestions_manage granted the ability to create new purchase suggestions as well as viewing and editing existing suggestions.
Delete purchase suggestions (suggestions_delete)
This permission grants the ability to view and delete purchase suggestions.
Version
This permission was added to Koha in version 24.11. In prior versions, the permission suggestions_manage granted the ability to delete purchase suggestions.
Gestionar sugerencias de compra (suggestions_manage)
This permission grants the ability to view and manage purchase suggestions, including changing the suggestions” statuses.
Atención
Prior to version 24.11, this permission granted the ability to create new purchase suggestions and delete existing suggestions as well as editing them. As of version 24.11, staff member with this permission will only be able to edit existing purchase suggestions.
Use all tools (tools)
The following permissions are used to give access to functions from the tools module, including some cataloguing tools. Checking the tools permission will give access to all tools. Click “Show details” to give access to specific tools.
Acceso a archivos almacenados en el servidor (access_files)
This permission gives access to the access files tool to access files stored on the server.
Perform batch extend due dates (batch_extend_due_dates)
This permission gives access to the batch extend due dates tool.
Cargar imágenes de usuarios en lote o una a la vez (batch_upload_patron_images)
This permission gives access to the patron image upload tool.
Delete old borrowers and anonymize circulation history (deletes borrower checkout history) (delete_anonymize_patrons)
This permission gives access to the batch patron deletion and anonymization tool.
Write additional contents for the OPAC and staff interfaces (news and HTML customizations) (edit_additional_contents)
This permission gives access to the news tool, the HTML customizations tool, and the pages tool.
Defina los días en los que la biblioteca permanece cerrada (edit_calendar)
This permission gives access to the calendar tool.
Establecer avisos de retraso/disparadores de estado para ítems atrasados (edit_notice_status_triggers)
This permission gives access to the overdue notice/status triggers tool.
Definir avisos (edit_notices)
This permission gives access to the notices and slips tool.
Realizar modificación de usuarios en lote (edit_patrons)
This permission gives access to the batch patron modification tool.
Editar frases para la característica Frase-del-Día (edit_quotes)
This permission gives access to the quote editor for the “Quote of the day” feature.
Exportar datos bibliográficos y de existencias (export_catalog)
This permission gives access to the export catalog data tool from the cataloging module
Importante
Staff members with this permission also need to have at least one of the editcatalogue sub-permissions.
Importar datos de usuario (import_patrons)
This permission gives access to the import patrons tool.
Perform inventory of your catalog (inventory)
This permission gives access to the inventory tool from the cataloging module.
Realizar eliminación de ítems en lote (items_batchdel)
This permission gives access to the batch item deletion tool from the cataloging module.
Realizar modificación de ítems en lote (items_batchmod)
This permission gives access to the batch item modification tool and the item modifications by age tool from the cataloging module.
Limit batch item modification to subfields defined in the SubfieldsToAllowForRestrictedBatchmod preference (items_batchmod_restricted)
This permission restricts the batch item modification tool to modify only the subfields defined in the SubfieldsToAllowForRestrictedBatchmod system preference.
Importante
Staff members with this permission also need to have the items_batchmod permission.
Crear etiquetas y códigos de barras imprimibles a partir de los datos del catálogo y los usuarios (label_creator)
This permission gives access to the patron card creator tool, as well as the label creator, the barcode image generator tool, and the quick spine label creator tool from the cataloging module.
Perfiles CSV para exportación (manage_csv_profiles)
This permission gives access to the CSV profiles tool.
Agregar, editar y eliminar listas de usuarios y sus contenidos (manage_patron_lists)
This permission gives access to the patron lists tool.
Importante
Staff members with this permission also need to have the list_borrowers permission (and optionally the view_borrower_infos_from_any_libraries permission), otherwise, they will only be able to create lists and view existing lists, but not add patrons to the lists.
Gestionar registros MARC preparados, incluyendo completar y revertir importaciones (manage_staged_marc)
This permission gives access to the manage staged MARC records tool from the cataloging module.
Importante
Unless staff members with this permission also have the stage_marc_import permission, they will only be able to manage records that have already been staged by someone else. This depends on your workflows.
Gestionar plantillas de modificación MARC (marc_modification_templates)
This permission gives access to the MARC modification templates tool from the cataloging module.
Moderar comentarios de usuarios (moderate_comments)
This permission gives access to the comments tool.
Gestionar las colecciones rotativas (rotating_collections)
This permission gives access to the rotating collections tool.
Tareas programadas para ser ejecutadas (schedule_tasks)
This permission gives access to the task scheduler tool.
Subir registros preparados MARC al depósito (stage_marc_import)
This permission gives access to the stage MARC records tool from the cataloging module.
Importante
Unless staff members with this permission also have the manage_staged_marc permission, they will only be able to stage records but not import them into the catalog. This depends on your workflows.
Subir cualquier archivo (upload_general_files)
This permission gives access to the upload tool to upload files.
Subir imágenes de cubierta locales (upload_local_cover_images)
This permission gives access to the upload local cover image tool from the cataloging module to upload a batch of cover images, as well as the ability to add local cover images from the record detail page and delete local cover images.
Nota
In order to add cover images to items, staff members will also need the edit_items permission.
Gestionar los archivos subidos (upload_manage)
This permission gives access to files uploaded via the upload tool.
Importante
Staff members with this permission also need to have the upload_general_files to access the upload tool.
Revisar registros del sistema (view_system_logs)
This permission gives access to the log viewer tool, as well as the “Modification log” tabs (in the patron’s account, for example, or in the record details page).
Manage serial subscriptions (serials)
The following permissions are used to give access to functions from the serials module. Checking the serials permission will give access to all functionalities. Click “Show details” to give specific permissions.
Nota
Staff who have one or more of the following sub-permissions will be able to search for and view serial subscriptions, and manage serial numbering patterns.
Importante
The serials permission is required to manage serial frequencies.
Nota
Some staff may also need acquisitions permissions, such as the vendors_manage permission since vendors for serials are managed in the acquisitions module.
Controlar vencimiento de publicación periódica (check_expiration)
This permission gives the ability to check the expiration date of serials.
Reclamar las publicaciones seriadas que faltan (claim_serials)
This permission gives the ability to claim missing issues.
Crear nueva suscripción (create_subcription)
This permission gives the ability to add new subscriptions.
Eliminar una suscripción existente (delete_subscription)
This permission gives the ability to delete serial subscriptions.
Editar una suscripción existente (edit_subscription)
This permission gives the ability to edit existing serial subscriptions.
Recibiendo series (receive_serials)
This permission gives the ability to receive issues of existing subscriptions.
Renovar una suscripción (renew_subscription)
This permission gives the ability to renew serial subscriptions.
Routing (routing)
This permission gives the ability to manage routing lists.
Manage subscriptions from any branch (superserials)
This permission is only useful if the IndependentBranches system preference is used.
Allow access to the reports module (reports)
The following permissions are used to give access to functions from the reports module. Checking the reports permission will give access to all functionalities. Click “Show details” to give specific permissions.
Nota
Staff who have one or more of the following sub-permissions will be able to run reports in the statistics wizard section, as well as the other reports on the main reports page.
Importante
Reports found on the Circulation page are not controlled by this permission.
Crear informes SQL (create_reports)
This permission gives the ability to create guided reports or SQL reports.
Importante
Staff who need to run reports already created need the execute_reports permission.
Eliminar informes SQL (delete_reports)
This permission gives the ability to delete saved SQL reports.
Importante
Staff with this permission also need the execute_reports permission.
Ejecutar informes SQL (execute_reports)
This permission gives the ability to run custom SQL reports, but not create or edit them.
Allow staff members to modify permissions, usernames, and passwords for other staff members (staffaccess)
This permission gives the ability to modify permissions, passwords, and usernames of patrons who are staff members (patrons whose category is of the “staff” type).
Importante
Staff with this permission also need the edit_borrowers permission and the permissions permission.
Reservas para cursos (coursereserves)
The following permissions are used to give access to functions from the course reserves module. Checking the coursereserves permission will give access to all functionalities. Click “Show details” to give specific permissions.
Nota
If the UseCourseReserves system preference is not enabled, these permissions will not have any effect.
Agregar reservas para cursos (add_reserves)
This permission gives the ability to add items to existing courses.
Eliminar reservas para cursos (delete_reserves)
This permission gives the ability to remove items from existing courses.
Agregar, editar y eliminar cursos (manage_courses)
This permission gives the ability to create, edit and delete courses.
Koha plugins (plugins)
The following permissions are used to give access to plugins. Checking the plugins permission will give access to all functionalities. Click “Show details” to give specific permissions.
Use administrative plugins (admin)
This permission gives the ability to use administrative plugins.
Configure plugins (configure)
This permission gives the ability to run the “configure” section of a plugin, if it has one.
Nota
Staff with this permission also need either the report permission or the tool permission in order to be able to access the plugins.
Manage plugins (manage)
This permission gives the ability to install or uninstall plugins.
Nota
Staff with this permission also need either the report permission or the tool permission in order to be able to access the plugins.
Use report plugins (report)
This permission gives the ability to use report plugins.
Use tool plugins (tool)
This permission gives the ability to use tool plugins.
Listas (listas)
The following permissions are used to give access to public list management. Checking the lists permission will give access to all functionalities. Click “Show details” to give specific permissions.
Importante
All staff members have permission to create, modify and delete their own lists. These permissions are only necessary if you’d like to give a staff member permission to edit or delete public lists that they have not created.
Create public lists (create_public_lists)
This permission gives the ability to create new public lists.
Version
This permission was added to Koha in version 24.11.
In previous versions, a staff member with the lists permission could create public as well as private lists.
Eliminar listas públicas (delete_public_lists)
This permission gives the ability to delete public lists created by someone else.
Edit public lists contents (edit_public_list_contents)
This permission gives the ability to change the contents of public lists that have the «Permitted staff only» permission.
Edit public lists (edit_public_lists)
This permission gives the ability to edit the name, settings, and permissions of a public list owned by someone else.
Nota
This does not give the staff member permission to change the contents of the list, unless the list permissions allow them to.
Use public lists (use_public_lists)
This permission gives the ability to view public lists.
Version
This permission was added to Koha in version 24.11.
In previous versions, a staff member with the lists permission could view public lists.
Patron clubs (clubs)
The following permissions are used to give access to the patron clubs functionalities. Checking the clubs permission will give access to all functionalities. Click “Show details” to give specific permissions.
Crear y editar clubs (edit_clubs)
This permission gives the ability to create and edit patron clubs based on existing club templates using the patron clubs tool.
Crear y editar plantillas de club (edit_templaates)
This permission gives the ability to create and edit club templates using the patron clubs tool.
Enroll patrons in clubs (enroll)
This permission gives the ability to enroll patrons from the patron record in the staff interface.
Nota
Staff with this permission also need either the edit_borrowers permission or the larger borrowers permission in order to be able to access the patron records to enroll them in clubs.
Create and modify interlibrary loan requests (ill)
This permission gives access to the interlibrary loan (ILL) module.
Módulos auto comprobantes (self_check)
The following permissions are used to enable the self checkout and the self checkin modules. Checking the self_check permission will give access to all functionalities. Click “Show details” to give specific permissions.
Importante
These permissions should be given to a dedicated self check patron, not a regular staff patron.
Log into the self check-in module (self_checkin_module)
This permission is used to enable the self checkin module. Give it only to a dedicated self check patron created for this purpose.
Importante
This permission prevents the patron from using any other OPAC functionality.
Realizar auto préstamo en el OPAC (self_checkout_module)
This permission is used to enable the self checkout module. Give it only to a dedicated self check patron created for this purpose.
Nota
This permission should be used for the patron matching the AutoSelfCheckID system preference.
Manage stockrotation operations (stockrotation)
The following permissions are used to give access to stockrotation management. Checking the stockrotation permission will give access to all functionalities. Click “Show details” to give specific permissions.
Add and remove items from rotas (manage_rota_items)
This permission gives the ability to manage the items in the rotas.
Create, edit and delete rotas (manage_rotas)
This permission gives the ability to manage rotas.
Cash management (cash_management)
The following permissions are used to give access to the point of sale module and the cash registers functionalities. Checking the cash_management permission will give access to all functionalities. Click “Show details” to give specific permissions.
Perform refunds of point of sale transactions (anonymous_refund)
This permission gives the ability to refund payments done through the point of sale from the cash register transaction history.
Perform cash register cashup action (cashup)
This permission gives the ability to record cash register cashups.
Access the point of sale page and take payments (takepayment)
This permission gives access to the point of sale module.
Recalls (recalls)
The following permissions are used to give access to the recalls functionalities. Checking the recalls permission will give access to all functionalities. Click “Show details” to give specific permissions.
Manage recalls for patrons (manage_recalls)
This permission gives access to the recall management page.
Manage the electronic resources module (erm)
This permission gives access to the e-resource management module.
Importante
Staff members must have this permission in order to be attached as agreement and license users in agreement and license records.
Allow staff to change logged in library (loggedinlibrary)
This permission gives the ability to change the library when logging into the staff interface.
This permission also gives the ability to set the library in the staff interface.
Nota
Staff members who do not have this permission will only be able to log into their home library.
Manage the preservation module (preservation)
This permission gives access to the preservation module.
Version
This permission was introduced in version 23.11 of Koha.
Patron information
Cuando revise un registro de usuario tiene la opción de ver la información de una de muchas pestañas encontradas en el lado izquierdo del registro.
Get there: Patrons > Browse or search for patron > Click patron name
Préstamo
For instruction on checking items out, view the Checking out section of this manual.
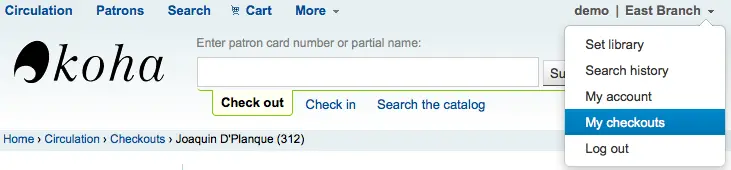
Staff members can access their own check out screen by clicking their username in the top right of the staff client and choosing “My checkouts”
Detalle
Nota
Los miembros del personal pueden acceder a los detalles de su propia cuenta haciendo clic en el nombre de su usuario en la parte superior derecha de la interfaz del personal y eligiendo “Mi cuenta”

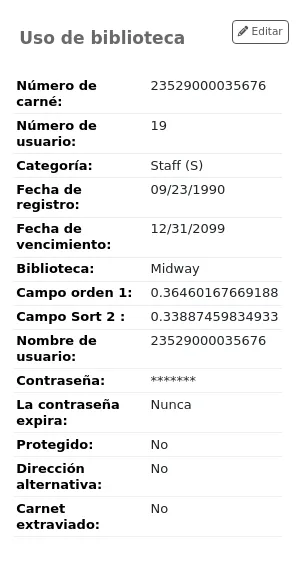
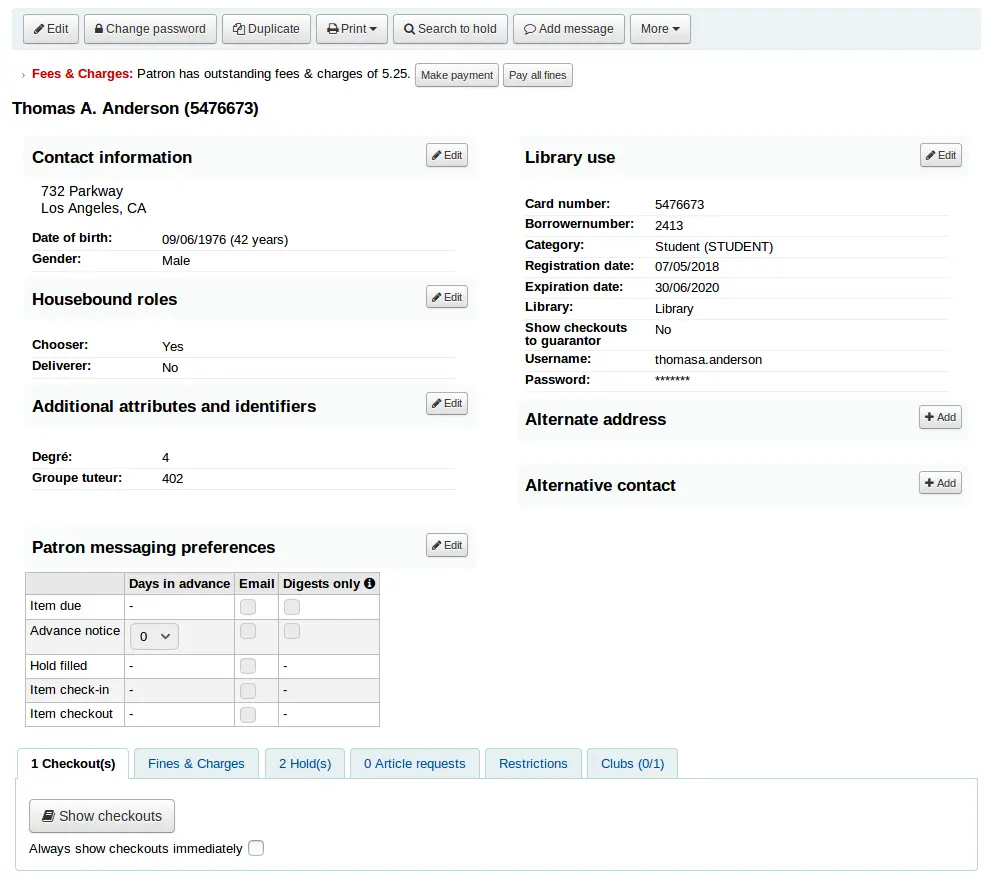
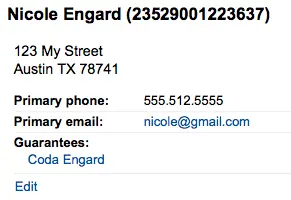
All patron information will appear in the Details tab. This includes all the contact information, notes, custom patron attributes, messaging preferences, etc. entered when adding the patron.
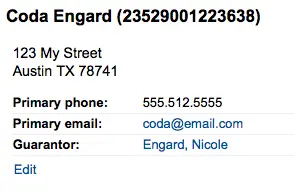
In the case of patrons who are marked as “Child” or “Professional” and their guarantors additional information will appear on their record.
A child patron will list their guarantor
On the guarantor’s record, all children and/or professionals will be listed
If the age of the patron is outside the age range defined in their patron category a warning will appear on their record.

Circulation summary
Below the patron’s information on the details screen is a tabbed display of the items they have checked out, overdue, and on hold, among other things.
Préstamos
The first tab shows the items the patron currently has checked out. The number of current checkouts will be displayed in the tab title.
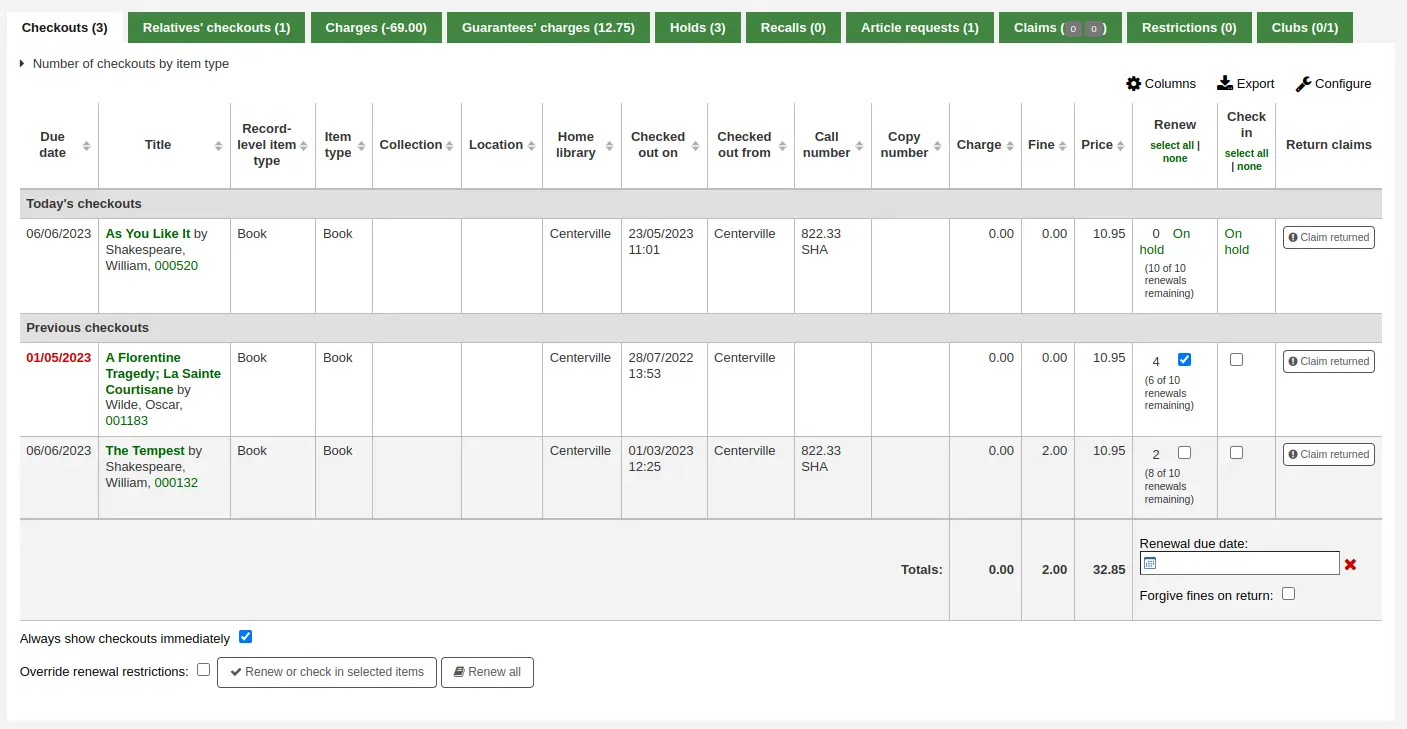
Nota
You can customize the columns of this table in the Table settings section of the Administration module (table id: issues-table, under Patrons).
Click “Configure” at the top right of the table to access the administration module directly.
Préstamos de parientes
If the patron has family at the library, staff can see what the other family members have checked out. The total number of checkouts among all family members will be displayed in the tab title.
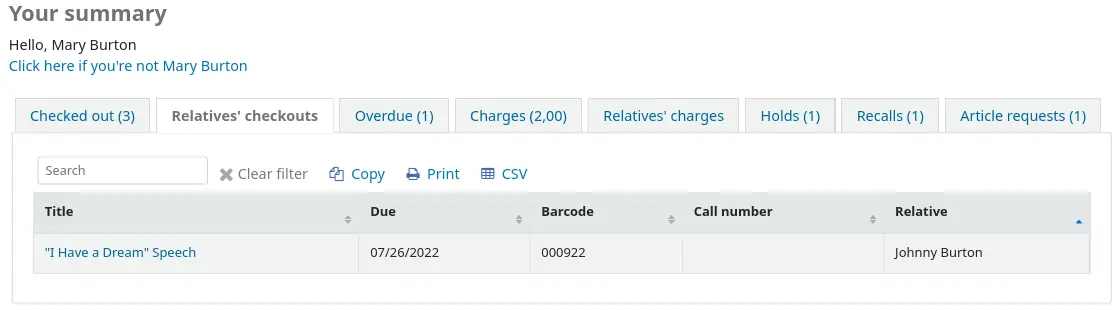
Nota
You can customize the columns of this table in the Table settings section of the Administration module (table id: relatives-issues-table, under Patrons).
Click “Configure” at the top right of the table to access the administration module directly.
Charges
The Charges tab will only show in the patron accounts that have unpaid amounts or unused credits. The total amount of unpaid charges or unused credits will be displayed in the tab title.
The tab will show the total amount, without any details. To see the details, go to the accounting tab.

Guarantees” charges
This tab will appear if the patron has guarantees and those guarantees have unpaid charges in their account. The total amount owed by guarantees will be displayed in the tab title.
The tab will show the guarantee’s name and the total unpaid amount, without any details. To see details, go to the guarantee’s accounting tab.

Reservas
If the patron has holds, the number of holds will appear on this tab’s title and the details will appear in the tab.
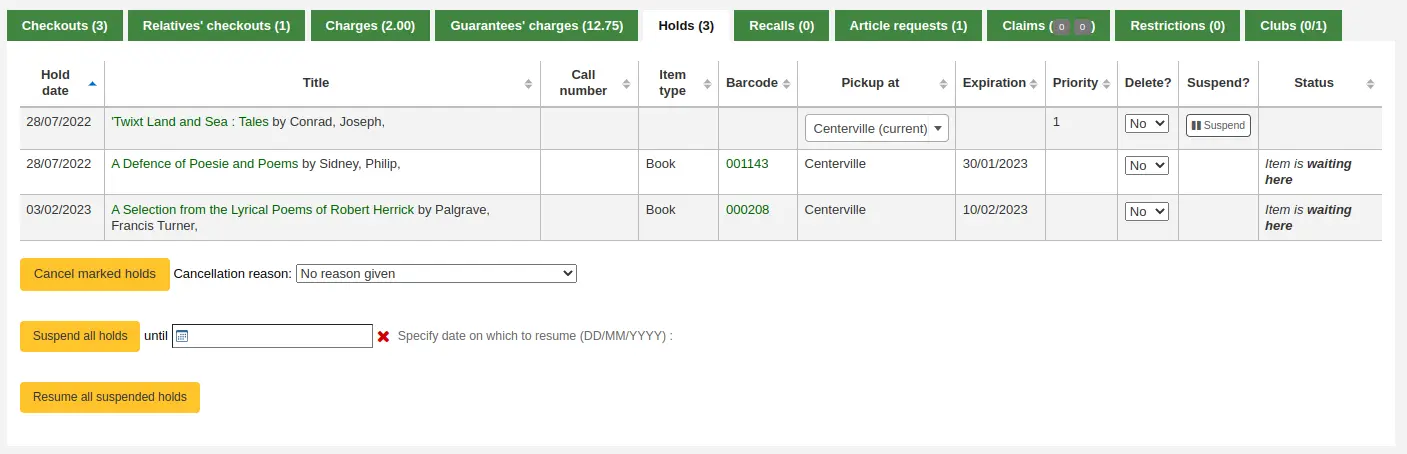
Nota
The barcode and call number will only appear on item-level holds or holds that have been confirmed. Record-level holds that are not waiting to be picked up will not have barcodes or call numbers.
From here you can manage the patron’s holds: change the pickup library, cancel or suspend holds.
Nota
You will only be able to suspend holds if the SuspendHoldsIntranet system preference is set to «Allow».
Nota
If, when suspending a hold, you want to be able to set a date at which to automatically resume the hold, set the AutoResumeSuspendedHolds system preference to «Allow» and make sure the unsuspend_holds cron job is activated.
Bookings
If the patron has bookings, the number of bookings will appear on this tab’s title and the details will appear in the tab.
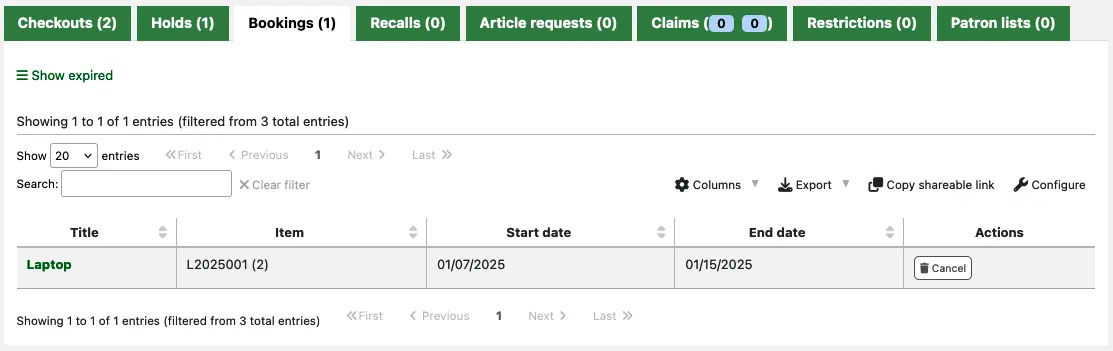
From here you can cancel any of the patron’s bookings: use the “Cancel” button in the Actions column.
Recalls
If recalls are enabled, currently active recalls requested by the patron will appear in this tab. The number of active recalls will be displayed in the tab title.

From here staff members can see the status of each recall and manage them.
Solicitud de artículos
If the ArticleRequests system preference is enabled, and the circulation rules allow it, the patrons will be able to request articles, either through the OPAC or in the staff interface. The number of active requests will be displayed in the tab title.
The details of the patron’s request, and its status, are visible in this tab.

Claims
If the patron has claimed they returned items, but those were not checked in, the claims will be shown in this tab. The number of resolved and unresolved claims will be displayed in the tab title. The first number, in green (or in gray if it’s 0), represents the number of resolved claims and the second number, in yellow (or in gray if it’s 0), represents the number of unresolved claims.

From this tab, staff can edit claim notes and resolve claims.
Restricciones
La pestaña Restricciones será mostrada para todos los usuarios. Si los usuarios no tienen restricciones usted podrá observar eso también en esa pestaña.

Si el usuario tiene restricciones en su cuenta, la pestaña mostrará el número y la descripción.
- There are at least four kinds of restrictions:
Manual
Retrasos
Suspension
Generar libre de deuda
Using the “Add manual restriction” link you can add a restriction to the patron record from here. This can be used for any type of restriction you need to put manually on a patron record.
Nota
Only staff with the manage_restrictions permission (or superlibrarian) will be able to add manual restrictions or remove existing restrictions.
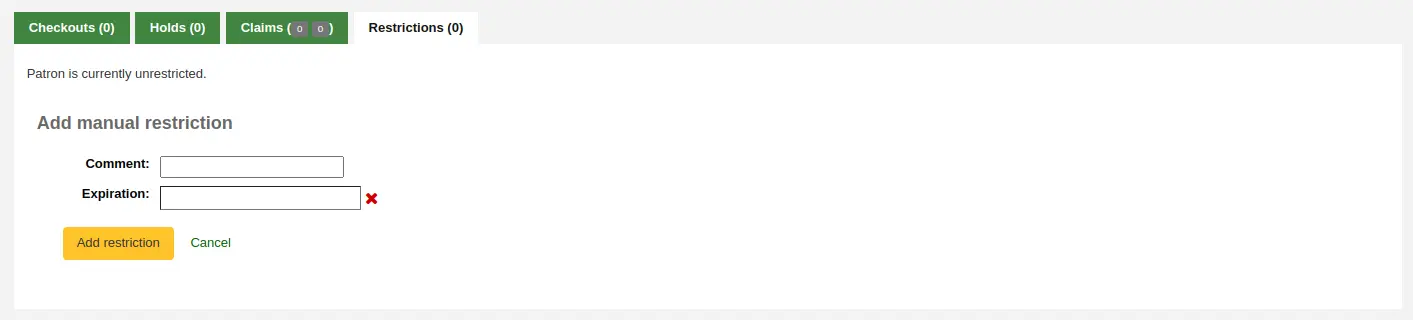
Type: if the PatronRestrictionTypes system preference is enabled, you will have a choice of restriction types. This list can be managed from the patron restriction types administration page
Comment: enter a comment to explain the restriction
Expiration: optionally enter an expiration date for this restriction. If there is no expiration date, the restriction will stay on the file until it is removed. If there is an expiration date, the restriction will automatically be expired and it will show in gray.
Version
Expired restrictions are marked as such as of Koha version 23.11. In prior versions, if a restriction was expired, it looked the same as an active restriction, but it stopped blocking circulation nonetheless.
Nota
Expired restrictions will stay visible in the patron’s file, but will not block circulation.
You can use the cleanup_database.pl cronjob with the –restrictions flag to automatically remove expired restrictions.

The overdues restrictions are automatically set when overdue notices are sent if you specified you wanted the patron restricted in the overdue notice/status triggers tool.
This restriction will not be removed automatically when the overdue items are returned unless the AutoRemoveOverduesRestrictions system preference is set to “Do”.
In the circulation rules, you can choose to fine users by suspending them instead of (or in addition to) fining them money. In that case, returning an overdue document will trigger a suspension restriction.
If using the RestrictPatronsWithFailedNotices system preference, patrons will be restricted if an email or SMS notice intended for them failed to be sent. The restriction is meant to prompt them to update their email address or SMS number.
Patrons may also be restricted if you have issued a discharge for them. Once the discharge is validated, the patron is automatically restricted.
Patrons can also be restricted by setting flags in their accounts.
Restrictions on a patron record will block checkouts. In fact, a message will appear in red when going to the checkout page.
Nota
Only staff with the force_checkout permission (or superlibrarian) will be able to temporarily override a restriction in order to check out anyway.
Restrictions may also prevent renewing items if the RestrictionBlockRenewing system preference is set to “block”.
On the OPAC, patrons will get a message saying their account is frozen. They will not be able to place holds from the OPAC.

If you have patrons that have more than one restriction, you can choose to cumulate their restriction periods or not through the CumulativeRestrictionPeriods system preference.
Nota
If you want to restrict patrons from doing various actions if their record is not pristine, check the following system preferences:
Set the OverduesBlockCirc system preference to “Block” to prevent patrons who have overdue materials from checking out other materials.
Set the OverduesBlockRenewing system preference to “block renewing for all the patron’s items” or “block renewing only for this item” to prevent patrons who have overdue materials from renewing their loans.
Enter values in the noissuescharge and NoIssuesChargeGuarantees system preferences in order to block checking out to patrons who have more than a certain amount in fines or to patrons whose guarantees owe more than a certain amount.
Enter a value in the maxoutstanding system preference to prevent patron from placing holds on the OPAC if they owe more than a certain amount.
Enter a value in the OPACFineNoRenewals system preference to prevent patron who owe more than a certain amount to renew their loans from the OPAC.
Set the BlockExpiredPatronOpacActions system preference to “Block” if you want to prevent patron whose membership has expired to place hold or renew their loans from the OPAC.
Version
As of Koha version 24.05, changes to patron restrictions can be logged with the BorrowersLog system preference.
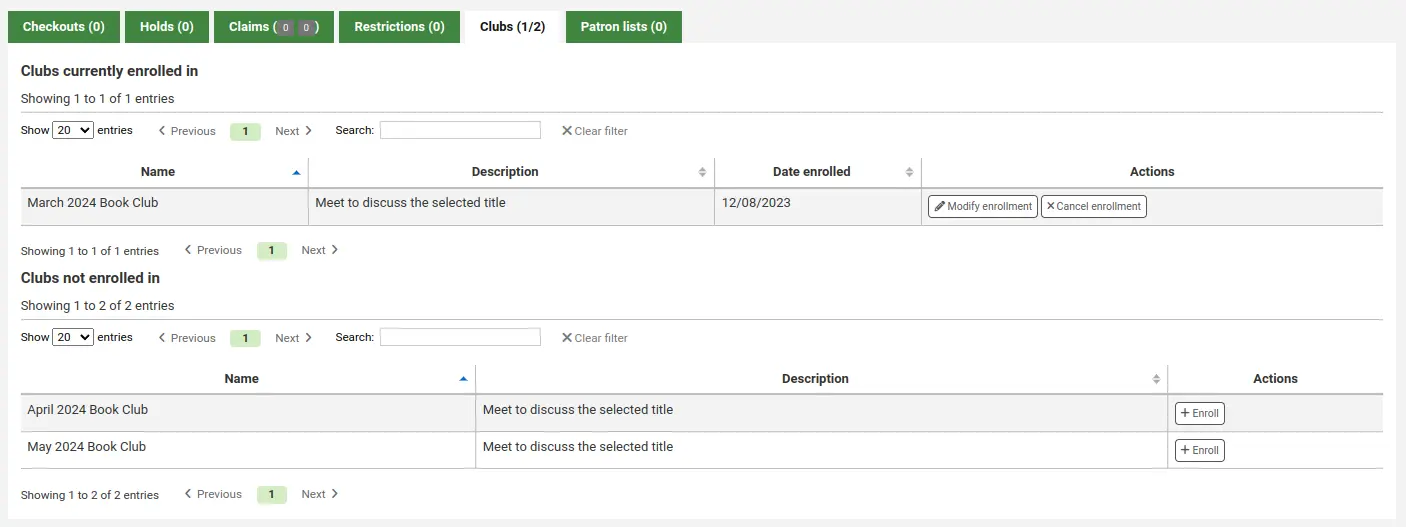
Clubes
If you use patron clubs, patrons will have a tab in their record indicating which club they are enrolled in, if any. The first number in the tab title is the number of clubs in which the patron is enrolled, and the second number is the number of clubs the patron is not enrolled in.
Patron lists
Version
This tab was added to Koha in version 23.11.
If the patron is in one or more patron lists, the list or lists they are in will be shown in this tab.
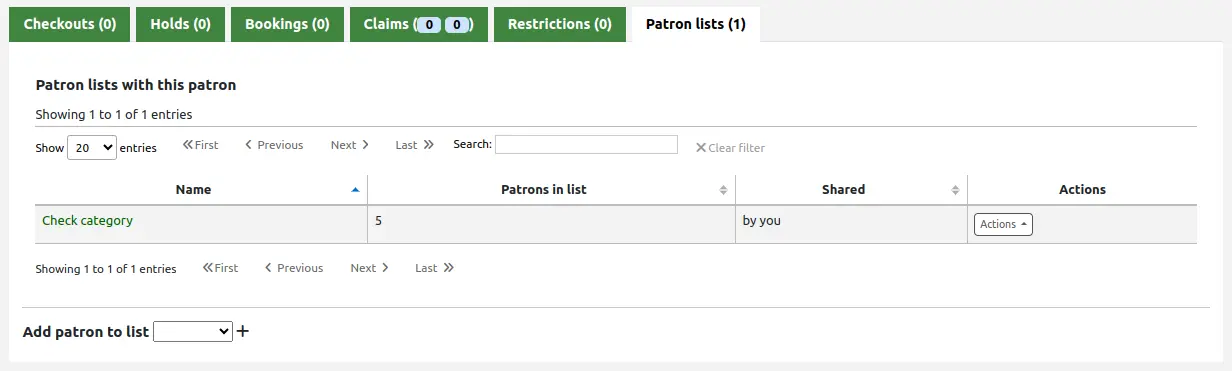
At the bottom of the tab, there is a dropdown menu to add the patron to another list. Choose the list from the dropdown menu, and click the “+” button to add them to the list.
Note that this dropdown menu only shows lists which don’t already have this patron. If the patron is in all the lists, this option is not visible.
Nota
Only staff with the manage_patron_lists permission (or the superlibrarian permission) will be able to add the patron to a list.
Accounting
Nota
Staff members must have the updatecharges permission or at least have the remaining_permissions permission under updatecharges (or the superlibrarian permission) in order to have access to this tab.
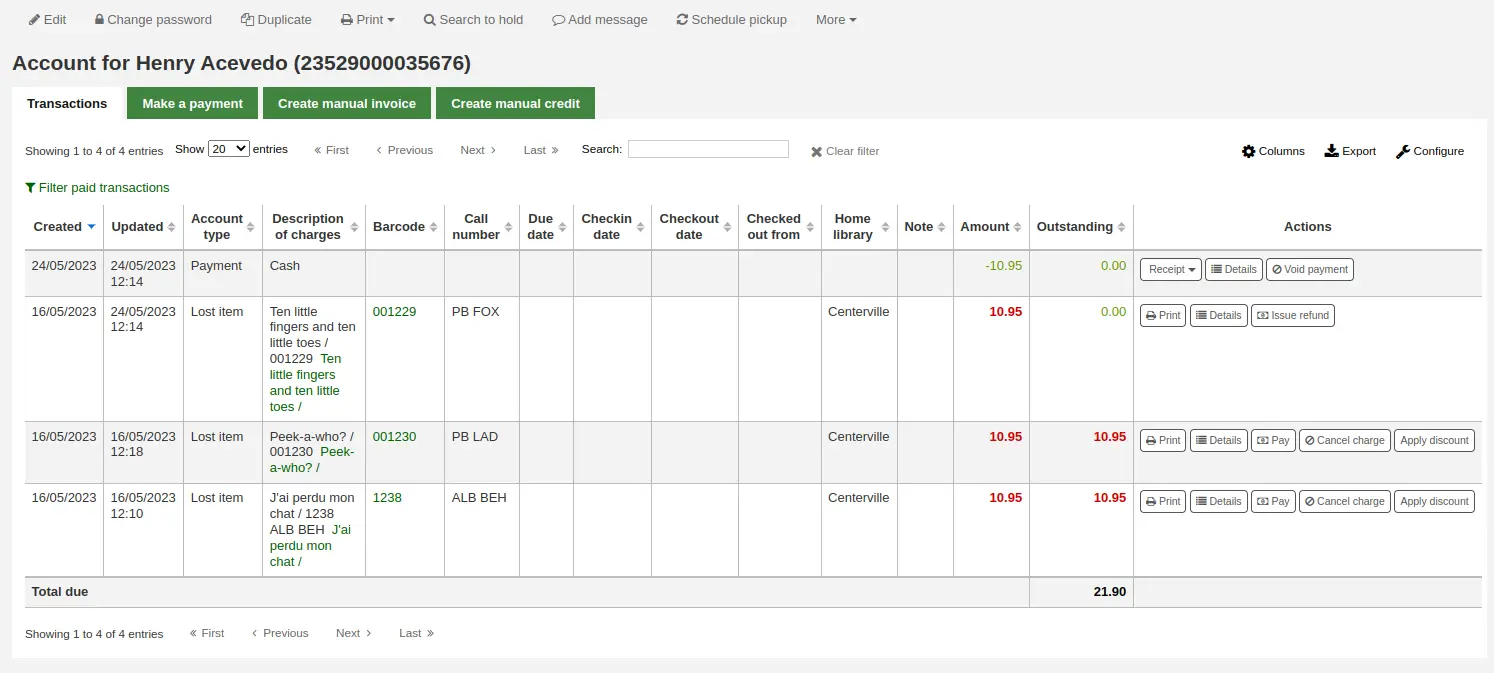
The patron’s complete accounting history will appear on the Accounting tab. The Accounting tab will show all types of charges and credits: overdue fines, membership fees, rental fees, hold fees and any other charge you may have for patrons.
Nota
You can customize the columns of this table in the Table settings section of the Administration module (table id: account-fines).
Nota
It’s possible to print a summary of outstanding charges and unused credits in the patron’s account by clicking “Print” at the top of the page and choosing the “Print account balance”.
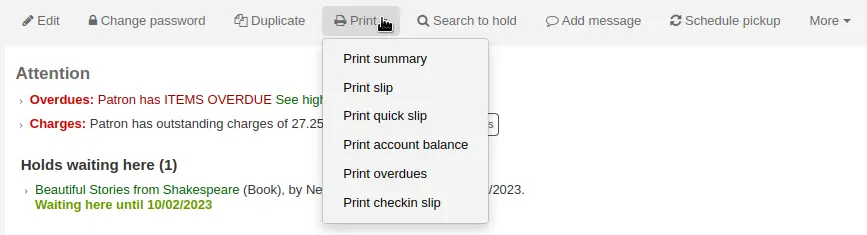
“Print summary” will print a full summary of the patron’s account, including outstanding charges.
The Transactions tab will show you the following columns:
Date: the date the charge, payment or credit was posted
En el caso de multas esto será el último día que las multas fue acumulada
Account type: what type of charge, payment or credit it is
In cases where an account type may have an accompanying status it will be displayed alongside the account type in brackets.
Description of charges: a description of the charges including the due date for overdue items and a link to the item record where one is available
Nota
For overdue fines, the default is the title and the due date. You can customize this by editing the OVERDUE_FINE_DESC template in the Notices and slips tool.
Barcode: if the charge is linked to a particular item, the barcode is displayed
Call number: if the charge is linked to a particular item, the item’s call number is displayed
Due date: if the charge is an overdue fine, the due date is displayed
Checkin date: if the charge is an overdue fine, the checkin date is displayed
Checkout date: if the charge is an overdue fine, the check out date is displayed
Home library: if the charge is linked to a particular item the home library is displayed
Notas: cualquier nota acerca de este pago/cargo
Cantidad: la cantidad total del pago o cargo
Pendiente: la cantidad todavía prevista encima cargo
Actions:
A selection of actions available to take upon the account line as detailed below
En el tope de la tabla puede hacer clic en “Filtrar transacción paga” para ocultar todas las transacciones completadas y además puede utilizar el cuadro de búsqueda para encontrar un monto o pago específico.
Actions
Action buttons will be available for the different account lines depending on the user’s permissions and the account type and status.
A button to print or email a receipt or invoice for that line item
Nota
If the line item is a credit (payment, writeoff or other credit), the receipt that will be printed will be the ACCOUNT_CREDIT notice. It can be customized in the Notices and slips tool.
If the line item is a debit (a charge), the invoice that will be printed will be the ACCOUNT_DEBIT notice. It can be customized in the Notices and slips tool.
A button to show further details about the charge and any payments that have been made
A button to void (reverse) a payment/credit
This button will only appear on a payment/credit line. Upon voiding the line it will reverse the payment process restoring the amountoutstanding for any debts/debits which the payment/credit may have previously been used to offset. This action is most commonly used to correct cases where a payment was recorded but never actually received. The credit line will be set to a zero amount and updated to VOID.
A button to cancel (remove) a charge/debit
This button will only appear on a charge/debit line that has not already had any payment/credits applied to it. Upon canceling the line it will be marked as “Cancelled” and a CANCELLATION line will be added and offset against it. This action is most commonly used to correct cases where a charge was made mistakenly.
A button to pay against charges/debits with outstanding amounts
This button will appear against any charge/debit with an outstanding amount. The subsequent page can be used to pay or writeoff the line partially or in full with a PAYMENT or WRITEOFF line will being added.
A button to issue a payout of credit
This button will appear against any credit line that has an amount outstanding and you have the payout permission. It allows the librarian to return outstanding credit to the patron and record the action with a PAYOUT line.
A button to issue a refund against a charge/debit
This button will appear against any charge/debit line that has been paid or partially paid and you have the refund permission. The subsequent modal dialogue will allow you to partially or fully refund the offset debt, either in CASH or by means of a credit added to the account.
A button to apply a discount to a charge/debit
This button will appear against any charge/debit which has not already been offset by a credit/payment and you have the discount permission. The subsequent modal dialogue will allow you to add a discount upon the charge.
Charging fines/fees
Most fees and fines will be charged automatically if the fines cron job is running. Fines will also be charged when an overdue item is checked in if the CalculateFinesOnReturn system preference is enabled.
Fines will be charged based on your circulation and fines rules
Hold fees will be charged based on the rules you set in the Patron types and categories administration area
Rental fees will be charged based on the settings in your Item iypes administration area
Marcar a un ítem como “Perdido” en el módulo de catalogación, automáticamente, le pondrá una multa al usuario equivalente al costo de reemplazo del ítem.
Creating a patron in a category with an enrollment fee.
Renewing a patron account in a category with an enrollment fee.
Article request fees will be charged based on the article request fees section of the circulation rules page.
Creating manual invoices
For fees that are not automatically charged, staff can create a manual invoice.
Nota
Staff members must have the manual_invoice permission (or the superlibrarian permission) in order to add manual invoices in a patron’s account.
Click on the “Create manual invoice” tab
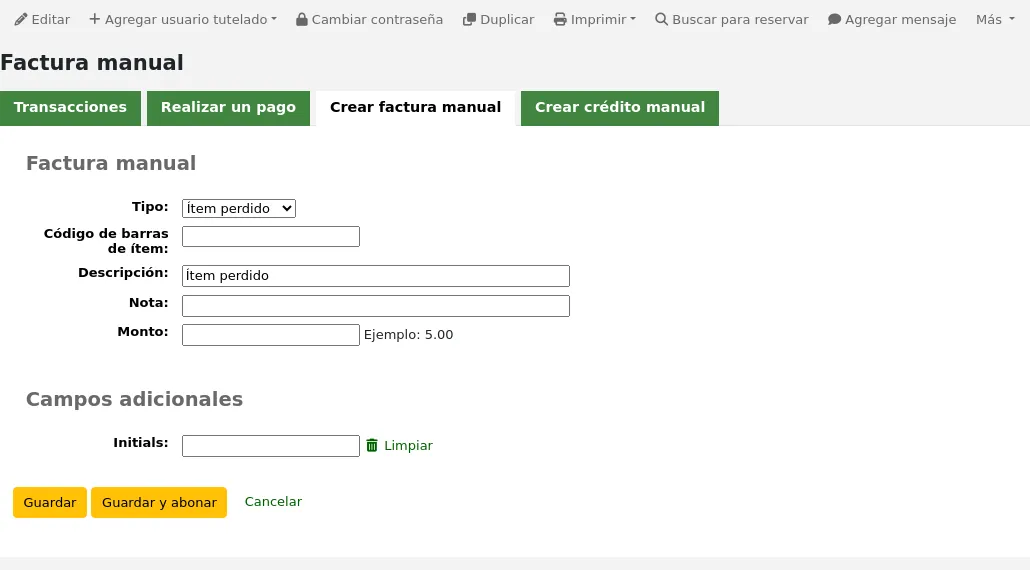
Type: choose the type of invoice to create.
Nota
To add additional values to the manual invoice type pull down menu, add them to the debit types in the Administration module.
Barcode: if the fee is associated with an item you can enter its barcode so that the line item shows a link to that item.
Description: enter the description of the charge.
Note: if needed, add a note about this charge.
Cost: if the type is a custom debit type, there will be a “Cost” field where you can enter the cost of the item. This is mainly for physical items being sold to the patron, such as used books or reusable bags, for example.
Version
This field was added to Koha in version 23.11.
Quantity: if the type is a custom debit type, there will be a “Quantity” field where you can enter quantity of items being charged. This is mainly for physical items being sold to the patron, such as used books or reusable bags, for example.
Version
This field was added to Koha in version 23.11.
Amount: enter the amount of the charge, do not enter currency symbols, only numbers and decimals.
Nota
If the type is a custom debit type, and you entered a cost and quantity, the amount will be automatically calculated.
If any additional fields were set up for account line debits, they will appear here.
Click “Save” to charge the amount to the patron’s account, or
Click “Save and pay” to charge the amount to the patron’s account and go directly to the payment page.
Paying and writing off charges
Each account line can be paid in full or written off using the “Make a payment” tab.
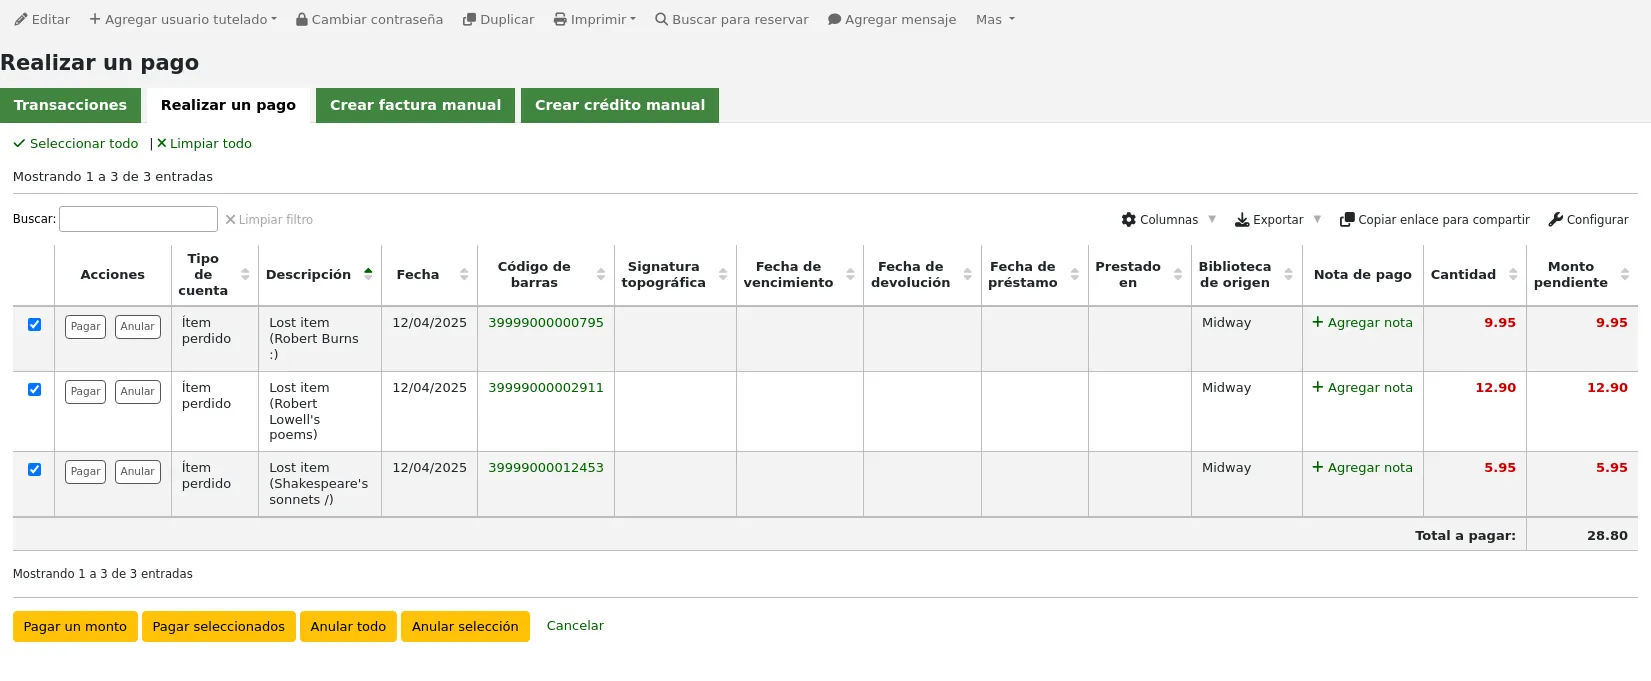
Nota
You can customize the columns of this table in the Table settings section of the Administration module (table id: pay-fines-table).
Each account line can be paid in full, partially paid, or written off.
Paying an individual charge in full
To pay an individual charge in full:
If you need to add a note about the payment, click “Add note” and type in the note before proceeding.
Click the “Pay” button next to the charge to be paid in full.
A table will show the details of the charge being paid, the full amount of the charge will be populated for you in the “Amount being paid” and the “Amount tendered” fields.
Nota
If you made a mistake and this charge should be written off instead, you can switch between “Pay” and “Write off” mode using the buttons located at the top of this tab. See Writing off an individual charge below.
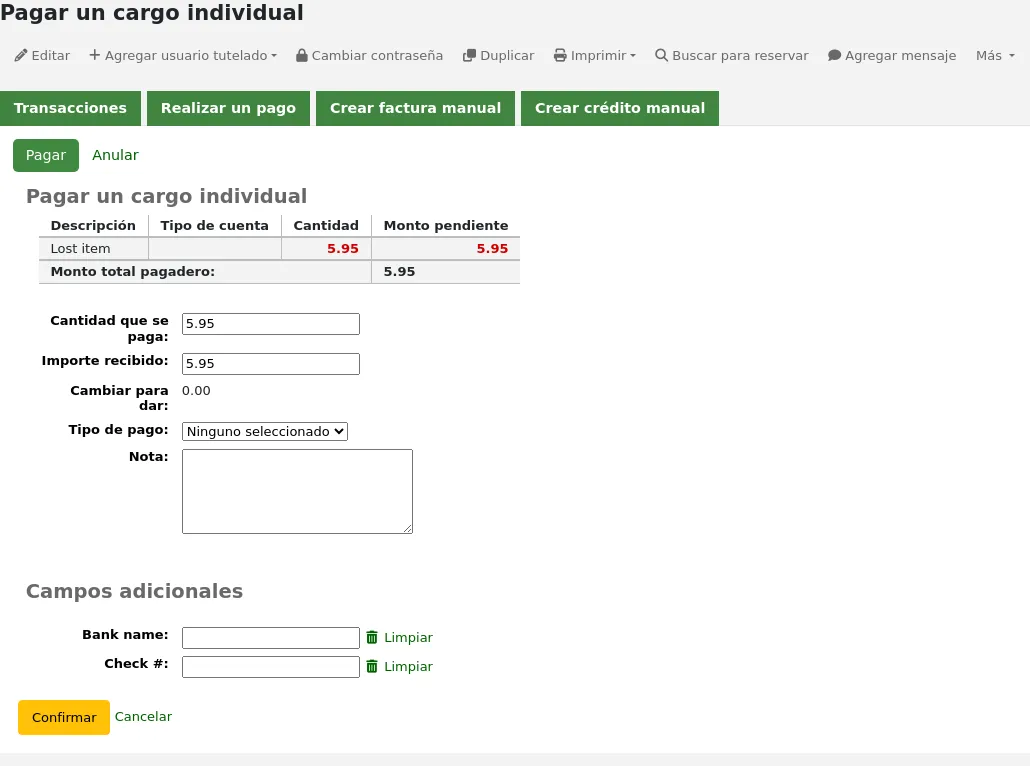
Amount being paid: this is the amount that will be debited from the charge. When paying a charge in full, this should be the full amount.
Amount tendered: this is the actual amount handed to you by the patron, it will be used to calculate the change. For example, if a patron has a 2.75$ fine to pay, and they pay with a 5$ bill, enter 5 in “Amount tendered”.
Change to give: if the amount being paid and the amount tendered are different (i.e. more money was collected) the amount of change to be given will be displayed.
Payment type: choose the type of payment.
Nota
This field will only appear if one or more values are defined in the PAYMENT_TYPE authorized value category.
Nota
This field will be required if either the UseCashRegisters system preference or the RequirePaymentType system preference is enabled.
Cash register: if the UseCashRegisters system preference is enabled, you will have a choice of cash register in which to enter the transaction.
Nota
If the UseCashRegisters system preference is enabled, and the CASH payment type is chosen above, you will be required to choose a cash register for the payment.
Whether or not this field is required when another payment type is chosen is determined by the RequireCashRegister system preference.
If any additional fields were set up for account line credits, they will appear here.
Click “Confirm”.
If change was to be given back to the patron, a pop-up window will appear to remind you, click “Yes” to confirm that you gave back the correct amount and confirm the payment.
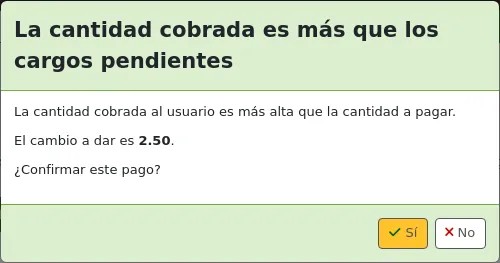
The charge’s outstanding amount will be set to zero (fully paid), and a payment line will be added in the patron’s transactions.
Nota
If the FinePaymentAutoPopup system preference is enabled, a print dialogue window will display. The receipt printed uses the letter ACCOUNT_CREDIT, which can be modified in the Notices and slips tool. If change was given for this transaction the details will be included when using this system preference.
In addition to printing receipts, you can automatically email receipts for payment and writeoff transactions to the patron with the AutomaticEmailReceipts system preference. The email sent uses the ACCOUNT_PAYMENT letter, which can be modified in the Notices and slips tool.
Partially paying an individual charge
To partially pay an individual charge:
Click the “Pay” button next to the charge to be partially paid.
A table will show the details of the charge being paid, the full amount of the charge will be populated for you in the “Amount being paid” and the “Amount tendered” fields.
Nota
If you made a mistake and this charge should be written off instead, you can switch between “Pay” and “Write off” mode using the buttons located at the top of this tab. See Partially writing off an individual charge below.
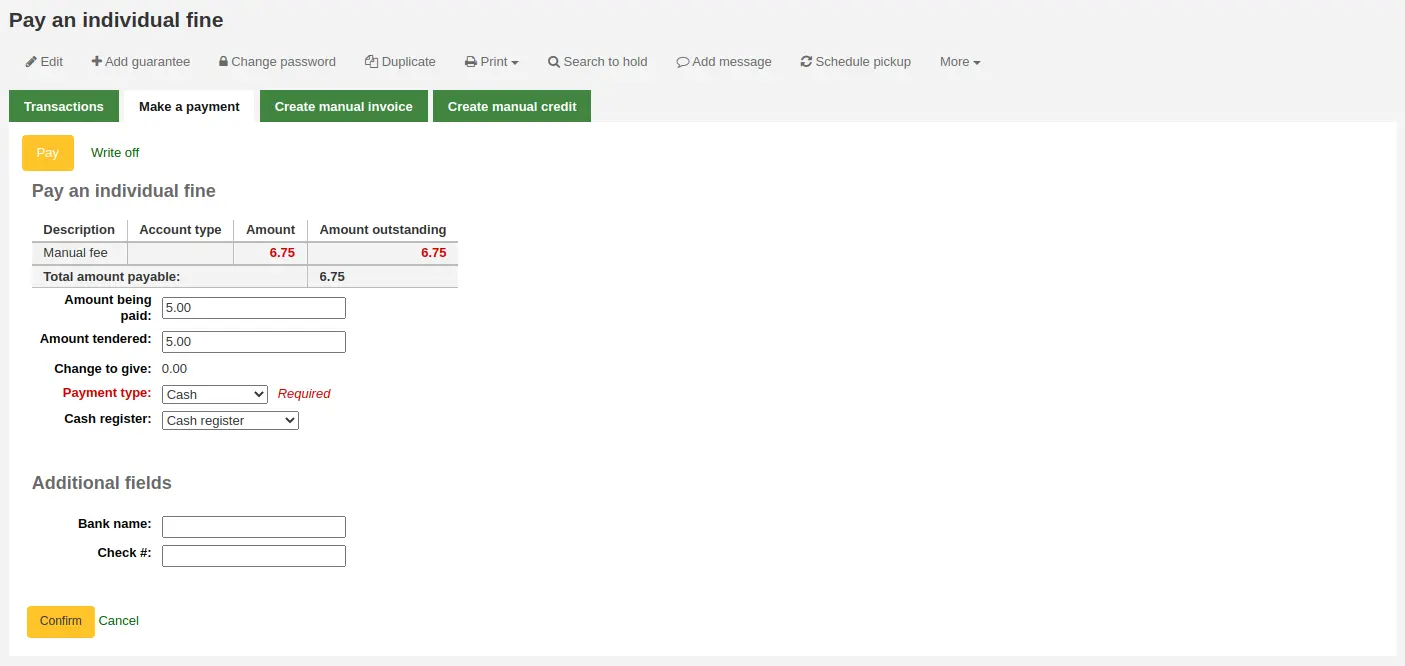
Amount being paid: this is the amount that will be debited from the charge. When partially paying a charge, enter the amount that should be paid.
Amount tendered: this is the actual amount handed to you by the patron, it will be used to calculate the change. For example, if a patron has a 2.75$ fine to pay, and they pay with a 5$ bill, enter 5 in “Amount tendered”.
Change to give: if the amount being paid and the amount tendered are different (i.e. more money was collected) the amount of change to be given will be displayed.
Payment type: choose the type of payment.
Nota
This field will only appear if one or more values are defined in the PAYMENT_TYPE authorized value category.
Nota
This field will be required if either the UseCashRegisters system preference or the RequirePaymentType system preference is enabled.
Cash register: if the UseCashRegisters system preference is enabled, you will have a choice of cash register in which to enter the transaction.
Nota
If the UseCashRegisters system preference is enabled, and the CASH payment type is chosen above, you will be required to choose a cash register for the payment.
Whether or not this field is required when another payment type is chosen is determined by the RequireCashRegister system preference.
If any additional fields were set up for account line credits, they will appear here.
Click “Confirm”.
If change was to be given back to the patron, a pop-up window will appear to remind you, click “Yes” to confirm that you gave back the correct amount and confirm the payment.
The charge will be updated to show the original amount and the current amount outstanding, and a payment line will be added in the patron’s transactions.
Nota
If the FinePaymentAutoPopup system preference is enabled, a print dialogue window will display. The receipt printed uses the letter ACCOUNT_CREDIT, which can be modified in the Notices and slips tool. If change was given for this transaction the details will be included when using this system preference.
In addition to printing receipts, you can automatically email receipts for payment and writeoff transactions to the patron with the AutomaticEmailReceipts system preference. The email sent uses the ACCOUNT_PAYMENT letter, which can be modified in the Notices and slips tool.
Paying an amount towards all charges
To pay an amount towards all charges:
Click the “Pay amount” button.
The total amount outstanding in the patron’s account will be displayed, and populated for you in the “Amount being paid” and the “Amount tendered” fields.
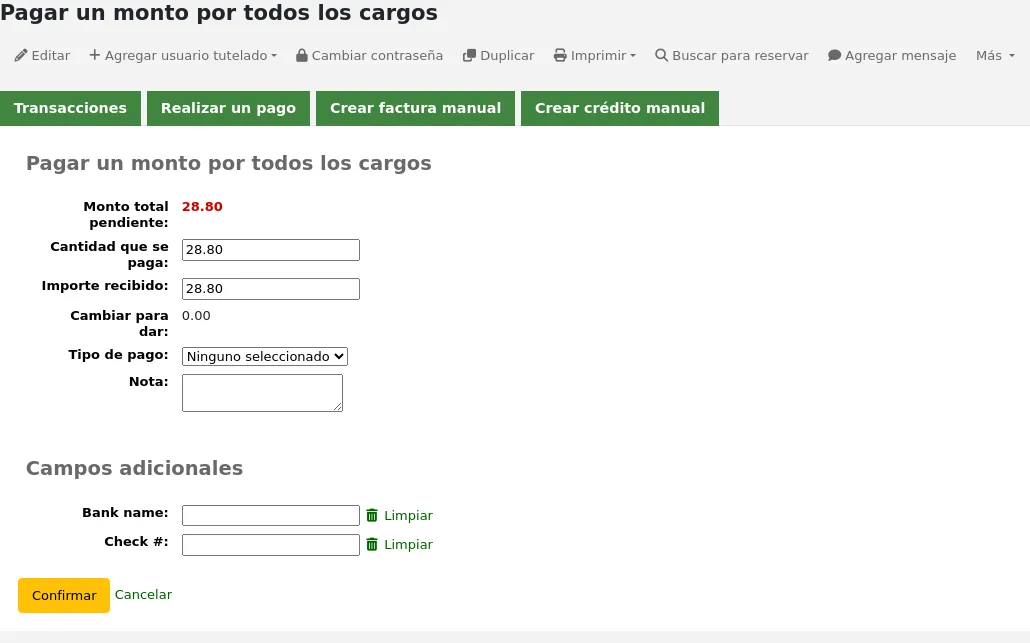
Total amount outstanding: this is the total unpaid charges in the patron’s account.
Amount being paid: this is the amount that will be debited from the outstanding amount. Enter the amount that will be paid.
Amount tendered: this is the actual amount handed to you by the patron, it will be used to calculate the change. For example, if a patron has a 2.75$ fine to pay, and they pay with a 5$ bill, enter 5 in “Amount tendered”.
Change to give: if the amount being paid and the amount tendered are different (i.e. more money was collected) the amount of change to be given will be displayed.
Payment type: choose the type of payment.
Nota
This field will only appear if one or more values are defined in the PAYMENT_TYPE authorized value category.
Nota
This field will be required if either the UseCashRegisters system preference or the RequirePaymentType system preference is enabled.
Cash register: if the UseCashRegisters system preference is enabled, you will have a choice of cash register in which to enter the transaction.
Nota
If the UseCashRegisters system preference is enabled, and the CASH payment type is chosen above, you will be required to choose a cash register for the payment.
Whether or not this field is required when another payment type is chosen is determined by the RequireCashRegister system preference.
Note: if needed, add a note about this payment.
If any additional fields were set up for account line credits, they will appear here.
Click “Confirm”.
If change was to be given back to the patron, a pop-up window will appear to remind you, click “Yes” to confirm that you gave back the correct amount and confirm the payment.
The charges” outstanding amounts will be updated, with the payment applied to oldest charges first, and a payment line will be added in the patron’s transactions.
Nota
If the FinePaymentAutoPopup system preference is enabled, a print dialogue window will display. The receipt printed uses the letter ACCOUNT_CREDIT, which can be modified in the Notices and slips tool. If change was given for this transaction the details will be included when using this system preference.
In addition to printing receipts, you can automatically email receipts for payment and writeoff transactions to the patron with the AutomaticEmailReceipts system preference. The email sent uses the ACCOUNT_PAYMENT letter, which can be modified in the Notices and slips tool.
Paying selected charges
To pay only some charges:
Check the selection boxes next to the charges to be paid.
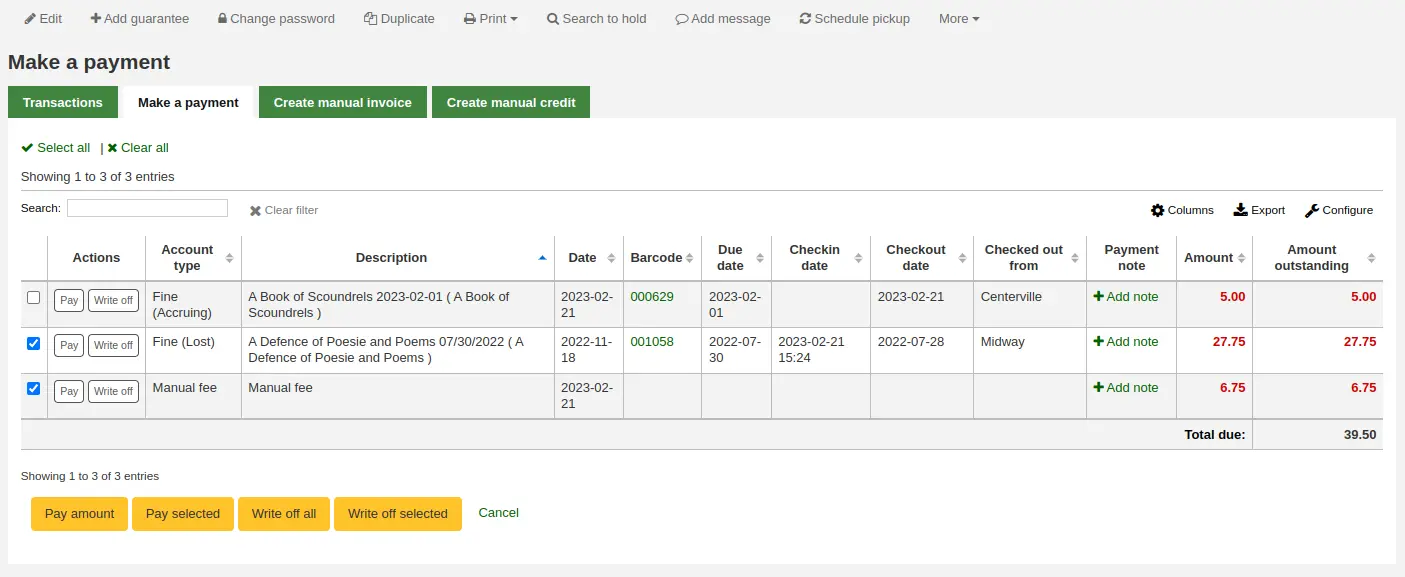
Click the “Pay selected” button.
The total outstanding amount for the selected charges will be displayed, and populated for you in the “Amount being paid” and the “Amount tendered” fields.
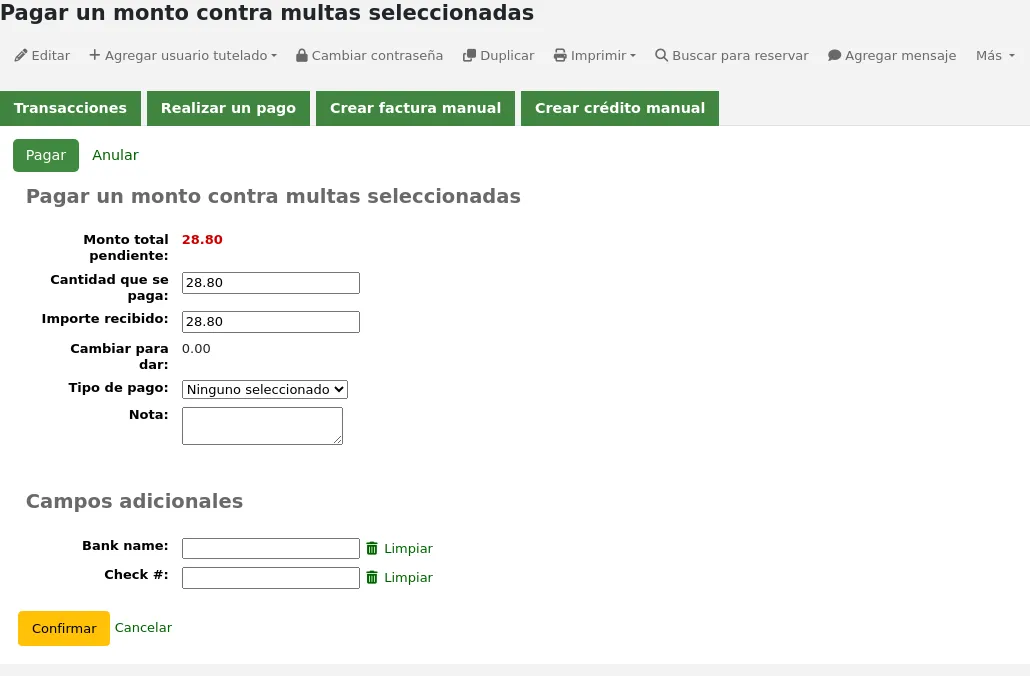
Total amount outstanding: this is the total unpaid amount for the selected charges.
Amount being paid: this is the amount that will be debited from the total outstanding amount of the selected charges. Enter the amount that will be paid.
Amount tendered: this is the actual amount handed to you by the patron, it will be used to calculate the change. For example, if a patron has a 2.75$ fine to pay, and they pay with a 5$ bill, enter 5 in “Amount tendered”.
Change to give: if the amount being paid and the amount tendered are different (i.e. more money was collected) the amount of change to be given will be displayed.
Payment type: choose the type of payment.
Nota
This field will only appear if one or more values are defined in the PAYMENT_TYPE authorized value category.
Nota
This field will be required if either the UseCashRegisters system preference or the RequirePaymentType system preference is enabled.
Cash register: if the UseCashRegisters system preference is enabled, you will have a choice of cash register in which to enter the transaction.
Nota
If the UseCashRegisters system preference is enabled, and the CASH payment type is chosen above, you will be required to choose a cash register for the payment.
Whether or not this field is required when another payment type is chosen is determined by the RequireCashRegister system preference.
Note: if needed, add a note about this payment.
If any additional fields were set up for account line credits, they will appear here.
Click “Confirm”.
If change was to be given back to the patron, a pop-up window will appear to remind you, click “Yes” to confirm that you gave back the correct amount and confirm the payment.
The selected charges” outstanding amounts will be updated, with the payment applied to oldest charges first, and a payment line will be added in the patron’s transactions.
Nota
If the FinePaymentAutoPopup system preference is enabled, a print dialogue window will display. The receipt printed uses the letter ACCOUNT_CREDIT, which can be modified in the Notices and slips tool. If change was given for this transaction the details will be included when using this system preference.
In addition to printing receipts, you can automatically email receipts for payment and writeoff transactions to the patron with the AutomaticEmailReceipts system preference. The email sent uses the ACCOUNT_PAYMENT letter, which can be modified in the Notices and slips tool.
Writing off all charges
Nota
Staff members must have the writeoff permission (or the superlibrarian permission) in order to be able to write off charges.
To write off all charges in a patron’s account:
Click the “Write off all” button
Confirm the writeoff
All charges” outstanding amounts will be set to zero (fully paid/written off), and a writeoff line will be added in the patron’s transactions.
Writing off an individual charge
Nota
Staff members must have the writeoff permission (or the superlibrarian permission) in order to be able to write off charges.
To write off a single charge:
If you need to add a note about the writeoff, click “Add note” and type in the note before proceeding
Click the “Write off” button next to the charge to be written off
A table will show the details of the charge being written off, the full amount of the charge will be populated for you in the “Writeoff amount” field.
Nota
If you made a mistake and this charge should be paid instead, you can switch between “Pay” and “Write off” mode using the buttons located at the top of this tab. See Paying an individual charge in full above.
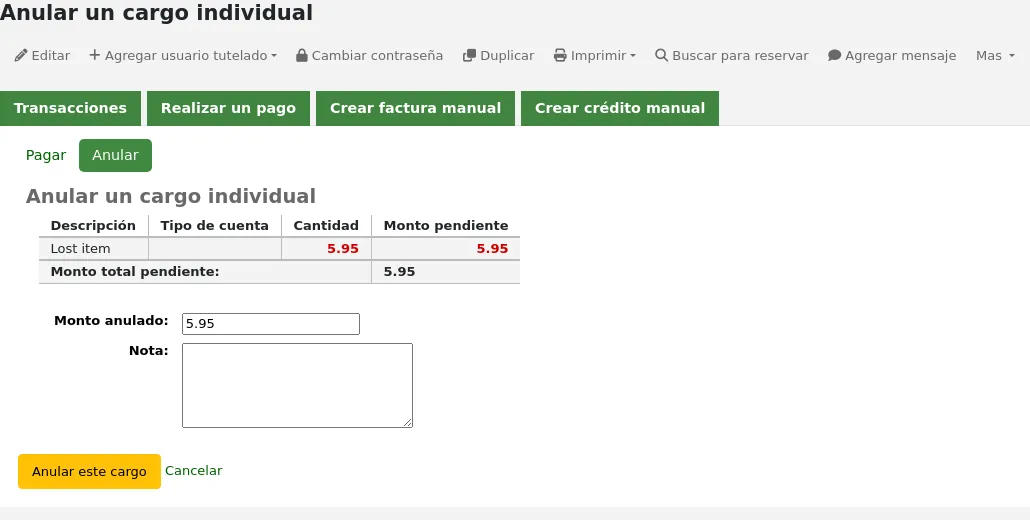
Writeoff amount: this is the amount that will be debited from the charge. When writing off a charge completely, this should be the full amount.
If any additional fields were set up for account line credits, they will appear here.
Click “Write off this charge”
The charge’s outstanding amount will be set to zero (fully paid/written off), and a writeoff line will be added in the patron’s transactions.
Nota
If the FinePaymentAutoPopup system preference is enabled, a print dialogue window will display. The receipt printed uses the letter ACCOUNT_CREDIT, which can be modified in the Notices and slips tool. If change was given for this transaction the details will be included when using this system preference.
In addition to printing receipts, you can automatically email receipts for payment and writeoff transactions to the patron with the AutomaticEmailReceipts system preference. The email sent uses the ACCOUNT_WRITEOFF letter, which can be modified in the Notices and slips tool.
Partially writing off an individual charge
Nota
Staff members must have the writeoff permission (or the superlibrarian permission) in order to be able to write off charges.
To partially write off a single charge:
If you need to add a note about the writeoff, click “Add note” and type in the note before proceeding
Click the “Write off” button next to the charge to be written off
A table will show the details of the charge being written off, the full amount of the charge will be populated for you in the “Writeoff amount” field.
Nota
If you made a mistake and this charge should be paid instead, you can switch between “Pay” and “Write off” mode using the buttons located at the top of this tab. See Partially paying an individual charge above.
Writeoff amount: this is the amount that will be debited from the charge. When partially writing off a charge, enter the amount to be written off.
If any additional fields were set up for account line credits, they will appear here.
Click “Write off this charge”
The charge will be updated to show the original amount and the current amount outstanding, and a writeoff line will be added in the patron’s transactions.
Nota
If the FinePaymentAutoPopup system preference is enabled, a print dialogue window will display. The receipt printed uses the letter ACCOUNT_CREDIT, which can be modified in the Notices and slips tool. If change was given for this transaction the details will be included when using this system preference.
In addition to printing receipts, you can automatically email receipts for payment and writeoff transactions to the patron with the AutomaticEmailReceipts system preference. The email sent uses the ACCOUNT_WRITEOFF letter, which can be modified in the Notices and slips tool.
Writing off selected charges
Nota
Staff members must have the writeoff permission (or the superlibrarian permission) in order to be able to write off charges.
To write off only some charges:
If you need to add a note about the writeoff, click “Add note” and type in the note before proceeding
Check the selection boxes next to the fines to be written off
Click the “Writeoff selected” button
The total outstanding amount for the selected charges will be displayed, and populated for you in the “Writeoff amount” field.
Nota
If you made a mistake and this charge should be paid instead, you can switch between “Pay” and “Write off” mode using the buttons located at the top of this tab. See Paying selected charges above.
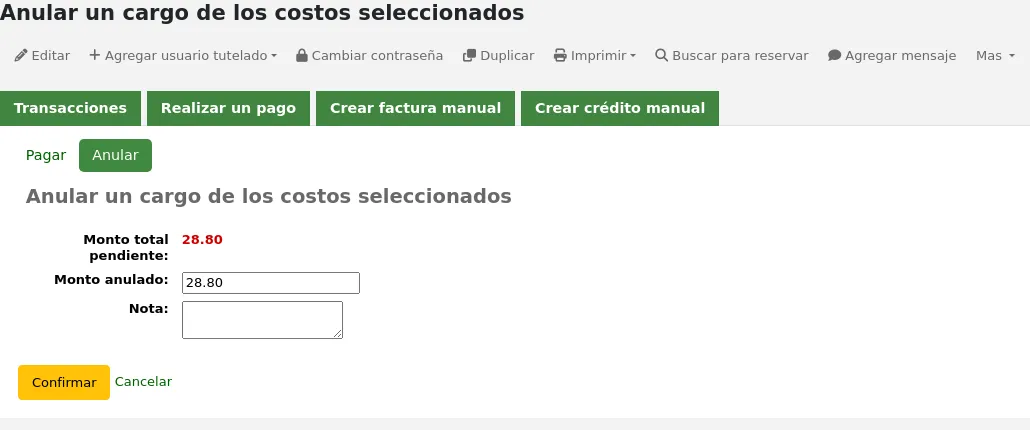
Writeoff amount: this is the amount that will be debited from the charge. When writing off the charges completely, this should be the full amount.
Note: if needed, enter a note about this writeoff.
If any additional fields were set up for account line credits, they will appear here.
Click “Confirm”
The selected charges” outstanding amounts will be updated, with the writeoff applied to oldest charges first, and a writeoff line will be added in the patron’s transactions.
Nota
If the FinePaymentAutoPopup system preference is enabled, a print dialogue window will display. The receipt printed uses the letter ACCOUNT_CREDIT, which can be modified in the Notices and slips tool. If change was given for this transaction the details will be included when using this system preference.
In addition to printing receipts, you can automatically email receipts for payment and writeoff transactions to the patron with the AutomaticEmailReceipts system preference. The email sent uses the ACCOUNT_WRITEOFF letter, which can be modified in the Notices and slips tool.
Cancel fines or fees
If a user was charged for something and it’s an error, you can cancel the fee by clicking the “Cancel charge” button in the Actions column.

A pop-up will open to optionally enter a note, and confirm the cancellation of the charge.
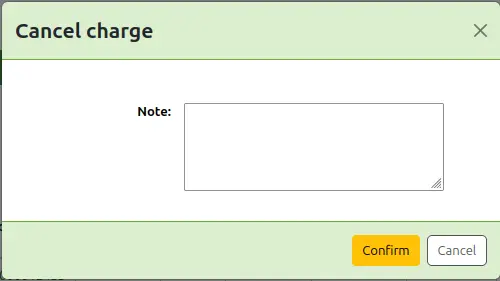
Once confirmed, a new line will be added to the account for a “Cancelled charge” of the same amount as the canceled charge. The charge that was canceled will now have the “Cancelled” status and the amount outstanding will be 0.

If you canceled a charge by mistake, you can void the cancellation (see Void payments below).
Void payments
If you accidentally mark a charge as paid, you can reverse that line item by clicking “Void payment” to the right of the line.

A pop-up will open to optionally enter a note, and confirm the voiding of the payment.
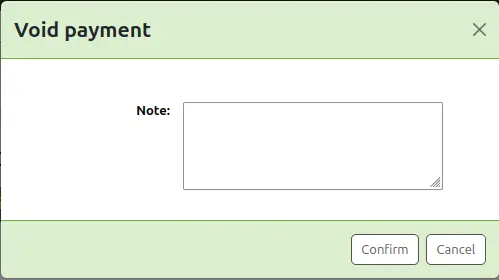
Once confirmed, a new line will be added to the account for “Credit has been voided” and the payment line will have the status “Voided”.

The payment line is added back to the “Make a payment” tab as an outstanding charge.
Creating manual credits
Los créditos manuales pueden ser utilizados para pagar parte de las multas, o para perdonar un monto de la multa.
Nota
Staff members must have the manual_credit permission (or the superlibrarian permission) in order to add manual credits to a patron’s account.
Click “Create manual credit”.
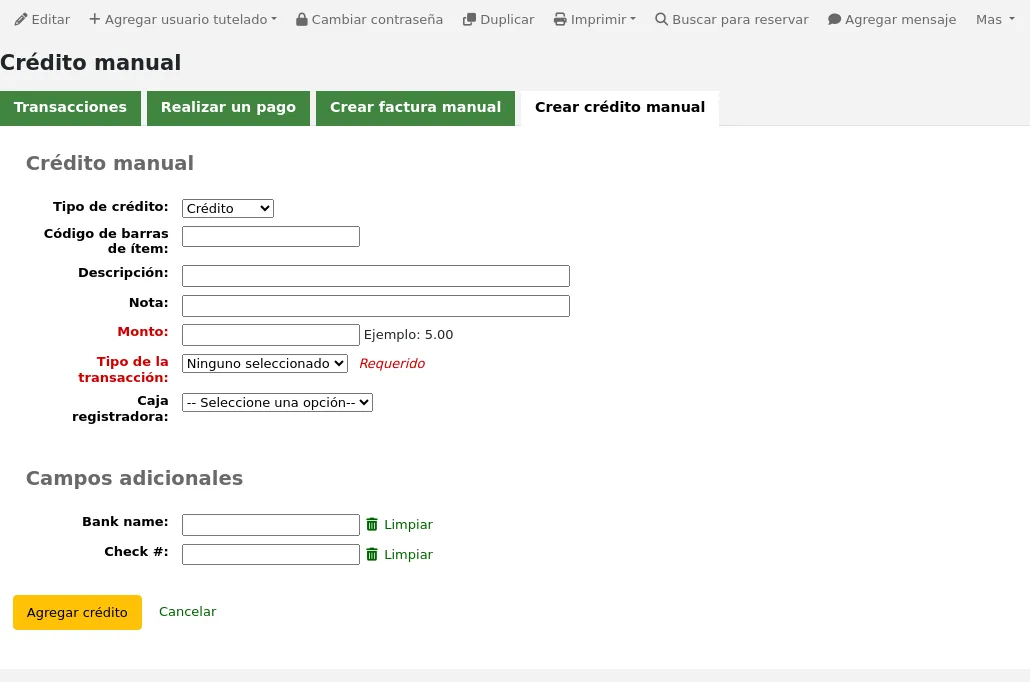
Type: choose the type of credit to apply.
Nota
To add additional values to the manual credit type drop-down menu, add them to the credit types in the Administration module.
Barcode: if this credit is associated with an item you can enter that item’s barcode so that the line item links to the right item.
Description: enter the description of the credit.
Note: if needed, add a note about this credit.
Amount: enter the credit’s amount, do not enter currency symbols, only numbers and decimals.
Transaction type: choose the type of credit.
Nota
This field will only appear if one or more values are defined in the PAYMENT_TYPE authorized value category.
Nota
This field will be required if either the UseCashRegisters system preference or the RequirePaymentType system preference is enabled.
Cash register: if the UseCashRegisters system preference is enabled, you will have a choice of cash register in which to enter the transaction.
Nota
If the UseCashRegisters system preference is enabled, and the CASH transaction type is chosen above, you will be required to choose a cash register for the payment.
Whether or not this field is required when another transaction type is chosen is determined by the RequireCashRegister system preference.
If any additional fields were set up for account line credits, they will appear here.
Click “Add credit”.
This will add a credit line to the patron’s account.
Nota
If the AccountAutoReconcile system preference is set to “Do”, the credit will automatically be used to reduce the outstanding amounts in the patron’s account, starting with the oldest charges.
Nota
If the AutoCreditNumber system preference is enabled, credits will be numbered.
Printing invoices
A la derecha de cada línea de cuenta hay un enlace de impresión. Haciendo clic en dicho enlace imprimirá un recibo para el ítem en línea que incluye la fecha y descripción del ítem con el total resaltado de la cuenta.
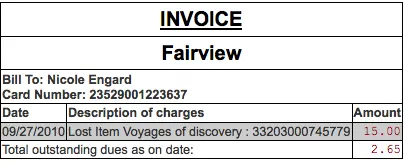
Listas de circulación
A list of all of the serial routing lists the patron belongs to will be accessible via the “Routing lists” tab on the patron record.
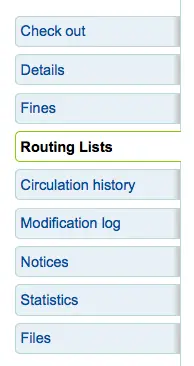
En esta pestaña podrá ver y editar las listas de circulación en las que figura este usuario.
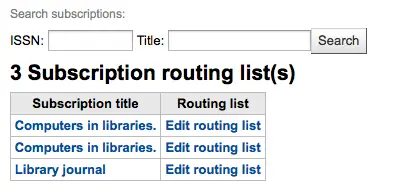
Historial de circulación
The circulation history tab will appear if you have set the intranetreadinghistory preference to allow it to appear. If you have the OPACPrivacy system preference set to “Allow” and the patron has decided that the library cannot keep this information this tab will only show currently checked out items.
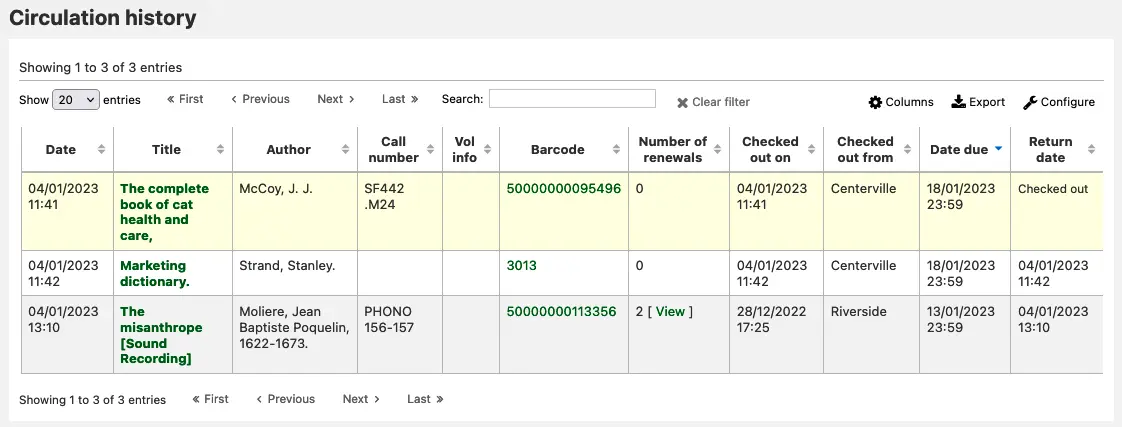
Nota
You can customize the columns of this table in the Table settings section of the Administration module (table id: checkouthistory-table).
To see when an item was renewed and by whom, click ‘View’ in the Number of renewals column.
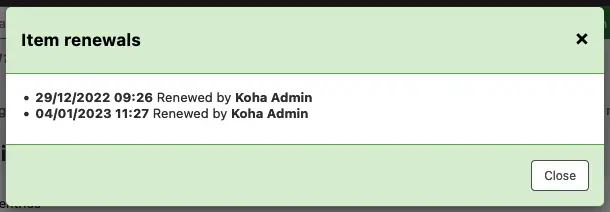
Si desea exportar una lista de códigos de barra de los ítems prestados hoy puede encontrar esa opción en el menú Mas arriba a la derecha de la página.
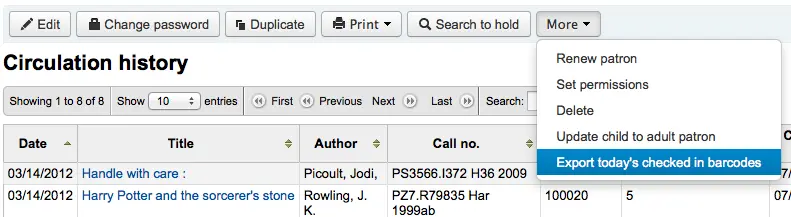
Esto generará un archivo de texto con un código de barras por línea.
Nota
If the RecordStaffUserOnCheckout system preference is enabled, the account of the staff member who checked out the item to the patron will also be displayed here.
Holds history
The holds history tab will appear if the IntranetReadingHistoryHolds system preference is set to “Allow”. It shows all the holds the patron has made, with their status.
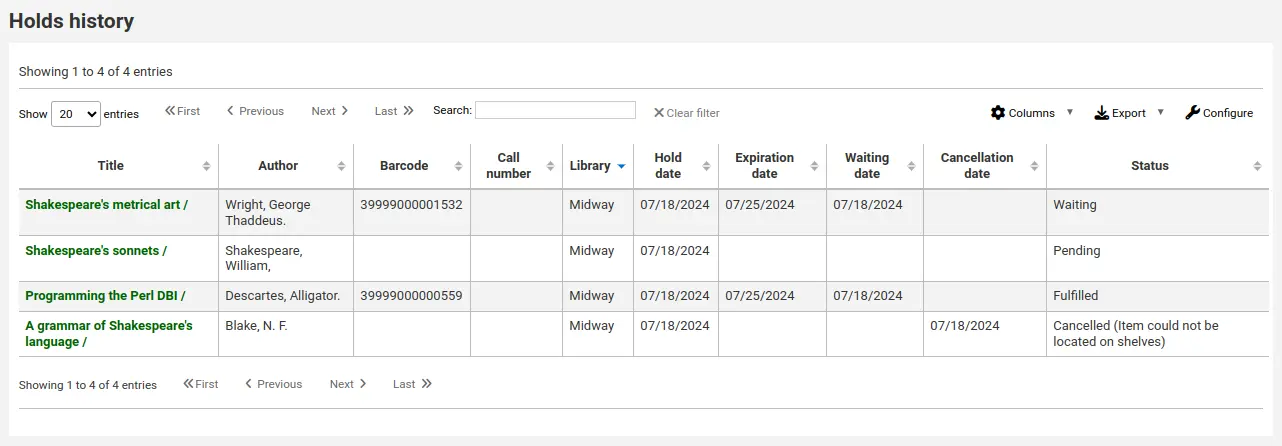
Nota
You can customize the columns of this table in the Table settings section of the Administration module (table id: holdshistory-table).
Nota
If the OPACPrivacy system preference is set to “Allow” and the patron has decided to never keep their history, this tab will only show current holds.
Registro de modificaciones
Nota
Only staff with the view_system_logs permission (or the superlibrarian permission) will have access to this tool.
If you have set your BorrowersLog to track changes to patron records, then this tab will appear. The Modification log will show when changes were made to the patron record. If you also have turned on the IssueLog and ReturnLog you will see checkins and outs on this screen as well.
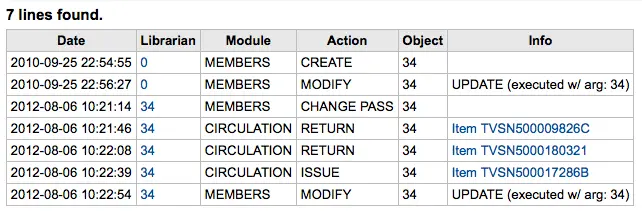
La columna Bibliotecario muestra el número de usuario del bibliotecario que hizo los cambios
Módulo lista “USUARIOS” para el módulo del usuario
La acción le dirá qué acción se está registrando
El campo Objeto muestra el número de usuario que se está modificando (en el ejemplo anterior, es un autocambio de mi propio registro)
Avisos
The Notices view shows the messages that have been generated for this patron.
Nota
The patron’s messaging preferences are set when adding or editing the patron. Other notices will be generated through the overdue notice/status triggers or the use of specific system preferences and features.
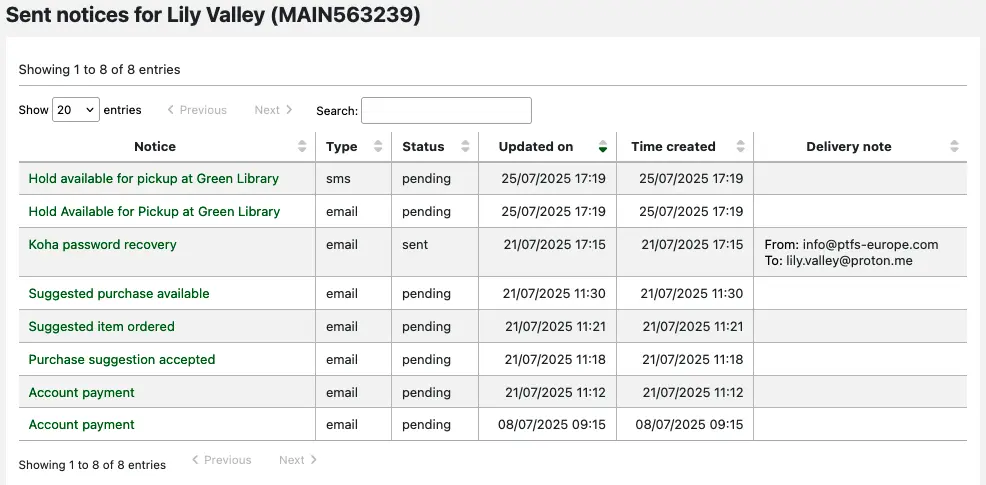
Clicking on the notice title will open the full text of the message in a pop-up modal.
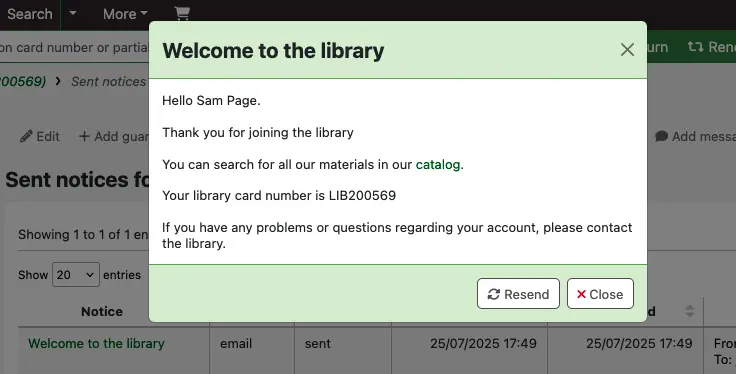
If the message has a status of sent or failed, you will have the option to resend the message to the patron by clicking the “Resend” button at the bottom of the modal.
If the message has failed and you are using the RestrictPatronsWithFailedNotices system preference, a restriction will be added to the patron’s account.
Estadísticas
Depending on what you set for the values of your StatisticsFields system preference, you can see statistics for one patron’s circulation actions.
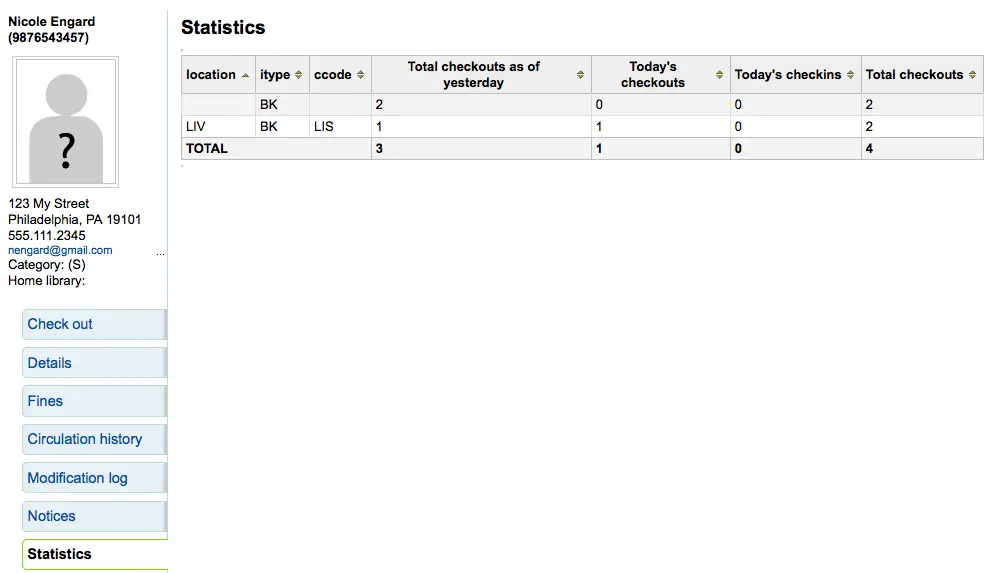
Archivos
If you set the EnableBorrowerFiles preference to “Do” the Files tab will be visible on the patron information page.
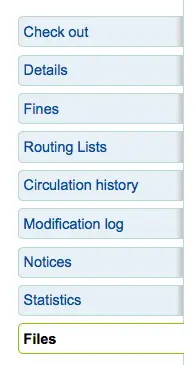
Desde aquí puede subir archivos para adjuntarlos al registro del usuario.
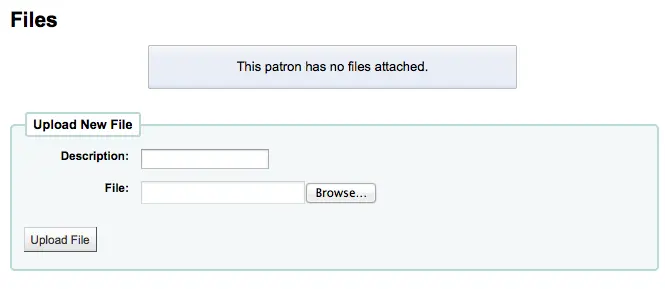
Todos los archivos que sean subidos aparecerán cobre un formulario done archivos adicionales pueden ser subidos.
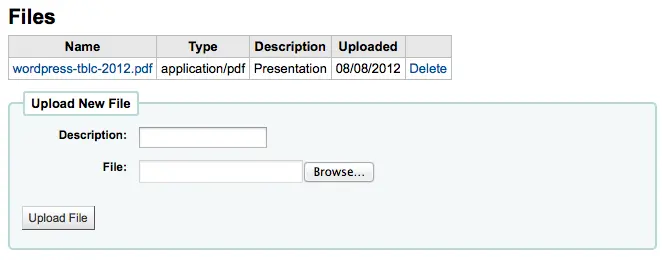
Sugerencias de compra
Si el usuario ha hecho alguna sugerencia de compra, verá una pestaña de sugerencias de compra en el registro del usuario.
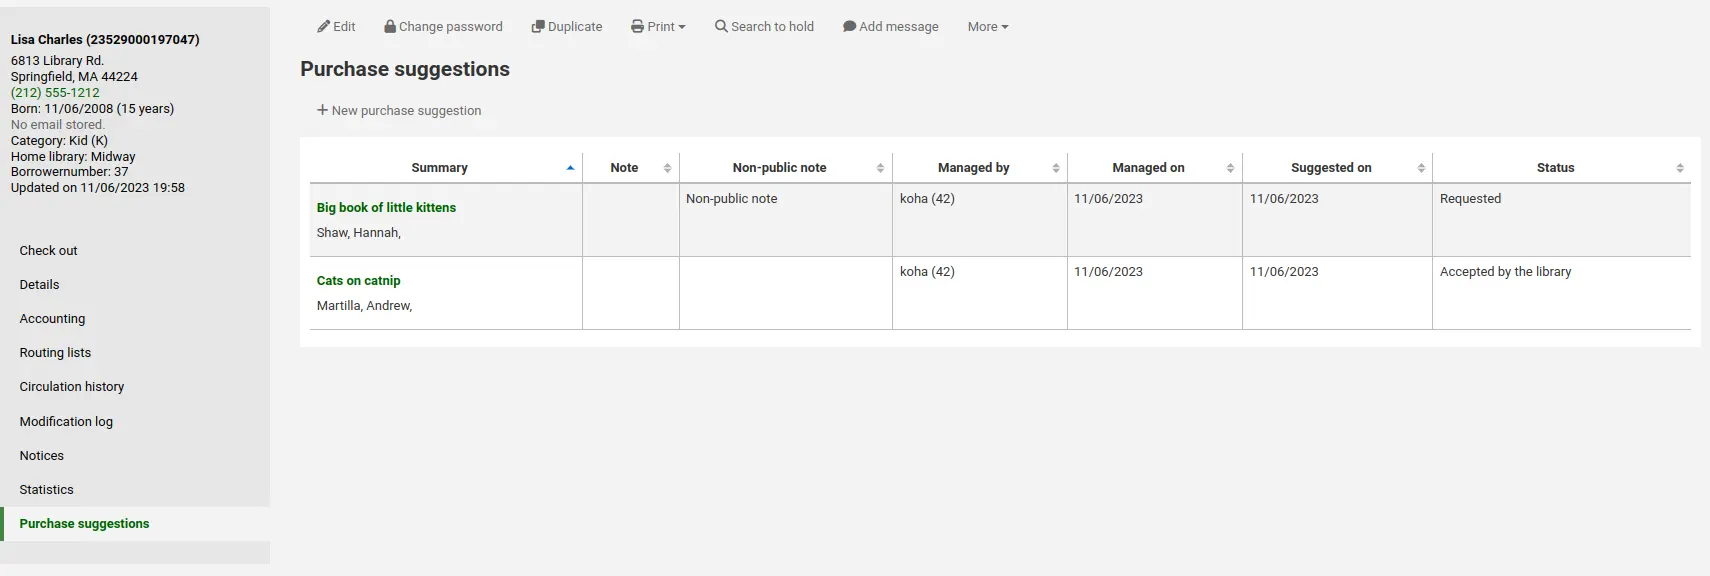
Nota
Staff members must have the suggestions_create permission (or the superlibrarian permission) in order to create purchase suggestions for patrons and view existing purchase suggestions.
Desde aquí se puede ver todas las sugerencias hechas por el usuario y su estado, también puede crear una sugerencia de compra a favor del usuario haciendo clic en el botón “Nueva sugerencia de compra” en la parte superior.
Learn more about managing purchase suggestions in the Acquisitions chapter of this manual.
Liberación de la deuda para el usuario
A discharge is a certificate that says the patron has no current checkouts and no holds. To enable this option on the patron record, set the useDischarge system preference to “Allow”.
Nota
In France, a «quitus» («discharge») is needed if you want to register for an account in a library or a university.
Nota
Las bibliotecas académicas, a menudo, requieren que usted tenga registros limpios antes de poderse graduar.
Emitting a discharge
To generate a discharge for a specific patron, click the “Discharges” tab on the left of the patron record.
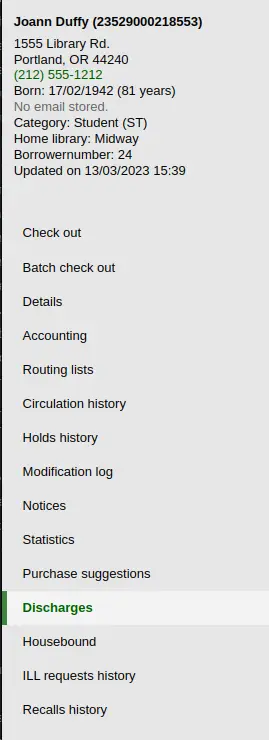
Or click on the “More” button and choose “Discharge”.
If the patron can have a discharge generated, it will have a button that says “Generate discharge”

If the patron has checkouts or holds, you’ll see a message explaining why the patron cannot be discharged.

Once the letter is generated you will have a PDF to download.
Nota
You can customize this message in the Notices and slips tool. The letter code is DISCHARGE.
Nota
You can style the PDF using the NoticeCSS preference, or add inline CSS in the DISCHARGE letter in the Notices and slips tool.
The patron will have a restriction added to their account.

A history of discharges will be added to the “Discharges” tab.

Approving discharge requests
Patrons can request discharges via the OPAC. Any pending discharges will be listed below the menu buttons on the main staff interface page, with other pending requests.
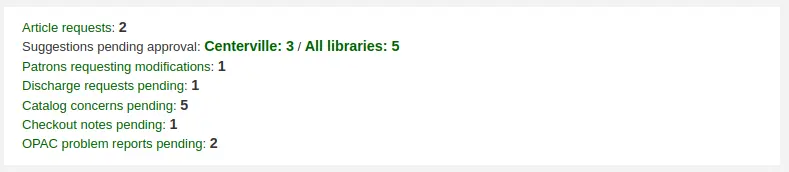
Clicking the pending discharge request link will open a screen where you can approve those discharges by clicking “Allow”.
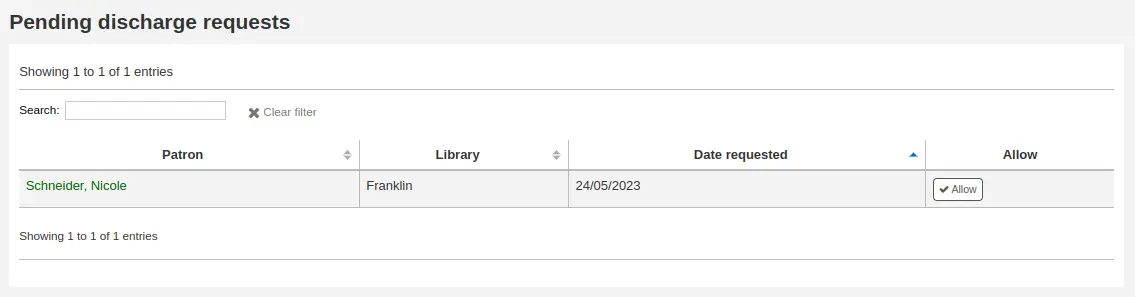
Housebound patrons
There are three roles a patron can have in regard to housebound circulation:
Importante
In order to use the housebound module, the HouseboundModule and ExtendedPatronAttributes system preferences must be enabled.
Seleccionador
The chooser is in charge of choosing the materials for the housebound patron.
If you have enabled the housebound module, with the HouseboundModule system preference, you will see that patrons now have a new section in their record called “Housebound roles”.
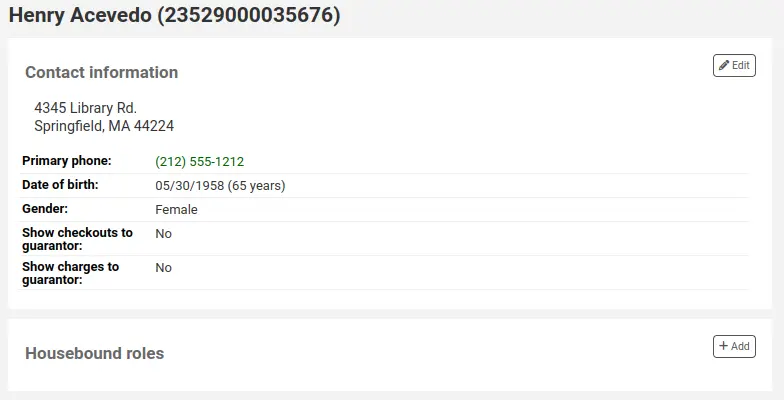
Click the “Add” button to mark this patron as a “Chooser”.

Repartidor
The deliverer is in charge of delivering the chosen materials to the housebound patron on a specific day at a specific time.
In the “Housebound roles”, click the “Add” button to mark this patron as a “Deliverer”.

Housebound borrowers
To create a housebound profile for a housebound patron, click on the “Housebound” tab in their record.
From there, you can edit their housebound profile information.
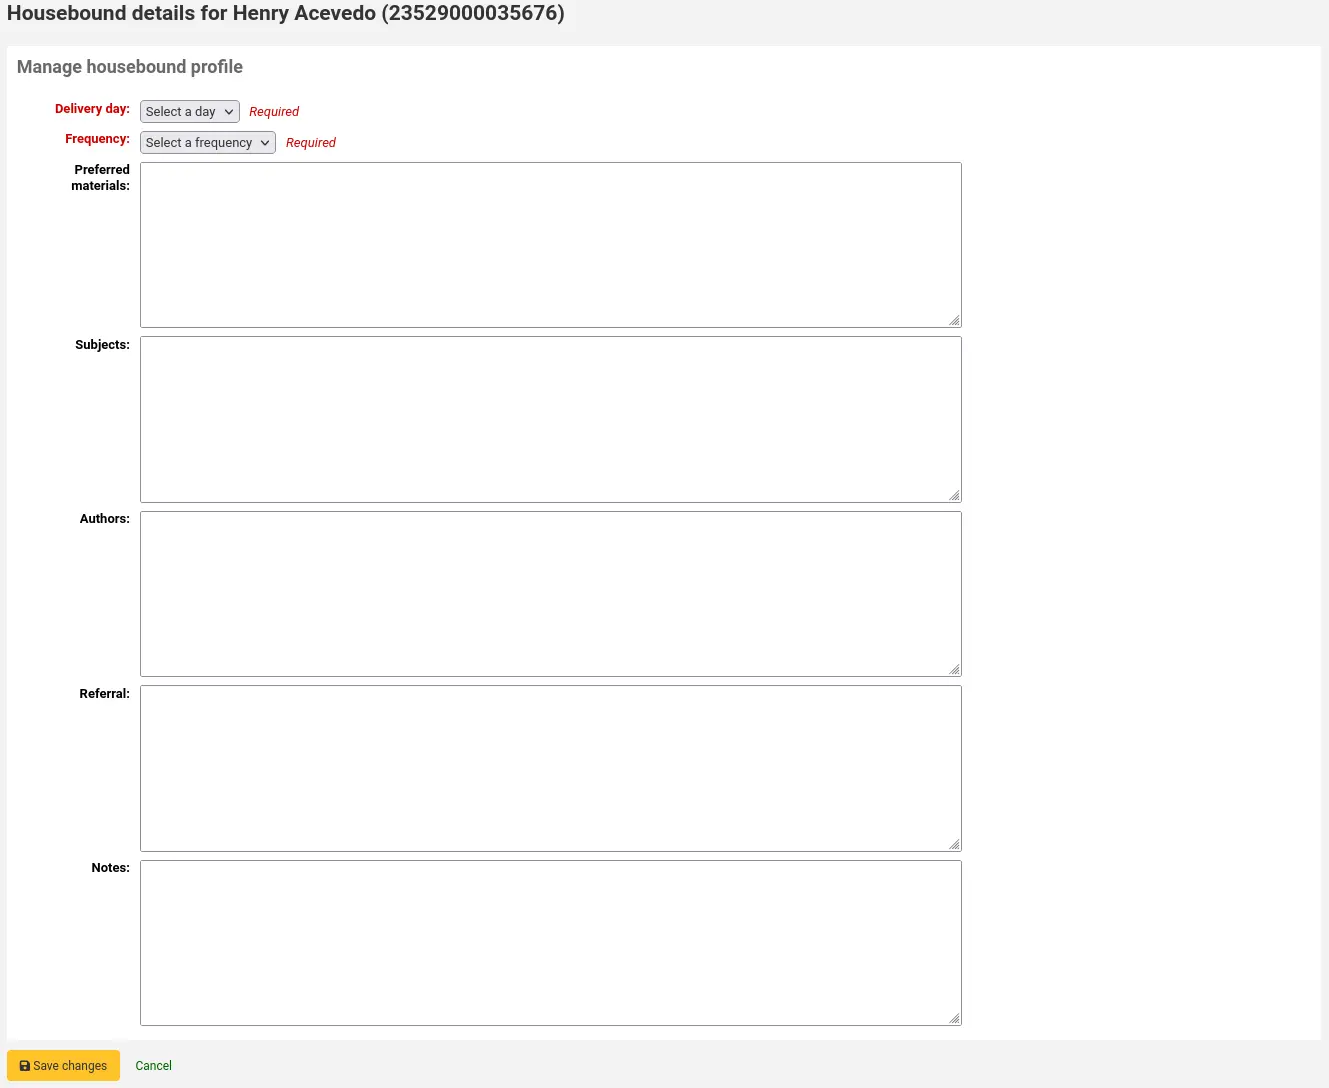
Delivery day: choose which day (or “Any”) the patron prefers to receive their delivery.
Frequency: choose the frequency at which they want to receive their deliveries.
Nota
The frequencies are managed in the HSBND_FREQ authorized value category.
Preferred materials: enter notes that will help the chooser choose appropriate documents for the housebound patron.
For example: books, dvds, magazines, etc.
Subjects: if the housebound patron has a preference for particular subjects, enter them here. This will help the chooser select interesting documents for the patron.
For example: romance, cookbooks, thrillers, etc.
Authors: if the housebound patron has favorite authors, enter them here.
For example: Danielle Steel, James Patterson, etc.
Referral: if the housebound patron has a referral, enter it here.
Notes: enter any other notes that may help the chooser or the deliverer.
Click the “Save changes” button to save the housebound profile.
Coordinating deliveries
To plan visits, go to the housebound patron’s record.
In their housebound tab, you will be able to create deliveries.
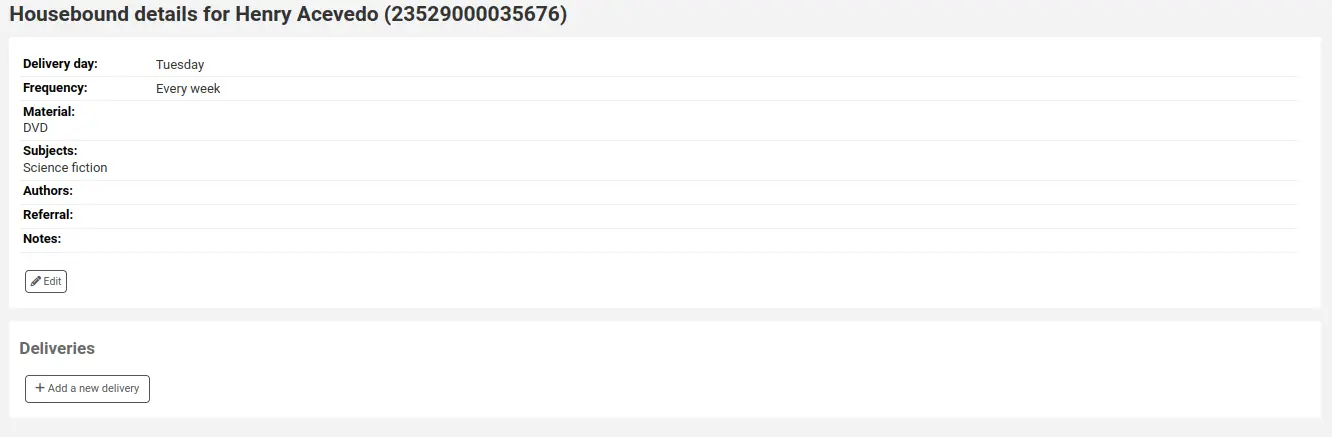
Click on “Add a new delivery”.
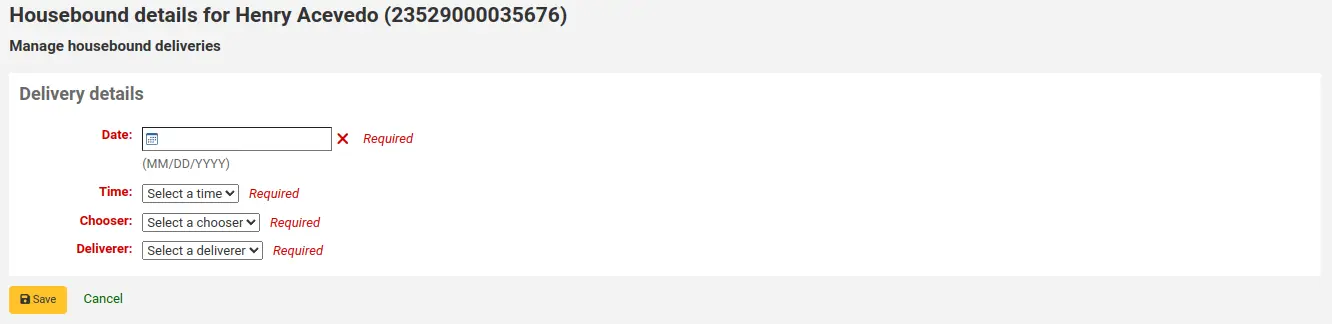
Fill out the information :
Date: enter the date of the delivery.
Time: select a time of day for the delivery. The choices are morning, afternoon, or evening.
Chooser: select a chooser who will be in charge of selecting the materials for this housebound patron.
Nota
This list is populated by the patrons having the chooser role.
Deliverer: select a deliverer who will be in charge of picking up the materials and bringing them over to the housebound patron.
Nota
This list is populated by the patrons having the deliverer role.
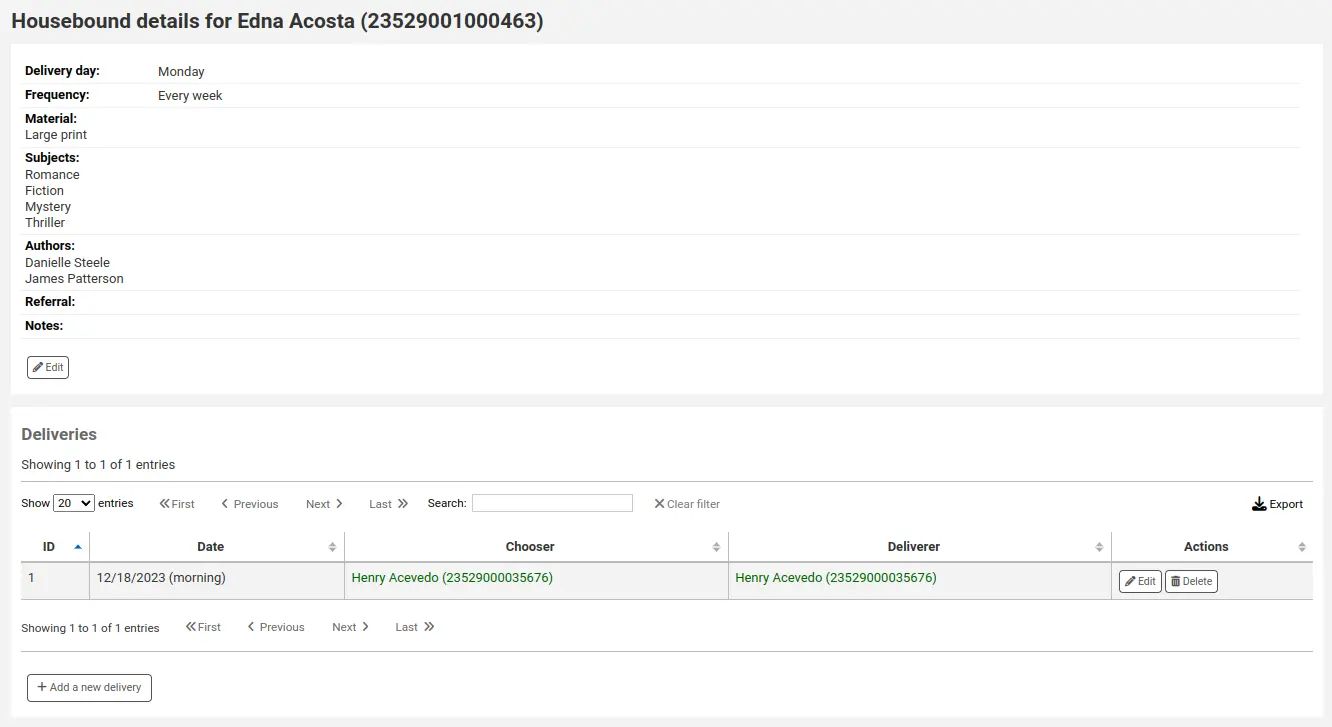
Nota
Choosers and Deliverers can be notified of planned deliveries via reports.
Example reports can be found in the SQL Reports Library at https://wiki.koha-community.org/wiki/SQL_Reports_Patrons#Patron_Characteristics.
Recalls history
If recalls are enabled, active and past recalls requested by the patron will appear in this tab.
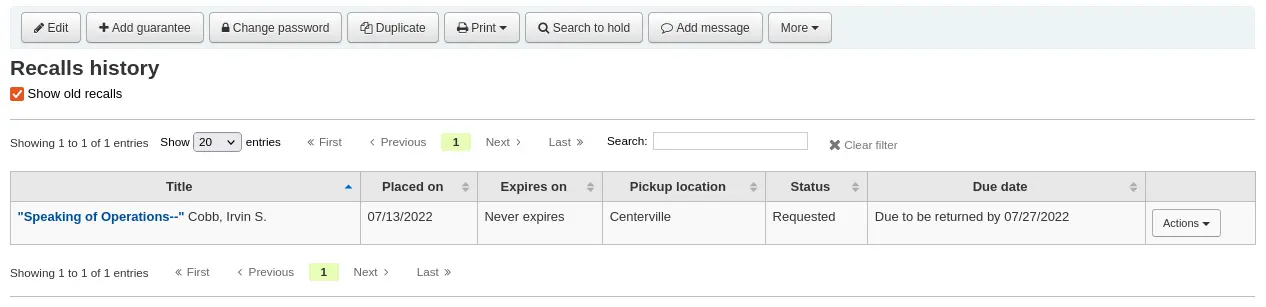
From here staff members can see the status of each recall and manage them.
Alert subscriptions
Version
This section was added to Koha in version 23.11.
Nota
Only staff with any one of the serial permissions (or the superlibrarian permission) will be able to see the patron’s email alert subscriptions.
If the RoutingSerials system preference is enabled, patrons who have opted in to email alerts for new serial issues via the “Subscriptions” tab in the bibliographic record will have an “Alert subscriptions” tab in their account.
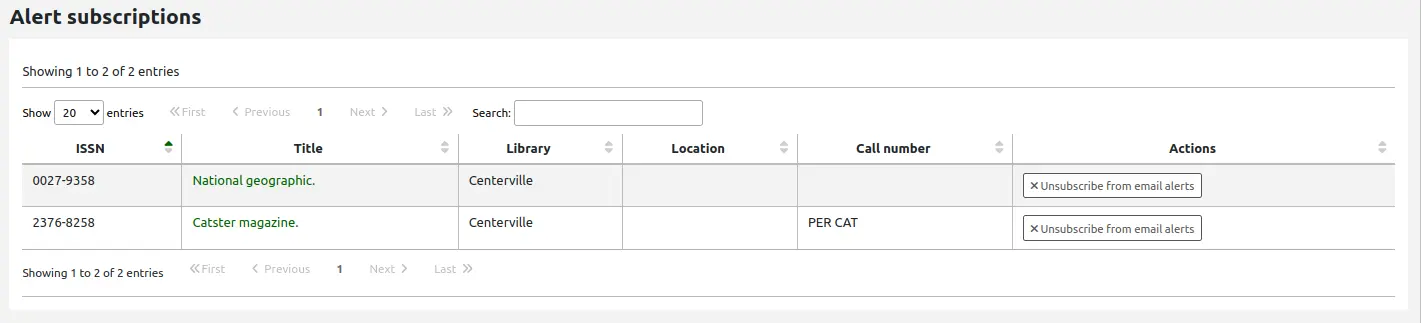
This tab lists all the serial email alerts the patron has subscribed to. Staff can cancel alerts for the patron by clicking the “Unsubscribe from email alerts” link. Note that patrons can unsubscribe themselves from the “Alert subscriptions” tab in their online account.
Two factor authentication in the staff interface
Koha offers two-factor authentication (2FA) for logging into the staff interface.
This two-factor authentication uses a time-based one-time password (TOTP). A TOTP is a password can only be used once and is only valid for a limited time.
Users wanting to use the two-factor authentication must have an app to generate these TOTPs. Any authenticator app, such as Google Authenticator, andOTP, FreeOTP and many others can be used. Applications that enable backup of their 2FA accounts (either cloud-based or automatic) are recommended.
Turn on the two-factor authentication with the TwoFactorAuthentication system preference.
Once this is done, the staff user must go to their account by clicking their username at the top of the page and clicking “My account”.
The user must then go to More > Manage two-factor authentication.
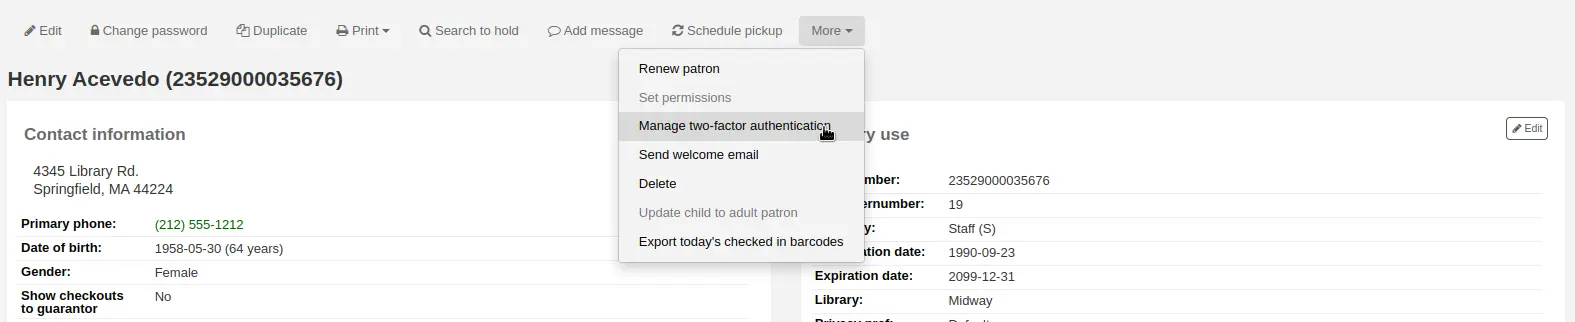
The status should be “Disabled” when first going to this page.

Click on “Enable two-factor authentication”.
A QR code will be presented. This code must be scanned with an authenticator app (see above for suggestions).
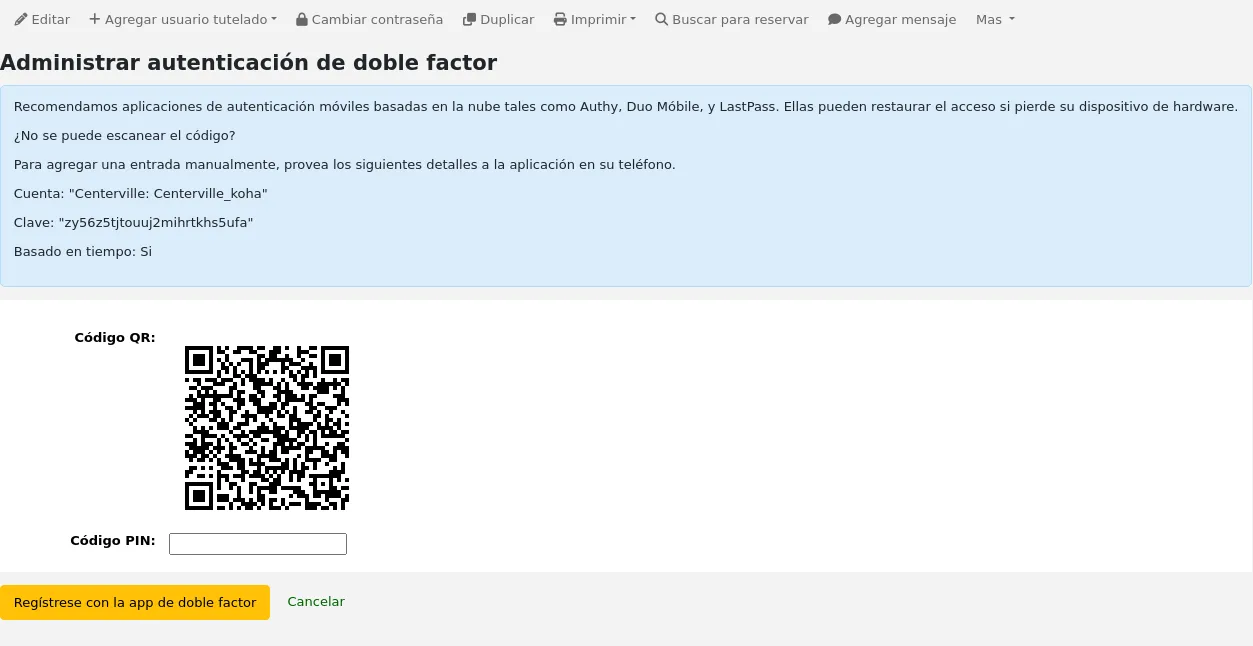
Nota
If the app doesn’t allow to scan QR codes, the page gives the credentials that can be entered manually (account, key, time-based).
Once the QR code is scanned, the app will return a time-based PIN code. The user must enter this PIN code in the PIN code field and click “Register with two-factor app”.
The status of the two-factor authentication will now be enabled.
Nota
An email will be sent to the user’s email address to alert them that the two-factor authentication has been enabled on their account.
You can customize this message in the Notices and slips tool. The letter code is 2FA_ENABLE.
When this user tries to log in to the staff interface, they will have to enter their username and password, like always, but also a two-factor authentication code.
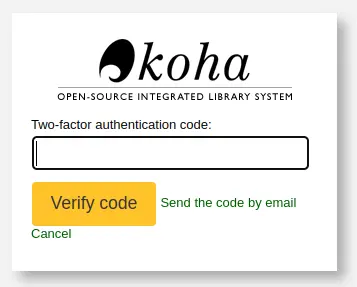
The user must then open their authenticator app, generate a time-based one-time password and enter it in the field in order to log in.
Nota
Alternatively, if the user doesn’t have the app handy, they can click on “Send the code by email”, which will send them an email with a time-based one-time password for them to use.
The email is based on the 2FA_OTP_TOKEN notice template, which can be customized in the Notices and slips tool.
Should the user wish to disable their two-factor authentication, they can go to their account in the staff interface, click More > Manage two-factor authentication and click “Disable two-factor authentication”.

Nota
An email will be sent to the user’s email address to alert them that the two-factor authentication has been disabled on their account.
You can customize this message in the Notices and slips tool. The letter code is 2FA_DISABLE.
Búsqueda de usuarios
Clicking on the link to the Patron module will bring you to a search/browse screen for patrons. From here you can search for a patron by their name or their card number.

Nota
By default, the search is a “Starts with” search, meaning that you have to search by the beginning of the patron’s name or the beginning of the patron’s card number. You can use the DefaultPatronSearchMethod system preference to change the patron search method to a “Contains” search to be able to search for any part of the patron’s name or card number.
Clicking the “More options” symbol to the right of the search box will open up an advanced patron search with more filters including the ability to limit to a specific category and/or library.
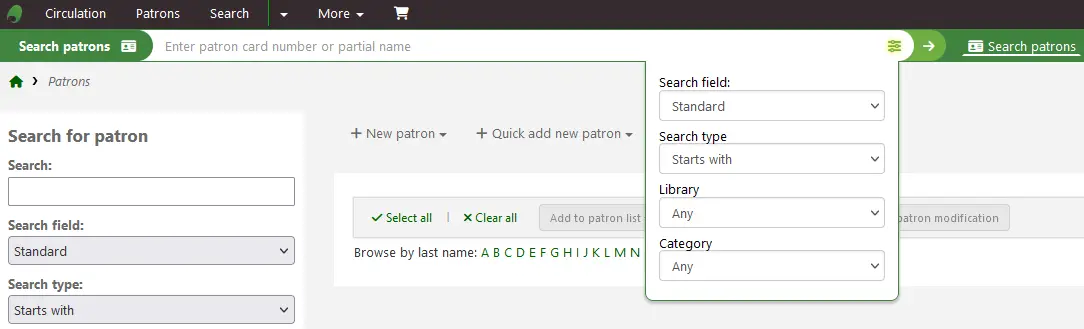
También puede filtrar los resultados de los usuarios usando las opciones de búsqueda en la parte izquierda de la página.
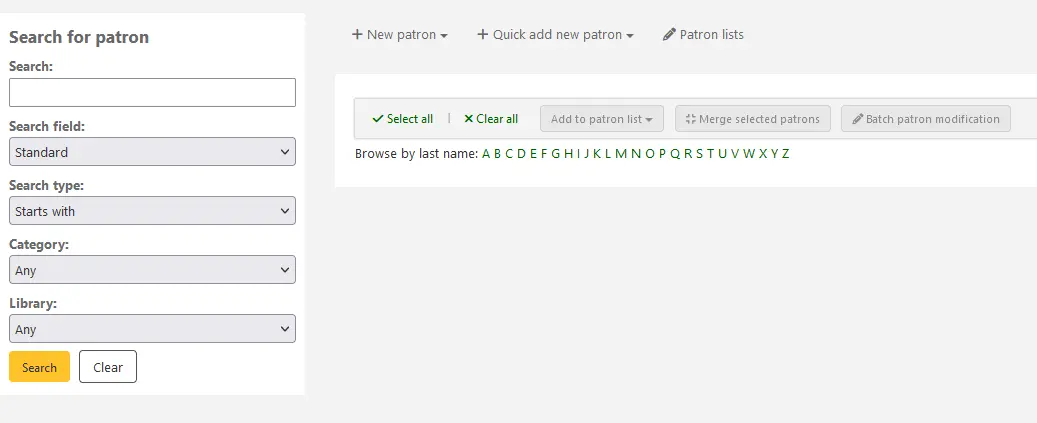
Dependiendo de lo que haya seleccionado en “Campos de búsqueda” puede buscar usuarios de varias maneras diferentes.
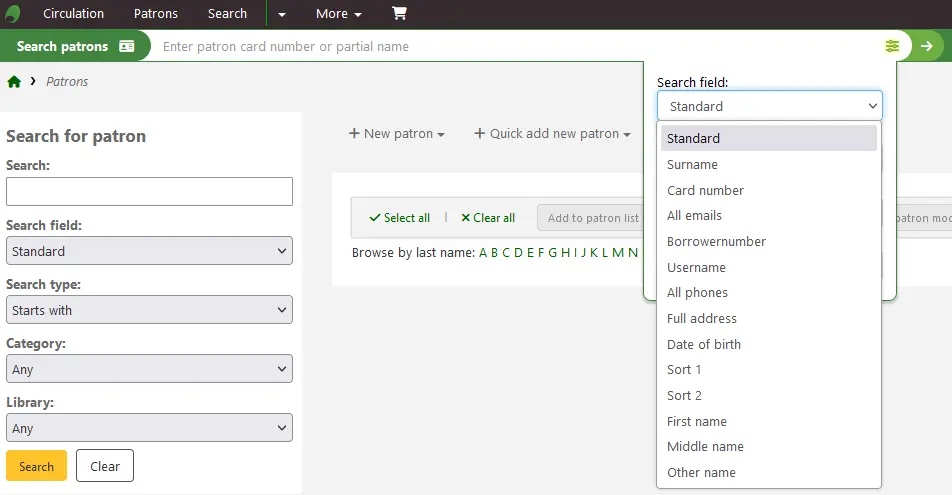
Estándar:
Ingrese cualquier parte de nombre, nombre de usuario, dirección de correo electrónico o código de barras.
Nota
You can use the system preference DefaultPatronSearchFields to define other fields to be used for searching with this option.
Surname:
Search for the patron’s surname
Card number:
Search for the patron’s card number
All emails:
Search all of the defined patron fields for email addresses
Borrowernumber:
Search for the Koha borrowernumber
Username:
Search for the patron’s username
All phones:
Will search all of the defined patron fields for phone numbers. Enter the phone number exactly as it is in the system or by using spaces between each batch of numbers.
Ejemplo: Para encontrar (212) 555-1212 puede buscarlo exactamente como fue ingresado, o buscando 212 555 1212
Full address:
Search for the patron’s address in all address fields
Fecha de nacimiento
Birth dates should be entered using the format set forth in the dateformat preference.
Campo orden 1
Este es un campo personalizado que las bibliotecas pueden utilizar para cualquier tipo de datos sobre el usuario.
Campo orden 2
Este es un campo personalizado que las bibliotecas pueden utilizar para cualquier tipo de datos sobre el usuario.
First name:
Search for the patron’s first name
Middle name:
Search for the patron’s middle name
Other name:
Search all of the patron’s other names fields
Any patron attribute type marked as searchable will also be listed in this list.
También puede elegir ya sea buscar por campos que comienzan con la cadena que ingresó o contienen la cadena. Eligiendo “Contiene” funcionará como una búsqueda con comodín.

También puede navegar por los registros de usuarios haciendo clic en las letras vinculadas en la parte superior.

If your search only returns one result, you will be taken directly to the patron’s file. If your search returns more than one result, you will be given a list from which to choose.
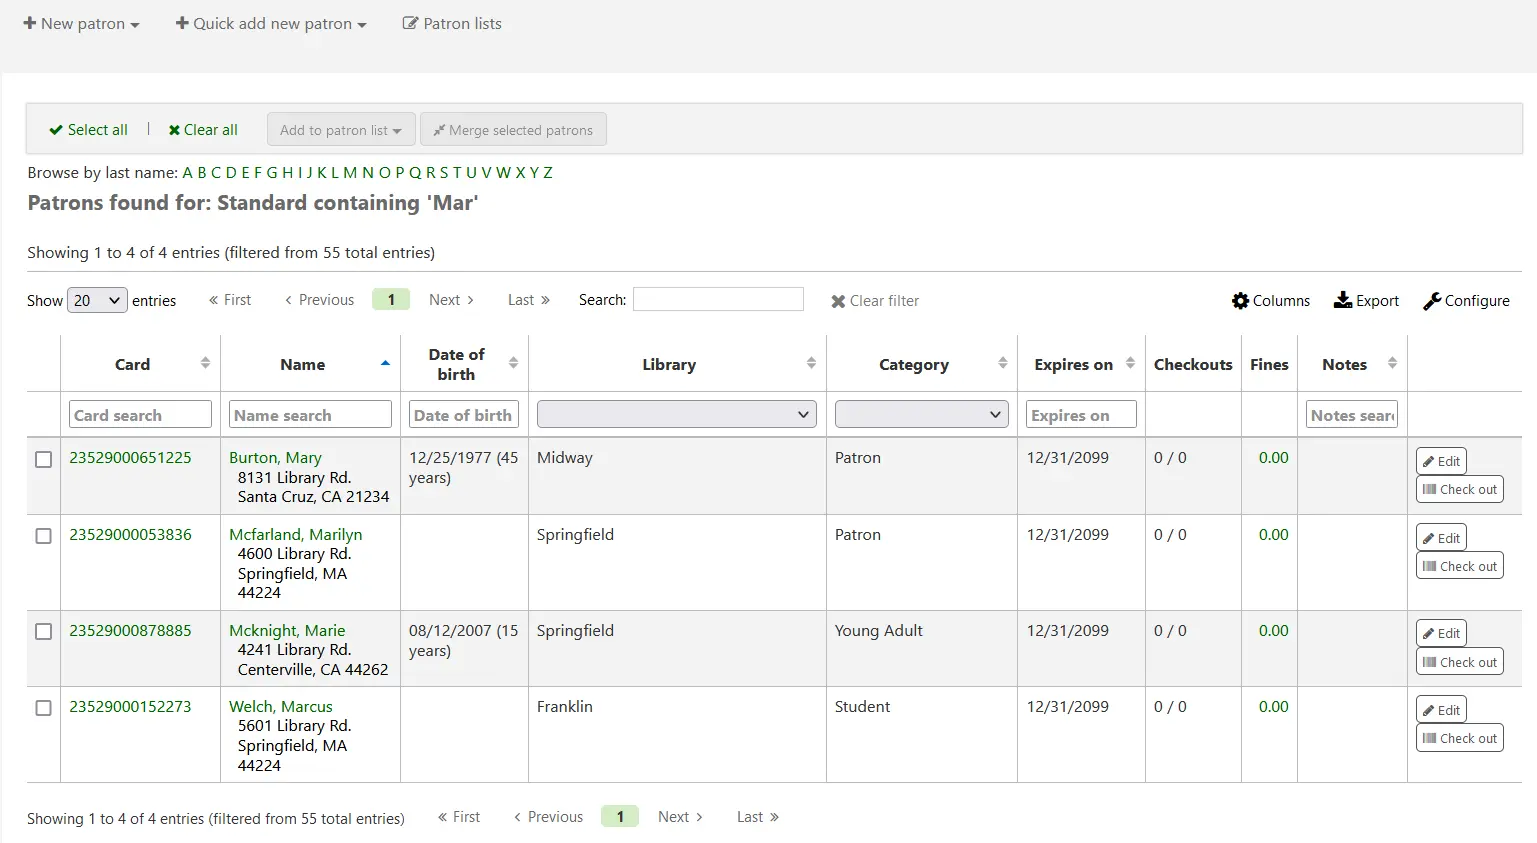
Nota
You can customize the columns of this table in the Table settings section of the Administration module, under the patrons tab (table id: memberresultst).
Selecting one or more patrons from the list of results by using the checkbox in the leftmost column will show other features you can use for the selected patrons.
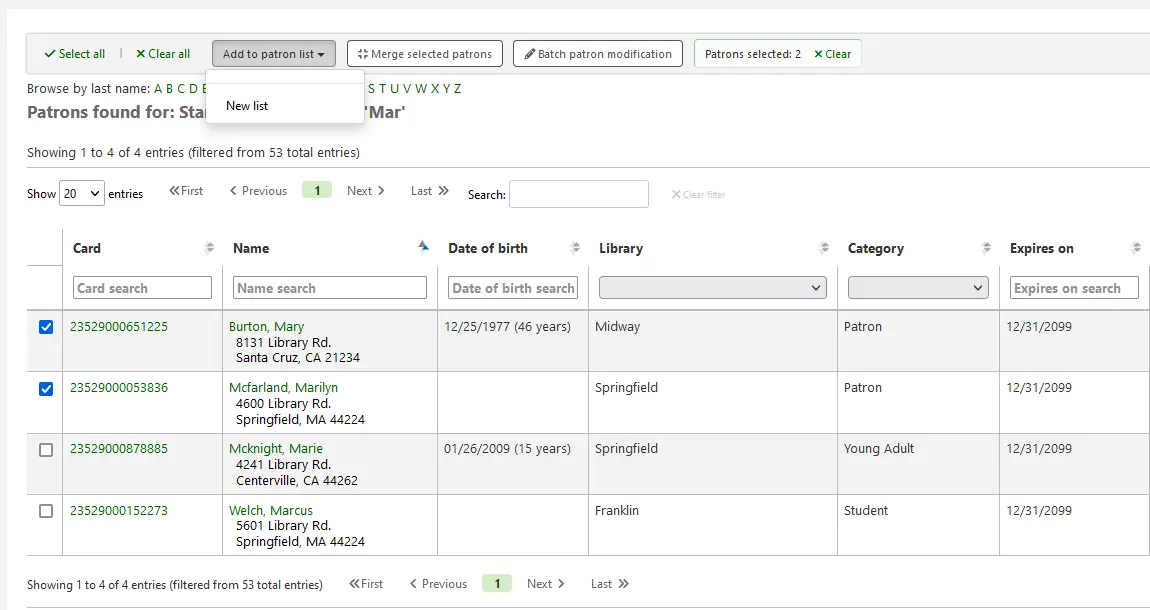
Add to patron list:
Add the selected patrons to an existing patron list or create a new list
Merge selected patrons:
Allows you to merge the selected patrons
Batch patron modification:
Sends the selected patrons to the batch patron modification tool
Communicating with patrons
Koha offers several options for communicating with patrons, some of which have already been covered in this chapter.
OPAC notes
OPAC notes are added to the patron’s file through the add patron form or the edit patron form, in the “Library set-up” section.
They show up in the “Your summary” section of the patron’s online account in the OPAC.
In the staff interface, OPAC notes will be in the “Library use” section of the patron’s file.
OPAC messages
OPAC messages are added to the patron’s file using the “Add message” button.
To leave a message that the patron will be able to see in the OPAC, choose «OPAC - Patron’s name» in the “Add a message for” field. Enter your message in the box, or choose a predefined message in the drop-down menu.
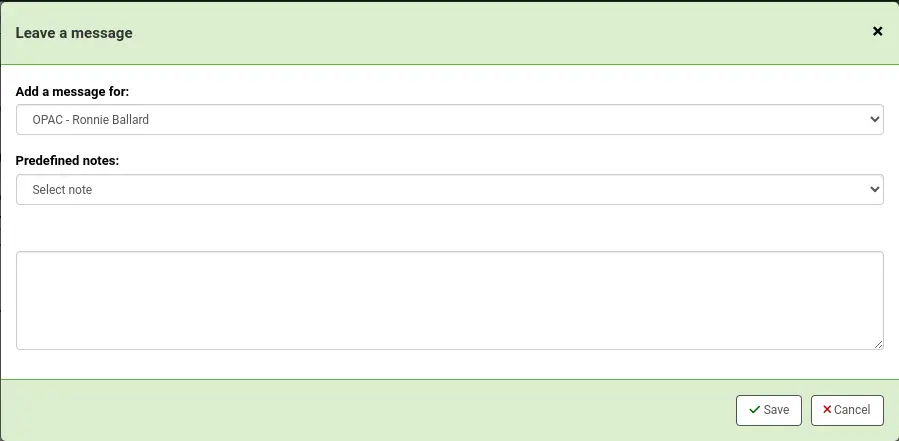
Nota
Predefined messages are added in the BOR_NOTES authorized value category.
Once saved, the patron will be able to see the message in the “Your summary” section of their online account. The patron will also be able to see the date on which the message was added as well as the name of the branch. They will have the option to dismiss the message. This will hide the message from their OPAC account and mark it as read, but it will not delete the message.

In the staff interface, OPAC messages are shown on the patron’s detail page, at the top of the page just under the row of action buttons.

It will also appear on the checkout page, to the right of the checkout box.

If you need to edit the message, click the “Edit” button next to the message, edit the text and click “Save”.
Advertencia
If you edit a message that has been dismissed by the patron, it will stay as “Read” and the patron will not see your edit.
If the patron dismisses the message, a “Read” mention with the date will appear next to the message in the staff interface to inform staff members that this message was read by the patron.

Automated notices
If the EnhancedMessagingPreferences system preference is set to “Allow”, staff can set the patron messaging preferences when adding a new patron or editing an existing patron.
If the EnhancedMessagingPreferencesOPAC system preference is set to “Show”, patrons can change their messaging preferences from their OPAC account.
Staff and patrons can set the messaging preferences for these notices:
Advance notice (PREDUE, PREDUEDGST): A notice sent before an item is due (can choose the number of days in advance). Advance notices are generated by the advance_notices.pl cron job.
Auto renewal (AUTO_RENEWAL, AUTO_RENEWAL_DGST): A notice to a patron that their checkouts were automatically renewed, or if there was a problem with the automatic renewal. (Shown if AutoRenewalNotices is set to «according to patron messaging preferences».)
Hold filled (HOLD, HOLDDGST, NEW_CURBSIDE_PICKUP): A notice when a confirmed hold is waiting for a patron, and when a curbside pickup is scheduled.
Hold reminder (HOLD_REMINDER): A notice reminding a patron that a hold is waiting for pickup. Hold reminder notices are generated a set number of days after the hold is filled by the holds_reminder.pl cron job.
Interlibrary loan ready (ILL_PICKUP_READY): A notice that an interlibrary loan request was fullfilled and is ready for pickup. (Shown if interlibrary loans are enabled.)
Interlibrary loan unavailable (ILL_REQUEST_UNAVAIL): A notice that an interlibrary loan request was canceled because it is unavailable. (Shown if interlibrary loans are enabled.)
Interlibrary loan updated (ILL_REQUEST_UPDATE): A notice that an interlibrary loan request was updated. (Shown if interlibrary loans are enabled.)
Item check-in (CHECKIN): A notice that lists the items the patron has just checked in.
Item checkout (CHECKOUT, RENEWAL): A notice that lists the items the patron has just checked out and renewed. This is an electronic form of the checkout receipt. If the RenewalSendNotice system preference is set to “Send”, the notice is called “Item checkout and renewal”.
Item due (DUE, DUEDGST): A notice sent on the day an item is due back at the library. Item due notices are generated by the advance_notices.pl cron job.
Recall awaiting pickup (PICKUP_RECALLED_ITEM): A notice that a recalled item is ready for pickup. (Shown if recalls are enabled.)
Return recalled item (RETURN_RECALLED_ITEM): A notice to a patron to return a recalled item. (Shown if recalls are enabled.)
Use the notices and slips tool to customize the notices.
Patrons can choose to receive notices as a digest by checking the “Digests only” checkbox, along with the delivery method. A digest combines all the messages for a notice type into one email (for example, all items due in three days), instead of sending multiple emails.
The delivery methods currently supported for sending notices are:
Email
SMS (text messages)
Automated phone call system
Print
Electronic notices are sent by the process_message_queue.pl cron job.
Print notices are generated using the gather_print_notices.pl cron job. It creates a single file for all print notices, that you can then print out and post using regular mail.
Overdue notices
Overdue notices are managed in Notices and slips and when they are sent is managed in Overdue notice/status triggers.
Patrons cannot opt out of receiving overdue notices like they can other notices (such as advance notices or hold notices)
To generate the overdue notices , you need to run the overdue_notices.pl cronjob. Then, the process_message_queue.pl cronjob will send the notices or the gather_print_notices.pl cronjob will gather them in a nice file you can print out and send out via regular mail.
Custom emails
Nota
Only staff with the edit_borrowers permission and the send_messages_to_patrons permission (or the superlibrarian permission) will be able to send custom emails to patrons.
Custom emails can be sent to an individual patron.
Version
This feature was added to Koha in version 24.05.
To send a custom email to a patron, click the “Add message” button.
Choose “Email - email addresses of patron” in the “Add a message for” field. If needed, choose a predefined notice in “Patron notice”.
Nota
Custom patron notices can be created in the notices and slips tool with the module “Patrons (custom message)”.
Otherwise, manually enter the email’s subject in the “Subject” field and the message in the “Body” field.
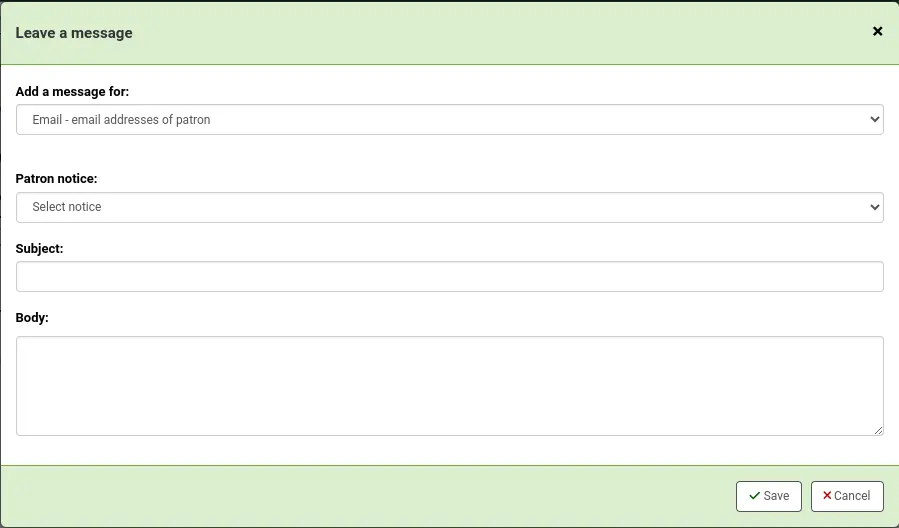
When you click “Save”, the message will be queued to be sent by the process_message_queue.pl cronjob. It will also be visible in the Notices tab of the patron’s file.