OPAC
Questo capitolo presuppone che le seguenti preferenze siano impostate come segue:
- opacthemes = bootstrap
- OPACXSLTResultsDisplay = default
- OPACXSLTDetailsDisplay = default
- DisplayOPACiconsXSLT = show
- TagsEnabled = Allow
- TagsInputOnDetail =Allow
- TagsInputOnList = Allow
- reviewson = Allow
- ShowReviewer = Allow
- ShowReviewerPhoto =Allow
- OPACFRBRizeEditions = Show
- OPACAmazonCoverImages = Show
- XISBN = Use
- OPACSearchForTitleIn = Default set of links
- OPACShowCheckoutName = Don’t show
- RequestOnOpac = Allow
- AutoResumeSuspendedHolds = Allow
- OpacBrowseResults = Enable
- SuspendHoldsOpac = Allow
- OPACShowBarcode = Don’t show
- OpacSeparateHoldings = Don’t separate
- OpacSeparateHoldingsBranch = home library
- DisplayLibraryFacets = holding library
Se le tue preferenze di sistema sono impostate in modo diverso, le schermate possono essere diverse.
Search Results
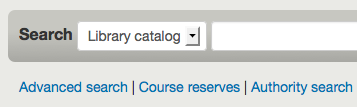
Per cercare sull’OPAC è possibile scegliere di inserire i termini di ricerca nella casella nella parte superiore dell’OPAC o fare clic sul link “Ricerca avanzata” per eseguire una ricerca più dettagliata.
Per maggiori informazioni sulla ricerca controllare il “Capitolo ` Ricerca <#searching>`__” di questo manuale.
Panoramica dei risultati
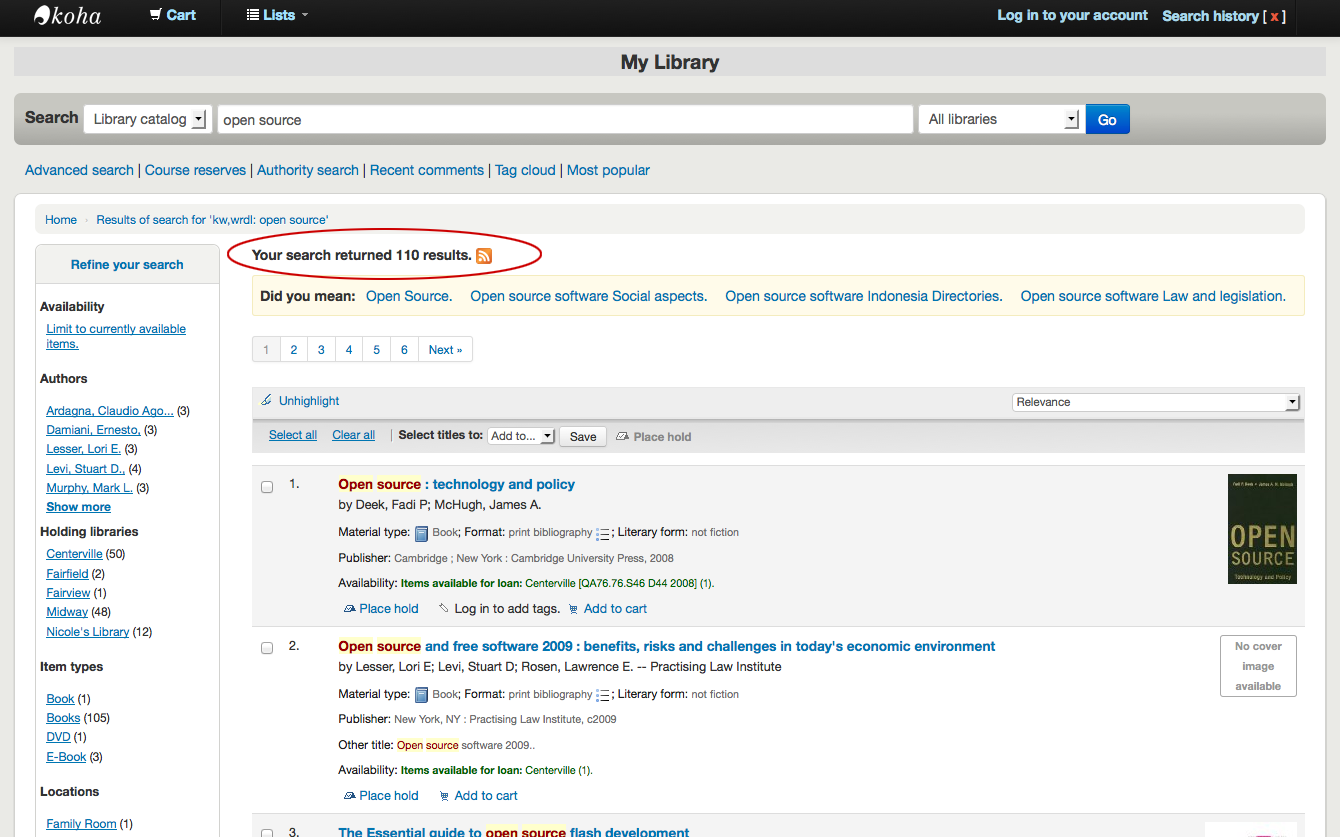
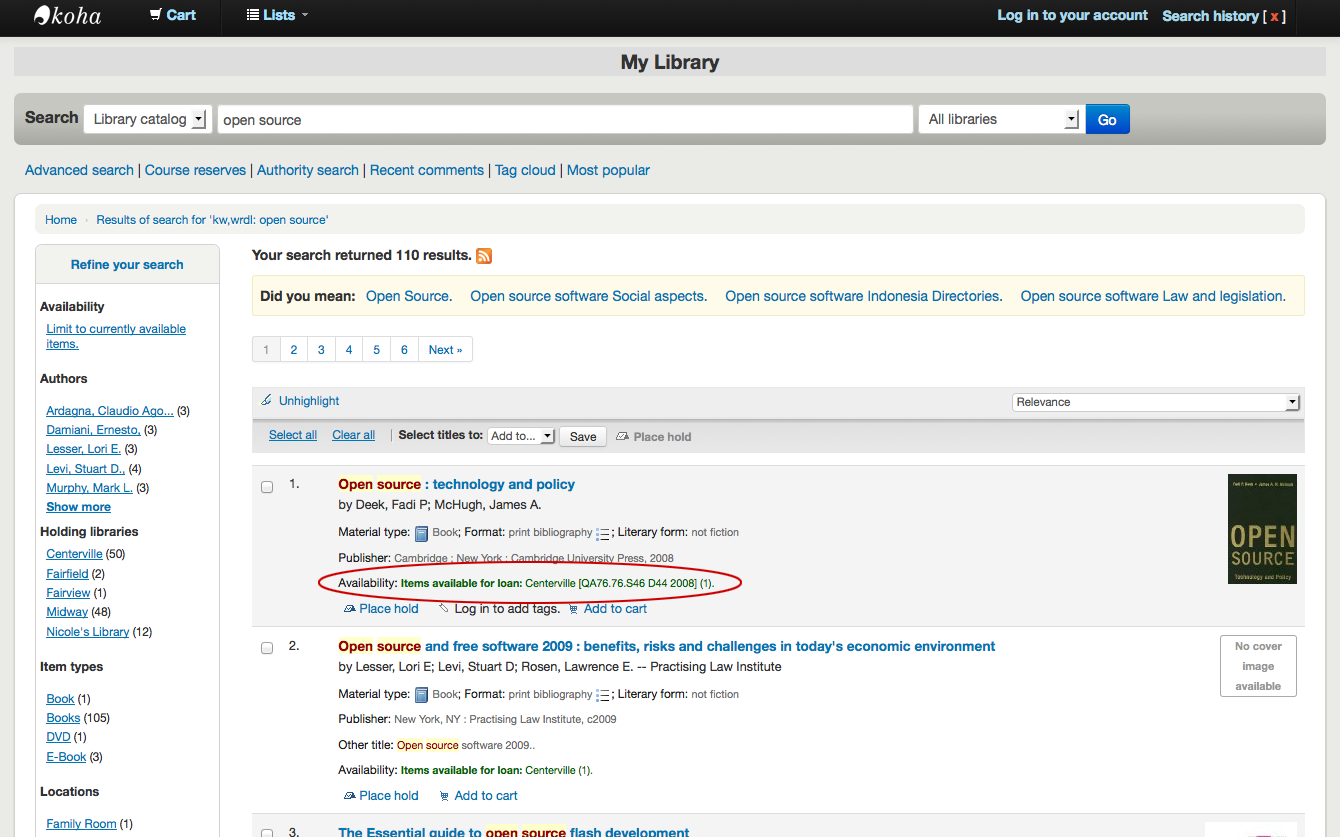
Dopo aver eseguito una ricerca il numero di risultati trovati dalla ricerca apparirà sopra i risultati medesimi
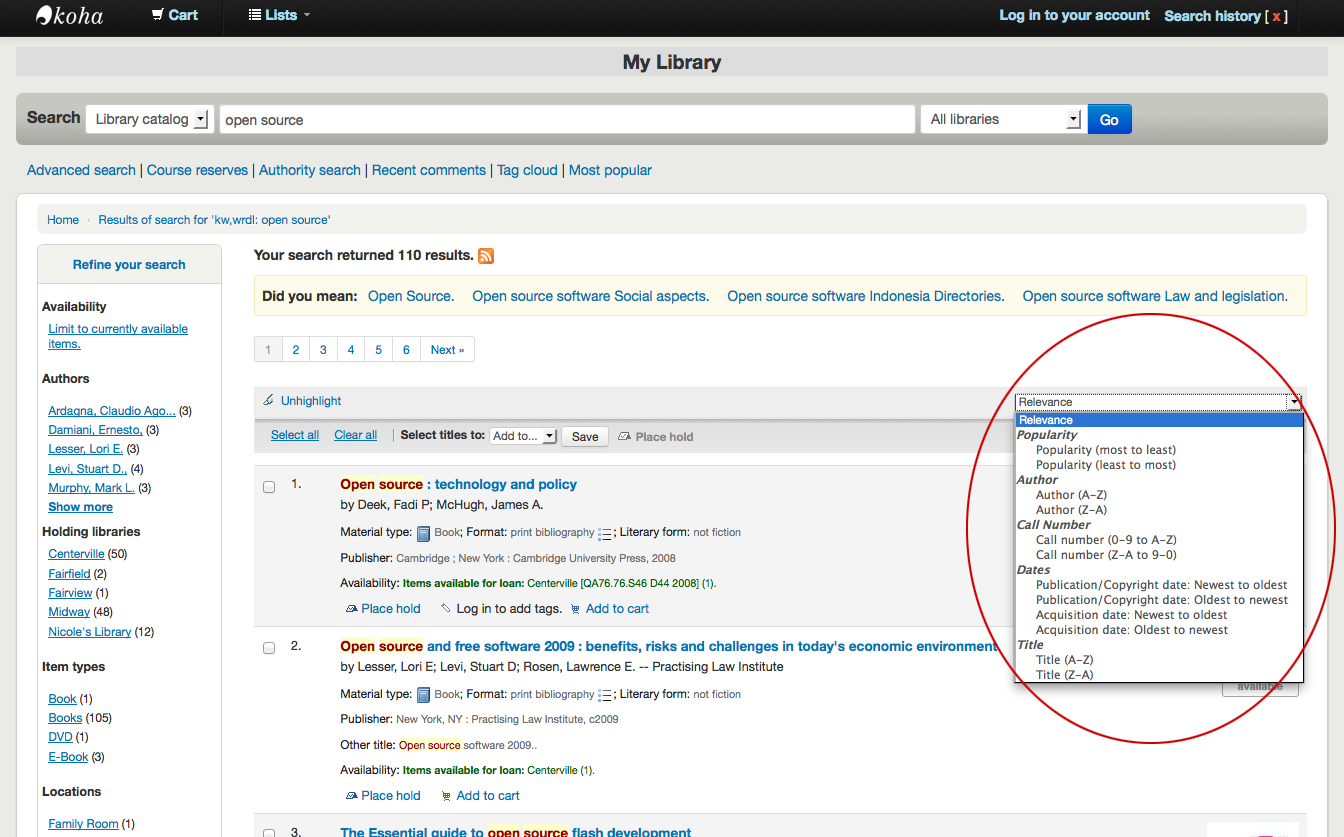
By default your search results will be sorted based on your OPACdefaultSortField and OPACdefaultSortOrder system preference values. To change this you can choose another sorting method from the pull down on the right.
Under each title on your results list a series of values from your leader will appear. It is important to note that this has nothing to do with the item types or collection codes you have applied to your records, this data is all pulled from your fixed fields. This can be turned on or off with the DisplayOPACiconsXSLT system preference.
Sotto ogni titolo vedrai la disponibilità delle copie collegate al record.
Nota
Anche se hai filtrato i risultati per biblioteca, tutte le posizioni che detengono la copia appariranno nei risultati della ricerca.
Importante
Lo status della prenotazione di una copia non influisce sulla sua disponibilita fino a quando la copia non è posta nello status “in attesa”. Copie con prenotazioni ma non in prestito (a scaffale dunque) saranno mostrate come disponibili fino a quando un bibliotecario non le toglierà dallo scaffale e passerà in circolazione in modo che visualizzi passino allo status “in attesa”.
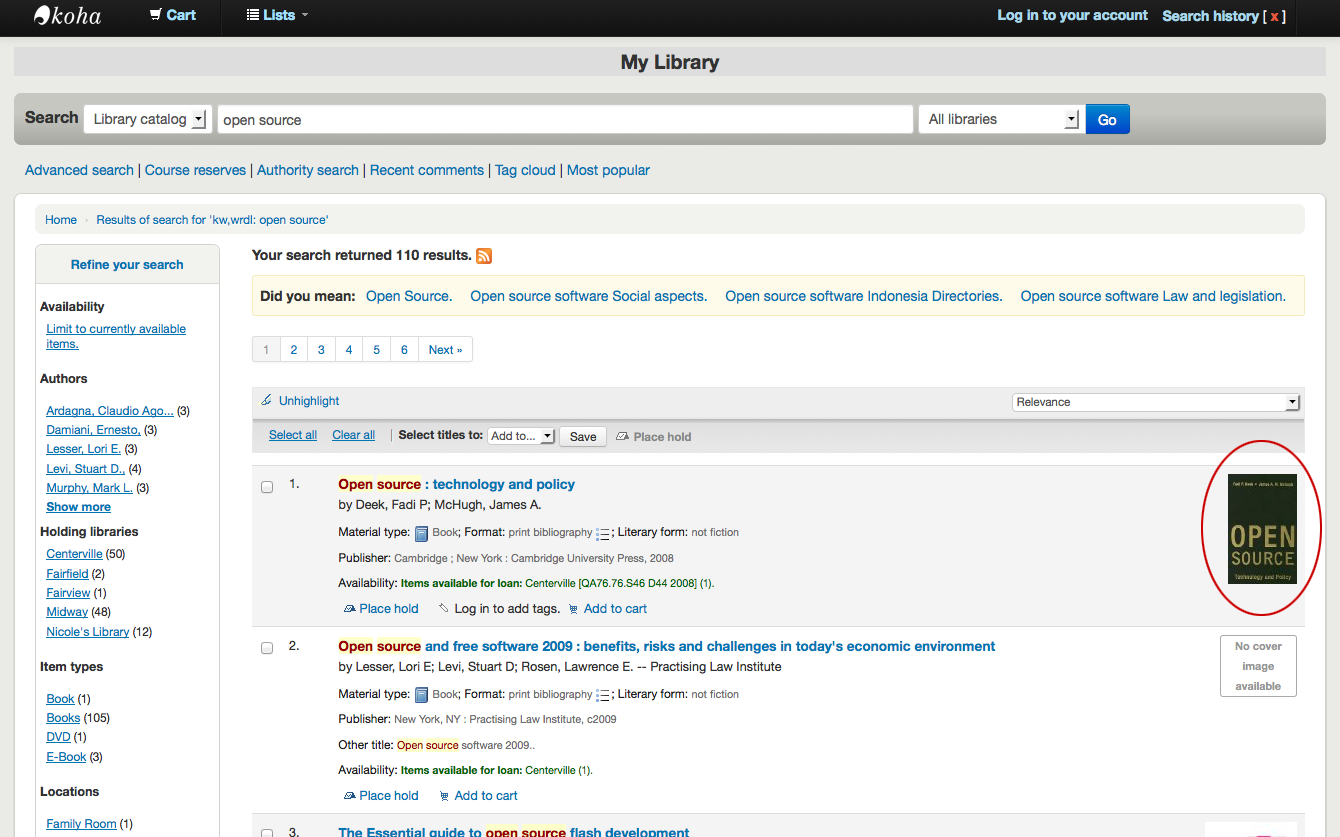
If you have turned on Enhanced Content preferences you may have book jackets on your search results.
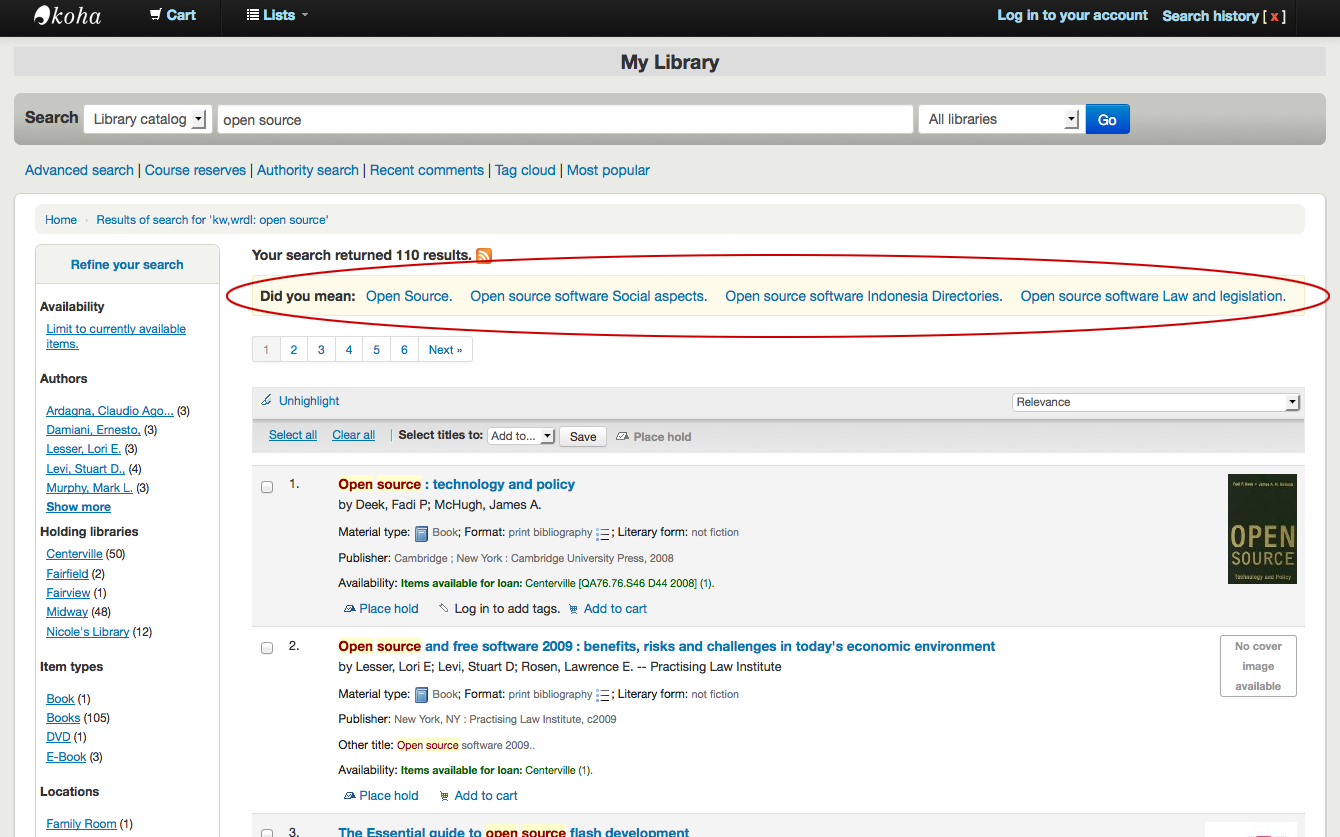
If you have set your Did you mean? options you will see a yellow bar across the top of your results will other related searches.
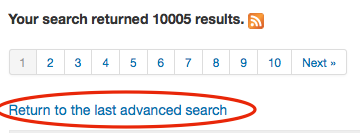
If you performed an advanced search you see an option to go back and edit your advanced search blow the list of results pages.
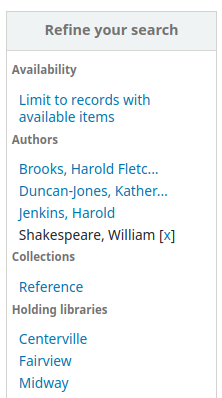
Filtri
Per filtrare i risultati cliccare sui link sotto il menu “Affina la ricerca” sul lato sinistro dello schermo

Depending on your setting for the DisplayLibraryFacets system preference you will see filters for your home, holding or both libraries.
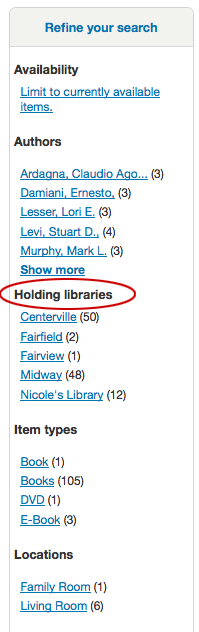
After clicking a facet you can remove that filter from your results by clicking the small “x” that appears to the right of the facet.
Cerca i feed RSS
You will be able to subscribe to your search results as an RSS feed by clicking the RSS icon in your address bar or next to the number of results. To learn more about what RSS feeds are check out this tutorial video.
Iscrivendosi ai risultati della ricerca come feed RSS, permetterà di vedere quando un nuovo record in una propria area di interesse si aggiunge al catalogo.
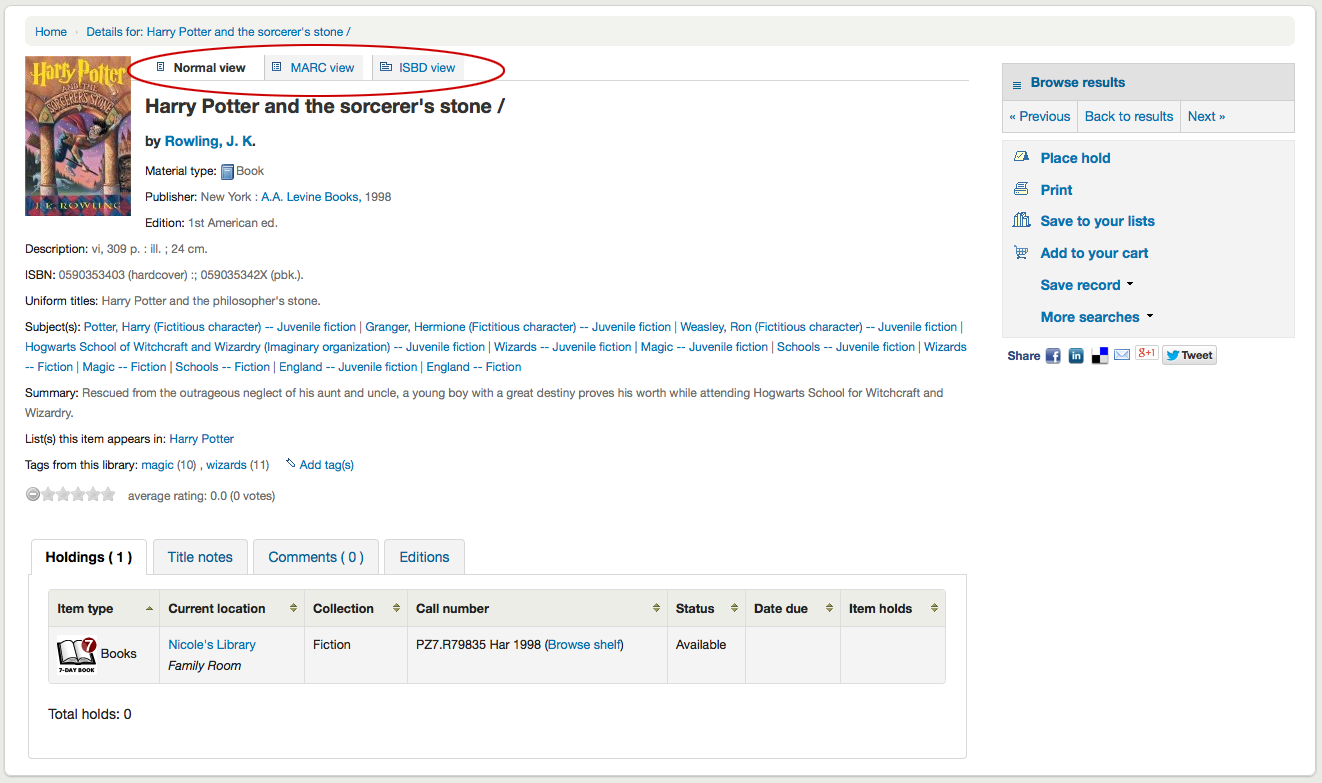
Record bibliografico
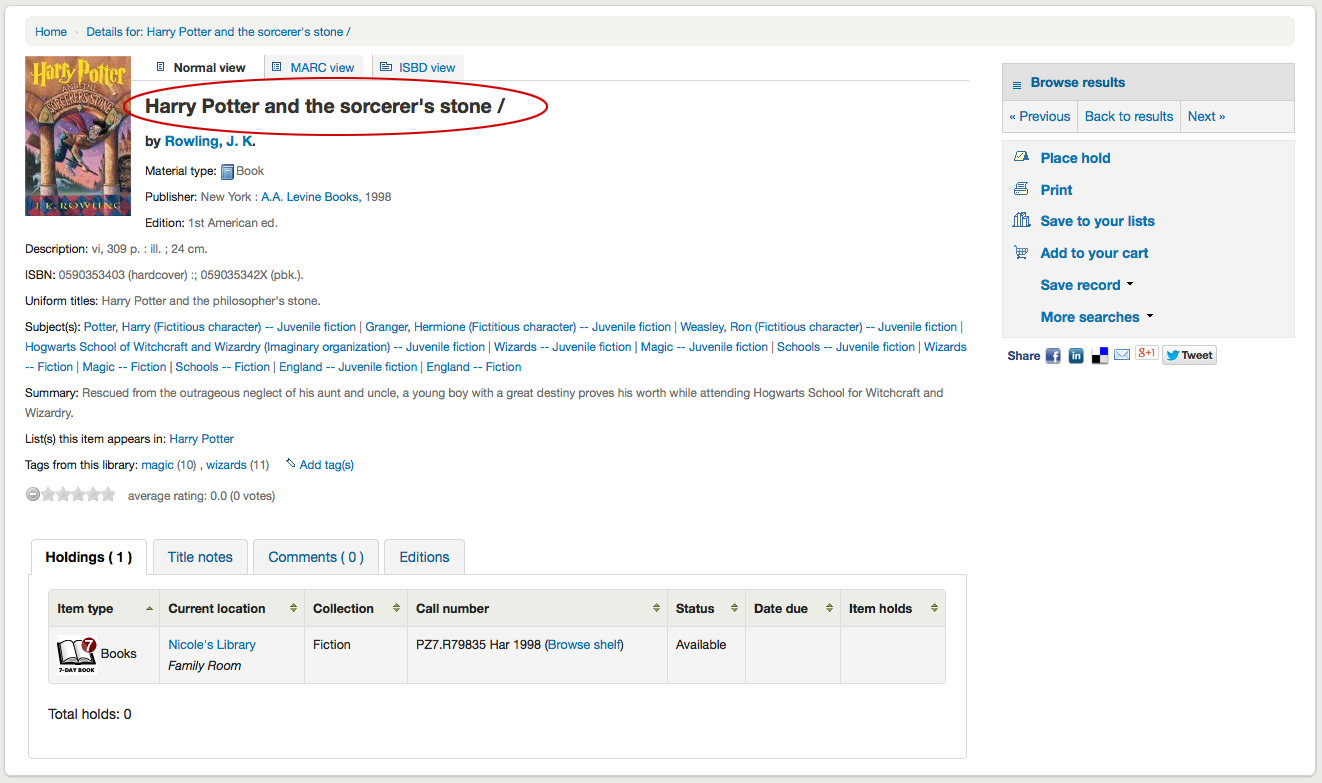
Quando si fa clic su un titolo dai risultati della ricerca, si apre il dettaglio bibliografico della registrazione. Questa pagina è suddivisa in aree.
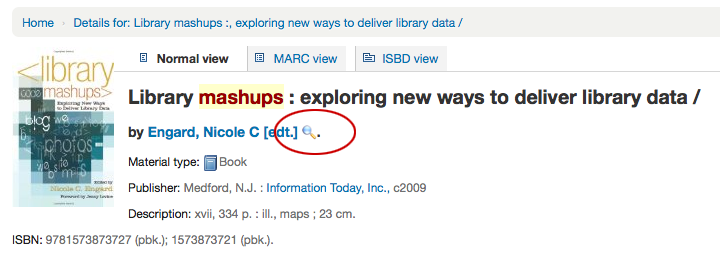
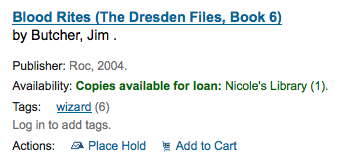
Nella parte superiore della pagina ci sarà il titolo e la natura dell’opera [se DVD, raccolta, etc]:
Sotto il titolo saranno elencati gli autori. Questi provengono dalle vostre 1xx e 7xx campi. Cliccando l’autore, parte una ricerca di altri titoli di quell’autore.
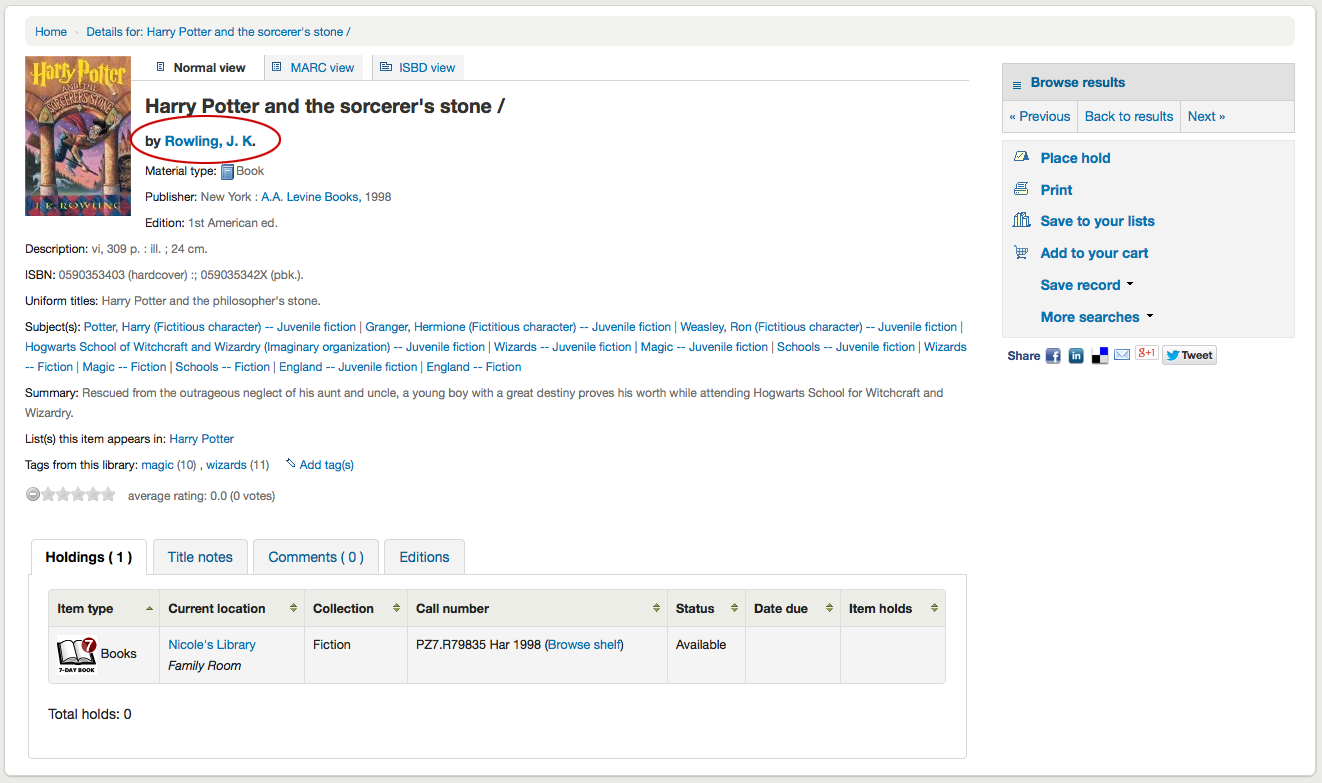
Se si dispone di un file di autorità verrà visualizzata una lente di ingrandimento a destra dell’autore e di altre intestazioni. Cliccando la lente d’ingrandimento si apre direttamente il record di autorità.
If you have your DisplayOPACiconsXSLT preference set to “show” you will see a material type that is determined by values in your fixed fields (learn more in the XSLT Item Types Appendix).
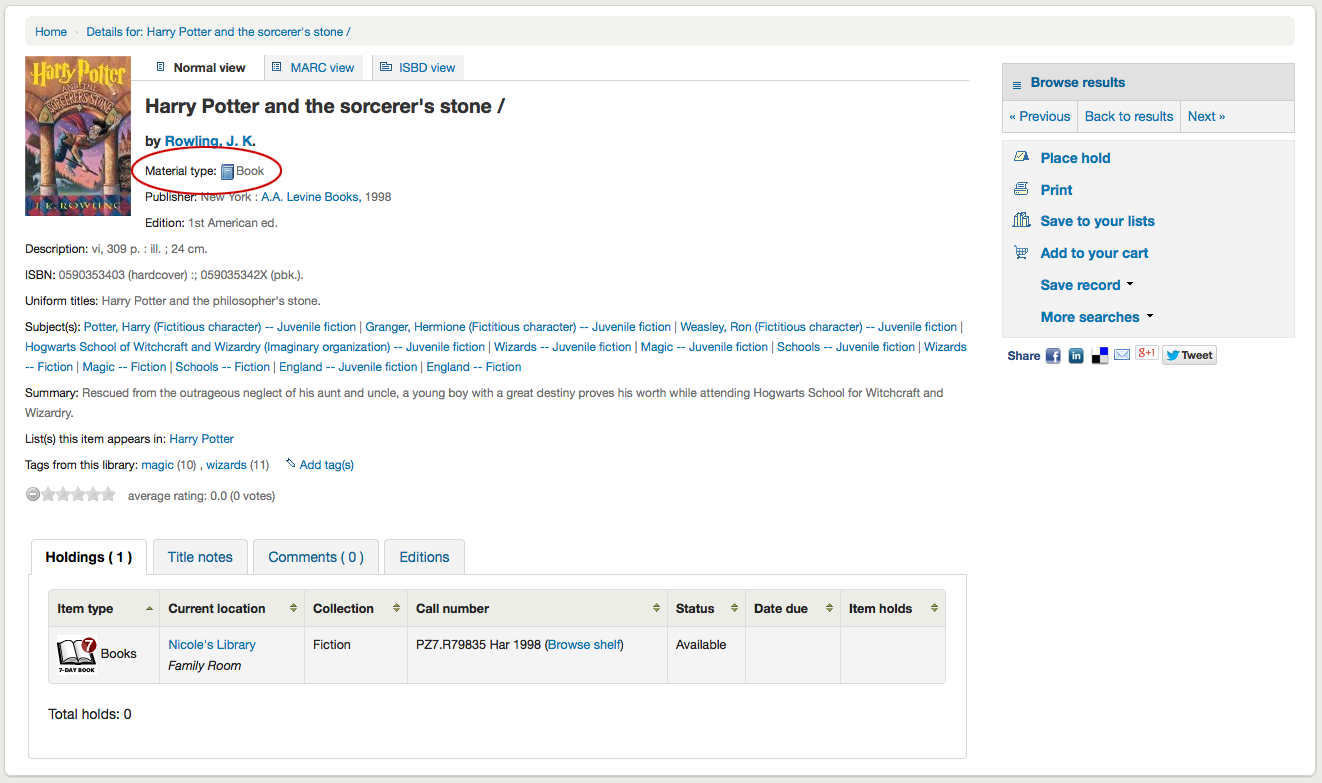
A continuazione vedrai la descrizione del record che stai visualizzando:
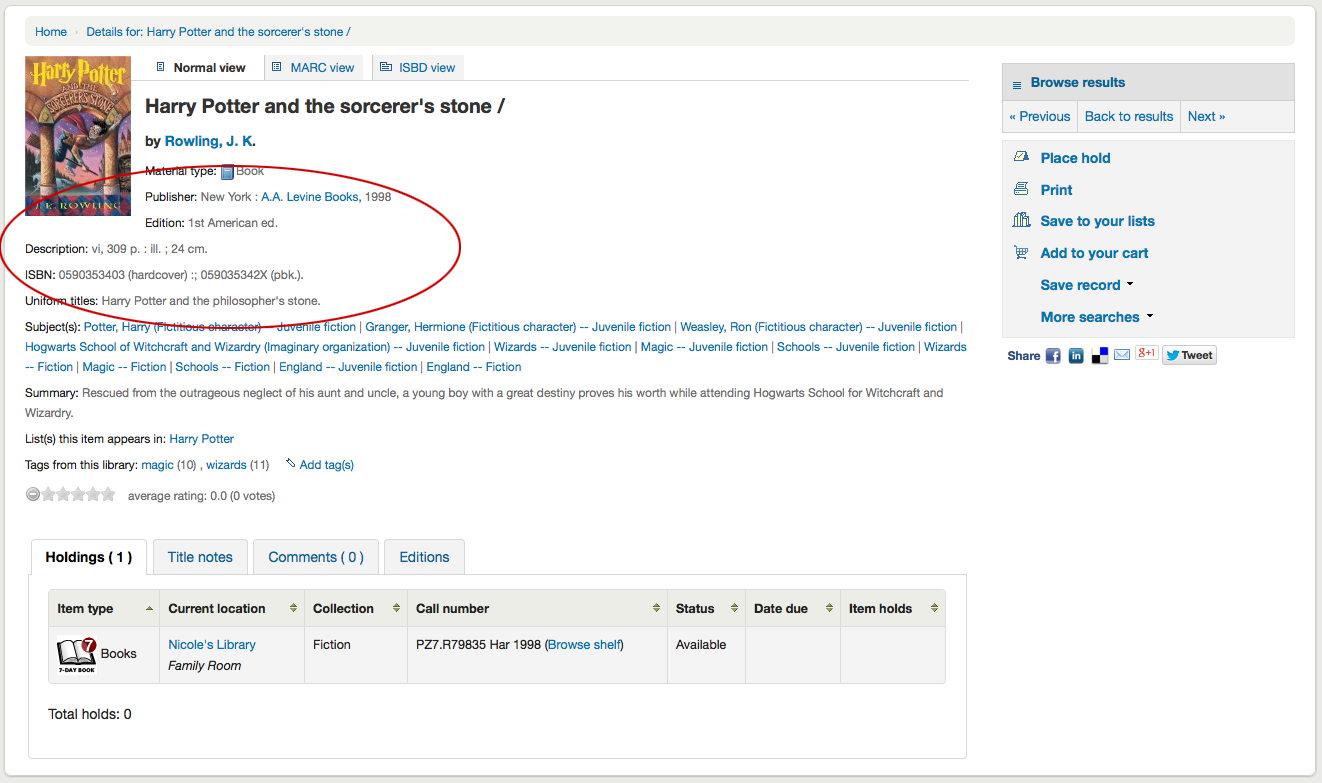
Dopo queste informazioni si trovano le intestazioni per soggetto, che può essere cliccato per la ricerca di altri titoli su argomenti simili
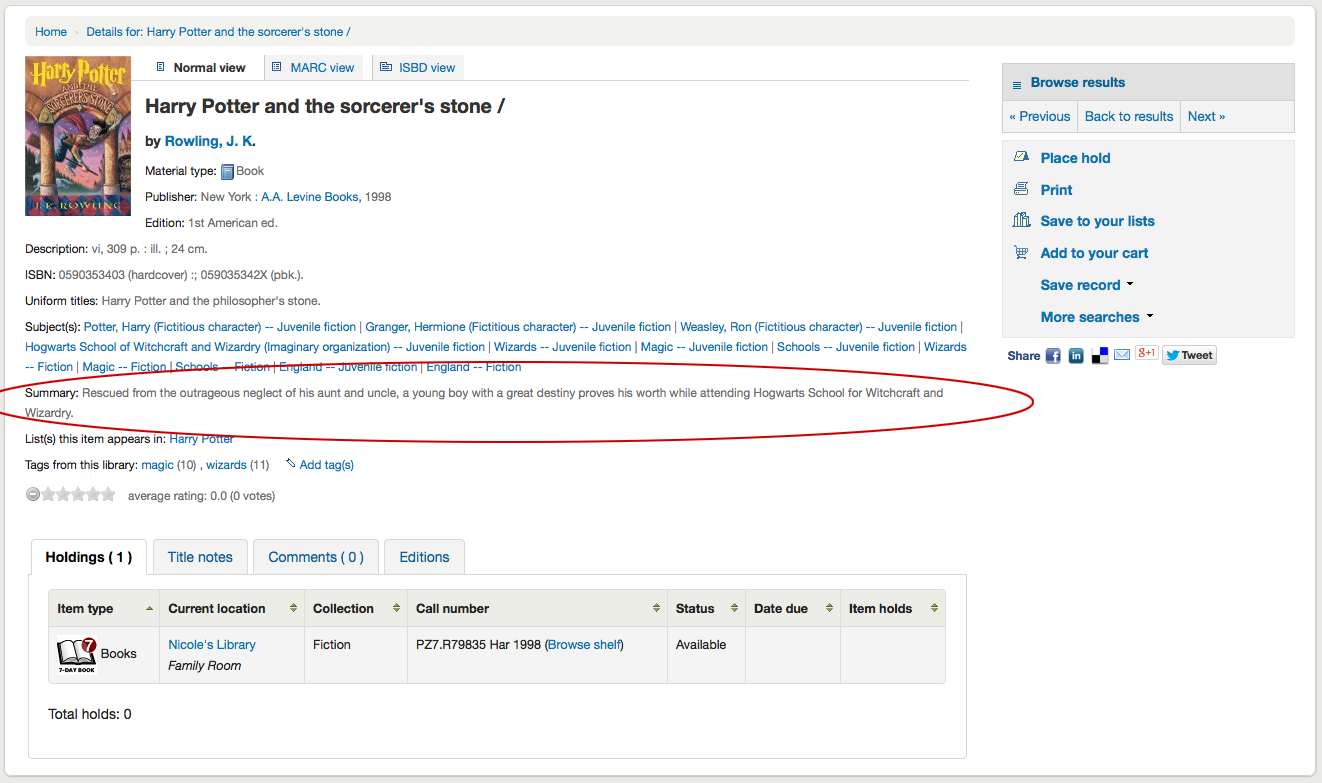
Se il record ha un indice o un o sommario esso apparirà accanto all” etichetta “Sommario” o “Indice”.
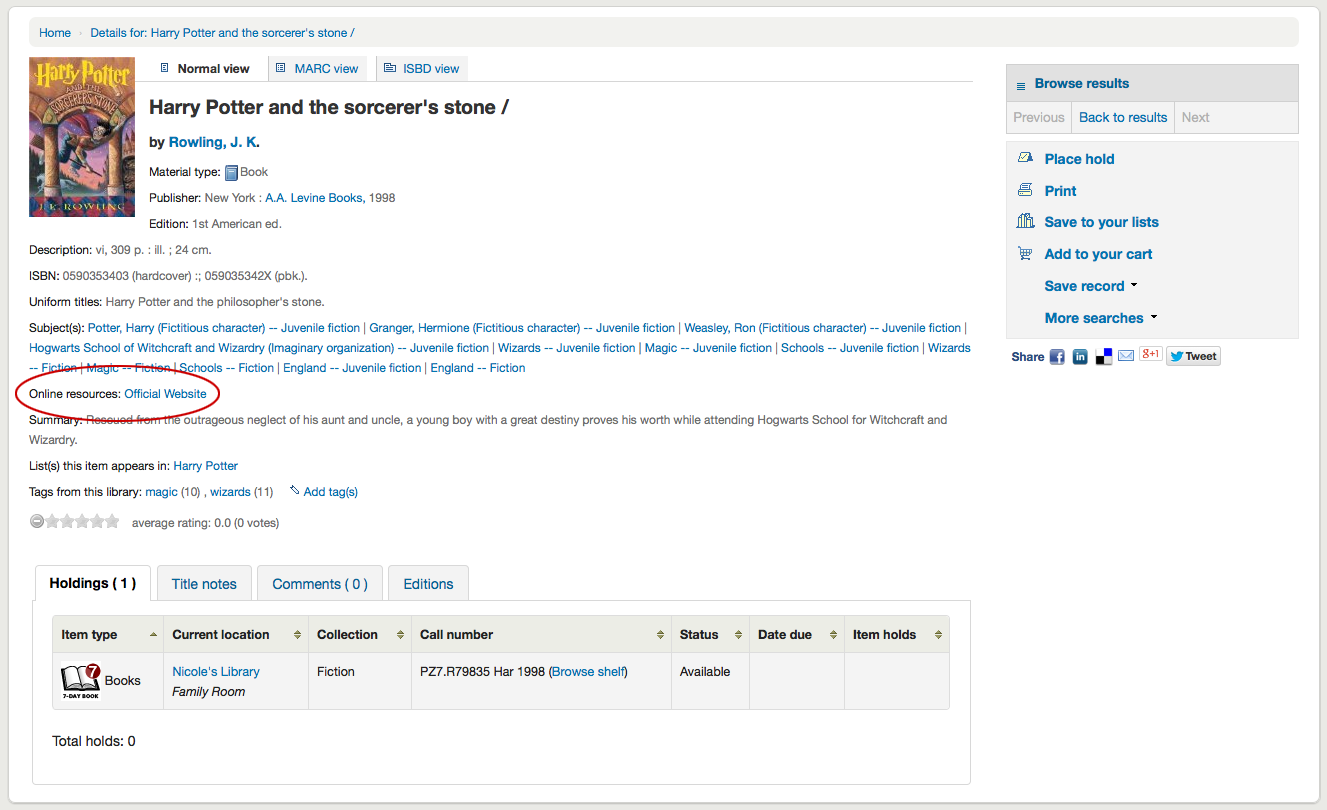
Se il record ha dati nei campi 856 vedrete i link a destra della etichetta “Risorse online”
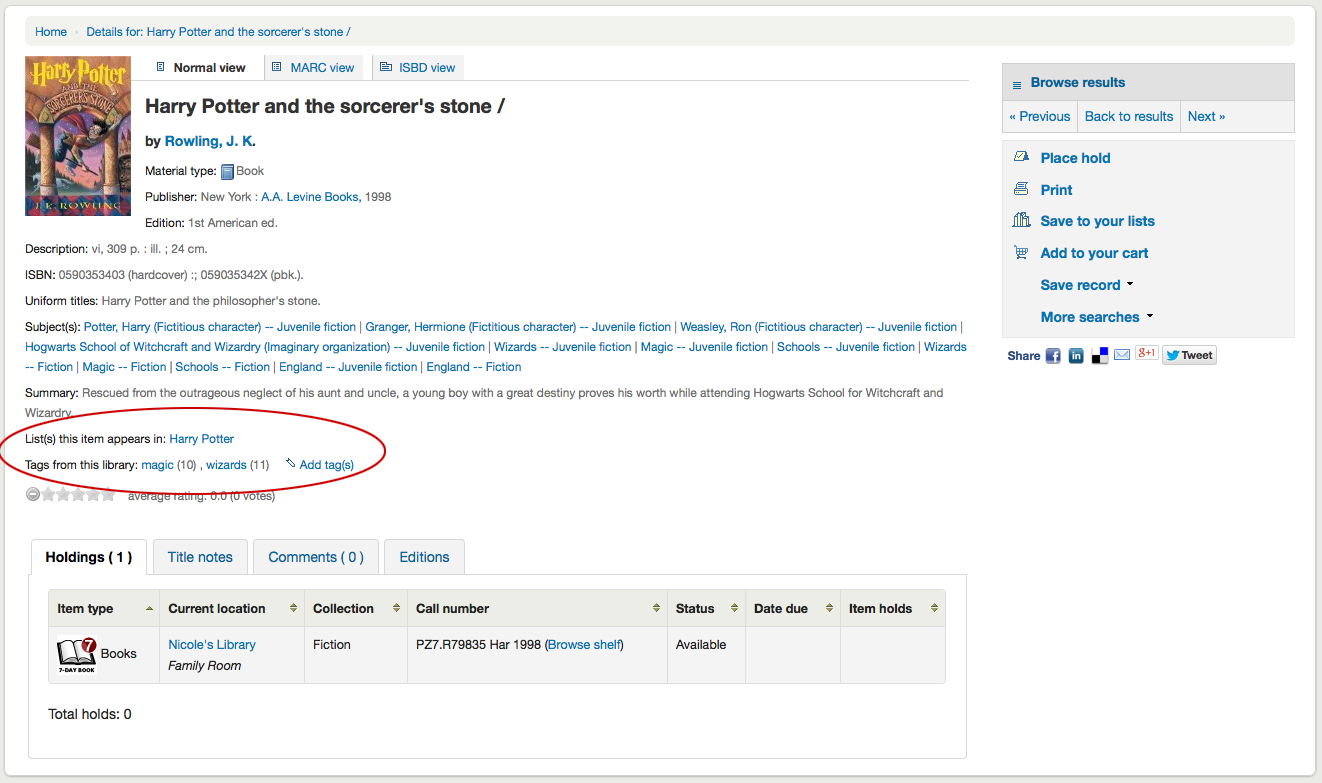
Se il titolo si sta visualizzando è in una lista pubblica, vedrai un elenco di quelli a destra della etichetta “Lista(e) in cui questo record appare” e se è stato taggato appariranno sotto l’etichetta «Tag da questa biblioteca”
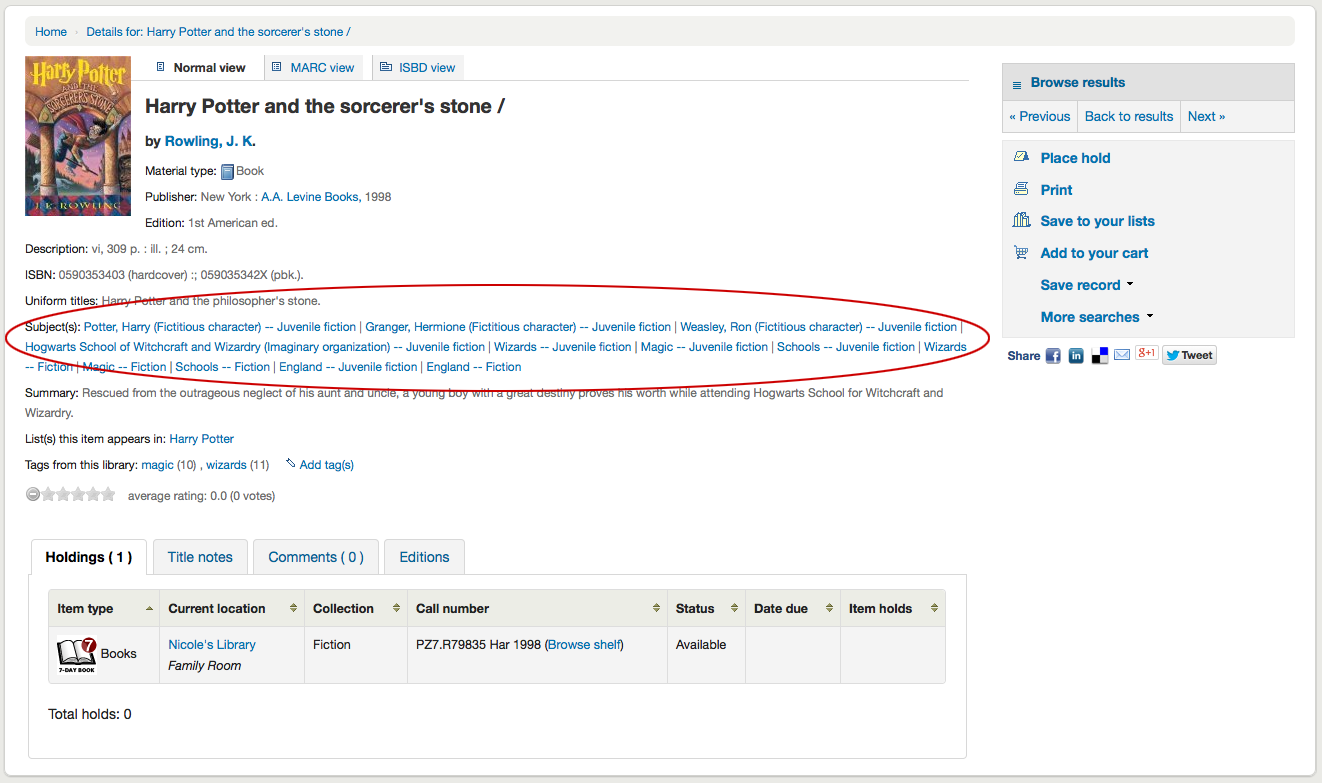
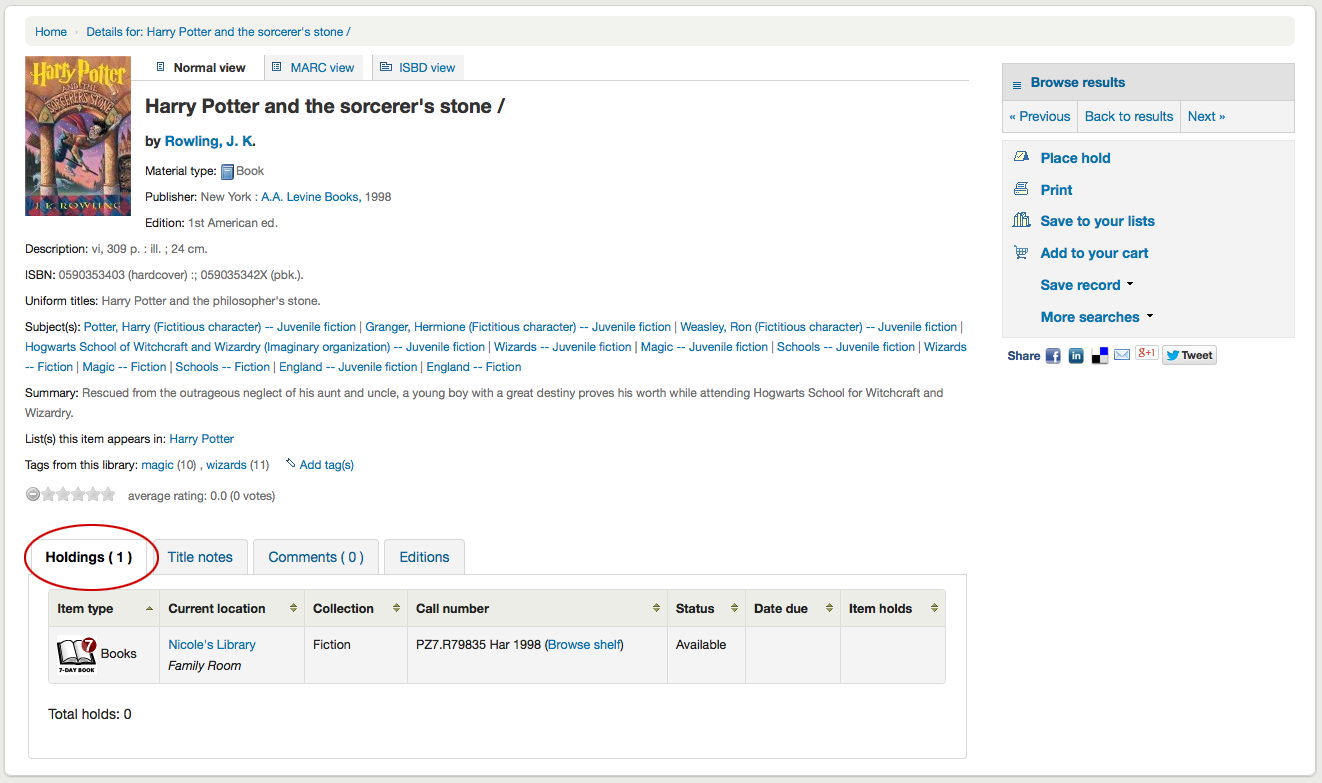
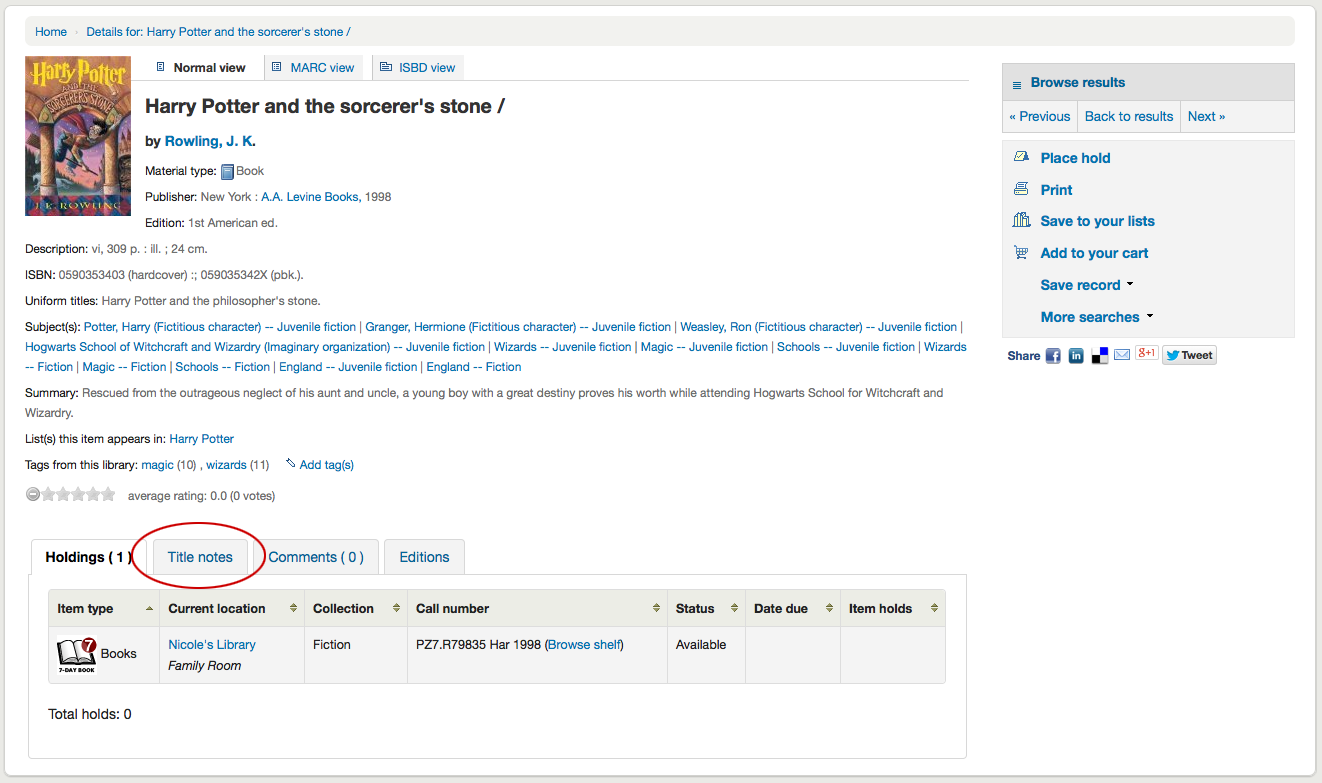
Nelle schede sotto i dettagli troverai i dati sul posseduto
Le note (campi 5xx del MARC21) appariranno sotto “Note”
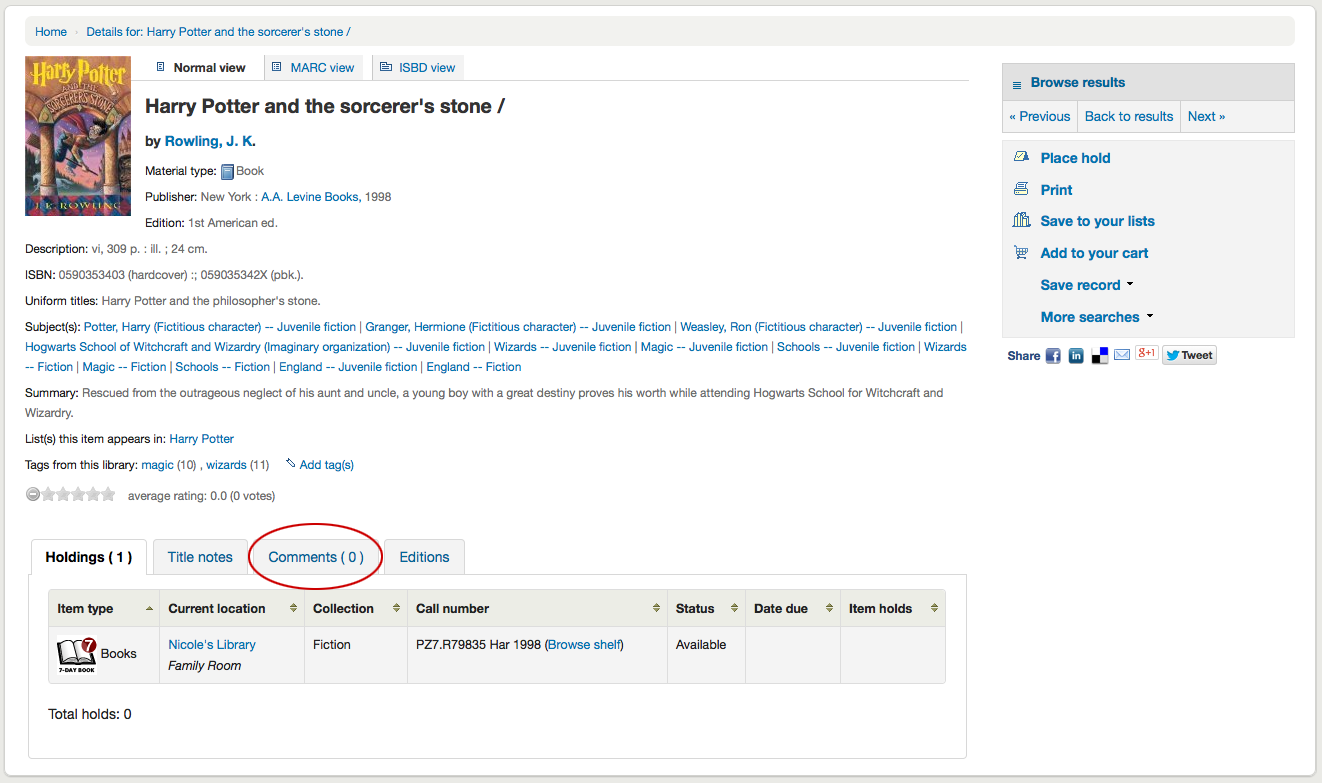
Se i commenti sono attivi, appariranno nella scheda successiva
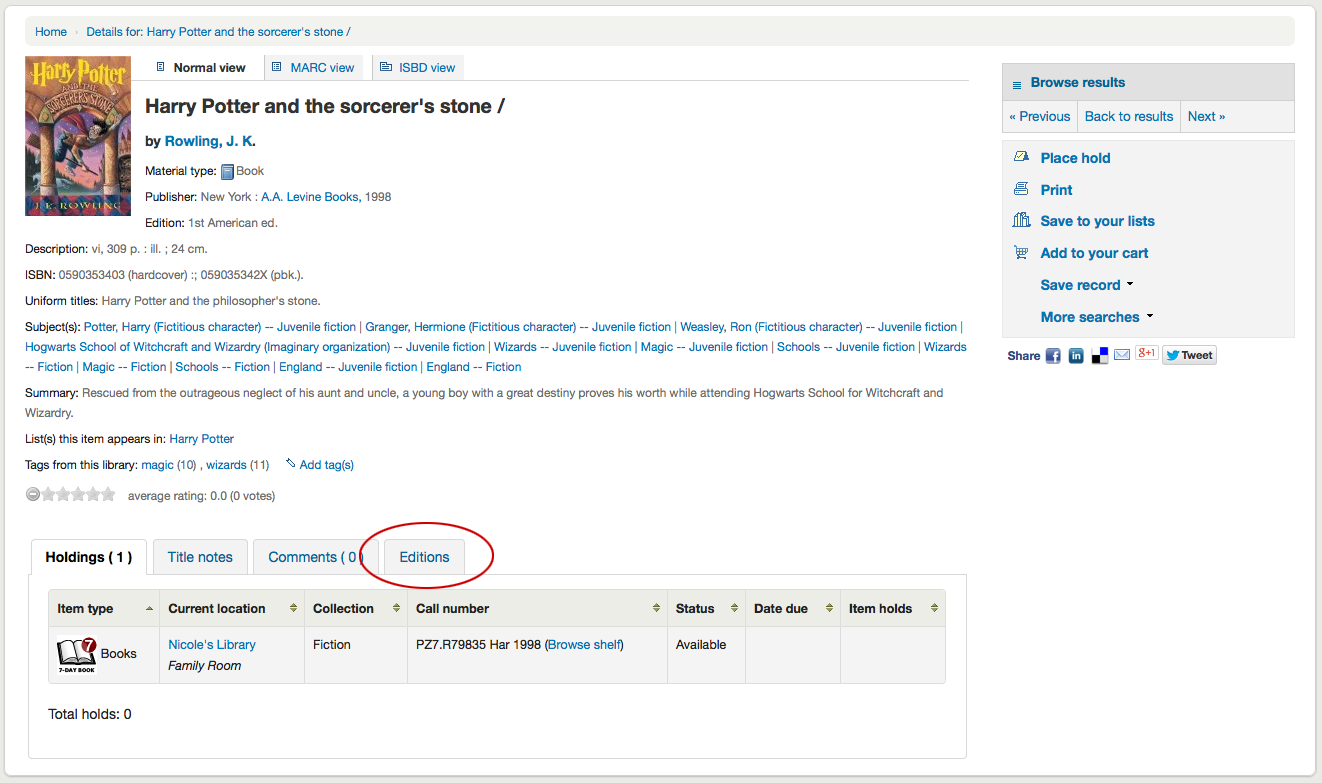
Infine, se FRBR è attivo e se in catalogo ci sono altre edizioni dello stesso titolo, vedrai la scheda “Edizioni”.
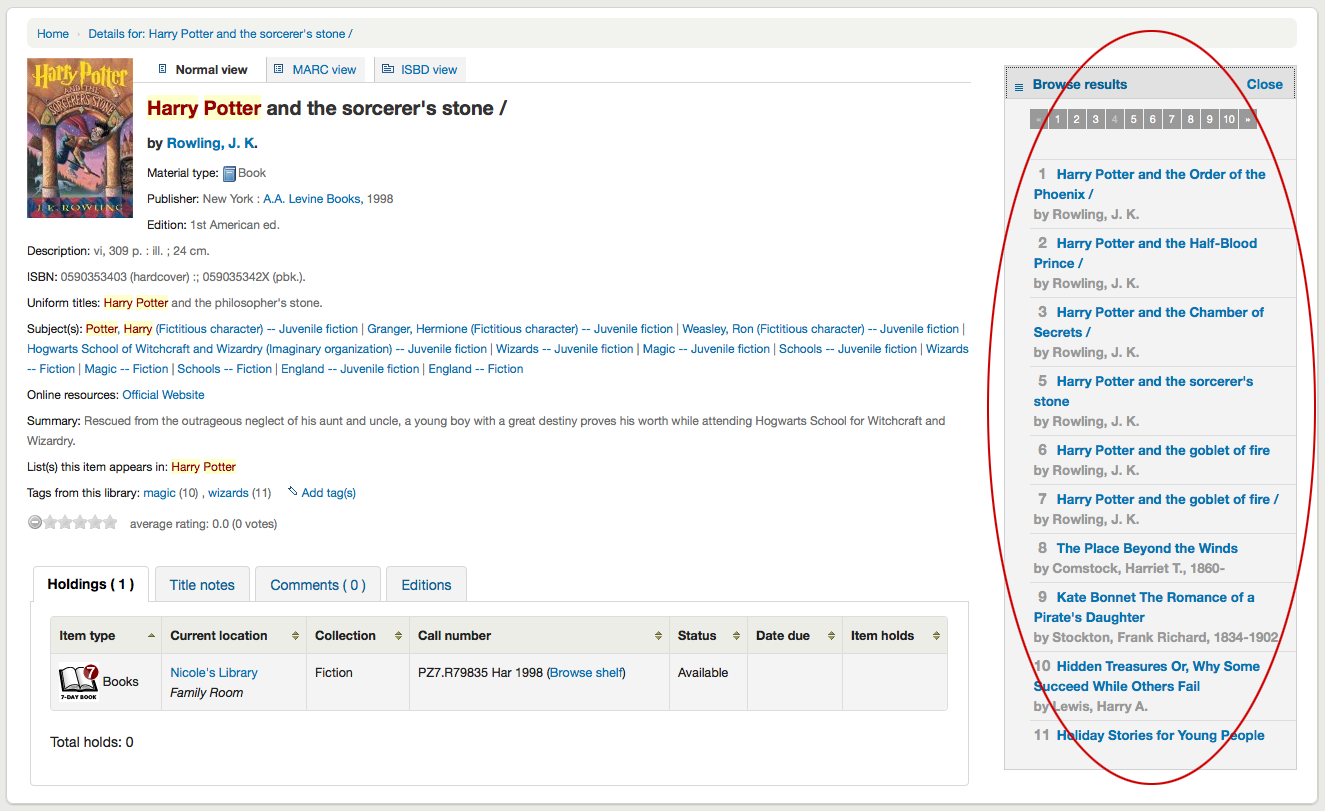
A destra dei dettagli troverete una serie di caselle. La prima casella è una lista di pulsanti per navigare i risultati di ricerca. Da lì si può vedere il risultato successivo o precedente dalla ricerca o tornare ai risultati.
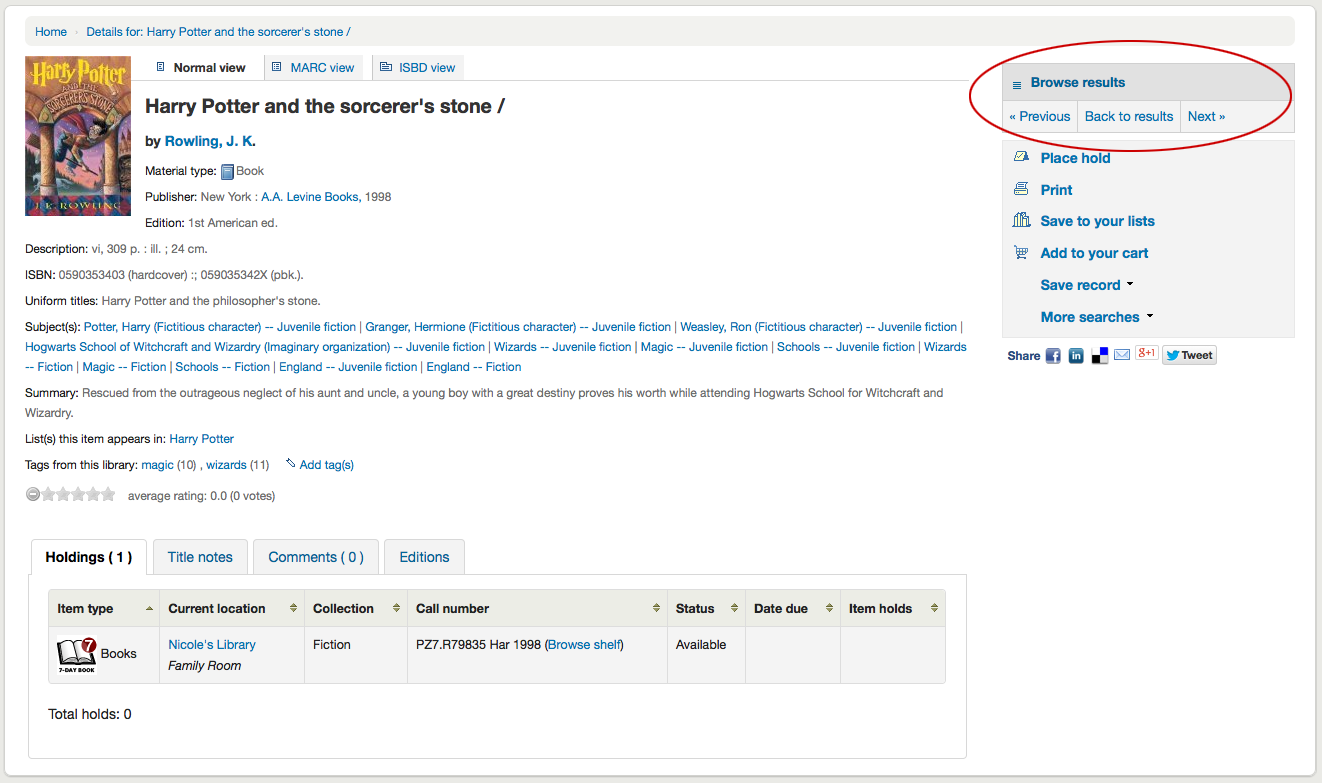
Facendo clic su Sfoglia tra i risultati nella parte superiore della colonna di destra aprirà i risultati della ricerca nella pagina di dettaglio
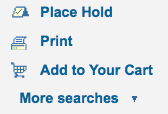
Sotto i bottoni di ricerca troverete i link per inserire una prenotazione, stampare il record, salvare il record in una lista, o aggiungerlo al carrello
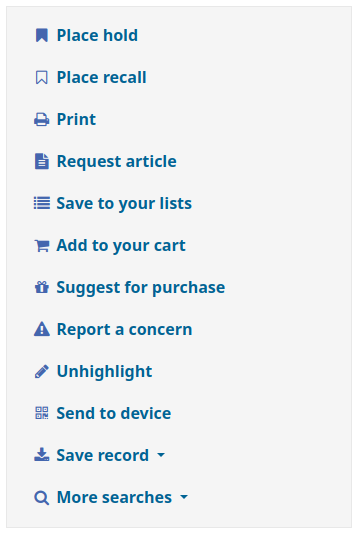
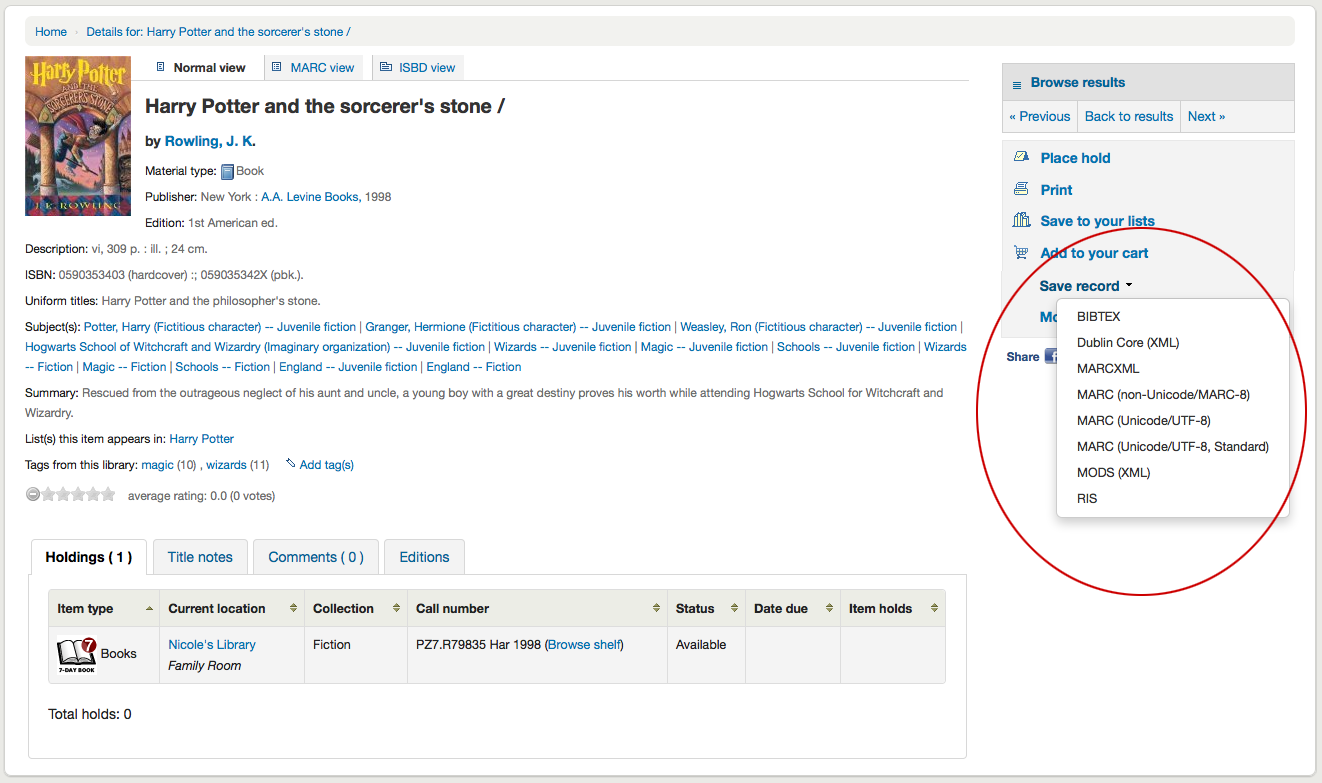
Clicking “More Searches” will show the list of libraries you entered in your OPACSearchForTitleIn preference
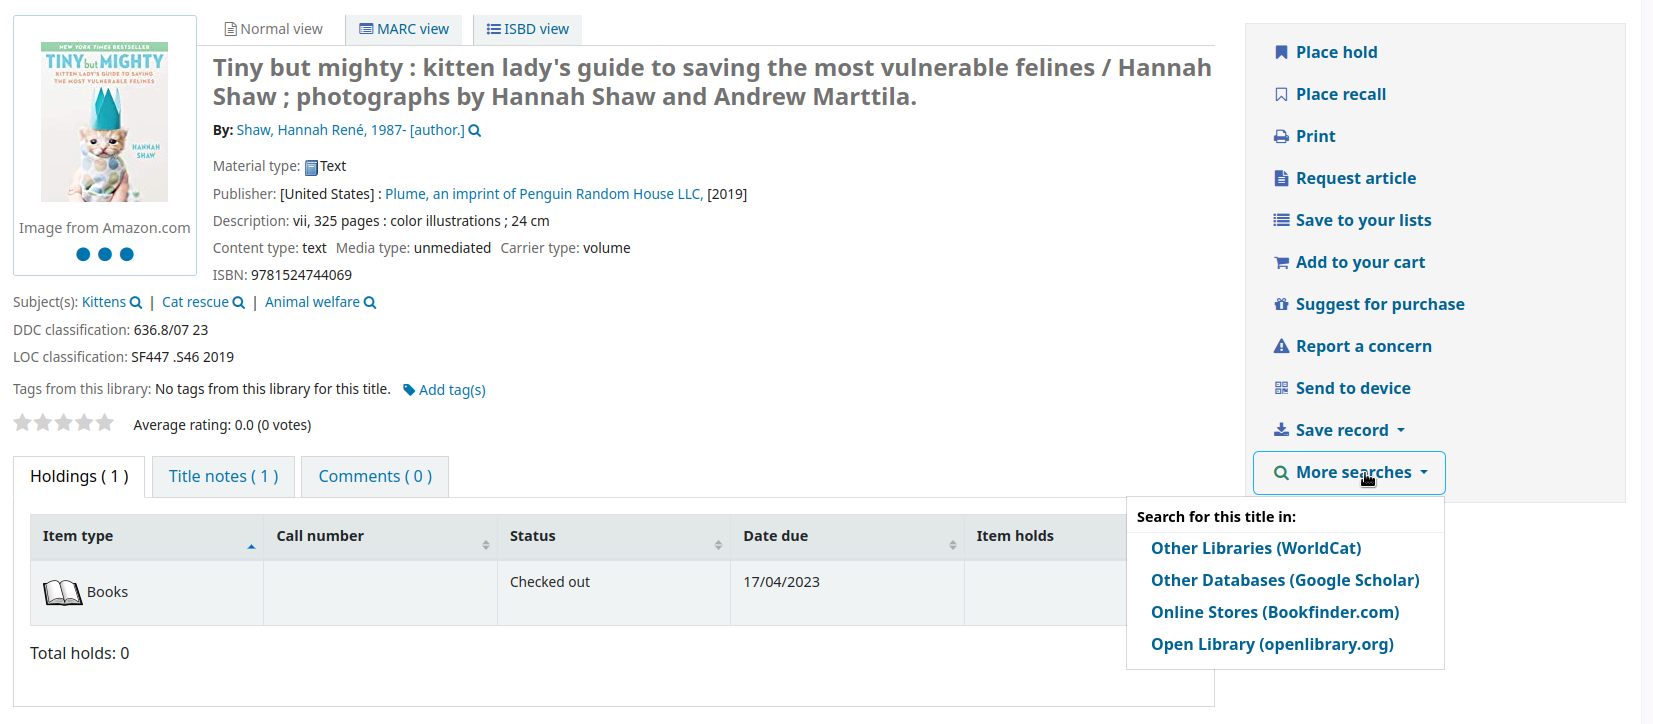
Under the “Save Record” label you will find a series of file formats you can save the record as. This list can be customized by altering the OpacExportOptions system preference.
Se in qualsiasi momento si desidera modificare la vista da “Normale” e passare alle viste Marc o ISBD, è possibile fare clic sulle schede nella parte superiore del record
Liste & Carrello
Il carrello è un contenitore temporaneo di record che ti servono durante la sessione. Quando avrai fatto il logout o chiuso il browser, perderai i record del carrello. Una lista è un contenitore permanente di record. Per imparare le liste, vai al capitolo Liste nell’interfaccia dello staff di questo manuale.
Liste
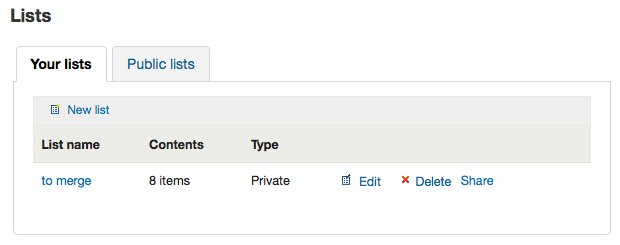
Gli utenti possono gestire le proprie liste private accedendo alla sezione “Le mie liste” nel proprio account.
Creare una lista
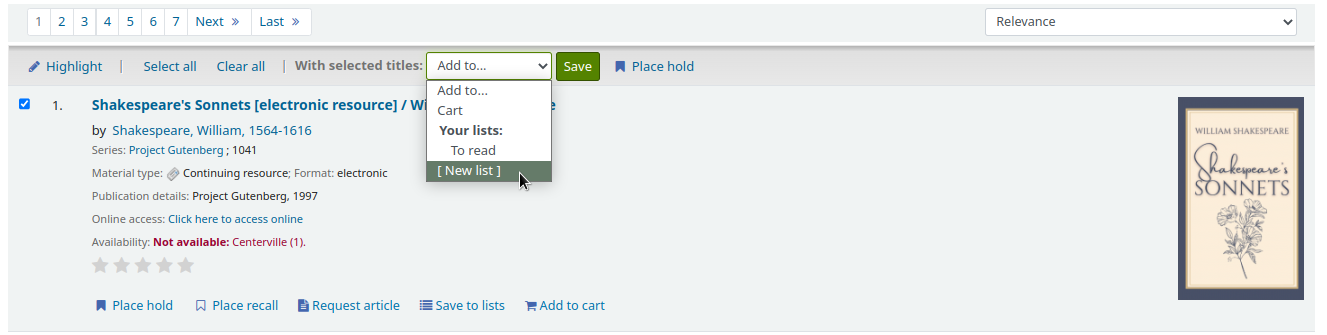
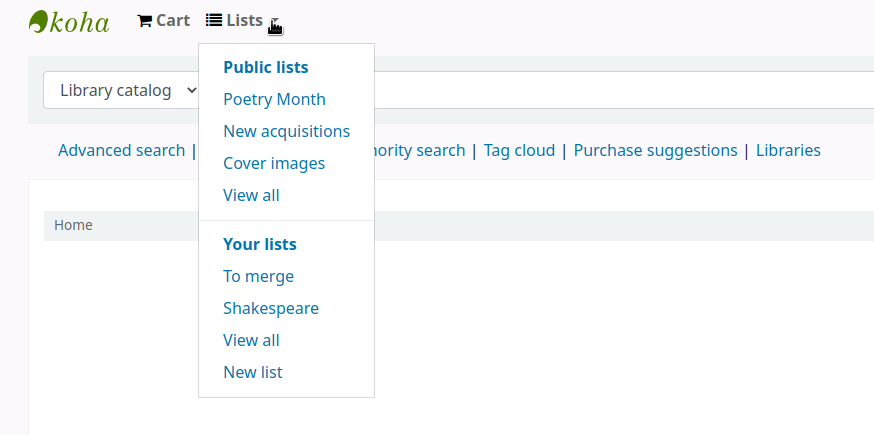
Le liste possono anche essere create scegliendo l’opzione “Nuova lista” nel menù “Aggiungi a” sui risultati della ricerca
Per creare una lista l’utente deve semplicemente cliccare sul link “Nuova lista” e compilare il modulo che appare
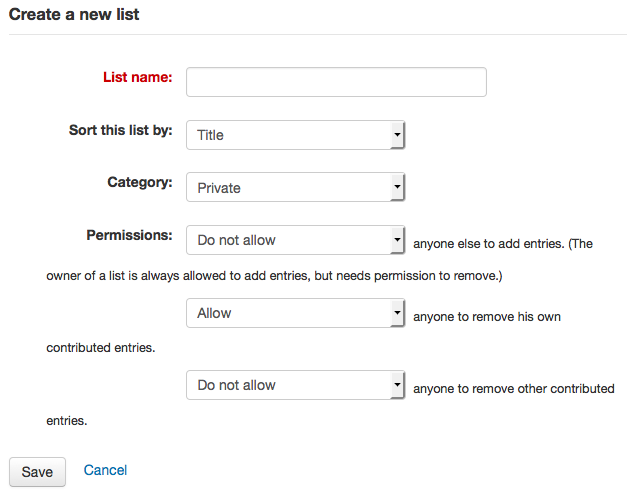
L’unico campo obbligatorio è il “Nome Lista”, ma l’utente può anche scegliere l’ordinamento della lista e se la lista è pubblica o privata.
Una lista privata verrà gestita e vista solo da te (in funzione dei permessi impostati sotto)
Una lista pubblica verrà vista da tutti ma gestita solo da te (in funzione dei permessi impostati sotto)
Importante
If you aren’t allowing patrons to create public lists with the OpacAllowPublicListCreation preference then patrons will only be able to create private lists.
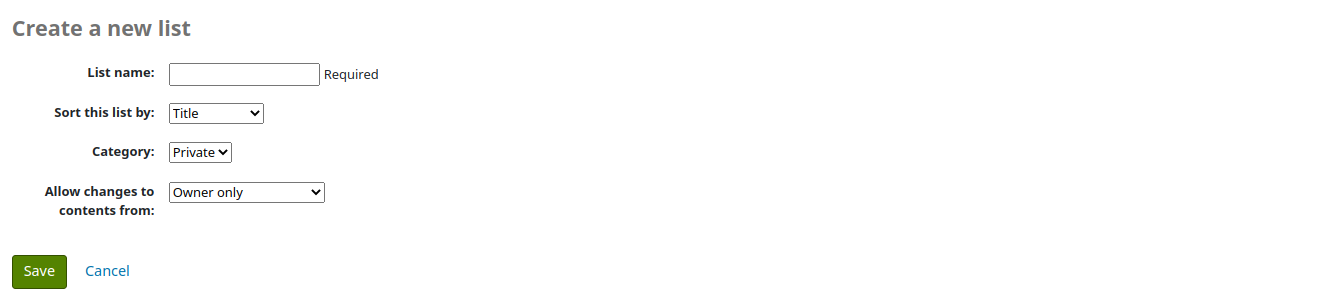
Al termine decidi quali permessi dare alla lista. Puoi permettere o non permettere:
a chiunque altro di aggiungere elementi
a chiunque altro di rimuovere i propri elementi
Nota
Il padrone di una lista può sempre aggiungere voci, ma ha bisogno del permesso per cancellarle.
chiunque a rimuovere contributi di altri
Aggiungere titoli alle liste
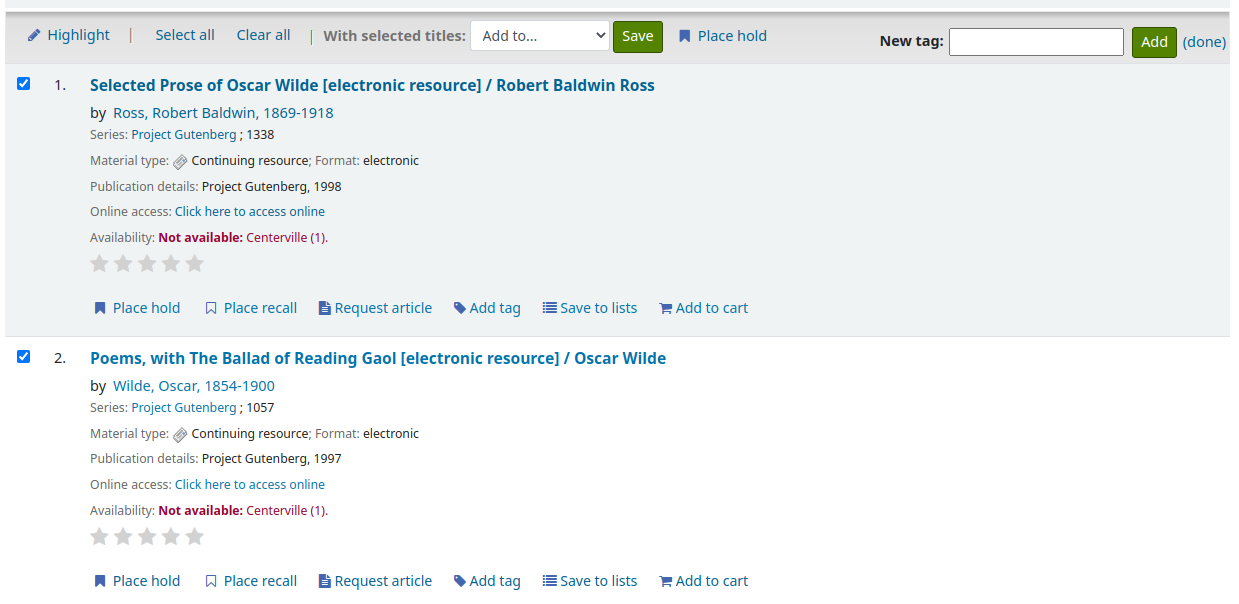
I titoli possono essere aggiunti alle listeo dalla pagina dei risultati e/o dal record bibliografico. Nella pagina dei risultati appaiono delle caselle di spunta sotto ogni record e in alto

Per aggiungere un singolo titolo a una lista, fare clic sul “Salva in una lista” e scegliere la lista a cui aggiungere il titolo. Per aggiungere più titoli a una lista, selezionare le caselle sulla sinistra dei titoli che si desidera aggiungere e scegliere la lista a cui si desidera aggiungere i titoli dal menù a tendina “Aggiungi anche a” nella parte superiore dello schermo.
Visualizzazione del contenuto di una lista
Per visualizzare il contenuto di una lista, fare clic sul nome della lista sotto il pulsante Liste.
Il contenuto della lista sarà simile alle pagine dei risultati di ricerca, tranne che ci saranno diverse opzioni di menu nella parte superiore della lista.

Sulla destra della lista titolo c’è una icona RSS che ti abilita a sottoscrivere gli aggiornamenti alla lista.
Utilizzando le opzioni del menu sopra l’elenco è possibile prenotare più copie, scaricare il contenuto della lista, inviarla per e-mail o stamparla.
Per prenotare una o più copie nella lista selezionare la casella a sinistra della copia e fare clic sul link “Prenota” in alto
Per scaricare il contenuto della lista clicca sul collegamento “Scarica Lista” e scegliere il formato desiderato per scaricarla
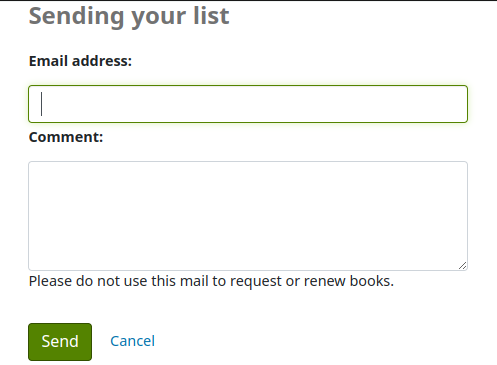
To email the list contents to someone, click the “Send List” link and enter in your email details in the form that pops up (view a sample Lists email)
Per stampare il contenuto della lista cliccare sul link “Stampa lista”
Gestione delle liste
Una volta che la lista è stato salvata gli utenti possono iniziare ad aggiungere titoli ad essa. Dalla scheda “Mie liste” sul record utente, l’utente può modificare e cancellare le liste che ha creato facendo clic sul collegamento relativo a destra del nome della lista.
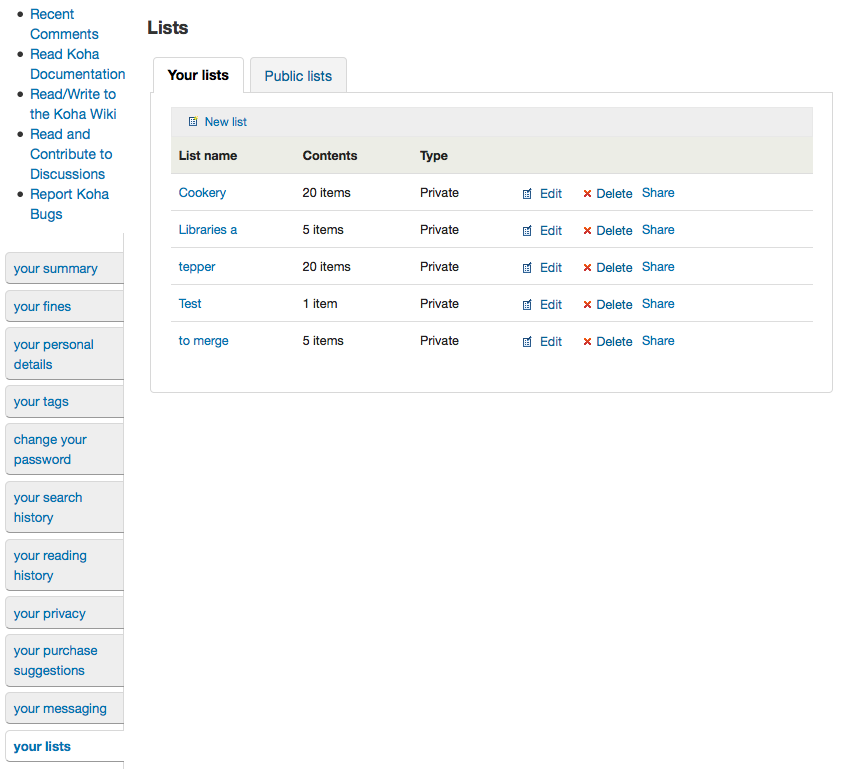
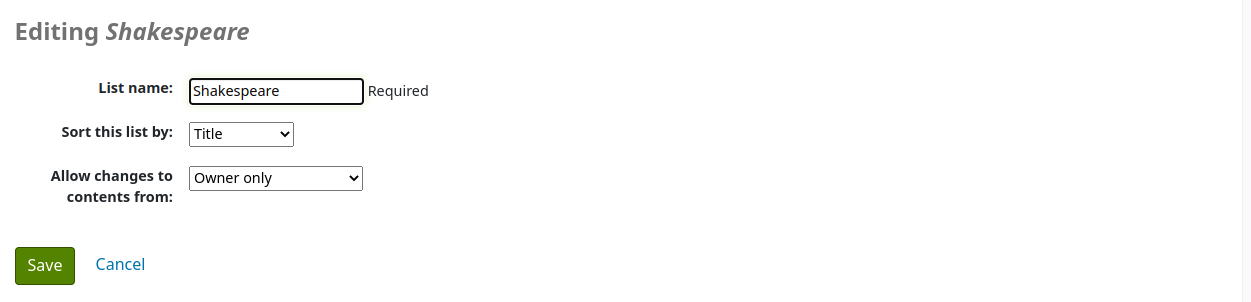
Per modificare il titolo della lista o l’ordinamento, gli utenti devono cliccare sul link “Modifica” alla destra della descrizione della lista.
Quando si clicca “Elimina” accanto a una lista vi verrà chiesto di confermare che si desidera eliminarla.
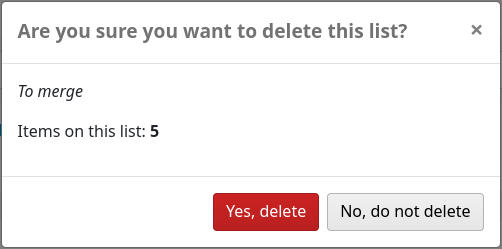
La lista non sarà cancellata fino a quando il pulsante “Conferma” viene premuto; si trova sulla destra della lista che si desidera eliminare.
If the library is allowing you to share private lists with the OpacAllowSharingPrivateLists preference then you will see the “Share” link on your list of lists and the “Share list” link at the top of each individual list. Clicking this will ask you to enter the email address of a patron.

Una volta inserito l’indirizzo email, Koha presenterà un messaggio di conferma

e invierà un messaggio a quell’utente.
Carrello
Aggiunta di titoli al carrello
I titoli possono essere aggiunti al carrello dalla pagina dei risultati e/o dal record bibliografico. Nella pagina dei risultati appaiono delle caselle di spunta sotto ogni record e in alto
Facendo clic sul pulsante “Aggiungi al carrello” aggiungerà il titolo al carrello. Per aggiungere più titoli in una sola volta, selezionare la casella a sinistra di ogni risultato e scegliere “Aggiungi al carrello” dal menù a tendina nella parte superiore dello schermo. Una volta che i titoli vengono aggiunti al carrello sarà chiesta conferma

From the results you will see which items are in your cart and will be able to remove those items by clicking “(remove)”.
Gestione del carrello
Una volta che hai dei titoli nel carrello è possibile gestirne i contenuti facendo clic sul pulsante “Carrello” che di solito si trova nella parte superiore dello schermo. Il carrello si apre in una nuova finestra.
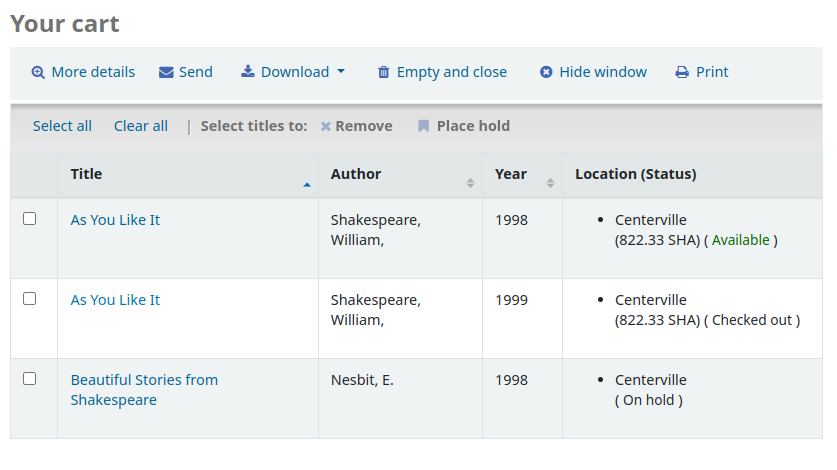
Da questa finestra vengono presentate diverse opzioni. Nella parte superiore del carrello ci sono alcuni pulsanti.
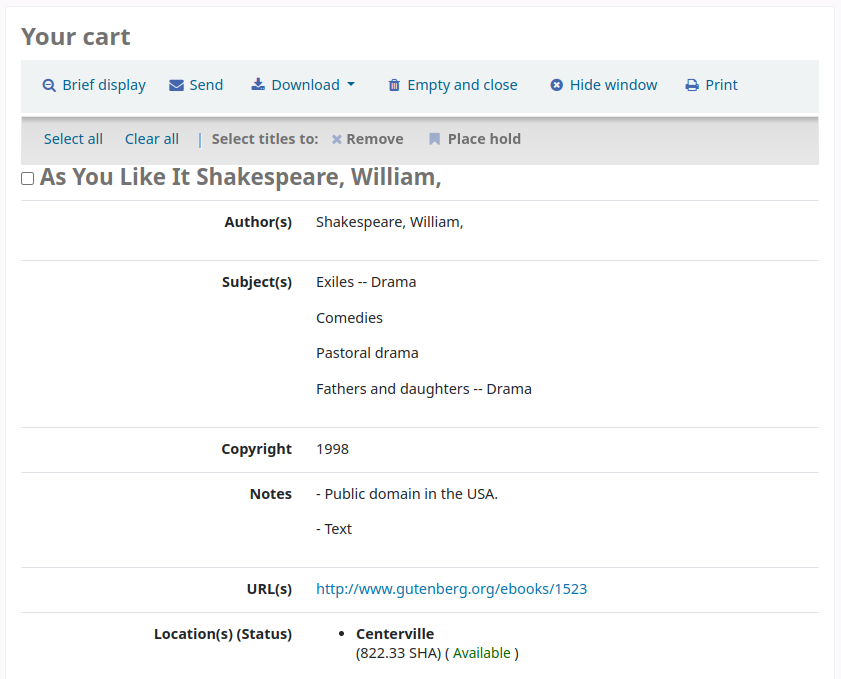
First is the “More details” button. Clicking this will show you additional information about the titles in your cart (ISBNs, Subjects, Publisher Info, Notes and more).
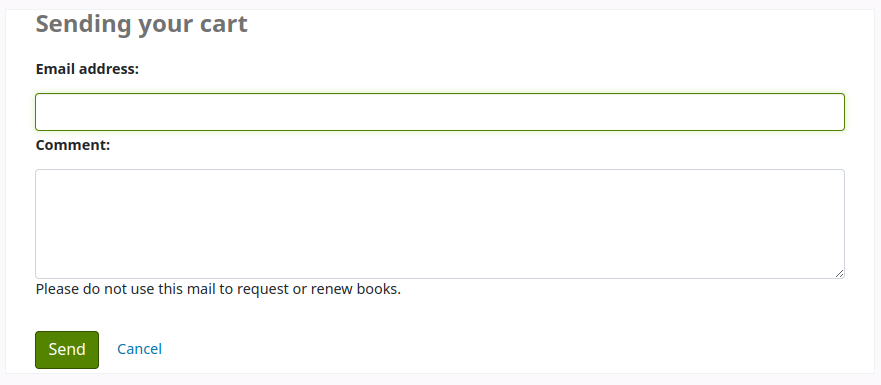
Next is the option to send the contents of your cart to an email address. This is handy if you want to send the resources you found at the library to your home email account to refer to later or to send to a patron researching a specific topic. Clicking this link will open up a new window that asks for the email address and message to send. View a sample Cart email.
Importante
Il carrello può essere inviato solo da utenti registrati. Questo consentirà di evitare che la funzione venga utilizzata per lo spamming.
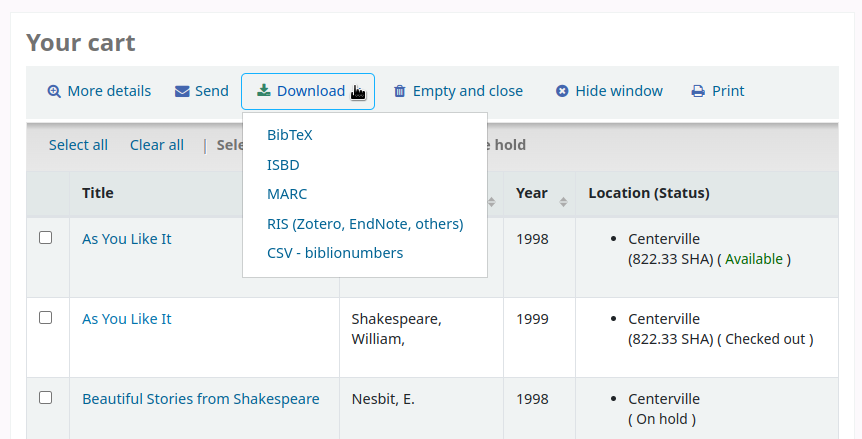
In addition to sending your cart you can download the contents of your cart in several pre-defined formats or using a CSV Profile that you defined in the Tools module.
Infine è possibile stampare il contenuto del tuo carrello scegliendo il link “Stampa”.
Oltre ai vari modi per salvare il contenuto del carrello, ci sono modi per aggiungere valore ai dati nel tuo carrello. Selezionando uno o più titoli dal carrello poterle aggiungerli a una lista (clicca su “Aggiungi ad una lista”), fare prenotazioni (clicca “Prenota”), o assegnare tag (fare clic su “tag”). Tutte queste operazioni seguono la stessa procedura che si fanno nell’OPAC.
Fare prenotazioni
Patrons can place holds on items via the OPAC if they’re logged in and you have the RequestOnOpac preference set to “Allow”. If the item can be placed on hold the option to place it on hold will appear in several different places.
Quando si visualizza una pagina di elenco o risultati di ricerca vedrete la possibilità di inserire presa sugli oggetti multipli spuntando le caselle a sinistra dei risultati e facendo clic “Place Hold” in alto
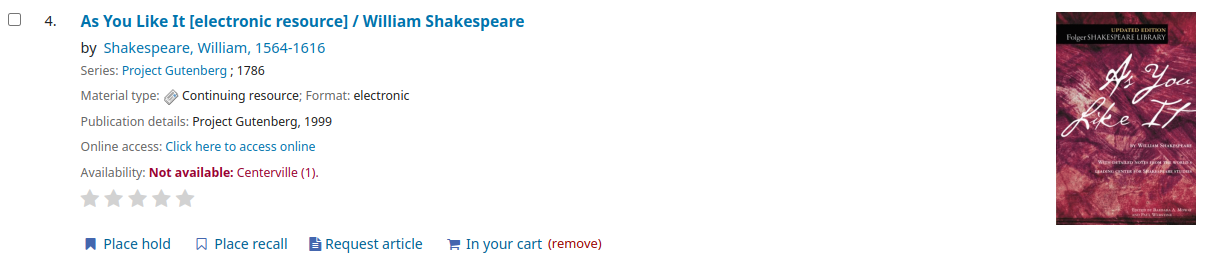
Quando si visualizza una lista o una pagina risultati di ricerca, si vedrà l’opzione per prenotare la copia sotto le informazioni di base sul titolo
Durante la visualizzazione di un singolo titolo c’è la possibilità di inserire una prenotazione nella casella sul lato destro dello schermo
Indipendentemente da quale link posti in alto si sceglie per fare una prenotazione, si sarà portati alla stessa schermata delle prenotazioni.
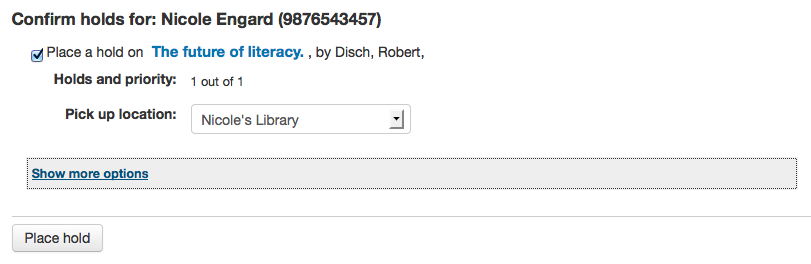
Cliccare la casella a sinistra delle copie che si desidera prenotare
Il titolo include un link alla pagina di dettaglio per il record
La priorità mostra la posizione nella coda assunta da una prenotazione
If allowed by your OPACAllowUserToChooseBranch preference the patron can choose where they’d like to pick up their hold
Se volete vedere altre opzioni è possibile fare clic su “Mostra altre opzioni”
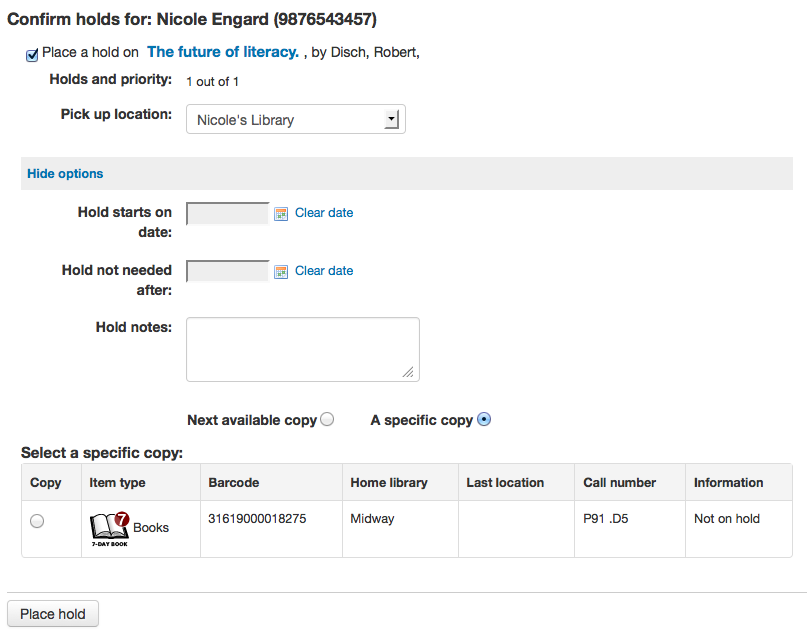
Modulo prenotazioni con tutte le opzioni
If you have the AllowHoldItemTypeSelection preference set to “Allow” and the record had more than one item type attached you will see an option to choose to limit the hold to a specific item type
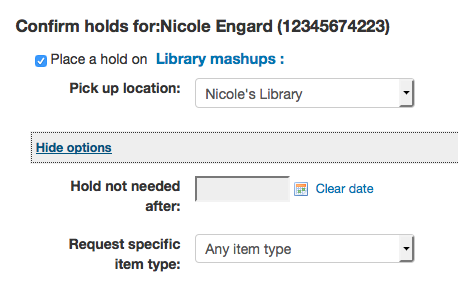
If allowed by your OPACAllowHoldDateInFuture preference, the “Hold Starts on Date” column will show. This field allows the patron to have their hold start on a future date.
Per impostazione predefinita, le prenotazioni rimangono nel sistema finché non vengono annullate, ma se l’utente indica “Prenotazione non necessaria oltre il” , la prenotazione avrà una data di scadenza.
Importante
Expired holds are removed by the Expired Holds Cron Job, this is not an automatic process and must be set up by your system administrator
If allowed by the OpacHoldNotes preference then patrons can leave notes about their holds for the library by clicking the “Edit notes” button
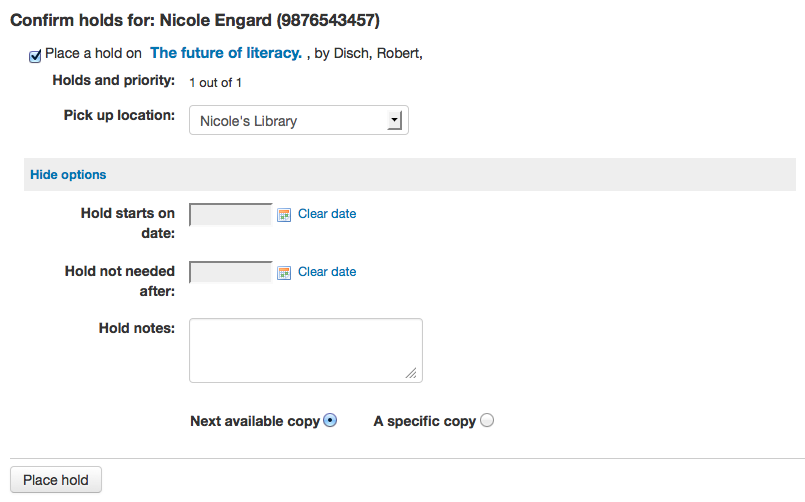
Depending on the rules you set regarding item specific holds in your circulation and fines rules the patron will be allowed to choose whether to place the hold on the next available copy and/or a specific copy
Una volta fatto clic sul pulsante Prenota l’utente sarà portata alla sua pagina di account dove si vedranno tutte le copie che ha prenotato.
Contenuti avanzati
Marcatura
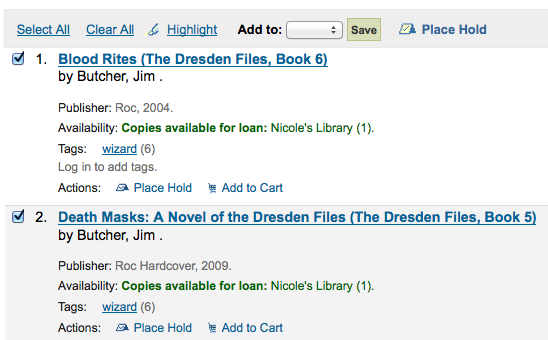
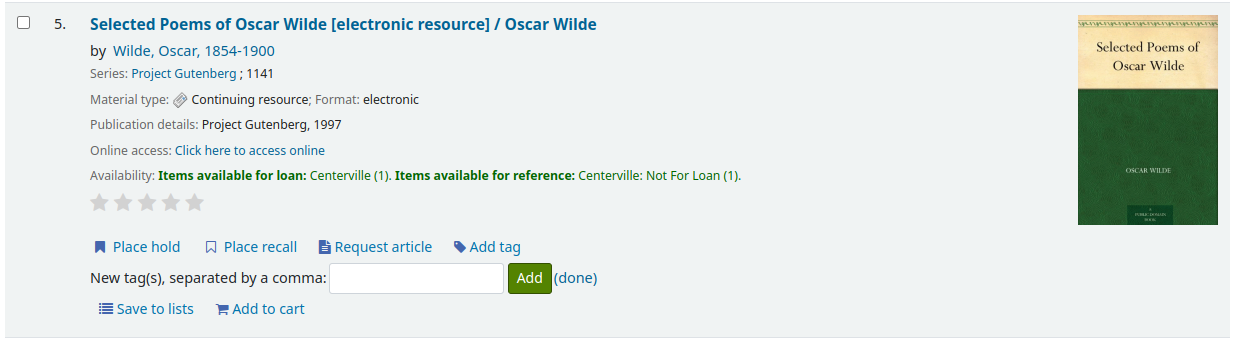
Depending on your settings for the TagsEnabled, TagsInputOnList and TagsInputOnDetail preferences you may be able to add tags to bibliographic records from the search results and/or bibliographic records. If you are allowing patrons to add tags from the search results screen you will see an input box below each result and a “Tag” option at the top of the screen.
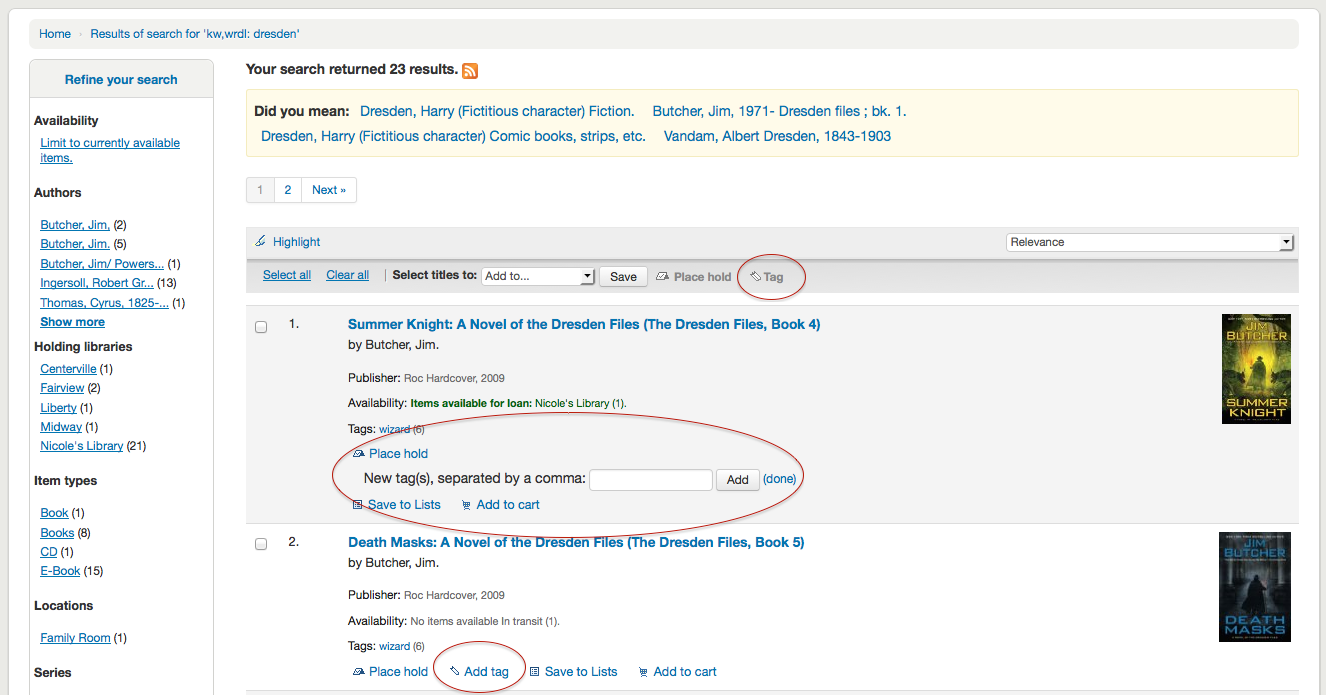
Per aggiungere un tag a una copia, scrivi i tag (separati da virgole) nella casella “Nuovi tag” e fai clic su “Aggiungi”. Verrà chiesta conferma per l’aggiunta dei tag.
Dai risultati puoi anche assegnare tag a oggetti in blocco cliccando le caselle di controllo a sinistra e facendo clic sul pulsante “Tag” nella parte superiore. Dopo averlo cliccato, il pulsante cambierà in una casella di testo per aggiungere tag a tutte le copie selezionate.
Commenti
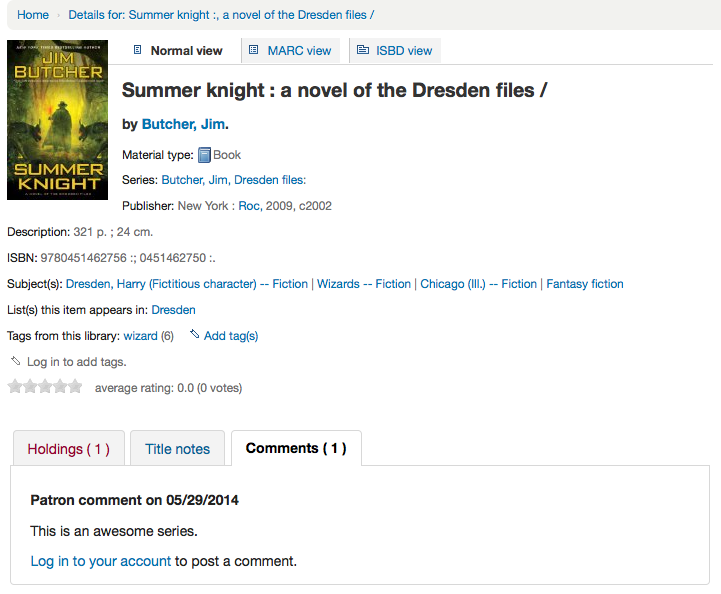
Patrons can leave comments in the OPAC if you have the reviewson preference set to allow this. Each bibliographic record has a comments tab below the bibliographic information.
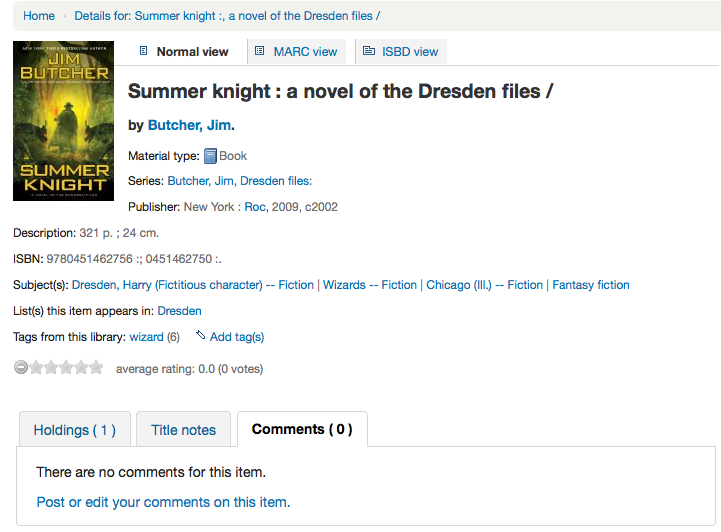
Se l’utente è collegato vedrà un link per aggiungere un commento alla copia. Cliccando su questo link si apre una finestra pop-up con una casella di testo per i commenti.
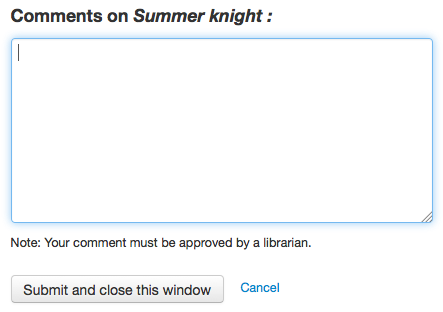
Una volta che il commento è stato digitato e il inviato tramite il bottone “Invia”, l’utente vedrà il commento come in sospeso e altri utenti non vedranno il commento.
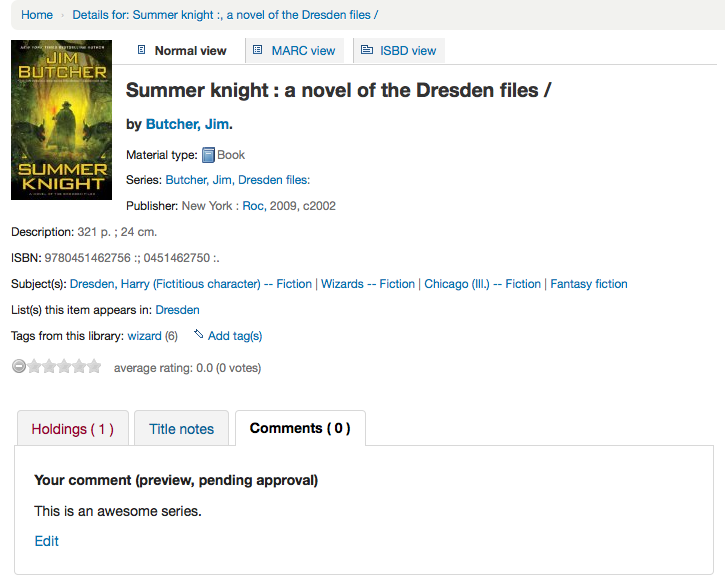
Once the comment is approved the patron will see the number of comments on the “Comments” tab and their comment labeled amongst the other comments. If you have set your ShowReviewerPhoto preference to “Show” then you’ll see the patron’s photo pulled from the Libravatar library.
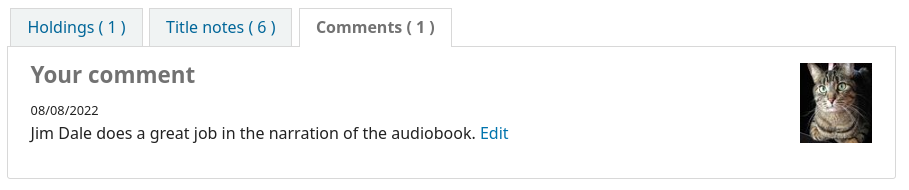
Other patrons will see the comment with the name of the patron who left the comment (unless you have set the ShowReviewer preference to not show patron names).
If you have your OpacShowRecentComments set to show then you’ll see the approved comments on that page.
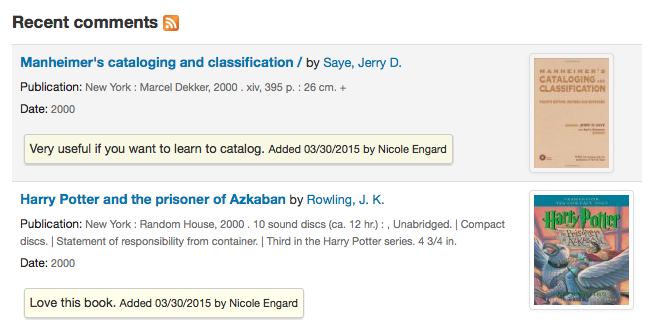
Da questa pagina gli utenti possono ricevere i commenti recenti utilizzando il feed RSS.
Zotero
Zotero is a Firefox add on that allows for the saving and generating of a bibliography. Learn more about and download Zotero at http://zotero.org.
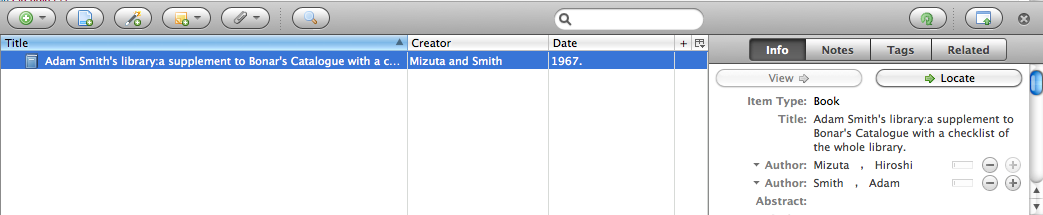
Quando su risultati della ricerca in OPAC Koha, se avete installato Zotero, vedrete un’icona di cartella nella barra degli indirizzi a destra dell’URL. Facendo clic su tale cartella si aprirà un elenco di titoli nella pagina da scegliere per aggiungerli a Zotero.
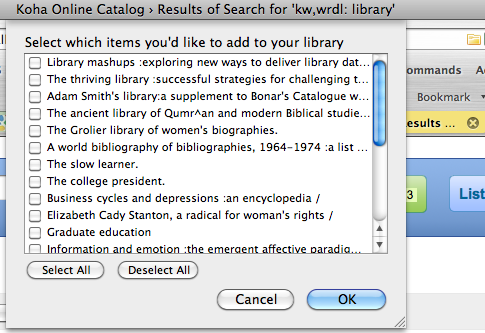
Selezionare i titoli che si desidera aggiungere a Zotero e fare clic sul pulsante “OK”. Questo aggiungerà i titoli a Zotero. È possibile visualizzare il titolo aprendo poi la biblioteca di Zotero.
Feed RSS personalizzati
È possibile utilizzare misc/cronjobs/rss/rss.pl per generare un feed RSS per qualsiasi query SQL (ad esempio una RSS per il bollettino delle nuove acquisizioni). RSS.pl viene eseguita sulla riga di comando e produce un documento XML RSS.
L’output va sistemato in una directory accessibile all’interfaccia dell’OPAC (o dello staff) affinché gli utenti possano scaricare il feed RSS.
Un esempio di utilizzo può essere trovato presso: misc/cronjobs/rss.pl lastAcquired.conf
Normalmente rss.pl deve essere eseguito periodicamente (ad es., al giorno) per mantenere il feed aggiornati.
Elenca i file di configurazione (ad esempio, lastAcquired.conf)
- nome del file da utilizzare come modello
- percorso del file di output
- Interrogazione SQL
rss.pl esegue la query SQL, quindi alimenta l’output della query attraverso il modello per produrre il file di output.
Importante
Per utilizzare i feed RSS personalizzati è necessario eseguire il rss.pl cron job.
Auto registrazione tramite l’OPAC
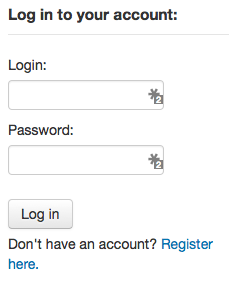
If you allow it, patrons can register for their own accounts via the OPAC. If you have the PatronSelfRegistration preference set to “Allow” then patrons will see a link to register below the log in box on the right of the main OPAC page.
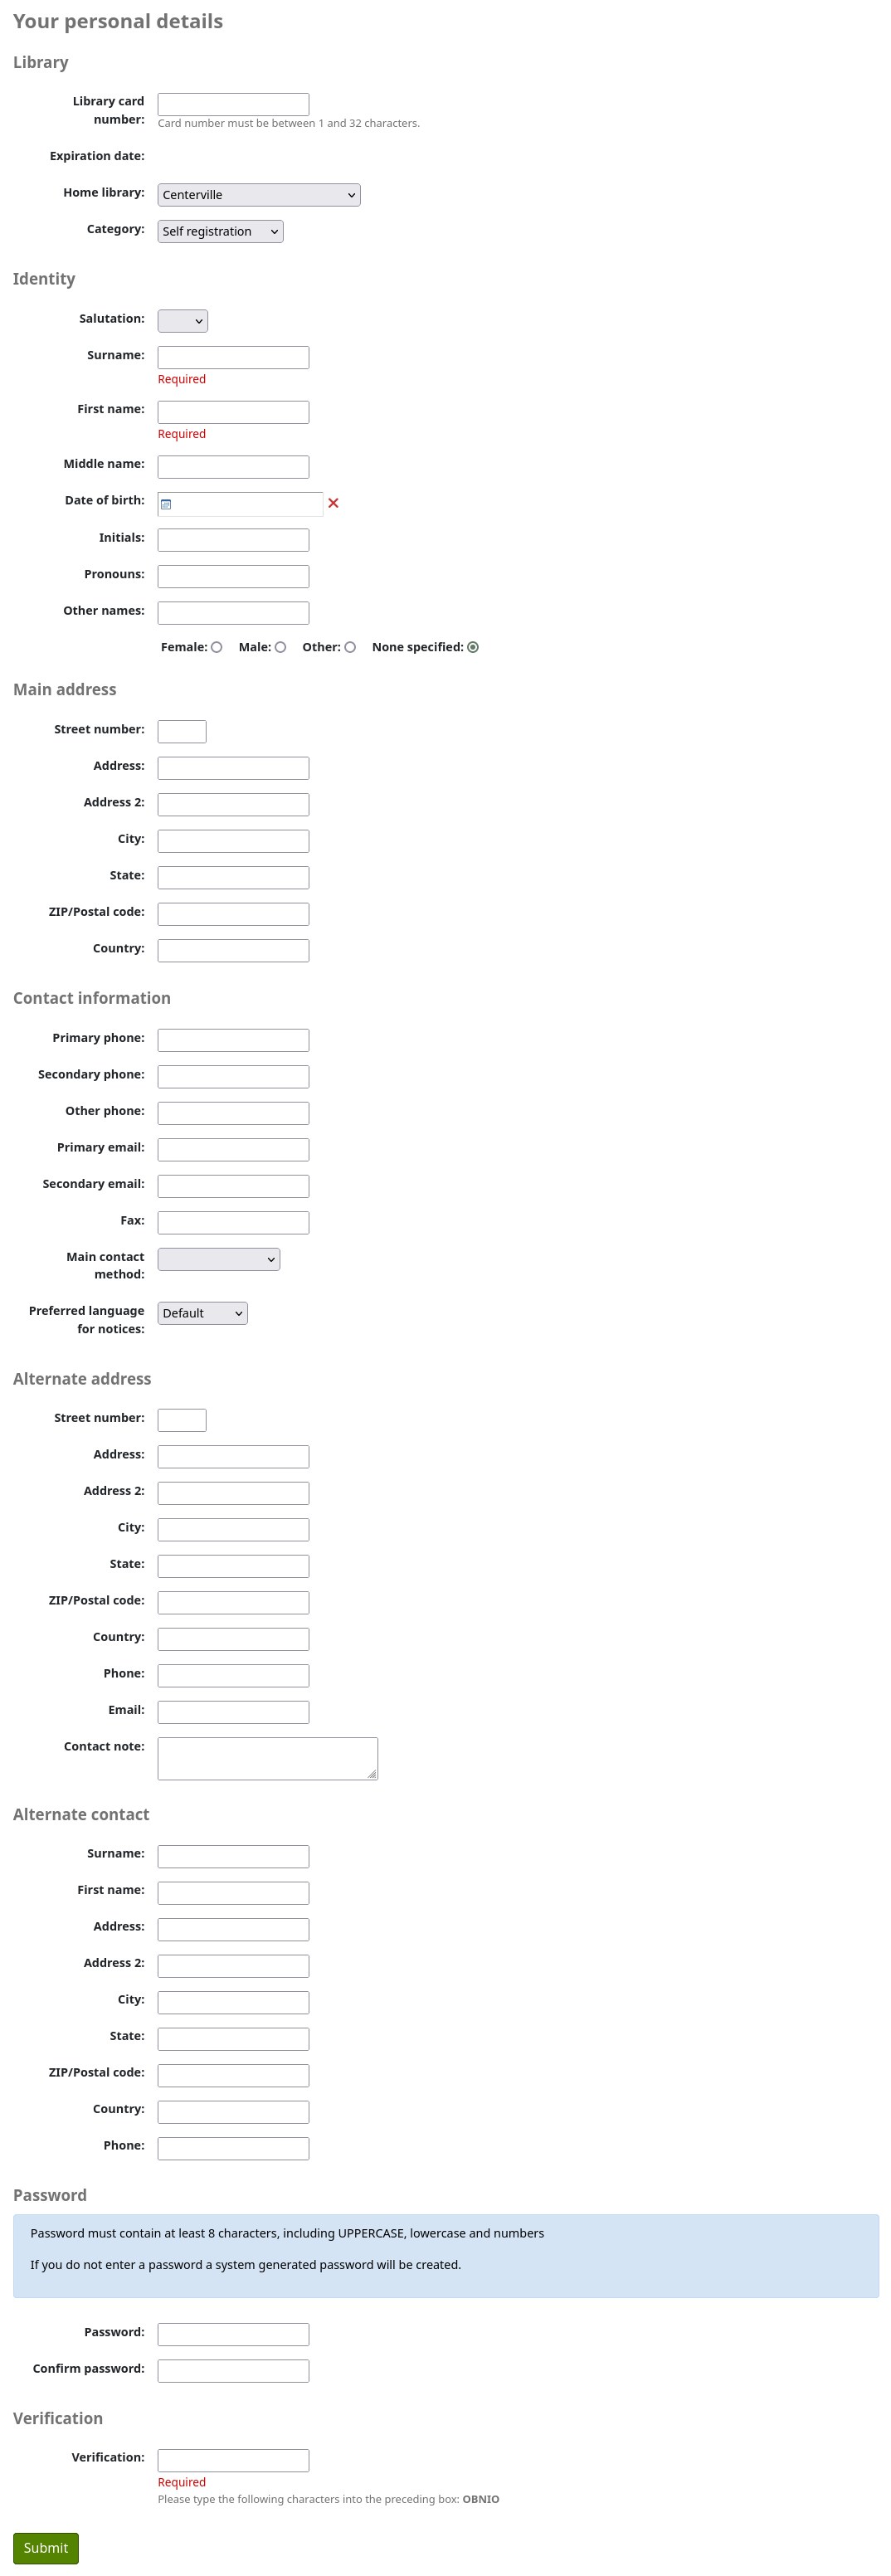
When the patron clicks the “Register here” link they will be brough to a registration page. The options on the registration page can be conrolled by editing the PatronSelfRegistrationBorrowerMandatoryField and the PatronSelfRegistrationBorrowerUnwantedField preferences.
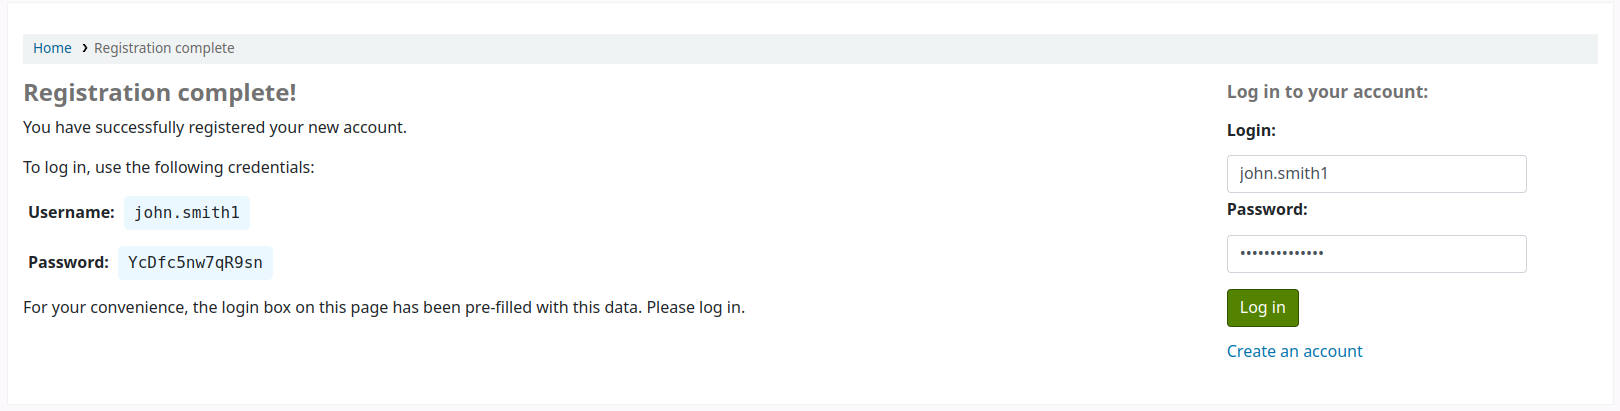
Once the patron has confirmed submitted their registration they will either be sent an email to confirm their account (if you have the PatronSelfRegistrationVerifyByEmail preference to require this) or presented with their new username and password.
Gli utenti registrati in questo modo non avranno un numero di tessera fino a quando la biblioteca non ne assegnerà uno; ma avranno immediatamente accesso a tutte le funzionalità dell’OPAC. Per questo motivo si raccomanda di:
- set up a provisional patron category for self registered patrons (such as “Self Registered) instead of using an existing patron category and set that value in the PatronSelfRegistrationDefaultCategory preference
- give this patron category minimal circulation privileges in the Circolazione e regole dei ritardi (such as allowing a couple holds, but no check outs)
In questo modo gli utenti, o dovranno venire in biblioteca per verificare la loro identità prima di avere un numero di tessera e la possibilità di avere prestiti o la biblioteca dovrà definire una procedura interna per la generazione di numeri di tessera prima di fornirne una all’utente autoregistrato. Una volta fatto questo la biblioteca può modificare la categoria a una più appropriato (sia esso un adulto, residente, non residente, studente, ecc) e aggiungere un numero di tessera / codice a barre.
Il mio account
From the OPAC patrons can log in and access their account if you have set the opacuserlogin preference to “Allow”. Once logged in patrons are brought to their account summary. If you would like to get to your account in the OPAC, you can click on your name in the top right of any page in the OPAC.
Resetting your password
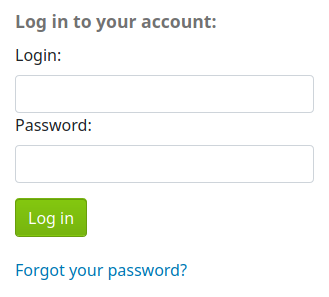
If you have the OpacResetPassword set to allow patrons to reset their password they can click “Forgot your password?” link found under the log in box to reset their passwords.
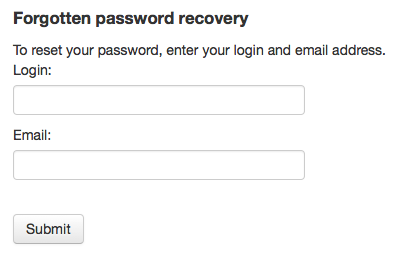
Once clicked they will be presented with a form asking for their username and their email address (patrons must have an email address on file to reset their password).
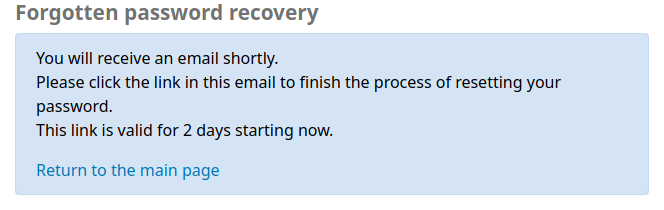
The system will then email the patron instructions for resetting their password.
My Summary
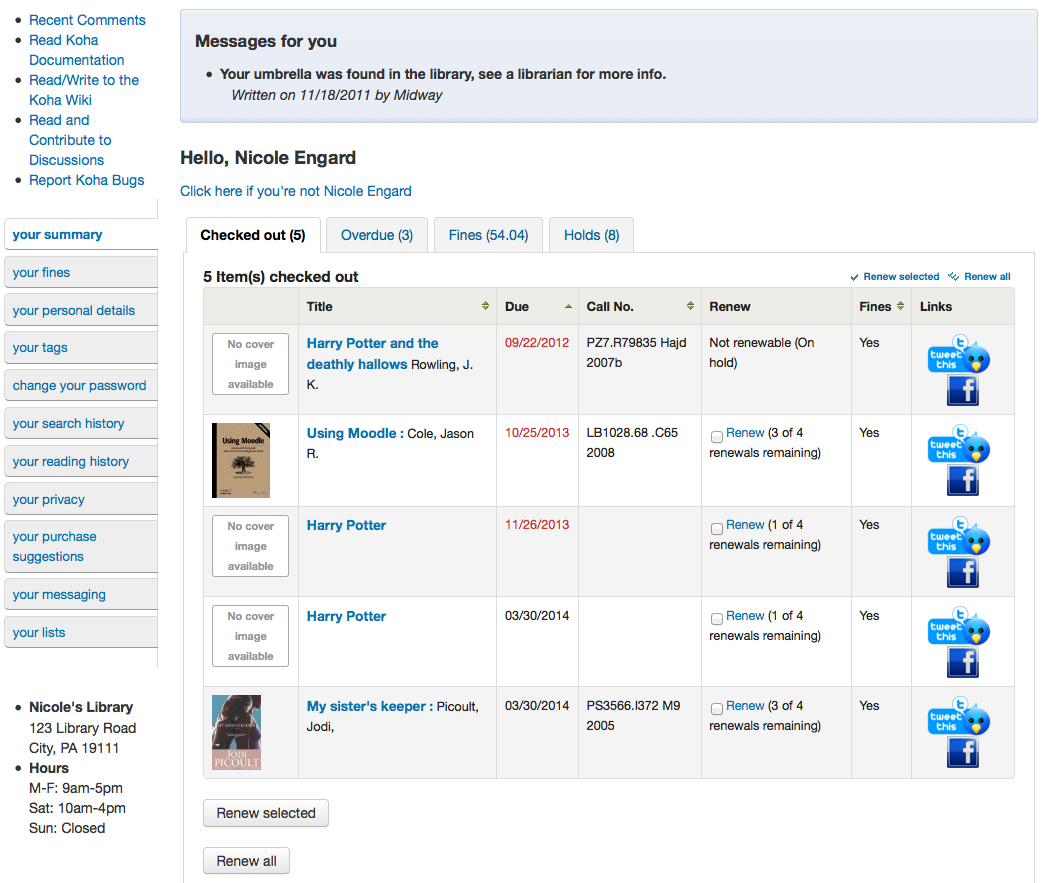
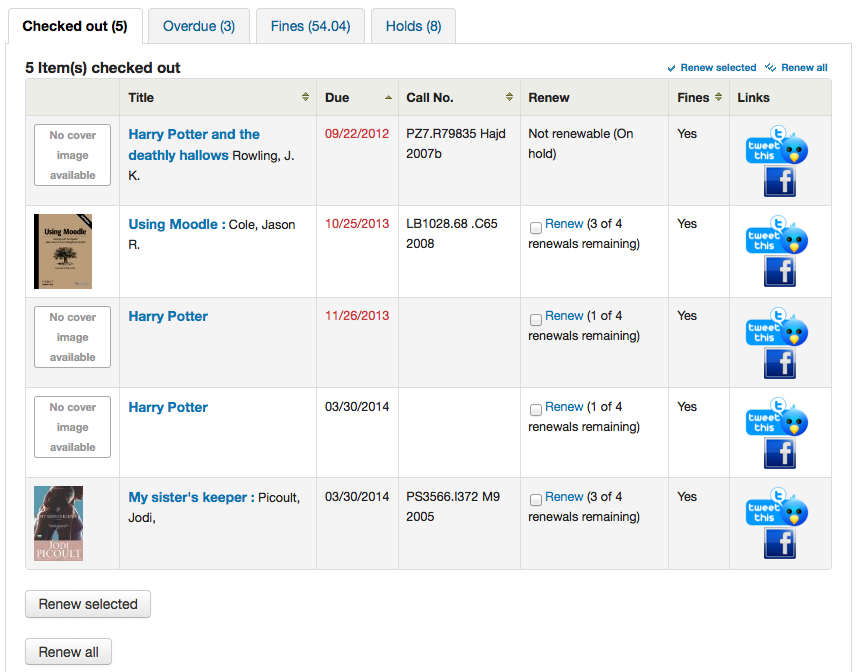
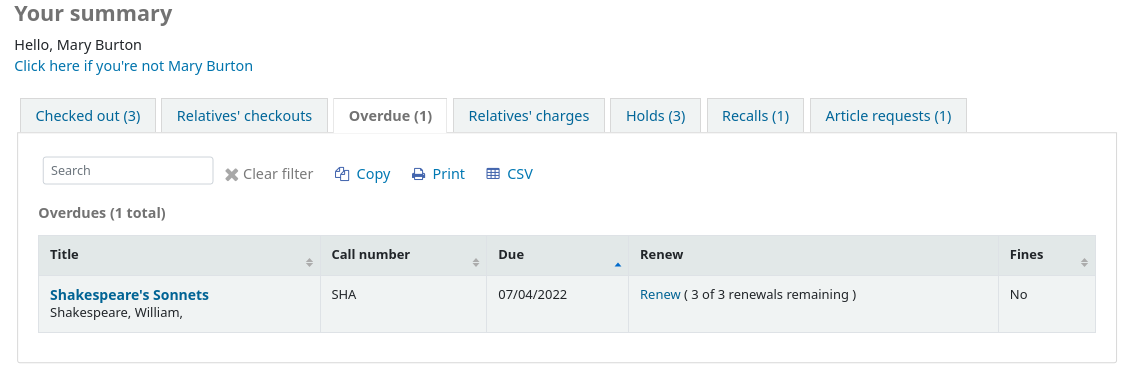
From the “my summary” tab, patrons will see all of the items they have checked out with the overdue items highlighted in red. If you have OpacRenewalAllowed set to “Allow” then your patrons will be able to renew their books right from the OPAC. If you have HTML entered in the OPACMySummaryHTML preference then you will see that to the right of the “Fines” column.
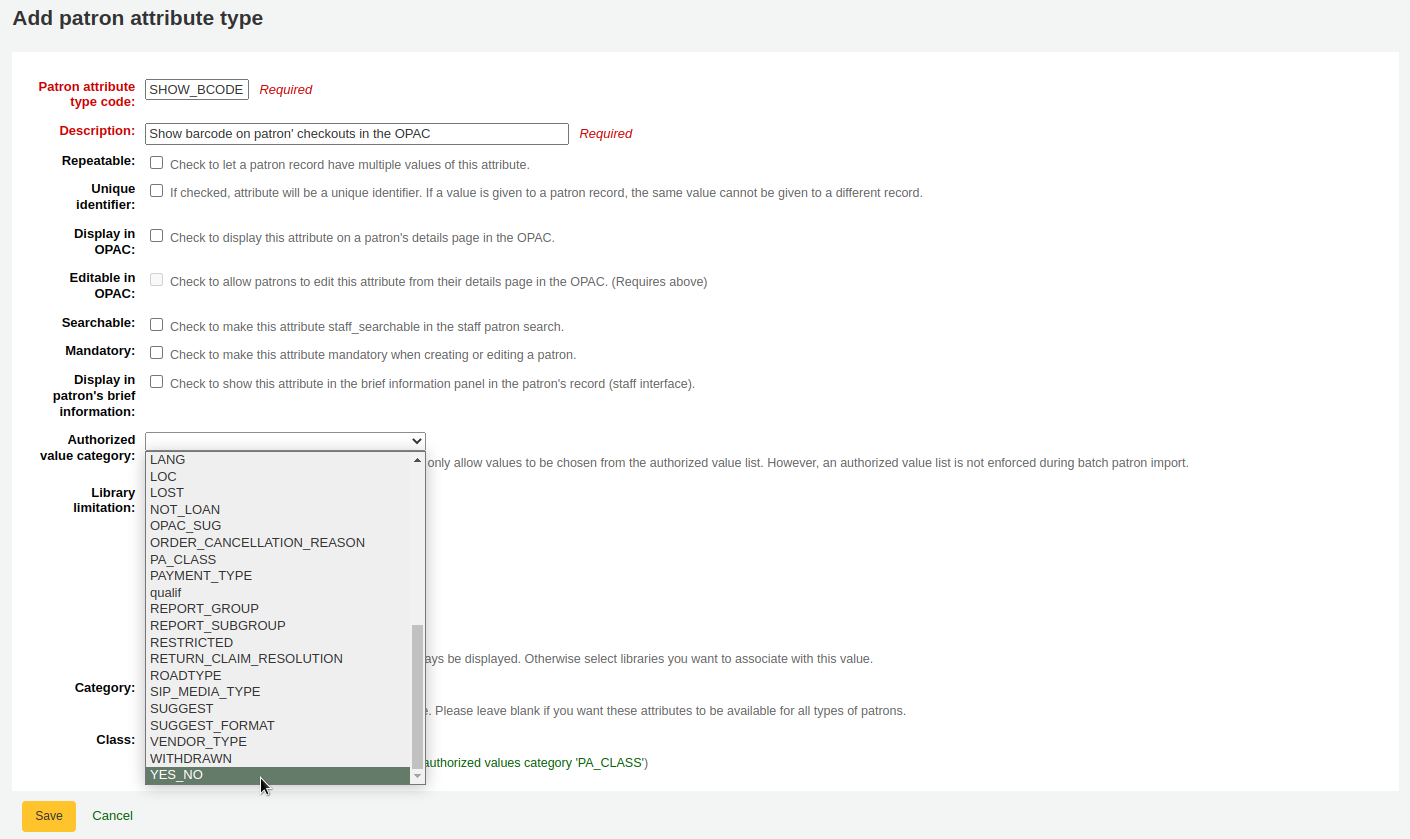
If your patrons would like to see the items barcodes on their list of checked out items you can set up a patron attribute with the value of SHOW_BCODE and authorized value of YES_NO.
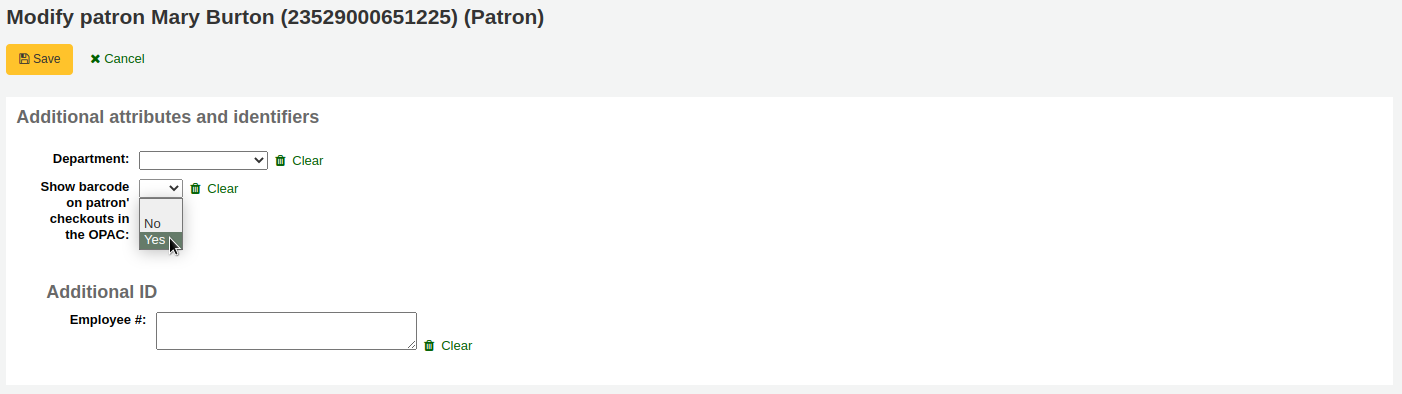
Then on the patron’s record set the value for SHOW_BCODE to yes.
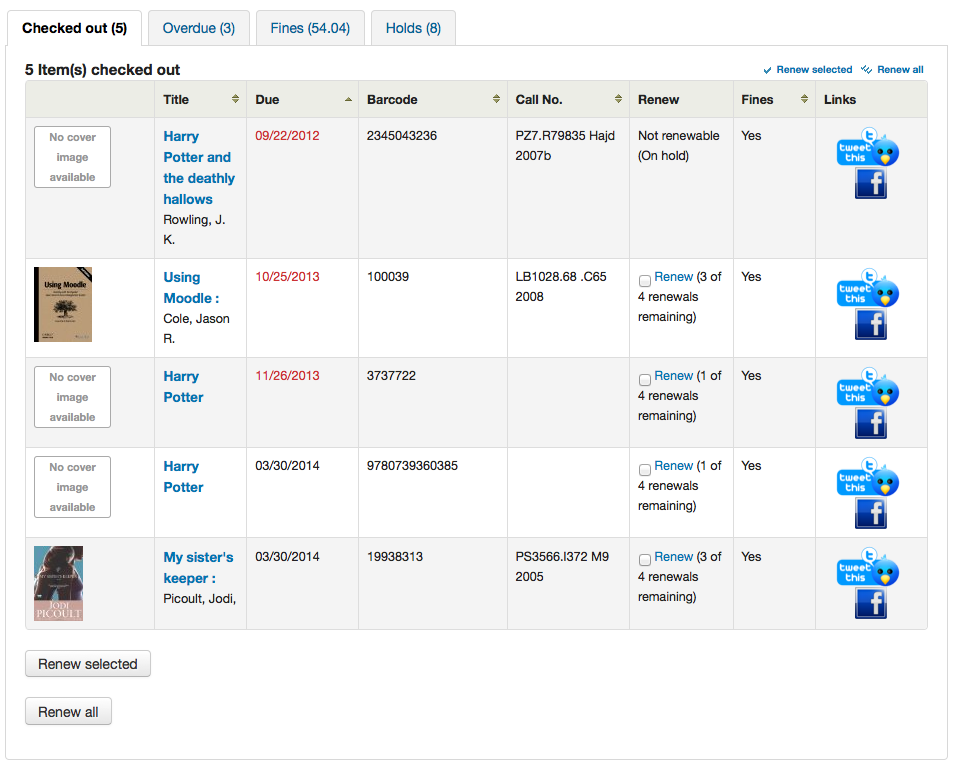
Verrà aggiunta una colonna nella sintesi dei prestiti nell’OPAC che mostra agli utenti il codici a barre delle copie in prestito.
If you would like your patrons to leave a note on an item they have checked out AllowCheckoutNotes preference must be set to allow.
In the patron’s summary of checkouts, there will be an added column to allow the patron to leave a note (for example: missing first page, or DVD is scratched). This note once confirmed by the patron will appear to the staff when this item is checked in.
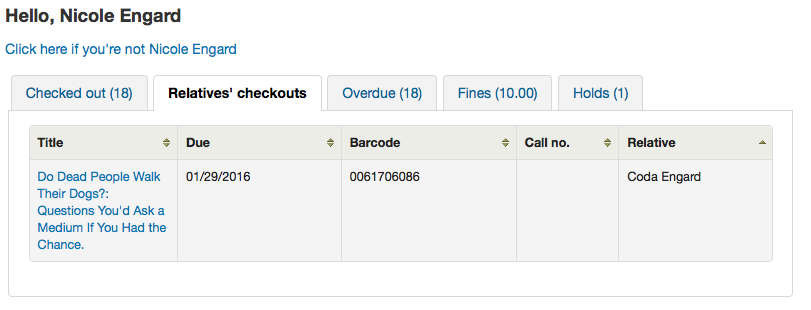
If their guarantee has allowed it via their privacy, when the guarantor logs in they will see a tab labeled «Relatives” checkouts» on their summary tab.
Facendo clic sulla scheda “in ritardo” verranno mostrate solo le copie prestate in ritardo di restituzione.
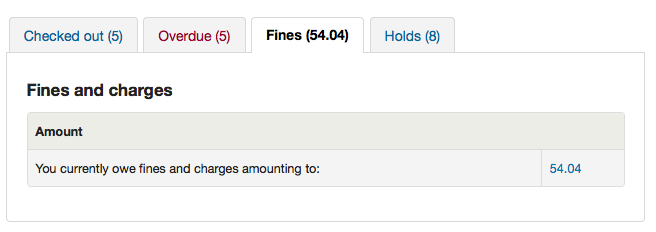
The “Fines” tab will show just a total of what the patron owes. Clicking on the total will take them to the “my fines” tab where they will see a complete breakdown of their fines and bills. If you don’t charge fines at your library you can turn the display of these tabs off by setting the OPACFinesTab preference to “Don’t Allow.”
Infine, cliccando sulla scheda “Prenotazioni”, l’utente vedrà lo stato di tutte le copie che hanno prenotato.
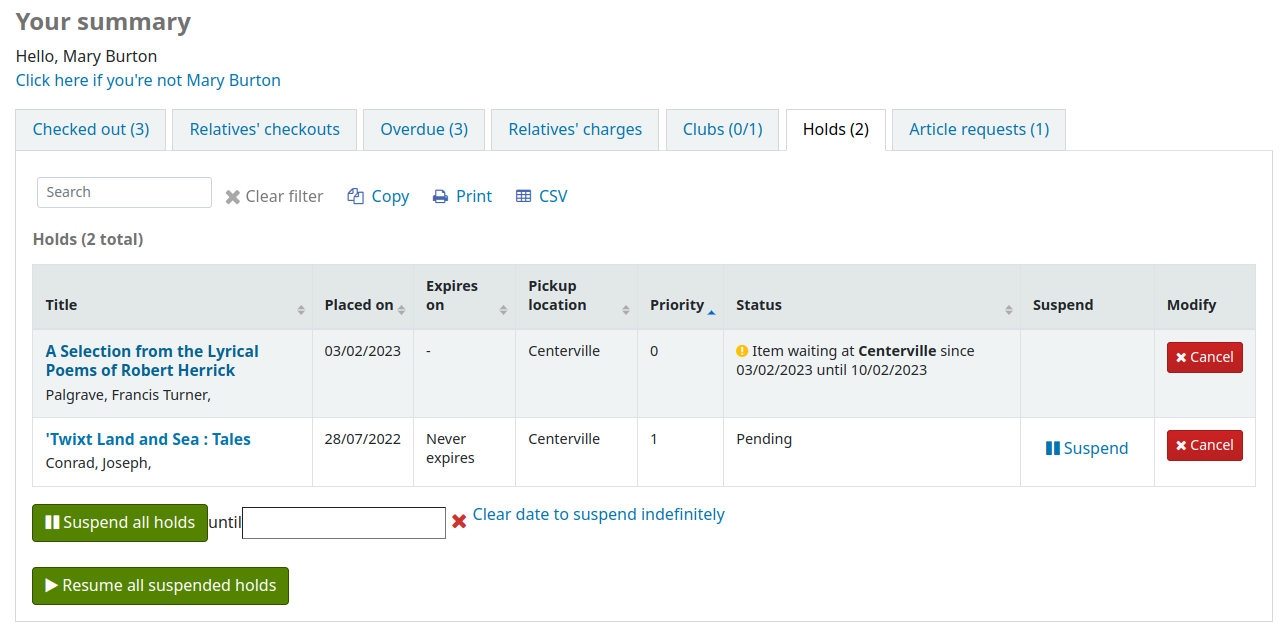
Patrons can cancel or suspend (depending on the value of your SuspendHoldsOpac system preference) their own holds if they are not in transit or already waiting for them. When they click “Suspend” they will be presented with the option to choose a date for their hold to resume.
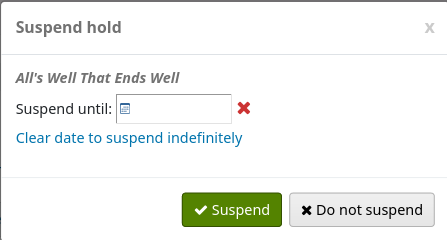
Essi possono anche sospendere tutte le prenotazioni indefinitamente o fino a una data specifica che scelgono compilando le opzioni per la sospensione in fondo alla pagina.
Nota
If you have your AutoResumeSuspendedHolds preference set to «Don’t allow» then you will not have the option to put an end date on the hold suspension
Blocchi utente
Se hai bloccato degli utenti essi vedreanno uno dei seguenti messaggi di errore in alto nei loro account.
Tessera contrassegnata come smarrita

Indirizzo da modificare
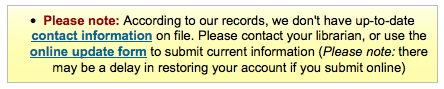
Nota
this error message will not include a link to the update form if you have OPACPatronDetails set to “Don’t allow”
Utente contrassegnato come limitato

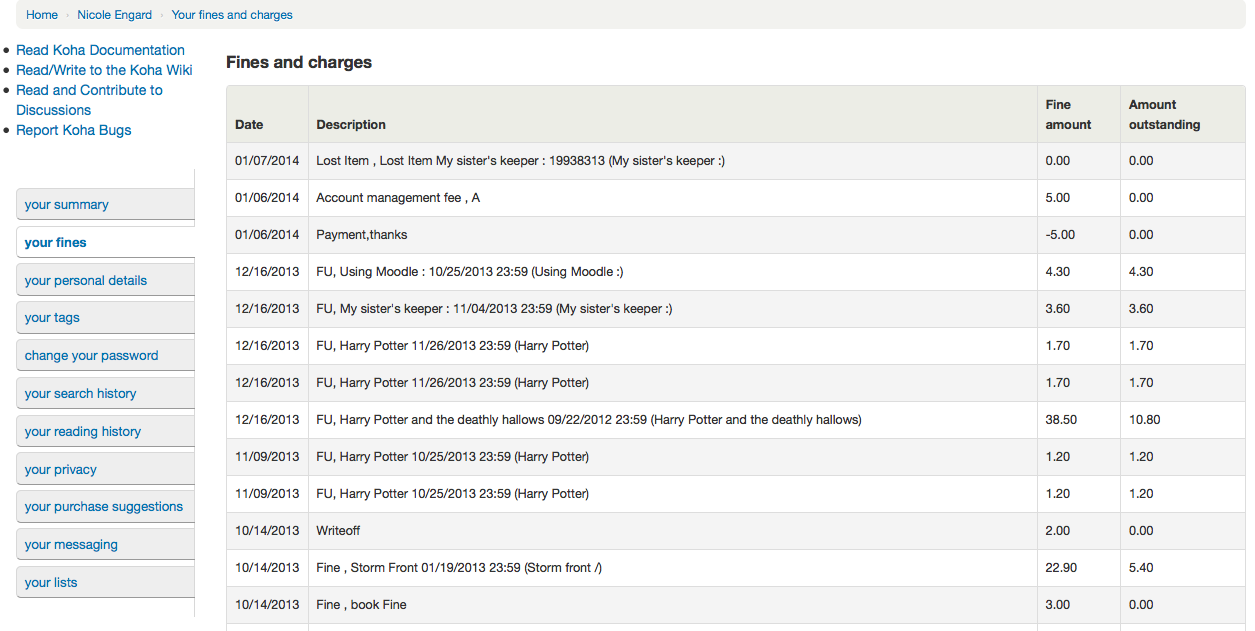
Le mie multe
Se la biblioteca prevede multe multe, la scheda successiva a sinistra è “le mie multe.” L’apertura di questa scheda mostra all’utente tutta la storia della sua contabilità con la biblioteca.
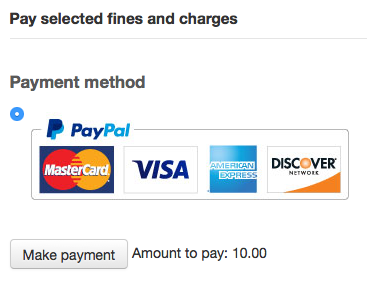
If you are allowing patrons to pay their fines using PayPal with the EnablePayPalOpacPayments preference there will be checkboxes to the left of each fine with an outstanding amount.
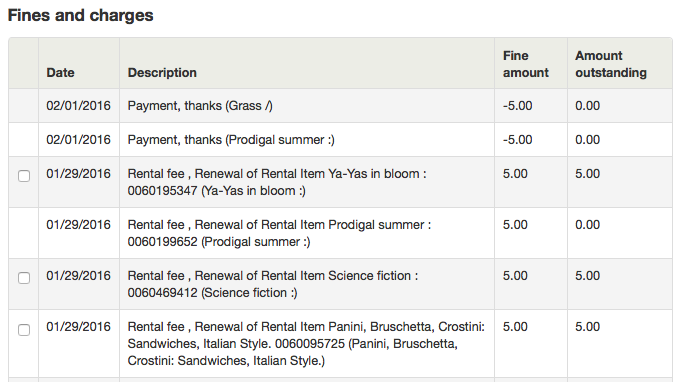
Nella parte inferiore l’utente vedrà la possibilità di pagare con PayPal per quanto ha selezionato.
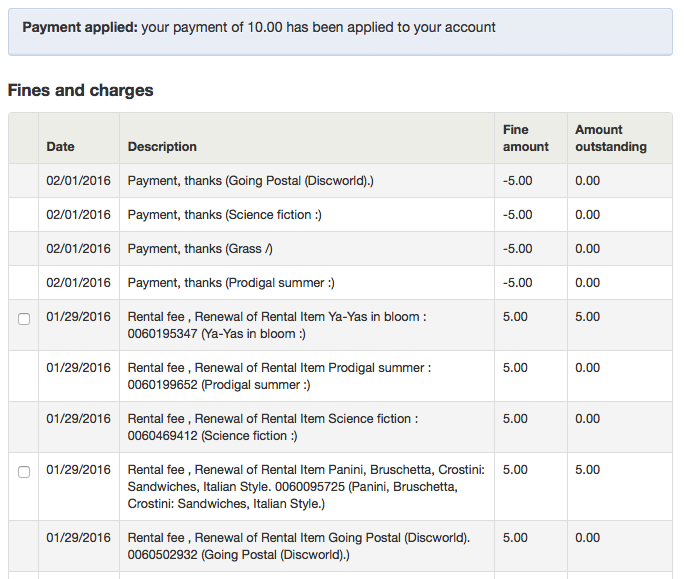
After paying they will be presented with a confirmation
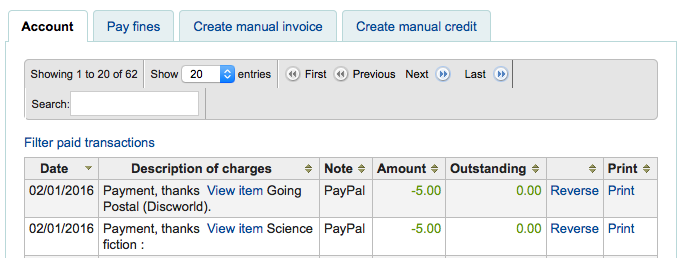
And you will see that the fine was paid using PayPal on the staff side.
I miei dettagli
If you have your OPACPatronDetails preference set to “Allow”, your patrons will see a form filled in with their contacting information by clicking on the “my personal details” tab. You can control what fields patrons see and can modify via the OPAC by setting the PatronSelfRegistrationBorrowerMandatoryField PatronSelfRegistrationBorrowerUnwantedField preferences.
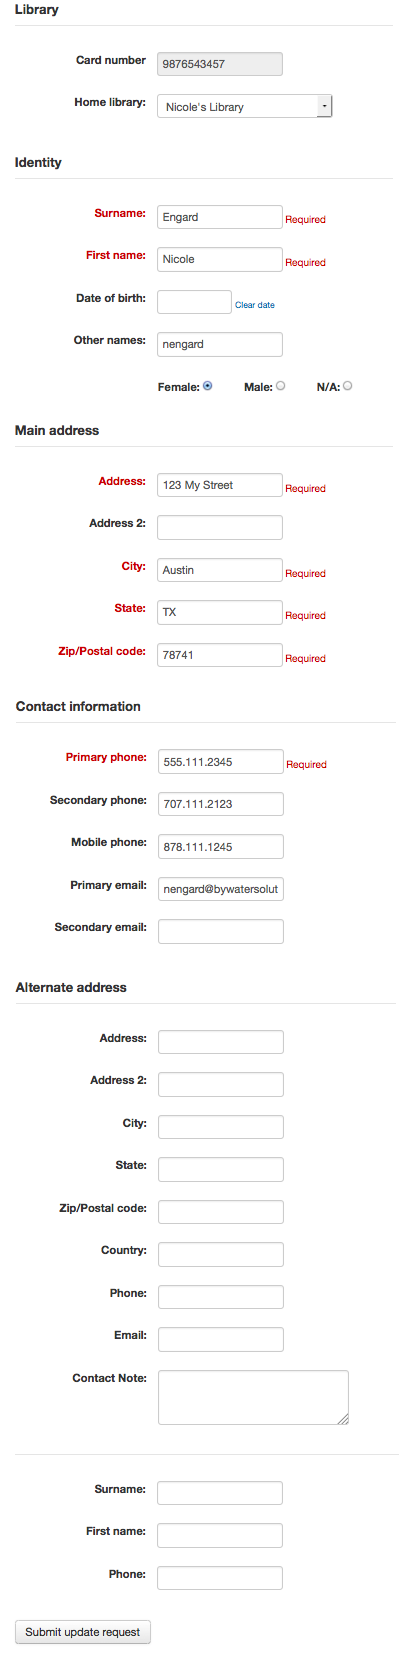
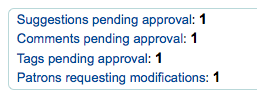
Gli utenti possono modificare i propri dati in questo modulo e cliccare su “Invia modifiche” per inviare le modifiche alla biblioteca per la revisione prima che il loro record venga aggiornato. Il personale vedrà le richieste di modifica degli utenti in una lista sotto i moduli della homepage dell’interfaccia dello staff, insieme a qualsiasi altra cosa in attesa di attenzione da parte della biblioteca.
If the OPACPatronDetails preference is set to “Don’t allow” then patrons will simply see their details and a message stating that they should contact the library for changes.

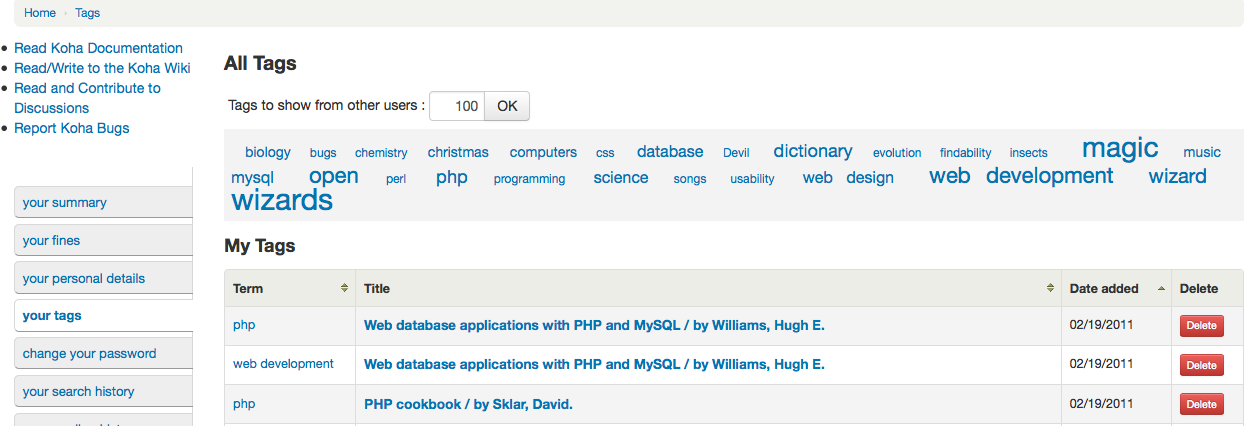
I miei tag
If your library has TagsEnabled set to “Allowed” then the next tab on the left will be “my tags.” This tab will show patrons all of the tags in the system as a cloud and then all of the tags they have applied in a list format. From here patrons have the ability to remove tags that they have added if they want.
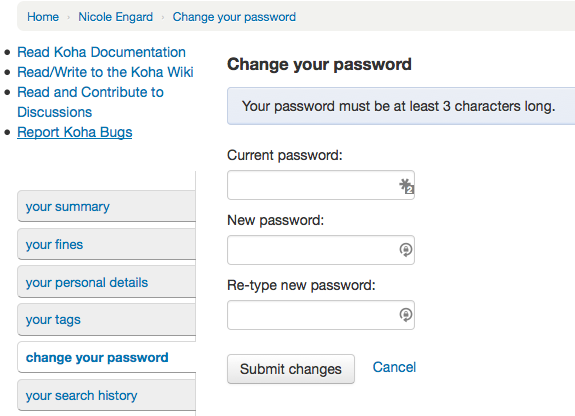
Change My Password
Next, if you have OpacPasswordChange set to “Allow” the next tab will be “change my password,” where patrons can change their password for logging into the OPAC. Patrons will be presented with a standard form asking them to enter their old password and then their new password twice.
Cronologia ricerche
If you have your EnableOpacSearchHistory preference set to “Allow” then your patrons can access their search history via the “my search history” tab.

La cronologia delle ricerche è una registrazione di tutte le ricerche gestiti dal patron. Cliccando su una qualsiasi delle frasi di ricerca si riesegue la ricerca. La cronologia di ricerca può essere eliminato dall’utente in qualsiasi momento cliccando sul pulsante “Elimina la cronologia di ricerca” posto nella parte superiore di questa scheda o facendo clic sul piccolo rosso “x” accanto al link “Ricerche effettuate” in alto a destra dell’OPAC.

La mia Cronologia delle letture
Depending on your library’s setting for opacreadinghistory your patrons may see the “my reading history” tab next. This will show the patron their entire reading history unless they have asked the library to not keep that information via the “my privacy” tab which will appear if you have the OPACPrivacy preference set to “Allow.”

If you have HTML entered in the OPACMySummaryHTML preference then you will see that to the right of the “Date” column.
La mia Privacy
The “my privacy” tab will appear if you have both the opacreadinghistory and the OPACPrivacy preferences set to “Allow.” This tab will allow the patrons to decide how the library keeps their circulation history data.
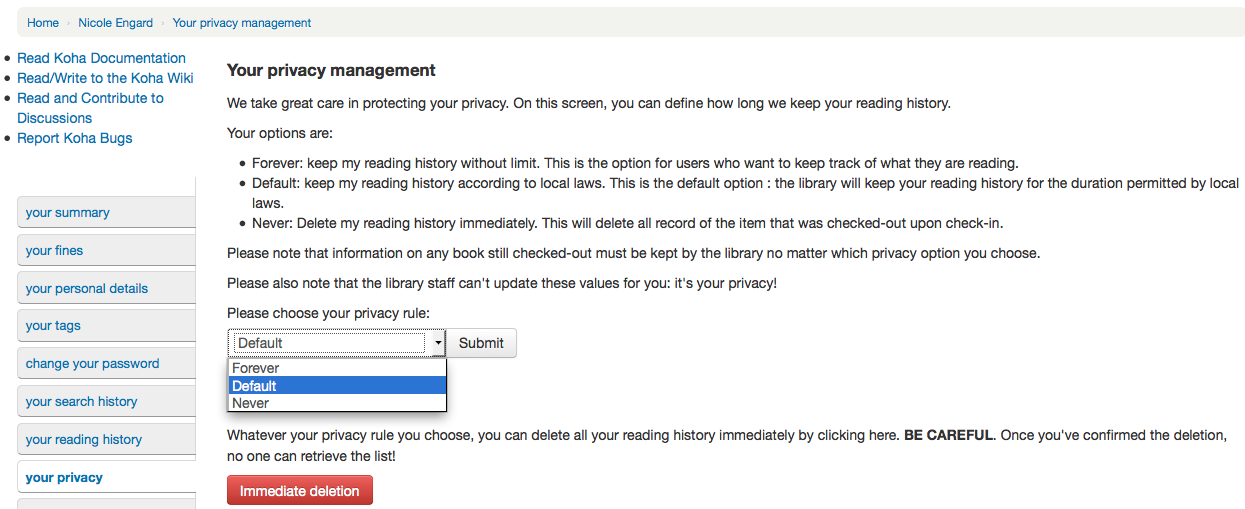
L’utente può scegliere tra tre opzioni:
- Sempre: mantieni traccia dei mie prestiti per sempre. Questa opzione è per quegli utenti che voglio ricordarsi di tutto quello che hanno letto.
- Predefinito: conserva il mio storico prestiti secondo le leggi locali. Questa è l’opzione predefinita: la biblioteca conserverà il tuo storico prestiti per la durata ammessa dalle leggi locali.
- Mai: cancella subito i miei prestiti. La registrazione del prestito verrà cancellata al momento della restituzione.
Depending on the patron’s suggestions the contents of the “my reading history” tab and the “Circulation History” tab in the staff client may change.
Indipendentemente dalla sua scelta, l’utente può cancellare la sua storia di lettura in blocco in qualsiasi momento facendo clic sul pulsante “eliminazione immediata”.
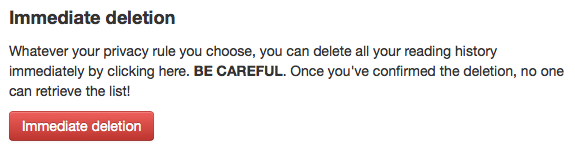
Facendo clic su questo pulsante non eliminerà le copie attualmente in prestito, ma cancellerà la precedente cronologia di lettura dell’utente.
Importante
In order for the patron to be able to delete their reading history you must have the AnonymousPatron preference set.
If you’re allowing guarantees to grand permission to their guarantors to view their current checkouts with the AllowPatronToSetCheckoutsVisibilityForGuarantor preference they will see that option on this screen.
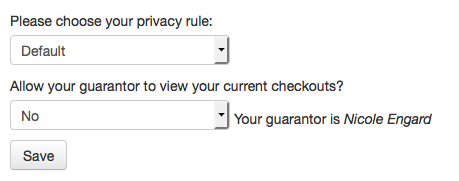
When the guarantor logs in they will see a tab labeled «Relatives” checkouts» on their summary tab.
I miei suggerimenti di acquisto
If your library allows patrons to make purchase suggestions the next tab will show all suggestions that the patron made to the library and their statuses. To disable this tab and the suggestion functionality set the Suggerimento preference to “Don’t allow.”
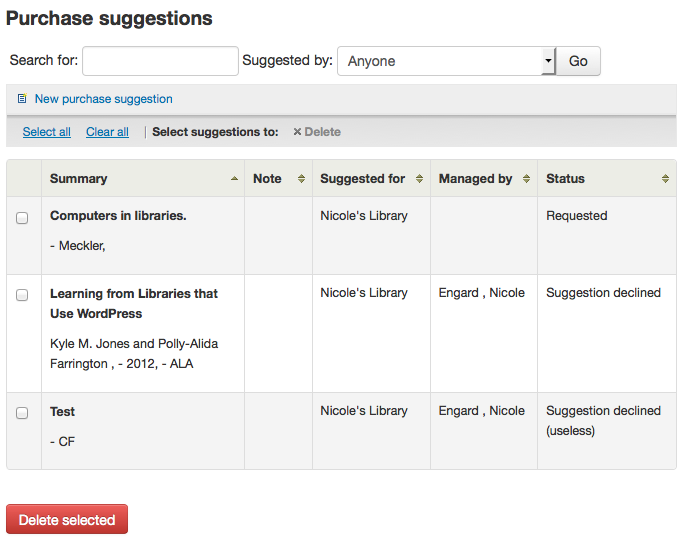
If you have OPACViewOthersSuggestions set to “Show” then patrons will be able to search suggestions from the top of this list.
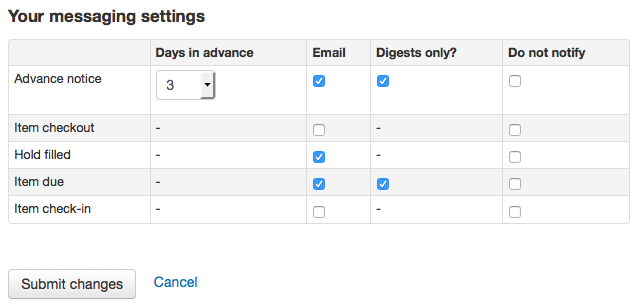
I miei messaggi
If your library has the EnhancedMessagingPreferences and the EnhancedMessagingPreferencesOPAC preferences set to “Allow” then your patrons will be able to choose which messages they receive from the library (with the exception of overdue notices which the library controls).
If you use an outside driver for sending text messages set with the SMSSendDriver preference, you will see an additional column to receive these messages as SMS (or text messages) and a field for a cell (or SMS) number.
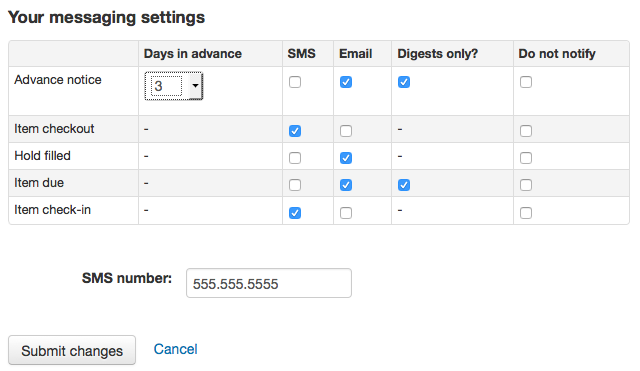
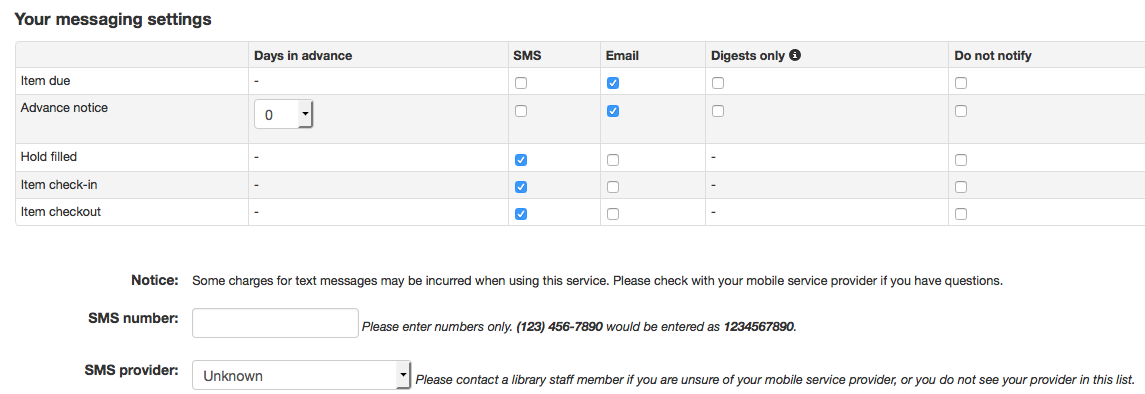
If you are using the Email protocol for sending text messages set with the SMSSendDriver preference, you will see an additional column to receive these messages as SMS (or text messages), a field for a cell (or SMS) number, and a pull down listing cellular providers entered in administration.
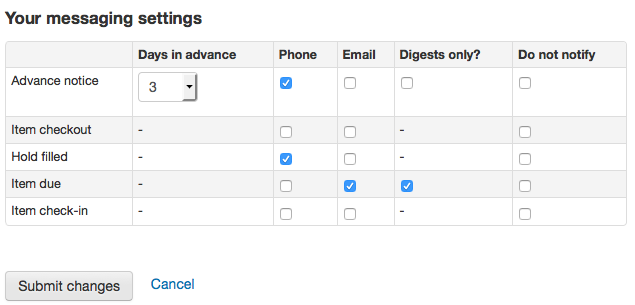
If you are using the Itiva Talking Tech service you will see an additional column to receive these messages via Phone.
- Questi avvisi sono:
- Preavviso: Un preavviso all’utente con le copie che stanno per scadere (l’utente può scegliere il numero di giorni di anticipo)
- Prestito di una copia: un avviso che elenca tutte le copie che l’utente ha preso in prestito e/o rinnovato; è la versione elettronica della ricevuta dei prestiti
- Prenotazione accettata: Un avviso quando hai confermato che la prenotazione è in attesa di ritiro da parte dell’utente
- Copia in scadenza: Un avviso nel giorno in cui una copia deve essere restituita alla biblioteca
- Copia restituita: Un avviso che elenca le copie da poco restituite dall’utente
Gli utenti possono scegliere se ricevere gli avvisi come digest spuntando la casella “solo digest” e il metodo di spedizione. Il digest è un raggruppamento di tutti i messaggi di un certo tipo (p.es. tutte le copie da restituire nei prossimi 3 giorni in un solo messaggio) invece di un messaggio per avviso.
Importante
È necessario scegliere un metodo di consegna (SMS o e-mail o telefono), insieme a “solo digest?” se si desidera ricevere i messaggi raggruppati.
Le mie liste
Finally, if your library has the virtualshelves set to “Allow” then the last tab will by “my lists.” From here your patrons can review public lists and create or edit their own private lists.
Ask for a Discharge
If you have enabled the useDischarge preference then patrons will be able to request a discharge via the OPAC.
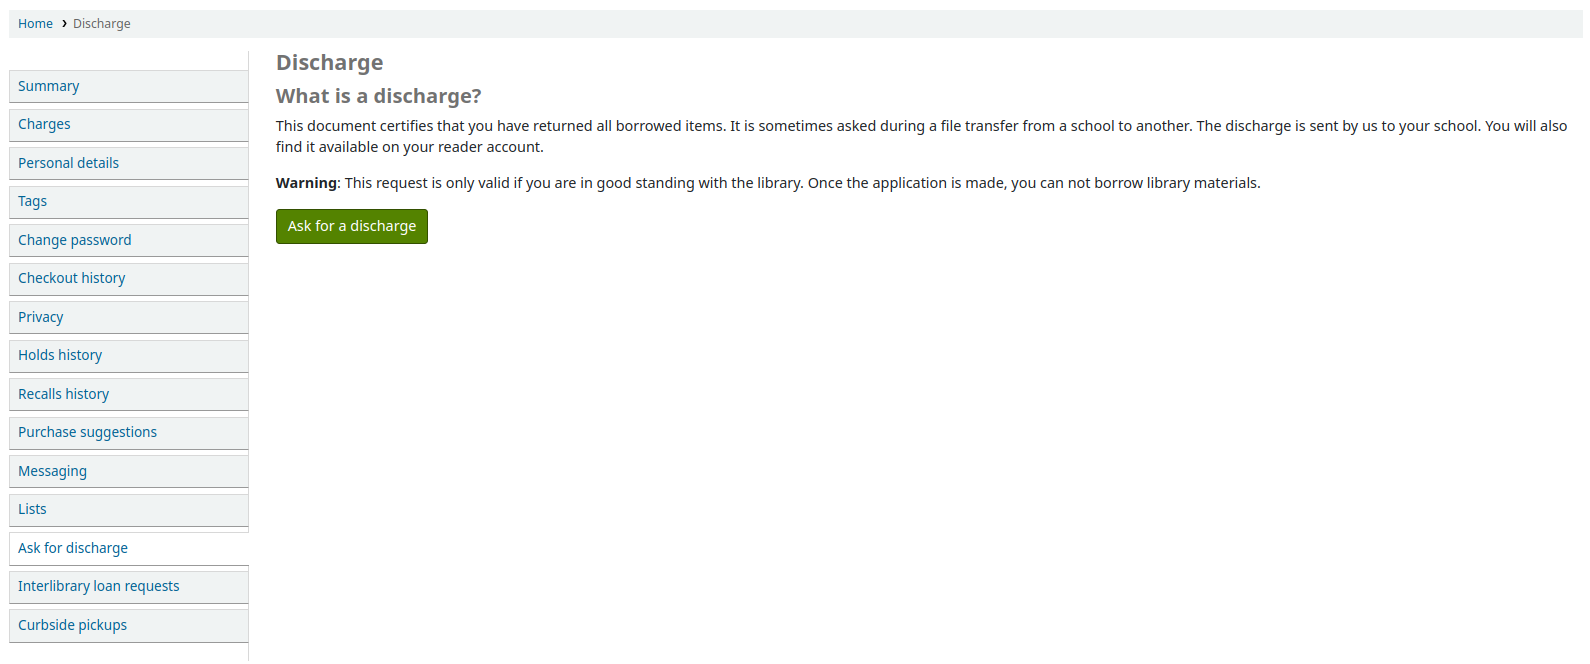
Da qui gli utenti posso chiedere una liberatoria
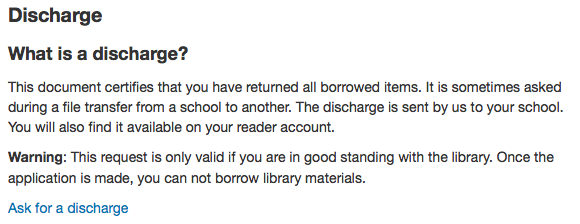
E riceveranno conferma della loro richiesta.

Suggerimenti di acquisto
If your library has the Suggerimento preference set to “Allow” then patrons will have the option to make purchase suggestions in several areas in the OPAC.
If you are allowing everyone to see the purchase suggestions made by others with the OPACViewOthersSuggestions preference, then there will be a link at the top of your OPAC under the search box.

Ci sarà un collegamento quando l’utente non trova nulla con la ricerca.

And there will be a link on the patron’s My Purchase Suggestions tab.
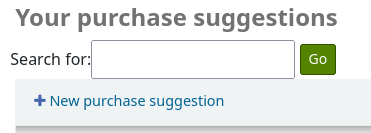
Facendo clic su uno qualsiasi di questi link si aprirà il modulo dei suggerimenti di acquisto.
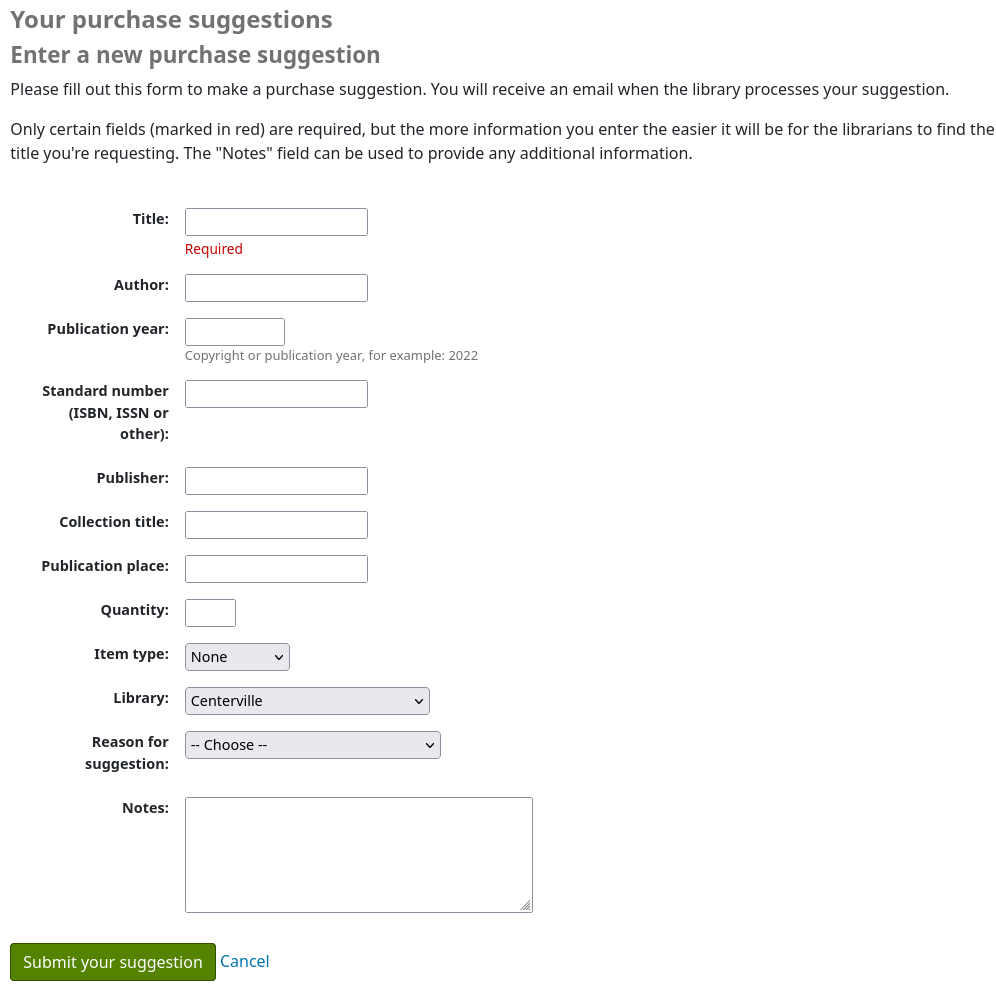
- Nel modulo il campo “Titolo” è obbligatorio.
- The Item type list can be edited by editing the SUGGEST_FORMAT authorized value.
- If you would like the “Reason for suggestion” menu shown in the screenshot above to appear on your suggestions list you need to add an authorized value category titled “OPAC_SUG” and include reasons as values in that list.
- If you would like the patron to be able to choose which branch they are making a suggestion for you need to set the AllowPurchaseSuggestionBranchChoice preference to “Allow”
Once the form is submitted the data will be saved to the Acquisitions module for the librarians to manage.