Catalogazione¶
Before you start cataloging in Koha you’re going to want to do some basic setup. Refer to the Lista di controllo per l’implementazione for a full list of these things. Most importantly you’re going to want to make sure that your Griglia di catalogazione bibliografica MARC are all defined the way you want. Once in the cataloging module you will not be able to add or remove fields and subfields so your frameworks must be ready before you start cataloging.
You can also use OCLC Connexion to send records directly in to Koha. For more information on that please review the OCLC Connexion Gateway setup Appendix.
- Get there: More > Cataloging
Record bibliografici¶
In Koha the bibliographic record contains the main information related to the material. This includes things like the title, author, ISBN, etc. This information is stored in Koha in Marc (different flavors of Marc are supported in Koha). Once this information is saved, Record di copie can be attached.
Aggiunta di record¶
I record bibliografici possono essere aggiunti a Koha tramite catalogazione originale o derivata. È possibile utilizzare l’interfaccia di catalogazione di base o quella avanzata.
Se vuoi catalogare un record partendo da un template vuoto nell’interfaccia di catalogazione di base
Clicca “Nuovo record”
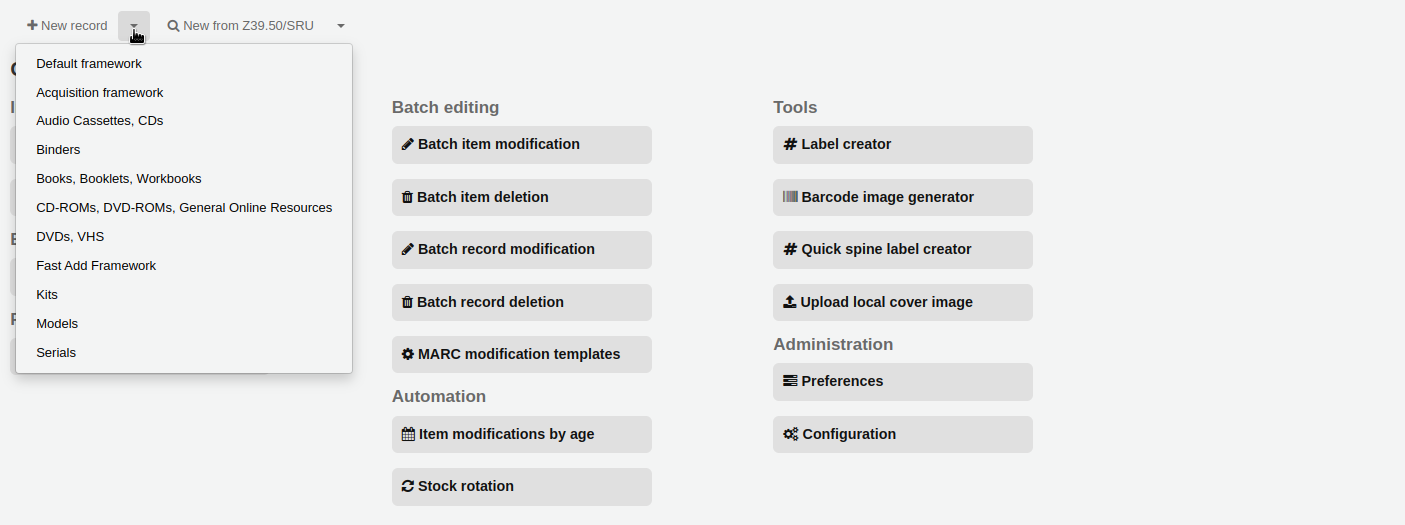
- Scegli il tipo di griglia di catalogazione su cui basare il record
Se vuoi catalogare un record partendo da un template vuoto partendo dall’interfaccia di catalogazione avanzata
- Enable the EnableAdvancedCatalogingEditor preference
- Click the “Advanced editor” button

Se vuoi catalogare un record partendo da un record di un altro catalogo, usando l’ultimo editore da te scelto (base o avanzato)
Clicca “Nuovo da Z39.50/SRU”
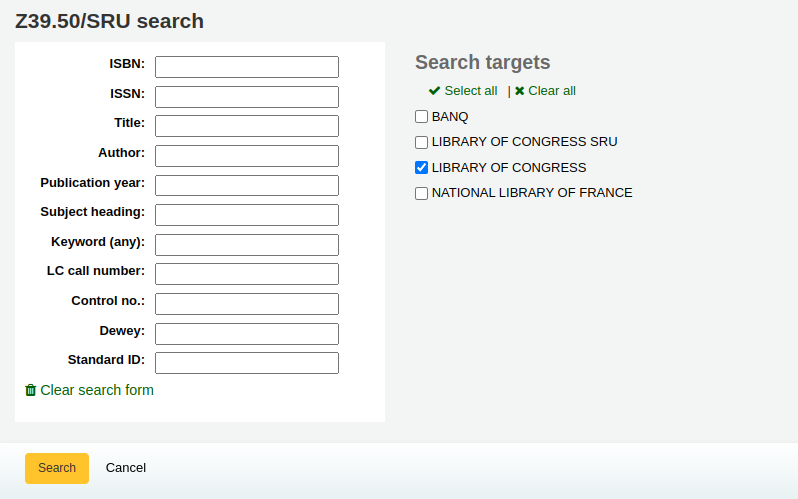
Cerca le opere che vuoi catalogare
Nota
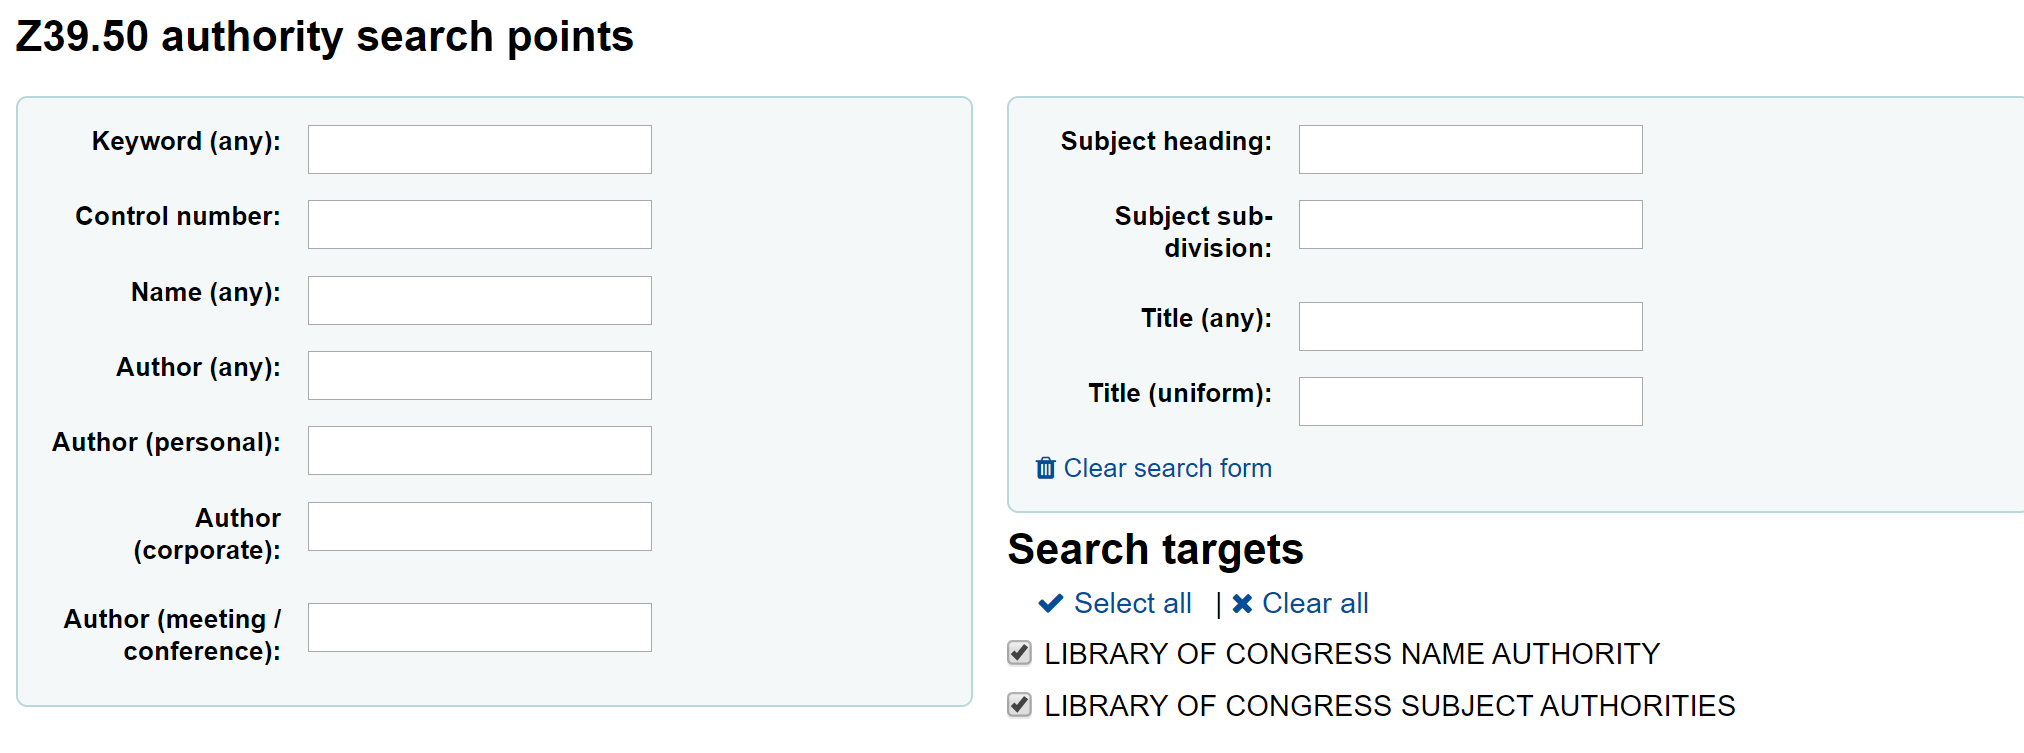
Se non vengono trovati risultati, prova a cercare su meno campi. Non tutti i server Z39.50 offrono la ricerca su tutti i campi sopraelencati.
Search targets can be altered by using the Z39.50 Admin area.
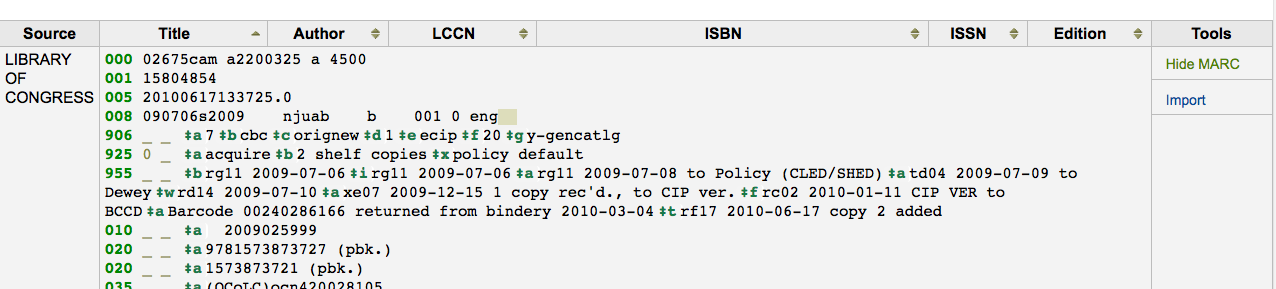
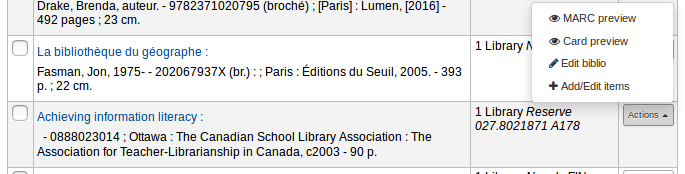
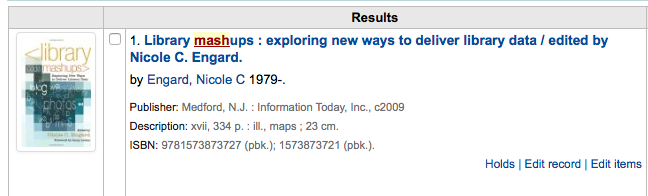
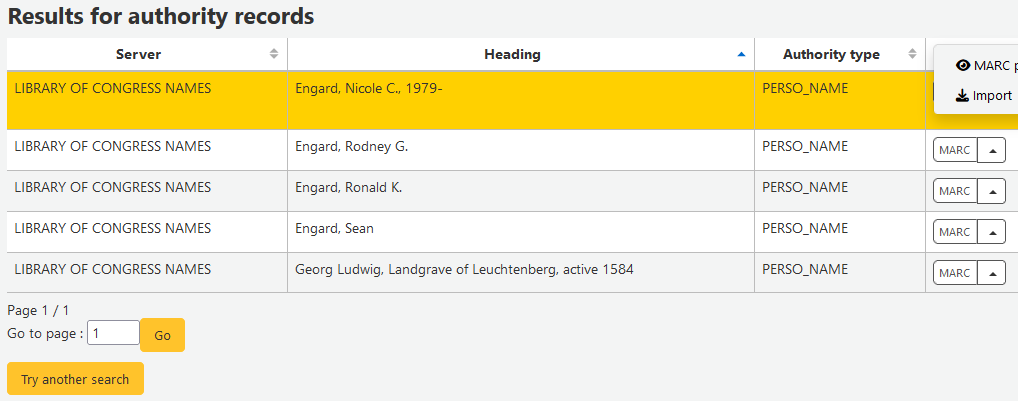
Dai risultati puoi visualizzare il MARC o la scheda catalografica dei record oppure importarli direttamente in Koha
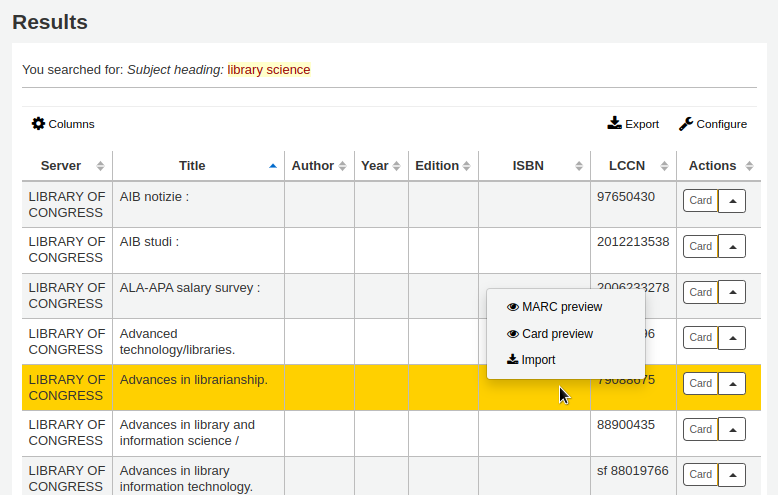
Oltre al link di importazione alla destra di ogni titolo, puoi cliccare su ogni titolo per visualizzare un menù per controllare il record e importarlo

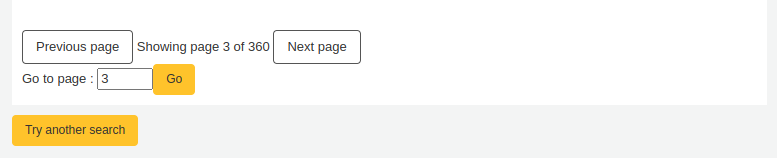
Se non trovi l’opera che cerchi tra i risultati della ricerca Z39.50, puoi provare a cliccare «Prova un’altra ricerca» a sinistra in basso
Basic Editor Cataloging¶
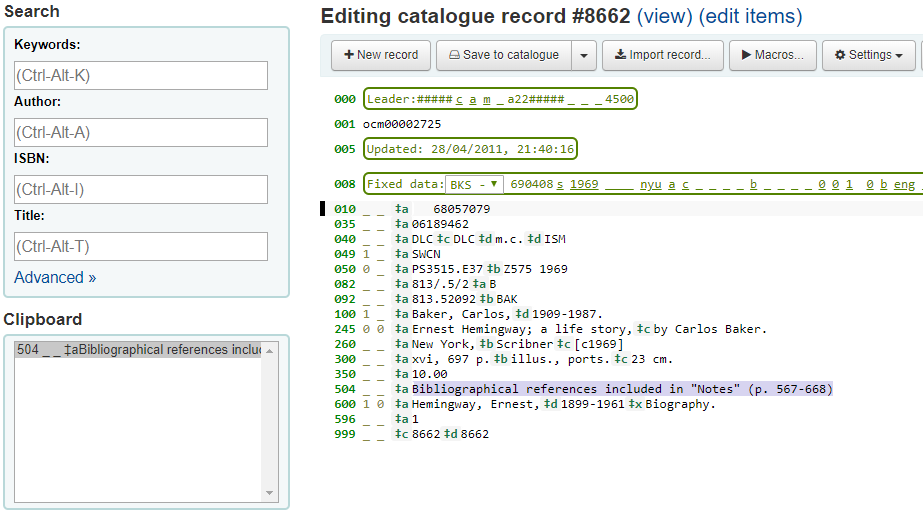
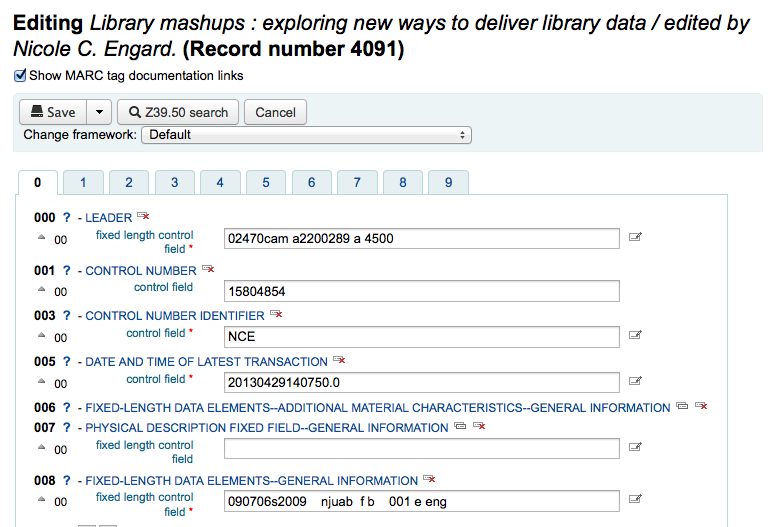
Nell’editor di base dopo aver aperto una griglia vuota o aver importato un record via Z39.50, ti verrà presentata la form per continuare a catalogare
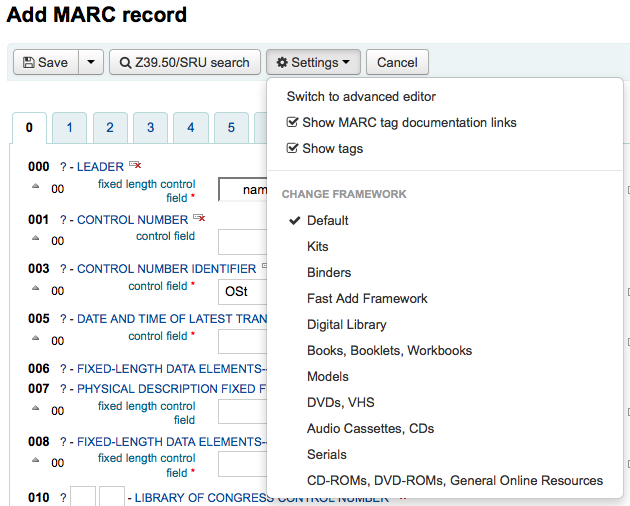
If you would rather not see the MARC tag numbers you can change the value in your hide_marc system preference or each user can check the box next to “Show tags” found under “Settings”.
Per espandere un tag compresso, clicca sul suo numero
Per ottenere informazioni su un tag dalla Library of Congress clicca il punto interrogativo (?) accanto ad ogni numero di campo
- Se ti sembra che ingombri lo schermo, puoi nascondere i punti interrogativi togliendo la spunta alla casella “Mostra i link alla documentazione MARC” che trovi nel menu “Impostazioni”
Sometimes fields may not be editable due to the value in your BiblioAddsAuthorities system preference. If you have this preference set to not allow catalogers to type in fields controlled by authorities you may see a lock symbol to the left of the field.

Se appare questa icona, premi sui tre puntini a destra del campo per cercare una voce di autorità esistente.

Dalla lista dei risultati, scegli “Utilizza authority” per copiare il valore nel record bibliografico

Per duplicare un campo clicca sull’icona “Ripeti questo tag” a destra del tag

Per spostare i sottocampi nell’ordine desiderato, clicca la piccola freccia verticale a sinistra del campo
Per duplicare/rimuovere un sottocampo clicca sull’icona clona/cancella alla destra del campo
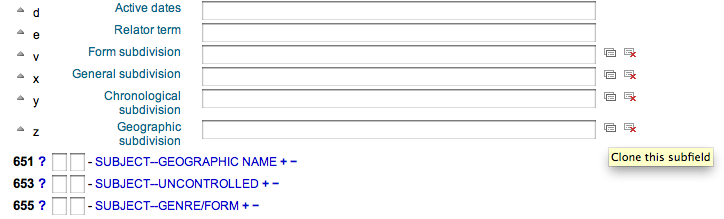
Per rimuovere un sottocampo (se ce n’è più di uno dello stesso tipo), premi il link “(-)” a destra del campo
Per usare un plugin clicca sull’apposita icona a destra del campo
Alcuni campi a lunghezza fissa hanno l’editor che cambia in funzione del tipo di materiale che stai catalogando (per esempio i campi 006 e 008)
Quando hai finito clicca il tasto “Salva” in alto e scegli se salvare e vedere il record bibliografico appena creato oppure continuare con l’aggiunta delle copie collegate al record
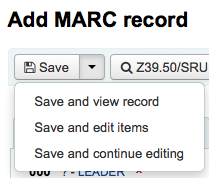
- Se scegli Salva e vedi il record vedi il record che hai appena catalogato
- Se scegli Salva e modifica le copie dopo aver salvato il record bibliografico arrivi a aggiungi/modifica le copie così puoi collegare il posseduto
- Choosing “Save and continue editing” will allow you to save your work so far and keep you in the editor to continue working
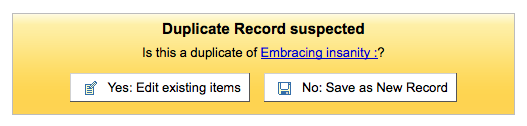
Se stai per salvare un record duplicato, riceverai un avviso prima del salvataggio
Advanced Editor Cataloging¶
In order to use the Advanced cataloging editor you need to enable the EnableAdvancedCatalogingEditor preference.
Importante
Questa funzione è attualmente sperimentale, e può avere bug che causano la corruzione di record. Inoltre non include alcun supporto per i campi fissi UNIMARC o NORMARC. Ti preghiamo di aiutarci a testarla e a segnalare eventuali bug, ma a tuo rischio e pericolo.
In the advanced editor once you’ve opened a blank framework or imported a record via Z39.50 you will be presented with the form to continue cataloging
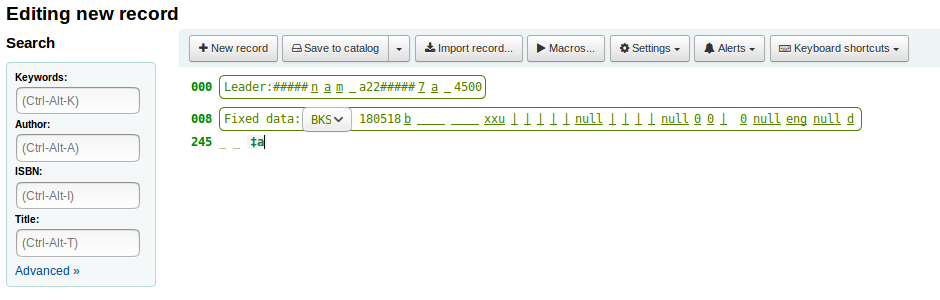
Utilizzando la casella di ricerca a sinistra è possibile eseguire ricerche Z39.50

E da quei risultati di Z39.50 è possibile visualizzare il record marc cliccando sul link a destra
Facendo clic su “Importa” porterà il record nell’editor in cui è possibile eseguire le modifiche
Nota
Quando aggiungi un nuovo record con l’editor avanzato, devi inserire un underscore per un indicatore vuoto e circondare gli indicatori con spazi.
Nota
Devi inserire uno spazio prina del primo delimitatore di sottocampo ma non prima o dopo gli altri delimitatori di sottocampo all’interno del campo.
At il fondo dell’editor si vedrà l’help dalla Library of Congress per il campo in cui ci si trova. Nei casi in cui il MARC è un campo invalido, sarà evidenziando in rosso. Per modificare i record utilizzando solo scorciatoie da tastiera, il relativo bottone ti informerà dei comandi
Advanced Cataloging Keyboard Shortcuts¶
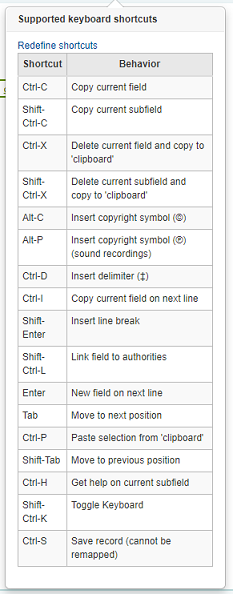
Le seguenti scorciatoie da tastiera possono essere utilizzate nella catalogazione avanzata per risparmiare tempo e click.
| Scorciatoia | Comportamento |
|---|---|
| Ctrl-D | Inserisci delimitatore (‡) |
| Ctrl-H | Ricevi aiuto sul presente sottocampo |
| Ctrl-S | Salva record |
| Ctrl-X | Cancella questo campo |
| Ctrl-Shift-X | Cancella il sottocampo corrente |
| Inserisci | Nuovo campo sulla nuova linea |
| Shift-Enter | Inserisci a capo |
| Tab | Sposta alla posizione successiva |
| Shift-Tab | Ritorna alla posizione precedente |
Macros in Advanced Cataloging¶
Per creare una nuova macro:
- Select the «> Macros…» button
- Apparirà un finestra pop up. In questa finestra seleziona «Nuova macro …», inserisci il nome della macro e clicca su OK.
- Ora clicca alla destra del piccolo numero 1 e inserisci la prima linea della tua macro. Per una macro multilinea, per esempio perchè lavori più campi, dai invio cosi che appaia un piccolo numero 2. Ora inserisci la seconda linea e continua così via via.
- Le tue macro verranno salvate automanticamente. Quando hai finito puoi selezionare la «x» per chiudere la finestra, o seleziona una macro da far girare sul record che stai modificando o seleziona una nuova macro da far girare.
Per modificare una macro esistente:
- Select the «> Macros…» button
- A window will pop up. In this window, select the macro that you wish to edit & make your changes.
- Le tue macro verranno salvate automanticamente, quando hai finito puoi selezionare la «x» per chiudere la finestra, o seleziona una macro da far girare sul record che stai modificando o seleziona una nuova macro da far girare.
La sintassi di base del linguaggio delle macro:
- new 500=‡aEdited with Rancor
- Crea un nuovo tag 500 con un sottocampo ǂa e lo imposta a «Edited with Rancor».
- 245c= by J.K. Rowling.
- Imposta il primo sottocampo ‡c del primo tag 245 nel record a «di J.K. Rowling», creandolo se necessario.
- 082a={084a}
- Imposta il sottocampo ǂa del primo tag 082 (creando il sottocampo se necessario) al contenuto del primo 084‡a.
- indicators=_1
- Sets the indicators of the last mentioned tag (in this case, 082) to «_» and «1».
- new 090a=Z674.75.W67
- Crea un nuovo sottocampo ǂa sul primo 090 (ma solo se quel campo già esiste) e lo imposta a Z674.75.W67.
- new 090a at end=Z674.75.W67
- Idem come sopra.
- nuovo 245b dopo a = a tale of might and magic /
- Crea un nuovo ‡b dopo il primo sottocampo a e lo imposta a » a tale of might and magic /».
- delete 245b
- Cancella il primo ‡b nel primo 245
Aggiunta di record analitici¶
Alcune volte le biblioteche offrono agli utenti la possibilità di ricerca degli articoli di rivista e quelli all’interno di monografie tramite la catalogazione analitica. La catalogazione analitica crea dei record separati per questi articoli, capitoli, sezioni eccetera compresi in una risorsa più estesa, sia un libro, un articolo di rivista, quotidiano o seriale. Nella catalogazione analitica, sebbene venga creato un record separato, questo non è fisicamente separato dalla copia superiore. Maggiori informazioni sugli Analitici al capitolo 13 dell’AACR2.
If you would like to catalog analytic records there are two options. One is to use the Easy Analytics funtion; the other is the Procedura avanzata per gli analitici.
Easy Analytics¶
The Easy Analytics feature makes linking analytic records together easier. The first thing you need to do is set the EasyAnalyticalRecords preference to “Display” and the UseControlNumber preference to “Don’t use.”
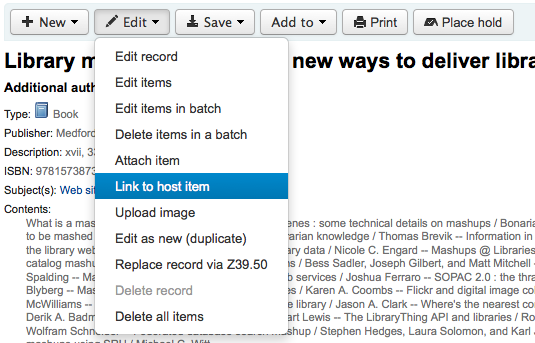
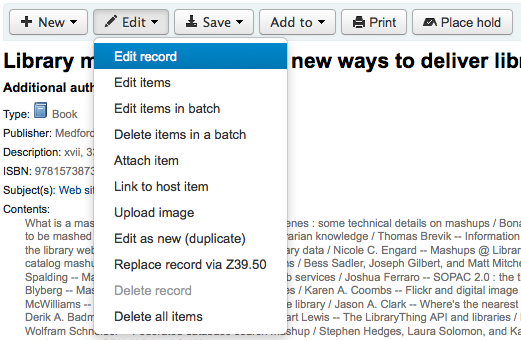
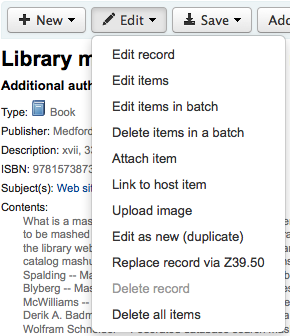
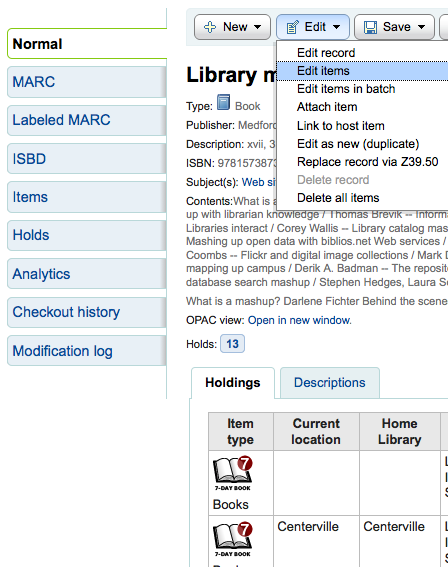
After cataloging your analytic record (see Adding Records for more on creating records) click “Edit” from the normal view and choose to “Link to Host Item”
Ti verrà chiesto di inserire il barcode della copia a cui questo record deve essere collegato.
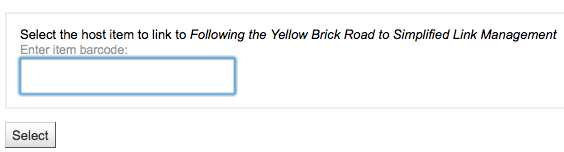
Dopo aver indicato il barcode della copia e aver cliccato “Scegli”, ti verrà presentato un messaggio di conferma.

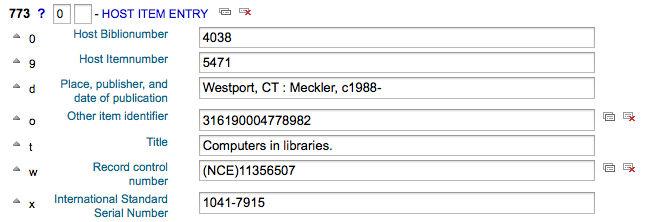
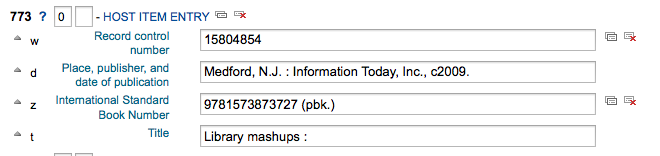
Il record avrà ora il campo 773 riempito per definire il legame.
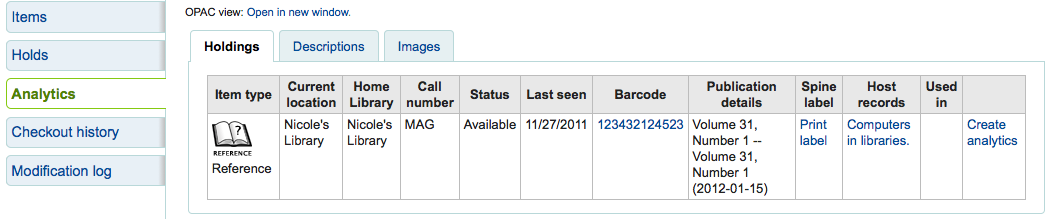
Per vedere tutti i record figlia collegati ad un record madre, cerca il record,clicca sul tab Analitici a sinistra e sotto la colonna “Usato in” verranno elencati i record analitici legati a ciascun barcode.

Nota
È possibile creare record analitici anche da questa schermata cliccando il link «Crea analitici»
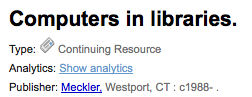
Puoi anche vedere i record analitici associati a questo record cliccando “Mostra analitici” in testa al record nella Vista Normale.
When looking at the analytic record you will also see a link to the host item under the “Host records” column in the holdings table when viewing the “Analytics” tab.
Procedura avanzata per gli analitici¶
To use the Enhanced Workflow method of adding analytics, the first thing you need to do is set the EasyAnalyticalRecords preference to “Don’t display” and the UseControlNumber preference to “Use.”
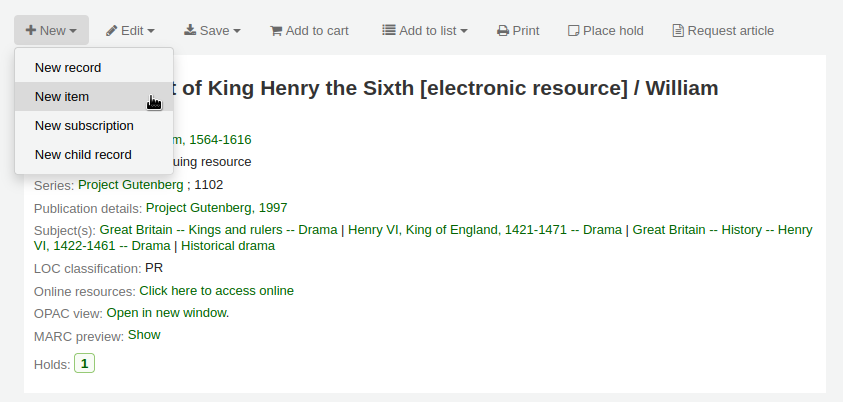
After cataloging your original record (see Adding Records for more on creating records) click “New” from the normal view and choose to “New child record.”
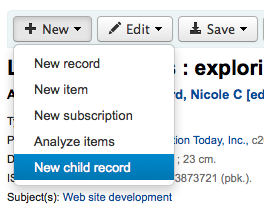
Ciò aprirà un nuovo record non compilato per la catalogazione. Il record avrà esclusivamente il campo 773 di MARC 21 compilato di modo da completare il collegamento una volta salvato il record.
Per vedere tutti i record figlia collegati ad un record madre, cerca il record,clicca sul tab Analitici a sinistra e sotto la colonna “Usato in” verranno elencati i record analitici legati a ciascun barcode.
Puoi anche vedere i record analitici associati a questo record cliccando “Mostra analitici” in testa al record nella Vista Normale.
When looking at the analytic record you will also see a link to the host item under the “Host records” column in the holdings table when viewing the “Analytics” tab.
Modifica di analitici¶
Se hai collegato un record analitico per errore, puoi rimuovere il link editando il record figlia (non il record madre). Per farlo, vai al record analitico e clicca “Modifica” e scegli “Modifica copie”. A sinistra di ogni copia vedrai due opzioni.

- Premi “Modifica nella superiore” per cambiare copia nel record superiore.
- Cliccando “Sgancia” verrà rimosso il campo 773 e il relativo link tra scheda analitica e madre.
Modifica di record¶
Per modificare un record puoi cliccare “Modifica il record” dai risultati di ricerca
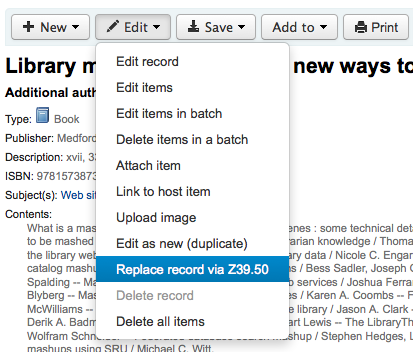
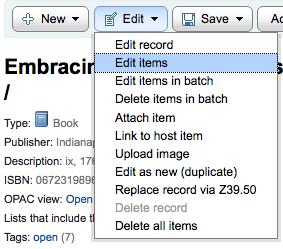
oppure cliccare il tasto Modifica nel record bibliografico e scegliere “Modifica il record”
Il record si aprirà nell’editor MARC
Un’alternativa è fare una ricerca Z39.50 che sovrascrive il tuo record con uno più completo da un’altra biblioteca. Puoi eseguire questa operazione selezionando “Sostituisci record via Z39.50” nel menu Modifica.
Fatta la scelta, verrai portato in una finestra di ricerca Z39.50 per cercare il record su altre biblioteche.
Quando hai finito le modifiche, clicca “Salva”.
You can also use the edit menu to add your own custom cover image if you have either OPACLocalCoverImages and/or LocalCoverImages set to “Display” by choosing “Upload Image” from the menu.

Choosing to “Upload Image” will take you to the Upload Local Cover Image Tool.
Duplicazione di record¶
Alcune volte il record da catalogare non può essere trovato via Z39.50. In tal caso puoi creare un duplicato di un record simile e modificarne le parti necessarie di modo da creare un nuovo record. Per duplicare un record esistente clicca “Modifica come nuovo (duplica)” dal menu Modifica nel record bibliografico.
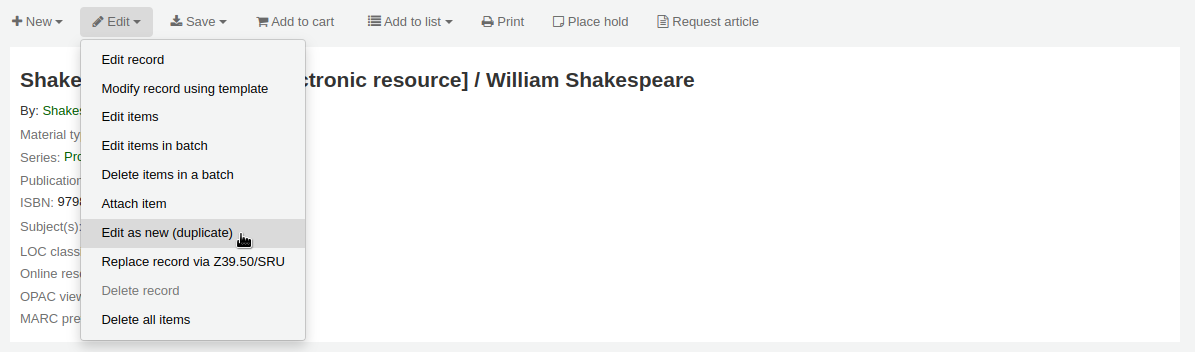
Ciò aprirà un nuovo record MARC con i campi precompilati con i valori del record bibliografico originale.

Attaching files to Records¶
Se si desidera caricare dei file su Koha è possibile farlo con poche impostazioni.
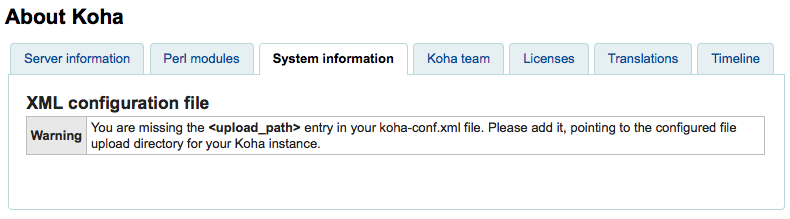
You will need to ask your system administrator to set the “upload_path” config variable to point to where the files will be stored
You can see if your upload path is set correctly by visiting About Koha > System Information. If there is an error you will see it there.
You will want to be sure that your OPACBaseURL system preference is set appropriately
You will want to add the upload.pl plugin to the 856$u subfield in one (or multiple) of your frameworks
Once you are all set up you can continue with cataloging as regular. You will see a plugin icon next to the 856$u that will open up the upload and/or search window
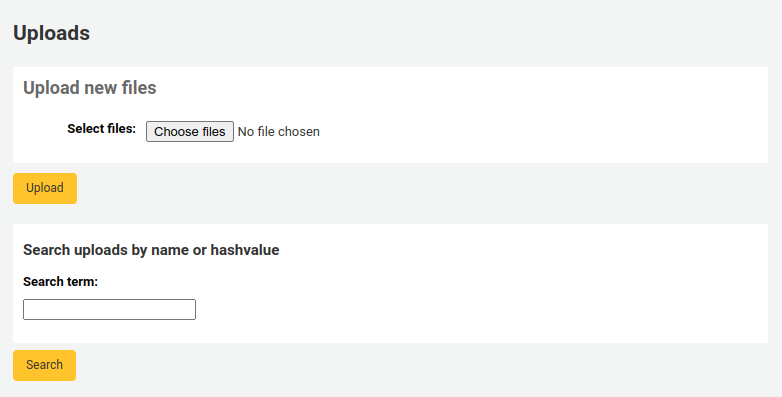
From this menu you can click browse to find a file and attach it, or you can search files you have uploaded previously using the search box. From the search results you can choose which file to attach.
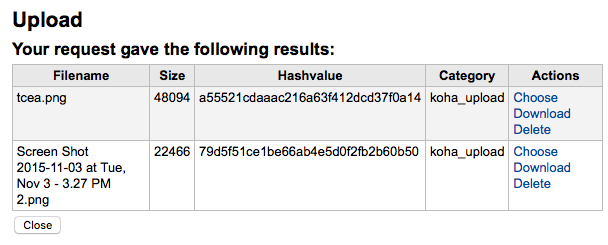
Una volta scelto il file verrà visualizzato come un link nel record MARC e sul display del dettaglio.
Merging Records¶
Per fondere dei records bibliografici, inizia andando nel modulo catalogazione fai una ricerca.
Se vedete dei duplicati tra i risultati, è possibile selezionare le caselle accanto ai duplicati e fare clic sul pulsante “Unione selezionati” nella parte superiore dei risultati.
Una volta che hai selezionato i record che vuoi fondere, clicca sul bottone “Fondi i record selezionati” in alto sulla lista. Ti verrà chiesto quale dei due record vuoi tenere come record primario e quale vuoi cancellare dopo la fusione. Se i record sono stati creati usando diverse griglie per la catalogazione, Koha ti chiederà anche quale griglia dovrà usare il record creato dalla fusione.
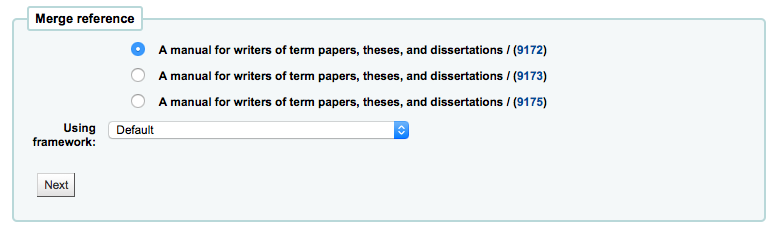
Verranno presentati i dati MARC di entrambi i record, ognuno accessibile dalla scheda con il bib number del record. Di default il primo record sarà selezionato, deseleziona i campi che non vuoi portare nel record finale poi vai nel secondo record e scegli i campi che vuoi portare nel record finale.

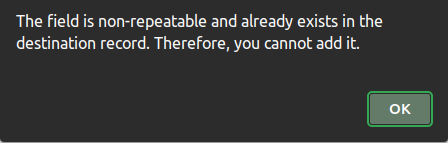
Se provi ad aggiungere un campo che non può essere ripetuto due volte (tipo il campo 200 per entrambi), ti verrà mostrato un errore
Sotto i record da unire, c’è un’opzione per indicare i campi per il report. Questo vi permetterà di controllare i campi che appariranno sulla pagina di conferma dell’unione:

Se non metti nulla, ti verrà presentato una pagina di conferma con i soli biblionumbers

If you enter fields you will see those on the confirmation page (you can set defaults with the MergeReportFields preference)
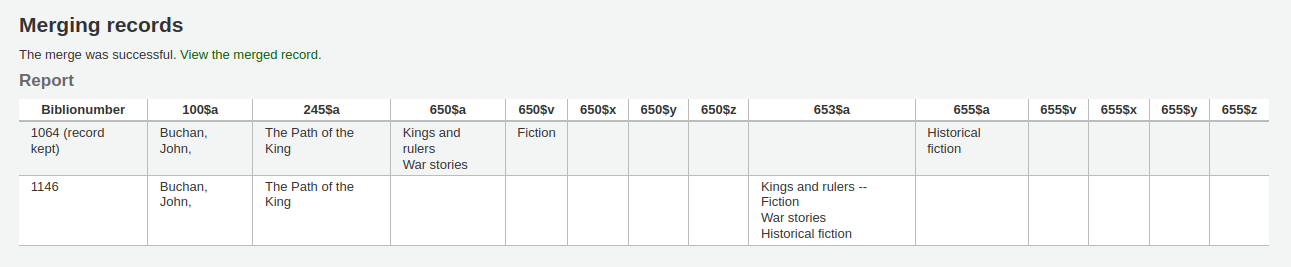
Quando le hai finito le tue scelte, clicca il bottone “fondi”. Il record primario ora CONTERRA” i dati che hai scelto insieme a tutte le linee di copia di entrambi i record bibliografici, il sendo record verrà cancellato.
Importante
E” importante riaggiornare Zebra dopo aver fuso dei records. Se un utente fa una ricerca su un record cancellato, Koha mostrerà un errore nell’Opac e non il nuovo record nato dalla fusione.
Nota
If you would like you can also use the Liste tool for merging records together. Learn more here.
Cancellazione Records¶
Per cancellare un record bibliografico clicca il tasto Modifica e scegli Cancella record
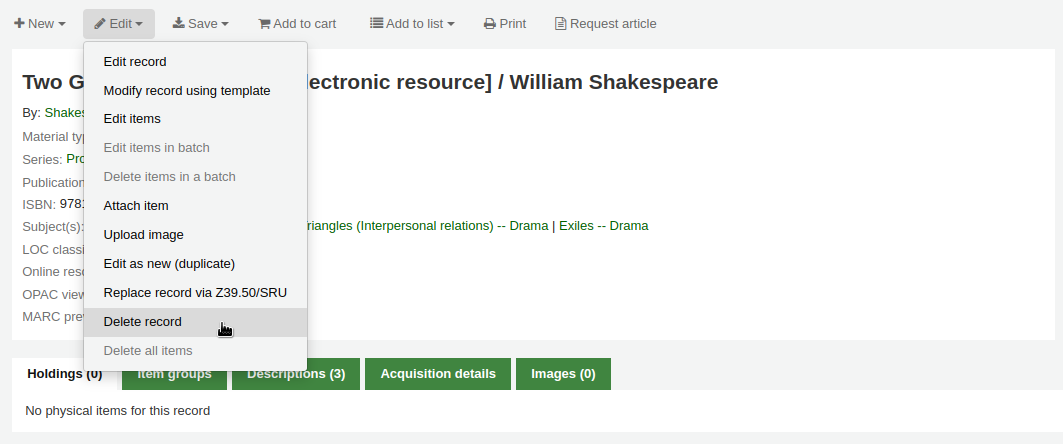
I record bibliografici possono essere cancellati solo se le loro copie sono state cancellate. Se provi a cancellare un record bibliografico con copie legate l’opzione cancella diventa grigia
Record di copie¶
In Koha ogni record bibliografico può avere una o più copie collegate. Ogni copia contiene informazioni sullo specifico esemplare posseduto dalla biblioteca.
Aggiunta di copie¶
Dopo aver salvato un nuovo record bibliografico, verrai portato ad una schermata con un record di copia non compilato, affinché possa aggiungere una copia al record bibliografico. Puoi anche cliccare “Modifica le copie” dai risultati di ricerca nel catalogo.
oppure puoi aggiungere una copia in qualsiasi momento cliccando “Nuovo” nel record bibliografico e poi “Nuova copia”
La fattura richiamata da questo id (invoiceid) non esiste.
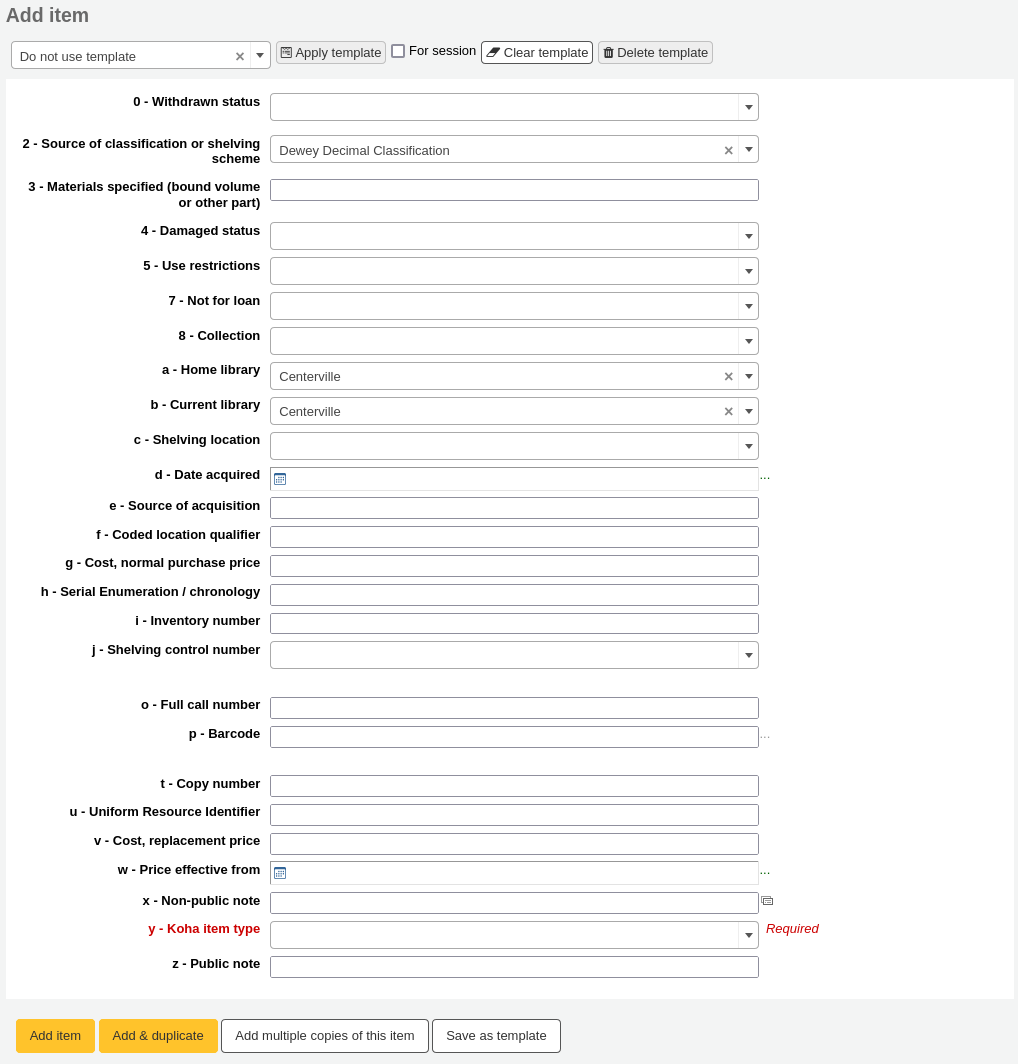
Infine se pensi di far circolare le copie, i seguenti campi devono essere specificati per le nuove copie:
2 - Fonte della classificazione
a - Localizzazione permanente
c - Biblioteca che possiede o presta la copia
o - Collocazione
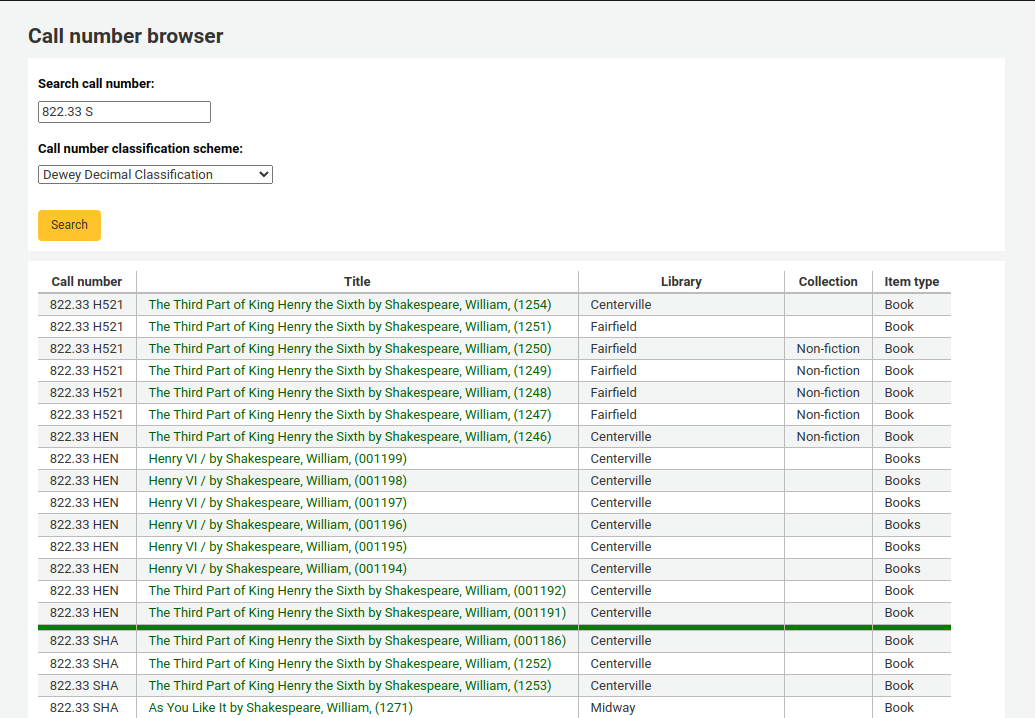
If you’d like you can use the call number browser plugin for this field. If it’s enabled you’ll see a … to the right of the field. When clicked that will open a call number browser window if the row is highlighted in Red then the call number is in use, if there is a thin Green line instead then the call number can be used.
p - Codice a barre
v - Costo, prezzo di sostituzione
- Questo è il valore che viene addebitato all’utente quando segni come “Persa” una copia a lui prestata.
y - Tipo copia Koha
To make sure that these values are filled in you can mark them as mandatory in the framework you’re using and then they will appear in red with a “required” label. The item will not save until the required fields are filled in.

Nota
To make item subfields required in a framework you’ll want to edit the 952 field in the framework editor.
Sotto la form di aggiunta, ci sono tre bottoni per aggiungere la copia

- Aggiungi copia aggiungerà semplicemente una copia
- Add & Duplicate will add the item and fill in a new form with the same values for your to alter
- Aggiungi più copie ti chiede il numero delle copie quindi aggiungerà le copie aumentando di +1 il codice a barre, in modo che rimanga univoco
Le copie aggiunte appariranno sopra la form

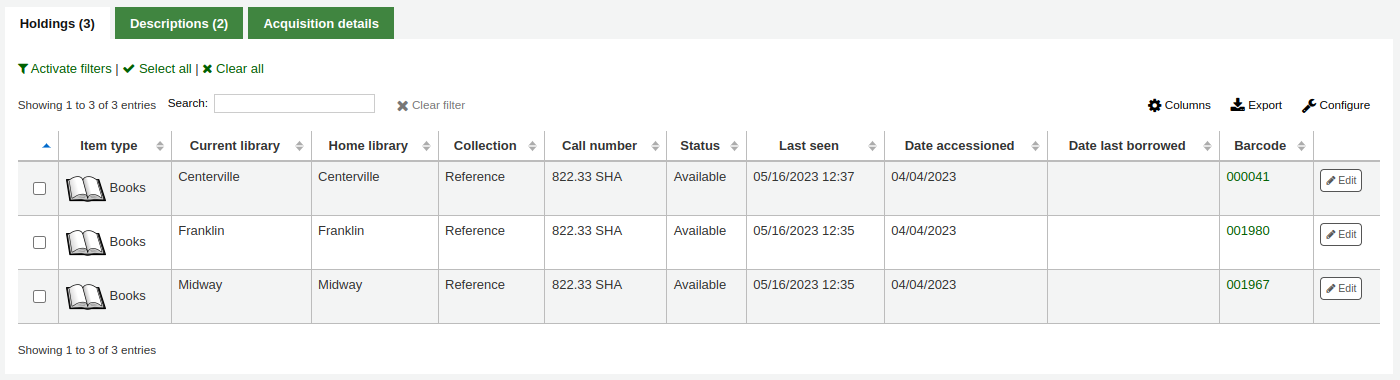
Le tue copie appariranno anche nella zona dei dettagli bibliografici del record mostrato.
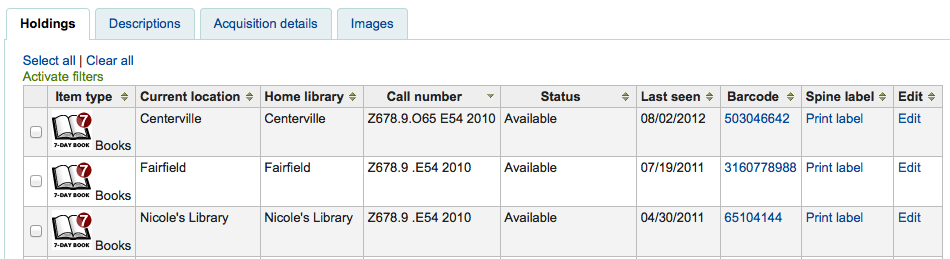
If you have SpineLabelShowPrintOnBibDetails set to “Display” then there will also be a link to print a quick spine label next to each item.
Puoi filtrare il contenuto dei tuoi dati di copia cliccando il collegamento Attiva filtri. Appare una riga in alto e puoi digitare in ogni colonna per filtrare i risultati della ricerca
Modifica di copie¶
Le copie possono essere editate in diversi modi.
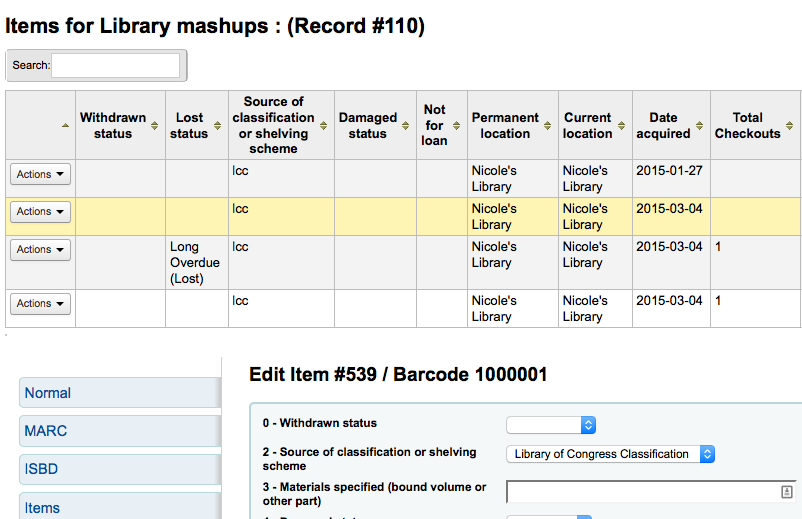
Puoi cliccare “Modifica” e poi “Modifica le copie” nel record bibliografico
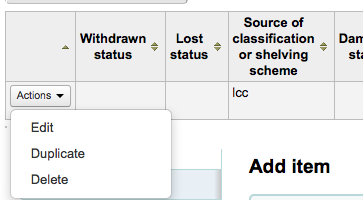
Ciò aprirà una lista di copie in cui potrai cliccare sul bottone “Azioni” a sinistra della copia da modificare e scegliere “Edit”.
Altrimenti puoi cliccare i link “Modifica copia” nella scheda “Copie”

Si aprirà l’editor della copia che vuoi modificare
Oppure ancora cliccando “Modifica” e poi “Modifica copie via batch”
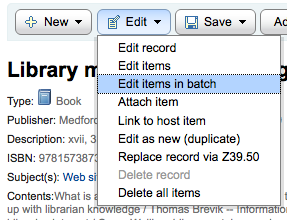
This will open up the batch item modification tool where you can edit all of the items on this record as a batch.
You can also enable StaffDetailItemSelection to have checkboxes appear to the left of each item on the detail display. You can then check off the items you would like to edit and click “Modify selected items” at the top of the list.
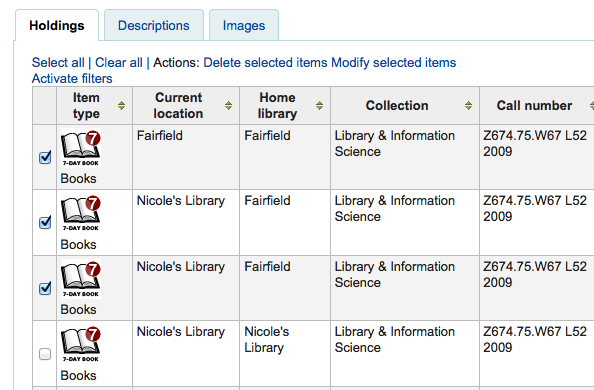
You can click “Edit” to the right of each item in the Holdings tab
There is also a link to Edit items from the search results in the staff client
Finally you can use the Batch Item Modification tool
Modifiche veloce agli status della copia¶
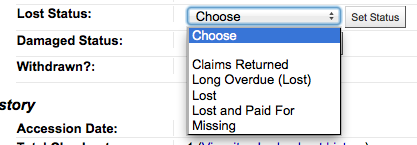
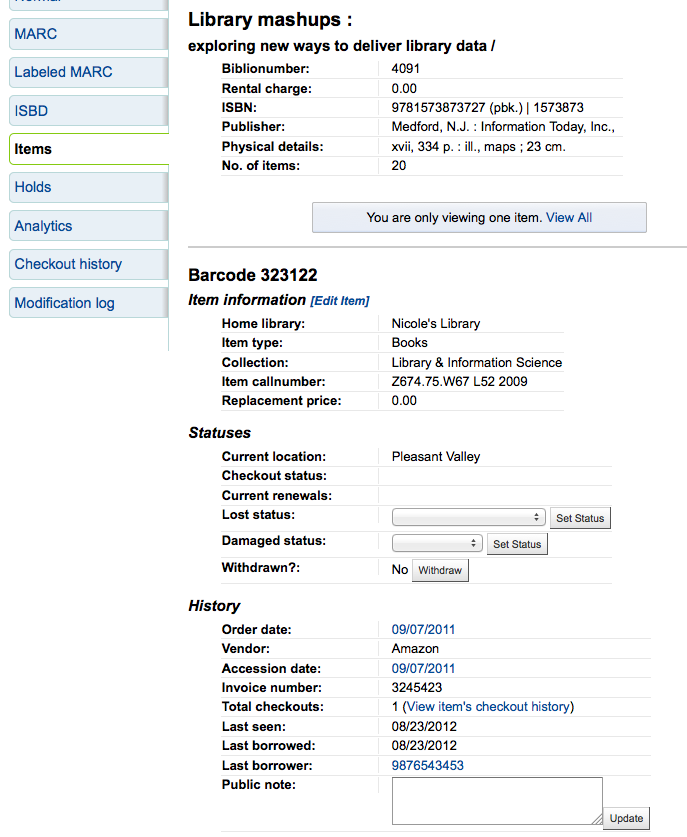
Spesso il personale della circolazione deve cambare lo status di una copia a Perso o Danneggiato. Questo non richiede di modificare l’intero record di copia. Cliccando sul barcode della copia nel riassunto dei prestiti o sullo storico delle restituzioni, sarai portato a un riassunto dei dati di copia. Ci puoi arrivare anche cliccando la linguetta “copie” sula sinistra nella visualizzazione di dettaglio del record.
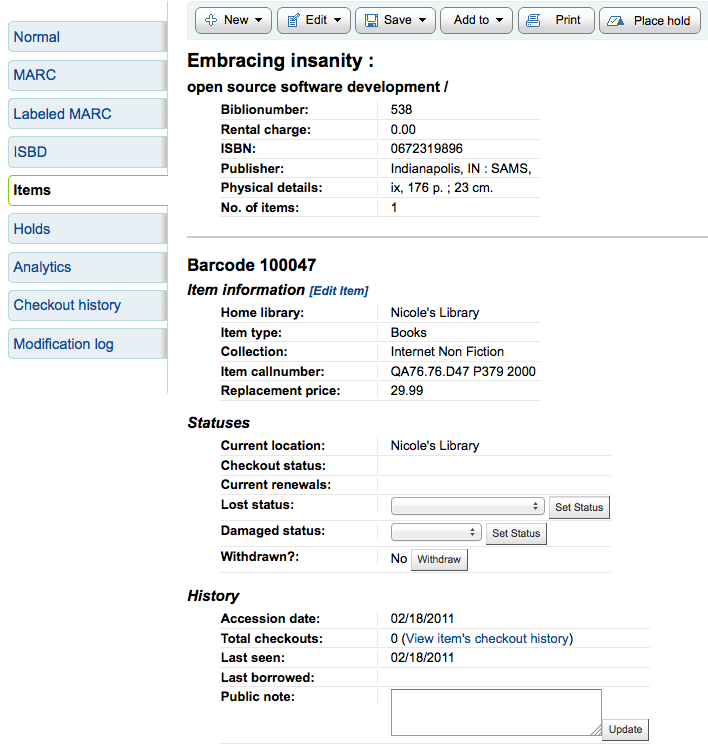
Da questa visualizzazione puoi mettere una copia come perduta scegliendo uno degli status relativi dal menu e cliccando sul bottone “Imposta status”
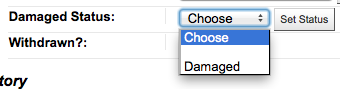
Puoi anche marcare una copia come danneggiata scegliendo uno status di danneggiata dal menù a tendina e premendo il bottone “Salva stato”.
Duplicating Items¶
Si può facilmente duplicare ogni copia facendo clic sul pulsante “Azione” alla sinistra di ciascuna copia sullo schermo di modifica delle copie
Da qui è possibile scegliere di “Duplicare” la copia e questo popolerà il modulo con i valori della copia scelta.
Informazioni sulla copia¶
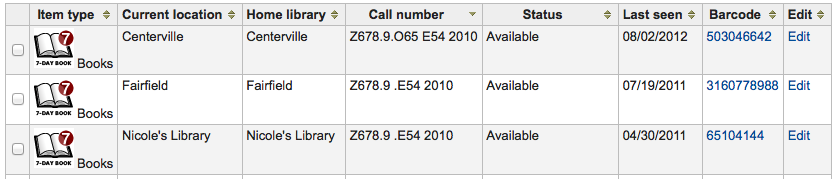
Nel menu a sinistra di ogni record bibliografico è presente una scheda dedicata alle copie.
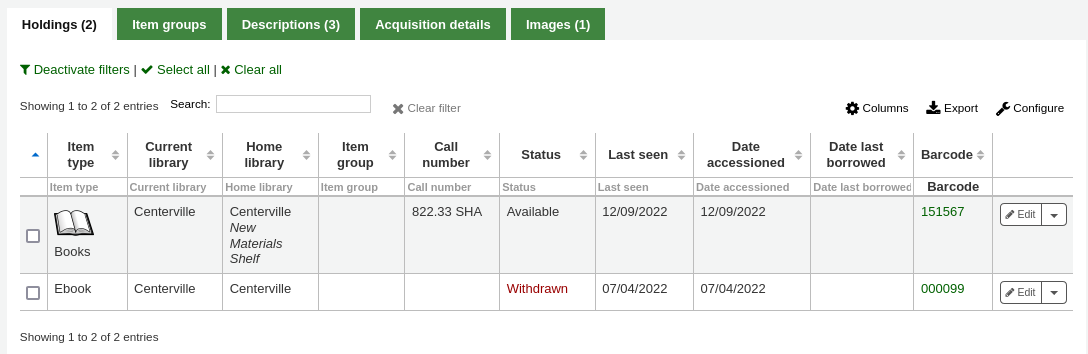
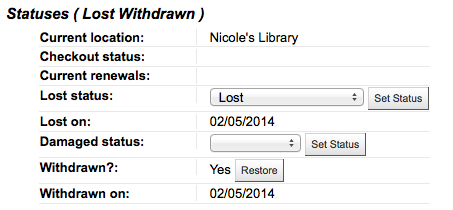
Facendo clic su questa tabella puoi avere le informazioni di base sulla copia. Da qui puoi vedere le informazioni di base sulla copia come la biblioteca di appartenenza, il tipo di copia, il codice di collezione, la collocazione e il prezzo di sostituzione. Puoi anche vedere e modificare le informazioni sullo status. Se una copia è persa o ritirata puoi vedere la data in cui lo status è stato modificato
In the History section you will see information about the check out history of the item and if you ordered the item via the acquisitions module then this section will include information about the order.
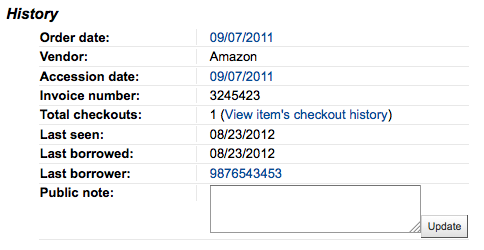
Se la data dell’ordine o di accesso è un link, cliccandoci verrai portato alle informazioni di acquisizione per quella copia.
Spostamento di copie¶
Le copie possono essere spostate da un record bibliografico all’altro utilizzando l’opzione Sposta qui una copia
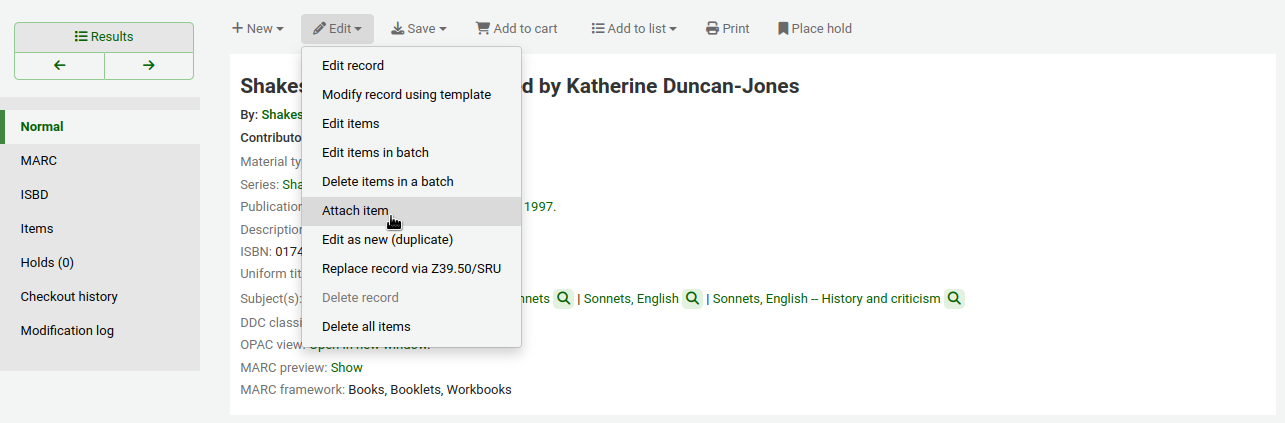
Accedi al record bibliografico destinatario dello spostamento di copia e scegli “Sposta qui una copia” dal menu “Modifica”.
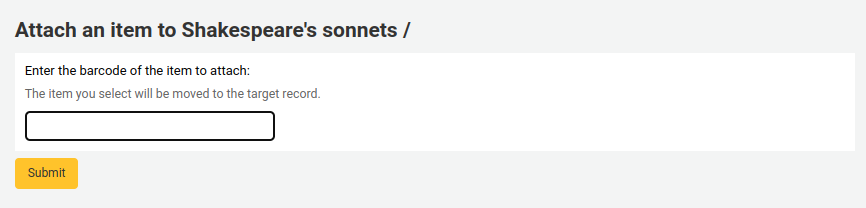
Inserisci il barcode della copia da spostare e clicca “Select”
If you want to move all items to a new record creating only one bibliographic record you can use the Merge Records tool instead.
Cancellazione delle copie¶
Ci sono diversi modi di cancellare record di copia. Si si tratta di cancellare una sola copia, puoi farlo dalla pagina dei dettagli del record bibliografico, con il bottone Edit. Da lì scegli “Modifica copie”.
Ti verrà presentata una lista di copie con accanto il link “Cancella”. Clicca sul link per cancellare la copia che non sia in prestito.

Se pensi che tutte le copie del record non siano in prestito, puoi usare la casella «Cancella tutte le copie» sotto il menù Edit, e tutte le copie verranno rimosse dal record.
You can also enable StaffDetailItemSelection to have checkboxes appear to the left of each item on the detail display. You can then check off the items you would like to delete and click “Delete selected items” at the top of the list.
Finally you can use the batch delete tool to delete a batch of items.
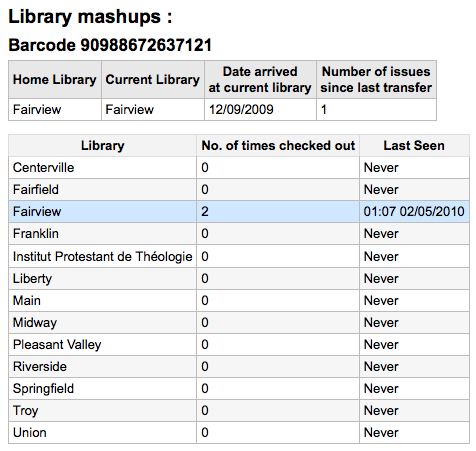
Item Specific Circulation History¶
Ogni record bibliografico ha uno storico della sua circolazione (con o senza i dati degli utenti, dipende dalle tue preferenze), ma ogni copia ha pur sempre il suo storico della circolazione. Per vederlo, clicca sul tab “Copie” a sinistra del record che stai vedendo.
Sotto il link “Storico” si trova il link dello “Storico dei prestiti”. Lo storico dei prestiti si presenta diverso dallo storico del record bibliografico.
Authority¶
I record di autorità sono modi per controllare i campi dei tuoi record bibliografici. Usando i record di autorità, puoi uniformare nomi, soggetti, luoghi, ecc.
Aggiungere authority¶
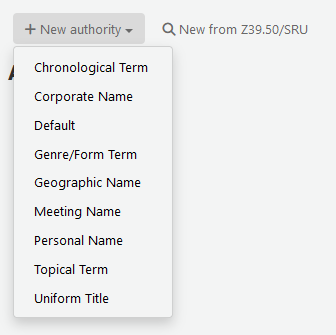
Per aggiungere un nuovo record di autorità puoi scegliere di inserirla cliccando sul bottone “Nuovo authority” o cercare la voce in altre biblioteche cliccando su “Nuova da Z39.50”.
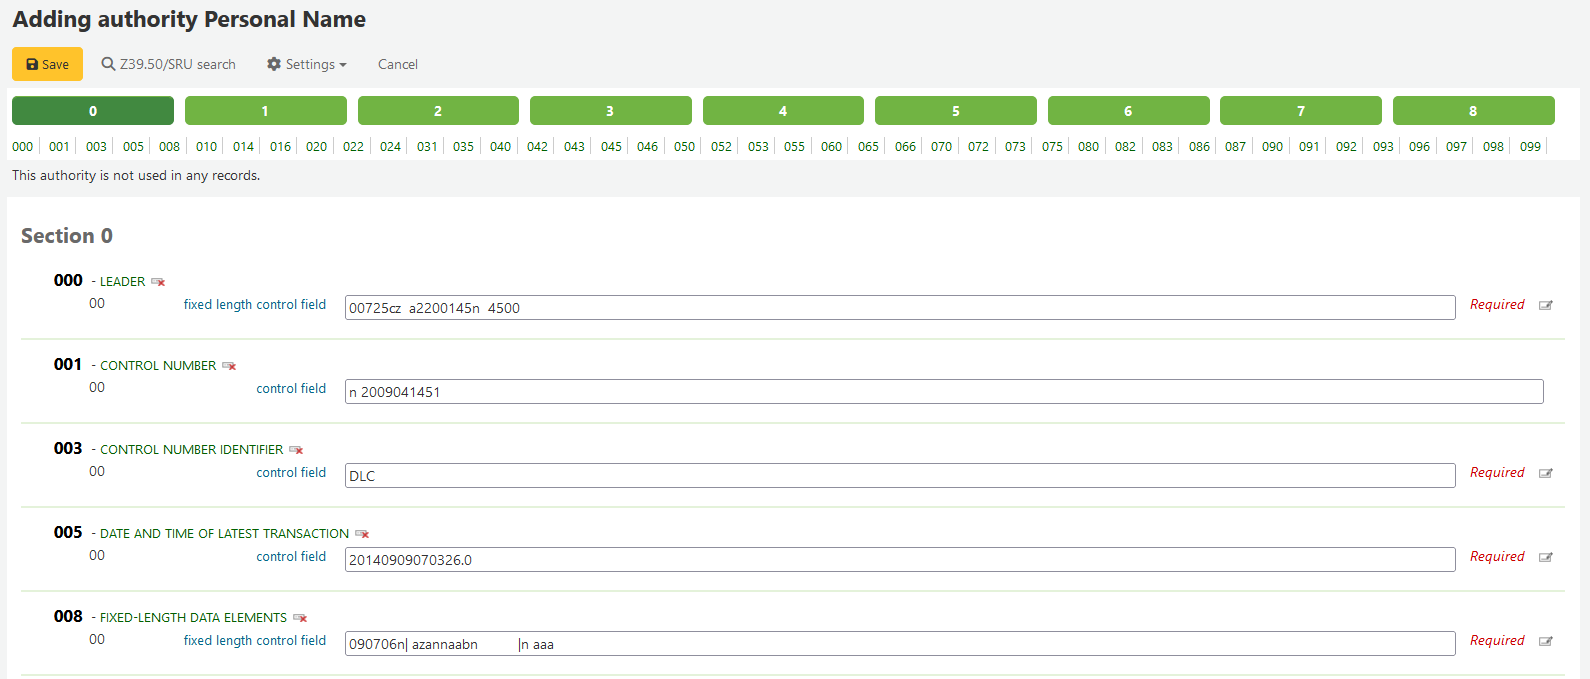
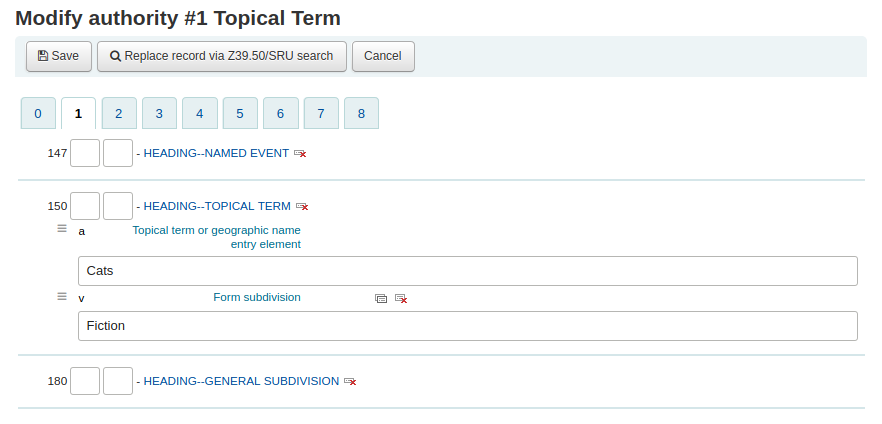
Se scegli di inserire una nuova authority da zero, la form che appare ti permetterà di inserire tutti i dati necessari del record di autorità.

Per espandere valori compressi, clicca sul titolo e appariranno i sottocampi. Per duplicare un campo, clicca su (+). Per accedere al plugin del campo premi “…” a destra del campo.
Legando authority ad altre intestazioni, premi su “…” a destra del campo per usare il plugin di ricerca.

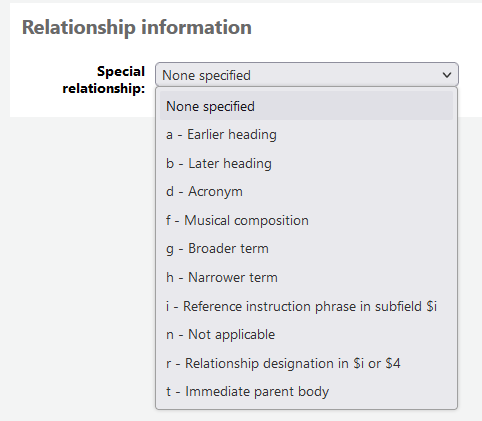
Da qui puoi cercare sull’authority file per indicare il record da agganciare. Se non lo trovi, puoi crearne uno premendo “Crea nuovo” a aggiungere il record al link. Questo plugin ti permette anche di scegliere la relazione tra le autorità.
Se scegli di cercare in un’altra biblioteca per il record di authority, ti verrà presentato un form di ricerca.
Dalla pagina dei risultati puoi cliccare il link “Importa” a destra del record che vuoi aggiungere in Koha
Ti verrà presentata una form per modificare l’authority prima di salvarla nel sistema.
Ricerca authority¶
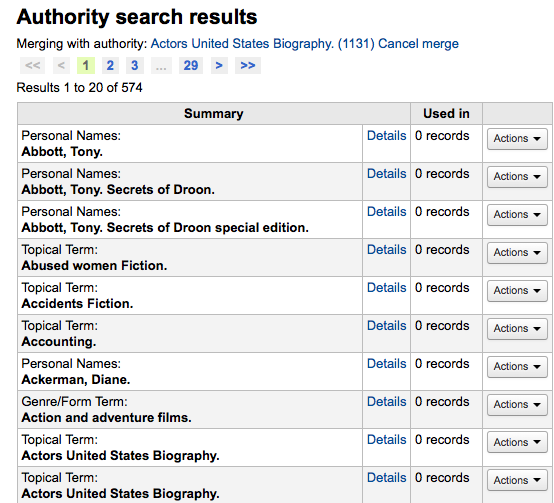
Dalla pagina dei record di autorità puoi cercare termini esistenti e i record bibliografici ad essi associati.

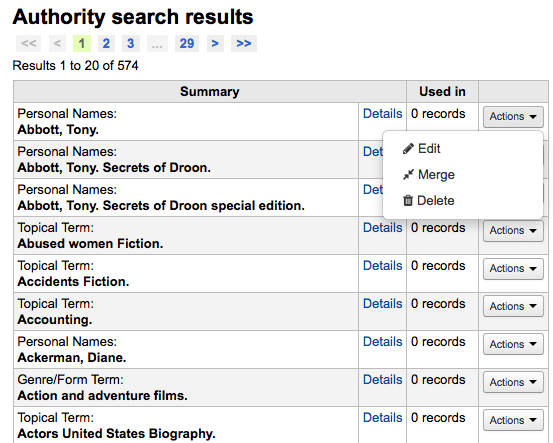
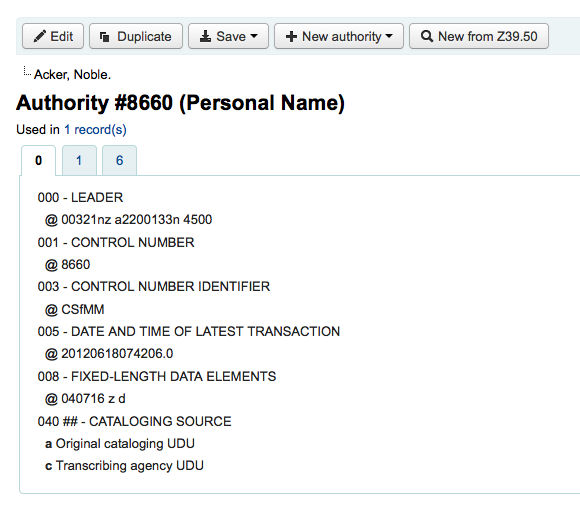
From the results you will see the authority record, how many bibliographic records it is attached to, an “Actions” menu that includes the ability to edit, merge and delete (if there are no bibliographic records attached).
Il link Dettagli a destra del record di autorità apre l’intero record, offrendo l’opzione di modificarlo.

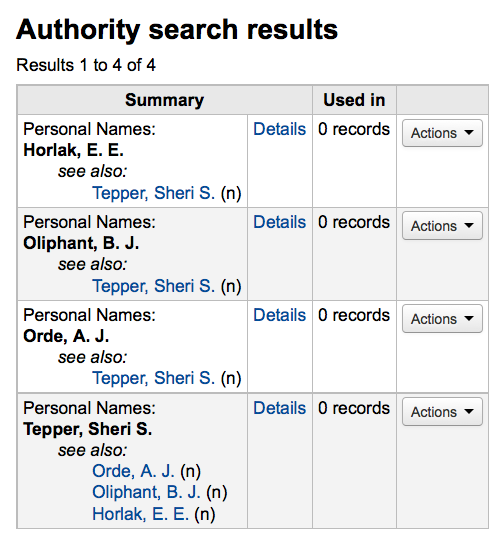
Se il record di authority ha “Vedi anche”, li vedrai marcati nei risultati. Cliccando sulle intestazioni relative, vedrai i risultati dell’intestazione accettata.
Modificare Authority¶
Le Authority possono essere modificate cliccando sulla breve descrizione dei risultati della ricerca e e cliccando sul tasto Modifica sopra il record. Oppure cliccando sul collegamento Modifica a sinistra dell’authority nei risultati della ricerca
Once you’ve made the necessary edits, simply click “Save” and dontmerge is set to “Do”, Koha will immediately update all of the bib records linked to the authority with the new authority record’s data. If dontmerge is set to «Don’t» then Koha won’t edit bib records when changes are made to authorities, rather, this is done later by the merge_authority.pl cronjob.
Per cancellare un record di autorità devi prima essere sicuro che non sia associato a record bibliografici. Se non è usato, ci sarà disponibile un bottone “Cancella” a destra del record nella pagina dei risultati e all’interno della pagina del record intero.
Fusione Authority¶
Se hai record di autorità duplicati li puoi fondere cliccando sul collegamento Fondi , che trovi nel menu delle azioni, vicino a due risultati nella ricerca sull’authority.

Dopo aver cliccato “Unisci” sul primo risultato vedrai quell’autorithy elencata in testa ai risultati.
Successivamente è necessario fare clic su “Fondi” accanto al secondo risultato che si desidera unire.
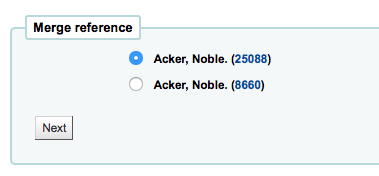
Ti sarà chiesto quale dei due record vuoi che dopo la fusione rimanga come record principale e quale che sia cancellatao
Verranno presentati i dati MARC di entrambi i record, ognuno accessibile dalla scheda con il bib number del record. Di default sarà selezionato il primo record, deseleziona i campi che non vuoi portare nel record finale poi spostati sul secondo tab per scegliere i campi che vuoi portare nel record finale.
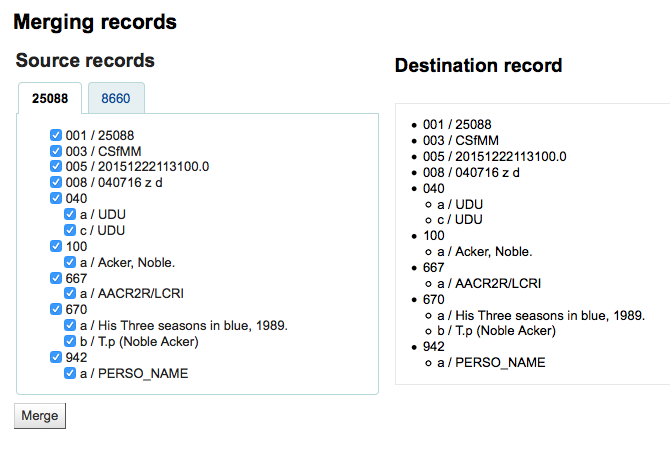
Una volta che hai completato la selezione clicca sul tasto Fondi. Il record principale conterrà i dati che hai scelto e il secondo sarà cancellato
Guide per la catalogazione¶
Guida rapida alla catalogazione del record bibliografico¶
| Tag | Label | Description | Instructions |
|---|---|---|---|
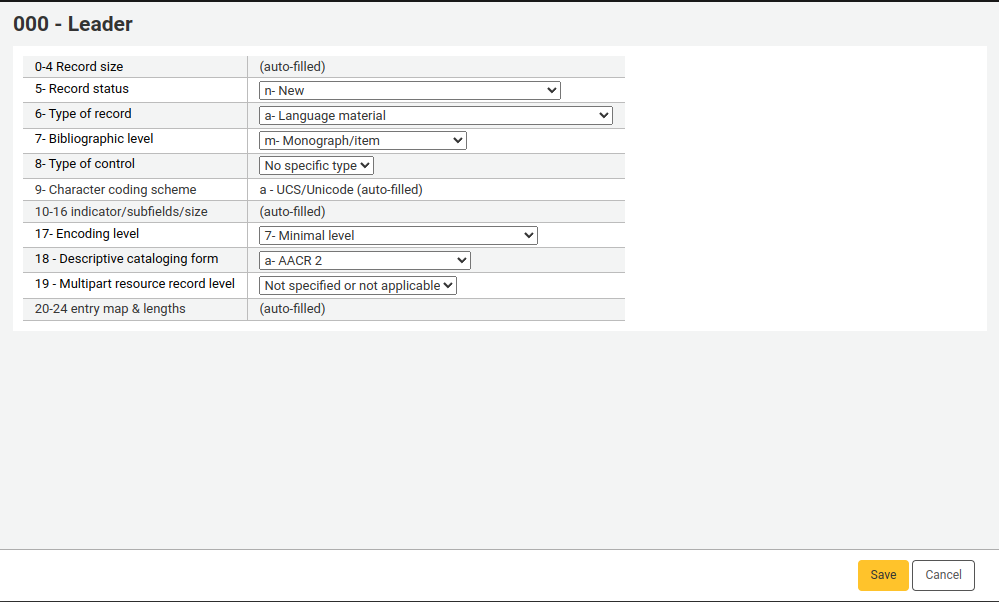
| 000 | LEADER | Describes the record(i.e. surrogate) – is it a record for a monograph? A serial? | Click in this field to fill it in. Then set «Bibliographic level» to “a” for articles or “s” for serials. Otherwise, leave everything as is. |
| 001 | CONTROL NUMBER | Accession number. | Enter the accession number written inside the item here. For articles and items which do not have accession numbers, leave blank. |
| 003 | CONTROL NUMBER IDENTIFIER | Your MARC Organizational Code | Click in this field to fill it in (will auto fill if you have your MARCOrgCode preference set). |
| 005 | D & T LATEST TRANSACTION | Current date and time. | Click in this field to fill it in. |
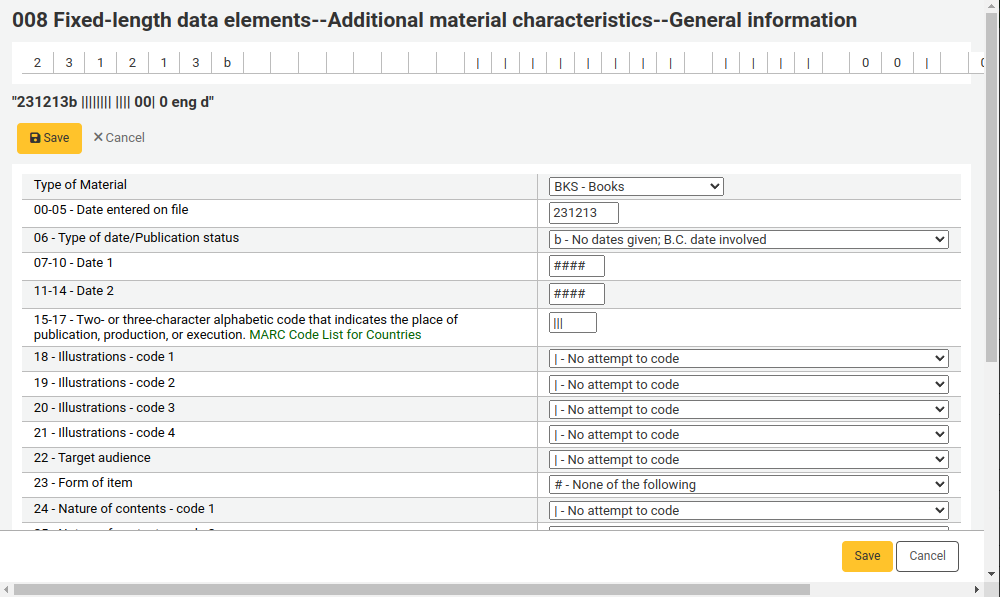
| 008 | FIXED-LENGTH DATA ELEMENTS | Field containing computer-readable representations of a number of things. | Generally you will only use “s” (single) or “m” (multiple) options for position 06- use the former when the item was published in a single year, the latter when it was published over the course of several. If there is a single date, only enter a date in the first date field (positions 07-10). Enter the three-digit country code in positions 15-17, being sure to add spaces if the country code is fewer than three characters long. If there is an index, note that fact in position 31. Enter the three-letter language code in positions 35-37. |
| 010 | LCCN | A number assigned by the Library of Congress to uniquely identify the work. | Check on the copyright page of the book (if it was published in the US) or the LC catalog for this number. If you can’t find it, don’t worry about it. |
| 020 | ISBN | Unique number used by publishers to identify books. | If this number isn’t listed on the book, there probably isn’t one. |
| 022 | ISSN | Unique number used by publishers to identify serials. | If this number isn’t listed on the book, there probably isn’t one. |
| 033 | DATE/TIME OF EVENT | Used for auction dates. Required for auction catalogs. | For auctions that took place on only one day, enter the date of the auction in the format YYYYMMDD in the subfield “a” and a “0” in the first indicator. For auctions that took place over two consecutive days or any number of non-consecutive days, create a subfield “a” for each day with the date in the format YYYYMMDD, and put a “1” in the first indicator. For auctions that took place over more than two consecutive days, create a subfield “a” (in format YYYYMMDD) for the first day and a subfield “a” (also in format YYYYMMDD) for the last day, and put a “2” in the first indicator. |
| 040 | CATALOGING SOURCE | Identifies which libraries created and modified the record. | For imported records, add a subfield “d” with your OCLC code as the value. For new records, make sure that the subfield “c” with your OCLC code as the value. |
| 041 | LANGUAGE CODE | Identifies all the languages used in an item, when two or more languages are present. | For significant portions of a text in a given language, there should be a subfield “a” with that language code. If there are only summaries or abstracts in a specific language, create a subfield “b” with that language code. |
| 100 | MAIN ENTRY–PERSONAL | Authorized form of the main author’s name | See Authorized headings sheet and AACR2. The first indicator should generally be a “1”, to indicate that the entry is surname first. If the name consists only of a forename, however, the first indicator should be “0”. |
| 110 | MAIN ENTRY–CORPORATE | Authorized form of the name of the main corporate author. Required for auction catalogs. | Auction catalogs should use a 110 field rather than a 100 field. See Authorized headings sheet and AACR2. Set the first indicator to “2”. |
| 111 | MAIN ENTRY–MEETING | Authorized form of the name of a meeting which acted as a main offer (e.g. conference proceedings) | See Authorized headings sheet and AACR2. Set the first indicator to “2”. |
| 245 | TITLE STATEMENT | Transcription of the title statement from the title page (or chief source of information) | Enter the title in subfield “a”, the subtitle in subfield “b”, and the statement of responsibility in subfield “c”. If you are creating a record for a single volume or part of a multi-part item, you should put the part number in subfield “n” and the part title in subfield “p.” For auction catalogs, the date (in “MM/DD/YYYY” format) should be listed in square brackets in subfield “f”. See ISBD punctuation sheet. Set the first indicator to “0” if there is no author, otherwise set it to “1”. Set the second indicator to the number of non-filing characters (i.e. characters in an initial articles plus the space… for «The » set the second indicator to “4”). |
| 246 | VARYING FORM OF TITLE | Alternate form of title for searching and filing purposes | If the patron might look for the work under a different title, enter it here. Do not include initial articles. The first indicator should be “3”, unless the title is merely a variant spelling, in which case the first indicator should be “1”. |
| 250 | EDITION STATEMENT | Transcription of the edition statement from the title page (or chief source of information) | Transcribe the edition statement exactly as it appears on the title-page. You may abbreviate if the edition statement is very long. |
| 260 | PUBLICATION (IMPRINT) | Publication information. | Put the location of publication in subfield “a”, the publisher in subfield “b”, and the year (or probable year) in subfield “c”. See ISBD punctuation sheet. |
| 300 | PHYSICAL DESCRIPTION | Physical description | Enter the pagination statement in subfield “a”, a brief description of «special» contents such as illustrations or maps in subfield “b” (see AACR2), and the size of the item in subfield “c”. See ISBD punctuation sheet. |
| 490 | SERIES STATEMENT | Shows the series statement exactly as it appears on the item. | Transcribe the series statement into subfield “a” with the volume number in subfield “v”. See ISBD punctuation sheet. Set the first indicator to “1” if you are using an 830. As a general rule, you should do so. |
| 500 | GENERAL NOTE | Notes that don’t fit anywhere else. | Enter notes as full sentences, with a separate 500 field for each distinct topic. |
| 501 | WITH NOTE | Notes whether the work is bound with the works described by other records. | Put description of relationship in subfield “a”. |
| 504 | BIBLIOGRAPHY, ETC. NOTE | Indicates whether the work includes a bibliography. | If the work includes a bibliography and index, put the text «Includes bibliographical references (p. XXX-XXX) and index.» in subfield “a”. If the work does not include an index, remove that part of the sentence. If the references are scattered throughout the work and not gathered into a distinct sentence, remove the parenthetical statement. |
| 505 | FORMATTED CONTENTS | List of contents in a standard format. Unformatted contents can be listed in a 500 (General Note) field. | See ISBD punctuation sheet. Set the first indicator to “0”. If you are separately coding authors and titles, set the second indicator to “0”. Otherwise, leave the second indicator blank. |
| 518 | DATE/TIME OF EVENT NOTE | Used for auction dates. | For auction catalogs, enter the date of the auction in the format “January 2, 1984” in the subfield “a” |
| 520 | SUMMARY, ETC. | A brief summary or abstract of the book or article. | In general you do not need to write a summary. A summary might be called for, however, with items that cannot be easily reviewed by a patron, such as books with highly acidic paper or CD-ROMs. |
| 546 | LANGUAGE NOTE | Note describing the languages used in the work | Only needed for works in multiple languages. See ISBD punctuation sheet. |
| 561 | PROVENANCE INFORMATION | Describes the previous ownership of the item. | Used only for rare books. |
| 563 | BINDING INFORMATION | Describes the binding of the item. | Used only for rare books. |
| 590 | LOCAL NOTE | Local notes. Required for auction catalogs. | Used for auction catalogs to indicate what types of coins are sold in the auction- Roman, Greek, etc. |
| 600 | SUBJECT ADDED–PERSONAL | Authorized form of personal names for people discussed in the work | See Authorized headings sheet and AACR2. The first indicator should generally be a “1”, to indicate that the entry is surname first. If the name consists only of a forename, however, the first indicator should be “0”. If you found the name in the LC authority file, set the second indicator to “0”. Otherwise set the second indicator to “4”. |
| 610 | SUBJECT ADDED–CORPORATE | Authorized form of corporate names for organizations discussed in the work | See Authorized headings sheet and AACR2. Set the first indicator to “2”. If you found the name in the LC authority file, set the second indicator to “0”. Otherwise set the second indicator to “4”. |
| 611 | SUBJECT ADDED–MEETING | Authorized form of meeting names for meetings discussed in the work | See Authorized headings sheet and AACR2. Set the first indicator to “2”. If you found the name in the LC authority file, set the second indicator to “0”. Otherwise set the second indicator to “4”. |
| 630 | SUBJECT ADDED–UNIFORM TITLE | Authorized form of titles for other works discussed in the work | See Authorized headings sheet and AACR2. Set the first indicator to the number of non-filing characters (i.e. characters in an initial articles plus the space… for «The » set the first indicator to “4”). If you found the name in the LC authority file, set the second indicator to “0”. Otherwise set the second indicator to “4”. |
| 650 | SUBJECT ADDED–TOPICAL | Library of Congress Subject Heading terms describing the subject of the work | See Authorized headings sheet and AACR2. If you found the name in the LC authority file, set the second indicator to “0”. Otherwise set the second indicator to “4”. |
| 651 | SUBJECT ADDED–GEOGRAPHICAL | Library of Congress Subject Heading geographical terms describing the subject of the work | See Authorized headings sheet and AACR2. If you found the name in the LC authority file, set the second indicator to “0”. Otherwise set the second indicator to “4”. |
| 655 | INDEX TERM–GENRE/FORM | Describes what an item is as opposed to what the item is about. | Generally used only for auction catalogs, which should have the genre heading «Auction catalogs.» (make sure to find the authorized heading!) If you found the name in the LC authority file, set the second indicator to “0”. If you are using a term from a specific thesaurus, set the second indicator to “7” and put the code for the thesaurus in subfield “2”. Otherwise set the second indicator to “4”. |
| 690 | LOCAL SUBJECT ADDED–TOPICAL | Used for headings from any custom subject authority file. | If there is no appropriate LCSH term, you can use a 690 with subject headings you find on other items in the catalog. |
| 691 | LOCAL SUBJECT ADDED–GEOGRAPHICAL | Used for headings from any custom subject authority file. | If there is no appropriate LCSH term, you can use a 691 with subject headings you find on other items in the catalog. |
| 700 | ADDED ENTRY–PERSONAL | Used for second authors and other persons related to the production of the work. | See Authorized headings sheet and AACR2. The first indicator should generally be a “1”, to indicate that the entry is surname first. If the name consists only of a forename, however, the first indicator should be “0”. |
| 710 | ADDED ENTRY–CORPORATE | Used for corporate bodies related to the production of the work (e.g. publishers). | See Authorized headings sheet and AACR2. Set the first indicator to “2”. |
| 711 | ADDED ENTRY–MEETING | Used for meetings related to the production of the work (e.g. symposia that contributed to the work). | See Authorized headings sheet and AACR2. Set the first indicator to “2”. |
| 730 | ADDED ENTRY–UNIFORM TITLE | Used for uniform titles related to the production of the work (e.g. a work that inspired the present work) | See Authorized headings sheet and AACR2. Set the first indicator to the number of non-filing characters (i.e. characters in an initial articles plus the space… for «The » set the first indicator to “4”). |
| 773 | HOST ITEM ENTRY | Describes the larger bibliographic unit that contains the work (e.g. book or journal containing the article being described in the current record) | If the host publication is author main entry, enter the authorized form of the author’s name in subfield “a”. Put the title in subfield “t”. If the host publication is an independent work, put publication information in subfield “d”. When available, ISSN and ISBN should always be used in, in subfields “x” and “z” respectively. Relationship information (e.g. volume number, page number, etc.) goes in subfield “g”. Subfield “q” contains an encoded representation of the location of the item: volume, issue, and section numbers are separated by colons, and the first page is entered following a “<” at the end of the subfield. See ISBD punctuation sheet. Set the first indicator to “0”. If you want the label «In:» to be generated, leave the second indicator blank. If you want something else displayed before the 773 text, set the second indicator to “8” and add a subfield “i” with the label you want at the beginning of the field (e.g. «$iOffprint from:»). |
| 830 | SERIES ENTRY–UNIFORM TITLE | Authorized form of the series name transcribed in the 490 field. Often this will just be the same as the 490. | See Authorized headings sheet and AACR2. Set the second indicator to the number of non-filing characters (i.e. characters in an initial articles plus the space… for «The » set the second indicator to “4”). |
| 852 | LOCATION/CALL NUMBER | Provides the section name for pre-barcode books, pamphlets, and some articles and serials. | Do not put anything in this field if you are cataloging a volume which gets only one record and a barcode. If the item does not get a barcode, or you are currently creating a record for an article in a volume, put the section in subfield “a” (see ANS cataloging documentation), and the call number in subfield “i”. Set the first indicator to “8”. |
| 856 | ELECTRONIC ACCESS | Links to material available online. | Put the URL of any electronic copies or summaries, etc. in subfield “u” and a link title in subfield “y”. Set the first indicator to “4”. |
| 942 | ADDED ENTRY ELEMENTS (KOHA) | Used for Koha-specific data. | Set the subfield “c” to the appropriate item type. |
Table: Cataloging Guide
Guida alla catalogazione delle copie¶
La tabella sottostante rappresenta i dati di copia predefiniti incorporati in Koha. Queste informazioni sono utilizzabili per migrare od importare i dati.
| MARC21 Tag/subfield | Data Element | Description | Notes |
|---|---|---|---|
| 952$0 | Withdrawn status | Default values:
|
Coded value, matching Authorized Value category (“WITHDRAWN” in default installation) |
| 952$1 | Lost status | Default values:
|
It’s possible to configure OPAC so that lost items don’t display with the hidelostitems system preference. Coded value, matching Authorized Value category (“LOST” in default installation) |
| 952$2 | Classification | Classification scheme that defines filing rules used for sorting call numbers. | A choice of classification sources as they are defined in administration. If no classification scheme is entered, the system will use the value entered in the DefaultClassificationSource preference. |
| 952$3 | Materials specified | Specific issues of serials or multi-part items. | Displayed when items are checked out and in to tell the staff how many pieces the item has. Copy/volume data is stored in 952$h and $t for display in Normal views. |
| 952$4 | Damaged status | Default values:
|
Coded value, matching Authorized Value category (“DAMAGE” in default installation) |
| 952$5 | Use restrictions | Default values:
|
Coded value, matching Authorized Value category (“RESTRICT” in default installation). This value has no effect on circulation. |
| 952$7 | Not for loan | Default values:
|
Coded value, matching Authorized Value category (“NOT_LOAN” in default installation). Negative number values can still be placed on hold. |
| 952$8 | Collection code | Coded value | Coded value, matching Authorized Value category (“CCODE” in default installation) |
| 952$9 | Item number | System-generated item number. | Does not display in the item record. |
| 952$a | Owning Library ** | Branch code | Required. Code must be defined in Libraries, Branches and Groups |
| 952$b | Holding library ** (usually the same as 952$a ) | Branch code | Required. Code must be defined in Libraries, Branches and Groups |
| 952$c | Shelving location code | Coded value, matching Authorized Value category (“LOC” in default installation) | |
| 952$d | Date acquired | YYYY-MM-DD | Date formats in the 952 subfields are required to be in the system internal format for data loading and subsequent item editing: YYYY-MM-DD |
| 952$e | Source of acquisition | Coded value or vendor string | Filled in automatically with the Koha assigned vendor id by Acquisitions when an item is received. |
| 952$g | Purchase price | Decimal number, no currency symbol (ex. 10.00) | Filled in automatically by Acquisitions when an item is received. |
| 952$h | Serial enumeration | Filled in automatically by Serials if the issue is received there. | |
| 952$o | Koha full call number | Can be filled in automatically based on the itemcallnumber system preference. | |
| 952$p | Barcode * | Max 20 characters | |
| 952$t | Copy number | Max 32 characters | |
| 952$u | Uniform Resource Identifier | Item specific URL | Full URL starting with http:// Only needed if your item has its own URL, not necessary if the bib record has a 856$u that applies to all items on the record. |
| 952$v | Replacement price | Decimal number, no currency symbol (ex. 10.00) | Filled in automatically by Acquisitions when an item is received. |
| 952$w | Price effective from | YYYY-MM-DD | Date formats in the 952 subfields are required to be in the system internal format for data loading and subsequent item editing: YYYY-MM-DD. Filled in automatically by Acquisitions when an item is received. |
| 952$x | Nonpublic note | This is a note field for notes that will not appear in the OPAC. Right now this note does not appear anywhere but in the item edit screen in the staff client. | |
| 952$y | Koha item type ** | Coded value, required field for circulation | Required. Coded value, must be defined in Item types |
| 952$z | Public note |
Table: Koha Embedded Holdings Data
* - required for circulation
** - required by Koha
Gestione degli ordini e delle prenotazioni¶
If you tend to import your MARC records when you have ordered the book (as opposed to when you receive the books), and allow patrons to place holds on those books, you may need to add item records to the *.mrc file before importing.
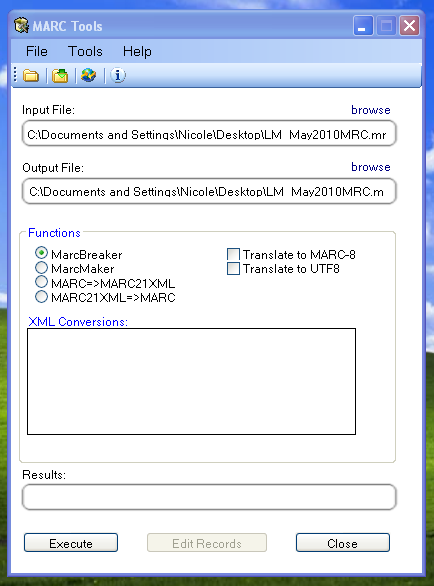
The easiest way to import your latest order is to first run your records through MARCEdit. Download your MARC records, saving them to your desktop or some other location you use/will remember. If you have MARCEdit already installed you should simply have to double click on your MARC records, and they will automatically open in MARCEdit.
Importante
Questo tutorial è stato scritto per MARCEdit versione 5.2.3769.41641 su Windows XP, le istruzioni possono variare per altre versioni o sistemi.
Il file originale sarà automaticamente utilizzato in input; assicurarsi di aver selezionato MarcBreaker, quindi fare clic su «Execute».
Il sistema presenta, nella parte inferiore della finestra, una lista dei record che saranno elaborati.
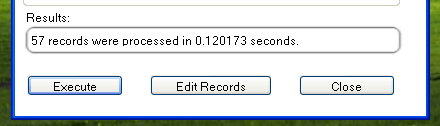
Fare clic su “Edit Records” per proseguire ed aggiungere i record delle copie.
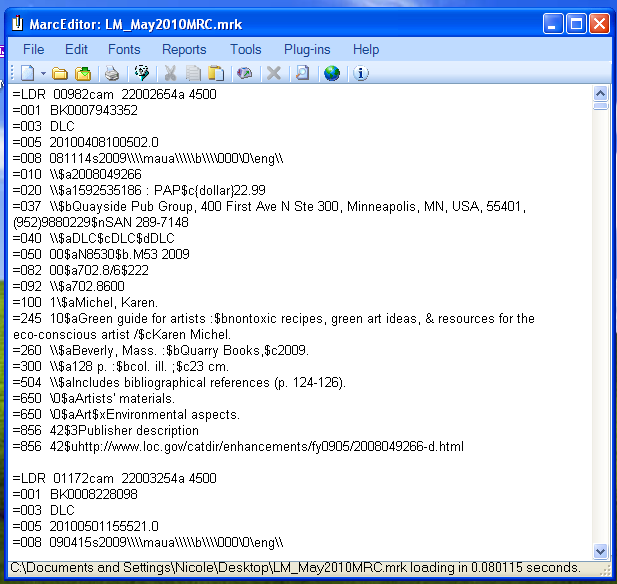
La finestra sarà sostituita da una più grande, che conterrà i record MARC.
Click on Tools > Add/Edit Field

Immettere le informazioni sulla copia nel formato di Koha
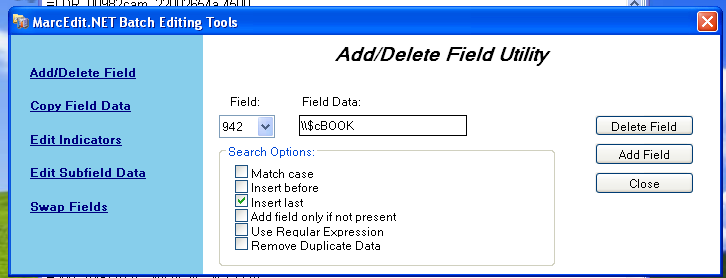
- Nella casella Field, digitare 942
- In the Field Data box, type \$c and the item type code (\$cBOOK in this example)
- Selezionare l’opzione “Insert last”
- Fare clic su Add Field”
Immettere i dati del record copia
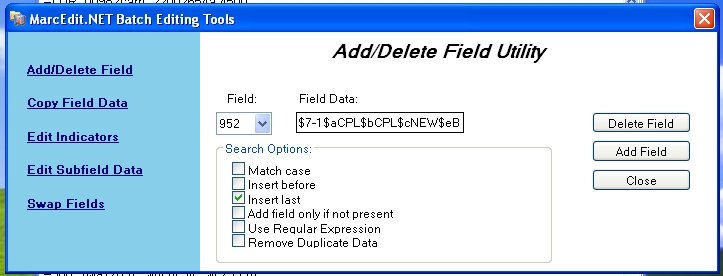
- Nella casella Field, digitare 952
- In the Field Data box, type
$7ORDERED_STATUS$aPERM_LOC$bCURR_LOC$cSHELVING_LOCATION$eSOURCE_OF_ACQ$yITEM_TYPE
- esempio: $7-1$aCPL$bCPL$cNEW$eBrodart$yBOOK
- Nell’installazione predefinita di Koha -1 è il valore per lo stato Ordinato
- Se lo si desidera, è possibile apportare modifiche ad altri campi che si vogliono compilare; per esempio si può cambiare il codice della collezione, per registrattre tutte le copie nella stessa collezione (8), compilare automaticamente la data di acquisizione (d), o scrivere una nota visibile agli utenti (z)
- Assicurarsi di usare il segno $ per separare i sottocampi; se si immettesse ciascun sottocampo su una riga separata, verrebbero generate altrettante copie, durante l’importazione del record MARC. Nell’esempio soprastante, verrebbereo create quattro copie, una per ciascun campo corretto.
- Make sure you look at the Administration > Authorized Values in Koha to put the correct code into the field
- esempio: $7-1$aCPL$bCPL$cNEW$eBrodart$yBOOK
- Selezionare l’opzione “Insert last”
- Fare clic su Add Field”
Chiudere la finestra dell’editor
Click on File > Compile into MARC

Scegli dove salvare il file
Now you want to go into your Koha system and follow the instructions for importing MARC records.
Una volta che le copie saranno arrivate, sarà necessario aprire i relativi record, modificare individualmente ciascuna copia per registrare il codice a barre corretto, e cambiare manualmente lo stato da Ordinato a nessun valore nel campo Non prestabile
Nota
Se acquistate le informazioni di catalogazione delle vostre copie, se lo desiderate potete chiedere al venditore di inserire nei record MARC le informazioni di cui avete bisogno per vostro conto. In qesto modo potette importare il file modificato dal venitore, che sovrascriverà i record esistenti e sostituirà automaticamente i dati con quelli desiderati.