Administration
Basisparameter
Pfad in Koha: Mehr > Administration
Wichtig
Konfigurieren Sie die Parameter in der vorgegebenen Reihenfolge.
Bibliotheken
Bei der Einrichtung ihres Koha-Systems wollen Sie für jede Zweigbibliothek Informationen eingeben. Diese Daten werden in unterschiedlichen Bereichen. von Koha verwendet.
Pfad in Koha: Mehr > Administration > Basisparameter > Bibliotheken
Bemerkung
Nur Bibliothekspersonal mit der Berechtigung manage_libraries permission (oder der superlibrarion-Berechtigung) hat Zugriff auf diesen Bereich.
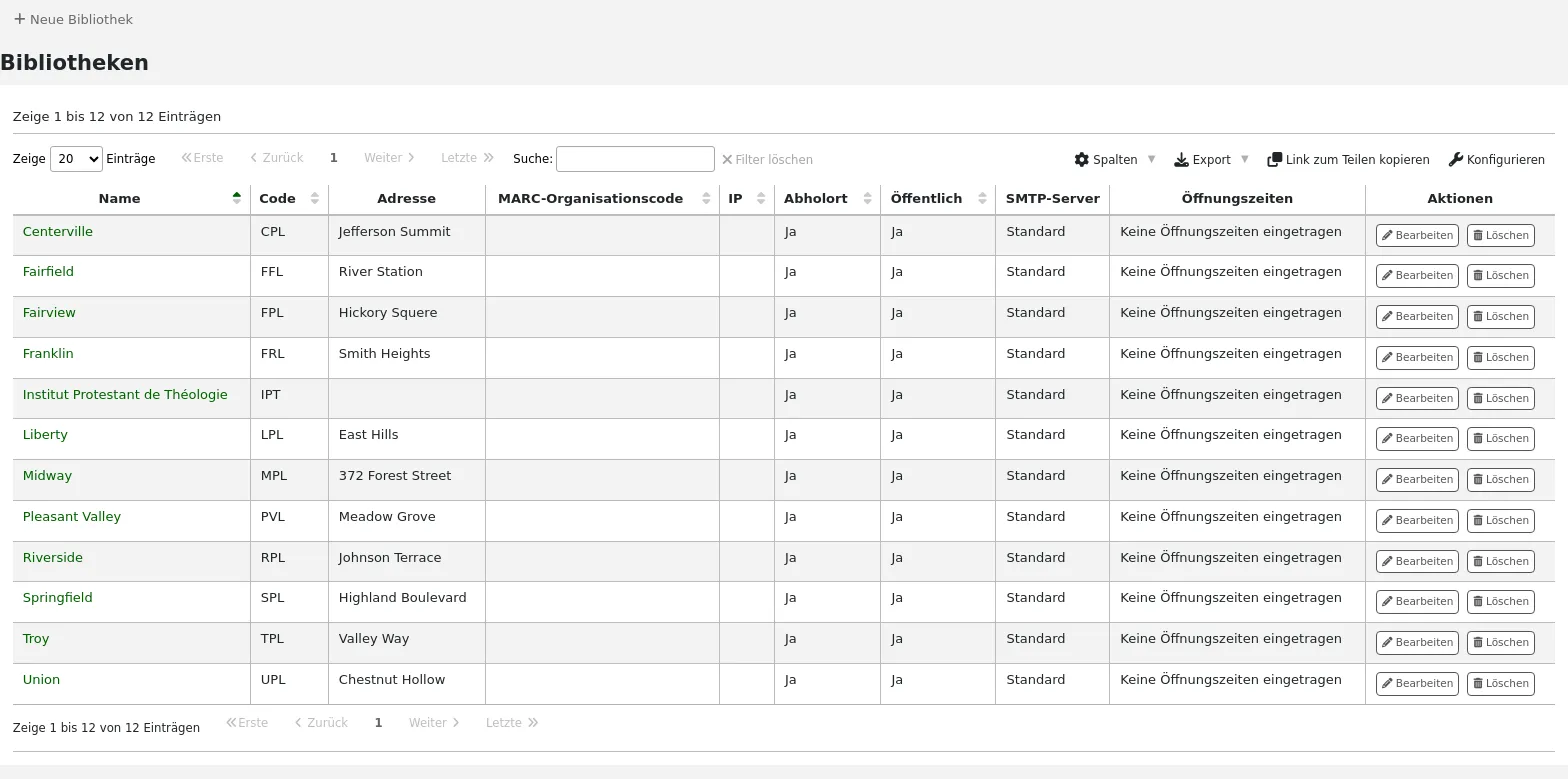
Wenn Sie auf dieser Seite sind, wird Ihnen eine Liste der in diesem System bereits angelegten Bibliotheken angezeigt.
Bemerkung
You can customize the columns of this table in the Table settings section of the Administration module (table id: libraries).
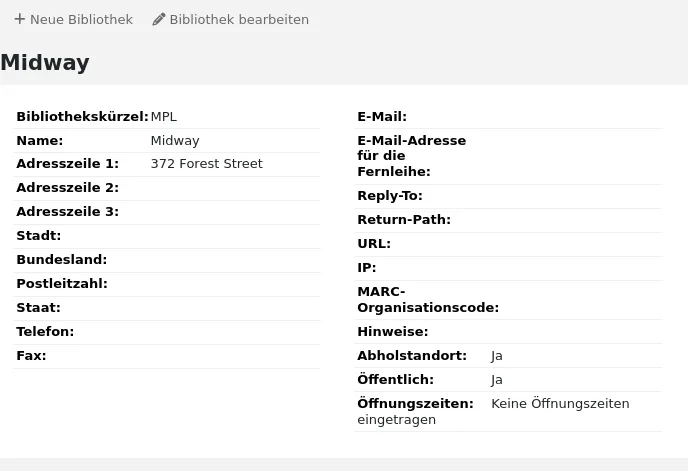
Wenn Sie auf den Namen der Bibliothek klicken, gelangen Sie zur Detailanzeige der Bibliotheksinformationen.
Neue Bibliothek anlegen
Eine neue Bibliothek hinzufügen:
‚Neue Bibliothek‘ anklicken
Füllen Sie das Formular aus
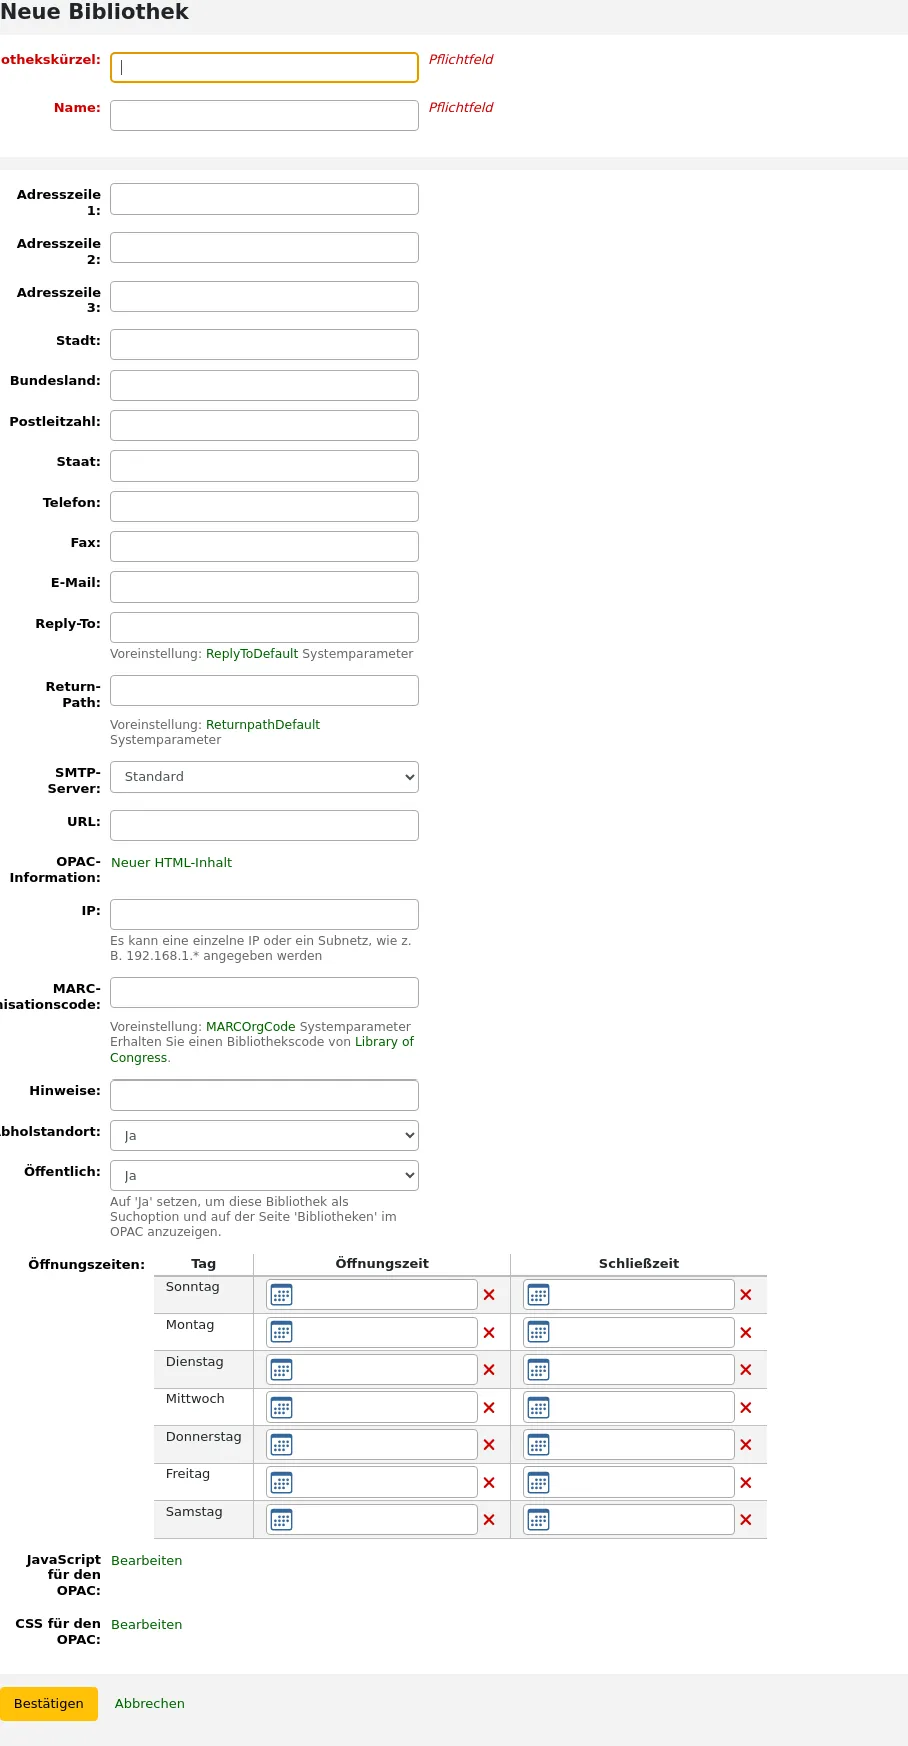
Bibliothekskürzel (Pflichtfeld): Das Bibliothekskürzel sollte keine Leerzeichen oder Bindestriche enthalten und zehn oder weniger Zeichen lang sein. Er dient als eindeutige Kennung in der Datenbank.
Name (Pflichtfeld): Der Name wird im OPAC und der Dienstoberfläche überall dort angezeigt, wo der Name der Bibliothek angegeben ist und sollte für alle nachvollziehbar sein.
Adresse, Stadt, Bundesland, Postleitzahl, Staat, 1. Telefonnummer, Fax: die Adress- und Kontaktfelder können verwendet werden um Benachrichtigungen individuell für jede Bibliothek anzupassen, sie werden auch auf der Seite ‚Bibliotheken‘ im OPAC angezeigt, wenn die Bibliothek auf „öffentlich“ gesetzt wurde
E-Mail-Adresse: die E-Mail-Adresse ist kein Pflichtfeld, sollte jedoch für jede Bibliothek im System ausgefüllt werden
Bemerkung
Stellen Sie sicher, dass eine E-Mail-Adresse für die Bibliothek angegeben ist, um sicherzustellen, dass E-Mails von und an die richtige Adresse geschickt werden
Bemerkung
Wenn hier keine E-Mail-Adresse eingegeben wird, wird die Adresse im Systemparameter KohaAdminEmailAddress verwendet um Benachrichtigungen zu versenden
E-Mail-Adresse für die Fernleihe: wird eine spezifische E-Mail-Adresse für die Fernleihe verwendet, kann diese hier eingetragen werden
Bemerkung
Wird hier keine E-Mail-Adresse eingetragen, wird die Adresse im Systemparameter ILLDefaultStaffEmail verwendet, um Fernleihbestellungen zu erhalten
Reply-To: Wenn Sie möchten, können Sie eine andere Antwort-Email-Adresse angeben. An diese Adresse gehen dann alle Antworten.
Bemerkung
Wird hier keine E-Mail-Adresse eingetragen, wird die Adresse im Systemparameter ReplytoDefault verwendet, an die Antworten an die Bibliothek gesendet werden
Return-Path: Sie können zusätzlich eine Return-Path-Adresse angeben. An diese Adresse werden alle Nachrichten geleitet, die nicht zugestellt werden können.
Bemerkung
Wird hier keine E-Mail-Adresse eingetragen, wird die Adresse im Systemparameter ReturnpathDefault verwendet, an die nicht zugestellte Nachrichten weitergeleitet werden.
SMTP-Server: wenn die Bibliothek einen anderen SMTP-Server als den Standard-Server nutzt, kann dieser hier angegeben werden.
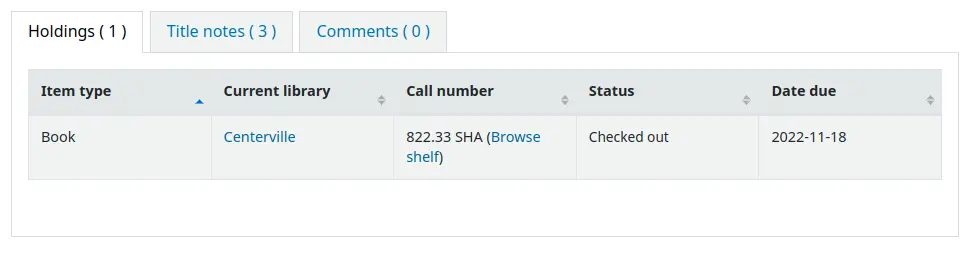
URL: Wenn das URL-Feld ausgefüllt ist, wird der Name der Bibliothek in der Exemplartabelle im OPAC verlinkt
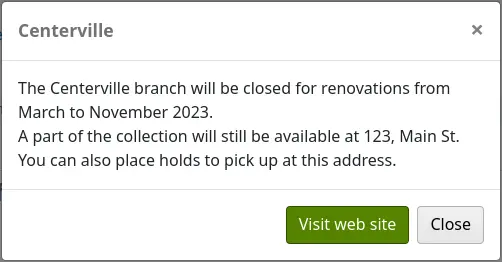
OPAC-Info: das Feld führt Sie zum Werkzeug HTML-Anpassungen, in dem Sie zusätzliche Informationen über die Bibliothek angeben können. Diese Informationen erscheinen auf der Seite ‚Bibliotheken‘ im OPAC, sowie in den Exemplarinformationen im OPAC.
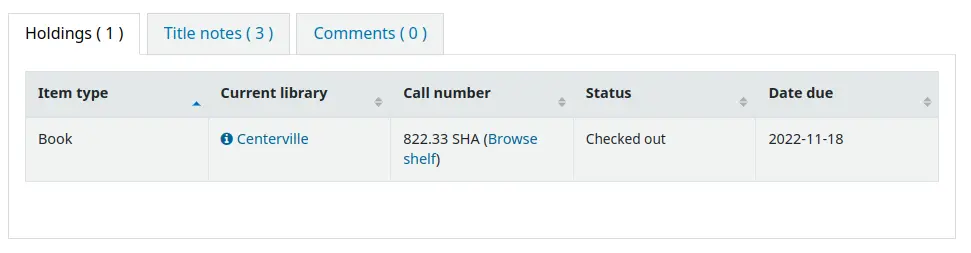
Wenn Sie auf einen Bibliotheksnamen klicken, neben dem ein kleines „i“-Icon angezeigt wird, öffnet sich ein Pop-Up-Fenster mit den Informationen.
Die IP-Adresse muss nicht ausgefüllt werden, es sei denn, Sie planen den Zugang zur Dienstoberfläche auf eine spezifische IP-Adresse einzuschränken.
Bemerkung
Die Systemparameter StaffLoginLibraryBasedOnIP und StaffLoginRestrictLibraryByIP nutzen IP-Adressen und -Bereiche von Bibliotheken.
MARC organization code: if this library has a specific MARC organization code, you can enter it here.
Bemerkung
Wenn hier nichts eingetragen ist, wird für die Bibliothek der Code aus dem Systemparameter MARCOrgCode verwendet.
Hier können Sie Anmerkungen angeben. Diese werden nicht im OPAC angezeigt.
Pickup location: choose whether this library will display as an available pickup location for holds and interlibrary loans.
Öffentlich: Entscheiden Sie, ob diese Bibliothek im OPAC in der Seite ‚Bibliotheken‘ im OPAC sowie als Filtermöglichkeit in der Erweiterten Suche angezeigt werden soll.
Öffnungszeiten: wenn Sie stundenweise Ausleihen anbieten, geben Sie die Öffnungszeiten der Bibliothek für jeden Tag der Woche an. Sie können dann den Systemparameter ConsiderLibraryHoursInCirculation entsprechend Ihrer Richtlinien einstellen.
Version
Dieses Feature gibt es in Koha seit Version 24.05.
UserJS: use this field to add custom JavaScript to the OPAC of this library (when patrons are logged in, or if there is a
SetEnv OPAC_BRANCH_DEFAULTentry in the Apache configuration file)Version
Dieses Feature gibt es in Koha seit Version 23.11.
Bemerkung
Bearbeitungen, die für alle Bibliotheken gelten sollen, können im Systemparameter OPACUserJS eingetragen werden.
UserCSS: use this field to add custom CSS to the OPAC of this library (when patrons are logged in, or if there is a
SetEnv OPAC_BRANCH_DEFAULTentry in the Apache configuration file)Version
Dieses Feature gibt es in Koha seit Version 23.11.
Bemerkung
CSS-Anweisungen, die für alle Bibliotheken gelten sollen, können im Systemparameter OPACUserCSS eingetragen werden.
If you have any additional fields for libraries (branches), they will be displayed at the bottom of the form.
Click ‚Submit‘ to save the new library.
Bearbeiten/Löschen einer Bibliothek
Klicken Sie in der Bibliotheksübersicht auf „Bearbeiten“ oder „Löschen“, um eine Bibliothek zu bearbeiten oder zu löschen.
Warnung
Sie können dann den „Bibliothekscode“ nicht mehr bearbeiten.
Warnung
Sie können eine Bibliothek, der noch Benutzer*innen oder Titel zugeordnet sind, nicht löschen.

Bibliotheksgruppen
Bibliotheksgruppen können verschiedenen Zwecken dienen: den Zugriff auf Benutzerdaten, Exemplaränderungen und Suchen im OPAC oder der Dienstoberfläche begrenzen oder das Verhalten bei Vormerkungen definieren.
Pfad in Koha: Mehr > Administration > Basisparameter > Bibliotheksgruppen
Bemerkung
Nur Bibliothekspersonal mit der Berechtigung manage_libraries permission (oder der superlibrarion-Berechtigung) hat Zugriff auf diesen Bereich.
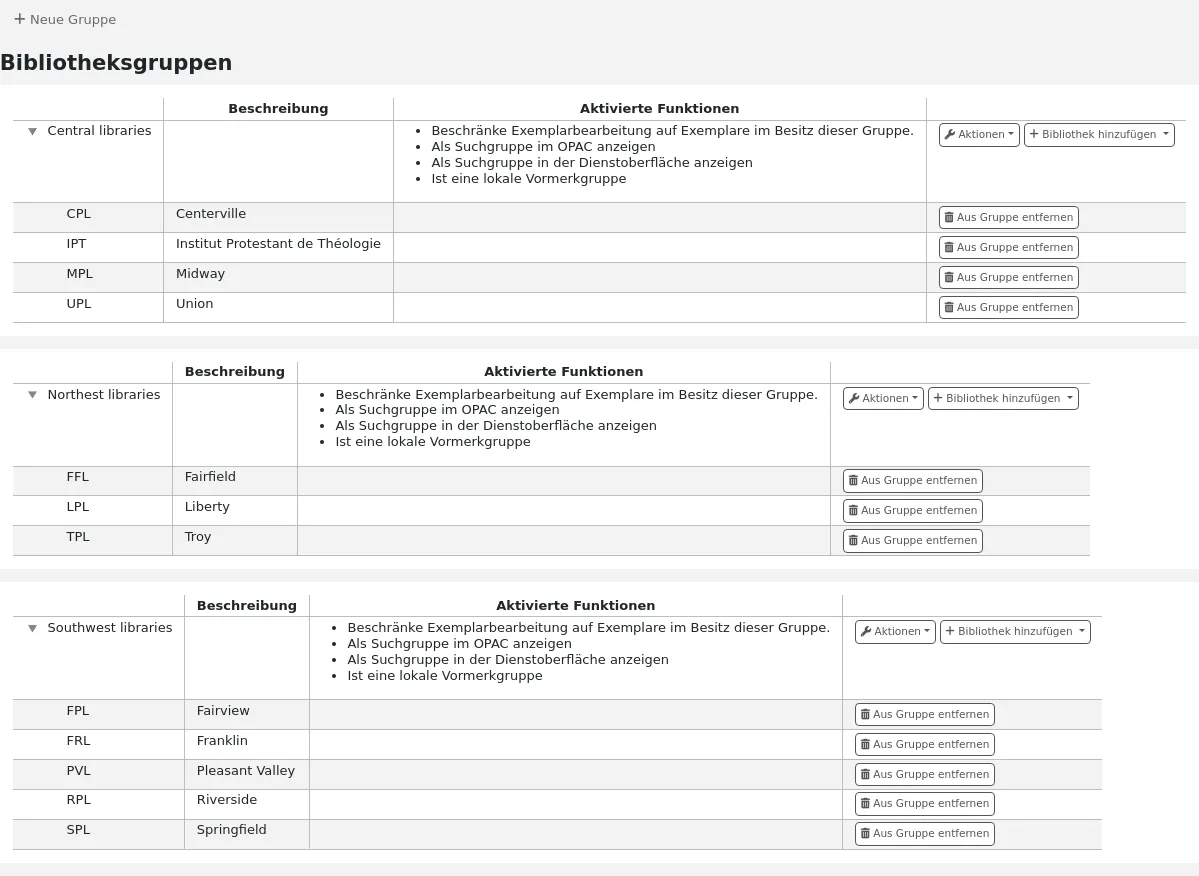
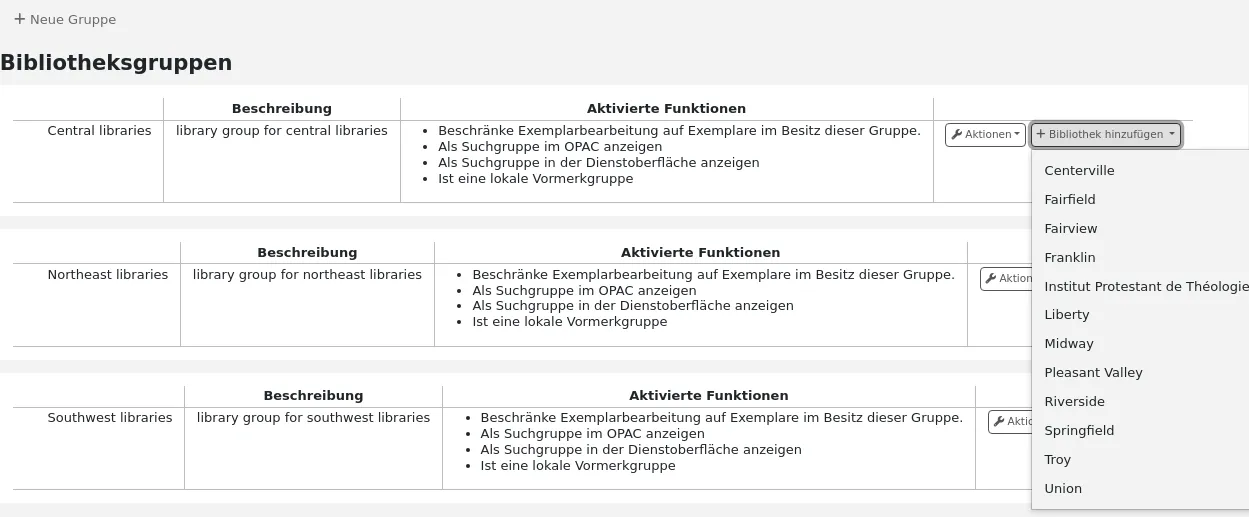
Wenn Sie auf dieser Seite sind, wird Ihnen eine Liste der in diesem System bereits eingetragenen Bibliotheksgruppen angezeigt.
Gruppe hinzufügen
Eine neue Bibliotheksgruppe erstellen,
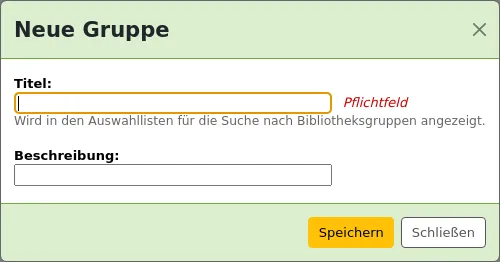
Klicken Sie auf „Neue Gruppe“ oben links auf dem Bildschirm.
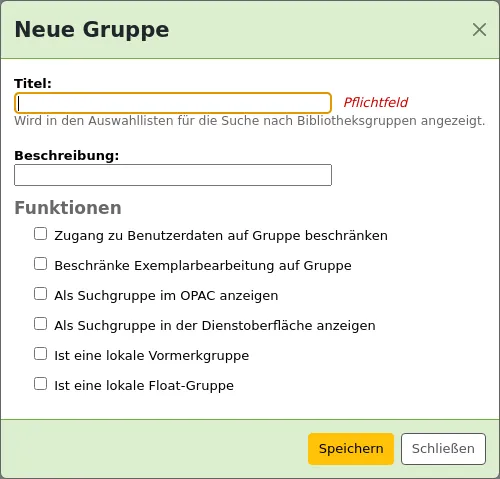
Titel (Pflichtfeld): geben Sie der Gruppe einen Namen. Dieser wird in der Auswahlliste in der erweiterten Suche angezeigt.
Beschreibung: vergeben Sie optional eine Beschreibung für die Gruppe. Diese wird nur auf dieser Seite genutzt, um den Zweck der Gruppe darzustellen.
Funktionen: die Gruppennutzung prüfen
Zugang zu Benutzerdaten auf Gruppe beschränken: dies schränkt die Sicht von Mitarbeiter*innen auf Benutzer*innen anderer Gruppen ein.
Bemerkung
Dies kann mit der Berechtigung view_borrower_infos_from_any_libraries überschrieben werden (oder der superlibrarian-Berechtigung).
Exemplarbearbeitung auf Gruppe beschränken: dies schränkt die Möglichkeit für Mitarbeiter*innen ein, Exemplare aus Bibliotheken anderer Gruppen zu bearbeiten.
Bemerkung
Dies kann mit der Berechtigung edit_any_item (oder der superlibrarian-Berechtigung) überschrieben werden.
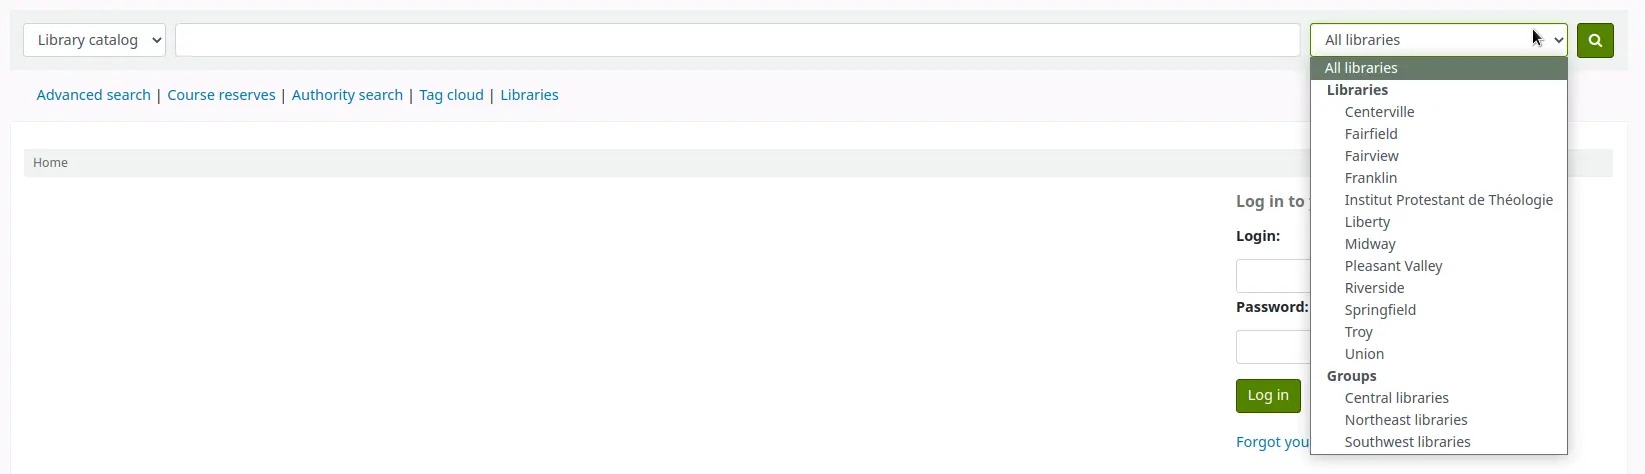
Als Suchgruppe im OPAC anzeigen: dies zeigt die Gruppe in der Bibliotheksauswahlliste im oberen Bereich des OPACs an (wenn der Systemparameter OpacAddMastheadLibraryPulldown auf „Hinzufügen“ steht) und in der erweiterten Suche.
Als Suchgruppe in der Dienstoberfläche anzeigen: fügt die Gruppe der Auswahlliste Bibliotheksgruppen in der erweiterten Suche der Dienstoberfläche hinzu.

Ist eine lokale Vormerkgruppe: macht die Gruppe zu einer lokalen Vormerkgruppe, welche genutzt werden kann, um Vormerkregeln in den Ausleihkonditionen hinzuzufügen, damit Benutzer*innen nur Exemplare dieser Gruppe vormerken können.
Ist eine Lokale Floating-Gruppe: macht die Gruppe zu einer lokalen Floating-Gruppe, die im Rückgabekonzept oder im Vormerkkonzept in den Ausleihkonditionen genutzt werden kann, um zu bestimmen, ob ein Exemplar „floaten“ (in der Rückgabebibliothek verbleiben) oder zurück in die Heimatbibliothek gebracht werden soll.
Klicken Sie auf „Speichern“, um die Gruppe anzulegen.
Bibliothek einer Gruppe hinzufügen
Klicken Sie auf die Schaltfläche ‚Bibliothek hinzufügen‘ neben der Gruppe um eine Bibliothek hinzuzufügen. Sie bekommen eine Liste von Bibliotheken angezeigt, die noch nicht auf der Liste der Gruppe stehen.
Untergruppe hinzufügen
Wenn Ihr Bibliothekssystem sehr groß ist, können Sie Untergruppen erstellen. Klicken Sie auf die Schaltfläche „Aktionen“ neben der Gruppe und wählen Sie die Option „Neue Untergruppe“ aus.

Füllen Sie die Felder „Titel“ und „Beschreibung“ (optional) aus. Die Funktionen werden von der übergeordneten Gruppe vererbt.
Gruppe löschen
Um eine Gruppe zu löschen, klicken Sie auf die Schaltfläche ‚Aktionen‘ neben der Gruppe und wählen Sie die Option ‚Löschen‘ aus.
Koha fordert dazu auf die Löschung zu bestätigen.
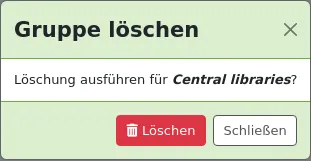
Klicken Sie auf „Löschen“, um zu bestätigen und die Gruppe zu löschen.
Ausleihtheken
Koha erlaubt es mehrere Theken für eine Bibliothek zu definieren. Wenn Sie z.B. Ausleihtheken in der Erwachsenen- und im Kinderbereich haben, oder wenn Sie Theken auf jeder Etage oder für jede Abteilung haben.
Stellen Sie sicher, dass Sie den Systemparameter UseCirculationDesks aktiviert haben, wenn Sie diese Funktion nutzen möchten.
Pfad in Koha: Mehr > Administration > Benutzer und Ausleihe > Theken
Ausleihtheken konfigurieren
Um eine neue Theke anzulegen, klicken Sie auf die Schaltfläche „Neue Theke“ am Anfang der Seite.
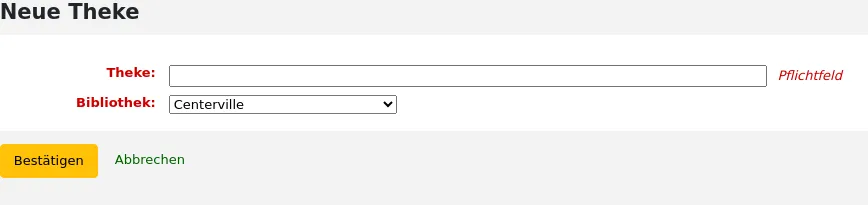
Im Feld „Theke“ geben Sie den Namen der Theke an.
Wählen Sie die Bibliothek aus, der diese Theke zugeordnet ist.
Klicken Sie auf ‚Absenden‘.
Theken bearbeiten
Um eine bereits existierende Theke zu bearbeiten, klicken Sie auf die Schaltfläche „Bearbeiten“ auf der rechten Seite des Thekeneintrags.

Von hier aus können Sie den Namen und/oder die Bibliothek der Theke verändern.
Ausleihtheken löschen
Um eine Theke zu löschen, klicken Sie auf die Schaltfläche „Löschen“ auf der rechten Seite des Thekeneintrags.
Exemplartypen
Pfad in Koha: Mehr > Administration > Basisparameter > Medientypen
Bemerkung
Nur Bibliothekspersonal mit der Berechtigung manage_itemtypes (oder der superlibrarian-Berechtigung) hat Zugang zu diesem Bereich.
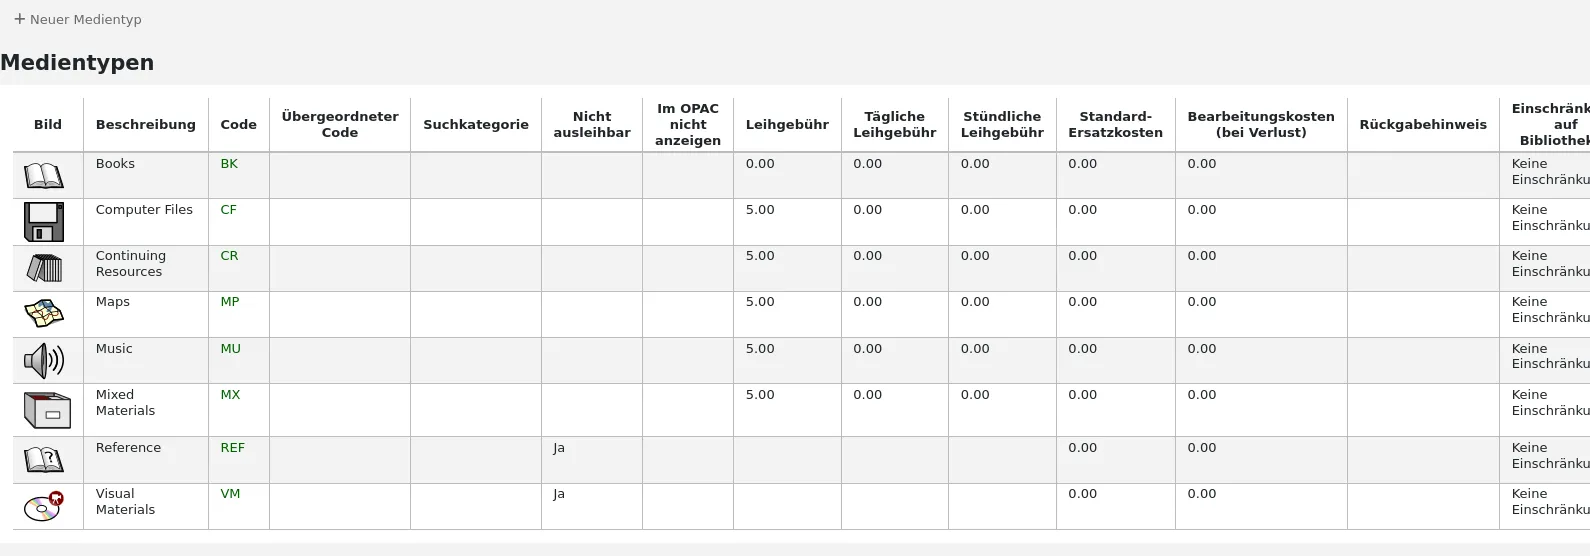
Koha ermöglicht die Organisation des Bestands nach Exemplartypen und Sammlungscodes. Zusammen mit Bibliotheken und Benutzertypen werden Exemplartypen verwendet, um Ausleihkonditionen zu steuern.
Exemplartypen beziehen sich meistens auf den Materialtyp (Buch, CD, DVD etc.), können aber so verwendet werden, wie es für Ihre Bibliothek am besten funktioniert.
Bemerkung
You can customize the columns of this table in the Table settings section of the Administration module (table id: table_item_type).
Exemplartypen hinzufügen
Um einen neuen Exemplartyp anzulegen,
Klicken Sie auf „Neuer Medientyp“ im oberen Bereich der Exemplartypseite.
Füllen Sie das Formular aus:
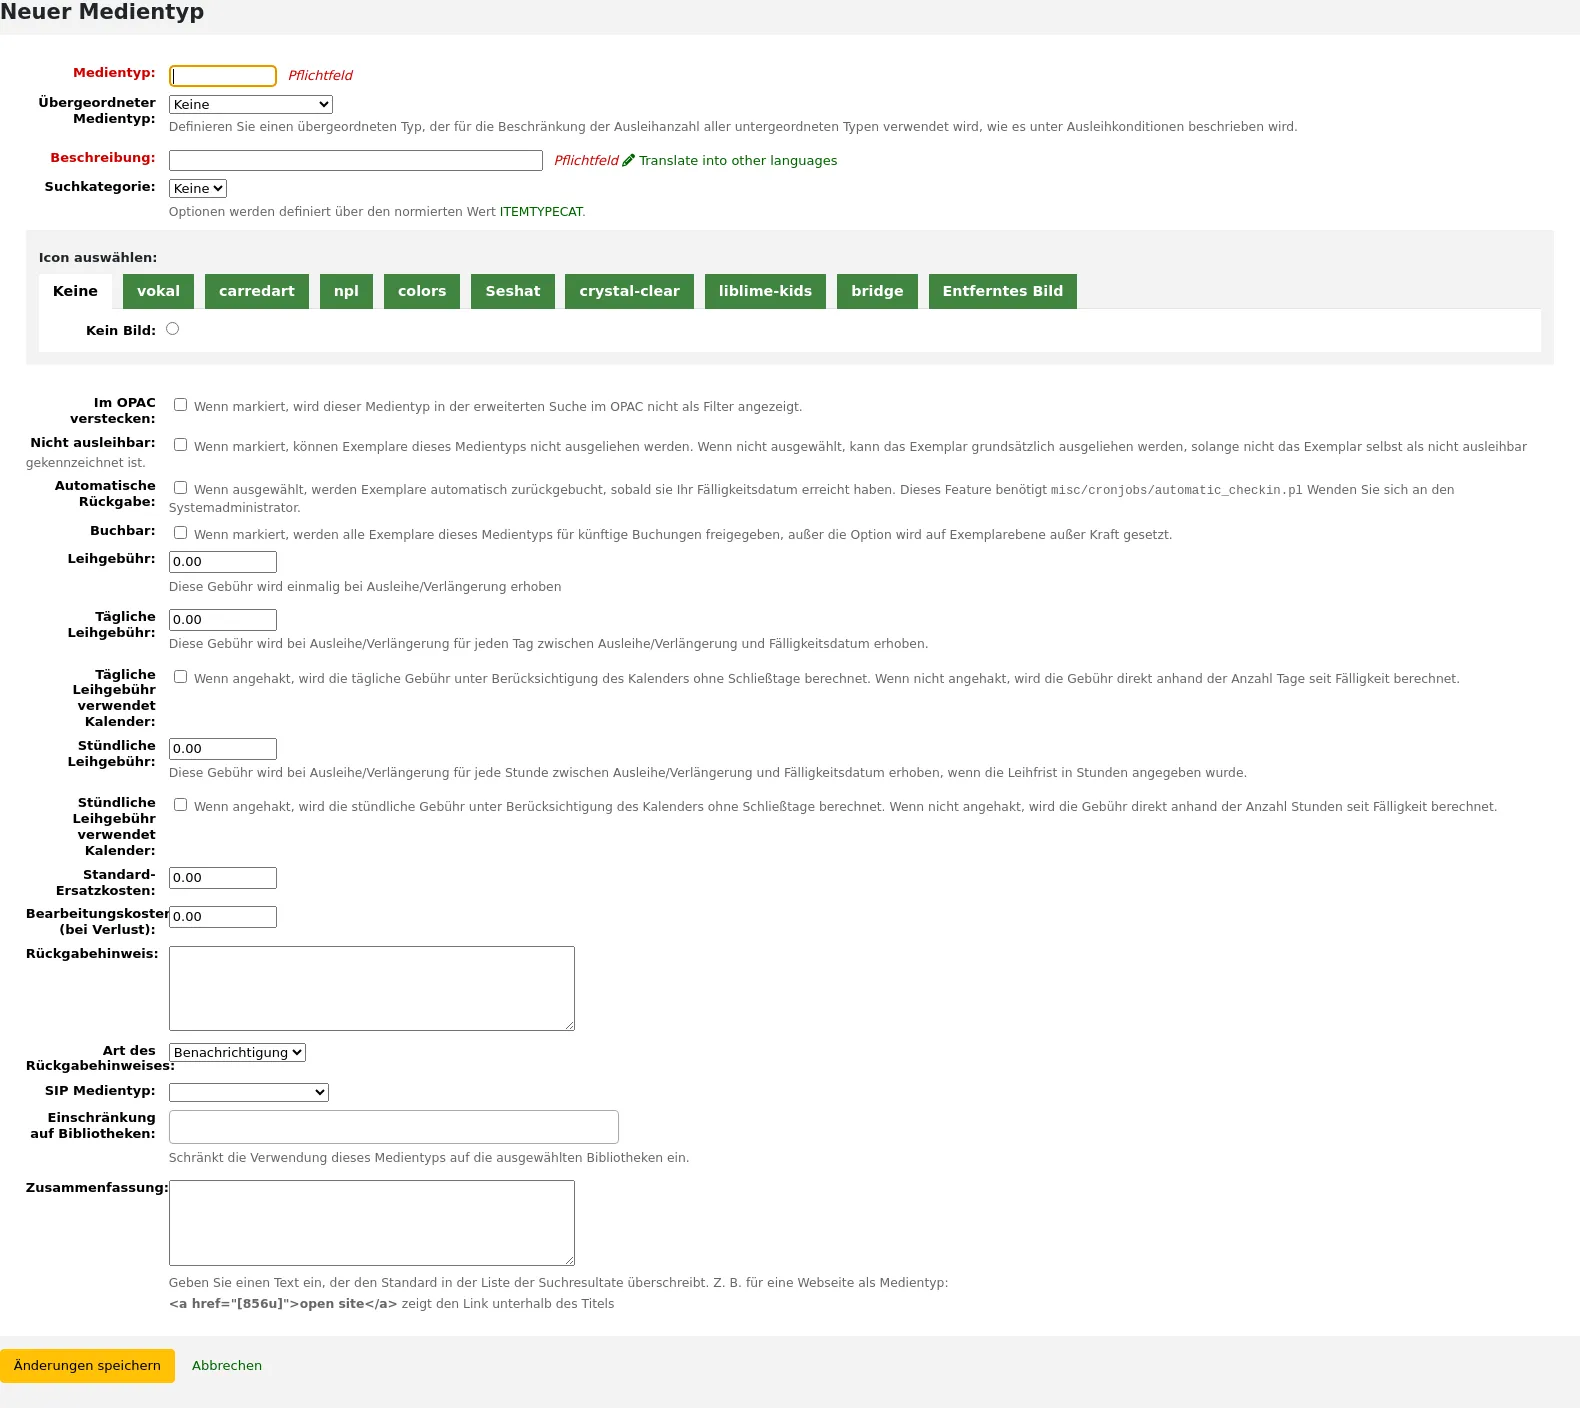
Exemplartyp: geben Sie einen kurzen Code für den Exemplartyp an (maximal 10 Zeichen)
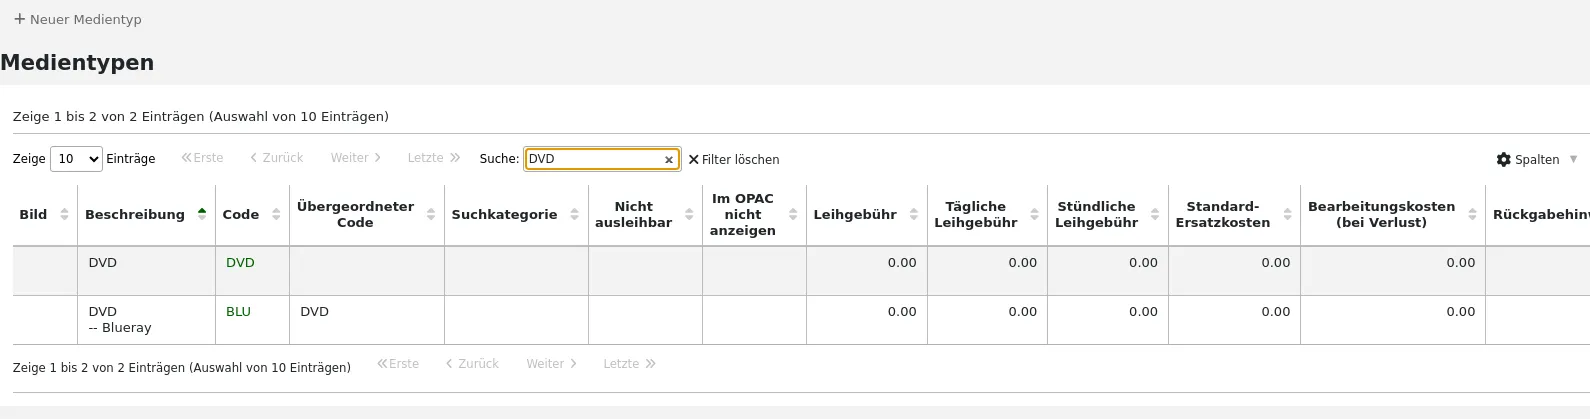
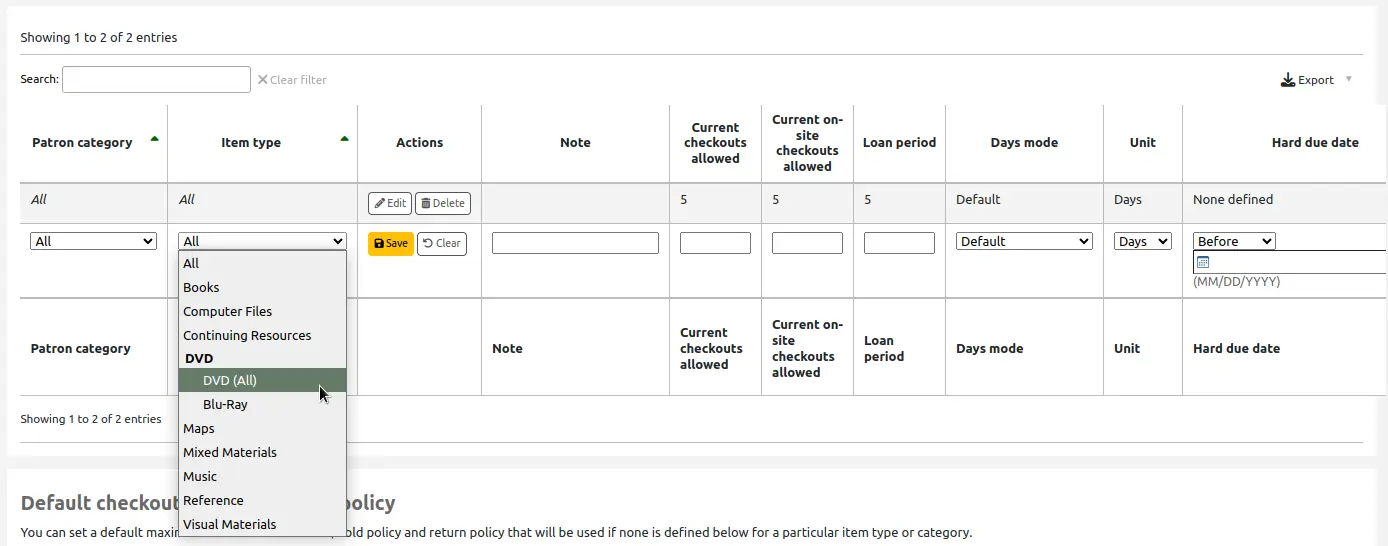
Übergeordneter Exemplartyp: Sie können einen Exemplartyp festlegen, der als übergeordneter Exemplartyp fungiert. Sie können dann Ausleihkonditionen auf Basis des übergeordneten Exemplartyps definieren.
Zum Beispiel könnten Sie Exemplartypen für DVD und Blu-Ray mit einem übergeordneten Exemplartyp DVD haben.
Sie können dann eine Ausleihregel nur für Blu-Ray oder für DVD und Blu-Ray (DVD (Alle)) festlegen
Beschreibung: die anzuzeigende Beschreibung für den Exemplartyp
In Installationen mit mehreren installierten Sprachen können Sie die Beschreibung des Exemplartyps in diese Sprachen über den Link „Übersetzen in andere Sprachen“ übersetzen.
Suchkategorie: Exemplartypen können gruppiert werden, um gemeinsam in der erweiterten Suche nach ihnen suchen zu können. Zum Beispiel können Sie DVDs und Blu-Rays einer Gruppe Film zuordnen, über die beide gesucht werden können. Die Gruppen werden in den Normierten Werten über die Kategorie ITEMTYPECAT authorized value category definiert.
Bemerkung
Suchkategorien werden nur im OPAC verwendet. Mitarbeiter*innen können in der erweiterten Suche der Dienstoberfläche nach einzelnen Exemplartypen suchen.
Icon auswählen: Sie können entscheiden, ob ein Bild mit Ihrem Exemplartyp verknüpft werden soll. Diese Bilder erscheinen in der Dienstoberfläche und im OPAC, in der erweiterten Suche und in der Exemplartabelle oder im bibliografischen Datensatz, wenn der Systemparameter item-level_itypes auf Datensatzebene eingestellt ist. Das Icon kann aus einer Reihe von Bildern ausgewählt werden oder es kann auf ein außerhalb von Koha abgelegtes Bild verlinkt werden.
Warnung
Wenn diese Option nicht aktiviert ist, können Sie die Einstellung von noItemTypeImages oder OPACNoItemTypeImages ändern.
Bemerkung
Damit Ihre Exemplartyp-Icons im OPAC erscheinen, müssen Sie OPACnoItemTypeImages auf „Zeigen“ setzen.
Im OPAC verstecken: für Exemplare, die im OPAC ausgeblendet wurden, kann der Exemplartyp in der erweiterten Suche ausgeblendet werden.
Wichtig
Dadurch wird nicht verhindert, dass diese Exemplare in den Trefferlisten auftauchen, es wird nur der Exemplartyp aus dem Suchformular der Erweiterten Suche entfernt.
Wenn Sie Exemplare eines bestimmten Exemplartyps vollständig verstecken möchten, z. B. wenn Sie eine Fachbibliothek mit Büchern nur für Mitarbeiter*innen haben und nicht möchten, dass diese im OPAC erscheinen, nutzen Sie den Systemparameter OpacHiddenItems.
Nicht ausleihbar: Markieren Sie diese Option für Exemplartypen, die nicht ausgeliehen werden sollen. Exemplare, die als ‚Nicht ausleihbar‘ markiert wurden, werden im Katalog angezeigt, können aber nicht an Benutzer*innen entliehen werden.
Automatische Rückgabe: für Exemplare, die nicht in physischer Form vorliegen, für die aber Ausleihkonditionen bestehen, z.B. Museumsausweise oder E-Books, kann die Checkbox markiert werden.
Bemerkung
Für diese Option wird cronjob misc/cronjobs/automatic_checkin.pl benötigt. Bitten Sie Ihren Systemadministrator dies einzurichten.
Buchbar: Aktivieren Sie diese Option, um Buchungen für alle Exemplare dieses Exemplartyps zu ermöglichen.
Version
Diese Funktion wurde in Koha-Version 24.11 hinzugefügt.
Leihgebühr: wenn Sie eine Ausleihgebühr für Exemplare dieses Typs verlangen, geben Sie hier die Gebühr ein. Der/die Benutzer*in wird dann bei der Ausleihe und Verlängerung mit der Gebühr belastet.
Wichtig
Geben Sie in dieses Feld keine Zeichen, sondern nur Ziffern und Dezimalpunkte ein (zum Beispiel sollten 5,00€ als 5.00 eingegeben werden).
Tägliche Leihgebühr: wenn eine Leihgebühr entsprechend der Anzahl der Tage, die das Exemplar entliehen ist, berechnet werden soll, geben Sie hier die tägliche Gebühr ein. Diese Gebühr wird dem/der Benutzer*in bei der Ausleihe in Rechnung gestellt, multipliziert mit der Anzahl der Tage, an denen das Exemplar ausgeliehen ist. Beispiel: Für ein Exemplar, das für 7 Tage ausgeliehen ist und für das eine tägliche Leihgebühr von 1$ anfällt, werden dem/der Benutzer*in bei der Ausleihe 7$ berechnet. Diese tägliche Leihgebühr wird auch bei Verlängerungen berechnet.
Wichtig
Geben Sie in dieses Feld keine Zeichen, sondern nur Ziffern und Dezimalpunkte ein (zum Beispiel sollten 5,00€ als 5.00 eingegeben werden).
Tägliche Leihgebühr verwendet Kalender: markieren Sie diese Checkbox, um Schließtage von der Berechnung der täglichen Leihgebühr auszuschließen.
Bemerkung
Stellen Sie sicher, dass Sie die Schließtage in den Kalender eintragen, um sie von der täglichen Leihgebühr auszuschließen.
Stündliche Leihgebühr: wenn Exemplare stundenweise ausgeliehen werden, geben Sie die Kosten pro Stunde hier ein. Auch dieser Gesamtbetrag (Stundensatz * Anzahl der Leihstunden) wird dem/der Benutzer*in bei der Ausleihe und Verlängerung in Rechnung gestellt.
Wichtig
Geben Sie in dieses Feld keine Zeichen, sondern nur Ziffern und Dezimalpunkte ein (zum Beispiel sollten 5,00€ als 5.00 eingegeben werden).
Stündliche Leihgebühr verwendet Kalender: markieren Sie die Checkbox, um Schließtage bei der Berechnung der stündlichen Leihgebühr auszuschließen.
Bemerkung
Stellen Sie sicher, dass Sie die Schließtage in den Kalender eintragen, um sie von der täglichen Leihgebühr auszuschließen.
Standard-Ersatzkosten: dies ist der Betrag, der dem/der Benutzer*in in Rechnung gestellt wird, wenn ein Exemplar dieses Typs verloren geht UND das Exemplar keine Ersatzkosten hat. Wenn das Exemplar einen Wiederbeschaffungswert hat, ist dies der Betrag, der dem/der Benutzer*in in Rechnung gestellt wird.
Wichtig
Geben Sie in dieses Feld keine Zeichen, sondern nur Ziffern und Dezimalpunkte ein (zum Beispiel sollten 5,00€ als 5.00 eingegeben werden).
Bearbeitungskosten (bei Verlust): diese Bearbeitungsgebühr wird zu den Ersatzkosten hinzugerechnet, wenn ein*e Benutzer*in ein solches Exemplar verliert.
Wichtig
Geben Sie in dieses Feld keine Zeichen, sondern nur Ziffern und Dezimalpunkte ein (zum Beispiel sollten 5,00€ als 5.00 eingegeben werden).
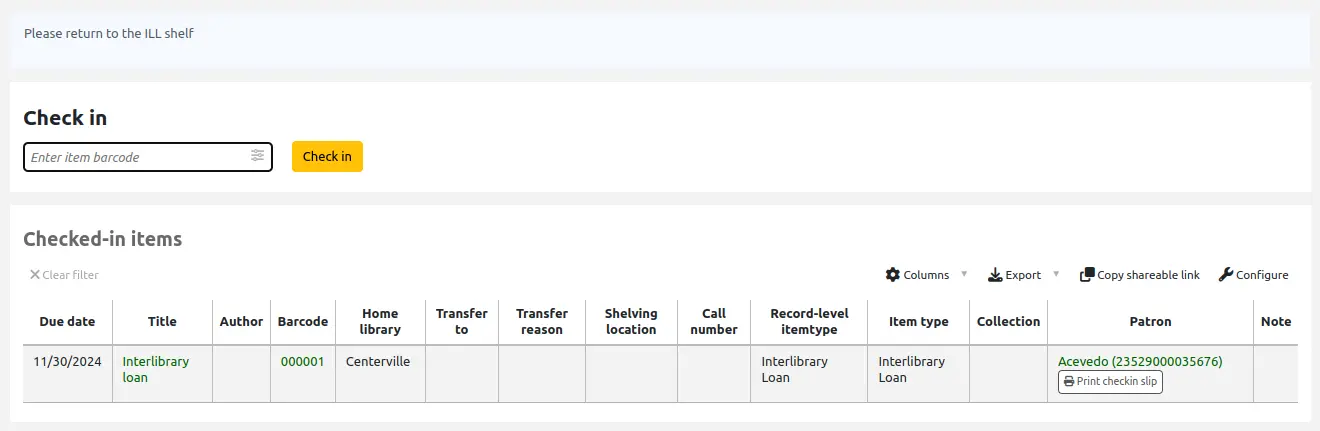
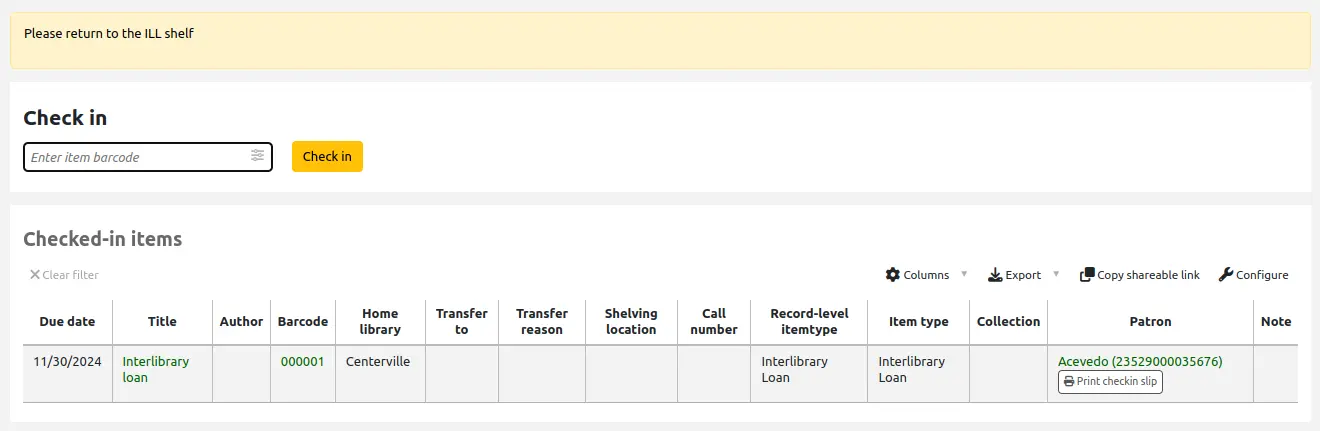
Wenn Sie möchten, dass eine Nachricht angezeigt wird wenn Exemplare mit diesem Exemplartyp zurückgegeben werden, können Sie einen Text in das Feld ‚Rückgabehinweis‘ eintragen.
Rückgabehinweis: der Hinweis kann eine „Benachrichtigung“ oder eine „Warnung“ sein. Der einzige Unterschied zwischen diesen beiden ist die Formatierung. Eine Benachrichtigung ist blau
und eine Warnung wird in gelb angezeigt.
SIP Medientyp: bei einigen SIP-Geräten müssen Sie einen SIP-spezifischen Medientyp anstelle des Koha-Exemplartyps verwenden (in der Regel benötigen Schließfächer und Sortiergeräte diesen Medientyp). Wenn Sie ein solches Gerät verwenden, wählen Sie den SIP-Medientyp für diesen Exemplartyp.
Einschränkung auf Bibliotheken: wenn dieser Exemplartyp nur in bestimmten Bibliotheken verwendet werden soll, können Sie diese hier auswählen. Wählen Sie „Alle Bibliotheken“, wenn dieser Exemplartyp im gesamten Bibliothekssystem verwendet wird.
Bemerkung
Wenn dies frei gelassen wird, gilt „Alle Bibliotheken“.
Tipp
Um mehr als eine Bibliothek auszuwählen, halten Sie die „Strg“-Taste gedrückt, während Sie die Bibliotheken anklicken.
Zusammenfassung: diese Zusammenfassung wird nur in Nicht-XSLT-Anzeigen verwendet.
Check for previous checkouts: this setting only appears if the CheckPrevCheckout system preference is set to either ‚Unless overridden by patron category or by item type, do‘ or ‚Unless overridden by patron category or by item type, do not‘. This allows libraries to customize whether Koha should warn staff when a patron has already checked out the same title, on a per-item type basis.
Inherit from system preferences: use the setting from the CheckPrevCheckout system preference.
Yes and override system preferences: always check the patron’s circulation history for this item type, regardless of the setting of the CheckPrevCheckout system preference.
No and override system preferences: never check the patron’s circulation history for this item type, regardless of the setting of the CheckPrevCheckout system preference.
Version
This option was added to Koha in version 25.11.
Zum Beenden klicken Sie auf ‚Änderungen speichern‘.
Bemerkung
Alle Felder, mit Ausnahme des „Medientyp“ können ausgehend von der Exemplartypliste bearbeitet werden.
Ihr neuer Exemplartyp wird jetzt in der Liste angezeigt.
Exemplartypen bearbeiten
Um einen Exemplartyp zu bearbeiten, klicken Sie auf die Schaltfläche „Bearbeiten“ daneben, oder klicken Sie auf den Code des Exemplartyps.
Eine Beschreibung der einzelnen Felder finden Sie im Bereich Exemplartypen hinzufügen.
Wichtig
Sie können den von Ihnen zugewiesenen Code für den ‚Medientyp‘ nicht mehr ändern. Sie können aber jederzeit die Beschreibung für den Exemplartyp bearbeiten.
Exemplartypen löschen
Um einen Exemplartyp zu löschen, klicken Sie auf die Schaltfläche „Löschen“ daneben.
Wichtig
Sie können keine Exemplartypen löschen, die von Exemplaren oder bibliografischen Datensätzen in ihrem System genutzt werden. In diesem Fall werden Sie in einer Meldung darauf hingewiesen, dass der Exemplartyp verwendet wird.

Normierte Werte
Normierte Werte können in verschiedenen Bereichen von Koha verwendet werden. Es handelt sich um Listen mit kontrolliertem Vokabular, Phrasen oder Codes.
Zum Beispiel können Sie normierte Werte verwenden, um zu kontrollieren, welche Angaben in einem MARC-Feld katalogisiert werden können.
Pfad in Koha: Mehr > Administration > Basisparameter > Normierte Werte

Bemerkung
Nur Bibliothekspersonal mit der Berechtigung manage_auth_values (oder der superlibrarian-Berechtigung) hat Zugang zu diesem Bereich.
Vorhandene Kategorien normierter Werte
Koha installs with predefined authorized values categories that your library is likely to use or that are used by the system.
AR_CANCELLATION
This category contains reasons why an article request might have been canceled.
Wenn Sie sich entscheiden, die voreingestellten Werte für diese Kategorie zu installieren, haben Sie
Das Exemplar konnte nicht im Regal gefunden werden (NOT_FOUND)
Das Exemplar war zu stark beschädigt für die Erfüllung der Vormerkung (DAMAGED)
Storniert im Nutzerkonto im OPAC (OPAC)
Sie können diese jederzeit nach der Installation verändern.
Statistik 1
Wird für Erwerbungsstatistiken verwendet. Sie können diese Kategorien verwenden, wenn Sie Konten im Erwerbugnsmodul anlegen.
Statistik 2
Wird für Erwerbungsstatistiken verwendet. Sie können diese Kategorien verwenden, wenn Sie Konten im Erwerbugnsmodul anlegen.
BOOKING_CANCELLATION
Version
This authorized value category was first introduced in version 24.11 of Koha.
These values are used when canceling bookings, as reasons why the booking has been canceled.
BOR_NOTES
Diese Werte werden für vordefinierte Benutzerbenachrichtigungen- und Ausleihbenachrichtigungen verwendet, die auf dem Ausleihbildschirm und im OPAC-Konto des/der Benutzer*in erscheinen.
Schreiben Sie die Nachricht, die angezeigt werden soll, in das Feld „Beschreibung“.
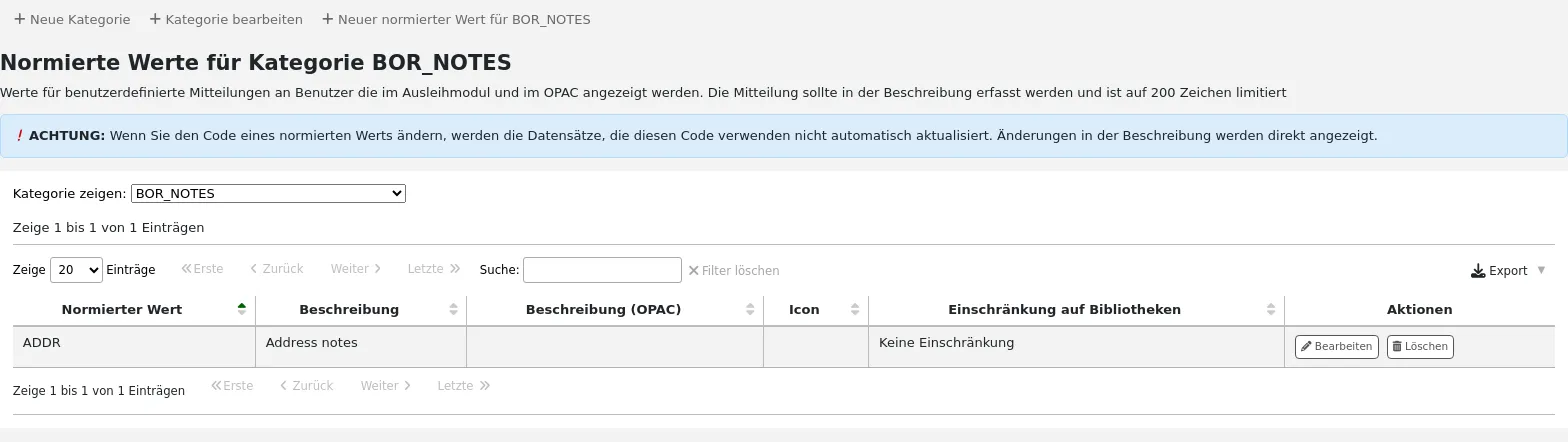
Bemerkung
Dieses Feld ist auf 200 Zeichen begrenzt. Das Nachrichtenfeld im Benutzerdatensatz kann jedoch mehr Zeichen enthalten. Schreiben Sie die ersten 200 Zeichen in die Beschreibung und den Rest beim Hinzufügen der Nachricht.
Bsort1
Werte, die im Feld Statistik 1 im Benutzerkonto eingetragen werden können.
Bsort2
Diese Werte können eingegeben werden, um patron’s sort 2 field zu befüllen
CAND
Eine Liste, die in UNIMARC verwendet wird.
CCODE
Diese Werte sind Sammlungs-Codes. Sie erscheinen beim cataloging and working with items.
Wird normalerweise mit items.ccode in der Koha-Datenbank verknüpft.
Wenn Sie sich entscheiden, die voreingestellten Werte für diese Kategorie zu installieren, haben Sie
Belletristik (FIC)
Sachliteratur (NFIC)
Nachschlagewerke (REF)
Sie können diese jederzeit nach der Installation verändern.
Warnung
Vermeiden Sie Bindestriche in Sammlungscodes, um beste Suchergebnisse zu erzielen.
CONTROL_NUM_SEQUENCE
Diese Kategorie wird verwendet, um Kontrollnummern im erweiterten Katalogisierungseditor zu erzeugen.
Geben Sie als Normierten Wert eine Zeichenkette an, die mit einer Nummer endet, und verwenden Sie die Beschreibung, um die Art der Nummer zu beschreiben. Zum Beispiel: ‚sprLib0001‘ ‚Springfield Bibliothek‘. Im erweiterten Editor wird dadurch ein neues Widget aktiviert, mit dem Sie die Art der Nummer auswählen und die nächste Nummer in der Folge generieren können.
COUNTRY
Eine Liste von Ländernamen, die in UNIMARC 102$a verwendet werden.
DAMAGED
Diese Kategorie enthält Beschreibungen für Exemplare, die als beschädigt gekennzeichnet sind. Sie kommen beim Katalogisieren und Arbeiten mit Exemplaren vor.
Wird normalerweise mit items.damaged in der Koha-Datenbank verknüpft.
Wenn Sie sich entscheiden, die voreingestellten Werte für diese Kategorie zu installieren, haben Sie
Beschädigt (1)
Sie können diese jederzeit nach der Installation verändern.
Warnung
Die normierten Werte für DAMAGED müssen numerisch sein.
DEPARTMENT
Diese Kategorie enthält Abteilungen, die für das Modul Semesterapparate benötigt und darin verwendet werden.
ERM_AGREEMENT_CLOSURE_REASON
Diese Werte werden genutzt, um den Grund für die Schließung eines Vereinbarungsdatensatzes zu beschreiben, sobald er im ERM-Modul als „geschlossen“ markiert wurde.
Sie können auch für Reports genutzt werden.
Voreingestellte Werte sind
Abgelaufen (expired)
Storniert (cancelled)
ERM_AGREEMENT_LICENSE_LOCATION
Diese Werte werden verwendet, um den physischen Ort eines license record zu beschreiben, falls Sie noch eine Papierkopie der Lizenz haben (statt einer elektronischen).
Voreingestellte Werte sind
Aktenschrank (filing cabinet)
Schrank (cupboard)
ERM_AGREEMENT_LICENSE_STATUS
Diese Werte werden verwendet, um den Status einer Lizenz zu beschreiben, die mit einem Vertragsdatensatz im ERM-Modul verbunden ist. Sie helfen den Mitarbeiter*innen, Lizenzen in ihrem Lebenszyklus zu markieren.
Sie können auch für Reports genutzt werden.
Voreingestellte Werte sind
Controlling (controlling)
Zukünftig (future)
Abgeschlossen (historic)
ERM_AGREEMENT_RENEWAL_PRIORITY
Diese Werte werden verwendet, um die Verlängerungspriorität für einen Vertragsdatensatz im ERM-Module zu beschreiben und anzuzeigen, wie wichtig die Erneuerung dieses Vertrags ist.
Sie können auch für Reports genutzt werden.
Voreingestellte Werte sind
Zur Durchsicht (for_review)
Erneuern (renew)
Stornieren (cancel)
ERM_AGREEMENT_STATUS
Diese Werte werden verwendet, um den Status eines Vereinbarungsdatensatzes im ERM-Modul zu beschreiben.
Sie können auch für Reports genutzt werden.
Voreingestellte Werte sind
Aktiv (active)
In Verhandlung (in_negotiation)
Geschlossen (closed)
Warnung
Ändern Sie nicht den Normierten Wert für „Closed“ (die Beschreibung kann geändert werden), er wird zur Aktivierung des „Closure reason“ Dropdownmenüs genutzt.
ERM_LICENSE_STATUS
Diese Werte werden verwendet, um den Status eines Lizenzdatensatzes im ERM-Modul zu beschreiben. Sie helfen den Mitarbeiter*innen, Lizenzen in ihrem Lebenszyklus zu markieren.
Sie können auch für Reports genutzt werden.
Voreingestellte Werte sind
In Verhandlung (in_negotiation)
Noch nicht aktiv (not_yet_active)
Aktiv (active)
Abgelehnt (rejected)
Abgelaufen (expired)
ERM_LICENSE_TYPE
Diese Werte werden verwendet, um die Art der Lizenz im ERM-Modul zu beschreiben.
Sie können auch bei Reports verwendet werden.
Voreingestellte Werte sind
Lokal (local)
Konsortial (consortial)
National (national)
Allianz (alliance)
ERM_PACKAGE_CONTENT_TYPE
Diese Werte werden verwendet, um die Materialarten zu beschreiben, die in einem lokalen Paket im ERM-Modul gefunden werden.
Nur für lokale Titel.
Voreingestellte Werte sind
Volltext (AggregatedFullText)
Abstract und Index (AbstractAndIndex)
E-Book (E-Book)
E-journal (E-Journal)
Gemischter Inhalt (MixedContent)
Onlinereferenz (OnlineReference)
Druck (Druck)
Streaming-Medien (StreamingMedia)
Unbekannt (Unbekannt)
ERM_PACKAGE_TYPE
Diese Werte werden verwendet, um die Arten von Paketen im ERM-Modul zu beschreiben.
Nur für lokale Titel.
Voreingestellte Werte sind
Lokal (local)
Komplett (complete)
ERM_TITLE_PUBLICATION_TYPE
Diese Werte werden verwendet, um die Materialart eines Titels im ERM-Modul zu beschreiben.
Dies ist nur für lokale Titel
Voreingestellte Werte sind
Hörbuch (Hörbuch)
Buch (Buch)
Buchreihe (Buchreihe)
Datenbank (Datenbank)
E-Book (E-Book)
Zeitschrift (Zeitschrift)
Newsletter (Newsletter)
Zeitung (Zeitung)
Berichte (Berichte)
Report (Report)
Streaming-Audio (streamingaudio)
Streaming-Video (streamingvideo)
Thesis/Dissertation (thesisdissertation)
Nicht spezifiziert (nichtspezifiziert)
Website (website)
ERM_USER_ROLES
Diese Werte werden verwendet, um die Rolle eines/einer Mitarbeiter*in zu beschreiben, der einem Vertrag oder Lizenzsatz im ERM-Modul zugeordnet ist.
Voreingestellte Werte sind
ERM BibliothekarIn (librarian)
FachreferentIn (subject_specialist)
ETAT
Diese Werte werden in französischen UNIMARC-Installationen in Feld 995 $o verwendet, um den Exemplarstatus zu identifizieren. Ähnlich wie NOT_LOAN.
HINGS_AS
Allgemeine Bestandsdaten: Erwerbungsstatus :: Dieses Datenelement spezifiziert den Erwerbungsstatus der Einheit zum Zeitpunkt des Bestandreports.
HINGS_C
Diese Werte werden als Designator für die Vollständigkeit allgemeiner Bestandsdaten verwendet.
HINGS_PF
Diese Werte werden als Bezeichner der physikalischen Form verwendet.
HINGS_RD
Allgemeine Bestandsdaten: Aufbewahrung :: Dieses Datenelement legt die Aufbewahrungsrichtlinien für diese Einheit zum Zeitpunkt des Bestandsberichts fest.
HINGS_UT
Diese Werte werden als Bezeichner für allgemeine Bestandsdaten - Art der Einheit verwendet.
HOLD_CANCELLATION
These values are used when canceling holds as reasons why the hold has been canceled.
Wenn Sie sich entscheiden, die voreingestellten Werte für diese Kategorie zu installieren, haben Sie
Das Exemplar konnte nicht im Regal gefunden werden (NOT_FOUND)
Das Exemplar war zu stark beschädigt für die Erfüllung der Vormerkung (DAMAGED)
Sie können diese jederzeit nach der Installation verändern.
HSBND_FREQ
Bei diesen Werten handelt es sich um Lieferhäufigkeiten, die bei der aufsuchenden Bibliotheksarbeit verwendet werden. Sie werden auf dem entsprechenden Reiter „Aufsuchende Bibliotheksarbeit“ im Benutzerkonto in der Dienstoberfläche angezeigt.
Wenn Sie sich entscheiden, die voreingestellten Werte für diese Kategorie zu installieren, haben Sie
Jede Woche (EW)
Sie können diese jederzeit nach der Installation verändern.
ILL_STATUS_ALIAS
Bei diesen Werten handelt es sich um den Status von Fernleihbestellungen, die im Fernleih-Modul verwendet werden.
ITEMTYPECAT
Diese Werte sind Suchkategorien für Exemplartypen. Sie ermöglichen die gleichzeitige Suche nach mehreren Exemplartypen.
Um Exemplartypen in Kategorien zusammen zu fassen, wählen Sie die Kategorie bei der Exemplartypkonfiguration aus.
Beispiel: Für ITEMTYPCAT wird die Kategorie „Neu“ definiert. Diese Suchkategorie wird dann den Exemplartypen „Neue Bücher“ und „Neue DVDs“ zugewiesen. Die beiden Exemplartypen erscheinen dann nicht mehr in der Auswahl der Erweiterten Suche und werden durch „Neu“ ersetzt. Wenn ein*e Benutzer*in „Neu“ für die Suche auswählt, wird nach beiden zugewiesenen Exemplartypen gesucht.
Bemerkung
Search categories are used in the OPAC only.
LANG
Diese Kategorie ist eine Liste von ISO 639-2 Standard-Sprachcodes.
LOC
Diese Werte sind Regalstandorte. Sie erscheinen in der Regel beim Hinzufügen oder Bearbeiten eines Exemplars.
Wird normalerweise mit items.location in der Koha-Datenbank verknüpft.
Wenn Sie sich entscheiden, die voreingestellten Werte für diese Kategorie zu installieren, haben Sie
Audiovisuelle Medien (AV)
Einstellwagen (CART)
CART wird mit dem Systemparameter UpdateItemLocationOnCheckin verwendet
Kinderbereich (CHILD)
Belletristik (FIC)
Magazin (GEN)
Neuerwerbungsregal (NEW)
In der Auslage (DISPLAY)
Bearbeitungzentrum (PROC)
PROC kann mit den Systemparametern NewItemsDefaultLocation und UpdateItemLocationOnCheckin. verwendet werden.
Nachschlagewerke (REF)
Dienstbüro (STAFF)
Sie können diese jederzeit nach der Installation verändern.
Warnung
Vermeiden Sie Bindestriche in den Standortcodes, um beste Suchergebnisse zu erzielen.
LOST
Diese Werte sind Beschreibungen für die als verloren markierten Exemplare. Sie werden angezeigt, wenn Sie ein Exemplar hinzufügen oder bearbeiten.
Wird normalerweise mit items.itemlost in der Koha-Datenbank verknüpft.
Wenn Sie sich entscheiden, die voreingestellten Werte für diese Kategorie zu installieren, haben Sie
Vermisst (1)
Lange überfällig (Verloren) (2)
Verloren und Buchersatz bezahlt (3)
Vermisst (4)
Fehlt im Paket (5)
Sie können diese jederzeit nach der Installation verändern.
Warnung
Der normierte Wert für LOST muss numerisch sein.
NOT_LOAN
Diese Werte sind Gründe, warum ein Exemplar nicht entliehen werden kann. Sie erscheinen, wenn Sie ein Exemplar hinzufügen oder bearbeiten.
Wird normalerweise mit items.notforloan in der Koha-Datenbank verknüpft.
Wenn Sie sich entscheiden, die voreingestellten Werte für diese Kategorie zu installieren, haben Sie
Im Buchhandel bestellt (-1)
Nicht ausleihbar (1)
Personalbibliothek (2)
Zum Paket hinzugefügt (3)
Sie können diese jederzeit nach der Installation verändern.
Warnung
Die normierten WErte für NOT_LOAN müssen numerisch sein.
Negative Zahlenwerte ermöglichen weiterhin das Vormerken (z. B. für den Status „Bestellt“).
Positive Zahlenwerte erlauben keine Vormerkung oder Ausleihe.
Ein Wert von 0 bedeutet „ausleihbar“.
OPAC_SUG
Diese Kategorie enthält eine Liste von Gründen, die im OPAC im Formular für Anschaffungsvorschläge angezeigt werden.
Wenn Sie sich entscheiden, die voreingestellten Werte für diese Kategorie zu installieren, haben Sie
Verfügbares Exemplare ist beschädigt (damaged)
Neuerscheinung eines/r beliebten Verfassers/Verfasserin (bestseller)
Sie können diese jederzeit nach der Installation verändern.
ORDER_CANCELLATION_REASON
These values are reasons why an order might have been canceled. They are used in acquisitions.
Wenn Sie sich entscheiden, die voreingestellten Werte für diese Kategorie zu installieren, haben Sie
Kein Grund angegeben (0)
Nicht auf Lager (1)
Wiederbeschaffung (2)
Sie können diese jederzeit nach der Installation verändern.
PA_CLASS
Diese Werte werden verwendet, um Benutzerattribute im Formular Benutzer hinzufügen und bearbeiten zusammenzufassen.
PAYMENT_TYPE
Diese Kategorie bildet eine Auswahlliste mit benutzerdefinierten Bezahlungsarten, wenn Gebühren gezahlt werden.
Wenn Sie sich entscheiden, die voreingestellten Werte für diese Kategorie zu installieren, haben Sie
Bar über SIP2 (SIP00)
Visa über SIP2 (SIP01)
Kreditkarte über SIP2 (SIP02)
Sie können diese jederzeit nach der Installation verändern.
qualif
Diese Werte sind Funktionscodes (Verfasser, Herausgeber, Mitarbeiter, etc.), die in UNIMARC 7XX $4 (Französisch) verwendet werden.
RELTERMS
Diese Kategorie ist eine Liste von MARC-Beziehungs-Codes und -Begriffen.
This list is based on the Library of Congress‘ MARC21 code list for relators
Wichtig
Diese Liste wird in bestehenden Installationen nicht auf dem laufenden Stand gehalten. Fügen Sie neue Werte zu ihrer Installation hinzu, sobald sie von der Library of Congress veröffentlicht werden.
It can be linked to a subfield in a MARC bibliographic framework in order to create a dropdown menu for catalogers to choose from instead of typing the relator code. In MARC21, relator codes are usually in subfield $4.
REPORT_GROUP
Diese Werte können zum Sortieren und Filtern Ihrer Reports verwendet werden. Sie erscheinen als Reiter auf der Seite Gespeicherte Reports.
Wenn Sie sich entscheiden, die voreingestellten Werte für diese Kategorie zu installieren, haben Sie
Gebühren (ACC)
Erwerbung (ACQ)
Katalog (CAT)
Ausleihe (CIRC)
Benutzer (PAT)
Zeitschriften (SER)
Sie können diese jederzeit nach der Installation verändern.
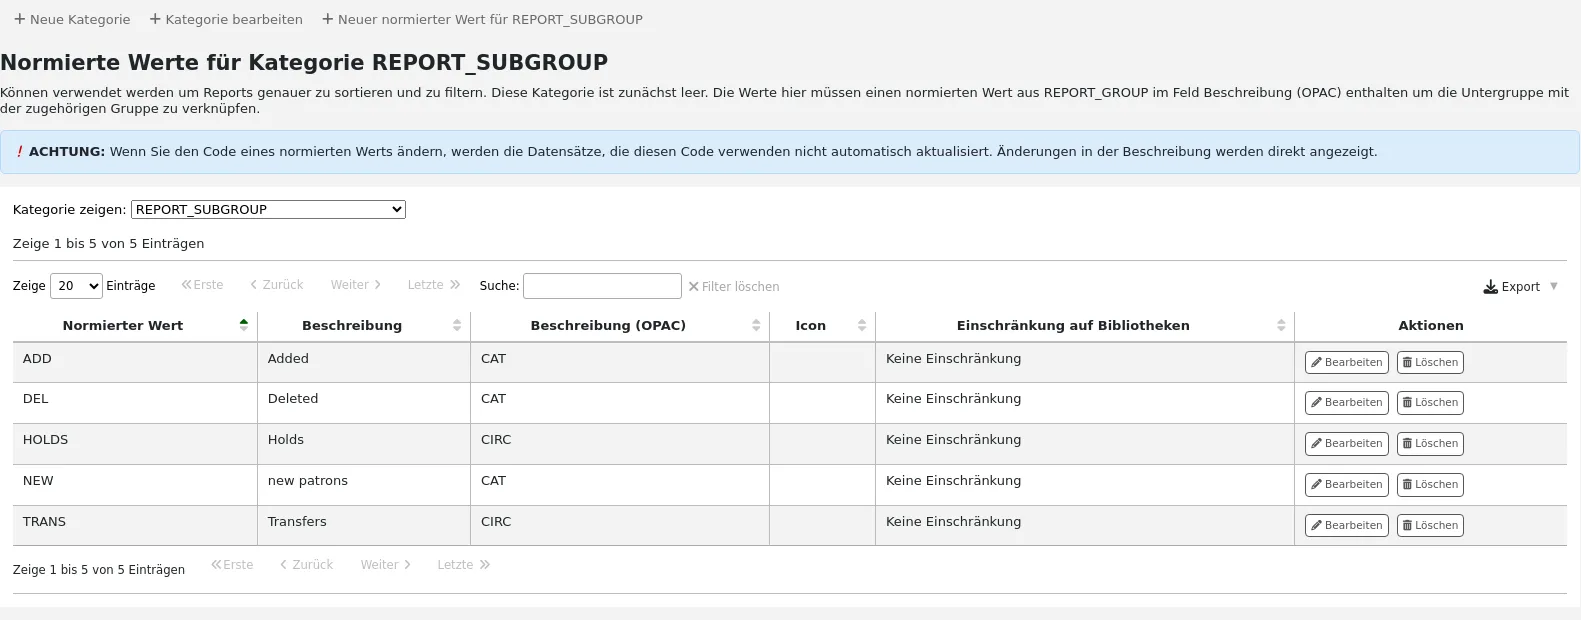
REPORT_SUBGROUP
Diese Werte können verwendet werden um Reports zu organisieren und zu filtern.
Diese Werte müssen den Normierten-Werte Code aus REPORT_GROUP im Feld Beschreibung (OPAC) enthalten, um die Untergruppe mit der entsprechenden Gruppe zu verknüpfen.
RESTRICTED
Diese Werte werden als Status für die eingeschränkte Benutzung eines Exemplars verwendet. Sie erscheinen beim Anlegen und Bearbeiten von Exemplaren.
Wird normalerweise mit items.restricted in der Koha-Datenbank verknüpft.
Wenn Sie sich entscheiden, die voreingestellten Werte für diese Kategorie zu installieren, haben Sie
Eingeschränkte Benutzung (1)
Sie können diese jederzeit nach der Installation verändern.
Warnung
Die normierten Werte für diese Kategorie müssen numerisch sein.
RETURN_CLAIM_RESOLUTION
Diese Werte sind Gründe, warum eine return claim has been resolved.
Wenn Sie sich entscheiden, die voreingestellten Werte für diese Kategorie zu installieren, haben Sie
Vom/von der Benutzer*in zurückgegeben (RET_BY_PATRON)
In der Bibliothek gefunden (FOUND_IN_LIB)
Sie können diese jederzeit nach der Installation verändern.
ROADTYPE
Bei diesen Werten handelt es sich um Straßentypen, die in den Benutzersadressen im Feld „Straßentyp“ im Benutzerformular verwendet werden.
SIP_MEDIA_TYPE
Diese Werte werden beim Erstellen oder Bearbeiten eines Exemplartyps verwendet, um einen SIP-spezifischen Exemplartyp für Geräte wie Schließfächer und Sortieranlagen zuzuweisen.
Wenn Sie sich entscheiden, die voreingestellten Werte für diese Kategorie zu installieren, haben Sie
Andere (000)
Buch (001)
Zeitschrift (002)
Zeitschriftenband (003)
Audioband (004)
Videokassette (005)
CD/CDROM (006)
Diskette (007)
Buch mit Diskette (008)
Buch mit CD (009)
Buch mit Audiokassette (010)
Warnung
SIP Medientypen sind auf 3 Stellen begrenzt. Stellen Sie sicher, dass Ihre Normierten Werte für SIP_MEDIA_TYPE nicht mehr als drei Stellen aufweisen.
STACK
Diese Werte sind Regalkontrollnummern. Sie werden angezeigt, wenn Sie ein Exemplar hinzufügen oder bearbeiten.
Wird normalerweise mit items.stack in der Koha-Datenbank verknüpft.
Warnung
Die normierten Werte für diese Kategorie müssen numerisch sein.
SUGGEST
Diese Werte sind Begründungen für die Annahme oder Ablehnung von Anschaffungsvorschlägen im Erwerbungsmodul. Sie erscheinen bei der Verwaltung von Anschaffungsvorschlägen.
Wenn Sie sich entscheiden, die voreingestellten Werte für diese Kategorie zu installieren, haben Sie
Verfügbar über Fernleihe (AVILL)
Bestseller (BSELL)
Dokument entspricht nicht unserer Erwerbungsrichtlinie (Poldoc)
Dokument zu teuer (Teuer)
Unzureichendes Budget (Budget)
Bibliotheksexemplar vermisst (LCL)
Vorhandenes Exemplar beschädigt (SCD)
Sie können diese jederzeit nach der Installation verändern.
SUGGEST_FORMAT
Dies ist eine Liste von Exemplartypen, die in einer Auswahlliste des Anschaffungsvorschlagformulars im OPAC angezeigt werden.
Wenn Sie sich entscheiden, die voreingestellten Werte für diese Kategorie zu installieren, haben Sie
Hörbuch (AUDIOBOOK)
Buch (BOOK)
E-Book (EBOOK)
DVD (DVD)
Großdruck (LP)
Sie können diese jederzeit nach der Installation verändern.
Warnung
Die Anschaffungsvorschlagstypen sind auf 30 Stellen begrenzt. Stellen Sie sicher, dass Ihre Normierten Werte für diese Kategorie nicht mehr als 30 Stellen aufweisen.
SUGGEST_STATUS
Die ist eine Liste zusätzlicher benutzerdefinierter Status für Anschaffungsvorschläge, die zusätzlich zu den voreingestellten Werten verwendet werden können.
Warnung
Der Status für Anschaffungsvorschläge ist auf zehn Zeichen begrenzt. Stellen Sie sicher, dass Ihr Normierter Wert nicht mehr Zeichen enthält.
Warnung
Der Status für Anschaffungsvorschläge darf keine Leerzeichen enthalten.
TERM
Diese Werte sind Begriffe, die im Modul Semesterapparate verwendet werden. Zum Beispiel: Frühling, Sommer, Winter, Herbst.
Diese Begriffe werden im Dropdownmenü angezeigt, wenn ein neuer Kurs hinzugefügt wird.
TICKET_RESOLUTION
Version
Diese Kategorie wurde in Koha-Version 24.05 hinzugefügt.
Diese Werte sind Arten von Beschlüssen, die zur Kennzeichnung von Katalogproblemen als ‚Resolved‘ zu verwenden sind.
TICKET_STATUS
Version
Diese Kategorie wurde in Koha-Version 24.05 hinzugefügt.
Diese Werte sind Status, die bei der Aktualisierung von Katalogproblemen zu verwenden sind.
UPLOAD
Diese Werte sind Kategorien, die Datei-Uploads zugeordnet werden. Ohne eine Kategorie wird ein Upload als temporär betrachtet und kann bei der automatischen Bereinigung entfernt werden.
VENDOR_INTERFACE_TYPE
Diese Werte werden im Erwerbungsmodul als Arten von Schnittstellen für Lieferanten-Schnittstellen verwendet.
VENDOR_ISSUE_TYPE
Diese Werte werden als eine Art von Problem mit einem Lieferanten verwendet, wenn im Erwerbungsmodul ein Heft hinzugefügt wird.
VENDOR_TYPE
Diese Werte werden genutzt, um Lieferanten im Erwerbungsmodul zu kategorisieren.
WITHDRAWN
Diese Werte sind Beschreibungen für ausgeschiedene Exemplare. Sie werden beim Anlegen und Bearbeiten von Exemplaren angezeigt.
Wird normalerweise mit items.withdrawn in der Koha-Datenbank verknüpft.
Wenn Sie sich entscheiden, die voreingestellten Werte für diese Kategorie zu installieren, haben Sie
Ausgeschieden (1)
Sie können diese jederzeit nach der Installation verändern.
Warnung
Die normierten Werte für diese Kategorie müssen numerisch sein.
YES_NO
Dies ist ein allgemeines Feld mit Normiertem Wert, das überall dort verwendet werden kann, wo Sie ein einfaches Ja/Nein-Auswahlmenü benötigen.
Wenn Sie sich entscheiden, die voreingestellten Werte für diese Kategorie zu installieren, haben Sie
Ja (1)
Nein (0)
Warnung
In der Regel erfordern binäre Felder einen Wert von 1 oder 0. Wenn Sie diese Werte ändern, stellen Sie sicher, dass das Feld, an das Sie es anhängen wollen, andere Werte als 0 oder 1 annehmen kann.
Hinzufügen einer neuen Normierter-Wert Kategorie
Zusätzlich zu den bereits in Koha vorhandenen Kategorien kann die Bibliothek weitere eigene Kategorien für normierte Werte definieren, um Eingaben in das System zu normieren. Um eine neue Kategorie hinzuzufügen.
Eine neue Kategorie hinzufügen:
Klicken Sie auf ‚Neue Kategorie‘
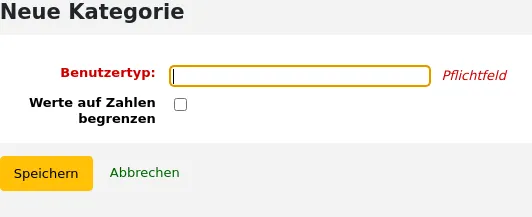
Füllen Sie das Formular aus
Verwenden Sie nicht mehr als 10 Zeichen in einer Kategorie (für eine kurze Bezeichnung, die deutlich macht wofür die Kategorie steht).
Warnung
Ein Kategoriencode darf keine Leerzeichen oder Sonderzeichen außer Unterstriche und Bindestriche enthalten.
Wert auf Zahlen beschränken: Markieren Sie die Checkbox, wenn die Werte in dieser Kategorie nur numerisch sein sollen. Dadurch wird verhindert, dass Mitarbeiter*innen Normierte Werte erstellen, die dieser Regel nicht entsprechen.
Version
Dieses Feature gibt es in Koha seit Version 24.05.
Klicken Sie auf „Speichern“
Gehen Sie nun zu Neue normierte Werte hinzufügen.
Neue normierte Werte hinzufügen
Es können zu jeder Kategorie neue normierte Werte hinzugefügt werden.
Um einen Wert hinzuzufügen:
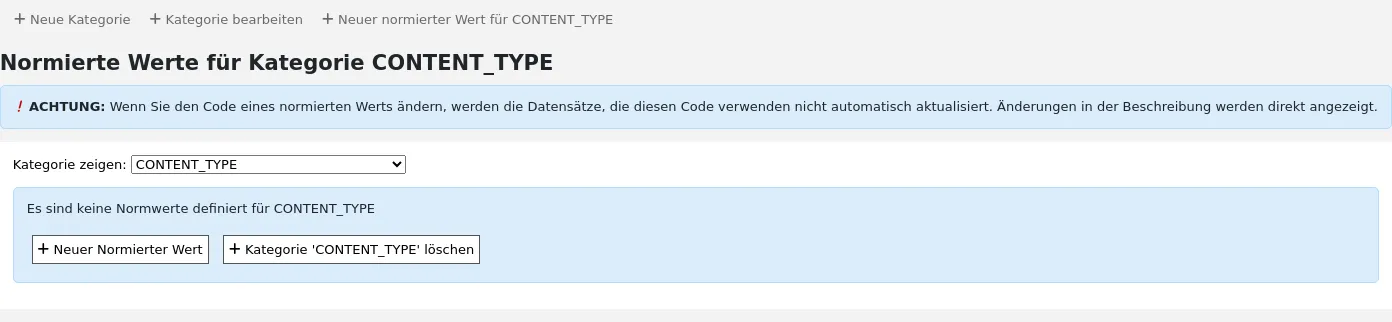
Klicken Sie in der Kategorienliste auf die Schaltfläche „Hinzufügen“ rechts neben der Kategorie
Alternativ können Sie auf den Namen der Kategorie klicken und dann ‚Neuer normierter Wert für…‘ auswählen
Wenn die Kategorie noch keine Werte enthält, klicken Sie unten auf der Seite auf ‚Neuer Normierter Wert‘
Füllen Sie das Formular aus
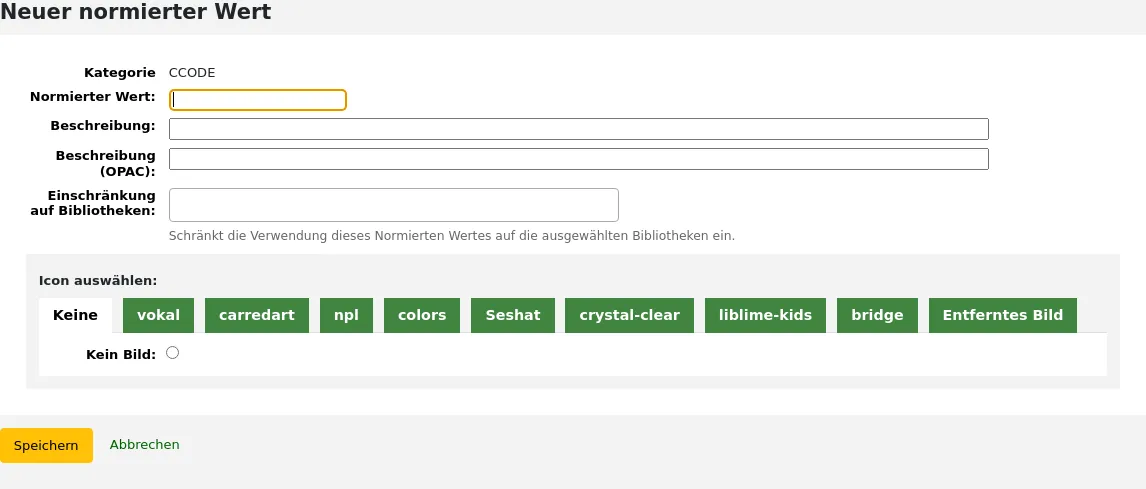
Normierter Wert: Geben Sie einen Code für Ihren Normierten Wert ein
Bemerkung
Der Normierte Wert ist auf 80 Zeichen begrenzt und darf keine Leerzeichen oder andere Sonderzeichen außer Unterstrichen und Bindestriche enthalten.
Manche Kategorien, wie SUGGEST_STATUS, können strengere Beschränkungen haben. Siehe den obigen Bereich existierende Normierte-Werte-Kategorien für festgelegte Beschränkungen.
Beschreibung: Verwenden Sie dieses Feld für die anzuzeigende Bezeichnung des Wertes.
Beschreibung (OPAC): Wenn Sie eine davon abweichende Bezeichnung für die Anzeige im OPAC wünschen, geben Sie diese hier ein. Wenn das Feld leer ist, wird die ‚Beschreibung‘ sowohl in der Dienstoberfläche als auch im OPAC verwendet.
Einschränkung auf Bibliotheken: wenn Sie diesen Normierten Wert auf bestimmte Bibliotheken beschränken möchten, wählen Sie diese aus diesem Menü aus. Um ihn für alle Bibliotheken verfügbar zu machen, wählen Sie einfach „Alle Bibliotheken“ am Anfang der Liste.
Icon auswählen: Sie können ein Bild auswählen, das neben der Beschreibung in der Dienstoberfläche und im OPAC erscheint.
Bemerkung
Dieses Feature kann nicht überall verwendet werden. Es ist vor allem für Standorte (LOC) und Sammlungen (CCODE) in der Erweiterten Suche vorgesehen.
Klicken Sie auf „Speichern“
Der neue Wert erscheint dann in der Liste gemeinsam mit den bereits vorhandenen
Normierte Werte löschen
Um einen normierten Wert zu löschen, klicken Sie auf die Schaltfläche „Löschen“ am rechten Ende der Zeile mit dem Wert.
Sobald keine normierten Werte mehr für eine Kategorie mehr definiert sind, kann auch die Kategorie gelöscht werden.
Benutzer*innen und Ausleihe
Einstellungen um Informationen für die Ausleihe und die Benutzer*innen zu verwalten.
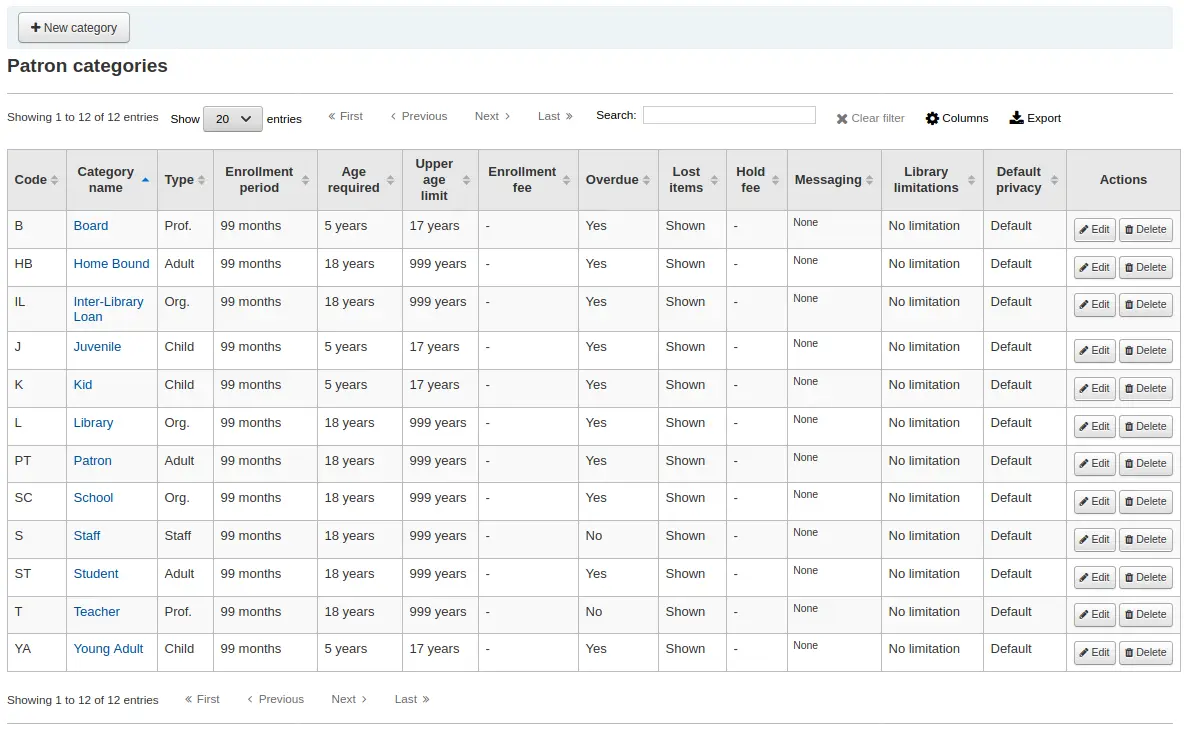
Benutzertypen
Mit Benutzertypen können Sie Ihre Benutzer*innen nach verschiedenen Rollen, Altersgruppen und Benutzerarten verwalten.
Pfad in Koha: Mehr > Administration > Benutzer und Ausleihe > Benutzertypen
Bemerkung
You can customize the columns of this table in the Table settings section of the Administration module (table id: patron_categories).
Bemerkung
Nur Bibliothekspersonal mit der Berechtigung manage_patron_categories (oder der superlibrarian-Berechtigung) hat Zugriff auf diesen Bereich.
Benutzertyp hinzufügen
Um einen neuen Benutzertyp hinzuzufügen, klicken Sie auf ‚Neuen Kategorie‘ oben auf der Seite
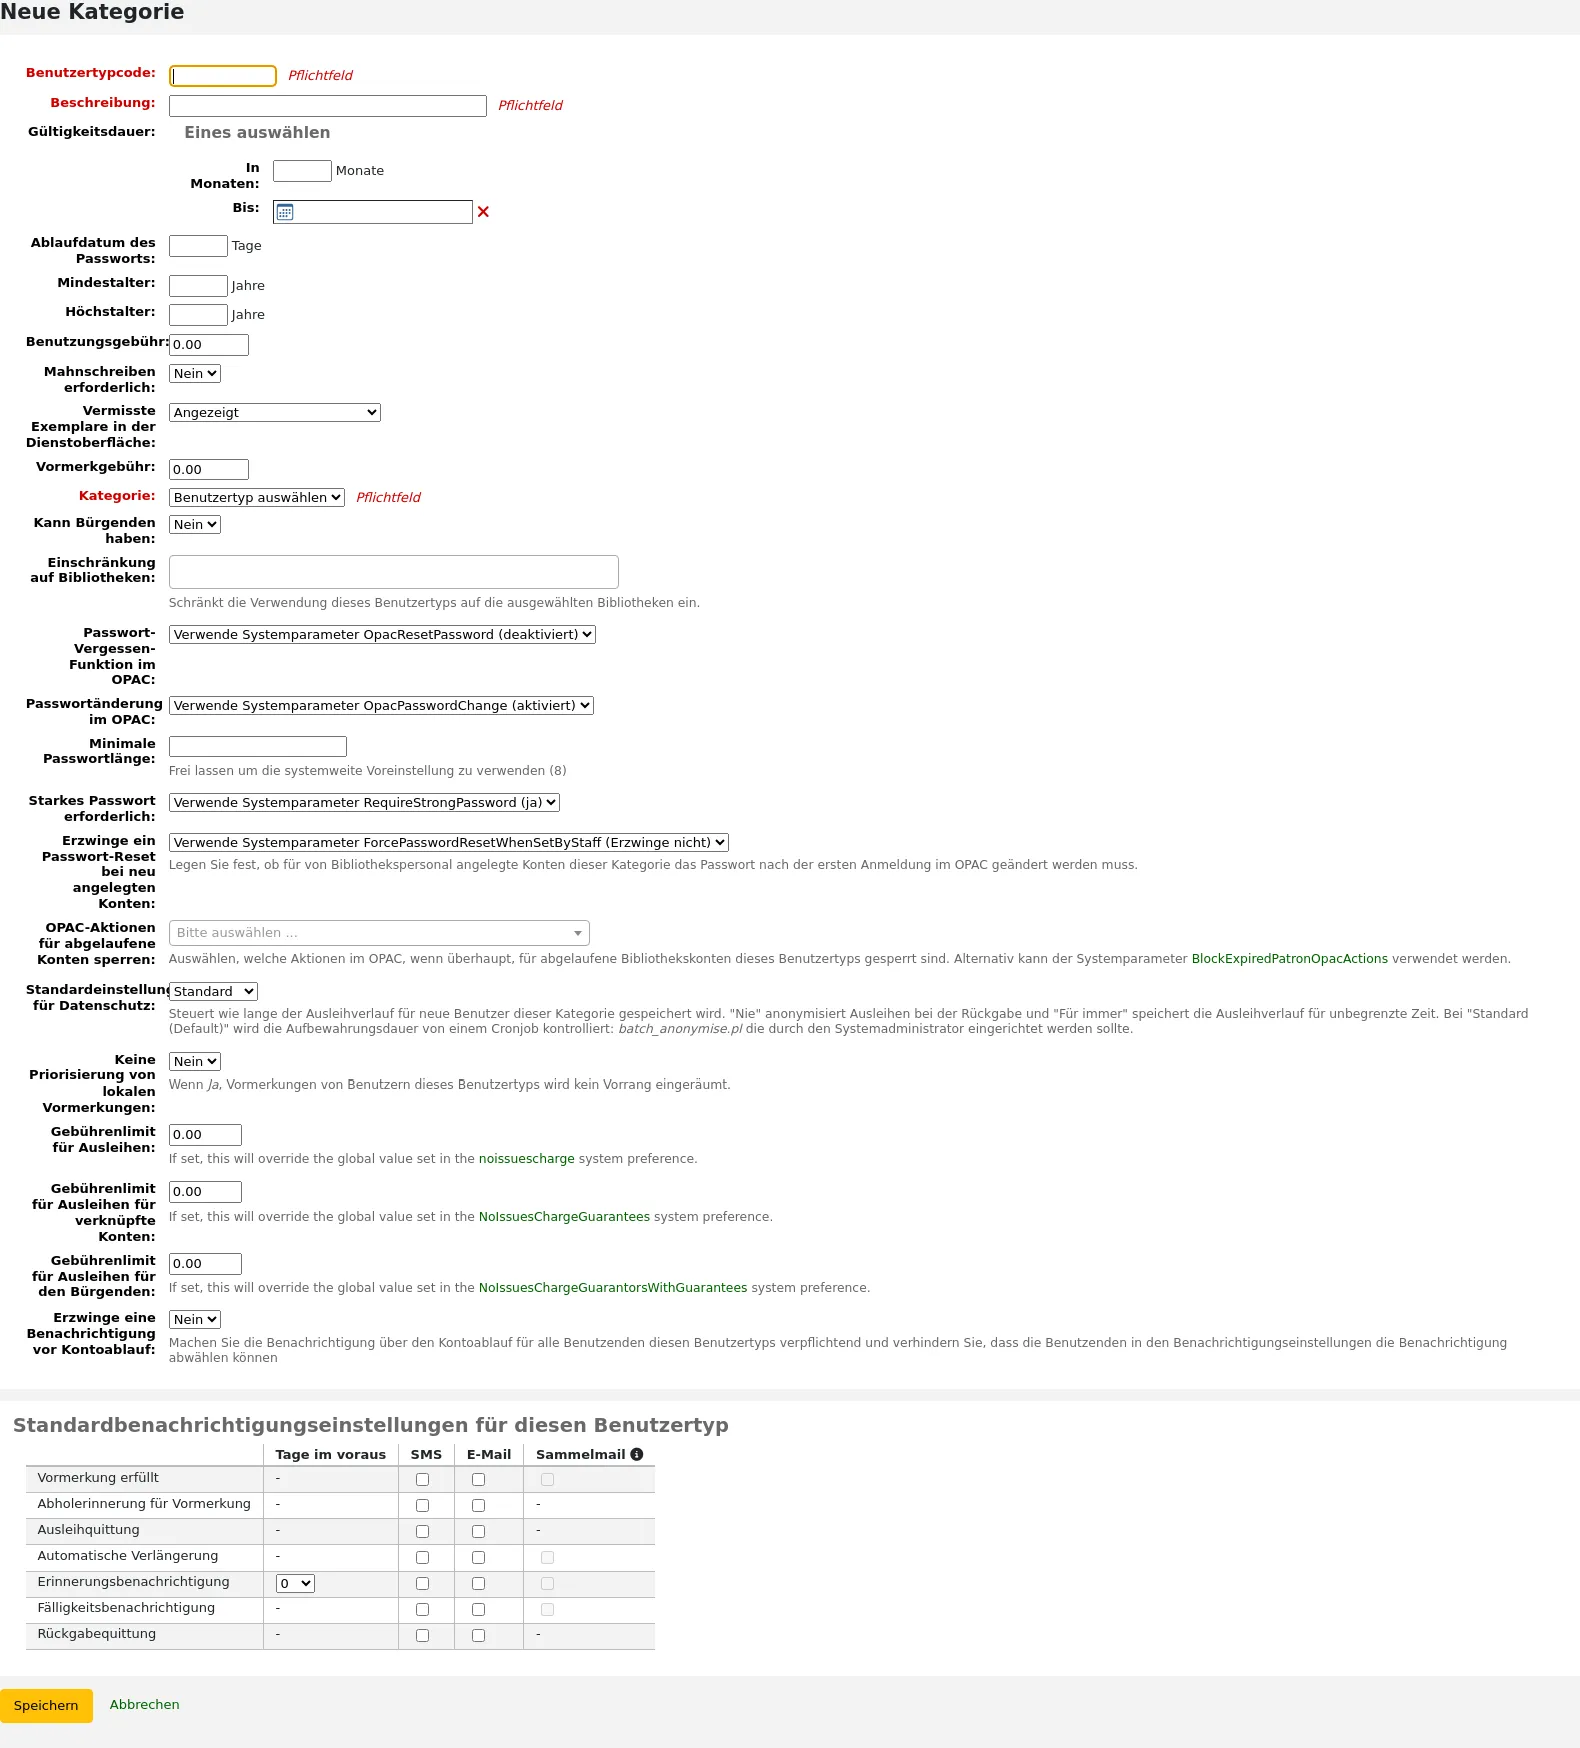
Benutzertypcode: Ein einmaliger Identifier für Ihren neuen Benutzertyp.
Der Benutzertypcode ist auf 10 Zeichen (Zahlen und Buchstaben) begrenzt und muss einmalig sein.
Das Feld ist erforderlich um den Benutzertyp zu speichern. Lassen Sie das Feld leer, bekommen Sie von Koha eine Fehlermeldung angezeigt.
Beschreibung: die anzuzeigende Beschreibung für den Benutzertyp.
Die Beschreibung wird überall in Koha angezeigt.
Das Feld ist erforderlich um den Benutzertyp zu speichern. Lassen Sie das Feld leer, bekommen Sie von Koha eine Fehlermeldung angezeigt.
Gültigkeitsdauer:
In Monaten: sollte eingegeben werden, wenn Sie für Ihre Benutzer*innen befristete Benutzerkonten verwenden. Zum Beispiel: Ausweise Studierender laufen nach 9 Monaten ab
Bis-Datum: Sie können wählen, zu welchem Datum die Ausweise ablaufen sollen
Das Feld ist erforderlich um den Benutzertyp zu speichern. Lassen Sie das Feld leer, bekommen Sie von Koha eine Fehlermeldung angezeigt.
Warnung
Sie können nicht beides, eine Monatsangabe und ein Bis-Datum für einen Benutzertyp angeben. Wählen Sie entweder das eine oder das andere.
Ablaufdatum des Passworts: geben Sie die Anzahl der Tage an, nach denen Benutzer*innen ihr Passwort ändern müssen.
Mindestalter: Das Mindestalter (in Jahren) für diesen Benutzertyp. Zum Beispiel: ein Benutzertyp „Erwachsene*r“ könnte ein Mindestalter von 18 Jahren haben; Benutzer*innen müssen dann mindestens 18 sein, um diesem Benutzertyp zugeordnet werden zu können.
Wenn ein*e Benutzer*in angelegt oder aktualisiert wird, erscheint eine Warnmeldung, wenn der/die Benutzer*in für den vergebenen Benutzertyp zu jung ist.

Dieser Wert wird vom Cronjob update_patrons_category.pl verwendet, um den Benutzertyp eines Benutzers zu aktualisieren, wenn diese zu jung sind.
Höchstalter: Höchstalter (in Jahren) für diesen Benutzertyp. Zum Beispiel: ein Benutzertyp ‚Kinder‘ könnte ein Höchstalter von 18 Jahren haben, so dass Kinderausweise nur bis zu einem Alter von 18 gültig sind.
Wenn ein*e Benutzer*in angelegt oder aktualisiert wird, erscheint eine Warnmeldung, wenn der/die Benutzer*in für den vergebenen Benutzertyp zu alt ist.
Dieser Wert wird vom Cronjob update_patrons_category.pl verwendet, um den Benutzertyp von Benutzern zu aktualisieren, wenn diese zu alt sind.
Benutzungsgebühr: Geben Sie die Gebühr an, die Sie für die Bibliotheksbenutzung erheben möchten.
Warnung
Geben Sie ganze Zahlen und Dezimalzahlen in diesem Feld an.
Bemerkung
Abhängig von Ihrem Wert für den Systemparameter FeeOnChangePatronCategory wird diese Gebühr sowohl bei der Wiederanmeldung als auch bei der Erstanmeldung eines/einer Benutzer*in erhoben.
Mahnschreiben erforderlich: Geben Sie „Ja“ an, wenn für Benutzer diesen Benutzertyps Mahnschreiben versendet werden sollen. Dies erlaubt es dann Mahntrigger im Modul Werkzeuge zu konfigurieren.
Vermisste Exemplare in der Dienstoberfläche: entscheiden Sie auf Basis des Benutzertyps, ob vermisste Exemplare in der Dienstoberfläche angezeigt werden.
Angezeigt: vermisste Exemplare werden in der Dienstoberfläche angezeigt.
Voreingestellt ausgeblendet: vermisste Exemplare sind ausgeblendet, aber Bibliothekspersonal kann diese über den Link „Zeige alle Exemplare“ sichtbar machen.
Bemerkung
Dies betrifft nur die Dienstoberfläche, daher macht es keinen Unterschied, wenn Sie diese Einstellung bei Benutzertypen ändern, die keinen Zugriff auf die Dienstoberfläche haben.
Vormerkgebühr: geben Sie die Höhe der Gebühr an, die Sie Benutzern für das Eintragen einer Vormerkung berechnen möchten.
Warnung
Geben Sie ganze Zahlen und Dezimalzahlen in diesem Feld an.
Kategorie: wählen Sie eine der sechs übergeordneteten Kategorien
Erwachsener: die häufigste Kategorie, normalerweise verwendet für einen allgemeinen Benutzertyp.
Kind: ein weiterer häufiger Benutzertyp.
Bibliothekspersonal: Mitarbeiter*innen der Bibliothek
Organisation: Organisationen können Bürgende für Benutzertypen der Kategorie Mitarbeiter sein.
Mitarbeiter*innen (Organisation): Mitarbeiter*innen können mit Benutzer*innen der Kategorie Organisation verknüpft werden.
Statistisch: diese Kategorie ist nur für statistische Zwecke sinnvoll, um z.B. die Vor-Ort-Nutzung von Medien zu erfassen.
Das Feld ist erforderlich um den Benutzertyp zu speichern. Lassen Sie das Feld leer, bekommen Sie von Koha eine Fehlermeldung angezeigt.
Can be guarantee: if the patrons of this category can have guarantors, choose yes. This will make the ‚Patron guarantor‘ and ‚Non-patron guarantor‘ sections appear in the patron form.
Einschränkung auf Bibliotheken: wenn erforderlich, kann ein Benutzertyp auf bestimmte Bibliotheken in Ihrem System eingeschränkt werden. Wählen Sie „Alle Bibliotheken“, wenn Sie möchten, dass jede Bibliothek diesen Benutzertyp nutzen kann.
Tipp
To select more than one library, hold the ‚Ctrl‘ key while making your selection.
Passwort-Vergessen-Funktion im OPAC: entscheiden Sie, ob Benutzer*innen dieses Benutzertyps ihr Passwort über die Passwort-Vergessen-Funktion im OPAC zurücksetzen können. Voreingestellt wird die Konfiguration des OpacResetPassword Systemparameters verwendet.
Beachten Sie den Systemparameter OpacResetPassword.
Dürfen: Benutzer*innen dieses Benutzertyps können die Passwort-Vergessen-Funktion im OPAC verwenden, unabhängig von der Konfiguration des Systemparameters OpacResetPassword.
Dürfen nicht: Benutzer*innen dieses Benutzertyps können die Passwort-Vergessen-Funktion im OPAC nicht verwenden, unabhängig von der Konfiguration des Systemparameters OpacResetPassword.
Passwortänderung im OPAC: entscheiden Sie, ob Benutzer*innen dieses Benutzertyps ihr Passwort im OPAC ändern können. Voreingestellt wird die Konfiguration des OpacPasswordChange verwendet.
Verwende Systemparameter OpacPasswordChange.
Erlaubt: Benutzer dieses Benutzertyps können ihr Passwort im OPAC ändern, unabhängig von der Konfiguration des Systemparameters OpacPasswordChange.
Nicht erlaubt: Benutzer dieses Benutzertyps können ihr Passwort im OPAC nicht ändern, unabhängig von der Konfiguration des Systemparameters OpacPasswordChange.
Minimale Passwortlänge: geben Sie die minimale Passwortlänge für Benutzer*innen dieses Benutzertyps an. Wird das Feld leer gelassen, wird die Konfiguration des Systemparameters minPasswordLength verwendet.
Starkes Passwort erforderlich: entscheiden Sie, ob Sie für Benutzer diesen Benutzertyps eine starke Passwortrichtlinie erzwingen möchten (mindestens ein Groß- und Kleinbuchstabe und eine Ziffer). Voreingestellt wird die Konfiguration des Systemparameters RequireStrongPassword verwendet.
Verwende Systemparameter RequireStrongPassword.
Ja: Benutzer diesen Benutzertyps müssen ein starkes Passwort setzen, unabhängig von der Einstellung im Sysemparameter RequireStrongPassword.
Nein: Benutzer diesen Benutzertyps müssen kein starkes Passwort verwenden, unabhängig von der Einstellung im Systemparameter RequireStrongPassword.
Zurücksetzen des Passworts für neue Benutzer*innen erzwingen: Wählen Sie, ob von Mitarbeiter*innen angelegte Benutzer*innen dieser Kategorie gezwungen werden sollen, ihr Passwort nach der ersten Anmeldung im OPAC zu ändern.
Verwende Systemparameter ForcePasswordResetWhenSetByStaff
Erzwingen: Benutzer dieser Kategorie müssen ihr Passwort ändern wenn sie sich zum ersten Mal am OPAC anmelden, unabhängig von der Einstellung in ForcePasswordResetWhenSetByStaff
Nicht erzwingen: Benutzer dieser Kategorie werden nicht gezwungen, ihr Passwort zu ändern, wenn sie sich zum ersten Mal am OPAC anmelden, unabhängig von der Einstellung in ForcePasswordResetWhenSetByStaff
Bemerkung
Dies gilt nur für Benutzer*innen, deren Konto manuell von Mitarbeiter*innen erstellt wurde (im Gegensatz zu selbst registrierten Benutzer*innen).
Version
Diese Einstellung wurde in Koha-Version 24.11 hinzugefügt.
Sperrung abgelaufener Konten: entscheiden Sie, ob Benutzer diesen Benutzertyps deren Benutzerkonto abgelaufen ist, für Aktionen im OPAC gesperrt sind. Voreingestellt wird die Einstellung des Systemparameters BlockExpiredPatronOpacActions verwendet.
Verwende Systemparameter BlockExpiredPatronOpacActions.
Blockieren bestimmter Aktionen:
Bemerkung
Diese Einstellung hat Vorrang vor dem Systemparameter BlockExpiredPatronOpacActions.
Warnung
Vor Koha-Version 24.11 ist diese Einstellung eine einfache Ein/Aus-Wahl, und alle Aktionen werden blockiert, wenn sie aktiviert ist.
Prüfe auf vorherige Ausleihen: wenn der Systemparameter CheckPrevCheckout auf eine „Wenn nicht durch Benutzertyp überschrieben“ Option gesetzt ist, können Sie hier den Wert für diesen spezifischen Benutzertyp setzen.
Ja und versuche, die Einstellung im Systemparameter zu überschreiben: Koha prüft, ob der Benutzer dieses Exemplar bereits ausgeliehen hat, es sei denn, die persönlichen Einstellungen des Benutzers verhindern dies.
Nein, und versuche die Einstellung in den Systemparametern zu überschreiben: Koha prüft nicht ob der Benutzer dieses Exemplar bereits ausgeliehen hat, es sei denn, die persönlichen Einstellungen des Benutzers erlauben dies.
Vom Systemparameter erben: die Einstellung des Systemparameters CheckPrevCheckout wird befolgt.
Kann Fernleihanfragen im OPAC stellen: Wenn der Systemparameter ILLModule aktiviert ist, bestimmt diese Einstellung, ob Benutzer*innen dieser Kategorie Fernleihanfragen aus dem OPAC heraus stellen können.
Version
Diese Funktion wurde mit Koha-Version 23.11 eingeführt. In früheren Versionen konnten alle Benutzer*innen Fernleihanfragen im OPAC anlegen.
Datenschutzvoreinstellung: wählen Sie die Voreinstellung für den Datenschutz bei diesem Benutzertyp.
Voreingestellt: Die Ausleihhistorie wird unbegrenzt gespeichert, bis entweder das Skript batch_anonymize.pl oder eine manuelle Anonymisierung ausgeführt werden.
Niemals: Die Ausleihhistorie wird direkt bei Rückgabe gelöscht. Statistiken bleiben erhalten, aber der Link zwischen Ausleihe, Exemplar und dem Benutzer wird gelöscht.
Für immer: Die Ausleihhistorie von Benutzern dieses Benutzertyps werden niemals anonymisiert, trotz Ausführung des Skripts oder einer manuellen Anonymisierung.
Diese Einstellung kann durch den/die Benutzer*in im OPAC geändert werden, wenn der Systemparameter OPACPrivacy aktiviert ist.
Keine Priorisierung von lokalen Vormerkungen: entscheiden Sie, ob Vormerkungen für Benutzer*innen dieses Benutzertyps Priorität erhalten.
Ja: Vormerkungen für Benutzer*innen dieses Benutzertyps erhalten keine spezielle Priorität, unabhängig von der gewählten Einstellung des LocalHoldsPriority Systemparameters.
Nein: Vormerkungen für Benutzer*innen dieses Benutzertyps werden durch den Systemparameter LocalHoldsPriority kontrolliert.
Gebührenlimit für die Ausleihe: Verhindern Sie, dass Benutzer*innen dieser Kategorie Exemplare ausleihen können, wenn sie mehr als den angegebenen Betrag schulden.
Wenn dieses Feld leer gelassen wird oder auf 0 steht, wird der Wert im Systemparameter noissuescharge für Benutzer*innen dieser Kategorie verwendet.
Wenn dieses Feld einen Wert hat, überschreibt es den Wert im Systemparameter noissuescharge für Benutzer*innen dieser Kategorie.
Version
Diese Einstellung wurde in Koha-Version 24.11 hinzugefügt.
Gebührenlimit für Bürgschaften in der Ausleihe: Verhindern Sie, dass Benutzer*innen dieser Kategorie Exemplare ausleihen können, wenn ihre Bürgschaften zusammen mehr als den angegebenen Betrag schulden.
Wenn dieses Feld leer bleibt oder auf 0 steht, wird der Wert im Systemparameter NoIssuesChargeGuarantees für Benutzer*innen dieser Kategorie verwendet.
Wenn dieses Feld einen Wert hat, überschreibt dieser den Wert im Systemparameter NoIssuesChargeGuarantees für Benutzer*innen dieser Kategorie.
Version
Diese Einstellung wurde in Koha-Version 24.11 hinzugefügt.
Gebührenlimit für die Ausleihe für Bürgen mit Bürgschaften: Verhindert, dass Benutzer*innen dieser Kategorie Exemplare ausleihen können, wenn der/die Benutzer*in Bürgschaften hat und die Bürgschaften dieses Bürgen zusammen mehr als den angegebenen Betrag schulden.
Wenn dieses Feld leer bleibt oder auf 0 steht, wird der Wert im Systemparameter NoIssuesChargeGarantorsWithGuarantees für Benutzer*innen dieser Kategorie verwendet.
Wenn dieses Feld einen Wert hat, überschreibt dieser den Wert im Systemparameter NoIssuesChargeGarantorsWithGuarantees für Benutzer*innen dieser Kategorie.
Version
Diese Einstellung wurde in Koha-Version 24.11 hinzugefügt.
Voreingestellte Benachrichtigungseinstellungen für diesen Benutzertyp: geben Sie erweiterte Nachrichteneinstellungen standardmäßig für den Benutzertyp an
Diese voreingestellten Parameter können für jede*n Benutzer*in individuell verändert werden. Dies ist nur eine Voreinstellung, um das Einrichten von Nachrichten beim Anlegen neuer Benutzer*innen zu erleichtern.
Bemerkung
This requires that you have EnhancedMessagingPreferences system preference set to ‚Allow‘.
Warnung
Diese Voreinstellungen werden beim Anlegen neuer Benutzer*innen im System verwendet. Änderungen verändern die Einstellungen in bestehenden Benutzerkonten nicht.
Wenn Sie die Voreinstellungen auf bestehende Benutzer*innen anwenden müssen, können Sie diese Änderungen erzwingen, indem Sie das Skript borrowers-force-messaging-defaults im Verzeichnis misc/maintenance ausführen. Bitten Sie Ihre*n Systemadministrator*in dabei um Hilfe.
Ausleih- und Gebührenregeln
Diese Regeln legen fest, wie Exemplare entliehen werden können, wann und wie Mahngebühren berechnet werden und wie mit Vormerkungen umgegangen wird.
Pfad in Koha: Mehr > Administration > Benutzer und Ausleihe > Ausleihkonditionen
Bemerkung
Nur Bibliothekspersonal mit der Berechtigung manage_circ_rules (oder der superlibrarian-Berechtigung) hat Zugang zu diesem Bereich.
Es wird immer die spezifischste Regel angewendet, dies entspricht der ersten Regel, welche die nachfolgenden Bedingungen in der angegebenen Reihenfolge erfüllt:
gleiche Bibliothek, gleicher Benutzertyp, gleicher Exemplartyp
gleiche Bibliothek, gleicher Benutzertyp, alle Exemplartypen
gleiche Bibliothek, alle Benutzertypen, gleicher Exemplartyp
gleiche Bibliothek, alle Benutzertypen, alle Exemplartypen
Voreingestellt (alle Bibliotheken), gleicher Benutzertyp, gleicher Exemplartyp
Voreingestellt (alle Bibliotheken), gleicher Benutzertyp, alle Exemplartypen
Voreingestellt (alle Bibliotheken), alle Benutzertypen, alle Exemplartypen
Voreingestellt (alle Bibliotheken), alle Benutzertypen, alle Exemplartypen
CircControl und HomeOrHoldingBranch sind ebenfalls wichtig, wenn es darum geht, welche Ausleihkondition greifen soll.
Wenn der Systemparameter CircControl auf „Bibliothek, unter der Sie angemeldet sind“ gesetzt ist, werden die Ausleihkonditionen auf Basis der Bibliothek ausgewählt, unter der Sie aktuell angemeldet sind
Wenn CircControl auf „der Bibliothek, bei welcher der Benutzer angemeldet ist“ eingestellt ist, dann werden die Ausleihregeln auf Basis der Heimatbibliothek des/der Benutzer*in ausgewählt
Wenn CircControl auf „die Bibliothek, aus der das Exemplar kommt“ eingestellt ist, werden die Ausleihkonditionen auf Basis der Exemplarbibliothek ausgewählt, wobei HomeOrHoldingBranch festlegt, ob es sich um die Heimatbibliothek oder die aktuelle Bibliothek des Exemplars handelt.
Wenn IndependentBranches auf „Nein“ eingestellt ist, wird der Wert aus HomeOrHoldingBranch verwendet, um festzulegen, ob ein Exemplar entliehen werden kann. Wenn die Heimatbibliothek des Exemplars nicht mit der Bibliothek übereinstimmt, bei der Sie eingeloggt sind, kann das Exemplar nur ausgeliehen werden, wenn Sie die superlibrarian-Berechtigung besitzen.
Wichtig
Es muss mindestens eine Standardausleihregel angelegt werden. Diese Regel sollte für alle Exemplartypen, alle Bibliotheken und alle Benutzertypen gelten. So werden alle Fälle abgefangen, für die keine spezifische Regel eingetragen wurde. Wenn das nicht geschieht, kann es passieren, dass Benutzer*innen keine Vormerkungen setzen können.
Ausleihkonditionen konfigurieren
Mit Hilfe der Ausleihkonditionen können Sie Regeln abhängig von Benutzer- und Exemplartyp definieren.
Bemerkung
Da die Tabelle sehr umfangreich ist, können Sie über die Schaltfläche „Export“, oben in der Tabelle, die vorhandenen Konditionen im Microsoft Excel- oder CSV-Format exportieren, um sie zu betrachten.
In der Matrix der Ausleihkonditionen können Sie Regeln basierend auf Kombinationen von Benutzertyp und Exemplartyp definieren. Wählen Sie in der Auswahlliste eine Bibliothek (oder ‚Alle Bibliotheken‘, wenn die Regel für alle Bibliotheken gelten soll) aus, um Regeln zu definieren:
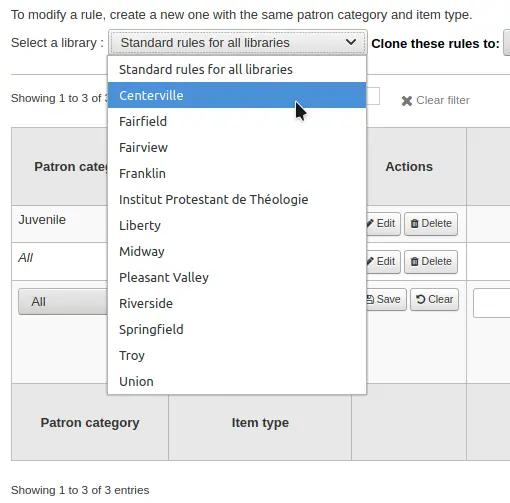
In der Matrix können Sie eine Kombination aus Benutzer- und Exemplartyp wählen, für welche die Regel gelten soll

Wählen Sie zuerst, für welche Benutzergruppe die Regel angewendet werden soll. Wenn Sie das Feld auf ‚Standard‘ setzen, wird die Regel auf alle Benutzertypen angewendet
Wählen Sie den Exemplartyp aus, für den diese Regel gelten soll. Wenn Sie dies auf „Alle“ belassen, wird die Regel auf alle Exemplartypen und diesen Benutzertyp angewendet
Wenn ein Exemplartyp einen übergeordneten Typ hat, wird die Regel als „Elter -> Kind“ angezeigt. Die Anzahl der gleichzeitig erlaubten Ausleihen wird entweder auf das Maximum des übergeordneten Exemplartyps (inklusive der weiteren untergeordneten Exemplartypen) oder das der spezifischen Regel beschränkt, je nachdem, welcher Wert kleiner ist.
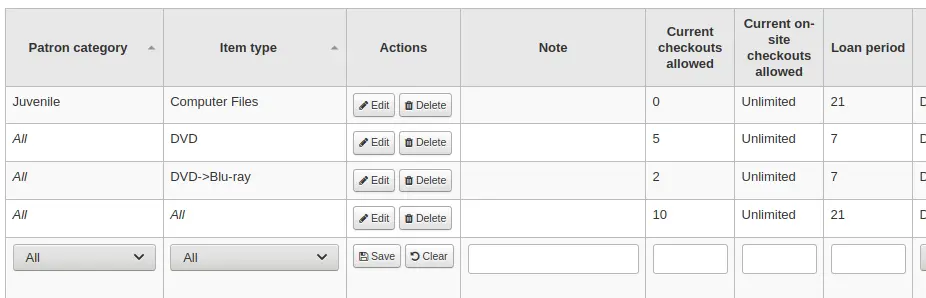
Im obigen Beispiel gibt es eine Regel für den Exemplartyp DVD mit einer maximalen Ausleihanzahl von 5 und eine Regel für Blu-Ray, einem untergeordneten Exemplartyp von DVD, mit einer maximalen Ausleihanzahl von 2. Ein*e Benutzer*in dieser Bibliothek kann maximal 2 Blu-Rays und insgesamt 5 DVDs oder Blu-Rays entleihen.
Zusammenfassend, ein*e Benutzer*in dieser Bibliothek kann entweder 0 Blu-Ray und 5 DVDs oder 1 Blu-Ray und 4 DVDs oder 2 Blu-Ray und 3 DVDs entleihen
Sie können Hinweise zu einer Ausleihregeln im Notizfeld hinterlegen. Dies kann hilfreich sein um festzuhalten, warum und wann etwas zuletzt geändert wurde.
Begrenzen Sie die Anzahl an Medien, die ein*e Benutzer*in dieses Benutzertyps gleichzeitig entliehen haben kann, indem Sie die Anzahl im Feld „Anzahl gleichzeitiger Ausleihen“ angeben.
Haben Sie durch die Einstellung des Systemparameters OnSiteCheckouts die Vor-Ort-Ausleihe aktiviert, dann limitieren Sie diese bitte auch im Feld ‚Anzahl gleichzeitiger Vor-Ort-Ausleihen‘.
Hinweis
Die Einstellung ist auch abhängig von der Einstellung im Systemparameter ConsiderOnSiteCheckoutsAsNormalCheckouts
Legen Sie fest, wie lange ein Exemplar an eine*n Benutzer*in dieses Benutzertyps entliehen wird, indem Sie die Anzahl der Zeiteinheiten (Tage oder Stunden) als „Leihfrist“ eintragen.
Legen Sie fest, ob die Leihfrist in der Spalte „Berechnung Fälligkeitsdatum“ Schließtage enthalten soll oder nicht. Die gewählte Variante lässt den Systemprameter useDaysMode für diese spezielle Regel unberücksichtigt.
Bei der Option „Standard“ wird die Einstellung des Systemparameters useDaysMode verwendet
Wählen Sie die Option „Überspringe Schließtage“, wenn Sie möchten, dass Tage, an denen die Bibliothek geschlossen ist, nicht eingerechnet werden
Wählen Sie die Option „Nächster Öffnungstag“, um das Fälligkeitsdatum auf den nächsten Öffnungstag nach der berechneten Frist zu legen
Wählen Sie die Option „Ignoriere den Kalender“, um den Kalender bei der Berechnung nicht zu berücksichtigen
Wählen Sie die Option „Gleicher Wochentag“, wenn Sie den Kalender verwenden möchten, um bei einer wochenbasierten Leihfrist das Fälligkeitsdatum auf den nächsten gleichen Wochentag zu legen bzw. anderenfalls den nächsten freien Öffnungstag
Wählen Sie aus, in welcher Zeiteinheit, Tagen oder Stunden, die Leihfrist und die Gebühren berechnet werden sollen. Geben Sie diese im Feld „Einheit“ ein
Bemerkung
Wenn Sie „Stunden“ verwenden, können Sie für jede Bibliothek die Öffnungszeiten der Bibliothek festlegen und bestimmen, wie die Fälligkeit berechnet wird, wenn sie außerhalb der Öffnungszeiten liegt.
Sie können auch ein festes Fälligkeitsdatum für einen bestimmten Benutzertyp und Exemplartyp konfigurieren. das feste Fälligkeitsdatum hat drei verschiedene Optionen:
Genau am: Das Fälligkeitsdatum jedes ausgeliehenen Exemplars mit dieser Regel wird auf das angegebene Datum gesetzt.
Vor: Koha berechnet die normale Leihfrist. Wenn das berechnete Fälligkeitsdatum nach dem angegebenen Datum liegen würde, wird stattdessen das angegebene Datum verwendet.
Nach: Koha berechnet die normale Leihfrist. Wenn das berechnete Fälligkeitsdatum vor dem angegebenen Datum liegen würde, wird das angegebene Datum verwendet.
Die „Mahngebühr“ ist die Gebühr, die für überfällige Exemplare berechnet werden soll.
Wichtig
Verwenden Sie nur Ziffern und Dezimalpunkte (keine Währungssymbole).
Geben Sie das „Intervall für Gebühren“ in der Zeiteinheit an, die Sie gewählt haben (z.B. berechnet Gebühren jeden Tag, oder alle zwei Stunden). Der Systemparameter finesCalendar steuert, wie und ob Schließtage bei der Berechnung berücksichtigt werden.
In den meisten Bibliotheken, die Gebühren erheben wird das Gebührenintervall auf mehr als einen Tag gesetzt.
Intervallende: Wenn eine Gnadenfrist von 2 Tagen und ein Intervall für Gebühren von 7 Tagen verwendet wird, wird die erste Gebühr 7 Tage nach dem Fälligkeitsdatum berechnet. Es dauert immer ein Gebührenintervall (7 Tage), bevor die erste Gebühr berechnet wird.
Intervallbeginn: Wenn eine Gnadenfrist von 2 Tagen und ein Intervall für Gebühren von 7 Tagen verwendet wird, wird die erste Gebühr 2 Tage nach dem Fälligkeitsdatum berechnet und die zweite Gebühr 9 Tage nach dem Fälligkeitsdatum.
Die ‚Gnadenfrist‘ ist die Anzahl an Tagen, die ein Exemplar überfällig sein kann, bevor Mahngebühren berechnet werden. Der Systemparameter FinesIncludeGracePeriod legt fest, ob und wie Schließtage bei der Berechnung berücksichtigt werden.
Wichtig
Dies kann nur für „Tage“ und nicht für „Stunden“ angegeben werden
Die ‚Maximale Mahngebühr‘ ist die maximale Gebühr, die für diese Benutzertyp-Exemplartyp-Kombination berechnet wird.
Wichtig
Wenn dieses Feld unausgefüllt bleibt, gibt es keine Begrenzung für die anfallenden Mahngebühren. Eine Maximalgebühr für das Konto kann im Systemparameter MaxFine gesetzt werden.
Wenn Sie verhindern möchten, dass Benutzer*innen für verlorene Exemplare überbelastet werden, können Sie die Checkbox ‚Maximale Mahngebühr = Buchersatzpreis‘ markieren. Dies verhindert, dass die Gebühr für den/die Benutzer*in über den Ersatzpreis für das Exemplar steigt.
Hinweis
Haben Sie auch die ‚Maximale Mahngebühr‘ gesetzt, wird die Gebühr weniger, wenn beide für die gesetzte Überfälligkeit gelten.
If you charge patrons a fine when they don’t come to pick up their waiting holds in time (see below the number of days set in ‚Holds pickup period (day)‘), enter the amount of the fine in ‚Expired hold charge‘.
Wenn dieses Feld frei gelassen wird, wird der Wert aus dem Systemparameter ExpireReservesMaxPickUpDelayCharge verwendet.
Version
Diese Option wurde erstmals in Version 25.05 von Koha eingeführt.
Wenn Ihre Bibliothek Benutzer*innen mit Ausleihsperren belegt, können Sie die Dauer der Sperre in Tagen unter ‚Sperrung (in Tagen)‘ angeben.
Wichtig
Dies kann nur für „Tage“ und nicht für „Stunden“ angegeben werden
Sie können die maximale Anzahl an Tagen, die ein*e Benutzer*in suspendiert werden kann, unter ‚Maximale Sperrung (in Tagen)‘ konfigurieren
Das „Berechnungsintervall für Sperren“ arbeitet analog zum „Intervall für Gebühren“. Zum Beispiel können Sie eine Sperre von einem Tag für je zwei Überfälligkeitstage definieren.
Entscheiden Sie als nächstes, ob der/die Benutzer*in diesen Exemplartyp verlängern kann und geben Sie die maximale Anzahl an Verlängerungen im Feld ‚Erlaubte Verlängerungen (Anzahl)‘ an.
Wenn Sie die Funktion zwischen Verlängerungen und Verlängerungen mit Vorlage des entliehenen Mediums zu unterscheiden erlauben (vergleiche UnseenRenewals), geben Sie an wie viele Verlängerungen ohne Vorlage BenutzerInnen vornehmen können. Diese werden nicht addiert zu den normalen Verlängerungen, sondern sind ein Teil der gesamten Anzahl der erlaubten Verlängerungen.
Wenn Verlängerungen erlaubt sind, können Sie über das Feld ‚Verlängerungsfrist‘ konfigurieren, wie lange der Verlängerungszeitraum (in der zuvor gewählten Einheit) sein soll.
Wenn Sie Verlängerungen erlauben, können Sie über das Feld ‚Keine weiteren Verlängerungen möglich vor‘ festlegen, ab welchem Zeitpunkt Benutzer*innen Ihre Medien verlängern können.
Exemplare können zu jedem Zeitpunkt verlängert werden, wenn dieses Feld freigelassen wird. Anderenfalls können Exemplare nur ab der Anzahl von Tagen/Stunden verlängert werden, die in diesem Feld angegeben wurde.
Um diesen Wert differenzierter anzugeben, nutzen Sie den Systemparameter NoRenewalBeforePrecision.
Wenn Sie die automatische Verlängerung aktivieren (siehe unten), geben Sie an, wie lange vor dem Fälligkeitsdatum die automatische Verlängerung stattfindet.
Version
Diese Möglichkeit wurde in Koha-Version 23.11 hinzugefügt.
In früheren Versionen, wurde bei automatischen Verlängerungen der Wert „keine Verlängerung vor“ verwendet, der sowohl für reguläre als auch für automatische Verlängerungen gilt.
Sie können automatische Verlängerungen für bestimmte Exemplartyp-Benutzertyp-Kombinationen aktivieren. Damit werden die Ausleihen anhand der Ausleihkonditionen automatisch verlängert, wenn keine Vormerkung eingetragen wurde.
Wichtig
Hierfür müssen Sie den Cronjob für automatische Verlängerungen aktivieren.
Wichtig
Diese Funktion benötigt einen Wert in der Spalte „Keine Verlängerung vor“. Andernfalls findet nach dem Fälligkeitsdatum jeden Tag eine Verlängerung statt.
Wenn Sie automatische Verlängerungen verwenden, können Sie die Option „Keine automatische Verlängerung nach“ verwenden, um den Zeitraum zu beschränken, für den ein*e Benutzer*in das Exemplar entleihen kann. Beispiel: Erlauben Sie keine automatischen Verlängerungen nach einer Ausleihfrist von 80 Tagen.
Ähnlich zu der Option für das feste Fälligkeitsdatum können Sie auch für automatische Verlängerungen über die Option „Keine automatischen Verlängerungen nach (festes Datum)“ festlegen, ab wann keine Verlängerungen mehr möglich sind.
Wenn Benutzer*innen diesen Benutzertyps Vormerkungen auf Exemplare diesen Exemplartyps setzen dürfen, geben Sie im Feld „Erlaubte Vormerkungen“ die maximale Anzahl an Vormerkungen (auf diesen Exemplartyp) an.
Lassen Sie das Feld frei für eine unbegrenzte Anzahl an Vormerkungen.
Wenn Sie die Anzahl der Vormerkungen lieber für den Benutzertyp und unabhängig vom Exemplartyp begrenzen möchten, können Sie dies unter Ausleih- und Vormerkregeln je Benutzertyp, wie unten beschrieben, festlegen.
Wenn Sie eine feste Begrenzung der Vormerkungen, unabhängig von Benutzertyp und Exemplartyp, für diese Bibliothek festlegen möchten, finden Sie diese Möglichkeit im Bereich Standardkonditionen für Ausleihe, Rückgabe und Vormerkungen unten.
Wenn Sie die Anzahl der Vormerkungen unabhängig vom Benutzertyp und Exemplartyp und über alle Bibliotheken hinweg begrenzen möchten, können Sie den Systemparameter maxreserves verwenden.
Sie können auch ein tägliches Limit für die Anzahl an Vormerkungen festlegen, die ein*e Benutzer*in eintragen kann.
Während die beiden Optionen zuvor beschränken, wie viele Vormerkungen auf verschiedene Titel eingetragen werden können, beschränkt die nächste Option die Anzahl an Vormerkungen, die auf einen einzelnen Titel gesetzt werden können. Beispiel: Für Belletristrik möchten Sie nur eine Vormerkung je Benutzer*in zur gleichen Zeit erlauben. Aber für Zeitschriften, bei denen die Exemplare den verschiedenen Heften entsprechen, ist mehr als eine Vormerkung zur gleichen Zeit gewünscht.
Hinweis
Ist dieser Wert größer als 1, aber nicht unbegrenzt, haben Mitarbeiter*innen die Möglichkeit mehrere Vormerkungen auf einmal vorzunehmen, wenn sie das nächste verfügbare Exemplar in der Dienstoberfläche vormerken
Als nächstes können Sie entscheiden wie die Verfügbarkeit von Exemplaren das Eintragen von Vormerkungen beeinflusst. Die Option „Vormerkung verfügbarer Titel“ hat drei mögliche Einstellungen:
Ja: Dies erlaubt das Vormerken zu jedem Zeitpunkt. Es spielt keine Rolle, ob die Exemplare verfügbar oder ausgeliehen sind.
Wenn nicht verfügbare vorhanden: Dies erlaubt das Eintragen einer Vormerkung sobald eines oder mehrere Exemplare des Titels entliehen sind. Es spielt keine Rolle, ob es noch eines oder mehrere weitere verfügbare Exemplare gibt.
Wenn alle nicht verfügbar: Dies erlaubt das Eintragen einer Vormerkung sobald alle Exemplare des Titels entliehen sind, die eine Vormerkung erfüllen könnten. Dies ist vor allem für Bibliotheken sinnvoll, die keine Bereitstellung von verfügbaren Medien für die Benutzer*innen anbieten.
Unter „Exemplarvormerkungen im OPAC“ können Sie festlegen, ob Benutzer*innen exemplarspezifische Vormerkungen für den Exemplartyp setzen können. Die Optionen sind:
Erlaube: Der/die Benutzer*in kann das nächste verfügbare oder ein bestimmtes Exemplar vormerken.
Erlaube nicht: Benutzer*innen können nur das nächste verfügbare Exemplar vormerken.
Erzwinge: Benutzer*innen können nur ein spezifisches Exemplar vormerken.
In der Spalte „Abholzeitraum für Vormerkungen (Tage)“ kann die Anzahl an Tagen festgelegt werden, nach denen Benutzer*innen ihre Vormerkungen abholen müssen. Dieser Wert bestimmt das „Ablaufdatum“ von Vormerkungen. Nach Ablauf der Frist werden Vormerkungen als problematisch eingestuft und erscheinen im Reiter „Vormerkungen, die ihr Ablaufdatum überschritten haben“ im Report Abholbereite Vormerkungen.
Der Standardzeitraum ist im Systemparameter ReservesMaxPickUpDelay festgelegt. Diese Spalte erlaubt es aber detailliertere Regeln für verschiedene Kombinationen aus Bibliotheken, Benutzer- und Exemplartypen zu erstellen.
Version
Diese Ausleihkondition wurde in Kohaversion 23.11. hinzugefügt.
Wenn Sie Benutzer*innen dieses Benutzertyps erlauben möchten Artikelbestellungen auf Exemplare dieses Exemplartyps zu machen, wählen Sie eine Option in der Spalte „Artikelbestellungen“
Nein: Benutzer*innen dieses Benutzertyps können keine Artikelbestellungen auf Exemplare dieses Exemplartyps erstellen
Ja: Benutzer*innen dieses Benutzertyps können Artikelbestellungen auf Exemplare dieses Exemplartyps setzen, entweder auf einzelne Exemplare (z.B. bei Zeitschriftenheften) oder auf Titel (z.B. bei Monographien)
Nur Titelsatz: Benutzer*innen dieses Benutzertyps können Artikelbestellungen auf Titel dieses Exemplartyps setzen, aber nicht auf bestimmte Exemplare
Nur Exemplar: Benutzer*innen dieses Benutzertyps können Artikelbestellungen auf Exemplare dieses Exemplartyps, aber nicht auf Titel, setzen
Warnung
Diese Spalte erscheint nur, wenn der Systemparameter ArticleRequests aktiviert ist.
Wenn Sie die Funktion für Artikelbestellungen verwenden möchten, müssen Sie diese zunächst über den Systemparameter ArticleRequests aktivieren und über den anderen Parameter das Formular konfigurieren.
Wenn Sie für den Exemplartyp eine Leihgebühr erheben und bestimmten Benutzertypen einen Rabatt auf die Leihgebühr einräumen möchten, können Sie den Prozentsatz (ohne das Prozent-Zeichen) bei ‚Rabatt auf Leihgebühr (%)‘ eintragen
Bemerkung
Enter the discount percentage using a decimal point.
Discounts must be a positive number with no more than two digits after the decimal. Whole numbers are also allowed. For example:
5,10,0.50,3.25,99.99.Values like
0.5,25.123, or-10are not accepted.Wenn der Systemparameter UseRecalls aktiviert ist, kann die Rückruffunktion genutzt werden.
Erlaubte Rückrufe (Anzahl): geben Sie die Anzahl der Rückrufe an, die ein*e Benutzer*in dieser Kategorie für Exemplare oder Titel diesen Exemplartyps haben kann.
Rückrufe je Titel (Anzahl): Geben Sie die Anzahl der Rückrufe ein, die ein*e Benutzer*in dieser Kategorie für einen Titeldatensatz dieses Exemplartyps haben kann.
Erlaube Rückrufe auf verfügbare Titel: geben Sie an ob Benutzer*innen Rückrufe auf Titel mit verfügbaren Exemplaren durchführen können
wenn nicht verfügbare vorhanden: wenn es mehrere Exemplare zu einem Titel gibt und mindestens eins nicht verfügbar ist, können Rückrufe für diese Exemplare durchgeführt werden
wenn alle nicht verfügbar: kein Exemplare darf verfügbar sein, damit ein Rückruf auf ein Exemplar durchgeführt werden kann
Rückrufe: Fälligkeitsintervall (Tag): geben Sie die Anzahl der Tage an, die einem/einer Benutzer*in zur Verfügung stehen, um das zurückgerufene Exemplar zurückzugeben
Rückrufe: Mahngebühr: geben Sie die Höhe der Mahngebühr an die fällig wird, wenn ein zurückgerufenes Exemplar nicht rechtzeitig zurückgegeben wird
Rückrufe: Abholzeitraum (Tag): geben Sie die Anzahl der Tage an, die einem/einer Benutzer*in zur Verfügung stehen, um ein zurückgerufenes und bereitgestelltes Exemplar abzuholen.
Bemerkung
Dieser Wert ersetzt den Wert des Systemparameters RecallsMaxPickUpDelay.
Wenn Sie fertig sind, klicken Sie auf „Speichern“, um Ihre Änderungen zu speichern. Um eine Regel zu bearbeiten, klicken Sie einfach auf die Schaltfläche „Bearbeiten“ am Anfang oder Ende jeder Zeile. Die Zeile mit der zu bearbeitenden Regel wird gelb hervorgehoben und die Werte werden in der letzten Zeile der Tabelle eingetragen. Bearbeiten Sie die Werte in dieser letzten Zeile und speichern Sie anschließend.
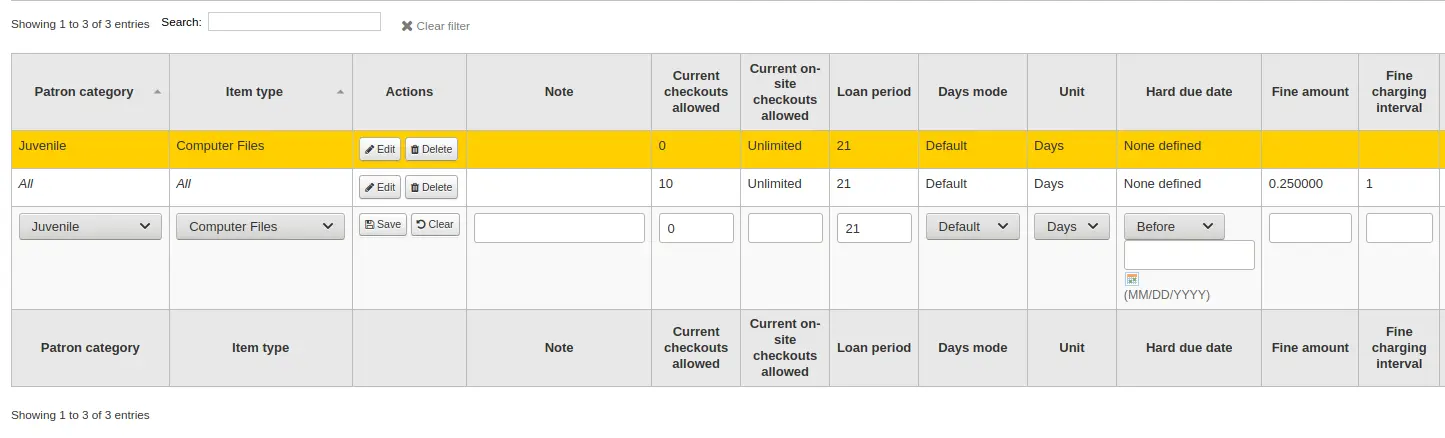
Hinweis
Wenn Sie, während Sie eine Regel bearbeiten, den Benutzertyp oder den Exemplartyp verändern, wird eine neue Regel angelegt oder eine andere bestehende Regel überschrieben. Sie können dies verwenden, um Regeln zu duplizieren, statt diese vollständig neu anlegen zu müssen, wenn die Einstellungen ähnlich sind.
Alternativ können Sie auch eine Regel mit dem gleichen Benutzertyp und Exemplartyp anlegen, um eine existierende Regel zu überschreiben, da es nur eine Regel für jede Kombination aus Bibliothek, Benutzertyp und Exemplartyp geben kann.
Wenn Sie eine Regel löschen möchten, klicken Sie auf die Schaltfläche „Löschen“ am Anfang oder Ende der Zeile.
Um Zeit zu sparen können Sie die Regeln einer Bibliothek für eine andere Bibliothek klonen, in dem Sie die entsprechende Funktion oberhalb der Matrix auswählen.

Nachdem Sie Klonen ausgewählt haben, werden Sie aufgefordert die Aktion zu bestätigen.

Voreinstellungen für Ausleihe, Rückgabe und Vormerkungen
Sie können eine maximale Anzahl an Ausleihen, eine maximale Anzahl an Vormerkungen und eine Vormerkregel definieren, die verwendet wird, wenn in den weiteren Tabellen keine spezifischere Regel für den Exemplartyp oder Benutzertyp konfiguriert wurde. Koha fällt auf Regeln als Voreinstellungen zurück.

In diesem Menü können Sie eine Voreinstellung definieren, der für alle Exemplartypen und Benutzer*innen Ihrer Bibliothek angewendet wird, wenn keine andere Option im Formular unten angezeigt wird.
Total current checkouts allowed: enter the total number of items patrons can have checked out at one time
Total current on-site checkouts allowed: enter the total number of items patrons can have checked out on site at a time (OnSiteCheckouts needs to be set to ‚Enable‘)
Maximum total holds allowed (count): enter the total number of pending holds patrons can have at the same time.
Hold policy: control where patrons can place holds from
From any library: patrons from any library may put items on hold (default if none is defined)
From local hold group: only patrons from a library in the item home library’s local hold group may put this book on hold
From home library: only patrons from the item’s home library may put items on hold.
No holds allowed: no patron may put items on hold.
Hold and booking pickup library match: control where patron can pick up holds and bookings
jede Bibliothek
Vormerkgruppe des Exemplars
Vormerkgruppe des Benutzers
Heimatbibliothek des Exemplars
die Bestandsbibliothek des Exemplars
Booking pre-processing (days): enter a number of days to prevent a new booking from starting too soon after an existing booking ends. This gives staff time to prepare the item between two bookings.
Version
Diese Funktion wurde in Koha-Version 24.11 hinzugefügt.
Booking post-processing (days): enter a number of days to prevent a new booking from ending too close to the start of an existing booking. This gives staff time to receive and process the item between two bookings.
Version
Diese Funktion wurde in Koha-Version 24.11 hinzugefügt.
Return policy: control where the item returns to once it is checked in
Exemplar geht zurück zur Heimatbibliothek
Exemplar geht zurück zur Ausleihbibliothek
Item floats: when an item floats, it stays where it was checked in and does not ever return ‚home‘
Exemplar verbleibt nach Bibliotheksgruppe: Befindet sich die Bibliothek, in der das Exemplar zurückgegeben wurde, in der gleichen „Floating-Gruppe“ der Bibliotheksgruppen, wie die Heimatbibliothek des Exemplars, wird es nicht transportiert. Anderenfalls wird das Medium zurück in die Heimatbibliothek transportiert.
Once your policy is set, you can unset it by clicking the ‚Unset‘ button to the right of the rule.
Voreingestellte Ausleih- und Vormerkregeln je Benutzertyp
Für diese Bibliothek kann eine maximale Anzahl an Ausleihen, Vor-Ort-Ausleihen und Vormerkungen festgelegt werden, die ein*e Benutzer*in eines bestimmten Benutzertyps unabhängig vom Exemplartyp ausleihen kann.

Hinweis
Wenn die Gesamtanzahl der Ausleihen, Vor-Ort-Ausleihen und Vormerkungen für einen bestimmten Benutzertyp frei gelassen wird, gilt keine Begrenzung, außer den Begrenzungen, die Sie ggf. über die Ausleihkonditionen in der Tabelle darüber konfiguriert haben.
Wenn Sie zum Beispiel eine Regel definiert haben, die besagt, dass Benutzer*innen generell 10 Bücher und 5 DVDs ausleihen dürfen, Sie aber möchten, dass diese Benutzer*innen nur eine Gesamtanzahl von 12 Medien auf einmal ausleihen dürfen, geben Sie hier 12 ein. Hat der/die Benutzer*in bereits 10 Bücher ausgeliehen, so kann er nur noch 2 DVDs ausleihen, damit es mit der Gesamtanzahl von 12 übereinstimmt.
Voreingestellte Regeln für die Stornierung abholbereiter Vormerkungen
Für diese Bibliothek können Sie festlegen, ob Benutzer*innen die bereits zur Abholung bereitstehenden Vormerkungen stornieren können.

Wählen Sie für jede Kombination aus Benutzer- und Exemplartyp aus, ob die Benutzer*innen Vormerkungen stornieren können, die bereits auf Abholung warten.
Wie bei den Ausleihkonditionen gelten die spezifischeren vor den allgemeineren Regeln (d.h. die Regel „alle“ Benutzertypen / „alle“ Exemplartypen gilt nur, wenn keine andere Regel für diese Kombination existiert).
Voreingestelltes Limit an offenen Artikelbestellungen
Wenn der Systemparameter ArticleRequests aktiviert ist, kann eine maximale Anzahl von Artikelbestellungen eingetragen werden, die eine BenutzerIn einer bestimmten Kategorie durchführen kann.

Bemerkung
Diese Option erscheint nur, wenn der Systemparameter ArticleRequests aktiviert ist.
Wählen Sie den Benutzertyp aus.
Geben Sie die Anzahl der Artikelbestellungen ein, die ein/e BenutzerIn dieser Kategorie zu einem bestimmten Zeitpunkt haben kann
Klicken Sie auf „Hinzufügen“
Voreingestellte Gebühr für Artikelbestellungen
Wenn der Systemparameter ArticleRequests aktiviert ist, kann der Betrag für eine Artikelbestellbestellung, die eine BenutzerIn eines bestimmten Benutzertyps dafür zahlen muss, festgelegt werden.

Bemerkung
Diese Option erscheint nur, wenn der Systemparameter ArticleRequests aktiviert ist.
Wählen Sie den Benutzertyp aus für den Sie eine Gebühr festlegen möchten, oder wählen Sie ‚Alle‘ aus, um für alle Benutzertypen eine Gebühr festzulegen
Bemerkung
Die Gebühr für einen spezifischen Benutzertyp ersetzt die Gebühr für alle Benutzertypen.
Wenn Sie beispielsweise die Gebühr für alle Benutzertypen auf 2 € gesetzt haben, und die Gebühr für die Fakultät auf 3 € festlegen, werden den Fakultätsmitgliedern 3 € und allen anderen Benutzerinnen 2 € berechnet.
Geben Sie den Betrag an (verwenden Sie den Punkt als Trennzeichen ohne Symbole, z. B. 5.00 für 5 €)
Klicken Sie auf „Hinzufügen“
The fee is charged to the patron when the request is placed.
Wenn die Artikelbestellung entweder über die Dienstoberfläche oder den OPAC aufgegeben wird, wird der/die Bibliotheksmitarbeiter*in bzw. der Benutzer*in über die erhobene Gebührenhöhe informiert.
Voreingestellte Regeln für die Rückerstattung bei Medienverlust
Hier können Sie die Standardregeln für die Rückerstattung bei Medienverlust festlegen.

Erstattung der Wiederbeschaffungsgebühr für verlorene Exemplare: Wählen Sie, ob die Wiederbeschaffungskosten für das verlorene Exemplar erstattet werden sollen oder nicht.
Erstattung der Gebühr für verlorene Exemplare: Die Wiederbeschaffungskosten werden erstattet. Dies kann zu einer Gutschrift führen, die dem/der Benutzer*in ausgezahlt wird, wenn er/sie die Gebühr bereits bezahlt hat.
Erstattung der Gebühr für verlorene Exemplare (nur, wenn sie nicht bezahlt wurden): Die Wiederbeschaffungskosten werden nur dann erstattet, wenn sie noch nicht bezahlt wurden.
Erstattung der Gebühr für verlorene Exemplare und Berechnung einer neuen Mahngebühr: Die Wiederbeschaffungskosten werden erstattet und die Mahngebühren werden ab dem heutigen Tag berechnet.
Erstattung der Gebühr für verlorene Exemplare und Wiedereinrichtung von Mahngebühren: Die Wiederbeschaffungskosten werden erstattet und Mahngebühren werden ab dem Tag, an dem das Exemplar als verloren gemeldet wurde, wieder eingerichtet.
Verbleib der Gebühr für verlorene Exemplare: Die Wiederbeschaffungskosten verbleiben auf dem Konto des/der Benutzer*in.
Bearbeitungsgebühr für verlorene Exemplare erstatten: Wählen Sie, ob die Bearbeitungsgebühr für das verlorene Exemplar erstattet werden soll, wenn das Exemplar zurückgegeben wird.
Erstattung der Bearbeitungsgebühr für verlorene Exemplare: Die Bearbeitungsgebühr wird erstattet. Dies kann zu einer Gutschrift führen, die dem/der Benutzer*in ausgezahlt wird, wenn er die Gebühr bereits bezahlt hat.
Erstattung der Bearbeitungsgebühr für verlorene Exemplare (nur wenn nicht bezahlt): Die Bearbeitungsgebühr wird nur dann erstattet, wenn sie noch nicht bezahlt wurde.
Bearbeitungsgebühr für verlorene Exemplare: Die Bearbeitungsgebühr verbleibt auf dem Konto des/der Benutzer*in.
Diese Kondition gilt für diese Bibliothek. Sie ist mit dem Systemparameter RefundLostOnReturnControl zu verwenden.
Bemerkung
You can limit refunds based on age:
Sie können die Frist, während derer die Gebühren für ein verlorenes Exemplare zurückerstattet werden können, über den Systemparameter NoRefundOnLostReturnedItemsAge festlegen;
use the NoRefundOnLostFinesPaidAge system preference to limit refunds based on when the fee was paid.
Default holds and bookings policies by item type
Sie können die Regeln für Vormerkungen und Buchungen für einzelne Exemplartypen unabhängig von den Benutzertypen bearbeiten.
Wählen Sie den Medientyp aus der Auswahlliste.
Set policies as explained below.
Click ‚Add‘ to save this rule.
Add as many rules as you need.
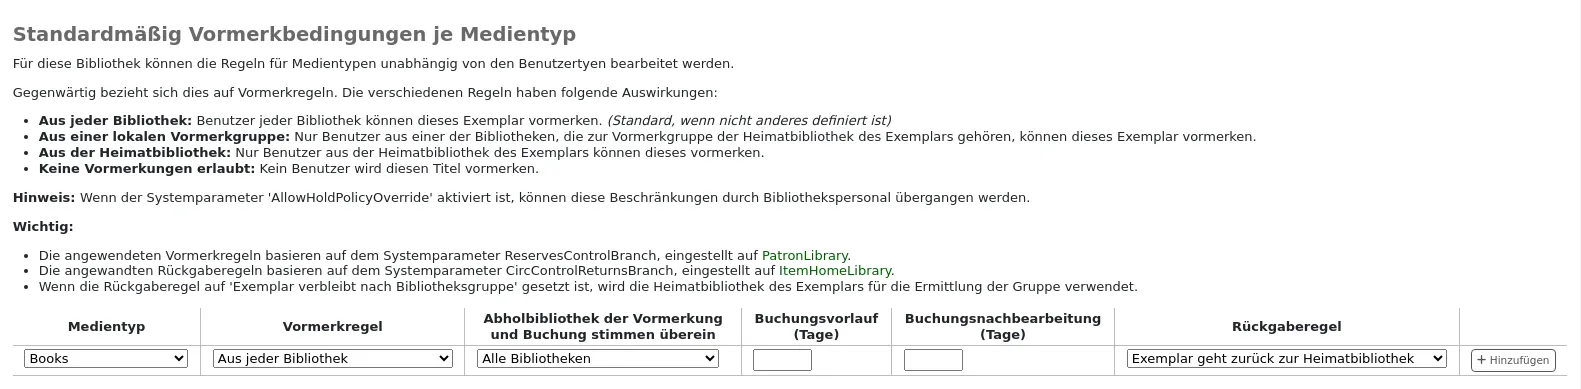
Vormerkregeln: Die verschiedenen Vormerkregeln haben nachfolgende Bedeutung.
From any library: patrons from any library may put this item on hold. (default if none is defined)
From local hold group: only patrons from libraries in the same item’s home library hold groups may put this book on hold.
From home library: only patrons from the item’s home library may put this book on hold.
No holds allowed: no patron may put this book on hold.
If the system preference AllowHoldPolicyOverride is set to ‚allow‘, these hold policies can be overridden by staff.
Bemerkung
Diese Regeln werden gemäß der Einstellung des Systemparamters ReservesControlBranch angewendet.
Hold and booking pickup library match: control where a patron can collect holds and bookings of the specified item type.
jede Bibliothek
Vormerkgruppe des Exemplars
Vormerkgruppe des Benutzers
Heimatbibliothek des Exemplars
die Bestandsbibliothek des Exemplars
Vorarbeitszeit bei Buchungen (Tage): Fügen Sie vor einer neuen Buchung eine Pufferzeit hinzu, damit das Bibliothekspersonal zwischen zwei Buchungen Zeit hat, das Exemplar vorzubereiten.
Enter a number of days. This will prevent a new booking from starting too soon after an existing booking ends.
Booking post-processing (days): add a buffer period after a new booking, to give staff time to receive the item in-between two bookings.
Enter a number of days. This will prevent a new booking from ending too close to the start of an existing booking.
Rückgaberegeln: Die verschiedenen Rückgaberegeln haben nachfolgende Bedeutung.
Exemplar geht zurück an Heimatbibliothek: Bei der Rückgabe erscheint eine Eingabeaufforderung zum Transfer des Exemplars in die Heimatbibliothek.
Exemplar geht zurück zur Ausleihbibliothek: Bei der Rückgabe erscheint eine Eingabeaufforderung zum Transfer des Exemplars zur Ausleihbibliothek.
Exemplar verbleibt in der Rückgabebibliothek: Das Exemplar bleibt in der Rückgabebibliothek bis es manuell transferiert oder manuell in einer anderen Bliothek zurückgebucht wird.
Item floats by library group: the item will not be transferred and will stay at the library it was checked in at, if the check-in library is within the same ‚float group‘ in library groups as the item’s home library. If the library is not in the same float group, the item will be transferred back to its home library.
Wenn die Rückgaberegel auf „Exemplar verbleibt nach Bibliotheksgruppe“ gesetzt ist, wird die Heimatbibliothek des Exemplars für die Ermittlung der Gruppe verwendet.
Bemerkung
Im Systemparameter CircControlReturnsBranch wird definiert, von welcher Bibliothek die Ausleihkonditionen angewandt werden.
Beispiel:
You may allow holds in your library service generally. However, you do not want brand new stock in the ‚New items‘ item type to be reserved by patrons at libraries other than the one to which the new stock belongs.
For the ‚New items‘ item type, you will set the ‚Hold policy‘ to ‚From home library‘ so that those items can only be placed on hold if the items‘ owning library and the patron’s home library are the same. You can set ‚Hold and booking pickup library match‘ to ‚item’s home library‘ to ensure the items on hold can only be collected from their home library. You should also set ‚Return policy‘ to ‚item returns home‘.
Benutzerattribute
Pfad in Koha: Mehr > Administration > Benutzer und Ausleihe > Benutzerattribute
Bemerkung
Nur Bibliothekspersonal mit der Berechtigung manage_patron_attributes (oder der superlibrarian-Berechtigung) haben Zugriff auf diesen Bereich.
Benutzerattribute können verwendet werden, um benutzerdefinierte Felder für das Benutzerkonto zu definieren. Sie werden über den Systemparameter ExtendedPatronAttributes aktiviert.
Dieses Feld kann zum Beispiel für Matrikelnummern oder Personalausweisnummern verwendet werden.
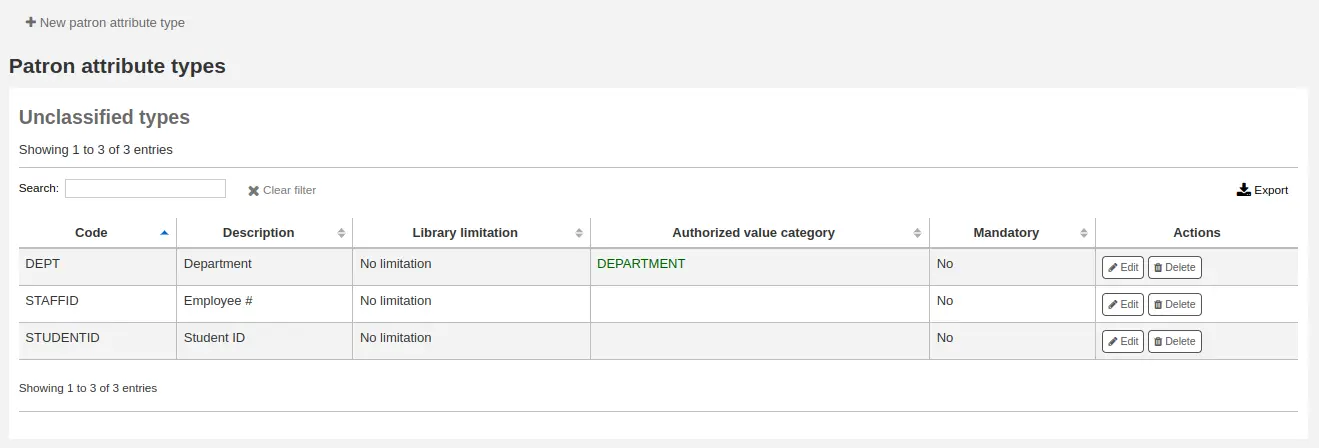
Benutzerattribut-Typen hinzufügen
Um ein neues Benutzerattribut hinzuzufügen, klicken Sie auf ‚Neues Benutzerattribut‘ am oberen Rand der Seite
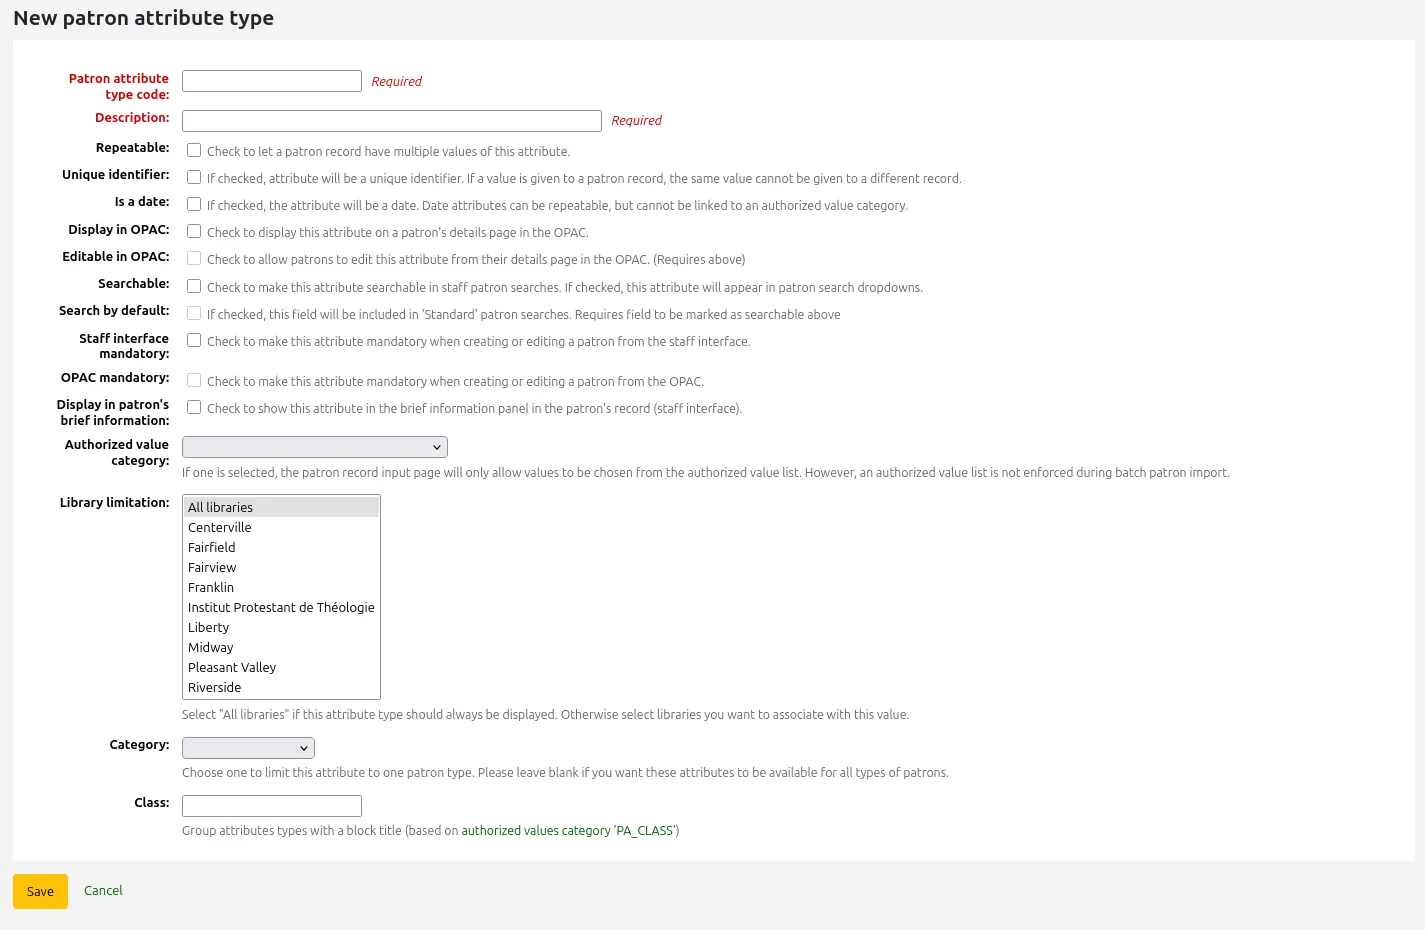
Im Feld ‚Benutzerattribut‘ wird ein kurzes eindeutiges Kürzel für dieses Feld hinterlegt
Warnung
Diese Einstellung kann nicht verändert werden, nachdem ein Attribut definiert worden ist
Im Feld ‚Beschreibung‘ können Sie eine längere textuelle Beschreibung des Feldes erfassen
Wählen Sie die Box ‚Wiederholbar‘ aus, wenn ein Benutzerdatensatz mehrere Werte für dieses Attribut haben kann.
Warnung
Diese Einstellung kann nicht verändert werden, nachdem ein Attribut definiert worden ist
Wenn die Checkbox ‚Eindeutige Kennung‘ angehakt ist, wird die Eigenschaft zur einzigartigen Kennung aktiviert. Das heißt: Wenn ein Wert einmal in einem Benutzerdatensatz eingetragen wurde, kann er in keinem weiteren eingetragen werden.
Eindeutige Benutzerattribute können als Prüfpunkt im Werkzeug für den Benutzerdatenimport verwendet werden
Warnung
Diese Einstellung kann nicht verändert werden, nachdem ein Attribut definiert worden ist
Ist ein Datum: markieren Sie die Checkbox, wenn der Attributwert ein Datum sein soll. Eine Datumsauswahl wird verfügbar sein.
Wichtig
Attribute vom Typ Datum können nicht mit Kategorien Normierter Werte verknüpft werden.
Version
Die Datumsoption wurde in Kohaversion 24.05 hinzugefügt.
Im OPAC anzeigen: markieren Sie die Checkbox, um dieses Attribut auf der Benutzerdetailseite im OPAC anzuzeigen.
Markieren Sie „Im OPAC editierbar“, um Benutzern zu erlauben, dieses Feld im OPAC zu bearbeiten.
Suchbar: markieren Sie die Checkbox, damit bei der Benutzersuche in der Dienstoberfläche nach diesem Attribut gesucht werden kann.
Voreingestellte Suche: Markieren Sie diese Checkbox, damit in der „Standard“-Benutzersuche der Dienstoberfläche nach diesem Attribut gesucht werden kann, d. h. keine Suche nach einem bestimmten Feld.
Diese Option setzt voraus, dass der Attributtyp durchsuchbar ist (siehe vorherige Option).
Version
Diese Möglichkeit wurde in Koha-Version 23.11 hinzugefügt.
Pflichtfeld: markieren Sie die Checkbox, wenn das Attribut für jede*n Benutzer*in ausgefüllt werden muss
Markieren Sie „Anzeige in der Benutzerkurzinfo“, um dieses Benutzerattribut in der Benutzerkurzinfo auf der linken Seite des Ausleihbildschirms und anderer Seiten des Benutzerkontos sichtbar zu machen
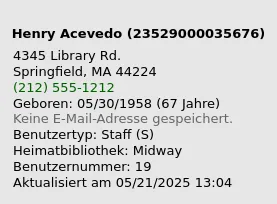
Kategorie für normierten Wert: wenn eine Option ausgewählt ist, können auf der Eingabeseite für Benutzerdatensätze nur Werte aus der Liste der normierten Werte ausgewählt werden.
You will first need to add an authorized value list for it to appear in this menu
Warnung
An authorized value list is not enforced during batch patron import.
Einschränkung auf Bibliotheken: wenn dieses Attribut nur von bestimmten Bibliotheken verwendet werden soll, können Sie diese Bibliotheken aus dieser Liste auswählen. Wählen Sie „Alle Bibliotheken“, damit es alle Bibliotheken verwenden können.
Warnung
Benutzer*innen, für die bereits Attribute festgelegt wurden, werden nicht geändert. Die Zweigstellenbeschränkung schränkt das Feld nur auf Grundlage der Bibliothek ein, in der der/die aktuelle Mitarbeiter*in eingeloggt ist.
Wenn ein Attribut für eine*n Benutzer*in festgelegt wurde, wird es in seinem Konto für alle Mitarbeiter*innen angezeigt. Es kann jedoch nur von den Mitarbeiter*innen der ausgewählten Zweigstellen bearbeitet werden.
Benutzertyp: Wenn das Attribut nur für einen Benutzertyp angezeigt werden soll, wählen Sie ihn hier
Klasse: Wenn Sie viele Attribute haben, kann es praktisch sein, sie zu gruppieren, damit Sie sie für die Bearbeitung leicht finden können. Wenn Sie einen normierten Wert für PA_CLASS erstellen, wird er im Dropdown-Menü „Klasse“ angezeigt und Sie können dann Ihre Attributseite so ändern, dass sie Bereiche von Attributen enthält
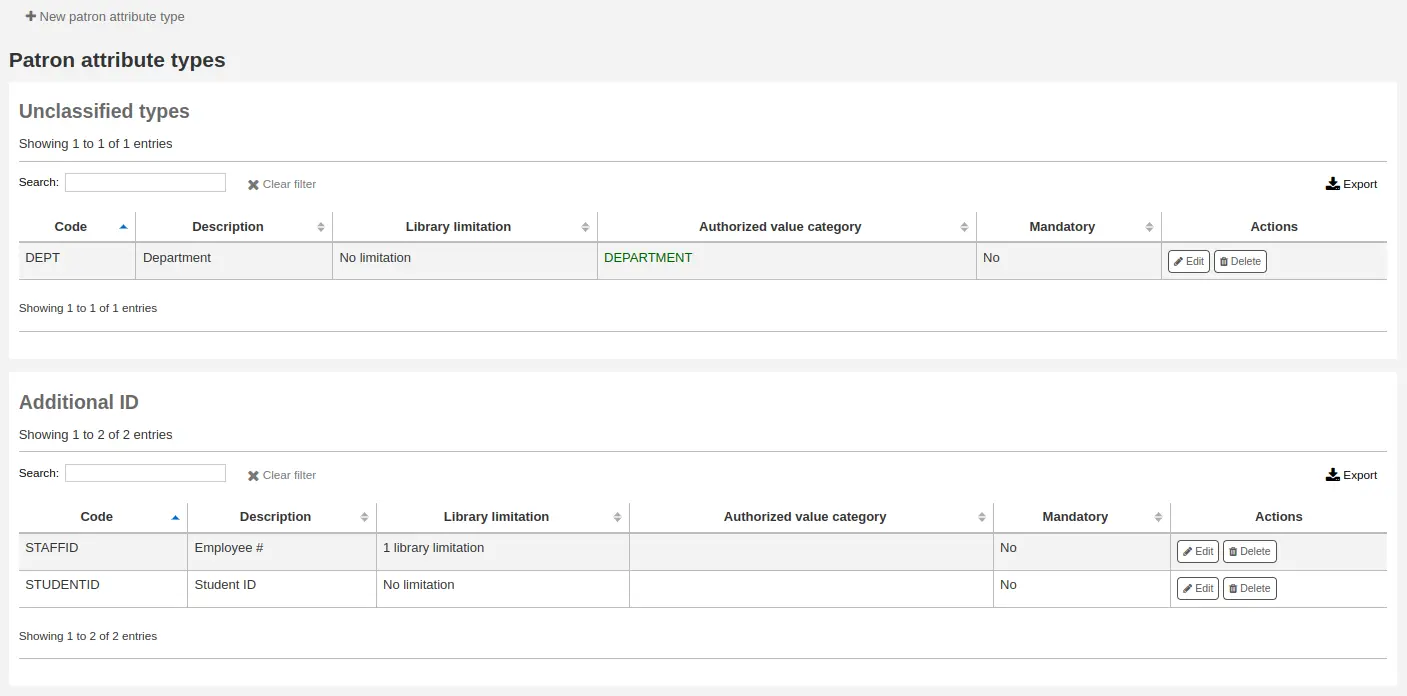
Klicken Sie auf ‚Speichern‘, um Ihr neues Attribut zu speichern.
Once added, your attribute will appear on the list of attributes and also on the patron record add/edit form
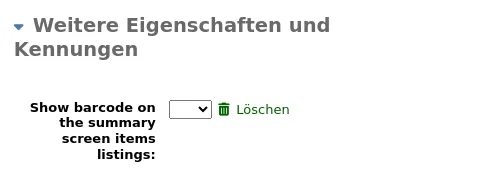
Benutzerattribut-Typen bearbeiten/löschen
In der Liste der Attribute befindet sich neben jedem Benutzerattribut eine Schaltfläche zum Bearbeiten und Löschen.
Einige Feldattribute können nach Ihrer Erzeugung nicht mehr geändert werden:
Benutzerattribut
Wiederholbar
Eindeutige Kennung
Ein Attribut, das noch im Gebrauch ist, können Sie nicht löschen.

Transportregeln
Begrenzen Sie den Transport von Exemplaren zwischen Standorten ausgehend vom Lieferstandort, Abholstandort und der Sammlung.
Pfad in Koha: Mehr > Administration > Benutzer und Ausleihe > Transportregeln
Bemerkung
Nur Bibliothekspersonal mit der Berechtigung manage_transfers (oder der superlibrarian-Berechtigung) hat Zugriff auf diesen Bereich.
Diese Regeln werden nur angewendet, wenn der Systemparameter UseBranchTransferLimits auf ‚Erzwingen‘ gesetzt ist.
Bevor Sie beginnen, sollten sie die Bibliothek wählen, für die Sie die Beschränkungen setzen wollen.

Transportregeln werden auf Grund der Sammlungscodes festgelegt, die Sie im Adminstrationsmodul in den Normierten Werten definiert haben.
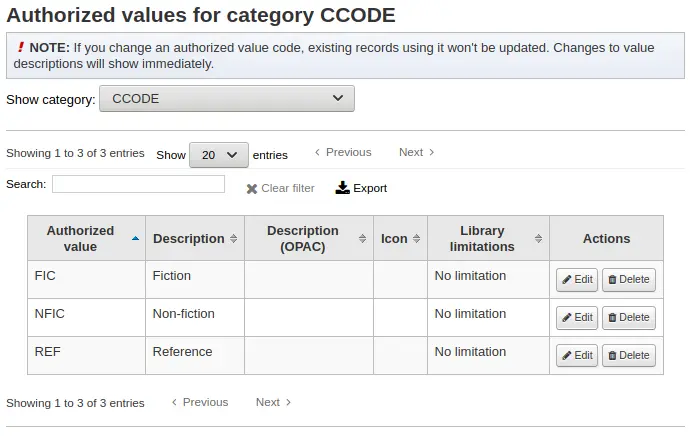
Sammlungscodes erscheinen als Reiter über den Auswahlboxen:
Markieren Sie die Checkboxen der Bibliotheken, die Exemplare mit dem oben ausgewählten Sammlungscode aus Ihrem Bestand erhalten dürfen (im unteren Beispiel: FIC)
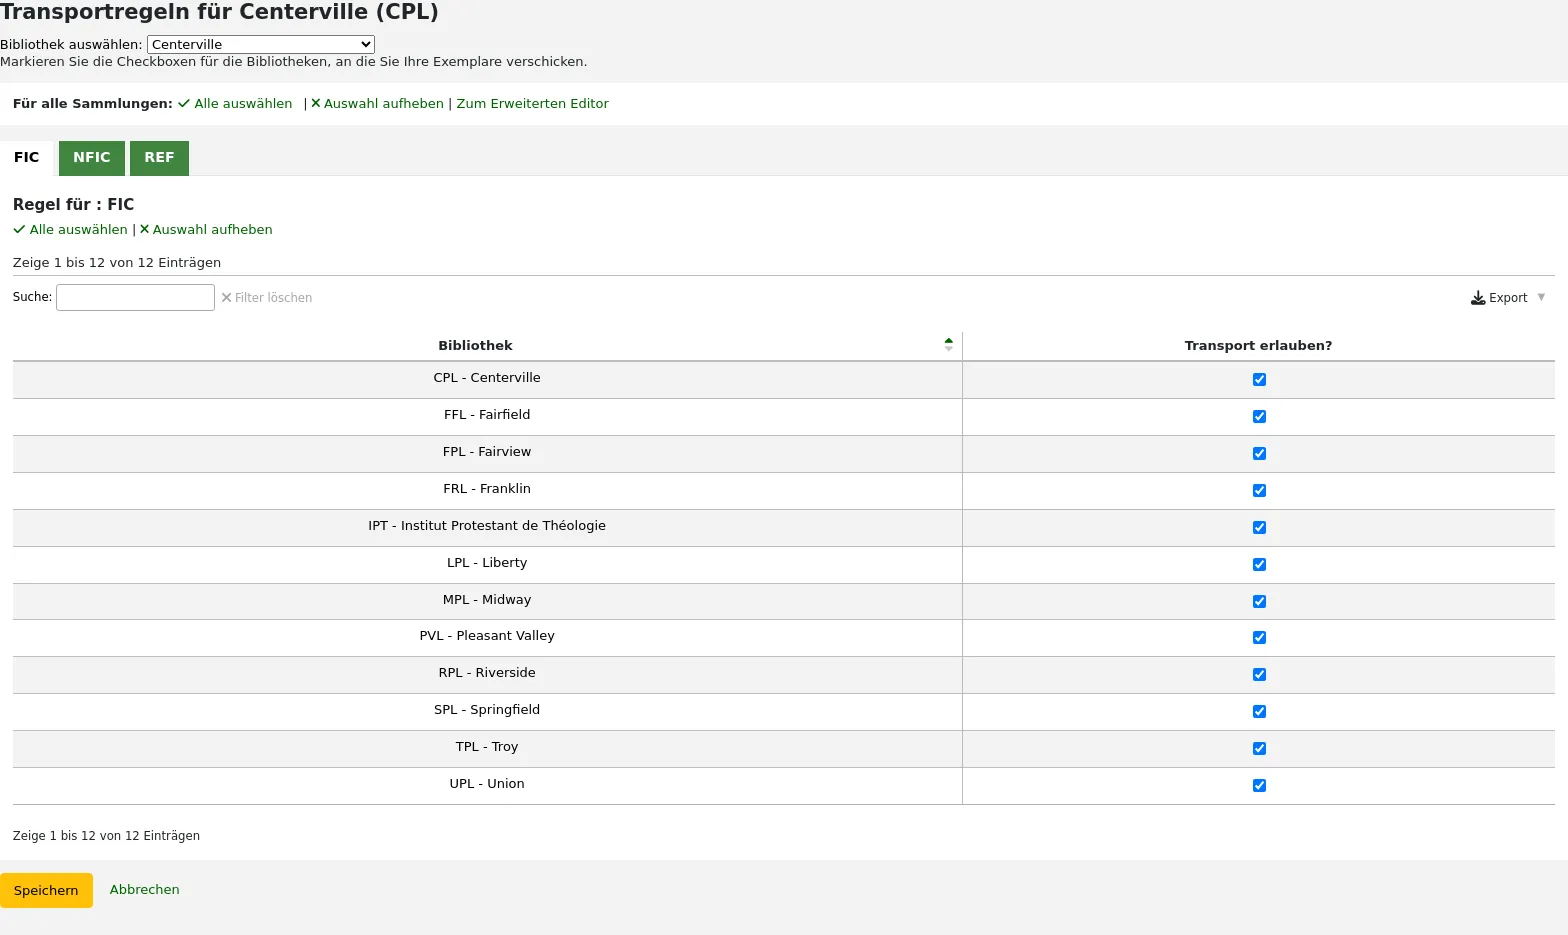
Im oben genannten Beispiel erlaubt die Bibliothek in Centerville Benutzern Exemplare aus allen Bibliotheken, außer aus Liberty und Franklin, bei sich zu bestellen.
Transportkostenmatrix
Mit der Transportkostenmatrix kann ein Bibliothekssystem die relativen Kosten für den Transport von Büchern zueinander festlegen.
Bemerkung
Nur Bibliothekspersonal mit der Berechtigung manage_transfers (oder der superlibrarian-Berechtigung) hat Zugriff auf diesen Bereich.
Damit das System diese Matrix verwenden kann, müssen Sie zunächst den Systemparameter UseTransportCostMatrix auf ‚Benutze‘ setzen.
Wichtig
Die Transportkostenmatrix kontrolliert, wo Vormerkungen gesetzt wurden. Wird die Matrix nicht genutzt, prüft Koha den Systemparameter StaticHoldsQueueWeight.
Die Kosten sind Dezimalwerte zwischen 0 (keine Kosten) und einem beliebigen Maximum (z.B. 1 oder 100). Zum Beispiel könnte die Distanz zwischen zwei Bibliotheken als Maß genommen werden, falls dies die Transferkosten präzise genug reflektiert.
Um die Transportkosten zu erfassen klicken Sie einfach auf die zu bearbeitende Zelle, wählen Sie ‚Deaktiviert‘ ab und geben Sie die ‚Kosten‘ ein
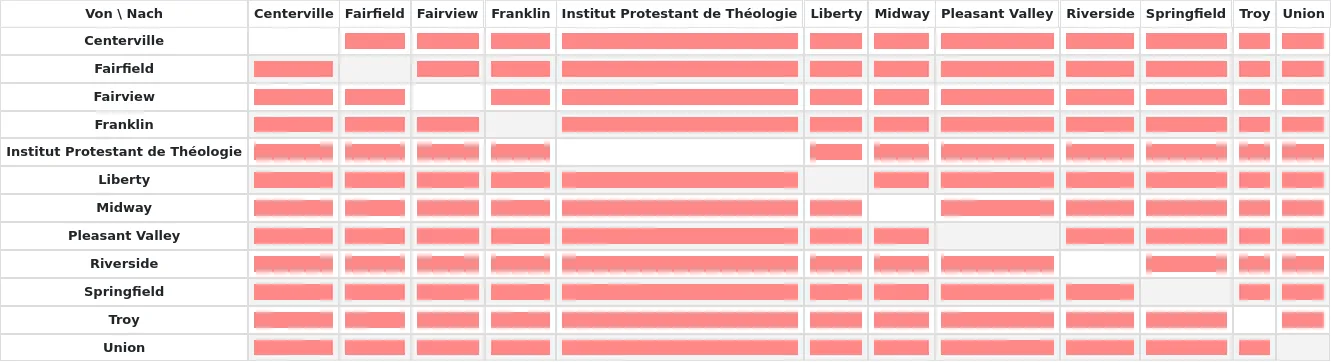
Nach der Eingabe der Kosten speichern Sie diese durch Betätigung der Eingabetaste oder der Schaltfläche ‚Speichern‘ unterhalb der Tabelle.
Hinweis
Ein ‚Null-Wert‘ macht keinen Unterschied, ob die Ausgangsbibliothek und die Bibliothek, wohin das Exemplar geschickt werden soll, dieselbe ist. Trotzdem sollten Sie hier eine 0 eingeben. Für alle anderen Nach/Von Kombinationen verursacht ein Null-Wert, dass die Verbindung deaktiviert ist. Zusammenfassend ist wichtig, dass Sie keinen Wert leer lassen. Das Beste ist, immer eine Zahl anzugeben.
Benachrichtigungen Ausleihe und Rückgabe
Die Bibliothek kann festlegen, ob Benutzer*innen automatisch E-Mail-Quittungen über Ausleihvorgänge erhalten (Ausleihen und Rückgaben).
Pfad in Koha: Mehr > Administration > Benutzer und Ausleihe > Ausleihmeldungen
Bemerkung
Nur Bibliothekspersonal mit der Berechtigung manage_item_circ_alerts (oder der superlibrarian-Berechtigung) hat Zugriff auf diesen Bereich.
Diese Einstellungen werden auf Grund der Benutzertypen und Exemplartypen festgelegt.
Wichtig
Diese Einstellung kann durch Änderungen in den Einstellungen für die Benachrichtigung jedes einzelnen Benutzers überschrieben werden.
Ausleih- und Rückgabebenachrichtigungen:
Wählen Sie Ihre Bibliothek aus dem Pull-Down-Menu oben am Bildschirm aus
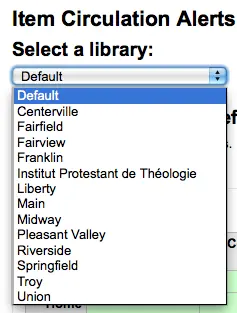
Um Einstellungen für alle Bibliotheken vorzunehmen lassen Sie das Menü auf ‚Standard‘
Voreingestellt werden für alle Exemplartypen und alle Benutzergruppen Benachrichtigungen bei Ausleihe und Rückgabe erstellt. Um dies zu ändern, klicken Sie auf die jeweilige Kombination aus Exemplartyp und Benutzertyp, für die Sie Benachrichtigungen deaktivieren wollen.
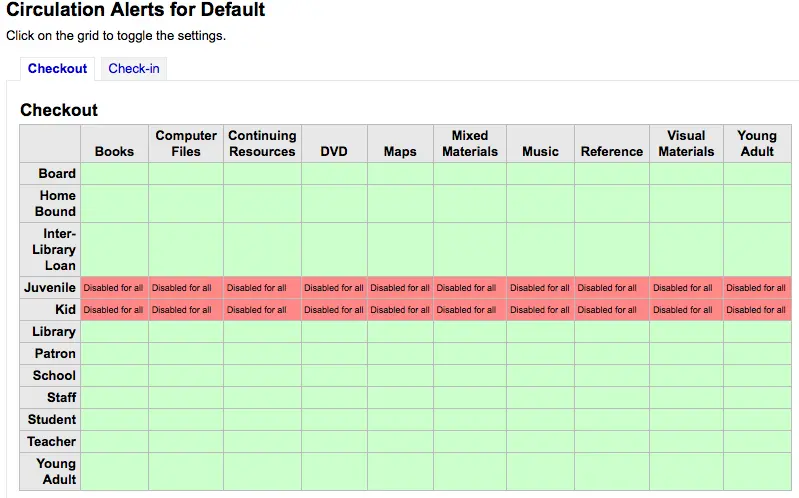
Im oben genannten Beispiel, bekommen Jugendliche und Kinder keine Ausleihbenachrichtigungen.
Städte
Um Benutzereinträge zu standardisieren, können Sie Städte oder Ortschaften Ihrer Region definieren, so dass das Bibliothekspersonal beim Hinzufügen neuer Benutzer*innen einfach den Ort aus einer Liste auswählen kann, anstatt den Ort und die Postleitzahl eintippen zu müssen.
Pfad in Koha: Mehr > Administration > Benutzer und Ausleihe > Städte
Bemerkung
Nur Bibliothekspersonal mit der Berechtigung manage_cities (oder der superlibrarian-Berechtigung) hat Zugriff auf diesen Bereich.
Neue Stadt hinzufügen
Um eine neue Stadt zu erfassen, klicken Sie auf ‚Neue Stadt‘ am Anfang der Seite und geben Sie die Stadt, das Bundesland die Postleitzahl und den Staat ein.
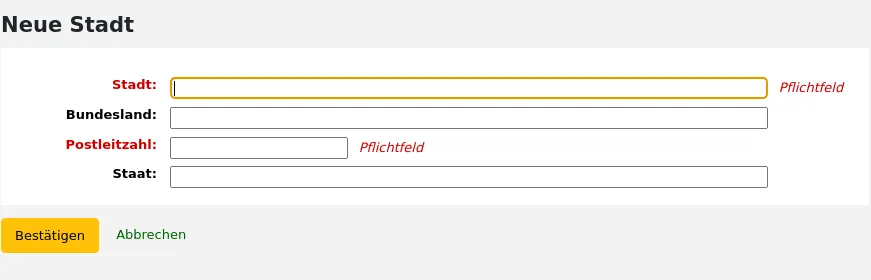
Nachdem Sie die Eingabe bestätigt haben wird die neue Stadt mit auf der Seite aufgelistet
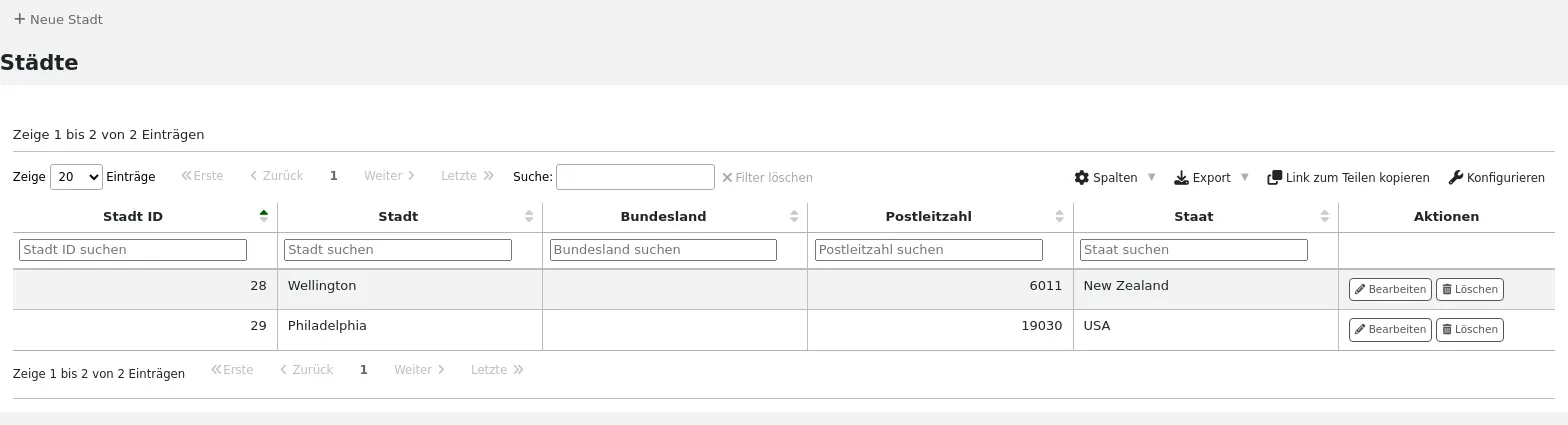
Städte können jederzeit geändert oder gelöscht werden.
Städte als Auswahlliste im Benutzerdatensatz anzeigen
Wenn Sie Städte im Formular ‚Neue Stadt‘ definiert haben, werden Ihnen diese im Benutzerdatensatz in einem Auswahlmenü angeboten.
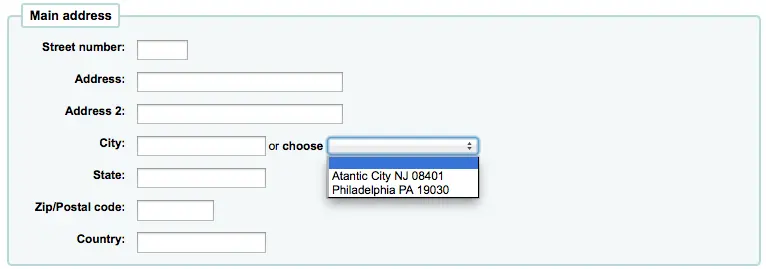
Dies erlaubt die leichte Eingabe von lokalen Ortschaften in den Benutzerdatensatz ohne das Risiko von Tippfehlern oder verwechselten Postleitzahlen.
Abholung
Mit der Abholfunktion können Sie mit Benutzer*innen Termine für die Abholung ihrer Medien vereinbaren. Dieser Bereich dient zur Konfiguration der Abholfenster
Pfad in Koha: Mehr > Administration > Benutzer und Ausleihe > Abholung
Bemerkung
Wenn das Modul verwendet werden soll muss der Systemparameter CurbsidePickup aktiviert werden.
Bemerkung
Nur Bibliothekspersonal mit der Berechtigung manage_curbside_pickups (oder der superlibrarian-Berechtigung) hat Zugriff auf diesen Bereich.
Abholungen einrichten
Klicken Sie auf der Konfigurationsseite auf den Reiter für die Bibliothek, für die Sie die Abholung konfigurieren möchten
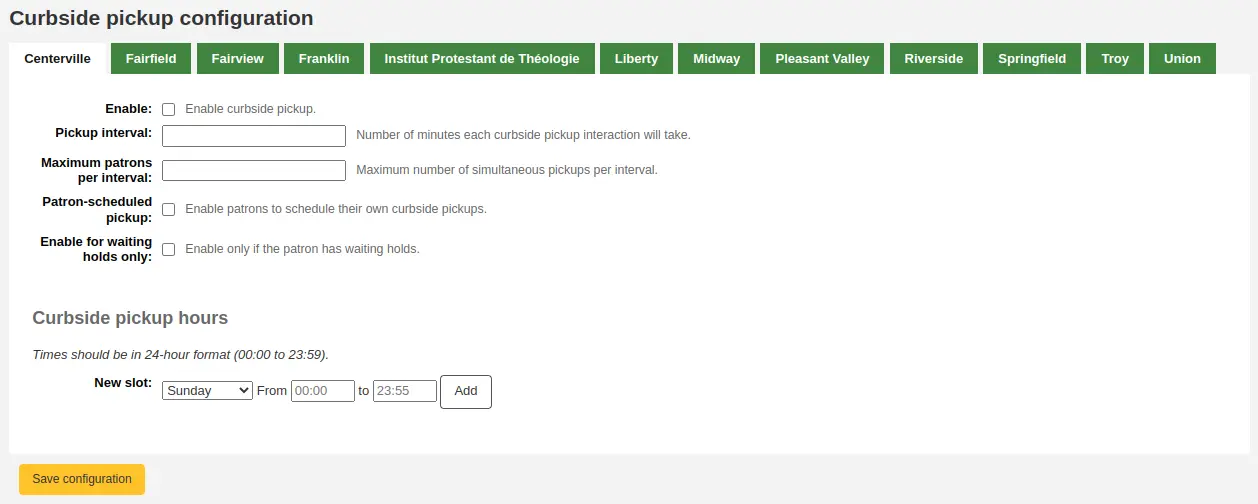
Füllen Sie das Formular aus
Aktivieren: Setzen Sie ein Häkchen in der Checkbox, um die Abholung für diese Bibliothek zu aktivieren
Abholintervall: Geben Sie die Anzahl der Minuten an, die jede Abholung dauern wird
Maximale Anzahl Benutzer*innen je Intervall: geben Sie die Anzahl der Abholerinnen an, die im gleichen Intervall abholen können
Benutzer-geplante Abholung: setzen Sie hier ein Häkchen in der Checkbox, wenn die Benutzerinnen in der Lage sein sollen, ihren eigenen Abholtermin über den OPAC festzulegen
Nur für abholbereite Vormerkungen aktivieren: setzen Sie hier ein Häkchen in der Checkbox, wenn die Abholung auf Benutzerinnen beschränkt werden soll, die abholbereite Vormerkungen haben
Erstelle Abholzeitfenster
Geben Sie für jedes Zeitfenster den Wochentag und die Anfangs- und Endzeiten für die Abholung an
das können Ihre Öffnungszeiten sein, oder auch abweichende Zeitfenster für die Abholung
Für die Stunden muss das Format in der Form XX:XX (Zahlen mit Doppelpunkt) und das 24-Stunden-Format vorliegen (1 Uhr Nachmittags ist z. B. 13:00 Uhr)
Klicken Sie auf „Hinzufügen“
Klicken Sie auf ‚Konfiguration speichern‘
Konfigurieren Sie diese Angaben für jeden Bibliotheksstandort der Abholungen anbietet.
Benutzersperrenarten
Wenn Sie Benutzersperren verwenden, können Sie die verfügbaren Sperrarten hier verwalten.
Benutzersperren werden mit dem Systemparameter PatronRestrictionTypes aktiviert.
Pfad in Koha: Mehr > Administration > Benutzer und Ausleihe > Benutzersperrenarten
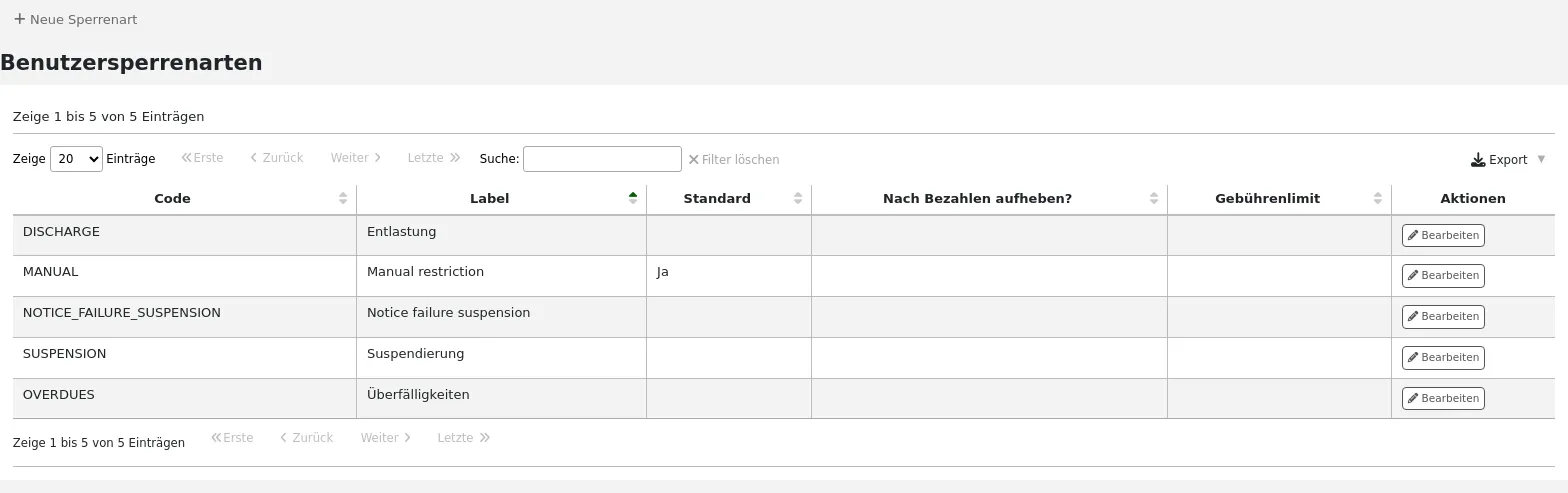
Bemerkung
Nur Bibliothekspersonal mit der Berechtigung manage_patron_restrictions (oder der superlibrarian- Berechtigung) hat Zugriff auf diesen Bereich.
Einen Sperrtyp hinzufügen
Um einen neuen Sperren-Typ hinzuzufügen, klicken Sie auf die Schaltfläche „Neue Sperrenart“ oben auf der Seite.
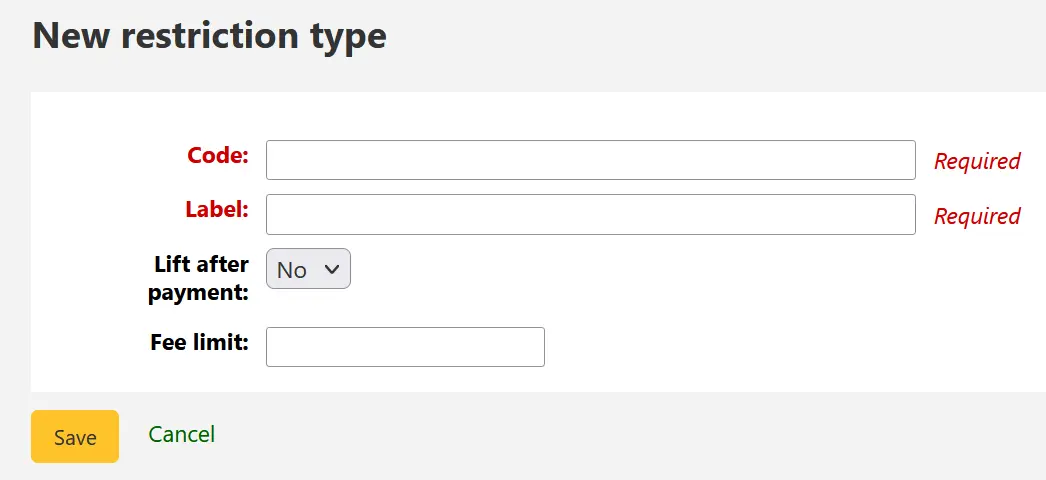
Code: Geben Sie einen Code für die Sperre ein. Die Codes sind auf 50 Zeichen begrenzt und sollten keine Leer-, Sonder- oder diakritischen Zeichen enthalten.
Beschreibung: Geben Sie die Beschreibung für die Sperre ein. Diese Beschreibung wird in Koha angezeigt.
Nach Bezahlung aufheben: Wenn diese Option auf „Ja“ gesetzt ist, werden Sperren, die diesen Typ verwenden, automatisch aufgehoben, wenn die Zahlungen den unter „Gebührenlimit“ festgelegten Betrag erreichen oder überschreiten.
Gebührenlimit: Geben Sie den Betrag ein, der gezahlt werden muss, um eine Sperre dieser Art aufzuheben. Dieses Feld wird nur verwendet, wenn „Aufhebung nach Zahlung“ auf „Ja“ eingestellt ist.
Sobald Sie auf „Speichern“ klicken, wird Ihre Sperre gespeichert und in der Tabelle der Sperren aufgeführt.
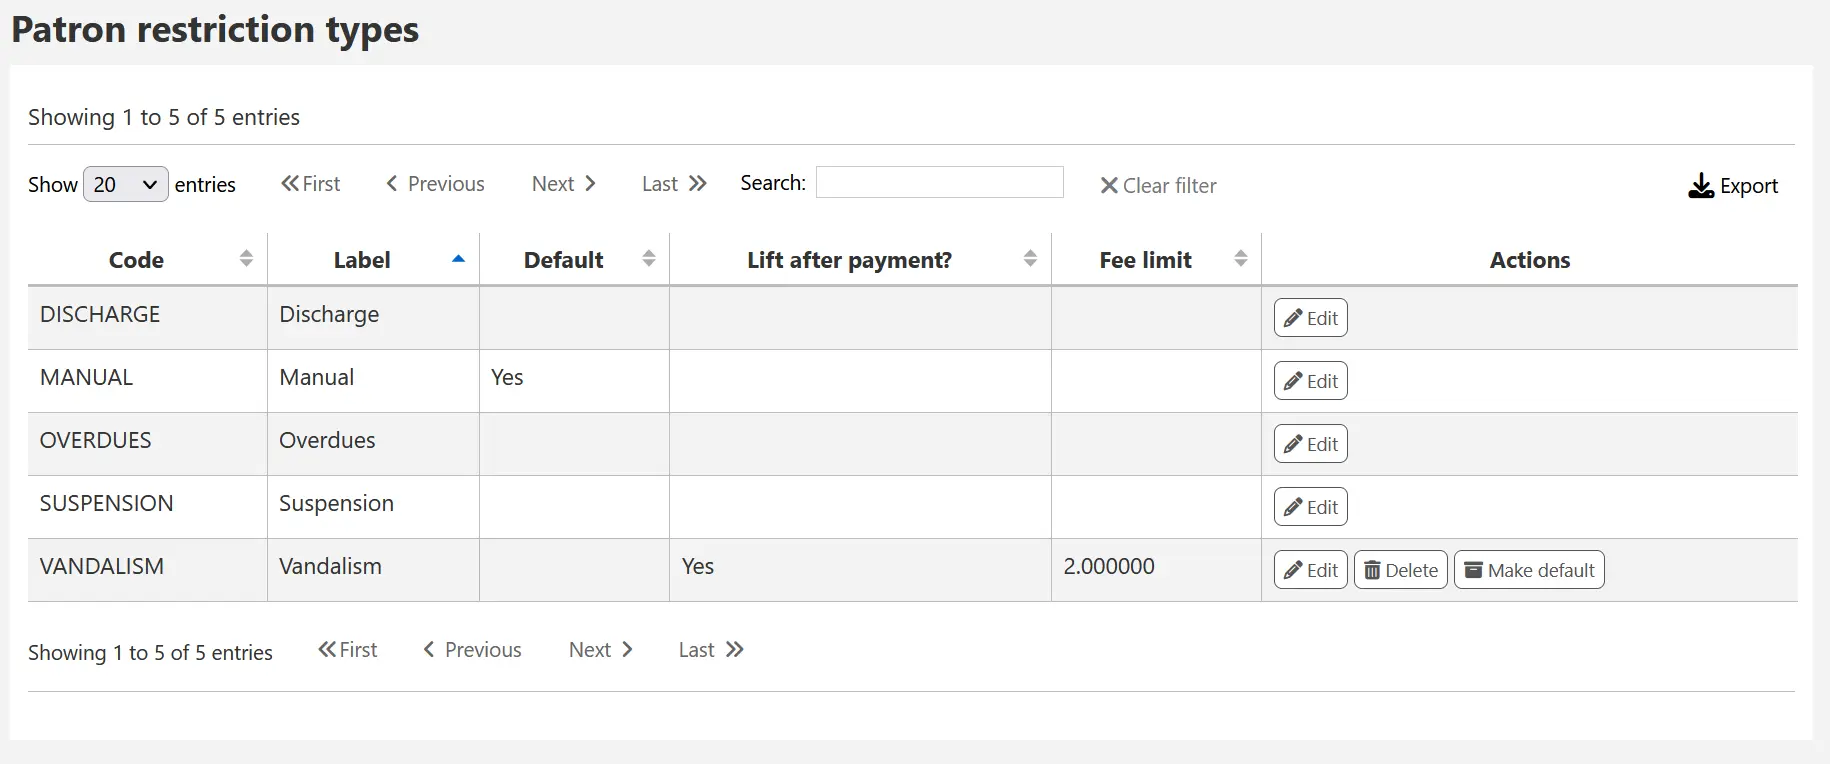
Manuell hinzugefügte Sperren können voreingestellt werden, die dann als Vorbelegung verwendet werden, wenn eine manuelle Sperre im Benutzerkonto hinzugefügt wird. Klicken Sie dazu auf den Button „Als Voreinstellung verwenden“.
Sie können auch alle lokal erstellten Sperren mit der Schaltfläche „Löschen“ löschen, solange diese nicht voreingestellt wurden.
Gebühren
Pfad in Koha: Mehr > Administration > Gebühren
Dieser Bereich beschäftigt sich mit den Parametern die bei der Verwaltung von Benutzerkonten verwendet werden.
Gebührenarten
Pfad in Koha: Mehr > Administration > Gebühren > Gebührenarten
Bemerkung
Nur Bibliothekspersonal mit der Berechtigung manage_accounts (oder der superlibrarian-Berechtigung) hat Zugriff auf diesen Bereich.
Dort können Sie die Gebühren definieren, die Sie von Ihren Benutzern verlangen.
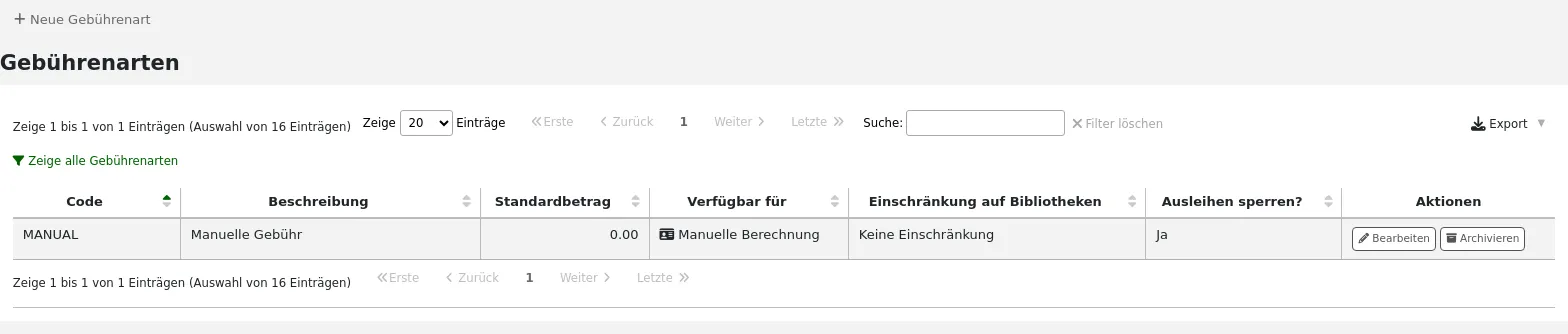
Wenn Sie die Seite zum ersten Mal aufrufen, sehen Sie nur die manuellen Gebührenarten, die bereits in Ihrem System konfiguriert sind.
Sie können die voreingestellten Systemgebührenarten durch einen Klick auf „Zeige alle Gebührenarten“ sichtbar machen.
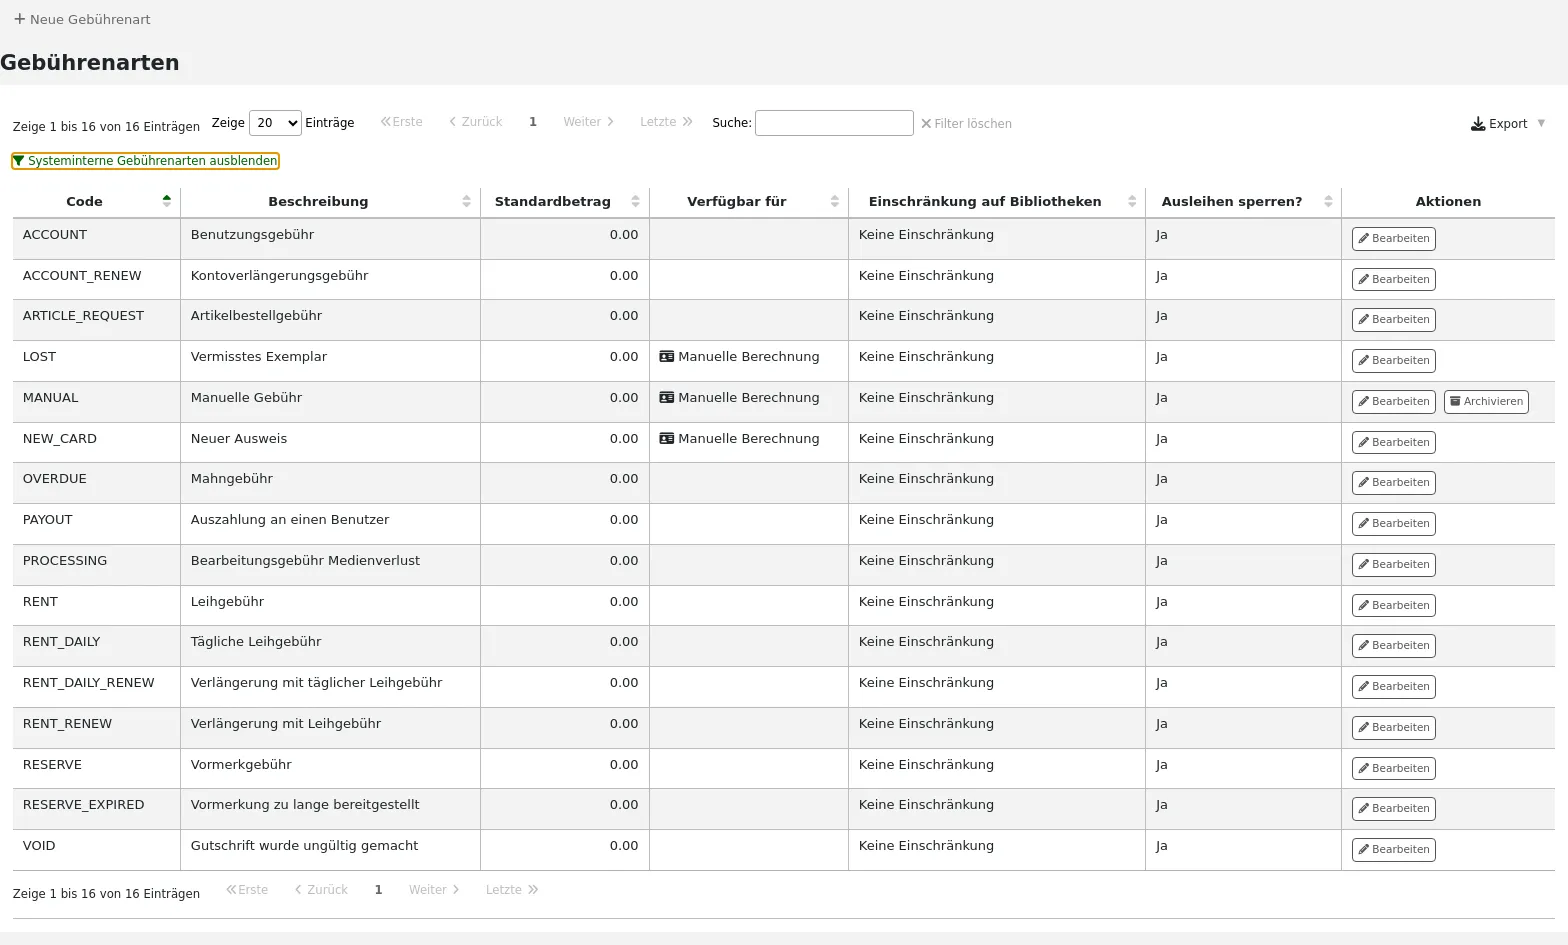
Sie können über den Link „Systeminterne Gebührenarten ausblenden“ zurück auf die Ansicht der eigenen Gebührenarten wechseln.
Systeminterne Gebührenarten
Einige Gebührenarten sind Teil der Koha-Installation. Die meisten dieser Gebührenarten sind automatisch berechnete Gebühren, die an anderen Stellen im System konfiguriert werden können.
ACCOUNT (Anmeldegebühr): Diese Gebühr wird bei Anelgen eines neuen Benutzerkontos berechnet. Sie wird in den Benutzertypen als „Benutzungsgebühr“ definiert.
ACCOUNT_RENEW (Kontoverlängerungsgebühr): Diese Gebühr wird berechnet, wenn ein Benutzerkonto verlängert wird. Wie die Gebührenart ACCOUNT zuvor wird diese als „Benutzungsgebühr“ in den Benutzertypen konfiguriert.
LOST (Vermisstes Exemplar): Diese Gebühr wird berechnet, wenn ein Exemplar als verloren deklariert wird. Die Gebührensumme ist abhängig von der Buchersatzgebühr des Exemplars oder den Standard-Ersatzkosten für den Exemplartyp. Die Gebühr kann auch manuell über den Reiter Gebühr erheben berechnet werden.
MANUAL (Manuelle Gebühr): Dies ist die mit Koha installierte manuelle Standardgebühr. Diese wird nicht automatisch berechnet, sondern kann über den Reiter Gebühr erheben händisch im Konto eingetragen werden.
NEW_CARD (Neuer Benutzerausweis): Dies ist eine weitere Standardgebühr in Koha. Diese wird nicht automatisch berechnet, sondern kann über den Reiter Gebühr erheben händisch im Konto eingetragen werden.
OVERDUE (Mahngebühr): Diese Gebühr wird dem Konto des/der Entleiher*in automatisch berechnet, wenn die Leihfrist überschritten wird. Die Höhe der Mahngebühr wird in der Einstellung Ausleihkonditionen festgelegt.
PAYOUT (Zahlung der Bibliothek an den Benutzer): Dies wird verwendet, wenn die Bibliothek eine Rückerstattung an den/die Benutzer*in vornimmt (z.B. bei einer Überzahlung).
PROCESSING (Bearbeitungsgebühr bei Verlust): Diese Gebühr wird dem/der Benutzer*in automatisch berechnet, wenn ein entliehenes Medium als verloren gekennzeichnet wird. Die Höhe der Gebühr wird in den Exemplartypen unter „Bearbeitungskosten (bei Verlust)“ festgelegt.
RENT (Leihgebühr): Diese Gebühr wird dem Konto dem/der Entleiher*in automatisch berechnet, wenn für den Exemplartyp eine Leihgebühr festgelegt wurde.
RENT_DAILY (Tägliche Leihgebühr): Diese Gebühr wird bei Ausleihe automatisch berechnet, wenn für den Exemplartyp eine tägliche Leihgebühr konfiguriert wurde.
RENT_DAILY_RENEW (Verlängerung eines Exemplars mit täglicher Leihgebühr): Diese Gebühr wird dem/der Benutzer*in automatisch berechnet, wenn ein Exemplar mit einem Exemplartyp, für den eine tägliche Leihgebühr konfiguriert wurde, verlängert wird.
RENT_RENEW (Verlängerung eines Exemplars mit Leihgebühr): Diese Gebühr wird dem/der Benutzer*in automatisch berechnet, wenn ein Exemplar mit einem Exemplartyp, für den eine Leihgebühr konfiguriert wurde, verlängert wird.
RESERVE (Vormerkgebühr): Diese Gebühr wird dem/der Benutzer*in automatisch berechnet, wenn dieser eine Vormerkung macht. Die Höhe der Gebühr hängt von dem für den Benutzertyp unter „Vormerkgebühr“ konfigurierten Betrag ab.
RESERVE_EXPIRED (Vormerkung nicht abgeholt): Diese Gebühr wird dem/der Benutzer*in automatisch berechnet, wenn bereitgestellte Vormerkungen nicht nach der im Systemparameter ExpireReservesMaxPickUpDelay definierten Anzahl von Tagen abgeholt wurden. Die Höhe der Gebühr wird im Systemparameter ExpireReservesMaxPickUpDelayCharge festgelegt.
Neue Gebührenart anlegen
Um eine neue Gebührenart anzulegen:
Klicken Sie auf „Neue Gebührenart“
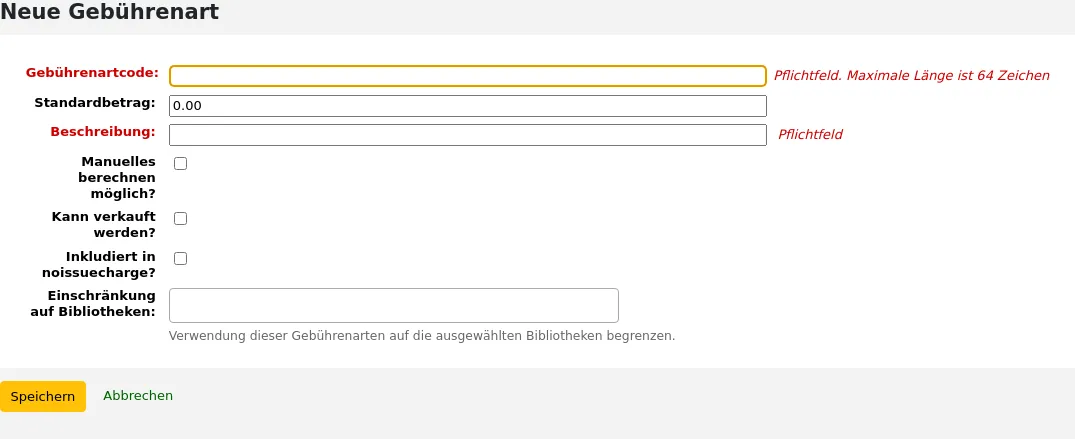
Gebührenartcode: Geben Sie einen Code ein (beschränkt auf 64 Zeichen).
Warnung
Codes sollten auf Buchstaben, Ziffern und Unterstriche begrenzt sein (_).
Vermeiden Sie Leer-, Sonder- und diakritische Zeichen.
Standardbetrag: geben Sie den Standard-Betrag ein.
Bemerkung
Das Bibliothekspersonal kann bei Bedarf die Höhe des Betrags ändern, wenn die Gebühr dem Benutzerkonto hinzugefügt wird.
Wichtig
Geben Sie keine Währungssymbole an. Schreiben sie nur den Betrag mit einem Dezimalpunkt (z.B. 5 oder 5.00 anstelle von 5€).
Beschreibung: Geben Sie eine Beschreibung ein, die im Dropdown-Menü verwendet wird, wenn Sie einem Benutzerkonto eine neue Gebühr hinzufügen oder wenn Sie einen Verkauf im Verkaufsmodul tätigen, und die auch in der Transaktionshistorie des Verkaufsmoduls erscheint.
Kann manuell in Rechnung gestellt werden: Markieren Sie diese Checkbox, wenn diese Gebührenart vom Bibliothekspersonal über die Funktion manuelle Gebühren manuell dem Konto eines/einer Benutzer*in hinzugefügt werden kann.
Kann verkauft werden?: markieren Sie die Checkbox, wenn diese Gebührenart im Verkaufsmodul verwendet werden kann.
In noissuescharge enthalten: Markieren Sie diese Checkbox, wenn dieser Gebührentyp bei der Berechnung des vom/von der Benutzer*in geschuldeten Betrags für den Systemparameter noissuescharge berücksichtigt werden soll. Dieser Systemparameter wird verwendet, um Ausleihen zu sperren, wenn ein*e Benutzer*in der Bibliothek mehr als einen bestimmten Betrag schuldet.
Einschränkung auf Bibliotheken: wählen Sie ggf. die Bibliotheken aus, in denen diese Gebührenart verwendet werden soll. Wenn Sie „Alle Bibliotheken“ wählen, wird die Gebührenart für alle Bibliotheken verfügbar.
Bemerkung
Sie können mehr als eine Bibliothek auswählen, indem Sie die Strg-Taste gedrückt halten, während Sie die Einträge auswählen.
If you have any additional fields for account debit types (account_debit_types), they will be displayed here.
Klicken Sie auf „Speichern“
Vorhandene Gebührenart bearbeiten
Sie können nur die „Manuelle Gebühr“ und die Gebührenarten, die Sie selbst hinzugefügt haben, bearbeiten.
Um eine Gebührenart zu bearbeiten:
Klicken Sie auf die Schaltfläche „Bearbeiten“ rechts neben der Gebührenart
Bearbeiten Sie jedes beliebige Feld
Klicken Sie auf „Speichern“
Gebührenart archivieren
Wenn es eine Gebührenart gibt, die Sie nicht länger benötigen, können Sie diese archivieren.
Hinweis
Es gibt keine Möglichkeit Gebührenarten zu löschen, da diese bereits verwendet worden sein könnten.
Um eine Gebührenart zu archivieren, klicken Sie die Schaltfläche „Archivieren“ auf der rechten Seite der Gebührenart.
Archivierte Gebührenart wiederherstellen
Wenn Sie eine archivierte Gebührenart wieder benötigen, können Sie auf die Schaltfläche „Wiederherstellen“ auf der rechten Seite der Gebührenart klicken.
Dies macht sie wieder verfügbar.
Gutschriftenarten
Pfad in Koha: Mehr > Administration > Gebühren > Gutschriftenarten
Bemerkung
Nur Bibliothekspersonal mit der Berechtigung manage_accounts (oder der superlibrarian-Berechtigung) hat Zugriff auf diesen Bereich.
Hier können Sie manuelle Gutschriftenarten definieren, die Sie Ihren Benutzer*innen gewähren können.
Wenn Sie die Seite zum ersten Mal aufrufen, sehen Sie nur die Gutschriftenarten, die bereits in Ihrem System konfiguriert sind.
Sie können die vorgegebenen Systemgutschriftenarten durch einen Klick auf „Zeige alle Gutschriftenarten“ sichtbar machen.
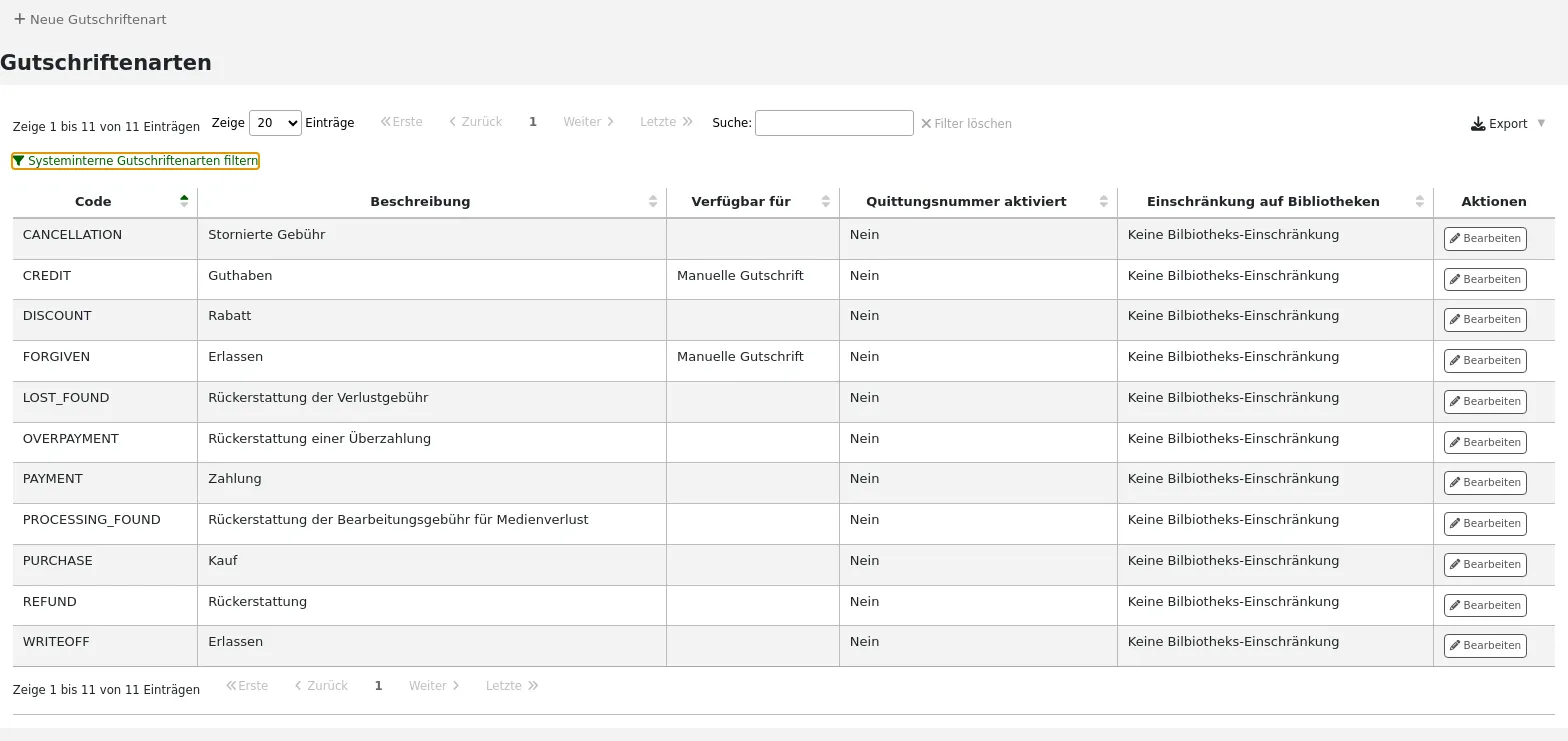
Sie können über den Link „Systeminterne Gutschriftenarten filtern“ zurück auf die Ansicht der manuellen Gutschriftenarten wechseln.
Systeminterne Gutschriftenarten
Einige Gutschriftenarten sind Teil der Koha-Installation. Die meisten dieser Gutschriftenarten sind automatisch berechnete Gutschriften, die an anderen Stellen im System konfiguriert werden können. Diese können nicht gelöscht werden.
CANCELLATION (Canceled charge): this is used when canceling a charge in a patron’s account
CREDIT (Gutschrift): dies wird für manuelle Gutschriften für Benutzer*innen verwendet.
DISCOUNT (Rabatt): dies wird für Rabatte auf Gebühren und Entgelte verwendet.
FORGIVEN (Erlassen): dies wird für manuelle Gutschriften für Benutzer*innen verwendet.
LOST_FOUND (Rückerstattung der Medienersatzgebühr): dies wird verwendet, wenn ein zuvor als Verlust gemeldetes Exemplar zurückgegeben wird. Wenn Sie die Medienersatzgebühr rückerstatten (siehe Standardregeln für die Rückerstattung bei Medienverlust), wird diese Gutschrift verwendet.
OVERPAYMENT (Rückerstattung einer Überzahlung): dies wird automatisch auf das Benutzerkonto gebucht, wenn ein*e Benutzer*in zu viel für eine Gebühr bezahlt hat. Dies wird hauptsächlich dann verwendet, wenn Rückgaben zurückdatiert werden und der/die Benutzer*in die Mahngebühr bereits bezahlt hat.
PAYMENT (Zahlung): wie der Name besagt, wir dies für Zahlungen verwendet.
PURCHASE (Purchase): this is used when a payment is made through the point of sale module.
REFUND (Rückerstattung einer Gebühr): dies wird bei Rückerstattung einer Gebühr oder eines Entgelts verwendet.
WRITEOFF (Writeoff): this is used when writing off a fine or charge.
Neue Gutschriftenart anlegen
Um eine neue Gutschriftenart anzulegen:
Klicken Sie auf „Neue Gutschriftenart“
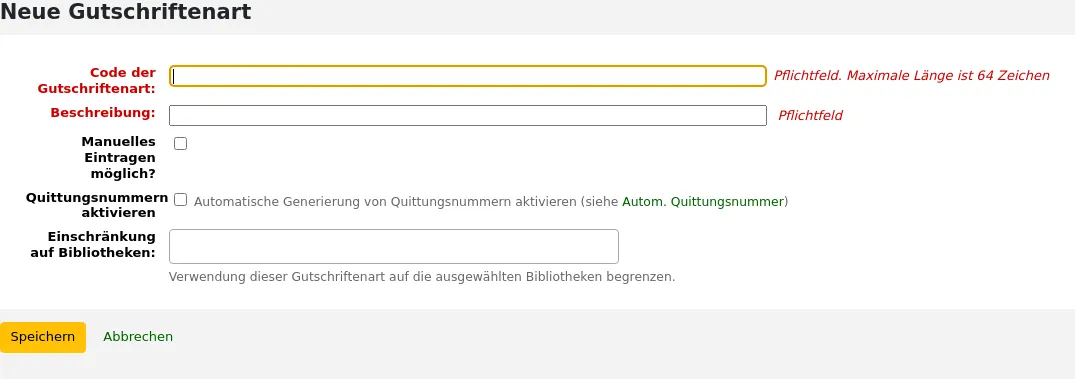
Geben Sie einen Code ein (beschränkt auf 64 Zeichen)
Warnung
Codes sollten auf Buchstaben, Ziffern und Unterstriche begrenzt sein (_).
Vermeiden Sie Leer-, Sonder- und diakritische Zeichen.
Schreiben Sie eine Beschreibung
Diese Beschreibung wird in der Auswahlliste und in der Transaktionshistorie verwendet, wenn Sie ein neues Guthaben in einem Benutzerkonto eintragen
Wenn diese Gutschriftenart als manuelle Gutschrift vom Bibliothekspersonal im Benutzerkonto eingetragen werden kann, markieren Sie die Checkbox „Manuelles Eintragen möglich?“
Wenn Sie möchten, dass diese Gutschriftenart fortlaufend nummeriert wird, markieren Sie „Quittungsnummern aktivieren“. Das Format der Nummer wird über den Systemparameter AutoCreditNumber festgelegt.
Wenn diese Gutschriftenart nur von bestimmten Bibliotheken verwendet wird, können sie diese Bibliotheken bei „Einschränkung auf Bibliotheken“ auswählen
Hinweis
Sie können mehr als eine Bibliothek auswählen, indem Sie die Strg-Taste gedrückt halten, während Sie die Einträge auswählen.
If you have any additional fields for account credit types (account_credit_types), they will be displayed here.
Klicken Sie auf „Speichern“
Vorhandene Gutschriftenart bearbeiten
Sie können nur die Gutschriftenarten bearbeiten, die manuell angelegt wurden.
Um eine Gutschriftenart zu bearbeiten:
Klicken Sie auf die Schaltfläche „Bearbeiten“ rechts neben der Gutschriftenart
Bearbeiten Sie jedes beliebige Feld
Klicken Sie auf „Speichern“
Gutschriftenart archivieren
Wenn es eine Gutschriftenart gibt, die Sie nicht länger benötigen, können Sie diese archivieren.
Hinweis
Es gibt keine Möglichkeit Gutschriftenarten zu löschen, da diese bereits verwendet worden sein könnten.
Um eine Gutschriftenart zu archivieren, klicken Sie die Schaltfläche „Archivieren“ auf der rechten Seite der Gutschriftenart.
Archivierte Gutschriftenart wiederherstellen
Wenn Sie eine archivierte Gutschriftenart wieder benötigen, können Sie auf die Schaltfläche „Wiederherstellen“ auf der rechten Seite der Gutschriftenart klicken.
Dies macht sie wieder verfügbar.
Kassen
Pfad in Koha: Mehr > Administration > Gebühren > Kassen
Diese Funktion wird über den Systemparameter UseCashRegisters aktiviert.
Bemerkung
Nur Bibliothekspersonal mit der Berechtigung manage_cash_registers (oder der superlibrarian-Berechtigung) hat Zugriff auf diesen Bereich.
Wenn Sie noch keine Kassen angelegt haben, werden Sie aufgefordert dies zu tun.
Sonst sehen Sie eine Liste Ihrer Kassen.
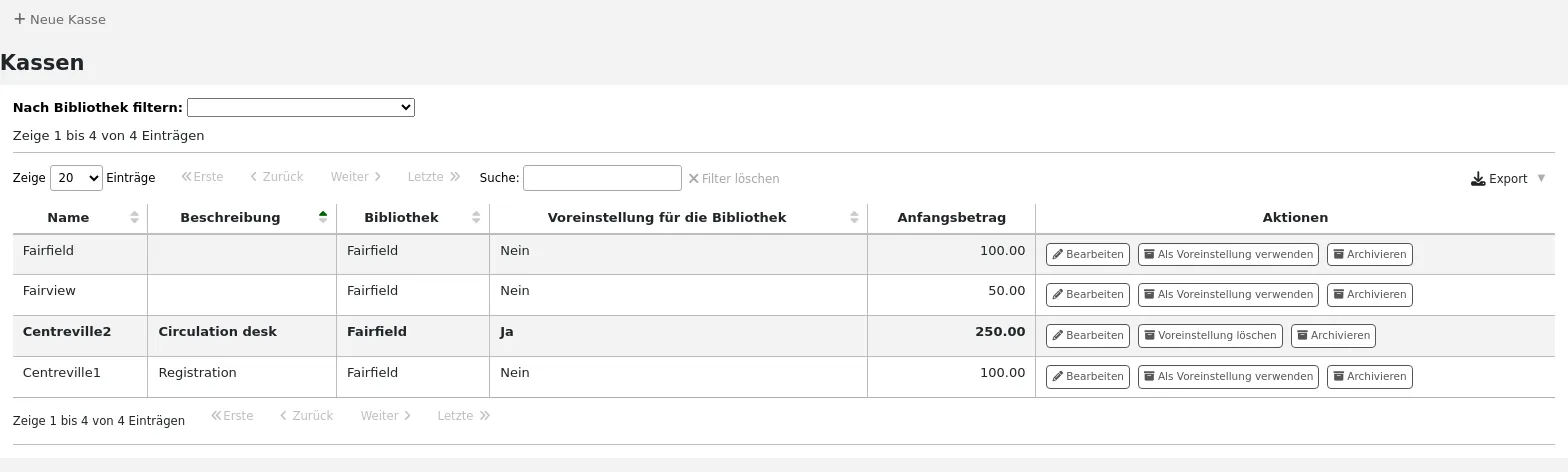
Über die Spalte „Aktionen“ können Sie Kassen bearbeiten, Voreinstellungen festlegen oder entfernen und Kassen archivieren und wiederherstellen.
The default status is only useful in libraries that have more than one register per branch. The default register will be preselected when entering a payment. If there is only one cash register per branch, the branch’s cash register will be selected when paying.
Neue Kasse anlegen
Klicken Sie auf „Neue Kasse“
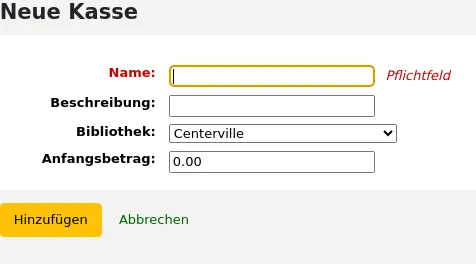
Geben Sie Ihrer Kasse einen Namen
Optional können Sie auch eine Beschreibung erfassen
Legen Sie fest, in welcher Bibliothek sich diese Kasse befindet
Als letztes geben Sie den Anfangsbetrag an, d.h. wie viel Geld sich in der Kasse befindet
Klicken Sie auf „Hinzufügen“
Plugins
Dieser Bereich dient der Verwaltung von Plugins.
Wichtig
Stellen Sie sicher, dass die Plugins in der Konfigurationsdatei aktiviert sind, bevor Sie sie verwenden.
Bemerkung
Nur Bibliothekspersonal mit der Berechtigung manage, der Berechtigung configure oder der Berechtigung admin (oder der superlibrarian-Berechtigung) sieht diesen Bereich.
Sehen Sie auch die Bereiche Werkzeug-Plugins und Report-Plugins.
Pfad in Koha: Mehr > Administration > Plugins
Installierte Administrations-Plugins werden in diesem Bereich angezeigt.
Bemerkung
Nur Bibliothekspersonal mit der Berechtigung admin (oder der superlibrarian-Berechtigung) kann administrative Plugins verwenden.
Plugins verwalten
In diesem Bereich können Sie alle Arten von Plugins sehen, verwalten und konfigurieren.
Bemerkung
Nur Bibliothekspersonal mit der Berechtigung manage (oder der superlibrarian-Berechtigung) kann Plugins installieren und deinstallieren.
Auf der Seite werden alle derzeit installierten Plugins angezeigt.
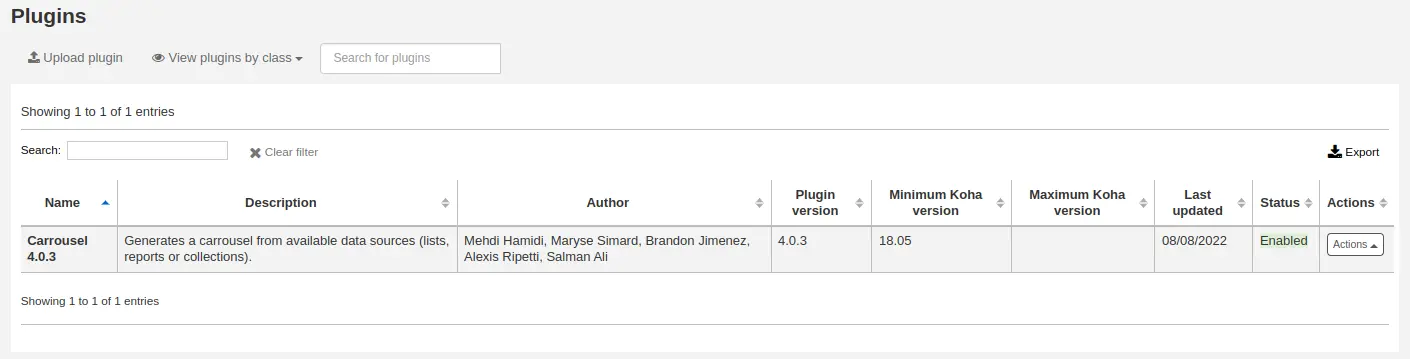
Wenn Sie viele Plugins haben, können Sie sich eine Teilmenge anzeigen lassen, indem Sie auf „Plugins nach Klasse anzeigen“ klicken.

Ein Plugin installieren
Um ein neues Plugin manuell zu installieren,
klicken Sie auf ‚Plugin hochladen‘.
Wählen Sie die KPZ-Datei auf Ihrem Computer und klicken Sie auf „Hochladen“.
Wenn Sie externe Plugin-Repositories konfiguriert haben, steht Ihnen oben auf der Seite ein Suchfeld zur Verfügung, mit dem Sie diese Repositories durchsuchen und direkt von dort installieren können, ohne die KPZ-Datei herunterladen und hochladen zu müssen. So installieren Sie ein Plugin aus einem Repository,
Geben Sie einen Suchbegriff in das Suchfeld ein.
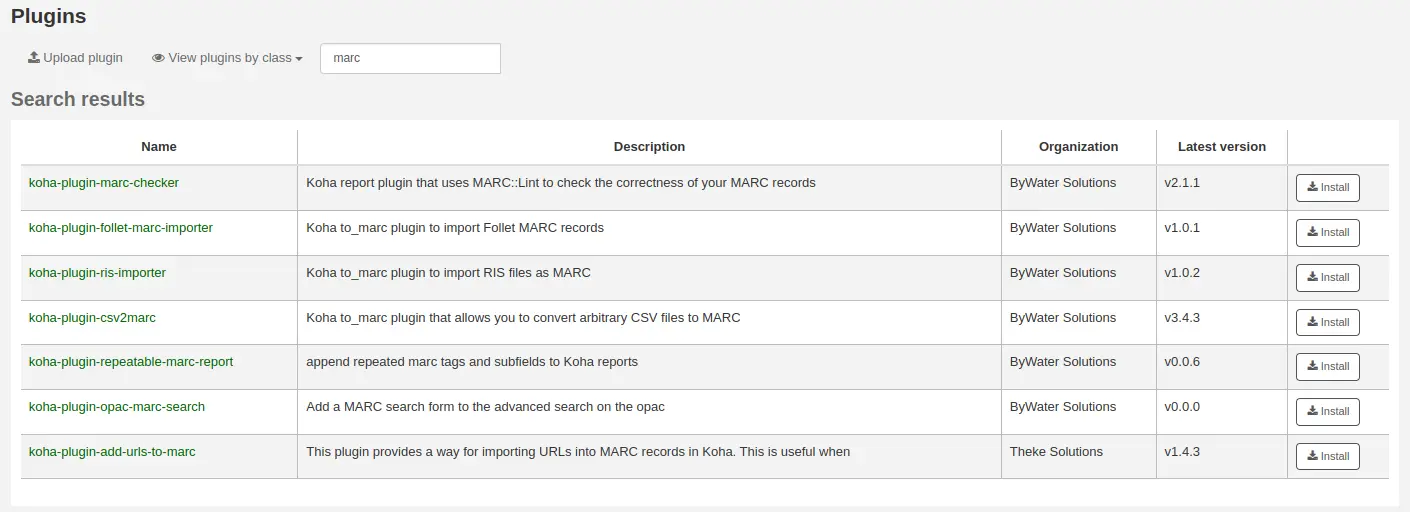
Klicken Sie rechts neben dem Plugin auf „Installieren“.
Manche Plugins müssen vor der Verwendung ggf. aktiviert werden.
Um ein Plugin zu aktivieren,
Klicken Sie auf die Schaltfläche „Aktionen“ rechts neben dem Plugin und wählen Sie „Aktivieren“
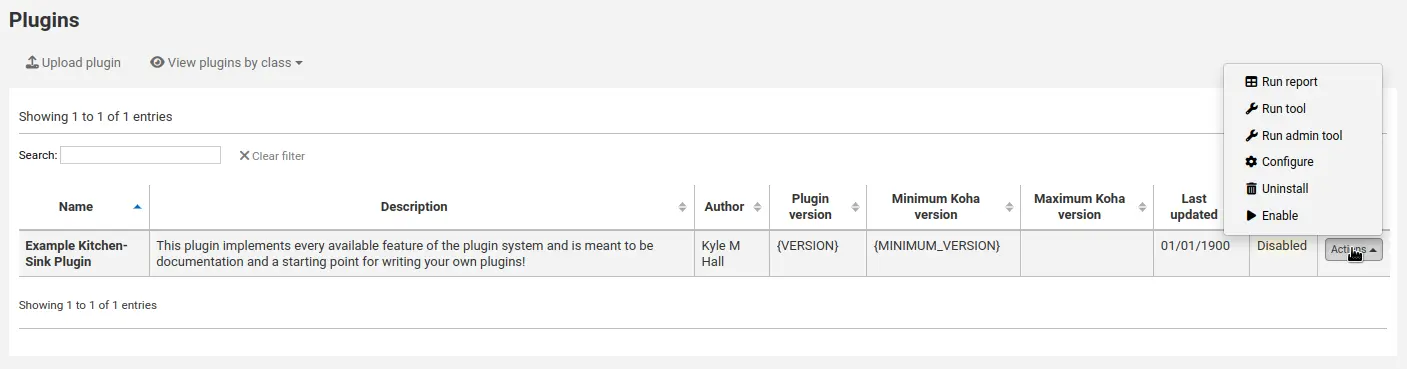
Ein Plugin verwenden
Alle Plugins sind unterschiedlich. Einige müssen vor der Verwendung konfiguriert werden, andere werden einfach ausgeführt.
Klicken Sie auf die Schaltfläche „Aktionen“ und wählen Sie „Konfigurieren“ oder „Ausführen“.
Befolgen Sie die Anweisungen des Pluginerstellers.
Bemerkung
Nur Bibliothekspersonal mit der Berechtigung configure (oder der superlibrarian-Berechtigung) können auf die Plugin-Konfiguration zugreifen.
Deaktivieren eines Plugins
Wenn Sie das Plugin vorübergehend außer Kraft setzen wollen, können Sie es deaktivieren.
Klicken Sie auf die Schaltfläche „Aktionen“ rechts neben dem Plugin und wählen Sie „Deaktivieren“
Dadurch wird das Plugin nicht deinstalliert. Es bleibt installiert, hat aber keine Auswirkungen auf Ihre Koha-Installation.
Ein Plugin löschen
Um ein Plugin zu löschen oder zu deinstallieren,
Klicken Sie auf die Schaltfläche „Aktionen“ rechts neben dem Plugin und wählen Sie „Löschen“
Dadurch wird das Plugin aus Ihrer Koha-Installation entfernt. Alle Aktionen oder Auswirkungen, die es hatte, werden beendet. Bei Bedarf können Sie es später wieder installieren, sofern es noch verfügbar ist.
Jobs
Dieser Bereich dient der Verwaltung von Hintergrund-Jobs. Jobs sind im System aufgereihte Aufgaben, die bearbeitet werden, wenn der Server über die entsprechenden Ressourcen verfügt, wie z. B. Stapelbearbeitung von Datensätzen und andere.
Pfad in Koha: Mehr > Administration > Jobs
Bemerkung
Nur Bibliothekspersonal mit der Berechtigung manage_background_jobs (oder der superlibrarian-Berechtigung) hat Zugriff auf diesen Bereich.
Jobs verwalten
Wenn Sie die Seite aufrufen, sehen Sie standardmäßig nur die aktuellen Jobs und die Jobs, die in der letzten Stunde in die Warteschlange gestellt wurden.
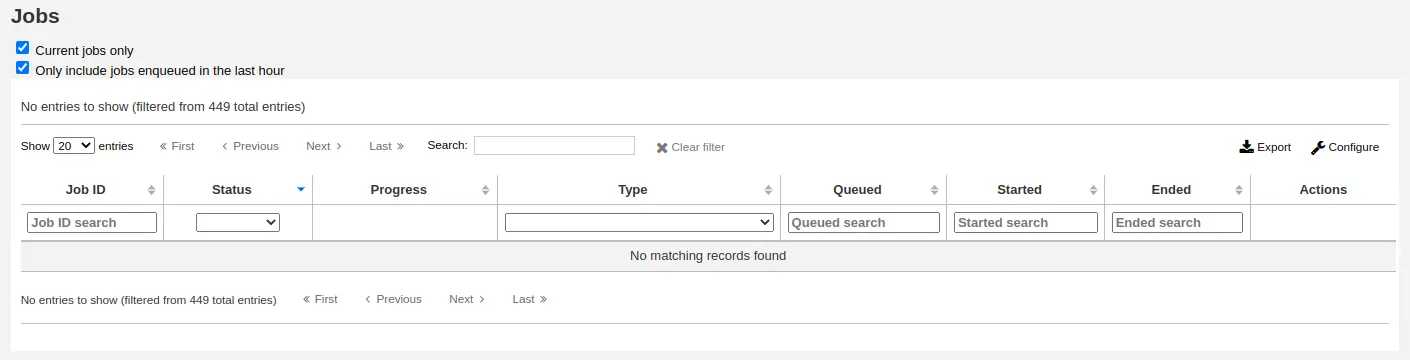
Um alle Jobs zu sehen, entfernen Sie die Markierung aus der Checkbox oben auf der Seite.
Nur aktuelle Jobs: deaktivieren Sie diese Option, damit auch abgeschlossene Jobs angezeigt werden
Nur Jobs aus der letzten Stunde: deaktivieren Sie diese Option, um frühere Jobs in die Warteschlange aufzunehmen
Über die Suchfelder unter den Spaltenüberschriften kann nach Jobs gesucht werden.
Auf der rechten Seite jedes Jobs befinden sich Aktionsschaltflächen.
Anzeigen: Darstellung der Job-Details, einschließlich, aber nicht beschränkt auf:
Job-ID: dies ist die Kennung des Jobs in der Koha-Datenbank, eine inkrementelle Nummer
Status: der Status des Jobs
Neu: der Job wurde eingereiht
Abgebrochen: der Job wurde von einem/einer Benutzer*in abgebrochen
Abgeschlossen: der Job wurde erfolgreich ausgeführt
Gestartet: der Job wurde gestartet, aber noch nicht abgeschlossen
Läuft: der Job wird gerade ausgeführt
Fehlgeschlagen: der Job wurde gestartet, ist aber aus irgendeinem Grund fehlgeschlagen
Fortschritt: zeigt an, wie weit der Job bereits abgeschlossen ist
Typ: gibt die Art des Jobs an
Stapeländerung bibliographischer Datensätze: Stapel von bibliographischen Datensätzen, die geändert werden sollen.
Stapellöschung bibliographischer Datensätze: Stapel von bibliographischen Datensätzen, die gelöscht werden sollen.
Stapeländerung von Normdatensätzen: Stapel von Normdatensätzen, die geändert werden sollen.
Stapellöschung von Normdatensätzen: Stapel von Normdatensätzen, die gelöscht werden sollen.
Stapeländerung von Exemplardatensätze: Stapel von Exemplardatensätzen, die geändert werden sollen.
Stapellöschung von Exemplardatensätzen: Stapel von Exemplardatensätzen, die gelöscht werden sollen.
Batch hold cancellation: a batch of holds to be canceled (when using the ‚Cancel selected‘ button).
Erstellen von eHoldings-Titeln: Titel, die im ERM-Modul aus einer Liste erstellt werden.
Elasticsearch-Index aktualisieren: bibliografische Datensätze, Normdatensätze oder Exemplare, die im Elasticsearch-Index aktualisiert werden sollen. Jede Änderung an einem bibliografischen Datensatz, einem Normdatensatz oder einem Exemplar löst eine Aktualisierung des Index aus, einschließlich Änderungen des Ausleihstatus.
Aktualisierung der Vormerkungs-Warteschlange: Wenn der Systemparameter RealTimeHoldsQueue aktiviert ist, lösen Änderungen an Vormerkungen eine Aktualisierung der Vormerkungs-Warteschlange aus.
Für den Import zwischengespeicherte MARC-Datensätze: bibliografische oder Normdatensätze, die für den Import bereitgestellt werden sollen.
Import von MARC-Datensätzen: zwischengespeicherte bibliographische oder Normdatensätze, die in den Katalog importiert werden sollen.
Revert import MARC records: imported bibliographic or authority records to be reverted.
In Warteschlange: Datum und Uhrzeit, wann der Job in die Warteschlange eingereiht wurde
Gestartet: Datum und Uhrzeit, wann der Job gestartet wurde
Beendet: Datum und Uhrzeit, wann der Job beendet wurde
Bericht: Dieser Bereich enthält Meldungen, die sich auf die Art des Jobs beziehen (z. B. die Anzahl der geänderten Datensätze im Falle einer Stapeldatensatzänderung)
Details: Dieser Bereich enthält Meldungen, die für die Art des Jobs spezifisch sind (z. B. welche Datensätze geändert wurden, wenn es sich um eine Stapeldatensatzänderung handelt)
Abbrechen: es ist möglich neue oder bereits begonnene Jobs abzubrechen
Katalog Administration
Machen Sie diese Einstellungen, bevor Sie in Ihrem Koha System beginnen zu katalogisieren.
Pfad in Koha: Mehr > Administration > Katalog
Bibliographisches MARC-Framework
Betrachten Sie Frameworks als Vorlagen für das Erstellen von neuen bibliographischen Datensätzen. Koha wird mit einigen vordefinierten Frameworks installliert, die bearbeitet oder gelöscht werden können. Bibliothekare können zudem eigene, an die Gegebenheiten der Bibliothek angepasste Frameworks erstellen.
Pfad in Koha: Mehr > Administration > Katalog > Bibliographisches MARC- Framework
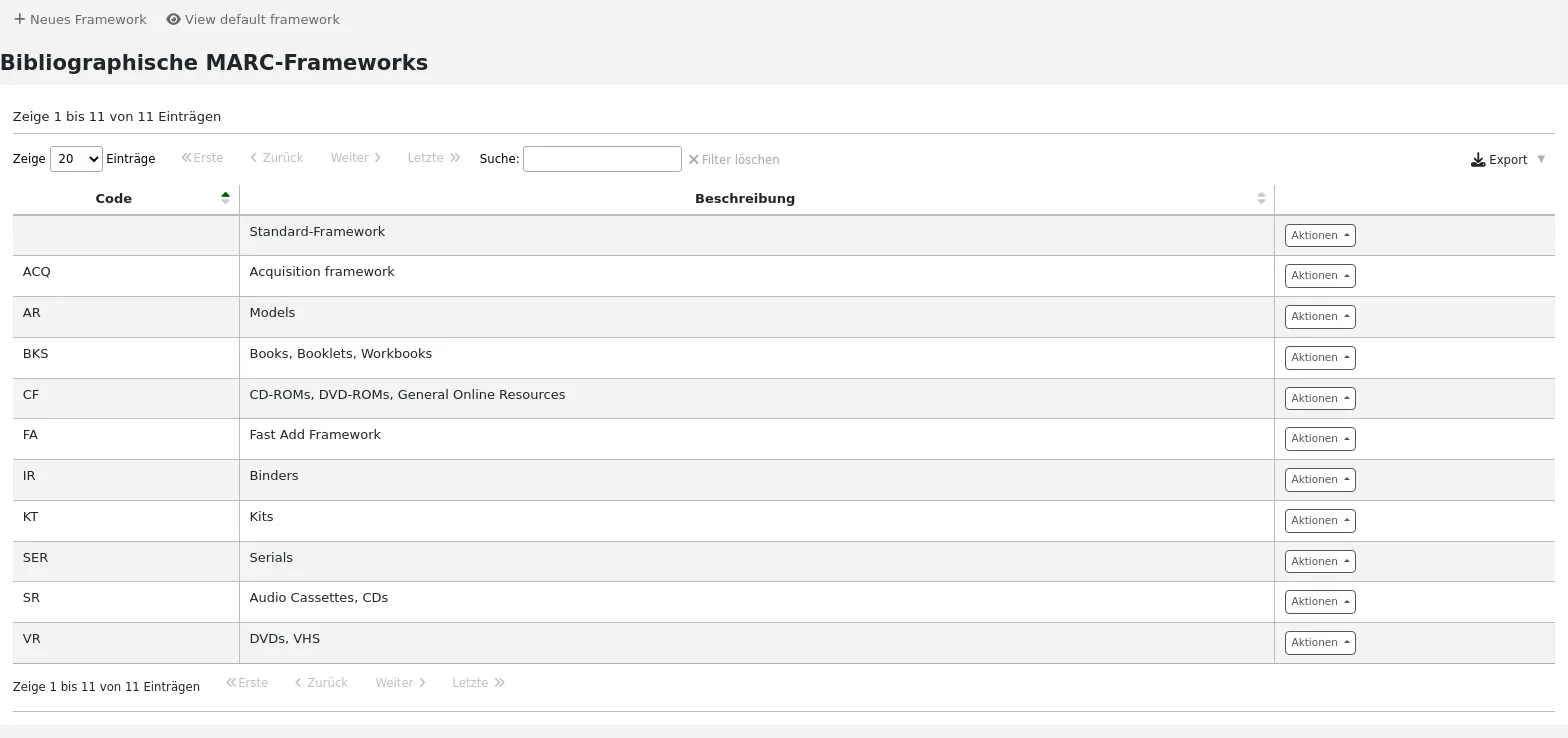
Bemerkung
Nur Bibliothekspersonal mit der Berechtigung manage_marc_frameworks (oder der superlibrarian-Berechtigung) hat Zugriff auf diesen Bereich.
Wichtig
Das Löschen oder Bearbeiten des Default-Frameworks führt zu Problemen bei der Katalogisierung von Datensätzen. Legen Sie immer ein auf dem Default-Framework basierendes neues Framework an, oder ändern Sie ein anderes bestehendes Framework.
Ein neues Framework hinzufügen
Neues Framework hinzufügen
‚Neues Framework‘ anklicken
Framework-Code: geben Sie einen Code aus höchstens vier Zeichen ein, ohne Leer-, Sonder- oder diakritische Zeichen.
Beschreibung: geben Sie eine genauere Definition Ihres Frameworks ein, dieses wird in Koha angezeigt.
Klicken Sie auf ‚Bestätigen‘
Sobald Ihr Framework hinzugefügt wurde, klicken Sie in der Liste der Frameworks rechts daneben auf „Aktionen“ und wählen Sie „MARC-Struktur“
Sie werden gefragt, welches Framework Sie als Grundlage für das neue Framework verwenden möchten, dies macht es einfacher, als mit einem leeren Framework zu beginnen

Sobald Ihr Framework angezeigt wird, können Sie jedes Feld und Unterfeld bearbeiten oder löschen, entsprechend der Anleitung für das Bearbeiten von Feldern und Unterfeldern
Ein bestehendes Framework bearbeiten
Wenn Sie auf „Aktionen“ und dann auf „Bearbeiten“ rechts neben einem Framework klicken, können Sie nur die Beschreibung des Frameworks bearbeiten.
Felder und Unterfelder eines Frameworks bearbeiten
Frameworks bestehen aus MARC-Feldern (tags) und Unterfeldern. Um Änderungen an Feldern und Unterfeldern vorzunehmen, klicken Sie auf „Aktionen“ und dann „MARC-Struktur“.
Wichtig
Wenn Sie Änderungen an Framework-Feldern und Unterfeldern vornehmen, müssen Sie den Test des bibliographischen MARC-Frameworks ausführen.
Ein MARC-Feld bearbeiten
Nachdem Sie auf „MARC-Struktur“ geklickt haben, gelangen Sie zu einer Übersicht aller für dieses Framework verfügbaren MARC-Felder und Sie können nach dem gewünschten Feld suchen. Um ein MARC-Feld zu bearbeiten, klicken Sie rechts des Feldes auf „Aktionen“ und „Feld bearbeiten“.
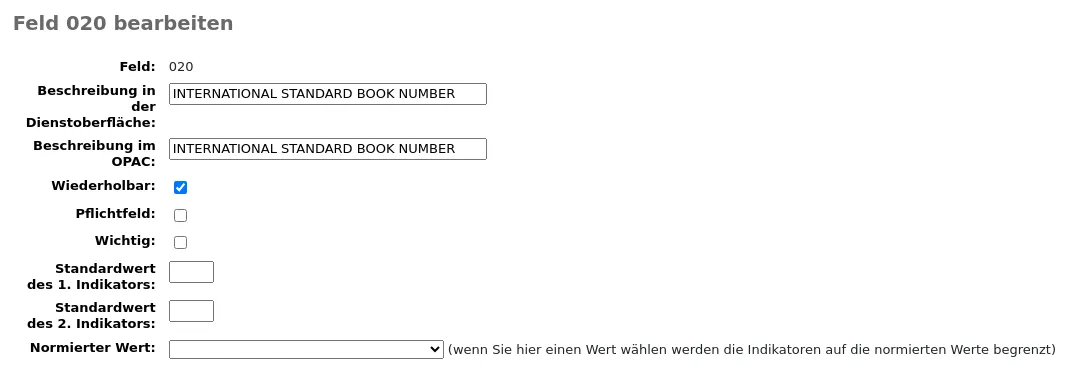
Im nächsten Fenster sehen Sie die Details des Feldes.
Tag: das MARC-Tag bzw. die Feldnummer ist nicht bearbeitbar.
Beschreibungstext für lib: Text, der in der MARC-Ansicht der Dienstoberfläche und im Basis-Editor angezeigt wird, wenn der Systemparameter advancedMARCeditor auf die Anzeige von Beschreibungstexten eingestellt ist.
Bemerkung
Wenn Sie XSLT verwenden (siehe den Paramter XSLTDetailsDisplay), werden die Bezeichnungen für die Ansicht „Normal“ im XSLT-Stylesheet definiert.
Dies hat keine Auswirkungen auf die Ansicht „Normal“, es sei denn, Sie verwenden kein XSLT.
Beschreibung im OPAC: Text, der in der MARC-Ansicht im OPAC angezeigt wird.
Bemerkung
Wenn Sie XSLT verwenden (siehe den Systemparameter OPACXSLTDetailsDisplay), werden die Bezeichnungen für die Ansicht „Normal“ im XSLT-Stylesheet definiert.
Dies hat keine Auswirkungen auf die Ansicht „Normal“, es sei denn, Sie verwenden kein XSLT.
Wiederholbar: Wenn die Checkbox markiert ist, hat das Feld im Basis-Editor ein nebenstehendes Icon, über das Sie dieses Feld mehrfach hinzufügen können.
Pflichtfeld: wenn die Checkbox markiert ist, kann der Datensatz nur gespeichert werden, wenn das Feld einen Wert enthält. Im Basis-Editor wird eine ‚Erforderlich‘-Markierung als Aufforderung angezeigt.
Wichtig: Wenn die Checkbox markiert ist, wird eine Warnung ausgegeben, wenn das Feld nicht belegt wurde, aber anders als beim „Pflichtfeld“, können Sie den Datensatz trotzdem speichern. Im Basis-Editor wird eine „Wichtig“-Markierung als Aufforderung angezeigt.
Indicator default values: add default values for indicators here so that they will be prefilled to save time when cataloging, but can still be edited if required.
Normierter Wert: Definieren Sie eine Auswahlliste normierter Werte für die Katalogisierer
Warnung
Die Option „Normierter Wert“ auf Feldebene hat keine Funktion.
Klicken Sie auf „Änderungen speichern“, um alle Änderungen zu speichern.
Ein MARC-Unterfeld bearbeiten
Um die Unterfelder eines Felds zu bearbeiten, klicken Sie auf „Aktionen“ und dann auf „Unterfelder bearbeiten“ auf der rechten Seite neben dem Feld in der Feldliste des Frameworks. Jedes Unterfeld hat seinen eigenen Reiter, der jeweils drei Bereiche enthält: Basiskonfiguration, Erweiterte Einstellungen und Weitere Optionen.
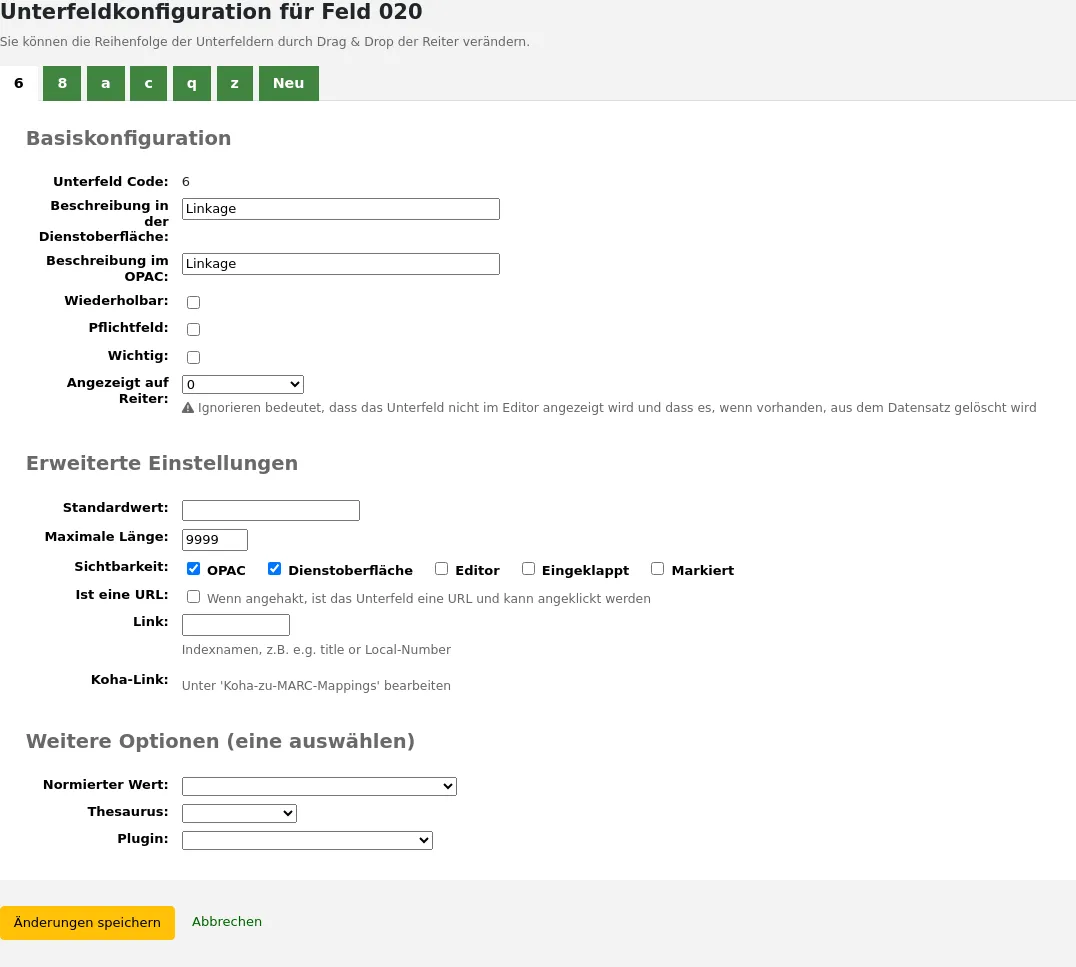
Für jedes Unterfeld können Sie die folgende Basiskonfiguration festlegen
Unterfeldcode: dies ist der MARC-Unterfeldcode und würde normalerweise nicht verändert werden.
Text für den Bibliothekar: Text, der in der MARC-Ansicht der Dienstoberfläche und im Basis-Editor angezeigt wird, wenn der Systemparameter advancedMARCeditor auf die Anzeige von Beschreibungstexten eingestellt ist.
Bemerkung
Wenn Sie XSLT verwenden (siehe den Paramter XSLTDetailsDisplay), werden die Bezeichnungen für die Ansicht „Normal“ im XSLT-Stylesheet definiert.
Dies hat keine Auswirkungen auf die Ansicht „Normal“, es sei denn, Sie verwenden kein XSLT.
Text für OPAC: Text, der in der MARC-Ansicht im OPAC angezeigt wird.
Bemerkung
Wenn leer, wird stattdessen der „Text für Bibliothekare“ genutzt
Bemerkung
Wenn Sie XSLT verwenden (siehe den Systemparameter OPACXSLTDetailsDisplay), werden die Bezeichnungen für die Ansicht „Normal“ im XSLT-Stylesheet definiert.
Dies hat keine Auswirkungen auf die Ansicht „Normal“, es sei denn, Sie verwenden kein XSLT.
Wiederholbar: Wenn die Checkbox markiert ist, wird das Feld im Basis-Editor mit einem nebenstehenden Icon versehen, das es Ihnen ermöglicht mehrere Unterfelder dieses Typs hinzuzufügen.
Pflichtfeld: wenn die Checkbox markiert ist, kann der Datensatz nicht gespeichert werden, bis Sie in diesem Unterfeld etwas eingegeben haben. Im Basis-Editor wird ein Hinweis „Pflichtfeld“ angezeigt.
Wichtig: Wenn die Checkbox markiert ist, wird eine Warnung ausgegeben, wenn das Feld nicht belegt wurde, aber anders als beim „Pflichtfeld“, können Sie den Datensatz trotzdem speichern. Im Basis-Editor wird eine „Wichtig“-Markierung als Aufforderung angezeigt.
Angezeigt auf Reiter: legt fest, auf welchem Reiter das Unterfeld angezeigt wird.
Wichtig
Alle Unterfelder eines Feldes müssen im selben Reiter angezeigt oder ignoriert werden. Ignorierte Felder werden nicht verwendet.
Warnung
When importing records, or editing existing records, subfields that are managed in tab ‚ignore‘ will be deleted. If you still wish to keep the subfields, but hide them, use the ‚Visibility‘ options below.
Für jedes Unterfeld können Sie die folgenden erweiterten Konfigurationsoptionen festlegen
Standardwert: legt fest, mit welchem Inhalt das Feld als Voreinstellung belegt wird. Dies bleibt änderbar, doch es spart Zeit für den Fall, dass Sie denselben Text immer wieder oder häufig benötigen.
Bemerkung
Es gibt eine Reihe von Werten, die Sie hier verwenden können, die beim Speichern eines neuen Datensatzes automatisch ersetzt werden:
<<MM>> - der aktuelle Monat, 2 Ziffern
<<DD>> - der aktuelle Tag des Monats, 2 Ziffern
<<JJ>> - das aktuelle Jahr, 2 Ziffern
<<YYYY>> - das aktuelle Jahr, 4 Ziffern
<<USER>> - der Benutzername der aktuell angemeldeten Benutzer*in
Zum Beispiel: die Voreinstellung „<<DD>>.<<MM>>.<<YYYY>>“ (ohne die Anführungszeichen) wird als „21.01.2021“ ausgegeben
Bemerkung
Wann diese Standardwerte verwendet werden wird im Systemparameter ApplyFrameworkDefaults festgelegt.
Maximale Länge: dieser Wert begrenzt die Anzahl der Zeichen, die in das Unterfeld eingegeben werden können.
Sichtbarkeit: hier können Sie auswählen, ob dieses Unterfeld sichtbar oder verborgen sein soll. Markieren Sie die Checkboxen, wenn das Feld sichtbar sein soll, und entfernen Sie die Markierung, wenn es verborgen sein soll.
OPAC: Wenn die Checkbox markiert ist, kann das Unterfeld im OPAC angezeigt werden. Bei Nicht-XSLT-Ansichten wird das Feld angezeigt. Bei XSLT-Ansichten hängt es vom Stylesheet ab.
Dienstoberfläche: Wenn die Checkbox markiert ist, wird das Unterfeld in der Dienstoberfläche angezeigt. Bei Nicht-XSLT-Ansichten wird das Feld angezeigt. Bei XSLT-Ansichten hängt es vom Stylesheet ab.
Editor: Wenn die Checkbox markiert ist, steht das Unterfeld für Änderungen im Basiseditor zur Verfügung.
Eingeklappt: Wenn die Checkbox markiert ist, wird das Unterfeld im Basiseditor ausgeblendet, aber angezeigt, wenn das Feldlabel angeklickt wird, um alle Unterfelder zu erweitern.
Markiert: Wenn die Checkbox markiert ist, ist das Unterfeld nicht verfügbar und wird in allen Ansichten ausgeblendet (dies entspricht der Deaktivierung aller Checkboxen).
Ist eine URL: Wenn die Checkbox markiert ist, ist das Unterfeld eine URL und kann angeklickt werden.
Link: Wenn Sie hier einen Indexnamen angeben, wird hinter dem Unterfeld in der MARC-Sicht ein Unterfeld in der Detailansicht der Dienstoberfläche angezeigt. Wenn der Link angeklickt wird, wird eine Katalogsuche mit dem angegebenen Index und dem Inhalt des Unterfelds ausgeführt.
Koha-Link: über dieses Feld kann eine Verknüpfung zwischen dem MARC-Unterfeld und einer Spalte in den Datenbanktabellen items, biblioitems und biblio hergestellt werden. Die Zuordnungen können auf der Seite Koha-zu-MARC-Mapping geändert werden.
Für jedes Unterfeld können Sie die folgenen weiteren optionalen Werte festlegen
Normierter Wert: bedeutet, dass der Wert aus einer Auswahlliste gewählt werden muss, die über eine Liste Normierter Werte generiert wird.
Im untenstehenden Beispiel wurde die Normierte-Wert Kategorie LANG auf 041$a gesetzt.
Dies erzeugt ein Auswahlmenü im Basiseditor.
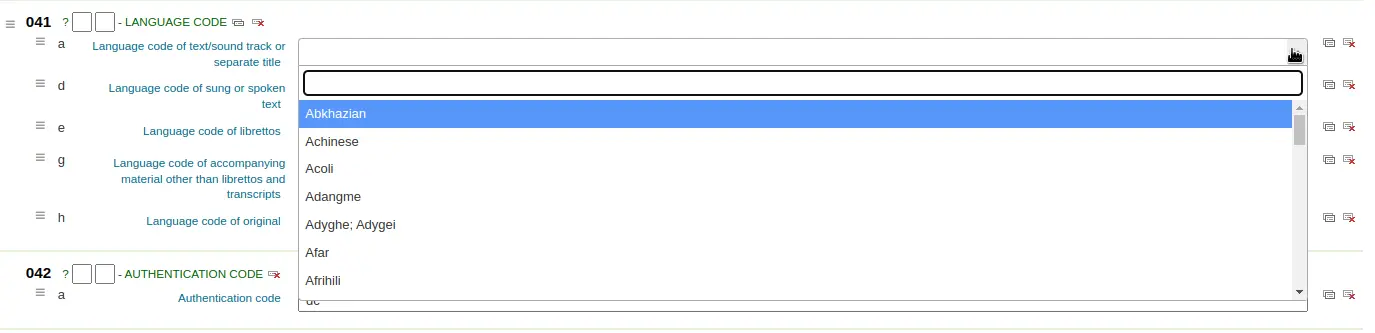
Thesaurus: bedeutet, dass der Wert mit dem Normdatenkatalog der ausgewählten Kategorie verknüpft ist. Normdatenkategorien werden im Bereich Normdatentypen verwaltet.
Plugin: means the value is calculated or managed by a cataloging plugin. Cataloging plugins, or value builders, can do almost anything.
Beispiele:
Für Signaturen gibt es die Möglichkeit einen Signaturenbrowser neben dem Signatur-Unterfeld hinzuzufügen, damit Sie erkennen können, welche Signaturen bereits genutzt werden und welche nicht. Wählen Sie dafür das Plugin cn_browser.pl. Erfahren Sie mehr im Kapitel Katalogisierung dieses Handbuchs.
Wenn Sie Upload-Dateien in der Katalogisierung laufen lassen möchten, können Sie das Plugin upload.pl auswählen. Dies erlaubt Ihnen Upload Dateien in Koha mit Ihrem Titeldatensatz zu verknüpfen.
Zum Beispiel gibt es in UNIMARC Plugins für alle 1xx-Felder, die kodierte Felder sind. Das Plugin ist eine große Hilfe für die Katalogisierer! Es gibt auch zwei Plugins (unimarc_plugin_210c and unimarc_plugin_225a, die den Herausgeber „auf magische Weise“ aus einer ISBN herleiten und die Sammlungsliste für den Herausgeber)
Wenn Sie eine Autovervollständigung für die Eingabe des Verlags in 260b und 264b aktivieren möchten, können Sie bei Plugin marc21_field_260b.pl auswählen. Wenn Sie dann beginnen, einen Verlagsnamen einzugeben, werden Ihnen passende Vorschläge, basierend auf den bereits im Katalog vorhandenen Verlagen angeboten.
Um die Änderungen zu speichern, klicken Sie einfach auf „Änderungen speichern“.
Tipp
Sie können die Reiter der Unterfelder per Drag & Drop verschieben, um die Anzeigereihenfolge beim Katalogisieren mit dem Basis-Editor zu ändern.
Standardmäßig werden sie in alphanumerischer Reihenfolge angezeigt (0-9, dann a-z).
Felder zu Frameworks hinzufügen
Wenn in einem Framework das Feld, das Sie benötigen, nicht enthalten ist, müssen Sie dieses ggf. anlegen. Klicken Sie dazu auf die Schaltfläche „Neues Feld“ oben auf der Seite.
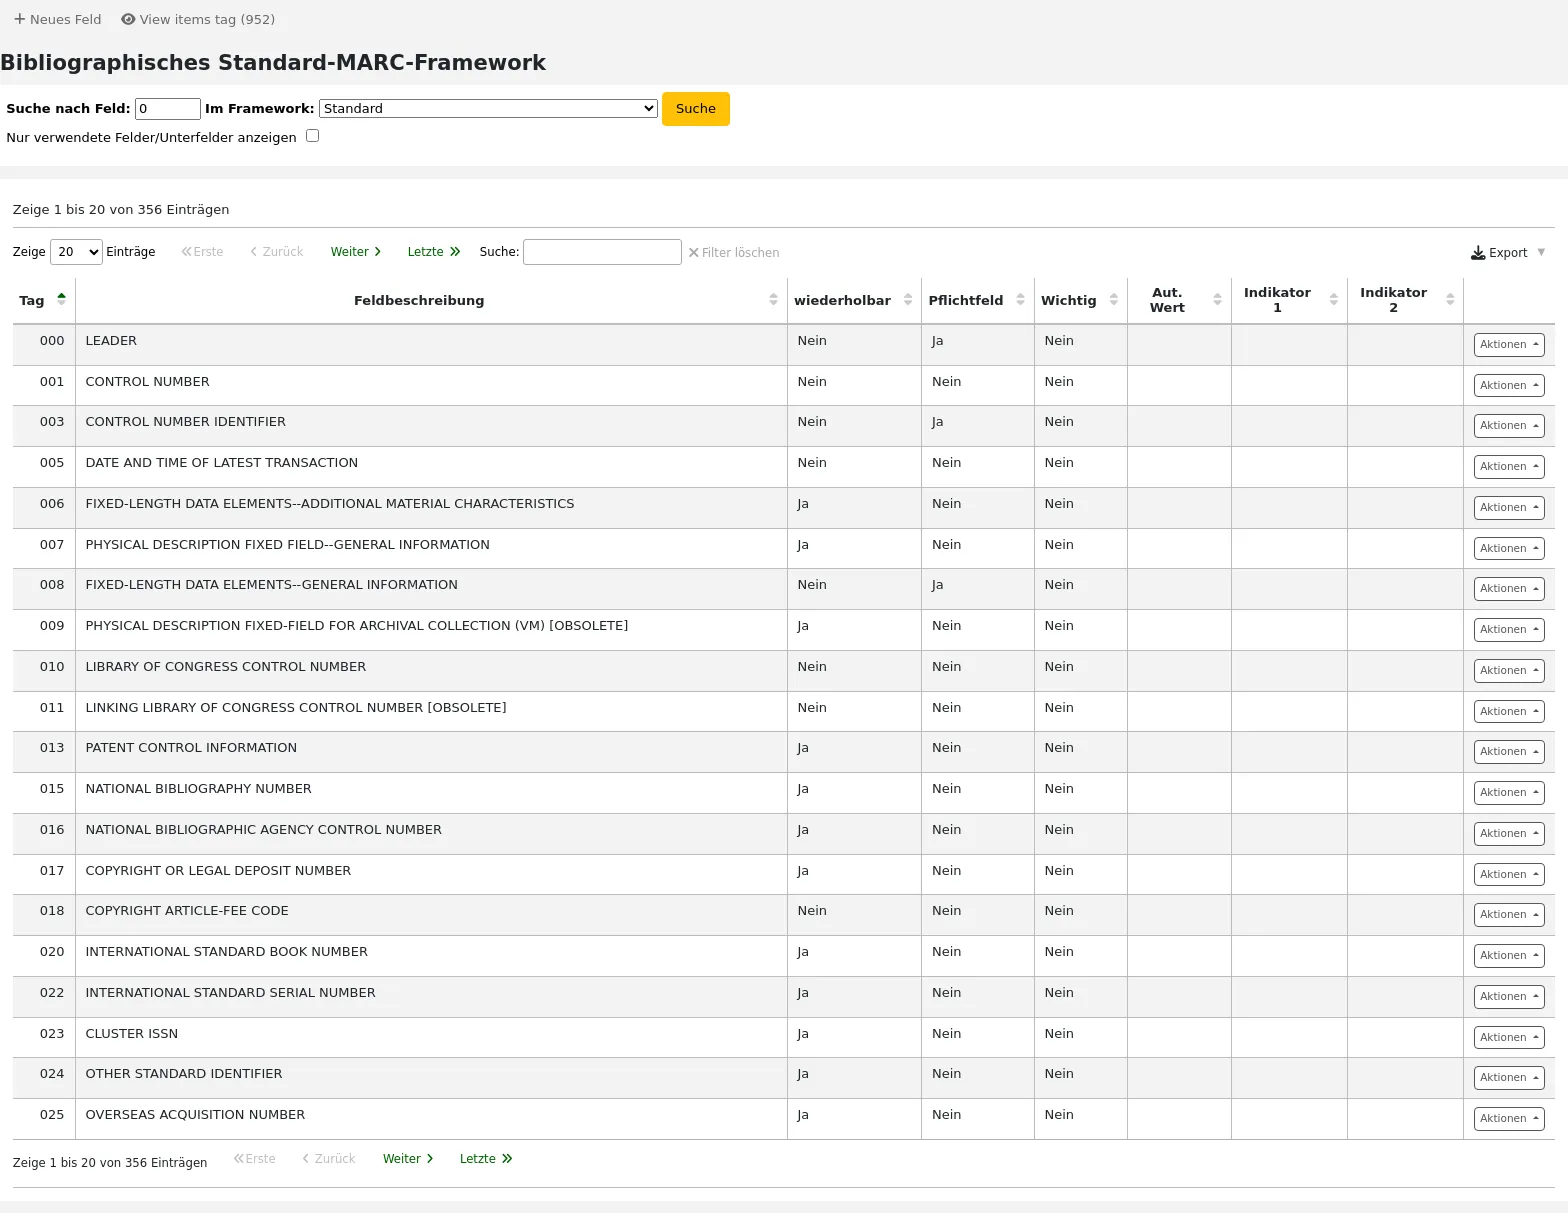
Dies öffnet ein leeres Formular, um MARC-Felder-Daten einzugeben
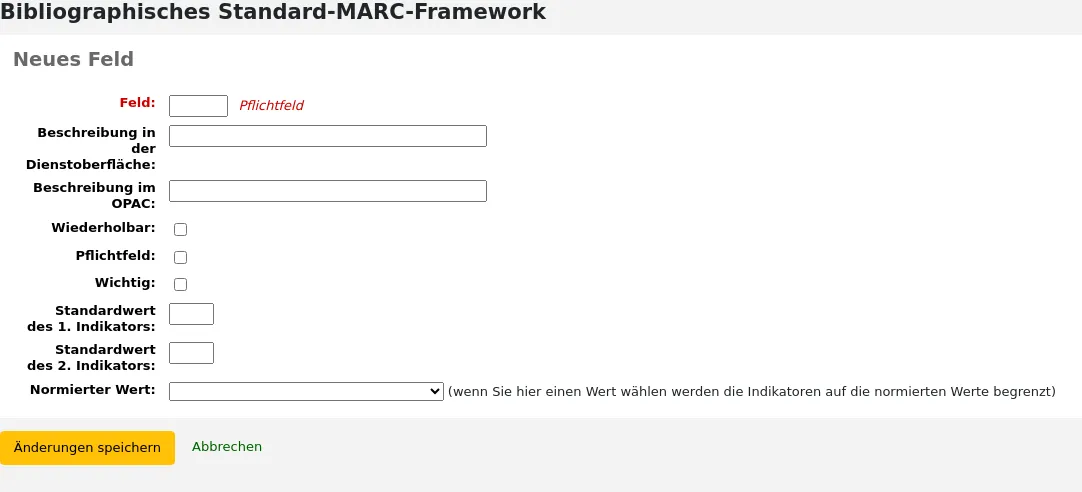
Klicken Sie neben dem neuen Feld auf den Button ‚Aktionen‘, und dann auf ‚Unterfelder bearbeiten‘. Klicken Sie dann auf den Reiter ‚Neu‘ und geben Sie den Code des Unterfeldes ein. Der Vorgang zum Vornehmen der weiteren Einstellungen für das neue Unterfeld ist derselbe wie im Bereich Felder und Unterfelder eines Frameworks bearbeiten in diesem Handbuch beschrieben.
Klicken Sie auf „Änderungen speichern“, wenn Sie fertig sind, und das neue Feld wird nun in der Liste für das Framework angezeigt.
Sie müssen zumindest ein Unterfeld zu Ihrem neuen Feld hinzufügen bevor es beim Katalogisieren erscheint.
Klicken Sie neben dem neuen Feld auf den Button ‚Aktionen‘, und dann auf ‚Unterfelder bearbeiten‘. Klicken Sie dann auf den Reiter ‚Neu‘ und geben Sie den Code des Unterfeldes ein. Der Vorgang zum Vornehmen der weiteren Einstellungen für das neue Unterfeld ist derselbe wie im Bereich Felder und Unterfelder eines Frameworks bearbeiten in diesem Handbuch beschrieben.
Frameworks importieren und exportieren
Neben jedem Framework gibt es je einen Link zum Import und Export.
Framework exportieren
Um ein Framework zu exportieren, wählen Sie die Option „Exportieren“ in der Schaltfläche „Aktionen“ rechts neben dem Frameworknamen.
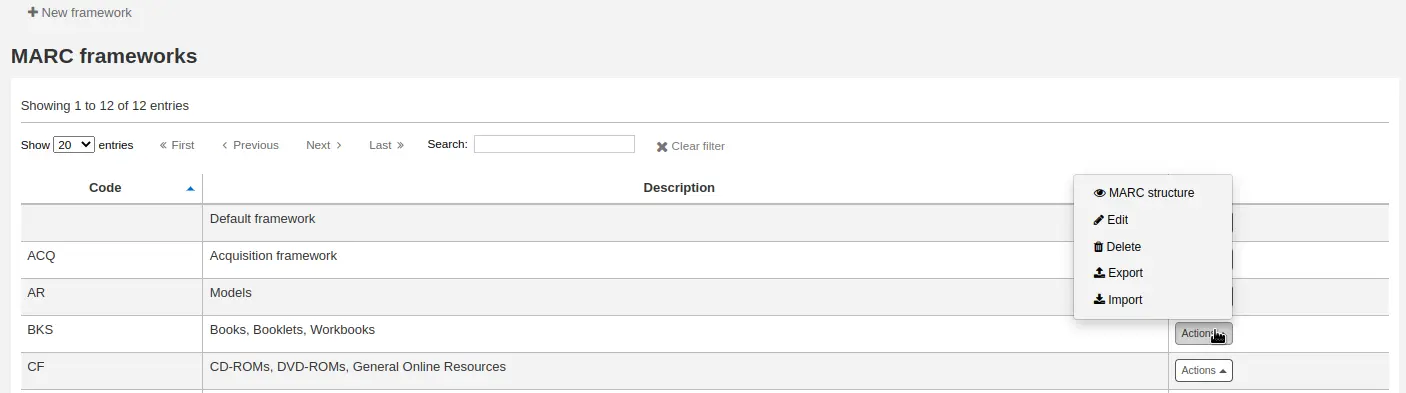
Wenn sie ‚Exportieren‘ auswählen, können Sie anschließend das Dateiformat wählen.
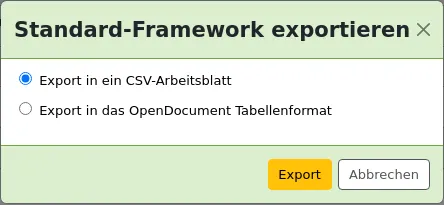
Ein Framework, das auf diese Weise exportiert wurde, kann in jede andere Koha-Installation importiert werden.
Framework importieren
Eine einfache Methode zur Erstellung eines neuen Frameworks ist, ein bereits vorhandenes Framework aus einer eigenen oder anderen Koha-Installation zu importieren. Dieses Framework muss vor dem Import aus der anderen Installation wie oben beschrieben exportiert werden.
Um ein Framework zu importieren, erstellen Sie zunächst ein neues Framework. Sobald Sie dieses Framework haben, klicken Sie auf „Aktionen“ und dann auf „Importieren“ rechts neben dem neuen Framework.
Sie werden gebeten, eine Datei auf ihrem Computer für den Import in das Framework auszuwählen.
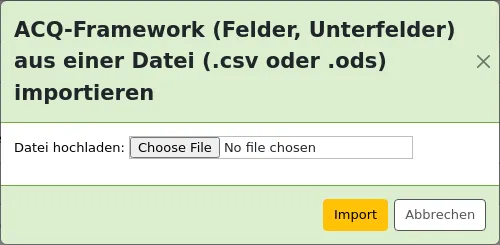
Sie werden gebeten, den MARC-Import zu bestätigen.
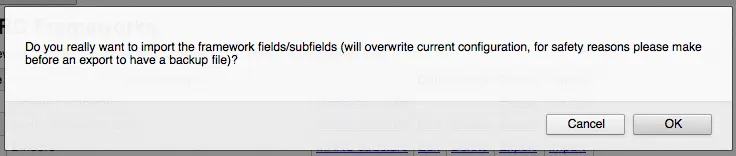
Während Ihre Datei hochgeladen wird, sehen Sie ein sich drehendes Symbol, das anzeigt, dass das System arbeitet.
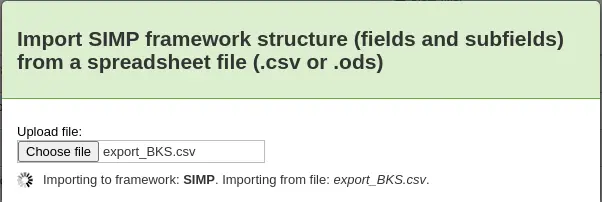
Sobald der Import abgeschlossen ist, gelangen Sie zum Anpassungswerkzeug für Frameworks, wo Sie Änderungen am importierten Framework vornehmen können.
Koha-zu-MARC-Mapping
Koha speichert nicht nur den gesamten MARC-Datensatz, sondern auch allgemeine Felder für den einfachen Zugriff in verschiedenen Tabellen der Datenbank (vor allem in den Tabellen items, biblioitems und biblio). Die Koha-MARC-Zuordnung wird verwendet, um Koha mitzuteilen, wo die entsprechenden Werte im MARC-Datensatz zu finden sind. Wann immer ein Datensatz hinzugefügt oder geändert wird, wird diese Verknüpfung verwendet um die Inhalte in der verknüpften Koha-Datenbankspalte zu aktualisieren. Die Informationen in den Datenbankspalten wird verwendet, um schnell auf wichtige Informationen zugreifen zu können ohne den ganzen MARC-Datensatz parsen zu müssen. Die Daten werden für die Anzeige auf vielen Seiten verwendet und können auch für Reports genutzt werden.
In vielen Fällen müssen Sie die bei der Installation eingestellten Standardwerte nicht ändern, aber es ist wichtig zu wissen, dass das Werkzeug vorhanden ist und jederzeit verwendet werden kann.
Warnung
Wenn Sie Mappings ändern, nachdem Daten zu Ihrem Katalog hinzugefügt worden sind, bitten Sie Ihren Systemadministrator, misc/batchRebuildBiblioTables.pl auszuführen. Dadurch werden die Werte in den Datenbankspalten für alle Ihre Datensätze aktualisiert.
Pfad in Koha: Mehr > Administration > Katalog > Koha-zu-MARC-Mapping
Bemerkung
Nur Bibliothekspersonal mit der Berechtigung manage_marc_frameworks (oder der superlibrarian-Berechtigung) hat Zugriff auf diesen Bereich.
Die Tabelle zeigt alle Datenbankfelder an, die zu MARC-Feldern gemappt werden können.

Um ein neues Mapping hinzuzufügen, klicken Sie auf die Schaltfläche „Hinzufügen“ rechts des entsprechenden Feldes.
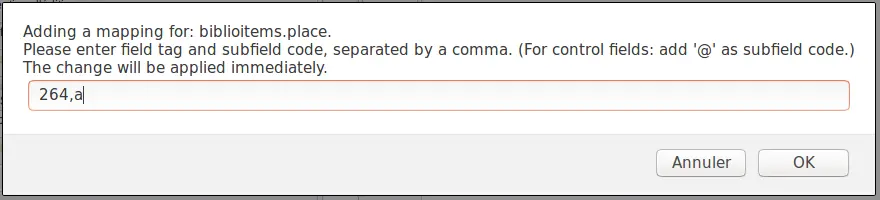
Geben Sie das MARC Feld und das Unterfeld, das Sie zu diesem Koha-Feld mappen wollen, durch Komma getrennt ein (z. B. „264,a“), und klicken Sie auf die Schaltfläche „OK“.
Bemerkung
Es ist möglich mehr als ein MARC-Feld mit einem Datenbankfeld zu verknüpfen. Sie können zum Beispiel das Feld 260$a und 264$a mit dem Feld biblioitems.place verknüpfen.
Möchten Sie das Mapping für ein Datenbankfeld löschen, klicken Sie die Schaltfläche ‚Entfernen‘.
Bemerkung
Alle Änderungen erfolgen sofort. Datensätze, die nach der Änderung erstellt oder bearbeitet werden, erhalten sofort die neuen Mappings. Wenn Sie jedoch die Mappings für bereits im Katalog vorhandene Datensätze aktualisieren möchten, bitten Sie Ihren Systemadministrator, misc/batchRebuildBiblioTables.pl auszuführen. Dadurch werden die Werte in den Datenbankspalten für alle Ihre Datensätze aktualisiert.
Bibliographisches MARC-Framework prüfen
Das Werkzeug prüft die MARC-Struktur eines bibliographischen Frameworks.
Pfad in Koha: Mehr > Administration > Katalog > Test des bibliographischen MARC-Frameworks
Bemerkung
Nur Bibliothekspersonal mit der Berechtigung manage_marc_frameworks (oder der superlibrarian-Berechtigung) hat Zugriff auf diesen Bereich.
Wenn Sie Ihr Bibliographisches MARC-Framework ändern, sollten Sie dieses Werkzeug nutzen, um Fehler in Ihrer Definition zu finden.
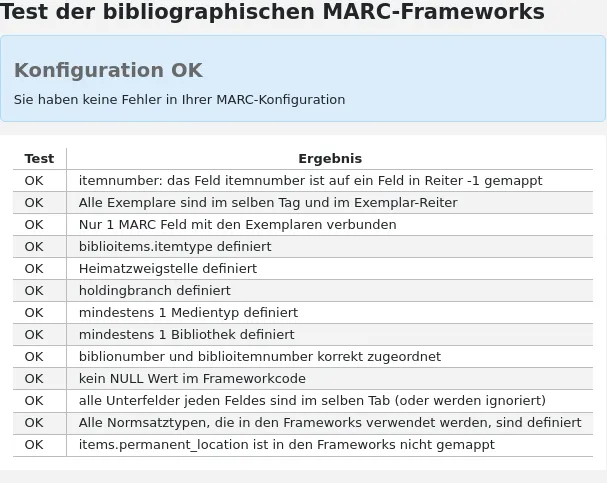
Klassifikationsquellen
Klassifikationsquelle bzw. Aufstellungssystematik werden in den Bibliografischen MARC-Frameworks, auf die Unterfelder 952$2 und 942$2 gemappt und in den Feldern items.cn_source und biblioitems.cn_source in der Datenbank abgespeichert.
Pfad in Koha: Mehr > Administration > Katalog > Klassifikationsquellen
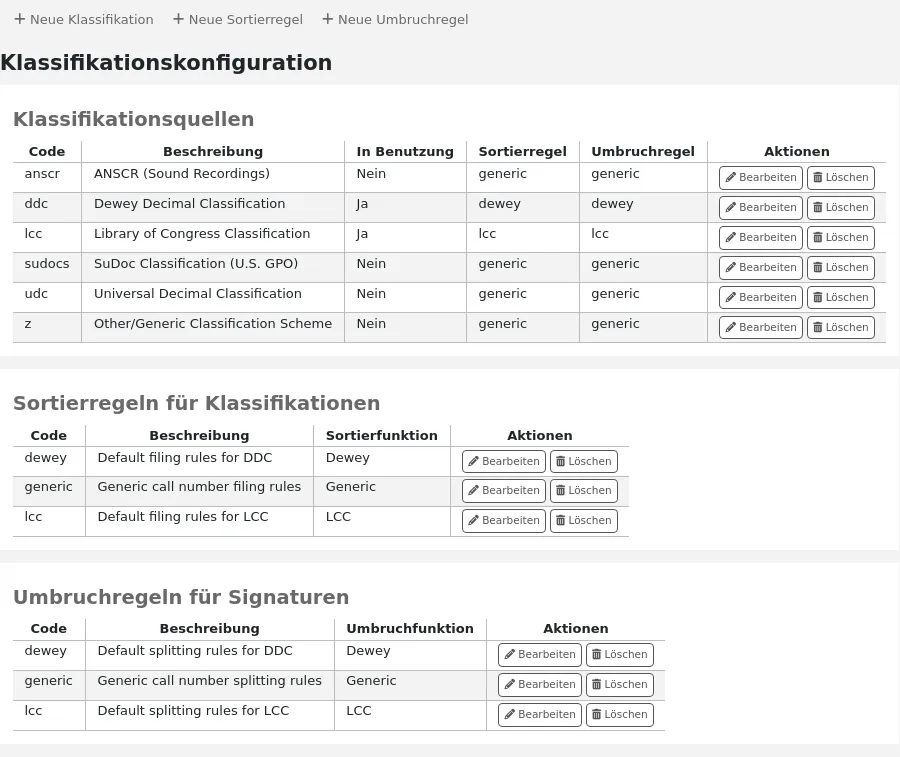
Bemerkung
Nur Bibliothekspersonal mit der Berechtigung manage_classifications (oder der superlibrarian-Berechtigung) hat Zugriff auf diesen Bereich.
Weit verbreitete Klassifikationen sind:
ddc - Dewey Dezimalklassifikation
lcc - Klassifikation der Library of Congress
Wenn Sie sich während der Installation dafür entschieden haben, Klassifikationsquellen zu installieren, sehen Sie hier weitere Einträge:
ANSCR (Tonaufnahmen)
SuDOC Klassifikation
Universelle Dezimalklassifikation
Andere/Generische Klassifikation
Klassifikationsquellen hinzufügen/bearbeiten
Über die Schaltfläche ‚Neue Klassifikation‘ können Sie ihre eigene Klassifikationsquelle hinzufügen. Zum Bearbeiten benutzen Sie den Button ‚Bearbeiten‘.

Beim Anlegen oder Ändern:
Geben Sie einen Code ein. Der Code ist auf 10 Zeichen begrenzt und muss einmalig sein.
Bemerkung
Der Code kann nach dem ersten Speichern nicht mehr bearbeitet werden.
Geben Sie eine Beschreibung ein. Die Beschreibung wird in der Auswahlliste im Katalogisierungsmodul angezeigt.
Markieren Sie „Verwendete Klassifikation?“, wenn diese in den Auswahllisten angezeigt werden soll.
Wählen Sie die passende Sortierregel aus der Auswahlliste aus.
Wählen Sie die passende Umbruchregel aus der Auswahlliste aus.
Sortierregeln für Klassifikationen
Sortierregeln legen die Reihenfolge fest, in der Exemplare im Regal platziert werden. Sortierregeln normieren die Signaturen, um es Koha zu ermöglichen diese zu vergleichen und in die richtige Reihenfolge zu bringen.
Zum Beispiel: eine DDC-Signatur wie „636.8/07 SHAW“ wird für die Sortierung zu „636_800000000000000_07_SHAW“ normiert.
Die normierte Signatur wird in items.cn_sort oder biblioitems.cn_sort in der Datenbank gespeichert
Values that are preconfigured in Koha are:
Dewey
LCC
Allgemein
Sortierregeln werden den Klassifikationsquellen zugewiesen. Mit der Schaltfläche „Neue Sortierregel“ können Sie neue Sortierregeln anlegen. Zur Bearbeitung benutzen Sie die Schaltfläche „Bearbeiten“.
Beim Anlegen oder Ändern:
Geben Sie einen Code ein. Der Code ist auf 10 Zeichen begrenzt und muss einmalig sein.
Bemerkung
Der Code kann nach dem ersten Speichern nicht mehr bearbeitet werden.
Geben Sie eine Beschreibung ein. Die Beschreibung wird in der Auwahlliste beim Anlegen und Bearbeiten von Klassifikationen verwendet.
Wählen Sie eine passende Ablageroutine - Dewey, Allgemein oder LCC
Die Sortierregel für DDC generiert die Sortierform der Signatur anhand der nachfolgenden Regeln:
Fügt Klassifikations- und Exemplarteile zusammen.
Konvertiert zu Großbuchstaben.
Entfernt alle Leerzeichen und Schrägstriche (/)
Trennt das alphabetische Präfix von der restlichen Signatur
Teilt auf in mehrere Teile anhand von Leerzeichen und Punkten.
Belässt die erste Zahlengruppe, wie sie ist.
Konvertiert die zweite Zahlengruppe zu einer Gruppe mit 15 Zeichen, indem Nullen vorangestellt werden.
Konvertiert jedes Leerzeichen zu einem Unterstrich.
Entfernt alle verbliebenen nicht-alphabetischen und nicht-numerischen Zeichen bis auf Unterstriche.
Die generische Sortierregel generiert die Sortierform der Signatur anhand der nachfolgenden Regeln:
Fügt Klassifikations- und Exemplarteile zusammen.
Entfernt alle führenden oder nachfolgenden Leerzeichen.
Konvertiert jedes Leerzeichen zu einem Unterstrich.
Konvertiert zu Großbuchstaben.
Entfernt alle nicht-alphabetischen und nicht-numerischen Zeichen bis auf Unterstriche.
Die Sortierregel für LCC generiert die Sortierform der Signatur anhand der nachfolgenden Regeln:
Umbruchregeln für Signaturen
Umbruchregeln legen fest, wie Signaturen für den Druck auf Rückenschilder aufgeteilt werden.
Bemerkung
Umbruchregeln werden nur dann verwendet, wenn im Layout festgelegt wurde, dass die Signaturen umgebrochen werden sollen.
Beispiel: eine DDC-Signatur wie „636.8/07 SHAW“ wird zu:
636.807
SHAW
sobald sie auf ein Etikett gedruckt wird.
Values that are preconfigured in Koha are:
Dewey
LCC
Allgemein
Umbruchregeln werden den Klassifikationsquellen zugewiesen. Mit der Schaltfläche „Neue Umbruchregel“ können Sie neue Umbruchregeln anlegen. Zur Bearbeitung benutzen Sie die Schaltfläche „Bearbeiten“.
Beim Anlegen oder Ändern:
Geben Sie einen Code ein. Der Code ist auf 10 Zeichen begrenzt und muss einmalig sein.
Bemerkung
Der Code kann nach dem ersten Speichern nicht mehr bearbeitet werden.
Geben Sie eine Beschreibung ein. Die Beschreibung wird in der Auwahlliste beim Anlegen und Bearbeiten von Klassifikationen verwendet.
Wählen Sie die passende Umbruchregel - DDC, Generisch, LCC oder Definition über RegEx
Die Umbruchregel für DDC nimmt die dreistellige Ziffernfolge und das Dezimal auf eine Zeile mit den anderen Teilen (Cutter, Präfix, etc.) jeweils auf einer eigenen Zeile (normalerweise getrennt nach Leerzeichen).
Die generische Umbruchregel teilt nach Leerzeichen auf.
Die Umbruchregel für LCC gibt jede Komponente auf einer separaten Zeile aus.
Die Umbruchregel mit RegEx erlaubt es benutzerdefinierte Umbruchregeln anzulegen.
Einige Beispiele für RegEx-Umbruchregeln:
Split on spaces:
s/\s/\n/g
Split on equal signs (=):
s/(\s?=)/\n=/g
Split on forward slashes (/):
s/(\s?\/)/\n/g
Remove first split if call number starts with J or K:
s/^(J|K)\n/$1 /
Cut after 9 characters:
s/(^.{9})/$1\n/
Es ist möglich, mehrere Umbruchanweisungen mit RegEx zu definieren, indem man auf den Link „Neu“ unter dem Eingabefeld klickt.
Beispiel: Wenn Sie nach 9 Zeichen UND nach Leerzeichen umbrechen möchten, können Sie beide Anweisungen angeben und die Signatur „971.42805092 C669r“ wird so umgebrochen
971.42805
092
C669r
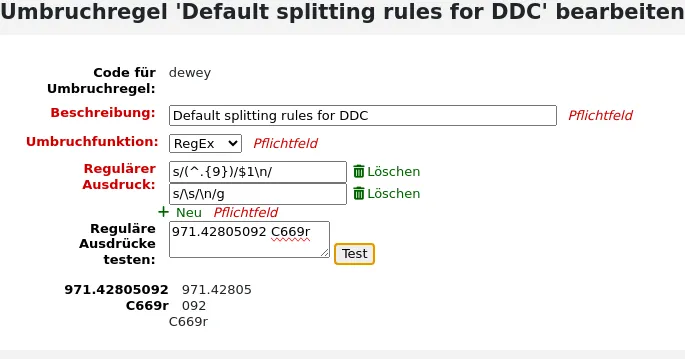
Datensatzabgleichregeln
Abgleichregeln werden angewendet, wenn MARC-Datensätze nach Koha importiert werden.
Pfad in Koha: Mehr > Administration > Katalog > Datensatzabgleichregeln
Bemerkung
Nur Bibliothekspersonal mit der Berechtigung manage_matching_rules (oder der superlibrarian-Berechtigung) hat Zugriff auf diesen Bereich.
Die Regeln, die Sie hier festlegen, werden beim Zwischenspeichern von MARC-Datensätzen für den Import angewandt.
Es ist wichtig den Unterschied zwischen ‚Prüfpunkten‘ und ‚Prüfchecks‘ zu verstehen, bevor eine neue Abgleichsregel in Koha hinzugefügt wird.
Prüfpunkte sind das Kriterium für die Übereinstimmung eines eingehenden Datensatzes mit einem bereits existierenden MARC-Datensatz in Ihrem Katalog. Hierbei kann es für eine Importregel mehrere Prüfpunkte geben, jeder mit einer eigenen Punktzahl. Ein eingehender Datensatz wird mit dem bereits bestehenden Datensatz verglichen (ein Datensatz nach dem anderen) und bekommt einen Treffer für jeden Prüfpunkt. Wenn die Gesamtpunktzahl der Prüfpunkte die festgelegte Schwelle für die Abgleichsregel erreicht oder darüber hinausgeht, geht Koha von einer guten Übereinstimmung aus und importiert/überlagert gemäß Ihren Vorgaben. Wichtig ist hier, die Summe der Prüfpunkte zu beachten. Stellen Sie sicher, dass die Summe Ihrer gewünschten Übereinstimmungen den Wert für eine erfolgreiche Übereinstimmung erreicht.
Beispiel:
Gesamtpunktzahl: 1000
Prüfpunkt Feld 020$a 1000
Prüfpunkt Feld 022$a 1000
Prüfpunkt Feld 245$a 500
Prüfpunkt Feld 100$a 100
Im oberen Beispiel führt eine Übereinstimmung entweder von Feld 020$a oder Feld 022$a zu einer erfolgreichen Übereinstimmung. Ein Match im Feld Titel 245$a und Feld Autor 100$a (und nicht von Feld 020$a oder 022$a) ergibt nur 600 und führt nicht zu einer Übereinstimmung. Und ein Match im Feld 020$a und 245$a ergibt 1500 und während dies eine erfolgreiche Übereinstimmung ergibt, sind die zusätzlichen 500 Punkte für das Titelfeld 245$a überflüssig. Das heisst, der eingehende Datensatz, der erfolgreich auf 020$a gematcht wurde benötigt keine Übereinstimmung für das Feld 245$a. Wenn Sie einen Treffer von 500 auf das Feld 100$a festlegen, wird der Match auf die Felder 245$a und 100$a eine erfolgreiche Übereinstimmung ergeben (Summe 1000) selbst, wenn das 020$a Feld keine Übereinstimmung ergibt.
Übereinstimmungsprüfungen werden gewöhnlich nicht für Importregeln verwendet. Trotzdem können Sie für bestimmte Zwecke dienlich sein, um Datensätze zu matchen. Erstens können Übereinstimmungsprüfungen anstelle eines Prüfpunktes als Übereinstimmungskriterium dienen, wenn Ihre Indexe veraltet sind. (Wenn Sie fürchten, dass Ihre Indexe veraltet sind, wäre der Neuaufbau Ihrer Indexe eine gute Idee, um dieses Problem zu lösen). Zweitens ist die Übereinstimmungsprüfung ein doppelter Check oder ein ‚Veto‘ für Ihre Abgleichsregel. Zum Beispiel für eine Abgleichsregel wie unten:
Gesamtpunktzahl: 1000
Prüfpunkt Feld 020$a 1000
Übereinstimmungsprüfung für 245$a
Koha prüft zuerst Tag/Unterfeld 020$a, ob der eingehende Datensatz mit einem existierenden Datensatz übereinstimmt. Wenn ja, wird eine Übereinstimmungsprüfung durchgeführt und überprüft sofort den Wert in 245$a des eingehenden Datensatzes. Danach vergleicht Koha diesen mit dem Feld 245$a des bereits bestehenden Datensatzes in Ihrem Katalog. Stimmen die Angaben in Feld 245$a überein, geht Koha davon aus, dass der Match erfolgreich war. Stimmen die Angaben in Feld 245$a nicht überein, dann schließt Koha daraus, dass die Datensätze keine Übereinstimmung haben. Die Übereinstimmungsprüfung kann ein nützliches Werkzeug für die Bestätigung echter Matches sein.
Wenn Sie Abgleichsregeln für Ihre Normdatensätze erstellen, müssen Sie folgende Indexe verwenden:
Indexname |
MARC Tag |
|---|---|
LC-Ausweisnummer |
010$a |
Personenname |
100$a |
Körperschaftsname |
110$a |
Meeting-name |
111$a |
Einheitstitel |
130$a |
Zeitschlagwort |
148$a |
Schlagwort - Sache |
150$a |
Name-geographisch |
151$a |
Term-Gattung-Form |
155$a |
Tabelle: Normdaten Indexe
Datensatzabgleichregeln hinzufügen
Um eine neue Abgleichregel anzulegen:
Klicken Sie auf ‚Neue Datensatzabgleichregel‘
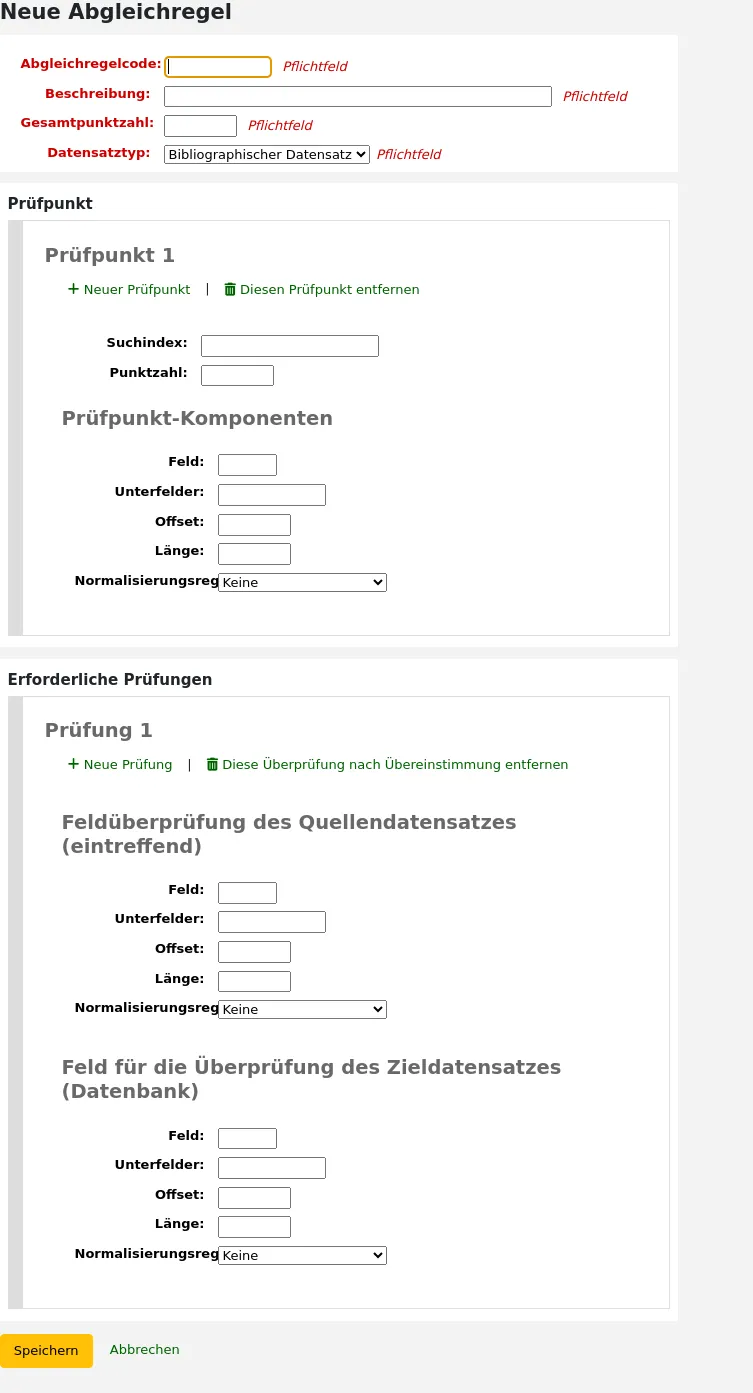
Wählen Sie einen eindeutigen Namen und geben Sie ihn in das Feld ‚Abgleichregelcode‘ ein
Die „Beschreibung“ ist beliebig, sollte aber für Sie eindeutig sein
‚Punktzahl‘ - Die Gesamtanzahl von ‚Punkten‘, die ein Titel bekommen muss, um als ‚übereinstimmend‘ gewertet zu werden
‚Datensatztyp‘ ist der Importtyp, für den diese Regel gelten soll-entweder Normdatensatz oder bibliographischer Datensatz
Prüfpunkte werden festgelegt, um zu definieren, welche Felder übereinstimmen sollen
Der „Suchindex“ kann durch einen Blick in die Indexkonfiguration Ihres Systems ermittelt werden. Für Zebra finden Sie die richtigen Indexnamen in der Datei ccl.properties. Ebenso können finden Sie hilfreiche Informationen in diesem Handbuch im Kapitel Koha Suchindizes.
„Punktzahl“ - Die Anzahl von „Punkten“, die eine Übereinstimmung mit diesem Feld wert ist. Wenn die Summe der einzelnen Punktezahlen größer als die Gesamtpunktzahl ist, stimmt der importierte Titel mit einem vorhandenen Datensatz überein.
Geben Sie das MARC-Feld für den Abgleich bei „Feld“ an.
Geben Sie das MARC-Unterfeld an, mit dem Sie abgleichen möchten, im Feld „Unterfelder“ an. Wenn Sie mit Kontrollfeldern wie 001 abgleichen, können Sie das Feld frei lassen.
„Offset“ - Für die Verwendung mit den Kontrollfeldern, 001-009
„Länge“ - Bei Verwendung der Kontrollfelder, 001-009
Im Moment gibt es mehrere Optionen für „Normalisierungsregeln“:
Keine - es erfolgt keine Normalisierung
Leerzeichen entfernen
Großbuchstaben
Kleinbuchstaben
Altes Verhalten - diese Option wurde eingerichtet, um das Verhalten vor der Einführung der weiteren Normalisierungsregeln zu erhalten.
ISBN - mit dieser Option wird der Abgleich mit ISBNs verbessert. Wenn die ISBN-Felder des eingehenden Datensatz zusätzlichen Text, z.B. „9780670026623 (säurefreies Papier)“, enthalten, werden die ISBN trotzdem gematcht.
„Erforderliche Prüfung“ - Während die Prüfpunkte mit dem Suchindex arbeiten, wird bei den Prüfungen direkt auf die Datensätze zugegriffen und diese können als Ersatz für die Prüfpunkte oder als zusätzliche Kriterien beim Abgleich verwendet werden.
Beispiel für eine Datensatzabgleichregel für einen bibliographischen Datensatz: Kontrollnummer
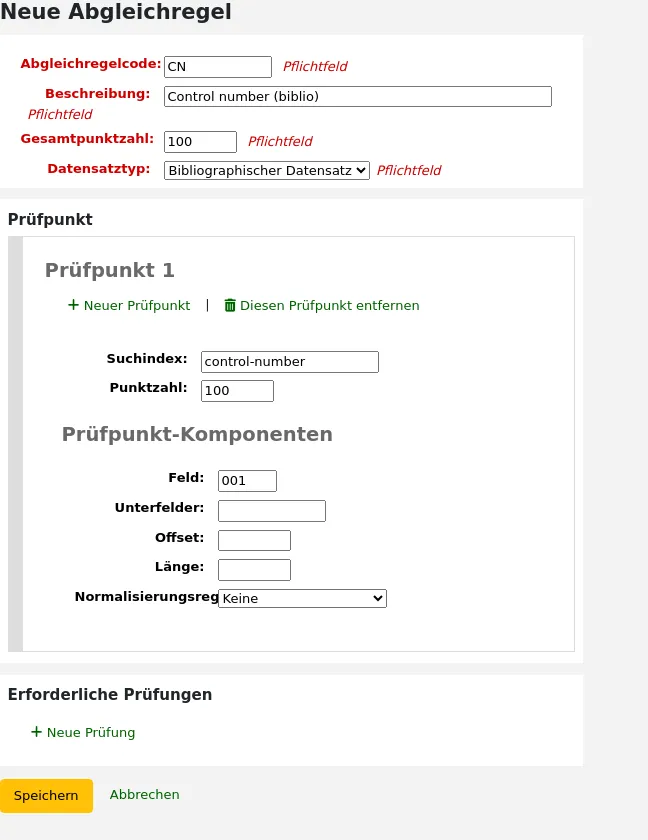
Gesamtpunktzahl: 100
Datensatztyp: Bibliographischer Datensatz
Bemerkung
Wenn Sie eine Regel für die Übereinstimmung von 001 in einem Normdatensatz erstellen möchten, müssen Sie eine zweite Regel erstellen und all diese Werte wiederholen und nur den Datensatztyp auf ‚Normdatensatz‘ ändern.
Punkte (nur diese):
Suchindex: control-number
Punktezahl: 100
Tag: 001
Bemerkung
In MARC21 ist dieses Feld für die Kontrollnummer bestimmt, die von der Organisation vergeben wird, die den Datensatz anlegt, gebraucht oder weitergibt.
Unterfelder: leer
Offset: 0 oder leer
Länge: 0 oder leer
Normalisierungsregel: Keine
Erforderliche Prüfungen: keine (klicken Sie auf „Diese Überprüfung nach Übereinstimmung entfernen“)
Datensatzquellen
Version
Dieser Bereich wurde in Kohaversion 24.05 hinzugefügt.
Datensatzquellen werden verwendet, um anzugeben, woher die Datensätze stammen und um optional zu verhindern, dass Datensätze aus bestimmten Quellen in Koha bearbeitet werden.
This is particularly useful in instances where records are cataloged in another system and pushed to Koha. Sometimes, in those cases, it’s best to edit the records in the source system rather than in Koha.
Bemerkung
Nur Bibliothekspersonal mit der Berechtigung manage_record_sources (oder der superlibrarian-Berechtigung) haben Zugriff auf diesen Bereich.
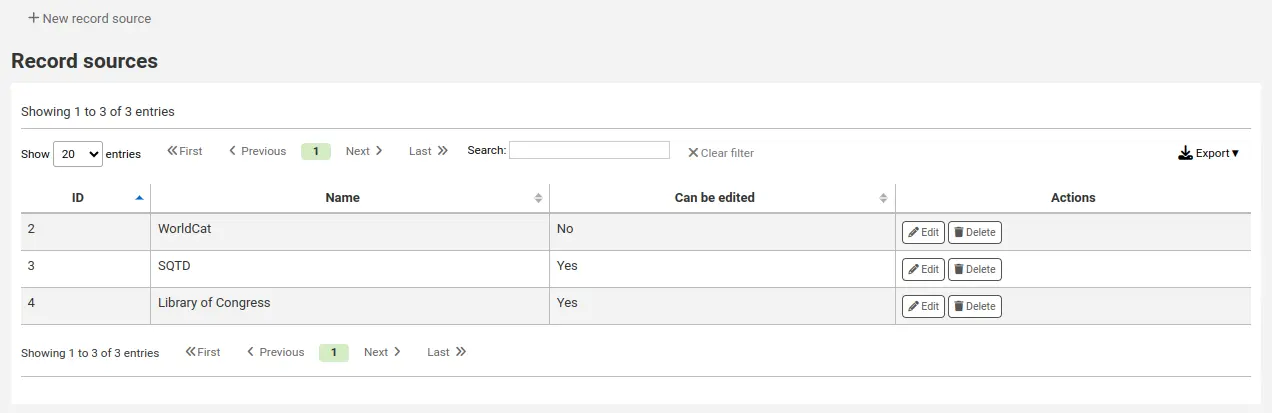
Eine Datensatzquelle hinzufügen
Um eine Datensatzquelle hinzuzufügen,
Klicken Sie auf „Neue Datensatzquelle“
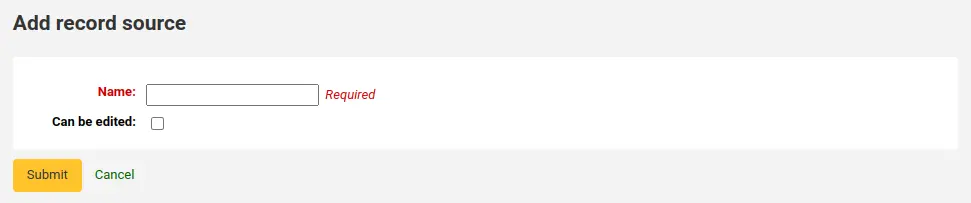
Füllen Sie das Formular aus
Name: Geben Sie den Namen der Quelle ein
Kann bearbeitet werden: Wenn die Checkbox markiert ist, können Datensätze aus dieser Quelle in Koha bearbeitet werden. Ist die Checkbox nicht markiert, können nur Mitarbeiter*innen mit der Berechtigung edit_locked_records die Datensätze bearbeiten.
Klicken Sie auf ‚Bestätigen‘
Eine Datensatzquelle bearbeiten
Um eine Datensatzquelle zu bearbeiten, klicken Sie die Schaltfläche „Bearbeiten“ neben der Quelle.
Eine Datensatzquelle löschen
Um eine Datensatzquelle zu löschen, klicken Sie auf die Schaltfläche „Löschen“ neben der Quelle und bestätigen Sie.
Datensatzüberlagerungsregeln
Datensatzüberlagerungsregeln erlauben es, Regeln festzulegen, wie importierte MARC-Datensätze auf Feld- und Kontextbasis überlagert werden sollen, wenn ein MARC-Datensatz aktualisiert wird.
Bemerkung
Nur Bibliothekspersonal mit der Berechtigung manage_marc_overlay_rules (oder der superlibrarian- Berechtigung) hat Zugriff auf diesen Bereich.
Kontexte
Verständnisentwicklung für das Konzept der Zusammenhänge.
Kontexte werden durch „Modul“ und „Filter“ definiert, was getrennte Regelsätze für verschiedene Kontexte ermöglicht.
Wenn Sie verschiedene Filterwerte für diese Module festlegen, werden die Regeln nur angewendet, wenn der Filterwert für ein bestimmtes Modul übereinstimmt. Ein Platzhalter „*“ kann verwendet werden, um alle möglichen Filterwerte zu finden.
Es gibt drei verschiedene Kontextmodule:
- Benutzername
Allows for defining rules that will be applied if the currently logged in user’s borrowernumber matches the filter condition.
- Benutzertyp
Ermöglicht die Definition von Regeln, die angewendet werden, wenn der Benutzertyp des/der aktuell angemeldeten Benutzer*in mit der Filterbedingung übereinstimmt.
- Quelle
Ermöglicht die Definition von Regeln, die angewendet werden, wenn der Datensatz in einem bestimmten Bereich von Koha aktualisiert wird. Die folgenden Aktualisierungsmethoden werden unterstützt:
Zwischengespeicherter MARC-Import
Z39.50
Dienstoberfläche
bulkmarcimport.pl
import_lexile.pl
Stapelbearbeitung von Datensätzen
Ein Kontext ist eigentlich nichts anderes als eine Kombination aus Modul und Filter. Jedes Mal, wenn ein Datensatz in Koha aktualisiert wird, wird ein Kontext festgelegt und die Filterwerte werden mit kontextabhängigen Werten gefüllt.
Examples of two different contexts are saving record in the staff client or the currently logged in user having a particular borrowernumber, for example „12“.
Diese beiden Kontexte werden wie folgt definiert:
Module: source, filter: intranet
Module: borrower, filter: 12
Es werden nur die Regeln eines Kontexts, d. h. einer Kombination aus Modul und Filter, angewendet. Wenn mehrere Kontexte übereinstimmen, werden sie nicht zusammengeführt.
Wenn wir die folgenden Regeln haben:
Module: source, filter: *, tag: 650, preset: Protect
Module: source, filter: *, tag: 500, preset: Protect
Module: borrower, filter: 12, tag: *, preset: Overwrite
Und wenn der Kontext der Datenaktualisierung, für die diese Regeln gelten, der folgende ist:
source => "intranet" (wildcard match)
borrower => 1 (no match)
Nur die ersten beiden Regeln werden angewandt.
Wenn stattdessen der Kontext der Regelbewertung wäre:
source => "intranet" (wildcard match)
borrower => 12 (an exact match, which is considered more specific than a wildcard match)
Nur die zweite Regel würde angewandt werden, obwohl die ersten beiden Regeln ebenfalls übereinstimmen, werden sie verworfen, da die Kontextübereinstimmung dieser Regel aufgrund des Platzhalters von geringerer Spezifität ist.
Die Kontextspezifität wird auf folgende Weise eingestuft:
Zunächst werden alle Regeln in Regelsätze gruppiert, die durch eine eindeutige Kombination aus Filter und Modul gekennzeichnet sind.
Wenn ein oder mehrere Kontexte eine Übereinstimmung mit einer Nicht-Wildcard-Filterbedingung aufweisen, wird der Regelsatz des Kontexts mit dem Modul mit der höchsten Spezifität ausgewählt. (Die Module sind oben in der Reihenfolge ihrer Spezifität aufgeführt).
Wird keine exakte Kontextübereinstimmung gefunden, wohl aber eine oder mehrere Wildcard-Übereinstimmungen, wird der Regelsatz des Kontexts mit dem Modul mit der höchsten Spezifität ausgewählt.
Wenn kein Kontext übereinstimmt, wird standardmäßig der ursprüngliche Datensatz mit dem eingehenden Datensatz überschrieben.
Regeln
Eine Regel besteht aus drei verschiedenen Teilen:
- Kontext
Ein Modul und ein Filter zum Abgleich wie oben beschrieben.
- Feld
Ein Feld-Tag-Ausdruck zur Festlegung, auf welche(s) Tag(s) die Regel angewendet werden soll. Es werden drei verschiedene Tag-Ausdrücke unterstützt:
Genaue Feldbezeichnung, z.B. „650“.
Ein regulärer Ausdruck, „6..“ zum Beispiel finden alle 6XX Felder.
Ein Platzhalter, „*“, der auf alle Tags passt
Wenn Regeln für einen bestimmten Kontext ausgewertet werden, wird die spezifischste Übereinstimmung ausgewählt. Die obigen Tag-Ausdrücke sind in der Reihenfolge ihrer Spezifität aufgeführt.
- Aktionen
Jede Regel definiert eine Reihe von Aktionen, die je nach Art der Aktualisierung ausgeführt werden. Es gibt vier Arten von Aktualisierungsereignissen: Hinzugefügt, Angehängt, Entfernt und Gelöscht. Für jedes Ereignis kann ausgewählt werden, ob die Aktualisierung durchgeführt oder übersprungen werden soll.
Durch das Aktivieren/Deaktivieren von Aktualisierungen dieser verschiedenen Ereignisse können 16 verschiedene Aktualisierungsverhaltensweisen definiert werden. Für die gängigsten/nützlichsten Kombinationen gibt es Voreinstellungen:
Voreinstellung |
Hinzugefügt |
Angehängt |
Entfernt |
Gelöscht |
|---|---|---|---|---|
Schütze |
Überspringen |
Überspringen |
Überspringen |
Überspringen |
Überschreibe |
Hinzufügen |
Anhängen |
Entfernen |
Löschen |
Neu |
Hinzufügen |
Überspringen |
Überspringen |
Überspringen |
Hinzufügen und anhängen |
Hinzufügen |
Anhängen |
Überspringen |
Überspringen |
Schütze vor Löschung |
Hinzufügen |
Anhängen |
Entfernen |
Löschen |
Schütze
Added: Skip, Appended: Skip, Removed: Skip, Deleted: Skip
„Schützen“ verhindert alle Aktualisierungen von übereinstimmenden Feldern und schützt sie vor dem Überschreiben.
Bei folgender Regel:
Module: source, filter: *, Tag: 650, Preset: Protect
Und der vorhandene und der importierte Datensatz:
100 1#$aTerrace, Vincent,$d1948-
650 #0$aTelevision serials$zUnited States$vCatalogs.
100 1#$aTerrace, Vincent,$d1948-
500 ##$aIncludes index.
650 #0$aTelevision pilot programs$zUnited States$vCatalogs.
behält das Feld 650 des Originaldatensatzes nach der Aktualisierung seinen ursprünglichen Wert bei (aber Feld 500 wird hinzugefügt, da das standardmäßige Verhalten, wenn keine Regel zutrifft, überschreiben ist):
100 1#$aTerrace, Vincent,$d1948-
500 ##$aIncludes index.
650 #0$aTelevision serials$zUnited States$vCatalogs.
Überschreibe
Added: Add, Appended: Append, Removed: Remove, Deleted: Delete
„Überschreiben“ erlaubt alle Aktualisierungen für übereinstimmende Felder.
Da das Standardverhalten das Überschreiben ist, wenn keine Regel übereinstimmt, ist das Hinzufügen einer Regel mit der Voreinstellung „Überschreiben“ nur dann sinnvoll, wenn es eine andere Regel mit einer geringeren Tag-Spezifität mit einem anderen Verhalten gibt, z. B. eine Wildcard-Tag-Regel.
Sind die folgenden beiden Regeln gegeben:
Module: source, filter: *, Tag: *, Preset: Protect
Module: source, filter: *, Tag: 650, Preset: Overwrite
Und der vorhandene und der importierte Datensatz:
500 ##$aIncludes index.
650 #0$aTelevision serials$zUnited States$vCatalogs.
Importierter Datensatz:
100 1#$aTerrace, Vincent,$d1948-
500 ##$aIncludes index.
650 #0$aTelevision pilot programs$zUnited States$vCatalogs.
Alle Felder des ursprünglichen Datensatzes werden geschützt, mit Ausnahme von Feld 650, und das Ergebnis sieht dann so aus:
500 ##$aIncludes index.
650 #0$aTelevision pilot programs$zUnited States$vCatalogs.
Neu
Added: Add, Appended: Skip, Removed: Skip, Deleted: Skip
„Neu“ lässt Aktualisierungen nur dann zu, wenn das eingehende Feld neu ist, d. h. wenn es im ursprünglichen Datensatz keine Felder mit diesem Tag gibt.
Bei folgender Regel:
Module: source, filter: *, Tag: 650, Preset: Add
Und der vorhandene und der importierte Datensatz:
100 1#$aTerrace, Vincent,$d1948-
650 #0$aTelevision serials$zUnited States$vCatalogs.
100 1#$aTerrace, Vincent,$d1948-
500 ##$aIncludes index.
650 #0$aTelevision pilot programs$zUnited States$vCatalogs.
Das Feld 650 im ursprünglichen Datensatz wird nicht durch das Feld 650 des importierten Datensatzes überschrieben, da der ursprüngliche Datensatz mindestens ein Feld 650 enthält. Feld 500 wird hinzugefügt, da die Standardregel das Überschreiben vorsieht. Der neue Datensatz ist folgender:
100 1#$aTerrace, Vincent,$d1948-
500 ##$aIncludes index.
650 #0$aTelevision serials$zUnited States$vCatalogs.
Wenn der ursprüngliche Datensatz jedoch so aussah:
100 1#$aTerrace, Vincent,$d1948-
Der entstehende Datensatz sieht so aus:
100 1#$aTerrace, Vincent,$d1948-
500 ##$aIncludes index.
650 #0$aTelevision pilot programs$zUnited States$vCatalogs.
Dies liegt daran, dass der ursprüngliche Datensatz keine Felder 650 enthielt, so dass das Hinzufügen dieser neuen Felder zulässig ist.
Hinzufügen und anhängen
Added: Add, Appended: Append, Removed: Skip, Deleted: Skip
Bei „Hinzufügen und Anhängen“ ist auch das Anhängen erlaubt, nicht aber das Entfernen oder Löschen.
Wenn wir also die folgende Regel vorliegen haben:
Module: source, filter: *, Tag: 650, Preset: Add and append
Und der vorhandene und der importierte Datensatz:
100 1#$aTerrace, Vincent,$d1948-
650 #0$aTelevision serials$zUnited States$vCatalogs.
100 1#$aTerrace, Vincent,$d1948-
500 ##$aIncludes index.
650 #0$aTelevision pilot programs$zUnited States$vCatalogs.
Der entstehende Datensatz sieht so aus:
100 1#$aTerrace, Vincent,$d1948-
500 ##$aIncludes index.
650 #0$aTelevision serials$zUnited States$vCatalogs.
650 #0$aTelevision pilot programs$zUnited States$vCatalogs.
Das „alte“ 650 Feld wurde nicht entfernt, da nur erlaubt wurde, neue Werte hinzuzufügen oder anzuhängen.
Würde stattdessen „Überschreiben“ verwendet, würde der resultierende Datensatz stattdessen lauten:
100 1#$aTerrace, Vincent,$d1948-
500 ##$aIncludes index.
650 #0$aTelevision pilot programs$zUnited States$vCatalogs.
wobei das Feld 650 des ursprünglichen Datensatzes entfernt wurde.
Schütze vor Löschung
Added: Add, Appended: Append, Removed: Remove, Deleted: Skip
„Vor Löschung schützen“ lässt alle Aktualisierungsvorgänge außer der Löschung zu. Eine Löschung liegt vor, wenn im eingehenden Datensatz keine Felder mit dem entsprechenden Tag vorhanden sind, so dass alle Felder mit diesem Tag aus dem ursprünglichen Datensatz entfernt werden würden.
Bei folgender Regel:
Module: source, filter: *, Tag: 650, Preset: Protect from deletion
Und der vorhandene und der importierte Datensatz:
100 1#$aTerrace, Vincent,$d1948-
650 #0$aTelevision serials$zUnited States$vCatalogs.
100 1#$aTerrace, Vincent,$d1948-
500 ##$aIncludes index.
650 #0$aTelevision pilot programs$zUnited States$vCatalogs.
Der entstehende Datensatz sieht so aus:
100 1#$aTerrace, Vincent,$d1948-
500 ##$aIncludes index.
650 #0$aTelevision pilot programs$zUnited States$vCatalogs.
Wenn hingegen der ursprüngliche Datensatz so aussah:
100 1#$aTerrace, Vincent,$d1948-
500 ##$aIncludes index.
In diesem Fall wäre die Löschung von 650 nicht zulässig und der Wert des Feldes im ursprünglichen Datensatz wäre geschützt. Der resultierende Datensatz würde stattdessen lauten:
100 1#$aTerrace, Vincent,$d1948-
500 ##$aIncludes index.
650 #0$aTelevision serials$zUnited States$vCatalogs.
Benutzerdefinierte Voreinstellungen
Um mit benutzerdefinierten Voreinstellungen zu arbeiten, ist ein umfassenderes Verständnis der Aktualisierungsereignisse erforderlich:
- Hinzugefügt
Bei einer Abgleichsregel mit einem Tag wird die für das Ereignis „Hinzugefügt“ konfigurierte Aktion auf neue Felder im eingehenden Datensatz angewendet, wenn der ursprüngliche Datensatz keine Felder mit diesem Tag enthält. Wenn die Aktion „Hinzufügen“ lautet, werden sie dem ursprünglichen Datensatz hinzugefügt, wenn „Überspringen“, werden sie verworfen.
- Angehängt
Wenn die beiden Datensätze gemeinsame Felder mit dem Regel-Tag haben, d. h. ein oder mehrere Felder mit identischen Unterfeld- und Identifikatorwerten, wird die für das Ereignis „Angehängt“ konfigurierte Aktion auf Felder angewendet, die im eingehenden Datensatz, aber nicht im ursprünglichen Datensatz gefunden wurden. Wenn die Aktion „Anhängen“ lautet, werden sie dem ursprünglichen Datensatz hinzugefügt, wenn „Überspringen“, werden sie verworfen.
- Entfernt
Wenn die beiden Datensätze gemeinsame Felder mit dem Regel-Tag haben, wird die für die Aktion „Entfernt“ konfigurierte Aktion auf Felder angewandt, die im ursprünglichen Datensatz, aber nicht im eingehenden Datensatz gefunden wurden. Bei der Aktion „Entfernen“ werden sie aus dem ursprünglichen Datensatz entfernt, bei „Überspringen“ werden sie beibehalten.
- Gelöscht
Wenn der ursprüngliche Datensatz Felder mit dem Regel-Tag enthält, im eingehenden Datensatz aber keine Felder mit diesem Tag gefunden werden, wird die für das Ereignis „Gelöscht“ konfigurierte Aktion auf die Felder im eingehenden Datensatz angewendet. Wenn die Aktion „Löschen“ lautet, werden die Felder aus dem ursprünglichen Datensatz entfernt, wenn „Überspringen“, bleiben sie erhalten.
OAI-Set-Konfiguration
Auf dieser Seite können Sie OAI-PMH-sets anlegen, bearbeiten und löschen
Bemerkung
Nur Bibliothekspersonal mit der Berechtigung manage_oai_sets (oder der superlibrarian-Berechtigung) hat Zugriff auf diesen Bereich.
Neues Set
Neues Set erstellen:
‚Neues OAI-Set‘ anklicken
Füllen Sie die Pflichtfelder ‚setSpec‘ und ‚setName‘ aus
Dann kann dem Set eine Beschreibung hinzugefügt werden. Klicken Sie hierzu auf ‚Beschreibung hinzufügen‘ und füllen Sie die angezeigte Textbox aus. Sie können so viele Beschreibungen hinzufügen, wie Sie möchten.
Klicken Sie auf ‚Speichern‘
Bearbeiten/Löschen eines Set
Klicken Sie den Link ‚Bearbeiten‘ in der Zeile für des Sets, das Sie bearbeiten möchten. Es öffnet sich ein Formular ähnlich wie zur Erfassung von Sets, wo Sie setSpec, setName und Beschreibung bearbeiten können.
Um ein Set zu löschen, klicken Sie ‚Löschen‘ in der entsprechenden Zeile.
Mappings definieren
Hier können Sie konfigurieren nach welchen Kriterien ein Set erstellt wird (welche Datensätze zum Set gehören), indem Sie Mappings definieren. Mappings sind eine Liste von Bedingungen, die der Datensatz erfüllen muss.
Alle Felder für ‚Feld‘, ‚Unterfeld‘ und ‚Wert‘ müssen ausgefüllt werden. Beispiel: Wenn im Set alle Datensätze enthalten sein sollen, die in Feld 999$9 mit Wert ‚XXX‘ haben, muss ‚Feld‘ gleich 999, ‚Unterfeld‘ gleich 9 und ‚Wert‘ gleich XXX eingetragen werden.
Wenn Sie eine weitere Bedingung hinzufügen möchten, klicken Sie auf die Schaltfläche „Hinzufügen“ und wiederholen Sie Schritt 1. Sie können zwischen den Booleschen Operatoren „und“ und „oder“ für die Verknüpfung der Bedingungen auswählen.
Klicken Sie auf ‚Speichern‘
Um eine Bedingung zu löschen, kann entweder das ‚Feld‘ das ‚Unterfeld‘ oder der ‚Wert‘ frei gelassen und gespeichert werden.
Hinweis
Die Bedingung trifft nur zu, wenn der Wert des Unterfeldes exakt dem definierten ‚Wert‘ entspricht. Ein Datensatz mit 999$9 = ‚XXX YYY‘ gehört nicht zu einem Set, dessen Bedingung 999$9 = ‚XXX‘ ist.
Groß- und Kleinschreibung ist relevant: ein Datensatz mit 999$9 = ‚xxx‘ wird nicht einem Set zugerechnet, für welches die Bedingung 999$9 = ‚XXX‘ ist.
Neues Set
Nachdem alle Sets konfiguriert wurden, müssen die Sets aufgebaut werden. Zu diesem Zweck muss das Skript misc/migration_tools/build_oai_sets.pl gestartet werden.
Exemplarsuchfelder
Get there: More > Administration > Catalog > Item search fields
This section allows you to add custom search fields to the item search option in the staff interface.
Bemerkung
Nur Bibliothekspersonal mit der Berechtigung manage_item_search_fields (oder der superlibrarian-Berechtigung) hat Zugriff auf diesen Bereich.
Adding a custom item search field
Um einen neuen Suchbegriff hinzuzufügen, klicken Sie auf die Schaltfläche ‚Neues Suchfeld‘.
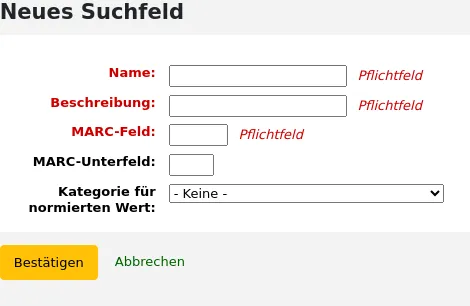
Name: enter the search field’s name
Von hier aus können Sie der Exemplarsuche in der Dienstoberfläche benutzerdefinierte Suchfelder hinzufügen
MARC field: enter the MARC field number to search in; the MARC field will also appear on the item search page
MARC subfield: enter the MARC subfield code to search in
Authorized value category: if needed, choose an authorized value category for this search field; this will effectively turn this search field in a dropdown menu instead of a free text field
Klicken Sie auf ‚Absenden‘.
Sobald das neue Feld hinzugefügt wurde, wird es in der Exemplarsuche in der Auswahlliste, die mit „Barcode“ beginnt, angezeigt.
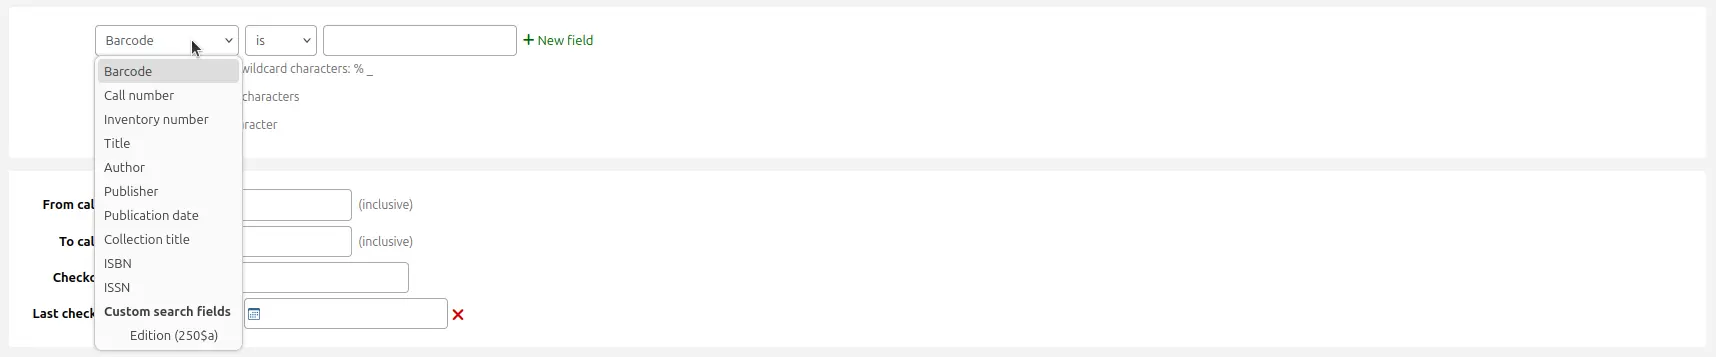
Editing a custom item search field
To edit an item search field, click the ‚Edit‘ button next to the search field in the table.
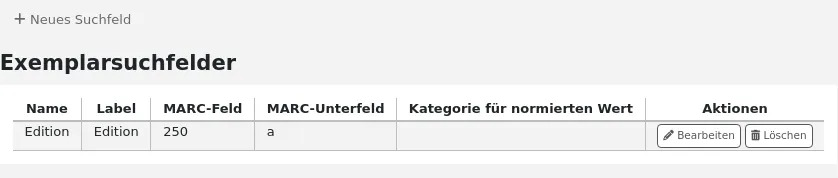
Nehmen Sie die Änderungen vor und klicken Sie auf „Bestätigen“.
Deleting a custom item search field
To delete an item search field, click the ‚Delete‘ button next to the search field in the table and confirm the deletion.
Suchfilter
Suchfilter sind benutzerdefinierte Suchen oder Filter, die auf Suchergebnisse angewendet werden können.
Diese Funktionalität wird mit dem Systemparameter SavedSearchFilters aktiviert.
Bemerkung
Dieser Bereich ist nur sichtbar, wenn der Systemparameter SavedSearchFilters aktiviert ist.
Bemerkung
Nur Bibliothekspersonal mit der Berechtigung manage_search_filters (oder der superlibrarian-Berechtigung) hat Zugriff auf diesen Bereich.
Suchfilter werden durch Durchsuchen des Katalogs über die Dienstoberfläche hinzugefügt.
Auf dieser Seite können Sie vorhandene Suchfilter verwalten.

Sie können Änderungen an jedem Suchfilter vornehmen, indem Sie auf die Aktionsschaltflächen auf der rechten Seite klicken.
Filter bearbeiten: ändern des Filternamens und seiner Verfügbarkeit im OPAC bzw. in der Dienstoberfläche
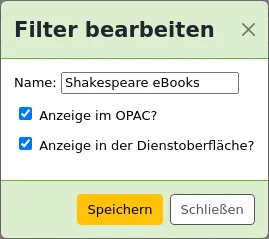
Suche bearbeiten: wenn Sie auf diese Schaltfläche klicken, gelangen Sie zum Formular „Erweiterte Suche“, in dem der Filter bereits angewendet wurde. Sie können die Suchparameter ändern und anschließend oben auf der Seite auf „Filter speichern“ klicken.
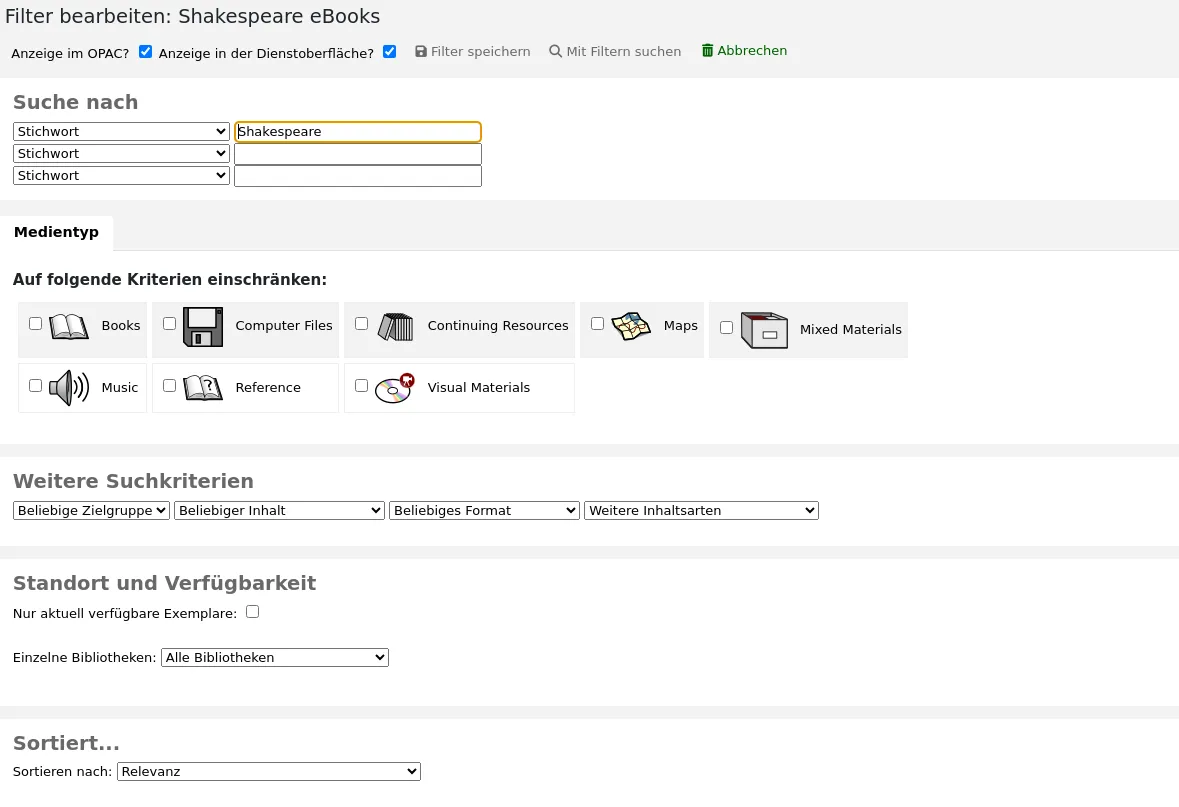
Löschen: Wenn Sie auf diese Schaltfläche klicken, wird der Filter gelöscht.
Warnung
Das Löschen eines Suchfilters erfordert keine Bestätigung. Sobald Sie auf „Löschen“ klicken, wird der Filter sofort gelöscht.
Bemerkung
Search filters can be used as predefined search URLs that you can use on your website or in HTML customizations.
Suchfilter sind über relativ kurze Links zugänglich.
<OPACBaseURL>/cgi-bin/koha/opac-search.pl?limit=search_filter:<Id of filter>
Verwenden Sie diese URL überall, um direkt auf die Suche zu verweisen.
Suchmaschinenkonfiguration
Sobald Sie den Systemparameter SearchEngine auf Elasticsearch umgestellt haben, wird Ihnen ein Link zur Suchmaschinenkonfiguration unter „Katalog“ im Administrationsmodul angeboten. Hier können Sie die Indizes, Facetten und deren Mapping auf MARC-Felder und -Unterfelder verwalten.
Bemerkung
Nur Bibliothekspersonal mit der Berechtigung manage_search_engine_config (oder der superlibrarian-Berechtigung) hat Zugriff auf diesen Bereich.
Die Seite ist in drei Reiter unterteilt: Suchfelder, Bibliographische Datensätze und Normdaten.
Wichtig
Wenn Sie auf dieser Seite etwas ändern, müssen Sie Ihre Datensätze komplett neu indizieren, da sonst nur die nach der Änderung hinzugefügten oder bearbeiteten Datensätze betroffen sind.
Gefahr
Alle über die Oberfläche vorgenommenen Änderungen gehen verloren, wenn Sie auf „Mappings zurücksetzen“ klicken oder wenn der Befehl „Neu erstellen“ mit dem Parameter --reset oder -r ausgeführt wird. Die Schaltfläche „Mappings zurücksetzen“ und der Parameter --reset setzen die Einstellungen auf die Standardwerte zurück.
Suchfelder
Der Reiter Suchfelder auf der Seite Suchmaschinenkonfiguration zeigt alle Suchfelder, die von Elasticsearch in Koha verwendet werden.
Die Tabelle zeigt:
Name: die Bezeichnung des Suchfeldes, wie in der Mapping-Datei definiert.
Aliases: some fields have aliases, for example, „author“ can also be „au“. These are hard-coded and cannot be changed.
Label: Einige Felder haben Bezeichnungen, die sich von ihrem Namen unterscheiden. Diese werden als Facettenüberschrift verwendet, wenn das Feld als Facette verwendet wird.
Typ: Der Typ beeinflusst, wie die Daten gespeichert und durchsucht werden.
Boolescher Wert: 0 / 1 (nein / ja).
Signatur: eine von der Klassifikationsquelle beeinflusste Signatur.
Datum: ein im ISO-Format gespeichertes Datum.
Geopunkt: ein Wert für die geografische Breite und Länge.
Version
Der Typ Geopunkt wurde in Koha-Version 24.05 hinzugefügt.
ISBN: ISBN-Standardnummer.
Nummer: eine Nummer.
Standardnr.: eine Nummer.
String: eine einfache Zeichenkette.
Summe: eine Summe von Werten.
Jahr: eine vierstellige Jahreszahl.
Gewicht: ein positiver numerischer Wert, der diesem Suchfeld zugewiesen wird, um es bei einer einfachen Suche „wichtiger“ zu machen. Je höher der Wert, desto „wichtiger“ ist dieses Feld bei der Relevanzsortierung.
Bemerkung
Die gewichtete Suche funktioniert nur bei der bibliografischen Suche, nicht bei der Suche nach Normdaten. Sie funktioniert auch nur für die einfache Suche, es sei denn, die Option „Feldgewichtungen auf die Suche anwenden“ in der erweiterten Suche ist aktiviert.
Suchbar: ob dieses Feld in der Dienstoberfläche oder im OPAC verwendet wird.
Suchfelder hinzufügen
Version
Die Möglichkeit, Suchfelder hinzuzufügen, wurde in Koha-Version 24.05 hinzugefügt.
Dieser Tabelle können Suchfelder hinzugefügt werden. Fügen Sie die Suchfeldinformationen in der letzten Zeile der Tabelle ein und klicken Sie auf die Schaltfläche „Hinzufügen“ am Ende der Zeile.
Suchfelder löschen
Version
Die Möglichkeit, hinzugefügte Suchfelder zu löschen, wurde in Koha-Version 24.05 hinzugefügt.
Manuell hinzugefügte Suchfelder können gelöscht werden. Die Standard-Suchfelder können nicht gelöscht werden, da sie für die korrekte Funktion von Koha notwendig sind.
Um ein Suchfeld zu löschen, klicken Sie auf die Schaltfläche „Löschen“ am Ende der Zeile.
Bibliographische Datensätze
Der Reiter Bibliographische Datensätze auf der Seite Suchmaschinenkonfiguration zeigt die MARC-Mappings für jedes von Elasticsearch in Koha verwendete Suchfeld.
Bemerkung
Die Standard-Zuordnungen sind im Bereich Elasticsearch-Indizes des Kapitels Suchen beschrieben.
Die Tabelle zeigt:
Suchfeld: das entsprechende Suchfeld (wie im Reiter Suchfelder definiert). Suchfelder können wiederholt werden, um mehrere MARC-Felder einzubeziehen.
Sortierbar: gibt an, ob dieses Mapping bei der Sortierung für dieses Suchfeld verwendet werden soll. Zum Beispiel hat der Titelindex in MARC21 mehrere verschiedene Titelfelder, aber nur das Feld 245 wird für die Sortierung verwendet.
Facettierbar: gibt an, ob dieses Mapping in den Facetten verwendet werden kann.
Version
Die Facetten-Konfiguration wurde in Koha-Version 24.05 hinzugefügt.
Beeinflussbar: gibt an, ob dieses Mapping in der Browse-Suche verwendet wird.
Suchbar: gibt an, ob dieses Mapping für die Suche verwendet wird.
Filter: beeinflusst die Art und Weise, wie Werte indiziert werden.
Interpunktion: Entfernt Satzzeichen.
Keine: die Werte werden so indiziert, wie sie sind.
Version
Filter wurden in Koha-Version 23.11 hinzugefügt.
Mapping: gibt das MARC-Feld an, das diesem Suchfeld zugeordnet ist.
Bemerkung
Mappings können ganze Felder oder nur bestimmte Teilfelder umfassen. Im Falle von Teilfeldern können diese einzeln oder als ein einziger Wert indiziert werden.
Zum Beispiel:
520indexiert den gesamten Inhalt des Feldes 520. Jedes Teilfeld des Feldes wird einzeln indiziert.100aindexiert nur den Inhalt von 100$a.020azindexiert nur den Inhalt der Teilfelder $a und $z des Feldes 020. Sie werden einzeln indiziert.245(abp)indexiert nur den Inhalt der Unterfelder $a, $b und $p von Feld 245. Sie werden als ein Eintrag indexiert.
Für Felder mit fester Länge lautet die Syntax wie folgt:
leader_/6indexiert die Position 6 des Leaders (000).007_/0indexiert Position 0 des Feldes 007.008_/39indexiert Position 39 des Feldes 008.008_/15-17indexiert die Positionen 15 bis 17 des Feldes 008 als eine Einheit.
Mappings hinzufügen
Um ein Mapping hinzuzufügen, fügen Sie die Informationen in die letzte Zeile der Tabelle ein und klicken auf die Schaltfläche „Hinzufügen“ am Ende der Zeile.
Wichtig
Denken Sie daran, dass Sie, wenn Sie etwas auf dieser Seite ändern, Ihre Datensätze komplett neu indexieren müssen, da sonst nur Datensätze betroffen sind, die nach der Änderung hinzugefügt oder bearbeitet wurden.
Gefahr
Alle über die Oberfläche vorgenommenen Änderungen gehen verloren, wenn Sie auf „Mappings zurücksetzen“ klicken oder wenn der Befehl „Neu erstellen“ mit dem Parameter --reset oder -r ausgeführt wird. Die Schaltfläche „Mappings zurücksetzen“ und der Parameter --reset setzen die Einstellungen auf die Standardwerte zurück.
Mappings löschen
Um ein Mapping zu löschen, klicken Sie auf die Schaltfläche „Löschen“ am Ende der Zeile.
Einige Mappings sind für das ordnungsgemäße Funktionieren von Koha erforderlich und können nicht gelöscht werden.
Wichtig
Denken Sie daran, dass Sie, wenn Sie etwas auf dieser Seite ändern, Ihre Datensätze komplett neu indexieren müssen, da sonst nur Datensätze betroffen sind, die nach der Änderung hinzugefügt oder bearbeitet wurden.
Gefahr
Alle über die Oberfläche vorgenommenen Änderungen gehen verloren, wenn Sie auf „Mappings zurücksetzen“ klicken oder wenn der Befehl „Neu erstellen“ mit dem Parameter --reset oder -r ausgeführt wird. Die Schaltfläche „Mappings zurücksetzen“ und der Parameter --reset setzen die Einstellungen auf die Standardwerte zurück.
Facettenreihenfolge
In diesem Bereich können Sie die Facetten, wie sie in den Suchergebnissen im OPAC und in der Dienstoberfläche angezeigt werden, anpassen.
Suchfeld: das entsprechende Suchfeld (wie im Reiter Suchfelder definiert).
Label: die Bezeichnung des Suchfelds (wie im Reiter Suchfelder definiert).
Version
Diese Spalte wurde in Koha-Version 23.11 hinzugefügt.
Authorized value category: for some facets, it is possible to define an authorized value category that will manage the text displayed for the facet items. Some facets have hard-coded authorized value categories, such as LOC for location and CCODE for collections.
Version
Diese Möglichkeit wurde in Koha-Version 23.11 hinzugefügt.
Um die Facetten neu anzuordnen, ziehen Sie die Zeile einfach an die gewünschte Stelle und legen Sie sie ab.
Um Facetten umzubenennen, müssen Sie die Bezeichnung im Reiter Suchfelder anpassen.
Um eine Facette zu löschen, klicken Sie auf die Schaltfläche „Löschen“.
Achtung
In den Kohaversionen 23.11 und früher ist es nicht möglich, Facetten zu löschen. Es ist jedoch möglich, die Markierung aus der Checkbox „Anzeigen“ zu entfernen, um sie aus den Suchergebnissen auszublenden.
Um eine neue Facette hinzuzufügen,
zuerst fügen Sie das Suchefeld hinzu,
anschließend fügen Sie Zuordnungen zu diesem Suchfeld hinzu, stellen Sie sicher, dass Sie „Facettierbar“ auf „Ja“ setzen,
schließlcih, fügen Sie die Facette in der Tabelle Facettenreihenfolge hinzu, indem Sie in der letzten Zeile die Werte eingeben und am Ende der Zeile auf die Schaltfläche „Hinzufügen“ klicken.
Version
Die Option zum Hinzufügen von Facetten wurde in Koha-Version 24.05 hinzugefügt.
Erwerbung
Das Koha-Erwerbungsmodul ermöglicht es der Bibliothek, Bestellungen und Lieferanten sowie die Haushaltsmittel zu überwachen und zu verwalten.
Vor der Benutzung des Erwerbungsmoduls muss die Grundkofiguration abgeschlossen sein.
Pfad in Koha: Mehr > Administration > Erwerbungsparameter
Währungen und Wechselkurse
Wenn Sie aus mehreren Ländern mit unterschiedlichen Währungen bestellen, können Sie Wechselkurse definieren, damit die Preise in der Erwerbung korrekt berechnet werden.
Bemerkung
Nur Bibliothekspersonal mit der Berechtigung currencies_manage (oder der superlibrarian-Berechtigung) hat Zugriff auf diesen Bereich.
Pfad in Koha: Mehr > Administration > Erwerbungsparameter > Währungen und Wechselkurse

Bemerkung
You can customize the columns of this table in the Table settings section of the Administration module (table id: currency).
Währung: dies ist der Code für die Währung. Für Standard-Währungen wird der ISO-Code als Währungscode verwendet (z.B. „USD“ für US-Dollar). Der ISO-Code wird verwendet, wenn Sie MARC-Datensätze über das Werkzeuge für den Import hochladen. Das Werkzeug wird versuchen, den Preis aus den Datensätzen in der aktiven Währung zu ermitteln.
Kurs: Der Kurs wird für die Berechnung des Preises in der aktiven Währung verwendet.
Bemerkung
Die Wechselkurse werden nicht automatisch aktualisiert, daher müssen Sie regelmäßig manuell aktualisieren, damit die Berechnungen korrekt ausgeführt werden.
Symbol: dies ist das Währungszeichen (z. B. $ für USD oder € für EUR).
Letzte Aktualisierung: Datum der letzten Aktualisierung der Währung in Koha.
Aktiv: Die aktive Währung ist die Hauptwährung in Ihrer Bibliothek. Ihre aktive Währung ist in der Spalte ‚Aktiv‘ markiert. Wenn Sie keine aktive Währung definiert haben, erhalten Sie eine Fehlermeldung mit der Aufforderung, eine aktive Währung zu bestimmen.
Die aktive Währung muss einen Kurs von 1 haben. Es kann nur eine aktuelle Währung geben.
Archiviert: bei archivierten Währungen steht in dieser Spalte „Ja“. Archivierte Währungen können nicht im Erwerbungsmodul verwendet werden.
Bemerkung
Es ist aktuell nicht möglich, Währungen manuell zu archivieren. Währungen werden archiviert, wenn Koha aktualisiert wird und eine zuvor im Erwerbungsmodul verwendete Währung gelöscht wurde.
Aktionen: Verwenden Sie die Schaltflächen zum Bearbeiten oder Löschen von Währungen.
Bemerkung
Wenn eine Währung mindestens einmal verwendet wurde, kann sie nicht gelöscht werden.
Eine neue Währung hinzufügen
Wenn eine von Ihnen verwendete Währung noch nicht in Ihrem System vorhanden ist, können Sie sie anlegen.
Klicken Sie auf „Neue Währung“.
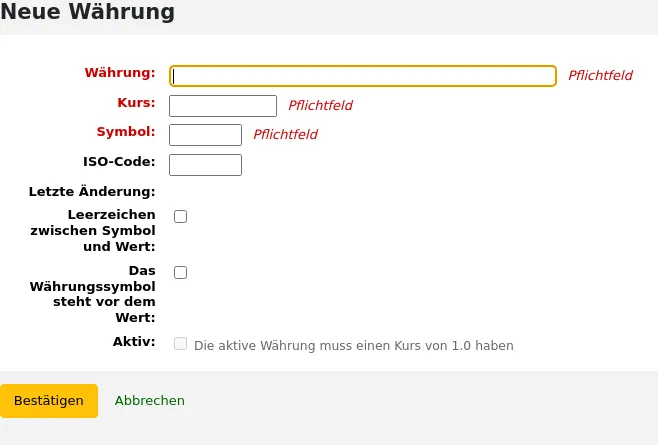
Füllen Sie das Formular aus.
Währung: Geben Sie einen Code für die Währung ein. Dies kann der ISO-Code oder ein anderer Code sein. Dieser Code wird im Erwerbungsmodul angezeigt.
Bemerkung
Wenn Sie sich entscheiden einen benutzerdefinierten Code zu verwenden, stellen Sie sicher, dass Sie den ISO-Code mit dem richtigen Code für die Währung ausfüllen. Dadurch wird sichergestellt, dass die Preise entsprechend dem Kurs berechnet werden.
Bemerkung
Dieses Feld ist auf 10 Zeichen beschränkt.
Kurs: Geben Sie den Kurs dieser Währung im Verhältnis zu Ihrer aktiven Währung ein.
Symbol: geben Sie das Symbol für die Währung ein (z. B. $ für USD oder € für EUR).
ISO-Code: Geben Sie den ISO-Code für die Währung ein (z. B. „USD“ für US-Dollar). Dieses Feld ist optional. Wenn dieses Feld leer ist, verwendet Koha den (obenstehenden) Währungscode als ISO-Code für die Preisberechnung.
Letzte Änderung: Dieses Feld wird automatisch mit dem heutigen Datum ausgefüllt, es ist nicht möglich, dieses Datum manuell zu ändern.
Leerzeichen zwischen Symbol und Wert: Wenn diese Option aktiviert ist, zeigt Koha den Preis mit einem Leerzeichen vor dem Währungssymbol an (z. B. 10,99 $ statt 10,99$).
Currency symbol precedes value: if checked, Koha will display the currency symbol before the price (for example, $10.99 rather than 10.99$).
Version
Diese Funktion wurde in Koha-Version 24.11 hinzugefügt.
Aktiv: Markieren Sie diese Checkbox, wenn diese Währung als Standardwährung im Erwerbungsmodul verwendet wird. Beachten Sie, dass es nur eine aktive Währung geben kann und dass der Kurs der aktiven Währung 1 sein muss.
Klicken Sie auf ‚Absenden‘.
Bearbeiten einer Währung
Wenn Sie häufig aus anderen Ländern bestellen, müssen Sie den Wechselkurs regelmäßig aktualisieren, um die Preise genau berechnen zu können.
Um eine bestehende Währung zu bearbeiten,
Klicken Sie auf die Schaltfläche „Bearbeiten“ rechts neben der Währung in der Währungstabelle.
Ändern Sie den Kurs oder einen anderen Wert.
Bemerkung
Beachten Sie, dass der Währungscode und das Datum der letzten Änderung nicht bearbeitet werden können.
Klicken Sie auf ‚Absenden‘.
Eine Währung löschen
Wenn es Währungen gibt, die Sie nie verwenden, können Sie diese löschen.
Klicken Sie in der Währungstabelle auf die Schaltfläche „Löschen“ rechts neben der Währung.
Warnung
Währungen, die mindestens einmal im Erwerbungsmodul verwendet wurden, können nicht gelöscht werden.
Etats
Etats werden verwendet um die Haushaltsmittel im Erwerbungsmodul zu verwalten. Sie können zum Beispiel einen Etat für das aktuelle Jahr anlegen (z.B. 2015), den Sie dann in Konten für die verschiedenen Ausgabenbereiche der Bibliothek unterteilen (z.B. Bücher, Audio etc).
Pfad in Koha: Mehr > Administration > Erwerbungsparameter > Etats
Bemerkung
Mitarbeiter*innen müssen die Berechtigung period_manage (oder die superlibrarian-Berechtigung) besitzen, um auf die Etat-Administrationsseite zugreifen zu können.
Es wird empfohlen, Mitarbeiter*innen, die Etats verwalten müssen, mindestens die folgenden Berechtigungen zu erteilen, da diese voneinander abhängig sind:
Im Hauptfenster der Etatverwaltung gibt es je einen Reiter für aktive und für inaktive Etats.
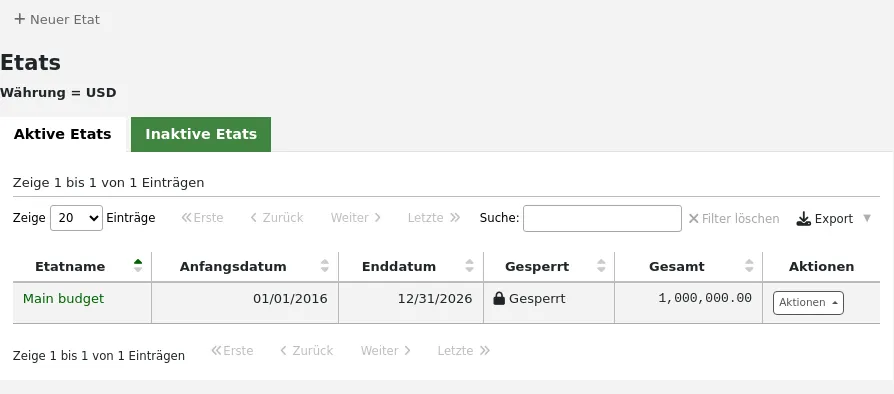
Etats hinzufügen
Etats können entweder durch Neuanlegung oder durch Duplizierung des letztjährigen Etats.
Bemerkung
Mitarbeiter*innen müssen die Berechtigung period_manage (oder die superlibrarian-Berechtigung) besitzen, um neue Etats anlegen oder duplizieren zu können.
Einen neuen Etat hinzufügen
Wenn Sie das Erwerbungsmodul zum ersten Mal einsetzen, müssen Sie zunächst einen Etat anlegen. Klicken Sie dazu auf die Schaltfläche ‚Neuer Etat‘.
Um einen neuen Etat hinzuzufügen,
Klicken Sie auf die Schaltfläche „Neuer Etat“.
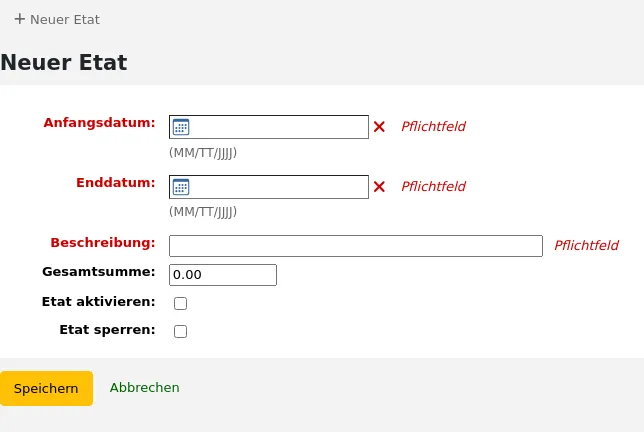
Füllen Sie das Formular aus:
Anfangsdatum (Pflichtfeld): Wählen Sie den Zeitraum, für den dieser Etat gültig ist, sei es ein Studienjahr, ein Etatjar, ein Quartal etc.
Enddatum (obligatorisch): Wählen Sie das Enddatum des Zeitraums, für den dieser Etat gilt.
Beschreibung (Pflichtfeld): Geben Sie eine Beschreibung für den Etat ein. Die Beschreibung sollte Ihnen helfen, bei der Bestellung den Etat zu identifizieren.
Gesamtsumme: Geben Sie die Gesamtsumme des Etats ein. Verwenden Sie keine Symbole, tragen sie nur die Summe des Etats mit Nummern und Dezimalen ein.
Etat aktivieren: Wenn ein Etat als aktiv gekennzeichnet ist, können auf diesen Etat im Erwerbungsmodul Bestellungen erfolgen, auch wenn das Bestelldatum nach dem Etatende liegt. Das erlaubt Ihnen auch Bestellungen zu bearbeiten, die noch im vorangegangenen Etatzeitraum aufgegeben wurden.
Etat sperren: Einen Etat zu sperren bedeutet, dass Sie zu diesem Etat keine Konten hinzufügen oder Unterkonten hinzufügen können und dass Sie keine Etatplanung vornehmen können. Sperren Sie den Etat, sobald er wie gewünscht angelegt ist.
Klicken Sie auf „Speichern“.
Sie gelangen zurück zur Liste der vorhandenen Etats.
Fahren Sie mit dem Hinzufügen von Konten zum Etat fort.
Einen Etat duplizieren
Am Ende des Jahres oder des Haushaltszeitraums können Sie den aktuellen Etat duplizieren. Dadurch werden auch alle Konten dupliziert, so dass Sie nicht jedes Jahr oder jeden Zeitraum von vorne beginnen müssen.
Um einen Etat zu duplizieren,
Klicken Sie in der Liste der Etats auf die Schaltfläche „Aktionen“ auf der rechten Seite.
Wählen Sie „Kopie“.
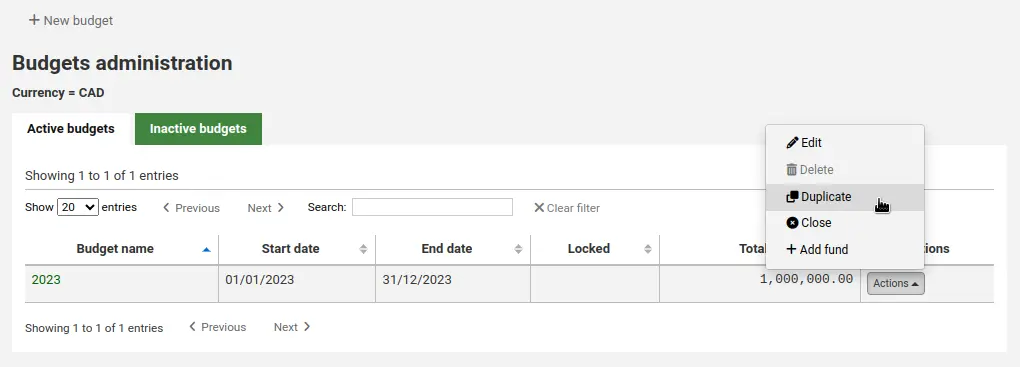
Alternativ,
Klicken Sie in der Liste der Etats auf den Namen des Etats.
Auf der Maske, welche die Etataufteilung anzeigt, klicken Sie auf die Schaltfläche ‚Bearbeiten‘ und wählen Sie ‚Etat duplizieren‘.
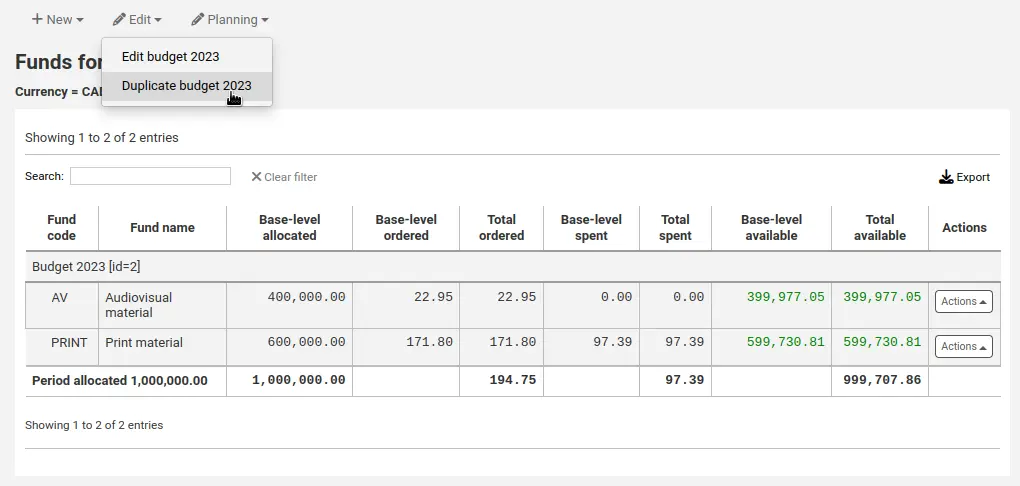
In beiden Fällen wird ein Formular angezeigt, um den Etat zu duplizieren.
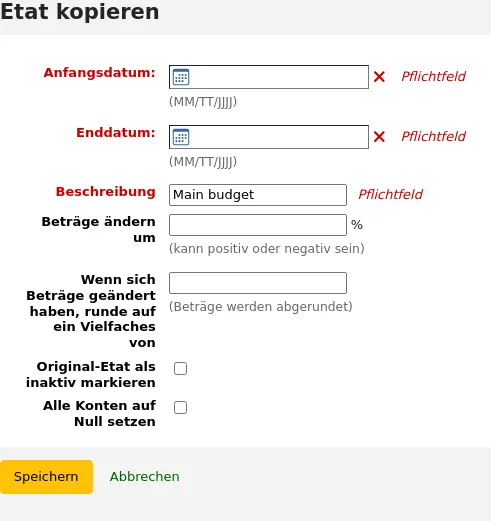
Anfangsdatum (obligatorisch): Wählen Sie das Startdatum für den Zeitraum, für den dieser neue Etat gilt.
Enddatum (obligatorisch): Wählen Sie das Enddatum des Zeitraums, für den dieser Etat gilt.
Beschreibung (obligatorisch): Geben Sie eine Beschreibung für diesen neuen Etat ein.
Beträge ändern nach: Standardmäßig werden der Gesamtbetrag aus dem duplizierten Budget und die ursprünglichen Beträge für jedes Konto verwendet. Bei Bedarf können Sie jedoch angeben, dass die Beträge um einen Prozentsatz geändert werden sollen, der positiv oder negativ sein kann. Wenn Ihr neuer Etat zum Beispiel um 2 % erhöht wurde, geben Sie 2 ein. Umgekehrt, wenn Ihr neuer Etat um 2 % gesenkt wurde, geben Sie -2 ein.
Wenn Beträge ändern, runde auf ein Vielfaches von: Wenn Sie bei „Beträge ändern um“ einen Wert eingegeben haben, berechnet Koha die Beträge automatisch. Sie können das Abrunden der Beträge erzwingen. Wenn Sie zum Beispiel „100“ eingeben, werden die Beträge auf Hunderter abgerundet (aus 5542 wird 5500).
Original-Etat als inaktiv markieren: setzen Sie den Haken bei diesem Feld, wenn der ursprüngliche Etat ab sofort nicht mehr verwendet werden soll. Sie können später immer noch den Etat bearbeiten, um ihn inaktiv zu machen.
Alle Konten auf Null setzen: Setzen sie ein Häkchen bei wenn Sie die Kontostrukturen des vorherigen Etats übernehmen, den neuen Betrag für jedes Konto jedoch manuell festlegen möchten.
Dies wird sowohl den Etat als auch alle zugehörigen Konten duplizieren, sodass Sie diese von Jahr zu Jahr wieder verwenden können.
Wenn es soweit ist, können Sie den vorherigen Etat schließen, um nicht eingegangene Bestellungen und, falls gewünscht, nicht ausgegebene Mittel in den neuen Etat zu verschieben.
Einen Etat anpassen
Bemerkung
Mitarbeiter*innen müssen die Berechtigung period_manage (oder die superlibrarian-Berechtigung) besitzen, um bestehende Etats zu bearbeiten.
Sie können bestehende Etats bearbeiten, um sie z. B. als inaktiv festzulegen oder sie zu sperren, um Kontoänderungen zu verhindern.
Um ein Budget zu bearbeiten,
Klicken Sie in der Liste der Etats auf die Schaltfläche „Aktionen“ auf der rechten Seite.
Wählen Sie „Bearbeiten“.
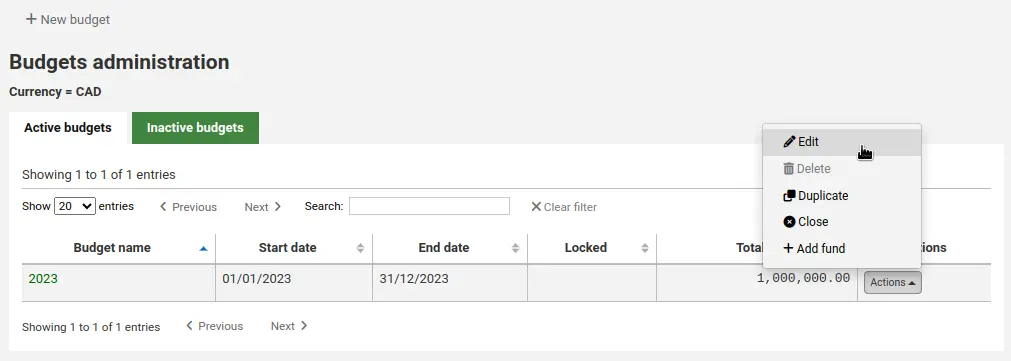
Alternativ,
Klicken Sie in der Liste der Etats auf den Namen des Etats.
Auf der Maske, welche die Etataufteilung anzeigt, klicken Sie auf die Schaltfläche „Bearbeiten“ und wählen Sie „Bearbeite Etat“
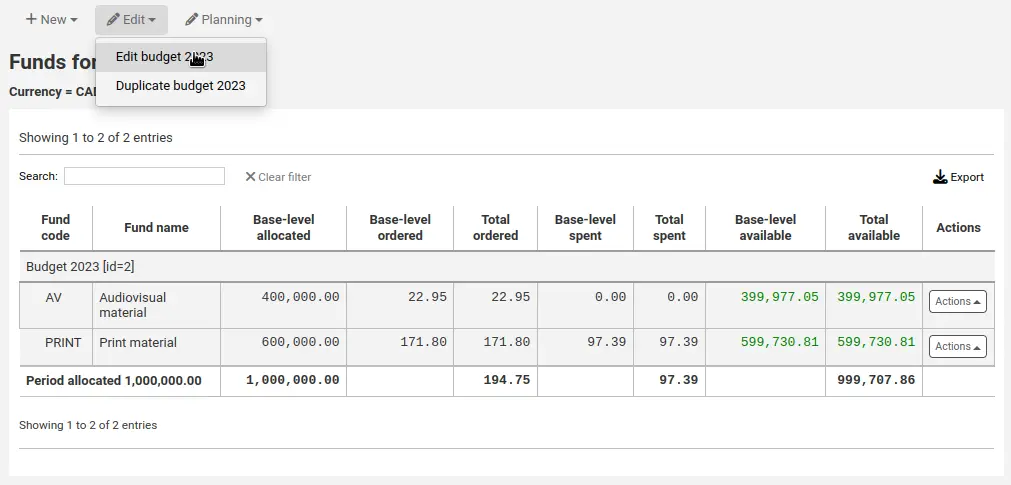
In beiden Fällen wird ein Formular angezeigt, um den Etat zu duplizieren.
Nehmen Sie Ihre Änderungen vor (siehe die Feldbeschreibungen oben).
Klicken Sie auf „Speichern“.
Einen Etat schließen
Schließen Sie einen Etat, um nicht erhaltene Bestellungen und, wenn gewünscht, verbliebene Mittel von einem vorherigen Etat auf einen neuen Etat zu verschieben. Bevor Sie den Etat schließen, können Sie den Etat des vorherigen Jahres duplizieren, um die nicht zugegangenen Bestellungen auf diesen umzubuchen.
Bemerkung
Mitarbeiter*innen müssen die Berechtigung period_manage (oder die superlibrarian-Berechtigung) besitzen, um bestehende Etats zu schließen.
Um einen Etat zu schließen,
Klicken Sie in der Liste der Etats auf die Schaltfläche „Aktionen“ auf der rechten Seite.
Wählen Sie „Schließen“
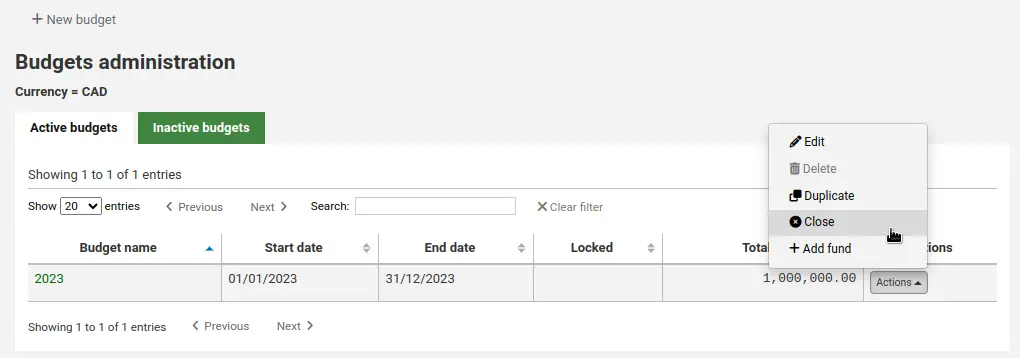
Bemerkung
Etats ohne nicht eingegangene Bestellungen können nicht geschlossen werden.
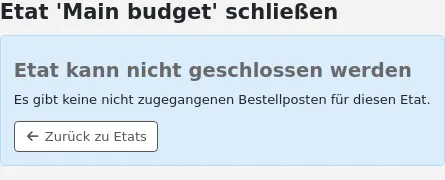
Füllen Sie das Formular aus.
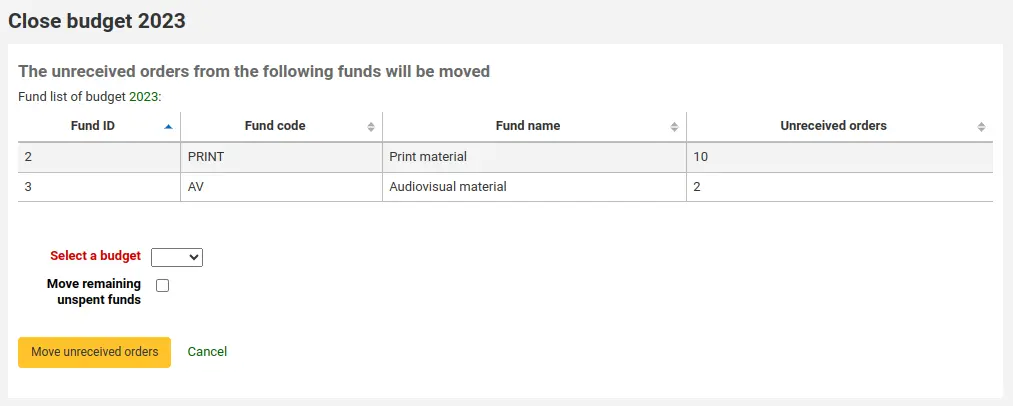
Etat auswählen: Wählen Sie den neuen Etat für nicht zugegangene Bestellungen aus dem Drop-down-Menü aus.
Bemerkung
Damit nicht zugegangene Bestellungen automatisch zum neuen Etat verschoben werden können, muss die Kontenstruktur des vorherigen Etats auch im neuen Etat existieren.
Verbliebene Mittel umbuchen: Markieren Sie die Checkbox, wenn Sie verbliebene Mittel aus den Konten des zu schließenden Etats auf den ausgewählten Etat umbuchen möchten.
Klicken Sie auf die Schaltfläche „Nicht zugegangene Bestellungen umbuchen“.
Es erscheint der Hinweis ‚Sie haben entschieden, alle nicht zugegangenen Bestellungen von ‚Etat X‘ nach ‚Etat Y‘ zu verschieben. Dieser Vorgang kann nicht rückgangig gemacht werden. Weiter?‘ Etat X ist der Etat, der geschlossen wird, Etat Y ist der ausgewählte Etat.
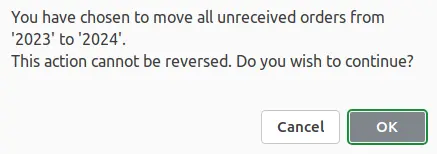
Wenn alles in Ordnung ist, klicken Sie ‚OK‘ und die nicht zugegangenen Bestellungen und, falls ausgewählt, die verbliebenen Mittel, werden verschoben.
Warten Sie, bis der ‚Bericht über die Umbuchung von nicht zugegangenen Bestellungen von Etat auf Etat Y‘ erscheint. Dieser stellt die betreffenden Bestellungen (nach Konto sortiert) und Umbuchungen oder eventuelle Probleme dar. Z.B. wird die Bestellung nicht verschoben, wenn der neue Etat kein Konto mit dem selben Namen wie das vorherige Konto enthält.
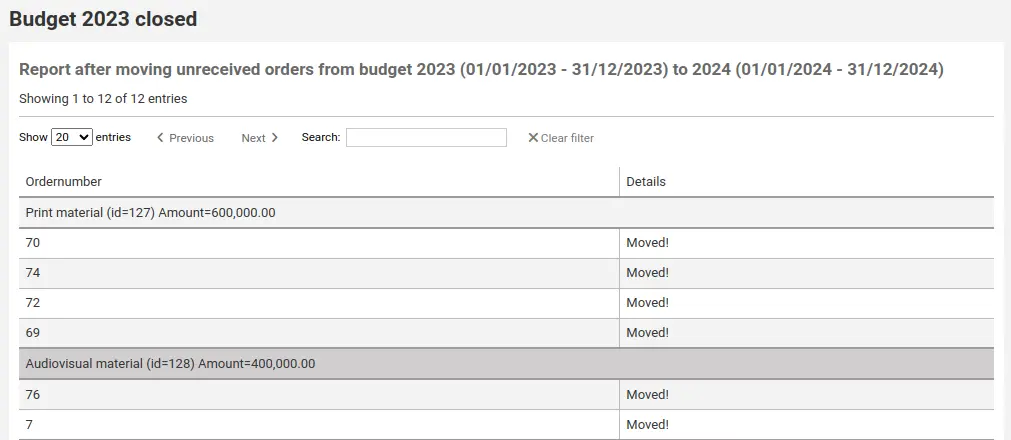
Einen Etat löschen
Um einen Etat zu löschen, darf es keine Konten haben. Beginnen Sie mit dem Löschen der Konten.
Warnung
Dies kann nicht rückgängig gemacht werden. Stellen Sie sicher, dass dieses Budget gelöscht werden muss. Sie können es stattdessen inaktiv setzen oder schließen.
Um einen Etat zu löschen,
Klicken Sie in der Liste der Etats auf die Schaltfläche „Aktionen“ auf der rechten Seite.
Wählen Sie „Löschen“.
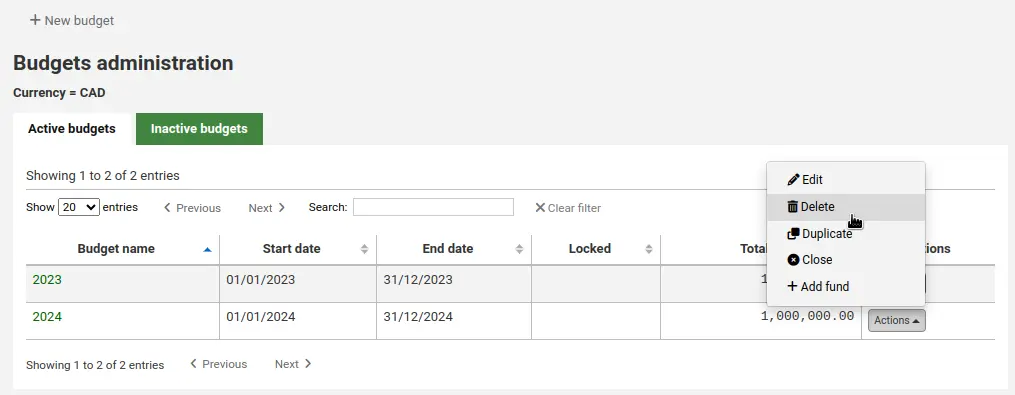
Klicken Sie auf „Ja, löschen“.

Konten
Konten stellen eine Unterteilung für einen Etat dar. Sie können zum Beispiel einen Etat für das aktuelle Jahr anlegen (z.B. 2015), den Sie dann in Konten für die verschiedenen Ausgabenbereiche der Bibliothek unterteilen (z.B. Bücher, Audio etc).
Pfad in Koha: Mehr > Administration > Erwerbungsparameter > Konten
Ein Konto zu einem Etat hinzufügen
Ein Konto wird zu einem Etat hinzugefügt. Vergewissern Sie sich vor dem Hinzufügen von Konten, dass Sie einen Etat hinzufügen.
Bemerkung
Wenn ein Etat geschlossen ist, ist es nicht möglich, Konten hinzuzufügen.
Um ein neues Konto hinzuzufügen,
Klicken Sie in der Liste der Etats auf die Schaltfläche „Aktionen“ auf der rechten Seite.
Wählen Sie „Konto hinzufügen“.
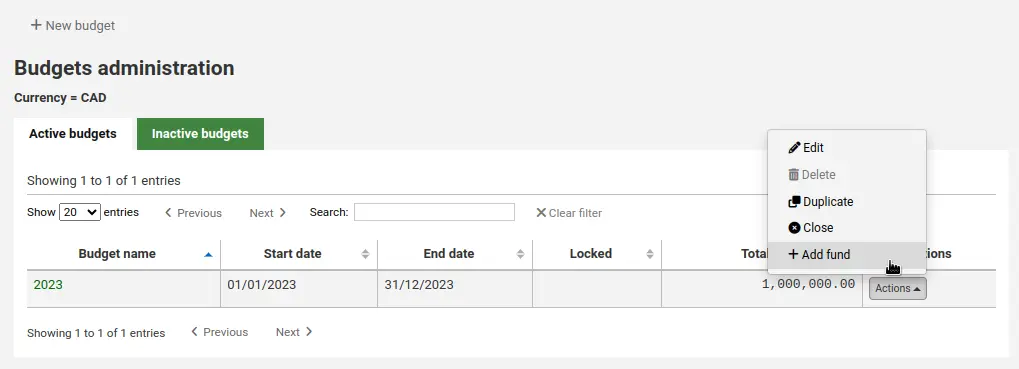
Alternativ,
Klicken Sie in der Liste der Etats auf den Namen des Etats.
Auf der Maske, welche die Etataufteilung anzeigt, klicken Sie auf die Schaltfläche ‚Neu‘ und wählen Sie ‚Neues Konto für …‘.
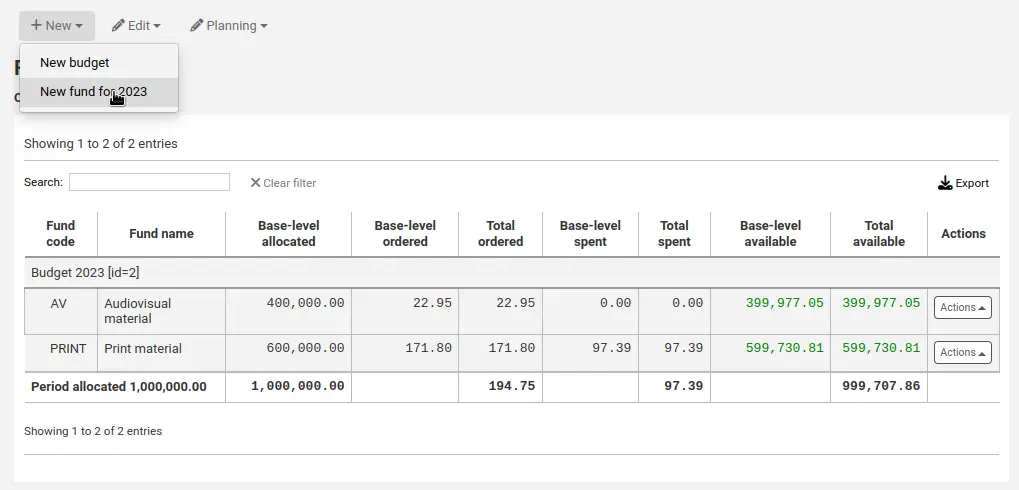
In beiden Fällen wird ein Formular zum Anlegen eines neuen Etats angezeigt.
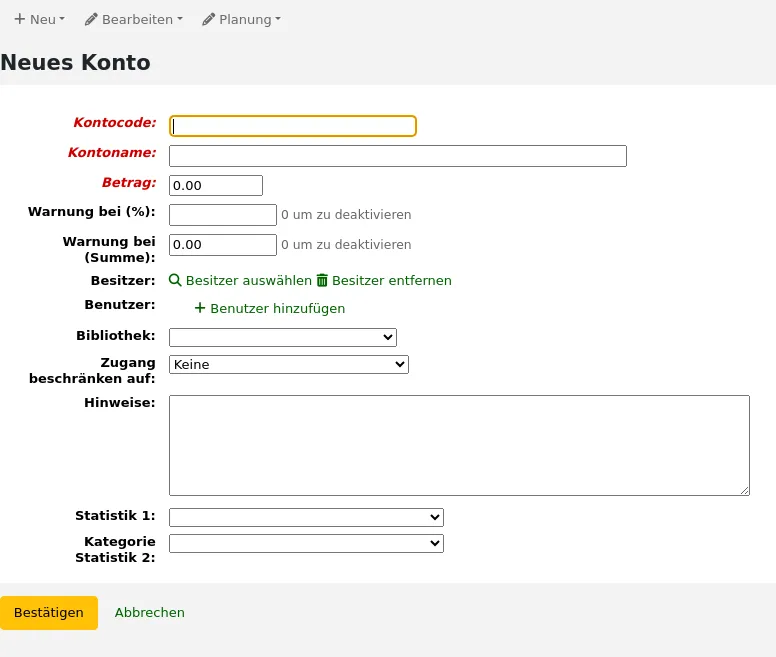
Kontocode (Pflichtfeld): geben Sie einen eindeutigen Identifikator für Ihr Konto ein.
Kontoname (Pflichtfeld): Geben Sie einen Namen für das Konto ein. Dieser Name sollte für die Mitarbeiter*innen verständlich sein, da er bei der Bestellung angezeigt wird.
Betrag (Pflichtfeld): Der Betrag sollte nur als Nummer oder Dezimalzahl angegeben werden und keine anderen Zeichen enthalten.
Warnung bei (%): Geben Sie einen Prozentwert ein, damit Koha Sie warnt, wenn Sie diesen Prozentsatz des Kontos ausgegeben haben, um eine Überschreitung zu verhindern. Wenn Sie z. B. 90 % eingeben, warnt Koha Sie bei jeder Bestellung, wenn 90 % des Kontos aufgebraucht sind.
Warnung bei (Summe): wie oben, aber für einen bestimmten ausgegebenen Geldbetrag. Wenn Sie z. B. 5000 eingeben, warnt Koha Sie bei jeder Bestellung, nachdem 5000 im Konto ausgegeben wurden.
Besitzer: Sie können dieses Konto einem/einer Mitarbeiter*in zuweisen.
Klicken Sie auf „Besitzer auswählen“.
Suchen Sie den/die Mitarbeiter*in in der Suchmaske für Benutzer*innen.
Bemerkung
Nur Bibliothekspersonal mit der Berechtigung budget_modify (oder der superlibrarian-Berechtigung) wird in den Suchergebnissen angezeigt.
Klicken Sie auf „Auswählen“ rechts neben dem Suchergebnis für Mitarbeiter*innen.
Bemerkung
Ein Konto kann nur einen Besitzer haben.
Bemerkung
Sie können einschränken, wer von diesem Konto bestellen kann, indem Sie entweder ‚Besitzer‘, ‚Besitzer und Benutzer‘ oder ‚Besitzer, Benutzer und Bibliothek‘ aus dem Auswahlmenü zur Zugangsbeschränkung wählen. Andernfalls hat das Hinzufügen von Benutzer*innen keine beschränkende Auswirkung.
Bemerkung
Mitarbeiter*innen mit der Berechtigung order_manage_all (oder der superlibrarian-Berechtigung) können Konten ungeachtet der Einschränkungen verwenden.
Vergewissern Sie sich, dass Ihre Mitarbeiter*innen nicht über diese Berechtigung verfügen, wenn Sie den Zugang zu Konten einschränken wollen.
Benutzer: Sie können auch Benutzer*innen hinzufügen, die Gelder dieses Kontos ausgeben können.
Bemerkung
Um die Nutzung dieses Kontos auf Benutzer*innen zu beschränken, müssen Sie entweder „Besitzer und Benutzer“ oder „Besitzer, Benutzer und Bibliothek“ im darunterliegenden Feld „Zugang beschränken auf“ auswählen. Anderenfalls hat das Hinzufügen von Benutzer*innen keine einschränkende Wirkung.
Bemerkung
Mitarbeiter*innen mit der Berechtigung order_manage_all (oder der superlibrarian-Berechtigung) können Konten ungeachtet der Einschränkungen verwenden.
Vergewissern Sie sich, dass Ihre Mitarbeiter*innen nicht über diese Berechtigung verfügen, wenn Sie den Zugang zu Konten einschränken wollen.
Klicken Sie auf „Benutzer hinzufügen“
Suchen Sie den/die Mitarbeiter*in in der Suchmaske für Benutzer*innen.
Bemerkung
Nur Bibliothekspersonal mit der Berechtigung budget_modify (oder der superlibrarian-Berechtigung) wird in den Suchergebnissen angezeigt.
Klicken Sie auf „Hinzufügen“ rechts neben dem Suchergebnis für Mitarbeiter*innen.
Bemerkung
Sie können so viele Benutzer*innen hinzufügen, wie Sie benötigen.
Wählen Sie „Schließen“, wenn alle Benutzer*innen hinzugefügt worden sind.
Bibliothek: Wenn dieses Konto für eine bestimmte Bibliothek bestimmt ist, wählen Sie sie hier aus.
Bemerkung
Um die Nutzung dieses Kontos auf die Bibliothek zu beschränken, müssen Sie im Feld „Zugang beschränken auf“ darunter „Besitzer, Benutzer und Bibliothek“ wählen. Anderenfalls hat die Auswahl einer Bibliothek keine einschränkende Wirkung.
Bemerkung
Mitarbeiter*innen mit der Berechtigung order_manage_all (oder der superlibrarian-Berechtigung) können Konten ungeachtet der Einschränkungen verwenden.
Vergewissern Sie sich, dass Ihre Mitarbeiter*innen nicht über diese Berechtigung verfügen, wenn Sie den Zugang zu Konten einschränken wollen.
Zugang beschränken auf: Sie können einschränken, wer von diesem Konto bestellen kann, indem Sie entweder ‚Besitzer‘, ‚Besitzer und Benutzer‘ oder ‚Besitzer, Benutzer und Bibliothek‘ auswählen.
Warnung
Ohne Besitzer wird die Zugangsbeschränkung ignoriert. Stellen Sie sicher, dass neben der Beschränkung auch ein Besitzer eingerichtet ist.
Bemerkung
Mitarbeiter*innen mit der Berechtigung order_manage_all (oder der superlibrarian-Berechtigung) können Konten ungeachtet der Einschränkungen verwenden.
Vergewissern Sie sich, dass Ihre Mitarbeiter*innen nicht über diese Berechtigung verfügen, wenn Sie den Zugang zu Konten einschränken wollen.
Hinweise: alle beschreibenden Anmerkungen zu diesem Konto.
Bemerkung
Hinweise werden nur auf diesem Bildschirm angezeigt (wenn Sie das Konto bearbeiten).
Statistik 1 durchgeführt auf: wird für statistische Zwecke verwendet. Wählen Sie eine Normierte-Wert-Kategorie, aus der Sie Werte auswählen können, wenn Sie Bestellungen über dieses Konto erteilen. Sie können dann eine Etatplanung und Reports über die Bestellungen nach diesen Kategorien erstellen. Die Standardwertkategorie Asort1 wurde speziell für diesen Zweck erstellt, aber Sie können jede beliebige Kategorie eines Normierten Werts in diesem Feld verwenden (z. B. CCODE, um Ausgaben nach Sammlungen zu planen).
Statistik 2 durchgeführt auf: wie oben, für eine zweite statistische Kategorie. Die standardmäßig genutzes Normierte-Wert-Kategorie Asort2 wurde speziell für diesen Zweck erstellt, aber Sie können jede zugelassene Kategorie eines Normierten Werts verwenden.
Bemerkung
Um mehr über Planungskategorien zu erfahren, überprüfen Sie Planungs Kategorie FAQ.
Klicken Sie auf ‚Absenden‘.
Sie gelangen zu einer Übersicht aller Konten für diesen Etat.

Die Währungsspalten im Konto werden wie folgt aufgegliedert:
‚Basis-Level zugewiesen‘ ist die Summe, die Sie definieren, wenn Sie ein Konto anlegen
‚Basis-Level bestellt‘ ist die Summe für Bestellungen in diesem Konto
‚Total bestellt‘ ist das Basis-Level für alle Bestellungen ausgehend von diesem Konto mit allen Unterkonten
‚Basis-Level ausgegeben‘ ist die Summe aller Ausgaben dieses Kontos (ohne Unterkonten)
‚Total ausgegeben‘ ist das Basis-Level für alle Ausgaben dieses Kontos mit allen Unterkonten
Basis-Level verfügbar
Insgesamt verfügbar
Rechts neben jedem Konto finden Sie ein Auswahlmenü ‚Aktionen‘, welches die Optionen ‚Bearbeiten‘, ‚Löschen‘ und ‚Unterkonto hinzufügen‘ auflistet.
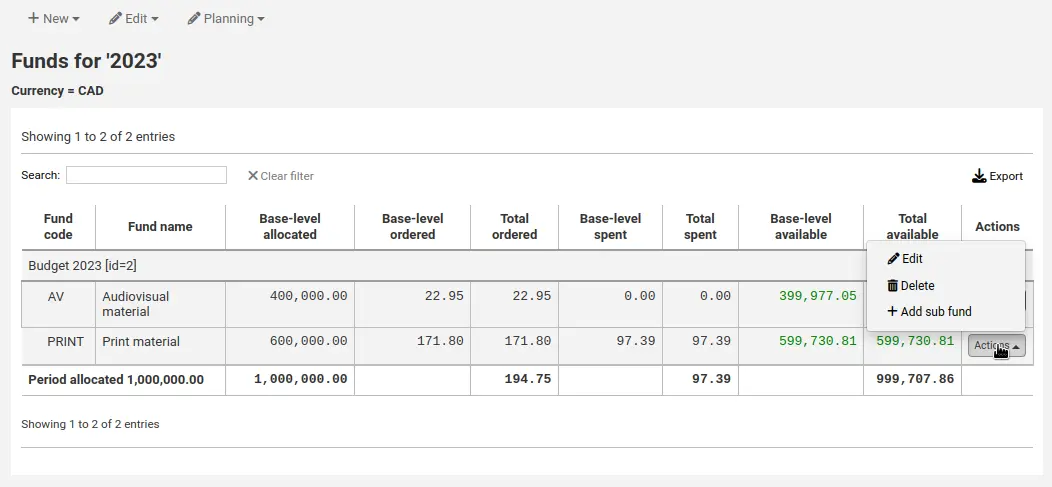
Ein Unterkonto hinzufügen
Ein Unterkonto ist eine Unterteilung des aufgelisteten Kontos. Ein Beispiel: Für ein Konto ‚Belletristik‘ könnte man weitere Unterkonten ‚Neuerscheinungen‘ und ‚Science Fiction‘ definieren. Es handelt sich um eine optionale Funktion, um die Finanzmittel zu organisieren.
Bemerkung
Wenn ein Budget gesperrt ist, ist es nicht möglich weitere Unterkonten anzulegen.
Um einem Konto ein Unterkonto hinzuzufügen,
Klicken Sie in der Liste aller Konten oder in der Liste der Konten eines bestimmten Etats auf die Schaltfläche „Aktionen“ auf der rechten Seite.
Wählen Sie „Neues Unterkonto“.
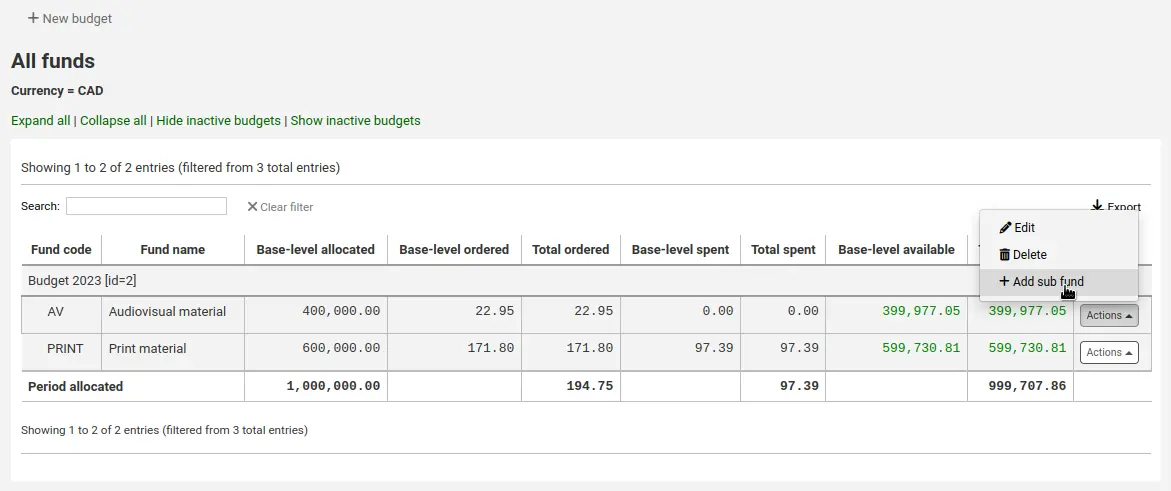
Füllen Sie das Formular für ein neues Unterkonto aus. Die Felder sind dieselben wie bei Konto hinzufügen. Der einzige Unterschied besteht darin, dass im Formular das „übergeordnete“ Konto angegeben wird.
Klicken Sie auf ‚Absenden‘.
Konten mit Unterkonten werden mit einem kleinen Pfeil nach links angezeigt. Klicken Sie diesen an, um die Unterkonten anzuzeigen.
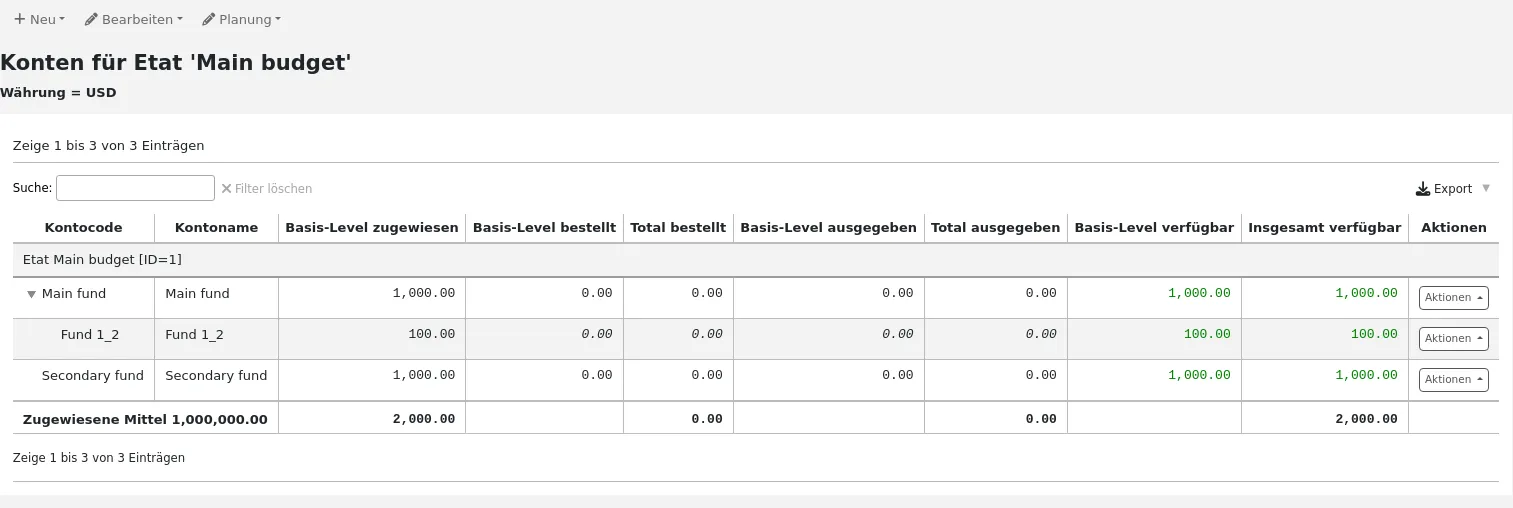
Konten löschen
Falls nötig, können Konten gelöscht werden.
Warnung
Wenn Sie ein Konto, in dem Bestellungen vorhanden sind, löschen, werden auch diese Bestellungen gelöscht. Löschen Sie Konten nur, wenn Sie sicher sind, dass sie gelöscht werden müssen. Es ist nicht möglich, dies rückgängig zu machen.
Um ein Konto zu löschen,
Klicken Sie in der Liste aller Konten oder in der Liste der Konten eines bestimmten Etats auf die Schaltfläche „Aktionen“ auf der rechten Seite.
Wählen Sie „Löschen“.
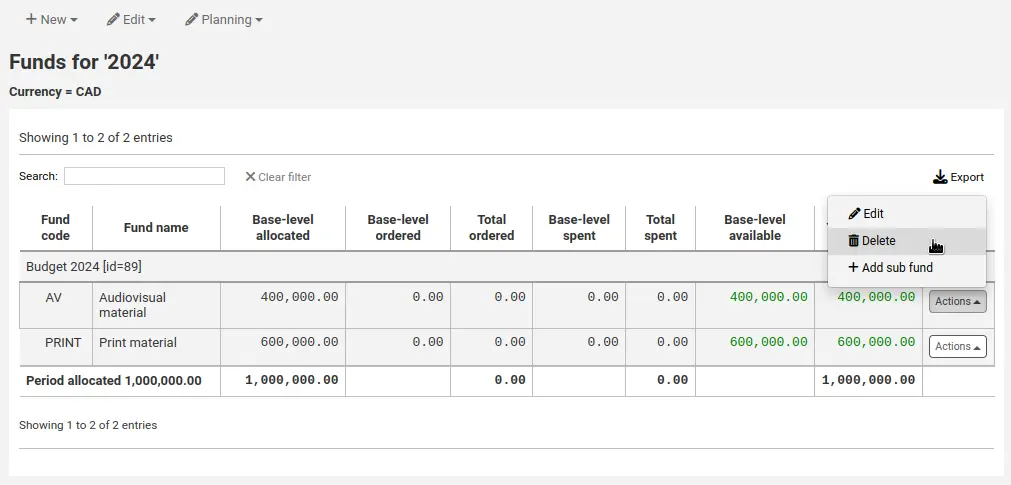
Klicken Sie in der Warnmeldung auf „Ja, dieses Konto löschen“.
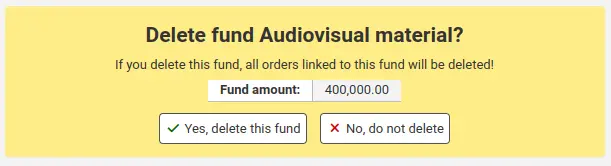
Etatplanung
Bemerkung
Mitarbeiter*innen müssen die Berechtigung planning_manage, die Berechtigung budget_manage und die Berechtigung period_manage (oder die superlibrarian-Berechtigung) besitzen, um Zugriff auf die Etatplanung zu bekommen.
In der Anzeige der Kontenliste können Sie über die Schaltfläche ‚Planung‘ festlegen, wie das Budget verwendet werden soll.
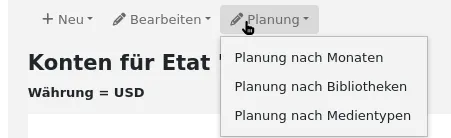
Wenn Sie ‚Planung nach Monaten‘ auswählen, wird der Betrag auf Monate verteilt.

Auf der linken Seite befinden sich Filter, mit denen Sie die Tabelle einschränken können.
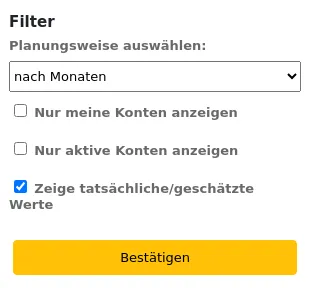
Auswahl der Planungsweise: Wählen Sie, ob Sie nach Monaten, Bibliotheken, Exemplartypen oder einer beliebigen Normierten Wertkategorie planen möchten, die in den Konten als Kategorie Statistik 1 oder 2 verwendet wird.
Nur meine Konten anzeigen: Damit werden Konten herausgefiltert, von denen Sie nicht der Besitzer sind.
Nur aktive Konten anzeigen: Damit werden Konten herausgefiltert, die nicht verwendet wurden (ohne gebundenen Betrag).
Zeige tatsächliche/geschätzte Werte: ändert die Tabelle so, dass auch die gebundenen Beträge angezeigt werden.
Spalten können individuell über die Schaltfläche „Spalten“ am Anfang der Tabelle ein- und ausgeblendet werden.
Von hier aus können Sie Ihre Ausgaben planen, indem Sie die Werte manuell oder über den Link ‚Reihe automatisch füllen‘ eingeben. Wenn Sie den Link verwenden wird das System den Betrag möglichst gleichmäßig verteilen, evtl. müssen Sie dann noch einige Anpassungen machen.
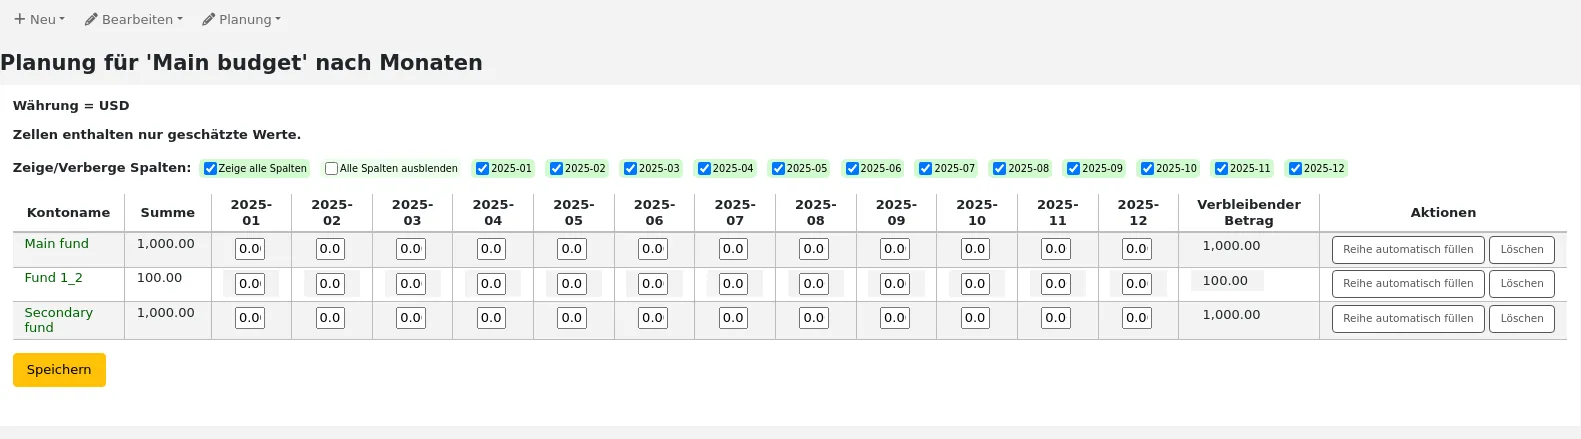
Um die Änderungen zu speichern, klicken Sie einfach auf „Änderungen speichern“.
Bemerkung
Wenn ein Konto gesperrt ist, können die Werte nicht bearbeitet werden.
Wenn Sie Ihre Daten in eine CSV-Datei exportieren möchten, können Sie einen Dateinamen unter ‚Ausgabe als Datei‘ angeben und auf ‚Ausgabe‘ klicken.
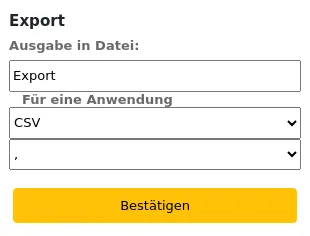
EDI-Konten
Hier können Sie die benötigten Kontaktinformationen Ihrer Erwerbungslieferanten einrichten.
Bemerkung
Dieser Bereich wird nur angezeigt, wenn der Systemparameter EDIFACT aktiviert ist.
Bemerkung
Nur Bibliothekspersonal mit der Berechtigung edi_manage (oder der superlibrarian-Berechtigung) hat Zugriff auf diesen Bereich.
Bemerkung
Bevor Sie anfangen müssen Sie mindestens einen Lieferanten für die Erwerbung eingerichtet haben.
Um Kontoinformationen hinzuzufügen, benützen Sie die Schaltfläche ‚Neues Konto‘.
Geben Sie die Informationen des Lieferanten in das Formular ein.
See the EDI questions for vendors section of the acquisitions module chapter for a description of each field.
Jeder Händler hat ein Konto.
Bibliotheks-EANs
Eine Bibliotheks-EAN ist eine Identifikationsnummer, die der Händler der Bibliothek zuweist, sodass Rechnungen dem jeweils zugehörigen Konto zugewiesen werden. Ein EDI-Konto kann mehrere EANs haben.
Bemerkung
Dieser Bereich wird nur angezeigt, wenn der Systemparameter EDIFACT aktiviert ist.
Bemerkung
Nur Bibliothekspersonal mit der Berechtigung edi_manage (oder der superlibrarian-Berechtigung) hat Zugriff auf diesen Bereich.
Um eine EAN hinzuzufügen, benützen Sie die Schaltfläche ‚Neue EAN‘.
In der angezeigten Maske können Sie die von ihrem Händler zur Verfügung gestellten Informationen eintragen.
See the EDI questions for vendors section of the acquisitions module chapter for a description of each field.
Weitere Parameter
Pfad in Koha: Mehr > Administration > Weitere Parameter
Identity providers
In diesem Bereich können Sie externe Identity Provider für Koha-Benutzer*innen definieren und verwalten. Dies ist relevant, wenn Ihre Benutzer*innen aus einer externen Quelle stammen, z. B. einem Studentenverwaltungssystem, Active Directory oder anderen ähnlichen Datenbanken.
Pfad in Koha: Mehr > Administration > Weitere Paramter > Identity Provider
Bemerkung
Nur Bibliothekspersonal mit der Berechtigung manage_identity_providers (oder der superlibrarian-Berechtigung) hat Zugriff auf diesen Bereich.
Einen Identity Provider hinzufügen
Um einen Identity Provider hinzuzufügen, klicken Sie auf die Schaltfläche „Neuer Identity Provider“.
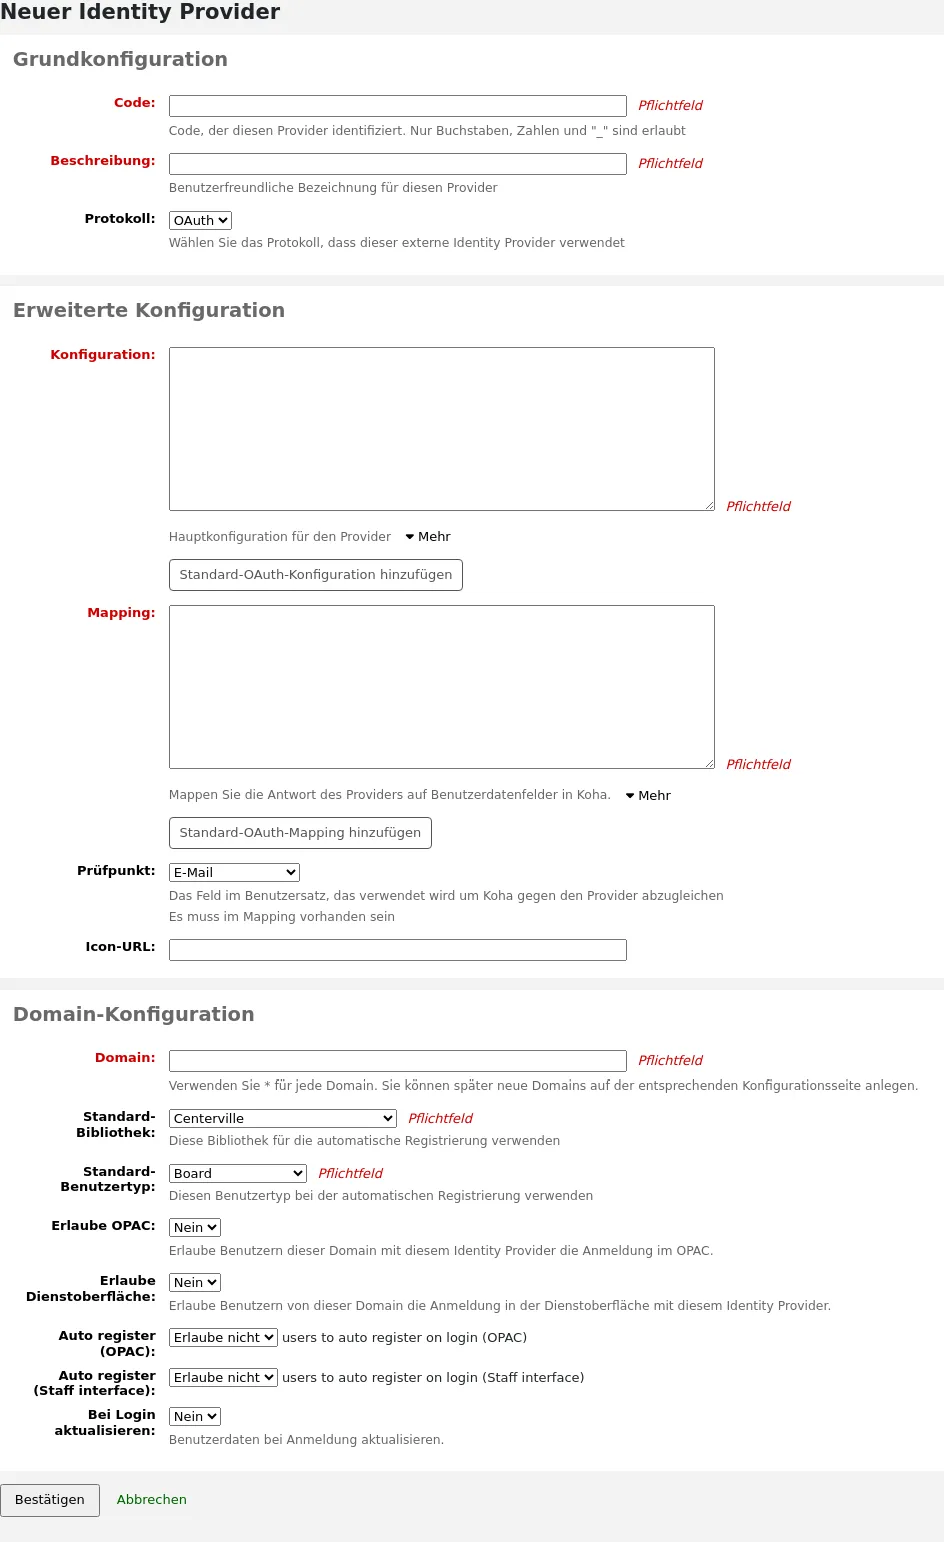
Basis-Konfiguration
Code: Geben Sie einen Code für diesen Provider ein.
Bemerkung
Der Code für den Identity Provider ist auf 20 Zeichen begrenzt und darf nur aus Buchstaben, Zahlen und einem Unterstrich (_) bestehen.
Beschreibung: geben Sie einen Namen für diesen Provider ein. Dieser wird in der Oberfläche angezeigt.
Protokoll: Wählen Sie, welches Protokoll dieser Identity Provider verwendet.
OAuth
OIDC
Erweiterte Konfiguration
Konfiguration: Verwenden Sie dieses Feld, um die für das oben ausgewählte Protokoll spezifische Konfiguration einzugeben.
Sie können auf die Schaltfläche „Standard-OAuth-Konfiguration hinzufügen“ oder „Standard-OIDC-Konfiguration hinzufügen“ klicken, um das Feld mit einigen Standardwerten auszufüllen, die Sie durch Ihre eigenen Werte ersetzen können.
The default OAuth configuration is:
{
 "key": "<enter client id>",
 "secret": "<enter client secret>",
 "authorize_url": "<enter authorization endpoint>",
 "token_url": "<enter token endpoint>",
 "userinfo_url": "<enter user info endpoint (optional)>",
 "scope": "email"
}
The default OIDC configuration is:
{
 "key": "<enter client id>",
 "secret": "<enter client secret>",
 "well_known_url": "<enter openid configuration endpoint>",
 "scope": "openid email"
}
Mapping: Verwenden Sie dieses Feld, um das Mapping der externen Datenbankfelder auf die Felder des/der Koha-Benutzer*in zu definieren.
Der Schlüssel ist das Koha-Feld aus der Tabelle borrowers und der Wert ist das externe Feld.
Bemerkung
You can find all fields for the borrowers table in the database structure.
Sie können auf die Schaltfläche „Standard-OAuth-Mapping hinzufügen“ oder „Standard-OIDC-Mapping hinzufügen“ klicken, um das Feld mit einigen Standardwerten auszufüllen, die Sie durch Ihre eigenen Werte ersetzen können.
Both the default OAuth mapping and default OIDC mapping are:
{
 "email": "email",
 "firstname": "given_name",
 "surname": "family_name"
}
Wenn die externen Felder verschachtelt sind, können Sie die Ebenen durch Punkte trennen.
For example, if the firstname is nested like so:
<user>
   <given_name>First name</given_name>
   <family_name>Family name</family_name>
   <email>Email address</email>
</user>
Use:
"firstname": "user.0.given_name"
Dadurch wird das Feld „given_name“ im ersten „user“-Feld abgerufen (0 = erster).
Wichtig
Wenn Sie die automatische Registrierung (siehe unten) verwenden möchten, stellen Sie sicher, dass entweder „userid“ oder „cardnumber“ in den Mappings vorhanden sind.
Wichtig
Stellen Sie sicher, dass das Feld für den Prüfpunkt (siehe unten) in den Mappings enthalten ist.
Prüfpunkt: Wählen Sie, welches Feld für den Abgleich zwischen eingehenden Benutzer*innen und vorhandenen Benutzer*innen verwendet wird.
Bemerkung
Das hier gewählte Feld muss in den Mappings (siehe oben) enthalten sein.
Icon-URL: Wenn Sie ein Icon auf dem Anmeldebildschirm für diesen Anbieter anzeigen lassen möchten, geben Sie hier die URL der Bilddatei ein.
Domain-Konfiguration
Bemerkung
Geben Sie mindestens eine Domäne für diesen Anbieter ein. Sobald sie gespeichert ist, können Sie weitere Domains zu diesem Provider hinzufügen.
Domain: Geben Sie die E-Mail-Domain für eingehende Benutzer*innen ein.
Bemerkung
Geben Sie ein Sternchen (*) ein, um alle Domains einzuschließen.
Standardbibliothek: Wenn die automatische Registrierung aktiviert ist, wählen Sie aus, in welcher Bibliothek neue Benutzer*innen registriert werden sollen.
Standardbenutzertyp: Wenn die automatische Registrierung aktiviert ist, wählen Sie den Benutzertyp, der neue Benutzer*innen zugewiesen werden.
Erlaube OPAC: Wählen Sie, ob sich Benutzer*innen dieser Domain im OPAC mit ihren Zugangsdaten dieses Identity Providers anmelden können.
Erlaube Dienstoberfläche: Wählen Sie aus, ob sich Mitarbeitende dieser Domain mit ihren Anmeldeinformationen dieses Identity Providers in der Dienstoberfläche anmelden können.
Automatische Registrierung: Wählen Sie aus, ob ein neues Benutzerkonto in Koha erstellt werden soll, wenn sich ein*e Benutzer*in aus dieser Domain zum ersten Mal mit seinen Anmeldedaten dieses Identity Providers anmeldet.
Bemerkung
Wenn die automatische Registrierung aktiviert ist, stellen Sie sicher, dass die Felder „userid“ oder „cardnumber“ in den Mappings enthalten sind (siehe oben).
Vergewissern Sie sich auch, dass die Standardbibliothek und der Standardbenutzertyp für neue Benutzer*innen richtig eingestellt sind. Diese werden den neuen Benutzer*innen zugewiesen.
Bei Login aktualisieren: Wählen Sie aus, ob das Benutzerkonto in Koha mit den externen Informationen aktualisiert werden soll, wenn sich ein*e Benutzer*in aus dieser Domain mit seinen Anmeldedaten dieses Identity Providers anmeldet.
Warnung
Die Informationen können verloren gehen, wenn Sie sie direkt in Koha ändern.
Sobald das Formular ausgefüllt ist, klicken Sie auf „Bestätigen“, um den neuen Identity Provider zu speichern.
Sobald der Identity Provider hinzugefügt wurde, müssen Sie Koha neu starten.
Hinzufügen einer E-Mail-Domain zu einem vorhandenen Identity Provider
Sie müssen mindestens eine E-Mail-Domain hinzufügen, wenn Sie einen neuen Identity Provider erstellen. Sie können weitere hinzufügen, indem Sie auf der Hauptseite der Identity Provider auf die Schaltfläche „Domains verwalten“ rechts neben dem Identity Provider und dann auf „Neue E-Mail-Domain“ klicken.
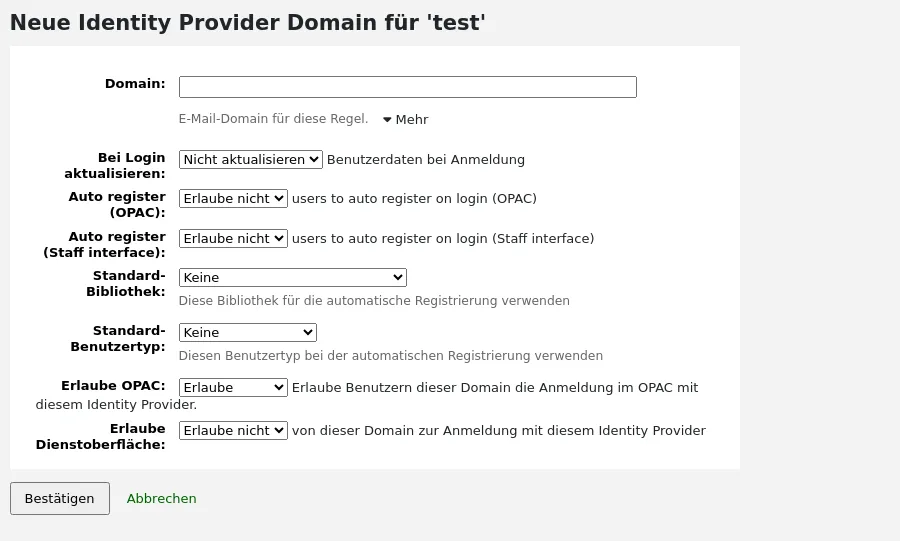
Domain: Geben Sie die E-Mail-Domain für eingehende Benutzer*innen ein.
Bemerkung
Geben Sie ein Sternchen (*) ein, um alle Domains einzuschließen.
Bei Login aktualisieren: Wählen Sie aus, ob das Benutzerkonto in Koha mit den externen Informationen aktualisiert werden soll, wenn sich ein*e Benutzer*in aus dieser Domain mit seinen Anmeldedaten dieses Identity Providers anmeldet.
Warnung
Die Informationen können verloren gehen, wenn Sie sie direkt in Koha ändern.
Automatische Registrierung: Wählen Sie aus, ob ein neues Benutzerkonto in Koha erstellt werden soll, wenn sich ein*e Benutzer*in aus dieser Domain zum ersten Mal mit seinen Anmeldedaten dieses Identity Providers anmeldet.
Bemerkung
Wenn die automatische Registrierung aktiviert ist, vergewissern Sie sich, dass die Felder „userid“ oder „cardnumber“ in den Mappings des Identity Providers enthalten sind.
Vergewissern Sie sich auch, dass die Standardbibliothek und der Standardbenutzertyp für neue Benutzer*innen richtig eingestellt sind. Diese werden den neuen Benutzer*innen zugewiesen.
Standardbibliothek: Wenn die automatische Registrierung aktiviert ist, wählen Sie aus, in welcher Bibliothek neue Benutzer*innen registriert werden sollen.
Standardbenutzertyp: Wenn die automatische Registrierung aktiviert ist, wählen Sie den Benutzertyp, der neue Benutzer*innen zugewiesen werden.
Erlaube OPAC: Wählen Sie, ob sich Benutzer*innen dieser Domain im OPAC mit ihren Zugangsdaten dieses Identity Providers anmelden können.
Erlaube Dienstoberfläche: Wählen Sie aus, ob sich Mitarbeitende dieser Domain mit ihren Anmeldeinformationen dieses Identity Providers in der Dienstoberfläche anmelden können.
Sobald das Formular ausgefüllt ist, klicken Sie auf „Bestätigen“, um die neue E-Mail-Domain zu speichern.
Z39.50/SRU-Server
Z39.50 ist ein Client-Server-Protokolle für die Suche und das Abfragen von Informationen von entfernten Datenbanken. Kurz gesagt ist es ein Werkzeug für die Fremddatenübernahme.
SRU-Suche/Abrufen via URL- ist ein Standard XML-basiertes Protokoll für Suchabfragen, welches CQL - Contextual Query Language - verwendet, eine Standard-Syntax für Abfragen.
Mit Koha können Sie auf Z39.50- und SRU-Server zugreifen, die öffentlich zugänglich sind oder für die Sie die Anmeldedaten besitzen, und von dieser Quelle Titel- und Normdatensätze übernehmen.
Pfad in Koha: Mehr > Administration > Weitere Parameter > Z39.50./SRU-Server
Bemerkung
Nur Bibliothekspersonal mit der Berechtigung manage_search_targets (oder der superlibrarian-Berechtigung) hat Zugriff auf diesen Bereich.
Koha hat eine Liste von Standardeinstellungen von Z39.50- bzw. SRU-Servern vorinstalliert, die Sie bearbeiten, löschen und vervollständigen können.
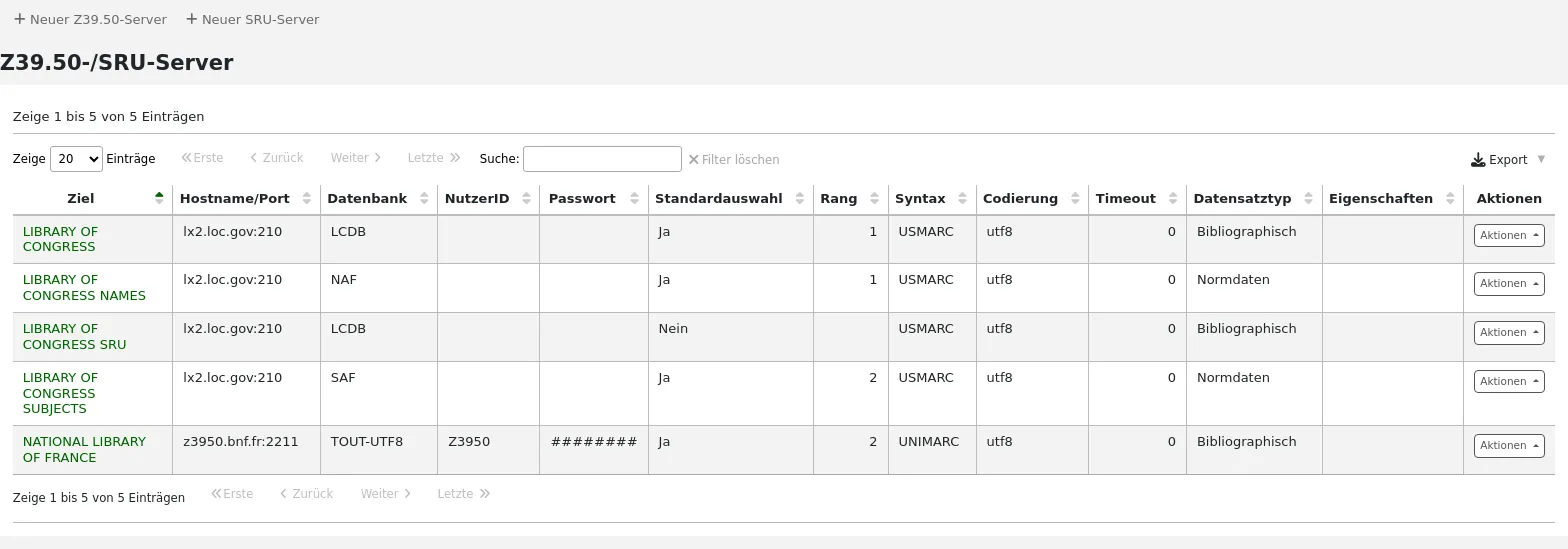
Ein Z39.50-Ziel hinzufügen
To find additional Z39.50 targets, you can use Index Data’s IRSpy https://irspy.indexdata.com or the Library of Congress’s list of targets https://www.loc.gov/z3950/. You can also contact individual libraries and ask for their Z39.50 information.
Auf der Z39.50-Haupseite, klicken Sie auf ‚Neuer Z39.50 Server‘.
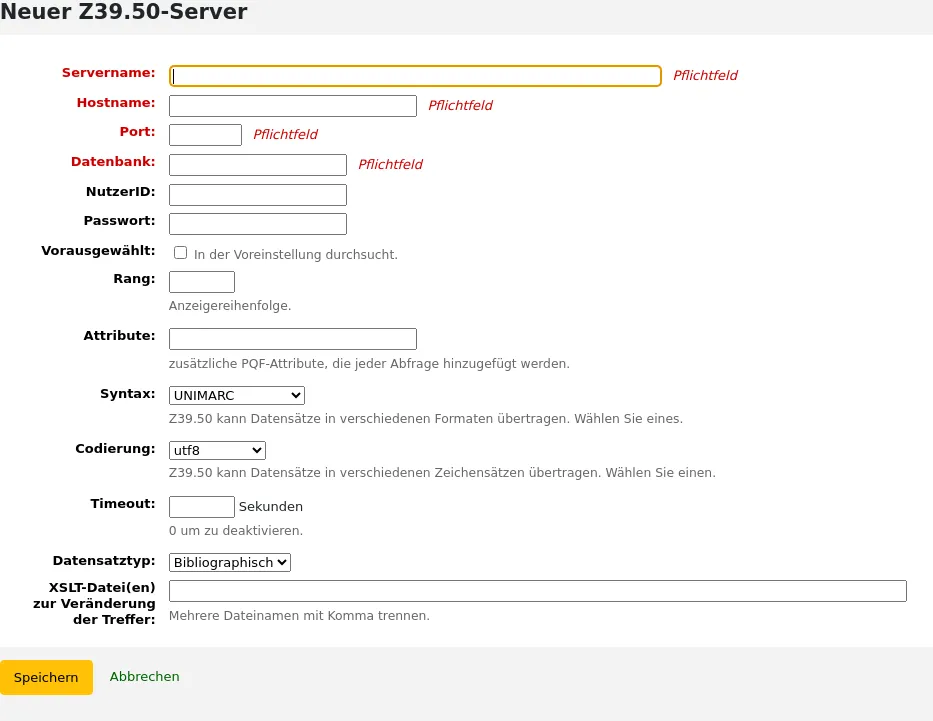
Servername: sollte einen einfach identifizierbaren Namen der Quelle enthalten. Beispiel: Name der Bibliothek. Er wird in Großbuchstaben gespeichert.
Hostname: geben Sie die Adresse des Z39.50-Ziels ein.
Port: der Port sagt Koha, auf welchem Port es Ergebnisse von diesem Server erhält.
Datenbank: geben Sie den Namen der Datenbank ein.
NutzerID: Einige Server können passwortgeschützt sein. Wenn dies bei dem Server, den Sie hinzufügen möchten, der Fall ist, geben Sie Ihre Benutzer-ID für diese Quelle ein.
Passwort: wenn der Server passwortgeschützt ist, geben Sie Ihr Passwort für diese Quelle ein.
Ausgewählt: Haken Sie die Box an, wenn Sie möchten, dass der Server automatisch durch Standardeinstellung ausgewählt wird.
Rang: Dieser legt fest, an welcher Stelle in der Liste der Server angezeigt wird. 0 ist die oberste Position, dann 1, 2, etc.
Bleibt der Rang leer, werden die Server in alphabetischer Reihenfolge angezeigt.
Attribute: Diese erlauben es PQF-Attribute anzugeben, die bei allen Abfragen angefügt werden.
Syntax: bezeichnet den MARC-Dialekt, den Sie verwenden.
Codierung: wählen Sie die von diesem Ziel verwendete Zeichenkodierung.
Bemerkung
Wenn Sie feststellen, dass Sonderzeichen beim Importieren von Datensätzen über Z39.50 nicht korrekt angezeigt werden, bedeutet dies, dass die Kodierung falsch ist. Ändern Sie die Kodierung und versuchen Sie erneut zu importieren.
Timeout: Geben Sie eine Anzahl von Sekunden ein, nach der die Suche nach dem Ziel abgebrochen werden soll, wenn innerhalb einer angemessenen Zeitspanne keine Ergebnisse gefunden werden. Dies ist hilfreich für Ziele, die sehr lange brauchen.
Datensatztyp: Wählen Sie aus, um welche Art von Daten es sich handelt, um Titel- oder Normdaten.
XSLT-Datei(en) zur Veränderung der Treffer: Eine oder mehrere XSLT-Dateien (durch Komma getrennt), die auf die Suchresultate angewandt werden.
Wenn Datensätze aus externen Quellen importiert werden, können Änderungen in den Datensätzen automatisiert erfolgen. Hierzu werden XSLT-Stylesheets verwendet. Koha wird bereits mit einigen XSLT-Beispieldateien /koha-tmpl/intranet-tmpl/prog/en/xslt/ installiert, die direkt verwendet werden können:
Del952.xsl: Exemplarinformationen löschen (Feld 952) (MARC21)
Del995.xsl: Exemplarinformationen löschen (Feld 995) (UNIMARC)
Del9LinksExcept952.xsl: Entfernen von Links zu Normdaten in bibliographischen Datensätzen ($9), außer im Fall von 952$9 (itemnumber) (MARC21)
Del9LinksExcept995.xsl: Entfernen von Links zu Normdaten in bibliographischen Datensätzen ($9), außer im Fall von 995$9 (itemnumber) (UNIMARC)
Klicken Sie auf „Speichern“.
Vorschläge für Z39.50-Server für bibliographische Daten
Koha Bibliotheken mit offenen Z39.50-Servern können im Koha Wiki: http://wiki.koha-community.org/wiki/Koha_Open_Z39.50_Sources Informationen teilen bzw. finden.
Known publicly available targets are listed on the Koha wiki at https://wiki.koha-community.org/wiki/Configure_Z39.50/SRU_targets.
You can also find open Z39.50 targets listed on the IRSpy website at https://irspy.indexdata.com/.
These targets are known to work:
LIBRARY OF CONGRESS
- Server name:
LIBRARY OF CONGRESS
- Hostname:
lx2.loc.gov
- Port:
210
- Datenbank:
LCDB
- Vorausgewählt:
select to search by default
- Rank:
Geben Sie einen Wert für die Anzeigereihenfolge ein, zum Beispiel 1.
- Syntax:
MARC21/USMARC
- Kodierung:
utf8
- Timeout:
0
- Datensatztyp:
Bibliographic
OHIOLINK
- Server name:
OHIOLINK
- Hostname:
olc1.ohiolink.edu
- Port:
210
- Datenbank:
INNOPAC
- Vorausgewählt:
select to search by default
- Rank:
Geben Sie einen Wert für die Anzeigereihenfolge ein, zum Beispiel 1.
- Syntax:
MARC21/USMARC
- Kodierung:
utf8
- Timeout:
0
- Datensatztyp:
Bibliographic
Ein SRU-Target hinzufügen
Auf der Z39.50/SRU-Haupseite klicken Sie auf ‚Neuer SRU-Server‘
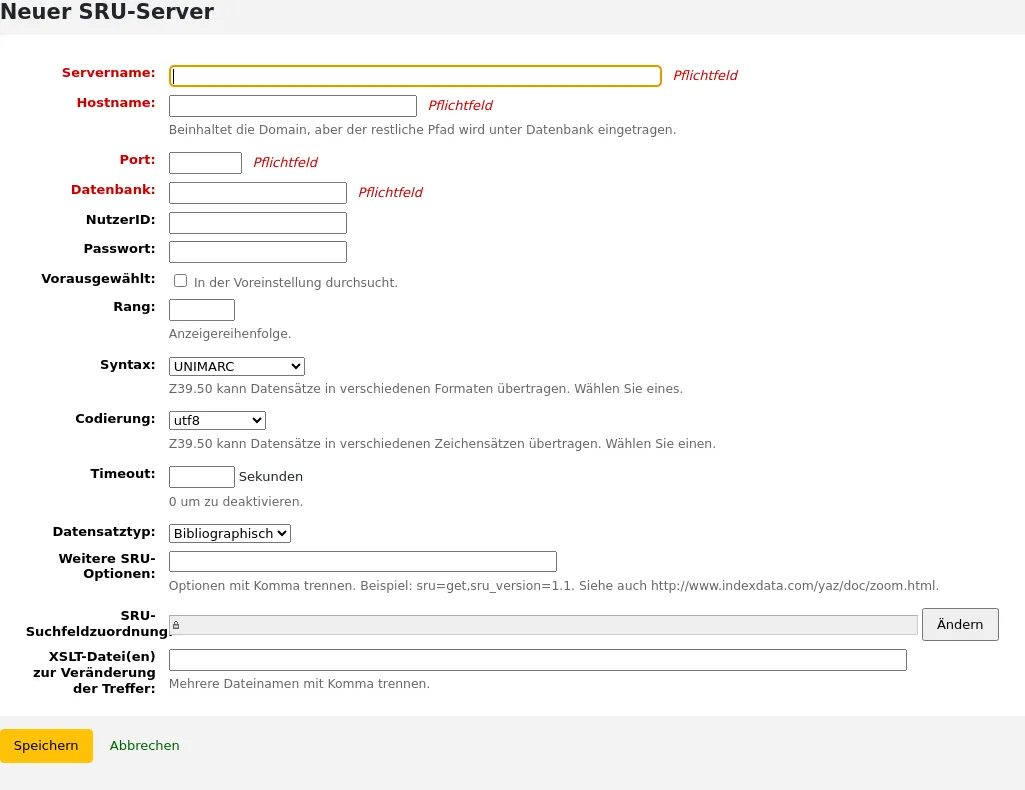
Servername: sollte einen einfach identifizierbaren Namen der Quelle enthalten. Beispiel: Name der Bibliothek.
Hostname: geben Sie die Adresse (URL) zum SRU-Ziel ein.
Port: Dieser sagt Koha, auf welchem Port es Ergebnisse von diesem Server erhält.
Datenbank: geben Sie den Namen der Datenbank ein.
NutzerID: Einige Server können passwortgeschützt sein. Wenn dies bei dem Server, den Sie hinzufügen möchten, der Fall ist, geben Sie Ihre Benutzer-ID für diese Quelle ein.
Passwort: wenn der Server passwortgeschützt ist, geben Sie Ihr Passwort für diese Quelle ein.
Ausgewählt: Haken Sie die Box an, wenn Sie möchten, dass der Server automatisch durch Standardeinstellung ausgewählt wird.
Rang: Dieser legt fest, an welcher Stelle in der Liste der Server angezeigt wird. 0 ist die oberste Position, dann 1, 2, etc.
Bleibt der Rang leer, werden die Server in alphabetischer Reihenfolge angezeigt.
Syntax: bezeichnet den MARC-Dialekt, den Sie verwenden.
Codierung: wählen Sie die von diesem Ziel verwendete Zeichenkodierung.
Bemerkung
Wenn Sie feststellen, dass Sonderzeichen beim Importieren von Datensätzen über Z39.50 nicht korrekt angezeigt werden, bedeutet dies, dass die Kodierung falsch ist. Ändern Sie die Kodierung und versuchen Sie erneut zu importieren.
Timeout: Geben Sie eine Anzahl von Sekunden ein, nach der die Suche nach dem Ziel abgebrochen werden soll, wenn innerhalb einer angemessenen Zeitspanne keine Ergebnisse gefunden werden. Dies ist hilfreich für Ziele, die sehr lange brauchen.
Datensatztyp: Wählen Sie aus, um welche Art von Daten es sich handelt, um Titel- oder Normdaten.
Zusätzliche SRU-Optionen: Sie können hier zusätzliche Optionen für externe Server angeben wie
sru_version=1.1oderschema=marc21, etc. Beachten Sie, dass solche Optionen serverabhängig sind.SRU-Suchfeldzuordnung: Klicken Sie auf „Bearbeiten“, um die Zuordnung zwischen den verfügbaren Feldern im Koha-Suchformular und den spezifischen serverabhängigen Indexnamen hinzuzufügen oder zu aktualisieren.
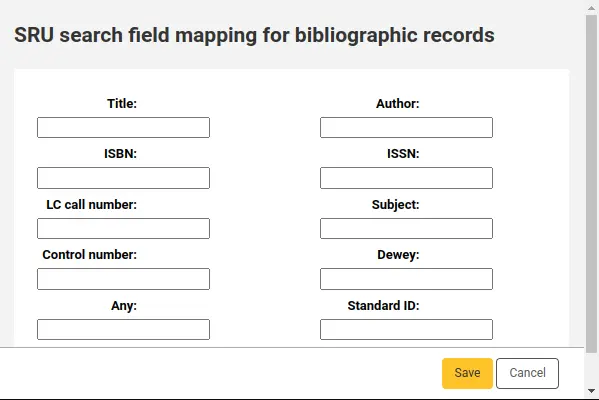
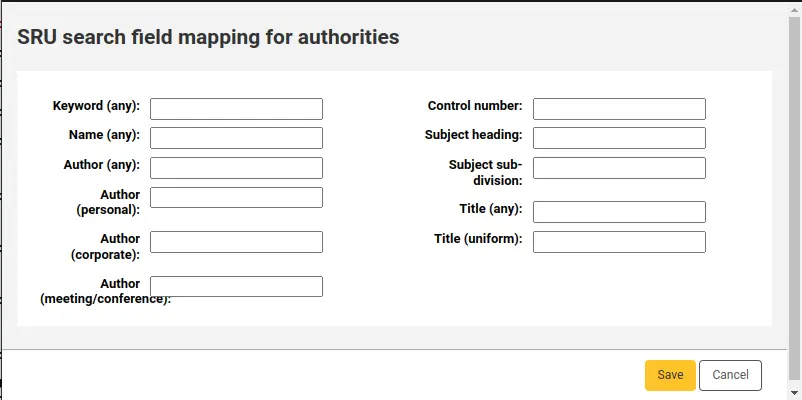
Um ihre Suchergebnisse weiter zu verfeinern, können Sie die folgenden Indexnamen der SRU-Suchfeldzuordnung hinzufügen. Um dies zu tun bearbeiten Sie den Server und verwenden Sie die ‚Ändern‘-Schaltfläche neben diesem Feld.
Titel
dc.title
ISBN
bath.isbn
Alle
cql.anywhere
Verfasser
dc.author
ISSN
bath.issn
Schlagwort
dc.subject
Standard-ID
bath.standardIdentifier
Tabelle: SRU Übereinstimmung
XSLT-Datei(en) zur Veränderung der Treffer: Eine oder mehrere XSLT-Dateien (durch Komma getrennt), die auf die Suchresultate angewandt werden.
Wenn Datensätze aus externen Quellen importiert werden, können Änderungen in den Datensätzen automatisiert erfolgen. Hierzu werden XSLT-Stylesheets verwendet. Koha wird bereits mit einigen XSLT-Beispieldateien /koha-tmpl/intranet-tmpl/prog/en/xslt/ installiert, die direkt verwendet werden können:
Del952.xsl: Exemplarinformationen löschen (Feld 952) (MARC21)
Del995.xsl: Exemplarinformationen löschen (Feld 995) (UNIMARC)
Del9LinksExcept952.xsl: Entfernen von Links zu Normdaten in bibliographischen Datensätzen ($9), außer im Fall von 952$9 (itemnumber) (MARC21)
Del9LinksExcept995.xsl: Entfernen von Links zu Normdaten in bibliographischen Datensätzen ($9), außer im Fall von 995$9 (itemnumber) (UNIMARC)
Klicken Sie auf „Speichern“.
OAI repositories
Version
This feature was first introduced in version 24.11 of Koha.
Get there: More > Administration > Additional parameters > OAI repositories
This section is used to define which OAI repositories to harvest metadata from in order to create records in Koha.
OAI-PMH harvesting is a protocol to retrieve records from an OAI-PMH repository. OAI-PMH repositories may be used by libraries for local history collections, thesis repositories… This functionality allows you to host and manage a collection outside of Koha but include the records in your Koha catalogue.
Once one or more OAI repositories are set up, use the harvest_oai.pl cronjob to harvest the records.
Adding an OAI repository to harvest
You will need to add a new OAI repository for each set you want to harvest. Click on the button ‚+ New OAI repository‘.
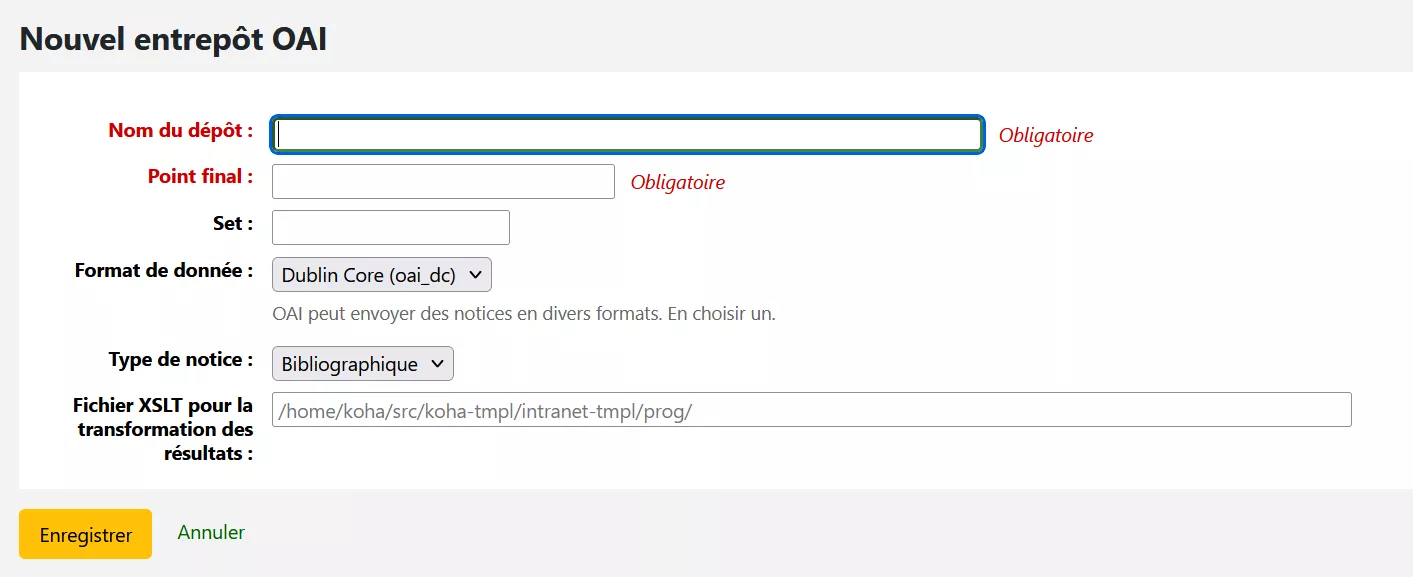
Repository name: enter a name that will help you identify the source
Endpoint: enter the URL.
The repository should provide you with its base endpoint; for example
https://doaj.org/oai?verb=Identifyfor the Directory of Open Access Journals. In the Koha endpoint field, simply enter the information before?verb, e.g.https://doaj.org/oai.
Set: the name of the set you want to harvest.
You can usually find all the sets available by adding
?verb=ListSetsto the endpoint you entered in the previous field.
Data format: choose the format to harvest in the list.
You can check the formats available for a repository by adding
?verb=ListMetadataFormatsto the endpoint you entered previously.
Record type: choose if you will harvest bibliographic or authority records in this set.
XSLT file for transforming results: type the path of the XSLT file you want to apply to transform Dublin Core XML to MARC. Several XSLT files are provided by default:
For bibliographic records:
<path_to_src>/koha-tmpl/intranet-tmpl/prog/en/xslt/OAIDCtoUNIMARCXML.xslor<path_to_src>/koha-tmpl/intranet-tmpl/prog/en/xslt/OAIDCtoMARC21XML.xslFor authority records:
<path_to_src>/koha-tmpl/intranet-tmpl/prog/en/xslt/AuthOAIDCtoUNIMARCXML.xslor<path_to_src>/koha-tmpl/intranet-tmpl/prog/en/xslt/AuthOAIDCtoMARC21XML.xsl
Click ‚Save‘ to save the new OAI repository.
SMTP-Server
Pfad in Koha: Mehr > Administration > Weitere Parameter > SMTP-Server
In diesem Bereich können Sie SMTP-Server für den Versand von E-Mails über Koha konfigurieren.
Bemerkung
Nur Bibliothekspersonal mit der Berechtigung manage_smtp_servers (oder der superlibrarian-Berechtigung) hat Zugriff auf diesen Bereich.
Die Standard-STMP-Konfiguration wird in der Datei koha-conf.xml festgelegt. In diesem Bereich können Sie jedoch zusätzliche Server hinzufügen.
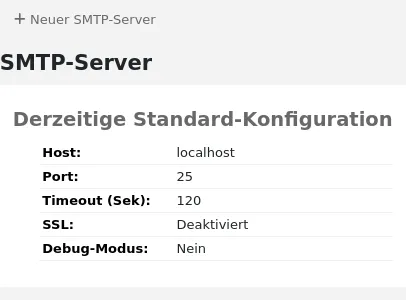
Um einen neuen Server hinzuzufügen,
„Neuer SMTP-Server“ klicken
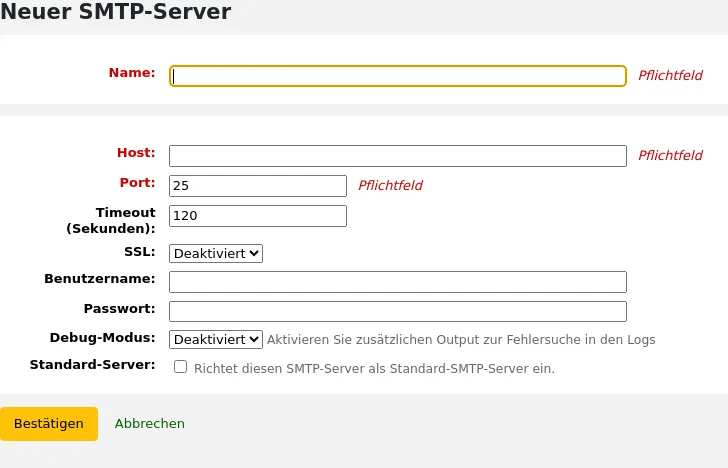
Name (Pflichtfeld): Geben Sie dem Server einen aussagekräftigen Namen, dieser Name wird in Koha angezeigt
Host (Pflichtfeld): Geben Sie den Hostnamen oder die IP-Adresse des Servers ein
Port (Pflichtfeld): geben Sie die von Ihrem/Ihrer Administrator*in zur Verfügung gestellt Portnummer ein
Timeout (Sekunden): Geben Sie die Anzahl der Sekunden ein, nach denen eine nicht gesendete E-Mail zu einem Fehler führt
SSL: Wählen Sie das von Ihrem/Ihrer Administrator*in bereitgestellte Sicherheitsprotokoll
Deaktiviert: keine Sicherheit (nicht empfohlen)
SSL
STARTTLS
Benutzername: Geben Sie den von Ihrem/Ihrer Administrator*in angegebenen Benutzernamen ein
Passwort: Geben Sie das von Ihrem/Ihrer Administrator*in vergebene Passwort ein
Debug-Modus: Wählen Sie, ob der Debug-Modus aktiviert werden soll, um zusätzliche Ausgaben in die Protokolle zu senden
Standardserver: Wählen Sie, ob dieser Server standardmäßig von allen Bibliotheken verwendet werden soll
Klicken Sie auf ‚Bestätigen‘
Sobald der Server hinzugefügt ist, können Sie ihn in den Bibliotheksdetails auswählen.
Meinten Sie?
Pfad in Koha: Mehr > Administration > Weitere Parameter > Meinten Sie?
Bemerkung
Nur Bibliothekspersonal mit der Berechtigung manage_didyoumean (oder der superlibrarian-Berechtigung) haben Zugriff auf diesen Bereich.
Koha kann ‚Meinten Sie?‘-Vorschläge auf der Basis der Normdaten generieren.
Wichtig
Meinten Sie? ist aktuell nur im OPAC verfügbar. Die Intranet-Optionen sind für zukünftige Entwicklungen aber bereits angelegt.
Auf dieser Seite kann konfiguriert werden, welche Optionen Koha Benutzern anbietet, um Ihre Suchergebnisse zu verbessern.
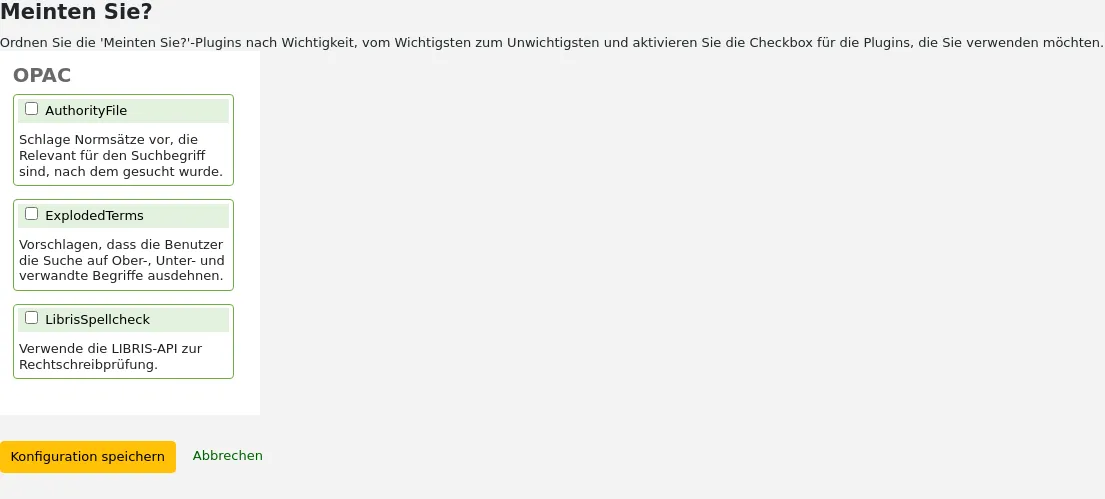
Um das ‚Meinten Sie…?‘-Plugin zu aktivieren, muss die Checkbox neben jedem Plugin angeklickt werden, das Sie verwenden möchten. Die beiden verfügbaren Plugins sind:
Das ExplodedTerms-Plugin schlägt dem/der Benutzer*in breitere/engere/verwandte Begriffe für eine Suche vor (Beispiel: Bei einer Suche nach ‚New York (Staat)‘ würde eine Suche mit engeren Begriffen auch nach ‚New York (Stadt)‘ suchen). Dieses Plugin ist nur für Bibliotheken mit hierarchischen Normdaten interessant.
Das AuthorityFile-Plugin durchsucht die Normdaten und schlägt dem/der Benutzer*in Titel vor, die mit den ersten 5 Normdatensätzen verknüpft sind, die es findet
Wenn ein Plugin die Priorität vor einem anderen haben soll, ziehen Sie es einfach über das andere.
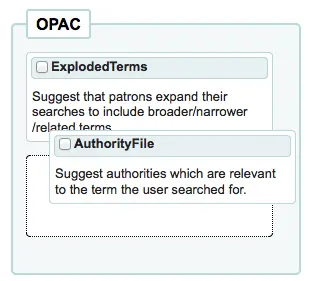
Wählen Sie beide Plugin, bekommen Sie verschiedene Optionen über der Trefferliste angezeigt
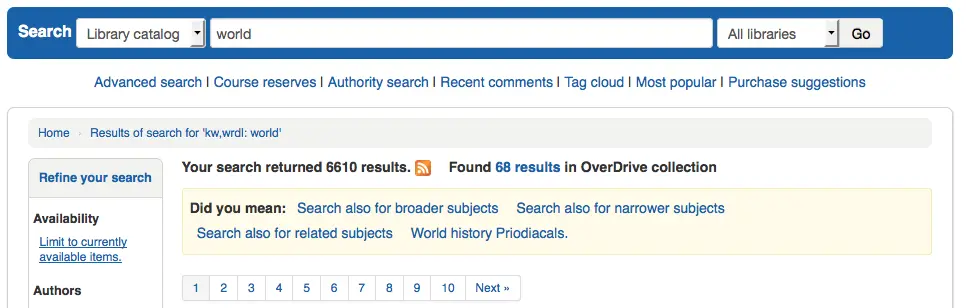
Wählen Sie nur den AuthorityFile, sehen Sie die Normdaten.
Tabellenkonfiguration
Dieser Bereich in der Administration erlaubt es Spalten in Tabellen in der Dienstoberfläche und im OPAC ein- oder auszublenden.
Pfad in Koha: Mehr > Administration > Weitere Parameter > Tabellenkonfiguration
Bemerkung
Nur Bibliothekspersonal mit der Berechtigung manage_column_config (oder der superlibrarian-Berechtigung) hat Zugriff auf diesen Bereich.
Klicken Sie auf das Modul, dessen Tabellen Sie bearbeiten möchten, um die verschiedenen Optionen anzuzeigen.
In diesem Bereich können Sie konfigurieren, welche Spalten in den Tabellen verschiedener Module in Koha angezeigt werden. Wenn keine Spalten ausgeblendet wurden, werden keine Häkchen und alle Spalten in der Tabelle angezeigt.
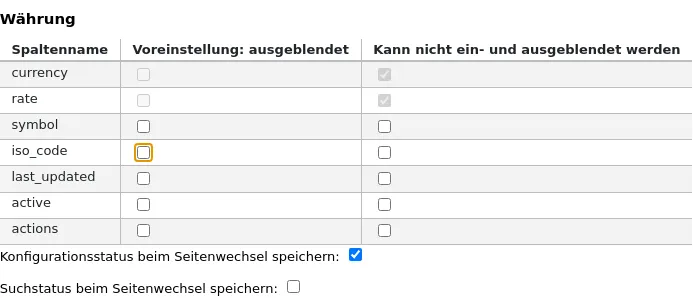
Und Sie sehen alle Spalten, wenn Sie die Tabelle auf der entsprechenden Seite sehen.

Wenn Spalten ausgeblendet wurden, sind diese in der Spalte ‚Voreinstellung: ausgeblendet‘ angehakt.
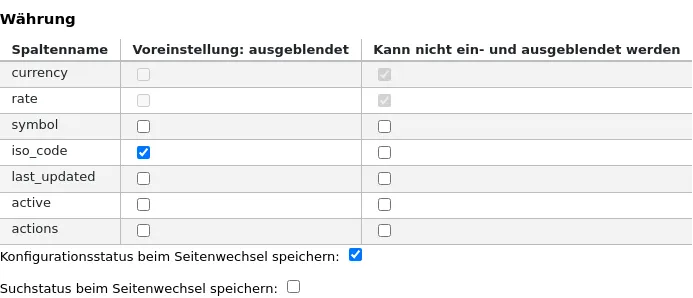
Und versteckt, wenn Sie die Tabelle sehen.
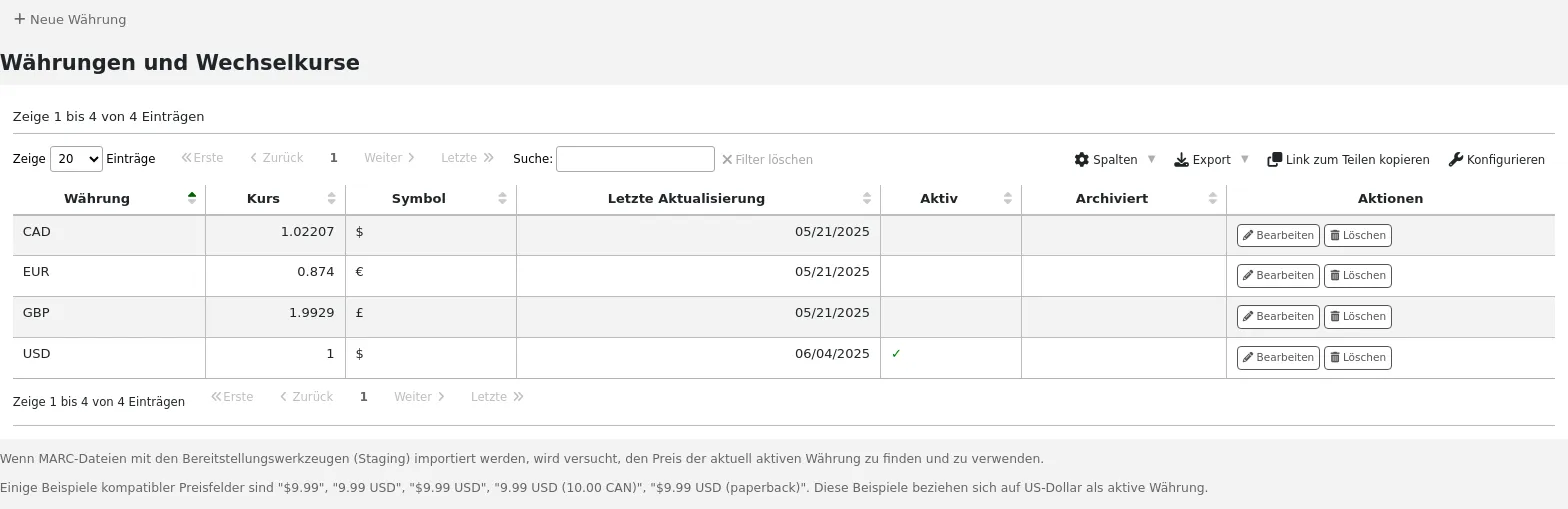
Die Spalte „Kann nicht ein- und ausgeblendet werden“ ermöglicht es, festzulegen, dass die Spalte beim Ansehen der Tabelle nicht ein- oder ausgeblendet werden kann.
Spalten können individuell über die Schaltfläche „Spalten“ am Anfang der Tabelle ein- und ausgeblendet werden.
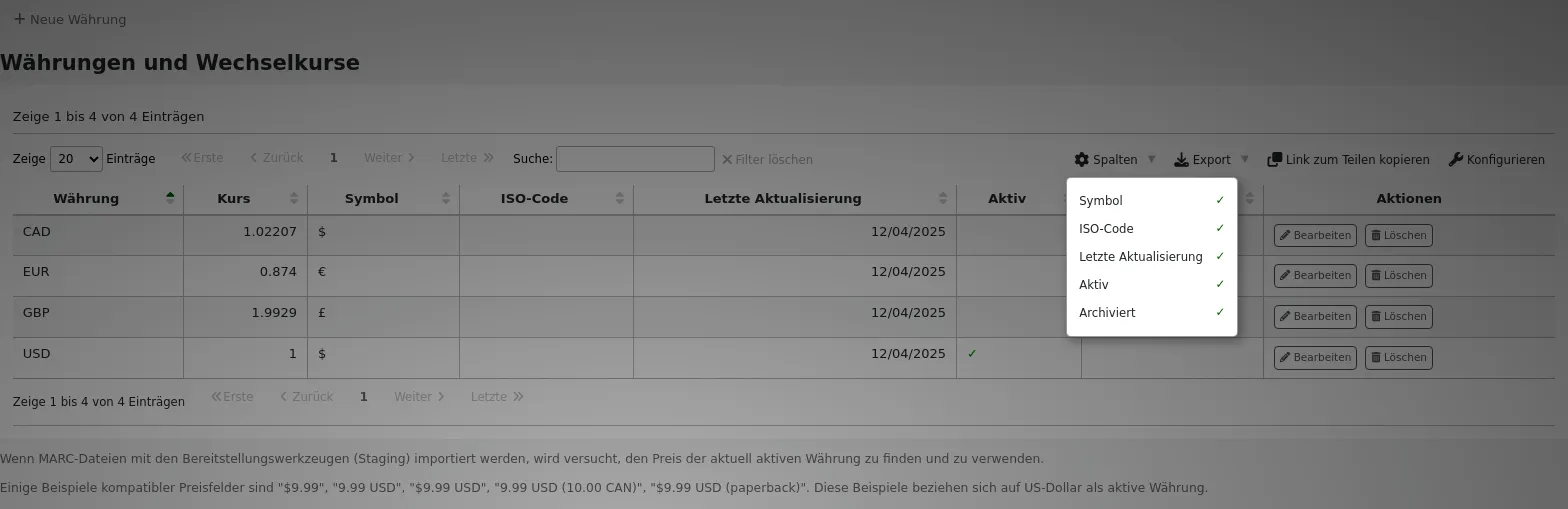
Zum Beispiel: in der Tabelle für die Definition von Währungen können die Spalten „Währung“ und „Rate“ nicht verändert werden. Wenn man auf die Schaltfläche „Spalten“ klickt, sind diese beiden Spalten dort nicht aufgeführt.
Bitte beachten Sie, dass Änderungen der Spaltensichtbarkeit über die Schaltfläche „Spalten“ nur für den aktuellen Benutzer und die aktuelle Session gültig sind. Sobald die Seite neu geladen wird, springen die Einstellungen zurück auf die Voreinstellung, wie sie unter Administration > Tabellenkonfiguration festgelegt wurde. Andere Benutzer sind davon nicht betroffen.
Modul |
Tabellen |
|---|---|
Erwerbung |
|
Administration |
|
Normdaten |
Es gibt im Modul Normdaten keine konfigurierbaren Tabellen. |
Katalog |
|
Katalogisierung |
|
Ausleihe |
|
Semesterapparate |
|
E-Ressourcen Management (ERM) |
|
Fernleihe |
|
Benutzer |
|
Verkauf |
|
Werkzeuge |
|
OPAC |
|
Reports |
|
Zeitschriften |
|
Bemerkung
Benutzer im OPAC können die Sichtbarkeit der Spalten nicht verändern. Für OPAC-Tabellen erlaubt dieses Feature nur die Sichtbarkeit der Spalten zu konfigurieren.
Bemerkung
Alle hier aufgelisteten Tabellen haben auch die Optionen für den Export nach Excel und CSV, das Kopieren in die Zwischenablage oder das Drucken oberhalb der Tabelle.
Akustische Signale
Wenn der Systemparameter AudioAlerts auf ‚Aktiviere‘ gesetzt ist, können Sie in diesem Bereich die verschiedenen akustischen Signale die Koha benutzt, kontrollieren.
Pfad in Koha: Mehr > Administration > Weitere Paramter > Akkustische Signale
Bemerkung
Nur Bibliothekspersonal mit der Berechtigung manage_audio_alerts (oder der superlibrarian-Berechtigung) hat Zugriff auf diesen Bereich.
Jede Dialog-Box in Koha hat eine zugewiesene CSS Klasse. Diese fungiert als Wahlschalter für einen Ton.
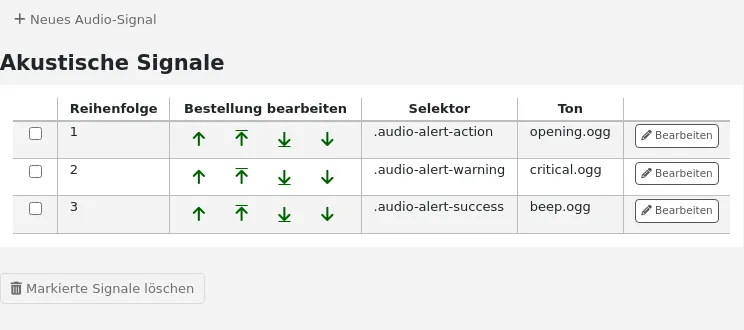
Sie können die Standardeinstellung durch klicken auf die Schaltfläche „Bearbeiten“ rechts von jedem Signal bearbeiten.
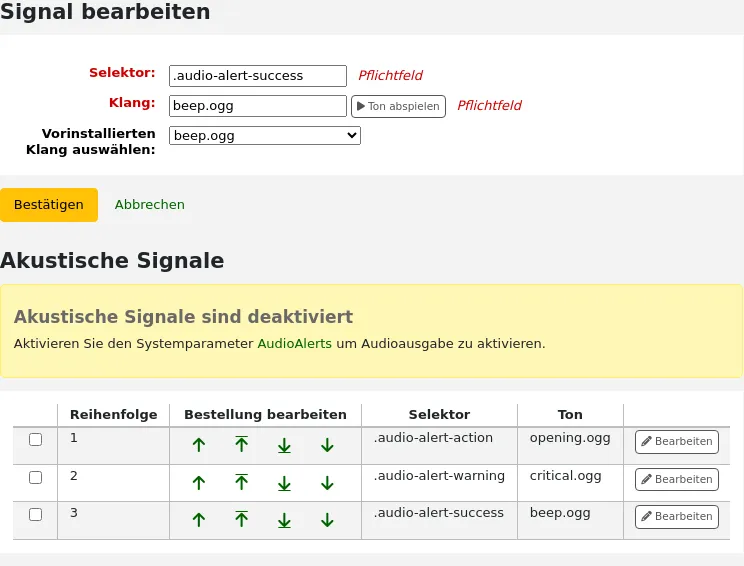
Sie können Signaltöne anderen CSS Klassen in Koha zuordnen, indem Sie die Information in die Box ‚Selektor‘ eingeben. Zum Beispiel
body:contains('Check in message')
Wenn Sie dann auf die Seite für die Rückgabe wechseln, hören Sie ein akkustisches Signal.
Jede Seite in Koha hat eine eigene ID, die verwendet werden kann um eine spezielle Seite einem Ton zuzuordnen
Jeder ID-Selektor ( HTML enthält id=“name_of_id“ ) und kann auch als Trigger fungieren: #name_of_selector
SMS-Mobilfunk-Provider
Wichtig
- Diese Option erscheint nur wenn der
Systemparameter SMSSendDriver, SMSSendMaxChar auf „E-Mail“ eingestellt ist.
Bemerkung
Nur Bibliothekspersonal mit der Berechtigung manage_sms_providers (oder der superlibrarian-Berechtigung) hat Zugriff auf diesen Bereich.
Bemerkung
Viele Mobilfunkanbieter haben die Unterstützung für die Funktion SMS::Send::Email veraltet. Ihre Verwendung wird nicht empfohlen, es sei denn, Sie verfügen über ein spezielles SMS-zu-E-Mail-Gateway.
Von hier aus können Sie soviele Netzprovider hinzufügen, wie Sie benötigen um SMS Nachrichten an Ihre Benutzer zu verschicken.
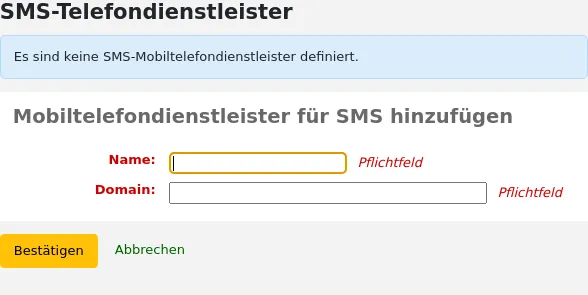
Einige Beispiele in den USA sind:
Mobile Carrier |
SMS Gateway Domain |
|---|---|
Alltel |
sms.alltelwireless.com |
AT&T |
txt.att.net |
Boost Mobile |
sms.myboostmobile.com |
Project Fi |
msg.fi.google.com |
Republic Wireless |
text.republicwireless.com |
Sprint |
messaging.sprintpcs.com |
T-Mobile |
tmomail.net |
U:S. Cellular |
email.uscc.net |
Verzion Wireless |
vtext.com |
Virgin Mobile |
vmobl.com |
Tabelle: Beispiele für SMS Anbieter
Um einen neuen Anbieter hinzuzufügen, geben Sie die Informationen in die Maske ein und klicken Sie ‚Hinzufügen‘ um zu speichern.
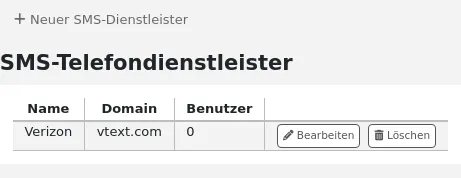
These options will appear in the OPAC for patrons to choose from on the Messaging tab if you have EnhancedMessagingPreferences enabled.
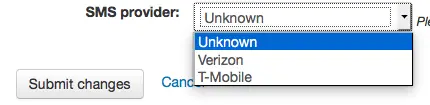
Bibliotheksstatistiken mit der Koha-Community teilen
Sie können Ihre Statistiken zur Verwendung von Koha mit der Hea-Community teilen. Das Teilen dieser Daten hilft bei der Entwicklung, da die Community auf diese Daten zurückgreift, um Entscheidungen zu treffen.
Bemerkung
Nur Bibliothekspersonal mit der Berechtigung manage_usage_stats (oder der superlibrarian-Berechtigung) hat Zugriff auf diesen Bereich.
Bitte beachten Sie, dass alle Daten anonymisiert sind und keine Benutzerdaten geteilt werden.
Weltweite Statistiken finden Sie unter https://hea.koha-community.org/
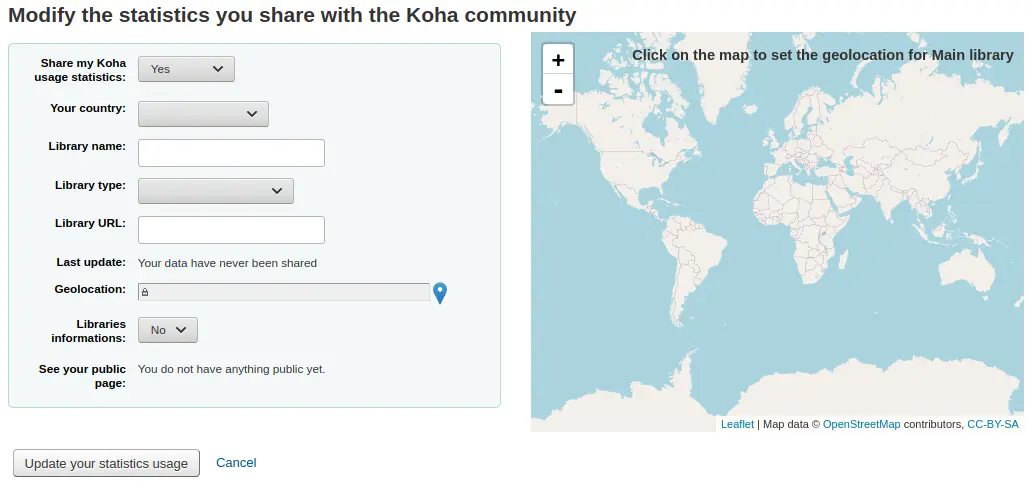
Koha-Nutzungsstatistiken teilen:
Die Voreinstellung ist „Unentschieden“, dies bewirkt, dass auf der Startseite der Administration ein Hinweis angezeigt wird.
Wählen Sie „Ja“, wenn Sie Ihre Nutzungsstatistiken teilen möchten
Wählen Sie „Nein“, wenn Sie keine Statistiken teilen möchten und auch keinen Hinweis auf der Startseite der Administration sehen möchten
Ihr Land: Wählen Sie das Land, in dem Ihre Bibliothek liegt
Bibliotheksname: Geben Sie den Namen Ihrer Bibliothek ein
Bibliothekstyp: Wählen Sie die Art Ihrer Bibliothek
Bibliothekswebseite: Geben Sie die URL der Webseite Ihrer Bibliothek an
Letzte Aktualisierung: Hier sehen Sie, an welchem Datum Ihre Daten zuletzt an die Hea-Webseite übermittelt wurden
Geolokalisierung: Verwenden Sie die Karte auf der rechten Seite um einen Marker an die Stelle zu setzen, an der Ihre Bibliothek sich befindet. Die Koordinaten werden dann im Feld Geolokalisierung angezeigt.
Bibliotheksinformation: Wenn Sie mehr als eine Zweigstelle haben, können Sie hier „Ja“ wählen und alle Zweigstellen auf der Karte eintragen
Ihre öffentliche Seite ansehen: Diese URL zeigt Ihnen Ihre Informationen auf der Hea-Webseite.
Klicken Sie auf „Nutzungsstatistiken aktualisieren“, um die Angaben zu speichern.
Daten mit der Mana KB teilen
Mana KB ist eine weltweite Knowledge Base, die verwendet wird um bestimmte Inhalte zwischen Bibliotheken zu teilen. Koha kann aktuell Abonnementdaten und Reports über die Mana KB austauschen. Dieser Bereich wird verwendet um die Verbindung zur Mana KB zu konfigurieren.
Pfad in Koha: Mehr > Administration > Weitere Parameter > Daten mit der Mana KB teilen
Bemerkung
Nur Bibliothekspersonal mit der Berechtigung manage_mana (oder der superlibrarian-Berechtigung) hat Zugriff auf diesen Bereich.
Geben Sie in dem Formular an, ob Sie die Mana KB verwenden möchten um Daten zu teilen oder nicht. Die Voreinstellung ist: „Nein, lass mich darüber nachdenken“. Wenn Sie die Mana KB verwenden möchten, ändern sie diese auf „Aktivieren“. Wenn Sie keine Daten austauschen möchten, wählen Sie „Deaktivieren“, dies deaktiviert dann auch den Hinweis am Anfang der Startseite des Administrationsmoduls.
Der restliche Text dieses Bereichs geht davon aus, dass „Aktivieren“ gewählt wurde.
Legen Sie fest, ob Sie Ihre Abonnementdaten automatisch teilen möchten. Dies bedeutet, dass jedes Mal, wenn Sie ein Abonnement im Zeitschriftenmodul anlegen, diese Daten automatisch mit der Mana KB geteilt werden und andere Bibliotheken die Daten von dort übernehmen können.
Um die Mana KB zu konfigurieren, müssen Sie ein Mana KB Token vom Mana KB Server anfordern, um Ihre Koha-Installation damit zu authentifizieren.
Geben Sie Ihren Namen oder den Ihrer Einrichtung in das Feld „Ihr Name“ ein.
Geben Sie Ihre E-Mail-Adresse im Feld „E-Mail-Adresse“ an. Stellen Sie sicher, dass Sie Zugriff auf den Posteingang dieser Adresse haben, da Sie weitere Informationen per E-Mail erhalten werden.
Sobald Sie Ihre Daten an die Mana KB übertragen haben, erhalten Sie ein Mana KB Token.
Klicken Sie auf den Bestätigungslink in der E-Mail, die Sie erhalten haben und bestätigen Sie, dass Sie kein Bot sind, um die Konfiguration der Mana KB abzuschließen.
Zusätzliche Felder
Dieser Bereich erlaubt es Zusatzfelder für Bestellkörbe, Rechnungen, Zeitschriftenabonnements und Erwerbungsbestellungen hinzuzufügen.
Bemerkung
Nur Bibliothekspersonal mit der Berechtigung manage_additional_fields (oder der superlibrarian-Berechtigung) hat Zugriff auf diesen Bereich.
Um ein neues Feld hinzuzufügen, wählen Sie zunächst die Tabelle.
Erwerbung
Rechnungen (aqinvoices): ein zu aqinvoices hinzugefügtes Feld, erscheint bei der Anzeige einer Rechnung im Erwerbungsmodul.
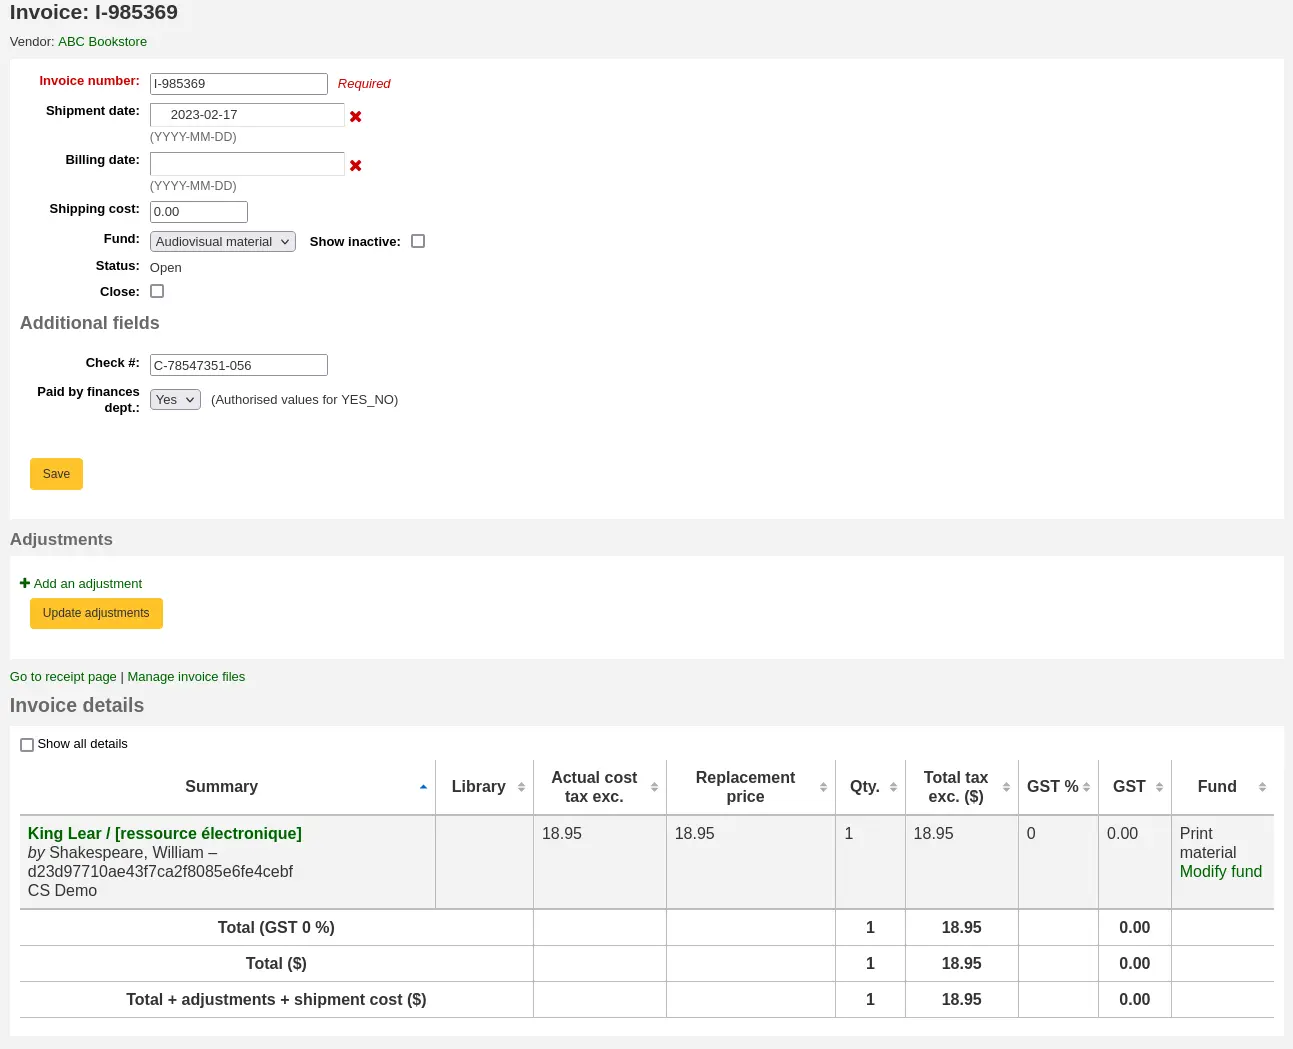
Order baskets (aqbasket): a field added to aqbasket will appear upon the creation of a new order basket or the modification of an existing order basket in the acquisitions module.
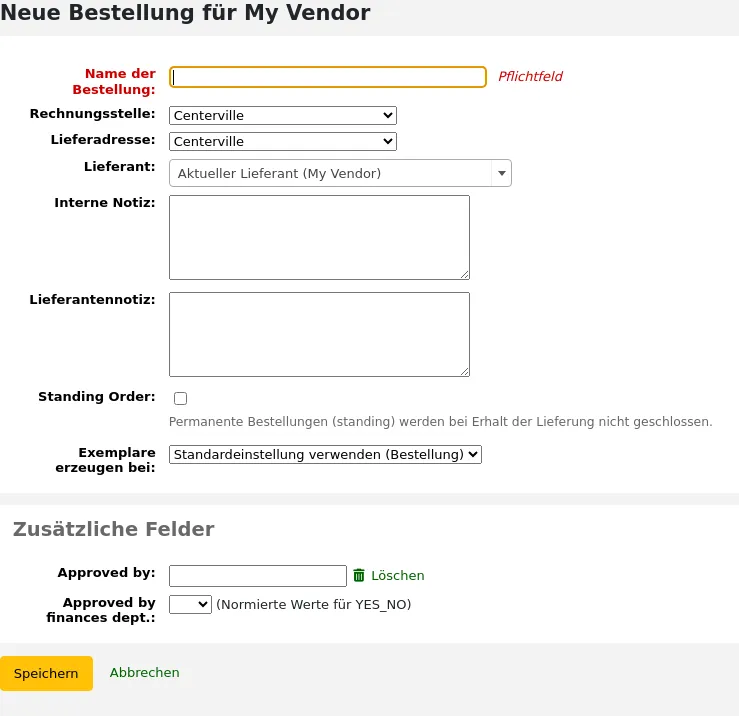
Erwerbungsbestellungen (aqbasket): Ein Feld, das zu aqorders hinzugefügt wird, wird beim Anlegen einer neuen Bestellung oder bei der Bearbeitung einer existierenden Bestellung angezeigt.
Administration
Bibliotheken (Zweigstellen): Ein Zusatzfeld für Bibliotheken wird angezeigt, wenn man Bibliotheken bearbeitet.
Version
Additional fields for libraries were added to Koha in version 25.05.
ERM
Vereinbarungen (erm_agreements): ein Feld, das zu erm_agreements hinzugefügt wird, wird angezeigt, wenn man im ERM-Modul Vereinbarungen anlegt oder bearbeitet.
Version
Additional fields for ERM agreements were added to Koha in version 24.11.
Lizenzen (erm_licenses): ein Zusatzfeld für erm_licenses wird angezeigt, wenn Lizenzen angelegt oder bearbeitet werden.
Version
Additional fields for ERM licenses were added to Koha in version 24.11.
Packages (erm_packages): a field added to erm_packages will appear when creating or editing packages in the ERM module.
Version
Additional fields for ERM packages were added to Koha in version 24.11.
Benutzer
Kontozeilen (Gutschrift) (accountlines:credit): ein Feld, das zu den Gutschrift-Kontozeilen hinzugefügt wird, erscheint bei Zahlung oder Erlass von Gebühren auf dem Konto eines Benutzers oder bei Erstellung manueller Gutschriften.
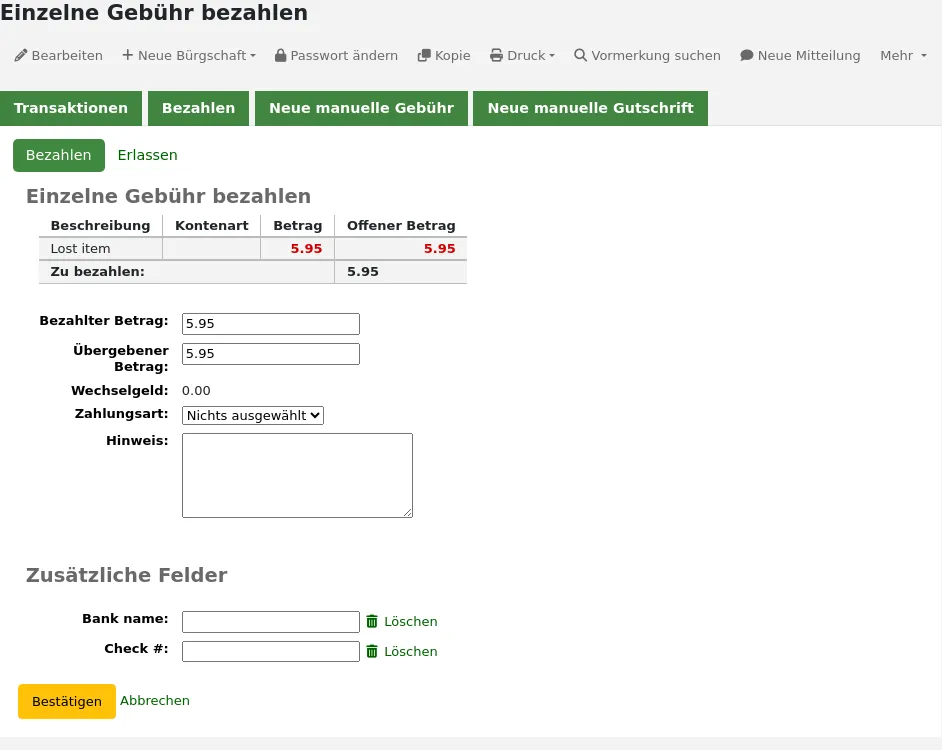
Kontozeilen (Gebühren) (accountlines:debit): ein Feld, das der Gebühren-Kontozeile hinzugefügt wird, erscheint beim Erstellen einer manuellen Rechnung
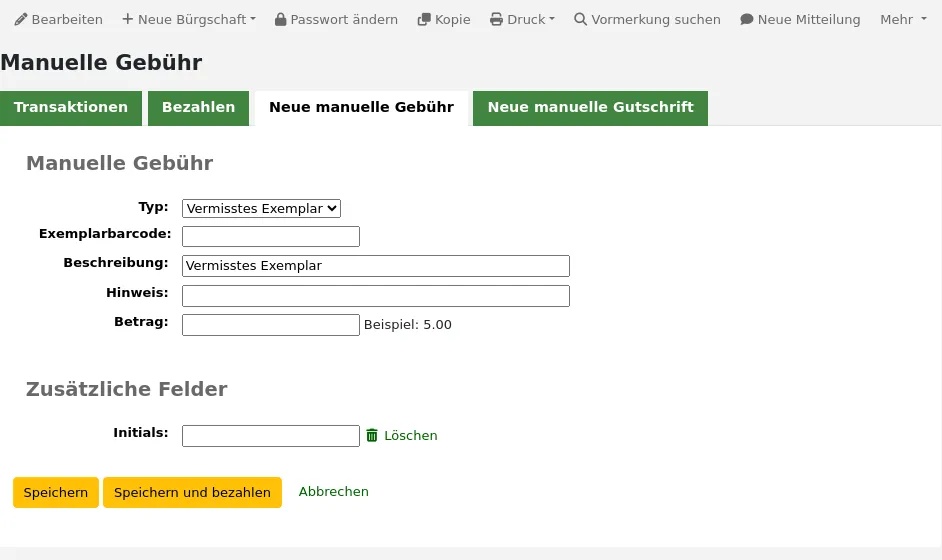
Gebührenarten (account_credit_types): ein zusätzliches Feld einer Gebührenart wird angezeigt, wenn Gebührenarten angelegt oder bearbeitet werden.
Version
Additional fields for credit types were added to Koha in version 25.05.
Gebührenarten (account_debit_types): ein zusätzliches Feld für eine Gebührenart, wird angezeigt wenn Gebührenarten angelegt oder bearbeitet werden.
Version
Additional fields for debit types were added to Koha in version 25.05.
Zeitschriften
Abonnements (subscription): ein Feld, das zu subscription hinzugefügt wird, wird beim Anlegen eines neuen Abonnements oder beim Bearbeiten eines existierenden Abonnements im Zeitschriftenmodul angezeigt.
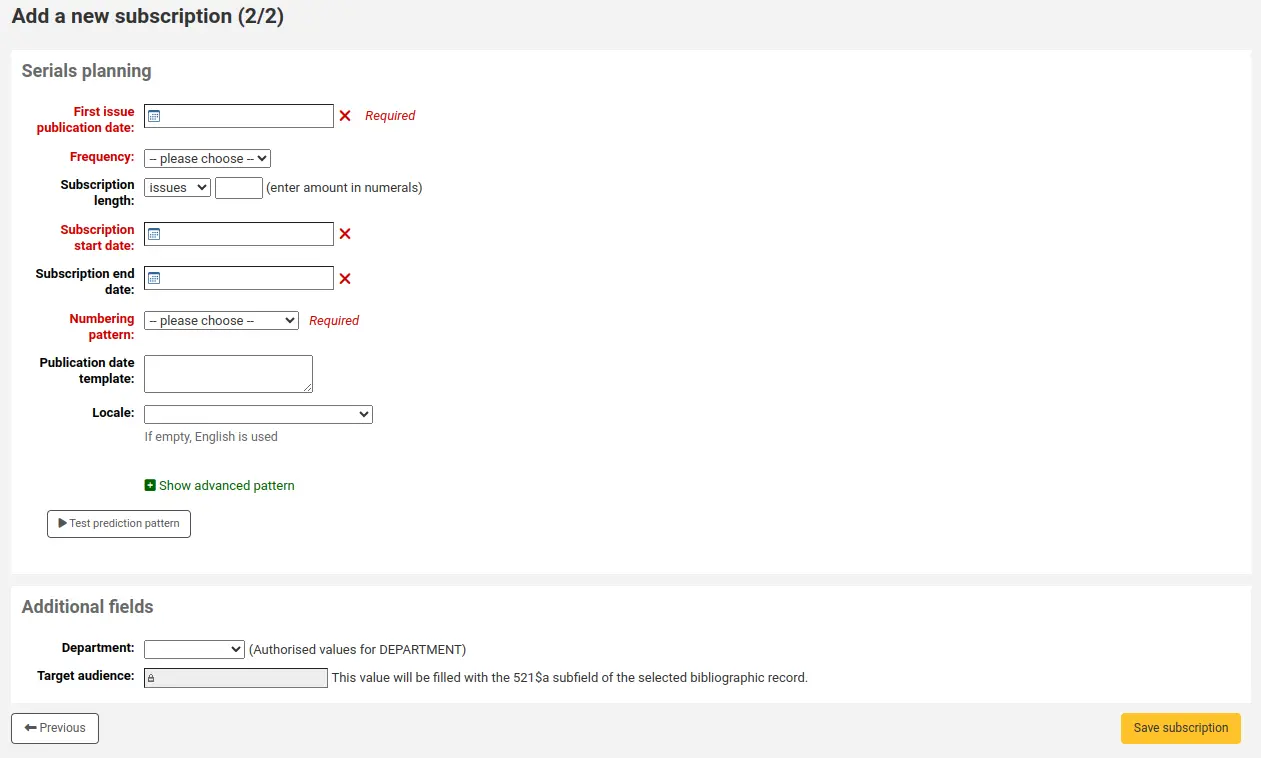
Klicken Sie auf „Neues Feld“.
Füllen Sie das Formular aus.
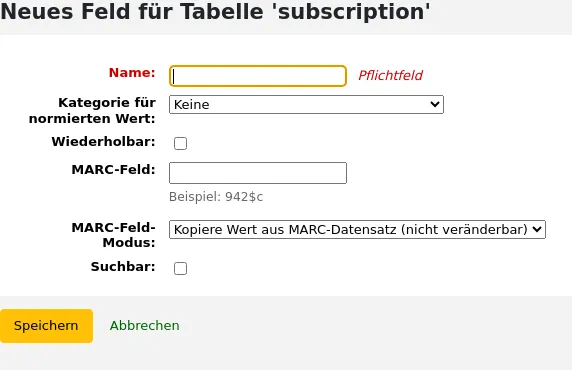
Name: das ist die Beschreibung des Feldes, die angezeigt werden soll.
Kategorie für normierten Wert: wenn Sie das Feld als Auswahlliste konfigurieren möchten, wählen Sie hier eine Kategorie für einen normierten Wert (bei Bedarf können Sie zunächst eine neue Kategorie für normierte Werte anlegen).
Repeatable: if you want the field to be repeatable, check this box. For free text fields, it will add a ‚New‘ button next to the field so that staff can repeat the field and add a new value. For fields with authorized value categories, it will create a list of checkboxes instead of a dropdown menu allowing staff to choose more than one option.
Version
Diese Funktion wurde in Koha-Version 24.11 hinzugefügt.
MARC-Feld: für Zusatzfelder für Abonnements ist es möglich, diese mit einem MARC-Feld zu verlinken. Das Zusatzfeld wird dann automatisch mit dem Inhalt dieses Feldes im Titelsatz vorbelegt.
Bemerkung
Sie können nur eine der beiden Optionen wählen (normierter Wert ODER MARC-Feld)
Warnung
Wählen Sie das MARC-Feld aus, dann geben Sie die Information in diesem Format an: Feld$Unterfeld
Zum Beispiel: 590$a
Suchbar: setzen Sie ein Häkchen in dieser Box, wenn Sie möchten, dass Sie in den Abonnements oder Bestellungen nach diesem Feld suchen können
Durchsuchbare Zusatzfelder für Bestellungen werden als Suchoptionen in der erweiterten Bestellsuche angezeigt
Durchsuchbare Zusatzfelder für Rechnungen werden als Suchoptionen in der Rechnungssuche angezeigt
Suchbare Zusatzfelder für Abonnements werden als Suchoptionen in der erweiterten Abonnementsuche angezeigt
Beispiele für Zusatzfelder
Beispiel 1: Das zusätzliche Feld verwendet Normierte Werte
Sie können nachverfolgen für welche Abteilung Sie die Zeitschrift bestellen
Geben Sie in das Feld ‚Name‘ die ‚Abteilung‘ an
Im Feld ‚Kategorie für normierte Werte‘ wählen Sie DEPARTMENT aus
Markieren Sie die Checkbox ‚Suchbar‘

Wenn Sie ein Abonnement anlegen, wird das Feld als ‚Zusatzfeld‘ mit einer Auswahlliste der normierten Werte angezeigt.
Wenn Sie das Abonnement anschauen, erscheint das Feld unter ‚Zusatzfelder‘.
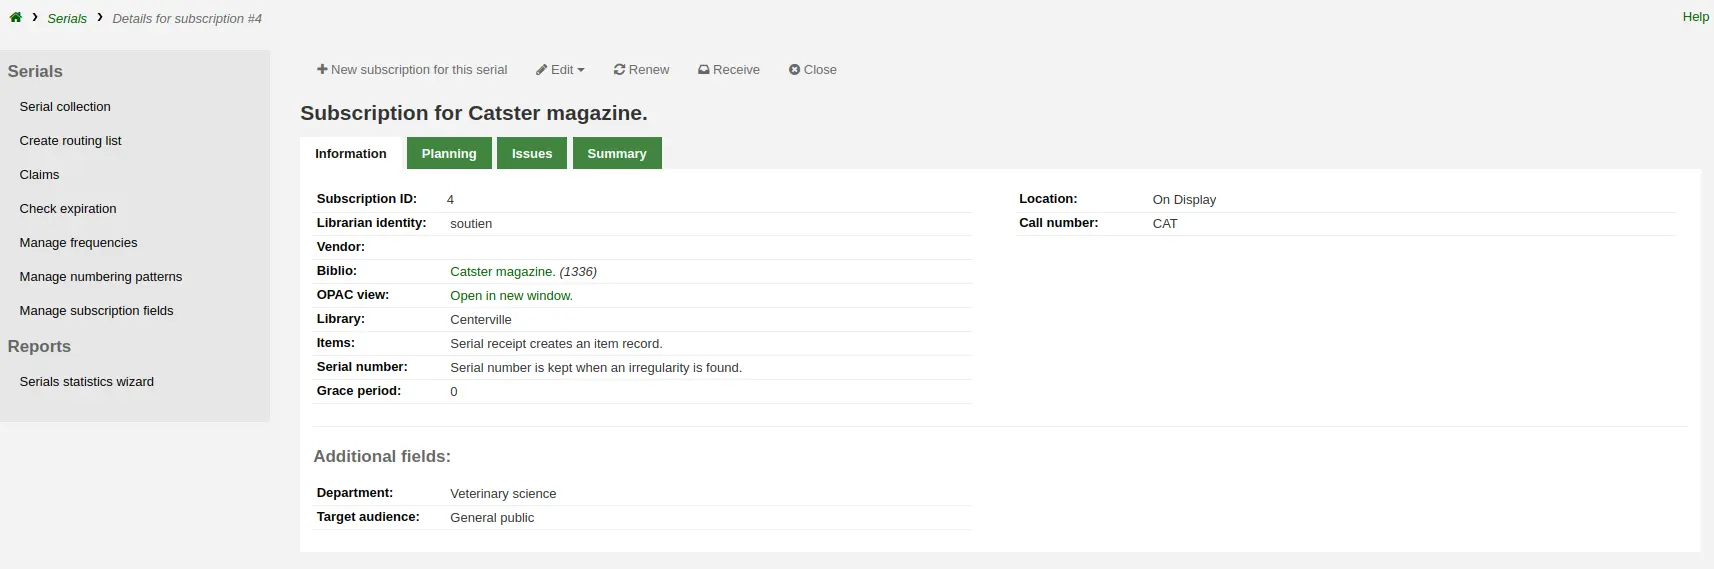
Da Sie das Feld als ‚suchbar‘ gekennzeichnet haben, wird es auch in der Suche der ‚Zeitschriftenabonnements‘ angezeigt.
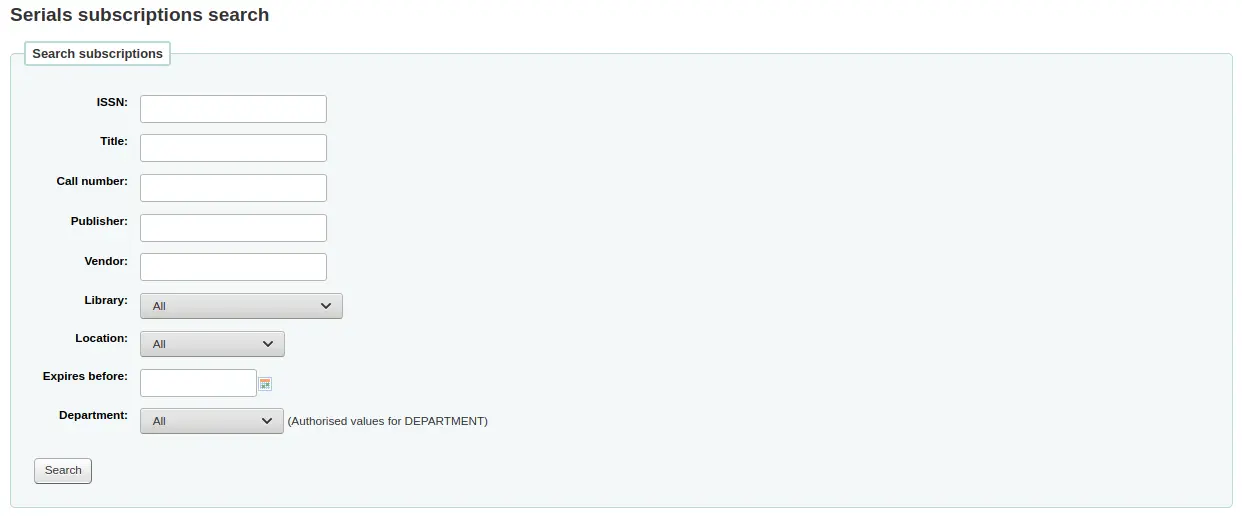
Beispiel 2: Zusätzliches Abonnementfeld als MARC-Fled
Dies ist vorallem hilfreich, wenn Sie auf der Detailansicht des Abonnements bibliographische Informationen anzeigen möchten. In diesem Beispiel, fügen wir das Feld 521$a hinzu, welches in MARC21 die Fußnote zur Zielgruppe darstellt.
Im Feld ‚Name‘ geben Sie ‚Zielgruppe‘ an
Im Feld ‚MARC Feld‘ geben Sie ‚521$a‘ ein
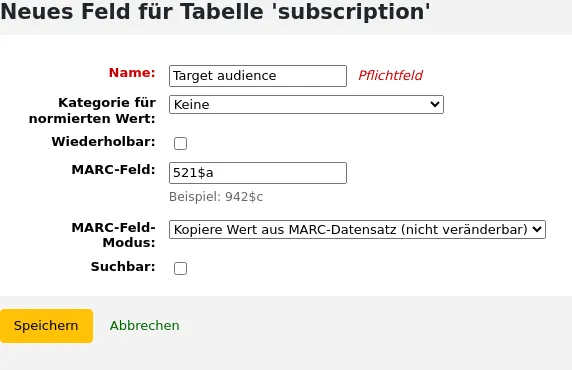
Bemerkung
Sie können dieses Feld ausgehend vom Abonnement nicht bearbeiten. Möchten Sie etwas hinzufügen, oder den Wert des Feldes ändern, müssen Sie die Änderung über das Katalogisierungsmodul durchführen.
In der Abonnement Ansicht, wird das Feld und die Information des bibliographischen Datensatzes unter ‚Zusatzfelder‘ angezeigt.
Beispiel 3: Zusätzliches freies Textfeld für Rechnungen
Wenn Sie Rechnungen zusätzliche Informationen beifügen müssen, z. B. die Nummer des Schecks, mit dem die Rechnung bezahlt wurde, können Sie auf die Verwendung eines Normierten Werts verzichten.
Geben Sie in das Feld „Name“ „Check #“ ein
Markieren Sie die Checkbox ‚Suchbar‘
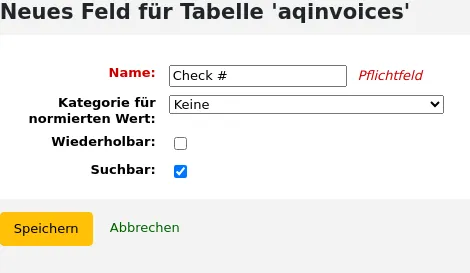
Die neuen Felder werden bei Aufruf einer Rechnung im Erwerbungsmodul angezeigt.
Da Sie das Feld als ‚suchbar‘ gekennzeichnet haben, wird es auch in der Rechnungssuche angezeigt.
Tastaturkürzel
In diesem Bereich können Tastenkürzel definiert werden, die im erweiterten Katalogisierungs-Editor verwendet werden.
Bemerkung
Dieser Bereich wird nur angezeigt, wenn der Systemparameter EnableAdvancedCatalogingEditor aktiviert ist.
Bemerkung
Nur Bibliothekspersonal mit der Berechtigung manage_keyboard_shortcuts (oder der superlibrarian-Berechtigung) hat Zugriff auf diesen Bereich.
Um ein Tastenkürzel zu ändern, geben Sie die zu verwendende Tastenkombination in das Feld in der Spalte „Tasten“ ein und klicken Sie auf „Tastenkürzel speichern“.
Achten Sie bei der Eingabe Ihres Tastenkürzels darauf, die Regeln der Tastenbelegung zu befolgen:
Mehrere Tasten mit Bindestrich „-“ trennen
Strg-Taste ist „Ctrl“
Alt-Taste ist „Alt“
Shift ist „Shift“
Wenn mehrere Tasten kombiniert werden, müssen diese in der folgenden Reihenfolge angegeben werden: Shift-Cmd-Ctrl-Alt