Katalogisierung
Pfad in Koha: Mehr > Katalogisierung
Vor der Katalogisierung mit Koha müssen einige Grundeinstellungen vorgenommen werden. Diese finden Sie in der Checkliste zur Implementierung. Der wichtigste Punkt ist, dass Sie die Bibliografischen MARC-Frameworks für die Anforderungen Ihrer Bibliothek anpassen. In normalen Katalogisierungseditor können Sie keine MARC-Felder oder -Unterfelder hinzufügen oder entfernen; deshalb sollten die Frameworks bereits vor Beginn der Katalogisierung eingerichtet werden.
Sie können auch OCLC-Katalogisierungsdienste wie WorldShare Record Manager und Connexion verwenden, um Datensätze direkt an Koha zu senden. Weitere Informationen finden Sie unter OCLC Cataloging Services.
Bibliographische Datensätze
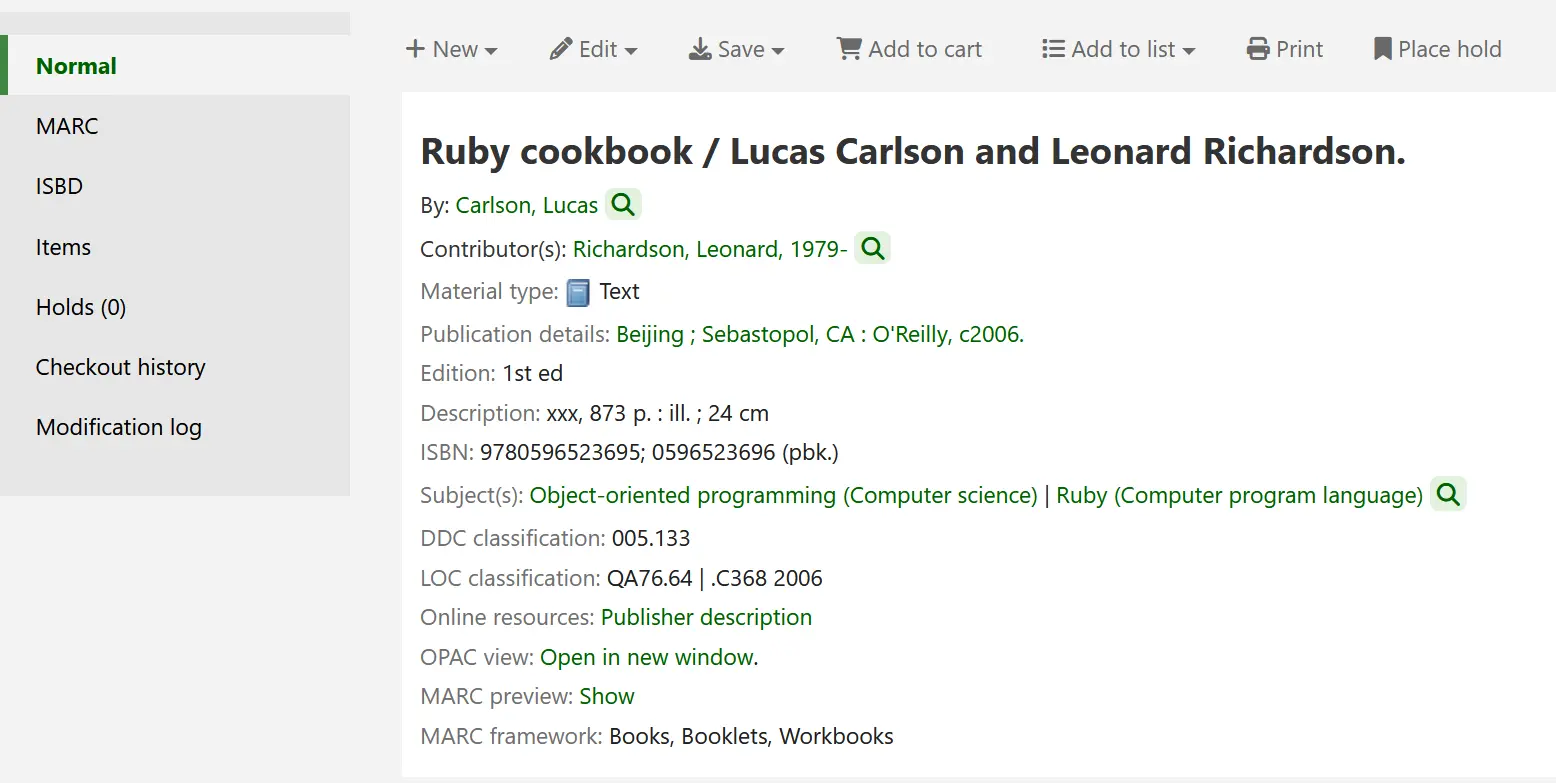
In Koha enthalten die bibliographischen Datensätze die Hauptinformationen über das katalogisierte Material. Diese umfassen Informationen wie den Titel, Verfasser, ISBN usw. Diese Informationen werden im MARC-Format gespeichert, wobei Koha diverse MARC-Varianten unterstützt. Standardmäßig wird die Seite mit den Datensatzdetails auf dem Reiter „Normal“ angezeigt und enthält die wichtigsten Details des Datensatzes.
Bemerkung
Im Reiter „Normal“ der Detailansicht wird auch angezeigt, welches Bibliographische MARC-Framework beim Anlegen des Datensatzes verwendet wurde.

Bemerkung
Koha unterstützt MARC21 und UNIMARC.
Sobald diese Titelinformationen abgespeichert wurden, können Exemplarsätze hinzugefügt werden.
Datensätze hinzufügen
Titel können in Koha durch Fremddatenübernahme oder Eigenkatalogisierung angelegt werden. Sie können auch den Einfachen oder den Erweiterten Editor benutzen.
Bemerkung
Um bibliografische Datensätze hinzufügen zu können, müssen die Mitarbeiter*innen die Berechtigung edit_catalogue (oder die superlibrarian-Berechtigung) besitzen.
Wenn Sie einen Datensatz katalogisieren möchten, können Sie ein leeres Template im einfachen Editor nutzen:
‚Neuer Titel‘ anklicken

Bemerkung
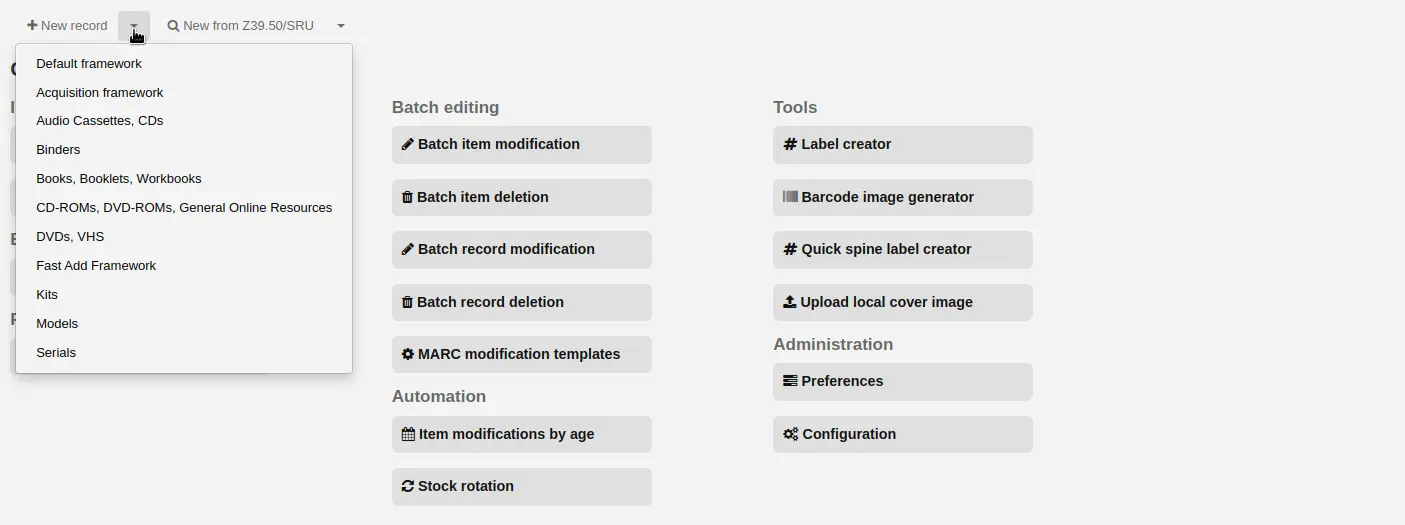
Mit dem Button ‚Neuer Titel‘ wird das bibliographische Standardframework für die Katalogisierung eines neuen Satzes geöffnet. Wenn Sie ein anderes Framework verwenden möchten, klicken Sie auf den kleinen Pfeil rechts neben dem Button ‚Neuer Titel‘ und wählen Sie das gewünschte Framework aus.
Bemerkung
Sie können Frameworks im Administrationsmodul neu erstellen oder bearbeiten.
Wenn Sie einen Datensatz katalogisieren möchten, verwenden Sie ein leeres Template im Erweiterten Editor:
Aktivieren Sie das Erweiterte Katalogisierungsmodul mit dem Systemparameter EnableAdvancedCatalogingEditor
Klicken Sie die Schaltfläche „Erweiterter Editor“

Wenn Sie einen neuen Datensatz aus einem vorhandenen Datensatz einer anderen Bibliothek erstellen möchten, nutzen Sie den Einfachen oder den Erweiterten Editor:
Klicken Sie die Schaltfläche „Import über Z39.50/SRU“

Bemerkung
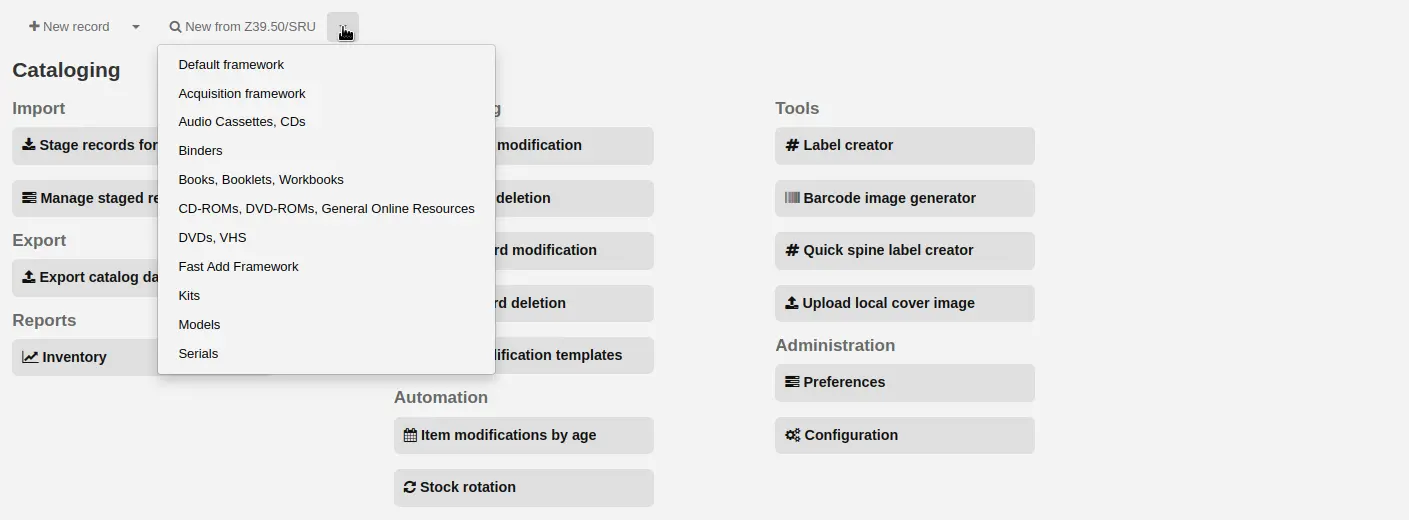
Mit dem Button ‚Import über Z39.50/SRU‘ wird das bibliographische Standardframework für die Katalogisierung eines neuen Satzes geöffnet. Wenn Sie ein anderes Framework verwenden möchten, klicken Sie auf den kleinen Pfeil rechts neben dem Button ‚Import über Z39.50/SUR‘ und wählen Sie das gewünschte Framework aus.
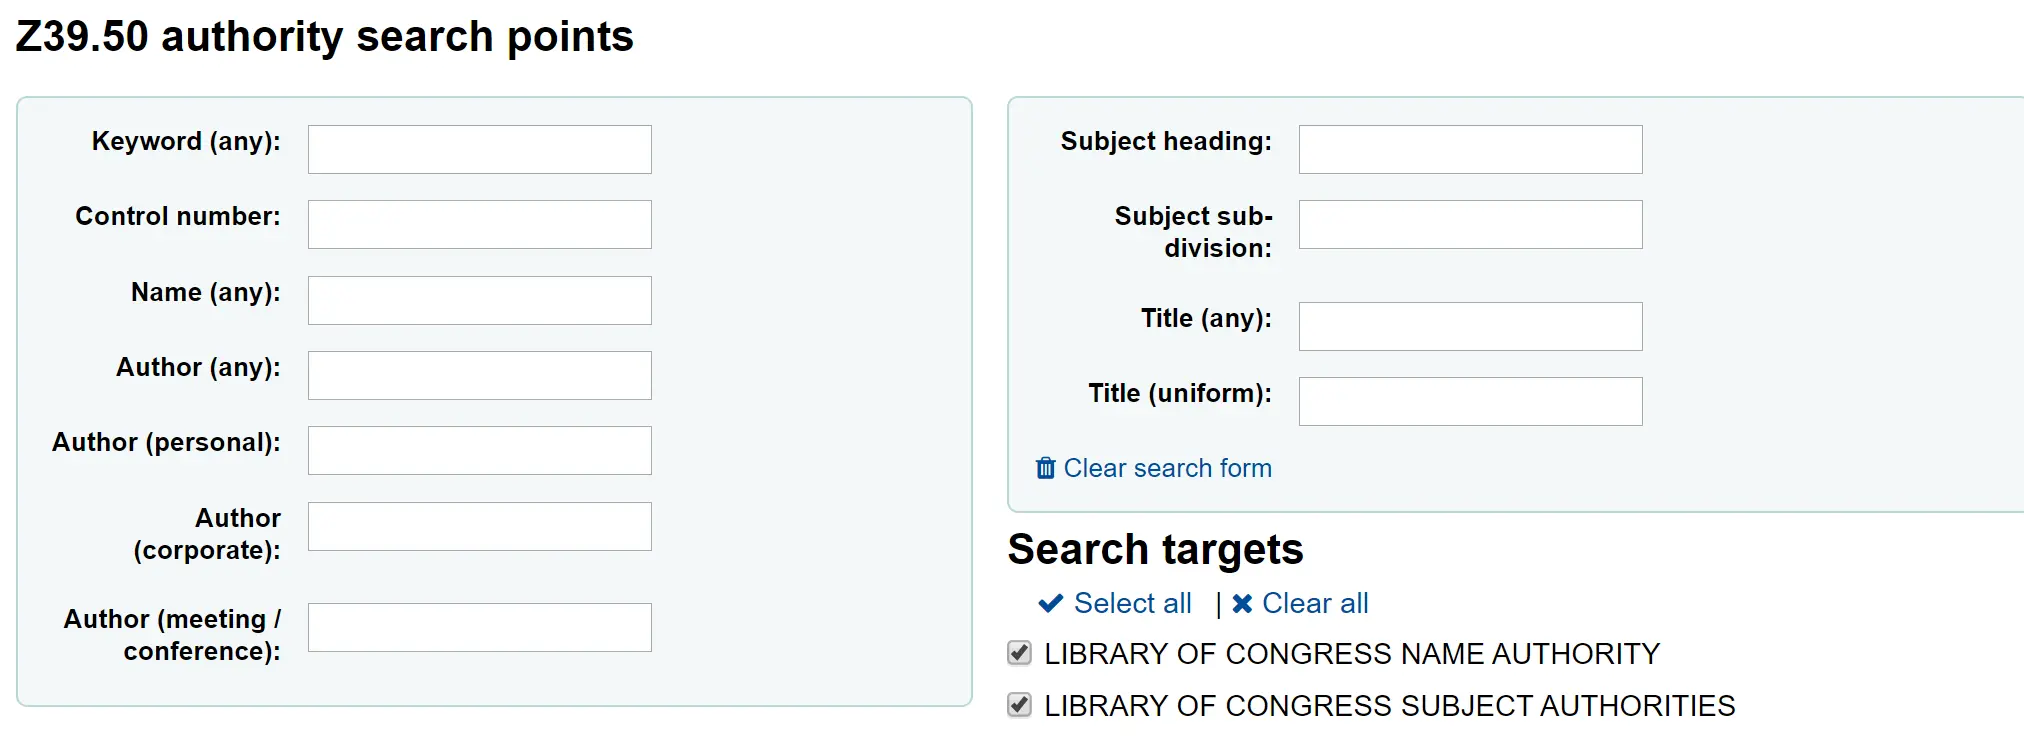
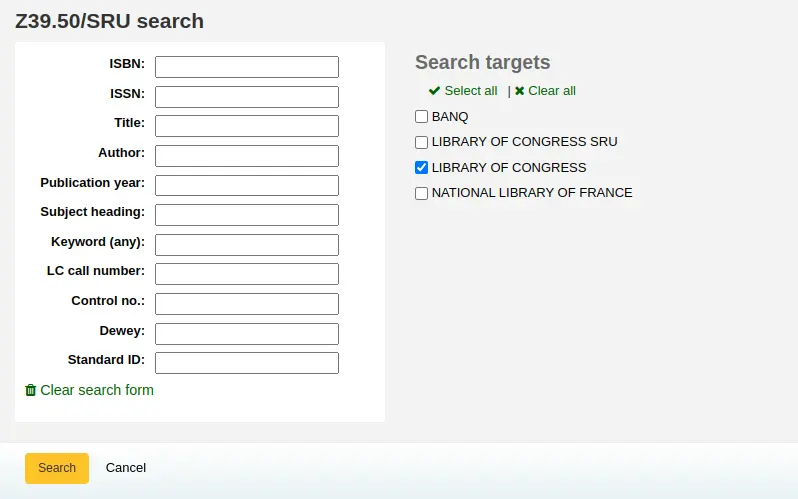
Suchen Sie nach dem Titel, den Sie katalogisieren möchten
Bemerkung
Versuchen Sie eine Suche mit weniger Suchoptionen, wenn keine Treffer gefunden werden. Nicht alle Z39.50/SRU-Vorgaben unterstützen alle Suchoptionen.
Bemerkung
Die Suchquellen können in der Administration unter Z39.50/SRU-Server angepasst werden.
Bemerkung
Die Anzeige von weiteren MARC Feldern und Unterfeldern kann über den Systemparameter AdditionalFieldsInZ3950ResultSearch konfiguriert werden.
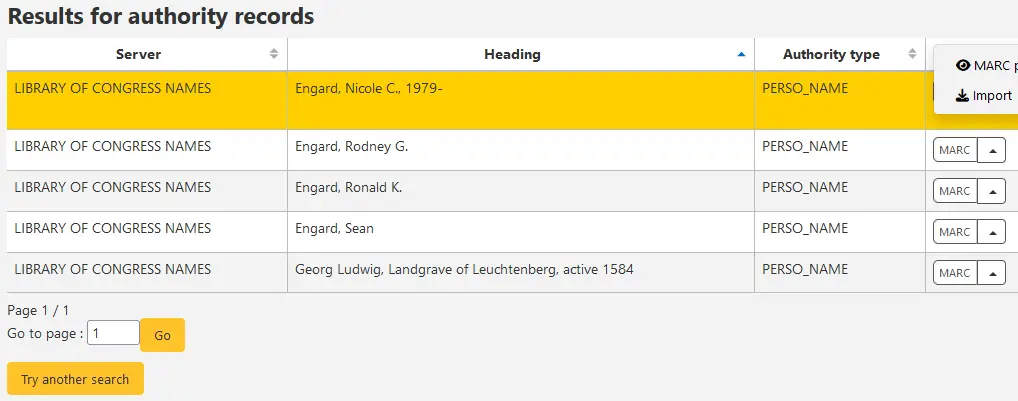
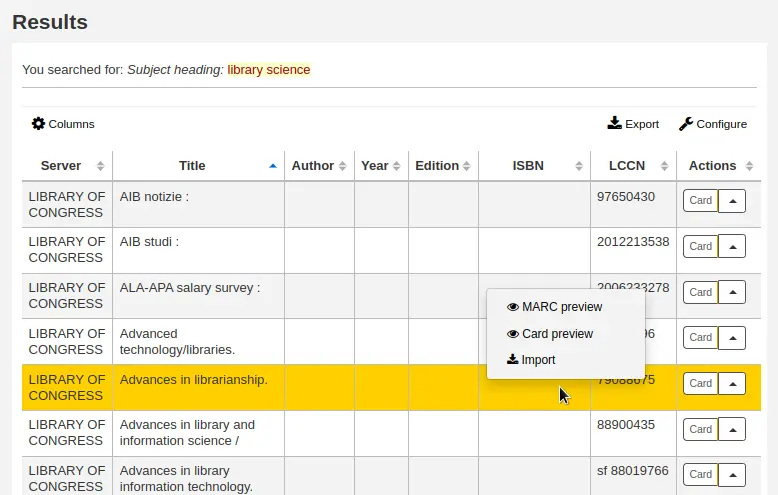
Wenn Sie auf den Pfeil neben einem Suchergebnis klicken (oder auch auf eine beliebige Stelle der Ergebniszeile) klicken, werden Ihnen Vorschau- und Importmöglichkeiten angezeigt.
Bemerkung
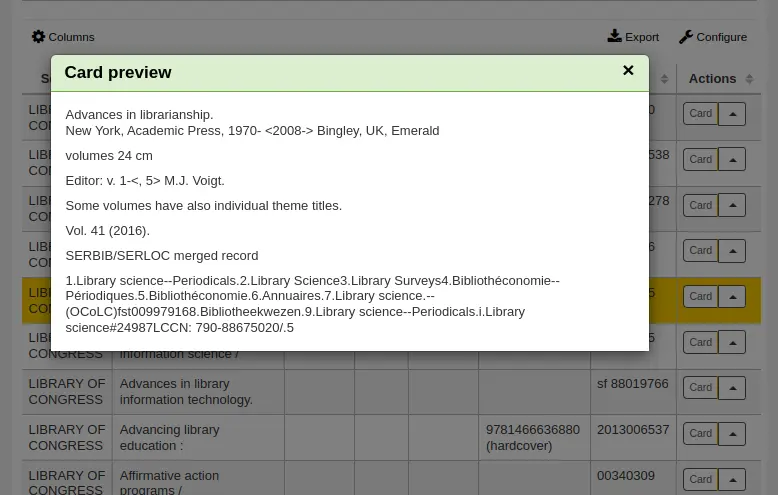
Standardoption beim Button neben einem Suchergebnis ist die zuletzt verwendete Option. Im oben angezeigten Screenshot war die letzte verwendete Option „ISBD-Vorschau“ (Card preview), daher ist für den Button diese Voreinstellung eingestellt.
Bemerkung
You can customize the columns of this table in the Table settings section of the Administration module (table id: resultst).
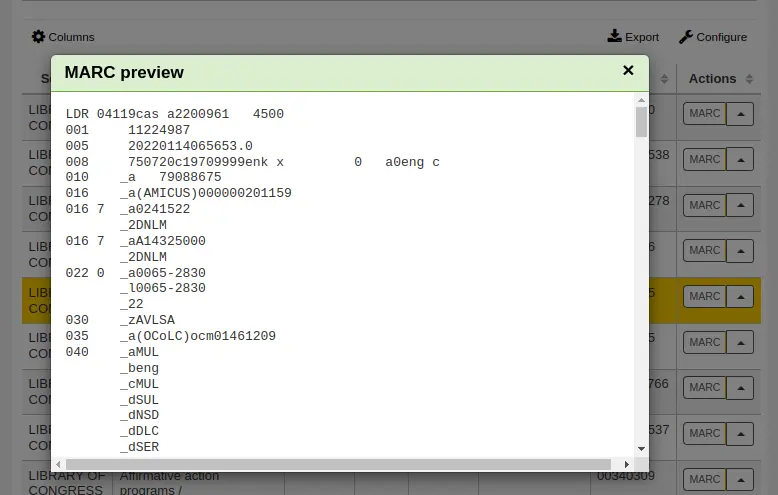
MARC-Vorschau: Diese Option öffnet den Datensatz im MARC-Format.
ISBD-Vorschau: Diese Option öffnet den Satz im Katalogkartenformat.
Import: Dies öffnet den Satz im Katalogisierungseditor von Koha, so dass Sie ihn bearbeiten und in Ihrem eigenen Katalog abspeichern können.
Wenn Sie den gesuchten Titel in der Z39.50-Trefferliste nicht finden, können Sie mit der Schaltfläche „Neue Suche“ unten links eine weitere Suche starten

Einfacher Editor
Wenn Sie im Einfachen Editor ein leeres Framework öffnen oder einen Datensatz per Z39.50/SRU-Schnittstelle importieren, erscheint die Katalogisierungsmaske, um die Katalogisierung fortzusetzen
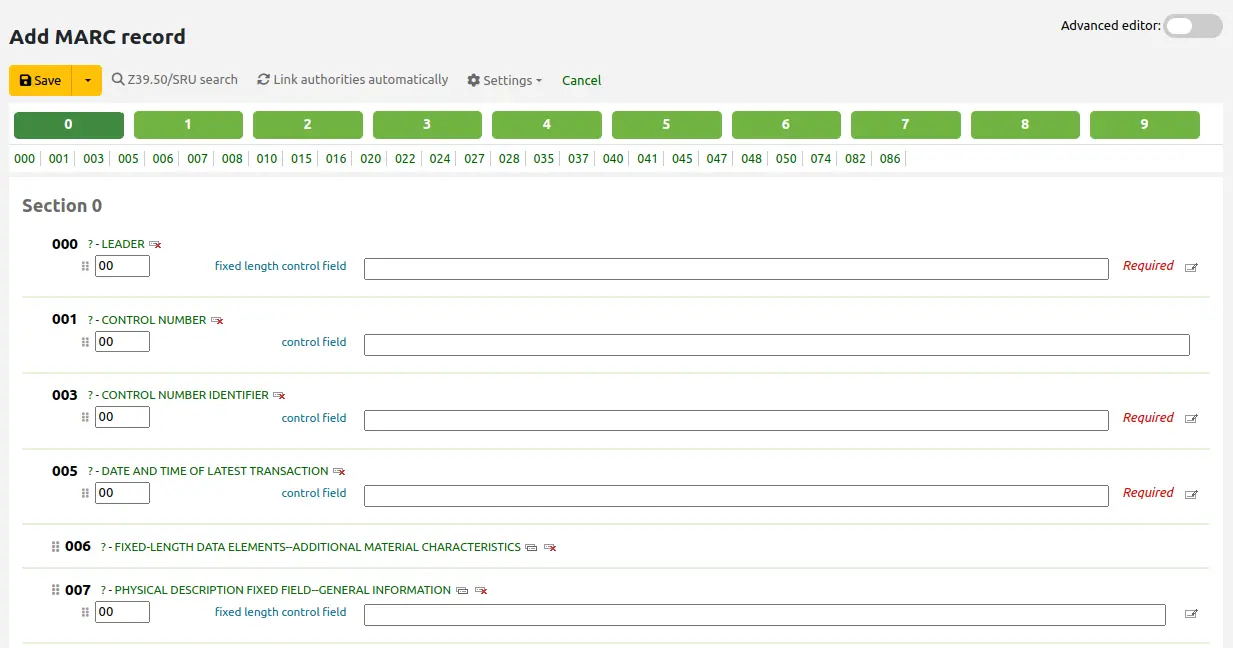
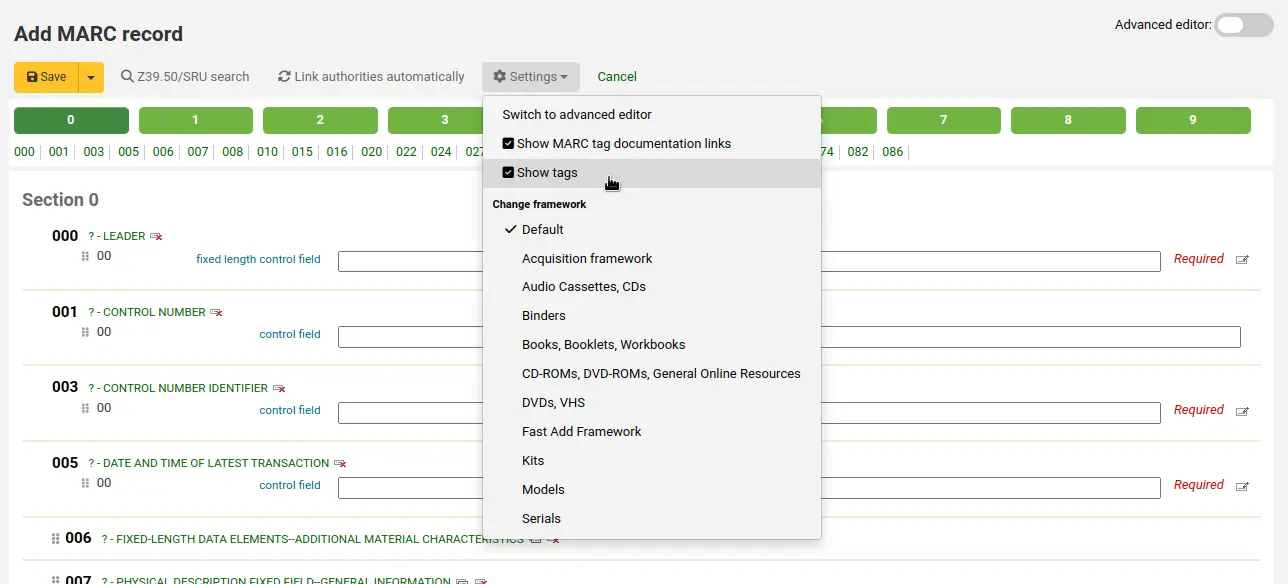
Wenn lieber keine MARC-Feldnummern angezeigt werden sollen, kann man den Wert über den hide_marc Systemparameter ändern oder es mit der Checkbox ‚Tags anzeigen‘ unter „Einstellungen“ in der Katalogisierung dem/der Benutzer*in selber überlassen.
Klicken Sie auf die Feldbezeichnung, um ein eingeklapptes Feld aufzuklappen
Wenn Sie die Dokumentation der Library of Congress zu einem MARC-Feld aufrufen möchten, klicken Sie auf das Fragezeichen (?) rechts neben der Feldnummer
Es ist möglich, die Quelle der MARC-Dokumentation zu ändern, indem Sie den Systemparameter MARCFieldDocURL setzen
Wenn Sie glauben, dass der Bildschirm überfüllt ist, oder Sie die Dokumentationslinks als störend empfinden oder nicht brauchen, können Sie diese über die Checkbox ‚MARC-Felddokumentationslinks‘ unter „Einstellungen“ ausblenden
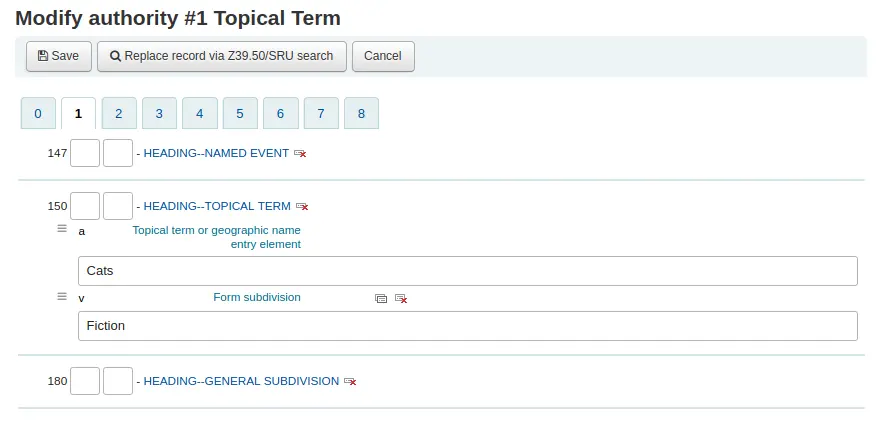
Manchmal sind Felder aufgrund der Einstellung des Systemparameters RequireChoosingExistingAuthority nicht editierbar. Wenn Sie diesen so gesetzt haben, dass beim Katalogisieren die von Normdaten kontrollierten Felder nicht frei bearbeitet werden können, wird neben dem Feld ein Vorhängeschloss angezeigt.

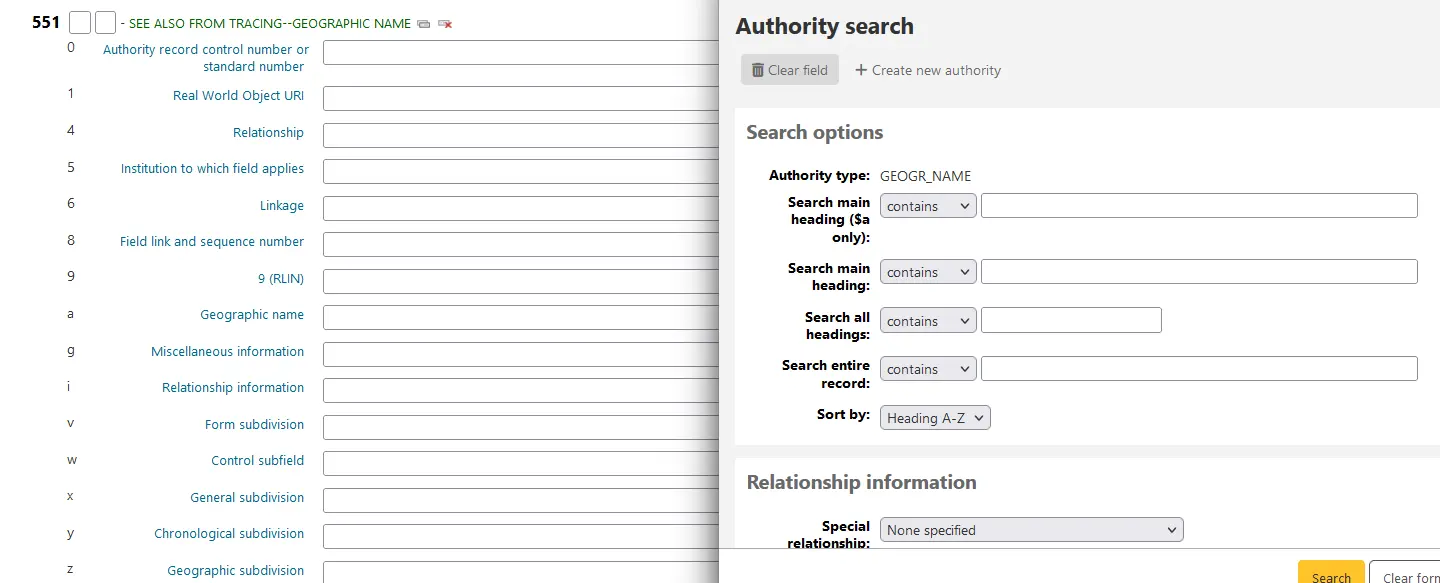
Wenn diese Grafik angezeigt wird, klicken Sie darauf und suchen Sie in dem neu geöffneten Fenster nach dem zu verknüpfenden Normsatz.
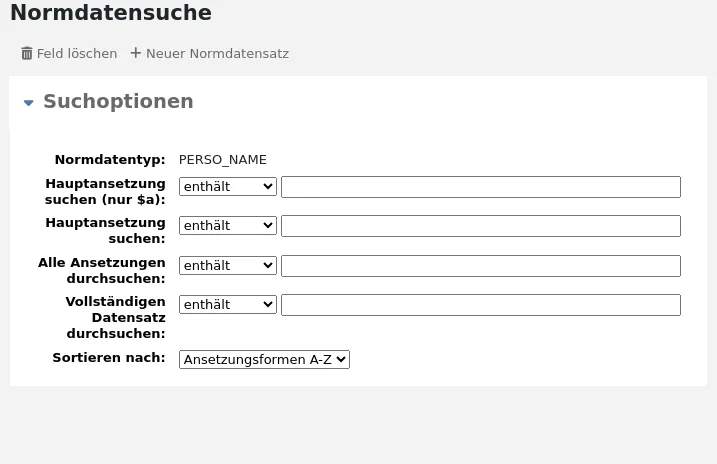
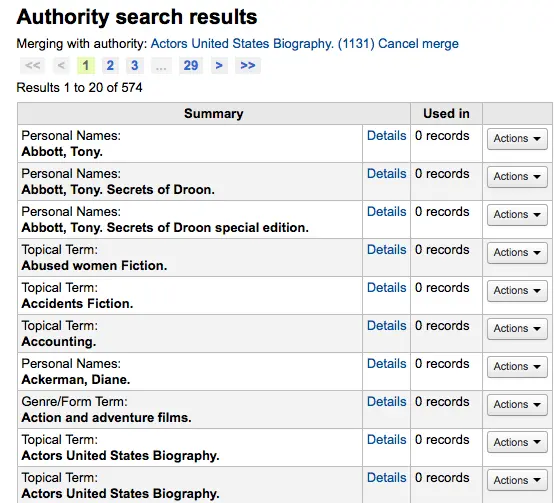
In der Resultatenliste klicken Sie auf ‚Wähle Normdaten‘ um dies in Ihr Katalogdatensatz einzubringen
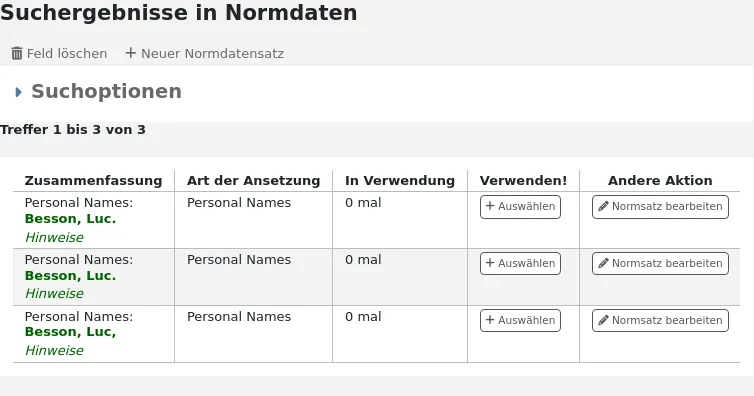
Bemerkung
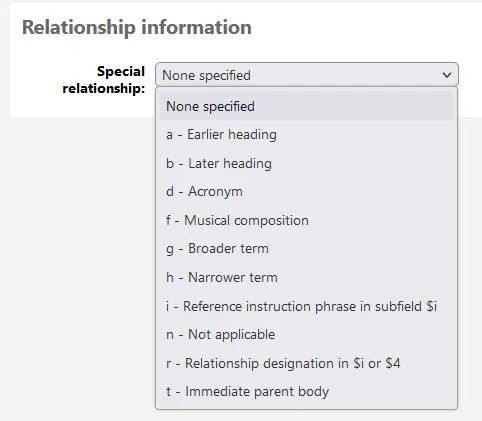
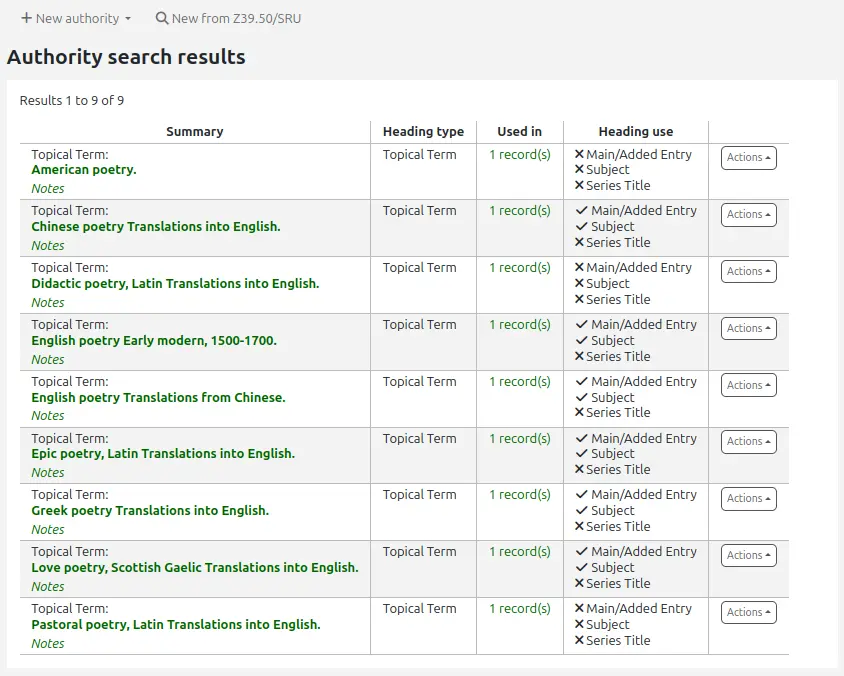
In MARC21 systems, if the ShowHeadingUse system preference is enabled, there will be an additional column showing the appropriate use of the authority record in main or added entries, subject headings, or series titles.
Klicken Sie auf das Symbol „Tag wiederholen“ auf der rechten Seite des Feldes, um dieses zu wiederholen

Um die Reihenfolge der Felder zu verändern, ziehen Sie die Unterfelder mithilfe der Symbole auf der linken Seite an die gewünschte Position

Bemerkung
Die Standardreihenfolge der Unterfelder können Sie im bibliografischen MARC-Framework durch Ziehen und Loslassen der Reiter für die Unterfelder auf der Seite Unterfelder bearbeiten verändern.
Um ein Unterfeld zu verdoppeln, klicken Sie auf das Klonen-Icon (für das Entfernen eines kopierten Feldes, klicken Sie auf das Löschen-Icon) rechts neben dem Feld

Um ein Unterfeld zu entfernen (wenn mehr als eines vom gleichen Typ da ist), klicken Sie auf - (Minuszeichen) rechts neben dem Feld
Klicken Sie auf das Icon rechts neben dem Feld, um ein Plugin zu aktivieren
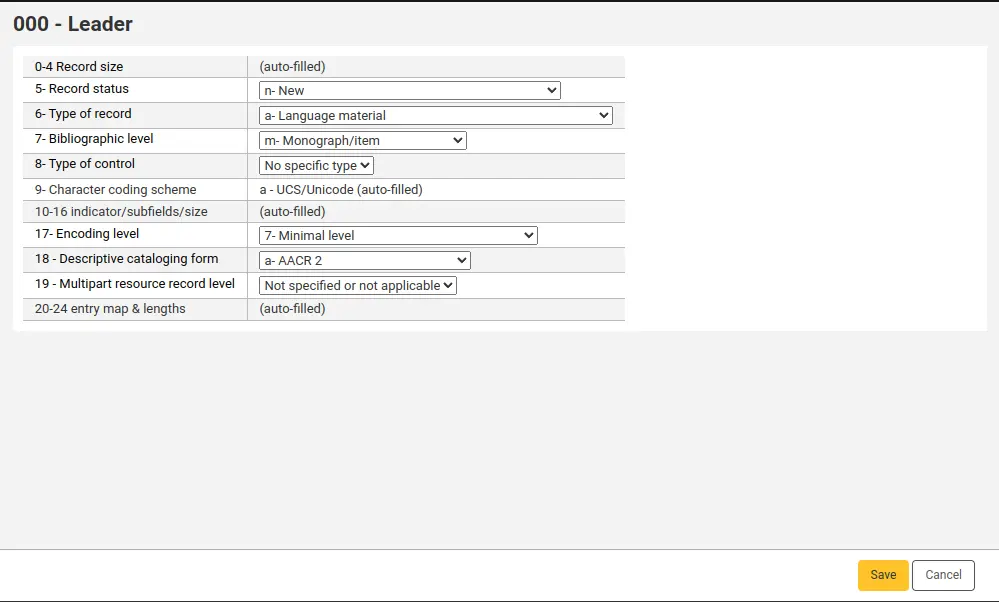
Einige Felder mit fester Länge haben Editoren, die sich je nach dem Matrialtyp ändern, das Sie katalogisieren (zum Beispiel die Felder 006 und 008)
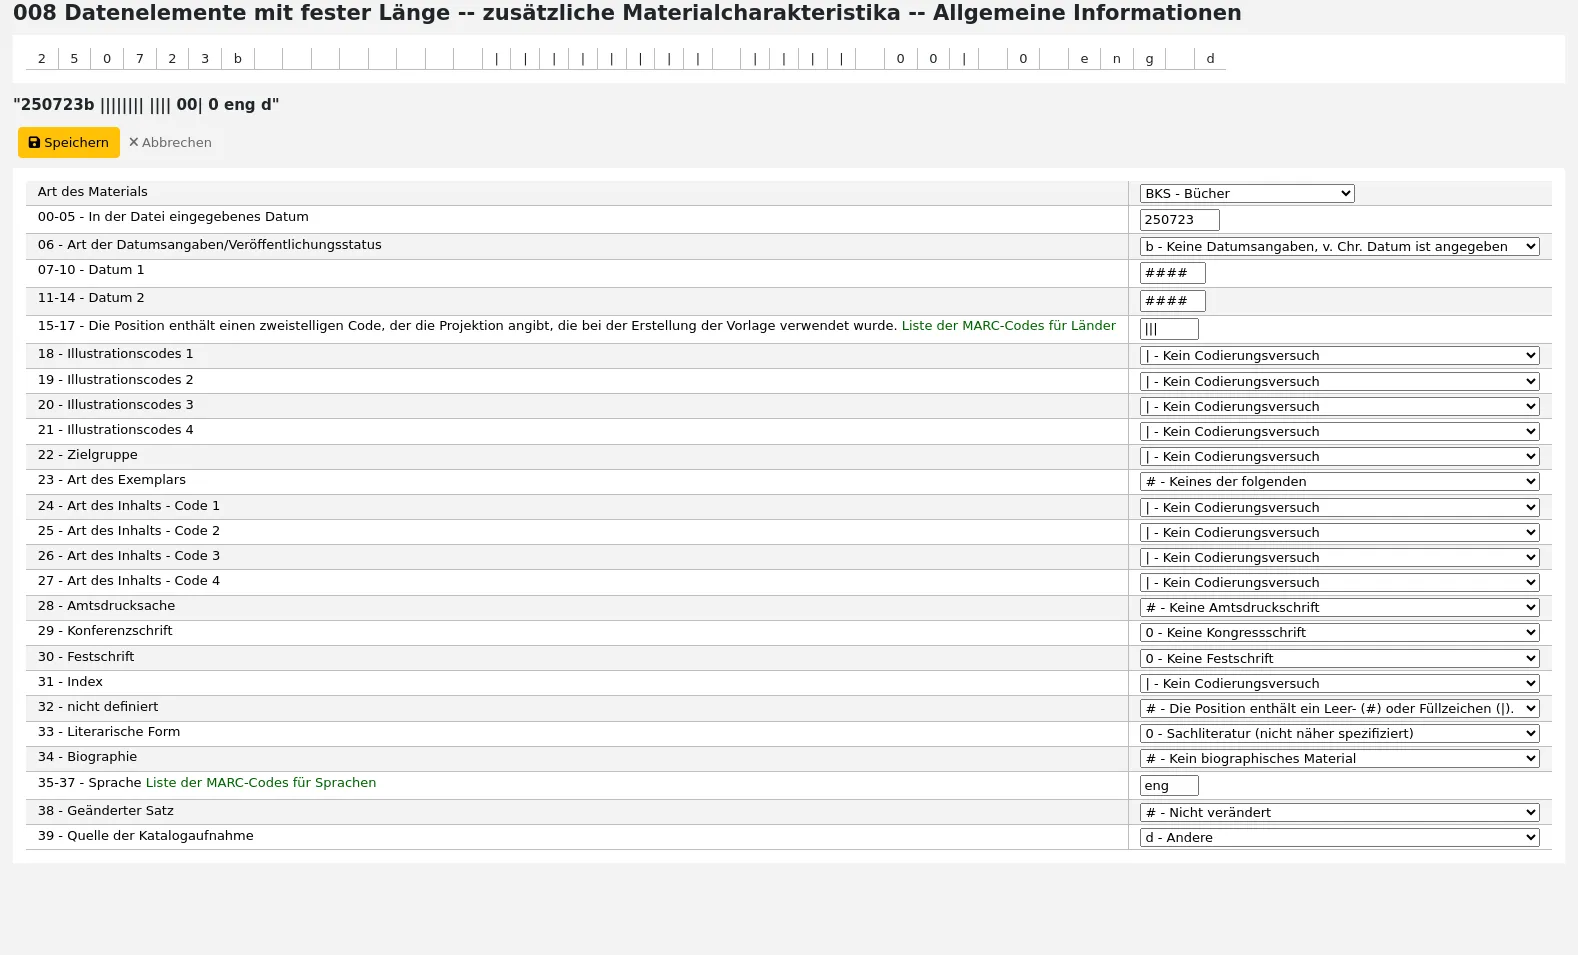
Bemerkung
Die ‚Art des Materials‘ in 008 wird durch den Wert an Position 06 des Leaders bestimmt.
Wenn Sie den Titel erfasst haben, klicken Sie auf ‚Speichern‘ und wählen Sie, ob Sie den angelegten Datensatz speichern und danach anzeigen oder Exemplare für den neuen Titel erfassen möchten
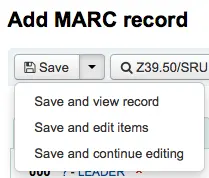
„Datensatz speichern und anzeigen“ zeigt Ihnen den soeben katalogisierten Datensatz
Nach dem Speichern des Datensatzes bringt Sie die Schaltfläche „Speichern und Exemplare bearbeiten“ zur „Maske Exemplare hinzufügen und bearbeiten“, um den Bestand hinzuzufügen
Die Schaltfläche „Speichern und fortfahren“ erlaubt Ihnen den katalogisierten Datensatz zu speichern und Sie können im Editor bleiben um mit dem Katalogisieren fortzufahren
Wenn Sie versuchen eine Dublette im System zu erzeugen, wird vor dem Speichern eine Warnung ausgegeben

Bemerkung
Um mögliche Dubletten zu identifizieren, sucht das System nach der ISBN. Falls es keine ISBN gibt, wird nach der betreffenden Kombination von Titel und Autor gesucht.
Wenn Pflicht- oder wichtige Felder oder Unterfelder nicht ausgefüllt werden, erscheinen entsprechende Warnmeldungen. Klicken Sie hier jeweils auf ‚Zum Feld‘ und ergänzen Sie dieses.
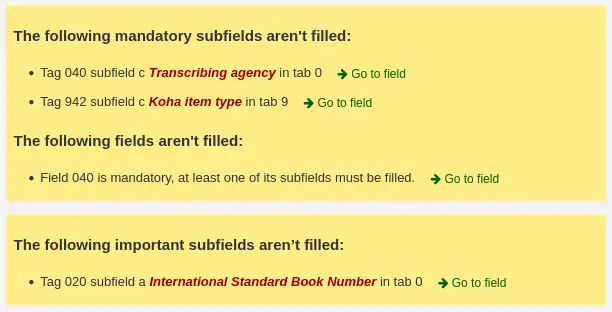
Wenn Sie weiter heruntergescrollt haben und die Warnmeldung erneut ansehen möchten, klicken Sie auf „Fehler“ in der Werkzeugleiste rechts.

Bemerkung
Das Fehlen als wichtig gekennzeichneter Felder oder Unterfelder verhindert nicht das Abspeichern des Satzes.
Nur das Fehlen von Pflichtfeldern oder -unterfeldern verhindert das Abspeichern des Satzes.
Erweiterter Editor
Der Systemparameter EnableAdvancedCatalogingEditor ermöglicht Ihnen, den Erweiterten Katalogisierungseditor zu benutzen.
Bemerkung
Mitarbeiter*innen müssen die Berechtigung advanced_editor sowie die Berechtigung edit_catalogue (oder die superlibrarian-Berechtigung) besitzen, um den erweiterten Editor nutzen zu können.
Bemerkung
Diese Funktion schließt aktuell keinen Support für UNIMARC-Felder ein.
Um mit dem erweiterten Editor zu katalogisieren, klicken Sie auf der Hauptkatalogisierungsseite auf die Schaltfläche ‚Erweiterter Editor‘ oder verwenden Sie den Schalter in der oberen rechten Ecke des Bildschirms Einfacher Editor.
Wenn Sie im Erweiterten Editor ein leeres Framework öffnen oder einen Datensatz per Z39.50-Schnittstelle importieren, erscheint die Katalogisierungsmaske, um die Katalogisierung fortzusetzen.
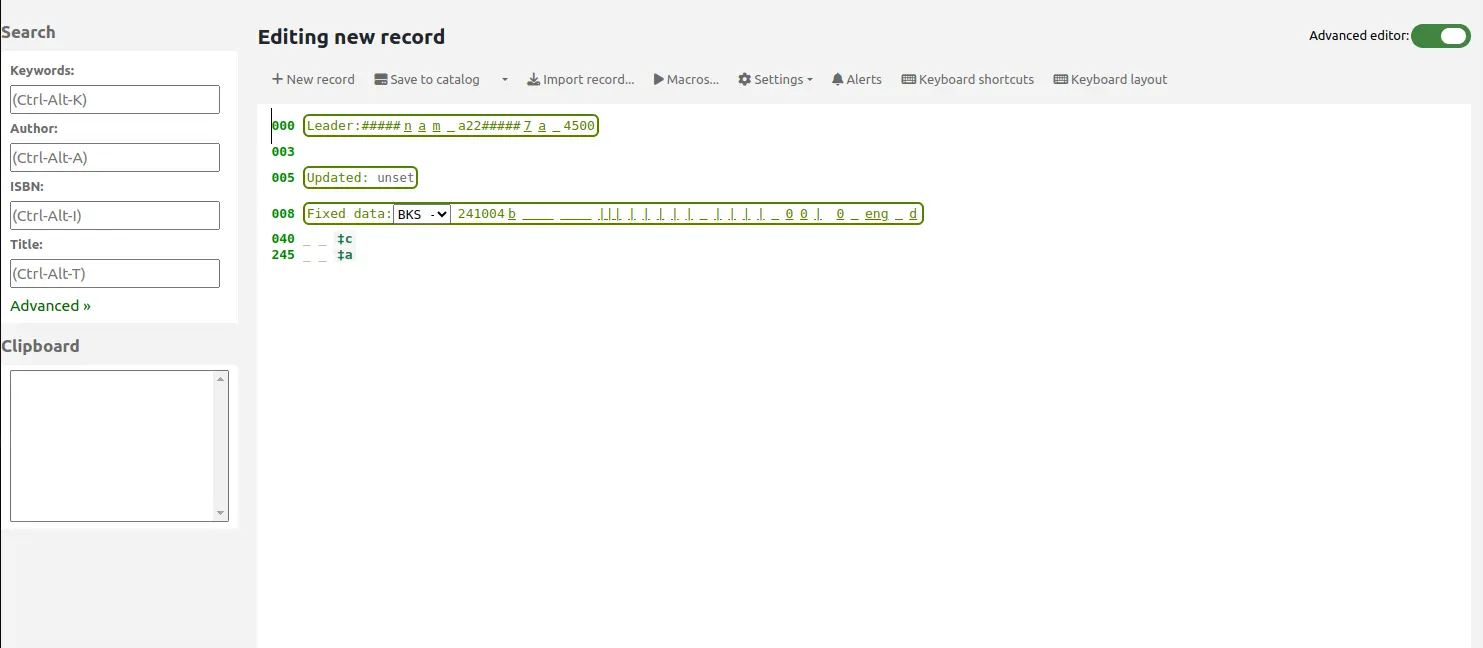
Über die Suchfelder auf der linken Seite können Sie Z39.50-Suchen durchführen.

Von diesen Z39.50-Ergebnissen können Sie den MARC-Datensatz anzeigen, indem Sie auf den Link auf der rechten Seite klicken
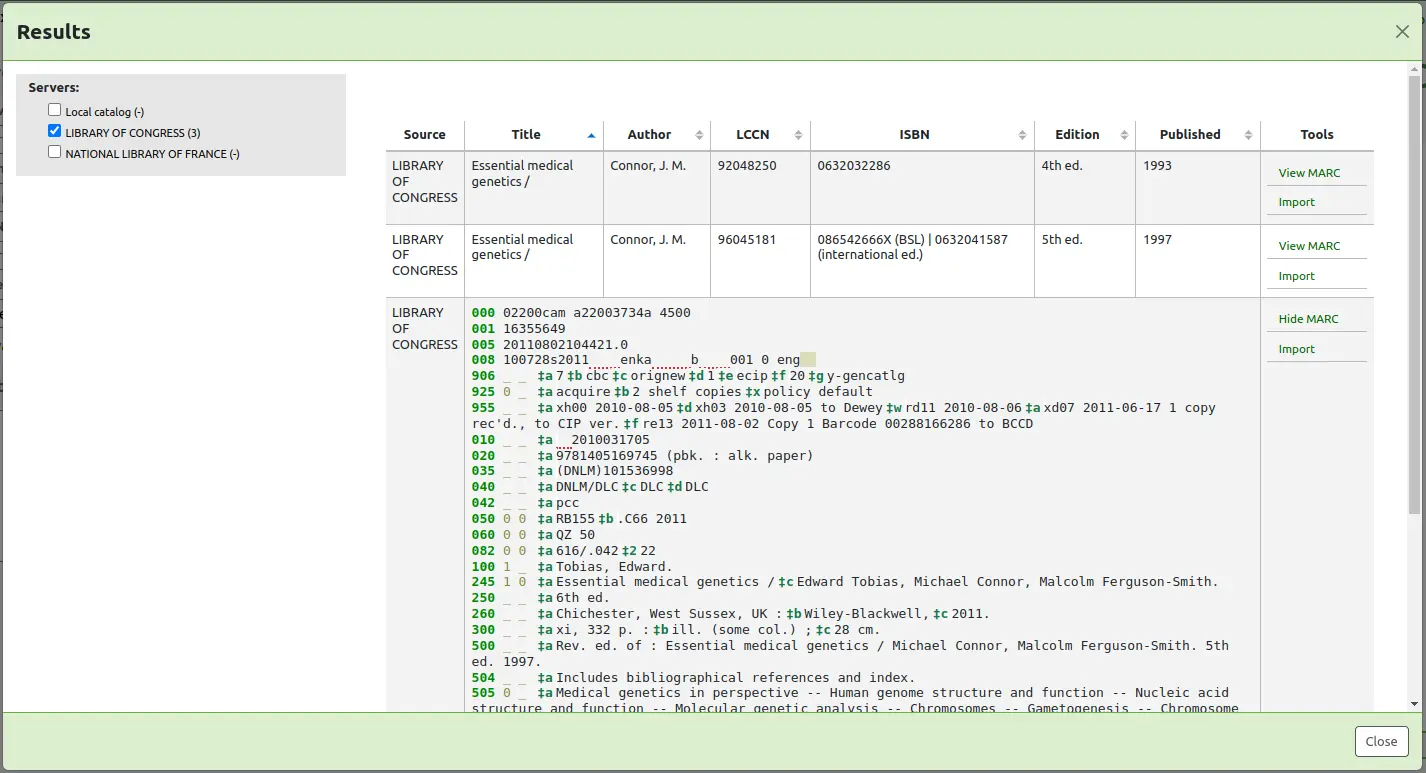
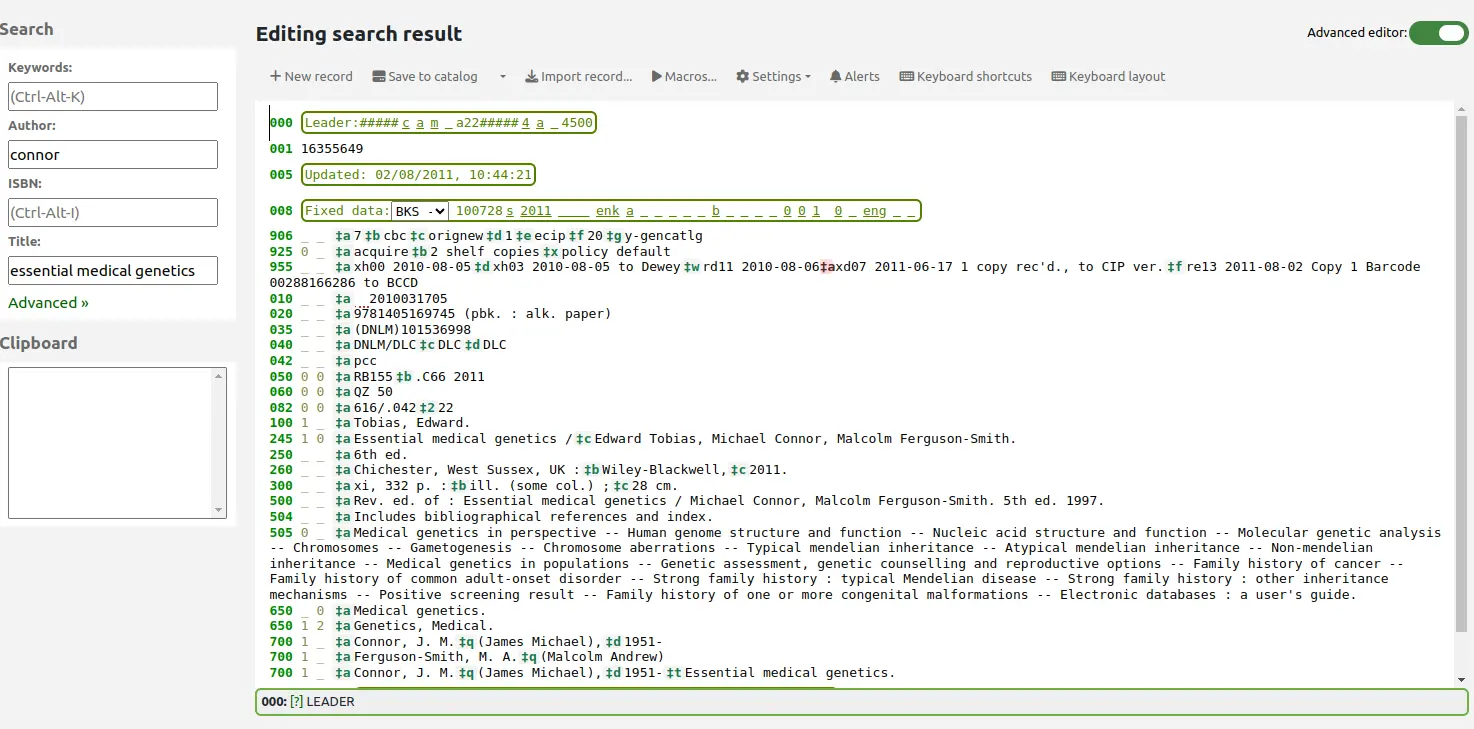
Wenn Sie auf „Import“ klicken, wird der Datensatz in den Editor übernommen, wo er bearbeitet werden kann.
Bemerkung
Um ein neues Feld im Erweiterten Editor anzulegen, benötigen Sie einen leeren Indikator und umgeben die Indikatoren mit Leerzeichen.
Bemerkung
Vor dem ersten Unterfeldtrennzeichen muss ein Leerzeichen gesetzt werden, aber nicht vor oder nach anderen Unterfeldtrennzeichen in diesem Feld.
Am unteren Rand der Editorseite sehen Sie die Hilfe der Library of Congress (oder die Dokumentation von MarcFieldDocURL) für das Feld, das Sie bearbeiten.
Ist das MARC ungültig, sehen Sie rote Hervorhebungen.
Die Schaltfläche „Tastaturkürzel“ informiert Sie über die notwendigen Befehle, um den Datensatz ausschließlich mit Hilfe der Tastatur zu bearbeiten.
Eine Zwischenablage ist verfügbar, um Text zwischen Feldern zu kopieren und einzufügen. In der Tabelle in der untenstehenden Abbildung finden Sie die Tastaturkürzel, die Sie mit der Zwischenablage verwenden können.
Tastaturkürzel für den Erweiterten Editor
Die folgenden Tastaturkürzel können im Erweiterten Editor des Katalogisierungsmoduls benutzt werden um Zeit zu sparen.
Tastenkürzel |
Verhalten |
|---|---|
Strg-Alt-C |
Aktuelles Feld kopieren |
Shift+Strg+C |
Aktuelles Unterfeld kopieren |
Strg-X |
Aktuelles Feld löschen und in Zwischenablage kopieren |
Shift+Strg+X |
Aktuelles Unterfeld löschen und in Zwischenablage kopieren |
Alt-C |
Copyright-Symbol einfügen (©) |
Alt-P |
Copyright-Symbol einfügen (©) (Tonaufnahmen) |
Strg+D |
Separator einfügen (‡) |
Strg+I |
Aktuelles Feld auf nächste Zeile kopieren |
Shift+Enter |
Zeilenumbruch einfügen |
Shift+Strg+L |
Feld mit Normdaten verknüpfen |
Eingabe |
Neues Feld auf neuer Zeile |
Tab |
An nächste Position verschieben |
Strg+P |
Auswahl aus der Zwischenablage einfügen |
Shift+Tab |
An vorherige Position verschieben |
Strg+H |
Hilfe zum aktuellen Unterfeld |
Shift+Strg+K |
Tastatur wechseln |
Strg+S |
Datensatz speichern (kann nicht geändert werden) |
Achtung
Das Standardkürzel zum Kopieren des aktuellen Feldes hat sich in Koha Version 24.11 geändert. In früheren Versionen war es Strg-C.
Sie können die Tastaturkürzel ändern, wenn die Standardkürzel nicht zu Ihrem Arbeitsablauf passen, indem Sie auf „Tastaturkürzel neu definieren“ klicken. Dies bringt Sie zur Tastaturkürzel-Administrationsseite.
Virtuelle Tastatur für den Erweiterten Editor
Eine virtuelle Tastatur für das Hinzufügen von diakritischen Zeichen und Sonderzeichen ist verfügbar. Verwenden Sie das Tastaturkürzel Shift+Strg+K, um die Tastatur anzuzeigen.
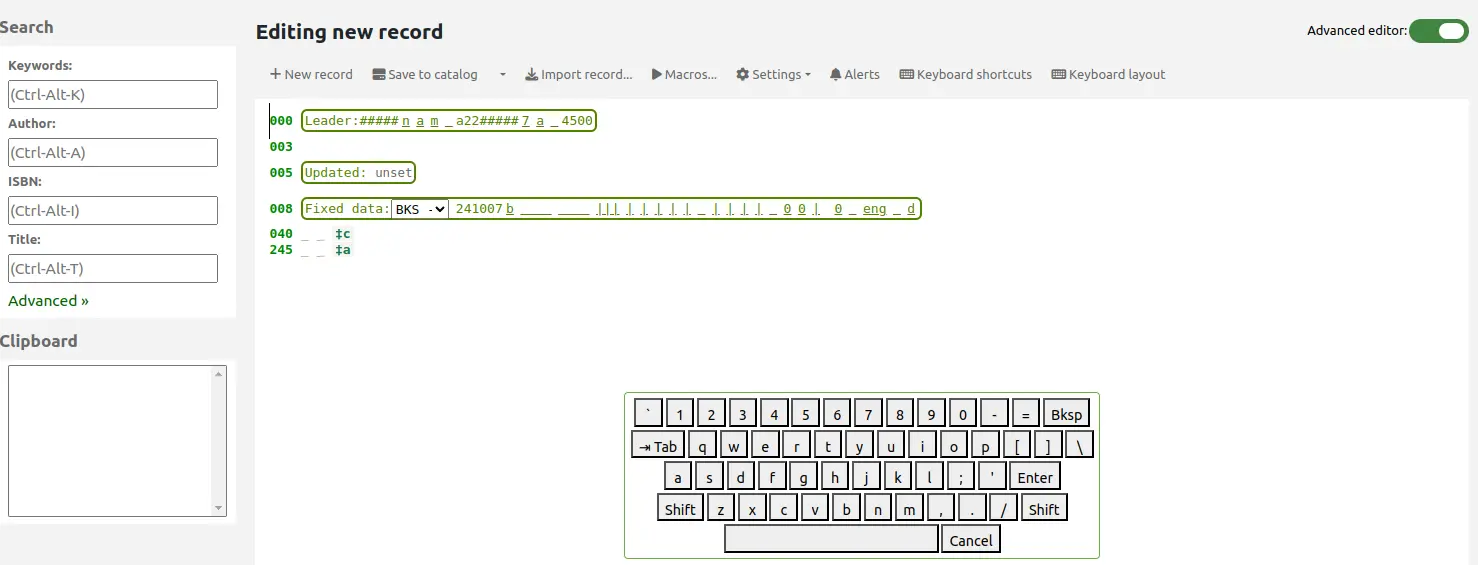
Eine neue Schaltfläche „Tastaturlayouts“ wird in der Menüleiste des Erweiterten Editors angezeigt, mittels derer Layouts für verschiedene Sprachen ausgewählt werden können.
Makros im Erweiterten Editor
Makros können verwendet werden, um sich wiederholende Informationen in Datensätze einzugeben.
Bemerkung
Um Makros für den fortgeschrittenen Editor erstellen zu können, müssen Mitarbeiter*innen die Berechtigung create_shared_macros (oder die superlibrarian-Berechtigung) besitzen.
Mitarbeiter*innen müssen die Berechtigung delete_shared_macros (oder die superlibrarian-Berechtigung) besitzen, um bestehende Makros aus dem erweiterten Editor löschen zu können.
Ein neues Makro hinzufügen:
Klicken Sie auf die Schaltfläche „Makros…“.
Klicken Sie im Pop-up-Fenster auf die Schaltfläche „Neues Makro…“.
Geben Sie den neuen Namen des Makros im Pop-up-Feld ein und klicken Sie auf „OK“.
Klicken Sie danach rechts neben die kleine Zahl „1“ und füllen Sie die erste Zeile Ihres Makros aus (siehe Makro-Syntax untenstehend). Um mehrere Makrozeilen bzw. mehrere Makrofelder zu erhalten, drücken Sie die Returntaste, so dass eine kleine „2“ erscheint. Füllen Sie dann die zweite Zeile/das zweite Feld aus etc.
Ihre Makros werden automatisch gespeichert. Nach dem Speichern können Sie „x“ klicken, um das Fenster zu schließen oder ein Makro auswählen, das Sie auf den aktuell in Bearbeitung befindlichen Datensatz anwenden möchten, oder ein anderes Makro auswählen.
Wie bearbeitet man ein bereits vorhandenes Makro:
Klicken Sie auf die Schaltfläche „Makros…“.
Wählen Sie im Pop-up-Fenster das Makro aus, das Sie bearbeiten möchten und nehmen Sie Ihre Anpassungen vor.
Ihr Arbeitsgang wird automatisch gespeichert und danach können Sie „x“ klicken um das Fenster zu schließen, oder Sie wähen ein Makro für den Datensatz aus.
Um ein Makro auszuführen:
Klicken Sie auf die Schaltfläche „Makros…“.
Wählen Sie im Pop-up-Fenster das Makro, das Sie ausführen möchten
Klicken Sie auf „Makro ausführen“
Die grundlegende Syntax für die Makrosprache:
new 500=‡aEdited with Rancor
Legen Sie ein neues Feld 500 mit Unterfeld a ‡a an und setzen Sie es auf „Bearbeitet mit Rancor“.
245c= von J.K. Rowling.
Wenn nötig legen Sie im Datensatz „von J.K.Rowling“ im ersten 245 Feld das Unterfeld ‡c an.
082a={084a}
Setzen Sie im ersten 082 Feld das Unterfeld a ‡a (wenn nötig legen Sie das Unterfeld an) mit dem gleichen Inhalt des ersten 084‡a Feldes.
indicators=_1
Setzen Sie die Indikatoren des zuletzt erwähnten Feldes (in diesem Fall Feld 082) auf „_“ und „1“.
new 090a=Z674.75.W67
Erstellt ein neues Unterfeld ‡a im ersten 090-Feld (aber nur wenn das Feld bereits existiert) und setzt es auf „Z674.75.W67“.
new 090a at end=Z674.75.W67
Das Gleiche wie oben.
new 245b after a= a tale of might and magic /`
Legen Sie nach dem ersten Unterfeld a ein neues Unterfeld b ‡b an und setzen Sie es auf „a tale of might and magic /“.
delete 245b
Löschen Sie das erste Unterfeld ‡b im ersten 245 Feld.
Sätze importieren
Sowohl bibliografische Sätze als auch Normdatensätze können in Koha importiert werden. Die zu importierenden Daten können im Format MARC oder MARCXML vorliegen.
Der Import von Sätzen in Koha besteht aus zwei Schritten.
The first is to stage records for import, which prepares the records, and imports them in the reservoir.
The second step is to import the prepared, or „staged“, files from the reservoir into the catalog.
MARC-Datensätze für Import zwischenspeichern
Bemerkung
Nur Mitarbeiter*innen mit der Berechtigung stage_marc_import (oder der superlibrarian-Berechtigung ) haben Zugang zu diesem Werkzeug.
Pfad in Koha: Mehr > Katalogisierung > Import > MARC-Datensätze für Import zwischenspeichern
Wählen Sie zunächst die MARC-Datei auf Ihrem Computer aus

- Als nächstes werden Ihnen die Optionen für den Abgleich und den Exemplardatenimport angeboten
Importe
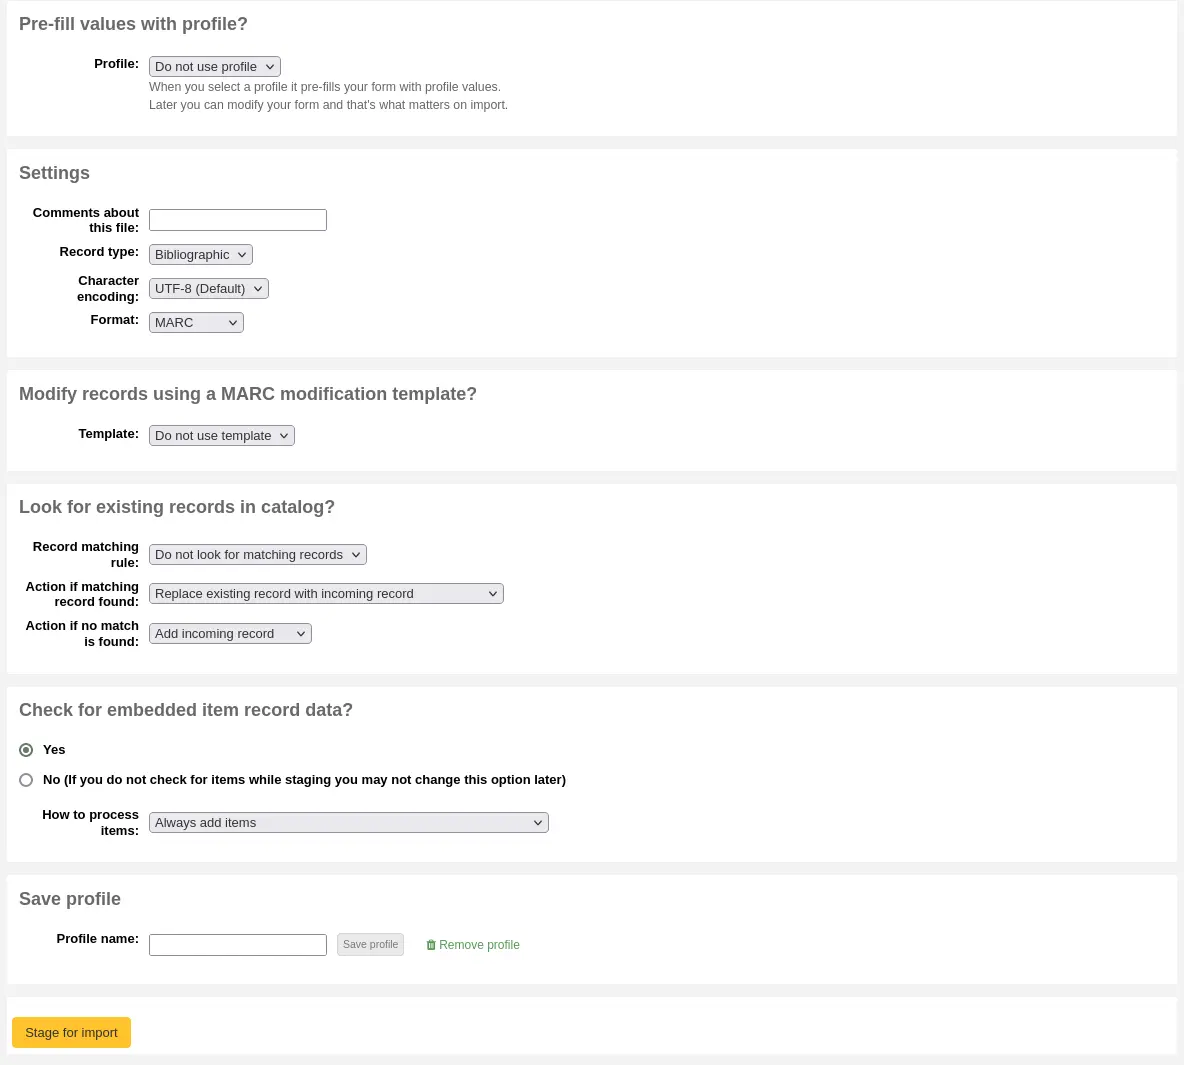
Prefill values with profile: if you already have staging profiles set up, you can choose the appropriate profile from the dropdown list
Profiles are used to prefill the rest of the staging settings form.
Sie können ein Profil anlegen, indem Sie die verschiedenen Einstellungen im unteren Bereich eintragen und dann einen Profilnamen am Ende des Formulars vergeben. Das nächste Mal, wenn Sie Daten importieren, ist das Profil dann verfügbar.
‚Kommentar zu dieser Datei‘: Geben Sie einen Kommentar an, der Ihnen hilft, die Datei leichter zu erkennen, wenn Sie diese im Werkzeug ‚Bereitgestellte MARC-Datensätze verwalten‘ suchen
Datensatztyp: Geben Sie an, um welche Art von Datensätzen es sich in dieser Datei handelt, Titel- oder Normdaten

Zeichensatz: Wählen Sie den Zeichensatz Ihrer Datei

Format: Wählen Sie das MARC-Format Ihrer Datei aus
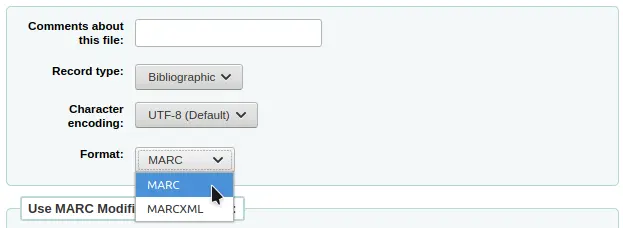
Datensätze mit einem Template für MARC-Modifikationen bearbeiten: Legen Sie fest, ob Sie die zu importierenden Daten mit einem Template für MARC-Modifikationen bearbeiten möchten

Wählen Sie, ob Sie nach übereinstimmenden Sätzen suchen möchten

Datensatzabgleichregel: Wählen Sie, mit welcher Regel geprüft werden soll, ob die Sätze im Katalog bereits vorhanden sind.

Bemerkung
Sie können die Datensatzabgleichregeln im Bereich Administration einrichten
Bemerkung
Wenn die Datensatzabgleichregel anhand der ISBN verwendet wird, wird Koha nur exakte Übereinstimmungen als solche erkennen. Wenn Sie feststellen, dass die ISBN-Abgleichregel nicht zufriedenstellend funktioniert, können Sie den Systemparameter AggressiveMatchOnISBN auf ‚Versuche‘ setzen und den Import erneut starten.
Aktion, wenn eine Übereinstimmung gefunden wurde: wählen Sie, was bei einem Treffer im Katalog getan werden soll
Vorhandenen Datensatz mit importiertem Datensatz ersetzen: wählen sie diese Option, wenn Sie bessere Datensätze importieren, als die, die Sie aktuell im Katalog haben oder wenn Sie Änderungen mit einem externen Werkzeug (z.B. MarcEdit) vorgenommen haben
Datensatz anlegen: dies lässt den vorhandenen Datensatz unverändert und legt den neuen Datensatz zusätzlich an, kann also zu Dubletten führen
Bereitgestellten Datensatz ignorieren (Exemplare können trotzdem verarbeitet werden): wählen sie diese Option, wenn Sie vorhandene Datensätze überschreiben möchten
Aktion, wenn keine Übereinstimmung gefunden wurde: wählen Sie, was getan werden soll, wenn der Datensatz nicht im Katalog gefunden wurde
Bereitgestellten Datensatz anlegen: wählen Sie diese Option, wenn Sie die Datensätze, die noch nicht in Ihrem Katalog sind, anlegen möchten (z.B. für neue Titel)
Bereitgestellten Datensatz ignorieren: wählen Sie diese Option, wenn Sie die Datensätze ohne Übereinstimmung mit einem vorhandenen Datensatz ignorieren möchten (z.B., wenn Sie vorhandene Datensätze ersetzen, aber nichts hinzufügen möchten)
Auf enthaltene Exemplardaten prüfen?: entscheiden Sie, ob Sie Exemplare (Feld 952) aus den MARC-Datensätzen importieren möchten (wenn Sie eine Datei mit Titeldaten laden)

Exemplare immer anlegen: die Exemplare unabhängig von einer Übereinstimmung immer anlegen
Exemplare nur anlegen, wenn ein passender Titel gefunden wurde: dies legt nur Exemplare bei Titeln an, die bereits in Ihrem Katalog sind
Exemplare nur anlegen, wenn kein passender Titel gefunden wurde: dies legt nur Exemplare bei neu importierten Titeln an, nicht bei bereits vorhandenen
Exemplare ersetzen, wenn ein passender Titel gefunden wurde: der Abgleich erfolgt über die Exemplarnummern (itemnumbers) und Barcodes, um sicher zu stellen, dass nur bereits vorhandene Exemplare überschrieben werden.
Bemerkung
Exemplarnummern (itemnumbers) haben Vorrang vor Barcodes
Exemplare ignorieren: es werden keine Exemplare angelegt
Profil speichern: Sie können entscheiden, ob Sie die gewählten Einstellungen als Profil für die spätere Wiederverwendung speichern möchten

Klicken Sie auf ‚Zum Import bereitstellen‘
Das Zwischenspeichern der Datensätze wird wie ein Background Job behandelt. Eine Fortschrittsbalken informiert Sie über den Fortgang des Jobs.

Klicken Sie auf „Details des Auftrags in der Warteschlange anzeigen“, um eine Zusammenfassung des Staging-Prozesses anzuzeigen
Sie erhalten eine Bestätigungsseite für Ihren MARC-Import
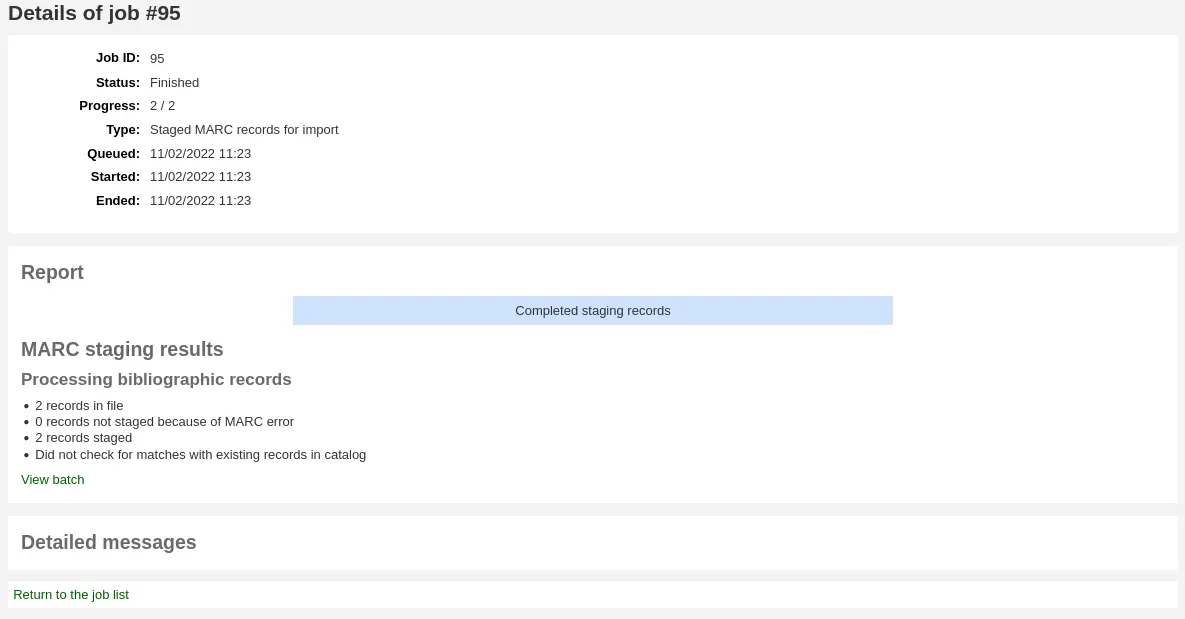
Anzahl der Sätze in der Datei
Anzahl der Datensätze mit MARC-Fehlern
Anzahl der bereitgestellten Sätze
Anzahl der Sätze mit mindestens einer Übereinstimmung im Katalog
Anzahl der bereitgestellten Sätze
Um den Vorgang abzuschließen, navigieren Sie zum Werkzeug Zwischengespeicherte MARC-Datensätze verwalten, indem Sie auf ‚Zeige Stapel‘ klicken.
If these records are to be used in acquisitions, you can stop here and add these records to a basket by ordering from a staged file
Zwischengespeicherte Datensätze verwalten
Bemerkung
Nur Mitarbeiter*innen mit der Berechtigung manage_staged_marc (oder der superlibrarian-Berechtigung) haben Zugriff auf dieses Werkzeug.
Pfad in Koha: Mehr > Katalogisierung > Import > Zwischengespeicherte Datensätze verwalten
Once you have staged your records for import you can complete the import using this tool.
Klicken Sie in der Liste der bereitgestellten Dateien auf den Namen der Datei, deren Import Sie abschließen möchten
Datensätze, die bereits importiert wurden, haben den Status „importiert“
Bemerkung
If you’re coming directly from the Stage records for import tool you will not see this list of staged files, you will be taken automatically to the right file summary
Sie sehen eine Zusammenfassung des zwischengespeicherten Datensatzes mit der Möglichkeit Ihre Abgleichsregeln zu ändern
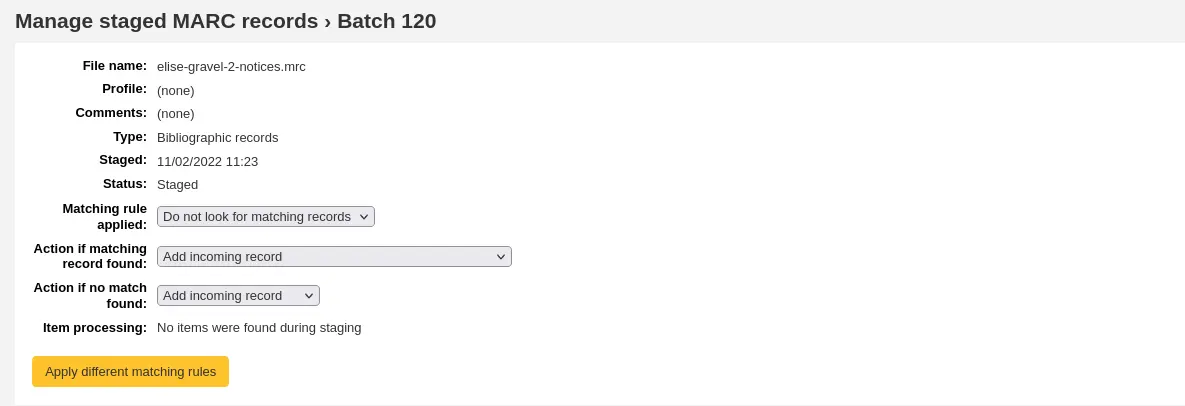
Unterhalb der Zusammenfassung befindet sich eine Schaltfläche, um den Datensatzstapel unter Verwendung eines bestimmten frameworks zu importieren
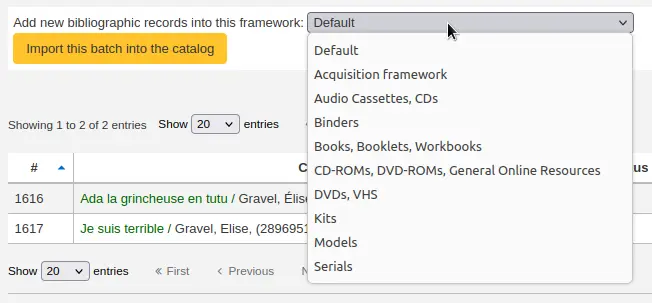
Es ist nicht notwendig ein anderes Framework als „Standard“ zu nutzen, aber für die Erstellung von Reports hilfreich.
Unterhalb der Auswahl für das Framework befindet sich eine Liste der Datensätze, die importiert werden
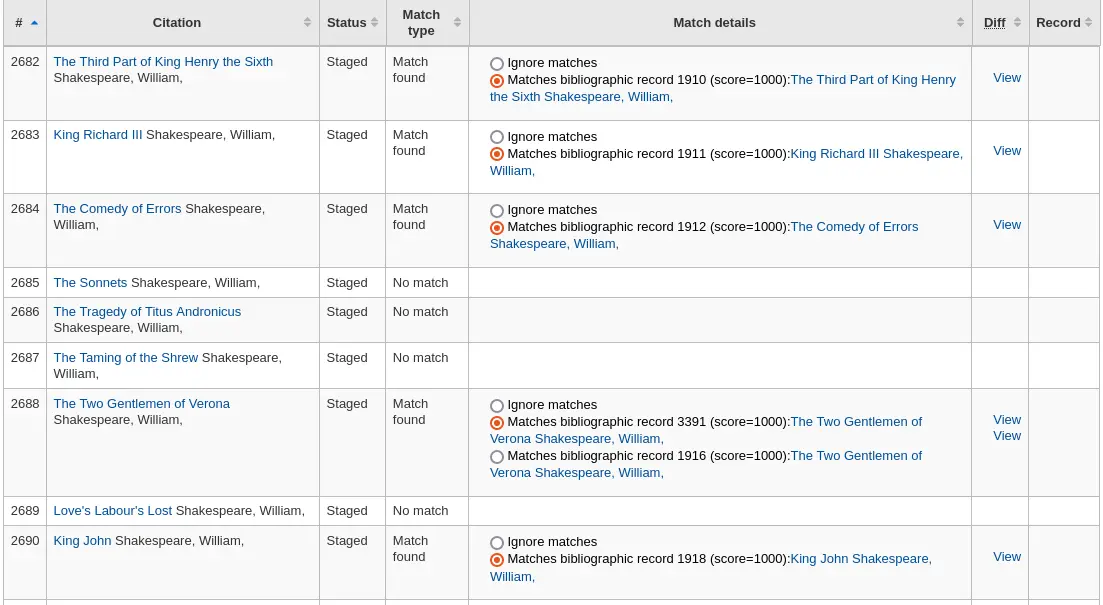
Überprüfen Sie die Zusammenfassung vor dem endgültigen Import um sicher zu stellen, dass die Abgleichregel funktioniert wie erwartet und die Datensätze so importiert werden, wie Sie dies möchten
Übereinstimmungen werden angezeigt mit Informationen in der Spalte ‚Übereinstimmungsdetails‘

Übereinstimmungen erscheinen mit Informationen in der ‚Details des Abgleichs‘-Spalte, mit einem Klick auf ‚Ansehen‘ unter ‚Diff‘ können Sie sich die Unterschiede zwischen den Versionen anzeigen lassen.
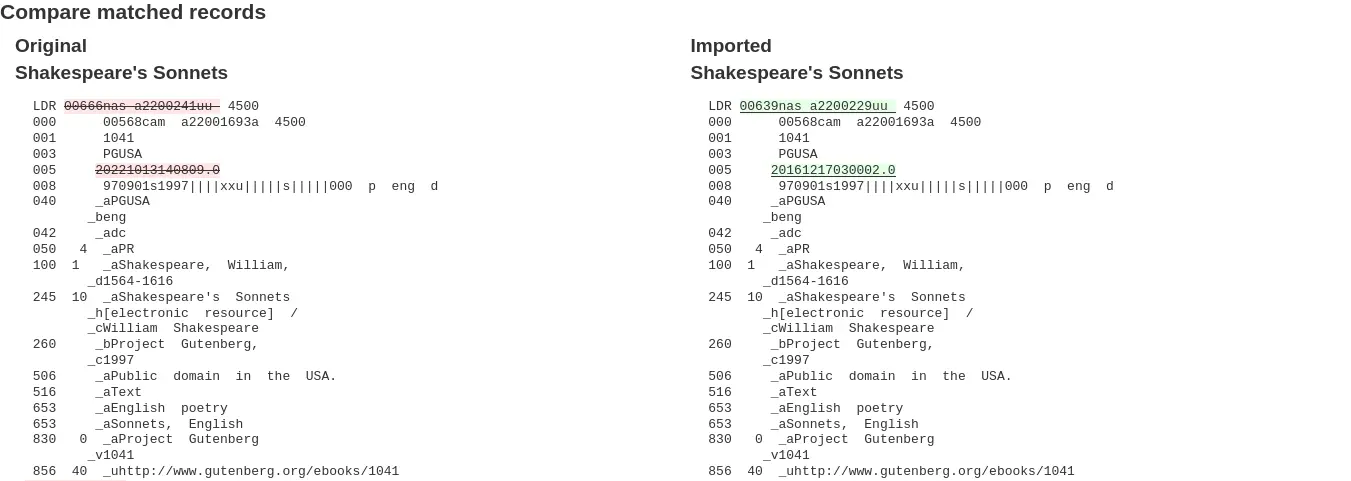
Für jede Übereinstimmung können Sie wählen, ob Sie die Übereinstimmung ignorieren möchten, indem Sie das Optionsfeld „Übereinstimmungen ignorieren“ auswählen. Wenn mehr als ein übereinstimmender Datensatz gefunden wurde, werden alle aufgelistet und Sie können wählen, mit welchem Sie den eingehenden Datensatz abgleichen möchten.

If ‚Ignore matches‘ is selected, the action chosen in ‚Action if no match is found‘ from the staging step will be applied.
Bemerkung
Here are the different behaviors depending on the ‚Action if matching record found‘ choice from the staging step and if a match is selected or if ‚Ignore matches‘ is selected.
Aktion, wenn Übereinstimmung gefunden wurde
„Zusammenführen“ ist ausgewählt
„Bereitgestellten Datensatz ignorieren“ ist ausgewählt
Vorhandenen Datensatz mit importiertem Datensatz ersetzen
Importierter Datensatz überschreibt übereinstimmender ausgewählter Datensatz
„Aktion, wenn keine Übereinstimmung gefunden wurde“ wird angewendet
Datensatz anlegen
Neuer Datensatz wurde hinzugefügt
Neuer Datensatz wurde hinzugefügt
Eingehenden Datensatz ignorieren
Eingehender Datensatz wurde ignoriert
„Aktion, wenn keine Übereinstimmung gefunden wurde“ wird angewendet
Klicken Sie auf ‚In Katalog übernehmen‘ um den Import zu vervollständigen
Der Datensatzimport wird als Hintergrundjob behandelt.

Sie erhalten eine Bestätigungsseite für Ihren MARC-Import
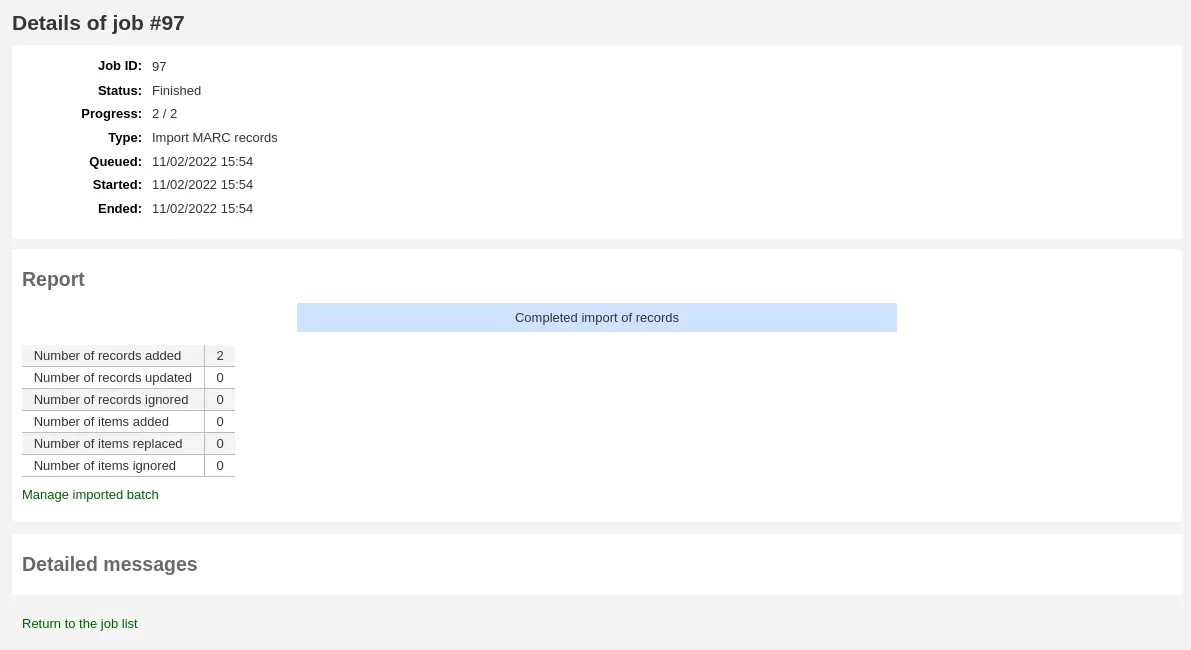
Anzahl der hinzugefügten Sätze: neu angelegte Datensätze
Anzahl der aktualisierten Datensätze: vorhandene Datensätze, die mit importierten Datensätzen überschrieben wurden
Anzahl der ignorierten Datensätze: Datensätze die aufgrund der Abgleichregeln ignoriert wurden
Anzahl hinzugefügter Exemplare: neu angelegte Exemplare
Anzahl ersetzter Exemplare: vorhandene Exemplare, die mit importieren Exemplaren überschrieben wurden
Anzahl an ignorierten Exemplaren mit dublettem Barcode: Exemplare, die ignoriert wurden, da der Barcode bereits in der Datenbank vorhanden ist
Nachdem der Import abgeschlossen wurde, wird ein Link zum Titel auf der rechten Seite jedes importierten Titels angezeigt
Sie können Ihren Import auch rückgängig machen, in dem Sie auf „Übernahme in den Katalog rückgängig machen“ klicken
Records imported using this tool remain in the ‚reservoir‘ until they are cleaned either through the ‚Clean‘ button in the Staged MARC record management home page (see below) or through the cleanup_database cronjob. Reservoir records will appear when searching the catalog from the cataloging module
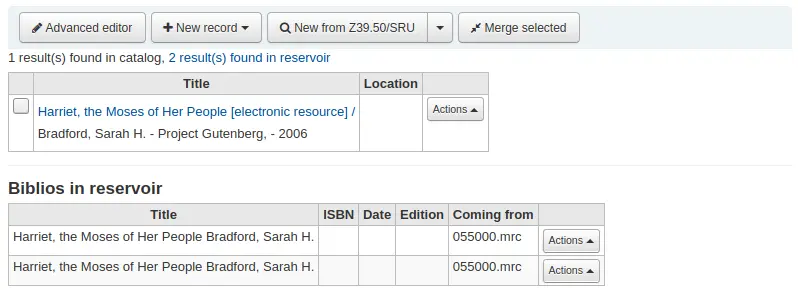
Um Datensätze aus dem „Datenpool“ zu entfernen:
Besuchen Sie die Startseite des Werkzeugs zur Verwaltung bereitgestellter MARC-Datensätze

Um die Importdaten zu bereinigen, klicken Sie auf ‚Bereinigen‘ auf der rechten Seite
Sie erhalten eine Bestätigungsnachricht

Bestätigen Sie die Löschung und die Datensätze werden aus dem Datenpool entfernt. Der Status ändert sich zu ‚bereinigt‘
Datensatz hinzufügen
Zeitschriftenaufsätze und Artikel innerhalb von Monographien und Periodika können über das Katalogisieren von unselbstständigen Werken erschlossen werden. Dabei wird für jeden Teil dieser Artikel, Kapitel, Abteilungen etc. (‚unselbständiges Werk‘) innerhalb des Materials (‚übergeordnetes Werk), wie ein Buch, ein Artikel in einer Zeitschrift, eine Zeitung oder Fortsetzung ein eigener Titelsatz angelegt, auch wenn der einzelne Teil nicht physisch vom übergeordneten Werk getrennt ist. Mehr Informationen dazu finden Sie im Kapitel 13 der AACR2 (Anglo-American Cataloguing Rules).
Wenn Sie unselbstständige Werke katalogisieren möchten, haben Sie zwei Möglichkeiten. Zum einen die Funktion Einfache Aufsätze, zum anderen den Erweiterten Workflow für unselbständige Werke.
Einfache Aufsätze
Die Funktion zur einfachen Erstellung von Teil-Ganzes-Beziehungen zwischen Datensätzen macht die Verknüpfung von Titelsätzen einfacher. Zuerst müssen Sie den Systemparameter EasyAnalyticalRecords auf ‚Aktiviere‘ und den Systemparameter UseControlNumber auf ‚Verwende keine‘ setzen.
Nach der Katalogisierung des unselbständigen Werkes, (Datensätze hinzufügen um mehr Datensätze anzulegen) klicken Sie ‚Bearbeiten‘ in der normalen Ansicht und wählen Sie ‚Mit übergeordnetem Werk verlinken‘
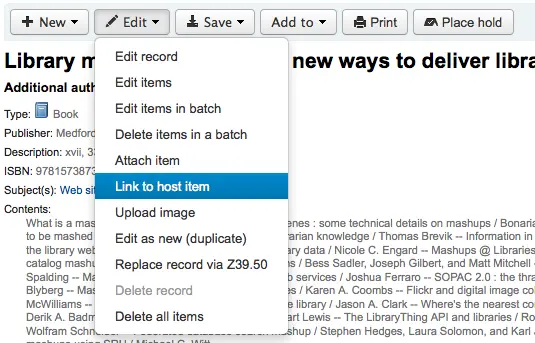
Hier werden Sie nach dem Barcode des Exemplares gefragt, das mit diesem Datensatz verknüpft werden soll.

Nach Abschluss der Eingabe des Exemplar-Barcodes erscheint eine Bestätigung.

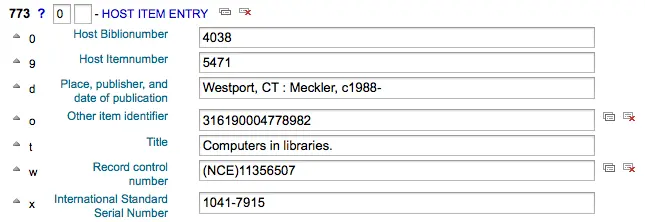
Feld 773 des Datensatzes wird automatisch mit den Informationen für den Link ausgefüllt.
Um alle mit dem übergeordneten Werk verknüpften unselbständigen Datensätze anzuzeigen, starten Sie eine Suche nach dem Datensatz, klicken Sie im linken Bereich auf den entsprechenden Tab und das unselbständige Werk, welches mit dem Barcode verbunden ist, wird in der Spalte „Benutzt in“ angezeigt.

Hinweis
Tipp: Sie können auch von diesem Bildschirm ausgehend unselbstständige Werke erfassen, indem Sie die entsprechende Schaltfläche verwenden
Sie erhalten auch eine Liste der zu diesem Datensatz gehörenden unselbständigen Werke, wenn Sie auf die Schaltfläche ‚Unselbständige Werke anzeigen‘ klicken, die sich in der normalen Ansicht über dem Datensatz befindet.

Es wird auch eine Verknüpfung zum übergeordneten Exemplar in der Spalte „übergeordneter Titel“ in der Tabelle Vormerkungen angezeigt.

Erweiterter Workflow für unselbständige Werke
Um den erweiterten Workflow benutzen zu können, müssen Sie den Systemparameter EasyAnalyticalRecords auf ‚Deaktiviere‘ setzen und den Systemparameter UseControlNumber auf ‚Verwende‘.
Nach der Katalogisierung Ihres Datensatzes, (mehr zum Anlegen von Datensätzen unter Datensatz hinzufügen ) klicken Sie ‚Neu‘ in der normalen Ansicht und wählen Sie ‚Mit übergeordnetem Werk verlinken‘.
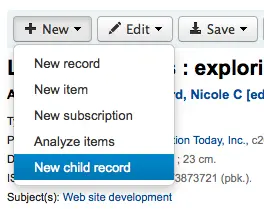
Dies öffnet einen leeren Datensatz zur Katalogisierung. Der leere Datensatz enthält nur das Feld 773, welches bereits ausgefüllt ist. Um den Link zu vervollständigen, wird der Datensatz nochmal gespeichert.

Der Link „Zeige unselbstständige Werke“ beim übergeordneten Satz zeigt nun unter Verwendung von dessen Datensatzkontrollnummer (001) sämtliche dazugehörigen untergeordneten Sätze des Typs „Unselbständiger Teil einer Monografie“ oder „Unselbständiger Teil einer fortlaufenden Publikation“ (Position 7 im Leader) an, wenn diese ein Feld 773 mit Unterfeld w aufweisen und darin die Datensatzkontrollnummer (001) des übergeordneten Satzes steht.
Unselbständige Werke bearbeiten
Wenn Sie einen Titeldatensatz falsch verknüpft haben, können Sie den Link entfernen indem Sie den verlinkten Datensatz bearbeiten (nicht den übergeordneten Datensatz).
Dazu gehen Sie in den untergeordneten Satz und klicken auf ‚Edit‘. Um UseControlNumber zu verwenden, bearbeiten oder entfernen Sie einfach das betreffende Feld 773.
Falls EasyAnalytics verwendet wird, wählen Sie ‚Exemplare bearbeiten‘. Links neben jedem Exemplar sehen Sie zwei Optionen.

‚übergeordnetem Titel bearbeiten‘ erlaubt die Bearbeitung des Exemplars im übergeordneten Titel.
Die Schaltfläche ‚Link löschen‘ entfernt das Feld 773 und die Verknüpfung mit dem übergeordneten Werk.
Bände zeigen
Wenn Sie ein Reihe von Bänden katalogisieren, zeigt Koha ein Label „Bände:“ und einen Link zu den Einträgen in der bibliografischen Detailansicht an.
Konfiguration:
Beim Katalogisieren einer Reihe von Bänden muss das verwendete Framework über die MARC-Felder 773$w und 830$w verfügen.
Stellen Sie den Systemparameter UseControlNumber auf „Verwende keine.“
Bemerkung
Setzen Sie den Systemparameter UseControlNumber auf „Nicht verwenden“, so dass das Label „In“ durch das Label und den Link „Bände: Bände anzeigen“ im übergeordneten Datensatz ersetzt wird. Untergeordnete Datensätze zeigen den Link „Bände anzeigen“ nicht an. Wenn „UseControlNumber“ auf „Verwenden“ gesetzt ist, werden die Beschriftung und der Link „In“ angezeigt.
Katalogisieren Sie den übergeordneten Datensatz. Notieren Sie sich die Kontrollnummer 001.
Beispiel:
000 LDR, pos. 19 = a - Set
001 xxx
773 _ _ $a  volume set title
Katalogisieren Sie den untergeordneten Datensatz. Geben Sie die Kontrollnummer aus dem übergeordneten Datensatz in das Unterfeld w des Tags 773 ein.
000 LDR, pos. 7 = m - Monograph/Item
000 LDR, pos. 19 = c - Part with dependent title
773 _  _ $a  volume set title $w xxx
Der übergeordnete Datensatz zeigt das Label „Bände:“ mit dem Link „Bände anzeigen“ an. Wenn Sie auf den Link klicken, wird der/die Benutzer*in zum untergeordneten Datensatz oder zu einer Seite mit Suchergebnissen für untergeordnete Datensätze weitergeleitet.
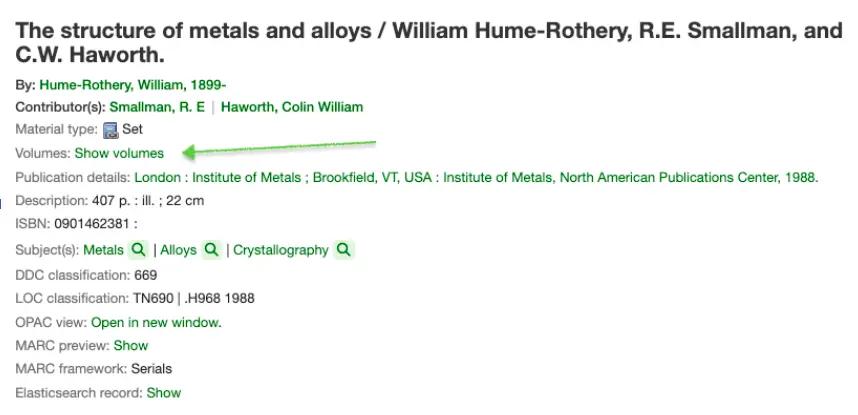
Titel bearbeiten
Bemerkung
Um bibliografische Einträge bearbeiten zu können, müssen die Mitarbeiter*innen die Berechtigung edit_catalogue (oder die superlibrarian-Berechtigung) besitzen.
Um einen Datensatz zu bearbeiten, klicken Sie auf die Schaltfläche „Aktion“ in der Trefferliste und verwenden Sie die Schaltfläche „Titel bearbeiten“.
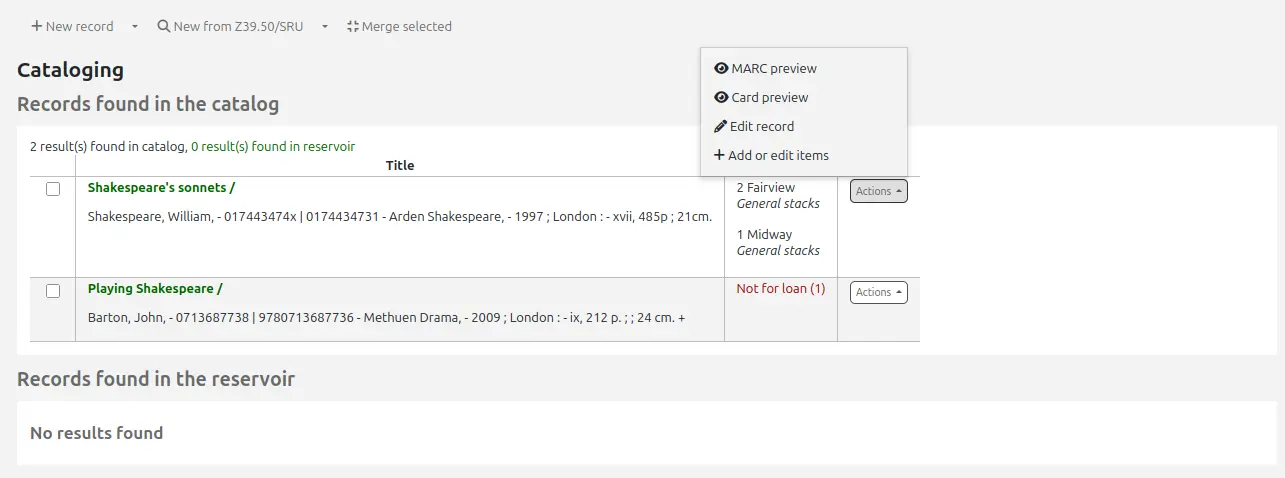
Or, click the ‚Edit‘ button on the record’s details page and choose ‚Edit record‘.

Der Datensatz wird im MARC-Editor geöffnet.
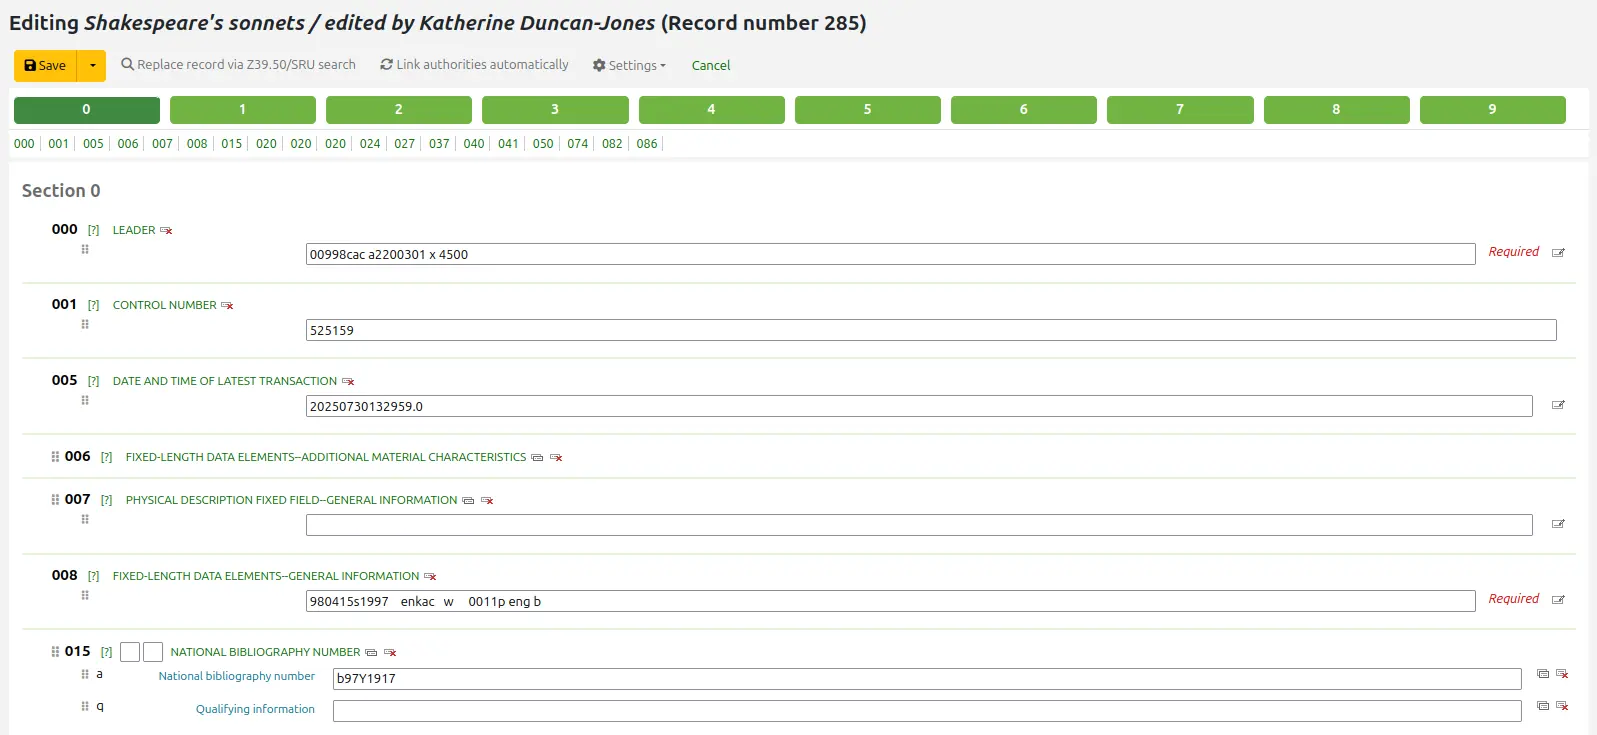
Über eine Z39.50/SRU-Suche können Sie den Datensatz mit einem vollständigeren Datensatz, den Sie in einer anderen Bibliothek gefunden haben überlagern. Verwenden Sie dazu die Funktion ‚Datensatz über Z39.50/SRU überschreiben‘ im Menü ‚Bearbeiten‘.

Wenn Sie dies auswählen, gelangen Sie in die Z39.50/SRU-Suche, wo Sie in anderen Bibliotheken nach dem Datensatz suchen können.
Nachdem Sie alle Änderungen vorgenommen haben (egal auf welche Weise), klicken Sie auf ‚Speichern‘ in der oberen linken Ecke des Editors.
Stapelbearbeitung von Titeln
Bemerkung
Nur Mitarbeiter*innen mit der Berechtigung records_batchmod (oder der superlibrarian-Berechtigung) haben Zugriff auf dieses Werkzeug.
Pfad in Koha: Mehr > Katalgisierung > Stapelbearbeitung > Stapelbearbeitung von Titeln
This tool is used to edit batches of bibliographic and authority records using MARC modification templates. Before visiting this tool you will need to set up at least one MARC modification template.
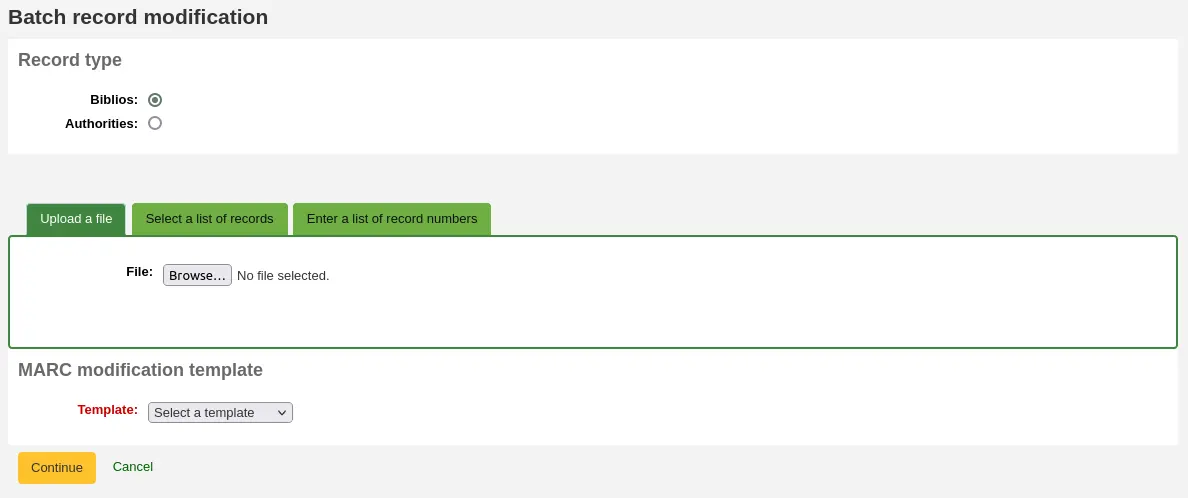
Datensatztyp: Legen Sie fest, ob Sie Titel- oder Normdatensätze ändern
Geben Sie die zu bearbeitenden Titeldatensatznummer (biblionumbers) oder Normdatensatz-IDs ein, auf eine von drei möglichen Arten
Hochladen einer Datei mit biblionumbers oder authids
verwenden Sie eine Liste;
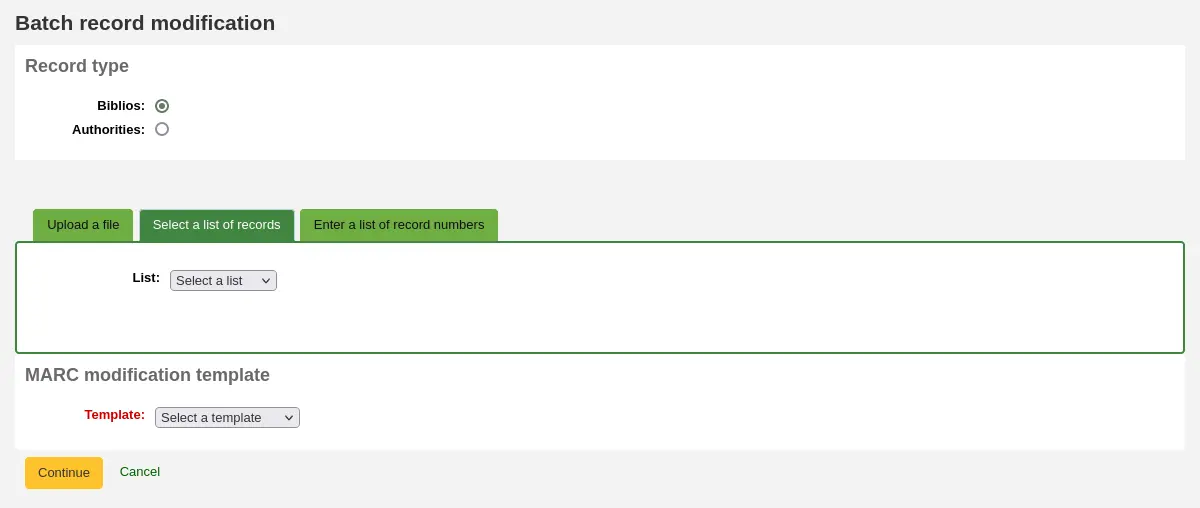
Oder die Nummern (eine pro Zeile) im angezeigten Eingabefeld eingeben.
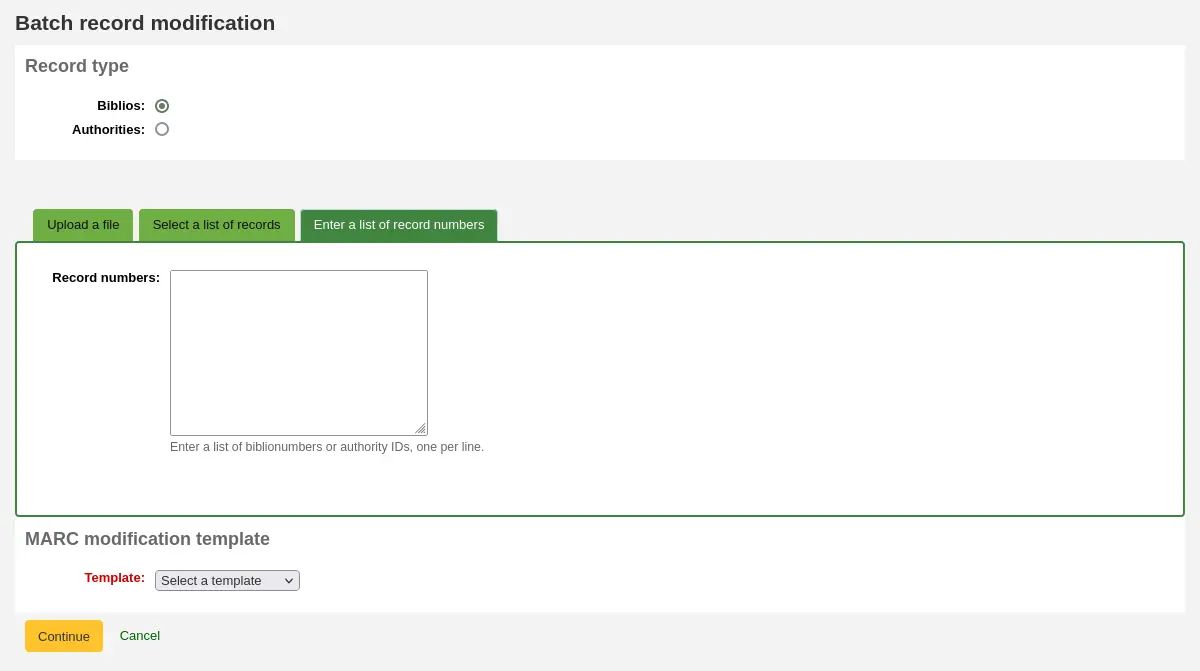
Template für MARC-Modifikationen: wählen Sie das Template für MARC-Modifikationen um diese Datensätze zu bearbeiten.
Wenn Sie die Kriterien eingegeben haben, klicken Sie ‚Fortsetzen‘

Es erscheint eine Liste der zu ändernden Datensätze. Neben jedem Eintrag erscheint eine Checkbox. Markierungen neben Exemplaren, die nicht geändert werden sollen, können entfernt werden.
Mit einem Klick auf die MARC-Ansicht können Sie sehen, welche Änderungen vollzogen wurden nach Abschluß der Bearbeitung.
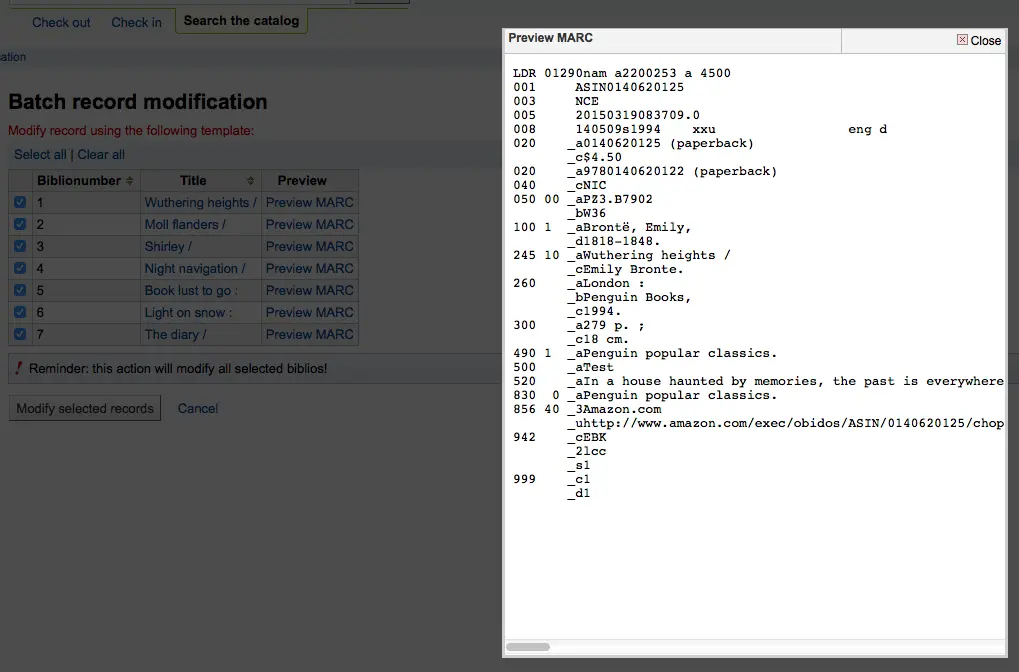
Wenn alles zu ihrer Zufriedenheit ist, können Sie die Änderungen mit einem Klick auf ‚Ausgewählte Datensätze bearbeiten‘ durchführen.
Templates für MARC-Modifikationen
Bemerkung
Nur Mitarbeiter*innen mit der Berechtigung marc_modification_templates (oder der superlibrarian-Berechtigung) haben Zugriff auf dieses Werkzeug.
Pfad in Koha: Mehr > Katalogisierung > Stapelbearbeitung > Templates für MARC-Modifikationen
Templates für MARC-Modifikation erlauben es, MARC-Datensätze während der Bereitstellung für den Import oder der Stapelbearbeitung von Titeln automatisch zu bearbeiten.
Dieses Werkzeug erlaubt es, MARC-Datensätze aus unterschiedlichen Quellen an Ihr MARC-Framework anzupassen. Dazu wird ein einfaches Skript mit den Aktionen ‚Copy‘, ‚Move‘, ‚Add‘, ‚Update‘ und ‚Delete fields‘ eingesetzt.
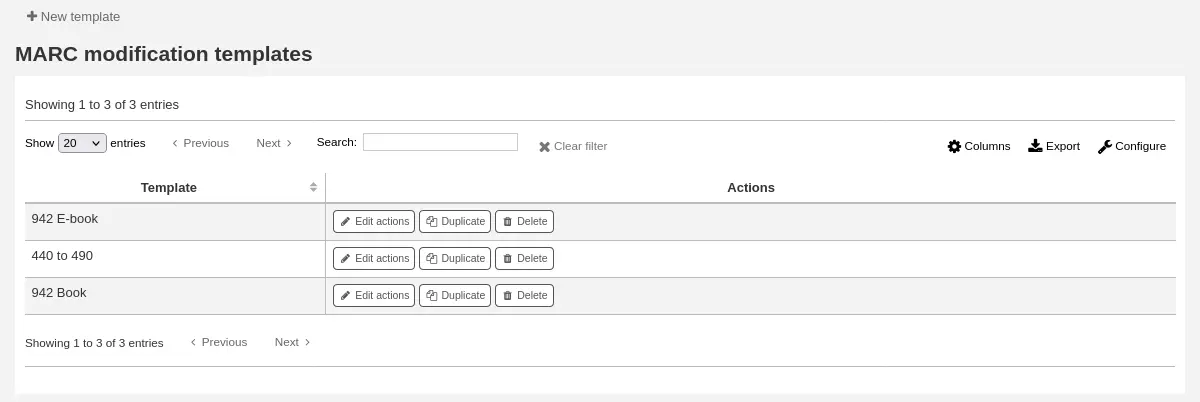
Legen Sie zunächst ein neues Template an, indem sie einen Namen eingeben und auf ‚Template erstellen‘ klicken. (Ein Template kann aus einer oder mehreren Aktionen bestehen.).
Optional können Sie auch ein existierendes Template kopieren indem Sie bei ‚Template kopieren‘ das zu kopierende Template in der Auswahlliste auswählen.
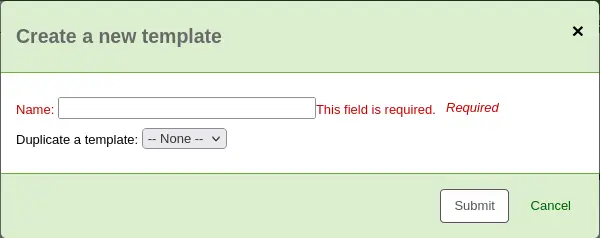
Als Nächstes können Sie Aktionen zum Template hinzufügen. Klicken Sie auf ‚Neue Aktion‘.
Ein Fenster ‚Neue Aktion‘ erscheint, indem Sie festlegen können, welche Aktionen durchgeführt werden sollen.
Wenn Sie z. B. einen Stapel Dateien von Ihrem EBook-Anbieter laden, möchten Sie vielleicht den biblio-Exemplartyp EBOOK zu 942$c hinzufügen.

Klicken Sie auf „Neues Template“
Geben Sie Feld 942 und Unterfeld c ein
Geben Sie den Wert „EBOOK“ ein (oder den Code für Ihren Exemplartyp ebook)
Geben Sie eine Beschreibung an, damit Sie diese Aktion später identifizieren können
Klicken Sie auf „Aktion hinzufügen“
Bemerkung
Wenn Sie die Werte in einem bestehenden Feld aktualisieren möchten, wählen Sie die Option „Aktualisiere existierendes oder erstelle neues“. Dadurch werden die vorhandenen Werte aktualisiert und ein neues Feld hinzugefügt, wenn keines vorhanden ist.
Jede Aktion kann auch eine optionale Bedingung enthalten, um den Wert oder das Vorhandensein eines anderen Feldes zu prüfen. Sie könnten zum Beispiel die Signatur zum Exemplardatensatz hinzufügen wollen, wenn sie noch nicht vorhanden ist.
Bemerkung
Die Bearbeitung von Exemplarfeldern funktioniert nur, wenn Sie die Vorlage MARC-Datensätze für Import zwischenspeichern verwenden. Sobald sich die Datensätze in Koha befinden, ist das Exemplar vom Datensatz „getrennt“ und kann nur noch mit dem Werkzeug Stapelbearbeitung von Exemplaren bearbeitet werden

Wählen Sie „Kopieren“
Entscheiden Sie, ob Sie das erste Vorkommen oder alle Vorkommen des Feldes kopieren wollen
Geben Sie das Feld 090 (oder ein anderes bibliographisches Signaturfeld) und das Unterfeld a ein, um zu kopieren
Geben Sie das Feld 952 und das Unterfeld o ein, in das kopiert werden soll
Wählen Sie ‚wenn‘
Geben Sie das Feld 952 und das Unterfeld o ein
Wählen Sie „existiert nicht“
Geben Sie eine Beschreibung an, damit Sie diese Aktion später identifizieren können
Klicken Sie auf „Aktion hinzufügen“
Die Aktionen „Verschieben“, „Kopieren“ und „Kopieren und ersetzen“ unterstützen reguläre Ausdrücke, die verwendet werden können, um Feldwerte während des Kopierens oder Verschiebens automatisch zu ändern. Ein Beispiel wäre das Entfernen des Zeichens „$“ im Feld 020$c.

Wählen Sie ‚Kopieren und ersetzen‘
Entscheiden Sie, ob Sie das erste Vorkommen oder alle Vorkommen des Feldes kopieren wollen
Geben Sie das Feld 020 und das Unterfeld c zum Kopieren ein
Geben Sie das Feld 020 und das Unterfeld c ein, in das kopiert werden soll
Setzen Sie das Häkchen bei „RegEx“ und geben Sie Ihren regulären Ausdruck ein (in diesem Fall s/\$// )
Wählen Sie ‚wenn‘
Geben Sie das Feld 020 und das Unterfeld c ein
Wählen Sie „Treffer“
Setzen Sie das Häkchen bei ‚RegEx‘ und geben Ihren regulären Ausdruck ein (in diesem Fall m/^\$/ )
Geben Sie eine Beschreibung an, damit Sie diese Aktion später identifizieren können
Klicken Sie auf „Aktion hinzufügen“
Bemerkung
Der Wert für eine Aktualisierung kann Variablen enthalten, die sich jedes Mal ändern, wenn die Vorlage verwendet wird. Derzeit unterstützt das System zwei Variablen, __BRANCHCODE__, die durch den branchcode der Bibliothek ersetzt wird, die derzeit die Vorlage verwendet, und __CURRENTDATE__, die durch das aktuelle Datum im ISO-Format (JJJJ-MM-TT) ersetzt wird.
Sie können auch reguläre Ausdrücke verwenden, um die Proxy-URL Ihrer Bibliothek vor den Links in Ihrem MARC-Datensatz einzufügen.

Wählen Sie ‚Kopieren und ersetzen‘
Entscheiden Sie, ob Sie das erste Vorkommen oder alle Vorkommen des Feldes kopieren wollen
Geben Sie das Feld 856 und das Unterfeld u zum Kopieren ein
Geben Sie das Feld 856 und das Unterfeld u ein, in das kopiert werden soll
Setzen Sie das Häkchen bei „RegEx“ und geben Sie Ihren regulären Ausdruck ein (in diesem Fall s/^/PROXY_URL/ )
Geben Sie eine Beschreibung an, damit Sie diese Aktion später identifizieren können
Klicken Sie auf „Aktion hinzufügen“
Bei der Entscheidung, ob Sie „Kopieren“ oder „Kopieren und ersetzen“ nutzen, sollten Sie sich das folgende Beispiel vor Augen halten:
245 _aThe art of computer programming _cDonald E. Knuth.
300 _aA_exists _bB_exists
Wenden Sie Aktion (a) an und kopieren das gesamte Feld 245 nach 300, erhält man:
245 _aThe art of computer programming _cDonald E. Knuth.
300 _aA_exists _bB_exists
300 _aThe art of computer programming _cDonald E. Knuth.
Wenden Sie Aktion (b) an und kopieren Unterfeld 245$a nach 300$a, erhält man:
245 _aThe art of computer programming _cDonald E. Knuth.
300 _aThe art of computer programming _bB_exists
Sobald die Aktionen gespeichert sind, erscheinen diese im oberen Bildschirmbereich. Die Aktionen können mit den Pfeilen neu angeordnet werden.

Aktionen werden in der Reihenfolge ihres Erscheinens abgearbeitet. Abhängig von Ihren Aktionen kann die Reihenfolge sehr wichtig sein. Zum Beispiel möchten Sie ein Feld nicht löschen lassen, bevor es in ein anderes Feld kopiert wird. Sie können die Pfeile verwenden, um Aktionen nach oben oder nach unten zu bewegen
Der Pfeil nach oben verschiebt die Aktion eine Position nach oben
Der Pfeil nach oben mit einer Linie oben verschiebt die Aktion an die erste Position
Der Pfeil nach unten mit einer Linie unten verschiebt die Aktion an die letzte Position
Der Pfeil nach unten verschiebt die Aktion eine Position nach unten
Sobald Ihr Template gespeichert ist, können Sie es auswählen, wenn Sie eins der Werkzeuge MARC-Datensätze für Imports zwischenspeichern oder Stapelbearbeitung von Datensätzen verwenden.

Titel duplizieren
Nicht immer können Sie einen passenden Datensatz via Z39.50/SRU finden. In diesem Fall können Sie einen ähnlichen Datensatz duplizieren und die notwendigen Änderungen und Ergänzungen für Ihren Datensatz vornehmen. Um einen vorhandenen Datensatz zu duplizieren, klicken Sie ‚Titel duplizieren‘ im Menü ‚Bearbeiten‘ des Datensatzes.
Bemerkung
Um bibliografische Datensätze duplizieren zu können, müssen Mitarbeiter*innen die Berechtigung edit_catalogue (oder die superlibrarian-Berechtigung) besitzen.

Dies öffnet einen neuen MARC-Datensatz, bei dem die Felder mit den Werten aus dem ursprünglichen Datensatz belegt sind.
Bearbeiten nach Bedarf und Speichern.
Bemerkung
Dies wird den originalen Datensatz nicht verändern.
Dateien anhängen
Wenn Sie Dateien in Koha hochladen möchten, können Sie dies mit einigen Einstellungen tun.
Ihr Systemadministrator muss ‚upload_path‘ config so einstellen, dass es darauf hinweist, wo die Dateien gespeichert sind
Sie merken, ob Ihr Upload-Pfad richtig gesetzt ist, indem Sie im Modul ‚Über Koha‘> Systeminformation überprüfen.

Überprüfen Sie, ob Ihr Systemparameter OPACBaseURL richtig eingestellt ist
Sie können das upload.pl Plugin für das Unterfeld 856$u in einem (oder mehreren) Ihrer Frameworks hinzufügen
Wenn Sie alles eingerichtet haben, können Sie mit dem Katalogisieren fortfahren. Ein Plugin Icon wird neben dem Feld 856$u angezeigt und das Upload und/oder Suchfenster klappt auf
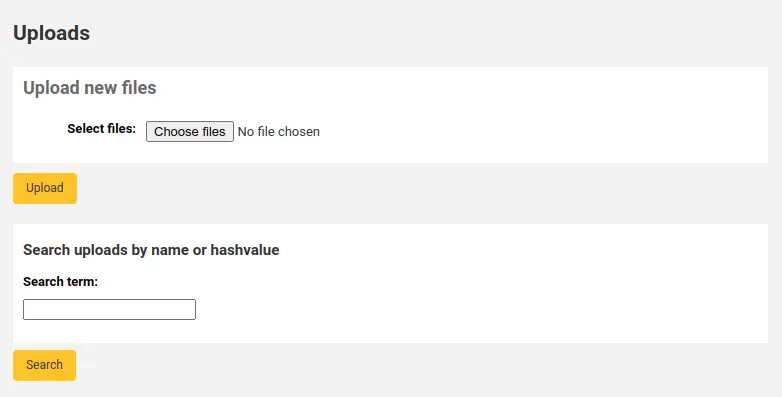
Von diesem Menü aus können Sie ‚durchsuchen‘ anklicken um eine Datei auszuwählen und sie anzuhängen, oder Sie benutzen die Suchbox um kürzlich heruntergeladene Dateien zu suchen. Ausgehend von der Trefferliste können Sie auswählen, welche Datei Sie anhängen möchten.
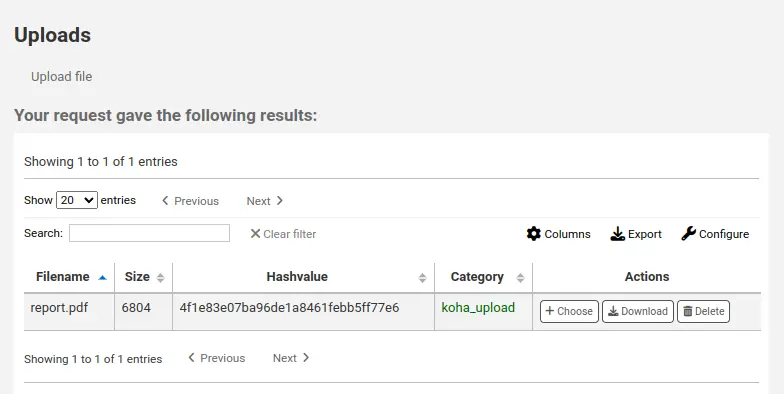
Wenn Sie die Datei ausgewählt haben wird diese als Link im MARC-Datensatz und in der Detailanzeige angezeigt.

Hinweis
Handelt es sich bei der Datei um ein PDF wird sie direkt im Benutzerbrowser geöffnet, handelt es sich hingegen um ein Bild oder um einen anderen Dateityp, wird der/die Benutzer*in aufgefordert die Datei herunterzuladen.
Coverbilder hinzufügen
Several free and paying services are integrated with Koha to provide cover images for your catalog, such as Amazon, Baker and Taylor, Google books, NovelList Select, Open Library, and Syndetics. Check the corresponding system preferences to enable the service of your choice.
Es gibt auch andere Optionen, wie zum Beispiel einen Coce image cache server, oder Remote-Coverbilder mit benutzerdefinierten URLs.
Warnung
Wenn Sie mehr als einen Coverservice aktivieren, werden Ihnen ggf. mehrere Coverbilder in einem Datensatz angezeigt.
Die meisten dieser Services verwenden die ISBN des Datensatzes um das Coverbild vom Anbieter abzurufen.
Um eigene Coverbilder hochzuladen, verwenden Sie das Werkzeug Coverbilder hochladen unter ‚Katalogisierung‘.
Warnung
Achten Sie darauf, dass Sie bei der Verwendung von Bildern das Urheberrecht beachten.
Hinzufügen eines einzelnen lokalen Titelbildes
Bevor Sie lokale Coverbilder hinzufügen, stellen Sie sicher, dass entweder der Systemparameter OPACLocalCoverImages und/oder der Systemparameter LocalCoverImages auf ‚Anzeige‘ gesetzt ist.
Bemerkung
Nur Bibliothekspersonal mit der Berechtigung upload_local_cover_images (oder der superlibrarian-Berechtigung) kann lokale Coverbilder verwalten.
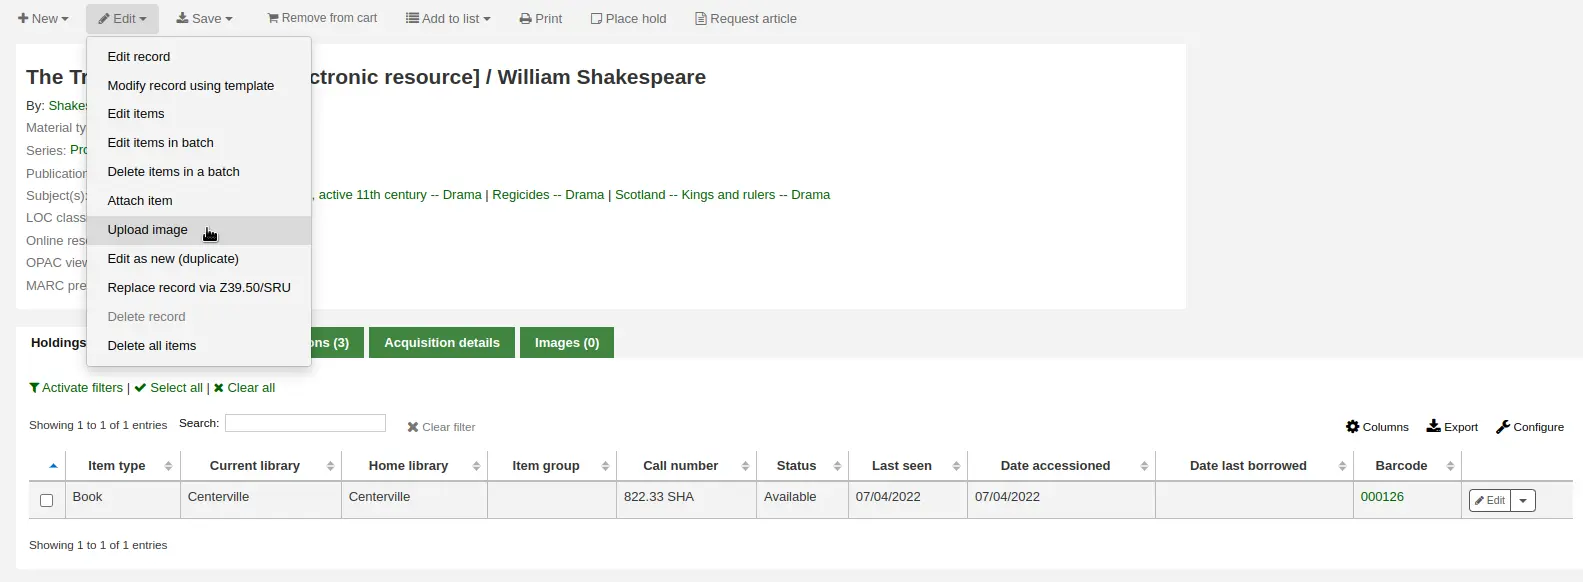
Wählen Sie in einem bibliografischen Datensatz die Option „Bild hochladen“ aus dem Menü „Bearbeiten“, um Ihr Coverbild hinzuzufügen.
Ziehen Sie das Bild in den Bereich, oder klicken Sie auf „Ziehen Sie die Dateien hierhin oder wählen Sie eine Datei aus‘“, um die Bilddatei auf Ihrem Computer auszuwählen.

Warnung
Koha hat keine maximale Dateigröße für dieses Werkzeug, aber der Webserver (z. B. Apache) kann die maximale Größe von Uploads begrenzen (fragen Sie Ihren Systemadministrator).
Wenn der Systemparameter AllowMultipleCovers auf „Erlaube“ gesetzt ist, haben Sie die Wahl, ob Sie vorhandene Cover ersetzen möchten oder nicht. Wenn der Systemparameter auf „Erlaube nicht“ gesetzt ist, wird das Bild existierende Coverbilder für diesen Datensatz ersetzen.
Bemerkung
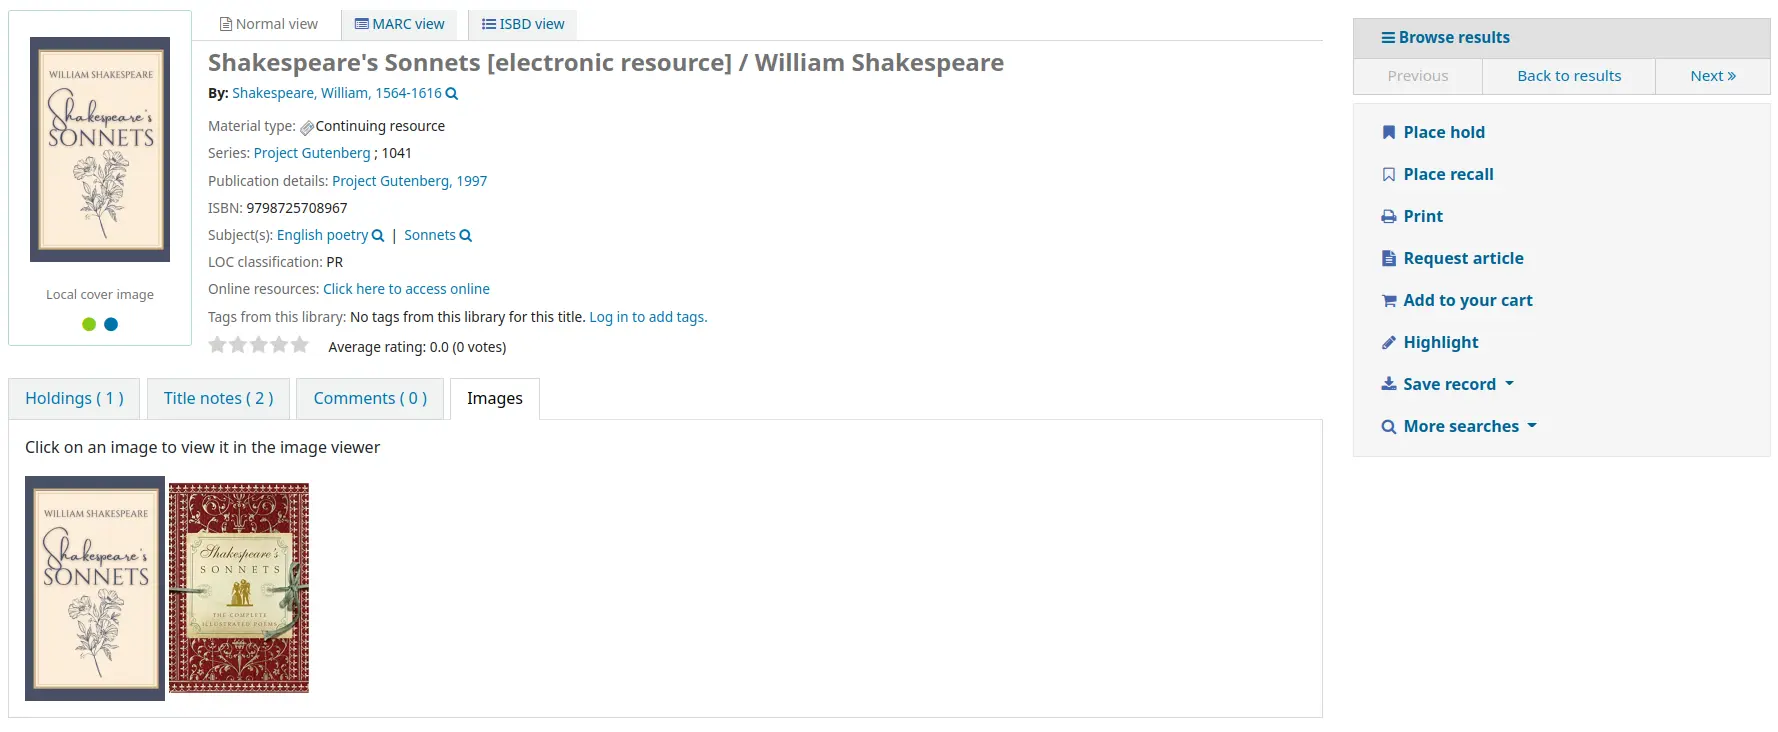
Wenn Sie mehrere Bilder für einen Datensatz hochladen möchten, werden diese von links nach rechts (dann von oben nach unten, abhängig vom Fassungsvermögen Ihres Bildschirms) in der Reihenfolge des Uploads angezeigt. Das Bild auf der linken Seite (das erste, das hochgeladen wurde) wird als Miniaturbild in der Trefferliste und in der Detailansicht angezeigt. Es gibt keine Möglichkeit Coverbilder neu zu ordnen, wenn sie auf diesem Weg hochgeladen wurden, darum beachten Sie beim Upload die gewünschte Anzeigereihenfolge.
Klicken Sie auf ‚Bilder verarbeiten‘
Alternativ können Sie das Werkzeug zum Hochladen von Coverbildern über Katalogisierung > Werkzeuge > Coverbilder hochladen ansteuern. Dort müssen Sie dann die biblionumber des Datensatzes angeben, für den Sie das Bild hochladen.

Bemerkung
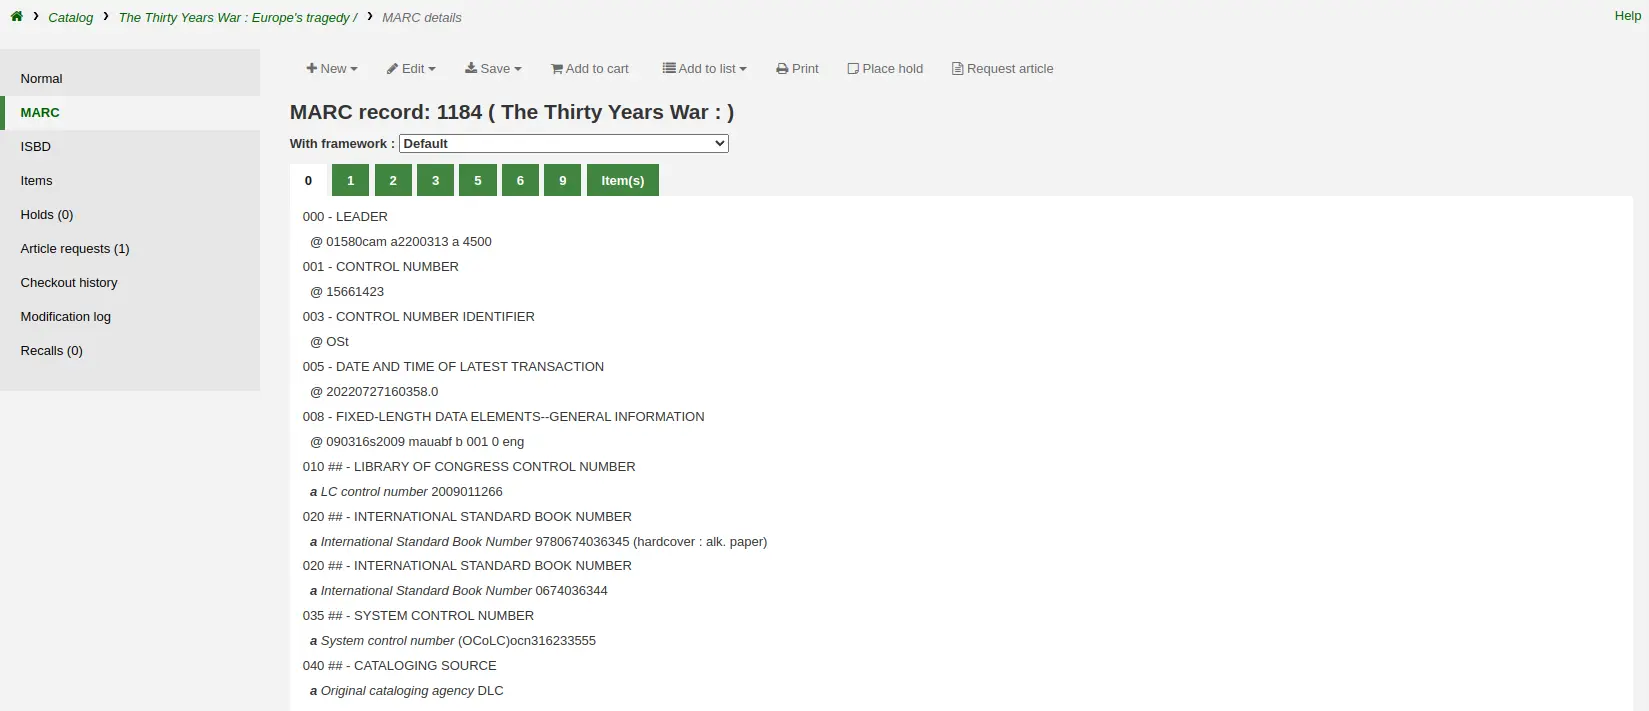
Die biblionumber oder Titeldatensatznummer ist nicht der Barcode, es ist die vom System automatisch generierte Nummer für jeden Titeldatensatz. Sie können die biblionumber an verschiedenen Stellen finden, nämlich:
Am Ende der URL in der Adresszeile Ihres Browsers auf der Detailansichtsseite. Die URL sieht in etwa so aus
Im Reiter MARC auf der Detailansichtsseite des Datensatzes der Dienstoberfläche
Einen Stapel an Coverbildern hinzufügen
Bemerkung
Nur Bibliothekspersonal mit der Berechtigung upload_local_cover_images (oder der superlibrarian-Berechtigung) kann Stapel lokaler Coverbilder hochladen.
Das Werkzeug zum Hochladen von Coverbildern erlaubt auch einen Stapel von Bildern in Form einer ZIP-Datei hochzuladen.
Mehrere Bilder hochladen:
Legen Sie ein Verzeichnis mit den Bildern an, die Sie hochladen möchten
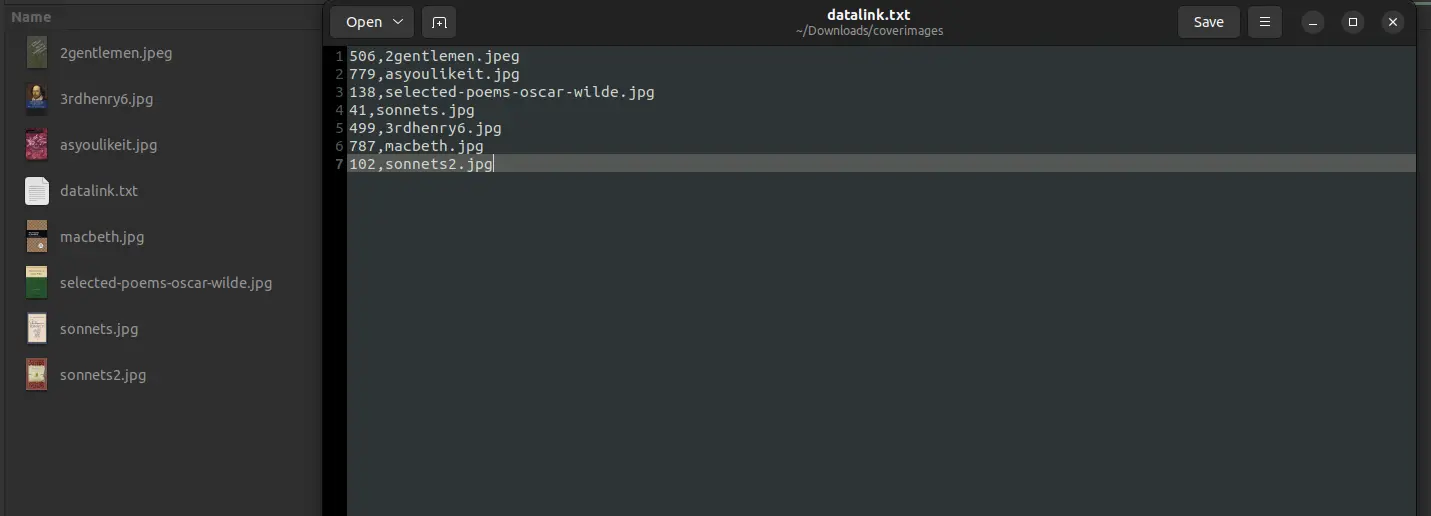
Legen Sie eine Textdatei (*.txt) mit dem Namen datalink.txt oder idlink.txt an, die pro Bild eine Zeile mit der Titelsatznummer (biblionumber) gefolgt vom Bildnamen enthält. Zum Beispiel:
- :
506,2gentlemen.jpeg 779,asyoulikeit.jpg 138,selected-poems-oscar-wilde.jpg 41,sonnets.jpg 499,3rdhenry6.jpg 787,macbeth.jpg 102,sonnets2.jpg
Warnung
Stellen Sie sicher, dass die Textdatei keine zusätzlichen Zeilen oder Zeichen enthält.
Erstellen Sie eine ZIP-Datei die alle Bilder und die zugehörige Textdatei enthält
Gehen Sie in der Koha-Dienstoberfläche auf das Werkzeug zum Hochladen von Coverbildern unter Katalogisierung > Werkzeuge > Lokales Cover hochladen, und ziehen Sie die ZIP-Datei von Ihrem Computer hinein oder wählen Sie sie aus
Der Dateityp „ZIP-Datei“ sollte ausgewählt sein
Wenn der Systemparameter AllowMultipleCovers auf „Erlaube“ gesetzt ist, haben Sie die Wahl, ob Sie vorhandene Cover ersetzen möchten oder nicht. Wenn der Systemparameter auf „Erlaube nicht“ gesetzt ist, wird das Bild existierende Coverbilder für diesen Datensatz ersetzen.
Klicken Sie auf ‚Bilder verarbeiten‘
Es wird eine Zusammenfassung des Uploads angezeigt

Bemerkung
Das Quellbild wird verwendet, um ein 140 x 200 Pixel großes Vorschaubild und ein 600 x 800 Pixel großes Bild in voller Größe zu erzeugen. Das hochgeladene Bild in Originalgröße wird von Koha nicht gespeichert.
In der Dienstoberfläche erscheinen die Coverbilder in den Suchergebnissen, auf der Seite mit den Datensatzdetails rechts neben dem Titel und im Reiter „Bilder“ in der Bestandstabelle am unteren Rand.
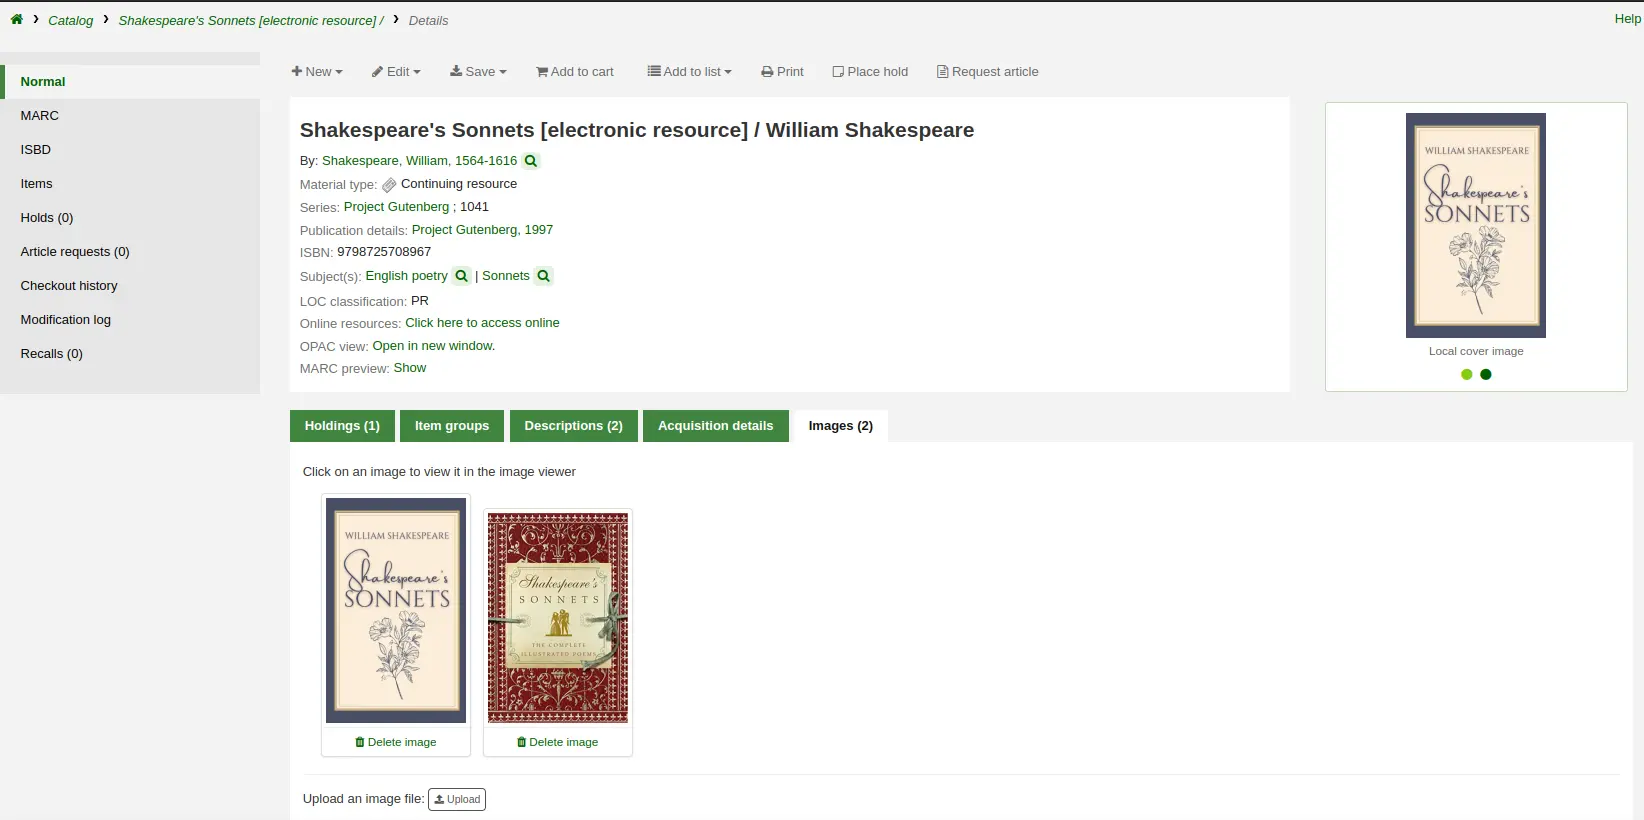
Im OPAC erscheinen die Coverbilder in den Suchergebnissen, auf der Seite mit den Datensatzdetails links neben dem Titel und im Reiter „Bilder“ in der Bestandstabelle am unteren Rand.

Löschen eines lokalen Coverbildes
Bemerkung
Nur Bibliothekspersonal mit der Berechtigung upload_local_cover_images (oder der superlibrarian-Berechtigung) kann lokale Coverbilder löschen.
Klicken Sie auf „Bild löschen“ unterhalb des Bildes im Reiter „Bilder“ in der Dienstoberfläche.

Verschmelze Datensätze
Bemerkung
Um bibliografische Datensätze zusammenführen zu können, müssen die Mitarbeiter*innen die Berechtigung edit_catalogue (oder die superlibrarian-Berechtigung) haben.
Um bibliographische Datensätze zusammenzuführen,
Führen Sie eine Suche im Katalog durch, um die Datensätze zu finden, die zusammengeführt werden müssen.
Markieren Sie die Checkboxen neben den Dubletten, um sie auszuwählen.
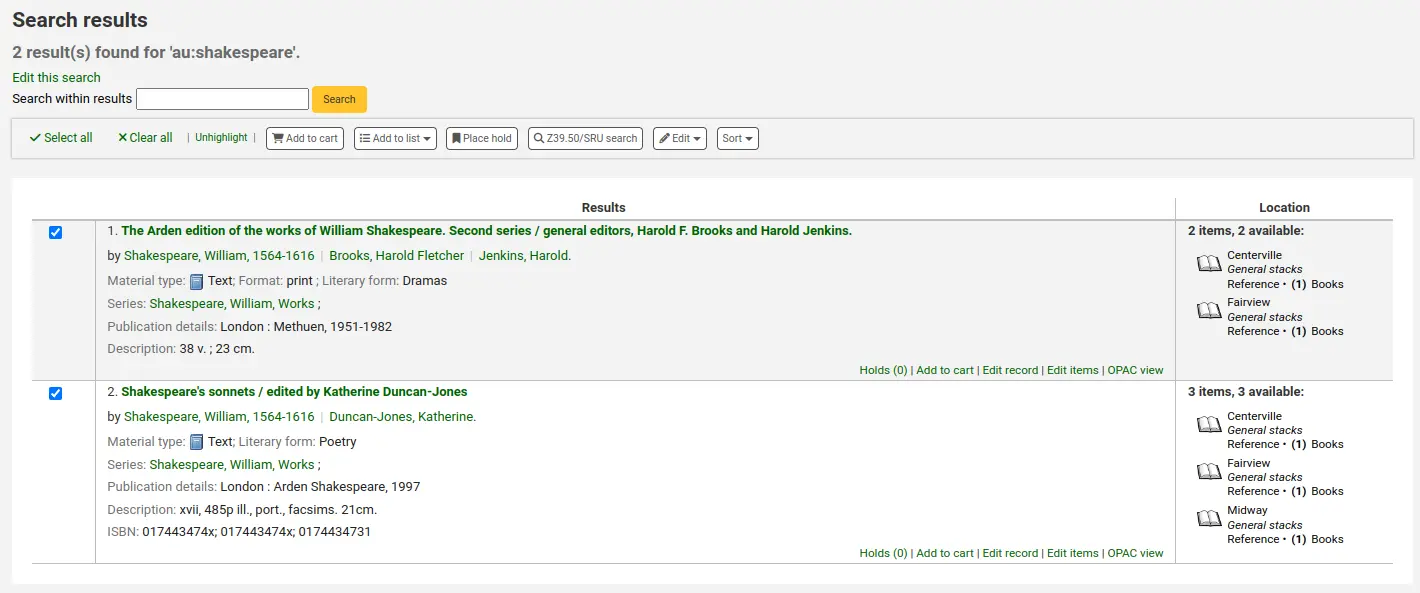
Klicken Sie auf „Bearbeiten“ und wählen Sie die Option „Datensätze zusammenführen“
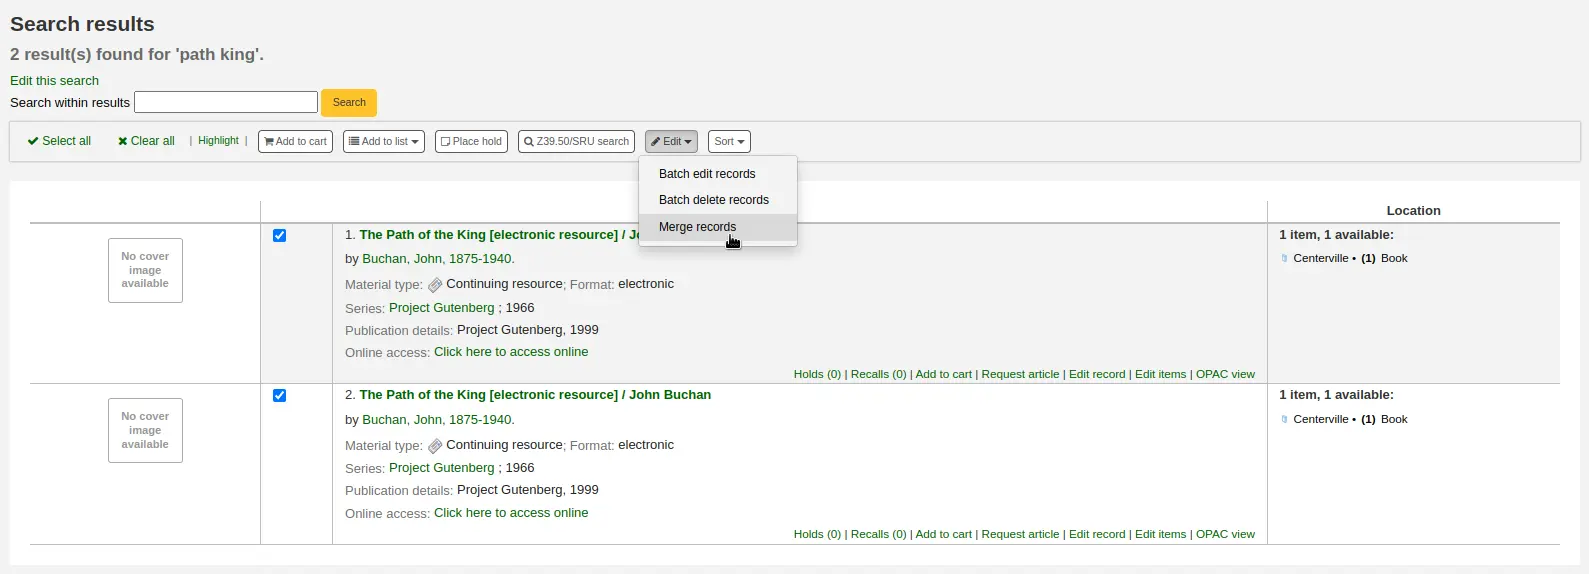
Bemerkung
Alternativ können Sie auch das Katalogisierungsmodul verwenden, um bibliografische Datensätze zusammenzuführen.
Wenn Dubletten in der Trefferliste erscheinen, können Sie eine Markierung hinter die ausgewählten Dubletten setzen und dann über der Trefferliste die Schaltfläche ‚Verschmelzen‘ auswählen.

Wählen Sie aus, welcher Datensatz als primärer Datensatz beibehalten werden soll; die anderen Datensätze werden nach der Zusammenführung gelöscht

Wählen Sie das Framework, das für den verschmolzenen Datensatz verwendet werden soll
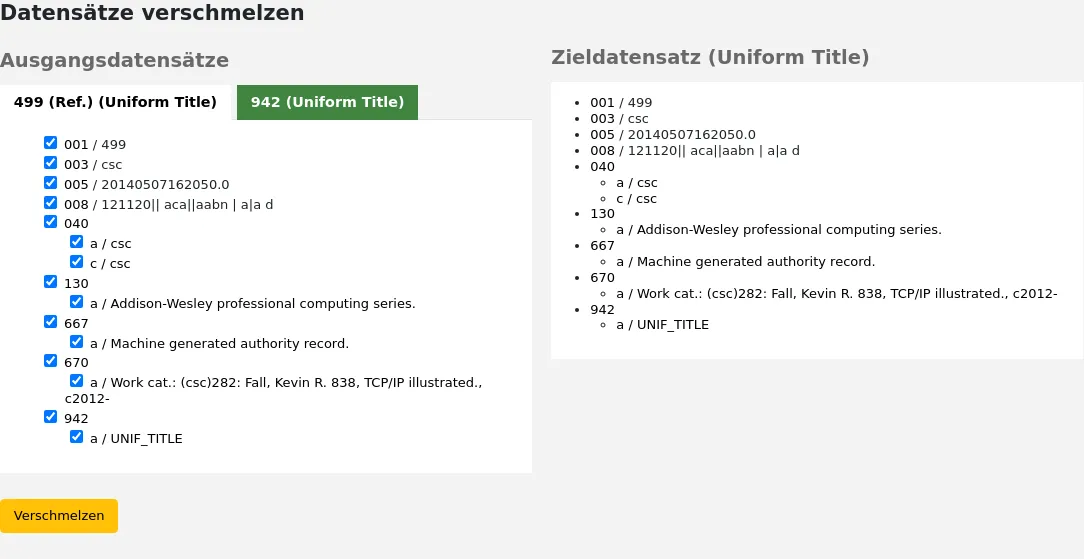
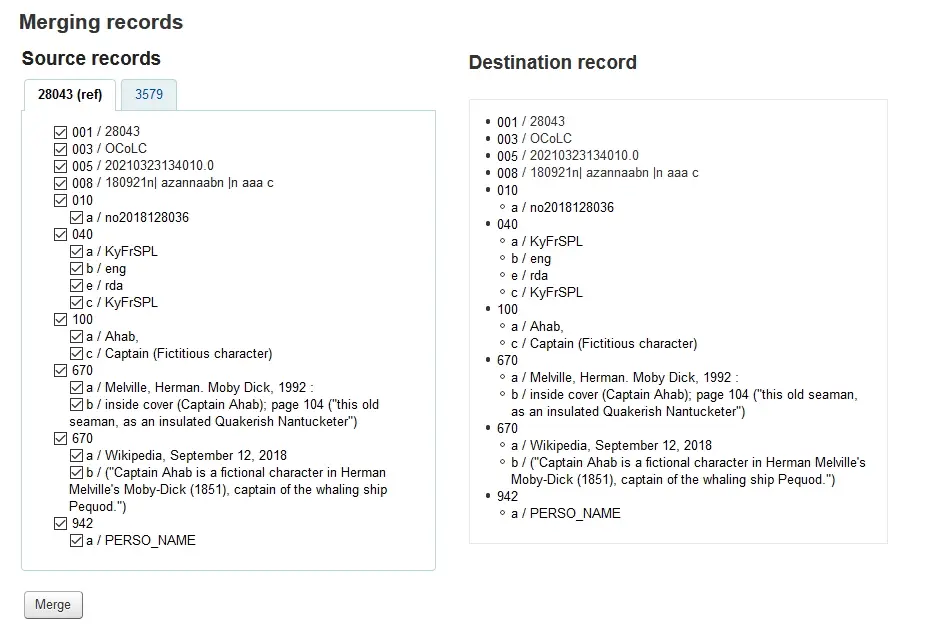
Ihnen wird das MARC für alle Datensätze angezeigt, Sie können darauf jeweils über einen Reiter zugreifen, der mit der biblionumber für diesen Datensatz gekennzeichnet ist. Standardmäßig wird der gesamte erste Datensatz ausgewählt.
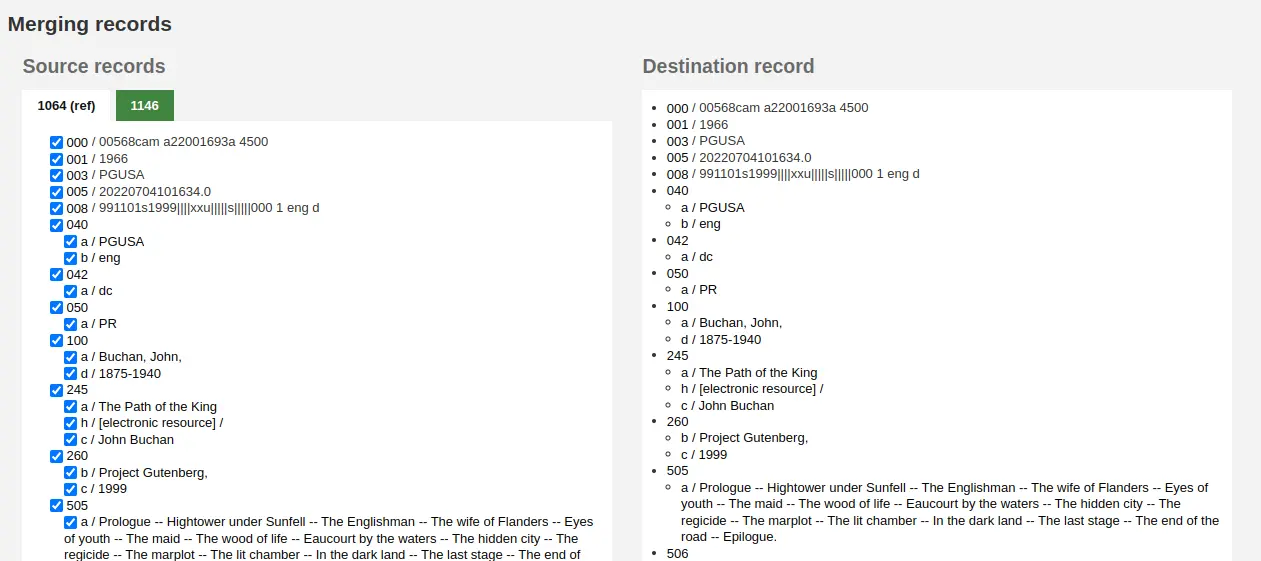
Nehmen Sie das Häkchen in den Feldern bei jedem Datensatz heraus, die Sie nicht im (finalen) Zieldatensatz haben möchten
Setzen Sie eine Markierung bei den Feldern, die Sie im (finalen) Zieldatensatz hinzufügen möchten
Bemerkung
Wenn Sie versuchen, ein Feld mehrfach anzugeben, das nicht wiederholbar ist, erhalten Sie eine Fehlermeldung (Beispiel: Sie wählen 245 in beiden Titeldatensätzen)

Bemerkung
Wenn Pflichtfelder im Zieldatensatz nicht vorhanden sind, werden die Titeldatensätze nicht verschmolzen. Sie müssen einen Wert für Pflichtfelder auswählen.
Wenn wichtige Felder im Zieldatensatz fehlen erhalten Sie eine Warnung, Sie können die Titeldatensätze aber dennoch verschmelzen.
Unter den Datensätzen, die Sie verschmelzen möchten, finden Sie eine Option ‚im Report anzuzeigende Felder‘. Hierüber können Sie auswählen, welche Felder angezeigt werden, wenn die Verschmelzung erfolgreich war:

Wenn Sie nichts eintragen bekommen Sie auf der Bestätigungsseite nur die Titelsatznummern angezeigt

Wenn Sie Felder eingeben sehen Sie diese auf der Bestätigungsseite.

Bemerkung
Sie können Standards für diesen Report angeben über den Systemparameter MergeReportFields.
Wenn Sie Ihre Auswahl beendet haben, klicken Sie auf den Button „Verschmelzen“.
Der primäre Datensatz enthält nun alle ausgewählten Daten und alle Exemplare sowie Erwerbungsinformationen beider Datensätze, der zweite Datensatz wird gelöscht.
Titeldatensätze über Listen verschmelzen
Eine weitere Möglichkeit zwei dublette Titel zusammenzuführen ist, diese einer Liste hinzuzufügen und von dort aus zu verschmelzen.
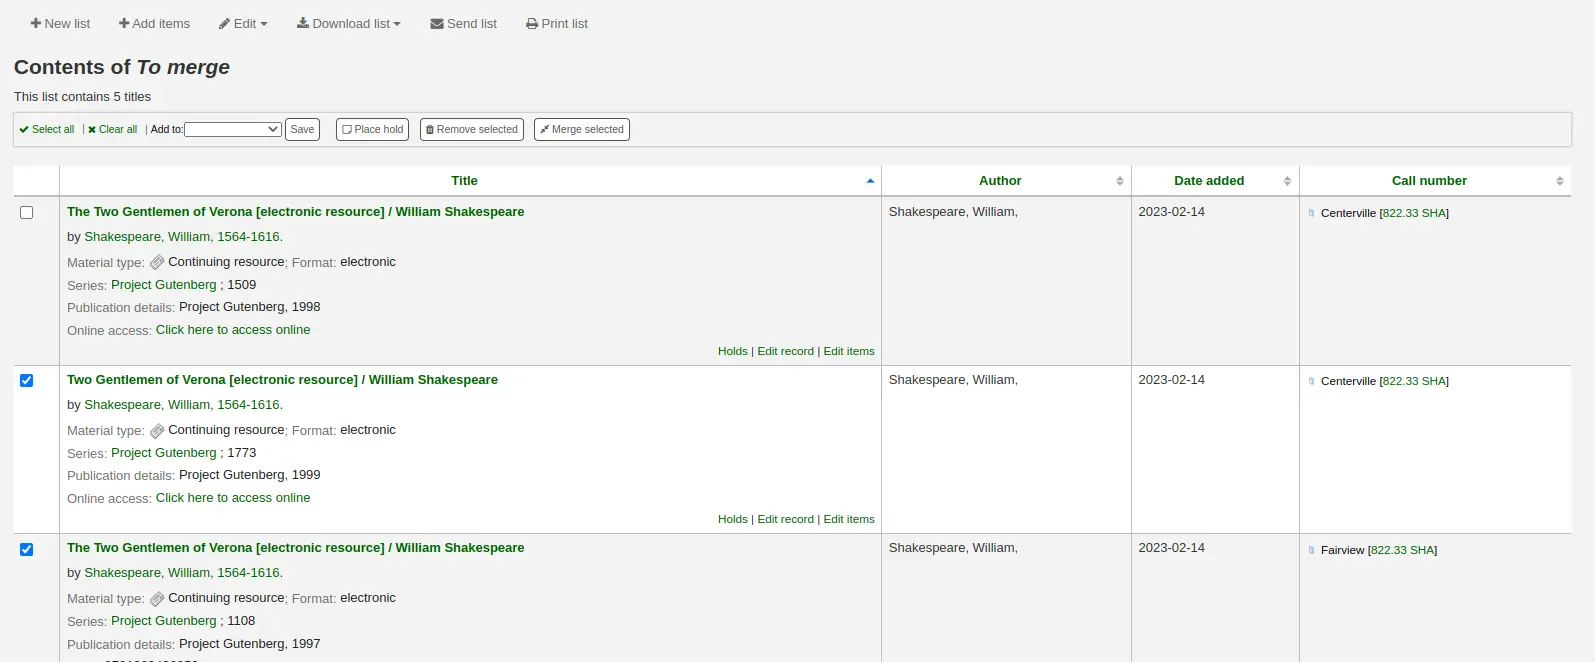
Gehen Sie zu den Listen und klicken Sie auf den Listentitel um die Liste anzusehen
Wählen Sie die zu verschmelzenden Datensätze aus
Klicken Sie auf „Titel verschmelzen“ oberhalb der Liste
Haben Sie die Datensätze ausgewählt, die verschmolzen werden sollen, ist der Ablauf der gleiche, wie wenn Sie die Datensätze in der Katalogisierung verschmelzen würden.
Datensätze löschen
Bemerkung
Um bibliografische Datensätze löschen zu können, müssen die Mitarbeiter*innen die Berechtigung edit_catalogue (oder die superlibrarian-Berechtigung) haben.
Um einen bibliographischen Datensatz zu löschen, klicken Sie auf die Schaltfläche ‚Bearbeiten‘ und wählen Sie ‚Titel löschen‘ aus.

Bibliografische Datensätze können nur dann gelöscht werden, wenn alle dazugehörigen Exemplare gelöscht sind. Versuchen Sie einen bibliographischen Datensatz mit angehängten Exemplaren zu löschen, wird die Löschoption ausgegraut angezeigt. (Siehe den Bereich Deleting items in diesem Handbuch, um zu erfahren, wie Sie Exemplare löschen können.)

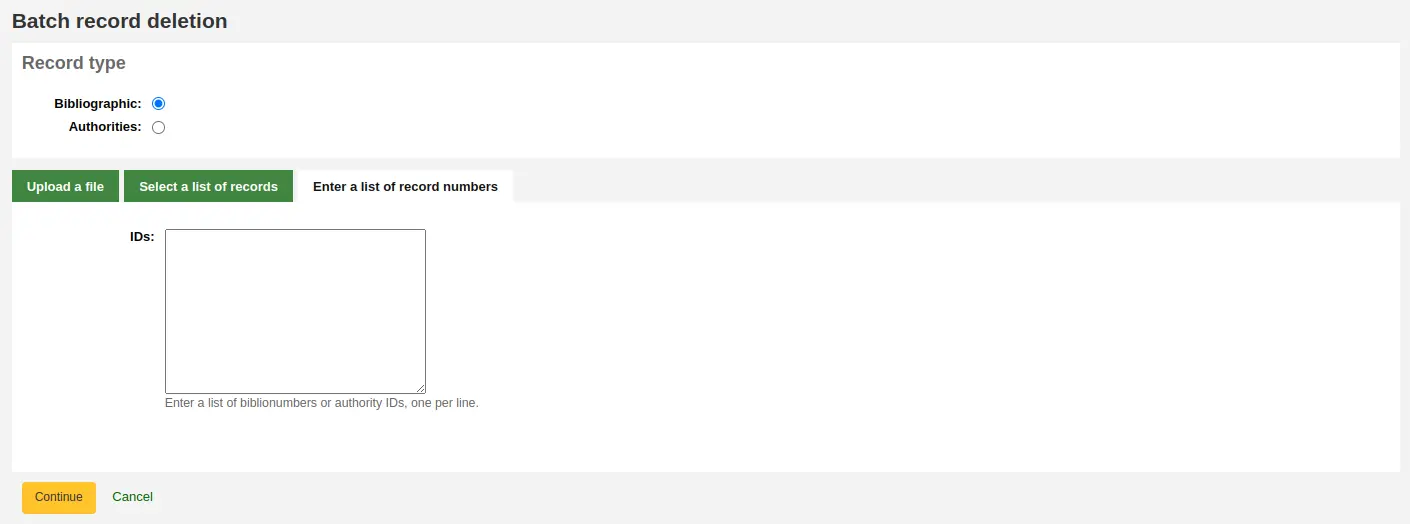
Stapellöschung von Titeln
Bemerkung
Nur Bibliothekspersonal mit der Berechtigung records_batchdel (oder der superlibrarian-Berechtigung) hat Zugriff auf dieses Werkzeug.
Pfad in Koha: Mehr > Katalogisierung > Stapelbearbeitung > Stapellöschung von Titeln
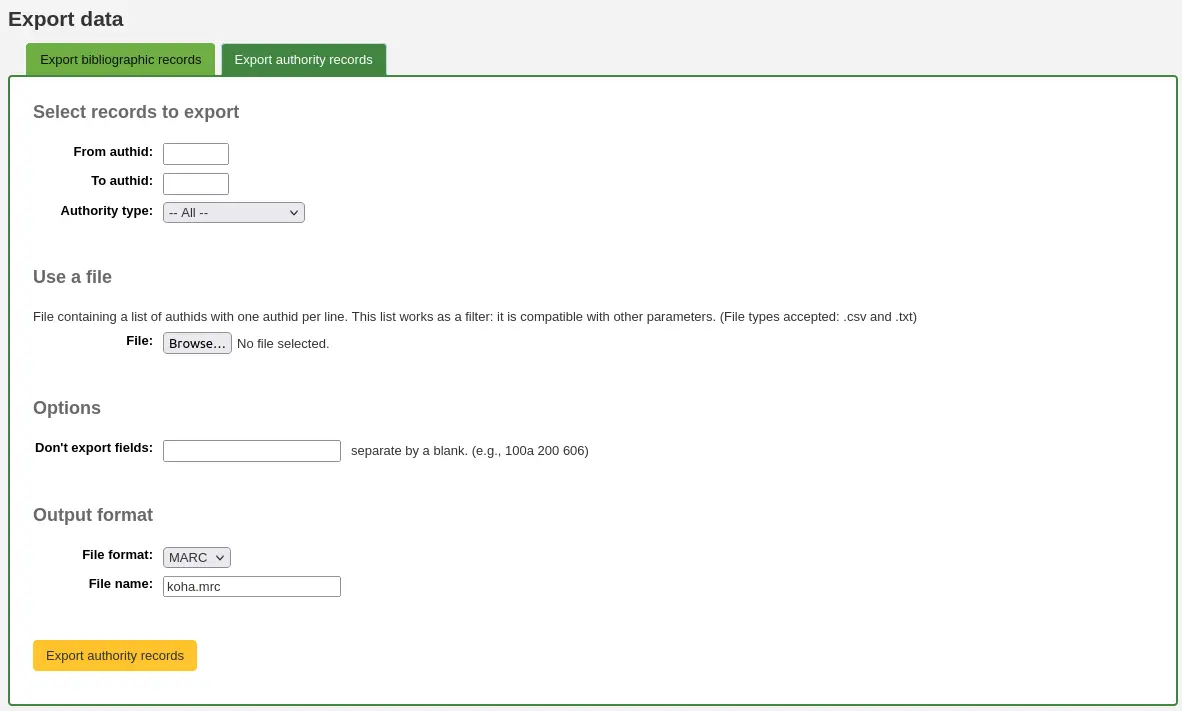
Dieses Werkzeug verwendet einen Stapel Datensatznummern von Titel- oder Normdatensätzen, um diese Datensätze und alle zugehörigen Exemplare zu löschen.
Zuerst müssen Sie festlegen, ob Sie Titel- oder Normsätze löschen möchten.
Als nächstes können Sie:
eine Datei mit biblionumbers oder authids hochladen;
eine Liste verwenden;
oder die Liste der Nummern in das vorgesehene Feld eingeben.
Nach dem Absenden des Formulars erhalten Sie eine Zusammenfassung der Datensätze, die Sie zu löschen versuchen.
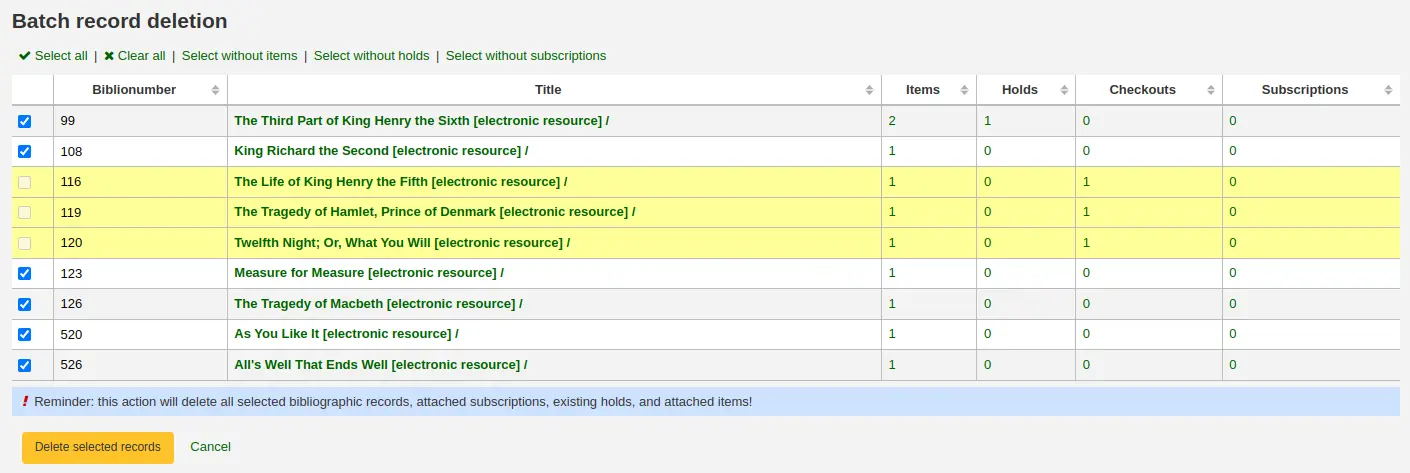
Wenn ein Datensatz, den Sie löschen möchten, nicht gelöscht werden kann, wird er hervorgehoben.
Markieren Sie die Datensätze, die Sie löschen möchten, und klicken Sie auf die Schaltfläche „Ausgewählte Datensätze löschen“, um den Vorgang abzuschließen.
Sie können auch die Links am oberen Rand der Tabelle verwenden, um nur die Datensätze ohne Exemplare, Vormerkungen oder Abonnements auszuwählen.
Kataloganfragen
Probleme mit bibliographischen Datensätzen melden
Wenn der Systemparameter CatalogConcerns aktiviert ist, kann das Bibliothekspersonal Anliegen bezüglich bestimmter bibliografischer Einträge melden.
Um ein neues Problem zu melden,
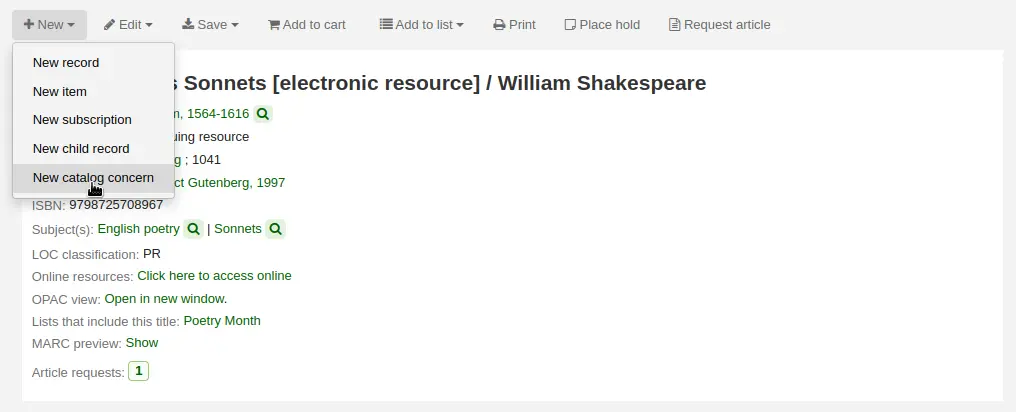
Klicken Sie auf der Detailseite des bibliografischen Datensatzes auf die Schaltfläche „Neu“ und wählen Sie „Neues Katalogproblem“.
Füllen Sie das Formular zum Problem aus.
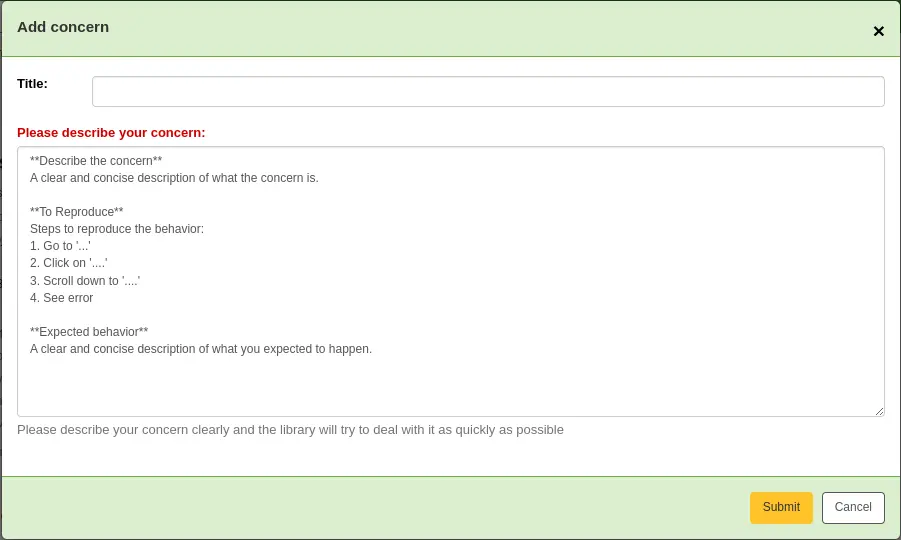
Titel: Geben Sie einen aussagekräftigen Titel zur Beschreibung des Problems ein.
Bitte beschreiben Sie Ihr Anliegen: Geben Sie Einzelheiten über das Problem an, und zwar so ausführlich wie möglich, damit der Mitarbeiter, der die Meldung erhält, das Problem nachvollziehen und verstehen kann.
Ein Beispiel dafür, was in der Beschreibung erwartet wird, ist im Feld angegeben:
**Describe the concern**

A clear and concise description of what the concern is.

**To Reproduce**

Steps to reproduce the behavior:
1. Go to '...'
2. Click on '....'
3. Scroll down to '....'
4. See error

**Expected behavior**

A clear and concise description of what you expected to happen.
Bemerkung
Dieser Text kann im Werkzeug HTML-Anpassung geändert werden, indem der Eintrag ‚CatalogConcernTemplate‘ angepasst wird.
Der Text am Ende des Formulars („Bitte beschreiben Sie Ihr Anliegen klar und deutlich…“) ist auch im Werkzeug HTML-Anpassung anpassbar, indem der Eintrag ‚CatalogConcernHelp‘ geändert wird.
Klicken Sie auf ‚Absenden‘.
Dies sendet eine E-Mail an das Katalogisierungsteam, um es zu benachrichtigen, dass ein neues Anliegen erstellt worden ist. Die E-Mail wird an die E-Mail-Adresse gesendet, die in dem Systemparameter CatalogerEmails angegeben ist. Bei der gesendeten E-Mail handelt es sich um die Benachrichtigung TICKET_NOTIFY, die im Werkzeug Benachrichtigungen und Quittungen angepasst werden kann.
Außerdem wird eine E-Mail an den Meldenden geschickt, um ihn über den Erhalt des Anliegens zu informieren. Bei der gesendeten E-Mail handelt es sich um die Benachrichtigung TICKET_ACKNOWLEDGE, die über das Werkzeug Benachrichtigungen und Quittungen. angepasst werden kann.
Anliegen, die zu diesem Datensatz gemeldet wurden, sind im Reiter „Anliegen“ sichtbar.

Alle Problem-Tickets werden im Report Katalogprobleme sichtbar sein.
Neu geöffnete Problemberichte werden auch im Benachrichtigungsbereich am unteren Rand der Hauptseite der Dienstoberfläche angezeigt.

Kataloganfragen verwalten
Wenn das Bibliothekspersonal oder Benutzer*innen Anliegen zu bibliografischen Einträgen äußern, werden alle Anliegen über den Bericht für Katalogprobleme zugänglich gemacht.
Pfad in Koha: Mehr > Katalogisierung > Reports > Katalogprobleme
Bemerkung
Dieser Report ist nur sichtbar, wenn entweder der Systemparameter CatalogConcerns oder der Systemparameter OpacCatalogConcerns aktiviert ist.
Bemerkung
Nur Bibliothekspersonal mit der Berechtigung edit_catalogue (oder der superlibrarian-Berechtigung) hat Zugang zu dieser Seite.
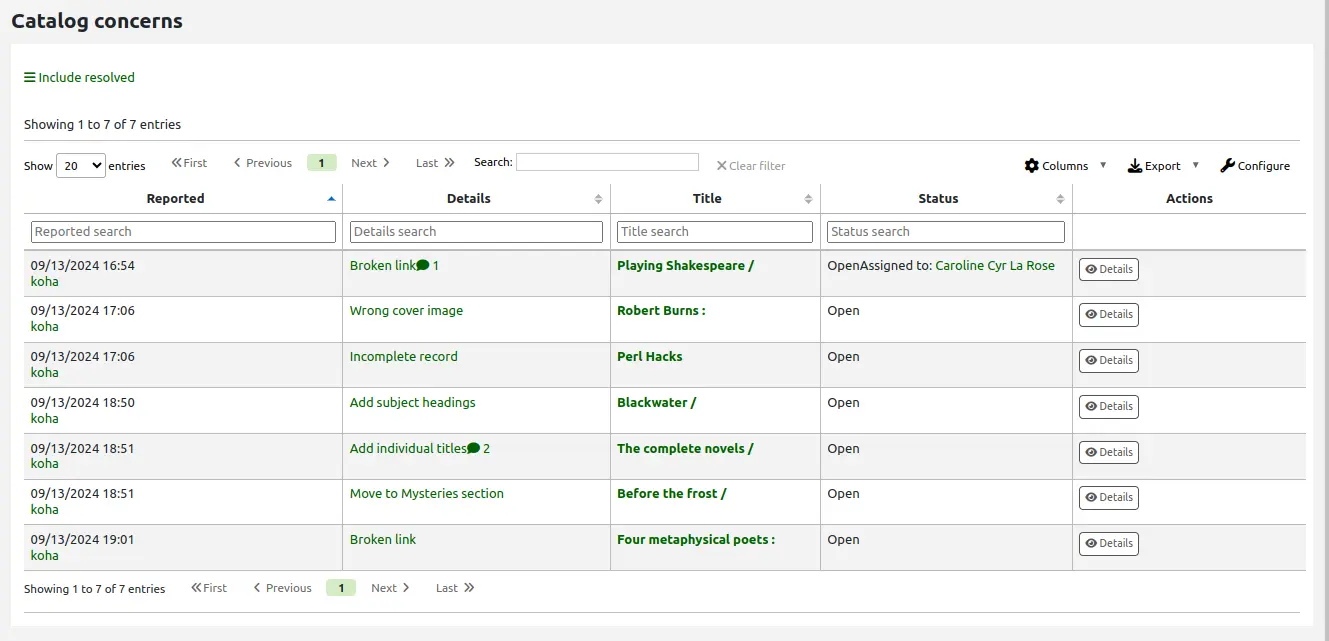
In diesem Report können Sie alle Anliegen, geordnet nach Datum, mit dem Namen des Melders, den Details des Anliegens, dem Titel des bibliografischen Eintrags, dem Status, dem Bearbeiter, falls vorhanden, und, falls gelöst, dem Datum und dem Namen des Mitarbeiters, der das Anliegen bearbeitet hat, einsehen.
Bemerkung
In Version 24.05 und neuer werden standardmäßig nur aktuelle Anliegen angezeigt. Klicken Sie bei Bedarf auf die Schaltfläche „Erledigte einschließen“ oben auf der Seite, um bereits erledigte Anliegen anzuzeigen. Klicken Sie auf „Gelöste filtern“, um die gelösten Anliegen wieder auszublenden.
In Version 23.11 und älter werden standardmäßig alle Anliegen angezeigt. Bei Bedarf können Sie oben auf der Seite auf „Behobene ausblenden“ klicken, um bereits behobene Anliegen auszublenden. Klicken Sie auf „Alle anzeigen“, um zur vollständigen Tabelle zurückzukehren.
Um die Details eines Anliegens zu sehen, klicken Sie entweder auf den Text in der Spalte „Details“ oder auf die Schaltfläche „Details“ in der Spalte „Aktionen“.
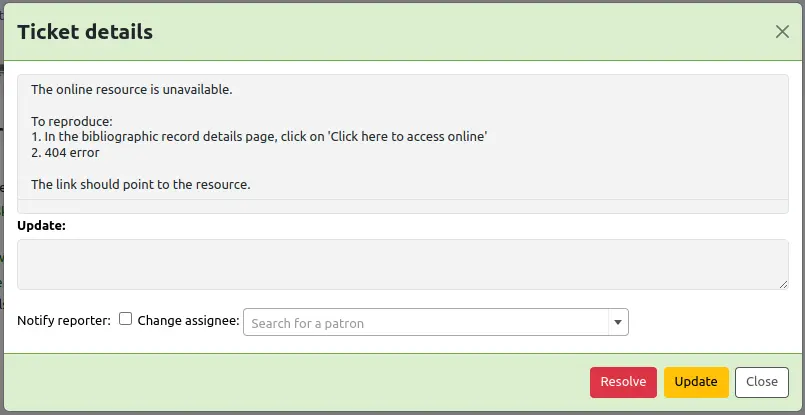
In dieser Ansicht können Sie einen Kommentar in das Feld „Aktualisieren“ eingeben.
Um den Kommentar einfach als Aktualisierung hinzuzufügen, klicken Sie auf die Schaltfläche „Aktualisieren“.
Bemerkung
Wenn es normierte Werte in der Kategorie TICKET_STATUS gibt, wird die Schaltfläche „Aktualisieren“ Status-Optionen mit den benutzerdefinierten Status anbieten.
Version
Dieses Feature wurde in Koha-Version 24.05 hinzugefügt.
Achtung
In Koha-Version 23.11 und älter ist die Schaltfläche „Aktualisieren“ mit „Kommentar“ beschriftet.
Um dieses Anliegen einem/einer Mitarbeiter*in zuzuweisen, suchen Sie den Namen des/der Benutzer*in im Feld „Bearbeiter ändern“ und klicken Sie dann auf „Aktualisieren“. Die betreffenden Personen erhalten eine E-Mail mit der Mitteilung TICKET_ASSIGNED, die im Werkzeug Benachrichtigungen und Quittungen angepasst werden kann.
Wenn dieses Anliegen gelöst ist, klicken Sie auf die Schaltfläche „Lösen“.
Bemerkung
Wenn in der Normierte-Werte-Kategorie TICKET_RESOLUTION normierte Werte vorhanden sind, bietet die Schaltfläche „Auflösen“ Auflösungsoptionen mit Ihren benutzerdefinierten Auflösungsstatus.
Version
Dieses Feature wurde in Koha-Version 24.05 hinzugefügt.
Wenn „Benachrichtigen“ angekreuzt ist, erhält der Melder eine E-Mail, die anzeigt, dass das Anliegen aktualisiert wurde. Die E-Mail, die bei einer Aktualisierung gesendet wird, ist die TICKET_UPDATE-Benachrichtigung, und die E-Mail, die gesendet wird, wenn das Anliegen gelöst wurde, ist die TICKET_RESOLVE-Benachrichtigung, die beide im Werkzeug Benachrichtigungen und Quittungen angepasst werden können.
Exemplare
In Koha, each bibliographic record can have one or more items attached. These items are sometimes referred to as holdings. Each item includes information about the physical copy the library has.
Exemplare hinzufügen
Bemerkung
Mitarbeiter*innen müssen über die Berechtigung edit_items (oder die superlibrarian-Berechtigung) verfügen, um Exemplare hinzufügen zu können.
Nachdem ein bibliographischer Datensatz gespeichert wurde, werden Sie auf die leere Exemplarerfassungsmaske weitergeleitet und können dort ein neues Exemplar anhängen.
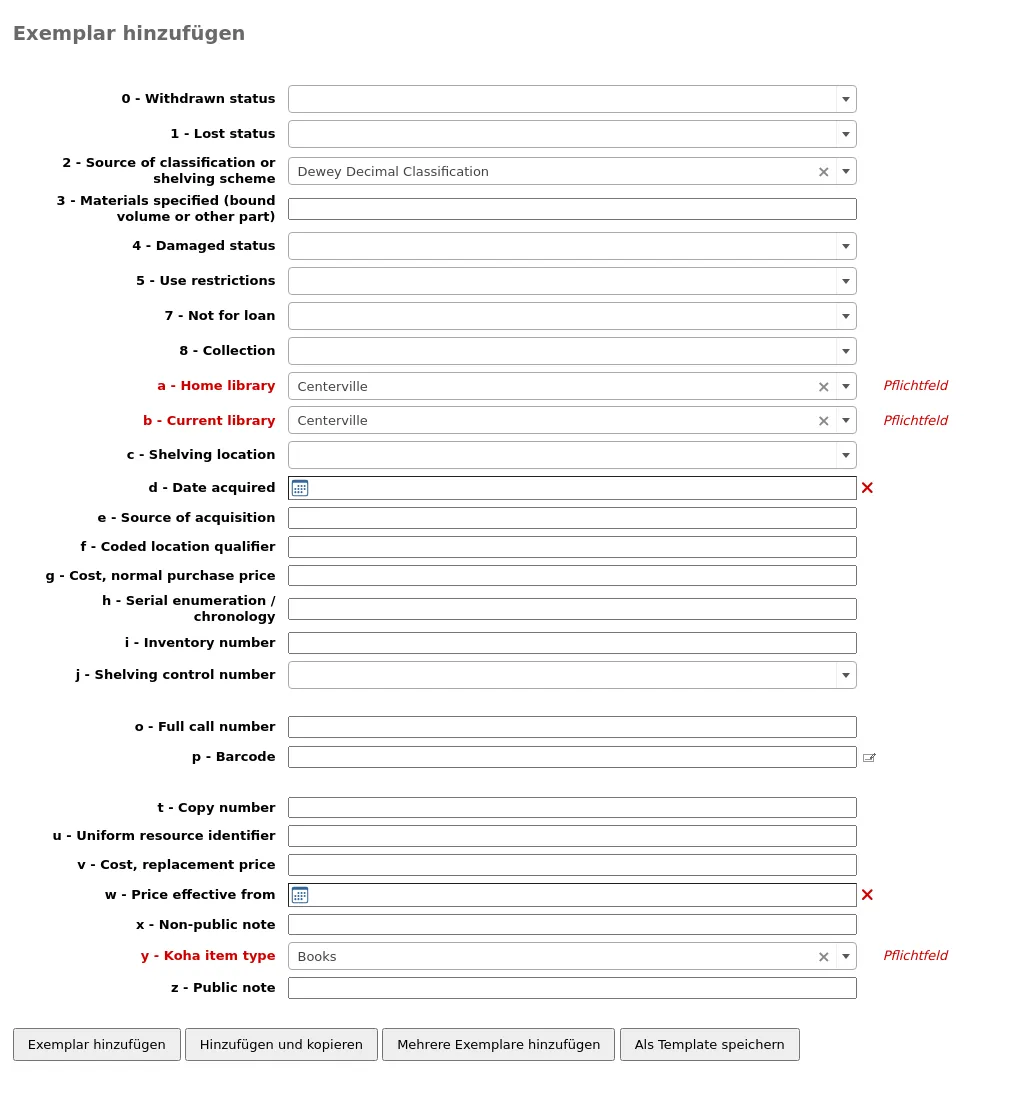
Other ways to add an item to a record :
From a record’s details page, click ‚New‘, and choose ‚New item‘.

From the cataloging search results, click ‚Actions‘ and choose ‚Add or edit items‘.

If you already have item templates, you can choose the template to apply and click ‚Apply template‘. This will prefill the item form with the template values.
Folgende Felder sollten mindestens ausgefüllt werden, damit das Exemplar später ausgeliehen werden kann:
-
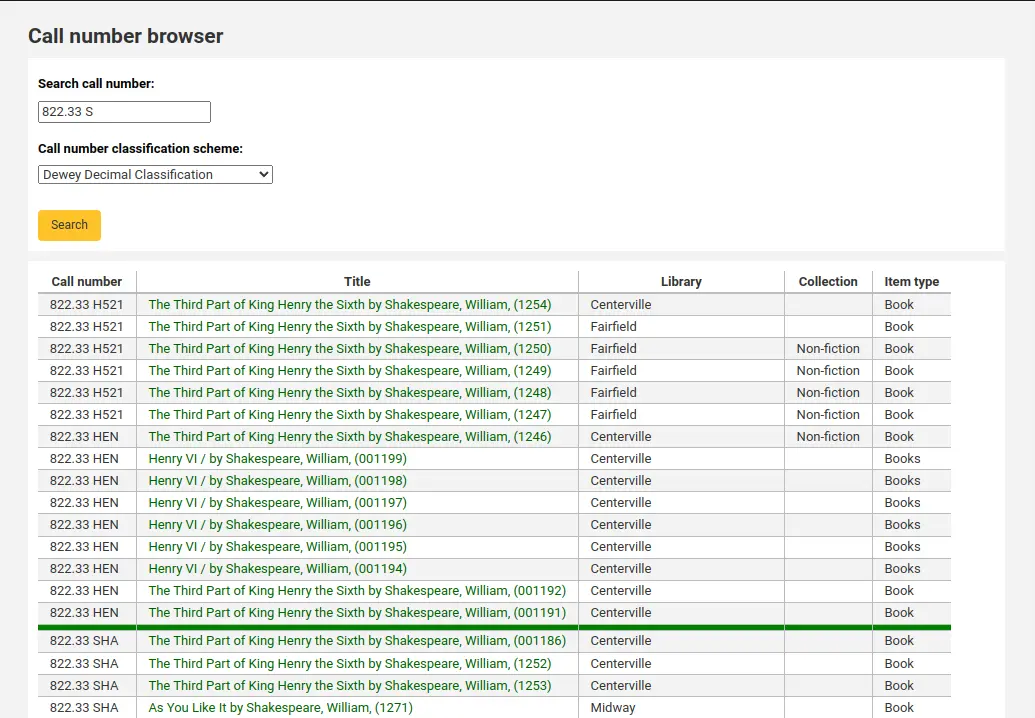
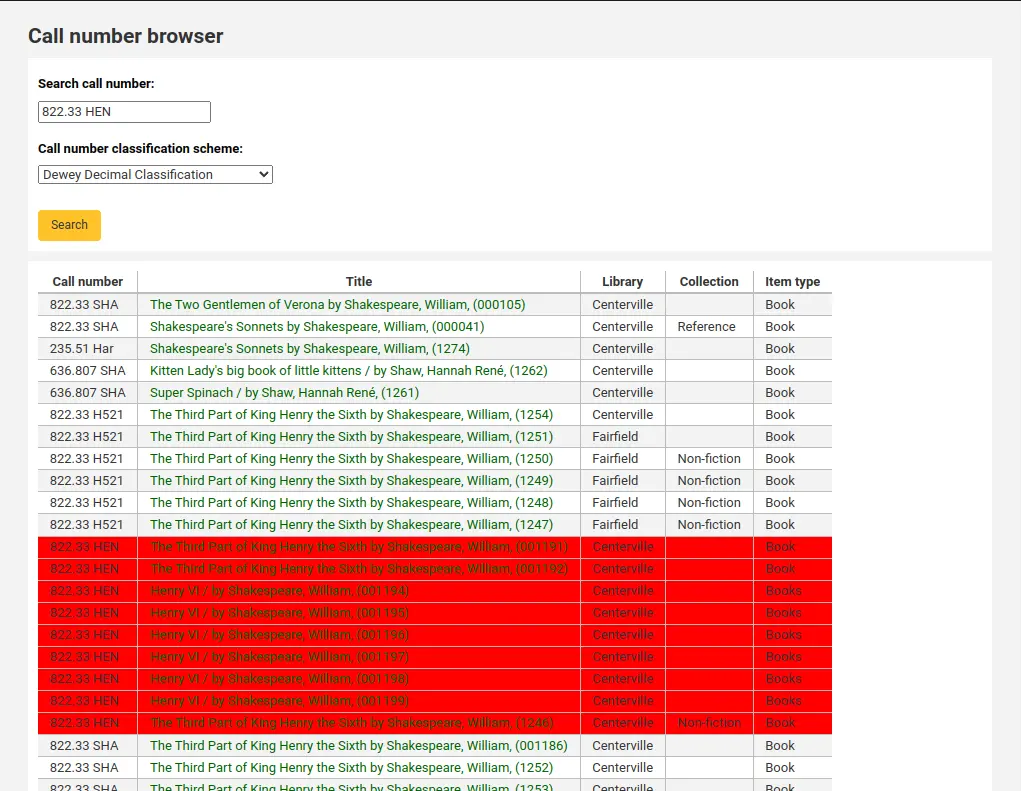
Für dieses Feld können Sie das Katalogisierungs-Plugin für den Signaturenbrowser (cn_browser.pl) verwenden. Ist das Plugin eingerichtet sehen Sie drei Punkte (…) rechts neben dem Feld. Werden diese angeklickt, öffnet sich ein Fenster mit dem Signaturenbrowser. Ist die Zeile rot unterstrichen, ist die Signatur bereits in Benutzung, erscheint stattdessen eine dünne grüne Linie, können Sie die gewünschte Signatur verwenden.
v - Kosten, Wiederbeschaffungspreis
Dieser Wert wird den Benutzern berechnet, wenn ein Exemplar als ‚Verloren‘ markiert wird, das bereits ausgeliehen wurde
Um sicherzustellen, dass diese Werte ausgefüllt sind, können Sie diese im Framework als Pflichtfelder Framework konfigurieren. In der Anzeige werden sie entsprechend in rot markiert. Der Datensatz wird erst dann gespeichert, wenn alle erforderlichen Felder ausgefüllt sind.

Bemerkung
Um Exemplar-Unterfelder in einem Framework erforderlich zu machen, bearbeiten Sie das Feld 952 im Framework-Editor.
Sie können neue normierte Werte direkt aus dem Formular für das Hinzufügen und Bearbeiten von Exemplaren heraus für alle Felder anlegen, die mit Kategorien normierter Werte verknüpft sind, z.B. Standort ($c) oder Sammlung ($8).
Geben Sie die Beschreibung des normierten Werts ein, wenn kein entsprechender Eintrag gefunden wird, sehen Sie die Option ‚(auswählen um anzulegen)‘.
Klicken Sie auf diese Option um ein Pop-Up-Fenster anzuzeigen, über das Sie den neuen normierten Wert anlegen können.
Die Kategorie des normierten Werts wird ausgehend vom verwendeten Eingabefeld vorausgefüllt, z.B. LOC für Standort und CCODE für Sammlung. Seien Sie vorsichtig bei der Wahl des Codes für den normierten Wert. Das korrekte Format dieser Codes finden Sie in den Hinweisen zu Hinzufügen neuer normierter Werte. Verwenden Sie das Feld Beschreibung für den tatsächlichen Wert, der angezeigt werden soll
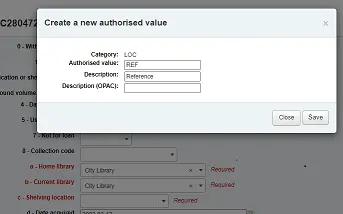
Sie können auf die gleiche Weise auch neue normierte Werte aus Titel- und Normsätzen heraus anlegen.
Bemerkung
Nur Bibliothekspersonal mit der Berechtigung manage_auth_values (oder der superlibrarian-Berechtigung) kann normierte Werte in der Katalogisierung hinzufügen.
Unterhalb des Eingabeformulars fnden Sie drei Schaltflächen um Exemplare hinzuzufügen.

‚Exemplar hinzufügen‘ wird ein einzelnes neues Exemplar hinzufügen
‚Hinzufügen & duplizieren‘ speichert das Exemplar mit den eingegebenen Daten und behält diese im Formular für das nächste Exemplar
‚Mehrere Exemplare hinzufügen‘ generiert so viele Exemplare, wie Sie als Anzahl angegeben haben. Der Barcode wird dabei jeweils um eins hochgezählt, so dass jeder generierte Barcode einmalig ist

„Als Vorlage speichern“ speichert dieses Exemplar als Exemplarvorlage zur späteren Wiederverwendung.
Warnung
Beim Speichern als Vorlage wird das Exemplar nicht gespeichert. Es wird nur die Vorlage erstellt.
Die Exemplare, die Sie beigefügt haben, erscheinen oberhalb des Eingabeformulars, sobald sie übermittelt sind

Bemerkung
You can customize the columns of this table in the Table settings section of the Administration module (table id: Items Editor).
Ihre Exemplare werden auch unter den bibliographischen Details auf der Detailseite bibliographischer Datensätze erscheinen, im Reiter „Bestand“.

Wenn Sie den Systemparameter SpineLabelShowPrintOnBibDetails auf ‚Zeige‘ gesetzt haben, wird ein Link für den schnellen Signaturdruck neben jedem Exemplar angezeigt.

Wenn Sie auf die aktivierten Filter-Links klicken, können Sie auch den Inhalt Ihrer Bestandstabelle filtern. Ihnen wird eine Reihe angezeigt, in der Sie in jede Spalte schreiben können um die Ergebnisse in der Tabelle zu filtern.

Hinzufügen und Verwenden von Templates
Sie können teilbare und wiederverwendbare Templates erstellen um ein neues Exemplarerfassungsformular einfach auszufüllen.
Bemerkung
Jede Person mit der Berechtigung edit_items kann Templates erstellen und teilen sowie ihre eigenen Templates löschen.
Mitarbeiter*innen müssen jedoch die Berechtigung manage_item_editor_templates (oder die superlibrarian-Berechtigung) haben, um von anderen erstellte Exemplarvorlagen zu verwalten.
Ein neues Template erstellen
Um ein Template zu erstellen
gehen Sie zu ein neues Exemplar hinzufügen
Füllen das Exemplarformular mit den Werten aus, die Sie zum Template hinzufügen möchten
Anstatt das Exemplar zu speichern, klicken Sie auf den Button „Als Template speichern“

Wählen Sie „Als neues Template speichern“
Geben Sie einen Namen für die Vorlage ein
Wählen Sie ob Sie dieses Template mit allen anderen Katalogisiererinnen teilen möchten
Klicken Sie auf „Speichern“
Ein vorhandenes Template aktualisieren
Um ein vorhandes Template zu bearbeiten,
gehen Sie zu ein neues Exemplar hinzufügen
wählen Sie das zu aktualisierende Template oberhalb des Formulars

Klicken Sie auf „Template anwenden“
Verändern Sie die Einträge wie gewünscht
Klicken Sie auf den Button „Als Template speichern“.

Wählen Sie das zu aktualisierende Template
Wählen Sie ob Sie dieses Template mit allen anderen Katalogisiererinnen teilen möchten
Klicken Sie auf „Speichern“
Ein Template verwenden
Um eine Vorlage zu nutzen,
gehen Sie zu ein neues Exemplar hinzufügen
wählen Sie das zu aktualisierende Template oberhalb des Formulars

Klicken Sie auf „Template anwenden“
Wenn die Option „Für Sitzung“ aktiviert ist, basieren alle neuen Exemplare auf dieser Vorlage, sofern nicht anders angegeben
Verändern Sie die Einträge wie gewünscht
Speichern Sie das Exemplar
Eine Vorlage löschen
Um eine Vorlage zu löschen,
gehen Sie zu ein neues Exemplar hinzufügen
Wählen Sie die zu löschende Vorlage oben im Formular

Klicken Sie auf „Vorlage löschen“
Exemplare bearbeiten
Bemerkung
Mitarbeiter*innen müssen die Berechtigung edit_items (oder die superlibrarian-Berechtigung) haben, um Exemplare bearbeiten zu können.
Exemplare können auf unterschiedlichen Wegen bearbeitet werden.
Klicken Sie ‚Bearbeiten‘ und ‚Exemplare bearbeiten‘ im Titeldatensatz.
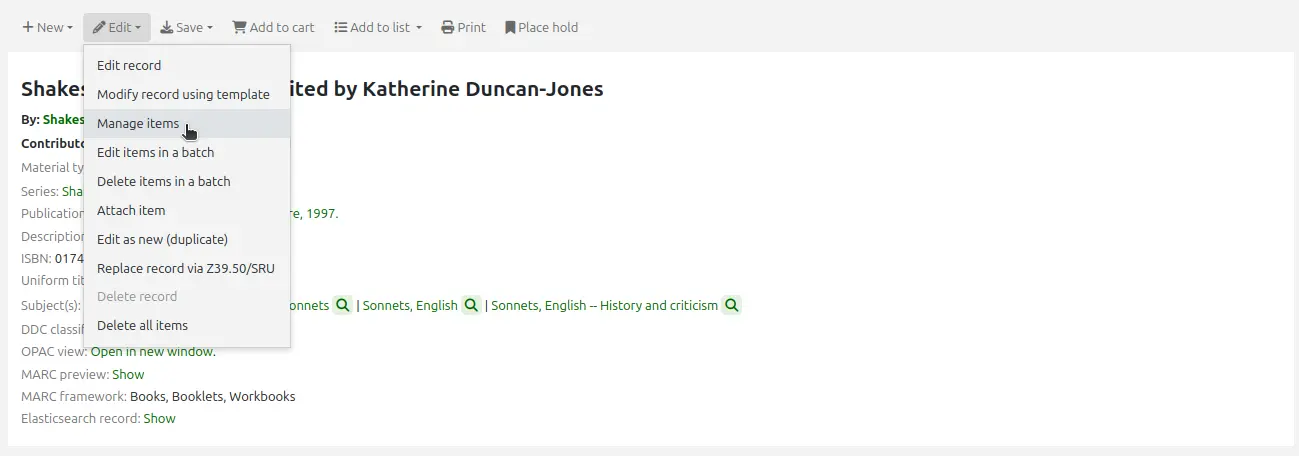
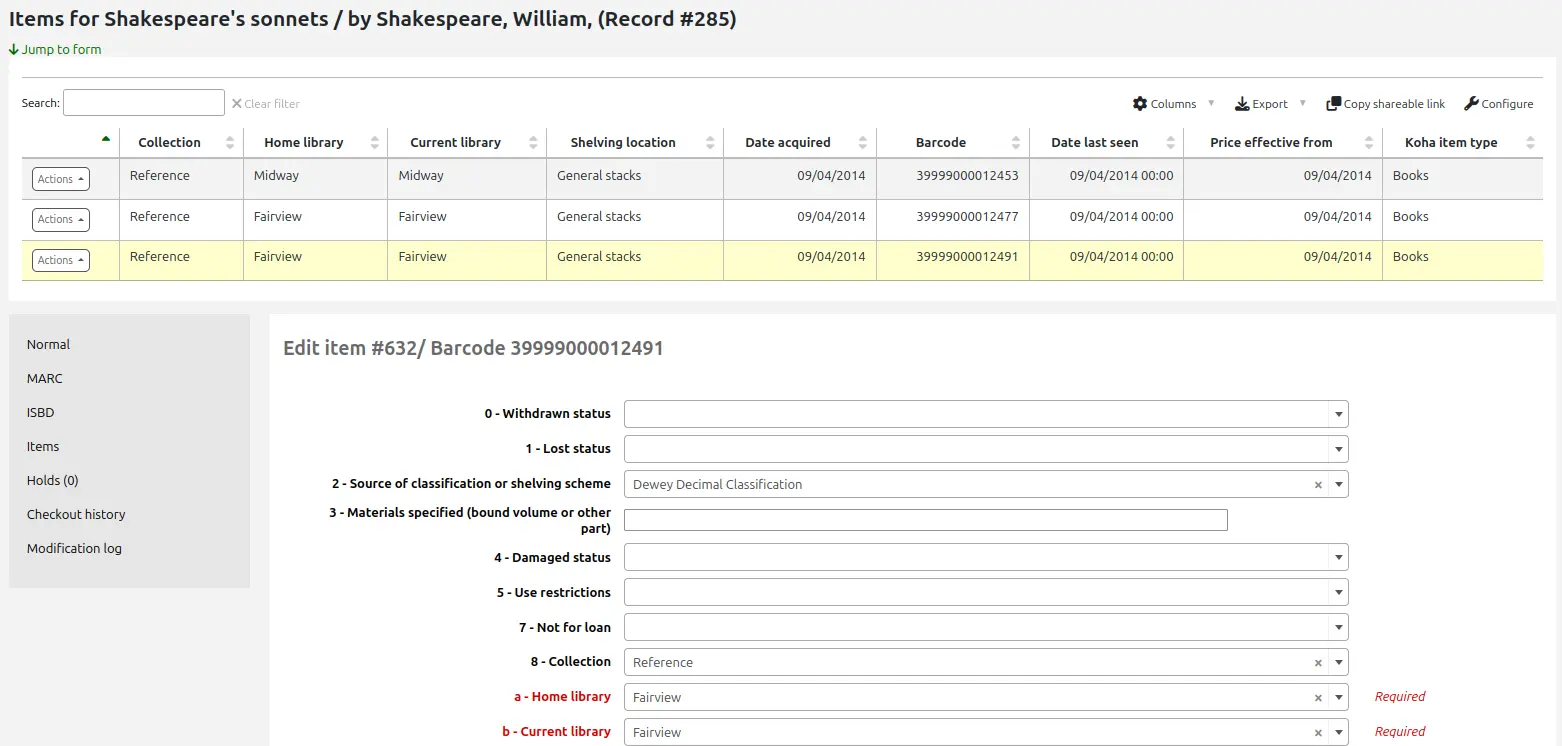
This will open up a list of items where you can click the ‚Actions‘ button to the left of the specific item you would like to edit and choose ‚Edit‘.

This will open the item in the form under the list of items where you will be able to edit the item information.
Wählen Sie in der Maske ‚Exemplare‘ im Menü ‚Bearbeiten->Exemplare bearbeiten‘ aus.
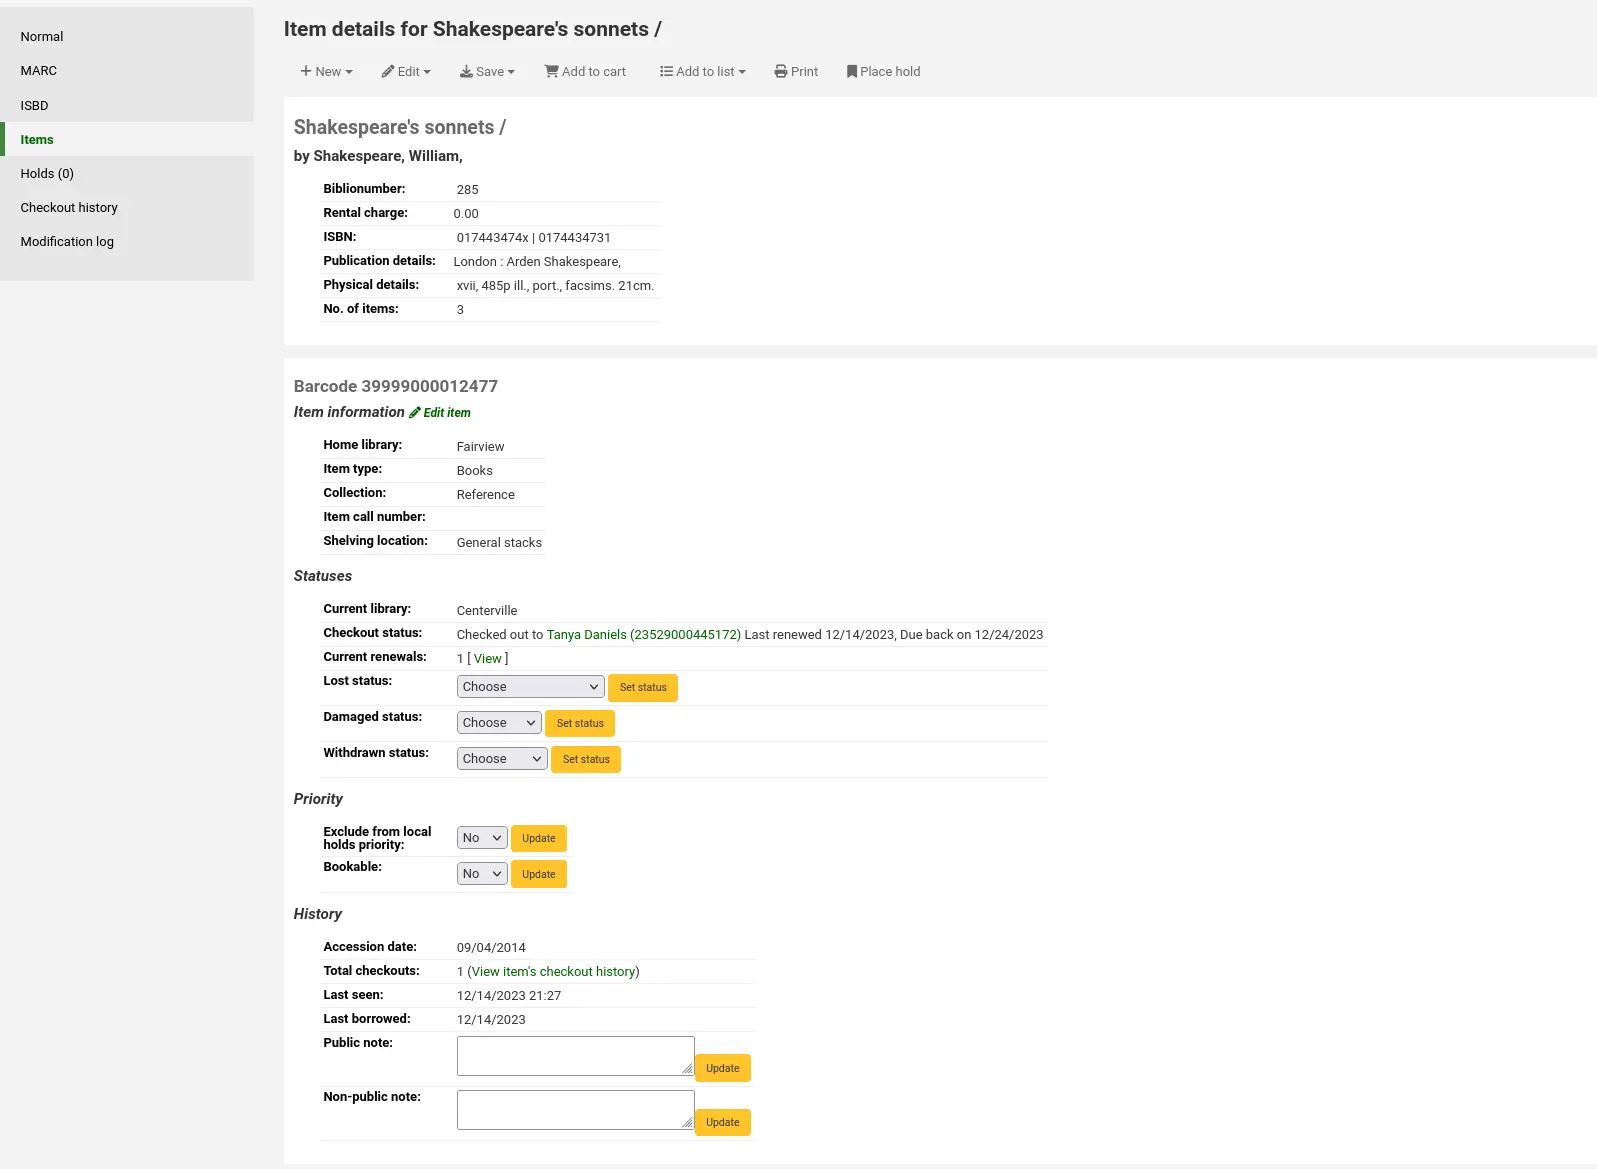
Nun wird der Editor geöffnet und das Exemplare angezeigt, welches Sie bearbeiten möchten.

Klicken Sie auf ‚Bearbeiten‘ und dann auf ‚Stapelbearbeitung von Exemplaren‘.
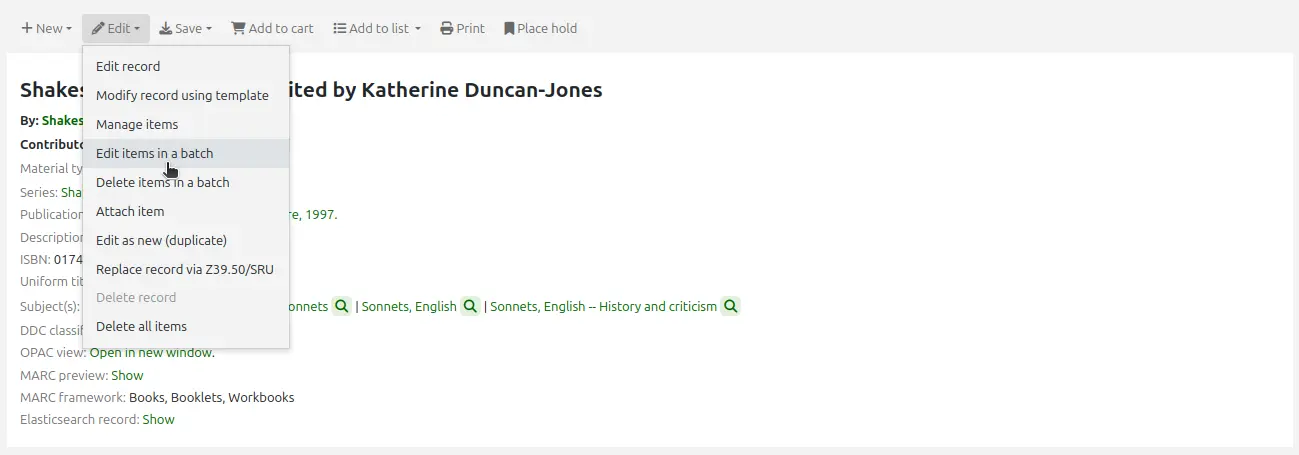
Dies öffnet die Stapelbearbeitung von Exemplaren, in welcher Sie alle zu diesem Datensatz gehörenden Exemplare im Stapel bearbeiten können.
You can check the items you would like to edit and click ‚Modify selected items‘ at the top of the list.

Dies öffnet die Stapelbearbeitung von Exemplaren, in welcher Sie alle zu diesem Datensatz gehörenden Exemplare im Stapel bearbeiten können.
Sie können sich auch im Reiter ‚Bestand“ die Liste der Exemplare anzeigen lassen und bei jedem Exemplar rechts auf ‚Bearbeiten‘ klicken.

In der Dienstoberfläche ausgehend von der Trefferliste gibt es auch einen Link um Exemplare zu bearbeiten.

This will open up a list of items where you can click the ‚Actions‘ button to the left of the specific item to edit and choose ‚Edit‘.

Schlussendlich können Sie auch im Modul ‚Werkzeuge‘ die Stapelbearbeitung von Exemplaren benutzen.
Schnelle Aktualisierung des Exemplarstatus
Oft müssen die Mitarbeiter*innen an der Ausleihtheke den Status eines Exemplars auf verloren oder beschädigt ändern. Dafür ist es nicht erforderlich, den gesamten Exemplardatensatz anzupassen. Sie können auf den Barcode in der Ausleih- oder Rückgabehistorie klicken und in die Exemplarzusammenfassung wechseln. Sie kommen ebenfalls auf diese Seite, wenn Sie den Reiter ‚Exemplare‘ auf der linken Seite in der Detailansicht eines bibliographischen Datensatzes auswählen.

In dieser Ansicht können Sie ein Exemplar als verloren markieren, indem Sie einen „Verloren-Status“ im PullDown-Menü auswählen und mit der Schaltfläche „Status setzen“ bestätigen. Dasselbe gilt für die Status „beschädigt“ und „ausgeschieden“.

Bemerkung
If the PreventWithdrawingItemsStatus system preference is enabled, staff members will not be able to withdraw items that are either checked out or in transit.
Exemplare duplizieren
Sie können jedes Exemplar ganz einfach duplizieren, indem Sie ausgehend vom Bearbeitungsbildschirm die Schaltfläche ‚Aktionen‘ klicken, die sich links von jedem Exemplar befindet.

This will populate the form with the values from the item you chose.
Stapelbearbeitung von Exemplaren
Bemerkung
Nur Bibliothekspersonal mit der Berechtigung items_batchmod (oder der superlibrarian-Berechtigung) hat Zugang zu diesem Werkzeug.
Pfad in Koha: Mehr > Katalogisierung > Stapelbearbeitung > Stapelbearbeitung von Exemplaren
Dieses Werkzeug ermöglicht Ihnen die Bearbeitung eines Stapels von Exemplardatensätzen in Koha.
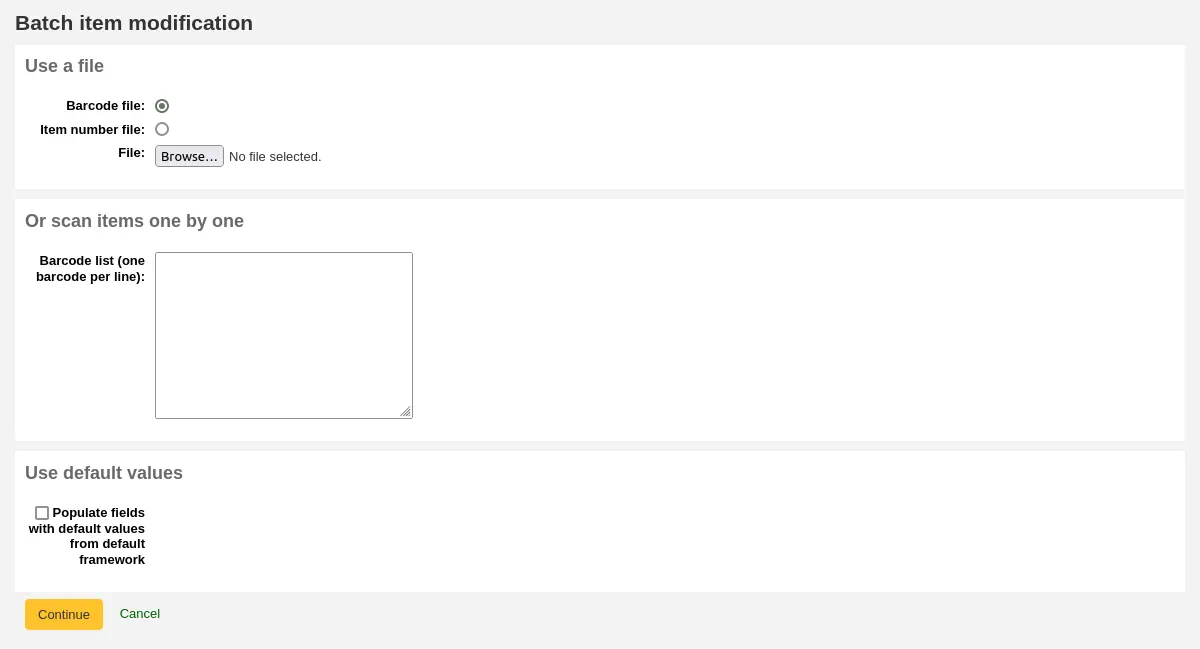
Mit dem Werkzeug können Sie entweder eine Datei mit Barcodes oder Exemplarnummern hochladen oder die Barcodes der Exemplare einzeln in das Feld unter dem Upload-Werkzeug einscannen. Sie können auch festlegen, dass die bearbeiteten Exemplare mit den im Standard-Framework definierten Standardwerten ausgefüllt werden sollen.
Sobald die Datei hochgeladen oder die Barcodes aufgelistet sind, klicken Sie auf „Weiter“

Sie erhalten eine Zusammenfassung der Exemplare, die Sie ändern möchten. Von hier aus können Sie die Exemplare, die Sie nicht ändern möchten, deaktivieren, bevor Sie die Änderungen im Formular unten vornehmen. Sie können auch Spalten ausblenden, die Sie nicht sehen müssen, um zu verhindern, dass Sie von links nach rechts blättern müssen, um die gesamte Exemplartabelle zu sehen. In der Spalte „Vormerkungen“ wird die Anzahl der aktuellen Vormerkungen für das Exemplar angezeigt.
Bemerkung
Um die Markierung aller derzeit ausgeliehenen Exemplare aufzuheben, klicken Sie auf den Link „Ausleihen löschen“ am oberen Rand des Formulars.
Wählen Sie im Bearbeitungsformular aus, welche Felder Sie bearbeiten möchten. Wenn Sie die Checkbox rechts neben jedem Feld markieren, können Sie die Werte in diesem Feld für die zu ändernden Exemplare löschen.
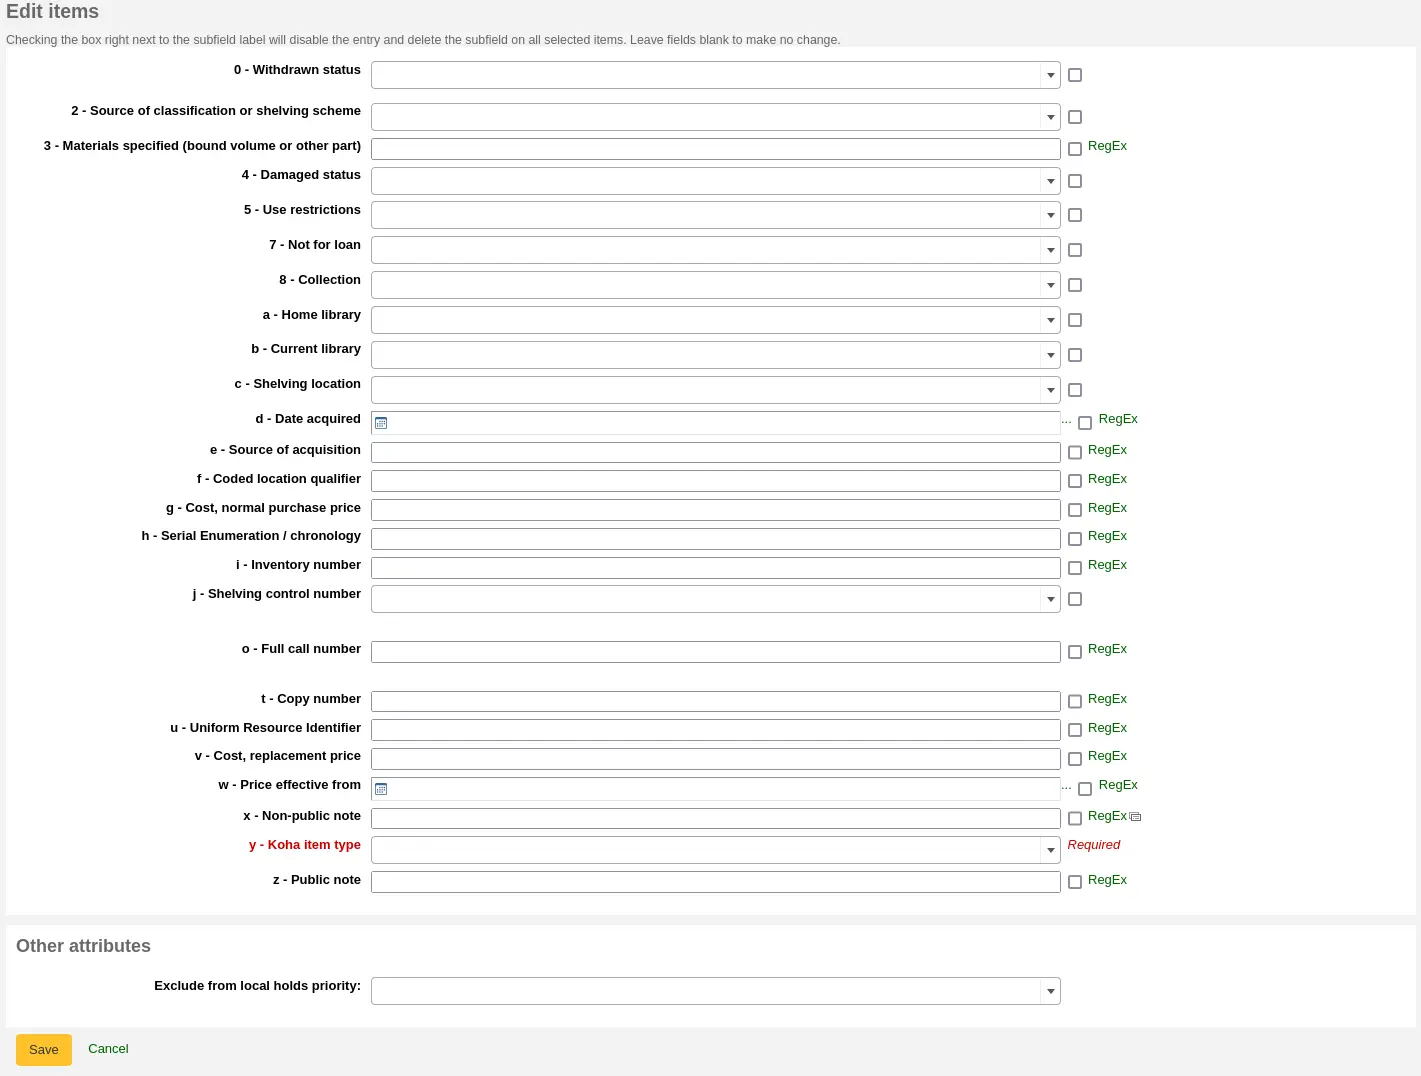
Sie können auch auf den Link „RegEx“ klicken, um das Textfeld in eine Ersetzung durch einen regulären Ausdruck zu ändern. Dies wird verwendet, um nur einen Teil einer Textzeichenfolge zu ändern.

Bemerkung
If the PreventWithdrawingItemsStatus system preference is enabled, you will not be able to withdraw items that are either checked out or in transit using the batch item editor.
Sobald die Änderungen vorgenommen wurden, wird der Auftrag in die Warteschlange der Hintergrund-Jobs aufgenommen.

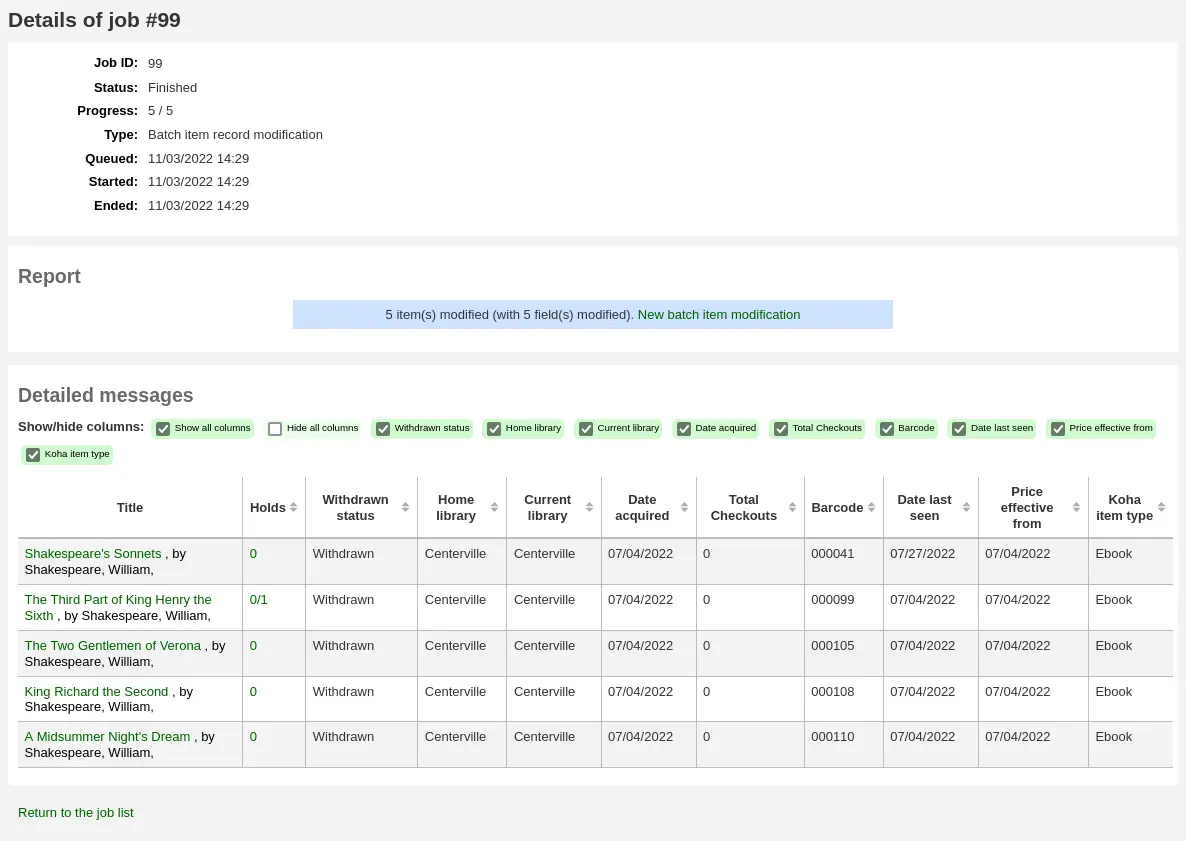
Um die bearbeiteten Exemplare zu sehen, klicken Sie auf „Details des Jobs in der Warteschlange anzeigen“.
Stapelbearbeitung von Exemplaren eines Titels
Sie können auch mehrere Exemplare an einem Titel auf einmal bearbeiten, indem sie Bearbeiten > Exemplare im Stapel bearbeiten auswählen.

This will bring you to the same batch item modification tool as above.
Stapelbearbeitung von Exemplaren aus einem Report
The batch item modification tool is also available from reports results when the results contain itemnumbers.
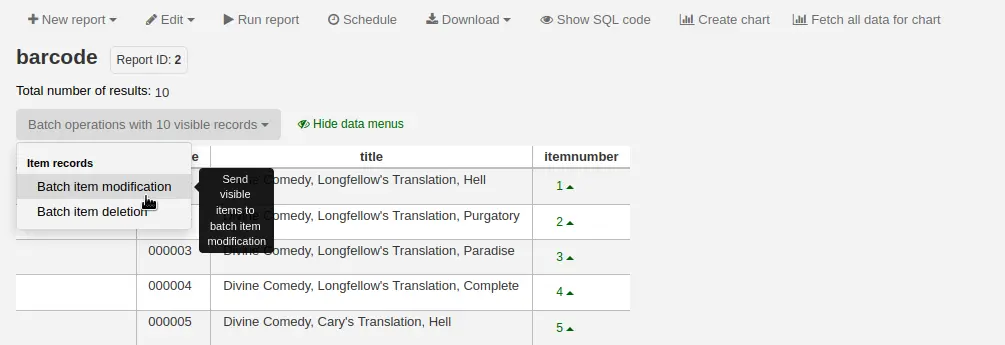
Wenn der Report die itemnumber enthält, erscheint automatisch die Option „Stapeloperationen mit X sichtbaren Datensätzen“. Diese Option beinhaltet die Stapelbearbeitung und Stapellöschung von Exemplardatensätzen.
Im Standard werden nur 20 Treffer beim Ausführen eines Reports angezeigt, daher werden bei der Stapeloperation auch nur 20 Treffer berücksichtigt. Sollen mehr als die angezeigten Treffer im Stapel bearbeitet werden, ändern Sie zuerst die Anzahl der Treffer pro Seite bevor Sie die Stapeloperationen ausführen.
Stapelbearbeitung von Exemplaren aus der Exemplarsuche
Version
Diese Möglichkeit wurde in Koha-Version 23.11 hinzugefügt.
Das Werkzeug „Stapelbearbeitung von Exemplaren“, kann auch über der Exemplarsuche angesteuert werden.
Wählen Sie einfach die zu bearbeitenden Exemplare aus der Ergebnisliste aus, klicken Sie auf „Stapelverarbeitung“, und wählen Sie „Stapeländerung von Exemplaren“.

Exemplare gruppieren
Sie können Exemplare gruppieren, um eine Untergruppe von Exemplaren in einem bibliografischen Datensatz vorzumerken, anstatt ein bestimmtes Exemplare oder das nächste verfügbare Exemplar. Wenn Sie z. B. einen bibliografischen Datensatz für eine Reihe und mehrere Exemplare für jeden Band haben, können Sie die Exemplare nach Bänden gruppieren und dann das nächste verfügbare Exemplar von „Band 4“ vormerken.
Bemerkung
Mitarbeiter*innen müssen die Berechtigung manage_item_groups (oder die superlibrarian-Berechtigung) haben, um Exemplargruppen erstellen, bearbeiten und löschen zu können.
You need to first enable the item groups feature with the EnableItemGroups system preference.
Wenn der Systemparameter aktiviert wurde, erscheint auf der Titeldetailansicht der Dienstoberfläche der Reiter „Exemplargruppen“.
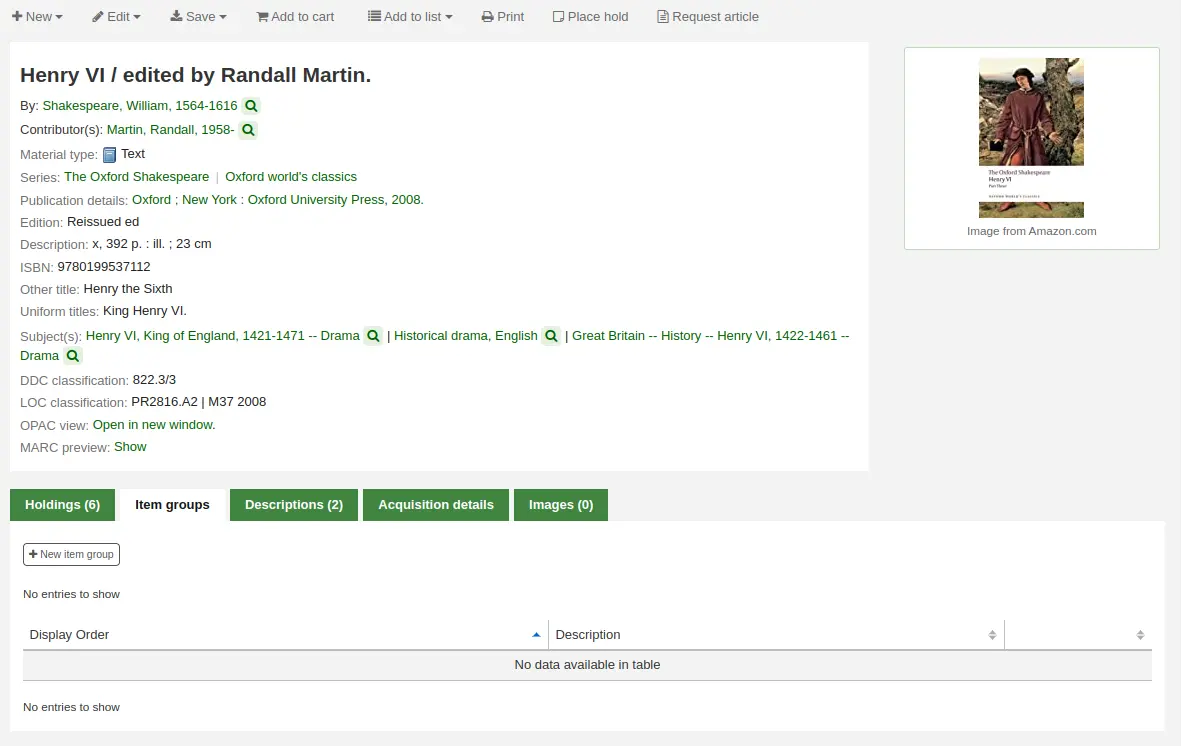
Klicken Sie auf den Button „Neue Exemplargruppe“
Im erscheinenden Formular
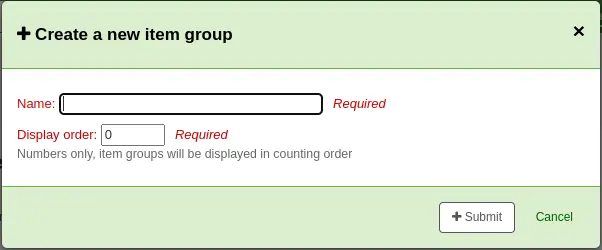
Name: geben Sie einen Namen für die Exemplargruppe ein, der Name ist in der Dienstoberfläche und im OPAC sichtbar
Reihenfolge der Anzeige: Geben Sie eine Zahl für die Position ein, an der diese Gruppe im Vergleich zu den anderen Gruppen desselben Datensatzes angezeigt werden soll (wenn Sie zum Beispiel Gruppen mit der Anzeigereihenfolge 0, 1 und 2 haben, wird die Gruppe 0 zuerst angezeigt, die Gruppe 1 als zweites, und die Gruppe 2 als drittes. Sie können irgendeine Zahl hier eingeben. Ihr Gruppen können auch 3, 11 und 27 sein. In diesem Fall wird 3 zuerst, dann 11, und 27 zuletzt angezeigt)
Klicken Sie auf „Bestätigen“ um die Gruppe zu erstellen
Wenn die Gruppe erstellt wurde, können Exemplare hinzugefügt werden.
Setzen Sie im Reiter „Exemplare“ ein Häkchen bei den Exemplaren die Sie zur Gruppe hinzufügen möchten
Klicken Sie oberhalb der Exemplartabelle auf „Zur Exemplargruppe hinzufügen/verschieben“
Wählen Sie die Gruppe aus zu der die ausgewählten Exemplare hinzugefügt werden sollen

Klicken Sie auf „Exemplargruppe eintragen“
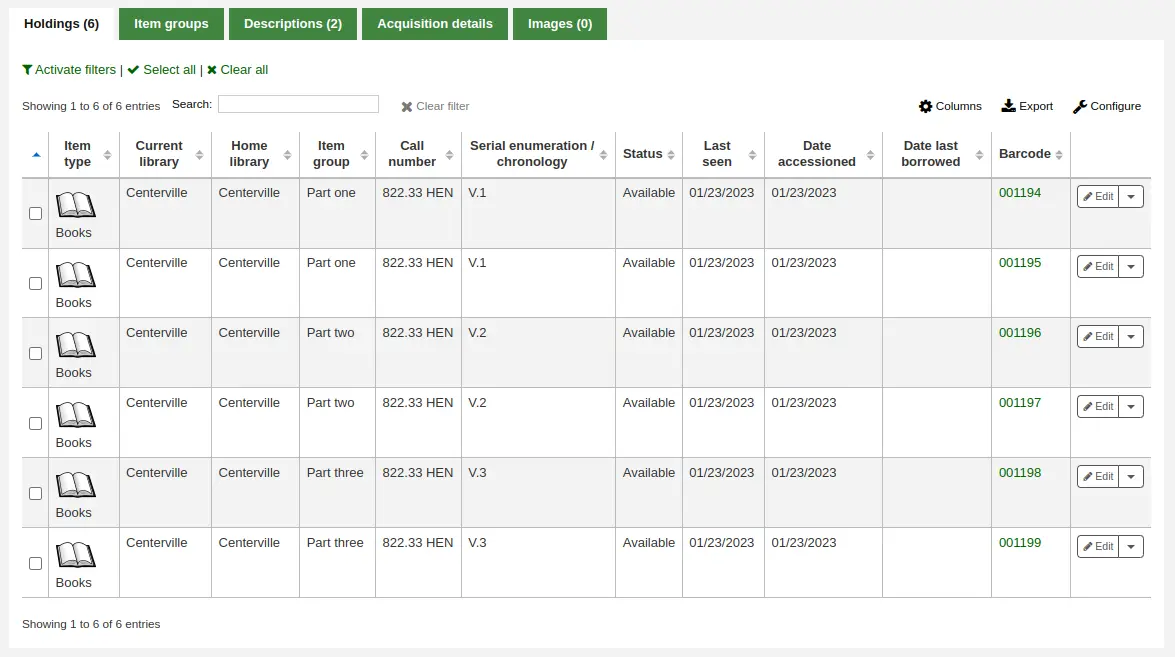
Die Exemplargruppe in der sich jedes Exemplar befindet wird im Reiter „Exemplare“ angezeigt.
Um eine Exemplargruppe zu löschen, gehen Sie auf den Reiter „Exemplargruppen“ und klicken Sie auf die Schaltfläche „Löschen“. Dadurch wird nur die Gruppe gelöscht, die Exemplare bleiben erhalten, sind aber nicht gruppiert.
Angaben zum Datensatz
Auf der linken Seite jedes Titeldatensatzes befindet sich ein Reiter ‚Exemplare‘.

Wenn Sie auf diesen Reiter klicken, erhalten Sie grundlegende Informationen über die Exemplare.
Der Bereich „Exemplarinformationen“ zeigt die Basisinformationen des Exemplars wie Heimatbibliothek, Exemplartyp, Sammlung, Signatur, Exemplarnummer, Standort, Wiederbeschaffungspreis und Begleitmaterialien.

Im Bereich „Status“ wird der aktuelle Status des Exemplars angezeigt. Wenn das Exemplar ausgeliehen ist, werden die Ausleihdetails angezeigt. Wenn das Exemplar verlängert wurde, können Sie auf „Anzeigen“ klicken, um die Details aller Verlängerungen zu sehen, einschließlich des Datums, des/der Mitarbeiter*in, der die Ausleihe verlängert hat, und ob dies manuell oder automatisch (über den Cron-Job automatic_renewals.pl) geschehen ist.

In diesem Bereich können Sie auch die Statusinformationen einsehen und bearbeiten. Wenn ein Exemplar als verloren, beschädigt oder ausgeschieden gekennzeichnet ist, sehen Sie das Datum, an dem dieser Status vergeben wurde.

Der Bereich „Priorität“ zeigt an, ob das Exemplar aus der lokalen Vormerkungs-Priorität ausgeschlossen istund ob eine Buchung auf das Exemplar vorgenommen werden kann.

Der Bereich „Historie“ enthält Informationen über den Verlauf des Erwerbs und der Ausleihe des Exemplars. Wenn Sie das Exemplar über das Erwerbungsmodul bestellt haben, enthält dieser Bereich das Bestelldatum, den Lieferanten, das Zugangsdatum und die Rechnungsnummer. Durch Anklicken des Bestell- oder Zugangsdatums gelangen Sie zu den Beschaffungsinformationen für dieses Exemplar. Dieser Bereich zeigt auch die Anzahl der gesamten Ausleihen (mit einem Link zur Anzeige der Ausleihhistorie), das Datum und die Uhrzeit, zu der das Exemplar zuletzt gesehen wurde, das Datum der letzten Ausleihe und den/die letzte*n Benutzer*in, der/die dieses Exemplar ausgeliehen hat (wenn der Systemparameter StoreLastBorrower aktiviert ist), ob das Exemplar vom/von der Benutzer*in bezahlt wurde, die Band- oder Zeitschriftennummer sowie OPAC- und interne Notizen.

Coverbilder für Exemplare hinzufügen
Bemerkung
Nur Bibliothekspersonal mit der Berechtigung upload_local_cover_images sowie der Berechtigung edit_items (oder der superlibrarian-Berechtigung) kann Coverbilder zu Exemplaren hinzuzufügen.
Wenn Sie entweder OPACLocalCoverImages und/oder LocalCoverImages aktiviert haben, können Sie Coverbilder für einzelne Exemplare über die Option ‚Bild hochladen‘ in der Auswahlliste der Schaltfläche ‚Bearbeiten‘ rechts in der Exemplartabelle hinzufügen.

Klicken Sie auf „Datei auswählen“ um das Bild auf Ihrem Rechner zu finden und anschließend „Datei hochladen“.
Auf der nächsten Seite haben Sie die Option, existierende Bilder zu überschreiben. Sie können dann auf „Bilder verarbeiten“ klicken.
Das Bild wird in einer eigenen Spalte „Coverbild“ in der Exemplartabelle angezeigt.
To delete an image, click on the image in the holdings display. You will see a grayed out copy of the image with the option to delete.

Exemplare umhängen
Bemerkung
Mitarbeiter*innen müssen die Berechtigung edit_items (oder die superlibrarian-Berechtigung) haben, um Exemplare verschieben zu können.
Exemplare können von einem an einen anderen Datensatz umgehängt werden, wenn Sie die Funktion ‚Exemplar anhängen‘ verwenden.

Gehen Sie Titel, an den das Exemplar gehängt werden soll und wählen Sie ‚Exemplar anhängen‘ im Menü ‚Bearbeiten‘.

Fügen Sie einfach den Barcode des Exemplars ein, das Sie weiterleiten wollen, und klicken Sie auf ‚Auswahl‘.
Wenn dies das letzte Exemplare an dem anderen Titel war, wird eine Schaltfläche angeboten, über die der Ausgangsdatensatz gelöscht werden kann.

Wenn Sie alle Exemplare eines Datensatzes an einen anderen Titeldatensatz umhängen möchten, können Sie dafür die Funktion Datensätze verschmelzen verwenden.
Exemplare löschen
Bemerkung
Mitarbeiter*innen müssen die Berechtigung edit_items (oder die superlibrarian-Berechtigung) besitzen, um Exemplare löschen zu können.
There are many ways to delete item records.
If you only need to delete one item, you can go to the record’s details page, click the ‚Edit‘ button at the top and choose ‚Manage items‘.

Click the ‚Actions‘ button next to the item to delete, and choose the ‚Delete‘ option. If the item is not checked out, it will be deleted.

If all the items attached to the record are not currently checked out, from the record’s details page, click the ‚Edit‘ button at the top and choose ‚Delete all items‘. This will delete all the items from the record.

Bemerkung
Mitarbeiter*innen müssen die Berechtigung delete_all_items (oder die superlibrarian-Berechtigung) haben, um alle Exemplare eines Datensatzes löschen zu können.
You can also choose the option ‚Delete items in a batch‘, from the same ‚Edit‘ button to delete all the items from the record.

Dies öffnet die Stapellöschung für Exemplare, in welcher Sie alle zu diesem Datensatz gehörenden Exemplare im Stapel bearbeiten können.
To delete several items from a record, but not necessarily all of them, you can check the items to delete and click ‚Delete selected items‘ at the top of the list.

Dies öffnet die Stapellöschung für Exemplare, in welcher Sie alle zu diesem Datensatz gehörenden Exemplare im Stapel bearbeiten können.
Sie können auch im Modul ‚Werkzeuge‘ die Stapellöschung von Exemplaren verwenden, um mehrere Exemplare auf einmal zu löschen.
Stapellöschung von Exemplaren
Bemerkung
Nur Bibliothekspersonal mit der Berechtigung items_batchdel (oder der superlibrarian-Berechtigung) hat Zugriff auf dieses Werkzeug.
Pfad in Koha: Mehr > Katalogisierung > Stapelbearbeitung > Stapellöschung von Exemplaren
Dieses Werkzeug ermöglicht Ihnen das Löschen eines Stapels von Exemplardatensätzen in Koha.
Mit diesem Werkzeug können Sie entweder eine Datei mit Barcodes oder Exemplarnummern hochladen oder die Barcodes der Exemplare einzeln in das Feld unter dem Upload-Werkzeug einscannen.
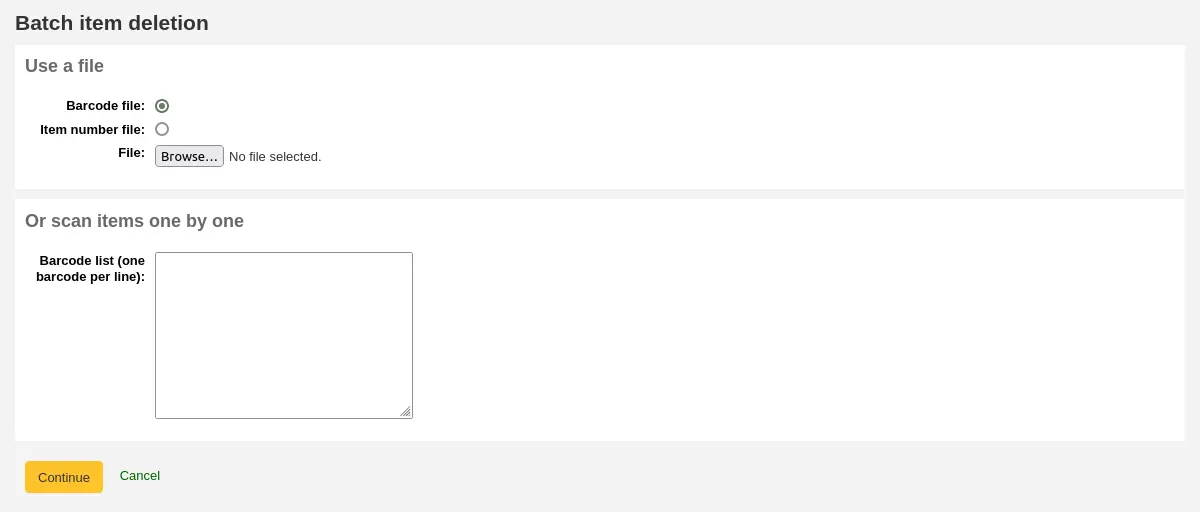
Sobald die Datei hochgeladen oder die Barcodes aufgelistet sind, klicken Sie auf „Weiter“
Es wird ein Bestätigungsbildschirm angezeigt. Hier können Sie die Exemplare, die Sie nicht löschen möchten, abwählen. Sie können die Checkbox „Datensätze löschen, wenn keine Exemplare mehr vorhanden sind“ ankreuzen, um den bibliografischen Datensatz zu löschen, wenn das letzte Exemplar gelöscht wird.

Bemerkung
Exemplare, die das letzte Exemplar sind, das an einem Titelsatz mit einer oder mehreren Vormerkungen auf Titelsatzebene hängt, werden automatisch ausgeschlossen. Sie müssen die Vormerkung löschen bevor Sie das Exemplar löschen können.
Exemplare die ausgeliehen sind werden ebenfalls automatisch ausgeschlossen. Sie müssen vor dem Löschen zuerst zurückgegeben werden.
Wenn die Datei (oder die Liste der gescannten Barcodes) mehr als 1000 Barcodes umfasst, kann Koha diese nicht mehr in einer Liste anzeigen. Die Daten können dennoch gelöscht werden, aber es ist nicht möglich einzelne Exemplare ab- oder auszuwählen und die Titelsätze mit dem letzten Exemplare zu löschen.

Klicken Sie auf „Markierte Exemplare löschen.“
Bemerkung
Wenn die Exemplare ausgeliehen sind werden sie nicht gelöscht.
Der Löschjob wird in die Hintergrundjobs eingereiht.

Klicken Sie auf „Zeige Details des Jobs in der Warteliste“ um Details über den Job anzusehen.
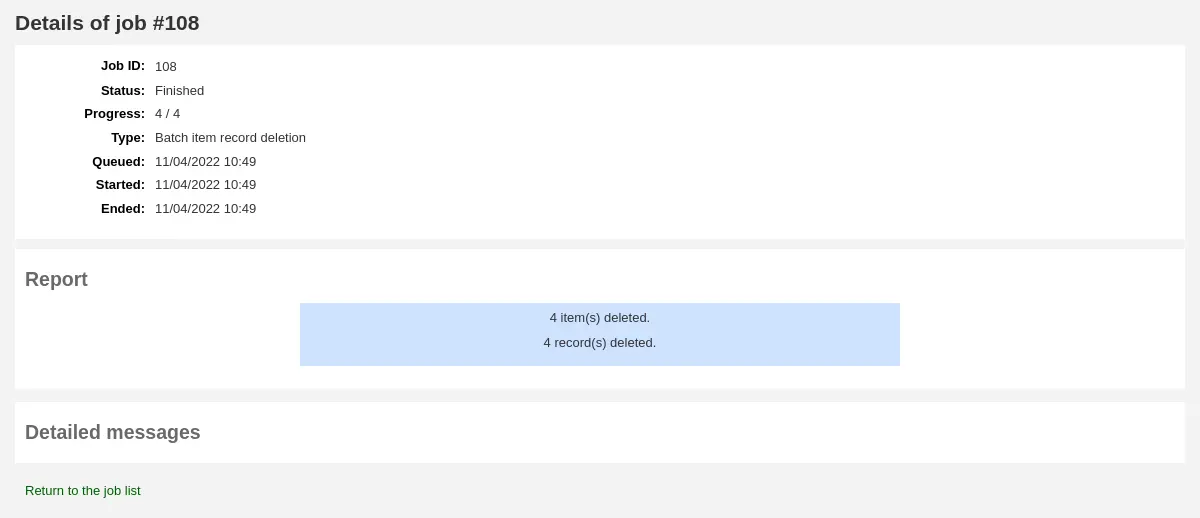
Klicken Sie auf „Stapellöschung von Exemplaren“ um eine neue Stapellöschung durchzuführen.
Stapellöschung von Exemplaren ausgehend vom Titelsatz
The batch item deletion tool is also available from the bibliographic record details page.
Klicken Sie ausgehend von der Detailansicht eines Titels auf den Button „Bearbeiten“ und wählen Sie dann „Stapellöschung von Exemplaren“.

This will open the batch item deletion tool for the items of the specific record.
Spapellöschung von Exemplaren aus einem Report
The batch item deletion tool is also available from reports results when the results contain itemnumbers.

Wenn der Report die itemnumber enthält, erscheint automatisch die Option „Stapeloperationen mit X sichtbaren Datensätzen“. Diese Option beinhaltet die Stapelbearbeitung und Stapellöschung von Exemplardatensätzen.
Standardmäßig werden bei der Ausführung von Reports nur 20 Ergebnisse angezeigt, so dass die Stapellöschung nur für 20 Ergebnisse durchgeführt wird. Wenn Sie mehr Ergebnisse in einem Stapel löschen möchten, stellen Sie sicher, dass Sie die Anzahl der Ergebnisse pro Seite ändern, bevor Sie den Stapelvorgang wählen.
Stapellöschung von Exemplaren aus der Exemplarsuche
Version
Diese Möglichkeit wurde in Koha-Version 23.11 hinzugefügt.
Das Werkzeug Stapellöschung von Exemplaren steht auch über die Exemplarsuche zur Verfügung.
Wählen Sie einfach die zu löschenden Exemplare aus der Ergebnisliste aus, klicken Sie auf „Stapelverarbeitung“ und wählen Sie „Stapellöschung von Exemplaren“.

Exemplarbezogene Ausleihhistorie
Jeder bibliographische Datensatz verfügt über eine Ausleihhistorie (mit oder ohne Benutzerinformationen, abhängig von Ihren Einstellungen), zusätzlich hat jedes Exemplar seine eigene Seite zur Ausleihhistorie. Um diese anzuzeigen, klicken Sie auf den Reiter ‚Exemplare‘ links neben dem Datensatz, den Sie gerade ansehen.

Unter der Rubrik ‚Ausleihhistorie‘ befindet sich ein Link zu ‚Ausleihhistorie des Exemplars anzeigen‘. Wenn Sie diesen anklicken, werden die Ausleihhistorie des Exemplars geöffnet. Diese sieht etwas anders aus, als die titelbezogene Ausleihhistorie.
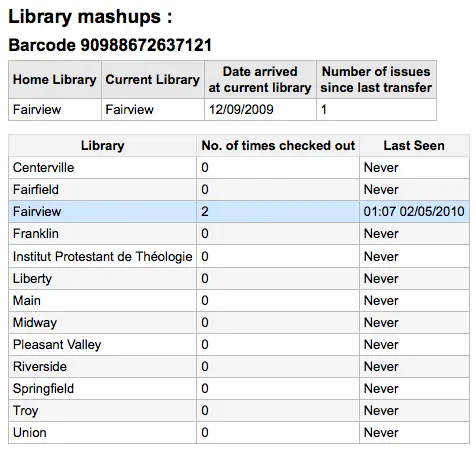
Exemplarbearbeitung nach Alter
Pfad in Koha: Mehr > Katalogisierung > Automatisierung > Exemplarbearbeitung nach Alter
Dieses Werkzeug ermöglicht es spezifische Exemplarfelder zu aktualisieren, wenn ein Exemplar ein bestimmtes Alter hat.
Bemerkung
Nur Bibliothekspersonal mit der Berechtigung items_batchmod (oder der superlibrarian-Berechtigung) hat Zugang zu diesem Werkzeug.
Bemerkung
Die Einstellungen in diesem Werkzeug funktionieren über den entsprechenden Cronjob.
Wenn Sie noch keine Regeln erstellt haben, wird auf der Seite die Option „Regeln hinzufügen“ angezeigt. Klicken Sie auf diese Schaltfläche, um Regeln zu erstellen.

Wenn Sie bereits Regeln haben, finden Sie eine Schaltfläche mit der Aufschrift „Regeln bearbeiten“. Um eine neue Regel zu erstellen, klicken Sie auf die Schaltfläche „Regeln bearbeiten“ oben auf der Seite.

Sie werden auf eine Seite weitergeleitet, auf der Sie bestehende Regeln bearbeiten oder eine neue Regel erstellen können.

Klicken Sie auf „Regel hinzufügen“.

Füllen Sie das Formular aus, um eine neue Regel zu erstellen:
Alter in Tagen: das Alter in Tagen, in dem das Exemplar aktualisiert wird
Altersfeld: das Feld, auf dem das Alter basiert
items.dateaccessioned (default): Erwerbungsdatum des Exemplars; in MARC21 wird das normalerweise auf das Feld 952$d gemappt
items.replacementpricedate: Datum, ab dem der Wiederbeschaffungspreis gilt; in MARC21 wird es normalerweise auf 952$w abgebildet
items.datelastborrowed: Datum, an dem das Exemplar zuletzt ausgeliehen wurde; in MARC21 wird es normalerweise auf 952$s abgebildet (nicht manuell anpassbar)
items.datelastseen: Datum der letzten Transaktion des Exemplars; in MARC21 wird es normalerweise auf 952$r abgebildet (nicht manuell anpassbar)
items.damaged_on: Datum, an dem der Status „Beschädigt“ gesetzt wurde (nicht manuell anpassbar)
items.lost_on: Datum, an dem der Status „Verlust“ gesetzt wurde (nicht manuell anpassbar)
items.withdrawn_on: Datum, an dem der Status „Ausgeschieden“ gesetzt wurde (nicht manuell anpassbar)
Bedingungen: welche Kriterien sind erforderlich, um die Aktualisierung auszulösen
Wählen Sie das zu prüfende Feld aus dem Dropdown-Menü
Geben Sie den Wert ein, den das Feld haben soll, um die Aktualisierung auszulösen
Wenn Sie mehr als eine Bedingung benötigen, klicken Sie auf „Bedingung hinzufügen“
Substitutionen: welche Änderungen bei der Ausführung des Skripts vorgenommen werden
Wählen Sie das zu ändernde Feld aus dem Dropdown-Menü
Geben Sie den Wert ein, den das Feld nach der Aktualisierung haben soll
Wenn Sie mehr als eine Änderung vornehmen müssen, klicken Sie auf „Substitution hinzufügen“
Wenn Sie fertig sind, klicken Sie auf die Schaltfläche „Speichern“, um die Regel zu speichern und zur Hauptseite zurückzukehren, oder klicken Sie erneut auf „Regel hinzufügen“, um eine weitere Regel hinzuzufügen.

Umlauf der Bestände
Pfad in Koha: Mehr > Katalogisierung > Automatisierung > Bestandsrotation
Bemerkung
Dieses Werkzeug ist nur verfügbar wenn der Systemparameter StockRotation aktiviert ist.
Bemerkung
Nur Bibliothekspersonal mit der Berechtigung stockrotation oder Unterberechtigungen (oder der superlibrarian-Berechtigung) hat Zugang zu diesem Werkzeug.
Die Bestandsrotation trägt zu einer gerechteren Verteilung der Ressourcen auf die einzelnen Bibliothekszweigstellen bei und ermöglicht es Benutzern, eine größere Auswahl an Titeln zu sehen.
Exemplare sind beliebt, solange sie in einer bestimmten Bibliothek neu sind. Mit der Zeit lässt ihre Nutzung jedoch oft nach. Mit diesem Werkzeug können Bibliothekare die Verlagerung von Exemplaren in eine andere Zweigbibliothek automatisieren, bevor die Nutzung nachlässt, und so die Nutzungsdauer der Exemplare verlängern.
Library staff create rotation plans (rotas) and then assign items to them. A cronjob is then used to cycle these items round the specified libraries on the rotation plan, moving them to the next stage after the prescribed period of time has passed at the current stage.
Bemerkung
For this tool to work as intended, the stockrotation.pl cron job needs to be configured to run on a daily basis.
E-Mail-Benachrichtigungen können verwendet werden, um den Bibliotheken eine Liste der im Regal befindlichen Exemplar zukommen zu lassen, die an die nächste Bibliothek weitergegeben werden sollen. Wenn ein Benachrichtigungen zu dem Zeitpunkt, an dem es übertragen werden soll, ausgeliehen ist, wird eine Benachrichtigung angezeigt, wenn es das nächste Mal zurückgegeben wird.
Bemerkung
Die verwendete Benachrichtigung ist SR_SLIP. Sie kann mit dem Werkzeug Benachrichtigungen und Quittungen angepasst werden.
From the stock rotation page you can add new rotation plans (rotas) and see a summary of your currently configured rotas. For each existing rota, there are buttons to: edit, manage stages and items, activate or deactivate, delete.
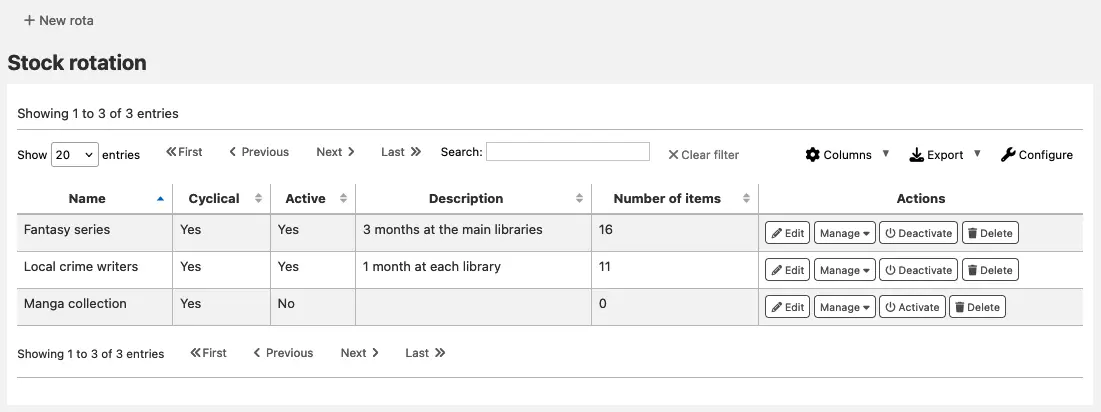
Bemerkung
You can customize the columns of this table in the Table settings section of the Administration module (table id: stock_rotation).
Einen neuen Rotationsplan erstellen
Bemerkung
Nur Bibliothekspersonal mit der Berechtigung manage_rotas (oder der superlibrarian-Berechtigung) kann neue Bestandsrotationen erstellen.
Klicken Sie auf „Neuer Plan“ ganz oben auf der Seite um einen neuen Rotationsplan zu erstellen.

Name: geben Sie einen Namen oder Code ein um den Plan ermitteln zu können
Zyklisch:
Nein: die Exemplare verbleiben beim Erreichen der letzten Bibliothek des Rotationsplans in dieser
Ja: die Exemplare zirkulieren weiter zur ersten Bibliothek im Rotationsplan wenn ihre zugewiesene Zeit in der letzten Bibliothek abgelaufen ist, solange bis sie manuell aus dem Plan entfernt werden
Beschreibung: optional können Sie eine erweiterte Beschreibung Ihrem Plan hinzufügen um diese in der Zusammenfassung anzeigen zu lassen
Once the rota is complete with stages and items, activate it to begin cycling the items through the rotation: on the stock rotation summary, click the ‚Activate‘ button next to the rota.

Stufen zu einer Bestandsrotation hinzufügen
Bemerkung
Nur Bibliothekspersonal mit der Berechtigung manage_rotas (oder der superlibrarian-Berechtigung) kann Stufen zu Bestandsrotationen hinzuzufügen.
Sobald die Bestandsrotation erstellt ist, können Sie ihr Stufen hinzufügen. Bei den Stufen handelt es sich um eine Zeitspanne, die ein Exemplar in einer bestimmten Bibliothek verbleibt, bevor es weitergegeben wird.
Klicken Sie auf der Übersichtsseite der Bestandsrotation auf die Schaltfläche „Verwalten“ und wählen Sie die Option „Stufen“.

Klicken Sie die Schaltfläche „Station hinzufügen“.
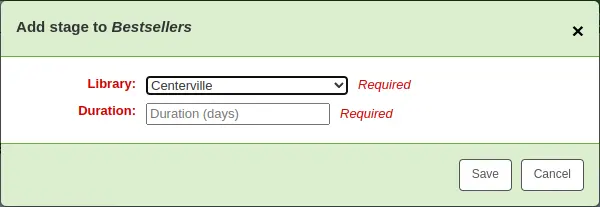
Bibliothek: wählen Sie die Bibliothek, für die diese Stufe ist
Dauer: Geben Sie die Anzahl der Tage ein, die das Exemplar in dieser Bibliothek verbleiben soll, bevor es weitergegeben wird
Klicken Sie auf „Speichern“.
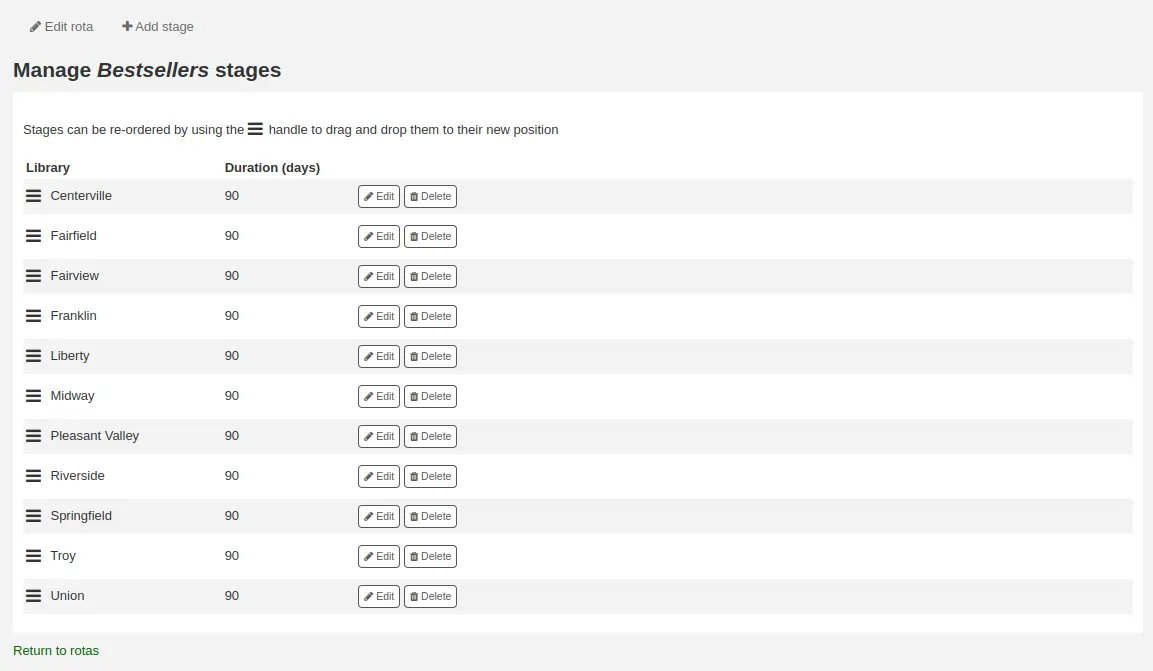
Wenn alle Stationen hinzugefügt wurden, können diese mithilfe der Symbole auf der linken Seite verschoben werden.
Exemplare einem Rotationsplan hinzufügen
Bemerkung
Nur Bibliothekspersonal mit der Berechtigung manage_rota_items (oder der superlibrarian-Berechtigung) kann Exemplare zu bestehenden Bestandsrotationen hinzufügen.
Sobald ein Plan Stationen hat, können auch Exemplare hinzugefügt werden.
Ausgehend von der Bestandsrotationsseite, klicken Sie auf den Button „Verwalte“ und dann „Exemplare“.

Klicken Sie auf den Button „Exemplare hinzufügen“.
Exemplare können einzeln einem Plan hinzugefügt werden (über den Barcode) oder im Stapel (über das Hochladen einer zeilengetrennten Barcodedatei).
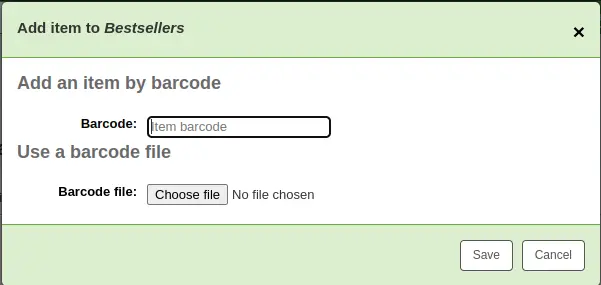
Exemplare können auch über den Katalog der Dienstoberfläche hinzugefügt werden, über den Reiter „Plan“ auf der linken Seite in der Detailansicht eines Titels.

Wählen Sie den Rotationsplan dem Sie das Exemplar hinzufügen möchten, und klicken Sie auf „Zum Plan hinzufügen“.
Exemplare können im Erwerbungsprozess automatisch zu einer Bestandsrotation hinzugefügt werden, indem das LRP-Feld (Library Rotation Plan) in EDI belegt wird.
Auf der Seite Verwalten > Exemplare wird eine Übersicht über alle Exemplare in der Bestandsrotation mit ihrem aktuellen Standort angezeigt. Sie haben die Möglichkeit, Exemplare sofort weiterzuverfolgen, Exemplare als „nachgefragt“ zu markieren und ein Exemplare aus der Rotation zu entfernen.
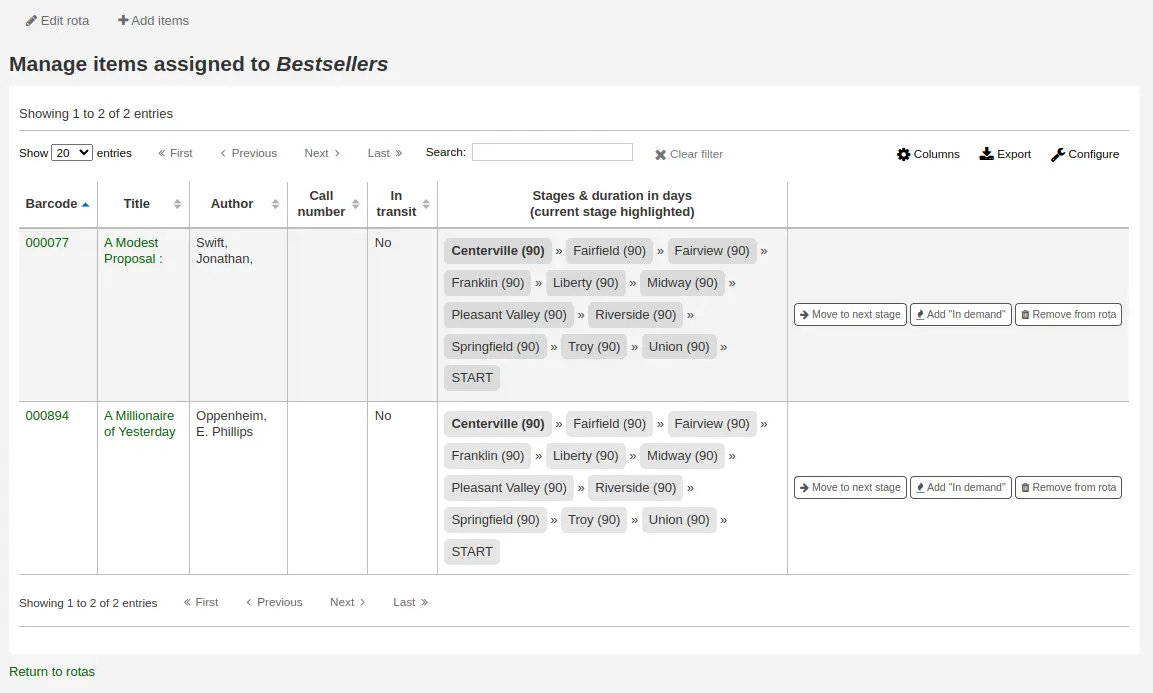
Bemerkung
You can customize the columns of this table in the Table settings section of the Administration module (table id: stock_rotation_manage_items).
In die nächste Stufe übergehen: Das Exemplar wird direkt in die nächste Stufe überführt, auch wenn die Dauer in der aktuellen Phase noch nicht abgeschlossen ist.
Hinzufügen von „Nachgefragt“: Verdoppelt die Dauer, die das Medium auf der aktuellen Stufe verbleibt, im Vergleich zu dem in der Bestandsrotation festgelegten Wert. Dies wird häufig für Exemplare verwendet, die sich in einer bestimmten Bibliothek als unerwartet beliebt erweisen.
Aus Bestandsrotation entfernen: das Exemplar aus der Bestandsrotation entfernen.
Einzelne Exemplare können auch über den Katalog der Dienstoberfläche im Reiter „Bestandsrotation“ verwaltet werden.

Etiketten erstellen
Bemerkung
Nur Bibliothekspersonal mit der Berechtigung label_creator (oder der superlibrarian-Berechtigung) hat Zugriff auf dieses Werkzeug.
Pfad in Koha: Mehr > Katalogisierung > Werkzeuge > Etikettendruck
Mit dem Werkzeug „Etikettendruck“ können Sie Layouts und Vorlagen verwenden, die Sie selbst gestalten, um eine nahezu unbegrenzte Vielfalt an Etiketten einschließlich Barcodes zu drucken. Hier sind einige der Funktionen des Werkzeugs zum Erstellen von Etiketten:
Anpassen von Etikettenlayouts
Entwurf benutzerdefinierter Etikettentemplates für gedruckte Etiketten
Erstellen und Verwalten von Etikettenstapeln
Export einzelner oder mehrerer Etiketten
Exportieren Sie eine oder mehrere Etiketten aus einem Stapel
Exportieren Sie die Etikettendaten in einem von drei Formaten:
PDF - Können in jedem PDF-Reader geöffnet und direkt auf einem Drucker ausgedruckt werden
CSV - Exportieren Sie den Etikettenstapel, nachdem das gewählte Layout angewendet wurde, um ihn in verschiedene andere Anwendungen zu importieren
XML - als alternatives Export-Format
Label Layouts
Pfad in Koha: Mehr > Katalogisierung > Werkzeuge > Etikettendruck > Verwalte > Layouts
Das Layout wird verwendet um festzulegen welche Felder auf die Etiketten gedruckt werden sollen.
Ein Layout hinzufügen
Um ein neues Layout zu erstellen, klicken Sie auf ‚Neu‘ am Anfang der Seite des Etikettendrucks und wählen Sie ‚Layout‘ aus.
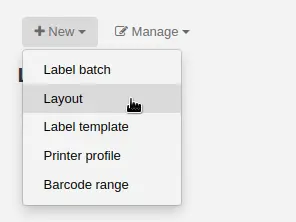
Über das angezeigte Formular können Sie festlegen, was auf Ihre Etiketten gedruckt werden soll.
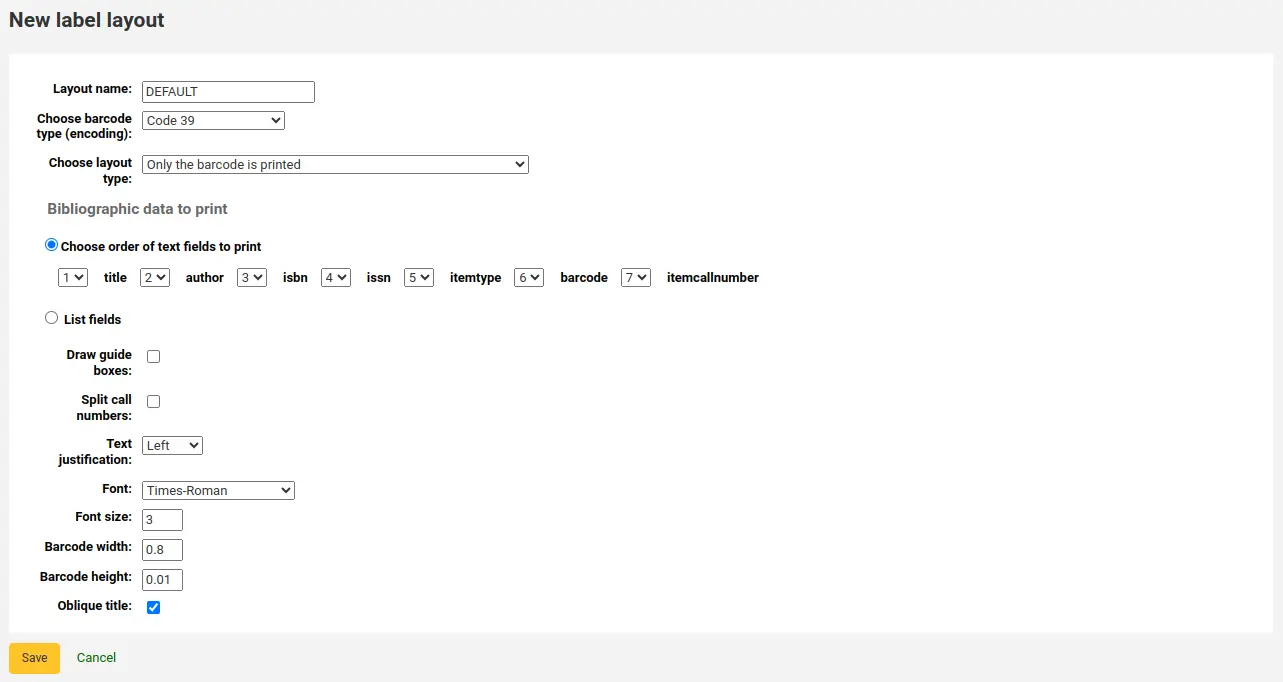
„Layoutname“: geben Sie einen passenden Namen für das Layout ein.
„Barcodetyp (Codierung) auswählen:“ wenn es sich um Barcodeetiketten handelt, wählen Sie die Codierung (Code39 ist am meisten verbreitet)
„Layout-Typ auswählen:“ wählen Sie welche Informationen auf dem Etikett gedruckt werden.
Nur Titelangaben werden gedruckt: es erscheinen nur Titelinformationen auf dem Etikett (das kann zum Beispiel für Signaturschilder verwendet werden)
Bemerkung
Die Titeldaten enthalten alle Datenfelder die möglicherweise zu Ihren MARC frameworks gemappt sind.
Der Barcode steht vor den Titeldaten: Der Barcode erscheint oben auf dem Etikett und die bibliografischen Informationen darunter
Die Titeldaten stehen vor dem Barcode: die bibliografischen Informationen erscheinen oben auf dem Etikett und der Barcode darunter
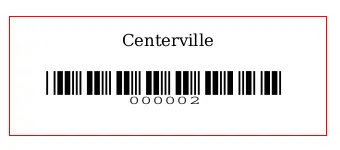
Barcode und Titeldaten werden alternierend gedruckt: die bibliografischen Informationen erscheinen auf einem Etikett und der Barcode auf dem Nächsten, abwechselnd für jedes Exemplar

Nur der Barcode wird gedruckt: nur der Barcode erscheint auf dem Etikett
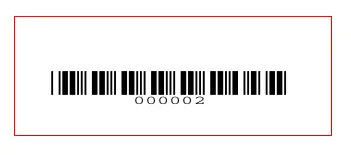
„Bibliographische Daten für den Druck“: wenn Sie Titeldaten auf dem Etikett drucken möchten, wählen Sie aus der voreingestellten Liste von Feldern, welche davon in welcher Reihenfolge auf dem Etikett erscheinen sollen. Alternativ können Sie auch auf „Felder auflisten“ klicken, und Ihre eigenen Daten eingeben.

Bemerkung
In ‚List fields‘, you can specify any database field from the following tables (use the database structure at https://schema.koha-community.org to find the field names):
items
biblioitems
biblio
branches
Sie können auch MARC Unterfelder als 4-stellige Unterfeldzeichenfolge angeben, zum Beispiel 245a für das Titelfeld in MARC21.
Sie können auch eine durch Leerzeichen getrennte Liste von Feldern, die in einer Zeile zusammengefasst werden sollen, in doppelte Anführungszeichen setzen, zum Beispiel „099a 099b“ oder „itemcallnumber barcode“.
Abschließend können Sie auch statische Textzeichenfolgen in einfachen Anführungszeichen einfügen, zum Beispiel „Hier etwas statischer Text.“
„Zeichne Umrandung“: wählen Sie ob Sie Orientierungslinien um jedes Etikett ausgedruckt haben möchten (das kann beim ersten Einrichten des Etikettendrucks nützlich sein, um die Ausrichtung mit Ihren Etikettenbögen zu überprüfen)
„Signaturen unterbrechen“: Wählen Sie aus, ob die Signaturen aufgeteilt werden sollen (normalerweise auf Rückenetiketten verwendet)
Bemerkung
Die Regeln für die Aufteilung von Signaturen werden unter Administration > Klassifizierungsquellen verwaltet.
„Textausrichtung“: Wählen Sie die Textausrichtung (links, mittig oder rechts)
„Schriftart“: Wählen Sie den Schrifttyp
Die Auswahl an Schriftarten ist derzeit auf folgende beschränkt:
Times-Roman (normal, fett, kursiv oder fett-kursiv): eine Schriftart mit Serifen
Courier (normal, fett, schräg (kursiv) oder fett-schräg (fett-kursiv)): eine Monospace-Schriftart
Helvetica (normal, fett, schräg (kursiv) oder fett-schräg (fett-kursiv)): eine serifenlose Schriftart
„Schriftgröße“: Eingabe der Schriftgröße in Punkt
„Barcodebreite“: Geben Sie beim Drucken von Barcodes die Breite des Barcodes als Bruchteil der eigentlichen Etikettenbreite an. Beispiel: 0,8 bedeutet, dass der Barcode 80 % der Länge des Etiketts einnehmen wird.
- Barcodehöhe: geben Sie für den Druck die Höhe des Barcodebildes in Pixeln an
einen Bruchteil der Etikettenhöhe.
„Kursiver Titel“: Wählen Sie, ob der Titel kursiv dargestellt werden soll
Klicken Sie auf „Speichern“, um das neue Layout zu speichern.
Nach dem Speichern werden Ihre Layouts unter Verwalten > Layouts angezeigt.
Ein Layout bearbeiten
Um ein bestehendes Layout zu bearbeiten, klicken Sie auf die Schaltfläche „Verwalten“ am oberen Rand des Werkzeugs „Etikettendruck“ und wählen Sie „Layout“.

Klicken Sie in der Tabelle der derzeit verfügbaren Layouts auf die Schaltfläche „Bearbeiten“ neben dem Layout, das Sie bearbeiten möchten.
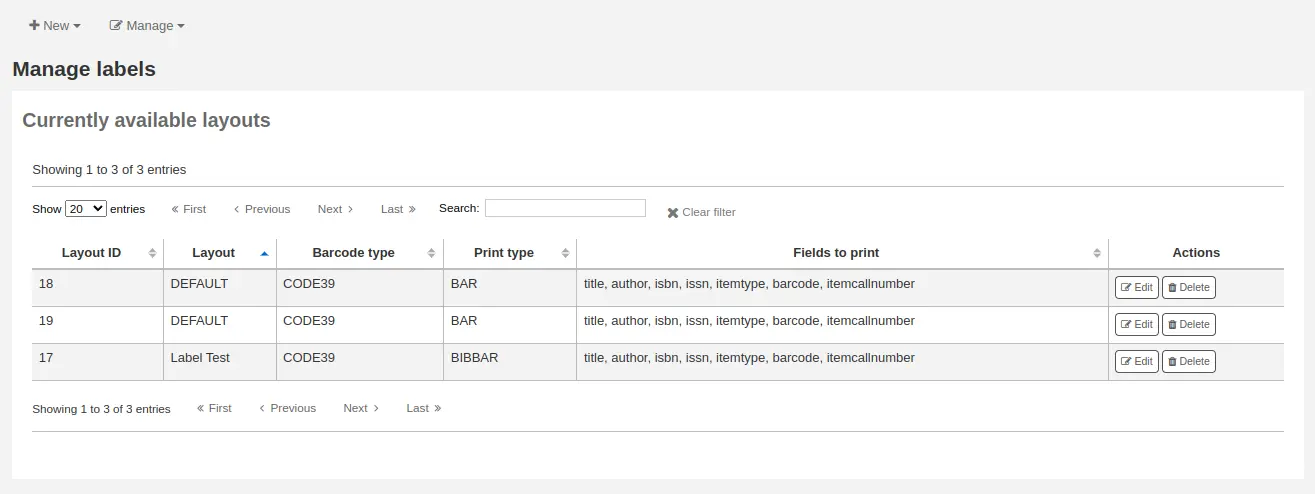
Ändern Sie die erforderlichen Werte und klicken Sie auf „Speichern“.
Ein Layout löschen
Um ein bestehendes Layout zu löschen, klicken Sie auf die Schaltfläche „Verwalten“ am oberen Rand des Werkzeugs „Etikettendruck“ und wählen Sie „Layout“.

Klicken Sie in der Tabelle der aktuell verfügbaren Layouts auf die Schaltfläche „Löschen“ neben dem Layout, das Sie löschen möchten, und bestätigen Sie den Löschvorgang.

Etiketten-Templates
Pfad in Koha: Mehr > Katalogisierung > Werkzeuge > Etikettendruck > Verwalten > Templates
Eine Vorlage basiert auf dem Etiketten-/Kartenmaterial, das Sie verwenden. Das kann Avery 5160 für Adressetiketten, Gaylord 47-284 für Rückenetiketten oder Avery 28371 für Ihre Benutzerausweise sein, um nur ein paar Beispiele zu nennen. Diese Etiketten enthalten alle Informationen, die Sie für die Einrichtung in Koha benötigen. Diese Informationen können auf der Verpackung oder auf der Website des Anbieters stehen, oder sie können manuell gemessen werden.
Eine Vorlage hinzufügen
Um eine neue Vorlage hinzuzufügen, klicken Sie auf die Schaltfläche „Neu“ oben auf der Seite zur Erstellung von Etiketten und wählen Sie „Template“.
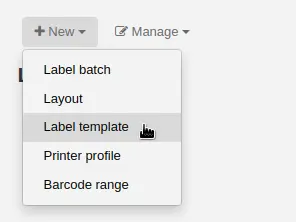
In dem nun erscheinenden Formular können Sie die Vorlage für Ihren Etiketten- oder Ausweisbogen festlegen.

„Template-ID“: Diese wird nach dem Speichern Ihrer Vorlage automatisch generiert, es handelt sich dabei um eine vom System erzeugte eindeutige ID
„Templatecode“: geben Sie einen Code für das Template ein, der Ihnen bei der späteren Identifizierung des Templates hilft
„Templatebeschreibung“: hier können Sie zusätzliche Informationen über das Template eingeben
„Einheiten“: wählen Sie welche Maßeinheit Sie für Ihr Template verwenden möchten. Es sollte am besten den Maßeinheiten entsprechen, die der Hersteller für Ihre Druckvorlagen angegeben hat.
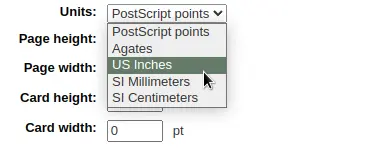
Die Maße, Anzahl der Spalten und Reihen können auf der Packung stehen, auf der Website des Herstellers, oder können manuell nachgemessen werden.
Seitenhöhe: Höhe der Seite
Seitenbreite: Breite der Seite
Etikettenbreite: Breite des Etiketts
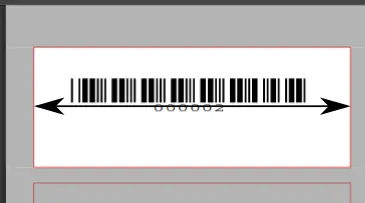
Etikettenhöhe: Höhe des Etiketts
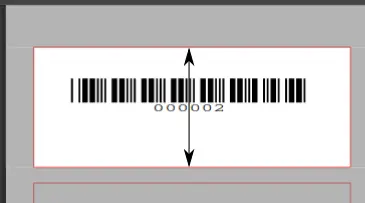
Oberer Seitenrand: Abstand zwischen dem oberen Seitenrand und dem Beginn der ersten Etikettenreihe
Linker Seitenrand: Abstand vom linken Seitenrand zum Beginn der ersten Etikettenreihe
Oberer Textrand: Abstand zwischen dem oberen Rand des Etiketts und dem Beginn der ersten Textzeile
Linker Textrand: Abstand zwischen dem linken Etikettenrand und dem Textbeginn
Bemerkung
Wenn Sie im Template keinen linken Textrand angeben, wird automatisch ein Rand mit 3/16‘‘ (13.5 Punkten) eingetragen.
Anzahl Spalten: Anzahl der Etikettenspalten auf einer Seite bzw. die Anzahl der Etiketten in einer Zeile
Anzahl Reihen: Anzahl der Etikettenreihen auf einer Seite bzw. Anzahl der Etiketten je Spalte
Abstand zwischen den Spalten: Abstand zwischen den Etikettenspalten
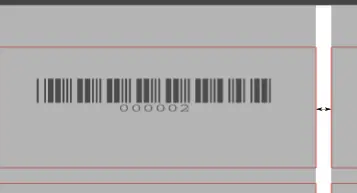
Abstand zwischen den Zeilen: Abstand zwischen zwei Reihen von Etiketten
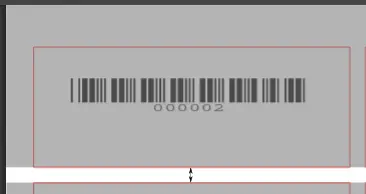
Ein Profil ist ein Satz von „Einstellungen“, das einem bestehenden Template vor dem Druck zugeordnet wird, um Eigenschaften eines bestimmten Druckers auszugleichen (dem das Profil zugeordnet ist).
Drucken Sie versuchsweise ein paar Etiketten, bevor Sie ein Profil auswählen. So können Sie einfacher ein Profil definieren, dass für Ihre Kombination von Drucker und Template passt.
Wenn Sie Unstimmigkeiten auf dem gedruckten Dokument gefunden haben, können sie ein Druckerprofil create a profile erstellen und es dem Template zuweisen.
Klicken Sie auf „Speichern“ um das Template zu speichern.
Nach dem Speichern werden Ihre Templates unter Verwalte > Templates angezeigt.
Ein Template bearbeiten
Um ein bestehendes Template zu bearbeiten, klicken Sie auf den Button „Verwalte“ und wählen Sie dann „Templates“.

Klicken Sie auf den Button „Bearbeiten“ bei dem Template das Sie bearbeiten möchten in der Tabelle der derzeit verfügbaren Templates.
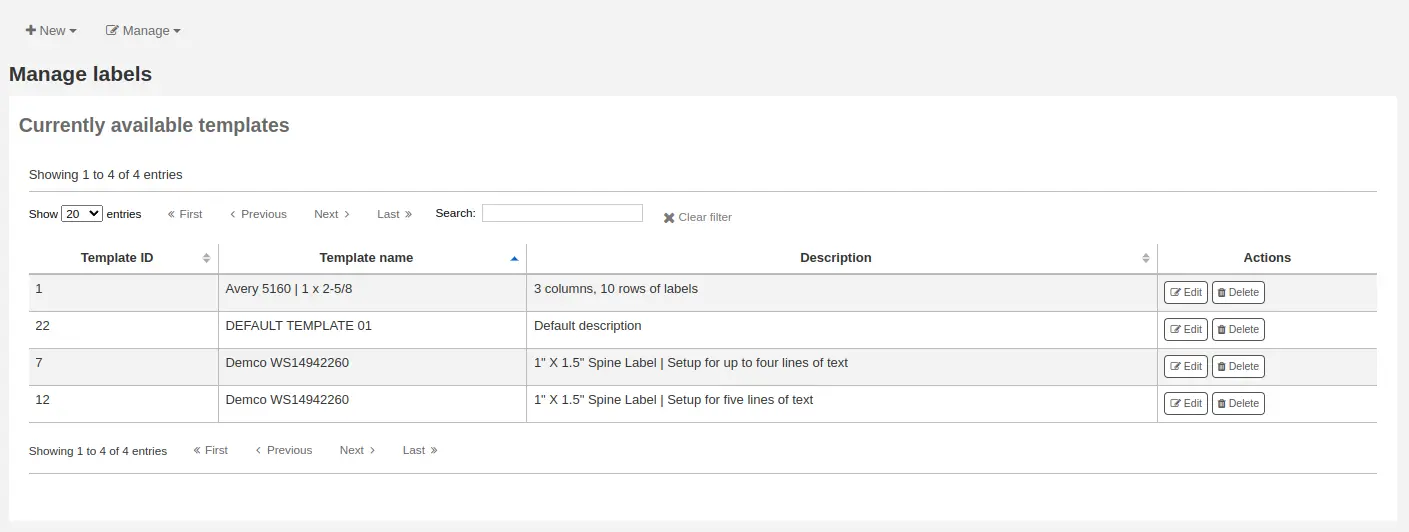
Ändern Sie die erforderlichen Werte und klicken Sie auf „Speichern“.
Eine Vorlage löschen
Um ein bestehendes Template zu löschen, klicken Sie auf den Button „Verwalte“ und wählen Sie dann „Templates“.
Klicken Sie in der Tabelle der aktuell verfügbaren Layouts auf die Schaltfläche „Löschen“ neben dem Layout, das Sie löschen möchten, und bestätigen Sie den Löschvorgang.

Druckerprofile
Get there: More > Cataloging > Tools > Label creator > Manage > Printer profiles
Ein Profil ist eine Reihe von „Anpassungen“, die auf ein bestimmtes Template unmittelbar vor dem Druck angewendet werden, um Anomalien zu kompensieren, die für einen bestimmten Drucker (dem das Profil zugewiesen ist) einzigartig und eigen sind. Das heißt, wenn Sie ein Template einrichten und dann einen Mustersatz von Daten drucken und feststellen, dass die Elemente nicht alle auf jedem Etikett gleich ausgerichtet sind, müssen Sie für jeden Drucker ein Profil einrichten, um die Unterschiede in den Druckstilen auszugleichen, z. B. die Verschiebung von Text nach links, rechts, oben oder unten.
Wenn Ihre Etiketten genau so gedruckt werden, wie Sie es wünschen, benötigen Sie kein Profil.
Ein Drucker-Profil hinzufügen
Um ein neues Profil hinzuzufügen, klicken Sie auf die Schaltfläche „Neu“ oben im Werkzeug „Etikettendruck“ und wählen Sie „Druckerprofil“.
Mit Hilfe des erscheinenden Formulars können Sie ein Profil erstellen, um eventuelle Probleme mit Ihrem Template zu beheben.
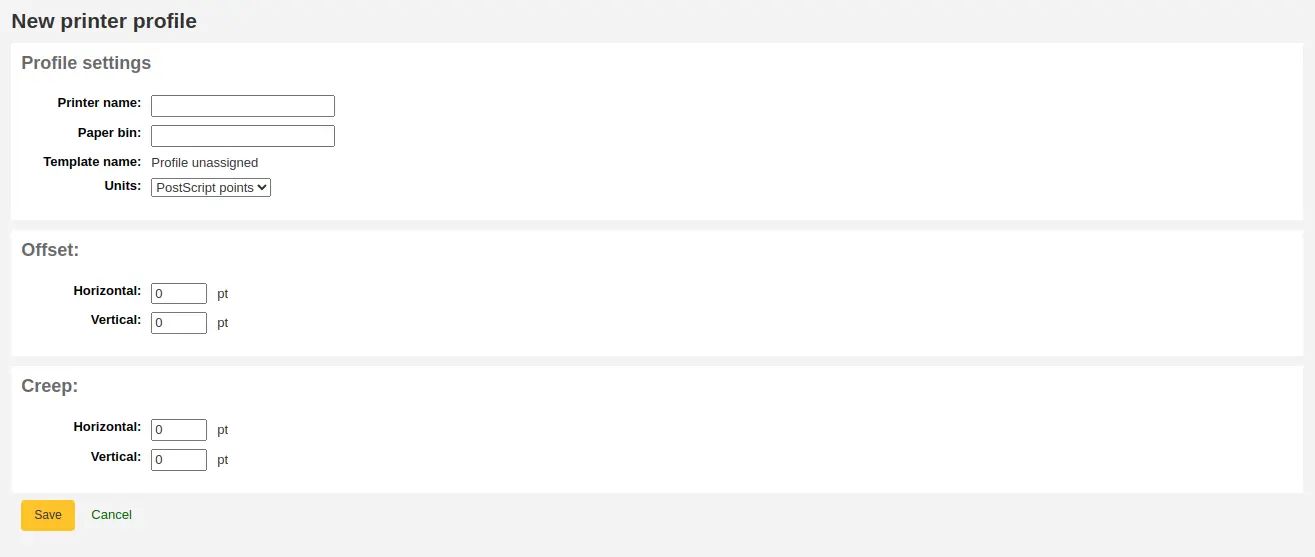
„Druckername“: Geben Sie einen Namen für den Drucker ein. Er muss nicht genau mit Ihrem Drucker übereinstimmen, sondern dient nur als Referenz innerhalb von Koha. Sie können also die Modellnummer des Druckers verwenden oder ihn „der Drucker auf meinem Schreibtisch“ nennen.
„Papierkorb“: Geben Sie einen Namen für das Papierfach des Druckers ein. Wie der Druckername wird er nur als Referenz verwendet.
Der „Name des Templates“ wird ausgefüllt, sobald Sie die Vorlage ausgewählt haben, auf die das Profil im Formular zur Bearbeitung von Templates angewendet werden soll
„Einheiten“: Legen Sie fest, welche Messskala Sie für Ihr Profil verwenden.

Die nächsten Bereiche dienen zur Einstellung des Etikettendrucks.
Offset beschreibt, was passiert, wenn das gesamte Bild entweder vertikal oder horizontal aus der Mitte gerät
Bundzuwachs beschreibt einen Zustand, bei dem sich der Abstand zwischen den Etiketten über die Seite hinweg oder nach oben und unten verändert
Bemerkung
Bei diesen Werten verschieben negative Zahlen den Fehler nach oben und links und positive Zahlen den Fehler nach unten und rechts
Beispiel: Der Text ist 0,25 Zoll vom linken Rand des ersten Etiketts, 0,28 Zoll vom linken Rand des zweiten Etiketts und 0,31 Zoll vom linken Rand des dritten Etiketts entfernt. Dies bedeutet, dass der horizontale Bundzuwachs auf 0,03“ eingestellt werden sollte, um diesen Unterschied auszugleichen.
Klicken Sie auf „Speichern“, um das neue Profil zu speichern.
Nach dem Speichern werden Ihre Profile auf der Seite ‚Verwalte > Verfügbare Profile‘ angezeigt.
Once you have saved your new profile, you can return to the list of templates and edit the template that this profile is for.
Ein Druckerprofil bearbeiten
Um ein bestehendes Druckerprofil zu bearbeiten, klicken Sie auf den Button „Verwalte“ und wählen Sie dann „Druckerprofile“.

Klicken Sie auf den Button „Bearbeiten“ bei dem Druckerprofil das Sie bearbeiten möchten in der Tabelle der derzeit verfügbaren Druckerprofile.
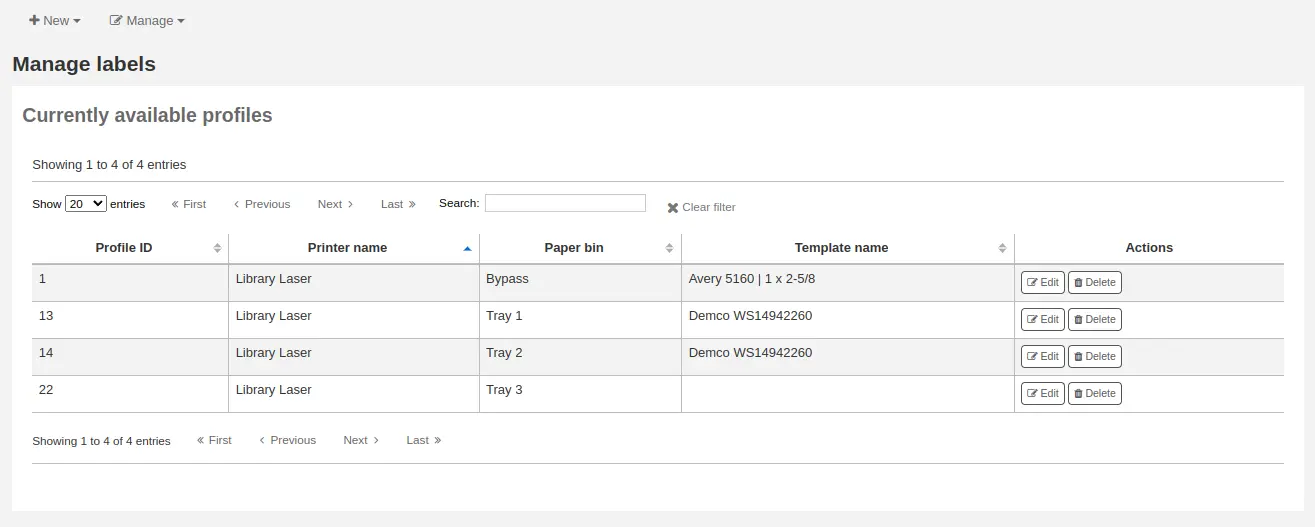
Ändern Sie die erforderlichen Werte und klicken Sie auf „Speichern“.
Ein Druckerprofil löschen
Um ein bestehendes Druckerprofil zu löschen, klicken Sie auf den Button „Verwalte“ und wählen Sie dann „Druckerprofile“.
Klicken Sie in der Tabelle der derzeit verfügbaren Druckerprofile auf den „Button“ Löschen bei dem Profil das Sie löschen möchten, und bestätigen Sie die Nachfrage.

Batches verwalten
Pfad in Koha: Mehr > Katalogisierung > Werkzeuge > Etikettendruck > Verwalte > Batches verwalten
Stapel beinhalten die Exemplare, für die Sie Etiketten drucken möchten. Sobald Sie in diesem Werkzeug sind, können Sie nach den Exemplaren suchen, für die Sie Etiketten drucken möchten.
Einen Batch hinzufügen
Stapel können auf zwei Arten erstellt werden. In der ersten kann der Link ‚Neuer Stapel‘ auf der Seite ‚Bereitgestellte MARC-Datensätze verwalten‘ ‚Staged MARC management‘ angeklickt werden.

Bei der anderen kann vom Werkzeug Etikettendruck aus ein neuer Stapel erstellt werden
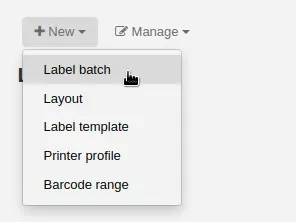
Sie bekommen einen leeren Stapel angezeigt mit einem Feld in dem Sie Barcodes oder Exemplarnummern einscannen können. Klicken Sie danach auf „Exemplar(e) hinzufügen“ unten auf der Seite.

Scannen Sie die Barcodes ein im Feld „Über Barcode(s) oder Exemplarnummer“ und klicken Sie anschließend auf „Exemplare hinzufügen“, oder klicken Sie direkt auf „Exemplar hinzufügen“, dann öffnet sich ein Suchfenster für die Suche nach Exemplaren, die Sie hinzufügen können.
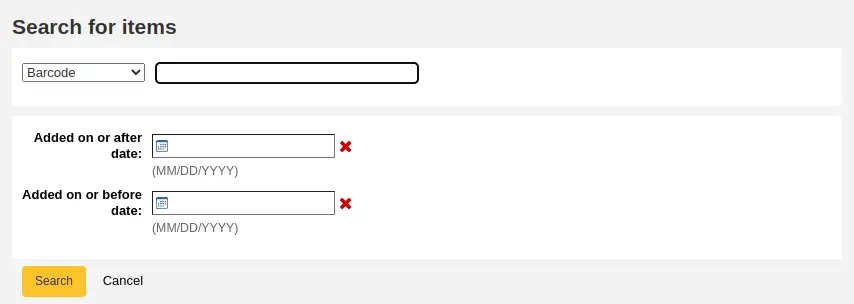
In der Trefferliste können Sie über die Checkboxen neben den Einzeltreffern auswählen, welche Exemplare zu einem Stapel hinzugefügt werden sollen. Klicken Sie hierzu auf ‚Markierte hinzufügen‘. Sie können auch einzelne Exemplare nacheinander über den Link ‚Hinzufügen‘ neben den einzelnen Einträgen hinzufügen.
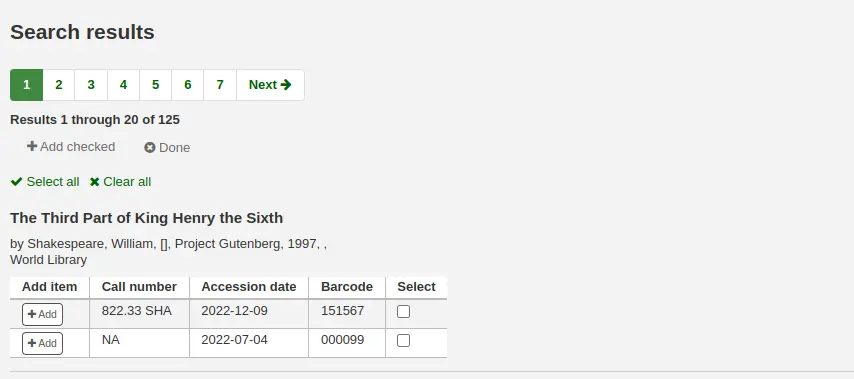
Wenn Sie alle Exemplare hinzugefügt haben, klicken Sie auf den Button „Fertig“. Klicken Sie erneut auf „Exemplar(e) hinzufügen“, um die Exemplare dem Stapel hinzuzufügen. Die anschließend erscheinende Tabelle listet die Exemplare auf die Sie ausgewählt haben.

Wurden manche Exemplare aus Versehen mehr als einmal hinzugefügt, können Sie diese über den Button „Dubletten entfernen“ aus dem Stapel löschen.
Wenn Sie einzelne Exemplare aus dem Stapel entfernen möchten, wählen Sie diese mit einem Häkchen in der Checkbox auf der rechten Seite aus, und klicken Sie auf den Button „Markierte Exemplare entfernen“.
Optional können Sie eine Beschreibung eintragen, um den Batch später leichter zu finden. Geben Sie im Feld „Batch-Beschreibung:“ eine Beschreibung ein und klicken Sie auf „Beschreibung speichern“. Die Beschreibung wird auf der Seite ‚Aktuell verfügbare Stapel erscheinen.
Um Ihre Etiketten zu drucken, klicken Sie die Schaltfläche „Gesamten Batch exportieren“. Um nur einige der Etiketten zu drucken verwenden Sie die Schaltfläche „Markierte exportieren“. Bei beiden Optionen erscheint ein Dialogfenster, in dem Sie das Template und Ihr Layout auswählen können. Wenn Sie Etikettenblatt verwenden, bei dem bereits einige Etiketten fehlen, können Sie angeben, bei welchem Etikett begonnen werden soll (die Etiketten werden dabei horizontal durchgezählt).
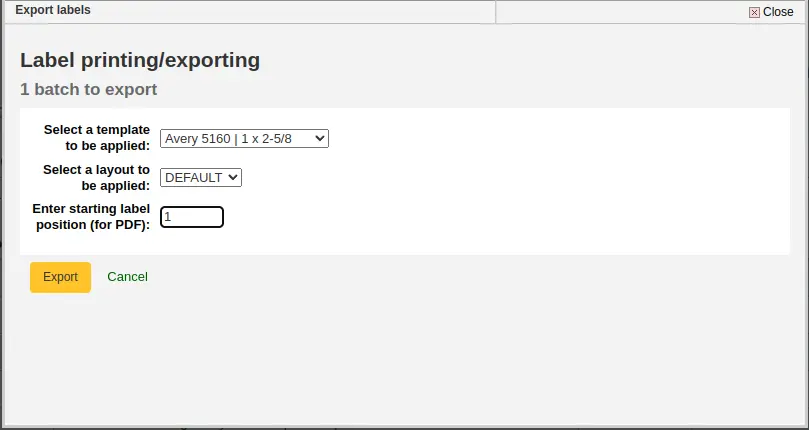
Sie können aus drei Download-Optionen wählen: PDF, CSV und XML.
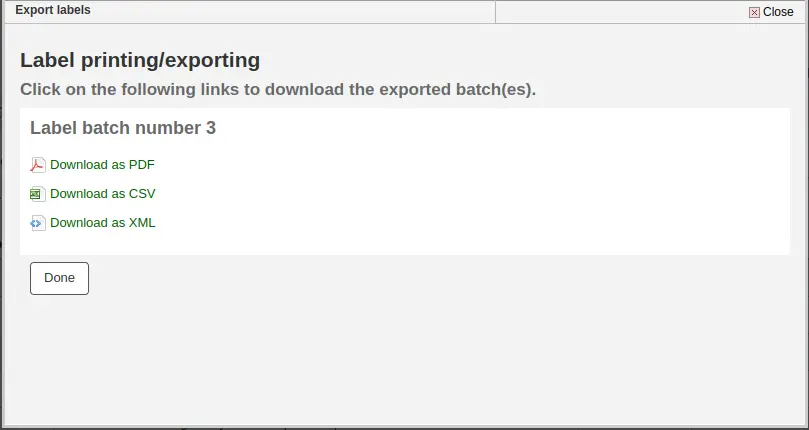
Nachdem die Datei gespeichert wurde, können Sie diese auf die leeren Etiketten drucken.
Der Batch ist gespeichert, und kann unter Verwalte > Batches verwalten aufgerufen werden.
Ein Batch bearbeiten
Um ein bestehenden Batch zu bearbeiten, klicken Sie auf den Button „Verwalte“ und wählen Sie dann „Batches verwalten“.

Sie können dann auf die aktuell verfügbare Stapel zugreifen.
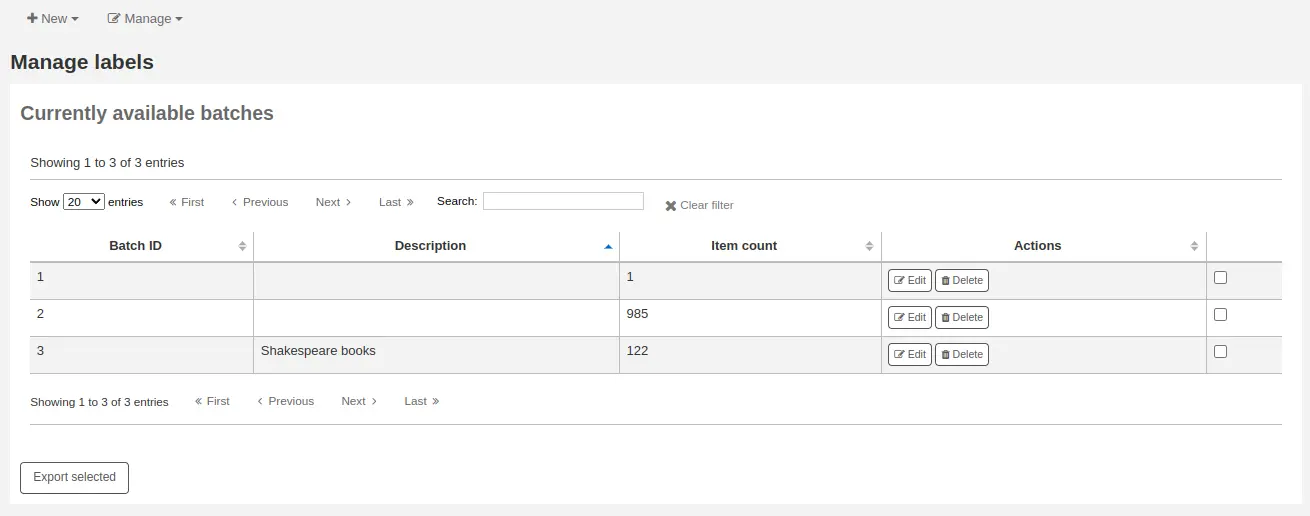
Sie können eine oder mehrere Stapel direkt von dieser Seite aus drucken, indem Sie die Checkbox rechts neben der oder den zu druckenden Stapeln markieren und auf „Ausgewählte exportieren“ klicken.
Um einen Stapel zu bearbeiten, klicken Sie auf die Schaltfläche „Bearbeiten“ neben dem zu bearbeitenden Stapel.
Löschen eines Etikettenstapels
Um einen bestehenden Etikettenstapel zu löschen, klicken Sie auf die Schaltfläche „Verwalten“ oben auf der Seite des Etikettenerstellers und wählen Sie „Etikettenstapel“.

Sie können dann auf die aktuell verfügbare Stapel zugreifen.

Klicken Sie auf die Schaltfläche „Löschen“ neben dem Stapel, den Sie löschen möchten, und bestätigen Sie den Löschvorgang.
Sie können einen Stapel auch von der Stapelseite aus löschen, indem Sie auf die Schaltfläche „Stapel löschen“ oberhalb der Tabelle mit den Exemplaren des Stapels klicken.
Barcodebereich
Pfad in Koha: Mehr > Katalogisierung > Werkzeuge > Etikettendruck > Neu > Barcodebereich
Wenn Sie Ihre Barcode-Etiketten im Voraus drucken möchten, noch bevor Sie die Exemplare katalogisieren, können Sie einen Stapel mit einer Reihe von Barcodes hinzufügen.
Klicken Sie auf „Neu“ und wählen Sie „Barcodebereich“ aus dem Werkzeug zur Erstellung von Etiketten.
Geben Sie den Anfangs- und Endbarcode ein.

Warnung
Das Werkzeug für den Barcodebereich akzeptiert im Moment keine führenden Nullen. Wenn Sie 0001234 angeben, wird der Barcode als 1234 gedruckt.
Klicken Sie auf „Bereich drucken“.
Es wird ein Dialogfenster angezeigt, in dem Sie das Template, das Layout sowie das erste zu bedruckende Etikett für ein angefangenes Etikettenblatt angeben können.

Bemerkung
Die einzige Download-Option für Barcodebereiche ist PDF.
Speichern Sie die Datei und drucken Sie sie auf ein leeres Etikettenblatt.
Barcode-Generator
Bemerkung
Nur Bibliothekspersonal mit der Berechtigung label_creator (oder der superlibrarian-Berechtigung) hat Zugriff auf dieses Werkzeug.
Pfad in Koha: Mehr > Katalogisierung > Werkzeuge > Barcodebild-Generator
Der Barcode-Generator kann genutzt werden um Bilder von Barcodes zu generieren (zum Beispiel für Benachrichtigungen).
Dieses Werkzeug kann für unterschiedliche Arten von Barcodes sowie für QR Codes genutzt werden.
Es wird ein Barcode erzeugt in dem gewählten Barcodeformat, und generiert außerdem ein einzigartiges HTML-Tag, das überall verwendet werden kann.

Füllen Sie das Formular aus um ein neues Bild zu erzeugen.
Barcodetyp: wählen Sie den Barcodetyp aus der verwendet werden soll
Bemerkung
Die meisten Barcodetypen erlauben nur numerische Zeichen.
Die folgenden erlauben alphanumerische Zeichen:
Code39
NW7
QRcode
Einige Barcodetypen (EAN13, EAN8, UPCA, and UPCE) erwarten spezifische Muster (die können hier eingesehen werden https://barcode.tec-it.com/en/ unter EAN/UPC).
Text ausblenden: setzen Sie hier ein Häkchen wenn Sie nur den Barcode als Bild erzeugen möchten. Wenn hier kein Häkchen gesetzt ist, erscheint die zu druckende Nummer auch im lesbaren Format unterhalb des Barcodes.
Barcodehöhe: geben Sie die Höhe des Barcodebildes in Pixeln an
Barcode: geben Sie den zu druckenden Barcode ein
Klicken Sie auf „Zeige Barcode“.

Auf der rechten Seite wird das Barcodebild generiert, das dann heruntergeladen oder gedruckt werden kann.
Unterhalb des Bildes wird ein HTML „img“ Tag erzeugt. Sie können den Code kopieren, und irgendwo an einer Stelle einfügen an der Sie den Barcode benötigen (beachten Sie jedoch, das dies nur in der Dienstoberfläche verfügbar ist).
Beim QR Code gibt es leicht unterschiedliche Optionen. Anstelle des Feldes „Barcodehöhe“ gibt es ein „Modulgröße für QR-Code“ Feld, das über einen Regler angepasst werden kann. Die Nummer bezieht sich auf die Größe in Pixel eines jedes schwarzen und weißen Quadrats im Code (Module). Je größer die Module, desto größer wird das erzeugte Bild sein.
Ein QR Code kann nicht nur alphanumerische Zeichen, sondern auch jede Art von Textinformationen enthalten, beispielsweise eine URL oder sogar einen kurzen Text.
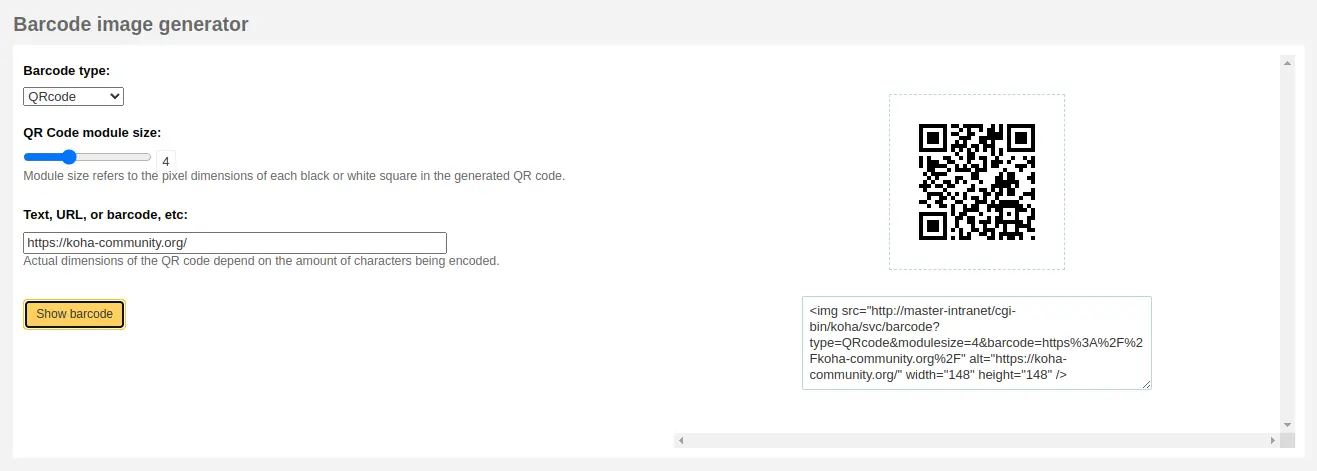
Schneller Signaturschilddruck
Bemerkung
Nur Bibliothekspersonal mit der Berechtigung label_creator (oder der superlibrarian-Berechtigung) hat Zugriff auf dieses Werkzeug.
Pfad in Koha: Mehr > Katalogisierung > Werkzeuge > Schneller Signaturschilddruck
Bemerkung
Dieses Werkzeug verwendet nicht die Etikettenlayouts oder -templates. Es wird einfach ein Signaturschild auf das erste Etikett des Blattes, oder auf ein einzelnes Etikett eines Etikettendruckers gedruckt.
Die Felder, die auf das Rückenschild gedruckt werden sollen, können Sie über den Systemparameter SpineLabelFormat definieren.
Formatieren Sie Ihren Etikettendruck, indem Sie das in koha-tmpl/intranet-tmpl/prog/en/css/ befindliche spinelabel.css bearbeiten oder direkt über den Systemparameter IntranetUserCSS.
Wenn Sie beispielsweise den folgenden CSS-Code in IntranetUserCSS einfügen, wird die Schriftart des Etiketts geändert.
/* Modify the Quick Spine Label Creator Font etc */
.tools.labels #spinelabel {
           font-size:11.5pt;
           font-family:courier new;
           font-weight:bold;
  }

Um diese Funktion zu nutzen benötigen Sie lediglich den Barcode des Buches, für das ein Rückenschild gedruckt werden soll, und klicken Sie anschließend auf „Etikett drucken“.
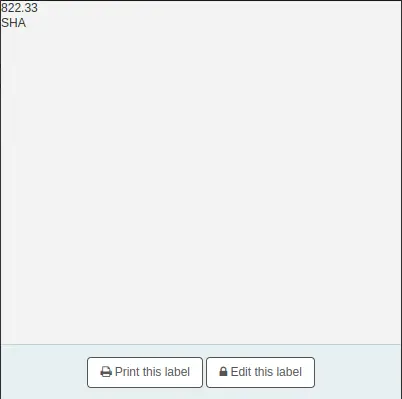
Klicken Sie im erscheinenden Fenster auf „Etikett drucken“.
Wenn Sie die Signatur noch ändern möchten, klicken Sie auf „Etikett bearbeiten“. Sie können anschließend in die Signatur klicken und sie bearbeiten.
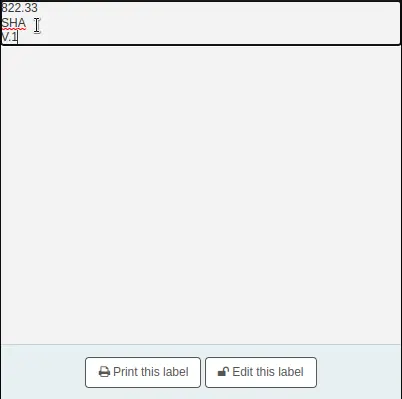
Daten exportieren
Bemerkung
Nur Bibliothekspersonal mit der Berechtigung export_catalog sowie mindestens einer der Unterberechtigungen editcatalogue (oder der superlibrarian-Berechtigung) hat Zugang zu diesem Werkzeug.
Pfad in Koha: Mehr > Katalogisierung > Export > Katalogdaten exportieren
Koha verfügt über ein Werkzeug, mit dem Sie Ihre bibliografischen Datensätze, Exemplardatensätze und Normdatensätze in großen Mengen exportieren können. Dies kann verwendet werden, um Ihre Datensätze an andere Bibliotheken, Organisationen oder Dienste zu senden, oder einfach zu Sicherungszwecken.
Bibliographische Datensätze exportieren
Im oberen Teil des Bildschirms müssen Sie auswählen, welche Daten Sie exportieren möchten. Wenn Sie bibliografische Datensätze mit oder ohne Exemplarinformationen exportieren möchten, klicken Sie auf den Reiter „Export bibliografischer Datensätze“.
Füllen Sie das Formular aus, um einzuschränken, welche Datensätze exportiert werden sollen (alle Felder sind optional)
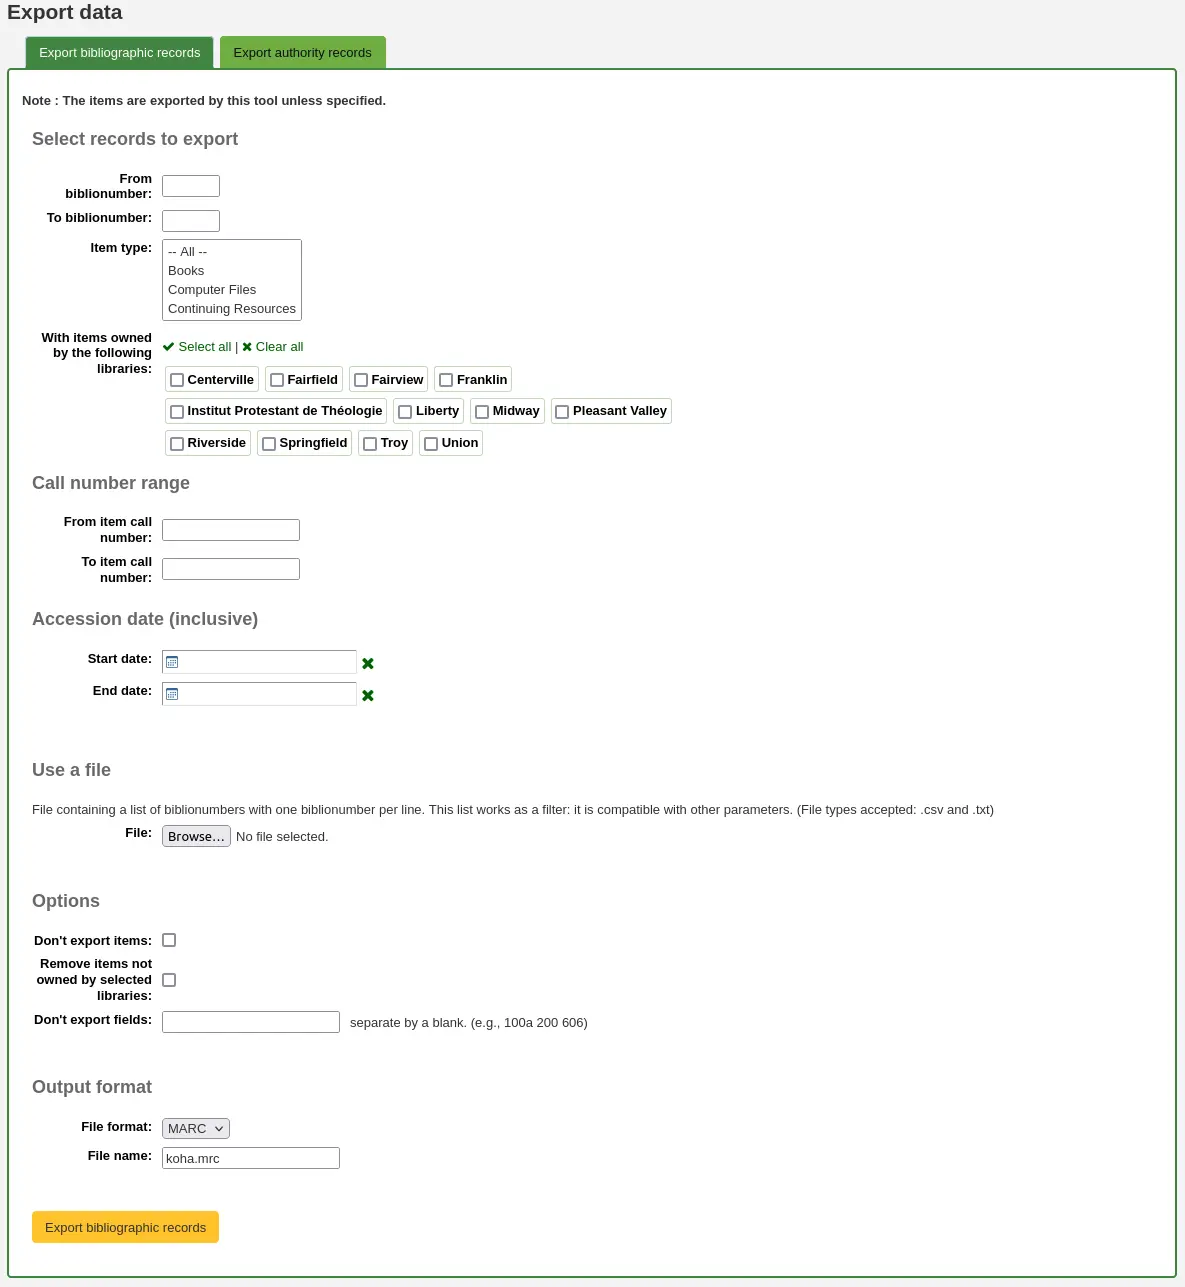
Von biblionumber / Bis biblionumber: Beschränken Sie den Export auf einen Bereich von biblio-Nummern
Exemplartyp: Beschränkung auf einen bestimmten Exemplartyp oder auf mehrere Exemplartypen
Warnung
Für diese Begrenzung wird der im Systemparameter item-level_itypes definierte Exemplartyp verwendet.
Wenn der Systemparameter item-level_itypes auf „bestimmtes Exemplar“ eingestellt ist und einem bibliographischen Datensatz keine Exemplare zugeordnet sind, wird dieser Datensatz nicht exportiert.
Um alle bibliografischen Datensätze eines bestimmten Typs zu exportieren, muss der Systemparameter item-level_itypes auf „bibliographischer Datensatz“ gesetzt werden.
Mit Exemplaren der folgenden Bibliotheken: Beschränkung auf eine bestimmte Bibliothek oder eine Gruppe von Bibliotheken
Warnung
Dies ist ein Filter; wenn dieser Wert auf den Standardwert gesetzt ist (alle Bibliotheken ausgewählt) oder eine oder mehrere Bibliotheken ausgewählt sind, werden bibliografische Datensätze ohne angehängte Exemplare nicht exportiert.
To get bibliographic records with no items, ‚clear all‘ selected libraries (that is, deselect all libraries).
Signaturbereich: Begrenzung auf einen Signaturbereich
Erwerbungsdatum (einschließlich): Begrenzung auf einen Datumsbereich der Erwerbung
Eine Datei verwenden: Sie können eine Datei mit den biblio-Nummern der zu exportierenden Datensätze laden. Der Dateityp muss .csv oder .txt sein
Exemplare nicht exportieren: Standardmäßig werden Exemplare exportiert. Markieren Sie dieses Feld, um nur bibliografische Datensätze zu exportieren
Exemplare entfernen, die nicht zu den ausgewählten Bibliotheken gehören: Markieren Sie diese Checkbox, um die exportierten Exemplare auf Exemplare der Bibliothek zu beschränken, unter der Sie angemeldet sind (wenn das Feld „Mit Exemplaren, die zu den folgenden Bibliotheken gehören“ oben auf „Alle“ eingestellt ist) oder auf die oben ausgewählte(n) Bibliothek(en)
Felder nicht exportieren: Geben Sie die Felder ein, die nicht exportiert werden sollen, getrennt durch Leerzeichen. Dies kann praktisch sein, wenn Sie Ihre Daten weitergeben. Sie können alle lokalen Felder entfernen, bevor Sie Ihre Daten an eine andere Bibliothek senden
Dateiformat: Wählen Sie den Dateityp, MARC oder MARCXML
Dateiname: Geben Sie bei Bedarf einen neuen Dateinamen für die Exportdatei ein
Klicken Sie auf „Bibliographische Datensätze exportieren“
Inventur
Bemerkung
Nur Bibliothekspersonal mit der Berechtigung inventory (oder der superlibrarian-Berechtigung) hat Zugriff auf dieses Werkzeug.
Pfad in Koha: Mehr > Katalogisierung > Reports > Inventur
Das Werkzeug „Inventur“ von Koha kann auf drei Arten verwendet werden:
Indem Sie eine Regal-Liste erstellen, auf der Sie dann Exemplare markieren können;
Durch Hochladen von Barcodes, die mit einem tragbaren Scanner erfasst wurden;
Durch den Vergleich von Barcodes, die von einem tragbaren Scanner erfasst oder direkt mit einer generierten Regalliste gescannt wurden.
Erstellen einer Regalliste
Wenn Sie nicht die Möglichkeit haben, Ihren Barcode-Scanner in der Bibliothek zu benutzen, können Sie eine Regalliste anhand der von Ihnen eingegebenen Kriterien erstellen. Diese können Sie dann ausdrucken, während Sie durch die Bibliothek gehen und Ihre Sammlung überprüfen, oder sie direkt in Koha auf einem tragbaren Gerät verwenden.
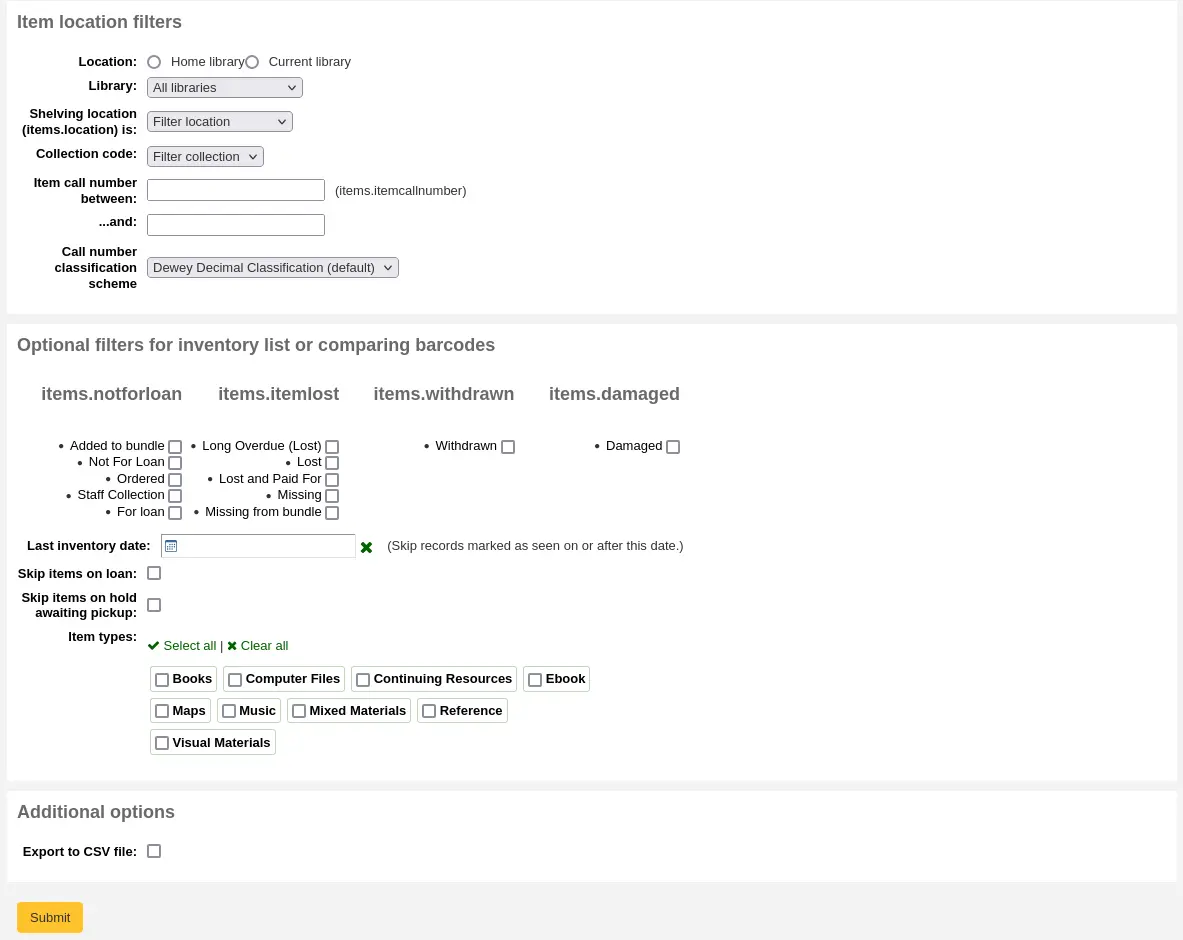
Wählen Sie zunächst die Kriterien für die Exemplare, die Sie in einer Liste ausdrucken möchten. Alle Parameter sind optional, aber wenn keine ausgewählt werden, kann die resultierende Liste ziemlich groß sein.
Bibliothek: Wählen Sie die Zweigstelle aus, die Sie überprüfen möchten, und geben Sie an, ob es sich bei dieser Zweigstelle um die Heimatbibliothek oder um die Bibliothek handelt, in der sich die Medien befinden.
Standort (items.location) ist: Sie können nach Standort filtern.
Signatur zwischen … und …: Sie können die Liste auch auf einen bestimmten Bereich von Signaturen beschränken.
Signaturschema: Wenn Sie nach der Signaturen filtern, stellen Sie sicher, dass Sie das richtige Klassifizierungsschema wählen
Sie können noch genauer mit dem Status der Exemplare filtern (Status nicht ausleihbar, verloren, ausgeschieden oder beschädigt). Markieren Sie die Checkboxen neben den Status, die Sie einbeziehen möchten. Wenn Sie die Liste beispielsweise zum Lesen von Regalen verwenden, kreuzen Sie nur den Status „ausleihbar“ an, da die anderen Exemplare wahrscheinlich nicht in den Regalen stehen werden.
Letztes Inventurdatum: Geben Sie hier ein Datum ein, um Exemplare zu überspringen, die als kürzlich gesehen gekennzeichnet wurden.
Ausgeliehene Exemplare übergehen: Markieren Sie dieses Feld, um ausgeliehene Exemplare aus der Liste herauszufiltern.
Ignoriere Exemplare, die auf Abholung warten: Markieren Sie diese Checkbox, um Exemplare herauszufiltern, die auf die Abholung durch Benutzer*innen warten
Exemplartypen: Markieren Sie die Checkboxen neben den Exemplartypen, die Sie in Ihre Regalliste aufnehmen möchten
Als CSV-Datei exportieren: Markieren Sie diese Checkbox, um eine CSV-Datei zu erstellen, die Sie in einer Anwendung auf Ihrem Desktop bearbeiten können. Wenn diese Checkbox nicht markiert ist, wird die Liste auf dem Bildschirm angezeigt.
Klicken Sie auf „Bestätigen“, um Ihre Regalliste zu erstellen.
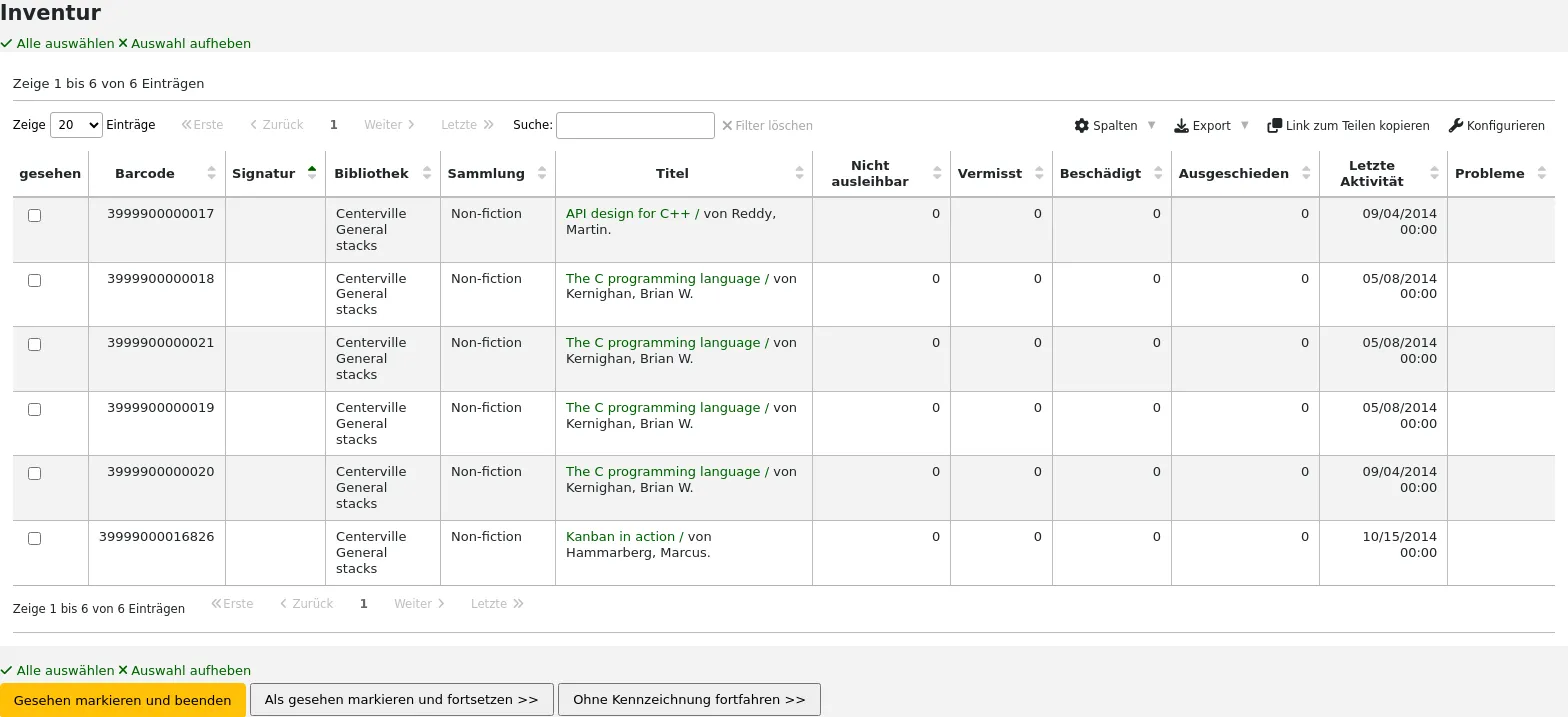
Wenn Sie die Exemplare in Ihrem Regal gefunden haben, kehren Sie zu dieser Liste zurück und kreuzen die Checkboxen neben den gefundenen Exemplaren an. Klicken Sie dann auf eine der drei Schaltflächen, um fortzufahren:

Als gesehen kennzeichnen und beenden: Aktualisiert das Datum und die Uhrzeit des zuletzt gesehenen Exemplars auf jetzt und kehrt zum vorherigen Bildschirm zurück.
Als gesehen kennzeichnen und fortsetzen: Aktualisiert das Datum und die Uhrzeit der zuletzt gesehenen Exemplare auf jetzt und zeigt die nächste Seite der Liste an.
Ohne Kennzeichnung fortfahren: Aktualisiert keines der Exemplare auf dieser Seite und zeigt die nächste Seite der Liste an.
Barcodes mit einem Scanner hochladen
Wenn Sie einen tragbaren Scanner (oder einen Laptop und einen USB-Scanner) haben, können Sie mit dem Scanner in der Hand durch die Bibliothek gehen und die Barcodes einscannen, wenn Sie auf sie stoßen (auf einem Laptop scannen Sie die Barcodes in eine Textdatei oder direkt in das Textfeld auf dem Bildschirm). Sobald Sie fertig sind, können Sie die vom Scanner erzeugte Textdatei in Koha hochladen.
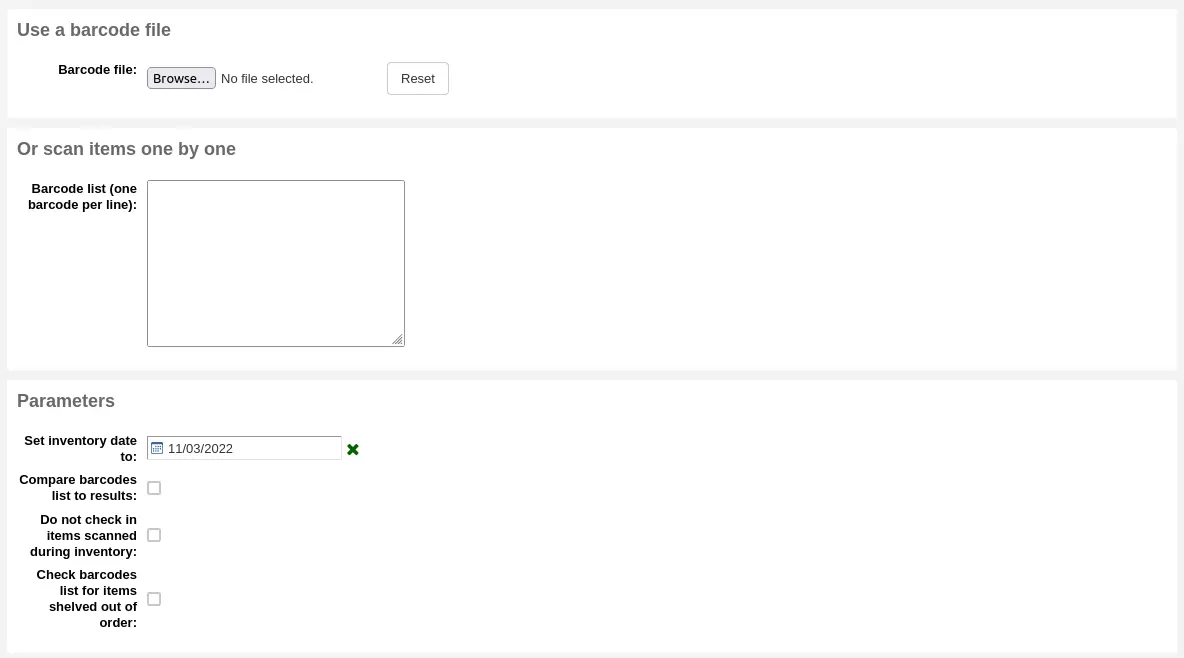
Setze Inventurdatum auf: Wählen Sie das Datum, an dem alle Exemplare als zuletzt gesehen gekennzeichnet werden sollen.
Barcodeliste mit Ergebnisliste vergleichen: Deaktivieren Sie die Option für diese Methode.
Während der Inventur gescannte Exemplare nicht zurückbuchen: Wenn diese Option nicht aktiviert ist, bucht Koha gescannte Exemplare zurück, da davon ausgegangen wird, dass sie sich im Regal befinden und somit nicht ausgeliehen sind. Wenn Sie gescannte Exemplare nicht rückbuchen möchten, aktivieren Sie diese Option.
Barcodeliste auf verstellte Exemplare hin prüfen: Wenn diese Option aktiviert ist, vergleicht Koha die Signaturen und stellt sicher, dass sie in der richtigen Reihenfolge sind.
Klicken Sie auf „Senden“. Dadurch wird das Datum „zuletzt gesehen“ aller Exemplare auf das gewählte Datum aktualisiert (die Uhrzeit „zuletzt gesehen“ ist 00:00).
Once you have the updated the last seen date for all items scanned during the inventory it is possible to use reports to identify items that were not scanned and can therefore be assumed missing (you can use the batch item modification tool to change the LOST status of these items). There are sample reports you can use on the Koha SQL Reports Library.
Gescannte Barcodes mit einer Regalliste vergleichen
Alternativ können Sie die beiden Methoden kombinieren, um eine Liste gescannter Barcodes automatisch mit einer generierten Liste zu vergleichen.
Laden Sie zunächst Ihre Barcode-Datei hoch oder scannen Sie die Barcodes in das Feld ein.
Setze Inventurdatum auf: Wählen Sie das Datum, das im Feld „zuletzt gesehen“ der Exemplare erscheinen soll (die Uhrzeit „zuletzt gesehen“ wird auf 00:00 gesetzt).
Barcodeliste mit Ergebnisliste vergleichen: sollte automatisch geprüft werden.
Während der Inventur gescannte Exemplare nicht zurückbuchen: Aktivieren Sie diese Option, wenn Sie nicht möchten, dass die gescannten Exemplare automatisch zurückgebucht werden, wenn sie ausgeliehen sind.
Wählen Sie die Filter (Bibliothek, Standort, Signaturen, Status oder Exemplartypen), um eine Liste zu erstellen, mit der Sie Ihre Barcodes vergleichen können. Klicken Sie auf „Senden“.
Bemerkung
Je nach Anzahl der Barcodes, die Sie vergleichen, kann dies einige Minuten dauern. Es wird nicht empfohlen, Listen mit mehr als 1000 Barcodes zu vergleichen, da dies eine Zeitüberschreitung der Sitzung verursachen kann.
Sobald Koha den Vergleich der Barcodedatei mit der generierten Liste abgeschlossen hat, gibt es die Anzahl der aktualisierten Exemplare und eine Liste der problematischen Exemplare zurück.
Bemerkung
Anders als bei Erstellung einer Regalliste, enthält die Liste, die hier präsentiert wird, nur die Exemplare, die Koha als problematisch eingestuft hat.
Fehlt (nicht gescannt): Das Exemplar ist in der generierten Liste, aber nicht in der Barcodedatei.
An falscher Stelle gefunden: Das Exemplar ist in der Barcodeliste, aber nicht in der generierten Liste.
Noch ausgeliehen: Das Exemplar ist ausgeliehen, befindet sich aber in der generierten Liste. Es wurde nicht automatisch zurückgebucht.
Kein Barcode: Der Barcode existiert nicht.
Unbekannter Status „nicht ausleihbar“: Das Exemplar hat den Status „nicht ausleihbar“, der nicht in der Normierten-Wert-Kategorie NOT_LOAN enthalten ist
Exemplar ist verstellt: die Signatur ist außerhalb der Reihenfolge
Leitfaden für die Katalogisierung
Titeldatensatz Katalogblatt
Dieser Bereich ist für MARC21.
Tag |
Label |
Beschreibung |
Anleitungen |
|---|---|---|---|
000 |
Satzkennung |
Beschreibt den Datensatz – ist es ein Datensatz für eine Monographie? Eine Zeitschrift? |
Klicken Sie in dieses Feld um es auszufüllen. Setzen Sie dann im ‚Bibliographieniveau‘ ein ‚a‘ für Aufsatz oder ein ‚s‘ für Serie. Ansonsten lassen Sie alles wie es ist. Der Wert in Position 6 beeinflusst die Materialart in 008. |
001 |
Kontrollnummer |
Zugangsnummer. |
Geben Sie hier die Zugangsnummer an, die im Exemplar verzeichnet ist. Wenn es sich um einen Aufsatz, oder ein Exemplar ohne Zugangsnummer handelt, lassen Sie es leer. Sie können den Systemparameter autoControlNumber verwenden, um dieses Feld automatisch mit der biblio-Nummer des Datensatzes zu füllen. |
003 |
Kontrollnummer Identifier |
Ihr MARC-Organisationscode |
Klicken Sie in dieses Feld, um es auszufüllen (das Feld wird automatisch ausgefüllt, wenn der Systemparameter MARCOrgCode gesetzt ist). |
005 |
Datum und Zeit der letzten Transaktion |
Aktuelles Datum und Zeit. |
Klicken Sie in dieses Feld um es auszufüllen. |
008 |
Datenelemente mit fester Länge |
Das Feld enthält etliches über computerlesbare Darstellungen. |
Die Materialart wird automatisch auf Basis des Leaders, Position 06, gesetzt. Im Allgemeinen benutzen Sie nur ‚s‘ (einzelne) oder ‚m‘ (mehrere) Optionen für Position 06-. Benutzen Sie ersteres wenn das Exemplar innerhalb eines Jahres veröffentlicht wurde und letzteres, wenn das Exemplar im Verlauf mehrerer Jahre veröffentlicht wurde. Wenn es ein Datum gibt, tragen Sie dieses ins erste Datumsfeld (Position 07-10) ein. Tragen Sie den dreistelligen Ländercode in den Positionen 15-17 ein und fügen Sie Leerzeichen hinzu, wenn der Ländercode weniger als drei Stellen hat. Wenn es einen Index gibt, vermerken Sie diesen in Position 31. Geben Sie den dreistelligen Sprachcode in den Positionen 35-37 ein. |
010 |
LCCN |
Eine von der Library of Congress zugeordnete Nummer kennzeichnet die Arbeit als eindeutig. |
Überprüfen Sie, ob die Nummer auf der Seite, wo das Copyrigt verzeichnet ist (wenn das Buch in den USA veröffentlicht wurde) zu finden ist, oder im LC-Katalog. |
020 |
ISBN |
Die eindeutige Nummer wird von Verlagen benutzt um Bücher eindeutig zu kennzeichnen. |
Wenn die Nummer nicht im Buch verzeichnet ist, dann gibt es wahrscheinlich keine. |
022 |
ISSN |
Die eindeutige Nummer wird von Verlagen benutzt um Zeitschriften eindeutig zu kennzeichnen. |
Wenn die Nummer nicht im Buch verzeichnet ist, dann gibt es wahrscheinlich keine. |
033 |
Datum/Zeit von Vorgängen |
Wird benutzt für das Auktions-Datum. Ist erforderlich für Auktionskataloge. |
Für Auktionen, die an einem einzelnen Tag stattfinden, geben Sie im Unterfeld ‚a‘ das Datum der Auktion im Format JJJJMMTT ein und eine ‚0‘ im ersten Indikator. Für Auktionen die auf zwei aufeinanderfolgenden Tagen stattfinden, legen Sie für jeden Tag ein Unterfeld ‚a‘ im Format JJJJMMTT an und vermerken Sie eine’1‘ im ersten Indikator. Für Auktionen, die an mehreren Tage stattfinden, legen Sie ein Unterfeld ‚a‘ im Format JJJJMMTT für den ersten Tag an und ein Unterfeld ‚a‘ auch im Format JJJJMMTT für den letzten Tag und schreiben Sie eine ‚2‘ in den ersten Indikator. |
040 |
Katalogisierungsquelle |
Kennzeichnet, welche Bibliothek den Datensatz angelegt und geändert hat. |
Fügen Sie ein Unterfeld ‚d‘ für importierte Datensätze hinzu und schreiben Sie den OCLC-Code als Wert hinein. Für neue Datensätze überprüfen Sie, dass das Unterfeld ‚c‘ den OCLC-Code enthält. |
041 |
Sprachcode |
Wenn zwei oder mehrere Sprachen vorhanden sind,kennzeichnet es alle Sprachen, die in einem Exemplar verzeichnet sind. |
Für wichtige Teile eines Textes in einer bestimmten Sprache, sollte im Unterfeld ‚a‘ der Sprachcode angegeben werden. Handelt es sich nur um Zusammenfassungen oder Abstracts in einer bestimmten Sprache, dann legen sie das Unterfeld ‚b‘ an und schreiben den Sprachcode dort hinein. |
100 |
Haupteintragung - Personenname |
autorisierte Form des Namens des Hauptautors |
Überprüfen Sie das Kopfblatt und AACR2. Der erste Indikator sollte immer eine ‚1‘ sein, um zu kennzeichnen, dass der Nachname zuerst eingegeben werden muss. Wenn der Name nur aus dem Vornamen besteht, muss der erste Indikator jedoch eine ‚0‘ enthalten. |
110 |
Haupteintragung - Körperschaft |
autorisierte Form der Hauptansetzung für Körperschaften. Erforderlich für Auktionskataloge. |
Für Auktionskataloge sollten Sie lieber das Feld 110 benutzen, als das Feld 100. Überprüfen Sie das Kopfblatt und AACR2. Setzen Sie den ersten Indikator auf ‚2‘. |
111 |
Haupteintragung - Kongressname |
Autorisierte Form eines Kongressnamens, der als Hauptansetzung fungiert (z. B. Tagungsbände) |
Überprüfen Sie das Kopfblatt und AACR2. Setzen Sie den ersten Indikator auf ‚2‘. |
245 |
Titel |
Abschrift des Titels von der Titelseite (oder Hauptquelle) |
Geben Sie den Titel in das Unterfeld ‚a‘ ein, den Untertitel in das Unterfeld ‚b‘ und den Hauptverantwortlichen in das Unterfeld ‚c‘. Wenn Sie einen Datensatz für ein einzelnes Heft oder für ein mehrbändiges Exemplar erstellen, sollten Sie die Teilnummer im Unterfeld ‚n‘ und den Teiltitel im Unterfeld ‚p‘ unterbringen. Für Auktionskataloge sollten Sie das Datum (im Format MM/TT/JJJJ) in eckigen Klammern in das Unterfeld ‚f‘ schreiben. Schauen Sie auf das ISBD Zeichenblatt. Setzen Sie den ersten Indikator auf ‚0‘ wenn kein Autor vorhanden ist, ansonsten setzen Sie den Indikator auf ‚1‘. |
246 |
Titelvarianten |
Ersatzform für Titel, die den Zweck zur Suche oder Archivierung haben |
Wenn der/die Benutzer*in die Möglichkeit hätte unter einem anderen Titel zu suchen, dann vermerken Sie das hier. Dies schließt keine einleitenden Artikel mit ein. Der erste Indikator sollte eine ‚3‘ beinhalten, es sei denn, der Titel hat eine abweichende Schreibweise. In diesem Fall sollte der erste Indikator eine ‚1‘ sein. |
250 |
Ausgabebezeichnung |
Abschreiben der Ausgabeinformation von der Titelseite (oder der Hauptquelle) |
Schreiben Sie die Information zur Ausgabe genau so ab, wie sie auf der Titelseite steht. Sie können sie abkürzen, wenn der Ausgabevermerk sehr lang ist. |
260 |
Publikation (Impressum) |
Veröffentlichungsinformationen. |
Schreiben Sie den Veröffentlichungsort in das Unterfeld ‚a‘ und den Verlag in das Unterfeld ‚b‘ (oder das mutmaßliche Jahr) in das Unterfeld ‚c‘. Prüfen Sie das ISBD-Zeichensetzungsblatt. |
264 |
Produktion, Veröffentlichung, etc. |
Datum der Herstellung, der Veröffentlichung, des Vertriebs oder des Urheberschutzvermerks. |
Schreiben Sie den Veröffentlichungsort in das Unterfeld ‚a‘ und den Verlag in das Unterfeld ‚b‘ und das Jahr (oder das mutmaßliche Jahr) in das Unterfeld ‚c‘. Beachten Sie die ISBD-Zeichensetzung. Die Feldbeschriftung wird dynamisch aus dem zweiten Indikator erzeugt und wird üblicherweise ‚1‘ für ‚Verlag:‘ sein. |
300 |
Physische Beschreibung |
Physische Beschreibung |
Geben Sie die Informationen zur Seitenzahl in das Unterfeld ‚a‘ ein, eine kurze Beschreibung spezieller Inhalte, wie zum Beispiel Illustrationen oder Karten in das Unterfeld ‚b‘ (AACR2) und die Größe des Exemplars in das Unterfeld ‚c‘. Prüfen Sie das ISBD-Zeichensetzungsblatt. |
490 |
Gesamttitelangabe |
Geben Sie die Serieninformation genau so an, wie sie auf dem Exemplar erscheint. |
Übertragen Sie die Serie in das Unterfeld ‚a‘ mit der Heftnummer im Unterfeld ‚v‘. Prüfen Sie das ISBD-Zeichensetzungsblatt. Setzen Sie den ersten Indikator auf ‚1‘ wenn Sie das Feld 830 belegt haben. Dies sollten Sie generell so machen. |
500 |
Allgemeine Fußnote |
Notizen, die nirgendwo anders passen. |
Geben Sie Notizen in ganzen Sätzen ein, mit einem separaten 500 er-Feld für jedes individuelle Thema. |
501 |
Fußnote zu enthaltenen Werken |
Notizen, bei denen die Arbeit verbunden ist mit anderen. |
Geben Sie Beschreibungen von Verknüpfungen in das Unterfeld ‚a‘ ein. |
504 |
Fußnote zu Literaturverzeichnissen usw. |
Geben Sie Bibliographien an, wenn das Werk welche enthält. |
Enthält das Werk eine Bibliographie und einen Index, dann geben Sie den Text „Enthält bibliographische Verweise (S. XXX-XXX) und einen Index“ in das Unterfeld ‚a‘ ein. Wenn das Werk keinen Index enthält, lassen Sie diesen Part im Text weg. Sind die Verweise im ganzen Werk verstreut und nicht deutlich in einem Satz zusammengefasst, dann entfernen Sie den Eintrag in Klammern. |
505 |
Fußnote zu strukturierten Inhaltsangaben |
Inhaltsangabe in einem Standard Format. Unformatierte Inhalte können in einem 500er-Feld (allgemeine Notiz) angegeben werden. |
Prüfen Sie das ISBD-Zeichensetzungsblatt. Setzen Sie den ersten Indikator auf ‚0‘. Haben Sie getrennt codierte Autoren und Titel, dann setzen Sie den zweiten Indikator auf ‚0‘. Ansonsten lassen Sie den zweiten Indikator leer. |
518 |
Fußnote zu Datum/Uhrzeit und Ort eines Ereignisses |
Wird für Auktions-Daten benutzt. |
Geben Sie das Datum für Auktionskataloge im Format „2. Januar 1984“ im Unterfeld „a“ an |
520 |
Fußnote zu Zusammenfassungen usw. |
Fußnote zu Zusammenfassungen usw. |
Normalerweise müssen Sie keine Zusammenfassung schreiben. Eine Zusammenfassung könnte dennoch nötig sein, bei Exemplaren, die von einem/einer Benutzer*in nicht leicht eingesehen werden können, wie zum Beispiel Bücher mit hoch säurehaltigem Papier oder CD-ROM’s. |
546 |
Fußnote zur Sprache |
Fußnote zur Sprache |
Das Feld wird nur für Werke in mehreren Sprachen benötigt, Prüfen Sie das ISBD-Zeichensetzungsblatt. |
561 |
Fußnote zur Besitz- und Aufbewahrungsgeschichte |
Das Feld beschreibt, wer der vorherige Besitzer des Exemplars war. |
Das Feld wird nur für seltene Bücher benutzt. |
563 |
Fußnote zu Einbandangaben |
Beschreibt die Bindung eines Exemplars. |
Das Feld wird nur für seltene Bücher benutzt. |
590 |
Lokale Fußnote (RLIN) |
lokale Fußnoten sind für Auktionskataloge erforderlich. |
Wird für Auktionskataloge benutzt um zu kennzeichnen welche Art von Münzen in einer Auktion verkauft wurden - römische, griechische, etc. |
600 |
Nebeneintragung unter einem Schlagwort - Personenname |
Autorisierte Form für persönliche Namen von Personen, die in einem Werk genannt werden |
Prüfen Sie das autorisierte Bestandsblatt und AACR2. Der erste Indikator sollte generell eine ‚1‘ enthalten, um festzuhalten, dass der Nachname zuerst angegeben werden muss. Wenn der Name nur aus einem Vornamen besteht, sollte der erste Indikator allerdings eine ‚0‘ bekommen. Haben Sie den Namen in der LC-Normdatendatei ermittelt, dann setzen Sie den zweiten Indikator auf ‚0‘. Ansonsten schreiben Sie eine ‚4‘ in den zweiten Indikator. |
610 |
Nebeneintragung unter einem Schlagwort - Körperschaftsname |
Autorisierte Form von Körperschaftsnamen für Organisationen, die in einem Werk genannt sind |
Prüfen Sie das autorisierte Bestandsblatt und AACR2. Setzen Sie den ersten Indikator auf ‚2‘. Haben Sie den Namen in der LC-Normdatendatei ermittelt, setzen Sie den zweiten Indikator auf ‚0‘. Andernfalls setzen Sie den zweiten Indikator auf ‚4‘. |
611 |
Nebeneintragung unter einem Schlagwort - Kongressname |
Autorisierte Form von Kongressnamen von Kongressen, die in Werken genannt werden |
Prüfen Sie das autorisierte Bestandsblatt und AACR2. Setzen Sie den ersten Indikator auf ‚2‘. Haben Sie den Namen in der LC-Normdatendatei ermittelt, setzen Sie den zweiten Indikator auf ‚0‘. Andernfalls setzen Sie den zweiten Indikator auf ‚4‘. |
630 |
Nebeneintragung unter einem Schlagwort - Einheitstitel |
Autorisierte Form von Titeln anderer Werke, die in einem Werk erwähnt werden |
Prüfen Sie das autorisierte Bestandsblatt und AACR2. Setzen Sie den ersten Indikator auf die Nummer nicht gefüllter Merkmale (z.Bsp. Merkmale in einem einleitenden Artikel plus ein Leerzeichen für „der/die/das“ und setzen Sie den ersten Indikator auf ‚4‘). Haben Sie den Namen in der LC-Normdatendatei gefunden, setzen Sie den zweiten Indikator auf ‚0‘. Ansonsten setzen Sie den zweiten Indikator auf ‚4‘. |
650 |
Nebeneintragung unter einem Schlagwort - Sachschlagwort |
Library of Congress Schlagwörter, die das Thema eines Werkes beschreiben |
Prüfen Sie das autorisierte Bestandsblatt und AACR2. Haben Sie den Namen in der LC-Normdatendatei ermittelt, setzen Sie den zweiten Indikator auf ‚0‘. Ansonsten setzen Sie den zweiten Indikator auf ‚4‘. |
651 |
Nebeneintragung unter einem Schlagwort - Geografischer Name |
Geographische Schlagwörter der Library of Congress, die das Thema eines Werkes beschreiben |
Prüfen Sie das autorisierte Bestandsblatt und AACR2. Haben Sie den Namen in der LC-Normdatendatei ermittelt, setzen Sie den zweiten Indikator auf ‚0‘. Ansonsten setzen Sie den zweiten Indikator auf ‚4‘. |
655 |
Indexierungsterm - Genre/Form |
Beschreibt, was ein Exemplar ist, im Gegensatz zu dem, wovon das Exemplar handelt. |
Wird normalerweise nur für Auktionskataloge genutzt, welche im Bestand das Genre „Auktionskatalog“ haben ( stellen Sie sicher, dass Sie den autorisierten Bestand haben). Wenn Sie den Namen in der LC-Normdatendatei ermittelt haben, setzen Sie den zweiten Indikator auf ‚0‘. Wenn Sie einen Begriff aus einem spezifischen Thesaurus benutzen, setzen Sie den zweiten Indikator auf ‚7‘ und hinterlegen den Code für den Thesaurus im Unterfeld ‚2‘. Ansonsten setzen Sie den zweiten Indikator auf ‚4‘. |
690 |
Nebeneintragung unter einem Schlagwort - Sachschlagwort |
Wird für den Bestand der Schlagwortnormdatendatei verwendet. |
Wenn es keinen geeigneten LCSH Begriff gibt, können Sie ein 690er Feld benutzen mit Schlagwörtern, die Sie in Exemplaren anderer Kataloge finden. |
691 |
LOCAL SUBJECT ADDED ENTRY–GEOGRAPHIC NAME (RLIN) |
Wird für den Bestand der Schlagwortnormdatendatei verwendet. |
Wenn es keinen geeigneten LCSH Begriff gibt, können Sie ein 691er Feld benutzen, mit Schlagworten, die Sie im Katalog in anderen Exemplaren finden. |
700 |
Nebeneintragung - Personenname |
Wird für zweite Autoren verwendet und andere Personen, die bei der Veröffentlichung eines Werkes beteiligt waren. |
Überprüfen Sie das Kopfblatt und AACR2. Der erste Indikator sollte immer eine ‚1‘ sein, um zu kennzeichnen, dass der Nachname zuerst eingegeben werden muss. Wenn der Name nur aus dem Vornamen besteht, muss der erste Indikator jedoch eine ‚0‘ enthalten. |
710 |
Nebeneintragung - Körperschaftsname |
Wird für Körperschaften benutzt, die an der Veröffentlichung eines Werkes beteiligt waren (z.Bsp. Verlage). |
Überprüfen Sie das Kopfblatt und AACR2. Setzen Sie den ersten Indikator auf ‚2‘. |
711 |
Nebeneintragung - Kongressname |
Wird verwendet für Kongresse, die bei der Veröffentlichung eines Werkes beteiligt waren (z. B. ein Symposium, das einen Beitrag zum Werk geleistet hat). |
Überprüfen Sie das Kopfblatt und AACR2. Setzen Sie den ersten Indikator auf ‚2‘. |
730 |
Nebeneintragung - Einheitstitel |
Wird für Einheitstitel verwendet, die bei der Veröffentlichung des Werkes von Bedeutung waren (z. B. ein Werk, welches das vorliegende Werk inspiriert hat) |
Prüfen Sie das autorisierte Bestandsblatt und AACR2. Setzen Sie den ersten Indikator auf die Zahl der non-filling Merkmale (bei Merkmalen in einem einleitenden Artikel plus Leerzeichen… für „der/die/das“ setzen Sie den ersten Indikator auf ‚4‘. |
773 |
Übergeordnete Einheit |
Beschreibt die übergeordnete Einheit eines Werkes (z. B. ein Buch oder eine Zeitschrift, die den Artikel beinhalten, der in dem aktuellen Datensatz beschrieben wird) |
Wenn die Veröffentlichung bestimmt, dass der Autor die Haupteintragung bekommen soll, dann geben Sie die normierte Form des Autorennamens im Unterfeld ‚a‘ an. Schreiben Sie den Titel in das Unterfeld ‚t‘. Wenn es sich bei der Veröffentlichung um ein unabhängiges Werk handelt, dann schreiben Sie die Information zur Veröffentlichung in das Unterfeld ‚d‘. Wenn verfügbar, dann sollten Sie die ISSN und die ISBN immer verwenden, und zwar in den Unterfeldern ‚x‘ bzw. ‚z‘. Informationen zum Verhältnis (z.Bsp. Bandnummer, Seitenzahl etc.) werden im Unterfeld ‚g‘ hinterlegt. Das Unterfeld ‚q‘ enthält eine verschlüsselte Information des Standortes des Exemplars: Band, Heft und Sektionsnummern werden durch Doppelpunkte getrennt, und der ersten Seite folgt a ‚<‘ am Ende des Unterfeldes. Prüfen Sie auch das ISBD-Zeichensetzungsblatt. Setzen Sie den ersten Indikator auf ‚0‘. Wenn Sie möchten, dass die Kennzeichnung „In:“ generiert wird, dann lassen Sie den zweiten Indikator leer. Wenn Sie vor dem Text in 773 noch etwas anderes angezeigt haben möchten, dann setzen Sie den zweiten Indikator auf ‚8‘ und fügen Sie ein Unterfeld ‚i‘ mit der gewünschten Kennzeichnung hinzu (z.Bsp. „$iOffprint von:“). |
830 |
Nebeneintragung unter dem Gesamttitel - Einheitstitel |
autorisierte Form des Namen der Serie, welche im Feld 490 aufgeführt wird. Oft handelt es sich um die gleiche Form wie im Feld 490. |
Beachten Sie auch das autorisierte Bestandsblatt und AACR2. Setzen Sie den zweiten Indikator auf die Nummer der non-filling Merkmale ( bei Merkmalen in einem einleitenden Artikel plus einem Leerzeichen… für „der/die/das“ setzen Sie den zweiten Indikator auf ‚4‘. |
852 |
Standort/Signatur |
Stellt den Sektionsnamen für Bücher ohne Barcode, Broschüren und einige Artikel und Serien bereit. |
Geben Sie nichts in dieses Feld ein, wenn Sie einen Band katalogisieren, der nur einen Datensatz und einen Barcode erhalten soll. Bekommt das Exemplar keinen Barcode oder Sie legen gerade einen Datensatz für einen Artikel in einem Band an, dann schreiben Sie die Sektion in das Unterfeld ‚a‘ (siehe auch ANS Katalogdokumentation) und die Signatur in das Unterfeld ‚i‘. Setzen Sie den ersten Indikator auf ‚8‘. |
856 |
Elektronische Adresse und Zugriff |
Verknüpfungen zu Online-Material. |
Geben Sie die URL jeder elektronischen Kopie oder Inhaltsübersicht etc. im Unterfeld ‚u‘ und die Verknüpfung zum Titel im Unterfeld ‚y‘ an. Setzen Sie den ersten Indikator auf ‚4‘. |
942 |
Zusätzliche Felder (Koha) |
Verwendet für Koha-spezifische Daten. |
Setzen Sie das Unterfeld ‚c‘ auf den entsprechenden Exemplartyp. |
Tabelle: Katalogaufnahme
Zusätzliche Felder (Koha)
Koha verwendet drei Felder, in denen die betreffenden Informationen gespeichert werden können.
At the record level, 942 (MARC21) or 942 and 099 (UNIMARC) is used to store information such as record-level item type, record-level call number and classification scheme.
Die Exemplarinformationen werden in 952 (MARC21) oder 995 (UNIMARC) gespeichert.
System control numbers for Koha are stored in 999 (MARC21) or 001 and 090 (UNIMARC).
Zusätzliche Eingabefelder (942 / 099)
942$0 / 099$x - Koha-Anfragen (ausgeliehen), alle Exemplare
MARC21: 942$0
UNIMARC: 099$x
This field contains the total number of issues/checkouts of all items of this record. It is populated using the update_totalissues.pl cronjob.
Gemappt auf: biblioitems.totalissues
Indexiert in: totalissues
Warnung
Dieses Feld sollte weder anpassbar sein noch manuell bearbeitet werden.
942$2 - Quelle der Klassifikations- oder Signaturenschemas
MARC21: 942$2
UNIMARC: 942$2
This field contains the source of classification used by the record’s call number (942$h and 942$i (MARC21)).
Eine Auswahl von Klassifikationsquellen Klassifikationsquellen finden Sie im Menü ‚Administration‘. Wenn kein Klassifikationsschema angegeben wurde, richtet sich Koha nach dem Wert, der im Systemparameter DefaultClassificationSource festgelegt wurden.
The source of classification will be used, along with the call number itself (942$h and 942$i (MARC21)) to create the normalized call number used when sorting by call number.
Gemappt auf: biblioitems.cn_source
Indexiert in: cn-bib-source
942$6 - Sortierform der Signatur
MARC21: 942$6
UNIMARC: 942$6
This field contains the normalized call number used for sorting, based on the record-level call number (942$h and 942$i (MARC21)) and the classification source (942$2).
Gemappt auf: biblioitems.cn_sort
Indexiert in: cn-bib-sort
Warnung
Dieses Feld sollte weder anpassbar sein noch manuell bearbeitet werden.
942$c - Koha Exemplartyp
MARC21: 942$c
UNIMARC: 942$c
Dieses Feld enthält den Exemplartyp auf Exemplarebene.
Der Exemplartyp auf Exemplarebene wird an unterschiedlichen Stellen in Koha verwendet.
Der Wert aus 942$c wird in 952$y (MARC21) oder 995$r (UNIMARC) als Standardwert kopiert, wenn ein neues Exemplar zu diesem Datensatz hinzugefügt wird
The record-level item type can be used for the circulation rules if the item-level_itypes system preference allows it (this system preference lets you choose between using the record-level or item-level item type for the circulation rules, among other things)
The record-level item type is indexed and used in the search (see also the AdvancedSearchTypes system preference) as well as the facets (this is useful to find records that don’t have items, like records for online resources, ebooks, pdf files, etc.)
The record-level item type is used for record-level/“next available“ holds
The record-level item type is used for record-level article requests
The record-level item type is displayed in various tables in the staff interface, in the circulation module among other places (it is possible to hide unwanted columns in the Table settings section of the Administration module)
Zugeordnet zu: biblioitems.itemtype
Indexiert in: itemtype (mc-itemtype), itype (mc-itype)
942$e - Ausgabe
MARC21: 942$e
UNIMARC: N/A
Dieses Feld enthält Informationen zur Ausgabe.
942$h - Klassifikationsteil
MARC21: 942$h
UNIMARC: N/A
This field contains classification part of the call number. It is used, along with 942$2 and 942$i (MARC21) to create the normalized call number (942$6) used when sorting by call number.
Gemappt auf: biblioitems.cn_class
Indexiert in: cn-class
942$i - Exemplarteil
MARC21: 942$i
UNIMARC: N/A
This field contains item part of the call number. It is used, along with 942$2 and 942$h (MARC21) to create the normalized call number (942$6) used when sorting by call number.
Gemappt auf: biblioitems.cn_item
Indexiert in: cn-item
942$k - Signatur-Präfix
MARC21: 942$k
UNIMARC: N/A
Dieses Feld enthält das Präfix der Signatur.
Gemappt auf: biblioitems.cn_prefix
Indexiert in: cn-prefix
942$m - Signatur-Suffix
MARC21: 942$m
UNIMARC: N/A
Dieses Feld enthält das Suffix der Signatur.
Gemappt auf: biblioitems.cn_suffix
Indexiert in: cn-suffix
942$n / 955$n - OPAC-Anzeige unterdrücken
MARC21: 942$n
UNIMARC: 955$n
Wenn der Systemparameter OpacSuppression auf ‚Verberge‘ eingestellt ist, gibt dieses Feld an, ob der Datensatz im OPAC ausgeblendet wird.
In diesem Feld bedeutet „1“, dass der Datensatz im OPAC ausgeblendet wird, und „0“ (oder leer), dass der Datensatz im OPAC sichtbar ist.
Sie können die Normierte-Wert-Kategorie YES_NO in diesem Feld verwenden, wenn Sie sich die numerischen Werte nicht merken wollen.
Indexiert in: suppress
942$s / 099$s - Kennzeichen für Zeitschriften-Datensatz
MARC21: 942$s
UNIMARC: 099$s
Diese Feld gibt an ob der Datensatz mit einem Zeitschriftenabonnement verknüpft ist, und wird vom Zeitschriften-Modul verwendet.
Zugehörig zu: biblio.serial
Warnung
Dieses Feld sollte weder anpassbar sein noch manuell bearbeitet werden.
Standort und Exemplarinformationen (952)
Koha verwendet das Feld 952, um Informationen über Exemplare (Bestand) in MARC21 zu speichern, und das Feld 995 in UNIMARC.
952$0 / 995$0 - Ausgeschieden
MARC21: 952$0
UNIMARC: 995$0
Nutzung
Dieses Feld wird verwendet, um den Ausgeschieden-Status (ausgesondert) des Exemplars anzugeben.
Sie können den Ausgeschieden-Status verwenden um Exemplare auszusondern ohne sie zu löschen.
In the search results, the withdrawn item will be marked as unavailable.
Auswirkungen auf die Ausleihe
Ein ausgeschiedenes Exemplar kann nicht ausgeliehen werden.
Ein ausgeschiedenes Exemplar kann nicht zurückgegeben werden, es sei denn, der Systemparameter BlockReturnOfWithdrawnItems erlaubt dies.
Werte
Der Ausgeschieden-Status ist numerisch, „0“ (oder leer) bedeutet „nicht ausgeschieden“, und jede andere Nummer bedeutet „Ausgeschieden“.
Standardmäßig ist das Feld mit der Normierter-Wert-Kategorie WITHDRAWN verbunden, so dass Sie sich die numerischen Werte nicht merken müssen. Die Standardwerte in der Normierter-Wert-Kategorie WITHDRAWN sind
1: Ausgeschieden
Anzeige
Dienstoberfläche
Search results (withdrawn items will be marked as unavailable)
Exemplartabelle in der Detailansicht des Titels
Reiter „Exemplare“ in der Detailansicht, „Ausgeschieden-Status“ unter „Status“
OPAC
Search results (withdrawn items will be marked as unavailable)
Exemplartabelle in der Detailansicht des Titels
Über den Systemparameter OpacHiddenItems lassen sich ausgeschiedene Exemplare im OPAC verstecken.
Zugeordnet zu: items.withdrawn
Indexiert in: withdrawn
952$1 / 995$2 - Verloren
MARC21: 952$1
UNIMARC: 995$2
Nutzung
Dieses Feld wird verwendet, um das Exemplar als verloren zu markieren.
Sie können den Status Verloren setzen um Exemplare als verloren oder vermisst zu kennzeichnen
In the search results, the lost item will be marked as unavailable.
Marking an item lost while it is checked out can charge the replacement cost (952$v (MARC21) or 995$g (UNIMARC)) to the patron (see WhenLostChargeReplacementFee), as well as a processing fee (the processing fee is set at the item type level)
The lost status can be changed automatically after a number of days overdue with the longoverdue.pl cronjob
Auswirkungen auf die Ausleihe
Der Systemparameter IssueLostItem legt fest, ob verlorene Exemplare entliehen werden können.
Mit dem Systemparameter BlockReturnOfLostItems wird geregelt, ob verlorene Exemplare zurückgegeben werden können.
Werte
Der Verluststatus ist numerisch, „0“ (oder leer) bedeutet „kein Verlust“ und jede andere Zahl bedeutet „Verlust“.
Standardmäßig ist das Feld mit der Normierter-Wert-Kategorie LOST verbunden, so dass Sie sich die numerischen Werte nicht merken müssen. Die Standardwerte in der Normierter-Wert-Kategorie LOST sind
1: Vermisst
2: Lange überfällig (Verloren)
3: Verloren und Buchersatz bezahlt
4: Vermisst
5: Fehlt im Paket
Anzeige
Dienstoberfläche
Trefferlisten (verlorene Exemplare werden als nicht verfügbar angezeigt)
Exemplartabelle in der Detailansicht des Titels
Reiter ‚Exemplare‘ des bibliografischen Datensatzes, ‚Verlust-Status‘ unter ‚Status‘
OPAC
Trefferlisten (verlorene Exemplare werden als nicht verfügbar angezeigt)
Exemplartabelle in der Detailansicht des Titels
Mit dem Systemparameter hidelostitems können Sie den OPAC so konfigurieren, dass verlorene Exemplare nicht angezeigt werden.
Gemappt auf: items.itemlost
Indexiert in: lost
952$2 / 995$4 - Quelle des Klassifikations- oder Signaturenschemas
MARC21: 952$2
UNIMARC: 995$4
Nutzung
This field contains the source of classification used by the record’s call number (952$o (MARC21) or 995$k (UNIMARC)).
The source of classification will be used, along with the call number itself (952$o (MARC21) or 995$k (UNIMARC)) to create the normalized call number (952$6 (MARC21) or 995$s (UNIMARC)) used when sorting by call number.
Werte
Eine Auswahl von Klassifikationsquellen finden Sie im Menü ‚Administration‘.
Wenn kein Klassifikationsschema angegeben wurde, richtet sich Koha nach dem Wert, der im Systemparameter DefaultClassificationSource festgelegt wurde.
Anzeige
Dies wird weder im OPAC noch in der Dienstoberfläche angezeigt. Die Informationen sind nur im Bearbeitungsformular des Exemplars verfügbar.
Gemappt auf: items.cn_source
Indexiert in: classification-source
952$3 / 995$l - Beilagen
MARC21: 952$3
UNIMARC: 995$l (L)
Nutzung
Dieses Feld wird verwendet, um Informationen über Begleitmaterialien hinzuzufügen oder um anzugeben, wie viele Teile das Exemplar hat.
Auswirkungen auf die Ausleihe
Diese Informationen werden bei der Ausleihe angezeigt, so dass das Ausleihpersonal sicherstellen kann, dass das gesamte Begleitmaterial bei der Ausleihe vorhanden ist und auch bei der Rückgabe noch vorhanden ist.

Werte
This is a free text field, but it is possible to associate it to an authorized value category in the MARC framework to make it into a drop-down menu.
Anzeige
Dienstoberfläche
Diese Informationen werden beim Ausleihen oder Rückbuchen eines Exemplars angezeigt
Exemplartabelle in der Detailansicht des Titels
Bemerkung
Use Table settings if you want to hide that column - Module: Catalog - Table id: holdings_table and/or otherholdings_table - Column: holdings_materials or otherholdings_materials
Reiter ‚Exemplare‘ des bibliografischen Datensatzes, ‚Beilagen‘ unter ‚Exemplarinformationen‘
OPAC
Bestandstabelle auf der Detailseite des Datensatzes (sie ist standardmäßig ausgeblendet)
Bemerkung
Use Table settings if you want to show that column - Module: OPAC - Table id: holdingst - Column: item_materials
Gemappt auf: items.materials
Indexiert in: materials-specified
952$4 / 995$1 - Beschädigung
MARC21: 952$4
UNIMARC: 995$1
Nutzung
Dieses Feld wird verwendet, um den Status „Beschädigt“ für das Exemplar festzulegen.
In the search results, the damaged item will be marked as unavailable.
Auswirkungen auf die Ausleihe
Der Status „beschädigt“ hat keinen Einfluss auf die Möglichkeit, ein Exemplar auszuleihen oder rückzubuchen.
Der Systemparameter AllowHoldsOnDamagedItems gibt an, ob beschädigte Exemplare vorgemerkt werden können oder nicht.
Werte
Der Beschädigungsstatus ist numerisch, ‚0‘ (oder leer) bedeutet ‚nicht beschädigt‘ und jede andere Zahl bedeutet ‚beschädigt‘.
Standardmäßig ist das Feld mit der Normierter-Wert-Kategorie DAMAGED verbunden, so dass Sie sich die numerischen Werte nicht merken müssen. Die Standardwerte in der Normierter-Wert-Kategorie DAMAGED sind
1: Beschädigt
Anzeige
Dienstoberfläche
Trefferlisten (beschädigte Exemplare werden als nicht verfügbar angezeigt)
Exemplartabelle in der Detailansicht des Titels
Reiter „Exemplare“ des bibliografischen Datensatzes, „Beschädigungsstatus“ unter „Status“
OPAC
Trefferlisten (beschädigte Exemplare werden als nicht verfügbar angezeigt)
Exemplartabelle in der Detailansicht des Titels
Über den Systemparameter OpacHiddenItems lassen sich beschädigte Exemplare im OPAC verstecken.
Gemappt auf: items.damaged
Indexiert in: damaged
952$5 / 995$3 - Benutzungsbeschränkungen
MARC21: 952$5
UNIMARC: 995$3
Nutzung
Dieses Feld wird verwendet, um den eingeschränkten Status des Exemplars festzulegen.
In the search results, the restricted item will be marked as available.
Auswirkungen auf die Ausleihe
Ein eingeschränktes Exemplar kann nicht ausgeliehen werden.
Werte
Der eingeschränkte Status ist numerisch, „1“ bedeutet „Eingeschränkter Zugang“ und „0“ (oder leer) bedeutet „Keine Einschränkung“.
Bemerkung
Im Gegensatz zu anderen Status kann der eingeschränkte Status nur 0 (Keine Einschränkung) oder 1 (Eingeschränkter Zugang) sein.
Standardmäßig ist das Feld mit der Normierter-Wert-Kategorie RESTRICTED verknüpft, so dass Sie sich die numerischen Werte nicht merken müssen. Die Standardwerte in der Normierter-Wert-Kategorie RESTRICTED sind
1: Eingeschränkter Zugang
Anzeige
Dienstoberfläche
Search results (restricted items will be marked as available)
Exemplartabelle in der Detailansicht des Titels
OPAC
Search results (restricted items will be marked as available)
Exemplartabelle in der Detailansicht des Titels
Zugeordnet zu: items.restricted
Indexiert in: restricted
952$6 / 995$s - Sortierform der Klassifikation
MARC21: 952$6
UNIMARC: 995$s
Warnung
Dieses Feld sollte weder anpassbar sein noch manuell bearbeitet werden.
Nutzung
Dieses Feld enthält die normalisierte Signatur, die zum Sortieren verwendet wird, basierend auf der Signatur auf Exemplarsatzebene (952$o (MARC21) oder 995$k (UNIMARC)) und der Klassifikationsquelle (952$2 (MARC21) oder 995$4 (UNIMARC)).
Anzeige
Dies Information wird weder im OPAC noch in der Dienstoberfläche angezeigt und ist nur für den internen Gebrauch von Koha bestimmt.
Gemappt auf: items.cn_sort
Indexiert in: cn-sort
952$7 / 995$o - Nicht ausleihbar
MARC21: 952$7
UNIMARC: 995$o
Nutzung
Dieses Feld wird verwendet, um den Status „nicht ausleihbar“ für das Exemplar festzulegen.
In the search results, the not for loan item will be marked as unavailable or for reference use only (see Reference_NFL_Statuses)
Auswirkungen auf die Ausleihe
Exemplare mit dem Status „nicht ausleihbar“ können nicht ausgeliehen werden (es sei denn, AllowNotForLoanOverride erlaubt dies)
Je nach Wert können Exemplare vorgemerkt werden oder nicht (siehe unten)
Abhängig von TrapHoldsOnOrder und SkipHoldTrapOnNotForLoanValue können nicht ausleihbare Exemplare verwendet werden, um Vormerkungen zu erfüllen
Der Systemparameter UpdateNotForLoanStatusOnCheckin kann verwendet werden, um die Werte für „nicht ausleihbar“ beim Rückbuchen automatisch zu ändern
Der Systemparameter UpdateNotForLoanStatusOnCheckout kann verwendet werden, um beim Ausleihen des Exemplars automatisch die Werte für „Nicht ausleihbar“ zu ändern
Werte
Der Status „nicht ausleihbar“ ist numerisch, „0“ (oder leer) bedeutet ausleihbar.
Negative Werte (< 0) bedeuten, dass das Exemplar nicht ausgeliehen, aber vorgemerkt werden kann.
Positive Werte (> 0) bedeuten, dass das Exemplar nicht ausgeliehen oder vorgemerkt werden kann.
Standardmäßig ist das Feld mit der Normierter-Wert-Kategorie NOT_LOAN verknüpft, so dass Sie sich die numerischen Werte nicht merken müssen. Die Standardwerte in der Normierter-Wert-Kategorie NOT_LOAN sind
-1: Bestellt
1: Nicht ausleihbar
2: Personalbibliothek
3: Zum Paket hinzugefügt
Anzeige
Dienstoberfläche
Trefferliste (nicht ausleihbare Exemplare werden als nicht verfügbar oder als Präsenzexemplare angezeigt, (siehe Reference_NFL_Statuses))
Exemplartabelle in der Detailansicht des Titels
Reiter „Exemplare“ in der Detailansicht, „Ausgeschieden-Status“ unter „Status“
OPAC
Trefferliste (nicht ausleihbare Exemplare werden als nicht verfügbar oder als Präsenzexemplare angezeigt, (siehe Reference_NFL_Statuses))
Exemplartabelle in der Detailansicht des Titels
Über den Systemparameter OpacHiddenItems lassen sich nicht ausleihbare Exemplare im OPAC verstecken.
Gemappt auf: items.notforloan
Indexiert in: notforloan
952$8 / 995$h - Sammlung
MARC21: 952$8
UNIMARC: 995$h
Nutzung
Dieses Feld wird verwendet, um die Sammlung des Exemplars festzulegen.
Sammlungen werden in Koha verwendet, um Exemplare auf andere Weise als physisch zu gruppieren (der physische Ort kann in 952$c (MARC21) oder 995$e (UNIMARC) gespeichert werden). Ein Beispiel für eine Sammlung könnte „Lokale Autoren“ sein.
Collections can also be used to limit transfers in multi-branch systems (see the Library transfer limits section of the administration) if BranchTransferLimitsType is set to ‚collection code‘
The collection of an item is used in the search (see the AdvancedSearchTypes system preference) as well as the facets.
Werte
Standardmäßig ist das Feld mit der Normierter-Wert-Kategorie CCODE verknüpft. Die Standardwerte in der Normierter-Wert-Kategorie CCODE sind
FIC: Belletristik
NFIC: Sachbücher
REF: Referenz
Anzeige
Dienstoberfläche
Die Sammlungen sind Teil der Facetten in den Suchergebnissen
Exemplartabelle in der Detailansicht des Titels
Bemerkung
Use Table settings if you want to hide that column - Module: Catalog - Table id: holdings_table and/or otherholdings_table - Column: holdings_ccode or otherholdings_ccode
Ausleihtabelle in der Benutzerdatei
Bemerkung
Use Table settings if you want to hide that column - Module: Circulation and Patrons - Table id: issues-table - Column: collection
Viele weitere Orte in ganz Koha
OPAC
Search results, if OpacItemLocation allows it
Die Sammlungen sind Teil der Facetten in den Suchergebnissen
Exemplartabelle in der Detailansicht des Titels
Bemerkung
Use Table settings if you want to hide that column - Module: OPAC - Table id: holdingst - Column: item_ccode
Viele weitere Orte im OPAC
Gemappt auf: items.ccode
Indexiert in: collection-code
952$9 / 995$9 - Exemplarnummer
MARC21: 952$9
UNIMARC: 995$9
Warnung
Dieses Feld sollte weder anpassbar sein noch manuell bearbeitet werden.
Nutzung
Die itemnumber ist die interne Nummer, die jedem Exemplar von Koha zugewiesen wird. Sie ist eindeutig und kann nicht erneut zugewiesen werden, selbst wenn das Exemplar gelöscht wird.
Anzeige
Dies Information wird weder im OPAC noch in der Dienstoberfläche angezeigt und ist nur für den internen Gebrauch von Koha bestimmt.
Gemappt auf: items.itemnumber
Indexiert in: itemnumber
952$a / 995$b - Heimatbibliothek
MARC21: 952$a
UNIMARC: 995$b
Erforderlich
Nutzung
Das Feld gibt die Heimatbibliothek des Exemplars an.
Die Heimatbibliothek ist für viele Dinge in Koha wichtig, unter anderem für
The home library of an item is used in the search as well as the facets (see the DisplayLibraryFacets system preference)
Auswirkungen auf die Ausleihe
Wie bereits erwähnt, basieren die Ausleihregeln auf der Bibliothek des Exemplars (siehe den Systemparameter HomeOrHoldingBranch)
Werte
Bibliotheken werden im Bereich Bibliotheken auf der Administrationsseite definiert.
Anzeige
Dienstoberfläche
Abhängig vom Systemparameter DisplayLibraryFacets, kann die Heimatbibliothek Teil der Facetten in den Suchergebnissen sein
Exemplartabelle in der Detailansicht des Titels
Bemerkung
Use Table settings if you want to hide that column - Module: Catalog - Table id: holdings_table and/or otherholdings_table - Column: holdings_homebranch or otherholdings_homebranch
Diese Informationen werden in der Dienstoberfläche im Reiter „Exemplar“ des bibliografischen Datensatzes, „Heimatbibliothek“ unter „Exemplarinformationen“ angezeigt
Ausleihtabelle in der Benutzerdatei
Bemerkung
Use Table settings if you want to hide that column - Module: Circulation and Patrons - Table id: issues-table - Column: homebranch
Viele weitere Orte in ganz Koha
OPAC
Search results (if OpacItemLocation allows it)
Abhängig vom Systemparameter DisplayLibraryFacets, kann die Heimatbibliothek Teil der Facetten in den Suchergebnissen sein
Bestandstabelle auf der Detailseite des Datensatzes, wenn OpacLocationBranchToDisplay dies erlaubt
Bemerkung
Use Table settings if you want to hide that column - Module: OPAC - Table id: holdingst - Column: item_home_location
Viele weitere Orte im OPAC
Gemappt auf: items.homebranch
Indexiert in: homelibrary
952$b / 995$c - Aktuelle Bibliothek
MARC21: 952$b
UNIMARC: 995$c
Erforderlich
Nutzung
Dieses Feld gibt die aktuelle Bibliothek (Bestandsbibliothek) des Exemplars) an.
Die aktuelle Bibliothek ist für viele Dinge in Koha wichtig, darunter
The current library of an item is used in the search as well as the facets (see the DisplayLibraryFacets system preference)
Auswirkungen auf die Ausleihe
Wie bereits erwähnt, basieren die Ausleihregeln auf der Bibliothek des Exemplars (siehe den Systemparameter HomeOrHoldingBranch)
Werte
Bibliotheken werden im Bereich Bibliotheken auf der Administrationsseite definiert.
Anzeige
Dienstoberfläche
Je nach dem Systemparameter DisplayLibraryFacets kann die Bestandsbibliothek Teil der Facetten in den Suchergebnissen sein
Exemplartabelle in der Detailansicht des Titels
Bemerkung
Use Table settings if you want to hide that column - Module: Catalog - Table id: holdings_table and/or otherholdings_table - Column: holdings_holdingbranch or otherholdings_holdingbranch
Diese Information wird in der Dienstoberfläche im Reiter „Exemplare“ des bibliografischen Datensatzes, „Aktuelle Bibliothek“ unter „Exemplarinformationen“ angezeigt
Viele weitere Orte in ganz Koha
OPAC
Search results (if OpacItemLocation allows it)
Je nach dem Systemparameter DisplayLibraryFacets kann die Bestandsbibliothek Teil der Facetten in den Suchergebnissen sein
Bestandstabelle auf der Detailseite des Datensatzes, wenn OpacLocationBranchToDisplay dies erlaubt
Bemerkung
Use Table settings if you want to hide that column - Module: OPAC - Table id: holdingst - Column: item_current_location
Viele weitere Orte im OPAC
Gemappt auf: items.holdingbranch
Indexiert in: holdinglibrary
952$c / 995$e - Standort
MARC21: 952$c
UNIMARC: 995$e
Nutzung
Dieses Feld gibt den Standort des Exemplars an (physischer Ort in der Bibliothek).
Standorte werden in Koha verwendet, um Exemplare physisch zu gruppieren. Ein Beispiel für einen Standort könnte „Kinderabteilung“ sein.
The location of an item is used in the search (see the AdvancedSearchTypes system preference) as well as the facets.
Der Systemparameter UpdateItemLocationOnCheckin kann verwendet werden, um die Standortwerte beim Rückbuchen automatisch zu ändern
Der Systemparameter UpdateItemLocationOnCheckout kann verwendet werden, um die Standortwerte beim Ausleihen automatisch zu ändern.
Werte
In der Voreinstellung ist das Feld mit der Normierter-Wert-Kategorie LOC verknüpft. Die Standardwerte in der Normierter-Wert-Kategorie LOC sind
AV: Audio-visuell
CART: Bücherwagen
CHILD: Kinderbereich
FIC: Belletristik
GEN: Allgemeine Magazine
NEW: Neuerwerbungs-Regal
DISPLAY: In der Auslage
PROC: Bearbeitungszentrum
REF: Referenz
STAFF: Mitarbeiterbüro
Der Standardwert für neue Exemplare kann im Systemparameter NewItemsDefaultLocation festgelegt werden
Anzeige
Dienstoberfläche
Die Standorte werden bei den Facetten für Suchergebnisse verwendet
Exemplarübersicht in der Detailansicht des Titelsatzes (unterhalb der Heimatbibliothek des Exemplars)
Diese Informationen werden in der Dienstoberfläche im Reiter „Exemplar“ des bibliografischen Datensatzes, „Heimatbibliothek“ unter „Exemplarinformationen“ angezeigt
Ausleihtabelle in der Benutzerdatei
Bemerkung
Use Table settings if you want to hide that column - Module: Circulation and Patrons - Table id: issues-table - Column: location
Viele weitere Orte in ganz Koha
OPAC
Search results (if OpacItemLocation allows it)
Die Standorte werden bei den Facetten für Suchergebnisse verwendet
Bestandstabelle auf der Detailseite eines Datensatzes, der Systemparameter OpacLocationOnDetail gibt an, in welcher Spalte sich diese Information befindet
Bemerkung
Use Table settings if you want to hide that column - Module: OPAC
Tabellen-ID: holdingst
Spalte: item_shelving_location (wenn OpacLocationOnDetail auf „separate Spalte“ gesetzt ist)
Viele weitere Orte im OPAC
Gemappt auf: items.location
Indexiert in: location
952$d / 995$5 - Zugangsdatum
MARC21: 952$d
UNIMARC: 995$5
Nutzung
Dieses Feld wird verwendet, um das Erwerbungsdatum des Exemplars einzutragen.
Das Erwerbungsdatum kann in der Suche und bei der Sortierung von Suchergebnissen verwendet werden
Wenn Sie das Erwerbungsmodul verwenden, sollte das Erwerbungsdatum automatisch in dieses Feld eingetragen werden
Werte
Das Datum muss im Format JJJJ-MM-TT eingetragen werden (um sicherzustellen, dass das Datum im korrekten Format eingetragen wird, wird ein Werkzeug für die Datenauswahl angeboten)
Anzeige
Dienstoberfläche
Exemplartabelle in der Detailansicht des Titels
Bemerkung
Use Table settings if you want to hide that column - Module: Catalog - Table id: holdings_table and/or otherholdings_table - Column: holdings_dateaccessioned or otherholdings_dateaccessioned
Reiter ‚Exemplare‘ des bibliografischen Datensatzes, ‚Zugangsdatum‘ unter ‚Historie‘
Gemappt auf: items.dateaccessioned
Indexiert in: date-of-acquisition
952$e / 995$a - Erwerbungsquelle
MARC21: 952$e
UNIMARC: 995$a
Nutzung
Dieses Feld wird verwendet, um den Lieferanten einzutragen, bei dem das Exemplar erworben wurde
Bei Verwendung des Erwerbungsmoduls wird der jeweilige Lieferant bei Eingang des Exemplars automatisch in das Feld eingetragen
Werte
Dies ist ein Freitextfeld
Wenn das Erwerbungsmodul verwendet wird, wird in diesem Feld die ID des Lieferanten, nicht der Name, eingetragen
Anzeige
Dies wird weder im OPAC noch in der Dienstoberfläche angezeigt. Die Informationen sind nur im Bearbeitungsformular des Exemplars verfügbar.
Gemappt auf: items.booksellerid
Indexiert in: acqsource
952$f / 995$8 - Codiertes Standortkennzeichen
MARC21: 952$f
UNIMARC: 995$8
Nutzung
Dieses Feld dient zur Eingabe eines dreistelligen Codes, der die spezifischen Hefte des Exemplars kennzeichnet, die sich außerhalb des Hauptbestandes desselben Exemplars befinden (wie MARC21 852$f).
Werte
Dies ist ein Freitextfeld
Das Feld in der Datenbank ist auf 10 Zeichen begrenzt
Anzeige
Dies wird weder im OPAC noch in der Dienstoberfläche angezeigt. Die Informationen sind nur im Bearbeitungsformular des Exemplars verfügbar.
Gemappt auf: items.coded_location_qualifier
Indexiert in: coded-location-qualifier
v - Kosten, Ersatzpreis
MARC21: 952$g
UNIMARC: 995$p
Nutzung
In dieses Feld wird der Einkaufspreis des Exemplars eingegeben
Bei Verwendung des Moduls Erwerbung sollte dies bei Erhalt automatisch mit dem Kaufpreis gefüllt werden
Werte
Dies ist ein Freitextfeld
Der Preis muss aus Ziffern bestehen, mit einem Punkt als Dezimalzeichen, ohne Währungssymbole (z.B. 24.95)
Das Feld in der Datenbank ist auf zwei Dezimalstellen begrenzt (z. B. 24.95 ist in Ordnung, aber 24.94875 ist es nicht)
Anzeige
Dies wird weder im OPAC noch in der Dienstoberfläche angezeigt. Die Informationen sind nur im Bearbeitungsformular des Exemplars verfügbar.
Gemappt auf: items.price
Indexiert in: price
952$h / 995$v - Band/Heft
MARC21: 952$h
UNIMARC: 995$v
Nutzung
Dieses Feld dient zur Eingabe der Heftnummer von Zeitschriften oder der Bandnummer von Reihen
Bei Verwendung des Zeitschriftenmoduls sollte dies automatisch mit der Heftnummer ausgefüllt werden
Werte
Dies ist ein Freitextfeld
Anzeige
Dienstoberfläche
Exemplartabelle in der Detailansicht des Titels
Bemerkung
Use Table settings if you want to hide that column - Module: Catalog - Table id: holdings_table and/or otherholdings_table - Column: holdings_enumchron or otherholdings_enumchron
Reiter „Exemplare“ des bibliografischen Eintrags, „Zeitschriftennummerierung“ unter „Historie“
OPAC
Exemplartabelle in der Detailansicht des Titels
Bemerkung
Use Table settings if you want to hide that column - Module: OPAC - Table id: holdingst - Column: item_enumchron
Gemappt auf: items.enumchron
952$i / 995$j - Inventarnummer
MARC21: 952$i
UNIMARC: 995$j
Nutzung
Dieses Feld dient zur Eingabe einer Inventarnummer für das Exemplar
Bemerkung
Die Inventarnummer ist nicht die Koha-interne Exemplarnummer (die in 952$9 (MARC21) oder 995$9 (UNIMARC) gespeichert ist)
Werte
Dies ist ein Freitextfeld
Das Feld in der Datenbank ist auf 32 Zeichen begrenzt
Anzeige
Dienstoberfläche
Exemplartabelle in der Detailansicht des Titels
Bemerkung
Use Table settings if you want to hide that column - Module: Catalog - Table id: holdings_table and/or otherholdings_table - Column: holdings_stocknumber or otherholdings_stocknumber
Gemappt auf: items.stocknumber
Indexiert in: number-local-acquisition
952$j / 995$q - Magazinnummer
MARC21: 952$j
UNIMARC: 995$q
Nutzung
In dieses Feld wird die Standortnummer eingegeben, an dem sich das Exemplar befindet
Werte
Die Magazinnummer sollte numerisch sein
In der Voreinstellung ist das Feld mit den normierten Werten der Kategorie STACK verknüpft, so dass Sie sich die numerischen Werte nicht merken müssen. Es gibt keine vorgegebenen Werte.
Anzeige
Dies wird weder im OPAC noch in der Dienstoberfläche angezeigt. Die Informationen sind nur im Bearbeitungsformular des Exemplars verfügbar.
Gemappt auf: items.stack
Indexiert in: stack
952$l / 995$w - Ausleihen gesamt
MARC21: 952$l (L)
UNIMARC: 995$w
Warnung
Dieses Feld sollte weder anpassbar sein noch manuell bearbeitet werden.
Nutzung
Dieses Feld enthält die Gesamtzahl der vergangenen und aktuellen Anfragen/Ausleihen dieses Exemplars
Die Anzahl der Anfragen wird verwendet, um die Suchergebnisse nach Beliebtheit zu sortieren
Die Anzahl der Anfragen für jedes Exemplar wird zur Aktualisierung der Gesamtzahl der Anfragen für den Datensatz verwendet (942$0 (MARC21) oder 099$x (UNIMARC))
Anzeige
Dienstoberfläche
Reiter „Exemplare“ des bibliografischen Datensatzes, „Gesamtzahl der Ausleihen“ unter „Historie“
Gemappt auf: items.issues
Indexiert in: issues
952$m / 995$x - Verlängerungen gesamt
MARC21: 952$m
UNIMARC: 995$x
Warnung
Dieses Feld sollte weder anpassbar sein noch manuell bearbeitet werden.
Nutzung
Dieses Feld enthält die Gesamtzahl der früheren Verlängerungen dieses Exemplars
Anzeige
Dienstoberfläche
Reiter „Exemplare“ des bibliografischen Datensatzes, „Aktuelle Verlängerungen“ unter „Status“
Gemappt auf: items.renewals
Indexiert in: renewals
952$n / 995$t – Vormerkungen gesamt
MARC21: 952$n
UNIMARC: 995$t
Warnung
Dieses Feld sollte weder anpassbar sein noch manuell bearbeitet werden.
Nutzung
Dieses Feld enthält die Gesamtzahl der früheren und aktuellen Vormerkungen für dieses Exemplar
The number of holds is used to create a RSS feed for items with the most holds
Anzeige
Dies wird weder im OPAC noch in der Dienstoberfläche angezeigt.
Gemappt auf: items.reserves
Indexiert in: reserves
952$o / 995$k - Signatur
MARC21: 952$o
UNIMARC: 995$k
Nutzung
In diesem Feld wird die Signatur des Exemplars hinterlegt
The call number of an item can used in the search
Werte
Die Signatur des Datensatzes kann in die Signatur des Exemplars kopiert werden. Der Systemparameter itemcallnumber gibt an, welches Datensatzfeld als Quelle verwendet werden soll
Anzeige
Dienstoberfläche
Exemplartabelle in der Detailansicht des Titels
Bemerkung
Use Table settings if you want to hide that column - Module: Catalog - Table id: holdings_table and/or otherholdings_table - Column: holdings_itemcallnumber or otherholdings_itemcallnumber
Reiter „Exemplare“ des bibliografischen Datensatzes, „Exemplarnummer“ unter „Exemplarinformationen“
Ausleihtabelle in der Benutzerdatei
Bemerkung
Use Table settings if you want to hide that column - Module: Circulation and Patrons - Table id: issues-table - Column: callno
Viele weitere Orte in ganz Koha
OPAC
Search results, if OpacItemLocation allows it
Exemplartabelle in der Detailansicht des Titels
Bemerkung
Use Table settings if you want to hide that column - Module: OPAC - Table id: holdingst - Column: item_callnumber
Ausleihtabelle im Benutzerkonto
Viele weitere Orte im OPAC
Gemappt auf: items.itemcallnumber
Indexiert in: local-classification
952$p / 995$f - Barcode
MARC21: 952$p
UNIMARC: 995$f
Für die Ausleihe erforderlich
Nutzung
In diesem Feld wird der Barcode des Exemplars hinterlegt
The barcode of an item can used in the search
Auswirkungen auf die Ausleihe
Der Barcode wird für die Ausleihe von Exemplaren benötigt
Werte
Dies ist ein Freitextfeld
Bemerkung
Bei den Barcodes in Koha wird nicht zwischen Groß- und Kleinschreibung unterschieden, d. h. ABC123 und abc123 werden als derselbe Barcode angesehen.
Das Feld in der Datenbank ist auf 20 Zeichen beschränkt
Anzeige
Dienstoberfläche
Exemplartabelle in der Detailansicht des Titels
Bemerkung
Use Table settings if you want to hide that column - Module: Catalog - Table id: holdings_table and/or otherholdings_table - Column: holdings_barcode or otherholdings_barcode
Klicken Sie ‚Bearbeiten‘ und ‚Exemplare bearbeiten‘ im Titeldatensatz
Ausleihtabelle in der Benutzerdatei (in der Titel-Spalte)
Gemappt auf: items.barcode
Indexiert in: barcode
952$q / 995$n -Fälligkeitsdatum
MARC21: 952$q
UNIMARC: 995$n
Warnung
Dieses Feld sollte weder anpassbar sein noch manuell bearbeitet werden.
Nutzung
Wenn das Exemplar ausgeliehen wird, wird das Fälligkeitsdatum in diesem Feld gespeichert (JJJJ-MM-TT)
Dieses Feld wird in der Facette „Auf Titel mit verfügbaren Exemplaren einschränken“ verwendet
Anzeige
Das Fälligkeitsdatum erscheint auf vielen Seiten im Ausleihmodul, aber es ist das Fälligkeitsdatum, das aus den Heften stammt, nicht aus dem Exemplar
Gemappt auf: items.onloan
Indexiert in: onloan
952$r / 995$y - Datum zuletzt gesehen
MARC21: 952$r
UNIMARC: 995$y
Warnung
Dieses Feld sollte weder anpassbar sein noch manuell bearbeitet werden.
Nutzung
Wenn das Exemplar ausgeliehen oder zurückgebucht wird, inventarisiert oder bei einer anderen Transaktion, die das Exemplar betrifft, werden das Datum und die Uhrzeit in diesem Feld gespeichert (JJJJ-MM-TT HH:MM:SS)
Anzeige
Dienstoberfläche
Exemplartabelle in der Detailansicht des Titels
Bemerkung
Use Table settings if you want to hide that column - Module: Catalog - Table id: holdings_table and/or otherholdings_table - Column: holdings_lastseen or otherholdings_lastseen
Reiter „Exemplare“ des bibliografischen Datensatzes, „Zuletzt gesehen“ unter „Historie“
Gemappt auf: items.datelastseen
Indexiert in: datelastseen
952$s / 995$m - Datum der letzten Ausleihe
MARC21: 952$s
UNIMARC: 995$m
Warnung
Dieses Feld sollte weder anpassbar sein noch manuell bearbeitet werden.
Nutzung
Wenn das Exemplar ausgeliehen wird, wird das Datum in diesem Feld gespeichert (JJJJ-MM-TT)
Anzeige
Dienstoberfläche
Exemplartabelle in der Detailansicht des Titels
Bemerkung
Use Table settings if you want to hide that column - Module: Catalog - Table id: holdings_table and/or otherholdings_table - Column: holdings_datelastborrowed or otherholdings_datelastborrowed
Reiter „Exemplare“ des bibliografischen Datensatzes, „Zuletzt ausgeliehen“ unter „Historie“
Gemappt auf: items.datelastborrowed
Indexiert in: datelastborrowed
952$t / 995$6 - Exemplarnummer
MARC21: 952$t
UNIMARC: 995$6
Nutzung
In dieses Feld wird die Exemplarnummer des Exemplars eingegeben
Werte
Dies ist ein Freitextfeld
Das Feld in der Datenbank ist auf 32 Zeichen begrenzt
Anzeige
Dienstoberfläche
Exemplartabelle in der Detailansicht des Titels
Bemerkung
Use Table settings if you want to hide that column - Module: Catalog - Table id: holdings_table and/or otherholdings_table - Column: holdings_copynumber or otherholdings_copynumber
Reiter „Exemplare“ des bibliografischen Datensatzes, „Exemplarnummer“ unter „Historie“
OPAC
Exemplartabelle in der Detailansicht des Titels
Bemerkung
Use Table settings if you want to hide that column - Module: OPAC - Table id: holdingst - Column: item_copy
Gemappt auf: items.copynumber
Indexiert in: copynumber
952$u / 995$7 - URI
MARC21: 952$u
UNIMARC: 995$7
Nutzung
Dieses Feld dient zur Eingabe einer URL oder URN, die für das Exemplar spezifisch ist
Es ist nicht notwendig, hier eine URL einzugeben, wenn es bereits eine URL in 856$u auf Datensatzebene gibt, es sei denn, die URL für das spezifische Exemplar unterscheidet sich von der in 856$u (wenn Sie z. B. eine Online-Zeitschrift haben, können Sie die URL für die Zeitschrift in 856$u und die URL für das spezifische Exemplar in 952$u eingeben)
Werte
Anzeige
Dienstoberfläche
Exemplartabelle in der Detailansicht des Titels
Bemerkung
Use Table settings if you want to hide that column - Module: Catalog - Table id: holdings_table and/or otherholdings_table - Column: holdings_uri or otherholdings_uri
OPAC
Exemplartabelle in der Detailansicht des Titels
Bemerkung
Use Table settings if you want to hide that column - Module: OPAC - Table id: holdingst - Column: item_url
Gemappt auf: items.uri
Indexiert in: uri
952$v / 995$g - Kosten, Wiederbeschaffungspreis
MARC21: 952$v
UNIMARC: 995$g
Nutzung
In dieses Feld wird der Wiederbeschaffungspreis eingegeben, der dem Benutzer, der das Exemplar verliert, in Rechnung gestellt wird
Bei Verwendung des Moduls Erwerbung sollte dies bei Erhalt automatisch mit dem Wiederbeschaffungspreis gefüllt werden
Werte
Dies ist ein Freitextfeld
Der Preis muss aus Ziffern bestehen, mit einem Punkt als Dezimalzeichen, ohne Währungssymbole (z.B. 24.95)
Das Feld in der Datenbank ist auf zwei Dezimalstellen begrenzt (z. B. 24.95 ist in Ordnung, aber 24.94875 ist es nicht)
Anzeige
Dienstoberfläche
Ausleihtabelle in der Benutzerdatei in der Spalte Preis)
Bemerkung
Use Table settings if you want to hide that column - Module: Circulation and Patrons - Table id: issues-table - Column: price
Reiter „Exemplare“ des bibliografischen Datensatzes, „Wiederbeschaffungspreis“ unter „Exemplarinformationen“
Gemappt auf: items.replacementprice
Indexiert in: replacementprice
952$w / 995$i - Preis gültig ab
MARC21: 952$w
UNIMARC: 995$i
Nutzung
In dieses Feld wird das Datum des Wiederbeschaffungspreises des Exemplars eingegeben
Bei Verwendung des Moduls Erwerbung sollte dieses Feld bei Erhalt automatisch mit dem Datum des Erwerbs ausgefüllt werden
Bleibt diese Angabe leer, wird standardmäßig das Erwerbungsdatum verwendet (952$d (MARC21) oder 995$5 (UNIMARC))
Werte
Dies sollte ein Datum im Format JJJJ-MM-TT sein
Anzeige
Dies wird weder im OPAC noch in der Dienstoberfläche angezeigt. Die Informationen sind nur im Bearbeitungsformular des Exemplars verfügbar.
Gemappt auf: items.replacementpricedate
Indexiert in: replacementpricedate
952$x / 995$z - Interne Notiz
MARC21: 952$x
UNIMARC: 995$z
Nutzung
Dieses Feld dient der Eingabe von internen Notizen zum Exemplar
Werte
Dies ist ein Freitextfeld
Anzeige
Dienstoberfläche
Exemplartabelle in der Detailansicht des Titels
Bemerkung
Use Table settings if you want to hide that column - Module: Catalog
Tabellen-ID: holdings_table und/oder otherholdings_table
Spalte: holdings_itemnotes_nonpublic oder otherholdings_itemnotes_nonpublic
Reiter „Exemplare“ des bibliografischen Datensatzes, „Interne Notiz“ unter „Historie“
Gemappt auf: items.itemnotes_nonpublic
952$y / 995$r - Koha-Exemplartyp
MARC21: 952$y
UNIMARC: 995$r
Erforderlich
Nutzung
Dieses Feld enthält den Exemplartyp auf Exemplarebene.
Der Exemplartyp auf Exemplarebene wird an verschiedenen Stellen in Koha verwendet.
The item-level item type is generally used for the circulation rules unless the item-level_itypes system preference is set to use the record-level item type (this system preference lets you choose between using the record-level or item-level item type for the circulation rules, among other things)
The item-level item type is indexed and used in the search (see also the AdvancedSearchTypes system preference) as well as the facets
Auswirkungen auf die Ausleihe
Der Exemplartyp wird als Grundlage für die Ausleihregeln verwendet und hat Auswirkungen auf die Anzahl der Exemplare, die ein*e Benutzer*in gleichzeitig ausleihen kann, die Anzahl der Vormerkungen usw.)
Werte
The values are managed in item types
Anzeige
Dienstoberfläche
Die Exemplartypen werden Teil der Facetten in den Suchergebnissen sein
Exemplartabelle in der Detailansicht des Titels
Bemerkung
Use Table settings if you want to hide that column - Module: Catalog - Table id: holdings_table and/or otherholdings_table - Column: holdings_itype or otherholdings_itype
Reiter „Exemplare“ des bibliografischen Datensatzes, „Medientyp“ unter „Exemplarinformationen“
Ausleihtabelle in der Benutzerdatei
Bemerkung
Use Table settings if you want to hide that column - Module: Circulation and Patrons - Table id: issues-table - Column: item_type
Viele weitere Orte in ganz Koha
OPAC
Exemplartypen werden Teil der facets in the search results
Exemplartabelle in der Detailansicht des Titels
Bemerkung
Use Table settings if you want to hide that column - Module: OPAC - Table id: holdingst - Column: item_itemtype
Viele weitere Orte im OPAC
Abgebildet auf: items.itype
Indexiert in: itemtype (mc-itemtype), itype (mc-itype)
952$z / 995$u - OPAC-Notiz
MARC21: 952$z
UNIMARC: 995$u
Nutzung
Dieses Feld dient zur Eingabe von Notizen zum Exemplar
Werte
Dies ist ein Freitextfeld
Anzeige
Dienstoberfläche
Exemplartabelle in der Detailansicht des Titels
Bemerkung
Use Table settings if you want to hide that column - Module: Catalog - Table id: holdings_table and/or otherholdings_table - Column: holdings_itemnotes or otherholdings_itemnotes
Reiter „Exemplare“ des bibliografischen Datensatzes, „OPAC-Notiz“ unter „Historie“
OPAC
Exemplartabelle in der Detailansicht des Titels
Bemerkung
Use Table settings if you want to hide that column - Module: OPAC - Table id: holdingst - Column: item_notes
Abgebildet auf: items.itemnotes
Indexiert in: note
Systemkontrollnummern (999)
Koha speichert seine Systemkontrollnummern im Feld 999 in MARC21 und in den Feldern 001 und 090 in UNIMARC.
Bemerkung
Die Exemplarnummer ist in 952$9 (MARC21) oder 995$9 (UNIMARC) hinterlegt (siehe oben).
999$c / 001 - biblionumber
Die biblionumber ist die interne Nummer, die jedem Datensatz von Koha zugewiesen wird. Sie ist einmalig und kann nicht erneut zugewiesen werden, auch wenn der Datensatz gelöscht wird.
MARC21: 999$c
UNIMARC: 001
Abgebildet auf: biblio.biblionumber
Indexiert in: local-number (sn, biblionumber)
Warnung
Dieses Feld sollte weder anpassbar sein noch manuell bearbeitet werden.
999$d / 090$a - Biblioitemnumber
Die biblioitemnumber ist die interne Nummer, die jedem Datensatz von Koha zugewiesen wird. Sie ist einmalig und kann nicht erneut zugewiesen werden, auch wenn der Datensatz gelöscht wird.
MARC21: 999$d
UNIMARC: 090$a
Abgebildet auf: biblioitems.biblioitemnumber
Indexiert in: biblioitemnumber
Warnung
Dieses Feld sollte weder anpassbar sein noch manuell bearbeitet werden.
Koha XSLT Icons für den Materialtyp
Wenn Sie einen der XSLT-Systemparameter (OPACXSLTDetailsDisplay, OPACXSLTResultsDisplay, XSLTDetailsDisplay, und/oder XSLTResultsDisplay) zusammen mit den Systemparametern DisplayOPACiconsXSLT und DisplayIconsXSLT angeschaltet haben, sehen Sie die Icons für den Materialtyp auf dem zugehörigen Bildschirm.
Wichtig
Diese Bilder kommen von den Werten, die im Leader hinterlegt sind. Wenn Ihr Leader nicht richtig katalogisiert ist, wäre es das Beste, den Systemparameter DisplayOPACiconsXSLT auszuschalten (dies ist auch möglich, wenn die anderen XSLT-Parameter angeschaltet bleiben).

Buch
leader6 = a (und einer der leader7 Werte darunter)
leader7 = a
leader7 = c
leader7 = d
leader7 = m
leader6 = t

Computerdateien
leader6 = m

Periodikum
leader7 = b
leader7 = i
leader7 = s

Karten
leader6 = e
leader6 = f

Gemischtes
leader6 = p

Musikalien
leader6 = c
leader6 = d
leader6 = i
leader6 = j

Visuelle Materialien
leader6 = g
leader6 = k
leader6 = r

Medienkombination
leader6 = o
Handhabung für Bestellexemplare und Vormerkungen
Wenn Sie Ihre MARC-Datensätze üblicherweise nach Bestellung der Bücher importieren (und nicht bei Eingang der Bücher) und den Benutzern erlauben, darauf Vormerkungen zu machen, ist es notwendig, dass Sie die Exemplardatensätze vor dem Import dem *.mrc file hinzufügen.
The easiest way to import your latest order is to first run your records through MARCEdit. Download your MARC records, saving them to your desktop or some other location you use/will remember. If you have MARCEdit already installed you should simply have to double click on your MARC records, and they will automatically open in MARCEdit.
Wichtig
Die Anleitung wurde mit der MARCEdit-Version 5.2.3769.41641 geschrieben auf Windows XP. Die Befehle können je nach Version und Betriebssystem unterschiedlich sein.
Ihre Orginaldatei ist automatisch im Input auffindbar. Stellen Sie sicher, dass MarcBreaker ausgewählt ist und klicken Sie dann auf „Ausführen“
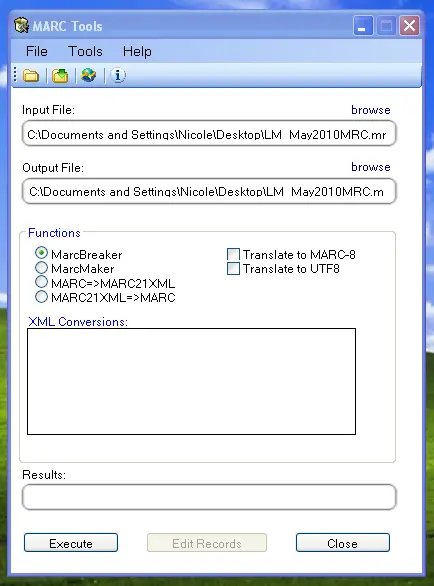
Es wird eine Zusammenfassung der verarbeiteten Datensätze im unteren Teil der Seite angezeigt

Klicken Sie „Datensatz bearbeiten“ wenn Sie weitere Exemplare hinzufügen möchten
Die Anzeige wir durch eine größere ersetzt, welche die MARC-Datensätze enthält
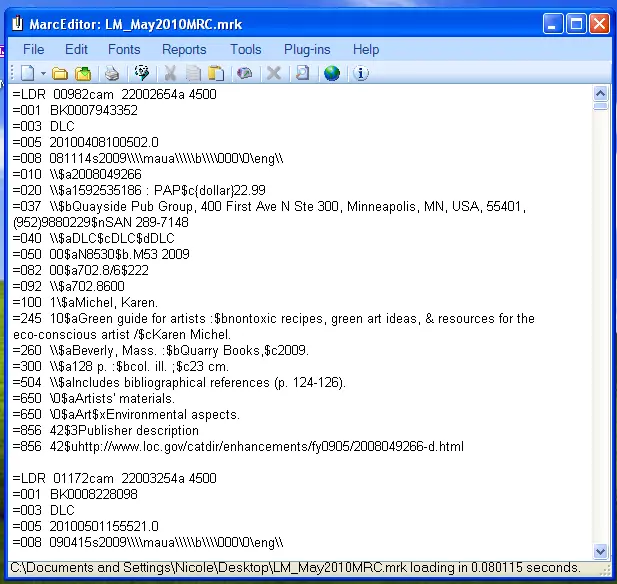
Klicken Sie auf Werkzeuge>Feld hinzufügen/bearbeiten
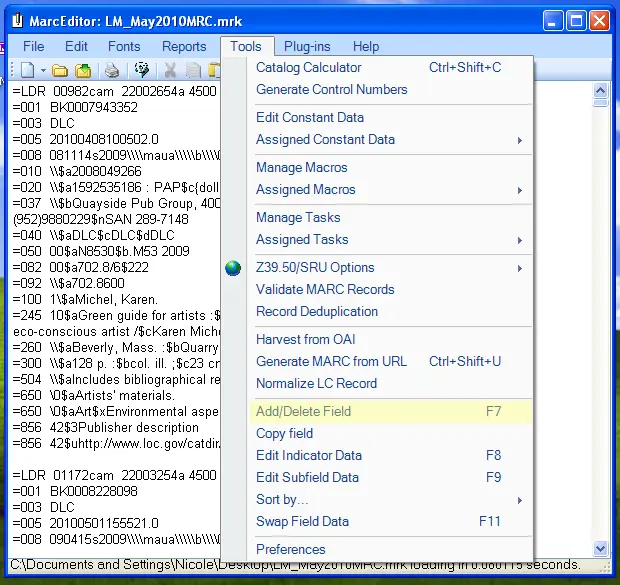
Geben Sie die Koha-spezifischen Exemplarinformationen ein
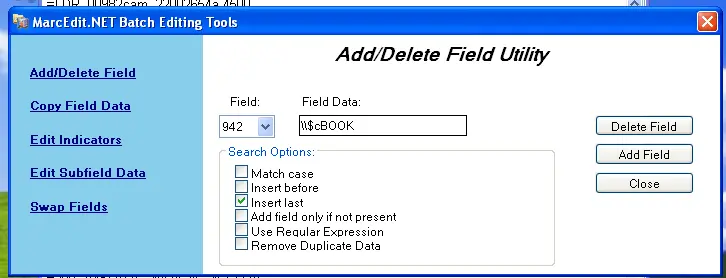
In der Feld Box, Typ 942
Tippen Sie in das Eingabefeld \\$c und den Medientypcode (\\$cBUCH in diesem Beispiel)
Markieren Sie die Checkbox „Zuletzt einfügen“
Klicken Sie auf ‚Neues Feld‘
Geben Sie die Exemplarinformationen ein
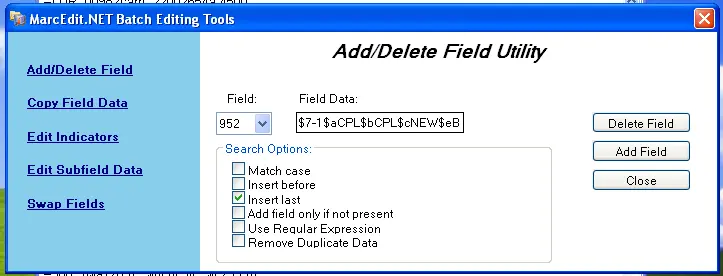
In der Feldbox, Typ 952
In der Feld Dateibox, Typ $7bestellt_STATUS$aPERM_LOC$bCURR_LOC$cSHELVING_LOCATION$eQuelle_der_ACQ$yITEM_TYPE
Ex. $7-1$aCPL$bCPL$cNEW$eBrodart$yBUCH
In einer Standardinstallation von Koha ist -1 der Wert für den Bestellt-Status
Sie können auch andere Unterfelder anschauen, in denen Sie Daten ablegen möchten, zum Beispiel können Sie den Sammlungscode ändern, damit alle Exemplare die gleiche Sammlung (8) haben. Es wird automatisch das Erwerbungsdatum (d) ausgefüllt. Sie können auch eine OPAC-Notiz hinzufügen.
Stellen Sie sicher, dass Sie das $-Zeichen eingeben, um die Unterfelder voneinander zu trennen. Wenn Sie jedes Unterfeld, das Sie hinzufügen, in eine separate Zeile schreiben, bewirkt dies, dass entsprechend viele Exemplare mit dem MARC-Datensatz importiert werden (im Beispiel oben handelt es sich um vier Exemplare, jedes mit seinen richtigen Unterfeldern)
Prüfen Sie die Konfiguration unter Administration > Normierte Werte in Koha, damit Sie den richtigen Code in das Feld eingeben
Markieren Sie die Checkbox „Zuletzt einfügen“
Klicken Sie auf ‚Neues Feld‘
Schließen Sie das Fenster des Editors
Klicken Sie auf die Datei>in MARC erstellen
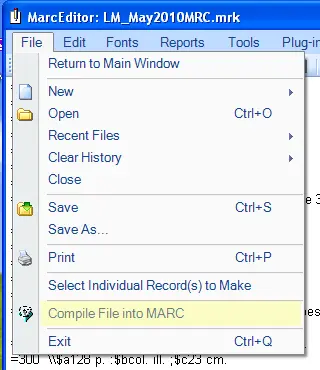
Geben Sie den Namen an, unter dem Sie die Datei speichern möchten
Gehen Sie nun in Ihre Koha-Datenbank und folgen Sie den Anweisungen im Modul ‚Werkzeuge‘ MARC-Datensätze für Import bereitstellen.
Wenn Sie das Exemplar eingegeben haben, klicken Sie auf das Exemplar und beschriften Sie es mit dem richtigen Barcode. Ändern Sie von Hand den Status von Bestellt auf eine leere Linie im Feld ‚Nicht entleihbar‘.
Hinweis
Wenn Sie die katalogisierten Exemplardatensätze beschaffen, bitten Sie ggf. Ihren Lieferanten, die für Ihren MARC-Satz benötigten Informationen zu liefern. So können Sie den aktuellen Datensatz mit dem vom Lieferanten bereitgestellten Satz überschreiben und erhalten damit im überschriebenen Satz automatisch alle Informationen, die Sie benötigen.


