OPAC
Hledat výsledky
To search the OPAC you can either choose to enter your search words in the box at the top of the OPAC or click on the ‚Advanced search‘ link to perform a more detailed search.

If Elasticsearch is used and the OpacBrowseSearch system preference is enabled, you will also see the Browse search option.
Poznámka
For more on searching check the Searching chapter in this manual.
Results overview
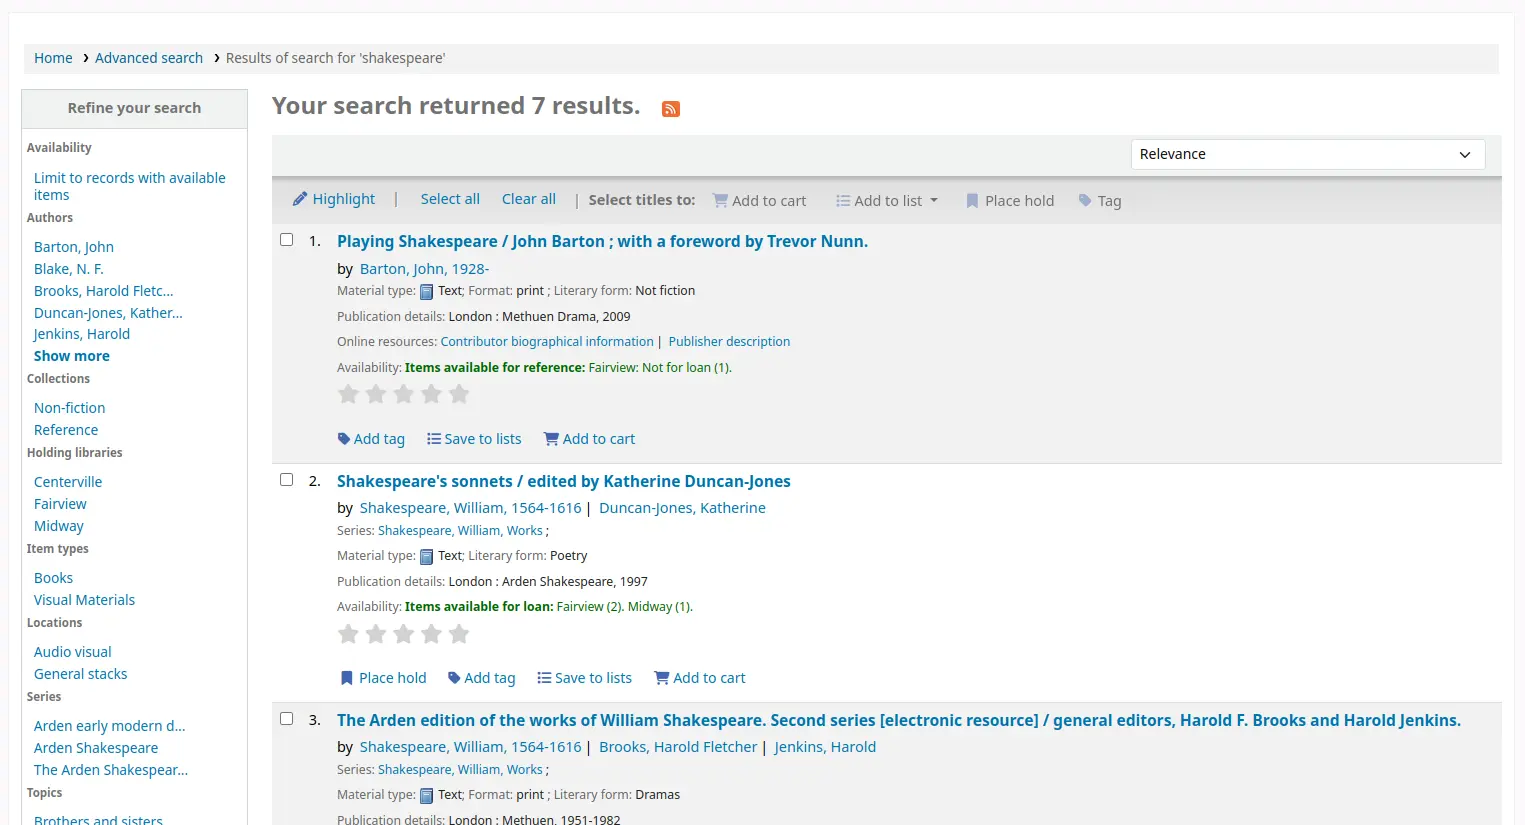
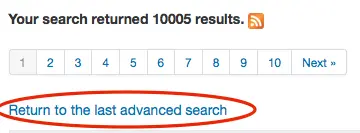
After performing a search, the number of results found for the search will appear above the results.
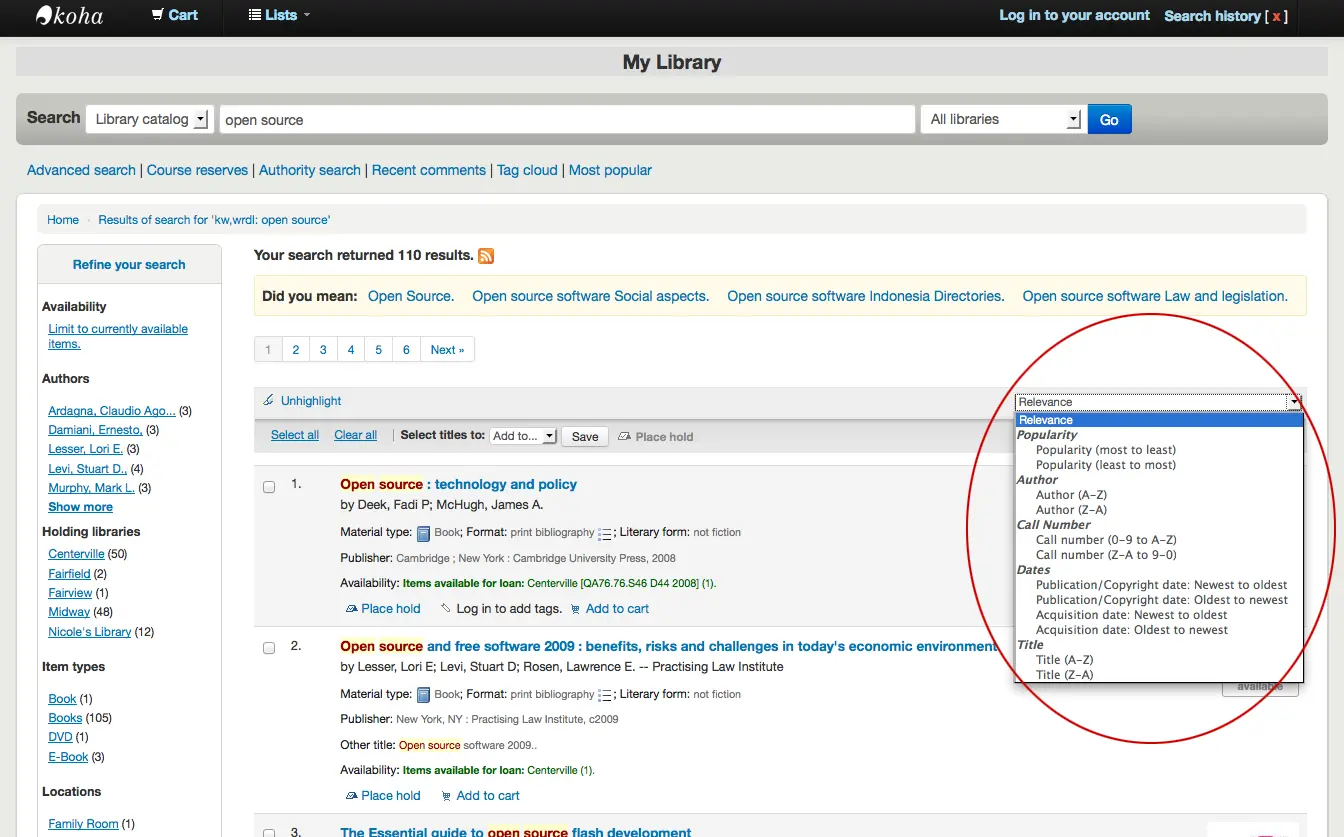
By default, the search results are sorted based on the OPACdefaultSortField and OPACdefaultSortOrder system preference values. To change the sort order of these results, you can choose another sorting method from the drop-down menu on the right.
Under each title in the results list, there will be a series of values from the record’s leader (field 000).
Poznámka
These values have nothing to do with the item types or collection codes you have applied to your records or items. This data is all pulled from the record’s control fields.
This can be turned on or off with the DisplayOPACiconsXSLT system preference.
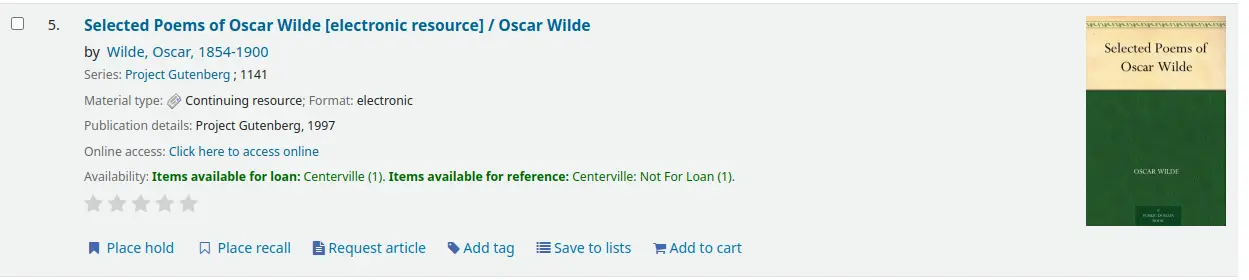
Below each title, there will be the availability for the items attached to the record.
Poznámka
Even if you filtered on one library location, all locations that hold the item will appear on the search results.
Varování
An item’s hold status does not affect whether or not the item is ‚available‘ until the item is in ‚waiting‘ status. Items with on-shelf holds will show as available until a staff member has pulled them from the shelf and checked the item in make it show ‚waiting‘.
If any enhanced content system preferences are turned on, there may be cover images next to the search results.
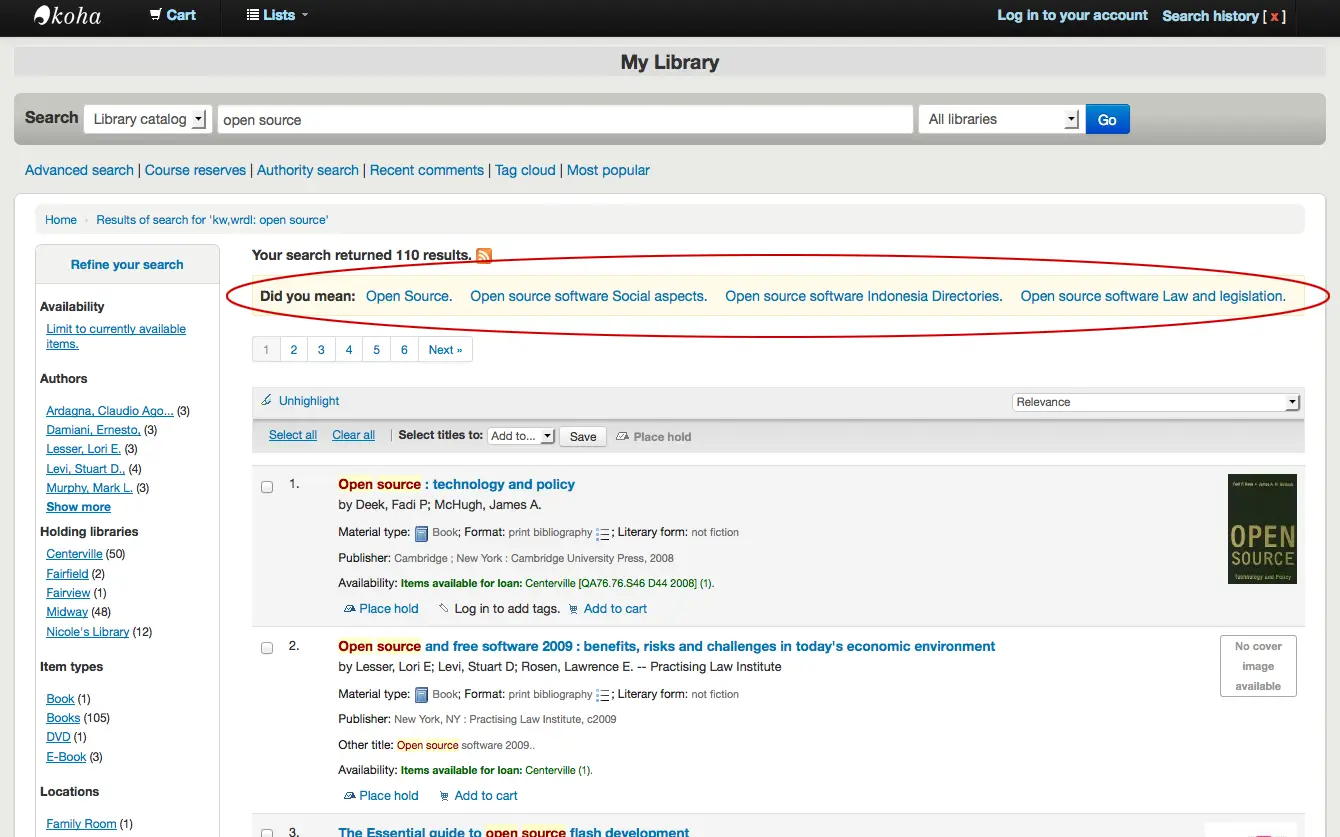
If Did you mean? options are set, there will be a yellow bar across the top of your results will other related searches.
If you performed an advanced search you see an option to go back and edit your advanced search blow the list of results pages.
Filters (facets)
To filter your results click on the links below the ‚Refine your search‘ menu on the left of your screen.
After clicking a facet you can remove that filter from your results by clicking the small ‚x‘ that appears to the right of the facet.
![Close-up view of the facets, in the author facets, "Shakespeare, William" is not longer a clickable link and has a [x] next to it](_images/removefilter.webp)
See the section on search results facets for more details on facets.
You can add custom content below the facets with the OPACResultsSidebar display location in the HTML customizations tool.
Search RSS feeds
You will be able to subscribe to your search results as an RSS feed by clicking the RSS icon in your address bar or next to the number of results.
Přihlášení k odběru výsledků vyhledávání jako jsou RSS kanály, vám umožní vidět, když je přidána nová jednotka do katalogu ve vaší oblasti zájmu.
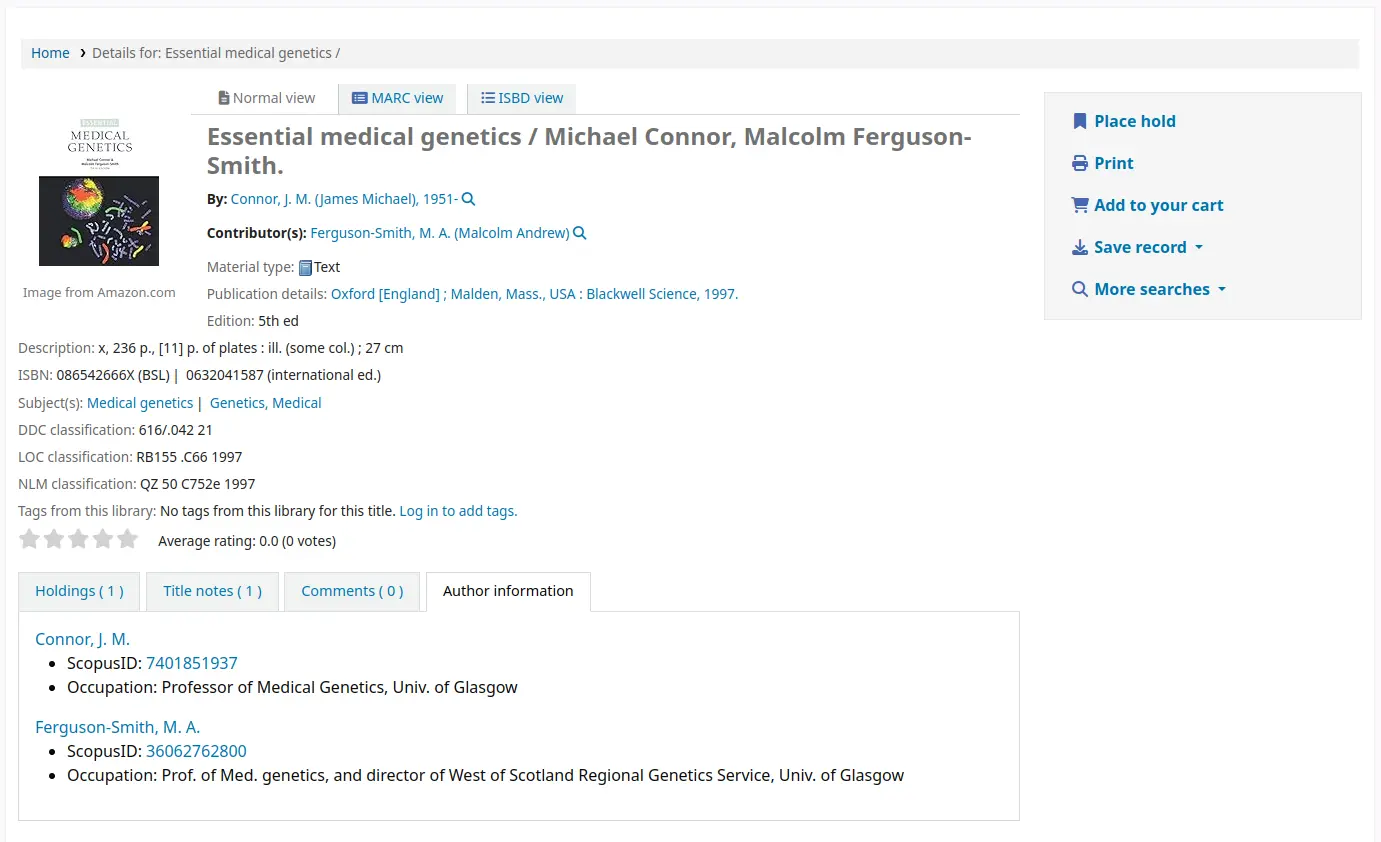
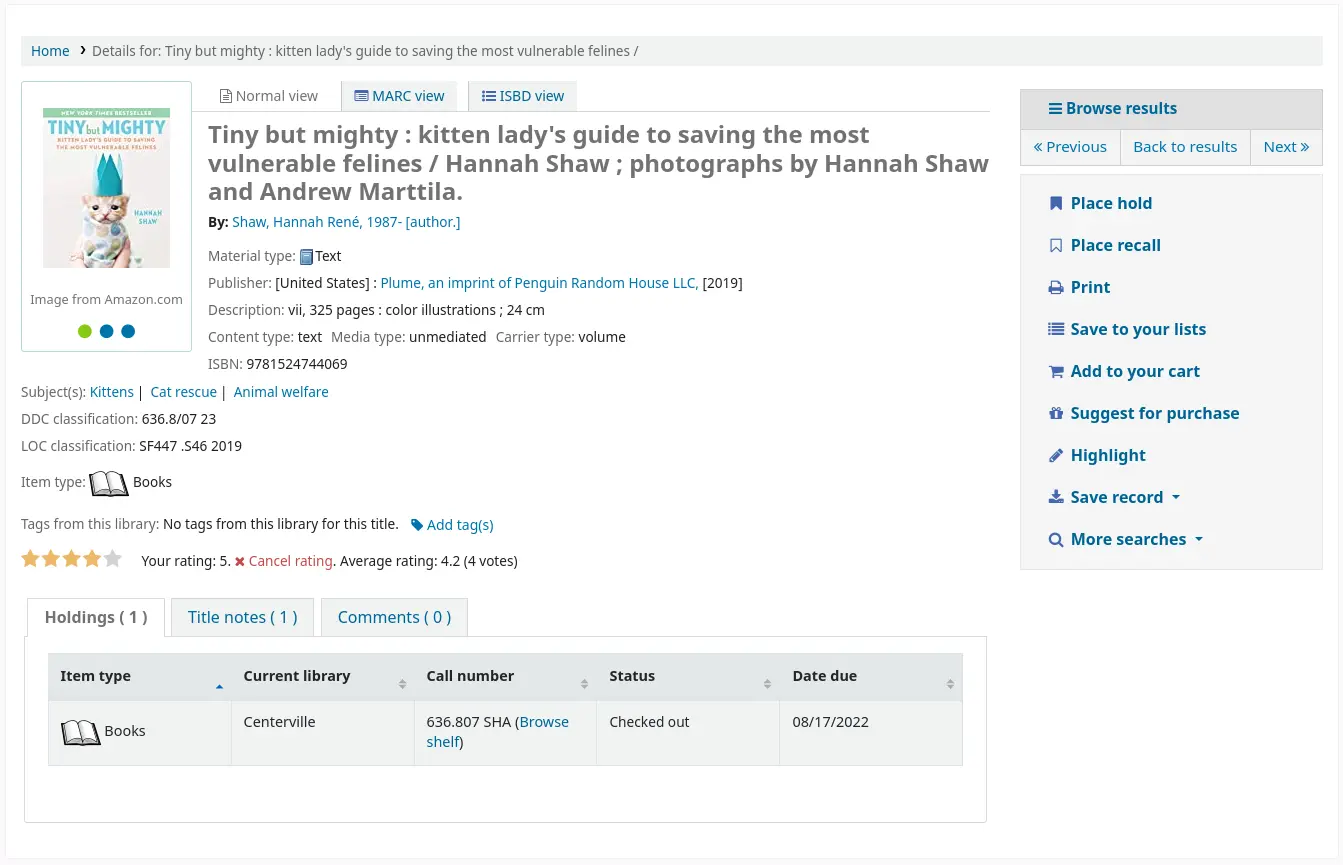
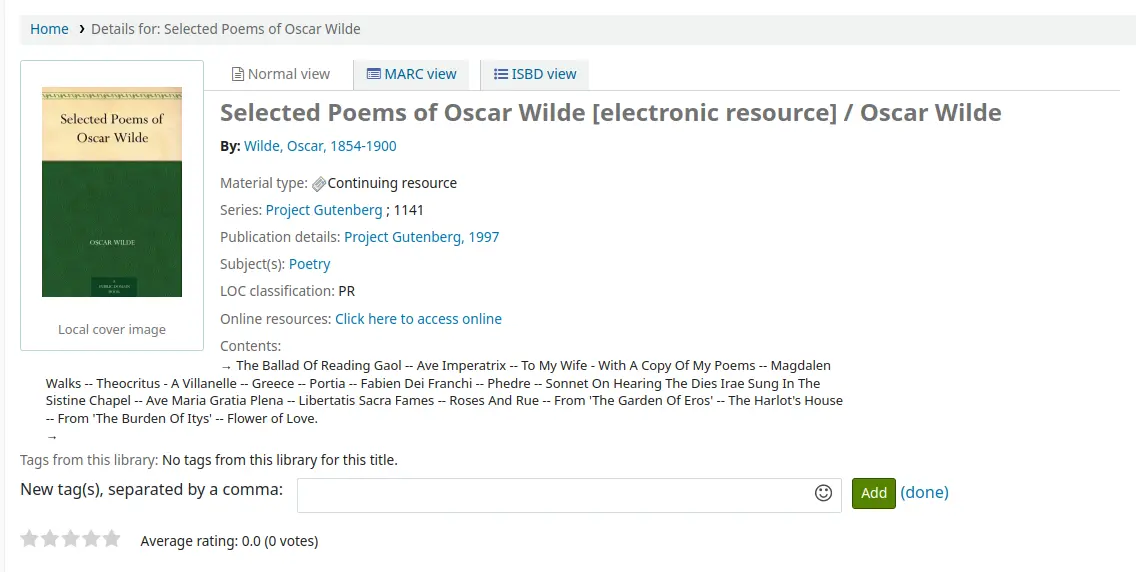
Bibliografický záznam
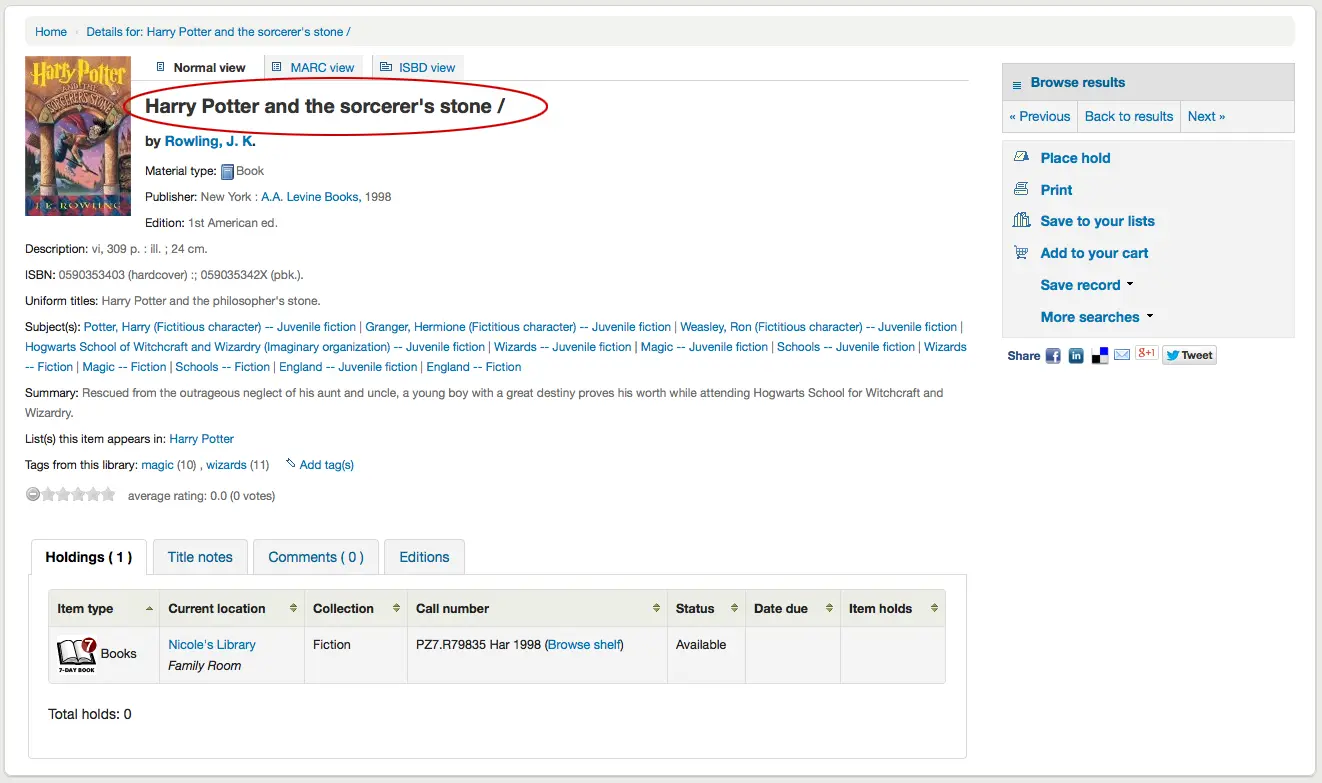
Pokud kliknete na název z výsledků vyhledávání, budete přeneseni před bibliografické detaily záznamu. Tato stránka je rozdělena do několika různých oblastí.
V horní části obrazovky bude nadpis a GMD:
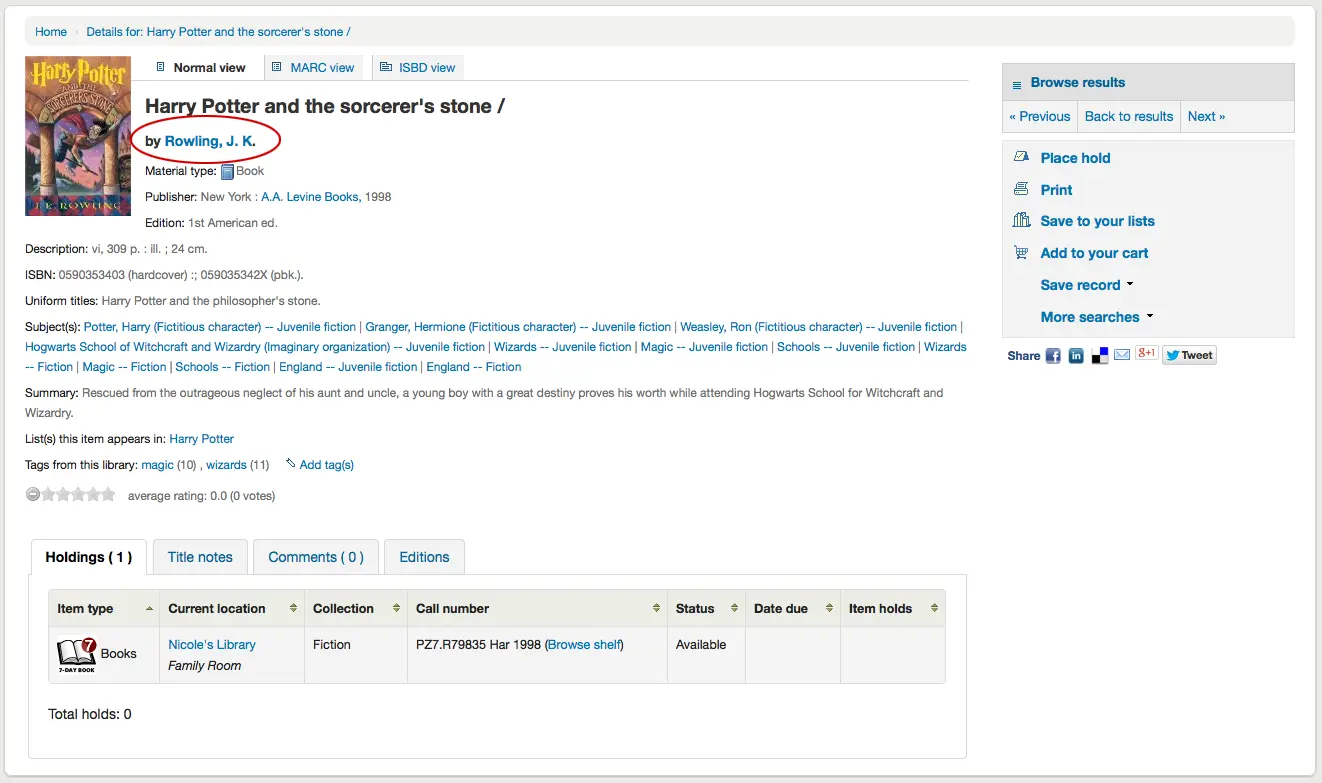
Below the title the authors will be listed. These come from your 1xx and 7xx fields. Clicking the author will run a search for other titles with that author.
Pokud máte autoritní záznamy uvidíte lupu vpravo od autority. Kliknutím na lupy se dostanete přímo na autoritní záznam.
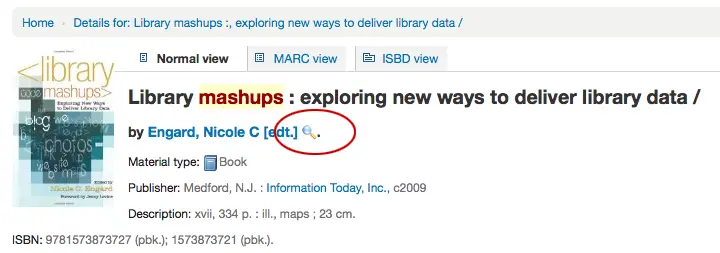
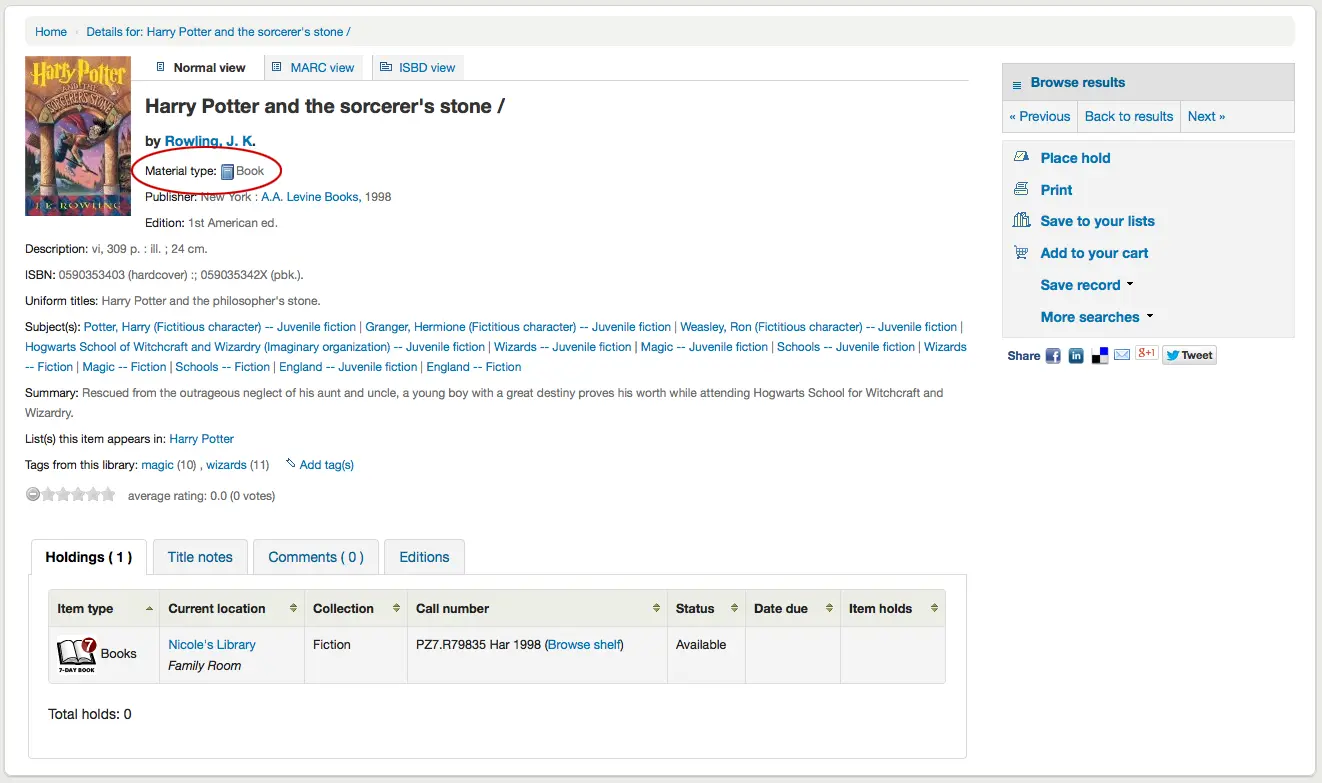
If you have your DisplayOPACiconsXSLT preference set to ‚show‘ you will see a material type that is determined by values in your fixed fields (learn more in the XSLT material type icons cataloging guide).
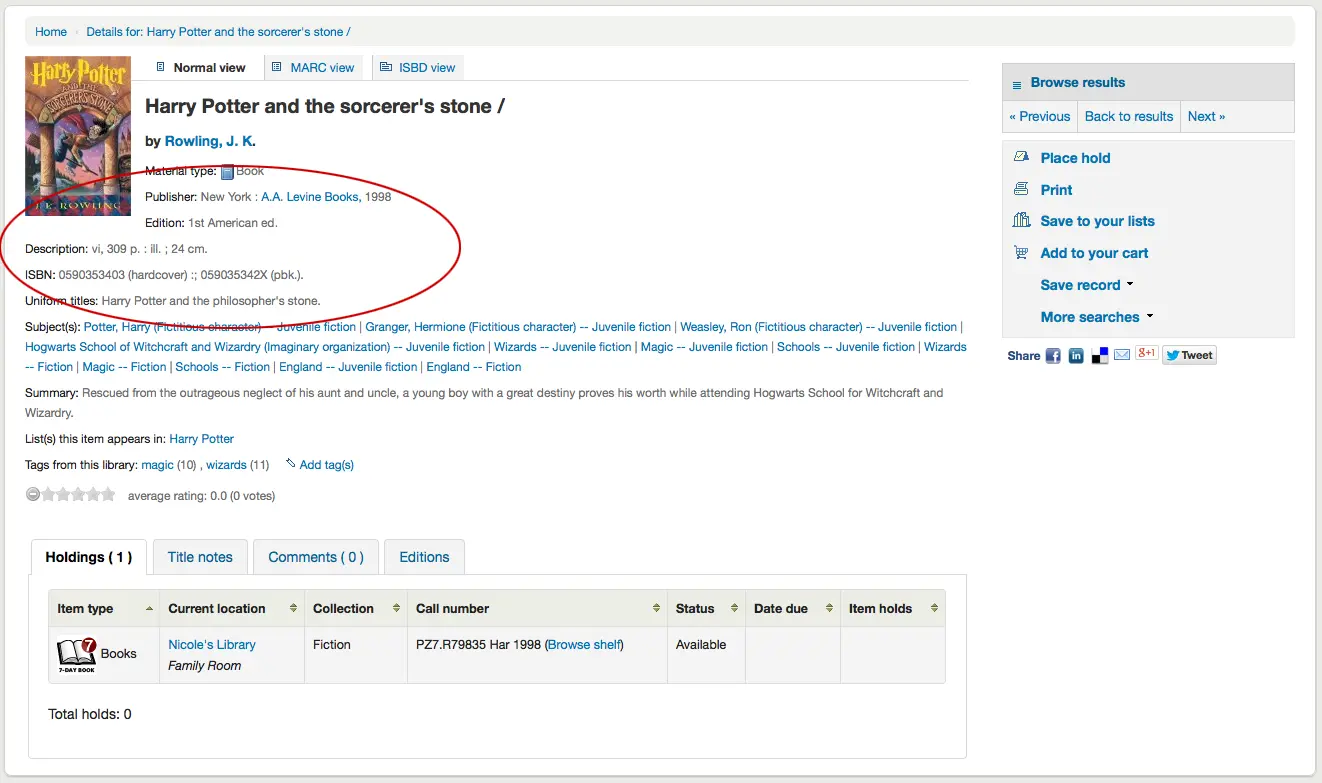
Dále uvidíte popis záznamu, který si prohlížíte:
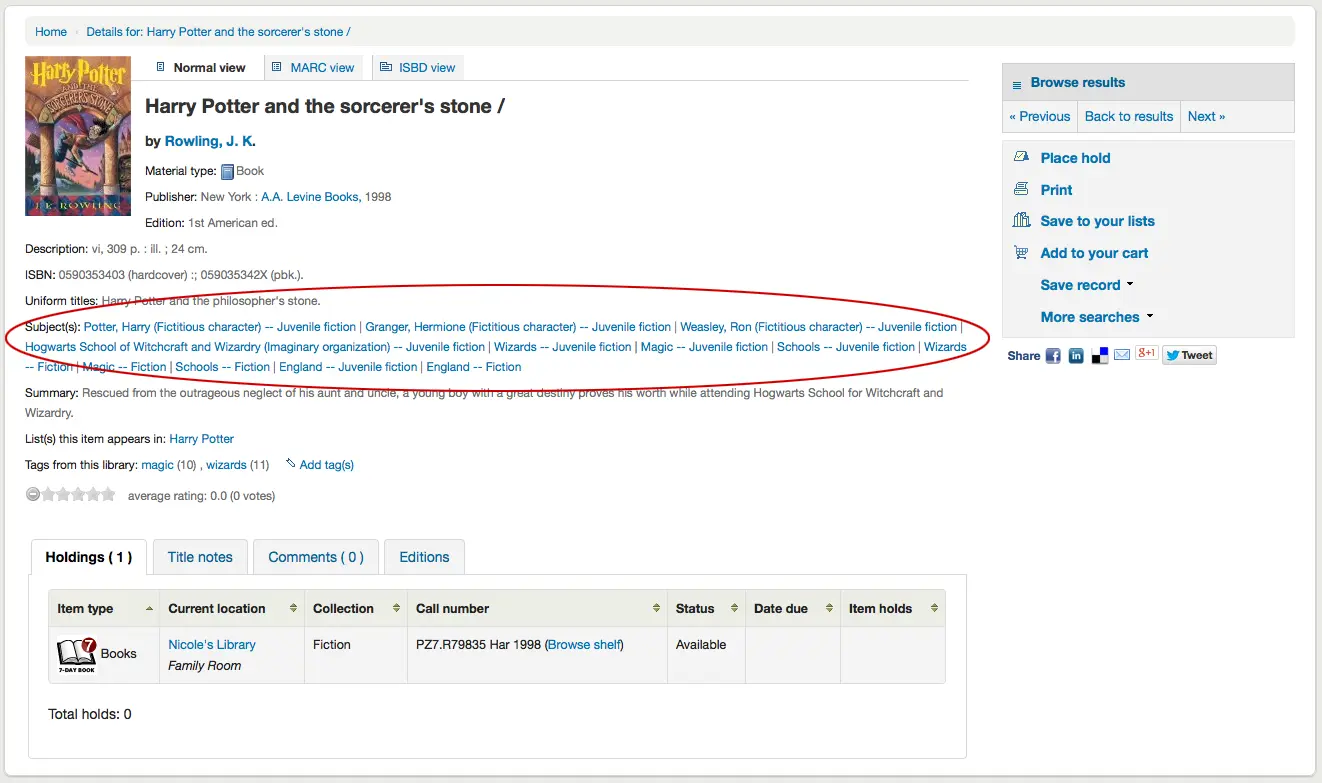
Následující po této informaci najdete předmětová hesla, na které můžete kliknout pro hledání dalších titulů na podobná témata
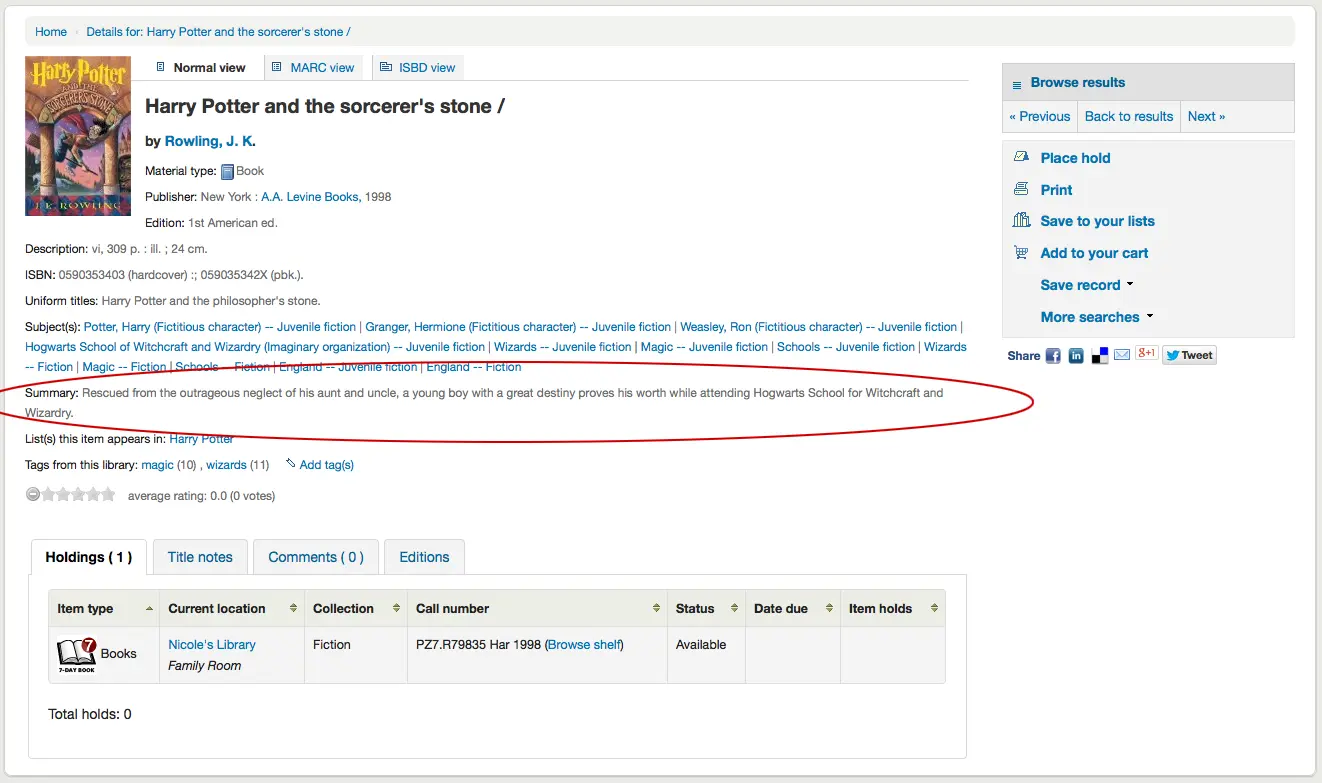
If your record has a table of contents or summary it will appear next to the ‚Summary‘ or ‚Table of contents‘ label
If your record has data in the 856 fields you’ll see the links to the right of the ‚Online resources‘ label
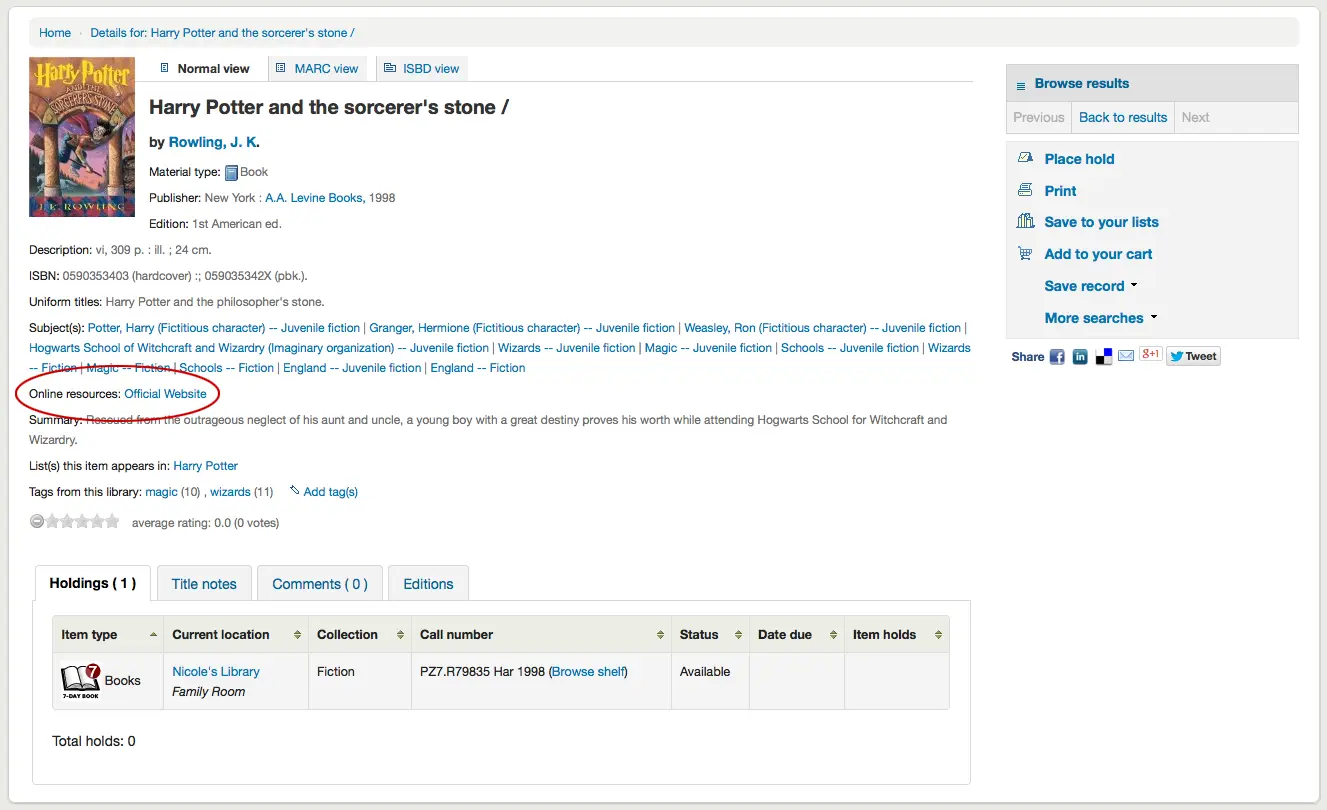
Pokud jednotka, kterou si chcete prohlížet je ve veřejném seznamu, pak uvidíte tento seznam vpravo od návěští „Seznam(y), v kterých tato jednotka zobrazí v“ a pokud má štítky, objeví se pod „Štítky od této knihovny „

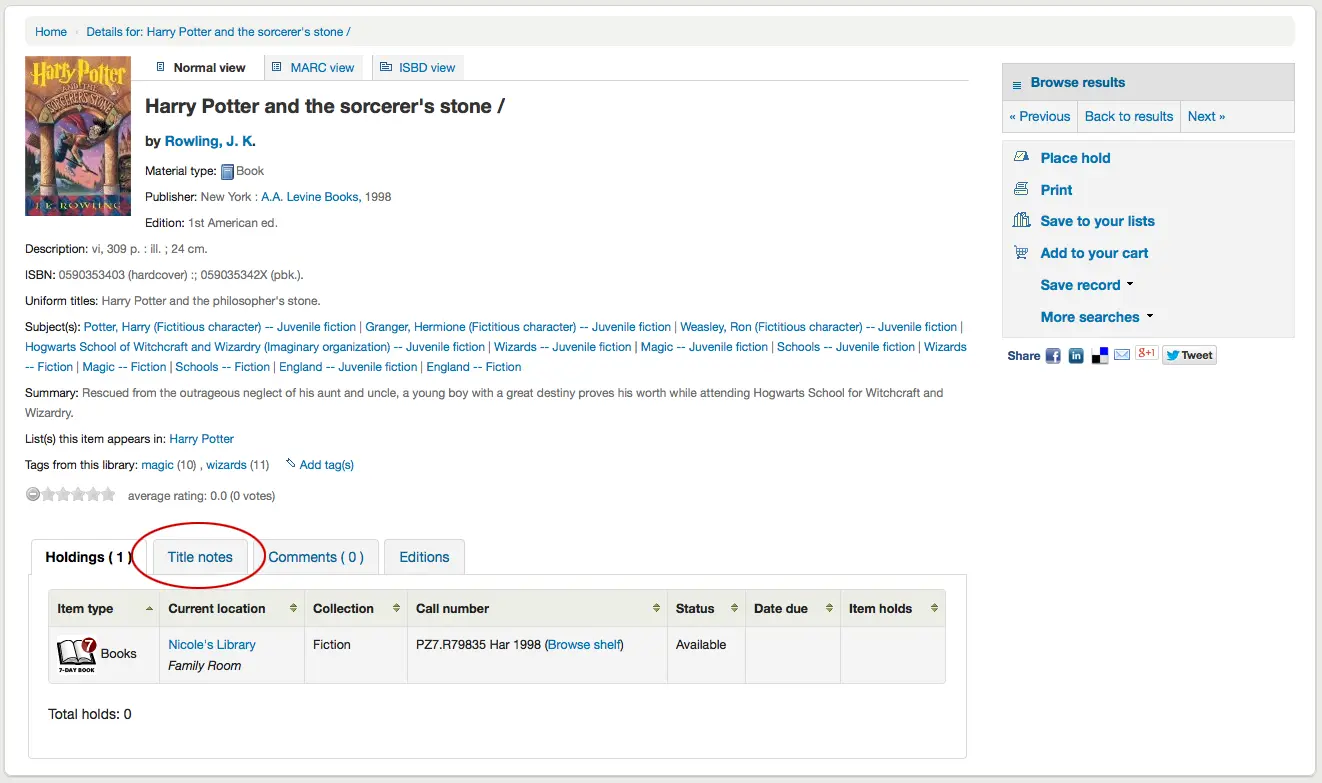
V záložkách pod detaily naleznete vaše data o jednotkách (exemplářích)

Poznámka
You can customize the columns of this table in the Table settings section of the Administration module (table id: holdingst).
Any notes (5xx fields) that have been cataloged will appear under ‚Title notes‘
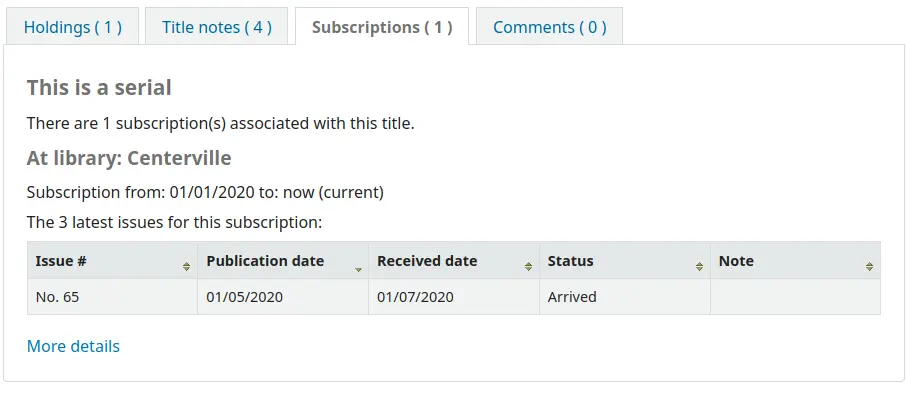
If the bibliographic record is linked to a subscription in the Serials module, there will be a ‚Subscriptions‘ tab with the subscription and issues information.
Poznámka
You can customize the columns of this table in the Table settings section of the Administration module (table id: subscriptionst).
Poznámka
If you chose a notice in the ‚Patron notification‘ field when adding the subscription, there will be a button patrons can click to be notified by email when a new issue is received.
Pokud povolíte připomínky, objeví se v další záložce
If the OPACAuthorIdentifiers system preference is turned on, and that your author authority records have standard identifiers, there will be an ‚Author identifiers‘ tab showing the identifiers with links to the author record on the source website.
A konečně, pokud jste povolili FRBR a máte další vydání titulu ve své sbírce, uvidíte je na záložce o vydáních.
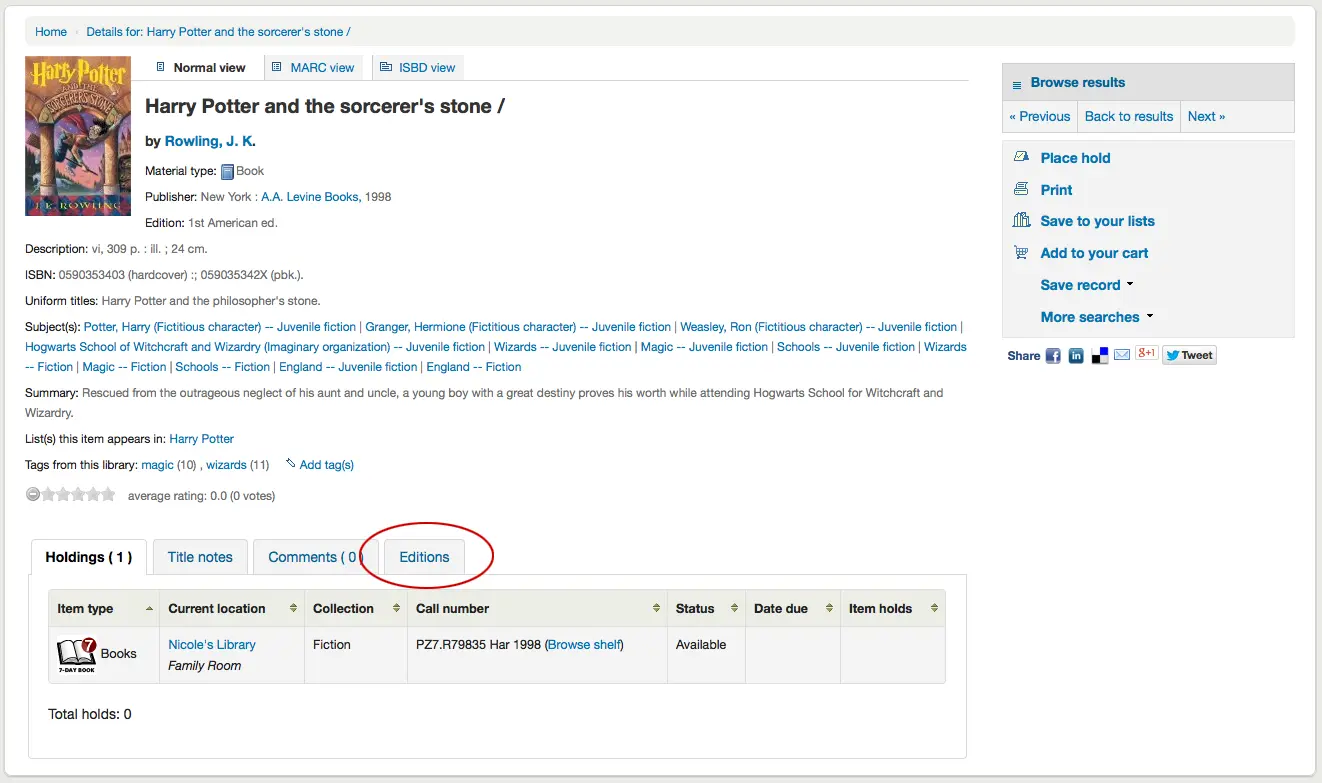
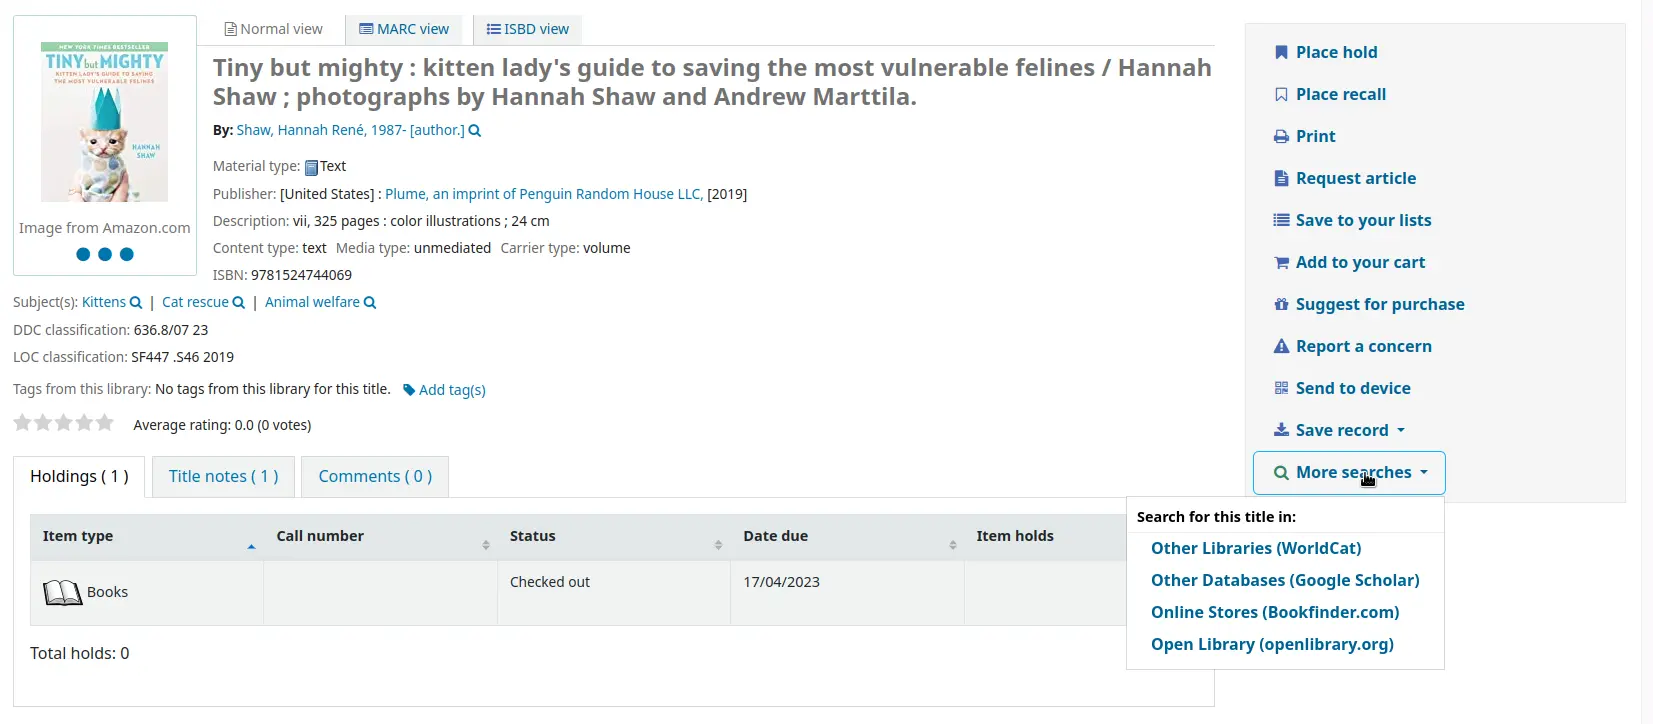
Napravo od detailů najdete řadu polí. První pole je seznam tlačítek pro navigaci ve výsledcích hledání. Odtud můžete vidět další nebo předchozí výsledek z vyhledávání nebo se vrátit na výsledky vyhledávání.
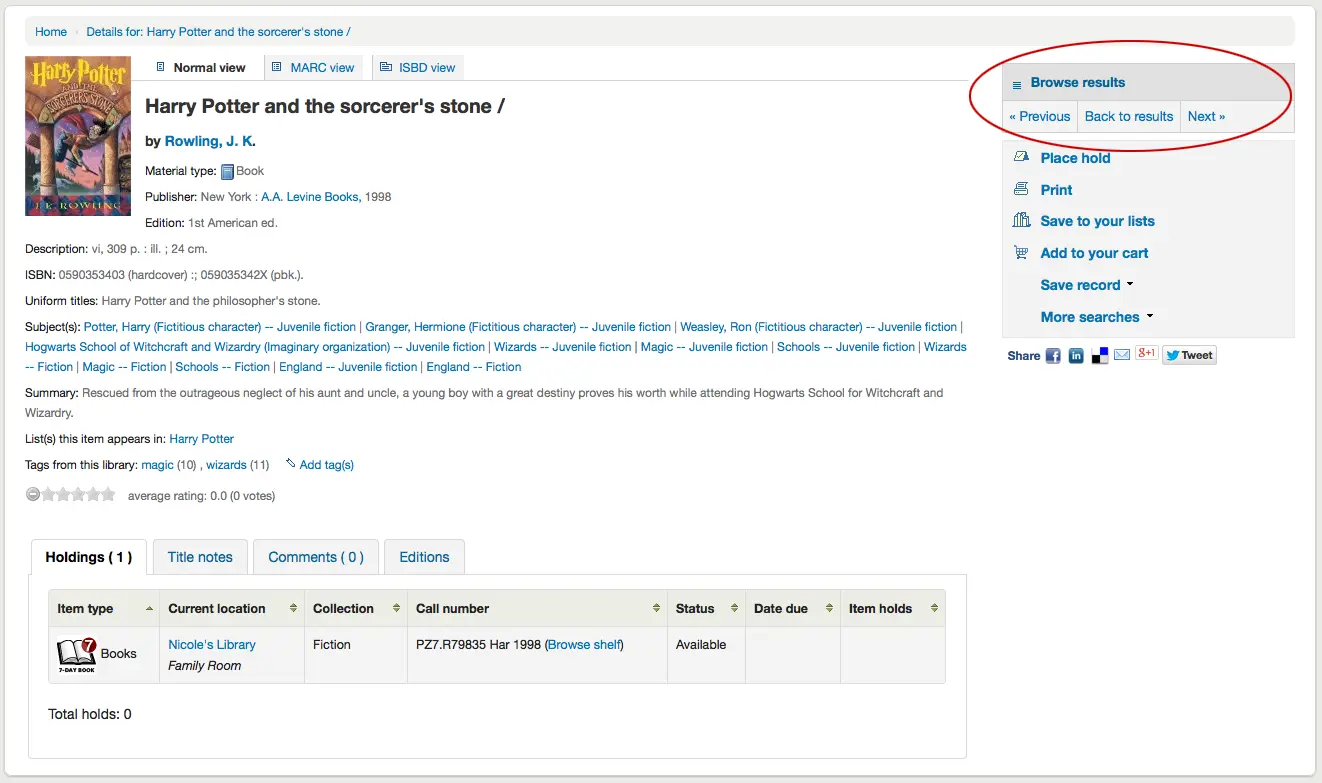
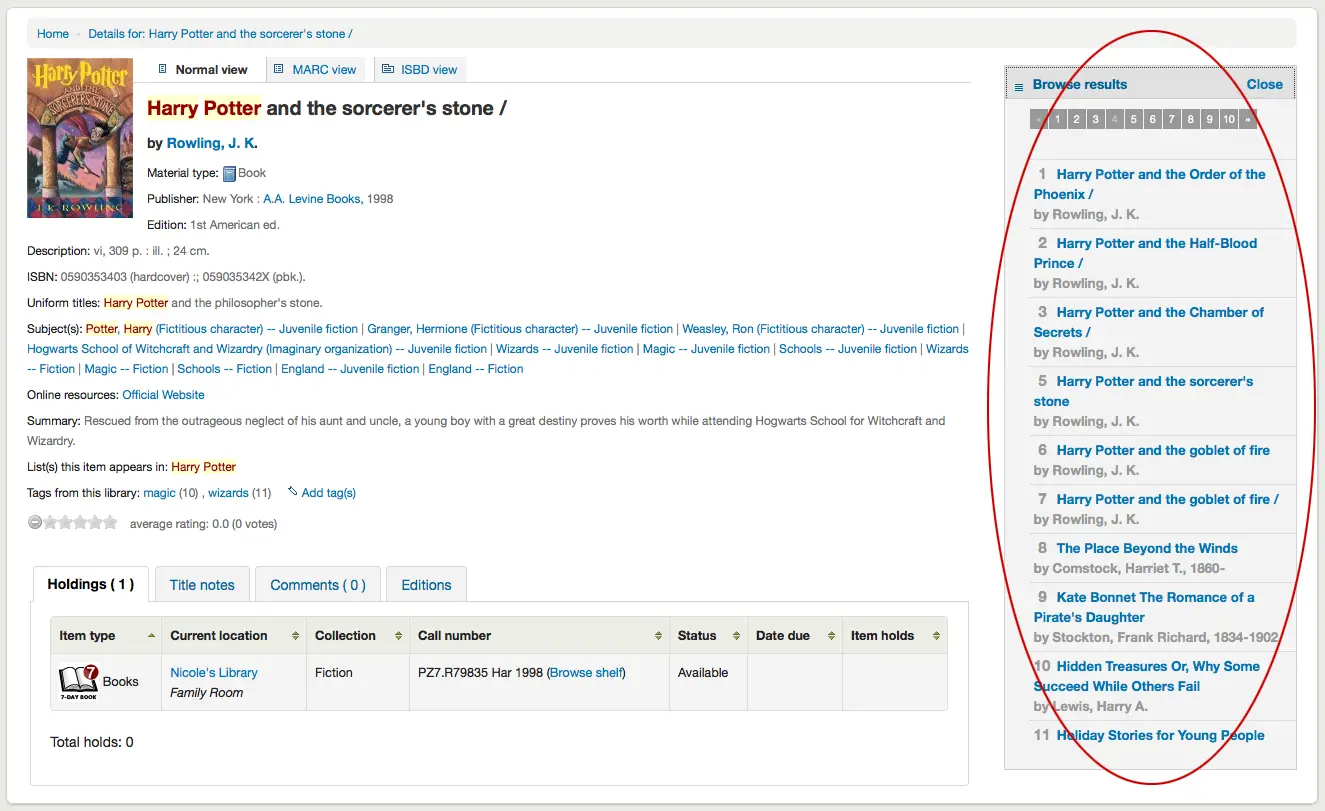
Clicking ‚Browse results‘ at the top of the right column will open up your search results on the detail page
Below the search buttons you’ll find the links to place a hold, print the record, save the record to your lists, add it to your cart or send to a device (using a QR code).
Another option that will appear on this right hand side bar, if a library is allowing purchase suggestions (see the suggestion system preference), is the ability to ‚Suggest for Purchase‘. Clicking this link will bring the user to the purchase suggestion form to fill out.
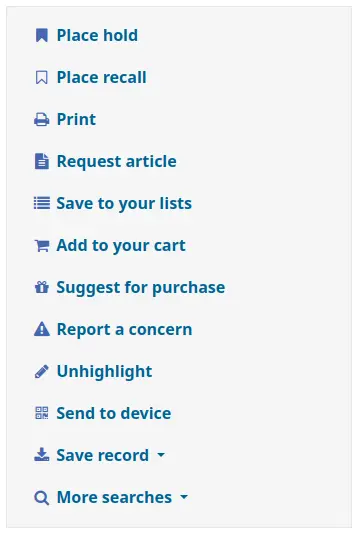
Clicking ‚More searches‘ will show the list of libraries you entered in your OPACSearchForTitleIn preference
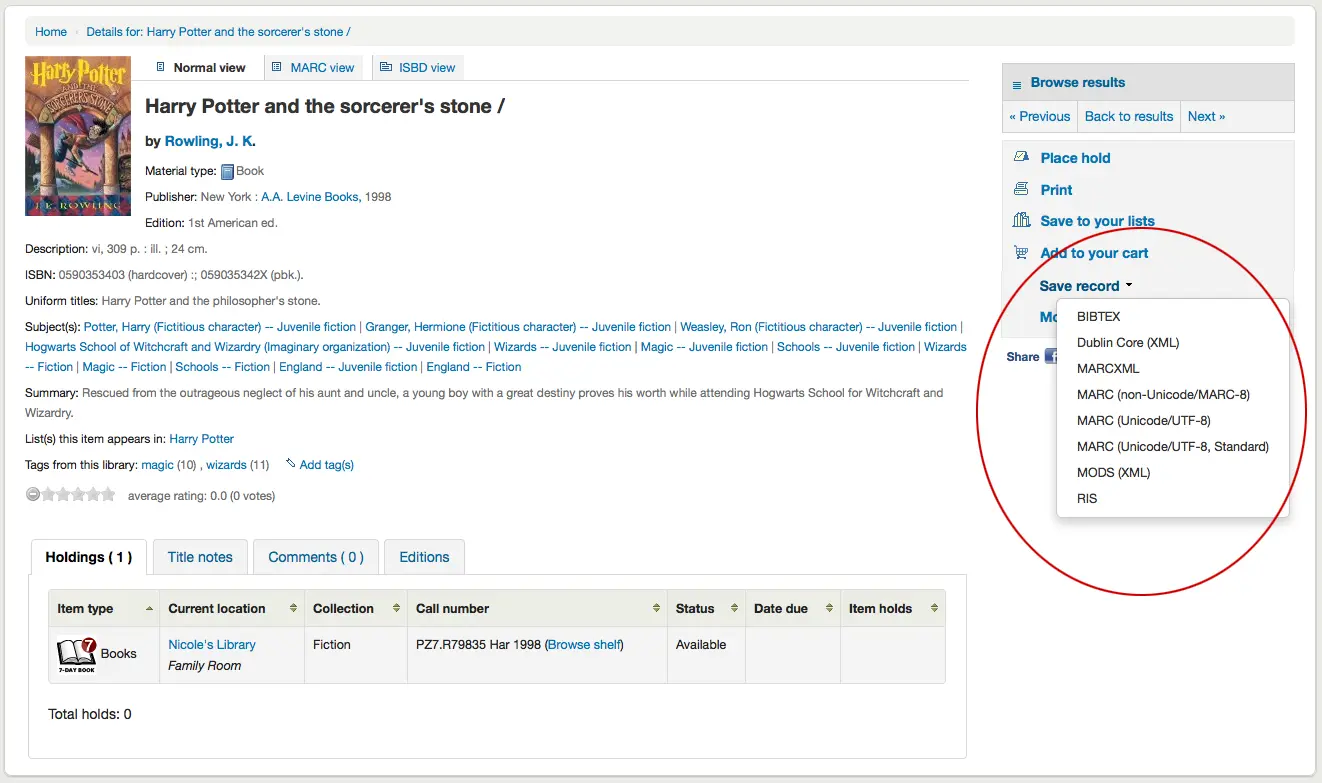
Under the ‚Save record‘ label you will find a series of file formats you can save the record as. This list can be customized by altering the OpacExportOptions system preference.
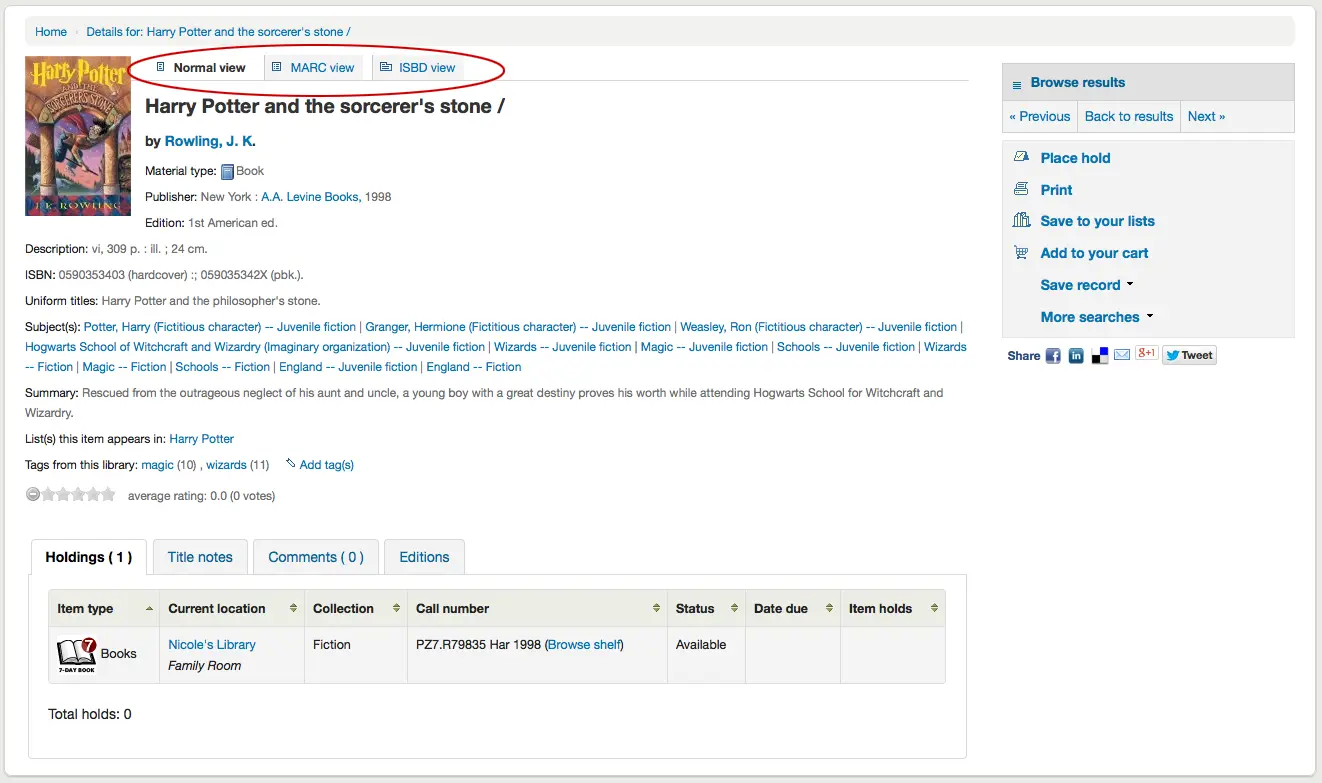
Pokud budete chtít kdykoli změnit pohled z „normálního“ pohledu a vidět MARC nebo ISBD, můžete klepnout na záložky v horní části záznamu
Reporting concerns about bibliographic records
If the OpacCatalogConcerns system preference is enabled, patrons will be able to report concerns regarding specific bibliographic records.
This is similar to the problem report feature but is linked to a specific bibliographic record, and there is the possibility to have a resolution.
To report a new concern,
In the bibliographic record’s detail page, click the ‚Report a concern‘ link in the options at the right side.
Poznámka
Patrons must be logged in to report a concern. If they are not logged in, the system will ask them for their login information.
Fill in the concern form.
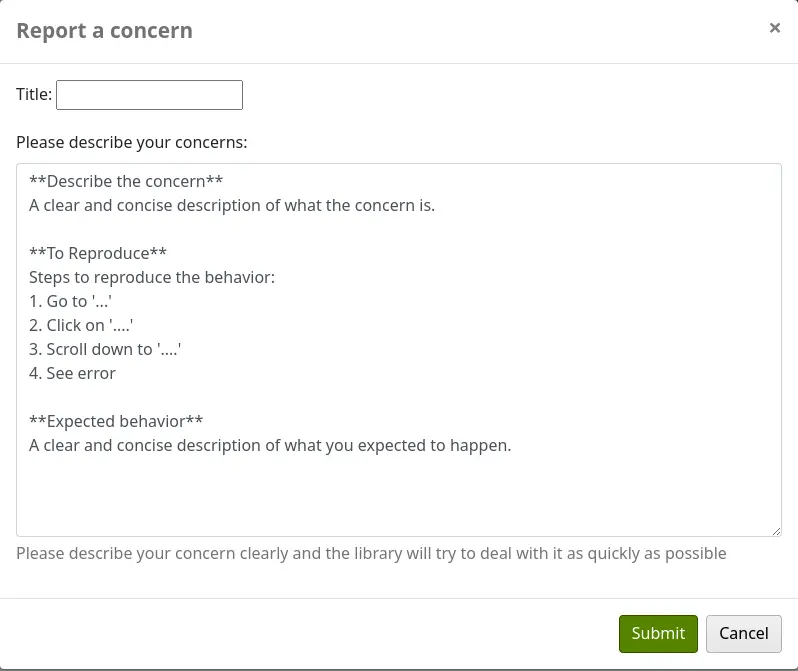
Title: enter a title describing succinctly the problem.
Please describe your concern: enter details about the problem, being the more descriptive possible so that the staff member who receives this is able to replicate and see the problem.
An example of what is expected in the description is provided in the field:
**Describe the concern**

A clear and concise description of what the concern is.

**To Reproduce**

Steps to reproduce the behavior:
1. Go to '...'
2. Click on '....'
3. Scroll down to '....'
4. See error

**Expected behavior**

A clear and concise description of what you expected to happen.
Poznámka
This text is customizable in the HTML customizations tool, by changing the ‚CatalogConcernTemplate‘ entry.
The text at the bottom of the form („Please describe your concern clearly…“) is also customizable in the HTML customizations tool, by changing the ‚CatalogConcernHelp‘ entry.
Click ‚Submit‘.
This will send an email to the cataloging team to notify them that a new concern has been created. The email will be sent to the email address in the CatalogerEmails system preference. The email sent is the TICKET_NOTIFY notice, which can be customized in the Notices and slips tool.
An email will also be sent to the reporter to notify them that the concern has been received. The email sent is the TICKET_ACKNOWLEDGE notice, which can be customized in the Notices and slips tool.
Concerns reported about this record are visible in the ‚Concerns‘ tab.
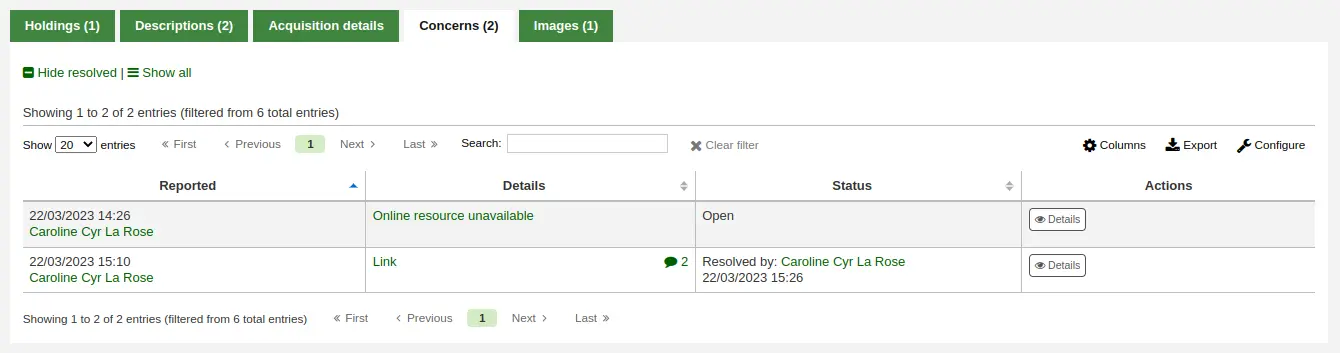
All concern tickets will be visible in the catalog concerns report.
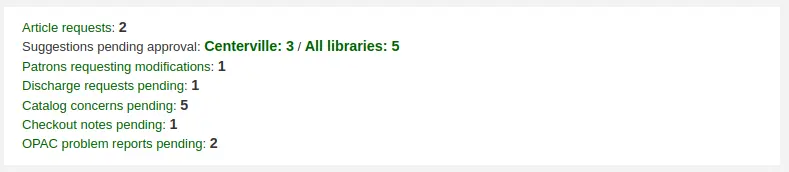
Newly opened concern reports will also appear in the notification section at the bottom of the staff interface main page.
Authority search
If the OpacAuthorities system preference is set to ‚Allow‘, patrons will be able to search authority records from the OPAC.
The authority search is accessed by the ‚Authority search‘ link under the search bar at the top of the page.
The search form allows patrons to search authorities by type and terms.
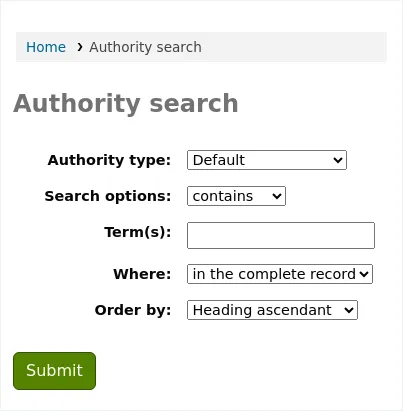
The results show the headings, the type of heading, and the number of bibliographic records this authority record is used in.
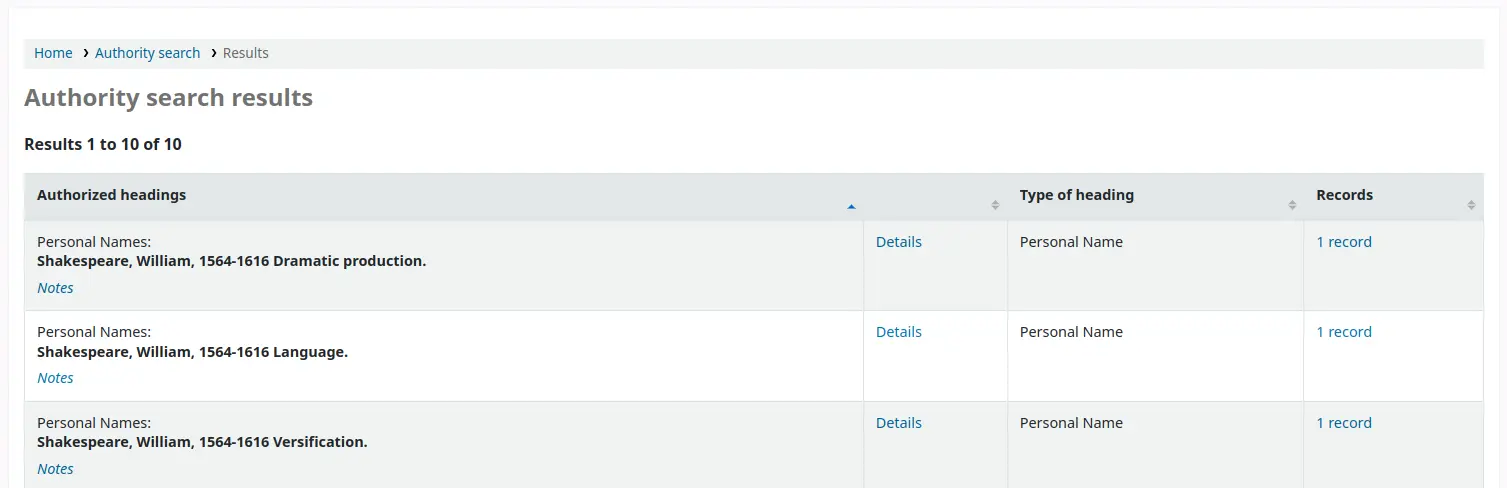
If the authority record contains notes, a ‚Notes‘ link will appear under the heading.
Clicking on ‚Details‘ will show the complete record.
Clicking on the number of records will do a catalog search for records linked to this authority record.
Lists and the cart
A cart is a temporary holding place for records you’re interested in finding during this session. That means that once you log out of the OPAC or close the browser you lose the items in your cart.
A list is a more permanent location for saving items.
To learn more about lists, check the Lists and cart chapter of this manual, which deal with these features in the staff interface.
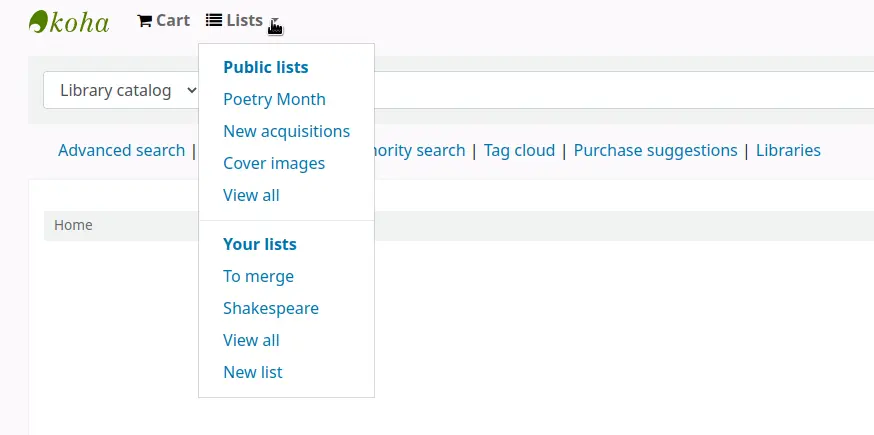
Seznamy
Patrons can manage their own private lists and find all public lists by visiting the ‚Lists‘ section of their account.
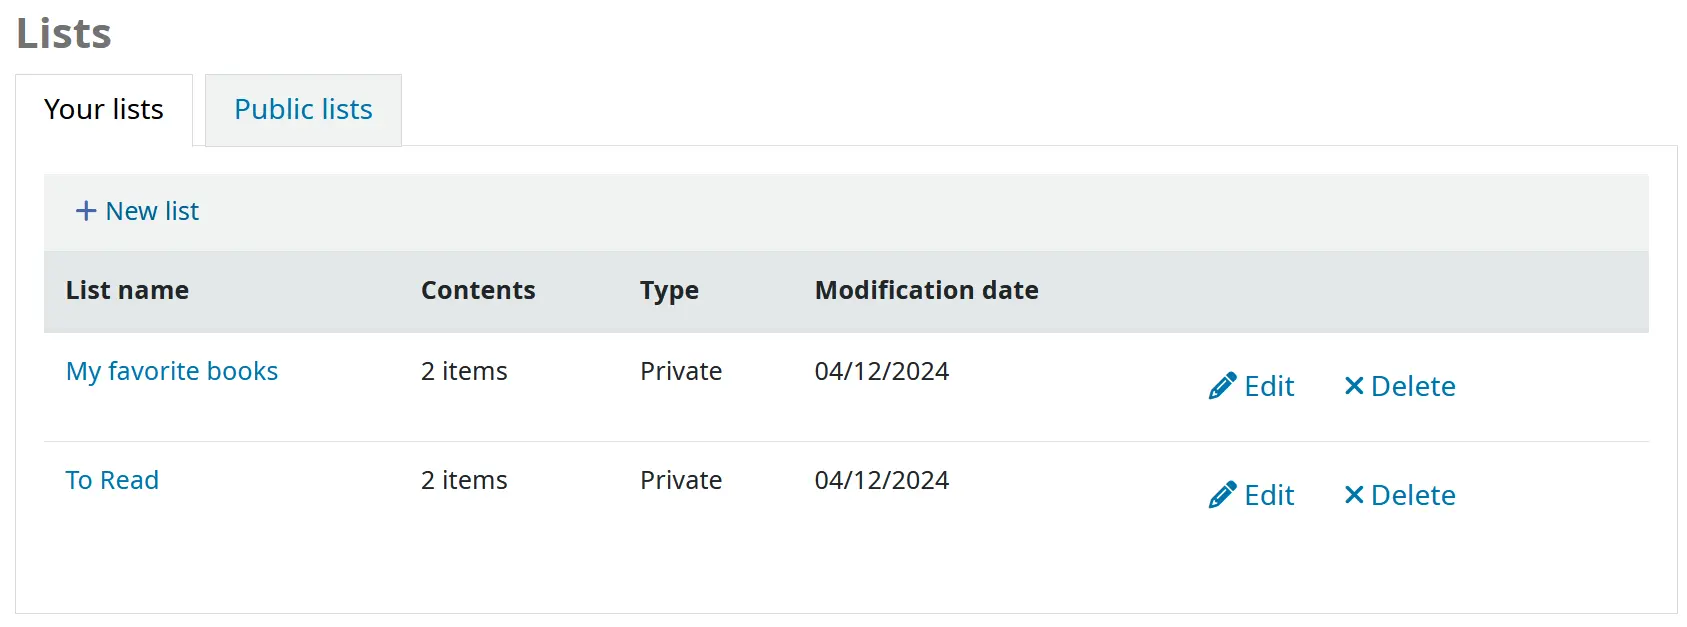
The ‚Modification date‘ column shows when the list was last modified and is helpful for quickly finding out how up to date the list is.
Creating lists
To create a list the patron simply needs to click the ‚New list‘ link and populate the form that appears.

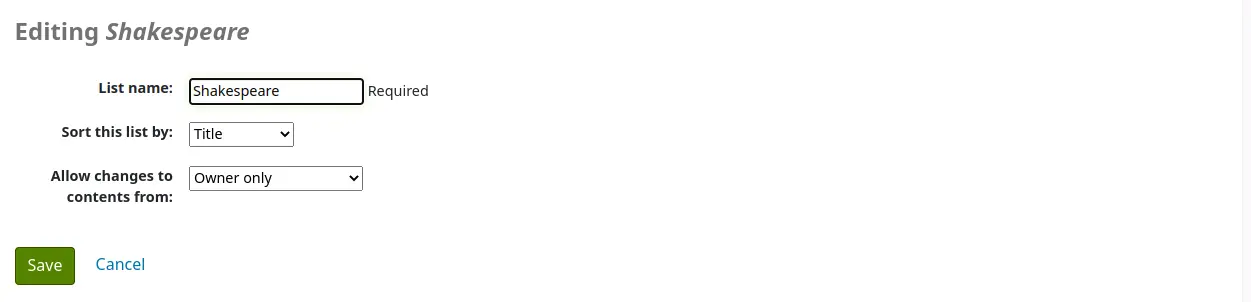
List name: the patron must enter a list name, it is the only required field
Sort this list by: the patron can choose how they want the list sorted (by title, author, publication year, call number or date added to the list).
Category: the patron can choose to keep this list private or make it public. A public list will be visible to all OPAC users.
Poznámka
This field will only appear if the OpacAllowPublicListCreation system preference is set to ‚Allow‘. Otherwise all lists created by patrons will be private.
Allow changes to content from: the patron can choose who will be able to add or remove titles from the list.
Nobody: nobody, including the patron themselves will be able to add or remove titles.
Owner only: only the patron who created the list will be able to add or remove titles. If the list is public or shared, the OPAC users or sharers will not be able to change the list contents.
Anyone seeing this list: everyone who has access to the list will be able to add or remove titles. If the list is public, this means everyone. If the list is private, only the owner will have the ability to change the contents. And if the list is shared, the owner and sharers will have this ability.
Staff only: this option will only appear to staff members, to make the list editable by all staff members.
Lists can also be created by choosing the ‚New list‘ option in the ‚Add to‘ menu on the search results
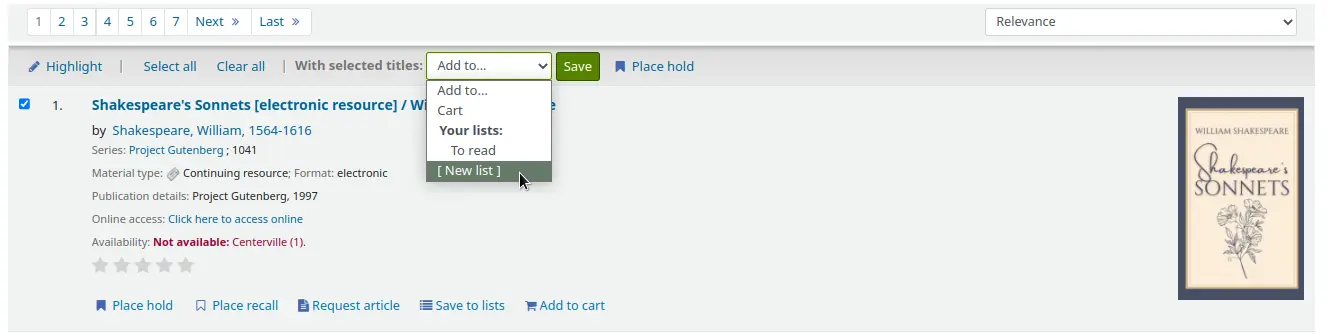
Adding titles to lists
Titles can be added to lists from the search results or from the bibliographic record.
In the search results, the option to add items to the list appear below each result (‚Save to lists‘ button)
and across the top of the results page, next to ‚Select titles to: Add to…‘
To add a single title to a list, click the ‚Save to lists‘ option and then choose the list you’d like to add the title to. To add multiple titles to a list check the boxes on the left of the titles you want to add and then choose the list you want to add the titles to from the ‚Add too‘ pull down at the top of the screen.
From the bibliographic record, the option to save the title to a list is in the menu on the right.
Titles can also be added to a list from the cart.
Viewing lists contents
To view the contents of a list, click on the list name under the ‚Lists‘ button.
Obsah seznamu bude vypadat podobně jako na vašich stránkách výsledků vyhledávání kromě toho, že budou existovat různé položky menu v horní části seznamu.
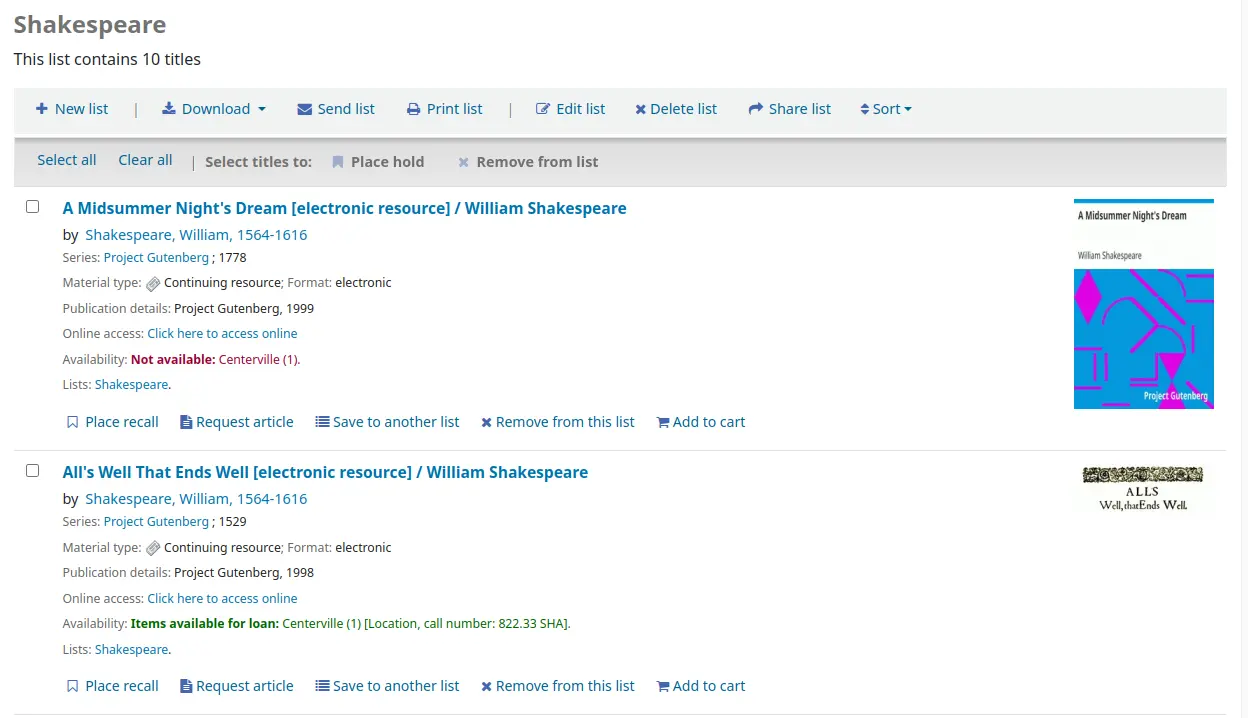
To the right of the list title there is an RSS icon that will allow you to subscribe to updates to the list.
Poznámka
The RSS icon only appears on public lists.
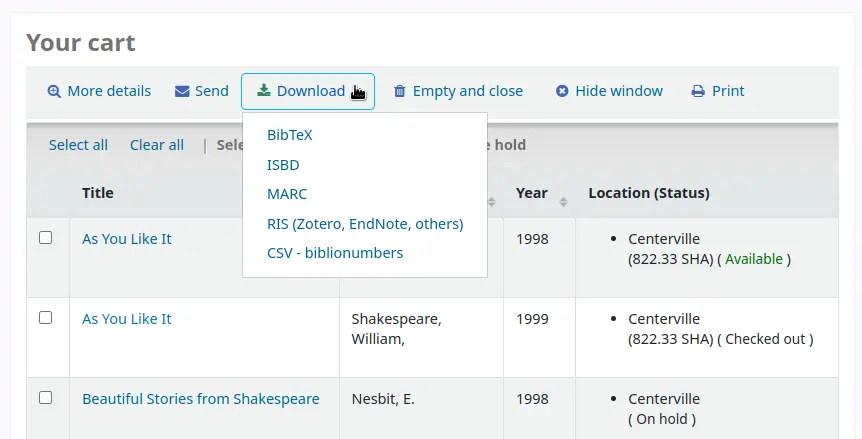
Pomocí voleb nabídek nad seznamem je možno umístit více rezervací na jednotky, stáhnout seznam obsahů, poslat seznam na e-mail nebo ho vytisknout.
To place a hold on one or more list items check the box to the left of the item and click the ‚Place hold‘ link at the top
To download the list contents click the ‚Download list‘ link and choose the format you’d like to download the list in
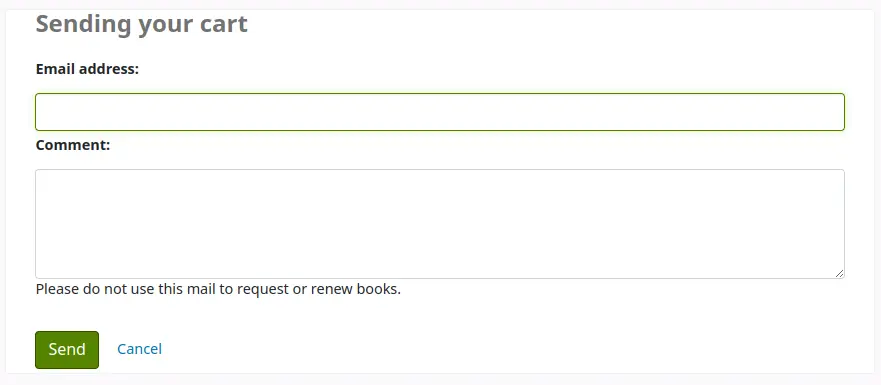
To email the list contents to someone, click the ‚Send list‘ link and enter in your email details in the form that pops up
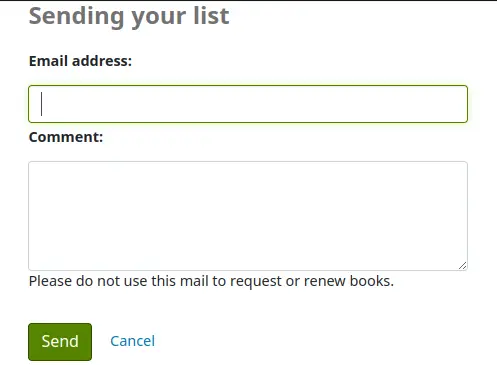
Poznámka
The message sent when emailing the list is LIST, which can be customized in the Notices and slips tool.
Poznámka
The ‚Send list‘ option will only appear if the OPACDisableSendList system preference is set to ‚Allow.‘
To print the contents of your list out click the ‚Print list‘ link
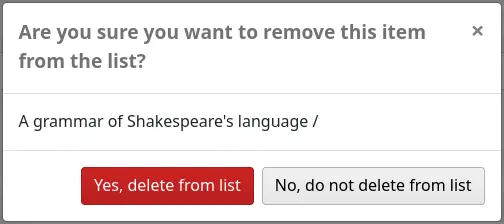
Removing titles from lists
To remove a title from a list,
-
Click ‚Remove from this list‘ under the title to remove.
Click ‚Yes, delete from list‘ to confirm the removal of the title from the list.
Managing lists
Once the list is saved, patrons can begin adding items to it. From the ‚Lists‘ tab in their account, the patron can edit and delete the lists they have created by clicking the appropriate button to the right of the list name.
To edit the list’s title or sorting patrons click the ‚Edit‘ button to the right of the list description.
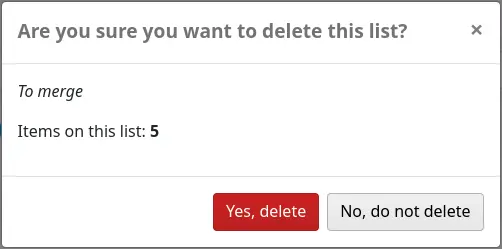
Při kliknutí na „Smazat“ vedle seznamu, budete vyzváni k potvrzení, že chcete seznam smazat.
If the OpacAllowSharingPrivateLists system preference is set to ‚Allow‘, patrons will see the ‚Share‘ button on the list of lists and the ‚Share list‘ button at the top of each individual list. Clicking this will ask you to enter the email address of a patron.

Hned po načtení souboru se zobrazí potvrzující zpráva.

and will send a message to that patron.
Once the other patron accepts the shared list, the sharing patron will receive a confirmation.
Poznámka
The message sent to share the list is SHARE_INVITE and the message sent to the sharing patron to confirm the other patron has accepted the share is SHARE_ACCEPT. Both messages are customizable in the Notices and slips tool.
The other patron will see the shared list with their own private lists (the type will be ‚Shared‘ rather than ‚Private‘). They will also have the option to remove the share, if they don’t want to have access to this list anymore.
The owner of the shared list will have the option to transfer the ownership of the list to one of the patrons with whom the list is shared.
If the TagsInputOnDetail system preference is enabled, patrons will have the possibility of adding tags to titles from the list view.
Košík
Adding titles to the cart
Titles can be added to the cart from the search results or from the bibliographic record.
In the search results, the option to add items to the cart appear below each result (‚Add to cart‘ button)
and across the top of the results page, next to ‚Select titles to: Add to…‘
Clicking the ‚Add to cart‘ button under a single result will add the one title to your cart.
To add multiple titles at once, check the box to the left of each result and then choose ‚Cart‘ from the ‚Add to‘ pull down at the top of the screen. Once titles are added to the cart you will be presented with a confirmation at the top of the page.

From the results you will see which items are in your cart and will be able to remove those items by clicking ‚(remove)‘.

From the bibliographic record, the option to add the title to the cart is in the menu on the right.
Managing the cart
Once there are titles in the cart, you can manage the contents by clicking on the ‚Cart‘ button usually found at the top of the screen. Your cart will open in a new window.
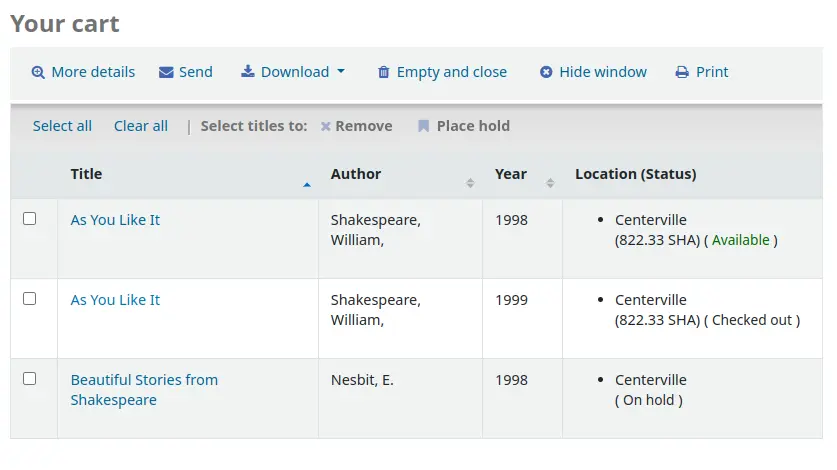
Z tohoto okna vám bude prezentováno několik možností. V horní části vozíku je několik tlačítek.
More details: clicking this will show additional information about the titles in the cart (ISBNs, subjects, publisher info, notes and more).
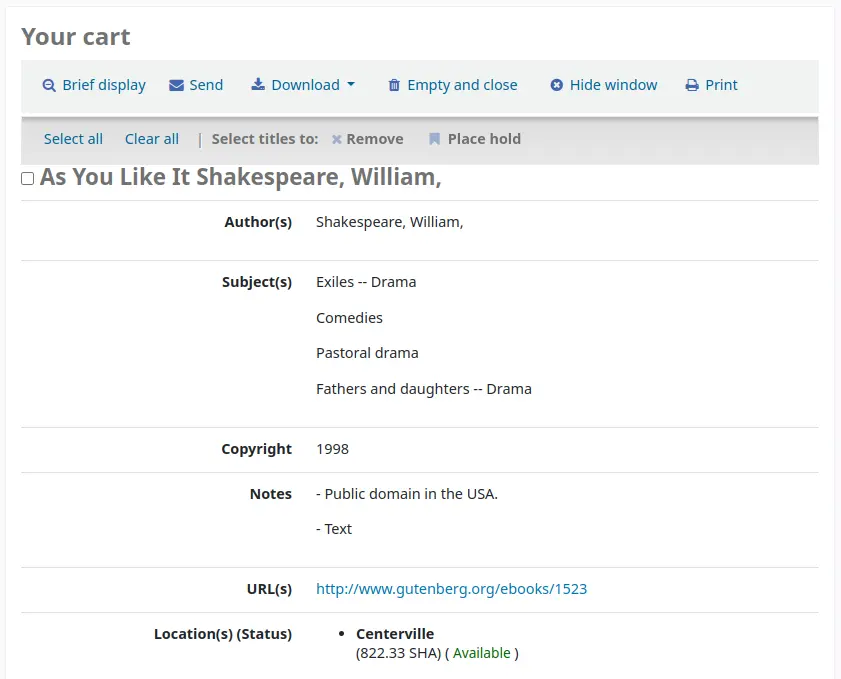
When clicked, the ‚More details‘ button will become ‚Brief display‘. Clicking this will return to the default display in table form of the title, author, copyright date and item location and status.
Send: the option to send the contents of the cart to an email address. This is handy if you want to send the resources you found at the library to your home email account to refer to later or to send to a patron researching a specific topic. Clicking this link will open up a new window that asks for the email address and message to send.
Varování
The cart can only be emailed by logged in users. This will prevent the cart email function from being used for spamming.
Poznámka
The message sent when emailing the cart is CART, which can be customized in the Notices and slips tool.
Download: you can download the contents of the cart in several predefined formats or using a CSV profile that you defined in the tools module.
Empty and close: this will empty the cart and close the window.
Hide window: this will close the window, but the cart will not be emptied.
Print: this will print out the contents of the cart.
In addition to the various different ways to save the contents of the cart, there are ways to add value to the data in your cart.
Select one or more titles from the cart and choose one of the options:
Remove: this will remove the selected titles from the cart.
Add to a list: this will add the selected titles to a list
Place hold: this will place a hold on all selected titles
Tag: if the TagsInputOnDetail system preference is enabled, patrons will be able to add tags to selected titles.
Placing holds
Patrons can place holds on items via the OPAC if they’re logged in and the OPACHoldRequests system preference is set to ‚Allow‘. If the item can be placed on hold, the option to place it on hold will appear in several different places.
If the DisplayMultiPlaceHold system preference is enabled, when viewing a list or search results page there will be the option to place hold on multiple items by checking the boxes to the left of the results and clicking ‚Place hold‘ at the top.
When viewing a list or search results page you’ll see the option to place the item on hold below the basic information about the title.
Při prohlížení individuálního titul, uvidíte možnost podat rezervaci v políčku na pravé straně obrazovky
All of the above links will show the same hold screen.
The box to the left of the items to place on hold should be checked.
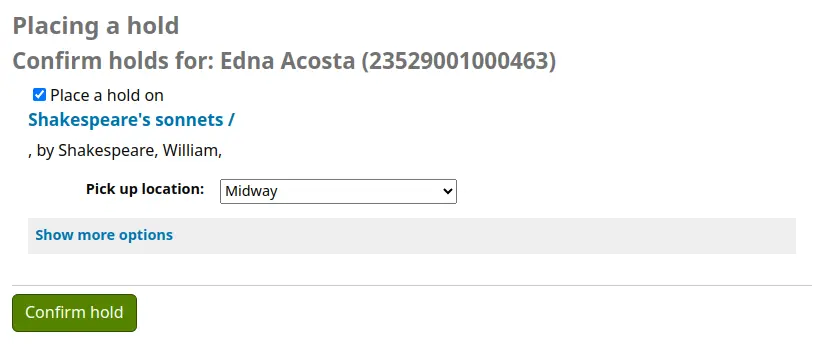
The title includes a link back to the detail page for the record.
Your priority: if the OPACShowHoldQueueDetails system preference is set to show the priority level, the priority, where in the holds queue this hold will fall, will be displayed.
Pickup location: if the OPACAllowUserToChooseBranch system preference is enabled, the patron can choose where they’d like to pick up their hold. The list of available pickup locations will include all libraries that have ‚Pickup location‘ set to ‚Yes‘ on the library configuration page.
Click ‚Show more options‘ to show additional settings for this hold.
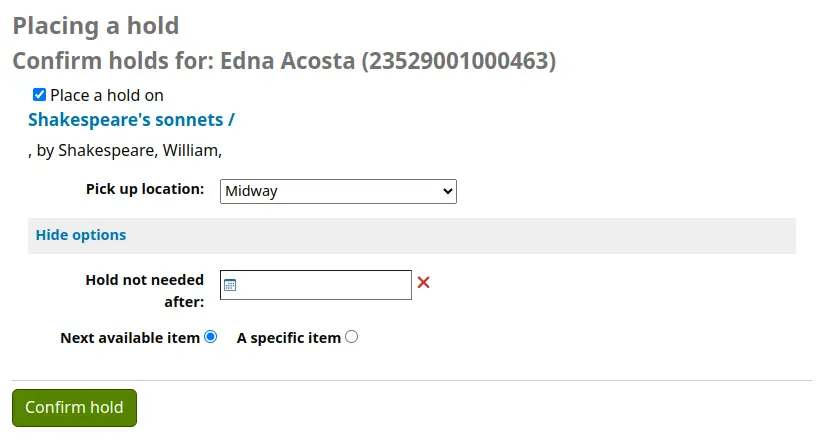
Hold starts on date: if the OPACAllowHoldDateInFuture system preference is enabled, this field will be displayed and it allows the patron to have their hold start on a future date.
Hold not needed after: by default, holds placed in the system remain until canceled, but if the patron fills in this field, the hold will have an expiration date.
Důležité
Expired holds are removed by the cancel_expired_holds.pl cronjob. This is not an automatic process and must be set up by the system administrator.
Request specific item type: if the AllowHoldItemTypeSelection system preference is set to ‚Allow‘, this option will be displayed for the patron to choose to limit the hold to a specific item type.
Request specific item group: if the EnableItemGroupHolds system preference is set to ‚Enable‘ and the record has item groups, the patron can choose to place a hold on the next available item of a group, rather than the next available item on the whole record or a specific item.
Hold notes: if the OpacHoldNotes system preference is enabled, patrons will be able to leave notes about their holds for the library.
Depending on the circulation rules regarding item-specific holds, the patron will be allowed to choose whether to place the hold on the next available item or a specific item.
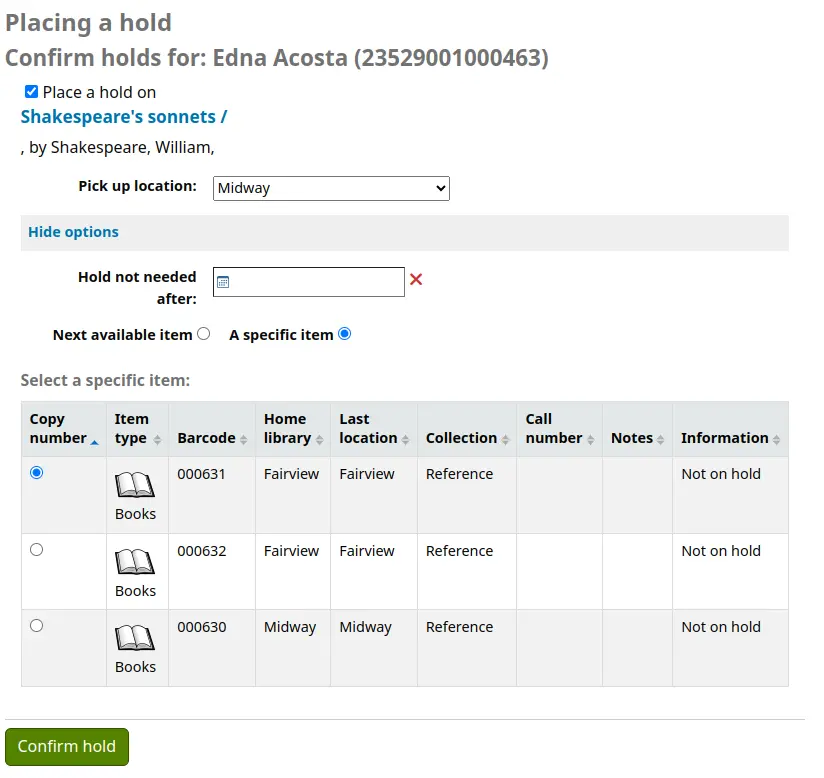
After clicking the ‚Confirm hold‘ button, the patron will be brought to their account page where they’ll see all of the items they have on hold.
Placing interlibrary loan requests
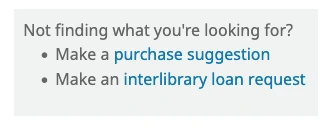
When the ILL requests module is enabled and some patron categories ‚can place ILL in OPAC‘, patrons will see a link under the search results to place interlibrary loan requests.
If the ILLOpacUnauthenticatedRequest system preference is set to ‚Don’t allow‘, patrons will be required to login before placing a request. After logging in, they will be redirected to the Interlibrary loan requests tab in their account to create the request.
If the ILLOpacUnauthenticatedRequest system preference is set to ‚Allow‘, patrons can place requests without being logged in or without having an account. When clicking ‚Make an interlibrary loan request‘, they may be prompted to first select a provider (if the library is using more than one backend) before accessing the ILL request form.
Poznámka
If there is a copyright clearance text in a ‚ILLModuleCopyrightClearance‘ HTML customization display location, the text displays here and patrons need to click ‚Yes‘ to accept before continuing.
The form includes fields for the patron’s personal details (first name, last name, e-mail address).
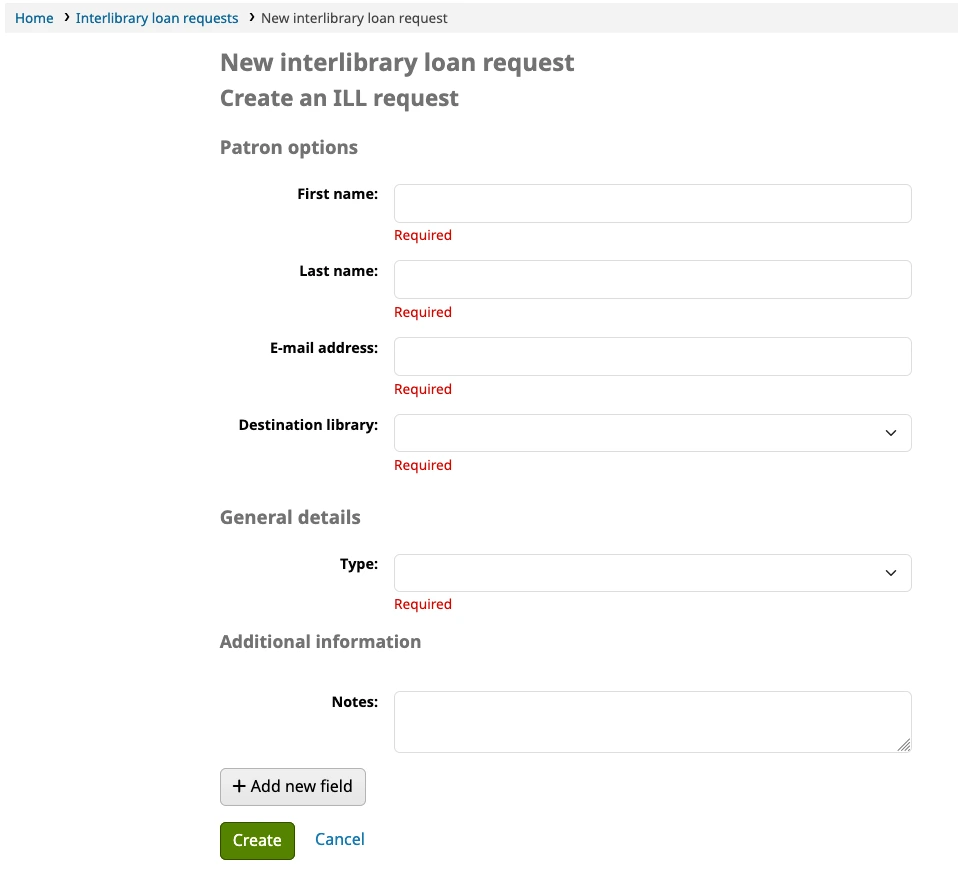
Destination library: the list is made of the libraries marked as pickup locations in the Libraries settings. This is the library that will be managing the request and be the pickup location for requested physical items.
Type: when a type is selected, the relevant input fields for that particular resource appear. The sets of fields for each request type are the same as those displayed when creating a request in the staff interface.
Clicking ‚Create‘ will submit the request to the library for processing.
Poznámka
If the ILLModuleDisclaimerByType system preference is in use, the disclaimer will appear at this stage. Whichever the option chosen by the patron, the request will be created and the type disclaimer value will be stored alongside the request’s other details.
Requesting recalls
If your library accepts recalls (see setting up recalls for more information), patrons will be able to place recalls on items.
The option to request a recall appears in various places in the OPAC:
In the results list after a search, the ‚Place recall‘ option appears at the bottom of each recallable result.
In the detailed record. the ‚Place recall‘ option appears on the right side of the screen (or bottom in mobile view) in the options
Either of those links will lead to the recall form.
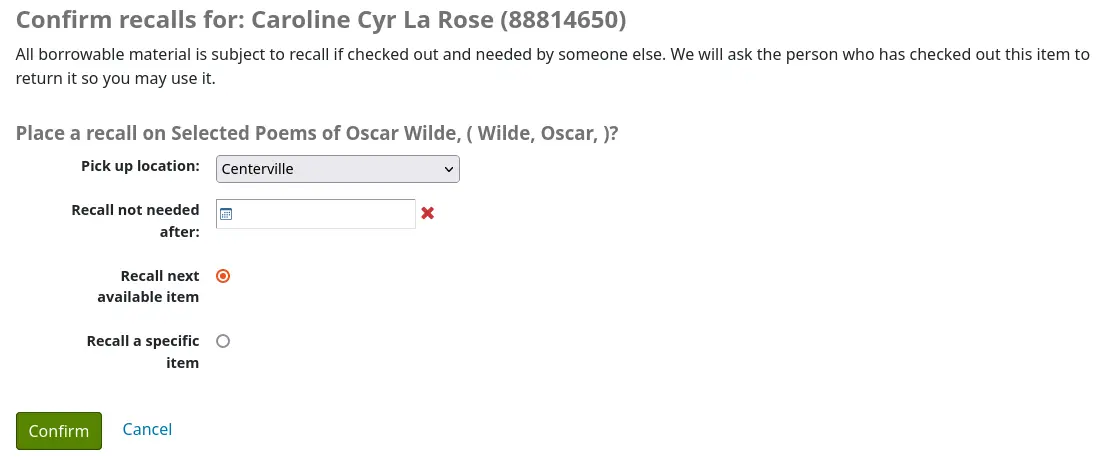
Pick up location: the patron can choose where they’d like to pick up their recalled item.
Recall not needed after: if the patron not need this item after a certain date, they can enter it here. The recall will be automatically expired (with the expire_recalls.pl cronjob) after that date.
Recall next available item or Recall a specific item: the patron can choose to recall any item or a specific one. If they choose ‚Recall a specific item‘, they will be asked to select the item in the list.
Once the patron confirms their recall request, they will have get a message saying the the patron who currently has the item will be notified.
Poznámka
The notice sent to the patron who currently has the item is RETURN_RECALLED_ITEM. It can be edited in the Notices and slips tool.
The request will be added to the recalls tab in their account summary, as well as in their recall history list.
Rozšířený obsah
OverDrive
If the OverDrive system preferences are used, an OPAC search will also search the library’s OverDrive collection.
After conducting a search, you will see a hyperlink above the library catalogue results: ‚Found X results in the library’s OverDrive collection‘.
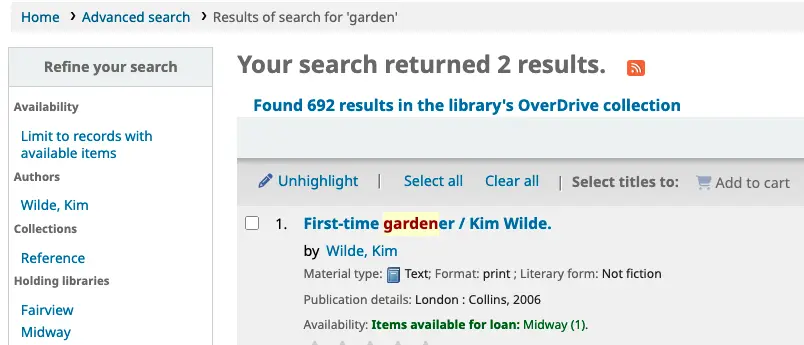
When you click on this link, you will see all the corresponding OverDrive results without navigating away from the OPAC.
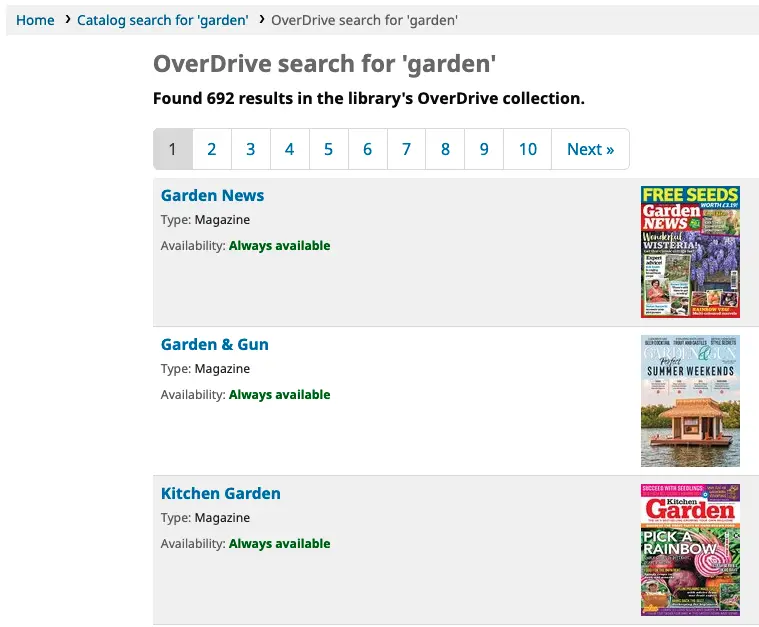
Clicking on a title in this list will take you to the record on the OverDrive website.
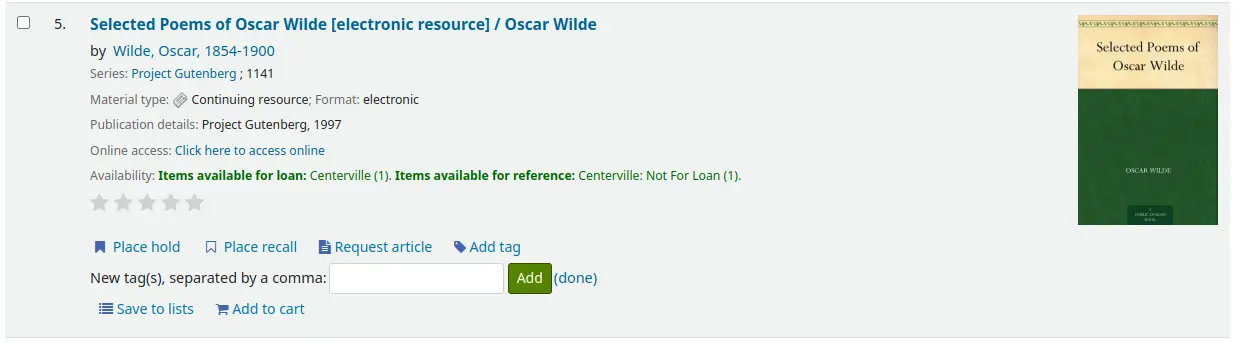
Štítkování
Depending on the settings for the TagsEnabled, TagsInputOnList and TagsInputOnDetail system preferences, patrons may be able to add tags to bibliographic records from the search results and/or from the bibliographic records‘ detail page.
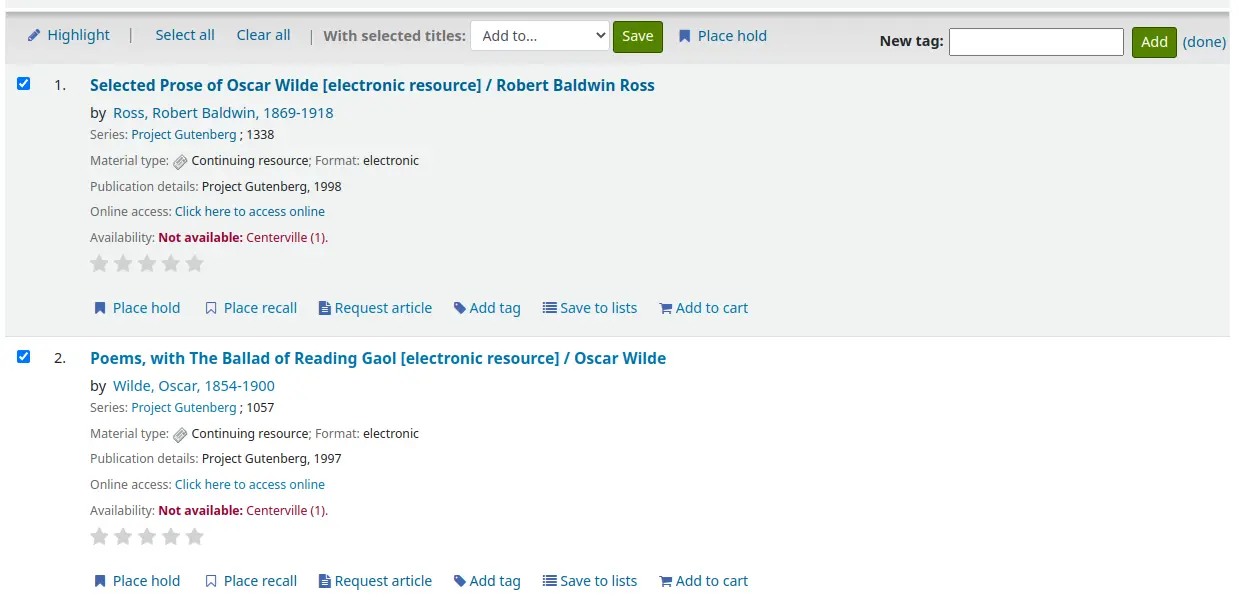
If you are allowing patrons to add tags from the search results list (see TagsInputOnDetail), patron will see an ‚Add tag‘ button below each result and a ‚Tag‘ option at the top of the screen.
To add a tag to one item, click ‚Add tag‘, type the tag or tags (separated by commas) in the ‚New tag‘ box and click ‚Add‘. You will be presented with a confirmation of your tags being added.
Z výsledků hledání lze také označit jednotky hromadně kliknutím na zaškrtávací políčka vlevo a kliknutím na tlačítko „Štítek“ v horní části. Po kliknutí na tlačítko „Štítek“ se toto změní do vstupního pole pro přidání štítků ke všem jednotkám, které jste vybrali.
If the TagsInputOnDetail system preference is enabled, patrons will also have the possibility to add tags from a list and from the cart.
If the TagsInputOnDetail system preference is enabled, patrons will have the possibility of adding tags from the record detail page by clicking the ‚Add tag(s)‘ link. The link will be replaced by an input box.
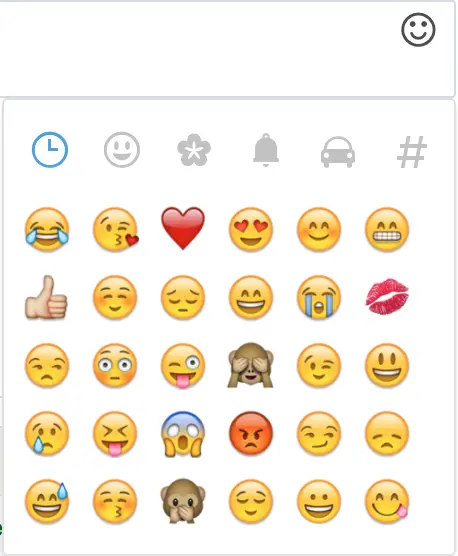
Emojis can also be included using the emoji picker when adding tags from the record detail page.
Zotero
Zotero is an open source reference manager for saving and managing a bibliography. Learn more about and download Zotero at https://www.zotero.org.
Když jste ve výsledcích vyhledávání v OPACu Koha, pokud máte nainstalováno Zotero, uvidíte ikonu složky v adresním řádku vpravo od URL. Kliknutím na tuto složku se otevře seznam titulů na stránce, abyste je mohli přidat do Zotera.
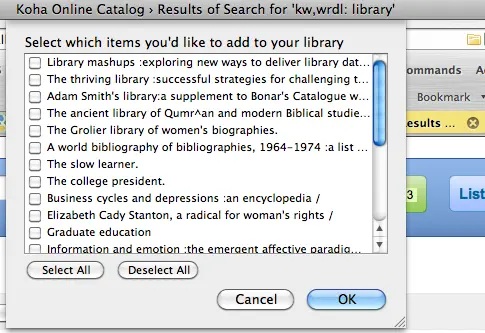
Vyberte tituly, které chcete přidat do Zotera a poté klepněte na tlačítko ‚OK‘. Tím přidáte tituly do Zotera. Tituly v Zotero můžete vidět, tím že otevřete knihovny Zotero.

Custom RSS feeds
Using the RSS feeds cron job you can generate an RSS feed for any SQL query (for example a new acquisitions RSS feed). The cron job is run on the command line to produce an RSS XML document.
Výstup by měl být umístěn v adresáři, který je přístupný z OPAC (nebo zze služebního intranetu), takže čtenáři si mohou stáhnout RSS vlákno.
An example of usage can be found at: misc/cronjobs/rss/lastAcquired.conf
Normally the RSS cron job should be run periodically (e.g., daily) to keep the feed up-to-date.
Konfigurační soubor (např. lastAcquired.conf) vypisuje
jméno souboru šablony, který se má použít
cestu k výstupnímu souboru
SQL dotaz
The RSS cron job runs the SQL query, then feeds the output of the query through the template to produce the output file.
Důležité
To use custom RSS feeds you need to turn on the RSS cron job.
Cookies information
You can add information about cookies to your OPAC, with a banner and policy.

From the cookie banner, users have the option to accept essential cookies or to view more information. When they click ‚More information‘, the Cookies policy pops up.
The cookie banner will be displayed on all pages until the user accepts cookies.
To set up cookie information:
Check whether you use non-essential cookies on your site.
Check for analytics tracking code in the OpacUserJS system preference.
Move any tracking code you have to the CookieConsentedJS system preference.
Decide what text you want displayed on the cookie banner: add it to the CookieConsentBar HTML customization.
Decide what content you want for the Cookies policy pop-up: add it to the CookieConsentPopup HTML customization.
Switch the CookieConsent system preference to ‚Require‘ and check the result.
OPAC self-registration
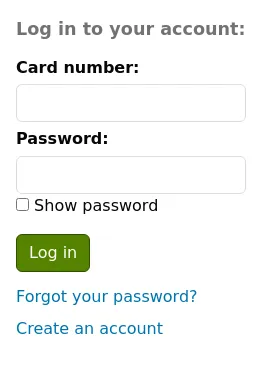
If you allow it, patrons can register for their own accounts via the OPAC. If you have the PatronSelfRegistration preference set to ‚Allow‘ then patrons will see a link to register below the log in box.
When the patron clicks the ‚Create an account‘ link they will be brought to a registration page. The options on the registration page can be controlled by editing the PatronSelfRegistrationBorrowerMandatoryField and the PatronSelfRegistrationBorrowerUnwantedField preferences.
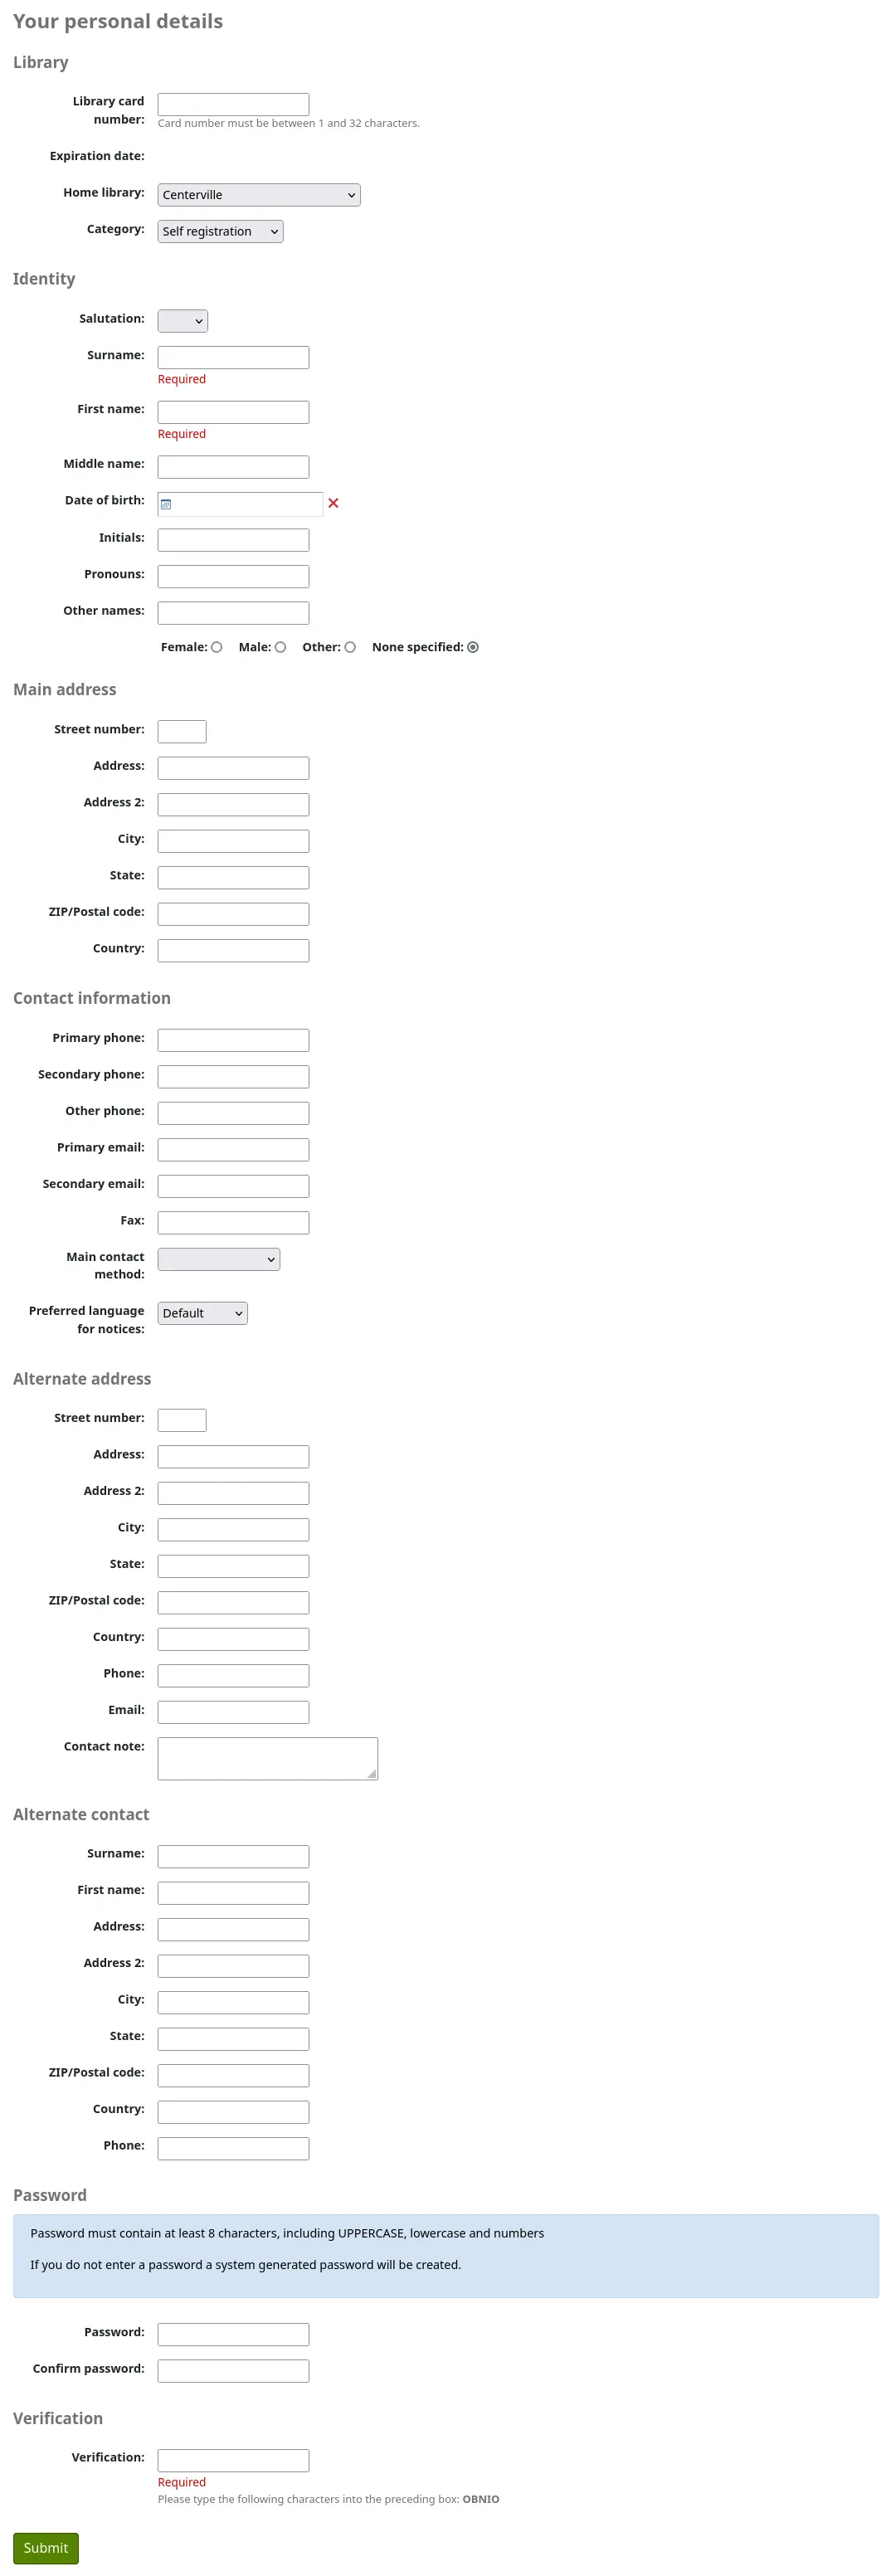
Poznámka
To prevent errors in birth years, you can enable the PatronSelfRegistrationAgeRestriction system preference. This adds a maximum age check to the self-registration.
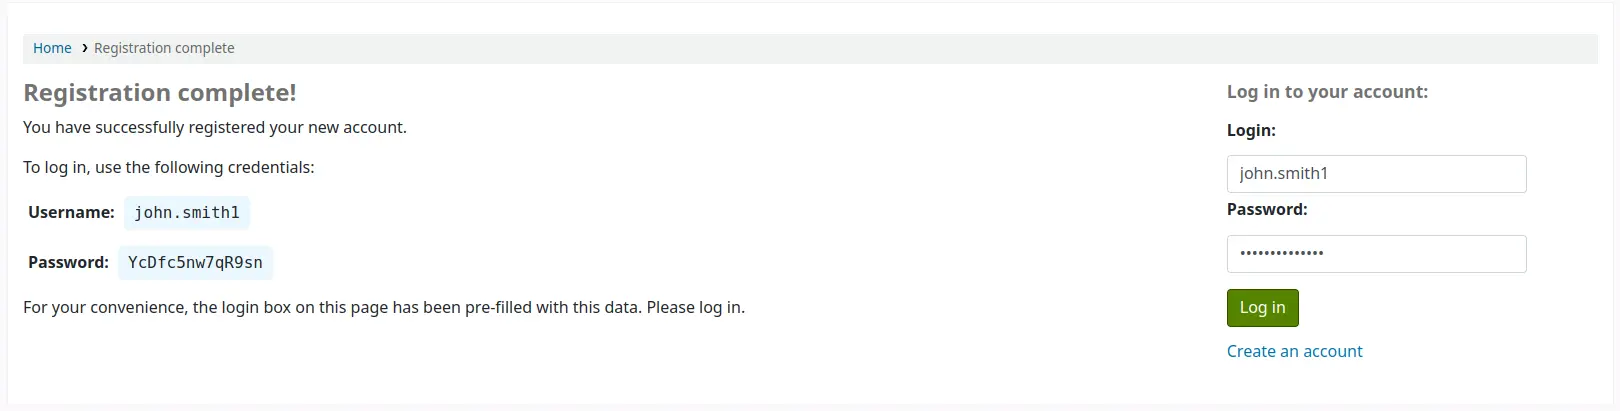
Once the patron has submitted their registration they will either be sent an email to confirm their account (if you have the PatronSelfRegistrationVerifyByEmail preference to require this) or presented with their new username and password. If the PatronSelfRegistrationPrefillForm system preference is set to ‚Show and prefill‘, they will be presented with the prefilled login form.
You can add additional instructions on this page by creating an HTML customization with the display location ‚PatronSelfRegistrationAdditionalInstructions‘.
To be notified when a patron registers via the OPAC, use the EmailPatronRegistrations system preference, or the PatronSelfRegistrationAlert system preference.
Patrons registered in this way will not have a card number until assigned one by the library, but will have access to all OPAC functionality immediately. For this reason it is recommended that you:
set up a provisional patron category for self registered patrons (such as ‚Self-Registered) instead of using an existing patron category and set that value in the PatronSelfRegistrationDefaultCategory preference
give this patron category minimal circulation privileges in the circulation and fines rules (such as allowing a couple holds, but no check outs)
That way patrons will either have to come in to the library to verify their identity before given a card number and the ability to check items out or the library will have to come up with internal policy on generating card numbers before providing them to self-registered patrons. Once this is done the library can change the category to one that is more appropriate (be it an adult, resident, non resident, student, etc) and add a card number/barcode.
Váš účet
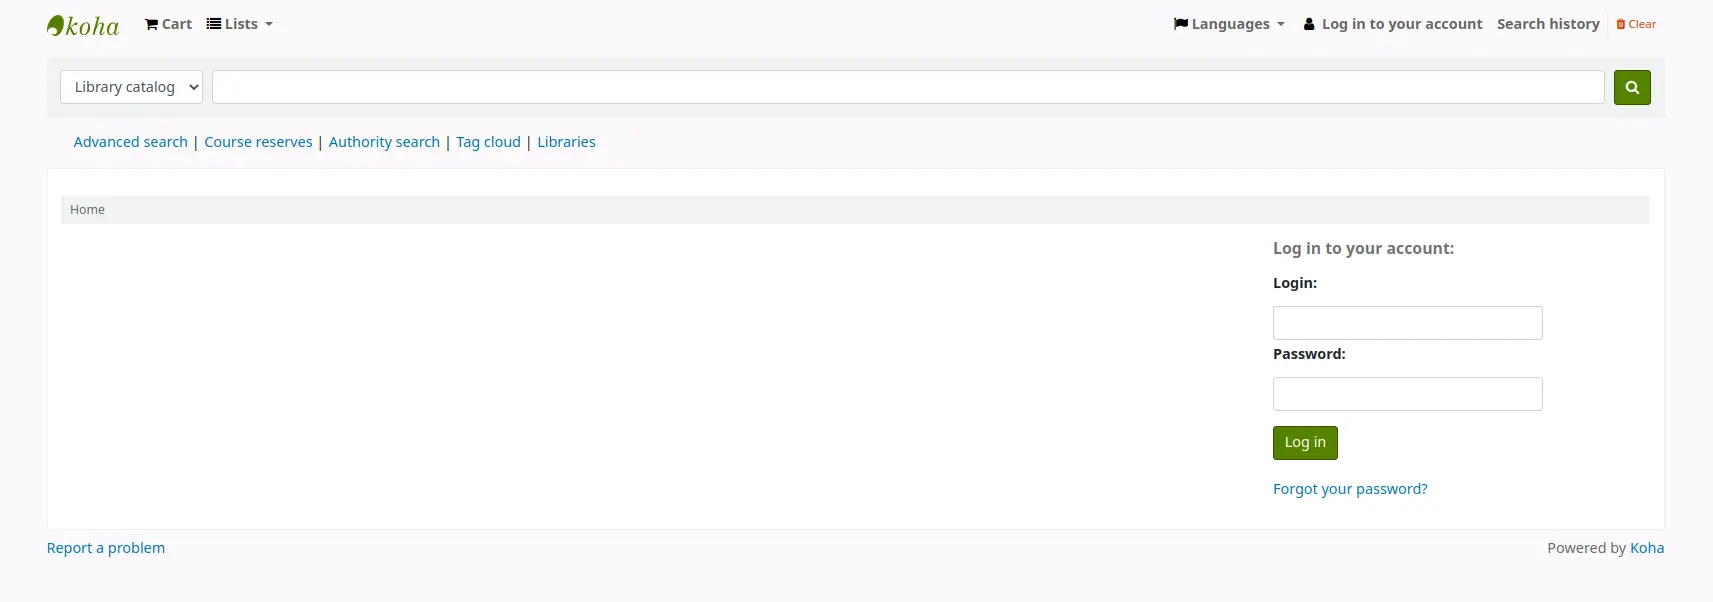
If the opacuserlogin system preference is set to ‚Allow‘, patrons can log in and access their account.
Once logged in patrons are brought to their account summary.
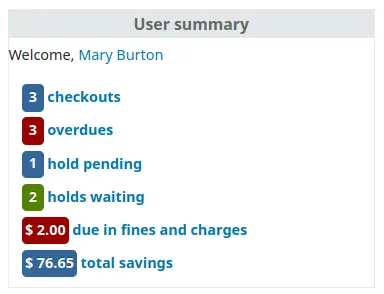
If patrons access the home page while logged in, and OPACUserSummary is set to ‚Show‘, they will see a small summary of their account instead of the login fields.
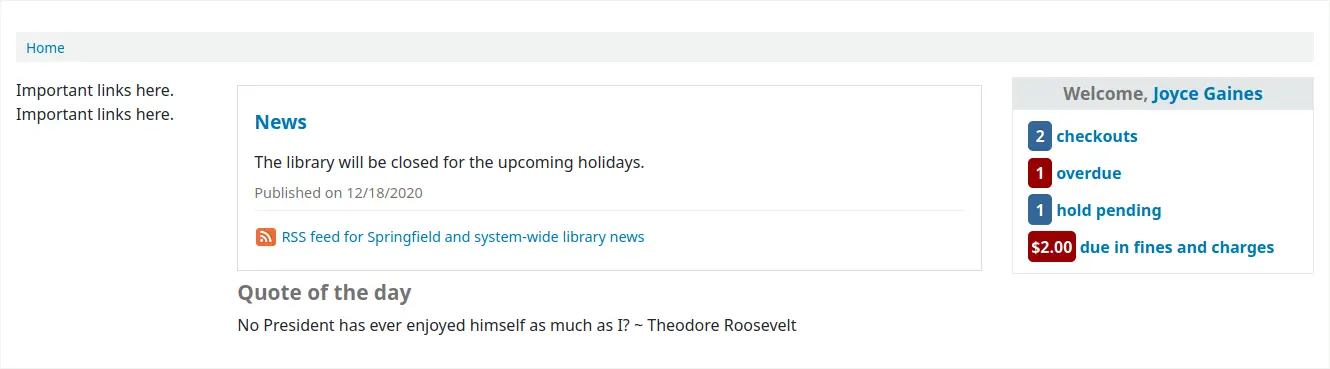
If OPACShowSavings is set to display savings in the summary box, this summary section will also contain the savings the patron made by using the library rather than purchasing the items.
From any page on the OPAC, clicking on their name at the top right of the page will bring a patron back to their account.
Resetting your password
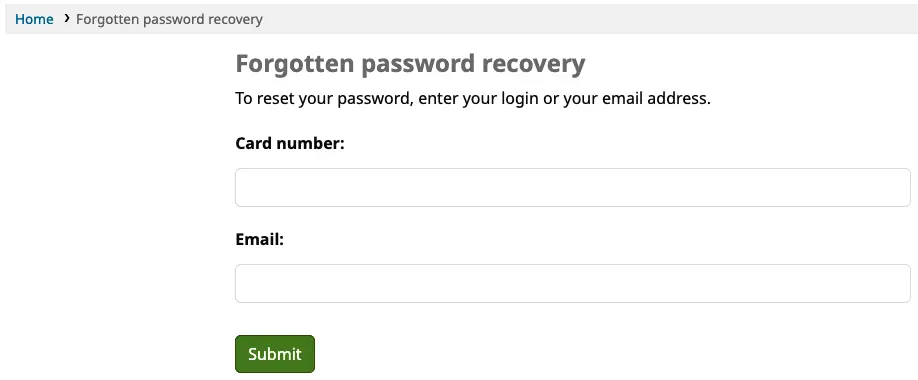
If you have the OpacResetPassword system preference set to ‚Allow‘, patrons can reset their password by clicking the ‚Forgot your password?‘ link found under the login box.
Once clicked, they will be presented with a form asking for their login or their email address.
Varování
Patrons must have an email address on file to reset their password. If they don’t have an email address already in their file, they will get an error message

The system will then email the patron instructions for resetting their password.
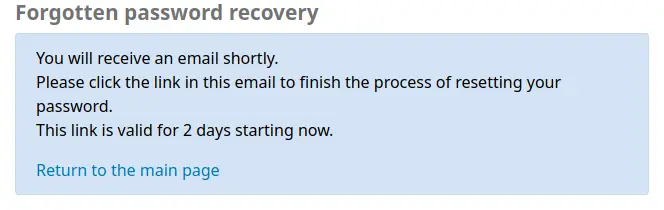
The content of the email can be customized with the Notices and slips tool. The code of the letter is PASSWORD_RESET.
If the NotifyPasswordChange system preference is enabled, the patron will receive a notification indicating their password was changed.
The content of that email can be customized with the Notices and slips tool. The code of the letter is PASSWORD_CHANGE.
Přehled účtu
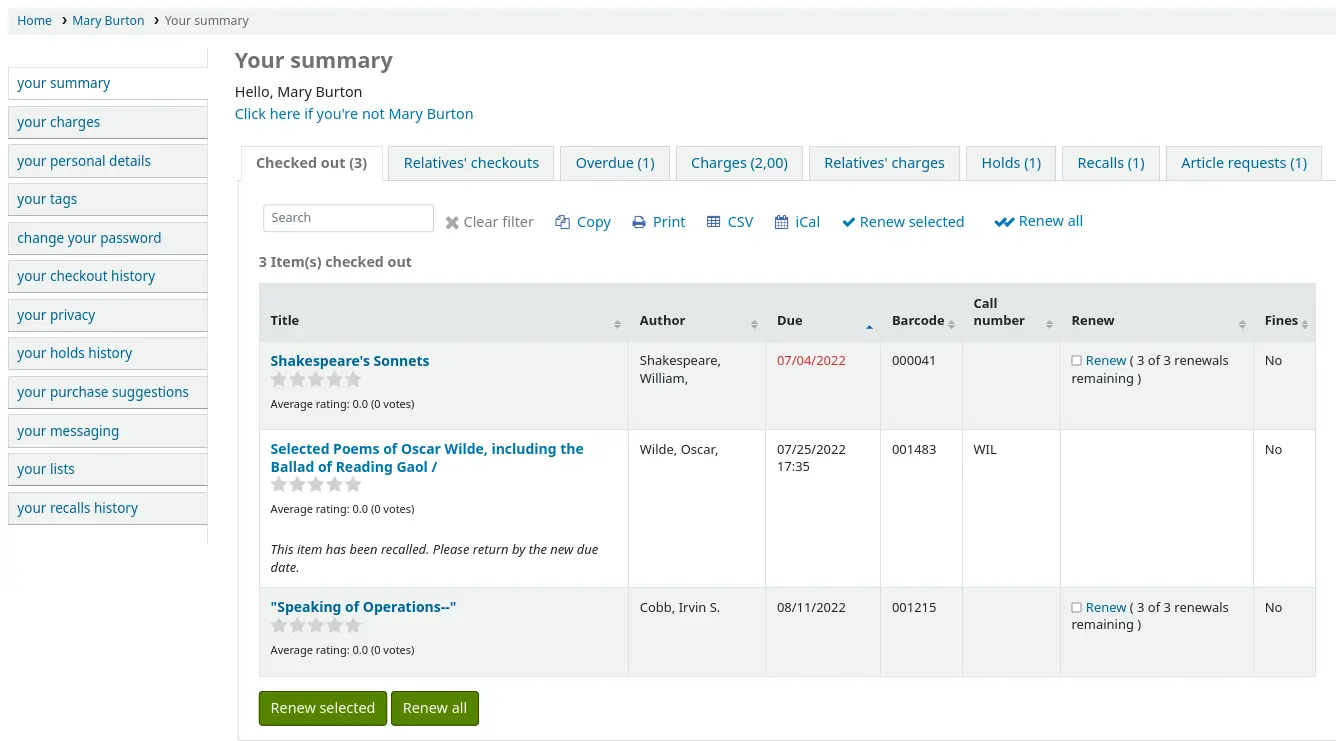
From the ‚your summary‘ tab, patrons will see all of the items they have checked out with the overdue items highlighted in red.
OPAC messages and OPAC notes will be displayed at the top of this page. For OPAC messages, the patron will have the option to dismiss the message. This will hide the message from their OPAC account and mark it as read, but it will not delete the message.

You can add content to this page with the OpacMySummaryNote HTML customization location. Content added there will appear above the patron’s summary and below the welcome message.

If OPACShowSavings is set to display savings in the ‚your summary‘ page, this section will also contain the savings the patron made by using the library rather than purchasing the items.

If OpacRenewalAllowed set to ‚Allow‘, patrons will be able to renew their checkouts from the OPAC.
If the patron has pending charges exceeding the value set in OPACFineNoRenewals, a note will display explaining that renewals cannot be made.

A note will display if the patron cannot place holds due to their charges exceeding the value set in the maxoutstanding system preference.

If AllowPatronToControlAutoRenewal is set to ‚Allow patrons‘, patrons will be able to choose whether or not they want their checkouts to be renewed automatically. If they choose ‘Yes’, items for which automatic renewal is enabled in the circulation rules will renew as expected. If they choose ‘No’, the automatic renewals that would have applied to this patron’s checkouts will not take place.

If you have HTML entered in the OPACMySummaryHTML preference then you will see that to the right of the ‚Fines‘ column.
Tip
By default, the barcode is not displayed in the patron’s checkout table on the OPAC. If your patrons would like to see the items barcodes on their list of checked out items you can set up a patron attribute with the value of SHOW_BCODE and authorized value of YES_NO.
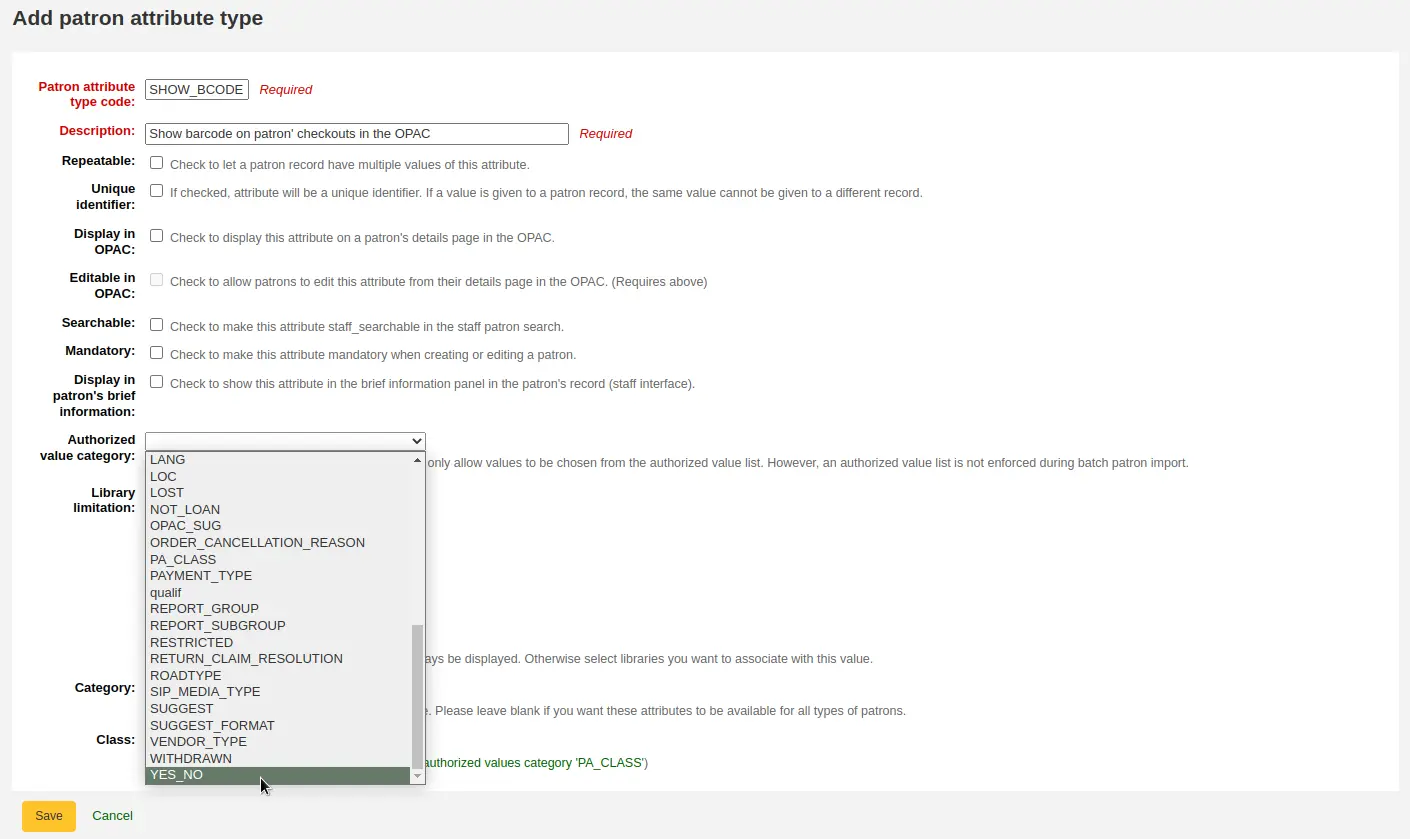
Then, on the patron’s record set the value for SHOW_BCODE to ‚Yes‘.
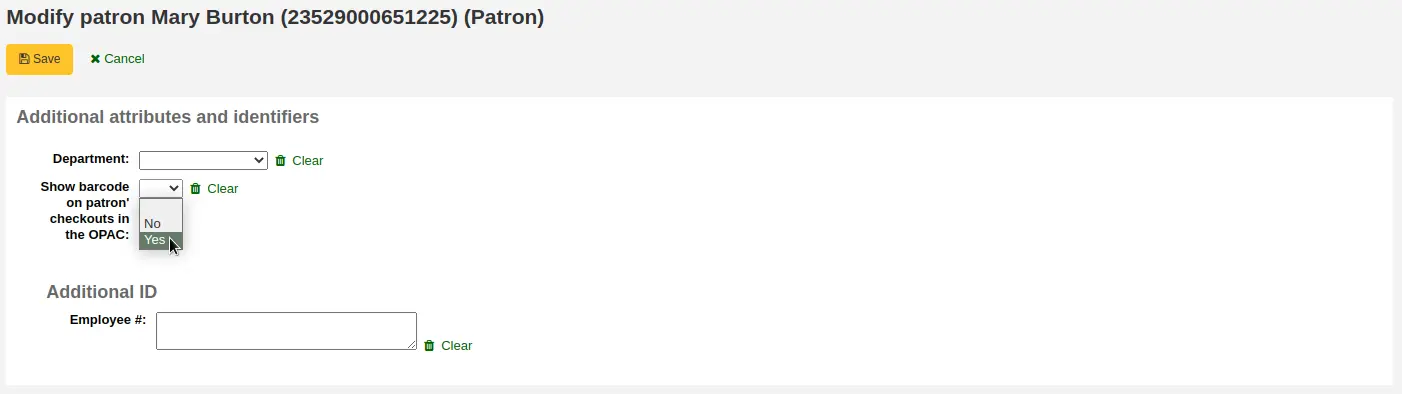
This will add a column to the checkout summary in the OPAC that shows the patron the barcodes of the items they have checked out.
If you would like your patrons to leave a note on an item they have checked out AllowCheckoutNotes preference must be set to allow.
In the patron’s summary of checkouts, there will be an added column to allow the patron to leave a note (for example: missing first page, or DVD is scratched).
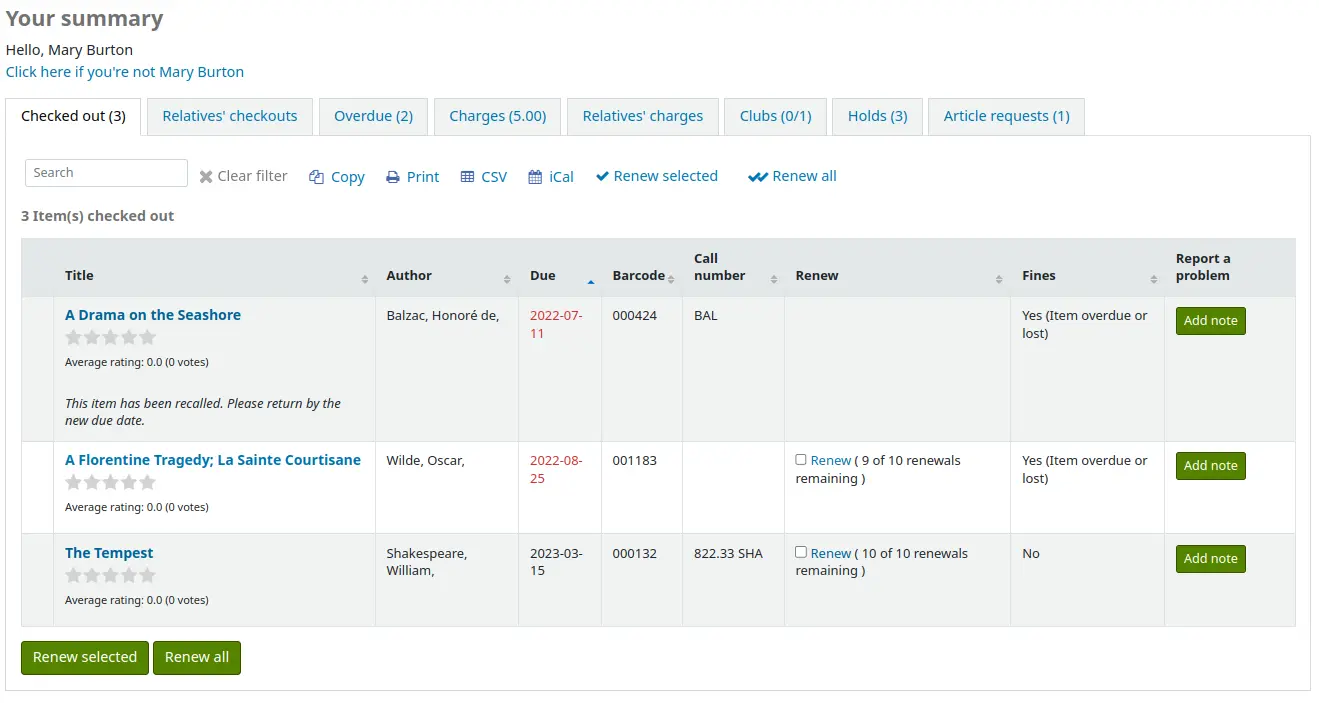
When the patron clicks on ‚Add note‘, they will be able to write a note about this checkout.
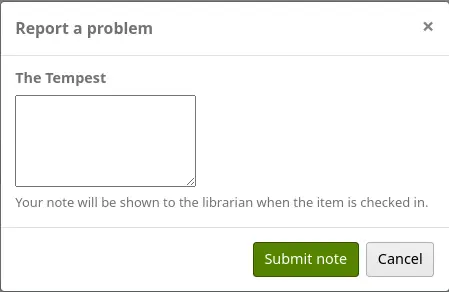
Staff will be able to see and manage checkout notes from the staff interface.
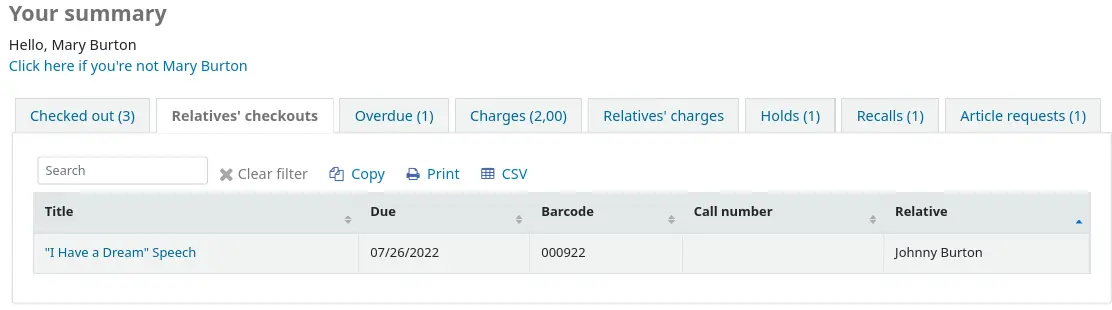
If their guarantee has allowed it via their privacy, or alternatively, if the staff is allowed to change this privacy setting in the staff interface with the AllowStaffToSetCheckoutsVisibilityForGuarantor system preference and this setting is turned on, when the guarantor logs in they will see a tab labeled „Relatives‘ checkouts“ on their summary tab.
Kliknutí na záložku „Opožděno“ ukáže pouze jdenotky, které přetáhly výpůjční dobu.
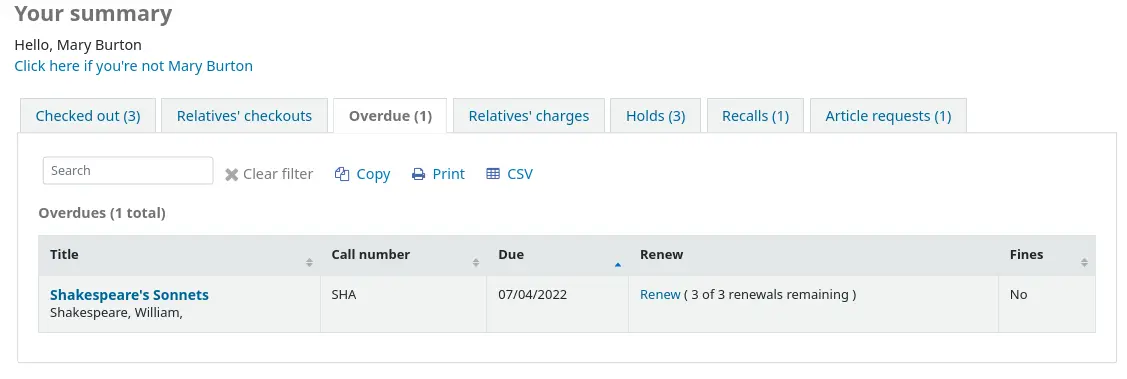
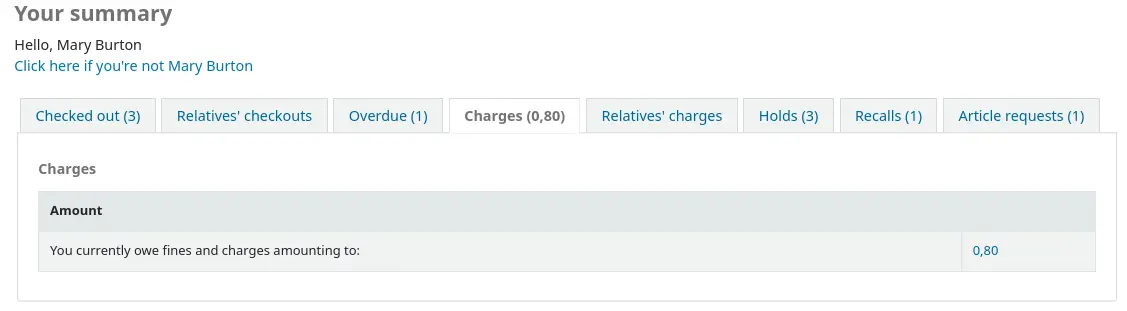
The ‚Fines‘ tab will show just a total of what the patron owes. Clicking on the total will take them to the ‚your fines‘ tab where they will see a complete breakdown of their fines and bills. If you don’t charge fines at your library you can turn the display of these tabs off by setting the OPACFinesTab preference to ‚Don’t allow.‘
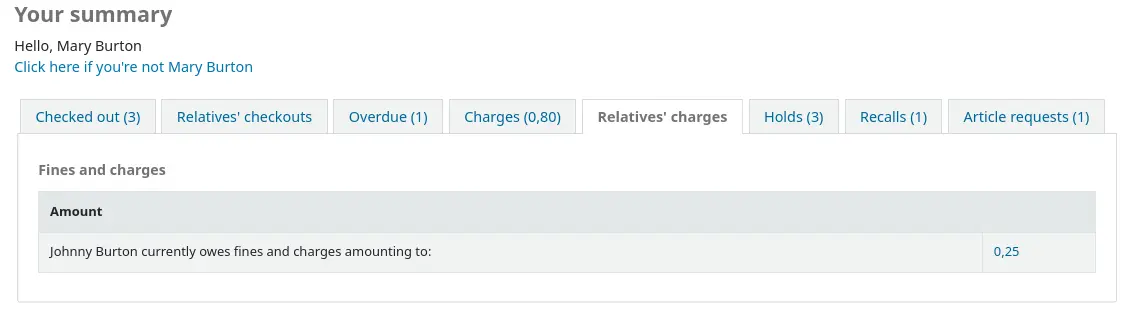
If their guarantee has allowed it via their privacy, or alternatively, if the staff is allowed to change this privacy setting in the staff interface with the AllowStaffToSetFinesVisibilityForGuarantor system preference and this setting is turned on, when the guarantor logs in they will see a tab labeled „Relatives‘ charges“ on their summary tab.
The ‚Clubs‘ tab shows all ongoing clubs which allow public enrollment. From here, patrons can enroll in clubs by clicking the ‚Enroll‘ button.

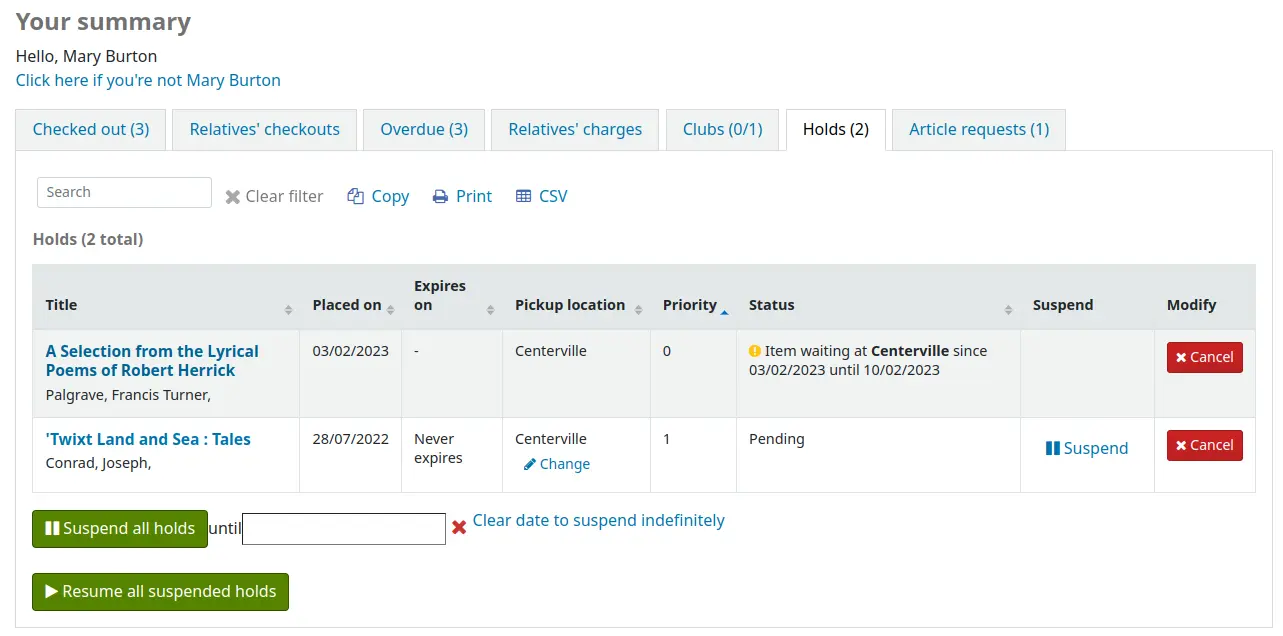
The ‚Holds‘ tab shows the patron the status of all of the items they have on hold.
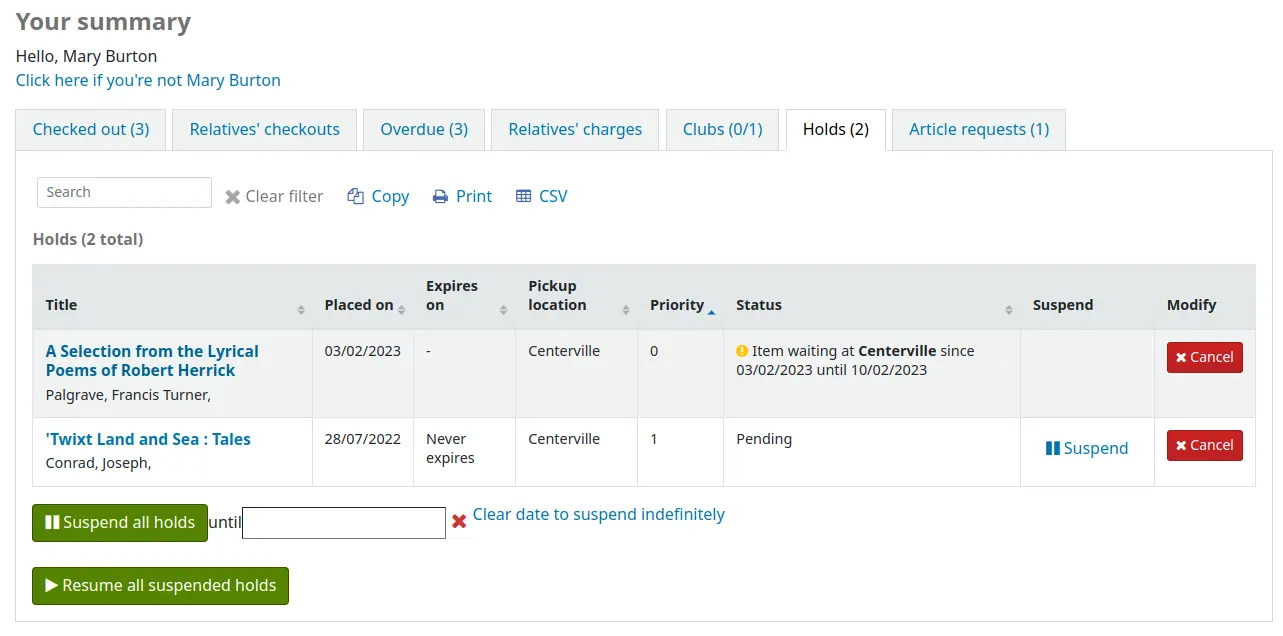
Depending on the value of the SuspendHoldsOpac system preference, patrons can suspend their own holds if they are not in transit or already waiting for them. When they click ‚Suspend‘ they will be presented with the option to choose a date for their hold to resume.
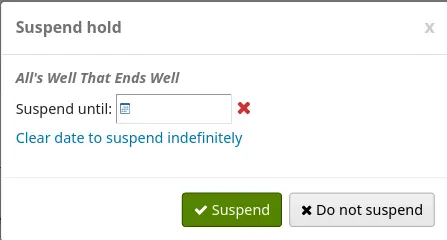
They can also suspend all of their holds indefinitely or until a specific date if they choose by filling in the suspend options at the bottom of the page.
Poznámka
If the AutoResumeSuspendedHolds system preference is set to „Don’t allow“, patrons will not have the option to put an end date on the hold suspension.
From this tab, patrons can also cancel holds. Depending on the waiting hold cancellation policy, they may also be able to cancel holds that are already waiting for them.
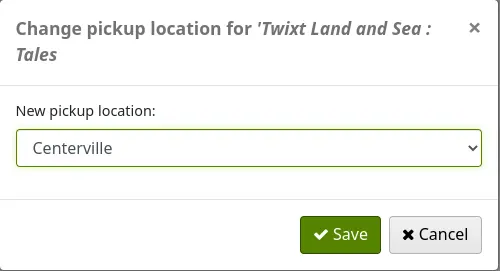
Depending on the value of the OPACAllowUserToChangeBranch system preference, the patron may be able to change the pickup library of holds. When one or more status is selected in the system preference, a ‚Change‘ link will appear under the current pickup library’s name for holds that have that status.
When the patron clicks on the ‚Change‘ link, there is a pop-up with a selection of libraries that allow hold pickups.
If your library allows recalls, the patron can see the recalls they have requested and their various statuses in the ‚Recalls‘ tab.
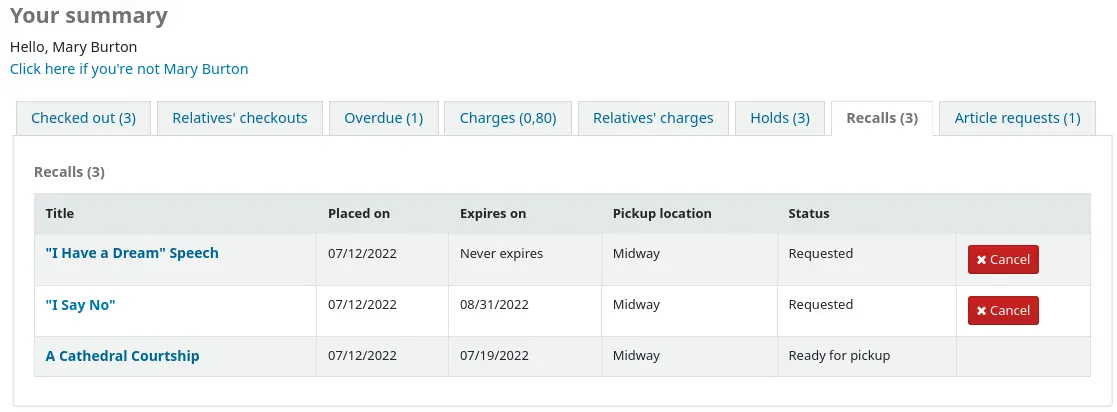
The patron can cancel a recall by clicking the ‚Cancel‘ button, provided that it is not already awaiting pickup.
Patron flags
If you have flagged your patron’s account they may see one of the following error messages at the top of their account.
Karta označená jako ztracená

Adresa čtenáře nejistá
Poznámka
this error message will not include a link to the update form if you have OPACPatronDetails set to ‚Don’t allow‘
Čtenář označen s omezením

Library card
Version
This feature was first introduced in version 24.11 of Koha.
If the OPACVirtualCard system preference is set to ‚Allow‘, patrons will see a ‚Library card‘ tab where their library card barcode is displayed.
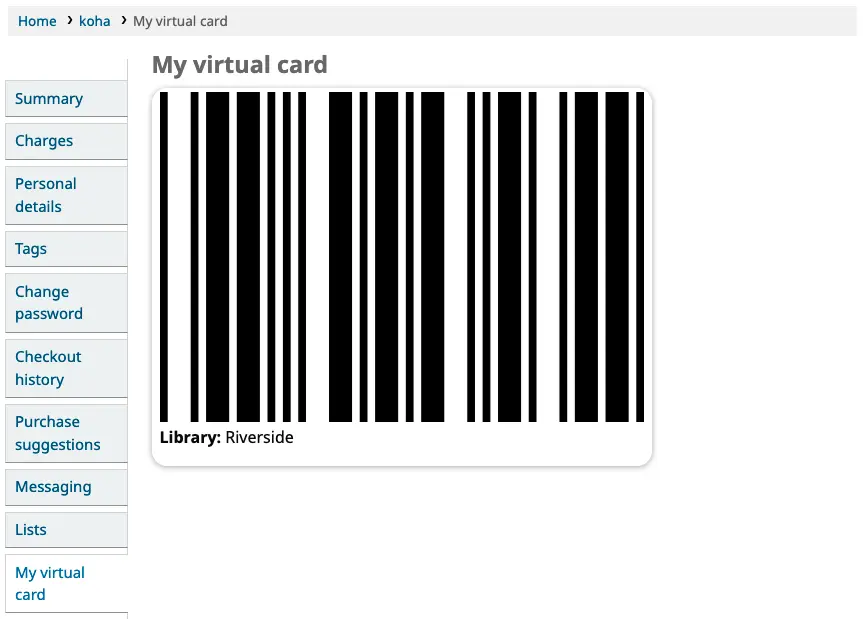
If the patron has logged in to their OPAC account from a mobile device, their barcode can then easily be scanned by library self-service kiosks and other services.
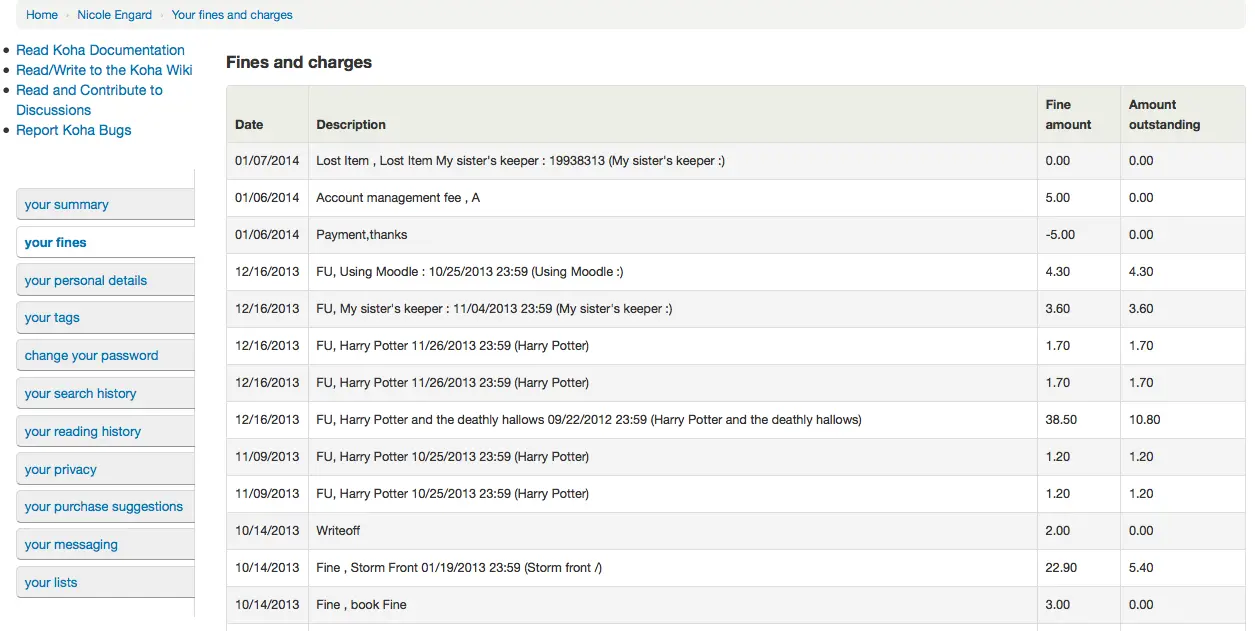
Your fines
If your library charges fines the next tab on the left is ‚your fines‘. Opening this tab will show the patron an entire history of their accounting at the library.
Osobní údaje
If you have your OPACPatronDetails preference set to ‚Allow‘, your patrons will see a form filled in with their contacting information by clicking on the ‚Your personal details‘ tab. You can control what fields patrons see and can modify via the OPAC by setting the PatronSelfModificationBorrowerUnwantedField and PatronSelfModificationMandatoryField preferences.
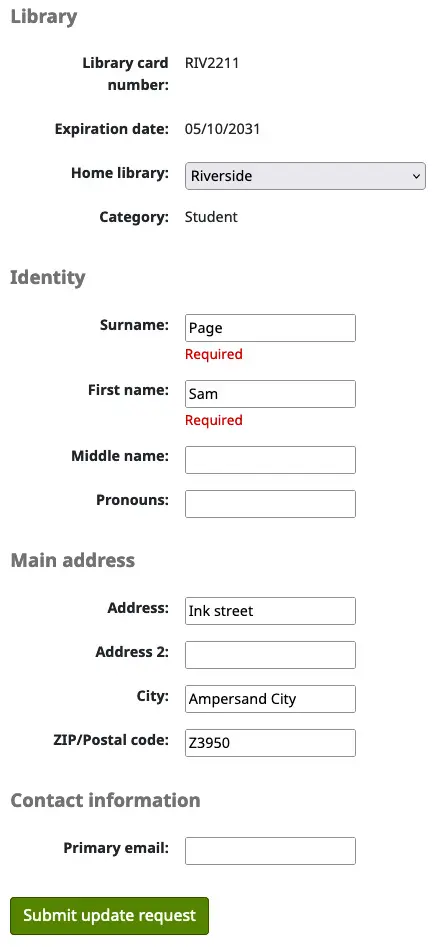
Patrons can edit their details in this form and click ‚Submit changes‘ to have their edits sent to the library for review before their record is updated. Staff will see all patrons requesting modification to their record listed below the modules on the main dashboard along with anything else awaiting library attention.
If the AutoApprovePatronProfileSettings system preference is enabled, staff will not need to approve changes.
If the OPACPatronDetails preference is set to ‚Don’t allow‘ then patrons will simply see their details and a message stating that they should contact the library for changes.
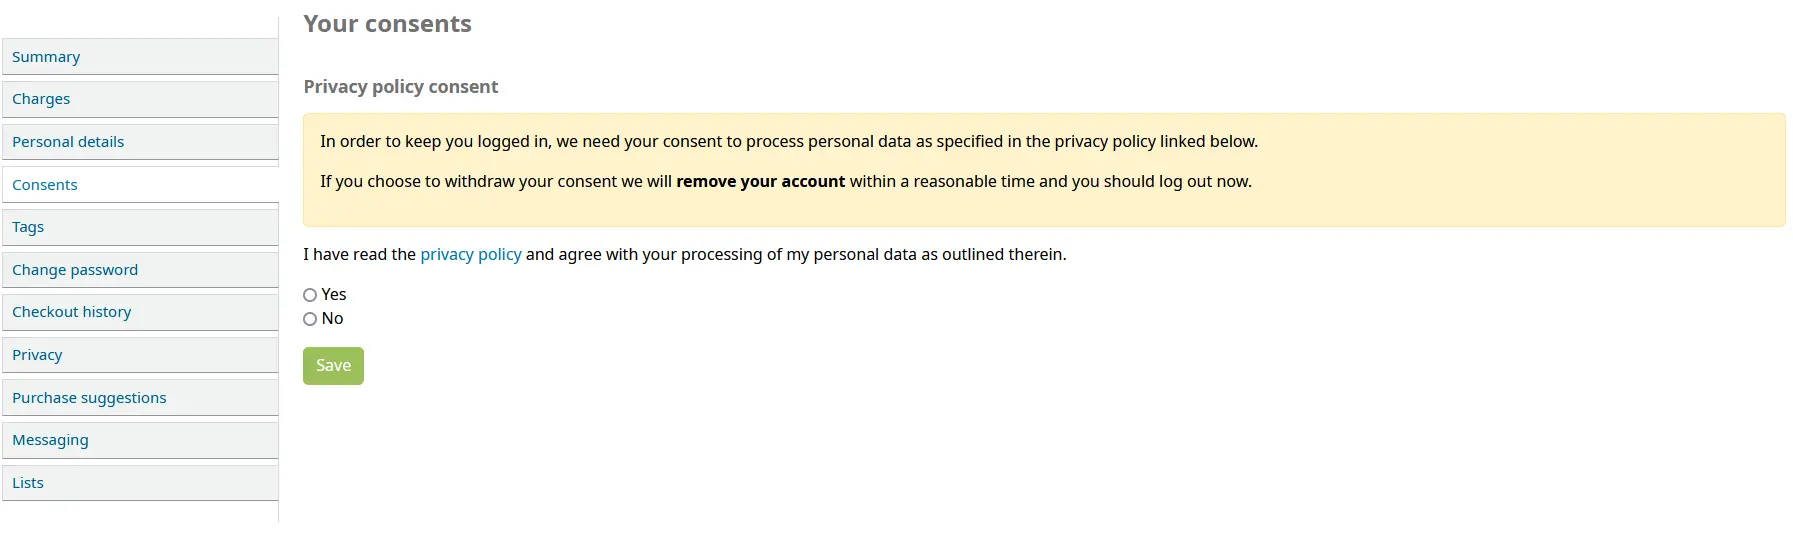
Consents
If you have set the system preference PrivacyPolicyConsent to ‚permissive‘ or ‚enforced‘ then logged in patrons in the OPAC will have a tab labeled ‚Consents‘ where their consent statements are saved. By default the library’s privacy policy is referred to in the consent statement. You can use a URL to link to your own privacy policy using the system preference PrivacyPolicyURL.
Version
A new plugin hook for ‚patron_consent_type‘ was added in version 23.11 of Koha to allow for further types of consent in the OPAC. See the Plugin Hooks page on the wiki for more information.
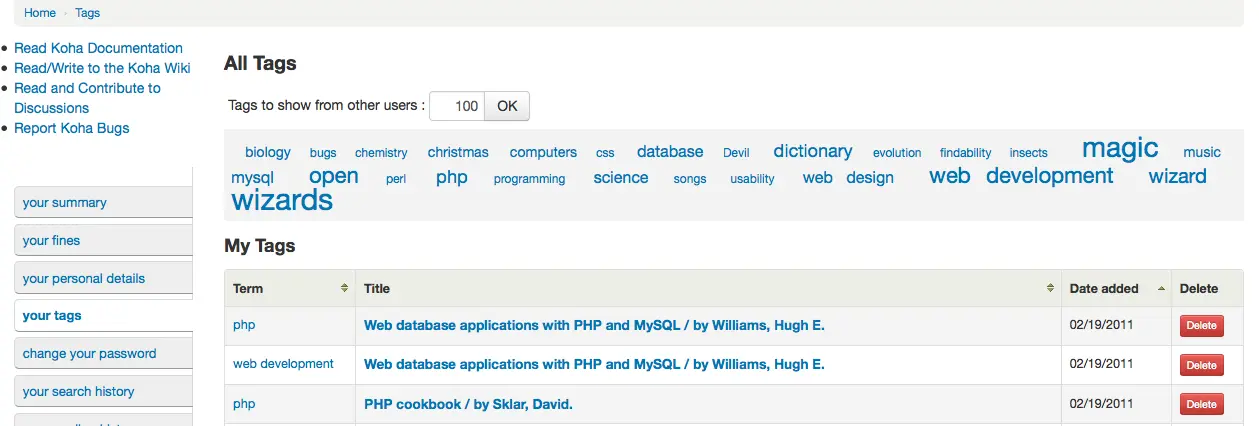
Vaše štítky
If your library has TagsEnabled set to ‚Allow‘ then the next tab on the left will be ‚your tags‘. This tab will show patrons all of the tags in the system as a cloud and then all of the tags they have applied in a list format. From here patrons have the ability to remove tags that they have added if they want.
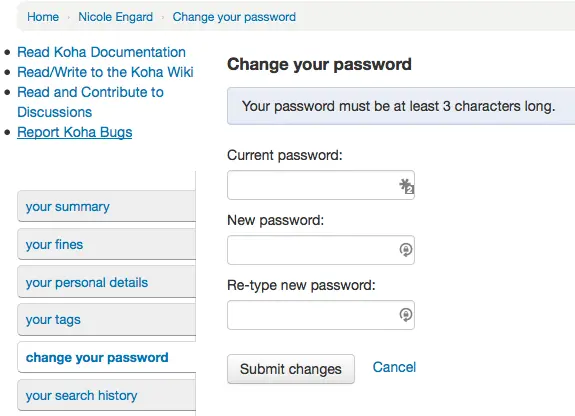
Změnit heslo
Next, if you have OpacPasswordChange set to ‚Allow‘ the next tab will be ‚change your password,‘ where patrons can change their password for logging into the OPAC. Patrons will be presented with a standard form asking them to enter their old password and then their new password twice.
If the NotifyPasswordChange system preference is enabled, the patron will receive a notification indicating their password was changed.
The content of this email can be customized with the Notices and slips tool. The code of the letter is PASSWORD_CHANGE.
Historie hledání
If you have your EnableOpacSearchHistory preference set to ‚Keep‘ then your patrons can access their search history via the ‚your search history‘ tab.
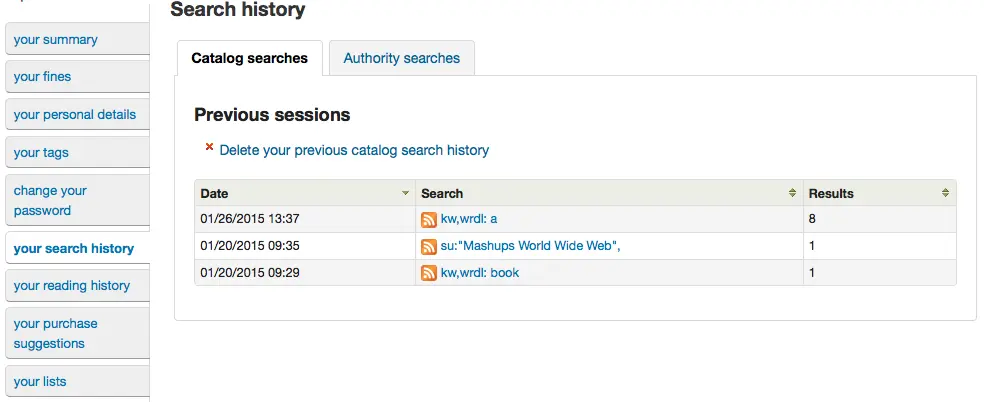
Historie vyhledávání je záznam všech vyhledávání provedených čtenářem. Kliknutím na některý z vyhledávacích frází znovu spusťte vyhledávání. Historie vyhledávání může být odstraněna čtenářem kdykoliv klepnutím na tlačítko ‚Smazat historii vyhledávání „, nacházející se v horní části této karty nebo kliknutím na malé červené „X“ hned vedle odkazu „Historie vyhledávání“ v pravém horním rohu OPACu.

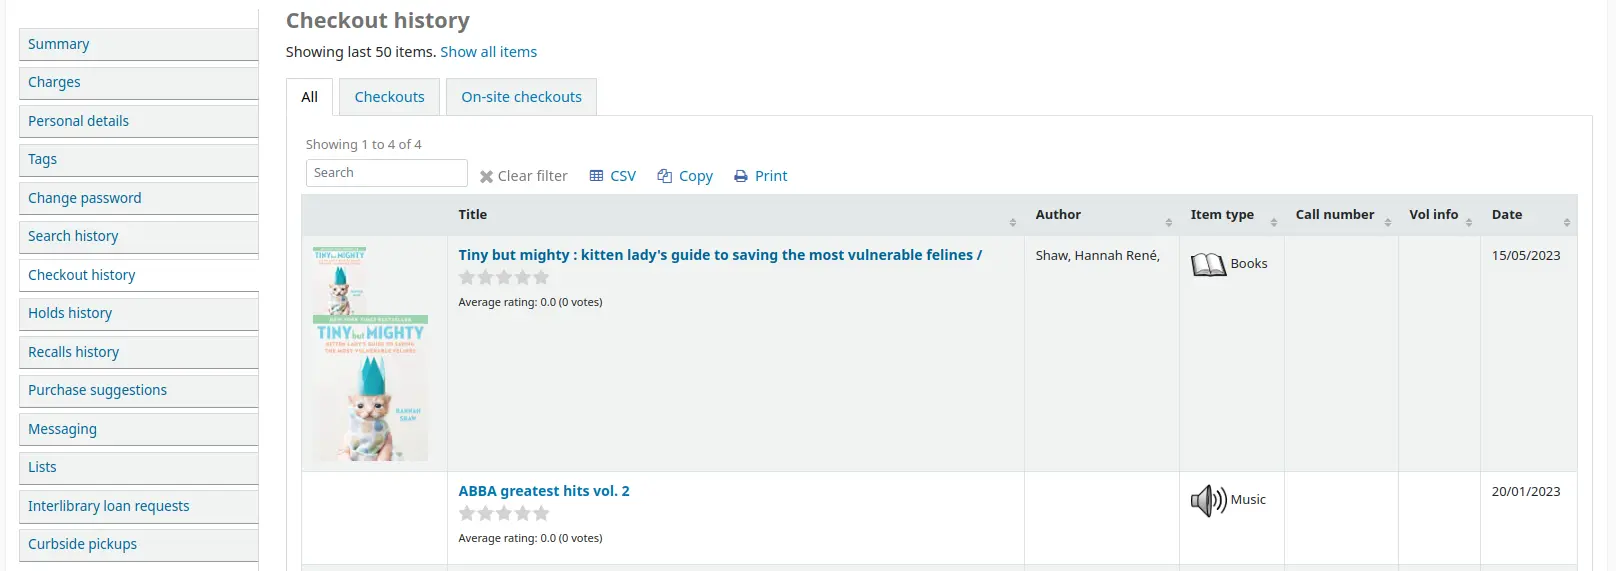
Checkout history
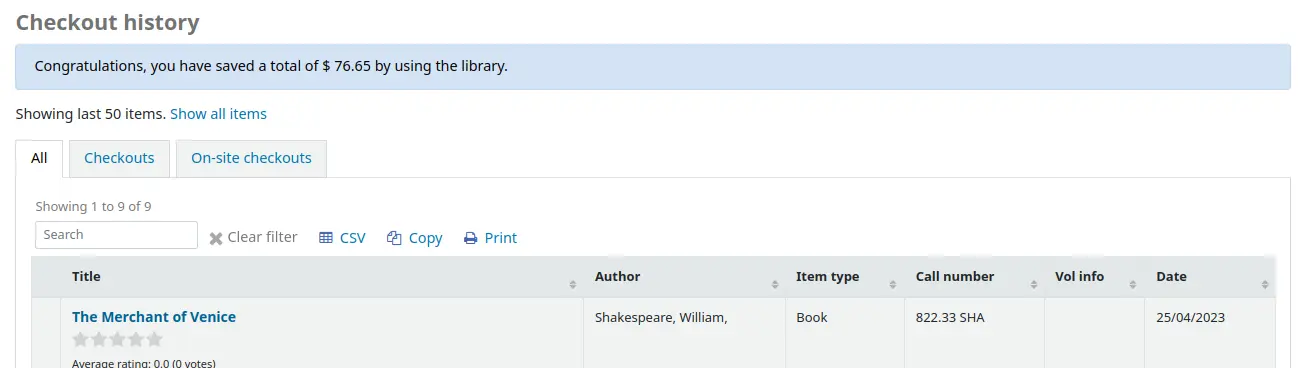
If the opacreadinghistory system preference is set to ‚Allow‘, patrons will have access to the ‚Checkout history‘ tab. This will show the patron their entire borrowing history, unless they have asked the library to not keep that information via the ‚Privacy‘ tab.
If OPACShowSavings is set to display savings in the ‚your summary‘ page, this section will also contain the savings the patron made by using the library rather than purchasing the items.
Your privacy
The ‚your privacy‘ tab will appear if you have both the opacreadinghistory and the OPACPrivacy preferences set to ‚Allow.‘ This tab will allow the patrons to decide how the library keeps their circulation history data.
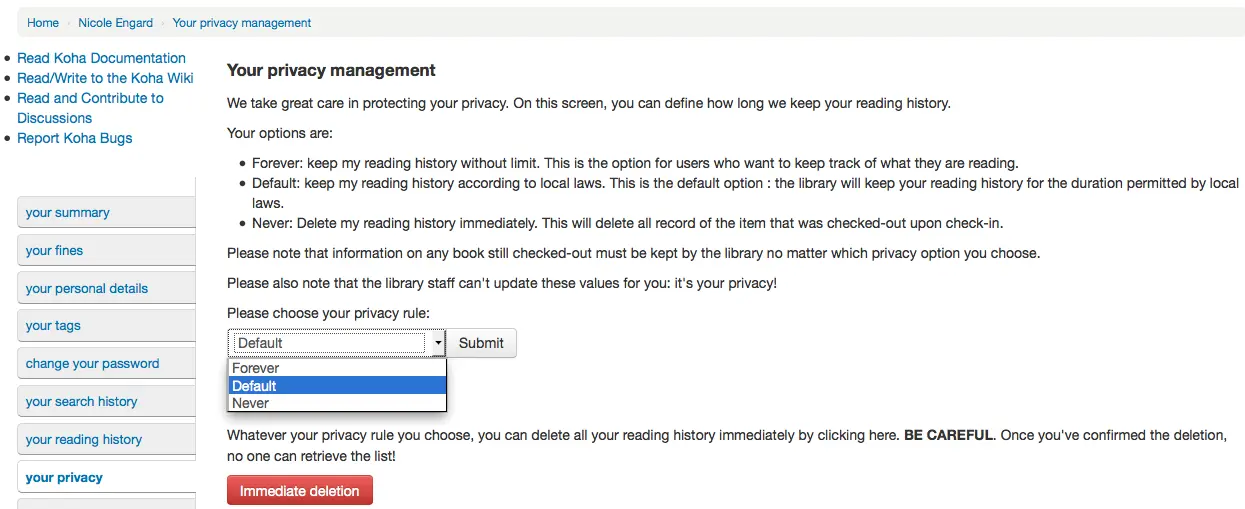
Čtenář si může vybrat ze třech možností:
Uchovávat vše: uchová historii výpůjček bez omezení. Toto nastavení je vhodné pro ty uživatele, kteří chtějí sledovat svoji čtenářskou historii.
Výchozí: uchová historii výpůjček na základě platné legislativy. Tato možnost je výchozí: knihovna bude uchovávat Vaši čtenářskou historii podle omezení daných platnými zákony.
Neuchovávat nic: historie výpůjček bude okamžitě mazána. Toto nastavení způsobí smazání všech záznamů o výpůjčce ihned po vrácení.
Depending on the patron’s suggestions the contents of the ‚Your reading history‘ tab and the ‚Circulation History‘ tab in the staff client may change.
Bez ohledu na volbu čtenáře, mohou odstranit svou historii výpůjček hromadně kdykoliv klepnutím na tlačítko ‚Okamžité smazání „.
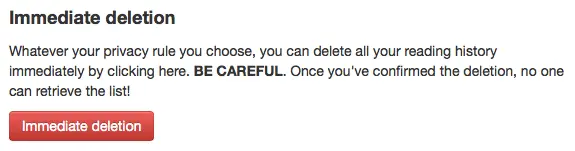
Kliknutím na toto tlačítko se neodstraní položky, které jsou v současné době vypůjčeny, ale vymaže minulost předchozích výpůjček čtenáře.
Důležité
In order for the patron to be able to delete their reading history you must have the AnonymousPatron preference set.
If you’re allowing guarantees to grant permission to their guarantors to view their current checkouts with the AllowPatronToSetCheckoutsVisibilityForGuarantor preference they will see that option on this screen.
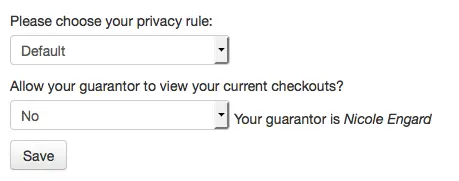
When the guarantor logs in they will see a tab labeled „Relatives‘ checkouts“ on their summary tab.
Your holds history
If the OPACHoldsHistory system preference is set to ‚Allow‘, patrons will be able to see all their current and past holds.

Návrhy na nákup
If your library allows patrons to make purchase suggestions the next tab will show all suggestions that the patron made to the library and their statuses. To disable this tab and the suggestion functionality set the suggestion preference to ‚Don’t allow.‘
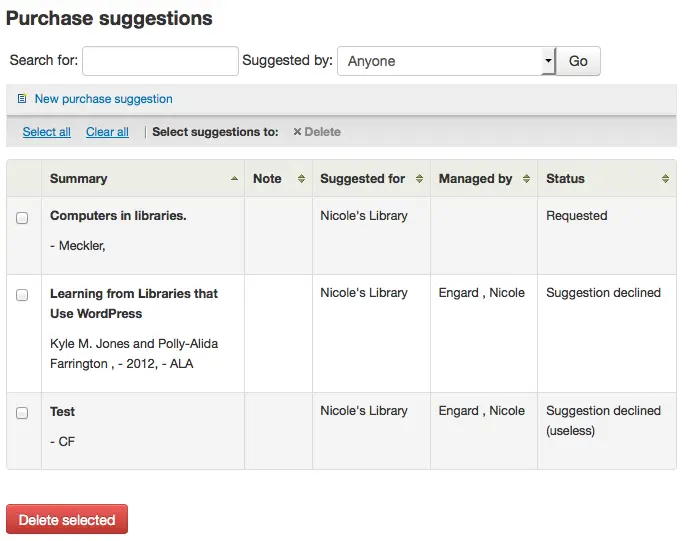
If you have OPACViewOthersSuggestions set to ‚Show‘ then patrons will be able to search suggestions from the top of this list.
Messaging
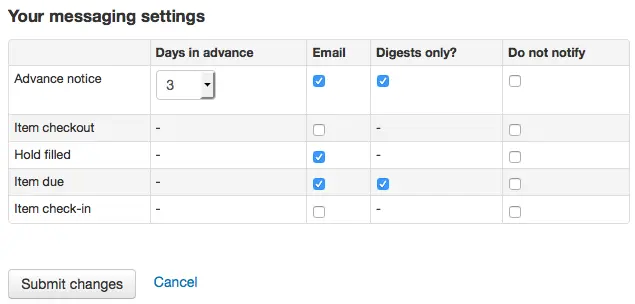
If your library has the EnhancedMessagingPreferences system preference set to ‚Allow‘ and the EnhancedMessagingPreferencesOPAC system preference set to ‚Show‘, then patrons are able to choose the messages they receive from the library (with the exception of overdue notices, which the library controls).
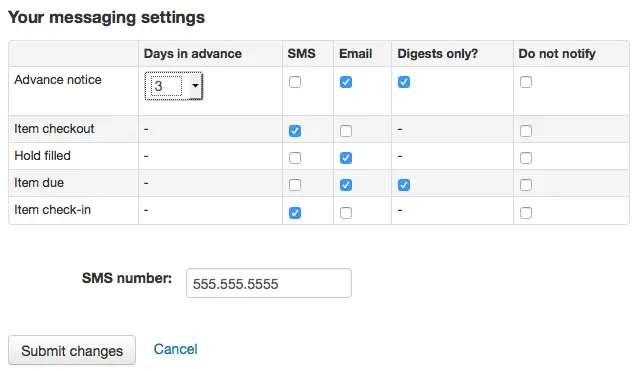
If you use an SMS driver for sending text messages set with the SMSSendDriver system preference, you will see an additional column to select these messages as SMS (or text messages) and a field for a mobile phone (or SMS) number.
If you are using the Email protocol for sending text messages set with the SMSSendDriver system preference, you will see an additional column to receive these messages as SMS (or text messages), a field for a mobile phone (or SMS) number, and a pull down listing cellular providers.
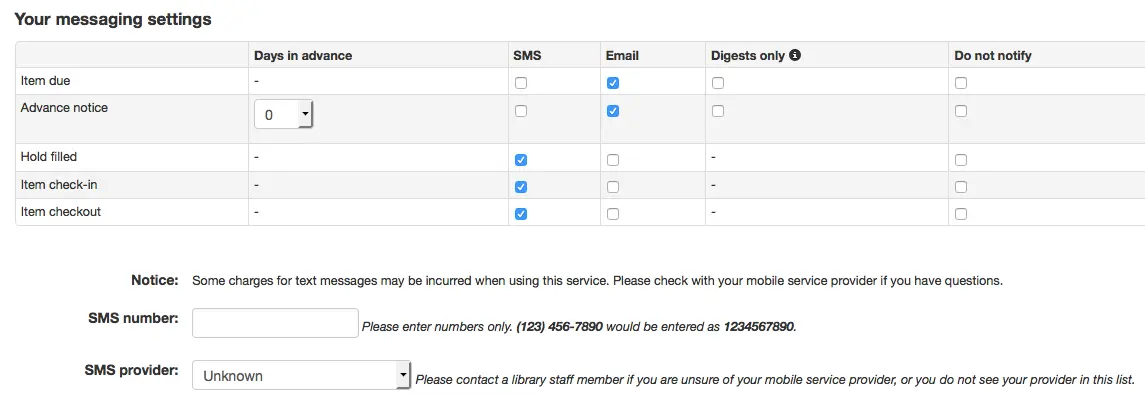
If you are using the i-tiva Talking Tech service you will see an additional column to receive these messages via Phone.
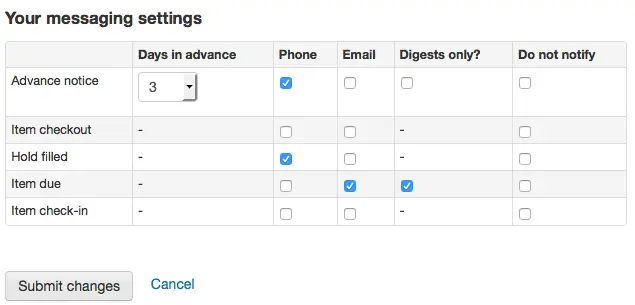
See patron messages for a list of the available notices.
Patrons can choose to receive notices as a digest by checking the ‚Digests only‘ checkbox, along with the delivery method. A digest combines all the messages for a notice type into one email (for example, all items due in three days), instead of sending multiple emails.
If the TranslateNotices system preference is set to ‚Allow‘, the patron will also see an option to choose ‚Preferred language for notices‘ with a dropdown list of available languages.
Důležité
You must choose a delivery method (SMS or email or phone) along with ‚Digests only‘ if you would like to receive a digest of the messages.
Seznamy
If the virtualshelves system preference is set to ‚Allow‘, patrons will see a ‚Lists‘ tab.
From here, patrons can view public lists and create or edit their own private lists.
Alert subscriptions
Version
This section was added to Koha in version 23.11.
If the RoutingSerials system preference is enabled, patrons who have opted in to email alerts for new serial issues via the ‚Subscriptions‘ tab in the bibliographic record will see an ‚Alert subscriptions‘ tab in their account.

This tab lists all the serial email alerts the patron has subscribed to. Patrons can cancel alerts by clicking the ‚Unsubscribe from email alerts‘ link if desired.
Požadavek na ukončení členství a vystavení potvrzení o vyrovnání závazků
If the useDischarge system preference is enabled, patrons will be able to request a discharge via the OPAC. A discharge is a certificate that says the patron has no current checkouts and no holds.
Patrons can request a discharge from the library by going to the ‚Ask for discharge‘ tab in their online account.
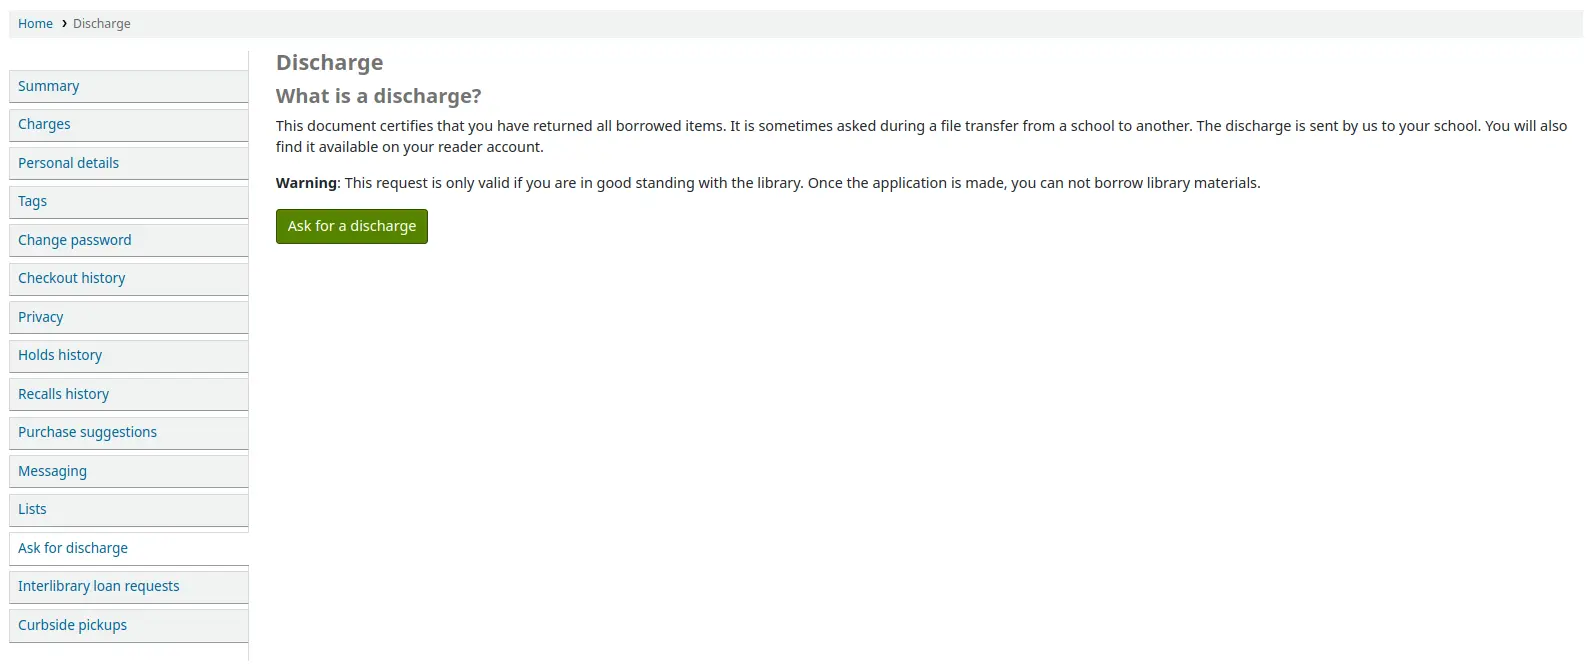
From here they can request a discharge by clicking the ‚Ask for a discharge‘ button. They will receive a confirmation of their request.
Once the discharge is approved by library staff, the patron will see a download link to download a PDF of their discharge.

Vaše distribuční seznamy
If you are named as a recipient on any serial routing lists you will see them listed here. The following note is displayed „You are subscribed to the routing lists for following serial titles. If you wish to make changes, please contact the library“.
Interlibrary loan requests
If the ILL requests module is enabled, patrons will see the ‚Interlibrary loan requests‘ tab. Their existing requests will be listed here, with information about their status.
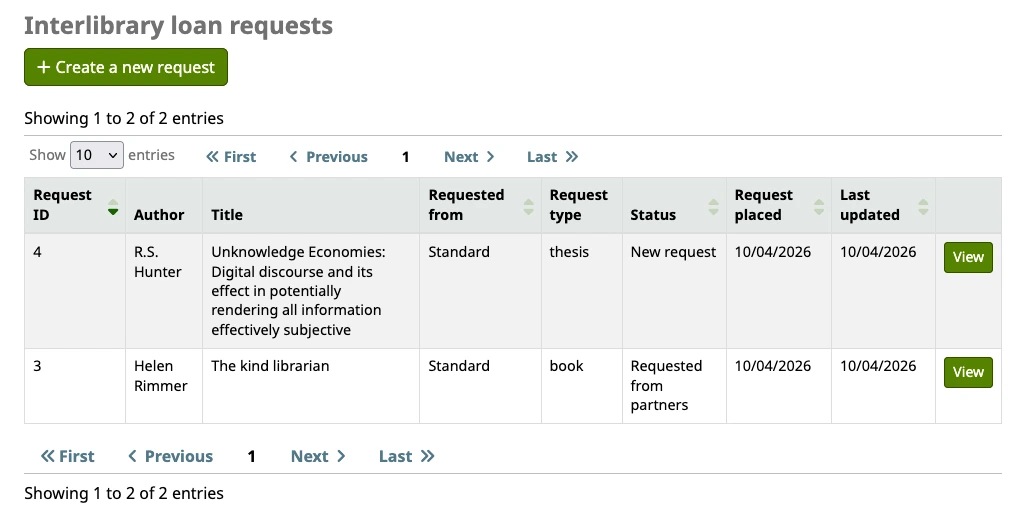
Additionally, if their patron category is allowed to place ILL requests in the OPAC, they will see a ‚Create a new request‘ button. When clicked, they will be presented with the form to place a new interlibrary loan request. If the library is using more than one backend, they may first be prompted to select a provider.
Poznámka
If there is a copyright clearance text in a ‚ILLModuleCopyrightClearance‘ HTML customization display location, the text displays here and patrons need to click ‚Yes‘ to accept before continuing.

Destination library: the list is made of the libraries marked as pickup locations in the Libraries settings. This is the library that will be managing the request and be the pickup location for requested physical items.
Type: when a type is selected, the relevant input fields for that particular resource appear. The sets of fields for each request type are the same as those displayed when creating a request in the staff interface.
Clicking ‚Create‘ will submit the request to the library for processing.
Poznámka
If the ILLModuleDisclaimerByType system preference is in use, the disclaimer will appear at this stage. Whichever the option chosen by the patron, the request will be created and the type disclaimer value will be stored alongside the request’s other details.
Once created, the request will initially be listed with the status ‚New request‘. Request statuses are updated as staff process the request.
Clicking ‚View‘ on a request brings up the full details.
The only change patrons can make is adding a note to the request then click ‚Submit modifications‘.
For requests with the status ‚New request‘, patrons will see the ‚Request cancellation‘ button. If used, the request’s status will be updated to ‚Cancellation requested‘. Staff may choose to delete the request to remove it completely.
Tip
If you want to be notified by email when patrons modify or cancel a request, use the ILLSendStaffNotices system preference. The emails use the ILL_REQUEST_MODIFIED and ILL_REQUEST_CANCEL notice templates. They can be customized in the Notices and slips tool.
Your recalls history
If your library allows recalls, the patron can see all their past and current recalls they have requested and their various statuses in the ‚your recalls history‘ tab.
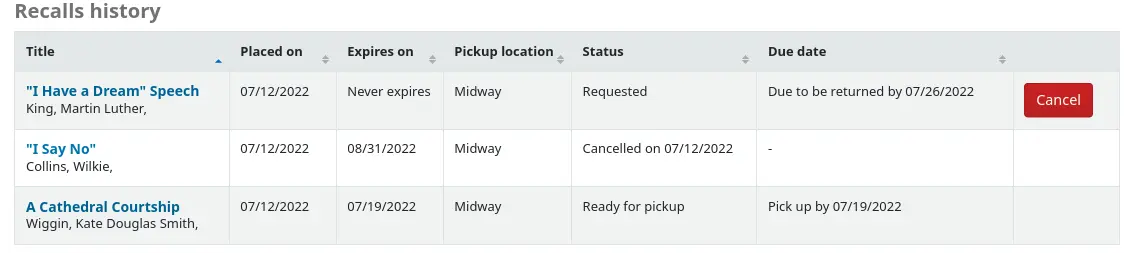
The patron can cancel a recall by clicking the ‚Cancel‘ button, provided that it is not already awaiting pickup.
Curbside pickups
If your library offers curbside pickup, the patron will be able to see their scheduled pickups under ‚Curbside pickups‘.
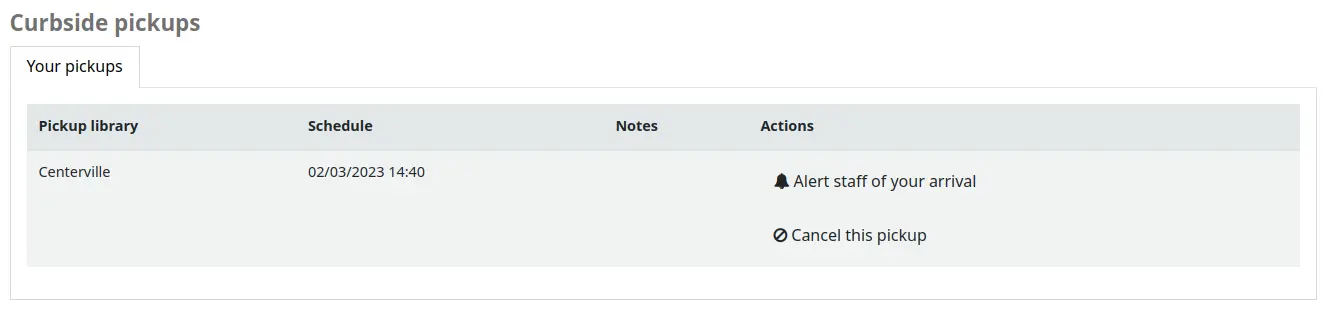
The patron has the option to indicate that they are outside the library by clicking ‚Alert staff of your arrival‘.
The patron also has the option to cancel their scheduled pickup with the ‚Cancel this pickup‘ button.
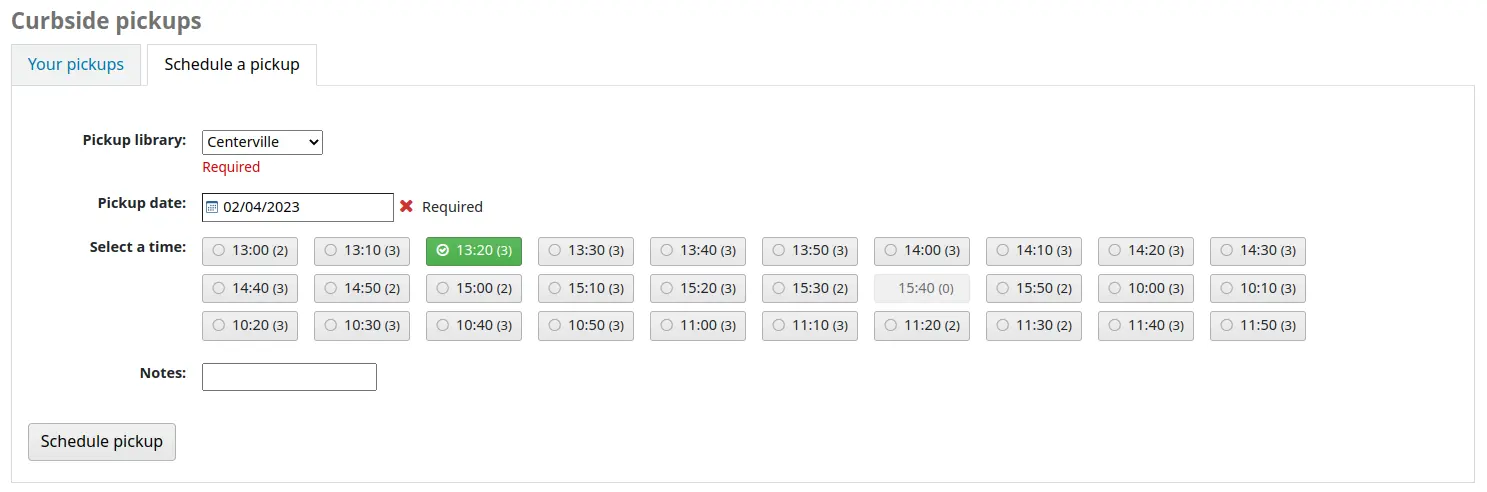
If the ‚Patron-scheduled pickup‘ setting is turned on in the curbside pickup configuration, the patron will be able to schedule their own curbside pickup appointment.

The patron must first choose a library at which they want to pick up their items
Poznámka
Only libraries with curbside pickup enabled will be displayed in the drop-down menu.
Furthermore, if the ‚Enable for waiting holds only‘ setting is turned on, only the libraries at which the patron has waiting holds will be enabled.
The patron must then choose a date
Poznámka
Only dates with available time slots will be displayed.
The possible pickup times will be displayed, depending on the day of the week
Poznámka
The number in parentheses under each time slot is the number of available appointments for that time. If the maximum number of appointments has been reached, based on the ‚Maximum patrons per interval‘ setting in the curbside pickup configuration, the time slot will be grayed out and the patron will not be able to select it.
The patron can optionally add a note about their pickup
The patron must then click ‚Schedule pickup‘ to save their appointment
Návrhy na nákup
If your library has the suggestion preference set to ‚Allow‘, patrons will have the option to make purchase suggestions in several areas in the OPAC.
If you are allowing everyone to see the purchase suggestions made by others with the OPACViewOthersSuggestions preference, there will be a link at the top of your OPAC under the search box.

Je tam odkaz, pokud čtenář nic nenalezl.

There will be a ‚Suggest for purchase‘ option in the detailed view of a bibliographic record.
And there will be a link in the Your purchase suggestions tab in the patron’s account.
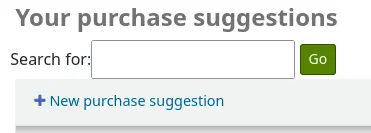
Kliknutím na některý z těchto odkazů se otevře formulář pro návrh nákupu.
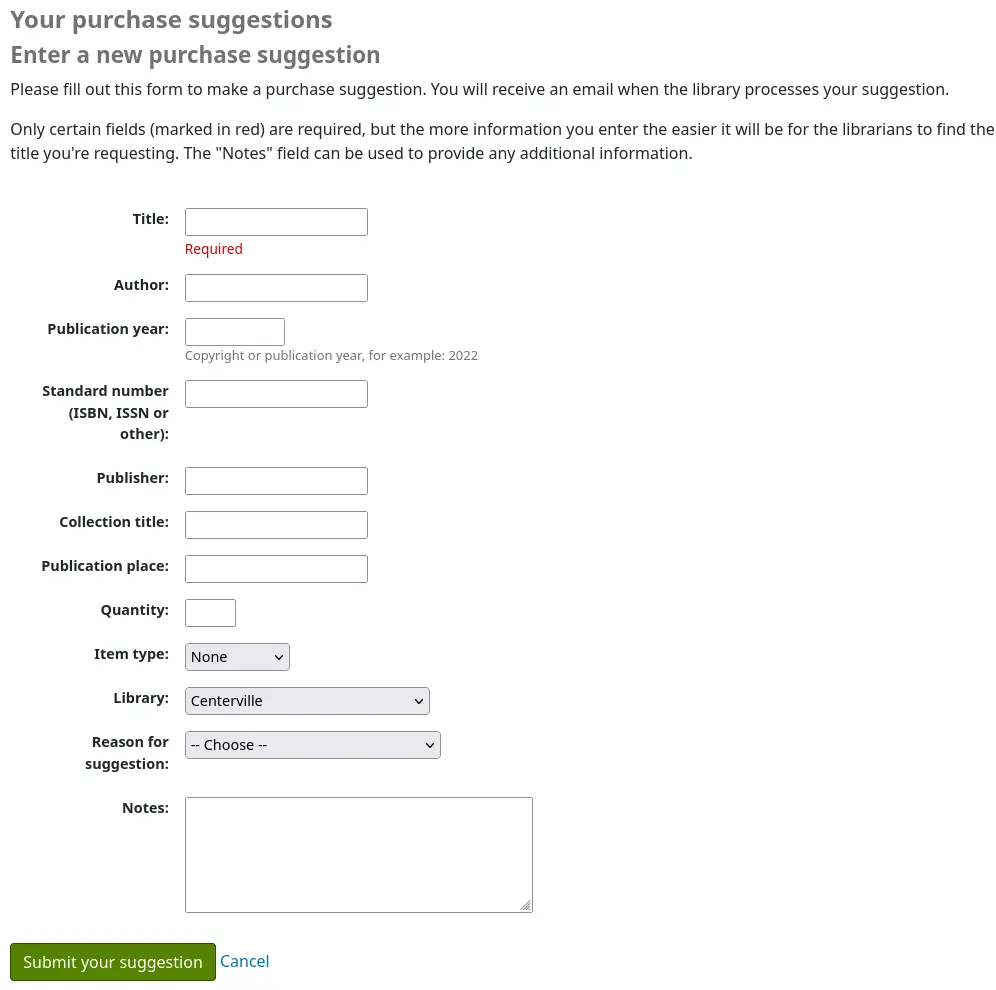
The informational text at the top of the form can be replaced using the HTML customizations tool, display location OpacSuggestionInstructions.
From the form only the ‚Title‘ is required by default.
Mandatory fields can be set using the OPACSuggestionMandatoryFields system preference.
The OPACSuggestionUnwantedFields system preference can be used to hide unnecessary fields.
The OPACSuggestionAutoFill system preference can be used to help patrons fill out the form using information from Google Books.
The item type list can be edited by editing the SUGGEST_FORMAT authorized value list.
The ‚Reason for suggestion‘ list can be edited by editing the OPAC_SUG authorized value list.
If the item already exists in the catalog, the patron will see a message with what Koha thinks is the corresponding title. Matches are made on the title/ author, ISBN or ISSN. If the title isn’t what the patron is trying to suggest, they can click ‚Confirm your suggestion‘, to suggest it anyway.

Once the form is submitted the purchase suggestion will appear in the acquisitions module for the librarians to manage.
If a purchase suggestion has been ordered through the acquisitions module, the patron’s purchase suggestion title will be clickable and bring the patron directly to the ordered record in the OPAC.
Libraries / Contact
If you have the OPACShowLibraries system preference set to ‚Show‘ and at least one of your libraries is ‚Public‘, a link to the Libraries page will be displayed below the search bar.
Výstraha
As of Koha version 25.05, the link is labeled ‚Contact‘ if there is only one library set as ‚public‘.
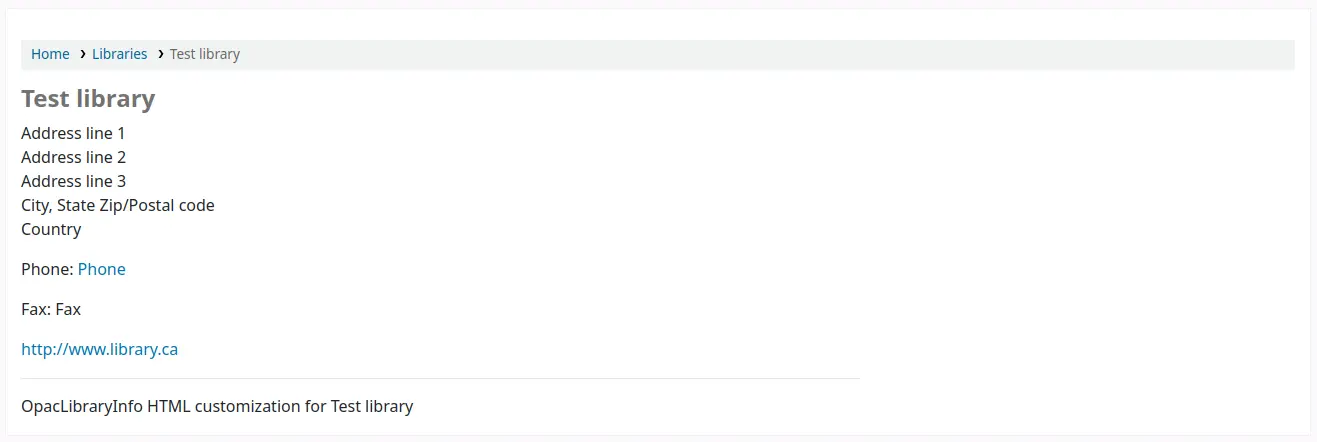
The Libraries page shows a list of all libraries set as ‚Public‘, with their contact information (address lines, city, state, zip/postal code, country, phone number, fax number, website).
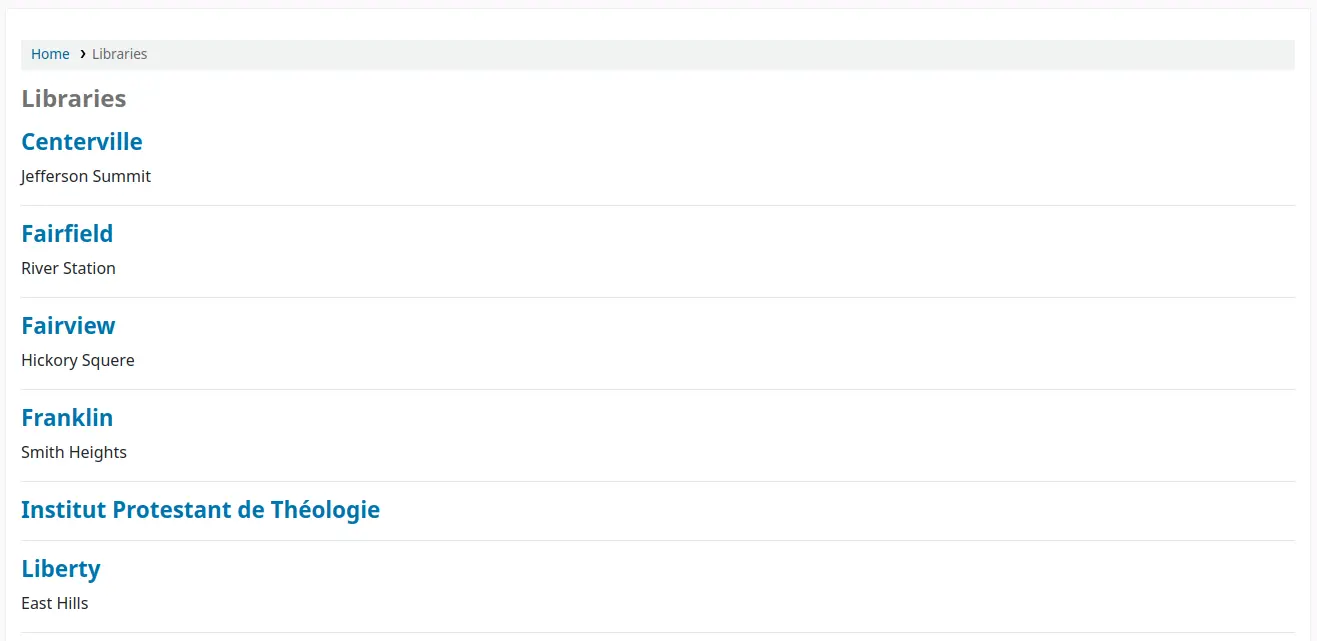
The library name itself is a link to a specific page for that library. This second page also includes ‚OpacLibraryInfo‘ HTML customizations for that library.
Reporting problems
If the OPACReportProblem system preference is enabled, patrons will have the option to report problems on the OPAC (broken links or inaccurate information for example).
At the bottom of each page is a ‚Report a problem‘ link.
When the patron clicks on the link, they are brought to a form where they can specify what exactly is the problem.
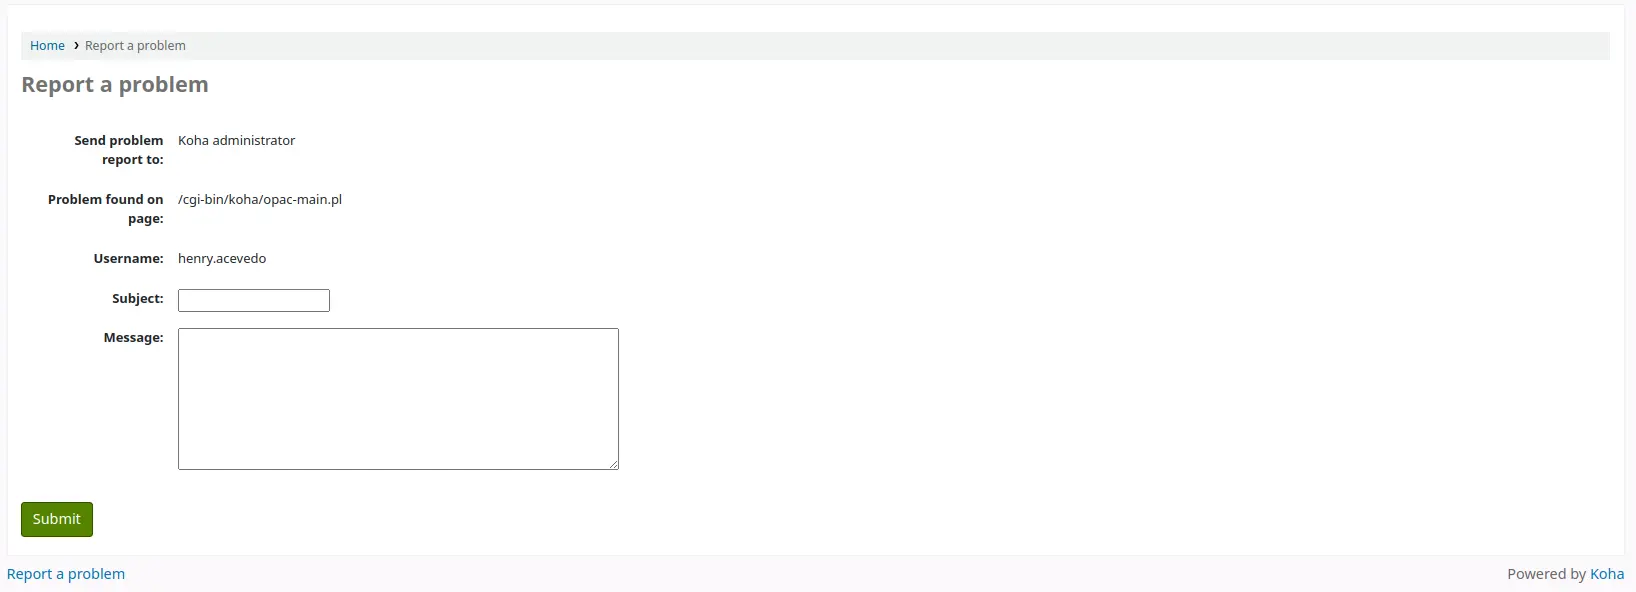
The problem report is sent to the Koha administrator by email (to the address in KohaAdminEmailAddress), and will appear in the OPAC problem reports tool. If the library has an email address, the patron will have the choice to either send the problem report to the library or to the administrator.
Poznámka
The notice sent by email is customizable in the Notices and slips tool. The letter code is PROBLEM_REPORT.
OPAC self checkout
Version
This feature was added in Koha version 23.11.
In addition to the self checkout module, there is a lighter weight option for libraries with smaller, trusted communities. With this option, patrons are allowed to check out items to themselves through their OPAC account with no oversight from library staff. This self checkout feature can be used on any computer or device with access to the OPAC, as opposed to the self checkout module which is meant to be used on dedicated computers.
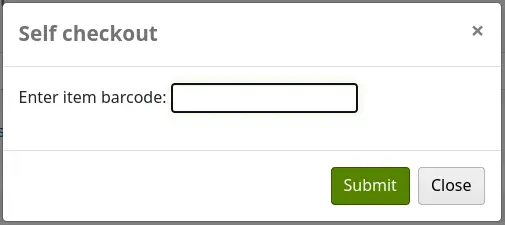
Once the OpacTrustedCheckout system preference is enabled, logged in patrons will see a ‚Self checkout‘ option at the top of the page in the OPAC.

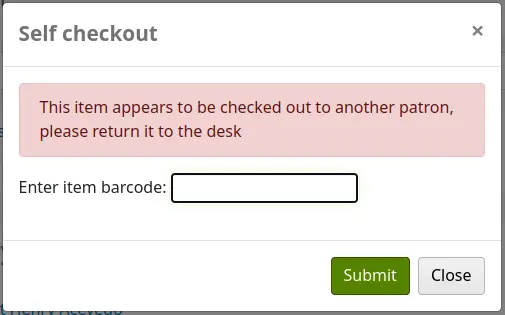
Clicking on the ‚Self checkout‘ link will open a pop-up where the patron can enter the item’s barcode and click ‚Submit‘ or press the enter key.
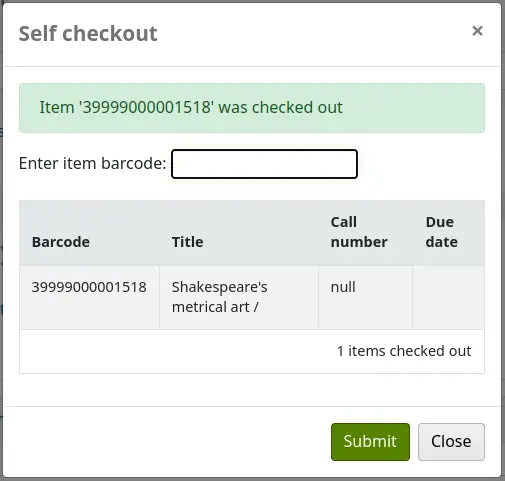
Once the item’s barcode has been entered, a confirmation message appears at the top of the pop-up and the item’s barcode, title, call number and due date are listed at the bottom. The patron has the option to scan or enter another barcode.
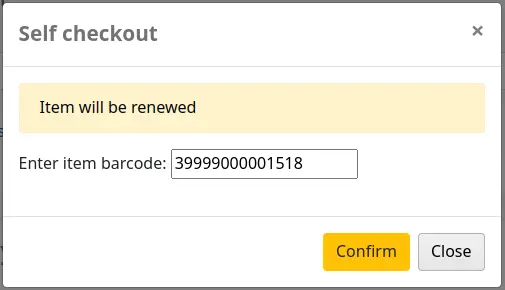
To renew the checkout, the patron only has to check out again (or renew from their summary).
If an item is already checked out to another patron, a message will say so.
Checkout will also be blocked if:
the barcode is not found;
the item is on hold for another patron;
the patron’s outstanding charges are over the limit;
the patron already has the maximum amount of checkouts;
the patron does not have the required age to checkout the item;
the item cannot be checked out because of a not for loan or withdrawn status.
Komentáře
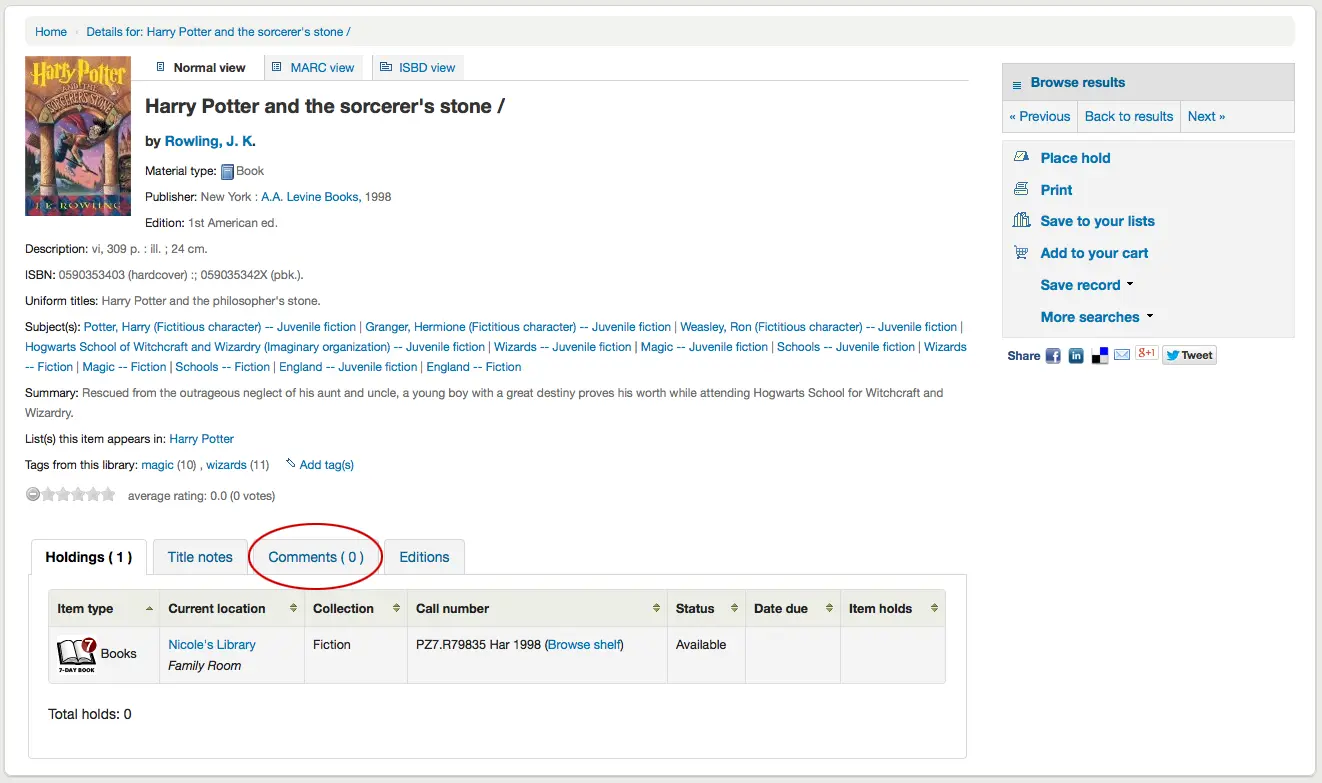
Patrons can leave comments in the OPAC if you have the OPACComments preference set to allow this. Each bibliographic record has a comments tab below the bibliographic information.
Pokud čtenář je připojen, uvidí odkaz na přidání komentáře k položce. Kliknutím na tento odkaz se otevře pop-up okno s textovým polem pro jeho vyjádření.
Jakmile byl komentář zadán a klepnuto na tlačítko „Odeslat“, čtenář vidí svůj komentář jako nevyřízený, a další čtenáři neuvidí k titulu žádné komentáře.
Once the comment is approved the patron will see the number of comments on the ‚Comments‘ tab and their comment labeled among the other comments. If the ShowReviewerPhoto system preference is set to ‚Show‘, the patron’s photo pulled from the Libravatar library will be displayed next to their comment.
Other patrons will see the comment with the name of the patron who left the comment (unless you have set the ShowReviewer preference to not show patron names).
If you have your OpacShowRecentComments set to show then you’ll see the approved comments on that page.
From this page patrons can subscribe to the recent comments using RSS if they would like.