Demandes de PEB (Prêts entre bibliothèques)
Le module de Demandes de PEB (prêts entre bibliothèques) permet de demander et gérer des prêts ou des copies de documents depuis des sources extérieures. Les adhérents peuvent soumettre leur demande via l’OPAC, à partir de l’onglet Vos demandes de prêts entre bibliothèques de leur compte. Les bibliothécaires peuvent alors examiner et traiter ces requêtes. Les bibliothécaires peuvent également créer eux-mêmes des demandes depuis l’interface professionnelle.
Note
Seuls les bibliothécaires avec la permission ill (ou la permission superlibrarian) pourront créer et gérer des demandes de PEB.
Configuration
Avant d’utiliser le module PEB, vous devez vous assurer d’avoir rempli les paramètres nécessaires.
Le module de Demandes de PEB peut être configuré pour différents types de demandes et processus. Koha utilise des “interfaces” pour traiter les demandes de PEB en fonction de comment le document doit être fourni. Les interfaces actuellement disponibles font l’objet d’une documentation sur le wiki communautaire de Koha, à https://wiki.koha-community.org/wiki/ILL_backends. Certaines interfaces sont disponibles sous la forme de plugins. Vous devrez configurer au moins une interface.
Attention
Depuis sa version 24.11, Koha dispose d’une interface par défaut connue comme “Standard”, qui remplace l’interface FreeForm. Le module PEB peut être utilisée uniquement avec l’interface Standard.
Ensuite, paramétrez vos préférences système pour les prêts entre bibliothèques. La plus importante est la préférence système ILLModule, interrupteur principal du module de PEB.
Parmi les catégories d’adhérents, choisissez celles autorisées à opérer des demandes de PEB à partir de l’OPAC.
Version
Avant la version 23.11, ce n’est pas nécessaire. Toutes les catégories d’adhérents étaient autorisées à faire de demandes de PEB à pair de l’OPAC.
A partir de la version 23.11, vous devez définir l’option pour chaque catégorie d’adhérents.
Le module PEB utilise des statuts prédéfinis. Vous pouvez ajouter des statuts spécifiques pour les adapter à votre processus de PEB dans la valeur autorisée ILL_STATUS_ALIAS.
Enfin, les bibliothécaires responsables des demandes PEB ont besoin de la permission ill (ou de la permission superlibrarian).
Notifications PEB par courriel
Des notifications par courriel peuvent être envoyées aux bibliothécaires quand un adhérent fait une demande de modification (code de la notification : ILL_REQUEST_MODIFIED) ou annule (code de la notification : ILL_REQUEST_CANCEL) une demande exitante. Activez cette fonctionnalité par le biais de la préférence système ILLSendStaffNotices.
L’adresse de courriel des bibliothécaires responsables du PEB peut être configurée par bibliothèque dans les paramètres de la bibliothèque. S’il n’y a pas une telle adresse, celle dans la préférence système ILLDefaultStaffEmail sera utilisée.
Des notifications peuvent être envoyées aux adhérents pour les mises à jour de leurs demandes :
mise à jour d’une demande de PEB (code de la notification : ILL_REQUEST_UPDATE)
indisponibilité de l’objet de la demande de PEB (code de la notification : ILL_REQUEST_UNAVAIL)
disponibilité de l’objet de la demande de PEB pour son retrait (code de la notification : ILL_PICKUP_READY)
Les notifications sont activées dans les préférences de messagerie aux adhérents par défaut des catégories d’adhérent.
Tous les modèles de message peuvent être personnalisés dans l’outil Notifications et tickets.
Créer des requêtes pour le PEB (prêt entre bibliothèques)
Allez à: Plus > Demandes de PEB
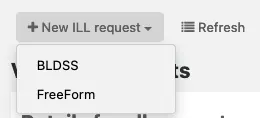
Choisissez “Nouvelle demande de PEB” puis Freeform.
Note
Les images présentées ici ne concernent que le backend FreeFrom.
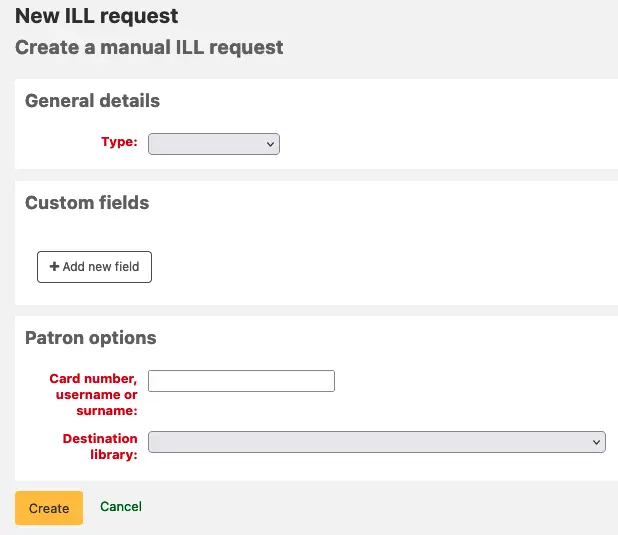
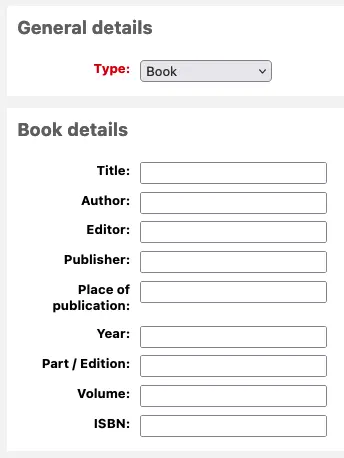
Choisir un type de matériel : Livre, Chapitre, Périodique, Article, Thèse, Conférence, Autres, Ressource générique.
Un formulaire différent s’affichera pour chaque type de matériel.
Renseigner le plus d’informations possibles.
Ajoutez des champs personnalisés, par exemple si vous souhaitez ajouter une note ou si vous utilisez le type « Autre ».
Sous les options de l’adhérent, entrer le numéro de carte de l’adhérent et la bibliothèque associée à la demande.
Cliquer sur « Créer » et une page récapitulative s’affiche alors.
Note
Si vous avez activé la préférence système ILLCheckAvailability et installé les plugins pour l’interface professionnelle, des résultats de recherche s’afficheront. L’utilisateur peut cliquer sur un lien renvoyant à une ressource pertinente s’il en trouve une, ou poursuivre la demande de PEB. S’il n’y a pas de résultat, la demande de PEB est complétée de façon habituelle.
Vous pouvez maintenant traiter la demande comme expliqué dans la section Gérer les demandes de PEB ou revenir à la liste de demandes de PEB en cliquant sur « Liste des demandes ».
Voir les demandes de PEB
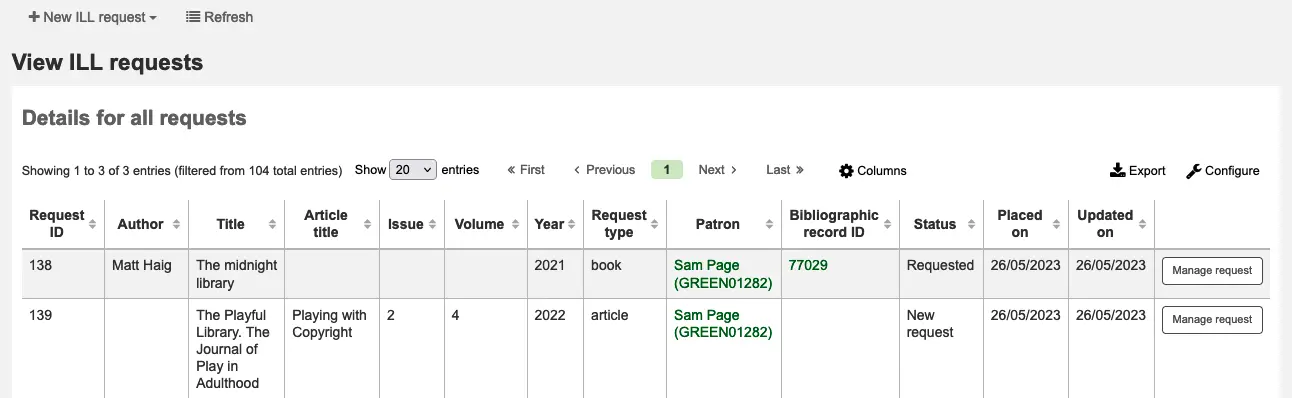
A partir de l’écran principal des demandes de PEB vous pouvez afficher, filtrer et trier les demandes de PEB.
Cliquez sur le bouton “Liste des demandes” de n’importe quelle page du module de PEB pour revenir à cette liste.
Astuce
Vous pouvez personnaliser cette vue.
Utilisez la préférence système ILLRequestsTabs pour organiser les demandes dans des onglets personnalisés.
Utilisez la préférence système ILLHiddenRequestStatuses pour masquer par défaut les demandes complétées.
Le tableau des demandes contient un grand nombre de données ; faites défiler la page vers la droite pour voir toutes les colonnes. Vous pouvez personnaliser les colonnes visibles / cachées de ce tableau dans la section Configurer les colonnes du module Administration (référence du tableau : ill-requests).
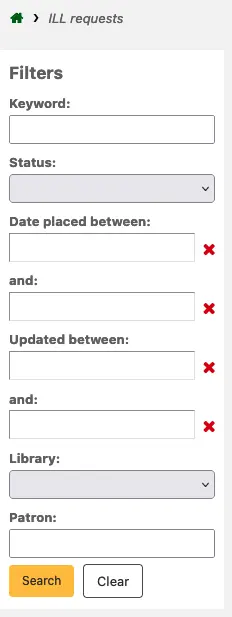
Utiisez les filtres à gauche de la page pour afficher un sous-ensemble de demandes basé sur les critères de votre choix.
Gérer les demandes de PEB
A partir de la vue principale des demandes de PEB, cliquez sur l’identifiant d’une demande dans la première colonne ou sur le bouton “Gérer la demande” dans la dernière colonne. Tous les détails de la demande seront alors affichés.
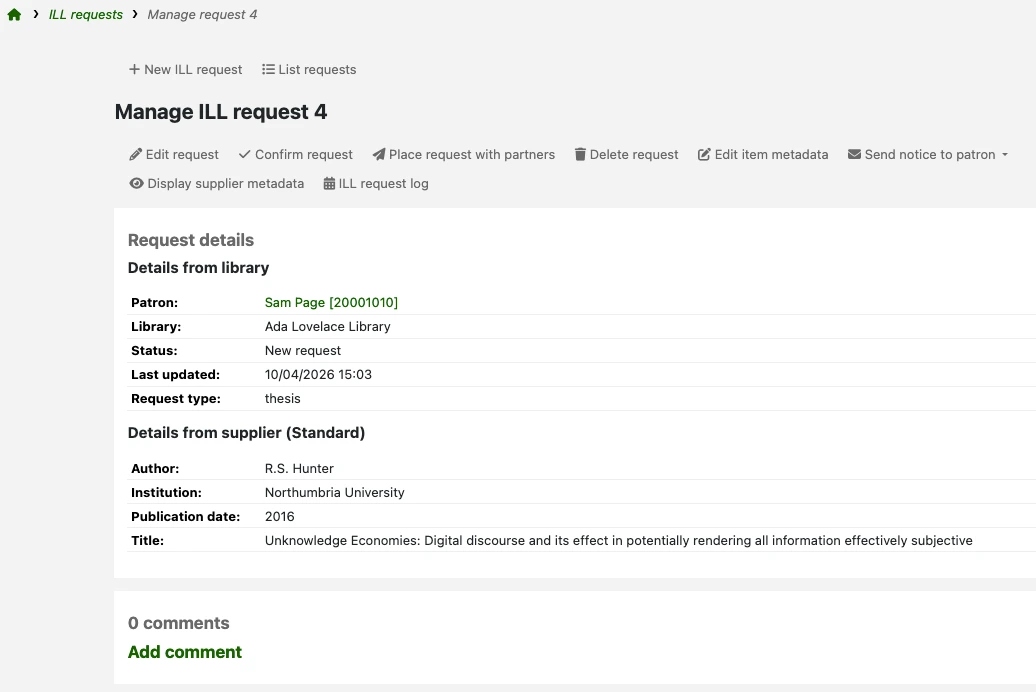
Selon le statut actuel de la demande et de l’interface utilisée, vous pourrez voir tout ou partie des boutons décrits dans la section suivante.
A partir de cet écran, vous pouvez ajouter des commentaires à cette demande. Vous pourrez être amenés à utiliser les commentaires pour conserver trace des travaux réalisés. Les commentaires sont en lecture seule (ils ne peuvent être ni modifiés ni supprimés). Ils ne sont visibles que dans l’interface professionnelle. Dès qu’un commentaire est effectué sur la demande, un chiffre apparaîtra dans la colonne “Commentaires” lors de la visualisation de la liste complète des demandes de PEB.
Demandes authentifiées
Les demandes authentifiées sont celles liées à l’adhérent Koha qui a demandé le document. Toutes les demandes effectuées dans l’interface professionnelle ou à l’OPAC par des adhérents connectés à leur compte sont des demandes authentifiées.
Les nouvelles demandes authentifiées ont le statut “Nouvelle demande”. Les bibliothécaires peuvent traiter les demandes en utilisant certains des boutons suivants.
Modifier la demande : pour mettre à jour l’adhérent à qui est associée la demande, quel bibliothécaire gère la demande, la bibliothèque destinataire.
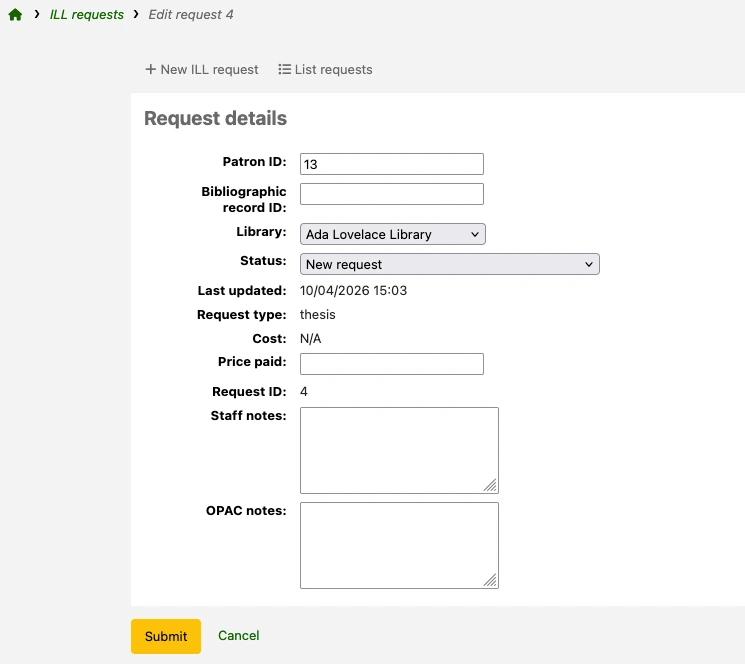
Des notes pour l’OPAC ou pour les seuls bibliothécaires peuvent être ajoutées à partir de l’écran de modification.
Si vous avez des statuts PEB personnalisés (gérés par la catégorie de valeurs autorisées ILL_STATUS_ALIAS), vous pouvez en affecter un en éditant le champ Statut.
Confirmer la demande : pour signaler manuellement le demande comme “Demandée”.
Faire une demande à des partenaires : afin que Koha envoie une demande à une bibliothèque. Utiliser cette option nécessite un paramétrage préalable. Le statut de la demande passe alors à “Demandé à des partenaires”.
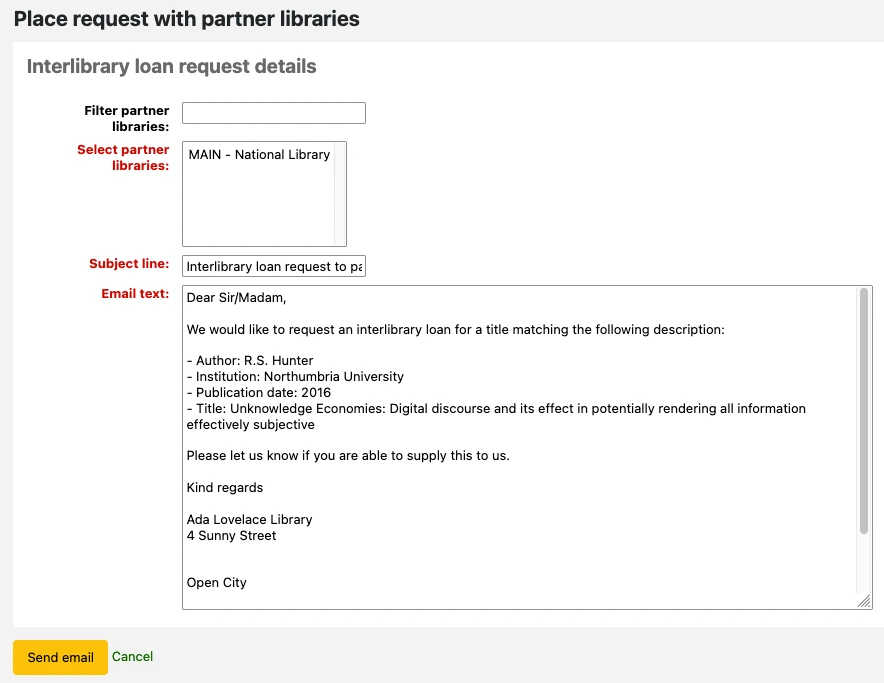
Filtrer les bibliothèques partenaires : saisissez des mots-clefs pour restreindre la liste des comptes affichés dans le champ suivant.
Sélectionner les bibliothèques partenaires : choisissez un destinataire dans la liste de vos partenaires PEB. Chaque code de compte est affiché en capitales devant le nom du compte.
Ligne Objet : vous pouvez personnaliser la ligne Objet du courriel que Koha va envoyer.
Contenu du courriel : vous pouvez personnaliser le texte du courriel que Koha va envoyer.
Note
La ligne Objet et le contenu par défaut utilisés ici sont définis dans le modèle de message ILL_PARTNER_REQ dans l’outil Notifications et tickets.
Annuler la demande : supprime totalement la demande. Les détails des demandes supprimés ne sont pas conservés dans la base de données Koha.
Modifier les metadonnées du document : pour modifier les métadonnées (titre, auteur, etc.) du titre demandé. C’est utile quand l’information initialement fournie est incomplète ou incorrecte.
Note
Certaines interfaces ne permettent pas de mettre à jour les metadonnées.
Envoyer une notification à l’adhérent : pour envoyer à l’adhérent ayant demandé le titre les changements effectués.
Demande de PEB disponible pour sa collecte : pour signaler à l’adhérent que le document qu’il a demandé est prêt à être récupéré. Vous pouvez personnaliser le contenu de la notification avec le modèle de notification ILL_PICKUP_READY dans l’outil Notifications et tickets.
Demande de PEB indisponible : pour informer l’adhérent que la bibliothèquene pourra lui fournir le titre demandé. Vous pouvez personnaliser le contenu de la notification avec le modèle de notification ILL_REQUEST_UNAVAIL dans l’outil Notifications et tickets.
Afficher les metadonnées du fournisseur : pour visualiser une version texte des détails du titre demandé. Cela peut être utile dans les cas où vous souhaiteriez copier-coller rapidement cette information hors Koha.
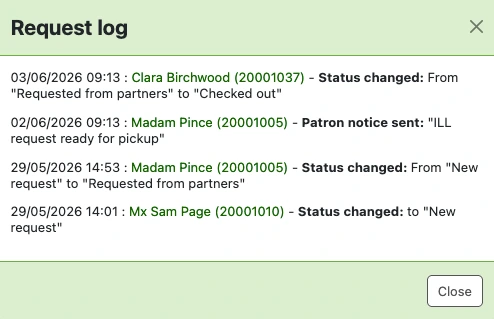
Log de la demande de PEB : pour visualiser un historique des actions sur cette demande. Pour toute information à afficher ici, la préférence système IllLog doit être paramétrer sur “Journaliser”.
Autres boutons que vous pourriez voir lors du traitement des demandes :
Changer de fournisseur : pour sélectionner une interface différente et demander le titre à un autre fournisseur. C’est utile si une mauvaise interface a été sélectionnée initialement ou quand le fournisseur s’avère dans l’impossibilité de fournir le titre demandé.
Annulation de la demande : pour annuler une demande placée auprès d’une source extérieure. Ce bouton est visible quand la demande a pour statut “Demandé” ou “Demandé à des partenaires”. Le statut est alors modifié en “Demande annulée”.
Emprunter : pour prêter directement à l’adhérent ayant fait la demande du document fourni par une bibliothèque partenaire. Le statut de la demande passe en “Prêté”.
Cette option n’est disponible que si vous avez activé la préférence système CirculateILL. Elle est utilisée pour la circulation des documents du PEB.
Marquer comme terminé : pour modifier le statut en “Terminé” quand la demande a été satisfaite et pleinement accomplie.
Demandes non-authentifiées
Si la préférence système ILLOpacUnauthenticatedRequest est configurée sur “Autoriser”, les adhérents peuvent faire des demandes sans forcément être connectés à leur compte ni avoir de compte.
Version
Cette fonctionnalité a été introduite à partir de la version 25.05 de Koha.
Les demandes effectuées de cette manière ont le statut “Non-authentifiées”. Avant de pouvoir les traiter, vous devez les lier au compte d’un adhérent.
A partir de l’écran principal des demandes de PEB, choisissez une demande ayant le statut “Non-authentifiée”.
Cliquez sur l’identifiant de la demande dans la première colonne ou sur le bouton “Gérer la demande” dans la dernière colonne pour visualiser tous le détails de la demande.
Cliquez sur le bouton “Modifier la demande”.
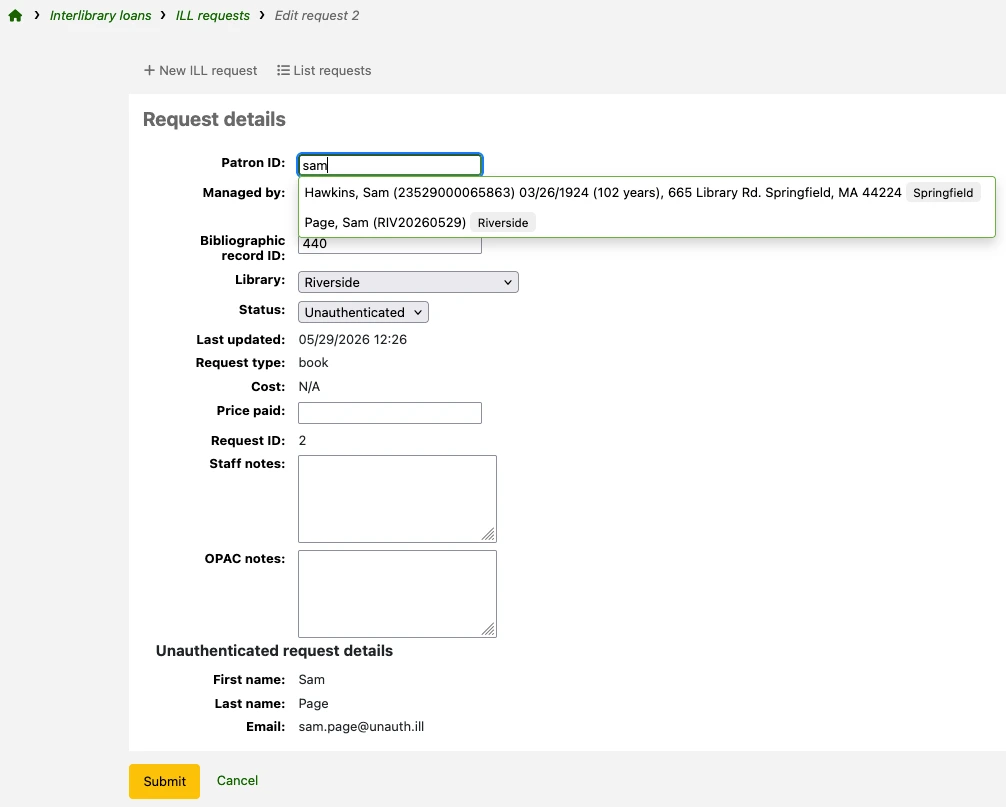
La section des détails de la demande non-authentifiée affiche les détails saisis par l’adhérent ayant fait la demande. Utilisez-les pour rechercher un adhérent existant.
Le champ “Identifiant de l’adhérent” en haut de page peut-être utilisé pour une recherche Adhérent rapide. Saisissez le début du nom de l’adhérent pour voir les suggestions.
Sinon, vous pouvez ouvrir le module Adhérents dans un autre onglet de votre navigateur et réaliser votre recherche ici.
Avertissement
Si la personne qui a fait la demande non-authentifiée n’est pas encore adhérente à la bibliothèque, vous devrez créer un nouvel adhérent pour elle avant de traiter la demande de PEB.
Que vous recherchiez un adhérent par son nom dans le champ Identifiant de l’adhérent ou en collant son numéro de carte dans le champ, vous devrez sélectionner l’adhérent concerné parmi les suggestions. Le champ sera alors mis à jour pour afficher le borrowernumber.
Cliquez sur “Valider” pour enregistrer vos modifications.
Vous pouvez maintenant gérer la demande de la même manière que les demandes authentifiées. La section de détails des demandes non-authentifiées ne l’affichera plus car la demande est désormais authentifiée.
Statuts des demandes
Koha a un ensemble de statuts prédéfinis, listés ci-dessous (avec leurs codes tels que stockés dans la table illrequests). Les interfaces installées peuvent avoir des statuts additionnels.
Nouvelle demande (NEW)
Non-authentifiée (UNAUTH)
Demandé (REQ)
Demandé à des partenaires (GENREQ)
Demande annulée (REQREV)
Annulation demandée - un adhérent a demandé l’annulation depuis l’OPAC. (CANCREQ)
Terminé (COMP)
Prêté (CHK)
Rendu à la bibliothèque (RET)
Soumettre une demande aux partenaires
Si vous avez un réseau de bibliothèques partenaires qui acceptent les demandes de PEB vous pouvez les gérer via Koha. Vous devez d’abord créer les comptes des bibliothèques partenaires :
Ajouter une catégorie d’adhérents à assigner à vos bibliothèques partenaires. Vous pouvez lui donner la description “Prêt entre bibliothèques” ou “Bibliothèque” et un type de catégorie “Organisation”. Puis, saisissez cette catégorie dans la préférence système ILLPartnerCode.
Version
La préférence système ILLPartnerCode a été ajoutée à Koha à partir de sa version 23.11. Dans les versions précédentes, le code des partenaires était défini dans le fichier koha-conf.xml. Le code par défaut était “IL”.
Créez un compte adhérent de cette catégorie pour chaque bibliothèque partenaire.
Chaque bibliothèque doit avoir une adresse de courriel qui servira pour l’envoi des demandes de PEB.
Note
Le modèle de message est ILL_PARTNER_REQ et le texte peut être personnalisé depuis les Notifications et tickets dans le module Outils.
Vous pouvez maintenant utiliser l’option “Faire une demande auprès de bibliothèques partenaires” lors du traitement des demandes.
Note
Si vous avez activé la préférence système ILLCheckAvailability vous pouvez utiliser des plugins pour faire des recherches dans les catalogues des bibliothèques partenaires en utilisant le protocole Z39.50 avant de confirmer la demande auprès du partenaire.
Circulation des documents du PEB
Si vous avez activé la préférence système CirculateILL vous pouvez prêter les documents du PEB directement à partir de la demande.
Lorsque vous créez une demande de type Livre une notice de catalogage succincte est créée automatiquement, avec la grille de catalogage rapide. Lorsque la demande a un statut approprié, le bouton Prêter s’affiche dans la barre d’outils Gérer la demande. En cliquant sur ce bouton, le bibliothécaire peut prêter l’ouvrage à l’usager ayant fait la demande ou à un compte adhérent permettant de suivre les statistiques du prêt sur place.
Pour prêter un document :
Cliquer sur le bouton Prêter.
Sélectionner un type d’exemplaire quand cela vous est demandé. Un exemplaire est créé automatiquement et rattaché à la notice bibliographique qui a été créée pour la demande. Le code barres de l’exemplaire est au format ILL-requestid.
Ensuite, sur l’écran de prêt au lecteur, sélectionner une date d’échéance. Si vous ne sélectionnez pas de date d’échéance, la règle de circulation appropriée sera utilisée pour calculer la date d’échéance.
Lorsque l’exemplaire est emprunté, le statut de la demande devient « Prêté » et au retour, le statut est mis à jour sur « Rendu à la bibliothèque ».
Les notices bibliographiques créées lors d’une demande de PEB présentent un onglet supplémentaire dans le tableau des exemplaires permettant de revenir sur la demande dans le module de PEB.