In Koha each bibliographic record can have one or more items attached. These items are sometimes referred to as holdings. Each item includes information to the physical copy the library has.
After saving a new bibliographic record, you will be redirected to a blank item record so that you can attach an item to the bibliographic record. You can also click 'Add/Edit Items' from the cataloging search results

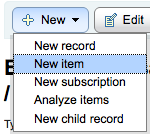
or you can add new item at any time by clicking 'New' on the bibliographic record and choosing 'New Item'
The item edit form will appear:
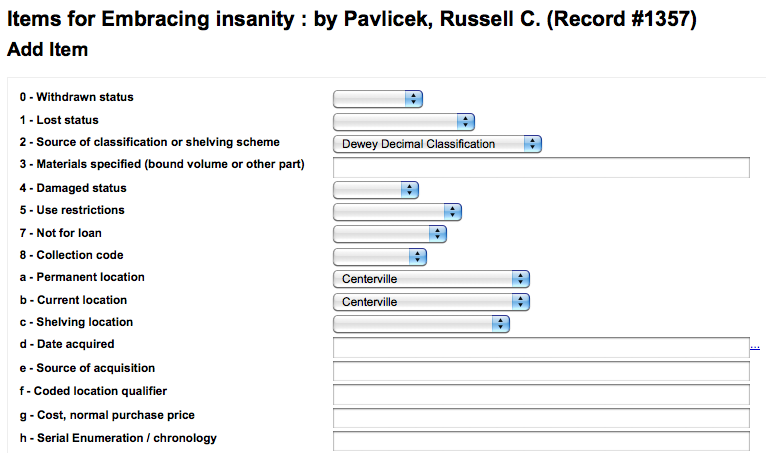
At the very least, if you plan on circulating the item, the following fields should be entered for new items:
-
2 - Source of classification
-
a - Permanent location
-
b - Current location
-
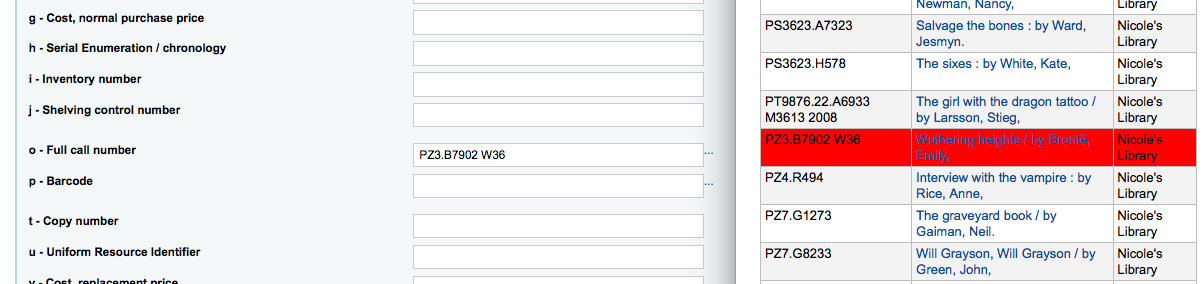
o - Full call number
-
If you'd like you can use the call number browser plugin for this field. If it's enabled you'll see a ... to the right of the field. When clicked that will open a call number browser window if the row is highlighted in Red then the call number is in use, if there is a thin Green line instead then the call number can be used.
-
-
p - Barcode
-
v - Cost, replacement price
-
This value will be charged to patrons when you mark an item they have checked out as 'Lost'
-
-
y - Koha item type
To make sure that these values are filled in you can mark them as mandatory in the framework you're using and then they will appear in red with a 'required' label. The item will not save until the required fields are filled in.

-
Note
To make item subfields required in a framework you'll want to edit the 952 field in the framework editor.
Below the add form there are 3 buttons for adding the item

-
Add Item will add just the one item
-
Add & Duplicate will add the item and fill in a new form with the same values for your to alter
-
Add Multiple items will ask how many items and will then add that number of items adding +1 to the barcode so each barcode is unique
Your added items will appear above the add form once submitted

Your items will also appear below the bibliographic details on the bib record display.
If you have SpineLabelShowPrintOnBibDetails set to 'Display' then there will also be a link to print a quick spine label next to each item.
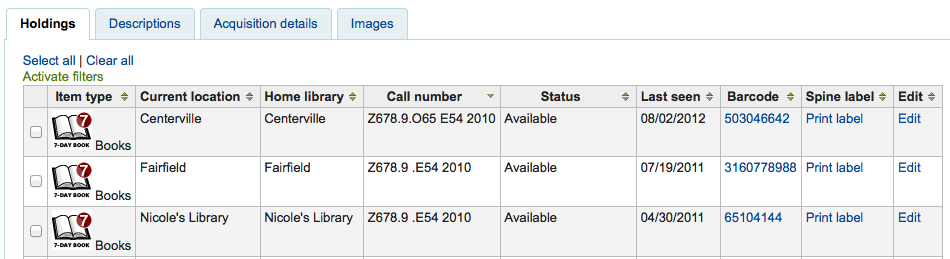
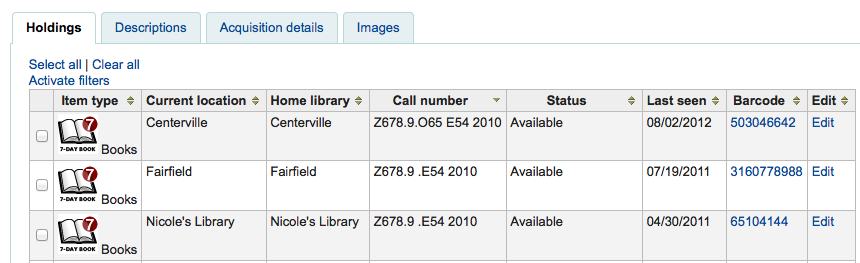
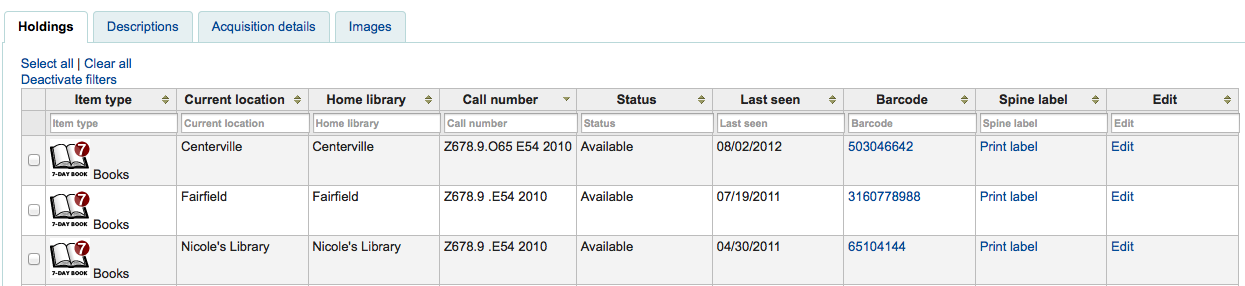
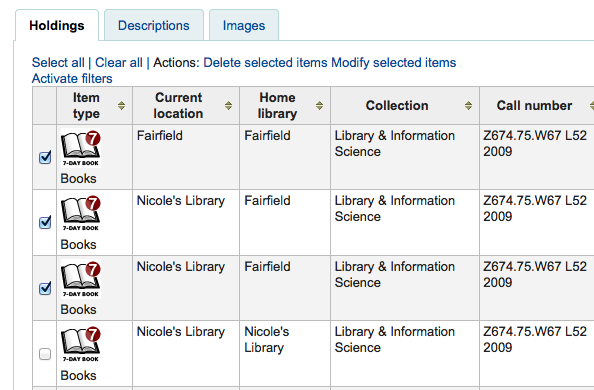
You can also filter the contents of your holdings table by clicking the 'Activate filters' links. This will show a row at the top where you can type in any column to filter the results in the table.
Items can be edited in several ways.
-
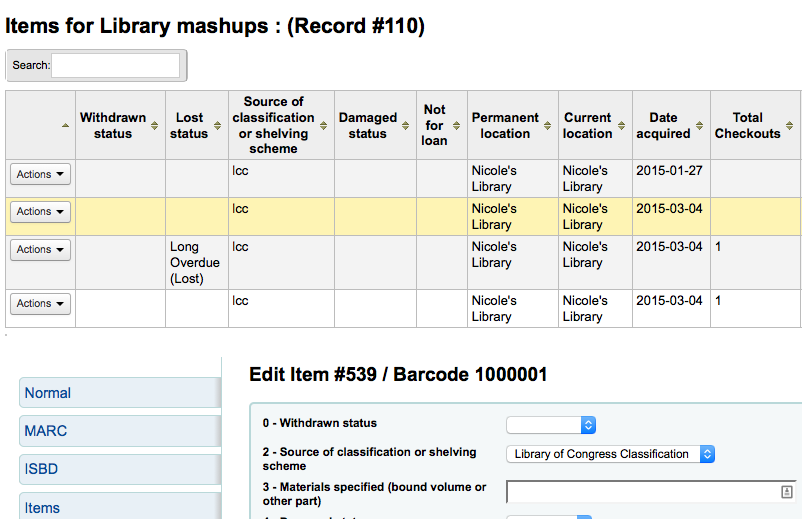
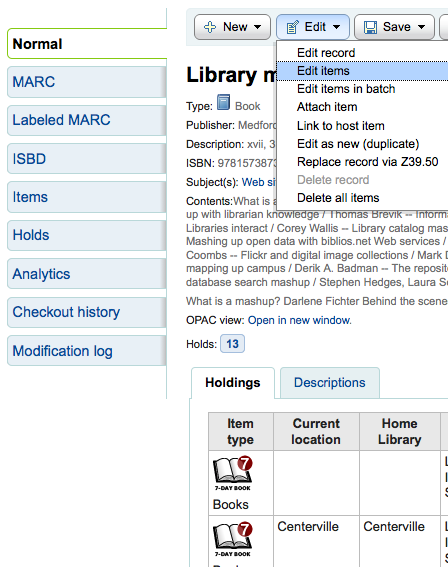
Clicking 'Edit' and 'Edit Items' from the bibliographic record
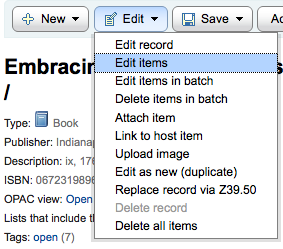
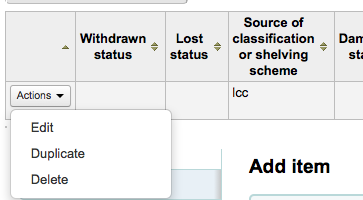
Which will open up a list of items where you can click the 'Actions' button to the left of the specific item you would like to edit and choose 'Edit'.
-
Clicking 'Edit Items' beside the item on the 'Items' tab
Which will open up the editor on the item you'd like to edit
-
Clicking 'Edit' and then 'Edit items in batch'

This will open up the batch item modification tool where you can edit all of the items on this record as a batch.
You can also enable StaffDetailItemSelection to have checkboxes appear to the left of each item on the detail display. You can then check off the items you would like to edit and click 'Modify selected items' at the top of the list.
-
You can click 'Edit' to the right of each item in the Holdings tab
-
There is also a link to Edit items from the search results in the staff client
-
Finally you can use the Batch Item Modification tool
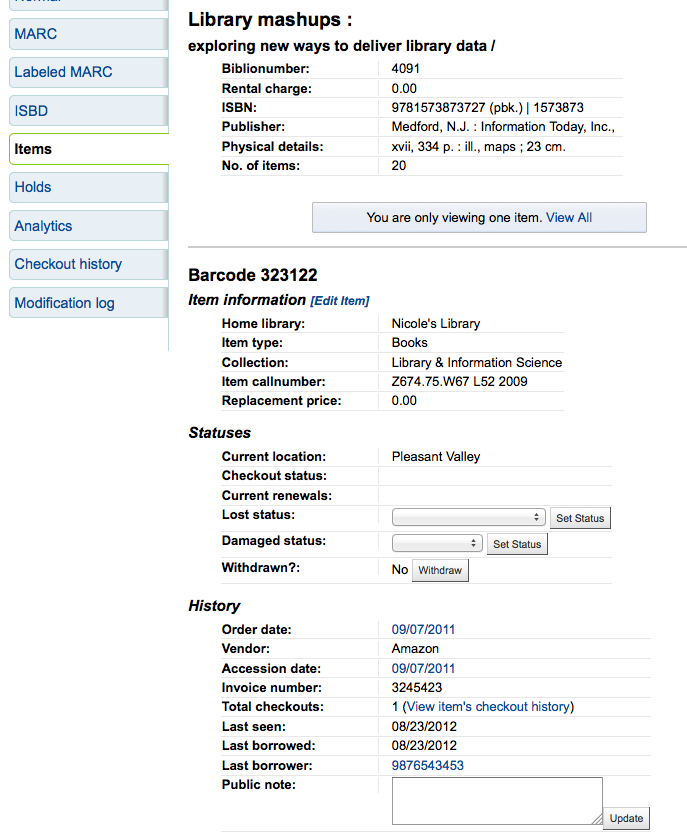
Often circulation staff need to change the status of an item to Lost or Damaged. This doesn't require you to edit the entire item record. Instead clicking on the item barcode on the checkout summary or checkin history will bring you to an item summary. You can also get to the item summary by clicking on the Items tab to the left of the bib detail page.
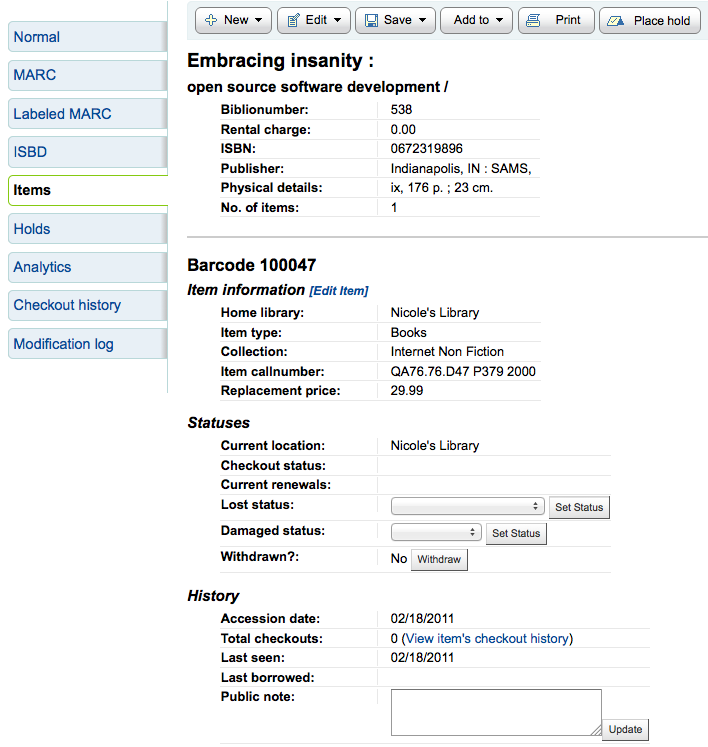
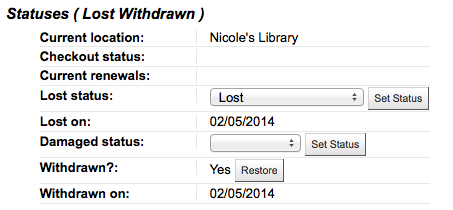
From this view you can mark an item lost by choosing a lost status from the pull down and clicking the 'Set Status' button.
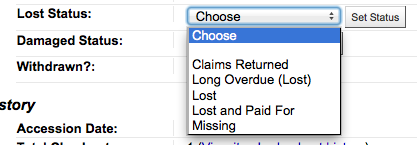
You can also mark an item as damaged by choosing a damaged status from the pull down and clicking the 'Set Status' button.

You can easily duplicate each item by clicking the 'Action' button the left of each item on the edit items screen
From here you can choose to 'Duplicate' the item and this will populate the form with the values from the item you chose.
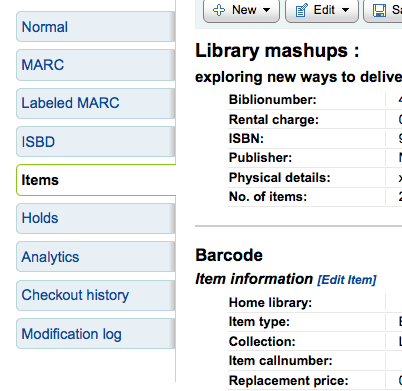
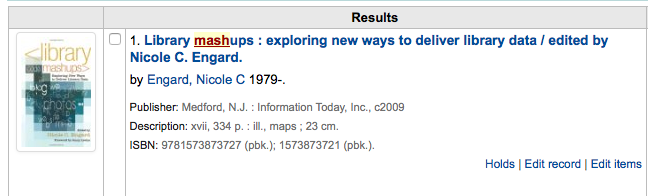
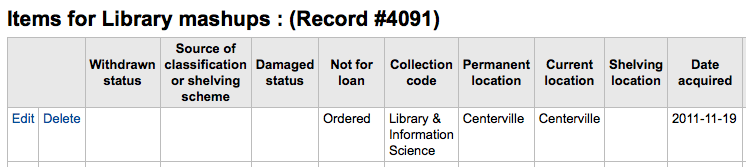
To the left of every bibliographic record there is a tab to view the items.
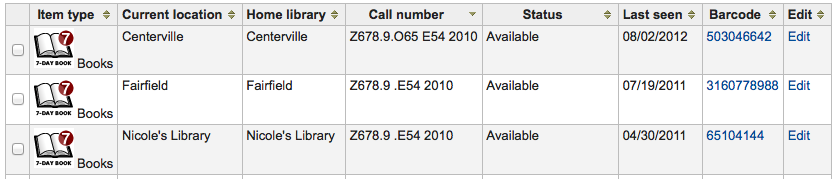
Clicking that tab will give you basic information about the items. From here you can see basic information about the item such as the home library, item type, collection code, call number and replacement price. You can also see and edit the status information. If an item is marked lost or withdrawn you will also see the date that status was applied.
In the History section you will see infomration about the check out history of the item and if you ordered the item via the acquisitions module then this section will include information about the order.
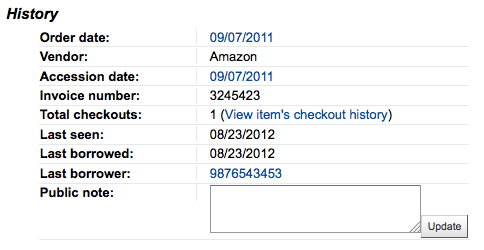
If the Order or Accession date is linked, clicking it will bring you to the acquisitions information for that item.
Items can be moved from one bibliographic record to another using the Attach Item option
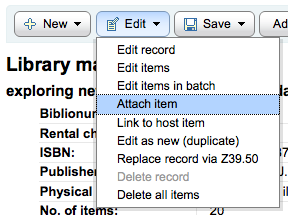
Visit the bibliographic record you want to attach the item to and choose 'Attach Item' from the 'Edit' menu.
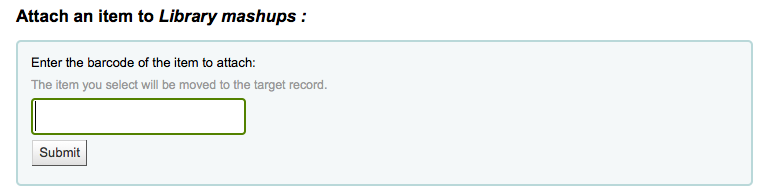
Simply enter the barcode for the item you want to move and click 'Select'
If you want to move all items to a new record creating only one bibliographic record you can use the Merge Records tool instead.
There are many ways to delete item records. If you only need to delete one item you can do this by opening up the detail page for the bib record and clicking the 'Edit' button at the top. From there you can choose to 'Edit items'.
You will be presented with a list of items and next to each one will be a link labeled 'Delete'. Click that link and if the item is not checked out it will delete that item.
If you know that all of the items attached to your record are not currently checked out you can use the 'Delete all items' option under the 'Edit menu' and it will remove all items from the record.
You can also enable StaffDetailItemSelection to have checkboxes appear to the left of each item on the detail display. You can then check off the items you would like to delete and click 'Delete selected items' at the top of the list.
Finally you can use the batch delete tool to delete a batch of items.
Each bibliographic record keeps a circulation history (with or without the patron information depending on your settings), but each item also has its own circulation history page. To see this, click on the 'Items' tab to the left of the record you are viewing.
Below the 'History' heading is a link to 'View item's checkout history,' clicking that will open up the item's history which will look slightly different from the bibliographic record's history page.
