Výpůjčky
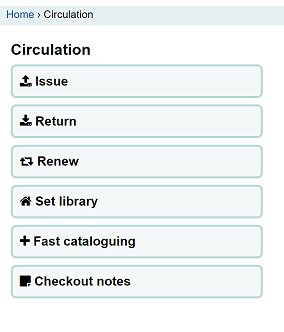
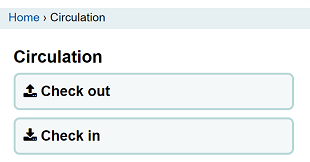
Výpůjčky jsou přístupné několika způsoby. Na hlavní stránce intranetu se nachází několik přímých odkazů pro půjčování, vracení a přesun jednotek. Pro úplný výpis funkcí modulu Výpůjčky přejděte na na stránku Výpůjčky. Odkaz na ni se nachází zcela vlevo nahoře na každé stránce a také v obsahu hlavní stránky intranetu.
Before circulating your collection you will want to set your Global system preferences, Basic parameters and Patrons and circulation rules.
V modulu výpůjčky můžete také snadno přecházet mezi záložky pod vyhledávacím políčkem pomocí klávesových zkratek:
hledání v katalogu: Alt+Q
skok na výpůjčku Alt+U
toto nebude fungovat u uživatelů Mac
vracení: Alt+R
Poznámka
Uživatelé Mac používají OPTION namísto ALT
Check out (issuing)
Chcete-li začít proces výpůjčky, musíte zadat čárový kód čtenáře nebo část jeho jména. Možnost výpůjčky se objeví ve třech hlavních místech:
Check out option in the search bar at the top of the staff interface’s main page

Check out option in the search bar at the top of the main circulation page

Those two options are essentially a patron search. If you only have one result, Koha will automatically go to the patron’s file, in the ‚Check out‘ tab.
If your search gives you more than one result, it will ask you to choose which patron to check out to.
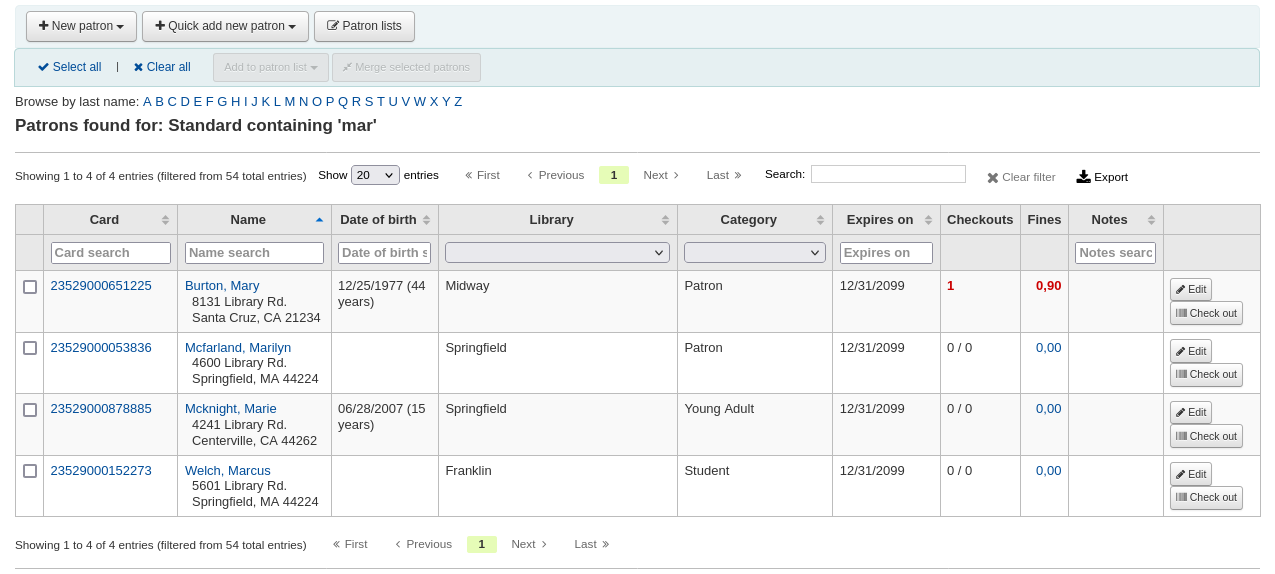
Poznámka
You can customize the columns of this table in the ‚Table settings‘ section of the Administration module, under the patrons tab (table id: memberresultst).
Clicking on a patron search result will bring you to the patron’s file, on the ‚Details‘ tab. Click the ‚Check out‘ tab to access the check out screen.
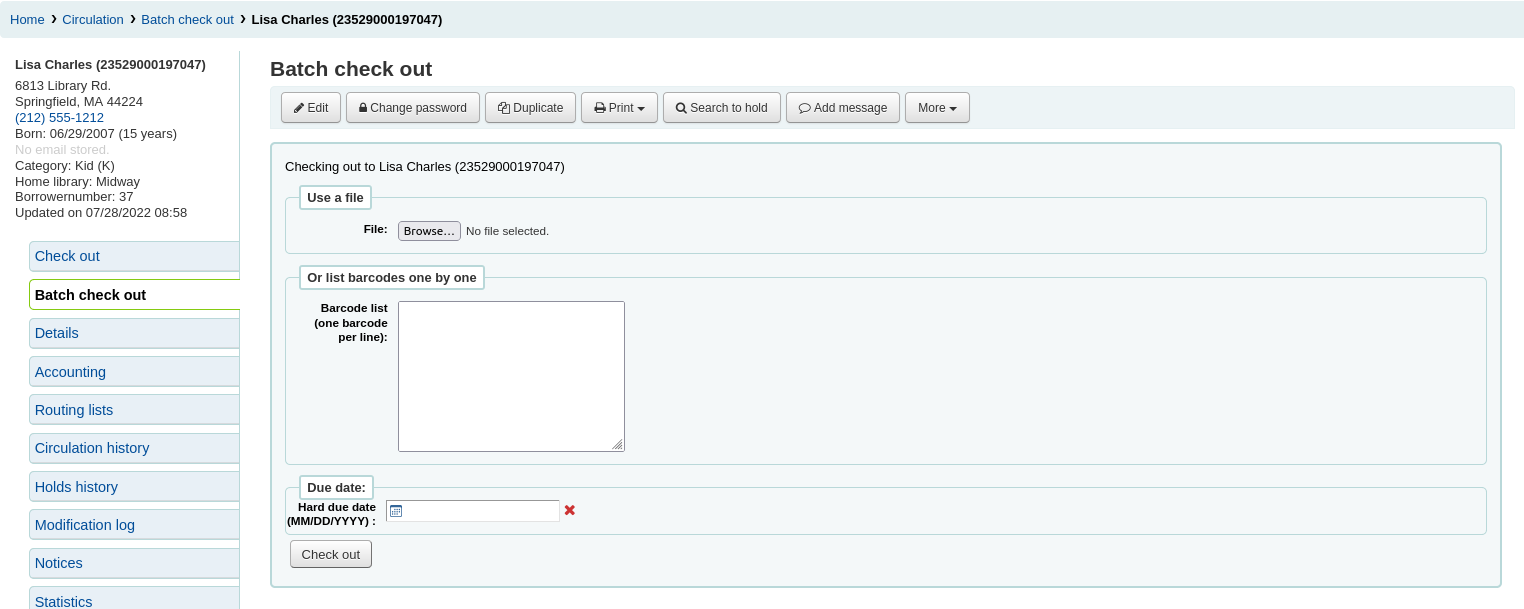
If you have enabled batch checkouts, click the batch check out tab on the patron record
Checking items out
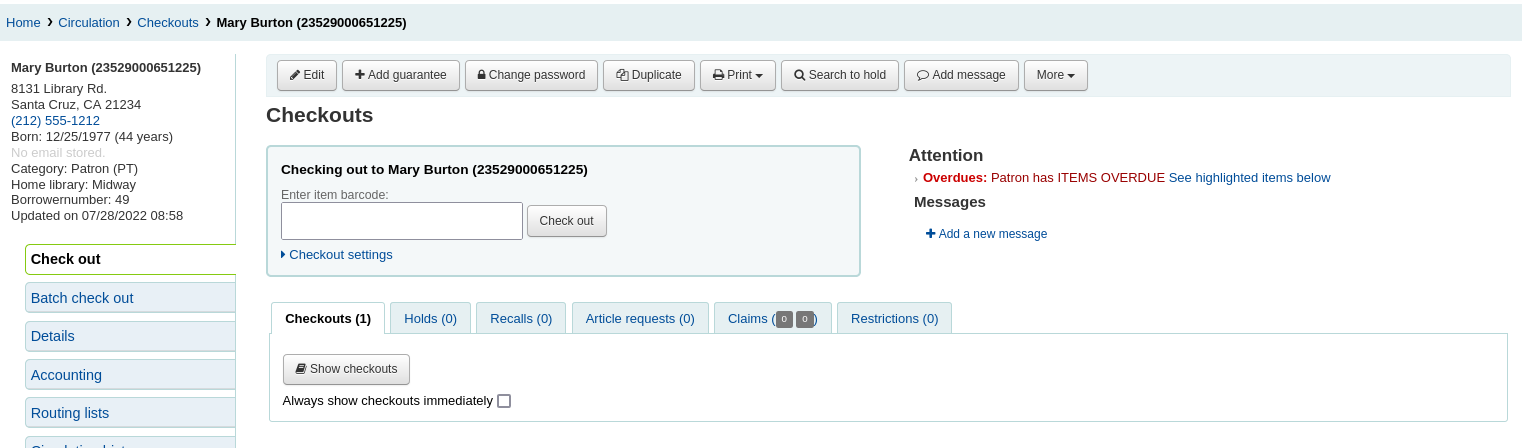
Chcete-li vypůjčit některý výtisk čtenáři, vyhledejte nejdříve čtenáře pomocí jedné z mnoha voleb uvedených výše. Poté se objeví obrazovka vypůjčení.
If ‚Always show checkouts immediately‘ is checked, you will see the list of current checkouts below the check out box.

Poznámka
The previousIssuesDefaultSortOrder system preference controls in which order these previous checkouts appear (earliest to latest, or latest to earliest).
Poznámka
You can customize the columns of this table in the ‚Table settings‘ section of the Administration module, under the circulation tab (table id: issues-table).
At the top of the check out screen is a field to type or scan the item’s barcode into.
Poznámka
Many modern barcode scanners will send a ‚return‘ to the browser, making it so that the ‚Check out‘ button is automatically clicked.
If the barcode is not found you will be prompted to use fast cataloging to add the item. Learn more about fast cataloging later in this manual.
If the itemBarcodeFallbackSearch system preference is set to ‚Enable‘, you can enter a keyword search in this box instead of just a barcode (this will make it possible to check out using title and/or call number).
If the AutoSwitchPatron system preference is set to ‚Enable‘, scanning a patron barcode here will take you to that patron’s file.
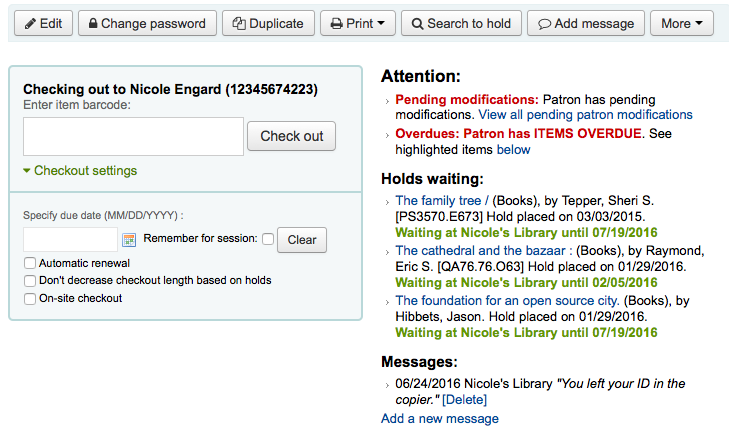
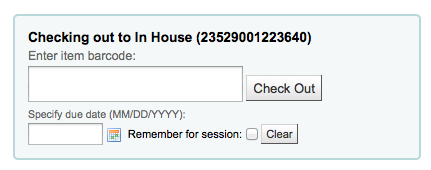
To see more checkout options click the ‚Checkout settings‘ link to expand the checkout area.
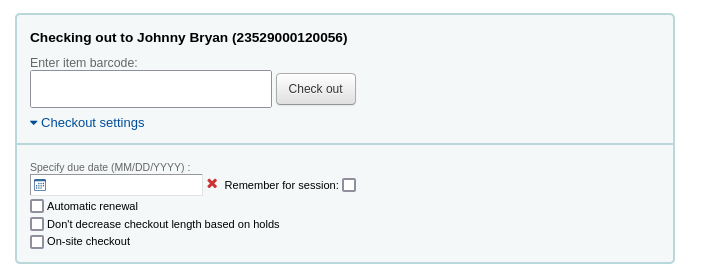
Specify due date: this option can be used to override the default due date for the item, as defined in the circulation and fines rules.
Poznámka
This option will only appear if the SpecifyDueDate system preference is set to allow staff to override the due date.
The red ‚X‘ is used to clear the date. If the ‚specify due date‘ field is empty, the default due date, as defined in the circulation and fines rules is used.
Remember for this session: check this box to use the same date for all checkouts. This will not only keep the specified due date for this patron but for all patrons, until you log out of the staff interface.
Automatic renewal: this option will allow this item to automatically be renewed
To use automatic renewals,
the automatic_renewals cron job must be running
the circulation and fines rules regarding automatic renewals must be defined
Just like regular renewals, the checkouts will not be automatically renewed if there is a hold on the item.
Don’t decrease checkout length based on holds: this option overrides the decreaseLoanHighHolds system preference.
Poznámka
This option will only appear if the decreaseLoanHighHolds system preference is enabled.
On-site checkout: this option indicates that this checkout is an on-site checkout.
Poznámka
This option will only appear if the checkout of items on site to patrons is allowed. These are usually items that are not for loan that you would like to check out for in-library use.
At the bottom of the page there is a summary of the patron’s current checked out items along with the due date (and time if the item is an hourly loan). Items checked out today will appear at the top, previously checked out items will be underneath.
Poznámka
The todaysIssuesDefaultSortOrder system preference controls in which order these new checkouts appear (earliest to latest, or latest to earliest).
Poznámka
Items that are hourly loan items will include the time with the due date.
If an item is checked out for on-site use, that information will be highlighted in red in the checkout summary.

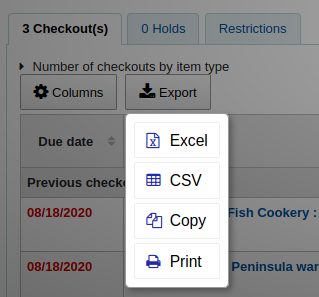
The ‚Export‘ button at the top of the table allows you to export the patron’s current checkouts in either Microsoft Excel or CSV format, or even copy or print their checkouts.
Pokud jsou vloženy nějaké zprávy týkající se čtenáře, zobrazí se vpravo od políčka pro půjčování.
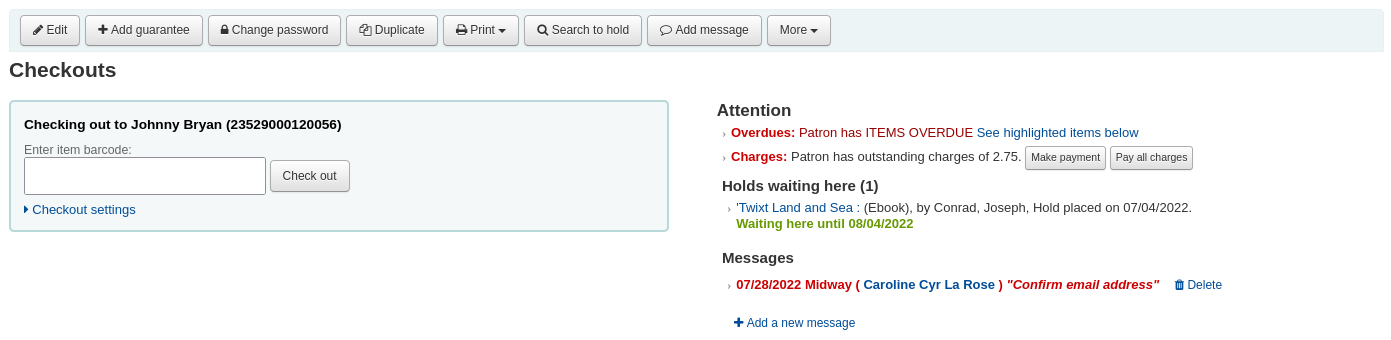
If the patron has a hold waiting at the library, that too will appear to the right of the check out box making it easy for the circulation staff to see that there is another item to give to the patron.
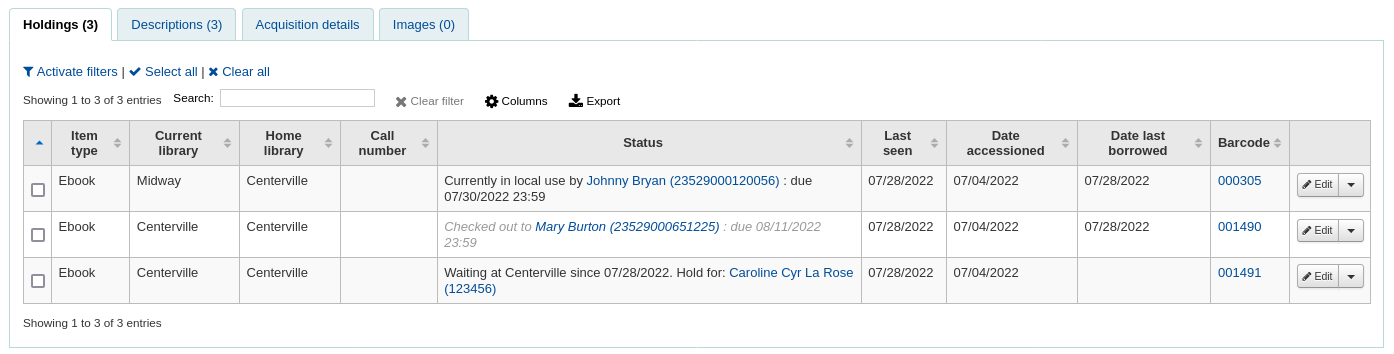
The details of the checkouts will appear on the record detail page in the staff interface as well.
Printing receipts
Pokud jste čtenáři půjčili všechny položky, můžete vytisknout potvrzení zvolením jedné ze dvou metod.
If you have the CircAutoPrintQuickSlip preference set to ‚open a print quick slip window‘ you can simply hit enter on your keyboard or scan a blank piece of paper with your barcode scanner. The idea being that you’re „checking out“ a blank barcode which triggers Koha to print the ‚Quick slip.‘
Můžete také klepnout na tlačítko Tisk v horní části obrazovky a vybrat „Tisk lístku“ nebo „Tisk rychlého lístku“.

Pokud vyberete ‚Tisk‘ -> ‚Všechny výpůjčky‘, budou vytištěny všechny aktuální výpůjčky čtenáře. Pokud vyberete ‚Tisk‘ -> ‚ Dnešní výpůjčky‘, budou vytištěny pouze dnešní výpůjčky.
‚Print summary‘ will generate a full page summary for the patron’s circulation information and ‚Print overdues‘ will print out a slip that lists all items that are overdue.
‚Print checkin slip‘ will print out a slip that lists items that were checked in today.
What prints on the slips can be customized by altering the slip templates under the Notices & slips tool.
Clear patron information
When you’re done checking an item out if you have the DisplayClearScreenButton preference set to ‚Show‘ you can clear the current patron by clicking the X in the top right of the patron’s info to remove the current patron from the screen and start over.
If you have the CircAutoPrintQuickSlip preference set to ‚clear the screen‘ then you simply need to hit enter or scan a blank barcode and the screen will be cleared of the current patron.
Batch checkouts
If you would like to perform a batch check out you can do so by turning on the BatchCheckouts system preference and assigning the proper patron categories via the BatchCheckoutsValidCategories system preference. This will allow you to use an RFID pad that reads multiple barcodes or perform a batch check out for training internal use.
From this screen you can scan several barcodes or load a file of barcodes.
If you have the SpecifyDueDate system preference enabled you will have the option to set a due date for the checkouts.
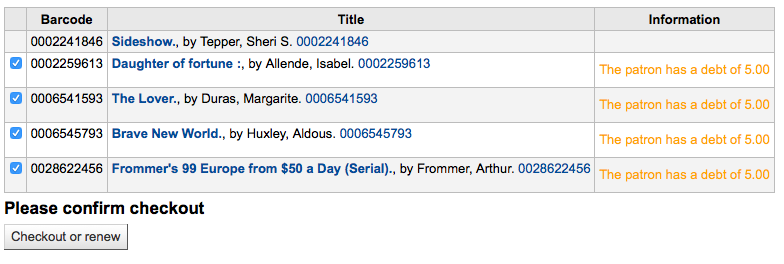
If the items cannot be checked out, a warning will be provided on the following screen, with the option to uncheck the items that are not to be checked out.
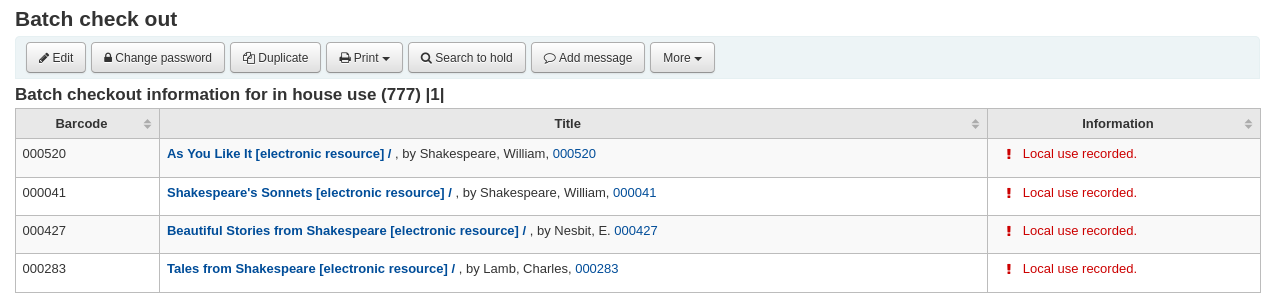
If you are using a statistical patron type then you’ll see that local use was recorded for each item you scanned.
Check out messages
Pokud půjčujete jednotku, která má v podpoli 3 pole 952 (nebo jiného pole, které používáte pro záznam jednotek) uvedeny další součásti (přílohy), objeví se zpráva, která Vás na to upozorní.

Jsou chvíle, kdy Koha zabrání knihovníkovi půjčit čtenáři výtisky. Když se to stane, objeví se varování oznamující knihovníkovi důvody, proč čtenář nemůže mít další výpůjčky.
Čtenář dluží příliš mnoho pokut
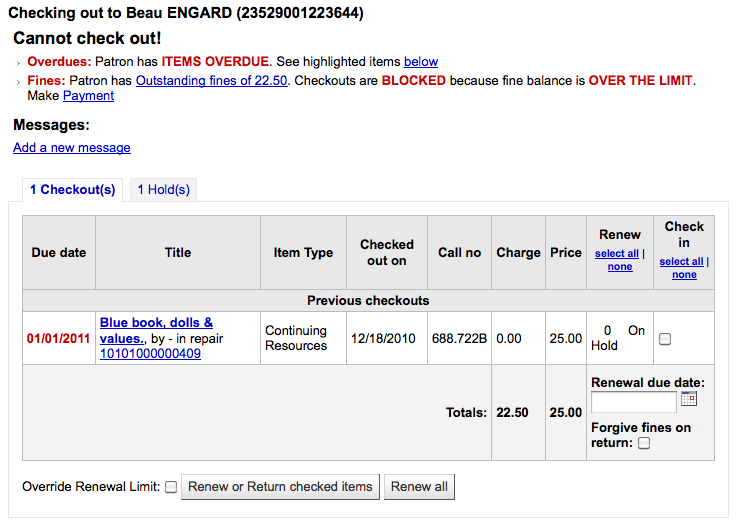
You can set the amount at which patron checkouts are blocked with the noissuescharge system preference
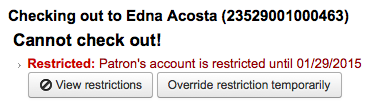
Patron has a restriction on their account

This can be set by the librarian editing a patron record and adding a restriction or by the Overdue/Notice Status Triggers
Pokud má zaměstnanec správné oprávnění, mohou toto omezení dočasně přehlížet
Čtenář potřebuje potvrdit svoji adresu
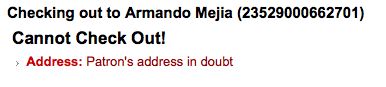
To může nastavit knihovník úpravou čtenářova záznamu a přidání ` příznak <#patronflags>`__
Čtenář ztratil svoji průkazku (kartu)
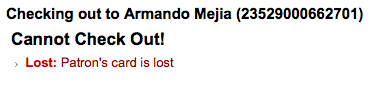
To může nastavit knihovník úpravou čtenářova záznamu a přidání ` příznak <#patronflags>`__
Check out warnings
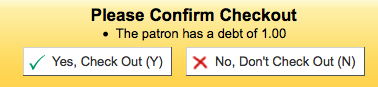
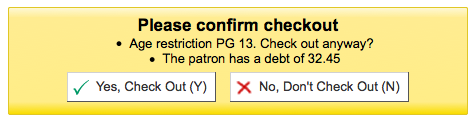
Někdy se může stát, že půjčování vyvolá varovnou zprávu, která se objeví ve žlutém rámečku ještě nad políčkem pro půjčování. Tato varování je třeba odsouhlasit předtím, než budete pokračovat v půjčování.
Čtenář má neuhrazené platby
Jednotka je rezervována pro jiného čtenáře
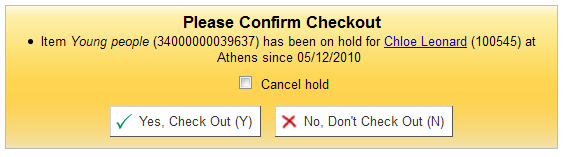
Jednotka by měla být v regálu s rezervacemi připravená pro jiného čtenáře
Tuto jednotku už má čtenář vypůjčenou

Jednotku má půjčenou jiný čtenář
This warning will allow you to place a hold on the item for the patron you’re trying to check it out to.
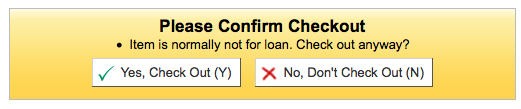
Jednotku nelze vypůjčit
Patron has too many things checked out and AllowTooManyOverride is set to ‚Allow‘

Patron has too many things checked out and AllowTooManyOverride is set to „Don’t allow“

Jednotka nemůže být proudložena

This can be overridden with the AllowRenewalLimitOverride system preference
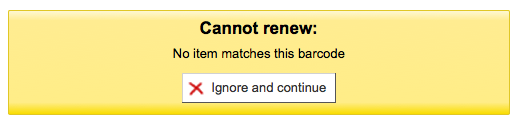
Čárový kód nebyl nalezen

Learn more about fast cataloging later in this manual.
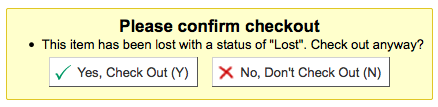
Vypůjčená jednotka je označena jako ztracená
Depending on the value in your IssueLostItem preference, you may just see a warning

nebo potvrzovací políčko
Půjčovaná jednotka není doporučená pro čtenáře tohoto věku
Item being checked out meets the decreaseLoanHighHolds system preference criteria

Item has accompanying material (field 952$3, ‚Materials specified‘, is filled)

If CircConfirmItemParts is set to ‚Require‘, the staff member will have to confirm the checkout

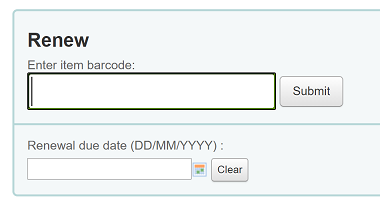
Prodlužování
Checked out items can be renewed (checked out for another period of time) based on your circulation rules and renewal preferences.
If you allow it, patrons can renew their own items via the OPAC, but sometimes you’ll need to help them by renewing their items via the staff client.
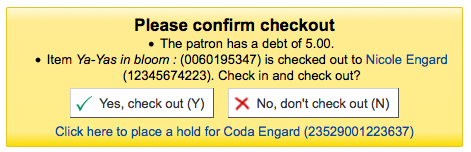
Tuto jednotku má vypůjčenou jiný čtenář. %s Vrátit a vypůjčit? %s
The first is to visit their details page or checkout page and review their checkout summary at the bottom.
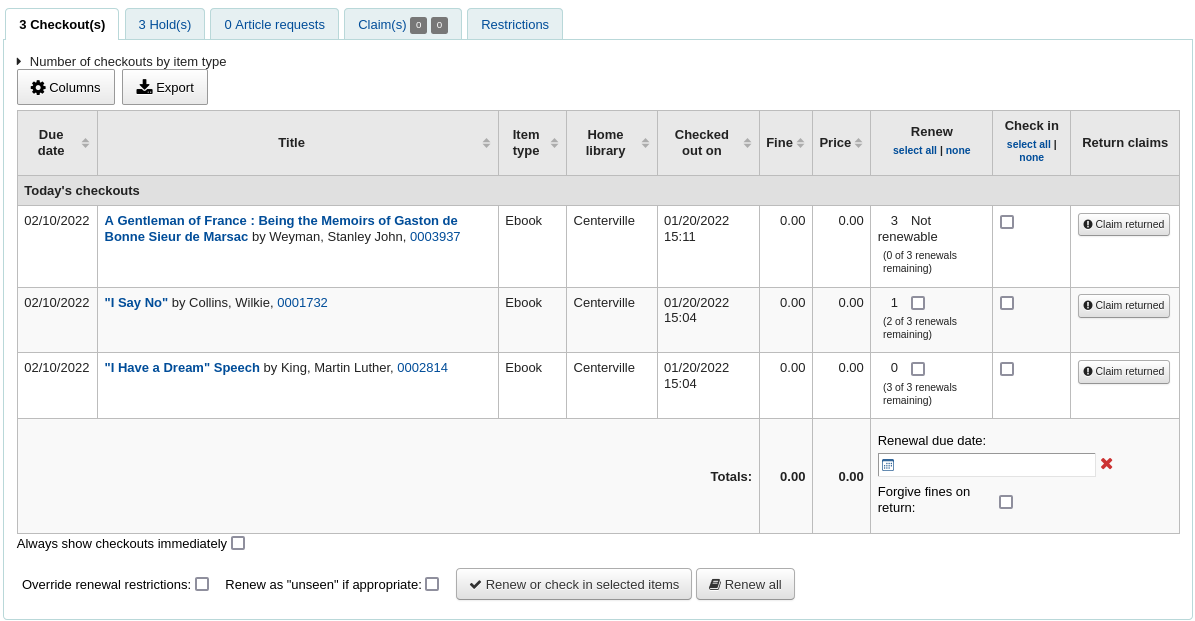
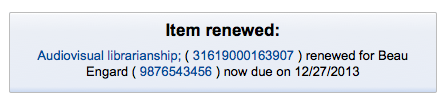
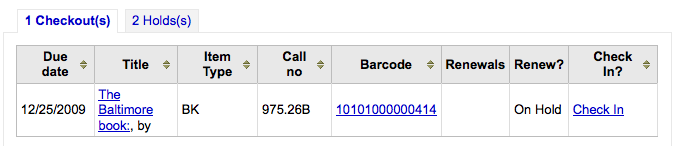
In the Renew column you will see how many times each item has been renewed and a checkbox to renew the item for the patron. Check the box of the items you would like to renew and click the ‚Renew or return checked items‘ button, or to renew all items checked out to the patron simply click the ‚Renew all‘ button.

Sometimes renewals will be blocked based on your circulation rules, to override this block you must have your AllowRenewalLimitOverride preference set to ‚Allow‘. If you allow renewal limit overrides, you will see a checkbox at the bottom left of the circulation summary. Check that box and then choose the items you would like to renew.

Zaškrtnutím tohoto políčka, budou přidány zaškrtávací políčka do sloupce prodloužení tam, kde jednotku dříve nešlo prodloužit.
You can also mark a renewal as ‚unseen‘, to differentiate between renewals where staff has actually seen the item, versus renewals where they didn’t see it (over the phone, for example). To do this, you must first enable the UnseenRenewals system preference. Once enabled, a checkbox will appear at the bottom left of the circulation summary. Check that box to mark the renewals as ‚unseen‘. Then click either ‚Renew or check in selected items‘ or ‚Renew all‘.

Stránka „Vrátit“ pod Výpůjčním menu
Naskenujte nebo vypiště čárový kód položky, kterou chcete přesunout
Hned po načtení souboru se zobrazí potvrzující zpráva.
Pokud vyberete ‚Zavřít‘, zobrazí se formulář.
Jakmile je jednotka vypůjčena, objeví se pod informacemi o čtenáři.
Check in (returning)
Vraácení vytisků je možné z různých míst
Zaškrtávací políčko v horní části hlavního intranetu

Možnost vrácení na liště rychlého vyhledání na stránce výpůjček

Odkaz na vrácení výpůjčky z přehledu čtenářových výpůjček (a na stránce přeled výpůjček)
Stránka „Vrátit“ pod Výpůjčním menu
Koha also offers an automatic checkin feature, which can be set in item types.
Checking items in
Chcete-li vrátit výtisk, sejměte čárový kód výtisku v návratové schránce. Přehled všech vrácených výtisků se objeví pod návratovou schránkou.
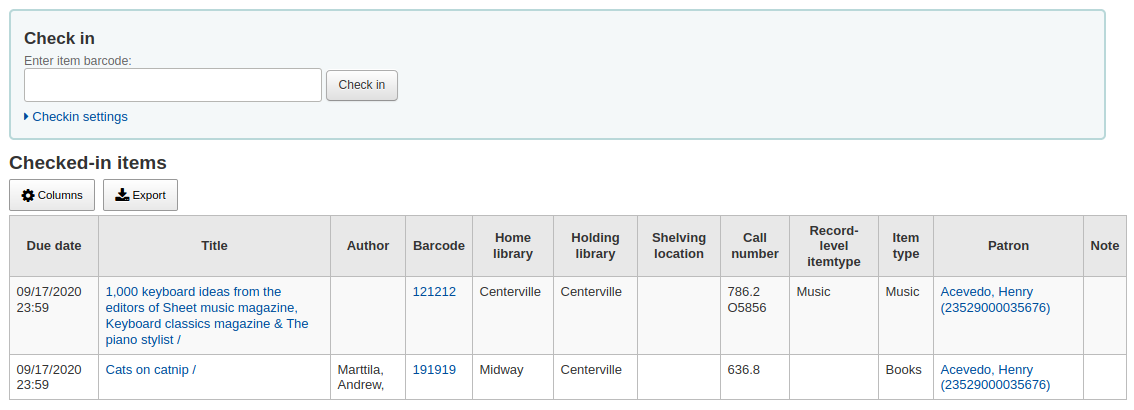
Poznámka
You can customize the columns of this table in the ‚Table settings‘ section of the Administration module (table id: checkedintable).
Pokud chcete provádět vracení jednotek, které byly vloženy do biblioboxu, zatímco knihovna byla uzavřena, můžete zaškrtnout políčko „Vracení knih z biblioboxu“. Systém pak nastaví jako datum vrácení předchozí otevírací den knihovny.
This requires that you have your closings added to the calendar tool
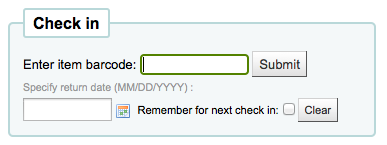
Můžete také zvolit možnost odpuštění všech poplatků za pozdní vrácení jednotek zaškrnutím ‚Odpustit upomínky‘ ještě před začátkem skenování kódů.
If you have the SpecifyReturnDate preference set to ‚Allow‘ you will be able to arbitrarily set the return date from below the check in box.
Check in messages
Při vracení jednotek se můžou zobrazit následující zprávy:
Pokud vracíte jednotky v knihovně, jiné než v domácí pobočce, zobrazí se zpráva s dotazem zda převést knihu do domácí knihovny
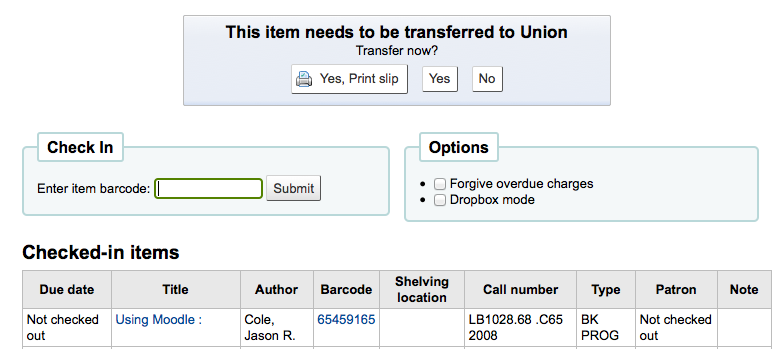
Po vrácení této jednotky se její stav v katalogu změní na „na cestě“

Chcete-li mít označenou jednotku jako zpátky na domácí pobočce, vracejte jednotky v domovské pobočce
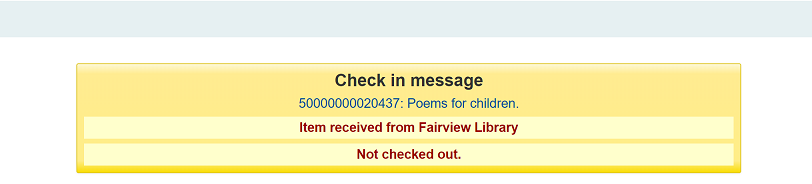
Objeví se zpráva, že výtisk není vypůjčen, ale status v katalogu bude změněn na „dostupné“. Tento krok je nezbytný k označení výtisku jako přijatého domovskou knihovnou.
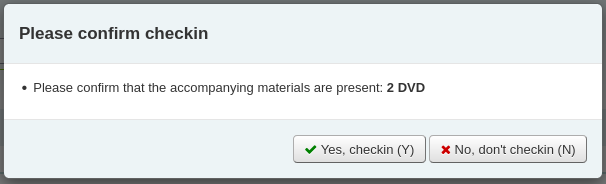
Pokud přijímáte výtisk, který by měl mít několik částí, zobrazí se zpráva informující vás o počtu kusů, který byste měli mít v ruce
If CircConfirmItemParts is set to ‚Require‘, the staff member will have to confirm the checkin
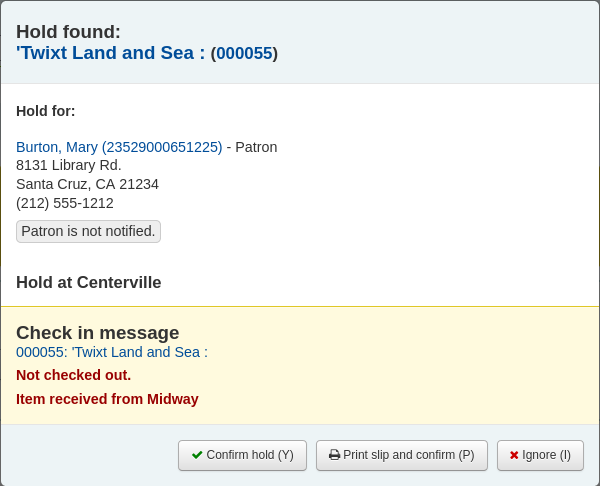
Pokud přijímáte jednotku, která má rezervace, budete vyzváni k potvrzení rezervace
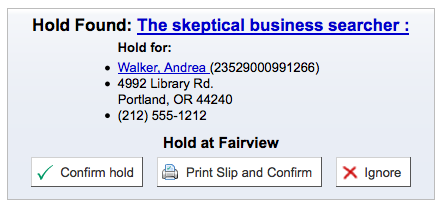
Kliknutím na tlačítko „Potvrdit rezervaci“ se označí výtisk jako čekající na vyzvednutí z knihovny

Clicking the ‚Print slip and confirm‘ button will mark the item as waiting for pickup at the library and present the library with a receipt to print and place on the book with the patron’s information
Ignorování rezervace ponechá rezervaci na výtisku, ale ponechá jeho status „Dostupný“ (což ale neruší rezervaci)
Pokud přijímáte jednotku, která má rezervaci v jiné pobočce, budete vyzváni k potvrzení a přepravy jednotky
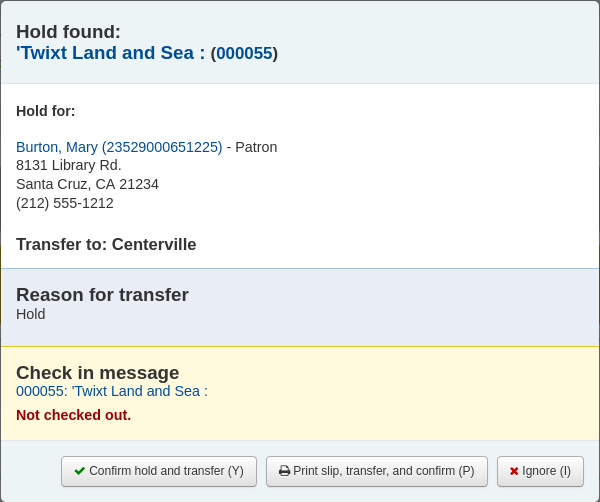
Clicking the ‚Confirm hold and transfer‘ button will mark the item as in transit to the library where the hold was placed

Clicking the ‚Print slip, transfer and confirm‘ button will mark the item as in transit to the library where the hold was placed and present the library with a receipt to print and place on the book with the patron’s information
Ignorování rezervace ponechá rezervaci na výtisku, ale ponechá jeho status „Dostupný“ (což ale neruší rezervaci)
If you have the system showing you fines at the time of checkin (FineNotifyAtCheckin) you will see a message telling you about the fine and providing you a link to the payment page for that patron

Circulation messages
Jedná se o krátké zprávy, které mohou knihovníci nechat pro čtenáře, nebo pro své kolegy a objeví se při práci s modulem Výpůjčky.
Setting up messages
Circulation messages are set up as authorized values. To add or edit circulation messages you want to work with the BOR_NOTES value.
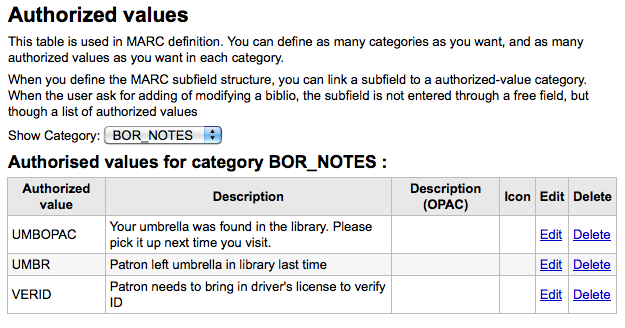
The ‚Description‘ field can hold a canned message that you would like to appear on the patron’s record.
Důležité
Pole „Popis“ je omezeno na 80 znaků, ale pole zprávy pro čtenáře pojme více. Zadejte 80 znaků do pole Popis a zbytek zadejte do čtenářova záznamu.
Adding a message
When on the patron’s check out tab you will see a link to ‚Add a new message‘ to the right of the check out box and a button at the top to ‚Add message‘.
When you click either of these options you will be asked to choose if the message is for the librarians or the patron and the message you would like to leave.
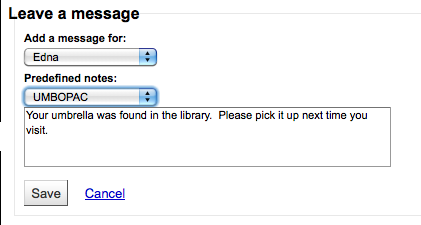
Poznámka
Zpráva pro čtenáře se také zobrazí knihovníkům.
Viewing messages
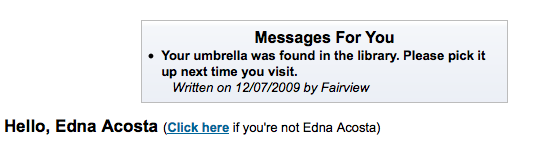
Zprávy o výpůjčkách jsou určené pro zaměstnance a/nebo čtenáře a objeví se na čtenářově výpůjční obrazovce vpravo výpůjčního políčka. Zprávy vypsané tučně a červeně jsou určeny jen pro pracovníky knihoven, zatímco zprávy v pravidelných kurzívních písmech jsou určeny pro čtenáře i knihovníka.
Výpůjční zprávy určené pro čtenáře se také objeví, když se přihlásíte do OPACu.
Rezervace
Koha allows patrons to put things on hold. A ‚Hold‘ is a way to reserve an item. Depending on your circulation and fines rules and hold preference settings patrons will be able to place items on hold for pickup at the library at a later date/time.
Placing holds in staff client
There are several ways to place holds from the staff client. The most obvious is using the ‚Place hold‘ button at the top of any bibliographic record.

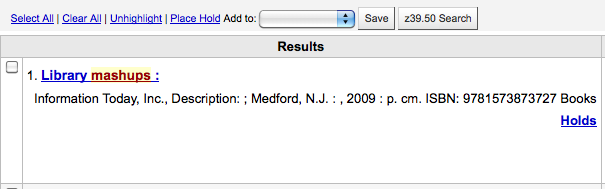
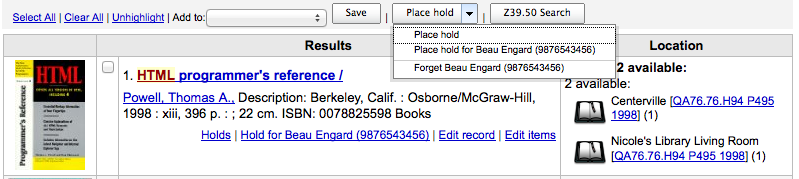
You can also click the smaller ‚Place hold‘ link found at the top of your catalog search results, or the ‚Holds‘ link found below each result.
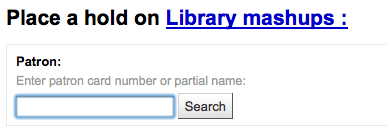
Budete požádáni o vyhledání čtenáře čárovým kódem nebo jeho libovolnou částí jeho jména, aby se zahájil proces rezervace.
Pokud byste chtěli nejdřív hledat čtenáře a pak bibliografický záznam pro rezervaci, můžete otevřít čtenářův záznam a klikněte na tlačítko „Vyhledat rezervace“ v horní části čtenářova záznamu.
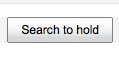
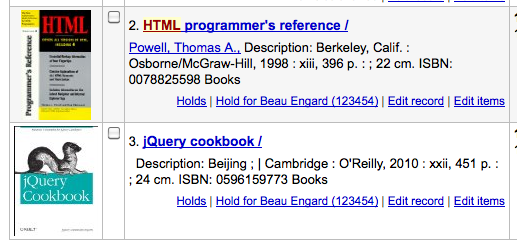
Po kliknutí na tlačítko se dostanete na stránku vyhledávání v katalogu, kde můžete najít knihu/y, které chcete zarezervovat. Pod každým názvem ve výsledcích uvidíte možnost „Rezervovat pro uživatele“.
Pokud chcete umístit rezervaci na více výtisků, jednoduše zaškrtněte políčka nalevo od nich, a klepněte na šipku vpravo od tlačítka „Zadat rezervaci“.
Podle množství jednotek, na které chcete najednout zadat rezervaci se vám zobrazí příslušný formulář. Pokud zadáváte rezervaci na jeden záznam, zobrazí se seznam všech jednotek, které můžete rezervovat.
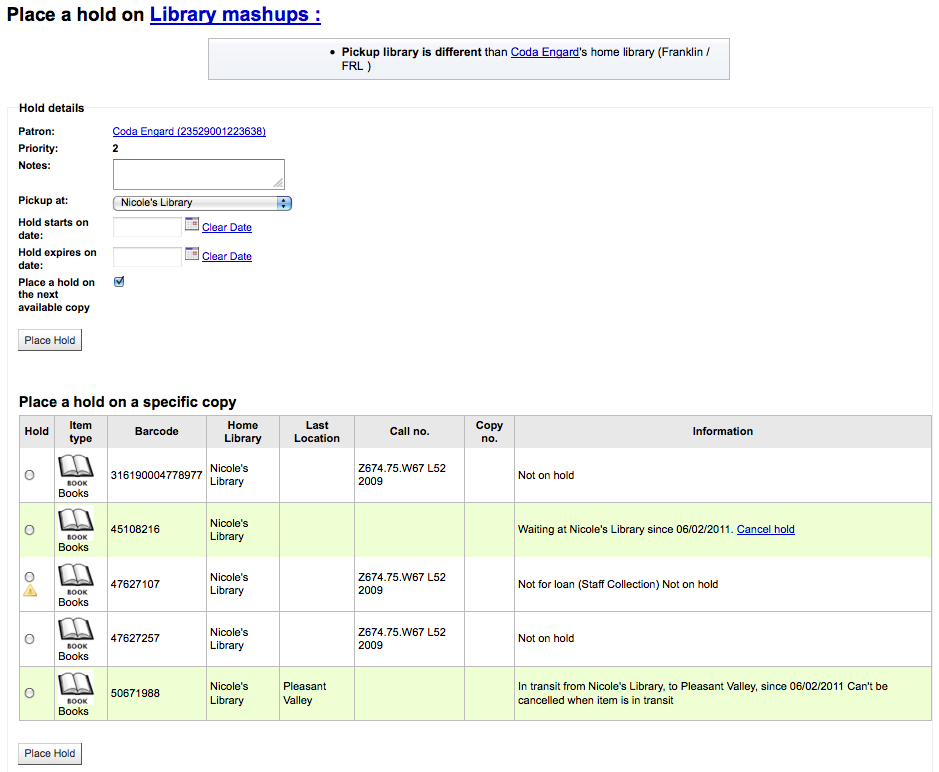
Zadejte poznámky, které platí pro tuto rezervaci
Vyberte knihovnu, ve které si uživatel vyzvedne jednotku
If you have the AllowHoldItemTypeSelection preference set to ‚Allow‘ and the record had more than one item type attached you will see an option to choose to limit the hold to a specific item type
Pokud čtenář podat rezervaci, která začne platit až jiný den než dnes, zadejte to v poli „Rezervace začíná od“
This option will only appear if the AllowHoldDateInFuture system preference is set to ‚Allow‘
Pokud čtenář uvedl, že už nechce jednotku po určitém datu, nebo máte-li limity rezervací na délku rezervace, můžete zadat datum vypršení platnosti rezervace v poli „Rezervace až do data“
To have expired holds cancelled automatically you will need to have the Expired holds cron job set to run on a regular basis.
Dále zvolte, zda chcete umístit rezervaci na další dostupný výtisk nebo na určitý výtisk klepnutím na přepínač vedle jednotlivých výtisků.
If you are placing a hold for internal purposes, such as checking for missing pages or needing to add a sticker, you can place a ‚non-priority‘ hold. This type of hold will not prevent the patron who currently has the item to renew their checkout.
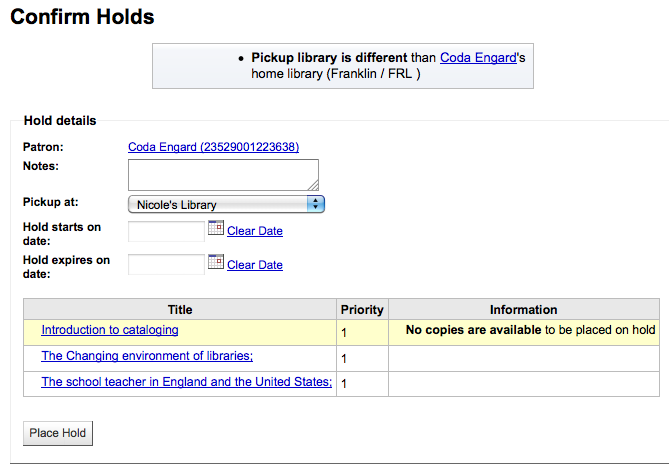
Pokud dáváte rezervace na více výtisků, objeví se vám další dostupné výběry pro všechny tituly. Pokud žádné výtisky nejsou jsou k dispozici pro rezervace, bude to zobrazeno na obrazovce pro potvrzení.
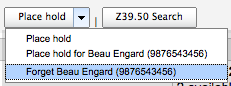
Once your hold is placed, if you’d like to have Koha forget that you used the ‚Search to hold‘ function, you can choose to have Koha ‚forget‘ the patron’s name by clicking the arrow to the right of the ‚Place hold‘ button on the search results and choosing the ‚Forget‘ option.
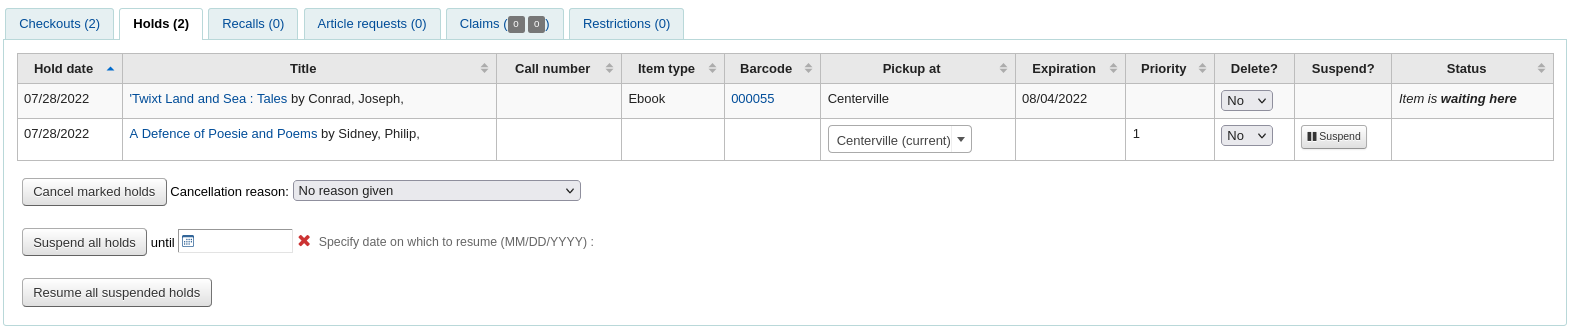
Managing holds
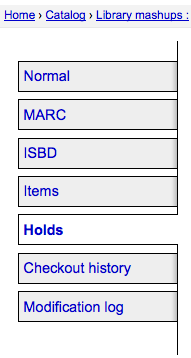
Holds can be altered and cancelled from the holds tab found on the left of the bibliographic record.
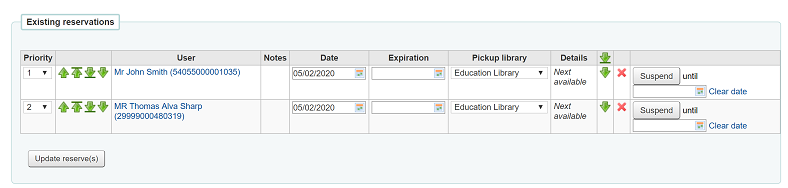
Ze seznamu rezervací můžete změnit pořadí rezervací, místo vyzvednutí, pozastavit a/nebo zrušení rezervace.
Poznámka
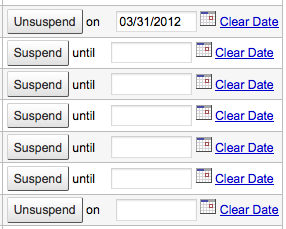
If you have your AutoResumeSuspendedHolds preference set to „Don’t allow“ then you will not have the option to put an end date on the hold suspension.
Poznámka
If you have your AllowHoldDateInFuture preference set to „Don’t allow“ you will not have the option to edit the date the hold was placed (the column labelled Date).
Poznámka
If you have the HoldsSplitQueue system preference set you will see the holds list split across different tables by either pickup library, itemtype or both.
Poznámka
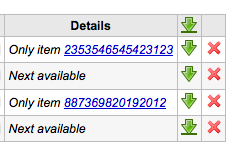
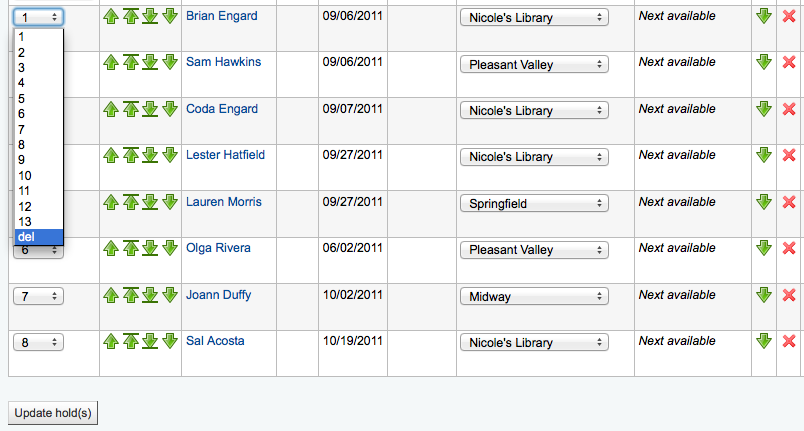
Depending on how you have your HidePatronName system preference set the list may show card numbers instead of names in the patron column like in the image above.
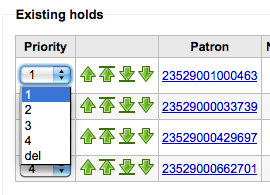
Chcete-li změnit nebo odstranit vlastní rezervace, stačí provést výběr z roletky „Priority“nebo klepnutím na šipky vpravo od Roletky „Priority“.
Pokud roletku priorit na přeskupení nebo odstranění rezervací, musíte kliknout na tlačítko „Aktualizovat rezervace“, aby se změny uložily.
Klepnutím na šipku dolů napravo od rezervací podrží rezervaci v dolní části seznamu, i když je dáno více pořadavků.
Např. vaše knihovna má domovské čtenáře, kteří jsou oprávněni držet výpůjčky po celé měsíce. To by nebylo spravedlivé vůči jiným čtenářům, pokud by domovský čtenář by mohl si vypůjčit zbrusu novou knihu a mít jí několik měsíců. Z tohoto důvodu by žádosti domovských čtenářů zůstaly na konci fronty, dokud všichni ostatní, kteří si chtěli knihu přečíst, tak již neučinili.
If a patron asks to have their hold suspended and you have the SuspendHoldsIntranet system preference set to ‚allow‘ you can do so by clicking the ‚Suspend‘ button to far right. If the patron gives you a date for the items to become unsuspended you can enter that in the date box and click the ‚Update hold(s)‘ button to save your changes.
Chcete-li odstranit nebo zrušit rezervaci klikněte na červený křížek vpravo v řádku frezevace. Chcete-li hromadně odstranit/zrušit rezervace, můžete vybrat „del“ z rozbalovacího menu vlevo od každého řádku a potom klepněte na tlačítko „Aktualizovat rezervace“ v dolní části seznamu.
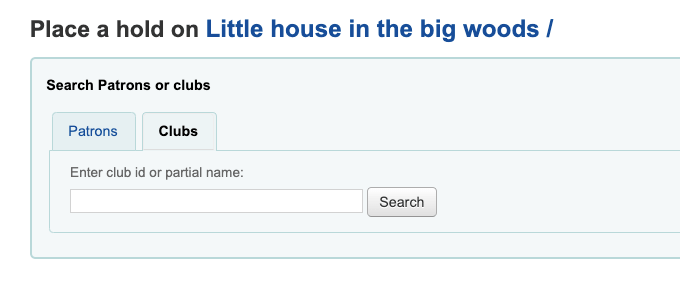
If your library uses the patron clubs feature, use the clubs tab to place a hold for a club. To place a hold for a club, click the clubs tab, search for and select the club name, and click the ‚Place hold‘ button.
Receiving holds
When items that are on hold are checked in or out the system will remind the circulation staff that the item is on hold and offer them options for managing the hold.
Když přijímáte jednotku, na kterou je rezervace, systém vás požádá, abyste buď potvrdili a přepravili jednotku
nebo jen potvrdit rezervaci
If the item needs to be transferred, clicking ‚Confirm and transfer‘ or ‚Print slip, transfer, and confirm‘ will mark the item as in transit to the proper library.
If the item is already at the pickup library, clicking the ‚Confirm‘ or the ‚Print slip and confirm‘ button will mark the item as ready for pickup by the patron.
Clicking ‚Ignore‘ will retain the hold, but allow the item to be checked out to another patron or change the status of the item (if it was returned damaged, for example).
The ‚Print slip and confirm‘ or ‚Print slip, transfer, and confirm‘ options will open a printable page that you can attach to the item with the necessary hold or transfer information.
Poznámka
The slip that is printed is the HOLD_SLIP notice. It can be modified with the Notices & slips tool.
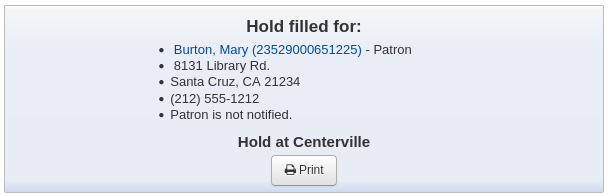
When the hold is confirmed, if the patron is notified, the ‚hold filled‘ notice will be sent to them.
Poznámka
The notice that is sent is the HOLD notice. It can be modified with the
Poznámka
If the HoldsAutoFill system preference is enabled, the circulation staff will not have to confirm the hold, but they will have the option to print the hold or transfer slip.
If the HoldsAutoFillPrintSlip system preference is enabled, the print window to print the hold or transfer slip will open automatically.
Once confirmed, the hold will show as ‚waiting‘ on the patron record and on the checkout screen under the ‚Holds‘ tab.
Záznam výtisku také ukazuje, že výtisk je rezervován.

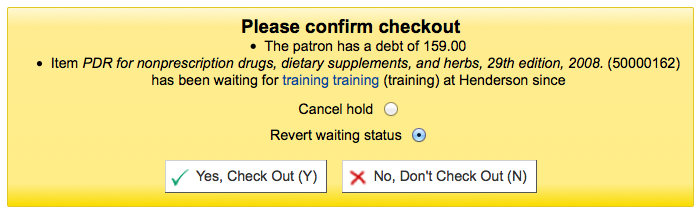
In some cases, a patron may come in to pick up a hold on behalf of someone else. In this case, make sure that the hold is cancelled when you check the item out to someone else. Alternatively, a check out might be attempted in error for an item that is already waiting for someone else. In this case you will be presented with a warning message.
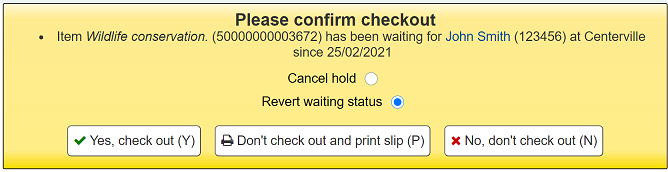
Cancel hold: in combination with ‚Yes, check out‘, this option will cancel the current hold and check the item out to the new patron.
Revert waiting status: in combination with ‚Yes, check out‘, this option will revert the waiting status of the hold (the patron who placed the hold will be back in first position in the queue) and check the item out to the new patron.
Yes, check out: this option will check the item out to the current patron.
Don’t check out and print slip: this option will open the print window to print the hold slip, the check out will be cancelled and the hold will remain.
No, don’t check out: this option will cancel the check out, the hold will remain.
If you try to check in an item that is already waiting to be picked up, a pop up indicating that a hold was found and the item is already waiting will appear.
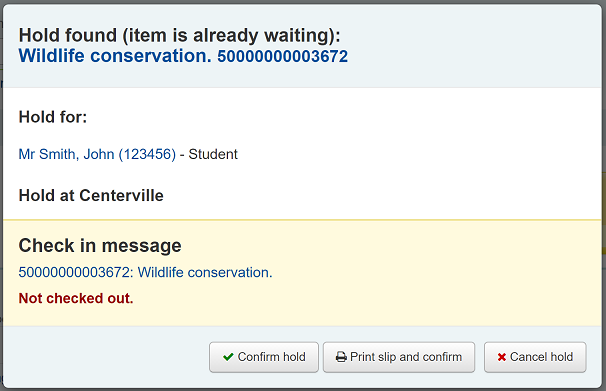
Confirm hold: this option will keep the existing hold.
Print slip and confirm: this option will open the print window to print the hold slip and keep the existing hold.
Cancel hold: this option will remove the hold.
If you cancel the hold and further holds exist for the item you will be presented with a new option to confirm the hold for the next patron.
Recalls
The recalls feature allows users to recall items that are currently checked out. Once the recall is confirmed, the borrower who currently has the item checked out will be notified that their due date has been adjusted and they need to return their item. Once recalled items are returned, the recall requester will be notified that their item is awaiting pickup at their specified pickup location.
See the requesting recalls section to learn how to place a recall in the OPAC.
Setting up recalls in Koha
To use this feature:
Enable the UseRecalls system preference
Set the RecallsMaxPickUpDelay system preference
Optionally, enable the RecallsLog system preference
Modify the following sections in the relevant circulation rules
Recalls allowed (count)
Recalls per record (count)
On shelf recalls allowed
Recall due date interval (day)
Recall overdue fine amount
Recall pickup period
Make sure all the staff member who will be managing recalls have the superlibrarian or manage_recalls permission
Schedule the recalls cronjobs
Review the recalls notices and slips to make sure they have all the information needed
Managing recalls
The recalls feature is relatively automated. Staff do not have a lot of manipulations to do to manage recalls.
Recall statuses
The possible statuses for recalls are the following:
Requested
A new recall request has been made and the item must be returned by the patron who currently has it
Requested recalls appear in
the recalls queue
the recalls to pull list, if an available item can fulfill the recall
the ‚Recalls‘ tab of the bibliographic record
the ‚Recalls‘ tab of the patron’s file (and its equivalent in the OPAC)
the ‚Recalls history‘ tab of a patron’s file (and its equivalent in the OPAC)
Waiting
A recalled item is awaiting pickup at the requester’s chosen branch
Waiting recalls appear in
In transit
An item has been assigned to a recall and is in transit to the requester’s chosen pickup branch
In transit recalls appear in
Overdue
A recalled item is overdue to be returned by the patron who currently has it
Overdue recalls appear in
Fulfilled
A recalled item has been checked out to the recall requester, and the recall is complete
Fulfilled recalls appear in
Expired
The recall was not completed before a defined expiration date or the recall requester failed to pick up their waiting recall within the pickup period defined in RecallsMaxPickUpDelay
Expired recalls appear in
Cancelled
The recall request was cancelled.
Cancelled recalls appear in
Receiving recalled items
Upon checkin in an item that has been recalled, a pop up will appear asking the staff member to confirm or ignore the recall.
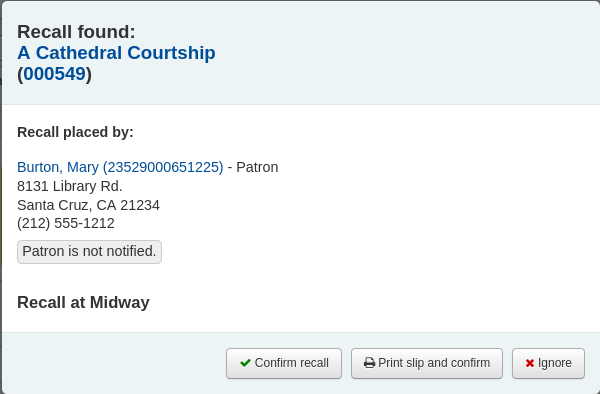
Confirm recall: this option will put the recall in ‚Waiting‘ status and, if the patron has an email address in their file, will notify them that their recalled item is now ready for pickup.
Poznámka
The notice sent is PICKUP_RECALLED_ITEM. You can modify it’s content in the notices and slips tool
Print slip and confirm: this option will print a slip you can attach to the item (similar to a hold slip) in addition to everything the ‚confirm recall‘ does (change the status and send the notice).
Poznámka
The slip is RECALL_REQUESTER_DET. You can modify it’s content in the notices and slips tool
Ignore: this option will check in the item, but the recall will not be set as awaiting pickup and the patron will not be notified.
If the patron asked to pick up their recalled item at a different library, a transfer will be triggered.
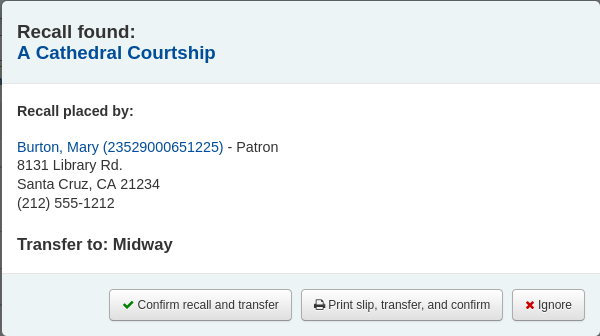
Confirm recall and transfer: this option will put the recall ‚In transit‘.
Print slip, transfer, and confirm: this option will print a slip you can attach to the item (similar to a hold slip) in addition to setting the recall as ‚In transit‘.
Ignore: this option will check in the item, but the recall will not be set as ‚In transit‘
Poznámka
The patron will not be notified that their recall is ready for them with any of the above options.
Cancelling recalls
Poznámka
Only requested or overdue recalls can be cancelled.
It is not possible to cancel a recall that is currently awaiting pickup
Staff can cancel recalls from various screen in the staff interface.
Cancel from the recalls queue either individually by clicking the ‚Actions‘ button and selecting the ‚Cancel‘ option.
Or by selecting several recalls and clicking the ‚Cancel selected recalls‘ button at the bottom of the screen.
If the recalled item is currently in transit, the cancel option will also trigger a transfer back to the item’s home library.
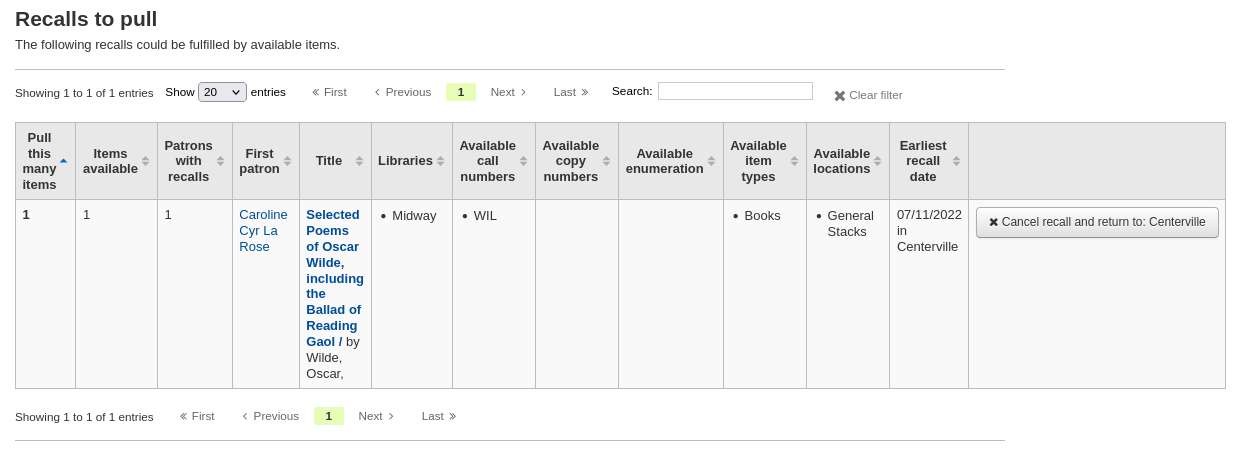
Cancel from the recalls to pull by clicking the ‚Cancel recall‘ button on the right
If the recalled item is currently in transit, the cancel option will also trigger a transfer back to the item’s home library.
Cancel from the overdue recalls list either individually by clicking the ‚Actions‘ button and selecting the ‚Cancel‘ option.
Or by selecting several recalls and clicking the ‚Cancel selected recalls‘ button at the bottom of the screen.
Cancel from the ‚Recalls‘ tab of a bibliographic record by clicking the ‚Actions‘ button and selecting the ‚Cancel‘ option.
Or by selecting several recalls and clicking the ‚Cancel selected recalls‘ button at the bottom of the screen.
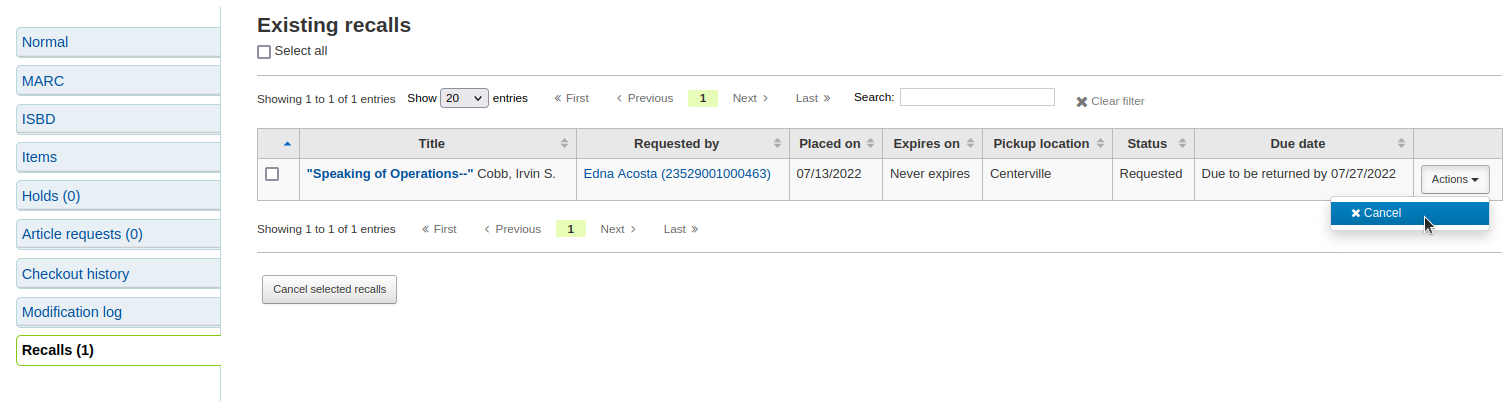
Cancel from the ‚Recalls‘ tab of a patron’s details page by clicking the ‚Actions‘ button and selecting the ‚Cancel‘ option.

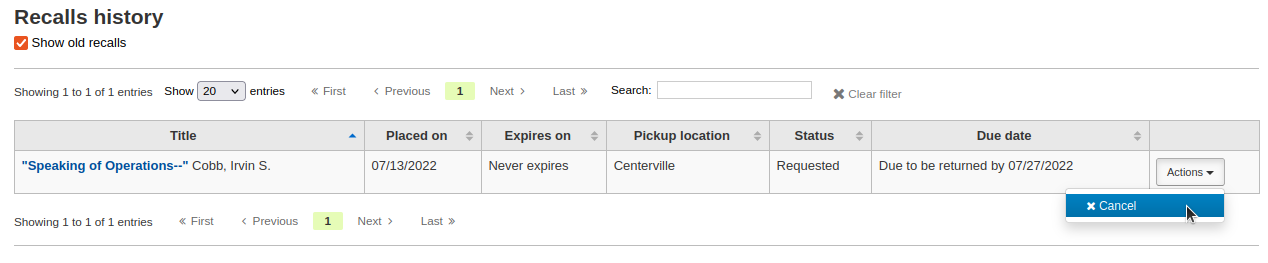
Cancel from the ‚Recalls history‘ tab of a patron’s file by clicking the ‚Actions‘ button and selecting the ‚Cancel‘ option.
Changing waiting recalls‘ status
If a recall is currently awaiting pickup and for some reason the staff needs to change this status (for example, the requesting patron called and they won’t be picking up the recall), it is possible to revert the waiting status.
Revert the status from the recalls queue by clicking the ‚Actions‘ button and selecting the ‚Revert waiting‘ option.
Revert the status from the Recalls awaiting pickup list by clicking the ‚Revert waiting status‘ button on the right.
Marking recalls as overdue
If a recall is not checked in by the new due date, it should be marked as overdue by the overdue_recalls cronjob. However, it is possible to mark recalls as overdue manually.
From the recalls queue, click the ‚Actions‘ button and selecting the ‚Mark as overdue‘ option.

Overdue recalls appear in the Overdue recalls list.
Expiring recalls
If a recall as been awaiting pickup for longer than the allowed period defined in RecallsMaxPickUpDelay, it should be expired automatically by the expire_recalls cronjob. However, it is possible to expire recalls manually.
From the recalls awaiting pickup list, click the ‚Expire recall‘ button on the right.
Recalls reports
Once recalls are set up, new sections will appear in the circulation module.
Get there: Circulation > Recalls
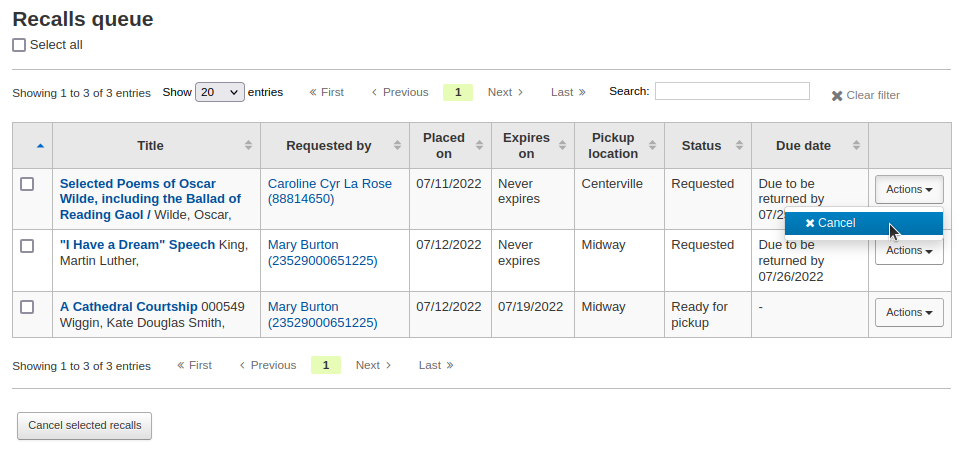
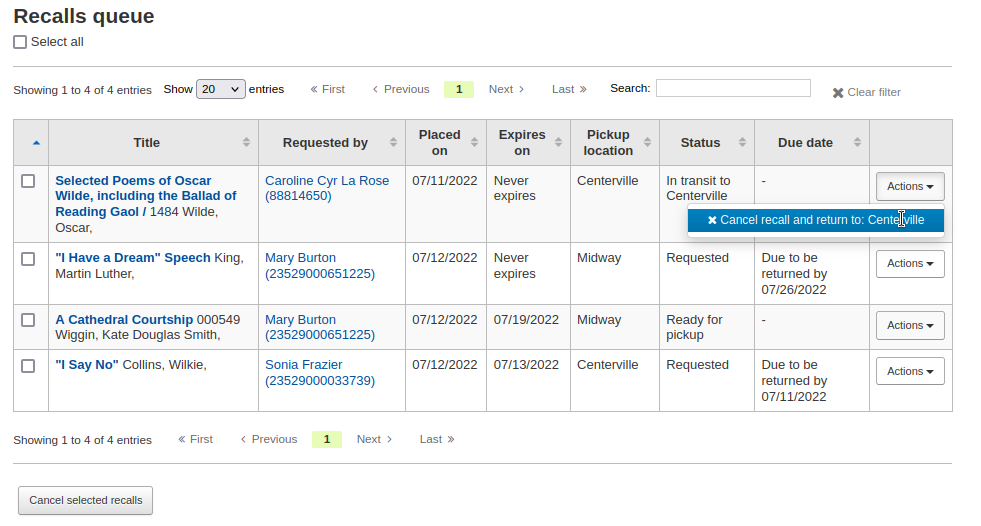
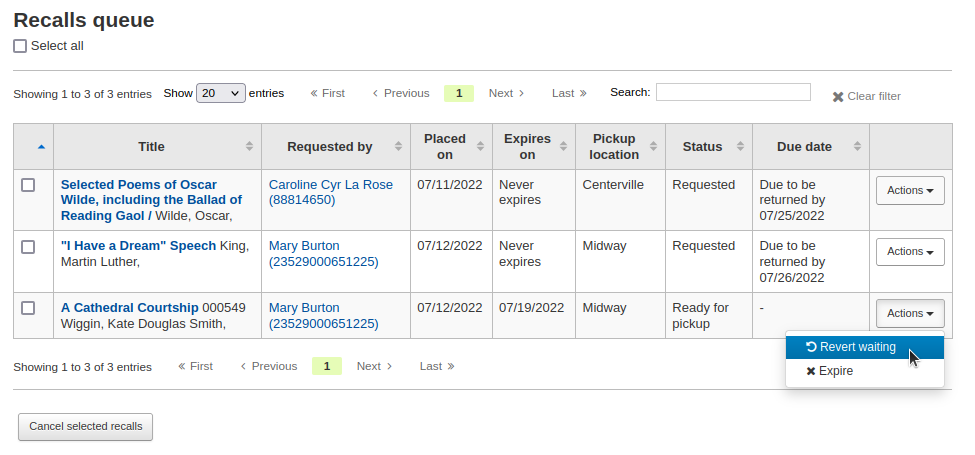
Recalls queue
The recalls queue shows all the current active recalls with their statuses.
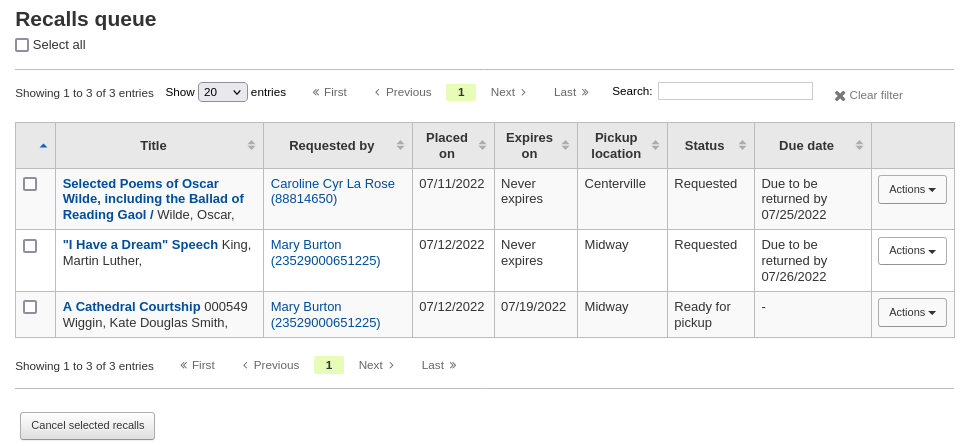
From the recalls queue, staff can cancel active recalls either individually by clicking the ‚Actions‘ button and selecting the ‚Cancel‘ option.
Or by selecting several recalls and clicking the ‚Cancel selected recalls‘ button at the bottom of the screen.
For recalls that are in transit, it is possible to cancel them and this will trigger a transfer back to their home library.
For recalls that are currently awaiting pickup, it is possible to revert the waiting status by clicking the ‚Actions‘ button and selecting the ‚Revert waiting‘ option.
For recalls that are overdue, it is possible to mark them as such from the recalls queue by clicking the ‚Actions‘ button and selecting the ‚Mark as overdue‘ option.
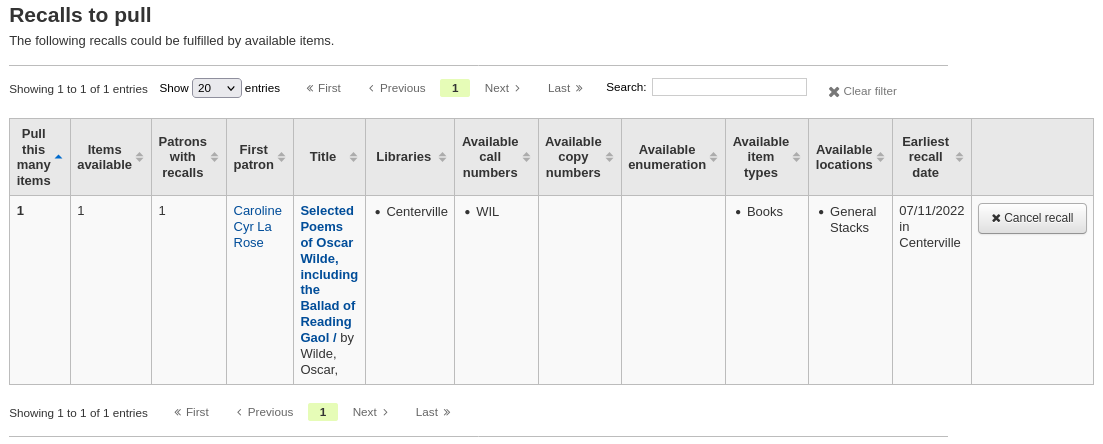
Recalls to pull
The recalls to pull list shows all the records that have been recalled but that have available items that could fulfill the request.
Staff can pick up these items from the shelves and check them in to fulfill the requests.
From the recalls to pull list, staff can cancel recalls if needed, by clicking the ‚Cancel recall‘ button on the right.
If the item is currently in transit, cancelling the recall will also trigger a transfer back the the item’s home library.
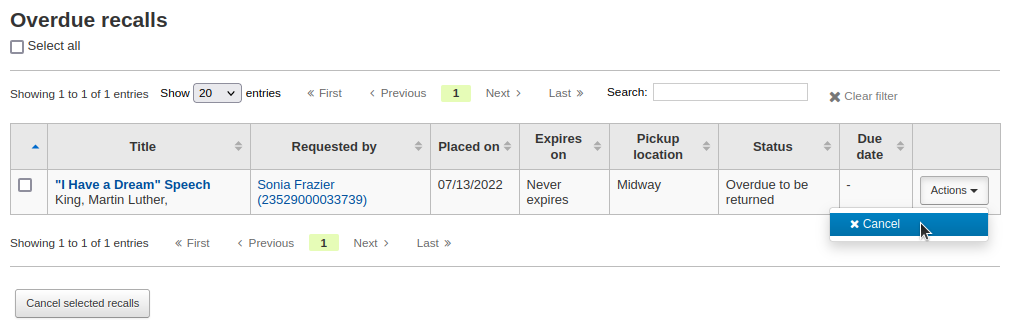
Overdue recalls
This list shows the items that have been recalled but have not been returned by the new due date.
Recalls can be marked as overdue automatically through the overdue_recalls cronjob or manually.
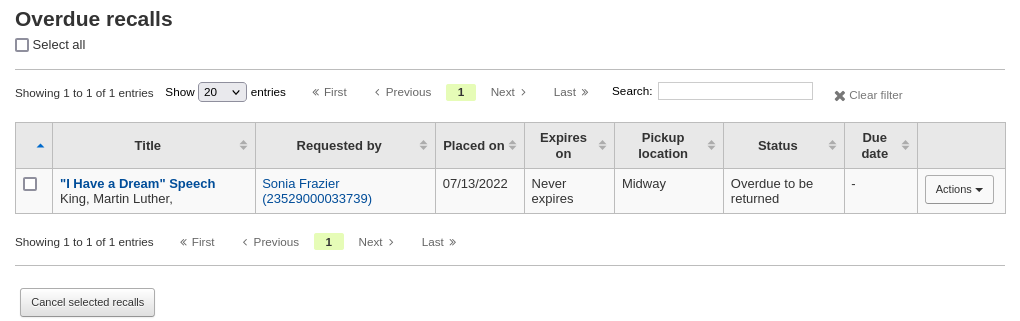
From this list, staff can cancel active recalls either individually by clicking the ‚Actions‘ button and selecting the ‚Cancel‘ option.
Or by selecting several recalls and clicking the ‚Cancel selected recalls‘ button at the bottom of the screen.
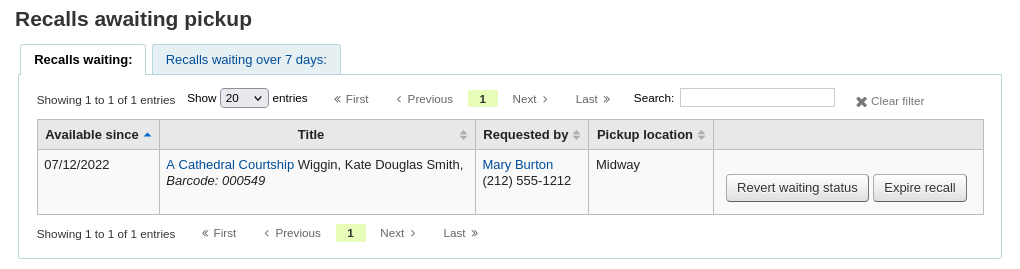
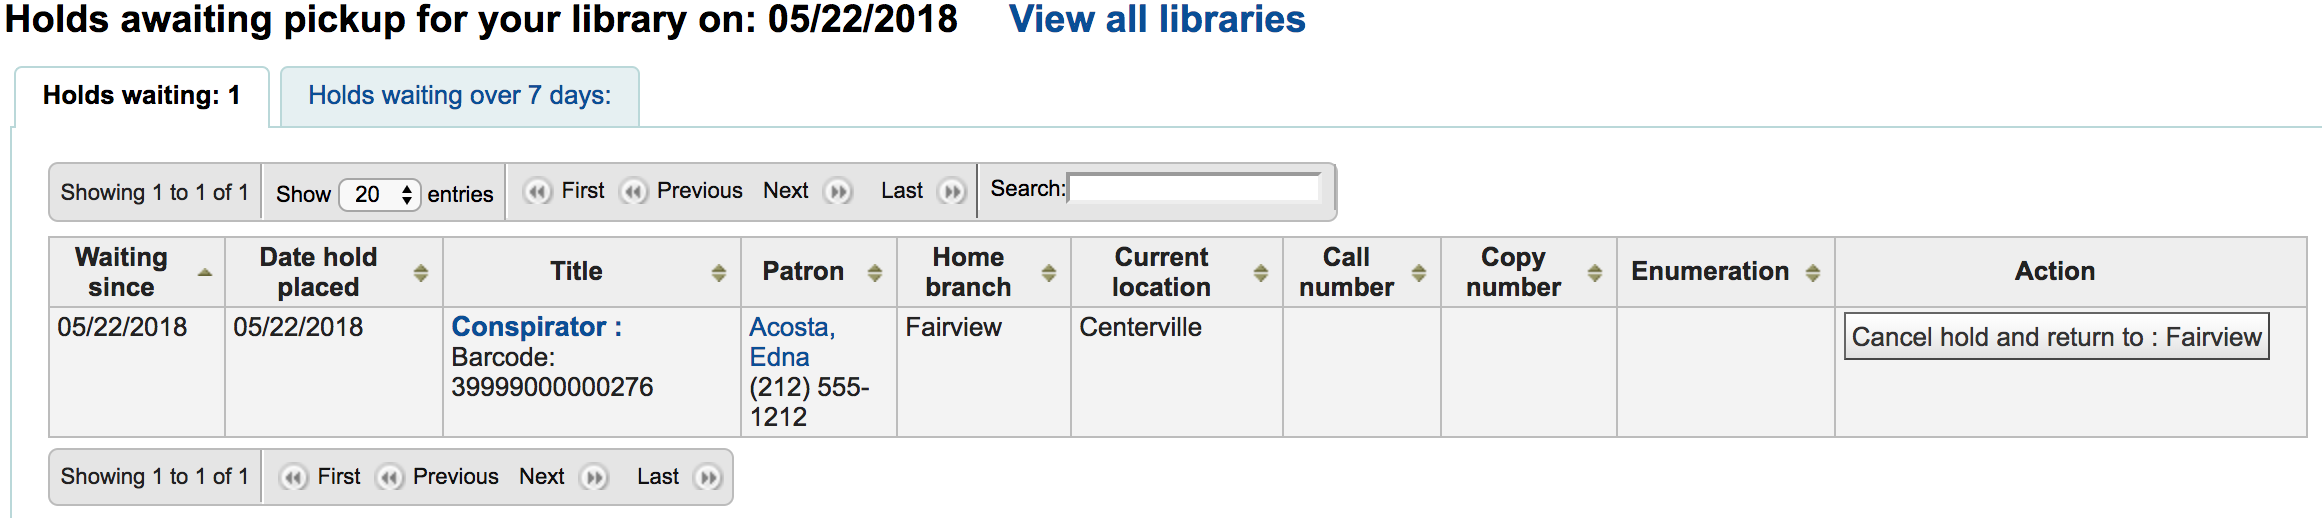
Recalls awaiting pickup
The recalls awaiting pickup list shows all the recalls that are currently waiting for the patron to come and get them.
This list is divided in two tabs:
Recalls waiting: shows all the recalls currently awaiting pickup.
Recalls waiting over x days: shows the recalls that have been waiting for more than the number of days specified in the RecallsMaxPickUpDelay system preference.
From this list, staff can revert waiting recalls by clicking on the ‚Revert waiting status‘ button on the right.
Staff can also manually expire recalls by clicking on the ‚Expire recall‘ button on the far right.
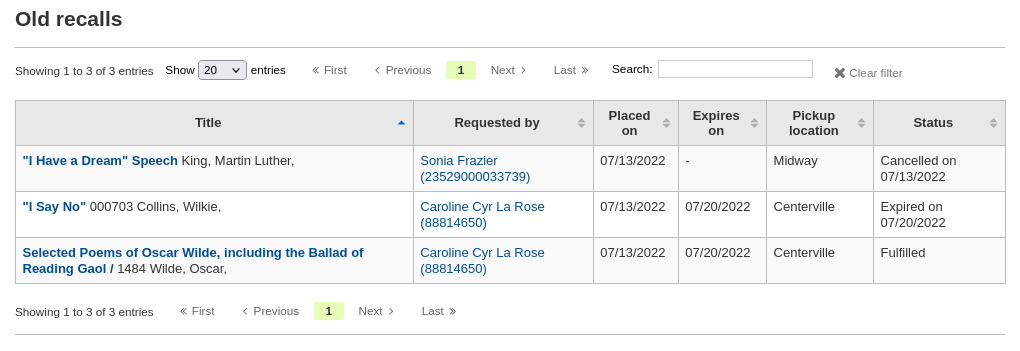
Old recalls
The old recalls list shows all the inactive recalls (completed, cancelled and expired).
Přesuny
Pokud pracujete v knihovně s několika obočkami, můžete přesunout jednotku z jedné knihovny do druhé za použití Přesunovacího nástroje. K přesunu jednoty
Get there: Circulation > Transfer
Přepravit jednotku
Kliknněte na „Přeprava“ na stránce výpůjček
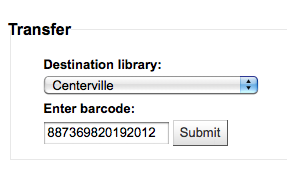
Zadejte knihovnu, do které chcete jednotku převést
Naskenujte nebo vypiště čárový kód položky, kterou chcete přesunout
Klikněte na tlačítko ‚Odeslat‘
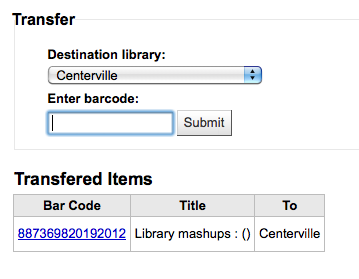
Výtisk nyní ohlašuje, že je „na cestě“

Pokud jednotka dorazí do jiné pobočky, knihovník musí jednotku přijmout a stvrdit, že již není „v přepravě“
Jednotka nebude neustále stěhována do nové pobočky
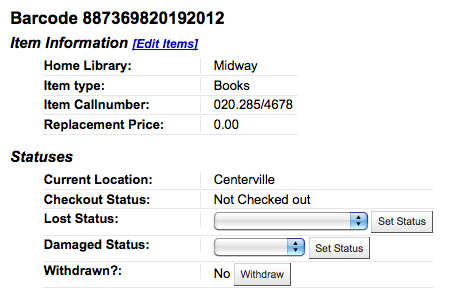
The item shows the same ‚Home library‘ but has updated the ‚Current location‘ to note where it resides at this time
Set library
By default you will enter the staff client as if you are at your home library. This library will appear in the top right of the staff client.

Jedná se o knihovnu, kde probíhají všechny výpůjčky. Pokud jste na připojeni do jiné knihovny, budete se muset nastavit na vaší knihovnu před výpůjčkou. Pro to klikněte na „Nastavit“ v pravém horním rohu na stránce výpůjček.
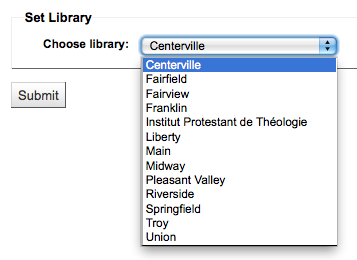
Hned po uložení vašich změn se nahoře vpravo objeví nová Knihovna.
Fast add cataloging
Sometimes circulation librarians need to quickly add a record to the system for an item they are about to check out. This is called ‚Fast add‘. To allow circulation librarians access to the Fast add cataloging tool, simply make sure they have the fast_cataloging permissions. There are two ways to add titles via fast add. If you know that you’re about to check out an item that isn’t in you catalog you can go to the Circulation module and click ‚Fast cataloging.‘

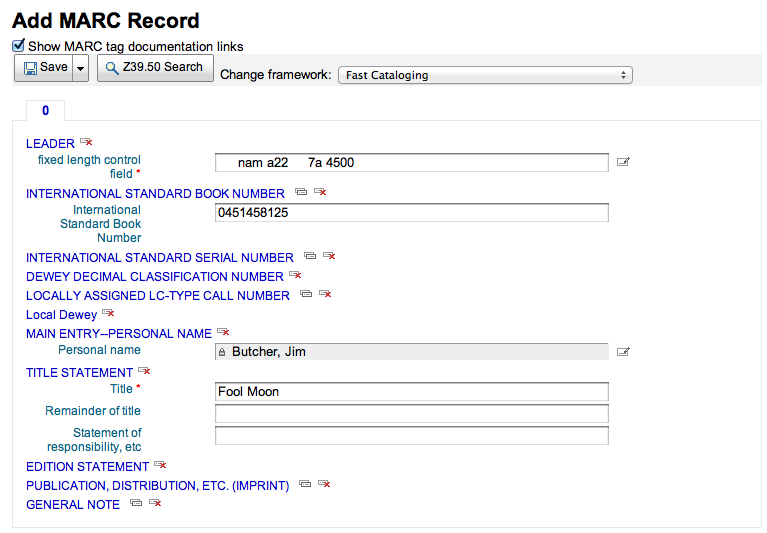
katalogizační interfejs se otevře s krátkým katalogizačním záznamem:
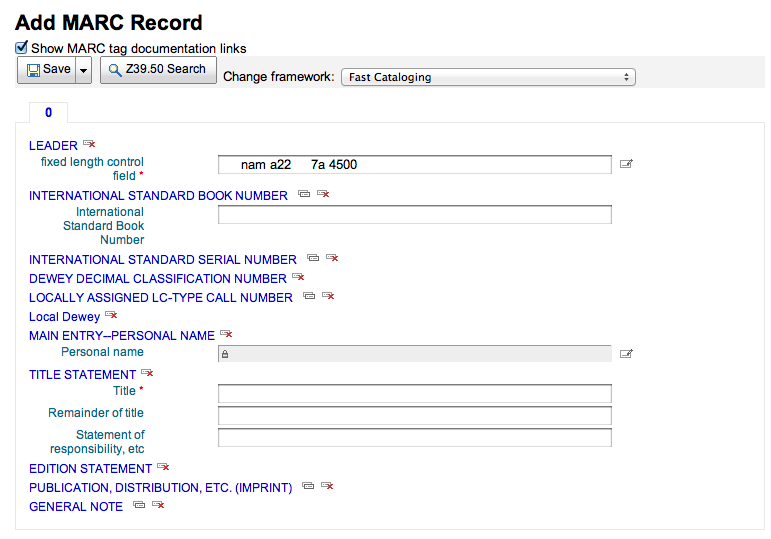
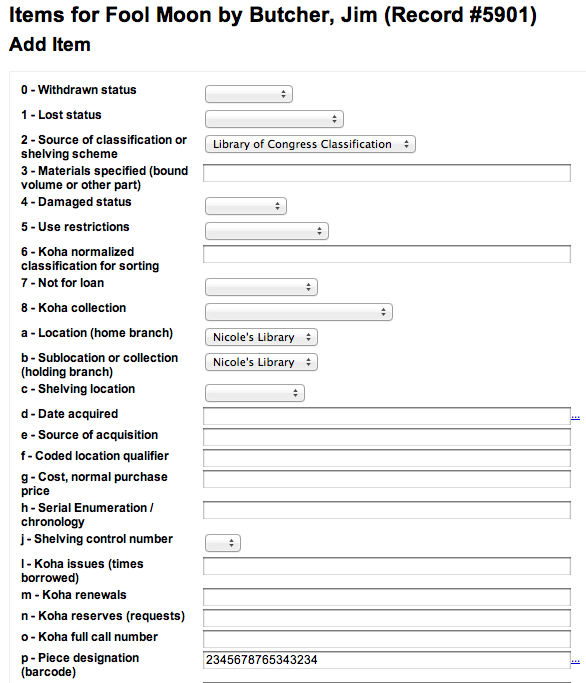
Po přidání Vašich katalogizačních údajů budete vyzváni k zadání údajů o jednotce. Vložte čárový kód jednotky, kód sbírky, atd. a jednotku před jejím půjčováním uložte.
Jiný způsob k rychlé katalogizaci je z obrazovky výpůjček. Zadáte-li čárový kód, která Koha nemůže najít, vyzve vás k použití rychlé katalogizace, pro přidání výtisku do Koha abyste ho mohli půjčit.
Kliknutím na tlačítko ‚Rychlá katalogizace‘ se dostanete k formuláři rychlé katalogizace, kde můžete vložit informace o titulu
Po kliknutí na ‚Uložit‘ se Vám otevře záznam jednotky, kde již bude vyplněn čárový kód, který jste předtím zadali.
Po kliknutí na tlačítko „Přidat jednotku“, bude tato jednotka automaticky půjčena uživateli, kterému jste se ji původně zkoušeli vypůjčit.

Circulation reports
Most reports can be found via the Reports module, but some of the more common circulation reports are available right from the Circulation module.
Get there: Circulation > Circulation reports
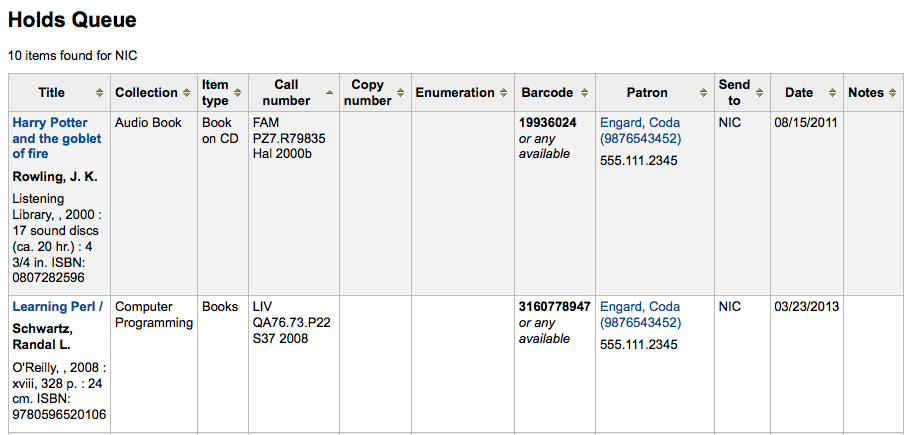
Holds queue
This report will show you all holds waiting to be pulled off the shelf at your library.
Poznámka
You can customize the columns of this table in the ‚Table settings‘ section of the Administration module (table id: holds-table).
To generate this report, you must have the Build holds queue cron job running. This cron job is a script that should be run periodically if your library system allows borrowers to place on-shelf holds. This script decides which library should be responsible for fulfilling a given hold request.
It’s behavior is controlled by the system preferences StaticHoldsQueueWeight, RandomizeHoldsQueueWeight and UseTransportCostMatrix.
If you do not want all of your libraries to participate in the on-shelf holds fulfillment process, you should list the libraries that *do* participate in the process here by inputting all the participating library’s branchcodes, separated by commas ( e.g. „MPL,CPL,SPL,BML“ etc. ).
By default, the holds queue will be generated such that the system will first attempt to hold fulfillment using items already at the pickup library if possible. If there are no items available at the pickup library to fill a hold, build_holds_queue.pl will then use the list of libraries defined in StaticHoldsQueueWeight. If RandomizeHoldsQueueWeight is disabled (which it is by default), the script will assign fulfillment requests in the order the branches are placed in the StaticHoldsQueueWeight system preference.
For example, if your system has three libraries, of varying sizes ( small, medium and large) and you want the burden of holds fulfillment to be on larger libraries before smaller libraries, you would want StaticHoldsQueueWeight to look something like „LRG,MED,SML“.
Chcete-li zátěž na plnění rezervací rozprostřít rovnoměrně na celý knihovní systém, jednoduše zvolte RandomizeHoldsQueueWeight. Je-li tato předvolba zvolena, bude pořadí, ve kterém budou knihovny žádány aby plnily objednávky, náhodné při každé změně fronty.
An alternative to static and randomized is using the Tansport cost matrix. It takes precedence in controlling where holds are filled from and allows you to define the ‚cost‘ of transport between any two libraries. To use the Transport cost matrix simply set your UseTransportCostMatrix preference to ‚Use‘.
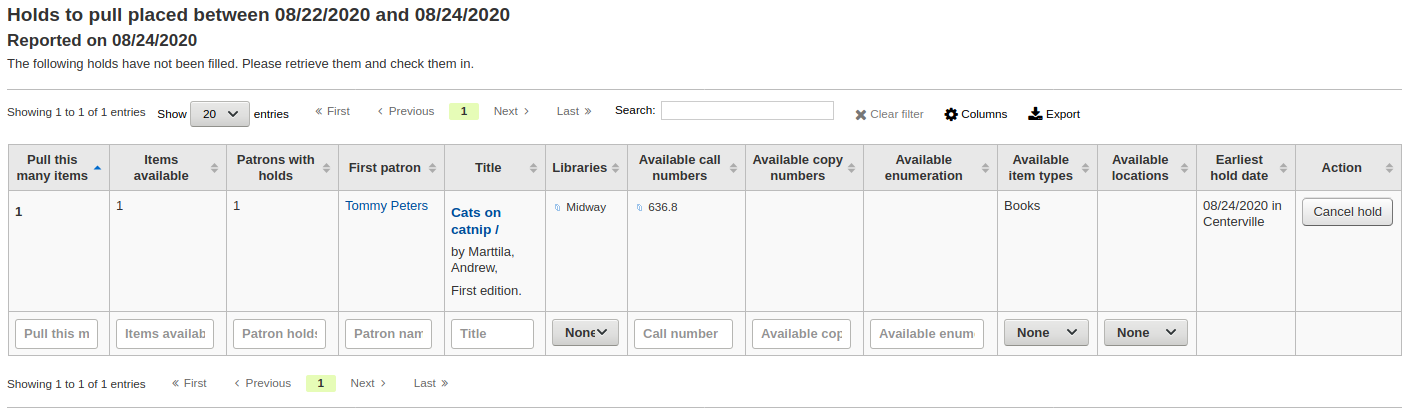
Objednávky ke stažení z regálu
This report will show you all of the items that have holds on them that are available at the library for pulling. If the items are available at multiple libraries then all libraries with that item available will see the hold to pull until one library triggers the hold.
If enabled, clicking the Mark item as lost button will mark item as lost and notify the requesting patron depending on the value of the CanMarkHoldsToPullAsLost system preference.
Poznámka
You can customize the columns of this table in the ‚Table settings‘ section of the Administration module (table id: holds-to-pull).
You can choose which LOST value to set the item to with the UpdateItemWhenLostFromHoldList system preference.
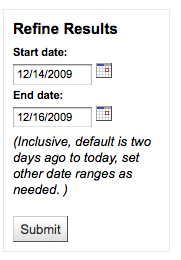
Můžete omezit výsledky, které vidíte pomocí políčka Zpřesnit na levé straně stránky:
Rezervace čekající na vyzvednutí
Tato zpráva zobrazí všechny rezervace, které čekají na čtenáře, aby si je vyzvedli.
Poznámka
You can customize the columns of this table in the ‚Table settings‘ section of the Administration module (table id: holdst).
Items that have been on the hold shelf longer than you normally allow (based on the ReservesMaxPickUpDelay preference value) will appear on the ‚Holds over‘ tab, they will not automatically be cancelled unless you have set the cron job to do that for you, but you can cancel all holds using the button at the top of the list.

Poznámka
You can customize the columns of this table in the ‚Table settings‘ section of the Administration module (table id: holdso).
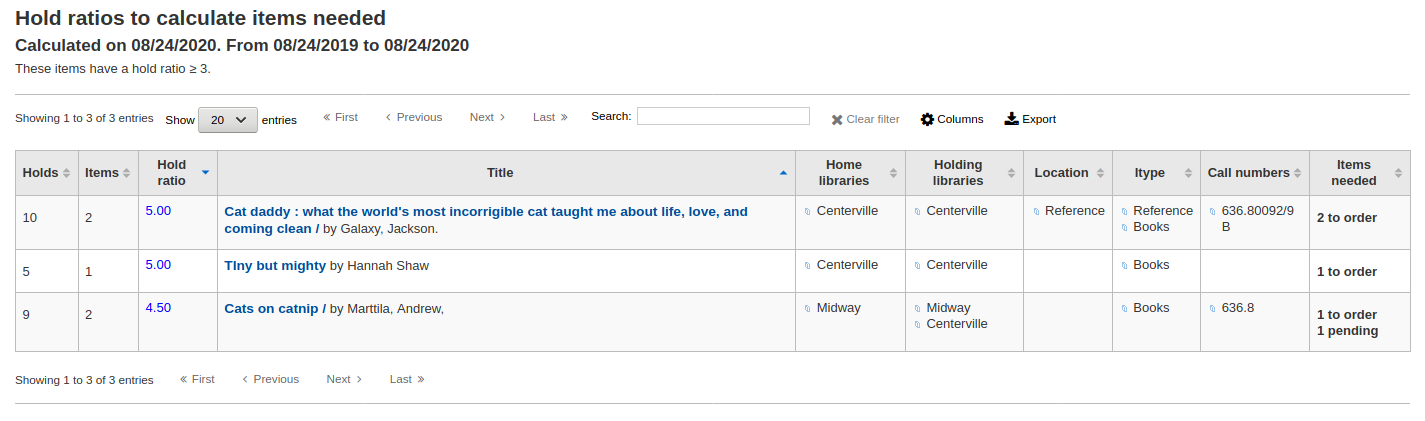
Poměry rezervací pro optimalizaci počtu jednotek
Poměry rezervací mohou pomoci při akvizici. Ukazují, kolik existuje požadavků vzhledem k počtu jednotek a ukazují, kdy je potřeba dokoupit další exempláře. Ve výchozím nastavení tento výstup ukáže všechny dokumenty, které mají poměr rezervací na jednotku alespoň 3.
Poznámka
You can customize the columns of this table in the ‚Table settings‘ section of the Administration module (table id: holds-ratios).
Příchozí přesuny
Tato zpráva zobrazí seznam všech výtisků, které Koha považuje „na cestě“ do vaší knihovny.
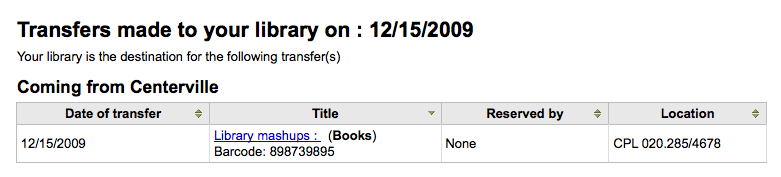
Pokud vaše převody jsou zpožděné v příchodu do vaší knihovny, uvidíte zprávu o tom, jak dlouho vaše výtisky jsou zpožděné.
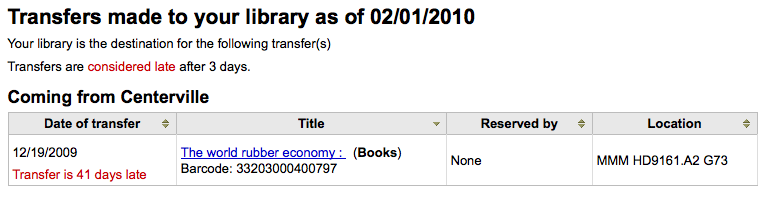
Důležité
An item is considered late based on the number of days you have entered in the TransfersMaxDaysWarning system preference.
Article requests
Article requests are somewhat similar to holds, but are not requests for an item to check out. Instead, article requests are requests for a photocopy of a particular section of a book or an article from a serial issue. This is very common in academic libraries where researchers may request a copy of a single article found in a journal.
Setting up article requests
First, enable your system preference for ArticleRequests.
Set to ‚Enable‘ patrons to place article requests.
Next you will need to decide how your patrons will make requests, either record only, item only, or both record and item level.
You can set 3 different system preferences for mandatory fields to be filled in depending on how your records are requested.
ArticleRequestsMandatoryFields: make the following fields mandatory for records that are record level or item level requestable
ArticleRequestsMandatoryFieldsItemsOnly make the following fields mandatory for records that are only item level requestable
ArticleRequestsMandatoryFieldsRecordOnly make the following fields mandatory for records that are only record level requestable
The ArticleRequestsOpacHostRedirection system preference is used if you create analytical records. If enabled, it will redirect the patron from the child record to the host record in the OPAC.
The ArticleRequestsSupportedFormats system preference determines the various formats patrons can request their articles in (either photocopy or scan).
Next you will want to go into your circulation and fines rules matrix and select each rule for which you want to allow requests.
You can allow requests to be made at the record level, item level, yes (which means both) and no (which means no article requests may be placed).
You can also limit the number of open article requests a patron can have at one time by patron category in the Default open article requests limit section of the circulation rules page.
You can set up a fee for each article request in the Default article request fees section of the circulation rules page.
Placing article requests
Now you can place requests on both the staff client and OPAC.
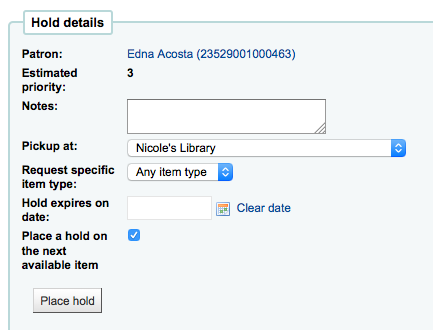
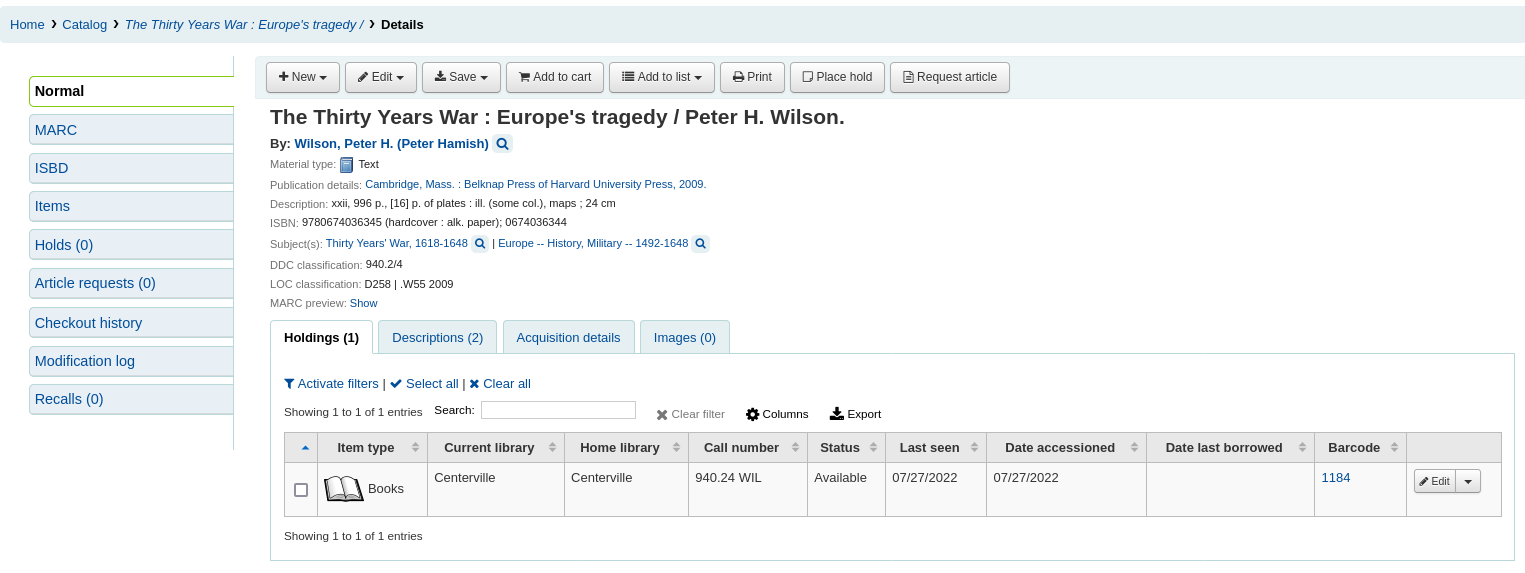
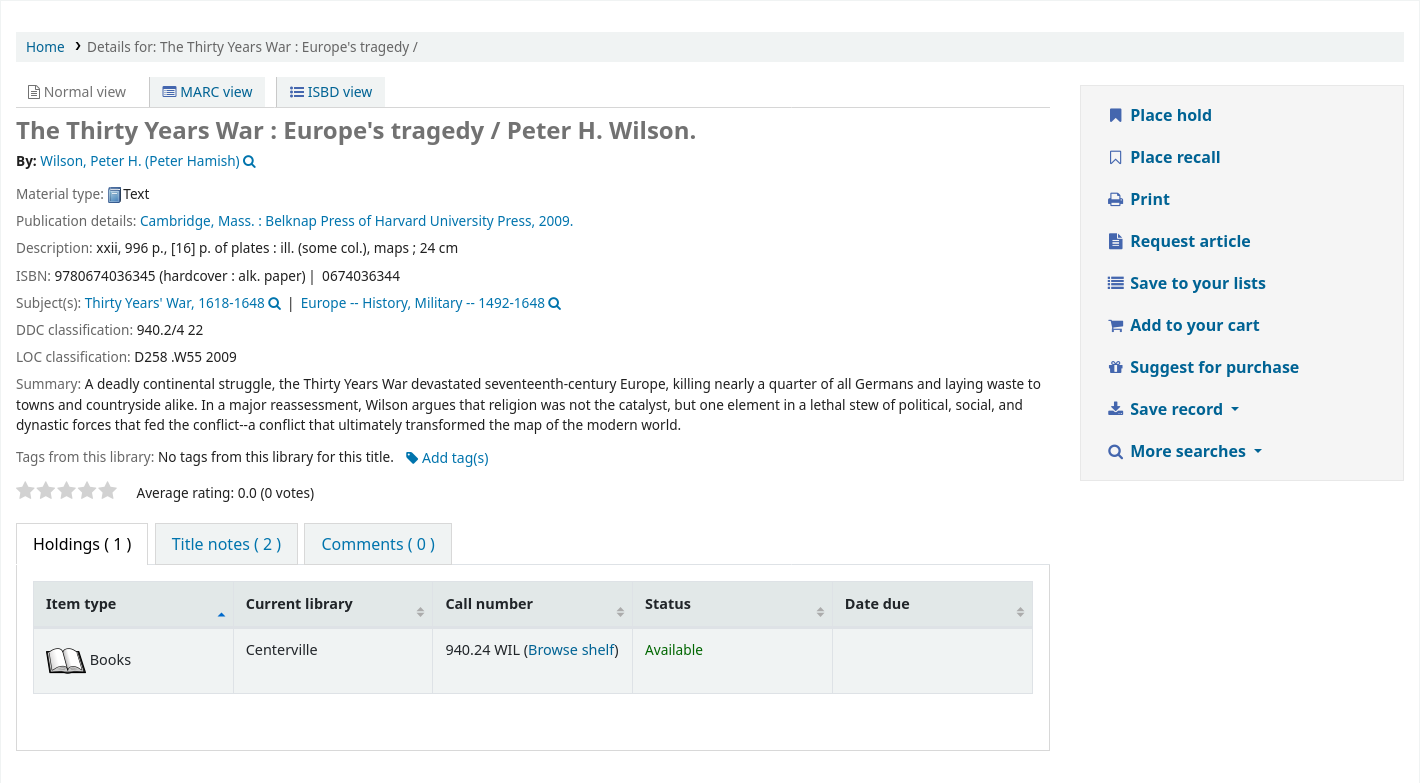
In the staff client, on the record details page, you will see a ‚Request article‘ button at the top and an ‚Article requests‘ tab to the left. The two options lead to the same page.
Just like a hold, you will be prompted to enter the patron’s card number or name.

If there is a fee, a message will appear to inform the staff member.

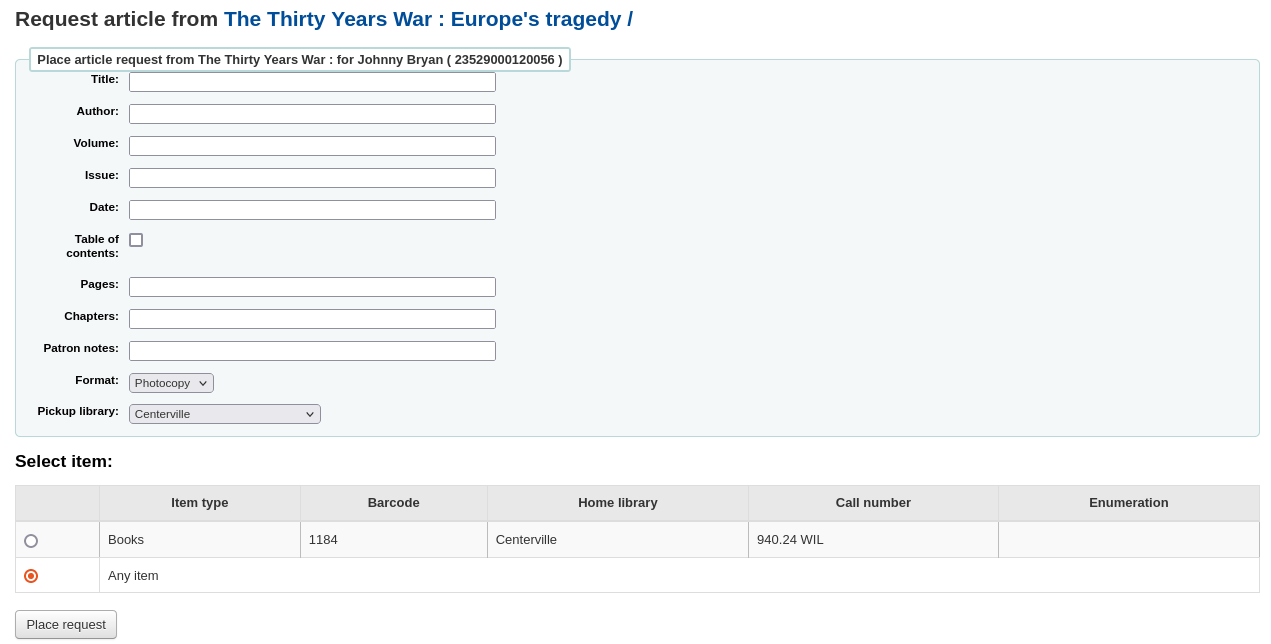
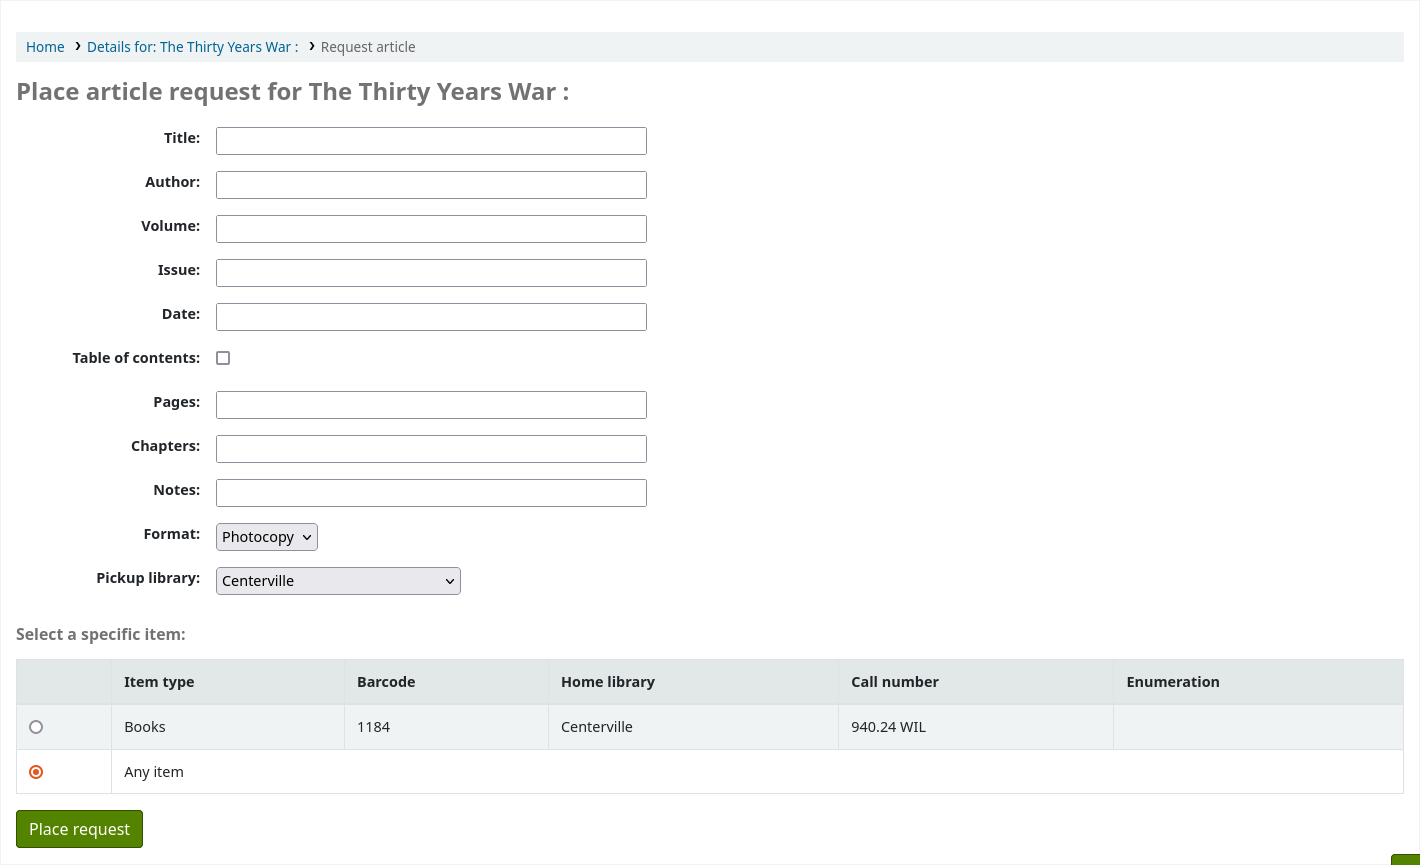
Fill in the form.
Poznámka
The mandatory fields are set through the three system preferences ArticleRequestsMandatoryFields, ArticleRequestsMandatoryFieldsItemsOnly, and ArticleRequestsMandatoryFieldsRecordOnly.
Title: enter the title of the requested article or chapter
Author: enter the author of the requested article or chapter
Volume: enter the volume in which this article or chapter is found
Issue: enter the issue in which this article is found
Date: enter the date of the issue in which this article is found
Table of contents: check to indicate the patron wants a copy of the table of contents
Pages: enter the pages to photocopy or scan
Chapters: enter the chapters to photocopy or scan
Patron notes: enter any relevant notes
Format: choose the format in which the patron wishes to receive this article or chapter
Poznámka
The possible formats are defined in the ArticleRequestsSupportedFormats system preference.
Pickup library: choose the library at which the patron wishes to pick up their photocopy
If allowed, choose the specific item to request.
Then, click on ‚Place request‘.
From the OPAC, patrons can place requests themselves either from the results list
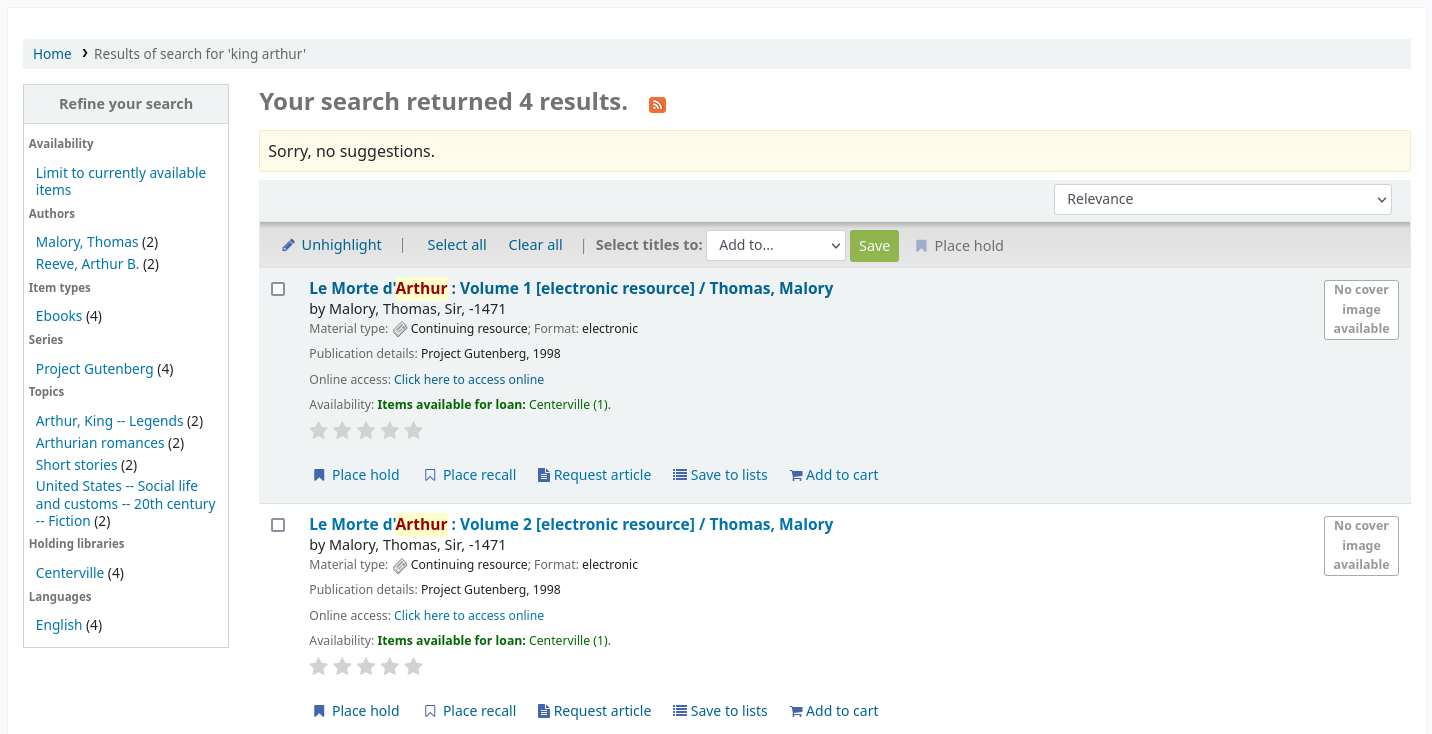
or by going to the detailed record.
As with a hold, if the patron is not logged in, they will be asked to do so.
The form is the same as the one in the staff interface.
If there is a fee, a message will appear to inform the patron.

If allowed, the patron can choose the specific item to request.
From their account, the patron will be able to follow the progress of their request from ‚new‘

to ‚pending‘, if necessary,

to ‚processing‘.

The patron will also receive an email notification when the status of the request changes.
Once the request is completed the patron will receive an email notification and the article request will no longer appear in their account.
Email notifications can be customized in notices and slips.
Managing article requests
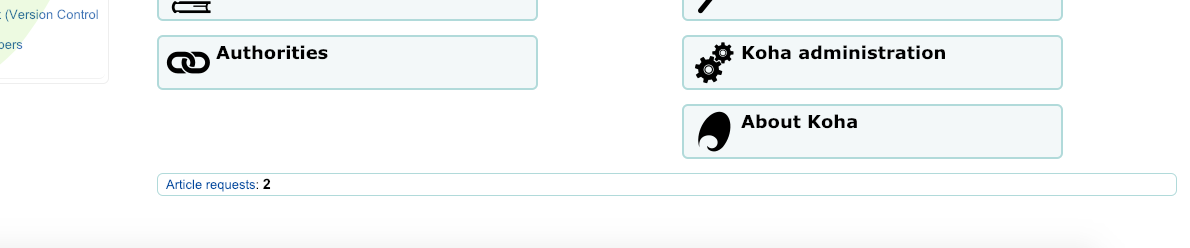
Once the article request has been placed, staff will see new requests at the bottom of the home page on the staff client. (In the same location as tags, comments and modifications).
From there staff will be able to select requests to process.
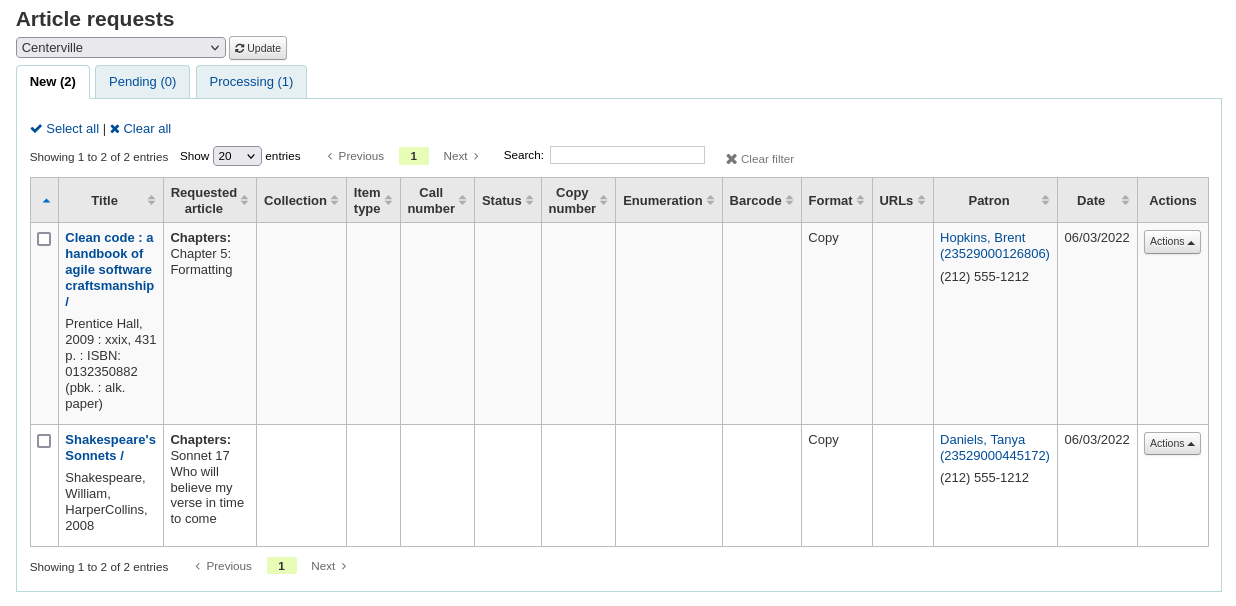
New requests are in the ‚New‘ tab.
The first step would be for a staff member to process the request, that moves the request to the processing tab and alerts other staff members that the request is in process. In the actions column, click on the dropdown menu and select ‚Process request‘. This will move the request to the processing tab.
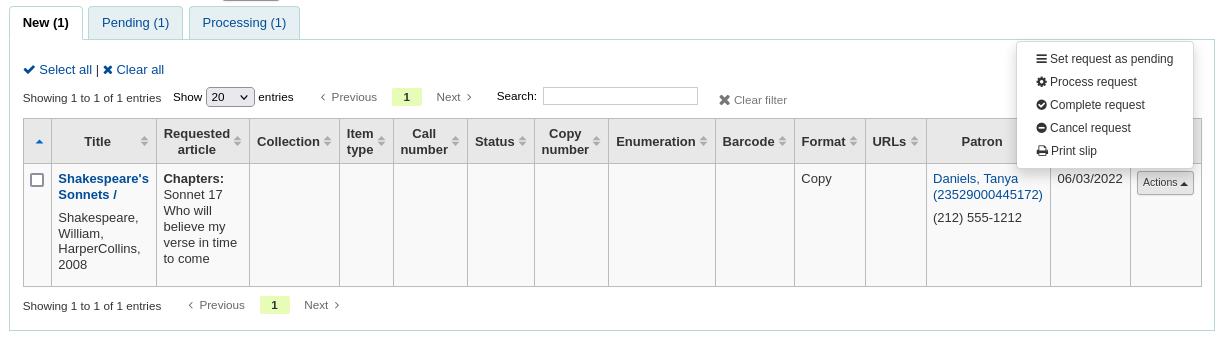
If for any reason, a request cannot be processed right away (for example, if the title is currently checked out), the status can be changed to ‚Pending‘. This will send a notice to the patron indicating the request has been received and seen, but has yet to be processed.
Next staff will go to the shelf and make a copy of the requested article.
Once that is complete, staff can print the article request slip (this can be customized in notices and slips under AR_SLIP) and staple or paper clip it to the article. In the actions column, you can select the dropdown and select print slip.
Finally, staff will select the complete article request from the actions dropdown menu which will send a notice to the patron who made the request letting them know the request is ready for pickup.
This removes the article request from the processing tab.
Poznámka
Actions can also be made in bulk by checking the boxes next to the requests to process or by clicking ‚Select all‘, and choosing the new status from the actions menu on top of the table.

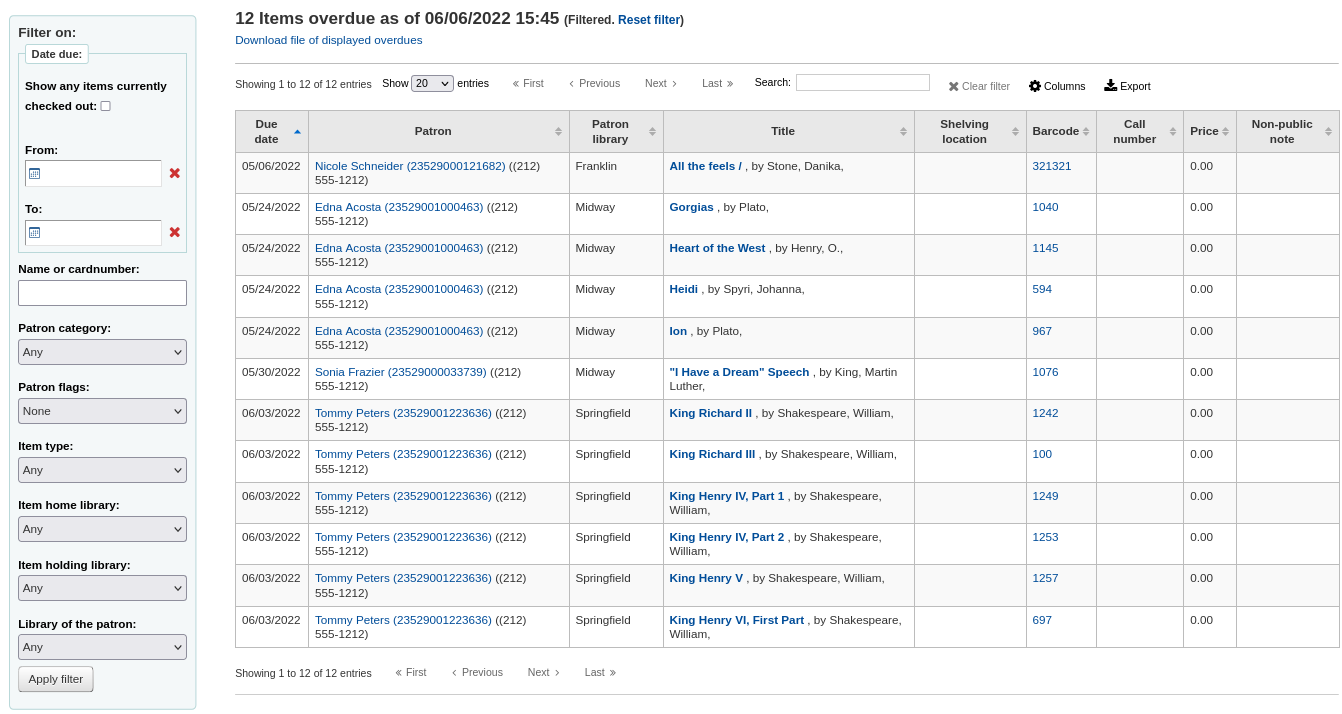
Překročené lhůty
Tato zpráva zobrazí všechny výtisky, jejichž výpůjční lhůta je překročena ve vaší knihovně.
Varování
U knihoven s velkým počtem čtenářů, může být tato zpráva zabrat značné množství času po spuštění.
Large libraries can choose to filter the report before it runs by setting the FilterBeforeOverdueReport system preference to ‚Require‘.
Poznámka
You can customize the columns of this table in the ‚Table settings‘ section of the Administration module (table id: circ-overdues).
Zprávu lze filtrovat pomocí volby menu na levé straně sestavy.
Poznámka
Tlačítko „Zobrazit všechny vypůjčené jednotky“ v podstatě přejde ze zprávy překročení výpůjční doby na zprávu o výpůjčkách. To vám ukáže všechny vypůjčené tituly bez ohledu na termín vrácení.
The report result can be downloaded via the ‚Download file of displayed overdues‘ link or the ‚Export‘ button at the top of the table.
Překročené lhůty s účtovaným poplatkem (upomínky)
Tato zpráva vám ukáže všechny včas nevrácené výpůjčky v knihovně, a pokuty které na ně naběhly.
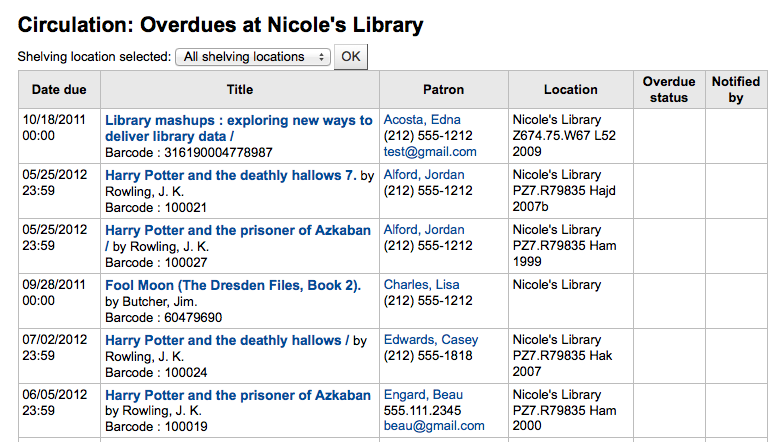
If you would like to limit the report you can use the pull down menu at the top to limit to a specific shelving location at your branch. To see overdues with fines at other branches you will have to change your branch or log in at that branch.
Důležité
If you do not charge fines and/or don’t have the fines cron job running you will see no data on this report.
Nevyřízené prezenční výpůjčky
If you are using the on site checkouts functionality (OnSiteCheckouts) then you’ll have a report to view all items that are currently checked out on site.
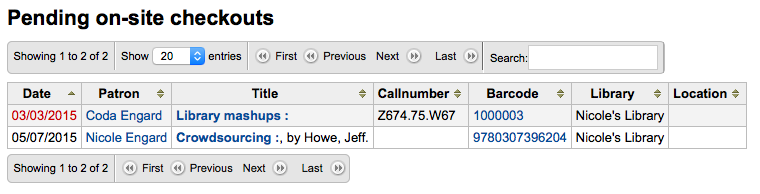
This will list the due date (overdues in red), who has the item, item information and what library the item is at.
Tracking in-house use
Many libraries track the use of items within the library.
Poznámka
This is different from tracking on-site usage. In-house use is the use of items in the library by patrons without them having to check them out. On-site use is the use of items on site that must first be checked out. To learn more about on site usage please review the OnSiteCheckouts preference.
Tracking the use of items in the library without checking them out can be done in Koha one of two ways. The first is to create one or more Statistical Patrons. When collecting items that have been used within the library, you will want to check them out to your statistical patron:
Namísto označení jednotky jako „vypůjčená“ bude systém nahrávat, že položka byla použita uvnitř v domě:

Tyto kroky opakujte pro všechny jednotky, které byly použity v knihovně, abyste měli přesné statistiky pro jejich použití.
The other way to record local use of items is to set your RecordLocalUseOnReturn preference to ‚Record.‘ Then whenever you check an item in that is not checked out and not on hold a local use will be recorded.

Poznámka
If you have RecordLocalUseOnReturn set to ‚Record‘ you can still use your statistical patrons to record local use as well.
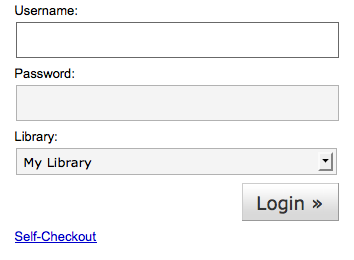
Self checkout
Koha comes with a very basic self checkout module. To enable this module you need to set the WebBasedSelfCheck system preference to ‚Enable.‘ To use this module you have to log in as a staff member with self_check permissions.
Poznámka
Create a staff patron specifically for this action so that you don’t leave a real staff client logged into a computer all day
There is no link to the Self checkout module, but a simple addition to the OPACUserJS system preference can add one.
$(document).ready(function(){
    $("#login .btn").parent().after("<p><a href=\"http://YOUR_KOHA_OPAC_URL/cgi-bin/koha/sco/sco-main.pl\" target=\"_blank\">Self-Checkout</a></p>");
});

**Important**

The code above has line breaks added to make it more readable,
please be sure to enter the above as one line in when putting it in
the system preference.
Tento odkaz se pak objeví v dolní části protokolu na stránce:
You can also access this module by going to: http://YOUR_KOHA_OPAC_URL/cgi-bin/koha/sco/sco-main.pl
When on the self checkout page, depending on the value in your SelfCheckoutByLogin system preference you will be asked to enter your cardnumber
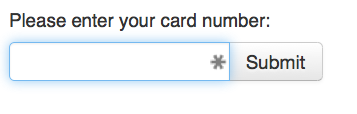
or your username and password
Jakmile jste přihlášeni k selfcheck modulu, budete požádáni na skenování jednotek, které si půjčujete
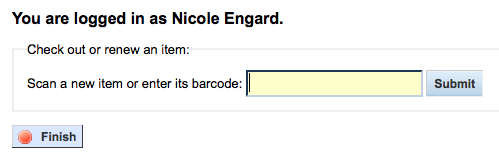
Jak skenujete jednotky, budou se objevovat pod polem čárového kódu

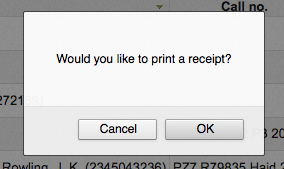
When you are finished scanning items it is important to click the ‚Finish‘ button. This will prompt you to print a receipt and log you out of the self check module.
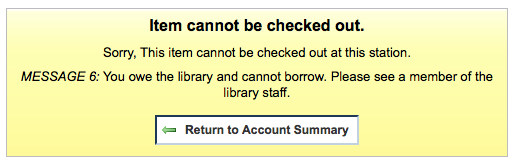
Při pokusu o výpůjčky jednotek, mohou být některé případy, kdy se objeví chybová hlášení a čtenář bude poslán za knihovníkem. To se stane, i když umožňujete překonání výpůjčních funkcí. Pouze knihovník může překonat blokování výpůjčky a tak čtenáři musí jít za knihovníkem pro pomoc v těchto situacích.
Self check-in
In order to use the self check-in module, you must first set the :ref: SelfCheckInModule <selfscheckinmodule-label> system preference to ‚Enable‘.
Then, you will have to create a patron with the self_checkin_module permission.
Poznámka
Create a staff patron specifically for this action so that you don’t leave a real staff client logged into a computer all day. You can give this patron only the aforementioned permission so it cannot be used for anything else.
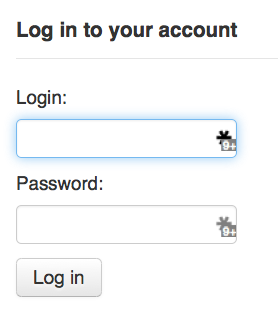
Once this is done, you can head over to the self check-in page: http://YOUR_KOHA_OPAC_URL/cgi-bin/koha/sci/sci-main.pl
Log in with your staff patron with self check-in permissions
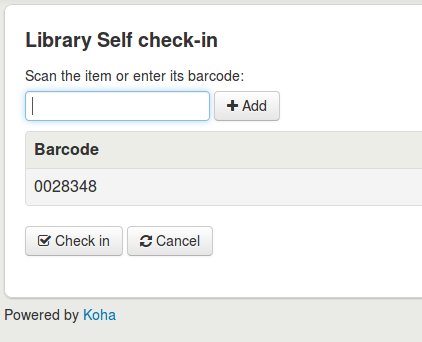
Once the computer or kiosk is set and the self check-in user logged in, patrons will be able to check-in their items themselves.
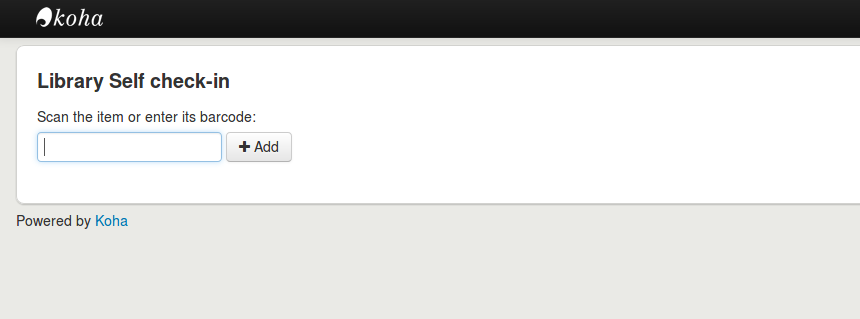
The patron will either scan the item’s barcode, if the computer is attached to a barcode scanner, or type in their item’s barcode in the box and click ‚Add‘ or press enter.
Poznámka
Most barcode scanners will automatically hit return after scanning.
Once they have scanned or entered all their items‘ barcodes, they can click on the ‚Check-in‘ button to return all the items at once.
Důležité
If the patron doesn’t click the ‚Check-in‘ button, the items will not be returned and will stay in their account.
Důležité
The self check-in module will not warn user if the item is late, if they have fines, if the item is on hold for someone else, or if they have messages in their account.
They can then click ‚Finish‘ to return to the main self check-in page.

Poznámka
If the patron doesn’t click ‚Finish‘, the screen will refresh after the timeout period specified in the SelfCheckInTimeout system preference.
Poznámka
Even if the patron doesn’t click ‚Finish‘ the item will still be checked in from their account.
You can customize the look of your self check-in screens by using the SelfCheckInUserCSS system preference or the SelfCheckInUserJS system preference.
You can add content, like instructions on how to use the self check-in system for example, by using the SelfCheckInMainUserBlock system preference.
Statistics about the transactions made through the self check-in module are logged into the action_logs table in the Koha database. You can therefore build a custom report to get the statistics you need.
Offline circulation utilities
Koha allows for you to continue circulation actions while offline by using any one of three utilities.
Offline circulation in Koha
If the AllowOfflineCirculation preference is set to ‚Enable‘ the library staff can continue to perform circulation actions within Koha when the system is offline. You will want to visit http://your-koha-staff-client-url/cgi-bin/koha/circ/offline.pl at least once while online and bookmark that page. That is the page you will go to when you are offline.
Důležité
The offline interface uses HTML LocalStorage, which depending on the browser and user setting, is limited to 2.5MB or 5MB per domain. This means that larger systems will not be able to synchronize their data and are recommended to use either the Firefox or Windows application for offline circulation.
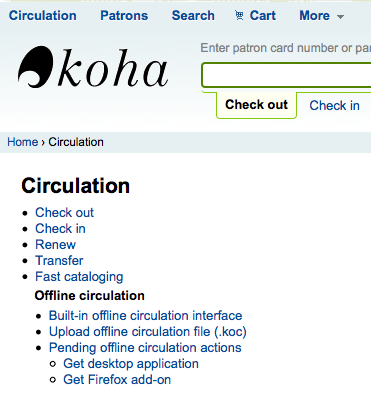
Nastavit
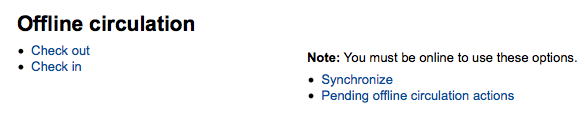
Předtím, než bude systém nedostupný, běžte do modulu Výpůjčky a klikněte na odkaz „Vestavěný klient pro offline výpůjčky“
Synchronizujte vaše data na každém počítači, který používáte pro půjčování a vracení. To provedete kliknutím na odkaz „Synchronizovat“ na pravé straně stránky.
Důležité
The offline interface uses HTML LocalStorage, which depending on the browser and user setting, is limited to 2.5MB or 5MB per domain. This means that larger systems will not be able to synchronize their data and are recommended to use either the Firefox or Windows application for offline circulation.
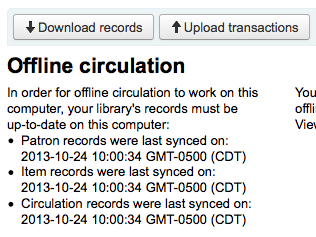
To Vám umožní stáhnout kopii čtenářských dat a dat o výpůjčkách do prohlížeče. Klikněte na tlačítko „Stáhnout záznamy“ nahoře a potřebná data budou stažena.
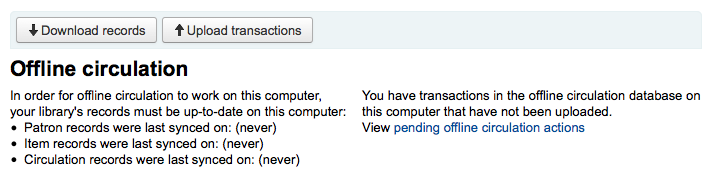
Jakmile budou stažena potřebná data, zobrazí se u každé sady datum poslední synchronizace.
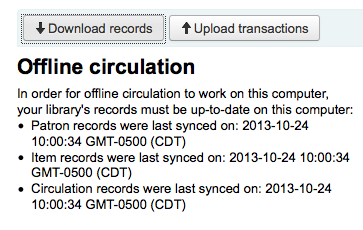
Toto by se mělo provádět pravidelně, pro případ, kdyby nečekaně vypadlo připojení.
Půjčování
V případě, že je systém nedostupný, využijte stránku s klientem pro offline výpůjčky, kde budete moci i nadále provádět výpůjčky a vracení.
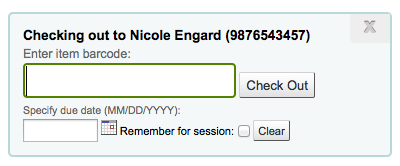
Půjčování se provádí vyhledáním čtenářů pomocí čárového kódu, nebo částí jména v horní částí stránky „Půjčování“. Poté budou vypsány informace o čtenáři, včetně výpůjček a poplatků, které jsou zapsány v lokální synchronizované databázi.
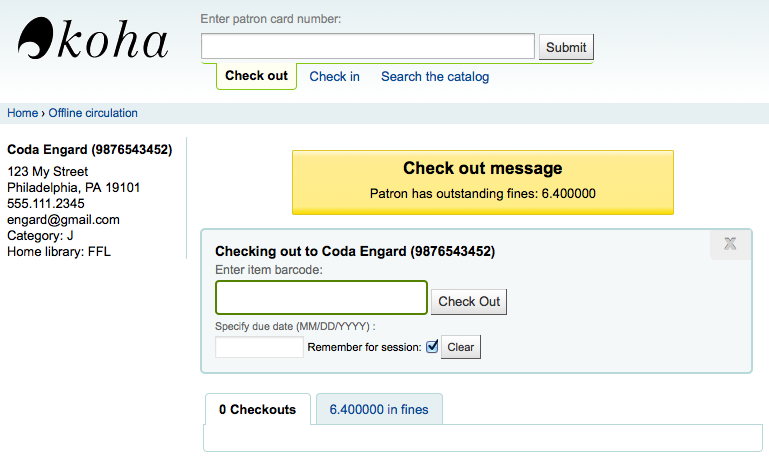
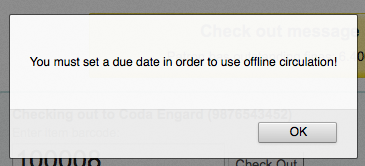
Načtěte čárový kód jednotky, kterou chcete vypůjčit a zadejte termín vrácení. Bez zadání data pro vrácení nelze pokračovat.
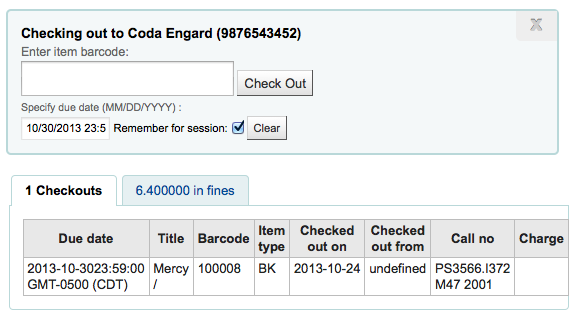
Jakmile je jednotka vypůjčena, objeví se pod informacemi o čtenáři.
Koha offline uploading
Once the system is back online visit the ‚Synchronize‘ page on the Offline circulation module and click ‚Upload transactions‘
Poté co je soubor nahrán, můžete kliknout na odkaz „Offline výpůjčky čekající na potvrzení“ a nechat systém Koha zpracovat akce provedené offline.

After clicking ‚View pending offline circulation actions‘ you will be brought to a summary of all of the actions you loaded in to Koha in your *.koc file.
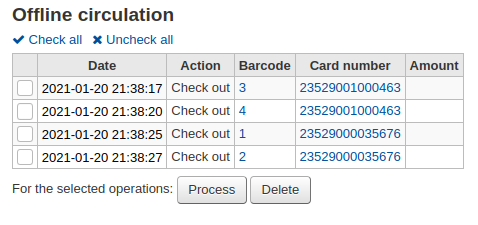
Jen pokud jsou záznamy ze všech výpujčních počítačů jsou nahrány, bude možno je všechny zkontrolovat nebo vybrat jen ty, které chcete zpracovat přes Koha.
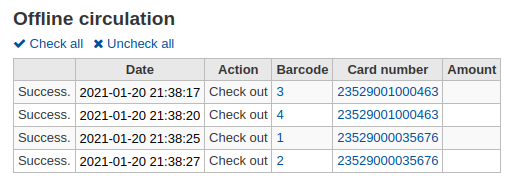
Click on the ‚Process‘ button and Koha will record every stored transaction one by one. For each transaction, the status will change to:
„Úspěšné.“ pokud byla transakce zpracována bez problémů
„Uživatel nenalezen.“ pokud je zadáno chybné číslo průkazky
„Exemplář nebyl nalezen.“ pokud čárový kód exempláře není správný
„Jednotka nebyla vypůjčena.“ pokud vracíte dostupnou jednotku
Jen pokud jsou ukončeny, máte souhrn všech svých transakcí
Firefox plugin
There is an offline circulation tool that you can add to your Firefox browser as an add-on. To do so, just go to https://addons.mozilla.org/en/firefox/addon/koct/ page and click on the „install now“ button. You may have to confirm the installation, just click on „install now“ and then restart Firefox to complete the installation.
Once you have installed the plugin and restarted Firefox, you will see the Koha logo in the download bar at the bottom right of Firefox.

Kliknutím na logo se otevře nástroj ve vlastním okně.
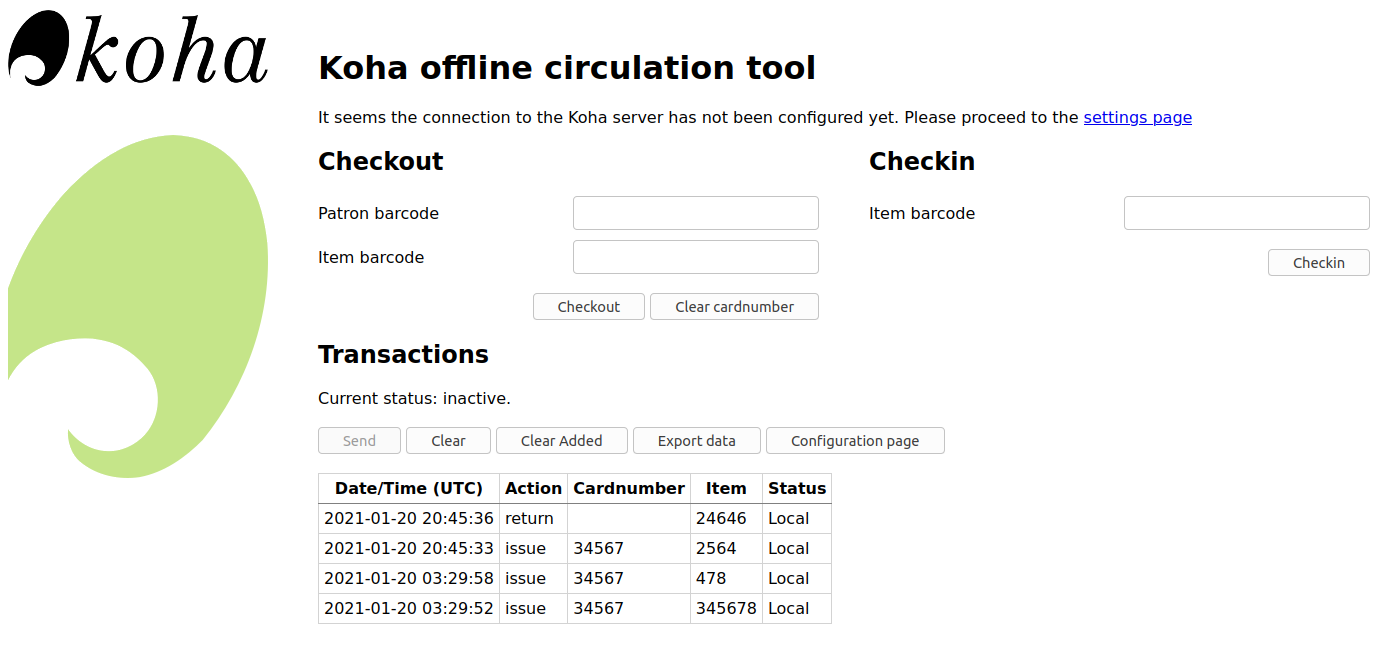
The plugin consists of three sections:
The ‚Check out‘ section is where you check out items
The ‚Check in‘ section is where you check in items
The ‘Transactions’ section is where you can track the transactions done while in offline mode
The transactions will keep information until you empty it.
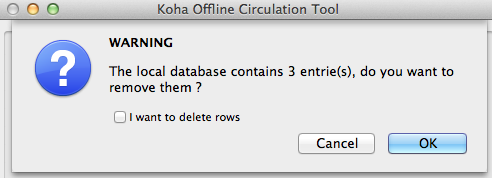
If you’d like to clear the transactions, click the ‚Clear‘ box before hitting the ‚OK‘ button.
The first thing you want to do then is to set up the plugin. Proceed to the settings page, linked in the top right of the page or under ‘Configuration page’ in the Transactions section.
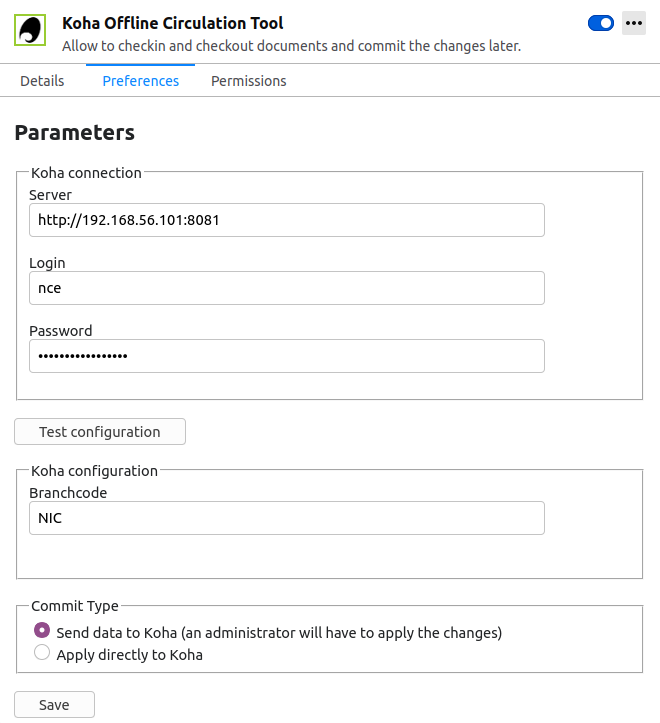
Answer the 5 questions presented:
Serrver = URL služebního intranetu
Uživatelské jméno = jméno u vašeho služebního loginu
Heslo = vaše služební heslo
Branch code = the code for the branch where you are located
Commit Type = If you select ‘Send data to Koha’, your account will need to be approved by an administrator. If you select ‘Apply directly to Koha’, your account will not need to be approved.
Důležité
Chcete-li uložit nastavení, budete muset zavřít okno plugin a znovu jej otevřít kliknutím na logo Koha v liště doplňků.
Poznámka
Můžete si vytvořit účet zaměstnance věnovaný offline výpůjčkám. Tak, bez ohledu na to, kdo je u výpůjčního pultu, mohou všichni používat stejný přihlašovací login. Vedle těchto řádků, můžete použít skupinové přihlášení, který již stejně máte pro výpůjčky.
Once you have everything set up you can start checking items in and out.
Výpůjčky:
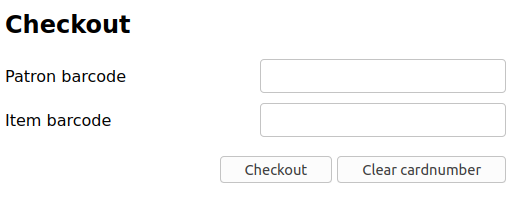
Under the ‚Checkout‘ heading
Skenujte čárový kód čtenáře
Skenujte čárový kód jednotky
Click ‚Checkout‘
Vracení:
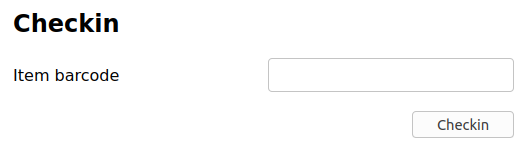
Under the ‚Checkin‘ heading
Skenujte čárový kód jednotky
Click ‚Checkin‘
Each time, you check out or check in an item, a new transaction is recorded in the local plugin database. This is recorded in the Transactions section bellow.
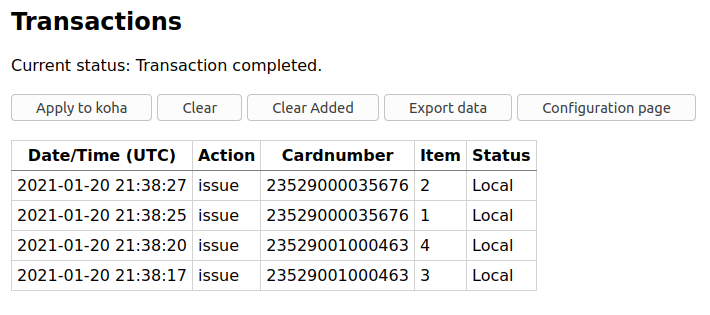
Poznámka
Status bude „místní“, pokud jste v režimu offline a nezpracováváte transakce v Koha
When your Internet connection comes back up you will want to get these transactions in to Koha. Before processing these transactions you should be aware of a few issues.
Because you are not connected to your Koha database when using this plugin holds will need additional processing. If an item you check in while offline has a hold, the hold is kept on the item. Since, you can’t confirm holds found during the processing of every check in, the holds stay on the item and will need to be managed later. If you only checked in a few items you can just keep a record of them all. If you checked in a lot of items you can use the Holds queue once it rebuilds to see what holds made it to the shelf erroneously.
Podobně, pokud čtenářova karta vypršela, nástroj offline výpůjčky o tom neví, takže výpůjčka bude provedena bez ohledu na zablokování čtenářova účtu.
Máte dvě možnosti pro přidání tohoto do Koha
Apply to Koha
If you checked in/out on more than one computer at the same time, what you want is to process every transaction consistently. Let’s say for instance that one patron checked a book out on one computer and then checked the same book in on another computer. To be consistent, you need to record the check out first and then the check in. Not the opposite! To do so, you need to group every transaction in one place, sort them all and then, process everything. So, you need to use the „Apply to Koha“ option from every plugin/computer you worked with. This way, the log will go to Koha and be accessible from the Offline Circulation page.

Get there: Circulation > Pending offline circulation actions
Jen pokud jsou záznamy ze všech výpujčních počítačů jsou nahrány, bude možno je všechny zkontrolovat nebo vybrat jen ty, které chcete zpracovat přes Koha.
Klikněte na tlačítko „Zpracovat“ a Koha nahraje všechny transakce jednu po druhé. Pro každou transakci se status změní na:
„Úspěšné.“ pokud byla transakce zpracována bez problémů
„Uživatel nenalezen.“ pokud je zadáno chybné číslo průkazky
„Exemplář nebyl nalezen.“ pokud čárový kód exempláře není správný
„Jednotka nebyla vypůjčena.“ pokud vracíte dostupnou jednotku
Jen pokud jsou ukončeny, máte souhrn všech svých transakcí
Použít přímo
Pokud jste provedli všechny výpůjční transakce na jednom počítači, pak vše je už setříděno, takže si můžete vybrat „Použít přímo“
Sloupec status bude aktualizován abyste věděli jestli transakce byly zapracovány
„Úspěšné.“ pokud byla transakce zpracována bez problémů
„Uživatel nenalezen.“ pokud je zadáno chybné číslo průkazky
„Exemplář nebyl nalezen.“ pokud čárový kód exempláře není správný
„Jednotka nebyla vypůjčena.“ pokud vracíte dostupnou jednotku
Offline circulation tool for Windows
The Offline circulation utility can be downloaded at: https://github.com/bywatersolutions/koha-offline-circulation/releases
To generate a borrowers.db file for loading in to the Windows tool you will need to run the file generator via a cron job.
Upload offline circulation file
The offline circulation tool for Windows will generate a KOC file that you can upload into Koha once your system comes back up.
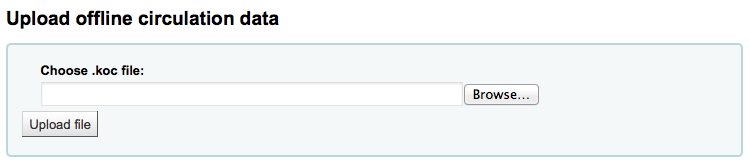
Na výpůjčním menu klikněte „Načíst offline výpůjční soubor (.koc)“
Browse your computer for the *.koc file
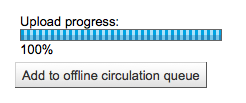
Hned po načtení souboru klikněte na ‚Zpracovat soubor‘
Pokud je toto dokončeno, budete moci nahrávat jiný soubor nebo obsluhovat čekající offline výpůjčky.
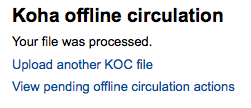
After clicking ‚View pending offline circulation actions‘ you will be brought to a summary of all of the actions you loaded in to Koha in your *.koc file.
Jen pokud jsou záznamy ze všech výpujčních počítačů jsou nahrány, bude možno je všechny zkontrolovat nebo vybrat jen ty, které chcete zpracovat přes Koha.
Klikněte na tlačítko „Zpracovat“ a Koha nahraje všechny transakce jednu po druhé. Pro každou transakci se status změní na:
„Úspěšné.“ pokud byla transakce zpracována bez problémů
„Uživatel nenalezen.“ pokud je zadáno chybné číslo průkazky
„Exemplář nebyl nalezen.“ pokud čárový kód exempláře není správný
„Jednotka nebyla vypůjčena.“ pokud vracíte dostupnou jednotku
Jen pokud jsou ukončeny, máte souhrn všech svých transakcí