Acquisitions
Le module Acquisitions de Koha permet à la bibliothèque de garder une trace des commandes passées auprès des fournisseurs et de gérer les budgets d’acquisition.
Aller à : Plus > Acquisitions
Configurer le module Acquisitions
Avant d’utiliser le module Acquisitions, assurez-vous d’avoir terminé le paramétrage.
Tout d’abord, paramétrez vos préférences système d’acquisitions et la partie Acquisitions du module Administration pour correspondre à l’organisation du travail dans votre bibliothèque. Avant de paramétrer vos comptes EDI et les EAN de la bibliothèque, vous devrez avoir saisi vos fournisseurs.
Sur la principale page des acquisitions vous verrez la liste des postes budgétaires de la bibliothèque.
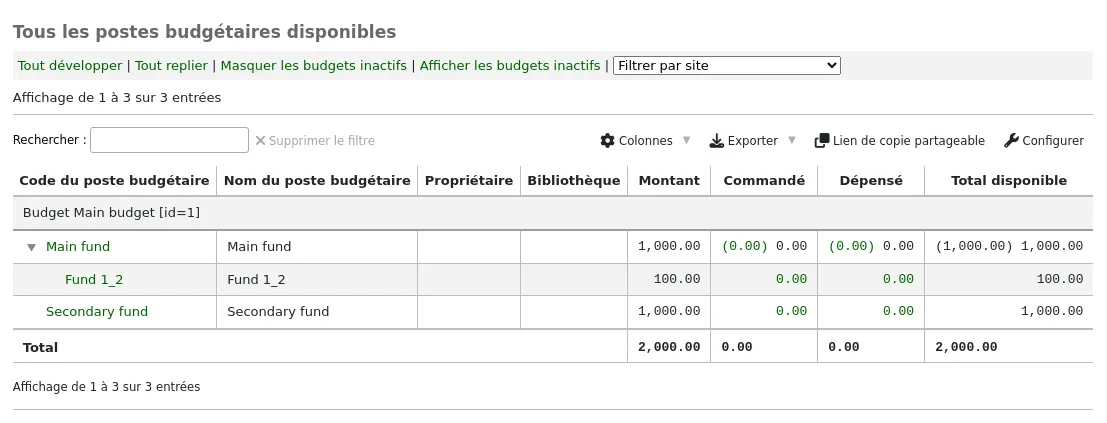
Pour en savoir plus, consultez la partie Suivi du budget/poste budgétaire de ce manuel.
Fournisseurs
Avant de saisir une commande, vous devez d’abord saisir au moins un fournisseur.
Ajouter un fournisseur
Note
Les membres du personnel doivent avoir la permission vendors_manage (ou la permission superbibliothécaire) pour ajouter des fournisseurs.
Pour ajouter un fournisseur, cliquez sur le bouton “Nouveau fournisseur” dans la page d’accueil du module Acquisitions.

Le formulaire “Nouveau fournisseur” est divisé en trois sections : informations sur le fournisseur, contacts et informations de commande.
Informations sur le fournisseur : informations de base sur le fournisseur
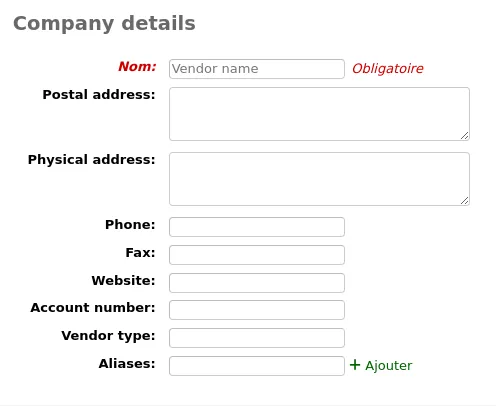
Nom (obligatoire) : ce nom est celui qui apparaîtra partout dans Koha où il sera question de ce fournisseur
Adresses postale et physique, téléphone, fax, site internet, numéro de compte : ces champs ne sont pas obligatoires et devraient être renseignés pour faciliter la génération des relances et la gestion des factures
Type de fournisseur : utilisez ce champ si vous souhaitez catégoriser vos fournisseurs (par exemple, libraire, donateur, fournisseur de ressource éléctronique)
Note
Par défaut, ce champ est en texte libre. Si vous préférez un menu déroulant, ajoutez de valeurs dans la catégorie de valeurs autorisées VENDOR_TYPE.
Alias : ajoutez un ou plusieurs alias au fournisseur comme mots-clefs supplémentaires pour le trouver lors d’une recherche de fournisseur. Par exemple, le fournisseur “American Library Association” aurait l’alias “ALA”.
Contacts : informations relatives à votre(vos) personne(s) contact(s) chez votre fournisseur

Aucun de ces champs n’est obligatoire. Il est tout de même recommandé de les remplir afin de garder toutes traces des coordonnées dans Koha
Contact principal des acquisitions : cochez cette case si cette personne est votre contact principal concernant les achats auprès de ce fournisseur
Contact principal pour les périodiques : cochez cette case si cette personne est votre contact principal concernant les achats de périodiques de ce fournisseur
Contact lors de la commande ? Cochez cette case si vous souhaitez pouvoir envoyer vos commandes directement par courriel à cette personne (voir ci-dessous la section Editer les paniers)
Contact pour les commandes en retard ? Cochez cette case si vous souhaitez pouvoir envoyer vos réclamations par courriel directement à cette personne
Contact pour les fascicules en retard ? Cochez cette case si vous souhaitez pouvoir envoyer vos réclamations de périodiques directement par courriel à cette personne
Vous pouvez ajouter plus d’un contact par fournisseur en cliquant sur “Ajouter un autre contact”
Interface : informations concernant le site internet du fournisseur, son logiciel ou le portail que vous utilisez pour gérer les commandes ou établir des statistiques sur ce fournisseur ou son organisation. Saisir une interface n’est pas obligatoire, n’utiliser cette section que pour conserver trace des informations dans Koha. Pour ajouter une interface fournisseur, cliquez sur “Ajouter une nouvelle interface”.
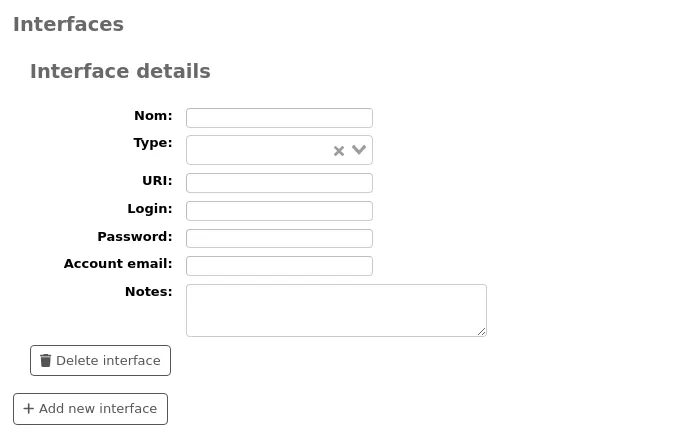
Renseigner le formulaire (tous les champs sont optionnels) :
Nom : saisir le nom de l’interface, ce sera visible dans Koha.
Type : choisir le type d’interface.
Note
Les valeurs de ce menu déroulant sont gérées par la catégorie de valeur autorisée VENDOR_INTERFACE_TYPE.
URI : saisir l’URL de l’interface.
Identifiant : saisir l’identifiant pour l’interface du fournisseur.
Mot de passe : saisir le mot de passe pour l’interface du fournisseur.
Note
Le mot de passe saisi ici sera encrypté dans la base. Il ne sera pas affiché par défaut sur la page de détails du fournisseur; il y aura, à la place du mot de passe, un lien “Afficher” qui pourra être cliqué afin d’afficher le mot de passe.
Danger
Veuillez noter que Koha n’est pas un gestionnaire de mots de passe. Bien que le mot de passe soit encrypté et que l’accès soit basé sur des permissions, il y a toujours un risque de sécurité à l’enregistrer ici. Utiliser un vrai gestionnaire de mots de passe est recommandé. Utilisez ce champ à vos propres risques.
Courriel du compte : saisir le courriel utilisé pour le compte sur cette interface.
Note : entrer n’importe quelles notes concernant cette interface.
Cliquer sur “Ajouter une nouvelle interface” si vous avez besoin de plus d’une interface pour ce fournisseur.
Information de commande : information générale de facturation
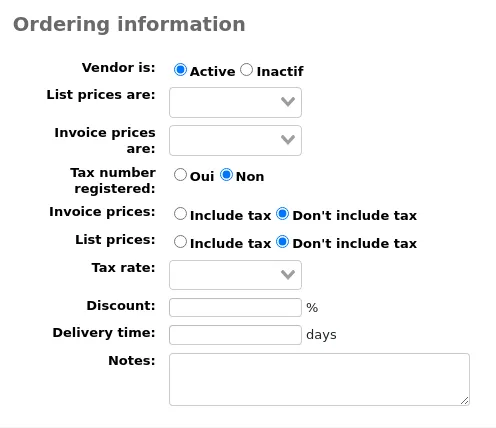
Pour passer une commande à un fournisseur, vous devez le rendre “Actif”
Choisir la devise pour les prix catalogue et les prix des factures
Note
Les devises sont configurées dans la section Devises et taux de change du module Administration
Si votre bibliothèque a un numéro de TVA précisez-le
Indiquez si vos prix catalogue et vos prix facturés incluent les taxes
Saisir le taux de taxes si votre bibliothèque y est assujettie pour ses commandes
Note
Les taux de taxes sont paramétrés dans les préférences système TaxRates
Si le fournisseur offre une remise, saisissez-la dans le champ “Remise”
Note
Vous pouvez entrer une remise spécifique qui sera appliquée au moment de la commande
Note
Saisissez le pourcentage de remise en utilisant le point comme séparateur décimal.
Les remises peuvent avoir jusqu’à deux chiffres avant le séparateur décimal et throis après. Par exemple :
9,99,-99,99.9,0.99,99.99,99.999.Si vous connaissez le délai de livraison de la commande, saisissez-le dans le champ prévu à cet effet. Cela permettra à Koha d’estimer le temps d’arrivée d’une livraison à la bibliothèque et de le signaler dans le rapport des commandes en retard.
Notes pour un usage interne
Rechercher des fournisseurs
Rechercher des fournisseurs à partir de la barre de recherche en haut de la page

Ou dans la case “Gérer les commandes” sur la page d’accueil des Acquisitions.
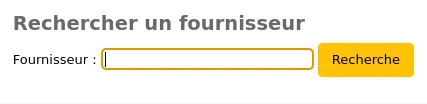
Vous pouvez rechercher n’importe quelle partie du nom du fournisseur ou ses alias.

Note
Une recherche vide renverra tous les fournisseurs.
Si vous avez beaucoup de fournisseurs, vous pouvez utiliser le menu déroulant pour accéder directement à un résultat.
Par défaut, tous les fournisseurs apparaissent dans les résultats, avec les fournisseurs inactifs en police grise et une note “(inactif)” à côté de leur nom. Vous pouvez cliquer sur “Afficher uniquement les fournisseurs actifs” pour masquer les fournisseurs inactifs.
Dans les résultats, vous pouvez voir tous les paniers actuellement ouverts. Vous pouvez cliquer sur « Afficher tous les paniers » pour afficher également les paniers fermés.
Il y a des boutons d’action sous chaque fournisseur :
“Ajouter” peut être utilisé pour créer un nouveau panier, ou ajouter un nouveau contrat à ce fournisseur.
“Modifier le fournisseur” est utilisé pour modifier les informations du fournissseur.
“Réceptionner des colis” apparaîtra quand un fournisseur a des paniers avec des commandes.
“Supprimer le fournisseur” apparaîtra quand un fournisseur n’a pas de paniers.
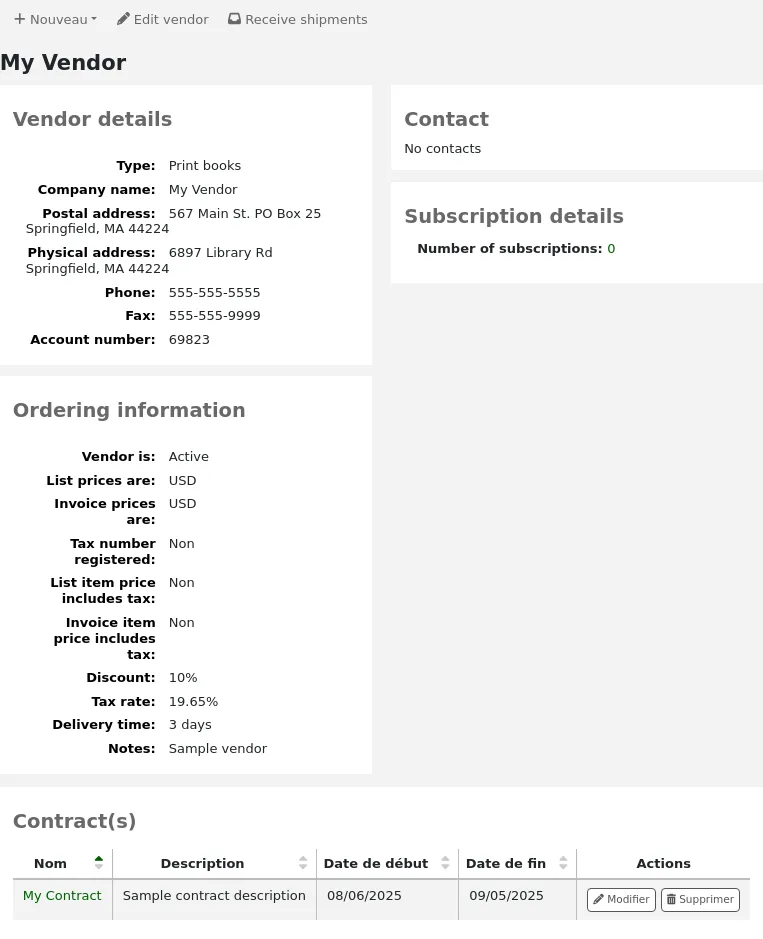
Voir un fournisseur
Pour accéder à la page d’informations du fournisseur, recherchez le fournisseur depuis la page d’accueil du module Acquisitions.
Lorsque les résultats s’affichent, cliquez sur le nom du fournisseur que vous souhaitez voir.
Modifier les informations du fournisseur
Note
Les membres du personnel doivent avoir la permission vendors_manage (ou la permission superbibliothécaire) pour modifier des fournisseurs.
Pour apporter des changements à un fournisseur recherchez le fournisseur depuis la page d’accueil du module Acquistions.
Cliquez sur le bouton “Modifier le fournisseur” sur la page de résultats
ou sur la page d’information du fournisseur.
Contrats du fournisseur
Vous pouvez définir des contrats (avec une date de début et de fin) et les rattacher à un fournisseur. Cela vous permet à la fin de l’année de voir combien vous avez dépensé sur un contrat spécifique avec un fournisseur. Certaines fois, les contrats sont paramétrés avec des montants plancher et plafond annuels.
Ajouter un contrat
Note
Les membres du personnel doivent avoir la permission contracts_manage (ou la permission superbibliothécaire) pour ajouter des contrats à des fournisseurs.
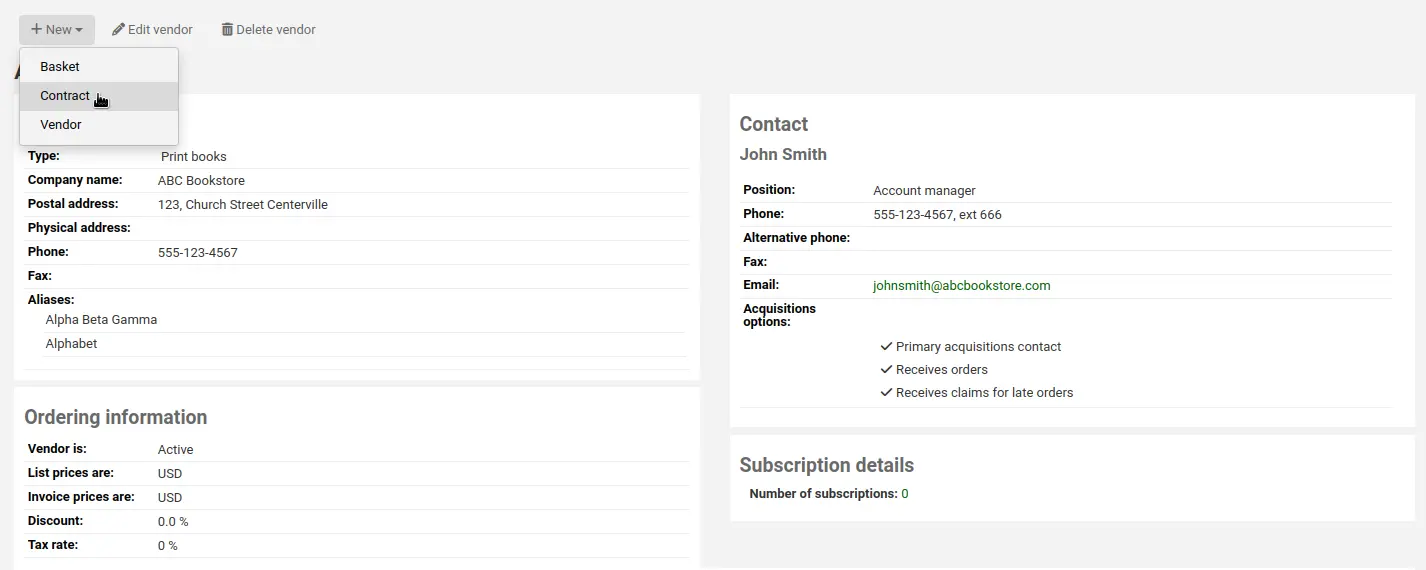
Vous pouvez ajouter un contrat à un fournisseur en recherchant le fournisseur, puis en cliquant sur le bouton “Ajouter” et en choisissant l’option “Contrat”.

Sinon, vous pouvez accéder à la page fournisseur, cliquer sur “Ajouter” et choisir “Contrat” à partir de là.
Le formulaire du contrat vous demandera des informations élémentaires à son propos
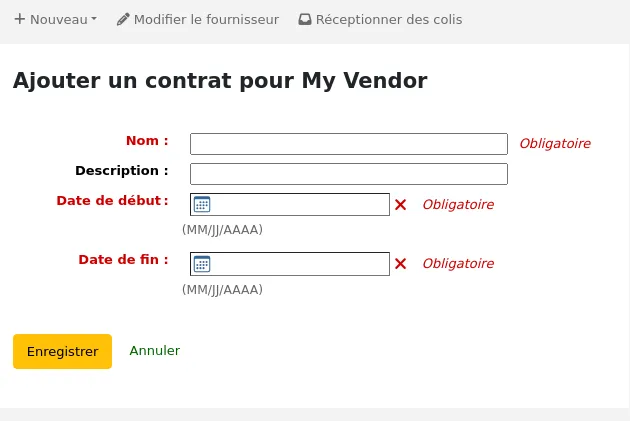
Avertissement
Vous ne pouvez pas saisir de contrat rétrospectivement. La date de fin ne doit pas dépasser celle d’aujourd’hui.
Une fois le contrat enregistré, il apparaîtra sur la page du fournisseur.
Il apparaîtra également lors de la création d’un panier.
Consigner des problèmes avec des fournisseurs
Version
Cette fonctionnalité a été apportée par la version 23.11 de Koha.
Note
Les membres du personnel doivent avoir la permission issue_manage (ou la permission superbibliothécaire) pour voir et gérer les problèmes liés aux fournisseurs.
“Problèmes avec les fournisseurs” est un moyen de suivre les problèmes qui peuvent survenir avec des fournisseurs. Cela peut ensuite aider aux négociations lors des renouvellements de contrats.
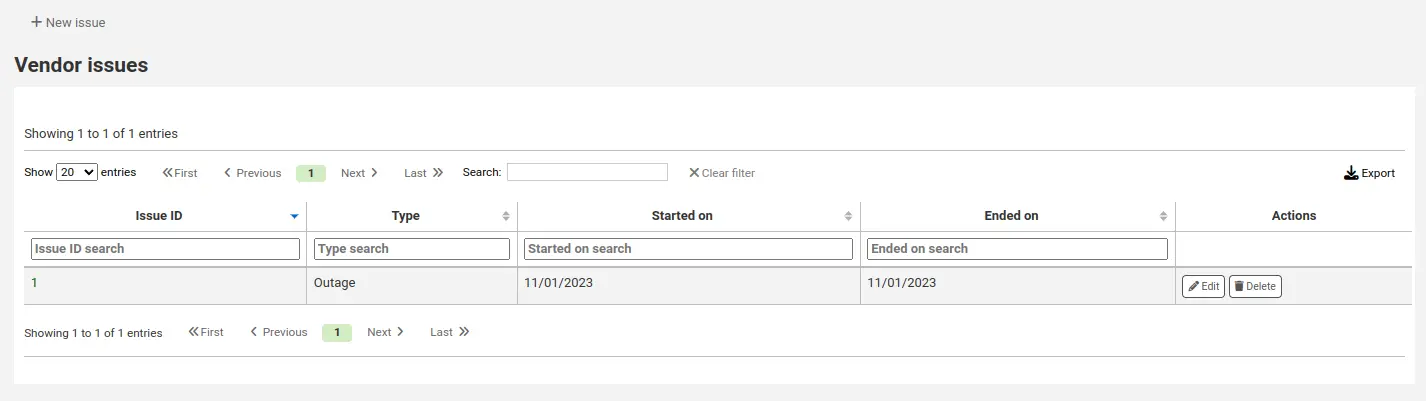
Pour accéder aux “Problèmes avec les fournisseurs”, rendez-vous sur la page du fournisseur et cliquez sur “Problèmes” dans le menu à gauche.
Cette page affichera tous les problèmes consignés pour ce fournisseur.
Pour consigner un nouveau problème,
Cliquer sur “Nouveau problème”
Renseigner le formulaire avec les informations sur l’incident.
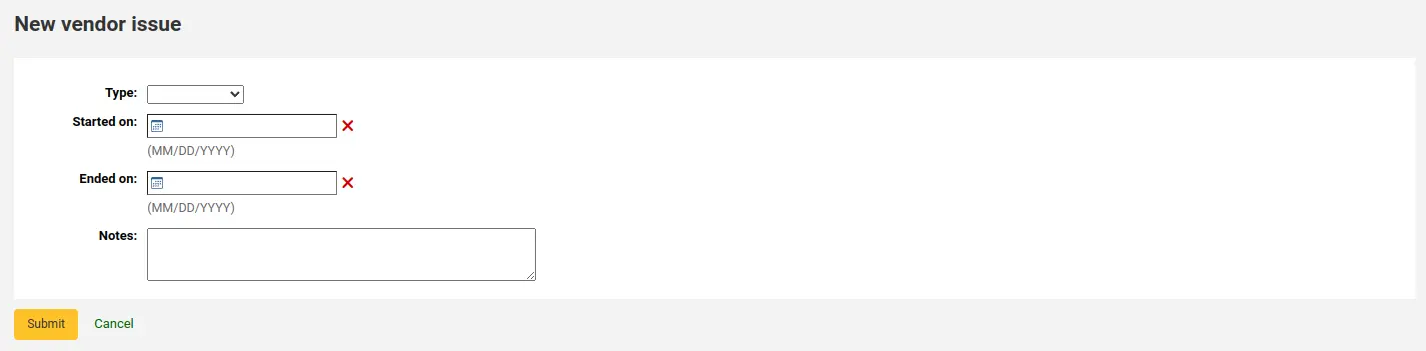
Type : choisir le type de problème.
Note
Les valeurs de ce menu déroulant sont gérées par la catégorie de valeur autorisée VENDOR_ISSUE_TYPE.
Début le : choisir la date de début du problème.
Fin le : choisir la date de fin du problème, s’il y a lieu.
Notes : saisir des détails à propos du problème.
Cliquer sur “Valider”.
Pour modifier un incident déjà consigné, cliquer sur le bouton “Modifier” du tableau.
S’il n’est plus pertinent de conserver trace d’un incident, vous pouvez le supprimer en cliquant sur le bouton “Supprimer” du tableau.
Gestion des suggestions d’achat
Vous pouvez créer des suggestions d’achat à partir de l’interface professionnelle soit pour la bibliothèque soit sur la fiche de l’adhérent. Selon ce qui est paramétré dans la préférence système suggestion, les adhérents seront autorisés à faire des suggestions d’achat via l’OPAC.
Note
Les membres du personnel doivent avoir la permission suggestions_manage (ou la permission superbibliothécaire) pour voir et gérer les suggestions d’achat.
Les membres du personnel ayant la permission suggestions_manage mais aucune des permissions acquisitions peuvent accéder à l’outil de gestion des suggestions depuis “Suggestions” dans le menu “Plus” de la barre d’en-tête.
Astuce
Les modifications apportées aux suggestions d’achat peuvent être journalisées : configurez la préférence système SuggestionsLog pour “journaliser” les modifications ultérieures dans la table action_logs.
Quand une suggestion est en attente de traitement, elle apparaîtra dans la page d’accueil du module Acquisitions à côté de la recherche fournisseur. Les suggestions pour le site où vous êtes connecté apparaîtront séparées des autres suggestions. En cliquant sur le nom de la bibliothèque vous arriverez à l’outil de gestion des suggestions.
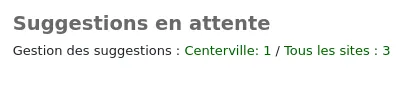
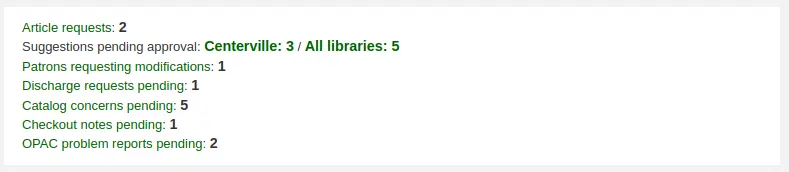
Cela apparaîtra aussi sur le tableau de bord du personnel sous les étiquettes du module.
S’il n’y a pas de suggestion en attente, vous pouvez accéder à la gestion des suggestions en allant dans le menu “Plus” et en choisissant “Suggestions” ou en cliquant sur le lien “Suggestions” dans le menu sur la gauche de la page Acquisitions.
Note
Vous pouvez personnaliser les colonnes de ce tableau dans la section Configurer les colonnes du module Administration (référence du tableau : suggestions).
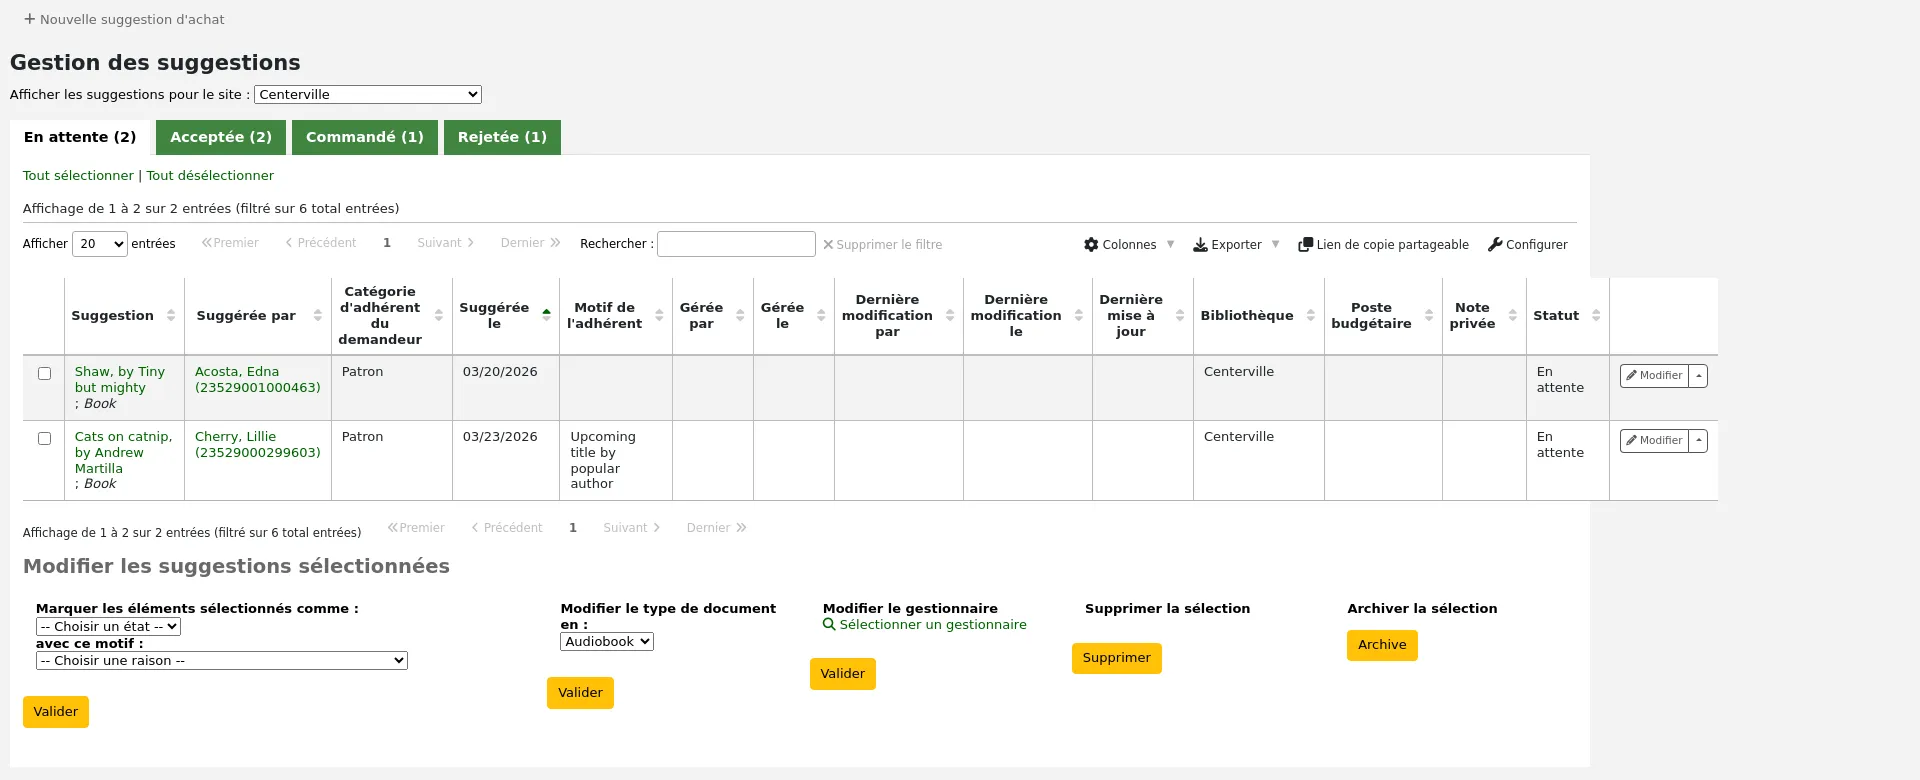
Vos suggestions seront triées dans plusieurs onglets : En attente, Acceptée, Vérifiée, Commandée et Rejetée.
En attente : une suggestion “En attente” est une suggestion qui attend une action de la part de la bibliothèque.
Acceptée : une suggestion “Acceptée” est une suggestion que vous avez marquée comme “Acceptée” en utilisant le formulaire en dessous des suggestions.
Vérifiée : une suggestion “Vérifiée” est une suggestion qui a été marquée comme “Vérifiée” en utilisant le formulaire en dessous des suggestions.
Commandée : une suggestion “Commandée” est une suggestion qui a été commandée en utilisant le lien depuis une suggestion dans un panier de commandes.
Rejetée : une suggestion “Rejetée” est une suggestion que vous avez marquée comme “Rejetée” en utilisant le formulaire en dessous de la liste des suggestions.
Note
Si votre méthode de travail nécessite davantage de statuts pour la gestion des suggestions, vous pouvez en ajouter d’autres en utilisant la catégorie de valeurs autorisées SUGGEST_STATUS.
Chaque suggestion affichera le nom du bibliothécaire qui l’a gérée ainsi que la date à laquelle elle a été gérée.
Les suggestions acceptées et rejetées afficheront la raison de l’acceptation ou du rejet sous “Statut”.
Pour les sites qui ont un grand nombre de suggestions, il y a des filtres sur la gauche de la page Gestion des suggestions. Ils permettent de limiter le nombre de titres affichés sur cette page.
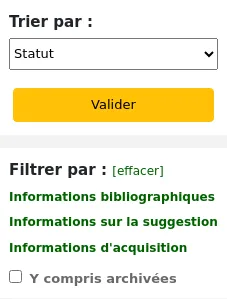
En cliquant sur le titre en bleu, vous étendez les options de filtrage et en cliquant sur Effacer vous effacez tous les filtres et montrez ainsi toutes les suggestions.
Note
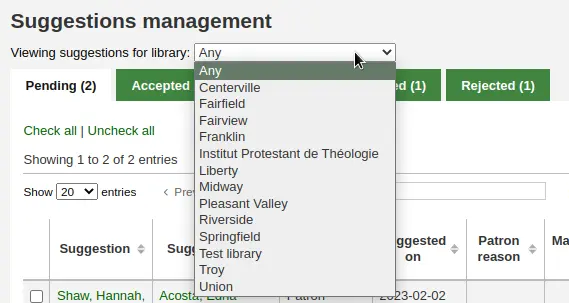
Les suggestions affichées seront automatiquement limitées à celles concernant votre site. Pour voir les suggestions concernant d’autres sites (ou tous les sites), changez le site dans le menu déroulant “Voir les suggestions pour le site”.
Approuver ou rejeter des suggestions d’achat
Une fois que vous avez changé le statut de la suggestion (en attente, acceptée, rejetée, vérifiée, ou commandée), la suggestion sera déplacée dans l’onglet correspondant. L’état de la suggestion sera également mis à jour sur le compte de l’adhérent dans l’OPAC et un courriel sera envoyé à l’adhérent utilisant le modèle de lettre qui correspond au statut choisi.
Quand vous passez en revue les suggestions “En attente” vous pouvez choisir de cocher la case à côté d’une ou plusieurs suggestions pour les approuver/rejeter puis choisir le statut et la raison de votre choix dans la section “Modifier les suggestions sélectionnées” en bas.
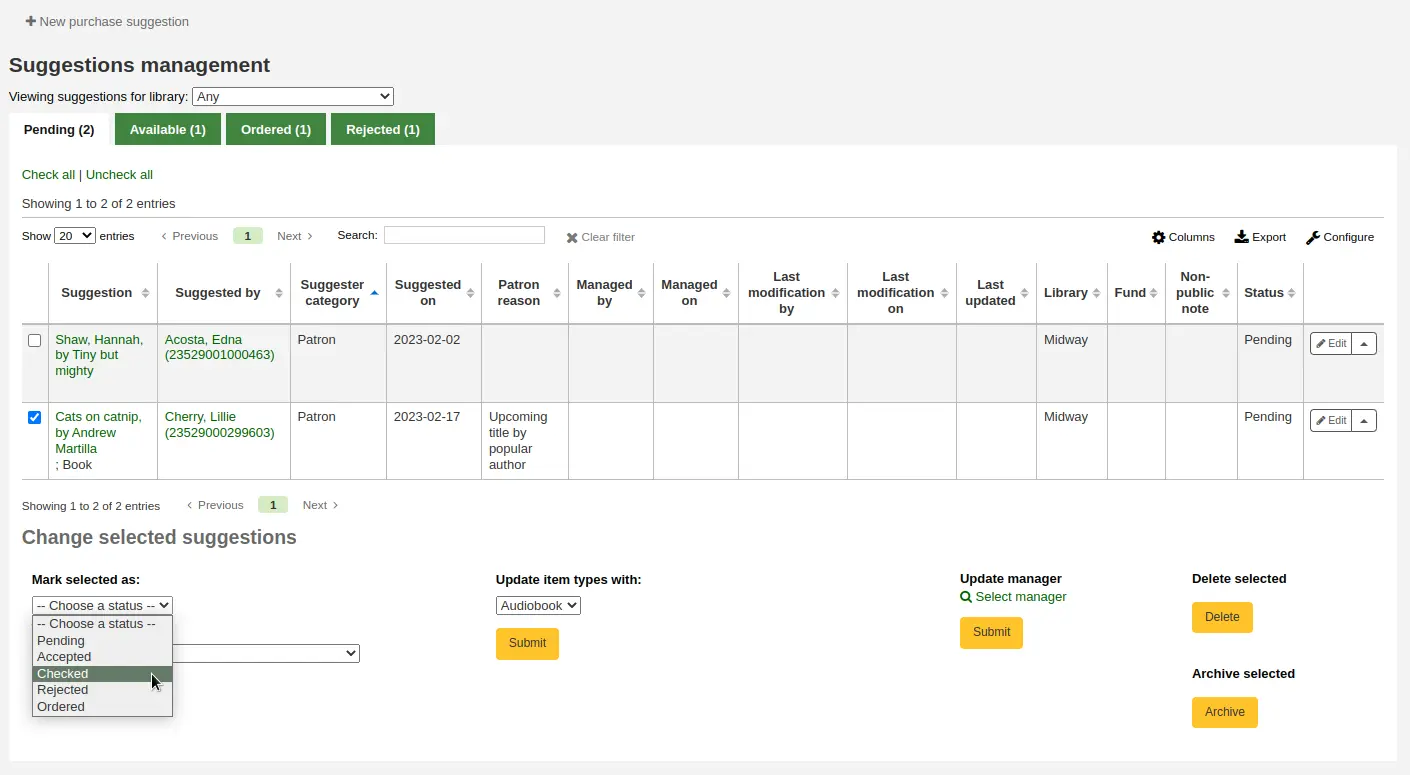
Note
Si votre méthode de travail nécessite davantage de statuts pour la gestion des suggestions, vous pouvez en ajouter d’autres en utilisant la catégorie de valeurs autorisées SUGGEST_STATUS.
Les motifs d’acceptation ou de refus des suggestions sont définis par la catégorie de valeurs autorisées SUGGEST.

Si vous choisissez “Autres…”, vous serez invité à entrer un texte dans un champ Raison. En cliquant sur “Annuler” sur la droite de ce champ, vous revenez à la liste de valeurs autorisées des raisons prédéfinies.

Il est également possible d’approuver ou rejeter des suggestions une par une en cliquant sur le titre de la suggestion pour ouvrir un résumé de la suggestion.
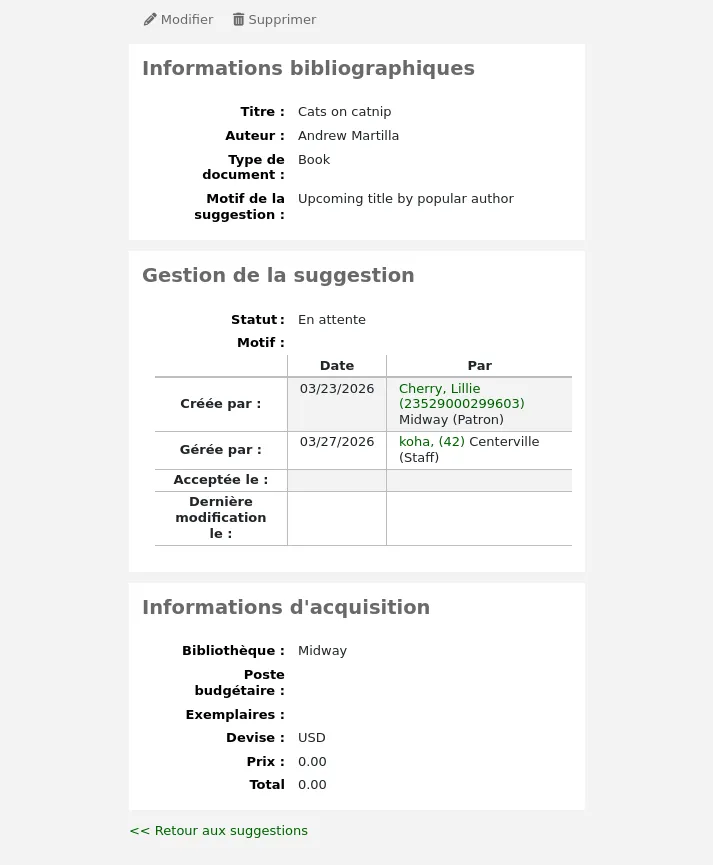
Cliquez sur “Modifier” en haut de la page de détail des suggestions pour ouvrir la page de modification des suggestions.
A partir de là, changez le statut dans la section “Gestion des suggestions” et cliquez sur “Enregistrer”.
Un changement de statut de suggestion déclenchera l’envoi d’une notification à l’adhérent qui a fait la suggestion. Les notifications peuvent être modifiées dans l’outil Notifications et tickets.
Le statut “Acceptée” déclenchera la notification ACCEPTED
Le statut “Rejetée” déclenchera la notification REJECTED
Le statut “Commandée” déclenchera la notification ORDERED
Note
Le statut “Commandée” sera automatiquement paramétré au moment de commander à partir d’une suggestion et la notification correspondante sera aussi envoyée à ce moment.
Choisissez ce statut manuellement seulement si vous n’utilisez pas le module Acquisitions pour saisir vos commandes.
Note
Si vous ajoutez des valeurs personnalisées dans la catégorie de valeurs autorisées SUGGEST_STATUS, vous pouvez ajouter les notifications correspondantes avec les mêmes noms en prenant soin de choisir le module “Suggestions” au moment de créer les nouvelles notifications.
Modifier les suggestions d’achat
En plus de changer le statut pour accepter ou rejeter les suggestions, vous pouvez aussi changer différents attributs au moment de gérer les suggestions.
Des modifications peuvent être faites en lot en sélectionnant les suggestions et en choisissant les nouvelles valeurs dans la section “Modifier les suggestions sélectionnées” en bas de page.
Vous pouvez changer le type de document des suggestions en les sélectionnant et en choisissant le nouveau type de document dans le menu déroulant “Modifier le type de document en” en bas de page.
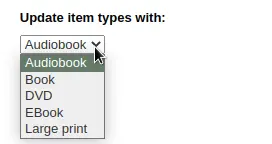
Note
Les types de documents dans cette liste sont générés par la catégorie de valeurs autorisées SUGGEST_FORMAT.
Vous pouvez aussi changer le gestionnaire des suggestions sélectionnées en cliquant sur le lien “Sélectionner un gestionnaire” et en recherchant dans votre base d’utilisateurs. Le nouveau gestionnaire recevra la notification NOTIFY_MANAGER.
Note
Seuls les utilisateurs ayant la permission suggestions_manage (ou la permission superbibliothécaire) apparaîtront dans les résultats.
Il est également possible de modifier des suggestions une par une en cliquant sur le bouton “Modifier” à droite de la suggestion ou en cliquant sur le titre de la suggestion.
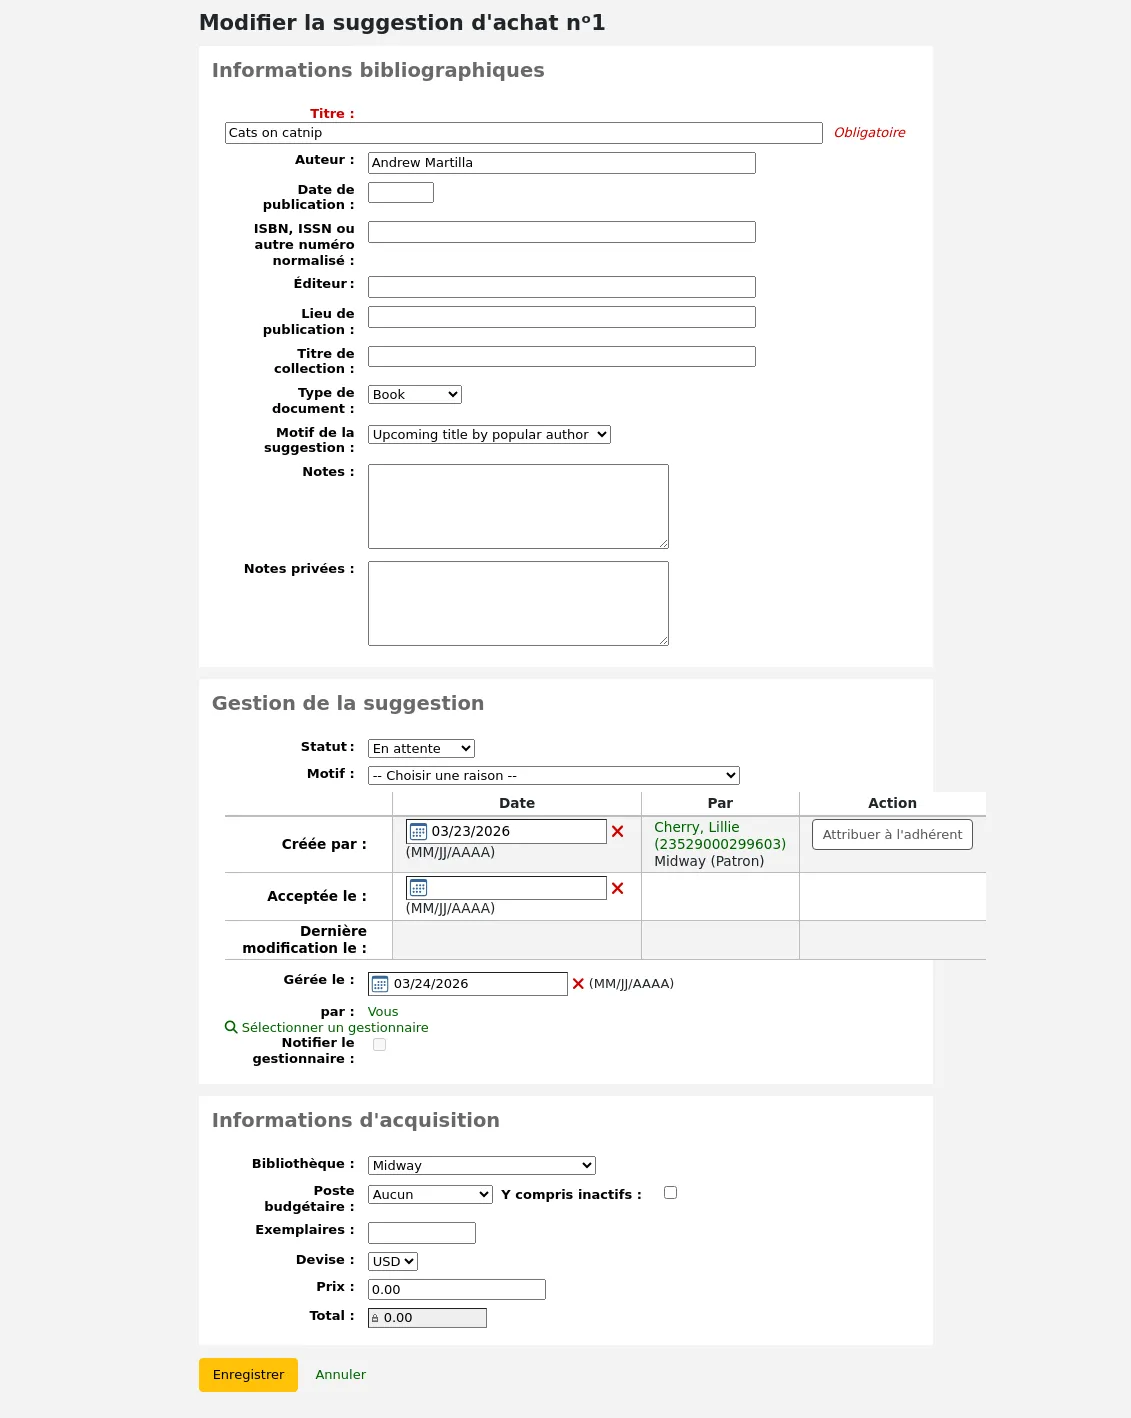
Cliquer sur “modifier” en haut de la page de détail de la suggestion ouvrira une page de modification de la suggestion.
Dans ce formulaire, vous pouvez modifier la suggestion (la détailler plus encore ou corriger des erreurs commises par l’adhérent). Vous pouvez également l’accepter ou la rejeter.
Dans la section “Informations bibliographiques”, vous pouvez ajouter des informations manquantes, telles que l’ISBN, l’éditeur, etc. ou corriger des informations erronées fournies par l’adhérent.
Cette information sera utilisée pour créer une notice bibliographique pour que vous puissiez commander ce titre à partir d’une suggestion.
Dans la section “Gestion des suggestions”, vous pouvez modifier le statut, et une raison pour l’acceptation ou le rejet de la suggestion, ou ajuster les dates si nécessaire.
En marquant une suggestion comme “En attente”, vous la déplacez de nouveau dans l’onglet “En attente”.
La case “Notifier le gestionnaire” peut être utilisée pour envoyer une notification au bibliothécaire qui avait précédemment géré la suggestion pour l’informer que la suggestion a été modifiée. La notification envoyée est la notification NOTIFY_MANAGER.
Dans la section “Informations d’acquisition”, vous pouvez modifier le poste budgétaire, le prix, la devise, etc.
Assigner la suggestion à un poste budgétaire déclenchera l’envoi d’une notification au propriétaire du poste budgétaire pour l’informer qu’une suggestion est prête à être gérée.
Le cronjob notice_unprocessed_suggestions.pl est nécessaire pour générer ces notifications.
La notification utilisée est TO_PROCESS, elle peut être modifiée dans l’outil Notifications et tickets.
Archiver des suggestions d’achat
Une fois que la suggestion a terminé le processus d’acquisition, il est possible de l’archiver. Si vous avez beaucoup de suggestions, et que la page met longtemps à se charger, archiver les anciennes suggestions améliorera la performance.
Sélectionnez les suggestions que vous voulez archiver et cliquez sur le bouton “Archiver” dans la cas “Archiver la sélection”.
Vous pouvez aussi archiver les suggestions d’achat en cliquant sur la petite flèche à côté du bouton “Modifier” et en choisissant “Archiver”.

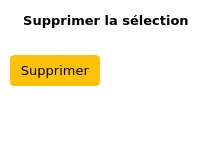
Les suggestions archivées disparaîtront de la liste, mais peuvent toujours être visualisées en cochant la case “Y compris archivées” dans les filtres et en cliquant sur le bouton “Valider”.
Les suggestions archivées auront la mention “Archivée” sous l’information de titre lors de leur visualisation.
Note
Les suggestions archivées disparaîtront de la section “Vos suggestions d’achat” dans la fiche de l’adhérent à l’OPAC.
Désarchiver des suggestions d’achat
Version
Cette fonctionnalité a été apportée par la version 26.05 de Koha.
Il est également possible de désarchiver des suggestions archivées.
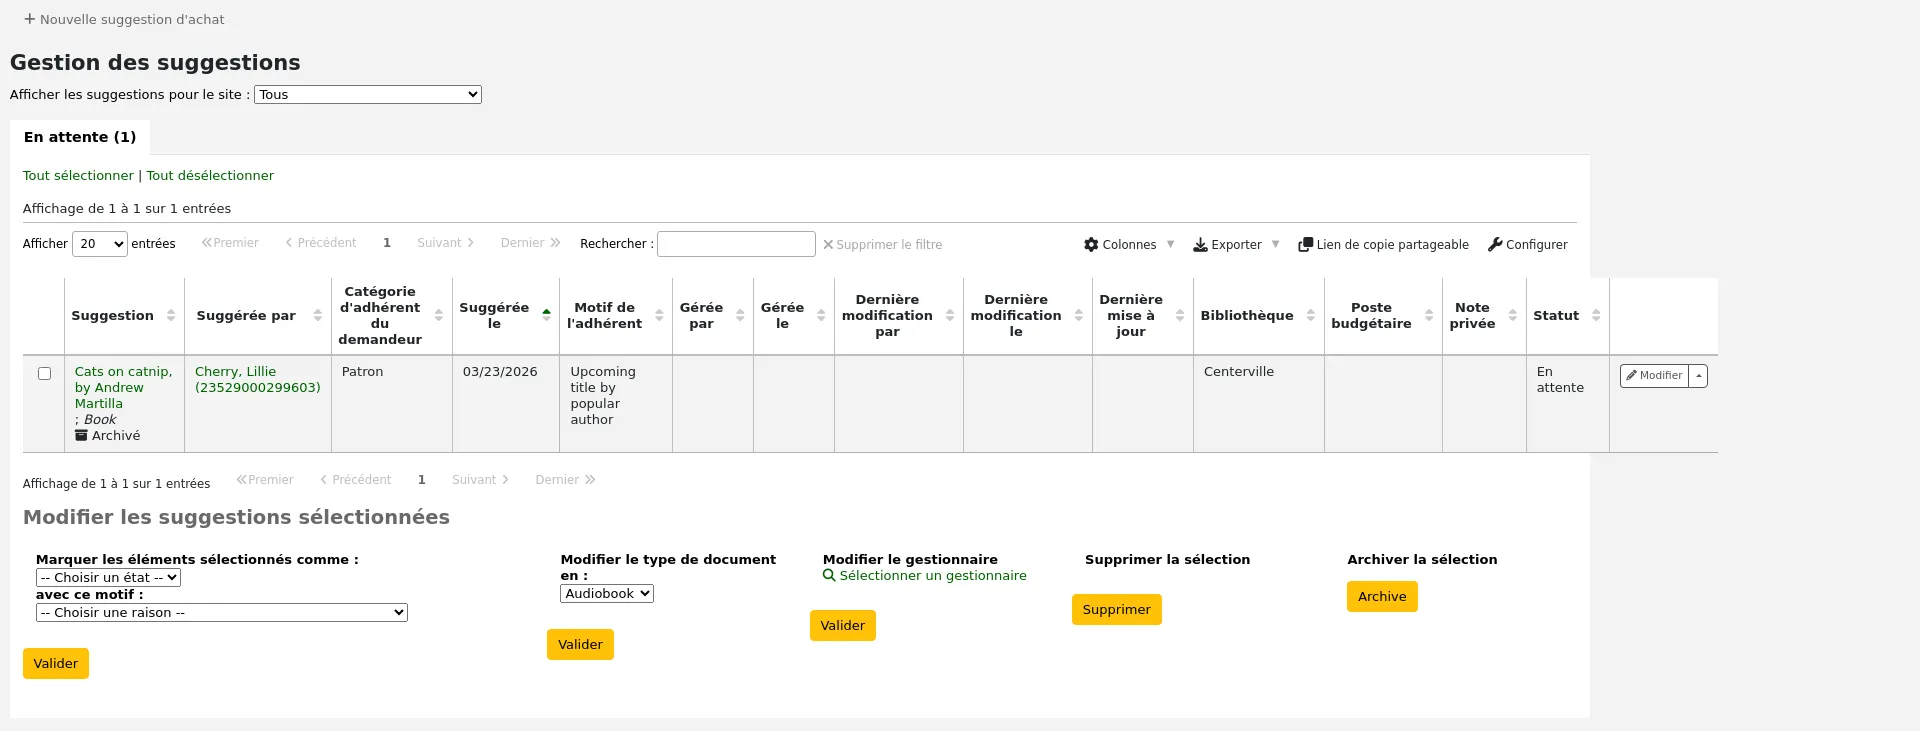
Commencez par afficher les suggestions archivées en cochant la case “Y compris archivées” et en cliquant sur le bouton “Valider”.
Cliquez sur la petite flèche à côté du bouton “Modifier” et choisissez “Désarchiver”.
La suggestion reviendra dans les suggestions normales.
Supprimer les suggestions d’achat
Note
Les bibliothécaires doivent avoir la permission suggestions_delete (ou la permission superbibliothécaire) pour supprimer les suggestions d’achat.
Une fois que vous n’avez plus besoin de suggestions d’achat, vous pouvez les retirer définivement du système.
Pour supprimer les suggestions par lot, sélectionnez les suggestions que vous voulez supprimer définitivement et cliquez sur le bouton “Supprimer” dans la case “Supprimer les suggestions sélectionnées”.
Vous pouvez également supprimer une suggestion en cliquant sur la petite flèche à côté du bouton “Modifier” et choisir “Supprimer”.

Il est également possible de supprimer les suggestions en cliquant sur le titre de la suggestion pour accéder à la page de détails de la suggestion et en cliquant sur le bouton “Supprimer” à partir de là.
Les anciennes suggestions d’achat peuvent être automatiquement supprimées en utilisant le cronjob purge_suggestions.pl.
Passer des commandes
Pour placer une commande, vous devez d’abord rechercher le fournisseur et créer un panier.
Avertissement
Si vous prévoyez d’utiliser EDIFACT pour passer vos commandes, vous aurez besoin de configurer les comptes EDI et EAN de la bibliothèque.
Créer un panier
Note
Les membres du personnel doivent avoir la permission order_manage (ou la permission superbibliothécaire) pour créer des paniers et ajouter des commandes.
Note
Si vous utilisez EDI pour vos commandes vous souhaiterez télécharger votre fichier de commande de votre fournisseur avant de commencer le processus dans Koha.
Pour créer un panier, vous devez d’abord rechercher le fournisseur auprès duquel vous commandez. A partir des résultats de la recherche fournisseur, cliquez sur le bouton “Ajouter” et choisissez “Panier”.

Sinon, vous pouvez cliquer sur le nom du fournisseur pour accéder à la page du fournisseur, puis cliquer sur “Ajouter” et choisir “Panier” à partir de là.
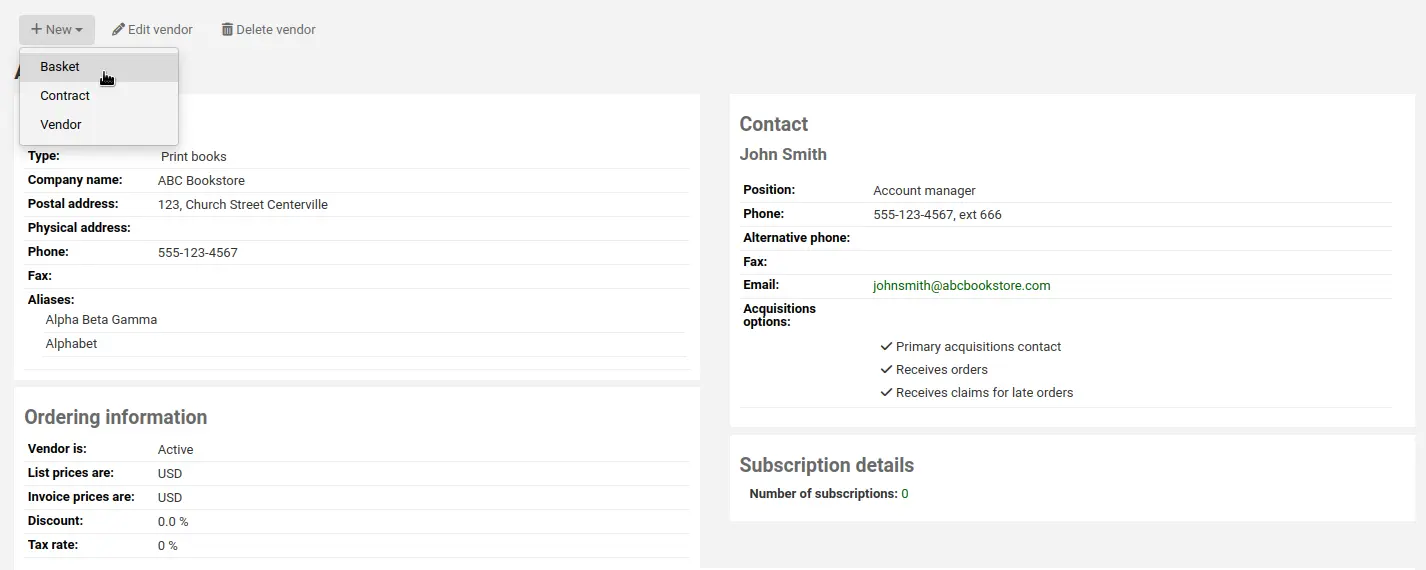
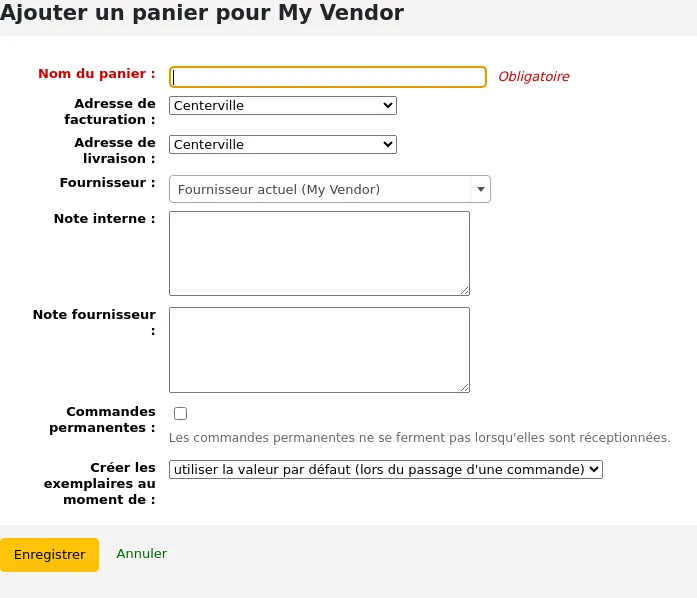
Après avoir cliqué sur “Ajouter” et “Panier”, il vous faudra saisir certaines informations à propos du panier de commande :
Donnez au panier un nom qui vous aidera à l’identifier par la suite
Saisissez les adresses de facturation et de livraison (ce sera par défaut celles du site sur lequel vous êtes connecté)
Si vous voulez changer de fournisseur pour votre commande, vous pouvez le sélectionner dans le menu déroulant
Les champs de notes sont optionnels et peuvent contenir n’importe quel type d’information
Si vous avez ajouté des contrats au fournisseur à qui vous passez la commande, vous pourrez choisir avec quel contrat vous souhaitez commander les documents.
Si vous faites une commande permanente (qui arrive régulièrement), cochez la case “Commandes en attente” pour ce panier.
Notez qu’un seul panier ne peut pas contenir à la fois des commandes fermes et permanentes.
Vous pouvez choisir de créer des exemplaires au moment de créer la commande, au moment de la recevoir, ou au moment de cataloguer l’exemplaire. Si vous choisissez une option différente de l’option par défaut, elle s’appliquera uniquement à ce panier. L’option par défaut est définie par la préférence système AcqCreateItem.
Si vous avez des champs supplémentires pour les paniers de commande, ils apparaîtront ici.
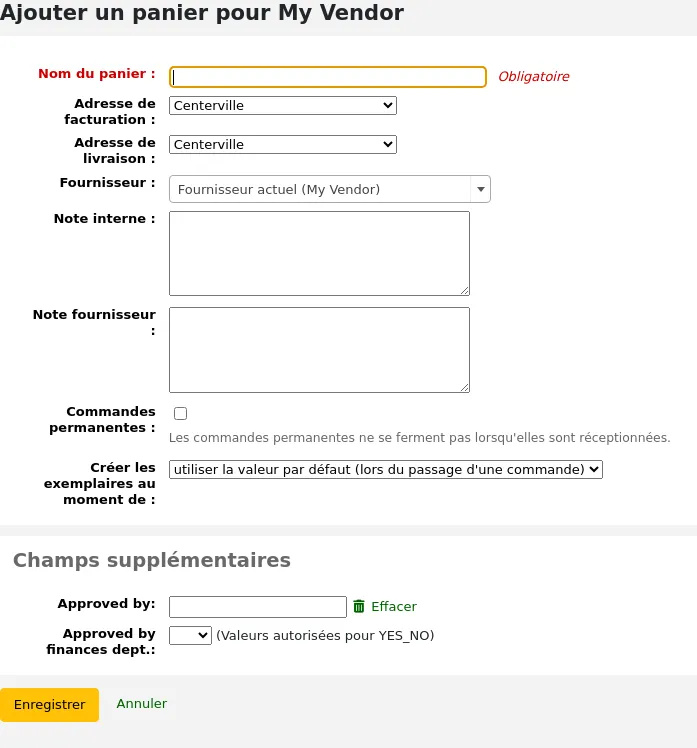
Lorsque vous avez fini, cliquez sur “Enregistrer”.
Ajouter des articles au panier
Note
Les membres du personnel doivent avoir la permission order_manage (ou la permission superbibliothécaire) pour ajouter des commandes à des paniers.
Une fois votre panier créé, cliquez sur “Ajouter au panier” depuis la page du panier.
Pour ajouter à un panier existant, cliquez sur “Ajouter au panier” à droite d’un panier existant.

Plusieurs options pour ajouter des exemplaires à la commande seront présentées.
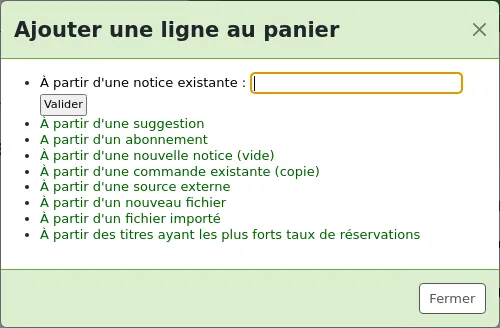
Commander à partir d’une notice existante
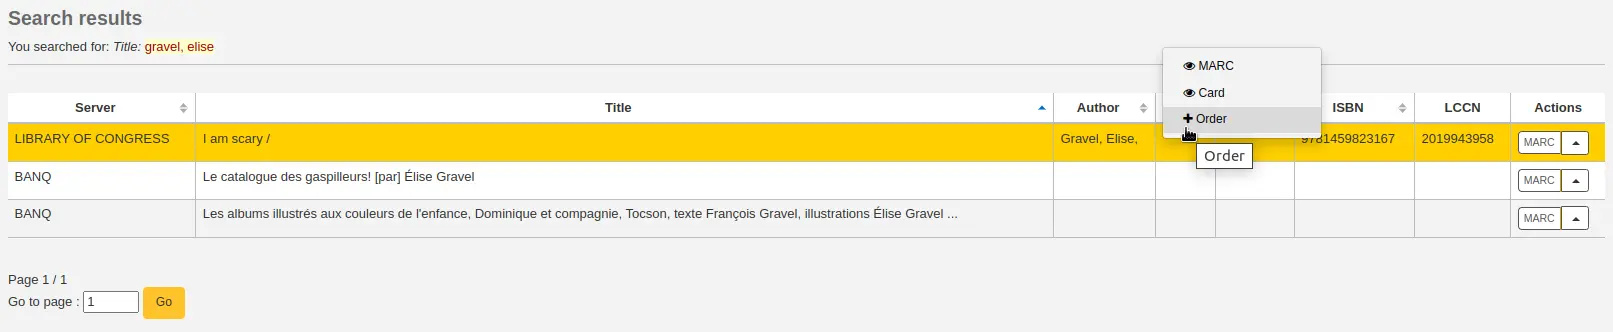
Si vous commandez un nouvel exemplaire d’un titre que vous avez déjà, vous pouvez chercher simplement la notice dans votre catalogue.
Dans les résultats, cliquez sur “Commander” pour arriver au formulaire de commande.
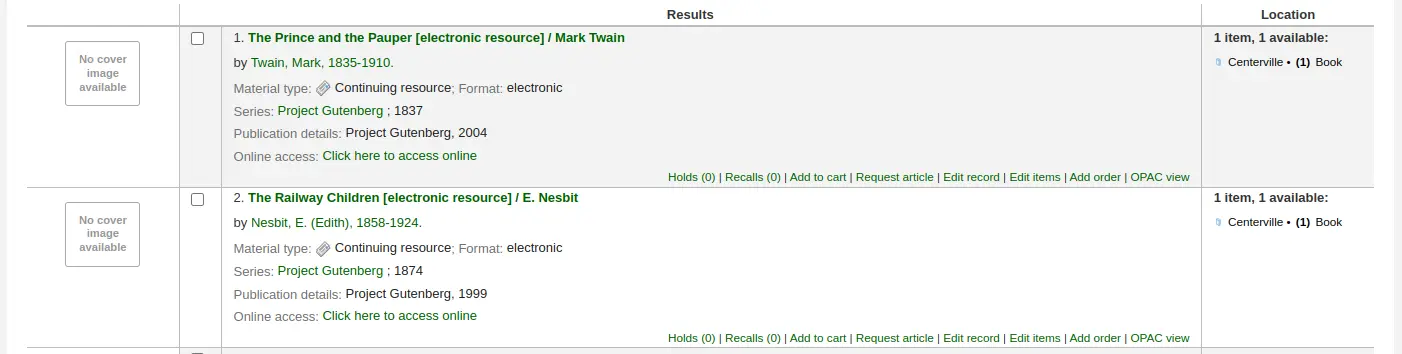
A partir de la vue détaillée de la notice, vous pouvez cliquer sur le bouton “Commander”.

Vous arriverez au formulaire de commande
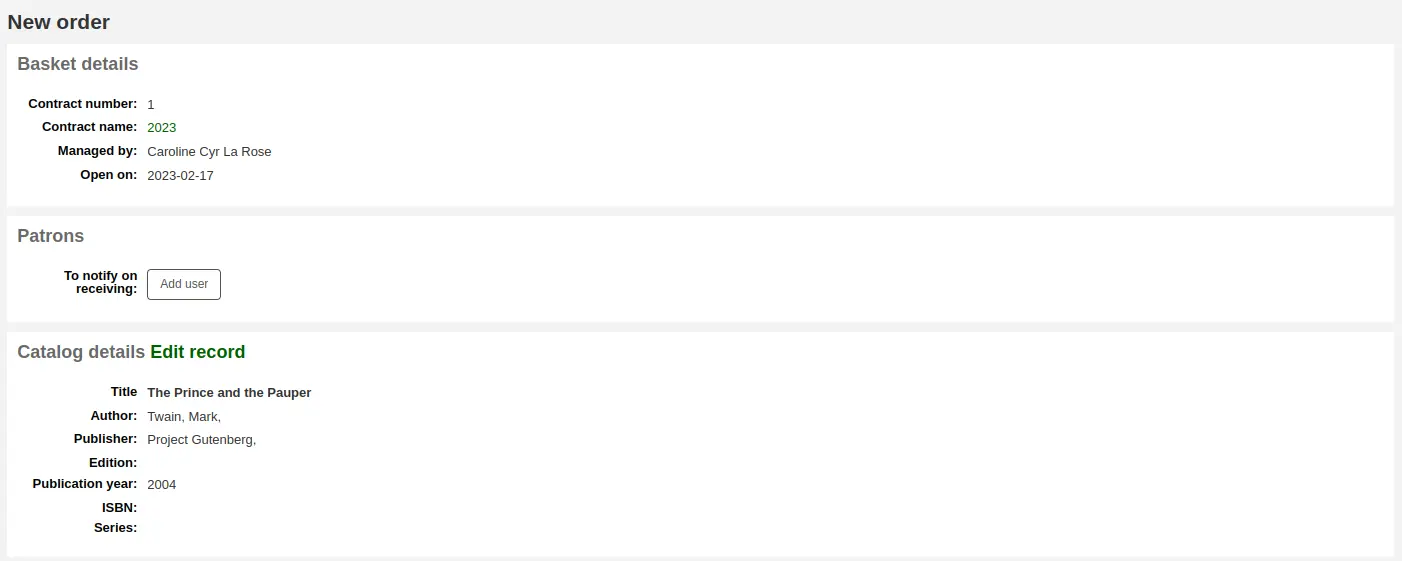
Tous les détails associés à l’exemplaire seront déjà listés sur “Détails du catalogue”.
Remplissez le reste du formulaire de commande, y compris les notifications d’adhérent, les exemplaires, et les détails financiers.
Commander à partir d’une suggestion d’achat
Si vous autorisez les adhérents à faire des suggestions d’achat (pour en savoir plus, consultez la partie gestion des suggestions d’achats de ce manuel), vous pouvez commander à partir de ces suggestions. Si vous souhaitez garder les traces des suggestions que vous avez commandées et reçues, vous devez passer la commande en utilisant ce lien.
Avertissement
Les suggestions doivent être acceptées avant que vous puissiez les commander.
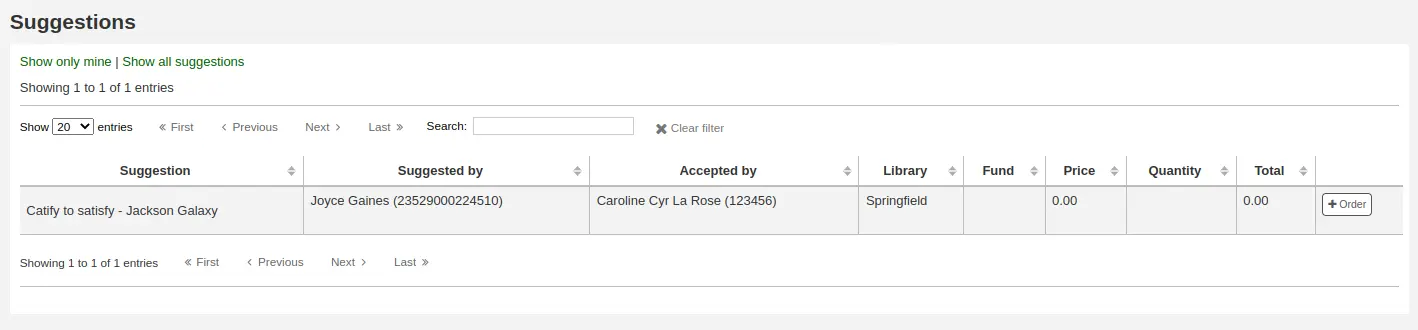
A partir des résultats, cliquez sur “Commander” à côté de l’exemplaire que vous souhaitez commander et un formulaire de commande s’affichera avec le lien de la suggestion.
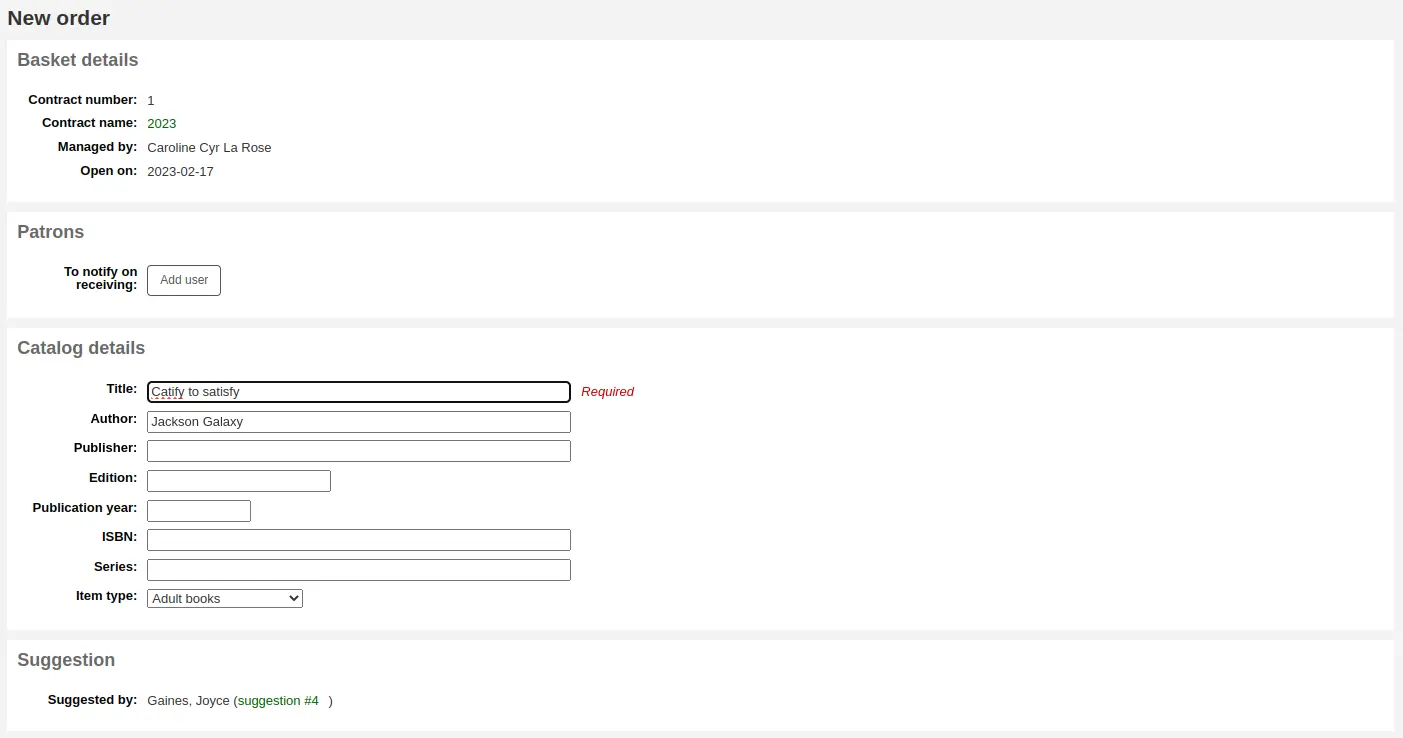
À partir de ce formulaire, vous pouvez faire les changements nécessaires.
Lorsque l’exemplaire apparaîtra dans votre panier, il comprendra un lien vers la suggestion.

Quand les commandes sont ajoutées au panier de cette manière, le statut de la suggestion est mis à jour en “Commandé”. Les adhérents peuvent voir ceci sur leur page Mes suggestions d’achat à l’OPAC. La modification de statut de la suggestion déclenche aussi la notification ORDERED; vous pouvez modifier son contenu dans Outils > Notifications et tickets.
Note
Il est possiblede créer automatiquement une réservation pour l’adhérent qui a fait la suggestion, en utilisant la préférence système PlaceHoldsOnOrdersFromSuggestions.
Commander à partir d’un abonnement
Si vous utilisez le module Périodiques, vous pouvez rattacher la commande de l’abonnement aux acquisitions en choisissant de passer la commande “À partir d’un abonnement”.
Après avoir cliqué sur le lien de la commande, vous arriverez sur une page de recherche qui vous aidera à trouver votre abonnement
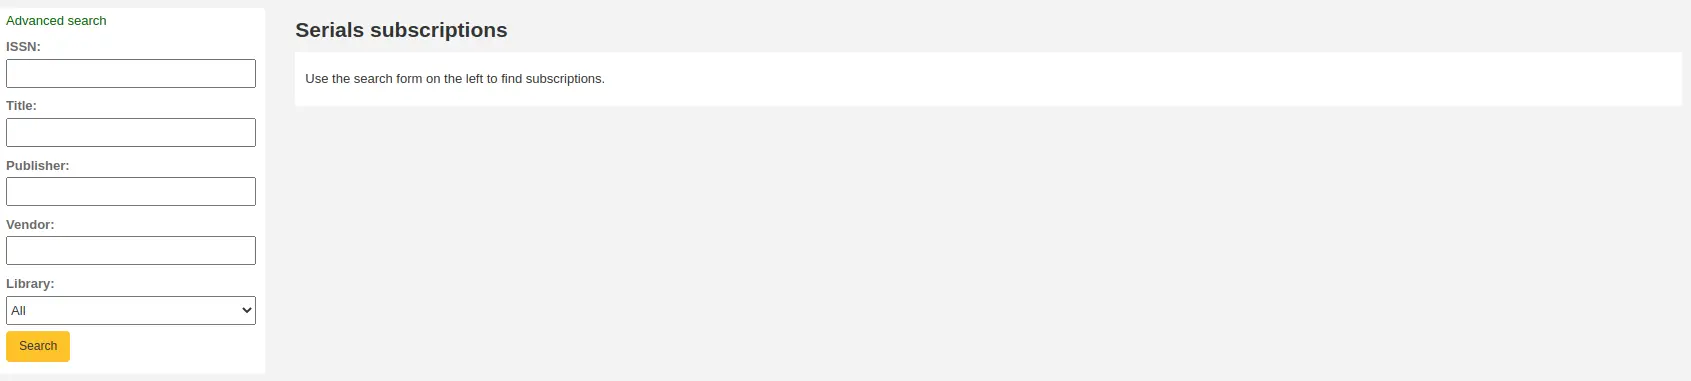
Vos résultats apparaîtront à droite du formulaire et chaque abonnement aura un lien “Commander” sur la droite
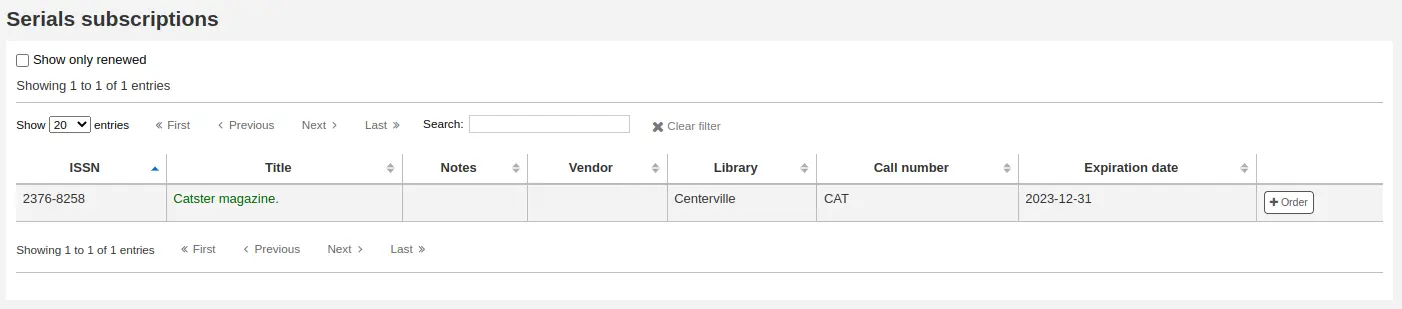
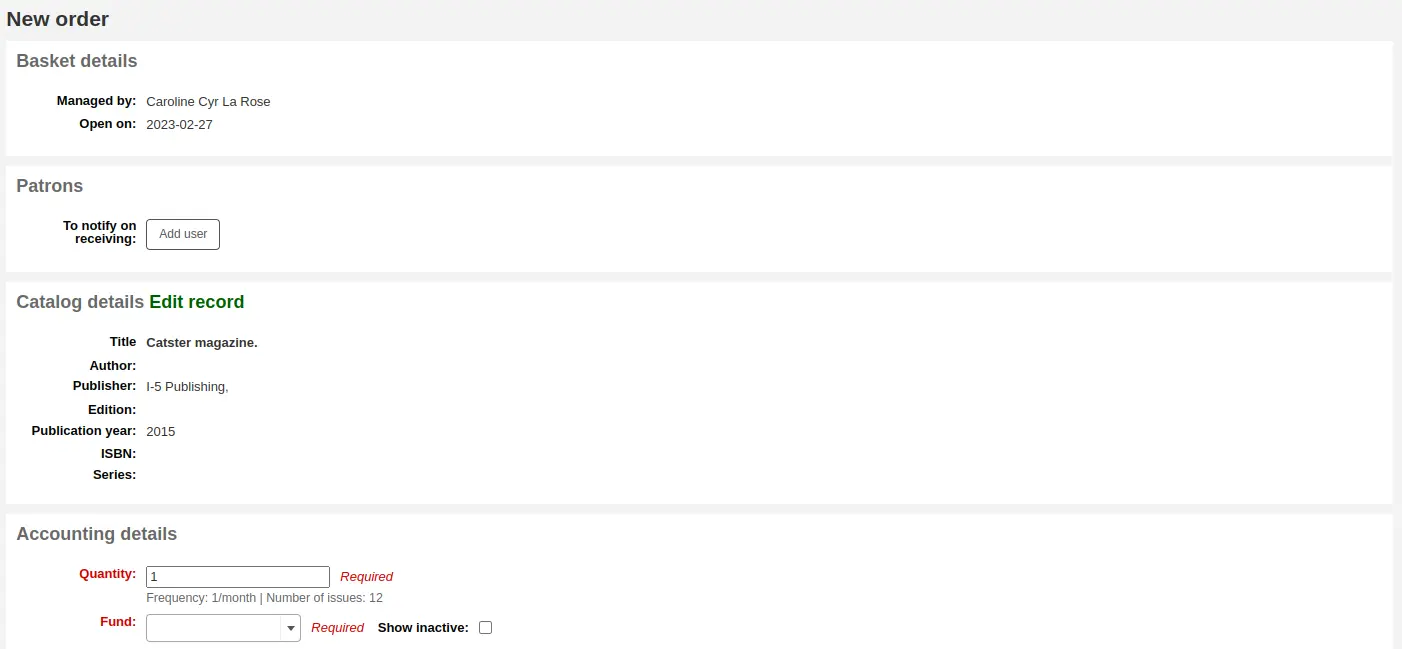
Cliquer sur “Commander” basculera les informations de l’abonnement sur le formulaire de commande sans la partie “Ajouter un exemplaire”, puisque vous souscrivez à un abonnement et qu’un exemplaire n’est pas nécessaire
Commander à partir d’une nouvelle notice (vide)
Pour commander à partir d’une notice qui ne peut être trouvée nulle part ailleurs, choisissez l’option “Depuis une nouvelle notice (vide)”.
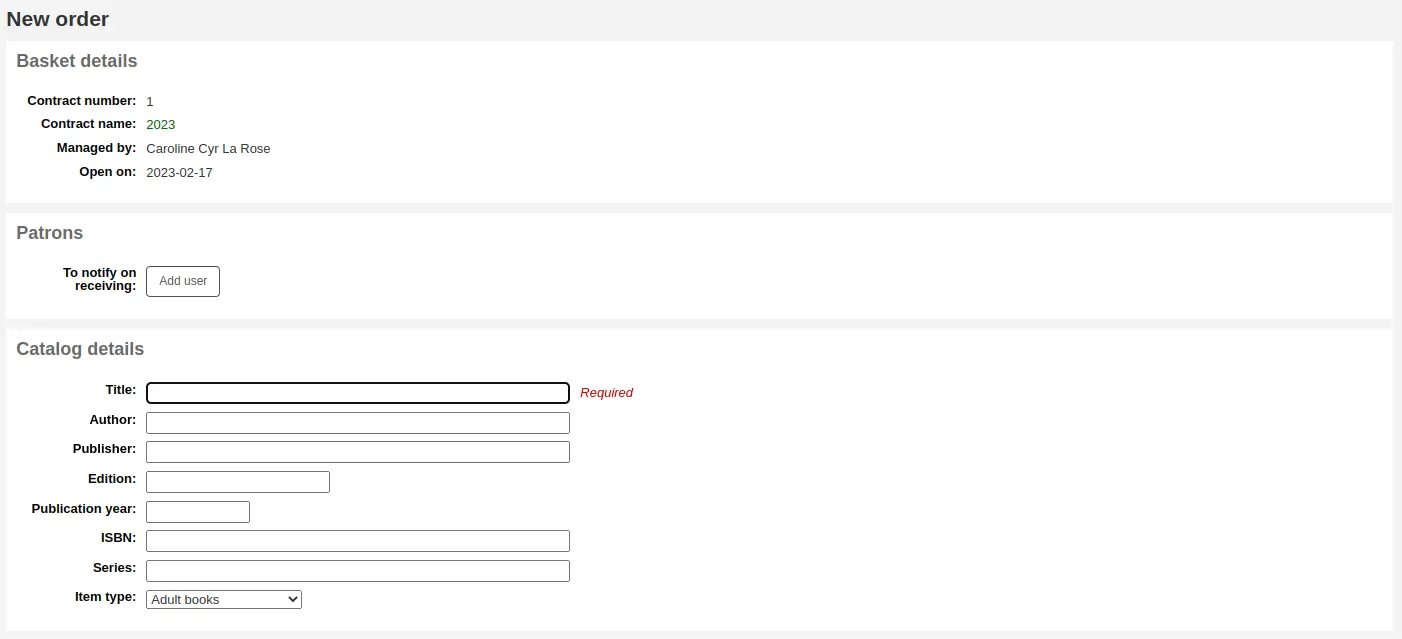
Vous serez amené à un formulaire vide à remplir avec toutes les informations sur l’exemplaire que vous commandez.
Note
Si le formulaire par défaut n’a pas les champs bibliographiques nécessaires pour passer une commande, activez la préférence UseACQFrameworkForBiblioRecords qui permettra à la grille MARC ACQ de personnaliser l’affichage des champs lors de la commande.
Dupliquer des commandes (commander à partir de commandes existantes)
Vous pouvez dupliquer une ligne de commande existante en choisissant l’option “A partir d’une commande existante (copie)”.
Vous serez amené à un formulaire de recherche pour rechercher parmi vos commandes existantes.
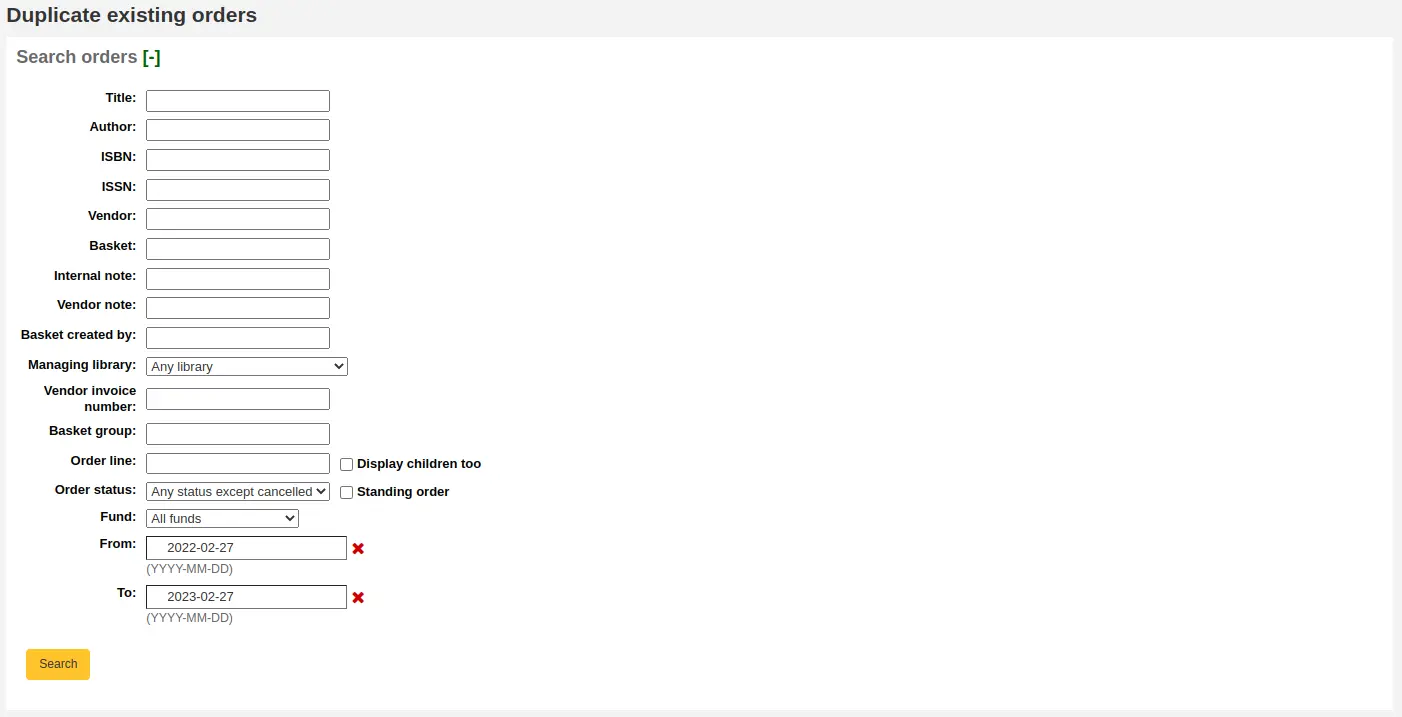
Cochez les cases à côté de la ou des commande(s) que vous voulez dupliquer.
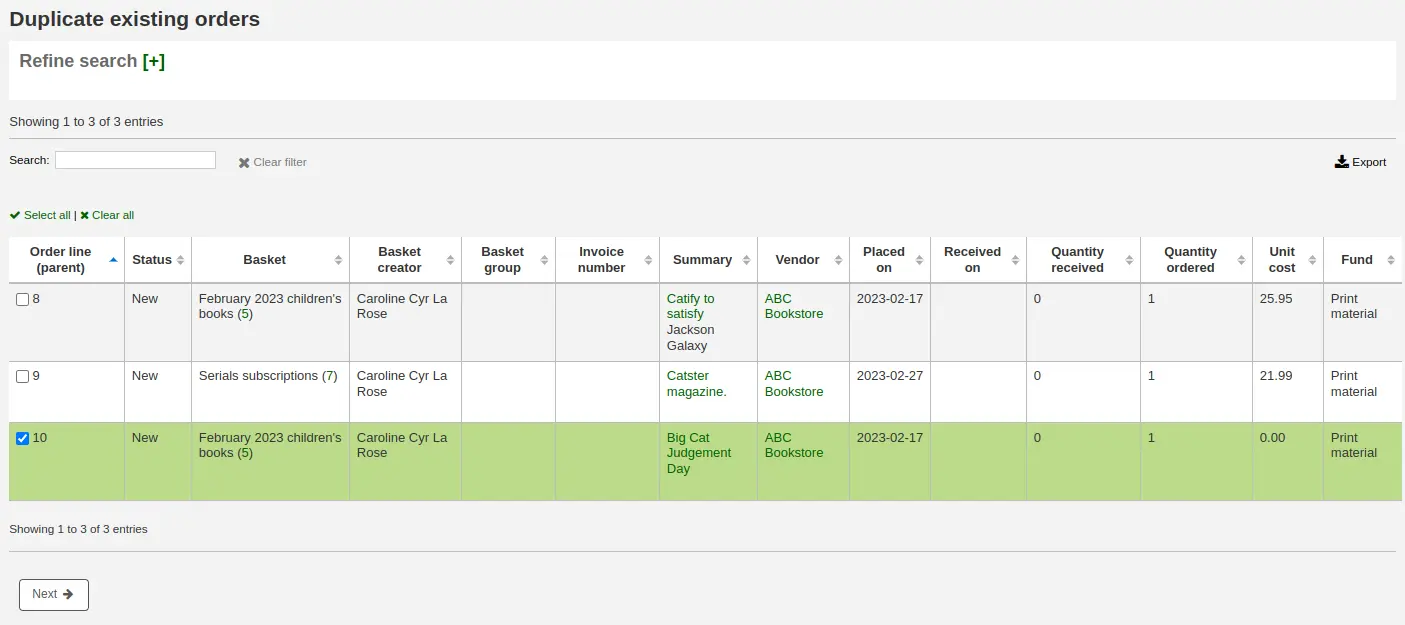
Cliquez sur “Suivant”
Cochez les cases à côté des valeurs pour copier depuis la commande originale ou choisissez de nouvelles valeurs.
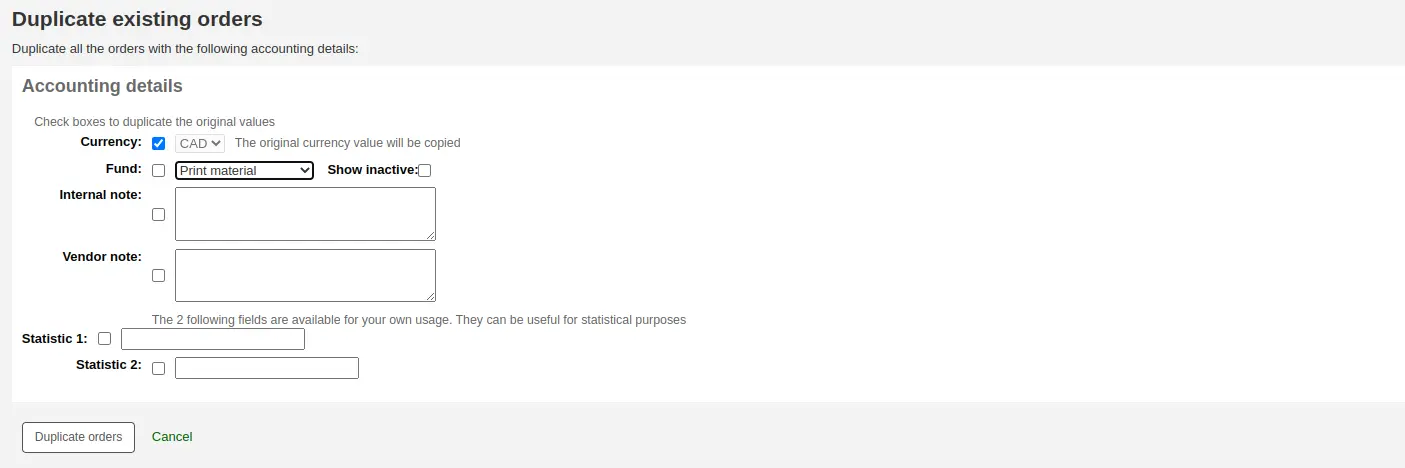
Cliquez sur “Dupliquer des commandes”

Cliquez sur “Retour au panier”
Commander à partir d’une source externe
Vous pouvez chercher dans d’autres catalogues de bibliothèques la notice d’un titre à acheter en utilisant l’option “À partir d’une source externe”. Ceci vous permettra de créer une commande à partir d’une notice MARC trouvée via une recherche Z39.50.
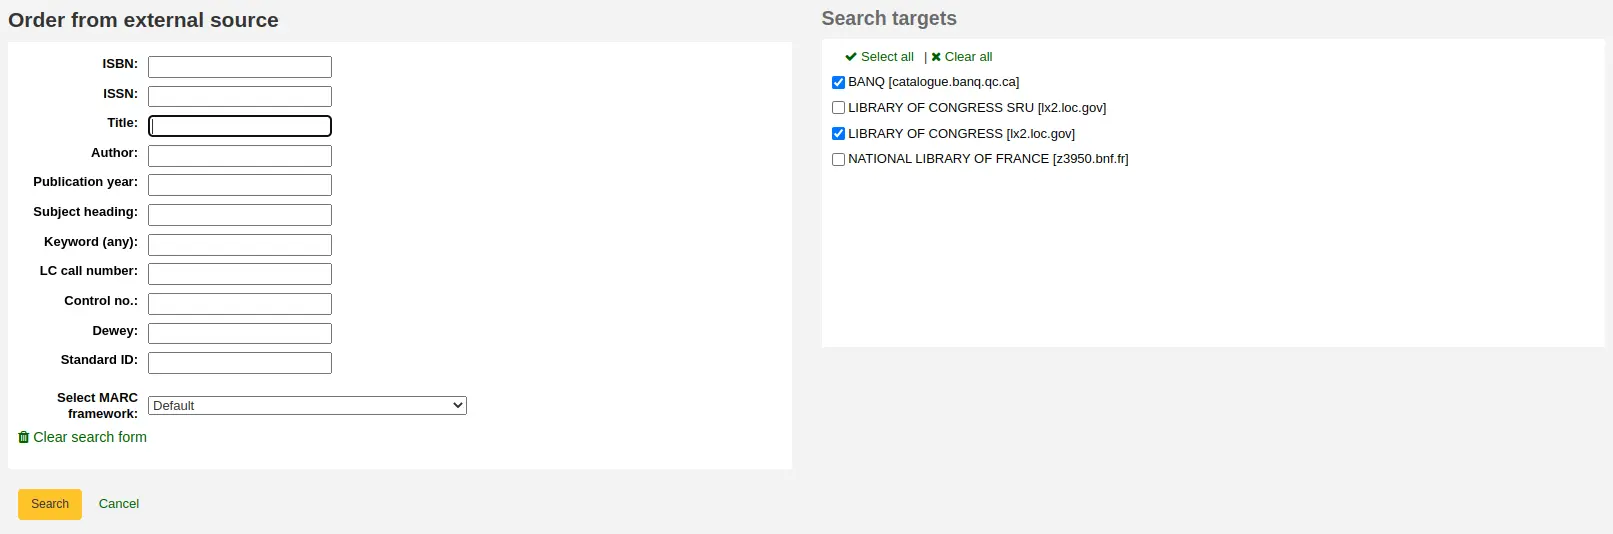
A partir des résultats, cliquez n’importe où dans la ligne du titre que vous voulez ajouter à votre panier et choisissez l’option “Commander”.
Si le document que vous commandez depuis une source externe ressemble à un doublon, Koha vous en avertira et vous donnera différentes façons de procéder.

Utiliser une notice existante : commander un autre exemplaire d’une notice bibliographique existante
Annuler et retourner à la commande : annuler la commande
Créer une nouvelle notice : créer une nouvelle notice bibliographique, tout en gardant aussi la notice existante
Commander à partir d’un nouveau fichier
Si votre fournisseur vous a fourni un fichier de notices (un fichier .mrc par exemple), vous pouvez ajouter des commandes en utilisant les notices de ce fichier. Choisissez l’option “A partir d’un nouveau fichier”.
Note
Les membres du personnel doivent avoir la permission stage_marc_import (ou la permission superbibliothécaire) en complément de la permission order_manage pour créer des commandes depuis un nouveau fichier.
Rendez-vous sur le module Catalogage pour télécharger des notices dans le réservoir. Préparez votre fichier comme décrit dans cette partie.
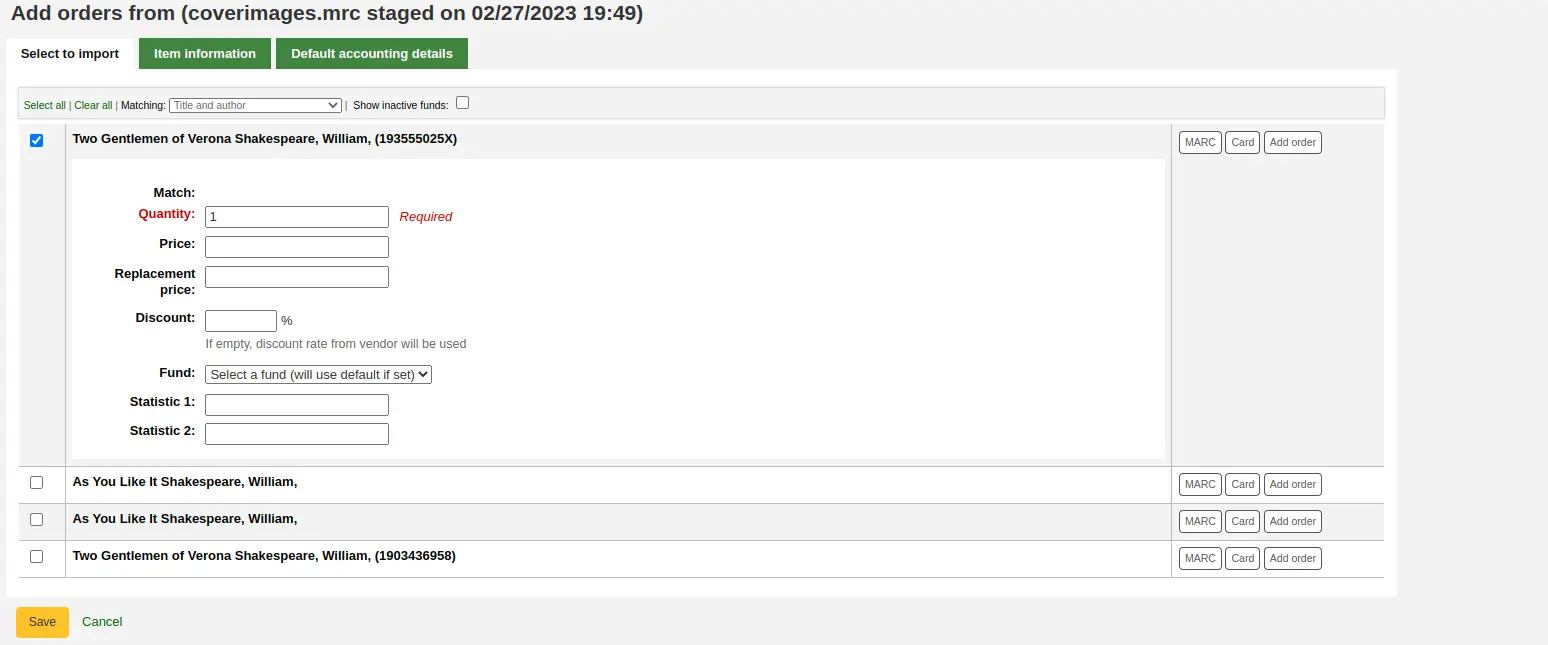
Une fois les fichiers importés, vous pouvez cliquer sur le bouton “Ajouter au panier des notices importées dans le réservoir”.

A côté de chaque titre, il y a une case à cocher. Cochez les titres que vous souhaitez commander, ou choisissez “Tout sélectionner” en haut. Selon les paramètres définis dans la préférence système MarcFieldsToOrder, Koha remplira la page suivante avec les quantités, prix, poste budgétaire, Statistique 1 et Statistique 2 appropriés, trouvés dans le fichier sélectionné.
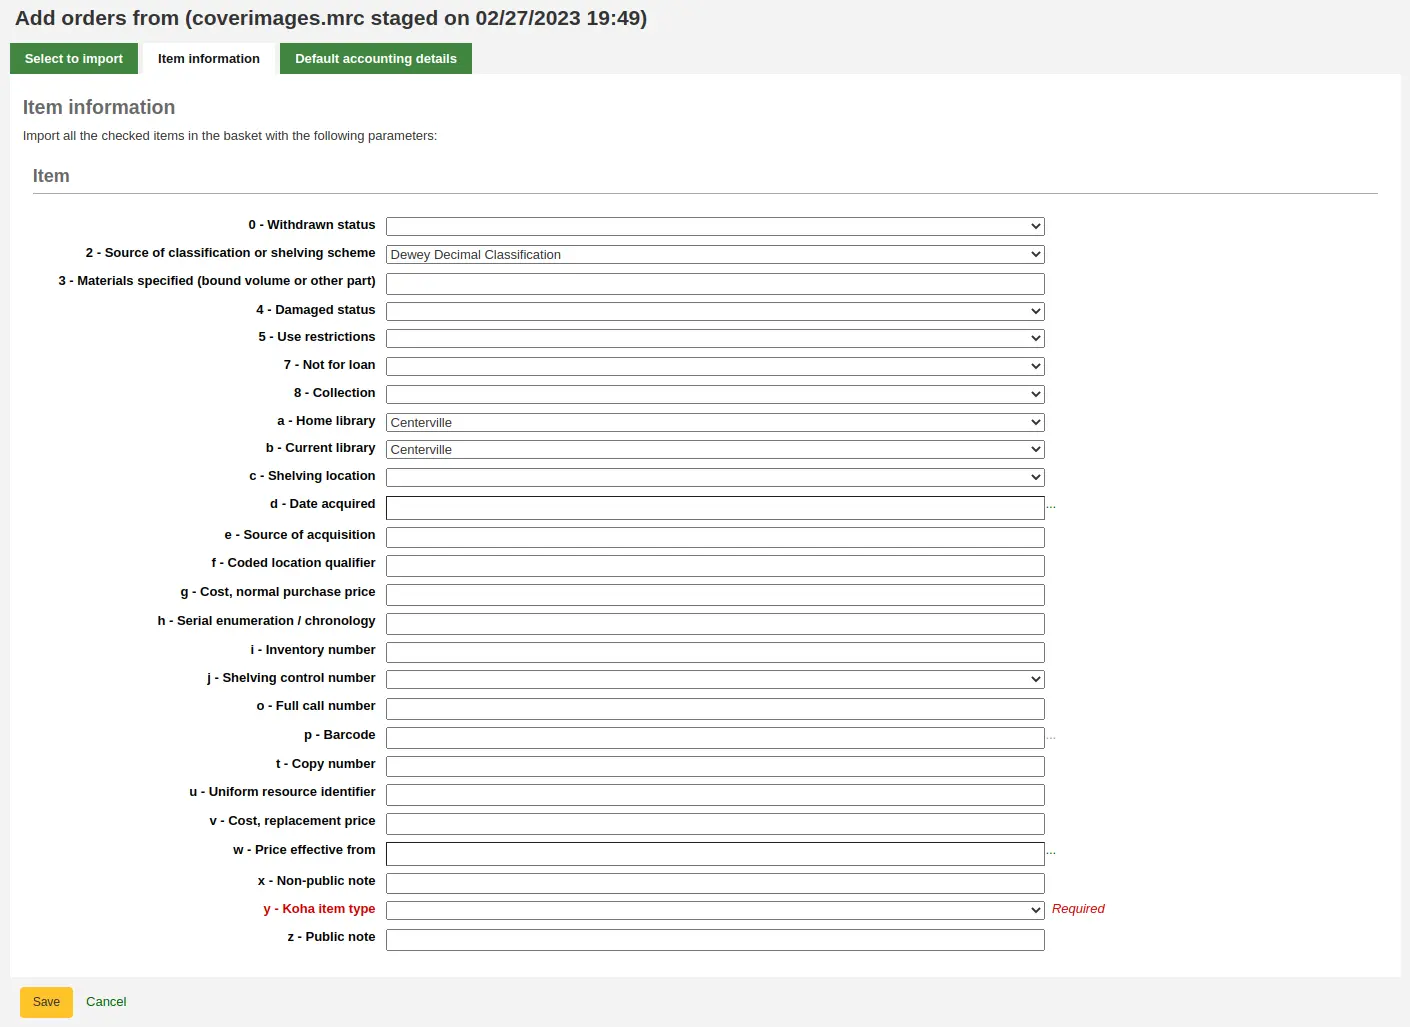
Dans l’onglet “données d’exemplaire” vous pouvez saisir des informations qui seront ajoutées à chaque exemplaire commandé telles que le type de document, le code de collection et le statut de prêt.
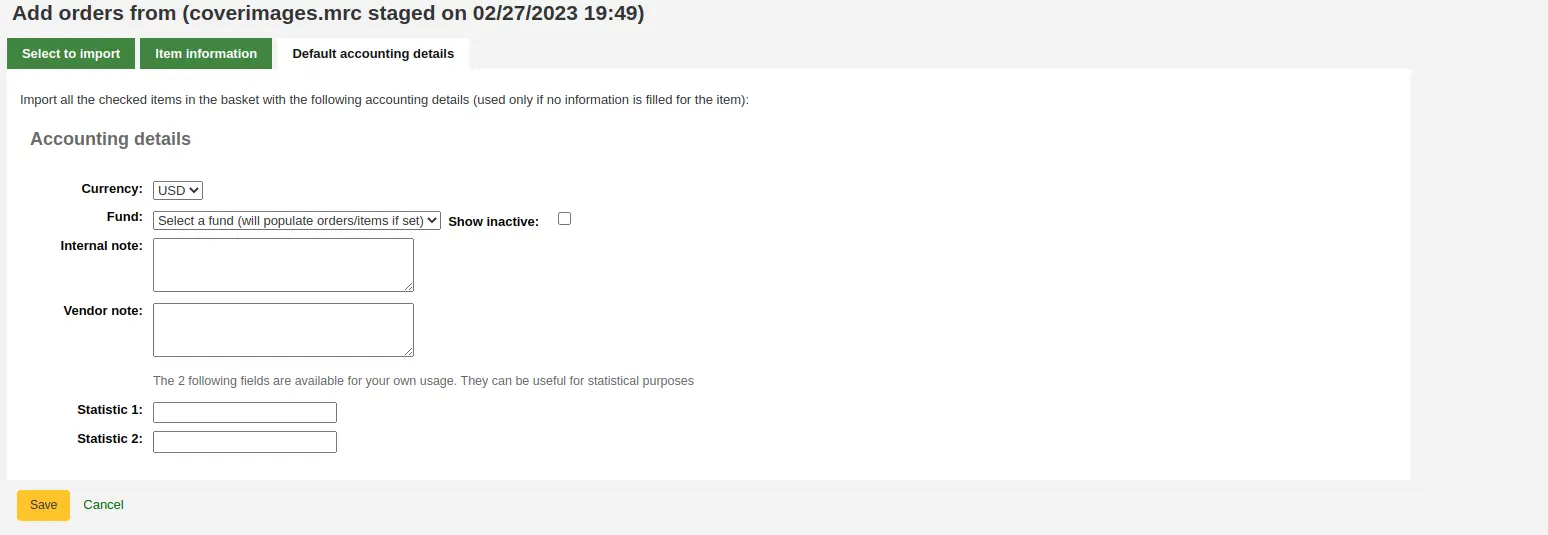
Si aucune information n’est importée concernant le poste budgétaire depuis la notice MARC grâce à la préférence système MarcFieldsToOrder, on peut utiliser l’onglet “Détails financiers par défaut” pour appliquer des valeurs liées aux informations budgétaires.
Cliquez sur “Enregistrer” pour ajouter au panier
Créer une commande à partir d’un fichier téléchargé
Cette option est la même que la précédente, mais dans ce cas, votre fichier a déjà été téléchargé. Le choix entre “commande à partir d’un nouveau fichier” et “commande à partir d’un fichier téléchargé” dépend de votre processus d’acquisition ou de vos permissions.
Une fois que vous aurez cliqué sur “A partir d’un fichier téléchargé”, vous obtiendrez une liste de tous les fichiers téléchargés dans votre système.
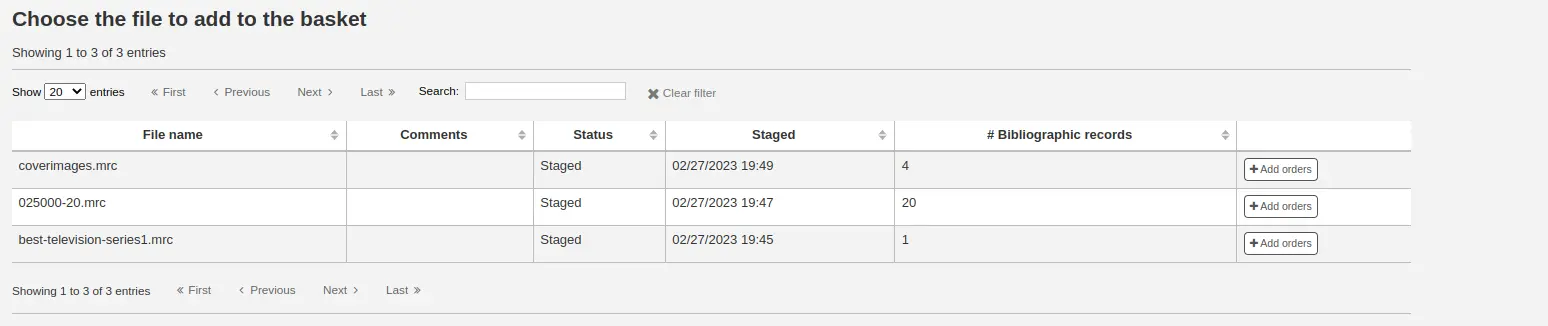
Dans la liste des fichiers qui s’affiche, cliquez sur le bouton “Ajouter des lignes de commande” pour ajouter les notices téléchargées à votre commande.
A côté de chaque titre, il y a une case à cocher. Cochez les titres que vous souhaitez commander, ou choisissez “Tout sélectionner” en haut. Selon les paramètres définis dans la préférence système MarcFieldsToOrder, Koha remplira la page suivante avec les quantités, prix, poste budgétaire, Statistique 1 et Statistique 2 appropriés, trouvés dans le fichier sélectionné.
Dans l’onglet “données d’exemplaire” vous pouvez saisir des informations qui seront ajoutées à chaque exemplaire commandé telles que le type de document, le code de collection et le statut de prêt.
Si aucune information n’est importée concernant le poste budgétaire depuis la notice MARC grâce à la préférence système MarcFieldsToOrder, on peut utiliser l’onglet “Détails financiers par défaut” pour appliquer des valeurs liées aux informations budgétaires.
Cliquez sur “Enregistrer” pour ajouter au panier
Classer à partir des titres ayant les plus forts taux de réservation
La dernière option pour commander est de le faire à partir d’une liste de titres avec les plus hauts ratios de réservation.
Note
Les membres du personnel doivent avoir la permission circulate_remaining_permissions (ou la permission superbibliothécaire) en complément de la permission order_manage pour créer des commandes à partir des titres fortement réservés.
Cette option vous basculera sur le rapport Ratios de réservations où vous pourrez trouver les documents avec un haut ratio de réservations et commander des exemplaires supplémentaires. Un lien avec le nombre d’exemplaires à commander se trouvera à côté de chaque titre, cliquez dessus et l’exemplaire s’ajoutera dans votre panier.

Paramétrer les notifications adhérent
Avec n’importe laquelle des options de commande ci-dessus vous vous retrouvez avec une option pour avertir les adhérents d’unn nouvel exemplaire dès sa réception. Le contenu de cette notification peut être modifié dans l’outil Notifications & tickets et aura le code ACQ_NOTIF_ON_RECEIV. Dans la section “Adhérents” vous verrez une option “Ajouter l’utilisateur”. Cliquez sur ce bouton pour ajouter les adhérents qui seront avertis du nouvel exemplaire.
Recherche de notification adhérent
Dans la fenêtre qui s’ouvre, recherchez les adhérents auxquels vous voulez envoyer des notifications et cliquez sur “Sélectionner”
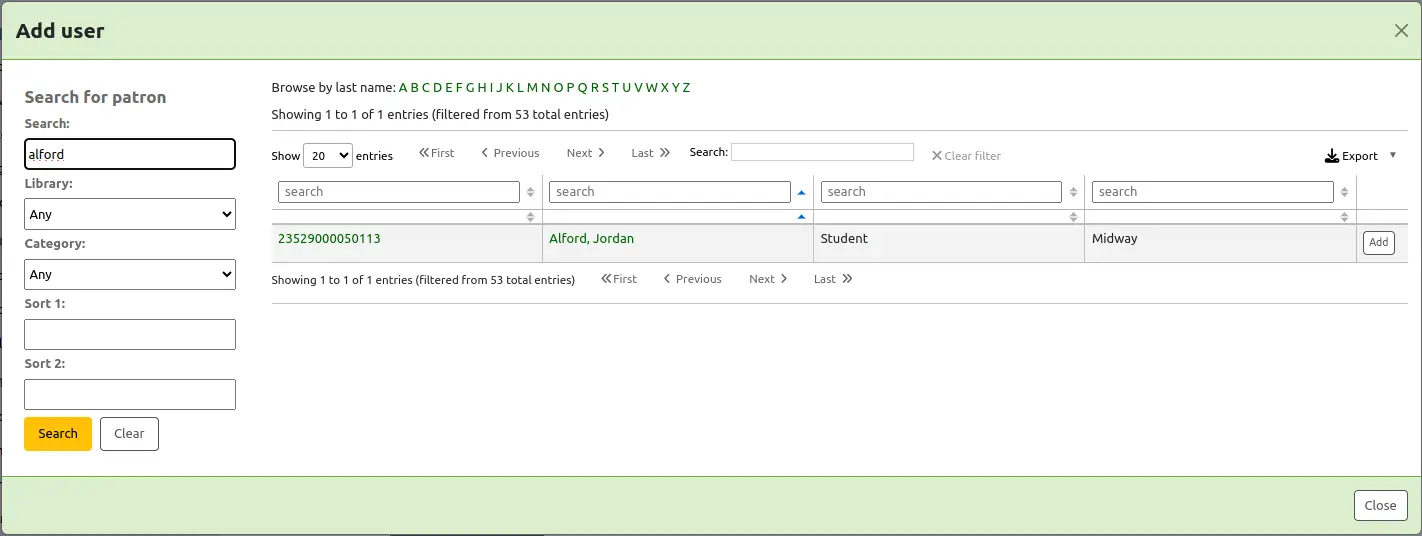
Lorsque vous avez terminé vous pouvez fermer la fenêtre et vous verrez s’afficher la liste des adhérents en dessous de la section “Adhérent”

Ajouter des exemplaires aux commandes
Après avoir ajouté les informations bibliographiques (pour toutes les méthodes de commandes sauf à partir de fichiers téléchargés), si votre préférence système AcqCreateItem est configurée sur “Créer un exemplaire au moment de faire une commande”, vous devrez ensuite saisir les données d’exemplaire. Vous devez remplir au moins une notice d’exemplaire puis cliquer sur le bouton “Ajouter un exemplaire” en dessous à gauche du formulaire.
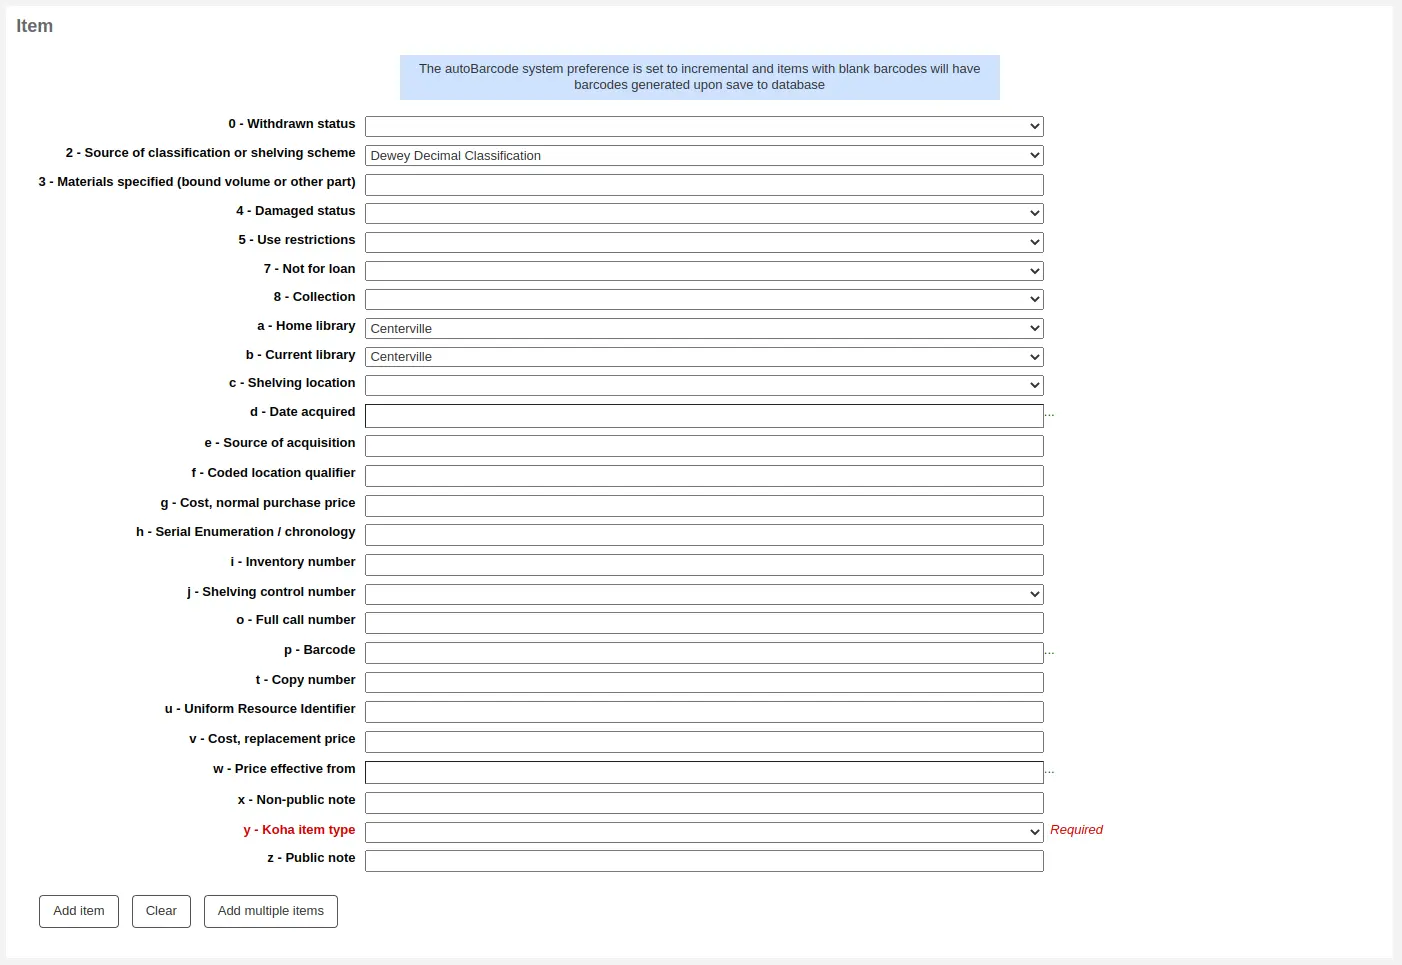
Après avoir cliqué sur le bouton “Ajouter un exemplaire”, l’exemplaire apparaîtra au-dessus du formulaire. Vous pouvez alors ajouter un exemplaire supplémentaire de la même façon (si vous commandez plus d’un exemplaire).

Si vous commandez plusieurs exemplaires, vous pouvez cliquer sur “Ajouter des exemplaires multiples” au lieu de les ajouter un par un. Vous devrez indiquer combien d’exemplaires vous voulez ajouter. Entrez simplement ce nombre dans la case et cliquez sur “Ajouter”.

Ajouter des détails financiers aux commandes
Une fois que vous avez saisi les données de l’exemplaire, vous devez saisir les données comptables.
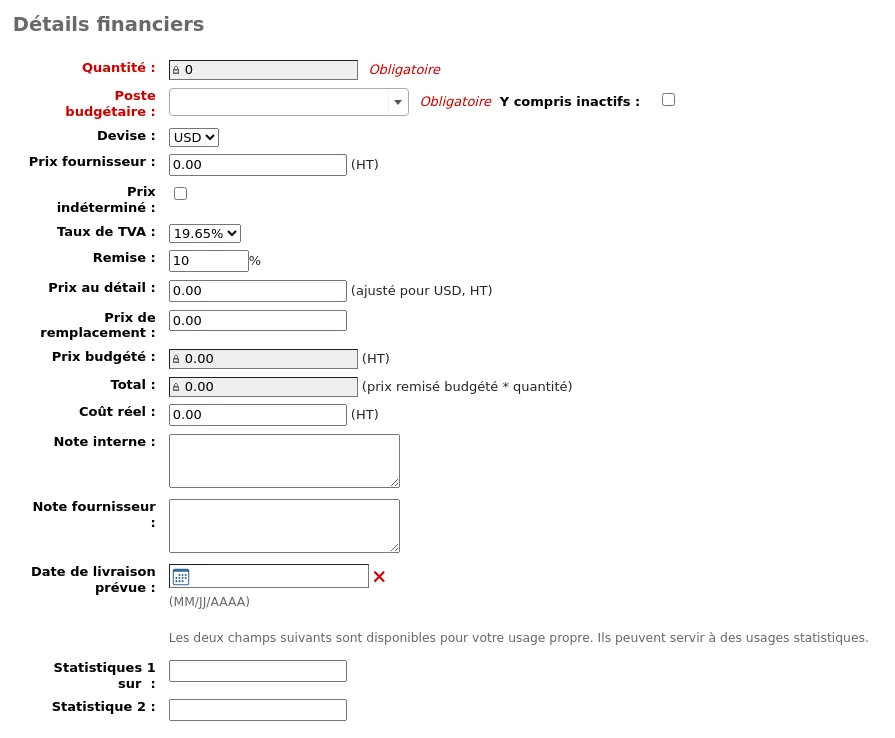
Quantité : saisissez la quantité d’exemplaires que vous voulez commander.
Avertissement
Si l’exemplaire est créé à partir d’une commande, vous ne pourrez pas modifier la quantité manuellement. Vous devez ajouter des exemplaires à la commande en cliquant sur le bouton “Ajouter” situé en bas du formulaire pour ajouter autant d’exemplaires que vous souhaitez commander.
Poste budgétaire : choisissez le poste budgétaire qui sera utilisé pour acheter ce titre.
La liste des postes budgétaires est alimentée par les postes budgétaires que vous avez créés dans la rubrique Administration du module Acquisitions.
Si vous avez de nombreux fonds budgétaires, vous pouvez commencer à saisir le nom du fond dans le champ et la liste sera filtrée.
Par défaut, seuls les fonds de budgets actifs seront disponibles dans le menu déroulant. Si vous devez visualiser aussi les fonds inacifs, cochez “Y compris Inactifs”.
Devise : choisissez la devise du prix.
Le menu déroulant des devises indiquera les monnaies que vous avez configurées dans la section Acquisitions de l’Administration.
Prix fournisseur : saisissez le prix avant que les taxes ou les remises soient appliquées.
Prix indéterminés : si le prix est indéterminé, cochez la case prix indéterminé. Vous pourrez revenir en arrière plus tard pour saisir le bon prix.
Note
Un panier avec au moins un prix incertain ne peut pas être fermé.
Voir la section Gérer les prix indéterminés ci-dessous pour apprendre comment gérer les prix indéterminés.
Taux de TVA : si vous devez payer des taxes, choisissez le taux.
Ce champ est renseigné par la préférence système TaxRates.
Remise : saisissez le taux de remise pour cette commande. Une fois cette donnée saisie, pressez la touche “Tab” pour que Koha remplisse automatiquement les champs de prix figurant en dessous.
Prix de vente : saisissez le prix public recommandé (RRP), le prix fixé par l’éditeur ou l’imprimeur comme recommandation pour les librairies.
Coût de remplacement : saisissez le prix qu’il en coûtera de faire remplacer l’exemplaire. C’est le prix à faire payer à l’adhérent quand un exemplaire est déclaré perdu (si la préférence système WhenLostChargeReplacementFee est paramétrée sur “Faire payer”).
Le prix budgété est le montant qui sera retiré dans la colonne “dépensée” du tableau des budgets. Le fait que ce prix soit TTC ou HT dépend du paramètre “Prix catalogue” de votre fournisseur.
Le total est le coût budgété multiplié par le nombre d’exemplaires commandés.
Coût réel : ce champ est habituellement laissé vide jusqu’à réception, quand vous pouvez confirmer le coût réel indiqué sur le ticket ou la facture du fournisseur.
Note interne : elle apparaîtra uniquement dans le module Acquisitions et dans l’interface professionnelle du catalogue, dans l’onglet “Détails sur l’acquisition” de la notice détaillée.
Note fournisseur : elle apparaîtra dans le module Acquisitions ainsi que sur la commande quand elle est exportée en CSV.
Date de livraison estimée : vous pouvez spécifier une date estimée de livraison pour cette commande spécifique. Si aucune date n’est saisie, la date de livraison estimée sera calculée en fonction du “Délai de livraison” des Informations Vendeurs. Cette date est utilisée pour gérer les commandes en retard
Si vous avez ajouté des catégories statistiques lors de la création du poste budgétaire, ces valeurs apparaissent dans les deux champs statistiques.
Si vous avez des champs supplémentaires pour les lignes de commande, ils apparaîtront ici.
Une fois tous les champs remplis, cliquez sur “Enregistrer” pour ajouter l’exemplaire dans votre panier. Si le prix dépasse le montant disponible dans le poste budgétaire, un message de demande de confirmation s’affichera.

L’alerte de confirmation vous autorisera à passer commande, une fois dépassé votre fond budgétaire, si vous le souhaitez.
Une fois votre commande ajoutée, vous pouvez la rechercher dans le module Acquisitions ou voir les informations la concernant dans la page de détail de la notice bibliographique sur l’interface professionnelle, si la préférence système AcquisitionDetails est paramétrée sur “Afficher”, ou voir dans la page de détail de la notice bibliographique à l’OPAC, si la préférence système OPACAcquisitionDetails est paramétrée sur “Afficher”.

Note
Vous pouvez personnaliser les colonnes de ce tableau dans la section Configurer les colonnes du module Administration (référence du tableau : acquisitionsdetails-table).
Modifier le panier
Note
Les membres du personnel doivent avoir la permission order_manage (ou la permission superbibliothécaire) pour éditer des paniers existants.
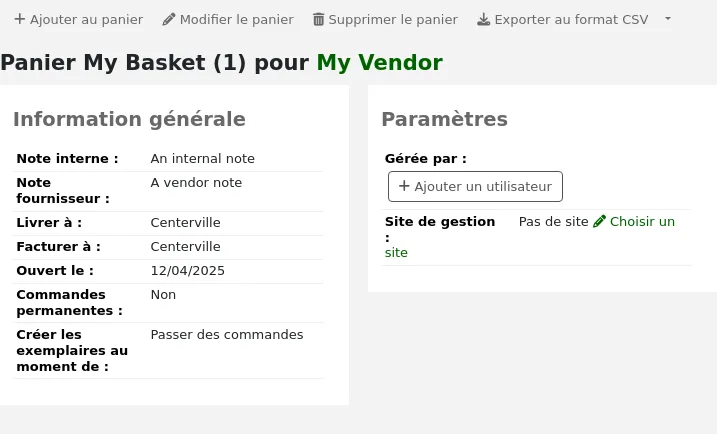
Après avoir ajouté l’exemplaire au panier, un résumé du panier s’affichera.

Note
Vous pouvez personnaliser les colonnes de ce tableau dans la section Configurer les colonnes du module Administration (référence du tableau : orders).
A partir du panier, vous pouvez modifier ou supprimer les exemplaires que vous avez ajoutés.
Choisir de “Modifier” la commande vous renverra vers le formulaire de commande au cas où vous souhaiteriez modifier les détails comptables ou les documents.
Choisir de “Transférer” la commande vous permettra de déplacer cette commande du panier d’un fournisseur vers le panier d’un fournisseur différent.
Note
Le nouveau fournisseur doit avoir au moins un panier en cours pour que vous puissiez transférer la commande.
Choisir de “Réserver” vous permettra de placer une réservation sur cette commande pour un adhérent.
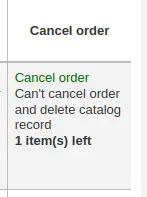
Choisir “Supprimer la commande” supprimera la ligne de commande mais laissera la notice correspondante dans le catalogue.
Choisir “Supprimer la commande et la notice” supprime à la fois la ligne de commande et la notice correspondante du catalogue.
La notice peut ne pas être effacée. Vous pouvez voir des précisions expliquant pourquoi.
Note
Si la commande a été créée à partir d’une suggestion, le statut de la suggestion repassera de “Commandée” à “Acceptée” si la commande est annulée.
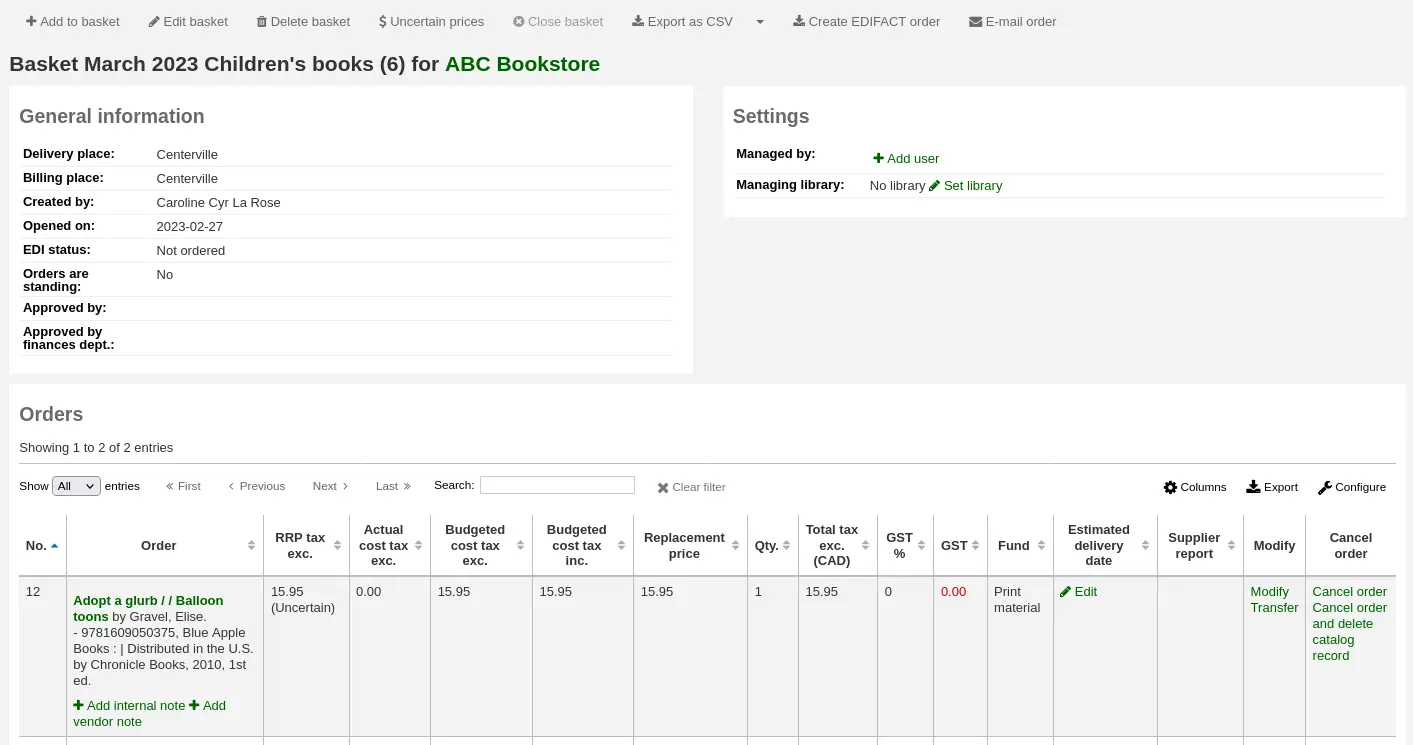
Sur la page de résumé, vous avez également accès aux différentes options via les boutons en haut de l’en-tête du panier.

Ajouter au panier ajouter des commandes au panier
Modifier le panier : modifier les informations du panier, telles que le nom ou l’adresse de facturation.
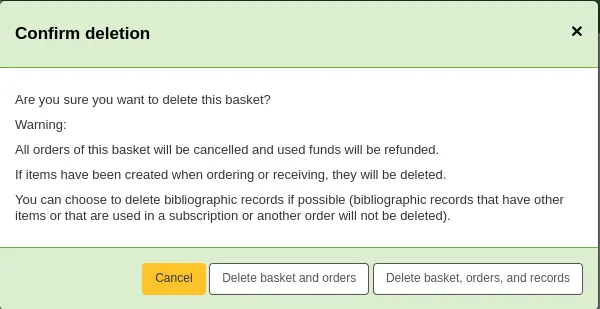
Supprimer le panier : si le panier est vide, vous aurez un simple message de confirmation avant de supprimer le panier. Si le panier contient des commandes, vous aurez un message de confirmation avec plusieurs options.
Supprimer le panier et les commandes : cela supprimera le panier, annulera les commandes, recréditera le budget, et supprimera les documents (commandés ou reçus).
Supprimer le panier, les commandes et les notices : en plus de ce qui était supprimé précédemment, seront supprimées les notices bibliographiques associées aux commandes (exceptées celles qui ne peuvent pas être supprimées parce qu’elles ont des exemplaires, des commandes ou des abonnements rattachés).
Fermer ce panier : fermer le panier vous permettra de l’ajouter à un groupe de paniers (ceci est facultatif) et de réceptionner ses exemplaires.
Exporter en CSV : ceci créera un fichier CSV avec toutes les commandes de ce panier. Vous pouvez ajouter différents profils CSV en vous rendant sur l’Outil Profils CSV.
Créer une commande EDIFACT : si vous utilisez l’EDI pour vos commandes vous pouvez cliquez sur le bouton “Créer une commande EDIFACT” quand vous aurez fini, pour envoyer votre fichier directement au fournisseur et ainsi fermer le panier.
Commande par courriel : ceci enverra les informations de la commande à votre contact chez ce fournisseur. Vérifiez que votre contact a bien un courriel dans son profil.
Note
La notification utilisée est basée sur le modèle de notification ACQORDER. Elle peut être modifiée dans l’outil Notifications et tickets.
Commander (fermer le panier)
Note
Les membres du personnel doivent avoir la permission order_manage (ou la permission superbibliothécaire) pour fermer des paniers existants.
Quand vous êtes sûr que votre panier est complet, vous pouvez cliquer sur le bouton “Fermer le panier” pour indiquer que le panier est complet et qu’il a été envoyé au fournisseur.
Avertissement
Vous devez fermer le panier pour pouvoir réceptionner les documents quand il arrivent. Seuls les exemplaires des paniers fermés s’afficheront comme prêts à être réceptionnés.
Si votre préférence système BasketConfirmations est paramétrée pour demander une confirmation, il vous sera demandé si vous êtes sûr de vouloir fermer le panier.
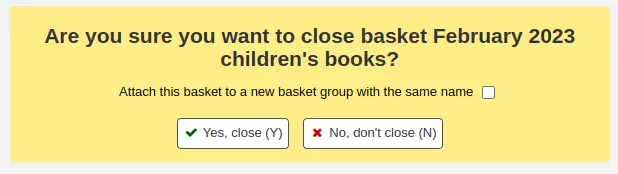
Lorsque vous fermez le panier, vous pouvez choisir d’ajouter celui-ci à un groupe pour en faciliter l’impression et la récupération. Si vous cochez la case “Attacher ce panier à un nouveau bordereau avec le même nom” vous serez basculé sur la liste des groupes où vous pourrez exporter un fichier PDF de la commande.
Avertissement
Un panier avec au moins un exemplaire marqué “prix indéterminé” ne pourra pas être fermé.
Voir la section Gérer les prix indéterminés ci-dessous pour apprendre comment gérer les prix indéterminés.
Gérer les prix indéterminés
Avertissement
Un panier avec au moins un exemplaire marqué “prix indéterminé” ne pourra pas être fermé.
Cliquer sur le bouton “Prix indéterminés” affichera la liste de tous les exemplaires dont le prix n’est pas connu afin de les modifier rapidement. A partir de cette liste, vous pouvez modifier rapidement les exemplaires en saisissant de nouveaux prix et quantités.
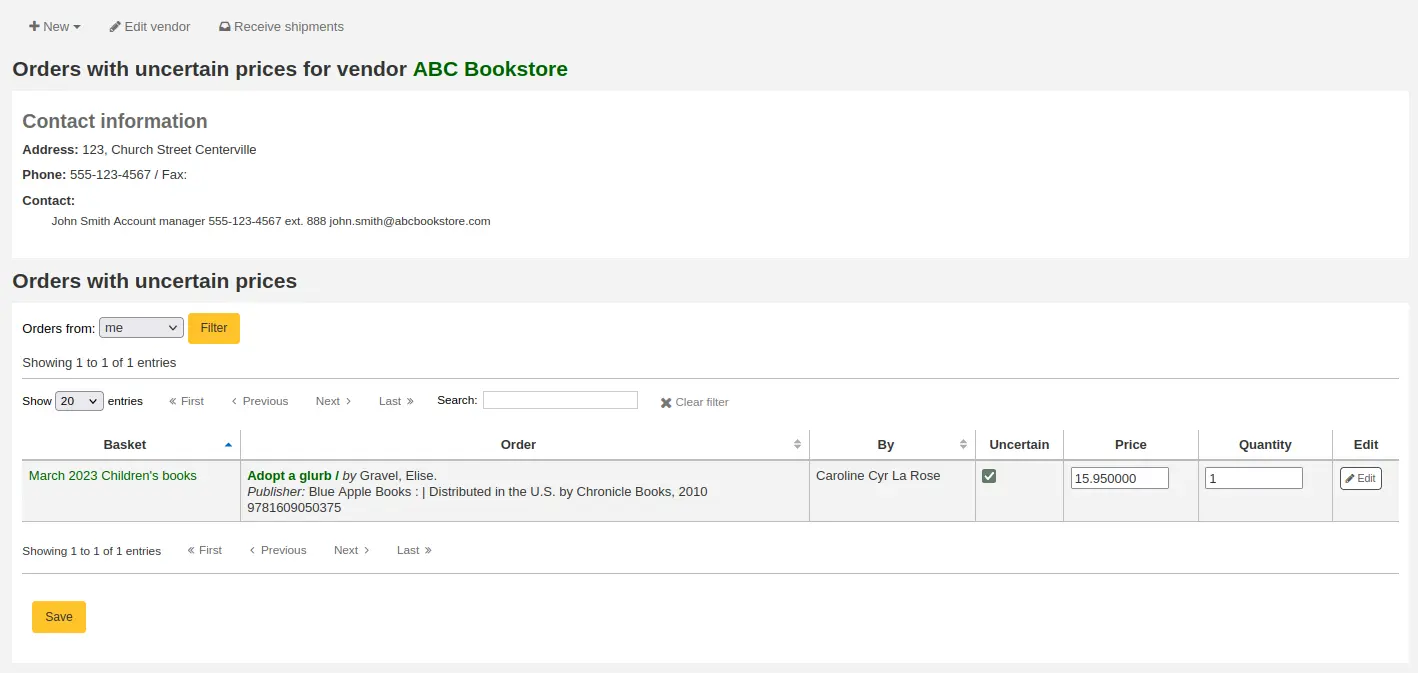
Note
La page Prix Incertains est indépendante du panier. Elle est liée au fournisseur ce qui permet de voir tous les exemplaires en commande qui ont un prix incertain pour ce fournisseur.
Ajouter un bordereau de commande
Un bordereau de commande est simplement un groupe de paniers. Dans certaines bibliothèques, plusieurs personnes sont en charge des paniers, et, à la fin d’une période donnée, un bibliothécaire les regroupe pour les transmettre au fournisseur en une seule fois. Ceci dit, il est toujours possible d’avoir un seul panier dans un bordereau, ou pas de bordereau du tout, si c’est le circuit habituel dans votre bibliothèque.
Note
Les membres du personnel doivent avoir la permission group_manage (ou la permission superbibliothécaire) pour créer, modifier, fermer et supprimer des bordereaux de commandes.
Note
Vous ne pouvez pas réouvrir un panier qui est rattaché à un bordereau. Le bouton Réouvrir ce panier sera grisé.
Pour créer un bordereau, allez à la page Détail fournisseur et cliquez sur l’onglet “Bordereaux de commande” sur le côté gauche.
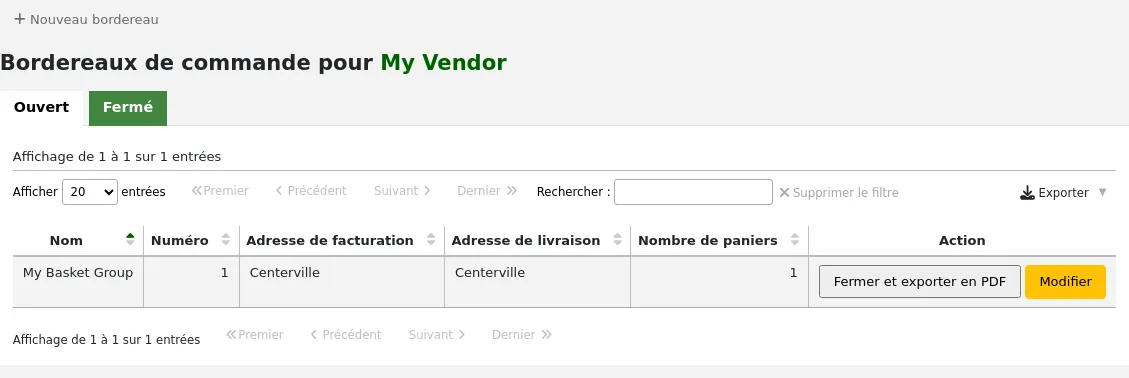
Cliquez sur le bouton “Nouveau bordereau”.

Nom du bordereau : c’est le nom que le bordereau aura dans Koha
Lieu de facturation : il s’agit de l’adresse de facturation qui apparaîtra sur le bordereau de commandes
Lieu de livraison : choisissez une bibliothèque où ces commandes devraient être envoyées, elle apparaîtra sur le bordereau de commande, sous la mention adresse de livraison. Vous pouvez aussi saisir une adresse différente
Commentaire pour la livraison : ce commentaire apparaîtra sur le bordereau de commande
Fermer le bordereau : si vous avez terminé ce bordereau et ne souhaitez plus le modifier, vous pouvez cocher cette case et le bordereau sera fermé et sauvegardé
Ajoutez des paniers au bordereau en cliquant sur le bouton “Ajouter au bordereau” à droite.
Cliquez sur “Enregistrer” pour finir de créer votre panier.
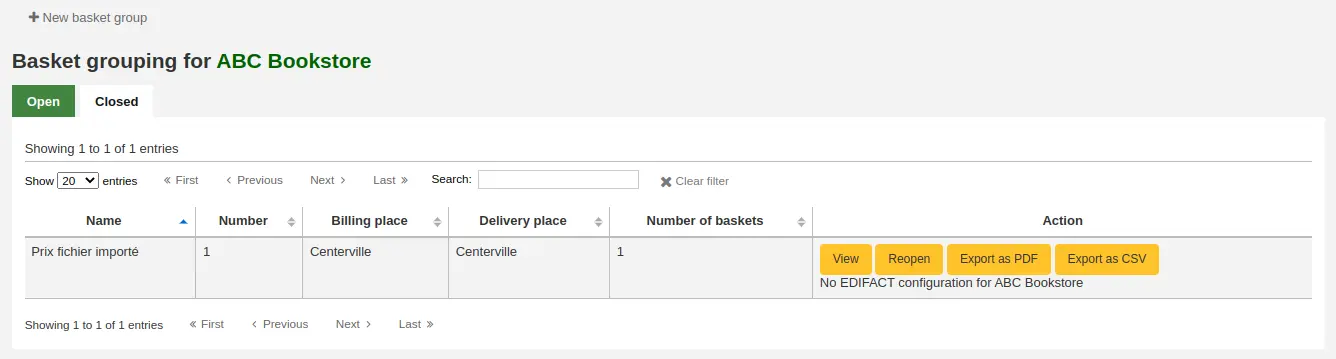
A cet endroit, vous pouvez exporter votre commande en PDF pour l’envoyer à votre fournisseur.
Note
Le contenu du fichier PDF n’est pas modifiable mais il est possible de changer sa langue et son formatage avec la préférence système OrderPdfFormat.
Le choix de l’option “English 1-Page” rend possible la personnalisation du texte au-dessus du tableau de commande avec la préférence système 1PageOrderPDFText.
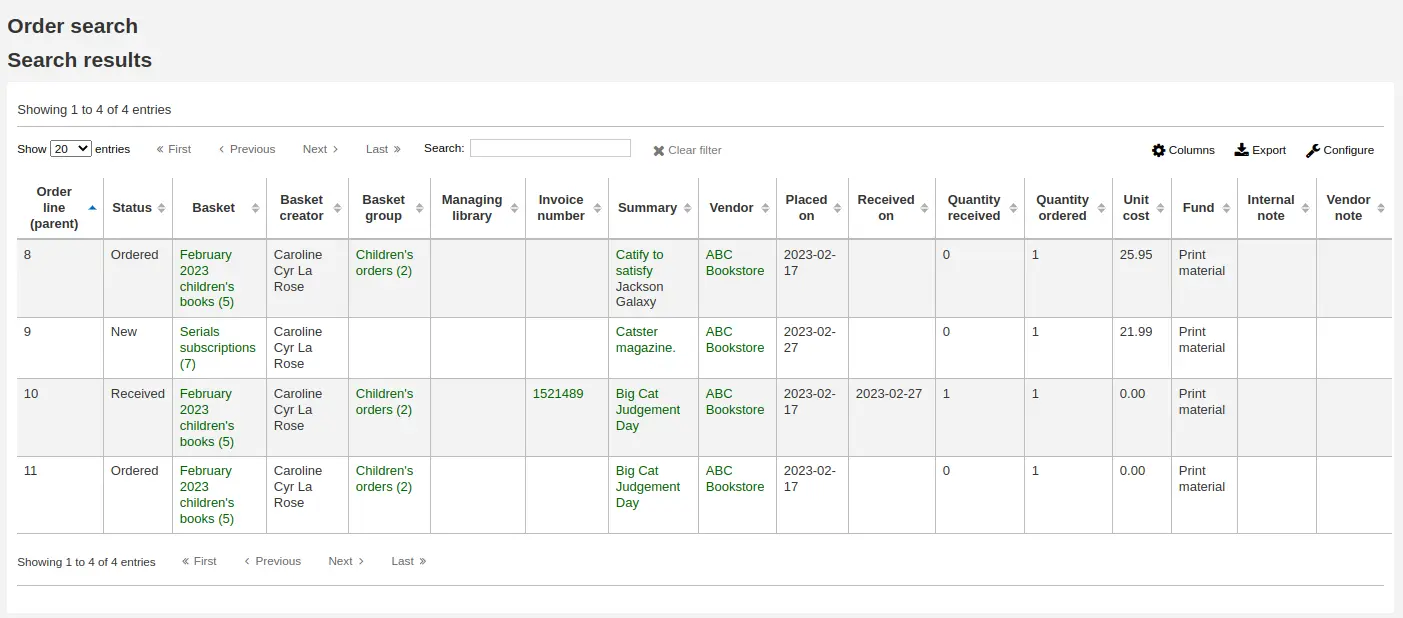
Rechercher des commandes
En haut de la plupart des pages du module Acquisitions, une barre de recherche rapide vous permet de faire une Recherche fournisseur ou une Recherche de commandes.
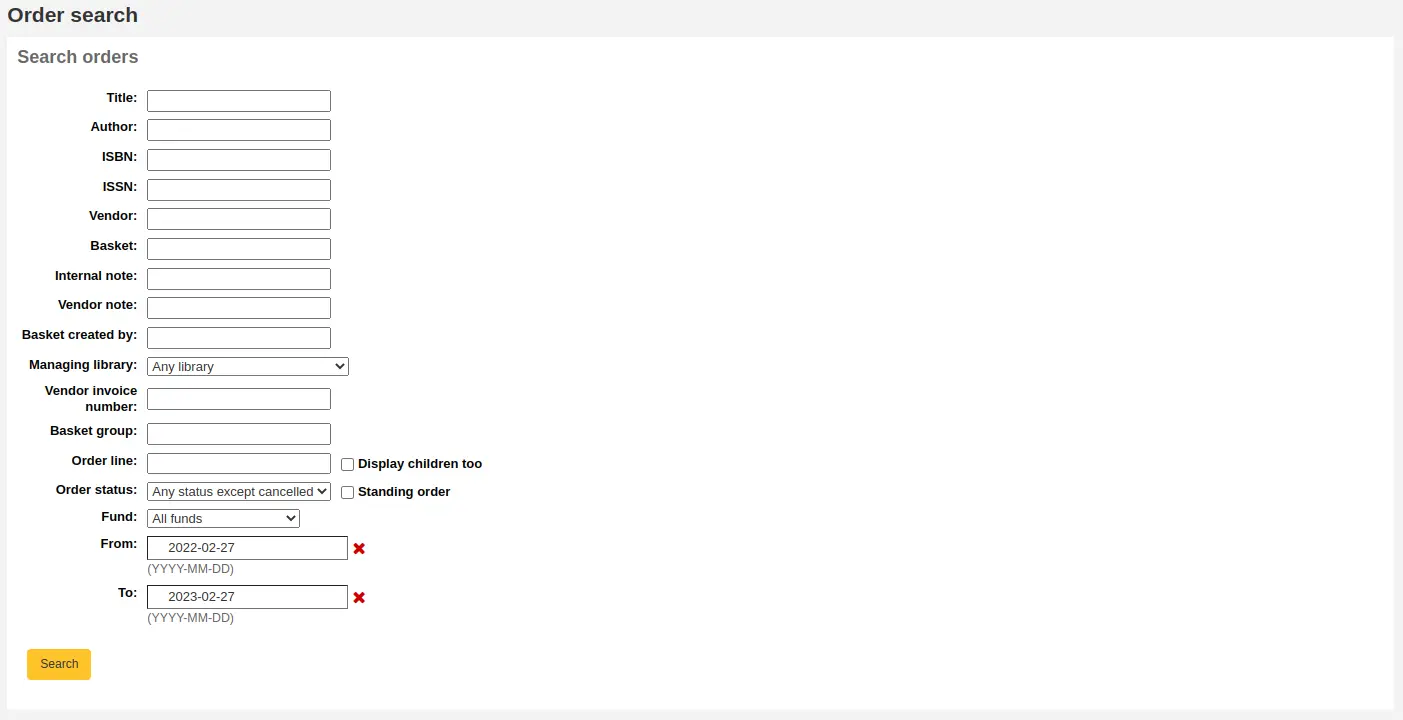
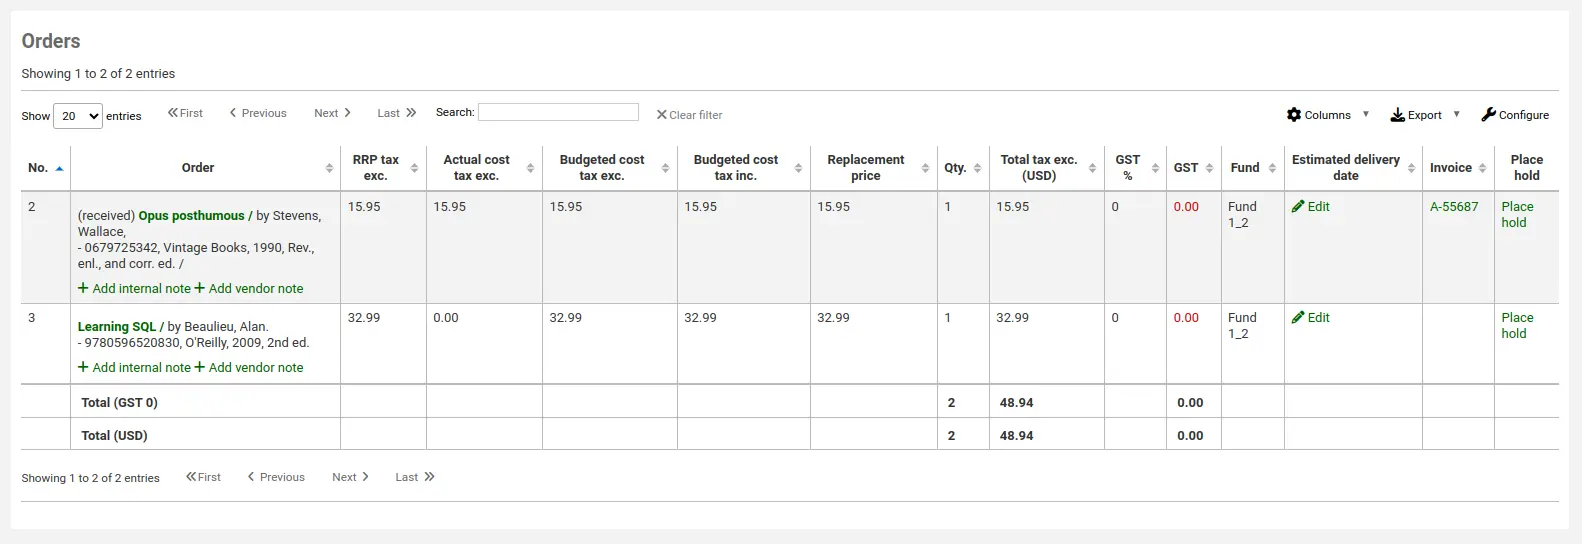
En utilisant la Recherche de commandes, vous pouvez chercher les exemplaires qui ont été commandés, par le titre ou le fournisseur.

Vous pouvez entrer des informations dans l’un ou l’autre champ et saisir n’importe quelle partie du titre ou du nom du fournisseur.
Note
Vous pouvez personnaliser les colonnes de ce tableau dans la section Configurer les colonnes du module Administration (référence du tableau : histsearcht).
Cliquez sur le bouton plus à droite de la barre de Recherche fournisseur pour afficher des options de recherche supplémentaires. Dans la recherche de paniers, vous pouvez saisir n’importe quelle partie du nom du panier ou de son numéro. Dans la recherche sur les numéros de factures, vous pouvez saisir une partie du numéro de facture.

Cliquer sur Recherche avancée à droite du bouton de recherche vous donnera toutes les options de recherche disponibles.
Réceptionner des commandes
Avertissement
Vous devez fermer le panier avant de pouvoir réceptionner les documents quand il arrivent. Seuls les exemplaires des paniers fermés s’afficheront comme prêts à être réceptionnés.
Note
Les membres du personnel doivent avoir la permission order_receive (ou la permission superbibliothécaire) pour réceptionner des commandes.
Les commandes peuvent être réceptionnées à partir de la page d’information du fournisseur
ou de la page de résultats de recherche fournisseur
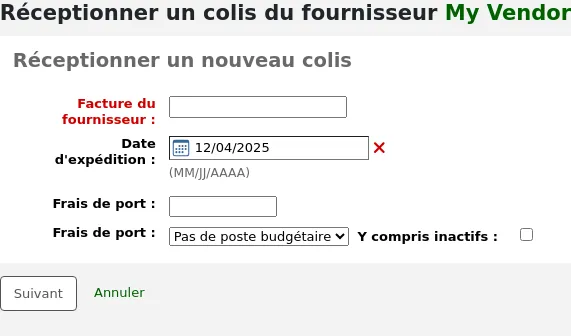
Après avoir cliqué sur “Réceptionner colis”, vous devrez saisir le numéro de facture attribué par le fournisseur, la date d’arrivée du colis, les frais d’expédition et le budget sur lequel les imputer.
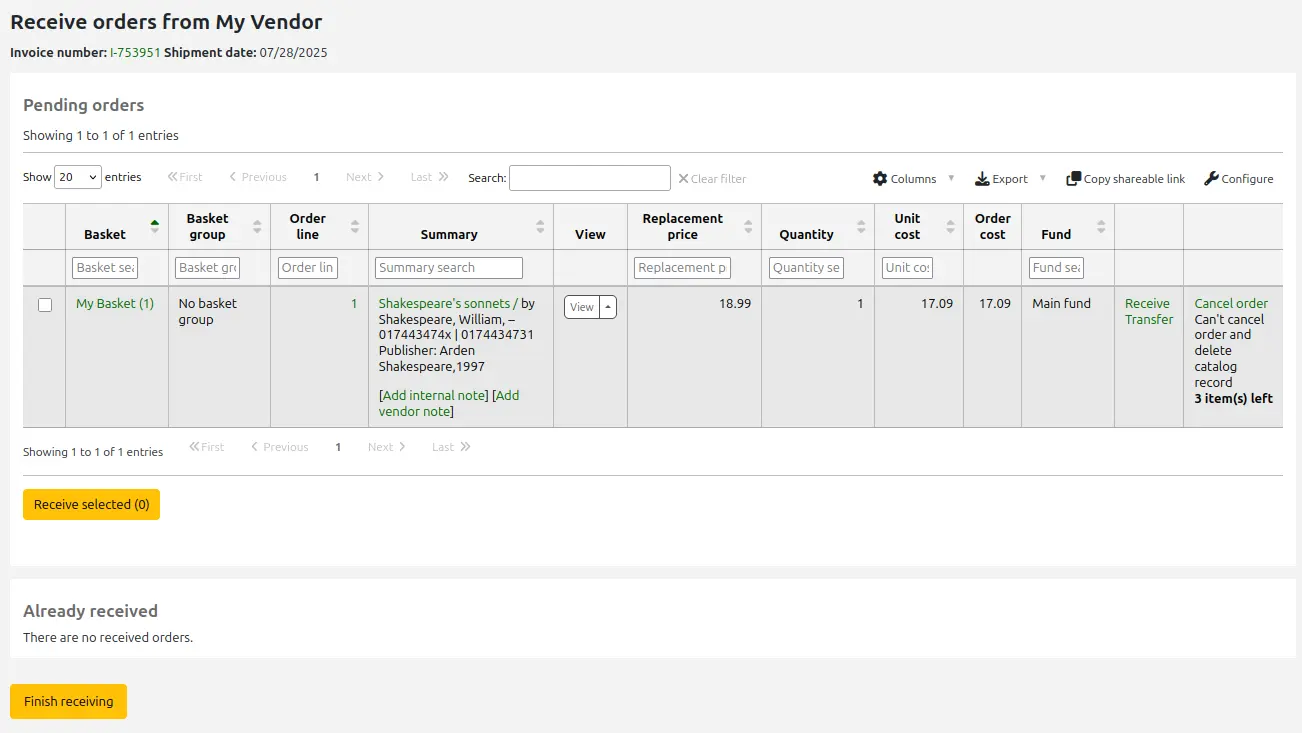
La page de réception liste tous les exemplaires qui sont encore en commande chez le fournisseur, quel que soit le panier des exemplaires.
Avertissement
Seuls les exemplaires des paniers fermés apparaîtront dans la liste des commandes en attente.
Note
Si vous avez beaucoup de commandes, vous pouvez les filtrer en utilisant le champ “Rechercher” juste au dessus du tableau, ou bien les champs de filtre en haut de chaque colonne du tableau.

Vous pouvez, par exemple, scanner l’ISBN du livre que vous réceptionnez dans la case de filtre et le tableau montrera alors uniquement les commandes correspondantes.
Assurez-vous simplement d’effacer les filtres quand vous avez fini, sinon les autres exemplaires n’apparaîtront pas.
Pour réceptionner un document précis, cliquez sur le lien “Réceptionner” à droite de l’exemplaire.
Selon le moment où vous avez choisi de créer l’exemplaire (soit selon la preférence système AcqCreateItem, soit au moment de créer votre panier), le formulaire sera légèrement différent.
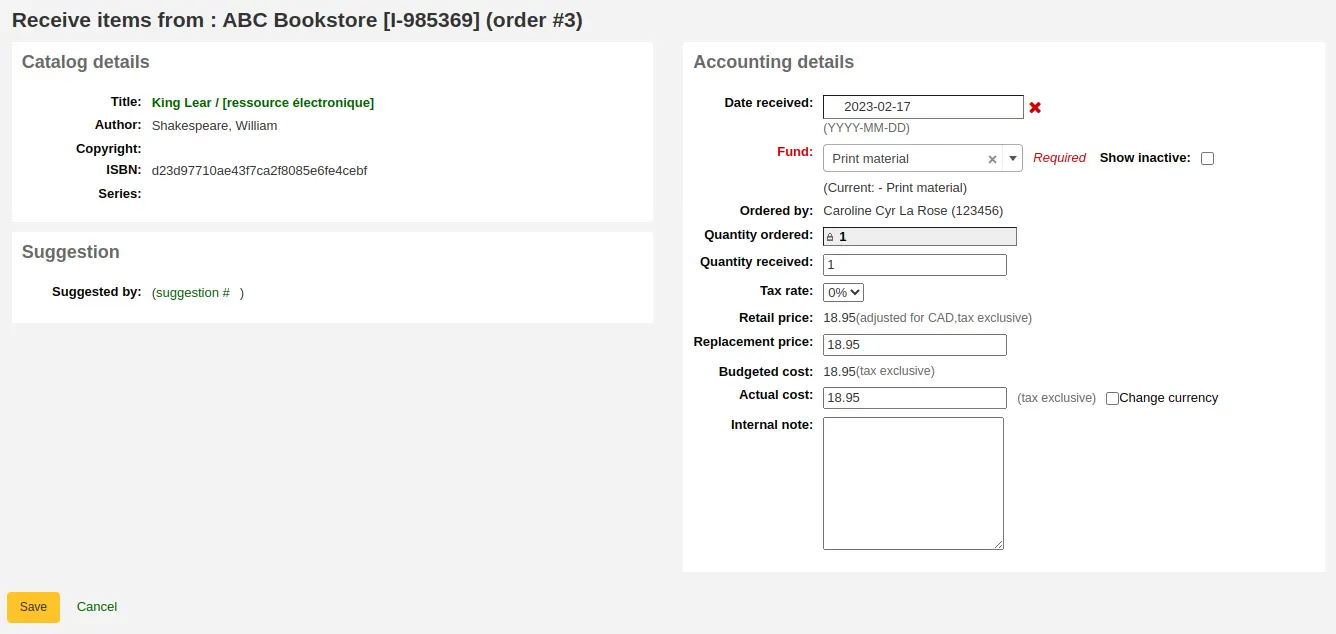
Si vous choisissez de créer l’exemplaire au moment de passer la commande, vous verrez le formulaire de création de l’exemplaire sur le côté gauche et les informations financières sur le côté droit.
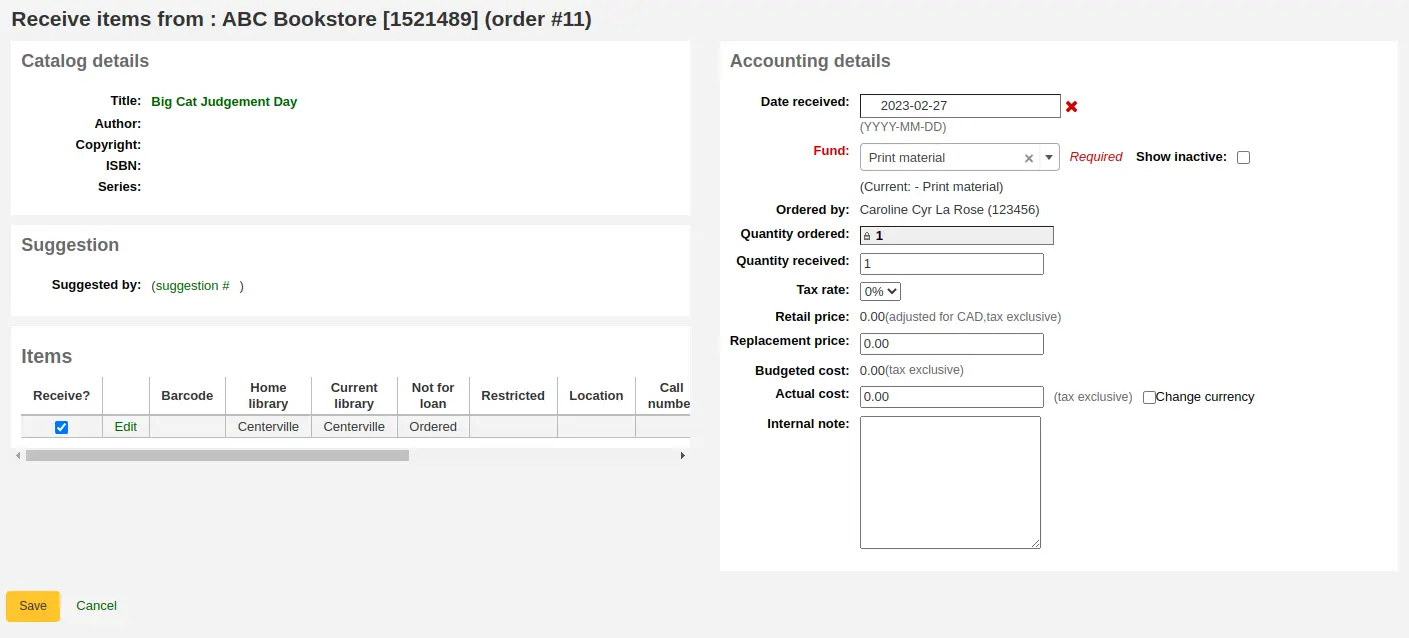
Vous pouvez cocher la case à côté de l’exemplaire pour le réceptionner, ou remplir le champ “Quantité reçue” sur le côté gauche.
Note
Vous pouvez choisir de marquer seulement une partie de la commande comme reçue si le fournisseur n’a pas envoyé l’intégralité de la commande, en cochant uniquement les cases à côté des exemplaires que vous voulez réceptionner ou en entrant la quantité adéquate dans le champ “Quantité reçue”.
Vous pouvez modifier l’exemplaire si besoin en cliquant sur le lien “Modifier”. Cela vous permettra de saisir les cotes et les codes à barres exacts si vous souhaitez le faire au moment de la réception.
Vous pouvez aussi modifier les informations de prix (prix de remplacement, prix réel et devise du prix réel). Les valeurs que vous saisirez complèteront automatiquement le sous-champ de coût, coût de remplacement et le sous-champ de coût, prix d’achat normal dans la notice exemplaire après enregistrement.
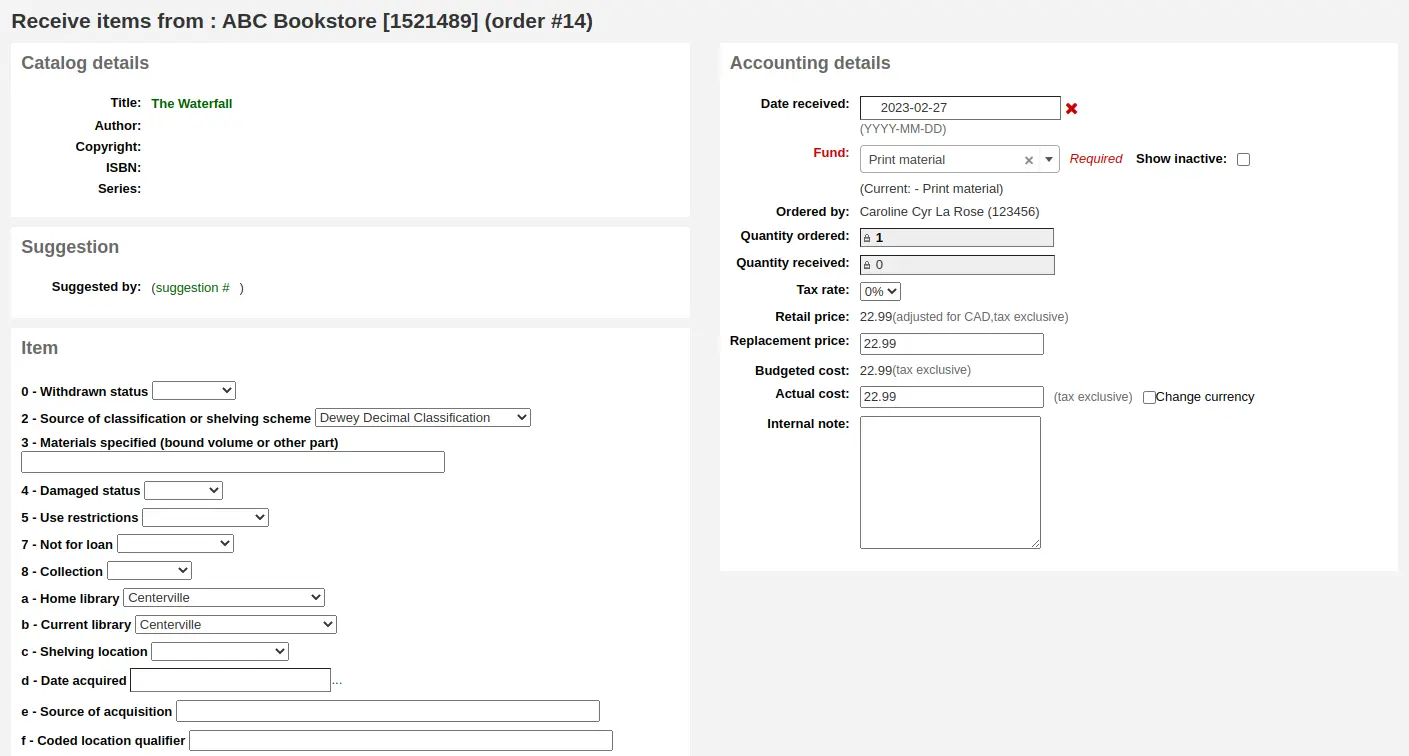
Si vous choisissez de créer l’exemplaire au moment de la réception, vous verrez le formulaire de création de l’exemplaire sur le côté gauche et les informations financières sur le côté droit.
Avertissement
Vous devez remplir le formulaire de création de l’exemplaire et cliquer sur “Ajouter un exemplaire” ou “Ajouter des exemplaires multiples” pour réceptionner la commande. Vous ne pourrez pas simplement changer le nombre dans “Quantité reçue”.
Vous pouvez modifier les informations de prix (prix de remplacement, prix réel, et devise du prix réel). Les valeurs que vous entrez complèteront automatiquement le sous-champ Coût de remplcement et le sous-champ Prix d’achat de la notice exemplaire après enregistrement.
Enfin, si vous choisissez de créer votre exemplaire au moment du catalogage, vous verrez uniquement les informations financières sur le côté droit.
Vous pouvez modifier les informations de coût (coût de remplacement, coût réel, et devise du coût réel).
Note
Les informations financières ne seront pas transférées sur l’exemplaire si l’exemplaire est créé au moment du catalogage.
Une fois que vous avez effectué tous les changements nécessaires (à la commande et/ou aux exemplaires), cliquez sur “Enregistrer” pour marque l(es) exemplaire(s) comme reçu(s).
Note
Si votre préférence système AcqItemSetSubfieldsWhenReceived est paramétrée pour ajouter ou modifier des données à la réception d’un exemplaire, ces changements s’effectueront après que vous ayez cliqué sur “Enregistrer”.
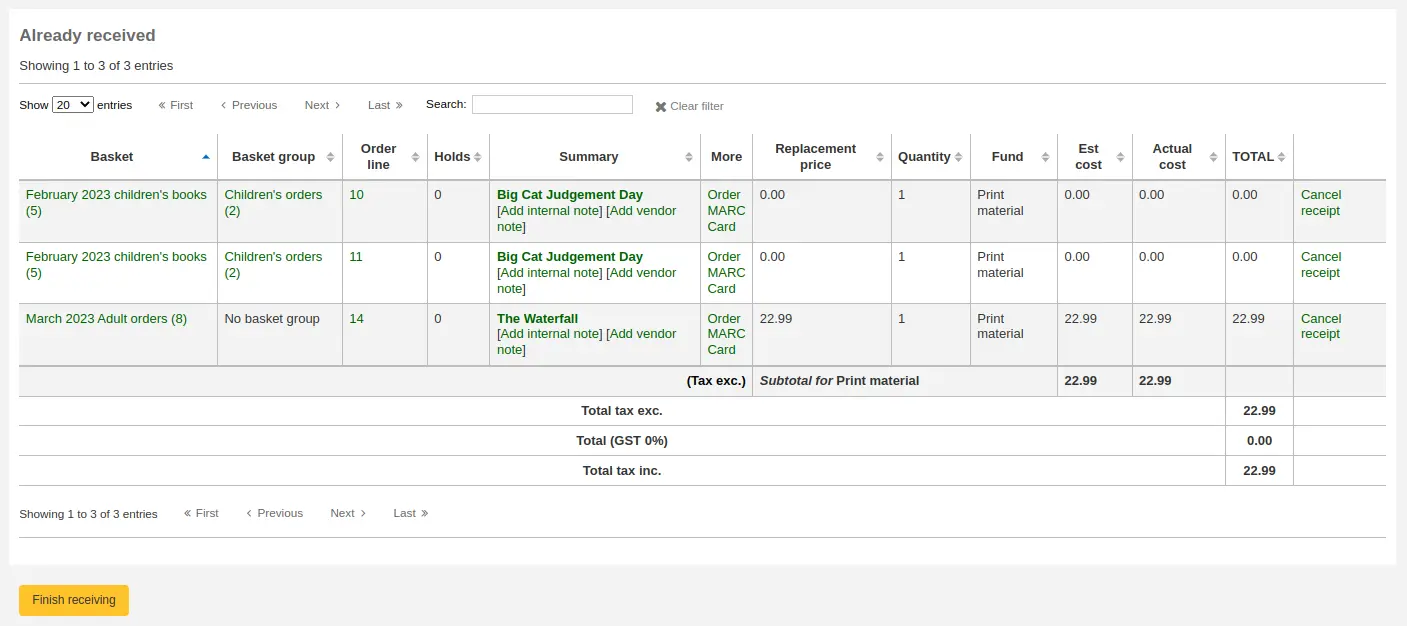
Quand vous avez fini la réception des exemplaires, vous pouvez quitter cette page ou cliquer le bouton “Finir la réception” en bas de l’écran.
Les commandes réceptionnées auront la mention “(reçu)” avant le titre dans la vue du panier.
Note
Quand toutes les commandes d’un panier ont été réceptionnées, le panier s’efface de la liste des paniers pour ce fournisseur. Vous pouvez cliquer sur “Voir tous les paniers” pour voir les paniers inactifs.

Note
Si un adhérent est noté comme souhaitant se voir notifier la réception de la commande, il recevra la notification ACQ_NOTIF_ON_RECEIV.
Si un adhérent a suggéré l’achat, il recevra la notification AVAILABLE.
Chacune de ces notifications peut être personnalisée dans l’outil Notifications et tickets.
Transférer des commandes
Note
Les membres du personnel doivent avoir la permission order_manage (ou la permission superbibliothécaire) pour transférer des commandes.
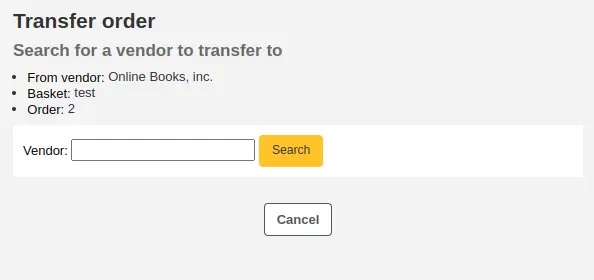
Si le document n’est plus disponible chez le fournisseur, vous pouvez transférer la commande dans le panier d’un autre fournisseur en cliquant sur le lien “Transférer” à droite du titre sur la page du panier ou la page de réception. Cela ouvrira une barre de recherche fournisseur.
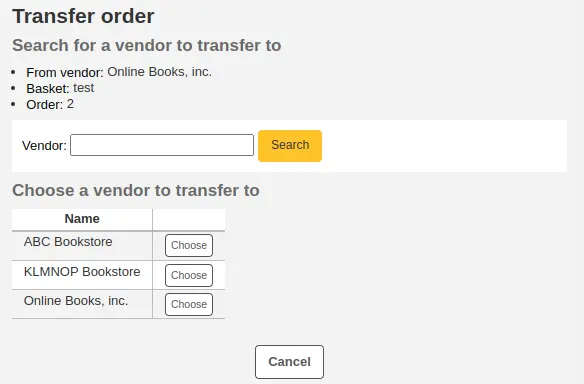
A partir des résultats, vous pouvez cliquer sur “Choisir” à droite du fournisseur à qui vous souhaitez recommander l’exemplaire.
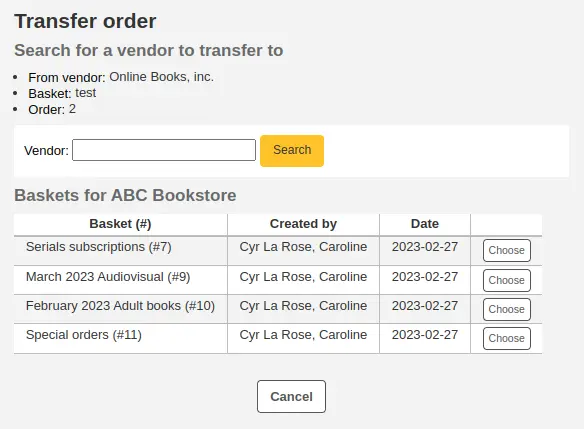
Les paniers s’afficheront. Pour déplacer l’exemplaire, cliquez simplement sur “Choisir” à droite du panier auquel vous souhaitez ajouter l’exemplaire.
Une fois que vous avez fait votre choix, un message de confirmation s’affichera.
Vous verrez les commandes transférées et les commandes annulées en affichant le panier.

Note
Même s’il est possible de rouvrir votre panier (à moins qu’il ne fasse partie d’un bordereau de commande, auquel cas le panier ne peut pas être rouvert), de transférer une ou plusieurs commandes et de refermer le panier, ce n’est pas recommandé. Cette façon de procéder mettra à jour la date de “fermeture du panier”, ce qui de fait faussera le calcul des “commandes en retard”.
Il est préférable de transférer une commande depuis la page de réception.
Annuler des commandes
Note
Les membres du personnel doivent avoir la permission order_manage (ou la permission superbibliothécaire) pour annuler des commandes.
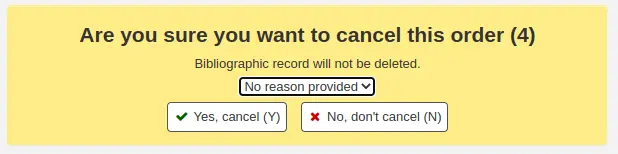
Si l’exemplaire n’est disponible nulle part, vous pouvez supprimer la commande en cliquant sur “Annuler la commande” ou “Annuler la commande et supprimer la notice du catalogue” tout à droite de la page du panier ou de la page de réception.
Ceci vous permettra de saisir le motif et de confirmer l’annulation.
Note
Le menu déroulant des motifs d’annulation est rempli par la catégorie de valeurs autorisées ORDER_CANCELLATION_REASON. S’il n’y a aucune valeur dans cette catégorie, ce sera un champ de texte libre au lieu d’un menu déroulant.
Vous verrez également que l’exemplaire est annulé si vous visualisez le panier.
Version
A partir de la version 23.11 de Koha, vous pouvez annuler des commandes de paniers fermés en activant la préférence système CancelOrdersInClosedBaskets.
Dans les versions antérieures, il n’est pas possible d’annuler des commandes quand le panier est fermé. Bien qu’il soit possible de rouvrir le panier (sauf s’il fait partie d’un bordereau de commandes, auquel cas le panier ne peut être rouvert), d’annuler une ou plusieurs commandes puis de re-fermer le panier, ça n’est pas recommandé. Cette manipulation va actualiser la date de fermeture du panier, ce qui entraînera des erreurs de calcul pour les “commandes en retard”. Dans ces cas, il est préférable d’annuler la commande à partir de la page Réception.
Factures
Note
N’importe quel bibliothécaire avec une des permissions acquisition (ou la permission superlibrarian) aura accès aux factures. Quoi qu’il en soit, il est nécessaire de bénéficier de permissions spécifiques pour effectuer des actions sur les factures :
la permission order_receive pour créer des factures,
la permission edit_invoices pour modifier des factures,
la permission merge_invoices pour fusionner des factures,
la permission reopen_closed_invoices pour réouvrir des factures clôturées, ou
la permission delete_invoices pour supprimer des factures.
Des factures sont générées lorsque les commandes sont réceptionnées. Les factures peuvent être recherchées en cliquant sur “Factures” à gauche de la page Acquisitions.
Après avoir lancé une recherche, vos résultats vont apparaître à droite des options de recherche.
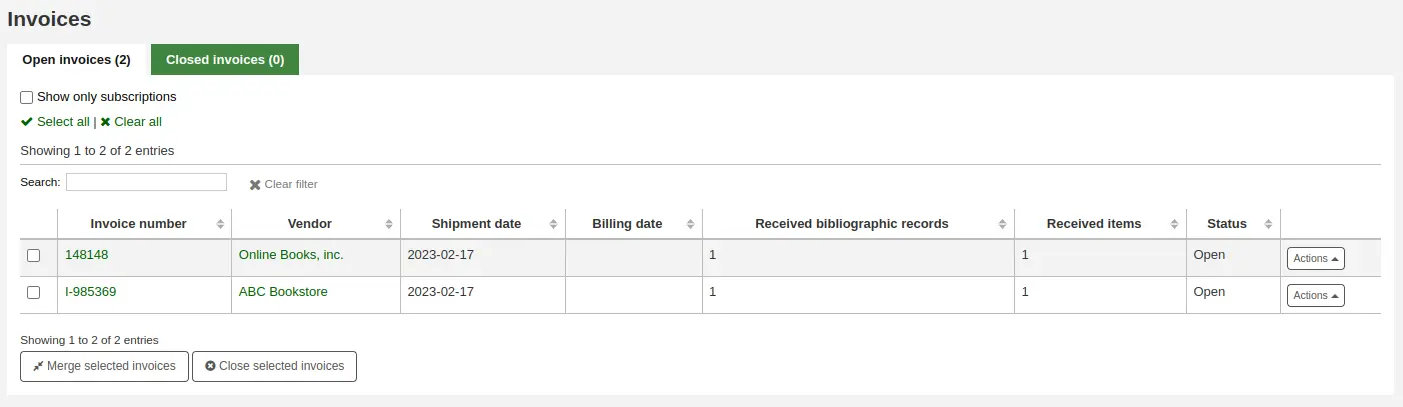
En bas du tableau, il y a un bouton pour fusionner les factures sélectionnées et un bouton pour fermer les factures sélectionnées.
Le bouton “Actions” sur la droite permet différentes actions sur une seule facture :
Détails : afficher la facture complète
Fermer : fermer la facture pour indiquer que la facture est payée
Supprimer : supprimer la facture; cette option est disponible uniquement pour les factures qui n’ont aucun exemplaire reçu
La page de détails de la facture présente toutes les informations à propos de la facture.
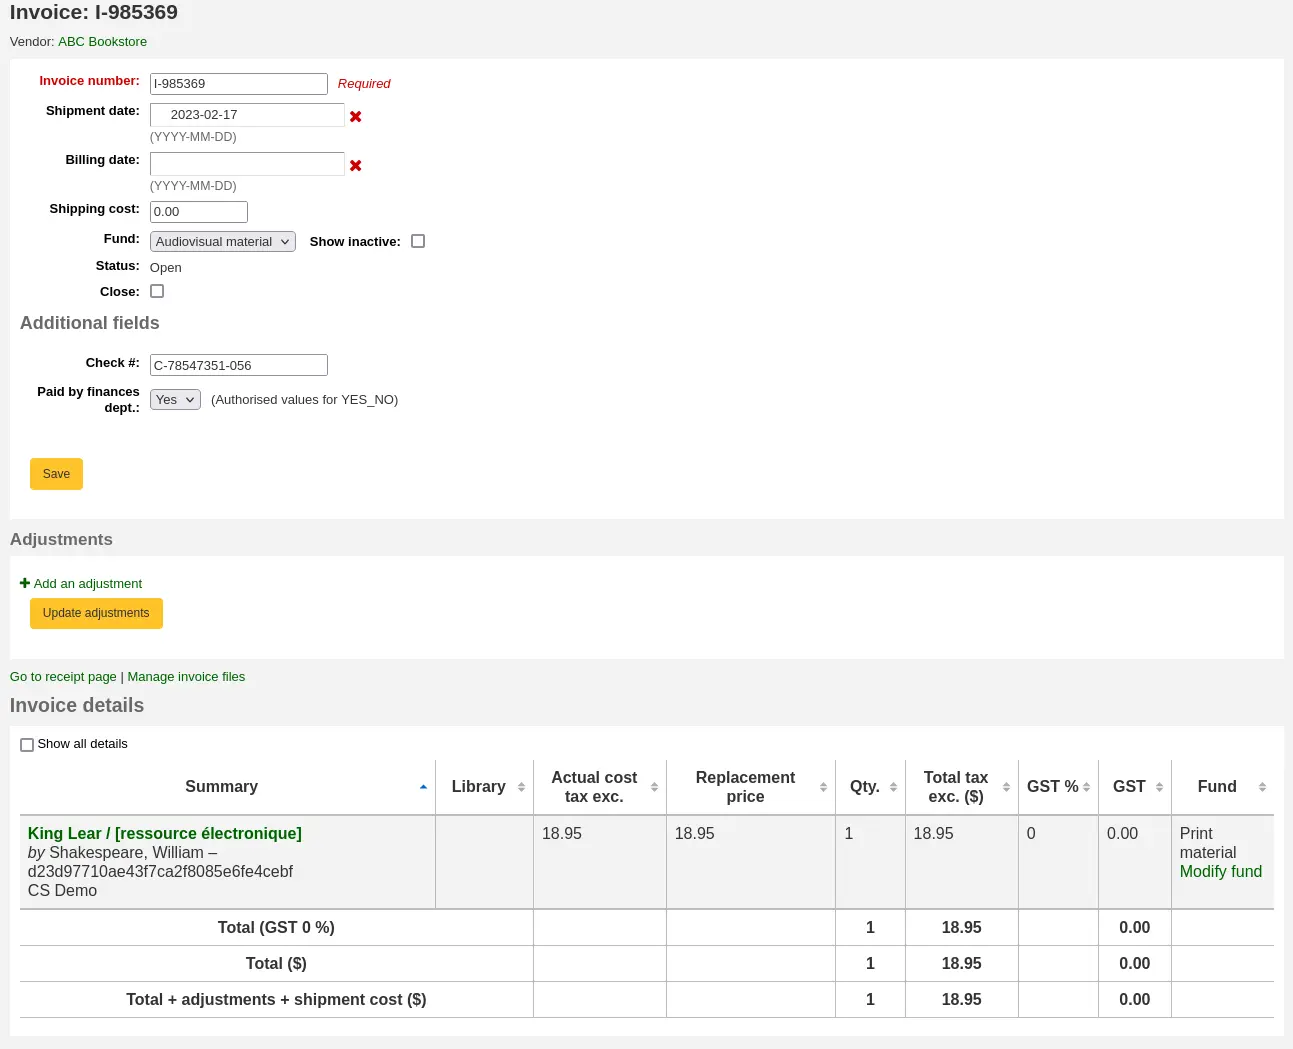
Numéro de facture : le numéro de facture saisi au moment de la réception est modifiable ici
Date d’expédition : la date saisie au moment de la réception est modifiable ici
Date de facturation : saisissez la date de facturation de la facture
Frais de port : le coût saisi au moment de la réception est modifiable ici
Poste budgétaire des frais de port : le poste budgétaire saisi au moment de la réception est modifiable ici
Statut : le statut de la facture, soit ouverte soit fermée ; si elle est fermée, la date de clôture apparaîtra également
Fermer : si la facture est toujours ouverte, elle peut être fermée en cochant cette case
Rouvrir : si la facture est fermée, elle peut être rouverte en cochant cette case
Champs supplémentaires : s’il y a des champs supplémentaires pour les factures, ils apparaîtront ici.
Dans la section Ajustements, vous pouvez ajouter des ajustements à vos factures en cliquant sur “Ajouter un ajustement”.
Ces ajustements peuvent concerner l’ajustement du prix qui est compensé par un arrondi ou l’ajout d’un avoir à la facture, par exemple.
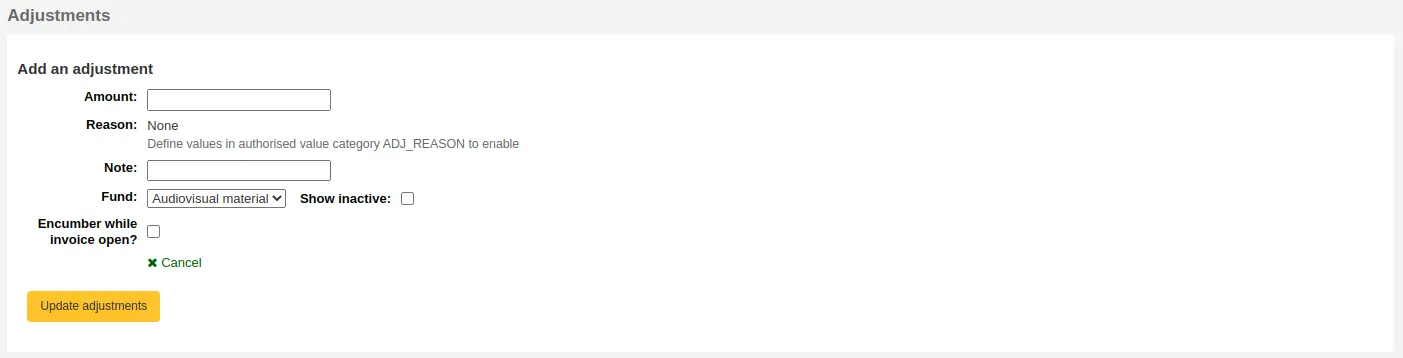
Montant : saisissez le montant de l’ajustement (il peut être positif ou négatif)
Motif : choisissez un motif, si nécessaire
Note
Les motifs sont remplis par la catégorie de valeurs autorisées ADJ_REASON.
Note : entrez une note, si nécessaire
Poste budgétaire : choisissez le poste budgétaire sur lequel doit être imputé le montant de l’ajustement
Ajouter lorsque la facture est ouverte : si cette case est cochée, le montant de l’ajustement sera retiré du poste budgétaire immédiatement. Si la case n’est pas cochée, le montant ne sera retiré que lorsque la facture sera fermée.
Cliquez sur “Mettre à jour les ajustements” pour enregistrer vos ajustements.
Si vous avez besoin de modifier l’ajustement ultérieurement, vous pouvez le faire dans le tableau en cliquant sur “Mettre à jour les ajustements”.

Dans la section “Détails d’une facture”, vous verrez les détails de chaque titre réceptionné dans cette facture.
Si besoin, vous pouvez modifier le fond budgétaire affecté à chaque titre en cliquant sur “Modifier le fond” dans la colonne “Budget”.
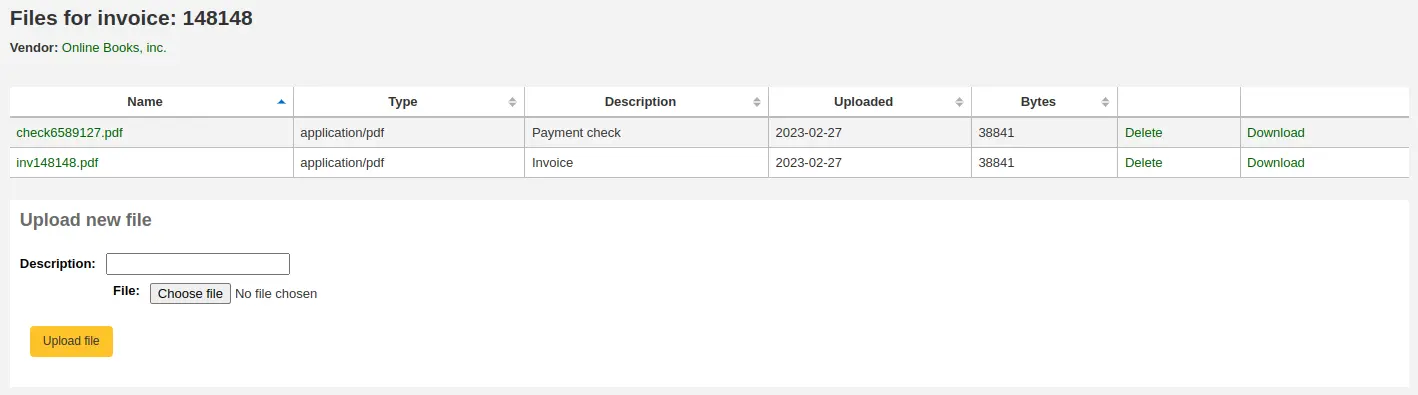
Attacher des fichiers aux factures
Si vous autorisez le téléchargement des fichiers d’acquisitions avec la préférence système AcqEnableFiles, vous verrez apparaître l’option pour gérer les fichiers des factures à côté du lien “Aller à la page de réception”
Pour voir ou rattacher les nouveaux fichiers, cliquez sur le lien “Gérer les fichiers des factures”
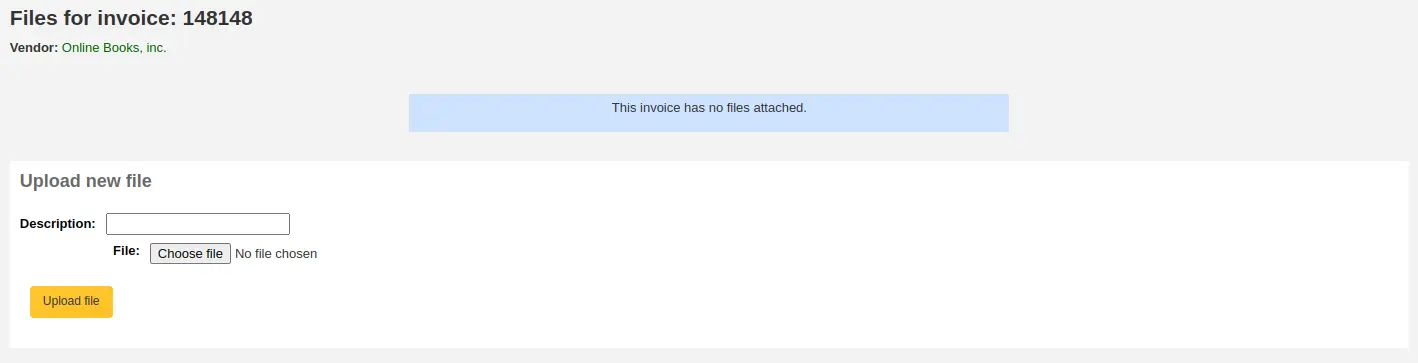
D’ici vous pouvez trouver un fichier à télécharger et consulter les fichiers que vous avez déjà rattachés.
Fusionner des factures
Note
Les bibliothécaires doivent avoir la permission merge_invoices (ou la permission superlibrarian) pour fusionner des factures.
Depuis les résultats de recherche sur les factures, vous pouvez aussi fusionner deux factures ou plus, si vous en avez besoin.
Cochez simplement la case à gauche des factures que vous souhaitez fusionner et cliquez sur le bouton “Fusionner les factures sélectionnées” en bas de la page. Un écran de confirmation s’affichera :
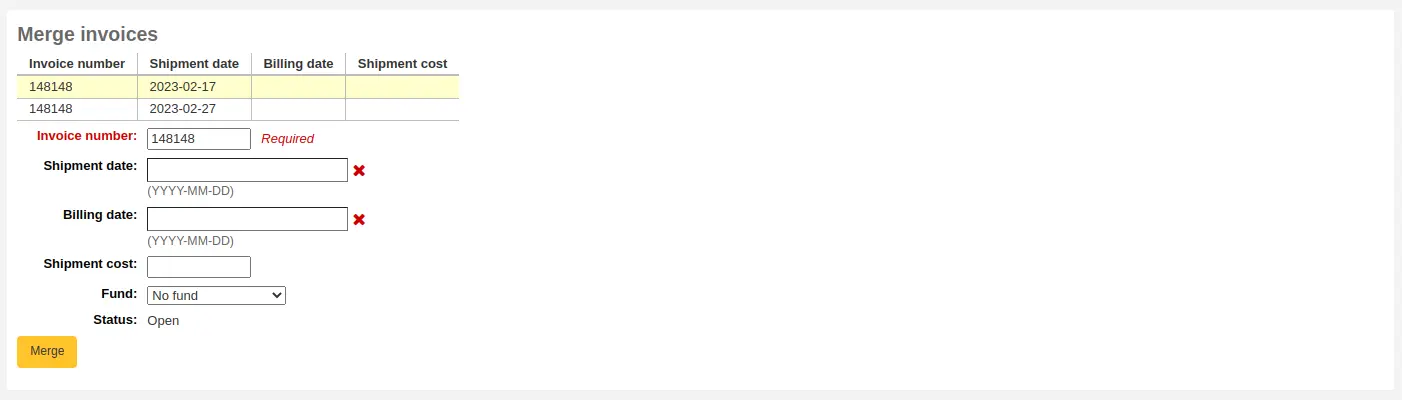
Cliquez sur le numéro de la facture que vous souhaitez conserver, celle-ci se surlignera en jaune. Saisissez les différentes données de facturation dans les zones prévues à cet effet et cliquez sur “Fusionner”. Les factures fusionneront alors en une seule.
Réclamations et commandes en retard
Note
Les membres du personnel doivent avoir la permission order_receive (ou la permission superbibliothécaire) pour gérer les commandes en retard et faire des réclamations.
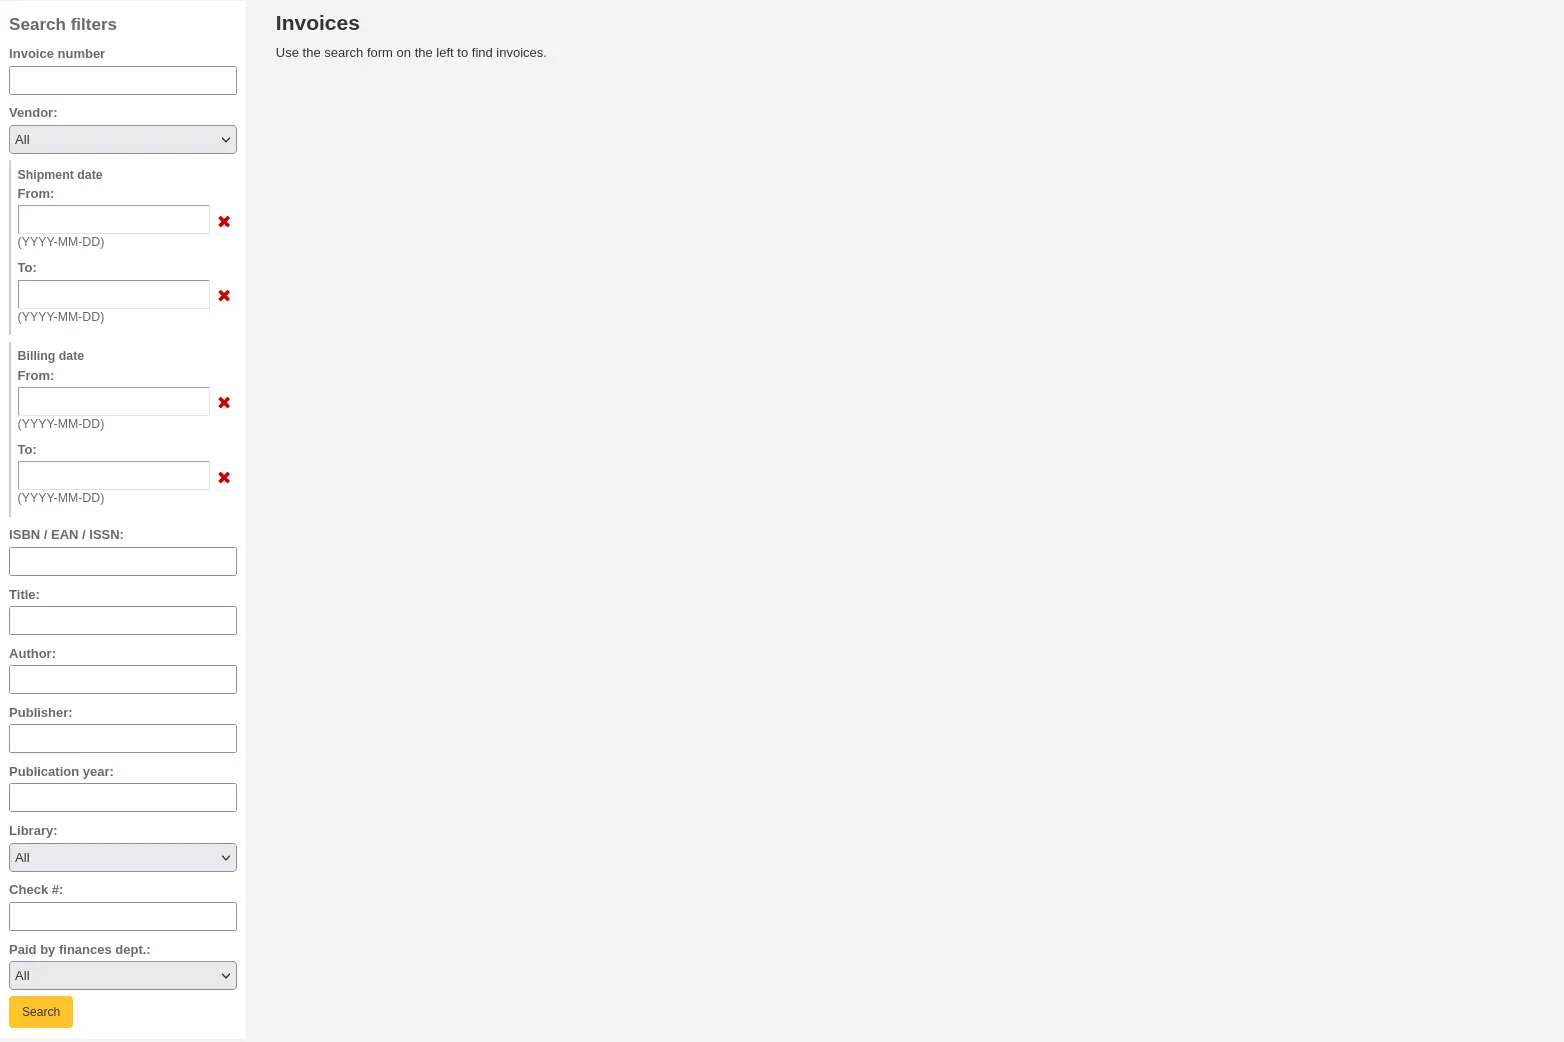
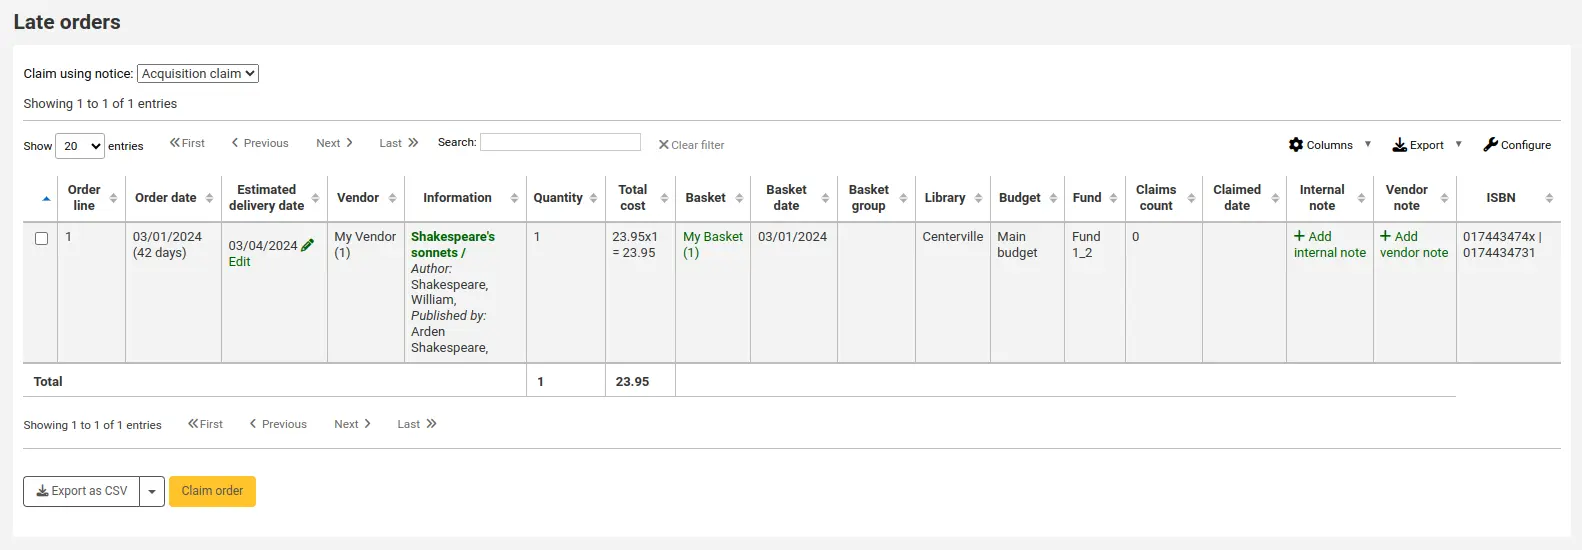
Le lien “Commandes en retard” sur la principale du module acquisitions mène à un rapport où toutes les commandes peuvent être filtrées pour trouver celles qui sont en retard.
En cliquant sur “Commandes en retard” sur la page Acquisitions, une série de filtres sera proposée sur le côté gauche de la page. Ces filtres ne s’appliquent que sur les paniers fermés.
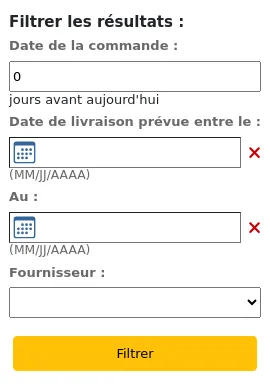
Date de commande : ce filtre limite les résultats aux commandes des paniers fermés depuis plus d’un certain nombre de jours. Cette zone est par défaut à 0, ce qui signifie que toutes les commandes de paniers fermés sont affichées dans cette liste.
Note
La date de commande est la date à laquelle le panier a été fermé.
Date de livraison estimée entre le … et le … : ce filtre limite les résultats aux commandes dont la livraison est possible entre ces deux dates. La date de livraison estimée est soit la date saisie dans le champ “Date de livraison estimée” des Détails financiers de la commande, soit une date calculée avec Date de commande (la date à laquelle le panier a été fermé) + le Délai de livraison saisi lors de la création du fournisseur.
Note
La date de livraison estimée peut être modifiée dans le tableau des commandes en retard.
Fournisseur : ce filtre limite les résultats aux commandes d’un fournisseur spécifique.
Note
Le menu déroulant des fournisseurs affiche seulement les fournisseurs avec des paniers fermés.
Une fois que vous avez filtré vos commandes en retard, une liste de ces exemplaires s’affichera.
Note
Vous pouvez modifier les colonnes de ce tableau dans la section Configurer les colonnes du module Administration (référence du tableau : late_orders).
Il y a plusieurs options pour réclamer les commandes en retard.
Si vous avez saisi une adresse de courriel pour un contact chez le fournisseur dans votre système, vous pouvez envoyer des courriels de réclamation quand une commande est en retard.
Choisissez la notification à envoyer dans le menu déroulant “Réclamer en utilisant la notification”

Note
La notification par défaut est “Réclamation Acquisitions” (code ACQCLAIM). Elle peut être modifiée dans l’outil Notifications et tickets.
Vous pouvez ajouter différentes notifications. Au moment de créer une nouvelle notification, choisissez “Réclamation Acquisitions”.
Cochez la case à droite des titres en retard à réclamer
Cliquez sur “Réclamer une commande” en bas à droite de la liste.
Si le fournisseur n’a pas de contact avec une adresse courriel, vous pouvez télécharger la liste des titres à réclamer dans un fichier CSV
Cochez la case à droite des titres en retard à réclamer
Cliquez sur “Exporter au format CSV” en bas à droite de la liste
Note
Le profil CSV utilisé par défaut est “Commandes en retard”. Vous pouvez le modifier ou en ajouter de nouveaux dans l’outil profils CSV.
Si vous en ajoutez un nouveau, choisissez le type de profil : SQL et l’utilisation : Export des commandes en retard.
Suivi du budget/poste budgétaire
Sur la page principale des acquisitions, un tableau s’affichera avec tous les postes budgétaires actifs et la répartition du budget de ce qui a été commandé ou dépensé.
Que les montants incluent ou non les taxes est contrôlé par la préférence système CalculateFundValuesIncludingTax.
Note
Vous pouvez personnaliser les colonnes de ce tableau dans la section Configurer les colonnes du module Administration (référence du tableau : accounts).
Utilisez le lien “Tout développer” pour afficher tous vos postes budgétaires et sous-postes budgétaires.
Le lien “Tout réduire” affichera uniquement les postes budgétaires de premier niveau.
Le lien “Masquer les budgets inactifs” masquera les budgets qui ne sont pas actuellement actifs (tels que les budgets des années précédentes).
Le lien “Afficher les budgets inactifs” affichera les budgets qui ne sont pas actuellement actifs (tels que les budgets des années précédentes).
“Filtrer par bibliothèque” : si vous avez plusieurs bibliothèques dans votre base et avez des postes budgétaires assignés aux différentes bibliothèques, utilisez ce menu déroulant pour filtrer le tableau et n’afficher que les postes budgétaires de la bibliothèque sélectionnée.
Astuce
Si le ligne indiquant le “Total” dans le tableau vous perturbe, vous pouvez la masquer en ajoutant ce code à la préférence IntranetUserCSS.
#funds_total {display:none;}
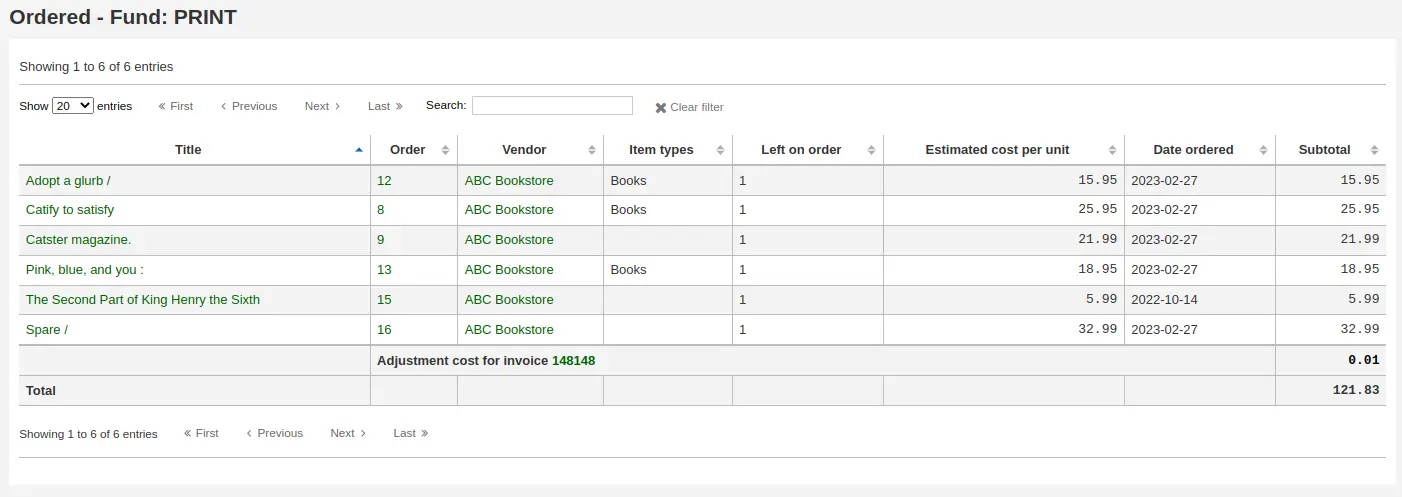
Pour consulter l’historique de toutes les commandes d’un poste budgétaire, vous pouvez cliquer directement sur le montant.
Traitement EDI
La section précédente expliquant toutes les options de commande, cette section précise les éléments reliés aux commandes EDI ou EDIFACT afin d’aider ceux qui utilisent seulement EDI pour tout ou partie de leurs procédures de commandes.
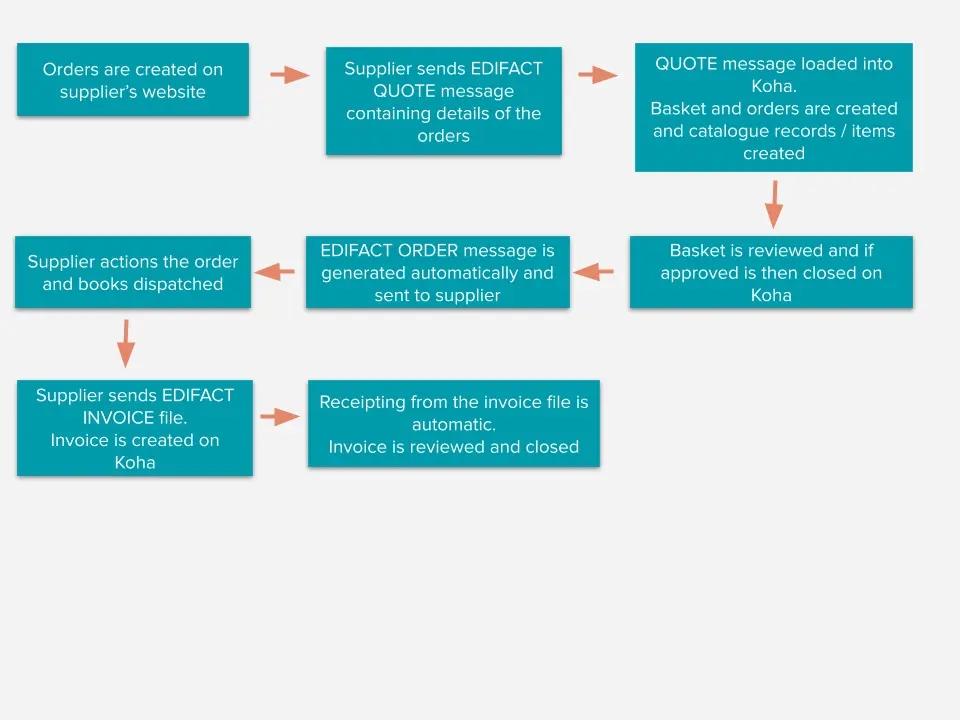
EDI permet d’échanger des fichiers de commande entre les fournisseurs et Koha. Quand les fichiers sont traités, les données de commande sont chargées directement sur Koha.
Le processus complet est présenté ci-dessous.
Note
Les bibliothèques n’ont pas à automatiser le processus complet et tous les fournisseurs n’utilisent pas toutes les fonctions. Par exemple, une bibliothèque peut utiliser les fichiers QUOTE et ORDER mais gérer manuellement facturation et réception. Ou alors, une bibliothèque peut créer un panier sur Koha manuellement ou à partir d’un fichier de notices MARC mais envoyer la commande au fournisseur via un fichier ORDER. Demandez à vos fournisseurs de quelles fonctions ils disposent.
Avertissement
Koha utilise la norme EDIFACT (EDItEUR and BiC) et non la norme X12 pour les commandes électroniques.
Paramétrer EDI dans Koha
- Afin d’utiliser EDIFACT dans Koha, la
La préférence système EDIFACT doit être activée.
Avant de commander en utilisant EDI, vous devrez vous assurer d’avoir effectué ces étapes :
Demandez à votre fournisseur/libraire ses informations de connexion. Voir les questions EDI pour les fournisseurs ci-dessous.
Il serait aussi bénéfique de demander quelques échantillons de fichiers EDIFACT a votre fournisseur
Partagez, avec votre fournisseur/libraire, vos codes de site, codes de types de documents, codes de postes budgétaires, et n’importe quel autre code ou valeur autorisée dont ils pourraient avoir besoin pour générer vos notices MARC de commande
Communiquez avec votre assistance-support ou la communauté Koha pour savoir si vous avez besoin d’un plugin basé sur les réponses de votre fournisseur
Par exemple, la firme ByWater Solutions a publié des plugins pour certains fournisseurs spécifiques à l’adresse suivante : https://github.com/bywatersolutions/koha-plugin-edifact-enhanced
Saisissez la notice fournisseur/libraire dans le module Acquisitions
Vérifiez vos préférences système du module Acquisitions
Assurez-vous de renseigner la préférence système MarcFieldsToOrder avec les valeurs pour les fichiers de commande (voir la section champs de commande MARC ci-dessous) si votre fournisseur vous enverra des fichiers avec les notices MARC que vous importerez manuellement. Si le fournisseur vous enverra des fichiers EDI QUOTE automatisés, la préférence système MarcFieldsToOrder n’a pas besoin d’être renseignée.
Saisissez vos Comptes EDI
Saisissez vos EANs de la bibliothèque
Activez le cron EDI pour qu’il puisse traiter des fichiers EDI.
Questions EDI pour les fournisseurs
Vous devrez rassembler les informations suivantes auprès de vos fournisseurs avant de commencer la configuration dans Koha.
Comptes EDI
Comptes EDI : ceci est l’information de connexion pour vos fournisseurs. Elle sera utilisée pour compléter la section comptes EDI.
Fournisseur : le nom du fournisseur
Description : une courte description si des explications supplémentaires sont nécessaires (particulièrement si vous avez plusieurs comptes pour un seul fournisseur) .
Transport : est-ce que le fournisseur transmet des fichiers EDI via FTP, SFTP, ou par un autre processus spécial ?
Options :
FTP
SFTP
FICHIER
Hôte distant : l’adresse URL ou IP du serveur FTP/SFTP
Nom : l’identifiant pour le serveur ci-dessus
Mot de passe : le mot de passe pour le serveur ci-dessus
Dossier de téléchargement : le chemin d’accès sur le serveur qui contient les fichiers que Koha ira télécharger et traiter
Répertoire d’envoi : le chemin d’accès sur le serveur où Koha enverra les fichiers pour que votre fournisseur puisse les traiter
Entité nommante : qui a attribué le SAN ci-dessous ?
Options :
EAN International (14)
US SAN Agency (31B)
Attribué par le fournisseur (91)
Attribué par l’acheteur (92)
SAN : l’identifiant électronique du fournisseur
Standard : le standard utilisé par le fournisseur, ceci modifiera la façon dont les messages EDI sont interprétés
Options :
BiC
EDItEUR
Devis activés : (oui ou non) Est-ce que le fournisseur accepte l’envoi et la réception de devis via EDIFACT, et est-ce que vous voulez envoyer et recevoir des devis via EDIFACT ?
Commandes activées :(oui ou non) Est-ce que ce fournisseur accepte l’envoi et la réception de commandes via EDIFACT, et est-ce que vous voulez envoyer et recevoir des commandes via EDIFACT ?
Factures activées : (oui ou non) Est-ce que le fournisseur accepte l’envoi et la réception de factures via EDIFACT, et est-ce que vous voulez envoyer et recevoir des factures via EDIFACT ?
Réponses activées : (oui ou non) Est-ce que le fournisseur accepte l’envoi et la réception de réponses via EDIFACT, et est-ce que vous voulez envoyer et recevoir des factures via EDIFACT ?
Commande automatique : (oui ou non) Cochez cette case si vous voulez que les devis génèrent automatiquement des commandes.
EAN
Chaque bibliothèque utilisant EDIFACT doit spécifier un identifiant d’acheteur, connu sous le nom de SAN ou EAN. Ceci remplira le paramètre EANs de la bibliothèque.
Site : choisissez la bibliothèque que cet EAN représente
Description : ajouter une description à cet EAN, si besoin
EAN : saisissez l’EAN
Entité nommante : choisissez qui a attribué le SAN ci-dessus
Options :
EAN International (14)
US SAN Agency (31B)
Attribué par le fournisseur (91)
Attribué par l’acheteur (92)
Champs MARC de commande ou grille Acquisitions
Note
Cela n’est nécessaire que si votre fournisseur vous envoie les fichiers de notices MARC que vous importerez via Télécharger des notices MARC dans le réservoir. Si votre fournisseur vous envoie des fichiers automatisés EDI QUOTE, il n’est pas nécessaire de renseigner la préférence système MarcFieldsToOrder.
Ces valeurs sont définies par la préférence système MarcFieldsToOrder.
prix : champ MARC21 contenant le prix de l’exemplaire
quantité : champ MARC21 contenant la quantité d’exemplaires pour la notice concernée
budget_code : champ MARC21 contenant le code du budget Koha à débiter
remise : champ MARC21 contenant le pourcentage de rabais sur le prix de l’exemplaire
sort1 : champ MARC21 qui renseignera le champ personnalisé sort1
sort2 : champ MARC21 qui renseignera le champ personnalisé sort2
Commander via EDI
La première étape, lorsque l’on commande avec EDI, se déroule sur le site web du fournisseur. Chaque vendeur utilise un vocabulaire différent, mais vous devrez commander sur leur site. Certains des termes que vous rencontrerez seront « panier », « commande » et/ou « commande MARC ». Le fournisseur vous enverra soit un fichier de notices MARC à importer dans Koha soit un fichier QUOTE si vous l’avez activé dans vos paramètres comptes EDI.
Travailler avec un fichier MARC
Une fois le fichier MARC téléchargé sur votre ordinateur, vous devrez vous connecter à Koha afin de poursuivre le processus.
Dans le module Acquisitions, créez un panier pour le fournisseur à qui vous commandez. Ajoutez votre fichier au panier en commandant à partir d’un nouveau fichier.
À partir de la fenêtre de confirmation, vous verrez toutes les donnés du fichier MARC en lien avec votre commande. Si vous ne voyez pas les champs tels que “budget” et “quantité” renseignés, assurez-vous que votre préférence système MarcFieldsToOrder est bien configurée.
Une fois que vous avez ajouté tous les exemplaires au panier, vous pouvez cliquer sur le bouton “Créer une commande EDIFACT”.
Note
Le bouton “Créer une commande EDIFACT” n’apparaît que si la préférence système EDIFACT est activée.
Il vous sera demandé si vous souhaitez créer la commande EDI et fermer le panier.
Envoyer la commande EDIFACT
Ceci générera un fichier ORDER avec le statut “en attente” dans les Messages EDIFACT dans Koha.
Les fichiers en attente seront traités par le cron job EDI et envoyés à votre fournisseur puis le statut dans les messages EDIFACT seront actualisés sur “Envoyés”.
Travailler avec un fichier QUOTE
Si vous avez des fichiers QUOTE activés, vous pouvez passer commande sur le site du fournisseur et un fichier QUOTE sera automatiquement généré et rendu disponible pour être collecté et chargé dans Koha. Vous verrez le fichier listé dans les messages EDIFACT dans Koha avec le statut “Reçu”. Le panier aura été créé et les notices et exemplaires ajoutées au panier.
Une fois que vous avez vérifié que le panier est correct, vous pouvez cliquer sur le bouton “Créer une commande EDIFACT”. Le processus se déroule ensuite comme pour l’envoi de commande EDIFACT ci-dessus.
Facturation EDI
Quand votre fournisseur de documents aura terminé le traitement de vos fichiers, il vous enverra aussi un fichier INVOICE par EDI. Le cron job EDI récupérera ce fichier de facture, notera les exemplaires facturés comme reçus et mettra à jour votre budget sans besoin d’intervention manuelle. En guise de contrôle final, la facture peut être consultée et fermée si tous les exemplaires ont été reçus correctement.
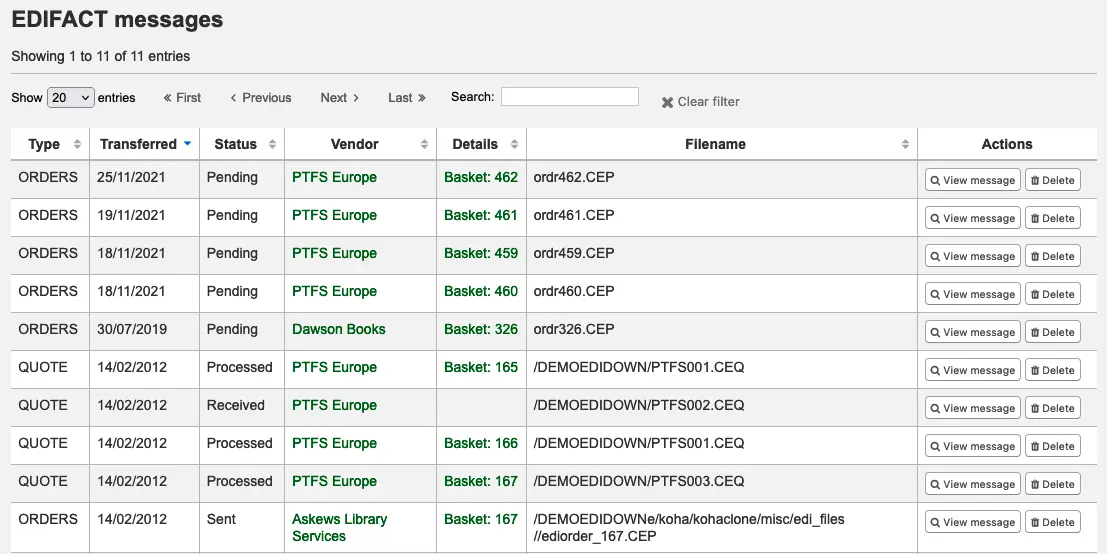
Les fichiers INVOICE peuvent être vus dans les Messages EDIFACT. Les fichiers traités ont le statut “Reçues”.
Si vous positionnez la préférence EdifactInvoiceImport sur “Ne pas importer”, vous pouvez charger les factures manuellement.
Messages EDIFACT
Un journal de tous les messages envoyés et reçus via EDIFACT est disponible dans Messages EDIFACT.
Note
Les membres du personnel doivent avoir la permission edi_manage (ou la permission superbibliothécaire) pour voir les messages EDIFACT envoyés.
Note
Les anciens messages EDIFACT peuvent être supprimés avec le script de nettoyage de la base de données en utilisant le paramètre --edifact-messages.