الأدوات
الأدوات تؤدي نوعاً من الأعمال في كوها .ويُشار إلى كثير من البندود المدرجة فيها في نظم إدارة المكتبات الأخرى باسم 'التقارير'.
للوصول: المزيد > الأدوات
المستخدمين والاعارة
قوائم المستفيد
ملاحظة
Only staff with the manage_patron_lists permission (or the superlibrarian permission) will have access to this tool.
للوصول: المزيد > الأدوات > المستفيدون والإعارة > قوائم المستفيد
Patron lists are a way to store a group of patrons for modifying patrons in batches, deleting patrons in batches, merging patrons, printing patron card batches, or reporting.
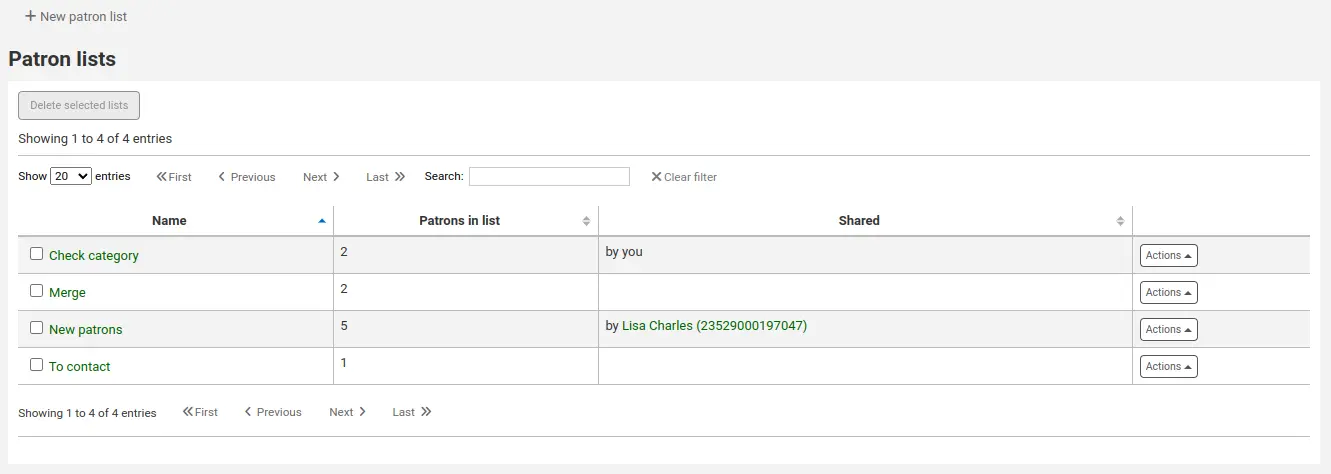
To create a new list of patrons click the 'New patron list' button.

Name: enter a list name.
Shared: checking the 'Shared' box will make this list visible to all users with the manage_patron_lists permission.
Click 'Save'.
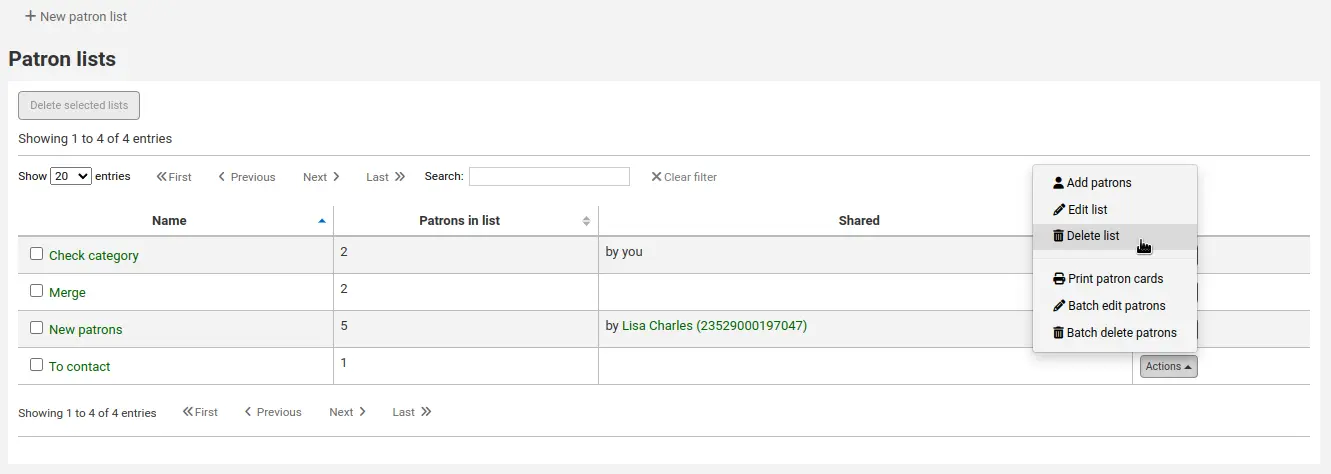
في كل قائمة مستفيدين توجد قائمة "إجراءات" تحتوي على المزيد من الخيارات
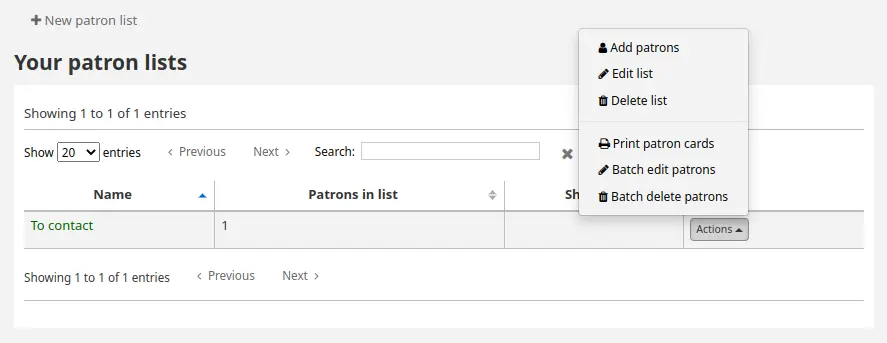
Add patrons: add patrons to the list
Edit list: edit the list name, or shared status
Delete list: delete the list (but not the patrons)
Print patron cards: send the patrons in the list to the patron card creator
Batch edit patrons: send the patrons in the list to the batch patron modification tool
Batch delete patrons: send the patrons in the list to the batch patron deletion tool
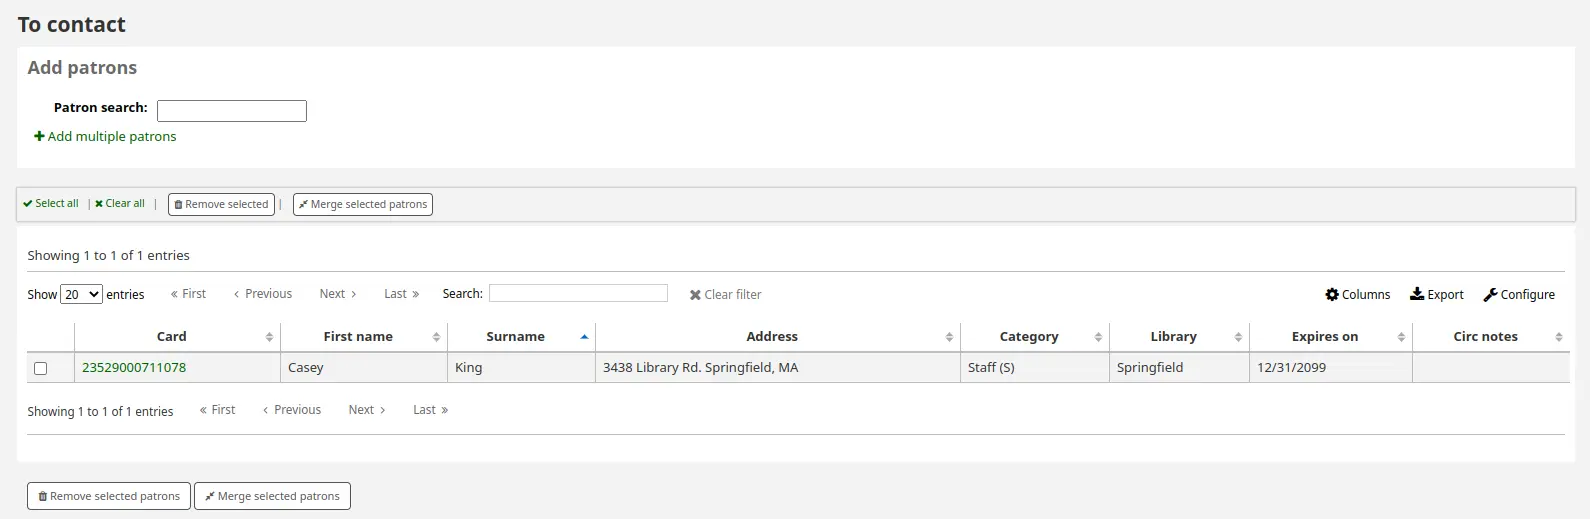
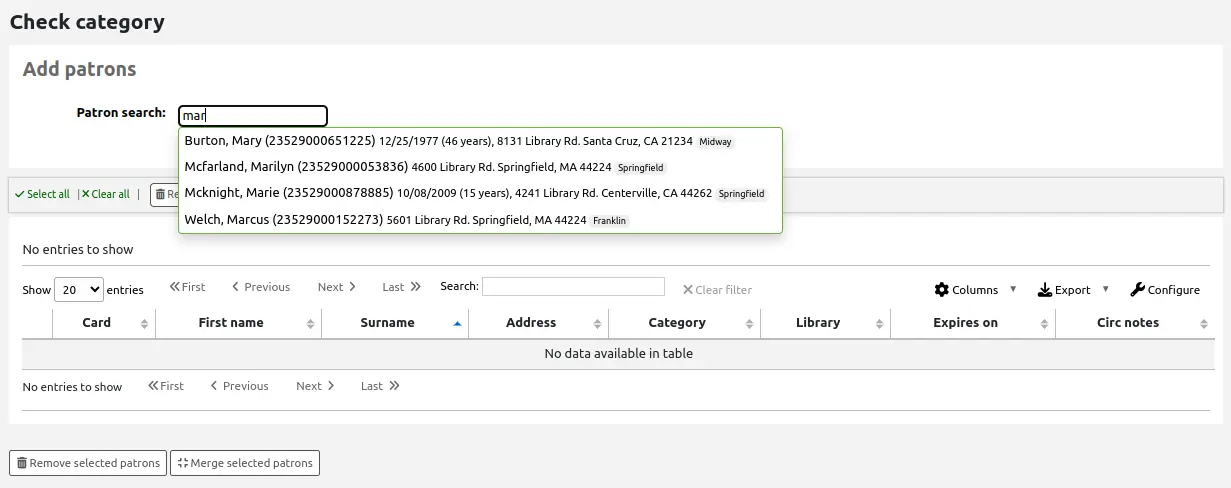
To add patrons to the list, click the 'Add patrons' link in the 'Actions' menu, or click the list name.
Enter the patron's name or card number in the search box and click on the right result to add the patron.
When you have found all the patrons to add, click the 'Add patrons' button to save them to the list.
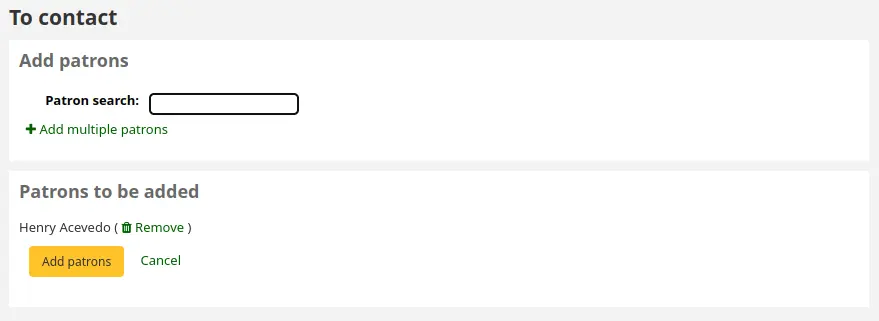
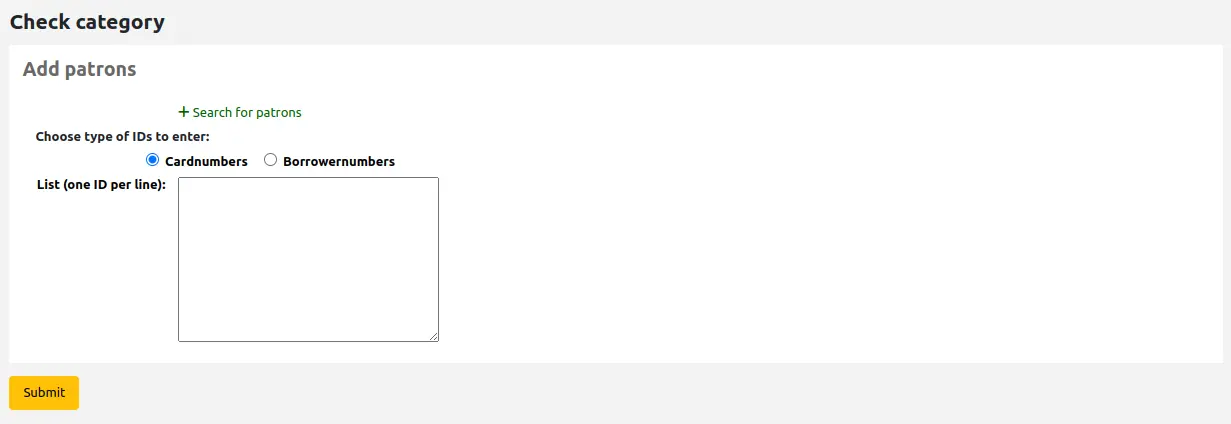
Alternatively, you can click on the 'Add multiple patrons' link and scan (or type in) card numbers in the box. Then click the 'Submit' button to save them to the list.
It is also possible to add patrons to a list from the patron search or from the patron lists tab in the patron record.
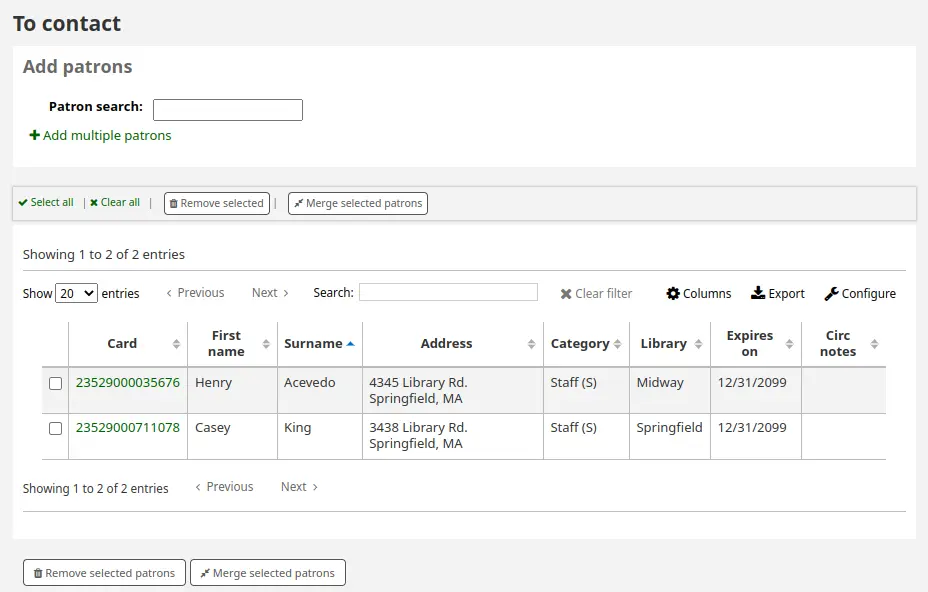
The added patrons will be displayed in the list table.
ملاحظة
You can customize the columns of this table in the Table settings section of the Administration module (table id: patron-list-table).
To delete a list, click the 'Actions' button and choose the 'Delete list' option.
To delete multiple lists at once, select the lists and click the 'Delete selected lists' button at the top of the table.
Version
The option to delete multiple lists at once was added in Koha version 23.11.
أندية المستفيد
Get there: More > Tools > Patrons and circulation > Patron clubs
Patron clubs create clubs in which patrons may be enrolled. It is useful for tracking summer reading programs, book clubs and other such clubs.
مهم
Staff will need the clubs permission or sub-permissions to edit clubs, templates and enroll patrons.
Creating a new club template
ملاحظة
Only staff with the edit_templates permission (or the superlibrarian permission) will be able to create or edit club templates.
A club template is a template that will be used to create clubs. You can add fields that can be filled out at the time a new club is created based on the template, or a new enrollment is created for a given club based on the template.
To create a new club template:
Click on the 'New club template' button.
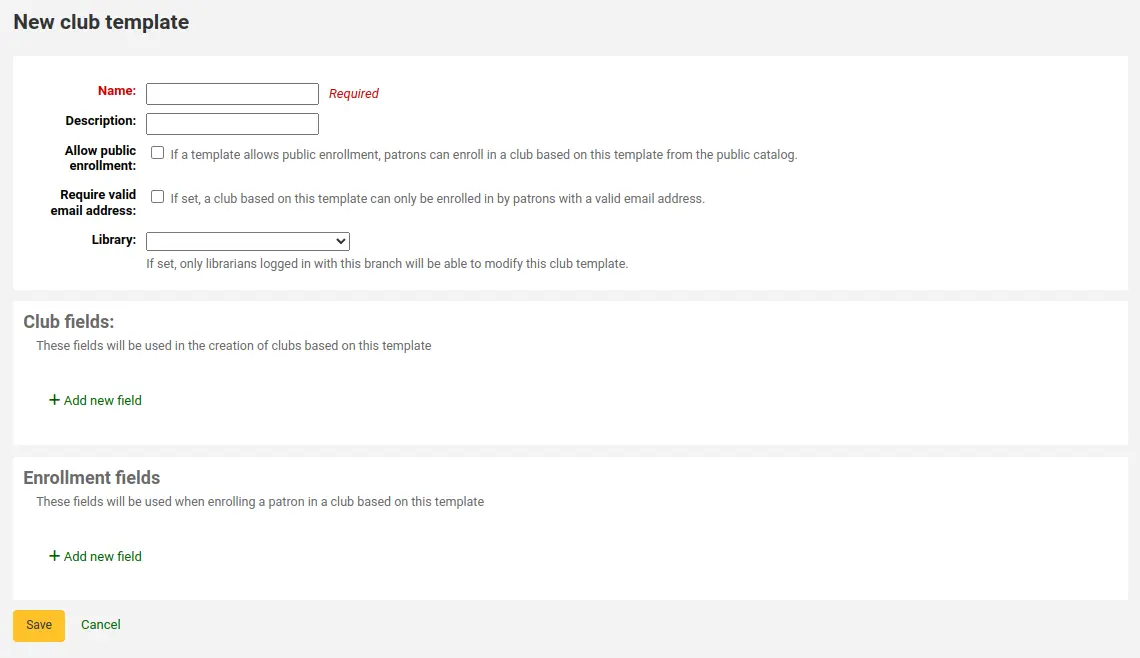
Fill out the form:
Name (required): enter a name for the club template. This could be something like 'Adult book club', 'Children’s book club' or 'Summer reading program'. Remember, these templates will be the starting point for each club you create.
Description: enter any additional information.
Allow public enrollment: if this box is checked, it will allow patrons to enroll in a club based on this template from the OPAC.
Require valid email address: if this box is checked, only patrons with a valid email address can enroll. So they will need a email address to enroll.
Library: choose a library to limit the use of this template to staff from a specific library. If you leave it blank, staff from any library will be able to create a new club using this template.
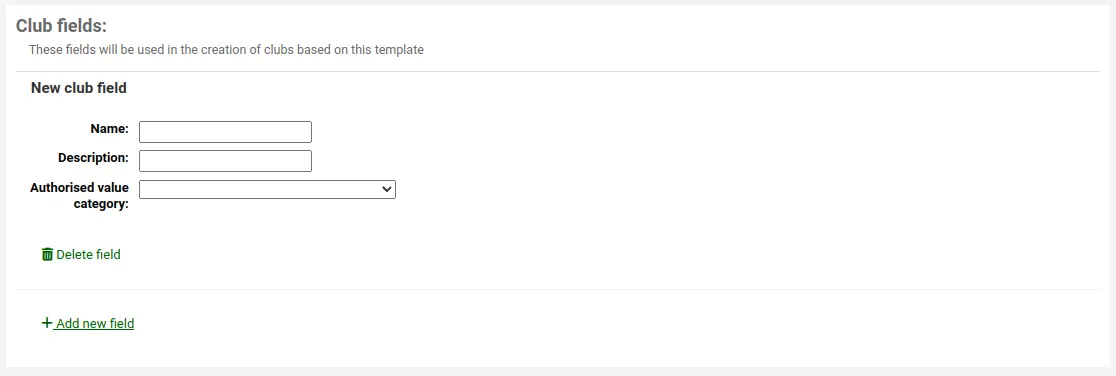
Club fields: these fields will be used when creating a club based on this template. For example, this can be the name of the club, the name of the animator, the theme, etc. To add a club field, click on 'Add new field'.
Name: enter the text that will be used as the label of the field.
Description: enter any additional information about this field.
Authorized value category: if you want the field to be a dropdown menu, choose an authorized value category here. If this is left blank, the field will be a simple text field.
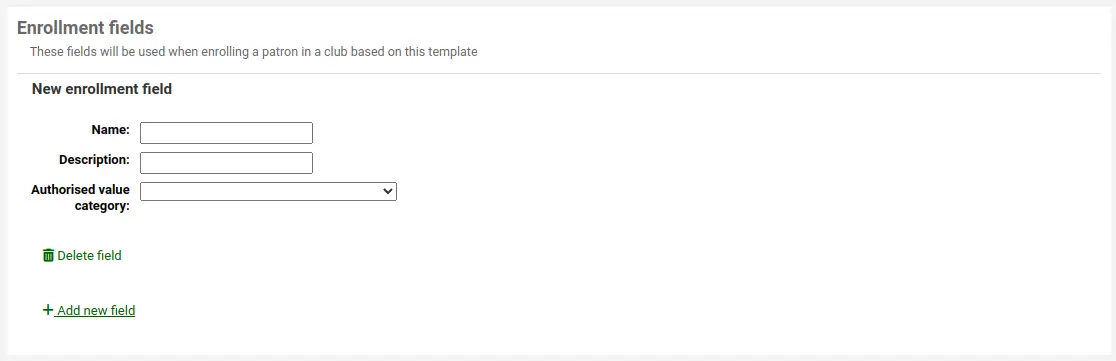
Enrollment fields: you can add any additional fields you want patrons to fill when they enroll in a club based on this template. To add an enrollment field, click on 'Add new field'.
Name: enter the text that will be used as the label of the field.
Description: enter any additional information about this field.
Authorized value category: if you want the field to be a dropdown menu, choose an authorized value category here. If this is left blank, the field will be a simple text field.
Click 'Save'.
Creating a new club based on a template
ملاحظة
Only staff with the edit_clubs permission (or the superlibrarian permission) will be able to create or edit clubs.
Once the templates are created, you can create actual clubs.
Click on the 'New club' dropdown menu and select the template you want to use.
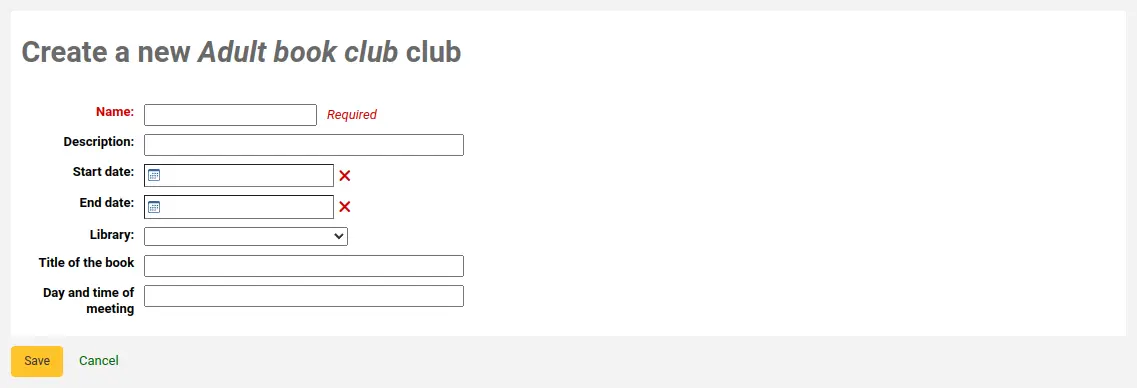
Fill out the form with the club information:
Name (required): enter the name of the specific club you are creating. This is the name the staff and the patrons will see when enrolling. For example, 'Summer 2018 reading club'.
Description: enter any additional information about the club.
Start date: choose the start date of the enrollment period. Staff and patrons will not be able to enroll in the club before the start date.
End date: choose the end date of the enrollment period. Once the club expires, enrollment will not be possible.
Library: if this club is limited to a specific library, choose it here. Only patrons from this specific library will be able to enroll. If you leave it blank, patrons from any library will be able to enroll.
If there were 'Club fields' in the template, they will appear at the bottom of the form.
Click 'Save'.
Enrolling a patron in a club from the staff interface
ملاحظة
Only staff with the enroll permission (or the superlibrarian permission) will be able to enroll patrons in clubs.
To enroll a patron in a club from the staff interface:
Go to the patron's account.
On the 'Details' page or the 'Check out' page, click on the 'Clubs' tab. All ongoing clubs will be displayed in this tab.
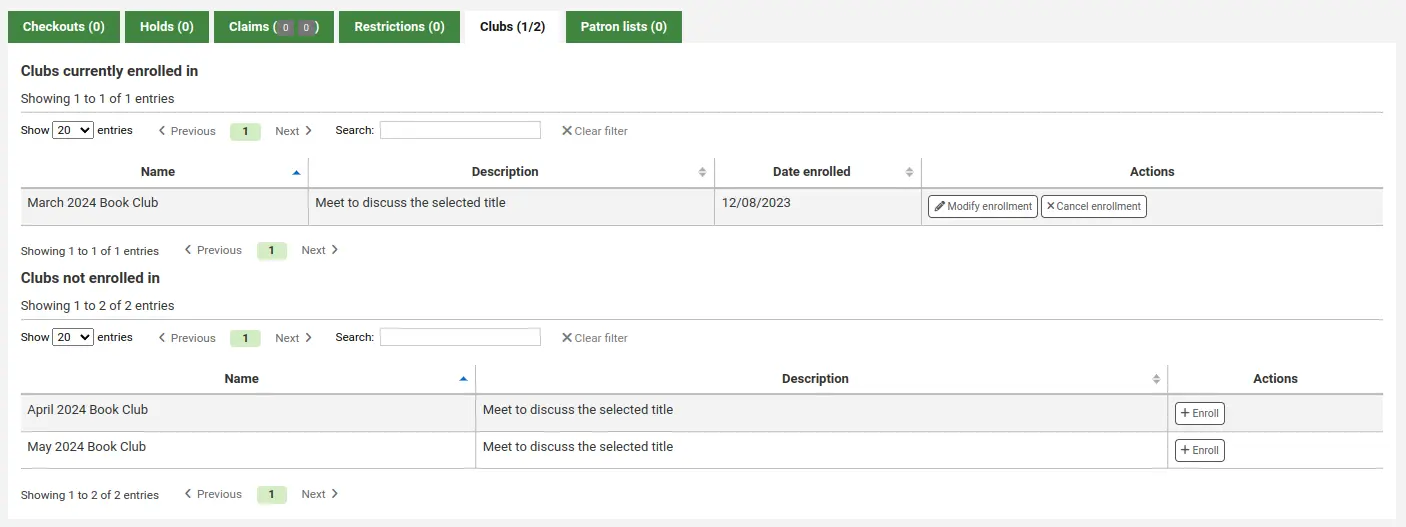
Click on the 'Enroll' button.
If there were any 'Enrollment fields' in the club template, they will appear here.
Click 'Finish enrollment'.
You can also modify an enrollment by clicking the 'Modify enrollment' button, or cancel an enrollment by clicking on the 'Cancel enrollment' button.
Enrolling a patron in a club from the OPAC
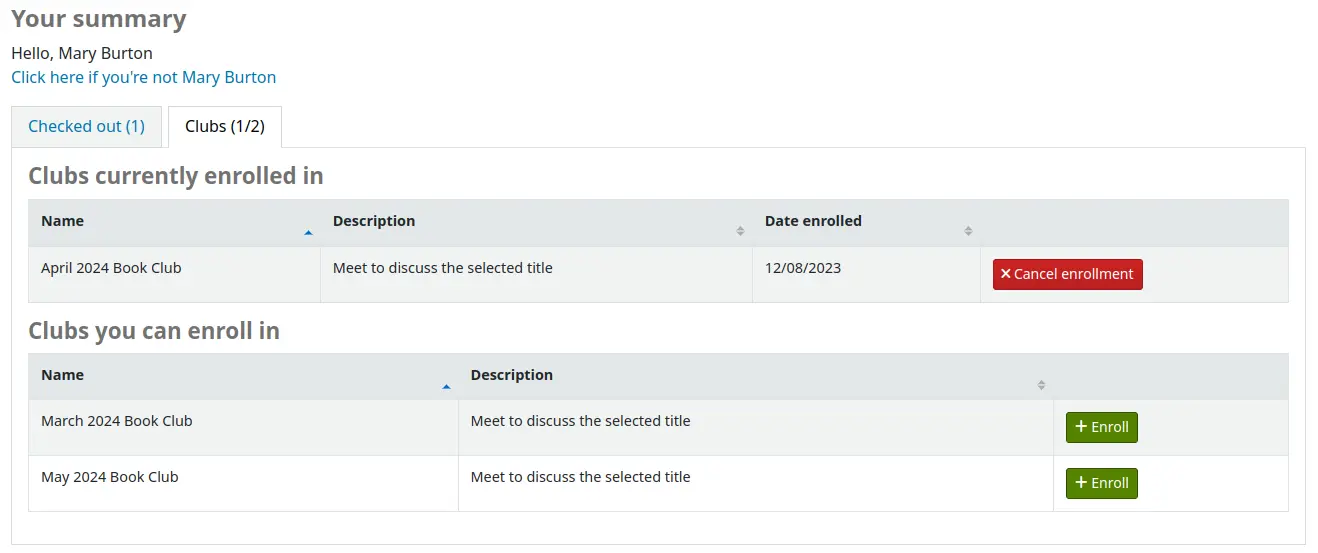
If you allow public enrollment, the club will be visible on the OPAC.
Patrons have to sign into their account.
In the 'Your summary' section, they will be able to click on the 'Clubs' tab and click the 'Enroll' button to enroll.
If there were any 'Enrollment fields' in the club template, they will appear here.
They can then click 'Finish enrollment'.
Patron can also cancel their enrollment to a club by clicking the 'Cancel enrollment' button.
Viewing enrollments
You can monitor the enrollments in each club by going to the 'Patron clubs' tool page and choosing 'Enrollment' from the 'Actions' button next to the club.
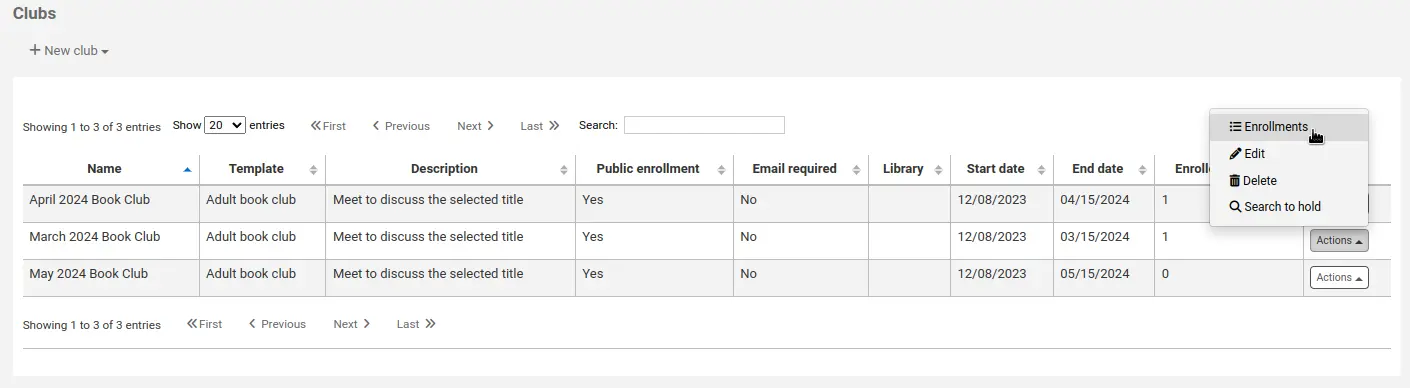
On this page, you will see the patrons enrolled in this club, as well as their answers to the enrollment fields.

Version
The values of the club enrollment fields are visible on this page from Koha version 23.11.
In prior versions, you need to create an SQL report to get the values. See this example in the Koha SQL reports library.
Placing a hold for a patron club
You can place holds for a patron club. Holds are placed for club members in a random order.
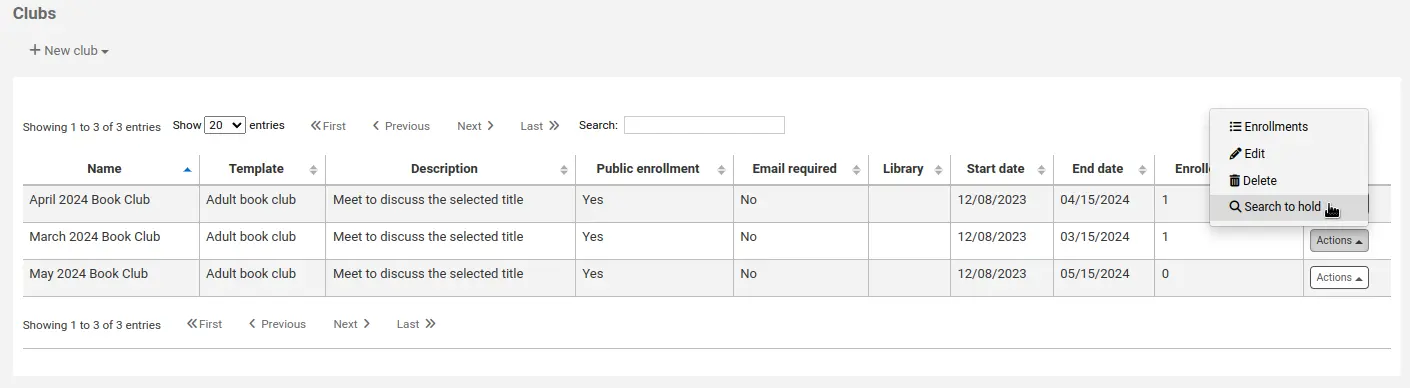
To place a hold for a patron club from the clubs page:
Go to the patron clubs tool ('Home > Tools > Patron clubs').
Click the 'Actions' button for the club and select 'Search to hold'.
Search for a title and select a record.
Select 'Place hold for [CLUBNAME]' from either the action links for the record,

or from the 'Place hold' action in the menu bar.
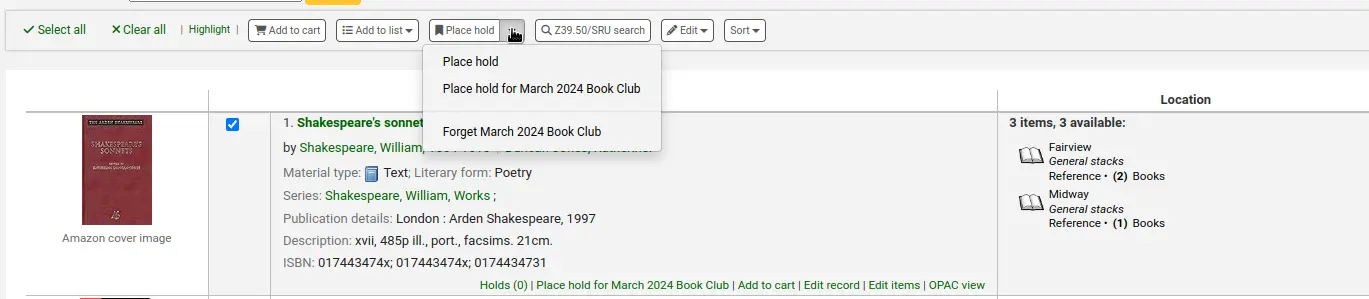
The place holds page is displayed and lists the club members.
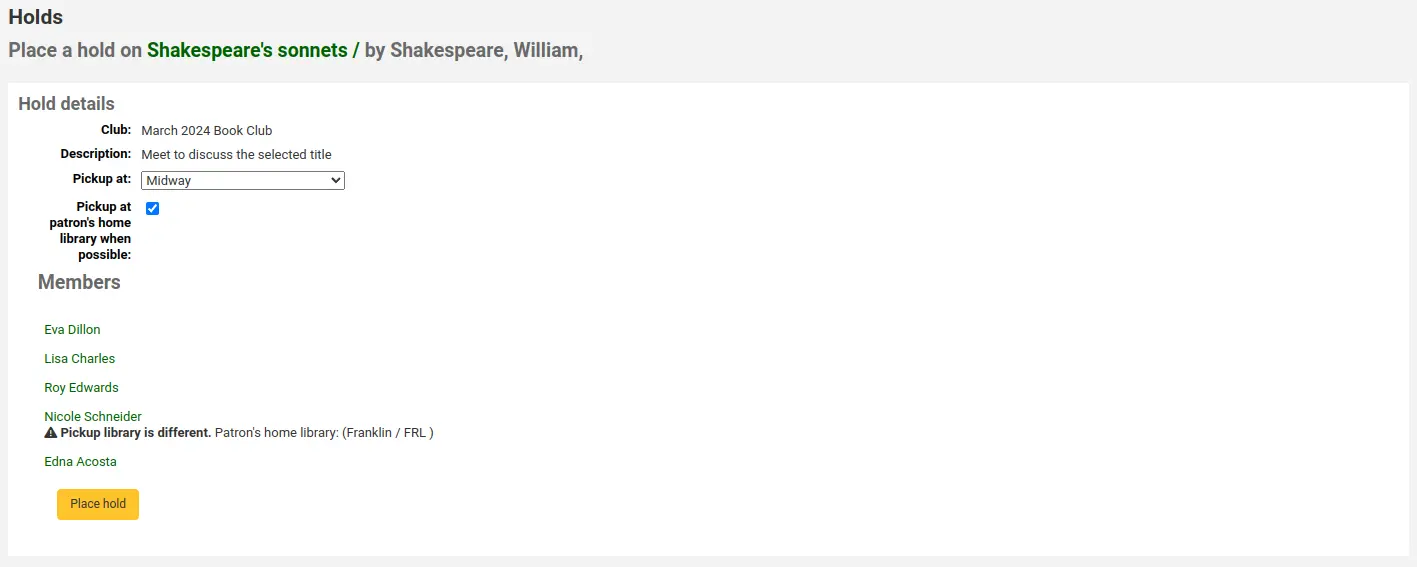
Click the 'Place hold' button.
Holds are placed for all club members at once, in a random priority order.
You can also place a hold for a patron club from the bibliographic record. When placing the hold, click on the 'Clubs' tab and search for the club's name. Then click the place hold button.

استيراد المستفيد
ملاحظة
Only staff with the import_patrons permission (or the superlibrarian permission) will have access to this tool.
Get there: More > Tools > Patrons and circulation > Import patrons
ويمكن استخدام أداة استيراد المستفيد في أي وقت لإضافة مستفيدين بكميات كبيرة. وهي تستخدم عادة في الجامعات والمدارس عندما دفعة جديدة من الطلاب المسجلين.
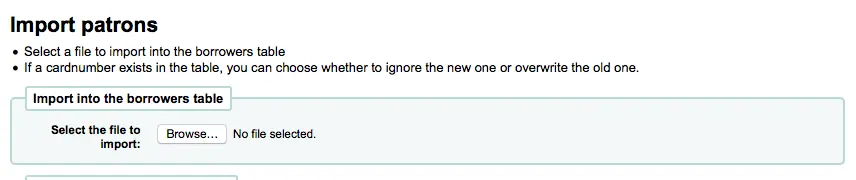
Creating a patron import file
You can download a blank CSV file with a header from the start page of the patron import tool that you can use as a template for your patron import. The header contains all fields that can be used with the patron import tool. You can delete fields and columns you don't need with the exception of a few mandatory ones. When overlaying, if your new .csv includes blank columns, any existing values in patron records will be overwritten with blanks. It is best to remove any blank columns in a .csv to ensure no existing data is removed.
هام
cardnumber, surname, and all fields you have defined in the BorrowerMandatoryField preference are required and must match valid entries in your database.
هام
يجب تخزين قيمة "كلمة المرور" بالنص العادي، وسيتم تحويلها إلى Bcrypthash ( وهي النسخة المرمزة لكلمة المرور)
إذا كانت كلمة مرورك فعلاً مشفرة تحدث إلى مدير النظام لديك حول الخيارات المتاحة
هام
Date formats should match your dateformat system preference, and must be zero-padded, e.g. '01/02/2008'. Alternatively you can supply dates in ISO format (e.g. '2008-12-01').
هام
If your data contains special characters or diacritics, make sure your file is encoded in UTF-8. Otherwise, the special characters will not be imported correctly.
ملاحظة
If loading patron attributes, the 'patron_attributes' field should contain a comma-separated list of attribute types and values.
إنَّ كود نوع السمة والنقطتان يجب أن تسبق كل قيمة.
على سبيل المثال: "INSTID:12345,BASEBALL:Cubs"
يجب إحاطة الحقل بأقواس إذا تم تعريف عدة قيم
بما أن القيم يمكن أن تحتوي على مسافات، قد تحتاج إلى قوسين نصيين مزودجين:
"INSTID:12345,BASEBALL:Cubs,""BASEBALL:White Sox""
ملاحظة
It's possible to set restrictions using the patron import tool. If the expiration date and comment match an existing restriction, the one in the import file will be skipped. So a patron import can be repeated multiple times without creating duplicate restrictions. But if one of the criteria is different, a new restriction will be added.
Importing patrons
Once you have created your file, you can use the patron import tool to bring the data into Koha.
اختر ملف CSV الخاص بك
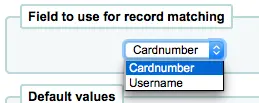
Choose to match on 'card number' or 'username' to prevent adding of duplicate card numbers to the system. Additional matchpoints can be set up using patron attributes marked as unique.
اﻹختيار التالي تستطيع إختيار القيم اﻹفتراضية لتطبيقها على كل المستفيدين المستوردين
For example, if you're importing patrons specific to one branch you can use the field on the import form to apply the branch code to all those you are importing.
Finally, you need to decide on what data you want to replace if there are duplicates.
تم العثور على سجل مطابق للحقل الذي اخترته من أجل مطابقة معايير منع التكرار

When using patron attributes in your installation, you can choose how they are handled on import. You can either decide to always overlay all patron attributes or you choose to only replace patron attributes included in your import file. This will leave other attributes untouched.

Notices and slips
ملاحظة
Only staff with the edit_notices permission (or the superlibrarian permission) will have access to this tool.
Get there: More > Tools > Patrons and circulation > Notices and slips
All notices and circulation receipts (or slips) generated by Koha can be customized using the Notices and slips tool. The system comes with several predefined templates that will appear when you first visit this tool.

ملاحظة
You can customize the columns of this table in the Table settings section of the Administration module (table id: lettert).
كل إشعار يمكن تحريره، ولكن بعضها فقط يمكن حذفه، وهذا لمنع الأخطاء في النظام بأن تحاول الرسالة أن ترسل بدون قالب.كل إشعار وقصاصة يمكن تحريرها حسب أساسيات المكتبة ، وبشكل افتراضي ستتمكن من رؤية الإشعارات لكل المكتبات.
If you have a style you'd like applied to all slips you can point the SlipCSS preference to a stylesheet. The same is true for notices, using the NoticeCSS preference to define a stylesheet.
You will also want to review the Customising notices and slips wiki page for more information on formatting these notices.
Adding notices and slips
لإضافة إخطار أو كعب جديد
Click 'New notice'
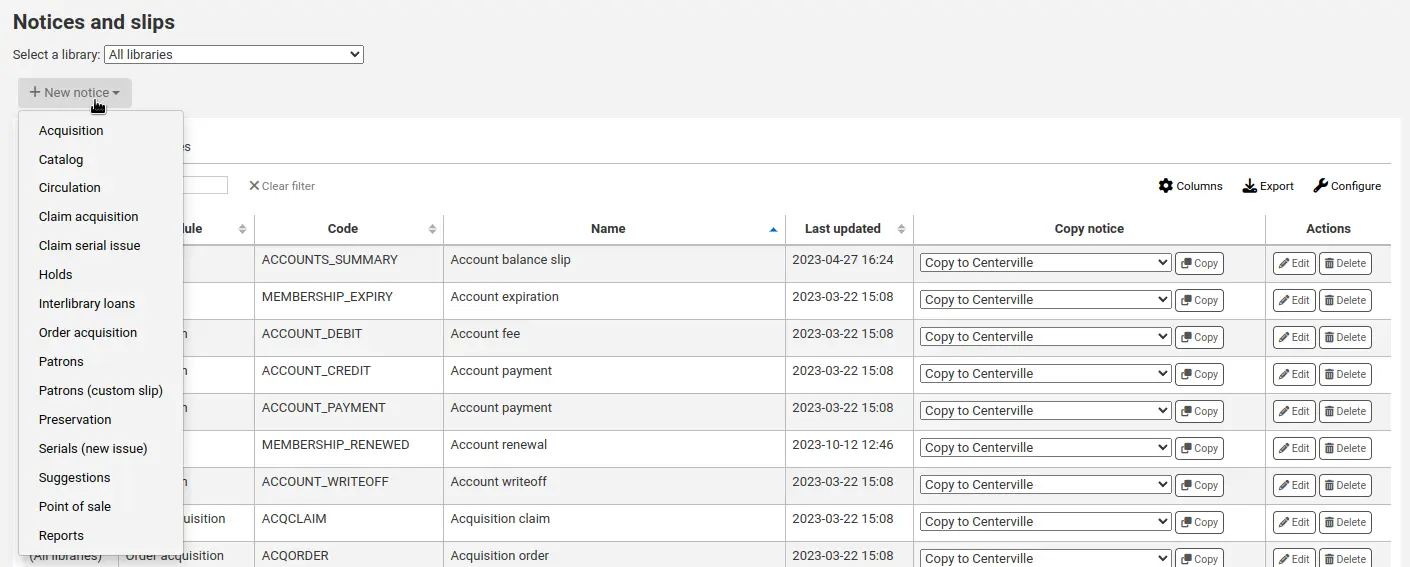
Choose the type of notice, or module this notice is related to
Acquisition: notice to be used in the acquisitions module
Bookings: notice to be used in the bookings process
Version
This type of notice was first introduced in version 24.11 of Koha.
Catalog: notice to be used in the catalog
Circulation: notice or slip to be used for circulation (such as overdue notices)
Claim acquisition: notice to be used when claiming late orders in the acquisitions module
Claim serial issue: notice to be used when claiming late serial issues in the serials module
Holds: notice or slip to be used in the holds process
Interlibrary loans: notice to be used in the ILL request process
Lists: notice to be used with the lists
Version
This type of notice was added to Koha in version 24.11.
Previously, notices related to lists were categorized under Patrons.
Order acquisition: notice to be used when ordering acquisitions
Patrons: notice or slip to be used in patron accounts
Patrons (custom slip): slip to be used in patron accounts
Version
This type of notice was added in Koha version 23.11.
Patrons (custom message): notice to be used when sending a custom email to a patron.
Version
This type of notice was added to Koha in version 24.05.
Preservation: notice or slip to be used in the preservation process
Version
This type of notice was added in Koha version 23.11.
Serials (new issue): notice to be used to notify patrons of the arrival of a new serial issue
Suggestions: notice to be used in the purchase suggestion process
Point of sale: notice or slip to be used in the point of sale module
Reports: notice to format custom report results
Version
This type of notice was added in Koha version 23.11.

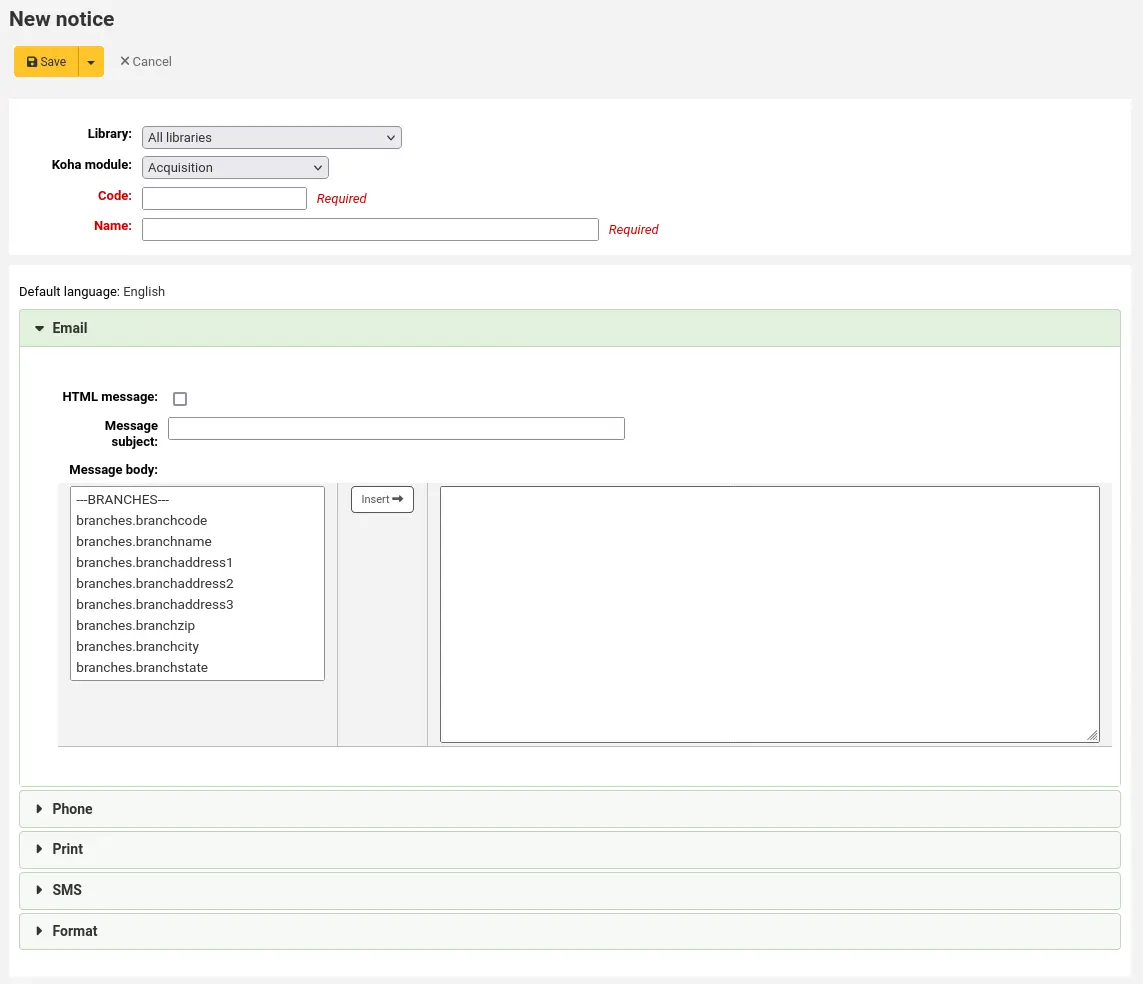
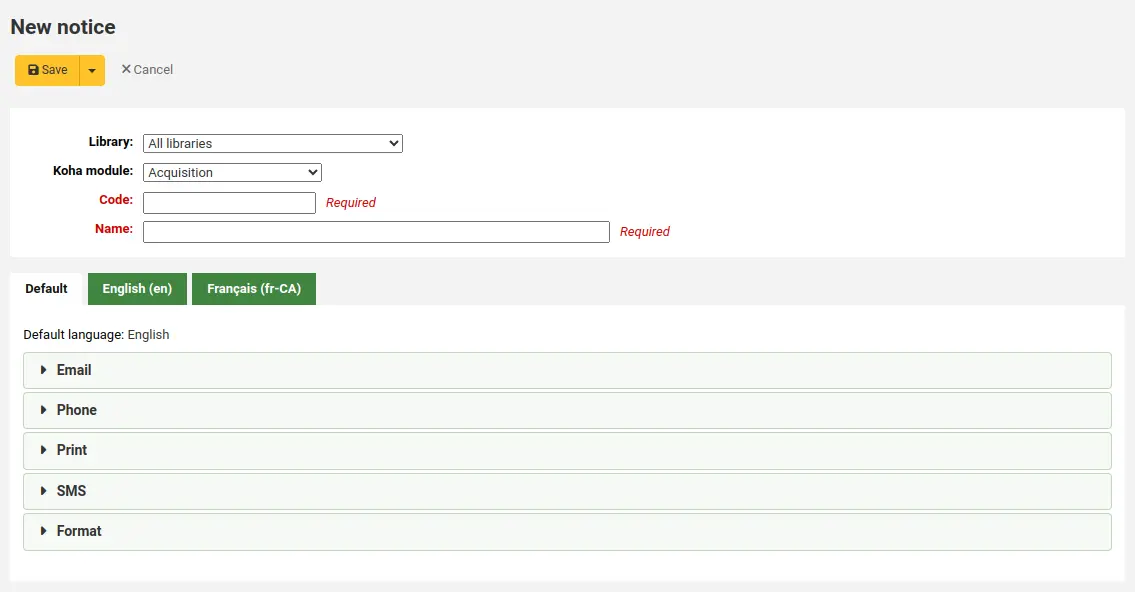
Fill out the notice information
Library: choose which library this notice or slip is for.
مهم
Not all notices can be library specific. For more information review the Customising notices and slips wiki page.
Koha module: if you didn't choose the correct module or type of notice previously, you can change it here.
Code: enter a unique alphanumeric code for this notice.
مهم
Note that codes are limited to 20 characters.
Name: enter a descriptive name for the notice.
ملاحظة
For overdue notices, be sure to put your library name in the description, so that it will be visible when setting up your triggers.
Next, you can customize the notice for every possible delivery method.
Every notice should have an email template set for it.
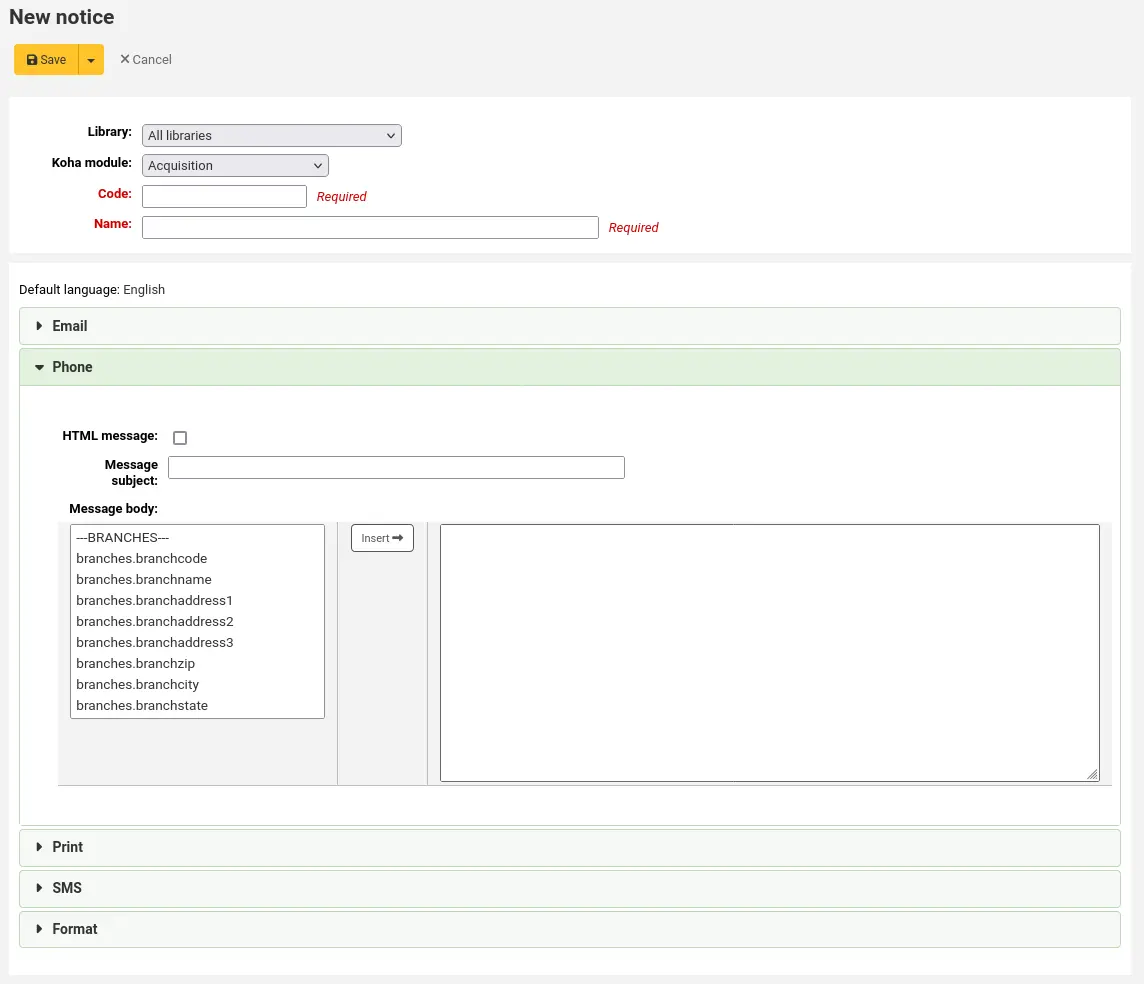
If the PhoneNotification system preference is enabled, you will have the option to add a phone template.
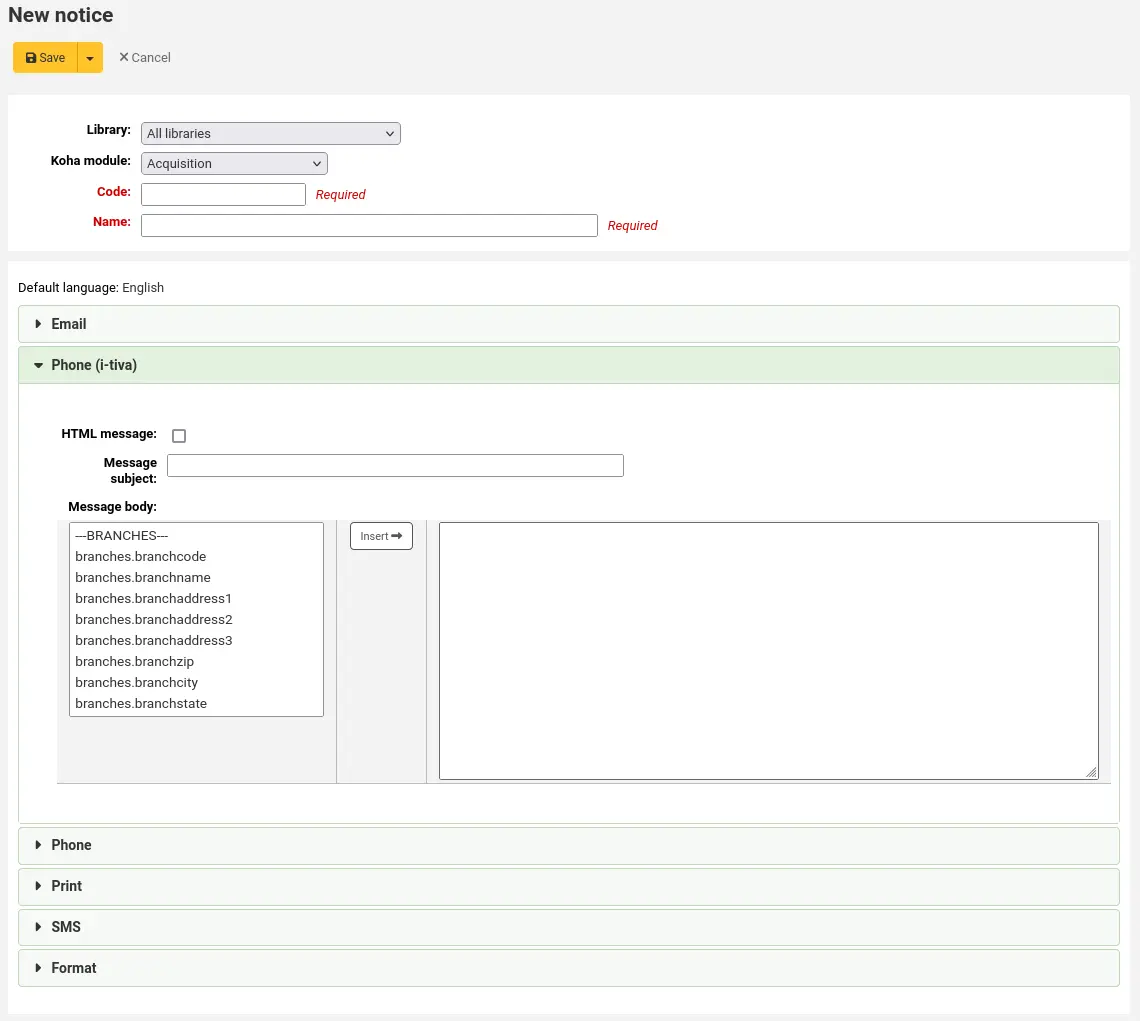
If you're using the TalkingTechItivaPhoneNotification service you can set up a notification specific to that service.
If you plan on printing this notice, you can set the print template
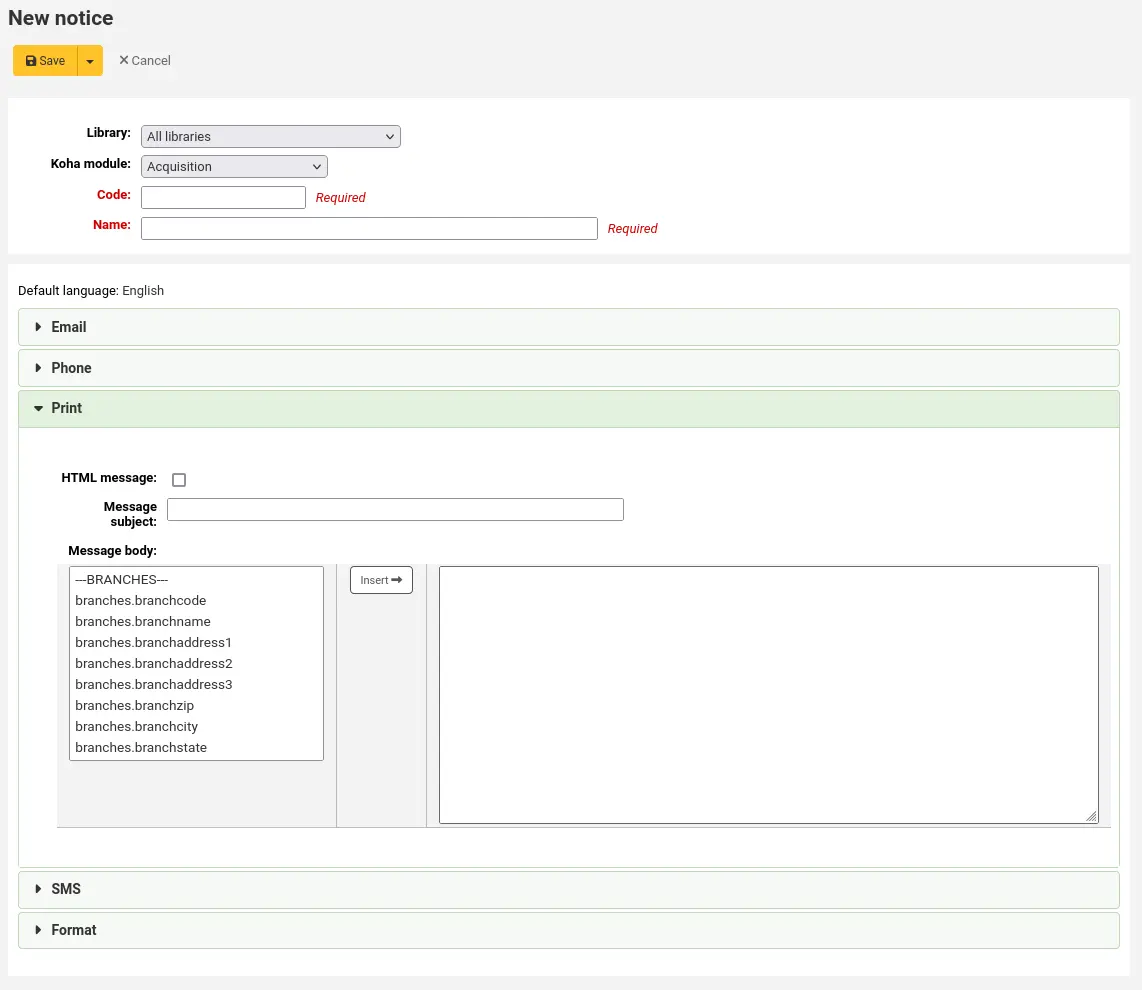
If you have enabled SMS notices with the SMSSendDriver system preference, you can set the text for your SMS notices
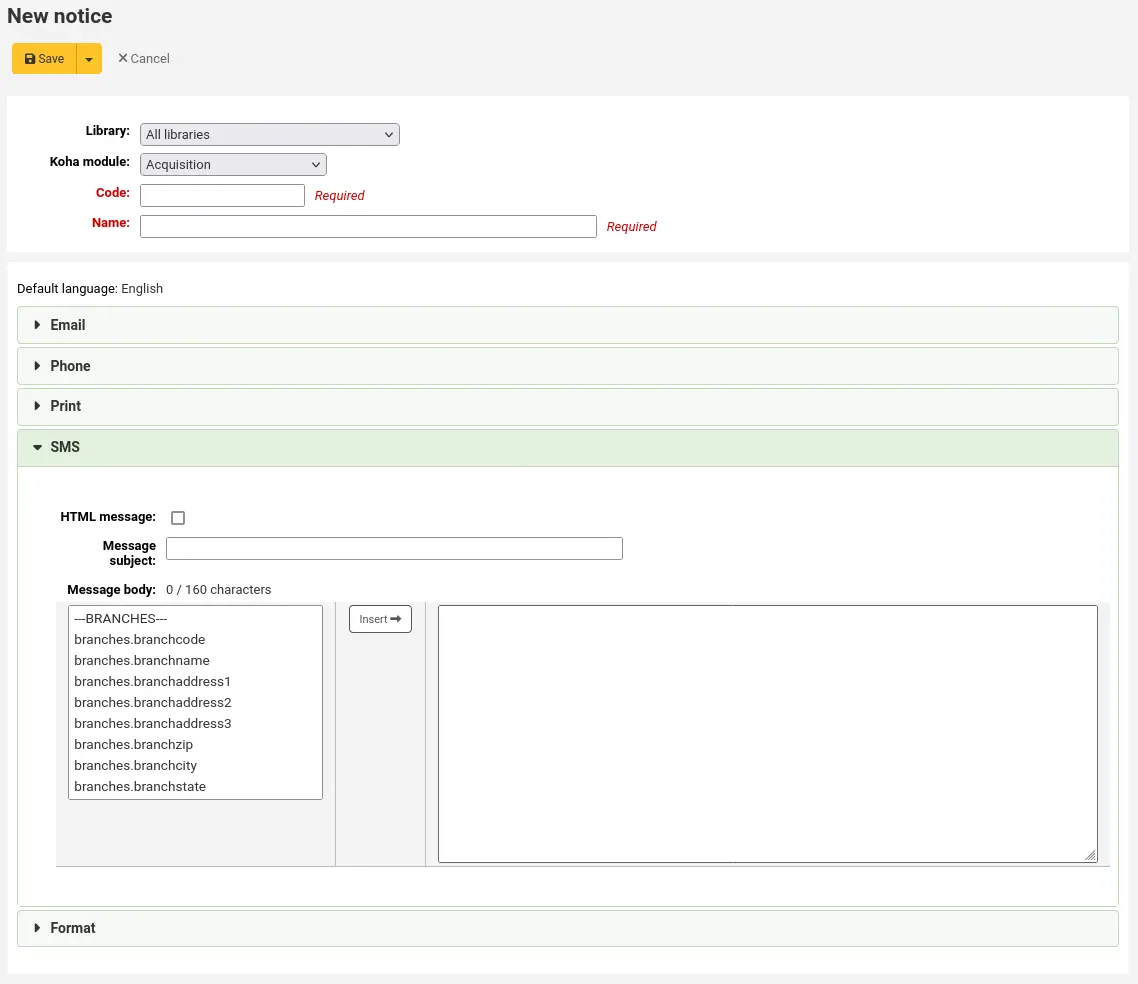
مهم
Text messages are limited to 1600 characters. Make sure to keep messages short and avoid adding variables that could be very long (such as the list of items due, for example).
The 'Format' tab is used to add formatting to the print notice.
Version
This option was added to Koha in version 24.05.
Click the links under 'Insert selectors to apply styles to' to automatically insert all the relevant selectors for either the headings, the tables, or all the text.
نصيحة
Use the links to insert the selectors and then remove the unnecessary ones if needed. For example, if you want to apply styling to the first level headings, click 'Headings' and then remove everything except
#slip h1and#receipt h1.Remove the text
// insert CSS herein the 'Style (CSS)' field and replace it with the formatting required.If this formatting is applicable to all print notices, check the 'Apply format settings to all notices' box. This will overwrite the styling in other notices, if any.
Each notice offers the same options
HTML message: if you plan on writing the notice or slip in HTML check the 'HTML message' box, otherwise the content will be generated as plain text
Message subject: for emails, this is what will appear in the subject line of the email
Message body: feel free to type whatever message you feel is best, use the fields on the left hand side to enter individualized data from the from database.
You can also use Template toolkit syntax for more flexibility. See the Notices with Template Toolkit wiki page for more information.
ملاحظة
Review the Customising notices and slips wiki page for more information.
مهم
Overdue notices can use
<<items.content>>tags by themselves, or use<item></item>to span all of the tags. Learn more about the Overdue notice markup.On overdue notices make sure to use
<<items.content>>tags to print out the data related to all items that are overdue.The other option, only for overdue notices, is to use the
<item></item>tags to span the line so that it will print out multiple lines. One example for the<item></item>tag option is:
<item>"<<biblio.title>>" by <<biblio.author>>,
<<items.itemcallnumber>>, Barcode: <<items.barcode>> ,
Checkout date: <<issues.issuedate>>, Due date:
<<issues.date\_due>> Fine: <<items.fine>> </item>
مهم
Only the overdue notices take advantage of the
<item></item>tags, all other notices referencing items need to use<<items.content>>.نصيحة
To add today's date you can use the
<<today>>tag.نصيحة
إذا أردت طباعة اسم المستفيد بالكامل على الكعوب أو الإخطارات يمكنك إما إدخال البيانات في حقل الاسم الآخر أو حقل الحروف الأولى لكل مستفيد واستخدام تلك القيمة.
View default: the 'view default' button allows you to display the default sample notice in a popup modal and even reset the notice to that default. This is available for the notices and slips that come with Koha.
Version
This option was added to Koha in version 24.11.
The system preference TranslateNotices will add tabs for each installed language to the notices editor. The notice defined in the 'Default' tab will be used if there is no preferred language set for a patron ('Preferred language for notices' field in the patron file).
معاينة قوالب الإخطارات
بالنسبة لبعض الإخطارات من الممكن معاينة قالب الإخطار الذي يعرض كيف سيبدو مستفيد محدد لمادة أو تسجيلة معينة.
إذا كان قالب الإخطار قابل للمعاينة فسوف يحتوي رأس قالب الإخطار على حقل لإدخال بيانات المعاينة
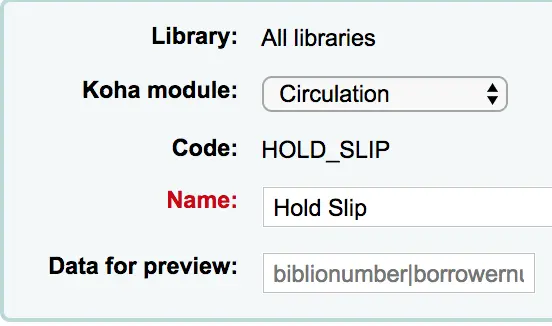
قم بملء المعلومات الضرورية للقالب ثم انقر على زر معاينة أدنى الرسالة. سوف يشير مربع المعاينة الحواري إلى ما إذا كان هناك أي مشكلات في توليد معاينة قالب الإخطار.
Overdue notice markup
When creating your overdue notices there are two tags in addition to the various database fields that you can use in your notices. You will also want to review the Customising notices and slips wiki page for information on formatting item information in these notices.
مهم
مهم هذه الوسوم الجديدة تعمل فقط على اشعارات التأخير، ليس اشعارات الإعارة الأخرى ذات الصلة في هذا الوقت.
هذين الوسمين هما <item> و </item> والتي يجب أن تشتمل عليهما جميع الحقول من التسجيلة البيبلوغرافية، والمواد البيبلوغرافية وجداول المواد.
مثال على استخدام هذه الوسوم في قالب الاخطار قد يكون:
The following item(s) is/are currently overdue:

<item>"<<biblio.title>>" by <<biblio.author>>, <<items.itemcallnumber>>, Barcode: <<items.barcode>> Fine: <<items.fine>></item>
مما يفترض أن مادتين قد تأخرتا ، والنتائج ستكون داخل الإشعار كما يلي:
The following item(s) is/are currently overdue:

"A Short History of Western Civilization" by Harrison, John B, 909.09821 H2451, Barcode: 08030003 Fine: 3.50
"History of Western Civilization" by Hayes, Carlton Joseph Huntley, 909.09821 H3261 v.1, Barcode: 08030004 Fine: 3.50
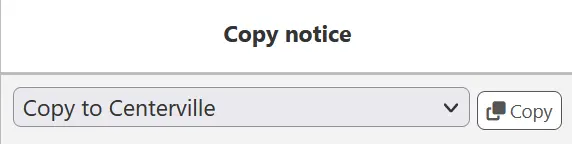
Copying notices and slips
You can also copy an existing notice to another library by selecting the library you want to copy it to in the column "Copy notice" and then clicking on the "Copy" button.
Existing notices and slips
Among the default notices are notices for several common actions within Koha. All of these notices can be customized by altering their text via the Notices and slips tool and their style using the NoticeCSS system preference to define a stylesheet.
مهم
New notices are only included by default in new installations. If you have upgraded from a previous version and need a new notice that was only added in the newer version you have upgraded to, you will have to manually add that notice.
نصيحة
Review the Customising notices and slips wiki page for information on formatting item information in these notices.
Here are some of what those notices do:
2FA_DISABLE
This notice is sent to a staff user when they disable the two-factor authentication on their account.
2FA_ENABLE
This notice is sent to a staff user when they enable the two-factor authentication on their account.
2FA_OTP_TOKEN
This notice is used to send a time-based one-time password to a staff user for them to use to log into the staff interface if they have enabled the two-factor authentication on their account.
ACCEPTED
This notice is sent to the patron when their purchase suggestion is accepted.
ملاحظة
If you don't want to send this notice, simply delete it.
ACCOUNT_PAYMENT
This notice is sent for each payment transaction in a patron's account if the AutomaticEmailReceipts system preference is set to 'Send'.
This is also the notice sent for payment transactions in a patron's account if the staff member manually sends the receipt by email using the 'Email' button on the transaction line.
ACCOUNT_WRITEOFF
This notice is sent for each writeoff transaction in a patron's account if the AutomaticEmailReceipts system preference is set to 'Send'.
This is also the notice sent for writeoff transaction in a patron's account if the staff member manually sends the receipt by email using the 'Email' button on the transaction line.
ACQCLAIM (مطالبة التزويد)
Used for claiming orders in the aquisitions module.
ACQCLAIM is the code of the sample notice, but it's possible to define several notices choosing any code. Only the module 'Claim acquisition' will be taken into account. All notices with this module will appear in the pull down on the late orders page.
يتم إرسال هذا الإخطار عند توافر عدة معايير:
The staff patron triggering the email has a valid email address.
The vendor contact marked as 'Contact about late orders?' has a valid email address.
ACQORDER (Acquisition order)
Used in the acquisitions module to send order information to the vendor
The notice is triggered manually from the basket summary page using the 'Email order' button in the toolbar.
يتم إرسال هذا الإخطار عند توافر عدة معايير:
The staff patron triggering the email has a valid email address.
The vendor contact marked as 'Primary acquisitions contact' and 'Contact when ordering' has a valid email address.
ACQ_NOTIF_ON_RECEIV
Used in the acquisition module to inform patrons on receiving orders they have been added to.
AR_CANCELED
This notice is sent to the patron when an article request is canceled by staff.
AR_COMPLETED
This notice is sent to the patron when an article request is marked as completed by staff.
AR_PENDING
This notice is sent to the patron when an article request is changed to 'pending' status
AR_PROCESSING
This notice is sent to the patron when an article request is marked as being processed by staff.
AR_REQUESTED
This notice is sent to the patron when an article request has been made in order to confirm the request.
AUTO_RENEWALS
This notice is sent to the patron if automatic renewals are enabled and the patron has chosen to receive it in their messaging preferences.
In order to send this notice, you must set the AutoRenewalNotices system preference to "according to patron messaging preferences".
This notice is set so that, depending on the result of the renewal, whether is was successful or not, the message will be different.
AUTO_RENEWALS_DGST
This notice is sent to the patron if automatic renewals are enabled and the patron has chosen to receive the digest in their messaging preferences.
In order to send this notice, you must set the AutoRenewalNotices system preference to "according to patron messaging preferences".
This notice is set so that, depending on the result of the renewal, whether is was successful or not, the message will be different.
AVAILABLE
This notice is sent to the patron who made a purchase suggestion, when the order created from the suggestion is received.
ملاحظة
If you don't want to send this notice, simply delete it.
BOOKING_CANCELLATION
This notice is sent to a patron when library staff cancel their booking.
Version
The BOOKING_CANCELLATION notice was first introduced in version 24.11 of Koha.
BOOKING_CONFIRMATION
This notice is sent to a patron when library staff place a booking on their behalf.
Version
The BOOKING_CONFIRMATION notice was first introduced in version 24.11 of Koha.
BOOKING_MODIFICATION
This notice is sent to a patron when library staff update their booking's pickup library, start date or end date.
Version
The BOOKING_MODIFICATION notice was first introduced in version 24.11 of Koha.
CART
This notice is used when sending the cart by email from the OPAC or when sending the cart by email from the staff interface.
CANCEL_HOLD_ON_LOST
This notice is sent to a patron who placed a hold on an item and staff marked this items as lost from the 'Holds to pull' list.
This notice is sent if the CanMarkHoldsToPullAsLost system preference is set to 'Allow to mark items as lost and notify the patron'.
CHECKIN
تم إرسال هذا الإخطار كلإخطار "رد" لكل المواد التي تم ردها
ويستخدم هذا الإشعار إذا توفر معيارين:
The EnhancedMessagingPreferences is set to 'Allow'
قد طلب من المستفيد لاستلام هذا الإشعار
If EnhancedMessagingPreferencesOPAC is set to 'Show', patrons will be able to choose their messaging preferences in their online account in the Messaging tab.
Staff can select this notice for a patron in their messaging preferences.
CHECKOUT
يتم إرسال هذا الإخطار كإخطار "إعارة" لكل المواد المعارة
ويستخدم هذا الإشعار إذا توفر معيارين:
The EnhancedMessagingPreferences is set to 'Allow'
قد طلب من المستفيد لاستلام هذا الإشعار
If EnhancedMessagingPreferencesOPAC is set to 'Show', patrons will be able to choose their messaging preferences in their online account in the Messaging tab.
Staff can select this notice for a patron in their messaging preferences.
CHECKOUT_NOTE
This notice is sent to the system administration (the email address in KohaAdminEmailAddress) to alert them that a patron added a checkout note from their checkouts list on the OPAC.
DISCHARGE
This notice is used to generate a PDF to document a successful discharge request
The PDF can either be downloaded by the patron from their patron account or from the staff interface when discharging a patron
The discharge feature is controlled by the useDischarge system preference.
DUE
This notice is sent as the 'Item due' notice for an checked out item that is due today.
ويستخدم هذا الإشعار إذا توفر معيارين:
The EnhancedMessagingPreferences is set to 'Allow'
قد طلب من المستفيد لاستلام هذا الإشعار
If EnhancedMessagingPreferencesOPAC is set to 'Show', patrons will be able to choose their messaging preferences in their online account in the Messaging tab.
Staff can select this notice for a patron in their messaging preferences.
DUEDGST
This notice is sent as the 'Item due' notice for all checked out items that are due today (digest option).
ويستخدم هذا الإشعار إذا توفر معيارين:
The EnhancedMessagingPreferences is set to 'Allow'
The patron has requested to receive this notice as a digest
If EnhancedMessagingPreferencesOPAC is set to 'Show', patrons will be able to choose their messaging preferences in their online account in the Messaging tab.
Staff can select this notice for a patron in their messaging preferences.
HOLD (Hold available for pickup)
This notice is sent to the patron when their hold is ready for pickup.
ويستخدم هذا الإشعار إذا توفر معيارين:
The EnhancedMessagingPreferences is set to 'Allow'
The patron has requested to receive this notice as a digest
If EnhancedMessagingPreferencesOPAC is set to 'Show', patrons will be able to choose their messaging preferences in their online account in the Messaging tab.
Staff can select this notice for a patron in their messaging preferences.
حين يشير هذا الإخطار إلى جدول الفروع فإنه يشير إلى معلومات فرع الالتقاط
HOLD_CHANGED
This notice is sent to library staff (either the email address in ExpireReservesAutoFillEmail), or the library's reply-to address, to alert them that a hold has been canceled, the item filled the next hold and is now waiting for another patron.
This notice is only sent if ExpireReservesAutoFill is set to 'Do'.
HOLD_REMINDER
This notice is sent to the patron when their hold has been waiting for pickup for more than a number of days
If EnhancedMessagingPreferencesOPAC is set to 'Show', patrons will be able to choose their messaging preferences in their online account in the Messaging tab. The notice is 'Hold reminder'.
Staff can select this notice for a patron in their messaging preferences. The notice is 'Hold reminder'.
The holds_reminder.pl cron job is required to generate this notice.
HOLDDGST
Version
This notice was added to Koha in version 23.11.
This notice is sent as the 'Hold filled' notice for holds waiting for pickup (digest option).
ويستخدم هذا الإشعار إذا توفر معيارين:
The EnhancedMessagingPreferences system preference is set to 'Allow'.
The patron has requested to receive this notice as a digest.
If the EnhancedMessagingPreferencesOPAC system preference is set to 'Show', patrons will be able to choose their messaging preferences in their online account in the Messaging tab.
Staff can select this notice for a patron in their messaging preferences.
HOLDPLACED
This notice is sent to the library staff when a hold has been placed.
This notice requires the emailLibrarianWhenHoldIsPlaced system preference to be set to 'Enable'.
When this notice references the branches table it is referring to the pickup library information.
HOLDPLACED_PATRON
This notice is sent to the patron who placed a hold.
This notice requires that the EmailPatronWhenHoldIsPlaced system preference be set to 'Email'.
Version
This notice was added to Koha in version 23.11, along with the corresponding system preference.
ILL_PARTNER_REQ
This notice is used by the ILL module to send requests to partner libraries.
ILL_PICKUP_READY
This notice is sent to the patron when the inter-library loan they requested has been fulfilled and is now ready for pickup.
Staff can select this notice for a patron in their messaging preferences. The notice is 'Interlibrary loan ready'.
ملاحظة
The option will only appear in the messaging preferences if the ILLModule system preference is enabled.
If EnhancedMessagingPreferencesOPAC is set to 'Show', patrons will be able to choose their messaging preferences in their online account in the Messaging tab. The notice is 'Interlibrary loan ready'.
ملاحظة
The option will only appear in the messaging preferences if the ILLModule system preference is enabled.
ILL_REQUEST_CANCEL
This notice is sent to library staff when a patron cancels their inter-library loan request from their account in the OPAC.
ILL_REQUEST_MODIFIED
This notice is sent to library staff when a patron modifies their inter-library loan request from their account in the OPAC.
ILL_REQUEST_UNAVAIL
This notice is sent to the patron when the inter-library loan they requested has been canceled because it was unavailable.
Staff can select this notice for a patron in their messaging preferences. The notice is 'Interlibrary loan unavailable'.
ملاحظة
The option will only appear in the messaging preferences if the ILLModule system preference is enabled.
If EnhancedMessagingPreferencesOPAC is set to 'Show', patrons will be able to choose their messaging preferences in their online account in the Messaging tab. The notice is 'Interlibrary loan unavailable'.
ملاحظة
The option will only appear in the messaging preferences if the ILLModule system preference is enabled.
ILL_REQUEST_UPDATE
This notice is sent to the patron to alert them that their inter-library loan request has been updated.
Staff can select this notice for a patron in their messaging preferences. The notice is 'Interlibrary loan updated'.
ملاحظة
The option will only appear in the messaging preferences if the ILLModule system preference is enabled.
If EnhancedMessagingPreferencesOPAC is set to 'Show', patrons will be able to choose their messaging preferences in their online account in the Messaging tab. The notice is 'Interlibrary loan updated'.
ملاحظة
The option will only appear in the messaging preferences if the ILLModule system preference is enabled.
LIST
This notice is used when sending a list by email from the OPAC or when sending a list by email from the staff interface.
MEMBERSHIP_EXPIRY
This notice can be sent to patrons to warn them that their cards are expiring soon.
Requires that you have the MembershipExpiryDaysNotice set and the related cron job set.
MEMBERSHIP_RENEWED
This notice can be sent to patrons to notify them that their library membership has been renewed.
The notice is generated by the membership_expiry.pl cronjob when it is called with the
--renewparameter.
NEW_CURBSIDE_PICKUP
This notice is sent to the patron when a curbside pickup is scheduled.
In order to send this notice,
The patron must have chosen to receive the 'Hold filled' notice by email.
Staff can select this notice for a patron in their messaging preferences
If EnhancedMessagingPreferencesOPAC is set to 'Show', patrons will be able to choose their messaging preferences in their online account in the Messaging tab.
NEW_SUGGESTION
This notice is sent to library staff when the EmailPurchaseSuggestions system preference is enabled.
NOTIFY_MANAGER
This notice is sent to a staff member when they are assigned as manager of a suggestion in the acquisitions module.
ODUE (Overdue notice)
This notice is used to send overdue notices to patrons
ODUE is the code of the sample notice, but it's possible to use any code and define multiple different messages for different patron categories and notice levels
Requires that you set Overdue notice/status triggers
OPAC_REG
This notice is sent to library staff when the EmailPatronRegistrations system preference is enabled and a patron registers through the OPAC.
OPAC_REG_VERIFY
This notice is sent to the patron who registered through the OPAC if the PatronSelfRegistrationVerifyByEmail system preference is enabled.
ORDERED
This notice is sent to the patron who made a suggestion, when the 'from a suggestion' option is used to create an order from it.
ملاحظة
If you don't want to send this notice, just delete it.
PASSWORD_CHANGE
This notice is sent to a patron whose password was changed, if the NotifyPasswordChange system preference is enabled.
PASSWORD_RESET
This notice is sent when a patron requests a new password from the OPAC in order to validate the email address.
The password reset feature is controlled by the OpacResetPassword system preference.
PICKUP_RECALLED_ITEM
This notice is sent to the patron who has requested a recall when the item is ready for them to pick up.
PREDUE
This notice is sent as the 'advance notice' when an item is due
ويستخدم هذا الإشعار إذا توفر معيارين:
The EnhancedMessagingPreferences is set to 'Allow'
قد طلب من المستفيد لاستلام هذا الإشعار
If EnhancedMessagingPreferencesOPAC is set to 'Show', patrons will be able to choose their messaging preferences in their online account in the Messaging tab.
Staff can select this notice for a patron in their messaging preferences.
PREDUEDGST
This notice is sent as the 'advance notice' digest for all items that are due
ويستخدم هذا الإشعار إذا توفر معيارين:
The EnhancedMessagingPreferences is set to 'Allow'
The patron has requested to receive this notice as a digest
If EnhancedMessagingPreferencesOPAC is set to 'Show', patrons can choose their messaging preferences in their online account in the Messaging tab.
Staff can select this notice for a patron in their messaging preferences.
PRES_TRAIN_ITEM
This notice is the default slip used in the Preservation module to print a list of items in a train.
Version
The PRES_TRAIN_ITEM notice was introduced in version 23.11 of Koha.
PROBLEM_REPORT
This notice is sent to the email address in the KohaAdminEmailAddress system preference, or the library's email address when a patron reports a problem on the OPAC.
RECEIPT
Used to send a payment receipt by email from the point of sale module.
REJECTED
This notice is sent when a patron's purchase suggestion is rejected.
ملاحظة
If you don't want to send this notice, just delete it.
RENEWAL
This notice is sent as the 'Item checkout and renewal' notice for all items that are renewed
This notice is used if three criteria are met:
The EnhancedMessagingPreferences is set to 'Allow'
The RenewalSendNotice system preference is set to 'Send'
قد طلب من المستفيد لاستلام هذا الإشعار
If EnhancedMessagingPreferencesOPAC is set to 'Show', patrons will be able to choose their messaging preferences in their online account in the Messaging tab.
Staff can select this notice for a patron in their messaging preferences.
RETURN_RECALLED_ITEM
This notice is sent to the patron who currently has an item in their possession that has been recalled. It serves to notify them of the new due date for the checked out item.
SERIAL_ALERT (New serial issue)
Notice used in the serials module to notify patrons/staff of new issues of a serial. SERIAL_ALERT (RLIST in older versions) is provided as a sample notice, but the notice code can be chosen freely as only the module is taken into account. Multiple notices can also be managed.
You have the option to select the notice used to inform the patron about a received serial issue when adding or editing a subscription. Choose from the 'Patron notification' drop down menu.
If a notice has been selected for a subscription, patrons can subscribe to the email notification from the subscription tab in the detail view in the OPAC.
ملاحظة
Notice also that if you'd like to notify patrons of new serial issues, you can click on 'define a notice' which will take you to the 'Notices' tool.
SHARE_ACCEPT
تستخدم لإعلام المستفيد عند قبول مستفيد آخر لقائمته المشاركة.
Requires that the OpacAllowSharingPrivateLists system preference be set to 'Allow'.
See Managing lists for more information about sharing lists.
SHARE_INVITE
يستخدم لإخطار المستفيد برغبة مستفيد آخر في مشاركة قائمة معه.
Requires that the OpacAllowSharingPrivateLists system preference be set to 'Allow'.
See Managing lists for more information about sharing lists.
SR_SLIP
Used to notify library staff from a particular library branch of items that should be transferred to another library in the context of stock rotation.
Requires the stockrotation.pl cron job.
STAFF_PASSWORD_RESET
This notice is sent when a staff member sends a password reset email to a patron.
The password reset feature is controlled by the OpacResetPassword system preference.
TICKET_ACKNOWLEDGE
This notice is sent to the reporter of a catalog concern when they report a concern through the staff interface, or when they report a concern through the OPAC, to acknowledge that the concern report was received.
The concern report feature is enabled in the staff interface by the CatalogConcerns system preference and in the OPAC by the OpacCatalogConcerns system preference.
TICKET_ASSIGNED
This notice is sent to the assignee of a catalog concern, when a ticket is assigned to them.
The concern report feature is enabled in the staff interface by the CatalogConcerns system preference and in the OPAC by the OpacCatalogConcerns system preference.
TICKET_NOTIFY
This notice is sent to the cataloging team, to the email address in the CatalogerEmails system preference, to notify them that a concern was reported about a bibliographic record.
The concern report feature is enabled in the staff interface by the CatalogConcerns system preference and in the OPAC by the OpacCatalogConcerns system preference.
TICKET_RESOLVE
This notice is sent to the reporter of a catalog concern when the concern is marked as resolved with the 'Notify' flag.
The concern report feature is enabled in the staff interface by the CatalogConcerns system preference and in the OPAC by the OpacCatalogConcerns system preference.
TICKET_UPDATE
This notice is sent to the reporter of a catalog concern when the concern is updated with the 'Notify' flag.
The concern report feature is enabled in the staff interface by the CatalogConcerns system preference and in the OPAC by the OpacCatalogConcerns system preference.
TO_PROCESS
Used to notify a staff member if a purchase suggestion has been moved to the fund they manage
Requires the notice_unprocessed_suggestions cron job
TRANSFER_OWNERSHIP
Sent to the patron to whom a list was transferred.
Version
This notice was added to Koha in version 24.11.
نصيحة
If you have upgraded from a previous version and need this notice, add the new notice, making sure to select the 'Lists' module and making sure to use the code TRANSFER_OWNERSHIP.
If you want the default text, you can use the 'View default' button and the 'Copy to template' button. This will copy the default text to your notice.
WELCOME
Sent to patrons when their account is set up if the AutoEmailNewUser preference is set to 'Send'
ملاحظة
For security reasons, it is not possible to send the patron's password in a notice.
There are also a set of predefined slips (or receipts) listed on this page. All of these slips can be customized by altering their text via the Notices and slips tool and their style using the SlipCSS preference to define a stylesheet. Here is what those slips are used for:
ACCOUNT_CREDIT
Used to print a receipt for a credit (either a payment, writeoff or other credit).
The slip or receipt can be printed manually with the 'Print' button next to a credit type account line in the patron's accounting tab.
The slip or receipt can also be printed semi-automatically when paying or writing off a charge if the FinePaymentAutoPopup system preference is enabled.
ملاحظة
It is possible to set specific notices for different credit types. To do so, create a new notice with the code CREDIT_ followed by the credit type code.
For example, to have a specific slip for writeoffs, create a new notice with the code CREDIT_WRITEOFF.
ACCOUNT_DEBIT
Used to print an invoice for a debit (any type of charge, such as a lost item fee, or overdue fine).
The slip or invoice can be printed manually with the 'Print' button next to a debit type account line in the patron's accounting tab.
ملاحظة
It is possible to set specific notices for different debit types. To do so, create a new notice with the code DEBIT_ followed by the debit type code.
For example, to have a specific slip for lost items, create a new notice with the code DEBIT_LOST.
ACCOUNTS_SUMMARY
Used to print a summary of outstanding charges and unused credits in the patron's account.
The slip can be printed manually with the 'Print account balance' option in the 'Print' button at the top of the patron's details page.
AR_SLIP
Used to print a slip for an article request
The slip or receipt can be printed manually when managing article requests from the staff interface.
Get there: Circulation > Article requests > Actions > Print slip
CHECKINSLIP
This slip lists all items that were checked in today for this patron
To print this slip, click Print > Print checkin slip from the patron file
You can also print this slip from the Check in page
ISSUEQSLIP
القسيمة السريعة فقط تحتوي على المواد التي تم إعارتها اليوم
ISSUESLIP
Used to print a full slip in circulation
القسيمة أو الاستلام سوف يظهر المواد المعارة اليوم، فضلا عن المواد التي لا تزال معارة
HOLD_SLIP
تستخدم في طباعة قسائم الحجز
The holds slip is generated when a hold is confirmed and set to waiting.
OVERDUE_SLIP
Used to print an overdues slip
The overdues slip can be generated manually using the 'print' menu in the patron account in the staff interface. It will show all items overdue.
RECALL_REQUESTER_DET
Used to print the details of the patron who has requested a recall on an item, when receiving the recall.
RECEIPT
Used to print a payment receipt in the point of sale module.
TRANSFERSLIP
تستخدم لطباعة قسائم النقل
تتم طباعة كعب نقل عند تأكيد النقل من فرع إلى آخر في النظام الخاص بك
In addition to managing and customizing notices and slips, the "Notices and slips" tool contains some additional templates which allow you to customize database entries for some specific purposes. So far, the only template available for this purpose is to modify the overdue fine description. Some more may be added in the future.
OVERDUE_FINE_DESC
This template is used to generate the description for overdue fines in a patron's account.
ملاحظة
The information available to this customization come from the checkouts (issues), items and patrons (borrowers).
إخطار التأخير / الحالة مرسلة
ملاحظة
Only staff with the edit_notice_status_triggers permission (or the superlibrarian permission) will have access to this tool.
Get there: More > Tools > Patrons and circulation > Overdue notice/status triggers
In order to send the overdue notices that you defined using the Notices and slips tool, you need to first set the triggers to have these messages.
مهم
In order to have overdue notices sent to your patrons, you need to set that patron category to require overdue notices.
مهم
Depending on the value of your OverdueNoticeCalendar preference the delay may or may not include days the library is closed based on the holiday calendar.
The Overdue notice/status triggers tool gives the librarian the power to send up to three notices to each patron type notifying them of overdue items
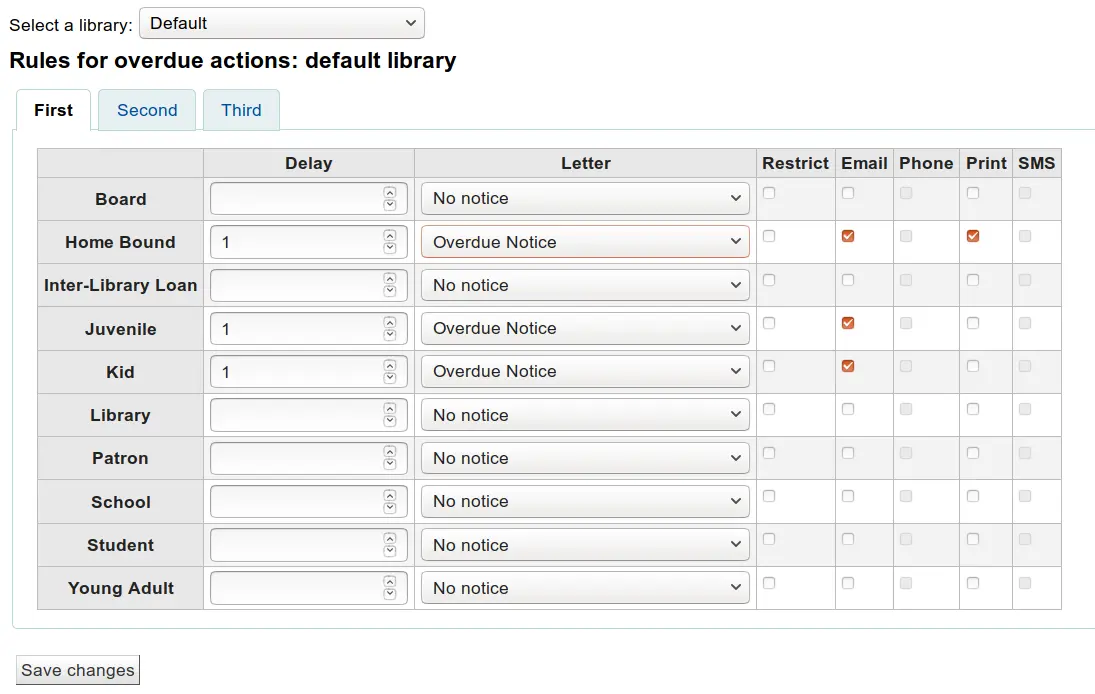
التأخير هو عدد الأيام بعد العدد المقرر قبل أى عمل مسبب.
مهم
إذا كنت تريد كوها أن يبدأ عمل (إرسل رسالة أو منع عضوا), قيمة التأخير مطلوبة.
لإرسال ملاحظات إضافية، انقر على علامات التبويب للإشعارات 'الثانية' و'الثالثة'
اذا كنت ترغب بمنع مستفيد من استعارة المواد بسبب مواده المتأخرة؟ افحص مربع 'حصر'، هذا سيضع ملاحظة على سجل المستفيد عند الاستعارة يبلغ المكتبي بأن المستفيد لا يستطيع الاستعارة بسبب المواد المتأخرة.
If you choose to restrict a patron in this way you can also have Koha automatically remove that restriction with the AutoRemoveOverduesRestrictions preference.
Next you can choose the delivery method for the overdue notice. You can choose from Email, Phone (if you are using the i-tiva Talking Tech service), Print and SMS (if you have set your SMSSendDriver).
منشئ بطاقات المستفيدين
ملاحظة
Only staff with the label_creator permission (or the superlibrarian permission) will have access to this tool.
Get there: More > Tools > Patron card creator
The patron card creator allow you to use layouts and templates which you design to print your custom patron cards on your printer. Here are some of the features of the patron card creator module:
Customize patron card layouts with text retrieved from the Koha patron data
Design custom card templates for printed patron cards (to match the label sheets)
بناء وإدارة دفعات من بطاقات المستفيد
Export (as PDF) single or multiple batches to print
تصدير بطاقات المستفيد متعددة أو مفردة من ضمن الدفعة
الأشكال
Get there: More > Tools > Patron card creator > Manage > Layouts
التخطيط يحدد النص والصور التي ستتم طباعتها على البطاقة و سيتم تحديد أيضا المكان الذي ستظهر فيه.
ملاحظة
Up to three lines of text, the patron's number in barcode representation and up to two images can be printed on to the card.
Add a layout
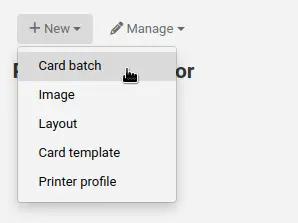
If you have no layouts defined, you will add a new layout by clicking the 'New' button and choosing 'Layout'.

You may also choose to press 'Manage layout' on the left side. Here you are offered a list of available layouts you can select for editing. But at the top of the page there is still the 'New layout' button.
الاسم الذي عُيينَ للشكل هو لمصلحتك، فسمها بشيء يكون سهل التعرف في المستقبل
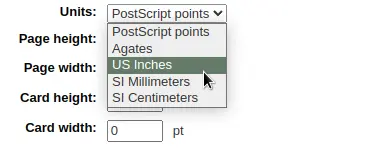
الوحدات المنسدلة تستخدم لتحديد نطاق القياس الذي تتجه لاستخادمه لأشكالك.
ملاحظة
A Postscript Point is 1/72", an Adobe Agate is 1/64", an Inch is 25.4 SI Millimeters
Next, note if this layout is for the front or the back of the patron card
ملاحظة
You will need a layout for both the front and back of your card if you have 2-sided library cards, this option doesn't allow you to print two sided cards, just lets you track which side of the card you're designing.
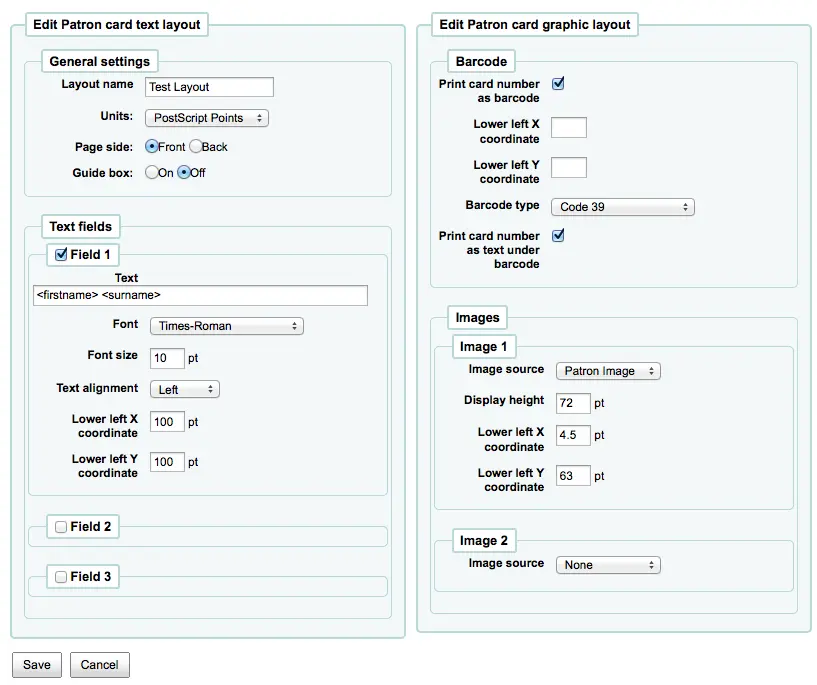
You have the option of adding up to 3 lines of text to your card. Your text can be static text of your choosing and/or fields from the patron record. If you want to print fields from the patron record you want to put the field names in brackets like so - <firstname>
ملاحظة
A full list of field names can be found in the database structure at https://schema.koha-community.org
عن كل سطر من النص، ويمكنك اختيار الخط الخاص بك، وحجم الخط ومكان وجود النص على البطاقة باستخدام X و Y أدنى تنسق
In order to show the barcode and the patron card number you will need to check the 'Print card number as barcode' option. This will turn the patron card number into a barcode. If you want the number to print in human readable format you will need to check the 'Print card number as text under barcode' option.
وأخيرا يمكنك اختيار ما يصل الى اثنين من الصور للطباعة على البطاقة.
One can be the patron image which you can resize to meet your needs.
The other image can be something like a library logo or symbol that you uploaded using the 'manage images' module of the patron card creator Tool.
هام
It is the designers responsibility to define textlines, barcode and images such that overlap is avoided.
After saving, your layouts will appear on the 'Manage layouts' page.

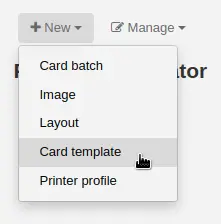
القوالب
Get there: More > Tools > Patron card creator > Manage > Card templates
A template describes the arrangement of labels on the label sheet/card stock you are using. This might be Avery 5160 for address labels, Gaylord 47-284 for spine labels or Avery 28371 for your patron cards, just to give a couple of examples. All of the information you will need for setting up a template may be on the packaging, and if not it can usually be found on the vendor's website or can be measured from a sample sheet.
Add a template
To add a new template click on the 'New template' button at the top of your page which brings you to the Edit template form immediately. You may also choose to press 'Manage templates' on the left side. Here you are offered a list of available templates you can select for editing. But in the top of the page there is still the 'New template' button.
Using the form that appears after pressing either 'Edit' or 'New template' you can define the template for your sheet of labels or cards.
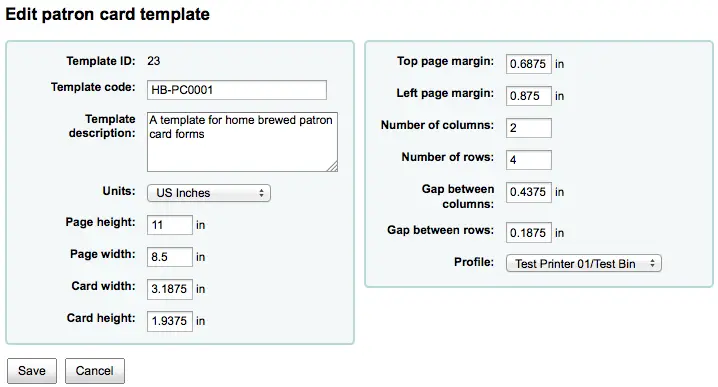
Template ID is simply a system generated unique id
Template code should be the name of this template to identify it on a list of templates
You can use the template description to add additional information about the template
الوحدات المنسدلة تستخدم لتحديد نطاق القياس الذي تتجه لاستخادمه لأشكالك.
ملاحظة
A Postscript Point is 1/72", an Adobe Agate is 1/64", an Inch is 25.4 SI Millimeters
The measurements (page height, page width, card width, card height) may be on the packaging, and if not it can usually be found on the vendor's website or can be measured from a sample sheet.
الملف الشخصي هو مجموعة من "التعديلات" التي يتم تطبيقها على قالب معطى قبل الطبع مباشرة مما يعوض عن المفارقات الفريدة والغربية لطابعة معطاة ( التي يتم تعيين الملف لها)
قبل اختيار الشكل حاول طباعة عينات للبطاقة بحيث تمكنك بسهولة تحديد الوضع الصحيح للطباعة /قوالب المجموعة.
After finding and documenting any anomalies in the printed document, then you can create a profile and assign it to the template.
هام
Do not specify a profile unless needed, i.e. do not click to define a printer profile. It is not possible to remove a profile from a template but you can switch to another profile.
ملاحظة
If you are using different printers you may be required to define several templates that are identical only different profiles are specified.
After saving, your templates will appear on the 'Manage templates' page.

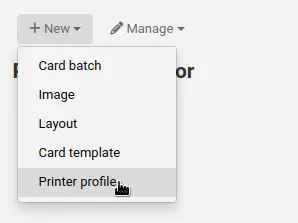
الملفات
Get there: More > Tools > Patron card creator > Manage > Profiles
A profile is a set of "adjustments" applied to a given template just prior to printing which compensates for anomalies unique and peculiar to a given printer. This means if you set a template up and then print a sample set of data and find that the items are not all aligned the same on each card, you need to set up a profile for each printer (or even different tray selections on the same printer) to make up for the differences in printing styles, such as the shifting of text to the left, right, top or bottom.
اذا كانت بطاقاتك تُطبع بالطريقة التي تريدها تماماً، لن تحتاج لملف تعريف.
Add a profile
To add a new profile, you want to click on the 'Profiles' button at the top of your page and choose 'New profile'
To add a new profile, you want to click on the 'New profile' button at the top of your page. Using the form that appears you can define the values to correct the card misalignment on your label sheet. You may also choose 'Manage profiles' on the left side and select one of the currently available profiles for editing.
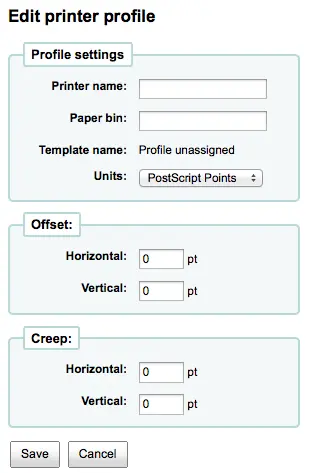
The Printer name and Paper bin do not have to match your printer exactly, they are for your reference so you can remember what printer you have set the profile for.
ملاحظة
For example: if you want to use the Printer model number in printer name you can, or you can call it 'the printer on my desk'
Template will be filled in once you have chosen which template to apply the profile to on the template edit form
الوحدات المندسلة تستخدم لتحديد مقياس القياس وأنت تذهب إلى استخدام ملف التعريف الخاص بك.
ملاحظة
A Postscript Point is 1/72", an Adobe Agate is 1/64", an Inch is 25.4 SI Millimeters
Offset should be used when the entire image is off center either vertically or horizontally. Creep describes a condition where the distance between the labels changes across the page or up and down the page
For offset and creep values, negative numbers move the printed information up and to the left on the printed sheet and positive numbers move down and to the right
Example: the text is printed 0 .25" from the left edge of the first label, 0 .28" from the left edge of the second label and 0 .31" from the left edge of the third label. This means the horizontal creep should be set to (minus) -0.03 " to make up for this difference.
After saving, your profiles will appear on the 'Manage printer profiles' page.

عند حفظك لملفك الجديد ، بإمكانك أن تعود لقائمة القوالب ، وأن تختار لتعديل القالب الذي ينتمي له هذا الملف.
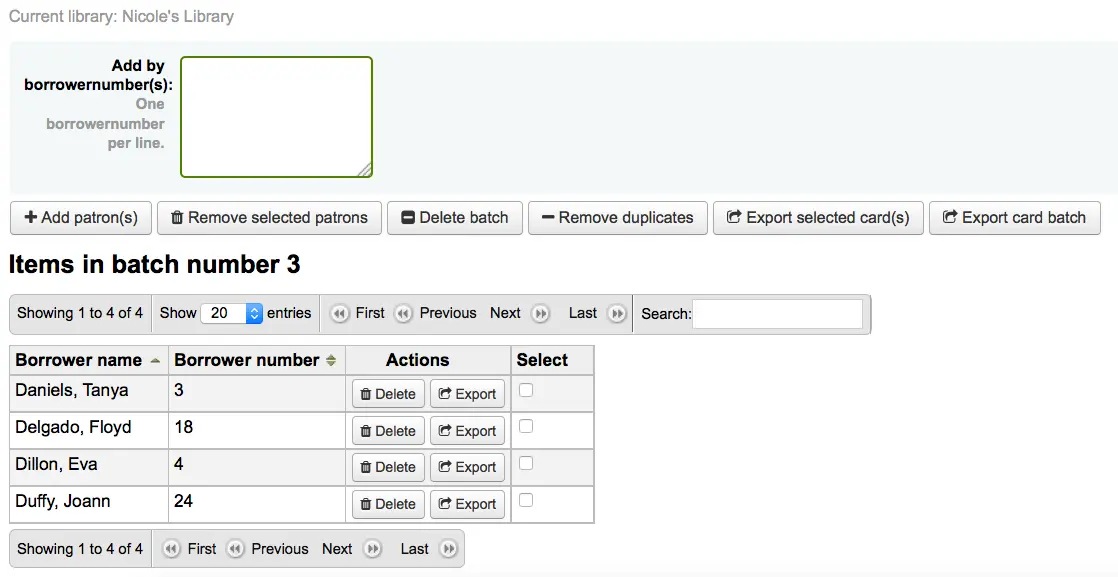
دفعات:
Get there: More > Tools > Patron card creator > Manage > Card batches
الكمية هي عبارة عن مجموعة من المستفيدين الذين تريد إنشاء بطاقات خاصة بهم
Add a batch
To add a new batch, you want to click on the 'New batches' button at the top of your page. Choosing the menu item 'Manage batches' on the left a list of already defined batches is displayed. In this display you can either select a batch for editing or add a new batch.
For a new batch a message pops up and directs you to select patrons to be processed in this batch.
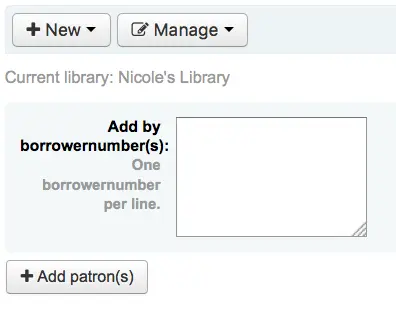
After choosing the 'Add patron(s)' button the Patron Search window pops up.
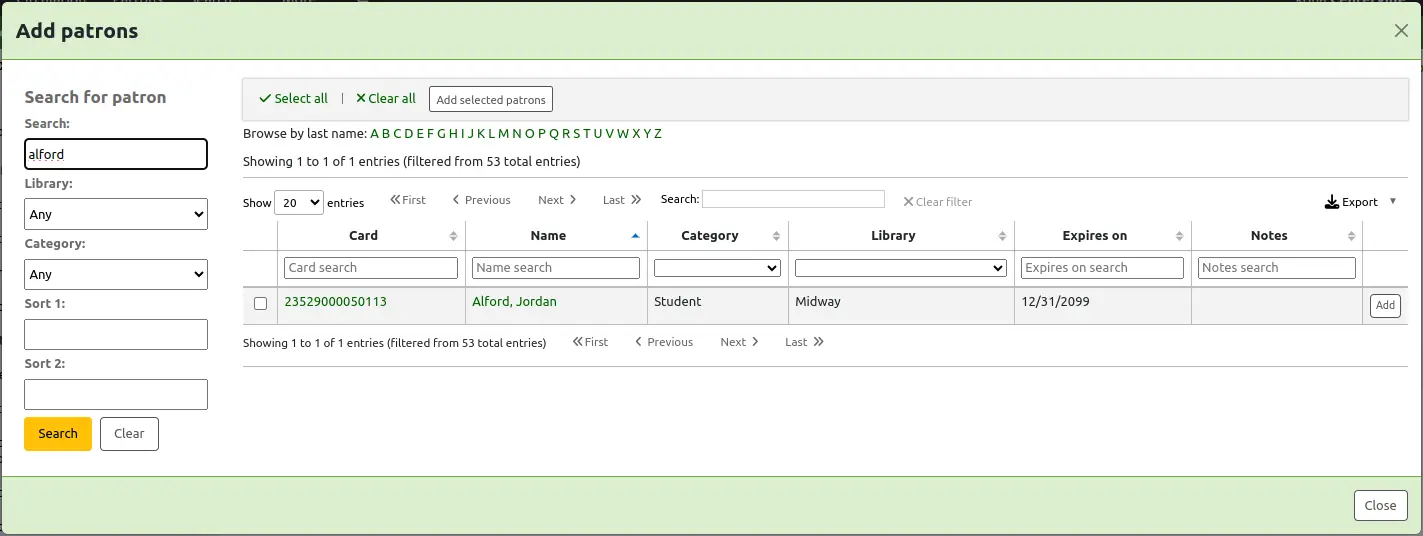
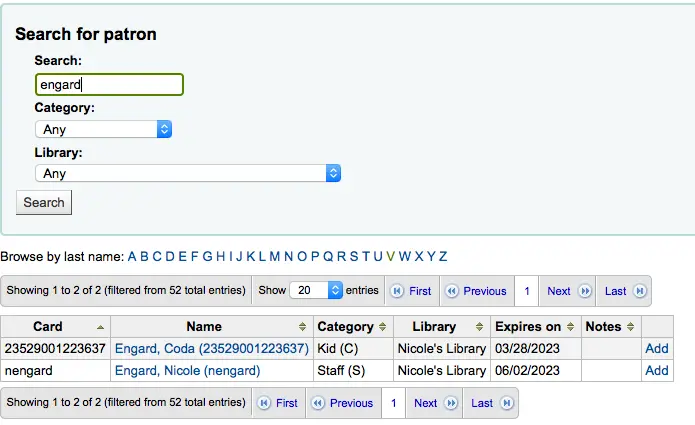
From here you can search for patrons to add to your batch by any part of their name, their category and/or library. Entering * in the search box will display all the patrons.
From the results you can add patrons to the batch by clicking the 'Add' button. After adding patrons from the results you can start over and perform another search or click 'Close' at the bottom of the screen to indicate that you are done. You will then be presented with your batch.
Alternatively, you can use a custom report to create a batch. A report that contains borrowernumbers will have the option to send the report results to the patron card creator.

Version
The option to send report results to the patron card creator was added to Koha version 23.11.
If you are satisfied with your batch you can proceed to export. If you want to correct or even delete that batch the buttons to do so can be found at the top of your screen. You can always come back here through the 'Manage > Card batches' button.
If you would like to export all patron cards you can click 'Export card batch' otherwise you can choose specific patrons to print cards for by checking the box to the right of their names and then choose 'Export selected card(s)' at the top.
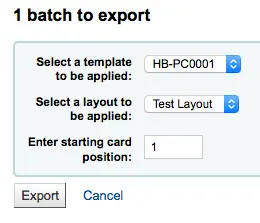
The export menu will ask you to choose a template, a layout and starting position (where on the sheet should printing begin).
ملاحظة
For the starting position if the first 6 labels have already been used on your sheet you can start printing on label in position 7 on the sheet. The labels are numbered left to right from top to bottom.
Once you click 'Export' you will be presented with a PDF of your labels for printing
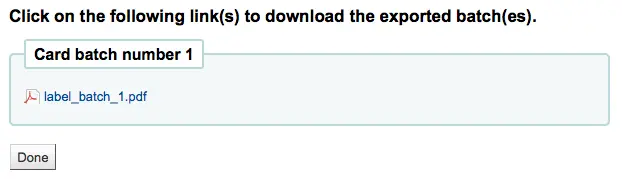
When you open the PDF you will see the cards for printing

The above image shows a layout that is made up of two text lines. The first one is just plain text, the second one is composed of the <firstname> <surname> fields. A patron image is printed (if available) and the barcode of patrons number is displayed in code 39. All this is printed on a template with three columns and 8 rows using position 1-3 here. When printing this PDF please take care that your printer doesn't rescale the PDF (e.g do not fit to paper size) otherwise the printer will not be able to print to the right place per your templates.
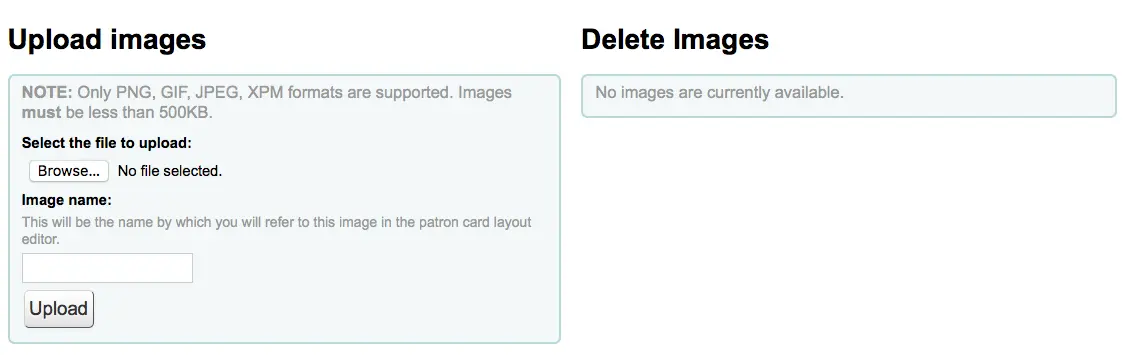
Manage images
Get there: More > Tools > Patron card creator > Manage > Images
Images uploaded using this tool will appear on the menu when creating patron card layouts. You are limited in how many images you can upload (not counting patron images) by the ImageLimit system preference.
هام
يجب أن لا تتجاوز الصور 500 كيلو بايت
ملاحظة
معلومة: الصور التي يتم تحميلها بواسطة هذه الأداة يجب أن تكون على الأقل 300dpi وهو الحد الأدنى لجودة الصور القابلة للطبع.
في وسط الشاشة نموذج رفع بسيط ، ببساطة استعرض حاسبك للعثور على الملف ، واعطه اسماً لتنظمه لاحقاً.
عندما يتم رفع الملف ، سيُعرض لك رسالة تأكيد.
والصورة سيتم ادراجها مع كل صورك الأخرى على الجانب الأيسر من الصفحة.

لحذف واحد أو العديد من هذه الصور، انقر فوق خانة الاختيار إلى يسار كل الصورة التي تريد حذفها وانقر على زر 'حذف'.
Batch patron deletion and anonymization
ملاحظة
Only staff with the delete_anonymize_patrons permission (or the superlibrarian permission) will have access to this tool.
Get there: More > Tools > Patrons and circulation > Batch patron deletion/anonymization
هذه الأداة تسمح لك بتجاهل معظم تواريخ الإعارة بالجملة (وهذا يعني أنه يمكنك الاحتفاظ بتسجيلاتٍ عن عدد مرات إعارة المواد - ولكن ليس المستفيدين الذين استعاروا المواد) أو حذف معظم المستفيدين (إزالتهم من النظام تماما).
مهم
It is recommended that you backup your database before using this tool. Changes made here are permanent.
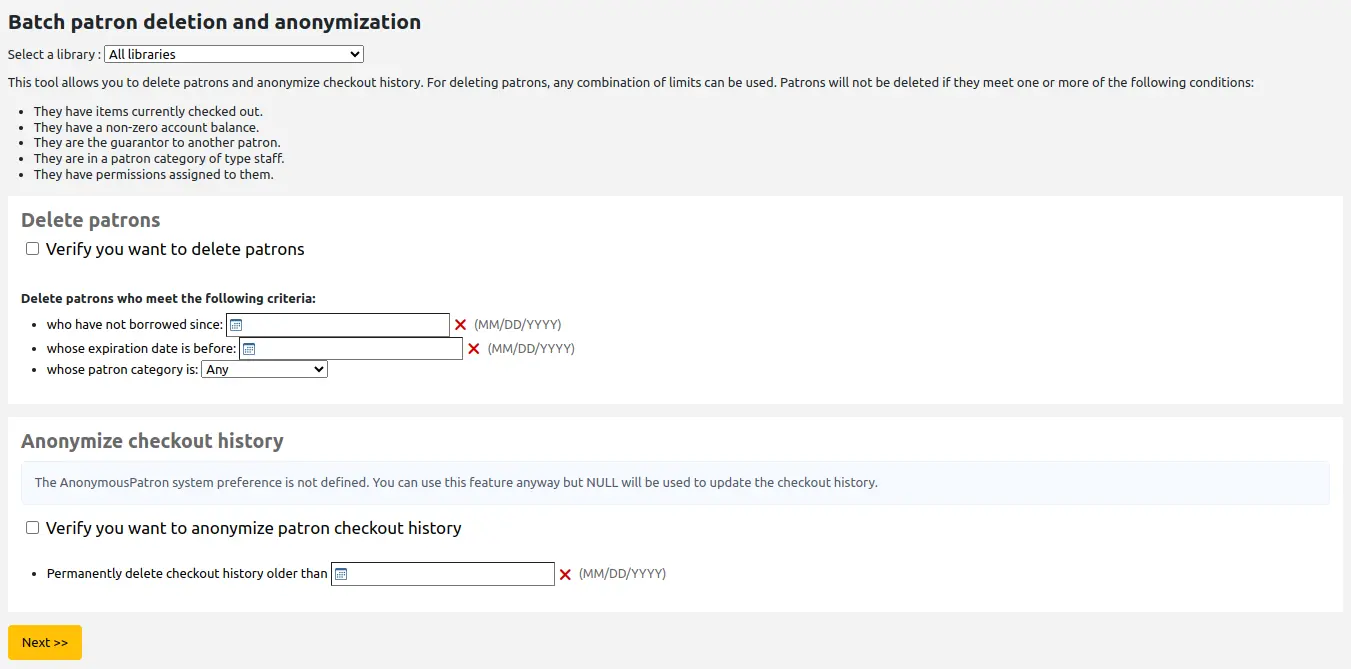
Batch deleting patrons
مهم
Patrons who meet one or more of these conditions will not be deleted:
They have items currently checked out.
They have a non-zero account balance.
They are the guarantor to another patron.
They are in a patron category of type staff.
They have permissions assigned to them.
To delete patrons,
If necessary, choose the library at the top of the page to limit the batch action to patrons from that library.
Check the 'Verify you want to delete patrons' box
Choose the criteria to select the patrons to delete
have not borrowed since a specific date
have accounts that will expire before a specific date
are in a specific patron category
are in a patron list
اضغط 'جديد'
A confirmation will appear showing the number of patrons to be deleted and a choice of deletion.
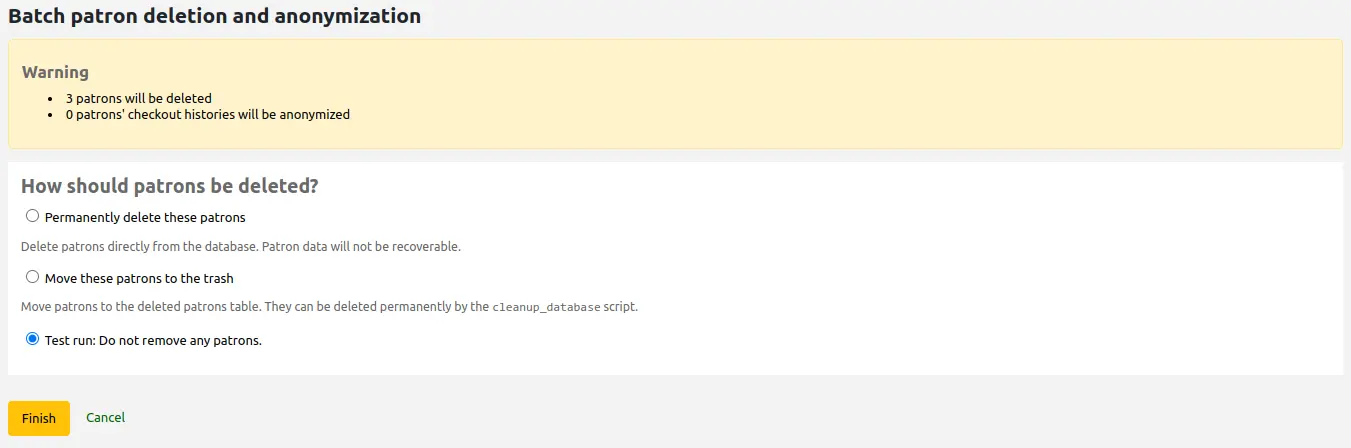
Choose the type of deletion:
Permanently delete these patrons: this will delete patrons directly from the database. Patron data will not be recoverable.
Move these patrons to the trash: this will move patrons to the deletedborrowers table. They can be deleted permanently with the cleanup_database.pl script (with the
--deleted-patronsparameter).Test run: Do not remove any patrons: this will not delete any patrons.
Click 'Finish'
Batch anonymizing patrons' checkout histories
Anonymizing checkout history will replace the patron's borrowernumber from the checkout history. It will still be possible to see how many times a particular item was checked out, but not by whom.
مهم
Make sure to set the AnonymousPatron system preference before anonymizing checkout histories. An invalid or empty value will cause an error.
To anonymize checkout histories,
If necessary, choose the library at the top of the page to limit the batch action to patrons from that library.
Check the 'Verify you want to anonymize patron checkout history' box
أدخل التاريخ قبل تعديل البيانات التي تريد
A confirmation will appear with the number of checkout histories that will be anonymized.

Click 'Finish'
A confirmation message will be displayed showing the number of histories that were actually anonymized.

تعديل المستفيد بالدفعة
ملاحظة
Only staff with the edit_patrons permission (or the superlibrarian permission) will have access to this tool.
Get there: More > Tools > Patrons and circulation > Batch patron modification
With this tool you can make edits to a batch of patron records. Simply load in a file of card numbers (one per line), choose from a list of patrons or scan patron card numbers in to the box provided.
All options are also available for use with borrowernumbers instead of card numbers.

Once you have the file loaded or the card numbers or borrowernumbers entered click 'Continue.' You will be presented with a list of the patrons and the changes you can make.
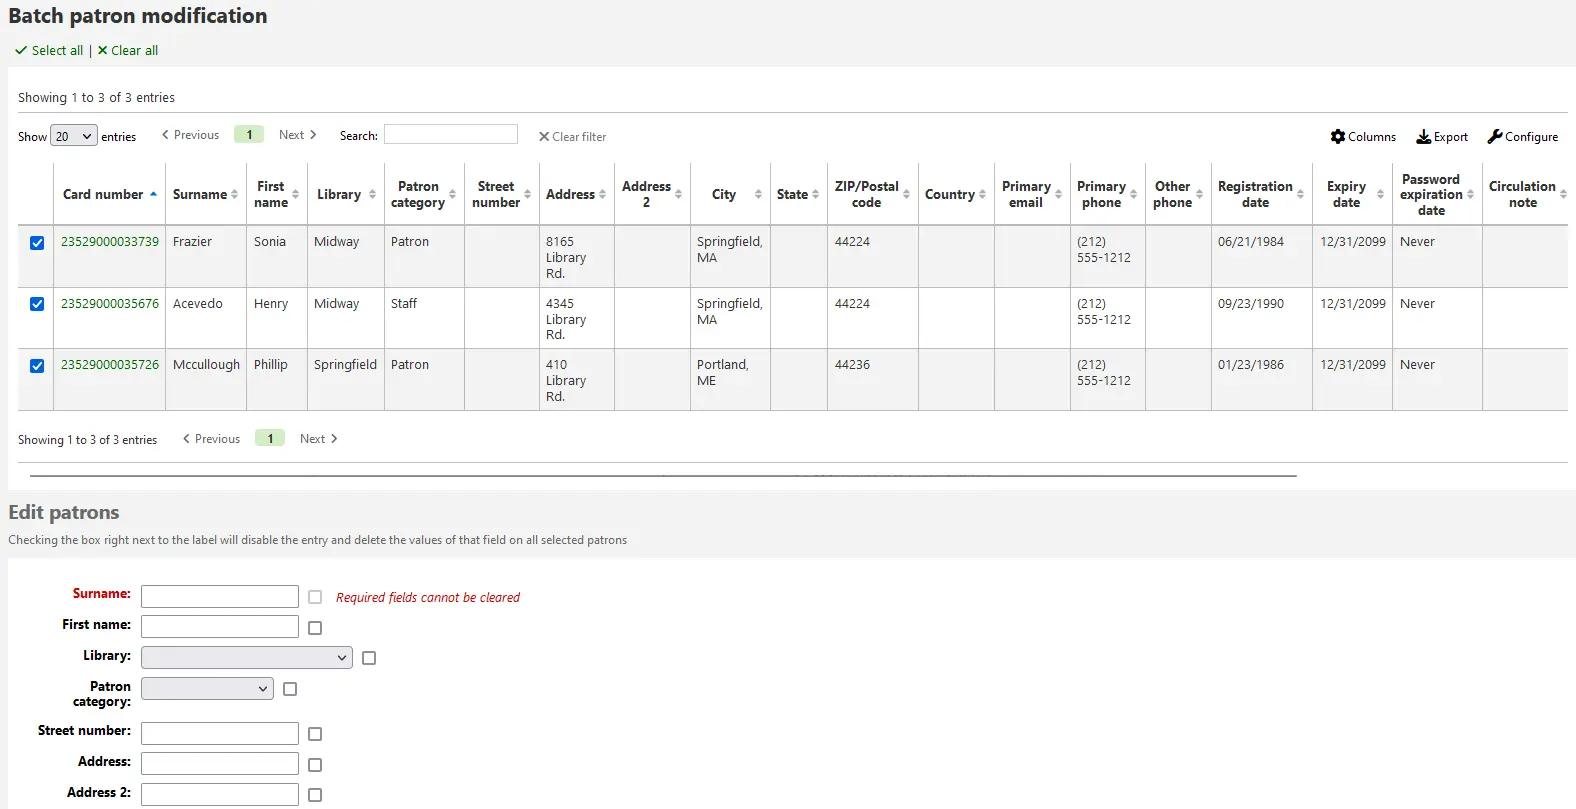
To the right of each text box there is a checkbox. Clicking that checkbox will clear our the field values.
مهم
إذا ما كان الحقل إلزامياً فإنك لن تتمكن من مسح القيم فيه.
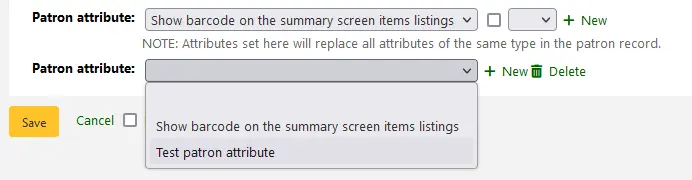
If you have multiple patron attributes you can change them all by using the '+ New' link to the right of the text box. This will allow you to add another attribute value.
Once you have made the changes you want, you can click 'Save' and the job will be enqueued.
تمديد تواريخ الاستحقاق بالدفعة
ملاحظة
Only staff with the batch_extend_due_dates permission (or the superlibrarian permission) will have access to this tool.
Get there: More > Tools > Patrons and circulation > Batch extend due dates
This tool allows you to update due dates in bulk, this can be useful if a library needs to close unexpectedly and cannot accept returns.
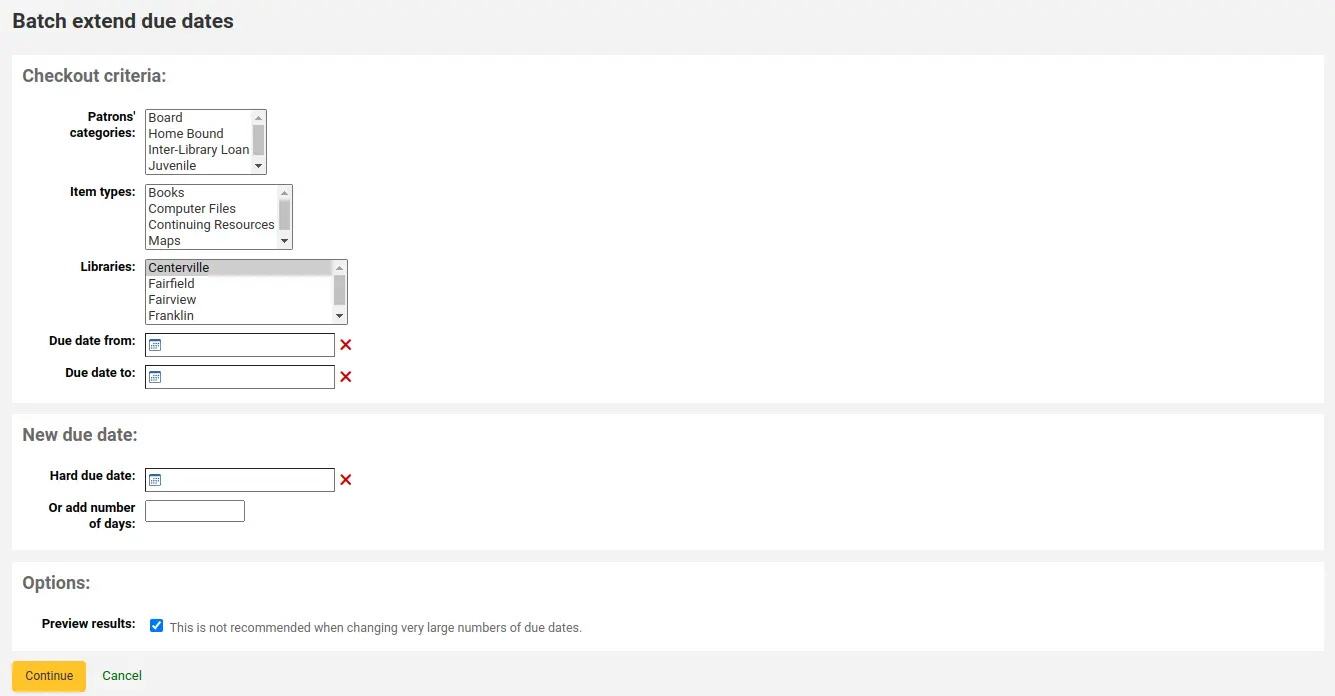
You can filter the selection of checkouts based on patron category, item types, library or a combination.
نصيحة
If needed, you can select multiple options in the dropdown lists by holding the CTRL key while selecting the options.
Version
The option to filter by item type is available from Koha version 23.11.
Next, specify a date range for the current due date of the materials on loan. For example, you may want to extend the due dates for recent checkouts but exclude long overdue loans.
Choose to extend the due dates either to a new hard due date or by a number of days. Using the number of days option can prevent large numbers of loans being due on the same date.
You can choose whether to preview the results of your selections.
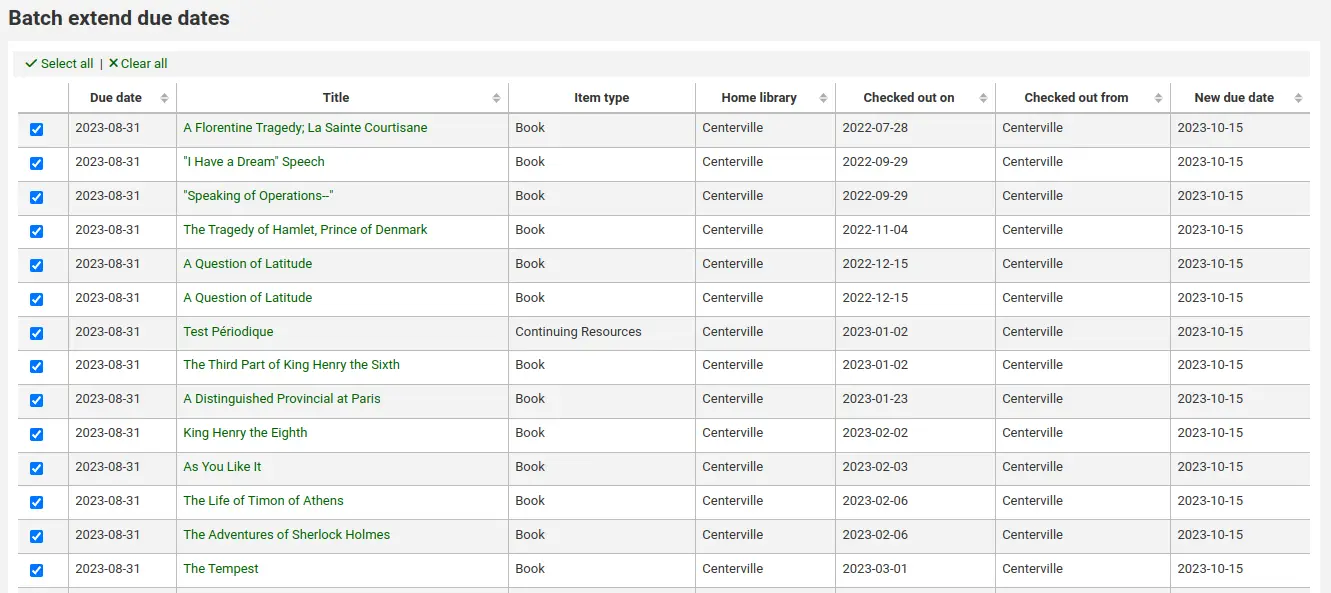
If you preview the results, you will see a table which shows you the current due date and the new due date so that you can check your selections. You can untick checkouts if they are incorrect or go back and change your selection.
Click on the 'Modify selected checkouts' button to see a confirmation screen showing the checkouts that have been modified.
مراقبة الوسوم
ملاحظة
Only staff with the moderate_tags permission (or the superlibrarian permission) will have access to this tool.
Get there: More > Tools > Patrons and circulation > Tags
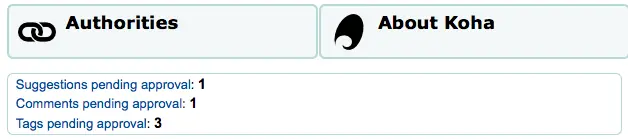
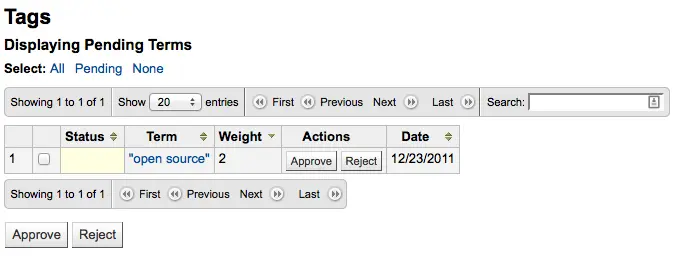
Depending on your tagging system preferences, librarians may need to approve tags before they are published on the OPAC. This is done via the tag moderation tool. If there are tags awaiting moderation they will be listed on the main staff dashboard under the module labels:
لإدارة الوسوم إذهب إلى أدوات الوسوم. عند زيارتك الأولى لهذا المكان ، سيُعرض لك قائمة من الوسوم التي تتطلب الموافقة أو الرفض من أمين المكتبة.
لرؤية كل العناوين التي تمت إضافة هذا الوسم لها قم ببساطة بالنقر على المصطلح
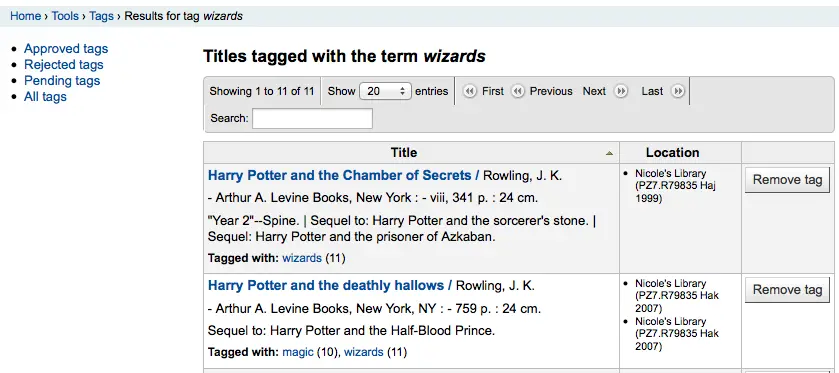
من قائمة العناوين هذه، يمكنك إزالة وسم بدون رفض استخدامه في المستقبل بشكل مباشر عن طريق النقر على زر 'إزالة الوسم' على يسار العنوان.
يمكنك الموافقة على الوسوم بطريقتين إما أن تنقر على 'موافقة' في نفس السطر الذي أدرج فيه التعبير. أو حدد كل التعابير التي وافقت عليها ثم انقر على 'موافقة' أسفل الجدول.
To reject a tag, you can either click the 'Reject' button in line with the term, or check all terms you want to reject and click 'Reject' below the table.
بمجرد الموافقة أو رفض الوسيمة سيتم نقلها إلى قائمة الوسوم المناسبة. سوف يظهر ملخص بكل الوسوم في يسار الشاشة

حتى لو تم رفض أو قبول الوسم، فإنه لا يزال أن تنقل الى قائمة أخرى.عند عرض قبول الوسوم لكل وسم كل من له الخيار للرفض:
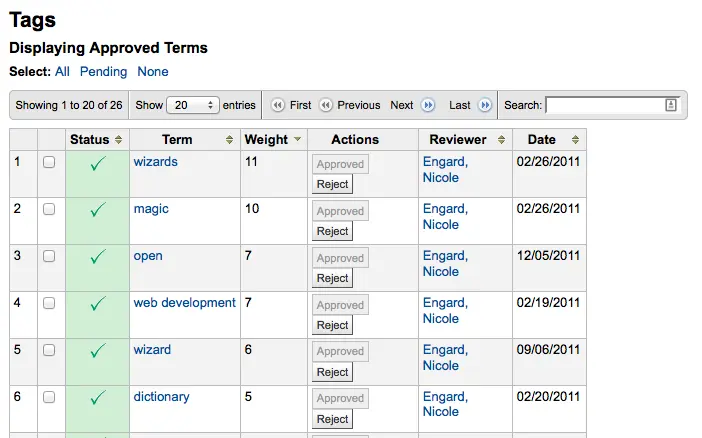
To check terms against the approved and rejected lists (and possibly against the dictionary you have assigned for tag moderation) simply enter the term into the search box on the bottom right of the screen to see the status of the term

وأخيرا يمكنك اختيار ما يصل الى اثنين من الصور للطباعة على البطاقة.

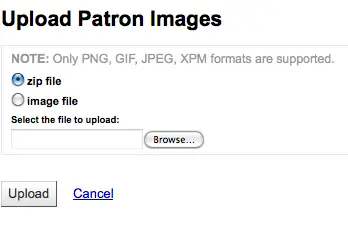
رفع صور مستفيد
ملاحظة
This section will only be visible if the patronimages system preference is set to 'Allow'.
ملاحظة
Only staff with the batch_upload_patron_images permission (or the superlibrarian permission) will have access to this tool.
Get there: More > Tools > Patrons and circulation > Upload patron images
Patron images can be uploaded in bulk if you are allowing patron images to be attached to patron records. These images can also be used when creating patron cards.
إنشاء ملف TXT والعنوان هو "DATALINK.TXT" أو "IDLINK.TXT"
في كل سطر في ملف النص أدخل رقم بطاقة المستفيد تليها فاصلة (أو علامة التبويب) ثم اسم ملف الصورة
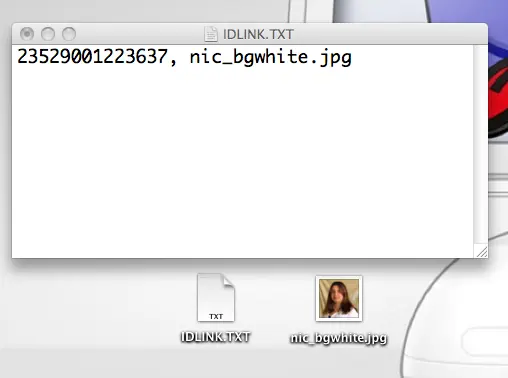
تأكد من أن ملفك النصي نص بسيط وليس نصاً قابلاً للتنسيق.
قم بضغط الملف النصي وملفات الصور
Go to the Upload patron images tool
لصورة واحدة، ببساطة أشر إلى ملف الصورة و أدخل رقم بطاقة المستفيد
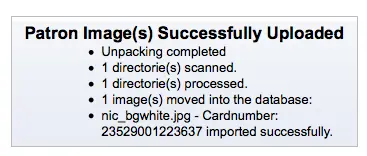
لصور متعددة، واختيار رفع ملف مضغوط
بعد الرفع ستظهر لك رسالة تأكيد
هام
هام: يوجد حد 520K لحجم الصورة المرفوعة ومن المفضل أن تكون الصورة بأبعاد 200x300 بكسيل ، ولكن الصور المشابهة ستعمل أيضاً.
مجموعات التدوير
ملاحظة
Only staff with the rotating_collections permission (or the superlibrarian permission) will have access to this tool.
Get there: More > Tools > Catalog > Rotating collections
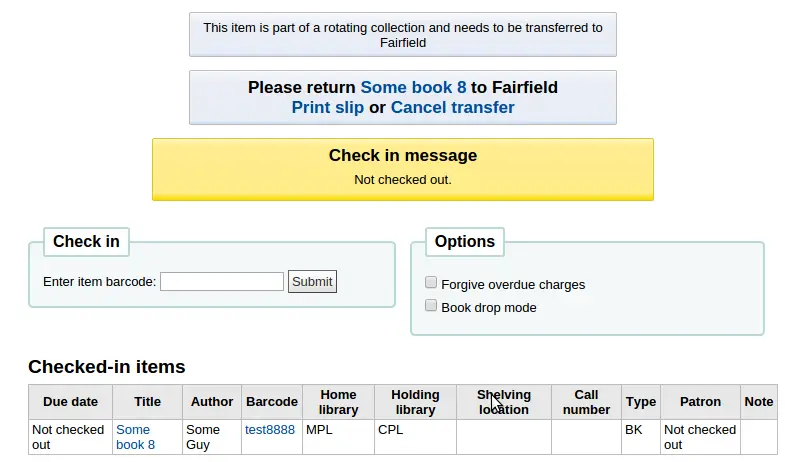
Rotating collections is a tool for managing collections of materials that frequently get shifted from library to library. It adds the ability to store not only an item's home library and current location but also information about where it is supposed to be transferred to next to ensure that all items in the collection are sent to the correct library. When an item in a rotating collection is checked in, library staff is notified that the item is part of a rotating collection and which branch it should be sent to if it is not at the correct one.
تحذير
The rotating collections tool will override all system preferences and circulation rules.
To create a new rotating collection, click the "New collection" button, fill in the title and description, and click "Submit". Once submitted you'll see "Collection name added successfully"; click "Return to rotating collections home" to return to the main Rotating collections management page (or click Rotating collections in the sidebar).
To add items to a collection, click "Actions" and choose "Add or remove items" next to the collection's name in the list of collections. Under "Add or remove items" scan or type in the barcode of the item you wish to add to the collection, and hit enter or click 'Submit' if necessary.
To remove an item from a collection, either click 'Remove' next to the item's barcode in the list of items within the collection or check the "Remove item from collection" box next to the Barcode text box under "Add or remove items", and scan or type in the barcode, clicking "Submit" or hitting Enter if necessary. Note: The "Remove item from collection" checkbox will remain checked as long as you are on the "Add or remove items" page, unless you uncheck it, to facilitate quickly removing a number of items at a time by scanning their barcodes.
Transfer a rotating collection
نقل مادة سوف:
قم بتغيير الموقع الحالي للمواد في تلك المجموعة إلى المكتبة التي سيتم نقلها إليها
بدء نقل من موقعه الأصلي الحالي / المكتبة المقتنية إلى الموقع الحالي/ المكتبة المقتنية ليتم نقله إليها. عند استلام مكتبة لمجموعة يجب عليها رد المواد كلها لاستكمال النقل.
يمكنك نقل المجموعة بإحدى طريقتين:
From the main Rotating collections page, click on "Actions" and choose "Transfer" next to the title of the collection you wish to transfer; choose the library you wish to transfer the collection to and click "Transfer collection".
Or, from the "add or remove items" page for a collection, you can click the "Transfer" button, choose the library you wish to transfer the collection to and click "Transfer Collection".
هام
من أجل استكمال عملية النقل، يجب على المكتبة المستقبلة للمجموعة المنقولة رد كل المواد من المجموعة كما استلمتها. سيقوم ذلك بمسح النقل لكي لا تظهر المواد بعد ذلك بأنها "في النقل"
إذا تم رد المادة المادة الموجودة في مجموعة منقولة في مكتبة أخرى غير المكتبة التي يفترض نقلها إليها، سيظهر إشعار لموظفي المكتبة بأن المادة جزء من مجموعة منقولة وكذلك إخبارهم بالمكان الذي يجب إرسالها إليه
Additional tools
التقويم
ملاحظة
Only staff with the edit_calendar permission (or the superlibrarian permission) will have access to this tool.
Get there: More > Tools > Additional tools > Calendar
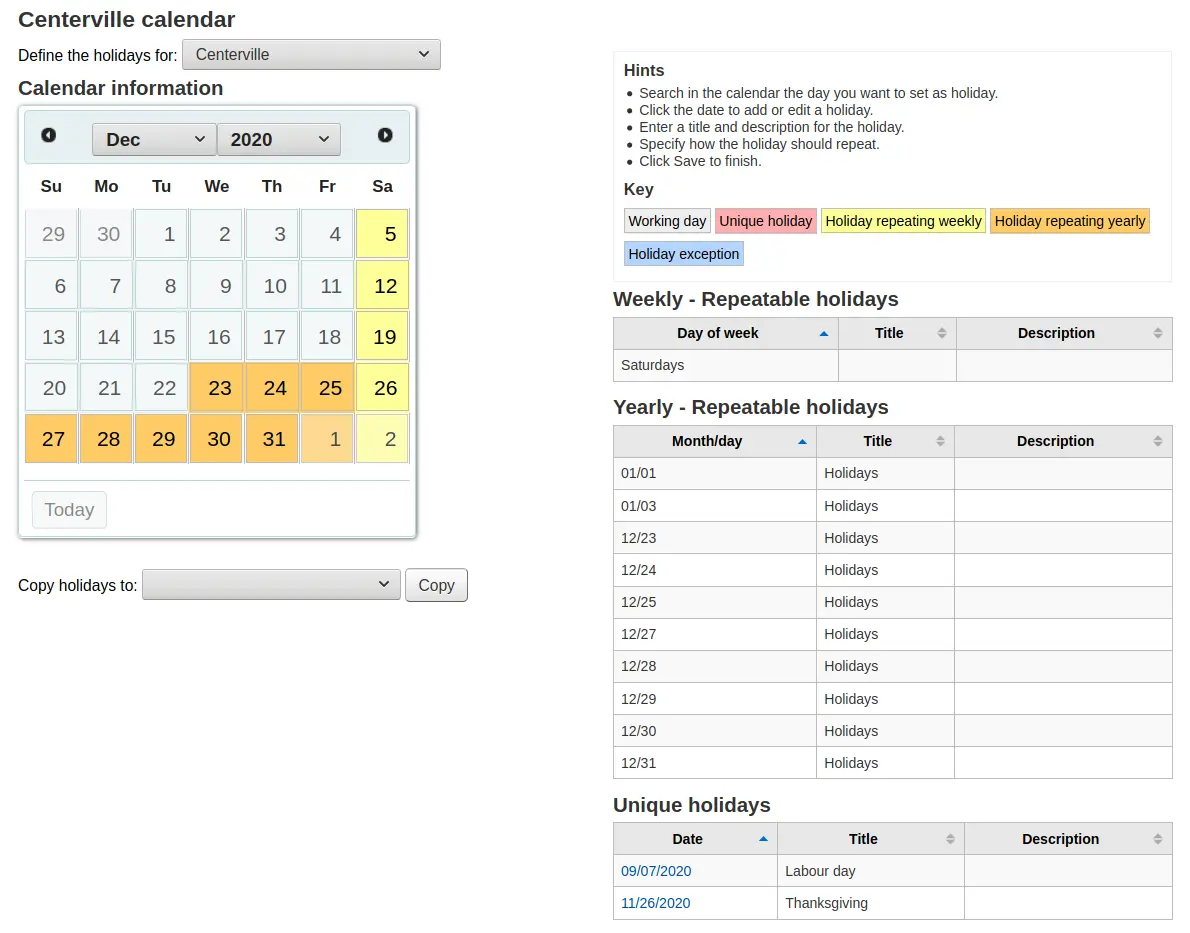
Libraries can define library closings and holidays to be used when calculating due dates. You can make use of the calendar by turning on the proper system preferences:
useDaysMode: Choose the method for calculating due date - either include days the library is closed in the calculation or don't include them
finescalendar: This will check the holiday calendar before charging fines
Adding events
قبل إضافة الأحداث, واختيار المكتبة التي ترغب في تطبيق إغلاق لها. وعند إضافة الأحداث يطلب منك إذا كنت ترغب في تطبيق هذا الحدث لفرع واحد أو جميع الفروع. لإضافة الأحداث, ببساطة
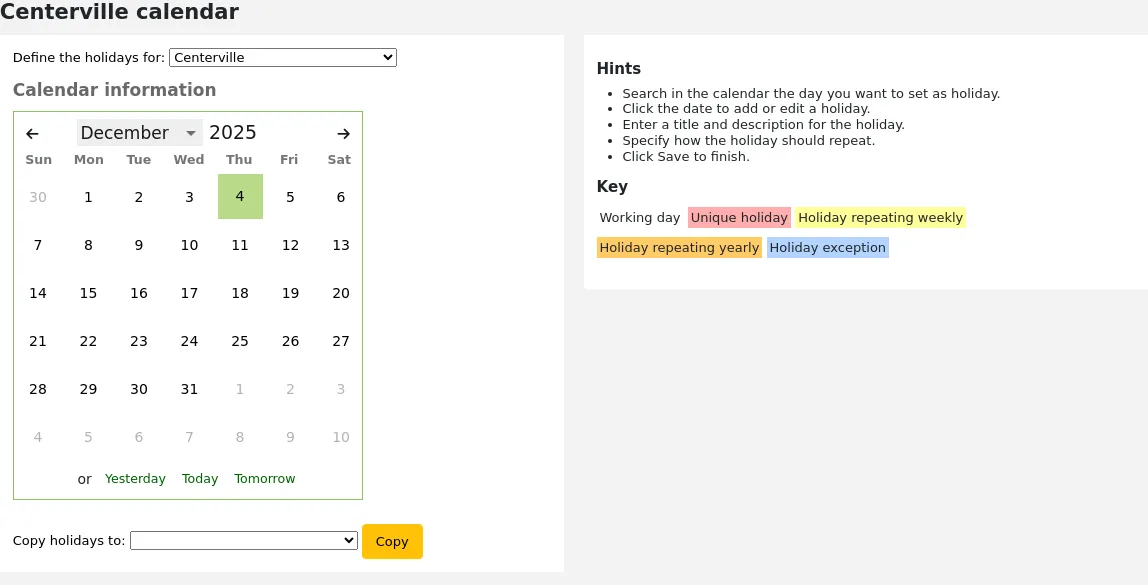
انقر على التاريخ في النتيجة والذي ترغب في تطبيق الإغلاق فيه
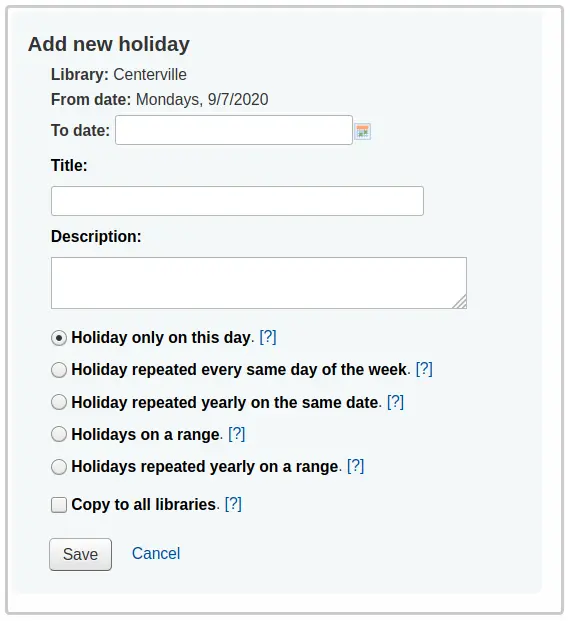
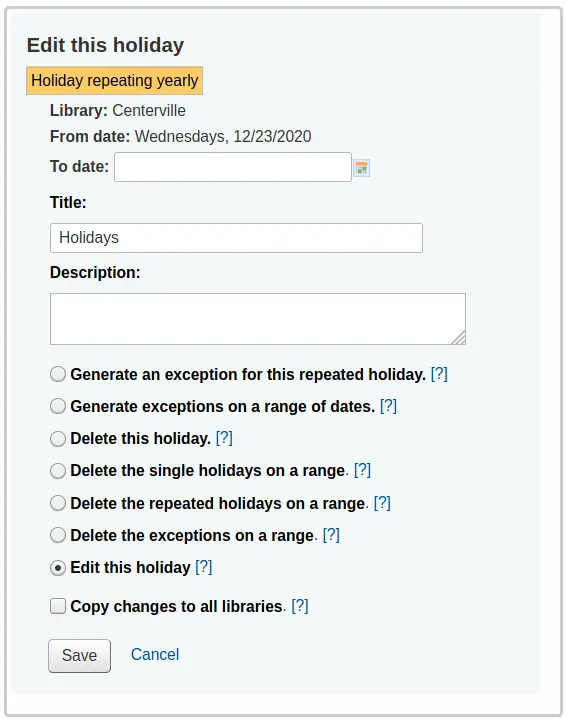
في النموذج الذي يظهر أعلى التقويم ، أدخل معلومات الإغلاق (لمزيد من المعلومات انقر على علامة الإستفهام [؟] على يمين الخيار)
سيتم ملأ المكتبة تلقائيا بناء على المكتبة التي تختارها من القائمة المنسدلة أعلى الصفحة
وسيتم أيضا المعلومات يوم ملئها تلقائيا استنادا إلى تاريخ النقر على التقويم
If this holiday extends on more than one day, enter the end date in 'To date'
In the 'title' enter the name of the holiday or the reason for the closing
In the 'description' enter more information about this holiday
ثم بعد ذلك يمكنك أن تختار إذا ما كان هذا الحدث هو حدث فردي يحدث مرة واحدة أو إذا ما كان متكرراً.
'Holiday only on this day': this is a one day holiday
'Holiday repeated every same day of the week': this is a weekly closing (if you're closed every Sunday, for example)
'Holiday repeated yearly on the same date': this is an annual holiday closing (if you're closed on January 1st each year, for example)
'Holiday on a range': this is a holiday that extends on several days
ملاحظة
Make sure to enter a 'To Date' at the top if you choose 'Holiday on a range'
'Holiday repeated yearly on a range': this is a holiday that extends on several days each year (such as summer holidays for schools)
ملاحظة
Make sure to enter a 'To Date' at the top if you choose 'Holiday repeated yearly on a range'
أخيرا تقرير ما إذا كان ينبغي تطبيق هذا الحدث على جميع المكتبات أو على واحدة فقط قد قمت بتحديدها أصلاً
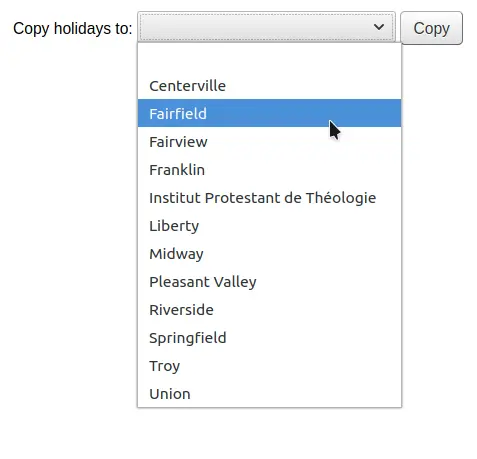
إذا ما فضّلتَ إدخال كل أيام العطل ومن ثمَّ نسخهم جميعاً إلى إحدى المكتبات الفرعية كلهم مرة واحدة ، فبإمكانك أن تستخدم قائمة النسخ أسفل التقويم
بعد الحفظ ستجد أن الحدث قد أُدرج في الملخص على يسار التقويم
Editing events
To edit events
انقر على المناسبة في النتيجة الذي تريد تغييره ( قم بذلك بالنقر على التاريخ في النتيجة، وليس الحدث المدرج في الملخص)
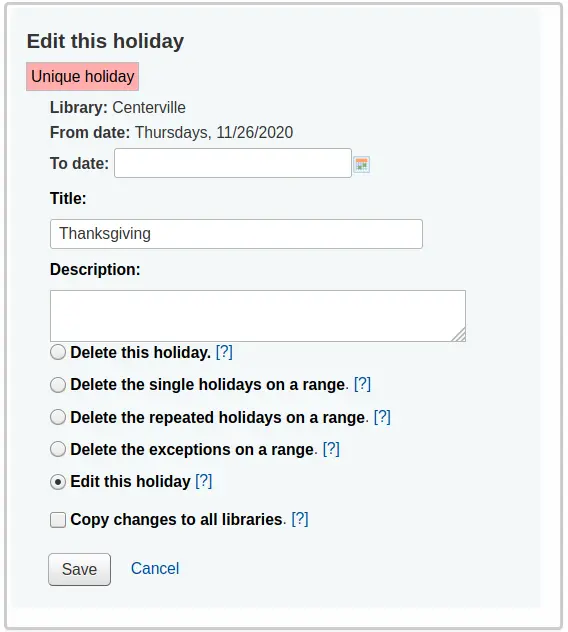
من هذا النموذج يمكك أن تجري التعديلات على العطلة أو أن تحذف العطلة نهائياً . كلا الفعلين يتطلب منك ان تنقر على 'حفظ' قبل أن تاخذ التعديلات مفعولها.
من هذا النموذج يمكك أن تجري التعديلات على العطلة أو أن تحذف العطلة نهائياً . كلا الفعلين يتطلب منك ان تنقر على 'حفظ' قبل أن تاخذ التعديلات مفعولها.
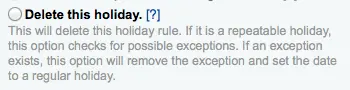
النقر على أحداث قابلة للتكرار سيقدم لك قليلاً من من الخيارات المختلفة
In the form above you will note that there is now an option to 'Generate an exception for this repeated holiday' and 'Generate exceptions on a range of dates' choosing one of these options will allow you to make it so that this date is not closed even though the library is usually closed on this date.
من هذا النموذج يمكك أن تجري التعديلات على العطلة أو أن تحذف العطلة نهائياً . كلا الفعلين يتطلب منك ان تنقر على 'حفظ' قبل أن تاخذ التعديلات مفعولها.
Additional help
عند إضافة أو تحرير الأحداث يمكنك الحصول على مساعدة إضافية بالقنر على علامة الاستقهام إلى جانب العديد من الخيارات المختلفة في الصفحة.
ملفات CSV
ملاحظة
Only staff with the manage_csv_profiles permission (or the superlibrarian permission) will have access to this tool.
Get there: More > Tools > Additional tools > CSV profiles
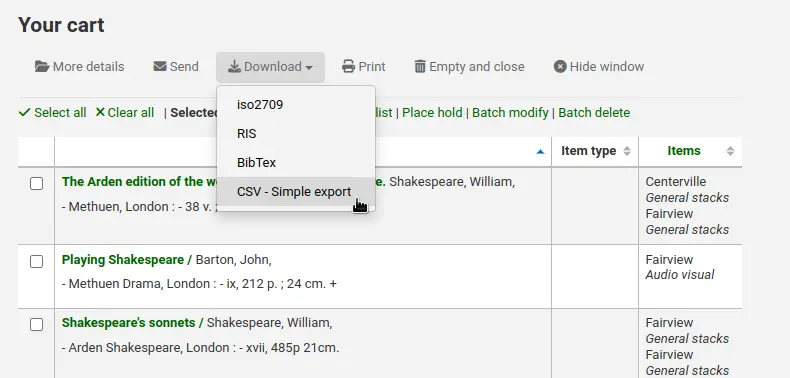
CSV profiles are created to define how you would like your cart or list to export.
CSV profiles are also used in the acquisitions module to export baskets and late orders, in the serials module to export late issues, and in the reports module to export the list of lost items.
Adding a CSV profile
To add a CSV profile,
Click on 'New CSV profile'
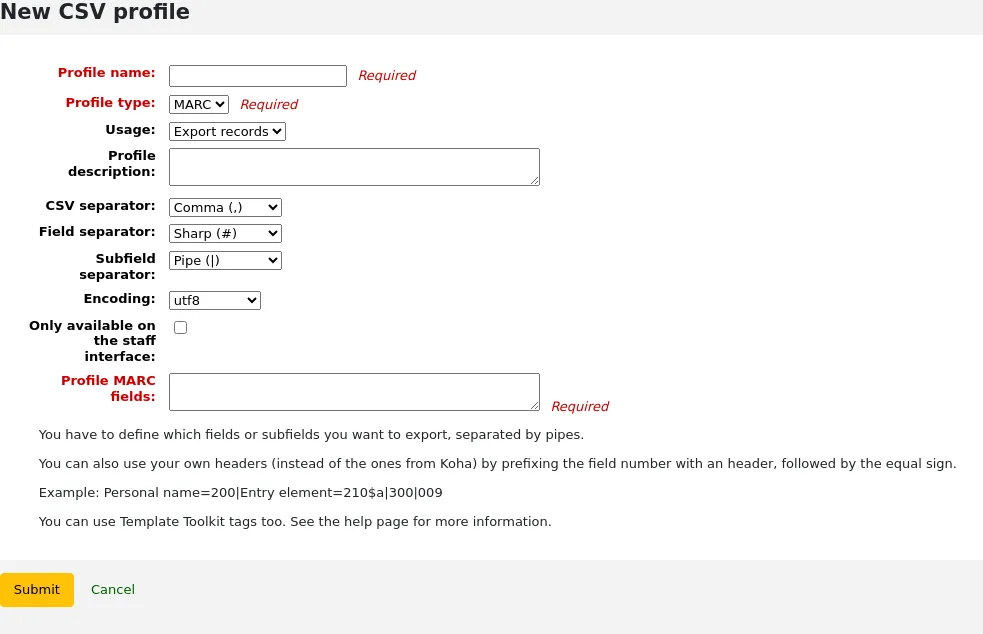
Profile name: enter a unique and meaningful name for the profile. This name will appear on the export pull down list when choosing 'Download' from your cart or list, or when choosing the profile in the acquisitions, serials or reports module to export baskets, late orders, etc.
Profile type: this determines what type of fields you plan to use (MARC or SQL) to define your profile; it will also affect the 'Usage' options below.
If you choose MARC, you will need to enter MARC fields.
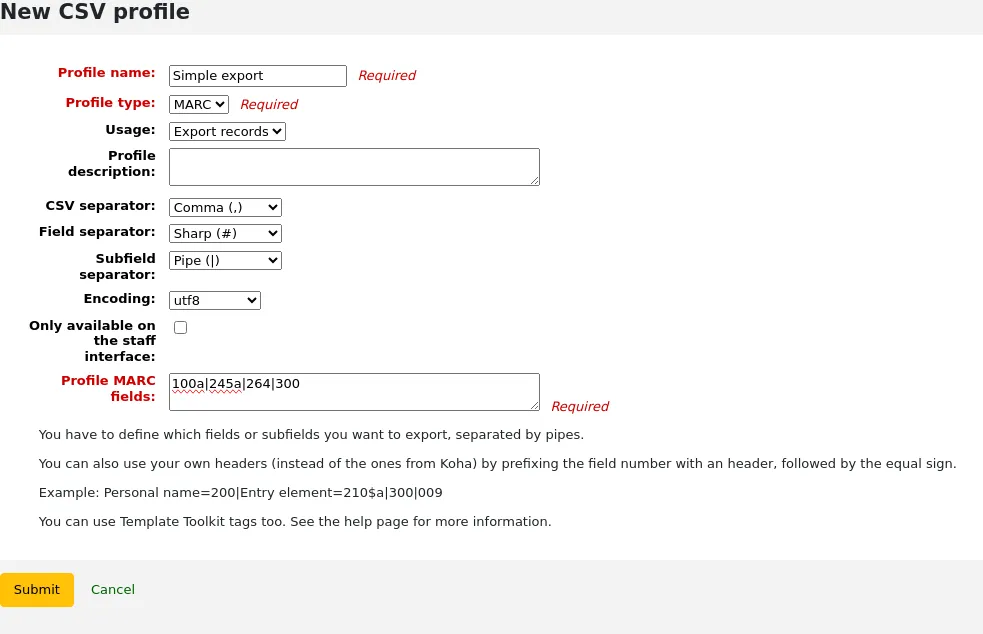
If you choose SQL, you will need to enter SQL database fields.
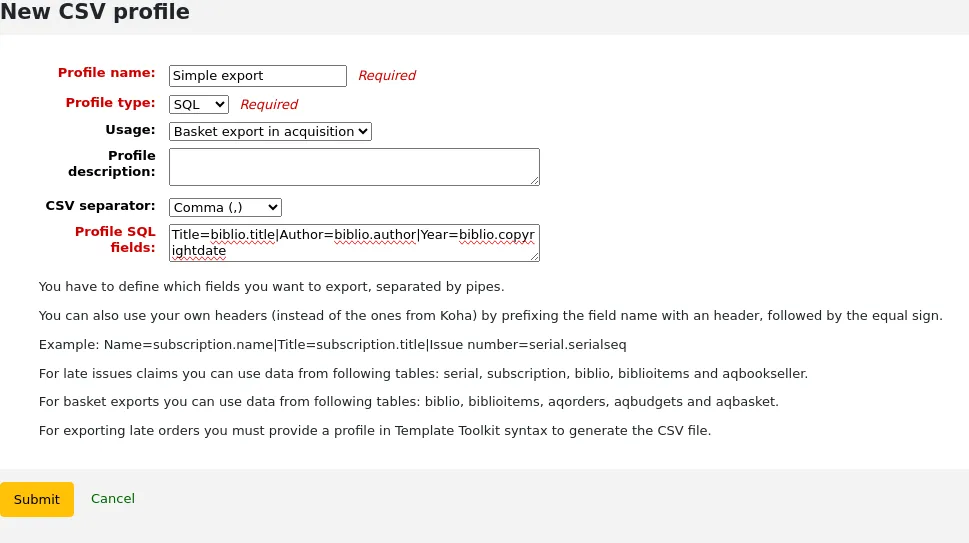
Usage: this field is used to indicate what type of report this CSV profile is used with:
Export records (only available with MARC profile type): this is used to export records from your cart or lists.
Late serial issues claims (only available with SQL profile type): this is used to export late issues of serial subscriptions
Export late orders (only available with SQL profile type): this is used to export late orders in the acquisitions module.
Basket export in acquisition (only available with SQL profile type): this is used to download records from acquisitions baskets.
Export lost items in report (only available with SQL profile type): this is used to export a CSV from the lost items report.
Profile description: you can use this field to expand the profile name. The description will also appear in the OPAC when patrons download content, so make sure it's clear for your patrons as well.
CSV separator: this is the character used to separate values and value groups.
ملاحظة
الخيار الأكثر شيوعاً هنا هو الفاصلة لأن معظم برامج جداول البيانات تعلم كيف تفتح الملفات المفصول بين بياناتها باستخدام الفاصلة.
Field separator (only available with MARC profile type): this is the character used to separate duplicate fields.
For example, you may have multiple 650 fields and this is the character that will appear in between each one in the column.

Subfield separator (only available with MARC profile type): this is the character used to separate duplicate subfields.
For example, you may have multiple $a subfields in a field.
Encoding: use this field to define the character encoding used when saving the file.
Only available on the staff interface (only available with MARC profile type): check this box to limit this CSV profile to the staff interface only, meaning patrons will not be able to use this profile to export their cart or lists from the OPAC.
Profile MARC fields (only available with MARC profile type): enter the fields or subfields to export, separated by pipes.
For example:
200\|210$a\|301
ملاحظة
You can use the dollar sign ($) to separate the field number and subfield code, or simply write the field number and subfield code together.
For example:
200\|210$a\|301
Or without the dollar sign:
200\|210a\|301
نصيحة
You can use your own headers (instead of the ones from Koha) by prefixing the field number with a header, followed by the equal sign.
For example:
Personal name=100\|title=245$a\|300
ملاحظة
You can customize further the profile with Template Toolkit syntax.
See Using Template Toolkit in MARC CSV profile below for more information and examples.
Profile SQL fields (only available with SQL profile type): enter the database fields to export, including the table name, separated by pipes.
For example:
biblio.title\|biblio.author
نصيحة
You can use your own headers (instead of the ones from Koha) by prefixing the field with a header, followed by the equal sign.
For example:
Title=biblio.title\|Author=biblio.author
مهم
For late issues claims you can use data from following tables:
serial
subscription
biblio
biblioitems
aqbookseller
For basket exports you can use data from following tables:
biblio
biblioitems
aqorders
aqbudgets
aqbasket
مهم
Exporting late orders requires a profile using the Template Toolkit syntax (the same syntax as the notices and slips).
There is a default profile that comes with Koha that you can use as an example.
Title[% separator %]Author[% separator %]Publication year[% separator %]ISBN[% separator %]Quantity[% separator %]Number of claims
[%~ SET biblio = order.biblio ~%]
"[% biblio.title %]"[% separator ~%]
"[% biblio.author %]"[% separator ~%]
"[% bibio.biblioitem.publicationyear %]"[% separator ~%]
"[% biblio.biblioitem.isbn %]"[% separator ~%]
"[% order.quantity%]"[% separator ~%]
"[% order.claims.count%][% IF order.claims.count %]([% FOR c IN order.claims %][% c.claimed_on | $KohaDates %][% UNLESS loop.last %], [% END %][% END %])[% END %]"
[% END %]
Click 'Submit' to save the new profile.
Using Template Toolkit in MARC CSV profiles
Template Toolkit syntax can be used to build complex CSV files.
For MARC information, you have to use the 'fields' variables to access the field list of the current record.
Start with the column heading, equal sign, and the TT variable. Always separate CSV columns with a pipe (|).
For example, this will return a two-column CSV file, with the first column titled "Title" and the second column titled "Author". The first column will contain 245$a and the second column will contain 100$a:
Title=[% fields.245.0.a.0 %]|Author=[% fields.100.0.a.0 %]
مهم
It's not possible to display an entire field (e.g. all of 245) you need to list the subfields you want to display.
The '0' indicate which field or subfield to print if there are more than one. For example, this will fetch the first subfield 'a' of the first '245' field it finds in the record:
[% fields.245.0.a.0 %]
Single subfield
This is the syntax to get a single subfield from a MARC field.
For example, to get 245$a:
[% fields.245.0.a.0 %]
Multiple subfields in the same column
To concatenate multiple subfields in one column, you'll need to use
[% FOREACH %]. Remember to always define the end of the FOREACH loop
with [% END %].
For example, to get both 245$a and 245$b in the same column:
[% FOREACH field IN fields.245 %][% field.a.0 %][% field.b.0 %][% END %]
Multiple subfield values
The previous examples only fetched the first occurrence of the subfield. In some
cases, a field might contain more than one subfield of the same code in a field.
In that case, you'll need to use the join() key. The parentheses contain
the separator character.
For example, to get 260$a, $b, and $c, in a case where there might be more than one of each subfield, they will be separated by a semicolon followed by a space:
[% FOREACH field IN fields.260 %][% field.a.join('; ') %][% field.b.join('; ') %][% field.c.join('; ') %][% END %]
Indicator values
The indicators can be accessible using the indicator key.
For example, to get the value of the second indicator of the 245 field:
[% fields.245.0.indicator.2 %]
Fixed-length data field values
You can use substr() (substring) to get values from specific positions in
fixed-length data fields.
For example, to get the language from the 008 field (positions 35-37):
[% fields.008.0.substr(35,3) %]
Using conditions
Template Toolkit allows to add conditions, with [% IF %],
[% ELSIF %], and [% ELSE %]. Remember to always define the end
of the condition with [% END %].
For example, to get 650$a if indicator 2 for 650 is set:
Subject=[% FOREACH field IN fields.650 %][% IF field.indicator.2 %][% field.a.0 %][% END %][% END %]
نصيحة
If you find you have extra spaces in your CSV, you can add tildes (~) inside the TT variables to remove extra whitespaces.
For example, the following code might replace the FOREACH variable with a space, making the title column start with a space:
Title=[% FOREACH field IN fields.245 %][% field.a.join(' ') %][% field.b.join(' ') %][% END %]
To correct this, add tildes at the beginning and end of the FOREACH variable:
Title=[%~ FOREACH field IN fields.245 ~%][% field.a.join(' ') %][% field.b.join(' ') %][% END %]
Modifying CSV profiles
To modify a CSV profile, click the 'Edit' button next to the profile.
Alter the necessary fields and click 'Submit'.
To delete a profile, click the 'Delete' button next to the profile.
Using CSV profiles
MARC CSV profiles will appear on the export list or cart menu under the 'Download' button in both the staff interface and the OPAC.
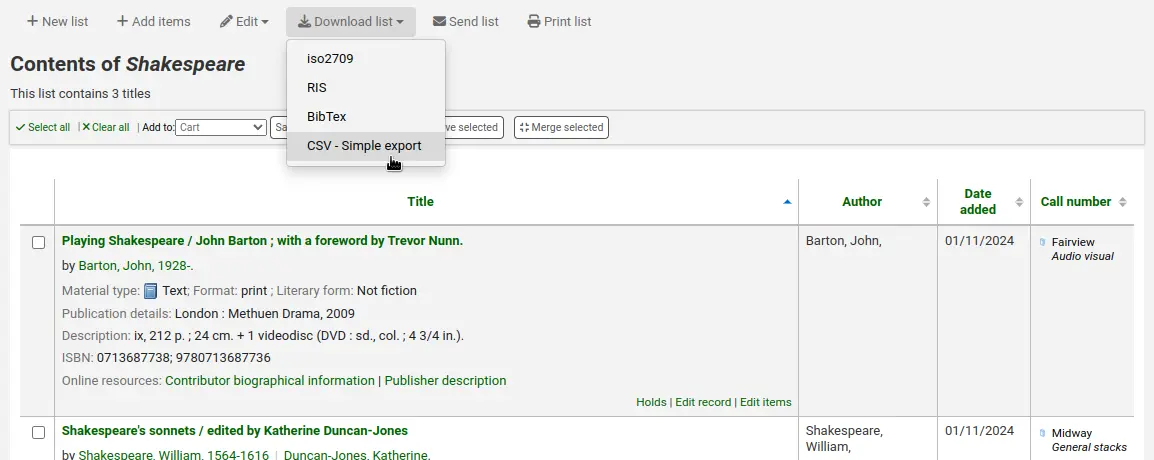
SQL CSV profiles will be available in various Koha modules in the staff interfaces depending on their usage.
'Late serial issues claims' CSV profiles will appear at the bottom of the late issues table in the serials module.
- 'Export late orders' CSV profiles will appear at the bottom of the
late orders table in the acquisitions module.
- 'Basket export in acquisition' CSV profiles will appear in the 'Download'
button in acquisitions baskets.
'Export lost items in report' CSV profiles will appear in the lost items report.
عارض السجل
ملاحظة
Only staff with the view_system_logs permission (or the superlibrarian permission) have access to the log viewer.
Get there: More > Tools > Additional tools > Log viewer
Actions in Koha are tracked in log files. The log system preferences determine what actions are logged. These logs are viewed using the log viewer.
Some actions are tracked by default, such as changes to system preferences and search engine mappings.
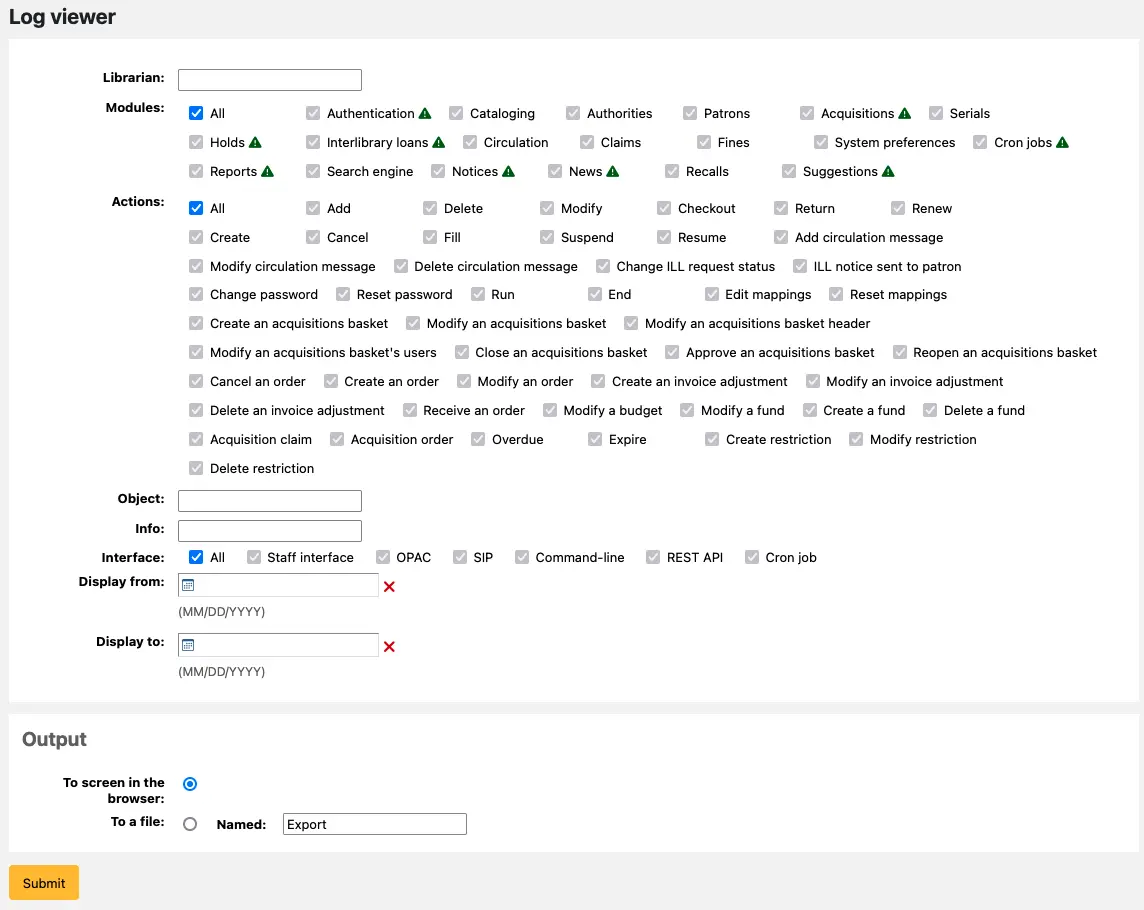
ملاحظة
The warning sign next to a module name indicates that the actions in this module are not logged. Change your logs preferences to log actions from a module.
Use the log viewer options to filter the log entry results:
- Librarian:
a staff member that performed an action (0 if done by Koha)
- Modules:
select a specific module
- Actions:
the type of action, such as modify and add
- Object:
the identifier for the object the action was performed on, for example the biblionumber, itemnumber, or borrowernumber
- Info:
additional information about an action, such as a system preference name (or partial name) or a barcode
- Interface:
where the action originated from, such as the staff interface, REST API, or SIP
- Display from:
show log entries from this date
- Display to:
show log entries to this date
The values for actions, object, and info depend on the module. The action logs table in the wiki lists some of the available values.
Example of the log viewer results for the circulation module:

ملاحظة
You can customize the columns of this table in the Table settings section of the Administration module (table id: logst).
أخبار
ملاحظة
Only staff with the edit_additional_contents permission (or the superlibrarian permission) will have access to this tool.
Get there: More > Tools > Additional tools > News
Koha's news module allows librarians to post news to the OPAC, staff interface and circulation receipts.
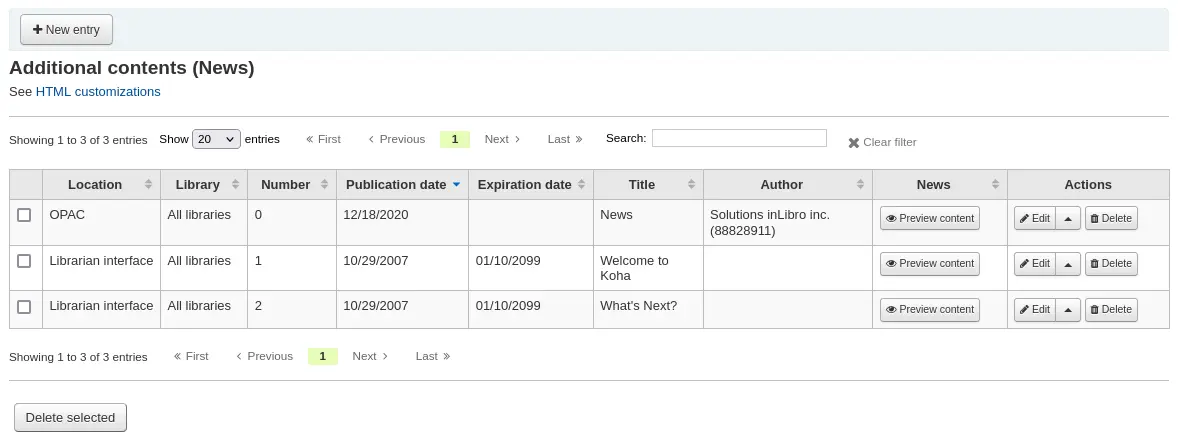
To add news to either the OPAC, the staff interface or a circulation receipt:
Click 'New entry'
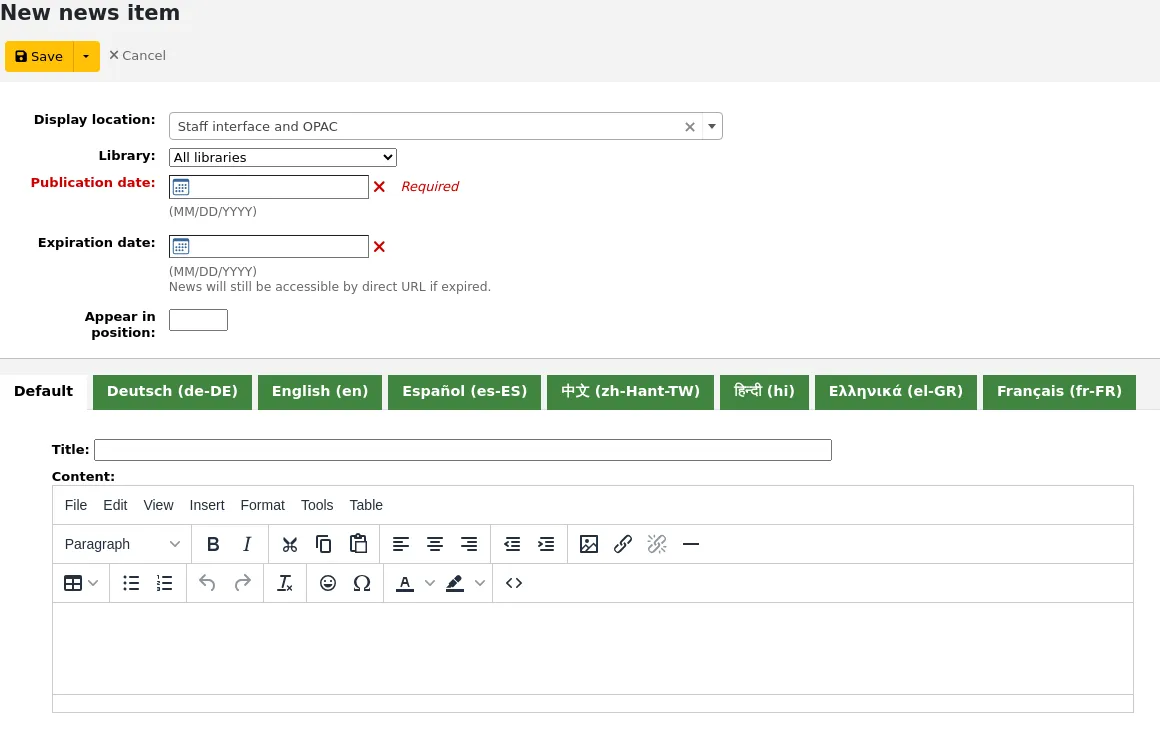
Code: enter a unique code for this news item
Display location: choose where to put the news

Librarian and OPAC interfaces: content will appear on the staff interface main page as well as in the news block on the OPAC
Librarian interface: content will appear on the staff interface main page
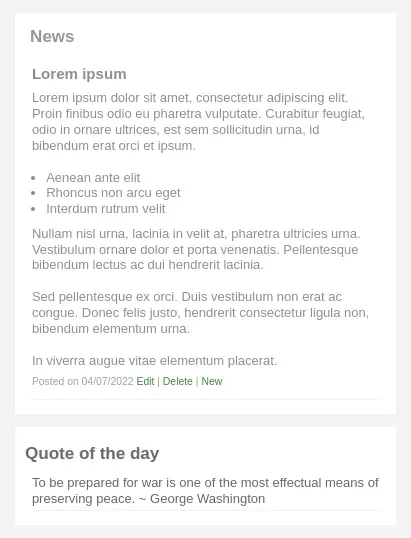
OPAC: content will appear in the top middle part of the OPAC page
Below the news in the OPAC there will be an RSS icon allowing you and your users to subscribe to library news
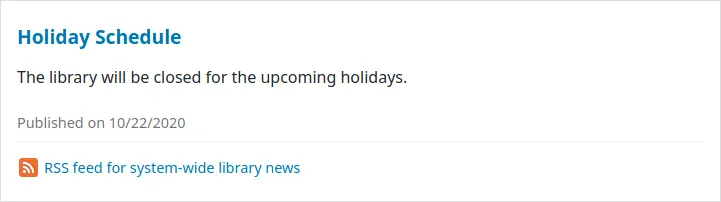
You can allow your users to choose to see branch-specific news with the OpacNewsLibrarySelect system preference
Slip: content will appear on the circulation receipts

ملاحظة
This can be activated or deactivated in the Notices and slips tool
Library: choose the library for which this news item will be shown
Prior to end users logging in to the OPAC only news items listed to appear for 'All libraries' will display unless your system administrator has configured an 'OPAC_BRANCH_DEFAULT' override in virtual host configuration. See installation for details.
Publication date: use the publication date field to control from which date your news item appears
Examples: (these assume today's date as 7 May 2019)
Publish on current date: set publication date as 7 May 2019
Schedule for publishing in future: set date later than 7 May 2019
Backdate the news item: set date earlier than 7 May 2019
Expiration date: use the expiration date field to automatically stop showing the news item when it is no longer relevant.
If this field is empty the news item will be shown until you remove it manually
Appear in position: you decide in what order your news items appear
If the field is left empty, the news will appear from newest to oldest
In this field, 0 is the top-most position; the larger the number, the lower in the list the news will appear
You can enter the news title and text for each language installed
ملاحظة
You can choose which type of editor to use here (either a text editor or a WYSIWYG (what you see is what you get) editor) with the AdditionalContentsEditor system preference.
After filling in all of the fields, click 'Save' at the top of the page.
Alternatively, click the arrow next to the 'Save' button and choose 'Save and continue editing' if you need to stay on this page to continue editing the news item.
Depending on your choice for the NewsAuthorDisplay system preference, you will also see the person who created the news item (this uses the logged in person).
HTML customizations
ملاحظة
Only staff with the edit_additional_contents permission (or the superlibrarian permission) will have access to this tool.
Get there: More > Tools > Additional tools > HTML customizations
Koha's HTML customizations tool allows staff to post content to the OPAC.
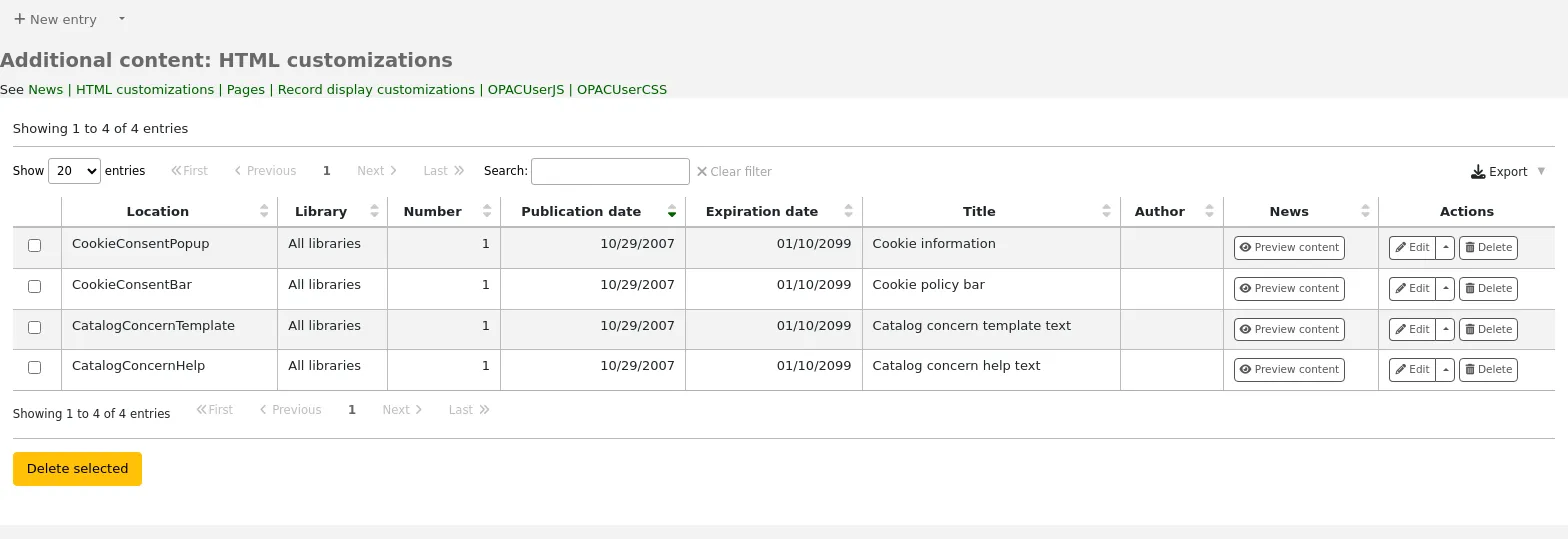
Add a new HTML customization
To add content:
Click 'New entry'
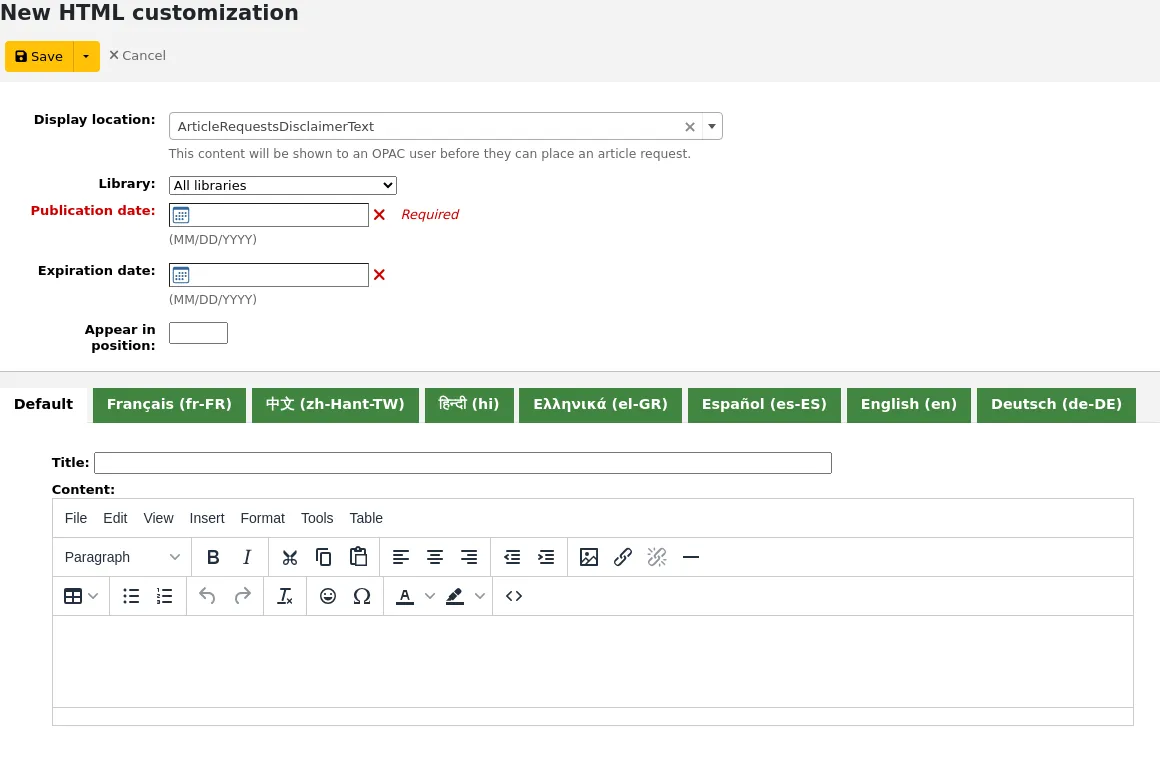
Code: enter a unique code for this additional content item
Display location: choose where to put the content.
See the list of all display locations below for details about each one.
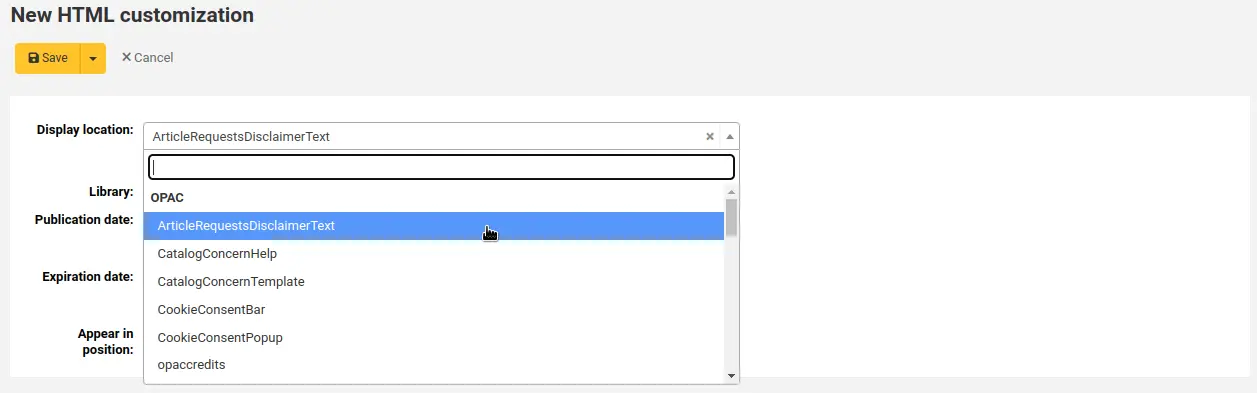
Library: choose the library for which this content will be shown
Prior to end users logging in to the OPAC only content blocks listed to appear for 'All libraries' will display unless your system administrator has configured an 'OPAC_BRANCH_DEFAULT' override in virtual host configuration.
Publication date: use the publication date field to control from which date your content appears
Examples: (these assume today's date as 7 May 2019)
Publish on current date: set publication date as 7 May 2019
Schedule for publishing in future: set date later than 7 May 2019
Backdate the news item: set date earlier than 7 May 2019
Expiration date: use the expiration date field to automatically stop showing the content when it is no longer relevant.
If this field is empty the content will be shown until you remove it manually
Appear in position: you decide in what order your content appear, when there is more than one in the same display location
If the field is left empty, the content will appear from oldest to newest
In this field, 0 is the top-most position; the larger the number, the lower in the list the content will appear
You can enter the content title and text for each language installed
ملاحظة
The title is not shown for additional content. It mostly serves to know at a glance what the content is about when looking at the list of additional content items. If you want a title to appear, you must add it in the text portion.
ملاحظة
You can choose which type of editor to use here (either a text editor or a WYSIWYG (what you see is what you get) editor) with the AdditionalContentsEditor system preference.
After filling in all of the fields, click 'Save' at the top of the page.
Alternatively, click the arrow next to the 'Save' button and choose 'Save and continue editing' if you need to stay on this page to continue editing the news item.
Display locations
OPAC locations
The following image shows where each block is displayed on the OPAC's main page, for the blocks that are displayed on the main page.
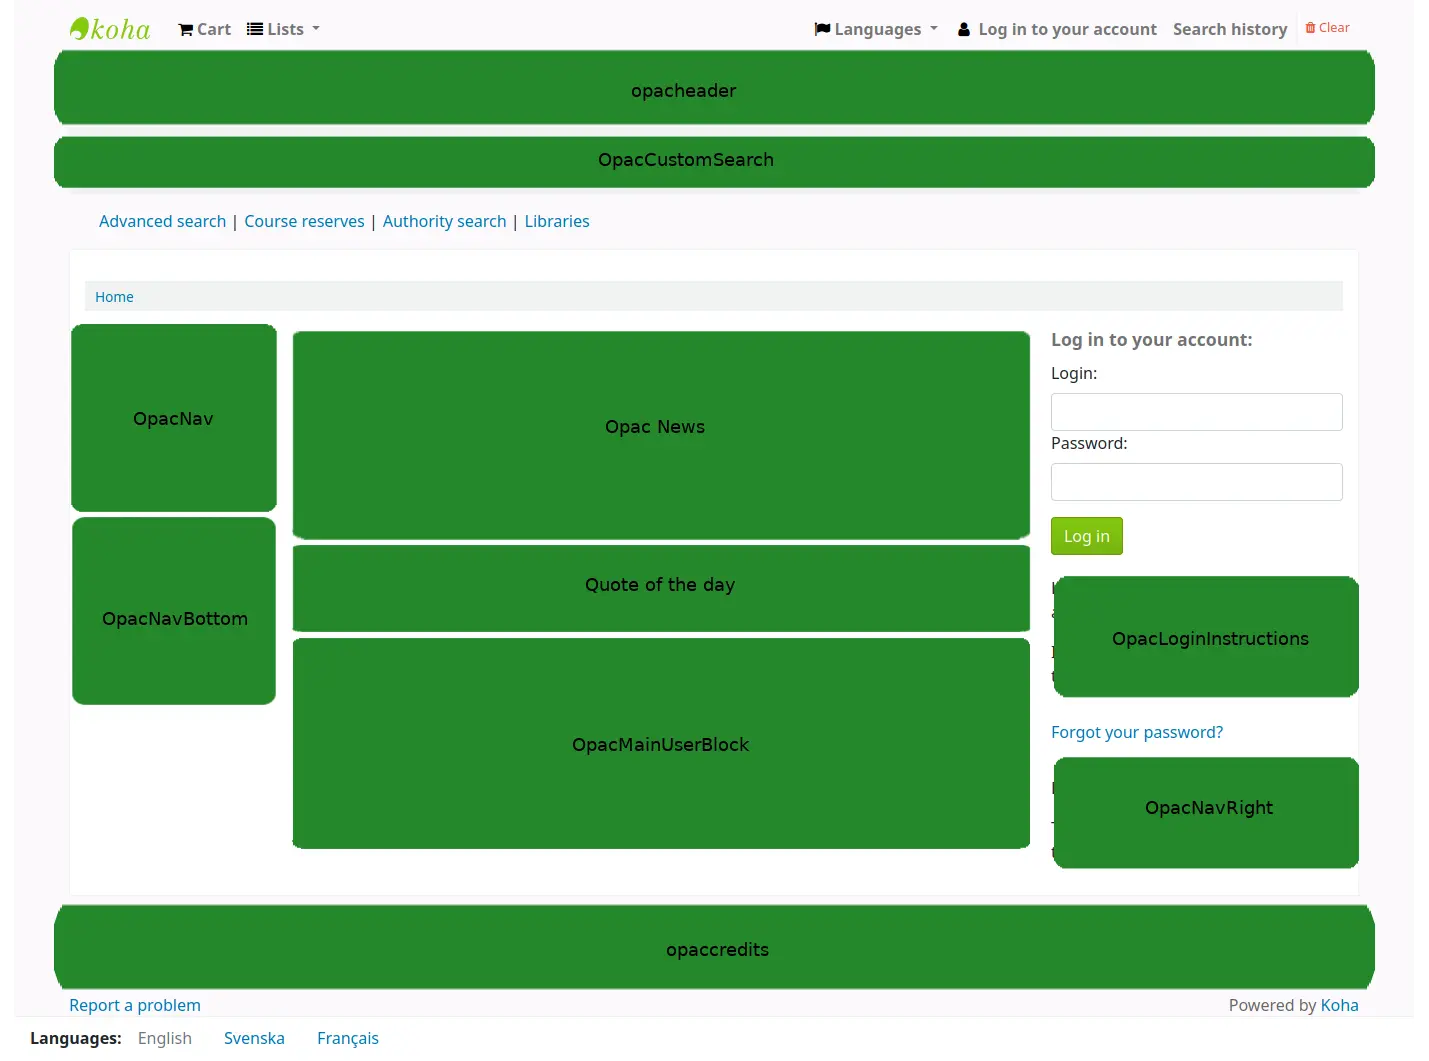
ملاحظة
The Quote of the day feature is found in the tools module, and the news are managed in the news tool. The rest of the customizable blocks are managed in the HTML customizations tool.
ArticleRequestsDisclaimerText: content will appear and patron will have to accept before they can continue to the article request form; use for any copyright/disclaimer patrons need to be aware of regarding photocopies or scans of articles or chapters
CatalogConcernHelp: content will appear at the bottom of catalog concern form when reporting a concern in the OPAC, or reporting a concern in the staff interface. The default text is "Please describe your concern clearly and the library will try to deal with it as quickly as possible".
CatalogConcernTemplate: content will appear in the main text area of the catalog concern form when reporting a concern in the OPAC, or reporting a concern in the staff interface. The default text is
**Describe the concern**

A clear and concise description of what the concern is.

**To Reproduce**

Steps to reproduce the behavior:
1. Go to '...'
2. Click on '....'
3. Scroll down to '....'
4. See error

**Expected behavior**

A clear and concise description of what you expected to happen.
نصيحة
Since this will be in a text field, there is no way to add formatting. Make sure to use the text editor, not the WYSIWYG editor, in order to have line breaks in your text.
CookieConsentBar: content will appear on the banner displayed when the CookieConsent system preference is enabled.
Version
The CookieConsentBar display location was added in version 23.11 of Koha.
ملاحظة
The CookieConsentBar content will appear on the cookie banner in both the OPAC and the staff interface.
CookieConsentPopup: content will be used as the main body for the Cookies policy that pops up when clicking 'More information' on the cookie banner.
Choices for non-essential cookies are added to the Cookies policy via the CookieConsentedJS system preference.
Version
The CookieConsentPopup display location was added in version 23.11 of Koha.
ملاحظة
The CookieConsentPopup content is used in both the OPAC and the staff interface.
ILLModuleCopyrightClearance: content will appear when creating an interlibrary loan request on the OPAC.
Version
The ILLModuleCopyrightClearance display location was added to Koha in version 24.05. In prior versions, it was a system preference by the same name: ILLModuleCopyrightClearance.
opaccredits: content will appear at the bottom of the page
OpacCustomSearch: content will replace the simple search bar at the top of the page
opacheader: content will appear at the top of the OPAC page
OpacLibraryInfo: content will appear in the 'Libraries' page in the OPAC, as well as in the holdings table in the OPAC
OpacLoginInstructions: content will appear under the login box on the OPAC's main page
OpacMaintenanceNotice: content will replace the default maintenance message when the OpacMaintenance system preference is set to 'Show'.
Version
Prior to Koha version 23.11, this was a system preference. See OpacMaintenanceNotice for more information.
OpacMainUserBlock: content will appear in the middle of the OPAC's main page
OpacMoreSearches: content will appear under the search box at the top of the OPAC. By default (and depending on system preferences) there is a link for Advanced search, Course reserves, Authority search, and Tag cloud. Any new searches will be added to the right of the already present links.
OpacMySummaryNote: content will appear above the patron's summary and below the welcome message when the patron logs in to the OPAC and views their 'your summary' tab.

OpacNav: content will appear on the left hand column of the main page and patron account on the OPAC. When on the patron account page, the content in OpacNav will appear before the account tabs (summary, charges, personal details, etc.)
OpacNavBottom: content will appear on the left hand column of the main page and patron account on the OPAC. When on the patron account page, the content in OpacNavBottom will appear after the account tabs (summary, charges, personal details, etc.). On the main page, the content in OpacNavBottom appears right below the content in OpacNav.
OpacNavRight: content will appear on the right side of the OPAC page
OPACResultsSidebar: content will appear on the search results page below the list of facets on the left side of the screen.
Version
Prior to Koha version 23.11, this was a system preference. See OPACResultsSidebar for more information.
OpacSuggestionInstructions: content will replace the text at the top of the purchase suggestion form on the OPAC
OpacSuppressionMessage: content will appear on the OPAC when a record is blocked. (See the OpacSuppression system preference for more information.)
Version
Prior to Koha version 23.11, this was a system preference. See OpacSuppressionMessage for more information.
PatronSelfRegistrationAdditionalInstructions: content will be displayed after the patron successfully creates a library account via the OPAC.
Version
Prior to Koha version 23.11, this was a system preference. See PatronSelfRegistrationAdditionalInstructions for more information.
ملاحظة
Note that this only appears after the patron has registered.
SCOMainUserBlock: content will appear in the center of the main page of the self check-out screen.
Version
Prior to Koha version 23.11, this was a system preference. See SCOMainUserBlock for more information.
SelfCheckHelpMessage: content will appear above the existing help message when clicking the 'Help' link in the top right of the self check-out interface.
Version
Prior to Koha version 23.11, this was a system preference. See SelfCheckHelpMessage for more information.
SelfCheckInMainUserBlock: content will appear in the center of the main page of the self check-in screen.
Version
Prior to Koha version 23.11, this was a system preference. See SelfCheckInMainUserBlock for more information.
Staff interface locations
IntranetmainUserblock: content will appear at the bottom of the staff interface homepage, underneath the module icons.
Version
Prior to Koha version 24.11, this was a system preference. See IntranetmainUserblock for more information.
RoutingListNote: content will appear below the routing list information.
Version
Prior to Koha version 25.05, this was a system preference. See RoutingListNote for more information.
StaffAcquisitionsHome: content will appear at the bottom of the Acquisitions module main page.
StaffAuthoritiesHome: content will appear at the bottom of the Authorities main page.
StaffCataloguingHome: content will appear at the bottom of the Cataloguing module main page.
StaffListsHome: content will appear at the bottom of the Lists main page.
StaffLoginInstructions: content will appear above the login form of the staff interface.
Version
Prior to Koha version 25.05, this was a system preference. See StaffLoginInstructions for more information.
StaffPatronsHome: content will appear at the bottom of the Patrons module main page.
StaffPOSHome: content will appear at the bottom of the Point of sale main page.
StaffReportsHome: content will appear at the bottom of the Reports main page.
Version
Prior to Koha version 25.11, this was a system preference. See IntranetReportsHomeHTML for more information.
StaffSerialsHome: content will appear at the bottom of the Serials module main page.
Pages
ملاحظة
Only staff with the edit_additional_contents permission (or the superlibrarian permission) will have access to this tool.
Get there: More > Tools > Additional tools > Pages
The pages tool is a tool to create custom additional pages in the OPAC and in the staff interface. It is based on the same tool as the news and the HTML customizations, therefore it works in the same way.
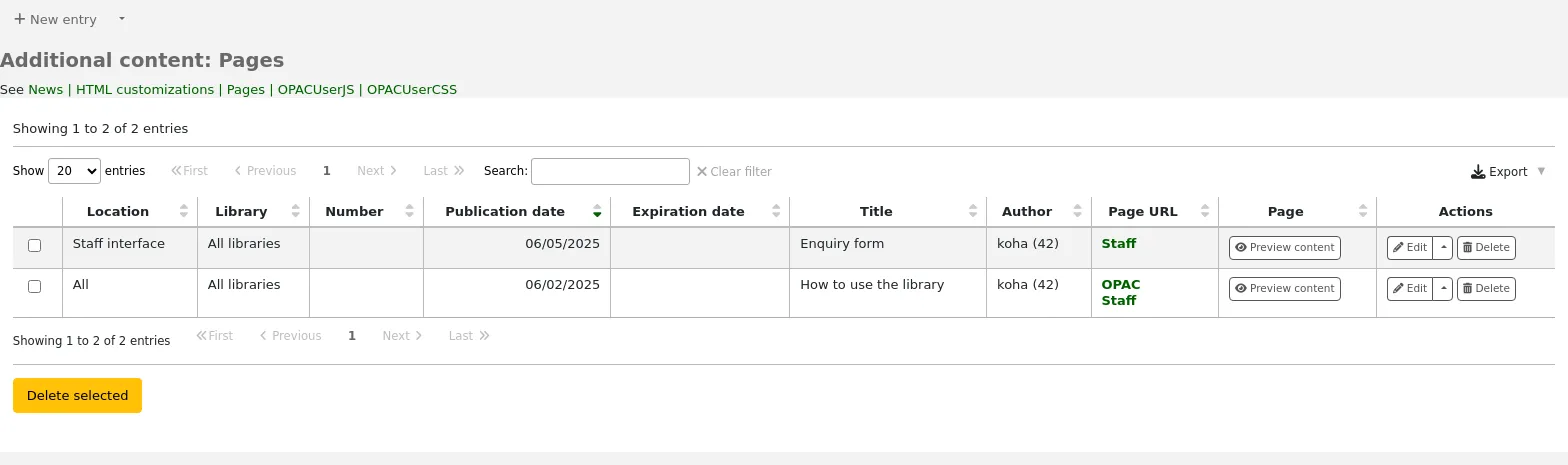
To add a new page:
Click 'New entry'
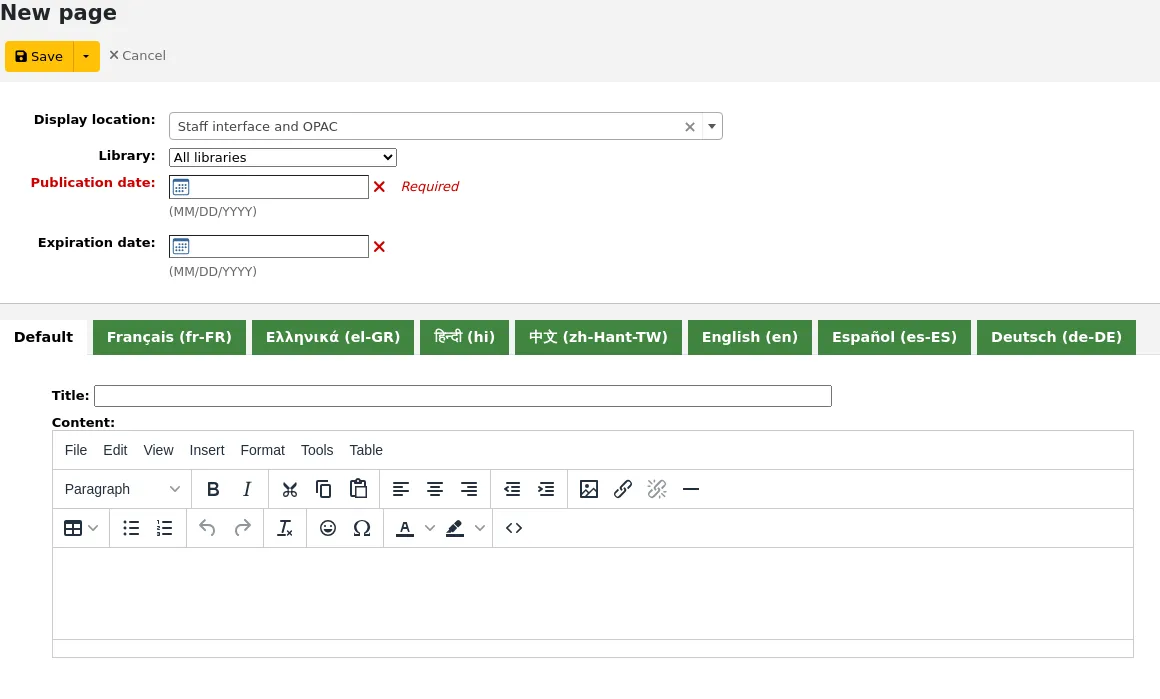
Display location: choose the interface from which this page should be accessed
Librarian and OPAC interfaces: two links will be created, one for the OPAC and one for the staff interface
Librarian interface: a link for the staff interface will be created
OPAC: a link for the OPAC will be created
Library: choose the library for which this page will be available
If an OPAC page is limited to a library, only logged in users whose home library matches the page library will be able to access the page.
Pages limited to a library will not be accessible to OPAC users who are not logged in, unless your system administrator has configured an 'OPAC_BRANCH_DEFAULT' override in virtual host configuration.
If a staff interface page is limited to a library, only staff logged into that library will be able to access the page.
Publication date: use the publication date field to control from which date your page is accessible, if it should only be accessed at a future date.
Expiration date: use the expiration date field to remove the page after a specific date.
If this field is empty the page will be available until you remove it manually
You can enter the page title and content for each language installed
ملاحظة
You can choose which type of editor to use here (either a text editor or a WYSIWYG (what you see is what you get) editor) with the AdditionalContentsEditor system preference.
After filling in all of the fields, click 'Save' at the top of the page.
Alternatively, click the arrow next to the 'Save' button and choose 'Save and continue editing' if you need to stay on this page to continue editing the news item.
In the table, a link will be generated for the OPAC or the staff interface or both. Use this link in HTML customizations, news or system preferences such as IntranetNav or IntranetmainUserBlock so that the patrons or staff members can access the new page.
ملاحظة
To link to a specific page, use the code in the URL with the
code=parameter. For example:OPACBASEURL/cgi-bin/koha/opac-page.pl?code=staff_and_opac_42 STAFFCLIENTBASEURL/cgi-bin/koha/tools/page.pl?code=staff_and_opac_42
In multi-language installations, use the
language=parameter followed by the language code to link to the page in a specific language. For example:OPACBASEURL/cgi-bin/koha/opac-page.pl?code=staff_and_opac_42&language=fr-CA STAFFCLIENTBASEURL/cgi-bin/koha/tools/page.pl?code=staff_and_opac_42&language=fr-CA
To use a custom page
Once the page has been developed and saved, you will see a summary table of all custom pages. This table also displays the generated links to access these custom pages. The links will be available in both the default language, and the installed language currently in use by the logged in staff member.
There is a button to preview the created page. This is helpful to check how the page looks and functions before it is deployed.
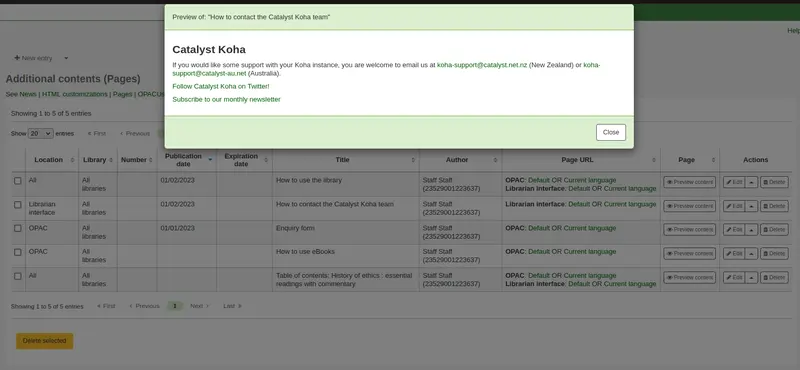
Now the page has been created, there are a number of ways to make the page accessible to your patrons in the Koha OPAC.
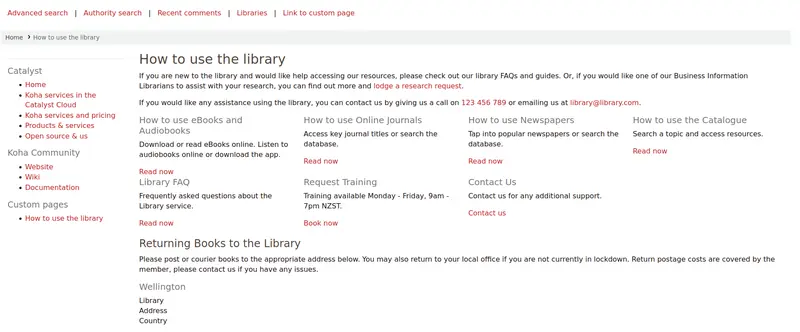
One option is to use an HTML customization to add the link to the page to a section of the OPAC. The page can be added as a navigation link (in OpacNav, OpacNavBottom, or OpacNavRight). Depending on the page, it may be more suitable in the header (opacheader), footer (opaccredits), or main section of the homepage (OpacMainUserBlock).
HTML customizations are only displayed on the OPAC, so News items would be the appropriate tool to add the link to the main landing page of the staff interface.
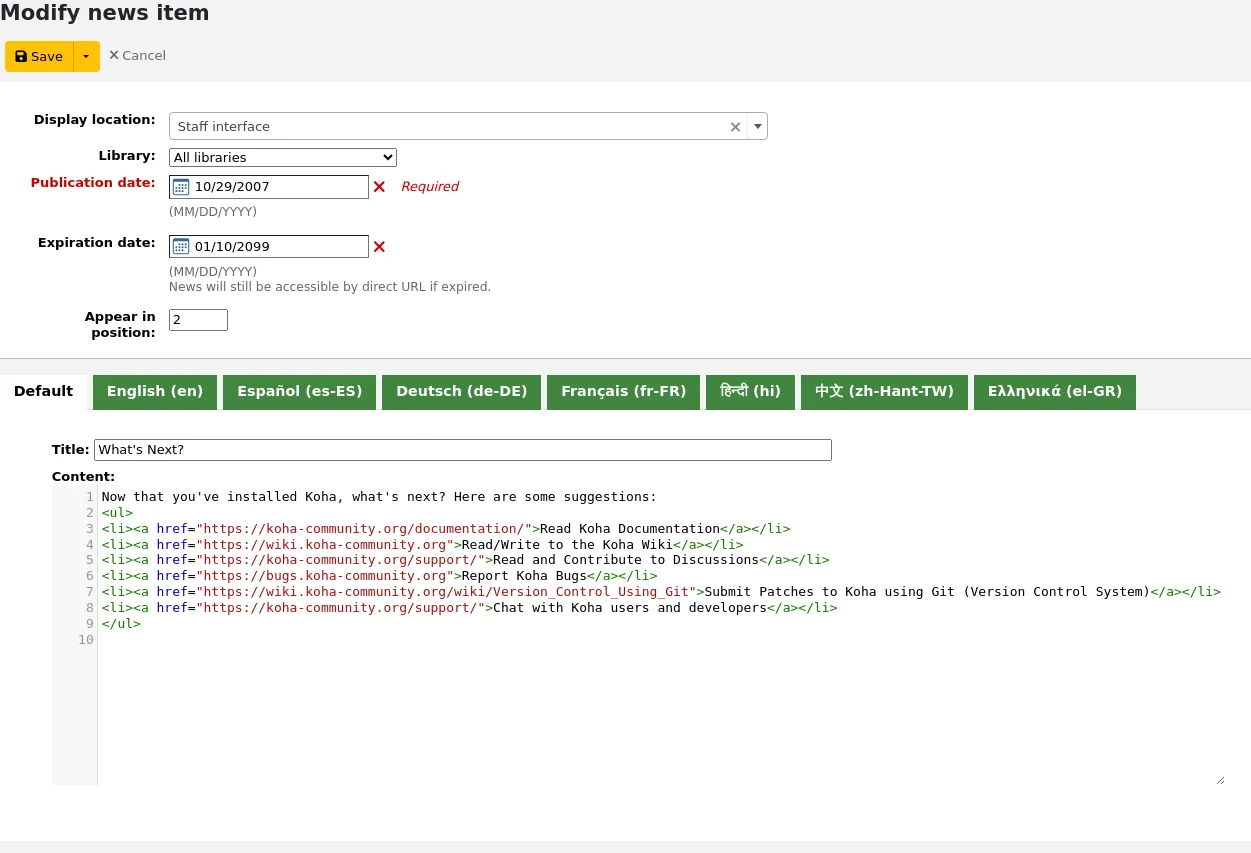
The benefit of putting the page link in an HTML customization or News item is that you can use the WYSIWYG editor, instead of writing code. However, there is always the option to write the content in the HTML text editor too, if you prefer.
Those more proficient in writing code could use jQuery (Javascript) to insert their page link anywhere in the OPAC or staff interface.
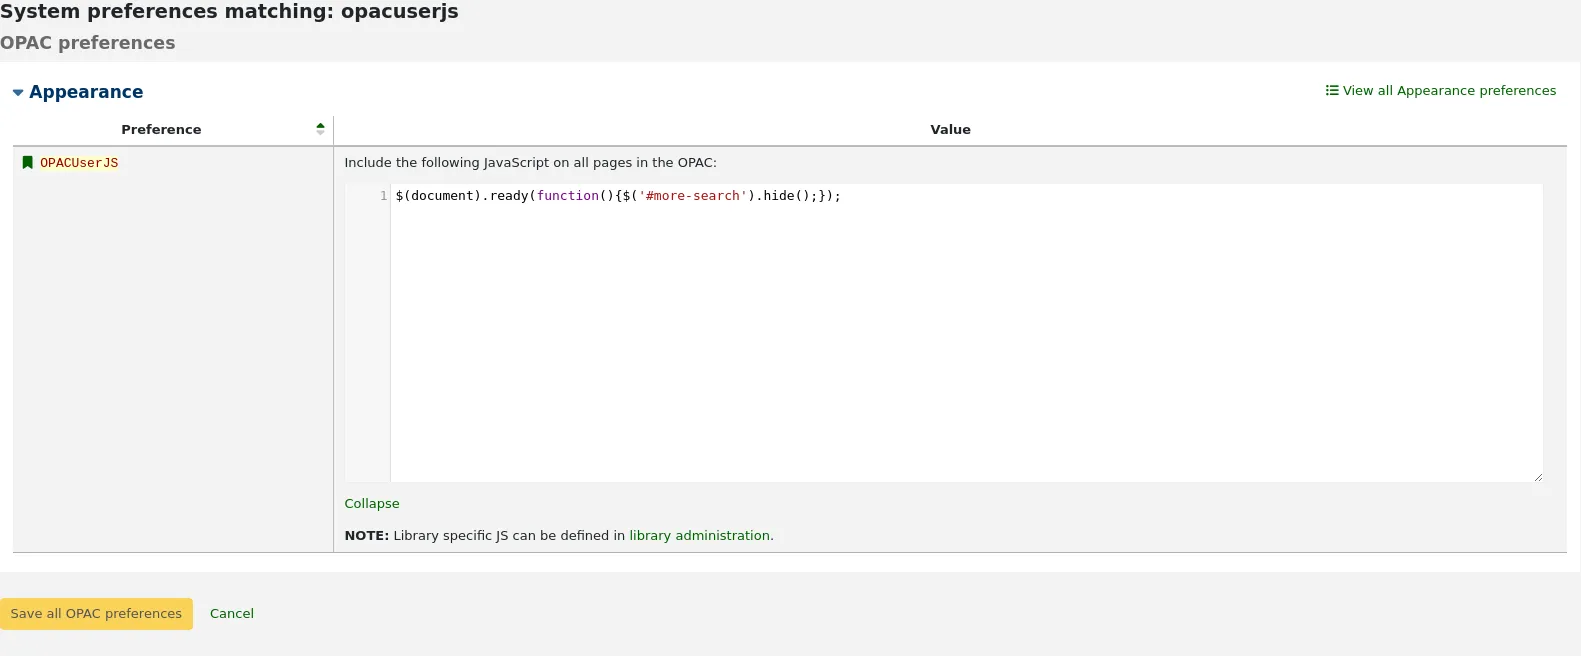
Using jQuery, the pages could be added to either interface as simple text links, or as more advanced button links or image links. Add code to the OPACUserJS system preference to apply jQuery to the OPAC, or to the IntranetUserJS system preference to apply jQuery to the staff interface.
Clever ways to use custom pages:
There are many interesting ways to use custom pages in a Koha library. We’ve heard discussion of pages being used for tables of contents, frequently asked questions pages for the library, and enquiry forms.
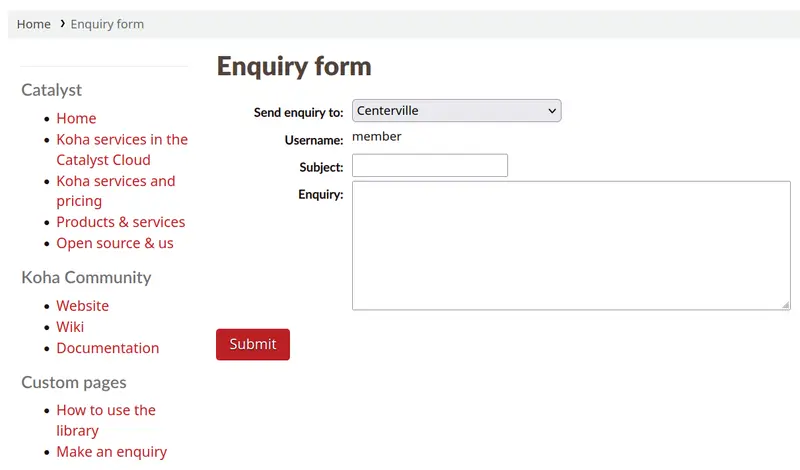
Another way to make custom Koha page content accessible for users, would be to catalog those pages so they pop in in Koha search results, for example library tutorials that patrons may be looking for.
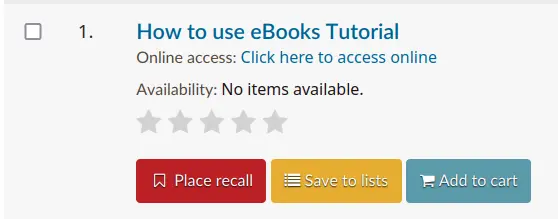
Once the page has been created, it can be cataloged in the URI field of a record (856$u). Alternatively, it could be cataloged in the URI field of an item attached to a record (952$u). Both of these fields get converted into hyperlinks by Koha. If cataloged in a record or item, it would then be indexed and become searchable.
Once cataloged, these pages could be used in other ways that are typically reserved for books and other records. The records representing pages can be added to lists, or stored in virtual collections or locations that make them easier to find in the catalog. They could even be captured and displayed in carousels!
Record display customizations
Version
This feature was first introduced in version 25.11 of Koha.
ملاحظة
Only staff with the edit_additional_contents permission (or the superlibrarian permission) will have access to this tool.
Get there: More > Tools > Additional tools > Record display customizations
This tool allows you to make changes to the way records are displayed in the staff interface or in the OPAC using custom Template Toolkit code. With this tool, you can easily display custom additional fields in the detail view of a MARC record without having to make changes in an XSLT stylesheet.
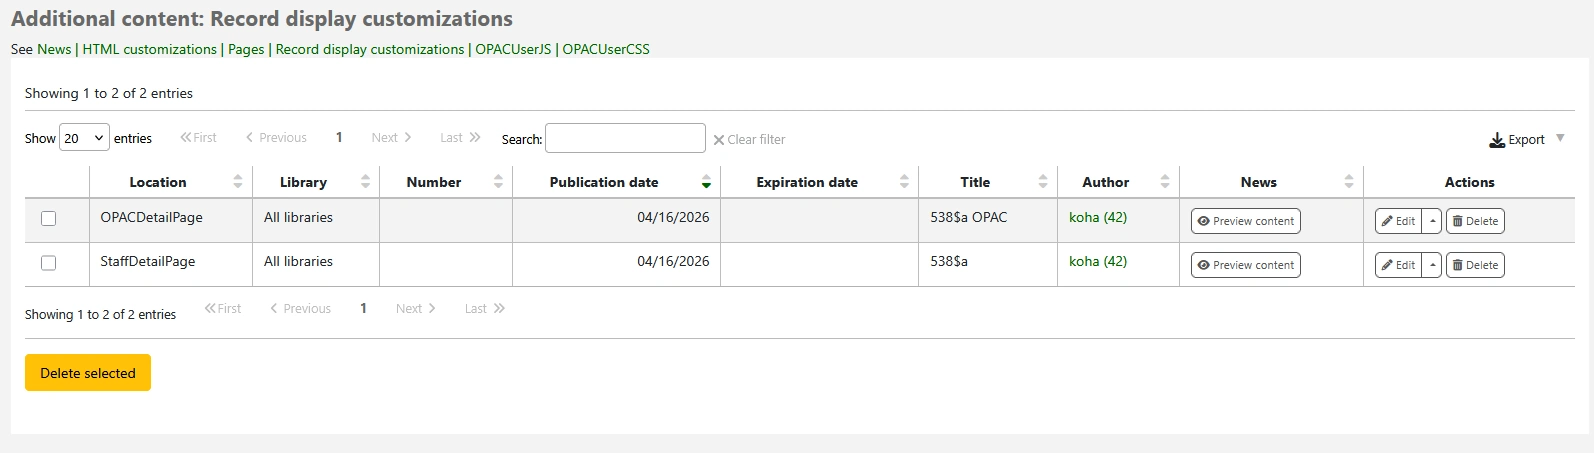
To add a new record display customization:
Click 'New entry'
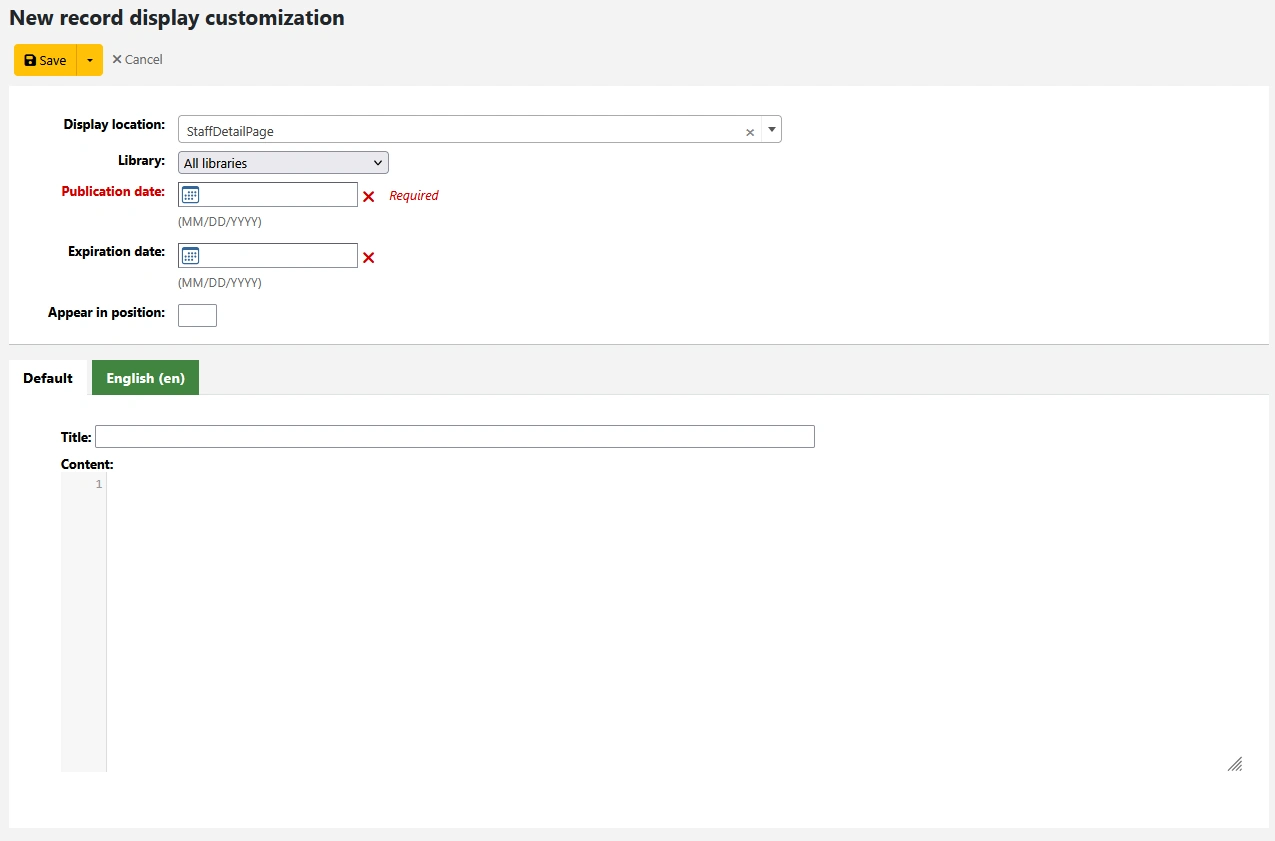
Display location: choose the page that you want the customization to be displayed on.
StaffDetailPage: the record customization will be displayed in the staff interface on the bibliographic record's detail page.
StaffListPage: the record customization will be displayed in the staff interface in lists of records.
StaffResultsPage: the record customization will be displayed in the staff interface in the results list of a search.
OPACDetailPage: the record customization will be displayed in the OPAC on the bibliographic record's detail page.
OPACListPage: the record customization will be displayed in the OPAC in both public and private lists of records.
Library: choose the library for which this record customization will be shown.
If a record customization for the staff interface is limited to a library, only staff logged into that library will see the customization.
If a record customization for the OPAC is limited to a library, only logged in OPAC users whose home library is the selected one will see the customization.
OPAC record customizations limited to a library will not be accessible to OPAC users who are not logged in unless your system administrator has configured an 'OPAC_BRANCH_DEFAULT' override in virtual host configuration.
Publication date: use the publication date field to control from which date the record customization should be shown, if it should only be shown at a future date.
If the publication date is set to today, before today or is left blank, the record customization will be shown immediately.
If the publication date is set in the future, the record customization will only be shown at that date or later.
Expiration date: use the expiration date field to remove the customization after a specific date.
If this field is empty, the record customization will be shown until you remove it manually.
Appear in position: this field is not currently in use.
Enter your title and content for the record customization.
نصيحة
See the wiki page Record customizations with Template Toolkit for some record customization examples.
You can enter record customization contents separately for each language installed in Koha.
After filling in all of the fields, click 'Save' at the top of the page.
Alternatively, click the arrow next to the 'Save' button and choose 'Save and continue editing' if you need to stay on this page to continue editing the record customization.
مجدول المهام
ملاحظة
Only staff with the schedule_tasks permission (or the superlibrarian permission) will have access to this tool.
Get there: More > Tools > Additional tools > Task scheduler
المهام المجدولة هي طريقة لجدولة التقارير للتشغيل وقتما تشاء
To schedule a task, visit the task scheduler and fill in the form
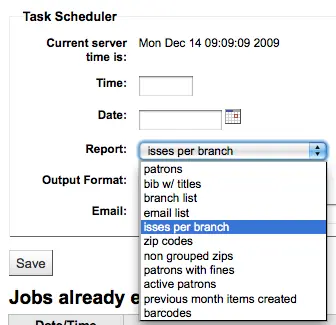
وقت الخادم الحالي يظهرعلى الخادم الخاص بك (جدولة كافة التقارير الخاصة بك لتشغيل على أساس ذلك الوقت - وليس في التوقيت المحلي الخاص بك)
يجب إدخال الوقت مثل HH: MM (2ساعة أرقام، أرقام 2 دقيقة)
يجب إدخال التاريخ باستخدام التقويم المنبثق
From Report choose the report you want to schedule
اختيار ما إذا كان الحصول على نص أو ربط النتائج
في حقل البريد الالكتروني أدخل البريد الالكتروني للشخص الذي تُريد أن يصله تقريرك
أدنى صفحة مجدول المهام، يوجد قائمة بالتقارير المجدولة

You can also schedule reports directly from the list of saved reports by clicking the small arrow next to the 'Run' button and selecting the 'Schedule' option.
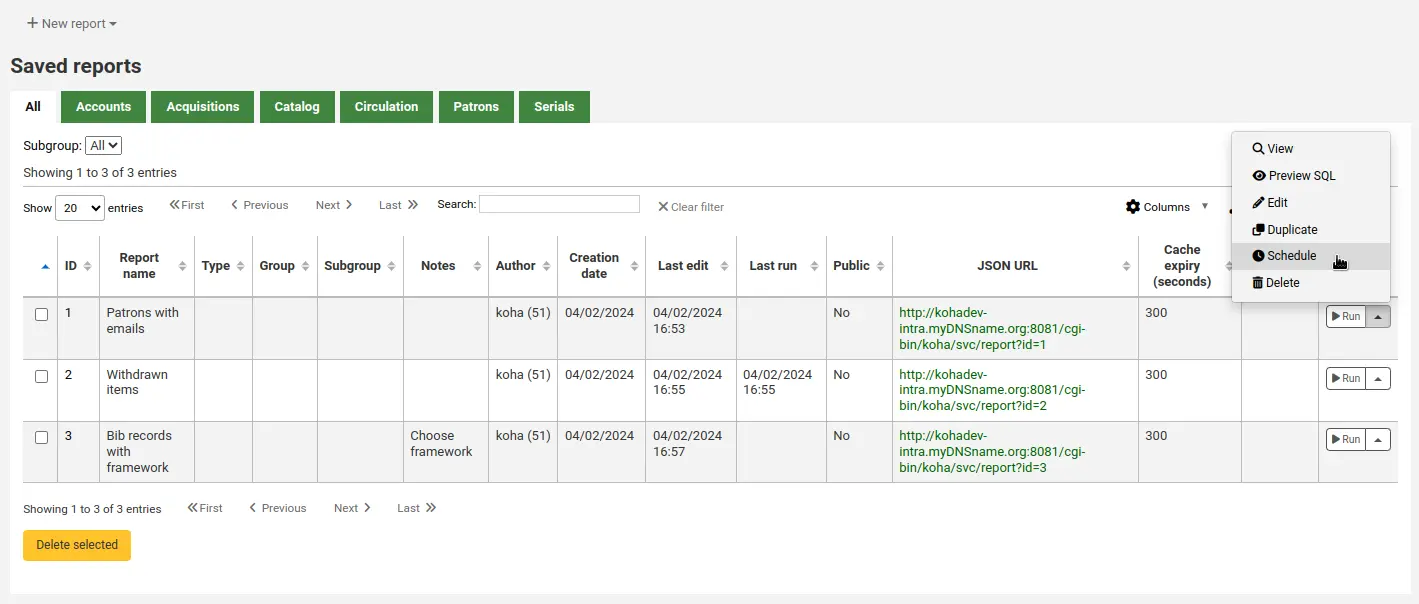
أستكشاف الخطأ و إصلاحه
مجدول المهام لن يعمل إذا كان مستخدم خادم الويب ليس له الصلاحية في استخدامه. لمعرفة ما إذا كان المستخدم لديه الصلاحية اللازمة، تفحص /etc/at.allow لمعرفة المستخدمين الموجودين. إذا كنت لا تملك ذالك الملف، تفحص etc/at.deny. إذا كان ملف etc/at.deny موجود لكنه فارغ، في هذه الحالة يمكن لأي مستفيد استخدامه. تحدث مع مدير نظامك لإضافة المستفيد في المكان الصحيح وذلك لجعل مجدول المهام يعمل
Quote editor
ملاحظة
Only staff with the edit_quotes permission (or the superlibrarian permission) will have access to this tool.
Get there: More > Tools > Additional Tools > Quote editor
This tool will allow you to add and edit quotes to show on the OPAC or the staff interface.
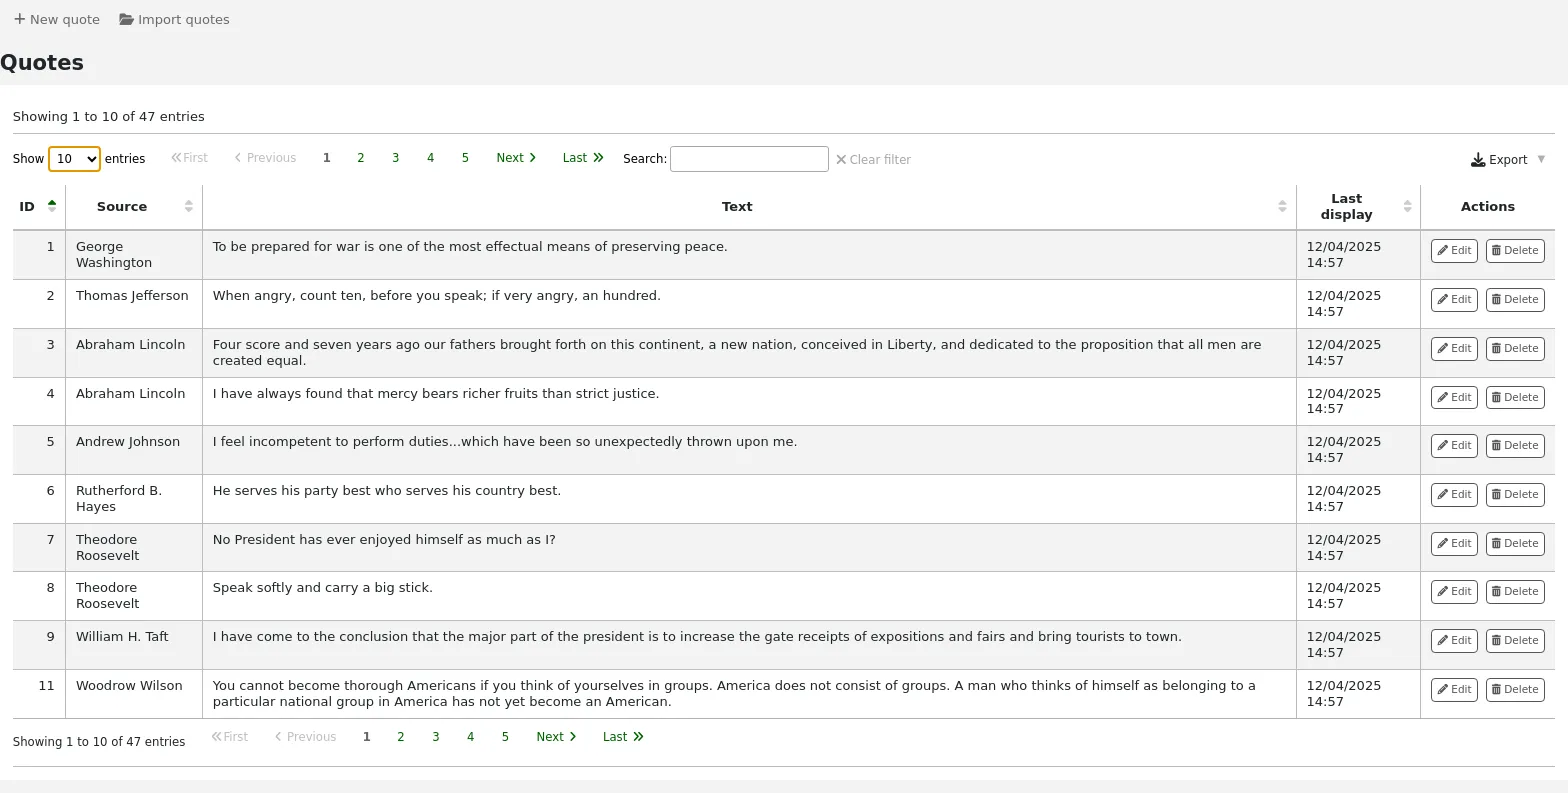
To turn this feature on set the QuoteOfTheDay system preference to either 'OPAC', 'staff interface', or both, and add at least one quote using this tool.
In the OPAC, the quotes will appear above the 'OpacMainUserBlock' news block.
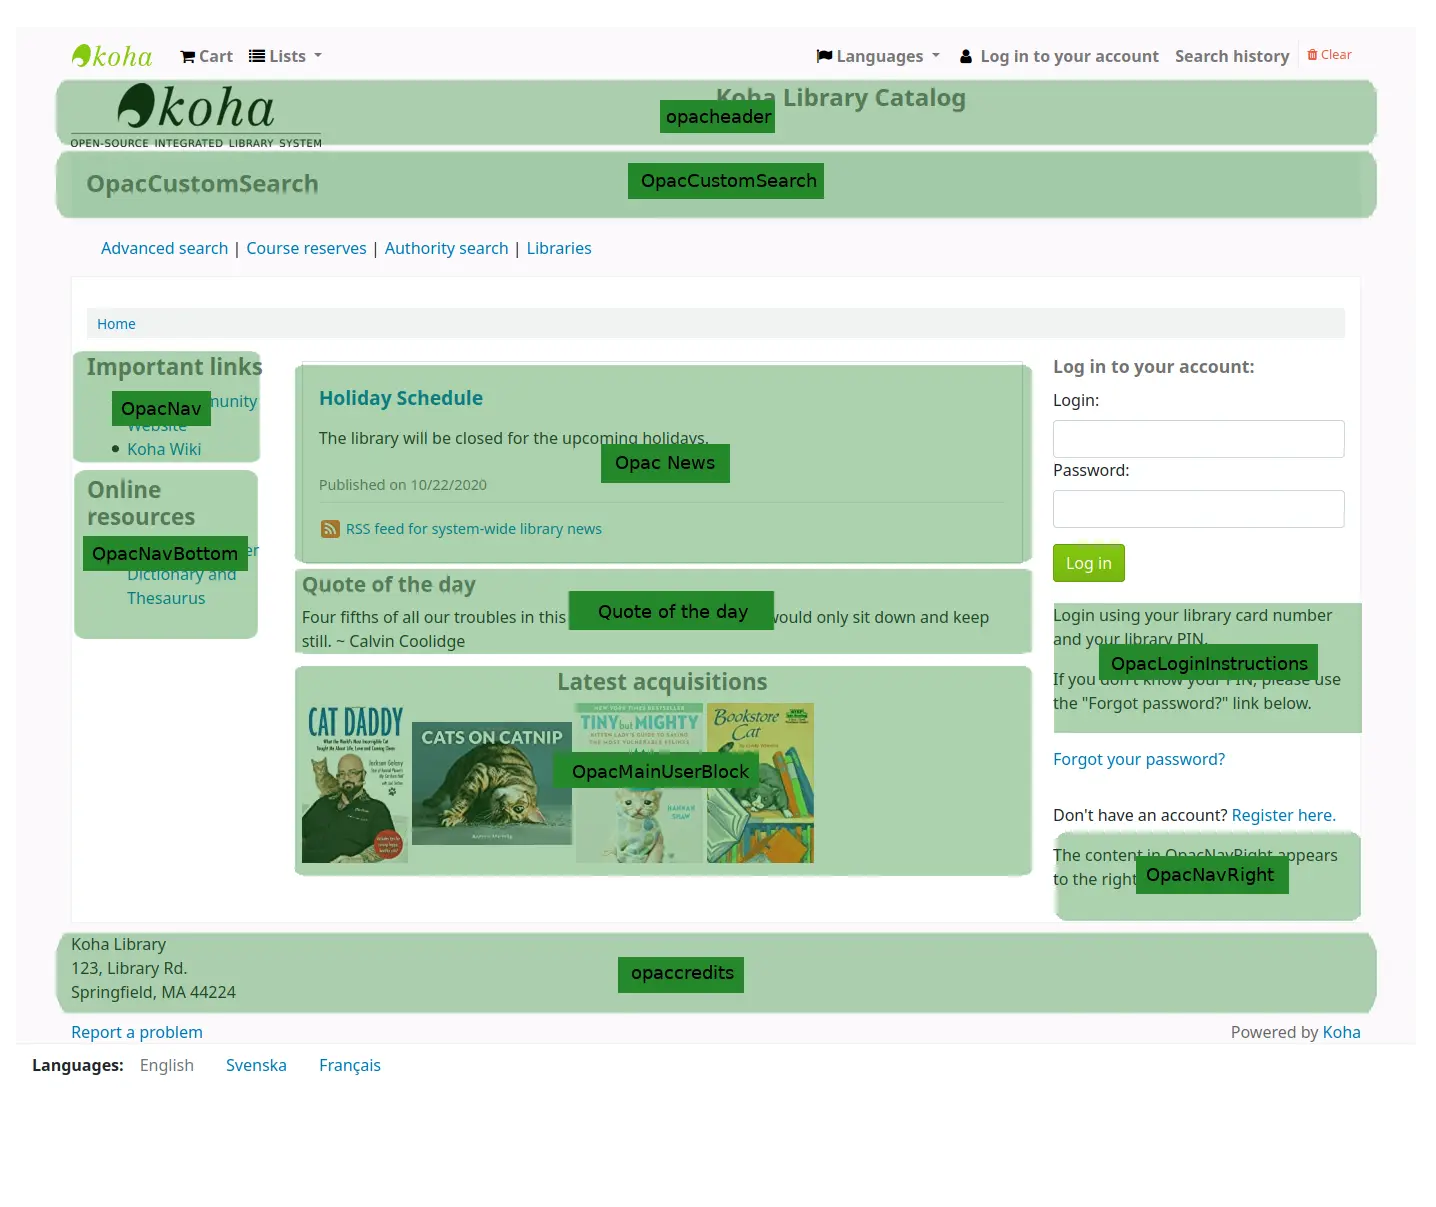
In the staff interface, the quotes will appear under the news on the left side.
Adding a quote
لإضافة إقتباس:
Click the 'New quote' button in the toolbar at the top of the page.
Fill out the form.
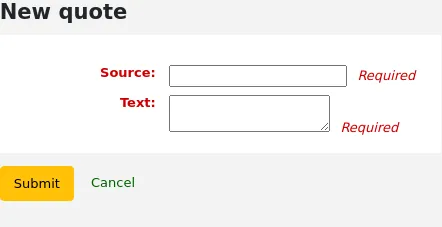
Source: enter the source of the quote, e.g. the name of the person who said the quote
Text: enter the text of the quote
تحذير
يجب ملؤ "المصدر" و "النص" لحفظ الإقتباس الجديد.
Click 'Submit' to save the new quote.
The new quote should now be visible in the list.
Importing quotes
You can import a batch of quotes as a CSV file. Your file must contain two columns in the form: "source","text" with no header row.
ملاحظة
ستتم مطالبتك لتأكيد رفع الملفات التي حجمها أكبر من 512KB.
To start the import process click the 'Import quotes' button at the top of the screen.
عندما تظهر لك نافذة إستيراد الإقتباسات سيكون بإمكانك إستعراض جهاز الحاسوب لتصل للملف الذي ترغب بإستيراده
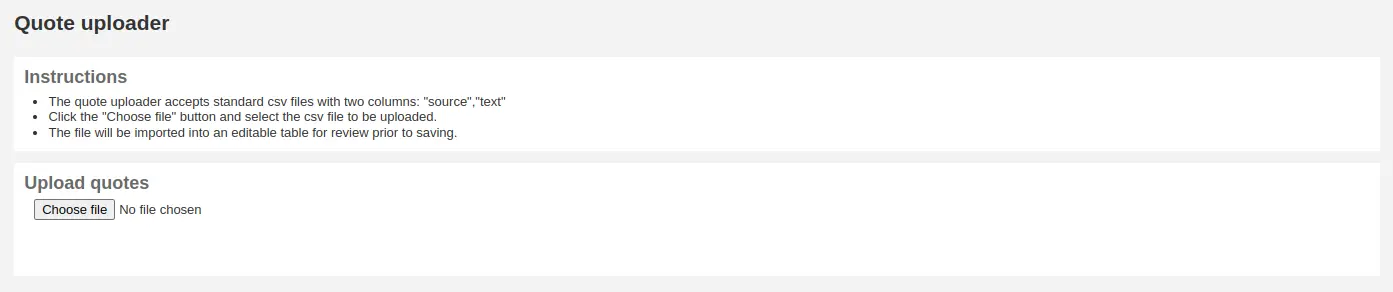
بعد تحديد ملف CVS ، انقر على الزر 'فتح' وسيتم رفع الملف إلى جدول تحرير مؤقت.

From the listing you can edit either the 'Source' or 'Text' fields by clicking on the desired field. When you are finished editing a field, press the <Enter> key on your keyboard to save the changes.

عندما ترضى عن الإقتباسات، أنقر على زر 'حفظ الإقتباسات' في شريط الأدوات ، وسيتم حفظ الإقتباسات.
Editing a quote
To edit a quote, click on the 'Edit' button to the right of the quote.
Edit either the 'Source' or 'Text' fields.
Click 'Submit' to save the quote.
Deleting a quote
To delete a quote, click on the 'Delete' button to the right of the quote.
Confirm the deletion by clicking 'Delete'.
Tool plugins
This tool is used to view, manage and configure plugins used as tools.
This section will only be visible once you have uploaded tool-type plugins in the plugin administration page.
Get there: More > Tools > Additional Tools > Tool plugins
ملاحظة
Only staff with the tool permission (or the superlibrarian permission) will be able to access tool plugins.
From this page, you will see only tool-type plugins.
See the managing plugins section of this manual to learn how to manage your tool-type plugins.
رفع
ملاحظة
Only staff with the upload_general_files permission (or the superlibrarian permission) will have access to this tool.
Get there: More > Tools > Additional Tools > Upload
This tool will allow you to upload files to your Koha system for selection from the Cataloging form.
Upload files
When you first visit the Upload tool you might see a warning about missing a category.

Categories are defined in the authorized value in the UPLOAD category. If you do not have upload categories then your files will be temporary and will be deleted the next time the server is rebooted. Once you have a value in the UPLOAD authorized value category you will see a Category pull down below the 'Browse' button.
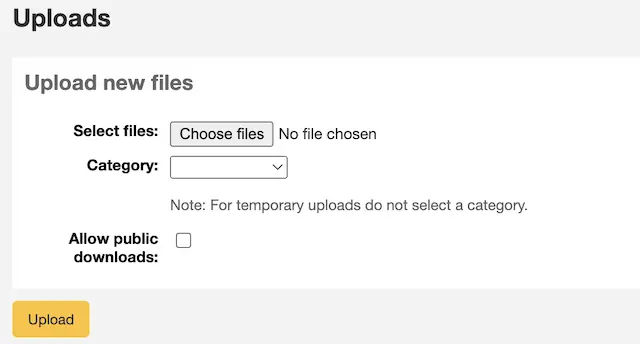
Browse your computer a file, choose a category and decide if the public will be able to download this file via the OPAC. Once your file is uploaded you will be presented with a confirmation.

Search files
All uploaded files are searchable from below the upload form. Using the form you can search any part of the filename and/or the Hashvalue.Search uploaded files
You will be presented with the results of your search.

الوصول للملفات
ملاحظة
Only staff with the access_files permission (or the superlibrarian permission) will have access to this tool.
Get there: More > Tools > Additional Tools > Access files
This option allows access to files stored on the server from the staff interface. The directories where the files are stored need to be defined in the koha-conf.xml file.
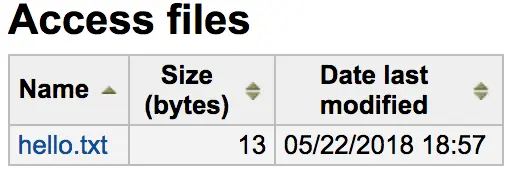
تقارير مشكلات الأوباك
Get there: More > Tools > Additional tools > OPAC problem reports
This tool is used to manage the problem reports sent by patrons via the OPAC.
ملاحظة
This tool only appears if the OPACReportProblem system preference is enabled.
From this tool, you will see all the problems that were reported by patrons on the OPAC.
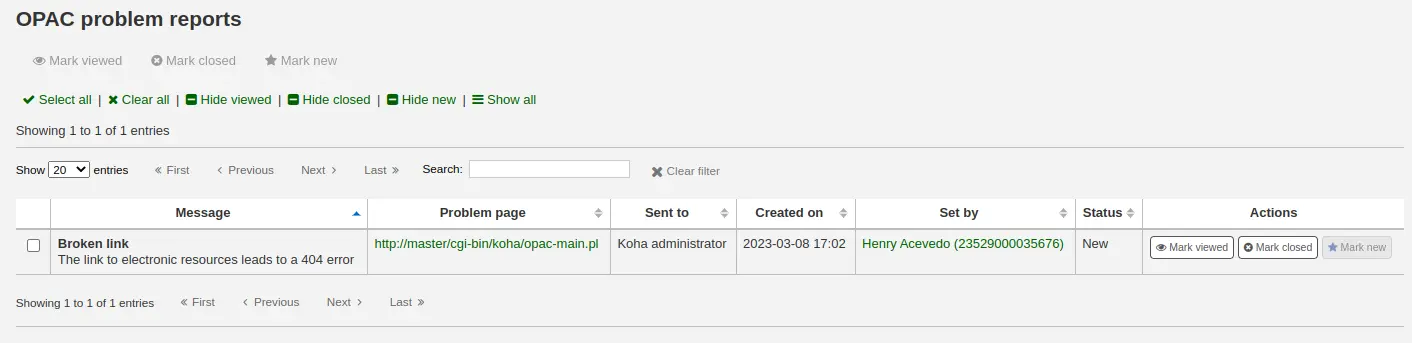
From the 'Actions' column, you can
'Mark viewed': mark this problem report as viewed, this will change the status of the problem report to 'Viewed'
'Mark closed': close this problem report, this will change the status of the problem report to 'Closed'
'Mark new': mark this problem as new (i.e. not viewed), this will revert the status back to 'New'.
You can also batch change statuses by checking the boxes next to the problem reports you want to change and use the button at the top of the page.
Cash management
Koha includes a number of options for dealing with monetary transactions and actions to allow for fine grained tracking of these processes for audit and analytic processes.
Cash registers
Cash registers can be used to track transactions to a specific location in your library. This can be especially helpful for detailing where cash has been taken for payments and then when this cash is subsequently removed and taken to the bank.
Setup
To enable the use of cash registers, you must turn on the UseCashRegisters system preference.
You can then configure cash registers for your library from the cash registers page in the administration module.
Cashup
ملاحظة
Only staff with the cashup permission (or the superlibrarian permission) will be able to perform cashups.
The action of 'cashing up' can be recorded against a cash register from both the library details and register details pages.
Clicking the Record cashup button will simply record the date and time that the action has taken place and is intended to allow the regular record of when money is collected from the cash register and taken to the bank.
Both of the above pages utilize the cashup record to limit the display of transactions/summaries to only pertinent information, since the last cashup.
Once a cashup has taken place, a summary of the transactions taken during that cashup period is available for display, and printing, via the Summary link found next to the last cashup date on the register details page.
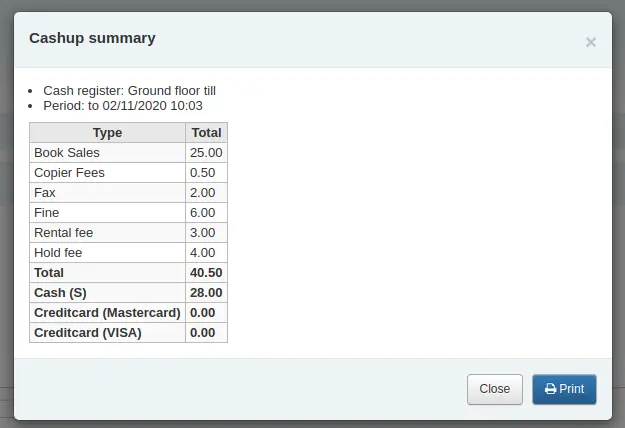
Cash summary for library
Get there: Home > Tools > Cash summary for library
A summary of transaction amounts associated to a libraries cash registers can be found under the 'Cash summary for library' page tool.
The summary will list registers associated with your logged in branch alongside information about how much money should be found in each register, what is available to take to the bank and a breakdown of income vs outgoings.
Note: You can also access this page from the left hand menu available on the Point of sale page when that module is enabled.
Transaction history for register
Get there: Home > Tools > Cash management > Transaction history for register
A list of all transactions to have taken place at a register is available by clicking on the cash register name from the library details page.
If you have the correct permissions, you can re-print receipts, issue refunds and record cashups from this page.
Note: You can also access this page from the left hand menu available on the Point of sale page when that module is enabled.
التعليقات
ملاحظة
Only staff with the moderate_comments permission (or the superlibrarian permission) will have access to this tool.
Get there: More > Tools > Patrons and circulation > Comments
كل التعليقات تضاف من قبل المستفيدين عبر الأوبك إلى التسجيلات الببليوغرافية التي تتطلب الاشراف من قبل أمناء المكتبات. اذا كان هناك تعليقات تنتظر الاشراف سوف يدرجوا على لوحة الموظفين الرئيسية تحت علامة الأدوات:
and next to the Comments tool on the Tools page
To moderate comments click on the notification on the main dashboard or go directly to the Comments tool and click 'Approve' or 'Delete' to the right of the comments awaiting moderation.
اذا لم يكن يوجد تعليقات للتعديل سترى رسالة تقول ذلك تماماً
يمكنك كذلك مراجعة وإلغاء الموافقة على تعليقات قمت بالموافقة عليها من قبل عن طريق اختيار تبويب "التعليقات الموافق عليها"