Nástroje
Nástroje v systému Koha vždy provádějí určitý druh akce. Mnoho z nich je často v jiných systémech označováno spíše jako výstupy.
Cesta: Více > Nástroje
Čtenáři a výpůjčky
Seznamy čtenářů
Get there: More > Tools > Patrons and circulation > Patron lists
Patron lists are a way to store a group of patrons for easy modification via the batch patron modification tool or reporting.
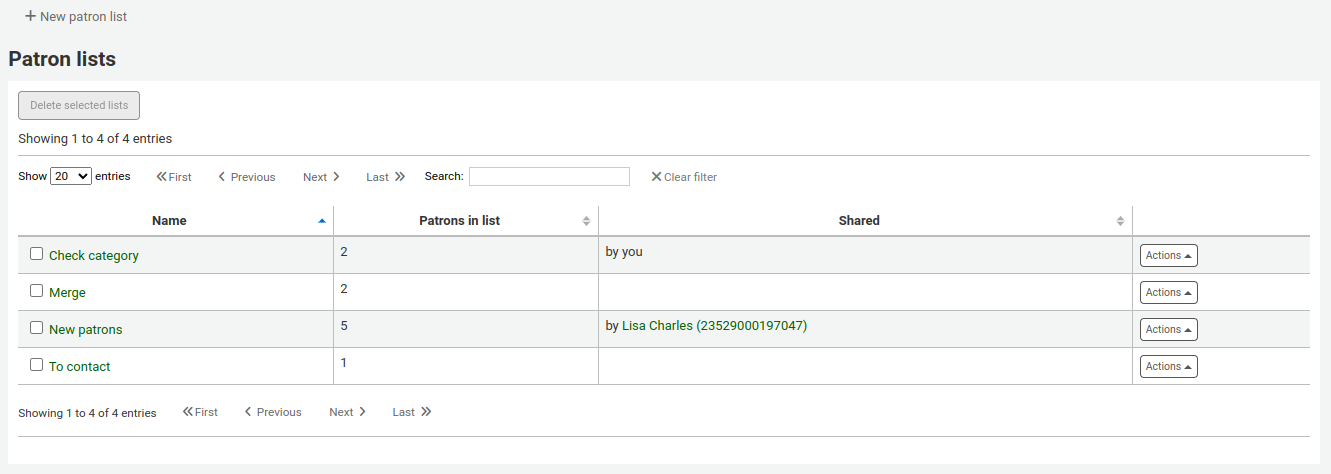
Pro vytvoření seznamu čtenářů klikněte na tlačítko „Nový seznam čtenářů“

Enter a list name.
Checking the ‚Shared‘ box will make this list visible to all users with the manage_patron_lists permission.
Save the list.
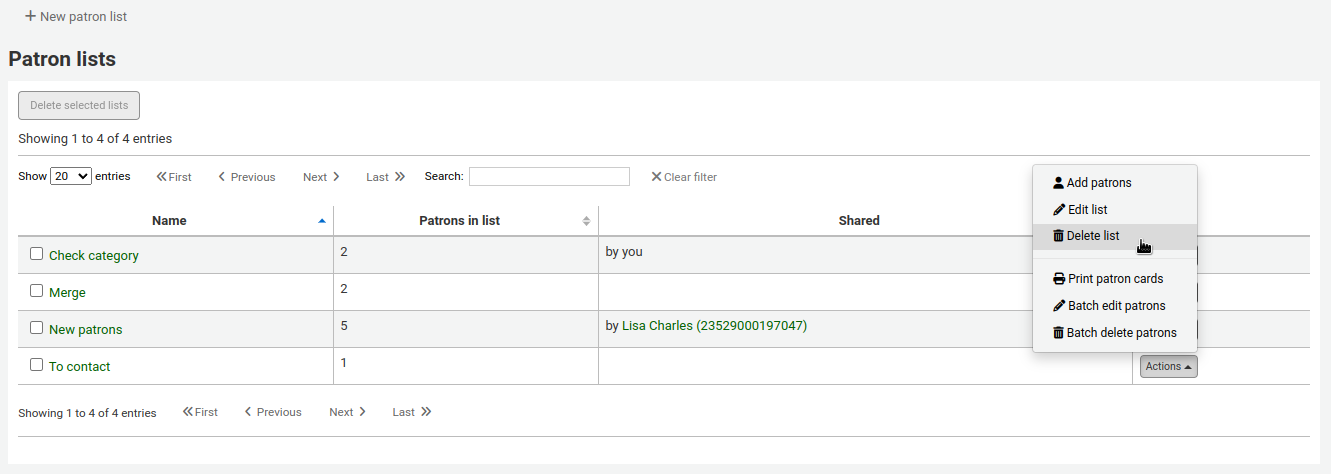
Each list has an ‚Actions‘ menu with more list options.
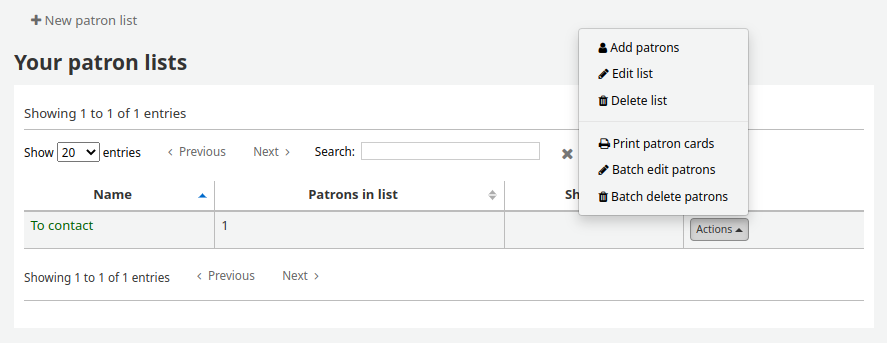
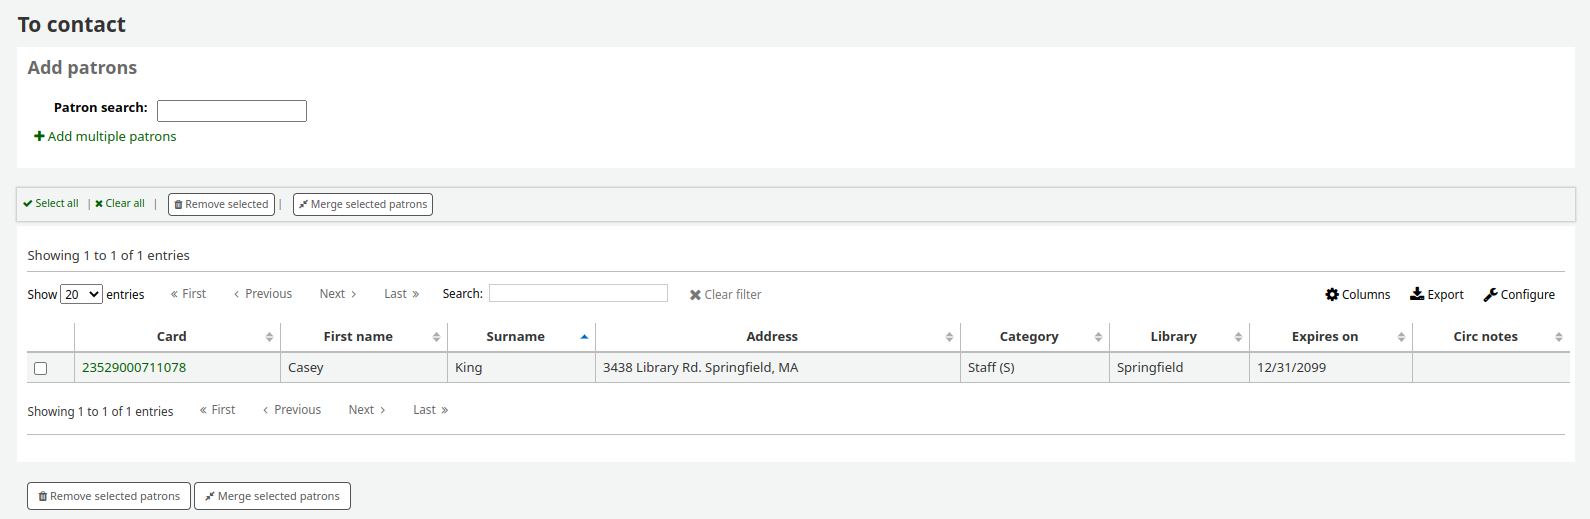
To add patrons to the list click the ‚Add patrons‘ link in the ‚Actions‘ menu.
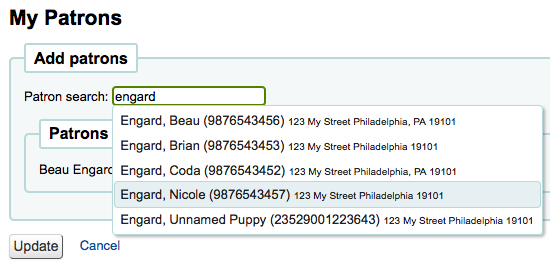
Do vyhledávacího políčka nahoře vložte jméno čtenáře nebo číslo průkazky a ze zobrazeného seznamu kliknutím na jméno čtenáře jej přidáte do seznamu.
Alternatively, you can click on the ‚Enter multiple card numbers‘ link and scan (or type in) barcodes in the box.
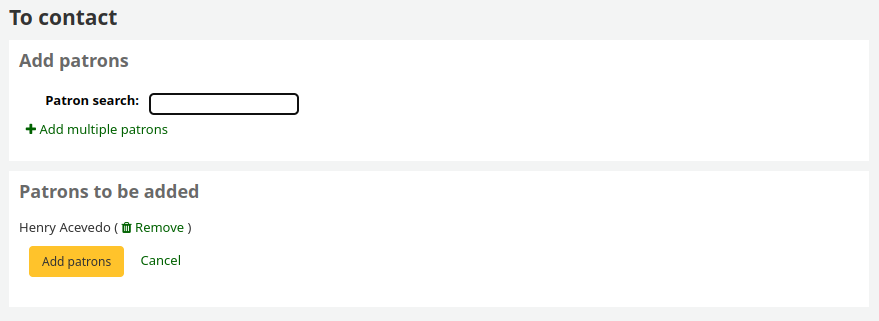
Once you have all of the patrons you would like to add you can click the ‚Add patrons‘ button to save them to the list.
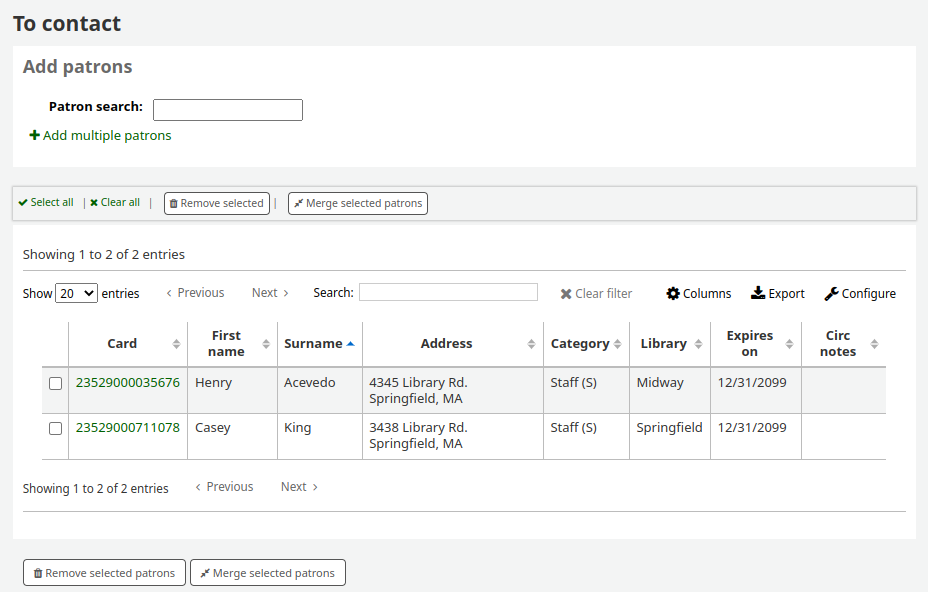
Poznámka
You can customize the columns of this table in the ‚Table settings‘ section of the Administration module (table id: patron-list-table).
To delete a list, click the ‚Actions‘ button and choose the ‚Delete list‘ option.
To delete multiple lists at once, select the lists and click the ‚Delete selected lists‘ button at the top of the table.
Version
The option to delete multiple lists at once was added in Koha version 23.11.
Čtenářské kluby
Get there: More > Tools > Patrons and circulation > Patron clubs
Patron clubs create clubs in which patrons may be enrolled. It is useful for tracking summer reading programs, book clubs and other such clubs.
Důležité
Staff will need the clubs permissions to edit clubs, templates and enroll patrons. To learn how to set patron permissions, go to the patron permissions section of this manual.
Creating a new club template
A club template is a template that will be used to create clubs. You can add fields that can be filled out at the time a new club is created based on the template, or a new enrollment is created for a given club based on the template.
To create a new club template:
Click on the ‚New club template‘ button.
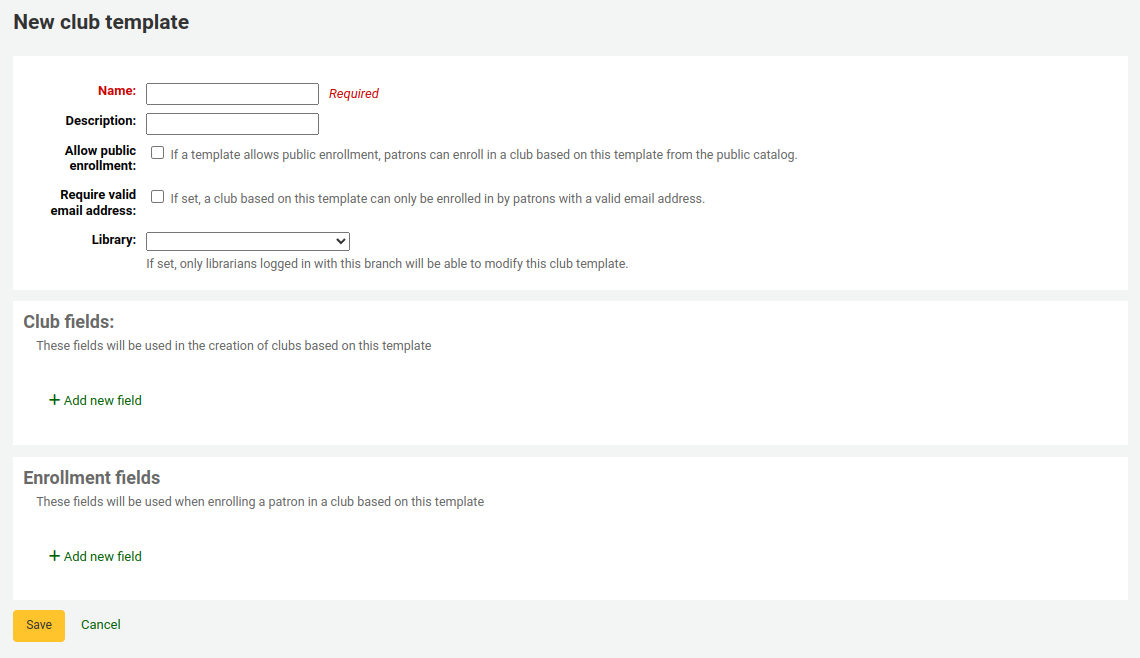
Fill out the form:
Name (required): enter a name for the club template. This could be something like ‚Adult book club‘, ‚Children’s book club‘ or ‚Summer reading program‘. Remember, these templates will be the starting point for each club you create.
Description: enter any additional information.
Allow public enrollment: if this box is checked, it will allow patrons to enroll in a club based on this template from the OPAC.
Require valid email address: if this box is checked, only patrons with a valid email address can enroll. So they will need a email address to enroll.
Library: choose a library to limit the use of this template to staff from a specific library. If you leave it blank, staff from any library will be able to create a new club using this template.
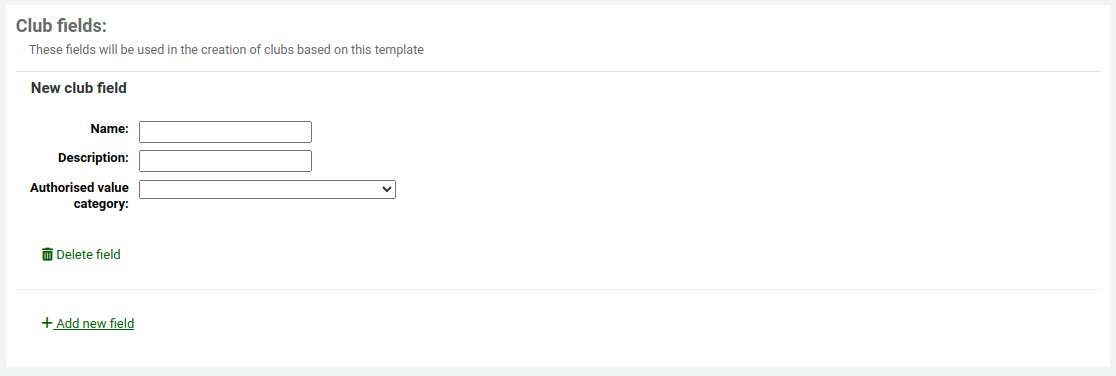
Club fields: these fields will be used when creating a club based on this template. For example, this can be the name of the club, the name of the animator, the theme, etc. To add a club field, click on ‚Add new field‘.
Name: enter the text that will be used as the label of the field.
Description: enter any additional information about this field.
Authorized value category: if you want the field to be a dropdown menu, choose an authorized value category here. If this is left blank, the field will be a simple text field.
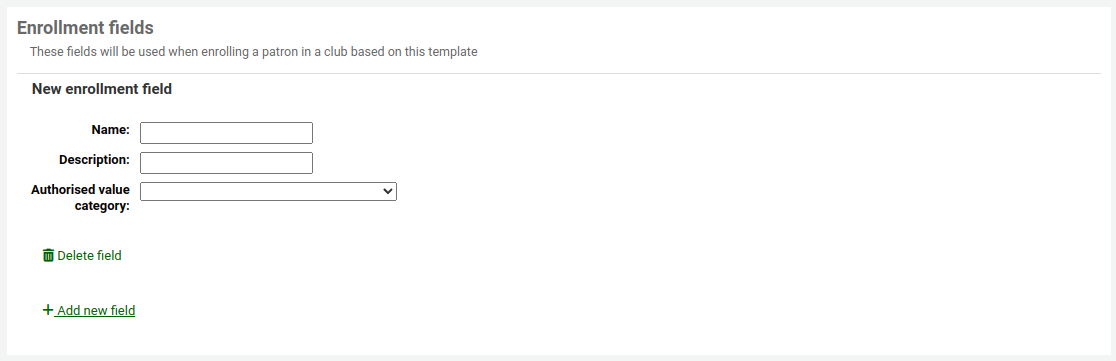
Enrollment fields: you can add any additional fields you want patrons to fill when they enroll in a club based on this template. To add an enrollment field, click on ‚Add new field‘.
Name: enter the text that will be used as the label of the field.
Description: enter any additional information about this field.
Authorized value category: if you want the field to be a dropdown menu, choose an authorized value category here. If this is left blank, the field will be a simple text field.
Click ‚Save‘.
Creating a new club based on a template
Once the templates are created, you can create actual clubs.
Click on the ‚New club‘ dropdown menu and select the template you want to use.
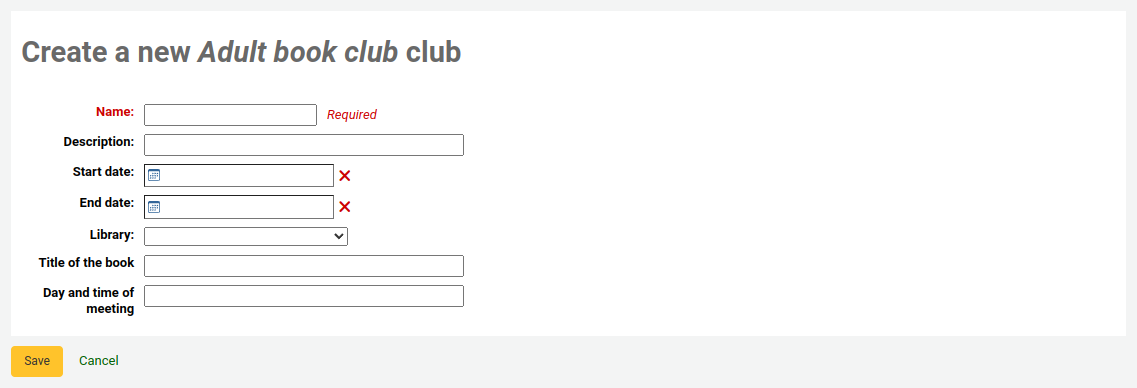
Fill out the form with the club information:
Name (required): enter the name of the specific club you are creating. This is the name the staff and the patrons will see when enrolling. For example, ‚Summer 2018 reading club‘.
Description: enter any additional information about the club.
Start date: choose the start date of the enrollment period. Staff and patrons will not be able to enroll in the club before the start date.
End date: choose the end date of the enrollment period. Once the club expires, enrollment will not be possible.
Library: if this club is limited to a specific library, choose it here. Only patrons from this specific library will be able to enroll. If you leave it blank, patrons from any library will be able to enroll.
If there were ‚Club fields‘ in the template, they will appear at the bottom of the form.
Click ‚Save‘.
Enrolling a patron in a club from the staff interface
To enroll a patron in a club from the staff interface:
Go to the patron’s account.
On the ‚Details‘ page or the ‚Check out‘ page, click on the ‚Clubs‘ tab. All ongoing clubs will be displayed in this tab.
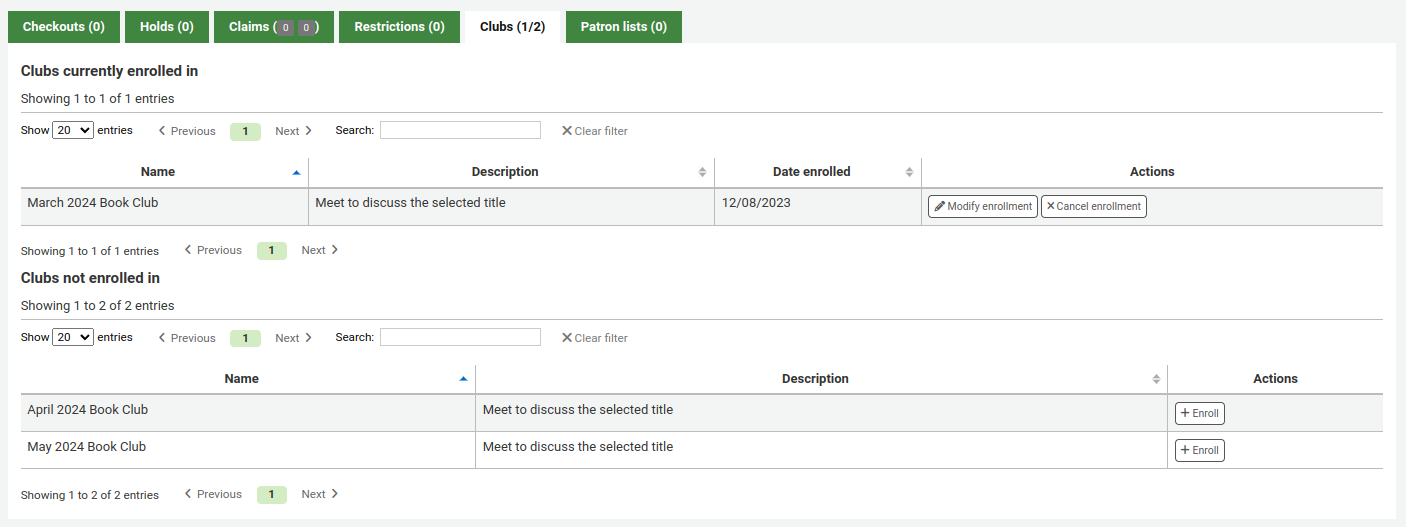
Click on the ‚Enroll‘ button.
If there were any ‚Enrollment fields‘ in the club template, they will appear here.
Click ‚Finish enrollment‘.
You can also modify an enrollment by clicking the ‚Modify enrollment‘ button, or cancel an enrollment by clicking on the ‚Cancel enrollment‘ button.
Enrolling a patron in a club from the OPAC
If you allow public enrollment, the club will be visible on the OPAC.
Patrons have to sign into their account.
In the ‚Your summary‘ section, they will be able to click on the ‚Clubs‘ tab and click the ‚Enroll‘ button to enroll.
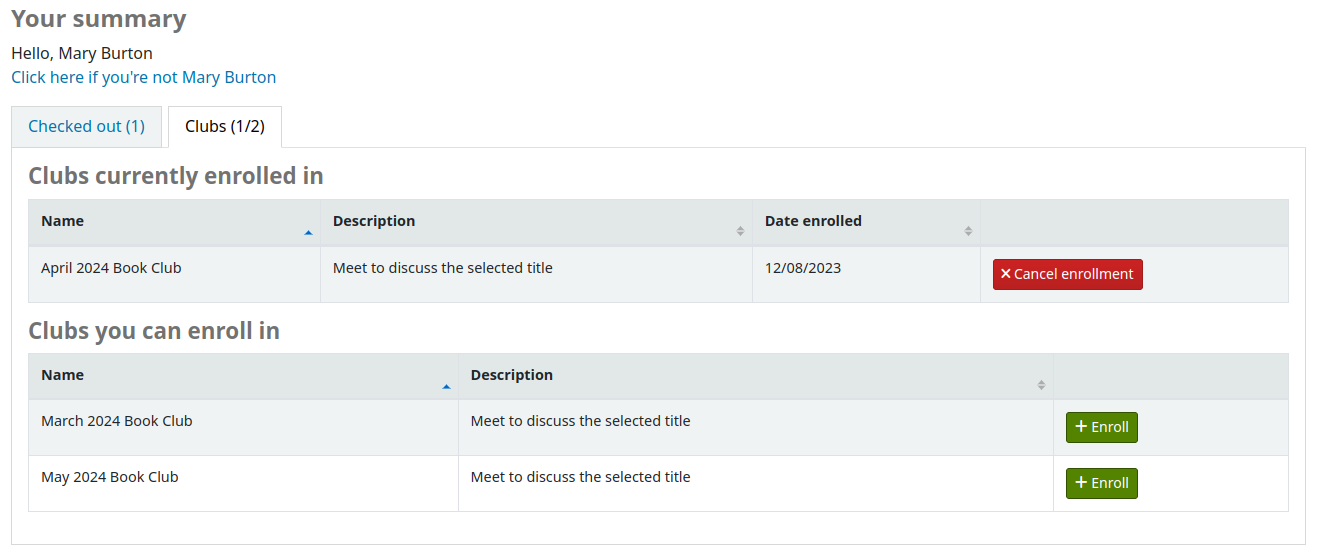
If there were any ‚Enrollment fields‘ in the club template, they will appear here.
They can then click ‚Finish enrollment‘.
Patron can also cancel their enrollment to a club by clicking the ‚Cancel enrollment‘ button.
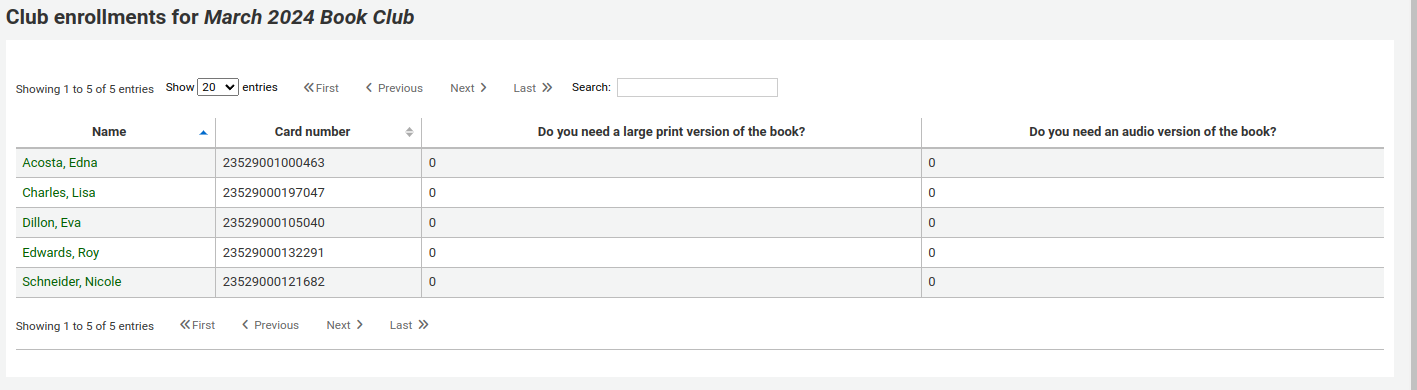
Viewing enrollments
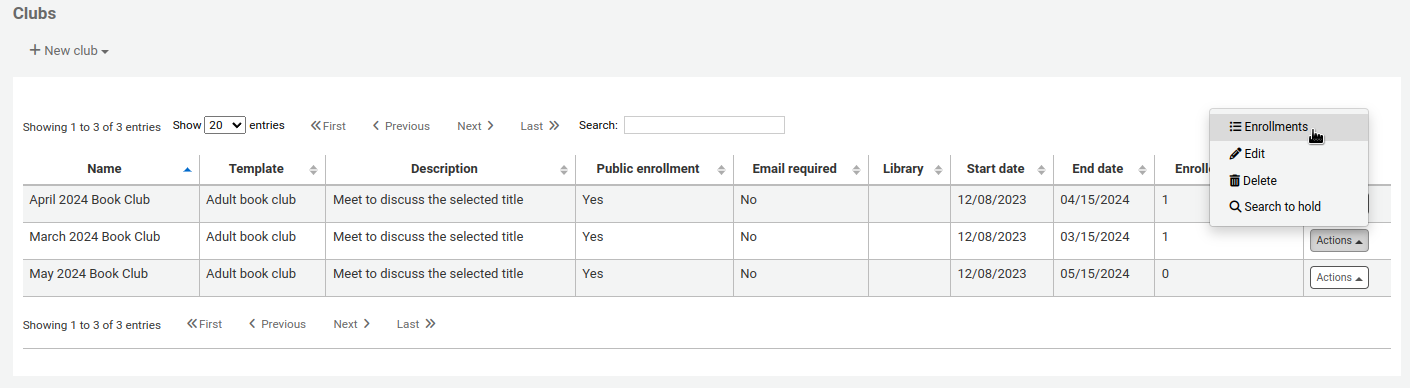
You can monitor the enrollments in each club by going to the ‚Patron clubs‘ tool page and choosing ‚Enrollment‘ from the ‚Actions‘ button next to the club.
On this page, you will see the patrons enrolled in this club, as well as their answers to the enrollment fields.
Version
The values of the club enrollment fields are visible on this page from Koha version 23.11.
In prior versions, you need to create an SQL report to get the values. See this example in the Koha SQL reports library.
Placing a hold for a patron club
You can place holds for a patron club. Holds are placed for club members in a random order.
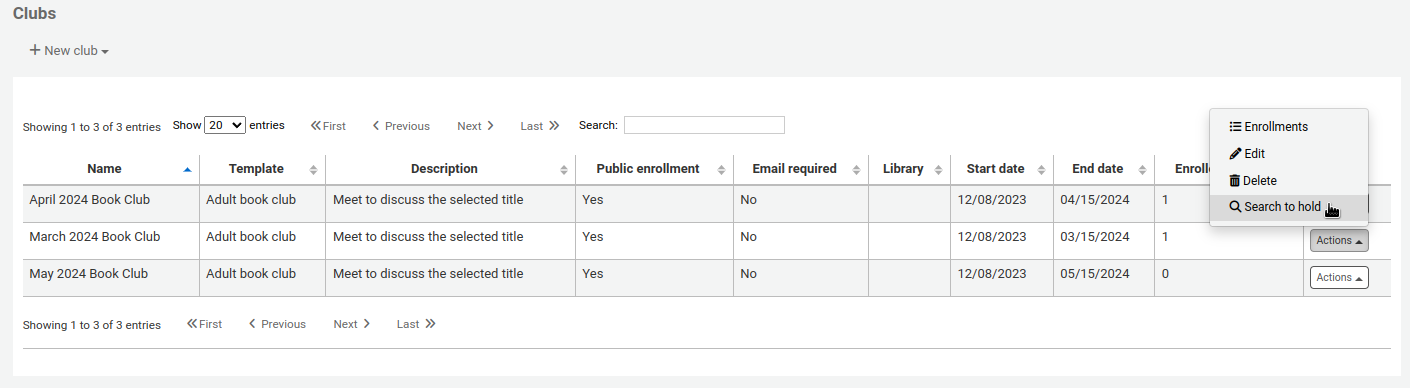
To place a hold for a patron club from the clubs page:
Go to the patron clubs tool (‚Home > Tools > Patron clubs‘).
Click the ‚Actions‘ button for the club and select ‚Search to hold‘.
Search for a title and select a record.
Select ‚Place hold for [CLUBNAME]‘ from either the action links for the record,

or from the ‚Place hold‘ action in the menu bar.
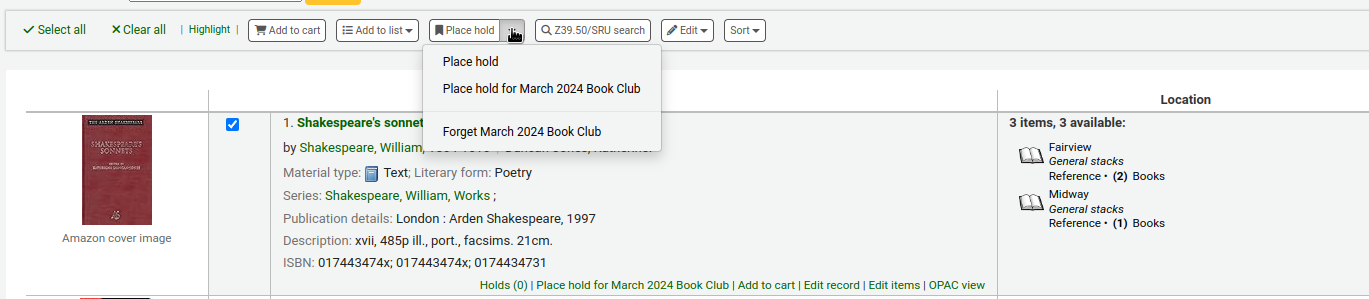
The place holds page is displayed and lists the club members.
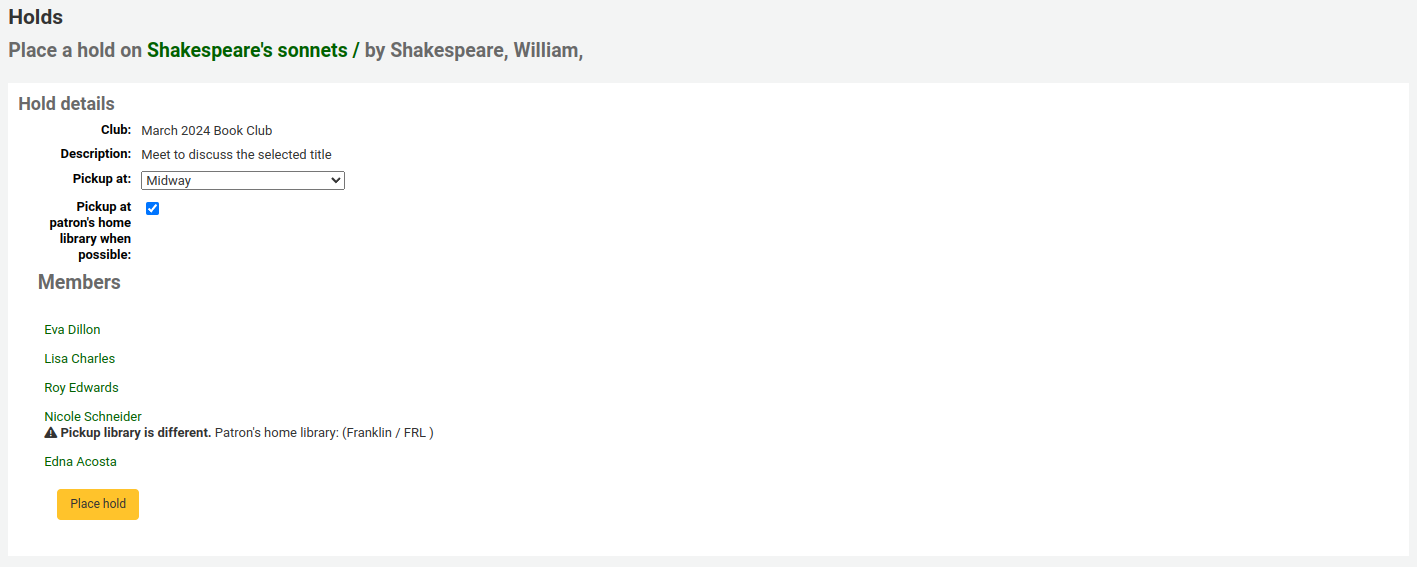
Click the ‚Place hold‘ button.
Holds are placed for all club members at once, in a random priority order.
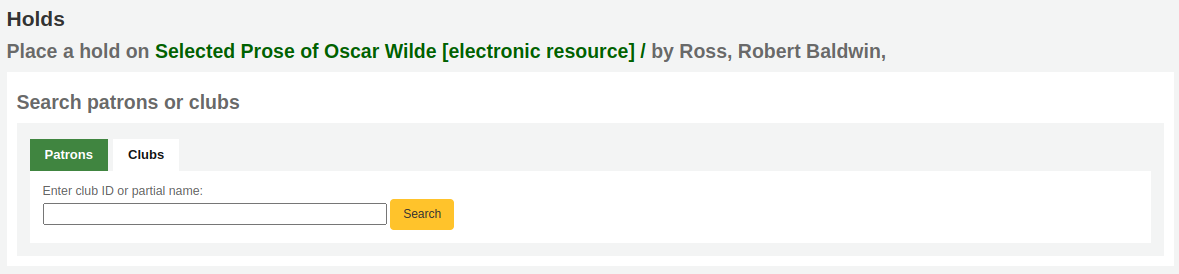
You can also place a hold for a patron club from the bibliographic record. When placing the hold, click on the ‚Clubs‘ tab and search for the club’s name. Then click the place hold button.
Import čtenářů
Get there: More > Tools > Patrons and circulation > Import patrons
Nástroj prop import čtenářů může být použit kdykoliv pro hromadné přidání čtenářů. To je běžně používané na univerzitách a ve školách, kdy registruje nová dávka studentů.
Creating a patron import file
You can download a blank CSV file with a header from the start page of the patron import tool that you can use as a template for your patron import. The header contains all fields that can be used with the patron import tool. You can delete fields and columns you don’t need with the exception of a few mandatory ones. When overlaying, if your new .csv includes blank columns, any existing values in patron records will be overwritten with blanks. It is best to remove any blank columns in a .csv to ensure no existing data is removed.
Důležité
cardnumber, surname, and all fields you have defined in the BorrowerMandatoryField preference are required and must match valid entries in your database.
Důležité
Hodnota „Heslo“ by měla být uloženo ve formátu prostého textu, a bude převeden na MD5 hash (což je šifrovaná verze hesla).
Pokud máte hesla už nějakým způsobem zakódovaná, zeptejte se na možnost importu správce systému
Důležité
Date formats should match your dateformat system preference, and must be zero-padded, e.g. ‚01/02/2008‘. Alternatively you can supply dates in ISO format (e.g. ‚2008-12-01‘).
Důležité
If your data contains special characters or diacritics, make sure your file is encoded in UTF-8. Otherwise, the special characters will not be imported correctly.
Poznámka
If loading patron attributes, the ‚patron_attributes‘ field should contain a comma-separated list of attribute types and values.
Kód typu atributu kód a dvojtečka by měly předcházet každou hodnotu.
Například: „INSTID:12345,BASEBALL:Cubs“
Pole musí být uzavřeno uvozovkami, pokud je nastaveno více hodnot.
Since values can contain spaces, additional doubled-quotes may be required:
„INSTID:12345,BASEBALL:Cubs,““BASEBALL:White Sox““
Poznámka
It’s possible to set restrictions using the patron import tool. If the expiration date and comment match an existing restriction, the one in the import file will be skipped. So a patron import can be repeated multiple times without creating duplicate restrictions. But if one of the criteria is different, a new restriction will be added.
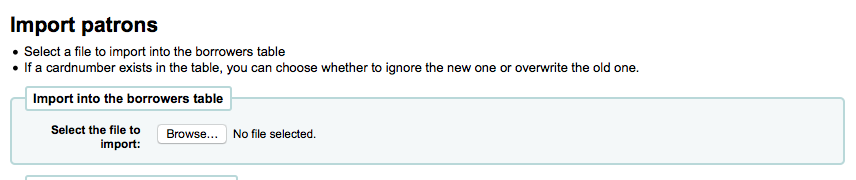
Importing patrons
Once you have created your file, you can use the patron import tool to bring the data into Koha.
Choose your CSV file
Choose to match on ‚cardnumber‘ or ‚username‘ to prevent adding of duplicate card numbers to the system. Additional matchpoints can be set up using patron attributes marked as unique.

Dále si můžete vybrat výchozí hodnoty, které platí pro všechny importované čtenáře
For example, if you’re importing patrons specific to one branch you can use the field on the import form to apply the branch code to all those you are importing.
Finally, you need to decide on what data you want to replace if there are duplicates.
Shodný záznam se určí na základě hodnoty „Pole pro zjišťování shody záznamů“

When using patron attributes in your installation, you can choose how they are handled on import. You can either decide to always overlay all patron attributes or you choose to only replace patron attributes included in your import file. This will leave other attributes untouched.

Oznámení & potvrzení
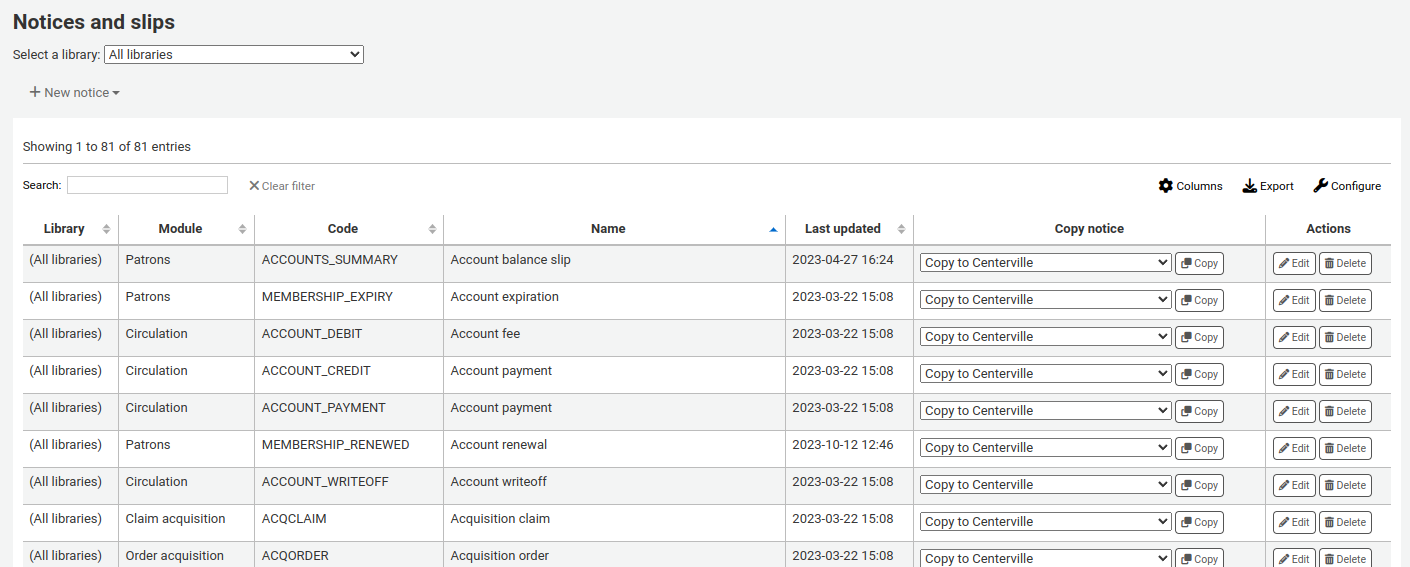
Get there: More > Tools > Patrons and circulation > Notices & slips
All notices and circulation receipts (or slips) generated by Koha can be customized using the Notices & slips tool. The system comes with several predefined templates that will appear when you first visit this tool.
Poznámka
You can customize the columns of this table in the ‚Table settings‘ section of the Administration module (table id: lettert).
Všechna oznámení mohou být upravována, ale pouze některá mouhou být smazána. Je to proto, aby se předešlo chybám při pokusu o odeslání neexistujícího oznámení. Všechna oznámení a potvrzení mohou být upravována pro každou knihovnu zvlášť, ale ve výchozím nastavení se pro všechny knihovny používají společná oznámení.
If you have a style you’d like applied to all slips you can point the SlipCSS preference to a stylesheet. The same is true for notices, using the NoticeCSS preference to define a stylesheet.
You will also want to review the Customising notices and slips wiki page for more information on formatting these notices.
Adding notices and slips
Chcete-li přidat nové oznámení nebo lístek pro tisk
Click ‚New notice‘
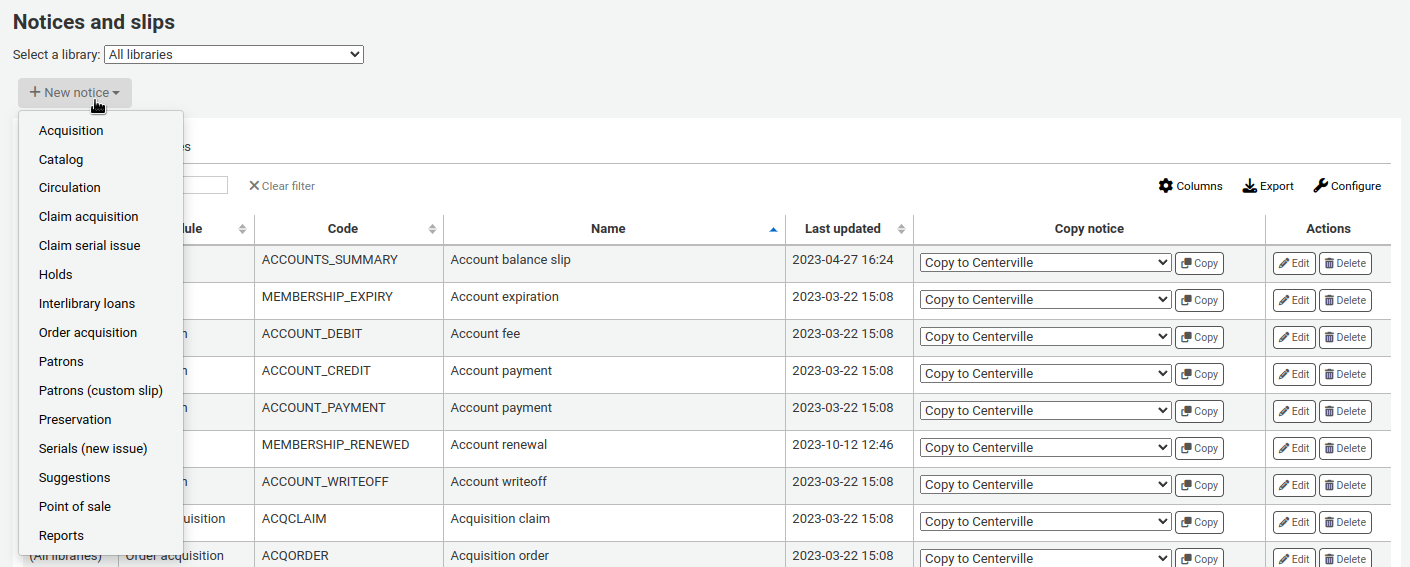
Choose the type of notice, or module this notice is related to
Acquisition: notice to be used in the acquisitions module
Catalog: notice to be used in the catalog
Circulation: notice or slip to be used for circulation (such as overdue notices)
Claim acquisition: notice to be used when claiming late orders in the acquisitions module
Claim serial issue: notice to be used when claiming late serial issues in the serials module
Holds: notice or slip to be used in the holds process
Interlibrary loans: notice to be used in the ILL request process
Order acquisition: notice to be used when ordering acquisitions
Patrons: notice or slip to be used in patron accounts
Patrons (custom slip): slip to be used in patron accounts
Version
This type of notice was added in Koha version 23.11.
Preservation: notice or slip to be used in the preservation process
Version
This type of notice was added in Koha version 23.11.
Serials (new issue): notice to be used to notify patrons of the arrival of a new serial issue
Suggestions: notice to be used in the purchase suggestion process
Point of sale: notice or slip to be used in the point of sale module
Reports: notice to format custom report results
Version
This type of notice was added in Koha version 23.11.
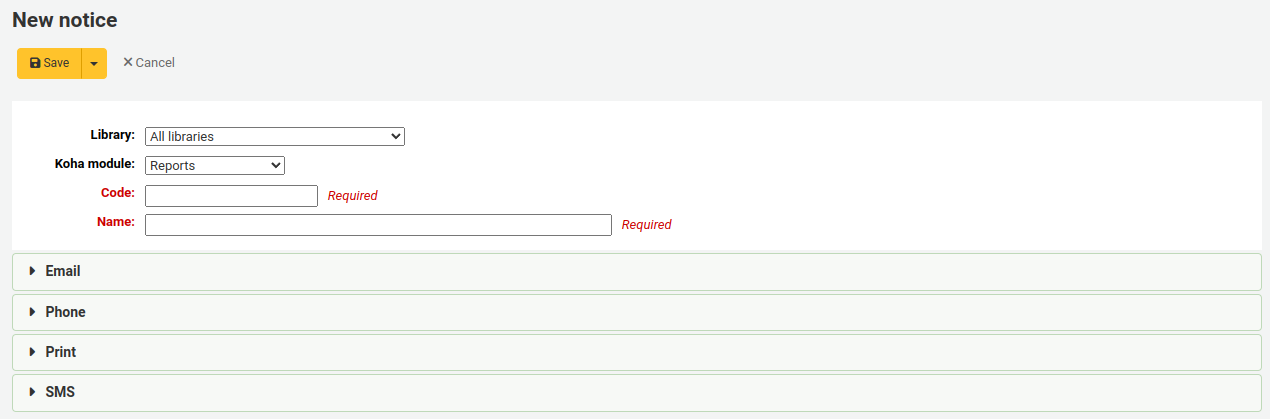
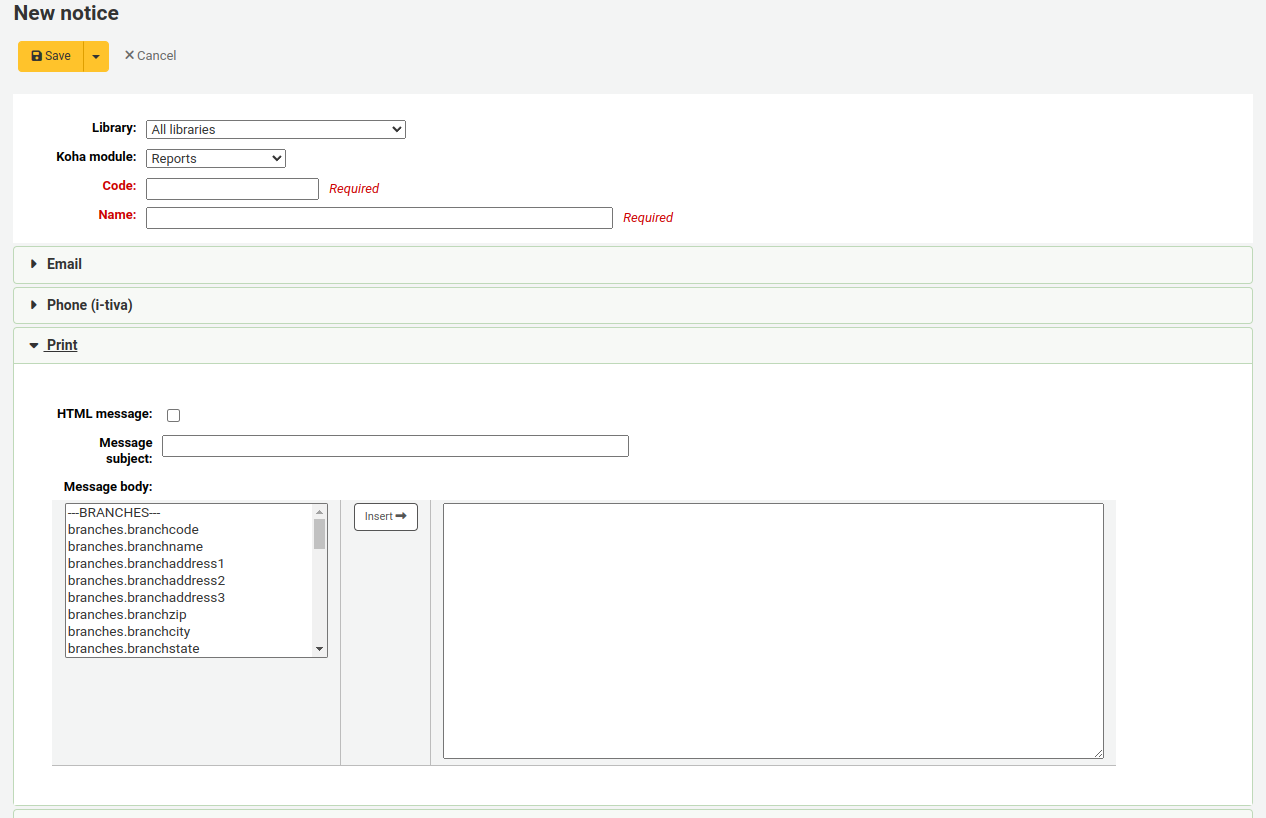
Fill out the notice information
Library: choose which library this notice or slip is for.
Důležité
Not all notices can be library specific. For more information review the Customising notices and slips wiki page.
Koha module: if you didn’t choose the correct module or type of notice previously, you can change it here.
Code: enter a unique alphanumeric code for this notice.
Důležité
Note that codes are limited to 20 characters.
Name: enter a descriptive name for the notice.
Poznámka
For overdue notices, be sure to put your library name in the description, so that it will be visible when setting up your triggers.
Next, you can customize the notice for every possible delivery method.
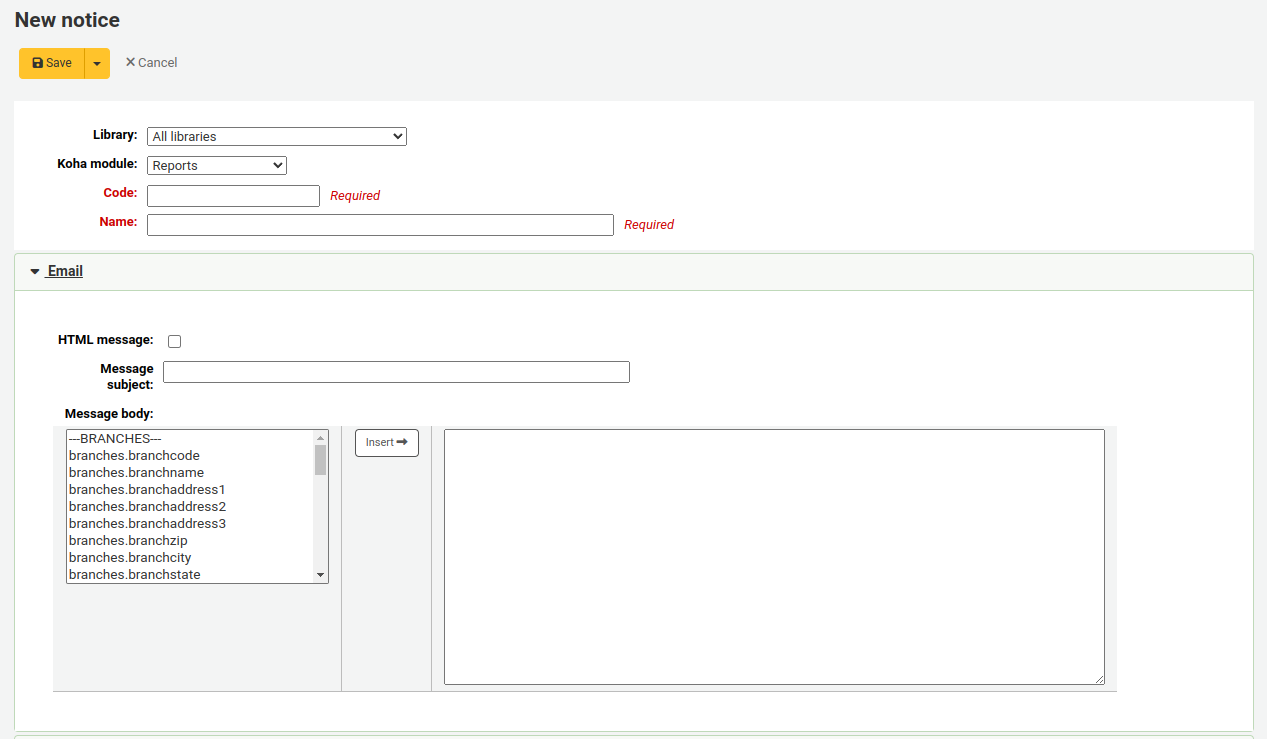
Every notice should have an email template set for it.
If the PhoneNotification system preference is enabled, you will have the option to add a phone template.

If you’re using the TalkingTechItivaPhoneNotification service you can set up a notification specific to that service.

If you plan on printing this notice, you can set the print template
If you have enabled SMS notices with the SMSSendDriver system preference, you can set the text for your SMS notices
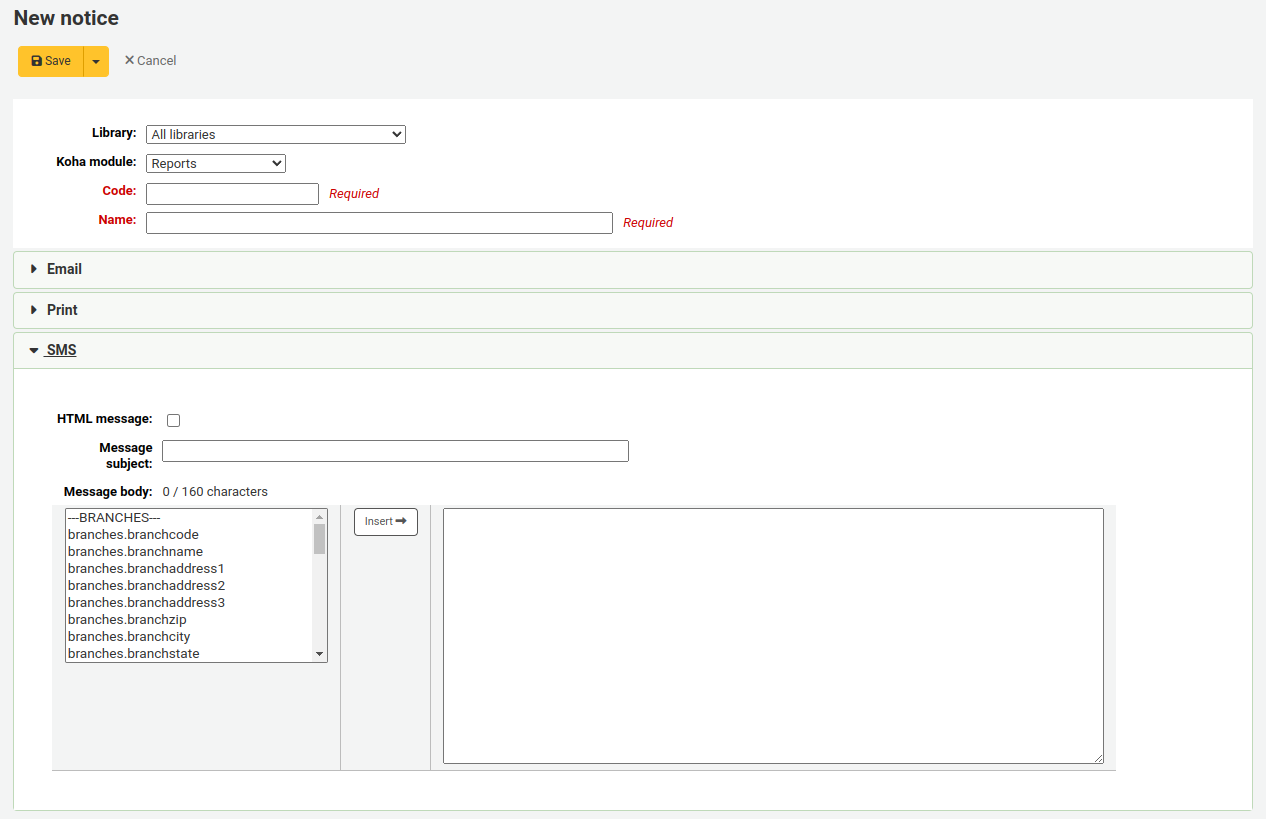
Důležité
Text messages are limited to 1600 characters. Make sure to keep messages short and avoid adding variables that could be very long (such as the list of items due, for example).
Each notice offers the same options
HTML message: if you plan on writing the notice or slip in HTML check the ‚HTML message‘ box, otherwise the content will be generated as plain text
Message subject: for emails, this is what will appear in the subject line of the email
Message body: feel free to type whatever message you feel is best, use the fields on the left hand side to enter individualized data from the from database.
You can also use Template toolkit syntax for more flexibility. See the Notices with Template Toolkit wiki page for more information.
Poznámka
Review the Customising notices and slips wiki page for more information.
Důležité
Overdue notices can use
<<items.content>>tags by themselves, or use<item></item>to span all of the tags. Learn more about the Overdue notice markup.On overdue notices make sure to use
<<items.content>>tags to print out the data related to all items that are overdue.The other option, only for overdue notices, is to use the
<item></item>tags to span the line so that it will print out multiple lines. One example for the<item></item>tag option is:<item>"<<biblio.title>>" by <<biblio.author>>, <<items.itemcallnumber>>, Barcode: <<items.barcode>> , Checkout date: <<issues.issuedate>>, Due date: <<issues.date\_due>> Fine: <<items.fine>> </item>
Důležité
Only the overdue notices take advantage of the
<item></item>tags, all other notices referencing items need to use<<items.content>>.Tip
To add today’s date you can use the
<<today>>tag.Tip
If you don’t want to print the patron’s full name on your slips or notice you can enter data in the Other name or Initials field for each patron and use that value instead.
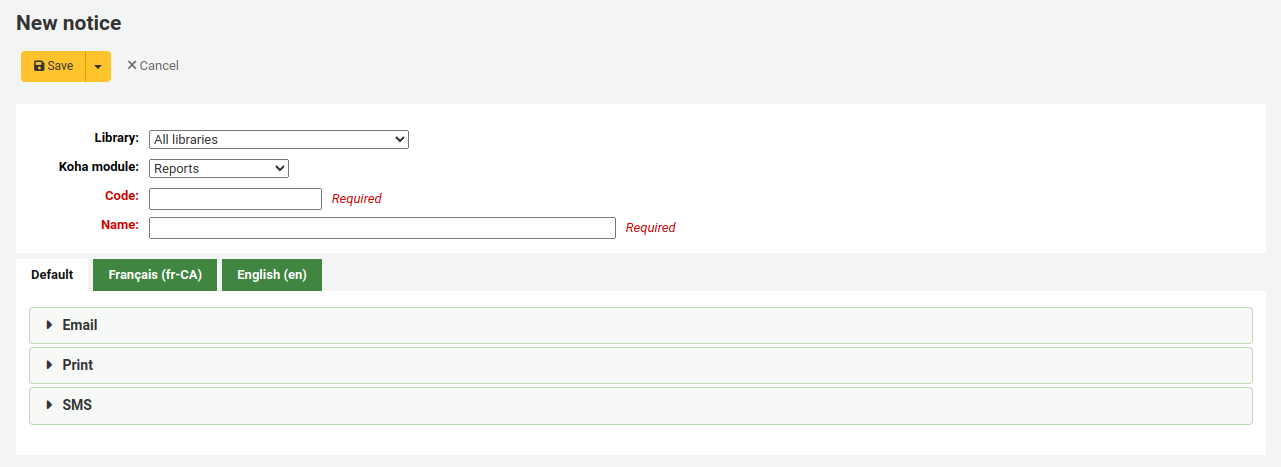
The system preference TranslateNotices will add tabs for each installed language to the notices editor. The notice defined in the ‚Default‘ tab will be used if there is no preferred language set for a patron (‚Preferred language for notices‘ field in the patron file).
Preview notice templates
For some notices it is possible to preview the notice template showing how it would look to a specified patron for a particular item or record.
If a notice template is previewable the notice template header will contain a field to enter preview data
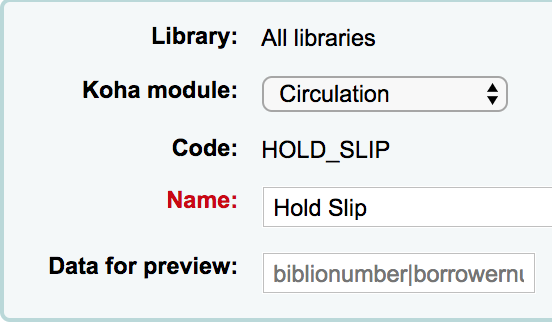
Fill in the necessary information for the template then click the Preview button below the message body. The preview dialog will indicate if there are any problems generating the notice template preview.
Overdue notice markup
When creating your overdue notices there are two tags in addition to the various database fields that you can use in your notices. You will also want to review the Customising notices and slips wiki page for information on formatting item information in these notices.
Důležité
Tyto nové tagy fungují pouze pro upomínky, nikoliv pro další oznámení související s výpůjčkami (v tomto stadiu vývoje Koha).
These tags are <item> and </item> which should enclose all fields from the biblio, biblioitems, and items tables.
Příklad použití těchto štítků v šabloně oznámení:
The following item(s) is/are currently overdue:

<item>"<<biblio.title>>" by <<biblio.author>>, <<items.itemcallnumber>>, Barcode: <<items.barcode>> Fine: <<items.fine>></item>
Což, za předpokladu, že dvě položky byly po lhůtě splatnosti, by mělo za následek oznámení jako:
The following item(s) is/are currently overdue:

"A Short History of Western Civilization" by Harrison, John B, 909.09821 H2451, Barcode: 08030003 Fine: 3.50
"History of Western Civilization" by Hayes, Carlton Joseph Huntley, 909.09821 H3261 v.1, Barcode: 08030004 Fine: 3.50
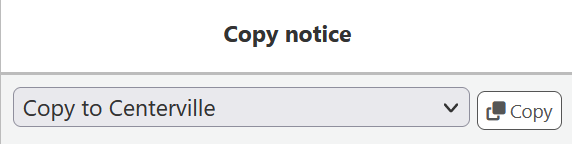
Copying notices and slips
You can also copy an existing notice to another library by selecting the library you want to copy it to in the column „Copy notice“ and then clicking on the „Copy“ button.
Existing notices and slips
Among the default notices are notices for several common actions within Koha. All of these notices can be customized by altering their text via the Notices and slips tool and their style using the NoticeCSS system preference to define a stylesheet.
Tip
Review the Customising notices and slips wiki page for information on formatting item information in these notices.
Here are some of what those notices do:
2FA_DISABLE
This notice is sent to a staff user when they disable the two-factor authentication on their account.
2FA_ENABLE
This notice is sent to a staff user when they enable the two-factor authentication on their account.
2FA_OTP_TOKEN
This notice is used to send a time-based one-time password to a staff user for them to use to log into the staff interface if they have enabled the two-factor authentication on their account.
ACCEPTED
This notice is sent to the patron when their purchase suggestion is accepted.
Poznámka
If you don’t want to send this notice, simply delete it.
ACCOUNT_PAYMENT
This notice is sent for each payment transaction in a patron’s account if the UseEmailReceipts system preference is set to ‚Send‘.
ACCOUNT_WRITEOFF
This notice is sent for each writeoff transaction in a patron’s account if the UseEmailReceipts system preference is set to ‚Send‘.
ACQCLAIM (Acquisition claim)
Used for claiming orders in the aquisitions module.
ACQCLAIM is the code of the sample notice, but it’s possible to define several notices choosing any code. Only the module ‚Claim acquisition‘ will be taken into account. All notices with this module will appear in the pull down on the late orders page.
This notice is sent if several criteria are met:
The staff patron triggering the email has a valid email address.
The vendor contact marked as ‚Contact about late orders?‘ has a valid email address.
ACQORDER (Acquisition order)
Used in the acquisitions module to send order information to the vendor
The notice is triggered manually from the basket summary page using the ‚Email order‘ button in the toolbar.
This notice is sent if several criteria are met:
The staff patron triggering the email has a valid email address.
The vendor contact marked as ‚Primary acquisitions contact‘ and ‚Contact when ordering‘ has a valid email address.
ACQ_NOTIF_ON_RECEIV
Used in the acquisition module to inform patrons on receiving orders they have been added to.
AR_CANCELED
This notice is sent to the patron when an article request is cancelled by staff.
AR_COMPLETED
This notice is sent to the patron when an article request is marked as completed by staff.
AR_PENDING
This notice is sent to the patron when an article request is changed to ‚pending‘ status
AR_PROCESSING
This notice is sent to the patron when an article request is marked as being processed by staff.
AR_REQUESTED
This notice is sent to the patron when an article request has been made in order to confirm the request.
AUTO_RENEWALS
This notice is sent to the patron if automatic renewals are enabled and the patron has chosen to receive it in their messaging preferences.
In order to send this notice, you must set the AutoRenewalNotices system preference to „according to patron messaging preferences“.
This notice is set so that, depending on the result of the renewal, whether is was successful or not, the message will be different.
AUTO_RENEWALS_DGST
This notice is sent to the patron if automatic renewals are enabled and the patron has chosen to receive the digest in their messaging preferences.
In order to send this notice, you must set the AutoRenewalNotices system preference to „according to patron messaging preferences“.
This notice is set so that, depending on the result of the renewal, whether is was successful or not, the message will be different.
AVAILABLE
This notice is sent to the patron who made a purchase suggestion, when the order created from the suggestion is received.
Poznámka
If you don’t want to send this notice, simply delete it.
CART
This notice is used when sending the cart by email from the OPAC or when sending the cart by email from the staff interface.
CANCEL_HOLD_ON_LOST
This notice is sent to a patron who placed a hold on an item and staff marked this items as lost from the ‚Holds to pull‘ list.
This notice is sent if the CanMarkHoldsToPullAsLost system preference is set to ‚Allow to mark items as lost and notify the patron‘.
CHECKIN
Toto upozornění je odesláno jako upozornění při vrácení každé jednotky
Toto oznámení se používá, když jsou splněna dvě kritéria:
The EnhancedMessagingPreferences is set to ‚Allow‘
Čtenář požádal, aby obdržel toto oznámení
If EnhancedMessagingPreferencesOPAC is set to ‚Show‘, patrons will be able to choose their messaging preferences in their online account in the Messaging tab.
Staff can select this notice for a patron in their messaging preferences.
CHECKOUT
Toto potvrzení je posíláno jako informace o všech vypůjčených jednotkách
Toto oznámení se používá, když jsou splněna dvě kritéria:
The EnhancedMessagingPreferences is set to ‚Allow‘
Čtenář požádal, aby obdržel toto oznámení
If EnhancedMessagingPreferencesOPAC is set to ‚Show‘, patrons will be able to choose their messaging preferences in their online account in the Messaging tab.
Staff can select this notice for a patron in their messaging preferences.
CHECKOUT_NOTE
This notice is sent to the system administration (the email address in KohaAdminEmailAddress) to alert them that a patron added a checkout note from their checkouts list on the OPAC.
DISCHARGE
This notice is used to generate a PDF to document a successful discharge request
The PDF can either be downloaded by the patron from their patron account or from the staff interface when discharging a patron
The discharge feature is controlled by the useDischarge system preference.
DUE
This notice is sent as the ‚Item due‘ notice for an checked out item that is due today.
Toto oznámení se používá, když jsou splněna dvě kritéria:
The EnhancedMessagingPreferences is set to ‚Allow‘
Čtenář požádal, aby obdržel toto oznámení
If EnhancedMessagingPreferencesOPAC is set to ‚Show‘, patrons will be able to choose their messaging preferences in their online account in the Messaging tab.
Staff can select this notice for a patron in their messaging preferences.
DUEDGST
This notice is sent as the ‚Item due‘ notice for all checked out items that are due today (digest option).
Toto oznámení se používá, když jsou splněna dvě kritéria:
The EnhancedMessagingPreferences is set to ‚Allow‘
Uživatel požaduje posílání tohoto oznámení ve formě souhrnu
If EnhancedMessagingPreferencesOPAC is set to ‚Show‘, patrons will be able to choose their messaging preferences in their online account in the Messaging tab.
Staff can select this notice for a patron in their messaging preferences.
HOLD (Hold available for pickup)
This notice is sent to the patron when their hold is ready for pickup.
Toto oznámení se používá, když jsou splněna dvě kritéria:
The EnhancedMessagingPreferences is set to ‚Allow‘
Uživatel požaduje posílání tohoto oznámení ve formě souhrnu
If EnhancedMessagingPreferencesOPAC is set to ‚Show‘, patrons will be able to choose their messaging preferences in their online account in the Messaging tab.
Staff can select this notice for a patron in their messaging preferences.
Když toto upozornění odkazuje na tabulku poboček, odkazuje na informaci o knihovně, kde má být rezervace vyzvednuta.
HOLD_CHANGED
This notice is sent to library staff (either the email address in ExpireReservesAutoFillEmail), or the library’s reply-to address, to alert them that a hold has been canceled, the item filled the next hold and is now waiting for another patron.
This notice is only sent if ExpireReservesAutoFill is set to ‚Do‘.
HOLD_REMINDER
This notice is sent to the patron when their hold has been waiting for pickup for more than a number of days
If EnhancedMessagingPreferencesOPAC is set to ‚Show‘, patrons will be able to choose their messaging preferences in their online account in the Messaging tab. The notice is ‚Hold reminder‘.
Staff can select this notice for a patron in their messaging preferences. The notice is ‚Hold reminder‘.
The holds_reminder.pl cron job is required to generate this notice.
HOLDPLACED
This notice is sent to the library staff when a hold has been placed.
This notice requires the emailLibrarianWhenHoldIsPlaced system preference to be set to ‚Enable‘.
When this notice references the branches table it is referring to the pickup library information.
ILL_PARTNER_REQ
This notice is used by the ILL module to send requests to partner libraries.
ILL_PICKUP_READY
This notice is sent to the patron when the inter-library loan they requested has been fulfilled and is now ready for pickup.
Staff can select this notice for a patron in their messaging preferences. The notice is ‚Interlibrary loan ready‘.
Poznámka
The option will only appear in the messaging preferences if the ILLModule system preference is enabled.
If EnhancedMessagingPreferencesOPAC is set to ‚Show‘, patrons will be able to choose their messaging preferences in their online account in the Messaging tab. The notice is ‚Interlibrary loan ready‘.
Poznámka
The option will only appear in the messaging preferences if the ILLModule system preference is enabled.
ILL_REQUEST_CANCEL
This notice is sent to library staff when a patron cancels their inter-library loan request from their account in the OPAC.
ILL_REQUEST_MODIFIED
This notice is sent to library staff when a patron modifies their inter-library loan request from their account in the OPAC.
ILL_REQUEST_UNAVAIL
This notice is sent to the patron when the inter-library loan they requested has been cancelled because it was unavailable.
Staff can select this notice for a patron in their messaging preferences. The notice is ‚Interlibrary loan unavailable‘.
Poznámka
The option will only appear in the messaging preferences if the ILLModule system preference is enabled.
If EnhancedMessagingPreferencesOPAC is set to ‚Show‘, patrons will be able to choose their messaging preferences in their online account in the Messaging tab. The notice is ‚Interlibrary loan unavailable‘.
Poznámka
The option will only appear in the messaging preferences if the ILLModule system preference is enabled.
ILL_REQUEST_UPDATE
This notice is sent to the patron to alert them that their inter-library loan request has been updated.
Staff can select this notice for a patron in their messaging preferences. The notice is ‚Interlibrary loan updated‘.
Poznámka
The option will only appear in the messaging preferences if the ILLModule system preference is enabled.
If EnhancedMessagingPreferencesOPAC is set to ‚Show‘, patrons will be able to choose their messaging preferences in their online account in the Messaging tab. The notice is ‚Interlibrary loan updated‘.
Poznámka
The option will only appear in the messaging preferences if the ILLModule system preference is enabled.
LIST
This notice is used when sending a list by email from the OPAC or when sending a list by email from the staff interface.
ČLENSTVÍ_PROPADNUTÍ
This notice can be sent to patrons to warn them that their cards are expiring soon.
Requires that you have the MembershipExpiryDaysNotice set and the related cron job set.
MEMBERSHIP_RENEWED
This notice can be sent to patrons to notify them that their library membership has been renewed.
The notice is generated by the membership_expiry.pl cronjob when it is called with the
--renewparameter.
NEW_CURBSIDE_PICKUP
This notice is sent to the patron when a curbside pickup is scheduled.
In order to send this notice,
The patron must have chosen to receive the ‚Hold filled‘ notice by email.
Staff can select this notice for a patron in their messaging preferences
If EnhancedMessagingPreferencesOPAC is set to ‚Show‘, patrons will be able to choose their messaging preferences in their online account in the Messaging tab.
NEW_SUGGESTION
This notice is sent to library staff when the EmailPurchaseSuggestions system preference is enabled.
NOTIFY_MANAGER
This notice is sent to a staff member when they are assigned as manager of a suggestion in the acquisitions module.
ODUE (Overdue notice)
This notice is used to send overdue notices to patrons
ODUE is the code of the sample notice, but it’s possible to use any code and define multiple different messages for different patron categories and notice levels
Requires that you set Overdue notice/status triggers
OPAC_REG
This notice is sent to library staff when the EmailPatronRegistrations system preference is enabled and a patron registers through the OPAC.
OPAC_REG_VERIFY
This notice is sent to the patron who registered through the OPAC if the PatronSelfRegistrationVerifyByEmail system preference is enabled.
ORDERED
This notice is sent to the patron who made a suggestion, when the ‚from a suggestion‘ option is used to create an order from it.
Poznámka
If you don’t want to send this notice, just delete it.
PASSWORD_CHANGE
This notice is sent to a patron whose password was changed, if the NotifyPasswordChange system preference is enabled.
PASSWORD_RESET
This notice is sent when a patron requests a new password from the OPAC in order to validate the email address.
The password reset feature is controlled by the OpacResetPassword system preference.
PICKUP_RECALLED_ITEM
This notice is sent to the patron who has requested a recall when the item is ready for them to pick up.
PREDUE
This notice is sent as the ‚Advanced notice‘ when an item is due
Toto oznámení se používá, když jsou splněna dvě kritéria:
The EnhancedMessagingPreferences is set to ‚Allow‘
Čtenář požádal, aby obdržel toto oznámení
If EnhancedMessagingPreferencesOPAC is set to ‚Show‘, patrons will be able to choose their messaging preferences in their online account in the Messaging tab.
Staff can select this notice for a patron in their messaging preferences.
PREDUEDGST
This notice is sent as the ‚Advanced notice‘ digest for all items that are due
Toto oznámení se používá, když jsou splněna dvě kritéria:
The EnhancedMessagingPreferences is set to ‚Allow‘
Uživatel požaduje posílání tohoto oznámení ve formě souhrnu
If EnhancedMessagingPreferencesOPAC is set to ‚Show‘, patrons will be able to choose their messaging preferences in their online account in the Messaging tab.
Staff can select this notice for a patron in their messaging preferences.
PRES_TRAIN_ITEM
This notice is the default slip used in the Preservation module to print a list of items in a train.
Version
The PRES_TRAIN_ITEM notice was introduced in version 23.11 of Koha.
PROBLEM_REPORT
This notice is sent to the email address in the KohaAdminEmailAddress system preference, or the library’s email address when a patron reports a problem on the OPAC.
RECEIPT
Used to send a payment receipt by email from the point of sale module.
REJECTED
This notice is sent when a patron’s purchase suggestion is rejected.
Poznámka
If you don’t want to send this notice, just delete it.
RENEWAL
This notice is sent as the ‚Item checkout and renewal‘ notice for all items that are renewed
Toto upozornění se použije, jsou-li splněny tyto tři podmínky:
The EnhancedMessagingPreferences is set to ‚Allow‘
The RenewalSendNotice system preference is set to ‚Send‘
Čtenář požádal, aby obdržel toto oznámení
If EnhancedMessagingPreferencesOPAC is set to ‚Show‘, patrons will be able to choose their messaging preferences in their online account in the Messaging tab.
Staff can select this notice for a patron in their messaging preferences.
RETURN_RECALLED_ITEM
This notice is sent to the patron who currently has an item in their possession that has been recalled. It serves to notify them of the new due date for the checked out item.
SERIAL_ALERT (New serial issue)
Notice used in the serials module to notify patrons/staff of new issues of a serial. SERIAL_ALERT (RLIST in older versions) is provided as a sample notice, but the notice code can be chosen freely as only the module is taken into account. Multiple notices can also be managed.
You have the option to select the notice used to inform the patron about a received serial issue when adding or editing a subscription. Choose from the ‚Patron notification‘ drop down menu.
If a notice has been selected for a subscription, patrons can subscribe to the email notification from the subscription tab in the detail view in the OPAC.
Poznámka
Notice also that if you’d like to notify patrons of new serial issues, you can click on ‚define a notice‘ which will take you to the ‚Notices‘ tool.
SHARE_ACCEPT
Toto upozornění se používá pro oznámení čtenáři, že jiný čtenář přijal sdílený seznam.
Requires that the OpacAllowSharingPrivateLists system preference be set to ‚Allow‘.
See Managing lists for more information about sharing lists.
SHARE_INVITE
Používá se k informování čtenáři, že nekdo jiný s ním chce sdílet seznam.
Requires that the OpacAllowSharingPrivateLists system preference be set to ‚Allow‘.
See Managing lists for more information about sharing lists.
SR_SLIP
Used to notify library staff from a particular library branch of items that should be transferred to another library in the context of stock rotation.
Requires the stockrotation.pl cron job.
STAFF_PASSWORD_RESET
This notice is sent when a staff member sends a password reset email to a patron.
The password reset feature is controlled by the OpacResetPassword system preference.
TICKET_ACKNOWLEDGE
This notice is sent to the reporter of a catalog concern when they report a concern through the staff interface, or when they report a concern through the OPAC, to acknowledge that the concern report was received.
The concern report feature is enabled in the staff interface by the CatalogConcerns system preference and in the OPAC by the OpacCatalogConcerns system preference.
TICKET_NOTIFY
This notice is sent to the cataloging team, to the email address in the CatalogerEmails system preference, to notify them that a concern was reported about a bibliographic record.
The concern report feature is enabled in the staff interface by the CatalogConcerns system preference and in the OPAC by the OpacCatalogConcerns system preference.
TICKET_RESOLVE
This notice is sent to the reporter of a catalog concern when the concern is marked as resolved with the ‚Notify‘ flag.
The concern report feature is enabled in the staff interface by the CatalogConcerns system preference and in the OPAC by the OpacCatalogConcerns system preference.
TICKET_UPDATE
This notice is sent to the reporter of a catalog concern when the concern is updated with the ‚Notify‘ flag.
The concern report feature is enabled in the staff interface by the CatalogConcerns system preference and in the OPAC by the OpacCatalogConcerns system preference.
K_PROCES
Used to notify a staff member if a purchase suggestion has been moved to the fund they manage
Requires the notice_unprocessed_suggestions cron job
WELCOME
Sent to patrons when their account is set up if the AutoEmailNewUser preference is set to ‚Send‘
Poznámka
For security reasons, it is not possible to send the patron’s password in a notice.
There are also a set of predefined slips (or receipts) listed on this page. All of these slips can be customized by altering their text via the Notices & slips tool and their style using the SlipCSS preference to define a stylesheet. Here is what those slips are used for:
ACCOUNT_CREDIT
Used to print a receipt for a credit (either a payment, writeoff or other credit).
The slip or receipt can be printed manually with the ‚Print‘ button next to a credit type account line in the patron’s accounting tab.
The slip or receipt can also be printed semi-automatically when paying or writing off a charge if the FinePaymentAutoPopup system preference is enabled.
Poznámka
It is possible to set specific notices for different credit types. To do so, create a new notice with the code CREDIT_ followed by the credit type code.
For example, to have a specific slip for writeoffs, create a new notice with the code CREDIT_WRITEOFF.
ACCOUNT_DEBIT
Used to print an invoice for a debit (any type of charge, such as a lost item fee, or overdue fine).
The slip or invoice can be printed manually with the ‚Print‘ button next to a debit type account line in the patron’s accounting tab.
Poznámka
It is possible to set specific notices for different debit types. To do so, create a new notice with the code DEBIT_ followed by the debit type code.
For example, to have a specific slip for lost items, create a new notice with the code DEBIT_LOST.
ACCOUNTS_SUMMARY
Used to print a summary of outstanding charges and unused credits in the patron’s account.
The slip can be printed manually with the ‚Print account balance‘ option in the ‚Print‘ button at the top of the patron’s details page.
AR_SLIP
Used to print a slip for an article request
The slip or receipt can be printed manually when managing article requests from the staff interface.
Get there: Circulation > Article requests > Actions > Print slip
CHECKINSLIP
This slip lists all items that were checked in today for this patron
To print this slip, click Print > Print checkin slip from the patron file
You can also print this slip from the Check in page
ISSUEQSLIP
Rychlé potvrzení obsahuje pouze jednotky, které byly vypůjčeny dnes
ISSUESLIP
Used to print a full slip in circulation
Potvrzení obsahuje jednotky vypůjčené dnes i ty, které jsou vypůjčené dříve
HOLD_SLIP
Používáno k tisku rezervačních lístků
The holds slip is generated when a hold is confirmed and set to waiting.
OVERDUE_SLIP
Used to print an overdues slip
The overdues slip can be generated manually using the ‚print‘ menu in the patron account in the staff interface. It will show all items overdue.
RECALL_REQUESTER_DET
Used to print the details of the patron who has requested a recall on an item, when receiving the recall.
RECEIPT
Used to print a payment receipt in the point of sale module.
TRANSFERSLIP
Používáno k tisku přepravních lístků
Přepravní lístek se tiskne, když potvrdíte přesun z jedné knihovny do druhé
This tool also allows you to modify database entries for some specific purposes. So far, only the overdue fine description is available.
OVERDUE_FINE_DESC
This template is used to generate the description for overdue fines in a patron’s account.
Poznámka
The information available to this customization come from the checkouts (issues), items and patrons (borrowers).
Upomínka/Spouštěče stavu
Get there: More > Tools > Patrons and circulation > Overdue notice/status triggers
In order to send the overdue notices that you defined using the Notices & slips tool, you need to first set the triggers to have these messages.
Důležité
In order to have overdue notices sent to your patrons, you need to set that patron category to require overdue notices.
Důležité
Depending on the value of your OverdueNoticeCalendar preference the delay may or may not include days the library is closed based on the holiday calendar.
The Overdue notice/status triggers tool gives the librarian the power to send up to three notices to each patron type notifying them of overdue items
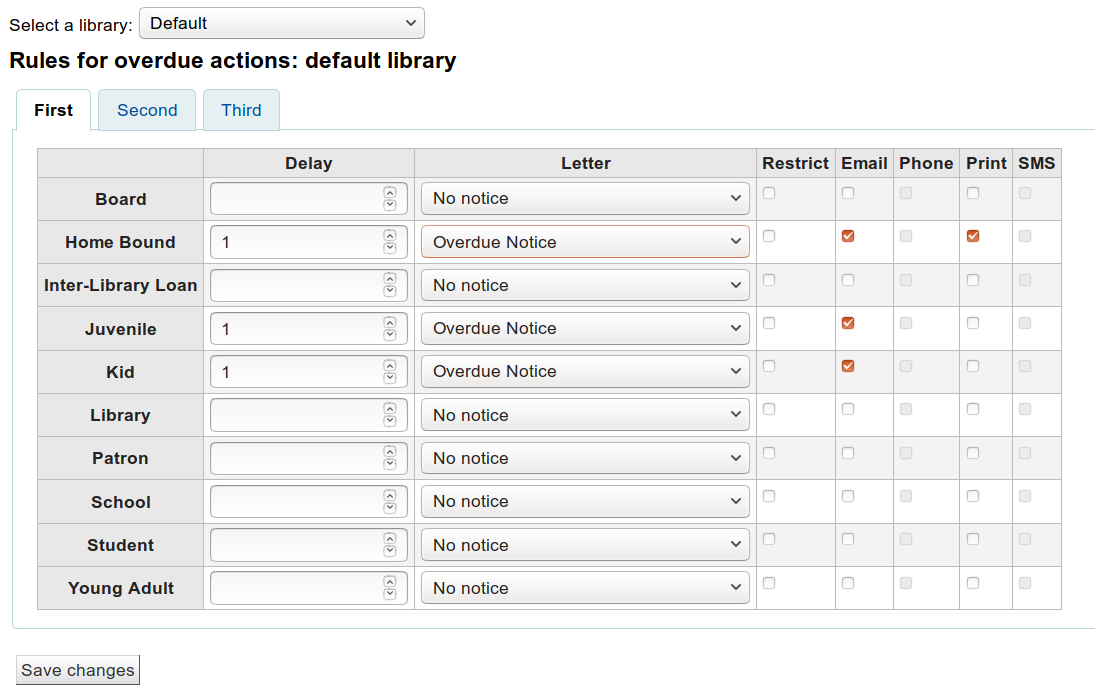
Prodleva je počet dní po stanoveném termínu vrácení, než je akce je spuštěna.
Důležité
Pokud chcete aby Koha ke spuštění akce (poslat dopis nebo omezit práva čtenáře), je nutno zadat hodnotu prodlevy.
Chcete-li poslat další upozornění, klikněte na záložky pro „Druhé“ a „Třetí“ upozornění
Pokud chcete zabránit čtenářům, kteří mají výpůjčky nevrácené v termínu, aby si mohli dále půjčovat, zaškrtněte políčko „Zakázat“. V režimu půjčování se potom zobrazuje informace o tomto omezení.
If you choose to restrict a patron in this way you can also have Koha automatically remove that restriction with the AutoRemoveOverduesRestrictions preference.
Next you can choose the delivery method for the overdue notice. You can choose from Email, Phone (if you are using the i-tiva Talking Tech service), Print and SMS (if you have set your SMSSendDriver).
Tvorba čtenářských průkazů
Get there: More > Tools > Patron card creator
The patron card creator allow you to use layouts and templates which you design to print your custom patron cards on your printer. Here are some of the features of the patron card creator module:
Customize patron card layouts with text retrieved from the Koha patron data
Design custom card templates for printed patron cards (to match the label sheets)
Vytváření a správa dávek čtenářských karet
Export (as PDF) single or multiple batches to print
Export jedné nebo více čtenářských karet z dávky
Rozložení
Get there: More > Tools > Patron card creator > Manage > Layouts
Rozložení definuje text a obrázky, které se vytisknou na kartě a kde se objeví.
Poznámka
Up to three lines of text, the patron’s number in barcode representation and up to two images can be printed on to the card.
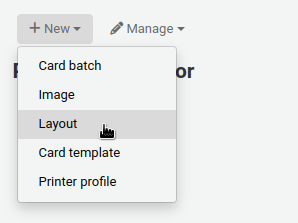
Add a layout
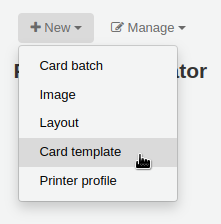
If you have no layouts defined, you will add a new layout by clicking the ‚New‘ button and choosing ‚Layout‘.
You may also choose to press ‚Manage layout‘ on the left side. Here you are offered a list of available layouts you can select for editing. But at the top of the page there is still the ‚New layout‘ button.
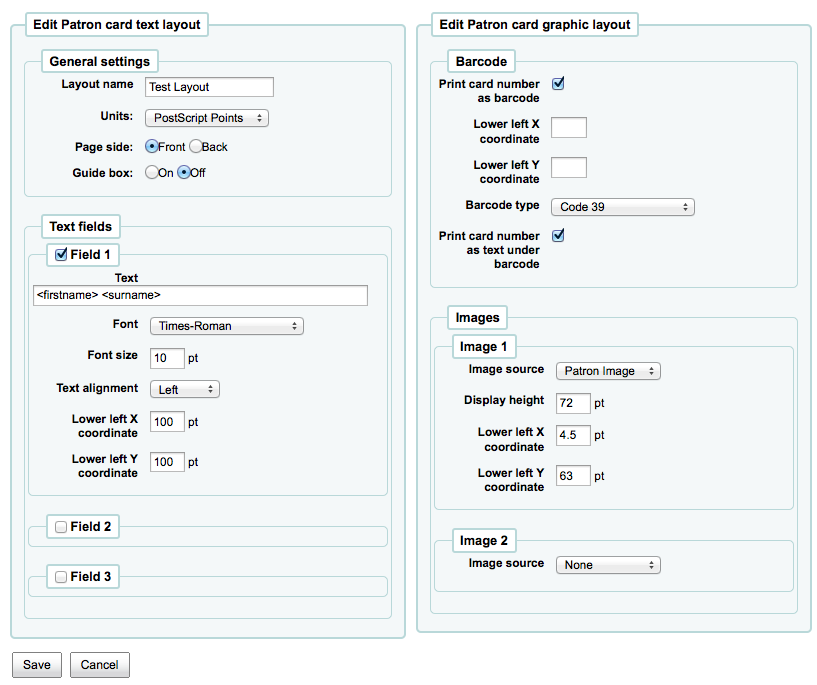
Název, který přiřadíte vzhledu (rozložení) je pro váš užitek, pojmenujte jej, a pak bude moci později snadno určit vzhled
Roletka s měrnými jadnotkami se užívá k určení měřítka, které chcete používat pro vaše rozvržení.
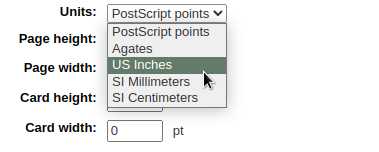
Poznámka
A Postscript Point is 1/72“, an Adobe Agate is 1/64“, an Inch is 25.4 SI Millimeters
Next, note if this layout is for the front or the back of the patron card
Poznámka
You will need a layout for both the front and back of your card if you have 2-sided library cards, this option doesn’t allow you to print two sided cards, just lets you track which side of the card you’re designing.
You have the option of adding up to 3 lines of text to your card. Your text can be static text of your choosing and/or fields from the patron record. If you want to print fields from the patron record you want to put the field names in brackets like so - <firstname>
Poznámka
A full list of field names can be found in the database schema at http://schema.koha-community.org
Pro každý řádek textu můžete zvolit písmo, velikost písma a umístění textu na průkazu s použitím souřadnic X a Y
In order to show the barcode and the patron card number you will need to check the ‚Print card number as barcode‘ option. This will turn the patron card number into a barcode. If you want the number to print in human readable format you will need to check the ‚Print card number as text under barcode‘ option.
Nakonec můžete vybrat až obrázky k tisku na kartě.
One can be the patron image which you can resize to meet your needs.
The other image can be something like a library logo or symbol that you uploaded using the ‚manage images‘ module of the patron card creator Tool.
Důležité
It is the designers responsibility to define textlines, barcode and images such that overlap is avoided.
After saving, your layouts will appear on the ‚Manage layouts‘ page.

Šablony
Get there: More > Tools > Patron card creator > Manage > Card templates
A template describes the arrangement of labels on the label sheet/card stock you are using. This might be Avery 5160 for address labels, Gaylord 47-284 for spine labels or Avery 28371 for your patron cards, just to give a couple of examples. All of the information you will need for setting up a template may be on the packaging, and if not it can usually be found on the vendor’s website or can be measured from a sample sheet.
Add a template
To add a new template click on the ‚New template‘ button at the top of your page which brings you to the Edit template form immediately. You may also choose to press ‚Manage templates‘ on the left side. Here you are offered a list of available templates you can select for editing. But in the top of the page there is still the ‚New template‘ button.
Using the form that appears after pressing either ‚Edit‘ or ‚New template‘ you can define the template for your sheet of labels or cards.
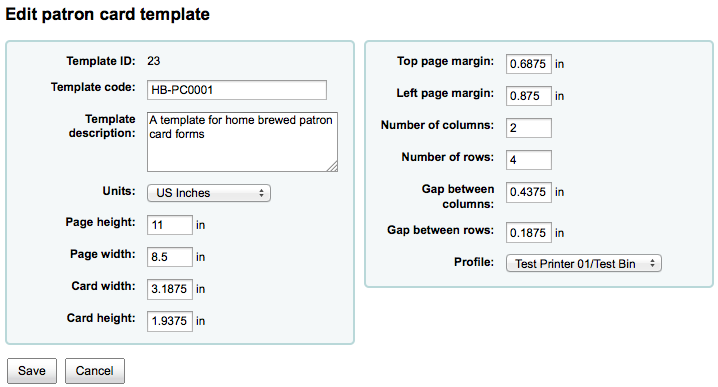
Template ID is simply a system generated unique id
Template code should be the name of this template to identify it on a list of templates
You can use the template description to add additional information about the template
Roletka s měrnými jadnotkami se užívá k určení měřítka, které chcete používat pro vaše rozvržení.
Poznámka
A Postscript Point is 1/72“, an Adobe Agate is 1/64“, an Inch is 25.4 SI Millimeters
The measurements (page height, page width, card width, card height) may be on the packaging, and if not it can usually be found on the vendor’s website or can be measured from a sample sheet.
Profil je množina „úprav“ aplikovaná na danou šablonu těsně před tiskem, což kompenzuje zvláštnosti charakteristické pro danou tiskárnu (ke které je přiřazen profil).
Před vybráním profilu zkuste vytisknout nějaký vzorek karty, abyste si mohli definovat profil, který je vhodný pro kombinaci vaší tiskárny / šablony.
After finding and documenting any anomalies in the printed document, then you can create a profile and assign it to the template.
Důležité
Nespecifikujte profil, pokud to není nutné, tedy neklikejte na definování profilu tiskárny. Není možné odebrat profil z šablony, ale můžete přepnout k jinému profilu.
Poznámka
Pokud používáte jiné tiskárny, může být nutné definovat několik šablon, které jsou identické, mají jen jiné specifikované profily.
After saving, your templates will appear on the ‚Manage templates‘ page.

Profily
Get there: More > Tools > Patron card creator > Manage > Profiles
A profile is a set of „adjustments“ applied to a given template just prior to printing which compensates for anomalies unique and peculiar to a given printer. This means if you set a template up and then print a sample set of data and find that the items are not all aligned the same on each card, you need to set up a profile for each printer (or even different tray selections on the same printer) to make up for the differences in printing styles, such as the shifting of text to the left, right, top or bottom.
Pokud vaše karty jsou vytištěny přesně tak, jak chcete, nebudete potřebovat profil.
Add a profile
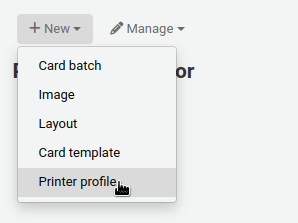
To add a new profile, you want to click on the ‚Profiles‘ button at the top of your page and choose ‚New profile‘
To add a new profile, you want to click on the ‚New profile‘ button at the top of your page. Using the form that appears you can define the values to correct the card misalignment on your label sheet. You may also choose ‚Manage profiles‘ on the left side and select one of the currently available profiles for editing.
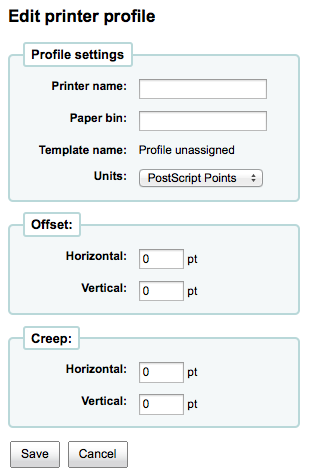
The Printer name and Paper bin do not have to match your printer exactly, they are for your reference so you can remember what printer you have set the profile for.
Poznámka
Například: pokud chcete použít Číslo modelu tiskárny v názvu tiskárny, můžete, nebo ji můžete nazvat tiskárna na mém stole.
Template will be filled in once you have chosen which template to apply the profile to on the template edit form
Roletka Jednotky se používá k definování měřítka, které budete používat pro svůj profil.
Poznámka
A Postscript Point is 1/72“, an Adobe Agate is 1/64“, an Inch is 25.4 SI Millimeters
Offset should be used when the entire image is off center either vertically or horizontally. Creep describes a condition where the distance between the labels changes across the page or up and down the page
For offset and creep values, negative numbers move the printed information up and to the left on the printed sheet and positive numbers move down and to the right
Example: the text is printed 0 .25“ from the left edge of the first label, 0 .28“ from the left edge of the second label and 0 .31“ from the left edge of the third label. This means the horizontal creep should be set to (minus) -0.03 “ to make up for this difference.
After saving, your profiles will appear on the ‚Manage printer profiles‘ page.

Pokud jste uložili váš nový profil, můžete se vrátit do seznamu šablon a vybrat úpravu šablony pro kterou je tento profil.
Dávky
Get there: More > Tools > Patron card creator > Manage > Card batches
Dávka je skupina čtenářů, pro které chcete vyrobit čtenářské karty.
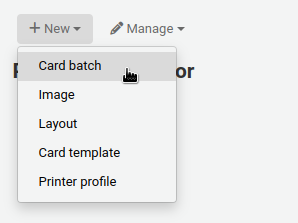
Add a batch
K přidání nové várky budete chtít kliknout na Nové várky na vrchní části vaší stránky. Vybráním položky v menu Spravovat várky na levé straně je seznam už definovaných várek. V seznamu si můžete buď vybrat várku k editaci nebo vybrat přidání nové várky.
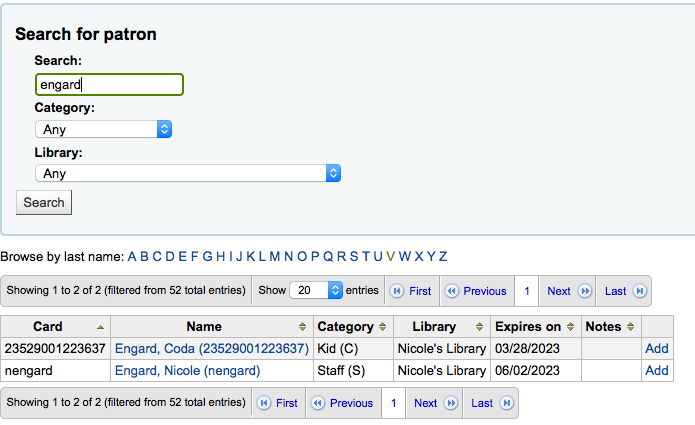
For a new batch a message pops up and directs you to select patrons to be processed in this batch.

After choosing the ‚Add patron(s)‘ button the Patron Search window pops up.
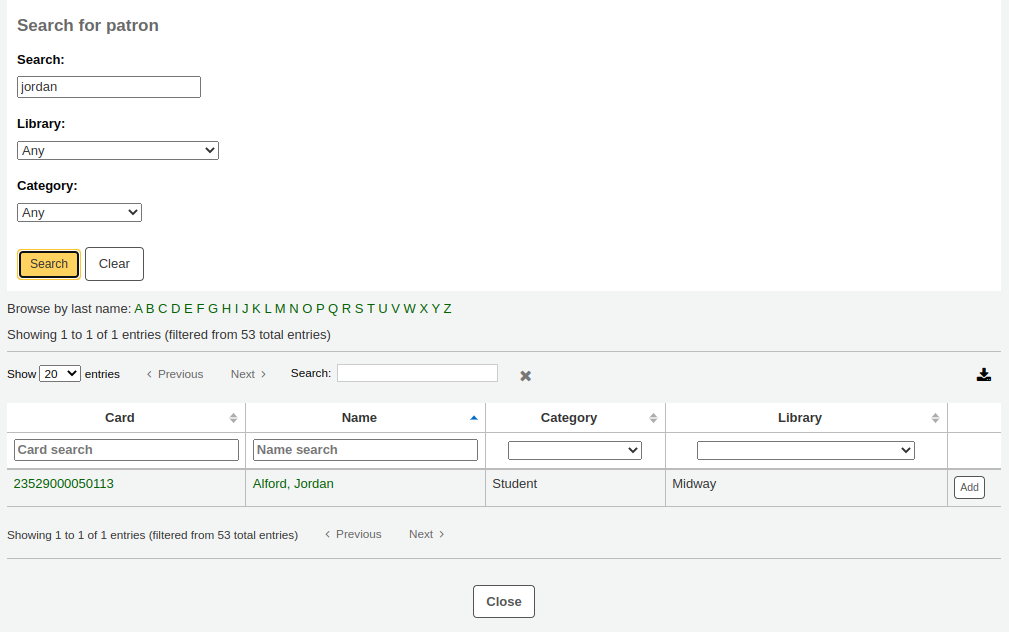
Odtud můžete hledat patrony k přidání do vaší várky jakoukoliv částí jejich jména, jejich kategorie a/nebo knihovny. Přidáním * do vyhledávacího pole se vám ukážou všichni patroni.
Z výsledků můžete přidat patrony k várce kliknutím na tlačítko Přidat. Po přidání patronů z výsledků můžete začít znovu a znovu někoho vyhledat, nebo kliknout na Zavřít na spodní části obrazovky k vyjádření, že jste skončili. Tímto se vám zobrazí vaše várka.
Alternatively, you can use a custom report to create a batch. A report that contains borrowernumbers will have the option to send the report results to the patron card creator.
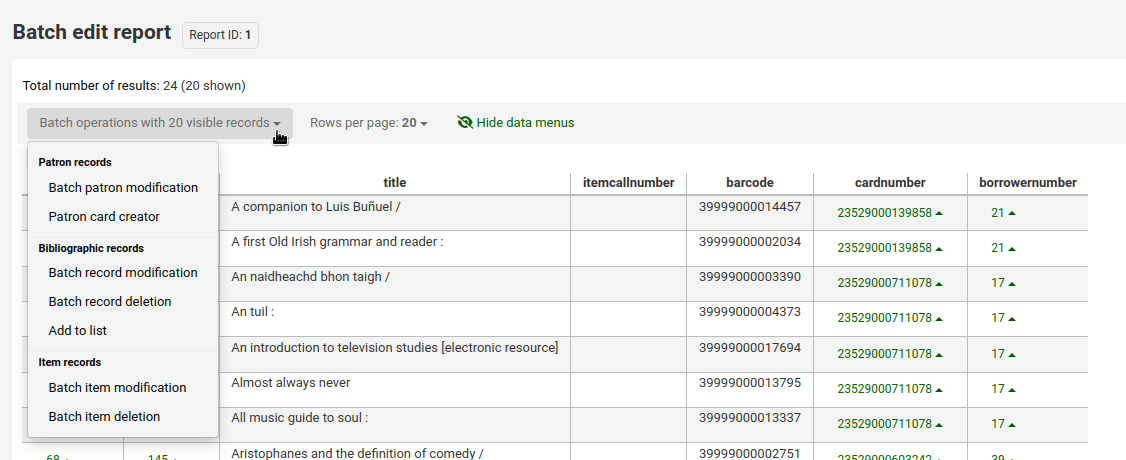
Version
The option to send report results to the patron card creator was added to Koha version 23.11.
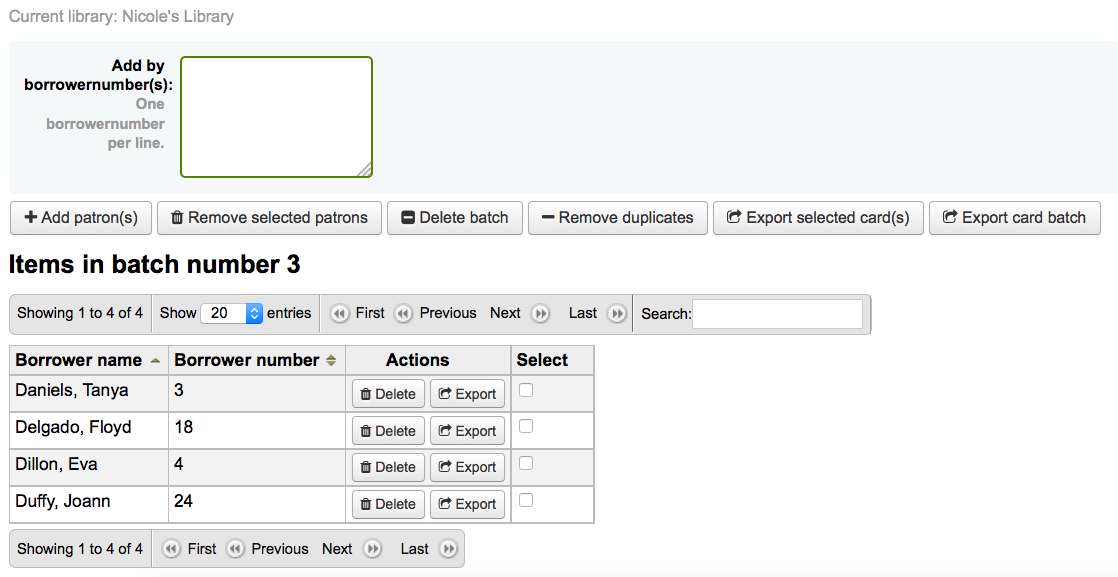
If you are satisfied with your batch you can proceed to export. If you want to correct or even delete that batch the buttons to do so can be found at the top of your screen. You can always come back here through the ‚Manage > Card batches‘ button.
If you would like to export all patron cards you can click ‚Export card batch‘ otherwise you can choose specific patrons to print cards for by checking the box to the right of their names and then choose ‚Export selected card(s)‘ at the top.
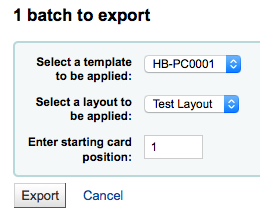
The export menu will ask you to choose a template, a layout and starting position (where on the sheet should printing begin).
Poznámka
For the starting position if the first 6 labels have already been used on your sheet you can start printing on label in position 7 on the sheet. The labels are numbered left to right from top to bottom.
Once you click ‚Export‘ you will be presented with a PDF of your labels for printing
When you open the PDF you will see the cards for printing

The above image shows a layout that is made up of two text lines. The first one is just plain text, the second one is composed of the <firstname> <surname> fields. A patron image is printed (if available) and the barcode of patrons number is displayed in code 39. All this is printed on a template with three columns and 8 rows using position 1-3 here. When printing this PDF please take care that your printer doesn’t rescale the PDF (e.g do not fit to paper size) otherwise the printer will not be able to print to the right place per your templates.
Manage images
Get there: More > Tools > Patron card creator > Manage > Images
Images uploaded using this tool will appear on the menu when creating patron card layouts. You are limited in how many images you can upload (not counting patron images) by the ImageLimit system preference.
Důležité
Obrázky musejí být menší než 500kB.
Poznámka
Obrázky načtené tímto nástrojem by měly být aspoň 300 dpi, což je minimální kvalita pro tisknutí obrázku.
Ve středu obrazovky najdete jednoduchý nahrávací formulář, stačí najít v počítači soubor a rozpoznatelně jej pojmenovat.
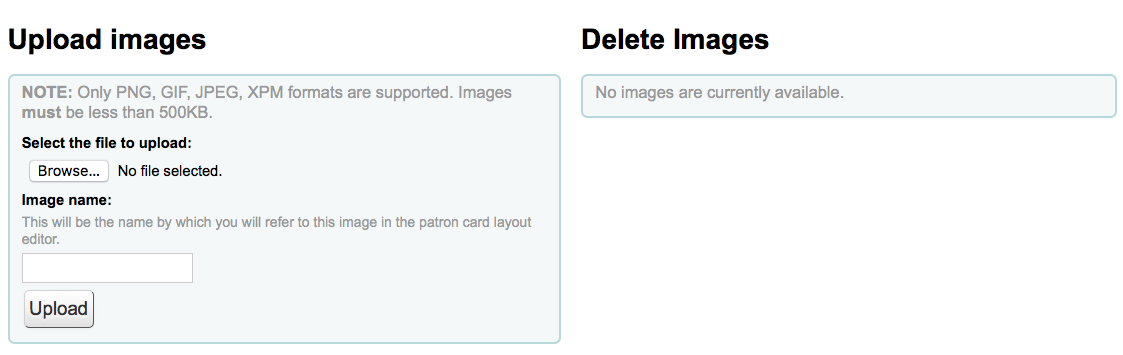
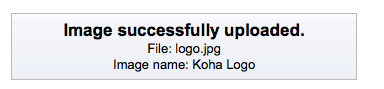
Hned po načtení souboru se zobrazí potvrzující zpráva.
Obrázek se objeví spolu s ostatními obrázky v seznamu napravo.
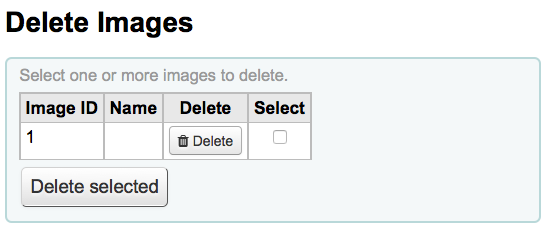
Chcete-li odstranit jeden nebo více z těchto snímků, klepněte na zaškrtávací políčko napravo od každého snímku, který chcete odstranit, a klepněte na tlačítko „Odstranit“.
Dávkové mazání/anonymizace čtenářů
Get there: More > Tools > Patrons and circulation > Batch patron deletion/anonymization
Tento nástroj umožňuje hromadně anonymizovat historie výpůjček (to znamená, že budete mít záznamy o tom, kolikrát výtisk byl půjčen - ale ne čtenáře, kteří si ho vypůjčili) nebo hromadně odstranit čtenáře (zcela je odstranit ze systému).
Důležité
Patrons with outstanding fines or items checked out are not saved. They are not completely removed from the system (they are only moved to the delete_borrowers table), but this tool does not provide as many checks as one may desire.
Důležité
Před použitím tohoto nástroje se doporučuje zazálohovat databázi. Změny, které provedete, jsou trvalé.
Důležité
The anonymization will fail quietly if AnonymousPatron preference does not contain a valid value.
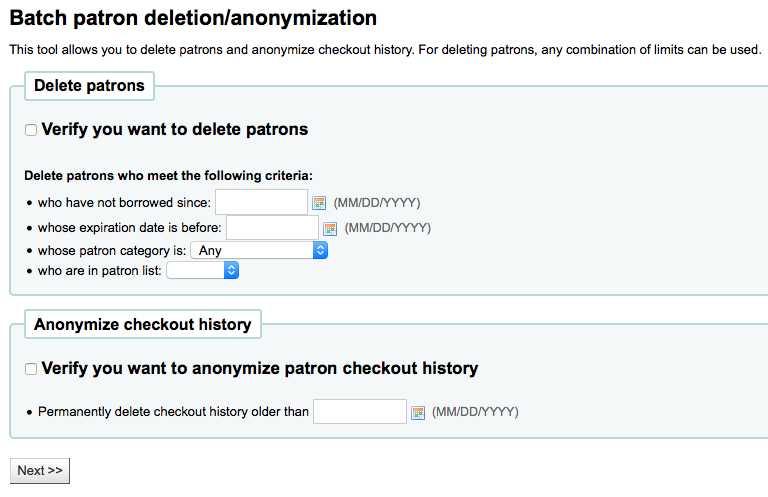
Buď vymazat nebo anonymizovat čtenáře
Check the ‚Verify‘ box on the task you would like to complete (delete or anonymize)
Zadejte datum, před kterým chcete změnit data
If deleting patrons you can also choose to find patrons who
have not borrowed since a specific date
have accounts that will expire before a specific date
are in a specific patron category
are in a patron list
Klikněte na tlačítko ‚Další‘
Zobrazí se potvrzení s otázkou zda-li jste si jistý/á, že chcete toho dosáhnout
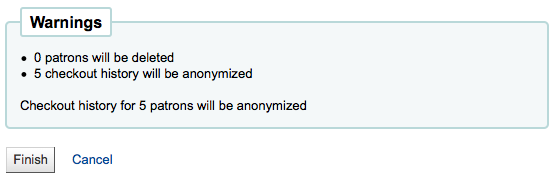
Kliknutí na tlačítko ‚Dokončit‘ odstraní nebo anonymizuje vaše údaje

Dávková úprava čtenářů
Get there: More > Tools > Patrons and circulation > Batch patron modification
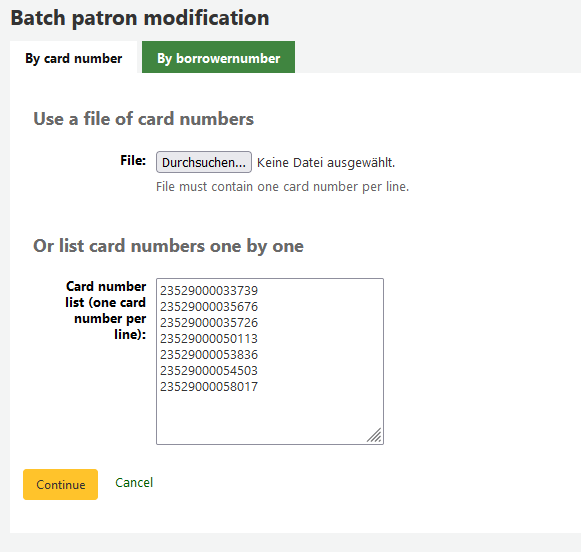
With this tool you can make edits to a batch of patron records. Simply load in a file of cardnumbers (one per line), choose from a list of patrons or scan patron card numbers in to the box provided. All options are also available for use with borrowernumbers instead of cardnumbers.
Once you have the file loaded or the cardnumbers or borrowernumbers entered click ‚Continue.‘ You will be presented with a list of the patrons and the changes you can make.
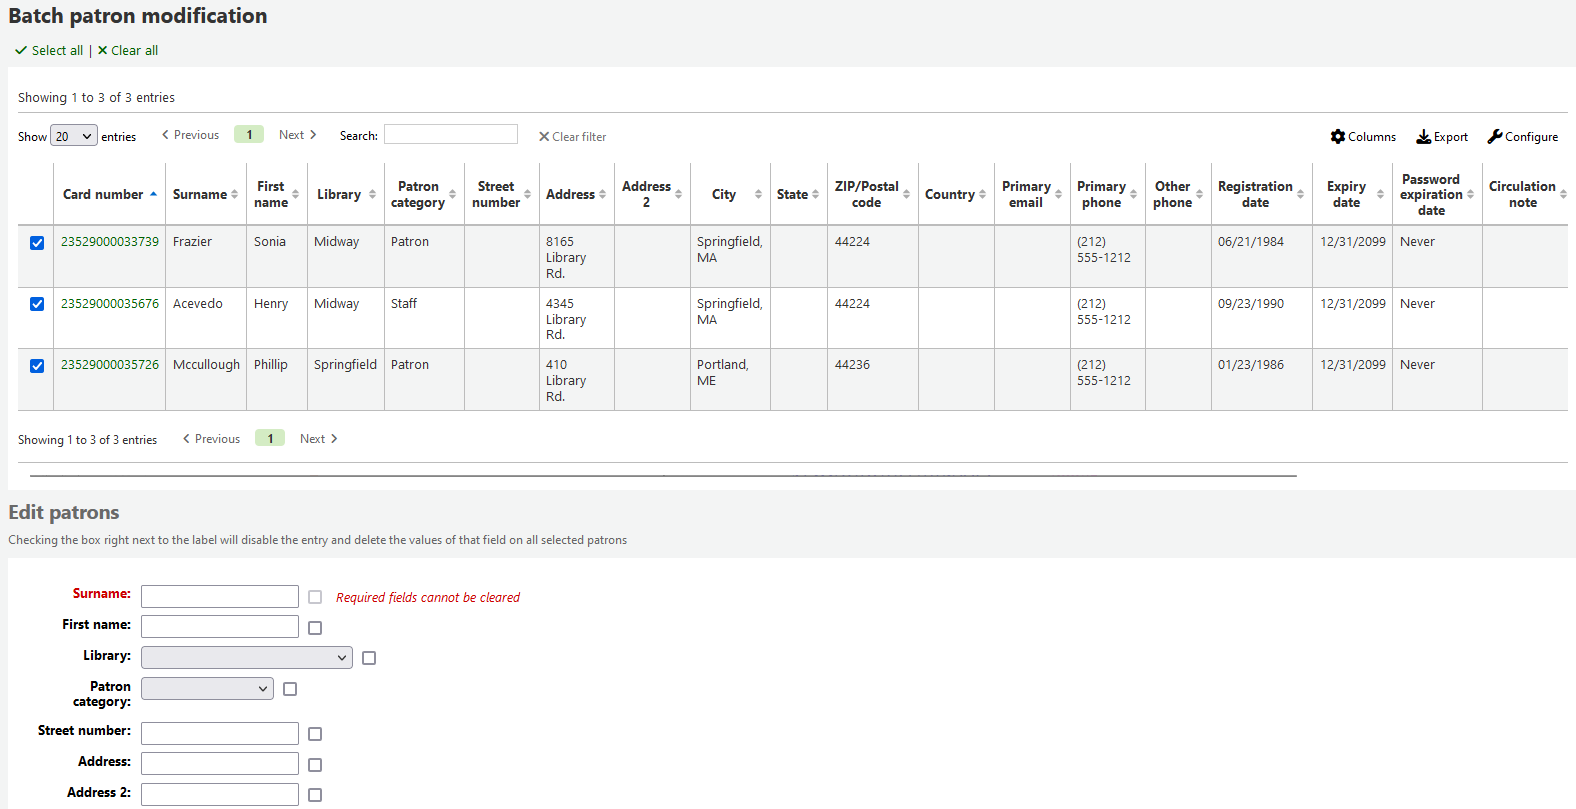
To the right of each text box there is a checkbox. Clicking that checkbox will clear our the field values.
Důležité
Pokud je pole povinné, nebudete moci vymazat jeho hodnotu.
If you have multiple patron attributes you can change them all by using the ‚+ New‘ link to the right of the text box. This will allow you to add another attribute value.
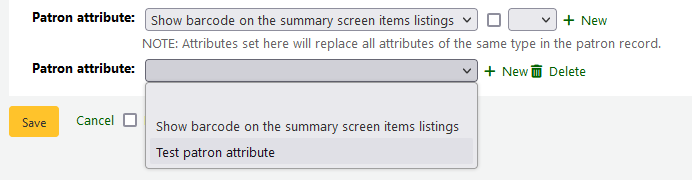
Once you have made the changes you want, you can click ‚Save‘ and the job will be enqueued.
Dávkový posun termínů vrácení
Get there: More > Tools > Patrons and circulation > Batch extend due dates
Poznámka
Access to this tool requires the batch_extend_due_dates permission.
This tool allows you to update due dates in bulk, this can be useful if a library needs to close unexpectedly and cannot accept returns.
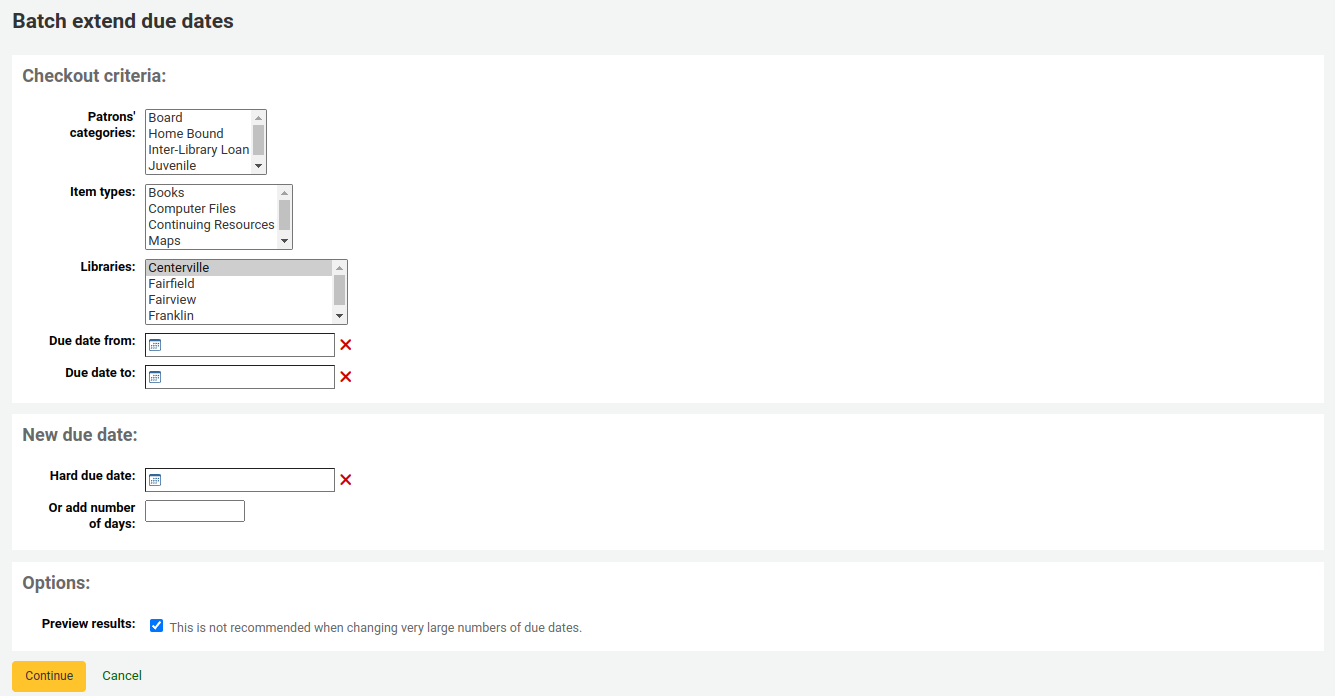
You can filter the selection of checkouts based on patron category, item types, library or a combination.
Tip
If needed, you can select multiple options in the dropdown lists by holding the CTRL key while selecting the options.
Version
The option to filter by item type is available from Koha version 23.11.
Next, specify a date range for the current due date of the materials on loan. For example, you may want to extend the due dates for recent checkouts but exclude long overdue loans.
Choose to extend the due dates either to a new hard due date or by a number of days. Using the number of days option can prevent large numbers of loans being due on the same date.
You can choose whether to preview the results of your selections.

If you preview the results, you will see a table which shows you the current due date and the new due date so that you can check your selections. You can untick checkouts if they are incorrect or go back and change your selection.
Click on the ‚Modify selected checkouts‘ button to see a confirmation screen showing the checkouts that have been modified.
Moderování štítků
Get there: More > Tools > Patrons and circulation > Tags
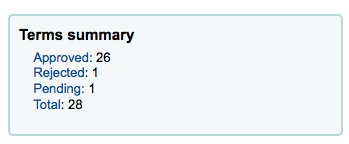
Depending on your tagging system preferences, librarians may need to approve tags before they are published on the OPAC. This is done via the tag moderation tool. If there are tags awaiting moderation they will be listed on the main staff dashboard under the module labels:

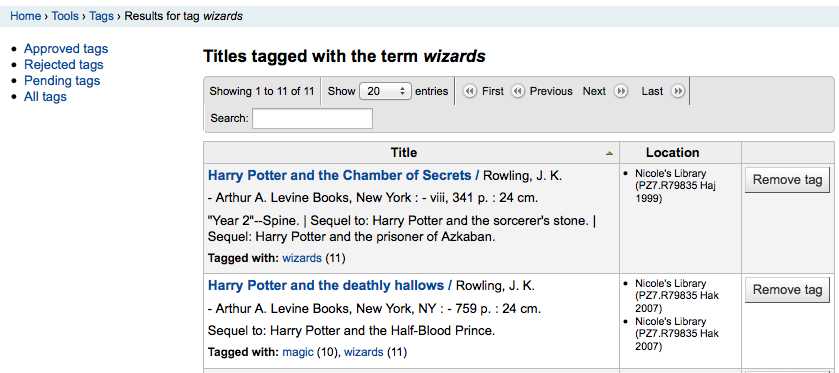
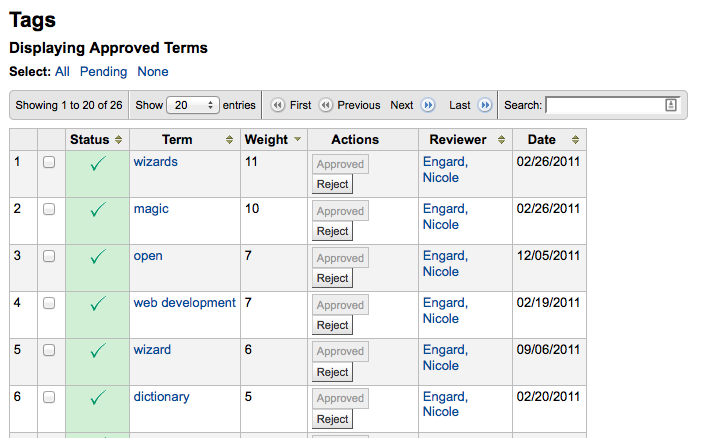
K moderování hodnotících štítků navštivte nástroj“Hodnotící štítky“. Při první návštěvě vám nástroj předloží seznam hodnotících štítků, které čekají na schválení nebo zamítnutí knihovníka

Chcete-li zobrazit všechny tituly, ke kterým tento hodnotící štítek byl přidán, klikněte na výraz
Chcete-li odstranit štítek z konkrétního titulu, jednoduše klikněte na tlačítko ‚Odstranit štítek‘ vpravo od názvu.
Ke schválení štítku, můžete klepnout na tlačítko „Schválit“v souladu s výrazem, nebo zkontrolovat všechny výrazy, které chcete schválit, a klikněte na tlačítko“ Schválit „pod tabulkou.
To reject a tag, you can either click the ‚Reject‘ button in line with the term, or check all terms you want to reject and click ‚Reject‘ below the table.
Jen pokud je značka schválena nebo odmítnuta, přenese se do příslušného seznamu značek. Seznam všech značek se objeví na pravé straně obrazovky.
I když je štítek schválen nebo zamítnut, může ještě být přesunut do jiného seznamu. Při prohlížení schválených štítků, každý štítek má možnost být odmítnut:
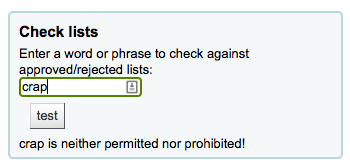
To check terms against the approved and rejected lists (and possibly against the dictionary you have assigned for tag moderation) simply enter the term into the search box on the bottom right of the screen to see the status of the term
Nakonec můžete vybrat až obrázky k tisku na kartě.
Načíst fotografie čtenářů
Get there: More > Tools > Patrons and circulation > Upload patron images
Patron images can be uploaded in bulk if you are allowing patron images to be attached to patron records. These images can also be used when creating patron cards.
Vytvořte soubor txt a nazvěte ho „DATALINK.TXT“ nebo „IDLINK.TXT“
Na každý řádek v textovém souboru zadejte číslo karty čtenáře, následované čárkou (nebo tabelátorem) a pak název souboru s obrázkem
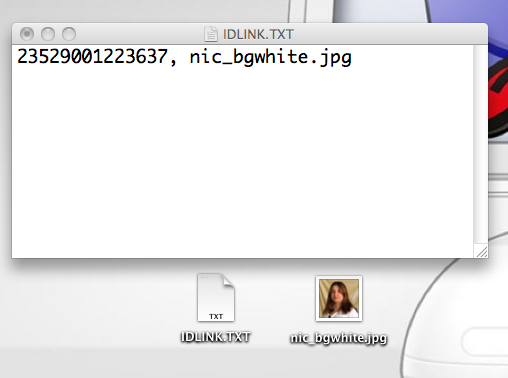
Ujistěte se, že váš TXT soubor je skutečně prostý text, ne RTF.
Zazipovat (komprimovat) textový a obrazový soubor
Go to the Upload patron images tool
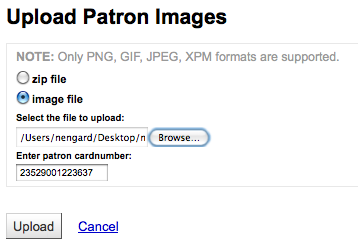
Pro jednotlivý obrázek jednoduše najeďte na soubor obrázku a zadejte číslo čtenářského průkazu
Pokud chcete vložit více souborů najednou, zvolte možnost načíst komprimovaného souboru
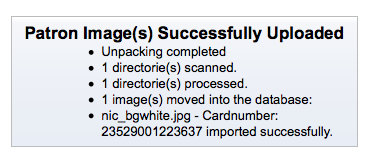
Po nahrání se Vám zobrazí potvrzení.
Důležité
Důležité: Je zde limit 520K na velikost nahraného obrázku a doporučuje se, aby obrázek byl 200x300 pixelů, ale menší snímky budou též fungovat.
Výměnné soubory
Get there: More > Tools > Catalog > Rotating collections
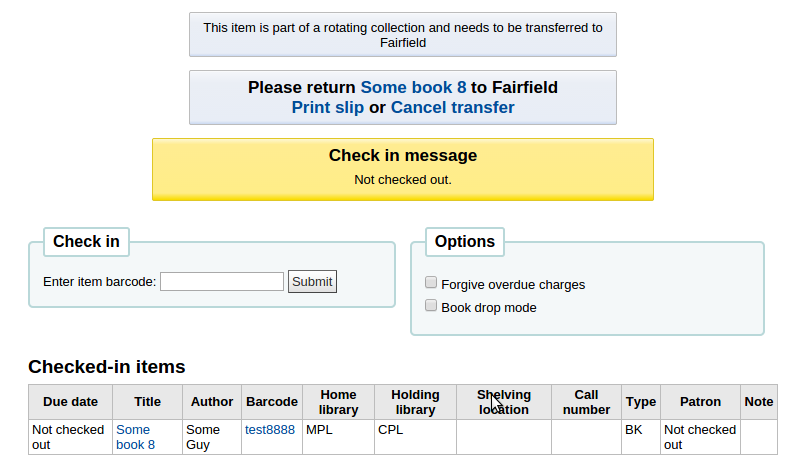
Rotating collections is a tool for managing collections of materials that frequently get shifted from library to library. It adds the ability to store not only an item’s home library and current location but also information about where it is supposed to be transferred to next to ensure that all items in the collection are sent to the correct library. When an item in a rotating collection is checked in, library staff is notified that the item is part of a rotating collection and which branch it should be sent to if it is not at the correct one.
Důležité
The AutomaticItemReturn system preference must be set to „Don’t automatically transfer items to their home library when they are returned“ for rotating collections to function properly.
To create a new rotating collection, click the „New collection“ button, fill in the title and description, and click „Submit“. Once submitted you’ll see „Collection name added successfully“; click „Return to rotating collections home“ to return to the main Rotating collections management page (or click Rotating collections in the sidebar).
To add items to a collection, click „Actions“ and choose „Add or remove items“ next to the collection’s name in the list of collections. Under „Add or remove items“ scan or type in the barcode of the item you wish to add to the collection, and hit enter or click ‚Submit‘ if necessary.
To remove an item from a collection, either click ‚Remove‘ next to the item’s barcode in the list of items within the collection or check the „Remove item from collection“ box next to the Barcode text box under „Add or remove items“, and scan or type in the barcode, clicking „Submit“ or hitting Enter if necessary. Note: The „Remove item from collection“ checkbox will remain checked as long as you are on the „Add or remove items“ page, unless you uncheck it, to facilitate quickly removing a number of items at a time by scanning their barcodes.
Transfer a rotating collection
Transferring a collection will:
Změní současnou lokaci jednotky ve sbírce na knihovnu do které bude přesunuta
Initiate a transfer from its original current location/holding library to the current location/holding library it is to be rotated to. When a library receives a collection they will need to check in the items to complete the transfer.
You can transfer a collection in one of two ways:
From the main Rotating collections page, click on „Actions“ and choose „Transfer“ next to the title of the collection you wish to transfer; choose the library you wish to transfer the collection to and click „Transfer collection“.
Or, from the „add or remove items“ page for a collection, you can click the „Transfer“ button, choose the library you wish to transfer the collection to and click „Transfer Collection“.
Důležité
Aby jste dokončili proces přenosu, knihovna obdržující Výměnnou sbírku by měla zkontrolovat všechny položky ze sbírky, když je dostávají. Toto dokončí přenos, aby se položky už dále neukazovaly jako „v přenosu“.
If an item in a rotating collection is checked in at a library other than the one it is supposed to be transferred to, a notification will appear notifying library staff that the item is part of a rotating collection, also letting them know where the item needs to be sent.
Additional tools
Kalendář
Get there: More > Tools > Additional tools > Calendar
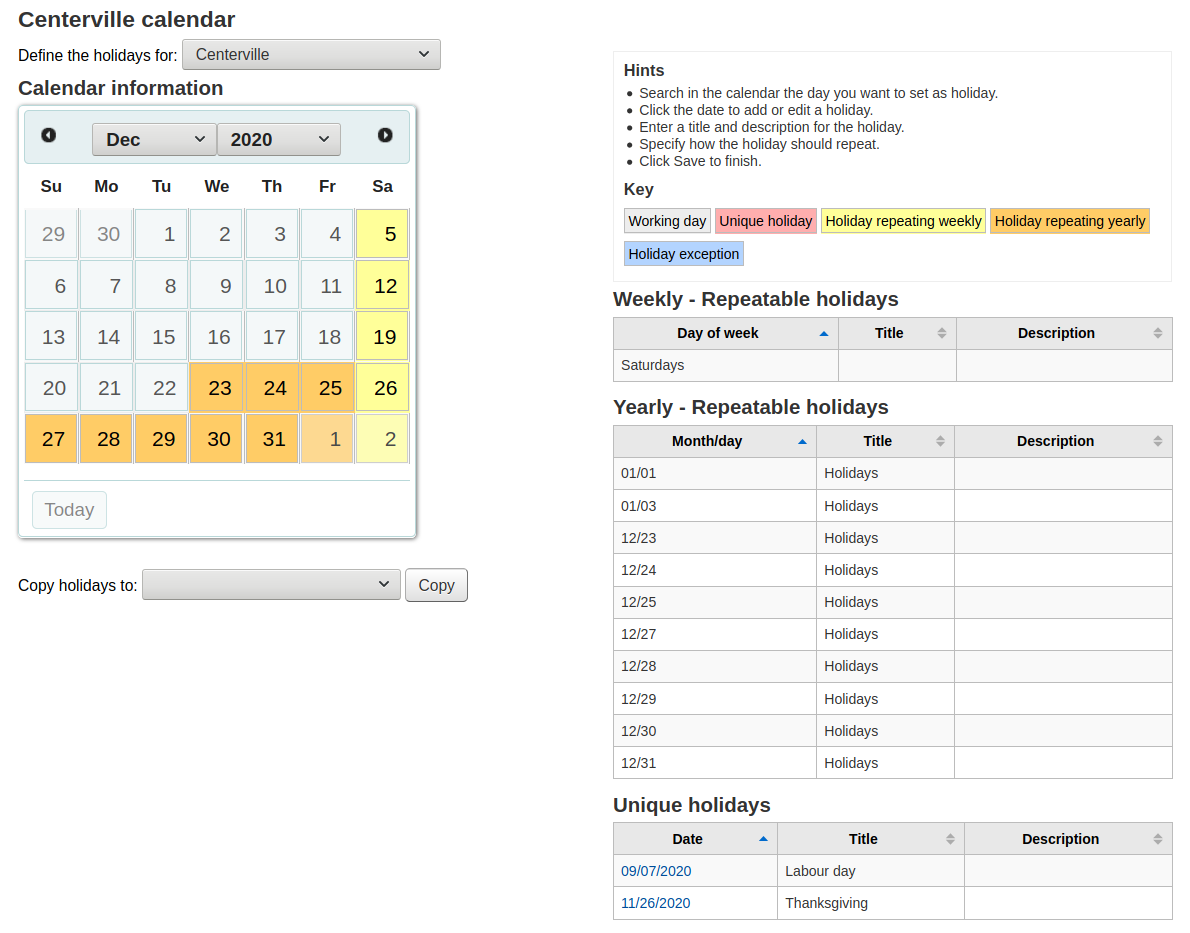
Libraries can define library closings and holidays to be used when calculating due dates. You can make use of the calendar by turning on the proper system preferences:
useDaysMode: Choose the method for calculating due date - either include days the library is closed in the calculation or don’t include them
finescalendar: This will check the holiday calendar before charging fines

Adding events
Před přidáním události, vyberte knihovnu, kterou chcete použít pro uzavírací den. Při přidávání události budete dotázáni, zda chcete použít událost na jednu pobočku nebo na všech pobočkách. Chcete-li přidat událostí, jednoduše
Klikněte v kalendáři na den který chcete nastavit jako zavírací den
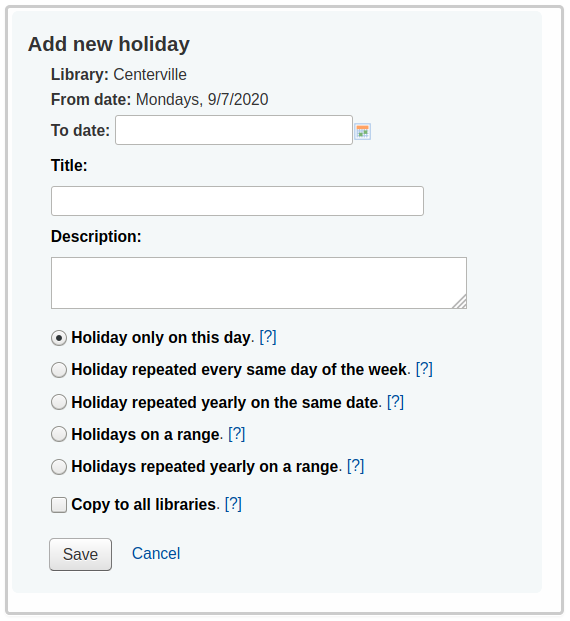
Ve formuláři, který se zobrazí nad kalendářem, zadejte závěrečné informace (pro více informací o každé možnosti klepněte na otazník [?] napravo od volby)
Knihovna se vyplní automaticky na základě knihovny, kterou si vybrete z rozbalovací roletky v horní části stránky
Den informace se vyplní automaticky na základě data, kdy jste klikli na kalendář
If this holiday extends on more than one day, enter the end date in ‚To date‘
In the ‚title‘ enter the name of the holiday or the reason for the closing
In the ‚description‘ enter more information about this holiday
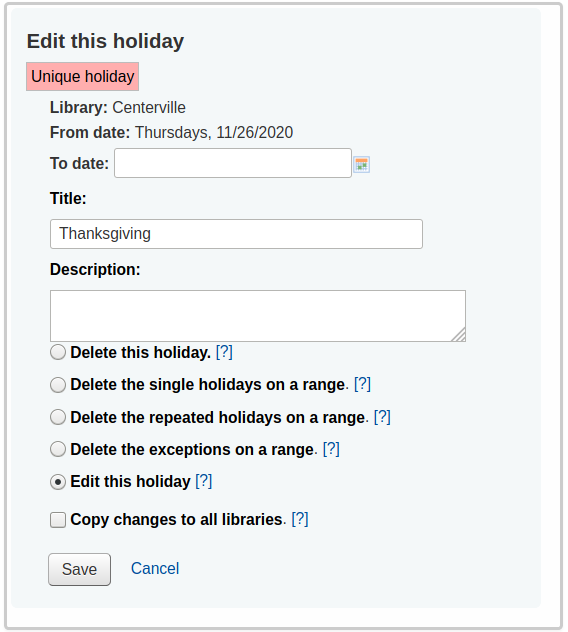
Dále můžete zvolit, zda tato událost je jednorázovou událostí nebo opakovanou.
‚Holiday only on this day‘: this is a one day holiday
‚Holiday repeated every same day of the week‘: this is a weekly closing (if you’re closed every Sunday, for example)
‚Holiday repeated yearly on the same date‘: this is an annual holiday closing (if you’re closed on January 1st each year, for example)
‚Holiday on a range‘: this is a holiday that extends on several days
Poznámka
Make sure to enter a ‚To Date‘ at the top if you choose ‚Holiday on a range‘
‚Holiday repeated yearly on a range‘: this is a holiday that extends on several days each year (such as summer holidays for schools)
Poznámka
Make sure to enter a ‚To Date‘ at the top if you choose ‚Holiday repeated yearly on a range‘
Nakonec se rozhodněte, zda tato událost by měla být použita pro všechny knihovny, nebo jen tu, kterou jste původně zvolili
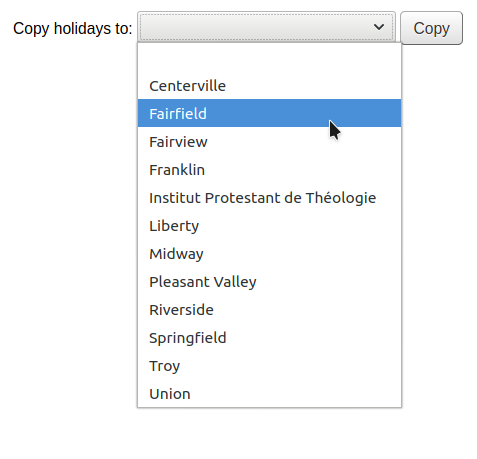
Pokud byste raději zadali všechny svátky a pak je všechny najednou zkopírovali na jinou pobočku, použijte kopírovací menu pod kalendářem
Po uložení uvidíte událost v seznamu vpravo od kalendáře
Editing events
Chcete-li upravit události
Klikněte na událost přímo v kalendáři (přehled událostí na právě straně nelze k tomuto účelu použít)
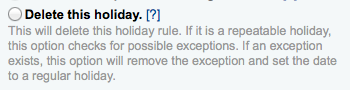
V tomto formuláři můžete upravovat nebo odstraňovat svátky. Pro provedení změn je nutné kliknout na ‚Uložit‘.
Všechny akce vyžadují, abyste klikli na tlačítko „Uložit“ než se změna provede.
Kliknutí na opakovatelné událostí bude nabízet mírně odlišné možnosti
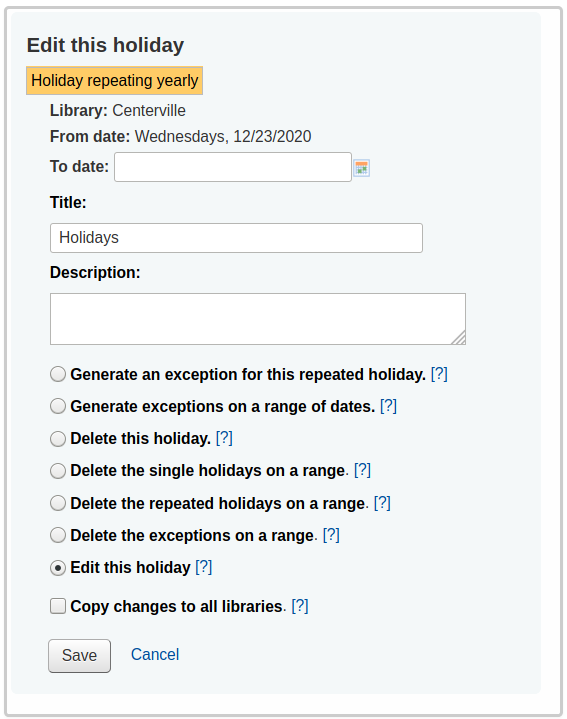
In the form above you will note that there is now an option to ‚Generate an exception for this repeated holiday‘ and ‚Generate exceptions on a range of dates‘ choosing one of these options will allow you to make it so that this date is not closed even though the library is usually closed on this date.
Všechny akce vyžadují, abyste klikli na tlačítko „Uložit“ než se změna provede.
Additional help
Při přidávání nebo editace událostí můžete získat další pomoc kliknutím na otazník vedle různých voleb ve formuláři
Profily CSV
Get there: More > Tools > Additional tools > CSV profiles
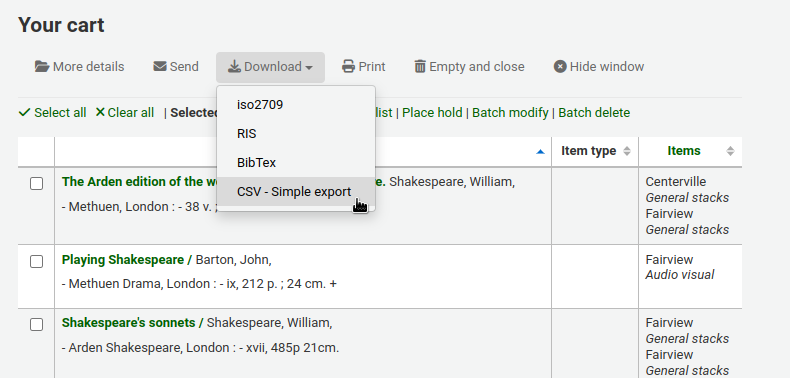
CSV profiles are created to define how you would like your cart or list to export.
CSV profiles are also used in the acquisitions module to export baskets and late orders, in the serials module to export late issues, and in the reports module to export the list of lost items.
Adding a CSV profile
To add a CSV profile,
Click on ‚New CSV profile‘
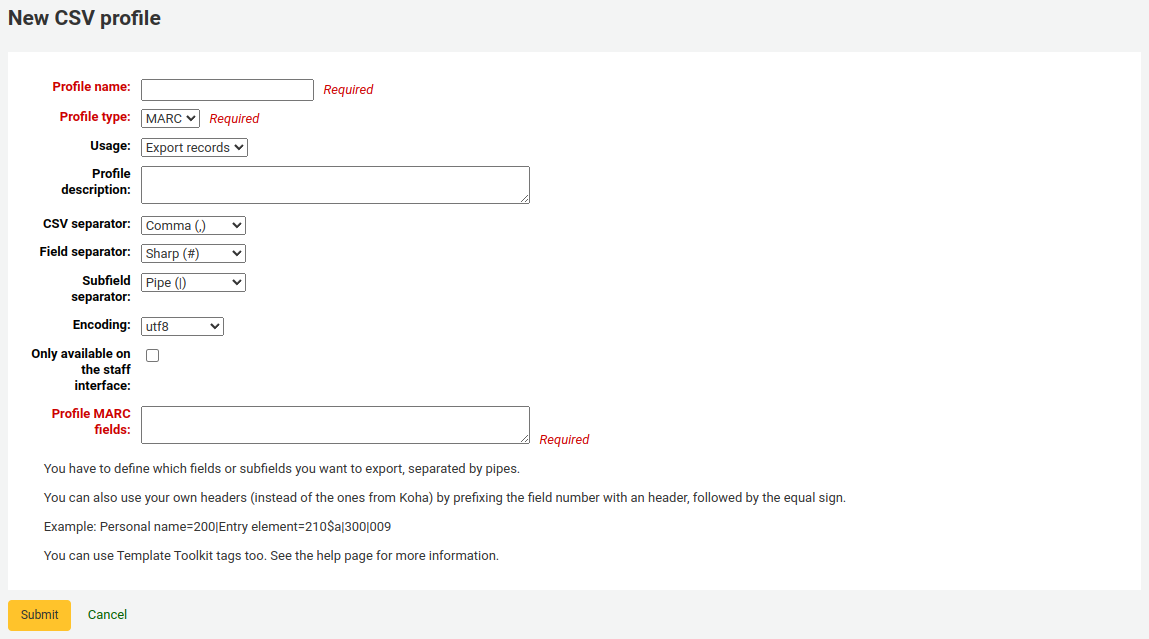
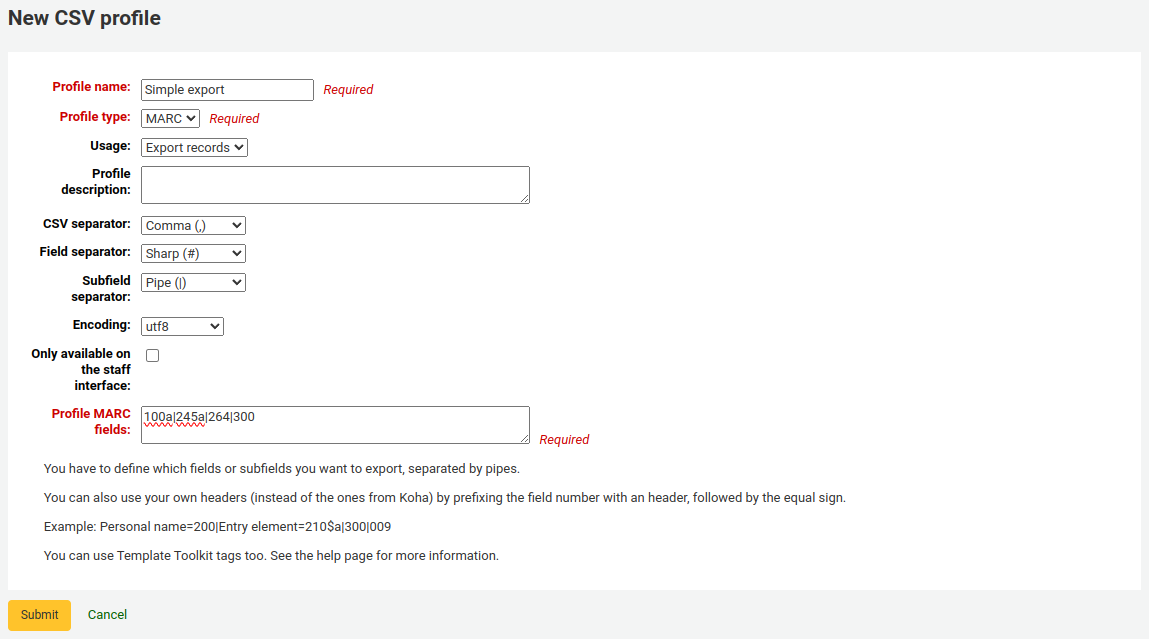
Profile name: enter a unique and meaningful name for the profile. This name will appear on the export pull down list when choosing ‚Download‘ from your cart or list, or when choosing the profile in the acquisitions, serials or reports module to export baskets, late orders, etc.
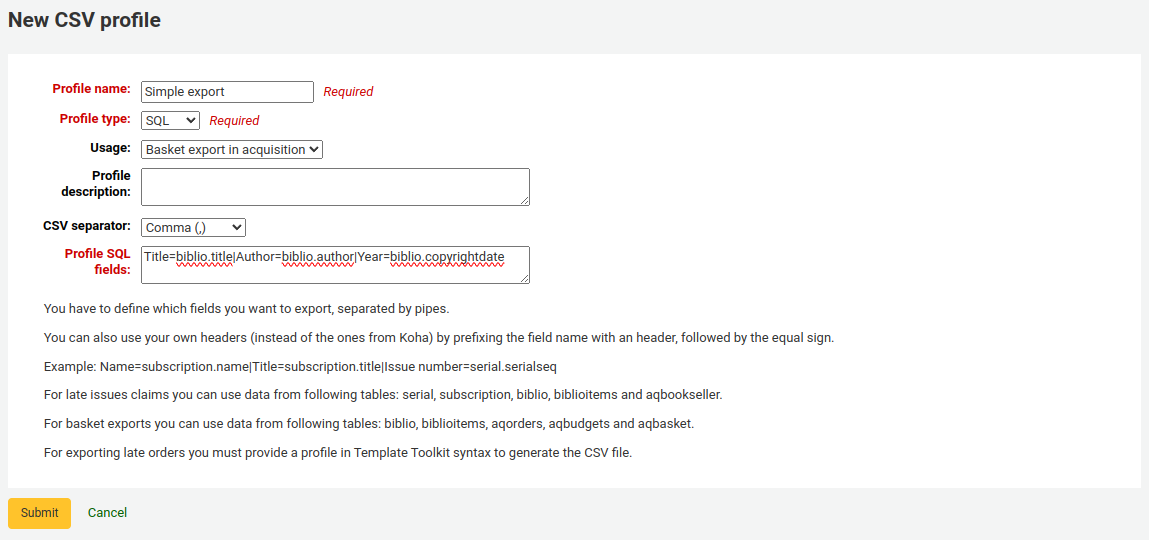
Profile type: this determines what type of fields you plan to use (MARC or SQL) to define your profile; it will also affect the ‚Usage‘ options below.
If you choose MARC, you will need to enter MARC fields.
If you choose SQL, you will need to enter SQL database fields.
Usage: this field is used to indicate what type of report this CSV profile is used with:
Export records (only available with MARC profile type): this is used to export records from your cart or lists.
Late serial issues claims (only available with SQL profile type): this is used to export late issues of serial subscriptions
Export late orders (only available with SQL profile type): this is used to export late orders in the acquisitions module.
Basket export in acquisition (only available with SQL profile type): this is used to download records from acquisitions baskets.
Export lost items in report (only available with SQL profile type): this is used to export a CSV from the lost items report.
Profile description: you can use this field to expand the profile name. The description will also appear in the OPAC when patrons download content, so make sure it’s clear for your patrons as well.
CSV separator: this is the character used to separate values and value groups.
Poznámka
Nejběžnější volbou je tu čárka, protože většina tabulkových aplikací ví, jak otevřít soubory oddělované čárkami.
Field separator (only available with MARC profile type): this is the character used to separate duplicate fields.
For example, you may have multiple 650 fields and this is the character that will appear in between each one in the column.

Subfield separator (only available with MARC profile type): this is the character used to separate duplicate subfields.
For example, you may have multiple $a subfields in a field.
Encoding: use this field to define the character encoding used when saving the file.
Only available on the staff interface (only available with MARC profile type): check this box to limit this CSV profile to the staff interface only, meaning patrons will not be able to use this profile to export their cart or lists from the OPAC.
Profile MARC fields (only available with MARC profile type): enter the fields or subfields to export, separated by pipes.
For example:
200\|210$a\|301
Poznámka
You can use the dollar sign ($) to separate the field number and subfield code, or simply write the field number and subfield code together.
For example:
200\|210$a\|301
Or without the dollar sign:
200\|210a\|301
Tip
You can use your own headers (instead of the ones from Koha) by prefixing the field number with a header, followed by the equal sign.
For example:
Personal name=100\|title=245$a\|300
Poznámka
You can customize further the profile with Template Toolkit syntax.
See Using Template Toolkit in MARC CSV profile below for more information and examples.
Profile SQL fields (only available with SQL profile type): enter the database fields to export, including the table name, separated by pipes.
For example:
biblio.title\|biblio.author
Tip
You can use your own headers (instead of the ones from Koha) by prefixing the field with a header, followed by the equal sign.
For example:
Title=biblio.title\|Author=biblio.author
Důležité
For late issues claims you can use data from following tables:
serial
subscription
biblio
biblioitems
aqbookseller
For basket exports you can use data from following tables:
biblio
biblioitems
aqorders
aqbudgets
aqbasket
Důležité
Exporting late orders requires a profile using the Template Toolkit syntax (the same syntax as the notices and slips).
There is a default profile that comes with Koha that you can use as an example.
Title[% separator %]Author[% separator %]Publication year[% separator %]ISBN[% separator %]Quantity[% separator %]Number of claims
[%~ SET biblio = order.biblio ~%]
"[% biblio.title %]"[% separator ~%]
"[% biblio.author %]"[% separator ~%]
"[% bibio.biblioitem.publicationyear %]"[% separator ~%]
"[% biblio.biblioitem.isbn %]"[% separator ~%]
"[% order.quantity%]"[% separator ~%]
"[% order.claims.count%][% IF order.claims.count %]([% FOR c IN order.claims %][% c.claimed_on | $KohaDates %][% UNLESS loop.last %], [% END %][% END %])[% END %]"
[% END %]
Click ‚Submit‘ to save the new profile.
Using Template Toolkit in MARC CSV profiles
Template Toolkit syntax can be used to build complex CSV files.
For MARC information, you have to use the ‚fields‘ variables to access the field list of the current record.
Start with the column heading, equal sign, and the TT variable. Always separate CSV columns with a pipe (|).
For example, this will return a two-column CSV file, with the first column titled „Title“ and the second column titled „Author“. The first column will contain 245$a and the second column will contain 100$a:
Title=[% fields.245.0.a.0 %]|Author=[% fields.100.0.a.0 %]
Důležité
It’s not possible to display an entire field (e.g. all of 245) you need to list the subfields you want to display.
The ‚0‘ indicate which field or subfield to print if there are more than one. For example, this will fetch the first subfield ‚a‘ of the first ‚245‘ field it finds in the record:
[% fields.245.0.a.0 %]
Single subfield
This is the syntax to get a single subfield from a MARC field.
For example, to get 245$a:
[% fields.245.0.a.0 %]
Multiple subfields in the same column
To concatenate multiple subfields in one column, you’ll need to use
[% FOREACH %]. Remember to always define the end of the FOREACH loop
with [% END %].
For example, to get both 245$a and 245$b in the same column:
[% FOREACH field IN fields.245 %][% field.a.0 %][% field.b.0 %][% END %]
Multiple subfield values
The previous examples only fetched the first occurrence of the subfield. In some
cases, a field might contain more than one subfield of the same code in a field.
In that case, you’ll need to use the join() key. The parentheses contain
the separator character.
For example, to get 260$a, $b, and $c, in a case where there might be more than one of each subfield, they will be separated by a semicolon followed by a space:
[% FOREACH field IN fields.260 %][% field.a.join('; ') %][% field.b.join('; ') %][% field.c.join('; ') %][% END %]
Indicator values
The indicators can be accessible using the indicator key.
For example, to get the value of the second indicator of the 245 field:
[% fields.245.0.indicator.2 %]
Fixed-length data field values
You can use substr() (substring) to get values from specific positions in
fixed-length data fields.
For example, to get the language from the 008 field (positions 35-37):
[% fields.008.0.substr(35,3) %]
Using conditions
Template Toolkit allows to add conditions, with [% IF %],
[% ELSIF %], and [% ELSE %]. Remember to always define the end
of the condition with [% END %].
For example, to get 650$a if indicator 2 for 650 is set:
Subject=[% FOREACH field IN fields.650 %][% IF field.indicator.2 %][% field.a.0 %][% END %][% END %]
Tip
If you find you have extra spaces in your CSV, you can add tildes (~) inside the TT variables to remove extra whitespaces.
For example, the following code might replace the FOREACH variable with a space, making the title column start with a space:
Title=[% FOREACH field IN fields.245 %][% field.a.join(' ') %][% field.b.join(' ') %][% END %]
To correct this, add tildes at the beginning and end of the FOREACH variable:
Title=[%~ FOREACH field IN fields.245 ~%][% field.a.join(' ') %][% field.b.join(' ') %][% END %]
Modifying CSV profiles
To modify a CSV profile, click the ‚Edit‘ button next to the profile.
Alter the necessary fields and click ‚Submit‘.
To delete a profile, click the ‚Delete‘ button next to the profile.
Using CSV profiles
MARC CSV profiles will appear on the export list or cart menu under the ‚Download‘ button in both the staff interface and the OPAC.
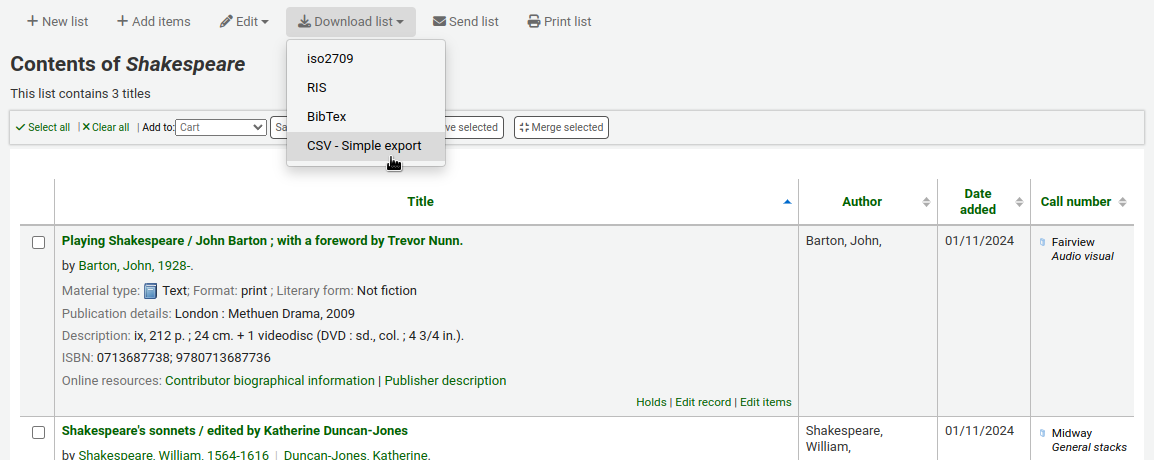
SQL CSV profiles will be available in various Koha modules in the staff interfaces depending on their usage.
‚Late serial issues claims‘ CSV profiles will appear at the bottom of the late issues table in the serials module.
- ‚Export late orders‘ CSV profiles will appear at the bottom of the
late orders table in the acquisitions module.
- ‚Basket export in acquisition‘ CSV profiles will appear in the ‚Download‘
button in acquisitions baskets.
‚Export lost items in report‘ CSV profiles will appear in the lost items report.
Prohlížeč logu
Get there: More > Tools > Additional tools > Log viewer
Actions within the Koha system are tracked in log files. Your system preferences can be changed to prevent the logging of different actions. These logs can be viewed using the log viewer.
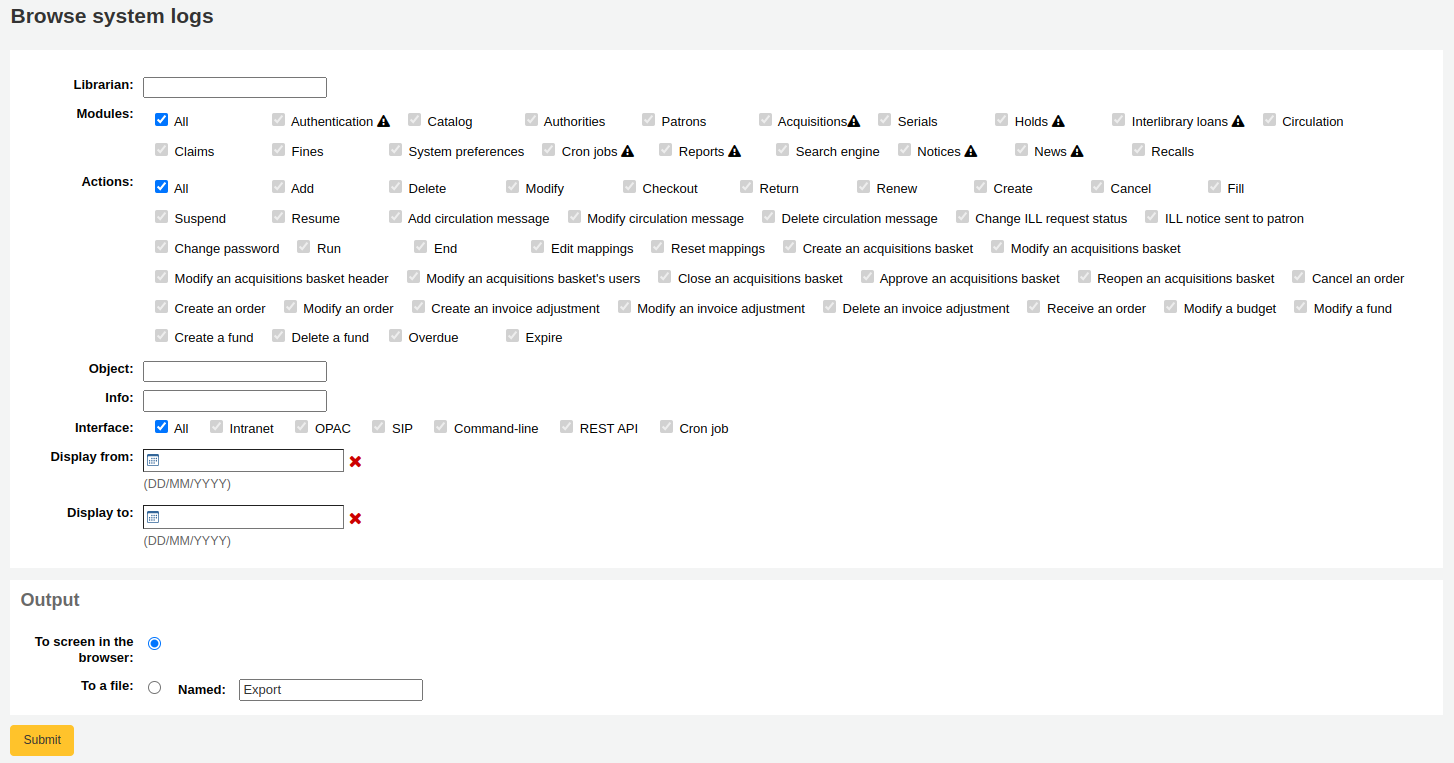
Poznámka
The warning sign next to a module name indicates that the actions in this module are not logged. Change your logs preferences to log actions from a module.
Volba různých kombinací možností menu vytvoří soubor se záznamem pro tento dotaz.
A query for all logs related to the Circulation module produces a result
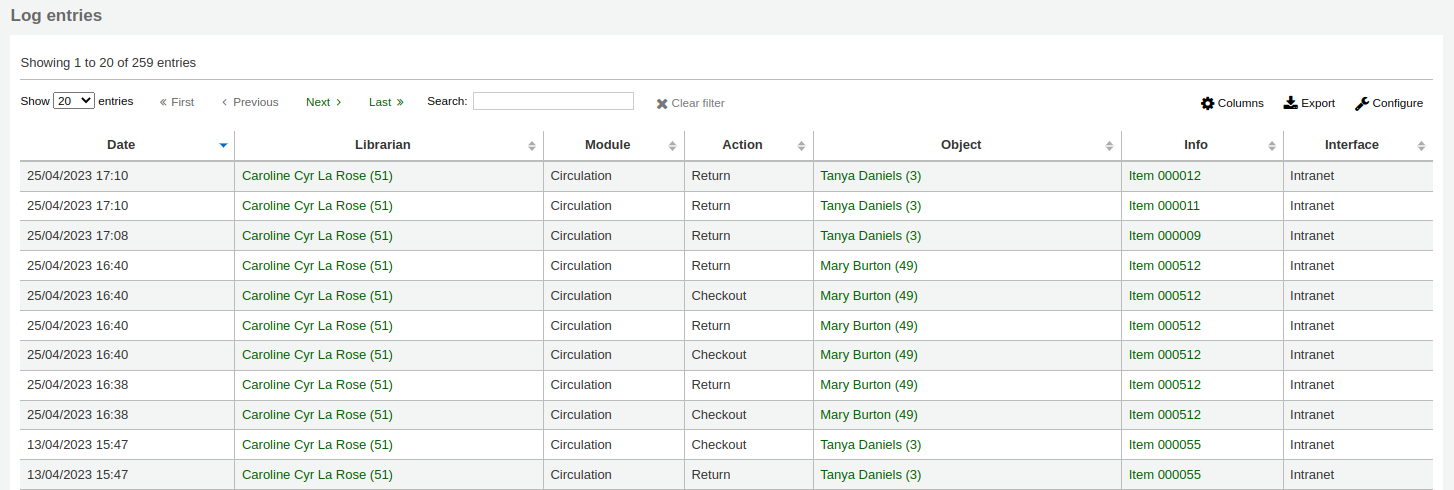
Poznámka
You can customize the columns of this table in the ‚Table settings‘ section of the Administration module (table id: logst).
Novinky
Get there: More > Tools > Additional tools > News
Koha’s news module allows librarians to post news to the OPAC, staff interface and circulation receipts.
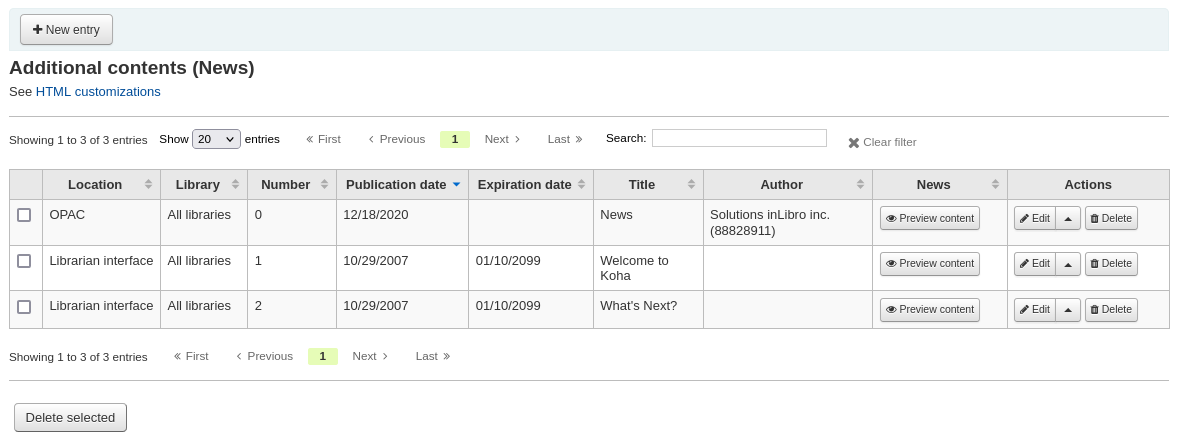
To add news to either the OPAC, the staff interface or a circulation receipt:
Click ‚New entry‘
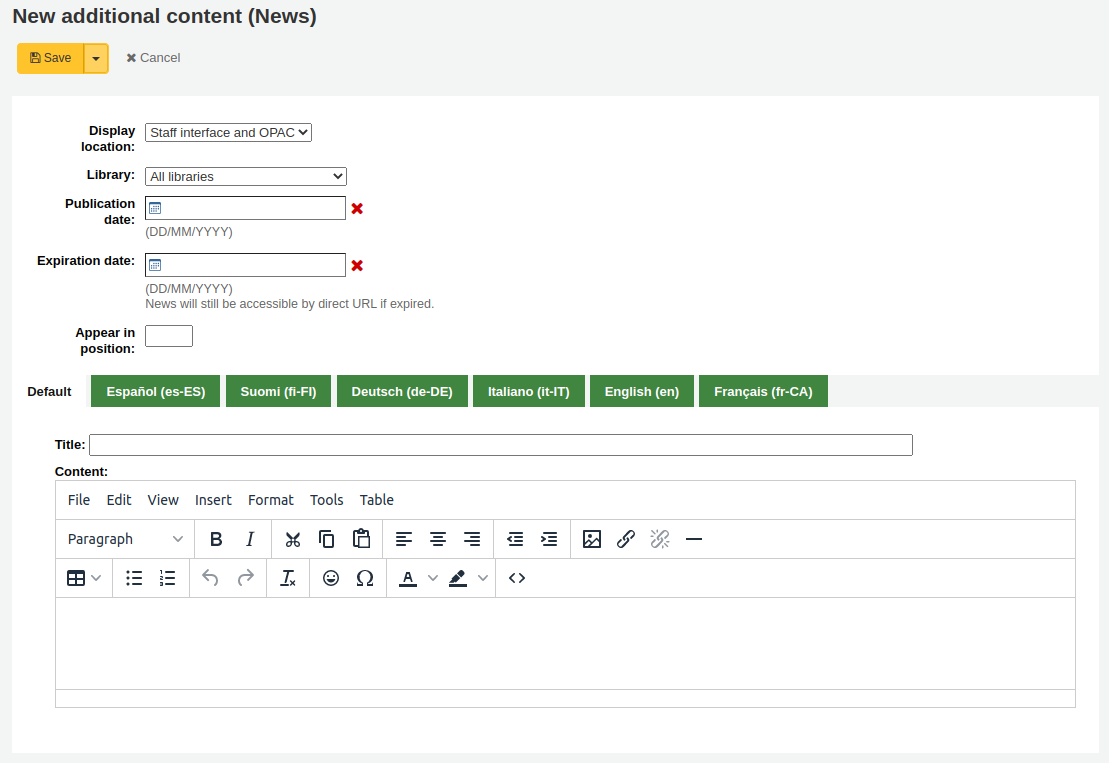
Code: enter a unique code for this news item
Display location: choose where to put the news

Librarian and OPAC interfaces: content will appear on the staff interface main page as well as in the news block on the OPAC
Librarian interface: content will appear on the staff interface main page
OPAC: content will appear in the top middle part of the OPAC page
Below the news in the OPAC there will be an RSS icon allowing you and your users to subscribe to library news

You can allow your users to choose to see branch-specific news with the OpacNewsLibrarySelect system preference
Slip: content will appear on the circulation receipts
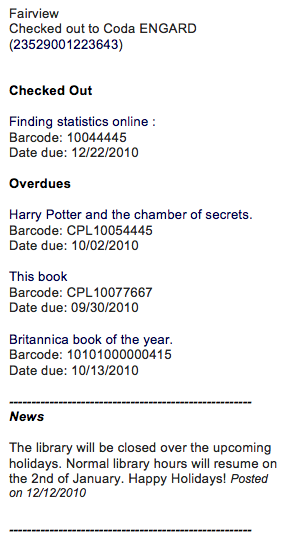
Poznámka
This can be activated or deactivated in the Notices & slips tool
Library: choose the library for which this news item will be shown
Prior to end users logging in to the OPAC only news items listed to appear for ‚All libraries‘ will display unless your system administrator has configured an ‚OPAC_BRANCH_DEFAULT‘ override in virtual host configuration. See installation for details.
Publication date: use the publication date field to control from which date your news item appears
Examples: (these assume today’s date as 7 May 2019)
Publish on current date: set publication date as 7 May 2019
Schedule for publishing in future: set date later than 7 May 2019
Backdate the news item: set date earlier than 7 May 2019
Expiration date: use the expiration date field to automatically stop showing the news item when it is no longer relevant.
If this field is empty the news item will be shown until you remove it manually
Appear in position: you decide in what order your news items appear
If the field is left empty, the news will appear from newest to oldest
In this field, 0 is the top-most position; the larger the number, the lower in the list the news will appear
You can enter the news title and text for each language installed
Poznámka
You can choose which type of editor to use here (either a text editor or a WYSIWYG (what you see is what you get) editor) with the AdditionalContentsEditor system preference.
After filling in all of the fields, click ‚Save‘ at the top of the page.
Alternatively, click the arrow next to the ‚Save‘ button and choose ‚Save and continue editing‘ if you need to stay on this page to continue editing the news item.
Depending on your choice for the NewsAuthorDisplay system preference, you will also see the person who created the news item (this uses the logged in person).
HTML customizations
Get there: More > Tools > Additional tools > HTML customizations
Koha’s HTML customizations tool allows staff to post content to the OPAC.
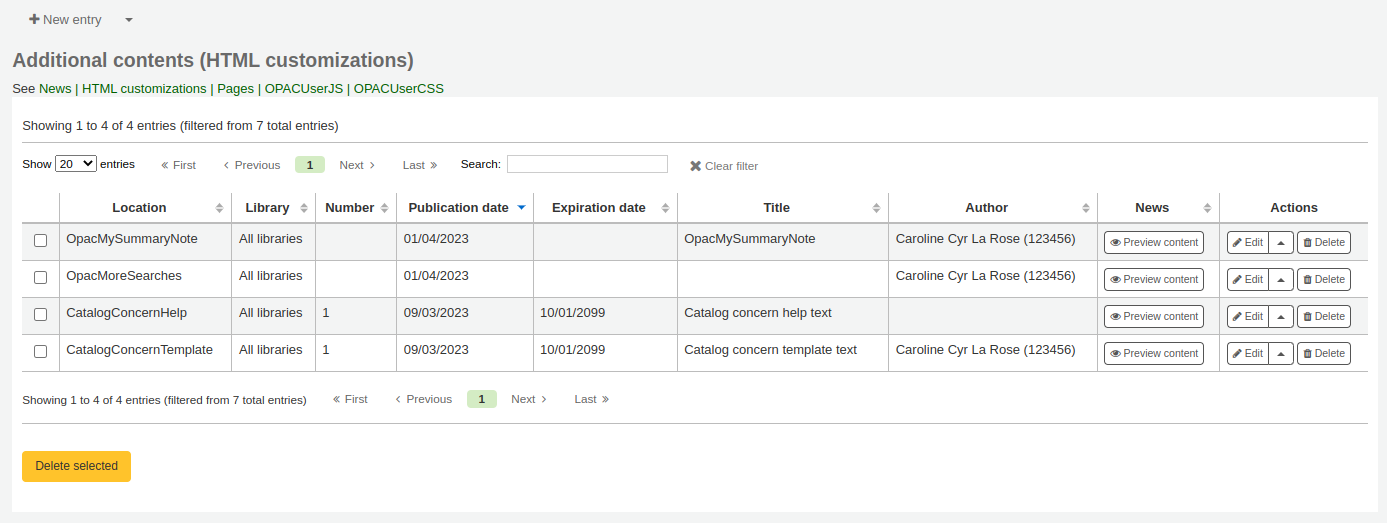
Add a new HTML customization
To add content:
Click ‚New entry‘
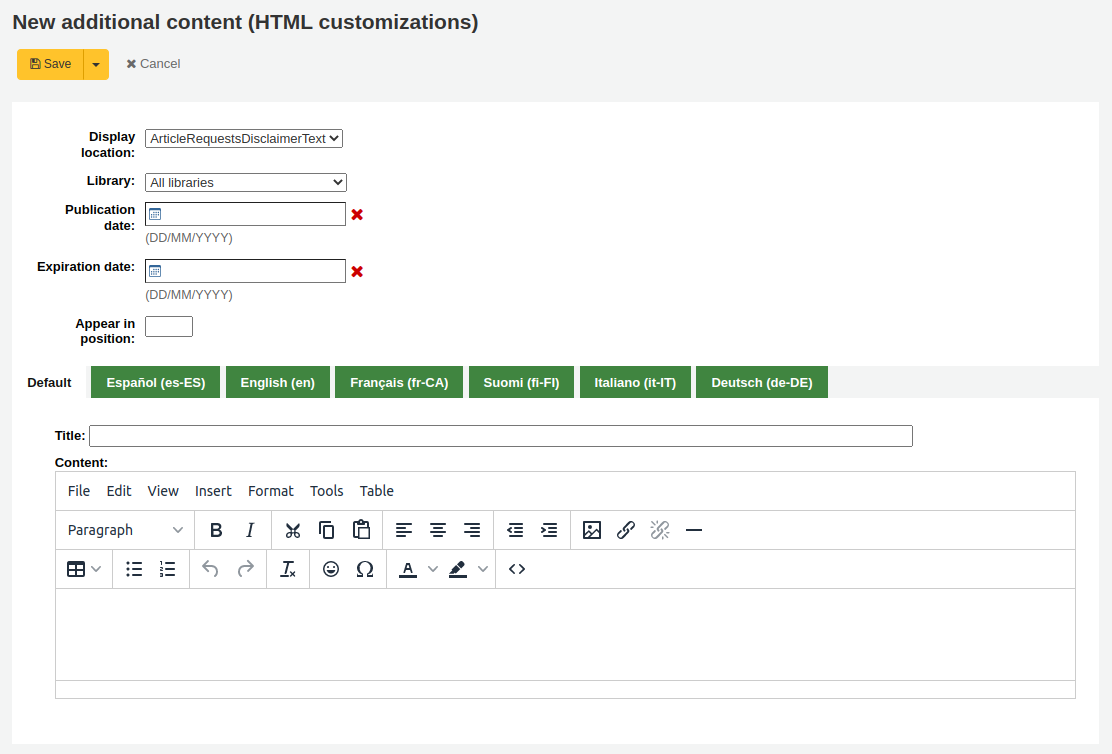
Code: enter a unique code for this additional content item
Display location: choose where to put the content.
See the list of all display locations below for details about each one.
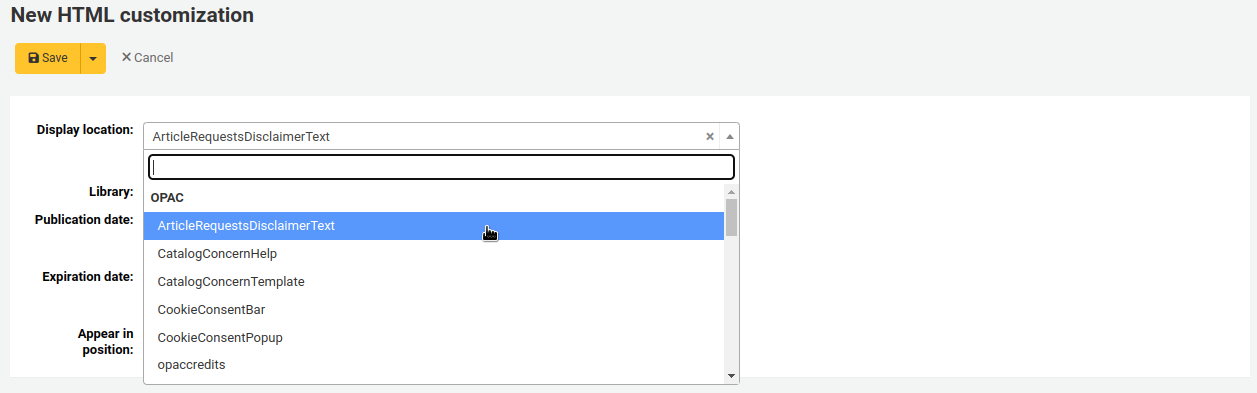
Library: choose the library for which this content will be shown
Prior to end users logging in to the OPAC only content blocks listed to appear for ‚All libraries‘ will display unless your system administrator has configured an ‚OPAC_BRANCH_DEFAULT‘ override in virtual host configuration.
Publication date: use the publication date field to control from which date your content appears
Examples: (these assume today’s date as 7 May 2019)
Publish on current date: set publication date as 7 May 2019
Schedule for publishing in future: set date later than 7 May 2019
Backdate the news item: set date earlier than 7 May 2019
Expiration date: use the expiration date field to automatically stop showing the content when it is no longer relevant.
If this field is empty the content will be shown until you remove it manually
Appear in position: you decide in what order your content appear, when there is more than one in the same display location
If the field is left empty, the content will appear from oldest to newest
In this field, 0 is the top-most position; the larger the number, the lower in the list the content will appear
You can enter the content title and text for each language installed
Poznámka
The title is not shown for additional content. It mostly serves to know at a glance what the content is about when looking at the list of additional content items. If you want a title to appear, you must add it in the text portion.
Poznámka
You can choose which type of editor to use here (either a text editor or a WYSIWYG (what you see is what you get) editor) with the AdditionalContentsEditor system preference.
After filling in all of the fields, click ‚Save‘ at the top of the page.
Alternatively, click the arrow next to the ‚Save‘ button and choose ‚Save and continue editing‘ if you need to stay on this page to continue editing the news item.
Display locations
OPAC locations
The following image shows where each block is displayed on the OPAC’s main page, for the blocks that are displayed on the main page.

Poznámka
The Quote of the day feature is found in the tools module, and the news are managed in the news tool. The rest of the customizable blocks are managed in the HTML customizations tool.
ArticleRequestsDisclaimerText: content will appear and patron will have to accept before they can continue to the article request form; use for any copyright/disclaimer patrons need to be aware of regarding photocopies or scans of articles or chapters
CatalogConcernHelp: content will appear at the bottom of catalog concern form when reporting a concern in the OPAC, or reporting a concern in the staff interface. The default text is „Please describe your concern clearly and the library will try to deal with it as quickly as possible“.
CatalogConcernTemplate: content will appear in the main text area of the catalog concern form when reporting a concern in the OPAC, or reporting a concern in the staff interface. The default text is
**Describe the concern**

A clear and concise description of what the concern is.

**To Reproduce**

Steps to reproduce the behavior:
1. Go to '...'
2. Click on '....'
3. Scroll down to '....'
4. See error

**Expected behavior**

A clear and concise description of what you expected to happen.
Tip
Since this will be in a text field, there is no way to add formatting. Make sure to use the text editor, not the WYSIWYG editor, in order to have line breaks in your text.
CookieConsentBar: content will appear on the banner displayed when the CookieConsent system preference is enabled.
Version
The CookieConsentBar display location was added in version 23.11 of Koha.
Poznámka
The CookieConsentBar content will appear on the cookie banner in both the OPAC and the staff interface.
CookieConsentPopup: content will be used as the main body for the Cookies policy that pops up when clicking ‚More information‘ on the cookie banner.
Choices for non-essential cookies are added to the Cookies policy via the CookieConsentedJS system preference.
Version
The CookieConsentPopup display location was added in version 23.11 of Koha.
Poznámka
The CookieConsentPopup content is used in both the OPAC and the staff interface.
opaccredits: content will appear at the bottom of the page
OpacCustomSearch: content will replace the simple search bar at the top of the page
opacheader: content will appear at the top of the OPAC page
OpacLibraryInfo: content will appear in the ‚Libraries‘ page in the OPAC, as well as in the holdings table in the OPAC
OpacLoginInstructions: content will appear under the login box on the OPAC’s main page
OpacMaintenanceNotice: content will replace the default maintenance message when the OpacMaintenance system preference is set to ‚Show‘.
Version
Prior to Koha version 23.11, this was a system preference. See OpacMaintenanceNotice for more information.
OpacMainUserBlock: content will appear in the middle of the OPAC’s main page
OpacMoreSearches: content will appear under the search box at the top of the OPAC. By default (and depending on system preferences) there is a link for Advanced search, Course reserves, Authority search, and Tag cloud. Any new searches will be added to the right of the already present links.
OpacMySummaryNote: content will appear above the patron’s summary and below the welcome message when the patron logs in to the OPAC and views their ‚your summary‘ tab.

OpacNav: content will appear on the left hand column of the main page and patron account on the OPAC. When on the patron account page, the content in OpacNav will appear before the account tabs (summary, charges, personal details, etc.)
OpacNavBottom: content will appear on the left hand column of the main page and patron account on the OPAC. When on the patron account page, the content in OpacNavBottom will appear after the account tabs (summary, charges, personal details, etc.). On the main page, the content in OpacNavBottom appears right below the content in OpacNav.
OpacNavRight: content will appear on the right side of the OPAC page
OPACResultsSidebar: content will appear on the search results page below the list of facets on the left side of the screen.
Version
Prior to Koha version 23.11, this was a system preference. See OPACResultsSidebar for more information.
OpacSuggestionInstructions: content will replace the text at the top of the purchase suggestion form on the OPAC
OpacSuppressionMessage: content will appear on the OPAC when a record is blocked. (See the OpacSuppression system preference for more information.)
Version
Prior to Koha version 23.11, this was a system preference. See OpacSuppressionMessage for more information.
PatronSelfRegistrationAdditionalInstructions: content will be displayed after the patron successfully creates a library account via the OPAC.
Version
Prior to Koha version 23.11, this was a system preference. See PatronSelfRegistrationAdditionalInstructions for more information.
Poznámka
Note that this only appears after the patron has registered.
SCOMainUserBlock: content will appear in the center of the main page of the self check-out screen.
Version
Prior to Koha version 23.11, this was a system preference. See SCOMainUserBlock for more information.
SelfCheckHelpMessage: content will appear above the existing help message when clicking the ‚Help‘ link in the top right of the self check-out interface.
Version
Prior to Koha version 23.11, this was a system preference. See SelfCheckHelpMessage for more information.
SelfCheckInMainUserBlock: content will appear in the center of the main page of the self check-in screen.
Version
Prior to Koha version 23.11, this was a system preference. See SelfCheckInMainUserBlock for more information.
Staff interface locations
StaffAcquisitionsHome: content will appear at the bottom of the Acquisitions module main page.
StaffAuthoritiesHome: content will appear at the bottom of the Authorities main page.
StaffCataloguingHome: content will appear at the bottom of the Cataloguing module main page.
StaffListsHome: content will appear at the bottom of the Lists main page.
StaffPatronsHome: content will appear at the bottom of the Patrons module main page.
StaffPOSHome: content will appear at the bottom of the Point of sale main page.
StaffSerialsHome: content will appear at the bottom of the Serials module main page.
Pages
Get there: More > Tools > Additional tools > Pages
The pages tool is a tool to create custom additional pages in the OPAC and in the staff interface. It is based on the same tool as the news and the HTML customizations, therefore it works in the same way.
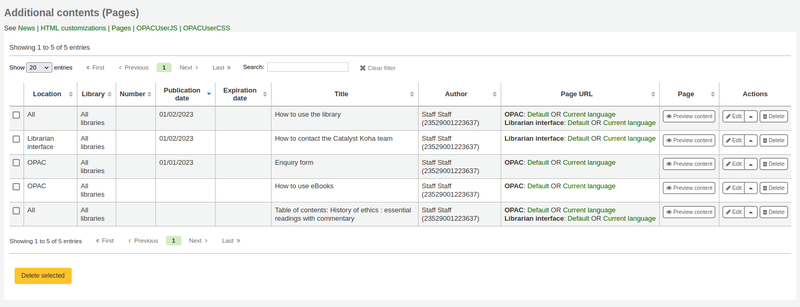
To add a new page:
Click ‚New entry‘
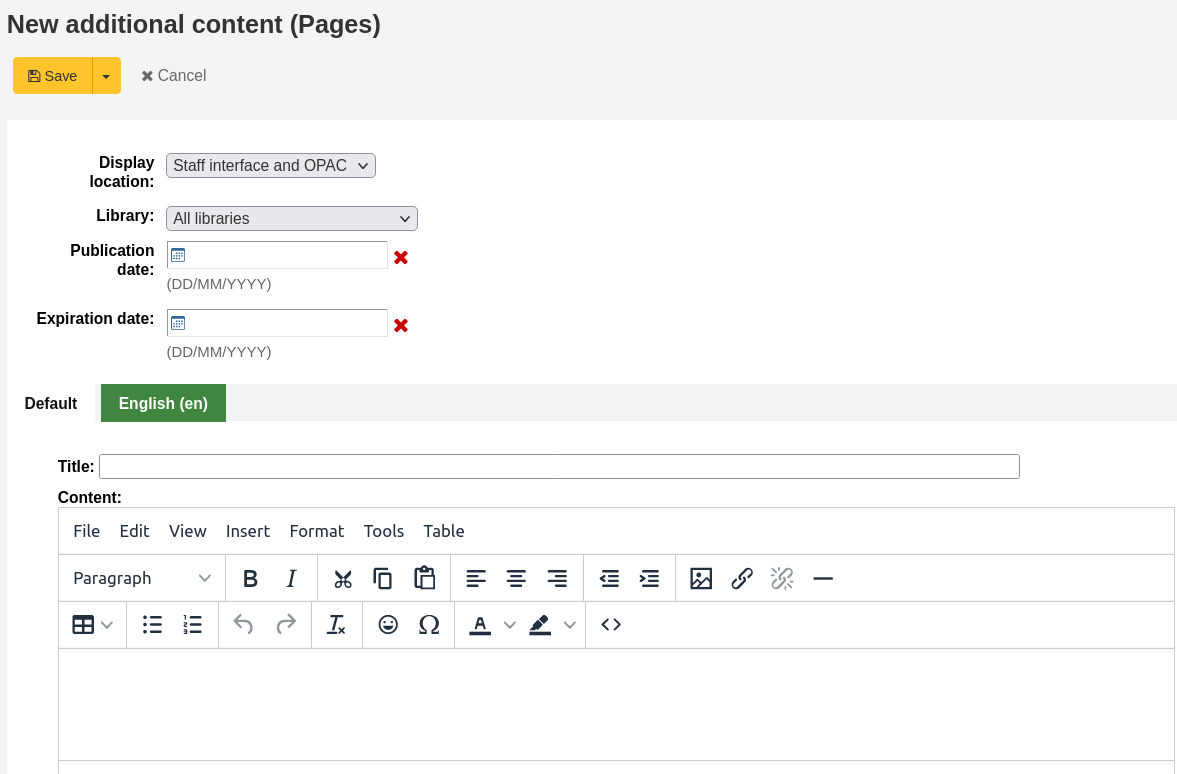
Display location: choose the interface from which this page should be accessed
Librarian and OPAC interfaces: two links will be created, one for the OPAC and one for the staff interface
Librarian interface: a link for the staff interface will be created
OPAC: a link for the OPAC will be created
Library: choose the library for which this page will be available
If an OPAC page is limited to a library, only logged in users whose home library matches the page library will be able to access the page.
Pages limited to a library will not be accessible to OPAC users who are not logged in, unless your system administrator has configured an ‚OPAC_BRANCH_DEFAULT‘ override in virtual host configuration.
If a staff interface page is limited to a library, only staff logged into that library will be able to access the page.
Publication date: use the publication date field to control from which date your page is accessible, if it should only be accessed at a future date.
Expiration date: use the expiration date field to remove the page after a specific date.
If this field is empty the page will be available until you remove it manually
You can enter the page title and content for each language installed
Poznámka
You can choose which type of editor to use here (either a text editor or a WYSIWYG (what you see is what you get) editor) with the AdditionalContentsEditor system preference.
After filling in all of the fields, click ‚Save‘ at the top of the page.
Alternatively, click the arrow next to the ‚Save‘ button and choose ‚Save and continue editing‘ if you need to stay on this page to continue editing the news item.
In the table, a link will be generated for the OPAC or the staff interface or both. Use this link in HTML customizations, news or system preferences such as IntranetNav or IntranetmainUserBlock so that the patrons or staff members can access the new page.
Poznámka
To link to a specific page, use the code in the URL with the
code=parameter. For example:OPACBASEURL/cgi-bin/koha/opac-page.pl?code=staff_and_opac_42 STAFFCLIENTBASEURL/cgi-bin/koha/tools/page.pl?code=staff_and_opac_42
In multi-language installations, use the
language=parameter followed by the language code to link to the page in a specific language. For example:OPACBASEURL/cgi-bin/koha/opac-page.pl?code=staff_and_opac_42&language=fr-CA STAFFCLIENTBASEURL/cgi-bin/koha/tools/page.pl?code=staff_and_opac_42&language=fr-CA
To use a custom page
Once the page has been developed and saved, you will see a summary table of all custom pages. This table also displays the generated links to access these custom pages. The links will be available in both the default language, and the installed language currently in use by the logged in staff member.
There is a button to preview the created page. This is helpful to check how the page looks and functions before it is deployed.
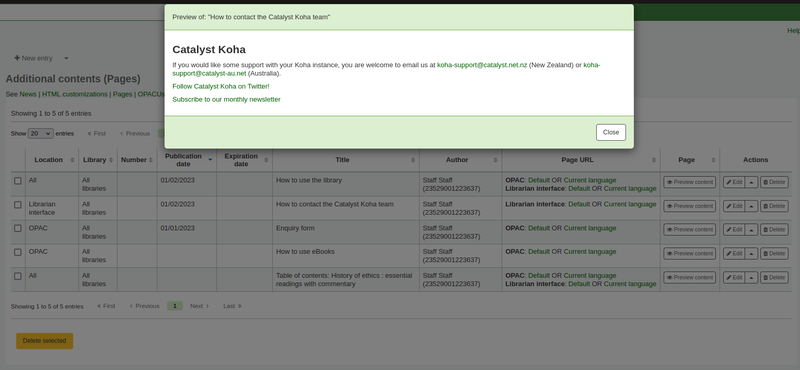
Now the page has been created, there are a number of ways to make the page accessible to your patrons in the Koha OPAC.
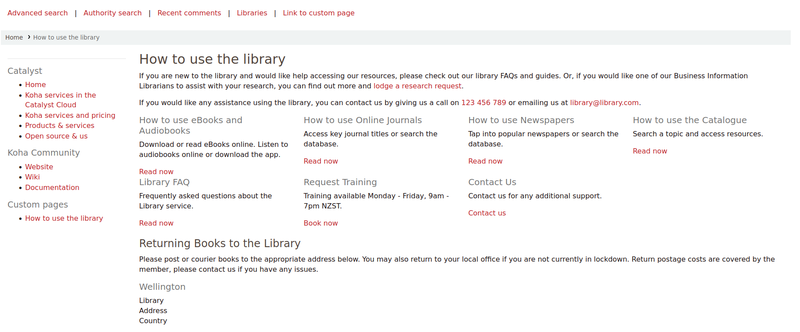
One option is to use an HTML customisation to add the link to the page to a section of the OPAC. The page can be added as a navigation link (in OpacNav, OpacNavBottom, or OpacNavRight). Depending on the page, it may be more suitable in the header (opacheader), footer (opaccredits), or main section of the homepage (OpacMainUserBlock).
HTML customizations are only displayed on the OPAC, so News items would be the appropriate tool to add the link to the main landing page of the staff interface.
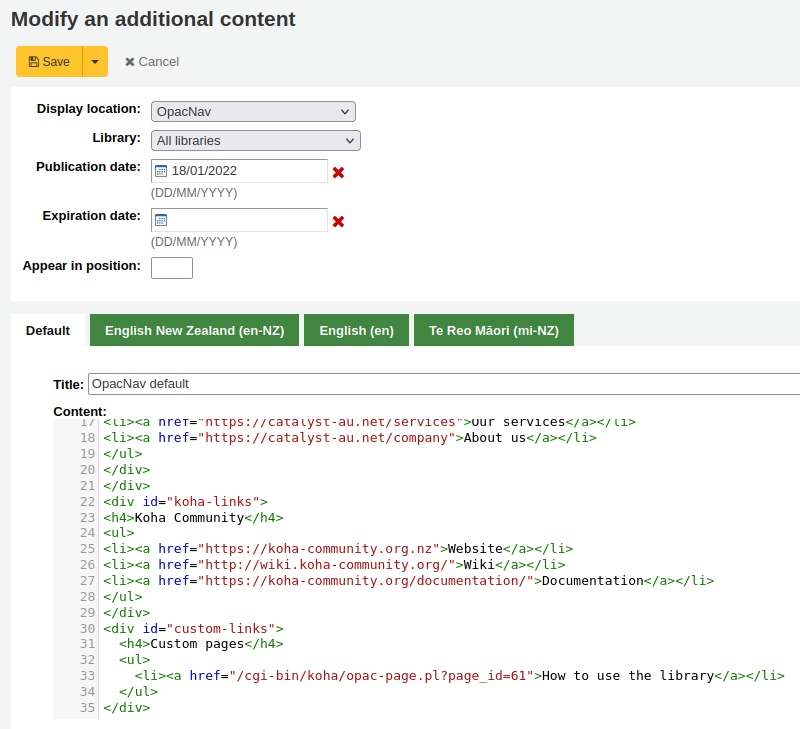
The benefit of putting the page link in an HTML customization or News item is that you can use the WYSIWYG editor, instead of writing code. However, there is always the option to write the content in the HTML text editor too, if you prefer.
Those more proficient in writing code could use jQuery (Javascript) to insert their page link anywhere in the OPAC or staff interface.
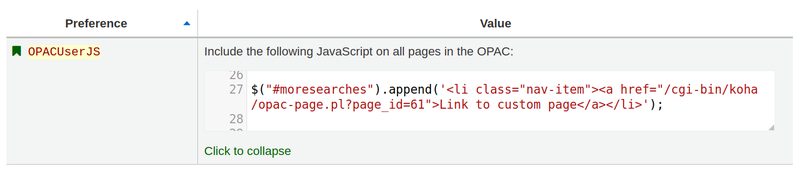
Using jQuery, the pages could be added to either interface as simple text links, or as more advanced button links or image links. Add code to the OPACUserJS system preference to apply jQuery to the OPAC, or to the IntranetUserJS system preference to apply jQuery to the staff interface.
Clever ways to use custom pages:
There are many interesting ways to use custom pages in a Koha library. We’ve heard discussion of pages being used for tables of contents, frequently asked questions pages for the library, and enquiry forms.

Another way to make custom Koha page content accessible for users, would be to catalogue those pages so they pop in in Koha search results, for example library tutorials that patrons may be looking for.
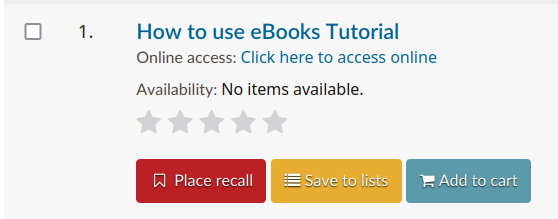
Once the page has been created, it can be catalogued in the URI field of a record (856$u). Alternatively, it could be catalogued in the URI field of an item attached to a record (952$u). Both of these fields get converted into hyperlinks by Koha. If catalogued in a record or item, it would then be indexed and become searchable.
Once catalogued, these pages could be used in other ways that are typically reserved for books and other records. The records representing pages can be added to lists, or stored in virtual collections or locations that make them easier to find in the catalogue. They could even be captured and displayed in carousels!
Plánovač úloh
Get there: More > Tools > Additional tools > Task scheduler
Plánovač úloh je způsob, jak naplánovat spouštění výstupu na určitou dobu podle potřeby.
To schedule a task, visit the task scheduler and fill in the form
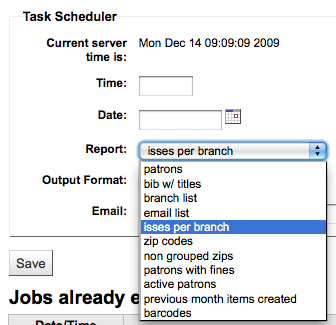
Aktuální čas serveru ukazuje čas na Vašem serveru (naplánujte si generování výstupu na základě tohoto času, ne Vašeho lokálního času)
Čas by měl být zadán ve formátu hh:mm (2 číslice hodiny, 2 číslice minuty)
Datum by mělo být přidáno pomocí vyskakovacího kalendáře
Z nabídky ‚Výstup‘ zvolte výstup, který chcete naplánovat
Vyberte, zda přijmout text, nebo odkaz k výsledkům
Do pole E-mail zadejte e-mailovou adresu osoby, které chcete zaslat výstup
Pod formulářem plánovače úloh se nachází seznam naplánovaných výstupů

You can also schedule reports directly from the list of saved reports by clicking the small arrow next to the ‚Run‘ button and selecting the ‚Schedule‘ option.
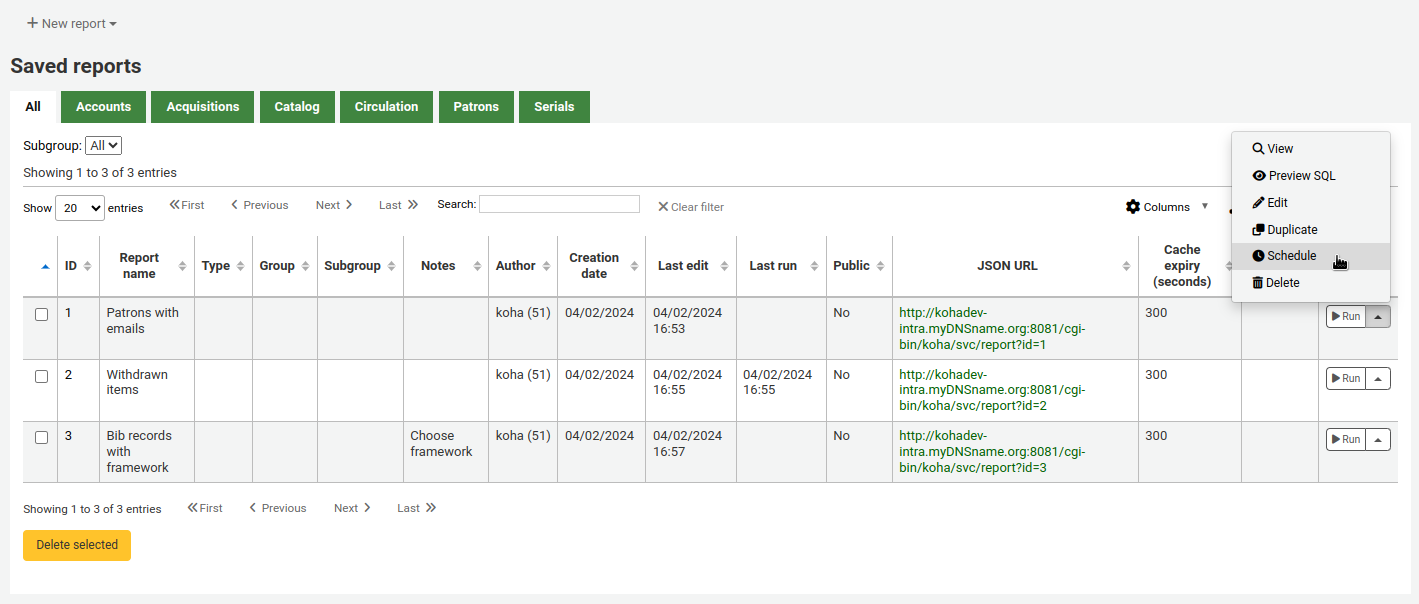
Řešení problémů
Plánovač úloh nebude fungovat pokud uživatel spouštějící webový serveru nemá oprávnění k jeho použití. Chcete-li zjistit, zda má uživatel nutné oprávnění nutné, zkontrolujte /etc/at.allow abyste viděli, jací uživatelé tam jsou. Pokud nemáte tento soubor, zkontrolujte soubor etc/at.deny. Pokud at.deny existuje, ale je prázdný, pak může každý uživatel plánovač používat. Promluvte si se svým správcem systému o přidání uživatele na správné místo, aby plánovač úloh pracoval.
Quote editor
Get there: More > Tools > Additional Tools > Quote editor
This tool will allow you to add and edit quotes to show on the OPAC or the staff interface.
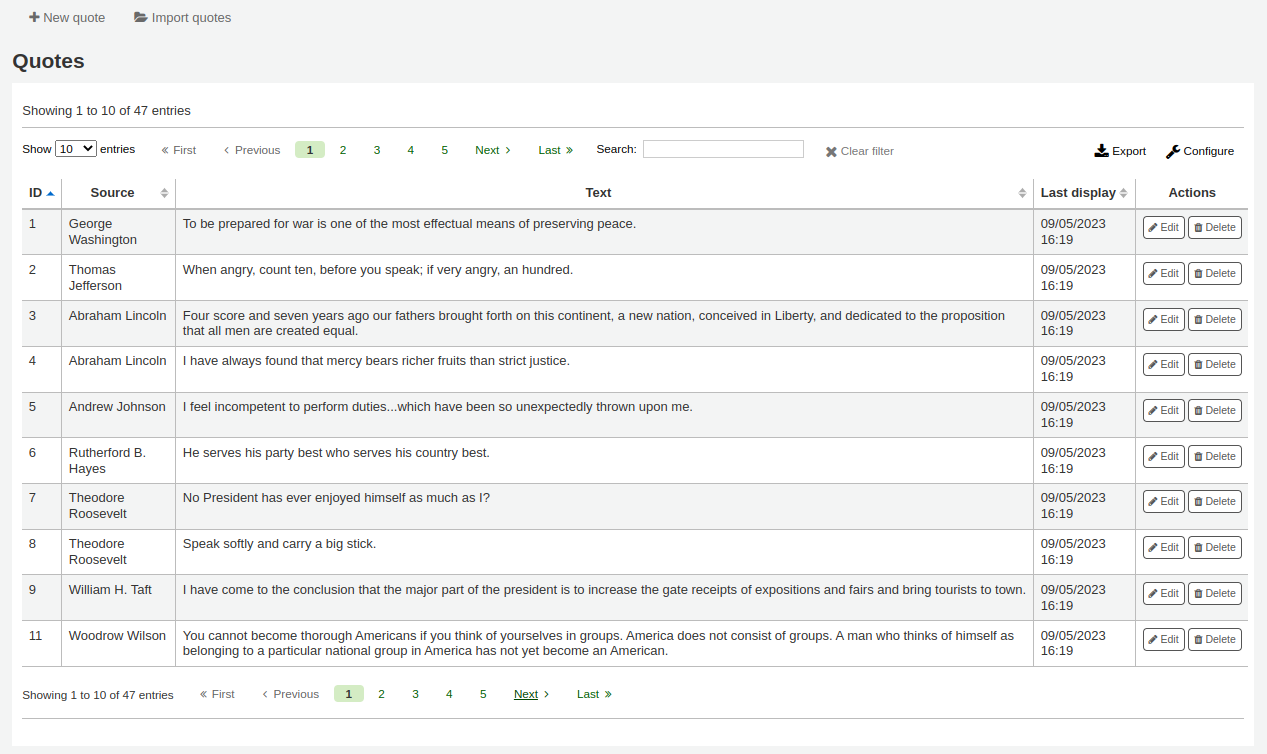
To turn this feature on set the QuoteOfTheDay system preference to either ‚OPAC‘, ‚staff interface‘, or both, and add at least one quote using this tool.
In the OPAC, the quotes will appear above the ‚OpacMainUserBlock‘ news block.
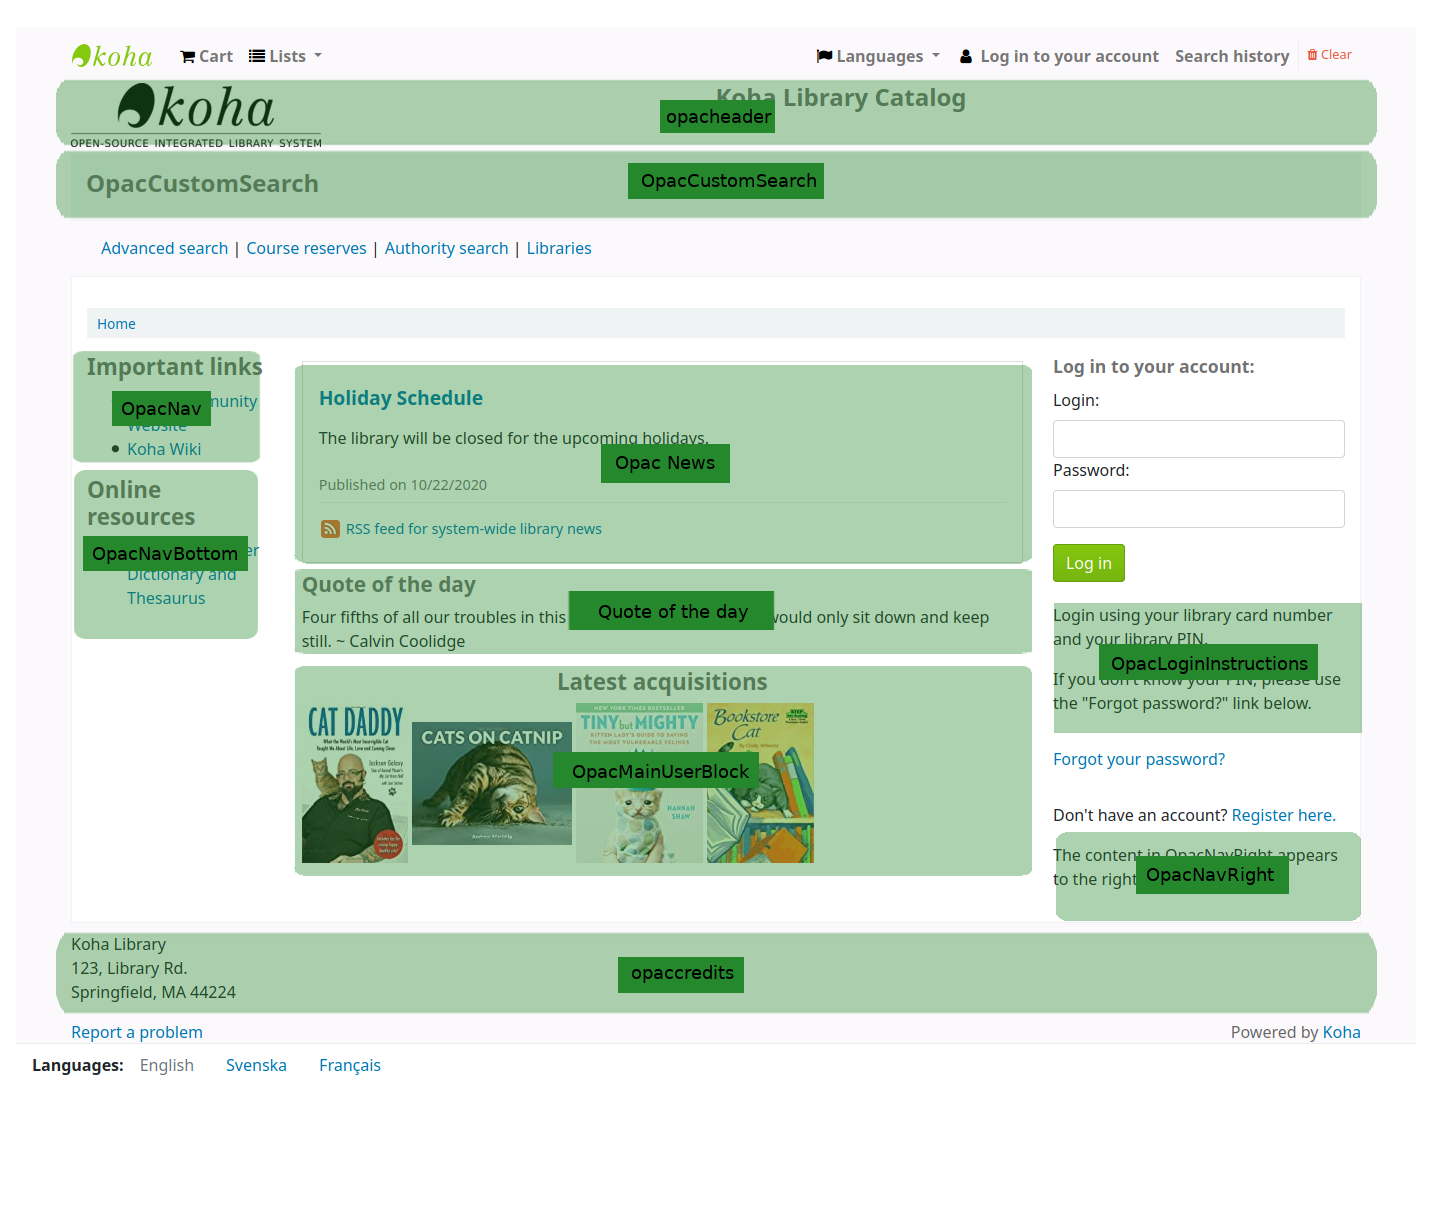
In the staff interface, the quotes will appear under the news on the left side.
Adding a quote
Chcete-li přidat citát
Click the ‚New quote‘ button in the toolbar at the top of the page.
Fill out the form.

Source: enter the source of the quote, e.g. the name of the person who said the quote
Text: enter the text of the quote
Varování
Jak pole ‚Zdroj‘, tak pole ‚Text“ musejí být vyplněna, aby byl citát uložen.
Click ‚Submit‘ to save the new quote.
The new quote should now be visible in the list.
Importing quotes
You can import a batch of quotes as a CSV file. Your file must contain two columns in the form: „source“,“text“ with no header row.
Poznámka
Pokud bude soubor větší než 512 KB, budete vyzvání k potvrzení.
To start the import process click the ‚Import quotes‘ button at the top of the screen.
Jakmile jste na obrazovce importu citátů, můžete procházet váš počítač až k souboru, který chcete importovat
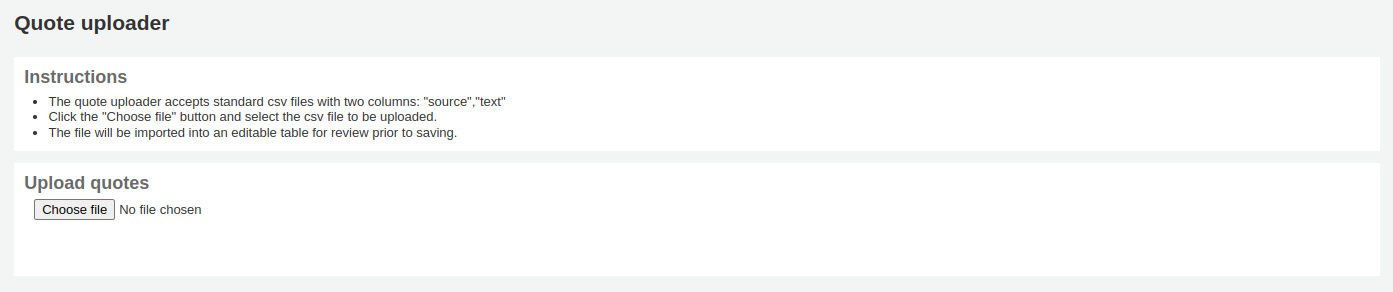
Po vybrání souboru CSV klikněte na tlačítko „Otevřít“ a soubor bude nahrán do dočasné tabulky pro úpravy.
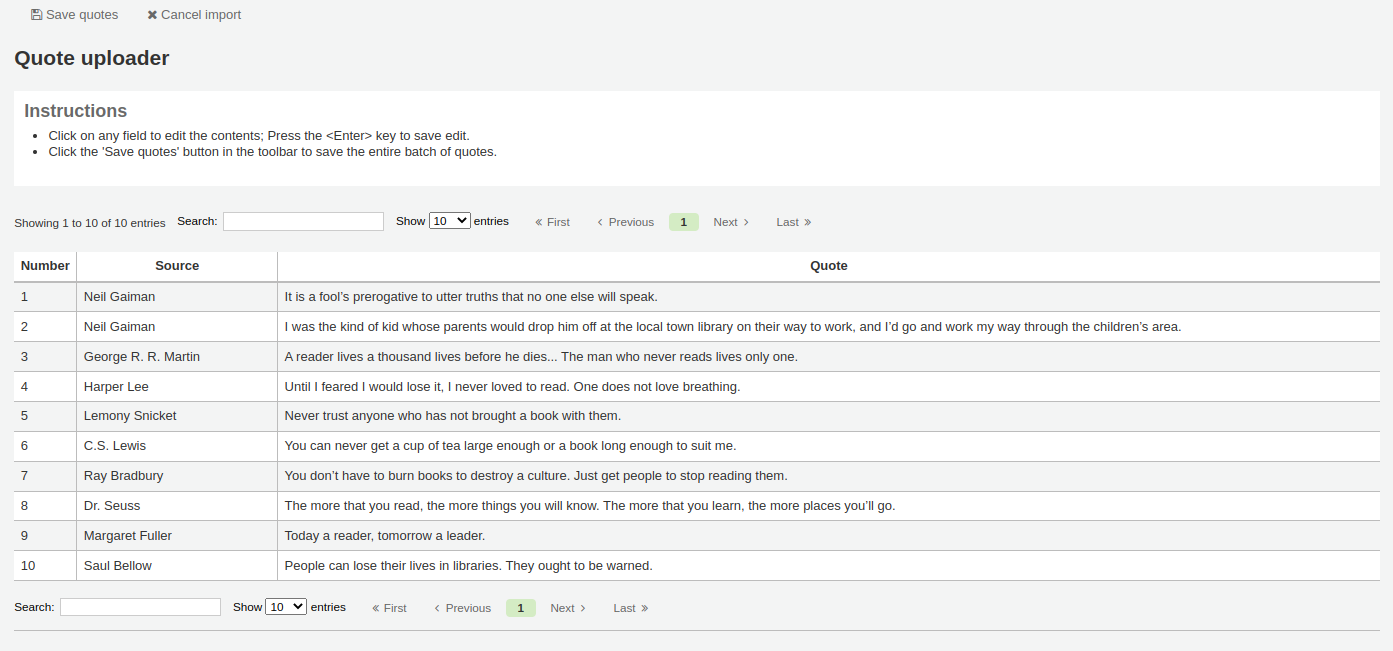
From the listing you can edit either the ‚Source‘ or ‚Text‘ fields by clicking on the desired field. When you are finished editing a field, press the <Enter> key on your keyboard to save the changes.

Jakmile jste spokojeni s citáty, klikněte na tlačítko „Uložit citáty“ na panelu nástrojů nahoře a citáty budou uloženy.
Editing a quote
To edit a quote, click on the ‚Edit‘ button to the right of the quote.
Edit either the ‚Source‘ or ‚Text‘ fields.
Click ‚Submit‘ to save the quote.
Deleting a quote
To delete a quote, click on the ‚Delete‘ button to the right of the quote.
Confirm the deletion by clicking ‚Delete‘.
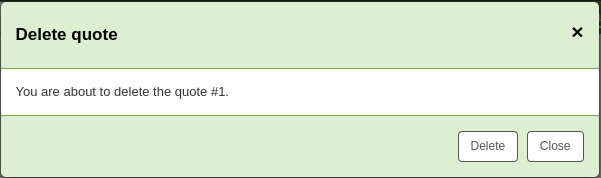
Tool plugins
This tool is used to view, manage and configure plugins used as tools.
This section will only be visible once you have uploaded tool-type plugins in the plugin administration page.
Get there: More > Tools > Additional Tools > Tool plugins
From this page, you will see only tool-type plugins.
See the managing plugins section of this manual to learn how to manage your tool-type plugins.
Načíst
Get there: More > Tools > Additional Tools > Upload
This tool will allow you to upload files to your Koha system for selection from the Cataloging form.
Upload files
When you first visit the Upload tool you might see a warning about missing a category.
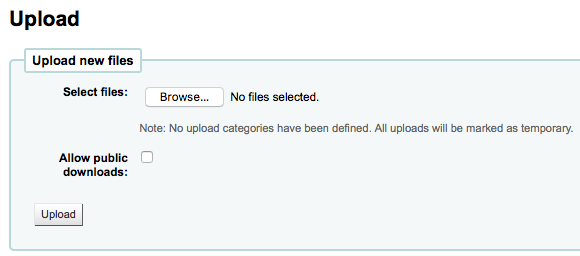
Categories are defined in the authorized value in the UPLOAD category. If you do not have upload categories then your files will be temporary and will be deleted the next time the server is rebooted. Once you have a value in the UPLOAD authorized value category you will see a Category pull down below the ‚Browse‘ button.
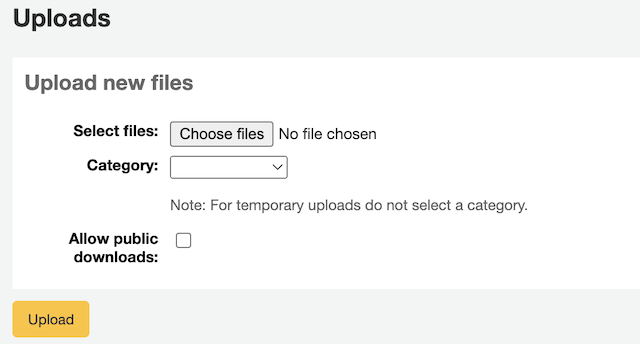
Browse your computer a file, choose a category and decide if the public will be able to download this file via the OPAC. Once your file is uploaded you will be presented with a confirmation.

Search files
All uploaded files are searchable from below the upload form. Using the form you can search any part of the filename and/or the Hashvalue.Search uploaded files
You will be presented with the results of your search.
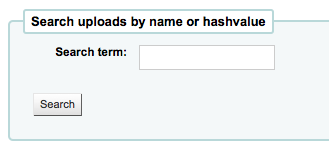
Přístup k souborům
Get there: More > Tools > Additional Tools > Access files
This option allows access to files stored on the server from the staff interface. The directories where the files are stored need to be defined in the koha-conf.xml file. In order to be able to access the tool, a staff patron requires the superlibrarian or access_files patron permission
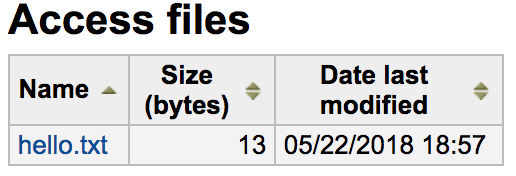
OPAC problem reports
Get there: More > Tools > Additional tools > OPAC problem reports
This tool is used to manage the problem reports sent by patrons via the OPAC.
Poznámka
This tool only appears if the OPACReportProblem system preference is enabled.
From this tool, you will see all the problems that were reported by patrons on the OPAC.
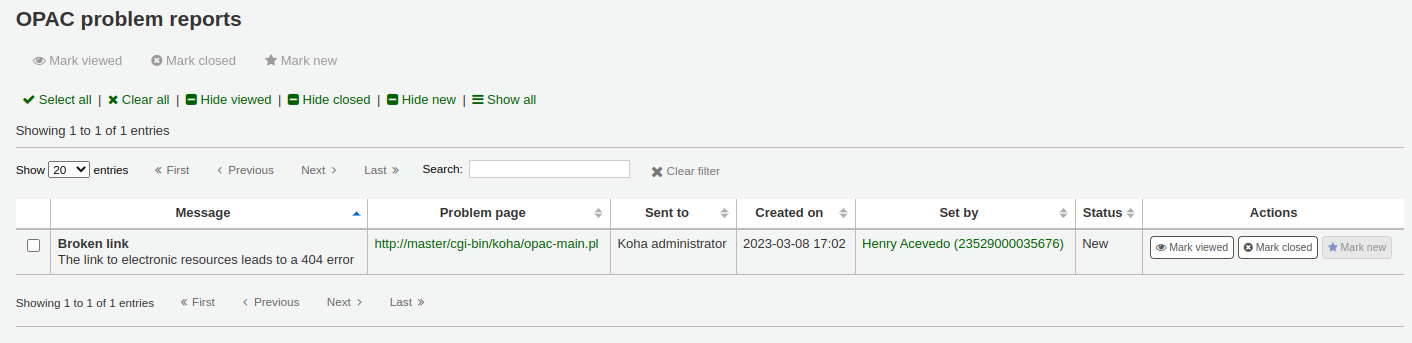
From the ‚Actions‘ column, you can
‚Mark viewed‘: mark this problem report as viewed, this will change the status of the problem report to ‚Viewed‘
‚Mark closed‘: close this problem report, this will change the status of the problem report to ‚Closed‘
‚Mark new‘: mark this problem as new (i.e. not viewed), this will revert the status back to ‚New‘.
You can also batch change statuses by checking the boxes next to the problem reports you want to change and use the button at the top of the page.
Cash management
Koha includes a number of options for dealing with monetary transactions and actions to allow for fine grained tracking of these processes for audit and analytic processes.
Cash registers
Cash registers can be used to track transactions to a specific location in your library. This can be especially helpful for detailing where cash has been taken for payments and then when this cash is subsequently removed and taken to the bank.
Setup
To enable the use of cash registers, you must turn on the UseCashRegisters system preference.
You can then configure cash registers for your library from the cash registers page in the administration module.
Cashup
The action of ‚cashing up‘ can be recorded against a cash register from both the library details and register details pages.
Clicking the Record cashup button will simply record the date and time that the action has taken place and is intended to allow the regular record of when money is collected from the cash register and taken to the bank.
Both of the above pages utilize the cashup record to limit the display of transactions/summaries to only pertinent information, since the last cashup.
Once a cashup has taken place, a summary of the transactions taken during that cashup period is available for display, and printing, via the Summary link found next to the last cashup date on the register details page.
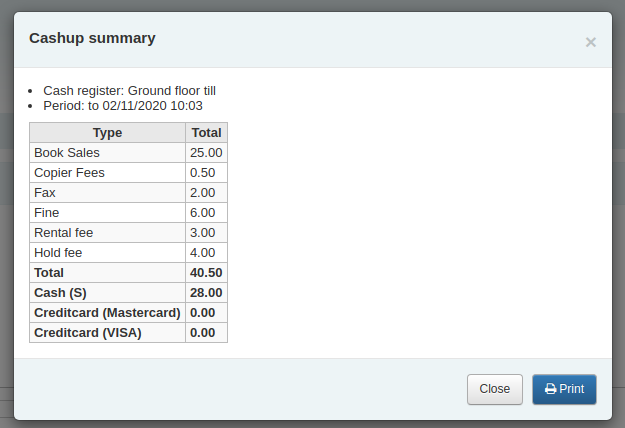
Cash summary for library
Get there: Home > Tools > Cash summary for library
A summary of transaction amounts associated to a libraries cash registers can be found under the ‚Cash summary for library‘ page tool.
The summary will list registers associated with your logged in branch alongside information about how much money should be found in each register, what is available to take to the bank and a breakdown of income vs outgoings.
Note: You can also access this page from the left hand menu available on the Point of sale page when that module is enabled.
Transaction history for register
Get there: Home > Tools > Cash management > Transaction history for register
A list of all transactions to have taken place at a register is available by clicking on the cash register name from the library details page.
If you have the correct permissions, you can re-print receipts, issue refunds and record cashups from this page.
Note: You can also access this page from the left hand menu available on the Point of sale page when that module is enabled.
Komentáře
Get there: More > Tools > Patrons and circulation > Comments
Všechny komentáře přidané čtenáři přes OPAC do bibliografických záznamů vyžadují moderování od knihovníků. Pokud jsou čekající komentáře na moderování, budou uvedeny na hlavním panelu v knihovnickém intranetu pod „Nástroje“:
and next to the Comments tool on the Tools page
To moderate comments click on the notification on the main dashboard or go directly to the Comments tool and click ‚Approve‘ or ‚Delete‘ to the right of the comments awaiting moderation.
Pokud nejsou vložené žádné komentáře, které by čekali na schválení, budete zde o tom informování.
Můžete si také znovu pročíst a zablokovat poznámky, které jste v minulosti schválili výběrem záložky „Schválené poznámky“