ERM (Electronic resource management)
The E-resource management (ERM) module is used to track the selection, acquisition, licensing, access, maintenance, usage, evaluation, retention, and deselection of a library’s electronic information resources. These resources can include electronic journals, electronic books, streaming media, databases, datasets and computer software.
To use the E-resource management (ERM) module, you must enable the ERMModule system preference.
Note
Only staff with the erm permission (or the superlibrarian permission) will have access to this module.
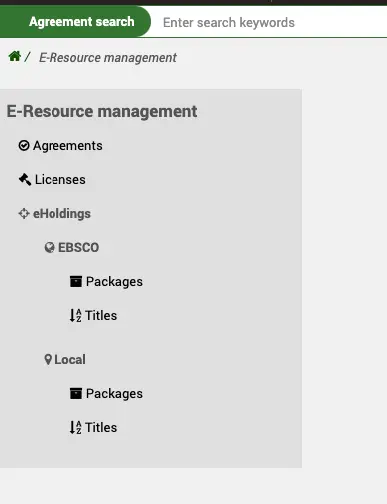
ERM home page
Get there: More > E-resource management
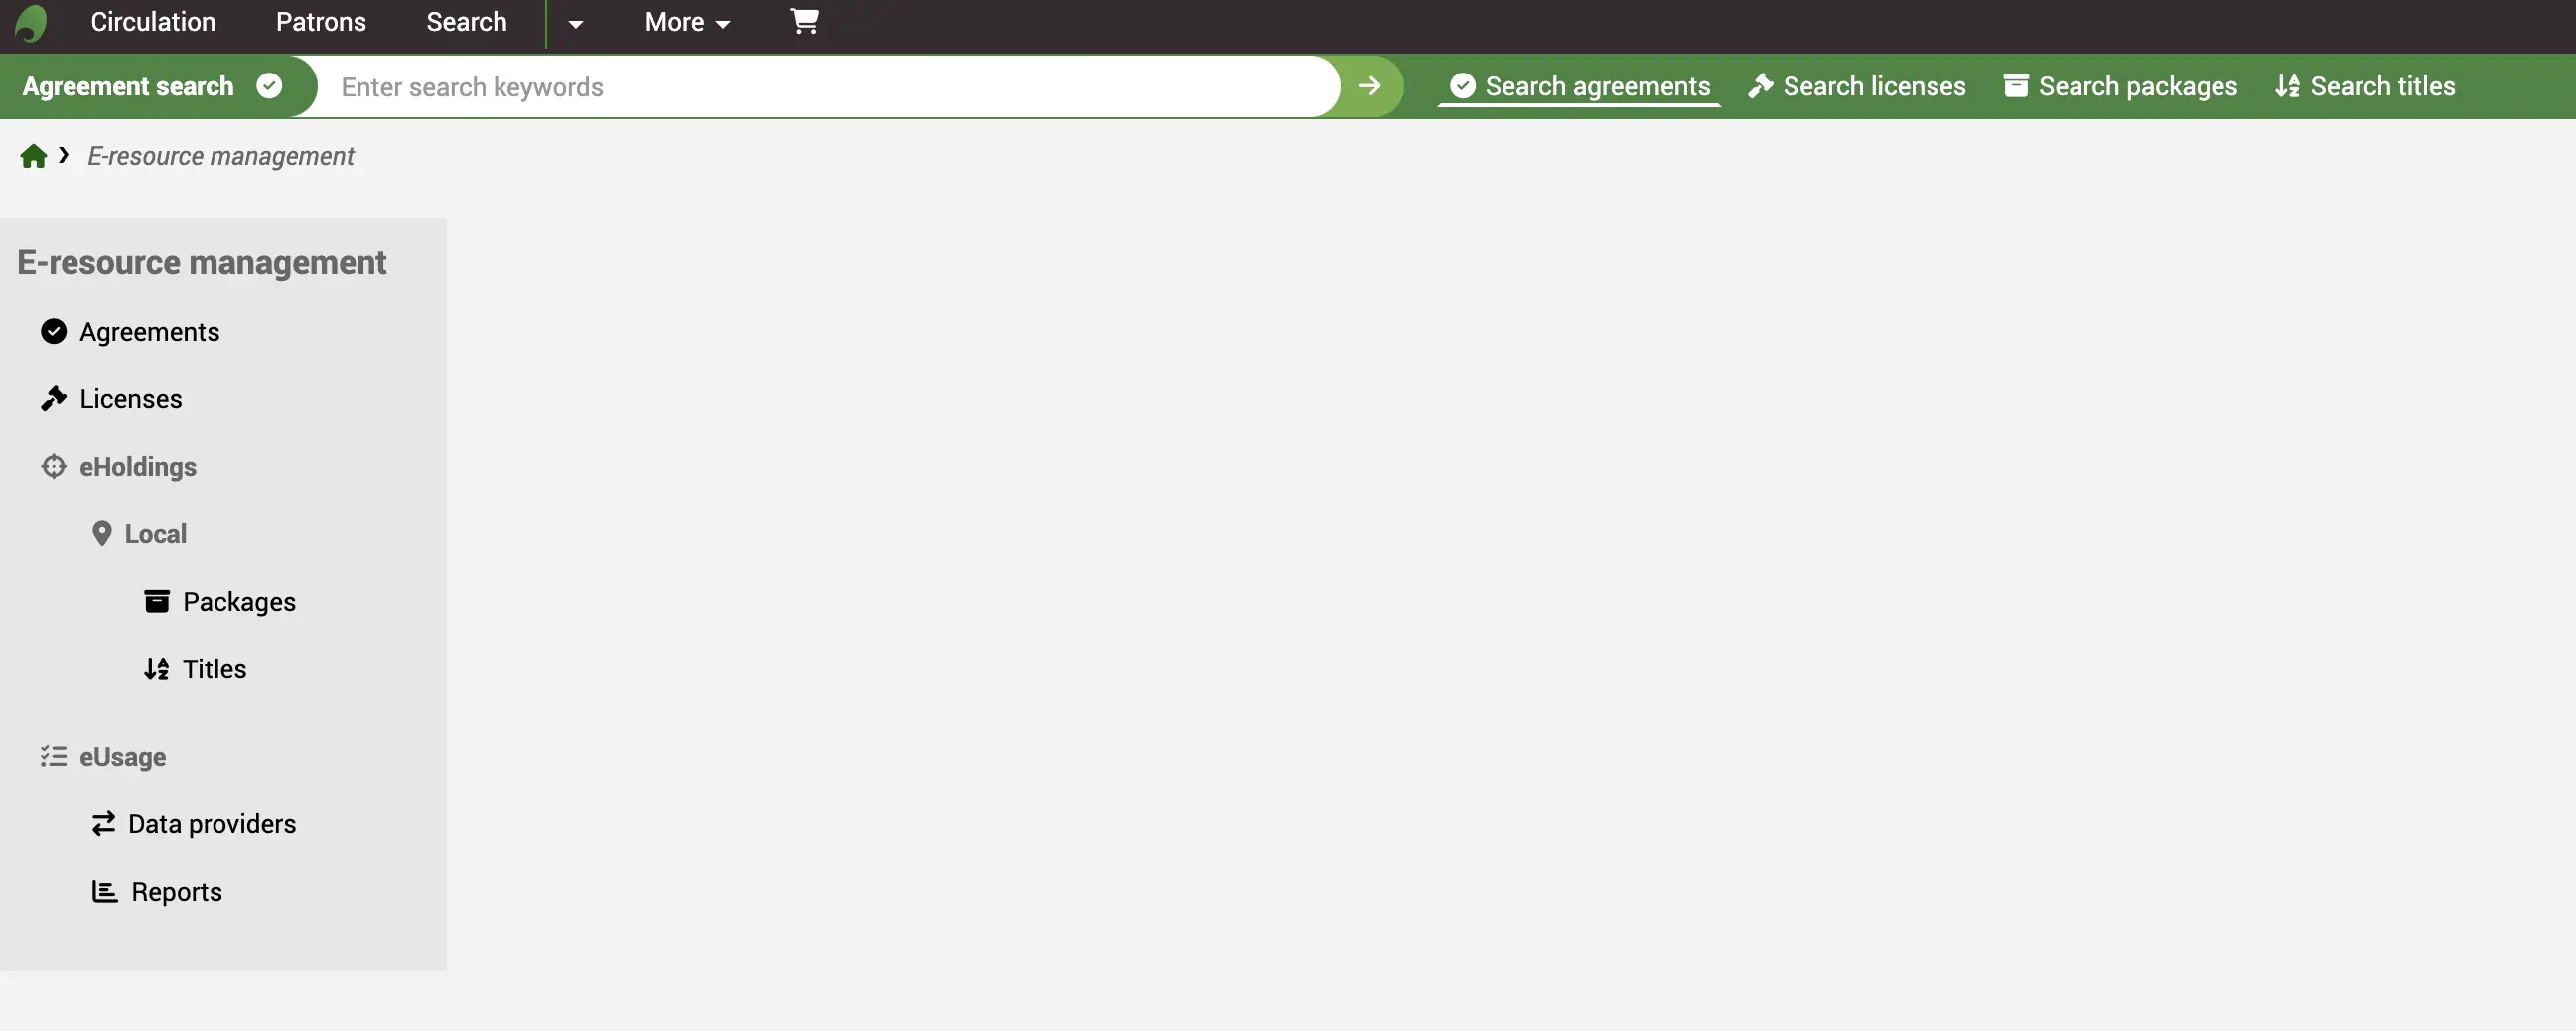
Search bar
The search bar allows you to quickly search agreement records and (Local) packages or titles.
Packages or titles from third-party knowledge bases are not searchable from here; go to the eHoldings instead.

Agreements
In ERM terms, Agreements describe what electronic subscriptions you can access whereas Licenses are used to describe what you can do with those resources.
Note
Before you start to create new Agreement records, ensure your staff users have either the superlibrarian or the erm permission and that you have reviewed the ERM authorized values to suit your needs. Also, ensure you have reviewed the ERM system preferences.
Create an Agreement record
From the ERM Home page click on the Agreements link in the left-hand menu.
Get there: More > E-Resource management > Agreements
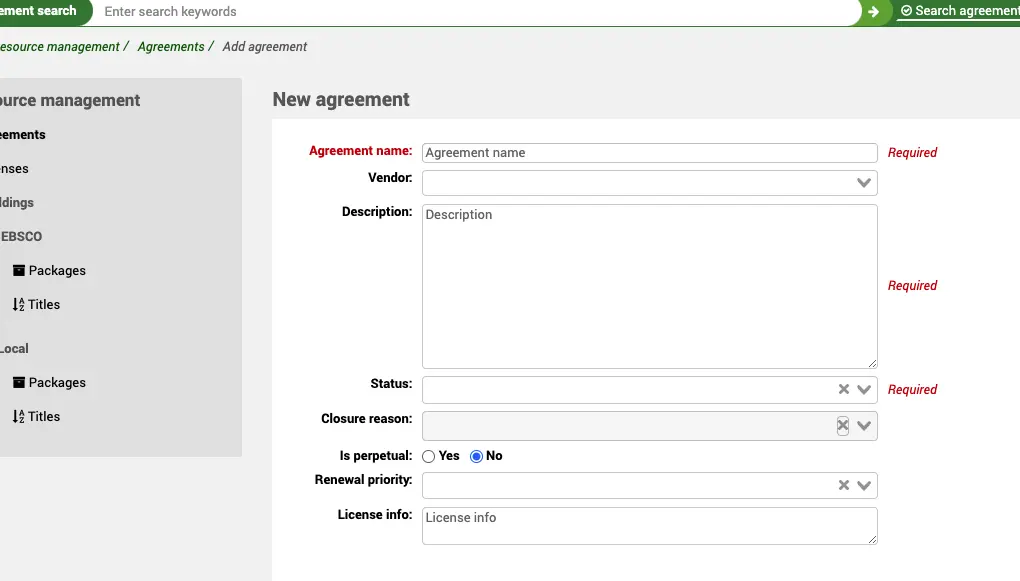
Use the + New Agreement button at the top of the Agreements table.
You are required to give the Agreement a Name, Description and Status. The status determines if this agreement is active or not. All other fields are optional.
The agreement can, optionally, be attached to an existing Vendor record in the acquisitions module. This allows you to keep a record of who supplied the e-resources and also to create purchase orders against it.
The Closure reason field will stay grayed out until you give the agreement the status of “closed” at which point it will become active.
The License info box can be used here if you don’t intend to use the Licenses part of ERM but still want to record information about a license alongside the agreement.
If you have any additional fields for ERM agreements (erm_agreements), they will be displayed here.
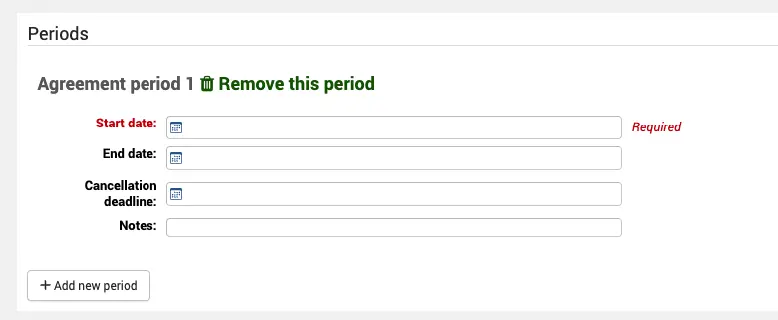
Periods
Multiple periods can be attached to an Agreement record.
The period describes the duration of the relationship you have with the provider. Every time you renew an agreement, you can record a new agreement period so that you have a historical record of how many times it has been renewed. You can also create agreement periods for future dates. So, for example, you may have a current period, some historical periods and an upcoming period.
The cancellation deadline can be used in reporting to alert you to upcoming end dates and therefore alert you to initiate the renewal with the provider.
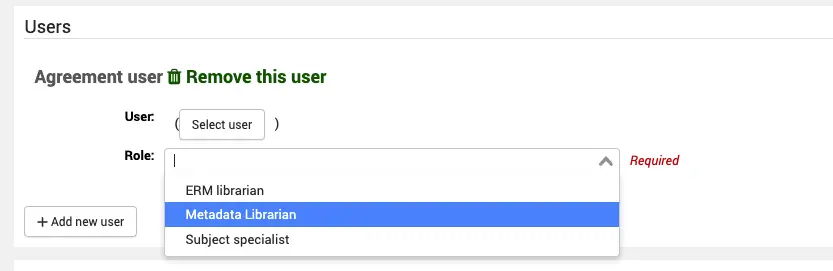
Users
In this context, a user is a staff user who has some involvement with the Agreement. They could be staff involved in procuring the e-resource, sorting out the licensing, the subject specialist, etc.
You can attach multiple users to an agreement.
In order to be attached to an agreement a staff user must have the erm permission (or the superlibrarian permission), otherwise they will not appear in the list when you try and select a user. This also keeps the list of patrons to a small, manageable, size by excluding your library patrons.
When you attach a user, you also assign them a role from the ERM_USER_ROLES authorized value.
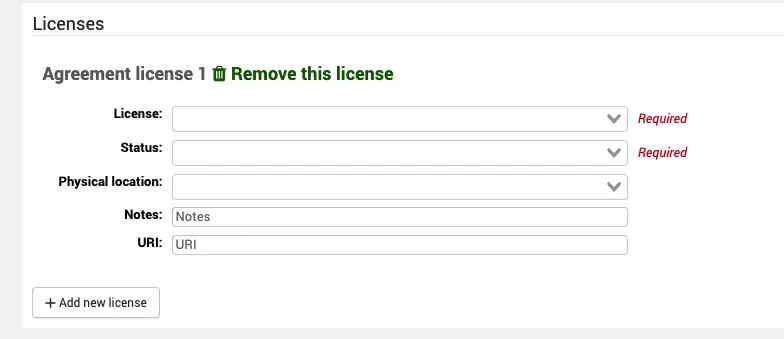
Licenses
If you want to link an agreement to a license record you created under licenses, use the “Add new license” button. An agreement can be attached to one or more license records.
Select the license name from the drop-down list of licenses you have previously created and give it a status.
The Physical location is where you may have stored a paper version of the document within your library.
You can also specify notes and a URI (if the license is actually available online).
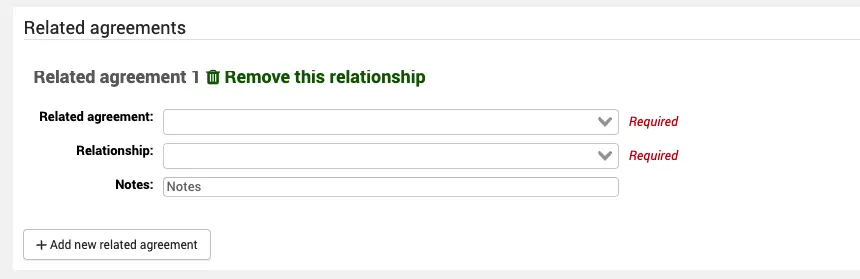
Related agreements
A related agreement is any agreement which has some relevance to an agreement already in the system. For example, an agreement which has superseded an existing agreement.
You can link an agreement to one or many other agreements.
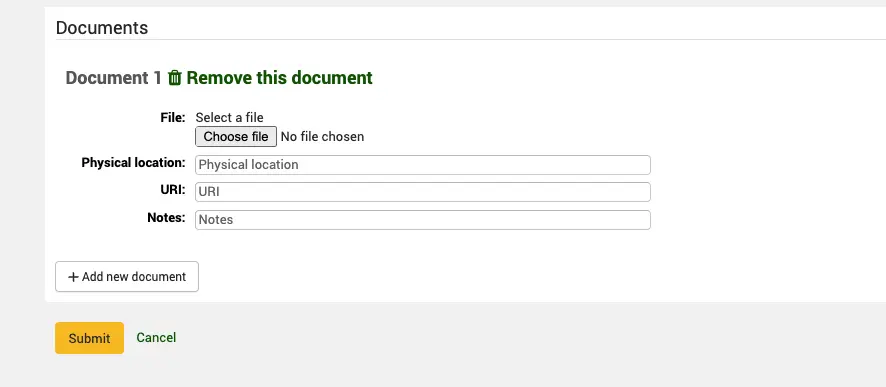
Agreement documents
You can attach one or more documents to an agreement record.
This is not meant to be for license documents (which are attached to license records) but other correspondence with a provider, information about the resources, etc. If you decide to only record agreement information and not licenses then you can, of course, also attach the license documents themselves.
The physical location is where any paper version of the correspondence is held in the library and the URI a link to any online copy.
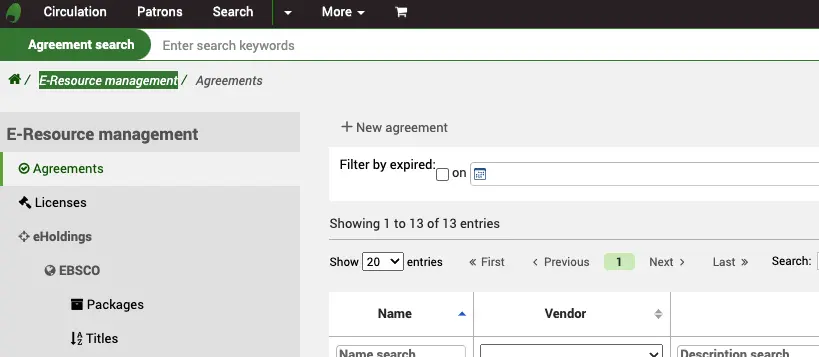
Search and view an Agreement record
From the ERM home page, click on the Agreements link in the left-hand menu.
Get there: More > E-resource management > Agreements
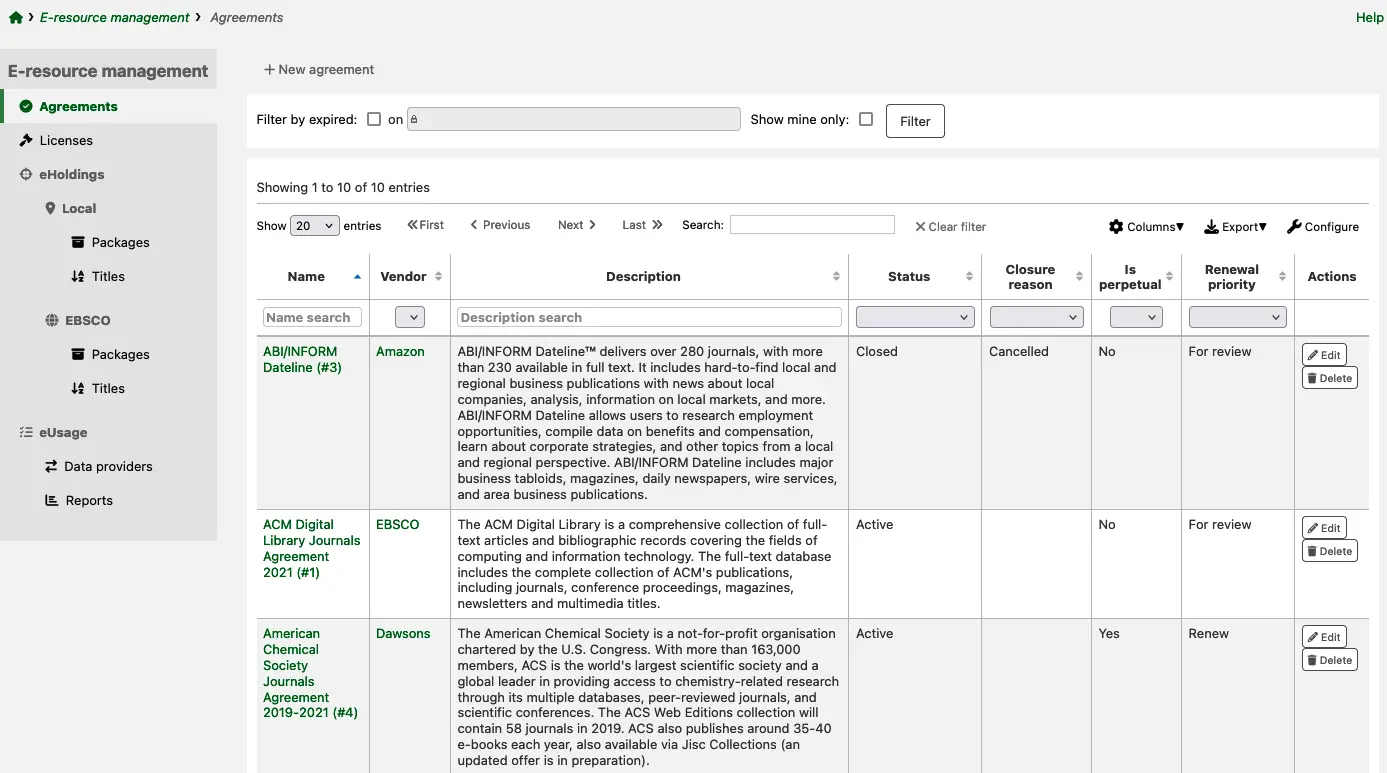
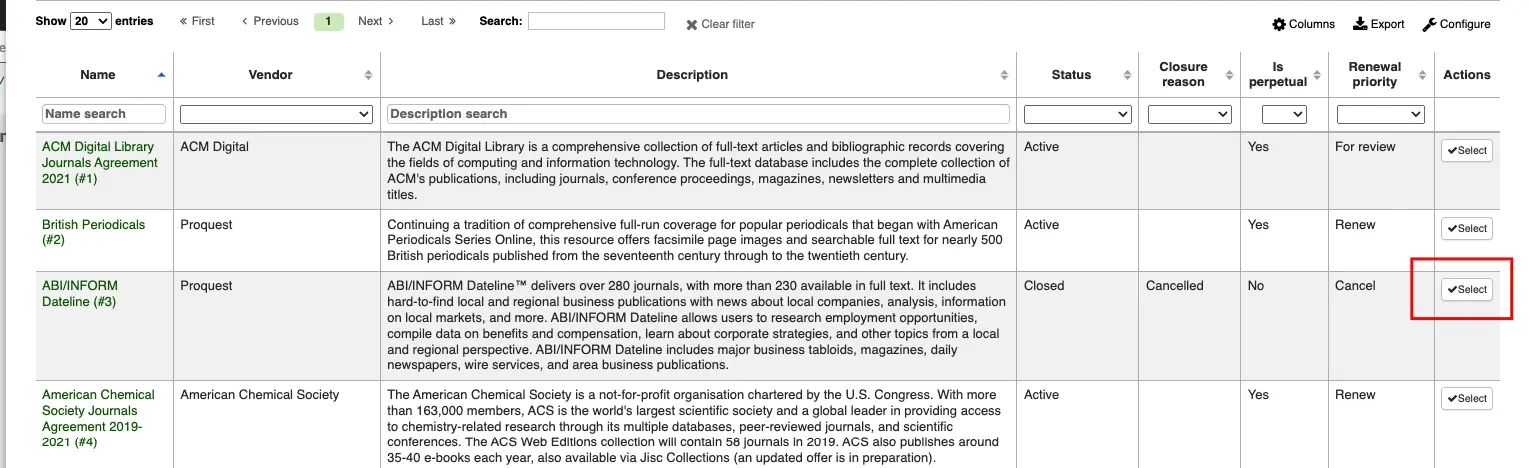
You will be presented with a list of existing agreements in the system ordered by the agreement name.
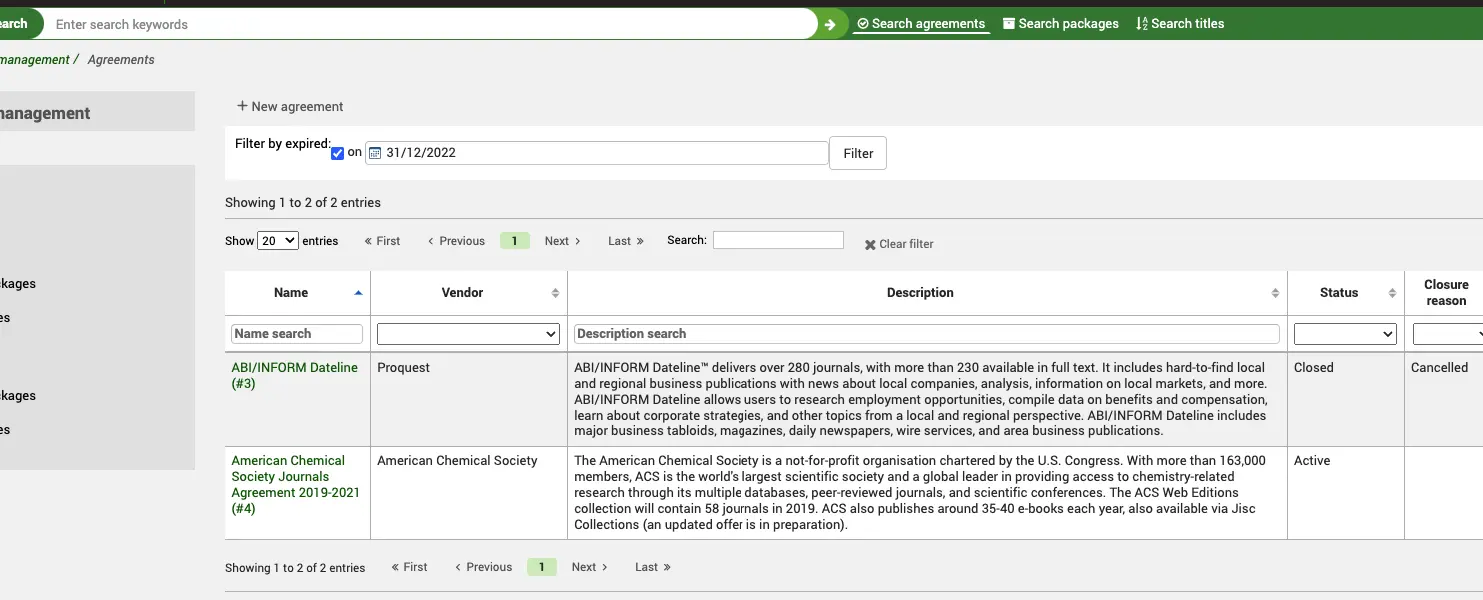
To only view expired agreements, tick ‘Filter by expired on’ above the table. Enter a date and click ‘Filter’.
To only see agreements linked to the account you are logged in as, tick ‘Show mine only’ and click ‘Filter’.
You can also use the table or column filters to search and filter data you are looking for (for example, all agreements with the Status: closed).
Note
You can customize the columns of this table by clicking the ‘Configure’ button. It will take you to the Administration module and specifically to the ‘table id: agreements’ section of the Table settings.
Clicking on the name of the agreement will take you through to the full view.
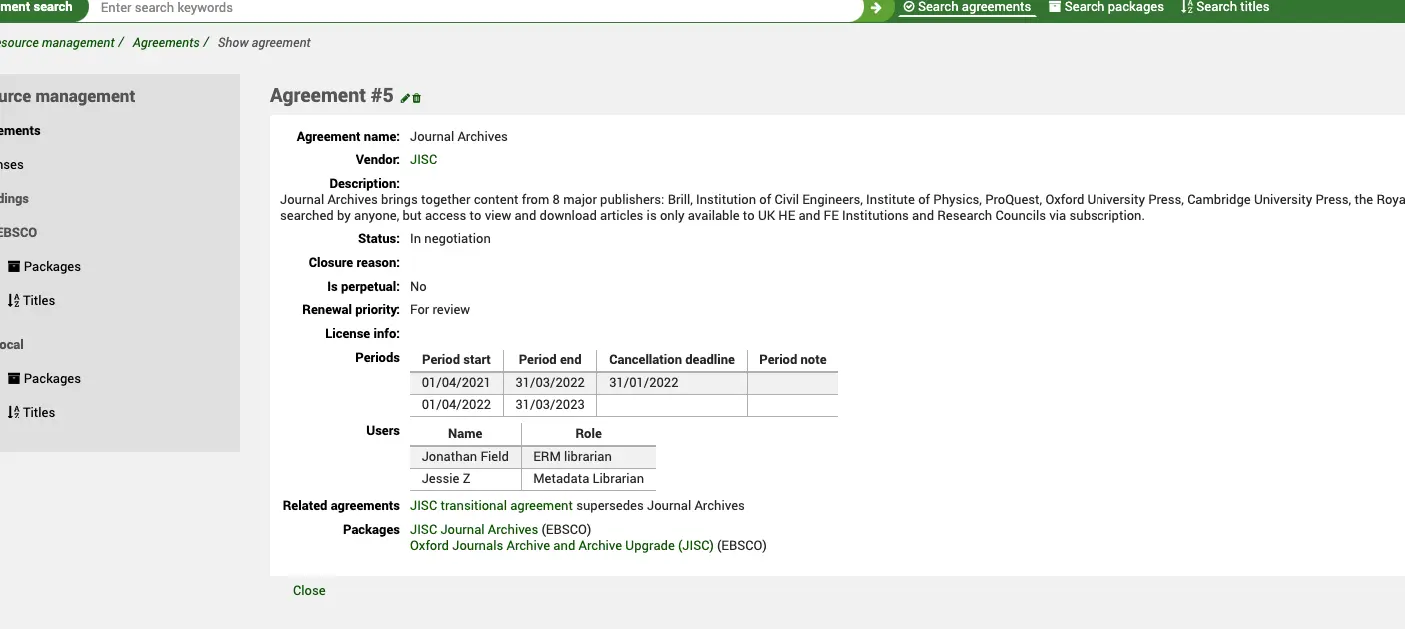
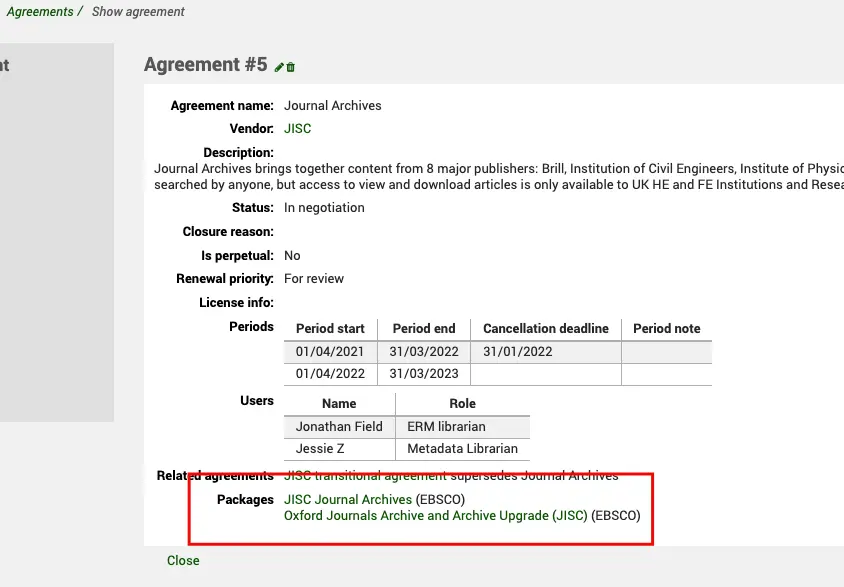
The full view summarizes all the information you entered when you were creating the agreement. The vendor it is attached to (which is a hypertext link to the vendor record), the status, any agreement periods, any users associated with the agreement, any related agreements and, importantly, what the agreement covers; that is, which vendor packages are included as part of the agreement. You will notice that the ‘Related agreements’ field is also a hypertext link to the other agreement and this is bidirectional. The link to the packages is also a hypertext link and takes you to the eHoldings section.
A package is a collection of e-resource titles which have been bundled together for distribution by a provider/vendor. Rather than selling you a license to use a single title, a vendor will typically sell you a selection of e-resources bundled together in a named package (e.g. Journal Archives). This can often contain tens or even hundreds of titles. Custom packages are often negotiated locally in various parts of the world with providers. The benefit of buying in packages means that the library does not have to undertake individual negotiation with publishers for specific titles, this is left to the provider.
Agreement Filters At the top of the Agreements page you will notice a Filter box. The purpose of this is to allow you to quickly filter expired agreements or agreements which may have an upcoming renewal (and therefore might require action).
Licenses
A license explains what you can do with the content you have subscribed to. It is, in effect, the contract or Terms of Use.
Get there: More > E-resource management > Licenses
Licenses work alongside Agreements or, if you’d prefer to simply record a list of licenses you have, it can work on its own.
Create a license record
From the ERM Home page click on the Licenses link in the left-hand menu.
Get there: More > E-resource management > Licenses
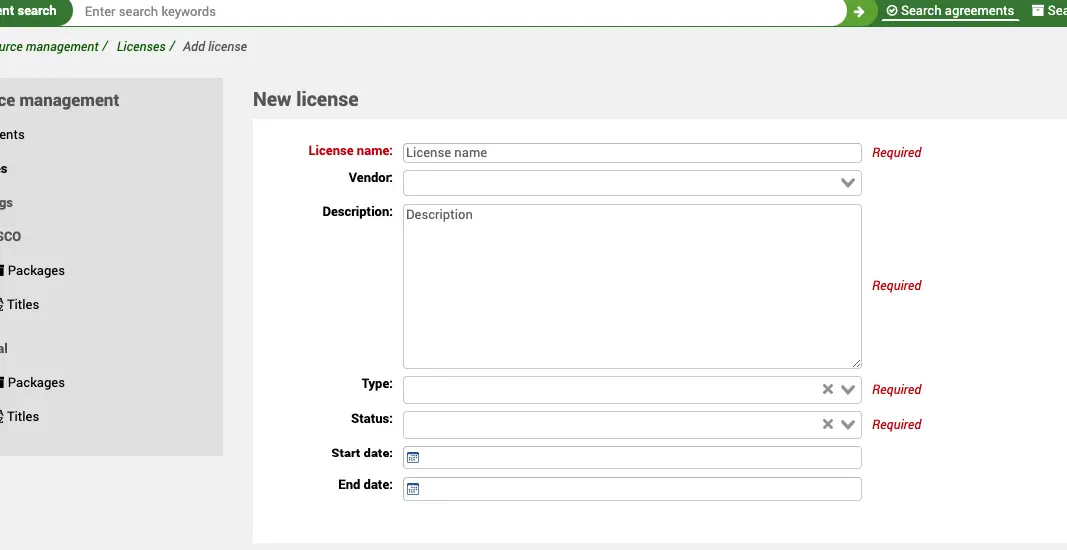
Use the ‘New license’ button at the top of the Licenses table.
You are required to give the License a Name, Description, Type and Status. The status determines if this agreement is active or not. All other fields are optional.
The license can, optionally, be attached to an existing Vendor record in the acquisitions module. This allows you to keep a record of which vendor the license is with.
The license will have both a start date and end date, these may differ from the dates in an agreement period.
If you have any additional fields for ERM licenses (erm_licenses), they will be displayed here.
Users
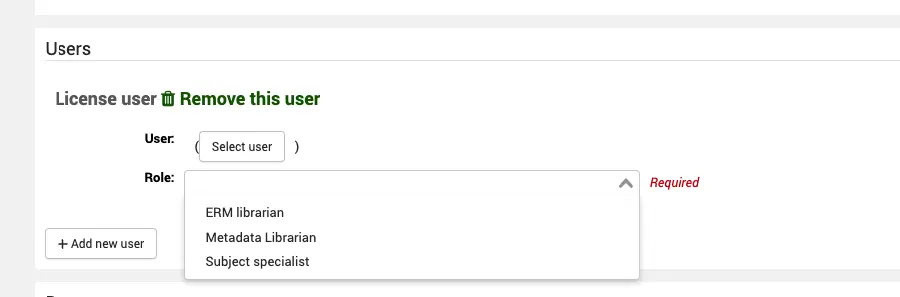
In this context, a user is a staff user who has some involvement with the License. They could be staff involved in negotiating or signing the license for example.
You can attach multiple users to a license.
In order to be attached to a license a staff user must have the erm permission (or the superlibrarian permission), otherwise they will not appear in the list when you try and select a user. This also keeps the list of patrons to a small, manageable, size by excluding your library patrons.
When you attach a user, you also assign them a role from the ERM_USER_ROLES authorized value.
License documents
You can attach one or more documents to a license record. From here you can attach PDF copies of license or terms of use.
The physical location is where any paper version of the correspondence is held in the library and the URI provides a link to any online copy.
Note
The file size of any uploaded documents for both licenses and agreements is limited to the value of the max_allowed_packet size in your MariaDB configuration file. If you exceed this size, you will get a file size warning. Speak to your system administrator to increase this value.

Search and view a license record
From the ERM Home page click on the Licenses link in the left-hand menu.
Get there: More > E-resource management > Licenses
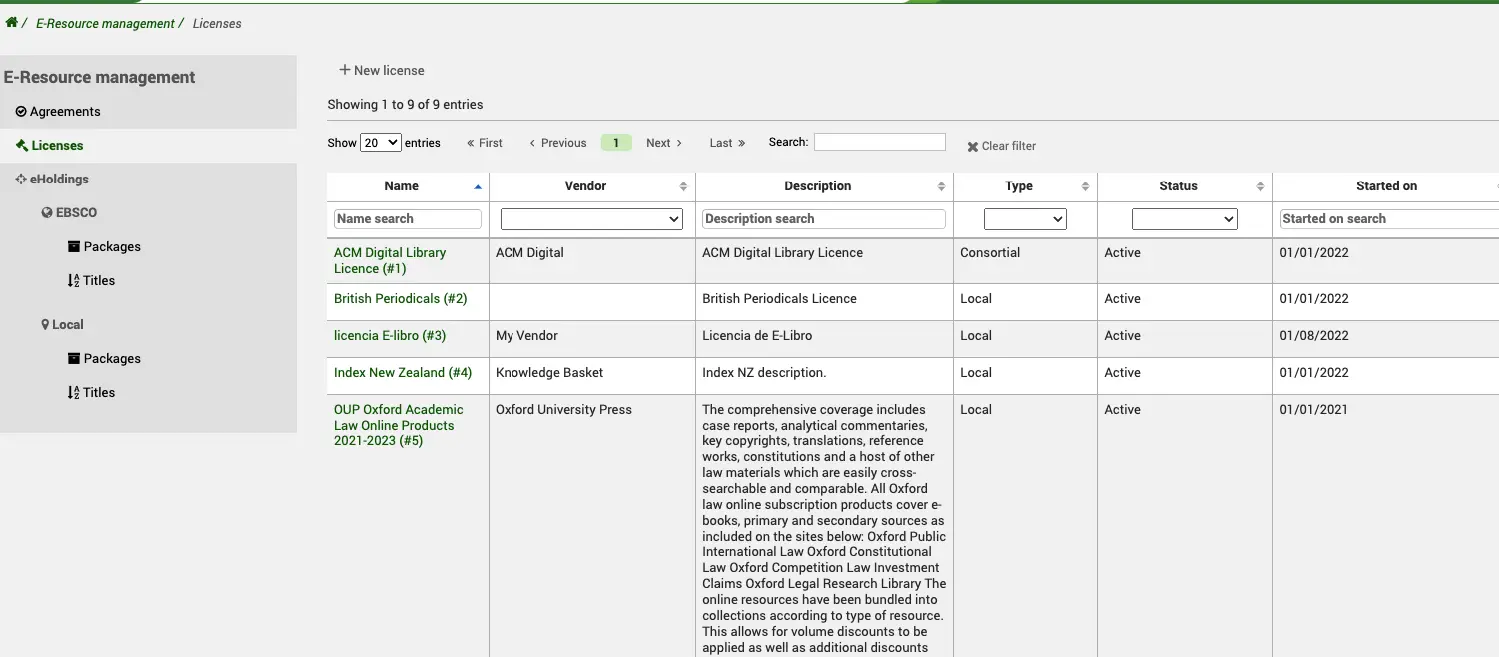
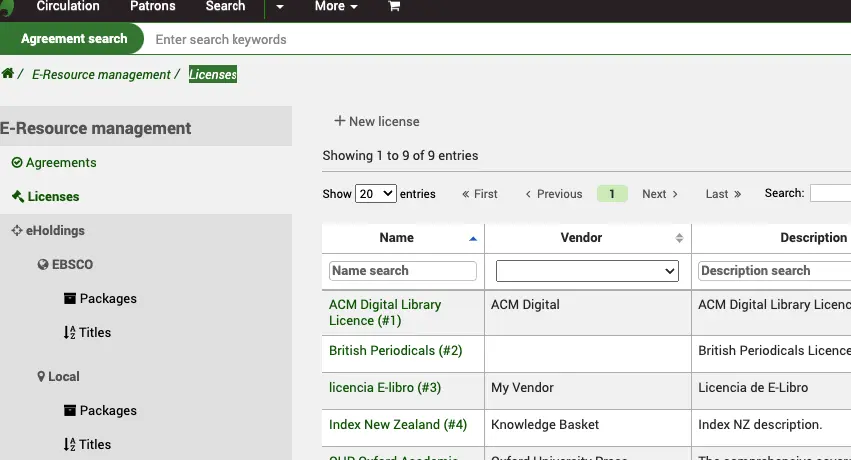
You will be presented with a list of existing licenses in the system ordered by the license name. You can use the table or column filters to search and filter data you are looking for (for example, all licenses with the Status: expired).
Note
You can customize the columns of this table by clicking the ‘Configure’ button. It will take you to the Administration module and specifically to the ‘table id: licenses’ section of the Table settings.
Clicking on the name of the license will take you through to the full view.
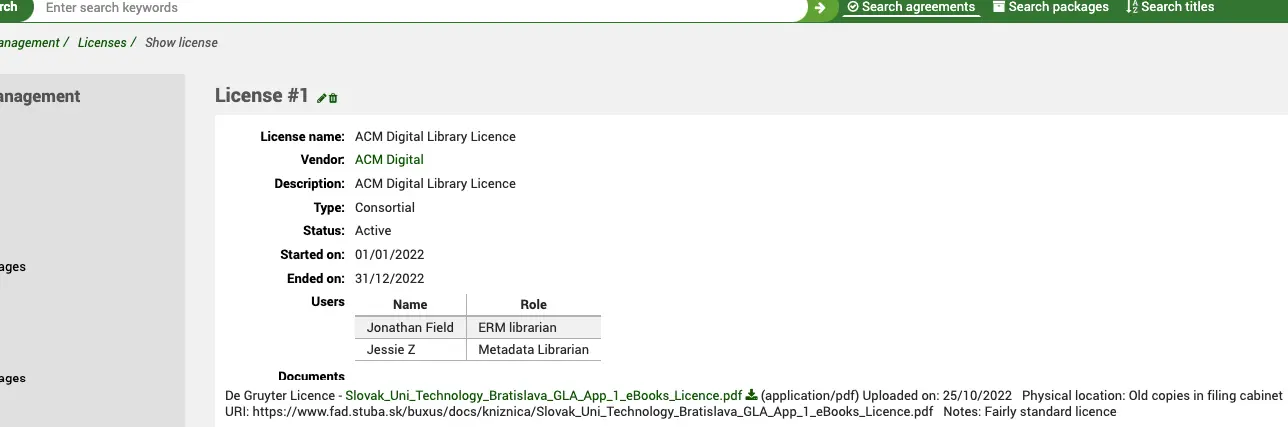
The full view summarizes all the information you entered when you were creating the license. The vendor it is attached to (which is a hypertext link to the vendor record), the Status, Type, start and end dates, any users associated with the license and, importantly, the link to the license document(s).
eHoldings
Definition of terms:
Resource
A resource is an instance of a title. Consequently a resource would have a separate resource ID for each occurrence of the title in a package.
For example: Teise / Law belongs in
DOAJ
Criminal Justice Abstracts with Full Text
etc.
Knowledge base (KB)
A knowledge base is an extensive database maintained by a knowledge base supplier (for example, EBSCO) that contains information about electronic resources such as title lists and coverage dates, etc. Knowledge bases typically organize the resources provided by a content provider into collections or databases that reflect specific content provider offerings, for example packages of e-journals, e-books, or other materials.
Providers
The provider of the e-resource, for example, the vendor, consortia or publisher.
Packages
A collection of e-resource titles bundled together and distributed by a provider.
Titles
The individual e-resources, for example a journal or e-book, usually contained within a package.
Get there: More > E-resource management
On the left-hand navigation menu, you will see links for each provider you have configured in the ERMProviders system preference.
EBSCO
The integration with the EBSCO global knowledge base is facilitated via their HoldingsIQ tool. This is a bidirectional API that allows you to update or read from EBSCO’s knowledge base of millions of titles. Your instance of the EBSCO knowledge base becomes searchable and manageable via Koha using your Customer ID in the configuration. Remember, the knowledge base always sits at EBSCO, you are just manipulating it through Koha in the same way you would if you were using EBSCOadmin. No content data is held locally in your Koha system.
Packages
Get there: More > E-resource management > EBSCO > Packages
On the Package home screen you will see a search box
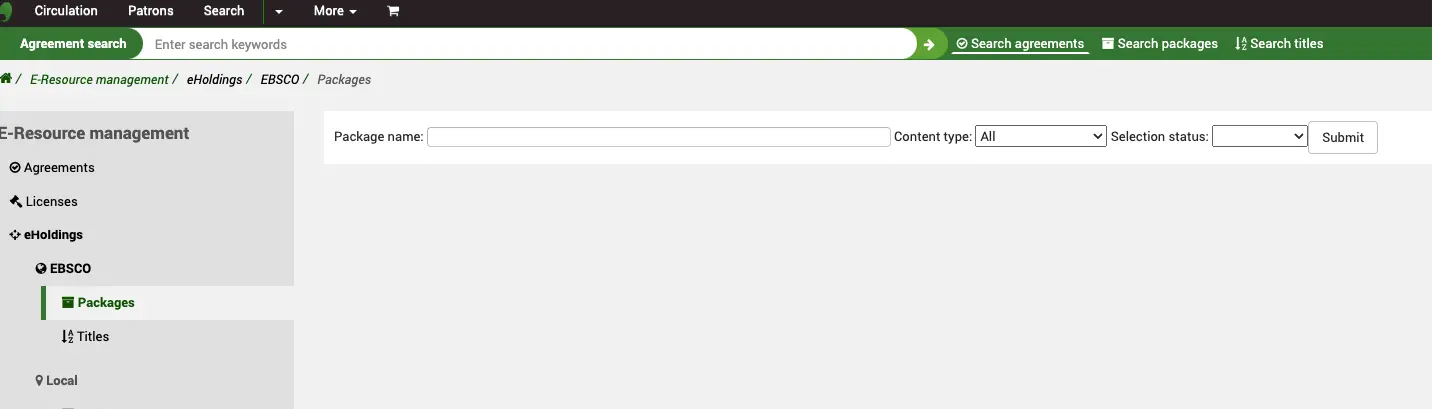
Koha acts as a “proxy” for the EBSCO HoldingsIQ service so any search you do here is done in real time against the EBSCO knowledge base (using your Customer ID in the ERMProviderEbscoCustomerID system preference). There are two filters:
Content type: This filter is provided by EBSCO as part of their HoldingsIQ API and allows you to narrow down your search to a particular content type (as defined by EBSCO).
Select status: This filter is provided by EBSCO as part of their HoldingsIQ API and allows you to narrow down your search to material that you may already have added to your holdings through EBSCOadmin. So, for example, you can search for packages that you have already subscribed to.
Any package which is already selected is indicated by a check mark on the right-hand side of the title.
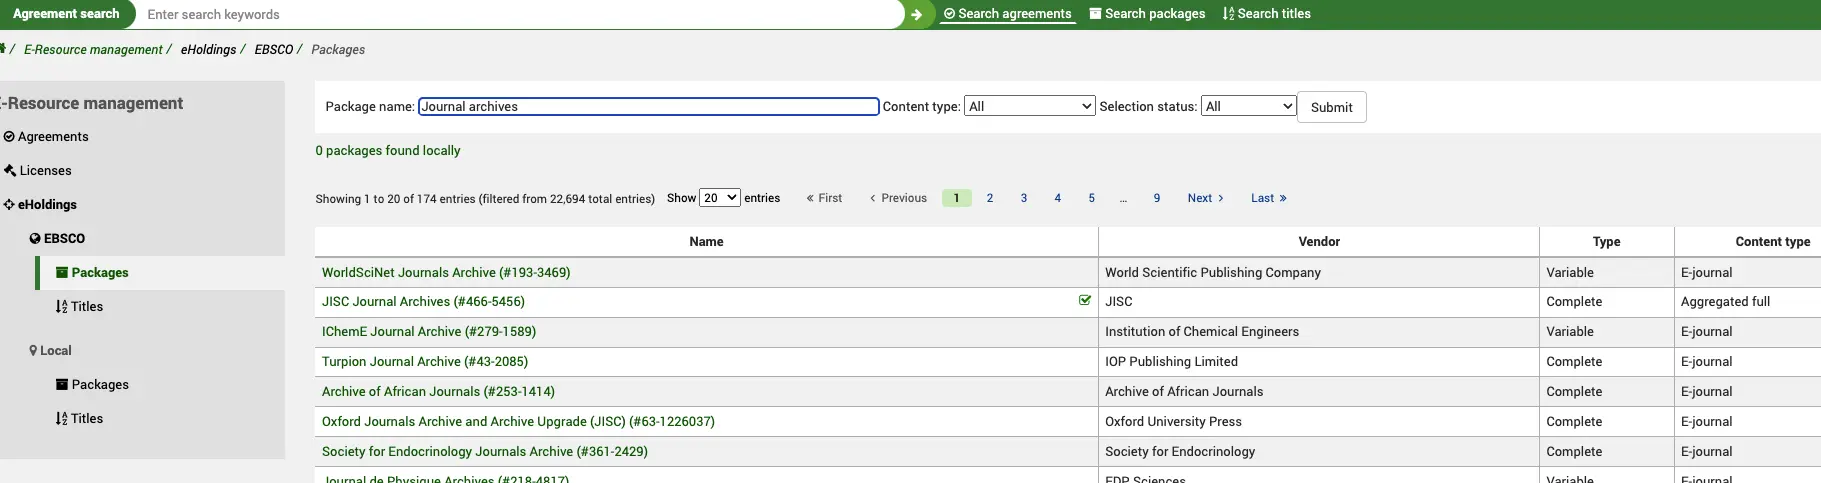
In brackets you can see the EBSCO package ID.
When you click on a package link, you will be taken to the full view of the package.
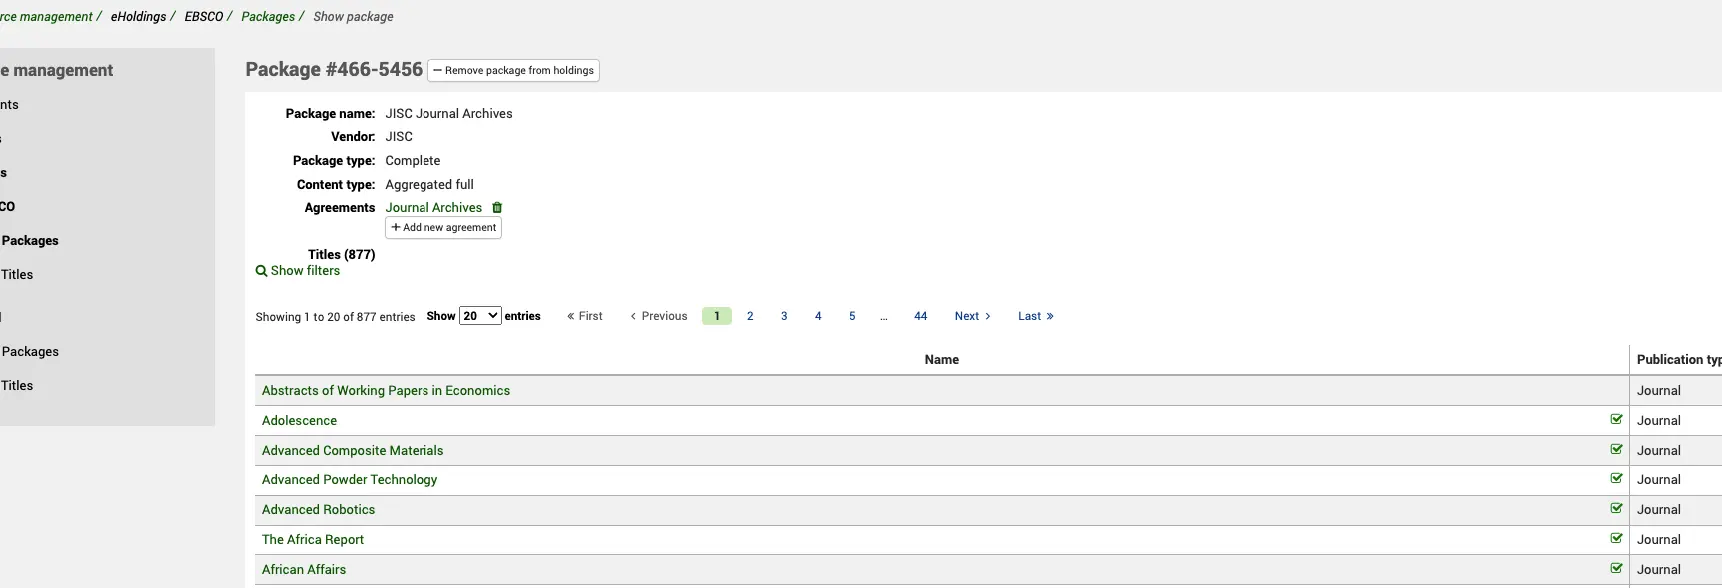
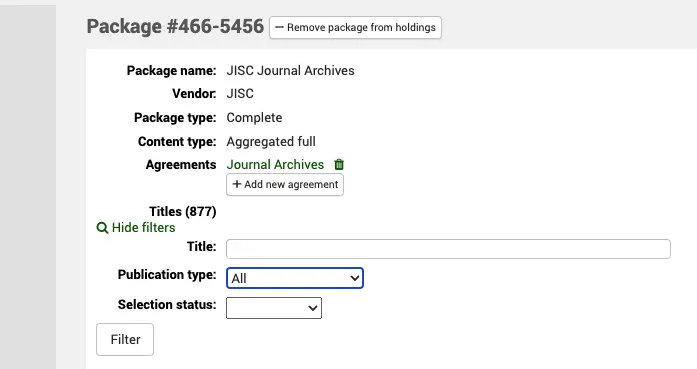
Some information displayed here is brought through from the HoldingsIQ API, you can see the Vendor (this is NOT the Koha vendor), the Content type and the Package type. You can also see from this screen that the package contains (in this case) 877 titles. As with the package list, you can see from here (by the check marks) which titles have been selected and which not.
Clicking on the Show filters link will give you some additional filters to allow you to search within the package for a particular title or group of titles. This can be by Publication type, Selection status (titles already selected, or not, in EBSCOadmin) and a title search box.
Add package to an Agreement
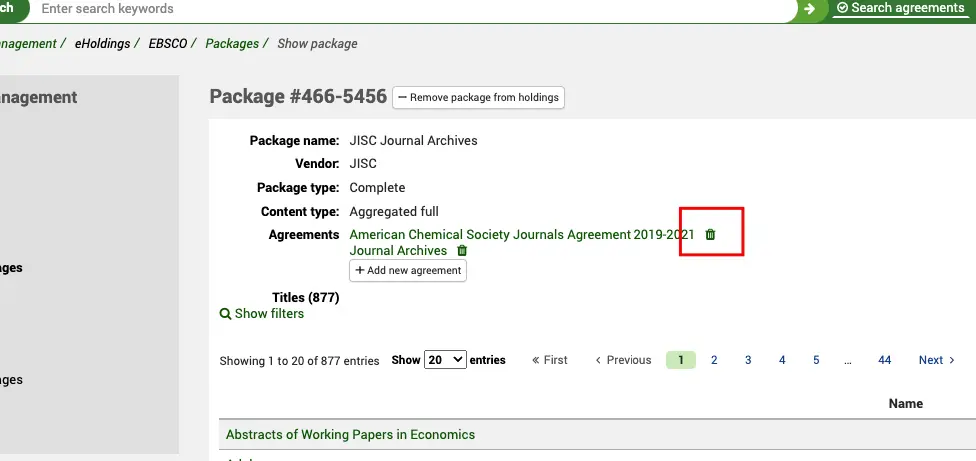
In the example above, you can see that this package has already been added to the existing Agreement record in Koha (called Journal Archives). A package can be added to multiple Agreement records. Clicking the hypertext link will take you to the agreement record.
Once you have made this connection, you will see the package listed on the agreement record.
To add to a new package, click on the ‘Add new agreement’ button and you will be taken to a dialogue box with a list of agreements that can be filtered. Use the Select button to make the connection between the two records.
Use the ‘Delete’ icon to remove a package from an agreement.
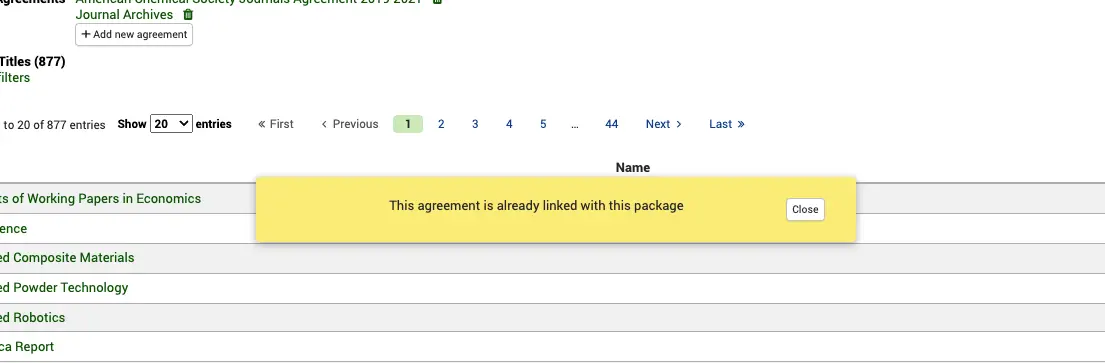
If you try to add a package to the same agreement more than once, you will receive the following error message:
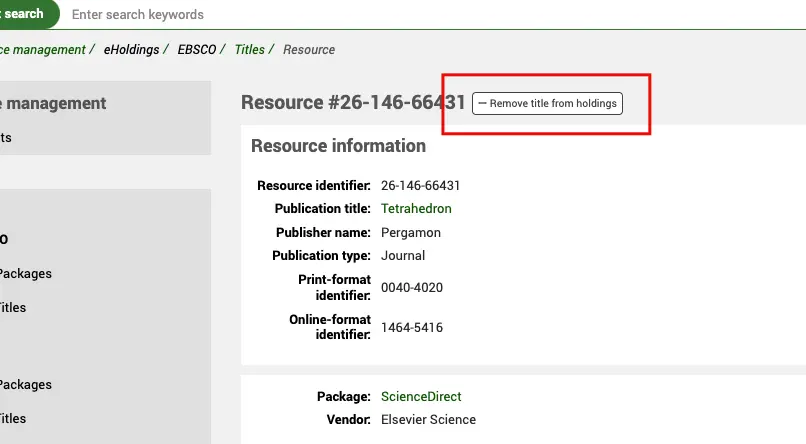
Add/remove package from holdings
From the package view, you are also able to add or remove a complete package from your EBSCO holdings.
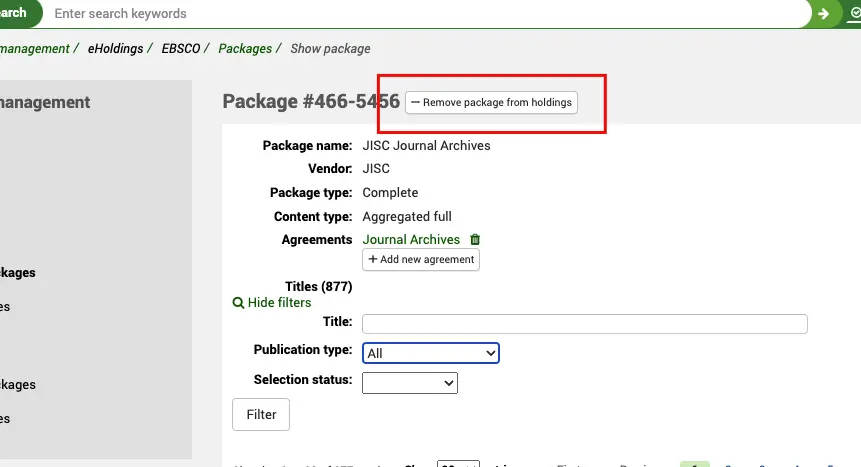
This makes an API call via the HoldingsIQ service to add or remove the package from your EBSCO central holdings. Because this is a real-time call you should see your holdings updated in EBSCOadmin as well.
You can also click on a title link here and go into the detail of a specific title in a package.
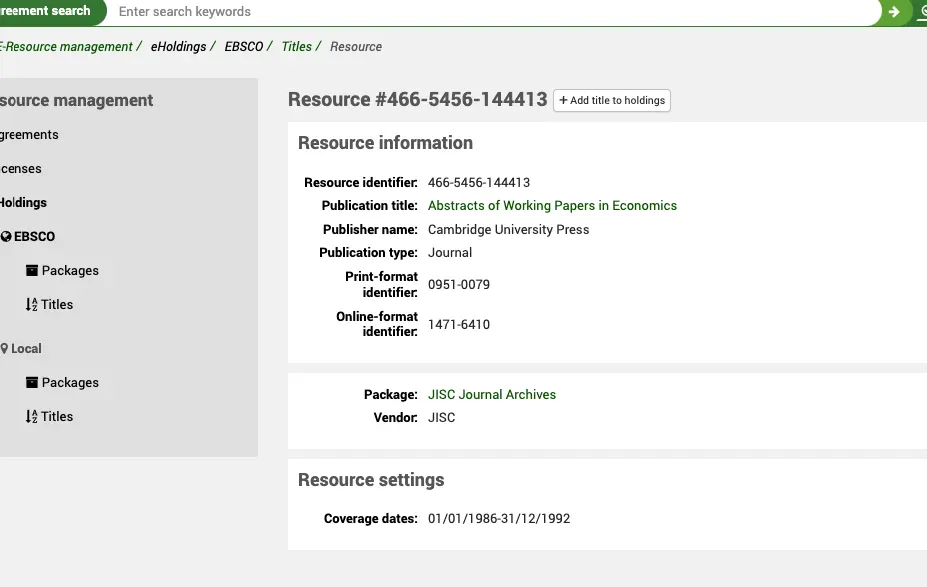
The Resource # you can see at the top of the screen is the EBSCO resource ID. The metadata you see is also returned by the HoldingsIQ API from the EBSCO knowledge base. You can see the Publication title, name, Publication type, and print/online IDs and the coverage dates. Remember the coverage dates of a title may be different depending on the package that the title is included in. You can also see both the Vendor and the Package (which is a hypertext link back to the full package you have come from).
Add/remove title from package
You can add or remove a title from a package you are subscribed to.
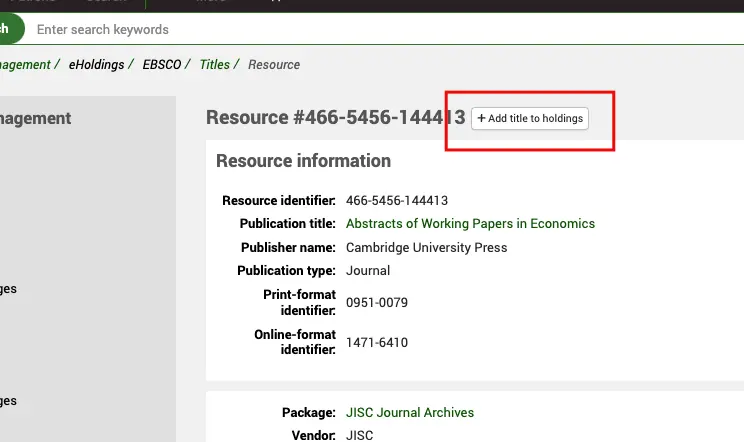
Although you may subscribe to a complete package, there may be individual titles you wish to specifically include/exclude. Use the ‘Add/remove title to holdings’ button to do this.
Titles
Get there: More > E-resource management > EBSCO > Titles
On the Titles home screen, you will see a search box.
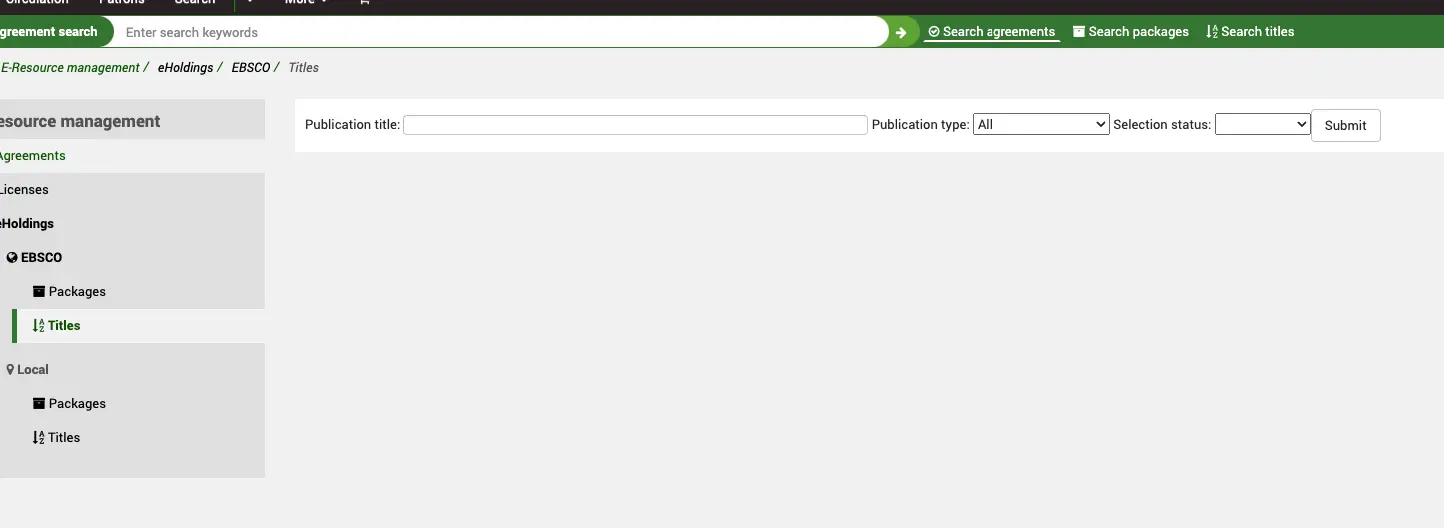
Koha acts as a “proxy” for the EBSCO HoldingsIQ service so any search you do here is done in real time against the EBSCO knowledge base (using your Customer ID in the ERMProviderEbscoCustomerID system preference). There are two filters:
Publication type: This filter is provided by EBSCO as part of their HoldingsIQ API and allows you to narrow down your search to a particular publication type (as defined by EBSCO).
Select status: This filter is provided by EBSCO as part of their HoldingsIQ API and allows you to narrow down your search to titles that you may already have added to your holdings through EBSCOadmin. So, for example, you can search for titles that you have already subscribed to.
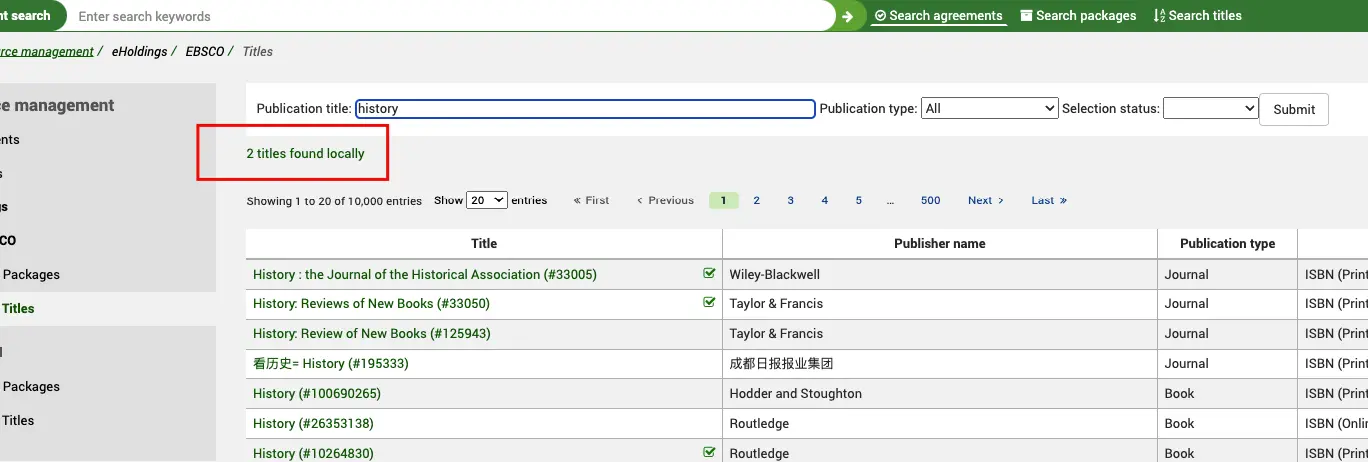
Any title which is already selected is indicated by a check mark on the right-hand side of the title.
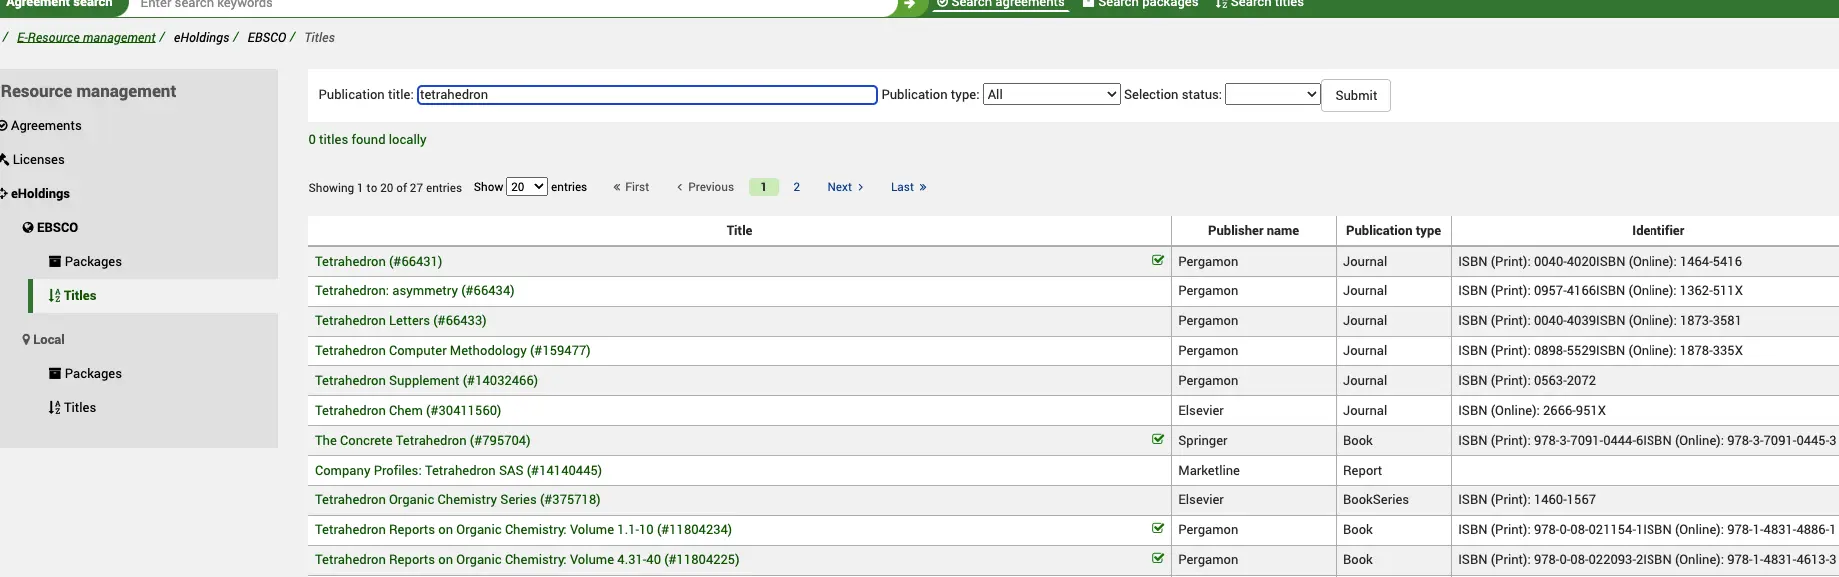
You will also notice that this search also searches for Local titles in addition to EBSCO titles. Any local titles will be indicated above the title list and this is a hypertext link to take you through to the Local titles table.
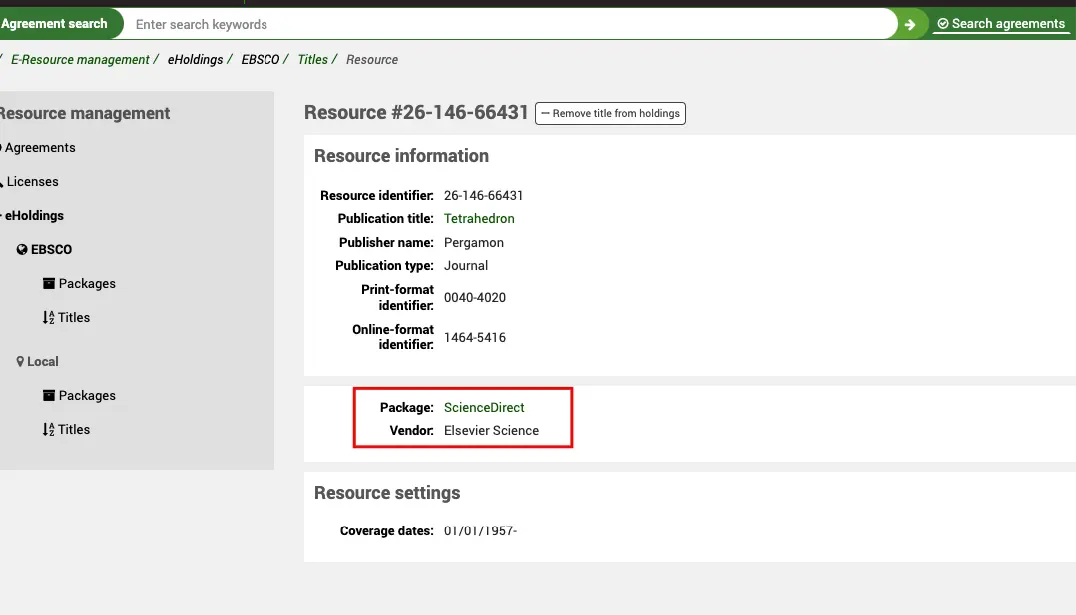
By clicking on a title, you can go into the full record view of it.

At the top you see the Title #. This is the EBSCO title reference. The rest of the metadata all comes from the HoldingsIQ API and includes things like IDs, publishers etc.
You can also see here every Package that this title is contained in. The check mark indicates that you are already subscribed to this package. So, in the example above, we have this title via the ScienceDirect package but not Scholars Portal.
If you click on the Package link, you will see the view of that resource within that package.
This includes the coverage provided by that provider.
If you want to selectively add or remove that title from your package holdings you can do that from this screen.
You can also see the EBSCO resource ID on this screen. Remember that the resource ID represents the instance of a title within a package.
If you want to go back to the title record, you can click on the Title link.
On the Title page, you are also provided with filters to narrow down your search. You get to this by clicking on the Show/Hide filters link.
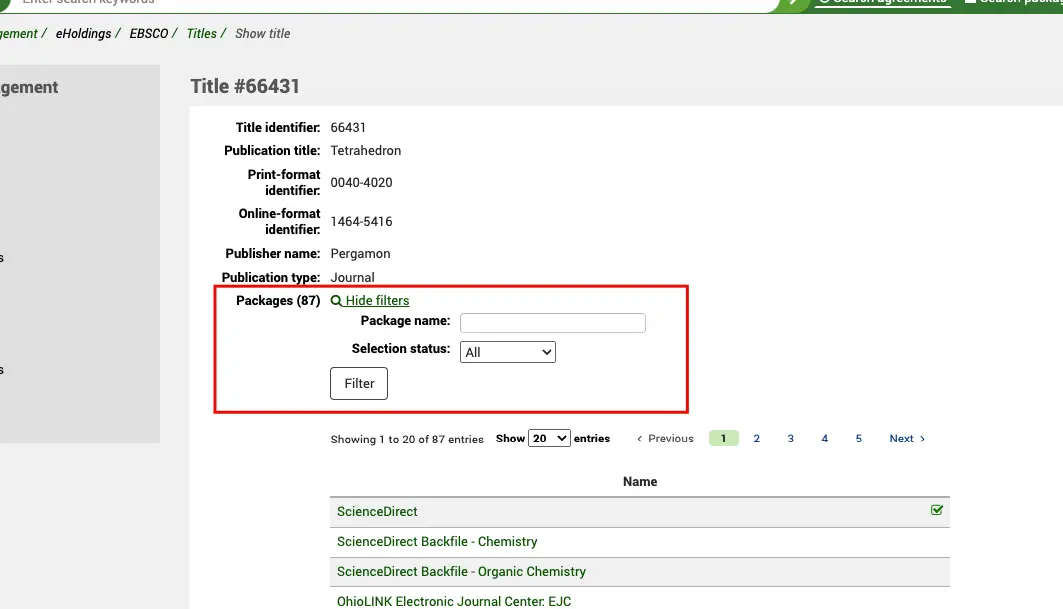
This is useful if you want to narrow down your query to a specific package or to packages that are already selected in your holdings.
Local
Local holdings are electronic holdings which are not contained in a global knowledge base but, instead (unlike EBSCO holdings) are stored in the local Koha database tables (erm_eholdings_titles).
Titles
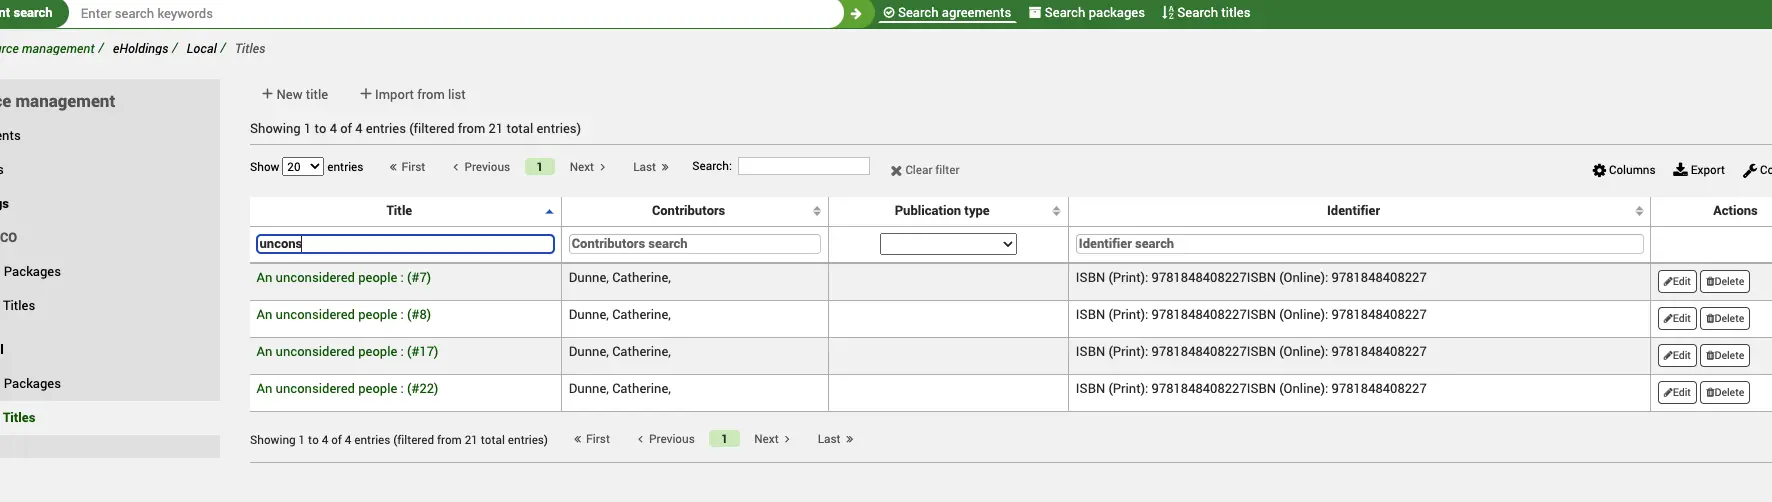
Get there: More > E-resource management > eHoldings > Local > Titles
On the Local Titles home screen, you will see a list of currently created local titles.
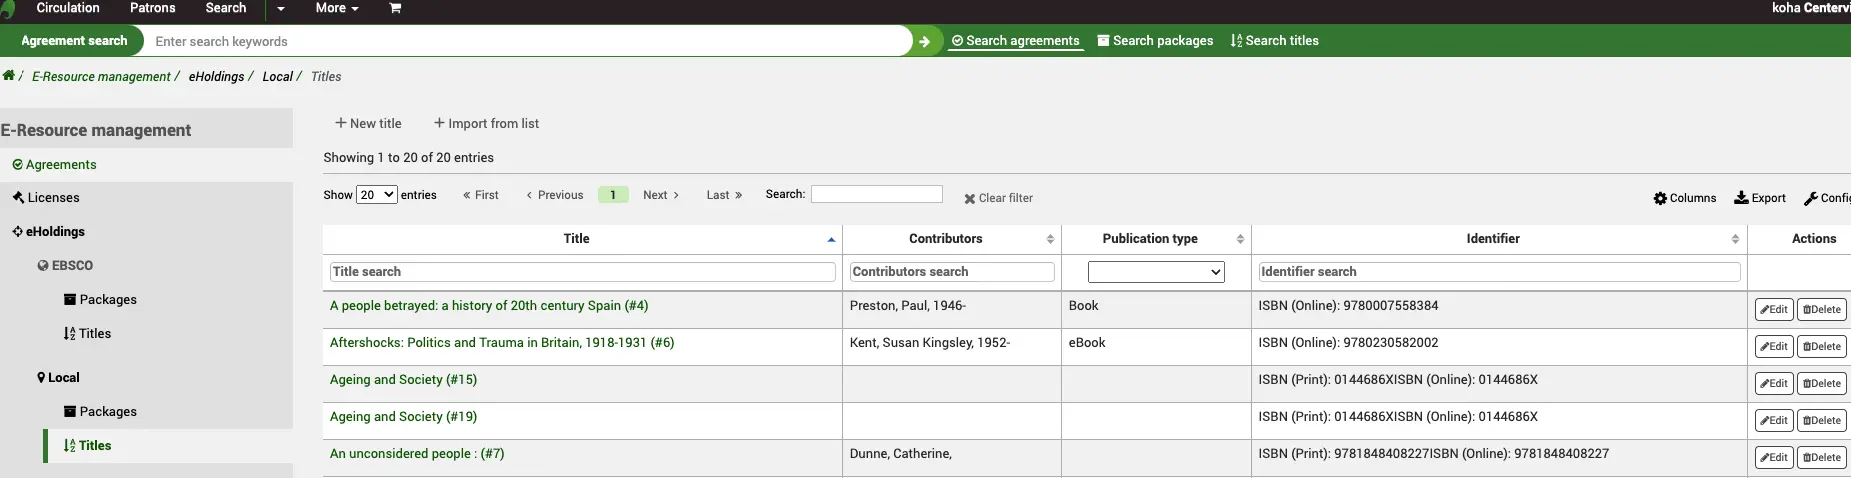
You can use the table and column filters to narrow down your list to a selected title or group of titles.
Note
You can customize the columns of this table by clicking the ‘Configure’ button. It will take you to the Administration module and specifically to the ‘table id: titles’ section of the Table settings.
By clicking on a title, you can go to the full view of the record.
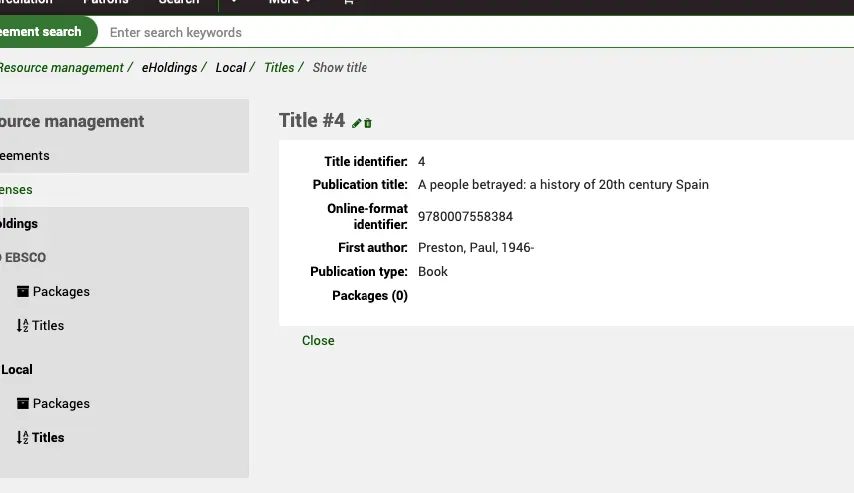
From here you can Edit or Delete the record.
If the record belongs to a locally created package, you will see that information here.
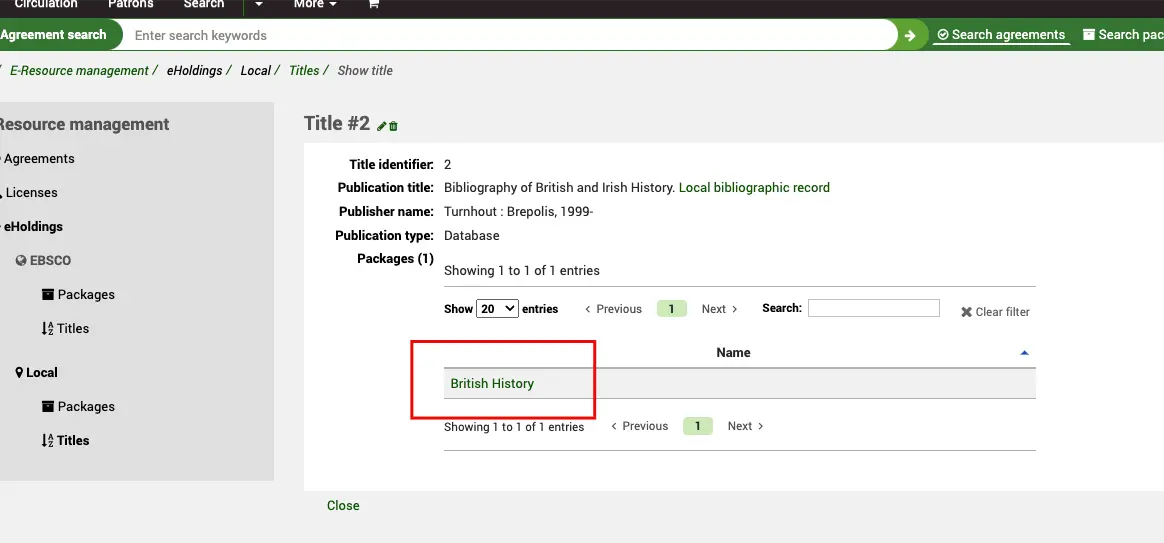
If the title is part of more than one package, you can use the table filters to restrict your search further. Clicking on the Package link will take you through to the package itself.
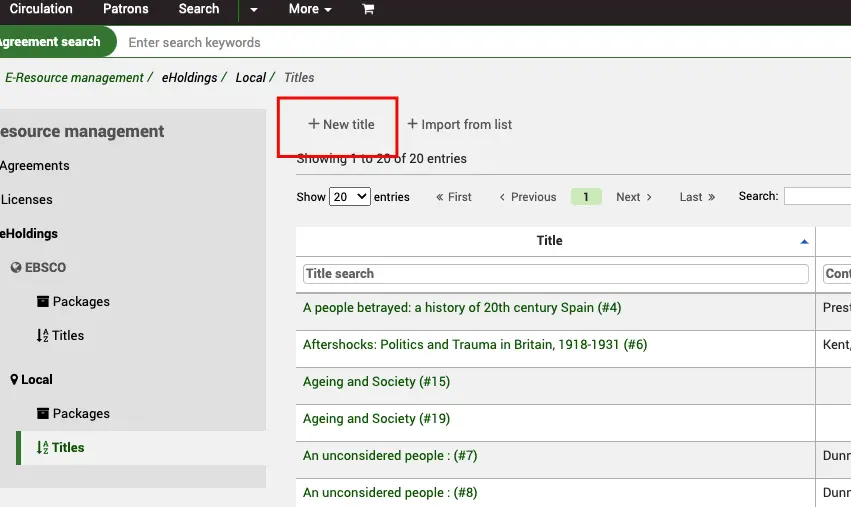
Create a new local title record
From the ERM Home page click on the Titles link in the left-hand menu under Local.
Get there: More > E-resource management > eHoldings > Local > Titles
Use the ‘New Title’ button at the top of the Titles table.
You should see a metadata template. This template is based on KBART metadata.
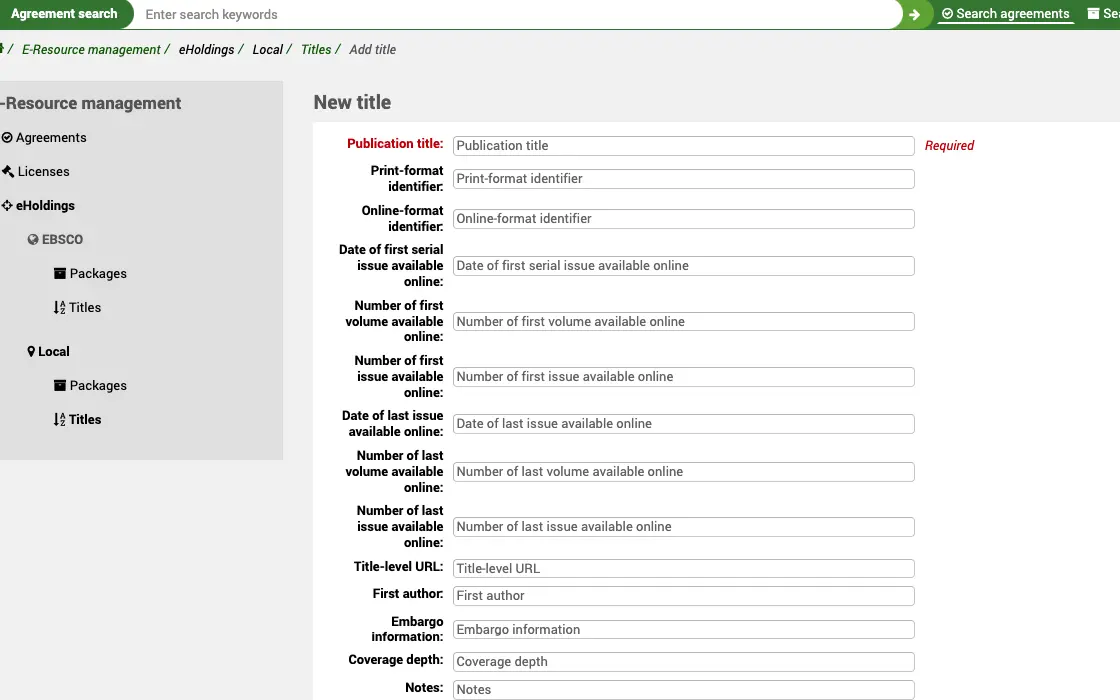
When you save the title, Koha will also automatically create a bibliographic record for you with as much of the metadata as possible. We map the KBART metadata to MARC21 in the following way:
publication_title = biblio.title
print_identifier = 020$a||020$z||022$a||022$y
online_identifier = 020$a||020$z||022$a||022$y
date_first_issue_online = 866$a (before ‘-‘)
date_last_issue_online = 866$a (after ‘-‘)
num_first_vol_online = 863$a (before ‘-‘)
num_last_vol_online = 863$a (after ‘-‘)
title_url = 856$u
first_author = biblio.first_author
coverage_depth = title_url ? ‘fulltext’ : ‘print’
notes = $852$z
publisher_name = 260$b
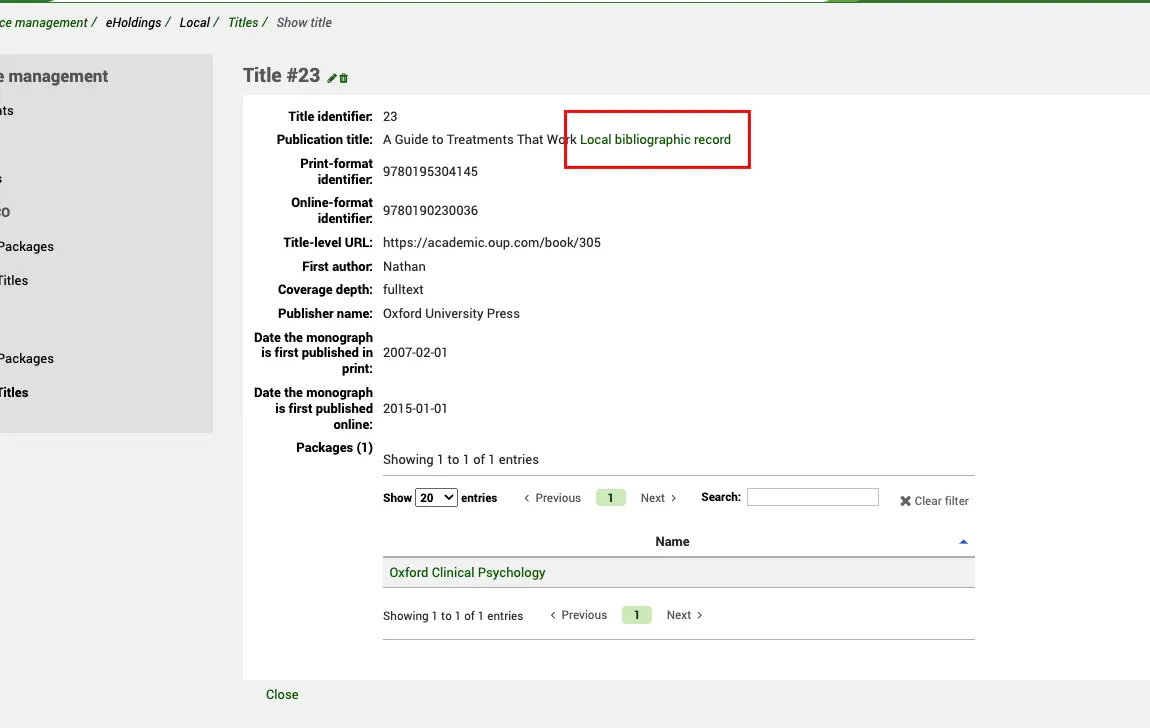
When you save the record and look at the full view, you will see a link to the bibliographic record.
At the bottom of the creation/edit template, you will see the option to add the title to a local package.
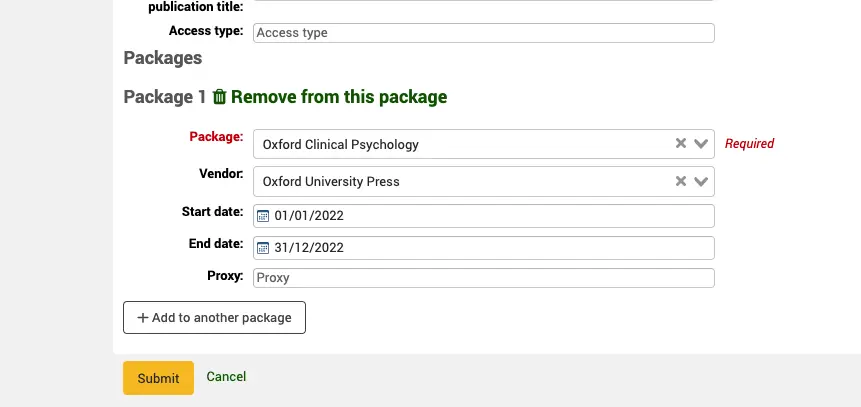
The package record must already exist before you try to link to it from the dropdown menu. You can also specify the Vendor, start and end dates and a reference to a proxy server if one is required for this service (this is not currently used in Koha, for reference only).
A title can belong to multiple packages.
Import a new local title record from a List
If you want to quickly add multiple title records to your Local holdings, then you have the option to import from a Koha list.
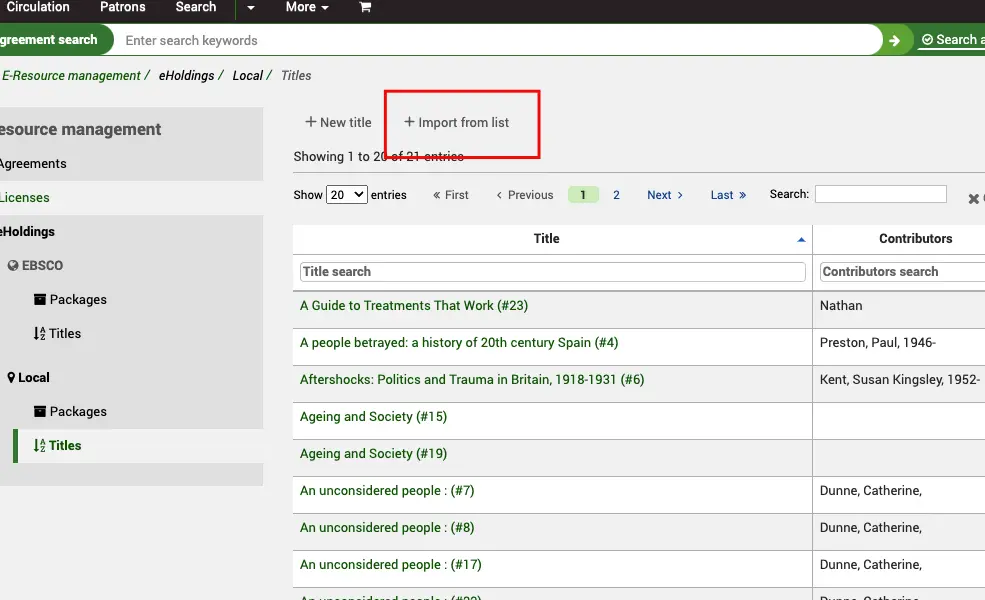
First of all, create a Koha List (as described elsewhere in this manual) and add some bibliographic information to it (either by creating the record manually or by importing it via z39.50 or Stage MARC records). Once the list has been created, you will see it in the table selection.
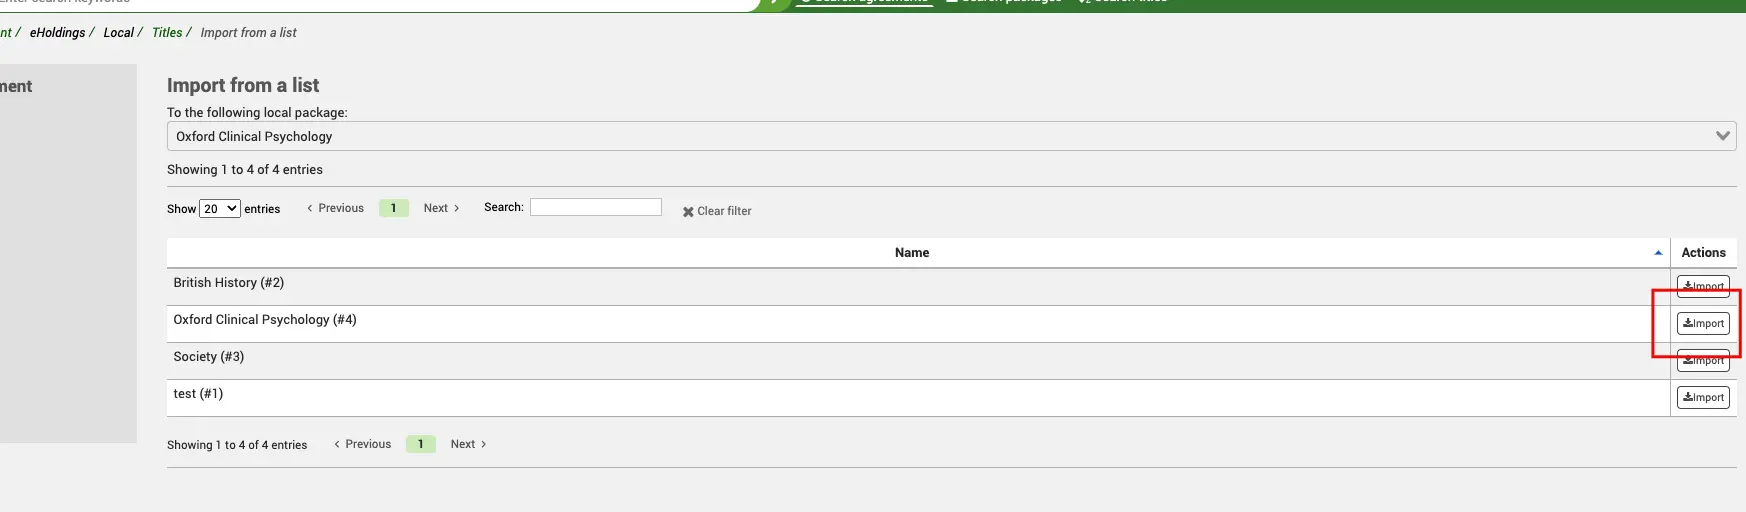
First select the package you want to add the titles to and then select the list from the selection in the table. Use the Import button to link them together.
You will see a message “import in progress” and the job should be completed in a few moments. You can click on the Job number if you want to view progress.
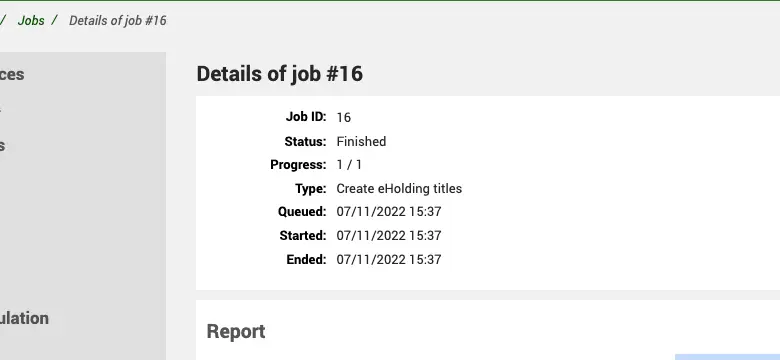
At this point you should see the titles in both the title list and also attached to your selected package.
Import a new local title record from a KBART file
Version
This component of ERM was introduced in version 24.05 of Koha.
If you want to quickly add multiple title records to your Local holdings, and your vendor can provide KBART records, then this is a quick way to get eholdings records into Koha.
First of all, create a Local package to attach the title records to.
Get there: More > E-resource management > eHoldings > Local > Packages
Once you have done that, go to your Local titles and use the button marked ‘Import from KBART file’.
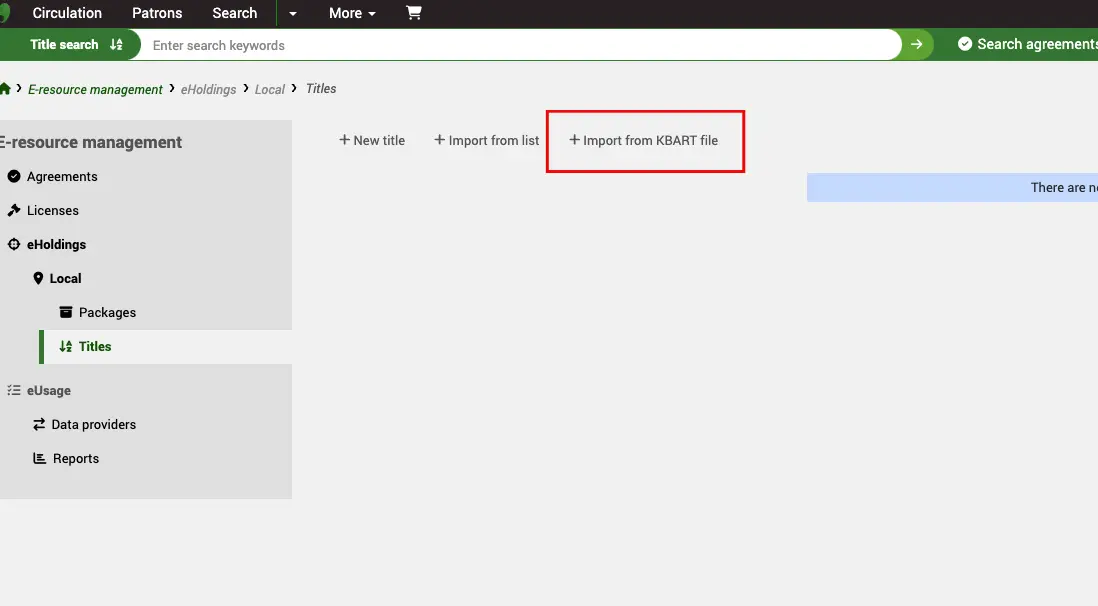
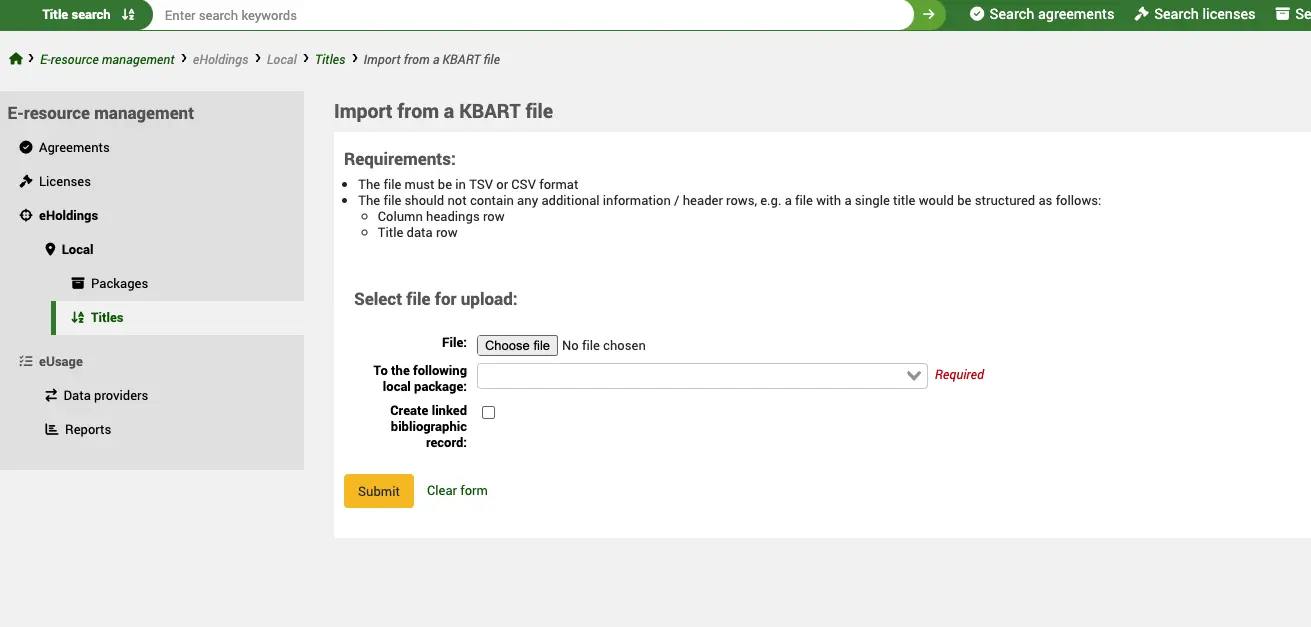
From here, use the File button to select a file of KBART files from your local device. Select the Package that you want to attach the titles to and, finally, select whether you want Koha to try and create basic bibliographic records from the data in the KBART file (this is optional).
Once the file is imported it will be sent to the background jobs for processing. You can check Background Jobs for progress but, once completed, the titles will appear in your Local title list.
Some useful resources:
Note
The imported KBART file should be in TSV or CSV format
Packages
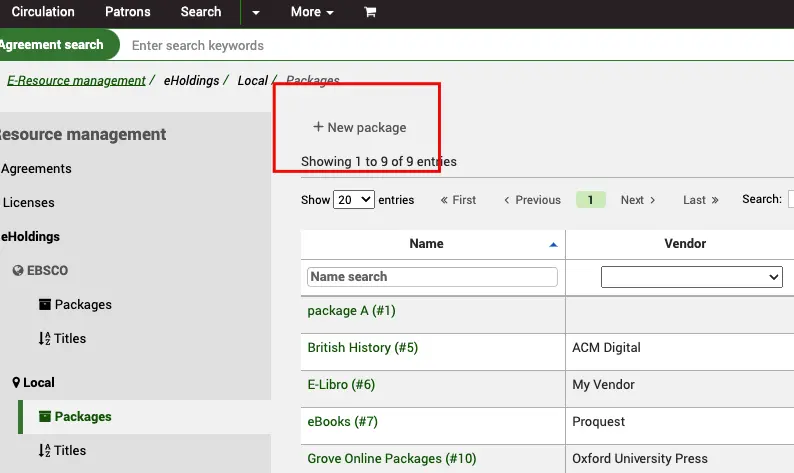
Get there: More > E-resource management > eHoldings > Local > Packages
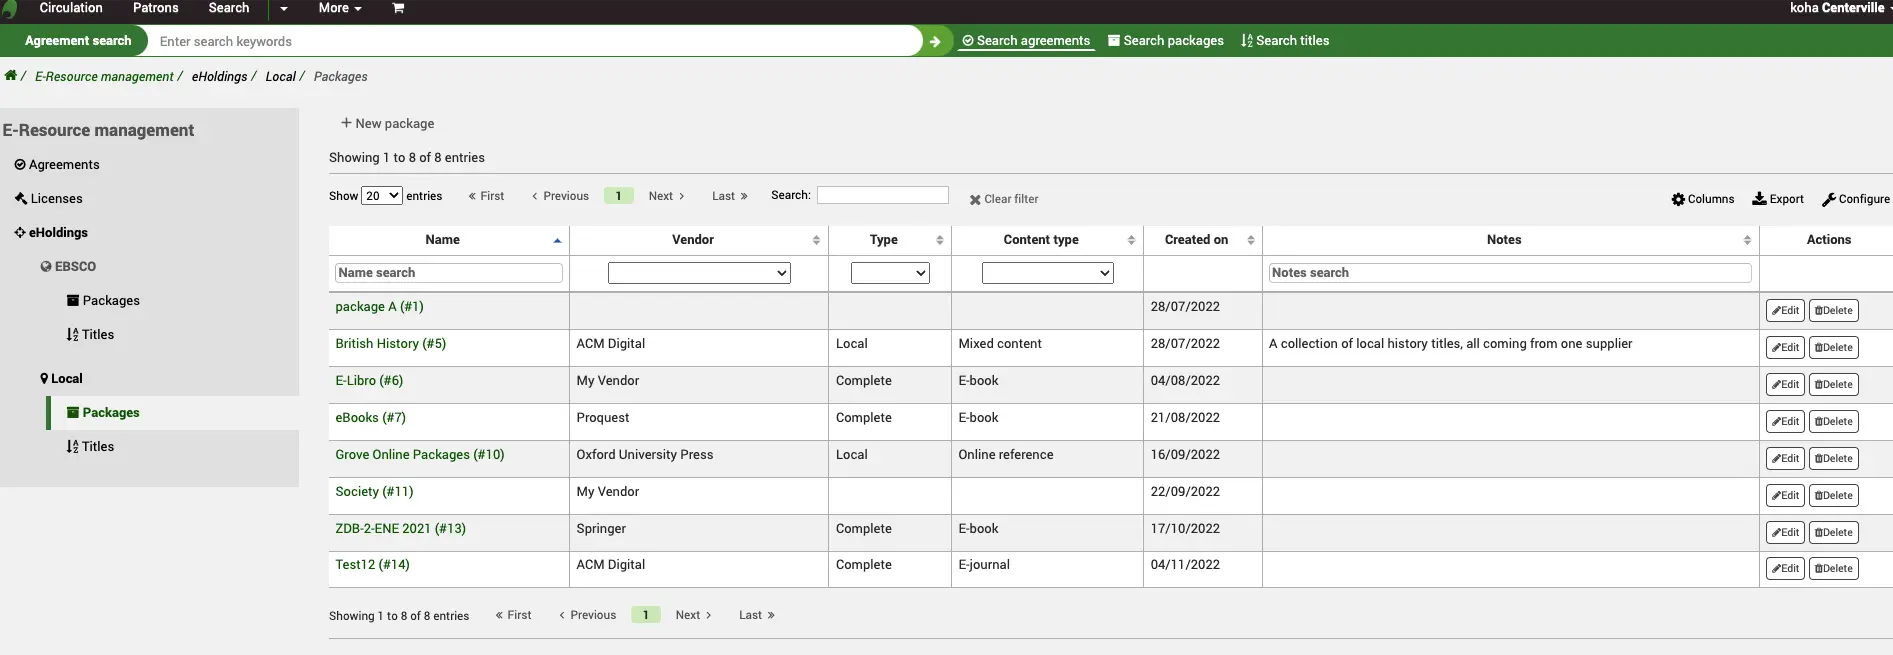
On the Local Package home screen, you will see a list of currently created local packages.
Note
You can customize the columns of this table by clicking the ‘Configure’ button. It will take you to the Administration module and specifically to the ‘table id: packages’ section of the Table settings.
Clicking on a package name will take you through to the full view.
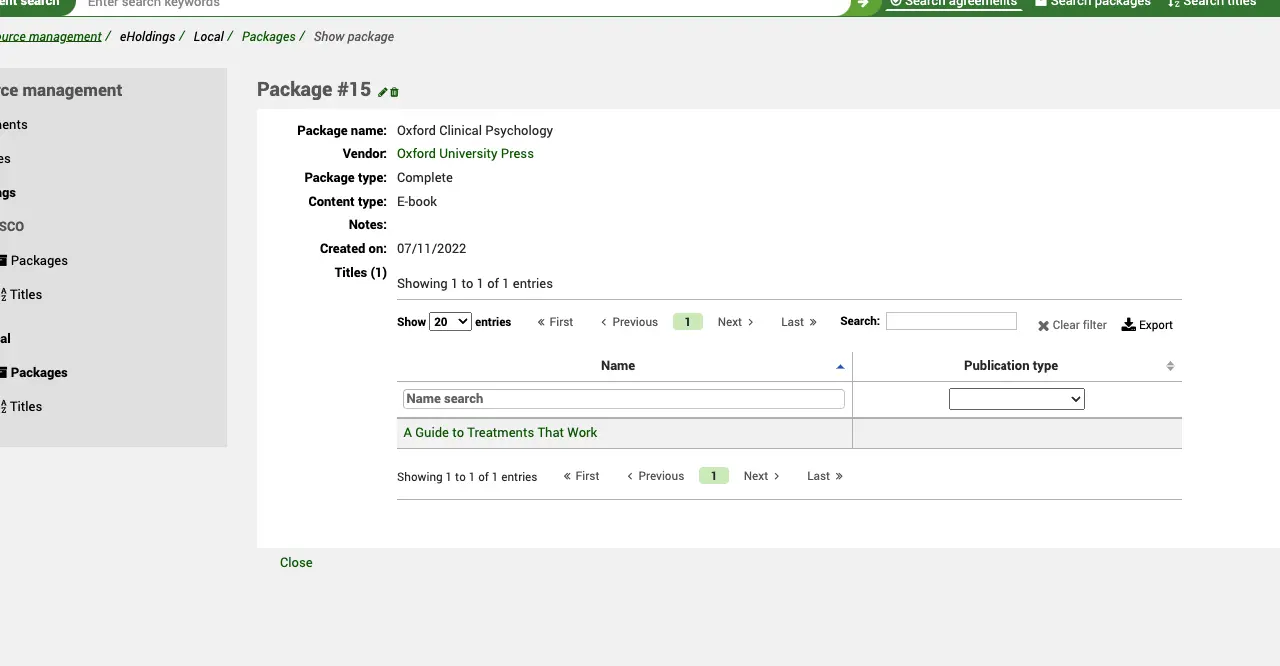
You can use the table filter to narrow down the titles if you need to.
Clicking on the title will take you to the title full view and clicking on the Vendor will take you through to the vendor record in acquisitions.
From this screen you can also use the Edit or Delete buttons.
When you edit a package, you have the option to attach it to an agreement you have already created.
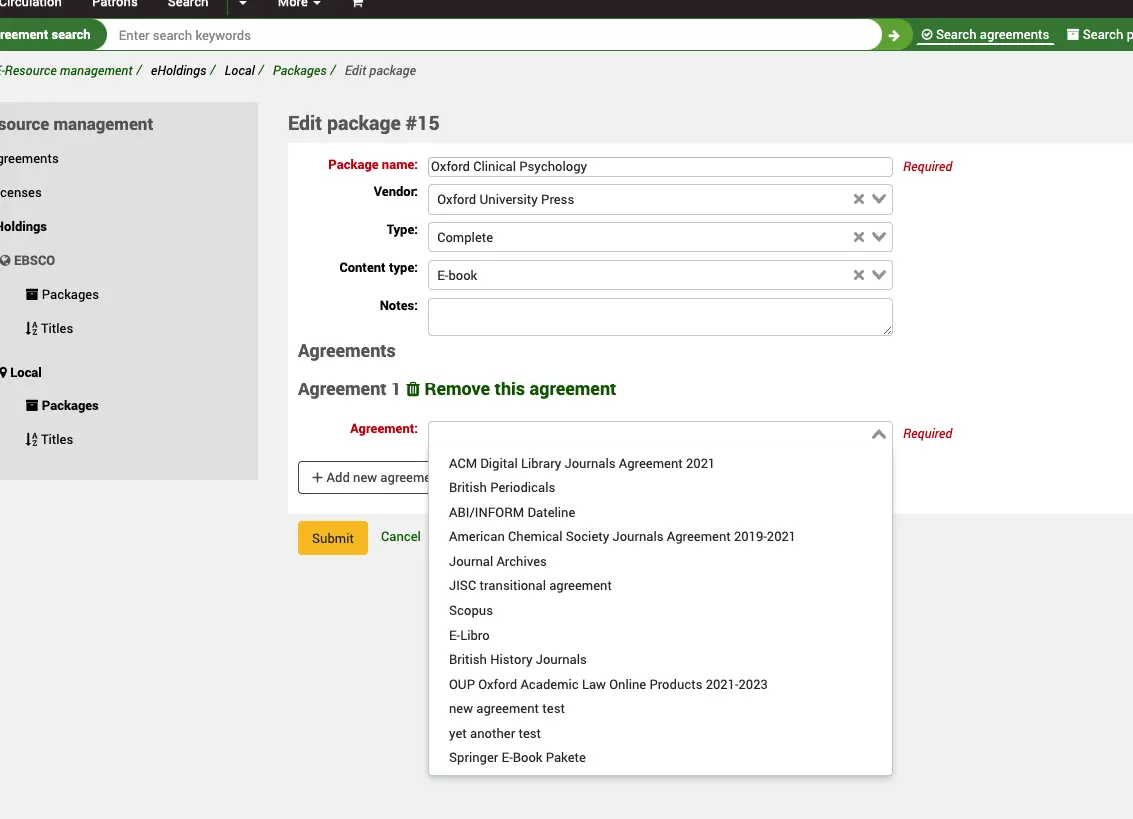
This package will then be viewable on the agreement record.
Create a new local package record
Get there: More > E-resource management > eHoldings > Local > Packages
Select the ‘New package’ button.
The Package name is a required field. You must have already created your agreement prior to attaching it to a package.
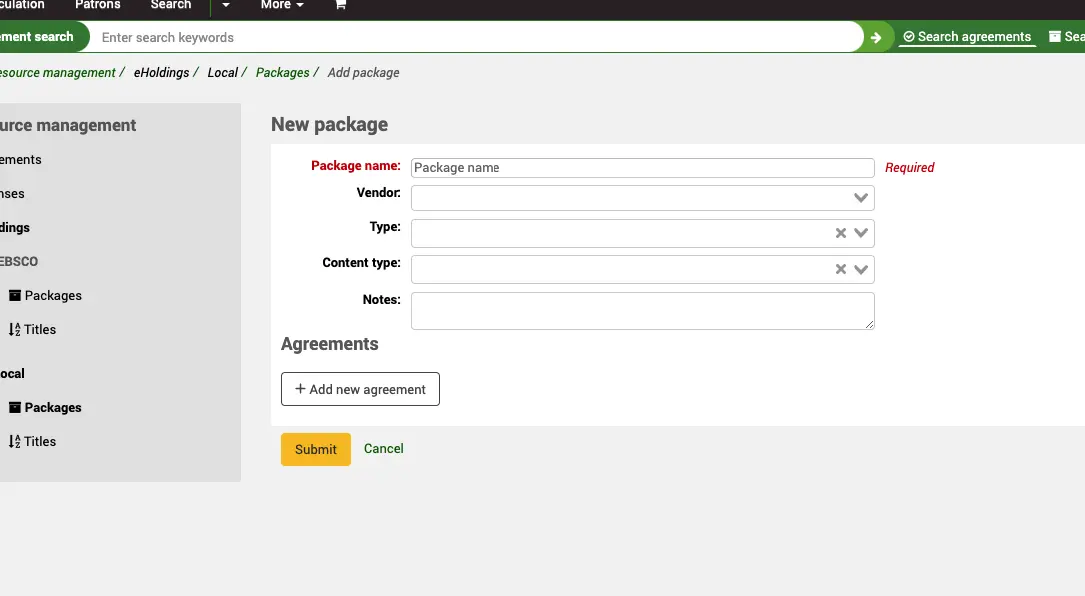
The Vendor, Type, Content type and Notes fields are optional.
If you have any additional fields for ERM packages (erm_packages), they will be displayed here.
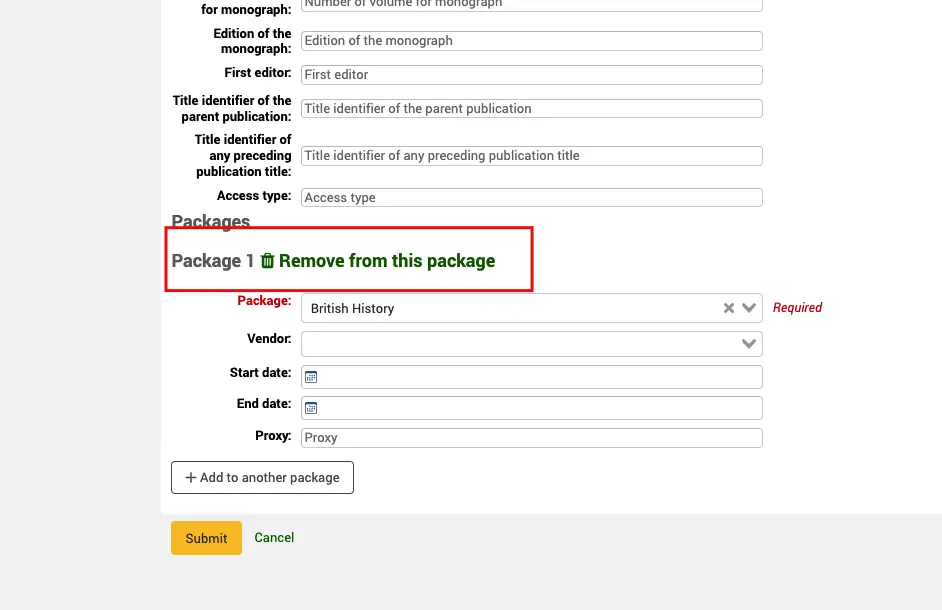
Remove a local title from a package record
Get there: More > E-resource management > eHoldings > Local > Titles
Search for the title you want to remove from the Local titles list.
Click through to the title detail and use the ‘Edit’ button.
At the bottom of the screen use the ‘Remove from this package’ link.
Data Providers
Version
This component of ERM was introduced in version 23.11 of Koha.
Data Providers (or Data Platforms) are the organizations who provide usage statistics for your electronic resources. This could be a vendor or a platform provider. The data provider record contains information about SUSHI credentials and any COUNTER data which has been harvested from the provider.
Definitions:
SUSHI (Standardized Usage Statistics Harvesting Initiative) is an ANSI/NISO standard that defines the model for harvesting e-resource usage data. It is designed to work with COUNTER.
COUNTER provides the standard that enables the knowledge community to count the use of electronic resources. Known as the Code of Practice, the standard ensures vendors and publishers can provide their library customers with consistent, credible and comparable usage data. Koha currently only supports version 5 of the COUNTER standard.
Note
Before you start to create new Data provider records, ensure your staff users have the erm permission (or the superlibrarian permission) and that you have reviewed the ERM authorized values to suit your needs. Also, ensure you have reviewed the ERM system preferences.
Create a Data Provider record
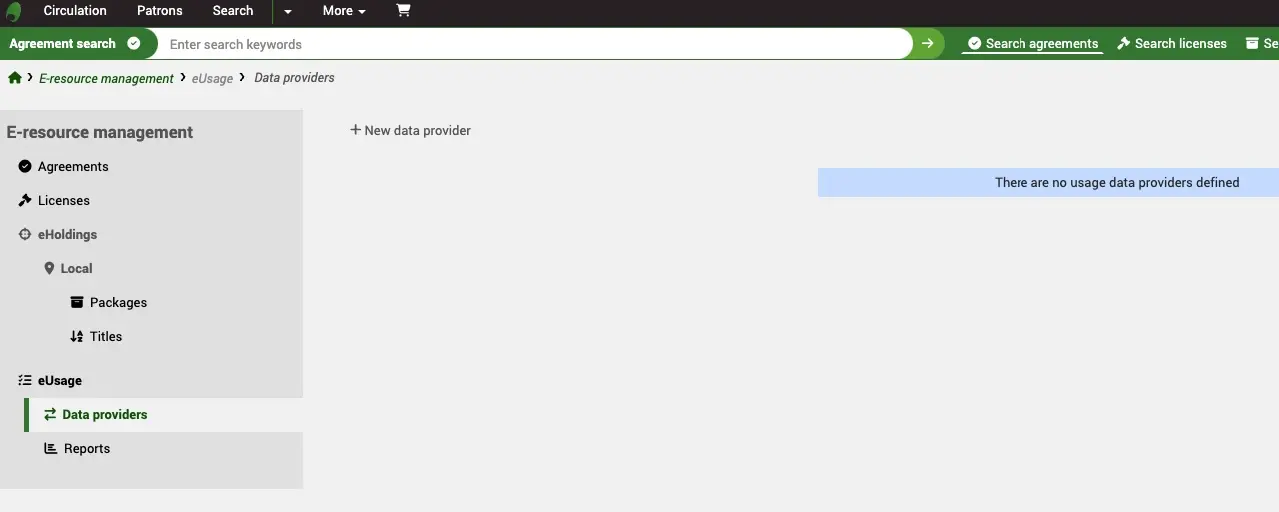
From the ERM Home page click on the Data providers link in the left-hand menu.
Get there: More > E-resource management > Data providers
Use the ‘New data provider’ button at the top of the Data Providers table.
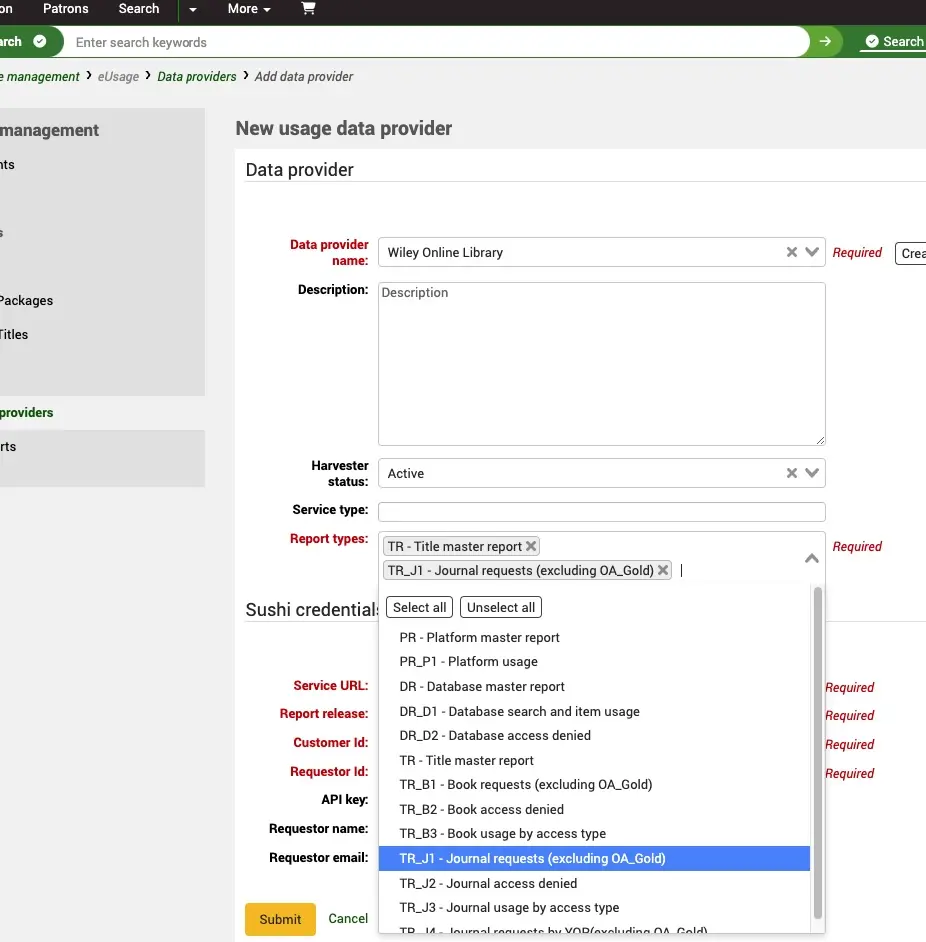
You are required to give the Data provider a name and list of report type(s). Koha, by default, will search the COUNTER Registry and add the provider details automatically for you unless you select the ‘Create manually’ button.
Start typing in the Data provider name box to see a list of providers registered on the COUNTER Registry.
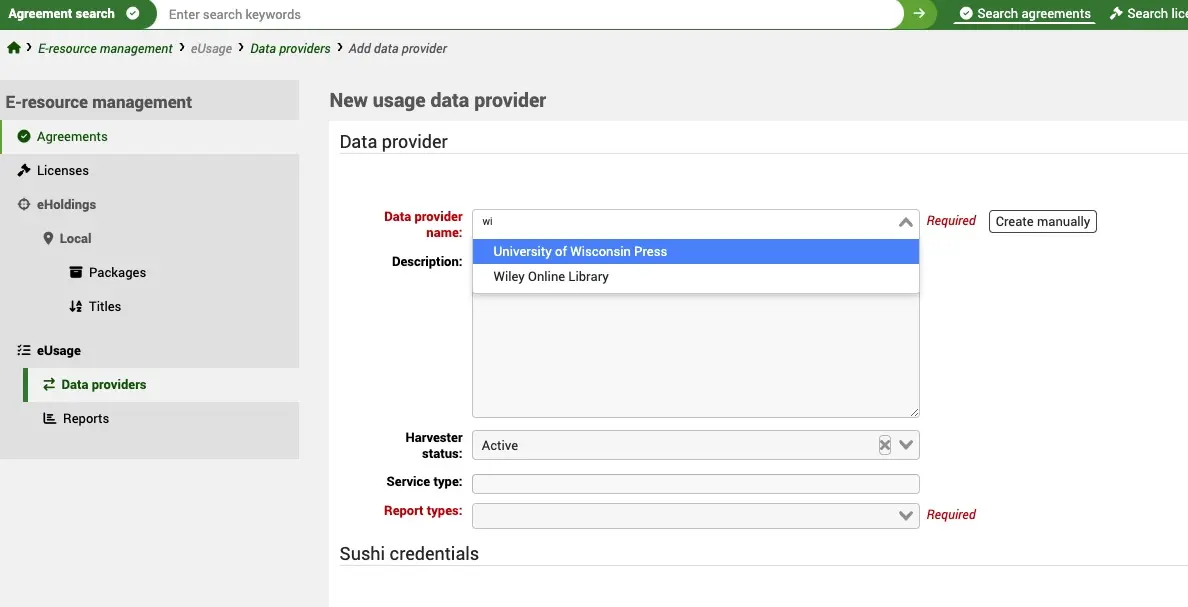
By setting the Harvester status to ‘Active’ it will be picked up by the background harvesting cronjob (erm_run_harvester.pl).
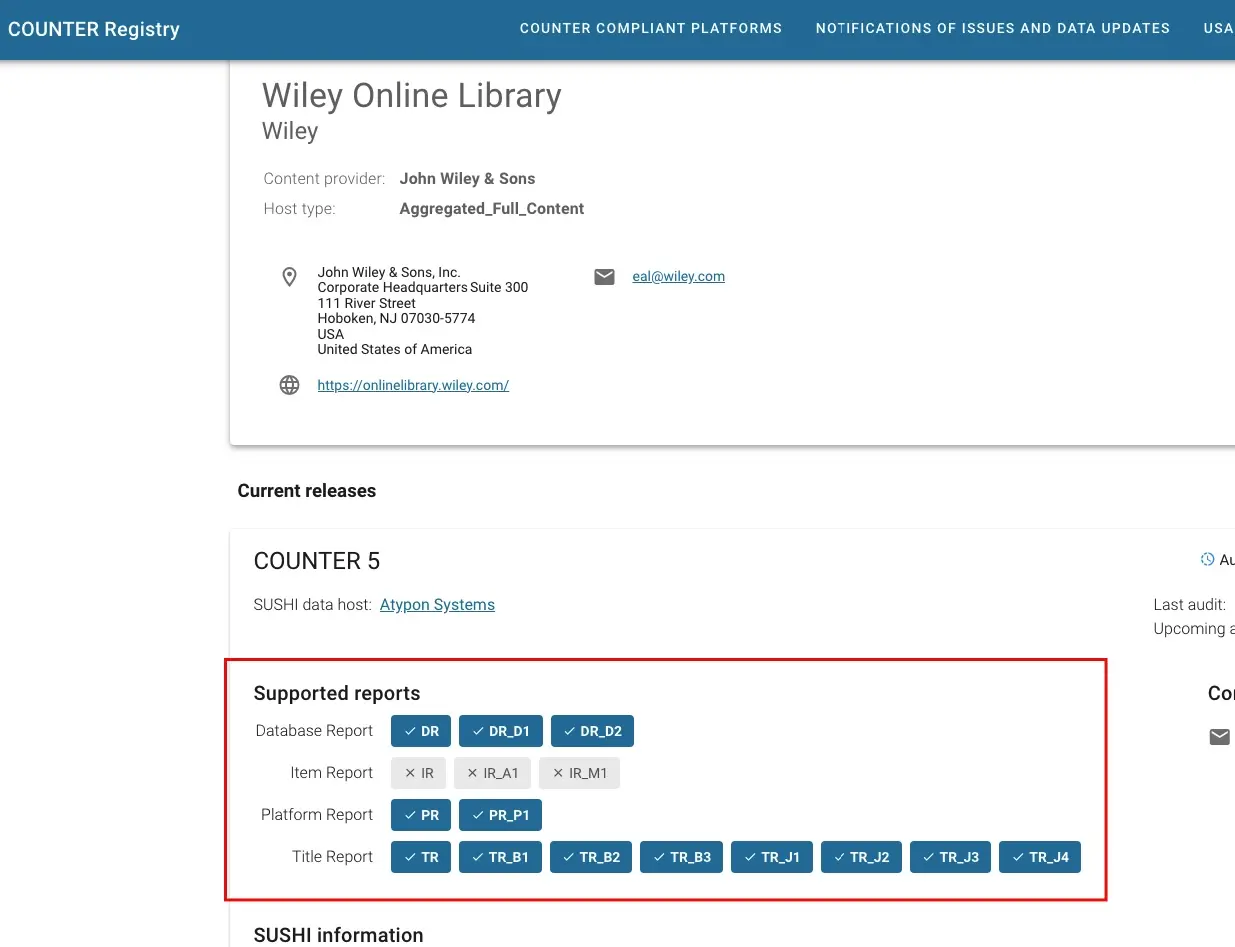
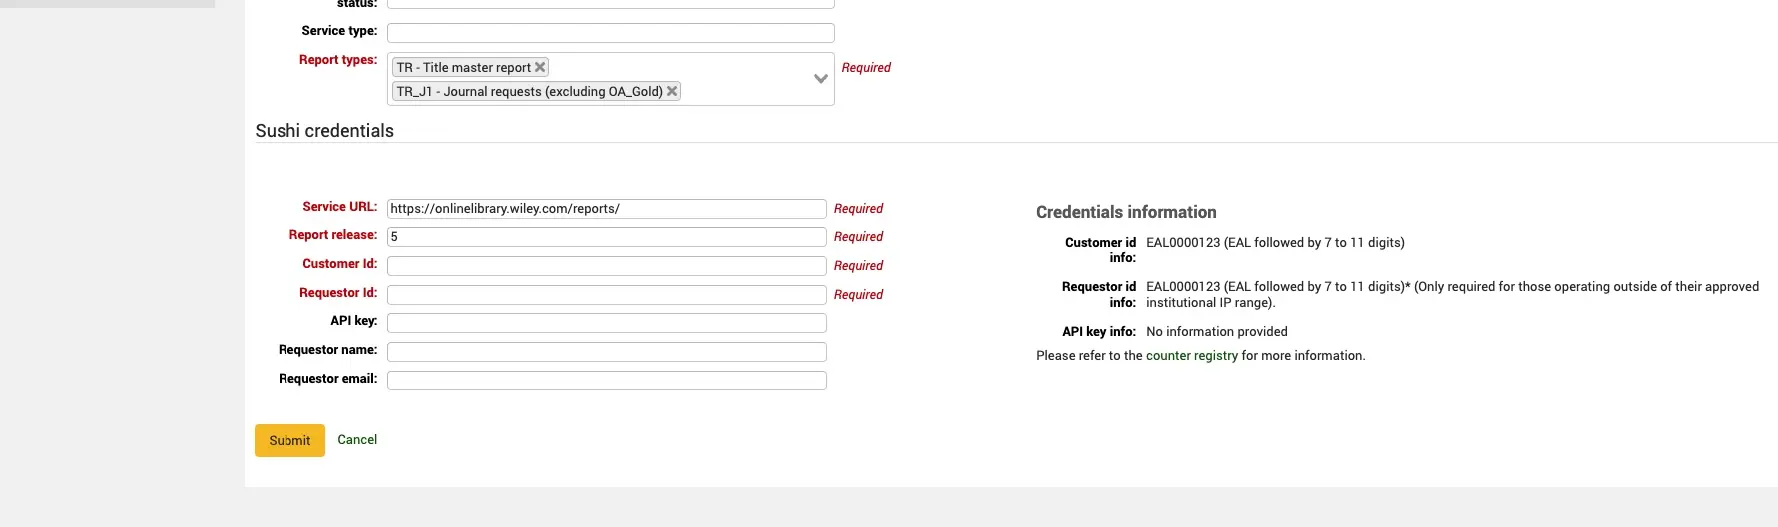
Report types is a required field and this defines which report type data is harvested from the provider. If you have created the provider from the COUNTER Registry then the report types supported will be automatically pulled through to the report types list and you can choose to select from that list or Select All. For more information about the report types, see 4. COUNTER reports, COUNTER Code of Practice. If you are unsure which report types your provider supports, and you are creating your provider manually, check the COUNTER Registry and search for the provider.
If you do not create the provider manually, the SUSHI credentials will be completed with information from the COUNTER Registry. The ‘Credentials information’ is also pulled through to assist you with the information you need to request from the provider. This may include a Customer Id, Requester Id or API key. You may also be required to provide a requester name and email.
You can toggle between the ‘Create manually’ and ‘Create from registry’ buttons depending on whether you want to input the information yourself or take it from the registry. You can also take the information from the registry and then toggle to ‘Create manually’ if you want to update things like the name.
Data providers home screen
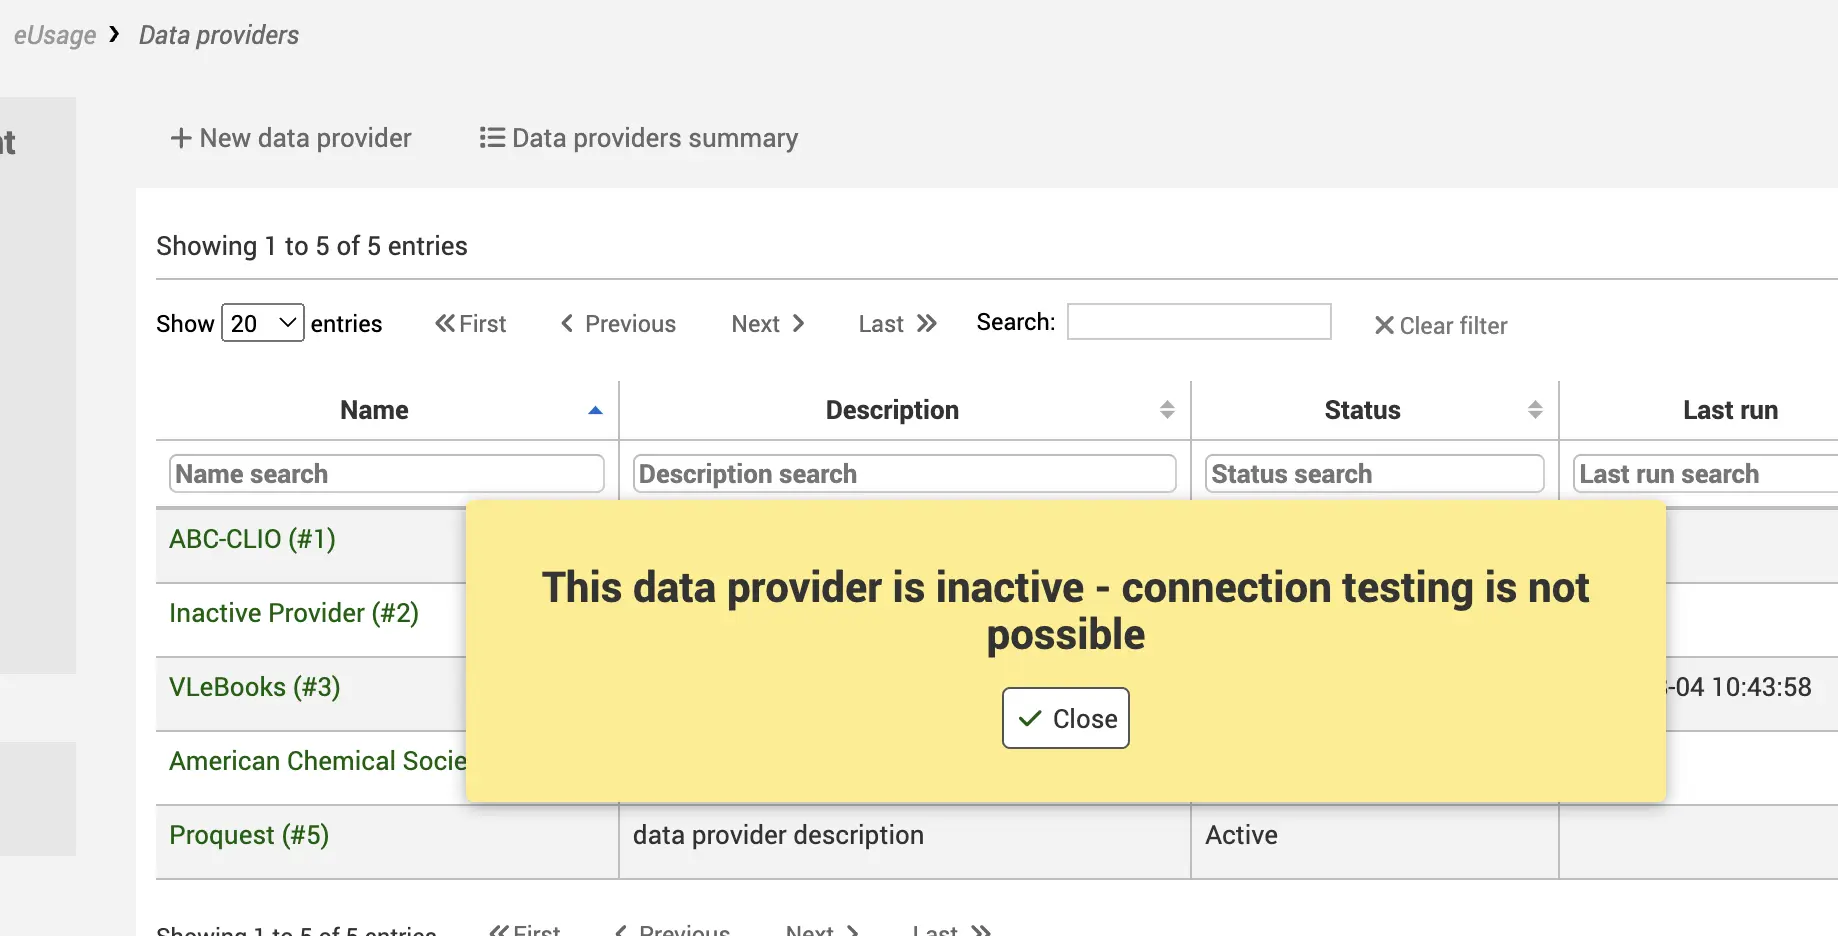
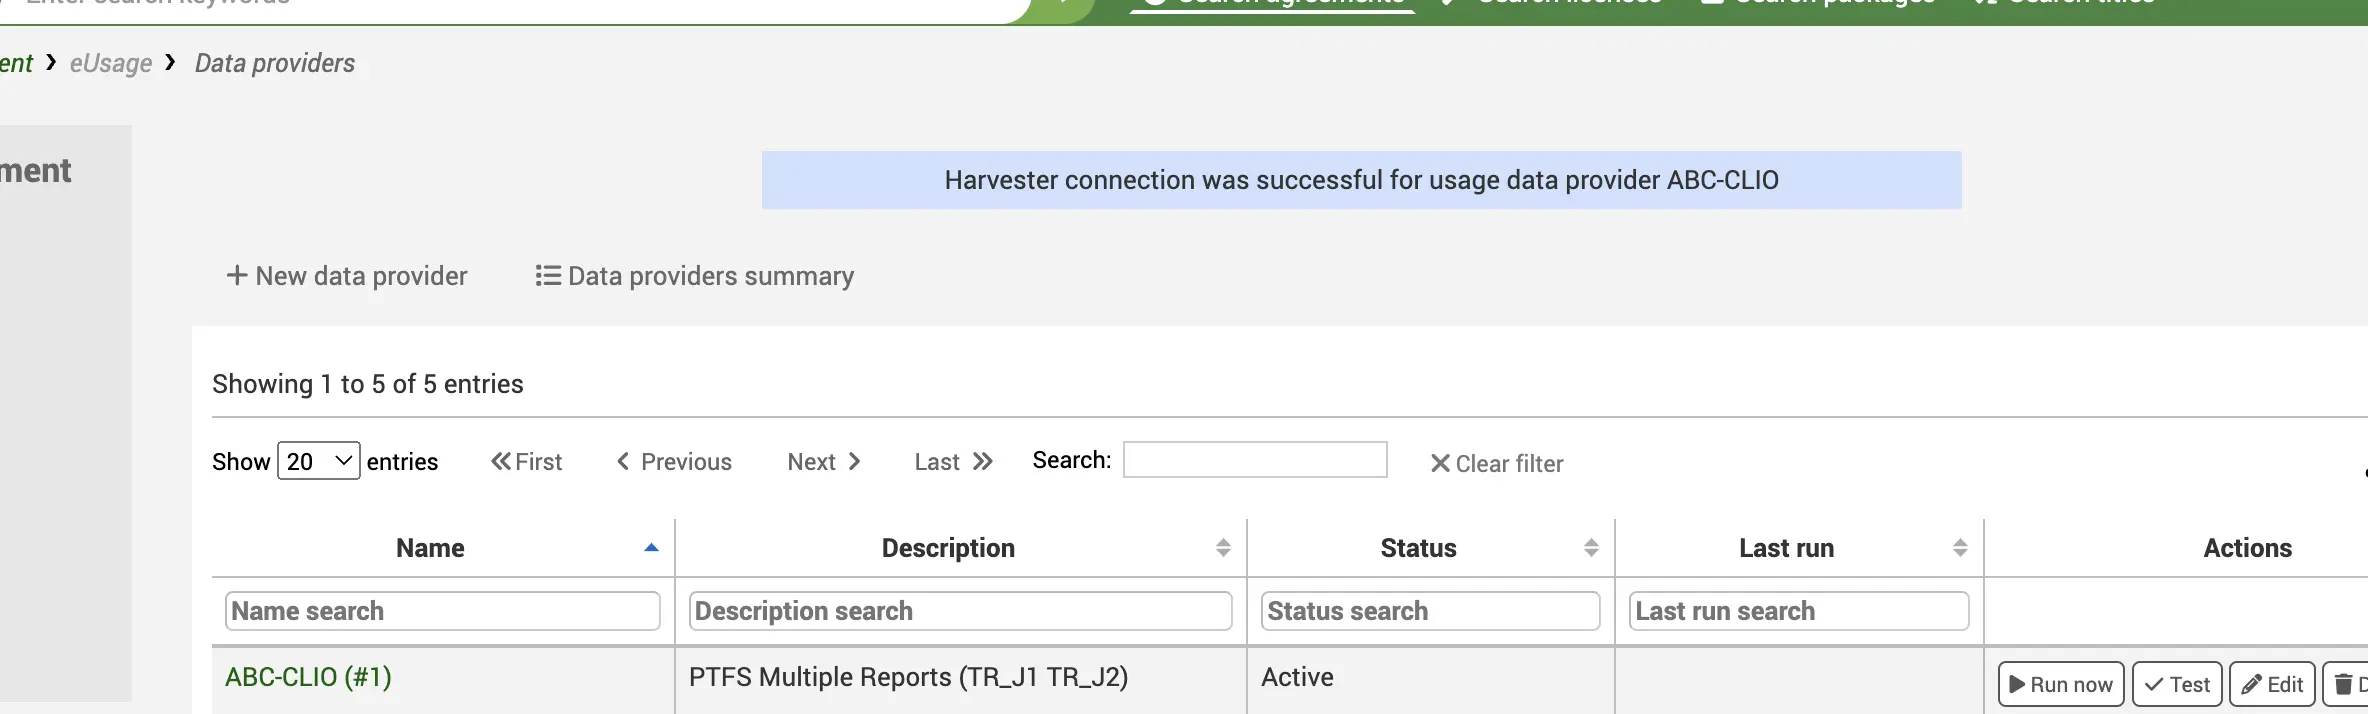
The Data providers home screen provides you with a list of your current data providers. You can see at a glance whether they are active or inactive and when the last harvest of that platform took place. Use the table filters to search for a specific Data provider. The four action buttons work as follows:
Test
The ‘Test now’ button will access the SUSHI endpoint you have configured and test your credentials to ensure they are valid. If the Data provider is inactive, you will receive a warning that the test cannot be completed.
If the Data provider is active, you will receive a success or failure message.
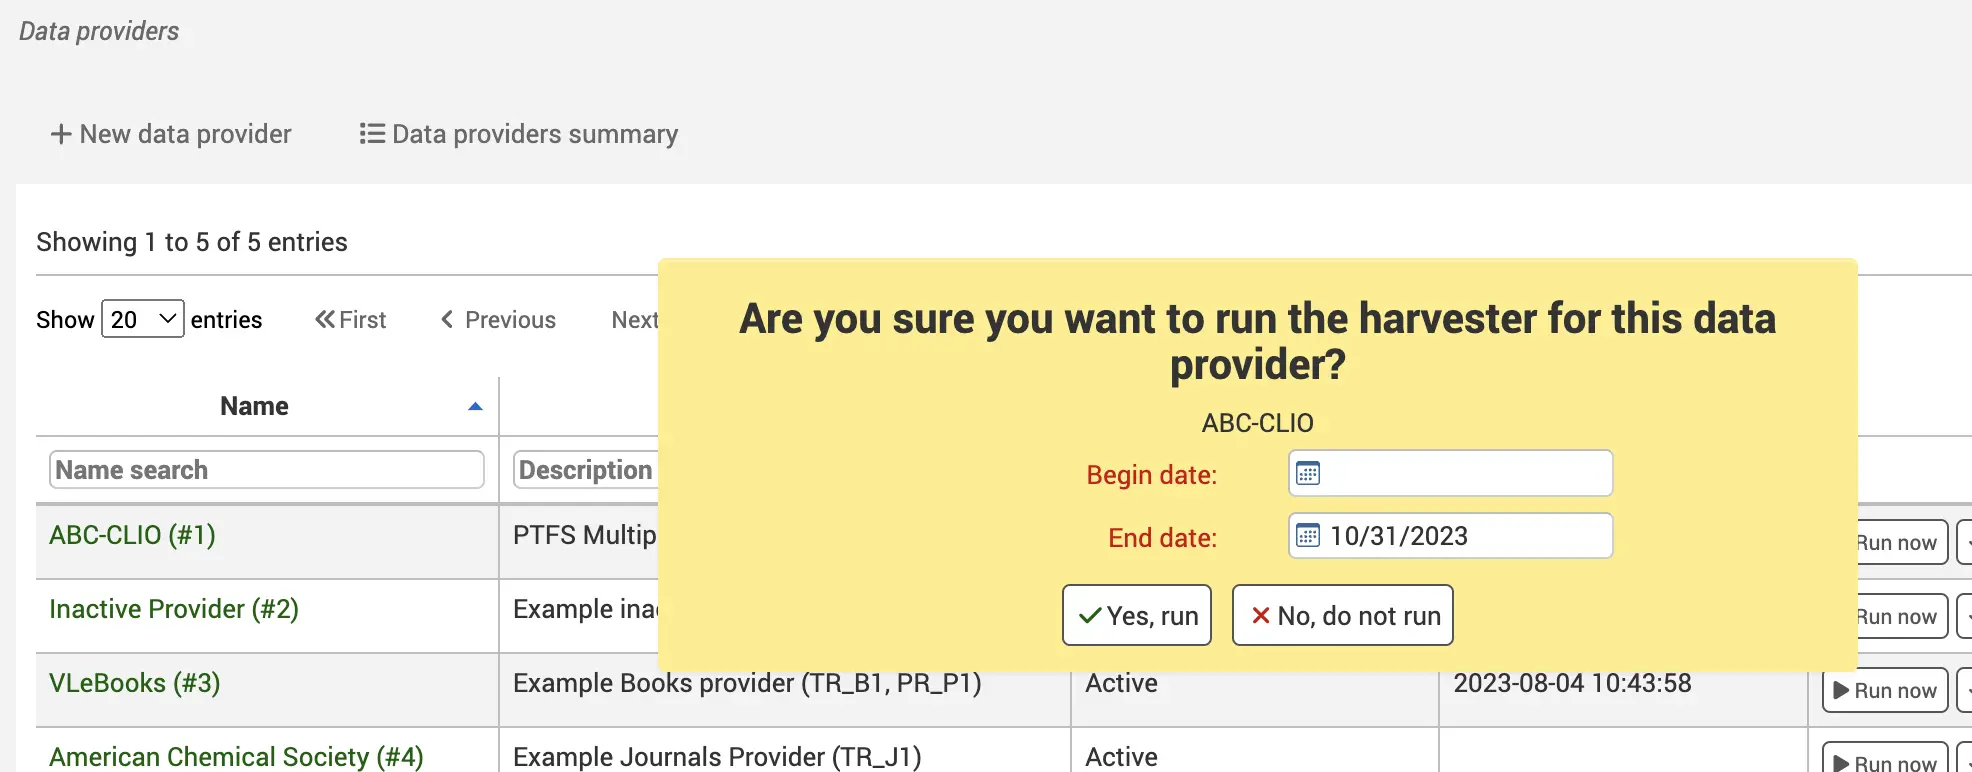
Run now
This will trigger an immediate harvest of the source. Run now also prompts you to provide a start and end harvest date.
Tip
Instead of manually clicking ‘Run now’ for every provider when you need to check new usage statistics, you can set up the harvesting cron job on your server. The erm_run_harvester.pl script will harvest the SUSHI data for all active usage data providers at regular intervals.
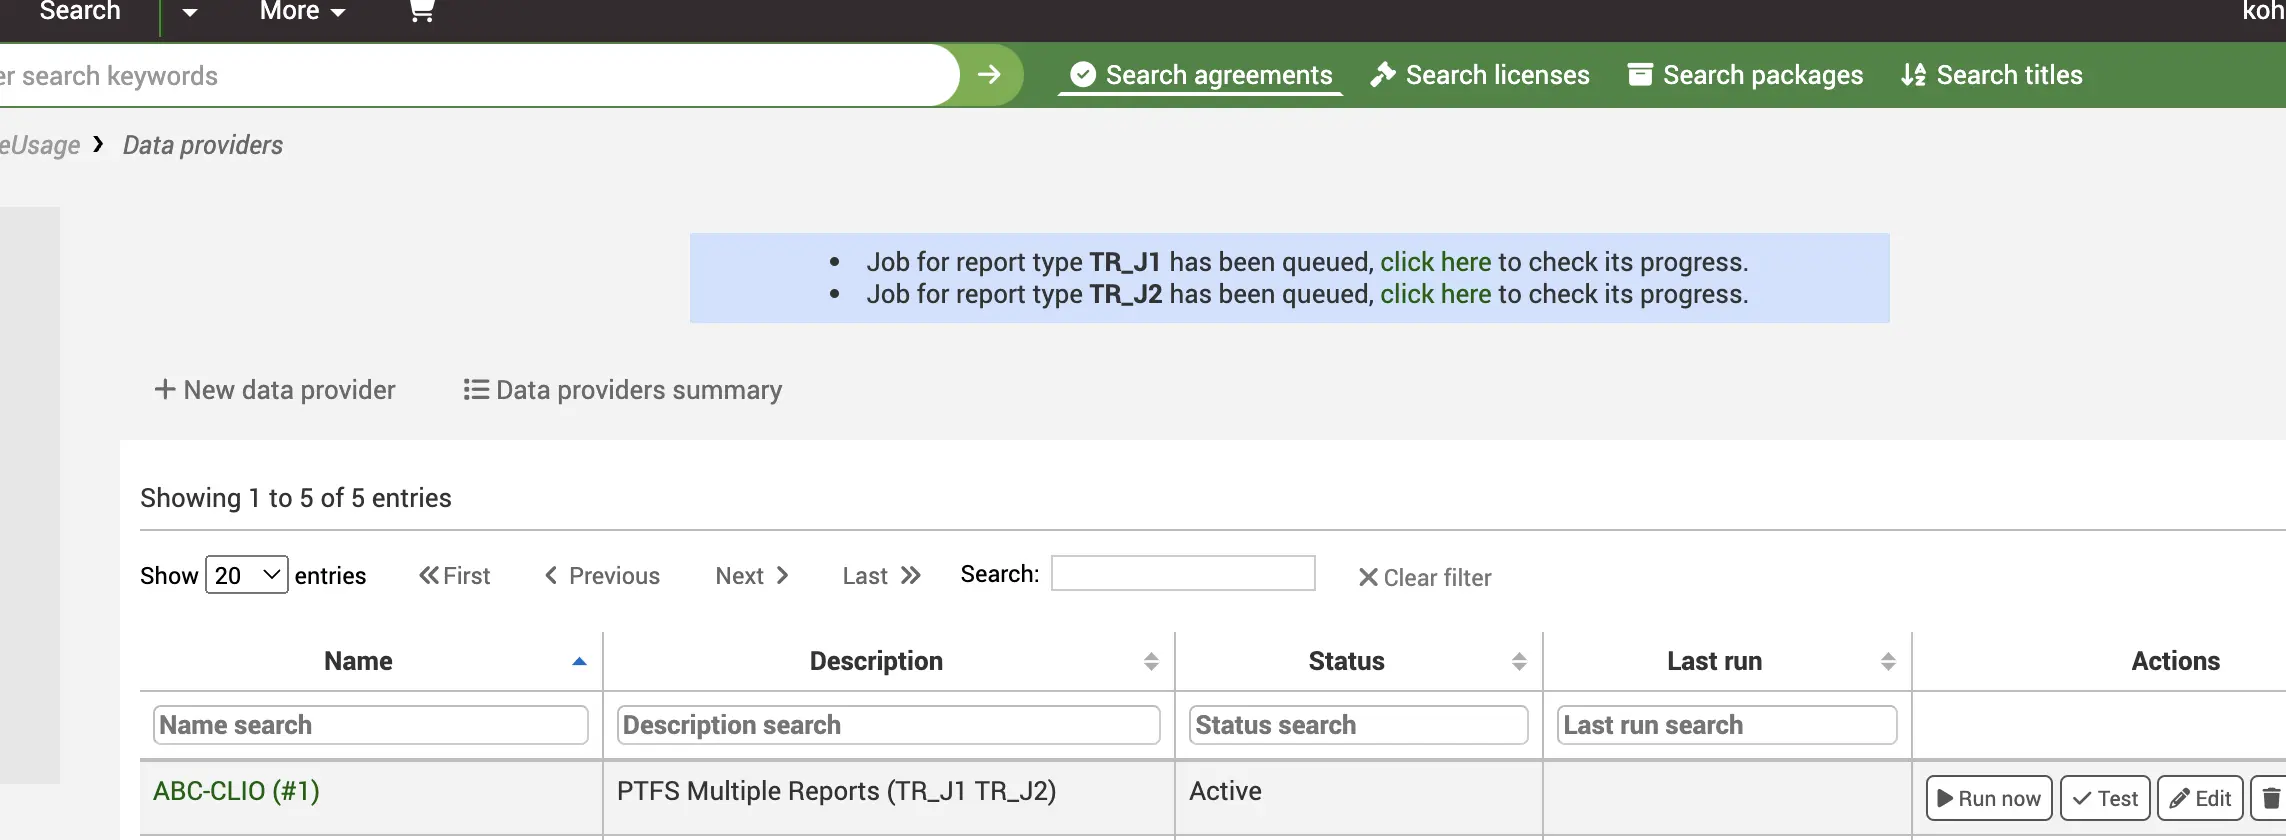
You will also see a link to the background job. There is one background job per report type.
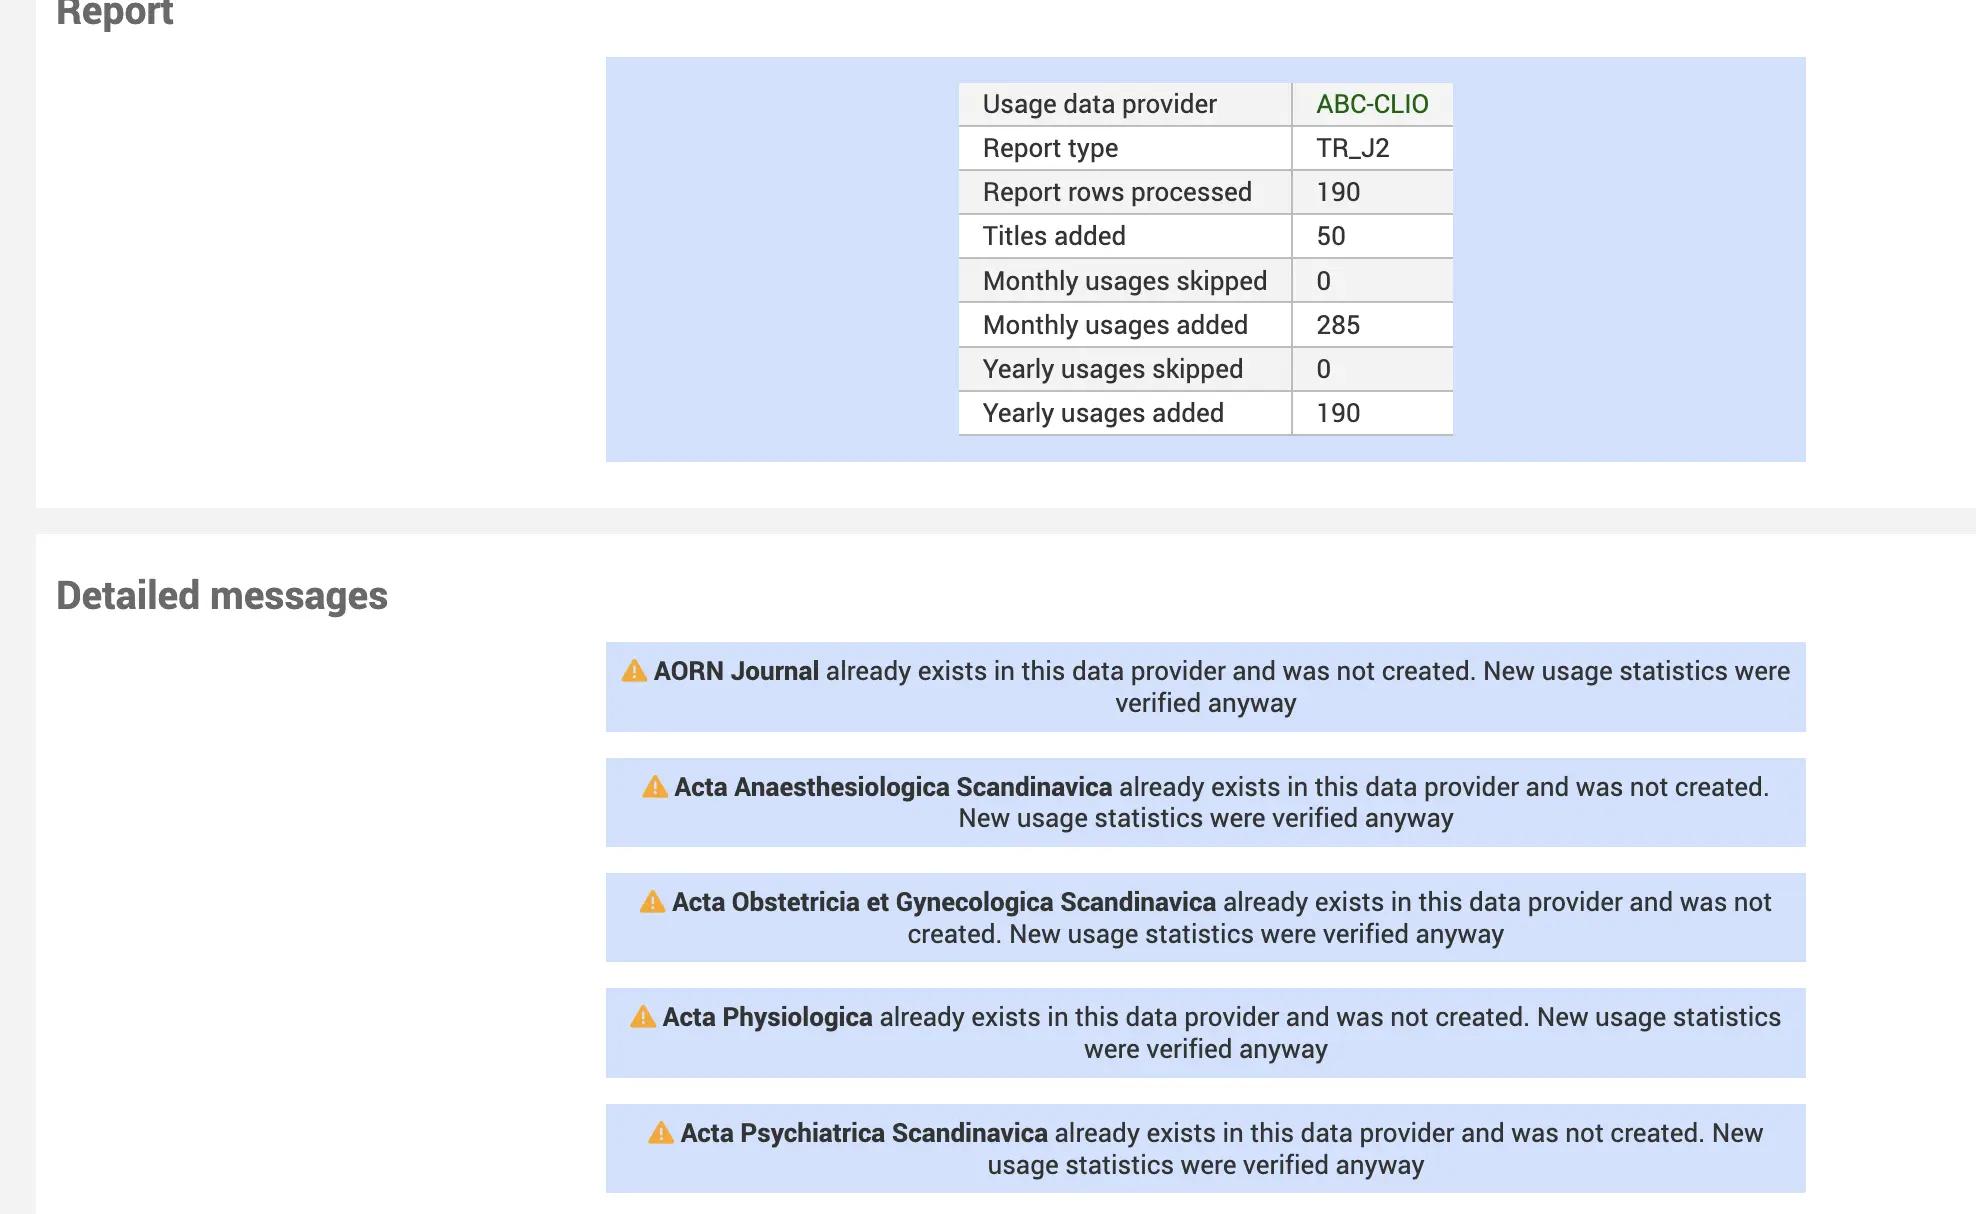
The summary page will give you a list of the report rows processed from the incoming COUNTER file and the number of provider title records imported into Koha. In addition it shows the amount of usage statistic counts that have been added to the data provider title tables. Each successfully added new title will have a check mark next to it to indicate it has been newly added.
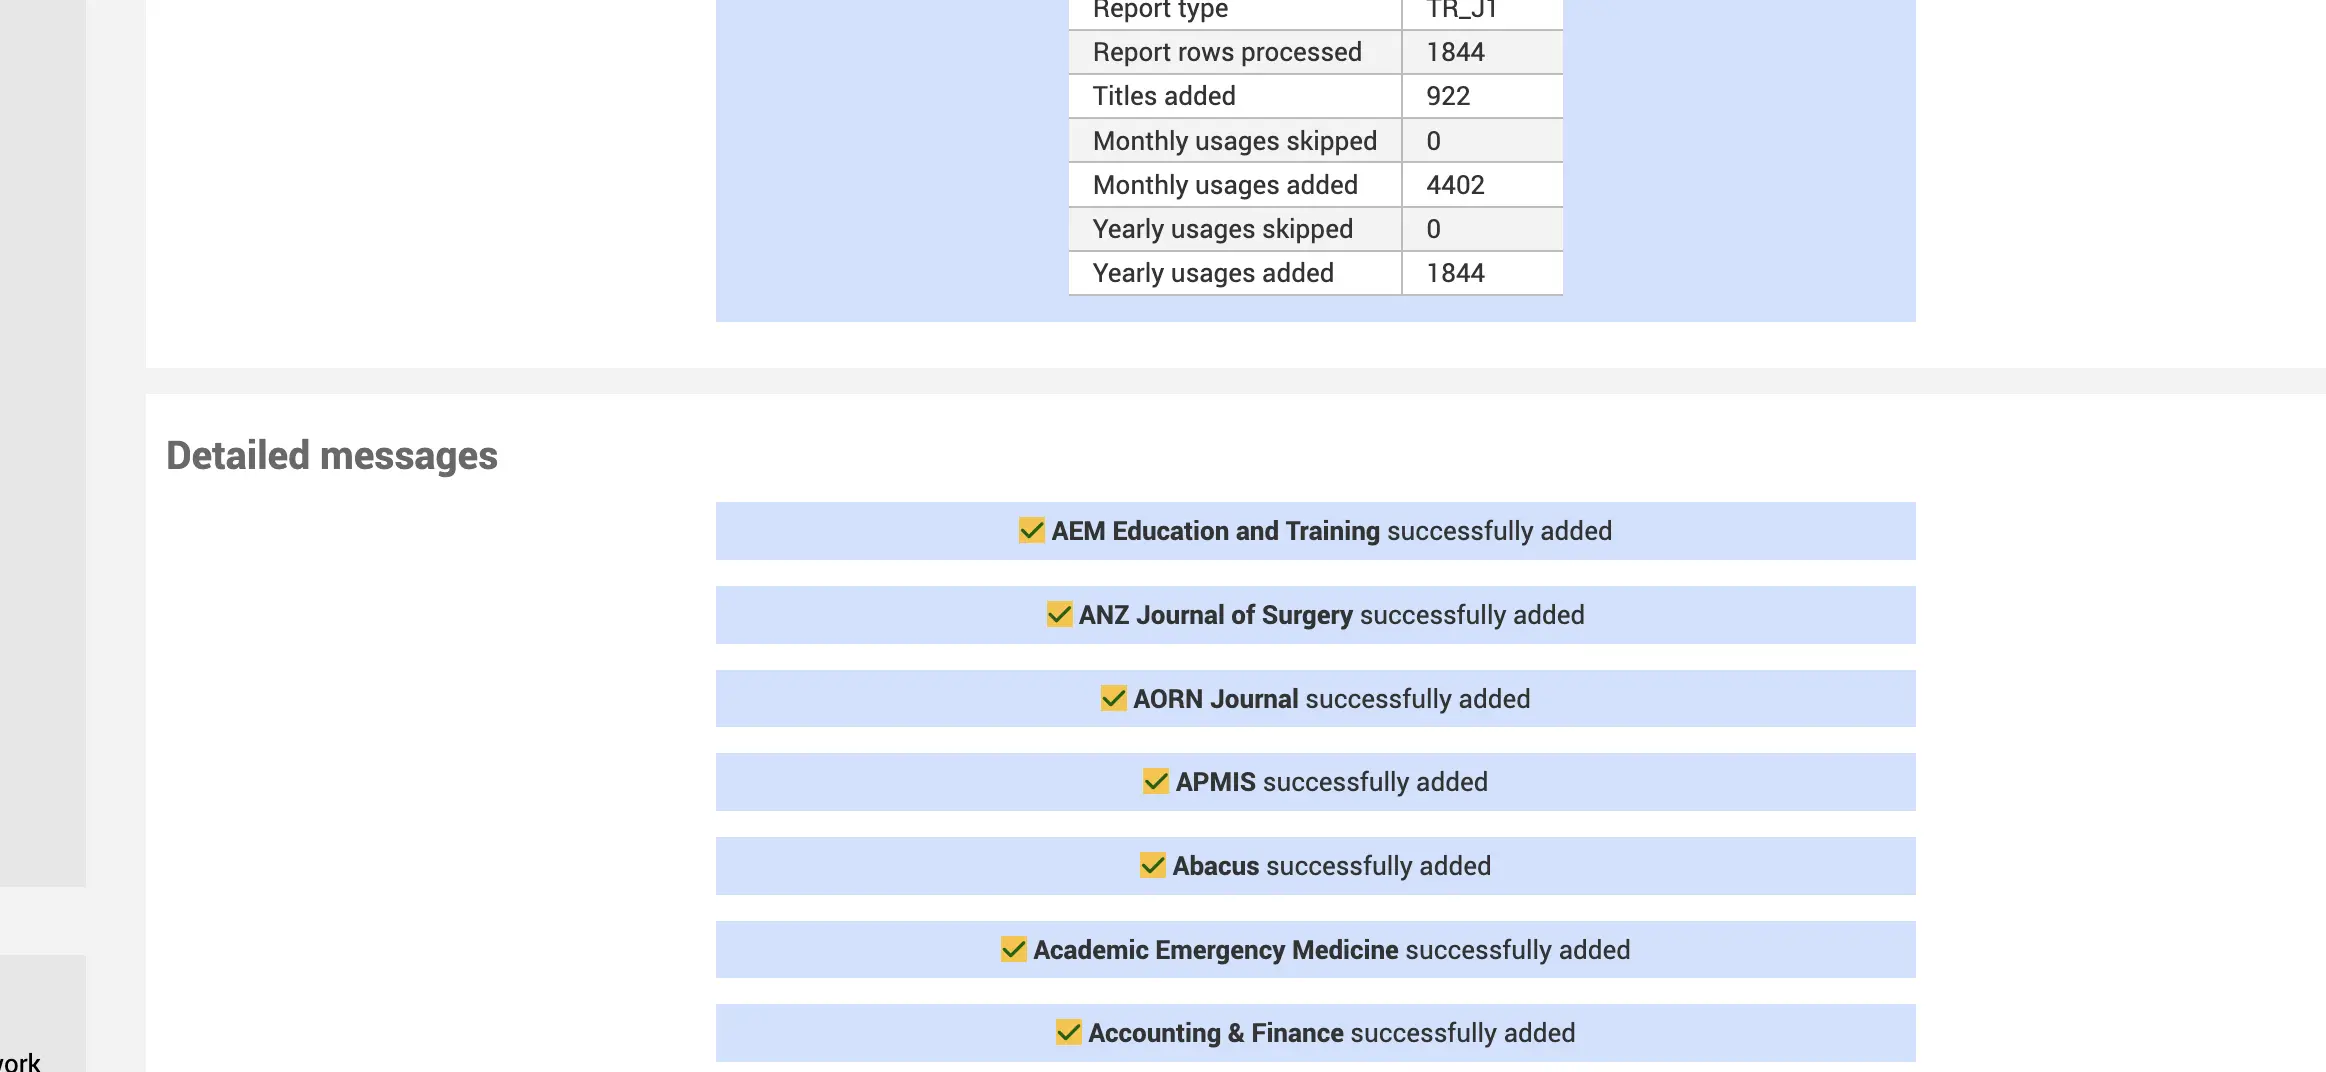
If the title already exists in Koha then you will see an alert that it exists but any counts have been updated.
Edit
To edit an existing Data Provider
Delete
To delete a Data Provider
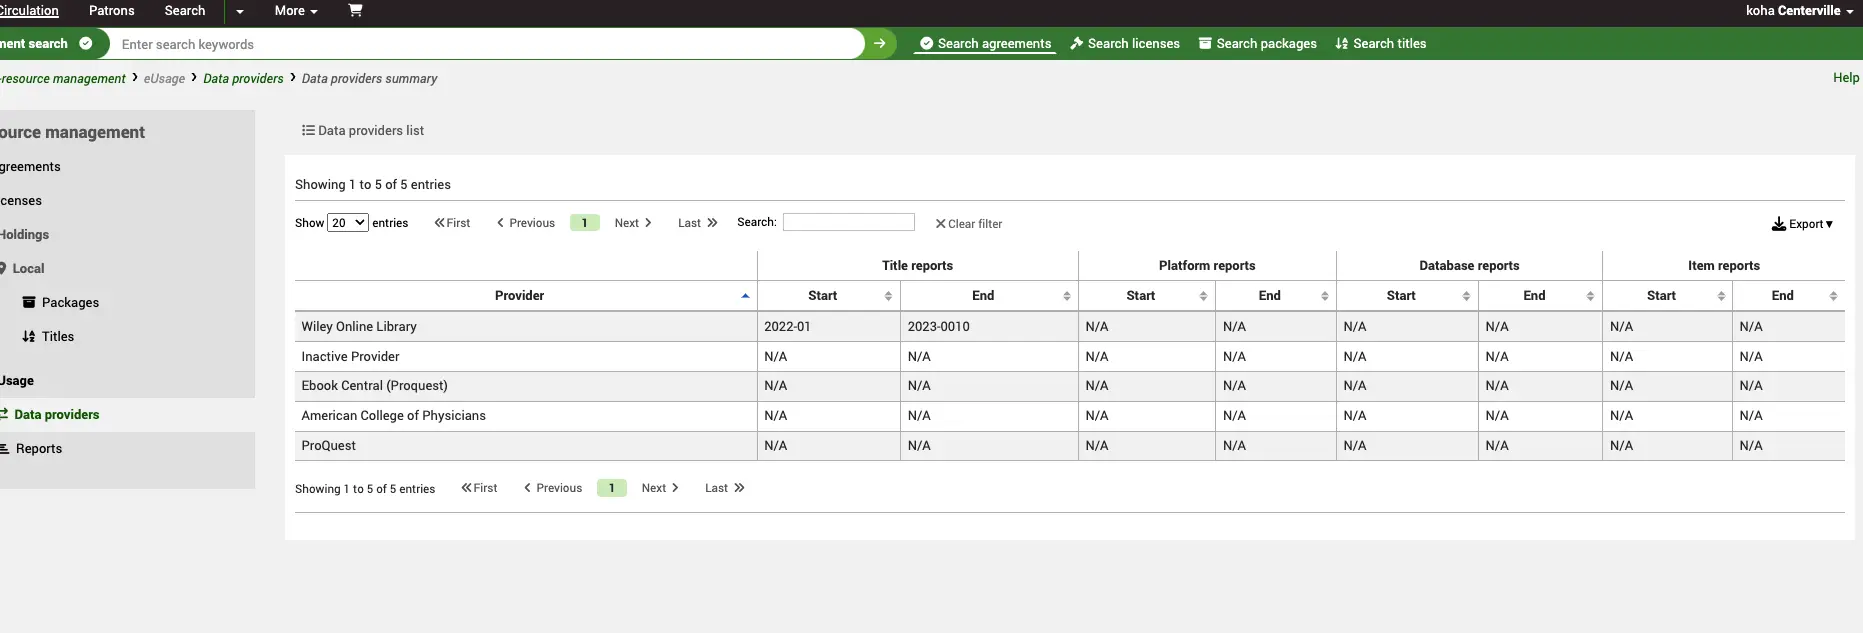
Data provider summary
Next to the ‘New data provider’ button, you will see a link to the Data provider summary. This gives you an at-a-glance view of all your Data providers, and the earliest and most recent data you have for each report type.
Search and view a Data Provider record
From the ERM Home page click on the Data providers link in the left-hand menu.
Get there: More > E-resource management > Data providers
You will be presented with a list of existing Data providers in the system. You can use the table or column filters to search and filter data you are looking for (for example, all Data providers with the Status: Active).
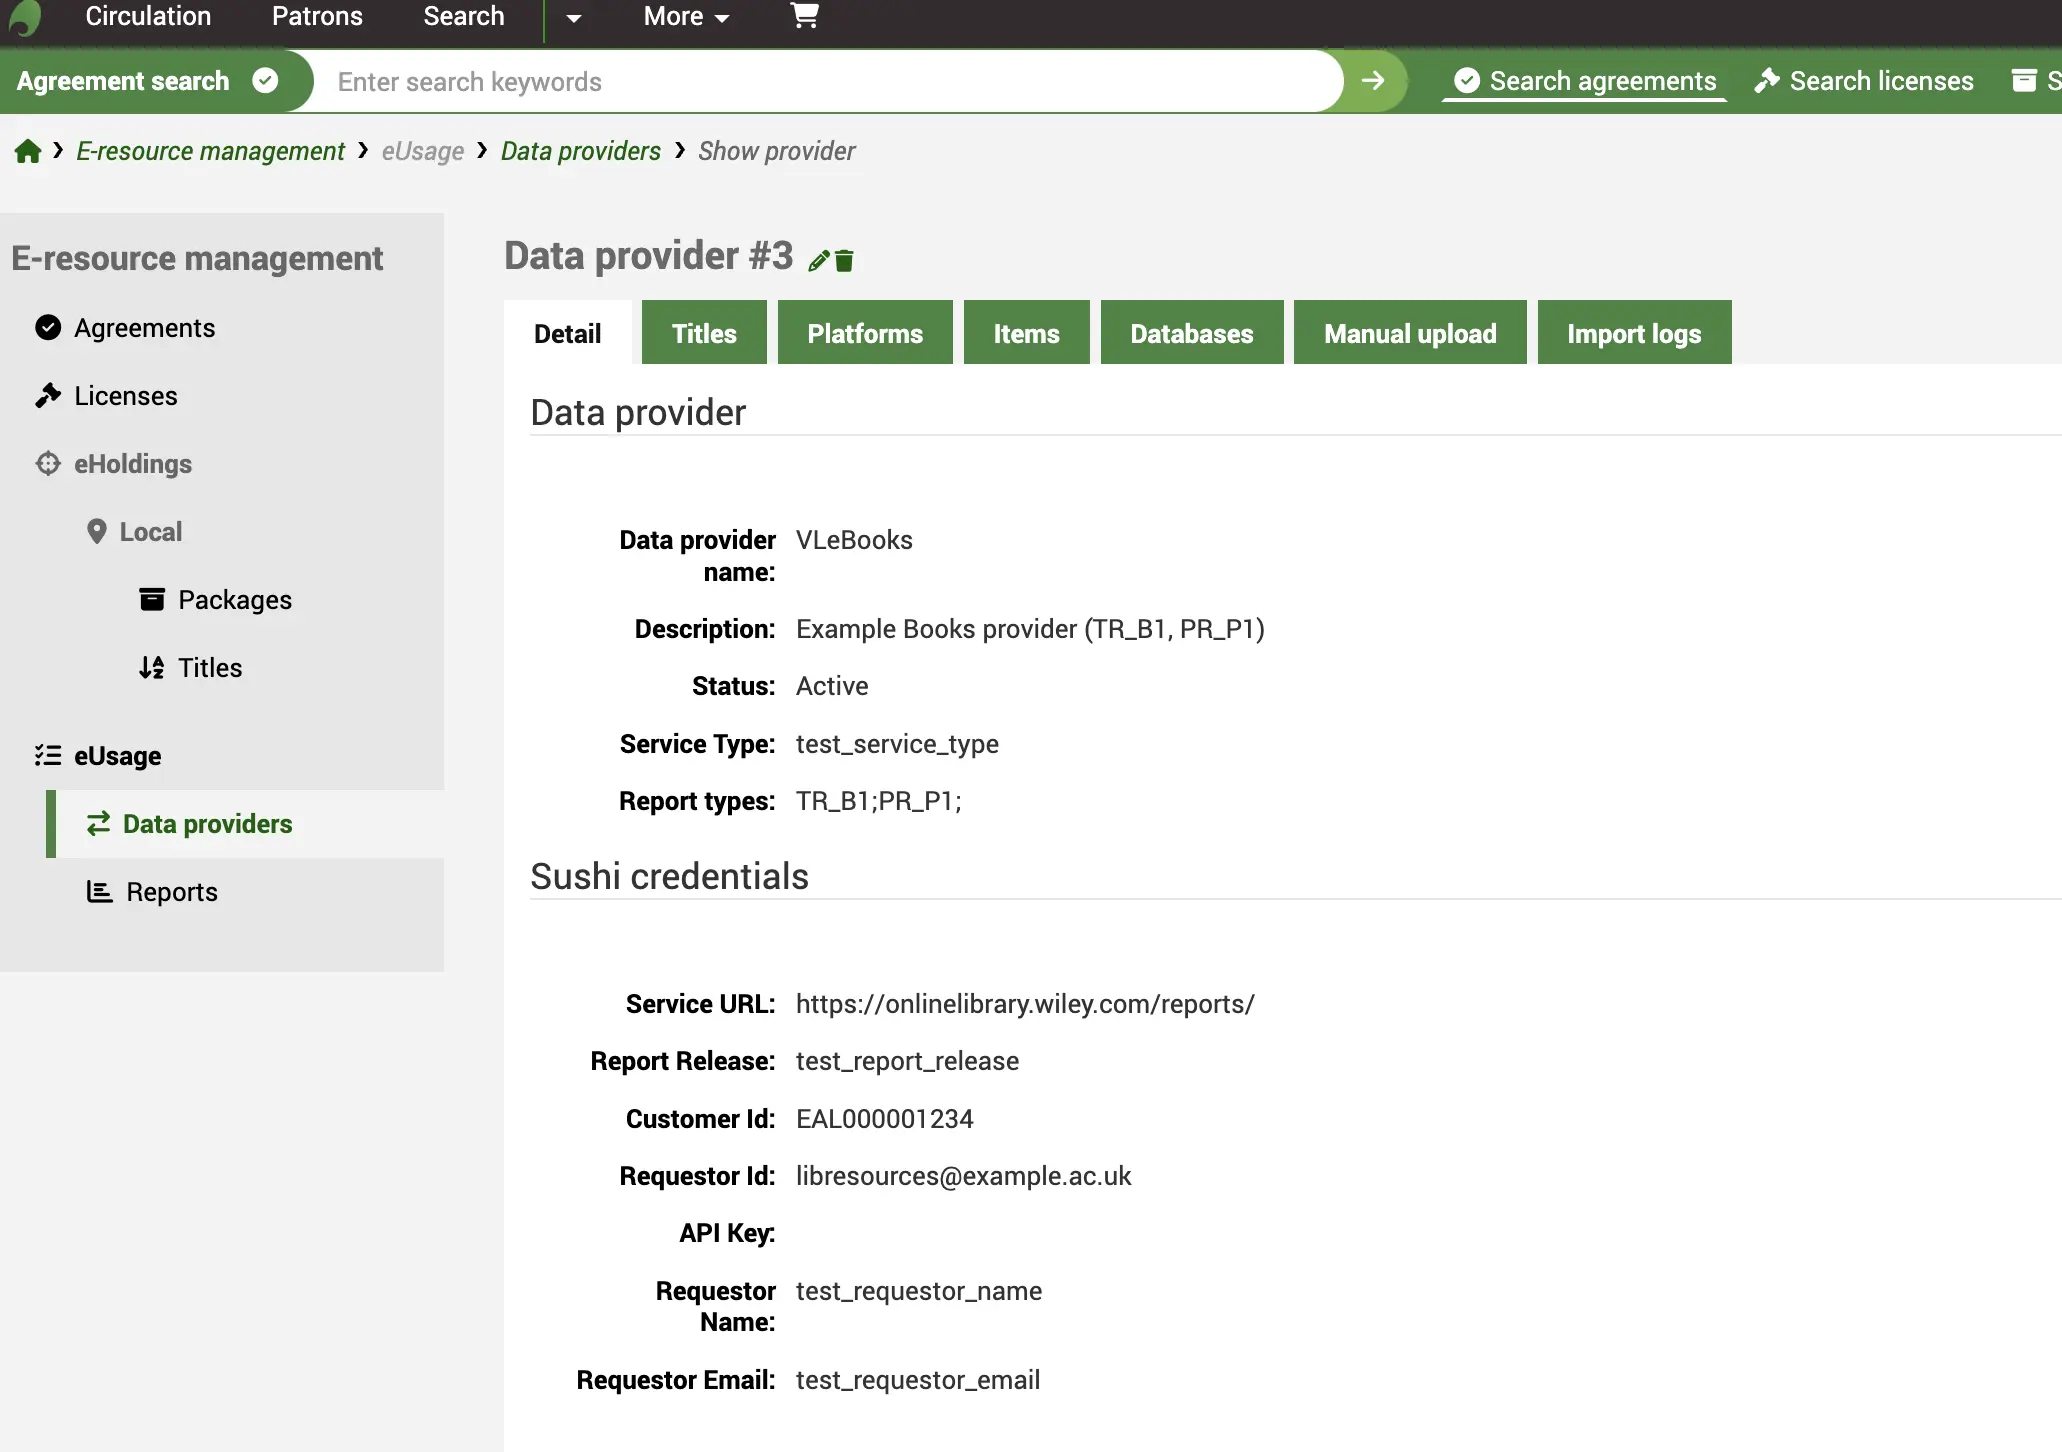
Clicking on the Name of the Data providers will take you through to the full view.
From here you can see a summary of the report types and SUSHI credentials but also some tabs which contain harvested data for Titles (TR), Platforms (PR), Items (IR) and Database (DR) reports.
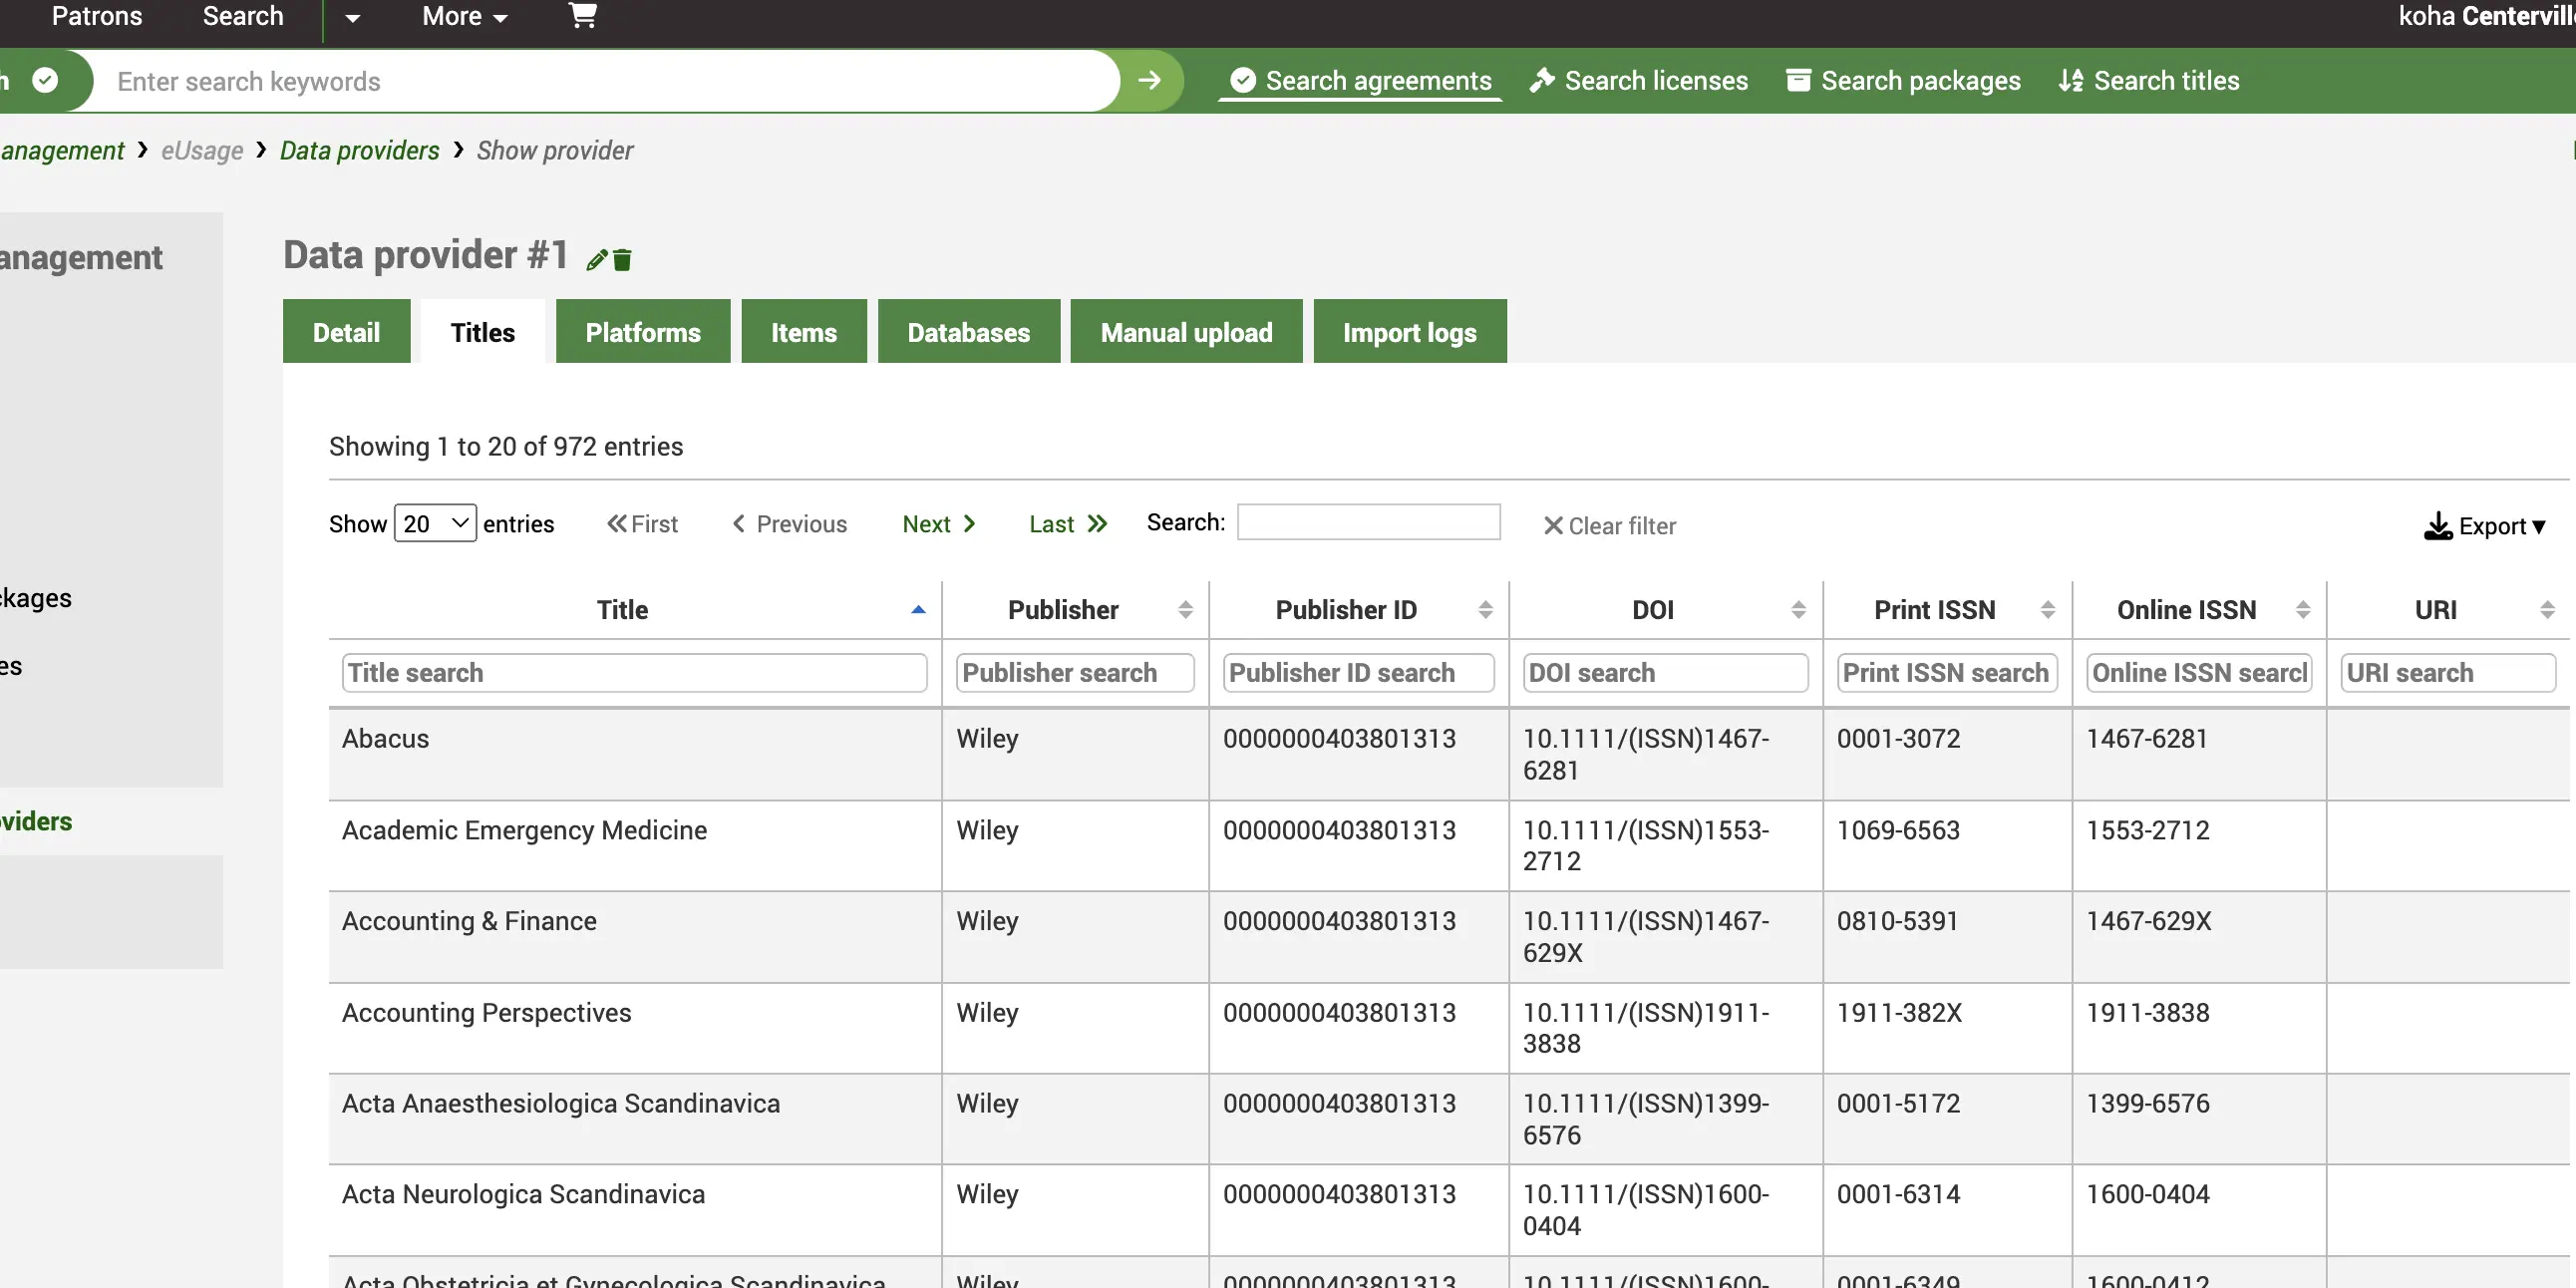
If we look at Titles, as an example, you can see a list of all harvested titles from this platform along with identifiers from the COUNTER report. Use the search boxes to narrow down your results.
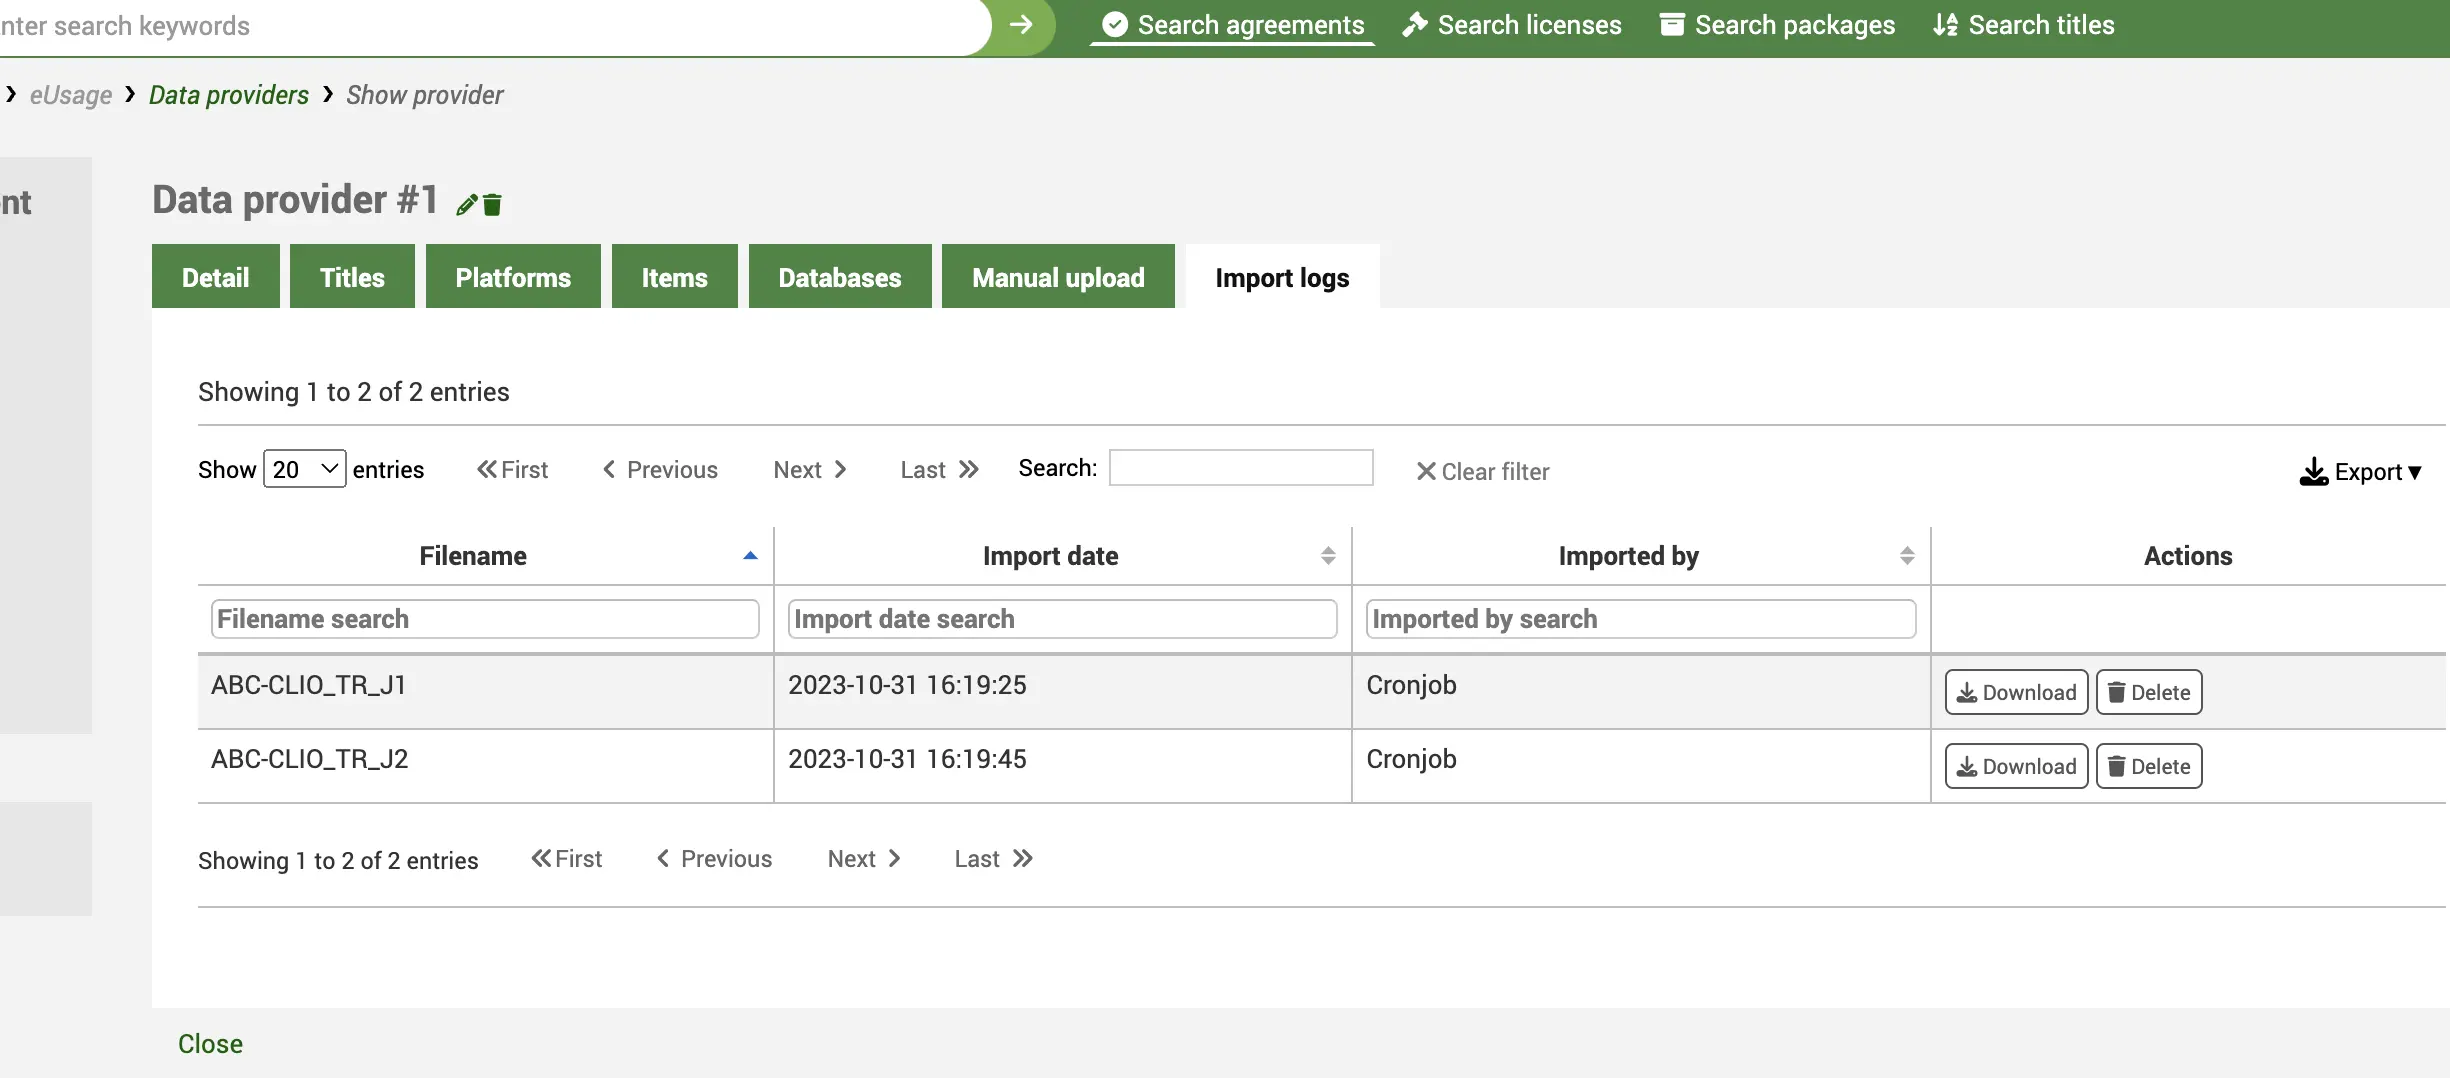
The Import logs tab gives an audit trail of all harvests including the import date and time. You will also see a ‘Download’ button which allows you to download the original COUNTER 5 file if you want to use it in another application or import it into a spreadsheet. You can also Delete the file from here along with the log entry.
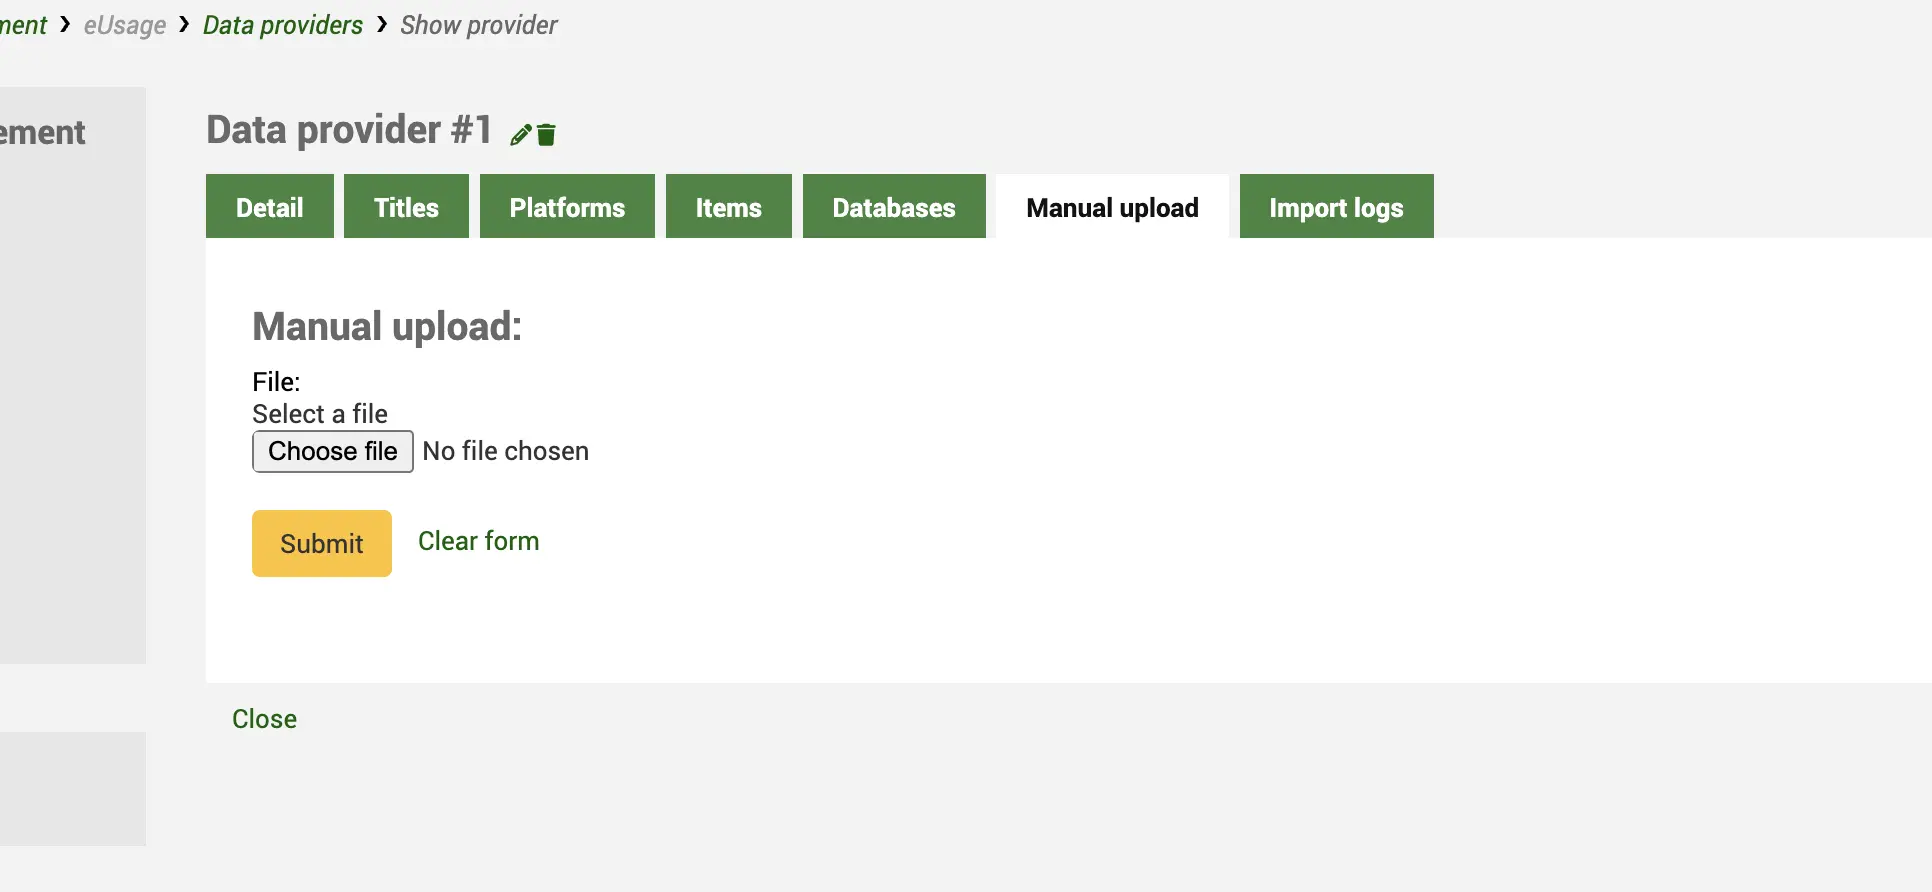
The Manual upload tab allows you to manually upload a COUNTER 5 file from your desktop. Use this for providers who don’t provide a SUSHI endpoint but can provide you with COUNTER compatible files via email or some other mechanism.
Reports
From the ERM Home page click on the Reports link in the left-hand menu.
Get there: More > E-resource management > Reports
Click the ‘Create Report’ tab to create a new report.
On the Reports home page, you will see a list of any ‘Saved reports’ and also the ability to ‘Create report’.

Create report
Usage statistics reports are located under the ERM module rather than the general Koha reporting module because of the unique nature of the statistical data.
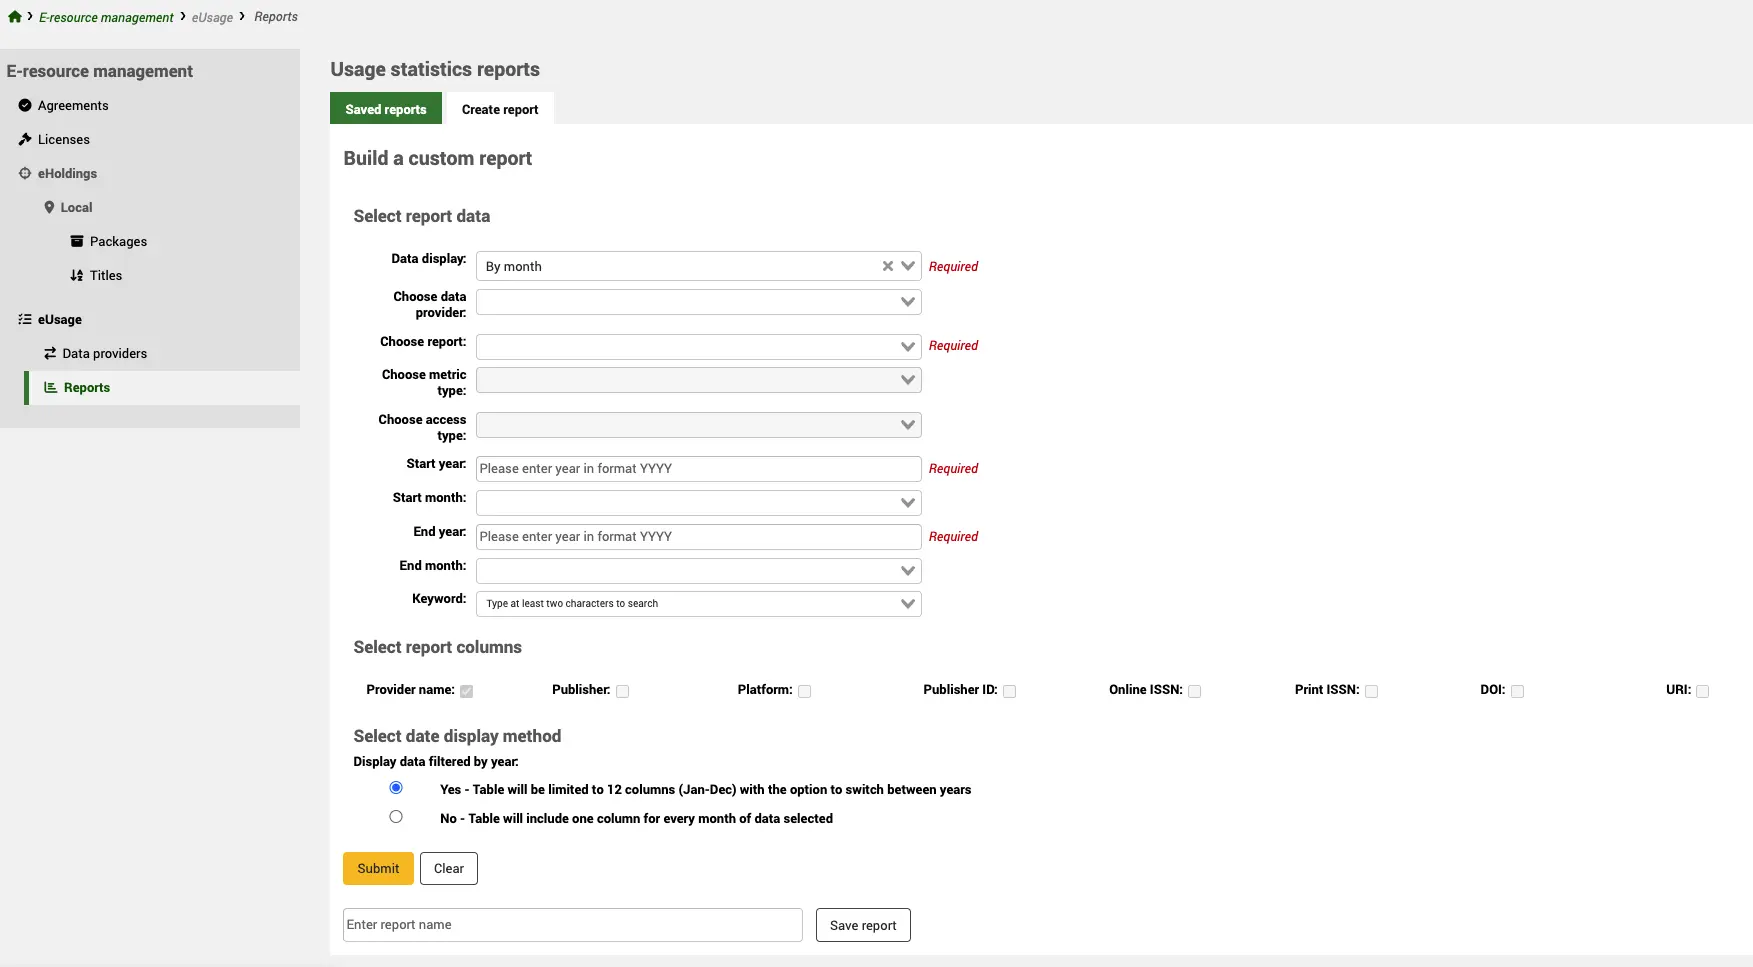
Select report data
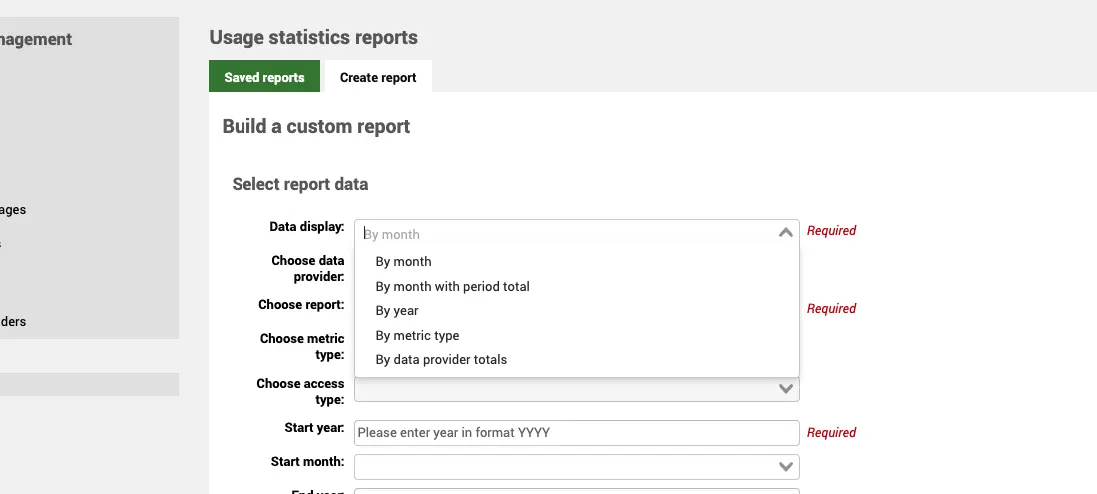
Data display (Required)
Depending on the nature of the data you are looking at, you have a number of data displays: both monthly and annual counts, with or without totals; counts by metric type, Total or Unique item requests. You can also use data provider totals to get a single overall count.
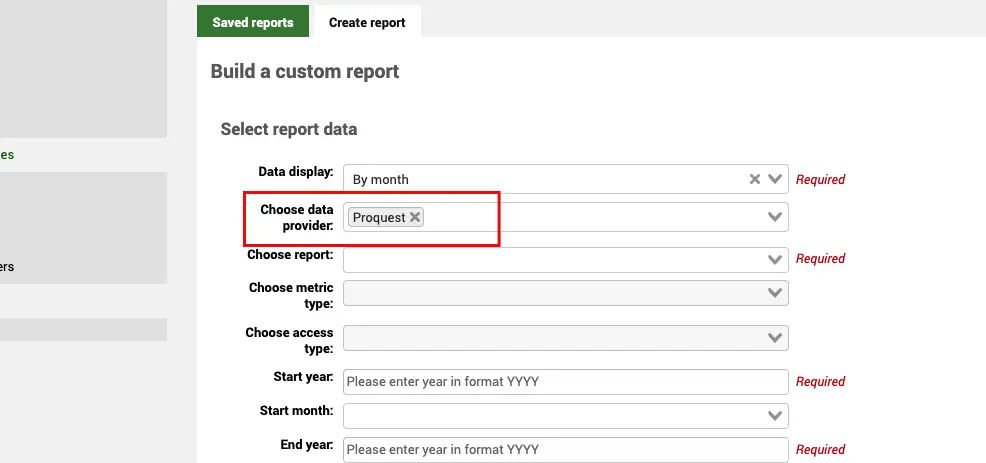
Choose data provider
You can specifically look at data for a single Data Provider (platform) by selecting the data provider from the dropdown list.
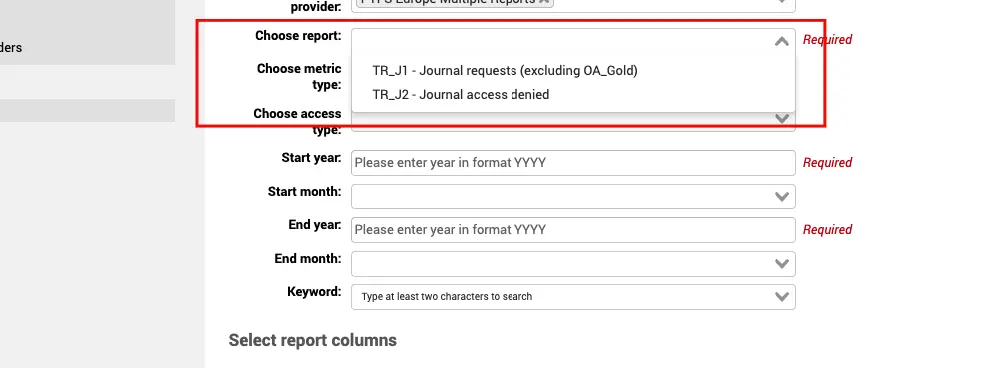
Choose report (Required)
Once you have selected a data provider, you can only select a report type that is in use in the data provider record. So, if the data provider supports TR_J1 and TR_J2 for example, these are the only report types you will see listed.
If you select the report type before the provider, this will limit the drop-down list of providers to those who support that report type.
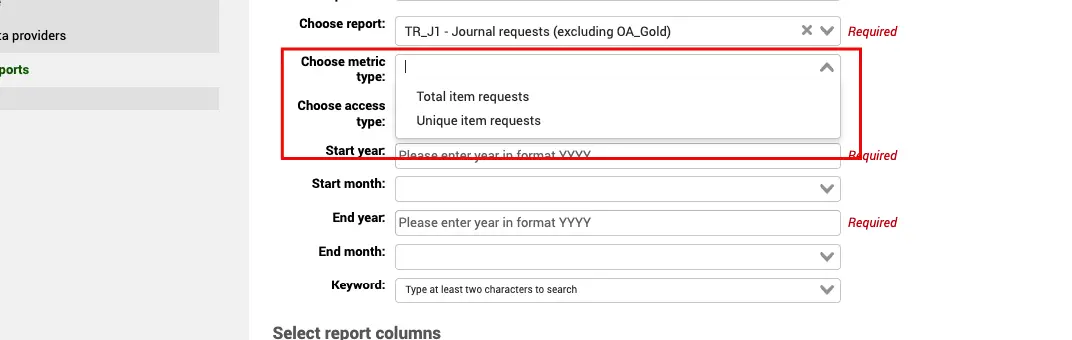
Choose metric type
The metric types which display depend on the report type you have selected. Some metric types only apply to certain report types. For example, TR_J1 supports Total Item Requests and Unique Item Requests whereas PR_P1 will give you Searches platform.
If you don’t select a metric type, all metric types will be displayed in your report.
Choose access type
For some very specific reports (e.g. TR_J3 and TR_B3) the data is broken down further into access types. When you select one of these reports, you will see that the access type field becomes active and offers an option of Controlled and OA_Gold.
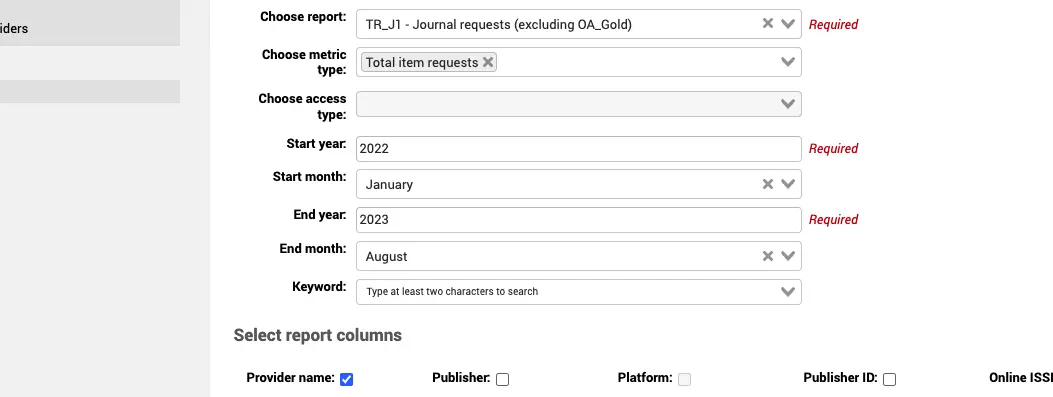
Start year (Required)
You must provide a start year for your report data.
Start month
You can (optionally) specify a month if you are trying to look at data for a specific period.
End year (Required)
You must provide an end year for your report data.
End month
You can (optionally) specify a month if you are trying to look at data for a specific period.
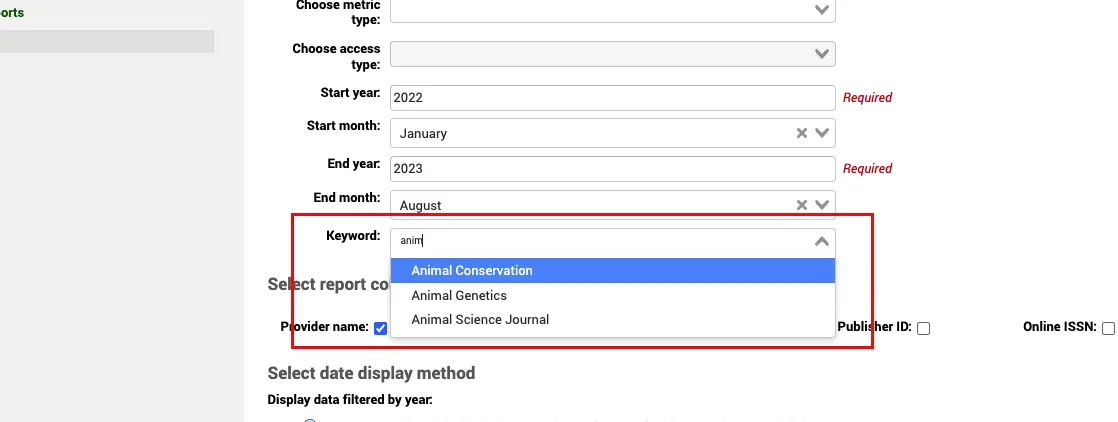
Keyword
Once you have selected a specific data provider, you can use the Keyword option to search for a specific title. This allows you to see statistics for a particular publication.
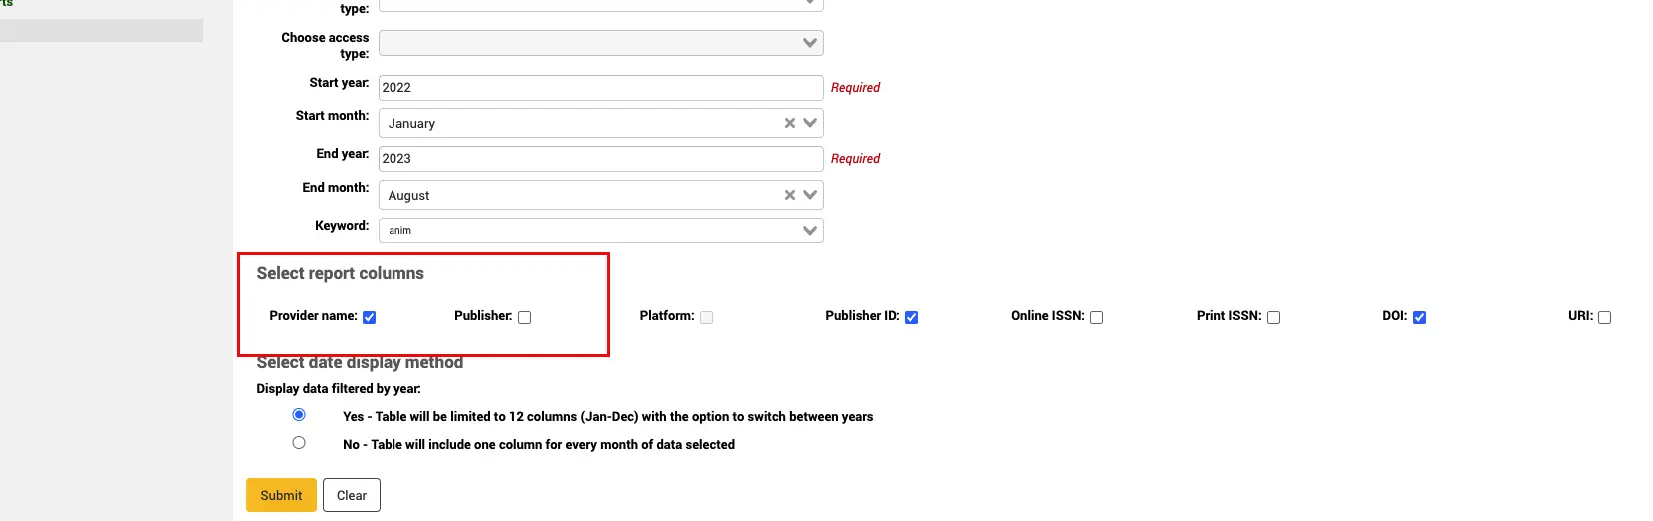
Select report columns
By default, the Provider name is output to your report but you can also include additional data which is included in your COUNTER report such as Publisher, DOI, etc.
Check the section 4. COUNTER reports, COUNTER Code of Practice for information about all the COUNTER reports.
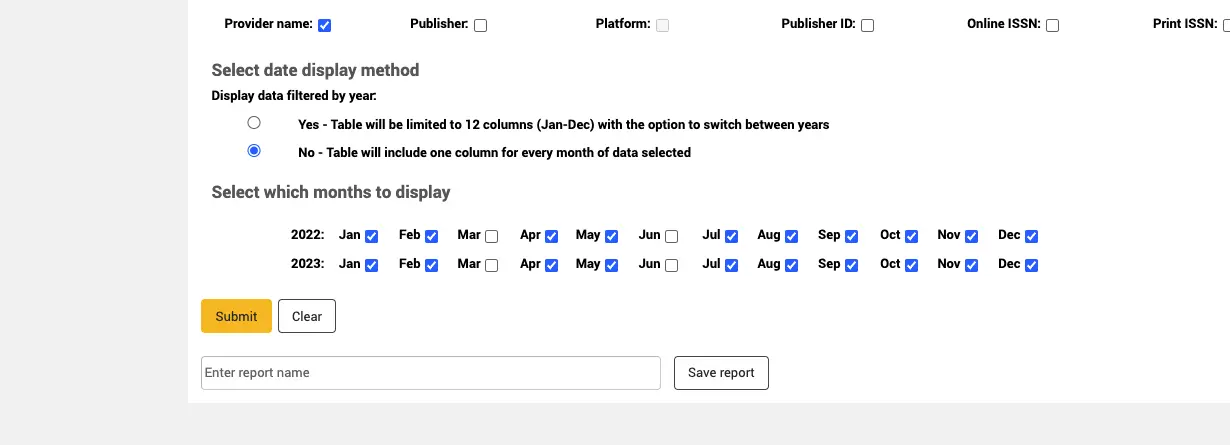
Select date display method
When set to Yes, the data will always be listed by a 12-month period from January to December. This is to make the report readable on the screen. On the report output, you will have the option to toggle by year if you have selected data for more than one year.
When set to No, you will have one column for every month selected. Obviously, if you have many months selected you may be required to use your scroll bar to navigate the results on the page.
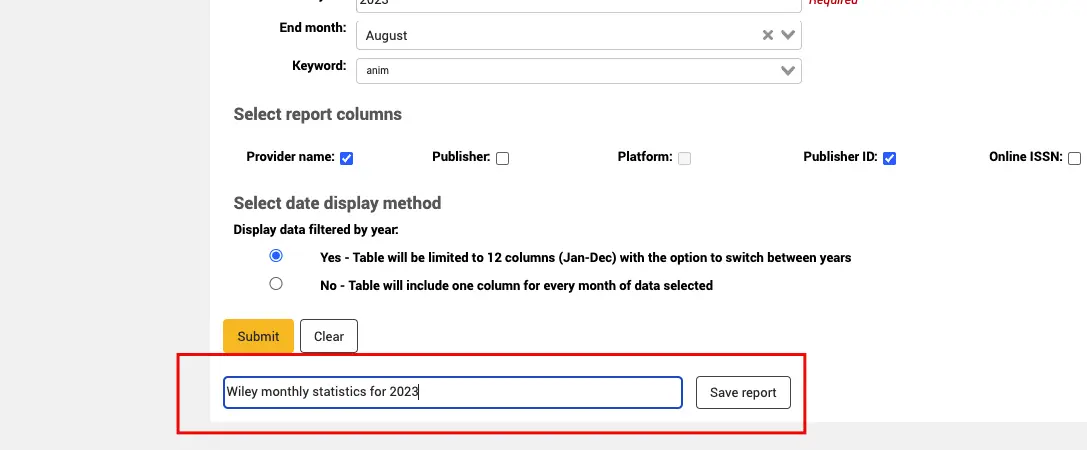
You can save your report by entering a name and selecting ‘Save report’.
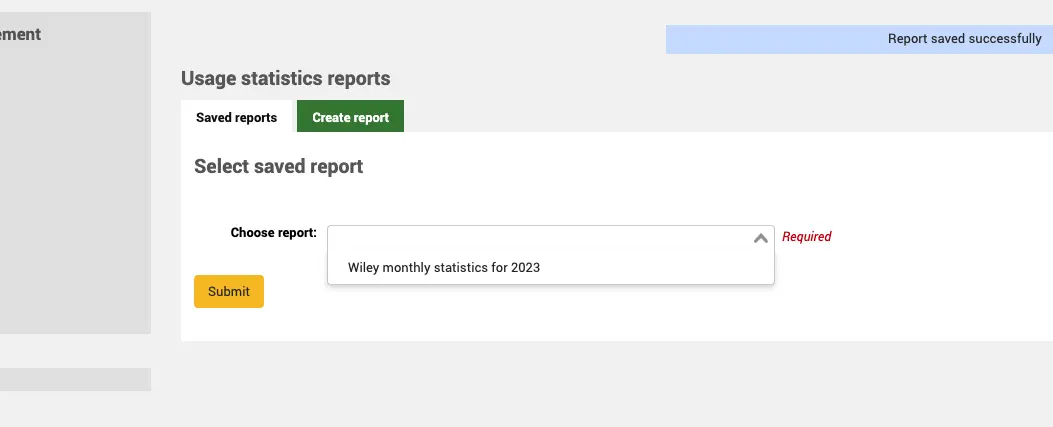
Saved reports
Once you have created a report, it will appear on the ‘Saved reports’ tab for future use.
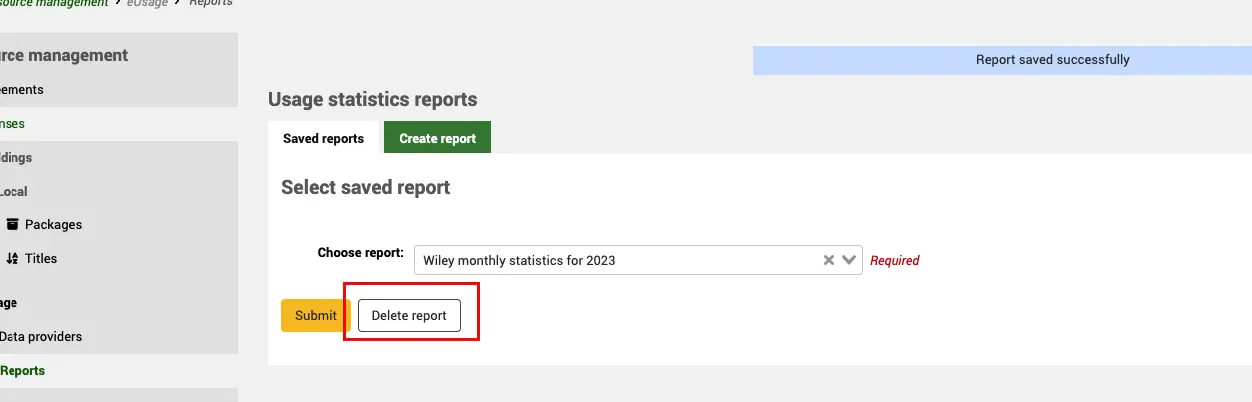
In order to Delete a saved report, use the Delete button on the Saved reports page once you have selected the report you would like to delete.
Once your report is set up select Submit to run the query. A report with data display set to Yes will look like this
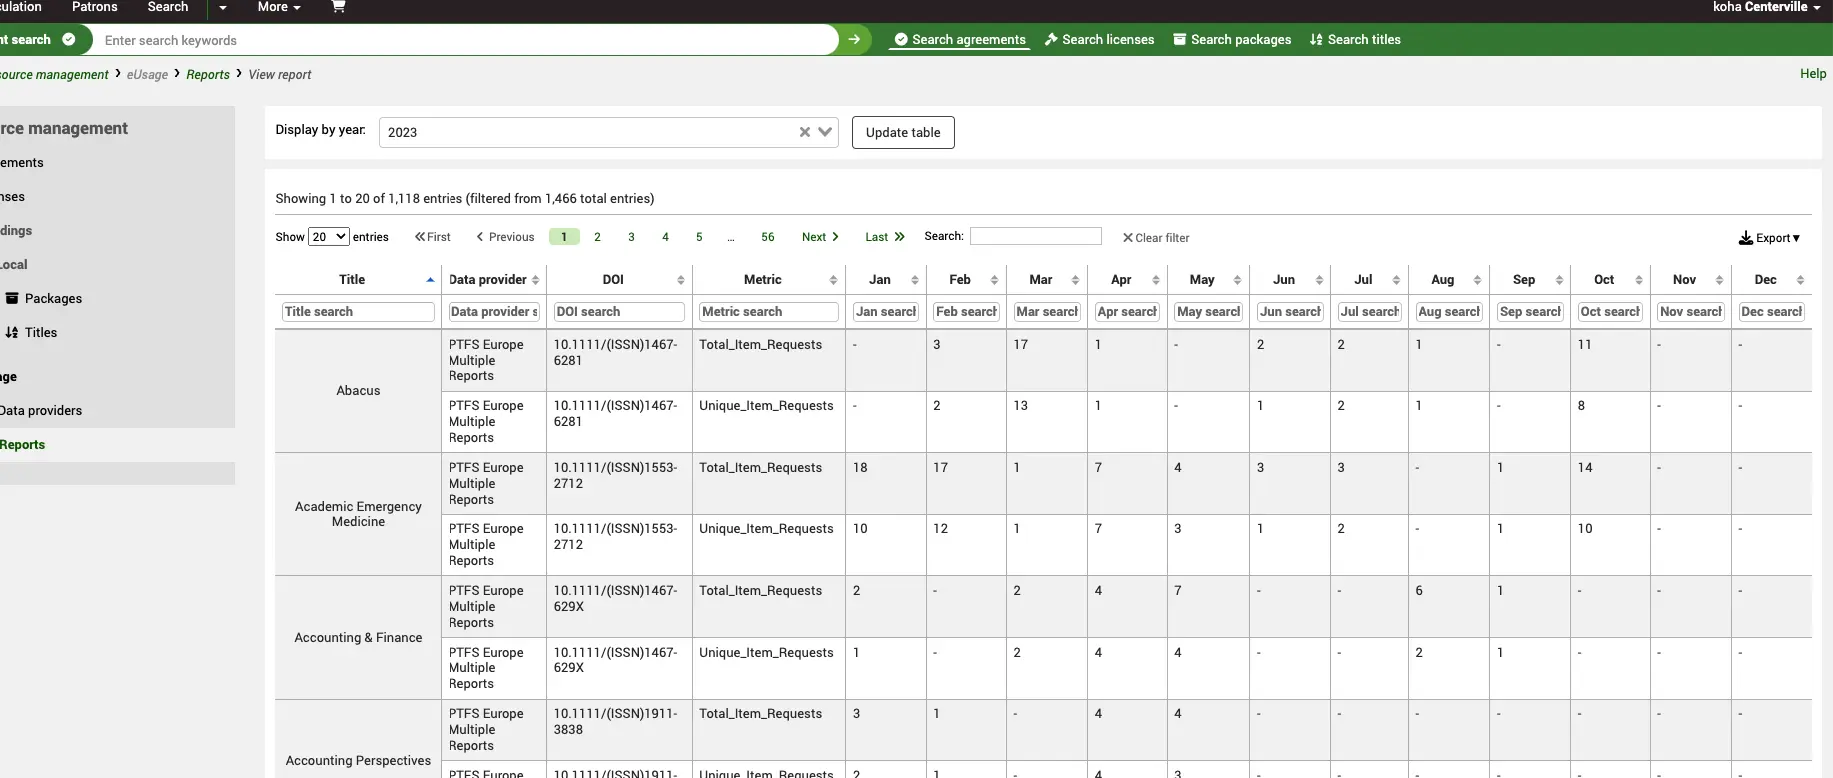
Take note of the ‘Display by year’ toggle at the top. If there is more than one year, you can use this to update the table with data from previous years.
When you select No, you will be offered a list of months to select/deselect.
Because of the number of months selected the report may scroll off to the right of your page.
Tip
Make sure you have harvested the latest data from your provider before you run the report. You can either do this manually by clicking ‘Run now’ in the data provider home screen, or you can use the harvesting cron job to automatically harvest data at regular intervals.