Benutzer
Stellen Sie vor dem Importieren oder Hinzufügen von Benutzern sicher, dass die Benutzertypen angelegt sind: Benutzertypen.
Eine*n neue*n Benutzer*in hinzufügen
Benutzer*innen können mit dem Modul ‚Benutzer‘ hinzugefügt werden.
Pfad in Koha: Benutzer
Bemerkung
Nur Bibliothekspersonal mit der Berechtigung edit_borrowers (oder der superlibrarian-Berechtigung) kann Benutzer*innen hinzufügen.
Hier können Sie eine*n neue*n Benutzer*in hinzufügen.
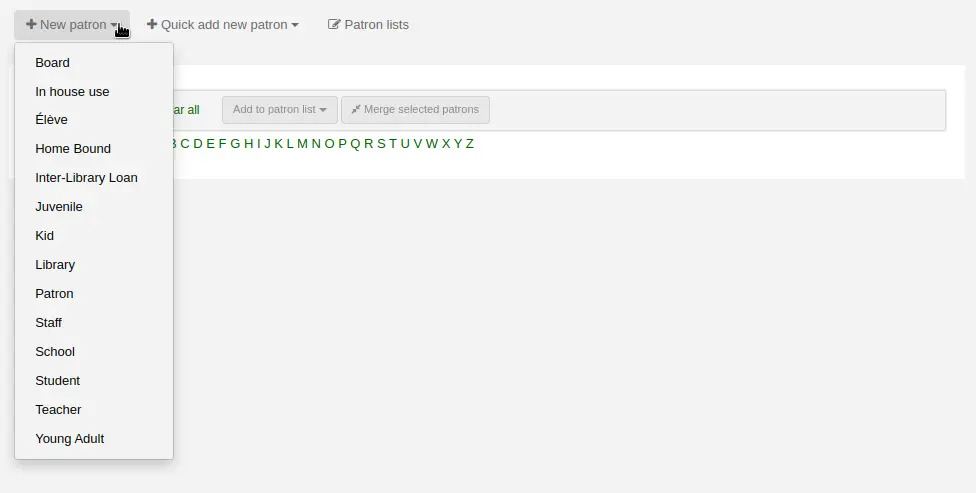
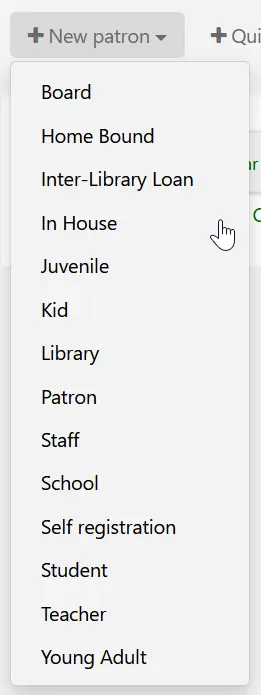
Klicken Sie auf ‚Neuer Benutzer‘
Bemerkung
Die Felder die im Formular zum Hinzufügen von Benutzer*innen angezeigt werden, können über den Systemparameter BorrowerUnwantedField angepasst werden.
Bemerkung
Die Pflichtfelder werden über den Systemparameter BorrowerMandatoryField festgelegt
Geben Sie zuerst Informationen zur Identität des Benutzers ein
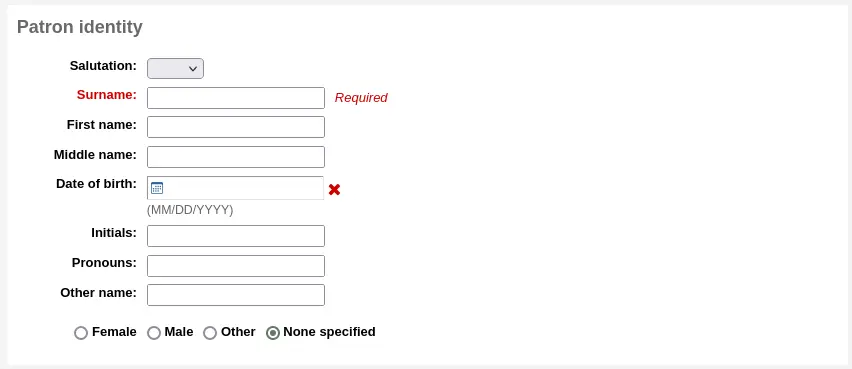
Die Anrede wird über den Systemparameter BorrowersTitles befüllt
Bemerkung
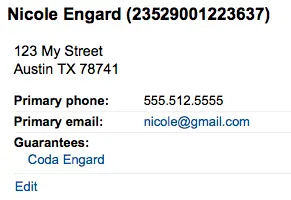
Wenn auf der Quittung keine vollständigen Namen gedruckt werden sollen, und die Felder Initialen oder Alias nicht verwendet werden, kann auch eine verkürzte Version des Namens verwendet werden, der dann auf der Quittung ausgedruckt wird.
Zum Beispiel:
Firstname: Nicole C.
Surname: Engard
Initials: NCE
Auf der Quittung können dann die <<borrowers.initials>> anstelle des vollständigen Namens gedruckt werden (NCE hier).
Oder auch so:
Firstname: Nicole
Surname: Engard
Initials: E
Auf der Quittung können in diesem Fall dann die Felder <<borrowers.initials>>, <<borrowers.firstname>> anstelle des vollständigen Namens gedruckt werden (hier: E, Nicole).
Wenn es sich bei diesem/dieser Benutzer*in um ein Kind handelt, werden Sie aufgefordert dieses mit einem Erwachsenen zu verknüpfen
Bemerkung
Bürgen können mit Benutzertypen verknüpft werden, bei denen „Kann Bürgenden haben“ auf „Ja“ gesetzt wurde.
Bemerkung
Dieses Feld kann mit dem Systemparameter ChildNeedsGarantor als Pflichtfeld festgelegt werden.
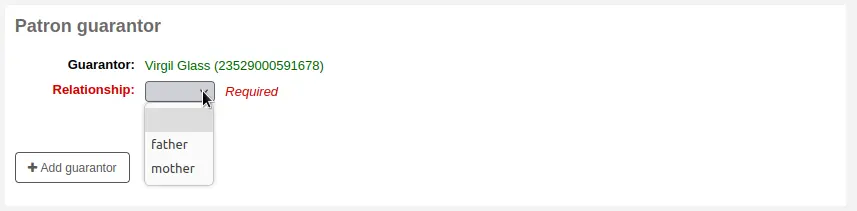
Wenn der Bürge ein Benutzer/eine Benutzerin der Bibliothek ist, klicken Sie auf ‚Bürgenden hinzufügen‘ um nach dem Benutzer/der Benutzerin zu suchen
Klicken Sie auf ‚Auswählen‘

Die Beziehungen werden aus dem Systemparameter borrowerRelationship belegt
Bemerkung
Es ist möglich mehr als einen Bürgenden zu einem Konto hinzuzufügen (zum Beispiel beide Elternteile).
Warnung
Ein Benutzer, für den jemand eine Bürgschaft hat, kann kein Bürge für jemand anderen sein und umgekehrt.
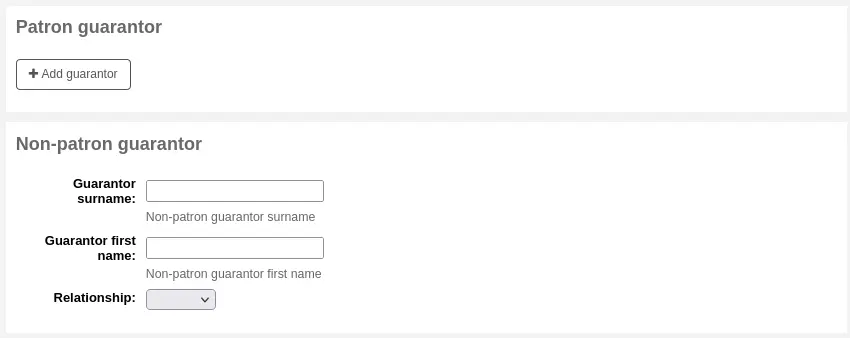
Wenn der Bürge keine BenutzerIn ist, können Sie Informationen des Bürgenden dennoch im Bereich ‚Unregistrierter BürgendeR‘ hinzufügen.
Geben Sie als nächstes die Hauptadresse und die Kontaktdaten ein
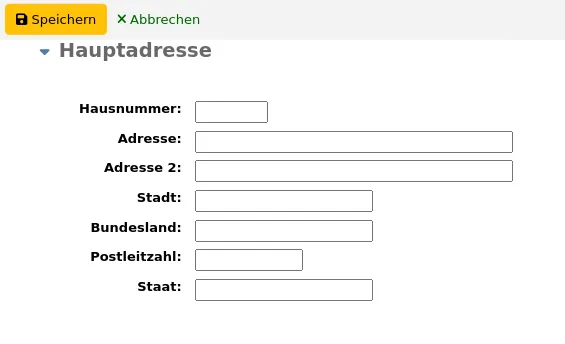
Bemerkung
Die Auswahlliste im Feld Straßentyp wird in der Normierten-Wert-Kategorie ROADTYPE festgelegt.
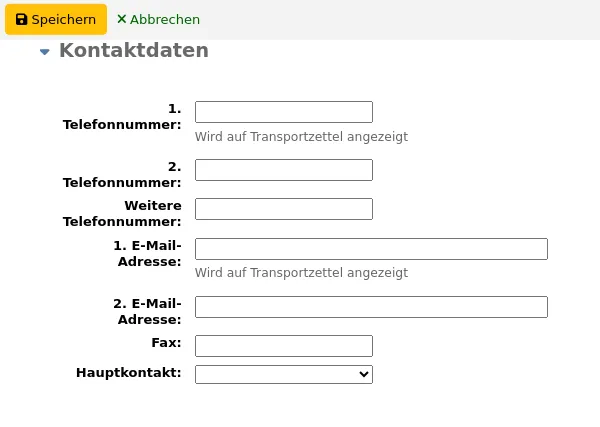
Die erste Telefonnummer und die erste E-Mail-Adresse der Kontaktinformationen erscheinen auf den Benachrichtigungen und Zetteln der Ausleihe (Quittungen, Transport- bzw. Transfer-Zettel und Vormerkungen). Die erste E-Mail-Adresse wird zudem für Benachrichtigungen wie z.B. bei Überschreitung der Leihfrist verwendet.
Die „Hauptkontaktmethode“ kann in Reports und vom Bibliothekspersonal verwendet werden, um festzustellen, wie der Benutzer/die Benutzerin vorrangig kontaktiert werden möchte.
Ein alternativer Kontakt kann ein Elternteil oder Bürge sein. Er kann auch im akademischen Kontext verwendet werden, um die Heimadresse eines Nutzers zu speichern.

Es kann für jede/n BenuterIn alternative Kontaktangaben geben. Ein Alternativer Kontakt kann beispielsweise ein Elternteil oder ein Bürge sein.

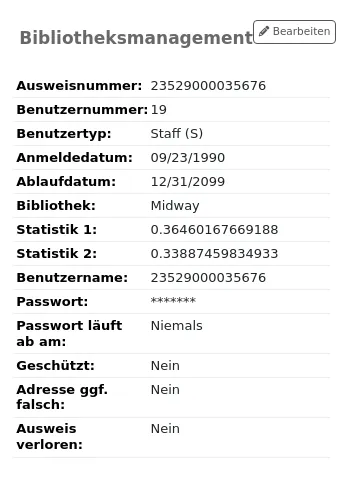
Der Bereich Bibliotheksmanagement beinhaltet Werte, die innerhalb der Bibliothek benutzt werden
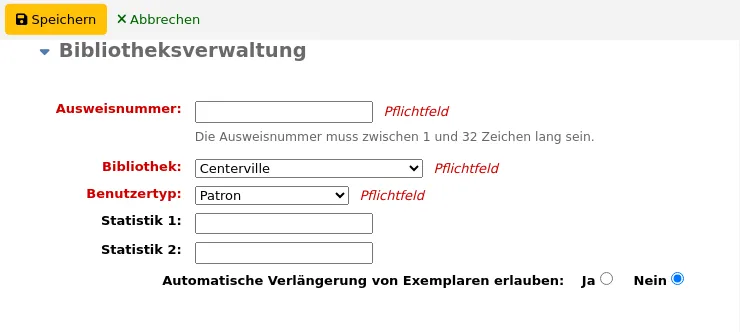
Die Ausweisnummer wird automatisch generiert, wenn Sie den Systemparameter autoMemberNum entsprechend gesetzt haben
Bemerkung
In einem neu installierten System ohne vorhandene Barcodes beginnt die Zählung mit 1 und wird jeweils um 1 erhöht. Um mit einer anderen Nummer zu starten, erfassen und speichern Sie Ihre letzte vergebene Nummer mit dem ersten Benutzer/der ersten Benutzerin. Danach wird der Wert jeweils um 1 erhöht.
Wenn Sie aus Versehen zu Beginn einen falschen Benutzertyp ausgewählt haben, können Sie dies hier korrigieren
Statistik 1 und 2 werden für statistische Zwecke innerhalb Ihrer Bibliothek gebraucht
Sie können Auswahllisten für diese Felder erstellen, in dem Sie normierte Werte hinzufügen in der Kategorie Bsort1 der normierten Werte oder der Kategorie Bsort2 der normierten Werte
„Automatische Verlängerung von Exemplaren erlauben“ steuert, ob die Ausleihen des Benutzers/der Benutzerin entsprechend der Ausleihkonditionen verlängert werden. Wenn „Ja“ ausgewählt wurde, werden Exemplare, für die eine automatische Verlängerung in den Ausleihkonditionen konfiguriert wurde, automatisch verlängert. Dies erfordert, dass der Cronjob automatic_renewal.pl täglich läuft. Wenn „Nein“ ausgewählt wird, werden nicht automatisch verlängert, auch wenn es in den Ausleihkonditionen so vorgesehen ist.
Protected: protected patrons cannot be deleted either manually or by batch. Use this for system patrons such as statistical patrons, SIP2 patrons, the self checkout user, or superlibrarians.
Version
Die Option „Geschützt“ wurde in Koha-Version 23.11 hinzugefügt.
Unter „Auf vorherige Ausleihen überprüfen“ kann für den Benutzer/die Benutzerin eingestellt werden, ob bei einer Ausleihe geprüft werden soll, ob das Exemplar schon einmal von dieser Person entliehen wurde. Dies überschreibt die Einstellungen im Benutzertyp und dem Systemparameter CheckPrevCheckout.
Preferred language for notices: if TranslateNotices is set to allow, you will be able to choose among the installed languages the language in which the patron would prefer to receive notices (such as overdue notices and advance notices).
Der Bereich für die Kontodaten beinhaltet weitere bibliotheksspezifische Felder
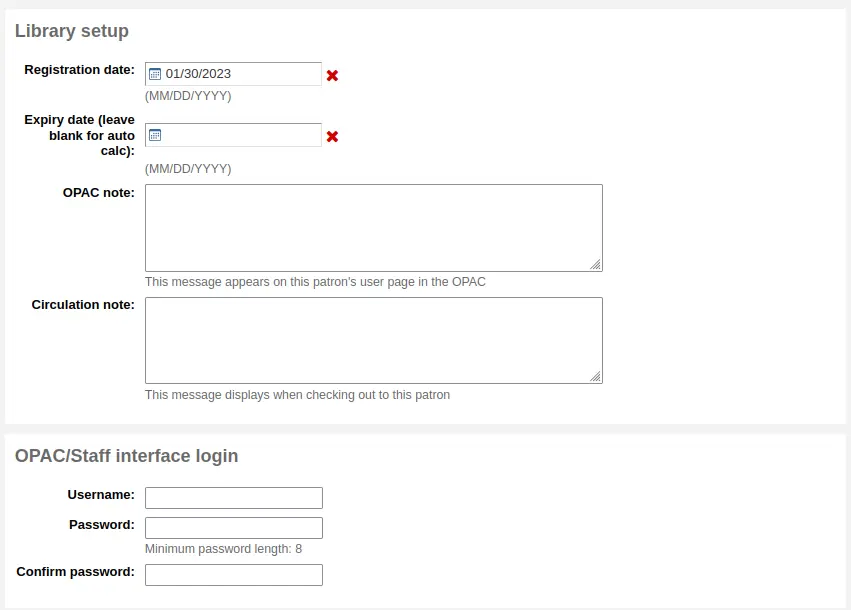
Das Registrierungdatum wird automatisch auf das heutige Datum gesetzt
Das Ablaufdatum wird basierend auf den Einträgen in den Benutzertypen automatisch berechnet
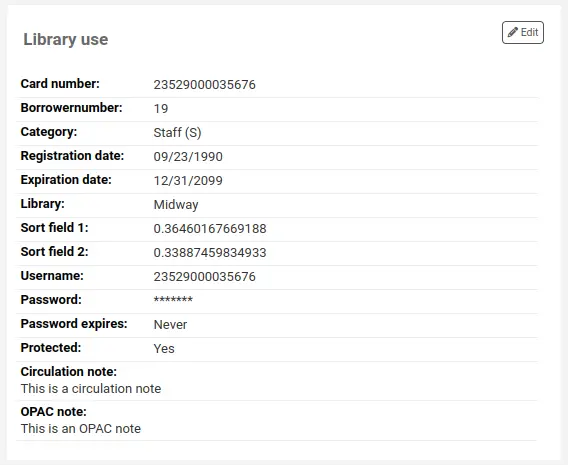
Die OPAC-Notiz ist eine Nachricht an den/die Benutzer*in - sie wird im Benutzerkonto im OPAC angezeigt

Bemerkung
Beachten Sie dazu auch die OPAC Nachrichten
Die Ausleihnotiz ist ausschließlich für das Bibliothekspersonal gedacht und erscheint, wenn ein*e Mitarbeiter*in ein Exemplar an diese*n Benutzer*in ausleiht
OPAC/Dienstoberfläche-Login und Passwort werden von der BenutzerIn (oder MitarbeiterIn) verwendet, um sich im Konto im OPAC oder der Dienstoberfläche einzuloggen.
Das Bibliothekspersonal kann sich nur in der Dienstoberfläche anmelden, wenn es die entsprechende Berechtigung catalogue hat.
Wenn der Systemparameter HouseboundModule aktiviert wurde, können Sie eine Rolle in der aufsuchenden Bibliotheksarbeit für den Benutzer/die Benutzerin auswählen.

Wenn Sie zusätzliche Benutzerattribute definiert haben, werden Ihnen diese als nächstes angezeigt
Finally, if you have the EnhancedMessagingPreferences system preference set to ‚allow,‘ you can choose the messaging preferences for this patron.
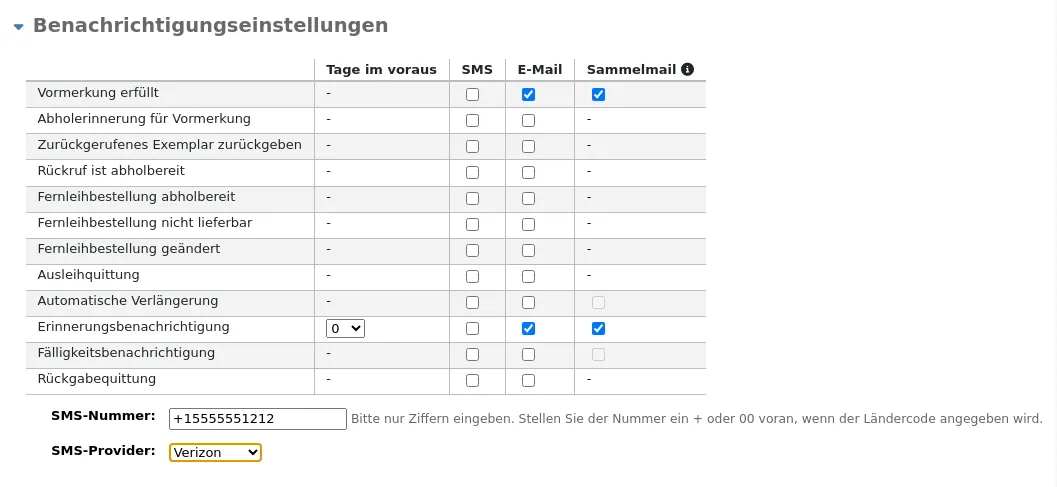
Die Definition jeder Benachrichtigungen finden Sie im Bereich Erinnerungs- und Vormerkbenachrichtigungen
Warnung
Die hier vorgenommen Einstellungen überschreiben alle Einstellungen, die in den Benutzertypen festgelegt wurden
Warnung
These preferences can be altered by the patron via the OPAC if the EnhancedMessagingPreferencesOPAC system preference is set to ‚show‘.
Wenn fertig, bitte ‚Speichern‘ anklicken
An dieser Stelle wird das System Sie warnen, wenn es meint, dass dieser Benutzersatz eine Dublette ist.

Bemerkung
Welche Felder für den Dublettencheck bei Benutzern verwendet werden, können Sie über den Systemparameter PatronDuplicateMatchingAddFIelds konfigurieren. Die Voreinstellung ist der Nachname, der Vorname und das Geburtsdatum.
Wenn Sie ein Mindest- oder Höchstalter in den Benutzertypen festgelegt und das Geburtsdatum als Pflichtfeld definiert haben, werden Sie eine Warnung erhalten, wenn Sie eine*n Benutzer*in hinzufügen möchten, der zu alt oder zu jung für den gewählten Benutzeryp ist:

Wenn für den Benutzertyp eine Benutzungsgebühr definiert wurde, wird die Gebühr erhoben, wenn das Konto angelegt wird. Die Gebühr kann dann über den Reiter Gebühren im Benutzerkonto verwaltet werden.
Benutzerschnellerfassung
Wenn Sie eine*n Benutzer*in schnell erfassen wollen weil an der Ausleihtheke viel los ist, können Sie die ‚Benutzer-Schnellerfassung‘ verwenden. Über ein abgespecktes Erfassungsformular müssen Sie nur die allernötigsten Felder zum Erfassen ausfüllen.
Die Schnellaufnahme verwendet zwei Systemparameter: BorrowerMandatoryField und PatronQuickAddFields. Über diese zwei Systemparameter wird gesteuert, welche Felder im Formular für die Benutzer-Schnellerfassung angezeigt werden.
Gehen Sie in das Modul Benutzer um eine*n Benutzer*in über die Benutzer-Schnellerfassung hinzuzufügen
Pfad in Koha: Benutzer
Klicken Sie auf den Button ‚Benutzer-Schnellerfassung‘.
Wählen Sie einen Benutzertyp aus.
Anschließend erhalten Sie ein verkürztes Erfassungsformular.

Wenn Sie alle notwendigen Felder ausgefüllt haben, klicken Sie auf ‚Speichern‘.
Wenn Sie das komplette Formular benötigen, klicken Sie auf ‚Vollständiges Formular anzeigen‘, überhalb des Buttons ‚Speichern‘.
Benutzerkonto für eine*n Mitarbeiter*in anlegen
Alle Mitarbeiter*innen müssen in Koha als Benutzer*innen mit dem Benutzertyp „Personal“ angelegt sein. Legen Sie den/die Mitarbeiter*in über Neuer Benutzer‘ an. Unter Benutzerberechtigungen können Sie dem Konto die Berechtigung für den Zugriff auf die Dienstoberfläche geben.
Wichtig
Bitte denken Sie daran, sichere Benutzernamen und Passwörter für Mitarbeiter*innen zu vergeben, da diese für den Zugang zur Dienstoberfläche verwendet werden.
Eine*n statistische*n Benutzer*in hinzufügen
Eine Möglichkeit um die Nutzung von Präsenzexemplaren zu erfassen, ist, diese auf eine*n statistische*n Benutzer*in „auszuleihen“. Der Ausleihprozess leiht das Buch nicht im eigentlichen Sinne aus, sondern protokolliert den Gebrauch innerhalb der Bibliothek. Um diese Methode einzusetzen, muss zuerst ein entsprechender Benutzertyp für die statistischen Nutzer*innen erfasst werden.

Als nächstes müssen Sie eine*n neue*n Benutzer*in aus der Benutzertypkategorie Statistisch erfassen.
Folgen Sie als nächstes den Schritten im Bereich ‚Neuer Benutzer hinzufügen‘ dieses Handbuchs. Da der/die Benutzer*in keine reale Person ist, müssen Sie nur die allernotwendigsten Felder sowie die korrekte Bibliothek ausfüllen bzw. belegen.
Um mehr über die Möglichkeiten der Protokollierung der Vor-Ort-Nutzung zu erfahren, klicken Sie auf Prokollieren der Vor-Ort-Nutzung.
Benutzer*innen duplizieren
Wenn Sie eine neue Familie in Ihr System eingeben, müssen Sie die Kontaktinformationen nicht jedes Mal aufs neue eingeben. Koha erlaubt Ihnen, einen Benutzerdatensatz zu duplizieren und nur die Teile zu bearbeiten, die geändert werden müssen.
Öffnen Sie das Benutzerkonto, das Sie als Ausgangspunkt verwenden möchten (den Benutzer, dessen Daten kopiert werden sollen)
Klicken Sie auf ‚Duplizieren‘ am Anfang des Eintrags

Alle Felder mit Ausnahme von Vorname, Ausweisnummer, OPAC-Login und OPAC-Passwort wurden kopiert. Tragen Sie die fehlenden Angaben ein und klicken Sie auf ‚Speichern‘

Hinweis
Wenn Sie in ein Feld klicken, in dem bereits Daten vorhanden sind, werden diese dabei gelöscht. Dies soll es Ihnen erleichtern, etwas anderes einzutragen
Sie gelangen jetzt zum neuen Benutzer
Benutzerfotos hinzufügen
Wenn Sie möchten können Sie Benutzerbilder hochladen um Benutzer*innen besser identifizieren zu können. Um diese Möglichkeit zu aktivieren, muss der Systemparameter patronimages auf „Erlaube“ gesetzt werden.
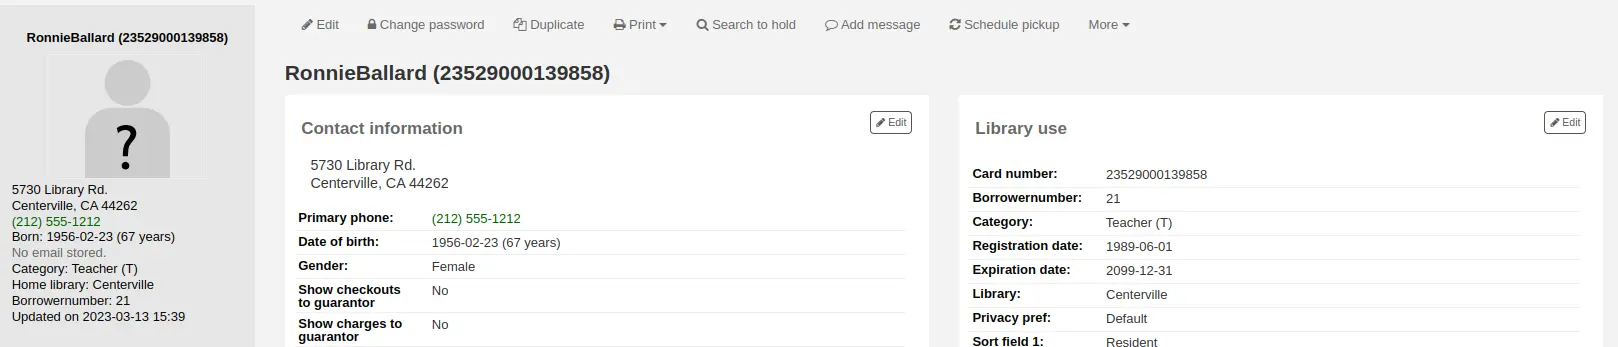
Wenn der Parameter auf „Erlaube“ gesetzt ist, sehen Sie ein Platzhalterbild unterhalb des Namens des Benutzers auf der linken Seite. Unterhalb des Namens im Hauptfenster haben Sie die Möglichkeit ein Benutzerbild hochzuladen.
Klicken Sie auf die Schaltfläche „Hinzufügen“ im Platzhalter-Bild.
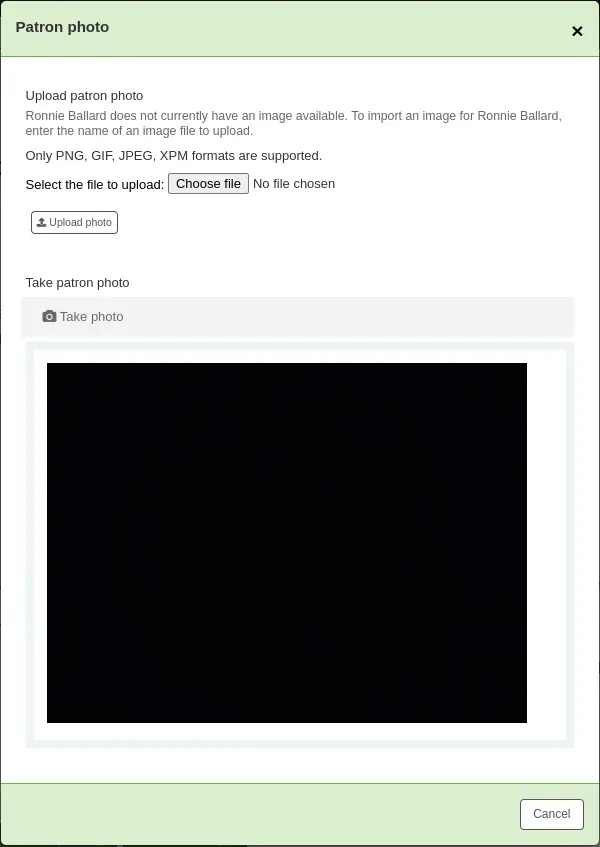
Sie können entweder ein auf dem Gerät vorhandenes Bild hochladen oder ein Bild mit einer Webcam aufnehmen.
Klicken Sie im Bereich „Benutzerfoto hochladen“ auf ‚Durchsuchen…‘ um ein Bild von Ihrem Gerät auszuwählen, und anschließend auf „Upload“, um das Benutzerfoto hochzuladen.
Warnung
Es gibt ein Limit von 100K für die Größe eines hochgeladenen Bildes, und es wird eine Bildgröße von 200x300 Pixeln empfohlen. Aber auch kleinere Bildern werden angezeigt.
Um ein Bild mit der Webcam aufzunehmen, klicken Sie auf die Schaltfläche „Foto aufnehmen“, sobald die Webcam auf den/die Benutzer*in gerichtet ist. Das System nimmt ein Bild auf und zeigt es Ihnen zur Überprüfung an. Wenn Sie zufrieden sind, klicken Sie auf „Hochladen“. Wenn nicht, klicken Sie auf „Foto erneut aufnehmen“, um ein neues Bild zu machen. Sie können das Bild auch herunterladen, indem Sie auf „Foto herunterladen“ klicken.
Um Benutzerfotos im Stapel hochzuladen, verwenden Sie das Werkzeug Benutzerfoto hochladen im Modul Werkzeuge.
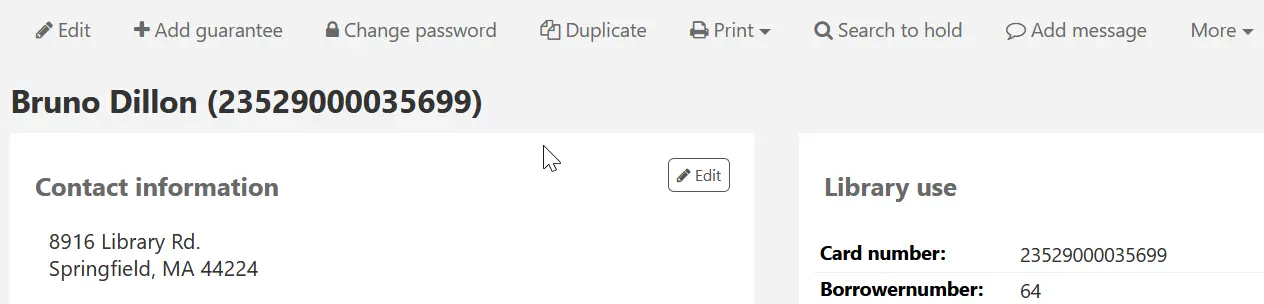
Benutzer*innen bearbeiten
Benutzer*innen können über eine der vielen Schaltflächen ‚Bearbeiten‘ bearbeitet werden.
Bemerkung
Nur Bibliothekspersonal mit der Berechtigung edit_borrowers (oder der superlibrarian-Berechtigung) kann Benutzerdateien bearbeiten.
Um den vollständigen Benutzerdatensatz zu bearbeiten, klicken Sie auf ‚Bearbeiten‘ oberhalb der Übersicht.
Um einen bestimmten Bereich des Benutzerdatensatzes zu bearbeiten (z.B. Bibliotheksmanagement), klicken Sie auf den Button ‚Bearbeiten‘ neben dem entsprechenden Bereich.
Bearbeiten Sie die Benutzerdaten und klicken Sie auf „Speichern“.
Warnung
Beachten Sie, dass Sie bei einer Änderung Ihres eigenen Benutzernamens aus Koha ausgeloggt werden.
Benutzerpasswörter ändern
Benutzerpasswörter können nicht ausgelesen werden.
Die „Sternchen“ in der Benutzerdetailansicht werden immer angezeigt, auch wenn kein Passwort eingetragen wurde.
Wenn ein*e Benutzer*in sein/ihr Passwort vergisst oder wenn sein/ihr Konto „gesperrt“ oder „administrativ gesperrt“ ist (siehe die Systemparameter FailedLoginAttempts und LockExpiredDelay), besteht die einzige Möglichkeit darin, das Passwort zurückzusetzen.
Dies kann in der Dienstoberfläche erfolgen. Um das Passwort zu ändern, klicken Sie auf den Link „Passwort ändern“.
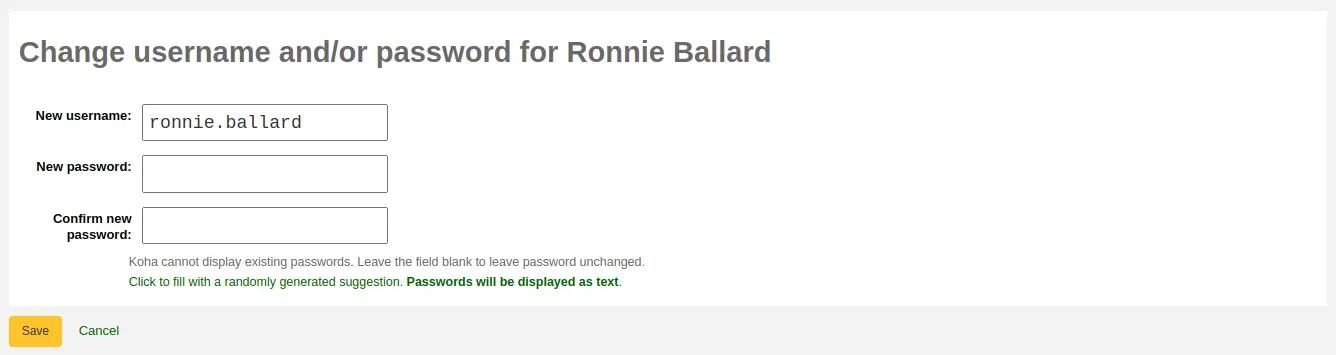
Koha kann bereits gespeicherte Passwörter nicht anzeigen, da diese verschlüsselt gespeichert werden. Lassen Sie das Feld leer, wenn das Passwort nicht geändert werden soll.
Dieses Formular kann automatisch ein Zufallspasswort generieren, wenn Sie auf den Link „Klicken Se hier, um ein Zufallspasswort zu generieren…“ gehen
Warnung
Beachten Sie, dass Sie bei einer Änderung Ihres eigenen Benutzernamens an dieser Stelle aus Koha ausgeloggt werden.
Changing the password through this form will also update the password expiry date, as set in the patron category.
Wenn der Systemparameter NotifyPasswordChange aktiviert ist, erhält der Benutzer/die Benutzerin eine E-Mail mit der Information, dass das Passwort geändert wurde.
Bemerkung
Der Inhalt dieser E-Mail kann unter Benachrichtigungen und Quittungen angepasst werden. Der Code der Benachrichtigung lautet PASSWORD_CHANGE.
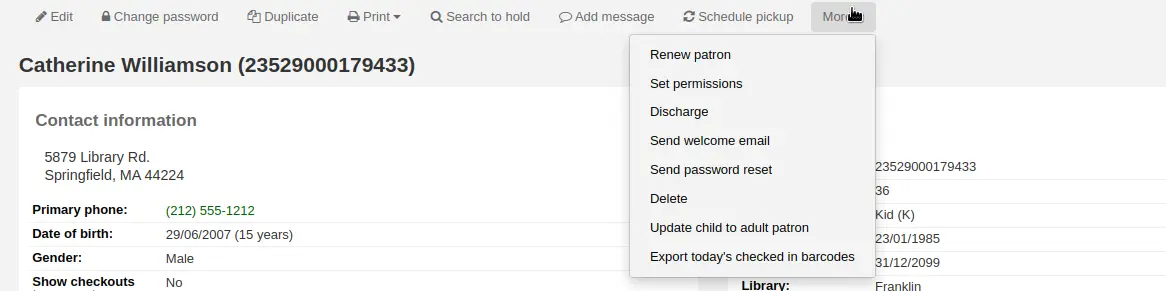
Wenn der Systemparameter OpacResetPassword aktiviert ist oder wenn der Benutzertyp dies zulässt, können Sie auch eine E-Mail zum Zurücksetzen des Passworts an den/die Benutzer*in senden, indem Sie auf „Mehr“ klicken und „Passwortrücksetzung senden“ wählen.
Dadurch wird eine E-Mail zum Zurücksetzen des Passworts an den/die Benutzer*in gesendet, ähnlich der E-Mail, die gesendet wird, wenn der/die Benutzer*in auf den Link “Passwort vergessen?“ im OPAC klickt. Der Link zum Zurücksetzen des Passworts ist jedoch so eingestellt, dass er nach 5 Tagen abläuft und nicht nach 2 Tagen, wenn er auf diese Weise versendet wird.
Bemerkung
Der Inhalt der E-Mail kann mit dem Werkzeug Benachrichtigungen und Quittungen angepasst werden. Der Code des Schreibens lautet STAFF_PASSWORD_RESET.
Nur Bibliothekspersonal mit der superlibrarian-Berechtigung kann das Ablaufdatum des Passworts sehen und dieses manuell ändern. Das Datum kann durch einen Klick auf die Schaltfläche „Bearbeiten“ am Seitenanfang oder über „Bearbeiten“ neben dem Bereich „Bibliotheksverwaltung“ im Benutzerdatensatz bearbeitet werden.
Benutzer-Flags hinzufügen
Sperren werden genutzt, damit Benutzer*innen nicht ausleihen können.
Die Ausleihe von Exemplaren kann auch durch das Setzen von Benutzer-Flags verhindert werden.

Wenn Sie möchten, dass vor einer Ausleihe zunächst die Adresse des/der Benutzer*in durch das Bibliothekspersonal überprüft wird, können Sie die Flag „Adresse falsch/fehlt“ verwenden. Dies erzeugt bei der Ausleihe eine Warnung.

Teilt ein Benutzer den Verlust seines Ausweises mit, kann durch Setzen der Flag „Ausweis verloren“ verhindert werden, dass andere Personen mit der Karte Medien ausleihen.

Wenn Sie eine*n Benutzer*in für die Bibliotheksbenutzung sperren möchten, können Sie eine manuelle Sperre setzen.

Bemerkung
Dies ist identisch mit dem Reiter „Sperren“ am unteren Ende der Detailseite eines Benutzers.
Bemerkung
Diese Sperre eines Benutzers kann automatisch über den Mahntrigger gesetzt werden
Wenn Sie ein Datum und/oder eine Notiz zur Sperre eingeben, werden diese ebenfalls in der Sperr-Benachrichtigung angezeigt.

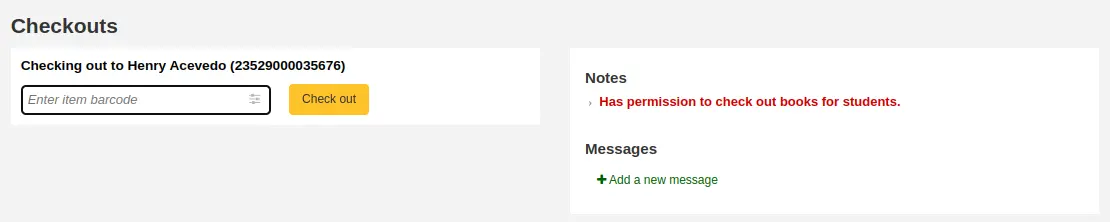
Hinzufügen von Notizen und Nachrichten zu einem Benutzerdatensatz
Sie können Notizen in einem Benutzerdatensatz hinterlassen. Dazu gibt es mehrere Möglichkeiten: Sie können entweder eine Ausleihnotiz oder eine interne Nachricht hinzufügen. Diese werden im OPAC für den/die Benutzer*in nicht sichtbar sein. Wenn Sie möchten, dass der/die Benutzer*in die Notizen und Nachrichten sieht, verwenden Sie OPAC-Notizen und OPAC-Nachrichten.
Ausleihnotizen
Circulation notes are added to the patron’s file through the add patron form or the edit patron form, in the ‚Library set-up‘ section.
In der Dienstoberfläche werden Ausleih-Notizen im Bereich „Bibliothekskonfiguration“ der Benutzerdatei angezeigt.
Ausleihbenachrichtigungen
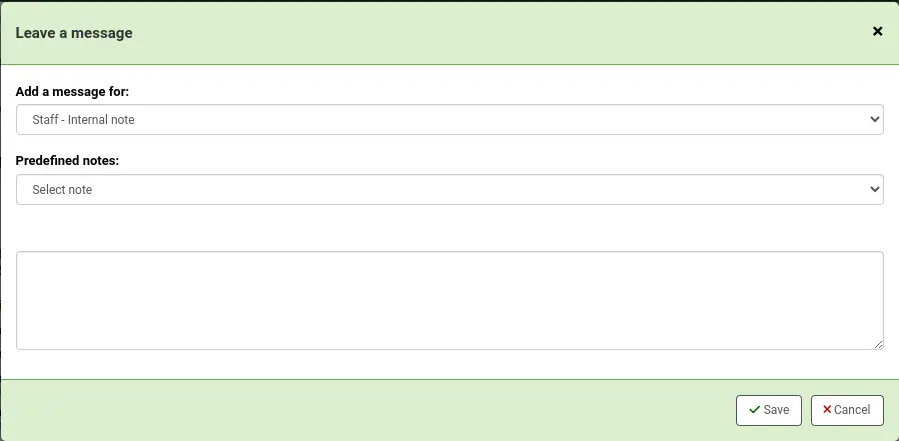
Interne Mitteilungen werden in der Benutzerdatei über die Schaltfläche „Neue Mitteilung“ eingetragen.
Um eine interne Mitteilung anzulegen, wählen Sie „Interne Notiz“ aus der Auswahlliste „Neue Mitteilung für“. Geben Sie Ihre Nachricht in das Eingabefeld ein oder wählen Sie eine vordefinierte Nachricht aus der Auswahlliste.
Bemerkung
Vordefinierte Mitteilungen können in der Normierte-Wert-Kategorie BOR_NOTES hinzugefügt werden.
Sobald sie gespeichert ist, wird die interne Mitteilung in fetter roter Schrift auf der Detailseite des Benutzers in der Dienstoberfläche angezeigt, und zwar oben auf der Seite direkt unter der Reihe der Aktionsschaltflächen.

Sie werden ebenfalls im Reiter Ausleihen auf der rechten Seite angezeigt.

Wenn Sie die Nachricht anpassen müssen, klicken Sie auf die Schaltfläche „Bearbeiten“ neben der Nachricht, passen Sie den Text an und klicken Sie auf „Speichern“.
Kinder zu Erwachsenen machen
Es findet kein automatischer Wechsel eines Benutzers von einer Kind- in eine Erwachsenenkategorie statt, es sei denn, der Cronjob zum Aktualisieren von Benutzertypen wird ausgeführt.
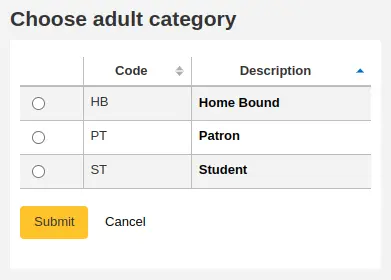
Um eine*n Benutzer*in manuell von Kind auf Erwachsener zu ändern, klicken Sie im Benutzerdatensatz im Menü „Mehr“ auf „Kind zu Erwachsenem aktualisieren“.
Daraufhin wird ein Pop-up-Fenster angezeigt, in dem Sie gefragt werden, in welche Ihrer Kategorien für Erwachsene dieses Kind aufgenommen werden soll.
Bemerkung
Diese Liste zeigt den Benutzertyp, die den Kategorie-Typ „Erwachsener“ haben.
Benutzerkonto verlängern
Wenn Sie das Benutzerkonto verlängern möchten, können Sie entweder das Ablaufdatum manuell ändern, oder unter der Schaltfläche ‚Mehr‘ auf ‚Benutzer verlängern‘ klicken.
Wenn Sie die zweite Option wählen, wird das neue Ablaufdatum basierend auf den Einstellungen des Benutzertyps des vorliegenden Benutzers berechnet. Der Systemparameter BorrowerRenewalPeriodBase legt dabei fest, ob das neue Ablaufdatum entweder ausgehend vom Tagesdatum oder vom alten Ablaufdatum berechnet wird.
Ein Vorteil des Verwendens des Menüeintrags „Benutzer verlängern“ ist, dass die Verlängerung des/der Benutzer*in in der Tabelle action_logs protokolliert wird, und auch als solche sichtbar ist, wenn die Loganzeige oder das Änderungslog des Benutzerkontos eingesehen werden.
Das Verlängerungsdatum ist sichtbar im Reiter ‚Details‘.
Wenn der/die Benutzer*in einen Benutzertyp mit Benutzungsgebühr hat, wird die Gebühr ebenfalls bei Verlängerung des Kontos erhoben. Sie können die Gebühr über den Reiter Gebühren im Benutzerkonto verwalten.
Benutzerkonto löschen
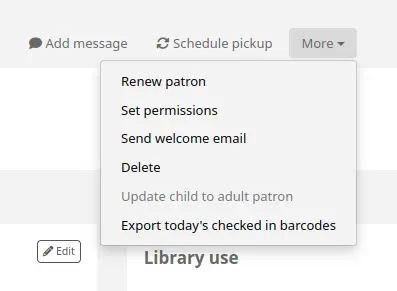
Aus dem Menü „Mehr“ heraus kann der/die Benutzer*in gelöscht werden.
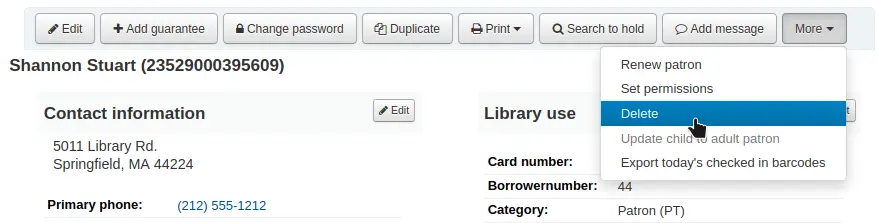
Bemerkung
Nur Bibliothekspersonal mit der Berechtigung delete_borrowers (oder der superlibrarian-Berechtigung) kann Benutzer*innen löschen.
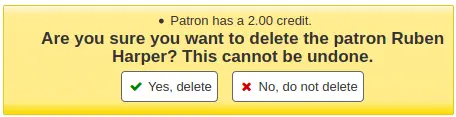
Es wird eine Meldung ausgegeben, wenn der/die Benutzer*in noch Ausleihen, Vormerkungen, Gebühren oder Guthaben auf dem Konto hat.
Wenn der/die Benutzer*in aktuell noch Ausleihen hat, ist eine Löschung nicht möglich.

Wenn der/die Benutzer*in noch offene Gebühren hat, ist eine Löschung nicht möglich.

Wenn der/die Benutzer*in noch ein ungenutztes Guthaben hat, ist eine Löschung möglich, aber es wird ein Warnhinweis ausgegeben.
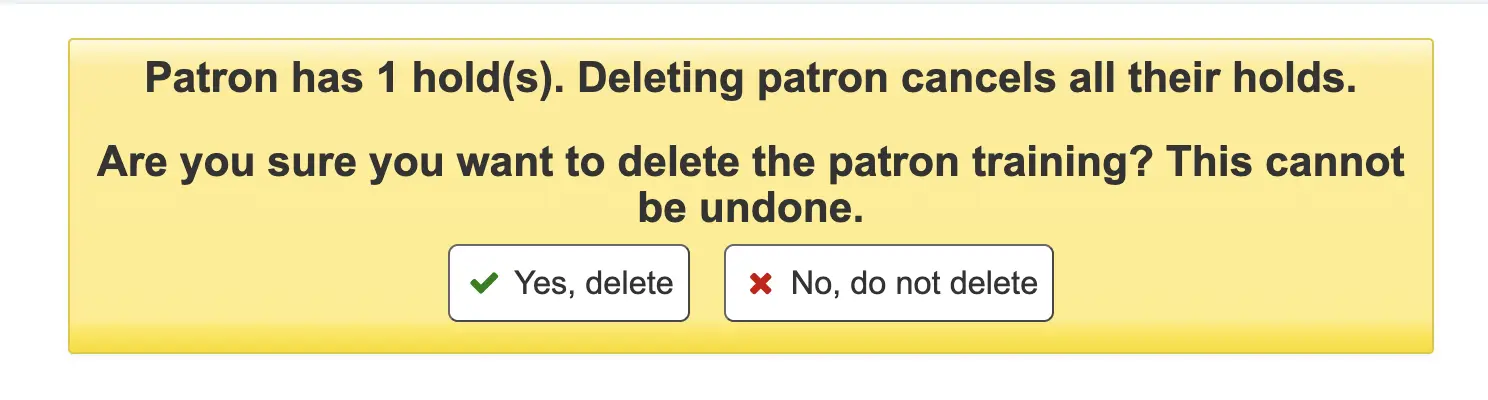
If a patron has existing holds on their account, the option to delete the patron is possible. The hold will be canceled and moved to the old_reserves table.
Wenn ein*e Benutzer*in öffentliche oder geteilte Listen hat, werden diese zusammen mit dem/der Benutzer*in gelöscht, es sei denn, der Systemparameter ListOwnershipUponPatronDeletion ist auf „Besitzer dieser Listen ändern“ gesetzt.
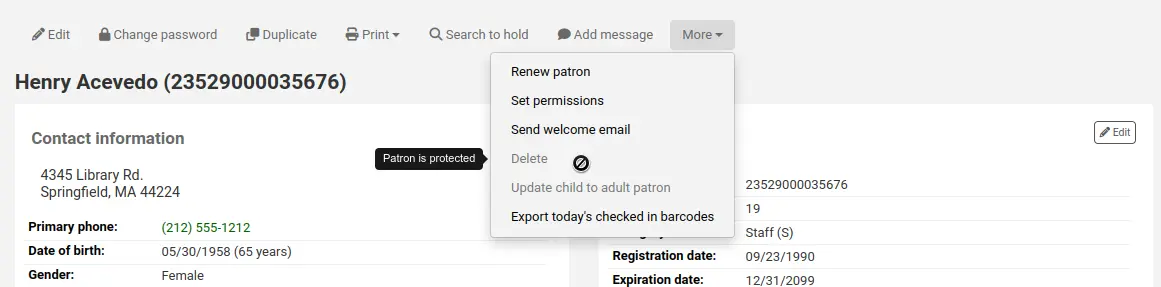
Wenn ein*e Benutzer*in geschützt ist, ist die Option „Löschen“ deaktiviert. Um den/die Benutzer*in trotzdem zu löschen, bearbeiten Sie den Benutzer im Bereich „Bibliotheksverwaltung“ und wählen bei „Geschützt“ „Nein“ aus, speichern und löschen den/die Benutzer*in dann.
Änderungswünsche der Benutzer*innen verwalten
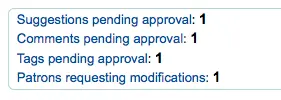
Wenn Sie Benutzern erlauben Änderungen in ihren Kontodaten über den OPAC durchzuführen (Systemparameter OPACPatronDetails), müssen Sie alle Änderungswünsche zunächst über die Dienstoberfläche moderieren und übernehmen, bevor die Änderung wirksam wird. Wenn es Änderungswünsche gibt, werden diese auf der Startseite der Dienstoberfläche im Dashboard unterhalb der Modulauswahl angezeigt (zusammen mit anderen Exemplaren, die auf Bearbeitung warten).
Hinweis
Benutzer*innen mit der Berechtigung ‚Superlibrarian‘ können Änderungswünsche von allen Bibliotheksstandorten einsehen, anderes Bibliothekspersonal sieht die Änderungswünsche Ihres angemeldeten Bibliotheksstandorts.
Wenn Sie den Link ‚Benutzer mit Änderungswünschen“ anklicken, gelangen Sie zu einer Liste mit Benutzer*innen, die Änderungen Ihrer persönlichen Daten angefordert haben.
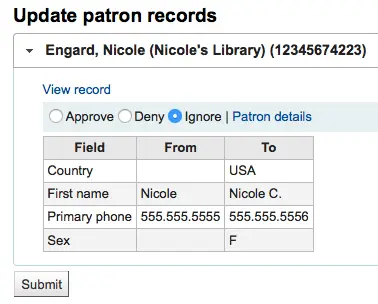
Von hier aus können Sie die Änderungen im Benutzerdatensatz überprüfen und dann ‚annehmen‘, ‚löschen‘ oder ‚ignorieren‘.
Wenn Sie den gesamten Benutzerdatensatz ansehen möchten, klicken Sie auf den ‚Benutzerdetails‘ Link rechts von den Auswahlmöglichkeiten. Dabei wird ein neuer Tab geöffnet.
Benutzerdatensätze verschmelzen
Wenn es versehentlich eine*n Benutzer*in mit zwei Benutzerdatensätzen gibt, ist es möglich diese zu verschmelzen. Dadurch gehen keine Vormerkungen oder die Ausleihhistorie verloren.
Bemerkung
Merging patrons requires the merge_borrowers permission.
Markieren Sie die Checkbox bei den Sätzen die Sie verschmelzen möchten, und klicken Sie auf den Button ‚Ausgewählte Benutzer verschmelzen‘.
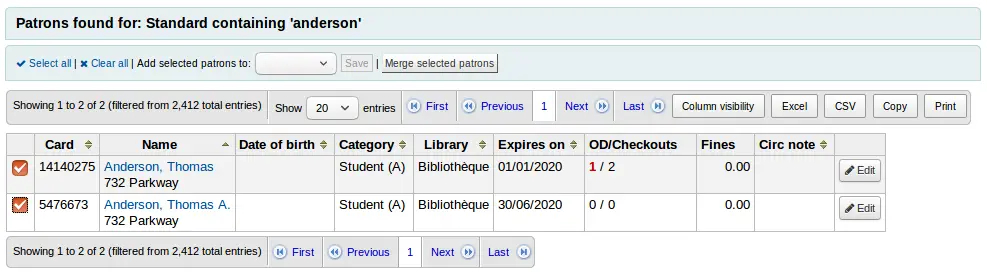
Hinweis
Es ist möglich mehr als zwei Datensätze gleichzeitig zu verschmelzen.
Wählen Sie den Benutzerdatensatz aus den Sie behalten möchten

Wenn erforderlich, können über die Schaltfläche „Benutzer vergleichen“ die verschiedenen Konten verglichen werden.
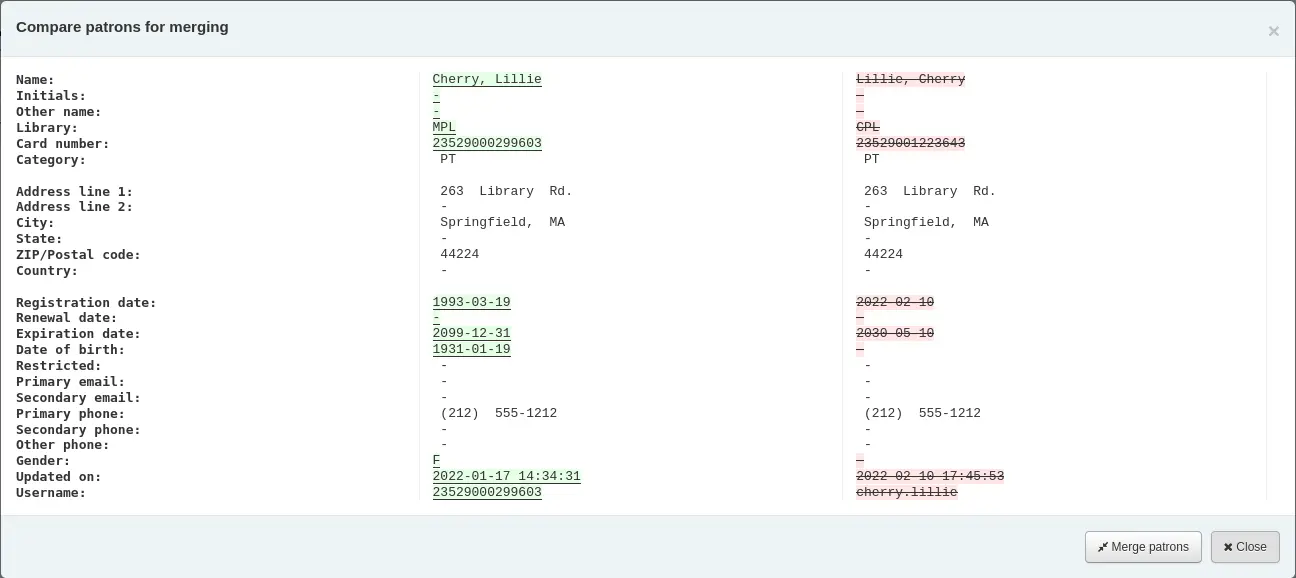
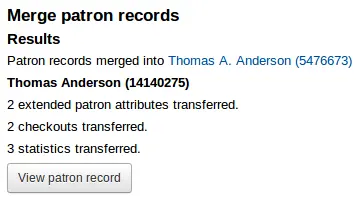
Klicken Sie auf die Schaltfläche „Benutzer verschmelzen“.
Die Ausleihen und Statistiken werden zu dem Gewinnerdatensatz transferiert, der andere Datensatz wird gelöscht.
Benutzerberechtigungen
Benutzerberechtigungen ermöglichen den Zugriff der Bibliotheksmitarbeiter*innen auf die Dienstoberfläche.
Wichtig
Damit ein*e Mitarbeiter*in sich in der Dienstoberfläche anmelden kann, muss er mindestens über die Berechtigung catalogue verfügen, die ihm die Anzeige der Dienstoberfläche ermöglicht.
Benutzerberechtigungen vergeben
Bemerkung
Nur Bibliothekspersonal mit der Berechtigung permissions (oder der superlibrarian-Berechtigung) kann Berechtigungen für andere Mitarbeiter*innen festlegen.
Zusätzlich zu der Berechtigung permissions können nur Mitarbeiter*innen mit der Berechtigung staffaccess die Berechtigung für andere Mitarbeiter*innen festlegen, deren Kategorie vom Typ „Mitarbeiter“ ist.
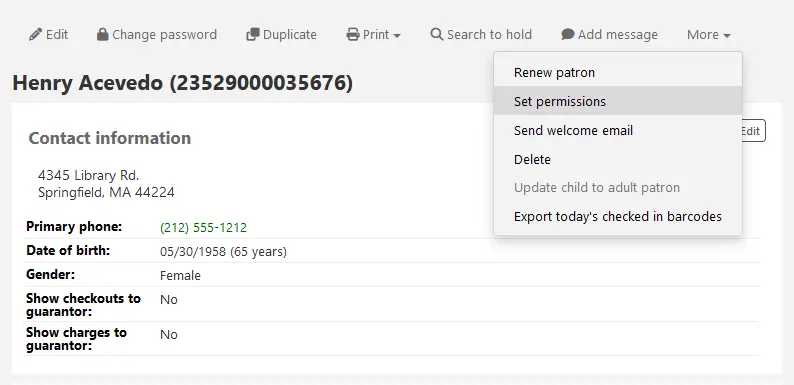
Gehen Sie im Benutzerdatensatz auf ‚Mehr‘ und wählen Sie dort ‚Berechtigungen setzen‘ um die Benutzerberechtigungen zu ändern.
Ihnen wird eine Liste mit Berechtigungen angezeigt, von denen Sie einige über ‚Zeige Details‘ auf der rechten Seite mit dem Pluszeichen aufklappen können.
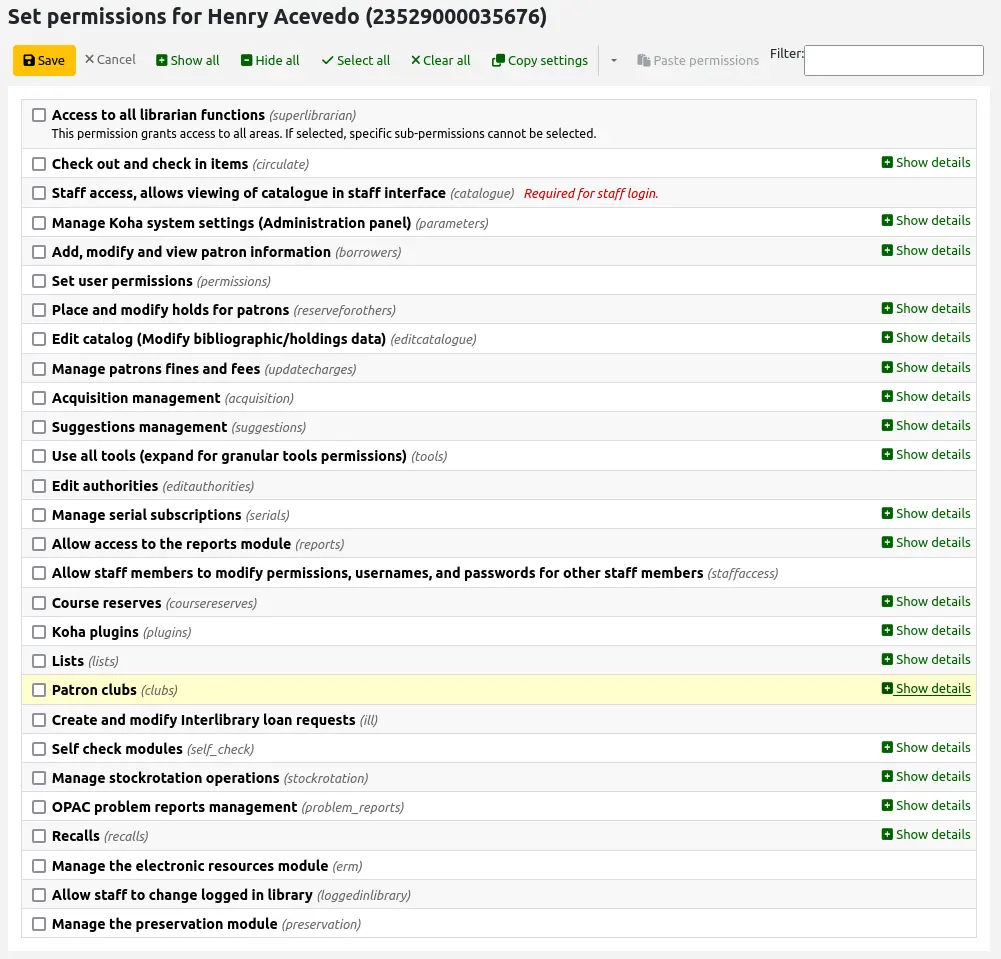
In jedem Fall werden alle untergeordneten Berechtigungen markiert, wenn die entsprechende übergeordnete Berechtigung markiert wird. Wenn Sie die Berechtigungen granularer vergeben möchten, erweitern Sie den jeweiligen Bereich und setzen Sie gezielt Markierungen bei den Berechtigungen, die Sie an den/die Mitarbeiter*in vergeben möchten.
Um die Berechtigungen eines/einer Benutzer*in auf eine*n andere*n Benutzer*in zu kopieren, klicken Sie auf die Schaltfläche „Einstellungen kopieren“, gehen dann zu den Berechtigungseinstellungen des/der anderen Benutzer*in und klicken auf „Berechtigungen einfügen“.
Klicken Sie auf die Pfeilschaltfläche neben „Einstellungen kopieren“ und wählen Sie „Kopierte Berechtigungen vergessen“, sobald Sie die Berechtigungen kopiert haben.
Version
Die Möglichkeit zum Kopieren von Berechtigungen wurde in Koha-Version 24.05 hinzugefügt.
Benutzerberechtigungen vergeben
Dieser Bereich beschreibt die verschiedenen Berechtigungen.
Zugriff auf alle Module und Funktionen in der Dienstoberfläche (superlibrarian)
Diese Berechtigung erteilt Zugriff auf alles in der Koha-Dienstoberfläche.
Die Superlibrarian-Berechtigung ermöglicht auch den Zugriff auf Dinge, die sonst z. B. durch die Systemparameter eingeschränkt sein können.
Bemerkung
Wenn diese Berechtigung ausgewählt wurde, müssen keine weiteren Berechtigungen gesetzt werden.
Exemplare ausleihen und zurückbuchen (circulate)
Die folgenden Berechtigungen werden verwendet, um Zugang zu den Funktionen des Moduls Ausleihe zu gewähren. Die Aktivierung der Berechtigung circulation erteilt Zugriff auf alle Funktionen. Klicken Sie auf „Details anzeigen“, um bestimmte Berechtigungen zu erteilen.
Übrige Berechtigungen für die Ausleihe (circulate_remaining_permissions)
Diese Berechtigung gewährt alle Ausleihrechte mit Ausnahme derjenigen, die durch die unten aufgeführten Berechtigungen abgedeckt sind.
Sperren für Ausleihe übergehen (force_checkout)
Mit dieser Berechtigung kann eine Bibliotheksmitarbeiterin die Ausleihbeschränkungen in folgenden Fällen übergehen:
Altersbeschränkung
Das Exemplar ist auf eine*n andere*n Benutzer*in ausgeliehen
Das Exemplar ist nicht ausleihbar
Der/die Benutzer*in hat überfällige Ausleihen
der/die Benutzer*in ist gesperrt
Das Exemplar ist verloren
Das Exemplar hat eine hohe Nachfrage
Das Exemplar ist vorgemerkt
Exemplarbuchungen verwalten (manage_bookings)
Mit dieser Berechtigung kann das Bibliothekspersonal Exemplarbuchungen verwalten.
Ausleihmitteilungen als gesehen/nicht gesehen markieren (manage_checkout_notes)
Mit dieser Berechtigung kann das Bibliothekspersonal die von den Benutzer*innen über den OPAC geschriebenen Ausleihmitteilungen verwalten.
Abholungen verwalten (manage_curbside_pickups)
Mit dieser Berechtigung kann das Bibliothekspersonal Abholtermine mit Benutzer*innen verwalten.
Benutzersperren verwalten (manage_restrictions)
Mit dieser Berechtigung kann das Bibliothekspersonal eine Sperre im Benutzerkonto aufheben, oder eine manuelle Sperre hinzufügen.
Bemerkung
Beachten Sie, dass ein*e Mitarbeiter*in ohne manage_restrictions, aber mit force_checkout die Sperre eines/einer Benutzer*in vorübergehend außer Kraft setzen kann, um ein Exemplar an ihn auszuleihen.
Report für Überfälligkeiten ausführen (overdues_report)
Mit dieser Berechtigung kann das Bibliothekspersonal die Reports über Mahnungen in der Rubrik Ausleihe ausführen (Mahnungen und Mahnungen mit Gebühren).
Verlängerungsbeschränkungen überschreiben (override_renewals)
Mit dieser Berechtigung kann Bibliothekspersonal Verlängerungsbeschränkungen überschreiben.
Erfordert, dass die Berechtigung circulate_remaining_permissions ebenfalls an die Bibliotheksmitarbeiter*innen vergeben wird.
Staff access, allows viewing the catalog in staff interface (catalogue)
Wichtig
Diese Berechtigung muss allen Bibliotheksmitarbeiter*innen zugewiesen werden, damit diese sich in der Dienstoberfläche anmelden können
Diese Berechtigung erteilt Zugriff auf die Dienstoberfläche, mit der Möglichkeit zu
searching the catalog (simple search, advanced search and item search)
Normdatensuche
Ansicht der Ausleihhistorie eines Titels (Benutzerinformationen werden nicht angezeigt)
Erstellung privater oder öffentlicher Listen, Hinzufügen von Exemplaren zu privaten und öffentlichen Listen, wenn die Berechtigung public list es zulässt, Bearbeitung und Löschung privater Listen
den Korb nutzen
Semesterapparate einsehen
Systemkonfiguration verwalten (Administration) (parameters)
Die folgenden Berechtigungen werden verwendet, um den Zugriff auf verschiedene Seiten des Administrationsmoduls zu ermöglichen. Die Aktivierung der Berechtigung parameters erteilt Zugriff auf alle Seiten. Klicken Sie auf „Details anzeigen“, um nur Zugriff auf bestimmte Seiten zu erteilen.
Gebühren- und Gutschriftenarten verwalten (manage_accounts)
Diese Berechtigung gibt Zugang zur Verwaltung der Bereiche Gebührenarten and Gutschriftenarten.
Zusätzliche Felder für Körbe und Abonnements verwalten (manage_additional _fields)
Diese Berechtigung gibt Zugang zur Verwaltung des Bereichs Zusatzfelder.
Wichtig
Diese Berechtigung setzt voraus, dass der/die Mitarbeiter*in auch die entsprechende Berechtigung für die jeweiligen Zusatzfelder hat.
Zusätzliche Felder |
Zugehörige Berechtigung |
|---|---|
Bestellkörbe (aqbasket) |
Körbe und Bestellposten verwalten (order_manage) |
Bestellzeilen (aqorders) |
Körbe und Bestellposten verwalten (order_manage) |
Rechnungen (aqinvoices) |
Rechnungen bearbeiten (edit_invoices) |
Abonnements (subscription) |
Existierendes Abonnement bearbeiten (edit_subscription) |
Kontozeilen (Gutschrift) (accountlines:credit) |
Verbleibende Berechtigungen für die Verwaltung von Entgelten und Gebühren (remaining_permissions) |
Kontozeilen (Gebühren) (accountlines:debit) |
Verbleibende Berechtigungen für die Verwaltung von Entgelten und Gebühren (remaining_permissions) |
Akustische Signale verwalten (manage_audio_alerts)
Die Berechtigung ermöglicht Zugriff zur Verwaltung des Bereichs Akustische Signale.
Hintergrundjobs verwalten (manage_background_jobs)
Die Berechtigung ermöglicht den Zugriff auf den Bereich Job-Verwaltung.
Kassen anlegen, bearbeiten und archivieren (manage_cash_registers)
Diese Berechtigung gibt Zugang zur Verwaltung des Bereichs Kassen.
Ausleihkonditionen verwalten (manage_circ_rules)
Diese Berechtigung erteilt Zugriff auf die Verwaltung des Bereichs Ausleih- und Gebührenregeln.
Ausleihkonditionen von allen Bibliotheken verwalten (manage_circ_rules_from_ any_libraries)
Diese Berechtigung ermöglicht, die Ausleihregeln aller Bibliotheken zu verwalten.
Wenn ein*e Mitarbeiter*in nicht über diese Berechtigung, aber über die Berechtigung manage_circ_rules verfügt, kann er/sie nur die Ausleihregeln der eigenen Bibliothek bearbeiten.
Städte verwalten (manage_cities)
Diese Berechtigung erteilt Zugriff auf den Bereich Verwaltung von Städten.
Klassifikationsquellen and Sortierregeln verwalten (manage_classifications)
Diese Berechtigung erteilt Zugriff auf die Verwaltung des Bereichs Klassifikationsquellen.
Spaltenkonfiguration verwalten (manage_column_config)
Diese Berechtigung gibt Zugang zum Bereich für Tabelleneinstellungen.
Abholungen verwalten (manage_curbside_pickups)
Diese Berechtigung erteilt Zugriff auf die Verwaltung des Bereichs Konfiguration für Abholungen.
In diesem Bereich werden die Abholzeiträume und andere Parameter für die Abholung verwaltet. Die Mitarbeiter*innen der Ausleihe, die die Abholungen verwalten, benötigen die Berechtigung manage_curbside_pickups unter circulate.
Meinten Sie?-Konfiguration verwalten (manage_didyoumean)
Diese Berechtigung erteilt Zugriff auf die Verwaltung des Bereichs Meinten Sie?.
Identity Provider verwalten (manage_identity_providers)
Diese Berechtigung erteilt Zugriff auf die Verwaltung des Bereichs Identity Provider.
Benachrichtigungseinstellungen für Ausleihe und Rückgabe verwalten (manage_item_circ_alerts)
Diese Berechtigung erteilt Zugriff auf die Verwaltung des Bereichs Benachrichtigungseinstellungen für Ausleihe und Rückgabe.
Suchfelder für Exemplare verwalten (manage_item_search_fields)
Diese Berechtigung erteilt Zugriff auf die Verwaltung des Bereichs Suchfelder für Exemplare.
Exemplartypen verwalten (manage_itemtypes)
Diese Berechtigung gibt Zugang zur Verwaltung des Bereichs Exemplartypen.
Tastaturkürzel für das erweiterte Katalogisierungsmodul verwalten (manage_ keyboard_shortcuts)
Diese Berechtigung gibt Zugang zur Verwaltung des Bereichs Tastenkürzel.
Bibliotheken und Bibliotheksgruppen verwalten (manage_libraries)
Diese Berechtigung erteilt Zugriff auf die Verwaltung der Bereiche Bibliotheken und Bibliotheksgruppen.
Einstellungen für Mana KB verwalten (manage_mana)
Die Berechtigung ermöglicht den Zugriff auf den Bereich Daten mit der Mana KB teilen.
MARC-Überlagerungsregeln verwalten (manage_marc_overlay_rules)
Diese Berechtigung erteilt Zugriff auf die Verwaltung des Bereichs Datensatzüberlagerungsregeln.
Datensatzabgleichregeln verwalten (manage_matching_rules)
Diese Berechtigung erteilt Zugriff auf die Verwaltung des Bereichs Datensatzabgleichregeln.
OAI-Sets verwalten (manage_oai_sets)
Diese Berechtigung erteilt Zugriff auf den Bereich OAI Sets.
Benutzerattribute verwalten (manage_patron_attributes)
Diese Berechtigung erteilt Zugriff auf die Verwaltung des Bereichs Benutzerattribute.
Benutzertypen verwalten (manage_patron_categories)
Diese Berechtigung erteilt Zugriff auf die Verwaltung des Bereichs Benutzertypen.
Benutzersperren verwalten (manage_patron_restrictions)
Diese Berechtigung gibt Zugriff auf die Verwaltung des Bereichs Arten von Benutzersperren.
Datenquellen verwalten (manage_record_sources)
Diese Berechtigung ermöglicht den Zugriff auf den Administrationsbereich Datensatzquellen.
Version
Diese Berechtigung, sowie das zugehörige Feature, wurden in Koha-Version 24.05 hinzugefügt.
Suchmaschinenkonfiguration verwalten (manage_search_engine_config)
Diese Berechtigung erteilt Zugriff auf den Bereich Suchmaschinen-Konfiguration.
Bemerkung
Dieser Bereich ist nur sichtbar, wenn der Systemparameter SearchEngine auf „Elasticsearch“ gesetzt ist.
Gespeicherte Suchfilter verwalten (manage_search_filters)
Diese Berechtigung erteilt Zugriff auf die Verwaltung des Bereichs Suchfilter.
Z39.50- und SRU-Serverkonfiguration verwalten (manage_search_targets)
Diese Berechtigung erteilt Zugriff auf die Verwaltung des Bereichs Z39.50- und SRU-Serverkonfiguration.
SMS-Mobilfunk-Provider verwalten (manage_sms_providers)
Diese Berechtigung ermöglicht den Zugriff auf den Administrationsbereich SMS-Mobilfunkanbieter.
Bemerkung
Dieser Bereich ist nur sichtbar, wenn der Systemparameter SMSSendDriver auf „E-Mail“ gesetzt ist.
SMTP-Server verwalten (manage_smtp_servers)
Diese Berechtigung erteilt Zugriff auf die Verwaltung des Bereichs SMTP-Server.
Systemparameter verwalten (manage_sysprefs)
Diese Berechtigung erteilt Zugriff auf den Bereich Globale Systemparameter.
Transportregeln und Transportkostenmatrix verwalten (manage_transfers)
Diese Berechtigung erteilt Zugriff auf die Verwaltung der Bereiche Transportregeln und die Transportkostenmatrix.
Einstellungen für mit der Koha-Community geteilte Nutzungsstatistiken verwalten (manage_usage_stats)
Diese Berechtigung erteilt Zugriff auf den Bereich Bibliotheksstatistiken mit der Koha-Community teilen.
Verbleibende Berechtigungen für das Administrationsmodul (parameters_remaining_permissions)
Diese Berechtigung erteilt Zugriff auf alle weiteren Bereiche der Administration, die obenstehend nicht erwähnt werden.
Benutzerdaten erstellen, bearbeiten und anzeigen (borrowers)
Die folgenden Berechtigungen werden verwendet, um Zugang zu den Funktionen des Moduls Benutzer zu erhalten. Die Aktivierung der Berechtigung borrowers erteilt Zugriff auf alle Funktionen. Klicken Sie auf „Details anzeigen“, um bestimmte Berechtigungen zu erteilen.
Benutzer*innen löschen (delete_borrowers)
Diese Berechtigung gibt die Möglichkeit, Benutzer*innen zu löschen.
Benutzerdaten erstellen, bearbeiten und anzeigen (edit_borrowers)
Diese Berechtigung gibt Zugriff auf das Benutzer-Modul um Benutzerdatensätze anzuzeigen sowie neue Benutzer*innen hinzuzufügen und bestehende Benutzer*innen zu ändern.
Warnung
Mitarbeiter*innen mit dieser Berechtigung, aber ohne die Berechtigung list_borrowers können direkt auf die Benutzerdateien zugreifen (z. B. über einen Direktlink), aber nicht nach Benutzer*innen suchen.
Benutzer*innen suchen, auflisten und anzeigen (list_borrowers)
Diese Berechtigung ermöglicht den Zugriff auf das Modul Benutzer, um Benutzerdateien zu suchen und anzuzeigen.
Warnung
Mitarbeiter*innen mit dieser Berechtigung, aber ohne die Berechtigung edit_borrowers, können zwar Benutzer*innen anzeigen, aber keine neuen Benutzer*innen hinzufügen oder bestehende Benutzer*innen bearbeiten.
Merge patrons (merge_borrowers)
This permission grants the right to merge patron records.
Nachrichten an Benutzer*innen versenden (send_messages_to_patrons)
Version
Diese Berechtigung, sowie das zugehörige Feature, wurden in Koha-Version 24.05 hinzugefügt.
Diese Berechtigung ermöglicht, benutzerdefinierte E-Mails an Benutzer*innen zu senden.
Bemerkung
Ohne diese Berechtigung, aber mit der Berechtigung edit_borrowers, kann das Bibliothekspersonal weiterhin interne Notizen und OPAC-Nachrichten hinzufügen und verwalten.
Zeige Benutzerinformationen von allen Bibliotheken (view_borrower_infos_from_any_libraries)
Diese Berechtigung ermöglicht den Zugriff auf Benutzerdateien aller Bilbiotheken.
Wenn ein*e Mitarbeiter*in diese Berechtigung nicht hat, aber die Berechtigung edit_borrowers hat, kann er/sie nur die Benutzer*innen seiner eigenen Bibliothek oder Bibliotheksgruppe sehen.
Berechtigungen setzen (permissions)
Diese Berechtigung ermöglicht das Setzen von Berechtigungen für andere Mitarbeiter.
Wichtig
Mitarbeiter*innen mit dieser Berechtigung können keine Berechtigungen für Benutzer*innen festlegen, deren Kategorie vom Typ „Mitarbeiter“ ist, es sei denn, sie haben auch die Berechtigung staffaccess.
Vormerkungen für Benutzer*innen setzen und bearbeiten (reserveforothers)
Die folgenden Berechtigungen werden für den Zugriff auf die Optionen für Vormerkungen verwendet. Die Aktivierung der Berechtigung reserveforothers erteilt Zugriff auf alle Funktionen. Klicken Sie auf „Details anzeigen“, um bestimmte Berechtigungen zu erteilen.
Reihenfolge der Vormerkungen verändern (modify_holds_priority)
Diese Berechtigung erlaubt Mitarbeiter*innen die Änderung der Vormerkungspriorität (Benutzer*innen in der Liste nach oben oder unten verschieben).
Vormerkungen für Benutzer*innen eintragen (place_holds)
Diese Berechtigung ermöglicht Mitarbeiter*innen Vormerkungen in der Dienstoberfläche zu setzen.
Katalogdaten bearbeiten (Titel und Exemplare hinzufügen und bearbeiten) (editcatalogue)
Die folgenden Berechtigungen werden verwendet, um den Zugriff auf die Funktionen des Moduls Katalogisierung zu ermöglichen. Die Aktivierung der Berechtigung editcatalogue erteilt Zugriff auf alle Funktionen. Klicken Sie auf „Details anzeigen“, um bestimmte Berechtigungen zu erteilen.
Erweiterten Katalogisierungseditor verwenden (advanced_editor)
Diese Berechtigung ermöglicht die Nutzung des erweiterten Katalogisierungs-Editors im Katalogisierungs-Modul.
Wichtig
Mitarbeiter*innen mit dieser Berechtigung müssen ebenfalls die Berechtigung edit_catalogue haben.
Alle Exemplare auf einmal löschen (delete_all_items)
Diese Berechtigung ermöglicht die Nutzung der Option „Alle Exemplare löschen“ im Menü „Bearbeiten“ in der Katalogisierung, um alle Exemplare eines Datensatzes zu löschen.
Jedes Exemplar bearbeiten, auch solche, die sonst eingeschränkt wären (edit_any_item)
Diese Berechtigung gibt die Möglichkeit, Exemplare zu bearbeiten, die zu Bibliotheken aus anderen Bibliotheksgruppen gehören.
Wichtig
Mitarbeiter*innen mit dieser Berechtigung müssen ebenfalls die Berechtigung edit_items haben.
Katalogdaten bearbeiten (Titel und Exemplare hinzufügen und bearbeiten) (edit_catalogue)
Diese Berechtigung gewährt die Fähigkeit zum Hinzufügen bibliografischer Datensätze (einschließlich des Imports von Datensätzen über z39. 50/SRU, sowie Duplizieren von Datensätzen), Bearbeiten bestehender bibliografischer Datensätze, Zusammenführen bestehender bibliografischer Datensätze, und Löschen bibliografischer Datensätze.
Exemplare bearbeiten (edit_items)
Diese Berechtigung gibt die Möglichkeit, Neue Exemplare hinzuzufügen, Exemplare zu bearbeiten und Exemplare zu löschen, aber nicht bibliographische Datensätze.
Mit dieser Berechtigung kann der/die Mitarbeiter*in auch Exemplarvorlagen erstellen und verwenden, aber die Berechtigung manage_item_editor_templates ist erforderlich, um von anderen Mitarbeiter*innen erstellte Exemplarvorlagen zu verwalten.
Beschränkt die Bearbeitung der Unterfelder auf jene, die im Systemparameter SubfieldsToAllowForRestrictedEditing eingetragen sind (edit_items_restricted)
Diese Berechtigung schränkt die Möglichkeit der Exemplarbearbeitung ein, auf Unterfelder, die im Systemparameter SubfieldsToAllowForRestrictedEditing angegeben sind.
Wichtig
Mitarbeiter*innen mit dieser Berechtigung müssen ebenfalls die Berechtigung edit_items haben.
Gesperrten Datensatz bearbeiten (edit_locked_records)
Diese Berechtigung gibt die Möglichkeit, Datensätze zu bearbeiten, die aus gesperrten Quellen stammen.
Version
Diese Berechtigung, sowie das zugehörige Feature, wurden in Koha-Version 24.05 hinzugefügt.
Schnellaufnahme (fast_cataloging)
Diese Berechtigung ermöglicht die Katalogisierung neuer Datensätze über die Schnellerfassungsmaske auf der Startseite des Ausleihmoduls sowie des Katalogisierungsmoduls.
Anlegen, Bearbeiten und Löschen von Exemplar-Templates, die anderen gehören (manage_item_editor_templates)
Diese Berechtigung ermöglicht die Verwaltung von Exemplar-Templates, die von anderen Benutzern angelegt wurden.
Bemerkung
Jede Person mit der Berechtigung edit_items kann Templates erstellen und teilen sowie ihre eigenen Templates löschen.
Anlegen, Bearbeiten und Löschen von Exemplarguppen, Exemplare einer Gruppe hinzufügen oder aus ihr entfernen (manage_item_groups)
Diese Berechtigung ermöglicht die Erstellung, Bearbeitung und Löschung von Exemplargruppen.
Benutzergebühren verwalten (updatecharges)
Die folgenden Berechtigungen werden verwendet, um den Zugriff auf die Funktionen des Reiters „Gebühren“ in den Benutzerdatensätzen zu ermöglichen. Die Aktivierung der Berechtigung updatecharges erteilt Zugriff auf alle Funktionen. Klicken Sie auf „Details anzeigen“, um bestimmte Berechtigungen zu erteilen.
Gebühren für Benutzer*innen rabattieren (discount)
Diese Berechtigung ermöglicht die Gewährung von Rabatten auf Gebühren.
Wichtig
Mitarbeiter*innen mit dieser Berechtigung müssen ebenfalls die Berechtigung remaining_permissions haben.
Guthaben auf Bibliothekskonto buchen (manual_credit)
Diese Berechtigung ermöglicht das Hinzufügen manueller Gutschriften zu einem Benutzerkonto.
Wichtig
Mitarbeiter*innen mit dieser Berechtigung müssen ebenfalls die Berechtigung remaining_permissions haben.
Manuelle Rechnungen zu einem Benutzerkonto hinzufügen (manual_invoice)
Diese Berechtigung ermöglicht die Erstellung manueller Rechnungen in einem Benutzerkonto.
Wichtig
Mitarbeiter*innen mit dieser Berechtigung müssen ebenfalls die Berechtigung remaining_permissions haben.
Guthaben an Benutzer*innen auszahlen (payout)
Diese Berechtigung ermöglicht die Rückzahlung von Gutschriften an Benutzer.
Wichtig
Mitarbeiter*innen mit dieser Berechtigung müssen ebenfalls die Berechtigung remaining_permissions haben.
Zahlungen an Benutzer*innen rückerstatten (refund)
Diese Berechtigung ermöglicht die Rückerstattung von Zahlungen, die die Benutzer*innen bereits an die Bibliothek geleistet haben.
Wichtig
Mitarbeiter*innen mit dieser Berechtigung müssen ebenfalls die Berechtigung remaining_permissions haben.
Verbleibende Berechtigungen für die Verwaltung von Entgelten und Gebühren (remaining_permissions)
Diese Berechtigung ermöglicht die Verwaltung von Gebühren, mit Ausnahme der Aktionen, die in den weiteren Unterberechtigungen definiert sind (Rabattierungen, Auszahlungen, Rückerstattungen und Erlasse).
Dies schließt ein, ist aber nicht beschränkt auf:
ermöglichst den Zugriff auf den Gebühren-Reiter des Benutzers;
ermöglicht die Zahlung existierender Gebühren;
ermöglicht die Stornierung von Gebühren;
erlaubt das Stornieren von Zahlungen; und
ermöglicht die Sicht auf die Transaktionshistorie eines Benutzers.
Gebühren und Entgelte erlassen (writeoff)
Diese Berechtigung ermöglicht den Erlass von Benutzungsgebühren.
Wichtig
Mitarbeiter*innen mit dieser Berechtigung müssen ebenfalls die Berechtigung remaining_permissions haben.
Erwerbung (acquisition)
Die folgenden Berechtigungen werden verwendet, um Zugriff zu den Funktionen des Moduls Erwerbung zu geben. Die Aktivierung der Berechtigung acquisition erteilt Zugriff auf alle Funktionen. Klicken Sie auf „Details anzeigen“, um bestimmte Berechtigungen zu erteilen.
Warnung
Sämtliche Unterberechtigungen der Erwerbung gewähren auch Zugriff auf die Startseite der Erwerbung. Das bedeutet, MitarbeiterInnen mit einer oder mehreren der folgenden Berechtigungen haben die Möglichkeit die Etats anzusehen, Lieferanten zu suchen und anzuzeigen und Rechnungen anzusehen.
Konten hinzufügen und löschen (aber nicht ändern) (budget_add_del)
Diese Berechtigung ermöglicht das Anlegen von Konten und das Löschen von Konten innerhalb eines Etats.
Wichtig
Mitarbeiter*innen mit dieser Berechtigung müssen auch die Berechtigung budget_manage und die Berechtigung budget_modify haben.
Warnung
Ohne die Berechtigung period_manage permission können Mitarbeiter*innen nur Unterkonten hinzufügen, da sie keinen Zugriff auf die Administrationsseite für Etats haben, um Konten der ersten Ebene hinzuzufügen.
Konten verwalten (budget_manage)
Diese Berechtigung ermöglichst den Zugriff auf die Administrationsseite für Konten.
Beachten Sie, dass dies nur den Zugriff auf die Seite ermöglicht. Sie müssen Ihren Mitarbeiter*innen die Berechtigung budget_add_del und die Berechtigung budget_modify erteilen, wenn sie in der Lage sein sollen, Änderungen an den Konten vorzunehmen.
Alle Konten verwalten (budget_manage_all)
Diese Berechtigung erlaubt die Anzeige aller Konten unabhängig von Beschränkungen auf diesen (Besitzer, Benutzer oder Bibliothek).
Wichtig
Mitarbeiter*innen mit dieser Berechtigung müssen ebenfalls die Berechtigung budget_manage haben.
Konten bearbeiten (keine Neuen anlegen, aber Existierende bearbeiten) (budget_modify)
Diese Berechtigung ermöglicht die Bearbeitung von Kontoinformationen und -beträgen.
Wichtig
Mitarbeiter*innen mit dieser Berechtigung müssen auch die Berechtigung budget_manage und die Berechtigung budget_add_del haben.
Vereinbarungen verwalten (contracts_manage)
This permission grants the ability to add, edit and delete contracts with vendors.
Währungen und Wechselkurse verwalten (currencies_manage)
Diese Berechtigung ermöglicht den Zugriff auf die Konfigurationsseite für Währungen und Wechselkurse.
Bestellungen löschen (delete_baskets)
Diese Berechtigung ermöglicht die Löschung von Körben.
Wichtig
Mitarbeiter*innen mit dieser Berechtigung müssen auch über die Berechtigung order_manage verfügen, um die Bestellungen sehen zu können, um sie zu löschen.
Rechnungen löschen (delete_invoices)
Diese Berechtigung ermöglicht die Löschung von Rechnungen.
EDIFACT-Übertragungen verwalten (edi_manage)
Diese Berechtigung ermöglicht den Zugriff auf die Administrationsseiten für EDI-Konten, Bibliotheks-EANs und erlaub den Zugriff auf gesendete EDIFACT-Nachrichten.
Rechnungen bearbeiten (edit_invoices)
Diese Berechtigung ermöglicht die Bearbeitung von Rechnungen (Änderung der Rechnungsinformationen, wie Rechnungsnummer, Rechnungs- und Lieferdatum, Rechnungsanpassungen, etc.).
Wichtig
Mitarbeiter*innen mit dieser Berechtigung können nur dann Bestellungen gegen Rechnung erhalten, wenn sie auch die Berechtigung order_receive haben.
Bestellgruppen verwalten (group_manage)
Diese Berechtigung ermöglicht das Anlegen, Bearbeiten, Schließen und Löschen von Bestellgruppen.
Lieferantenprobleme verwalten (issue_manage)
Diese Berechtigung ermöglicht das Erstellen, Bearbeiten und Löschen von Lieferantenproblemen.
Version
Diese Berechtigung wurde in Koha-Version 23.11 eingeführt.
Rechnungen verschmelzen (merge_invoices)
Diese Berechtigung erlaubt das Verschmelzen von Rechnungen.
Bestellungen und Bestellposten verwalten (order_manage)
Diese Berechtigung ermöglicht das Anlegen von Bestellungen, inklusive dem Anlegen von Bestellkörben und dem Anlegen von Bestellposten, dem Bearbeiten existierender Bestellkörbe, dem Schließen von Bestellkörben, etc.
Wichtig
Mitarbeiter*innen mit dieser Berechtigung können nur dann aus einer neuen Datei bestellen, wenn sie auch die Berechtigung stage_marc_import haben.
Ebenso können Mitarbeiter*innen nur dann aus Titeln mit den höchsten Vormerkungsquoten bestellen, wenn sie auch die Berechtigung circulate_remaining_permissions haben.
Alle Bestellungen und Bestellposten verwalten, unabhängig von Beschränkungen (order_manage_all)
Diese Berechtigung ermöglicht die Verwaltung von allen Bestellungen und Bestellposten, auch wenn diese auf Besitzer, Benutzer oder Bibliothek beschränkt wurden.
Wichtig
Mitarbeiter*innen mit dieser Berechtigung müssen ebenfalls die Berechtigung order_manage haben.
Bestellungen zugehen lassen und Lieferungen verwalten (order_receive)
Mit dieser Berechtigung können Sie Rechnungen erstellen, Bestellungen empfangen und Reklamationen verspäteter Bestellungen erstellen.
Etats verwalten (period_manage)
Diese Berechtigung erteilt Zugriff auf die Etatverwaltung und damit das Anlegen, Duplizieren, Bearbeiten und Löschen von Etats.
Warnung
Ohne die Berechtigung budget_manage, die Berechtigung budget_add_del und die Berechtigung budget_modify können Mitarbeiter*innen keine Etatkonten hinzufügen oder bearbeiten.
Etatplanung verwalten (planning_manage)
Diese Berechtigung ermöglicht den Zugriff auf die Etatplanung.
Wichtig
Mitarbeiter*innen mit dieser Berechtigung müssen auch die Berechtigung budget_manage und die Berechtigung period_manage haben.
Geschlossene Rechnungen öffnen (reopen_closed_invoices)
Diese Berechtigung erlaubt das Wiederöffnen geschlossener Rechnungen.
Lieferanten verwalten (vendors_manage)
Diese Berechtigung ermöglicht das Erstellen, Bearbeiten und Löschen von Lieferanten.
Beachten Sie, dass Lieferanten im Erwerbungsmodul, im Zeitschriftenmodul und im ERM-Modul verwendet werden.
Vorschlagsbearbeitung (suggestions)
Die folgenden Berechtigungen werden verwendet, um den Zugriff auf die Funktion zur Verwaltung von Anschaffungsvorschlägen des Moduls Erwerbung zu ermöglichen. Derzeit gibt es nur eine Unterberechtigung. Wenn Sie entweder suggestions oder suggestion_manage ankreuzen, hat das die gleiche Wirkung.
Create purchase suggestions (suggestions_create)
Diese Berechtigung ermöglicht das Anlegen und Verwalten von Anschaffungsvorschlägen, inklusive dem Anlegen von neuen Anschaffungsvorschlägen und Statusänderungen.
Version
This permission was added to Koha in version 24.11. In prior versions, the permission suggestions_manage granted the ability to create new purchase suggestions as well as viewing and editing existing suggestions.
Delete purchase suggestions (suggestions_delete)
Diese Berechtigung gibt die Möglichkeit, Anschaffungsvorschläge zu löschen.
Version
This permission was added to Koha in version 24.11. In prior versions, the permission suggestions_manage granted the ability to delete purchase suggestions.
Anschaffungsvorschläge verwalten (suggestions_manage)
This permission grants the ability to view and manage purchase suggestions, including changing the suggestions‘ statuses.
Achtung
Prior to version 24.11, this permission granted the ability to create new purchase suggestions and delete existing suggestions as well as editing them. As of version 24.11, staff member with this permission will only be able to edit existing purchase suggestions.
Zugriff auf alle Werkzeuge (tools)
Die folgenden Berechtigungen werden verwendet, um Zugriff auf Funktionen des Moduls Werkzeuge zu geben, einschließlich einiger Katalogisierungswerkzeuge. Die Aktivierung der Berechtigung tools erteilt Zugriff auf alle Werkzeuge. Klicken Sie auf „Details anzeigen“, um Zugang zu bestimmten Werkzeugen zu erhalten.
Zugriff auf abgelegte Dateien auf dem Server (access_files)
Diese Berechtigung gibt Zugriff zum Werkzeug Dateizugriff, um Zugriff auf die auf dem Server gespeicherten Dateien zu erhalten.
Stapelverlängerung von Fälligkeitsdaten ausführen (batch_extend_due_dates)
Diese Berechtigung erteilt Zugang zum Werkzeug zur Stapelverlängerung von Fälligkeitsdaten.
Einzelne oder mehrere Benutzerfotos heraufladen (batch_upload_patron_images)
Diese Berechtigung erteilt Zugriff auf das Werkzeug zum Hochladen von Benutzerbildern.
Alte Benutzer löschen und Ausleihhistorie anonymisieren (löscht die Ausleihhistorie der Benutzer) (delete_anonymize_patrons)
Diese Berechtigung erteilt Zugriff auf das Werkzeug zur Löschung und Anonymisierung von Benutzerdaten.
Zusätzliche Inhalte für den OPAC und die Dienstoberfläche (Nachrichten und HTML-Anpassungen) (edit_additional_contents)
Diese Berechtigung gibt Zugriff auf das Werkzeug Nachrichten, das Werkzeug HTML-Anpassungen und das Werkzeug Seiten.
Definieren der Schließtage der Bibliothek (edit_calendar)
Diese Berechtigung erteilt Zugriff auf den Schließtagekalender.
Mahntrigger für überfällige Medien verwalten (edit_notice_status_triggers)
Diese Berechtigung erteilt Zugriff auf das Werkzeug zur Konfiguration der Mahntrigger.
Benachrichtigungen verwalten (edit_notices)
Diese Berechtigung erteilt Zugriff zum Werkzeug Benachrichtigungen und Quittungen.
Stapelbearbeitung von Benutzern (edit_patrons)
Diese Berechtigung erteilt Zugriff zum Werkzeug zur Stapelbearbeitung von Benutzern.
Einträge für ‚Zitat des Tages‘ bearbeiten (edit_quotes)
Diese Berechtigung erteilt Zugriff auf den Zitat des Tages-Editor für die Funktion „Zitat des Tages“.
Titel- und Bestandsdaten aus Koha exportieren (export_catalog)
Diese Berechtigung erteilt Zugriff zum Werkzeug zum Datenexport von Titel- und Bestandsdaten aus dem Katalogisierungs-Modul
Wichtig
Mitarbeiter*innen mit dieser Berechtigung müssen außerdem mindestens eine der Unterberechtigungen editcatalogue besitzen.
Benutzerdaten importieren (import_patrons)
Diese Berechtigung erteilt Zugriff auf das Werkzeug zum Benutzerdatenimport.
Inventur des Bestands durchführen (inventory)
Diese Berechtigung gibt Zugriff auf das Werkzeug Inventur im Katalogisierungs-Modul.
Stapellöschung von Exemplaren durchführen (items_batchdel)
Diese Berechtigung erteilt Zugang zum Werkzeug zur Stapellöschung von Exemplaren aus dem Katalogisierungs-Modul.
Stapelbearbeitung von Exemplaren durchführen (items_batchmod)
Diese Berechtigung ermöglicht den Zugriff auf das Werkzeug Stapelbearbeitung von Exemplaren und das Werkzeug Exemplarbearbeitung nach Alter im Katalogisierungs-Modul.
Stapelbearbeitung von Exemplaren beschränken auf Unterfelder, die im Systemparameter SubfieldsToAllowForRestrictedBatchmod definiert sind (items_batchmod_restricted)
Diese Berechtigung begrenzt die Stapelbearbeitung von Exemplaren auf die im Systemparameter SubfieldsToAllowForRestrictedBatchmod angegebenen Unterfelder.
Wichtig
Mitarbeiter*innen mit dieser Berechtigung müssen ebenfalls die Berechtigung items_batchmod haben.
Erstellen Sie druckfertige Etiketten und Barcodes aus Katalog- und Benutzerdaten (label_creator)
Diese Berechtigung erteilt Zugriff auf die Werkzeuge für den Benutzerausweisdruck, den Etikettendruck, den Barcodebild-Generator, den schnellen Signaturschilddruck im Katalogisierungs-Modul.
Profile für CSV-Export verwalten (manage_csv_profiles)
Diese Berechtigung erteilt Zugriff zum Werkzeug zur Verwaltung von CSV-Profilen.
Benutzerlisten und deren Einträge anlegen, bearbeiten und löschen (manage_patron_lists)
Diese Berechtigung erteilt Zugriff auf das Werkzeug für Benutzerlisten.
Wichtig
Mitarbeiter*innen mit dieser Berechtigung müssen auch über die Berechtigung list_borrowers verfügen (und optional über die Berechtigung view_borrower_infos_from_any_libraries), sonst können sie nur Listen erstellen und bestehende Listen einsehen, aber keine Benutzer*innen zu den Listen hinzufügen.
Zwischengespeicherte MARC-Datensätze verwalten, inklusive dem vervollständigen und rückgängig machen von Importen (manage_staged_marc)
Diese Berechtigung erteilt Zugriff auf das Werkzeug zur Verwaltung zwischengespeicherter MARC-Datensätze im Katalogisierungs-Modul.
Wichtig
Wenn Mitarbeiter*innen mit dieser Berechtigung nicht auch über die Berechtigung stage_marc_import verfügen, können sie nur Datensätze verwalten, die bereits von einem/einer anderen Mitarbeiter*in bereitgestellt wurden. Dies hängt von Ihren Arbeitsabläufen ab.
Templates für MARC-Modifikationen verwalten (marc_modification_templates)
Diese Berechtigung erteilt Zugang zum Werkzeug für Templates für MARC-Modifikationen im Katalogisierungs-Modul.
Benutzerkommentare moderieren (moderate_comments)
Diese Berechtigung erteilt Zugriff zum Werkzeug zur Verwaltung von Kommentaren.
Rotationsbestände verwalten (rotating_collections)
Diese Berechtigung erteilt Zugriff zum Werkzeug zur Verwaltung von Rotationsbeständen.
Zeitplaner für auszuführende Aufgaben verwenden (schedule_tasks)
Diese Berechtigung erteilt Zugriff auf das Werkzeug Aufgabenplaner.
MARC-Datensätze im Datenpool bereitstellen (stage_marc_import)
Diese Berechtigung erteilt Zugriff auf das Werkzeug zum Zwischenspeichern von MARC-Datensätzen im Katalogisierungs-Modul.
Wichtig
Wenn Mitarbeiter*innen mit dieser Berechtigung nicht auch die Berechtigung manage_staged_marc haben, können sie nur Datensätze bereitstellen, aber nicht in den Katalog importieren. Dies hängt von Ihren Arbeitsabläufen ab.
Dateien hochladen (upload_general_files)
Diese Berechtigung erteilt Zugriff zum Werkzeug zum Hochladen von Dateien.
Lokale Coverbilder hochladen (upload_local_cover_images)
Diese Berechtigung gibt Zugriff auf das Werkzeug Lokales Cover hochladen aus dem Katalogisierungsmodul, um einen Stapel von Cover-Bildern hochzuladen, sowie die Möglichkeit, Lokale Cover-Bilder von der Datensatz-Detailseite aus hinzuzufügen und Lokale Cover-Bilder zu löschen.
Bemerkung
Um Cover-Bilder zu Exemplaren hinzuzufügen, benötigen die Mitarbeiter*innen auch die Berechtigung edit_items.
Hochgeladene Dateien verwalten (upload_manage)
Diese Berechtigung erteilt Zugriff auf hochgeladene Dateien über das Upload Werkzeug.
Wichtig
Mitarbeiter*innen mit dieser Berechtigung müssen auch die Berechtigung upload_general_files haben, um auf das Upload-Werkzeug zugreifen zu können.
Systemlogs durchsuchen (view_system_logs)
Diese Berechtigung ermöglicht den Zugriff auf das Werkzeug Loganzeige sowie auf den Reiter „Änderungslog“ (z. B. im Benutzerkonto oder auf der Seite mit den Datensatzdetails).
Zeitschriftenabonnements verwalten (serials)
Die folgenden Berechtigungen werden für den Zugriff auf Funktionen des Moduls Zeitschriften verwendet. Die Aktivierung der Berechtigung serials erteilt Zugriff auf alle Funktionen. Klicken Sie auf „Details anzeigen“, um bestimmte Berechtigungen zu erteilen.
Bemerkung
Mitarbeiter, die über eine oder mehrere der folgenden Unterberechtigungen verfügen, können nach Zeitschriftenabonnements suchen und diese anzeigen und Zeitschriftennummerierungsmuster verwalten.
Wichtig
Die Berechtigung serials ist für die Verwaltung von Erscheinungsweisen erforderlich.
Bemerkung
Einige Mitarbeiter*innen benötigen möglicherweise auch die Berechtigung acquisitions, so wie z. B. die Berechtigung vendors_manage, da die Lieferanten für Zeitschriften im Modul Erwerbung verwaltet werden.
Ablaufdatum einer Zeitschrift überprüfen (check_expiration)
Diese Berechtigung ermöglicht es, das Ablaufdatum eines Abonnements zu überprüfen.
Fehlende Hefte reklamieren (claim_serials
Diese Berechtigung ermöglicht die Reklamation fehlender Hefte.
Neues Abonnement anlegen (create_subscription)
Diese Berechtigung ermöglicht das Anlegen neuer Abonnements.
Existierendes Abonnement löschen (delete_subscription)
Diese Berechtigung ermöglicht es, Zeitschriftenabonnements zu löschen.
Existierendes Abonnement bearbeiten (edit_subscription)
Diese Berechtigung ermöglicht die Bearbeitung von bestehenden Abonnements.
Heftzugang (receive_serials)
Diese Berechtigung ermöglicht den Zugang von Heften für existierende Abonnements.
Abonnements verlängern (renew_subscription)
Diese Berechtigung ermöglicht die Verlängerung von Abonnements.
Umlauflisten (routing)
Diese Berechtigung ermöglicht die Verwaltung von Umlauflisten.
Abonnements von jeder Bibliothek verwalten (superserials)
Diese Berechtigung ist nur dann sinnvoll, wenn der Systemparameter IndependentBranches verwendet wird.
Erlaubt den Zugriff auf das Modul Reports (reports)
Die folgenden Berechtigungen werden verwendet, um Zugriff auf Funktionen des Moduls Reports zu gewähren. Die Aktivierung der Berechtigung reports erteilt Zugriff auf alle Funktionen. Klicken Sie auf „Details anzeigen“, um bestimmte Berechtigungen zu erteilen.
Bemerkung
Mitarbeiter*innen, die über eine oder mehrere der folgenden Unterberechtigungen verfügen, können die Reports im Bereich Statistik-Wizards sowie die anderen Reports auf der Hauptseite der Reports ausführen.
Wichtig
Reports auf der Startseite der Ausleihe werden nicht von dieser Berechtigung kontrolliert.
SQL-Reports erstellen (create_reports)
Diese Berechtigung ermöglicht das Anlegen von Geführten Reports oder SQL-Reports.
Wichtig
Mitarbeiter, die bereits erstellte Berichte ausführen müssen, benötigen die Berechtigung execute_reports.
SQL-Reports löschen (delete_reports)
Diese Berechtigung ermöglicht, gespeicherte SQL-Reports zu löschen.
Wichtig
Bibliothekspersonal mit dieser Berechtigung benötigt ebenfalls die Berechtigung execute_reports.
SQL-Reports ausführen (execute_reports)
Diese Berechtigung ermöglicht das Ausführen gespeicherter SQL-Reports, aber nicht diese anzulegen oder zu bearbeiten.
Erlaube Bibliotheksmitarbeiter*innen Berechtigungen, Benutzernamen und Passwörter anderer Bibliotheksmitarbeiter*innen zu bearbeiten (staffaccess)
Diese Berechtigung ermöglicht die Änderung von Berechtigungen, Passwörtern und Benutzernamen von Benutzer*innen, die Mitarbeiter*innen sind (Benutzer*innen, deren Kategorie vom Typ „Mitarbeiter“ ist).
Wichtig
Bibliothekspersonal mit dieser Berechtigung benötigt außerdem die Berechtigung edit_borrowers und die Berechtigung permissions.
Semesterapparate (coursereserves)
Die folgenden Berechtigungen werden verwendet, um Zugang zu den Funktionen des Moduls Semesterapparate zu erhalten. Die Aktivierung der Berechtigung coursereserves erteilt Zugriff auf alle Funktionen. Klicken Sie auf „Details anzeigen“, um spezifische Berechtigungen zu erteilen.
Bemerkung
Wenn der Systemparameter UseCourseReserves nicht aktiviert ist, haben diese Berechtigung keinen Effekt.
Semesterapparate anlegen (add_reserves)
Diese Berechtigung ermöglicht das Hinzufügen von Exemplaren zu bestehenden Semesterapparaten.
Semesterapparate löschen (delete_reserves)
Diese Berechtigung ermöglicht es, Exemplare aus bestehenden Semesterapparaten zu entfernen.
Kurse hinzufügen, bearbeiten oder löschen (manage_courses)
Diese Berechtigung ermöglicht das Erstellen, Bearbeiten und Löschen von Semesterapparaten.
Koha-Plugins (plugins)
Die folgenden Berechtigungen werden für den Zugriff auf Plugins verwendet. Die Aktivierung der Berechtigung plugins erteilt Zugriff auf alle Funktionen. Klicken Sie auf „Details anzeigen“, um spezifische Berechtigungen zu erteilen.
Nutzung administrativer Plugins (admin)
Diese Berechtigung ermöglicht die Nutzung administrativer Plugins.
Plugins konfigurieren (configure)
Diese Berechtigung ermöglicht es, den „Konfigurieren“-Bereich eines Plugins auszuführen, wenn es einen solchen hat.
Bemerkung
Bibliothekspersonal mit dieser Berechtigung benötigt zusätzlich entweder die Berechtigung report oder die Berechtigung tool, um auf die Plugins zugreifen zu können.
Plugins verwalten (manage)
Diese Berechtigung ermöglicht die Installation und Deinstallation von Plugins.
Bemerkung
Bibliothekspersonal mit dieser Berechtigung benötigt zusätzlich entweder die Berechtigung report oder die Berechtigung tool, um auf die Plugins zugreifen zu können.
Report-Plugins verwenden (report)
Diese Berechtigung ermöglicht die Nutzung von Report-Plugins.
Werkzeug-Plugins verwenden (tool)
Diese Berechtigung ermöglicht die Nutzung von Werkzeug-Plugins.
Listen (lists)
Die folgenden Berechtigungen werden verwendet, um den Zugang zur Verwaltung öffentlicher Listen zu ermöglichen. Die Aktivierung der Berechtigung lists erteilt Zugriff auf alle Funktionen. Klicken Sie auf „Details anzeigen“, um spezifische Berechtigungen zu erteilen.
Wichtig
Alle Bibliotheksmitarbeiter*innen besitzen die Berechtigung, eigene Listen zu erstellen, zu bearbeiten und zu löschen. Das Setzen der Berechtigung hier ist nur notwendig, wenn Mitarbeiter*innen die Berechtigung zum Bearbeiten und Löschen anderer öffentlicher Listen erhalten sollen.
Create public lists (create_public_lists)
Diese Berechtigung ermöglicht das Anlegen von neuen öffentlichen Listen.
Version
This permission was added to Koha in version 24.11.
In previous versions, a staff member with the lists permission could create public as well as private lists.
Öffentliche Listen löschen (delete_public_lists)
Die Berechtigung ermöglicht, von anderen Personen erstellte öffentliche Listen zu löschen.
Inhalte der öffentlichen Liste bearbeiten (edit_public_list_contents)
Mit dieser Berechtigung können Sie den Inhalt von öffentlichen Listen ändern, die die Berechtigung „Nur für Mitarbeiter“ haben.
Öffentliche Listen bearbeiten (Name, Einstellungen und Berechtigungen, aber explizit nicht die Inhalte) (edit_public_lists)
Die Berechtigung ermöglicht, die Bezeichnung, die Einstellungen und die Berechtigungen einer öffentlichen Liste zu bearbeiten, die im Besitz einer anderen Person ist.
Bemerkung
Dies gibt dem/der Mitarbeiter*in nicht die Berechtigung, den Inhalt der Liste zu ändern, es sei denn, die Listenberechtigungen erlauben es ihm/ihr.
Use public lists (use_public_lists)
This permission gives the ability to view public lists.
Version
This permission was added to Koha in version 24.11.
In previous versions, a staff member with the lists permission could view public lists.
Clubs (clubs)
Die folgenden Berechtigungen werden verwendet, um Zugang zu den Benutzer-Club-Funktionen zu gewähren. Die Aktivierung der Berechtigung clubs erteilt Zugriff auf alle Funktionen. Klicken Sie auf „Details anzeigen“, um bestimmte Berechtigungen zu erteilen.
Clubs anlegen und bearbeiten (edit_clubs)
Diese Berechtigung ermöglicht die Erstellung und Anpassung von Clubs für Benutzer basierend auf vorhandenen Club-Templates mit dem Werkzeug Clubs.
Club-Templates anlegen und bearbeiten (edit_templates)
Diese Berechtigung ermöglicht die Erstellung und Anpassung von Club-Templates über das Werkzeug Clubs.
Benutzer für Clubs anmelden (enroll)
Diese Berechtigung erteilt die Möglichkeit, Benutzer einzuschreiben, ausgehend vom Benutzerdatensatz in der Dienstoberfläche.
Bemerkung
Bibliothekspersonal mit dieser Berechtigung benötigt außerdem entweder die Berechtigung edit_borrowers oder die umfassendere Berechtigung borrowers, um auf Benutzerdatensätze zugreifen zu können, um sie in Clubs einzuschreiben.
Erstellen und Bearbeiten von Fernleihbestellungen (ill)
Diese Berechtigung ermöglicht den Zugriff auf das Fernleihmodul.
Module zur Selbstausleihe und -rückgabe (self_check)
Die folgenden Berechtigungen werden verwendet, um die Module Selbstausleihe und Selbstrückgabe zu aktivieren. Die Aktivierung der Berechtigung self_check erteilt Zugriff auf alle Funktionalitäten. Klicken Sie auf ‚Details anzeigen‘, um bestimmte Berechtigungen zu erteilen.
Wichtig
Diese Berechtigungen sollten einem speziellen Selbstverbuchung-Benutzer erteilt werden, nicht einem regulären Mitarbeiter-Benutzer.
Für die Selbstrückgabe anmelden (self_checkin_module)
Diese Berechtigung wird verwendet, um das Modul Selbstrückgabe zu aktivieren. Geben Sie es nur einem eigens zu diesem Zweck erstellten Selbstverbuchung-Benutzer.
Wichtig
Diese Berechtigung verhindert, dass der Benutzer andere OPAC-Funktionen nutzen kann.
Selbstausleihe im OPAC durchführen (self_checkout_module)
Diese Berechtigung wird verwendet, um das Modul Selbstausleihe zu aktivieren. Geben Sie es nur einem eigens zu diesem Zweck erstellten Selbstverbuchung-Benutzer.
Bemerkung
Diese Berechtigung sollte für den im Systemparameter AutoSelfCheckID definierten Benutzer gesetzt sein.
Bestandsrotationsoperationen verwalten (stockrotation)
Die folgenden Berechtigungen werden für den Zugriff auf die Verwaltung von Bestandsrotation verwendet. Die Aktivierung der Berechtigung stockrotation erteilt Zugriff auf alle Funktionen. Klicken Sie auf „Details anzeigen“, um bestimmte Berechtigungen zu erteilen.
Exemplare zu Plänen hinzufügen und entfernen (manage_rota_items)
Diese Berechtigung ermöglicht die Verwaltung von Exemplaren in Bestandsrotationen.
Pläne erstellen, bearbeiten und löschen (manage_rotas)
Diese Berechtigung ermöglicht die Verwaltung von Bestandsrotationen.
Kassenführung (cash_management)
Die folgenden Berechtigungen werden für den Zugriff auf das Modul Verkaufsstelle und die Kassenfunktionalitäten verwendet. Die Aktivierung der Berechtigung cash_management erteilt Zugriff auf alle Funktionen. Klicken Sie auf „Details anzeigen“, um bestimmte Berechtigungen zu erteilen.
Anonyme Rückerstattungen durchführen (anonymous_refund)
Diese Berechtigung ermöglicht die Rückerstattung von Zahlungen, die über die Verkaufsstelle getätigt wurden, aus der Kassentransaktionshistorie.
Kassiervorgang durchführen (cashup)
Diese Berechtigung ermöglicht die Aufzeichnung von Auszahlungen.
Zugang zum Verkaufsmodul und Bearbeitung von Einzahlungen
Diese Berechtigung ermöglicht den Zugriff auf das Modul Verkaufsstelle.
Rückrufe (recalls)
Die folgenden Berechtigungen werden verwendet, um Zugang zu den Funktionen Rückrufe zu gewähren. Die Aktivierung der Berechtigung recalls markieren erteilt Zugriff auf alle Funktionen. Klicken Sie auf „Details anzeigen“, um bestimmte Berechtigungen zu erteilen.
Rückrufe für Benutzer verwalten (manage_recalls)
Diese Berechtigung erteilt Zugriff auf die Seite zur Verwaltung von Rückrufen.
Zugriff auf das ERM-Modul (erm)
Diese Berechtigung erteilt Zugriff auf das ERM-Modul (zur Verwaltung elektronischer Ressourcen).
Wichtig
Bibliothekspersonal muss diese Berechtigung haben, um mit Vereinbarungen und Lizenzen in Vereinbarungs- und Lizenzdatensätzen verknüpft werden zu können.
Personal ermöglichen, die angemeldete Bibliothek zu ändern (loggedinlibrary)
Diese Berechtigung gibt die Möglichkeit, die Bibliothek bei Anmeldung in der Dienstoberfläche zu ändern.
Die Berechtigung ermöglicht das Festlegen der Bibliothek in der Dienstoberfläche.
Bemerkung
Mitarbeiter*innen, die diese Berechtigung nicht haben, können sich nur in ihrer Heimatbibliothek anmelden.
Bestandserhaltungsmodul verwalten (preservation)
Diese Berechtigung erteilt Zugriff zum Modul Bestandserhaltung.
Version
Diese Berechtigung wurde in Koha-Version 23.11 eingeführt.
Benutzerinformationen
Wenn Sie sich einen Benutzersatz anschauen, haben Sie über die Reiter auf der linker Seite die Möglichkeit, sich weitere Benutzerdaten anzeigen zu lassen.
Pfad in Koha: Benutzer > nach Benutzer suchen > Name des Benutzers anklicken
Ausleihe
Um zu erfahren, wie Medien ausgeliehen werden, klicken Sie auf den Bereich Ausleihe in diesem Handbuch.
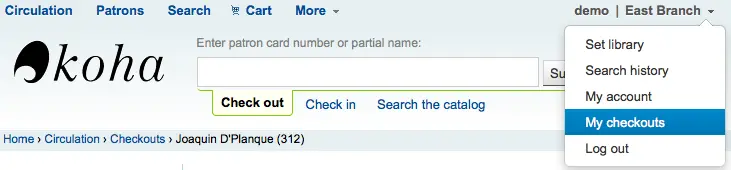
Mitarbeiter*innen können über die Dienstoberfläche ihre Ausleihen einsehen, indem Sie rechts oben im Bildschirm auf Ihren Loginnamen klicken, und im Menü ‚Meine Ausleihen‘ auswählen
Details
Bemerkung
Mitarbeiter*innen können über die Dienstoberfläche Ihr Konto aufrufen, indem Sie rechts oben im Bildschirm auf Ihren Loginnamen klicken, und im Menü ‚Mein Konto‘ auswählen

Alle Benutzerinformationen erscheinen in der Einzelanzeige. Dies schließt alle Kontaktdaten, Hinweise, Benachrichtigungsvorgaben usw. ein, die bei der Aufnahme des Benutzers eingegeben wurden.
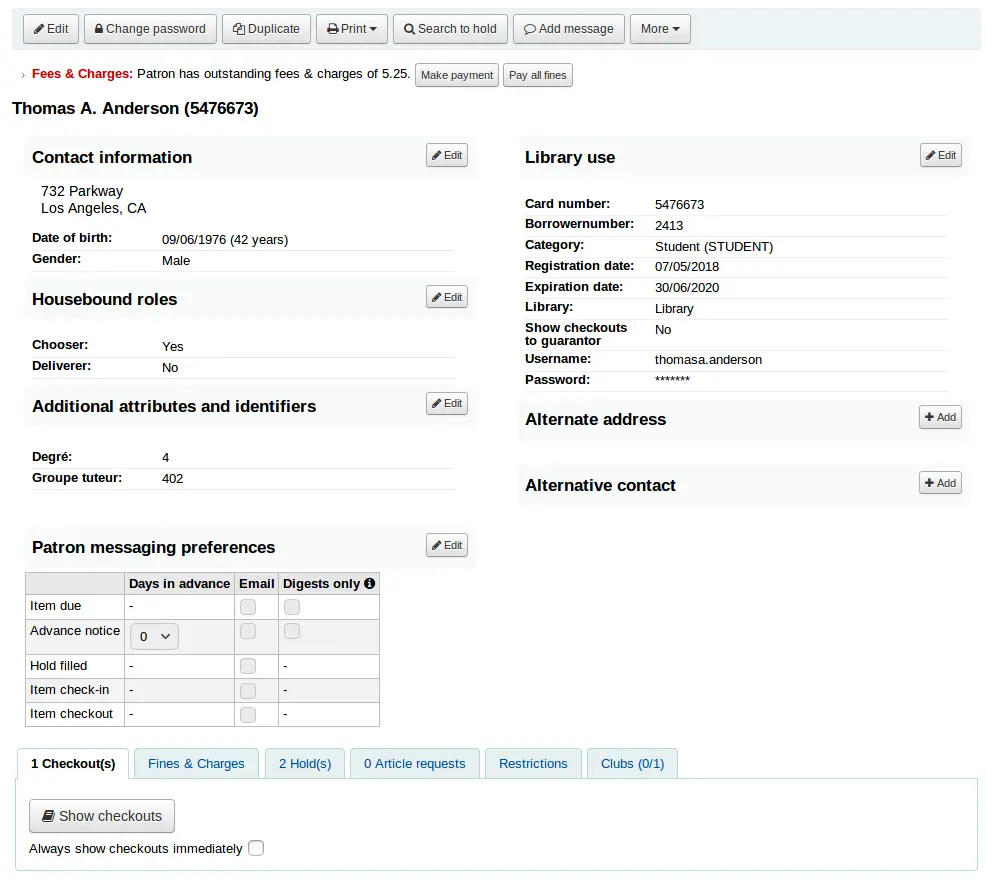
Ist ein*e Benutzer*in als ‚Kind‘ oder ‚Mitarbeiter (Organisation)‘ markiert, werden die Informationen über den/die Verantwortliche*n angezeigt.
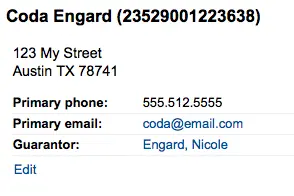
In einem Kindbenutzer wird der Bürge angezeigt
Beim Datensatz für den Bürgen werden alle Kinder und/oder Professionelle aufgeführt
Wenn das Alter eines Benutzers außerhalb des im Benutzertyps definierten Altersbereichs liegt, wird ein Warnhinweis im Benutzerdatensatz angezeigt.

Übersicht der Ausleihen
Unterhalb der Informationen zum Benutzer befindet sich eine Informationsbox mit Reitern für unter anderem die entliehenen, überfälligen und vorgemerkten Titel des Benutzers.
Ausleihen
Unter dem ersten Tab erscheinen die Exemplare die der Benutzer gerade ausgeliehen hat. Die Anzahl der aktuellen Ausleihen wird im Titel des Reiters angezeigt.
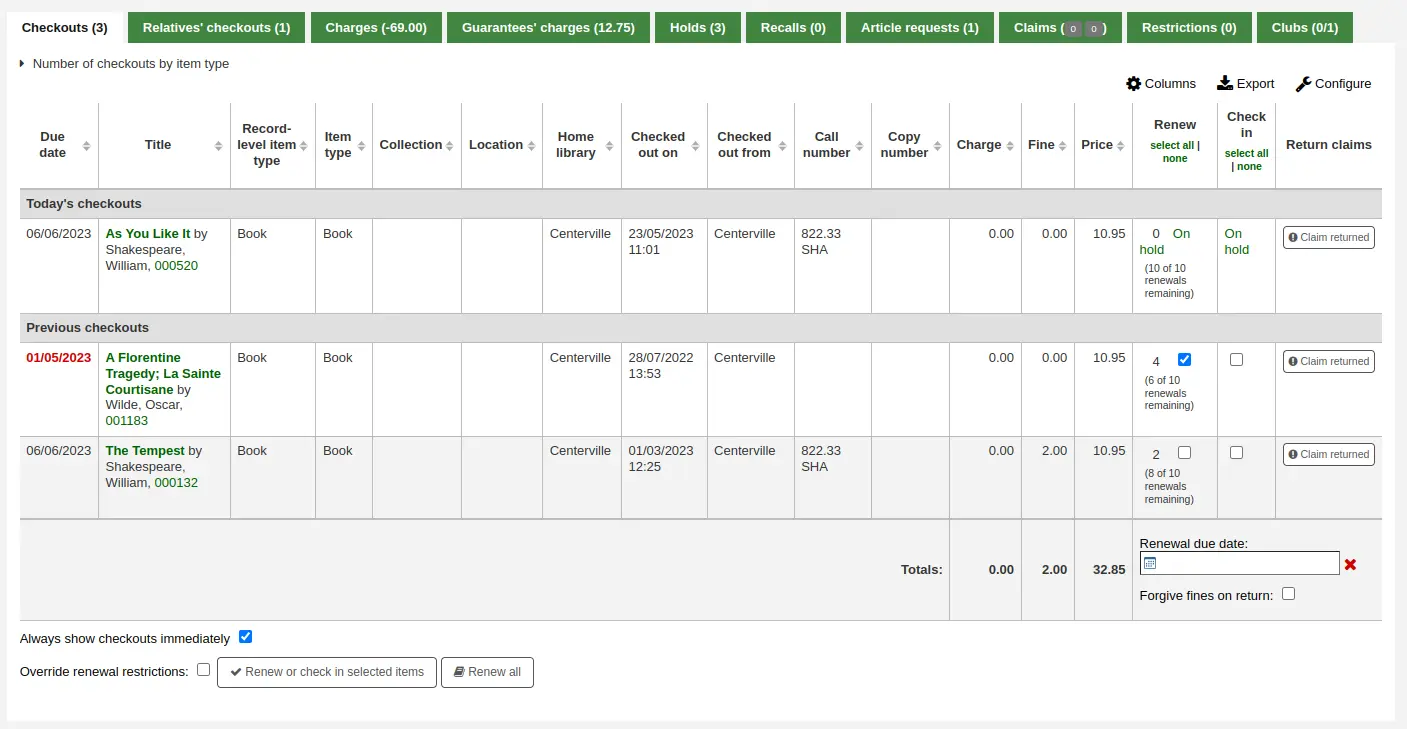
Bemerkung
You can customize the columns of this table in the Table settings section of the Administration module (table id: issues-table, under Patrons).
Klicken Sie oben rechts in der Tabelle auf „Konfigurieren“, um direkt auf das Administrationsmodul zuzugreifen.
Ausleihen der Verwandten
Wenn der/die Benutzer*in mit anderen Familienmitgliedern verknüpft ist, können das Bibliothekspersonal im Konto sehen, was andere Familienmitglieder ausgeliehen haben. Die Gesamtzahl der Ausleihen aller Familienmitglieder wird im Titel des Reiters angezeigt.
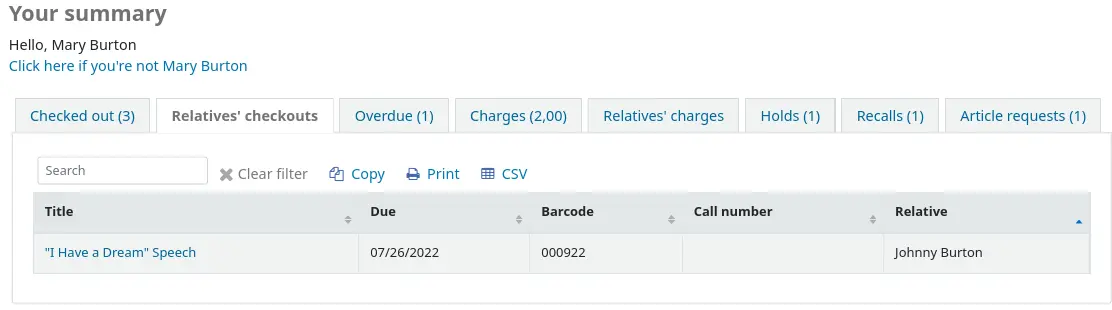
Bemerkung
You can customize the columns of this table in the Table settings section of the Administration module (table id: relatives-issues-table, under Patrons).
Klicken Sie oben rechts in der Tabelle auf „Konfigurieren“, um direkt auf das Administrationsmodul zuzugreifen.
Gebühren
Der Reiter Gebühren wird im Benutzerkonto nur dann angezeigt, wenn der Benutzer offene Gebühren oder unverbrauchtes Guthaben hat. Der Gesamtbetrag der offenen Gebühren oder unverbrauchten Guthaben wird im Titel des Reiters angezeigt.
Der Reiter zeigt die Gesamtsumme ohne weitere Details. Um die Details zu sehen, wechseln Sie auf den Reiter Gebühren.

Gebühren der Bürgschaft
Dieser Reiter wird angezeigt, wenn der Benutzer Bürgschaften hat und diese Bürgen unbezahlte Gebühren auf ihrem Konto haben. Der Gesamtbetrag der Bürgschaften wird im Reitertitel angezeigt.
Der Reiter zeigt den Namen der Bürgschaft und die Gesamtsumme ohne weitere Details. Um die Details zu sehen, wechseln Sie auf den Reiter Gebühren der Bürgschaft.

Vormerkungen
Wenn der Benutzer Vormerkungen hat, wird die Anzahl der Vormerkungen auf dem entsprechenden Tab angezeigt. Die Details der Vormerkungen erscheinen darunter.
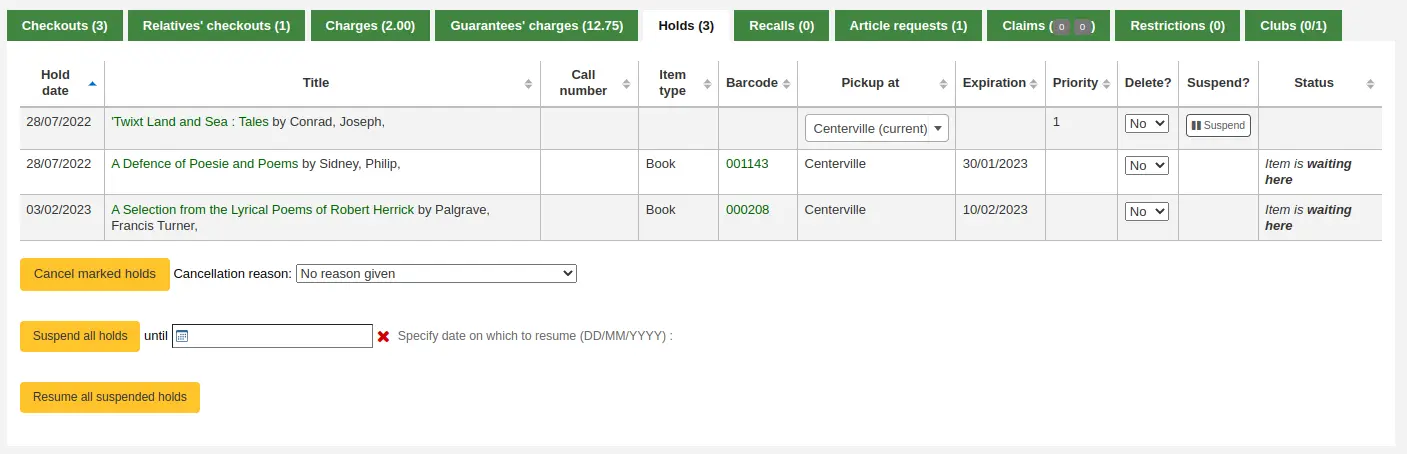
Bemerkung
Der Barcode und die Signatur werden nur bei Exemplarvormerkungen oder bei bereitgestellten Vormerkungen angezeigt. Titelvormerkungen die noch bearbeitet werden müssen haben keine Barcodes oder Signaturen.
Hier können Sie die Vormerkungen bearbeiten indem Sie die Abholbibliothek ändern, die Vormerkung stornieren oder aussetzen.
Bemerkung
Vormerkungen können nur dann ausgesetzt werden, wenn der Systemparameter SuspendHoldsIntranet auf „Erlaube“ gesetzt ist.
Bemerkung
Wenn beim Aussetzen einer Vormerkung ein Datum für die Reaktivierung eingetragen werden soll, muss der Systemparameter AutoResumeSuspendedHolds auf „Erlaube“ stehen. Außerdem muss der Cronjob unsuspend_holds cron job aktiviert sein.
Buchungen
If the patron has bookings, the number of bookings will appear on this tab’s title and the details will appear in the tab.
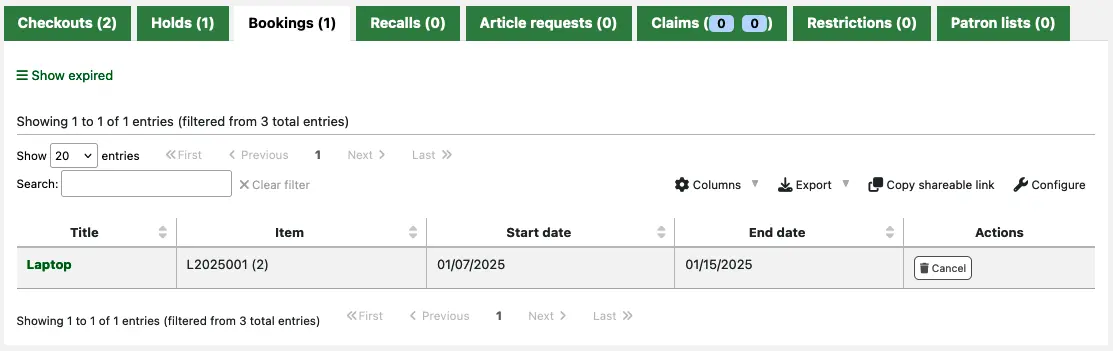
Von hier aus können Sie alle Buchungen des Benutzers stornieren: Verwenden Sie die Schaltfläche „Stornieren“ in der Spalte „Aktionen“.
Rückrufe
If recalls are enabled, currently active recalls requested by the patron will appear in this tab. The number of active recalls will be displayed in the tab title.

From here staff members can see the status of each recall and manage them.
Artikelbestellungen
Wenn der Systemparameter ArticleRequests aktiv ist und die Ausleihkonditionen es erlauben, können über den OPAC oder die Dienstoberfläche Artikelbestellungen aufgegeben werden. Die Anzahl aktiver Bestellungen wird im Titel des Reiters angezeigt.
Die Details der Bestellungen sowie der Status sind unter dem entsprechenden Tab sichtbar.

Reklamationen
Wenn der Benutzer reklamiert hat, dass er Exemplare zurückgegeben hat, diese aber nicht zurückgebucht wurden, werden die Reklamationen in diesem Reiter angezeigt. Die Anzahl der gelösten und nicht gelösten Reklamationen wird im Reitertitel angezeigt. Die erste Zahl in grün (oder in grau, wenn sie 0 ist) steht für die Anzahl der erledigten Reklamationen und die zweite Zahl in gelb (oder in grau, wenn sie 0 ist) für die Anzahl der nicht erledigten Reklamationen.

In diesem Reiter kann das Bibliothekspersonal die Reklamationsnotizen bearbeiten und Reklamationen lösen.
Sperren
Der Tab ‚Sperren‘ wird immer angezeigt. Wenn der Benutzer keine Sperren hat, wird das entsprechend angezeigt.

Wenn der Benutzer Sperren hat, wird die Anzahl der vorhandenen Sperren und deren Art angezeigt.
- Es gibt wenigstens vier Arten von Sperren:
manuelle Sperre
Überfälligkeiten
Suspendierung
Entlastung
Über den Link „Neue manuelle Sperre“ kann von hier aus eine Sperre auf dem Bibliothekskonto eingetragen werden. Dies kann für jede Art von Sperre verwendet werden, die von Hand eingetragen werden soll.
Bemerkung
Nur Bibliothekspersonal mit der Berechtigung manage_restrictions (oder der superlibrarian-Berechtigung) kann manuelle Sperren hinzufügen oder bestehende Sperren entfernen.
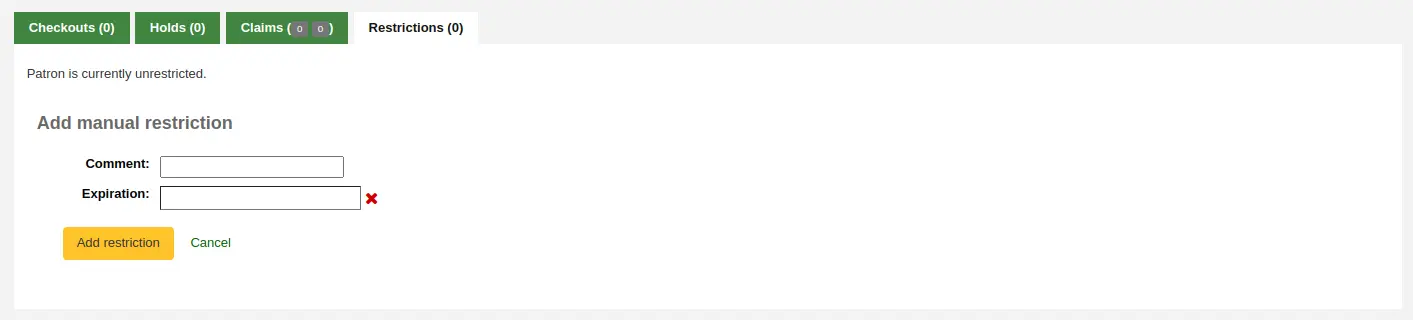
Typ: Wenn der Systemparameter PatronRestrictionTypes aktiviert wurde, haben Sie eine Auswahl an Sperrenarten. Diese Liste kann im Administrationsmodul unter Benutzersperren verwaltet werden
Kommentar: eine Kommentar zu bzw. eine Begründung für die Sperre
Ablauf: optional kann ein Ablaufdatum für die Sperre angegeben werden. Wird kein Ablaufdatum angegeben, bleibt die Sperre, bis sie gelöscht wird. Wenn es ein Ablaufdatum gibt, wird sie automatisch ungültig und ggf. entfernt und in Grau angezeigt..
Version
Abgelaufene Sperren werden ab Koha Version 23.11 als solche gekennzeichnet. In früheren Versionen sah eine abgelaufene Sperre genauso aus wie eine aktive Sperre , aber sie blockierte die Ausleihe nicht mehr.
Bemerkung
Abgelaufene Sperren bleiben in der Benutzerdatei sichtbar, blockieren aber nicht die Ausleihe.
Sie können den Cron-Job cleanup_database.pl mit dem Flag –restrictions verwenden, um abgelaufene Sperren automatisch zu entfernen.

Die Sperre Überfälligkeiten kann automatisch mit dem Versand eines Mahnschreibens über den Mahntrigger gesetzt werden.
Die Sperre wird nicht automatisch entfernt wenn die überfälligen Exemplare zurückgeben werden. Es sei denn, der Systemparameter AutoRemoveOverduesRestrictions ist auf „Entferne“ gesetzt.
In den Ausleihkonditionen können Sie Benutzergruppen mit Sperren anstelle (oder zusätzlich) mit Mahngebühren belegen. In diesem Fall löst ein zu spät zurückgegebenes Exemplare eine Sperrfrist aus.
If using the RestrictPatronsWithFailedNotices system preference, patrons will be restricted if an email or SMS notice intended for them failed to be sent. The restriction is meant to prompt them to update their email address or SMS number.
Benutzer können auch gesperrt werden, wenn eine Entlastung eingetragen wird. Wenn die Entlastung bestätigt wird, ist der Benutzer automatisch gesperrt.
Benutzer können auch durch das Setzen von Flags in ihren Konten gesperrt werden.
Bei Sperren in einem Benutzersatz ist keine Ausleihe möglich. Es erscheint eine Nachricht in roter Schrift unter dem Reiter Ausleihe.
Bemerkung
Nur Bibliothekspersonal mit der Berechtigung force_checkout (oder der superlibrarian-Berechtigung) kann eine Sperre vorübergehend außer Kraft setzen, um trotzdem ausleihen zu können.
Sperren können unter Umständen auch das Verlängern von Exemplaren verhindern wenn der Systemparameter RestrictionBlockRenewing auf „blockiere“ gesetzt ist.
Im OPAC erhalten Benutzer den Hinweis, dass das Konto gesperrt ist. Sie können dann keine Vormerkungen im OPAC absetzen.

Wenn es Benutzer*innen mit mehr als einer Sperre gibt, können Sie über den Systemparameter CumulativeRestrictionPeriods entscheiden, ob Sie die Sperrfristen aufaddieren möchten.
Bemerkung
Wenn Sie nur bestimmte Aktionen für einen Benutzer sperren möchten, beachten Sie die folgenden Systemparameter:
Setzen Sie den Systemparameter OverduesBlockCirc auf „Sperre“, um zu verhindern das Benutzer*innen mit überfälligen Medien auf dem Konto weitere Medien ausleihen.
Setzen Sie den Systemparameter OverduesBlockRenewing auf „kann grundsätzlich nicht mehr verlängert werden“ oder „können nur diese nicht mehr verlängert werden“, um Verlängerungen von überfälligen Medien zu verhindern.
Um Ausleihen auf Konten zu verhindern, bei denen mehr als eine bestimmte Summe Gebührensumme aufgelaufen ist, tragen Sie einen Wert in die Systemparameter noissuescharge bzw. NoIssuesChargeGuarantees ein.
Um zu verhindern, dass jemand Vormerkungen einträgt, wenn mehr als eine bestimmte Gebührensumme im Konto eingetragen ist, legen Sie einen entsprechenden Wert im Systemparameter maxoutstanding fest.
Um zu verhindern das Benutzer*innen, die mehr als eine bestimmte Summe an Gebühren im Konto offen haben, Verlängerungen vornehmen, tragen Sie einen entsprechenden Wert im Systemparameter OPACFineNoRenewals ein.
Setzen Sie den Systemparameter BlockExpiredPatronOpacActions auf „Sperre“, um zu verhindern das Benutzer*innen mit abgelaufenem Ausweis Medien verlängern oder vormerken.
Version
Seit Koha-Version 24.05 können Änderungen an Benutzersperren mit dem Systemparameter BorrowersLog protokolliert werden.
Clubs
Wenn Sie Clubs verwenden, erscheint im Benutzerkonto ein Reiter mit den Clubs, in denen der Benutzer Mitglied ist. Die erste Zahl im Titel des Reiters ist die Anzahl der Clubs, in denen der Benutzer eingeschrieben ist, und die zweite Zahl ist die Zahl der Clubs, in denen der Benutzer nicht eingeschrieben ist.
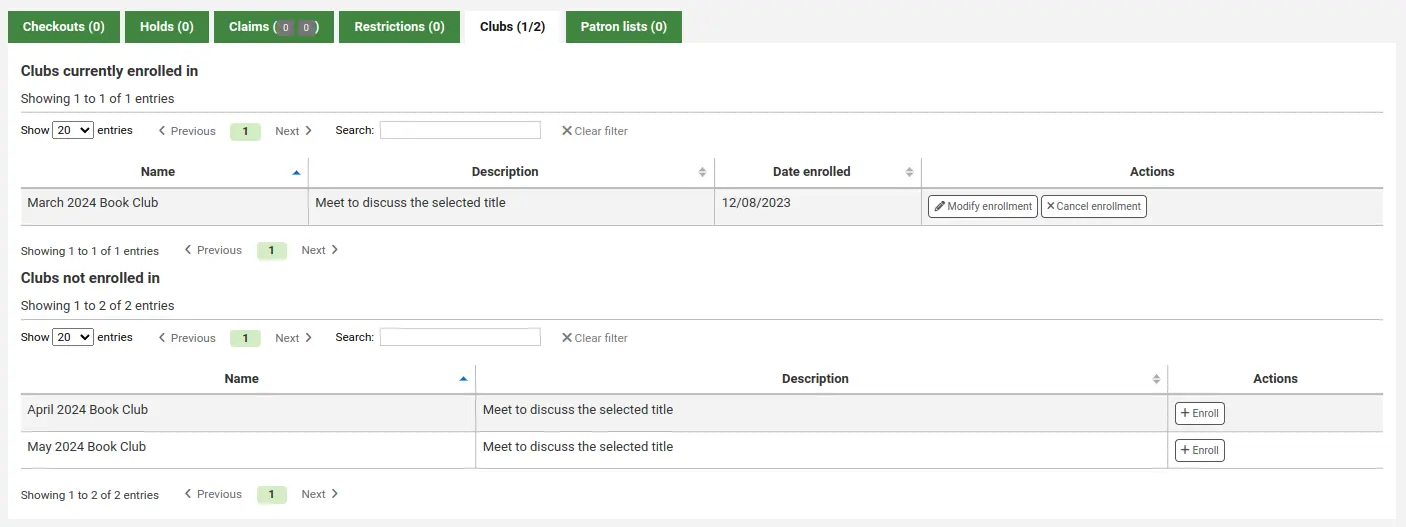
Benutzerlisten
Version
Dieser Reiter wurde in Koha-Version 23.11 hinzugefügt.
Wenn der Benutzer in einer oder mehreren Benutzeristen ist, werden die Liste oder Listen, in denen er sich befindet, in diesem Reiter angezeigt.
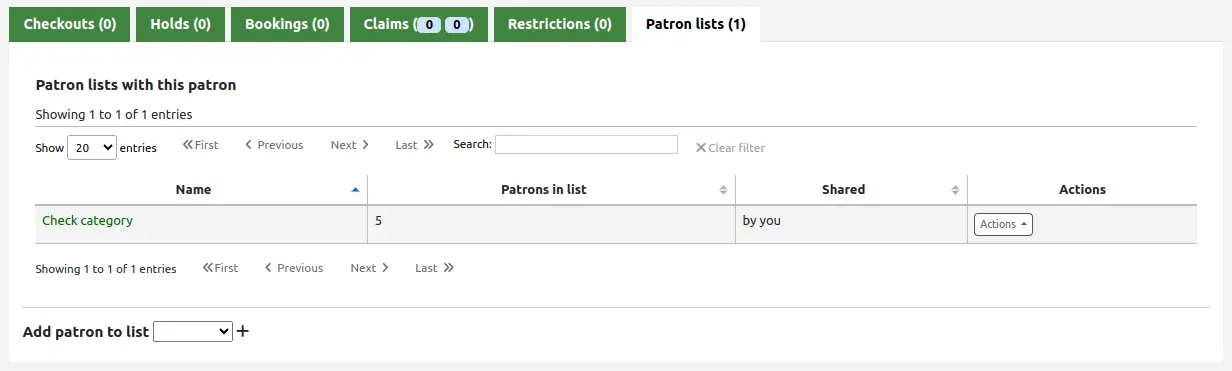
Unten im Reiter befindet sich ein Dropdown-Menü, mit dem Sie den Benutzer zu einer anderen Liste hinzufügen können. Wählen Sie die Liste aus dem Dropdown-Menü und klicken Sie auf die Schaltfläche „+“, um ihn der Liste hinzuzufügen.
Beachten Sie, dass in diesem Drop-down-Menü nur Listen angezeigt werden, in denen dieser Benutzer noch nicht enthalten ist. Wenn der Benutzer in allen Listen enthalten ist, ist diese Option nicht sichtbar.
Bemerkung
Nur Bibliothekspersonal mit der Berechtigung manage_patron_lists (oder der superlibrarian-Berechtigung) kann den/die Benutzer*in zu einer Liste hinzuzufügen.
Gebühren
Bemerkung
Mitarbeiter*innen müssen über die Berechtigung updatecharges oder zumindest über die Berechtigung remaining_permissions unter updatecharges (oder die superlibrarian-Berechtigung) verfügen, um Zugriff auf diesen Reiter zu haben.
Die gesamte Gebührenhistorie eines Benutzers erscheint im Reiter Gebühren. Der Reiter Gebühren zeigt alle Arten von Gebühren und Gutschriften an: Mahngebühren, Benutzungsgebühren, Leihgebühren, Vormerkgebühren und jede andere Gebühr, die Sie von Ihren Benutzern erheben.
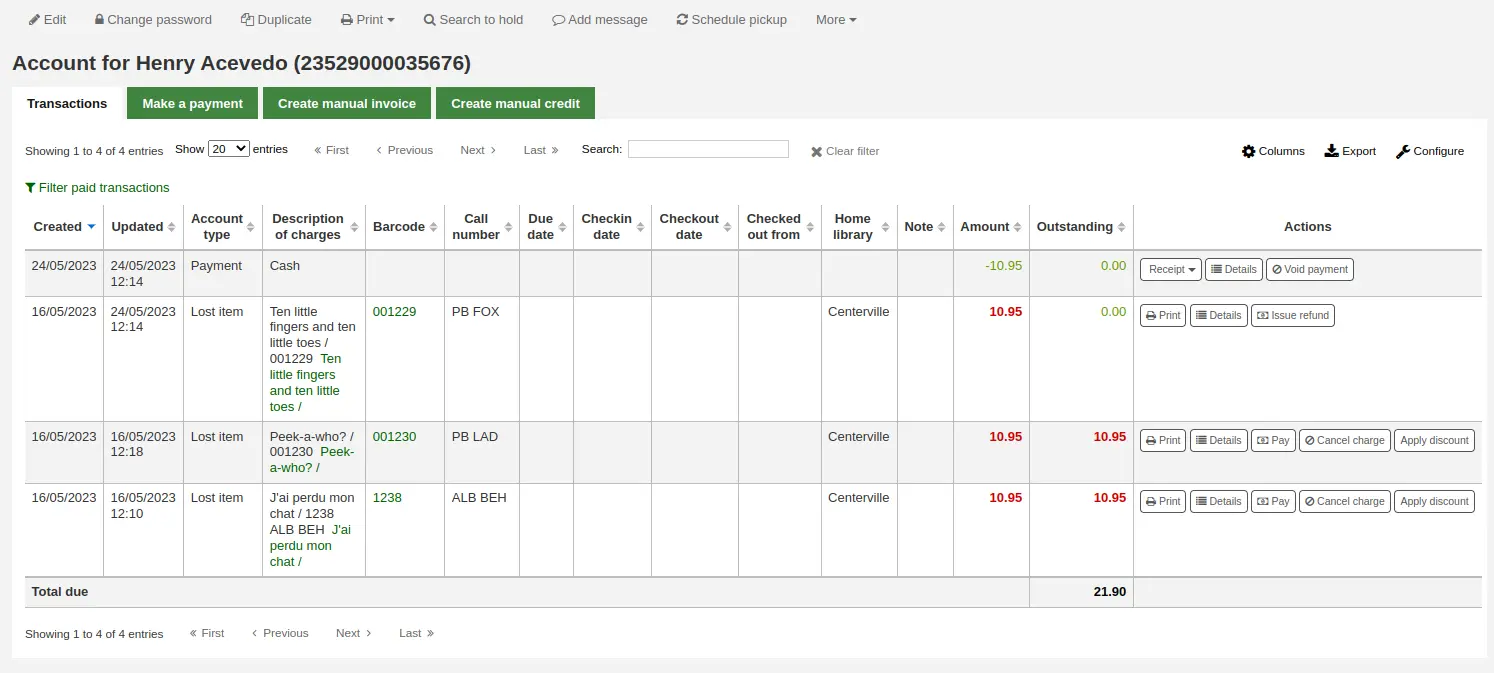
Bemerkung
You can customize the columns of this table in the Table settings section of the Administration module (table id: account-fines).
Bemerkung
Es ist möglich, eine Zusammenfassung der ausstehenden Gebühren und der nicht genutzten Gutschriften auf dem Benutzerkonto auszudrucken, indem Sie oben auf der Seite auf „Drucken“ klicken und „Kontostand drucken“ wählen.
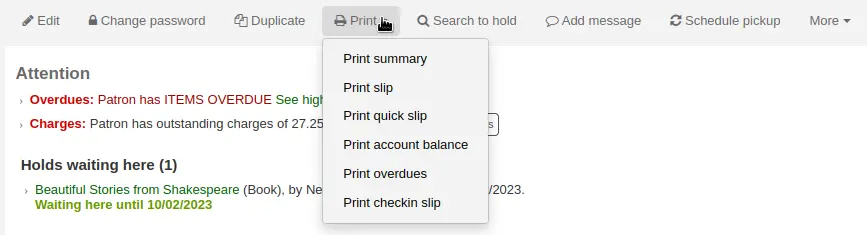
„Zusammenfassung drucken“ druckt eine vollständige Zusammenfassung des Benutzerkontos, einschließlich der ausstehenden Gebühren.
Der Reiter Transaktionen zeigt die folgenden Spalten:
Datum: das Datum, an dem die Gebühr, die Zahlung oder das Guthaben eingetragen wurde
Wenn es sich um Mahngebühren handelt, ist dies der letzte Tag an dem die Gebühr aktualisiert wurde
Kontenart: um welche Art von Gebühr, Zahlung oder Guthaben es sich handelt
In den Fällen, in denen eine Kontenart einen zugehörigen „Status“ hat, wird dieser neben der Kontenart in eckigen Klammern angezeigt.
Beschreibung: eine Beschreibung der Gebühren inklusive dem Fälligkeitsdatum bei Überfälligkeiten und einem Link zum Exemplar, wenn dieses noch vorhanden ist
Bemerkung
Für Überfälligkeits-Gebühren werden standardmäßig der Titel und das Fälligkeitsdatum verwendet. Sie können dies anpassen, indem Sie die Vorlage OVERDUE_FINE_DESC im Werkzeug Benachrichtigungen und Quittungen bearbeiten.
Barcode: wenn die Gebühr mit einem bestimmten Exemplar verknüpft ist, wird der Barcode angezeigt
Signatur: wenn die Gebühr mit einem bestimmten Exemplar verknüpft ist, wird die Signatur des Exemplars angezeigt
Fälligkeitsdatum: wenn es sich um eine Mahngebühr handelt, wird das Fälligkeitsdatum angezeigt
Rückgabedatum: wenn es sich um eine Mahngebühr handelt, wird das Rückgabedatum angezeigt
Ausleihdatum: wenn es sich um eine Mahngebühr handelt, wird das Datum der Ausleihe angezeigt
Heimatbibliothek: wenn die Gebühr mit einem spezifischen Exemplar verknüpft ist, wird dessen Heimatbibliothek angezeigt
Hinweis. Hinweise zur Gebühr oder Zahlung
Betrag: die Gesamtsumme der Gebühr oder Zahlung
Unbezahlt: diese Summe ist noch fällig
Aktionen:
Eine Auswahl an verfügbaren Aktionen, die für die jeweilige Zeile ausgeführt werden können
Zu Beginn der Tabelle können Sie über ‚Bezahlte Transaktionen ausblenden‘ alle bezahlten Gebühren ausblenden. Darüber können Sie über das Suchfeld nach einer bestimmten Gebühr oder Zahlung suchen.
Aktionen
Schaltflächen mit Aktionen sind für die verschiedenen Kontozeilen in Abhängigkeit von den Berechtigungen des Benutzers, der Kontenart und deren Status verfügbar.
Eine Schaltfläche, um eine Quittung oder Rechnung für diese Zeile zu drucken oder per E-Mail zu versenden
Bemerkung
Handelt es sich bei der Belegposition um eine Gutschrift (Zahlung, Erlass oder sonstige Gutschrift), wird als Beleg der Vermerk ACCOUNT_CREDIT gedruckt. Er kann im Werkzeug Benachrichtigungen und Quittungen angepasst werden.
Wenn es sich bei der Belegposition um eine Gebühr handelt, wird die Rechnung mit der Benachrichtigung ACCOUNT_DEBIT gedruckt. Sie kann im Werkzeug Benachrichtigungen und Quittungen angepasst werden.
Eine Schaltfläche um weitere Details zur Gebühr und den Zahlungen gegen diese anzuzeigen
Eine Schaltfläche um eine Zahlung/Guthaben ungültig (rückgängig) zu machen
Diese Schaltfläche wird nur für Zahlungen/Gutschriften angezeigt. Durch das ungültig machen wird der Prozess umgekehrt und der ausstehende Betrag für alle Schulden/Gebühren wieder zurückgesetzt, die zuvor damit ausgeglichen wurden. Diese Aktion wird meistens dann verwendet, wenn eine Zahlung zwar vermerkt, aber nicht eingegangen ist. Die Summe der Gutschrift wird auf null und der Eintrag auf „Ungültig“ gesetzt .
Eine Schaltfläche um eine Belastung zu stornieren (zu entfernen)
This button will only appear on a charge/debit line that has not already had any payment/credits applied to it. Upon canceling the line it will be marked as ‚Cancelled‘ and a CANCELLATION line will be added and offset against it. This action is most commonly used to correct cases where a charge was made mistakenly.
Eine Schaltfläche um Belastungen mit offenen Beträgen zu bezahlen
Diese Schaltfläche wird bei allen Gebühren/Belastungen mit einem offenen Betrag angezeigt. Die darauf nachfolgende Seite erlaubt es, einen Betrag ganz oder teilweise zu bezahlen oder zu erlassen, eine Zeile mit „ZAHLUNG“ oder „ERLASS“ wird entsprechend hinzugefügt.
Eine Schaltfläche für die Auszahlung von Guthaben
Diese Schaltfläche wird nur bei Gutschriften mit ungenutztem Betrag angezeigt, wenn der/die Mitarbeiter*in die Berechtigung payout hat. Es erlaubt dem/der Bibliothekar*in, den noch offenen Betrag an den/die Benutzer*in auszuzahlen. Dies wird mit einer Zeile „AUSZAHLUNG“ dokumentiert.
Eine Schaltfläche um eine Rückzahlung für eine Gebühr/Belastung auszuführen
Diese Schaltfläche wird für jede Gebühr/Belastung angezeigt, die bezahlt oder teilweise bezahlt wurde, wenn Sie die Berechtigung refund haben. Im angezeigten Dialogfenster können Sie die eingezahlte Summe ganz oder teilweise entweder „Bar“ oder über das Hinzufügen einer Gutschrift zum Konto ausbezahlen.
Eine Schaltfläche um einen Rabatt für eine Gebühr/Belastung zu geben
Diese Schaltfläche wird bei einer Gebühr/Belastung angezeigt, die noch nicht über eine Zahlung/Gutschrift verändert wurde, wenn Sie die Berechtigung discount besitzen. Im angezeigten Dialogfenster kann ein Rabattbetrag für die Gebühr eingetragen werden.
Erhebung von Gebühren/Entgelten
Die meisten Gebühren werden automatisch durch den Cron-Job fines erhoben. Gebühren können auch bei Rückgabe eines überfälligen Exemplares berechnet werden, wenn der Systemparameter CalculateFinesOnReturn aktiv ist.
Gebühren werden auf Grundlage der in der Administration konfigurierten Ausleihkonditionen berechnet
Vormerkgebühren werden anhand des Benutzertyps und der Ausleihkonditionen im Administrationsmodul berechnet
Leihgebühren werden anhand der Konfiguration der Exemplartypen berechnet
Wenn Sie in der Katalogisierung ein Exemplar als ‚Verloren‘ markieren, wird dem Benutzer automatisch die entsprechende Buchersatzgebühr auf das Konto gebucht
Wenn ein Benutzer mit einer Benutzungsgebühr für den Benutzertyp angelegt wird.
Wenn ein Benutzerkonto mit einer Benutzungsgebühr für den Benutzertyp verlängert wird.
Bestellgebühren für Artikel werden basierend auf der in den Ausleihkonditionen definierten Artikelbestellgebühr berechnet.
Gebühren erheben
Für nicht automatisch berechnete Gebühren können Mitarbeiter*innen manuell eine Rechnung erzeugen.
Bemerkung
Mitarbeiter*innen müssen die Berechtigung manual_invoice (oder die superlibrarian-Berechtigung) haben, um manuelle Rechnungen in ein Benutzerkonto eintragen zu können.
Klicken Sie auf den Reiter „Manuelle Rechnung erstellen“
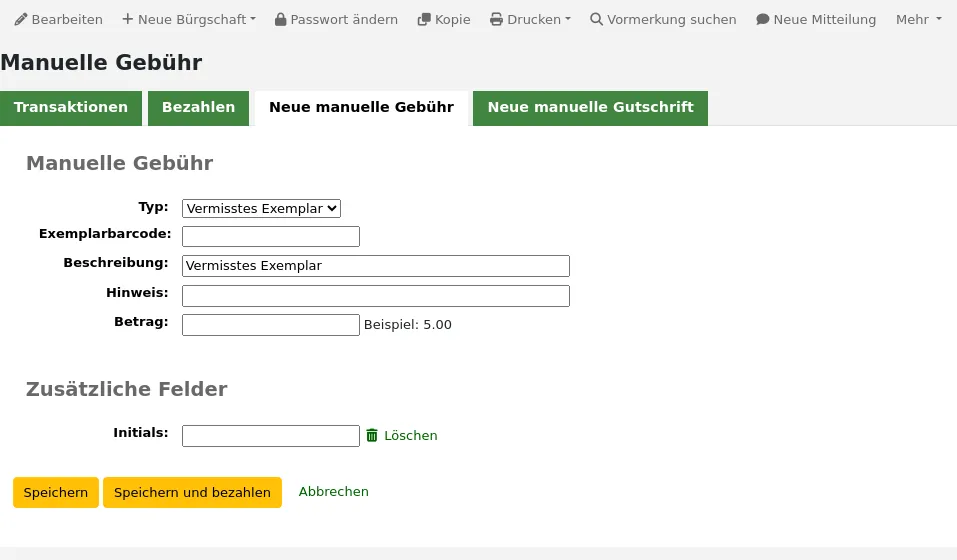
Typ: Wählen Sie die Art von Rechnung, die Sie erstellen möchten.
Bemerkung
Um zusätzliche Werte zur Auswahlliste für die manuellen Gebührentypen hinzuzufügen, fügen Sie diese zu den Gebührenarten im Administrationsmodul hinzu.
Barcode: Wenn die Gebühr mit einem bestimmten Exemplar verknüpft ist, können Sie dessen Barcode angeben, damit der Eintrag einen Link zum Exemplar anzeigt.
Beschreibung: Geben Sie eine Beschreibung der Gebühr ein.
Hinweis: Fügen Sie, falls notwendig, einen Hinweis zur Gebühr ein.
Kosten: Wenn es sich um eine benutzerdefinierte Gebührenart handelt, gibt es ein Feld „Kosten“, in das Sie die Kosten des Exemplars eingeben können. Dies gilt vor allem für physische Exemplare, die an den Benutzer verkauft werden, wie z. B. gebrauchte Bücher oder wiederverwendbare Taschen.
Version
Dieses Feld wurde in Koha-Version 23.11 hinzugefügt.
Menge: Wenn es sich um eine benutzerdefinierte Gebührenart handelt, gibt es ein Feld „Menge“, in das Sie die Menge der zu belastenden Exemplar eingeben können. Dies gilt vor allem für physische Exemplare, die an den Benutzer verkauft werden, wie z. B. gebrauchte Bücher oder wiederverwendbare Taschen.
Version
Dieses Feld wurde in Koha-Version 23.11 hinzugefügt.
Betrag: Geben Sie den Betrag der Gebühr ein, geben Sie keine Währungssymbole ein, nur Ziffern und Dezimalstellen.
Bemerkung
Wenn es sich bei dem Typ um eine benutzerdefinierte Gebührenart handelt und Sie einen Preis und eine Menge eingegeben haben, wird der Betrag automatisch berechnet.
Wenn zusätzliche Felder für Kontobelastungen eingerichtet wurden, werden sie hier angezeigt.
Klicken Sie auf „Speichern“ um den Betrag dem Benutzerkonto hinzuzufügen, oder
Klicken Sie auf „Speichern und bezahlen“, um den Betrag dem Konto des Benutzers zu belasten und direkt zur Zahlungsseite zu gelangen.
Bezahlung und Erlass von Gebühren
Jede Kontozeile kann über den Reiter „Zahlung vornehmen“ vollständig bezahlt oder erlassen werden.
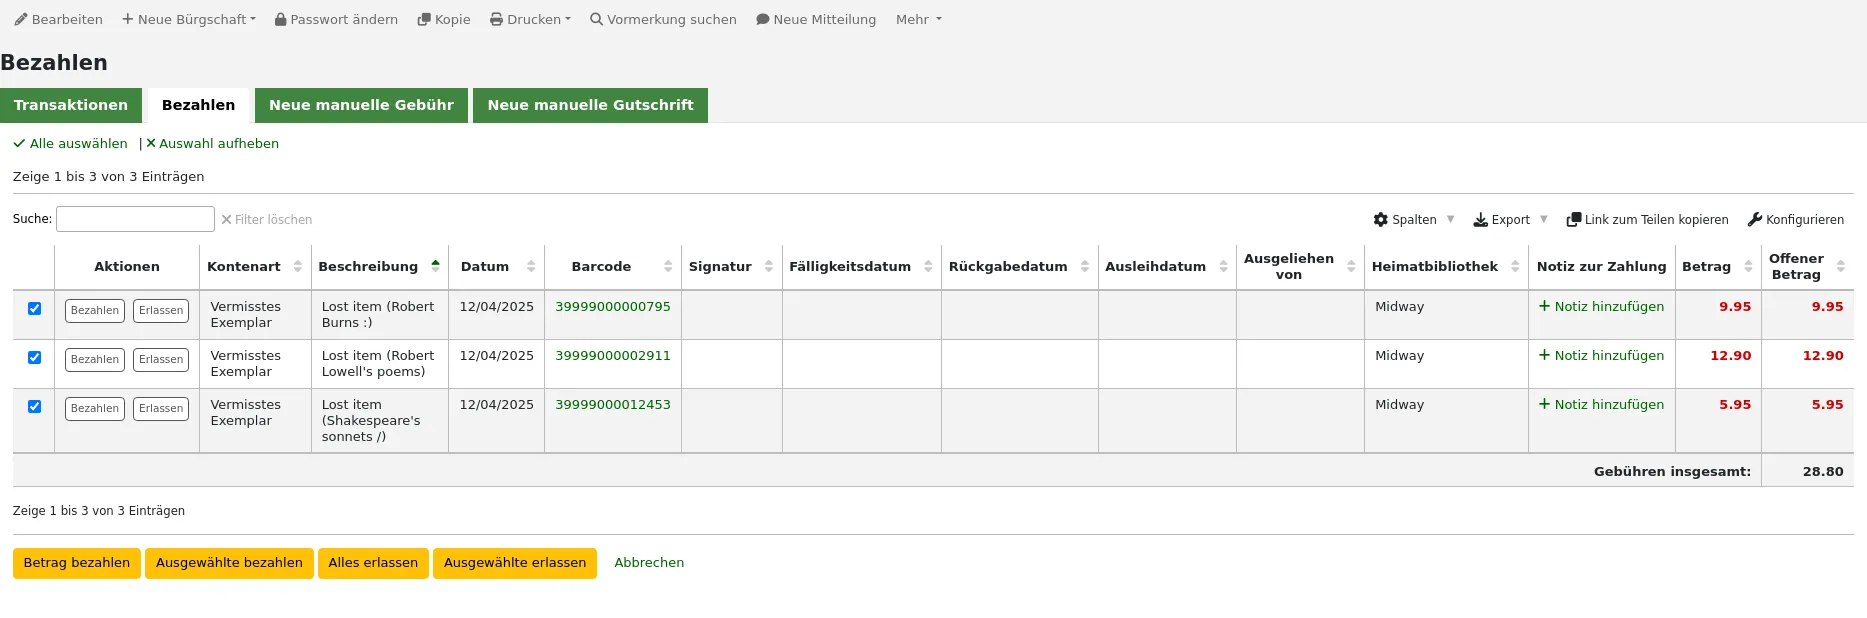
Bemerkung
You can customize the columns of this table in the Table settings section of the Administration module (table id: pay-fines-table).
Jede Kontozeile kann vollständig oder teilweise bezahlt oder erlassen werden.
Eine individuelle Gebühr vollständig bezahlen
Um eine individuelle Gebühr vollständig zu bezahlen:
Wenn Sie eine Notiz zur Zahlung eingeben möchten, klicken Sie auf „Notiz hinzufügen“ und geben Sie die Notiz ein bevor Sie fortfahren.
Klicken Sie auf „Bezahlen“ neben der Gebühr, die Sie vollständig bezahlen möchten.
In einer Tabelle werden die Einzelheiten der zu zahlenden Gebühr angezeigt. Der volle Betrag der Gebühr wird in den Feldern „Zu zahlender Betrag“ und „Übergebener Betrag“ für Sie eingetragen.
Bemerkung
Wenn Sie einen Fehler gemacht haben und diese Gebühr stattdessen erlassen werden soll, können Sie mit den Schaltflächen oben in diesem Reiter zwischen den Modi „Bezahlen“ und „Erlassen“ wechseln. Siehe Erlass einer einzelnen Gebühr unten.
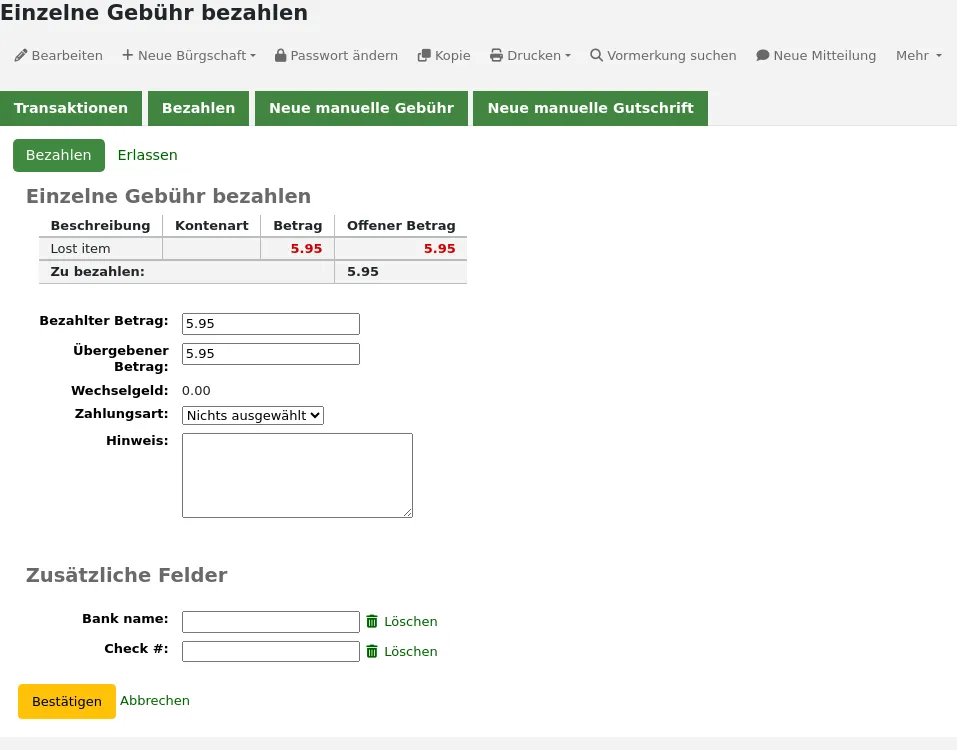
Zu zahlender Betrag: Dies ist der Betrag, der von der Gebühr abgebucht wird. Wenn Sie eine Gebühr in voller Höhe bezahlen, sollte dies der volle Betrag sein.
Übergebener Betrag: Dies ist der tatsächliche Betrag, der Ihnen vom Benutzer ausgehändigt wurde, und wird für die Berechnung des Wechselgeldes verwendet. Wenn ein Benutzer z.B. eine Gebühr von 2,75 $ zu zahlen hat und mit einem 5 $-Schein bezahlt, geben Sie 5 in „Übergebener Betrag“ ein.
Herauszugebendes Wechselgeld: Wenn der gezahlte und der übergebene Betrag voneinander abweichen (d. h. mehr Geld eingenommen wurde), wird der Betrag des herauszugebenden Wechselgeldes angezeigt.
Zahlungsart: Art der Zahlung auswählen.
Bemerkung
Dieses Feld wird nur angezeigt, wenn ein oder mehrere Werte in der Kategorie PAYMENT_TYPE der Normierten Werte definiert sind.
Bemerkung
Dieses Feld ist erforderlich, wenn entweder der Systemparameter UseCashRegisters oder der Systemparameter RequirePaymentType aktiviert ist.
Kasse: Wenn der Systemparameter UseCashRegisters aktiviert ist, können Sie wählen, welche Kasse für eine Transaktion verwendet werden soll.
Bemerkung
Wenn der Systemparameter UseCashRegisters aktiviert ist und der Zahlungstyp CASH obenstehend gewählt ist, ist es erforderlich, eine Kasse für die Zahlung zu wählen.
Ob dieses Feld erforderlich ist, wenn eine andere Zahlungsart gewählt wird, wird durch den Systemparameter RequireCashRegister bestimmt.
Wenn zusätzliche Felder für Konto-Gutschriften eingerichtet wurden, werden sie hier angezeigt.
Klicken Sie auf „Bestätigen“.
Wenn Wechselgeld herausgegeben werden muss, wird dies in einem Dialogfenster angezeigt, um daran zu erinnern. Mit einem Klick auf „Ja“ kann die korrekte Herausgabe und damit die Zahlung bestätigt werden.
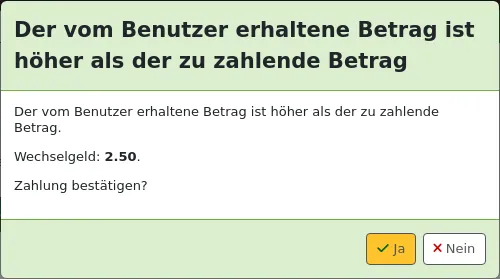
Der ausstehende Betrag der Gebühr wird auf Null gesetzt (vollständig bezahlt), und eine Zahlungszeile wird in den Transaktionen des Benutzers hinzugefügt.
Bemerkung
Wenn der Systemparameter FinePaymentAutoPopup aktiviert ist, wird ein Druckdialog angezeigt. Die gedruckte Quittung nutzt die Benachrichtigung ACCOUNT_CREDIT, die im Werkzeug Benachrichtigungen und Quittungen angepasst werden kann. Wenn für die Transaktion Wechselgeld zurückgegeben wurde, kann dies mit diesem Systemparameter ebenfalls ausgegeben werden.
In addition to printing receipts, you can automatically email receipts for payment and writeoff transactions to the patron with the AutomaticEmailReceipts system preference. The email sent uses the ACCOUNT_PAYMENT letter, which can be modified in the Notices and slips tool.
Bezahlung eines Teilbetrags für eine individuelle Gebühr
Um einen Teilbetrag einer individuellen Gebühr zu bezahlen:
Klicken Sie auf „Bezahlen“ neben der Gebühr, die Sie teilweise bezahlen möchten.
In einer Tabelle werden die Einzelheiten der zu zahlenden Gebühr angezeigt. Der volle Betrag der Gebühr wird in den Feldern „Zu zahlender Betrag“ und „Übergebener Betrag“ für Sie eingetragen.
Bemerkung
Wenn Sie einen Fehler gemacht haben und diese Gebühr stattdessen erlassen werden sollte, können Sie mit den Schaltflächen oben in diesem Reiter zwischen den Modi „Bezahlen“ und „Erlassen“ wechseln. Siehe Teilweiser Erlass einer einzelnen Gebühr unten.
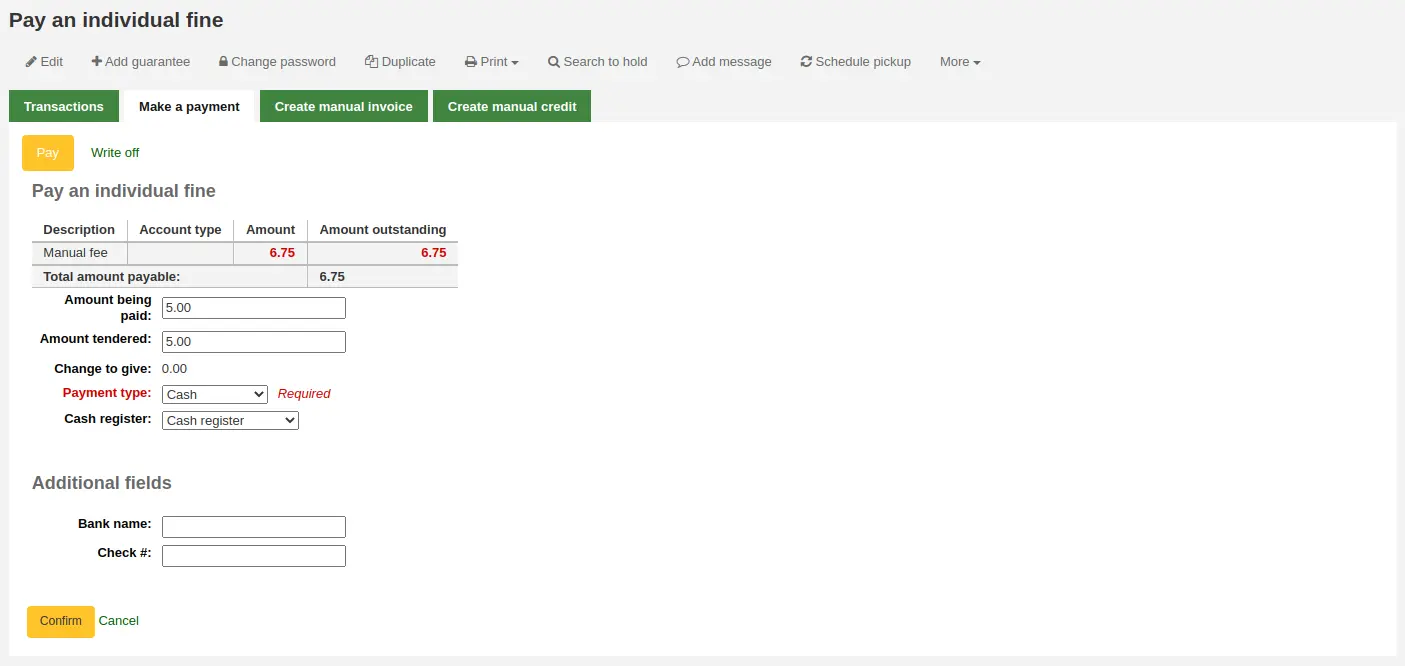
Zu zahlender Betrag: Dies ist der Betrag, der von der Gebühr abgebucht wird. Wenn Sie eine Gebühr teilweise bezahlen, geben Sie den zu zahlenden Betrag ein.
Übergebener Betrag: Dies ist der tatsächliche Betrag, der Ihnen vom Benutzer ausgehändigt wurde, und wird für die Berechnung des Wechselgeldes verwendet. Wenn ein Benutzer z.B. eine Gebühr von 2,75 $ zu zahlen hat und mit einem 5 $-Schein bezahlt, geben Sie 5 in „Übergebener Betrag“ ein.
Herauszugebendes Wechselgeld: Wenn der gezahlte und der übergebene Betrag voneinander abweichen (d. h. mehr Geld eingenommen wurde), wird der Betrag des herauszugebenden Wechselgeldes angezeigt.
Zahlungsart: Art der Zahlung auswählen.
Bemerkung
Dieses Feld wird nur angezeigt, wenn ein oder mehrere Werte in der Kategorie PAYMENT_TYPE der Normierten Werte definiert sind.
Bemerkung
Dieses Feld ist erforderlich, wenn entweder der Systemparameter UseCashRegisters oder der Systemparameter RequirePaymentType aktiviert ist.
Kasse: Wenn der Systemparameter UseCashRegisters aktiviert ist, können Sie wählen, welche Kasse für eine Transaktion verwendet werden soll.
Bemerkung
Wenn der Systemparameter UseCashRegisters aktiviert ist und der Zahlungstyp CASH obenstehend gewählt ist, ist es erforderlich, eine Kasse für die Zahlung zu wählen.
Ob dieses Feld erforderlich ist, wenn eine andere Zahlungsart gewählt wird, wird durch den Systemparameter RequireCashRegister bestimmt.
Wenn zusätzliche Felder für Konto-Gutschriften eingerichtet wurden, werden sie hier angezeigt.
Klicken Sie auf „Bestätigen“.
Wenn Wechselgeld herausgegeben werden muss, wird dies in einem Dialogfenster angezeigt, um daran zu erinnern. Mit einem Klick auf „Ja“ kann die korrekte Herausgabe und damit die Zahlung bestätigt werden.
Die Gebühr wird aktualisiert, und zeigt neben dem ursprünglichen auch den noch offenen Betrag, und es wird eine Zahlungszeile in den Transaktionen des Benutzers hinzugefügt.
Bemerkung
Wenn der Systemparameter FinePaymentAutoPopup aktiviert ist, wird ein Druckdialog angezeigt. Die gedruckte Quittung nutzt die Benachrichtigung ACCOUNT_CREDIT, die im Werkzeug Benachrichtigungen und Quittungen angepasst werden kann. Wenn für die Transaktion Wechselgeld zurückgegeben wurde, kann dies mit diesem Systemparameter ebenfalls ausgegeben werden.
In addition to printing receipts, you can automatically email receipts for payment and writeoff transactions to the patron with the AutomaticEmailReceipts system preference. The email sent uses the ACCOUNT_PAYMENT letter, which can be modified in the Notices and slips tool.
Einen Betrag für alle Gebühren bezahlen
Einen Betrag für alle Gebührenposten bezahlen:
Klicken Sie auf den Button „Betrag bezahlen“.
Der Gesamtbetrag, der auf dem Konto des Benutzers aussteht, wird angezeigt und in den Feldern „Zu zahlender Betrag“ und „Übergebener Betrag“ für Sie eingetragen.

Ausstehender Gesamtbetrag: Dies ist der Gesamtbetrag der unbezahlten Gebühren auf dem Konto des Benutzers.
Zu zahlender Betrag: Dies ist der Betrag, der von dem ausstehenden Betrag abgebucht wird. Geben Sie den Betrag ein, der gezahlt werden soll.
Übergebener Betrag: Dies ist der tatsächliche Betrag, der Ihnen vom Benutzer ausgehändigt wurde, und wird für die Berechnung des Wechselgeldes verwendet. Wenn ein Benutzer z.B. eine Gebühr von 2,75 $ zu zahlen hat und mit einem 5 $-Schein bezahlt, geben Sie 5 in „Übergebener Betrag“ ein.
Herauszugebendes Wechselgeld: Wenn der gezahlte und der übergebene Betrag voneinander abweichen (d. h. mehr Geld eingenommen wurde), wird der Betrag des herauszugebenden Wechselgeldes angezeigt.
Zahlungsart: Art der Zahlung auswählen.
Bemerkung
Dieses Feld wird nur angezeigt, wenn ein oder mehrere Werte in der Kategorie PAYMENT_TYPE der Normierten Werte definiert sind.
Bemerkung
Dieses Feld ist erforderlich, wenn entweder der Systemparameter UseCashRegisters oder der Systemparameter RequirePaymentType aktiviert ist.
Kasse: Wenn der Systemparameter UseCashRegisters aktiviert ist, können Sie wählen, welche Kasse für eine Transaktion verwendet werden soll.
Bemerkung
Wenn der Systemparameter UseCashRegisters aktiviert ist und der Zahlungstyp CASH obenstehend gewählt ist, ist es erforderlich, eine Kasse für die Zahlung zu wählen.
Ob dieses Feld erforderlich ist, wenn eine andere Zahlungsart gewählt wird, wird durch den Systemparameter RequireCashRegister bestimmt.
Hinweis. Fügen Sie, falls notwendig, eine Notiz zur Zahlung hinzu.
Wenn zusätzliche Felder für Konto-Gutschriften eingerichtet wurden, werden sie hier angezeigt.
Klicken Sie auf „Bestätigen“.
Wenn Wechselgeld herausgegeben werden muss, wird dies in einem Dialogfenster angezeigt, um daran zu erinnern. Mit einem Klick auf „Ja“ kann die korrekte Herausgabe und damit die Zahlung bestätigt werden.
Die ausstehenden Beträge der Gebühren werden aktualisiert, wobei die Zahlung zuerst auf die ältesten Gebühren angewendet wird, und eine Zahlungszeile wird in den Transaktionen des Benutzers hinzugefügt.
Bemerkung
Wenn der Systemparameter FinePaymentAutoPopup aktiviert ist, wird ein Druckdialog angezeigt. Die gedruckte Quittung nutzt die Benachrichtigung ACCOUNT_CREDIT, die im Werkzeug Benachrichtigungen und Quittungen angepasst werden kann. Wenn für die Transaktion Wechselgeld zurückgegeben wurde, kann dies mit diesem Systemparameter ebenfalls ausgegeben werden.
In addition to printing receipts, you can automatically email receipts for payment and writeoff transactions to the patron with the AutomaticEmailReceipts system preference. The email sent uses the ACCOUNT_PAYMENT letter, which can be modified in the Notices and slips tool.
Bezahlung ausgewählter Gebühren
Um nur einige Gebühren zu bezahlen:
Kreuzen Sie die Auswahlfelder neben den zu zahlenden Gebühren an.
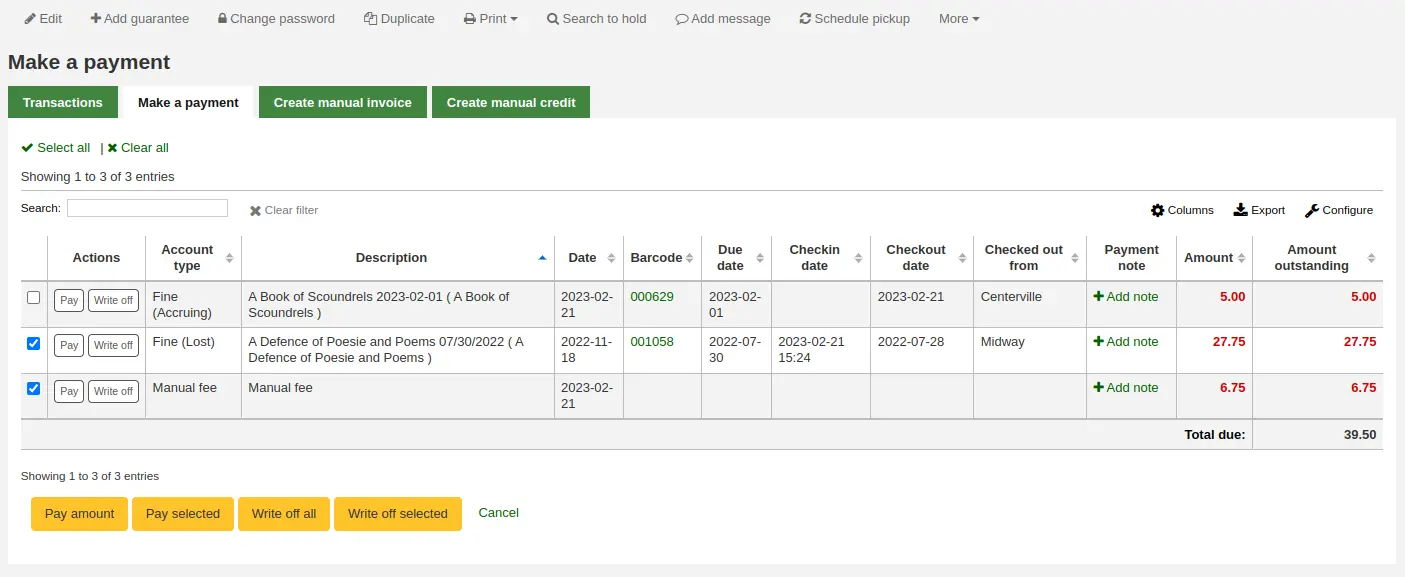
Klicken Sie auf den Button „Ausgewählte bezahlen“.
Der ausstehende Gesamtbetrag für die ausgewählten Gebühren wird angezeigt und für Sie in den Feldern „Zu zahlender Betrag“ und „Übergebener Betrag“ eingetragen.
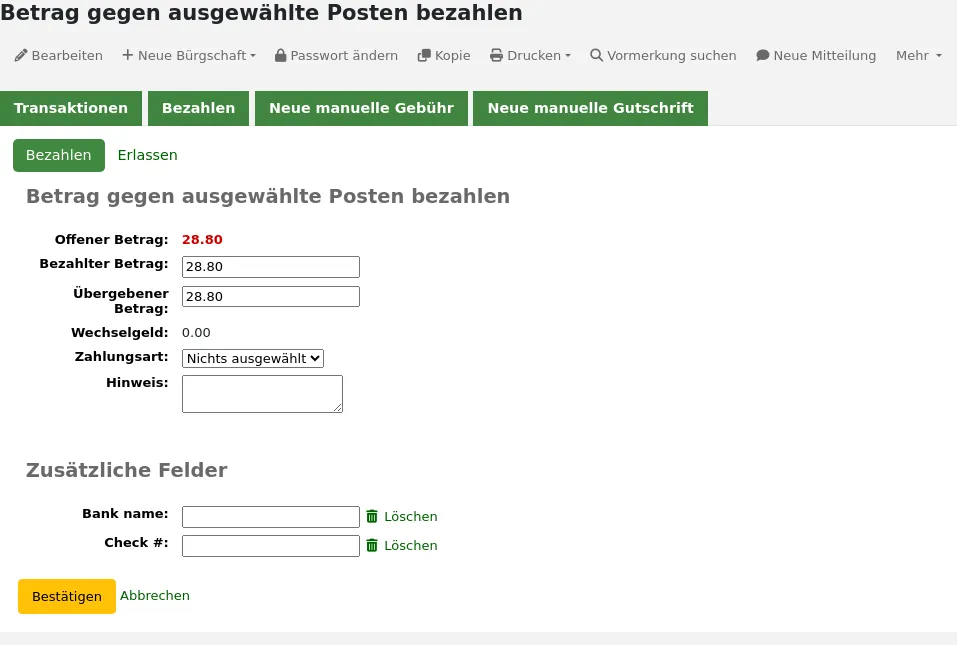
Ausstehender Gesamtbetrag: Dies ist der gesamte unbezahlte Betrag für die ausgewählten Gebühren.
Zu zahlender Betrag: Dies ist der Betrag, der vom ausstehenden Gesamtbetrag der ausgewählten Gebühren abgebucht wird. Geben Sie den Betrag ein, der gezahlt werden soll.
Übergebener Betrag: Dies ist der tatsächliche Betrag, der Ihnen vom Benutzer ausgehändigt wurde, und wird für die Berechnung des Wechselgeldes verwendet. Wenn ein Benutzer z.B. eine Gebühr von 2,75 $ zu zahlen hat und mit einem 5 $-Schein bezahlt, geben Sie 5 in „Übergebener Betrag“ ein.
Herauszugebendes Wechselgeld: Wenn der gezahlte und der übergebene Betrag voneinander abweichen (d. h. mehr Geld eingenommen wurde), wird der Betrag des herauszugebenden Wechselgeldes angezeigt.
Zahlungsart: Art der Zahlung auswählen.
Bemerkung
Dieses Feld wird nur angezeigt, wenn ein oder mehrere Werte in der Kategorie PAYMENT_TYPE der Normierten Werte definiert sind.
Bemerkung
Dieses Feld ist erforderlich, wenn entweder der Systemparameter UseCashRegisters oder der Systemparameter RequirePaymentType aktiviert ist.
Kasse: Wenn der Systemparameter UseCashRegisters aktiviert ist, können Sie wählen, welche Kasse für eine Transaktion verwendet werden soll.
Bemerkung
Wenn der Systemparameter UseCashRegisters aktiviert ist und der Zahlungstyp CASH obenstehend gewählt ist, ist es erforderlich, eine Kasse für die Zahlung zu wählen.
Ob dieses Feld erforderlich ist, wenn eine andere Zahlungsart gewählt wird, wird durch den Systemparameter RequireCashRegister bestimmt.
Hinweis. Fügen Sie, falls notwendig, eine Notiz zur Zahlung hinzu.
Wenn zusätzliche Felder für Konto-Gutschriften eingerichtet wurden, werden sie hier angezeigt.
Klicken Sie auf „Bestätigen“.
Wenn Wechselgeld herausgegeben werden muss, wird dies in einem Dialogfenster angezeigt, um daran zu erinnern. Mit einem Klick auf „Ja“ kann die korrekte Herausgabe und damit die Zahlung bestätigt werden.
Die ausstehenden Beträge der ausgewählten Gebühren werden aktualisiert, wobei die Zahlung zuerst auf die ältesten Gebühren angewendet wird, und eine Zahlungszeile wird in den Transaktionen des Benutzers hinzugefügt.
Bemerkung
Wenn der Systemparameter FinePaymentAutoPopup aktiviert ist, wird ein Druckdialog angezeigt. Die gedruckte Quittung nutzt die Benachrichtigung ACCOUNT_CREDIT, die im Werkzeug Benachrichtigungen und Quittungen angepasst werden kann. Wenn für die Transaktion Wechselgeld zurückgegeben wurde, kann dies mit diesem Systemparameter ebenfalls ausgegeben werden.
In addition to printing receipts, you can automatically email receipts for payment and writeoff transactions to the patron with the AutomaticEmailReceipts system preference. The email sent uses the ACCOUNT_PAYMENT letter, which can be modified in the Notices and slips tool.
Erlass aller Gebühren
Bemerkung
Mitarbeiter*innen müssen die Berechtigung writeoff (oder die superlibrarian-Berechtigung) haben, um Gebühren erlassen zu können.
Um alle Gebühren in einem Benutzerkonto zu erlassen:
Klicken Sie auf die Schaltfläche „Alle erlassen“
Den Erlass bestätigen
Die ausstehenden Beträge aller Gebühren werden auf Null gesetzt (vollständig bezahlt/erlassen), und in den Transaktionen des Benutzers wird eine Erlasszeile hinzugefügt.
Eine individuelle Gebühr erlassen
Bemerkung
Mitarbeiter*innen müssen die Berechtigung writeoff (oder die superlibrarian-Berechtigung) haben, um Gebühren erlassen zu können.
Eine einzelne Gebühr erlassen:
In einer Tabelle werden die Einzelheiten der erlassenen Gebühr angezeigt, und im Feld „Erlassungsbetrag“ wird der volle Betrag der Last für Sie eingetragen
Klicken Sie auf „Erlassen“ neben der Gebühr, die Sie erlassen möchten
In einer Tabelle werden die Einzelheiten der erlassenen Gebühr angezeigt, und im Feld „Erlassungsbetrag“ wird der volle Betrag der Last für Sie eingetragen.
Bemerkung
Wenn Sie einen Fehler gemacht haben und diese Gebühr stattdessen bezahlt werden sollte, können Sie mit den Schaltflächen oben in diesem Reiter zwischen den Modi „Bezahlen“ und „Erlassen“ wechseln. Siehe Eine einzelne Gebühr in voller Höhe bezahlen oben.
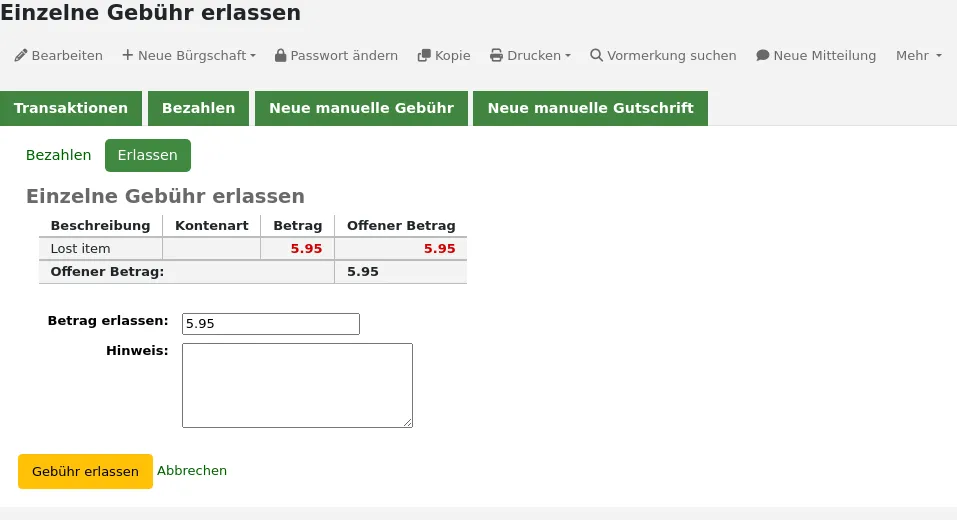
Erlassungsbetrag: Dies ist der Betrag, der von der Gebühr abgebucht wird. Bei der vollständigen Erlassung einer Gebühr sollte dies der volle Betrag sein.
Wenn zusätzliche Felder für Konto-Gutschriften eingerichtet wurden, werden sie hier angezeigt.
Klicken Sie „Gebühr erlassen“
Der ausstehende Betrag der Gebühr wird auf Null gesetzt (vollständig bezahlt/erlassen), und in den Transaktionen des Benutzers wird eine Erlasszeile hinzugefügt.
Bemerkung
Wenn der Systemparameter FinePaymentAutoPopup aktiviert ist, wird ein Druckdialog angezeigt. Die gedruckte Quittung nutzt die Benachrichtigung ACCOUNT_CREDIT, die im Werkzeug Benachrichtigungen und Quittungen angepasst werden kann. Wenn für die Transaktion Wechselgeld zurückgegeben wurde, kann dies mit diesem Systemparameter ebenfalls ausgegeben werden.
In addition to printing receipts, you can automatically email receipts for payment and writeoff transactions to the patron with the AutomaticEmailReceipts system preference. The email sent uses the ACCOUNT_WRITEOFF letter, which can be modified in the Notices and slips tool.
Teilweise Erlassung einer individuellen Gebühr
Bemerkung
Mitarbeiter*innen müssen die Berechtigung writeoff (oder die superlibrarian-Berechtigung) haben, um Gebühren erlassen zu können.
Um einen Teilbetrag einer individuellen Gebühr zu erlassen:
In einer Tabelle werden die Einzelheiten der erlassenen Gebühr angezeigt, und im Feld „Erlassungsbetrag“ wird der volle Betrag der Last für Sie eingetragen
Klicken Sie auf „Erlassen“ neben der Gebühr, die Sie erlassen möchten
In einer Tabelle werden die Einzelheiten der erlassenen Gebühr angezeigt, und im Feld „Erlassungsbetrag“ wird der volle Betrag der Last für Sie eingetragen.
Bemerkung
Wenn Sie einen Fehler gemacht haben und diese Gebühr stattdessen bezahlt werden sollte, können Sie mit den Schaltflächen oben in diesem Reiter zwischen den Modi „Bezahlen“ und „Erlassen“ wechseln. Siehe Teilweise Bezahlung einer einzelnen Gebühr oben.
Erlassungsbetrag: Dies ist der Betrag, der von der Gebühr abgebucht wird. Wenn Sie eine Gebühr teilweise erlassen, geben Sie den zu erlassenden Betrag ein.
Wenn zusätzliche Felder für Konto-Gutschriften eingerichtet wurden, werden sie hier angezeigt.
Klicken Sie „Gebühr erlassen“
Die Gebühr wird aktualisiert, und zeigt neben dem ursprünglichen auch den noch offenen Betrag, und es wird eine Erlasszeile in den Transaktionen des Benutzers hinzugefügt.
Bemerkung
Wenn der Systemparameter FinePaymentAutoPopup aktiviert ist, wird ein Druckdialog angezeigt. Die gedruckte Quittung nutzt die Benachrichtigung ACCOUNT_CREDIT, die im Werkzeug Benachrichtigungen und Quittungen angepasst werden kann. Wenn für die Transaktion Wechselgeld zurückgegeben wurde, kann dies mit diesem Systemparameter ebenfalls ausgegeben werden.
In addition to printing receipts, you can automatically email receipts for payment and writeoff transactions to the patron with the AutomaticEmailReceipts system preference. The email sent uses the ACCOUNT_WRITEOFF letter, which can be modified in the Notices and slips tool.
Erlass ausgewählter Gebühren
Bemerkung
Mitarbeiter*innen müssen die Berechtigung writeoff (oder die superlibrarian-Berechtigung) haben, um Gebühren erlassen zu können.
Um nur einige Gebühren zu erlassen:
In einer Tabelle werden die Einzelheiten der erlassenen Gebühr angezeigt, und im Feld „Erlassungsbetrag“ wird der volle Betrag der Last für Sie eingetragen
Kreuzen Sie die Auswahlfelder neben den zu erlassenden Gebühren an
Klicken Sie auf die Schaltfläche „Ausgewählte erlassen“
Der ausstehende Gesamtbetrag für die ausgewählten Gebühren wird angezeigt und im Feld „Erlassungsbetrag“ für Sie eingetragen.
Bemerkung
Wenn Sie einen Fehler gemacht haben und diese Gebühr stattdessen bezahlt werden sollte, können Sie mit den Schaltflächen oben in diesem Reiter zwischen den Modi „Bezahlen“ und „Erlassen“ wechseln. Siehe Zahlung ausgewählter Gebühren oben.
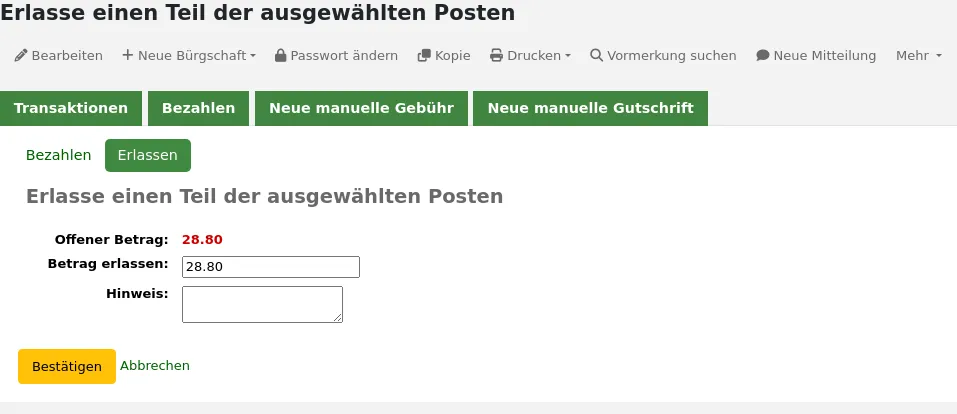
Erlassungsbetrag: Dies ist der Betrag, der von der Gebühr abgebucht wird. Bei der vollständigen Erlassung der Gebühren sollte dies der volle Betrag sein.
Notiz: Geben Sie, falls notwendig, eine Notiz zu dieser Erlassung ein.
Wenn zusätzliche Felder für Konto-Gutschriften eingerichtet wurden, werden sie hier angezeigt.
Klicken Sie auf „Bestätigen“
Die ausstehenden Beträge der ausgewählten Gebühren werden aktualisiert, wobei die Erlassung zuerst auf die ältesten Gebühren angewendet wird, und eine Erlasszeile in den Transaktionen des Benutzers hinzugefügt wird.
Bemerkung
Wenn der Systemparameter FinePaymentAutoPopup aktiviert ist, wird ein Druckdialog angezeigt. Die gedruckte Quittung nutzt die Benachrichtigung ACCOUNT_CREDIT, die im Werkzeug Benachrichtigungen und Quittungen angepasst werden kann. Wenn für die Transaktion Wechselgeld zurückgegeben wurde, kann dies mit diesem Systemparameter ebenfalls ausgegeben werden.
In addition to printing receipts, you can automatically email receipts for payment and writeoff transactions to the patron with the AutomaticEmailReceipts system preference. The email sent uses the ACCOUNT_WRITEOFF letter, which can be modified in the Notices and slips tool.
Gebühren und Entgelte stornieren
Wenn einem Benutzer/einer Benutzerin fälschlicherweise eine Gebühr berechnet wurde, kann diese über „Gebühr stornieren“ in der Spalte Aktionen storniert werden.

A pop-up will open to optionally enter a note, and confirm the cancellation of the charge.
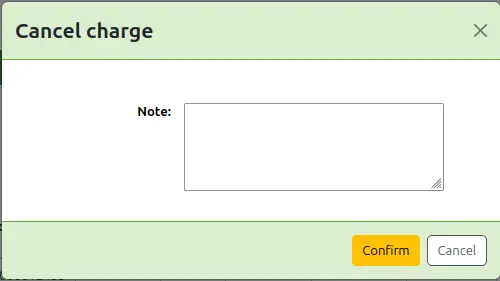
Once confirmed, a new line will be added to the account for a ‚Cancelled charge‘ of the same amount as the canceled charge. The charge that was canceled will now have the ‚Cancelled‘ status and the amount outstanding will be 0.

If you canceled a charge by mistake, you can void the cancellation (see Void payments below).
Zahlungen ungültig machen
Wenn Sie aus Versehen einen Gebührenposten als bezahlt markiert haben, können Sie dies über die Schaltfläche auf der rechten Seite „ungültig machen“.

A pop-up will open to optionally enter a note, and confirm the voiding of the payment.
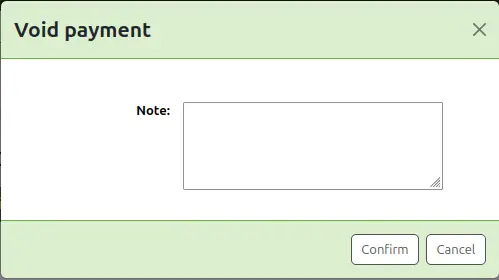
Once confirmed, a new line will be added to the account for ‚Credit has been voided‘ and the payment line will have the status ‚Voided‘.

The payment line is added back to the ‚Make a payment‘ tab as an outstanding charge.
Guthaben erzeugen
Manuelle Guthaben können verwendet werden, um einen Teil einer Gebühr zu bezahlen oder eine bestimmte Summe zu erlassen.
Bemerkung
Mitarbeiter*innen müssen über die Berechtigung manual_credit (oder die superlibrarian-Berechtigung) verfügen, um einem Benutzerkonto manuelle Gutschriften hinzufügen zu können.
Wählen Sie „Neue manuelle Gutschrift“.
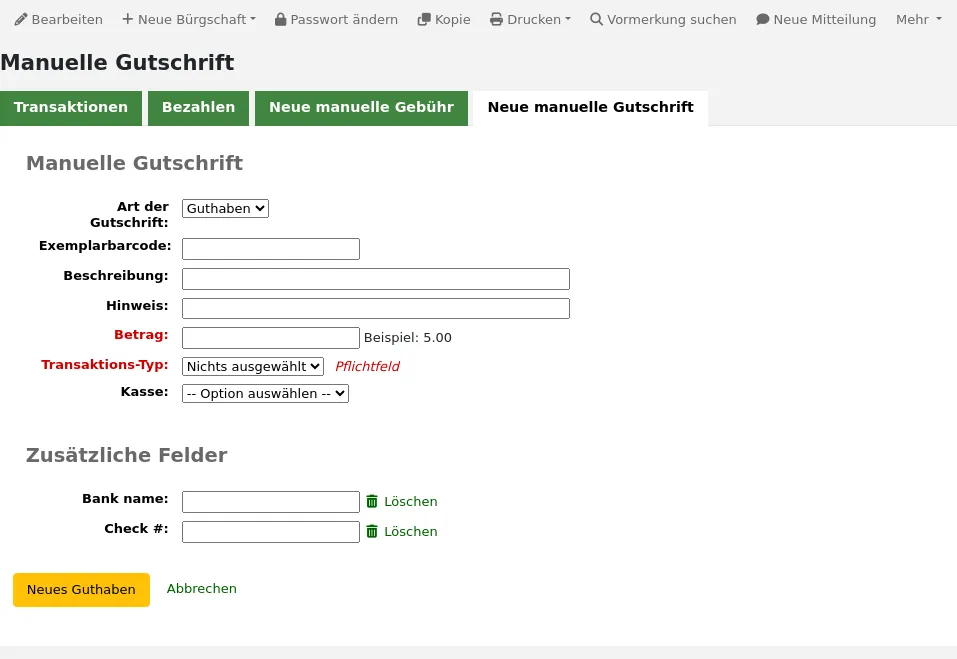
Wählen Sie die Art der Gutschrift aus, die Sie hinzufügen möchten.
Bemerkung
Um zusätzliche Werte zur Auswahlliste für die manuellen Gutschriftenarten hinzuzufügen, fügen Sie diese zu den Gutschriftenarten im Administrationsmodul hinzu.
Barcode: Wenn dieses Guthaben mit einem Exemplar verknüpft ist, können Sie den Barcode angeben um einen Link zum Exemplar rechts daneben anzuzeigen.
Beschreibung: Geben Sie die Beschreibung des Guthabens ein.
Hinweis. Fügen Sie, falls notwendig, eine Notiz zur Gutschrift hinzu.
Betrag: Geben Sie den Betrag der Gutschrift ein, geben Sie keine Währungssymbole ein, nur Ziffern und Dezimalstellen.
Transaktionstyp: Wählen Sie die Art der Gutschrift.
Bemerkung
Dieses Feld wird nur angezeigt, wenn ein oder mehrere Werte in der Kategorie PAYMENT_TYPE der Normierten Werte definiert sind.
Bemerkung
Dieses Feld ist erforderlich, wenn entweder der Systemparameter UseCashRegisters oder der Systemparameter RequirePaymentType aktiviert ist.
Kasse: Wenn der Systemparameter UseCashRegisters aktiviert ist, können Sie wählen, welche Kasse für eine Transaktion verwendet werden soll.
Bemerkung
Wenn der Systemparameter UseCashRegisters aktiviert ist und obenstehend der Transaktionstyp CASH gewählt wurde, ist es erforderlich, für die Zahlung eine Kasse zu wählen.
Ob dieses Feld erforderlich ist, wenn eine andere Transaktionsart gewählt wird, wird durch den Systemparameter RequireCashRegister bestimmt.
Wenn zusätzliche Felder für Konto-Gutschriften eingerichtet wurden, werden sie hier angezeigt.
Klicken Sie auf ‚Guthaben hinzufügen‘.
Dadurch wird dem Konto des Benutzers eine Gutschriftenzeile hinzugefügt.
Bemerkung
Wenn der Systemparameter AccountAutoReconcile auf „Machen“ gesetzt ist, wird das Guthaben automatisch verwendet, um die ausstehenden Beträge auf dem Konto des Benutzers zu reduzieren, beginnend mit den ältesten Gebühren.
Bemerkung
Wenn der Systemparameter AutoCreditNumber aktiviert ist, werden Gutschriften nummeriert.
Rechnungen drucken
Rechts neben jedem Konto ist ein Link für den Druck. Wenn Sie diesen Link anklicken wird eine Rechnung für das Konto ausgedruckt, die das Datum und die Beschreibung des betreffenden Titels zusammen mit ausstehenden Totalbetrag des Kontos enthält.
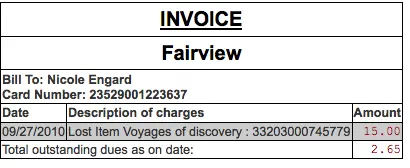
Umlauflisten
Eine Liste aller Umlauflisten auf denen ein Benutzer steht ist im Benutzerkonto über den Reiter ‚Umlauflisten‘ verfügbar.
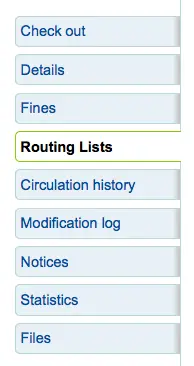
Unter diesem Reiter können Sie alle Umlauflisten dieses Benutzers bearbeiten.
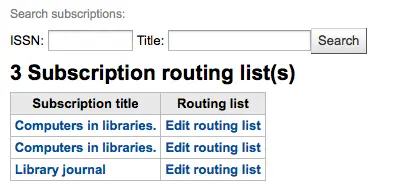
Ausleihhistorie
Der Reiter mit der Ausleihhistorie wird angezeigt, wenn sie über den Systemparameter intranetreadinghistory aktiviert wurde. Wenn Sie den Systemparameter OPACPrivacy auf „Erlauben“ gesetzt haben, und der Benutzer/die Benutzerin entschieden hat, dass die Bibliothek diese Information nicht speichern darf, zeigt dieser Reiter lediglich die aktuell entliehenen Medien an.
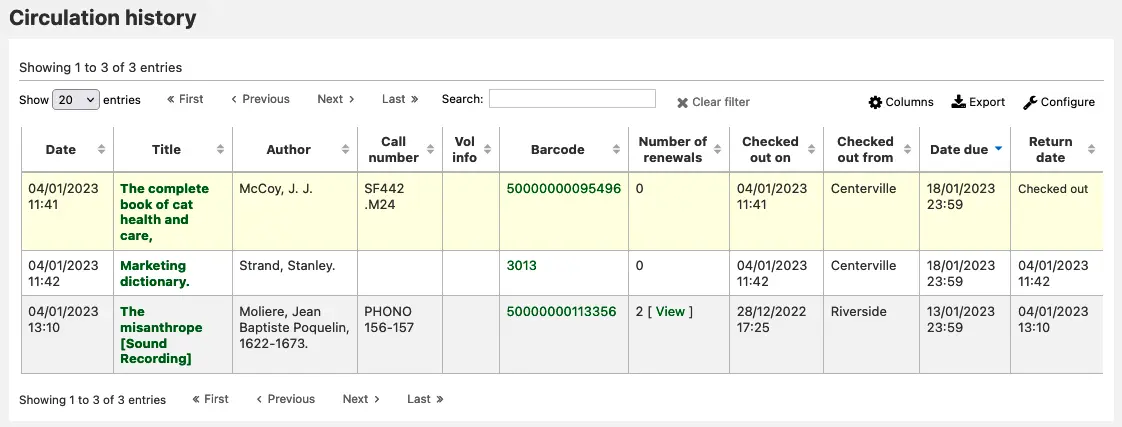
Hinweis
You can customize the columns of this table in the Table settings section of the Administration module (table id: checkouthistory-table).
Um zu sehen, wann ein Exemplar von wem verlängert wurde, klicken Sie auf „Anzeigen“ in der Spalte mit der Anzahl der Verlängerungen.
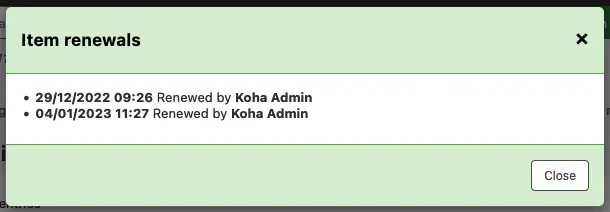
Für den Export einer Liste der heute zurückgegebenen Exemplare können Sie die entsprechende Option unter dem Menüpunkt ‚Mehr‘ am oberen Seitenrand benutzen.
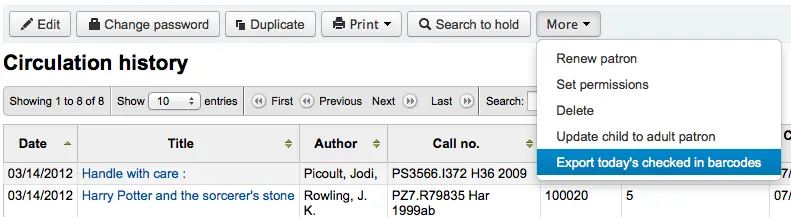
Erzeugt eine Textdatei mit einem Barcode pro Zeile.
Bemerkung
Wenn der Systemparameter RecordStaffUserOnCheckout aktiviert ist, wird hier auch das Konto des Mitarbeiters angezeigt, der das Exemplar an den Benutzer ausgeliehen hat.
Vormerkhistorie
Der Reiter „Vormerkungshistorie“ wird angezeigt, wenn der Systemparameter IntranetReadingHistoryHolds auf „Zulassen“ gesetzt ist. Sie zeigt alle Vormerkungen, die der Benutzer vorgenommen hat, mit ihrem Status an.
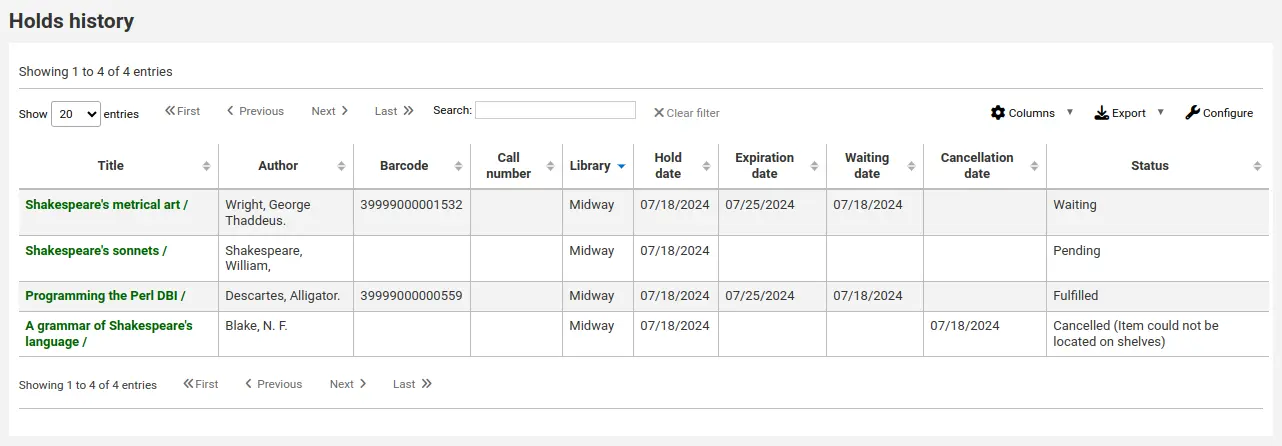
Bemerkung
You can customize the columns of this table in the Table settings section of the Administration module (table id: holdshistory-table).
Bemerkung
Wenn der Systemparameter OPACPrivacy auf „Zulassen“ eingestellt ist und der Benutzer sich entschieden hat, seine Historie nie zu speichern, zeigt dieser Reiter nur die aktuellen Vormerkungen an.
Änderungslog
Bemerkung
Nur Bibliothekspersonal mit der Berechtigung view_system_logs (oder der superlibrarian-Berechtigung) hat Zugang zu diesem Werkzeug.
Wenn Sie den Systemparameter BorrowersLog aktiviert haben, um Änderungen an Benutzerdatensätzen nachverfolgen zu können, wird dieser Reiter angezeigt. Das Änderungslog zeigt alle Änderungen, die am Benutzerdatensatz gemacht wurden. Wenn zusätzlich die Parameter IssueLog und ReturnLog aktiviert wurden, werden auch die Ausleihen und Rückgaben dort angezeigt.
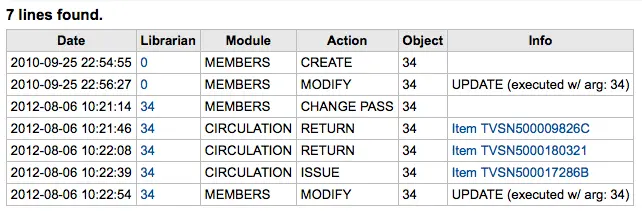
Das Feld Mitarbeiter zeigt die Benutzernummer des/der Mitarbeiter*in, der/die die Änderungen durchgeführt hat
Die Spalte Modul zeigt ‚Benutzer‘ für das Benutzermodul
Die Spalte ‚Aktion‘ zeigt welche Änderung durchgeführt wurde
Die Spalte ‚Objekt‘ zeigt die Benutzerdatensatznummer die geändert wurde (im obigen Beispiel wurde der eigene Benutzersatz geändert)
Benachrichtigungen
The Notices view shows the messages that have been generated for this patron.
Bemerkung
Die Benachrichtigungseinstellungen für ein Konto werden beim Anlegen oder beim Bearbeiten eines Benutzers/einer Benuzerin festgelegt. Andere Benachrichtigungen werden über die Mahntrigger oder spezifische Systemparameter und Funktionen generiert.
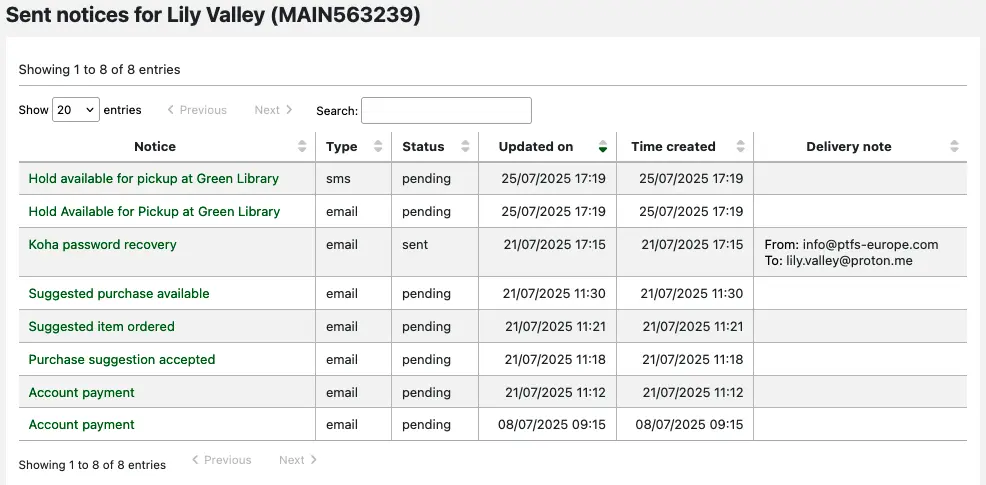
Clicking on the notice title will open the full text of the message in a pop-up modal.
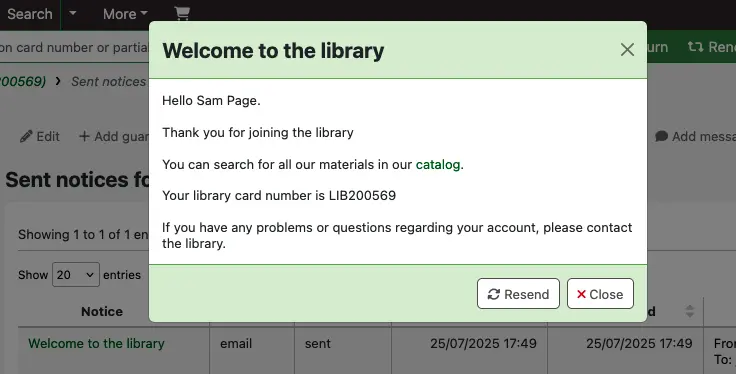
If the message has a status of sent or failed, you will have the option to resend the message to the patron by clicking the ‚Resend‘ button at the bottom of the modal.
If the message has failed and you are using the RestrictPatronsWithFailedNotices system preference, a restriction will be added to the patron’s account.
Statistiken
Abhängig vom Systemparameter StatisticsFields werden Statistiken für die Transaktionen eines Benutzers angezeigt.
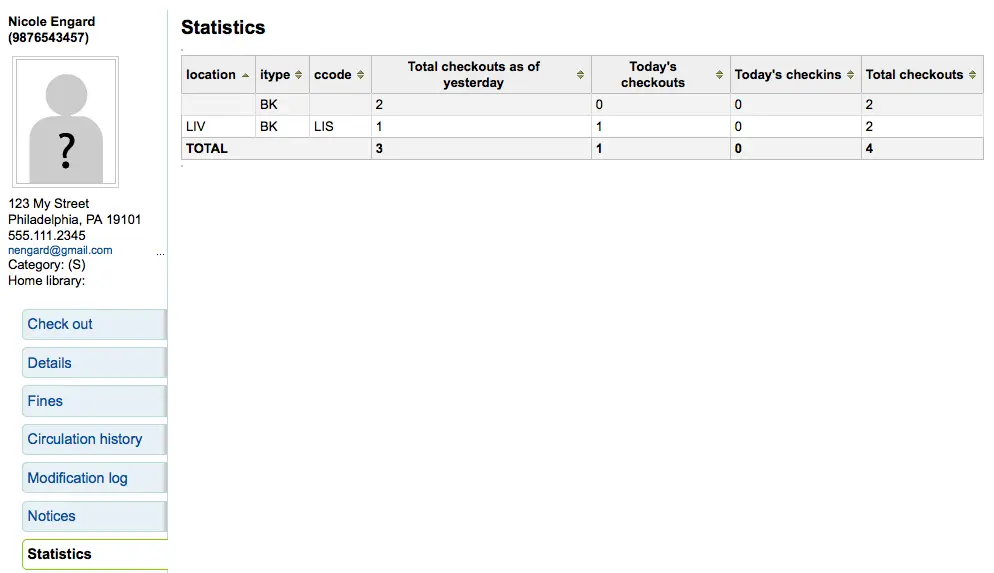
Dateien
Wenn Sie im Systemparameter EnableBorrowerFiles den Upload von benutzerspezifischen Dateien erlauben, erscheint ein entsprechender Reiter auf der Seite mit den Benutzerinformationen.
Von hier aus können Sie zum Benutzer gehörende Dateien hochladen.
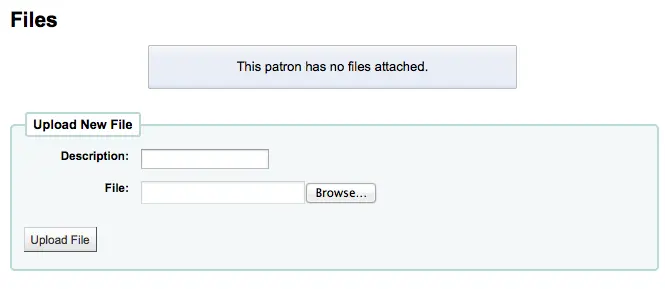
Bereits hochgeladene Dateien erscheinen oberhalb des Upload-Formulars.

Anschaffungsvorschläge
Wenn der Benutzer Anschaffungsvorschläge gemacht hat, wird ein neuer Reiter mit diesen im Benutzerdatensatz angezeigt.
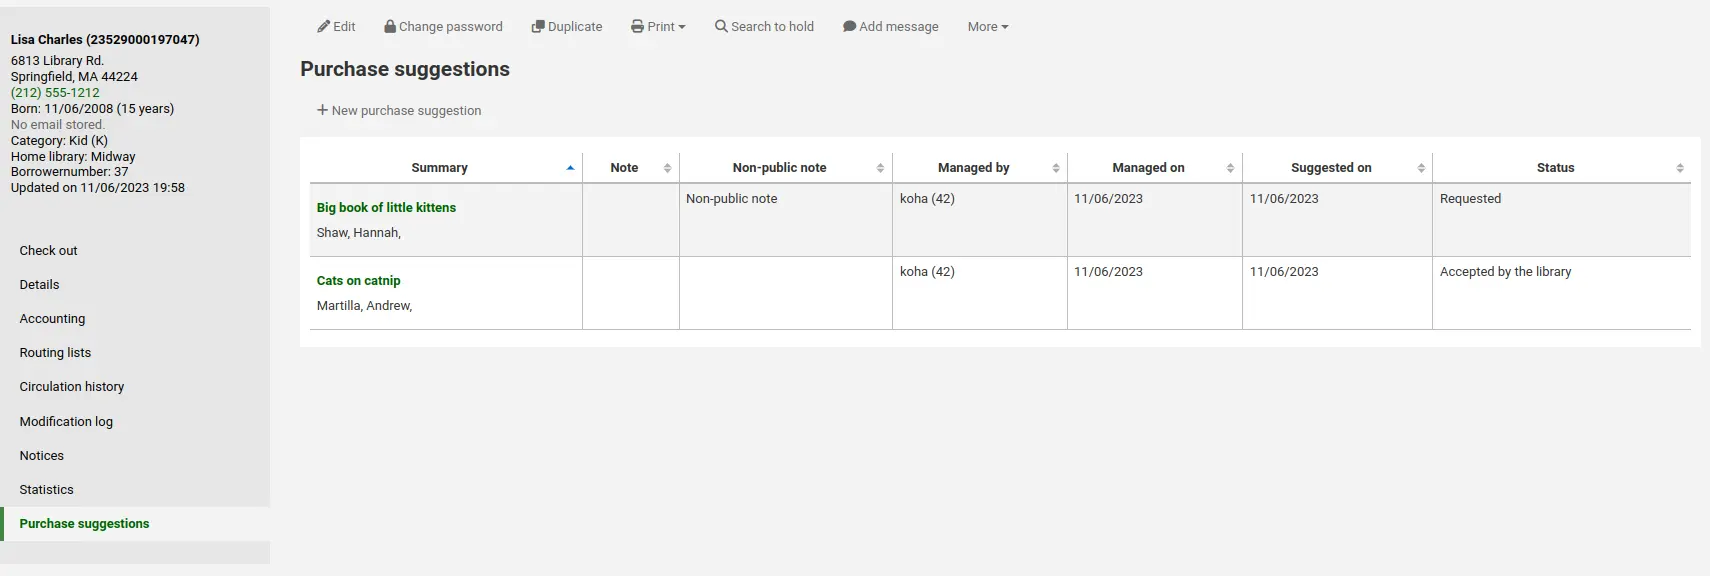
Bemerkung
Mitarbeiter*innen müssen die Berechtigung suggestions_create (oder die superlibrarian-Berechtigung) haben, um Anschaffungsvorschläge für Benutzer*innen zu erstellen und bestehende Anschaffungsvorschläge einzusehen.
Hier können Sie alle Anschaffungsvorschläge die vom Benutzer gemacht wurden und deren Status sehen. Außerdem können Anschaffungsvorschläge für den Benutzer über die Schaltfläche ‚Neuer Anschaffungsvorschlag‘ eingegeben werden.
Erfahren Sie mehr zur Verwaltung von Anschaffungsvorschlägen im Kapitel Erwerbung in diesem Handbuch.
Entlastungen
Eine Entlastung ist ein Schreiben, welches bestätigt, dass der Benutzer aktuell keine Ausleihen und Vormerkungen auf seinem Benutzerkonto hat. Um diese Funktion im Benutzerkonto zu nutzen, muss der Systemparameter useDischarge auf „Zulassen“ gesetzt sein.
Bemerkung
In Frankreich wird ein „quitus“ („Entlastung“) benötigt, um ein Konto bei einer Bibliothek oder Universität zu eröffnen.
Bemerkung
Mancherorts ist ein Nachweis über ein entlastetes Konto bei der Bibliothek Bedingung für den Studienabschluss.
Abgabe einer Entlastung
Um eine Entlastung für einen bestimmten Benutzer zu erzeugen, wählen Sie den Reiter ‚Entlastungen‘ auf der linken Seite des Benutzerdatensatzes.
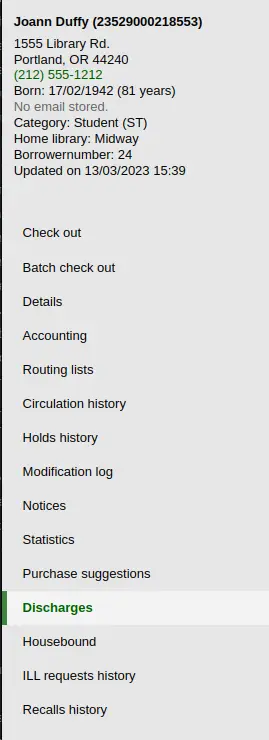
Oder klicken Sie auf die Schaltfläche „Mehr“ und wählen Sie „Entlastung“.
Wenn für den Benutzer eine Entlastung erzeugt werden kann, erscheint die Schaltfläche ‚Entlastung erzeugen‘

Wenn der Benutzer Ausleihen oder Vormerkungen hat, erscheint eine Nachricht, die erklärt, warum der Benutzer nicht entlastet werden kann.

Sobald die Benachrichtigung erstellt wurde, steht ein PDF zum Download zur Verfügung.
Bemerkung
Sie können diese Benachrichtigung im Werkzeug Benachrichtigungen und Quittungen anpassen. Der Buchstabencode ist DISCHARGE.
Bemerkung
Sie können die PDF-Datei mit der Einstellung NoticeCSS gestalten oder Inline-CSS in der DISCHARGE-Benachrichtigung im Werkzeug Benachrichtigungen und Quittungen hinzufügen.
Beim Benutzer wird eine Sperre zum Benutzerkonto hinzugefügt.

Eine Historie der Entlastungen wird im Reiter „Entlastungen“ hinzugefügt.

Entlastungsanfragen bestätigen
Benutzer können Entlastungen über den OPAC beantragen. Beantragte Entlastungen werden im Dashboard auf der Startseite der Dienstoberfläche unterhalb der Menü-Schaltflächen zusammen mit anderen ausstehenden Anfragen angezeigt.

Wenn Sie auf den Link für ausstehende beantragte Entlastungen klicken, öffnet sich ein Bildschirm, auf dem Sie diese Entlastungen durch Anklicken von „Zulassen“ genehmigen können.
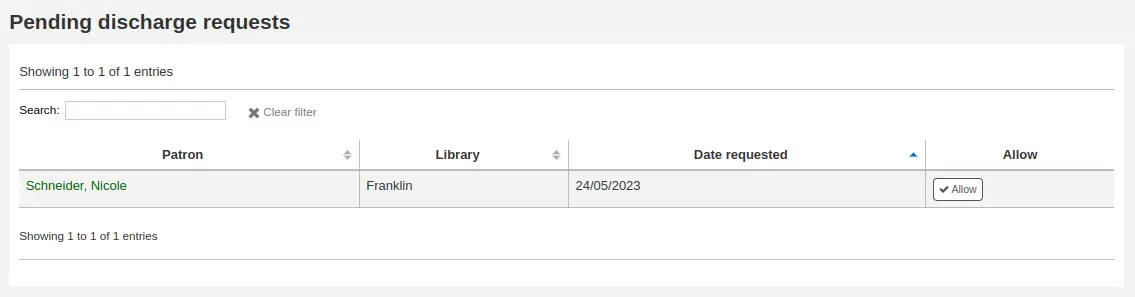
Aufsuchende Bibliotheksarbeit
Es gibt drei Rollen, die ein Benutzer bei der hausgebundenen Ausleihe haben kann:
Wichtig
Um das Modul für die aufsuchende Bibliotheksarbeit verwenden zu können müssen die Systemparameter HouseboundModule und ExtendedPatronAttributes aktiviert sein.
Auswählender
Die auswählende Person kann Materialien für den hausgebundenen Benutzer auswählen.
Wenn der Systemparameter HouseboundModule aktiviert wurde, ist im Formular für die Details im Benutzersatz ein Bereich namens „Rollen in der aufsuchenden Bibliotheksarbeit“ zu sehen.
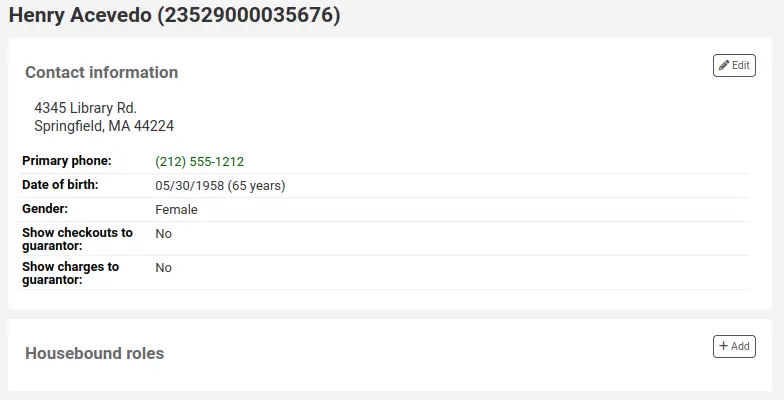
Klicken Sie auf die Schaltfläche „Hinzufügen“ um den Benutzer als „Auswählende Person“ zu markieren.

Austräger
Der Austräger liefert zu einem bestimmten Tag und zu einer bestimmten Zeit die ausgewählten Materialien an die hausgebundene Person.
Wenn Sie im Benutzerdatensatz unter „Rollen in der aufsuchenden Bibliotheksarbeit“ auf „Hinzufügen“ klicken, können Sie den Benutzer als „Austräger“ markieren.

Hausgebundene Benutzer
Um ein Profil für einen Nutzer der die aufsuchende Bibliotheksarbeit in Anspruch nehmen möchte anzulegen, klicken Sie auf den Tab ‚Aufsuchende Bibliotheksarbeit‘ im Benutzerdatensatz.
Hier können Sie die entsprechenden Einstellungen vornehmen.
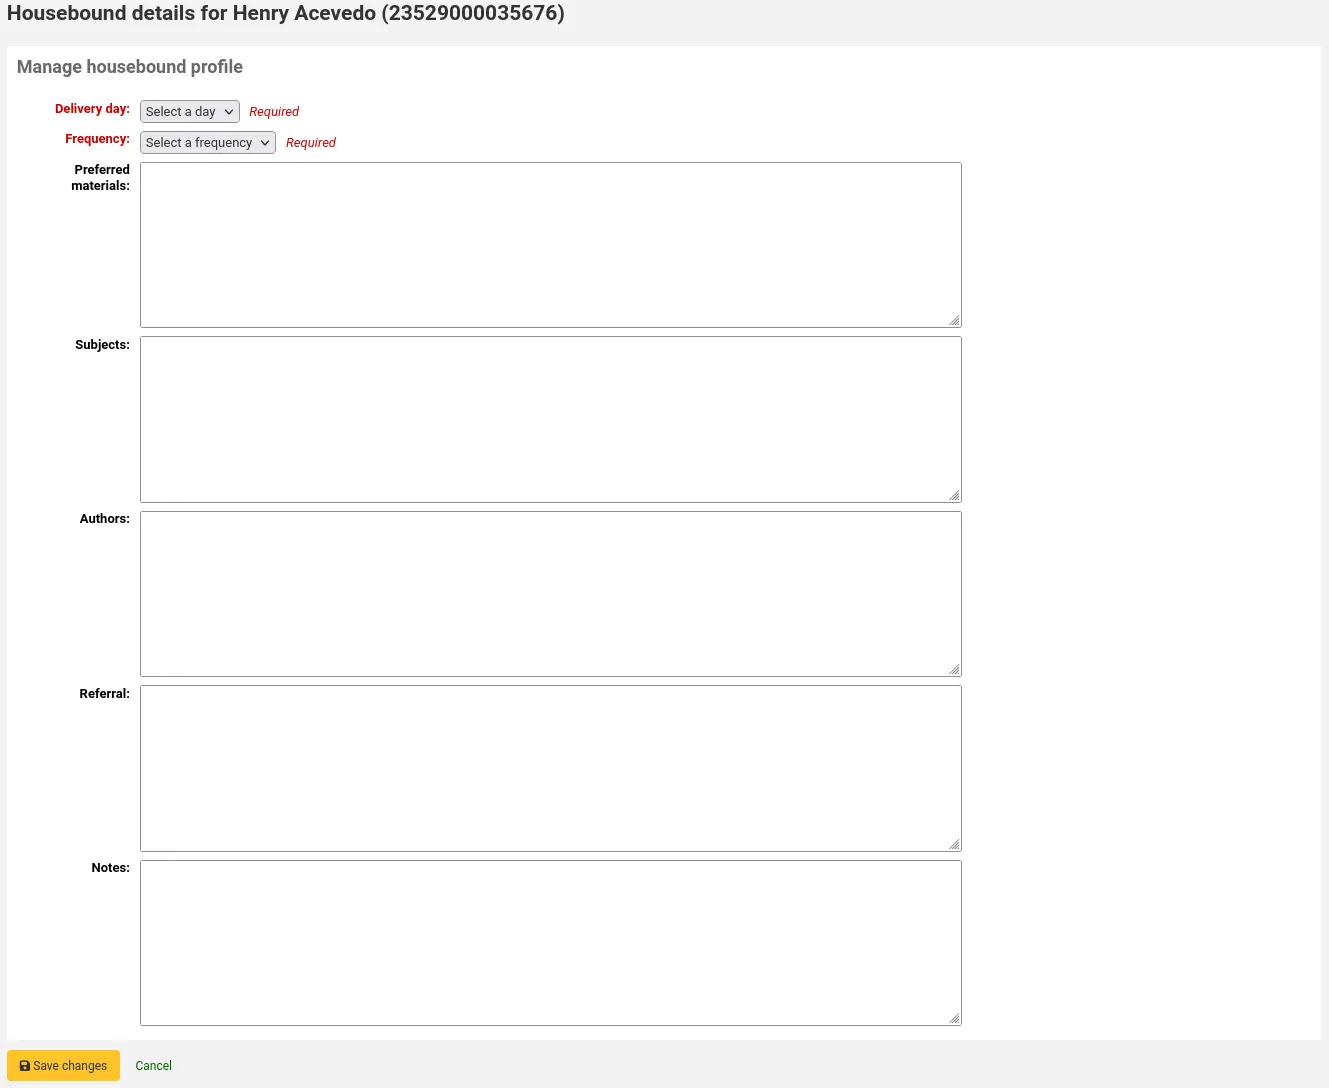
Liefertag: wählen Sie an welchem Tag (oder an ‚allen‘ Tagen) der Benutzer bevorzugterweise die Lieferung erhalten soll.
Frequenz: wählen Sie die gewünschte Frequenz der Lieferungen.
Bemerkung
Die Frequenzen werden über die Kategorie HSBND_FREQ der Normierten Werte verwaltet.
Bevorzugte Materialien: Angaben hier helfen der Auswählperson geeignetes Material für die betreffende Person auszusuchen.
Zum Beispiel: Bücher, DVDs, Zeitschriften, etc.
Themen: Wenn die betreffende Person bestimmte Interessen hat, können geeignete Themen hier eingetragen werden. Das hilft der Auswählperson geeignete Materialen für die Person auszuwählen.
Zum Beispiel: Romantik, Kochbücher, Thriller, etc.
Verfasser: wenn die betreffende Person Lieblingsautor/innen hat können Sie diese hier angeben.
Zum Beispiel: Antoine de Saint-Exupéry, Sergio Bambaren, etc.
Empfehlung: wenn die betreffende Person eine Empfehlung hat, können Sie sie hier eingeben.
Hinweise: hier können Sie Angaben unterbringen, die entweder der Auswählperson oder dem Austräger helfen.
Klicken Sie auf ‚Änderungen speichern‘ um das Profil für die aufsuchende Bibliotheksarbeit zu speichern.
Lieferungen einplanen
Rufen Sie den Benutzerdatensatz, an den die aufsuchende Bibliotheksarbeit gerichtet ist, auf, um Besuche einzutakten.
Im Reiter Aufsuchende Bibliotheksarbeite können Sie Lieferungen hinzufügen.
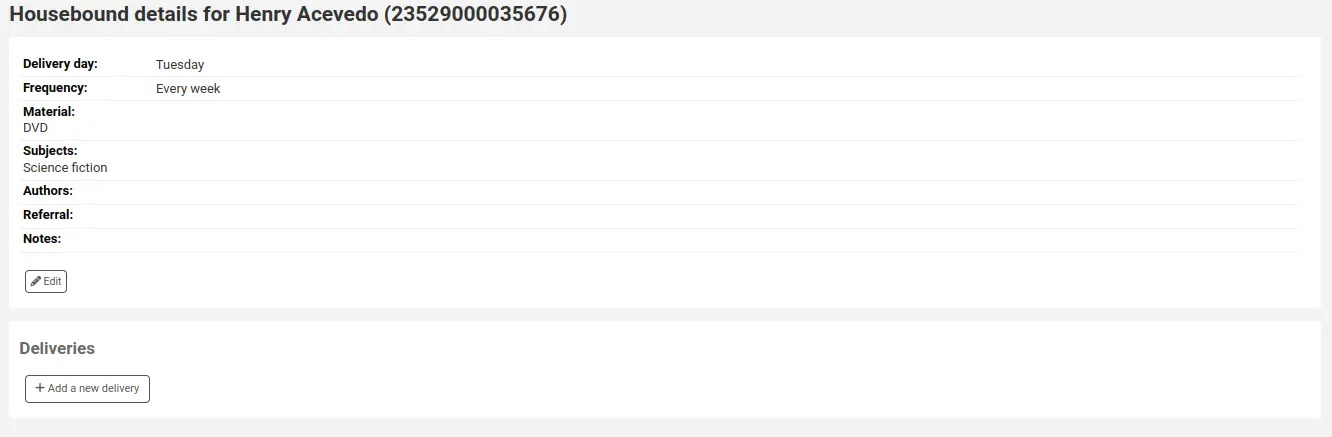
Klicken Sie auf ‚Neue Lieferung hinzufügen‘.

Füllen Sie die folgenden Felder aus:
Datum: Geben Sie das Datum für die Lieferung ein.
Zeit: Wählen Sie die Tageszeit für die Lieferung. Zur Auswahl stehen Morgen, Nachmittag, Abend.
Auswählperson: Wählen Sie die Person, die für die zu beliefernde Person Materialen auswählen wird.
Bemerkung
Diese Liste wird von den Benutzern mit der Rolle Auswähler gefüllt.
Austräger: wählen Sie einen Zusteller aus, der die Materialien abholt und zum hausgebundenen Benutzer bringt.
Bemerkung
Diese Liste wird von den Benutzern mit der Rolle Zusteller gefüllt.
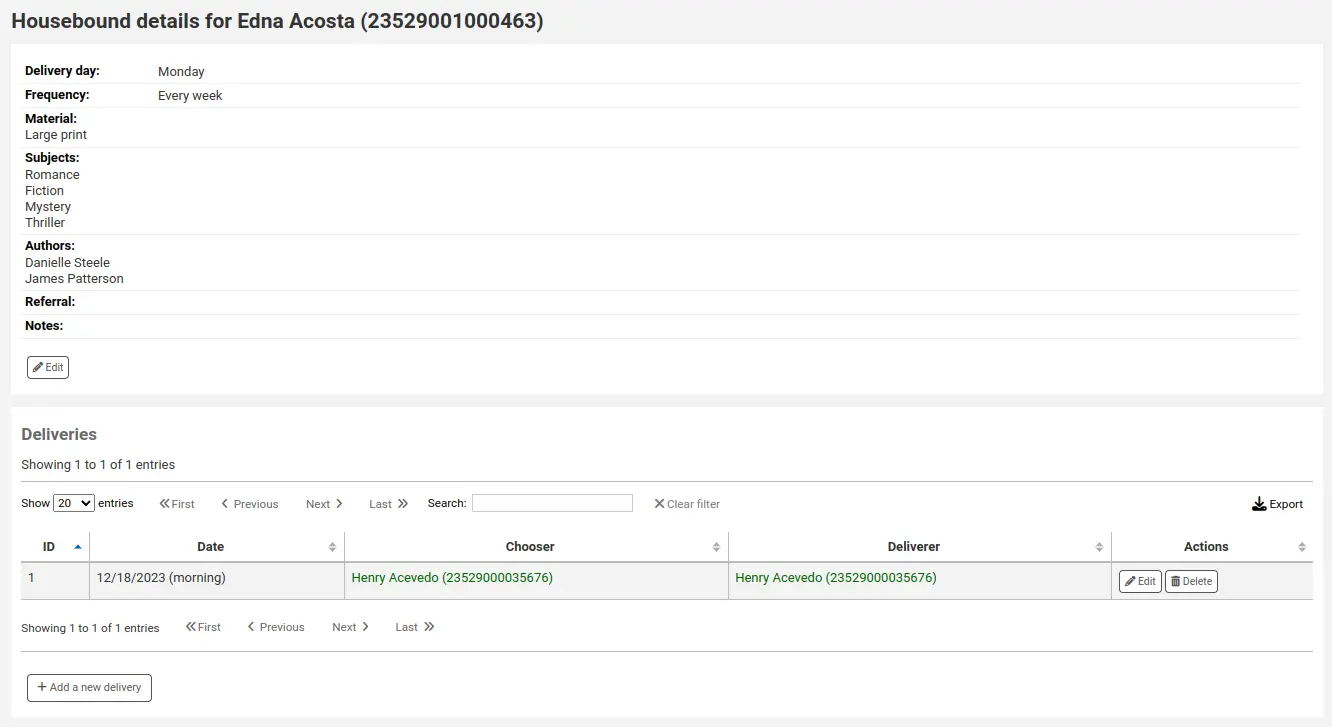
Bemerkung
Auswähler und Zusteller können über geplante Lieferungen über Reports benachrichtigt werden.
Beispielreports finden Sie in der SQL Reports Library unter https://wiki.koha-community.org/wiki/SQL_Reports_Patrons#Patron_Characteristics.
Rückrufhistorie
If recalls are enabled, active and past recalls requested by the patron will appear in this tab.
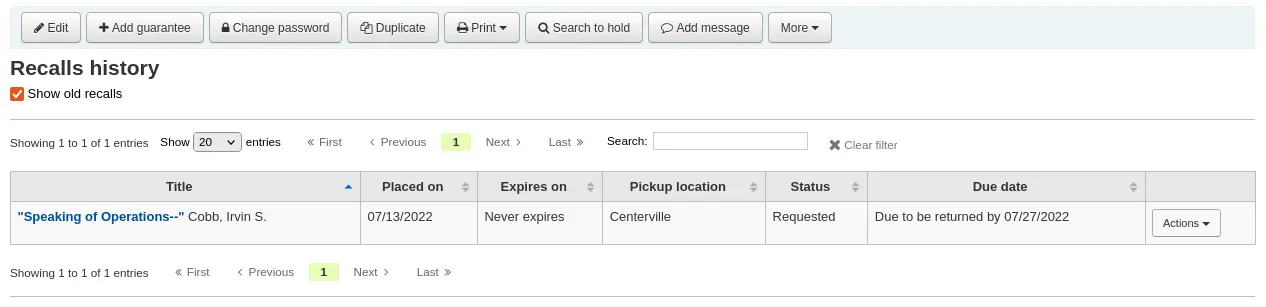
From here staff members can see the status of each recall and manage them.
Benachrichtigungsabonnements
Version
Dieser Bereich wurde in Koha-Version 23.11 hinzugefügt.
Bemerkung
Nur Bibliothekspersonal mit der serial-Berechtigung (oder der superlibrarian-Berechtigung) kann die E-Mail-Benachrichtigungsabonnements des/der Benutzer*in sehen.
Wenn der Systemparameter RoutingSerials aktiviert ist, haben Benutzer, die sich über den Reiter „Abonnements“ im bibliographischen Datensatz für E-Mail-Benachrichtigungen über neue Zeitschriftenausgaben entschieden haben, einen Reiter „Benachrichtigungs-Abonnements“ in ihrem Konto.
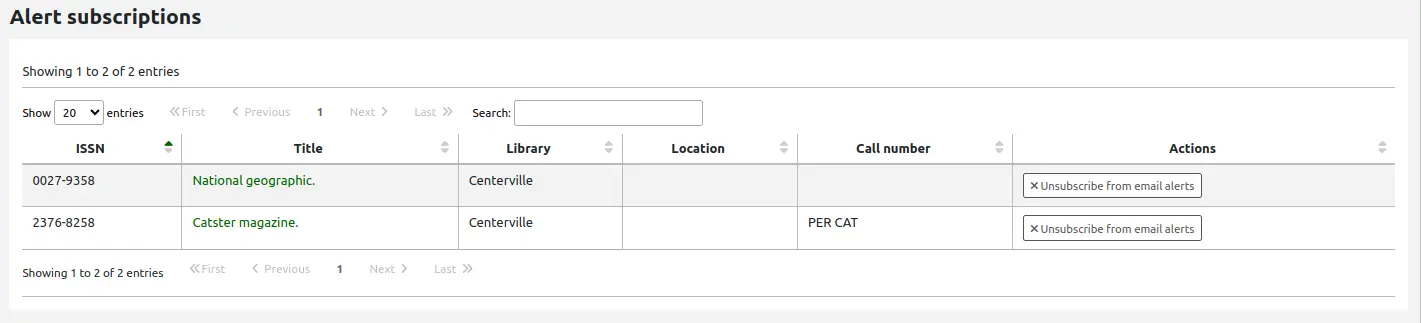
In diesem Reiter sind alle E-Mail-Zeitschriftenwarnungen aufgelistet, die der/die Benutzer*in abonniert hat. Das Bibliothekspersonal kann die Benachrichtigungen für den/die Benutzer*in abbestellen, indem es auf den Link „E-Mail-Benachrichtigungen abbestellen“ klickt. Beachten Sie, dass sich die Benutzer*innen selbst über den Reiter „Benachrichtigungs-Abonnements“ in ihrem Online-Konto abmelden können.
2-Faktor-Authentifizierung in der Dienstoberfläche
Koha unterstützt 2-Faktor-Authentifizierung (2FA) für die Anmeldung in der Dienstoberfläche.
Diese 2-Faktor-Authentifizierung verwendet ein zeitbasiertes Einmalpasswort (TOTP). Ein TOTP ist ein Passwort, dass nur einmalig verwendet werden kann und nur für eine beschränkte Zeit gültig ist.
Bibliothekspersonal, dass die 2-Faktor-Authentifizierung nutzen möchte, müssen eine App installieren, um diese TOTPs zu generieren. Dafür kann jede Authenticator-App, wie z.B. Google Authenticator, andOTP oder FreeOTP verwendet werden. Anwendungen, die ein Backup der 2FA-Konten ermöglichen (entweder cloud-basiert oder automatisch) werden empfohlen.
Die 2-Faktor-Authentifizierung wird über den Systemparameter TwoFactorAuthentication aktiviert.
Sobald dies geschehen ist, wechselt man über einen Klick auf den Benutzernamen und „Mein Konto“ am oberen Seitenrand in das eigene Dienstkonto.
Als nächstes wird Mehr > 2-Faktor-Authentifizierung verwalten aufgerufen.
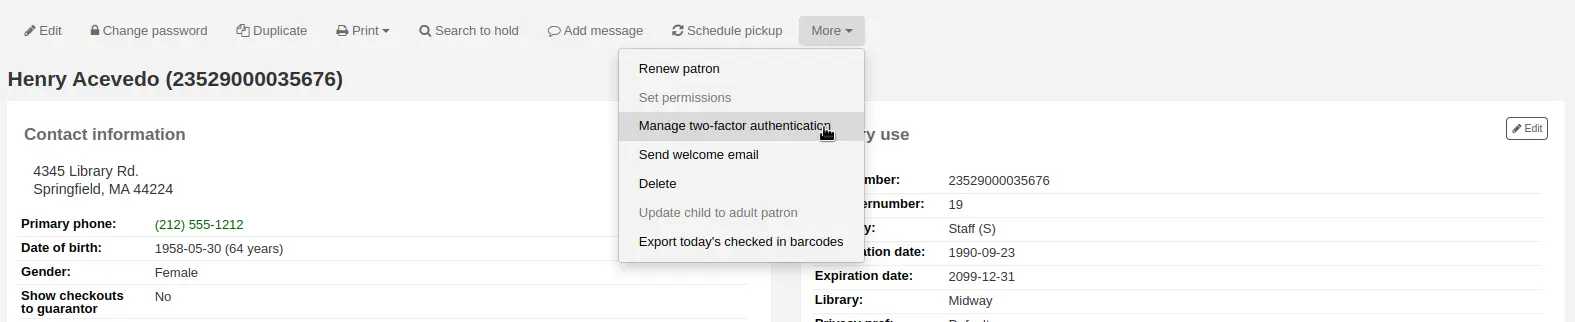
Wenn die Seite zum ersten Mal aufgerufen wird, sollte der Status „Deaktiviert“ sein.

Als nächstes muss ‚2-Faktor-Authentifizierung aktivieren‘ angeklickt werden.
Es wird ein QR-Code angezeigt. Dieser Code muss mit der gewählten Authenticator-App eingescannt werden (s.o für Vorschläge).
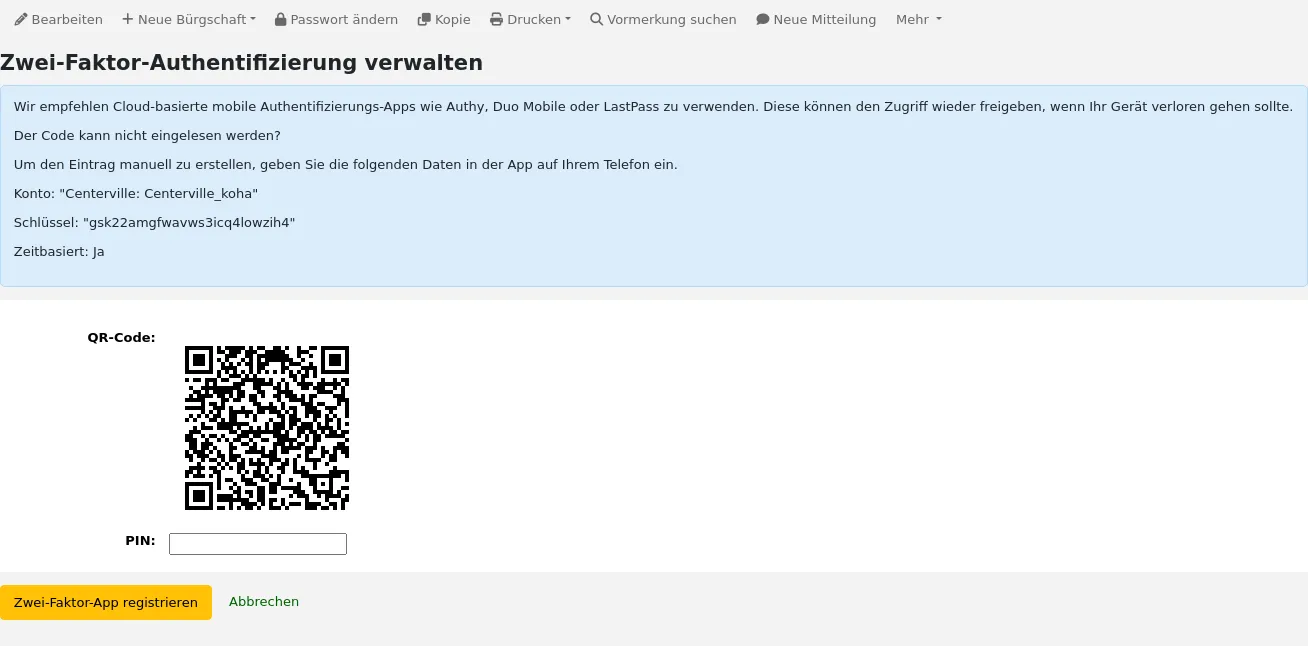
Bemerkung
Wenn die App es nicht erlaubt QR-Codes einzulesen, können die angezeigten Details auch manuell eingegeben werden (Konto, Schlüssel, zeitbasiert).
Sobald der QR-Cdoe eingelesen wurde, zeigt die App einen zeitbasierten PIN an. Dieser PIN muss im entsprechenden Feld in Koha eingegeben und anschließend mit „2-Faktor-App registrieren“ bestätigt werden.
Der Status der 2-Faktor-Authentifizierung ist jetzt „aktiviert“.
Bemerkung
Es wird eine E-Mail an die E-Mail-Adresse des Benutzers gesendet, um ihn darauf hinzuweisen, dass die Zwei-Faktor-Authentifizierung für sein Konto aktiviert wurde.
Sie können diese Benachrichtigung im Werkzeug Benachrichtigungen und Quittungen anpassen. Der Buchstabencode ist 2FA_ENABLE.
Wenn der Benutzer/die Benutzerin nun versucht sich in der Dienstoberfläche anzumelden, müssen Sie nach Eingabe von Login und Passwort zusätzlich den 2-Faktor-Authentifizierungscode eingeben.
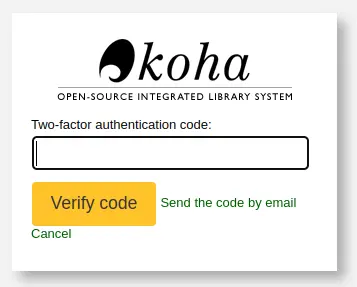
Dazu wir die Authenticator-App geöffnet, ein zeitbasiertes Einmalpasswort generiert und für die Anmeldung im Feld eingegeben.
Bemerkung
Wenn der Nutzer die App nicht zur Hand hat, kann er alternativ auf „Code per E-Mail senden“ klicken, woraufhin er eine E-Mail mit einem zeitbasierten Einmalpasswort erhält.
Die E-Mail basiert auf der Benachrichtigungsvorlage 2FA_OTP_TOKEN, die im Werkzeug Benachrichtigungen und Quittungen angepasst werden kann.
Um die 2-Faktor-Authentifizierung wieder zu deaktivieren, klickt man im Dienstkonto unter Mehr > 2-Faktor-Authentifizierung verwalten auf „2-Faktor-Authentifizierung deaktivieren“.

Bemerkung
Es wird eine E-Mail an die E-Mail-Adresse des Benutzers gesendet, um ihn darauf hinzuweisen, dass die Zwei-Faktor-Authentifizierung für sein Konto deaktiviert wurde.
Sie können diese Benachrichtigung im Werkzeug Benachrichtigungen und Quittungen anpassen. Der Buchstabencode ist 2FA_DISABLE.
Benutzersuche
Wenn Sie auf den Link zum Benutzermodul klicken, gelangen Sie zu einem Suchbildschirm für Benutzer. Von hier aus können Sie nach einem Benutzer anhand seines Namens oder seiner Ausweisnummer suchen.

Bemerkung
By default, the search is a ‚Starts with‘ search, meaning that you have to search by the beginning of the patron’s name or the beginning of the patron’s card number. You can use the DefaultPatronSearchMethod system preference to change the patron search method to a ‚Contains‘ search to be able to search for any part of the patron’s name or card number.
Wenn Sie auf das Symbol „Weitere Optionen“ rechts neben dem Suchfeld klicken, öffnet sich eine erweiterte Benutzersuche mit weiteren Filtern und der Möglichkeit, die Suche auf eine bestimmte Kategorie und/oder Bibliothek zu beschränken.
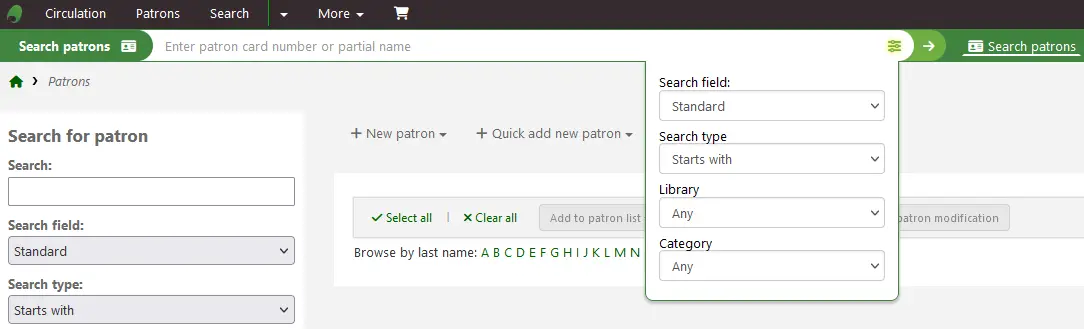
Mit den Facetten auf der linken Seite der Trefferliste können Sie ihre Suchergebnisse weiter einschränken.
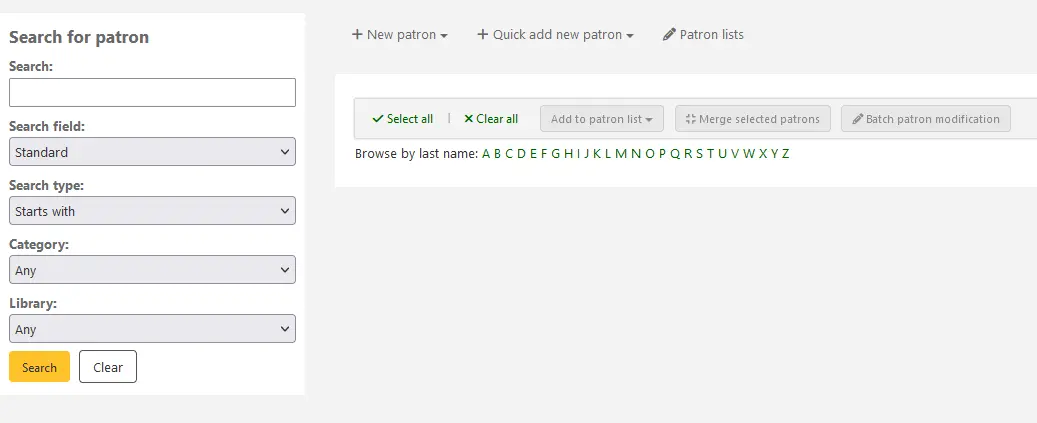
Wählen Sie unter ‚Suchfelder‘ nach welchem Feld die Benutzer gesucht werden sollen.
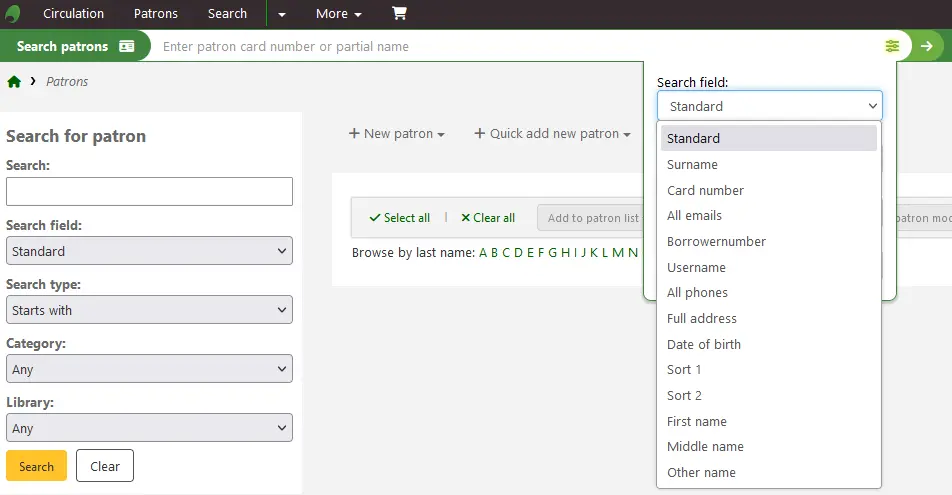
Standard:
Teil des Namens, Benutzernamens, der E-Mail-Adresse oder des Barcode eingeben
Bemerkung
Sie können den Systemparameter DefaultPatronSearchFields verwenden, um andere Felder zu definieren, die für die Suche mit dieser Option verwendet werden sollen.
Nachname:
Suche nach dem Nachnamen des Benutzers
Kartennummer:
Suche nach der Kartennummer des Benutzers
Alle E-Mails:
Durchsuchen Sie alle definierten Benutzerfelder nach E-Mail-Adressen
Benutzernummer:
Suche nach der Koha-Benutzernummer
Benutzername:
Suche nach dem Benutzernamen des Benutzers
Alle Telefonnummern:
Durchsucht alle für Telefonnummern definierten Benutzerfelder. Geben Sie die Telefonnummer entweder genau so ein, wie sie im System erfasst wurde, oder mit Leerzeichen zwischen den verschiedenen Nummerngruppen.
Beispiel: Um (212) 555-1212 zu finden, können Sie die Nummer genau so eingeben oder als 212 555 1212
Vollständige Adresse:
Suche nach der Adresse des Benutzers in allen Adressfeldern
Geburtsdatum
Geburtsdaten müssen in dem Format eingegeben werden, dass im Systemparameter dateformat festgelegt wurde.
Statistik 1
Dieses ist ein benutzerdefiniertes Feld, das Bibliotheken zu jeglicher Art von Information über den Benutzer verwenden können.
Statistik 2
Dieses ist ein benutzerdefiniertes Feld, das Bibliotheken zu jeglicher Art von Information über den Benutzer verwenden können.
Vorname:
Suche nach dem Vornamen des Benutzers
Zweiter Vorname:
Suche nach dem zweiten Vornamen des Benutzers
Anderer Name:
Durchsuchen Sie alle weiteren Namensfelder des Benutzers
Jeder Benutzerattribut-Typ, der als suchbar gekennzeichnet ist, wird ebenfalls in dieser Liste aufgeführt.
Sie können auswählen, ob Sie Felder suchen, die mit Ihrem eingegebenen Suchbegriff beginnen oder diesen enthalten. Wenn Sie ‚Enthält‘ wählen, funktioniert dies wie eine trunkierte Suche.
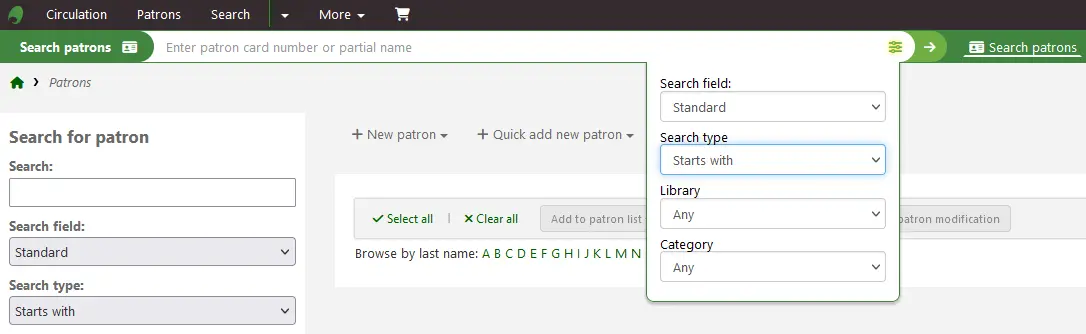
Sie können die Benutzer auch durchblättern, indem Sie auf die verlinkten Buchstaben am oberen Rand klicken.

Wenn Ihre Suche nur ein Ergebnis liefert, werden Sie direkt zum Benutzerkonto weitergeleitet. Wenn Ihre Suche mehr als ein Ergebnis ergibt, können Sie den richtigen Eintrag aus einer Liste auswählen.
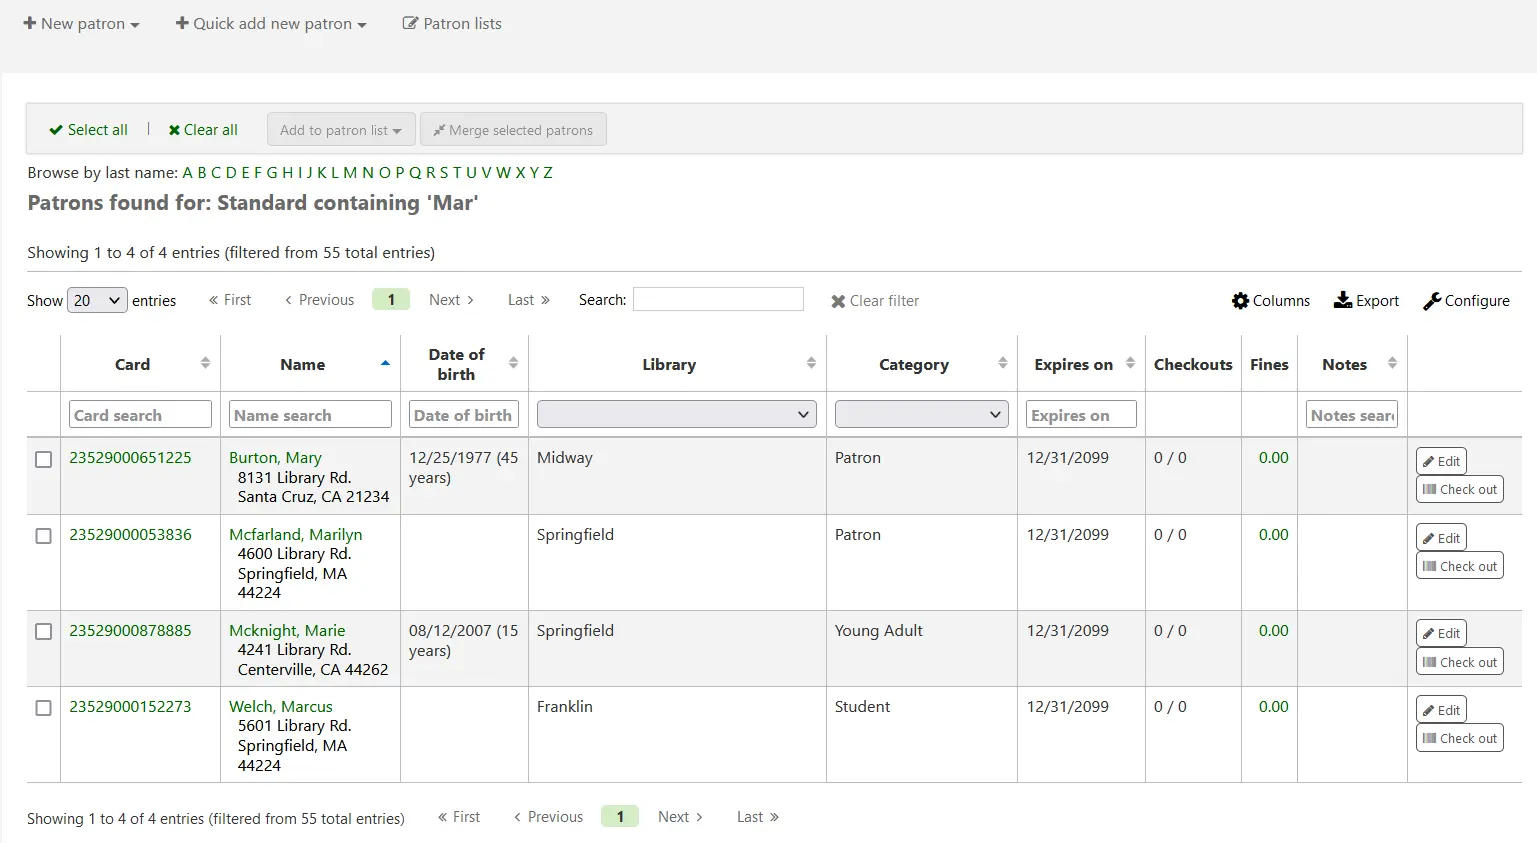
Bemerkung
You can customize the columns of this table in the Table settings section of the Administration module, under the patrons tab (table id: memberresultst).
Wenn Sie einen oder mehrere Benutzer aus der Ergebnisliste auswählen, indem Sie die Checkbox in der Spalte ganz links markieren, werden weitere Funktionen angezeigt, die Sie für die ausgewählten Benutzer*innen verwenden können.
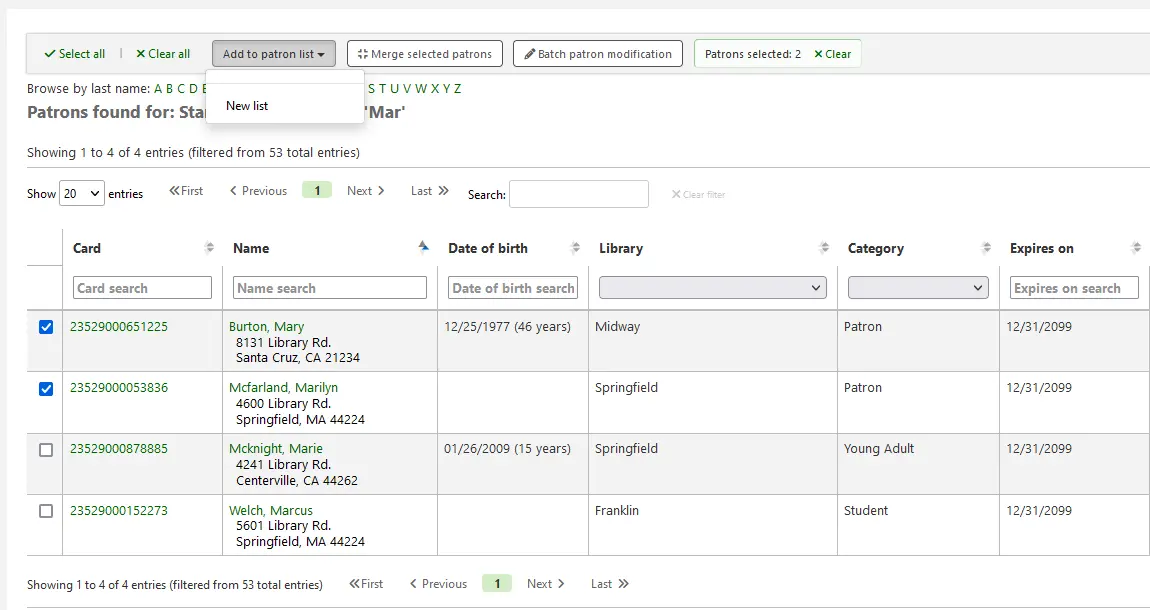
Zu Benutzerliste hinzufügen:
Add the selected patrons to an existing patron list or create a new list
Ausgewählte Benutzer zusammenführen:
Allows you to merge the selected patrons
Stapeländerung von Benutzern:
Sendet die ausgewählten Benutzer an das Werkzeug Stapelbearbeitung von Benutzern
Kommunikation mit Benutzern
Koha bietet verschiedene Möglichkeiten der Kommunikation mit Benutzern, von denen einige bereits in diesem Kapitel behandelt wurden.
OPAC-Notizen
OPAC notes are added to the patron’s file through the add patron form or the edit patron form, in the ‚Library set-up‘ section.
Sie werden in der Kontoübersicht im Benutzerkonto im OPAC angezeigt.
In der Dienstoberfläche werden OPAC-Notizen im Bereich „Bibliothekskonfiguration“ des Benutzerkontos angezeigt.
OPAC-Mitteilungen
OPAC-Mitteilungen werden im Benutzerkonto über die Schaltfläche „Neue Mitteilung“ eingetragen.
Um eine Mitteilung anzulegen, die im OPAC sichtbar ist, wählen Sie „OPAC - Name des Benutzers“ aus der Auswahlliste „Neue Mitteilung für“. Geben Sie Ihre Nachricht in das Eingabefeld ein oder wählen Sie eine vordefinierte Nachricht aus der Auswahlliste.
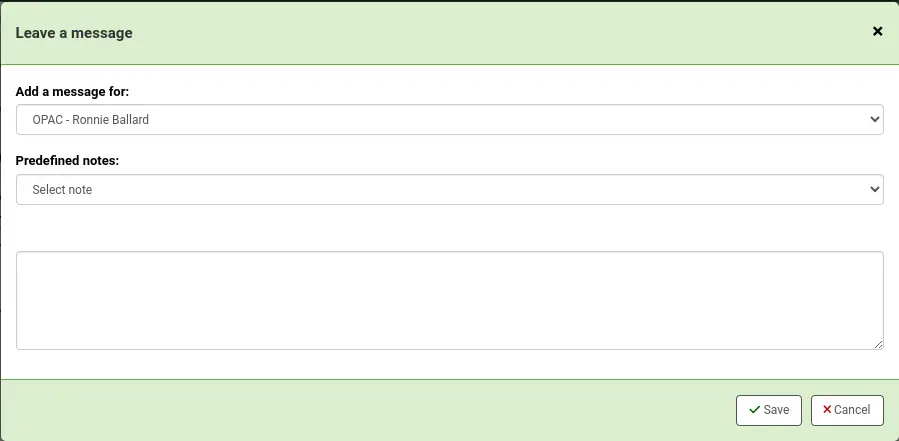
Bemerkung
Vordefinierte Mitteilungen können in der Normierte-Wert-Kategorie BOR_NOTES hinzugefügt werden.
Nach dem Speichern sieht der Benutzer die Mitteilung im Reiter Kontoübersicht im Benutzerkonto im OPAC. Der Benutzer sieht außerdem das Datum, an dem die Mitteilung erstellt wurde und den Namen der Bibliothek. Er hat die Möglichkeit, die Nachricht zu verwerfen. Dadurch wird die Nachricht aus dem OPAC-Konto des Benutzers ausgeblendet und als gelesen markiert, aber die Nachricht wird nicht gelöscht.

In der Dienstiberfläche werden OPAC-Mitteilungen in den Benutzerdetails am Anfang der Seite unterhalb der Werkzeugleiste angezeigt.

Sie werden ebenfalls im Reiter Ausleihen auf der rechten Seite angezeigt.

Wenn Sie die Nachricht anpassen müssen, klicken Sie auf die Schaltfläche „Bearbeiten“ neben der Nachricht, passen Sie den Text an und klicken Sie auf „Speichern“.
Warnung
Wenn Sie eine Nachricht bearbeiten, die vom Benutzer abgelehnt wurde, bleibt sie als „Gelesen“ stehen und der Benutzer sieht Ihre Bearbeitung nicht.
Wenn der/die Benutzer*in die Nachricht ignoriert, erscheint neben der Nachricht in der Dienstoberfläche der Vermerk „Gelesen“ mit dem Datum, um die Mitarbeiter*innen darüber zu informieren, dass diese Nachricht vom/von der Benutzer*in gelesen wurde.

Automated notices
If the EnhancedMessagingPreferences system preference is set to ‚Allow‘, staff can set the patron messaging preferences when adding a new patron or editing an existing patron.
If the EnhancedMessagingPreferencesOPAC system preference is set to ‚Show‘, patrons can change their messaging preferences from their OPAC account.
Staff and patrons can set the messaging preferences for these notices:
Advance notice (PREDUE, PREDUEDGST): A notice sent before an item is due (can choose the number of days in advance). Advance notices are generated by the advance_notices.pl cron job.
Auto renewal (AUTO_RENEWAL, AUTO_RENEWAL_DGST): A notice to a patron that their checkouts were automatically renewed, or if there was a problem with the automatic renewal. (Shown if AutoRenewalNotices is set to „according to patron messaging preferences“.)
Hold filled (HOLD, HOLDDGST, NEW_CURBSIDE_PICKUP): A notice when a confirmed hold is waiting for a patron, and when a curbside pickup is scheduled.
Hold reminder (HOLD_REMINDER): A notice reminding a patron that a hold is waiting for pickup. Hold reminder notices are generated a set number of days after the hold is filled by the holds_reminder.pl cron job.
Interlibrary loan ready (ILL_PICKUP_READY): A notice that an interlibrary loan request was fullfilled and is ready for pickup. (Shown if interlibrary loans are enabled.)
Interlibrary loan unavailable (ILL_REQUEST_UNAVAIL): A notice that an interlibrary loan request was canceled because it is unavailable. (Shown if interlibrary loans are enabled.)
Interlibrary loan updated (ILL_REQUEST_UPDATE): A notice that an interlibrary loan request was updated. (Shown if interlibrary loans are enabled.)
Item check-in (CHECKIN): A notice that lists the items the patron has just checked in.
Item checkout (CHECKOUT, RENEWAL): A notice that lists the items the patron has just checked out and renewed. This is an electronic form of the checkout receipt. If the RenewalSendNotice system preference is set to ‚Send‘, the notice is called ‚Item checkout and renewal‘.
Item due (DUE, DUEDGST): A notice sent on the day an item is due back at the library. Item due notices are generated by the advance_notices.pl cron job.
Recall awaiting pickup (PICKUP_RECALLED_ITEM): A notice that a recalled item is ready for pickup. (Shown if recalls are enabled.)
Return recalled item (RETURN_RECALLED_ITEM): A notice to a patron to return a recalled item. (Shown if recalls are enabled.)
Use the notices and slips tool to customize the notices.
Patrons can choose to receive notices as a digest by checking the ‚Digests only‘ checkbox, along with the delivery method. A digest combines all the messages for a notice type into one email (for example, all items due in three days), instead of sending multiple emails.
The delivery methods currently supported for sending notices are:
E-Mail
SMS (Textnachrichten)
Automatisiertes Telefonsystem
Druck
Electronic notices are sent by the process_message_queue.pl cron job.
Print notices are generated using the gather_print_notices.pl cron job. It creates a single file for all print notices, that you can then print out and post using regular mail.
Mahnungen
Overdue notices are managed in Notices and slips and when they are sent is managed in Overdue notice/status triggers.
Benutzer können den Erhalt von Mahnbenachrichtigungen nicht abwählen (wie bei Erinnerungs- und Vormerkbenachrichtigungen)
Um Mahnbenachrichtigungen zu generieren, muss der Cronjob overdue_notices.pl ausgeführt werden. Der Cronjob process_message_queue.pl verschickt dann anschließend die Benachrichtigungen bzw. kann der gather_print_notices.pl Cronjob diese in einer Datei zusammenfassen, die für den Druck verwendet werden kann.
Benutzerdefinierte E-Mails
Bemerkung
Nur Bibliothekspersonal mit der Berechtigung edit_borrowers und der Berechtigung send_messages_to_patrons (oder der superlibrarian-Berechtigung) kann benutzerdefinierte E-Mails an Benutzer*innen senden.
Benutzerdefinierte E-Mails können an einen individuellen Benutzer versandt werden.
Version
Dieses Feature wurde in Koha-Version 24.05 hinzugefügt.
Um eine benutzerdefinierte E-Mail an den Benutzer zu senden, klicken Sie auf die Schaltfläche „Benachrichtigung hinzufügen“.
Wählen Sie im Feld „Nachricht hinzufügen für“ die Option „E-Mail - E-Mail-Adressen des Benutzers“. Wählen Sie bei Bedarf eine vordefinierte Mitteilung im Feld „Benutzer-Mitteilung“.
Bemerkung
Benutzerdefinierte Benachrichtigungen für Benutzer können im Werkzeug Benachrichtigungen und Quittungen mit dem Modul „Benutzer (benutzerdefinierte Benachrichtigung)“ erstellt werden.
Andernfalls geben Sie den Betreff der E-Mail manuell in das Feld „Betreff“ und die Nachricht in das Feld „Text“ ein.
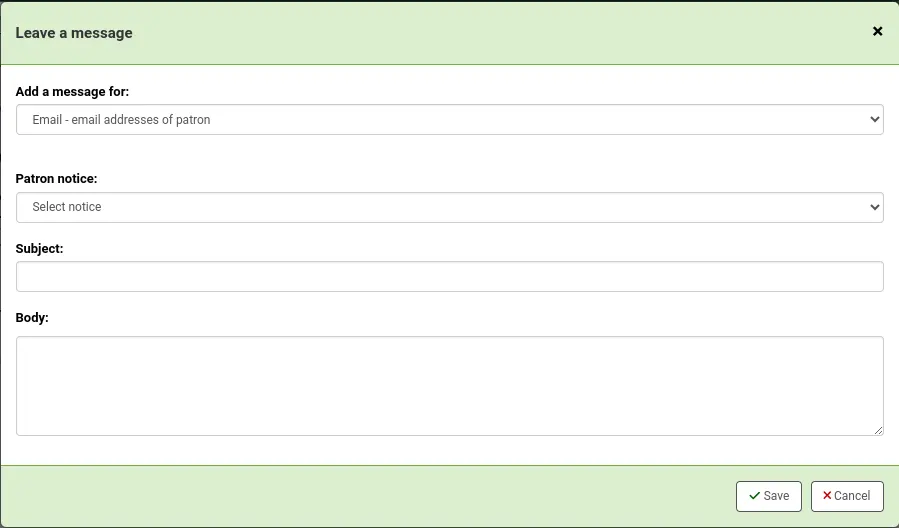
Wenn Sie auf „Speichern“ klicken, wird die Nachricht in eine Warteschlange gestellt, die vom Cron-Job process_message_queue.pl gesendet werden soll. Sie wird auch im Reiter „Benachrichtigungen“ der Benutzerdatei sichtbar sein.