Course reserves
Das Modul zur Verwaltung von Semesterapparaten erlaubt es Exemplare temporär in einen Semesterapparat zu stellen und mit anderen Ausleihkonditionen zu verknüpfen, während Sie für den Kurs verwendet werden.
Course reserves setup
Before using course reserves you will need to do some set up.
First you will need to enable course reserves by setting the UseCourseReserves preference to ‚Use‘.
Als nächstes müssen Sie alle Ihre Dozenten als Benutzer anlegen: added as patrons.
Next you will want to add a couple of new authorized values for Departments and Terms.
You may also want to create new item types, collection codes and/or shelving locations to make it clear that the items are on reserve to your patrons. You will also want to be sure to confirm that your circulation and fines rules are right for your new item types (whether they be hourly or daily loans).
Adding courses
Once you have completed your set up for course reserves you can start creating courses and adding titles to the reserve list.

Von der Startseite des Moduls für Semesterapparate können Sie einen neuen Kurs über die Schaltfläche ‚Neuer Kurs‘ anlegen.
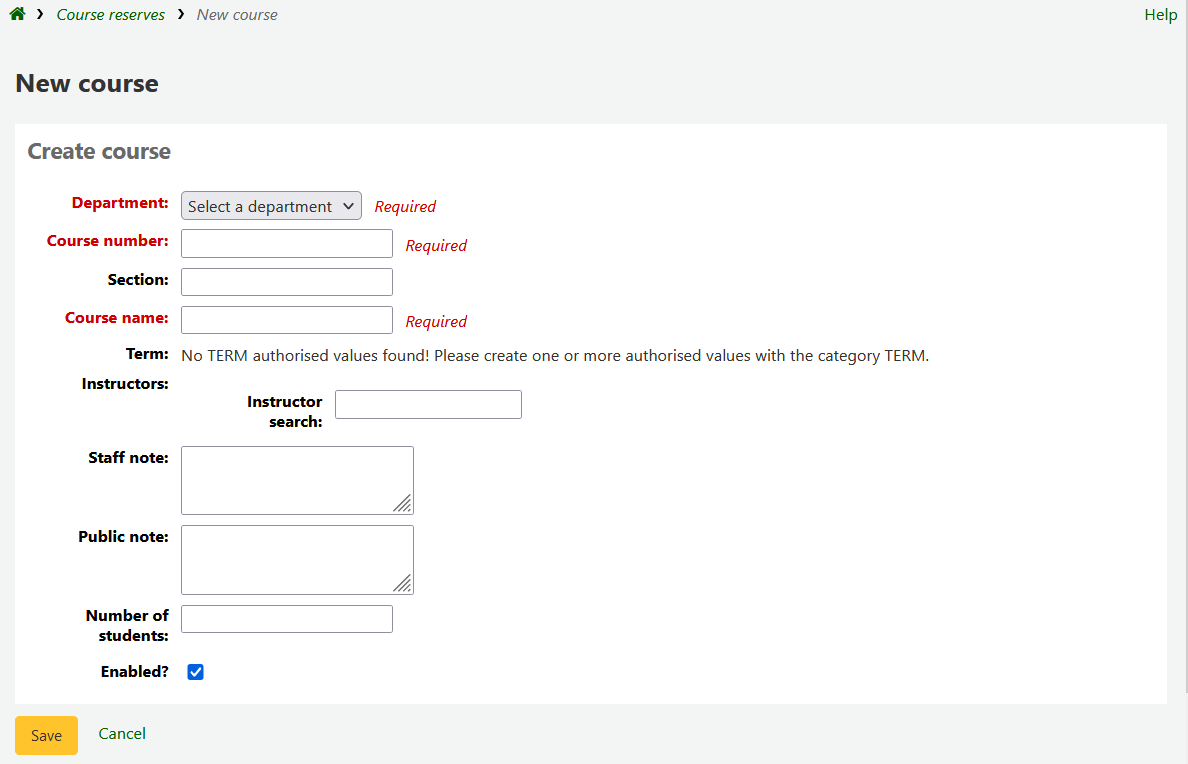
Your new course will need a department, number and name at the bare minimum. You can also add in additional details like course section number and term. To link an instructor to this course simply start typing their name and Koha will search your patron database to find you the right person.

Wenn der gesuchte Dozent angezeigt wird, klicken Sie auf den Namen und er wird hinzugefügt. Sie können diesen Vorgang für alle Dozenten des Kurses wiederholen. Jeder Dozent wird über der Suchmaske angezeigt und kann über ‚Löschen‘ rechts neben dem Namen entfernt werden.

Wenn Sie möchten, dass der Kurs im OPAC angezeigt wird, müssen Sie darauf achten, dass ‚Aktiviert?‘ angehakt ist, bevor Sie den Kurs speichern.
Nachdem der Kurs gespeichert wurde, wird er auf der Startseite des Moduls angezeigt und kann gesucht werden.

Note
You can customize the columns of this table in the ‚Table settings‘ section of the Administration module (table id: courses page, course_reserves_table).
Adding reserve materials
Um Exemplare in einen Semesterapparat zu stellen, muss zunächst der Kurs angelegt werden. Dies erfolgt über das Modul für die Semesterapparate.

Klicken Sie auf den Titel des Semesterapparates zu dem Sie Exemplare hinzufügen möchten.
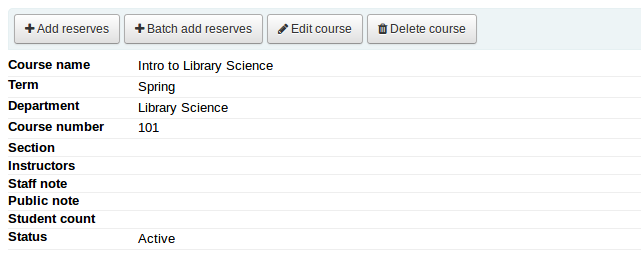
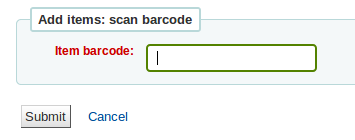
Klicken Sie die Schaltfläche ‚Exemplare hinzufügen‘ um Exemplare zum Semesterapparat hinzuzufügen. Sie werden nach dem Barcode des Exemplars gefragt.
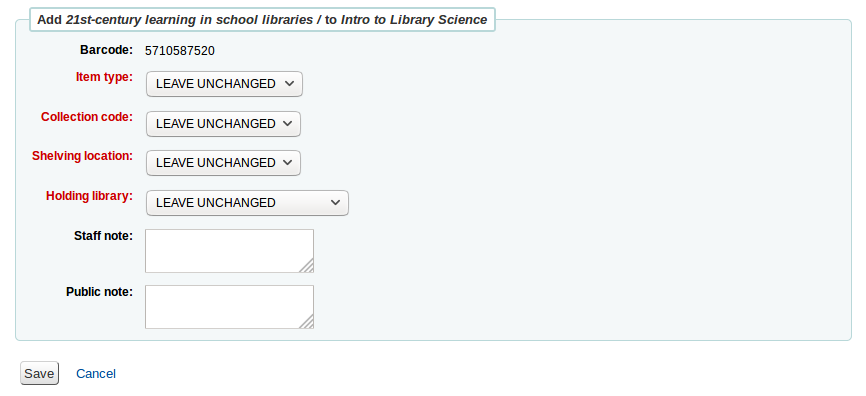
For each item, you can change the item type, collection code, shelving location or holding library. These changes will only apply while the course is active. When you deactivate the course, the items will go back to their original settings.
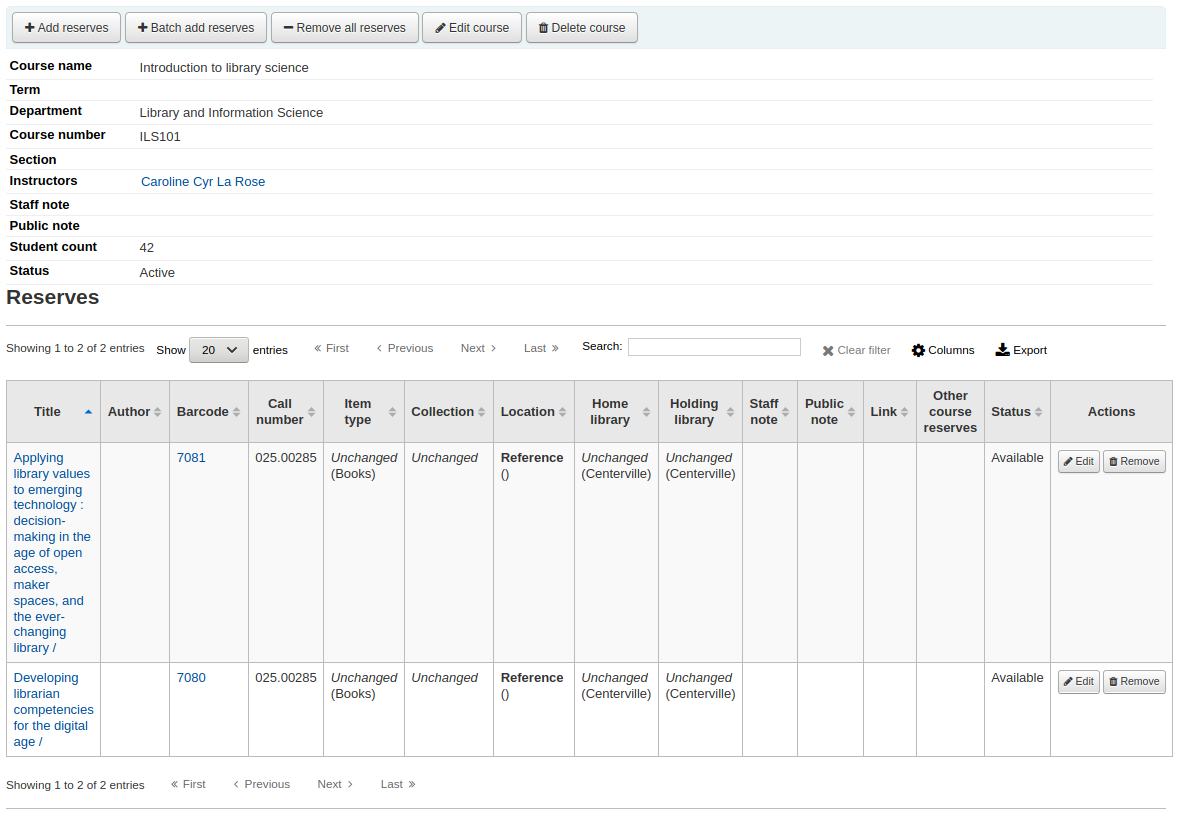
After you are done scanning the barcodes to add to the course you can see them on the course page
Note
You can customize the columns of this table in the ‚Table settings‘ section of the Administration module (table id: reserves page, course_reserves_table).
You also have the possibility of adding several items at the same time. Click on ‚Batch add reserves‘.
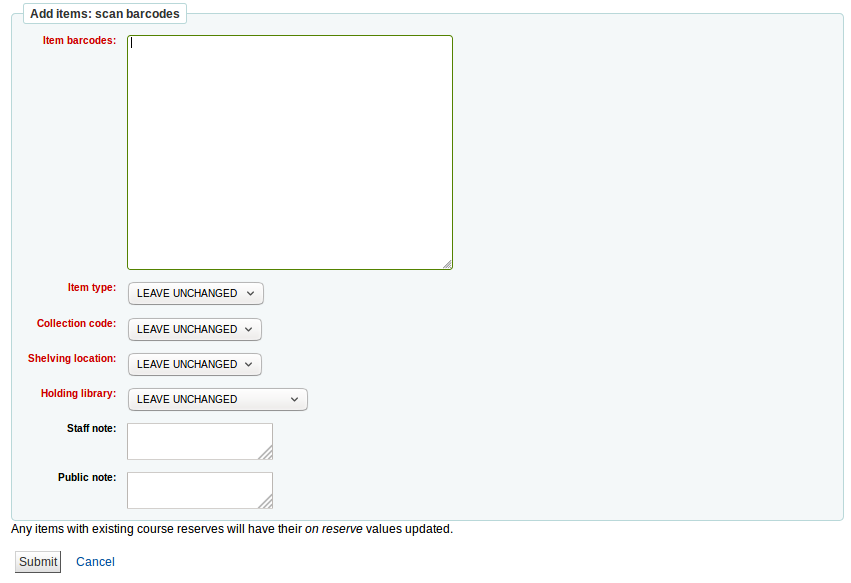
Scan the barcodes of the items you want to add to the reserve and change the item type, collection code, shelving location or holding library, if needed.
Course reserves in the OPAC
Once you have enabled course reserves and added courses you will see a link to course reserves below your search box in the OPAC.

Clicking that link will show you your list of enabled courses (if you have only one course you will just see the contents of that one course).

Note
You can customize the columns of this table in the ‚Table settings‘ section of the Administration module (table id: course_reserves_table).
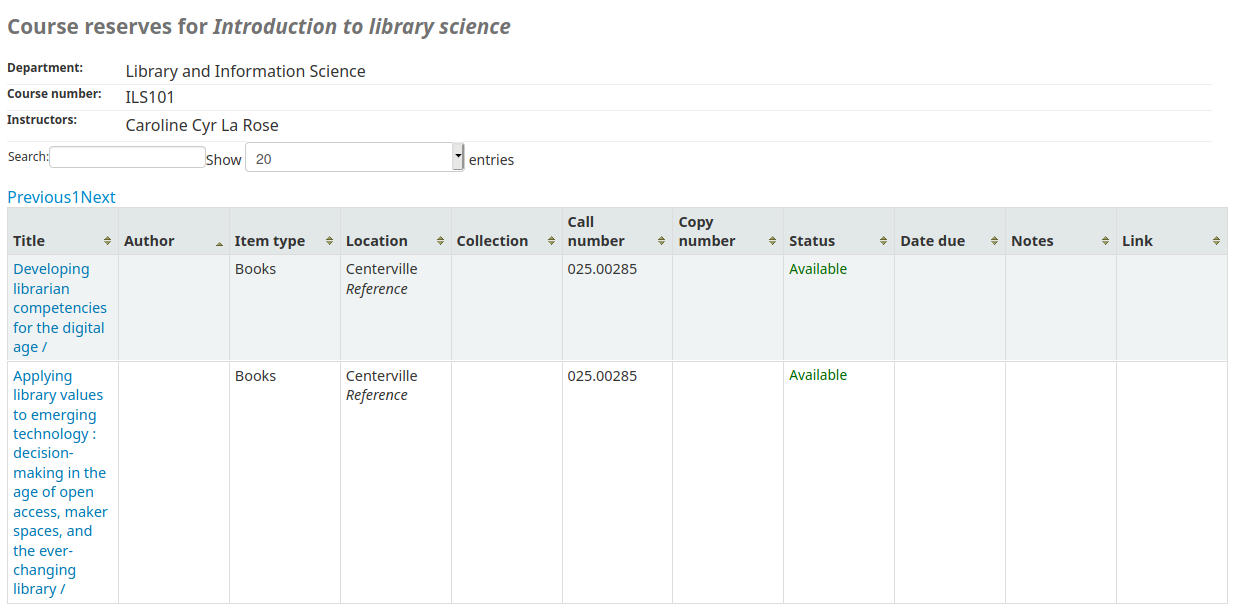
You can search course reserves by any field (course number, course name, instructor name, department) that is visible in the list of courses. Clicking a course name will show you the details and reserve items.
Note
You can customize the columns of this table in the ‚Table settings‘ section of the Administration module (table id: course-items-table).