Erwerbung
Das Koha Erwerbungsmodul ermöglicht es der Bibliothek Bestellungen bei Lieferanten zu erfassen sowie Etats und Konten zu verwalten.
Pfad in Koha: Mehr > Erwerbung
Einrichten des Erwerbungsmoduls
Bevor Sie das Erwerbungsmodul verwenden, müssen Sie sicherstellen, dass Sie alle Einstellungen vorgenommen haben.
First, set your acquisitions system preferences and acquisitions administration to match your library’s workflow. Before setting your EDI accounts and library EANs, you will need to have entered your vendors.
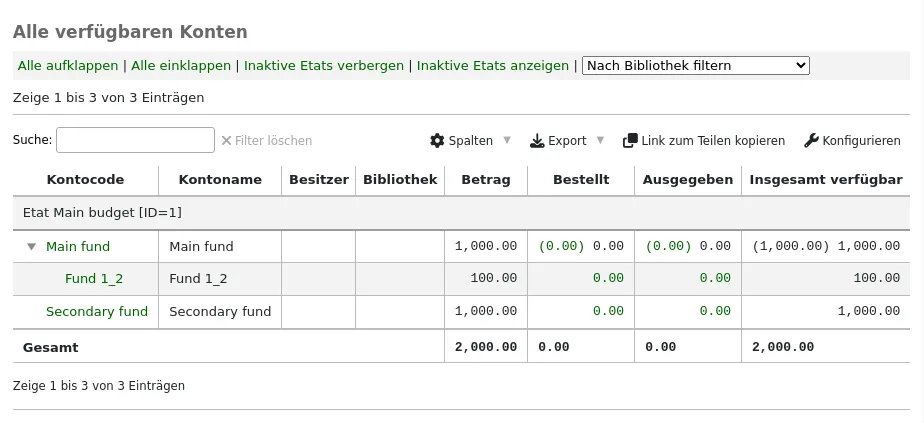
Auf der Startseite der Erwerbung sehen Sie Ihre Konten aufgelistet.
Learn more in the budget/fund tracking section.
Lieferanten
Bevor eine Bestellung gemacht werden kann, muss zuerst ein Lieferant angelegt oder ausgewählt werden.
Lieferanten anlegen
Bemerkung
Mitarbeiter*innen müssen die Berechtigung vendors_manage (oder die superlibrarian-Berechtigung) besitzen, um Lieferanten hinzufügen zu können.
Klicken Sie auf „Neuer Lieferant“ auf der Startseite der Erwerbung, um einen neuen Lieferanten anzulegen.

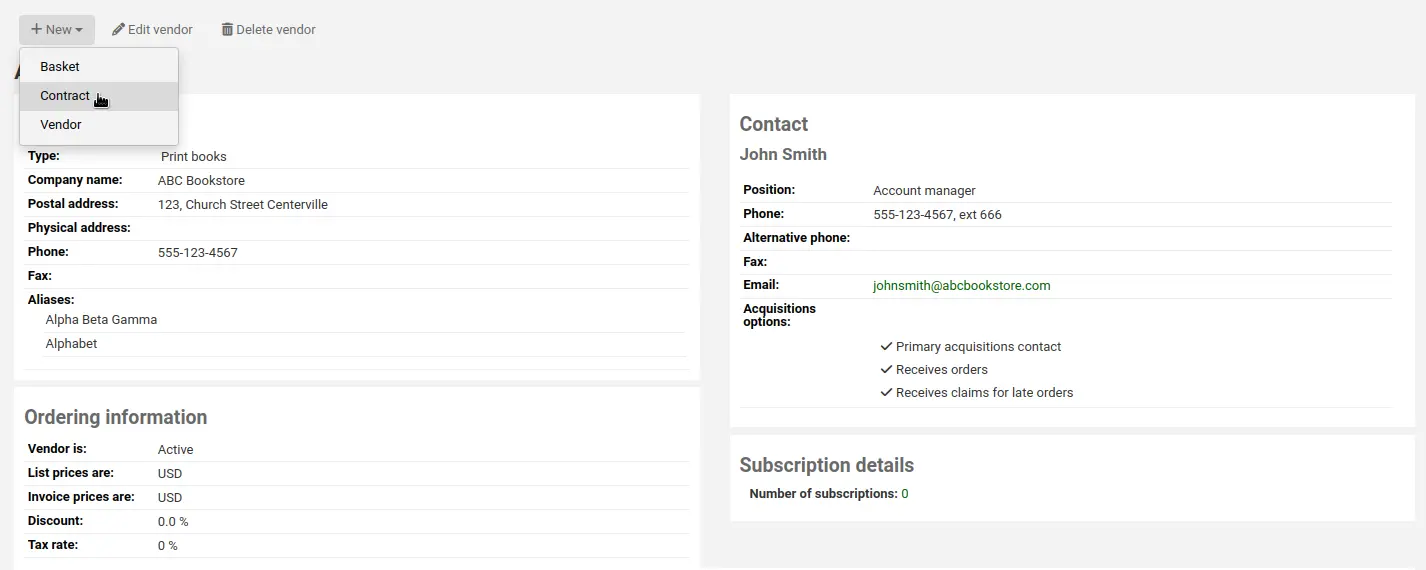
Das Formular für neue Lieferanten ist in drei Bereiche aufgeteilt: Lieferantendetails, Kontakte und Bestellinformationen.
Lieferantendetails: Grundlegende Informationen über den Lieferanten
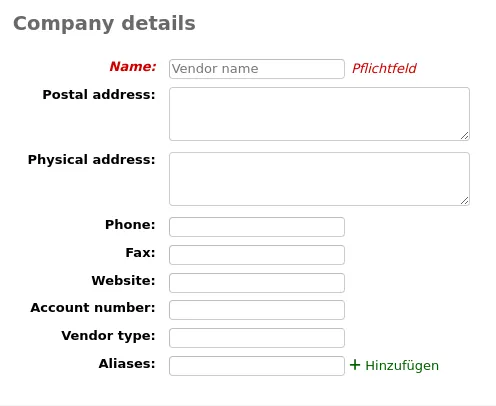
Name (Pflichtfeld): der Name, der an allen Stellen in Koha erscheint, wenn auf diesen Lieferanten verwiesen wird
Postanschrift, Besuchsadresse, Telefon, Fax, Website, Kundennummer: diese Felder sind optional und sollten ausgefüllt werden, wenn Liefermahnschreiben und Rechnungen erstellt werden sollen
Art des Lieferanten: verwenden Sie dieses Feld, um Ihre Lieferanten zu kategorisieren (z. B. Buchhändler, Spender, Anbieter elektronischer Medien)
Bemerkung
Voreingestellt ist dieses Feld ein Freitextfeld. Wenn Sie hier ein Drop-Down-Menü bevorzugen, fügen Sie Werte im Normierten Wert VENDOR_TYPE hinzu.
Pseudonyme: fügen Sie einem Lieferanten einen oder mehrere Pseudonyme hinzu, um nach Ihnen in der Lieferantensuche recherchieren zu können. Zum Beispiel könnte die „American Library Association“ das Pseudonym „ALA“ bekommen.
Kontakte: Informationen zu den Kontakten beim Lieferanten
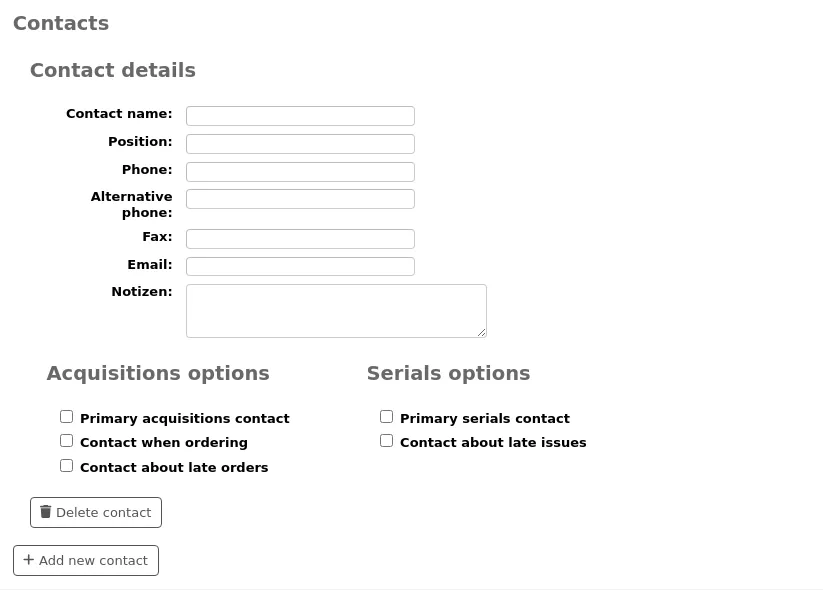
Diese Felder sind keine Pflichtfelder. Sie müssen nur ausgefüllt werden, wenn Sie diese Informationen in Koha verwalten möchten
Primärer Erwerbungskontakt: markieren Sie die Checkbox, wenn die Person ihr primärer Ansprechpartner bei diesem Lieferanten ist
Primärer Zeitschriftenkontakt: markieren Sie die Checkbox, wenn die Person ihr primärer Ansprechpartner für Zeitschriften ist
Contact when ordering? check this box if you want to be able to send your orders by email directly to this person (see the editing baskets section below)
Contact about late orders? check this box if you want to be able to send your acquisitions claims by email directly to this person
Contact about late issues? check this box if you want to be able to send your serials claims by email directly to this person
Sie können pro Lieferant mehr als eine Kontaktperson hinzufügen indem Sie auf den Button ‚Einen weiteren Kontakt hinzufügen‘ klicken
Konten: Informationen zu Website, Software oder Portal des Lieferanten, die genutzt werden, um Bestellungen zu verwalten oder Statistiken des Lieferanten oder der Organisation zu sammeln. Ein Konto muss nicht angelegt werden. Nutzen Sie es daher nur, um die Informationen in Koha zu verwalten. Um ein Lieferantenkonto hinzuzufügen, klicken Sie auf „Weiteres Konto hinzufügen“.
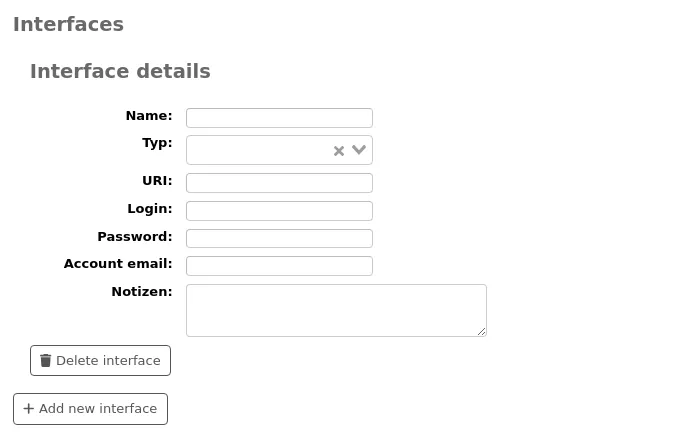
Füllen Sie das Formular aus (alle Felder sind optional):
Name: geben Sie den Namen des Kontos ein, dieser ist in Koha sichtbar.
Typ: Angabe zur Art des Kontos.
Bemerkung
Einträge dieser Auswahlliste können in den Normierten Werten in der Kategorie VENDOR_INTERFACE_TYPE angepasst werden.
URI: geben Sie hier die URL des Kontos ein.
Benutzername: Der Benutzername für den oben genannten Server.
Passwort: geben Sie hier das Passwort für das Konto an.
Bemerkung
Dieses Passwort wird in der Datenbank verschlüsselt. Voreingestellt wird es nicht auf der Detailseite der Lieferanten angezeigt. Stattdessen gibt es einen Link „Anzeigen“, welcher angeklickt werden kann, um das Passwort anzuzeigen.
Gefahr
Bitte beachten Sie, dass Koha kein Passwortmanager ist. Auch wenn das Passwort verschlüsselt ist und nur mit den entsprechenden Berechtigungen darauf zugegriffen werden kann, besteht dennoch ein Sicherheitsrisiko, das Passwort in Koha zu speichern. Es wird empfohlen, einen echten Passwort-Manager zu verwenden. Die Nutzung dieses Feldes erfolgt auf eigene Gefahr.
Konto-E-Mail: für die E-Mail-Adresse dieses Kontos.
Hinweis: geben Sie Informationen zu diesem Konto ein.
Klicken Sie auf „Hinzufügen eines weiteren Kontos“, wenn Sie mehr als ein Konto für diesen Lieferanten benötigen.
Bestellinformationen: allgemeine Informationen zur Rechnungsstellung
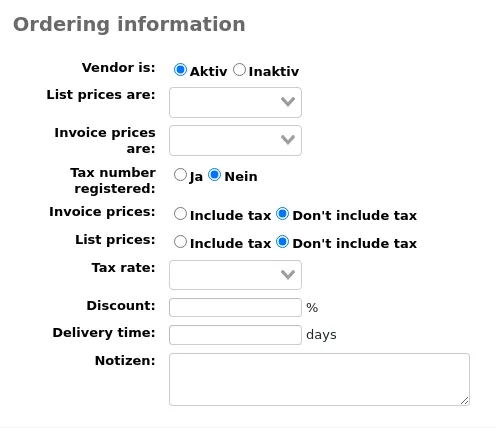
Um bei einem Lieferanten bestellen zu können, müssen Sie diesen auf ‚Aktiv‘ setzen
Wählen Sie die Währung für Listen- und Rechnungspreise
Bemerkung
Währungen werden unter Währungen und Wechselkurse im Bereich Administration konfiguriert
Wenn Ihrer Bibliothek Steuern berechnet werden, können Sie die Steuernummer als registriert markieren
Geben Sie an, ob Listenpreise und/oder Rechnungspreise Steuern enthalten
Geben Sie die Steuerrate an, wenn Ihre Bibliothek für Einkäufe Steuern bezahlen muss
Bemerkung
Steuerraten werden über den Systemparameter TaxRates konfiguriert
Wenn der Lieferant immer einen gewissen Rabatt gewährt, kann dieser unter ‚Rabatt‘ angegeben werden
Bemerkung
You can enter item specific discounts when placing an order
Bemerkung
Enter the discount percentage using a decimal point.
Discounts can have up to two digits before the decimal and three digits after the decimal. For example:
9,99,-99,99.9,0.99,99.99,99.999.If you know how long it usually takes orders to arrive from this vendor you can enter a delivery time. This will allow Koha to estimate when orders will arrive at your library on the late orders report.
Hinweise sind bibliotheksintern
Lieferantensuche
Suchen Sie nach Lieferanten entweder über die Suchleiste am Anfang der Seite

oder über das Suchfeld unter „Bestellungen verwalten“ im Inhaltsbereich der Startseite.
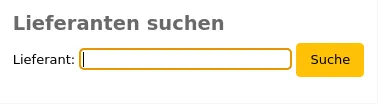
Sie können nach jedem Teil des Lieferantennamens oder dessen Alias suchen.
Bemerkung
Eine leere Suche zeigt Ihnen alle Lieferanten.
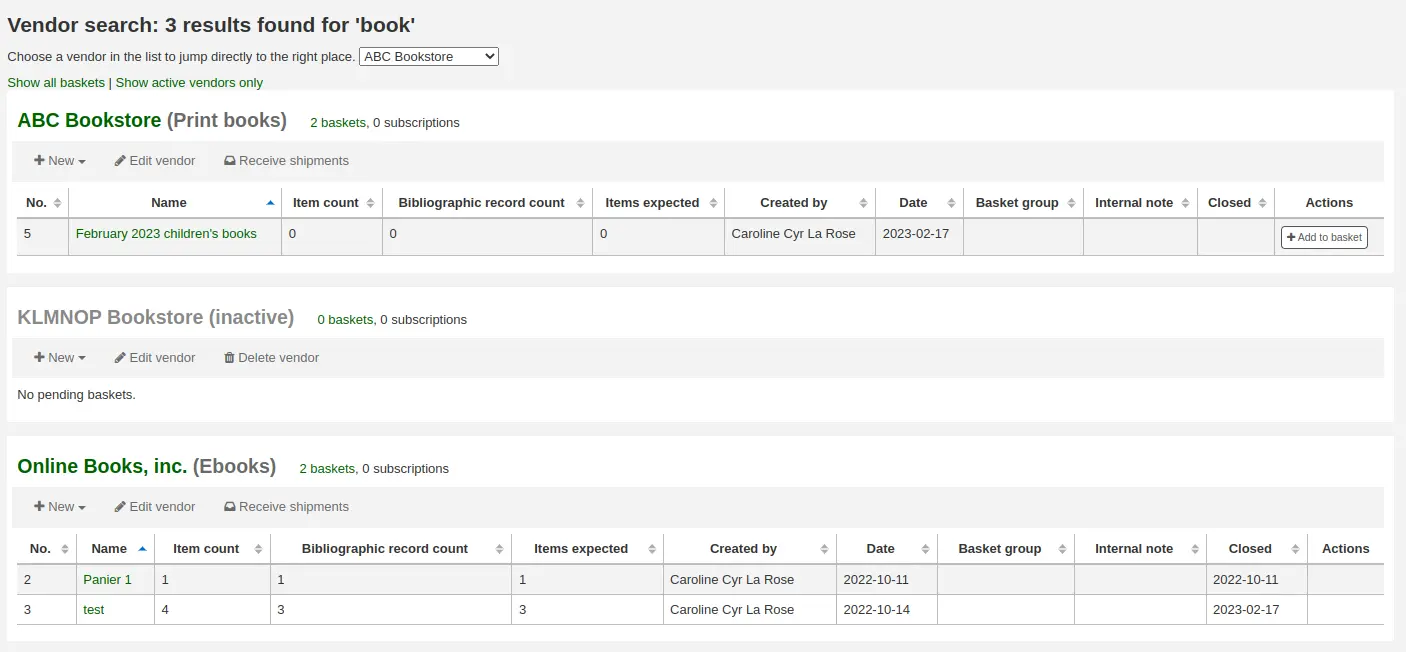
Wenn Sie viele Lieferanten haben, können Sie die Auswahlliste verwenden, um direkt zu einem bestimmten Treffer zu springen.
Voreingestellt werden alle Lieferanten in der Trefferliste angezeigt, dabei werden inaktive Lieferanten in grauer Schrift und mit einem „(inaktiv)“ neben dem Namen angezeigt. Sie können über den Link „Nur aktive Lieferanten anzeigen“ die Suche einschränken.
In der Trefferliste sehen Sie alle aktuell offenen Bestellungen. Sie können auf „Alle Bestellungen“ klicken, um auch geschlossene Bestellungen anzuzeigen.
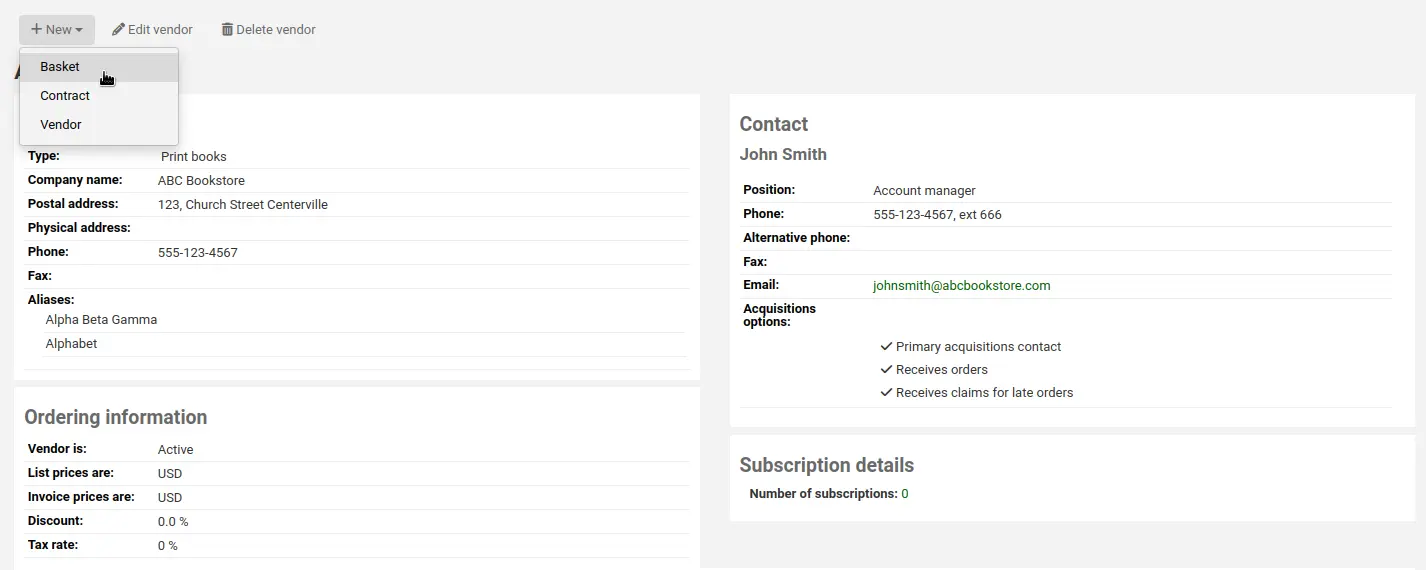
Unter jedem Lieferanten werden Schaltflächen für Aktionen angezeigt:
‚New‘ can be used to create a new basket, or add a new contract to that vendor.
‚Edit vendor‘ is used to edit the vendor information.
„Lieferung erhalten“ wird angezeigt, wenn ein Lieferant Bestellungen mit offenen Bestellposten hat.
„Lieferant löschen“ wird angezeigt, wenn es für einen Lieferanten keine Bestellungen gibt.
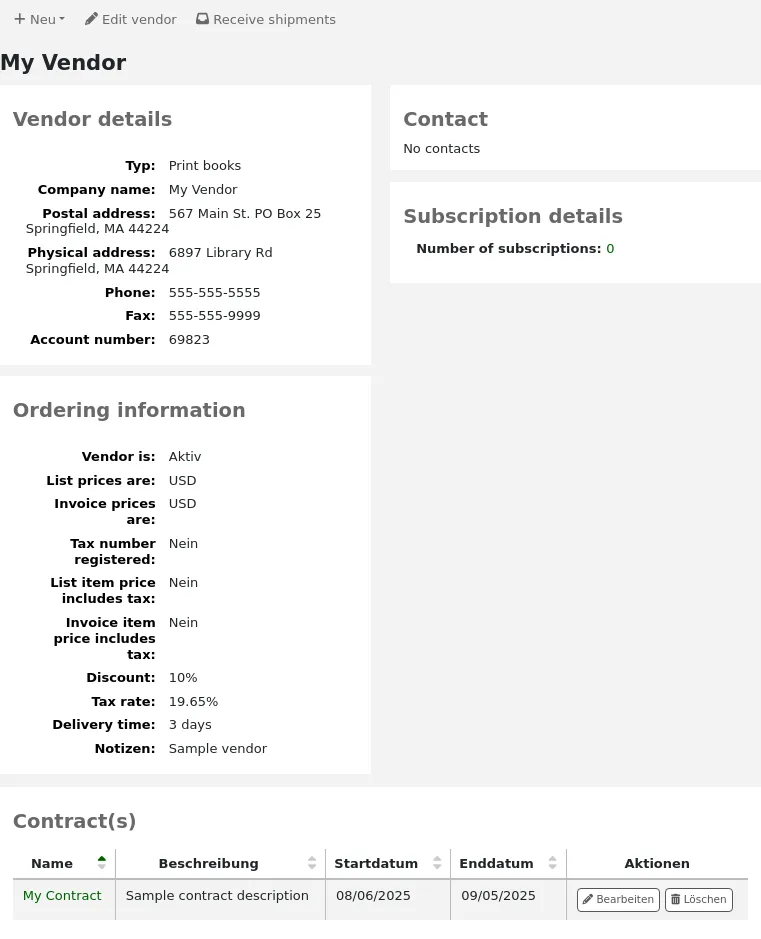
Lieferant anzeigen
To view a vendor’s information page, search for the vendor from the acquisitions home page.
Klicken Sie in den Ergebnissen auf den Namen des Lieferanten, den Sie anzeigen oder bearbeiten möchten.
Lieferanten bearbeiten
Bemerkung
Bibliothekspersonal muss die Berechtigung vendors_manage (oder die superlibrarian-Berechtigung) besitzen, um bestehende Lieferanten bearbeiten zu können.
To make changes to a vendor search for the vendor from the acquisitions home page.
Klicken Sie auf „Lieferant bearbeiten“ in der Trefferliste
oder in der Detailansicht des Lieferanten.
Vereinbarungen
Sie können Vereinbarungen (mit Anfangs- und Enddatum) einem bestimmten Lieferanten zuweisen. Am Jahresende können Sie dann den Umsatz mit diesem Lieferanten sehen. In manchen Fällen werden Vereinbarungen mit einem minimalen bzw. maximalen Jahresbetrag abgeschlossen.
Vereinbarung anlegen
Bemerkung
Mitarbeiter*innen müssen die Berechtigung contracts_manage (oder die superlibrarian-Berechtigung) besitzen, um Lieferantenvereinbarungen anlegen zu können.
You can add a contract to a vendor by searching for the vendor, clicking the ‚New‘ button and choosing the ‚Contract‘ option.

Alternatively, you can access the vendor page and click ‚New‘ and choose ‚Contract‘ from there.
Das Formular für die Vereinbarungen bietet Felder für ganz wesentliche Informationen über die Vereinbarung
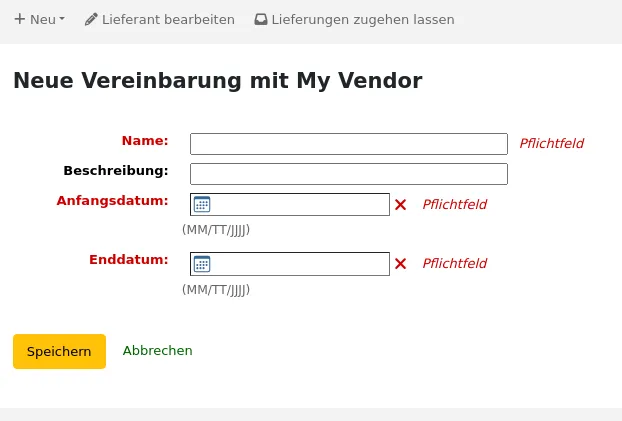
Warnung
Sie können eine Vereinbarung nicht retrospektiv eingeben, das Enddatum darf nicht vor dem Tagesdatum liegen.
Once the contract is saved it will appear on the vendor page.
It will also be an option when creating a basket.
Erfassung von Problemen bei Lieferanten
Version
Diese Funktion wurde in Version 23.11 von Koha eingeführt.
Bemerkung
Sie müssen als Bibliotheksmitarbeiter*in mit der Berechtigung issue_manage (oder mit der superlibrarian-Berechtigung) angemeldet sein, um Lieferantenprobleme anzeigen und bearbeiten zu können.
Lieferantenprobleme erlauben das Erfassen und Verwalten von Problemen, die in Zusammenhang mit einem bestimmten Lieferanten auftauchen können. Die Funktion kann bei der späteren Vergabe von Verträgen mit Lieferanten als Hilfestellung dienen.
Um auf Probleme des Lieferanten zuzugreifen, gehen Sie auf die Seite des Lieferanten und klicken Sie im Menü auf der linken Seite auf „Probleme“.
Auf dieser Seite werden alle Hefte angezeigt, die für diesen Lieferanten erfasst wurden.
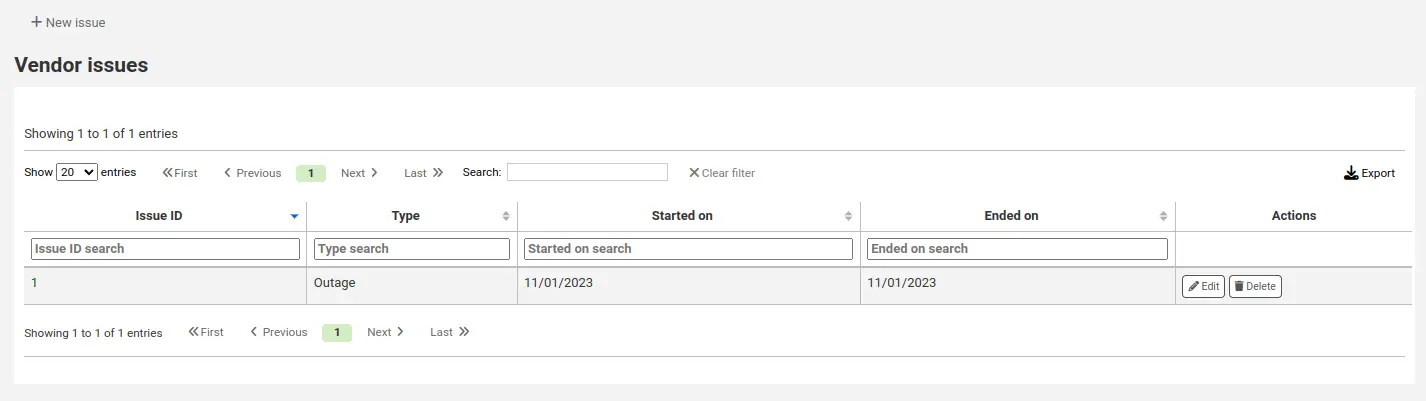
Um ein neues Heft zu erfassen,
Klicken Sie auf ‚Neues Problem‘
Füllen Sie das Formular mit den Informationen zum Problem aus.
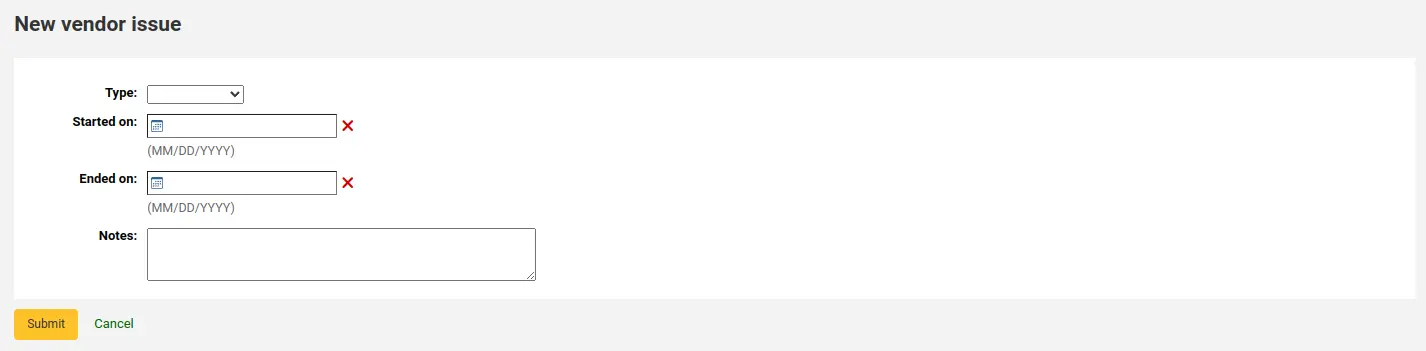
Typ: Wählen Sie den Hefttyp aus.
Bemerkung
Einträge dieser Auswahlliste werden in der VENDOR_ISSUE_TYPE authorized value category verwaltet.
Begonnen am: Wählen Sie das Datum, an dem das Problem begonnen hat.
Beendet am: Wählen Sie das Datum, an dem das Problem beendet wurde, falls dies der Fall ist.
Hinweis: geben Sie Details zum Problem an.
Klicken Sie auf ‚Absenden‘.
Um ein bestehendes Problem zu bearbeiten, klicken Sie auf die Schaltfläche „Bearbeiten“ in der Tabelle.
Wenn ein Problem nicht mehr relevant ist, können Sie es löschen, indem Sie auf die Schaltfläche „Löschen“ in der Tabelle klicken.
Anschaffungsvorschläge verwalten
You can create purchase suggestions via the staff interface either for the library or on the patron’s behalf from their record. Depending on your settings in the suggestion system preference, patrons may also be able to make purchase suggestions via the OPAC.
Bemerkung
Bibliothekspersonal muss die Berechtigung suggestions_manage (oder die superlibrarian-Berechtigung) besitzen, um Anschaffungsvorschläge anzeigen und verwalten zu können.
Wenn Mitarbeiter*innen die Berechtigung suggestions_manage besitzen, aber keine der Berechtigungen unter acquisitions, können sie die Vorschlagsbearbeitung über „Anschaffungsvorschläge“ im Menü „Mehr“ in der Navigationsleiste aufrufen.
Tipp
Änderungen an Anschaffungsvorschlägen können protokolliert werden: Setzen Sie den Systemparameter SuggestionsLog system preference auf „Protokollieren“, damit alle nachfolgenden Aktualisierungen in der Tabelle action_logs gespeichert werden.
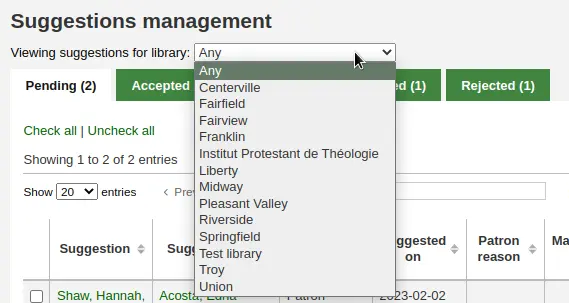
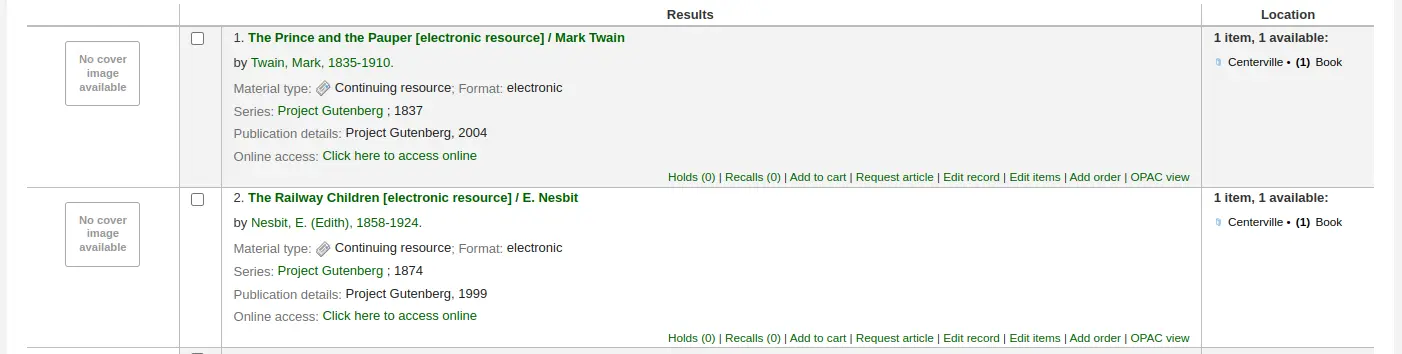
Wenn ein Anschaffungsvorschlag zur Überprüfung vorliegt, wird dieser auf der Startseite des Erwerbungsmoduls neben der Lieferantensuchleiste angezeigt. Die Anschaffungsvorschläge für die Bibliothek, unter der Sie angemeldet sind, werden getrennt von den restlichen Vorschlägen angezeigt. Wenn Sie auf den Namen der Bibliothek klicken, gelangen Sie auf die Seite zur Verwaltung der Anschaffungsvorschläge.

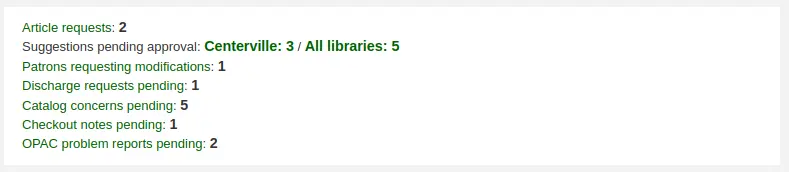
Es wird außerdem im Dashboard auf der Startseite unterhalb der Module angezeigt.
Wenn es keine unbearbeiteten Anschaffungsvorschläge gibt, können Sie die Seiten zur Verwaltung von Anschaffungsvorschlägen auch über das Menü „Mehr“ oder durch den Link „Anschaffungsvorschläge verwalten“ auf der Startseite des Erwerbungsmoduls aufrufen.
Bemerkung
You can customize the columns of this table in the Table settings section of the Administration module (table id: suggestions).
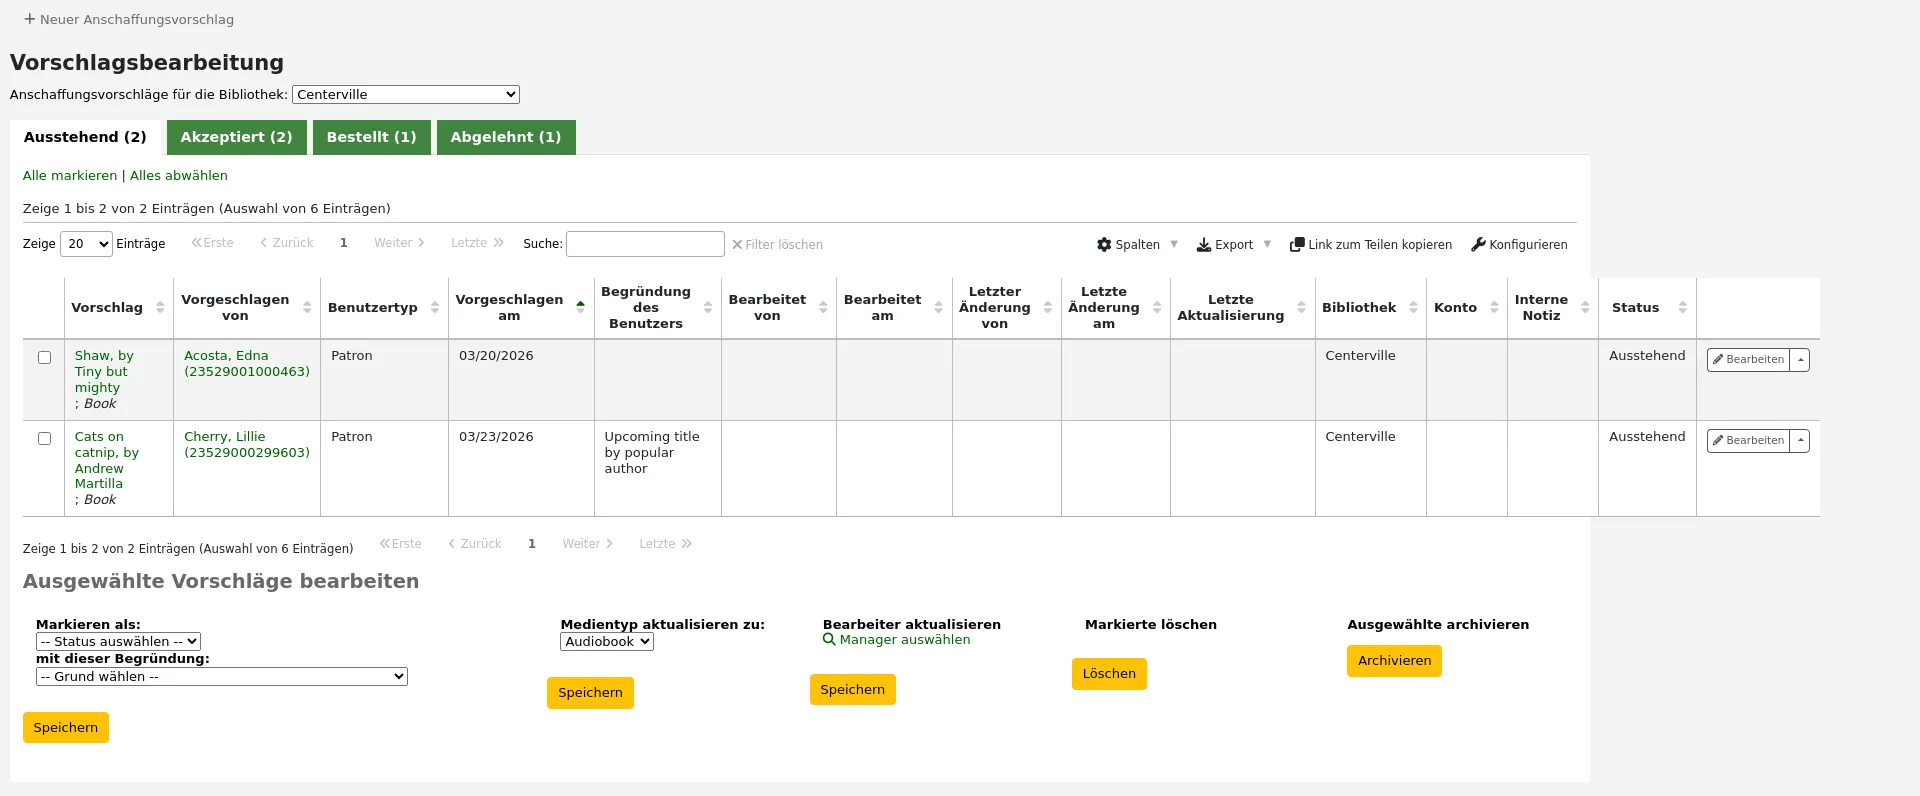
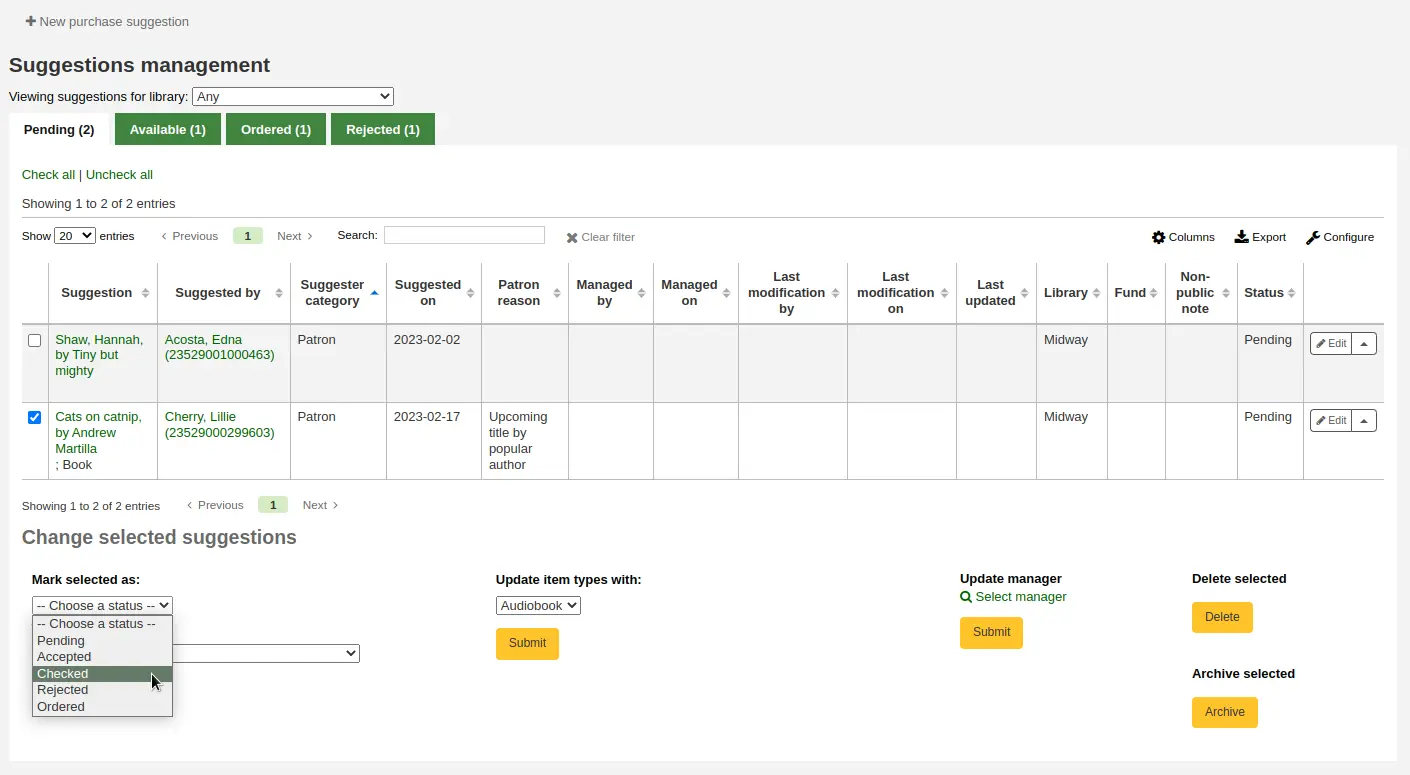
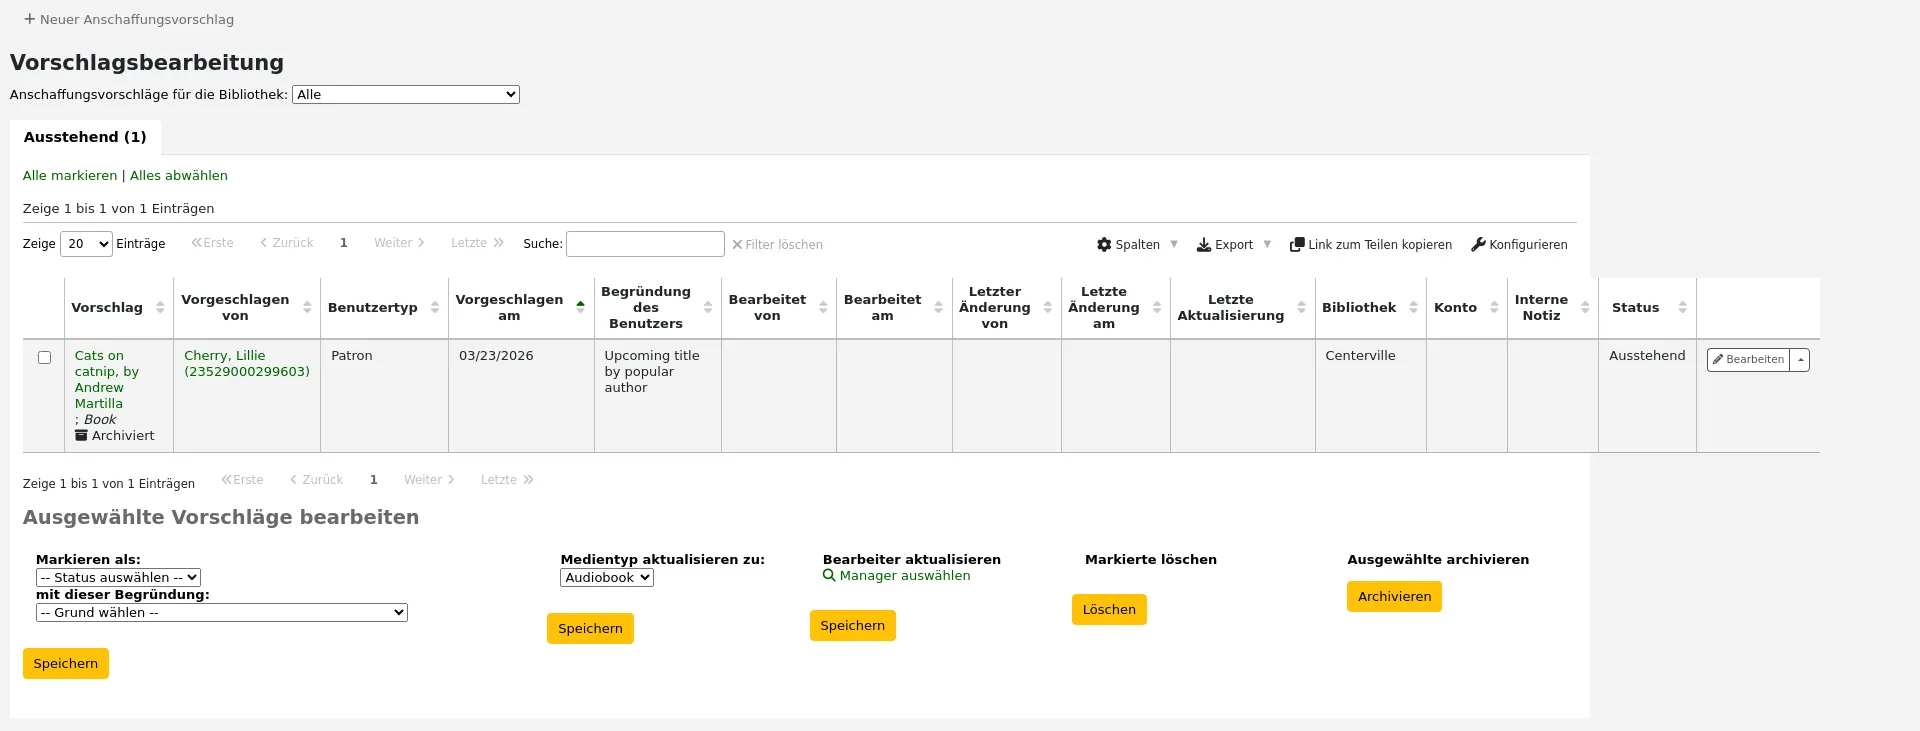
Ihre Anschaffungsvorschläge werden auf verschiedene Reiter verteilt: Zu bearbeiten, Akzeptiert, Geprüft, Bestellt und Abgelehnt.
Zu bearbeiten: Ein „unbearbeiteter“ Anschaffungsvorschlag wartet auf Bearbeitung durch die Bibliothek.
Akzeptiert: Ein „akzeptierter“ Anschaffungsvorschlag wurde als solcher durch das Formular unter den Anschaffungsvorschlägen gekennzeichnet.
Geprüft: Ein „geprüfter“ Anschaffungsvorschlag wurde als solcher durch das Formular unter den Anschaffungsvorschlägen gekennzeichnet.
Bestellt: Ein „bestellter“ Anschaffungsvorschlag wurde über die Funktion Aus einem Anschaffungsvorschlag einer Bestellung hinzugefügt.
Abgelehnt: Ein „abgelehnter“ Anschaffungsvorschlag wurde als solcher über das Formular unterhalb der Liste der Anschaffungsvorschläge gekennzeichnet.
Bemerkung
Wenn Ihr Arbeitsablauf mehr Status für die Verwaltung von Anschaffungsvorschlägen erfordert, können Sie weitere hinzufügen, indem Sie SUGGEST_STATUS authorized values category verwenden.
Für jeden Anschaffungsvorschlag wird angezeigt, welche*r Mitarbeiter*in den Vorschlag bearbeitet hat und wann dies war.
Akzeptierte und abgewiesene Anschaffungsvorschläge zeigen außerdem die jeweilige Begründung unter „Status“.
Für Bibliotheken, die eine große Menge von Anschaffungsvorschlägen zu verwalten haben, stehen am linken Rand der Seite Filter zur Verfügung, die helfen, die Anzahl der auf der Seite angezeigten Vorschläge zu begrenzen.
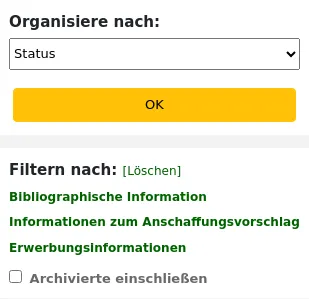
Wenn Sie auf die blauen Überschriften klicken, öffnen sich die Filteroptionen. Wenn Sie auf ‚[löschen]‘ klicken, werden alle Filter geleert und alle Anschaffungsvorschläge angezeigt.
Bemerkung
Auf der Seite mit den Anschaffungsvorschlägen wird automatisch auf die Anschaffungsvorschläge Ihrer eigenen Bibliothek eingeschränkt. Um auch die Anschaffungsvorschläge anderer Bibliotheken zu sehen, können Sie die Bibliothek in der Auswahlliste „Anschaffungsvorschläge für die Bibliothek:“ anpassen.
Anschaffungsvorschläge annehmen oder ablehnen
When changing the status of a purchase suggestion (pending, accepted, rejected, checked, or ordered), the suggestion will be moved to the matching tab. The status will also be updated on the patron’s account in the OPAC and an email notice will be sent to the patron using the template that matches the status you have chosen.
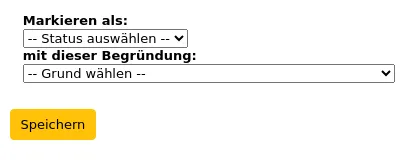
Wenn Sie die unbearbeiteten Anschaffungsvorschläge bearbeiten, können Sie über die Checkbox neben den Einträgen diejenigen auswählen, die Sie akzeptieren/ablehnen möchten, und dann den Status und eine Begründung angeben.
Bemerkung
Wenn Ihr Arbeitsablauf mehr Status für die Verwaltung von Anschaffungsvorschlägen erfordert, können Sie weitere hinzufügen, indem Sie SUGGEST_STATUS authorized values category verwenden.
Die Gründe für die Annahme und Ablehnung von Anschaffungsvorschlägen werden durch SUGGEST authorized value category definiert.

Wenn Sie als Begründung „Andere…“ wählen, können Sie einen freien Text in das Eingabefeld eingeben. Wählen Sie abbrechen rechts neben dem Eingabefeld, um wieder die Auswahlliste mit den normierten Begründungen zu erhalten.
Es ist ebenfalls möglich Anschaffungsvorschläge einzeln anzunehmen oder abzulehnen, indem man die Schaltfläche „Bearbeiten“ klickt.
Klicken Sie auf „Bearbeiten“ am Anfang der Seite um den Anschaffungsvorschlag zum Bearbeiten zu öffnen.
Von hier aus können Sie den Status im Bereich „Vorschlagsbearbeitung“ ändern und auf „Speichern“ klicken.
Wenn sich der Status eines Anschaffungsvorschlags ändert, wird eine Benachrichtigung an den/die Benutzer*in gesendet, der/die den Anschaffungsvorschlag gemacht hat. Die Benachrichtigungen können im Notices and slips tool bearbeitet werden.
Der Status „Akzeptiert“ löscht die Benachrichtigung ACCEPTED aus
Der Status „Abgelehnt“ löst die Benachrichtigung REJECTED aus
Der Status „Bestellt“ löst die Benachrichtigung ORDERED aus
Bemerkung
The ‚Ordered‘ status will automatically be set when ordering from a suggestion and the corresponding notice will also be sent at that time.
Vergeben Sie diesen Status nur dann manuell, wenn Sie das Erwerbungsmodul nicht zur Nachverfolgung Ihrer Bestellungen verwenden.
Bemerkung
Wenn Sie benutzerdefinierte Status in der SUGGEST_STATUS authorized values hinzufügen, können Sie add corresponding notices mit denselben Namen hinzufügen, wobei Sie darauf achten müssen, dass Sie beim Erstellen der neuen Hinweise das Modul ‚Anschaffungsvorschläge‘ wählen.
Anschaffungsvorschläge bearbeiten
Sie können nicht nur den Status auf Akzeptiert oder Abgelehnt ändern, sondern auch viele weitere Eigenschaften bearbeiten, wenn Sie Anschaffungsvorschläge verwalten.
Bearbeitungen können auch im Stapel ausgeführt werden, indem Sie die betreffenden Anschaffungsvorschläge markieren und die neuen Werte im Bereich „Ausgewählte Vorschläge bearbeiten“ am unteren Rand der Seite auswählen.
Sie können auch den Exemplartyp der Anschaffungsvorschläge verändern, indem Sie diese auswählen und einen neuen Exemplartyp aus der Auswahlliste „Medientyp aktualisieren zu“ auswählen.
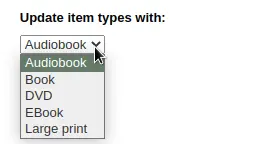
Bemerkung
Die Exemplartypen in dieser Liste werden durch SUGGEST_FORMAT authorized value category befüllt.
Sie können auch den Bearbeiter der ausgewählten Anschaffungsvorschläge ändern, indem Sie auf den Link „Bearbeiter auswählen“ klicken und Ihre Benutzerdatenbank durchsuchen. Der neue Bearbeiter erhält NOTIFY_MANAGER notice.
Bemerkung
Nur Benutzer*innen mit der Berechtigung suggestions_manage (oder der superlibrarian-Berechtigung) können die Ergebnisse sehen.
Es ist auch möglich die Anschaffungsvorschläge einzeln über die Schaltfläche „Bearbeiten“ auf der rechten Seite oder durch einen Klick auf den Titel zu bearbeiten.
Klicken Sie die Schaltfläche „Bearbeiten“ am oberen Seitenrand, um den Anschaffungsvorschlag zum Bearbeiten zu öffnen.
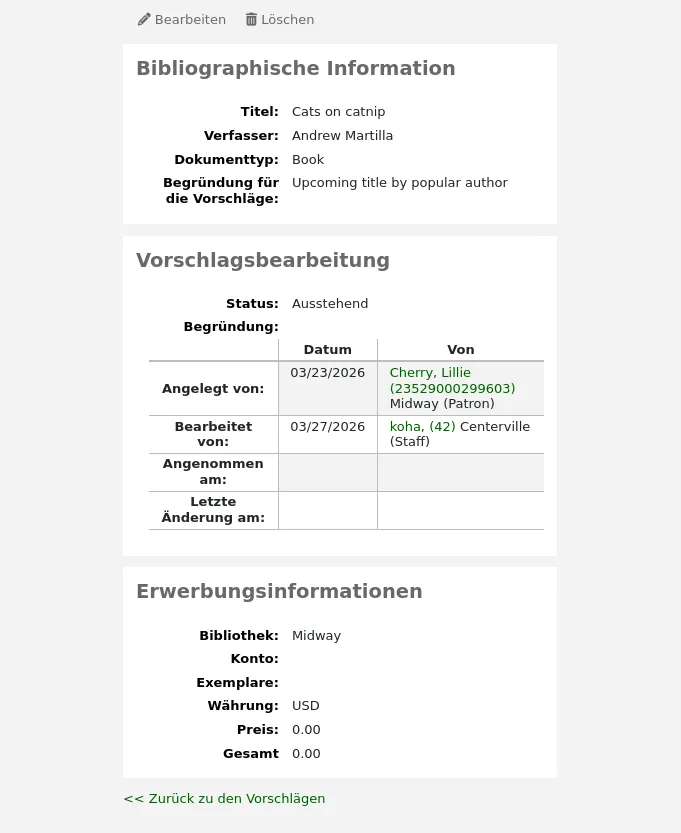
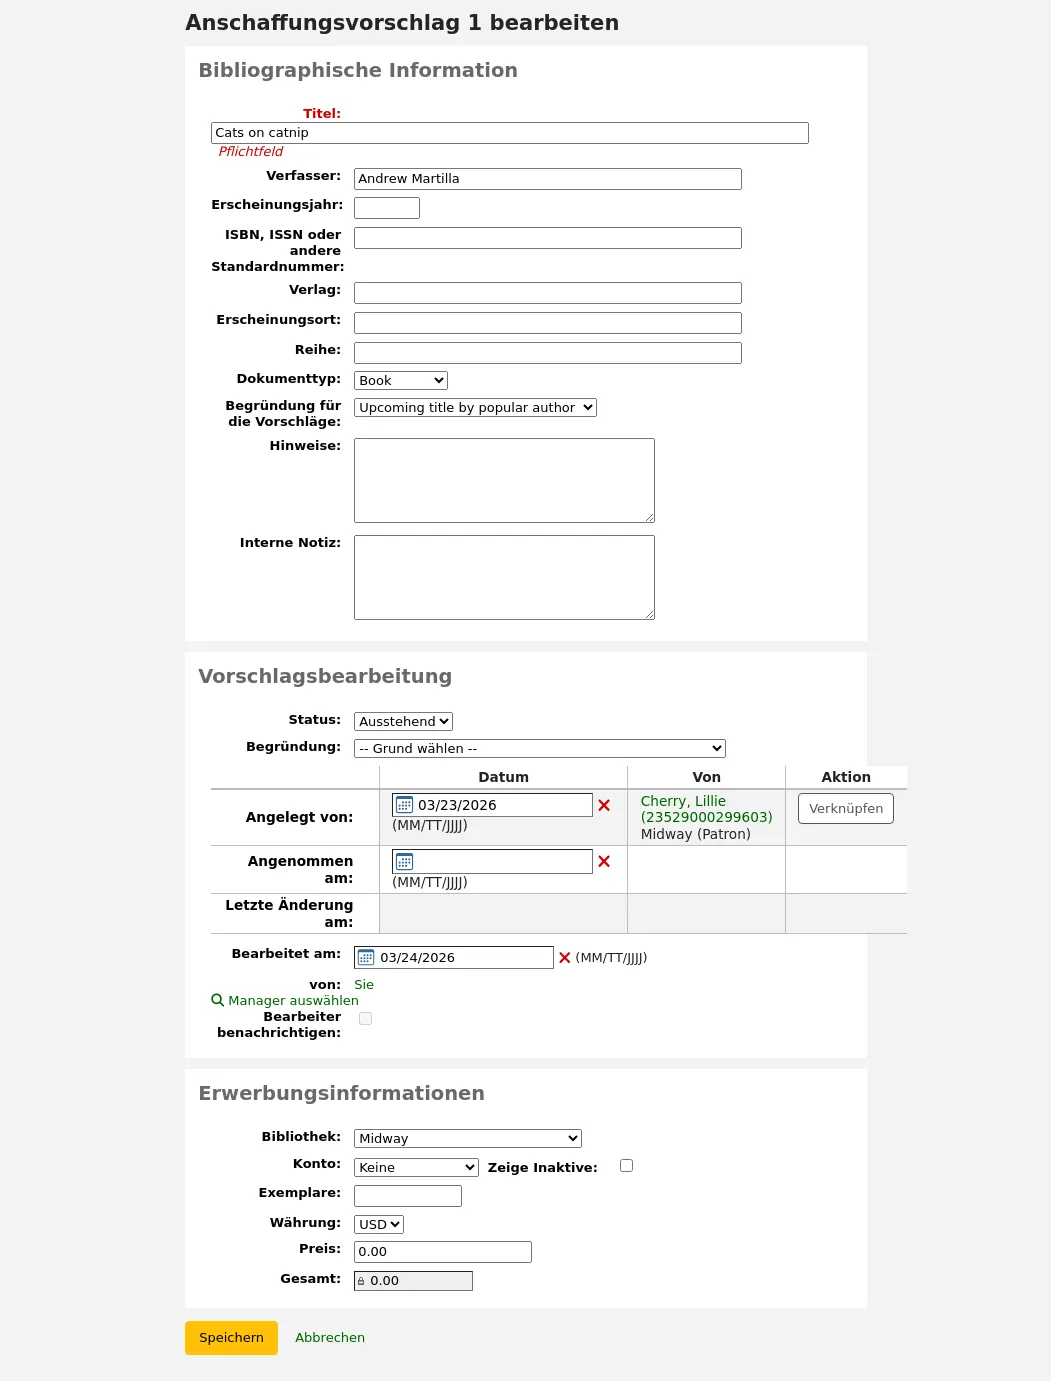
In diesem Formular können Sie den Anschaffungsvorschlag bearbeiten (mehr Details hinzufügen oder die Eingaben des Benutzers korrigieren). Sie können den Vorschlag hier auch akzeptieren oder ablehnen.
Im Bereich „Bibliographische Information“ können Sie fehlende Informationen, wie die ISBN oder den Verlag, ergänzen oder falsche Angaben des Benutzers/der Benutzerin korrigieren.
This information will be used to create a bibliographic record should you order this title from the suggestion.
Im Bereich „Vorschlagsbearbeitung“ können Sie den Status bearbeiten, die Begründung für eine Ablehnung oder Annahme des Vorschlags hinzufügen oder falls erforderlich die Daten bearbeiten.
Wenn Sie einen Status als „Zu bearbeiten“ markieren, wird er wieder in den Reiter „Zu bearbeiten“ verschoben.
The ‚Notify manager‘ checkbox can be used to send a notice to the staff member who previously managed the suggestion to inform them the suggestion was modified. The notice sent is NOTIFY_MANAGER notice.
Im Bereich ‚Erwerbungsinformationen‘ können Sie u. a. den Etat, Preis und Währung ändern.
Wenn ein Anschaffungsvorschlag einem Etat zugewiesen wird, wird zur Information eine Nachricht an die BesitzerIn des Etats gesendet.
The notice_unprocessed_suggestions.pl cronjob is necessary to generate these notices.
The notice used is TO_PROCESS, it can be edited in the Notices and slips tool.
Anschaffungsvorschläge archivieren
Sobald der Anschaffungsvorschlag den Erwerbungsprozess durchlaufen hat, können sie diesen archivieren indem Sie die Schaltfläche „Bearbeiten“ über den kleinen Pfeil aufblättern und „Archivieren“ auswählen. Dies entfernt den Vorschlag aus der Liste. Wenn Sie sehr viele Anschaffungsvorschläge haben und die Seite sehr lange lädt, wird das Archivieren der alten Vorschläge die Performanz verbessern.
Wählen Sie die Anschaffungsvorschläge, die Sie archivieren möchten aus, und klicken Sie auf die Schaltfläche „Archivieren“ im Bereich „Ausgewählte archivieren“.

Sie können die Anschaffungsvorschläge auch archivieren indem Sie neben dem Button ‚Bearbeiten‘ auf den kleinen Pfeil klicken und ‚Archivieren‘ auswählen.

Archivierte Anschaffungsvorschläge verschwinden aus der Liste, können aber durch Aktivieren der Checkbox „Archivierte einschließen“ in den Filtern angezeigt werden.
Archivierte Anschaffungsvorschläge werden als ‚Archiviert‘ angezeigt.
Bemerkung
Archived suggestions will disappear from the ‚Your purchase suggestions‘ section of the patron’s file on the OPAC.
Anschaffungsvorschläge löschen
Bemerkung
Bibliothekspersonal muss die Berechtigung suggestionsdelete (oder die superlibrarian-Berechtigung) besitzen, um Anschaffungsvorschläge anzeigen und verwalten zu können.
Wenn Anschaffungsvorschläge nicht mehr benötigt werden, können diese gelöscht werden.
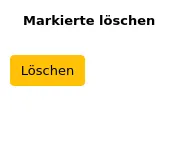
Sie können die ausgewählten Anschaffungsvorschläge löschen, indem Sie auf die Schaltfläche ‚Löschen‘ in der Box ‚Markierte löschen‘ klicken.
Sie können einen Anschaffungsvorschlag auch löschen indem Sie neben dem Button ‚Bearbeiten‘ auf den kleinen Pfeil klicken und ‚Löschen‘ auswählen.

Eine weitere Möglichkeit den Anschaffungsvorschlag zu löschen ist, auf den Titel des Vorschlags zu klicken um in die Detailansicht zu gelangen, und dort ganz oben auf ‚Löschen‘ zu gehen.
Old purchase suggestions can be automatically deleted using the purge_suggestions.pl cronjob.
Bestellungen anlegen
To place an order you must first search for the vendor or bookseller and create a basket.
Warnung
If you are planning on using EDIFACT to submit your order you will need to first set up your library’s EDI accounts and EANs.
Einen Bestellkorb anlegen
Bemerkung
Mitarbeiter*innen müssen die Berechtigung order_manage (oder die superlibrarian-Berechtigung) haben, um Bestellungen anzulegen.
Bemerkung
Wenn Sie EDI für den Bestellvorgang verwenden, sollten Sie zunächst den Bestelldatensatz von Ihrem Lieferanten herunterladen bevor Sie in Koha damit arbeiten.
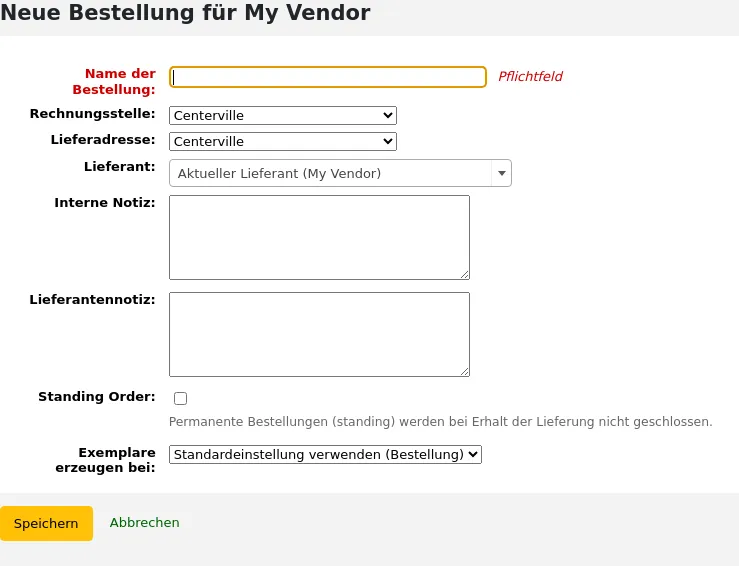
To create a basket you must first search for the vendor you’re ordering from. From the vendor search results, click the ‚New‘ button and choose ‚Basket‘.

Sie können auch zuerst auf den Namen des Lieferanten klicken, und dann auf der Detailansicht ‚Neu‘ und ‚Bestellung‘ wählen.
Nachdem Sie auf ‚Bestellung‘ geklickt haben können Sie Informationen zum Bestellkorb angeben:
Wenn Sie einen Bestellkorb erstellen, sollten Sie ihm einen sprechenden Namen geben der Ihnen bei der späteren Identifizierung hilft
Rechnungsstelle und Lieferort angeben (voreingestellt ist die Bibliothek mit der Sie angemeldet sind)
Falls Sie den Lieferanten wechseln möchten verwenden Sie die entsprechende Auswahlliste
Die Notizfelder sind optional und können beliebige Informationen enthalten
Wenn Sie für den Lieferanten Vereinbarungen erfasst haben, können Sie bei der Bestellung auswählen unter welcher Vereinbarung Sie die Bestellung aufgeben.
Wenn Sie eine Bestellung als Standing Order Bestellung anlegen möchten (Exemplare die regelmäßig geliefert werden), setzen Sie einen Häkchen in der Checkbox ‚Standing order‘.
Bitte beachten Sie das eine Bestellung nicht gleichzeitig eine einmalige und eine ‚Standing-Order‘ Bestellung sein kann.
Sie können sich entscheiden Exemplare entweder bei Bestellung, bei Zugang oder in der Katalogisierung anzulegen. Wenn Sie eine andere Option als die Voreinstellung wählen, wird diese nur für diese Bestellung verwendet. Die Voreinstellung wird über den Systemparameter AcqCreateItem konfiguriert.
Wenn Sie Zusätzliche Felder für Bestellungen haben, werden sie hier angezeigt.
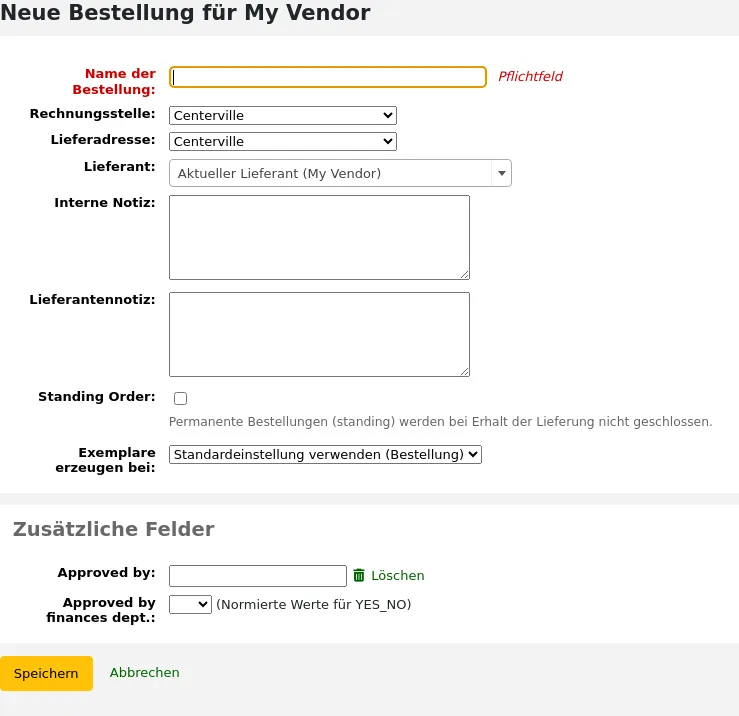
Zum Abschluss klicken Sie auf „Speichern“.
Bestellposten zum Bestellkorb hinzufügen
Bemerkung
Mitarbeiter*innen müssen die Berechtigung order_manage (oder die superlibrarian-Berechtigung) besitzen, um Bestellungen Bestellposten hinzuzufügen.
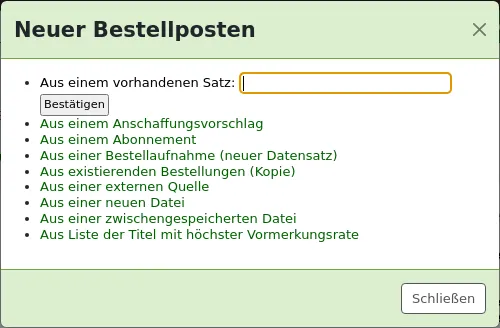
Klicken Sie auf ‚Neuer Bestellposten‘ oberhalb des Bestellkorbes.
Um einen Bestellposten zu einem bereits existierenden Korb hinzuzufügen, klicken Sie auf ‚Neuer Bestellposten‘ auf der rechten Seite.

Es werden verschiedene Optionen ein Exemplar zu einem Bestellposten hinzuzufügen angezeigt.
Vorhandenen Titel nachbestellen
Wenn Sie ein zusätzliches Exemplar zu einem Titel nachbestellen möchten, können Sie den Datensatz einfach im System suchen.
in der Trefferliste können Sie „Neue Bestellung“ auswählen und gelangen so auf das Bestellformular.
In der Detailansicht können Sie auf die Schaltfläche „Neue Bestellung“ klicken.

Sie gelangen auf das Bestellformular
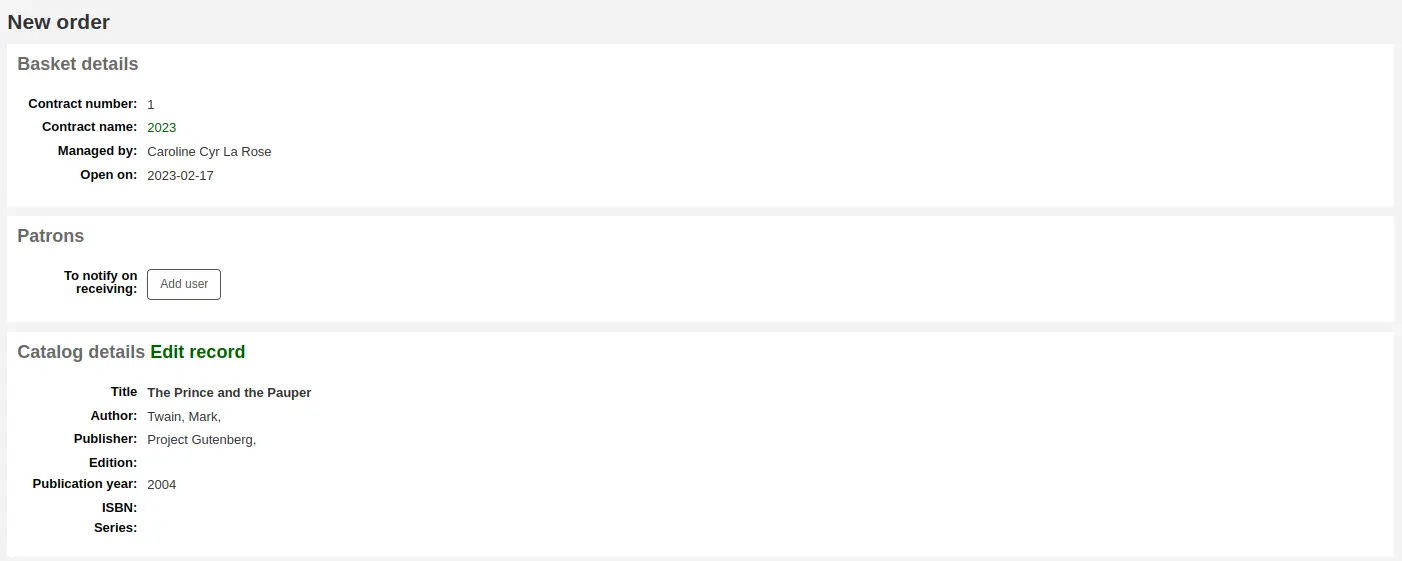
Alle zum Exemplar gehörenden Angaben werden unter ‚Katalogdetails‘ angezeigt
Fill out the rest of the order form, including patron notifications, items, and accounting details.
Bestellung aus einem Anschaffungsvorschlag
Wenn Sie Benutzern erlauben Anschaffungsvorschläge zu machen (erfahren Sie hierzu mehr im Kapitel managing purchase suggestions), dann können Sie Bestellposten aus diesen Vorschlägen erzeugen. Um verfolgen zu können, welche Anschaffungsvorschläge bestellt wurden und zugegangen sind, sollte der Bestellposten über diesen Link angelegt werden.
Warnung
Anschaffungsvorschläge müssen akzeptiert werden, bevor Sie diese bestellen können.
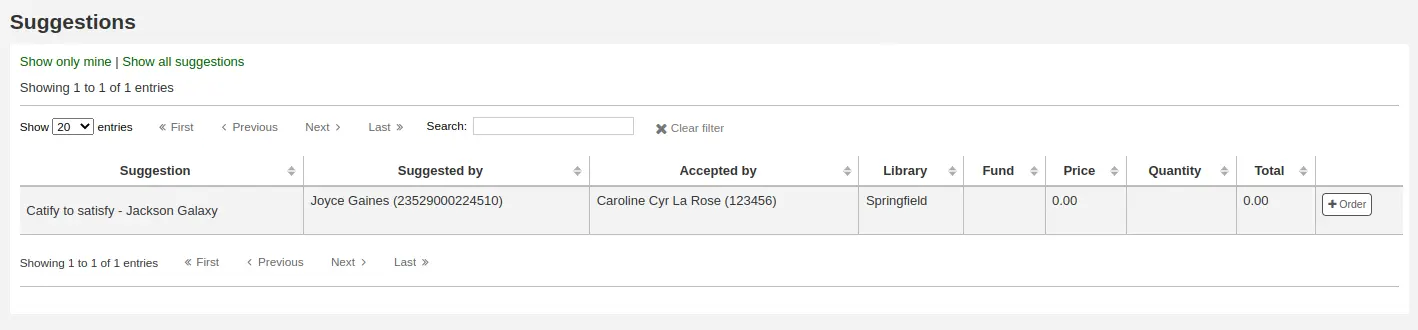
Klicken Sie in der Trefferliste neben dem zutreffenden Exemplar auf ‚Bestellen‘, um ein entsprechendes Formular inklusive eines Links zum Anschaffungsvorschlag zu erhalten.
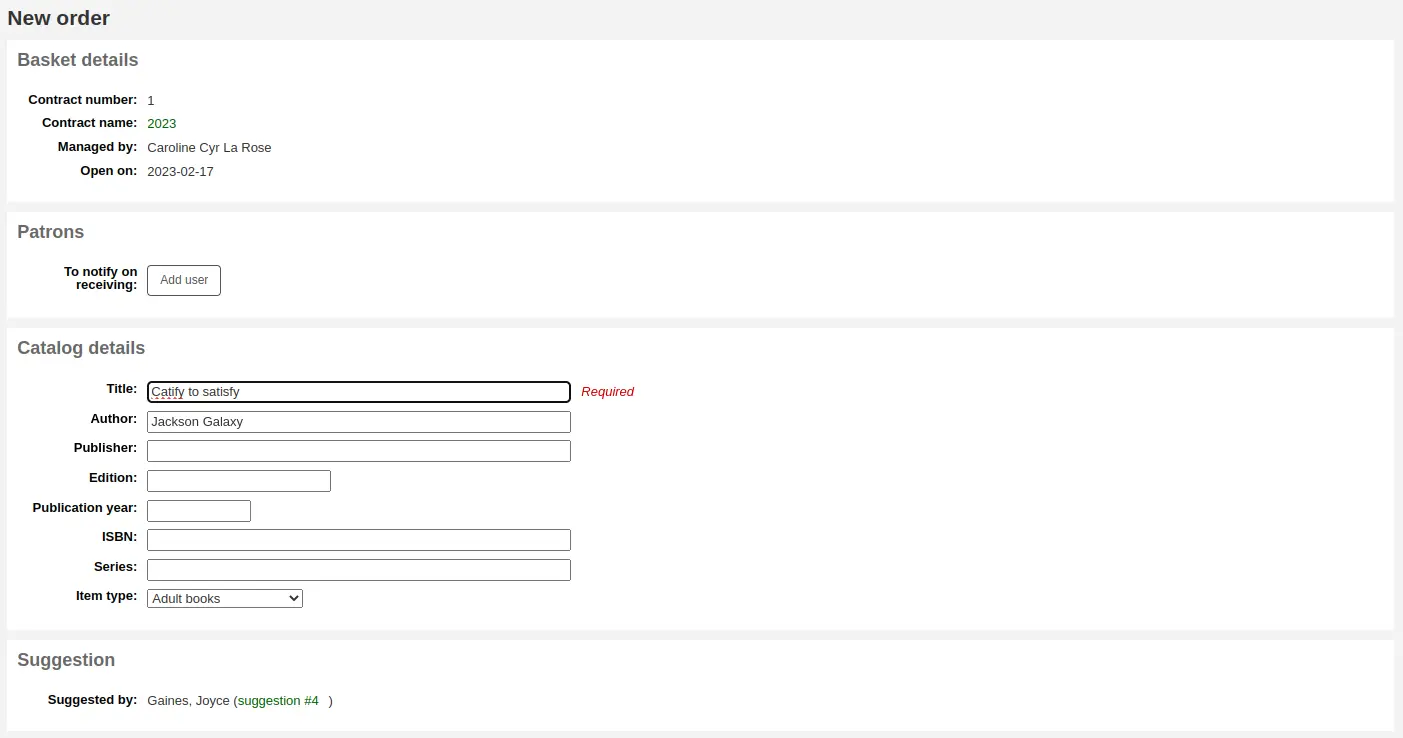
In diesem Formular können Sie wenn nötig Änderungen an den Katalogdaten vornehmen.
Die Bestellposition im Korb enthält einen Link zum entsprechenden Vorschlag.

Wenn Bestellungen auf diese Weise angelegt werden, wird der Status des Vorschlags auf „Bestellt“ aktualisiert. Benutzer*innen können dies auf der Seite Anschaffungsvorschläge ihres Kontos im OPAC einsehen. Die Statusänderung des Vorschlags löst auch die Benachrichtigung ORDERED aus. Sie können deren Inhalt unter Werkzeuge > Benachrichtigungen und Quittungen aktualisieren.
Bemerkung
It is possible for a hold to be automatically created for the patron who made the suggestion, using the PlaceHoldsOnOrdersFromSuggestions system preference.
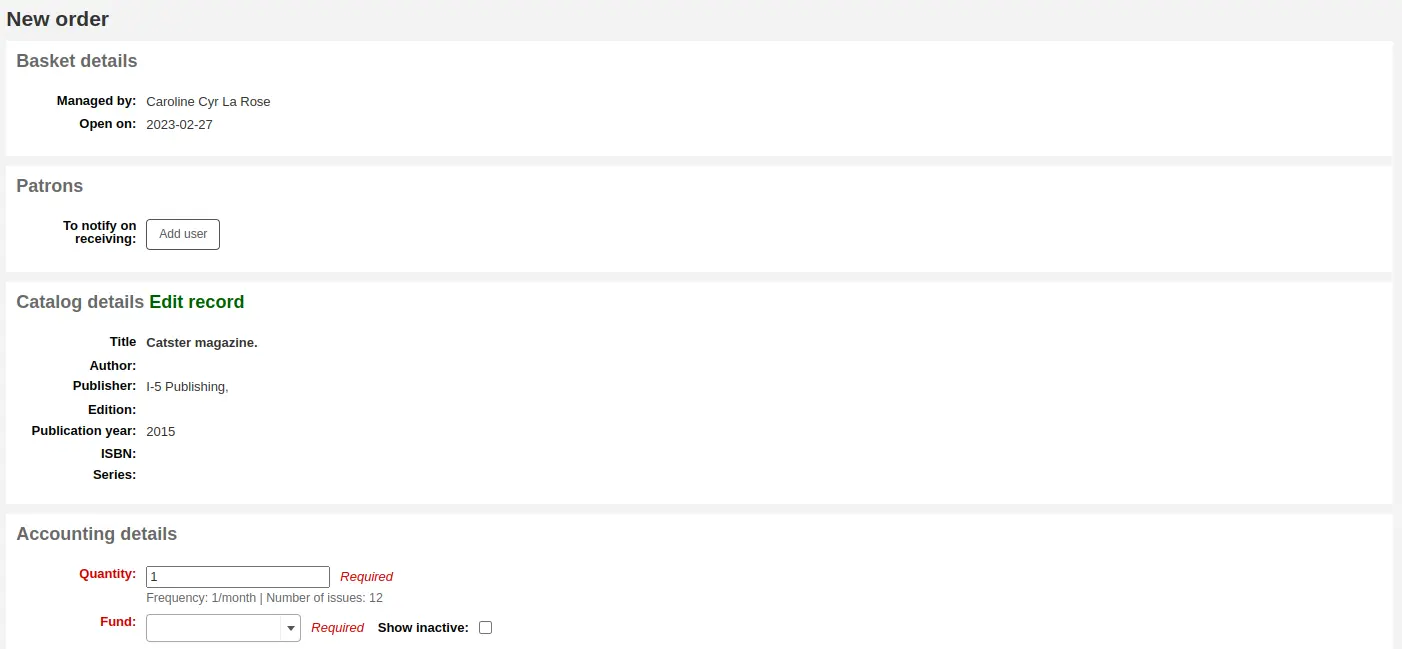
Bestellung für ein Abonnement
Wenn Sie das Zeitschriftenmodul verwenden, können Sie die Bestellungsinformationen für das Abonnement mit der Erwerbung verknüpfen, indem Sie Bestellung „Aus einem Abonnement“ auswählen.
Nachdem der Bestell-Link angeklickt wurde, wird eine Seite mit Suchoptionen angezeigt, über die nach dem Abonnement gesucht werden kann
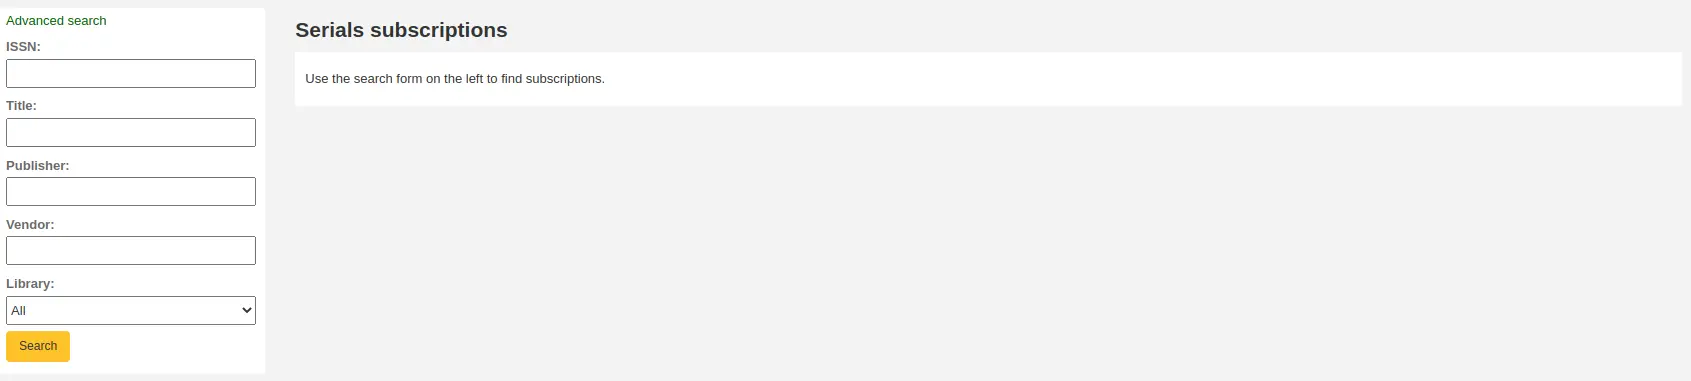
Die Ergebnisse erscheinen auf der rechten Seite des Formulars, und jedes Abonnement hat einen ‚Bestellen‘-Link auf der rechten Seite

Wenn sie auf ‚Bestellen‘ klicken, erscheint die Information zum Abonnement im Bestellformular ohne die Auswahl ‚Exemplar hinzufügen‘, da Sie nur ein Abonnement bestellen und ein Exemplar nicht notwendig ist
Bestellung mit einer Bestellaufnahme (neuer Datensatz)
Um eine Bestellung für etwas anzulegen, das Sie nicht im Katalog oder externen Quellen finden können, wählen Sie „Aus einer Bestellaufnahme (neuer Datensatz)“.
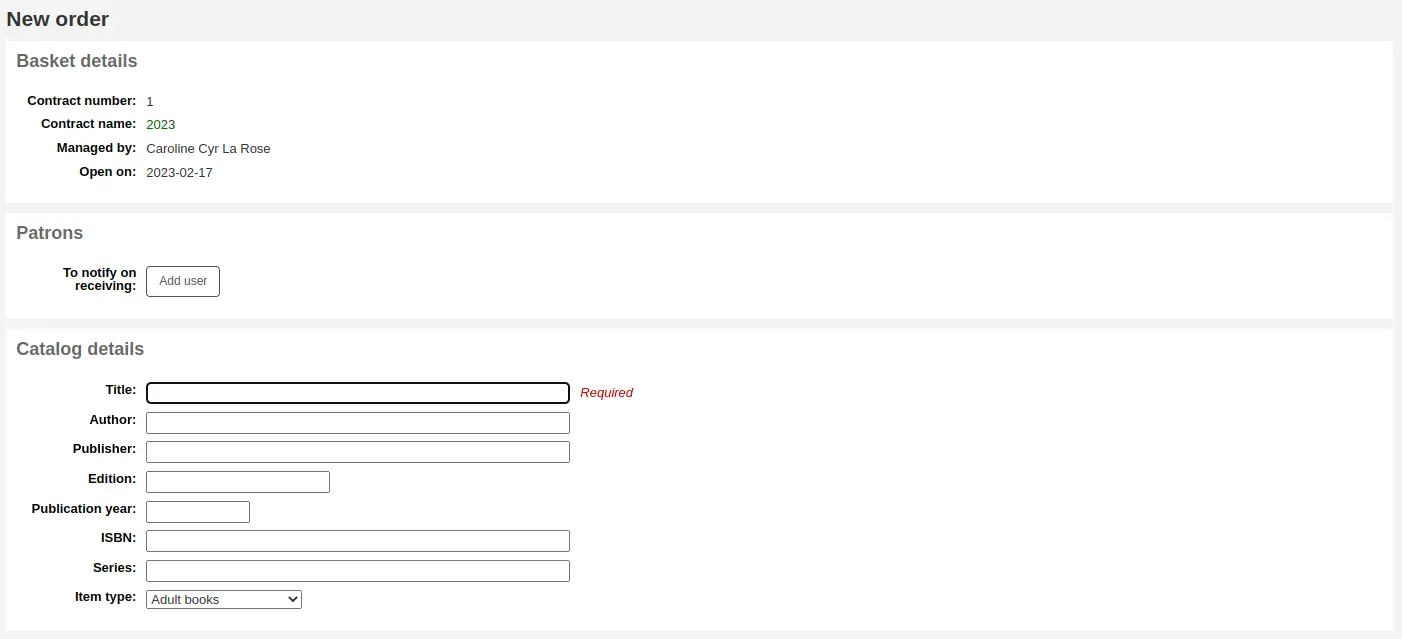
Es wird ein leeres Formular angezeigt, wo Sie alle notwendigen Details bezüglich des zu bestellendenTitels eingeben können.
Bemerkung
Wenn im voreingestellten Formular nicht diejenigen Katalogfelder enthalten sind, die für eine Bestellung benötigt werden, aktivieren Sie den Systemparameter UseACQFrameworkForBiblioRecords, um die Anzeige der Felder über das MARC-Framework ACQ anpassen zu können.
Bestellungen kopieren (Bestellung aus existierenden Bestellungen)
Sie können bestehende Bestellposten kopieren, indem Sie die Option „Aus existierenden Betellungen (Kopie)“ wählen.
Ihnen wird ein Suchformular angezeigt, über das Sie nach bestehenden Bestellungen recherchieren können.
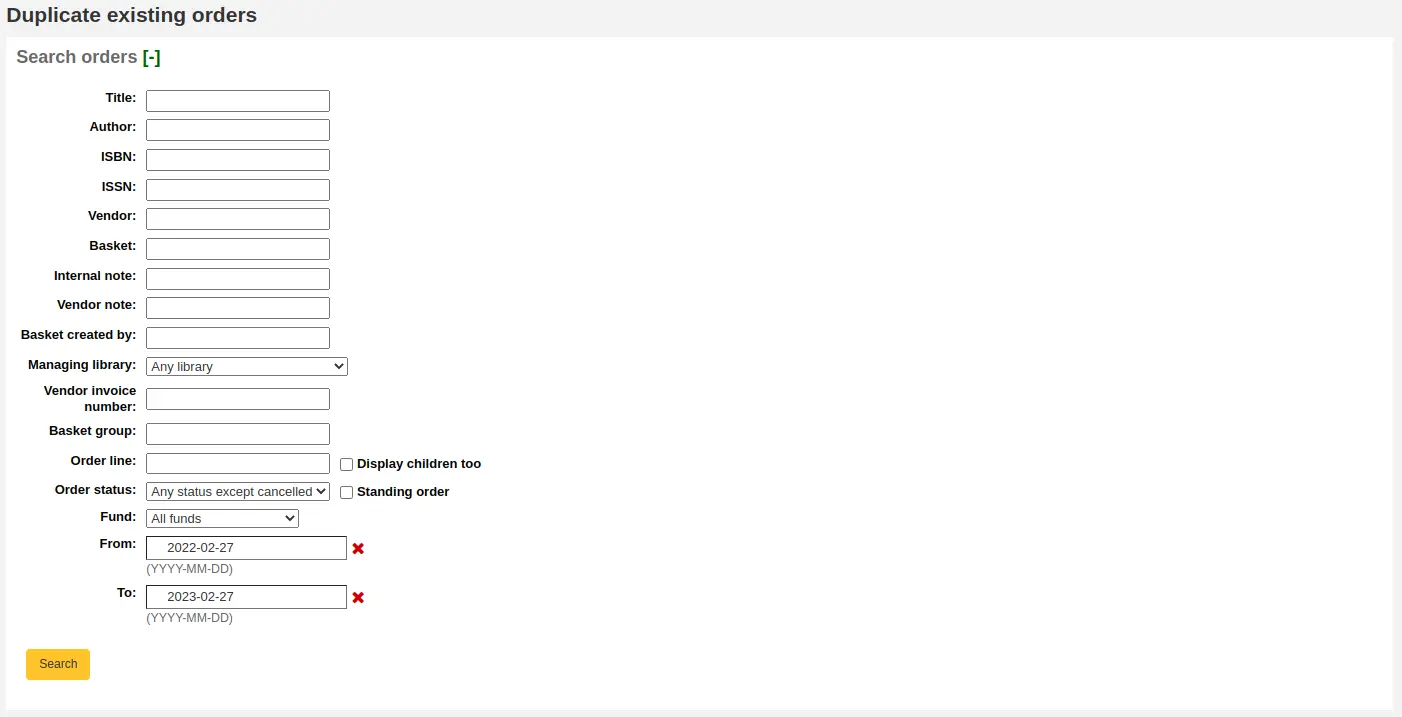
Klicken Sie auf die Checkboxen neben den Bestellungen, die Sie kopieren möchten.
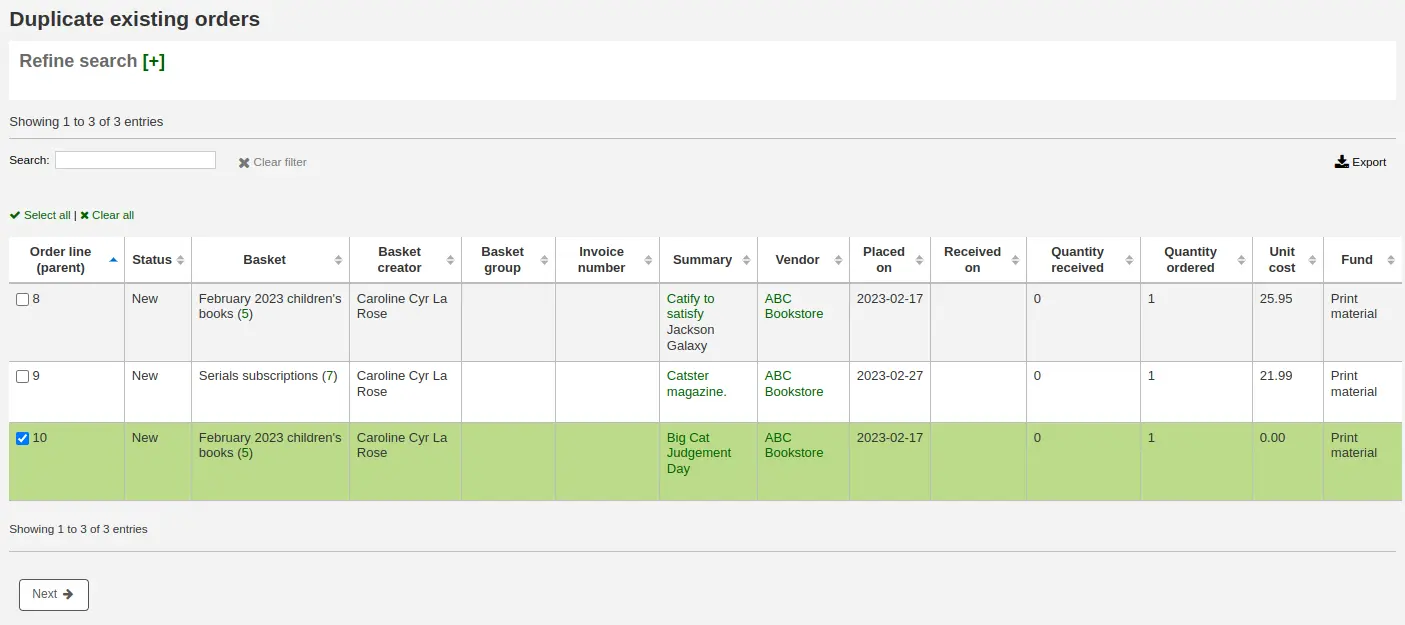
Klicken Sie auf ‚Weiter‘
Markieren Sie die Checkbox bei denjenigen Werten, die Sie aus der ursprünglichen Bestellung übernehmen möchten, oder geben Sie andere Werte ein.
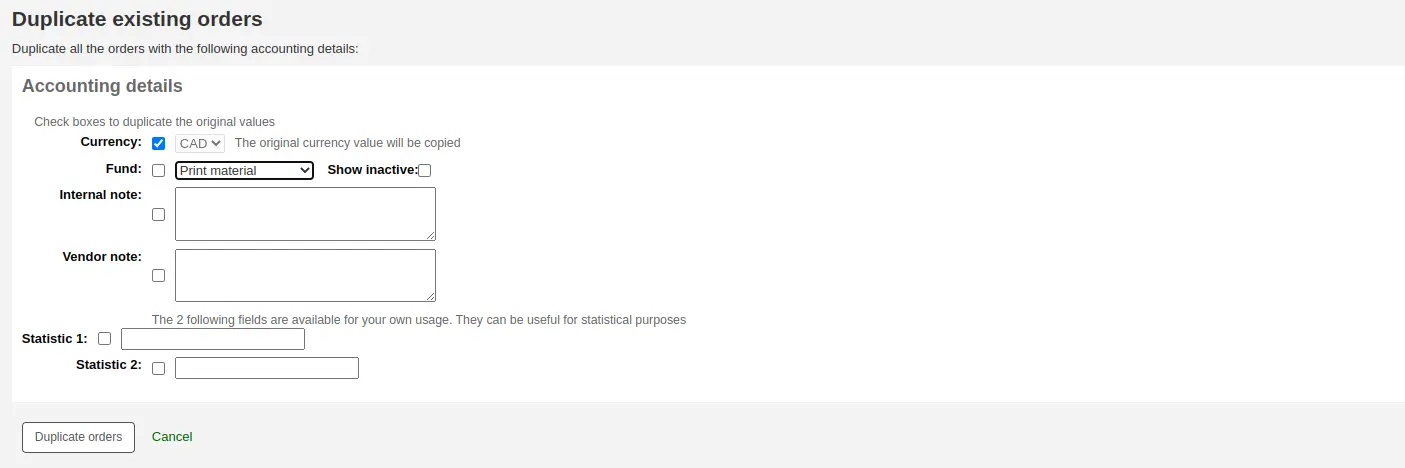
Klicken Sie auf ‚Bestellungen kopieren‘

Klicken Sie auf ‚Zurück zur Bestellung‘
Bestellung über Download aus externer Quelle
Wenn Sie in anderen Bibliotheken nach dem Titel suchen möchten, den Sie bestellen wollen, können Sie hierfür ‚Aus einer externen Quelle‘ auswählen und dort eine Bestellung ausgehend von einer Z39.50-Suche erzeugen.
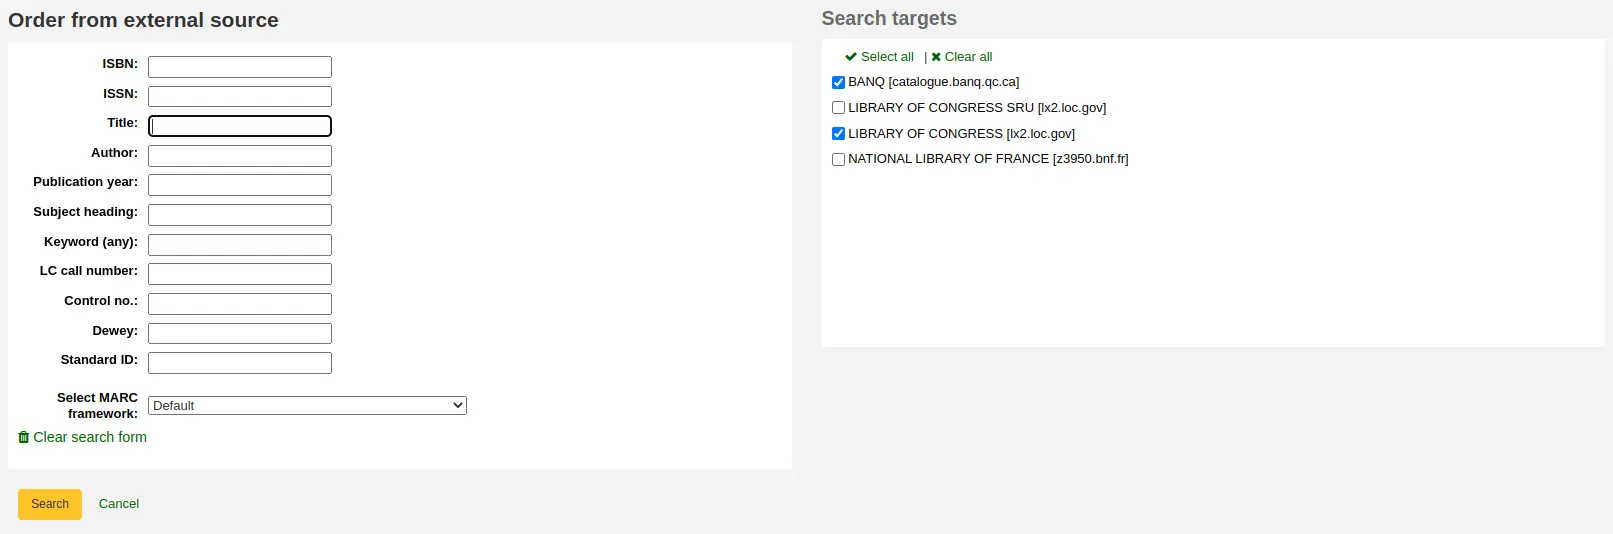
In der Trefferliste klicken Sie auf die Schaltfläche ‚Bestellen‘ neben dem Titel, den Sie erwerben möchten.
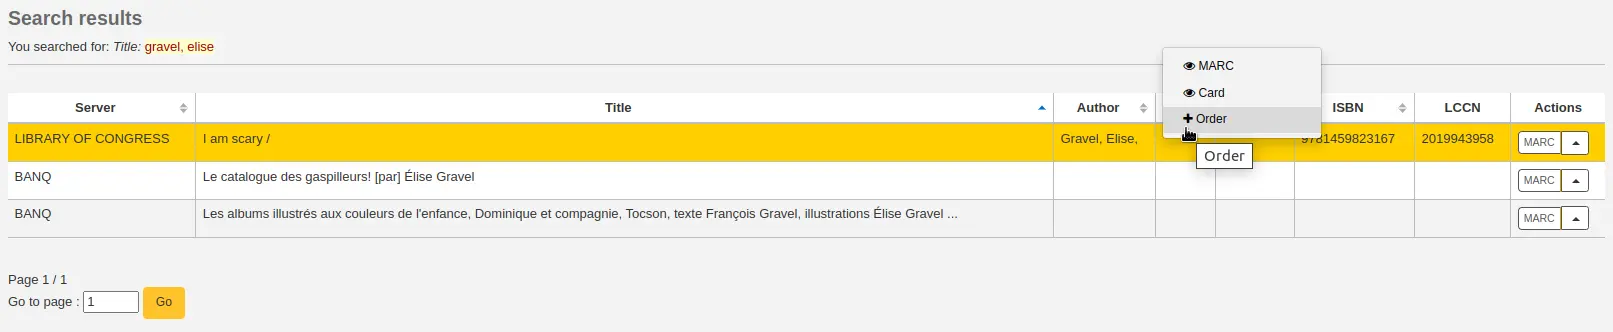
Wenn es sich beim Titel aus dem Z39.50-Download um eine mögliche Dublette handelt, wird das System eine Warnung mit verschiedenen Handlungsoptionen ausgeben.

Verwende vorhandenen Datensatz: ein weiteres Exemplar eines bereits vorhandenen Titels bestellen
Abbrechen und zurück zur Bestellung: die Bestellung abbrechen
Neuen Datensatz anlegen: einen neuen Titelsatz anlegen, während der vorhandene ebenfalls erhalten bleibt
Bestellung aus einer neuen Datei
Wenn Ihr Lieferant Ihnen die Datensätze als Datei (z.B. als .mrc) geschickt hat, können Sie die Bestellungen auch über diese Datei erstellen. Wählen Sie dazu „Aus einer neuen Datei“.
Bemerkung
Mitarbeiter*innen müssen die Berechtigung stage_marc_import (oder die superlibrarian-Berechtigung) zusätzlich zur Berechtigung order_manage besitzen, um aus einer neuen Datei bestellen zu können.
Sie werden auf MARC-Datensätze für Import bereitstellen weitergeleitet. Laden Sie die Datei wie dort beschrieben hoch.
Sobald die Dateien zwischengespeichert wurden, können Sie die Schaltfläche „Zwischengespeicherte Datensätze zu Bestellung hinzufügen“ verwenden.

Verwenden Sie die Checkboxen neben jedem Titel, um diejenigen zu markieren, die Sie bestellen möchten, oder verwenden sie „Alle auswählen“ am oberen Seitenrand. Abhängig von der Konfiguration des Systemparameters MarcFieldsToOrder werden Anzahl, Preis, Konto, Statistik 1 und Statistik 2 auf der folgenden Seite mit Werten aus den zwischengespeicherten MARC-Datensätzen vorbelegt.
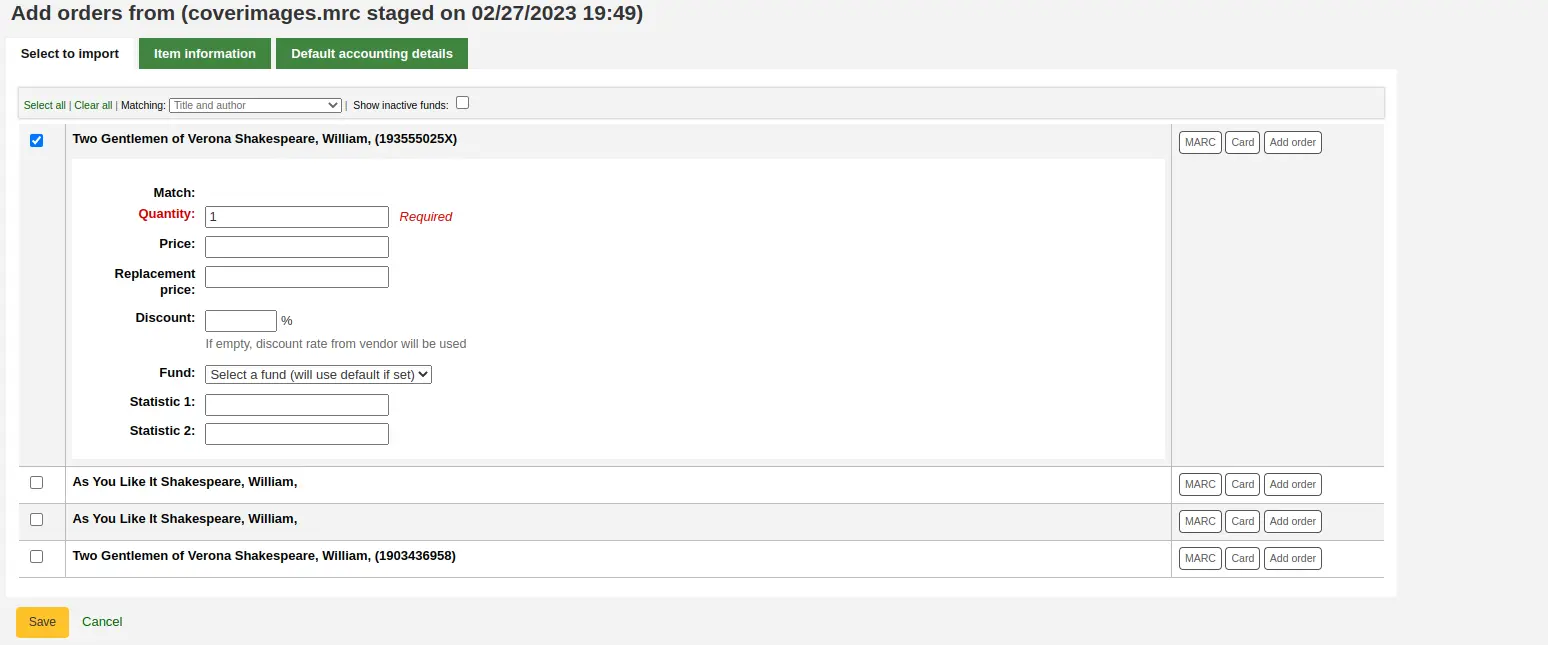
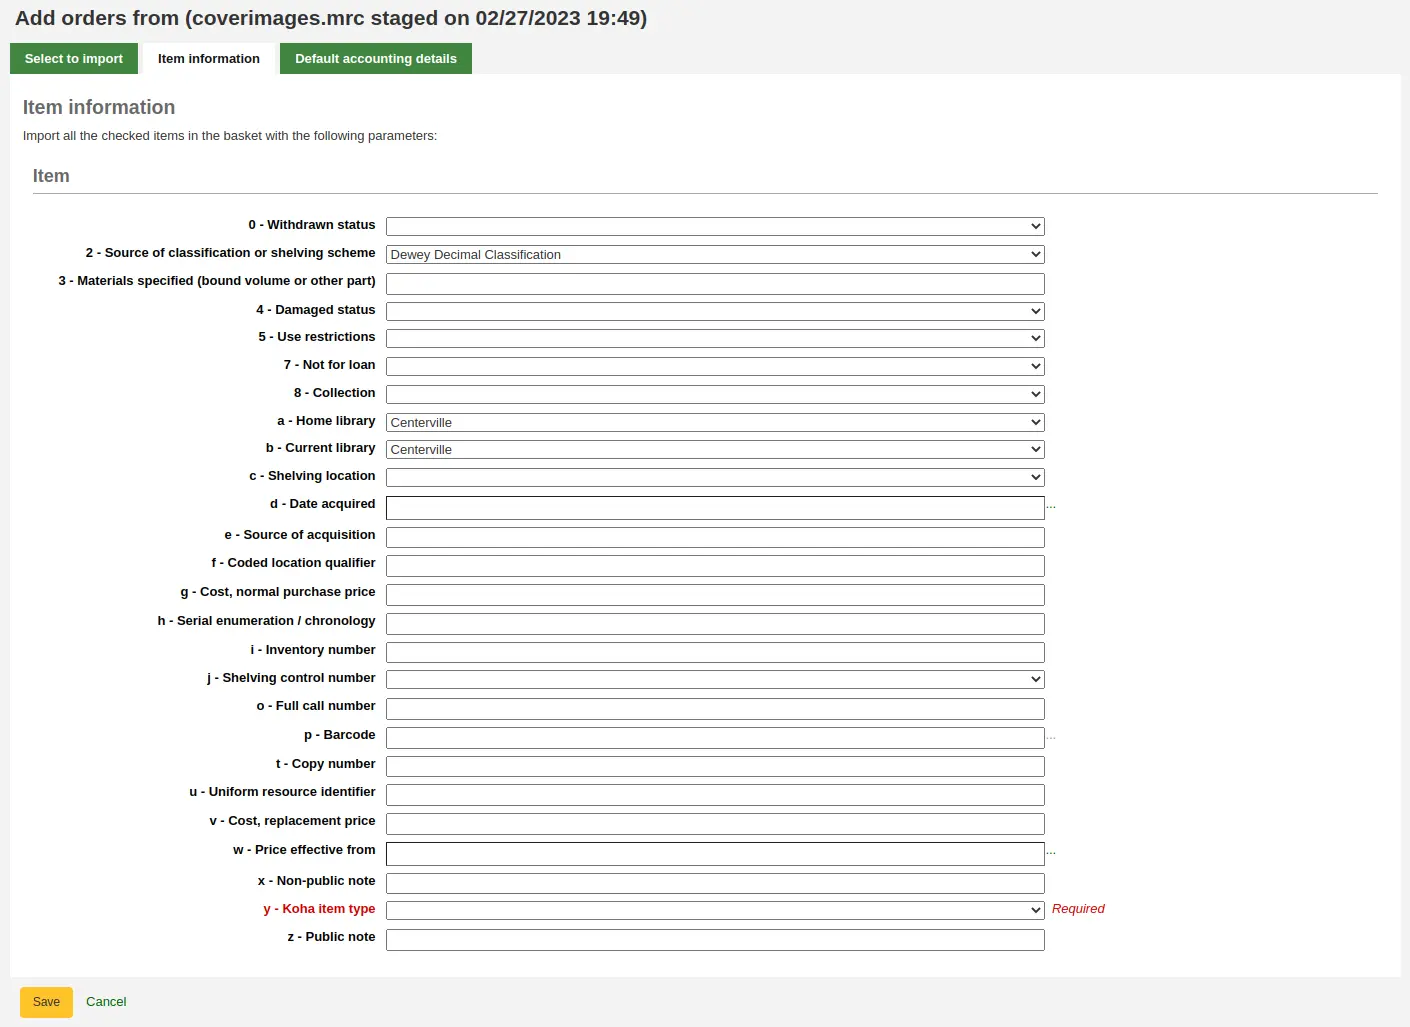
Auf dem Reiter ‚Exemplarinformationen‘ können Sie Exemplarangaben machen, die dann für die Generierung aller bestellten Exemplare verwendet werden - zum Beispiel den Exemplartyp, die Sammlung und den ‚Nicht ausleihbar‘-Status.
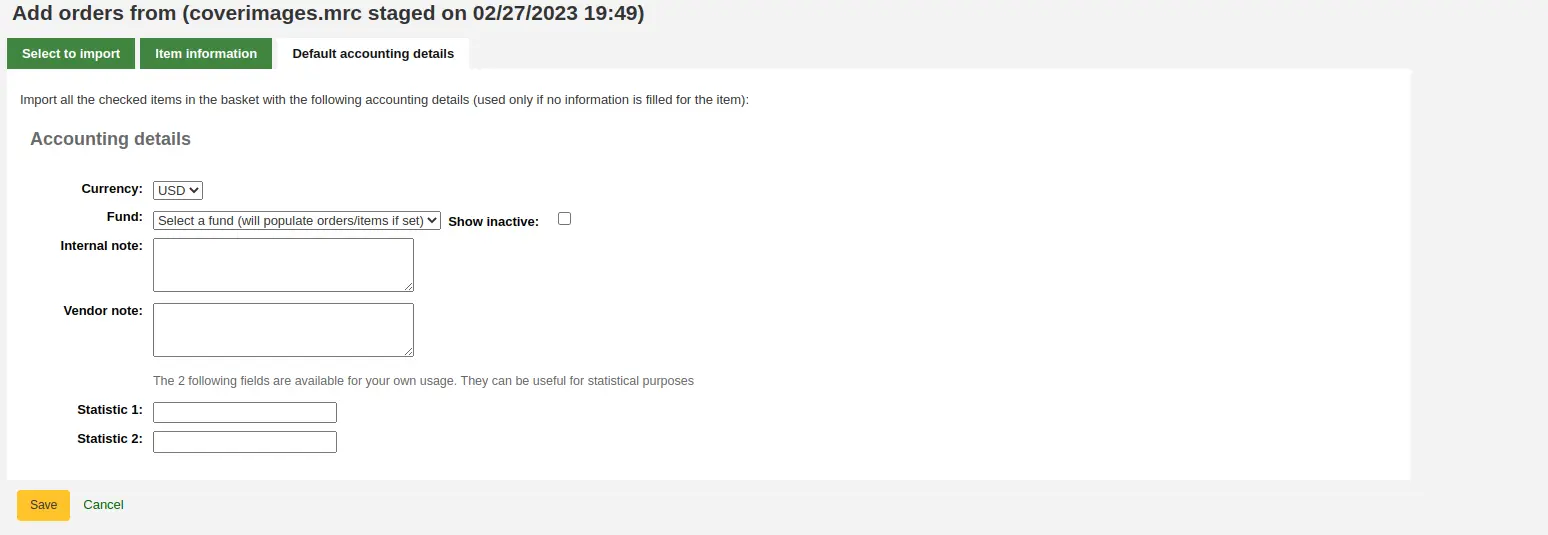
Wenn keine Informationen zum Konto aus dem MARC-Datensatz über den Systemparameter MarcFieldsToOrder übernommen wurden, können Sie Standardwerte auf dem Reiter „Standard-Abrechnungsdetails“ festlegen.
Klicken Sie auf „Speichern“, um zur Bestellung hinzuzufügen
Bestellen aus einer zwischengespeicherten Datei
Diese Option ist die Gleiche wie die vorherige, aber in diesem Fall wurde die Datei bereits zwischengespeichert. Ob Sie „Aus einer neuen Datei“ oder „Aus einer zwischengespeicherten Datei“ auswählen, hängt also von Ihrem Erwerbungsworkflow und Ihren Berechtigungen ab.
Sobald Sie „Aus einer zwischengespeicherten Datei“ ausgewählt haben, wird Ihnen eine Liste mit den in Ihrem System zwischengespeicherten Dateien angezeigt.
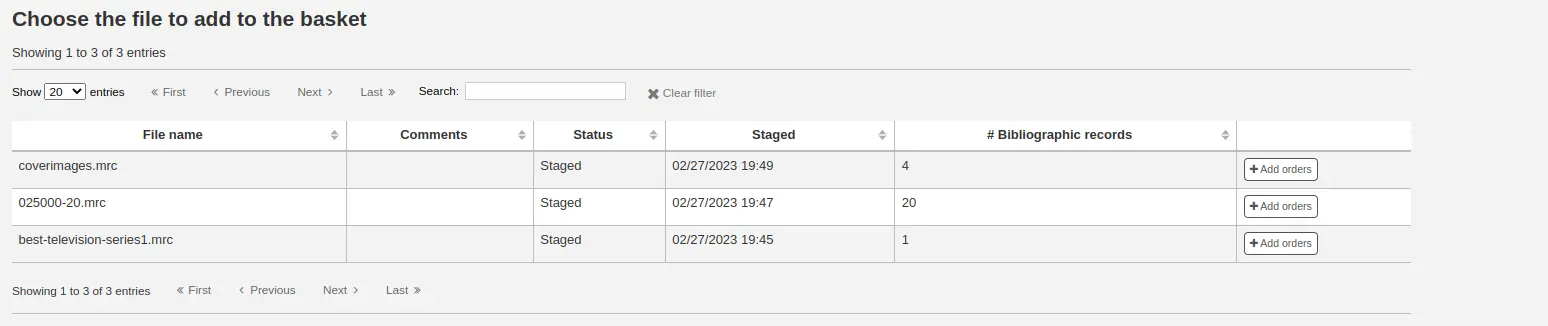
In der Liste der Dateien sehen Sie auch eine Schaltfläche mit „Bestellungen hinzufügen“, um die Titel aus der zwischengespeicherten Datei zu Ihrer Bestellung hinzuzufügen.
Verwenden Sie die Checkboxen neben jedem Titel, um diejenigen zu markieren, die Sie bestellen möchten, oder verwenden sie „Alle auswählen“ am oberen Seitenrand. Abhängig von der Konfiguration des Systemparameters MarcFieldsToOrder werden Anzahl, Preis, Konto, Statistik 1 und Statistik 2 auf der folgenden Seite mit Werten aus den zwischengespeicherten MARC-Datensätzen vorbelegt.
Auf dem Reiter ‚Exemplarinformationen‘ können Sie Exemplarangaben machen, die dann für die Generierung aller bestellten Exemplare verwendet werden - zum Beispiel den Exemplartyp, die Sammlung und den ‚Nicht ausleihbar‘-Status.
Wenn keine Informationen zum Konto aus dem MARC-Datensatz über den Systemparameter MarcFieldsToOrder übernommen wurden, können Sie Standardwerte auf dem Reiter „Standard-Abrechnungsdetails“ festlegen.
Klicken Sie auf „Speichern“, um zur Bestellung hinzuzufügen
Bestellung von Titeln mit höchster Vormerkrate
Die letzte Möglichkeit eine Bestellung zu erzeugen ist einen Titel aus der Liste mit den höchsten Vormerkraten auszuwählen.
Bemerkung
Mitarbeiter*innen müssen die Berechtigung circulate_remaining_permissions (oder die superlibrarian-Berechtigung) zusätzlich zur Berechtigung order_manage haben, um aus Titeln mit hohen Vormerkraten bestellen zu können.
Diese Option bringt Sie zum Report über Vormerkraten, über den Titel mit vielen Vormerkungen ermittelt und Exemplare gezielt nachbestellt werden können. Neben jedem Titel wird hierzu ein Link mit der empfohlenen Anzahl an zu bestellenden Exemplaren angezeigt zum Anlegen der Bestellung angezeigt.

Benutzerbenachrichtigungen einrichten
Bei allen vorgenannten Bestelloptionen gibt es die Möglichkeit, bei Erhalt der Bestellung die Benutzer*innen zu benachrichtigen. Der Benachrichtigungstext kann im Werkzeug für Notices and slips angepasst werden, der Code lautet ACQ_NOTIF_ON_RECEIV. Im Bereich „Benutzer“ sehen Sie die Option „Benutzer hinzufügen“. Klicken Sie auf diese Schaltfläche, um Benutzer hinzuzufügen, die über die neue Ausgabe benachrichtigt werden sollen.
Suche nach zu benachrichtigenden Benutzern
Suchen Sie im nun angezeigten Fenster die Benutzer, die Sie benachrichtigen möchten und klicken Sie auf „Hinzufügen“
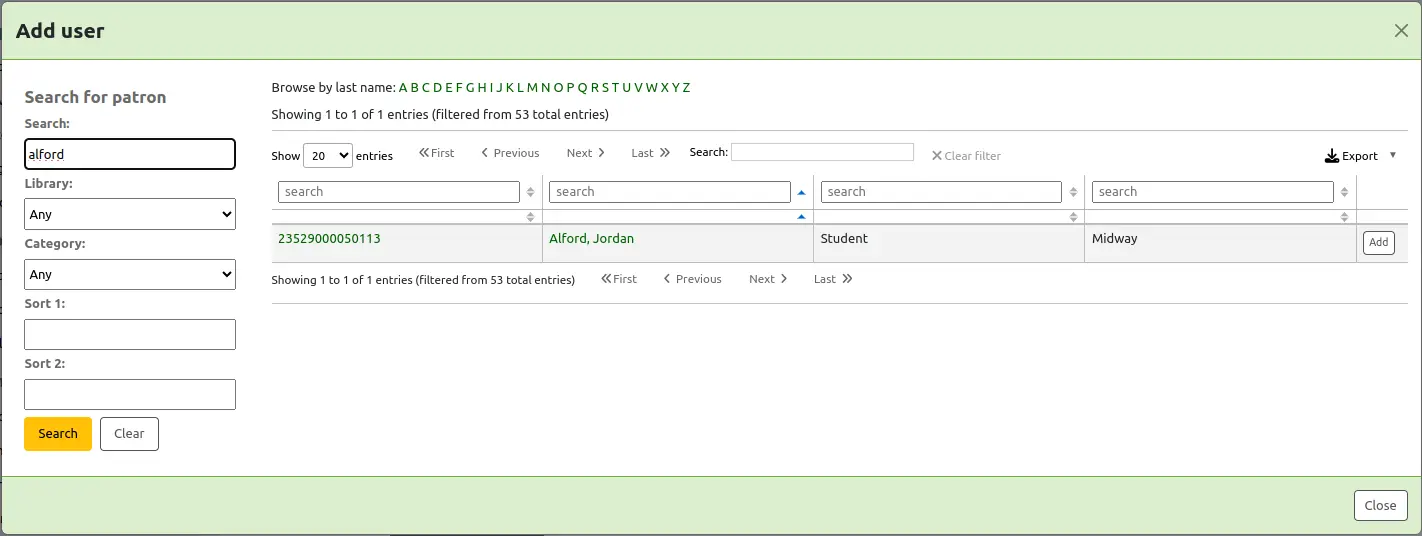
Sobald Sie fertig sind, können Sie das Fenster schließen und die Liste der Benutzer*innen wird im Bereich ‚Benutzer‘ angezeigt

Exemplare zu Bestellposten hinzufügen
Nachdem der Datensatz angelegt wurde (für alle Bestellmethoden mit Ausnahme der zwischengespeicherten Dateien), werden die Exemplare erfasst, wenn Ihr Systemparameter AcqCreateItem auf „Bestellung“ gesetzt ist. Sie müssen dann mindestens einen Exemplarsatz ausfüllen und auf die Schaltfläche „Exemplar hinzufügen“ am Ende des Formulars klicken.
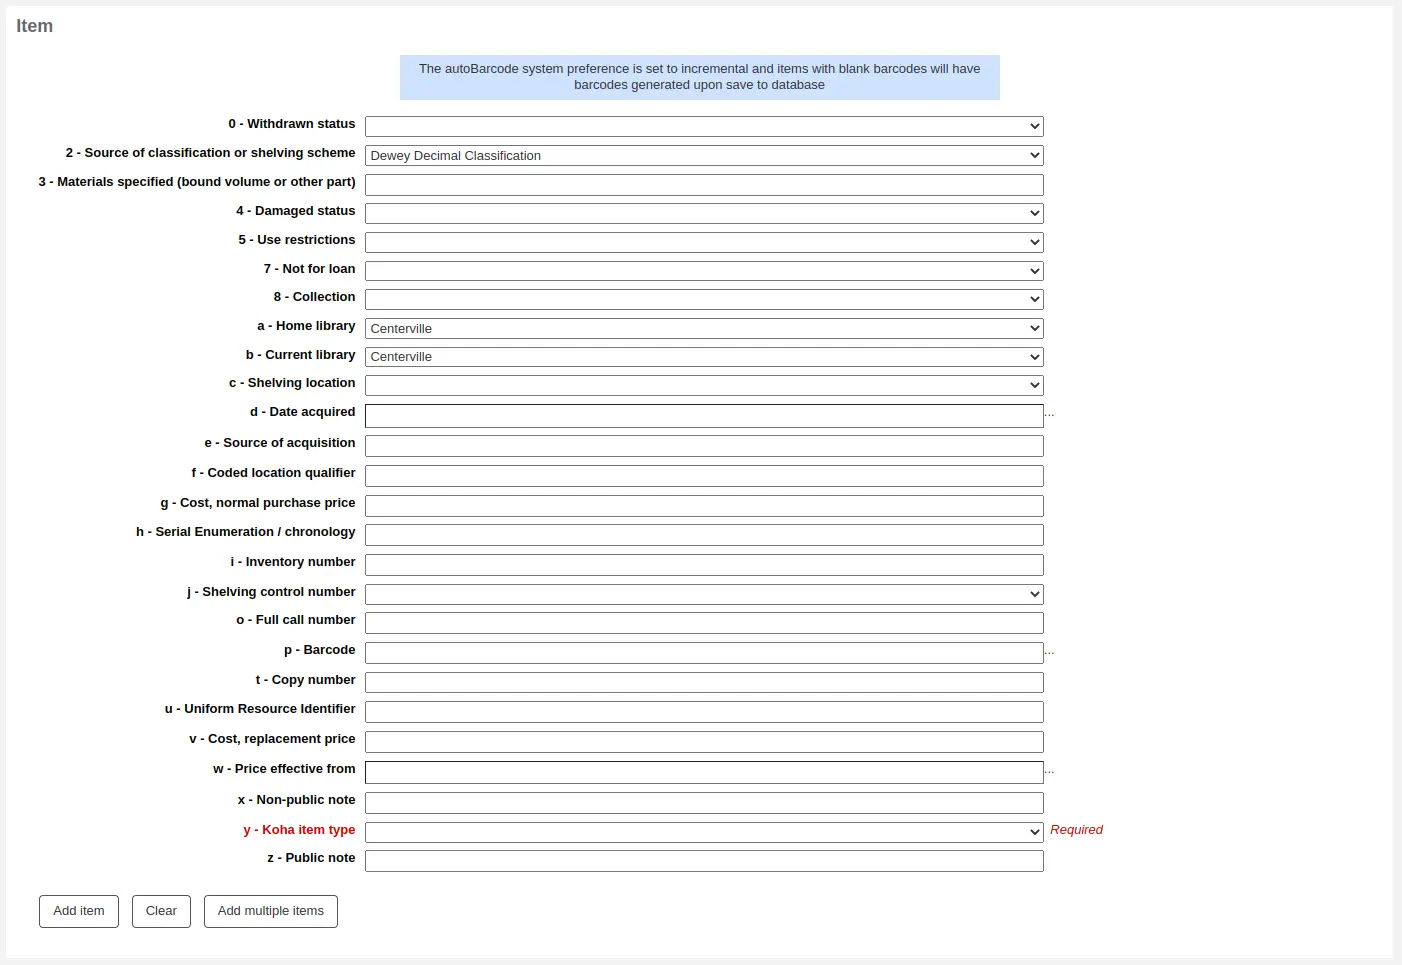
Nach Betätigung der Schaltfläche ‚Exemplar hinzufügen‘ erscheint das Exemplar in der Übersichtsliste oberhalb des Formulars. Sie können bei Bedarf auf die gleiche Weise ein oder mehrere Exemplar(e) hinzufügen.

Wenn Sie mehrere Exemplare bestellen, können Sie auch die Schaltfläche „Mehrere Exemplare hinzufügen“ verwenden, statt diese nacheinander einzeln anzulegen. Sie werden dann gefragt, wie viele Exemplare Sie hinzufügen möchten. Geben Sie die Anzahl dann einfach in das Feld ein und klicken Sie auf „Hinzufügen“.

Rechnungsdetails zum Bestellposten hinzufügen
Nach Eingabe der Informationen zum Titel müssen die Buchungsdetails zur Bestellung erfasst werden.
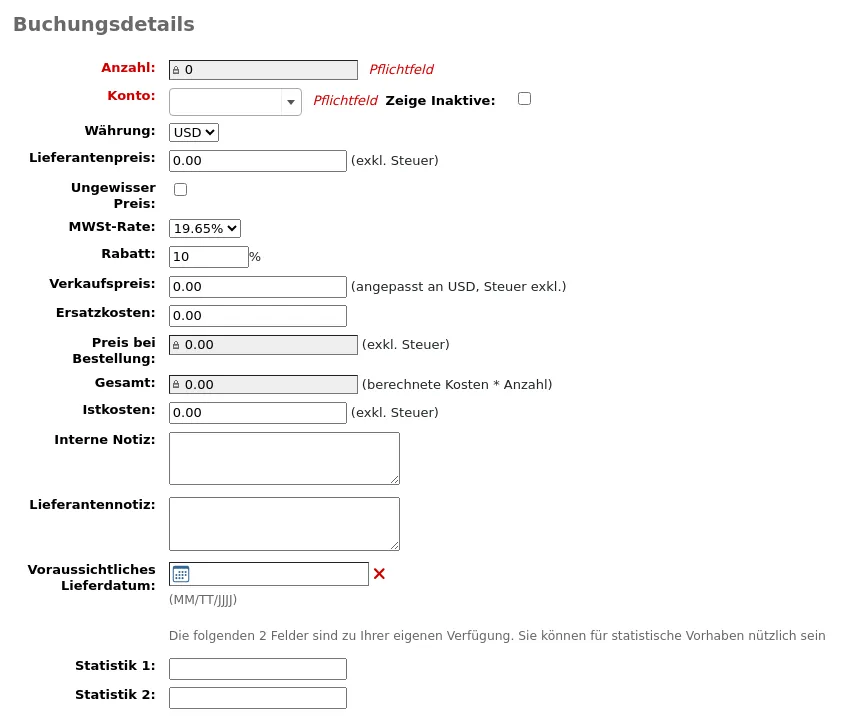
Anzahl: Geben Sie die Anzahl der Exemplare an, die Sie bestellen möchten.
Warnung
If the item is created upon ordering, you will not be able to edit the quantity manually, you must add items to the order by clicking ‚Add item‘ below the item form to add as many items as you’re ordering.
Konto: Wählen Sie das Konto aus, auf das die Bestellung gebucht werden soll.
Die Liste der Konen wird mit den Konten befüllt, die im Administrationsbereich Erwerbung angelegt wurden.
Wenn Sie viele Budgets haben, können Sie den Budgetnamen in das Feld eingeben und die Liste wird für Sie gefiltert.
Voreingestellt sind im Dropdown-Menü nur Mittel für aktive Budgets verfügbar. Wenn Sie auch Ihre inaktiven Mittel sehen möchten, markieren Sie die Checkbox „Inaktive anzeigen“.
Währung: Wählen Sie die Währung für den Preis aus.
Lieferantenpreis: geben Sie den Preis vor Steuern und vor Abzug von Rabatten ein.
Ungewisser Preis: Setzen Sie hier ein Häkchen, wenn der Preis noch nicht bekannt ist, und Sie die Bestellung später weiter bearbeiten möchten.
Bemerkung
Ein Bestellkorb, der mindestens einen Bestellposten mit ungewissen Preis beinhaltet, kann nicht geschlossen werden.
Im Bereich Umgang mit ungewissen Preisen erfahren Sie mehr darüber.
Steuersatz: Wenn Sie Umsatzsteuer zahlen müssen, wählen Sie den Steuersatz.
Die Werte dieser Auswahlliste stammen aus dem Systemparameter TaxRates.
Rabatt: Geben Sie den Rabatt für diesen Bestellposten ein. Wenn Sie nach der Eingabe die Tabulator-Taste betätigen, wird Koha die darunter liegenden Felder automatisch befüllen.
Verkaufspreis: Im Feld Verkaufspreis wird u. U. ein empfohlener Verkaufspreis aus den Daten eingetragen.
Ersatzkosten: die Ersatzkosten sind der Preis des Exemplars bei einer Neuanschaffung. Dieser Preis wird den BenutzerInnen berechnet, wenn das Exemplar als verloren gekennzeichnet wird (und wenn der Systemparameter WhenLostChargeReplacementFee auf „Berechne“ gesetzt ist).
Der Preis bei Bestellung ist die Summe, die als „gebunden“ von den verfügbaren Mitteln abgezogen wird. Ob dieser Preis inklusive oder exklusive Steuern gerechnet wird, hängt von der Einstellung für den Listenpreis im Lieferanten ab.
Bei ‚Gesamt‘ stehen die gesamten Kosten des Einzelexemplars multipliziert mit der Anzahl der bestellten Exemplare.
Istkosten: dieses Feld bleibt in der Regel solange leer, bis der Lieferant bei der Lieferung die tatsächlichen Kosten angibt.
Interne Notiz: diese wird nur im Erwerbungsmodul und in der Detailansicht der Dienstoberfläche im Reiter ‚Erwerbungsdetails‘ angezeigt.
Lieferantennotiz: diese wird im Erwerbungsmodul, aber auch im CSV-Export ausgegeben.
Geschätztes Lieferdatum: Sie können ein geschätztes Lieferdatum für diese spezifische Bestellung angeben. Wenn hier kein Datum eingegeben wird, wird das voraussichtliche Lieferdatum anhand der ‚Lieferzeit‘ in der vendor information berechnet. Dieses Datum wird bei der Verwaltung von late orders verwendet
Wenn Sie beim Anlegen des Kontos diesem statistische Werte zugewiesen haben, tauchen diese ganz unten in den Feldern Statistik 1 und Statistik 2 auf.
Wenn Sie additional fields for order lines haben, werden diese hier erscheinen.
Wenn Sie alle Felder ausgefüllt haben, klicken Sie auf ‚Speichern‘ um den Bestellposten zum Korb hinzuzufügen. Wenn der Gesamtpreis das verfügbare Budget des Kontos überschreitet, erhalten Sie eine entsprechende Meldung.

Trotz der Warnung können Sie die Bestellung anlegen, wenn Sie die Meldung entsprechend bestätigen.
Wenn Sie Ihre Bestellung eingegeben haben, können Sie im Erwerbungsmodul danach suchen oder die Informationen über die Detailansicht der Titeltrefferliste in der Dienstoberfläche abrufen, wenn der Systemparameter AcquisitionDetails auf ‚Zeige‘ gesetzt ist. Im OPAC können Sie die Informationen in der Detailansicht des Titelsatzes ansehen, wenn der Systemparameter OPACAcquisitionDetails auf ‚Zeige‘ gesetzt ist.

Bemerkung
You can customize the columns of this table in the Table settings section of the Administration module (table id: acquisitiondetails-table).
Bestellung bearbeiten
Bemerkung
Mitarbeiter*innen müssen die Berechtigung order_manage (oder die superlibrarian-Berechtigung) besitzen, um bestehende Bestellungen zu bearbeiten.
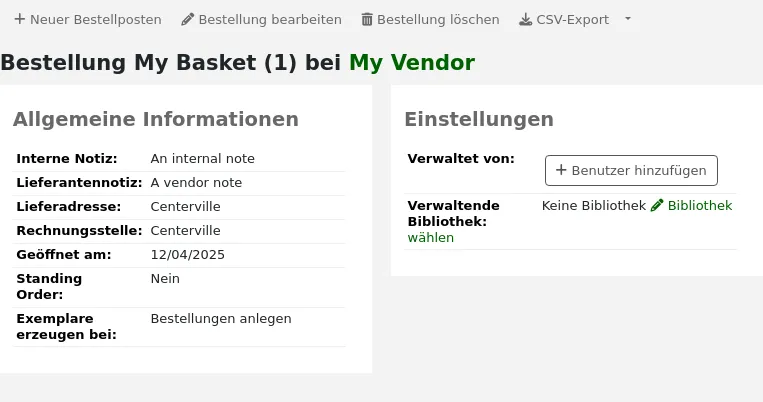
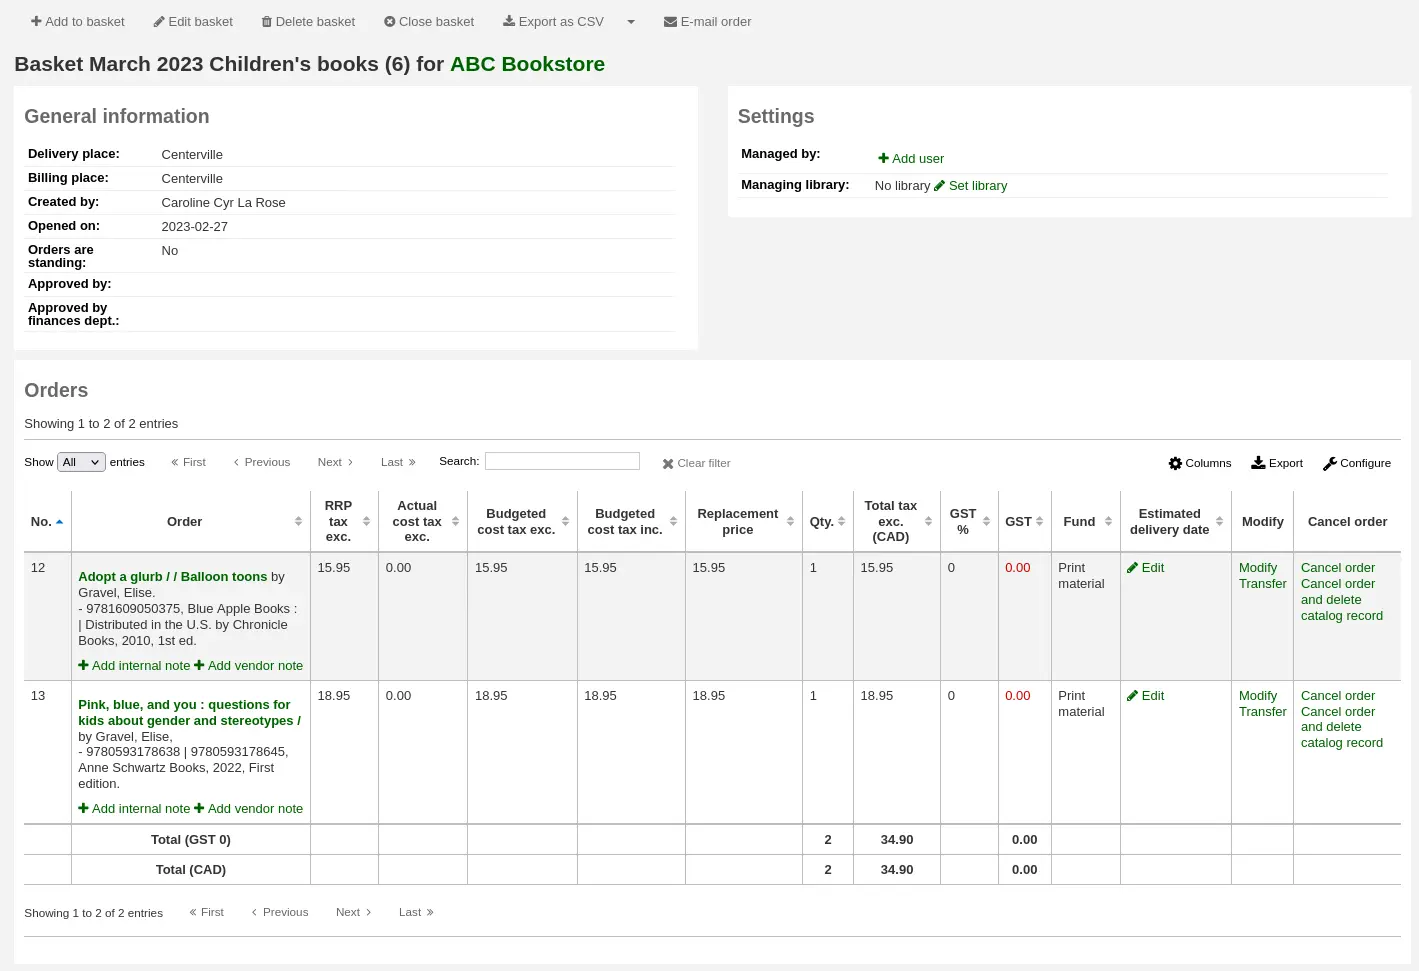
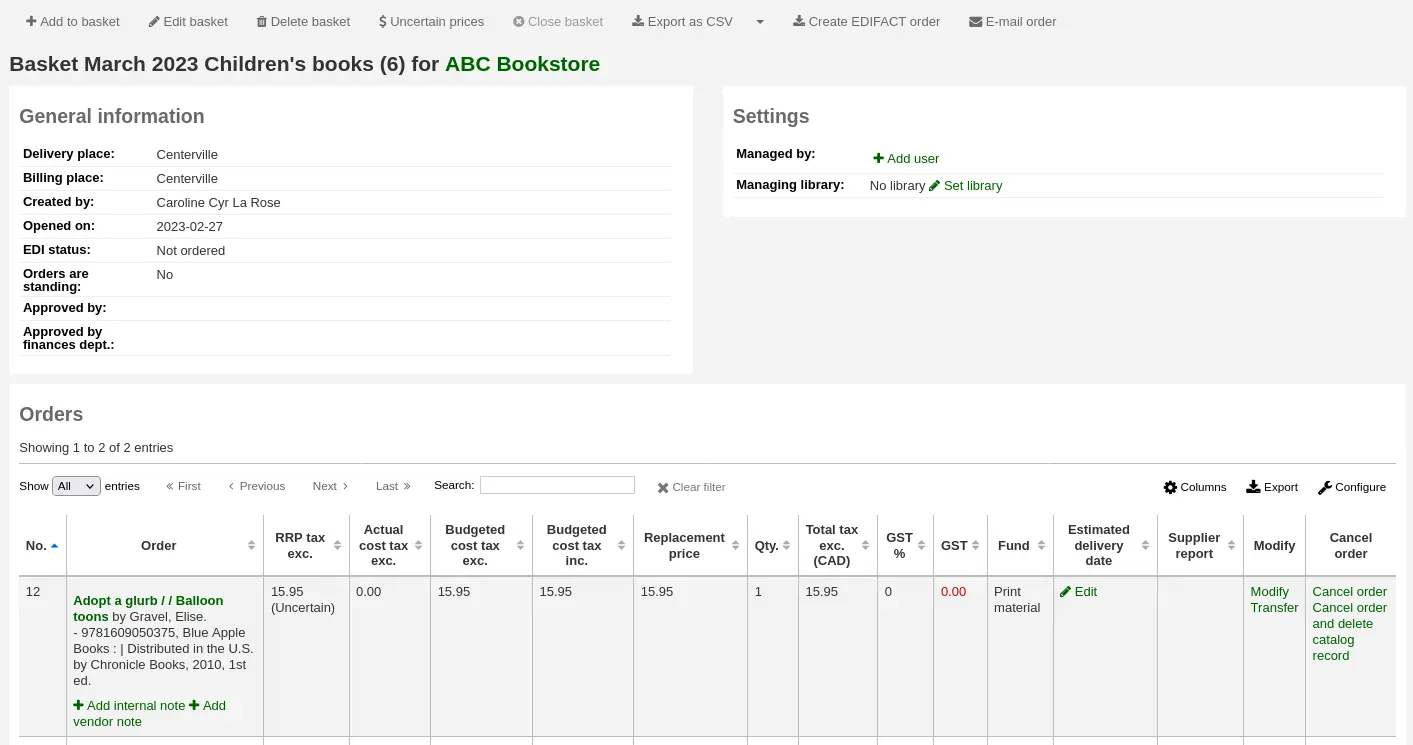
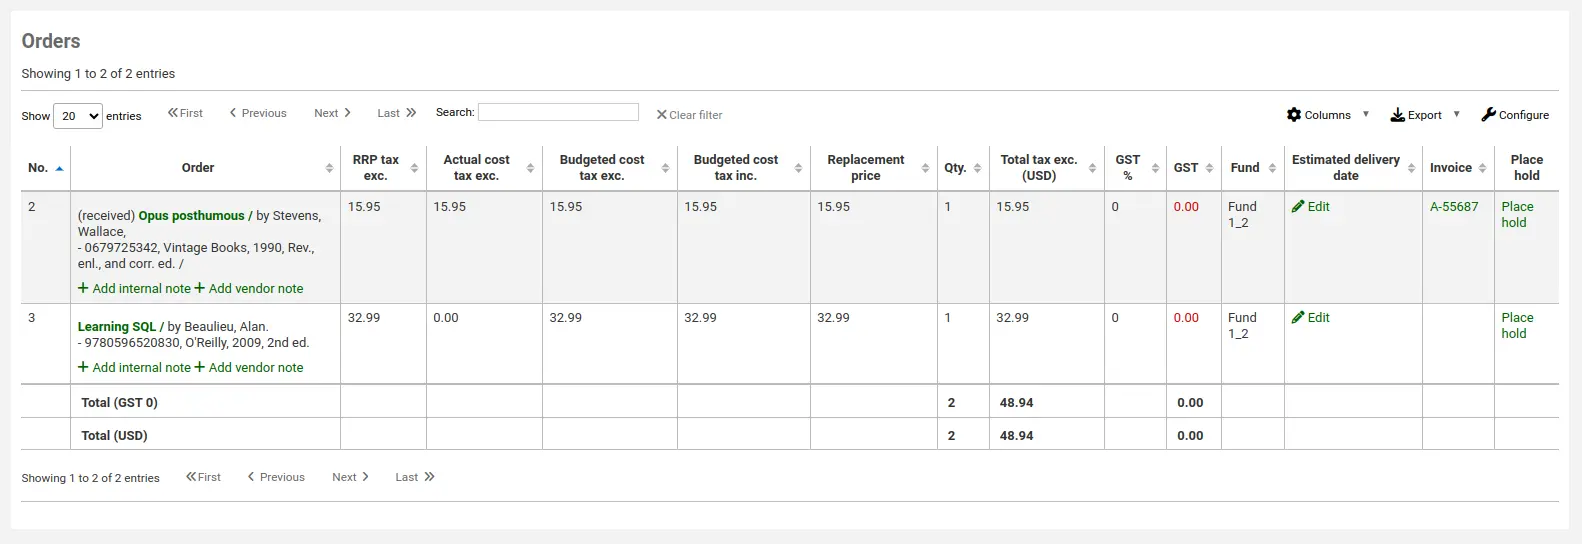
Nachdem ein Medium dem Korb hinzugefügt worden ist, wird Ihnen eine Übersicht des Korbes gezeigt.
Bemerkung
You can customize the columns of this table in the Table settings section of the Administration module (table id: orders).
Von der Bestellung aus können Sie die Bestellposten bearbeiten oder entfernen, die Sie hinzugefügt haben.
Klicken Sie auf „Ändern“, gelangen Sie zurück zum Bestellformular, falls Sie die Buchungsdetails oder die Exemplaranzahl ändern müssen.
Klicken Sie auf „Transfer“, können Sie die Bestellposten aus der Bestellung dieses Lieferanten zu einem anderen Lieferanten verschieben.
Bemerkung
Dafür muss der neue Lieferant mindestens eine offene Bestellung haben.
Wenn Sie die Option „Vormerkung erstellen“ wählen, können Sie für eine*n Benutzer*in eine Vormerkung auf diese Bestellung erstellen.
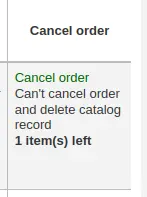
Wenn Sie die „Bestellung stornieren“ wird der Bestellposten gelöscht, aber der Titel verbleibt im Katalog.
Wenn Sie „Bestellung stornieren und Titel löschen“ wählen, werden sowohl der Bestellposten als auch der Titel im Katalog gelöscht.
Ein Titelsatz kann unter Umständen nicht gelöscht werden. Wenn dies der Fall ist, erscheint ein Hinweis mit dem Grund.
Bemerkung
Wenn die Bestellung auf Grundlage eines Vorschlags erstellt wurde, wird der Status des Vorschlags von „Bestellt“ auf „Angenommen“ zurückgesetzt, wenn der Auftrag storniert wird.
Auf der Übersichtsseite haben Sie auch verschiedene Optionen über die Schaltflächen am Anfang der Seite.

Add to basket: add orders to the basket
Bestellung bearbeiten: Ändern Sie die Informationen zur Bestellung, wie deren Namen und Rechnungsadresse.
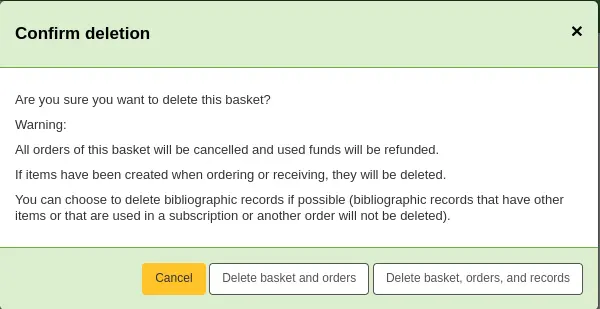
Bestellung löschen: wenn die Bestellung leer ist, erhalten Sie eine Bestätigung, bevor die Bestellung gelöscht wird. Wenn Bestellposten enthalten sind, werden Ihnen mehrere Optionen angeboten.
Bestellung und Bestellposten löschen: dies löscht die Bestellung, storniert die Bestellposten, gibt die Haushaltsmittel frei und löscht die Exemplare (bestellt oder zugegangen).
Bestellung, Bestellposten und titel löschen: dies löscht alle oben angegebenen Daten und zusätzlich die Titeldatensätze für die Bestellungen (außer denen, die nicht gelöscht werden können, da weitere Exemplare, Bestellposten oder Abonnements mit ihnen verknüpft sind).
Close basket: closing the basket will enable you to add it to a basket group (this is optional) and receive its items.
CSV-Export: dies erzeugt eine CSV-Datei mit allen Bestellposten aus dieser Bestellung. Sie können mehrere CSV-Exportformate über das Werkzeug CSV-Profile hinterlegen.
Neue EDIFACT-Bestellung: Wenn Sie Ihre Bestellungen mit EDI bearbeiten, können Sie auf die Schaltfläche „Neue EDIFACT-Bestellung“ klicken, sobald Sie fertig sind und damit die Datei an den Lieferanten übertragen und die Bestellung schließen.
E-Mail-Bestellung senden: dies sendet die Bestellinformationen an den hinterlegten Kontakt für diesen Lieferanten. Stellen Sie sicher, dass für den Lieferanten eine E-Mail-Adresse im Lieferantendatensatz erfasst wurde.
Bemerkung
Die gesendete E-Mail basiert auf der ACQORDER-Vorlage für Benachrichtigungen. Sie kann über das Werkzeug Notices and slips tool angepasst werden.
Bestellen (Schließen der Bestellung)
Bemerkung
Mitarbeiter*innen müssen die Berechtigung order_manage (oder die superlibrarian-Berechtigung) besitzen, um bestehende Bestellungen zu schließen.
Wenn Sie alle Bestellposten angelegt haben und die Bestellung vollständig ist, können Sie die ‚Bestellung schließen‘. Dies bedeutet, dass die Bestellung abgeschlossen ist und an den Lieferanten versandt wurde.
Warnung
Um bestellte Exemplare zugehen zu lassen, muss der Korb geschlossen werden. Nur bei Exemplaren von Körben die geschlossen sind, werden die entsprechenden Buttons angezeigt.
Wenn Sie den Systemparameter BasketConfirmations so gesetzt haben, dass immer eine Bestätigung erforderlich ist, erhalten Sie immer zuerst eine Nachfrage beim Schließen der Bestellung.
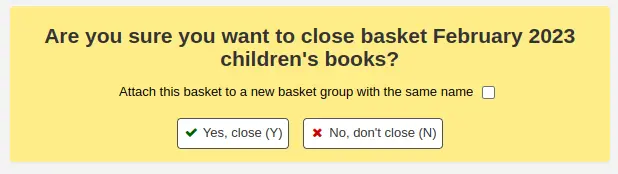
Haben Sie die Bestellung geschlossen, können Sie diese einer Gruppe zuordnen, um die Bestellungen leichter ausdrucken und wiederfinden zu können. Wenn Sie die Checkbox „Bestellung einer Bestellgruppe mit demselben Namen hinzufügen“ markieren, gelangen Sie zur Gruppenliste. Von dort können Sie eine PDF-Datei mit der Bestellung exportieren.
Warnung
Eine Bestellung, die einen oder mehrere Bestellposten mit „ungewissem Preis“ enthält, kann nicht geschlossen werden.
Im Bereich Umgang mit ungewissen Preisen erfahren Sie mehr darüber.
Bestellungen mit ungewissem Preis
Warnung
Eine Bestellung, die einen oder mehrere Bestellposten mit „ungewissem Preis“ enthält, kann nicht geschlossen werden.
Wenn Sie auf ‚Unsichere Preise‘ klicken, erscheint eine Liste mit Exemplaren, deren Preise unsicher sind, um sie rasch bearbeiten zu können. Ausgehend von dieser Liste können Sie die Exemplare schnell bearbeiten, indem Sie den neuen Preis und die Menge angeben.
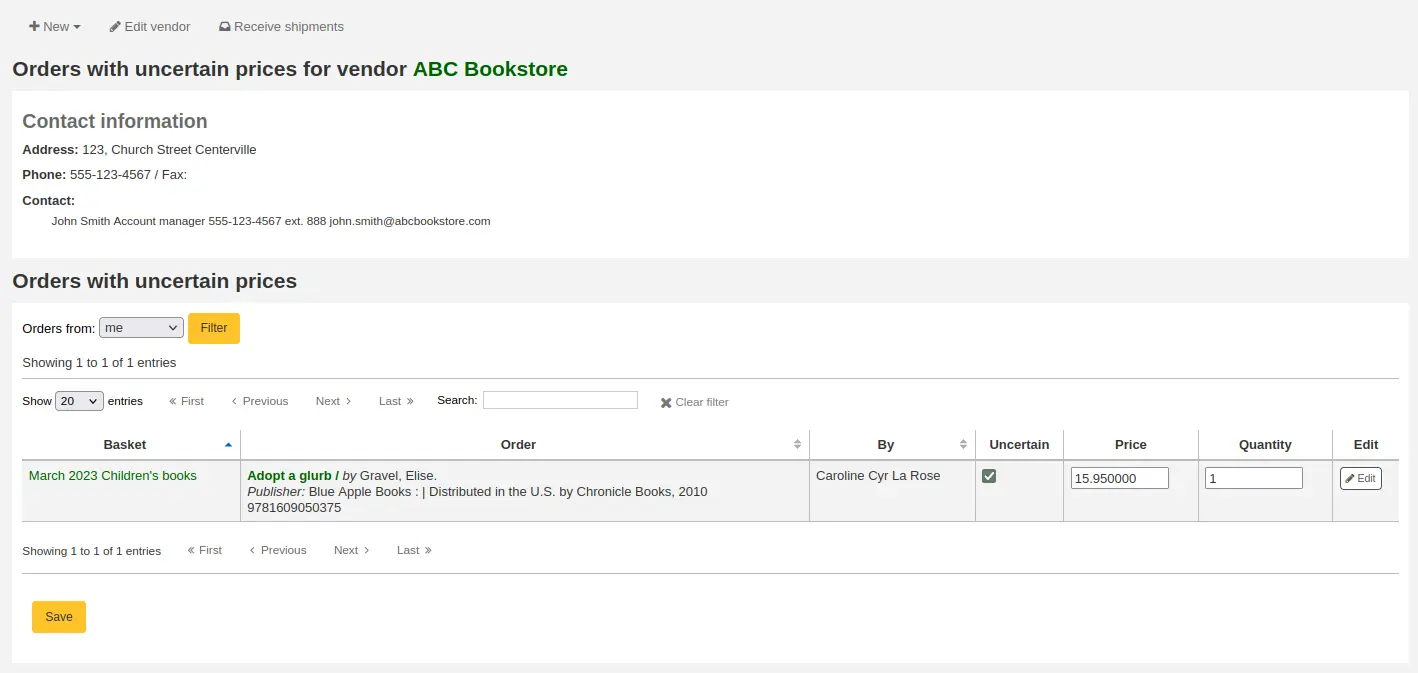
Bemerkung
Die Seite Unsichere Preise ist unabhängig von den Bestellkörben. Sie zeigt alle unsicheren Preise für einen einzelnen Lieferanten.
Eine Bestellgruppe anlegen
Eine Bestellgruppe ist eine Gruppe von Bestellkörben. In einigen Bibliotheken erstellen verschiedene MitarbeiterInnen Bestellungen, und am Ende eines Zeitraums werden die Bestellungen in einer Bestellgruppe zusammengefasst und gesammelt an den Lieferanten geschickt. Es ist auch möglich nur einen Korb pro Bestellgruppe zu haben und diese an den Lieferanten zu schicken, oder auch Bestellgruppen gar nicht zu verwenden.
Bemerkung
Mitarbeiter*innen müssen die Berechtigung group_manage (oder die superlibrarian-Berechtigung) besitzen, um Bestellgruppen erstellen, bearbeiten, schließen oder löschen zu können.
Bemerkung
Sie können einen Bestellkorb nicht wieder öffnen, der mit einer Bestellgruppe verknüpft ist. In diesem Fall ist die Schaltfläche zum Öffnen des Korbes ausgegraut.
Um eine Bestellgruppe anzulegen, rufen Sie den Lieferanten auf und klicken Sie auf den Reiter „Bestellgruppen“ auf der linken Seite.

Klicken Sie auf die Schaltfläche „Neue Bestellgruppe“.
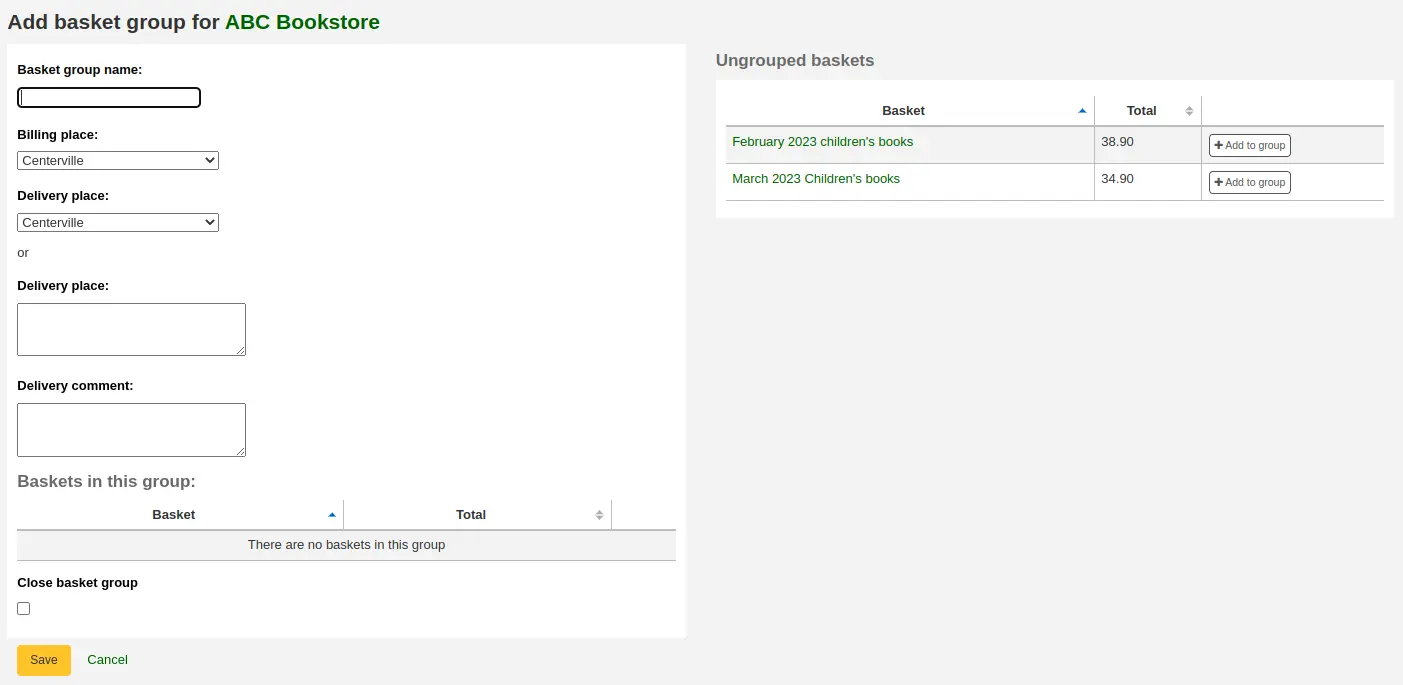
Bestellgruppenname: dies ist der Name der Bestellgruppe, der in Koha verwendet wird
Rechnungsadresse: dies ist die Rechnungsadresse, die in einer über die Bestellgruppe generierten Bestellung angezeigt wird
Lieferadresse: wählen Sie eine Bibliothek, an welche diese Bestellungen verschickt werden sollen. Dies wird in der Bestellgruppe unter Lieferadresse angezeigt. Sie können auch eine abweichende Adresse angeben
Lieferkommentar: dieser Kommentar wird in einer aus der Bestellgruppe erzeugten Bestellung angezeigt
Bestellgruppe schließen: wenn Sie bereits wissen, dass Sie keine weiteren Änderungen mehr vornehmen werden, können Sie die Gruppe direkt schließen
Fügen Sie Bestellkörbe einer Gruppe hinzu, indem Sie auf den Button ‚Zur Gruppe hinzufügen‘ auf der rechten Seite klicken.
Klicken Sie auf „Speichern“, um die Bestellung abzuschließen.
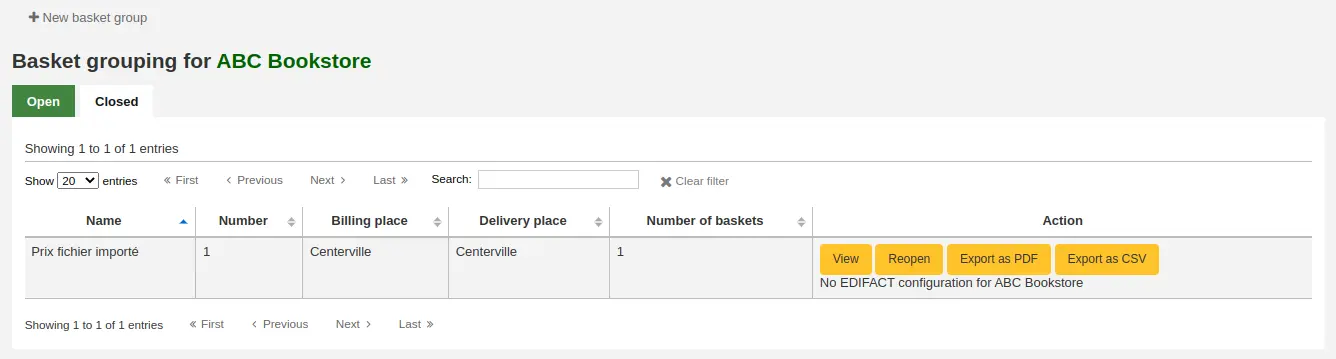
Von hier aus können Sie Ihre Bestellung als PDF-Datei exportieren, um diese an den Lieferanten zu schicken.
Bemerkung
Es ist nicht möglich, die generierte PDF-Datei zu bearbeiten, aber Sie können die Sprache und das Format über den Systemparameter OrderPdfFormat ändern.
Wenn Sie die Option ‚English 1-Page‘ verwenden, ist es möglich, den Text über der Bestelltabelle mit dem Systemparameter 1PageOrderPDFText anzupassen.
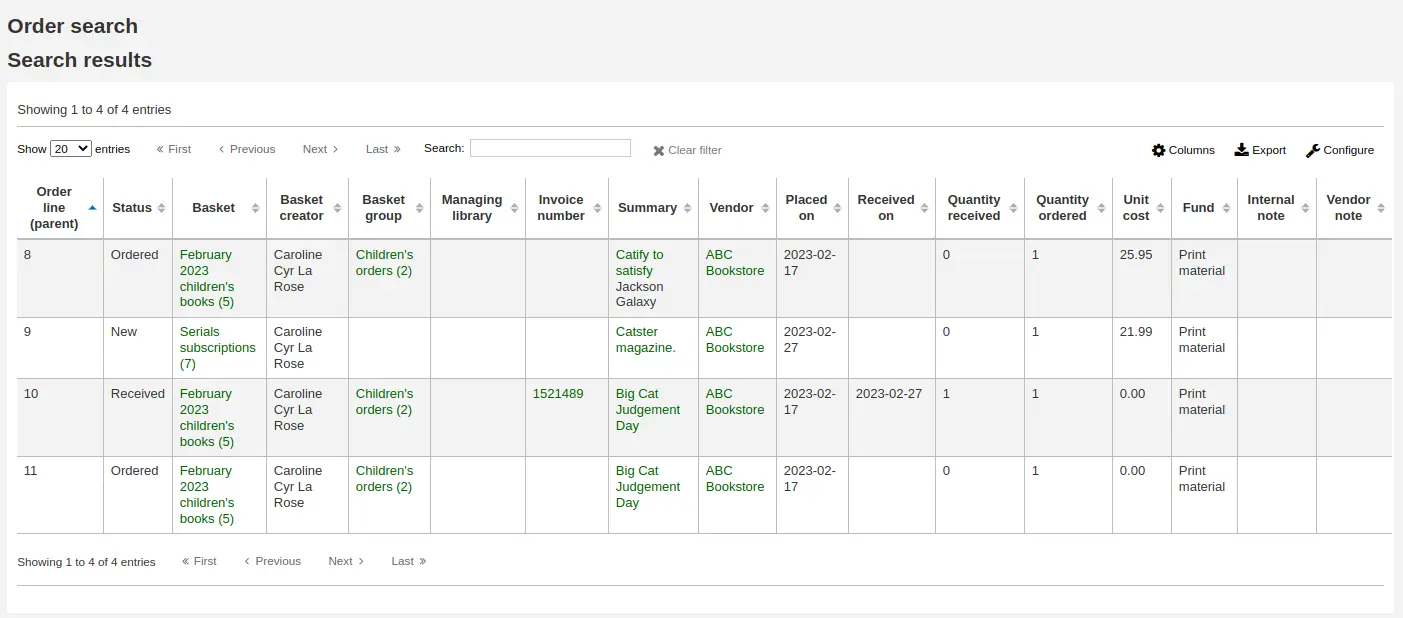
Bestellungen suchen
Im oberen Bereich der verschiedenen Erwerbungsseiten befindet sich ein kurzes Suchfeld, in dem Sie entweder eine Liefernatensuche oder eine Suche in den Bestellposten durchführen können.
Mit ‚Bestellung suchen‘ können Sie nach bestellten Exemplaren mit oder ohne Angabe des Lieferanten suchen.

Sie können Angaben in einem oder beiden Feldern machen und einen beliebigen Teil des Titels oder Lieferantennamens eingeben.
Bemerkung
You can customize the columns of this table in the Table settings section of the Administration module (table id: histsearcht).
Wenn Sie auf das Pluszeichen neben dem Lieferantensuchfeld klicken, werden weitere Suchoptionen verfügbar. Im Suchfeld ‚Bestellung‘ können Sie nach einem Teil des Bestellnamens oder der Bestellnummer suchen. Im Feld ‚Rechnungsnummer‘ können Sie einen Teil der Rechnungsnummer eingeben.

Wenn Sie in ‚Bestellungen durchsuchen‘ auf ‚Erweiterte Suche‘ auf der rechten Seite neben der Schaltfläche ‚Bestätigen‘ klicken, bekommen Sie alle verfügbaren Suchoptionen angezeigt.

Bestellzugang
Warnung
You must close the basket to be able to receive items when they arrive. Only items in closed baskets will show as ready to receive.
Bemerkung
Mitarbeiter*innen müssen die Berechtigung order_receive (oder die superlibrarian-Berechtigung) besitzen, um Bestellungen eingehen zu lassen.
Lieferungen können Sie ausgehend von der Übersichtsseite des Lieferanten zugehen lassen
oder von der Trefferliste der Lieferantensuche
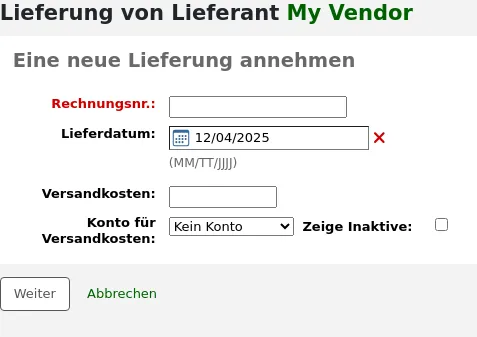
Nachdem Sie auf „Lieferung erhalten“ geklickt haben, können Sie die Rechnungsnummer des Lieferanten, das Lieferdatum, Versandgebühren und Konto für diese angeben.
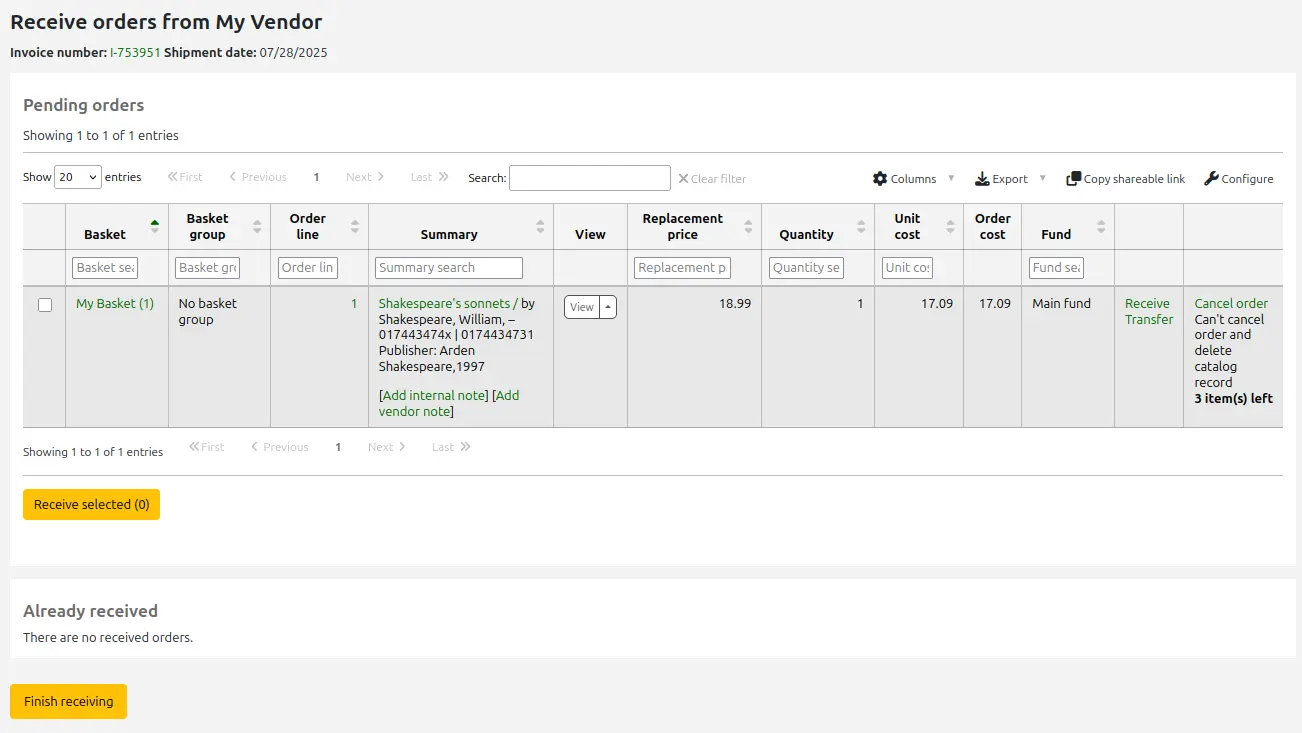
Beim Zugang werden alle Exemplare angezeigt, die noch beim Lieferanten bestellt sind, unabhängig von der Zuordnung zu einer einzelnen Bestellung.
Warnung
Nur Exemplare von geschlossenen Bestellungen erscheinen in der Liste der offenen Bestellungen.
Bemerkung
Wenn Sie sehr viele Bestellposten haben, können Sie diese über das Suchfeld über der Tabelle oder die Filter am Anfang jeder Tabellenspalte eingrenzen.

Sie können zum Beispiel die ISBN des Buches im Suchfilter einlesen und die Tabelle wird dann nur die entsprechenden Bestellposten anzeigen.
Stellen Sie sicher, dass die Filter alle geleert sind, wenn Sie fertig sind, da sonst die anderen Bestellposten nicht angezeigt werden.
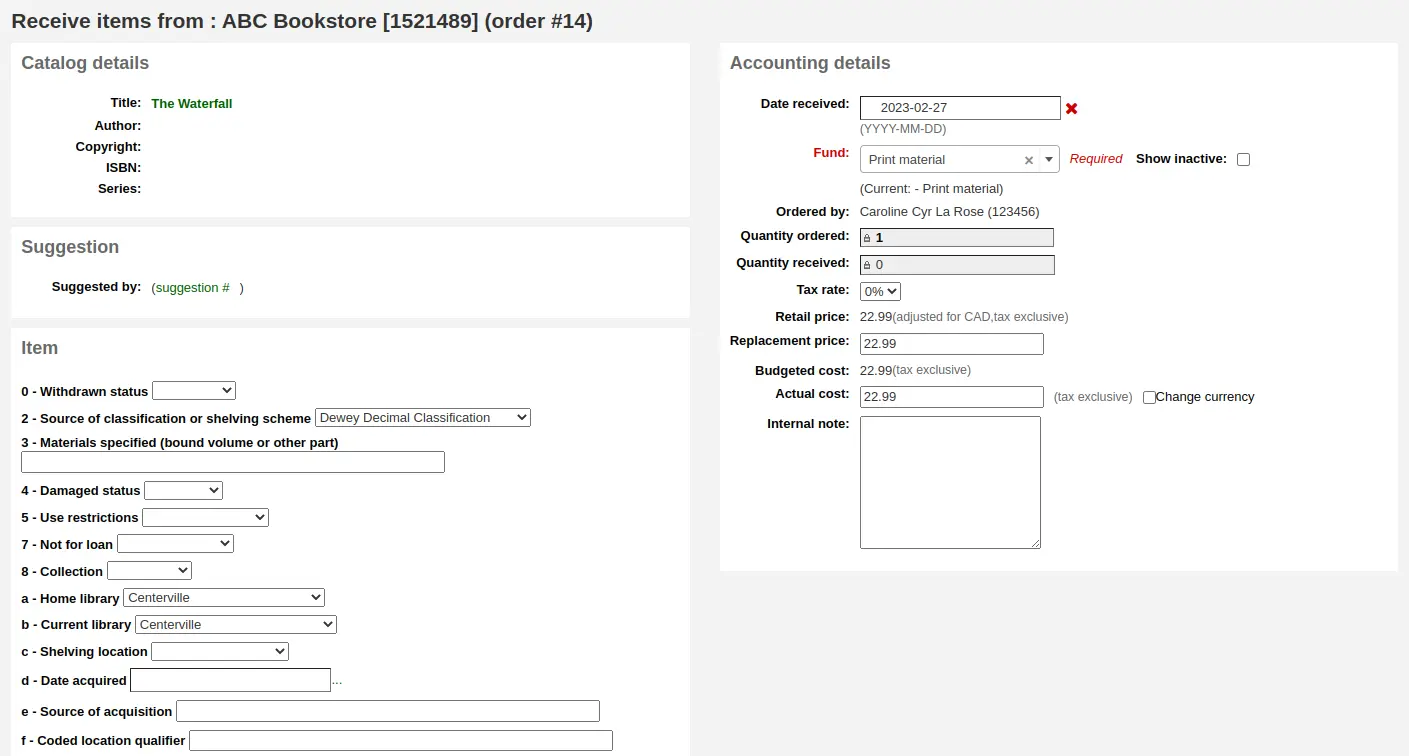
Um ein bestimmtes Exemplar in Empfang zu nehmen klicken Sie auf ‚Zugang‘ rechts neben dem Exemplar.
Abhängig davon, wann Sie Exemplare anlegen (entweder definiert über den Systemparameter AcqCreateItem oder bei Anlegen der Bestellung), wird das Formular leicht unterschiedlich aussehen.
Wenn Sie Exemplare bei Bestellung angelegt haben, werden die Exemplare auf der linken Seite und die finanziellen Informationen auf der rechten Seite angezeigt.
Sie können entweder die Checkbox neben dem Exemplareintrag markieren oder das Feld „Gelieferte Anzahl“ auf der linken Seite ausfüllen.
Bemerkung
Sie können auch nur einen Teil der Bestellung zugehen lassen, wenn der Lieferant nicht vollständig geliefert hat, indem Sie die Checkboxen neben den Exemplareinträgen links oder das Feld „Gelieferte Anzahl“ entsprechend ausfüllen.
Sie können das Exemplar bearbeiten, indem Sie den Link „Bearbeiten“ anklicken. Dies erlaubt es die Signaturen und Barcodes zu ergänzen, wenn Sie dies an dieser Stelle im Workflow tun möchten.
Sie können auch die Kosteninformationen (Wiederbeschaffungskosten, tatsächliche Kosten und Währung der tatsächlichen Kosten) ändern. Die Werte, die Sie dort eingeben, werden nach dem Speichern automatisch im Exemplardatensatz in das ‚Cost, replacement price‘ subfield und das ‚Cost, normal purchase price‘ subfield eingetragen.
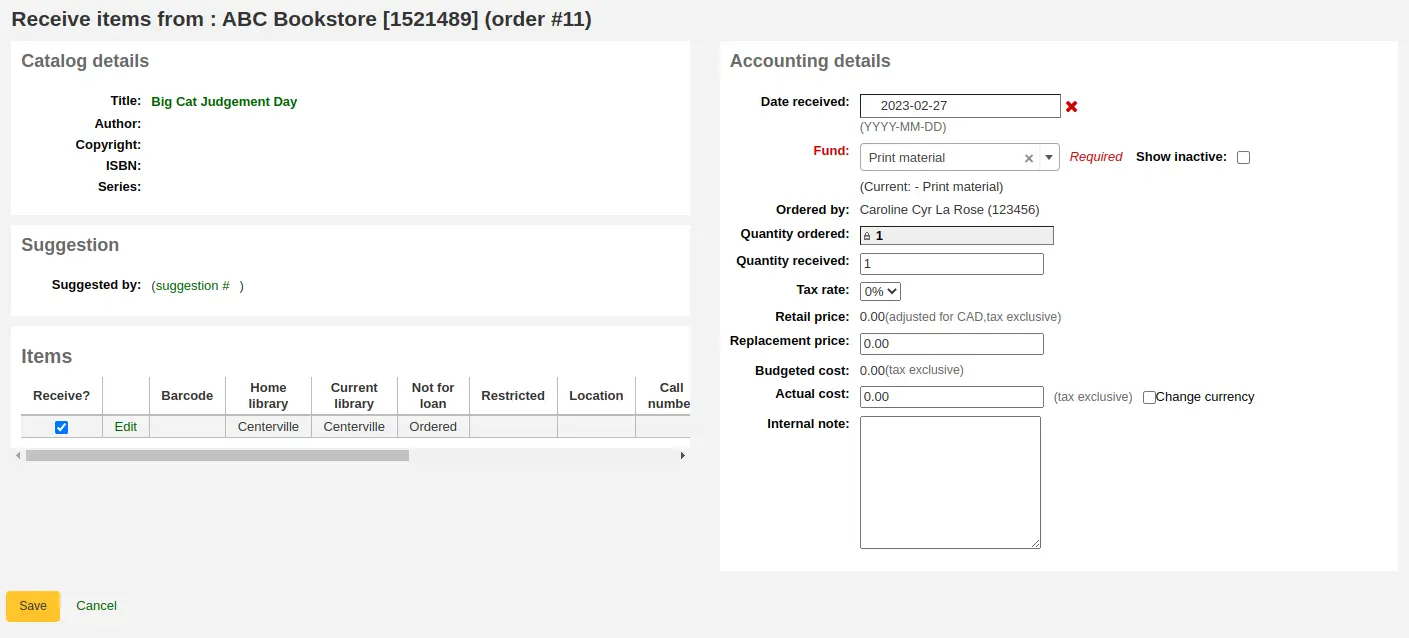
Wenn Sie die Exemplare bei Zugang anlegen, werden Sie auf der linken Seite das Exemplarformular sehen und die finanziellen Informationen auf der rechten Seite.
Warnung
Sie müssen das Exemplarformular ausfüllen und auf „Exemplar hinzufügen“ oder „Mehrere Exemplare hinzufügen“ klicken um die Bestellung zugehen zu lassen. Sie können an dieser Stelle nicht die „Gelieferte Anzahl“ bearbeiten.
Sie können die Kosteninformationen (Wiederbeschaffungskosten, tatsächliche Kosten und Währung der tatsächlichen Kosten) ändern. Die Werte, die Sie dort eingeben, werden nach dem Speichern automatisch im Artikeldatensatz in das ‚Cost, replacement price‘ subfield und das ‚Cost, normal purchase price‘ subfield eingetragen.
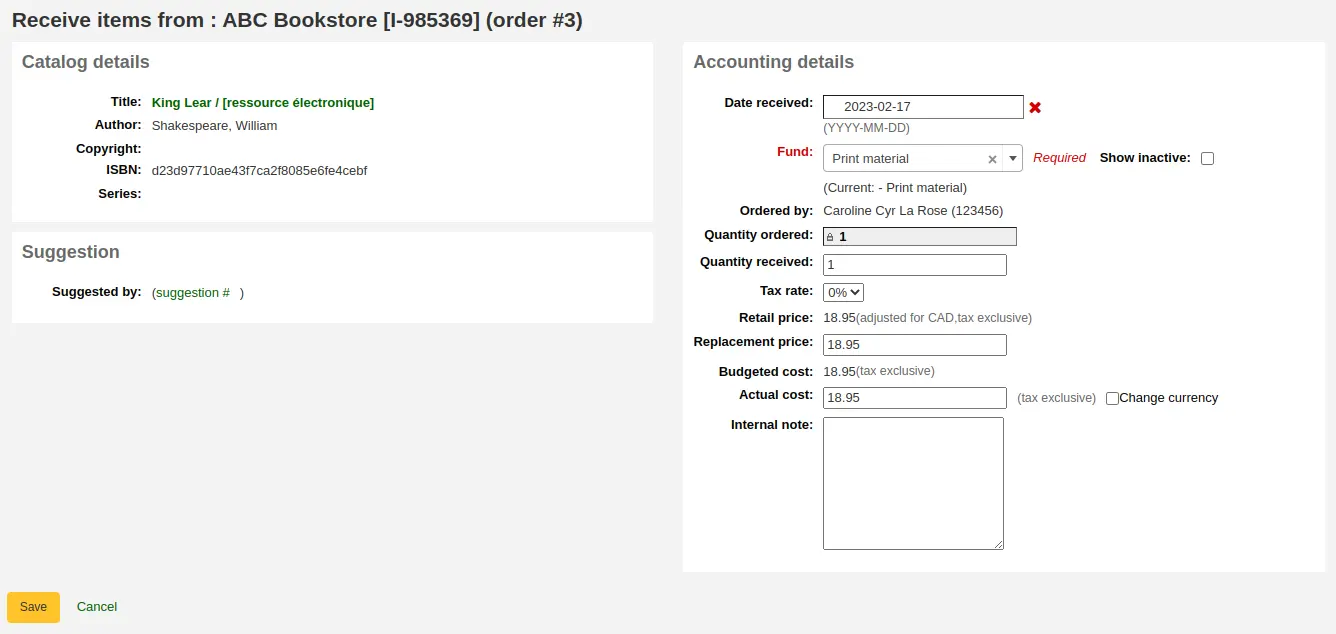
Zuletzt: Wenn Sie Ihre Exemplare in der Katalogisierung anlegen, sehen Sie nur die finanziellen Informationen auf der linken Seite.
Sie können die Kosteninformationen (Wiederbeschaffungskosten, tatsächliche Kosten und Währung der tatsächlichen Kosten) ändern.
Bemerkung
Die Preisinformationen können nicht automatisch in das Exemplar übertragen werden, wen dieses in der Katalogisierung angelegt wird.
Sobald Sie alle erforderlichen Änderungen durchgeführt haben (in der Bestellung/bei den Exemplaren), klicken Sie „Speichern“ um die Exemplare als zugegangen zu kennzeichnen.
Bemerkung
Wenn Sie den Systemparameter AcqItemSetSubfieldsWhenReceived konfiguriert haben, um Exemplardaten bei Zugang zu ändern oder zu ergänzen, werden diese Änderungen durchgeführt, nachdem Sie auf „Speichern“ geklickt haben.
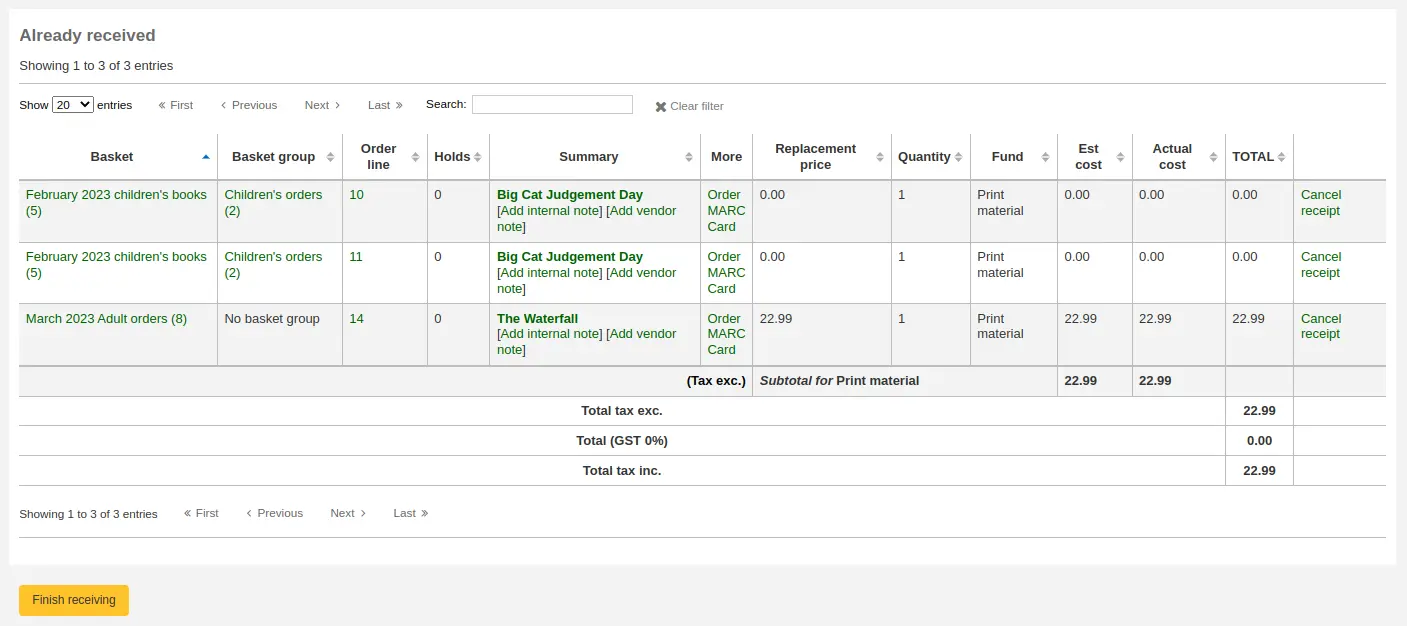
Wenn Sie den Empfang der Bestellungen abgeschlossen haben, können sie auf eine andere Seite navigieren oder im unteren Seitenbereich auf die Schaltfläche ‚Lieferung abschließen‘ klicken.
Bei zugegangenen Bestellposten steht „(received)“ vor dem Titel in der Bestellübersicht.
Bemerkung
Wenn alle Bestellposten einer Bestellung zugegangen sind, wird die Bestellung nicht länger beim Lieferanten in der Suche angezeigt. Sie können auf „Zeige alle Bestellungen“ klicken um auch die abgeschlossenen Bestellungen zu sehen.

Bemerkung
Wenn Benutzer*innen über Benachrichtigen, wenn Bestellung eingegangen ist verknüpft wurden, erhalten sie die ACQ_NOTIF_ON_RECEIV-Benachrichtigung.
Wenn Benutzer*innen einen Anschaffungsvorschlag gemacht haben, erhalten sie die AVAILABLE Benachrichtigung.
Diese beiden Benachrichtigungen können mit dem Werkzeug Notices and slips tool angepasst werden.
Bestellungen verschieben
Bemerkung
Mitarbeiter*innen müssen die Berechtigung order_manage (oder die superlibrarian-Berechtigung) besitzen, um Bestellposten zu transferieren.
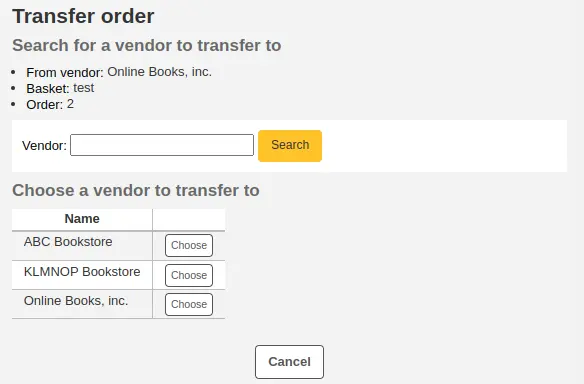
If the item is no longer available from this vendor you can transfer the order to another vendor’s basket by clicking the ‚Transfer‘ link to the right of the title on the basket page or the receiving page. This will pop up a vendor search box.
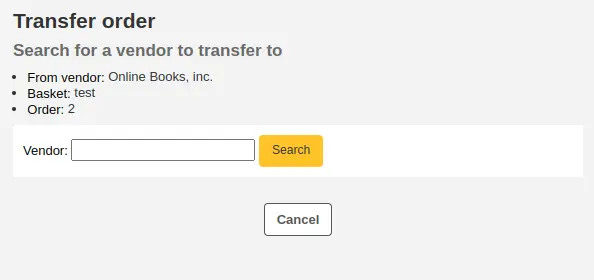
Ausgehend von der Trefferliste können auf die Schaltfläche ‚Auswählen‘ klicken rechts vom Lieferant, bei dem Sie das Exemplar bestellen möchten.
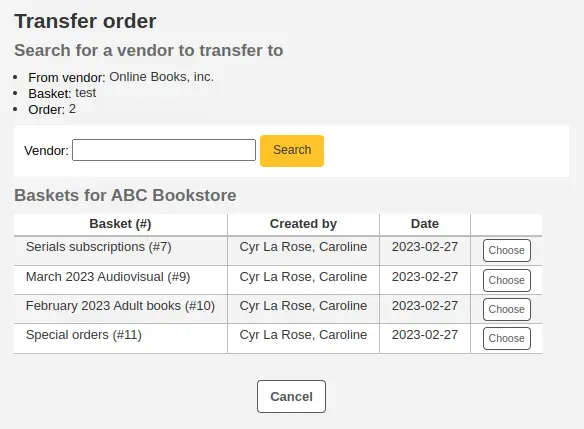
Es werden Ihnen dann die offenen Bestellkörbe des Lieferanten, den Sie ausgewählt haben angezeigt. Um das Exemplare umzuhängen klicken Sie einfach auf ‚Auswählen‘ rechts von dem Korb, wo das Exemplar bestellt werden soll.
Nachdem Sie den Lieferanten ausgewählt haben, bekommen Sie eine Bestätigungsnachricht angezeigt.
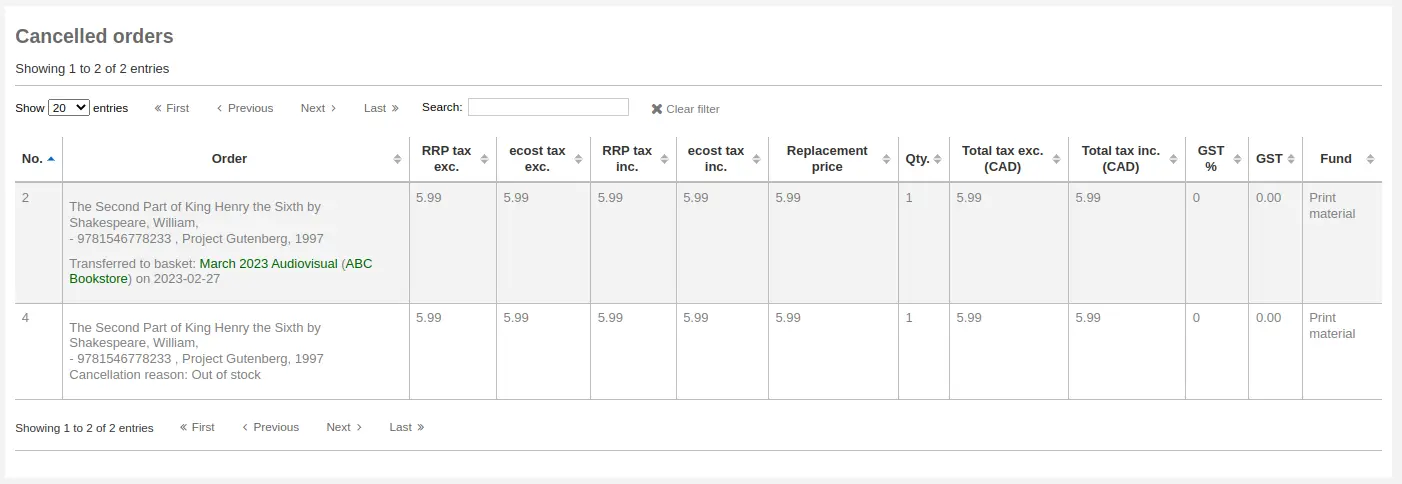
Wenn Sie eine Bestellung ansehen, werden Sie auch die verschobenen Bestellposten sehen.
Bemerkung
Whilst it is possible to re-open your basket (unless it is part of a basket group, in which case the basket cannot be reopened), transfer one or more orders and re-close the basket, this is not recommended. This procedure will update the ‚basket closed‘ date, which in turn will cause your ‚late order‘ calculations to be incorrect.
It is preferable to transfer an order from the receiving page.
Stornierung von Bestellungen
Bemerkung
Mitarbeiter*innen müssen die Berechtigung order_manage (oder die superlibrarian-Berechtigung) besitzen, um Bestellposten stornieren zu können.
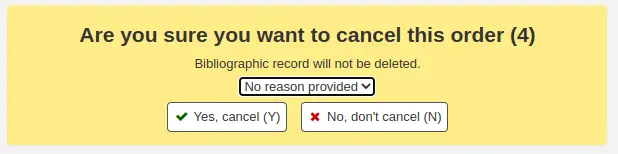
If the item cannot be found anywhere you can cancel the order by clicking ‚Cancel order‘ or ‚Cancel order and delete catalog record‘ to the far right on the basket page or the receiving page.
Hier werden Sie aufgefordert, einen Grund für die Stornierung anzugeben und zu bestätigen.
Bemerkung
Das Dropdown-Menü für die Stornierungsgründe wird durch ORDER_CANCELLATION_REASON authorized values category befüllt. Gibt es in dieser Kategorie keine normierten Werte, handelt es sich um ein Freitextfeld und nicht um ein Dropdown-Menü.
Wenn Sie sich die Bestellung ansehen, sehen Sie auch, dass das Exemplar storniert wurde.
Version
Ab Koha Version 23.11 können Sie Bestellposten in geschlossenen Bestellungen stornieren, indem Sie den Systemparameter CancelOrdersInClosedBaskets aktivieren.
In prior versions, it is not possible to cancel orders when the basket is closed. Whilst it is possible to re-open your basket (unless it is part of a basket group, in which case the basket cannot be reopened), cancel one or more orders and re-close the basket, this is not recommended. This procedure will update the ‚basket closed‘ date, which in turn will cause your ‚late order‘ calculations to be incorrect. In those cases, it is preferable to cancel an order from the receiving page.
Rechnungen
Bemerkung
Jeder mit einer acquisition-Berechtigung (oder superlibrarian-Berechtigung) hat Zugriff auf Rechnungen. Zur Ausführung von Aktionen mit Rechnungen sind jedoch spezielle Rechnungsberechtigungen erforderlich:
die Berechtigung order_receive zur Erstellung von Rechnungen,
die Berechtigung edit_invoices zur Bearbeitung von Rechnungen,
die Berechtigung merge_invoices, um Rechnungen zusammenzuführen,
die Berechtigung reopen_closed_invoices, um geschlossene Rechnungen erneut zu öffnen, oder
die Berechtigung delete_invoices um Rechnungen zu löschen.
When orders are received invoices are generated. Invoices can be searched by clicking on ‚Invoices‘ in the left of the Acquisitions page.

Die Suchresultate werden im Bereich rechts neben den Suchoptionen angezeigt.
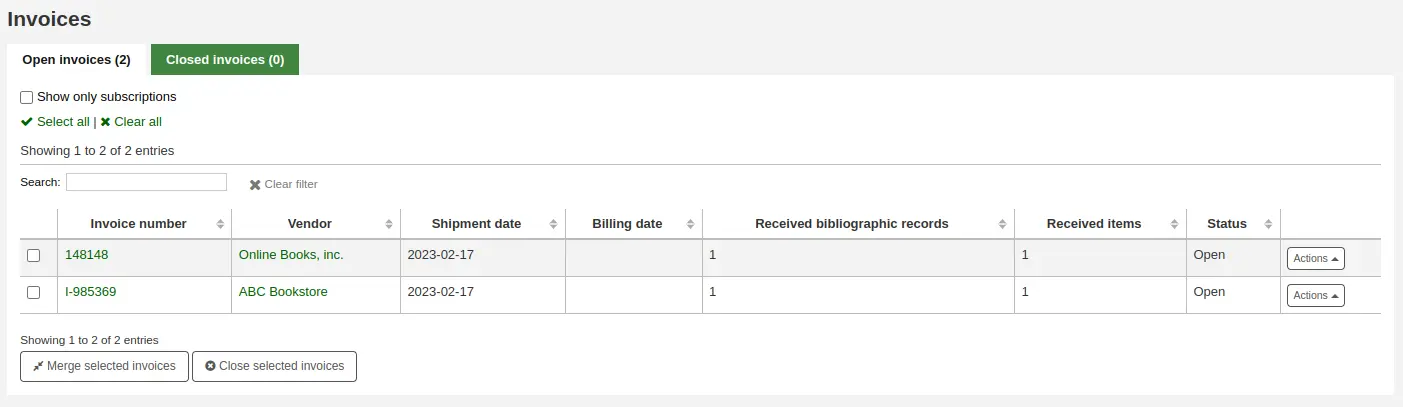
At the bottom of the table, there is a button to merge selected invoices and a button to close selected invoices.
Über den Button ‚Aktionen‘ auf der rechten Seite können Sie für eine einzelne Rechnung verschiedene Aktionen durchführen:
Details: zeigt die Detailansicht der Rechnung
Schließen: mit dem Schließen der Rechnung wird angezeigt, das diese bezahlt wurde
Löschen: die Rechnung wird gelöscht; diese Option ist nur verfügbar wenn für diese Rechnung keine weiteren Exemplare mehr zugegangen lassen werden können
Auf der Detailansicht der Rechnung sind alle Informationen über die Rechnung zu sehen.
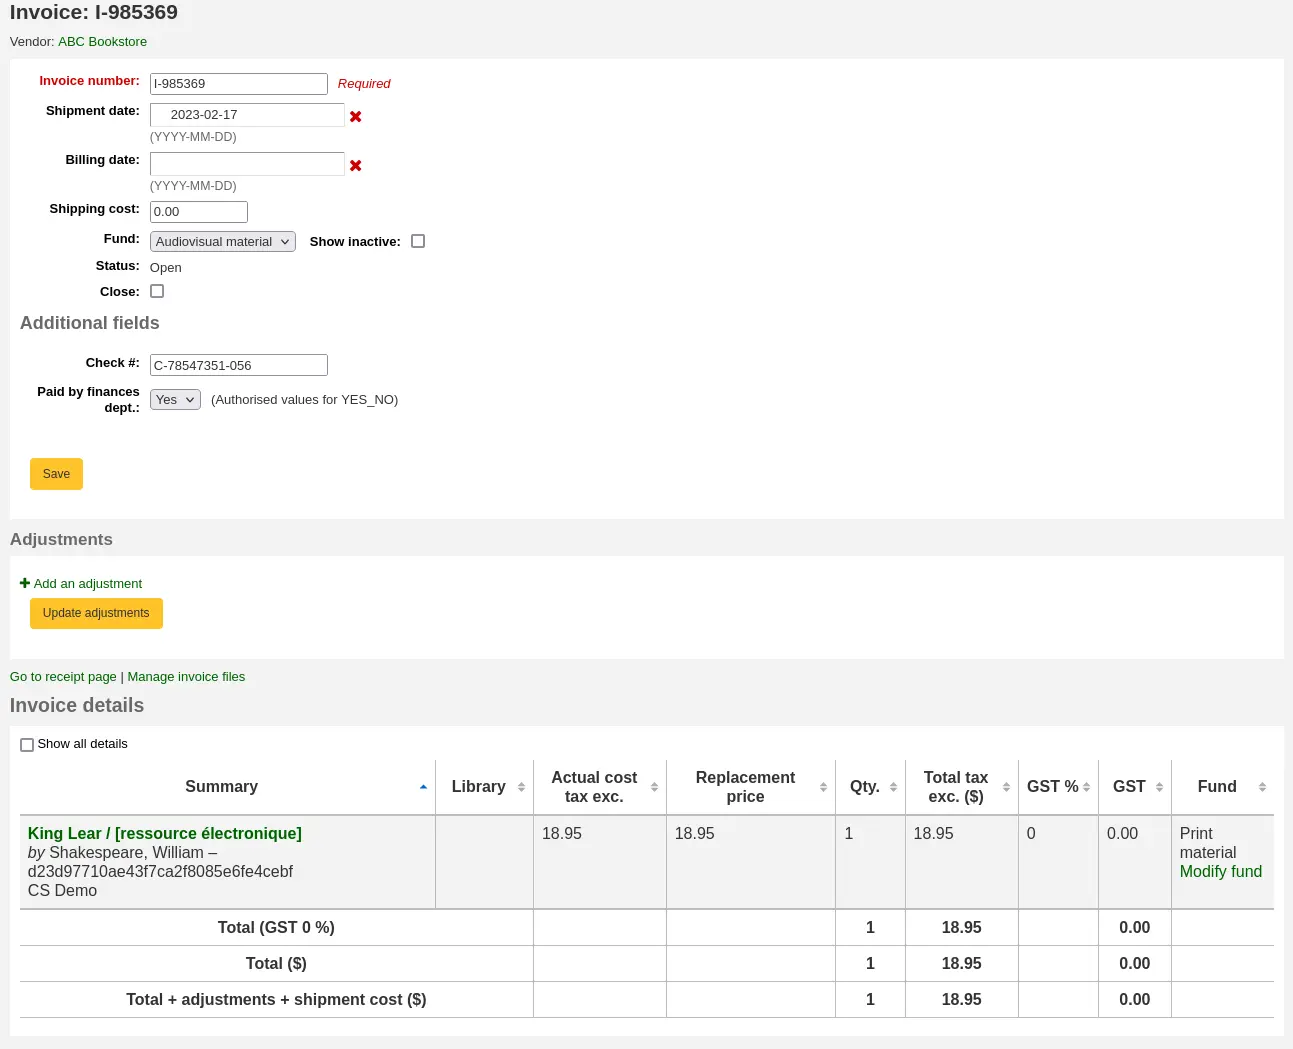
Invoice number: the invoice number entered upon receiving is editable here
Shipment date: date entered upon receiving is editable here
Rechnungsdatum: geben Sie das Rechnungsdatum an
Shipping cost: the shipping cost entered upon receiving is editable here
Shipping fund: the fund from which to subtract the shipping cost chosen upon receiving is editable here
Status: der Status der Rechnung, dieser ist entweder offen oder geschlossen; wenn er geschlossen ist, wird das Schließdatum angezeigt
Schließen: wenn die Rechnung noch offen ist, kann diese über das Setzen des Häkchens in der Checkbox geschlossen werden
Wieder öffnen: wenn die Rechnung geschlossen ist, kann diese über das Setzen des Häkchens in der Checkbox wieder geöffnet werden
Zusätzliche Felder: wenn es Zusatzfelder für Rechnungen gibt, werden sie hier angezeigt.
Im Bereich Anpassungen können Sie Anpassungen für Ihre Rechnungen hinzufügen indem Sie auf ‚Neue Anpassung‘ klicken.
Anpassungen können Sie zum Beispiel vornehmen um Ungenauigkeiten im Rundungsbereich vorzunehmen, oder um eine Gutschrift zur Rechnung zu erfassen.

Betrag: Geben Sie einen Betrag für die Anpassung ein (im positiven oder negativen Bereich)
Grund: geben Sie einen Grund an wenn dieser benötigt wird
Bemerkung
The reasons are populated by the ADJ_REASON authorized values category.
Hinweis: geben Sie wenn nötig einen Hinweis ein
Konto: wählen Sie das Konto, von dem der Betrag für die Anpassung abgezogen werden soll
Konto bei offener Rechnung belasten: Wenn diese Checkbox angehakt ist, wird die Summe für die Anpassung sofort vom Konto abgebucht. Wenn sie nicht angehakt ist, wird die Summe erst abgezogen, wenn die Rechnung geschlossen wird.
Klicken Sie auf ‚Anpassungen aktualisieren‘ um Ihre Anpassungen zu speichern.
Wenn Sie die Anpassung nach dem Speichern ändern müssen, können Sie dies in der Tabelle machen. Klicken Sie danach auf ‚Anpassung aktualisieren‘.

Im Bereich „Rechnungsdeatails“ finden Sie Details zu jedem erhaltenen Titel dieser Rechnung.
Bei Bedarf können Sie das für jeden Titel verwendeten Budget ändern, indem Sie in der Spalte „Budget“ auf „Budget ändern“ klicken.
Dateien an Rechnungen anhängen
Wenn Sie mit dem Setzen des Systemparameters AcqEnableFiles das Hochladen von Erwerbungsdateien erlaubt haben, wird Ihnen die Option, Rechnungsdateien zu verwalten, neben dem Link „Zur Inventarisierung“ angezeigt
Um mehr neue Dateien anzuschauen oder hinzuzufügen, klicken Sie auf den Link ‚Rechnungsdateien verwalten‘
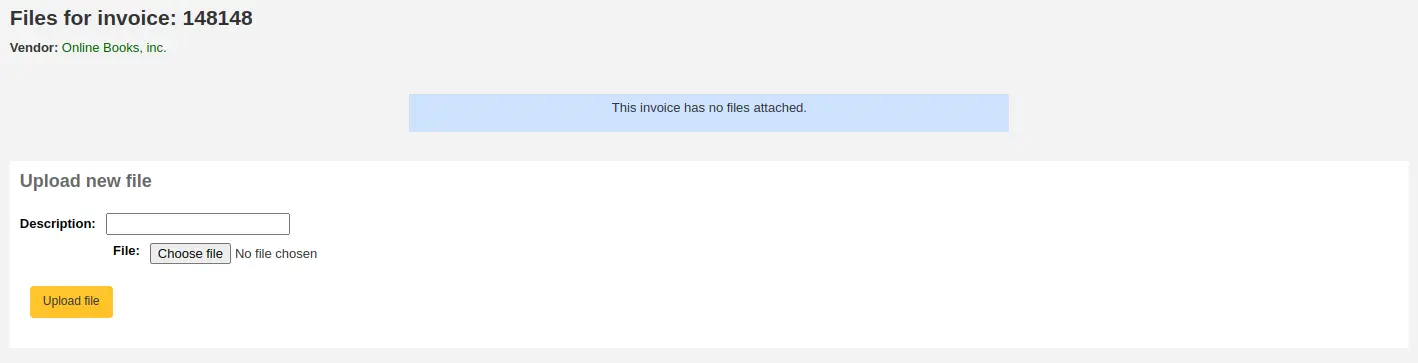
Hier können Sie eine Datei hochladen und/oder die Dateien anschauen, die sie bereits hinzugefügt haben.

Rechnungen verschmelzen
Bemerkung
Mitarbeiter*innen müssen die Berechtigung merge_invoices (oder die superlibrarian-Berechtigung) besitzen, um Rechnungen zusammenzuführen.
Ausgehend von der Trefferliste der Rechnungen können Sie zwei oder mehr Rechnungen miteinander verschmelzen.
Wählen Sie über die Checkboxen links die Rechnungen aus, die Sie miteinander verschmelzen möchten und klicken Sie auf den Button ‚Ausgewählte Rechnungen verschmelzen‘ am Ende der Seite. Im nächsten Schritt können Sie das Verschmelzen bestätigen:
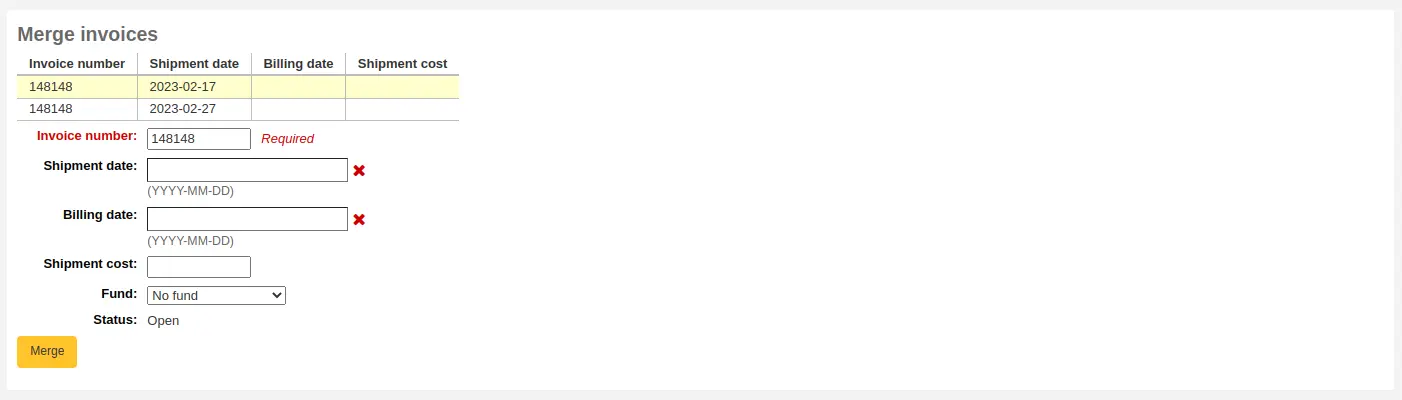
Klicken Sie auf die Zeile der Rechnungsnummer, die Sie behalten möchten und sie wird gelb hinterlegt. Geben Sie eine andere Rechnungsinformation in das vorgegebene Feld ein und klicken Sie auf ‚Verschmelzen‘. Die Rechnungen werden zusammengefügt.
Reklamationen und verspätete Bestellungen
Bemerkung
Mitarbeiter*innen müssen die Berechtigung order_receive (oder die superlibrarian-Berechtigung) besitzen, um verspätete Bestellungen verwalten und reklamieren zu können.
Der Link ‚Überfällige Bestellungen‘ auf der Startseite der Erwerbung führt zu einem Report, über diesen verspätete Bestellungen gefiltert werden können.
Wenn Sie auf den Link für ‚Verspätete Bestellungen‘ auf der Startseite der Erwerbung klicken, wird Ihnen auf der linken Seite eine Reihe von Filtern angeboten. Diese Filter können nur für geschlossene Bestellkörbe angewendet werden.
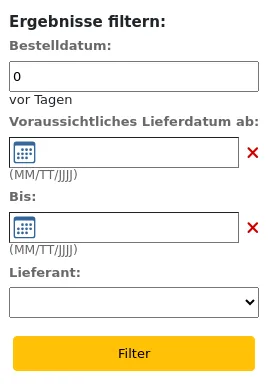
Bestelldatum: hier kann nach Bestellungen gefiltert werden, die entsprechend vor mehr als X Tagen geschlossen wurden. Voreingestellt sind 0 Tage, damit werden alle geschlossenen Bestellungen aufgelistet.
Bemerkung
The order date is the date the basket was closed.
Estimated delivery date from … to …: this filter limits the results to orders estimated to be delivered between two dates. The estimated delivery date is either the date entered in the ‚Estimated delivery date‘ field in the accounting details section of the order, or it is calculated as order date (date the basket was closed) + delivery time entered when creating the vendor.
Bemerkung
Das voraussichtliche Lieferdatum kann in der Tabelle der verspäteten Bestellungen bearbeitet werden.
Lieferant: filtert die Bestellungen von einem spezifischen Lieferant.
Bemerkung
Die Auswahlliste der Lieferanten zeigt nur Lieferanten mit geschlossenen Bestellungen.
Nachdem über die Filter Ihre Bestellungen gesucht wurden, wird eine Liste dieser Exemplare angezeigt.
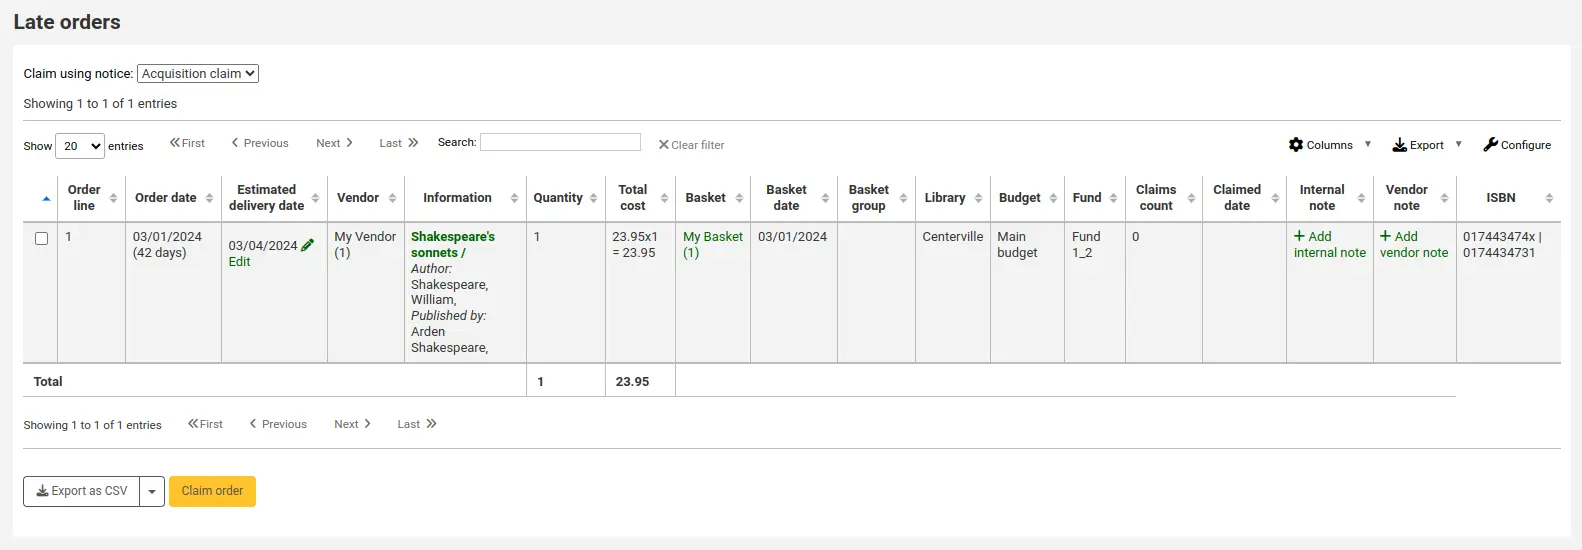
Bemerkung
You can customize the columns of this table in the Table settings section of the Administration module (table id: late_orders).
Es gibt verschiedene Möglichkeiten verspätete Bestellungen zu reklamieren.
If you have entered in an email address for a contact at the vendor’s in your system you can send them claim emails when an order is late.
Wählen Sie die zu versendende Benachrichtigung in dem Drop Down Menü ‚Reklamation mit Benachrichtigung‘

Bemerkung
The default notice is ‚Acquisition claim‘ (code ACQCLAIM). It can be modified in the Notices and slips tool.
You can add different notices. When creating a new notice, choose ‚Claim acquisition‘.
Setzen Sie ein Häkchen in der Checkbox bei den Titeln, die Sie reklamieren möchten
Klicken Sie auf ‚Bestellung reklamieren‘ am Ende der Liste.
Wenn für den Lieferanten kein Kontakt mit einer Mailadresse für verspätete Bestellungen existiert, kann auch eine Liste der zu reklamierenden Bestellungen als CSV-Datei heruntergeladen werden
Setzen Sie ein Häkchen in der Checkbox bei den Titeln, die Sie reklamieren möchten
Klicken Sie auf „Reklamation als CSV exportieren“ rechts unten in der Liste
Bemerkung
‚Late orders‘ ist als CSV-Profil voreingestellt. Über das Werkzeug CSV-Profile können Sie es bearbeiten, oder neue Profile hinzufügen.
Wenn Sie ein Neues hinzufügen, wählen Sie als Profiltyp ‚SQL‘, und unter Verwendung ‚Verspätete Bestellungen exportieren‘ aus.
Etat/Konten Planung
Auf der Hauptseite des Erwerbungsmoduls wird Ihnen eine Tabelle der active funds angezeigt, mit einer Aufschlüsselung, was bestellt oder ausgegeben wurde.
Ob die Beträge Steuern enthalten oder nicht, wird durch den Systemparameter CalculateFundValuesIncludingTax gesteuert.
Bemerkung
You can customize the columns of this table in the Table settings section of the Administration module (table id: accounts).
Verwenden Sie den Link „Alle aufklappen“, um alle Ihre Konten und Unterkonten zu sehen.
Der Link ‚Alle einklappen‘ zeigt nur Konten auf der obersten Ebene.
Der Link ‚Inaktive Etats verbergen‘ verbirgt Etats, die momentan nicht aktiv sind (wie z. B. Etats vorheriger Jahre).
Der Link ‚Inaktive Etats anzeigen‘ zeigt Etats an, die momentan nicht aktiv sind (wie z. B. Etats vorheriger Jahre).
„Nach Bibliothek filtern“: Wenn Sie mehrere Bibliotheken in Ihrem System haben und Etats unterschiedlichen Bibliotheken zugewiesen sind, können Sie dieses Drop-down-Menü nutzen um die Tabelle zu filtern und nur die Etats für eine bestimmte Bibliothek anzuzeigen.
Tipp
Wenn die Zeile „Gesamt (Summen)“ am Ende der Tabelle verwirrend ist, können Sie sie ausblenden indem Sie diesen Code im Systemparameter IntranetUserCSS einfügen.
#funds_total {display:none;}
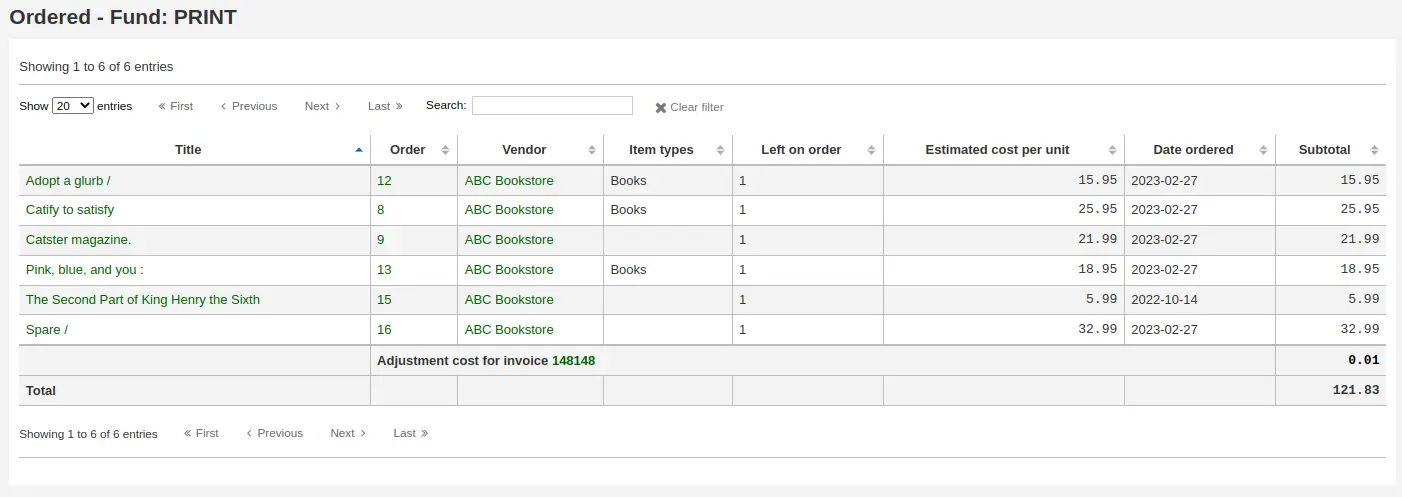
Um eine Übersicht über alle Bestellungen in einem Konto zu erhalten, klicken Sie auf den entsprechenden Betrag, der mit einem Hyperlink versehen ist.
EDI bearbeiten
In den vorangegangenen Bereichen wurden alle Bestelloptionen erläutert. In diesem Bereich werden die Teile herausgegriffen, die sich auf die EDI- oder EDIFACT-Bestellung beziehen, um denjenigen zu helfen, die EDI für einen Teil oder den gesamten Bestellprozess verwenden.
EDI ermöglicht es Bestelldateien zwischen Lieferanten und Koha auszutauschen. Wenn die Dateien verarbeitet werden, werden die Bestellinformationen direkt nach Koha geladen.
Im Folgenden wird der vollständige Arbeitsablauf beschrieben.
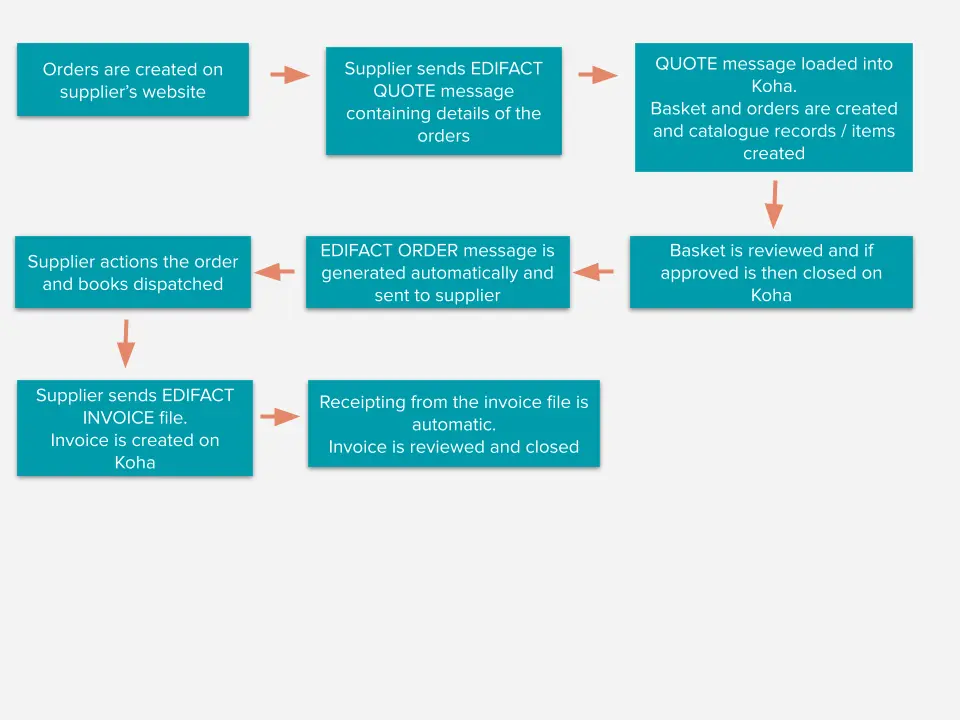
Bemerkung
Bibliotheken müssen nicht den gesamten Prozess automatisieren und nicht alle Lieferanten unterstützen alle Funktionen. Z. B. kann eine Bibliothek QUOTE- und ORDER-Dateien nutzen, aber Rechnungsbearbeitung/Zugang manuell durchführen. Oder eine Bibliothek erstellt in Koha eine Bestellung manuell oder aus einer Datei mit MARC-Datensätzen, sendet die Bestellung aber über eine ORDER-Datei an den Lieferanten zurück. Sprechen Sie mit Ihren Lieferanten, um zu erfahren welche Funktionen sie unterstützen.
Warnung
Koha unterstützt den EDIFACT Standard (EDItEUR and BiC), nicht aber den X12 Standard für die elektronische Bestellung.
EDI einrichten
- Um EDIFACT in Koha zu nutzen,
EDIFACT system preference must be enabled.
Befolgen Sie bitte folgende Schritte, bevor Sie über EDI bestellen:
Fragen Sie Ihren Lieferanten/Buchhändler/Großhändler nach dessen Verbindungsinformationen. Siehe untenstehend EDI questions for vendors.
Es könnte auch hilfreich sein vom Lieferanten einige Probe EDIFACT-Dateien anzufordern
Teilen Sie mit Ihrem Lieferanten/Buchhändler/Großhändler Ihre Bibliothekscodes, Codes für Exemplartypen, Kontencodes, und alle anderen Codes oder die Normierten Werte die für das Erstellen Ihrer MARC Bestelldatensätze nötig sind
Treten Sie in Kontakt mit Ihrem Support Provider oder der Community, ob Sie basierend auf der Antwort des Lieferanten ein Plugin benötigen
ByWater Solutions hat zum Beispiel hier Plugins für spezielle Lieferanten veröffentlicht: https://github.com/bywatersolutions/koha-plugin-edifact-enhanced
Create a vendor/bookseller/jobber record im Erwerbungsmodul
Prüfen Sie Ihre Systemparameter für die Erwerbung
Fill in the MarcFieldsToOrder system preference with values for order files (see the MARC order fields section below) if your vendor will be sending you files of MARC records for you to import manually. If the vendor will be sending automated EDI QUOTE files the MarcFieldsToOrder system preference does not need to be filled.
Enter your EDI Accounts
Enter your Library EANs
Schalten Sie den EDI Cronjob an, damit EDI-Dateien verarbeitet werden können.
EDI Fragen für Lieferanten
Sie müssen zuerst die folgenden Informationen von Ihren Lieferanten einholen, bevor Sie mit dem Einrchtigungsprozess beginnen können.
EDI-Konten
EDI accounts: This is the basic connection information for your vendor. It will be used to fill in the EDI accounts section.
Lieferant: Der Name des Lieferanten
Beschreibung: eine kurze Beschreibung wenn zusätzliche Erklärungen notwendig sind (speziell, wenn Sie mehrere Konten für einen Lieferanten haben).
Transport: Übermittelt der Lieferant EDI Dateien über FTP, SFTP oder etwas anderes, das eine spezielle Verarbeitung erfordert?
Optionen:
FTP
SFTP
DATEI
Remote host: Die URL oder IP-Adresse Ihres FTP/SFTP Servers
Benutzername: Der Benutzername für den oben genannten Server
Passwort: Das Passwort für den oben genannten Server
Download-Verzeichnis: Der Pfad zum Server, der Dateien zum Herunterladen und Verarbeiten in Koha bereitstellt
Upload-Verzeichnis: Der Pfad zum Server, auf dem Koha Dateien zum Verarbeiten für den Lieferanten hochlädt
Abfragekriterium: Wer hat die nachstehende SAN zugewiesen?
Optionen:
EAN international (14)
US SAN Agency (31B)
Zugewiesen durch Lieferant (91)
Zugewiesen durch Käufer (92)
SAN: Identifizierungsmerkmal für den Lieferant
Standard: welcher Standard wird vom Lieferanten verwendet; dies beeinflusst wie die EDI Benachrichtigungen interpretiert werden
Optionen:
BiC
EDItEUR
Angebote aktiviert: (ja oder nein) Unterstützt dieser Lieferant das Senden und Erhalten von Angeboten über EDIFACT und möchten Sie über EDIFACT Angebote schicken und erhalten?
Bestellungen aktiviert: (ja oder nein) Unterstützt dieser Lieferant das Senden und Erhalten von Bestellungen über EDIFACT und möchten Sie Bestellungen über EDIFACT senden und erhalten?
Rechnungen aktiviert: (ja oder nein) Unterstützt dieser Lieferant das Senden und Erhalten von Rechnungen über EDIFACT und möchten Sie Rechnungen über EDIFACT senden und erhalten?
Rechnungen aktiviert: (ja oder nein) Unterstützt dieser Lieferant das Senden und Erhalten von Rechnungen über EDIFACT und möchten Sie Rechnungen über EDIFACT senden und erhalten?
Automatisches Bestellen: (ja oder nein) markieren Sie die Checkbox, wenn Sie möchten, dass aus Angeboten automatisch Bestellungen generiert werden.
EAN
Jede Bibliothek die EDIFACT nutzt muss eine Käuferkennung angeben, bekannt als SAN oder EAN. Diese wird für die Belegung der Bibliothek-EANs verwendet.
Bibliothek: wählen Sie die Bibliothek aus die dieser EAN entspricht
Beschreibung: fügen Sie eine optionale Beschreibung zu dieser EAN hinzu
EAN: geben Sie die EAN ein
Abfragekriterium: Wählen Sie aus, wer die EAN oben vergeben hat
Optionen:
EAN international (14)
US SAN Agency (31B)
Zugewiesen durch Lieferant (91)
Zugewiesen durch Käufer (92)
MARC-Bestellfelder oder Rasterbestellung
Bemerkung
Dies ist nur erforderlich, wenn Ihr Lieferant Ihnen Dateien mit MARC-Datensätzen zum Importieren über Stage MARC records for import im Katalogisierungsmodul schickt. Wenn Ihr Lieferant automatisierte EDI QUOTE-Dateien sendet, muss der Systemparameter MarcFieldsToOrder nicht ausgefüllt werden.
Diese Werte werden im Systemparameter MarcFieldsToOrder definiert.
Preis: MARC21 Feld, welches den Exemplarpreis enthält
Menge: MARC21 Feld das die Anzahl der Exemplare für einen bestimmten Datensatz enthält
budget_code: MARC21 Feld das den Code für den Etat enthält der belastet werden soll
Rabatt: MARC21 Feld das den Rabatt in Prozent enthält
sort1: MARC21-Feld, das in das sort1-Feld übernommen wird
sort2: MARC21 Feld das Feld sort2 bestückt
Bestellen über EDI
The first step in ordering using EDI happens on the book vendor’s website. Each seller will use different language, but you will need to place your order on their site. Some language that you might see included „basket“, „order“, „cart“, and/or „MARC order“. The vendor will then either send you a file of MARC records to import into Koha OR the vendor will send a QUOTE file if you have this enabled in your EDI accounts settings.
Arbeiten mit einer MARC-Datei
Sobald Sie die MARC-Datei auf Ihren Computer heruntergeladen haben müssen Sie sich bei Koha anmelden und den Vorgang dort fortsetzen.
Legen Sie in der Erwerbung eine Bestellung für den Lieferanten an, bei dem Sie bestellen möchten. Fügen Sie Ihre Datei der Bestellung hinzu, indem Sie Bestellung aus einer neuen Datei auswählen.
Ausgehend vom Bestätigungsbildschirm sehen Sie alle Daten aus der MARC Datei, die zu Ihrer Bestellung passen. Wenn Felder wie Konto oder Mengenangabe nicht ausgefüllt sind, überprüfen Sie die Einstellungen in Ihrem Systemparameter MarcFieldsToOrder.
Wenn Sie alle Exemplare dem Bestellkorb zugeordnet haben, klicken Sie auf die Schaltfläche ‚EDIFACT-Bestellung‘.
Bemerkung
The ‚Create EDIFACT order‘ button only displays is you have enabled the EDIFACT system preference.
Sie werden gefragt, ob Sie die EDI-Bestellung erstellen und den Warenkorb schließen möchten.
EDIFACT-Bestellung versenden
Dies erzeugt eine ORDER-Datei mit dem Status ‚Ausstehend‘ in der EDIFACT messages in Koha.
Die ausstehenden Dateien werden durch den EDI cron job verarbeitet und an Ihren Lieferanten gesendet und der Status in EDIFACT messages wird auf ‚Gesendet‘ aktualisiert.
Arbeiten mit einer QUOTE-Datei
Wenn Sie QUOTE-Dateien aktiviert haben, können Sie die Bestellung auf der Website des Lieferanten aufgeben und eine QUOTE-Datei wird automatisch generiert und zum Abholen und Laden in Koha bereitgestellt. Die Datei wird in Koha unter EDIFACT messages mit dem Status „Empfangen“ angezeigt. Der Warenkorb wurde erstellt und Datensätze und Exemplare wurden dem Warenkorb hinzugefügt.
Wenn Sie überprüft haben ob der Korb korrekt ist, können Sie den Button ‚Erzeuge EDIFACT-Bestellung‘ klicken. Der Prozess wird dann wie bei Sending the EDIFACT order abgeschlossen.
EDI Rechnungen
Hat der Buchlieferant Ihre Datei bearbeitet, schickt er ebenfalls eine Rechnung über EDI. Der EDI Cronjob greift sich die Rechnungen und markiert auf der Rechnung gefundene Exemplare als ‚erhalten‘ und aktualisiert Ihre Konten, ohne dass Sie manuell tätig werden müssen.
INVOICE-Dateien können in der Datei EDIFACT messages eingesehen werden. Verarbeitete Dateien haben den Status „Erhalten“.
Wenn Sie für den Systemparameter EdifactInvoiceImport auf „Kein automatischer Import“ gewählt haben, können die Rechnungsdateien manuell geladen werden.
EDIFACT-Nachrichten
Ein Protokoll aller gesendeten und empfangenen Benachrichtigungen kann unter EDIFACT-Nachrichten eingesehen werden.
Bemerkung
Mitarbeiter*innen müssen die Berechtigung edi_manage (oder die superlibrarian-Berechtigung) besitzen, um versendete EDIFACT-Nachrichten einsehen zu können.
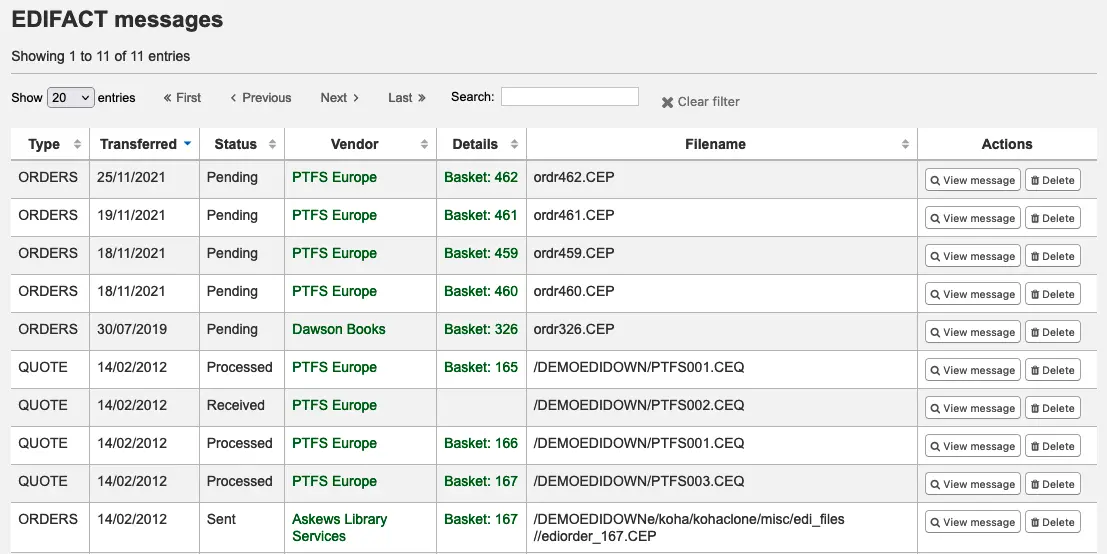
Bemerkung
Alte EDIFACT-Nachrichten können mit dem Datenbankbereinigungsskript mit der Option --edifact-messages gelöscht werden.