Circulação
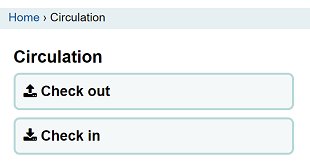
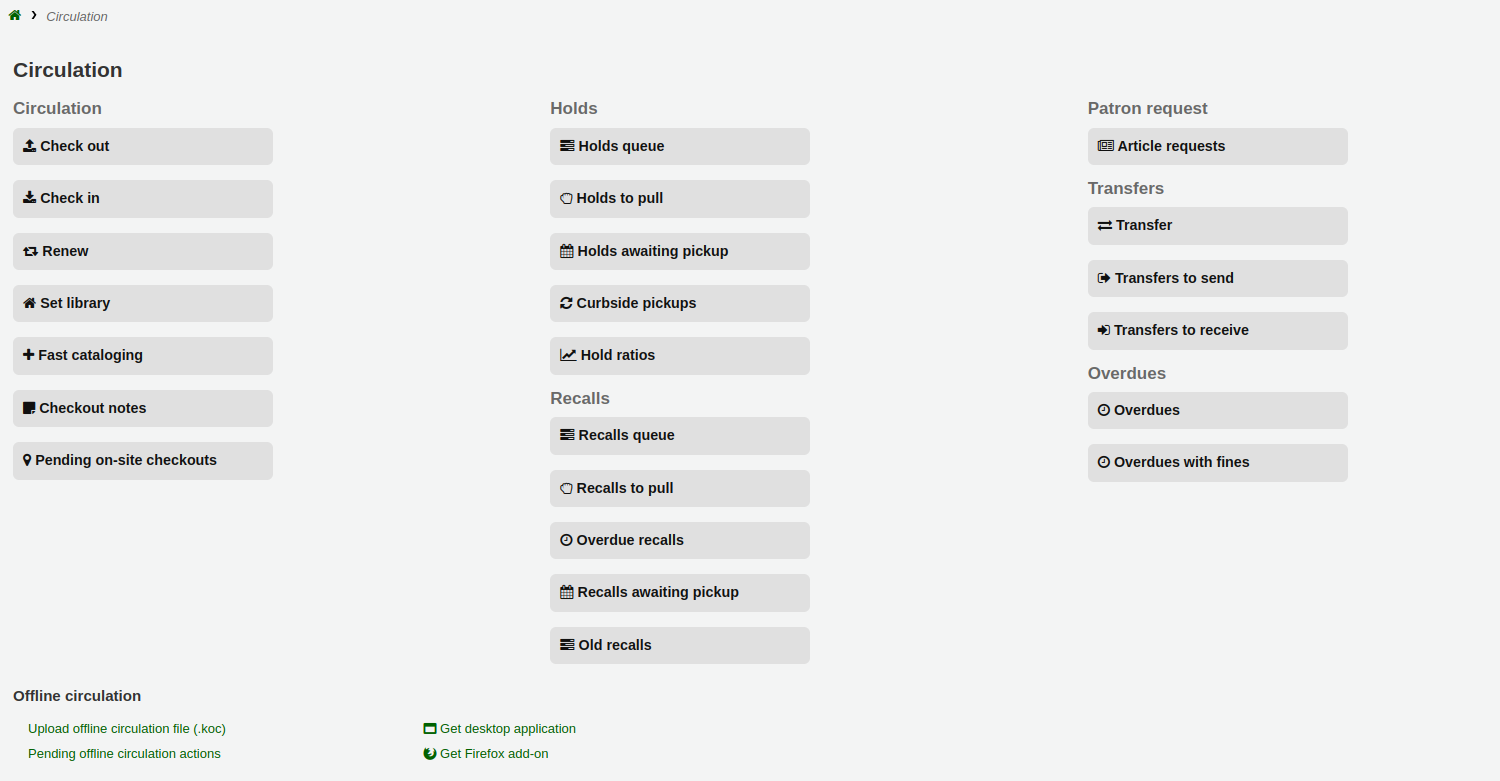
Funções de circulação podem ser acessadas de diversas maneiras. Na página principal da interface administrativa existem alguns links rápidos no centro da página para emprestar, devolver ou transferir itens. Para uma lista completa das funções de circulação você pode visitar a página de Circulação que está listada no topo da página.
Before circulating your collection you will want to set your Global System Preferences, Basic Parameters and Patrons & Circulation Rules.
Na tela de Circulação você pode alternar entre as abas na caixa de pesquisa rápida na parte superior da tela utilizando as seguintes teclas de atalho:
vá para a busca no catálogo com Alt+Q
jump to the checkout with Alt+U
- this will not work for Mac users
vá para a tela de devolução com Alt+R
Note
Mac users use the OPTION button in place of ALT
Check Out (Issuing)
Para iniciar o processo de empréstimos você precisa primeiro entrar com o código de barras do usuário ou uma parte de seu nome. As opções de empréstimo aparecem em três locais:
Check out option on the top of the main staff client

Opção de empréstimo no registro do usuário
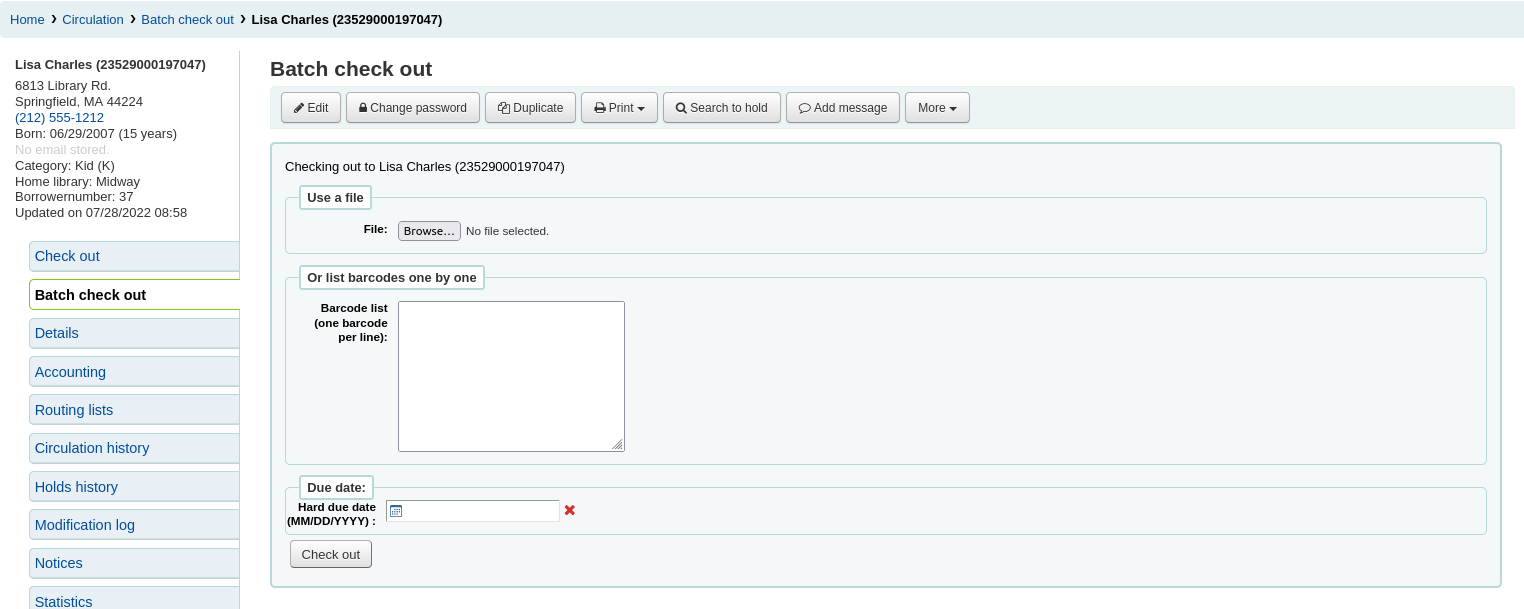
If you have enabled batch checkouts then click the batch check out option on the patron record
Check out option on the quick search bar on the circulation page

Emprestando itens
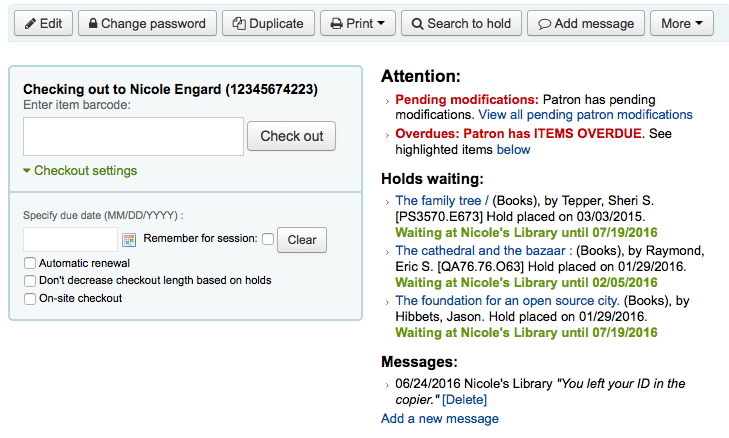
Para ver um item de um usuário, primeiro procurar esse patrão usando uma das muitas opções listadas acima. Então você será presenteado com a tela de check-out.
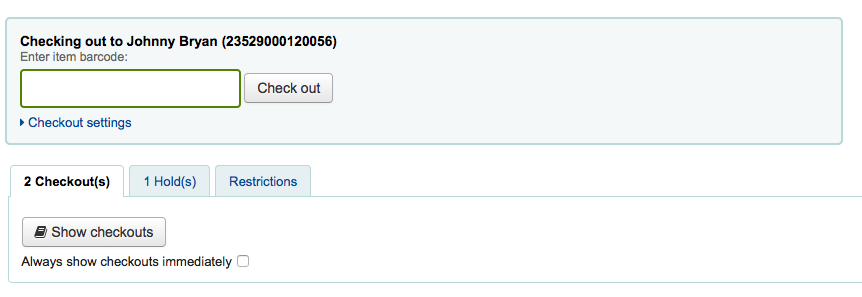
Se você tiver escolhido para ‘Sempre mostrar os checkouts imediatamente’ então você verá a lista de check-out na caixa abaixo de marcação.
Na parte superior da tela do Empréstimos, existe uma caixa para digitar ou ler códigos de barras do item em questão.
Important
Muitos leitores de código de barras enviam um ‘enter’ para o navegador, o que faz com que o botão ‘Emprestar’ seja clicado automaticamente
If the barcode is not found you will be prompted to use fast cataloging to add the item. Learn more about fast cataloging later in this manual.
If you have itemBarcodeFallbackSearch set to ‘Enable’ then you can enter a keyword search in this box instead of just a barcode (this will make it possible to check out using title and/or call number).
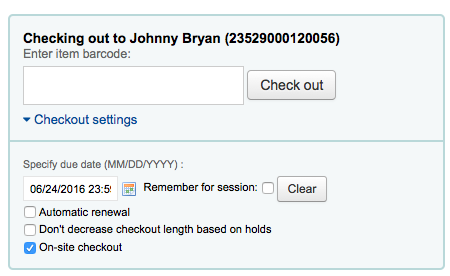
To see more checkout options click the ‘Checkout settings’ link to expand the checkout area.
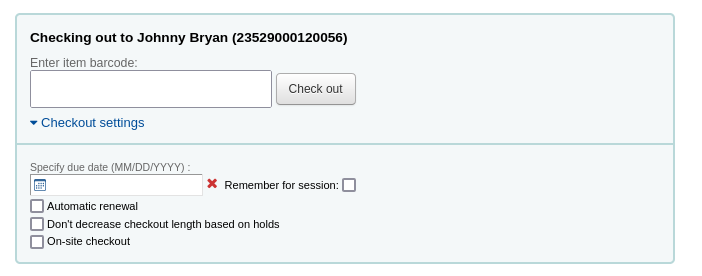
Abaixo da caixa para o código de barras podem estar opções para substituir a data de devolução do item.
- This option will only appear if you have set the SpecifyDueDate system preference to allow staff to override the due date
Below the box for the barcode you will see a checkbox for ‘Automatic renewal’. This will allow this item to automatically renew if the appropriate cron job is running and there are no holds on the item.
Next is an option to no decrease the loan length based on holds. This overrides the decreaseLoanHighHolds preference.
If you’re allowing the checkout of items on site to patrons (these are usually items that are not for loan that you would like to check for in library use) then you will see the ‘On-site checkout’ checkbox after clicking the ‘Checkout settings’ link to expand your circulation options.
Na parte inferior da página há um resumo dos exemplares atualmente emprestados pelo usuário e a data de devolução. Os itens emprestados hoje aparecerão no topo.
Note
Items that are hourly loan items will include the time with the due date.
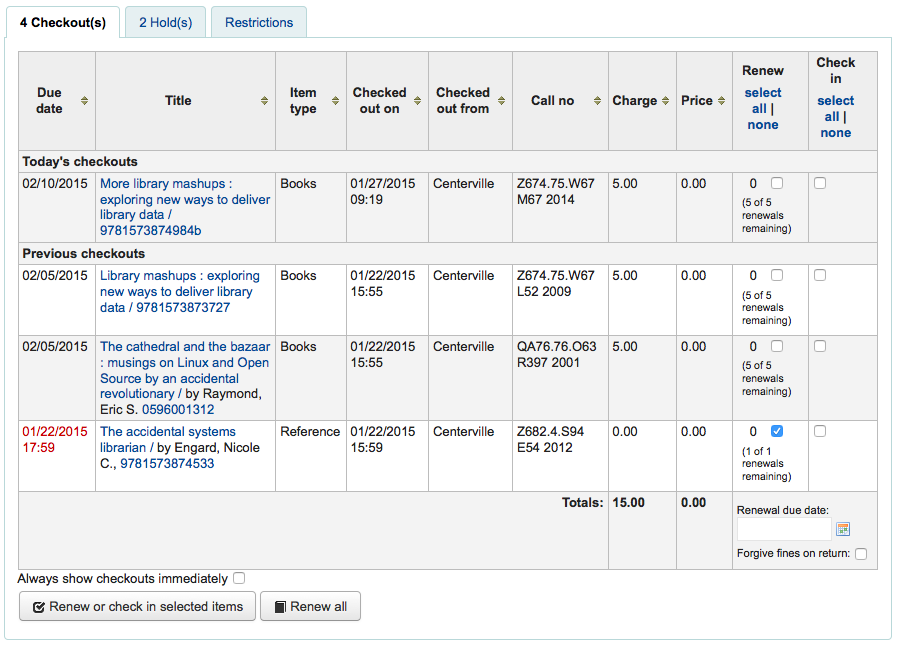
Se você verificou um item no uso do local você verá que destacadas em vermelho no resumo de check-out.

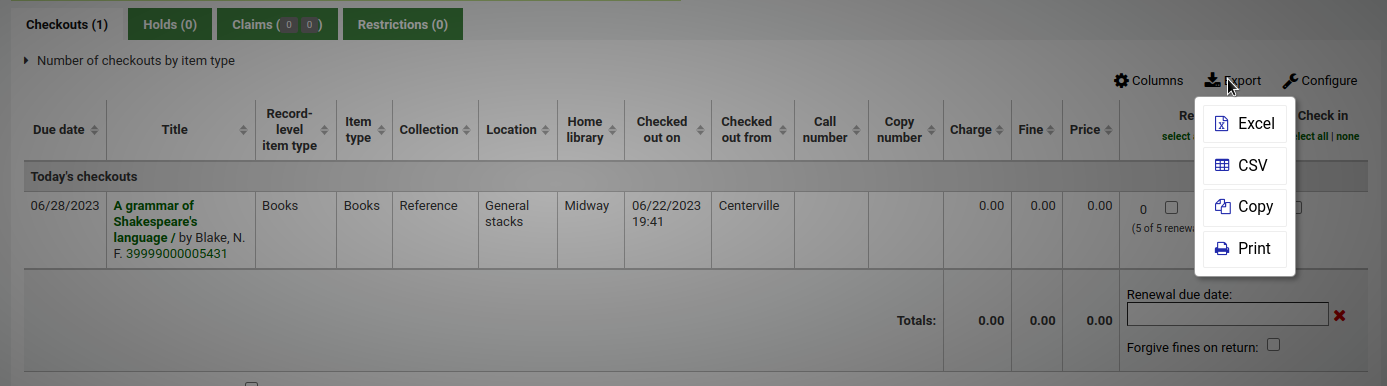
If you have set your ExportWithCsvProfile preference, you will also see the option to export the patron’s current checkout information using a CSV Profile or ISO2709 (MARC21) format.
Também no rodapé da página está a lista dos exemplares que o usuário reservou
From the holds list you can suspend or resume patrons holds using the options at the bottom of the list if you have the SuspendHoldsIntranet preference set to ‘allow.’
Note
If you have your AutoResumeSuspendedHolds preference set to “Don’t allow” then you will not have the option to put an end date on the hold suspension
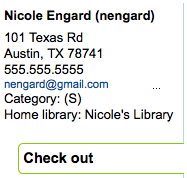
Se existem notas no registro do usuário as mesmas aparecem à direita da caixa de empréstimo
Se o usuário tem uma reserva em espera na biblioteca, aparecerá uma mensagem do lado direito da caixa de empréstimo para que o funcionário possa ver se existe outro exemplar disponível para oferecer ao usuário
The details of the checkouts will appear on the bib detail page in the staff client as well.
Imprimindo Recibos
Quando você tiver emprestado todos os exemplares para o usuário, você pode imprimir para ele um recibo clicando no botão ‘Imprimir’ no topo da página e escolhendo ‘Imprimir recibo’ ou ‘Recibo rápido’.
If you have the CircAutoPrintQuickSlip preference set to ‘open a print quick slip window’ you can simply hit enter on your keyboard or scan a blank piece of paper with your barcode scanner. The idea being that you’re “checking out” a blank barcode which triggers Koha to print the ‘Quick slip.’
O segundo é que você pode clicar no botão imprimir no topo da tela e escolher ‘Imprimir comprovante’ ou ‘Comprovante rápido’
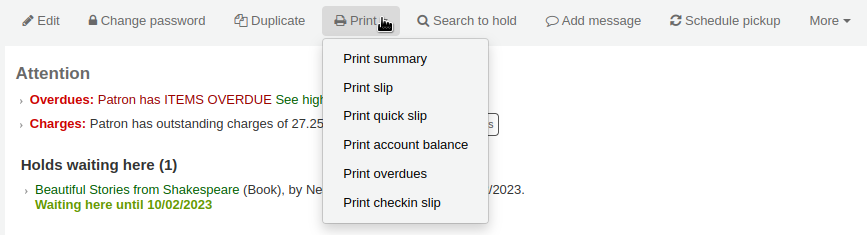
Se você selecionar ‘Imprimir Recibo’ será impressa uma lista de todos os exemplares emprestados pelo usuário, inclusive aqueles emprestados anteriormente. Escolhendo ‘Imprimir Recibo Rápido’ irá imprimir uma lista com apenas os exemplares emprestados hoje.
‘Print summary’ will generate a full page summary for the patron’s circulation information and ‘Print overdues’ will print out a slip that lists all items that are overdue.
What prints on the slips can be customized by altering the slip templates under the Avisos & Etiquetas rápidas tool.
Limpar Informação do usuário
When you’re done checking an item out if you have the DisplayClearScreenButton preference set to ‘Show’ you can clear the current patron by clicking the X in the top right of the patron’s info to remove the current patron from the screen and start over.

If you have the CircAutoPrintQuickSlip preference set to ‘clear the screen’ then you simply need to hit enter or scan a blank barcode and the screen will be cleared of the current patron.
Batch Checkouts
If you would like to perform a batch check out you can do so by turning on the BatchCheckouts system preference and assigning the proper patron categories via the BatchCheckoutsValidCategories preference. This will allow you to use an RFID pad that reads multiple barcodes or perform a batch check out for training internal use.
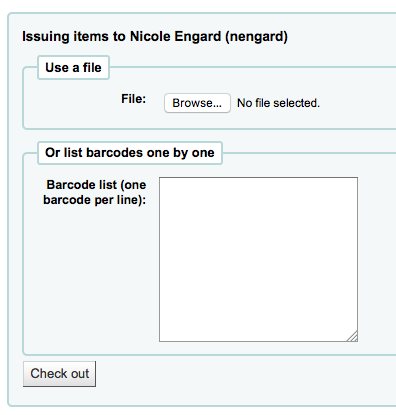
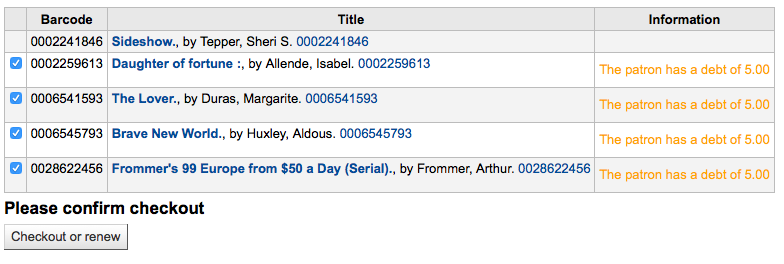
From this screen you can scan several barcodes or load a file of barcodes. If those items cannot be checked out they will provide a warning on the following screen
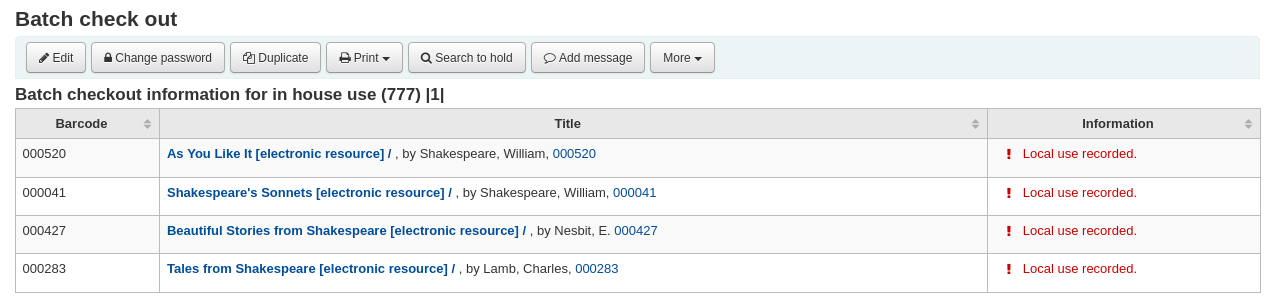
If you are using a statistical patron type then you’ll see that local use was recorded for each item you scanned.
Mensagens de empréstimo
Se você emprestar um item que tem mais de uma parte e catalogou esta informação no subcampo 3 do registro do Item (no MARC21), uma mensagem irá aparecer avisando quantos itens terá que ser emprestado.

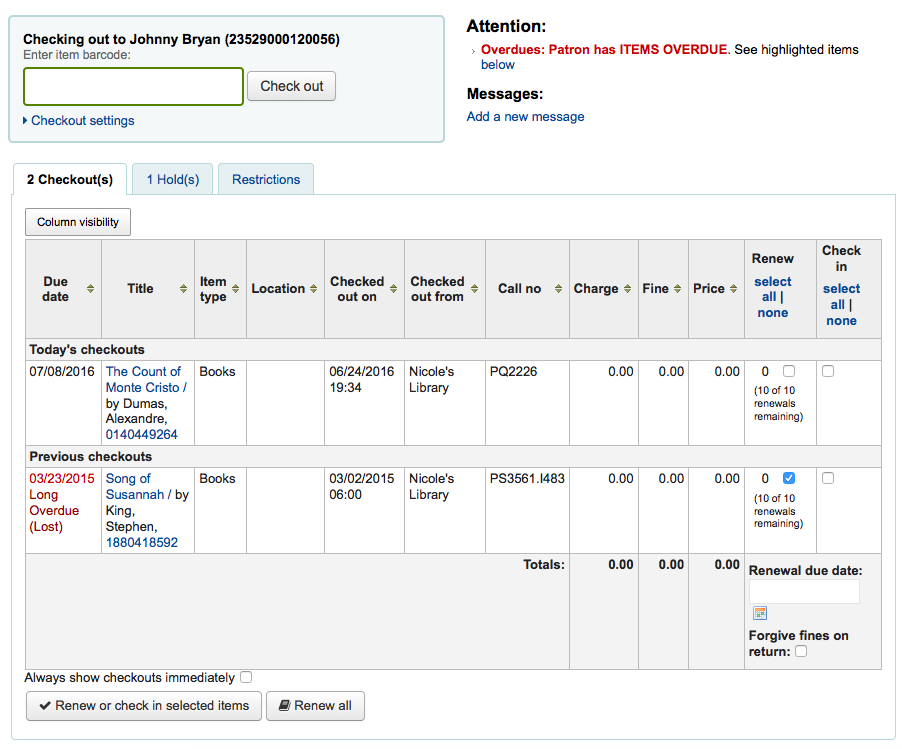
Há momentos em que Koha vai impedir o funcionário de emprestar exemplares a um usuário. Quando isso acontecer, aparecerá um aviso notificando o funcionário do porquê de o leitor não poder emprestar mais materiais.
Patron owes too much in fines
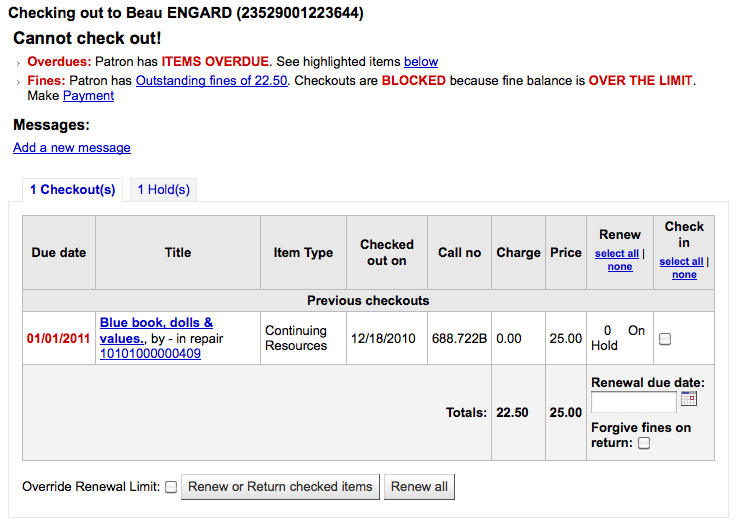
- You can set the amount at which patron checkouts are blocked with the noissuescharge system preference
Patron has a restriction on their account

This can be set by the librarian editing a patron record and adding a restriction or by the Overdue/Notice Status Triggers
Se o agente tem a permissão correta eles podem substituir a restrição temporária

Patron needs to confirm their address

- This can be set by the librarian editing a patron record and adding a flag
Patrons has lost their library card

- This can be set by the librarian editing a patron record and adding a flag
Avisos de empréstimos
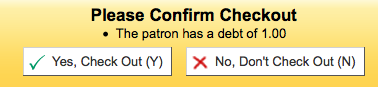
Algumas vezes os empréstimos irão disparar mensagens de aviso que aparecerão em uma caixa amarela acima do campo de empréstimo. estes avisos precisam ser validados antes que você possa prosseguir com os empréstimos.
Usuário não possui multas pendentes
Exemplar reservado para outro usuário
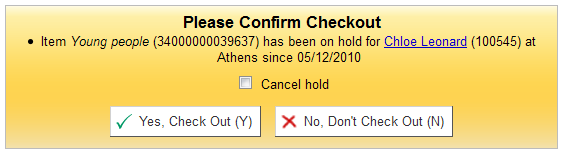
Exemplar deve estar na estante de reservas aguardando por outro usuário

Exemplar já emprestado para este usuário

Exemplar emprestado para outro usuário
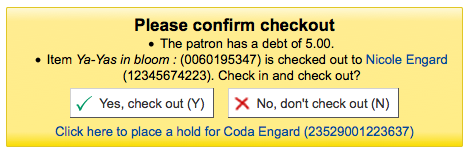
- This warning will allow you to place a hold on the item for the patron you’re trying to check it out to.
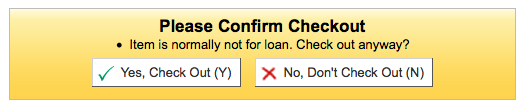
Exemplar não emprestável
Patron has too many things checked out and AllowTooManyOverride is set to ‘Allow’

Patron has too many things checked out and AllowTooManyOverride is set to “Don’t allow”

Item cannot be renewed

- This can be overridden with the AllowRenewalLimitOverride system preference
Código de barras não encontrado

- Learn more about fast cataloging later in this manual.
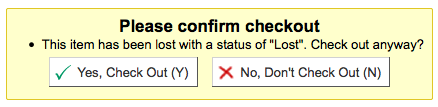
Item being checked out is marked as ‘lost’
Depending on the value in your IssueLostItem preference, you may just see a warning

or a confirmation box
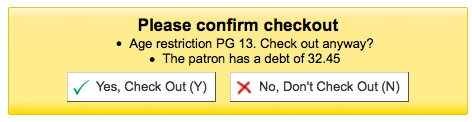
Exemplar que será emprestado não é recomendado para usuários desta idade
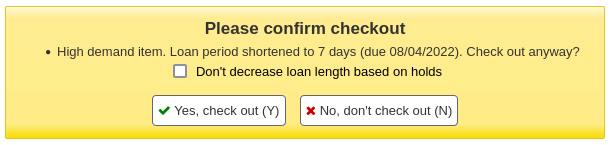
Item being checked out meets the decreaseLoanHighHolds system preference criteria
Renewing
Checked out items can be renewed (checked out for another period of time) based on your circulation rules and renewal preferences.
If you allow it, patrons can renew their own items via the OPAC, but sometimes you’ll need to help them by renewing their items via the staff client.
To renew items checked out to a patron, you can do one of two things.
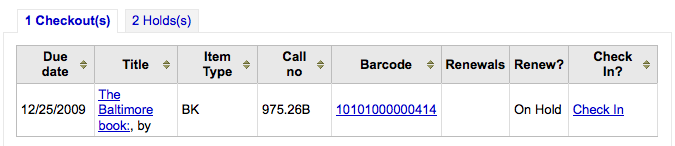
The first is to visit their details page or checkout page and review their checkout summary at the bottom.

In the Renew column you will see how many times each item has been renewed and a checkbox to renew the item for the patron. Check the boxed of the items you would like to renew and click the ‘Renew or Return checked items’ button, or to renew all items checked out to the patron simply click the ‘Renew all’ button.

Sometimes renewals will be blocked based on your circulation rules, to override this block you must have your AllowRenewalLimitOverride preference set to ‘Allow’. If you allow renewal limit overrides, you will see a checkbox at the bottom left of the circulation summary. Check that box and then choose the items you would like to renew.

Ao clicar nesta caixa, caixas de seleção serão adicionadas na coluna de renovação indicando que o exemplar não é renovável.
The second option is to visit the ‘Renew’ page found under the Circulation menu.
And scan the barcodes of the items you would like to renew.

If the item is renewed you will receive a confirmation message.

If the barcode is not found you will be presented with an error.

If the item is not actually checked out you will also receive an error.

Check In (Returning)
A devolução de exemplares pode ser feita a partir de diferente lugares
A caixa de devolução na tela principal da interface administrativa

O link de devolução na barra de pesquisa rápida na página de Circulação

O link de devolução no resumo de empréstimos do usuário
A página de devolução sob o menu Circulação
Devolvendo itens em
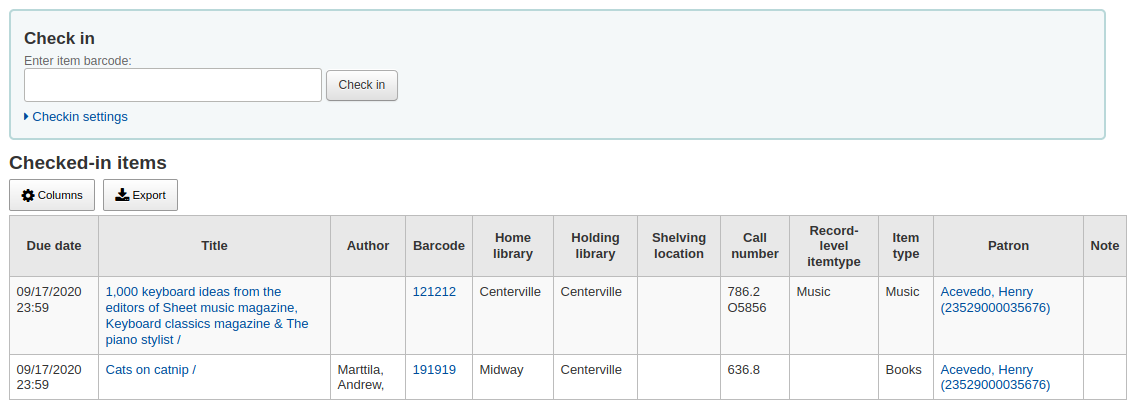
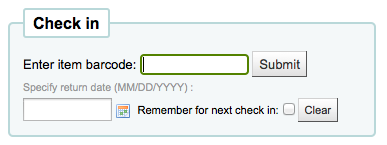
Para devolver um item digitalize o código de barras para o item na caixa fornecida. Um resumo de todos os itens devolvidos aparecerá debaixo da caixa de devolução
Se estiver devolvendo exemplares que foram colocados na caixa de retorno enquanto a biblioteca estava fechada, você pode selecionar o modo ‘Caixa de devolução’ antes de escanear os exemplares. Com este método a data de retorno será a última data em que a biblioteca esteve aberta.
- This requires that you have your closings added to the Holidays & Calendar Tool
Pode escolher perdoar todas as multas de atraso para os itens que estão emprestados clicando na caixa respectiva antes de ler o itens.
If you have the SpecifyReturnDate preference set to ‘Allow’ you will be able to arbitrarily set the return date from below the check in box.
Mensagens de devolução
Existem várias mensagens que podem aparecer quando retornar itens:
If you are checking an item in at a library other than the home branch, a message will appear asking you to transfer the book to the home library
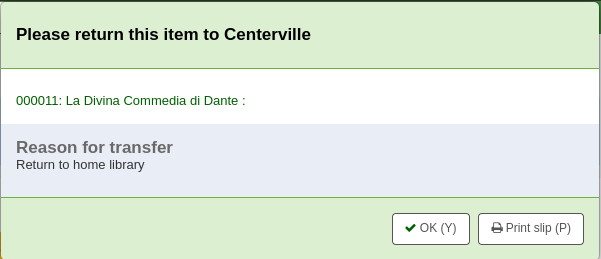
Depois que este exemplar é devolvido o status do exemplar mudará no catálogo para ‘em trânsito’

To mark an item as back at the home branch, check the item in at the home branch

- Uma mensagem aparecerá para indicar que o exemplar não está emprestado, mas o status constará como disponível no catálogo. Este passo é necessário para marcar exemplares como recebidos na biblioteca de origem.
Se você estiver registrando a devolução de um exemplar que tem multiplas partes ou peças uma mensagem irá aparecer alertando sobre o número de peças que você deve receber
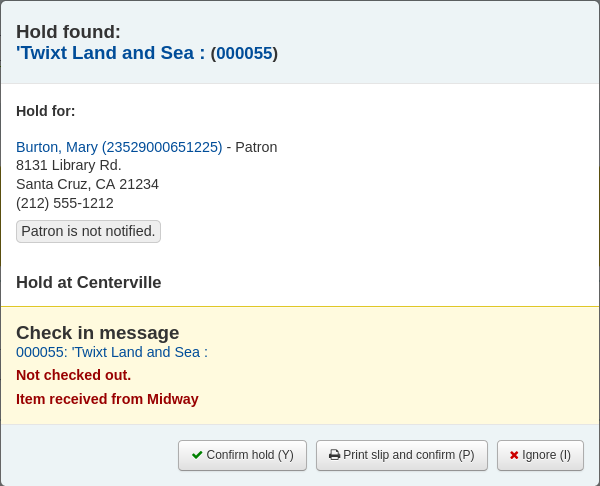
If you’re checking an item in that has a hold on it, you will be prompted to confirm the hold
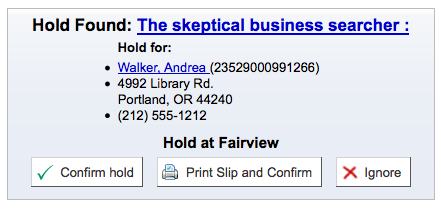
Clicando no botão Confirmar reserva irá marcar o exemplar como ‘aguardando retirada’ na biblioteca

Ao clicar no botão de Imprimir Comprovante e Confirmar, o item será marcado como esperando retirada na biblioteca, e na biblioteca ficará disponível um recibo com as informações do usuário para imprimir e por no livro
Ignorar a reservar vai deixar o estado do item como disponível, mas deixa o item em reserva (não cancela)
If you’re checking in an item that has a hold on it at another branch you will be prompted to confirm and transfer the item
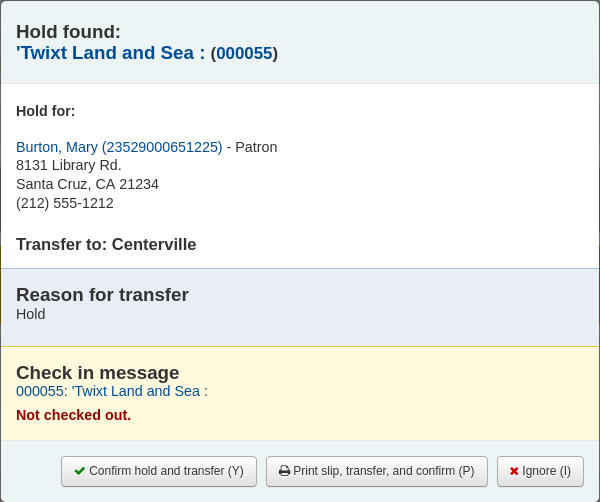
Clicando em Confirmar reserva e no botão Transferir irá marcar o exemplar como ‘em trânsito’ para a biblioteca em que a reserva foi feita

Clicando no botão Imprimir recibo, transferir e confirmar irá marcar o item como em transito para a biblioteca em que foi realizada a reserva e imprimir um recibo impresso para a biblioteca atual com o livro e as informações do usuário
Ignorar a reservar vai deixar o estado do item como disponível, mas deixa o item em reserva (não cancela)
If you have the system showing you fines at the time of checkin (FineNotifyAtCheckin) you will see a message telling you about the fine and providing you a link to the payment page for that patron

Circulation Messages
Mensagens de circulação são mensagens curtas que os bibliotecários podem deixar para seus usuários ou seus colegas e que aparecem durante a circulação.
Configuração de Mensagens
Circulation messages are set up as Authorized Values. To add or edit Circulation Messages you want to work with the BOR_NOTES value.

The ‘Description’ field can hold a canned message that you would like to appear on the patron’s record.
Important
The ‘Description’ field is limited to 80 characters, but the patron message field can hold more than that. Enter 80 characters in the ‘Description’ field and then type the rest on the patron record.
Adicionando uma mensagem
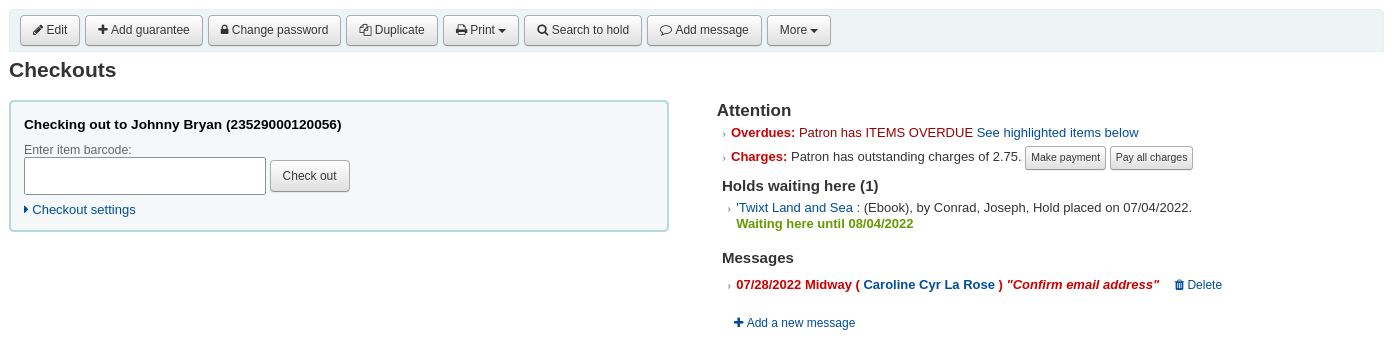
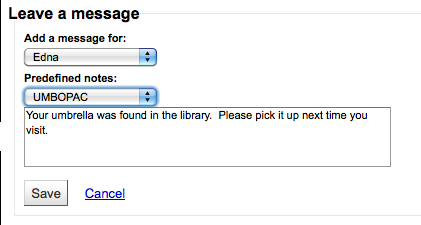
When on the patron’s check out tab you will see a link to ‘Add a new message’ to the right of the check out box and a button at the top to ‘Add message’.
When you click either of these options you will be asked to choose if the message is for the librarians or the patron and the message you would like to leave.
Note
A message for the patron will also show to the library staff.
Visualizando mensagens
Circulation messages meant for the staff and/or the patron will appear on the patron’s checkout screen to the right of the checkout box. Messages in bold and red are meant for the library staff only, whereas messages in regular italics font are meant for the patron and the librarian.
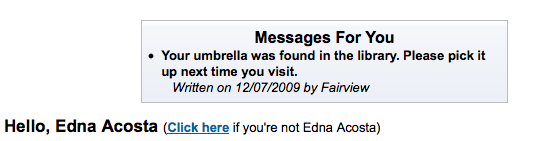
Circulation messages meant for the patron will also appear when they log into the OPAC.
Reservas
Koha allows patrons to put things on hold. A ‘Hold’ is a way to reserve an item. Depending on your circulation and fine rules and hold preference settings patrons will be able to place items on hold for pickup at the library at a later date/time.
Placing Holds in Staff Client
Existem diversas maneiras para efetuar reservas pelos funcionários. A mais óbvia é usar o botão ‘Reservar’ no topo de qualquer registro bibliográfico.

Você pode também clicar no link menor ‘Reservar’ no topo da página de resultados do catálogo, ou no link ‘Reservas’ em cada resultado.
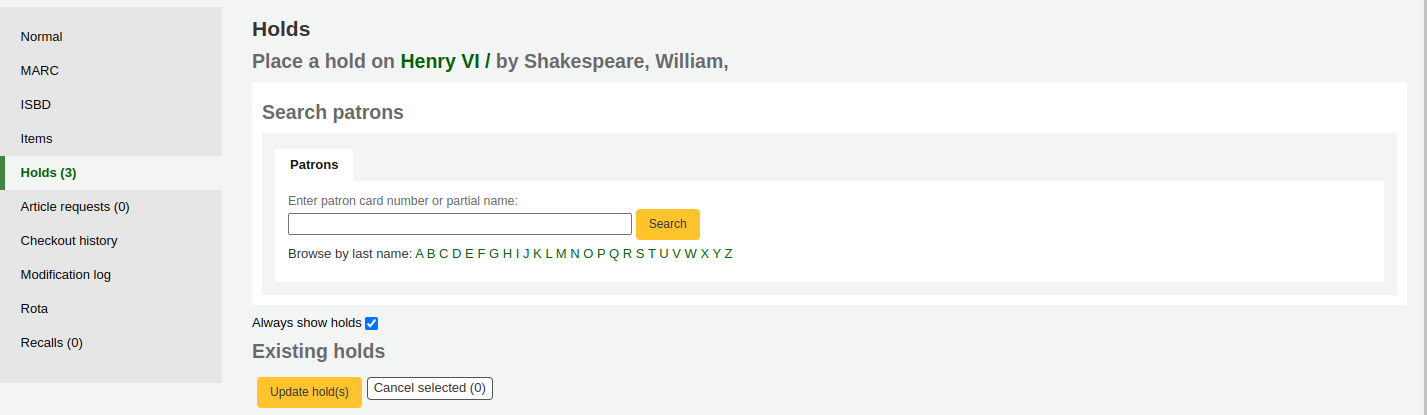
Você será solicitado para pesquisar pelo usuário por código de barras ou qualquer parte de seu nome no início do processo.
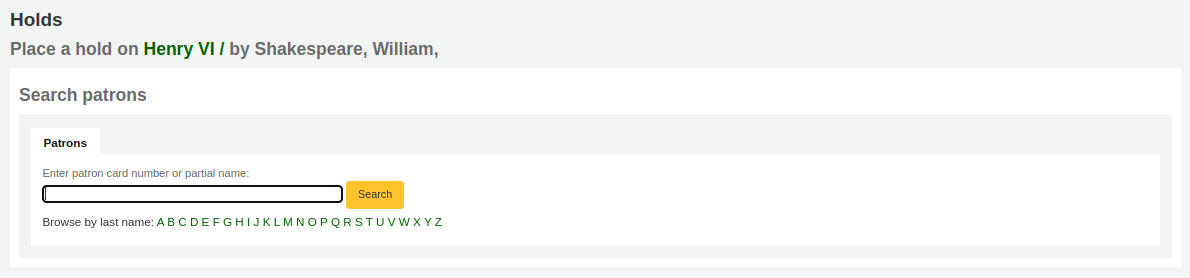
Se você quiser procurar pelo usuário primeiro e então o registro para reservar, você pode abrir o cadastro do usuário e clicar no botão ‘Pesquisar para reservar’.
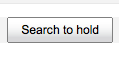
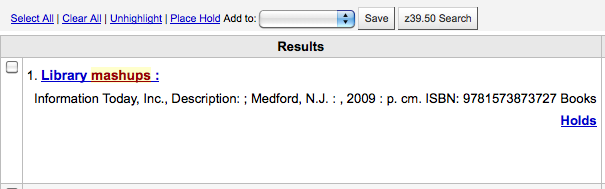
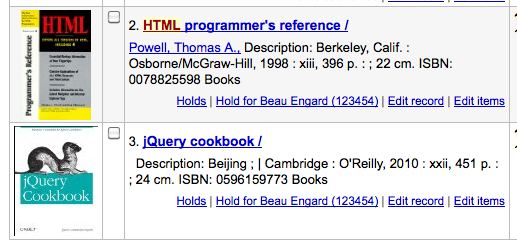
Depois de clicar no botão, você será levado a página de pesquisa no catálogo onde você pode encontrar o(s) exemplar(es) que você deseja reservar. Sob cada título na tela de resultados você verá uma opção ‘Reservar para usuário.’
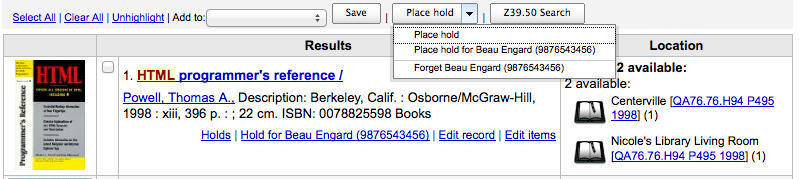
Se você quer reservar múltiplos itens de uma lista, clicando nas caixas de seleção e posteriormente no botão ‘Reservar’.
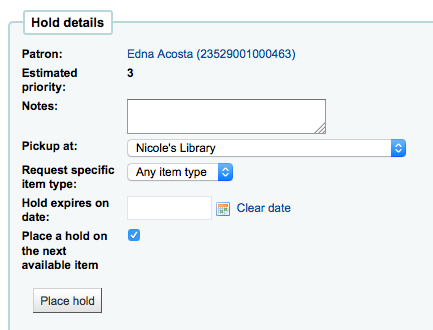
Dependendo de quantos exemplares você escolher para reservar de uma vez você verá um formulário de reserva diferente. Se você estiver reservando em apenas um registro bibliográfico, você verá uma lista de todos os exemplares disponíveis para reserva.
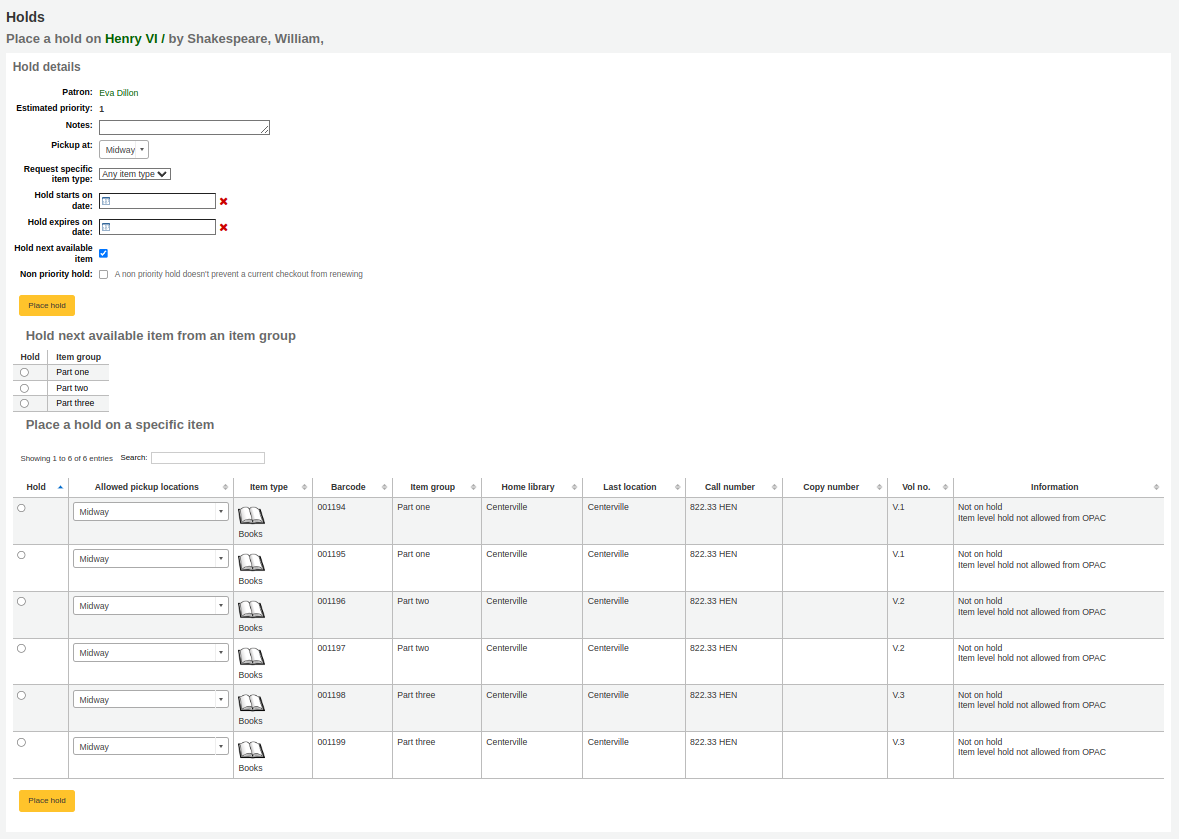
Digite quaisquer notas aplicáveis a esta reserva
Escolha a biblioteca na qual o usuário irá retirar o exemplar
If you have the AllowHoldItemTypeSelection preference set to ‘Allow’ and the record had more than one item type attached you will see an option to choose to limit the hold to a specific item type
If the patron wants the hold to start on a date other than today, enter that in the ‘Hold starts on date’ field
- This option will only appear if the AllowHoldDateInFuture system preference is set to ‘Allow’
If the patron has specified that they don’t want the item after a certain date, or if you have limits on hold lengths, you can enter an expiration date for the hold in the ‘Hold expires on date’
- To have expired holds cancelled automatically you will need to have the Expired Holds cron job set to run on a regular basis.
Depois, escolha se você quer reservar o próximo item disponível ou um item específico.
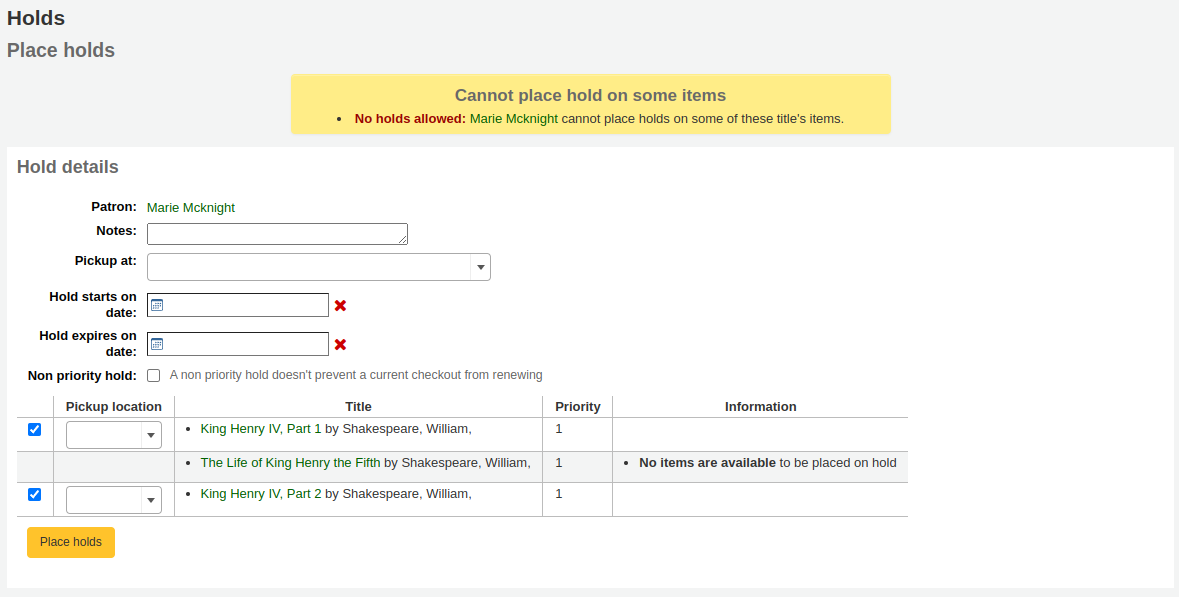
Se você estiver reservando mais de um item eles serão apresentados com os próximos disponíveis de cada título. Se nenhum item estiver disponível para reserva, será informado na tela de confirmação.
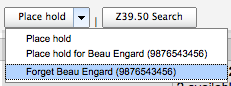
Uma vez que sua reserva foi efetuada, se você gostaria de ter Koha esqueça de que você usou a função ‘Pesquisar para reservar’ você pode optar por ter Koha’ esquecer ‘o nome do usuário, clicando na seta à direita no botão ‘Reservar’ nos resultados da pesquisa e escolher a opção ‘Esquecer’.
Gerenciar reservas
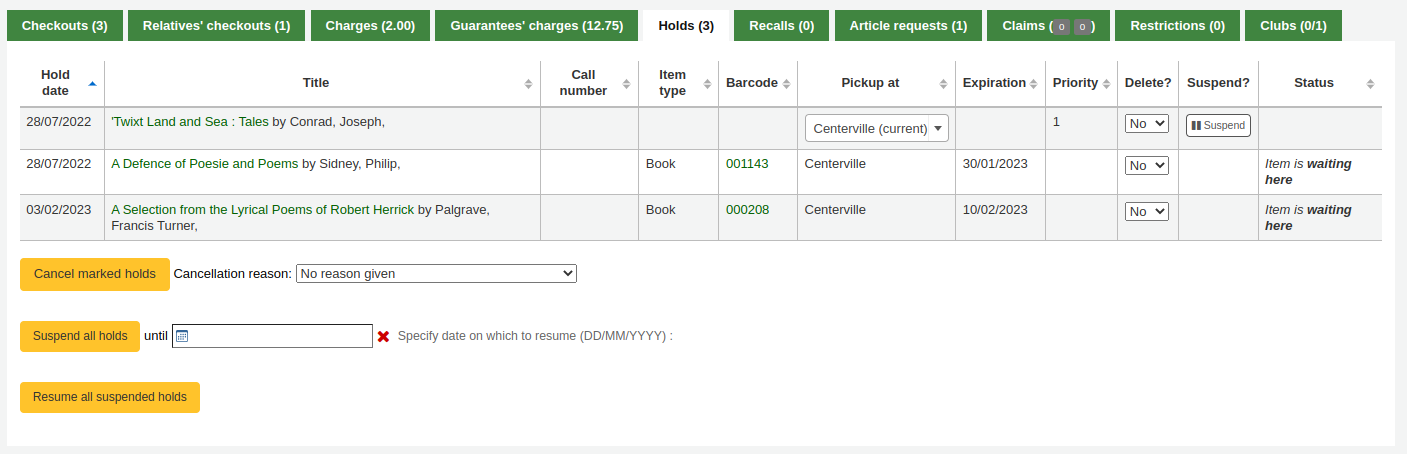
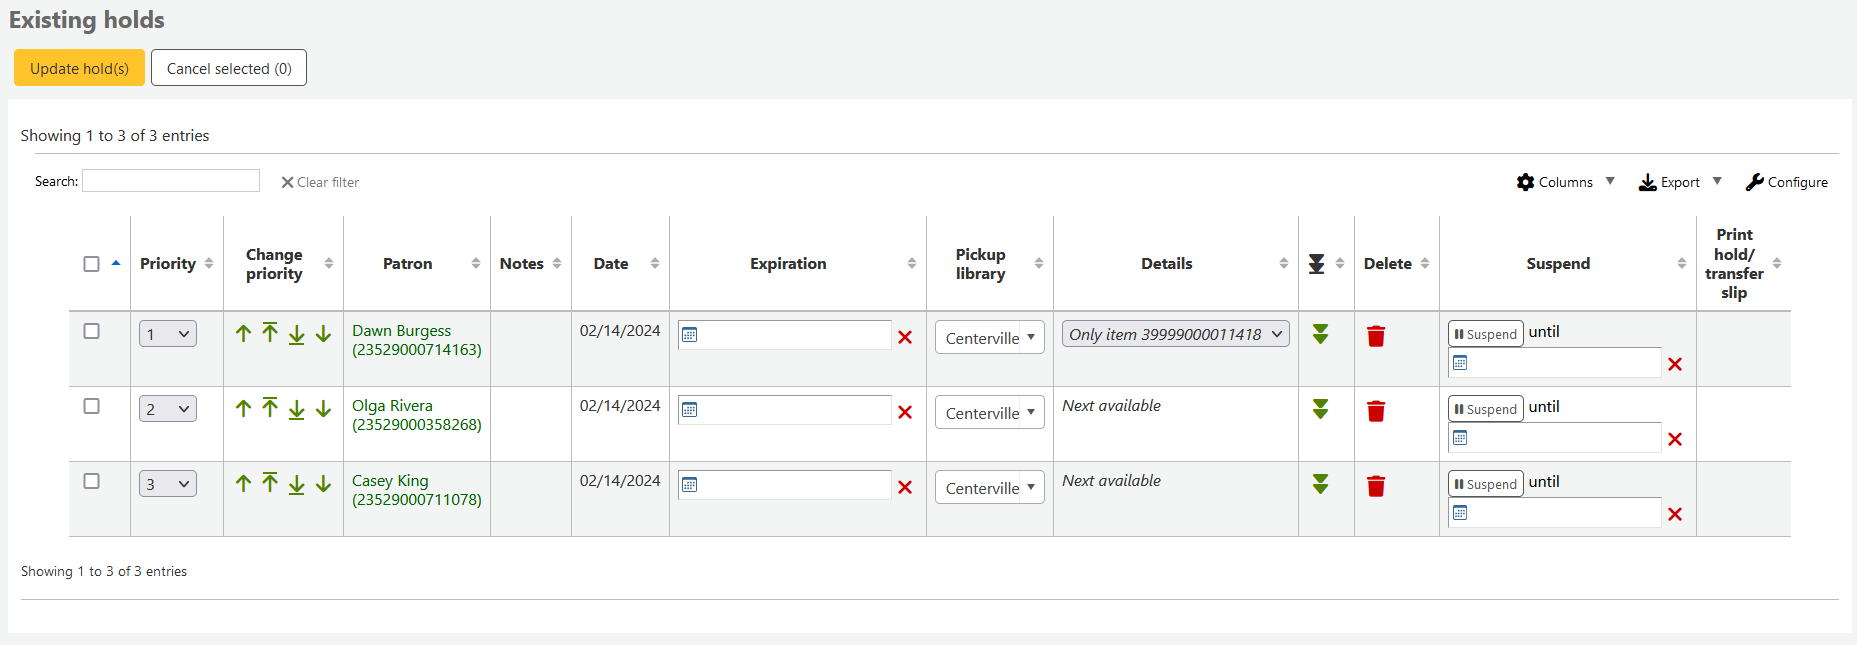
Holds can be altered and cancelled from the Holds tab found on the left of the bibliographic record.
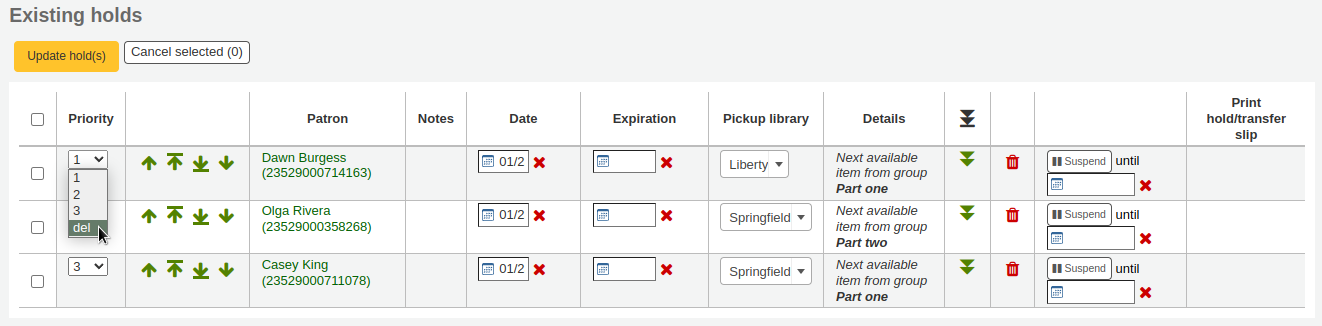
From the list of holds you can change the order of the holds, the pickup location, suspend and/or cancel the hold.
Note
If you have your AutoResumeSuspendedHolds preference set to “Don’t allow” then you will not have the option to put an end date on the hold suspension
Note
Depending on how you have your HidePatronName system preference set the list may show card numbers instead of names in the Patron column like in the image above.
Para reorganizar ou excluir reservas, simplesmente faça a seleção em ‘Prioridade’ ou clique nas setas a direita para alterar a ordem.
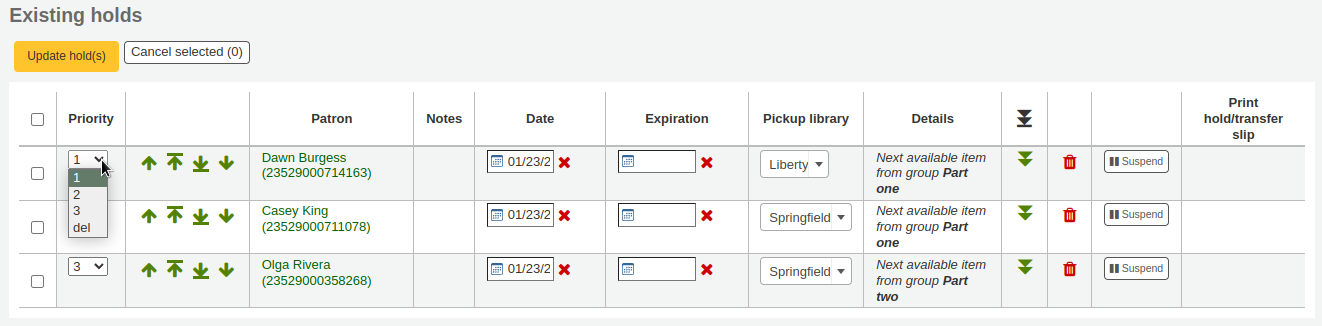
Se você usar a lista suspensa de prioridades para reordenar ou apagar empréstimos você terá que clicar em ‘Atualizar empréstimos’ para salvar as alterações.
Ao clicar na seta para baixo no lado direito da reserva fará com que ela ocupe o último lugar da lista, mesmo que mais pedidos de reserva sejam feitos.
Por exemplo, a biblioteca tem clientes internos que estão autorizados pegar livros ao mesmo tempo por meses. Não seria justo com outros clientes se clientes internos fossem capazes de conferir um novo livro e mantê-lo durante meses. Por esta razão, o pedido dos clientes internos é mantido no último lugar da fila até que todo mundo que queria ler esse livro já o tenha lido.

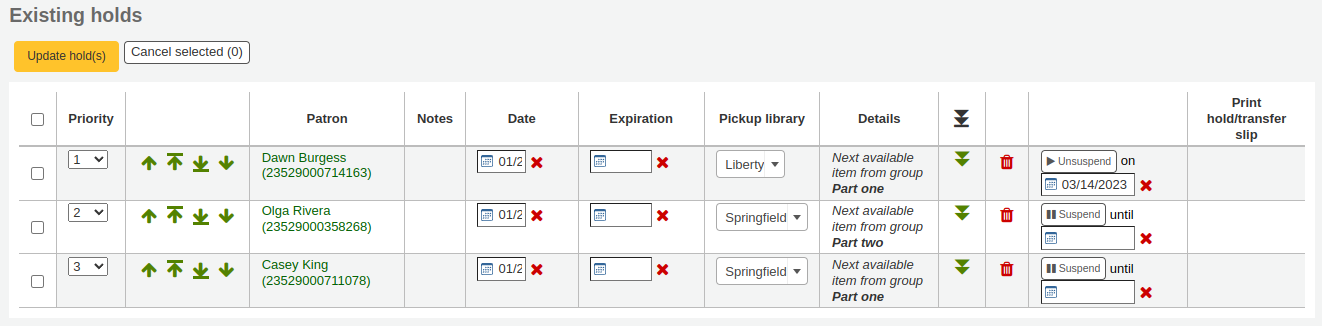
If a patron asks to have their hold suspended and you have the SuspendHoldsIntranet system preference set to ‘allow’ you can do so by clicking the Suspend button to far right. If the patron gives you a date for the items to become unsuspended you can enter that in the date box and click the ‘Update hold(s)’ button to save your changes.
To delete or cancel a hold click the red ‘X’ to the right of the hold line. To delete/cancel a bunch of holds you can choose ‘del’ from pull down to the left of each line and then click ‘Update hold(s)’ at the bottom of the list.
Recebendo reservas
When items that are on hold are checked in or out the system will remind the circulation librarian that the item is on hold and offer them options for managing the hold.
When you check in an item that has a hold on it the system will ask you to either confirm and transfer the item
or just confirm the hold
Clicando no botão de confirmação fará com que o exemplar seja registrado como reservado para o usuário. se o exemplar tiver que ser transferido, o exemplar também será marcado como ‘em trânsito’ para a biblioteca escolhida. Clicando em ‘Ignorar’ fará com que a reserva seja retida, mas permitirá que você empreste o exemplar para outro usuário. Escolhendo confirmar e imprimir o levará a uma página imprimível que você pode colocar dentro do material juntamente com a informação de reserva ou transferência.
Uma vez confirmada a reserva ela será exibida no registro do usuário e na tela de empréstimo sob a aba ‘Reservas’.
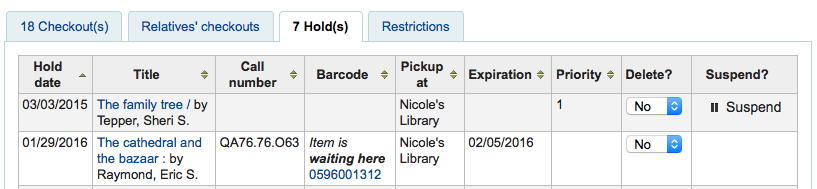
From here if the patron would like you suspend their holds you can do so one by one or in bulk.
O registro do item agora irá informar que está reservado.

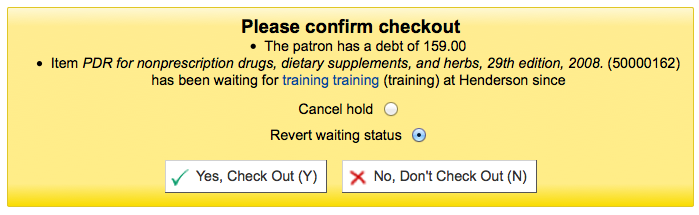
Em alguns casos um usuário pode retirar uma reserva para seu amigo (ou alguém de sua casa). Neste caso, você precisa ter certeza que a reserva está cancelada quando emprestar para outra pessoa. Quando tentar emprestar um item que está aguardando outra pessoa será apresentado uma mensagem de alerta.
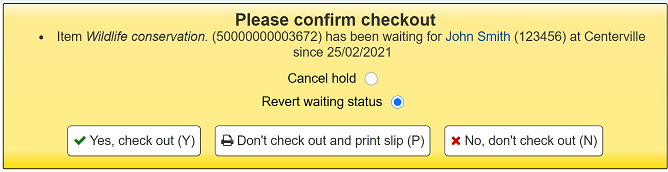
Aqui você pode emprestar o exemplar para o usuário e calcelar a reserva.
Transferências
If you work in a multi-branch system you can transfer items from one library to another by using the Transfer tool.
- Get there: Circulation > Transfer
To transfer an item
Click ‘Transfer’ on the Circulation page

- Digite a biblioteca para qual você quer transferir o item
- Escaneie ou digite o código de barras do exemplar que você deseja transferir
Clique ‘Enviar’
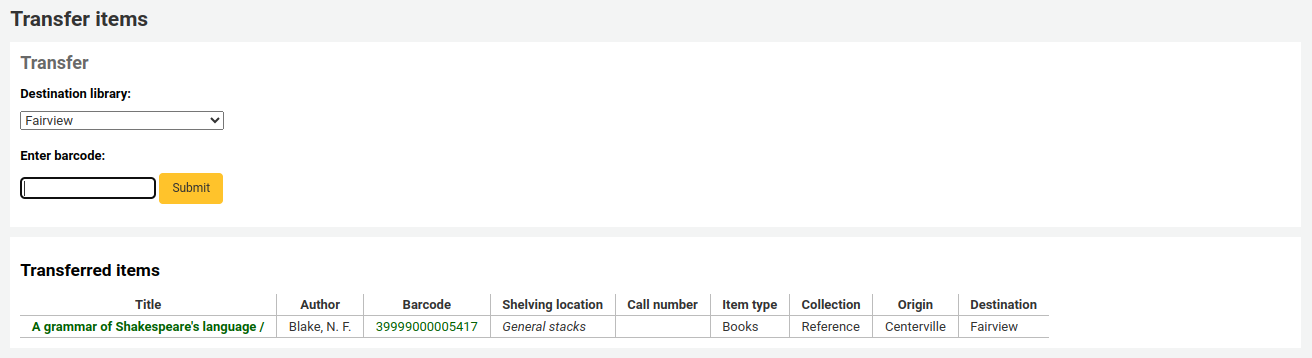
O item agora irá informar que está em trânsito

Quando o exemplar chega na outra biblioteca o funcionário precisa registrar a chegada para confirmar que o exemplar não está mais em trânsito
The item will not be permanently moved to the new library
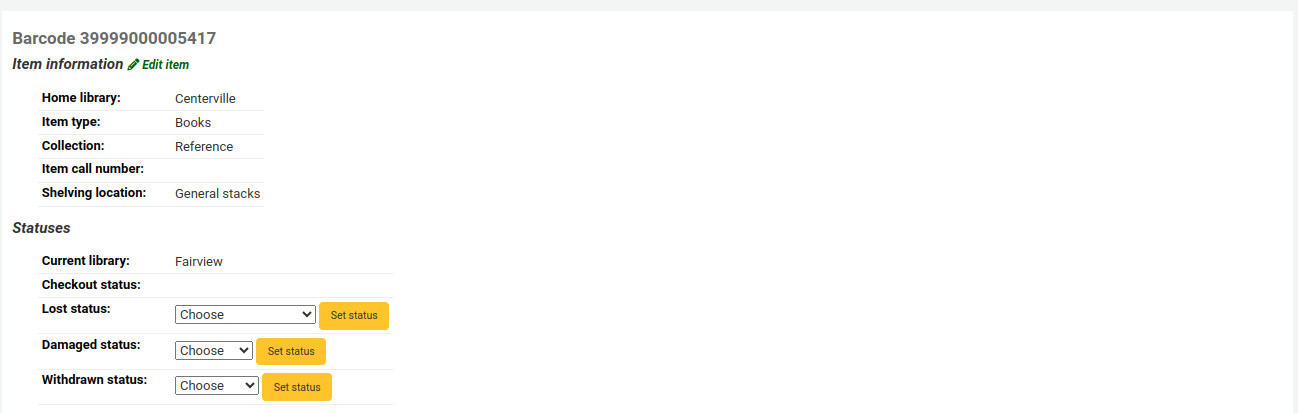
- O exemplar exibe a mesma ‘Biblioteca de Origem’ mas teve atualizada a ‘Localização Atual’ para indicar onde ele se localiza no momento
Alterar biblioteca
Por padrão você irá entrar na interface administrativa como se estivesse na sua biblioteca de origem. Esta biblioteca aparece na parte superior direita da tela da interface administrativa.

Esta é a biblioteca que as transações ocorrerão. Se você estiver em outra biblioteca (ou em um bookmobile) você precisa alterar a sua biblioteca antes de iniciar a circulação de exemplares. Para isso, você precisa clicar em ‘Alterar biblioteca’ no topo direito da página de circulação.

Quando vocẽ tiver salvo suas alterações, sua nova biblioteca irá aparecer no topo direito.
Catalogação expressa
Sometimes circulation librarians need to quickly add a record to the system for an item they are about to check out. This is called ‘Fast Add.’ To allow circulation librarians access to the Fast Add Cataloging tool, simply make sure they have the fast_cataloging permissions. There are two ways to add titles via fast add. If you know that you’re about to check out an item that isn’t in you catalog you can go to the Circulation module and click ‘Fast cataloging.’
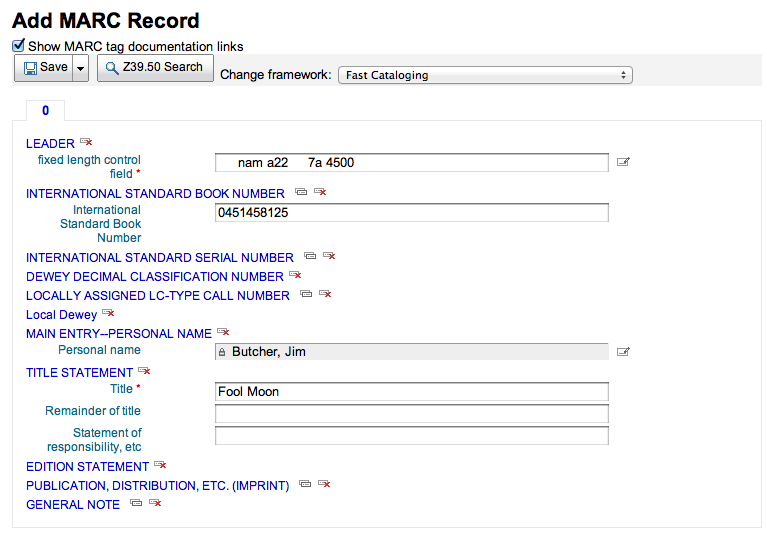
The cataloging interface will open up with the short cataloging record:
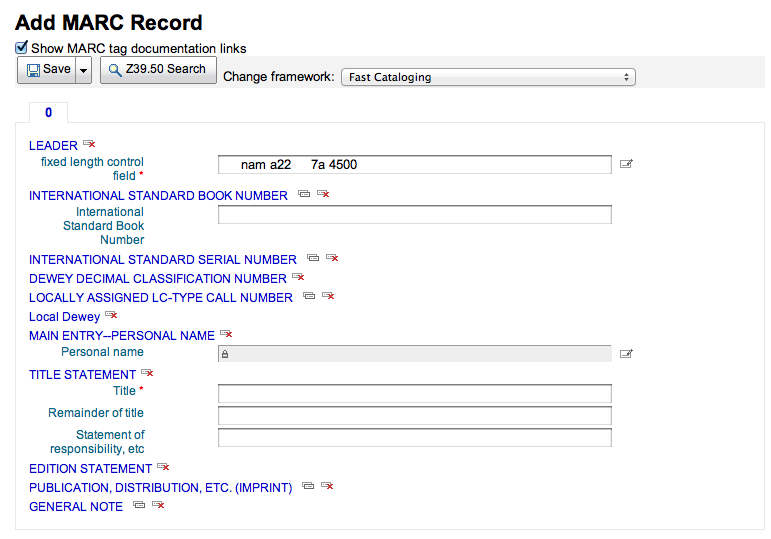
Após adicionar seus dados de catalogação será pedido os dados do item. Informe o código de barras, código da coleção, etc e salve o item antes de emprestá-lo.
A outra maneira para uma catalogação expressa é pela tela de devolução. Quando você digitar um código de barras que o Koha não encontrar, você poderá usar a catalogação expressa para adicionar o item ao Koha e emprestá-lo.
Clicando em ‘Catalogação expressa’ te levará ao formulário de catalogação expressa que poderá inserir a informação do título
Depois de clicar em ‘Salvar’ você será levado para o registro do item onde o código de barras já estará preenchido com o código de barras que você está tentando emprestar.
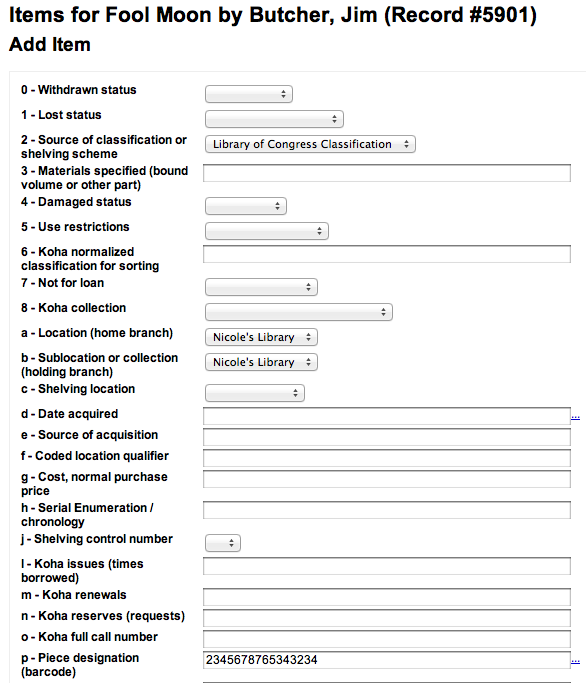
Após clicar em adicionar o item irá aparecer abaixo do formulário e então você poderá incluir seu próximo item da mesma maneira (se estiver adquirindo mais de um item).

Relatórios de circulação
Most reports can be found via the Reports module, but some of the more common circulation reports are available right from the Circulation module.
- Get there: Circulation > Circulation reports
Fila de reservas
Este relatório irá listar todas as reservas de sua biblioteca.
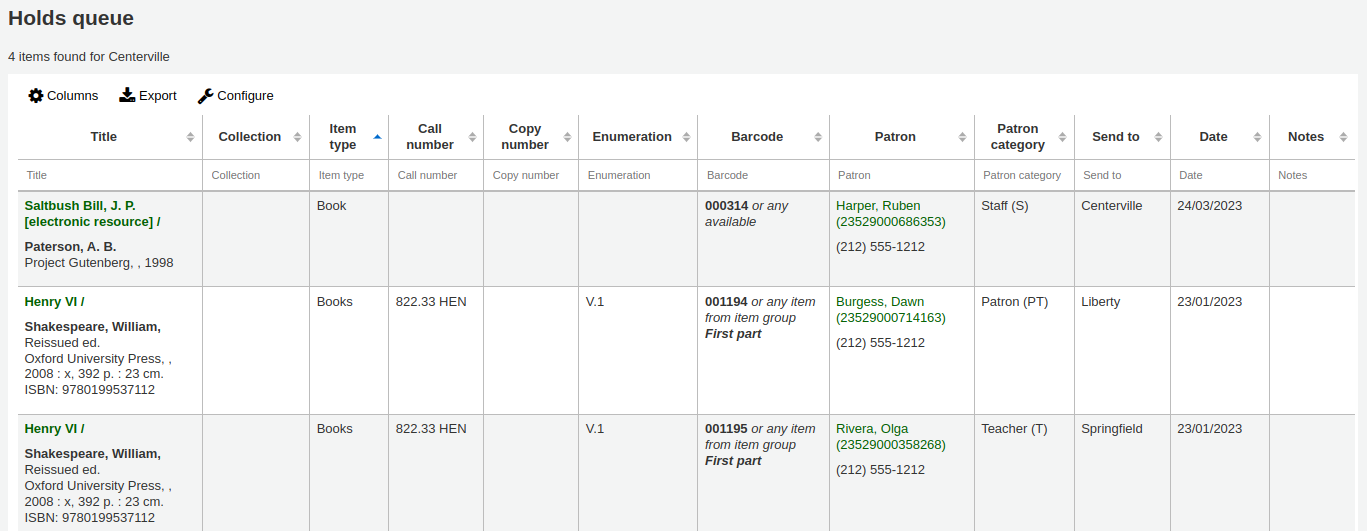
To generate this report, you must have the Build Holds Queue cron job running. This cron job is a script that should be run periodically if your library system allows borrowers to place on-shelf holds. This script decides which library should be responsible for fulfilling a given hold request.
It’s behavior is controlled by the system preferences StaticHoldsQueueWeight and RandomizeHoldsQueueWeight.
If you do not want all of your libraries to participate in the on-shelf holds fulfillment process, you should list the libraries that *do* participate in the process here by inputting all the participating library’s branchcodes, separated by commas ( e.g. “MPL,CPL,SPL,BML” etc. ).
By default, the holds queue will be generated such that the system will first attempt to hold fulfillment using items already at the pickup library if possible. If there are no items available at the pickup library to fill a hold, build_holds_queue.pl will then use the list of libraries defined in StaticHoldsQueueWeight. If RandomizeHoldsQueueWeight is disabled ( which it is by default ), the script will assign fulfillment requests in the order the branches are placed in the StaticHoldsQueueWeight system preference.
Por exemplo, se o seu sistema tem três bibliotecas de tamanhos variados (pequena, média e grande) e você deseja que a maior incidência de reservas recaia sobre as bibliotecas maiores antes das menores, você pode configurar StaticHoldsQueueWeight para algo como “GDE,MED,PEQ”.
Caso você queira que o encargo das reservas recaia de maneira equânime na rede de bibliotecas, simplesmente ative a preferência RandomizeHoldsQueueWeight.Quando esta preferência do sistema está ativa, a ordem na qual cada biblioteca será solicitada a atender reservas será aleatória a cada vez que a lista for gerada.
Leaving StaticHoldsQueueWeight empty is contraindicated at this time. Doing so will cause the build_holds_queue script to ignore RandomizeHoldsQueueWeight, causing the script to request hold fulfillment not randomly, but by alphabetical order.
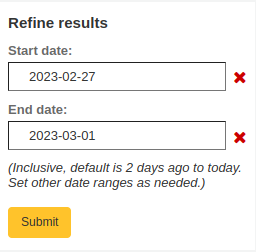
Holds to pull
Este relatório exibirá todos os exemplares reservados que estão disponíveis na biblioteca para retirada. Se os exemplares estiverem disponíveis em mais de uma biblioteca, então todas as bibliotecas com aquele exemplar disponível verão uma indicação de reserva até que alguma delas a aceite.
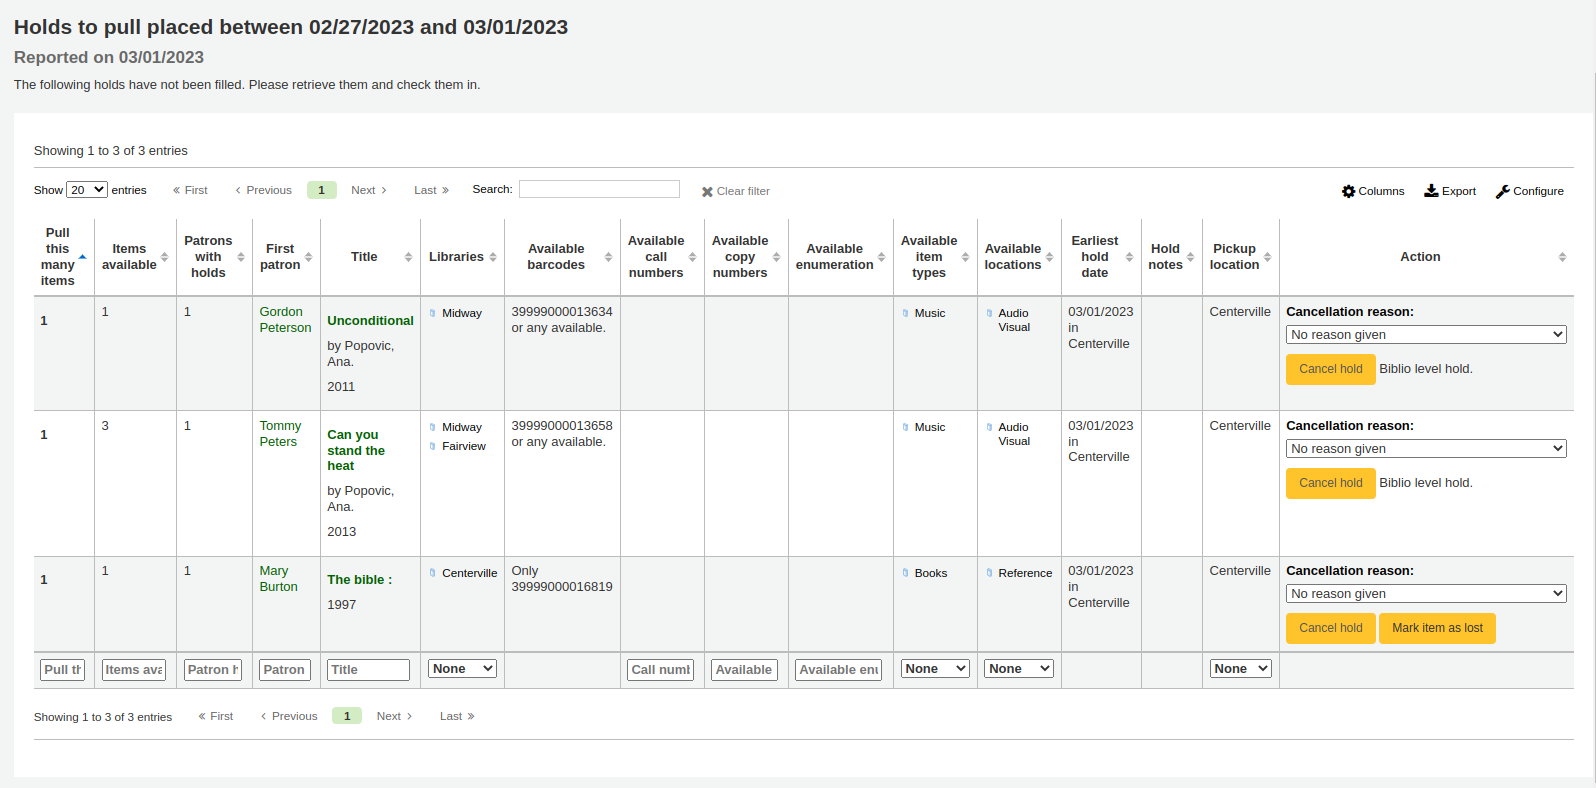
You can limit the results you see by using the Refine box on the left side of the page:
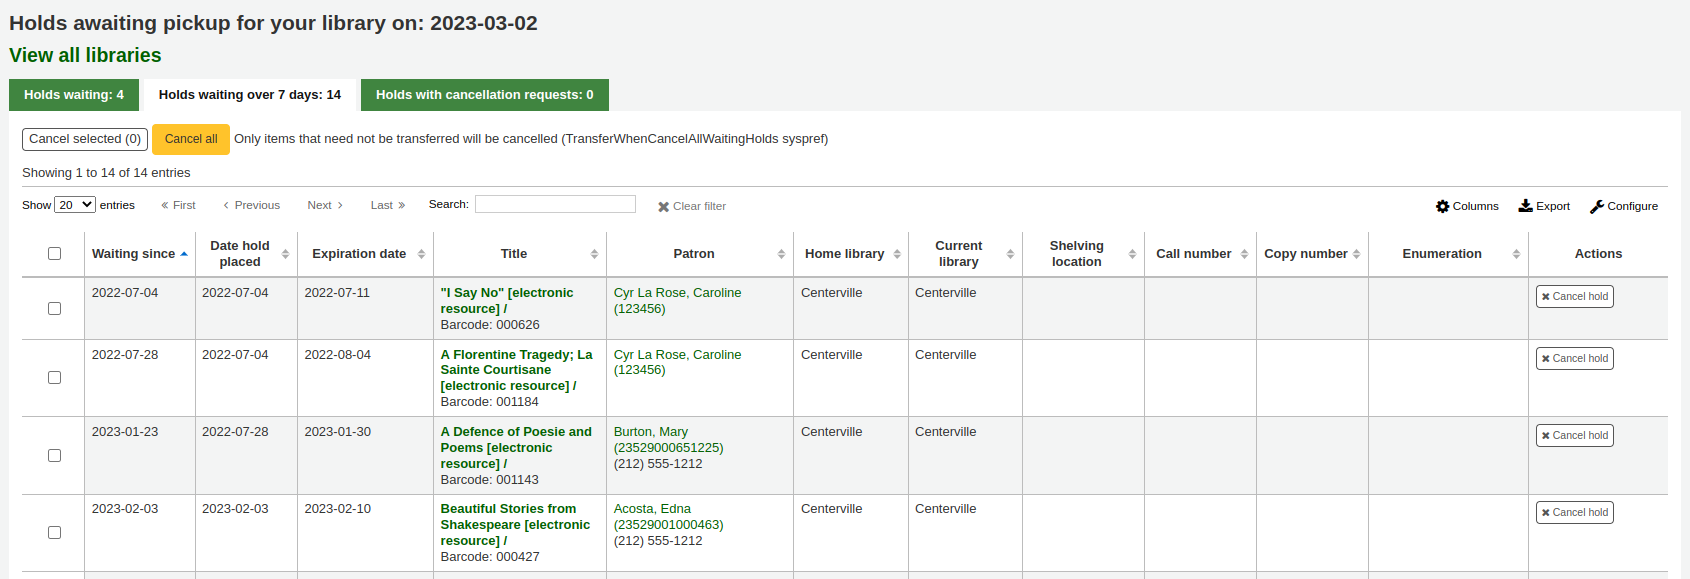
Holds awaiting pickup
Este relatório irá exibir todas as reservas que estão aguardando a retirada pelos usuários.
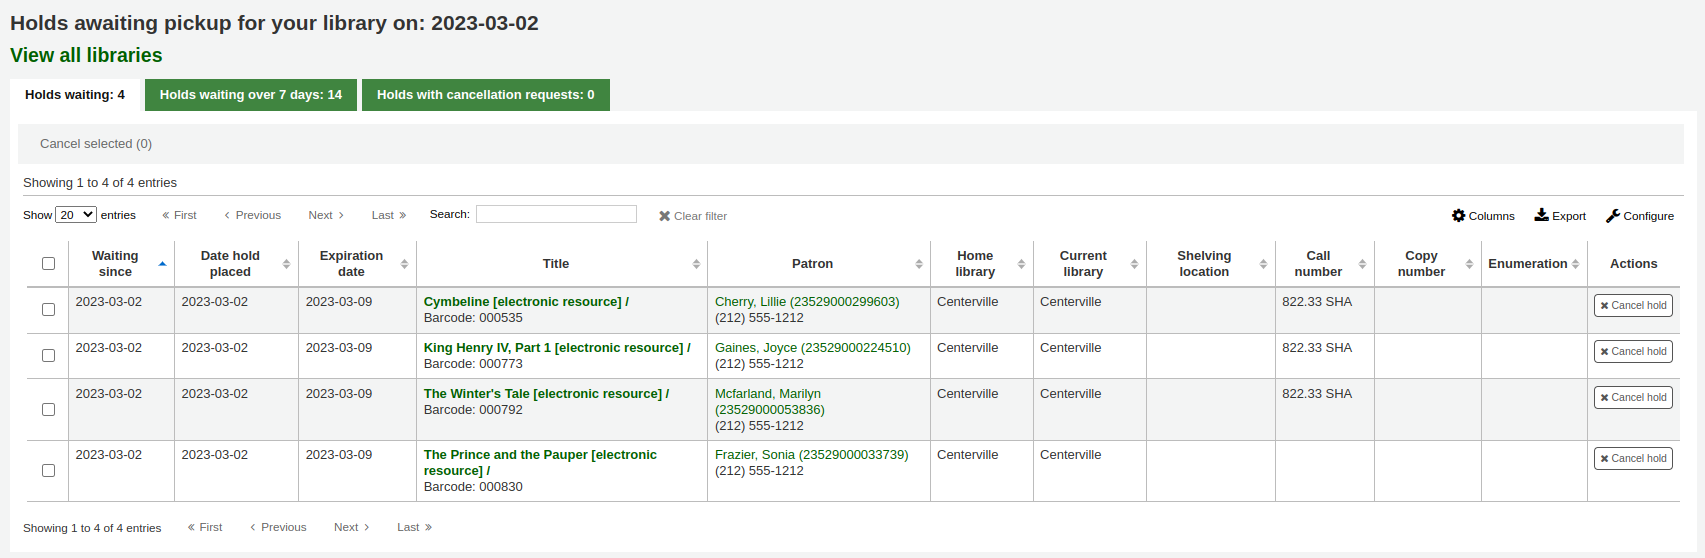
Items that have been on the hold shelf longer than you normally allow (based on the ReservesMaxPickUpDelay preference value) will appear on the ‘Holds Over’ tab, they will not automatically be cancelled unless you have set the cron job to do that for you, but you can cancel all holds using the button at the top of the list.
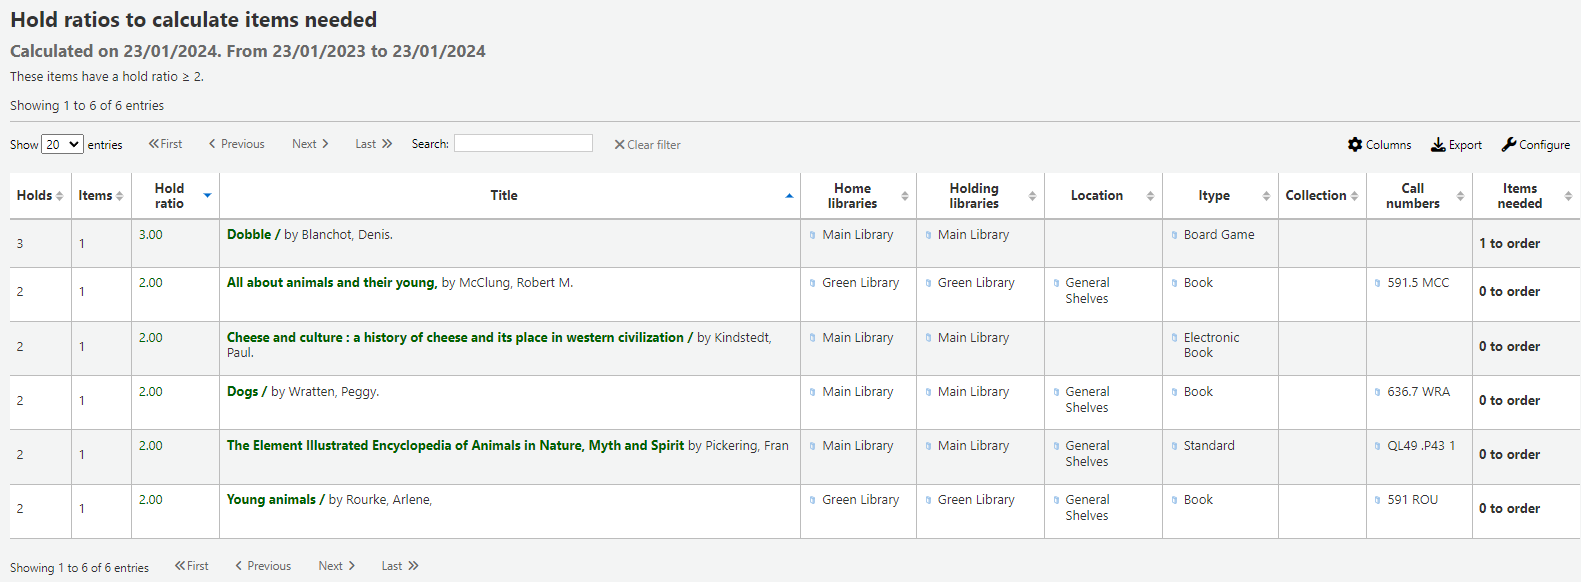
Taxas de reservas
A Taxa de reservas auxiliar no desenvolvimento do acervo. Utilizar este relatório permite observar quantos usuários tem reservas em exemplares e quais você poderia comprar maior quantidade. Por padrão, está configurado para demandar 3 exemplares para cada reserva. O relatório irá informá-lo quantos exemplares são necessários para atingir esta cota.
Transferências a receber
Este relatório irá listar todos os exemplares que o Koha acredita que estão em trânsito para sua biblioteca.

Se suas transferências estão atrasadas para chegar na biblioteca, você verá uma mensagem informando o quão atrasados estes exemplares estão.
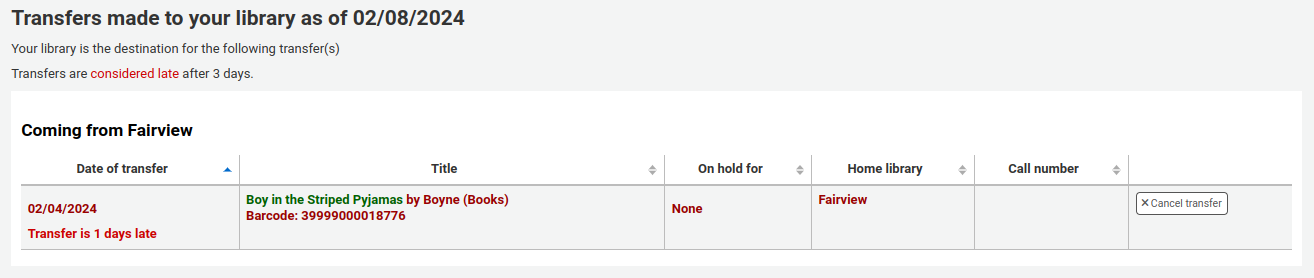
Important
An item is considered late based on the number of days you have entered in the TransfersMaxDaysWarning system preference.
Article Requests
First enable your system preference for ArticleRequests.
Set to Enable patrons to place article requests.
Next you will need to decide how your patrons will make requests, either record only, item only, or both record and item level.
You can set 3 different system preferences for mandatory fields to be filled in dependent on how your records are requested.
ArticleRequestsMandatoryFields: make the following fields mandatory for records that are record level or item level requestable
ArticleRequestsMandatoryFieldsItemOnly make the following fields mandatory for records that are only item level requestable
ArticleRequestsMandatoryFieldsRecordOnly make the following fields mandatory for records that are only record level requestable
Next you will want to go into your circulation and fine rules matrix and select each rule that you want to allow requests.
You can allow requests to be made at the record level, item level, (Yes which means both) and no (none).
Now you can place requests on both the staff client and OPAC.
Once the article request has been placed, staff will see new requests at the bottom of the home page on the staff client. (In the same location as tags, comments and modifications).
From there staff will be able to select requests to process.
The first step would be for a staff member to process the request, that moves the request to the processing tab and alerts other staff members that the request is in process. On the actions column, click on the dropdown menu and select process request. This will move the request to the processing tab.
Next staff will go to the shelf and make a copy of the requested article.
Once that is complete, staff can print the Article request slip (this can be customized in notices and slips) and staple or paper clip it to the article. In the actions column, you can select the dropdown and select print slip.
Finally, staff will select the complete article request from the actions dropdown menu which will send a notice to the patron who made the request letting them know the request is ready for pickup.
This removes the article request from the processing tab.
Atrasos
Important
For libraries with a large patron base, this report may take a significant amount of time to run.
Note
Large libraries can choose to filter the report before it runs by setting the FilterBeforeOverdueReport system preference to ‘Require’.
Este relatório irá listar todos os exemplares em atraso na sua biblioteca.
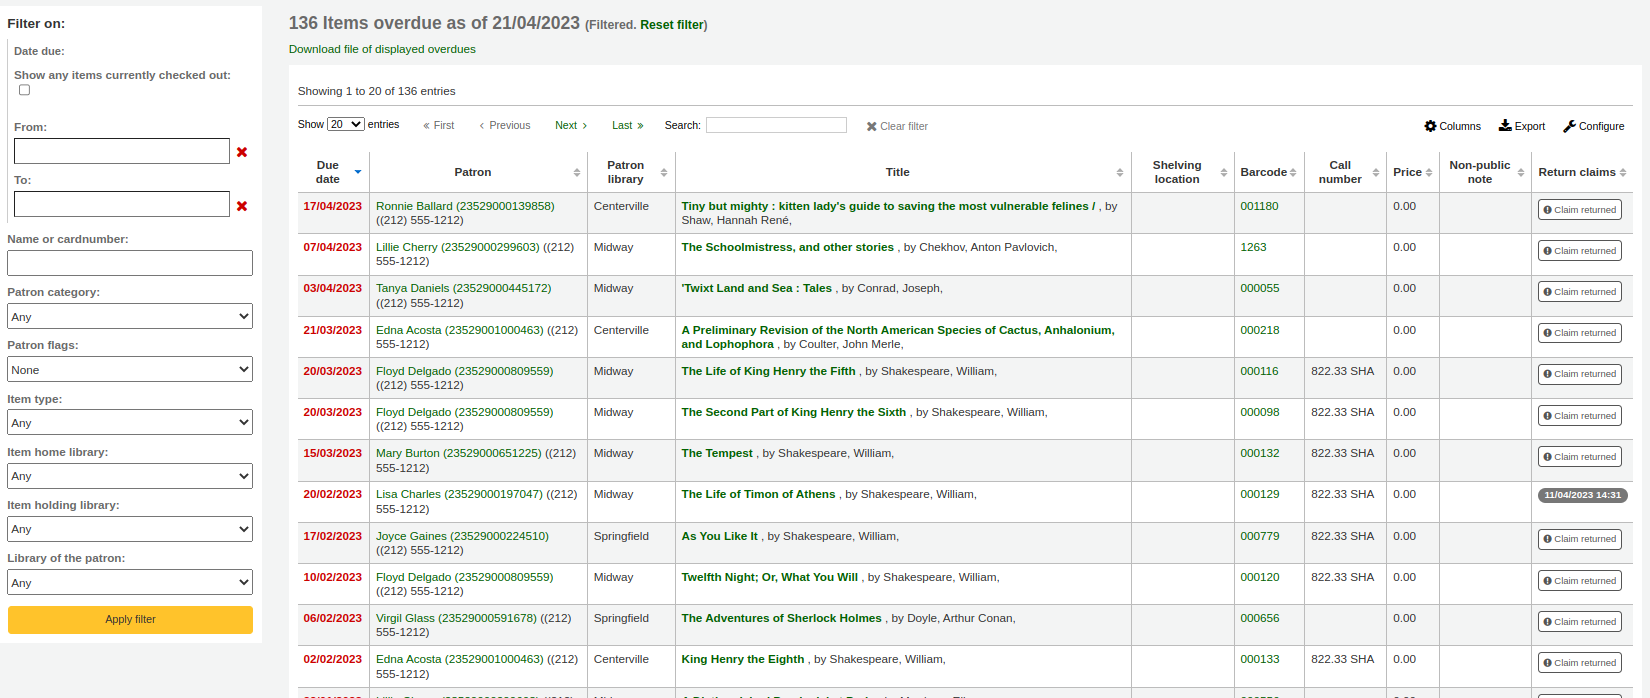
O relatório pode ser filtrado utilizando o menu de opções encontrado no lado esquerdo do relatório.
Note
The ‘Show any items currently checked out’ checkbox basically switches this from a report of overdues to a report of checkouts. It will show all titles checked out regardless of due date.
Overdues with fines
Este relatório irá mostrar-lhe qualquer atrasos em sua biblioteca que tenham acumulado multas sobre eles.
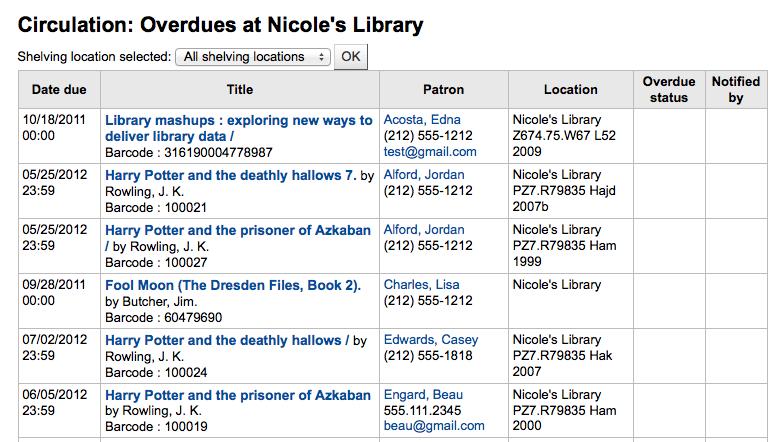
If you would like to limit the report you can use the pull down menu at the top to limit to a specific shelving location at your branch. To see overdues with fines at other branches you will have to change your branch or log in at that branch.
Important
If you do not charge fines and/or don’t have the fines cron job running you will see no data on this report.
Enquanto se aguarda checkouts no local
If you are using the on site checkouts functionality (OnSiteCheckouts) then you’ll have a report to view all items that are currently checked out on site.
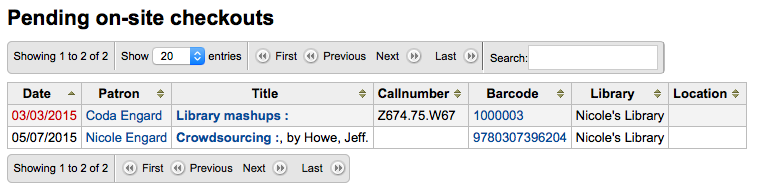
This will list the due date (overdues in red), who has the item, item information and what library the item is at.
Tracking In house Use
Many libraries track the use of items within the library.
Note
This is different from tracking on site usage. In house use is the use of items in the library by patrons without them having to check them out. On site use is the use of items on site that must first be checked out. To learn more about on site usage please review the OnSiteCheckouts preference.
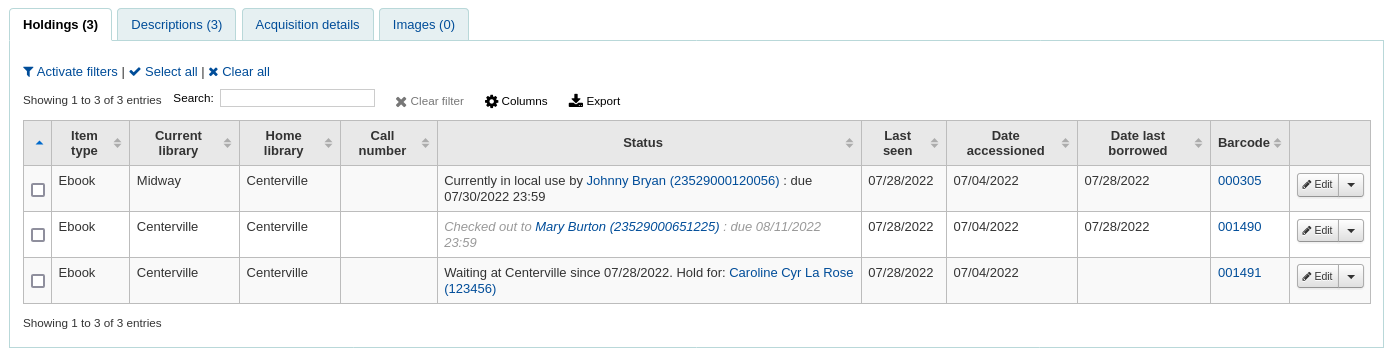
Tracking the use of items in the library without checking them out can be done in Koha one of two ways. The first is to create one or more Statistical Patrons. When collecting items that have been used within the library, you will want to check them out to your statistical patron:
Instead of marking the item as ‘checked out’ the system will record that the item was used in house:

Repeat these steps for all items that have been used within the library to keep accurate statistics for item use.
The other way to record local use of items is to set your RecordLocalUseOnReturn preference to ‘Record.’ Then whenever you check an item in that is not checked out and not on hold a local use will be recorded.

Note
If you have RecordLocalUseOnReturn set to ‘Record’ you can still use your statistical patrons to record local use as well.
In Processing / Book Cart Locations
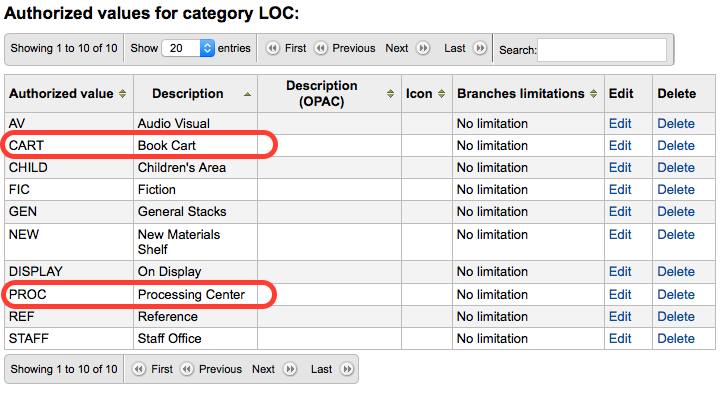
Koha allows for handling temporary locations like the processing center and/or book carts throughout the library. For this feature to work you must first make sure you have authorized values set in the LOC category for PROC (Processing Center) and CART (Book Cart).
Next you need to set the NewItemsDefaultLocation system preference to PROC. This will set the new items to the Processing Center as their default location.
When creating items you enter in their desired final shelving location and Koha will temporarily change that to PROC. If InProcessingToShelvingCart is set to “Don’t move” then when an item with a location of PROC is checked in it will either automatically update the item to use the permanent location. If InProcessingToShelvingCart is set to “Move” then when an item is checked in the location is changed from PROC to CART.
A cron job is then set to run at specified intervals to age items from CART to the permanent shelving location. (For example, an hourly cron entry of cart_to_shelf.pl –hours 3 where –hours is the amount of time an item should spend on the cart before aging to its permanent location.)
Note
If the ReturnToShelvingCart system preference is set to “Move”, any newly checked-in item is also automatically put into the shelving cart, to be covered by the same script run.
Important
Checkins with confirmed holds will not go into the shelving cart. If items on the shelving cart are checked out, the cart location will be cleared.
Auto-empréstimo
Koha comes with a very basic self checkout module. To enable this module you need to set the WebBasedSelfCheck preference to ‘Enable.’ To use this module you have to log in as a staff member with circulation permissions.
Note
Create a staff patron specifically for this action so that you don’t leave a real staff client logged into a computer all day
There is no link to the Self Checkout module, but a simple addition to the IntranetUserJS system preference can add one.
$(document).ready(function(){ $("#login
      #submit").parent().after("<p><a
      href=\"http://YOUR_KOHA_OPAC_URL/cgi-bin/koha/sco/sco-main.pl\"
      target=\"_blank\">Self-Checkout</a></p>"); });

**Important**

The code above has line breaks added to make it more readable,
please be sure to enter the above as one line in when putting it in
the system preference.
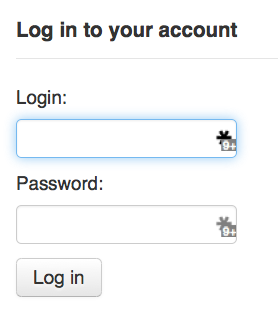
The link will then appear at the bottom of the log in page:
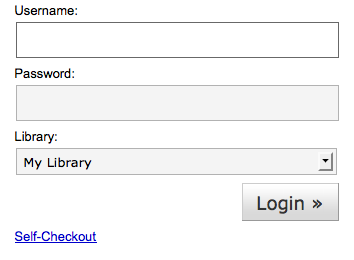
You can also access this module by going to : http://YOUR_KOHA_OPAC_URL/cgi-bin/koha/sco/sco-main.pl
When on the self checkout page depending on your value in the SelfCheckoutByLogin preference you will be asked to enter you cardnumber
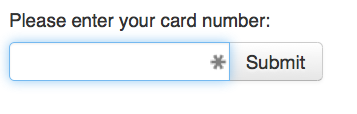
or your username and password:
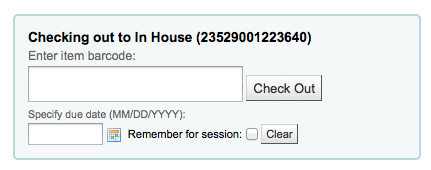
Once you’re logged in to the self check module you will be asked to scan the items you are checking out
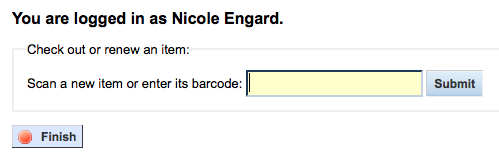
As you scan items they will appear below the barcode box

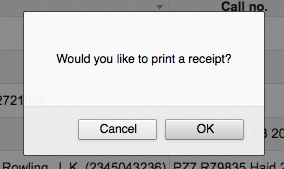
When you are finished scanning items it is important to click the ‘Finish’ button. This will prompt you to print a receipt and log you out of the self check module.
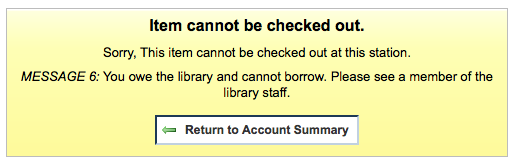
When attempting to check items out there are some instances where error messages will appear and the patron will be directed to the librarian. This will happen even if you are allowing overrides on circulation functions. Only a librarian can override a circulation block and so patrons must go to the librarian for help in these situations.
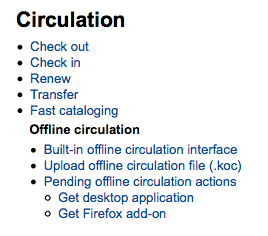
Offline Circulation Utilities
Koha allows for you to continue circulation actions while offline by using any one of three utilities.
Offline Circulation in Koha
If the AllowOfflineCirculation preference is set to ‘Enable’ the library staff can continue to perform circulation actions within Koha when the system is offline. You will want to visit http://your-koha-staff-client-url/cgi-bin/koha/circ/offline.pl at least once while online and bookmark that page. That is the page you will go to when you are offline.
Important
The offline interface uses HTML LocalStorage, which depending on the browser and user setting, is limited to 2.5MB or 5MB per domain. This means that larger systems will not be able to synchronize their data and are recommended to use either the Firefox or Windows application for offline circulation.
Configurar
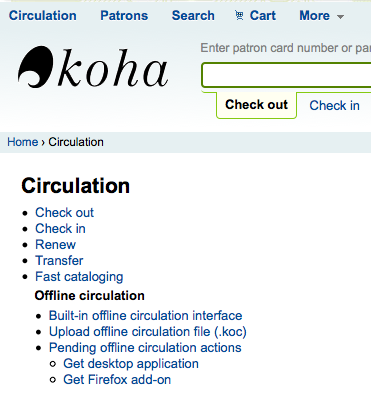
Antes que o sistema fique fora do ar pela primeira vez, acesse o módulo Circulação e clique em ‘Interface de circulação offline’
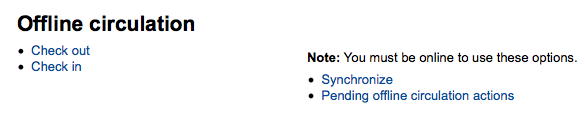
Sincronize seus dados em cada computador que realiza circulações clicando em ‘Sincronizar’ à direita da tela.
Important
The offline interface uses HTML LocalStorage, which depending on the browser and user setting, is limited to 2.5MB or 5MB per domain. This means that larger systems will not be able to synchronize their data and are recommended to use either the Firefox or Windows application for offline circulation.
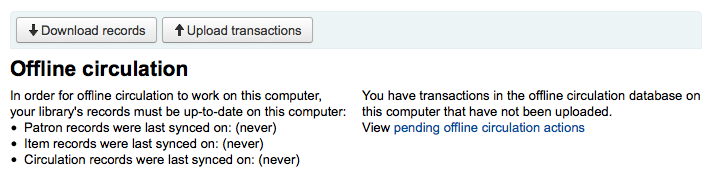
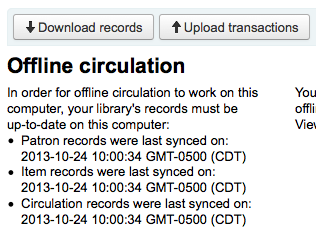
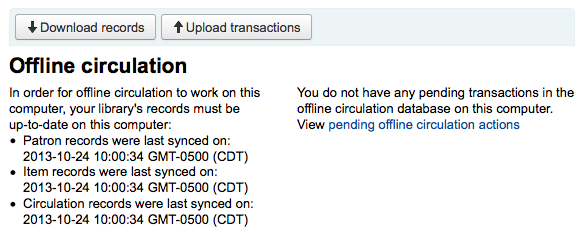
Esta função permitirá que você baixe um arquivo contendo todos os dados de seus usuários e de circulação. Clique em ‘Download de registros’ na barra superior da página para sincronizar seus dados.
Once your data is downloaded you will see the dates your data was last synced to the right of each data set.
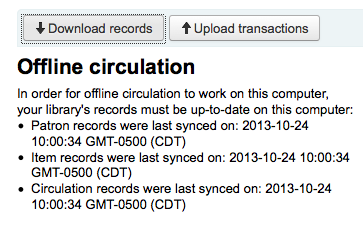
This should be done regularly in preparation for any unexpected connection losses.
Circulating
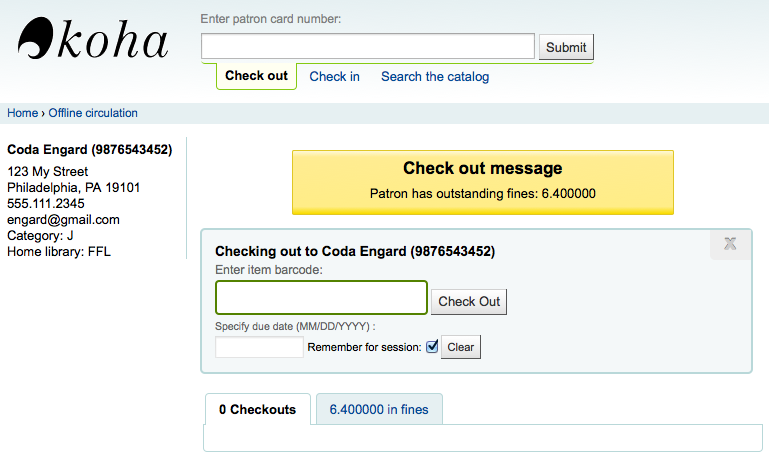
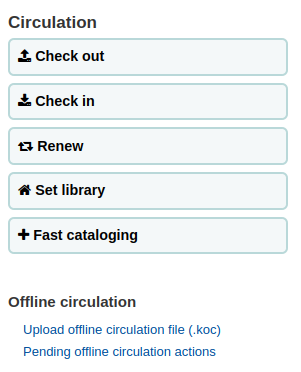
When your system goes offline visit the Offline Circulation page (http://your-koha-staff-client-url/cgi-bin/koha/circ/offline.pl) in Koha and click ‘Check out’ or ‘Check in’ to perform offline actions.
O empréstimo é feito a partir da busca do usuário através de seu nome ou código de barras no topo na tela ‘Empréstimo’. Depois de selecionar um usuário, surgirão todos os seus dados, incluindo multas e empréstimos feitos anteriormente.
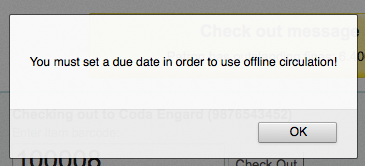
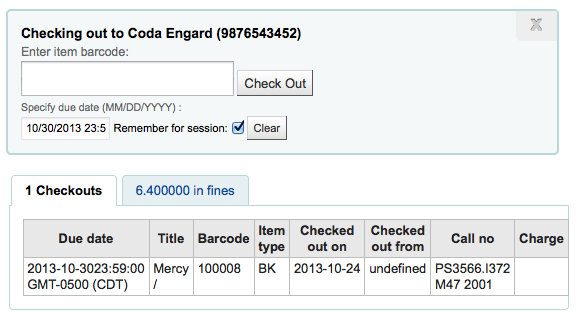
Escaneie o código de barras do exemplar que você deseja emprestar e insira a data de devolução. Se você não inserir uma data de devolução, o Koha irá lhe solicitar uma.
Quando o exemplar é emprestado, ele aparece abaixo das informações do usuário.
Koha Offline Uploading
Quando o sistema voltar a funcionar, visita a página de sincronização no módulo de Circulação Offline e clique em ‘Carregar transações’
After the files are uploaded you can click ‘View pending offline circulation actions’ on the right.
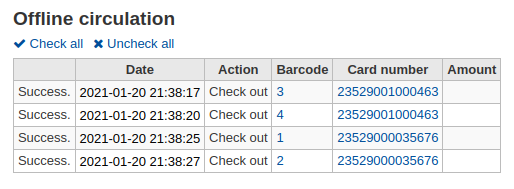
After clicking ‘View pending offline circulation actions’ you will be brought to a summary of all of the actions you loaded in to Koha in your *.koc file.

- Assim que todos os logs de todos os computadores que registram circulação de materiais forem carregados, será possível selecionar todos ou apenas os que você deseja que sejam processados no Koha.
- Click on the Process button and Koha will record every stored
transaction one by one. For each transaction, the status will change
to:
- “Sucesso.” se a transação foi processada corretamente
- “Usuário não encontrado.” se o número da carteirinha do usuário estiver incorreto
- “Item não encontrado.” se o código de barras do item estiver errado
- “Item não emprestado.” se você tentou devolver um item disponível
Quando finalizar você terá um resumo de todas as suas transações
Firefox Plugin
There is an offline circulation tool that you can add to your Firefox browser as an addon. To do so, just go to https://addons.mozilla.org/en/firefox/addon/koct/ page and click on the “install now” button. You may have to confirm the installation, just click on “install now” and then restart Firefox to complete the installation.
Once you have installed the plugins and restarted Firefox, you will see the Koha logo in the download bar at the bottom right of Firefox.

A click on the logo will open the tool in its own window.
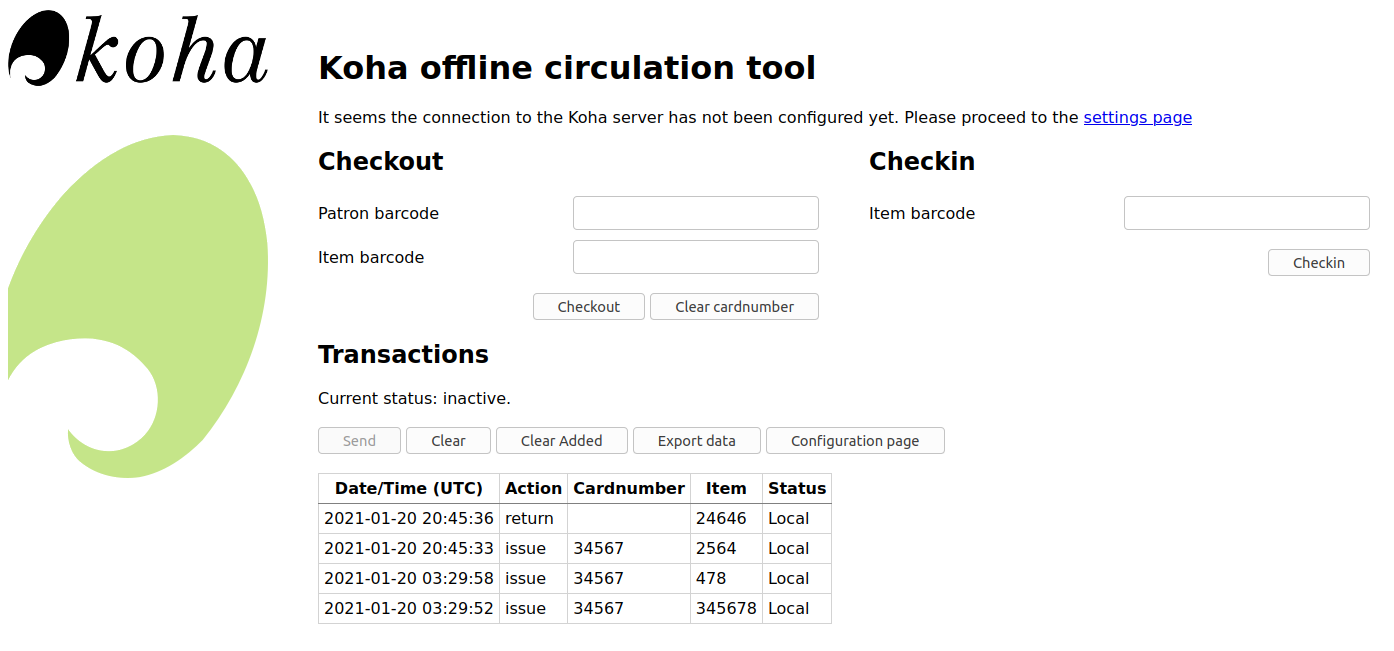
The plugin consists of four tabs:
The Check Out tab is where you check out items
The Check In tab is where you check in items
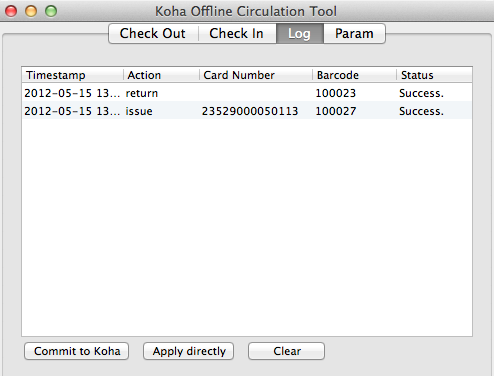
The Log tab keeps track of every transaction done while in offline mode
The log will keep information until you empty it. Each time you open the plugin and it contains data in the log it will warn you
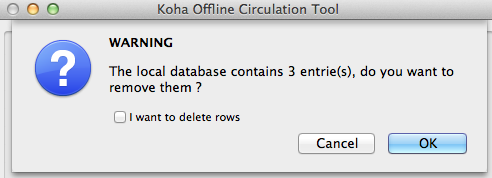
If you’d like to clear the log, check the ‘I want to delete rows’ box before hitting the ‘OK’ button. Otherwise clicking ‘OK’ will keep the items in the log and let you continue working with the tool.
The Param tab is to set up the plugin
The first thing you want to do then is to set up the plugin. Go to the Param tab to set up the plugin
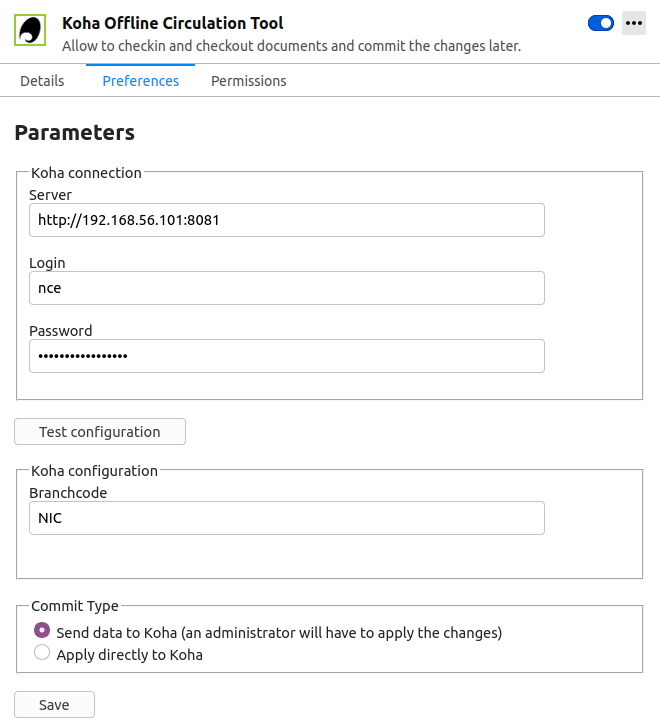
Answer the 4 questions presented:
Server = the URL of the librarian interface
Branch Code = the code for the branch where you are located
Username = your staff account login
Password = your staff account password
Important
To save the settings, you will have to close the plugin window and re-open it by clicking again on the Koha logo in the add-on bar.
Note
You can create a staff account dedicated to the offline circulation. So that, no matter who is at the circulation desk, they can all use the same login. Along those lines, you can use a group login that you already have in place for circulation as well.
Once you have everything set up you can start checking items in and out.
Checking out:
- Go to the Check Out tab
- Scan the patron barcode
- Scan the item barcode
- Clique ‘Salvar’
Checking in:
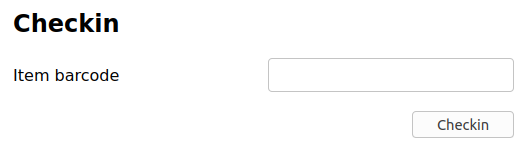
- Go to the Check In tab
- Scan the item barcode
- Click Save
Each time, you check out or check in an item, a new transaction is recorded in the local plugin database and you will see, at the bottom of the plugin how many transactions has been made during the offline circulation. For example, “10 Row(s) Added” means you did 10 transactions.

Then, if you want an overview of every transaction, go to the Log tab. This tab will show you the transactions in the plugin database
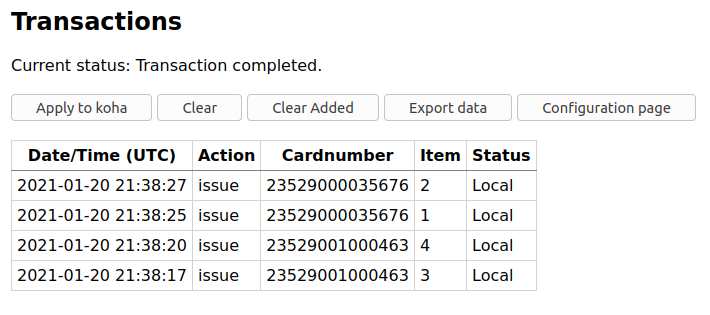
Note
The status will be “Local.” as long as you are offline and don’t process the transactions into Koha.
When your Internet connection comes back up you will want to get these transactions in to Koha. Before processing these transactions you should be aware of a few issues.
Because you are not connected to your Koha database when using this plugin holds will need additional processing. If an item you check in while offline has a hold, the hold is kept on the item. Since, you can’t confirm holds found during the processing of every check in, the holds stay on the item and will need to be managed later. If you only checked in a few items you can just keep a record of them all. If you checked in a lot of items you can use the Holds Queue once it rebuilds to see what holds made it to the shelf erroneously.
Similarly, if an patron card was expired, the offline circulation tool won’t know about it, so the checkout will be recorded regardless of the patron’s account being blocked normally.
You have two options for adding this data to Koha
Commit to Koha
If you checked in/out on more than one computer at the same time, what you want is to process every transaction consistently. Let’s say for instance that one patron checked a book out on one computer and then checked the same book in on another computer. To be consistent, you need to record the check out first and then the check in. Not the opposite! To do so, you need to group every transaction in one place, sort them all and then, process everything. So, you need to use the “Commit to Koha” option from every plugin/computer you worked with. This way, the log will go to Koha and be accessible from the Offline Circulation page.
Get there: Circulation > Pending offline circulation actions
Assim que todos os logs de todos os computadores que registram circulação de materiais forem carregados, será possível selecionar todos ou apenas os que você deseja que sejam processados no Koha.
Click on the Process button and Koha will record every stored transaction one by one. For each transaction, the status will change to:
- “Sucesso.” se a transação foi processada corretamente
- “Usuário não encontrado.” se o número da carteirinha do usuário estiver incorreto
- “Item não encontrado.” se o código de barras do item estiver errado
- “Item não emprestado.” se você tentou devolver um item disponível
Quando finalizar você terá um resumo de todas as suas transações
Aplicar diretamente
If you performed all of the circulation actions on one computer then everything is sorted already so you can choose to “Apply directly”
The status column will be updated to let you know if the transactions were applied
- “Sucesso.” se a transação foi processada corretamente
- “Usuário não encontrado.” se o número da carteirinha do usuário estiver incorreto
- “Item não encontrado.” se o código de barras do item estiver errado
- “Item não emprestado.” se você tentou devolver um item disponível
Once you’re finished you can review all of the items right in the Log tab
Once you are done you can clear the log by clicking Clear. If you don’t you will be warned the next time you open the Offline Circulation tool.
Offline Circ Tool for Windows
The Offline Circulation Utility can be downloaded at: https://github.com/bywatersolutions/koha-offline-circulation/releases
To generate a borrowers.db file for loading in to the Windows tool you will need to run the file generator via a cron job.
Upload Offline Circ File
The offline circulation tool for Windows will generate a KOC file that you can upload into Koha once your system comes back up.
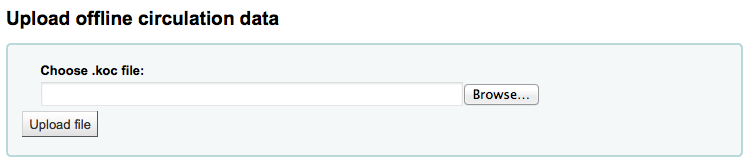
No menu Circulação clique em ‘Carregar arquivo de circulação off-line (.koc)’
Browse your computer for the *.koc file
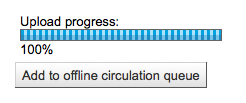
Assim que o arquivo for carregado, clique para processar o arquivo
Quando concluída, você poderá carregar outro arquivo ou dirigir-se para ações de circulação off-line pendentes.
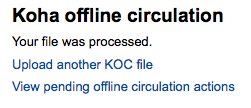
After clicking ‘View pending offline circulation actions’ you will be brought to a summary of all of the actions you loaded in to Koha in your *.koc file.
- Assim que todos os logs de todos os computadores que registram circulação de materiais forem carregados, será possível selecionar todos ou apenas os que você deseja que sejam processados no Koha.
- Click on the Process button and Koha will record every stored
transaction one by one. For each transaction, the status will change
to:
- “Sucesso.” se a transação foi processada corretamente
- “Usuário não encontrado.” se o número da carteirinha do usuário estiver incorreto
- “Item não encontrado.” se o código de barras do item estiver errado
- “Item não emprestado.” se você tentou devolver um item disponível
Quando finalizar você terá um resumo de todas as suas transações