Ferramentas
Ferramentas no Koha realizam todos os tipos de ações. Na maioria dos casos os itens listados sob Ferramentas no Koha são referenciados em ‘Relatórios’ em outros sistemas de gerenciamento de bibliotecas.
- Get there: More > Tools
Usuários e circulação
Patron lists
- Get there: More > Tools > Patrons and Circulation > Patron lists
Patron lists are a way to store a group of patrons for easy modification via the batch patron modification tool or reporting.
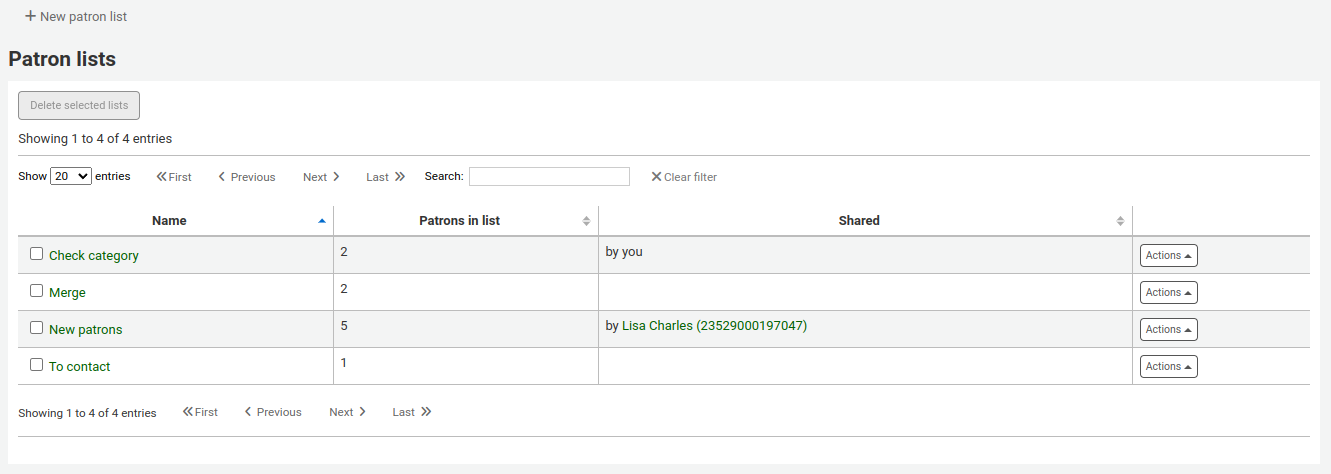
Para criar uma nova lista de usuários, clique no botão ‘Nova lista de usuários’
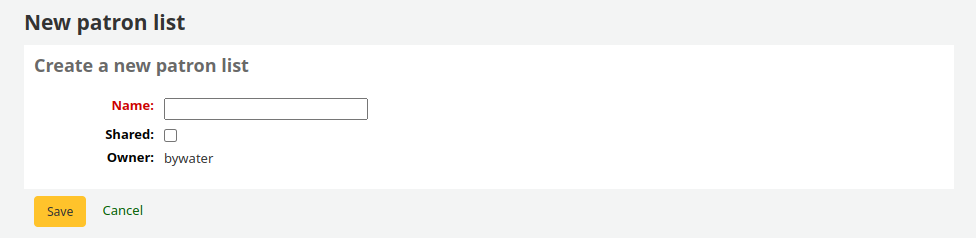
Insira um nome para a lista e salve.
Each list has an ‘Actions’ menu with more list options.
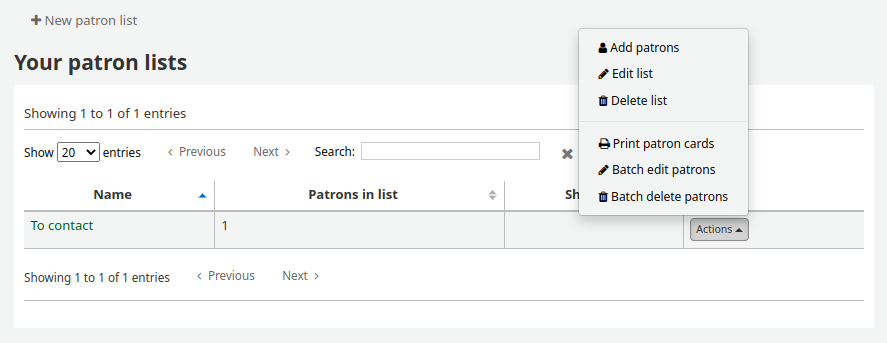
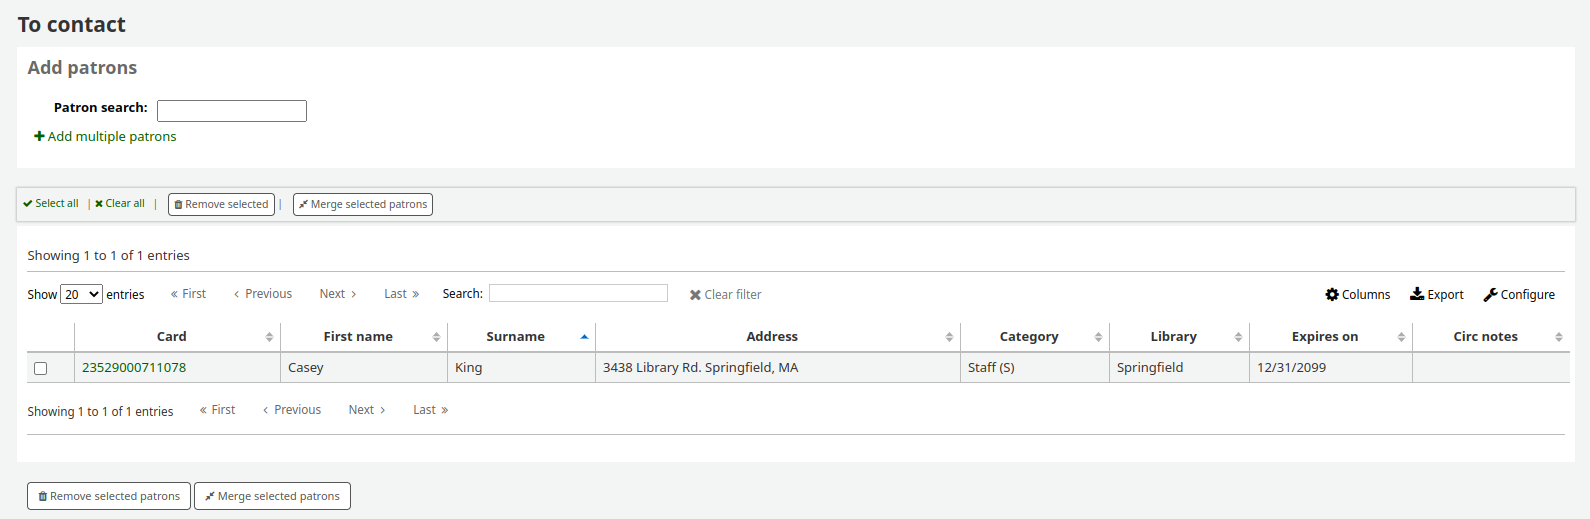
To add patrons to the list click the ‘Add patrons’ link in the ‘Actions’ menu.
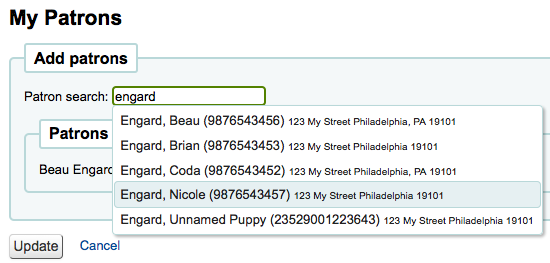
Insira o nome do usuário ou número de carteirinha na caixa de pesquisa e clique no resultado para adicionar o usuário.
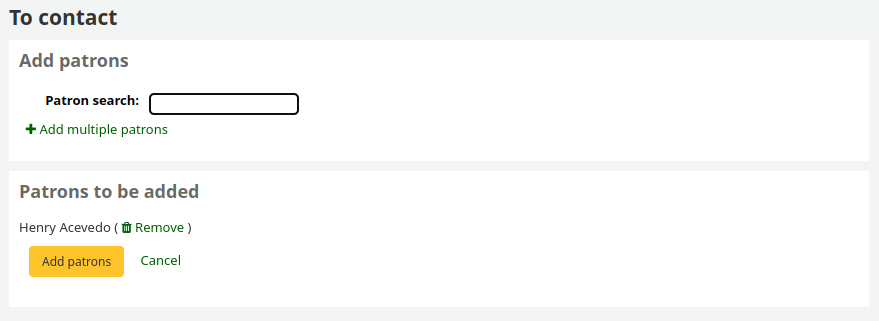
Once you have all of the patrons you would like to add you can click the ‘Add patrons’ button to save them to the list.

Patron clubs
- Get there: More > Tools > Patrons and Circulation > Patron clubs
Patron clubs create clubs which patrons may be enrolled in. It is useful for tracking summer reading programs, book clubs and other such clubs.
Important Staff will need permission to edit clubs, templates and enroll patrons. Go to your staff members account tab and click on the More drop down menu. Select Set Permissions and make sure patron clubs have checkmarks next to each of the functions you want your staff to have. Remember if your staff is a superlibrarian, they will have the permission.
Creating a new club template Here you can add fields that can be filled out at the time a new club is created based on the template, or a new enrollment is created for a given club based on the template. Click on the New Club template button
Name is required. This could be something like Adult Book Club, Children’s Book Club or Summer Reading Program. Remember these templates will be starting point for each club you create.
Description can be any additional information
Allow Public Enrollment: if this box is checked it will allow patrons to enroll in a club based on this template from the OPAC
Require valid email address: if this box is checked only patrons with a patrons with a valid email address can enroll. So they will need a email address to enroll.
The library drop down gives you the flexibility to enroll patrons from specific branches. If you let it set to blank, all branches will be able to enroll.
Club Fields: these fields will be used when creating a club based on this template you can connect authorized values here Enrollment Fields: you can add any additional fields you want to have filled out by your patrons like you can connect authorized values here.
Creating a new club based on a template Here you can add information about a new club using a template you created. Click on the New Club dropdown menu and select the template you want to use.
Name is required, this will be the name of the specific club using the template you created. For example, if I used my Kids Club template, I can create Kids Club 2017
Description – any additional information
Start and End date will depict when this club runs, the entire duration of the club. Once the club expires, it will be removed from the OPAC for users to enroll if that option is selected.
The library drop down gives you the flexibility to enroll patrons from specific branches. If you let it set to blank, all branches will be able to enroll.
- Enrolling a patron in a club
- pull up a patron account click on the checkout tab on the left hand side click on the tab for club add the patron to the selected club by selecting the enroll button you can also cancel enrollment by clicking on the cancel enrollment
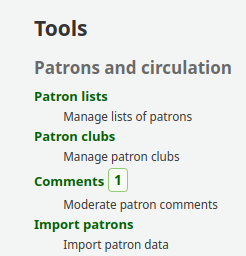
Comentários
- Get there: More > Tools > Patrons and Circulation > Comments
All comments added by patrons via the OPAC to bibliographic records require moderation by the librarians. If there are comments awaiting moderation they will be listed on the main page of the staff client below the module list:
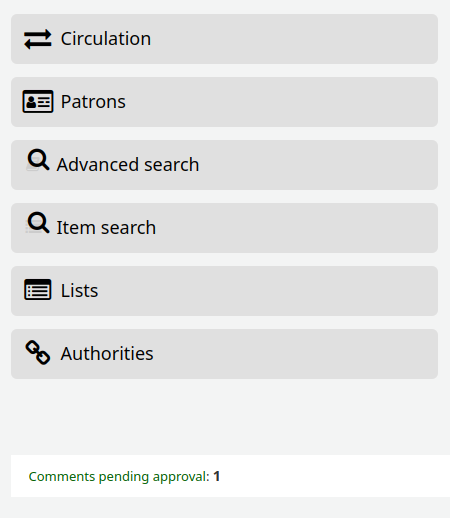
and next to the Comments tool on the Tools Module
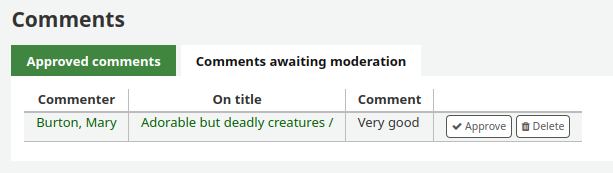
Todos os comentários adicionados pelos usuários via OPAC dependem de moderação de funcionários para serem visualizados. Para moderar os comentários, simplesmente clique em ‘Aprovar’ ou ‘Excluir’ no lado direito dos comentários que estão aguardando moderação.
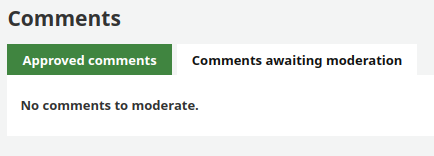
Se não existir comentário para moderação, você verá uma mensagem dizendo isto
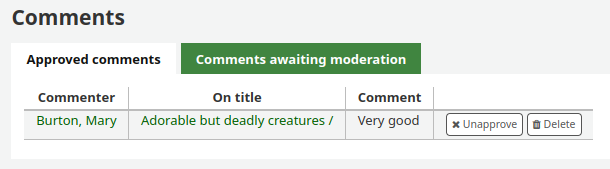
Você também pode rever e desaprovar comentários que aprovados no passado, escolhendo a aba ‘Comentários aprovados’
Importar usuário
- Get there: More > Tools > Patrons and Circulation > Import Patrons
A ferramenta de importação de usuários pode ser usada em qualquer momento para adicionar usuários em lote. É usada com maior frequência em universidades e escolas quando tem um novo lote de usuários registrados.
Criando Arquivo de Usuários
Sua instalação do Koha vem com um arquivo CSV em branco que você pode suar como template para seus registros de usuários. Se você deseja criar um arquivo, tenha certeza que seu arquivo tem os campos sequintes nesta ordem do cabeçalho:
cardnumber, surname, firstname, title, othernames, initials, streetnumber, streettype, address, address2, city, state, zipcode, country, email, phone, mobile, fax, emailpro, phonepro, B_streetnumber, B_streettype, B_address, B_address2, B_city, B_state, B_zipcode, B_country, B_email, B_phone, dateofbirth, branchcode, categorycode, dateenrolled, dateexpiry, gonenoaddress, lost, debarred, debarredcomment, contactname, contactfirstname, contacttitle, guarantorid, borrowernotes, relationship, ethnicity, ethnotes, sex, password, flags, userid, opacnote, contactnote, sort1, sort2, altcontactfirstname, altcontactsurname, altcontactaddress1, altcontactaddress2, altcontactaddress3, altcontactstate, altcontactzipcode, altcontactcountry, altcontactphone, smsalertnumber, privacy, patron_attributes
Important
A ‘senha’ deve ser armazenada em um texto sem formatação, desta forma ela será convertida para um Bcrypt hash.
Se as passwords já se encontram encriptadas, fale com o administrador do sistema sobre as opções existentes
Important
Date formats should match your system preference, and must be zero-padded, e.g. ‘01/02/2008’.
Important
The fields ‘branchcode’, ‘categorycode’ and all fields you have defined in the BorrowerMandatoryField preference are required and must match valid entries in your database.
Note
If loading patron attributes, the ‘patron_attributes’ field should contain a comma-separated list of attribute types and values.
- The attribute type code and a colon should precede each value.
- Por exemplo: “INSTID:12345,BASEBALL:Cubs”
- Este campo deve ser empacotado entre aspas, se vários valores são definidos.
- Since values can contain spaces, additional doubled-quotes may be required:
- “INSTID:12345,BASEBALL:Cubs,”“BASEBALL:White Sox”“”
- When replacing a patron record, any attributes specified in the input file replace all of the attribute values of any type that were previously assigned to the patron record.
Importando usuários
Quando você tiver feito todas as edições, você pode clicar em ‘Salvar’ no topo do editor.
Choose your CSV file
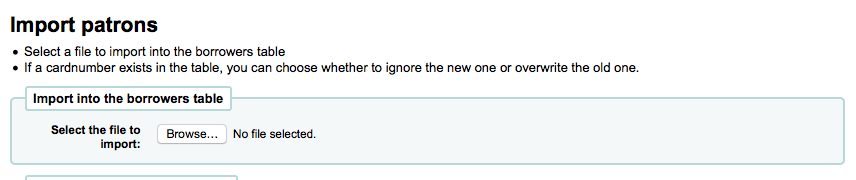
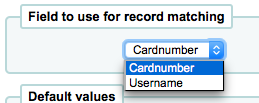
Choose to match on ‘Cardnumber’ or ‘Username’ to prevent adding of duplicate card numbers to the system
Next you can choose default values to apply to all patrons you are importing
- ex. Se você estiver importando usuários específicos de uma ramal você pode usar o campo no formulário de importação que aplica o código da ramal pata todos que estiver importando.
Finally you need to decide on what data you want to replace if there are duplicates.

- Um registro correspondente é encontrado utilizando o campo que você escolheu como critério de correspondência para evitar duplicação
- Se você incluiu atributos de usuários no seu arquivo você pode decidir se deseja adicionar seus valores aos valores existentes ou apagar os valores existentes e manter somente os seus.
Avisos & Etiquetas rápidas
- Get there: More > Tools > Patrons and Circulation > Notices & Slips
All notices and circulation receipts (or slips) generated by Koha can be customized using the Notices & Slips Tool. The system comes with several predefined templates that will appear when you first visit this tool.
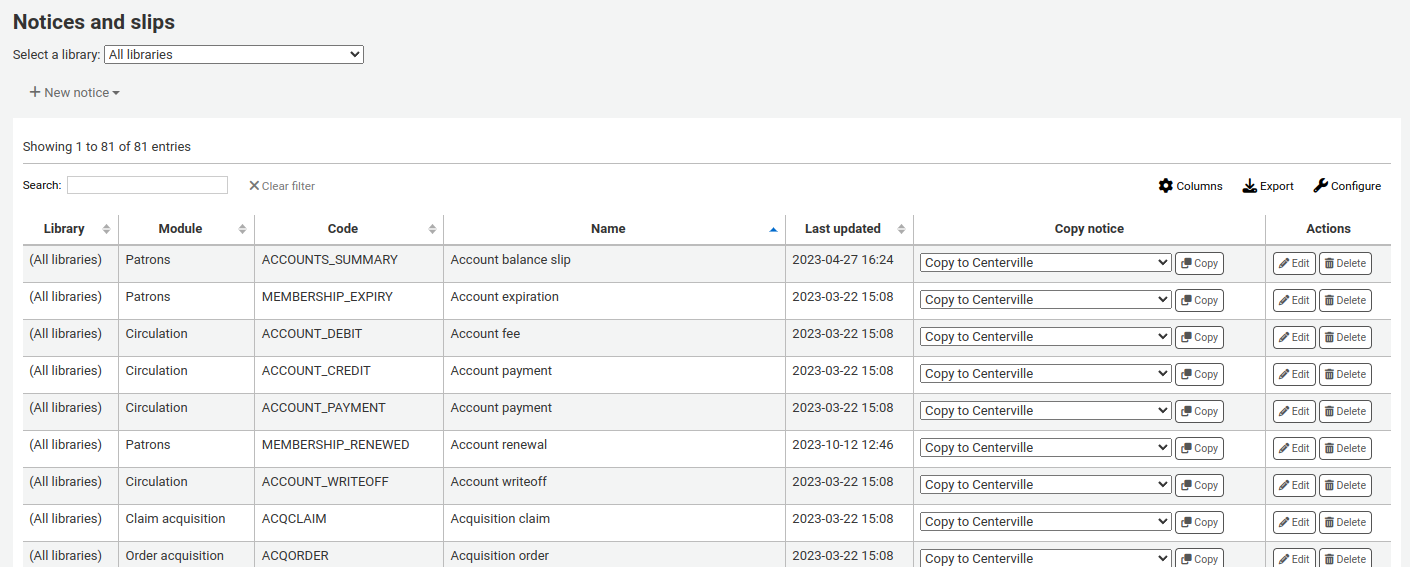
Todos os avisos podem ser editados, mas só alguns podem ser excluídos, isso é para evitar que mensagens de erro do sistema sejam enviadas sem um modelo. As mensagens e comprovantes podem ser editados em cada biblioteca, mas por padrão, você verá os avisos para todas as bibliotecas.
If you have a style you’d like applied to all slips you can point the SlipCSS preference to a stylesheet. The same is true for notices, using the NoticeCSS preference to define a stylesheet.
You will also want to review the Notices & Slips Field Guide for more information on formatting these notices.
Adicionando Avisos e Recibos
Para adicionar um novo aviso
Click ‘Adicionar notificação’
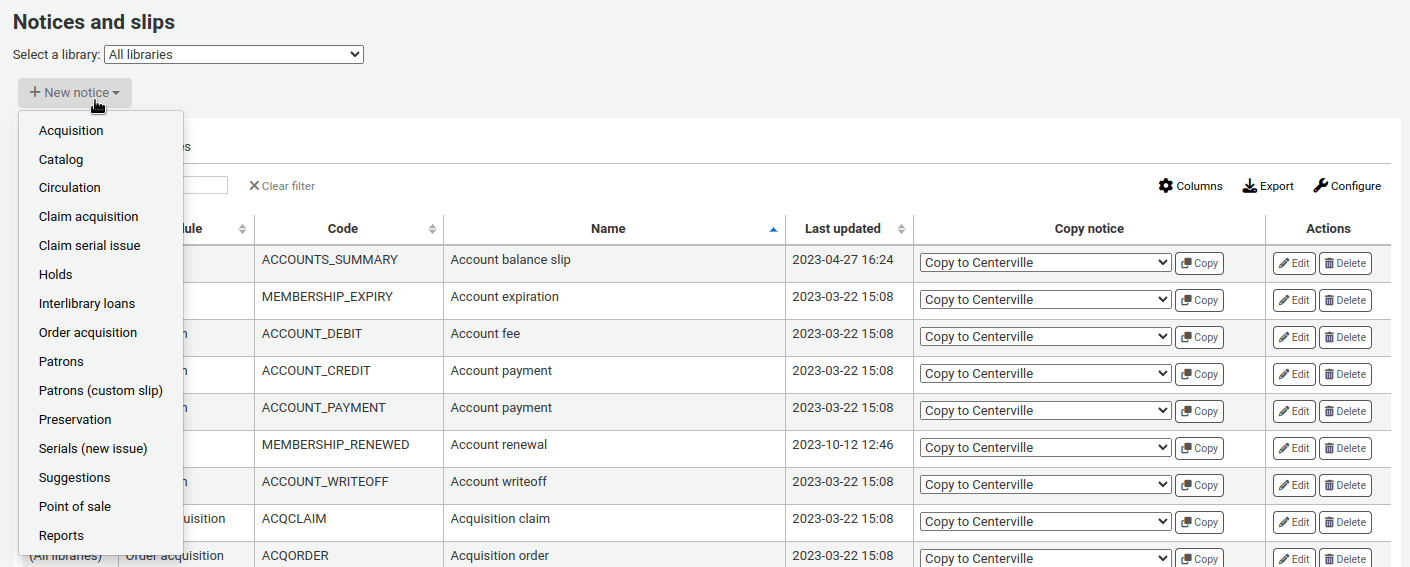
Escolha para qual biblioteca será este recibo
Important
Not all notices can be branch specific for more information review the Notices & Slips Field Guide in this manual.
Escolha o módulo ao qual este aviso está relacionado
O Código é limitado a 20 caracteres
Important
When working with the overdue notices you want each notice at each branch to have a unique code. Think about using the branch code in front of the notice code for each branch.
Use o nome do campo para expandir seu Código
Note
With overdue notices, be sure to put your branch name in the description as well so that it will be visible when setting up your triggers.
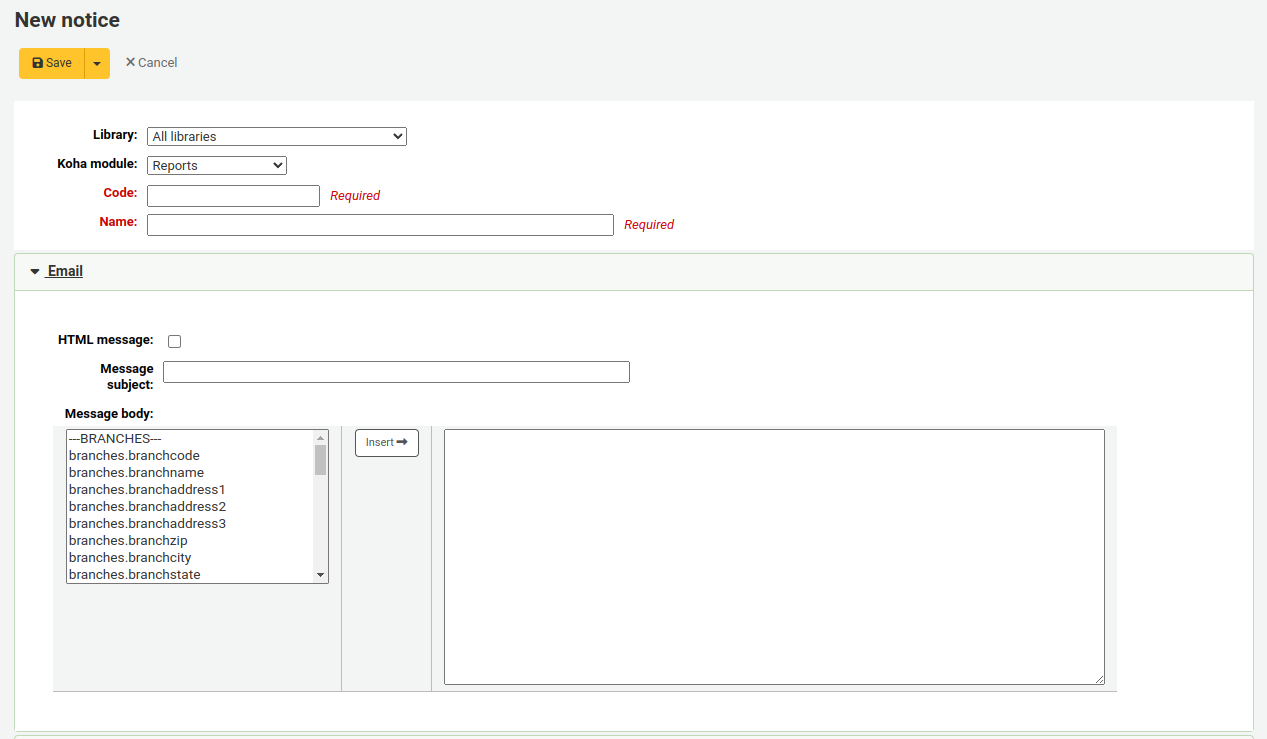
Next you can customize the notice for every possible delivery method
Every notice should have an Email template set for it
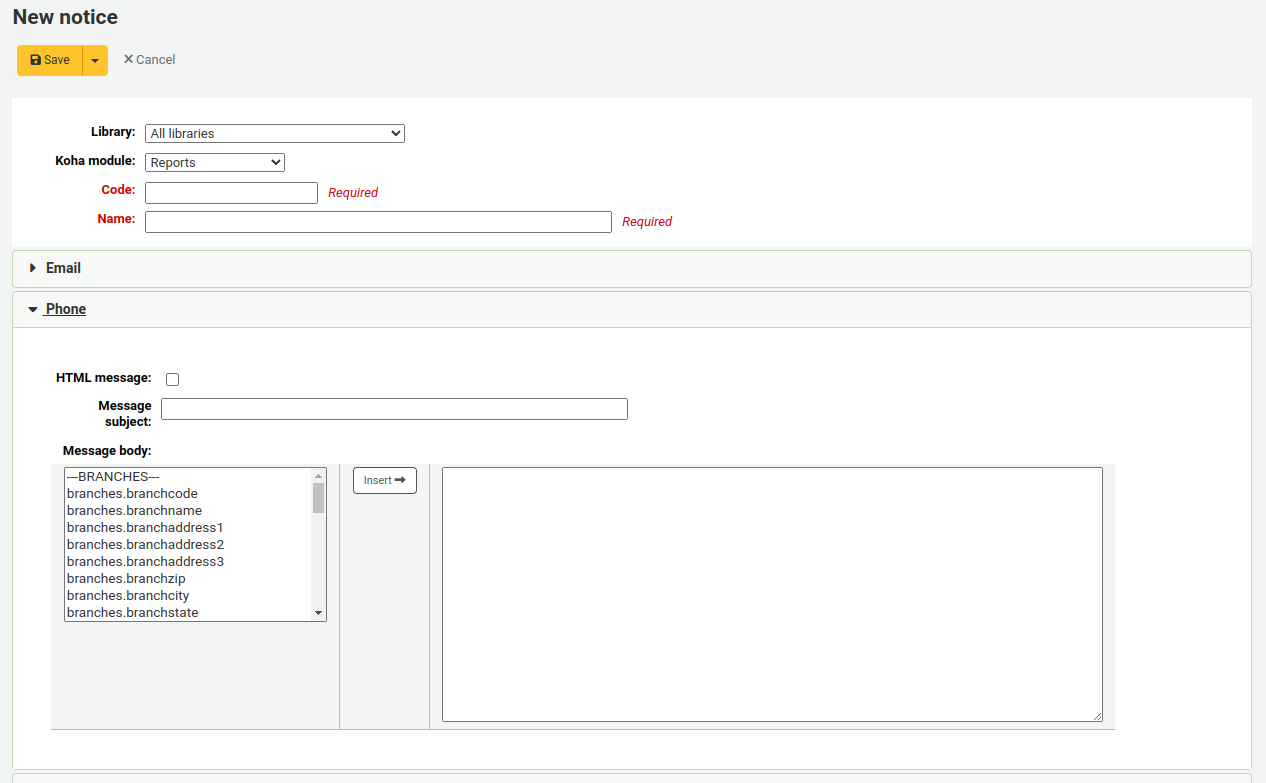
If you’re using the TalkingTechItivaPhoneNotification service you can set up a Phone notification
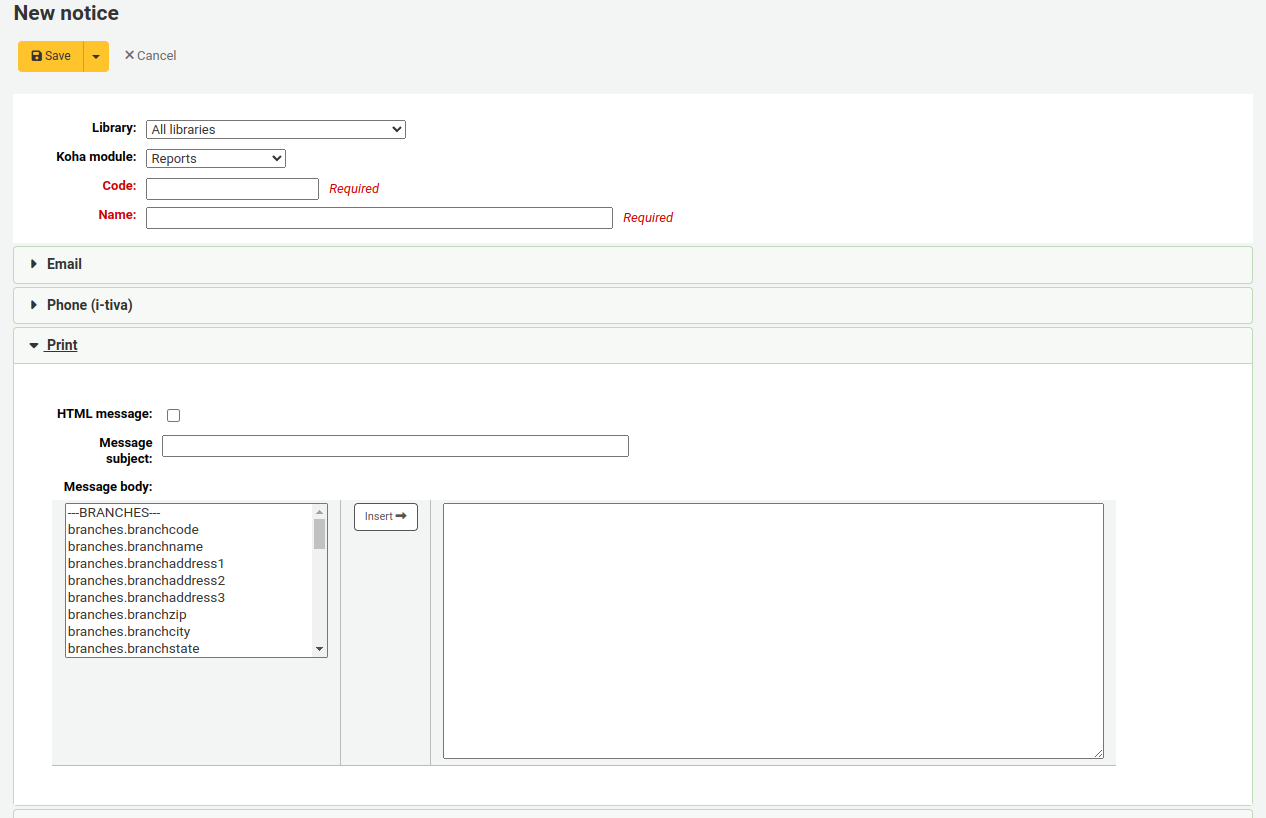
If you plan on printing this notice you can set the Print template next
If you have enabled SMS notices with the SMSSendDriver preference you can set the text for your SMS notices next
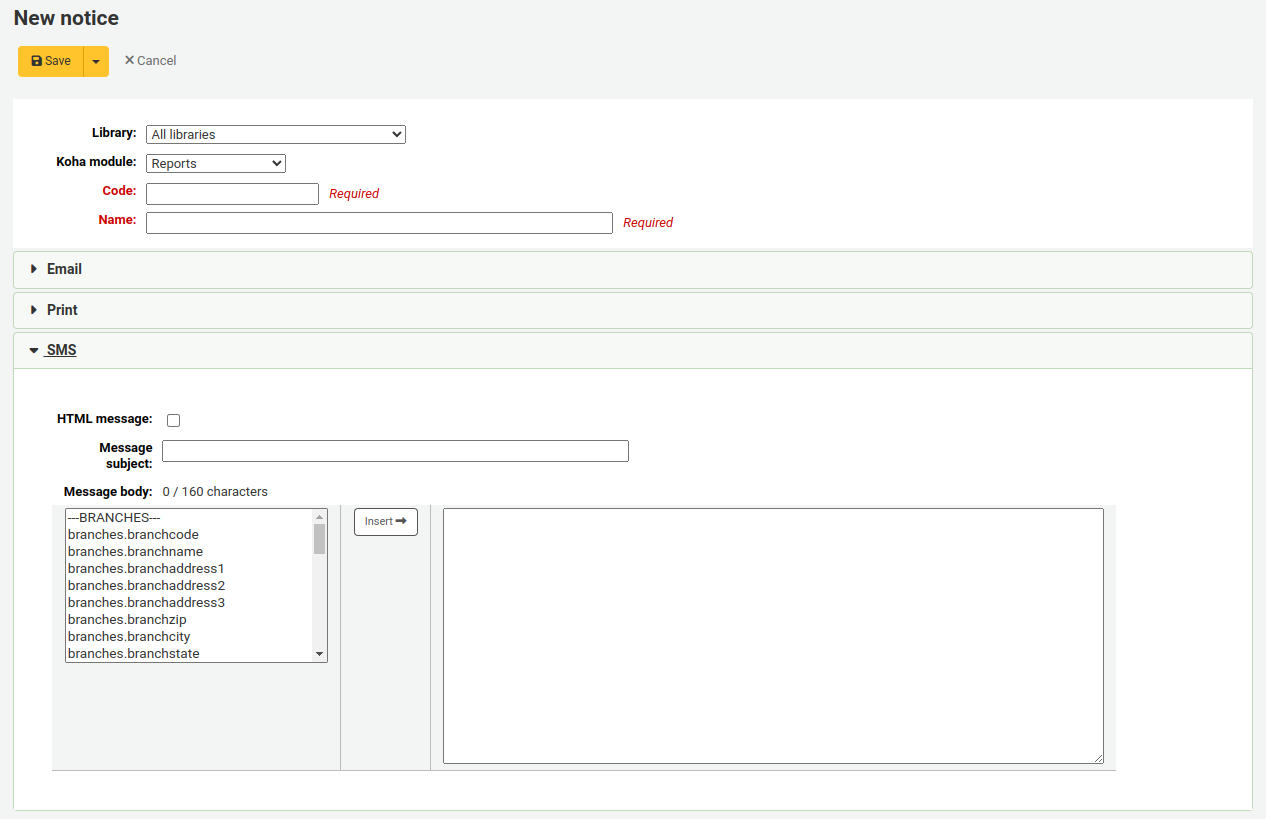
Each notice offers you the same options
Se desejar elaborar as mensagens ou comprovantes em formato HTML, verifique se a opção ‘Mensagem HTML’ está selecionada, senão o conteúdo será gerado como texto simples
Assunto da Mensagem é o que aparecerá na linha de assunto do e-mail
In the message body feel free to type whatever message you feel is best, use the fields on the left hand side to enter individualized data from the from database.
Note
Review the Notices & Slip Field Guide for info on what fields can be used here.
Important
Overdue notices can use <<items.content>> tags by themselves, or use <item></item> to span all of the tags. Learn more about the Overdue Notice Markup
On overdue notices make sure to use <<items.content>> tags to print out the data related to all items that are overdue.
The other option, only for overdue notices, is to use the <item></item> tags to span the line so that it will print out multiple lines One example for the <item></item> tag option is:
<item>”<<biblio.title>>” by <<biblio.author>>, <<items.itemcallnumber>>, Barcode: <<items.barcode>> , Checkout date: <<issues.issuedate>>, Due date: <<issues.date_due>> Fine: <<items.fine>> Due date: <<issues.date_due>> </item>
Important
Only the overdue notices take advantage of the <item></item> tags, all other notices referencing items need to use <<items.content>>
Note
To add today’s date you can use the <<today>> syntax
Note
If you don’t want to print the patron’s full name on your slips or notice you can enter data in the Other name or Initials field for each patron and use that value instead.
Marcação do Aviso de Atraso
When creating your overdue notices there are two tags in addition to the various database fields that you can use in your notices. You will also want to review the Notices & Slips Field Guide for information on formatting item information in these notices.
Important
These new tags only work on the overdue notices, not other circulation related notices at this time.
These tags are <item> and </item> which should enclose all fields from the biblio, biblioitems, and items tables.
Um exemplo de utilização dessas tags no template de aviso poderia ser:
The following item(s) is/are currently overdue:

<item>"<<biblio.title>>" by <<biblio.author>>, <<items.itemcallnumber>>, Barcode: <<items.barcode>> Fine: <<items.fine>></item>
O que, assumindo que dois exemplares estão atrasados, resultará em um aviso como:
The following item(s) is/are currently overdue:

"A Short History of Western Civilization" by Harrison, John B, 909.09821 H2451, Barcode: 08030003 Fine: 3.50
"History of Western Civilization" by Hayes, Carlton Joseph Huntley, 909.09821 H3261 v.1, Barcode: 08030004 Fine: 3.50
Avisos e recibos existentes
Among the default notices are notices for several common actions within Koha. All of these notices can be customized by altering their text via the Notices & Slips tool and their style using the NoticeCSS preference to define a stylesheet. You will also want to review the Notices & Slips Field Guide for information on formatting item information in these notices. Here are some of what those notices do:
ACCTDETAILS
- Sent to patrons when their account is set up if the AutoEmailOPACUser preference is set to ‘Send’
ACQCLAIM (Acquisition Claim)
- Utilizado na parte de reclamações do módulo de aquisição
- Get there: More > Acquisitions > Late issues
CHECKIN
- Este aviso é enviado para todos os exemplares devolvidos
- This notice is used if two criteria are met:
- The EnhancedMessagingPreferences is set to ‘Allow’
- The patron has requested to receive this notice
- Get there:OPAC > Login > my messaging
- Get there:Staff Client > Patron Record > Correspondências
CHECKOUT
- Notícias na tela de circulação irão aparecer abaixo dos exemplares que forem emprestados
- This notice is used if two criteria are met:
- The EnhancedMessagingPreferences is set to ‘Allow’
- The patron has requested to receive this notice
- Get there:OPAC > Login > my messaging
- Get there:Staff Client > Patron Record > Correspondências
DUE
- Este aviso é enviado para um exemplar em atraso
- This notice is used if two criteria are met:
- The EnhancedMessagingPreferences is set to ‘Allow’
- The patron has requested to receive this notice
- Get there:OPAC > Login > my messaging
- Get there:Staff Client > Patron Record > Correspondências
DUEDGST
- Este aviso é utilizado para alertar usuários sobre exemplares em atraso
- This notice is used if two criteria are met:
- The EnhancedMessagingPreferences is set to ‘Allow’
- The patron has requested to receive this notice as a digest
- Get there:OPAC > Login > my messaging
- Get there:Staff Client > Patron Record > Correspondências
HOLD (Hold Available for Pickup)
- This notice is used if two criteria are met:
- The EnhancedMessagingPreferences is set to ‘Allow’
- The patron has requested to receive this notice
- Get there:OPAC > Login > my messaging
- Get there:Staff Client > Patron Record > Correspondências
- Quando este aviso faz alusão à tabela de bibliotecas, ele está se referindo às informações sobre a biblioteca de retirada.
- This notice is used if two criteria are met:
HOLDPLACED (a notice to the library staff that a hold has been placed)
- This notice requires the emailLibrarianWhenHoldIsPlaced system preference to be set to ‘Enable’
- Quando este aviso faz alusão à tabela de bibliotecas, ele está se referindo às informações sobre a biblioteca de retirada.
MEMBERSHIP_EXPIRY
- This notice can be sent to patrons to warn them that their cards are expiring soon.
- Requires that you have the MembershipExpiryDaysNotice set and the related cron job set.
ODUE (Overdue Notice)
- Este aviso é utilizado para enviar avisos de atraso para os usuários
- See a Sample Overdue Notice
- Requires that you set Overdue Notice/Status Triggers
PREDUE
- Este aviso é utilizado para enviar avisos de atraso para os usuários
- This notice is used if two criteria are met:
- The EnhancedMessagingPreferences is set to ‘Allow’
- The patron has requested to receive this notice
- Get there:OPAC > Login > my messaging
- Get there:Staff Client > Patron Record > Correspondências
PREDUEDGST
- Este aviso é enviado para todos os exemplares em atraso
- This notice is used if two criteria are met:
- The EnhancedMessagingPreferences is set to ‘Allow’
- The patron has requested to receive this notice as a digest
- Get there:OPAC > Login > my messaging
- Get there:Staff Client > Patron Record > Correspondências
RENEWAL
- Este aviso é enviado para todos os exemplares renovados
- This notice is used if three criteria are met:
- The EnhancedMessagingPreferences is set to ‘Allow’
- The RenewalSendNotice preference is set to ‘Send’
- The patron has requested to receive the checkout notice
- Get there:OPAC > Login > my messaging
- Get there:Staff Client > Patron Record > Correspondências
RLIST (Routing List)
Used in the serials module to notify patrons/staff of new issues of a serial
- Get there: More > Serials > New Subscription
Você tem a opção de selecionar o aviso de ‘Routing List’ quando cria uma nova assinatura (escolha a partir do menu ‘Notificação de usuário).
Note
Notice also that if you’d like to notify patrons of new serial issues, you can click on ‘define a notice’ which will take you to the ‘Notices’ tool
SHARE_ACCEPT
- Utilizado para notificar um usuário quando outro usuário tiver aceitado sua lista compartilhada.
- Requires that you set OpacAllowSharingPrivateLists to ‘Allow’
SHARE_INVITE
- Utilizado para notificar um usuário de que outro usuário deseja compartilhar uma lista com ele.
- Requires that you set OpacAllowSharingPrivateLists to ‘Allow’
TO_PROCESS
- Used to notify a staff member if a purchase suggestion has been moved to the fund they manage
- Requires the notice_unprocessed_suggestions cron job
There are also a set of predefined slips (or receipts) listed on this page. All of these slips can be customized by altering their text via the Notices & Slips tool and their style using the SlipCSS preference to define a stylesheet. Here is what those slips are used for:
- ISSUEQSLIP
- Usado para imprimir um recibo rápido na circulação
- O recibo rápido apenas inclui itens que foram emprestados hoje
- ISSUESLIP
- Usado para imprimir um recibo completo na circulação
- Notícias na tela de circulação irão aparecer abaixo dos items que forem emprestados
- HOLD_SLIP
- Usado para imprimir um recibo de reserva
- O recibo de reserva é gerado quando uma reserva é confirmada
- TRANSFERSLIP
- Usado para imprimir um recibo de transferência
- O comprovante de transferência é impresso quando você confirmar uma transferência de uma biblioteca para outra na sua rede
Overdue Notice/Status Triggers
- Get there: More > Tools > Patrons and Circulation > Overdue Notice/Status Triggers
In order to send the overdue notices that you defined using the Notices tool, you need to first set the triggers to have these messages.
Important
In order to have overdue notices sent to your patrons, you need to set that patron category to require overdue notices.
Important
Depending on the value of your OverdueNoticeCalendar preference the delay may or may not include days the library is closed based on the holiday calendar.
A ferramenta de avisos de atrasos dá ao funcionário a possibilidade de enviar três avisos a cada tipo de usuário sobre os materiais que os mesmos possuem em atraso

Atraso é o número de dias após um empréstimo terminar e antes de ativar uma ação.
Important
If you want Koha to trigger an action (send a letter or restrict member), a delay value is required.
Para enviar avisos adicionais, clique nos separadores de ‘Terceiro’ e ‘Segundo’ aviso
Se você deseja evitar que os usuários façam empréstimos se eles tiverem materiais em atraso, clique na caixa ‘Restringir’. Isto colocará um aviso na tela do registro do usuário no momento do empréstimo informando o funcionário que este usuário não pode realizar empréstimos enquanto não devolver os exemplares em atraso.
- If you choose to restrict a patron in this way you can also have Koha automatically remove that restriction with the AutoRemoveOverduesRestrictions preference.
Next you can choose the delivery method for the overdue notice. You can choose from Email, Phone (if you are using the iTiva Talking Tech service), Print and SMS (if you have set your SMSSendDriver).
Note
The Feed option is not yet a feature in Koha, it is there for future development.
See a Sample Overdue Notice
Criador de cartões de usuários
- Get there: More > Tools > Patron Card Creator
O módulo de Carteirinhas permite usar esquemas e modelos personalizados para imprimir uma variedade ilimitada de carteirinhas incluindo código de barras. Aqui estão algumas das funcionalidades deste módulo:
- Customize patron card layouts with text retrieved from the Koha patron data
- Design custom card templates for printed patron cards (to match the label sheets)
- Construir e gerir lotes de carteirinhas de usuário
- Export (as PDF) single or multiple batches to print
- Exportar uma ou várias carteirinhas de usuários a partir de um lote
Layouts
- Get there: More > Tools > Patron Card Creator > Manage > Layouts
Um esquema define o texto e as imagens que vai ser impressas no cartão e onde devem aparecer.
Note
Up to three lines of text, the patron’s number in barcode representation and up to two images can be printed on to the card.
Adicionar um layout
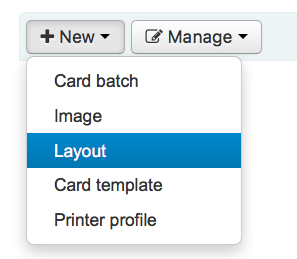
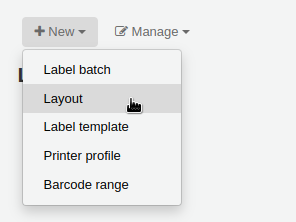
If you have no layouts defined, you will add a new layout by clicking the ‘New’ button and choosing ‘Layout’.
You may also choose to press ‘Manage layout’ on the left side. Here you are offered a list of available layouts you can select for editing. But at the top of the page there is still the ‘New layout’ button.

O nome do esquema é para seu próprio benefício, por isso, chame-lhe algo que seja fácil de identificar posteriormente
O menu Unidades é usado para definir a escala de medição que vai ser usada no perfil.
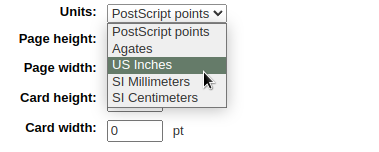
Note
A Postscript Point is 1/72” an Adobe Agate is 1/64”, an Inch is 25.4 SI Millimeters
Next note if this layout is for the front or the back of the patron card
Note
You will need a layout for both the front and back of your card if you have 2-sided library cards, this option doesn’t allow you to print two sided cards, just lets you track which side of the card you’re designing.
You have the option of adding up to 3 lines of text to your card. Your text can be static text of your choosing and/or fields from the patron record. If you want to print fields from the patron record you want to put the field names in brackets like so - <firstname>
Note
A full list of field names can be found in the database schema at http://schema.koha-community.org
Para cada linha de texto, é possível escolher a fonte, o tamanho e a localização do texto no cartão usando as coordenadas X e Y
A fim de mostrar o código de barras e o número da carteirinha é necessário verificar a opção ‘Imprimir Número da carteirinha como código de barras’. Isto irá transformar o número da carteirinha em um código de barras.
Finally you can choose up to two images to print on the card.
- One can be the patron image which you can resize to meet your needs.
- The other image can be something like a library logo or symbol that you uploaded using the ‘Manage Images’ module of the Patron Card Creator Tool.
Important
It is the designers responsibility to define textlines, barcode and images such that overlap is avoided.
After saving, your layouts will appear on the ‘Manage layouts’ page.
Templates
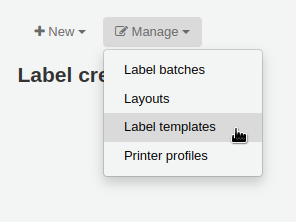
- Get there: More > Tools > Patron Card Creator > Manage > Card templates
A template describes the arrangement of labels on the label sheet/card stock you are using. This might be Avery 5160 for address labels, Gaylord 47-284 for spine labels or Avery 28371 for your patron cards, just to give a couple of examples. All of the information you will need for setting up a template may be on the packaging, and if not it can usually be found on the vendor’s website or can be measured from a sample sheet.
Adicionar Template
To add a new template click on the ‘New template’ button at the top of your page which brings you to the Edit template form immediately. You may also choose to press ‘Manage templates’ on the left side. Here you are offered a list of available templates you can select for editing. But in the top of the page there is still the ‘New template’ button.
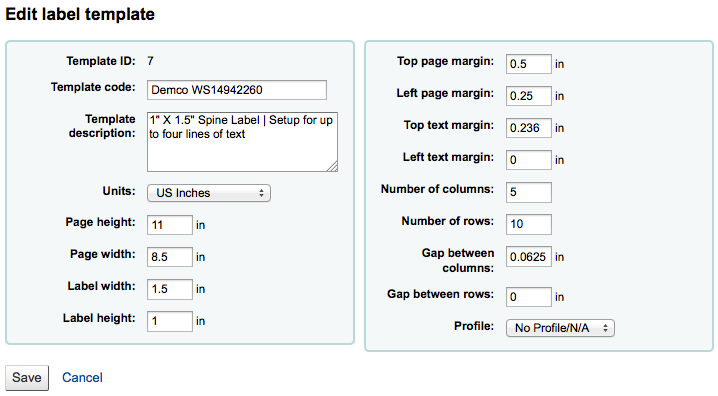
Using the form that appears after pressing either ‘Edit’ or ‘New template’you can define the template for your sheet of labels or cards.
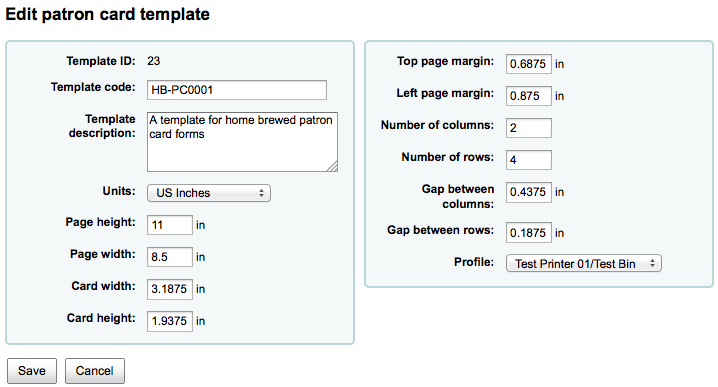
Template ID is simply a system generated unique id
Template Code should be the name of this template to identify it on a list of templates
Pode usar Descrição do Modelo para adicionar informação adicionar sobre o modelo
The Units pull down is used to define what measurement scale you’re going to be using for the template.
Note
A Postscript Point is 1/72” an Adobe Agate is 1/64”, an Inch is 25.4 SI Millimeters
The measurements (page height, page width, card width, card height) may be on the packaging, and if not it can usually be found on the vendor’s website or can be measured from a sample sheet.
A profile is a set of “adjustments” applied to a given template just prior to printing which compensates for anomalies unique and peculiar to a given printer (to which the profile is assigned).
Antes de escolher um perfil Alguns tentam imprimir cartões amostra de modo que você pode facilmente definir um perfil que é direito para sua combinação de impressora / modelo.
After finding and documenting any anomalies in the printed document, then you can create a profile and assign it to the template.
Important
Do not specify a profile unless needed, i.e. do not click to define a printer profile. It is not possible to remove a profile from a template but you can switch to another profile.
Note
If you are using different printers you may be required to define several templates that are identical only different profiles are specified.
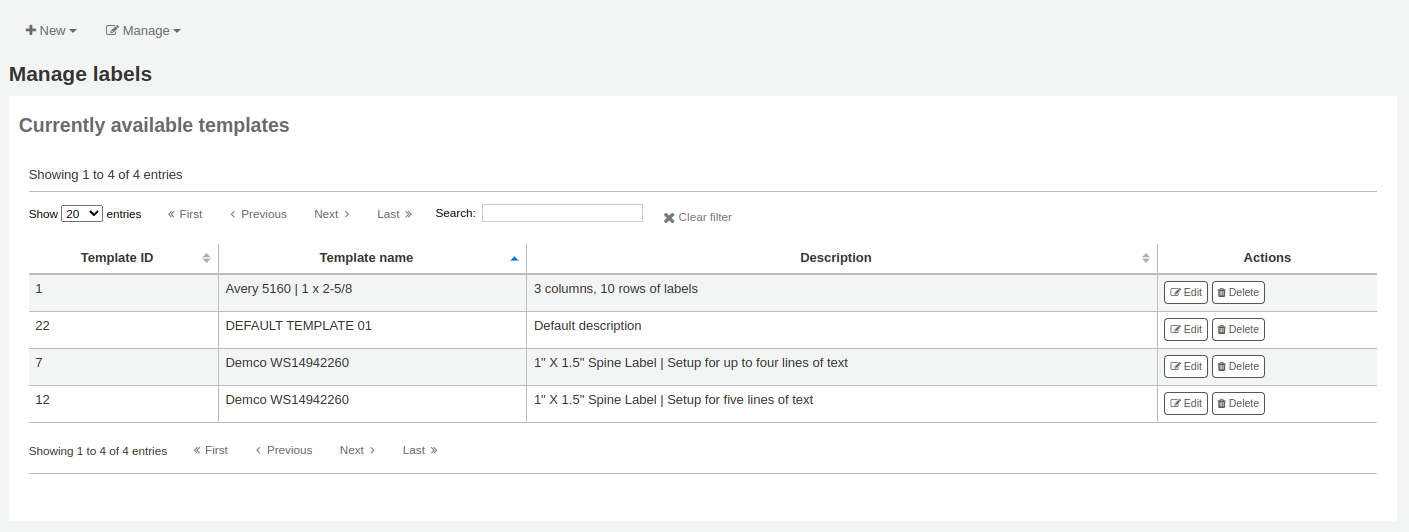
After saving, your templates will appear on the ‘Manage templates’ page.
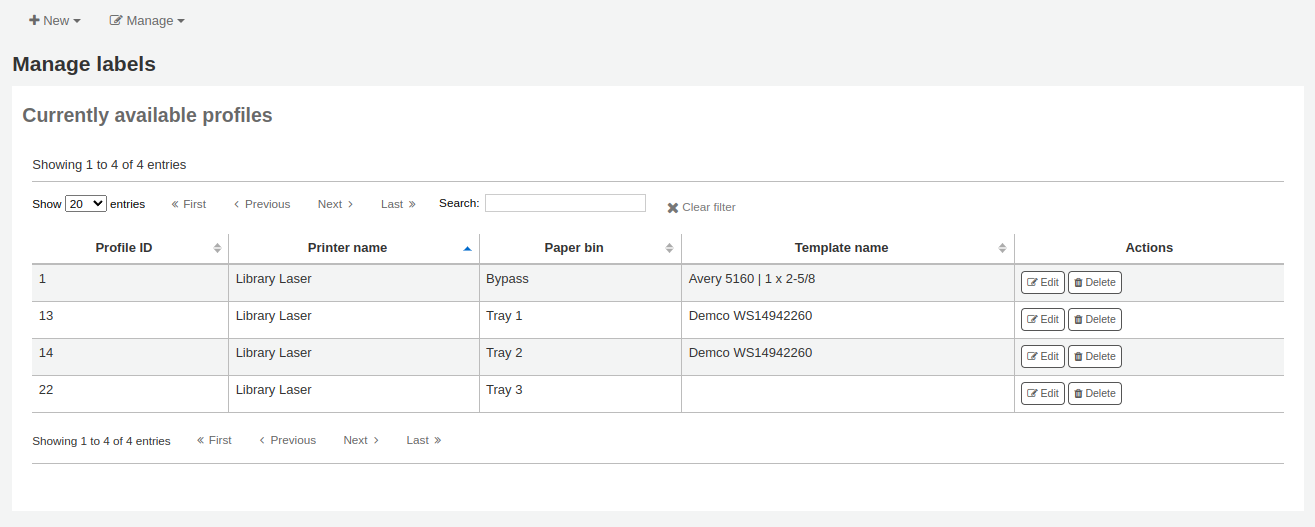
Perfis
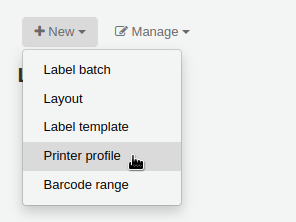
- Get there: More > Tools > Patron Card Creator > Manage > Profiles
A profile is a set of “adjustments” applied to a given template just prior to printing which compensates for anomalies unique and peculiar to a given printer. This means if you set a template up and then print a sample set of data and find that the items are not all aligned the same on each card, you need to set up a profile for each printer (or even different tray selections on the same printer) to make up for the differences in printing styles, such as the shifting of text to the left, right, top or bottom.
Se os cartões estão a imprimir da forma desejada, não precisa de um perfil.
Adicionar um perfil
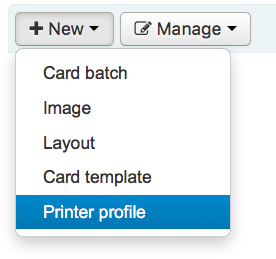
Para adicionar um novo perfil, você quer clicar no botão ‘Perfis’ na parte superior da página e escolha ‘Novo Perfil’
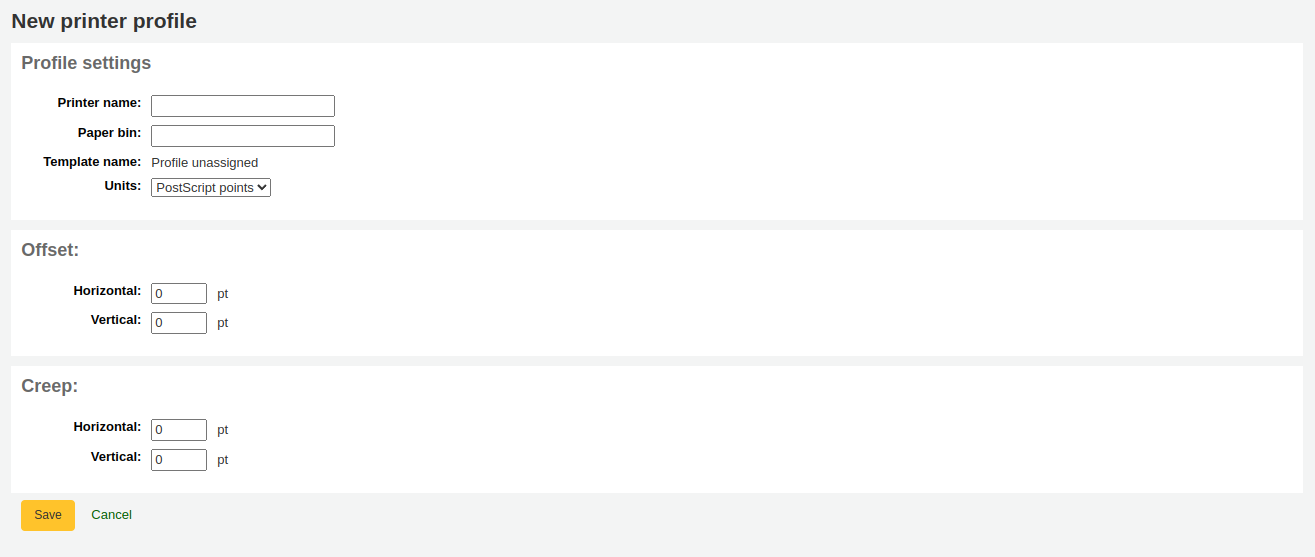
To add a new profile, you want to click on the ‘New profile’ button at the top of your page. Using the form that appears you can define the values to correct the card misalignments on your label sheet. You may also choose ‘Manage profiles’ on the left side and select one of the currently available profiles for editing.
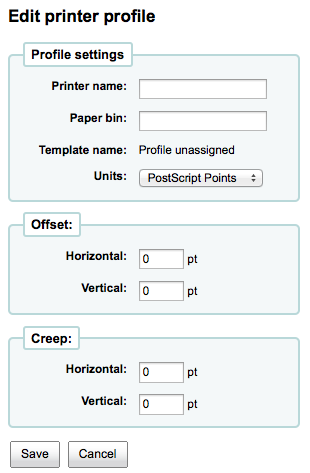
The Printer Name and Paper Bin do not have to match your printer exactly, they are for your reference so you can remember what printer you have set the profile for.
Note
For example: if you want to use the Printer model number in printer name you can, or you can call it ‘the printer on my desk’
Template will be filled in once you have chosen which template to apply the profile to on the template edit form
O menu Unidades é usado para definir a escala de medição que vai ser usada no perfil.
Note
A Postscript Point is 1/72” an Adobe Agate is 1/64”, an Inch is 25.4 SI Millimeters
Offset should be used when the entire image is off center either vertically or horizontally. Creep describes a condition where the distance between the labels changes across the page or up and down the page
- For offset and creep values, negative numbers move the printed information up and to the left on the printed sheet and positive numbers move down and to the right
- Example: the text is printed 0 .25” from the left edge of the first label, 0 .28” from the left edge of the second label and 0 .31” from the left edge of the third label. This means the horizontal creep should be set to (minus) -0.03 ” to make up for this difference.
After saving, your profiles will appear on the ‘Manage Printer Profiles’ page.

Após guardar o seu novo perfil, pode voltar a lista de modelos e editar o modelo para que use o perfil criado.
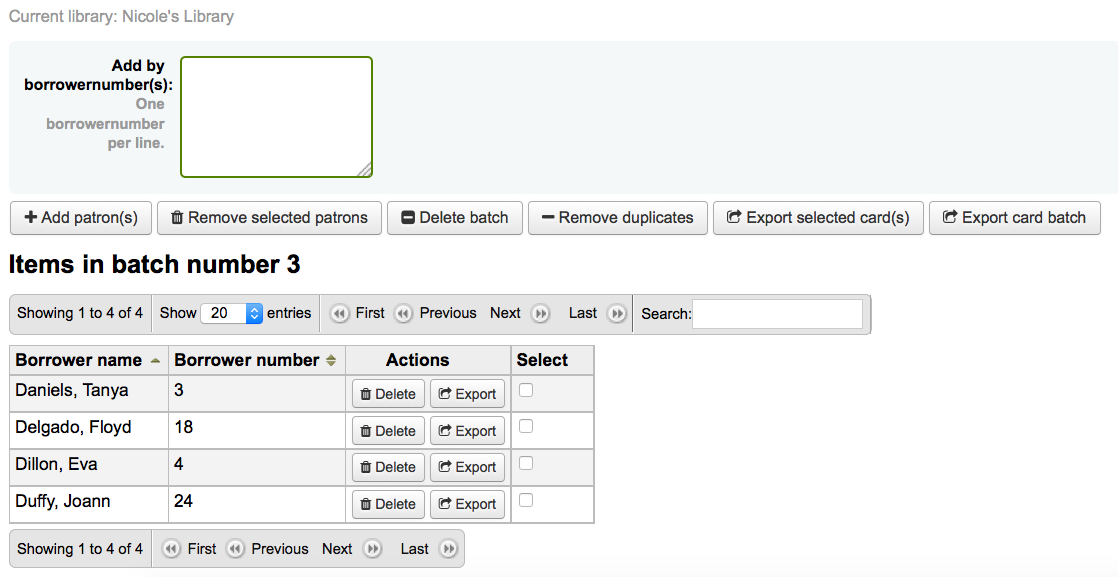
Lotes
- Get there: More > Tools > Patron Card Creator > Manage > Card batches
Um lote é um grupo de usuários para os quais se deseja criar carteirinhas.
Adicionar um Lote
To add a new batch, you want to click on the ‘New batches’ button at the top of your page. Choosing the menu item ‘Manage batches’ on the left a list of already defined batches is displayed. In this display you can either select a batch for editing or add a new batch.
For a new batch a message pops up and directs you to select patrons to be processed in this batch.
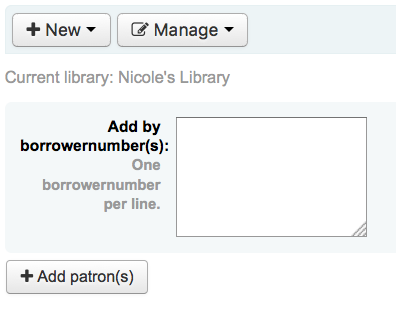
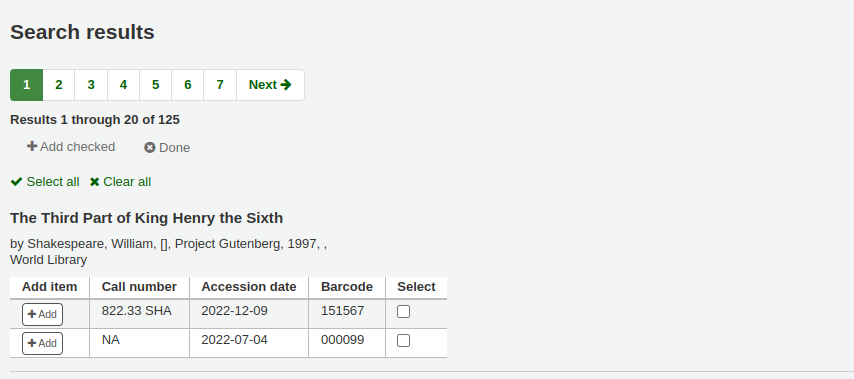
After choosing the ‘Add item(s)’ button the Patron Search window pops up.
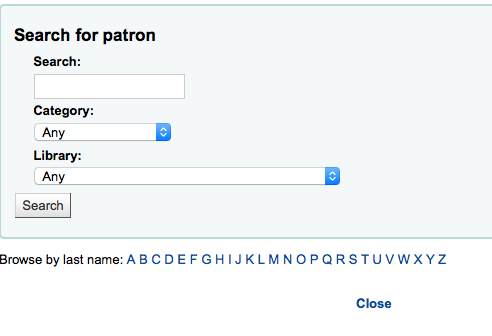
From here you can search for patrons to add to your batch by any part of their name, their category and/or library. Entering * in the search box will display all the patrons.
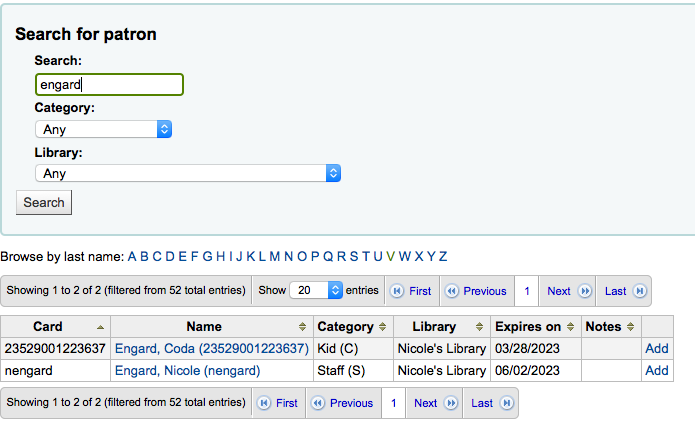
From the results you can add patrons to the batch by clicking the ‘Add’ button. After adding patrons from the results you can start over and perform another search or click ‘Close’ at the bottom of the screen to indicate that you are done. You will then be presented with your batch.
 If you are satisfied with your batch you can proceed to export. If you
want to correct or even delete that batch the buttons to do so can be
found at the top of your screen. You can always come back here through
the ‘Manage > Card batches’ button.
If you are satisfied with your batch you can proceed to export. If you
want to correct or even delete that batch the buttons to do so can be
found at the top of your screen. You can always come back here through
the ‘Manage > Card batches’ button.
If you would like to export all patron cards you can click ‘Export card batch’ otherwise you can choose specific patrons to print cards for by checking the box to the right of their names and then choose ‘Export selected card(s)’ at the top.
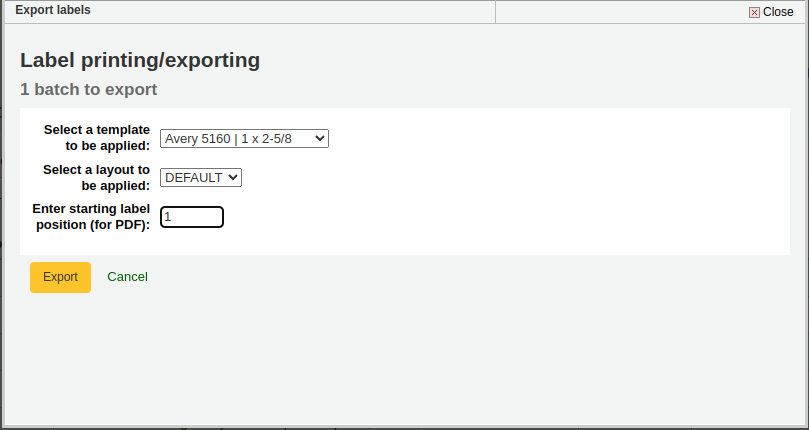
The export menu will ask you to choose a template, a layout and starting position (where on the sheet should printing begin).
Note
For the starting position if the first 6 labels have already been used on your sheet you can start printing on label in position 7 on the sheet. The labels are numbered left to right from top to bottom.

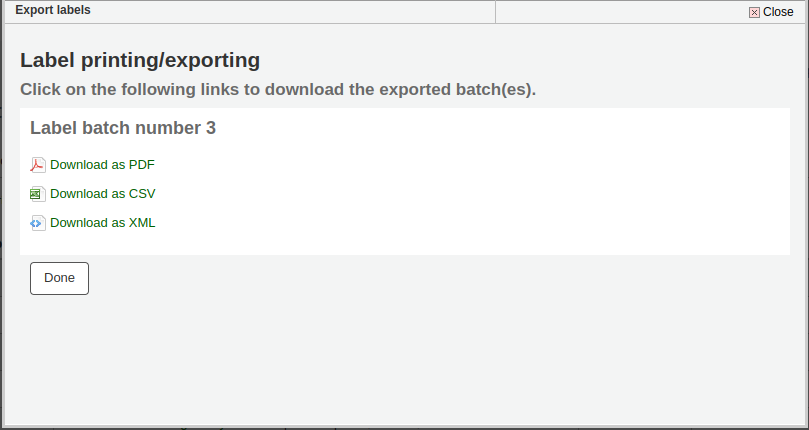
Once you click ‘Export’ you will be presented with a PDF of your labels for printing
When you open the PDF you will see the cards for printing

The above image shows a layout that is made up of two textlines. The first one is just plain text, the second one is composed of the <firstname> <surname> fields. A patron image is printed (if available) and the barcode of patrons number is displayed in code 39. All this is printed on a template with three columns and 8 rows using position 1-3 here. When printing this PDF please take care that your printer doesn’t rescale the PDF (e.g do not fit to paper size) otherwise the printer will not be able to print to the right place per your templates.
Gerenciar Imagens
- Get there: More > Tools > Patron Card Creator > Manage > Images
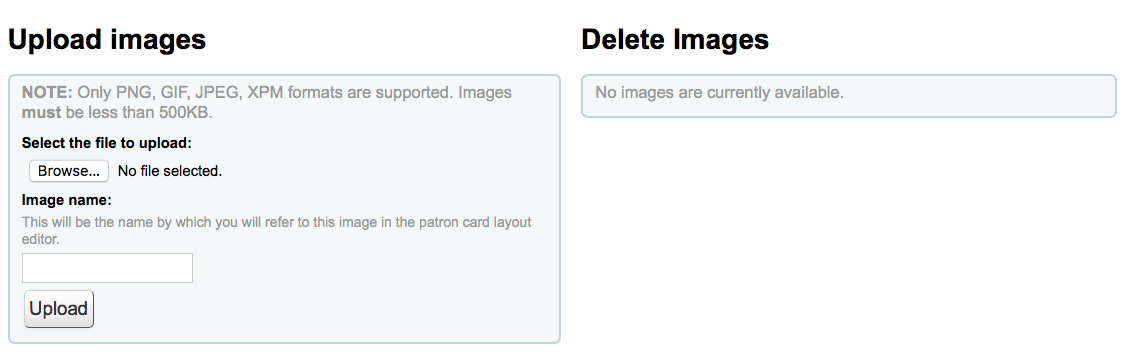
Images uploaded using this tool will appear on the menu when creating patron card layouts. You are limited in how many images you can upload (not counting patron images) by the ImageLimit system preference.
Important
Imagens precisam ter menos que 500k.
Note
Imagens carregadas com esta ferramenta devem ter no mínimo 300 dpi, a resolução necessária para uma impressão adequada.
No centro da tela há um formulário simples de upload, procure o arquivo em seu computador e dê-lhe um nome para reconhecê-lo mais tarde.
Quando o arquivo for carregado, surgirá uma mensagem de confirmação.
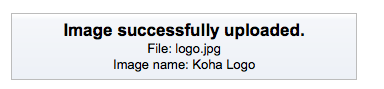
E a imagem será listada com as demais no lado direito da página.
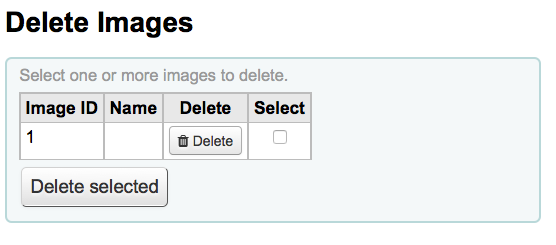
Para excluir uma ou mais imagens, clique na caixa de seleção à direita de cada imagem que você deseja apagar e clique no botão ‘Excluir’.
Patrons (anonymize, bulk-delete)
- Get there: More > Tools > Patrons and Circulation > Patrons (anonymize, bulk-delete)
Esta ferramenta permite tornar anônimo o histórico de circulação ou excluir registros de usuário em massa. Isso significa que o sistema mantém uma ligação entre os empréstimos antigos e seus exemplares, mas corta a ligação com o usuário.
Important
Patrons with outstanding fines or items checked out are not saved. They are not completely removed from the system (they are only moved to the delete_borrowers table), but this tool does not provide as many checks as one may desire.
Important
Before using this tool it is recommended that you backup your database. Changes made here are permanent.
Important
The anonymization will fail quietly if AnonymousPatron preference does not contain a valid value.
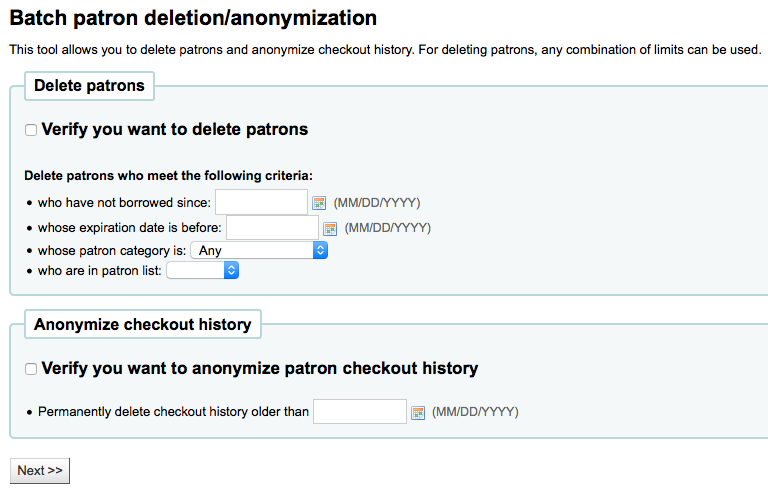
Para excluir ou tornar anônimos os usuários
Marque a caixa “Verificar” sobre a tarefa que você gostaria de completar (Apagar ou Anonymize)
Digite uma antes da qual você pretende ajustar os dados
If deleting patrons you can also choose to find patrons who
- have not borrowed since a specific date
- have accounts that will expire before a specific date
- are in a specific patron category
- are in a patron list
Click ‘Seguinte’
Uma confirmação aparecerá perguntando se você está ciente do que está fazendo
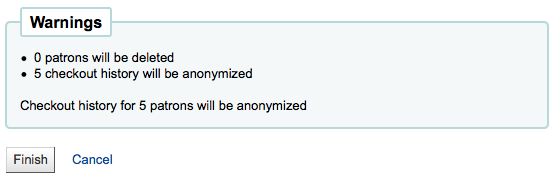
Clicando em ‘Finalizar’ para com que todos os dados sejam excluídos ou anonimizados

Batch patron modification
- Get there: More > Tools > Patrons and Circulation > Batch patron modification
With this tool you can make edits to a batch of patron records. Simply load in a file of cardnumbers (one per line), choose from a list of patrons or scan patron card numbers in to the box provided.
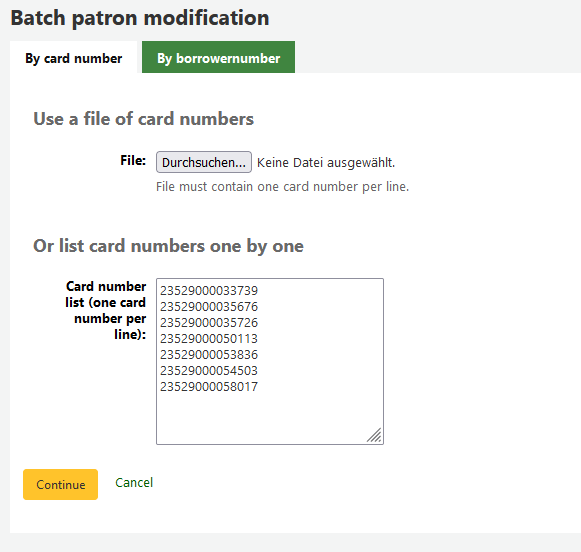
Uma vez que subiu um arquivo ou códigos de barras escaneados clique ‘Continuar’. Será apresentado uma lista com usuários e as alterações que você fez.
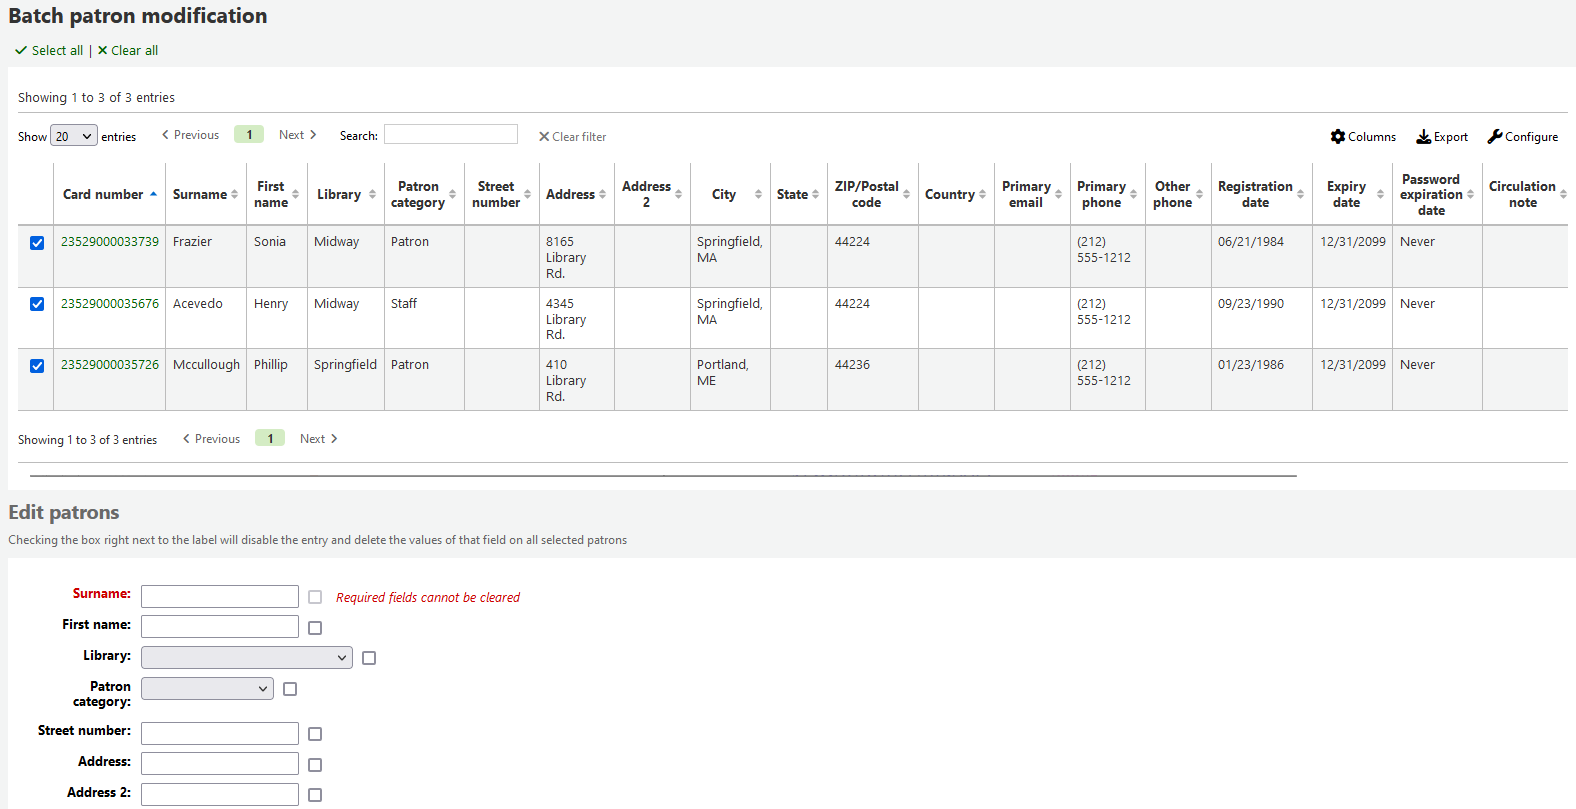
A esquerda de cada caixa de texto existe uma caixa de marcação. Clicando na caixa de marcação irá limpar os valores deste campo.
Important
If the field is mandatory you will not be able to clear the value in it.
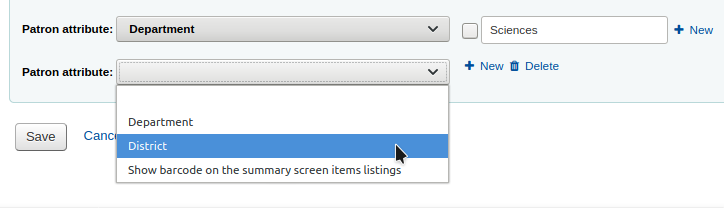
Se você tem mais de um atributo de usuário você pode alterá-los usando o sinal (+) a direita da caixa de texto. Ele permitirá você adicionar outro valor de atributo.
Quando você tiver feito todas as alterações, você pode clicar em ‘Salvar’ e o Koha irá apresentá-lo com as alterações feitas nos registros de usuários.
Tag Moderation
- Get there: More > Tools > Patrons and Circulation > Tags
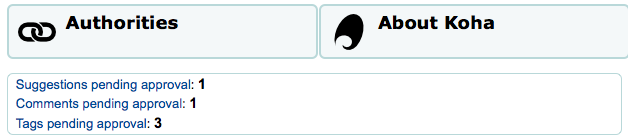
Depending on your tagging system preferences, librarians may need to approve tags before they are published on the OPAC. This is done via the Tag Moderation Tool. If there are tags awaiting moderation they will be listed on the main staff dashboard under the module labels:
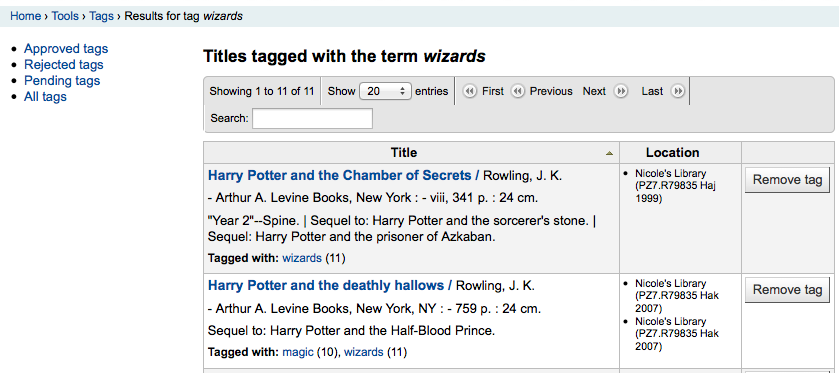
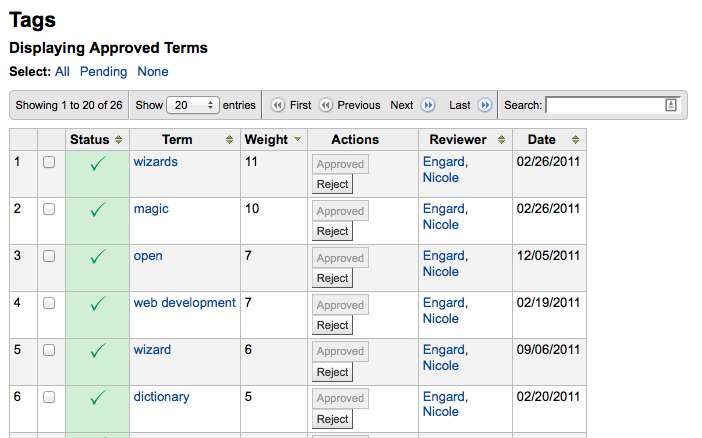
Para moderar as tags visite a ferramentas de Tags. Quando visitar pela primeira vez a ferramenta, será apresentado para você uma lista com tags que estão aguardando aprovação por um bibliotecário
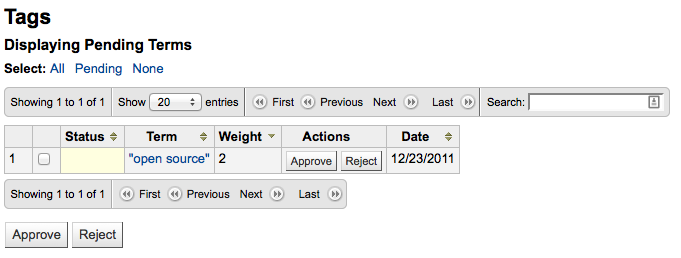
To see all of the titles this tag was added to simply click on the term
- From this list of titles you can remove a tag without outright rejecting it from being used in the future by clicking the ‘Remove tag’ button to the right of the title.
Para aprovar uma tag, você pode clicar no botão ‘Aprovar’ com o termo, ou marcar todos os termos que você deseja aprovar e clique em ‘Aceitar’ abaixo da tabela.
Para rejeitar uma tag, você pode clicar no botão ‘Rejeitar’ com o termo, ou verifique todos os termos que você deseja rejeitar e clique em ‘Rejeitar’ abaixo da tabela.
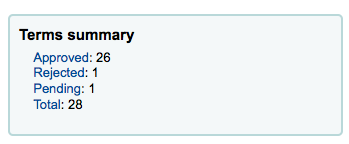
Assim que um etiqueta for aprovada ou rejeitada será movida para a lista apropriada. Um sumário de todas as etiquetas aparecerá à direita do ecrã.
Even though a tag is approved or rejected, it can still be moved to another list. When viewing approved tags each tag has the option to reject:
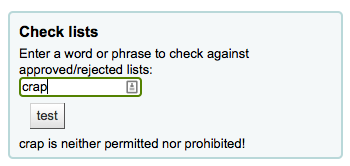
To check terms against the approved and rejected lists (and possibly against the dictionary you have assigned for tag moderation) simply enter the term into the search box on the bottom right of the screen to see the status of the term
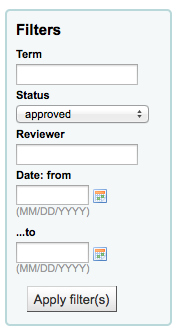
Finally you can find tags by using the filters on the left.
Upload fotos do usuário
- Get there: More > Tools > Patrons and Circulation > Upload Patron Images
Patron images can be uploaded in bulk if you are allowing patron images to be attached to patron records. These images can also be used when creating patron cards.
Crie um arquivo txt e o nomeie como “DATALINK.TXT” ou “IDLINK.TXT”
On each line in the text file enter the patron’s card number followed by comma (or tab) and then the image file name
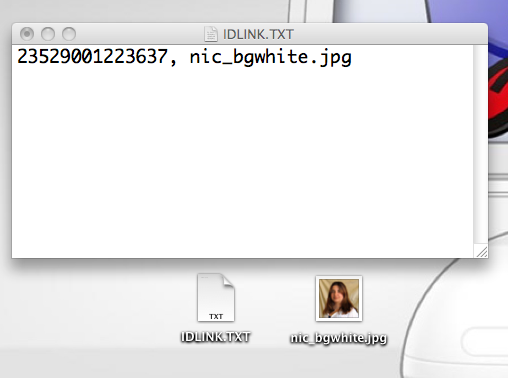
- Assegure-se que o seu arquivo TXT é um arquivo de texto plano e não RTF.
Zipar e enviar o arquivo de texto e os arquivos de imagens
Vá para a Ferramenta de Upload de Imagens de Usuário
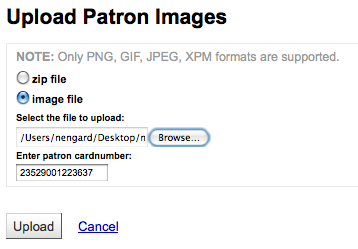
Para uma só imagem, selecione o arquivo da imagem e digite o número da carteirinha do usuário
Para mais de um arquivo de imagem, escolha upload de arquivo .zip
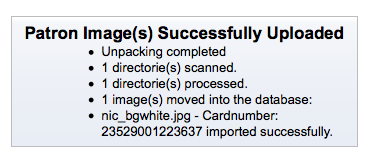
Depois de escolher você receberá uma mensagem de confirmação
Important
Há um limite de 100K para o tamanho da imagem carregada e recomenda-se que a imagem seja de 200x300 pixels, mas as imagens menores funcionarão melhor
Colecções
- Get there: More > Tools > Catalog > Rotating Collections
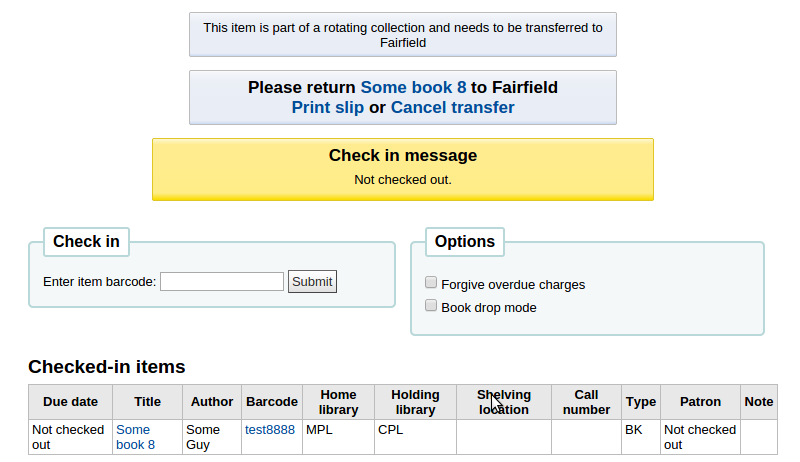
Rotating Collections is a tool for managing collections of materials that frequently get shifted from library to library. It adds the ability to store not only an item’s home library and current location but also information about where it is supposed to be transferred to next to ensure that all items in the collection are sent to the correct library. When an item in a rotating collection is checked in, library staff is notified that the item is part of a rotating collection and which branch it should be sent to if it is not at the correct one.
Important
The AutomaticItemReturn system preference must be set to “Don’t automatically transfer items to their home library when they are returned” for Rotating Collections to function properly.
- To create a new rotating collection, click the “New Collection” button, fill in the Title and Description, and click Submit. Once submitted you’ll see “Collection Name added successfully”; click “Return to rotating collections home” to return to the main Rotating Collections management page (or click Rotating Collections in the sidebar).
- To add items to a collection, click “Add or remove items” next to the collection’s name in the list of collections. Under “Add or remove items” scan or type in the barcode of the item you wish to add to the collection, and hit Enter or click Submit if necessary.
- To remove an item from a collection, either click Remove next to the item’s barcode in the list of items within the collection or check the “Remove item from collection” box next to the Barcode text box under “Add or remove items, and scan or type in the barcode, clicking Submit or hitting Enter if necessary. Note: The “Remove item from collection” checkbox will remain checked as long as you are on the “Add or remove items” page, unless you uncheck it, to facilitate quickly removing a number of items at a time by scanning their barcodes.
Transfer a Rotating Collection
Transferring a collection will:
- Change the current location of the items in that collection to the library it is to be transferred to
- Initiate a transfer from its original current location/holding library to the current location/holding library it is to be rotated to. When a library receives a collection they will need to check in the items to complete the transfer.
You can transfer a collection in one of two ways:
From the main Rotating Collections page, click on Transfer next to the title of the collection you wish to transfer; choose the library you wish to transfer the collection to and click “Transfer collection”.
Or, from the “add or remove items” page for a collection, you can click the Transfer button, choose the library you wish to transfer the collection to and click “Transfer Collection”.
Important
In order to complete the transfer process, the library receiving the rotating collection should check in all items from the collection as they receive them. This will clear the transfer so that the items are no longer shown as being “in transit”.
If an item in a rotating collection is checked in at a library other than the one it is supposed to be transferred to, a notification will appear notifying library staff that the item is part of a rotating collection, also letting them know where the item needs to be sent.
Catálogo
Exclusão de itens em lote
- Get there: More > Tools > Catalog > Batch item deletion
Esta ferramenta permitirá que você exclua um lote de registros de exemplares do Koha.
A partir da ferramenta pode escolher carregar um arquivo com código de barras ou IDs dos documentos, ou então pode ler os itens um a um, na caixa debaixo da ferramenta de carregamento.
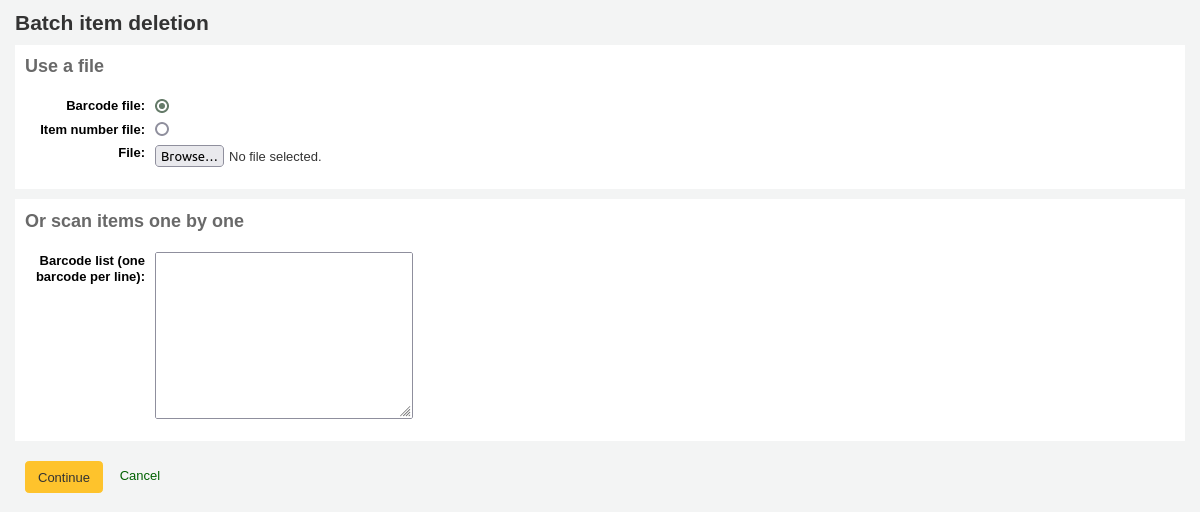
Uma vez que subiu um arquivo ou códigos de barras escaneados clique ‘Continuar’.
You will be presented with a confirmation screen. From here you can uncheck the items you don’t want to delete and decide if Koha should delete the bib record if the last item is being deleted before clicking ‘Delete selected items.’ If you’d like you can delete the bibliogrphic record if you’re deleting the last item by clicking the checkbox next to ‘Delete records if no items remain’.
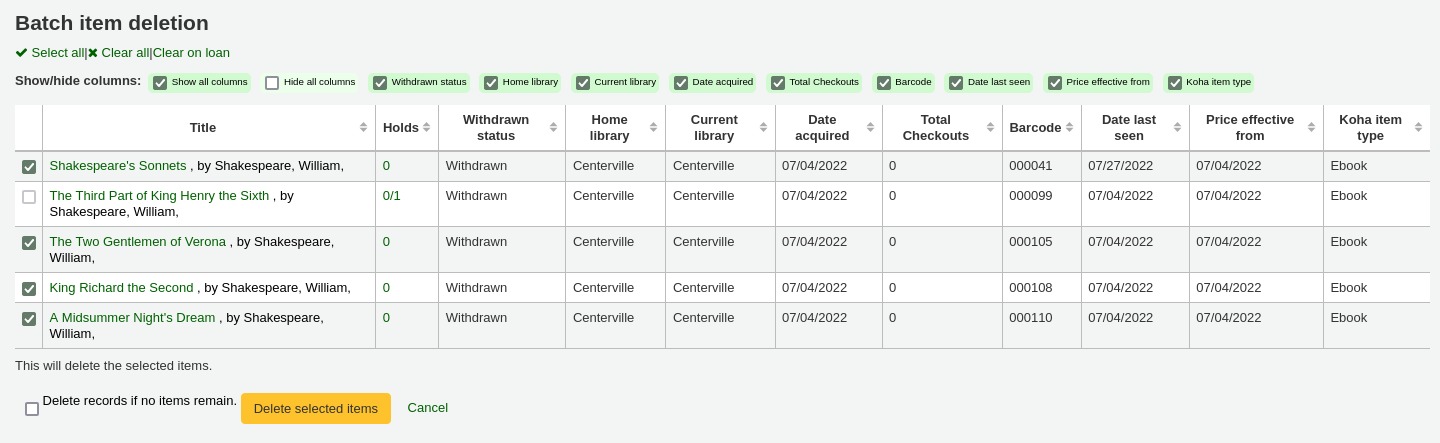
Se seu arquivo (ou lista de códigos de barra escaneados) tiver mais do que 1000 códigos de barras, o Koha não conseguirá te apresentar uma lista dos itens. Você ainda conseguirá excluí-los, mas não será possível escolher quais itens especificamente deletar ou deletar o registro bibliográfico do item.

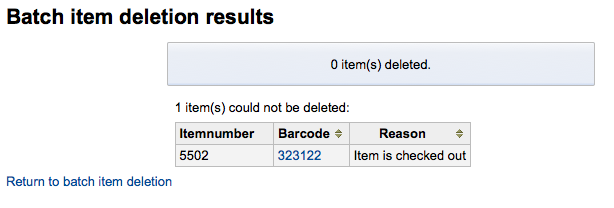
Se os itens estiverem emprestados será apresentado um erro após clicar em ‘Excluir itens selecionados’ e os itens não serão excluidos.
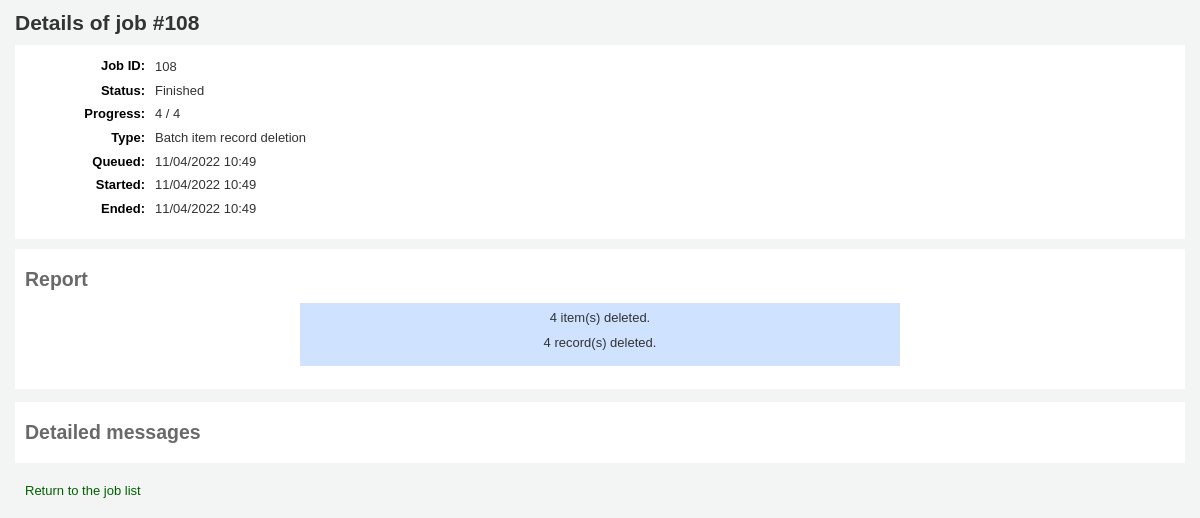
Se os itens pode ser excluídos, os mesmos serão excluídos e será presenteado com a confirma da operação.
Modificação de itens em lote
- Get there: More > Tools > Catalog > Batch item modification
Esta ferramenta irá permitir que você modifique um lote de registros de exemplares do Koha.
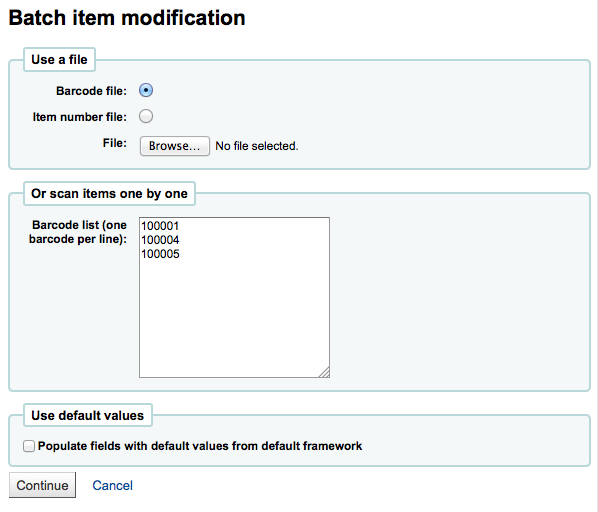
From the tool you can choose to upload a file of barcodes or item ids, or you can scan items one by one into the box below the upload tool. You can also decide the items edited should be populated with the default values you have defined in your default framework.
Once you have your file uploaded or the barcodes listed you can click ‘Continue.’
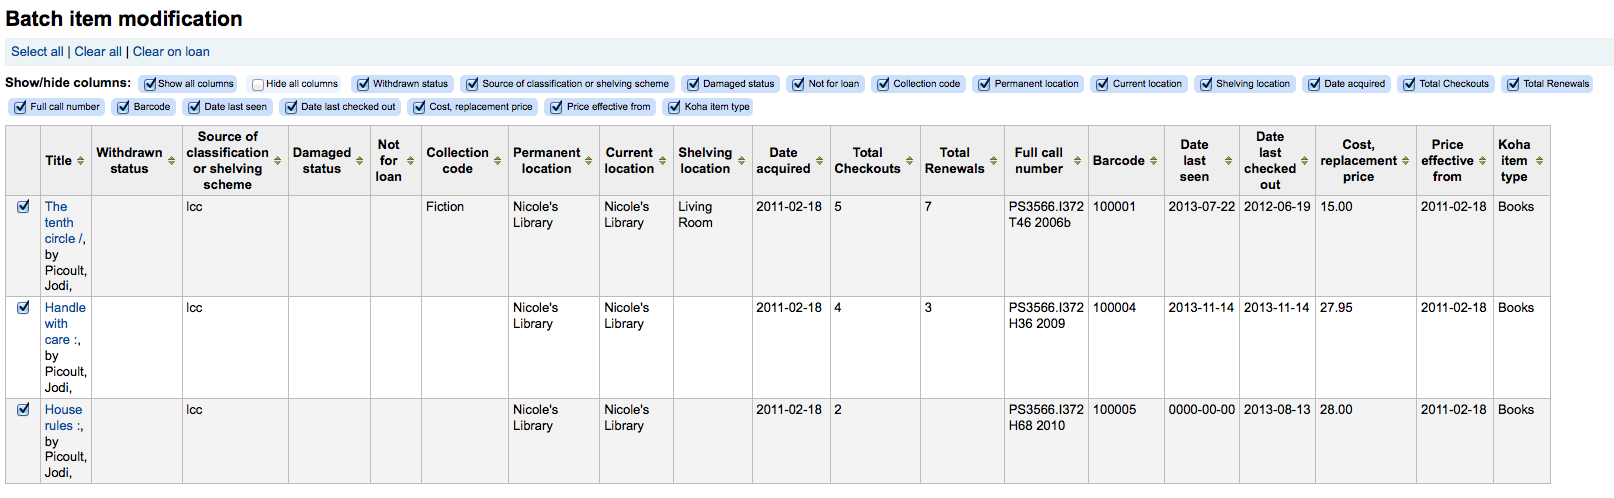
Será apresentado um resumo de itens que você deseja modificar. Você poderá deselecionar os itens que não deseja modificar antes de efetuar as alterações no formulário a seguir. Você pode também ocultar colunas que não deseja visualizar para prevenir selecionar na esquerda para a direta para ver o formulário completo.
Note
Se você não deseja modificar os itens que estão emprestados, clique no link ‘Limpar ao emprestar’, desta forma os itens que estão emprestados não serão modificados.
Usando o formulário de edição você poderá escolher quais campos você fará a edição. Através da marcação nas caixas de escolha a direita de cada campo você pode limpar o valor em cada registro que estiver modificando.
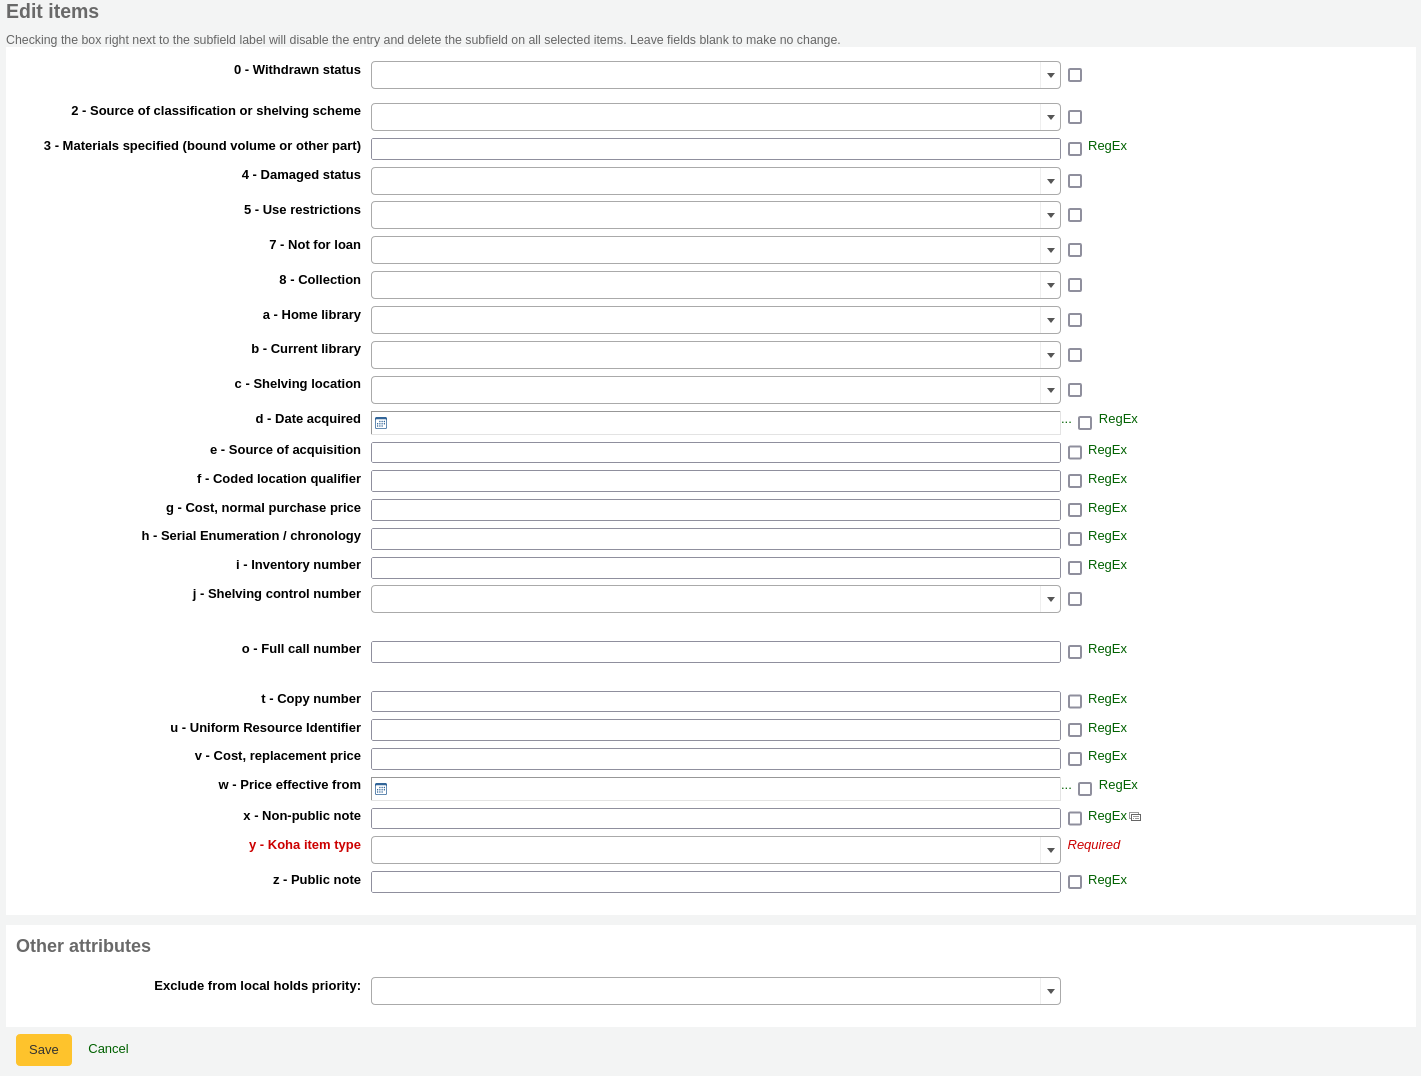
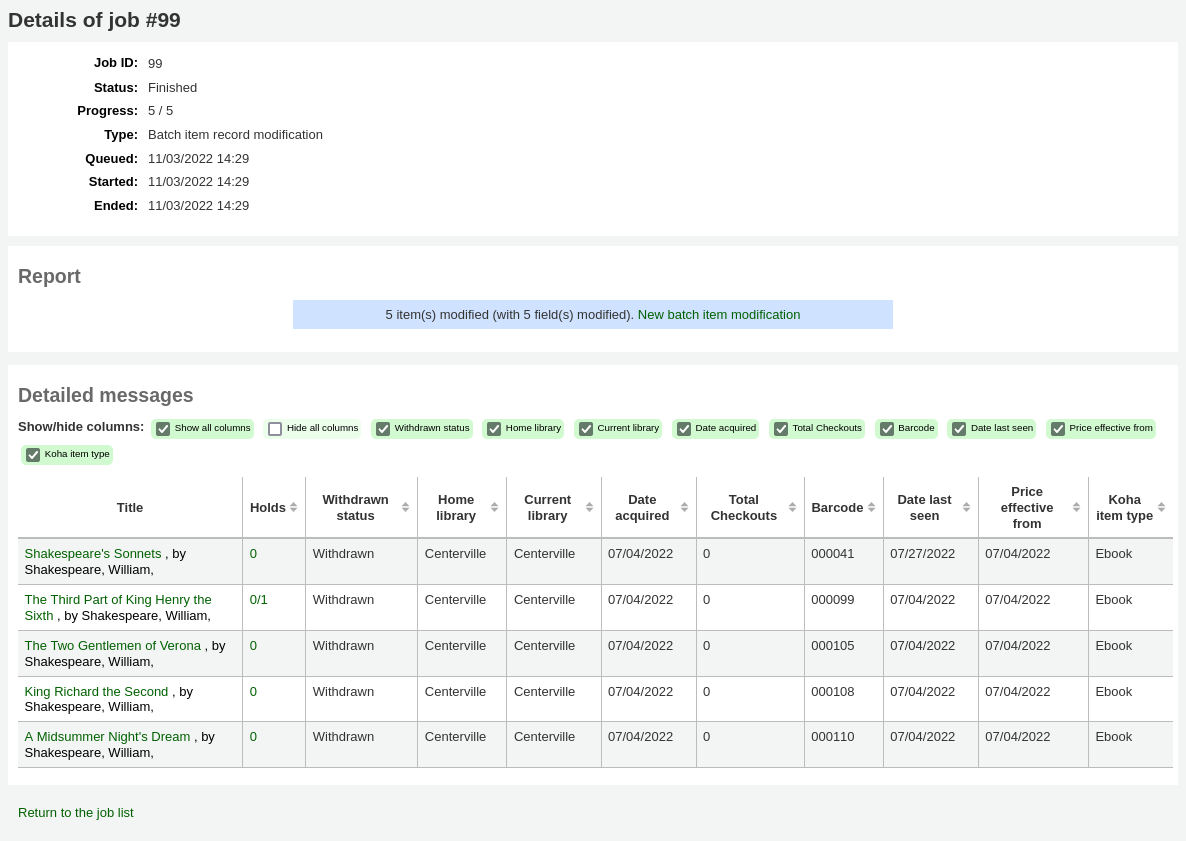
Quando você tiver feito todas as alterações você pode apresentá-las com os resultados de busca.
Note
Você pode também modificar itens em um registro bibliográfico em lote indo no registro bibliográfico e clicando em Editar > Modificar itens em lote
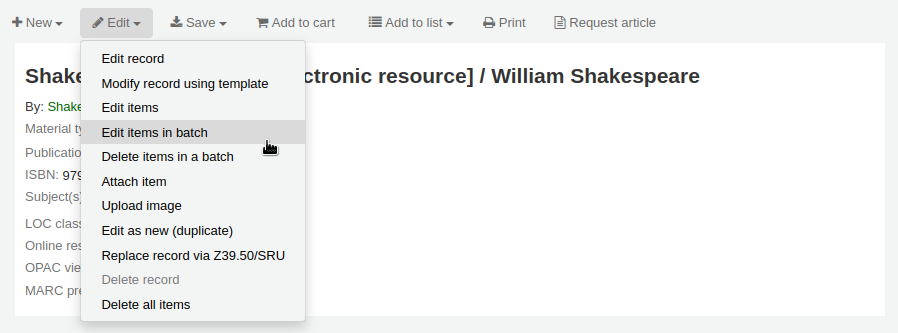
Exclusão de registros em lote
This tool will take a batch of record numbers for either bibliographic records or authority records and allow you to delete all those records and any items attached to them in a batch.
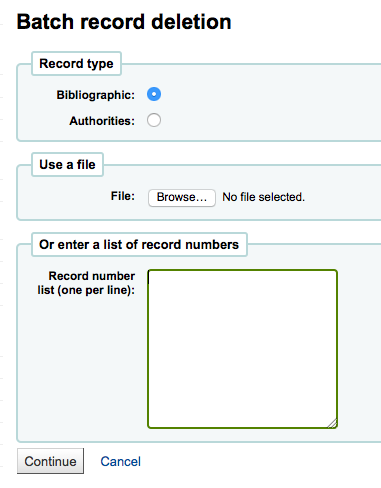
First you need to tell the tool if you’re deleting bibliographic or authority records. Next you can load a file with biblionumbers or authids or enter a list of those numbers in the box provided. Once you submit the form you will be presented with a summary of the records you are trying to delete.
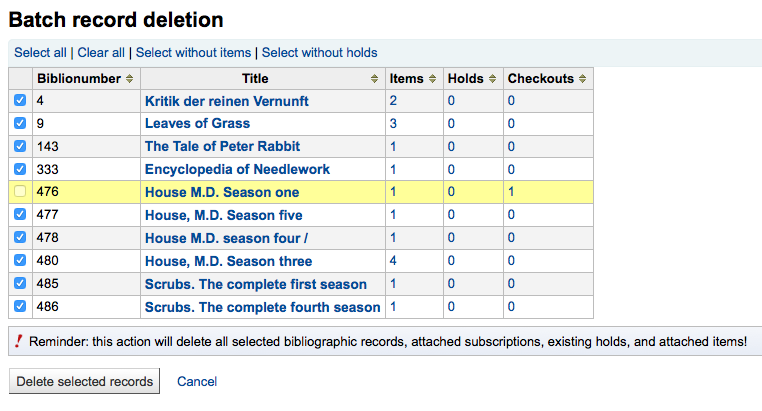
Se um registro não puder ser deletado ele será marcado.
Confira os registros que você deseja excluir e clique no botão ” Excluir registros selecionados ” para concluir o processo.
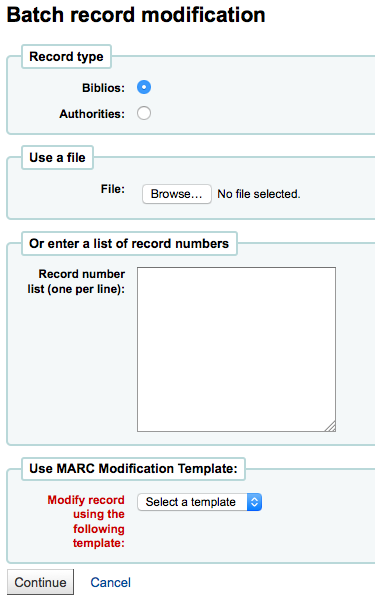
Batch record modification
- Get there: More > Tools > Catalog > Batch record modification
This tool will allow you to edit batches of bibliographic and/or authority records using MARC Modification Templates. Before visiting this tool you will want to set up at least one MARC modification template.
QUANDO rápido você Clicar em ‘Exportar “Você Será, solicitado tem Escolher o TAMANHO PARA O Exportar arquivo em.
- Escolher se deseja ou não verificar correspondências entre registros
- Enter the biblionumbers or authids
- You can upload a file of these numbers or
- Digite os números (um por linha) na caixa fornecida
- Finalmente, escolha o template de modificação MARC que você quer usar para editar estes registros.
Once you’ve entered your criteria click ‘Continue’
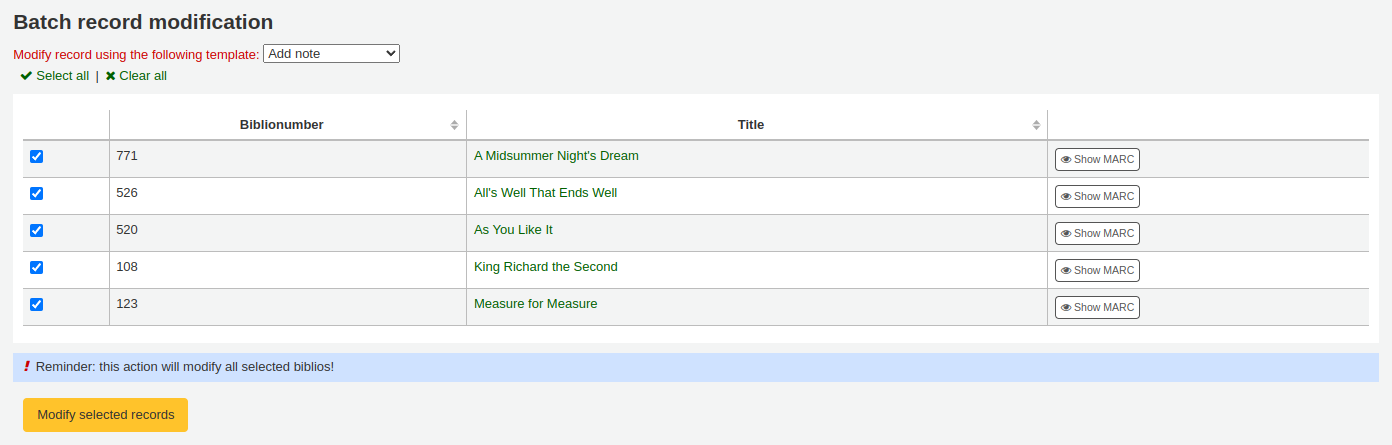
Você será presenteado com uma lista de registros que serão editados. Ao lado de cada um é uma caixa de seleção para que você pode desmarcar os itens que você preferiria não editar neste momento.
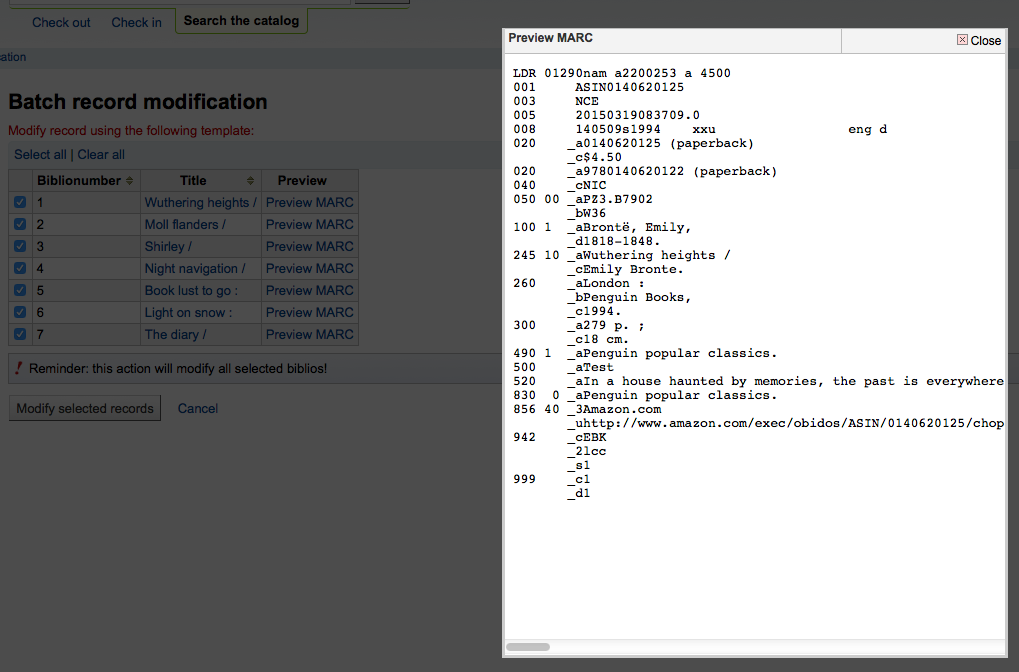
Clicking Preview MARC will allow you to see what edits will be made when you finalize the edit.
Once you’re sure everything is the way you want you can click the ‘Modify selected records’ button and your records will be modified.
Automatic item modifications by age
- Get there: More > Tools > Catalog > Automatic item modifications by age
This tool allows librarians to update item specific fields when an item reaches a certain age.
Note
Staff need the items_batchmod permission to access this tool
Important
The settings in this tool will be acted upon by the corresponding cron job
If you haven’t created any rules you will see the option to ‘Add rules’ on the Tool page. Click this button to create rules.

If you have rules already there will be a button that reads ‘Edit rules’. To create a new rule click the ‘Edit rules’ button at the top of the page

You will be brought to a page where you can edit exisitng rules or create a new rule

In the form that appears you can set :
- the age in days at which the item will update (Age)
- what criteria is needed to trigger the update (Conditions)
- what changes are made when the script runs (Substitutions)

Once you’re done you can click the ‘Add this rule’ link and then add additional rules or you can click the ‘Submit these rules’ button to save your changes.
Export Data (MARC & Authorities)
- Get there: More > Tools > Catalog > Export Data
O Koha traz uma ferramenta que permite exportar em massa os registro bibliográficos e/ou empréstimos. Pode ser usada para enviar os seus registros para outras bibliotecas, organizações ou serviços, ou apenas para cópias de segurança.
Exportar registros bibliográficos
É necessário selecionar os dados que está exportando no topo da tela. Se você está exportando registros bibliográficos com ou sem reservas você precisa clicar na aba ‘Exportar registros bibliográficos’.
Preencha o formulário para limitar a exportação a um limite específico (todos os campos são opcionais)
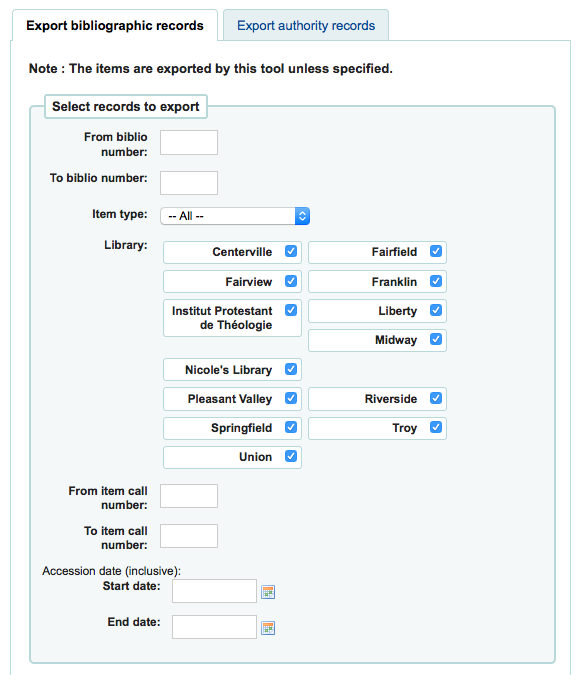
Escolher para limitar a sua exportação por qualquer um ou mais das seguintes opções
Limitar a um intervalo de números de registro
Limitar a um tipo de documento
Important
This limit will use the type you have defined in the item-level_itypes preference. If you have the item-level_itypes preference set to ‘specific item’ and you have no items attached to a bib record it will not be exported. To get all bib records of a specific type you will need your item-level_itypes preference set to ‘biblio record’.
Limite de uma biblioteca ou grupo específico de bibliotecas
Important
This is a filter: if you leave this set to the default (all libraries selected) or select one or more libraries, bib records with no items attached will not be exported. To get bib records with no items you will need to ‘clear all’ (i.e. de-select all libraries).
Limitar a um conjunto de cotas
Limitar a um intervalo de data de aquisição
If you’d like you can load a file of biblionumbers for the records you would like to export. File type needs to be .csv or .txt

De seguida escolha o que não vai exportado
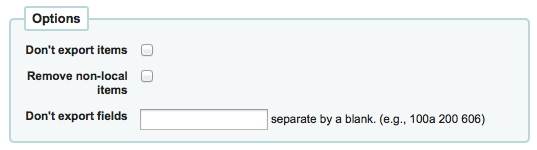
- Por padrão todos os exemplares serão exportados excepto se assinalar a caixa ‘Não exportar os exemplares’
- Para limitar a exportação somente para itens da biblioteca que você está autenticado (se você deixar o campo ‘Biblioteca’ definido para ‘todas ‘) ou para a biblioteca que você selecionou marque a opção ‘Remover itens não-local’
- Pode também escolher quais os campo que não deseja exportar. Pode ser útil que está a partilhar dados, removendo todos os dados locais antes de enviar os dados para outras bibliotecas
Por fim, escolha o tipo e o nome do arquivo
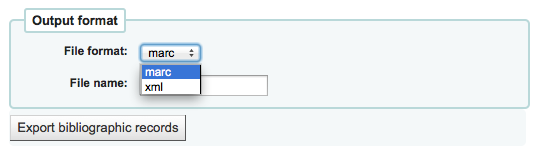
- Escolher para exportar os dados em MARC ou MARCXML
- Selecionar o nome para guardar o arquivo
Clicar em ‘Exportar registros bibliográficos’
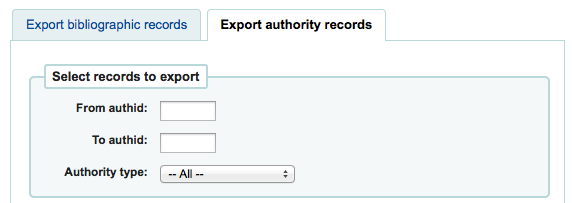
Exportar registros de autoridade
Escolha no topo da tela quais dados você irá exportar. Se você quiser exportar os registros de autoridade, você precisa clicar na aba ‘Exportar registros de autoridade’.
Preencha o formulário para limitar a exportação a um limite específico ou tipo de registro de autoridade (todos os campos são opcionais)
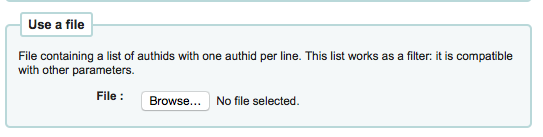
Or you can choose a file of authids to export
File type needs to be .csv or .txt
Next choose fields that you would like to exclude from the export separated by a space (no commas)

- Se você quer excluir todos os subcampos do 200 por exemplo, digite 200
- Se você quer excluir um subcampo específico digite no campo o valor: 100a irá excluir somente o subcampo a do 100
Por fim, escolha o tipo e o nome do arquivo
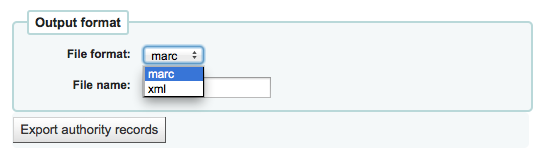
- Escolher para exportar os dados em MARC ou MARCXML
- Selecionar o nome para guardar o arquivo
Clicar em ‘Exportar registros de autoridade’
Inventory
- Get there: More > Tools > Catalog > Inventory
Koha’s Inventory Tool can be used in one of three ways: 1. By printing out a shelf list that you can then mark items off on; 2. By uploading a text file of barcodes gathered by a portable scanner; 3. By comparing a text file of barcodes gathered by a portable scanner to a
generated shelf list.
If you do not have the ability to use your barcode scanner on the floor of the library, the option available to you is to generate a shelf list based on criteria you enter.
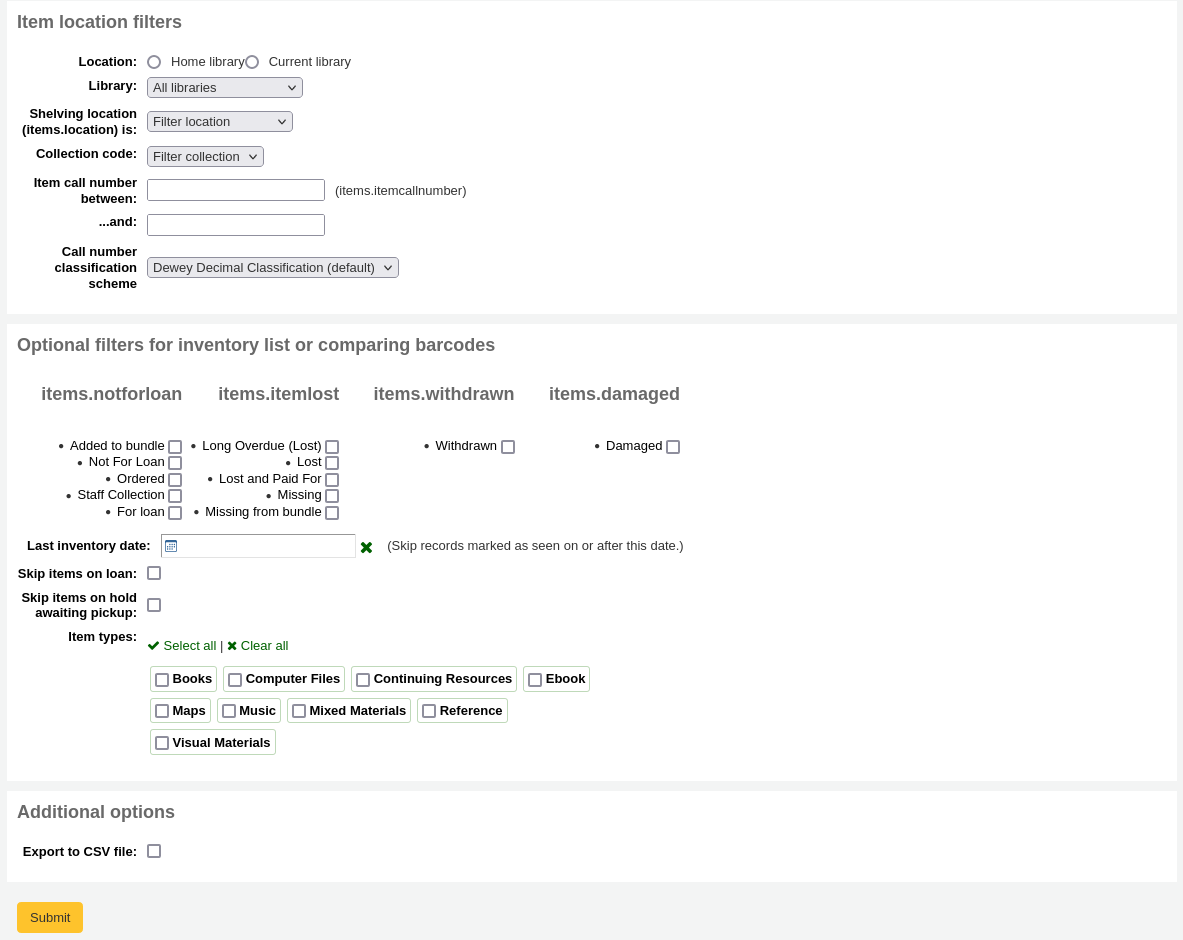
First, choose the criteria for the items you want to print out on a list. All parameters are optional, but if none are selected, the resulting list might be quite large.
- Library: choose the branch you want to check, as well as if that branch is the home library or the current of the items.
- Shelving location (items.location) is: you can filter by location.
- Item callnumber between … and …: you can also limit the list to a specific range of callnumbers.
You can filter even more with item statuses (not for loan status, lost status, withdrawn status or damaged status). Check the boxes next to the statuses you want to include. For example, if you are using the list to shelf read, check only the ‘for loan’ status as the other items probably won’t be on the shelves.
- Last inventory date: enter a date here to skip items that have been marked as seen recently.
- Skip items on loan: check this box to filter out loaned items from the list.
- Export to CSV file: check this box to generate a CSV file for altering in an application on your desktop. If this box is unchecked, the list will be presented on the screen.
Click on ‘Submit’ to generate your shelf list. You can then print it to use while walking around the library checking your collection or use it directly in Koha on a portable device.
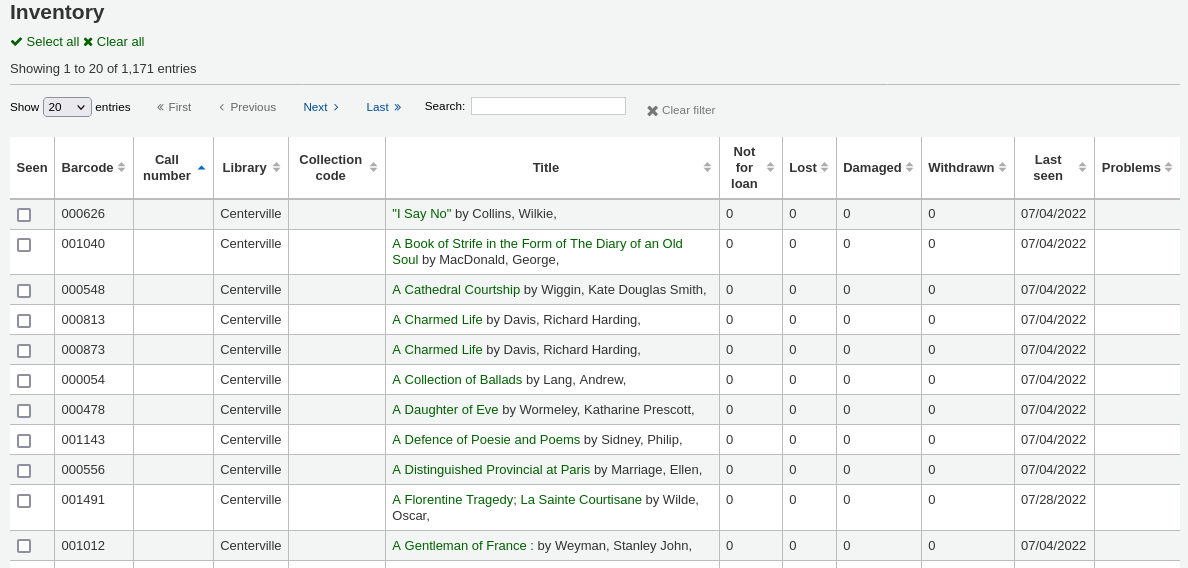
Once you have found the items on your shelves, return to this list and check the boxes next to the items you found. Next, click on one of the three buttons to continue:
- Mark seen and quit: updates the ‘last seen’ date of the checked items to today and returns to the previous screen.
- Mark seen and continue: updates the ‘last seen’ date of the checked items to today and shows the next page of the list.
- Continue without marking: doesn’t update any of the items on this page and shows the next page of the list.
If you have a portable scanner (or a laptop and USB scanner) you can walk through the library with the scanner in hand and scan barcodes as you come across them (on a laptop, scan the barcodes into a text file). Once finished you can then upload the text file generated by the scanner to Koha.
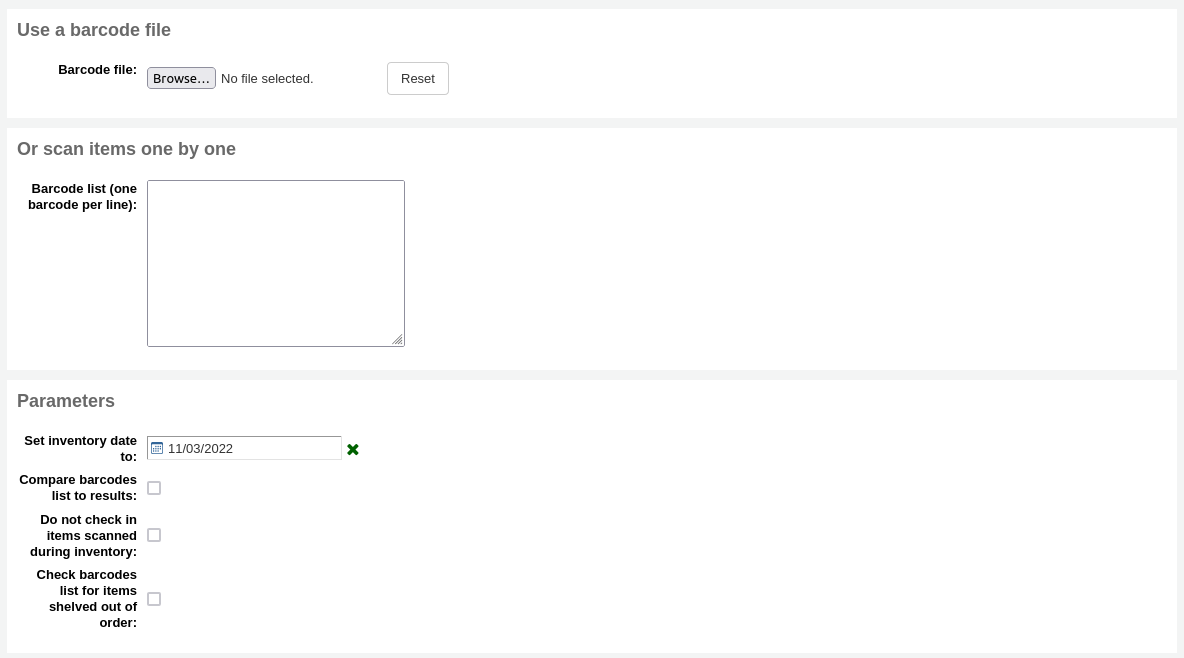
Choose the text file and the date you want to mark all items as seen and then scroll to the very bottom and click ‘Submit’. This will update all the items’ ‘last seen’ date to the chosen date. By default, this will also check in the items scanned as it is assumed that they are on the shelf and so not loaned out. If you do not want to check in scanned items, check the ‘Do not check in items scanned during inventory’ before clicking ‘Submit’.
Alternatively, you can combine the two methods to automatically compare a list of scanned barcodes with a generated list. First, upload you barcode file and choose the date you want to appear in the items’ ‘last seen’ field. Then, check the ‘Compare barcodes list to results’. Choose the filters (library, shelving location, callnumbers or statuses) to generate a list with which to compare your barcodes. Click on ‘Submit’.
Note
Depending on the number of barcodes you are comparing, this may take a few minutes. It is not recommended to compare lists of more than 1000 barcodes as this may cause a session timeout.
Once Koha has finished comparing the barcodes file to the generated list, it will return the number of items updated and a list of problematic items.
- Missing (not scanned): the item is in the generated list but not in the barcodes file.
- Found in wrong place: the item is in the barcodes list, but not in the generated list.
- Still checked out: the item is checked out, but is in the generated list. It was not automatically checked in.
- Barcode not found: the barcode doesn’t exist.
- Item withdrawn: the item has ‘withdrawn’ status, but it is in the barcodes file.
Gerador de etiquetas
- Get there: More > Tools > Catalog > Label Creator
O módulo das Etiquetas permite usar esquemas e modelos por si desenhados para imprimir uma variedade ilimitada de etiquetas incluindo código de barras. Aqui estão algumas das funcionalidades deste módulo:
- Personalizar esquemas das etiquetas
- Design de rótulos de modelos personalizados para etiquetas impressas
- Construir e gerir lotes de etiquetas
- Exportação de lotes únicos ou múltiplos
- Exportar etiquetas únicas ou múltiplas a partir de um lote
- Exportação de dados da etiqueta em um dos três formatos:
- PDF - Etiquetas legíveis por qualquer leitor de PDF padrão, tornando imprimíveis numa impressora
- CSV - Exportar dados da etiqueta após escolha do esquema aplicado permitindo assim às etiquetas serem importadas noutras aplicações
- XML - Incluido como alternativa de formato exportado
Templates
- Get there: More > Tools > Label Creator > Manage > Label templates
Um template é baseado na etiqueta/stock que você utiliza. Pode ser Avery 5160 para etiquetas de endereço, Gaylord 47-284 para etiquetas de lombada ou Avery 28371 para carteirinhas, por exemplo. Estas etiquetas em geral são acompanhadas de informações para configuração no Koha (largura, altura, etc.). Esta informação em geral está na embalagem, mas também pode ser obtida no site do fabricante.
Adicionar Template
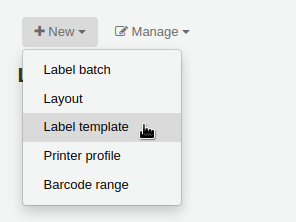
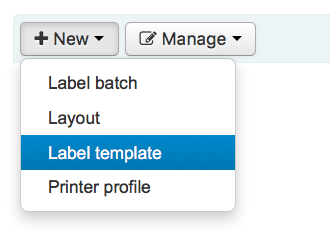
To add a new template, you want to click on the ‘New’ button at the top of the Label Creator and choosing ‘Label template’.
Usando o formulário que aparece pode definir o modelo para a sua folha de etiquetas ou cartões.
ID do Modelo vai ser automaticamente gerado após guardar o modelo, sendo um simples identificar único no sistema
Código de modelo deve ser algo que ajude na identificação do modelo na lista.
Pode usar Descrição do Modelo para adicionar informação adicionar sobre o modelo
O menu Unidades é usado para definir a escala de medição que vai ser usada no modelo. Deve ser provavelmente a mesma unidade de medição usada na descrição do modelo dado pelo fornecedor.
The measurements, number of columns and number of rows can be found on the vendor product packaging or website.
Important
If you do not supply a left text margin in the template, a 3/16” (13.5 point) left text margin will apply by default.
A profile is a set of “adjustments” applied to a given template just prior to printing which compensates for anomalies unique and peculiar to a given printer (to which the profile is assigned).
- Antes de selecionar um perfil, tente imprimir algumas etiquetas de exemplo. Assim você pode facilmente definir um perfil adequado para sua impressora/template.
- After finding any anomalies in the printed document, create a profile and assign it to the template.
After saving, your templates will appear on the ‘Manage’ area under ‘Label templates’.
Perfis
- Get there: More > Tools > Label Creator > Manage > Printer Profiles
A profile is a set of “adjustments” applied to a given template just prior to printing which compensates for anomalies unique and peculiar to a given printer (to which the profile is assigned). This means if you set a template up and then print a sample set of data and find that the items are not all aligned the same on each label, you need to set up a profile for each printer to make up for the differences in printing styles, such as the shifting of text to the left, right, top or bottom.
Se suas etiquetas estiverem sendo impressas como você deseja, não é necessário um perfil.
Adicionar um perfil
To add a new profile, you want to click on the ‘New’ button at the top of the Label Creator tool and choose ‘Printer profile’.
Usando o formulário que aparece pode criar um perfil para corrigir qualquer problema com seu modelo.
O Nome da impressora e o tipo de papel não têm necessariamente de ter a mesma impressora, apenas são referências para lembrar qual a impressora do perfil. Pode usar o número de modelo de impressora no nome ou chamar-lhe ‘a impressora local’
Template will be filled in once you have chosen which template to apply the profile to on the template edit form
O menu Unidades é usado para definir a escala de medição que vai ser usada no perfil.
Offset describes what happens when the entire image is off center either vertically or horizontally and creep describes a condition where the distance between the labels changes across the page or up and down the page
- Para estes valores, os números negativos movem o erro acima e à esquerda e os números positivos movem o erro abaixo e à direita
- Exemplo: o texto está a 0,55 mm da margem esquerda da primeira etiqueta, 0,57mm da margem esquerda da segunda etiqueta e 0,61mm da margem esquerda da terceira etiqueta. Isto significa que o deslocamento horizantal deve ser ajustado para 0,6mm.
After saving, your profiles will appear on the ‘Manage’ area under ‘Printer profiles’.
Após guardar o seu novo perfil, pode voltar a lista de modelos e editar o modelo para que use o perfil criado.
Layouts
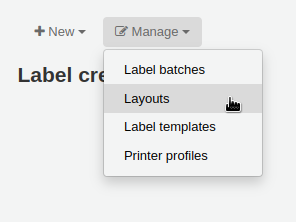
- Get there: More > Tools > Label Creator > Manage > Layouts
Um layout é usado para definir quais campos aparecerão em suas etiquetas.
Adicionar um layout
To add a new layout, you want to click on the ‘New’ button at the top of the Label Creator tool and choose ‘Layout’.
Usando o formulário que aparece pode criar um perfil para corrigir qualquer problema com seu modelo.
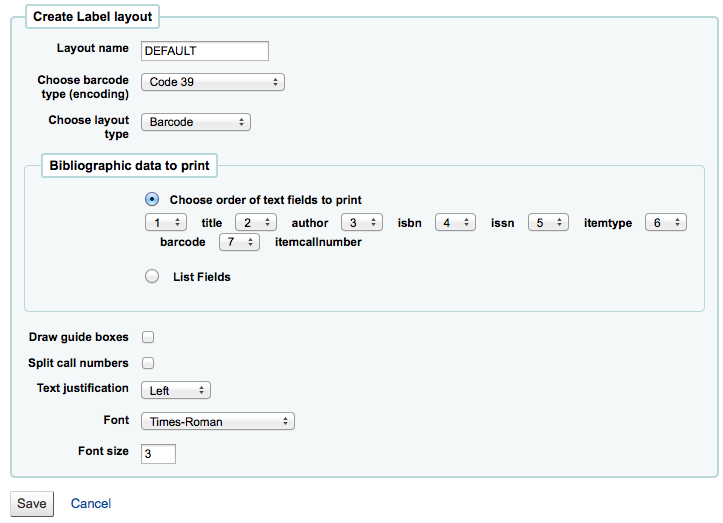
The name of your layout can be anything you’d like to help you identify it later.
If this is a barcode label you’ll want to choose the encoding (Code 39 is the most common)
O tipo de layout pode ser qualquer combinação de informações bibliográfica e/ou código de barras. Por exemplo, uma etiqueta de lombada conteria apenas informação bibliográfica enquanto a etiqueta utilizada pelos funcionários conteria informação bibliográfica e o código de barras.
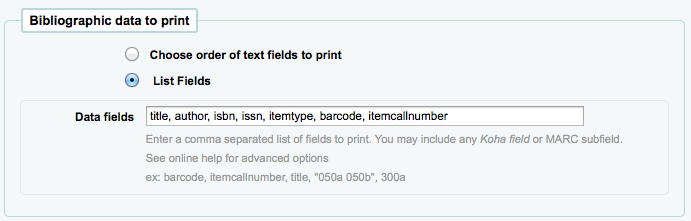
O campo “Dados Bibliográficos a Imprimir” inclui os campos MARC que podem ser mapeados das suas planilhas MARC. Você pode escolher a partir da lista predefinida de campos ou você pode clicar em “Listar campos”. Em ‘Listar Campos’, você pode especificar MARC subcampos utilizando 4 carácteres, ou seja, o número do campo e a letra correspondente ao subcampo: Isto é 254a para o campo de título; Você também pode inserir uma lista de campos, estes separados por espaços em branco e entre aspas duplas o intervalo de campos, por exemplo, “099b 099a” ou “númerodechamadadoitem código de barras”). Os campos disponíveis são os da lista tabelas do banco de dados abaixo. Por fim, você pode adicionar um texto, mas deve ser linear, ou seja, sem parágrafos, em aspas simples, por exemplo, ‘Algum texto estático aqui’.
You can use the schema viewer (http://schema.koha-community.org) with the following tables to find field names to use:
Currently all fields in the following tables are used: items, biblioitems, biblio, branches
Choose if the label maker should print out the guidelines around each label
Choose if you’d like Koha to try to split your call numbers (usually used on Spine Labels)
Finally choose your text settings such as alignment, font type and size.
Depois de salvar, os esquemas aparecerem na página de gestão dos esquemas.
Lotes
- Get there: More > Tools > Label Creator > Manage > Label batches
Lotes são compostos pelos códigos de barras que você deseja imprimir. Utilizando esta ferramenta, você pode buscar pelos exemplares para os quais você deseja imprimir etiquetas.
Adicionar um Lote
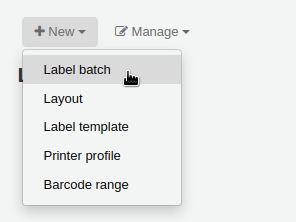
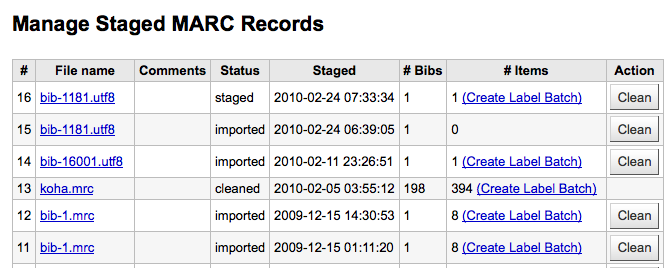
Batches can be created in one of two ways. The first is to click the ‘Create Label Batch’ link on the ‘Staged MARC Management’ page:
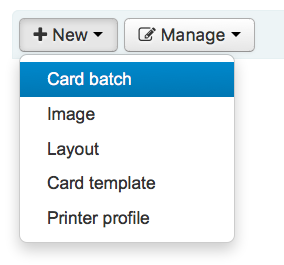
A outra é escolher por criar um novo lote a partir da ferramenta de criação de etiquetas
You will be brought to an empty batch with a box to scan barcodes or itemnumbers in to and an ‘Add item(s)’ button at the bottom of the page.
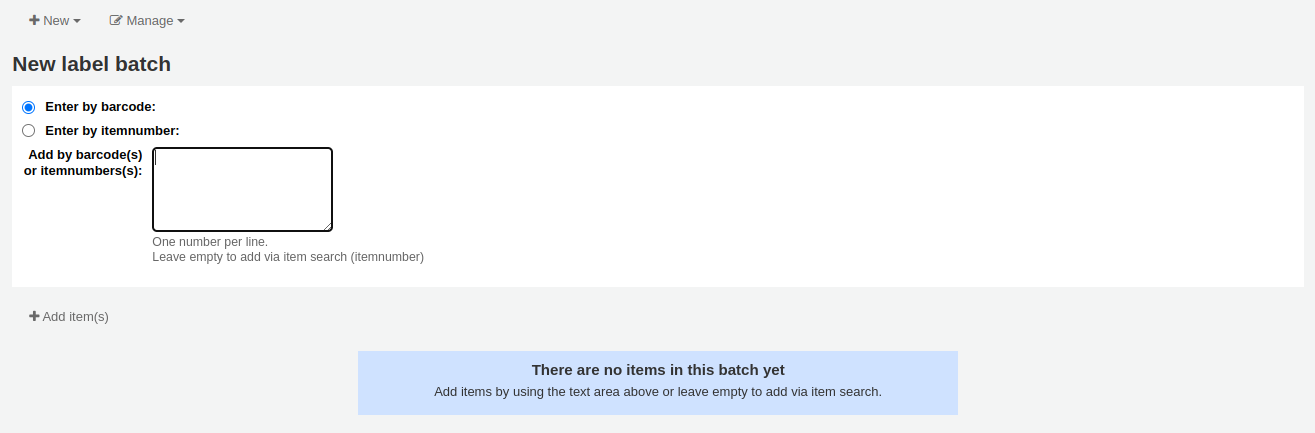
You can either scan barcodes in to the box provided and click the ‘Add item(s)’ button or you can click the ‘Add item(s)’ button with the barcodes box empty. Clicking ‘Add item(s)’ with nothing in the barcodes box will open a search window for you to find the items you want to add to the batch.
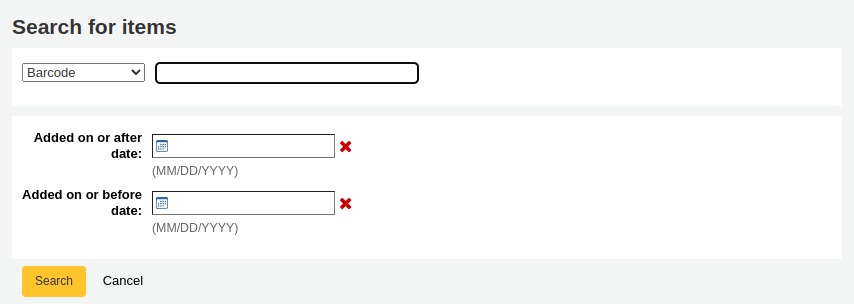
Nos resultados da busca, clique na caixa de seleção ao lado dos exemplares que você deseja adicionar ao lote e clique em ‘Adicionar selecionados’. Você também pode adicionar os exemplares um a um clicando no link ‘Adicionar’ ao lado de cada exemplar.
Quando você adicionar todos os exemplares, clique em ‘OK’. A página seguinte exibirá os exemplares que você selecionou.
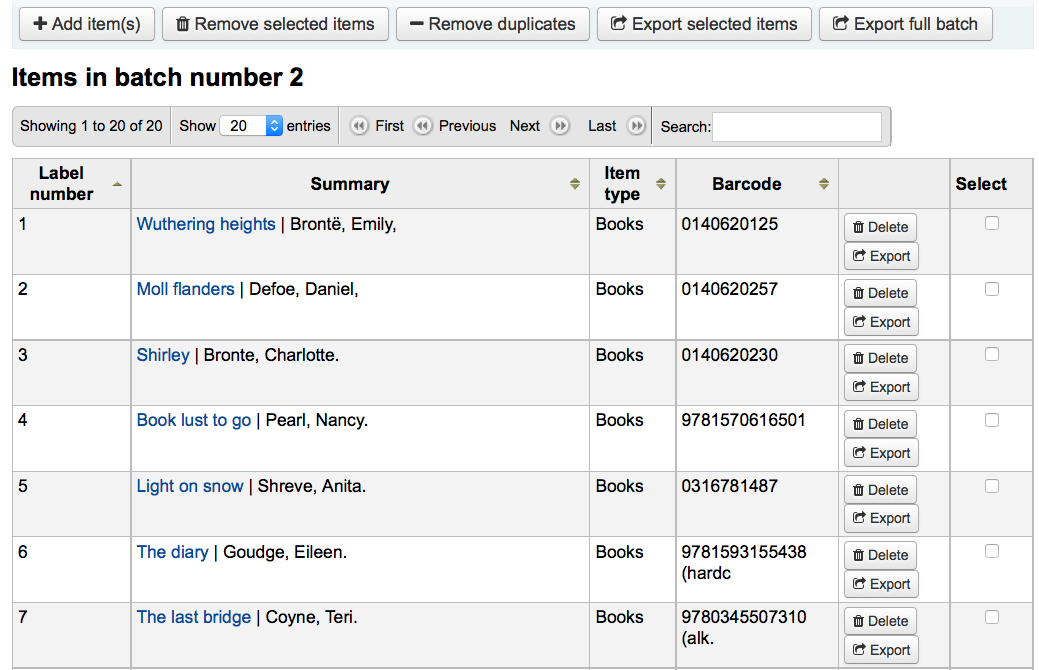
To print your labels, click the ‘Export full batch’ button. To print only some of the labels, click the ‘Export selected item(s)’ button. Either way you will be presented with a confirmation screen where you can choose your template and layout.
Você terá três opções de download: PDF, Excel e CSV.
Depois de salvar seu arquivop, simplesmente imprima nas etiques em branco que você tem na biblioteca.
Quick Spine Label Creator
Get there: More > Tools > Catalog > Quick Spine Label Creator
Note
This tool does not use the label layouts or templates, it simply prints a spine label in the first spot on the label sheet.
- Define the fields you want to print on the spine label in the SpineLabelFormat system preference
- Formate a impressão da sua etiqueta editando o arquivo spinelabel.css em koha-tmpl/intranet-tmpl/prog/en/css/
Para usar essa ferramenta basta o código de barras para o livro que você gostaria de imprimir a etiqueta de lombada.

MARC modification templates
Modificação de Templates MARC fornece ao usuário do Koha a capacidade de alterar registros MARC automaticamente enquanto carrega registros para importação.
Esta ferramenta é útil para alterar registros MARC de diferentes fornecedores/fontes que utilizam seu framework MARC. O sistema permite criar scripts básicos com ações de copiar, mover, adicionar, atualizar e excluir campos.
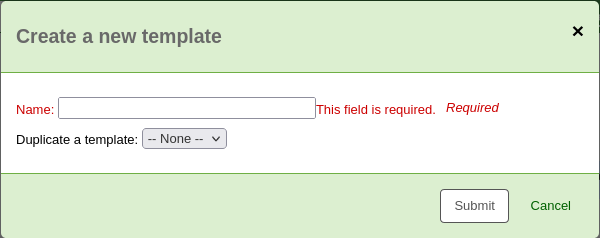
Comece adicionando um novo template (um template pode ser composto por uma ou mais ações). Insira um nome para ele e clique em ‘Criar template’.
Next you can add actions to the template by filling in the Action box. For example if you’re loading in a batch of files from your EBook vendor you might want to add the biblio item type of EBOOK to the 942$c.
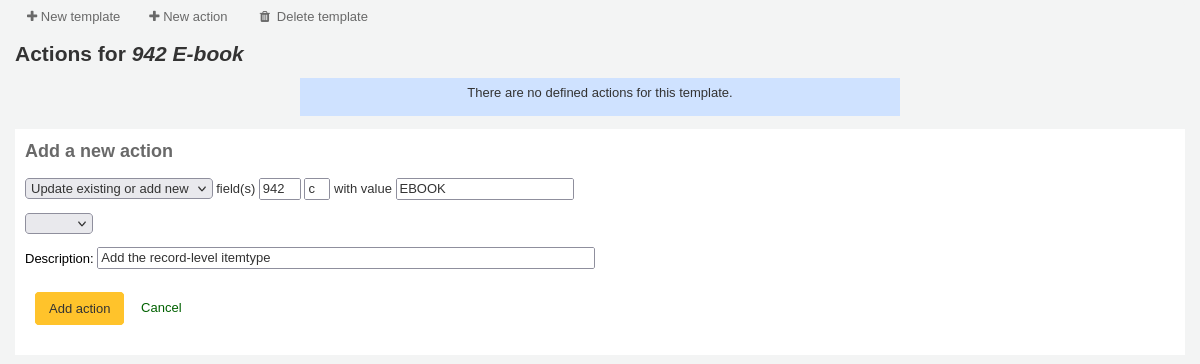
- Selecione ‘Adicionar/Atualizar’
- Insira o campo 952 e o subcampo c
- Insira o valor de ‘EBOOK’ (ou o código para ebook que você tenha definido)
- Insira uma descrição, assim você poderá identificar melhor esta ação posteriormente
- Click ‘Nova categoria’
Each action can also have an optional condition to check the value or existence of another field. For example you might want to add the call number to the item record if it’s not already there.

- Selecione ‘Copiar’
- Decide if you want to copy the first occurrence or all occurrence of the field
- Insira o campo 090 (ou qualquer outro campo de número de chamada) e o subcampo a para copiá-lo
- Insira o campo 952 e o subcampo o para copiá-lo para
- Selecione ‘se’
- Insira o campo 952 e o subcampo o
- Selecione “não existente”
- Insira uma descrição, assim você poderá identificar melhor esta ação posteriormente
- Click ‘Nova categoria’
The Copy & Move actions also support Regular Expressions, which can be used to automatically modify field values during the copy/move. An example would be to strip out the ‘$’ character in field 020$c.

Choose ‘Copy and replace’
Decide if you want to copy the first occurrence or all occurrences of the field
Insira o campo 020 e o subcampo c para copiá-lo para
Insira o campo 020 e o subcampo c para copiá-lo para
Check the ‘RegEx’ box and enter your regular expression (in this case s/\$// )
Selecione ‘se’
Insira o campo 020 e o subcampo c
Selecione “encontrados”
Check the ‘RegEx’ box and enter your regular expression (in this case m/^\$/ )
Insira uma descrição, assim você poderá identificar melhor esta ação posteriormente
Click ‘Nova categoria’
Note
The value for an update can include variables that change each time the template is used. Currently, the system supports two variables, __BRANCHCODE__ which is replaced with the branchcode of the library currently using the template, and __CURRENTDATE__ which is replaced with the current date in ISO format ( YYYY-MM-DD ).
You could also use regular expressions to add your library’s proxy URL in front of links in your MARC record.

- Choose ‘Copy and replace’
- Decide if you want to copy the first occurrence or all occurrences of the field
- Enter the field 856 and subfield u to copy
- Enter the 856 field and u subfield to copy to
- Check the ‘RegEx’ box and enter your regular expression (in this case s/^/PROXY_URL/ )
- Insira uma descrição, assim você poderá identificar melhor esta ação posteriormente
- Click ‘Nova categoria’
When choosing between ‘Copy’ and ‘Copy and replace’ keep the following example in mind:
245 _aThe art of computer programming _cDonald E. Knuth.
300 _aA_exists _bB_exists
If we apply action (a) Copy the whole field 245 to 300, we get:
245 _aThe art of computer programming _cDonald E. Knuth.
300 _aA_exists _bB_exists
300 _aThe art of computer programming _cDonald E. Knuth.
If we apply action (b) Copy the subfield 245$a to 300$a, we get:
245 _aThe art of computer programming _cDonald E. Knuth.
300 _aThe art of computer programming _bB_exists
Quando suas ações forem salvas, você poderá vê-las no topo da tela. Ações podem ser movidas para cima ou para baixo utilizando as setas ao lado delas.

Dependendo de suas ações, o pedido pode ser muito importante. Por exemplo, se você quiser excluir um campo antes de copiá-lo para outro campo.
Para adicionar outro template você pode começar do zero ou clicar em ‘Duplicar template atual’ para criar uma cópia de um template pré-existente e começar a partir dele.
Once your template is saved you will be able to pick it when using the Stage MARC Records for Import tool.

Stage MARC Records for Import
- Get there: More > Tools > Catalog > Stage MARC records for import
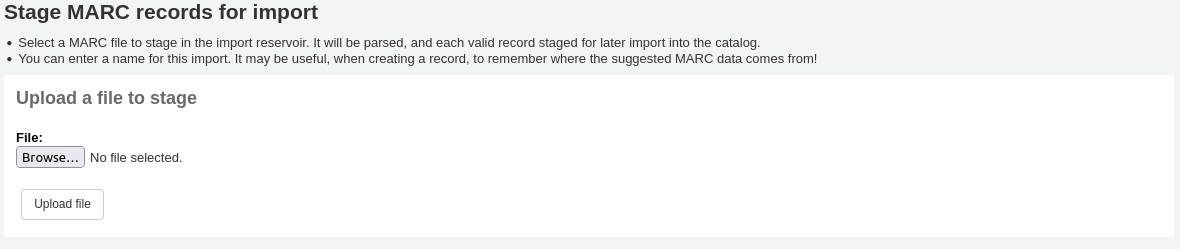
Esta ferramenta pode ser usada para importar tanto registros bibliográficos quanto de autoridades que estejam salvos no formato MARC. Importar registros para o Koha envolve duas etapas. A primeira é a fase de carregamento dos registros para importação.
Primeiro encontra o arquivo MARC no seu computador
Em seguida, serão apresentadas as opções para a concordância de registro e da importação de exemplares
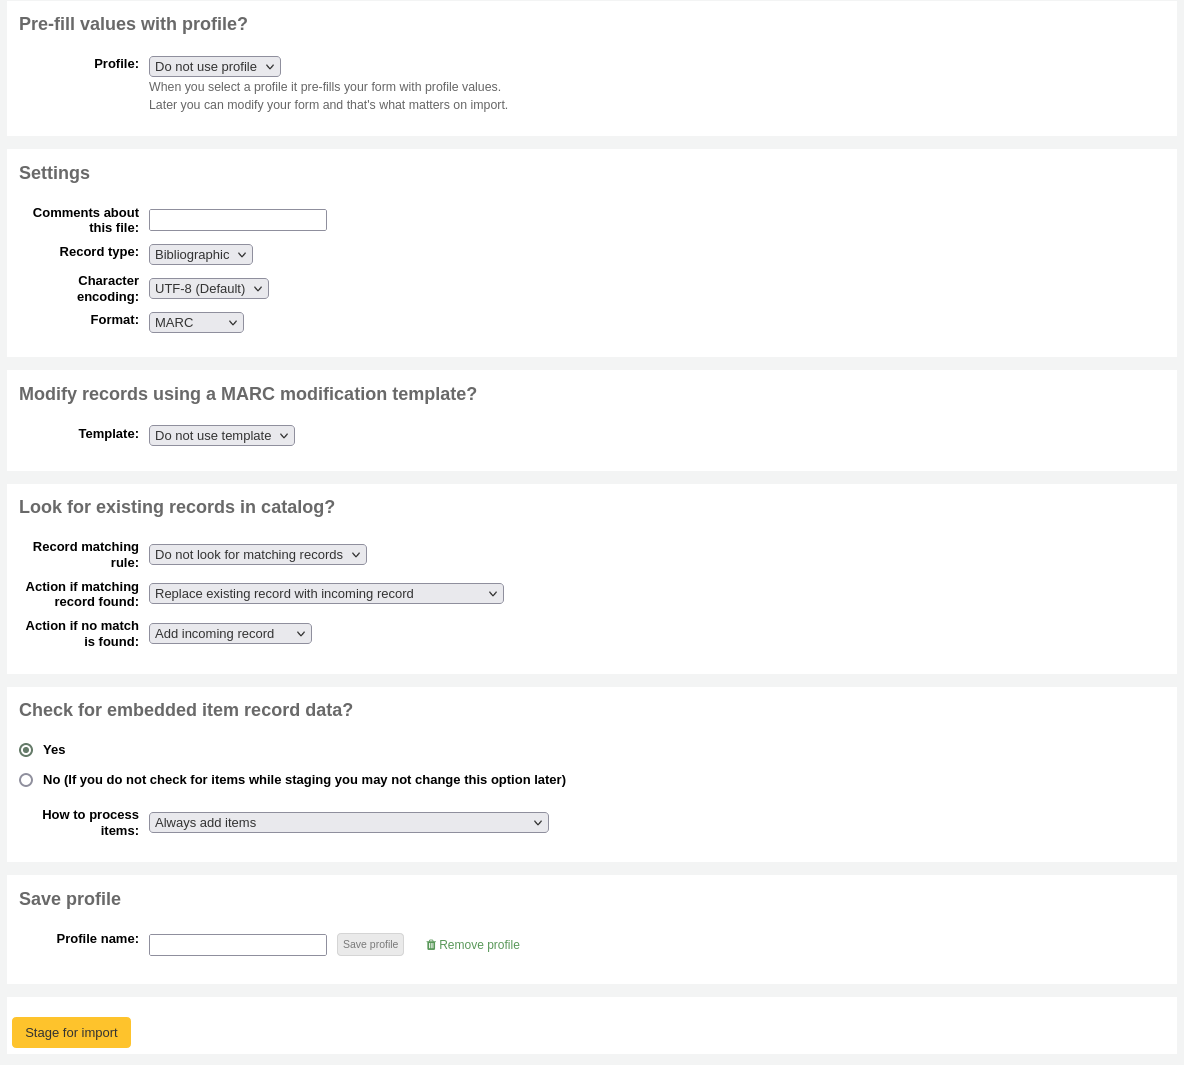
Enter ‘Comments about this file’ to identify your upload when going to the ‘Manage Staged MARC Records’ tool
Indique ao Koha que tipo de arquivo é este (bibliográfico ou de autoridade)

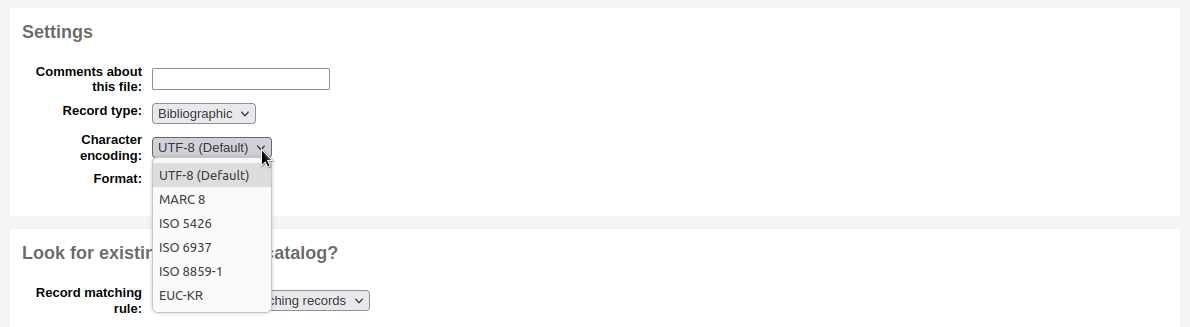
Escolha o tipo de codificação dos caracteres
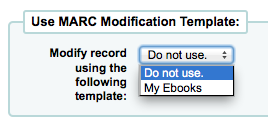
Choose if you would like to use a MARC Modification Template to alter the data you’re about to import
Escolher se deseja ou não verificar correspondências entre registros

You can set up record matching rules through the administration area

- When using the ISBN matching rule Koha will find only exact matches. If you find that the ISBN match is not working to your satisfaction you can change the AggressiveMatchOnISBN preference to ‘Do’ and then run your import again.
Em seguida, escolha o que fazer com os registros correspondentes no caso de serem encontrados
Por fim, escolha o que fazer com os registros que são únicos
Em seguida, você pode escolher importar ou não os dados do exemplar encontrado nos registros MARC (caso o arquivo que você esteja carregando seja um arquivo bibliográfico)
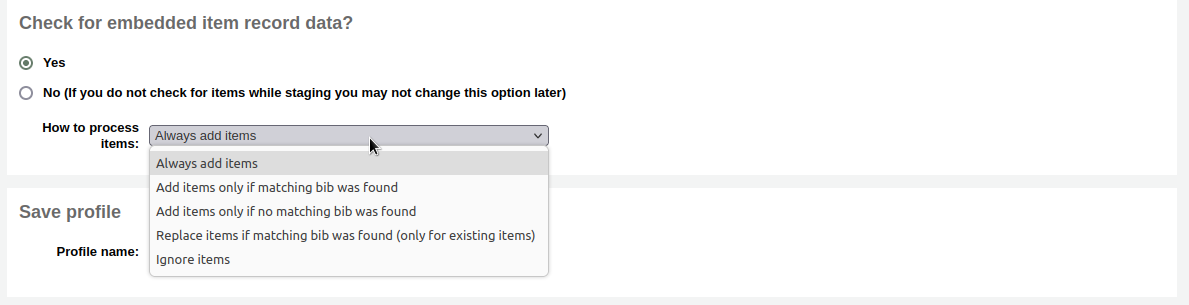
- From here you can choose to always add items regardless of matching status, add them only if a matching bib was found, add items only if there was no matching bib record, replace items if a matching bib was found (The match will look at the itemnumbers and barcodes to match on for items. Itemnumbers take precendence over barcodes), or Ignore items and not add them.
Clicar ‘Preparar para importar’
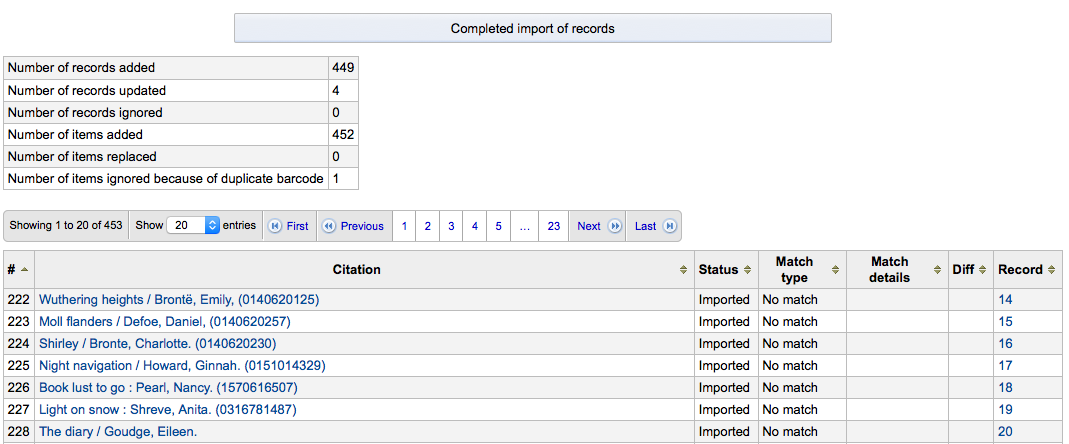
Será presenteado com uma confirmação da importação MARC
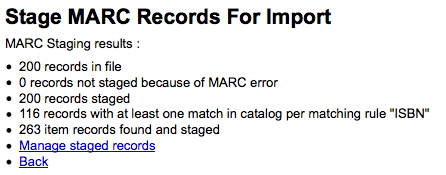
To complete the process continue to the Manage Staged MARC Records Tool
Staged MARC Record Management
- Get there: More > Tools > Catalog > Staged MARC Record Management
Once you have staged your records for import you can complete the import using this tool.

Na lista de registros, selecione o nome do arquivo que pretende terminar de importar
- Você vai notar que os registros que já foram importados terão esta informação em ‘Status’
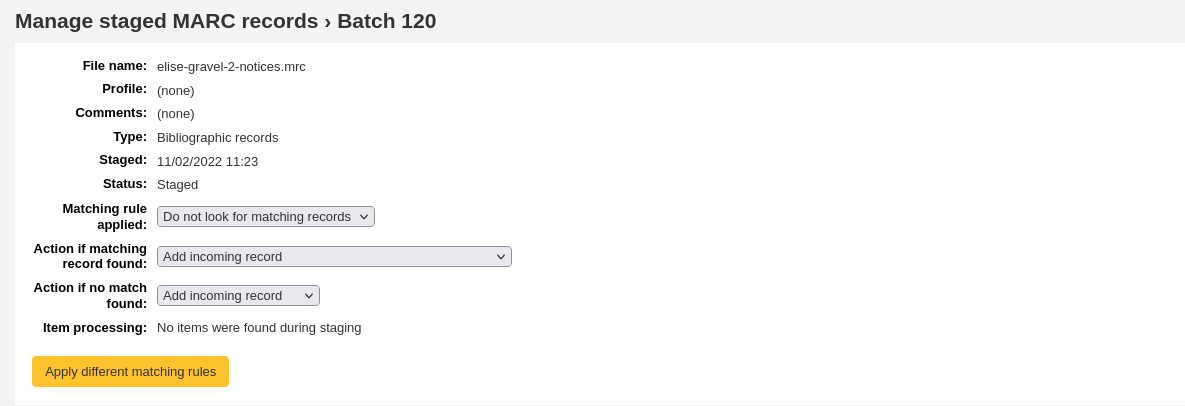
Um resumo de sua importação aparecerá junto com a opção de mudar as regras de correspondência
Below the summary is the option to import the batch of bib records using a specific framework
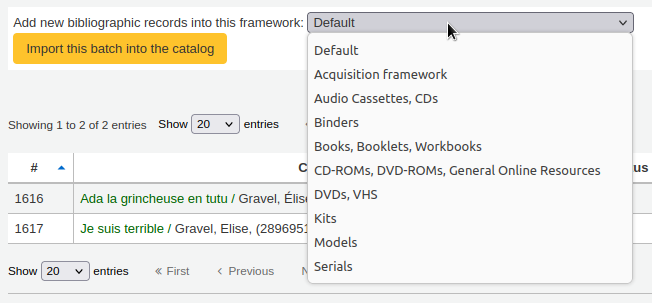
- Escolher uma planilha diferente de ‘padrão’ não é necessário, mas pode ser útil para executar relatórios e ter o nível correto do registro bibliográfico selecionado na importação.
Below the framework selection there will be a list of the records that will be imported
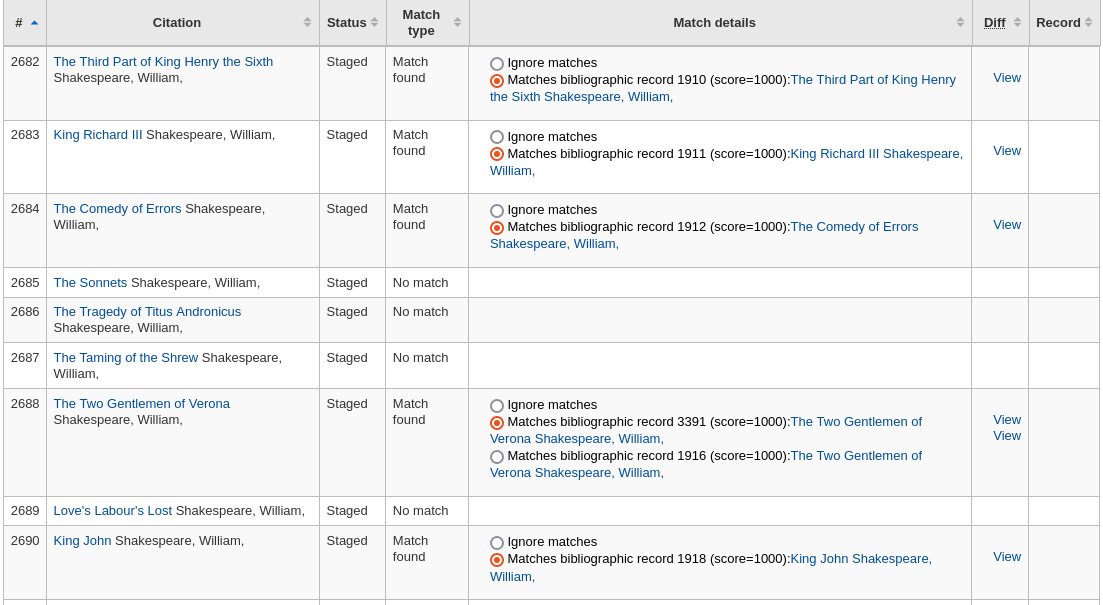
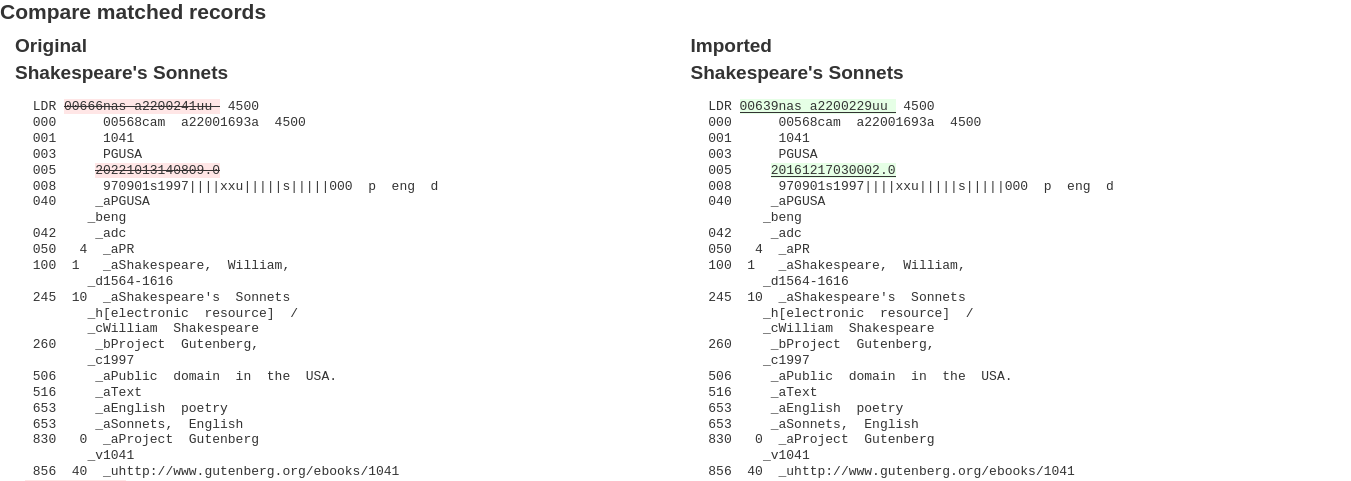
Rever o sumário antes de completar a importação para ter a certeza que a regra de concordância funcionou e que os regisrtos aparecem como esperado
Matches will appear with info under the ‘Match details column’

and when clicking the ‘View’ link under ‘Diff’ you can see the difference between versions.
Clicar em ‘Importar para o catálogo’ para completar a importação
Assim que a importação estiver completa, um link para os novos registros aparecerá à direita de cada título que foi importado
Você também pode desfazer sua importação clicando no botão ‘Desfazer importação para catálogo’
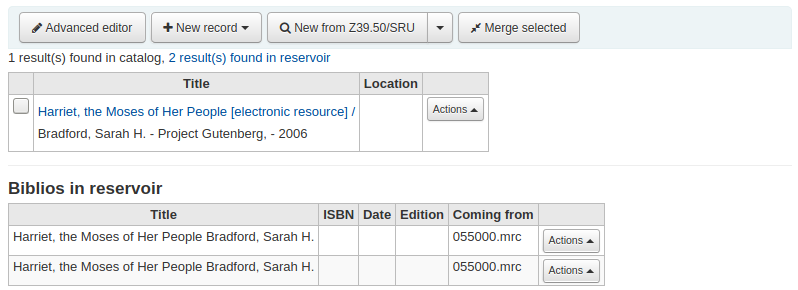
Records imported using this tool remain in the ‘reservoir’ until they are cleaned. These items will appear when searching the catalog from the Cataloging tool:
Para limpar os itens do ‘reservatório’:
Visite o tela principal da ferramenta Tratamento de Registros MARC
Para limpar um lote, clique no botão ‘Limpar’ à direita
Será mostrada uma mensagem de confirmação
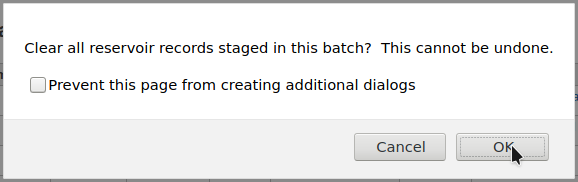
- Aceite a exclusão, os registros serão retirados do reservatório e status será alterado para ‘limpo’
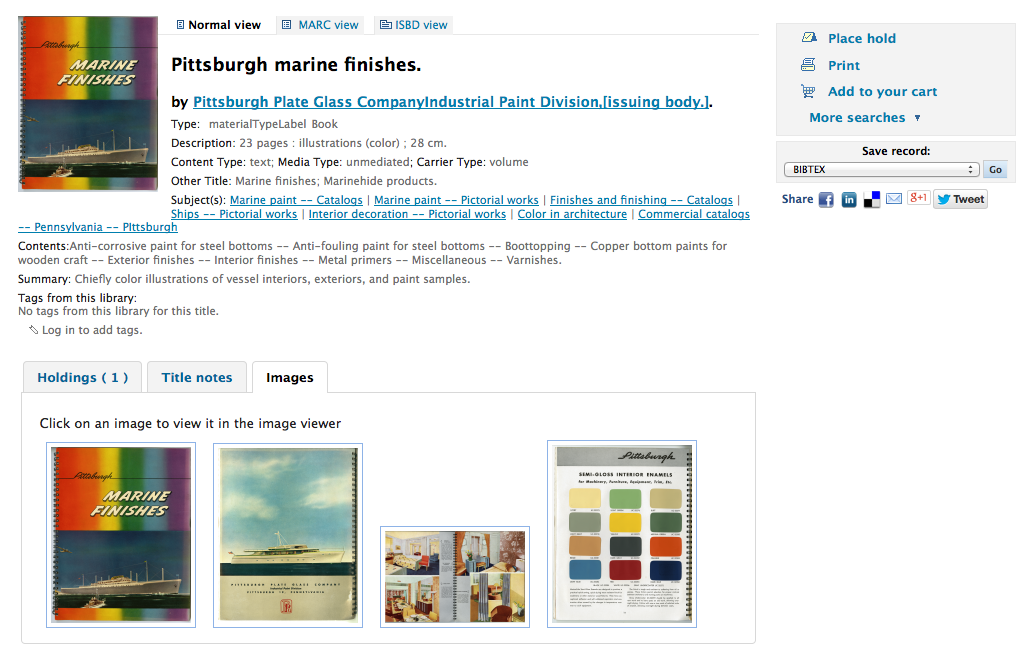
Upload Local Cover Image
- Get there: More > Tools > Catalog > Upload Local Cover Image
This tool will allow you to upload cover images for the materials in your catalog. To access this tool, staff will need the upload_local_cover_images permission. In order for images to show in the staff client and/or OPAC you will need to set your LocalCoverImages and/or OPACLocalCoverImages preferences to ‘Display.’ Images can be uploaded in batches or one by one.
Note
O Koha não tem um limite máximo de tamanho de arquivo para esta ferramenta, mas Apache poderá limitar o tamanho máximo de uploads (fale com o seu administrador de sistemas).
Note
When you want to upload multiple images onto a bib record, they will display left to right (then top to bottom, depending on screen real estate) in order of uploading, and the one on the left (the first one uploaded) will be the one used as a thumbnail cover in search results and on the detail page. There is no way to reorder cover images uploaded in this way, so be sure to upload them in the order you’d like them to appear.
Se estiver enviando uma única imagem:
Visite a ferramenta e clique no botão ‘Navegar’ para visualizar a imagem na sua máquina.
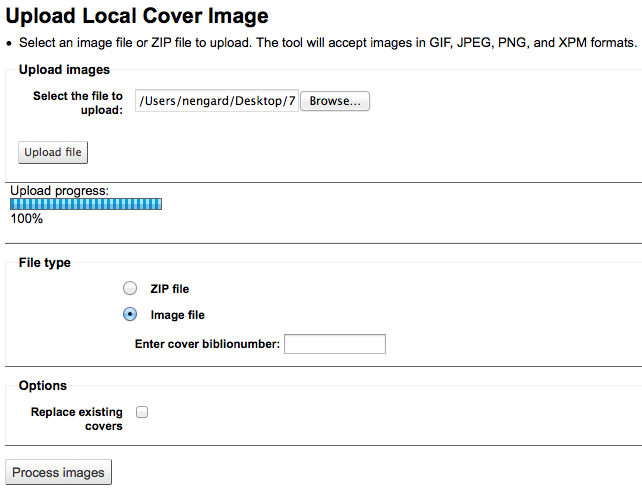
Clique ‘Upload de arquivo’
Escolhar ‘Arquivo de imagem’ na seção ‘Tipo de arquivo’
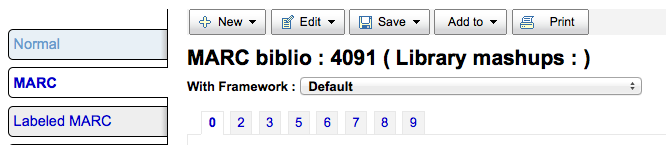
Digite o biblionumber para o registro que estiver anexando a imagem. Não é o mesmo número ro código de barras, este é um número gerado pelo Koha.
Find the biblionumber by looking at the end of the URL in the address bar when on the detail page

or by clicking on the MARC tab on the detail page in the staff client
Se você quiser substituir qualquer uma das imagens de capa que você já tiver carregado, clique em ‘Substituir capas existentes’, na seção ‘Opções’
Clique ‘Processar imagens’
Será exibido um sumário do upload e um link para o registro que você adicionou imagem para
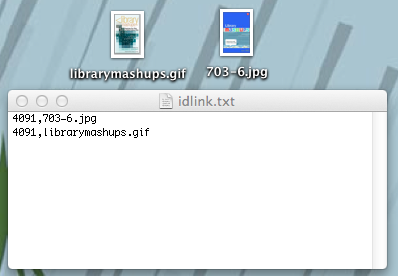
Se quiser enviar várias imagens de uma vez, você deve usar um arquivo ZIP com as imagens.
Inclua no arquivo ZIP todas as imagens que estiver fazendo o upload
Also include a text file (*.TXT) named either datalink.txt or idlink.txt listing the biblionumber followed by the image name for each image one per line
ex. 4091,image4091.jpg
Procurar em seu computador o arquivo *.zip
Clique ‘Upload de arquivo’
Escolha ‘Arquivo Zip’ na seção ‘Tipo de arquivo’
Se você quiser substituir qualquer uma das imagens de capa que você já tiver carregado, clique em ‘Substituir capas existentes’, na seção ‘Opções’
Clique ‘Processar imagens’
Será apresentada com um sumário do upload

Important
The source image is used to generate a 140 x 200 px thumbnail image and a 600 x 800 px full-size image. The original sized image uploaded will not be stored by Koha
Você será capaz de ver suas imagens de capa no cliente pessoal na página de detalhes sob o separador ‘Imagem’ na tabela de participações no fundo
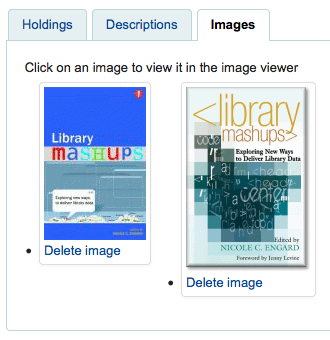
No OPAC as imagens de capa aparecerão também nas imagens da aba, assim como próximas ao título e nos resultados de busca.
If you would like to remove a cover image you can click ‘Delete image’ below the image if you have the upload_local_cover_images permission.
Ferramentas adicionais
Calendário
- Get there: More > Tools > Additional Tools > Calendar
É possível definir o fecho da biblioteca e os feriados usados no cálculo das datas de devolução. Pode usar o Calendário ativando a respectiva preferência de sistema:
- Get there:More > Administration > Global System Preferences >
Circulation > useDaysMode
- Selecionar o método de cálculo das datas de devolução - incluir ou não os dias que a biblioteca está fechada no cálculo.
- Get there: More > Administration > Global System Preferences >
Circulation > finescalendar
- Isto irá verificar o calendário de férias antes da cobrança de multa
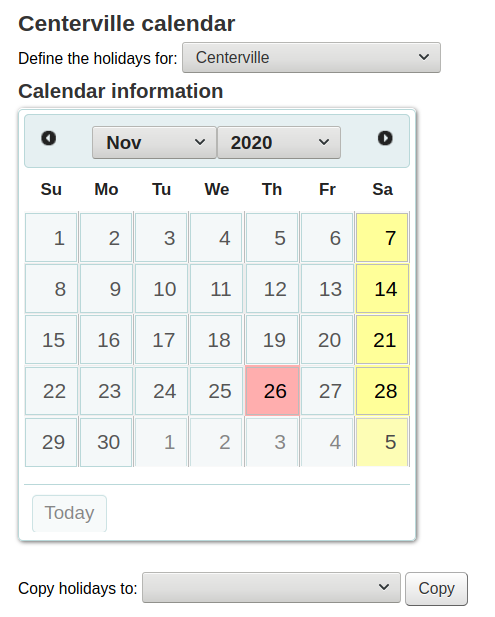
Adicionar Eventos
Antes de adicionar eventos, escolha a biblioteca para a qual você gostaria de registrar os fechamentos. Quando adicionar eventos, você será perguntado se gostaria de de aplicar este evento para uma ou todas as bibliotecas. Para adicionar eventos, simplesmente
Clicar na data do calendário que deseja aplicar o fecho da biblioteca
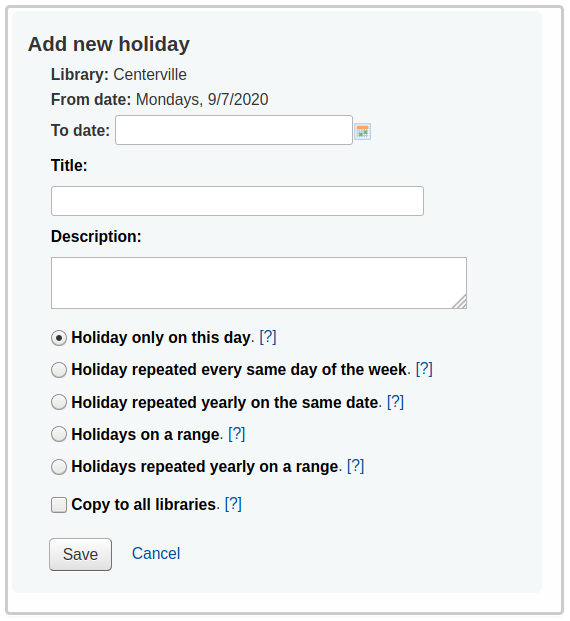
In the form that appears above the calendar, enter the closing information (for more info on each option click the question mark [?] to the right of the option)
A biblioteca vai ser preenchida automaticamente baseada na biblioteca escolhida na lista no topo da página
A informação do dia também vai ser automaticamente preenchida de acordo com a data clicada no calendário
Na descrição insira a razão da biblioteca estar fechada
De seguida pode escolher se este evento é único ou pode ser repetido.
- Se é um feriado de um dia, escolha ‘Feriado apenas neste dia’
- Se este é um fechamento semanal (como um dia de final de semana), então você pode escolher ‘Feriado repetido todo mesmo dia da semana’
- Se é um fechamento de feriado anual, escolha ‘Feriado repetido na mesma data anualmente’
- Se a biblioteca permanecerá fechada durante alguns dias seguidos no ano (como nas férias escolares) escolha ‘Feriados repetitivos anualmente em sequência” e coloque uma “Data de término’ na parte superior
- Se a biblioteca permanecerá fechada durante alguns dias seguidos no ano (como nas férias escolares) escolha ‘Feriados repetitivos anualmente em sequência” e coloque uma “Data de término’ na parte superior
Por fim, decida se o evento deve ser aplicado a todas a bibliotecas ou apenas a seleccionada originalmente
Se você preferir inserir todos os feriados e então copiá-los para outra biblioteca de uma só vez, você pode utilizar o menu cópia, abaixo do calendário
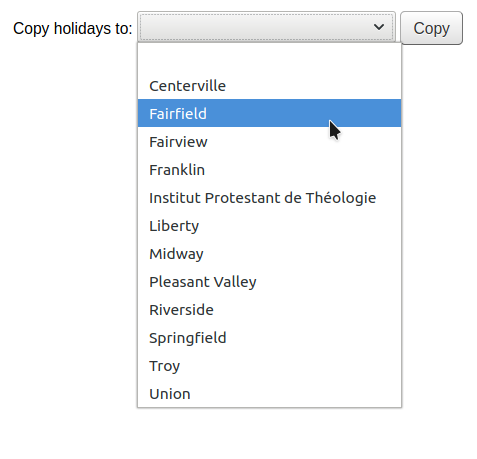
Depois de salvar, você verá o evento listado no resumo à direita do calendário
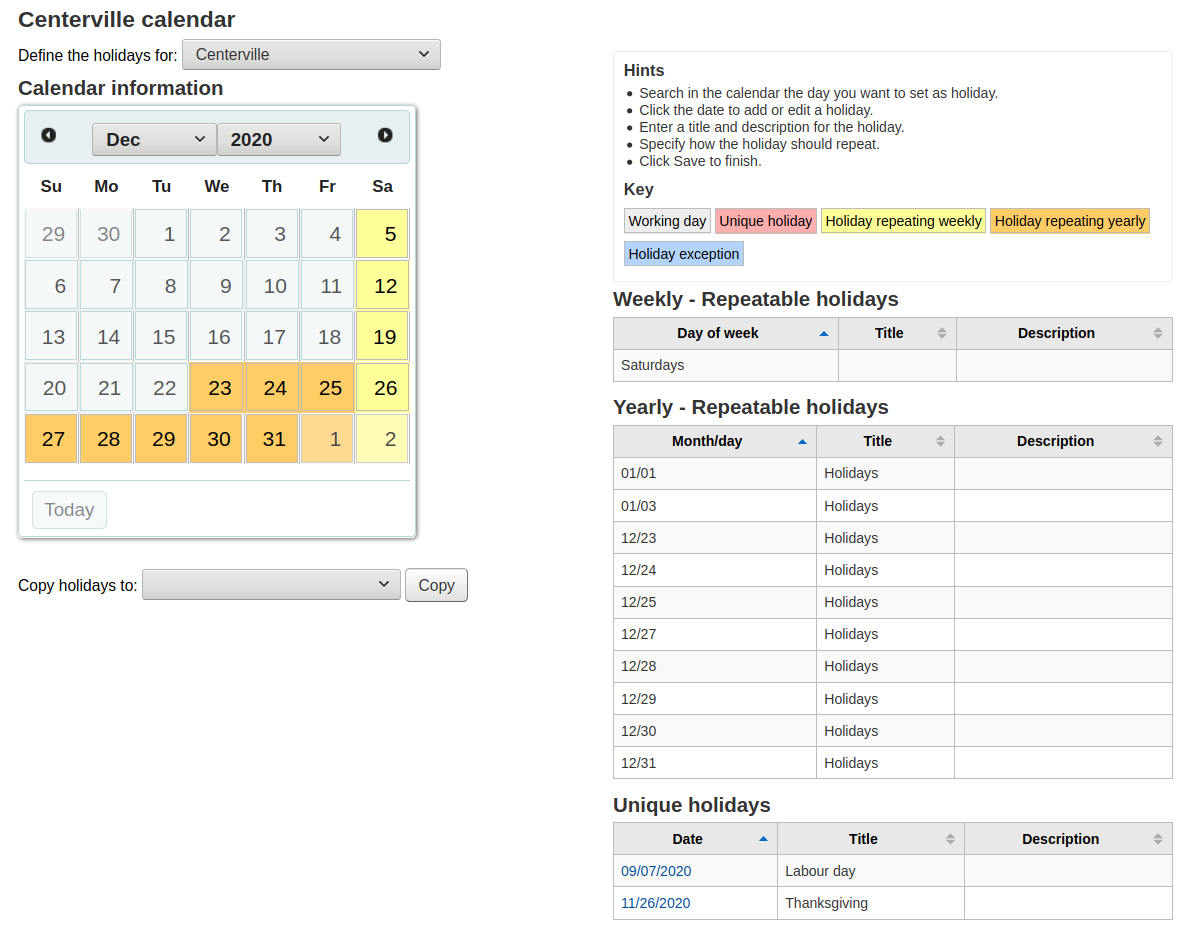
Modificar Eventos
Para editar eventos
Clicar no evento do calendário que deseja alterar (executar carregando na data do calendário, e não no evento listado no sumário)
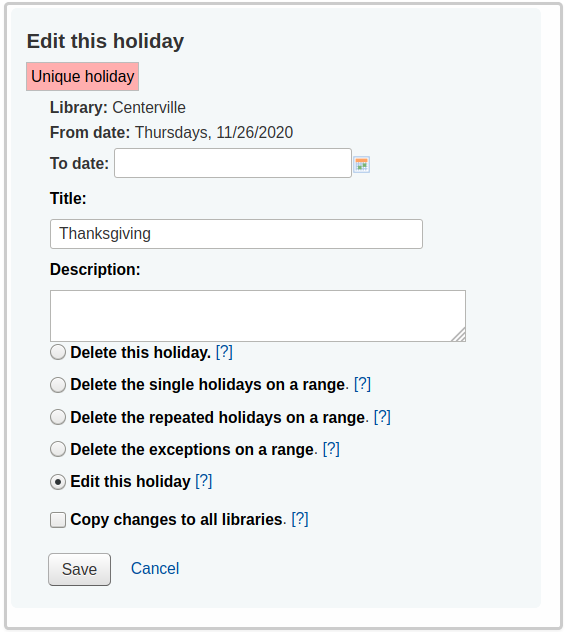
From this form you can make edits to the holiday or delete the holiday completely.
- All actions require that you click ‘Save’ before the change will be made.
Clicar em eventos repetidos oferece diferentes opções
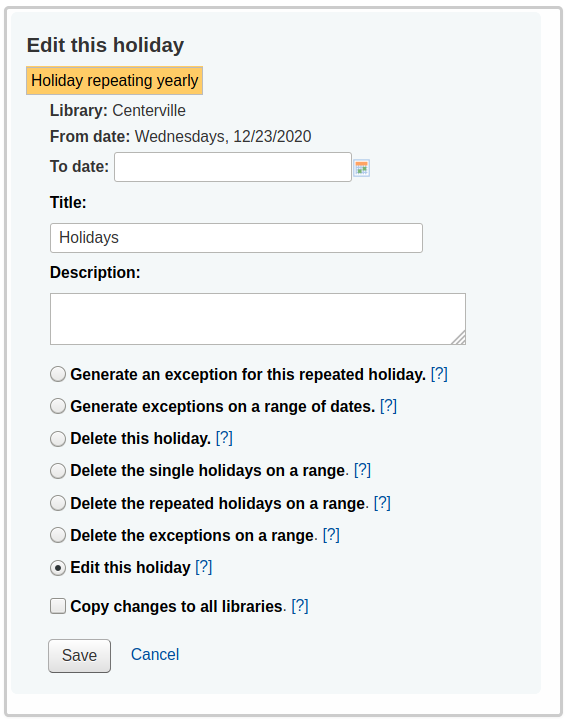
- No formulário abaixo pode verificar que existe uma opção para gerar uma excepção para o feriado repetido. Ao escolher essa opção, permite transformar a data em não fechada mesmo que a biblioteca esteja fechada nessa data.
- All actions require that you click ‘Save’ before the change will be made.
- No formulário abaixo pode verificar que existe uma opção para gerar uma excepção para o feriado repetido. Ao escolher essa opção, permite transformar a data em não fechada mesmo que a biblioteca esteja fechada nessa data.
Ajuda Adicional
Quando adicionar ou editar eventos, pode obter ajuda adicional clicando no sinal mais em azul próximo das várias opções do formulário
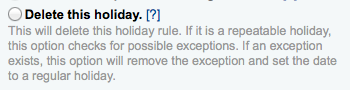
Perfis CVS
- Get there: More > Tools > Additional Tools > CSV Profiles
Perfis CSV são criado para definir como a sua lista ou sacola são exportados.
Adicionar Perfis CSV
Para adicionar um perfil CSV
Click ‘CSV Profiles’ from the Tools menu
The ‘Profile type’ determines what type of fields you plan to use (MARC or SQL) to define your profile
- If you choose MARC then you will need to enter MARC fields
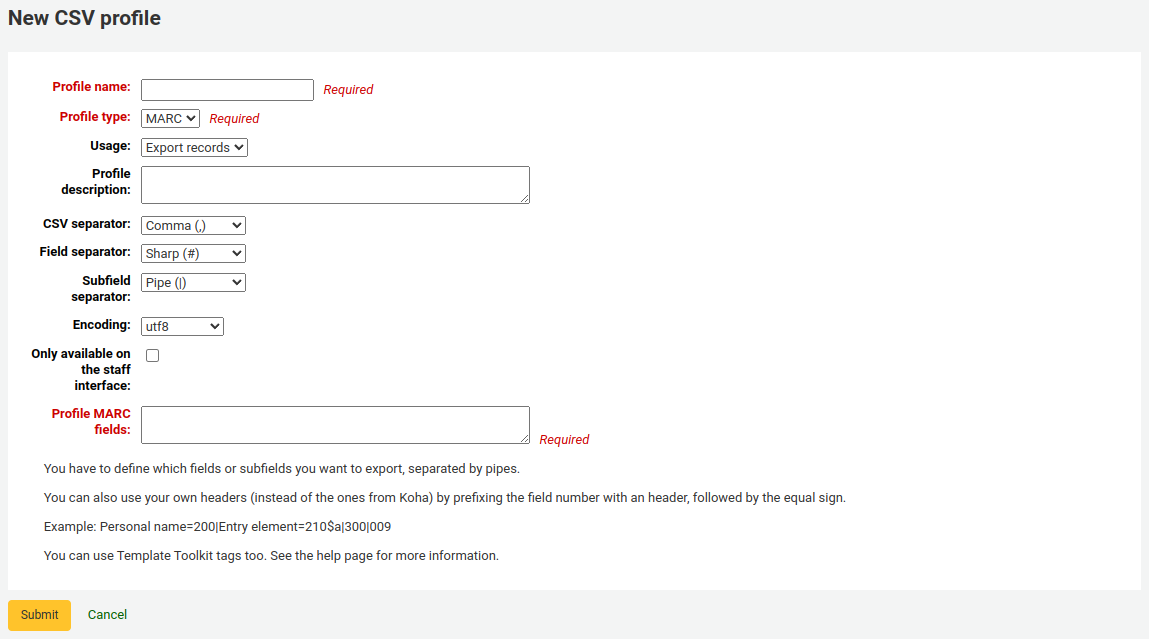
If you choose SQL then you will need to enter SQL database fields
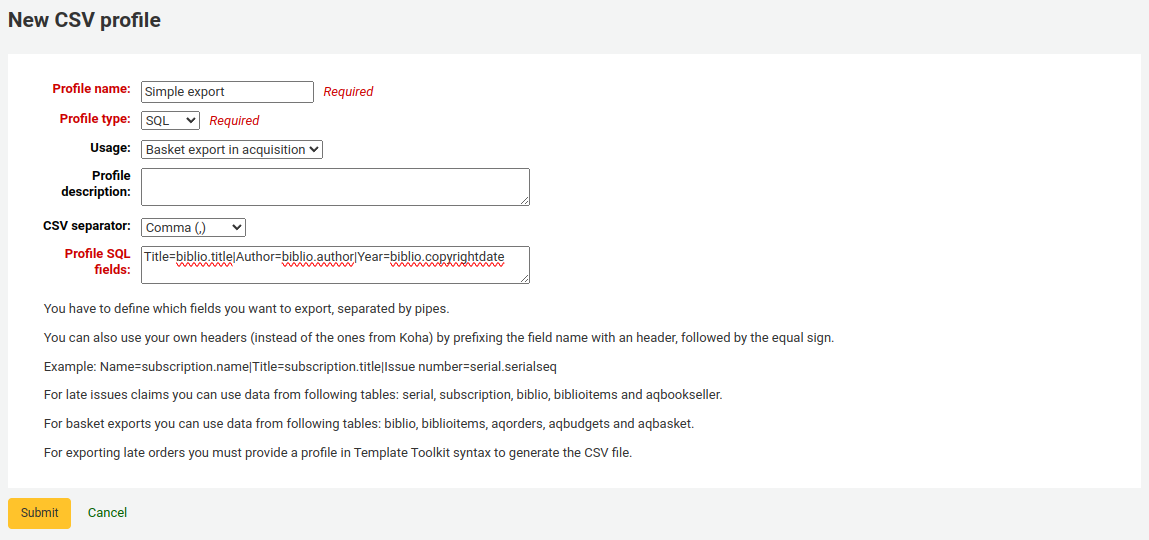
O ‘Nome de perfil’ vai aparecer na lista de exportação quando escolher a opção ‘Donwload’ na sua sacola ou lista
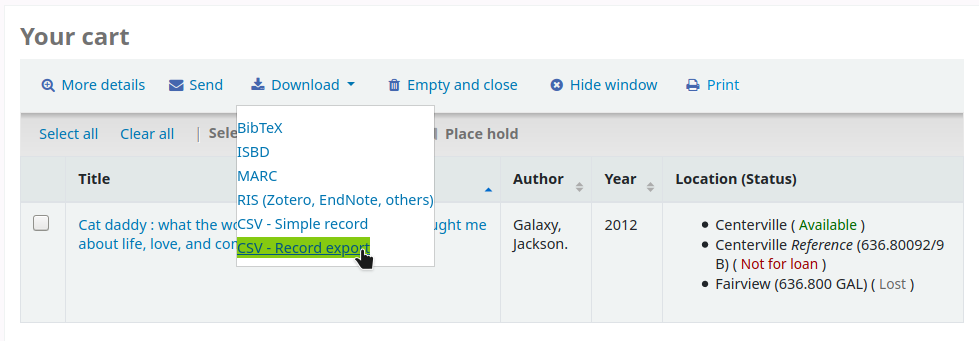
A “Descrição de perfil’ é para seu próprio benefício, mas irá também aparecer no OPAC quando usuaŕios baixarem conteúdo, então tenha certeza que está claro para os usuários também
O ‘Separador CSV’ é o caracter usado para separar valores e grupos de valores
Note
O opção mais comum aqui é a virgula porque a maioria das aplicações de tabela abrem arquivos separando por virgulas.
The ‘Field separator’ is the character used to separate duplicate fields
Exemplo: Você pode ter mais de um campo 650 e este caractere é que irá aparecer entre cada campo na coluna

The ‘Subfield separator’ is the character used to separate duplicate subfields
- Exemplo: Você pode ter múltiplos subcampos $a em um campo
O campo ‘Codificação’ permite que você defina a codificação usada para salvar o arquivo
Finally format your CSV file using the ‘Profile MARC’ or ‘Profile SQL’ field
Define which fields or subfields you want to export, separated by pipes. Example : 200|210$a|301 for MARC and biblio.title|biblio.author for SQL
Note
You can also use your own headers (instead of the ones from Koha) by prefixing the field number with an header, followed by the equal sign. Example : Personal name=100|title=245$a|300
Quando você digitar em qualquer campo alguma informação em seu perfil, clique em ‘Enviar’ e te será apresentado uma tela de confirmação que seu perfil foi salvo.

Modify CSV Profiles
Quando você tiver criado pelo menos um perfil CSV, uma opção para ‘Modificar Perfil CSV’ aparecerá abaixo do formulário para Adicionar.
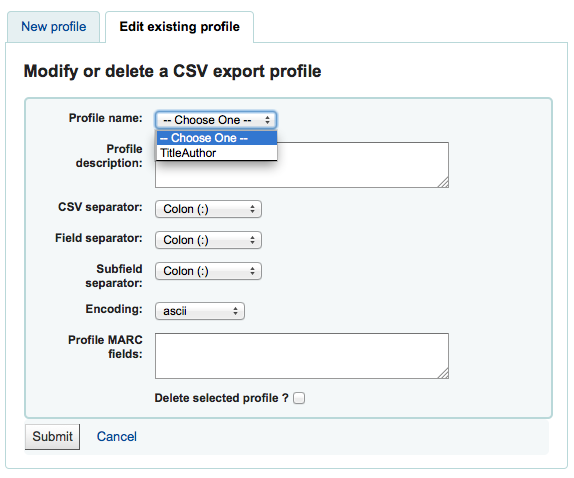
Selecionar o perfil que deseja editar e alterar os campos necessários.
Depois de enviar suas alterações lhe será apresentado uma mensagem de confirmação no topo da tela

Para excluir um perfil, marque a opção ‘Apagar perfil selecionado’ antes de clicar em ‘Enviar consulta’
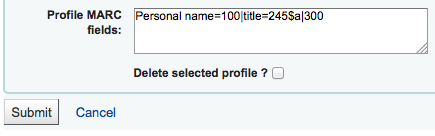
Usando Perfis CSV
Os seus perfis CSV vão aparecer no menu da lista de exportação ou do cesto debaixo de botão de ‘Download’
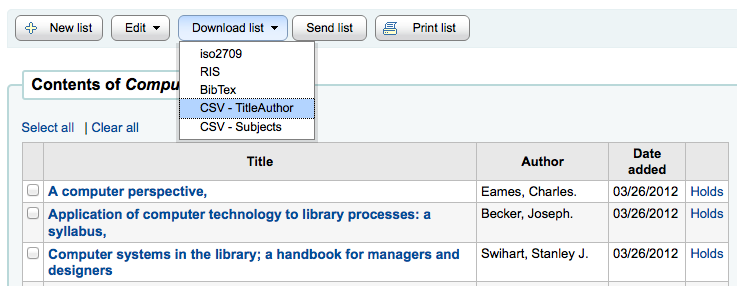
Log Viewer
- Get there: More > Tools > Additional Tools > Log Viewer
Actions within the Koha system are tracked in log files. Your system preferences can be changed to prevent the logging of different actions. These logs can be viewed using the Log Viewer Tool.

Escolher diferentes combinações do menu fará com quem seja produzido log para este pedido.
A query for all logs related to the Circulation module produces a result
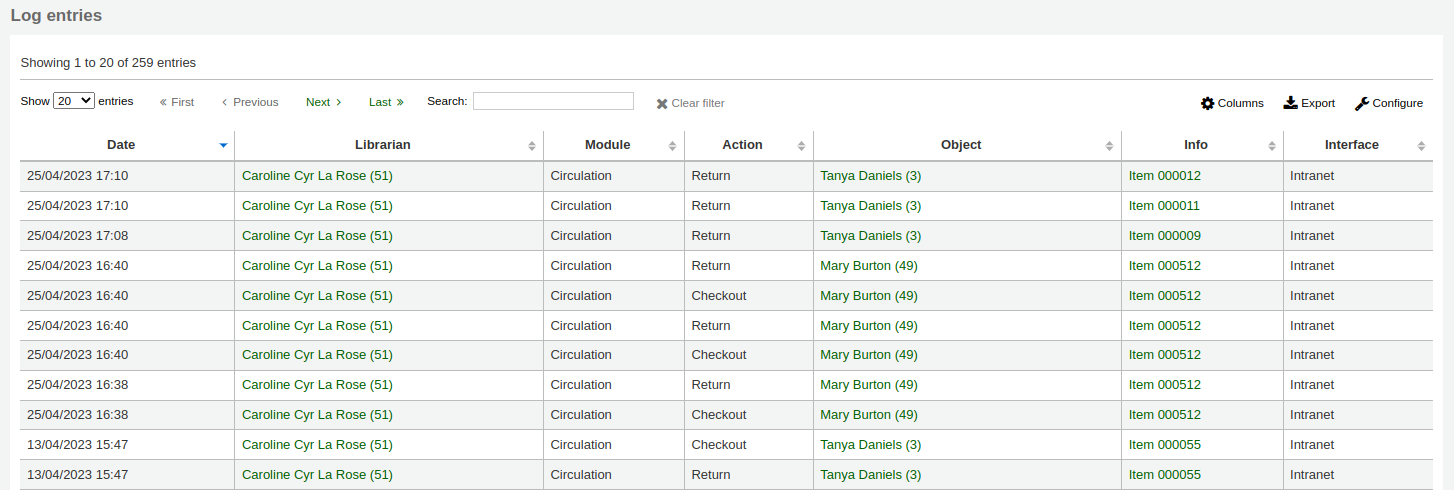
Notícias
- Get there: More > Tools > Additional Tools > News
O módulo notícias do Koha permite que os bibliotecários publiquem notícias no OPAC e na interface administrativa.
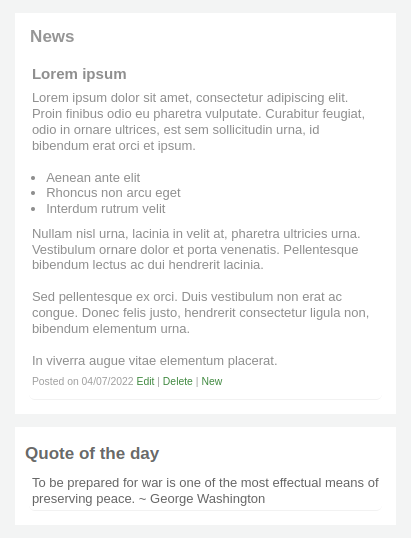
Para adicionar notícias tanto no OPAC, Posto de processamento técnico ou um comprovante de empréstimo:
Clicar em ‘Adicionar’
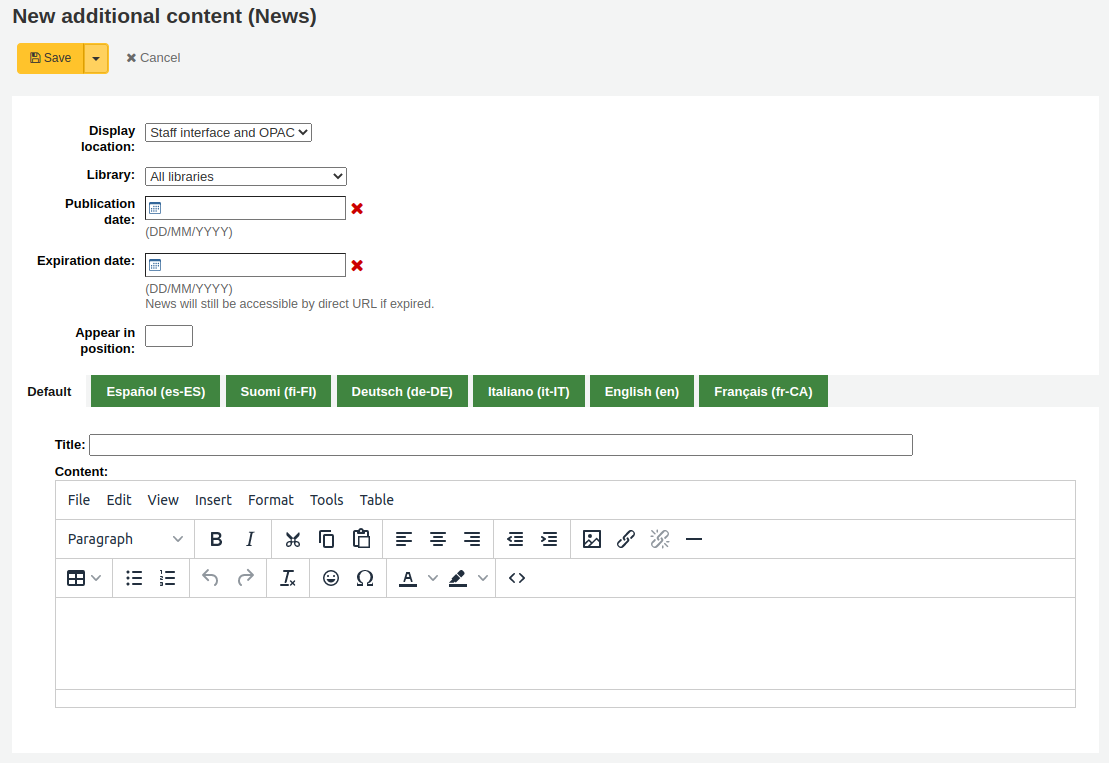
Under ‘Display Location’ choose whether to put the news on the OPAC, Slip (circulation receipt) or the Librarian (Staff) Interface.
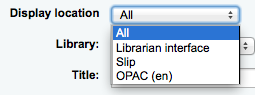
Choose the library this news item will show for
Escolher um título para a entrada
Usando os campos da data de publicação e expiração pode controlar o tempo que o item aparece
- Examples: (these assume today’s date as 07-May-2015)
- Publish on current date: set publication date as 07-May-2015
- Schedule for publishing in future: set date later than 07-May-2015
- Backdate the news item: set date earlier than 07-May-2015
- Examples: (these assume today’s date as 07-May-2015)
‘Aparecer na posição’ permite decidir qual a ordem que as notícias aparecem
A caixa ‘Notícias’ permite a utlização de código HTML para formatar suas notícias
Após verificar os registros importados, clique em ‘Concluir a importação’
News in the OPAC will appear above the OpacMainUserBlock
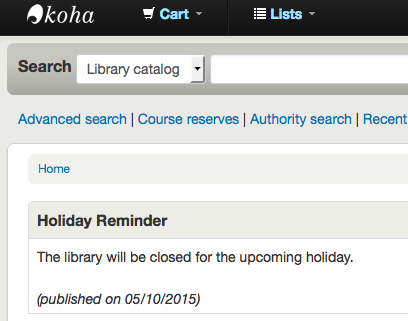
- Below the news in the OPAC there will be an RSS icon allowing you to subscribe to library news
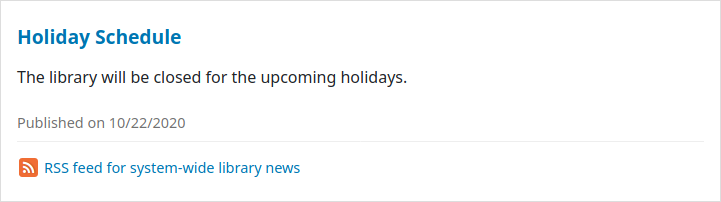
Notícias no interface dos técnicos aparece à esquerda do ecrã
Notícias na tela de circulação irão aparecer abaixo dos items que forem emprestados
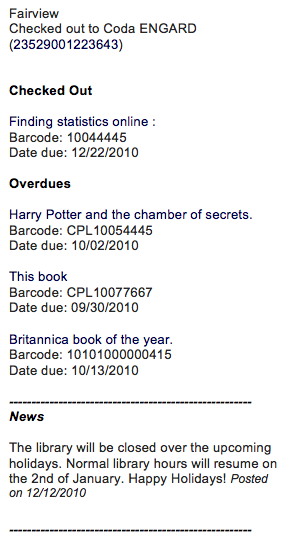
Depending on your choice for the NewsAuthorDisplay preference you will also see the person who created the news item (this uses the logged in person)
Task Scheduler
- Get there: More > Tools > Additional Tools > Task Scheduler
A calendarização de tarefas é uma forma de calendarizar relatórios sempre que desejar.
Para agendar uma tarefa, visite a Calendarização de Tarefas e preencha o formulário
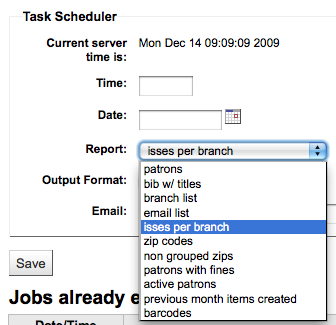
- Hora Atual do Servidor exibe o horário em seu servidor (Agende seus relatórios a serem executados de acordo com este horário - não seu horário local)
- A hora deve ser inserida como hh:mm (2 dígitos para as horas, 2 dígitos para os minutos)
- Data deve ser escolhida usando o calendário de pop-up
- Escolhe da lista os relatório que pretende agendar
- Escolher se deseja receber o texto ou um link para os resultados
- No campo de Email insira o email da pessoa para a qual deseja enviar o relatório
Abaixo do agendador de tarefas existe uma lista com os relatórios agendados

Você pode também calendarizar relatórios diretamente da lista de relatórios guardados usando o link respectivo
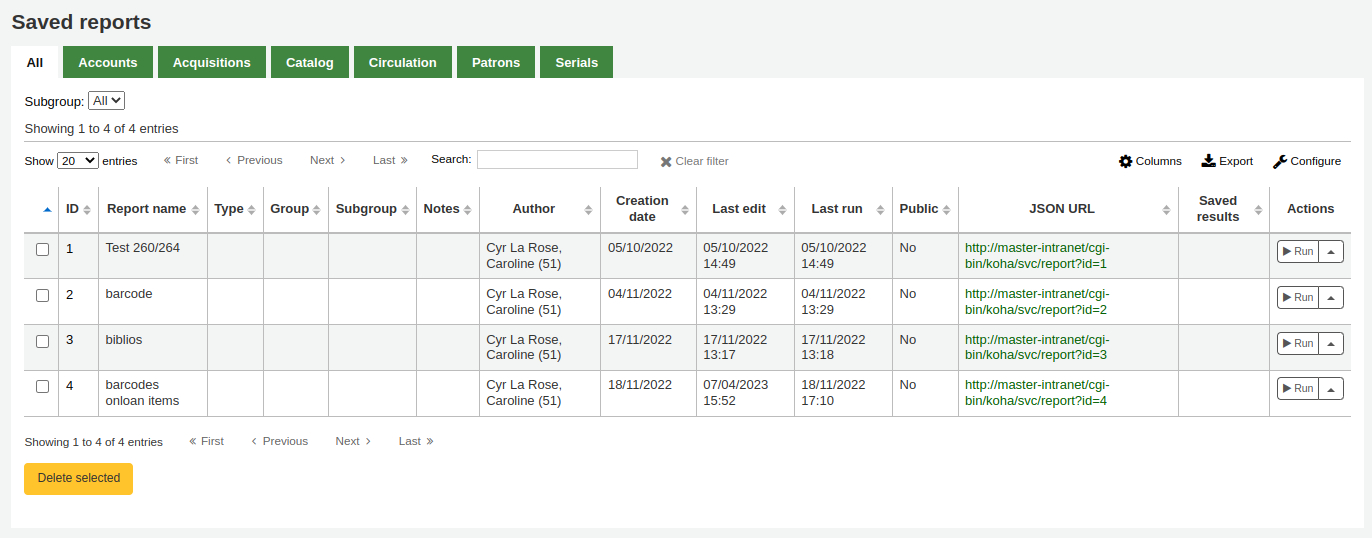
Solução de problemas
Calendarização de tarefas não funciona se o usuário onde o servidor web é executado não tem a permissão para usá-lo. Para descobrir se o usuário tem as permissões necessárias, verifique o arquivo /etc/at.allow para ver quais usuários. Se você não tem esse arquivo, verifique /etc/at.deny. Se o arquivo at.deny estiver em branco, qualquer usuário pode utilizá-lo. Fale com o seu administrador do sistema sobre como adicionar o usuário no lugar certo para fazer funcionar o calendarização de tarefas.
Quote of the Day (QOTD) Editor
- Get there: More > Tools > Additional Tools > Edit quotes for QOTD feature
This tool will allow you to add and edit quotes to show on the OPAC if you’re using the Quote of the Day (QOTD) feature.
To turn this feature on set the QuoteOfTheDay preference to ‘Enable and add at least one quote via the Quote of the Day Editor. Once these steps are complete you will see your quotes above the OpacMainUserBlock in the OPAC:
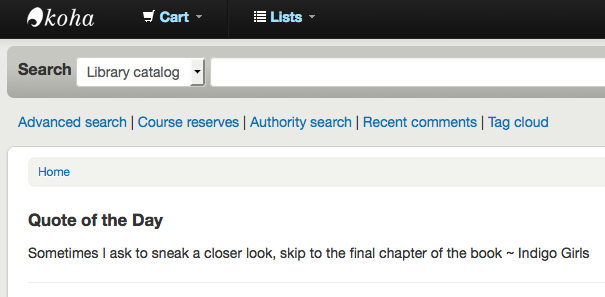
Add a Quote
To add a quote:
Clique em ‘Adicionar citação’ na barra de ferramentas e uma citação em branco será adicionada no final da lista atual de citações.
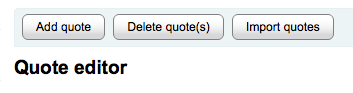
Important
Both the ‘Source’ and the ‘Text’ fields must be filled in in order to save the new quote.
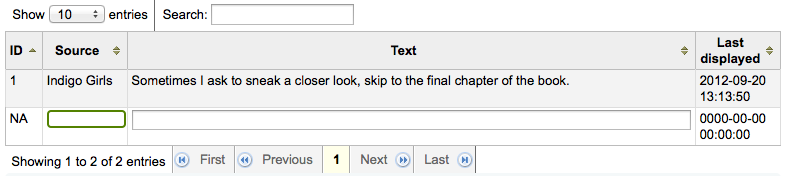
When finished filling in both fields, press the <Enter> key on your keyboard to save the new quote.
The list will update and the new quote should now be visible in the list.
Note
You may cancel the addition of a new quote any time prior to saving it simply by pressing the <Esc> key on your keyboard.
Edit/Delete a Quote
Uma vez que as citações subirem para a tabela de edição, você pode editar a fonte e o texto da citação.
Edite os campos ‘Fonte’ ou ‘Texto’ clicando no campo desejado.
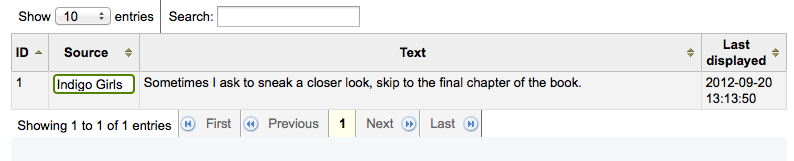
When you are finished editing a field, press the <Enter> key on your keyboard to save the changes.
A lista será atualizada, as edições salvas, e visíveis.
If you’d like you can also delete quote(s).
- Selecione citação(ões) que você deseja excluir clicando no id da citação correspondente.
- Once quote selection is finished, simply click the ‘Delete quote(s)’ button.
- Será mostrada uma mensagem de confirmação da exclusão.
- Após confirmar a exclusão, a lista será atualizada e a citação não irá mais ser exibida.
Import Quotes
If you’d like you can import a batch of quotes as a CSV file. Your file must contain two columns in the form: “source”,”text” with no header row.
Note
Será mostrada uma mensagem de confirmação para o carregamento de arquivos maiores que 512KB.
To start the import process click the ‘Import quotes’ button at the top of the screen
Once on the import quotes screen you can browse your computer for the file you would like to import
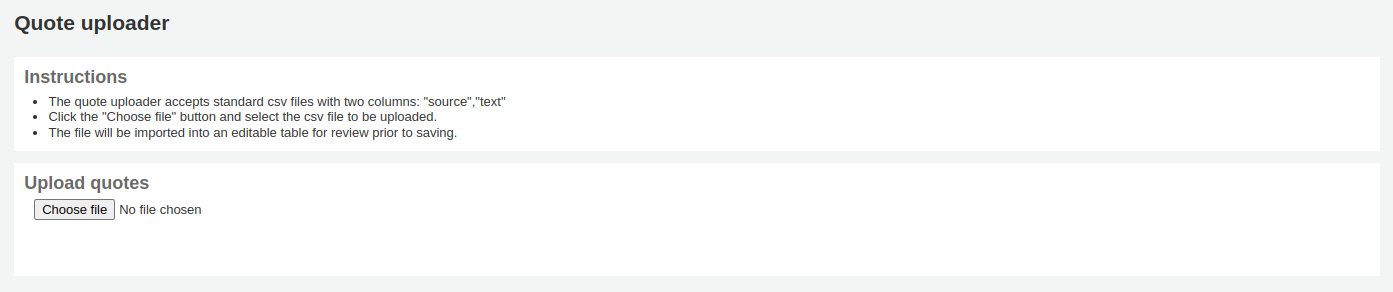
Após selecionar o arquivo CSV, clique no botão ‘Abrir’ e o arquivo será enviado para uma tabela temporária de edição.
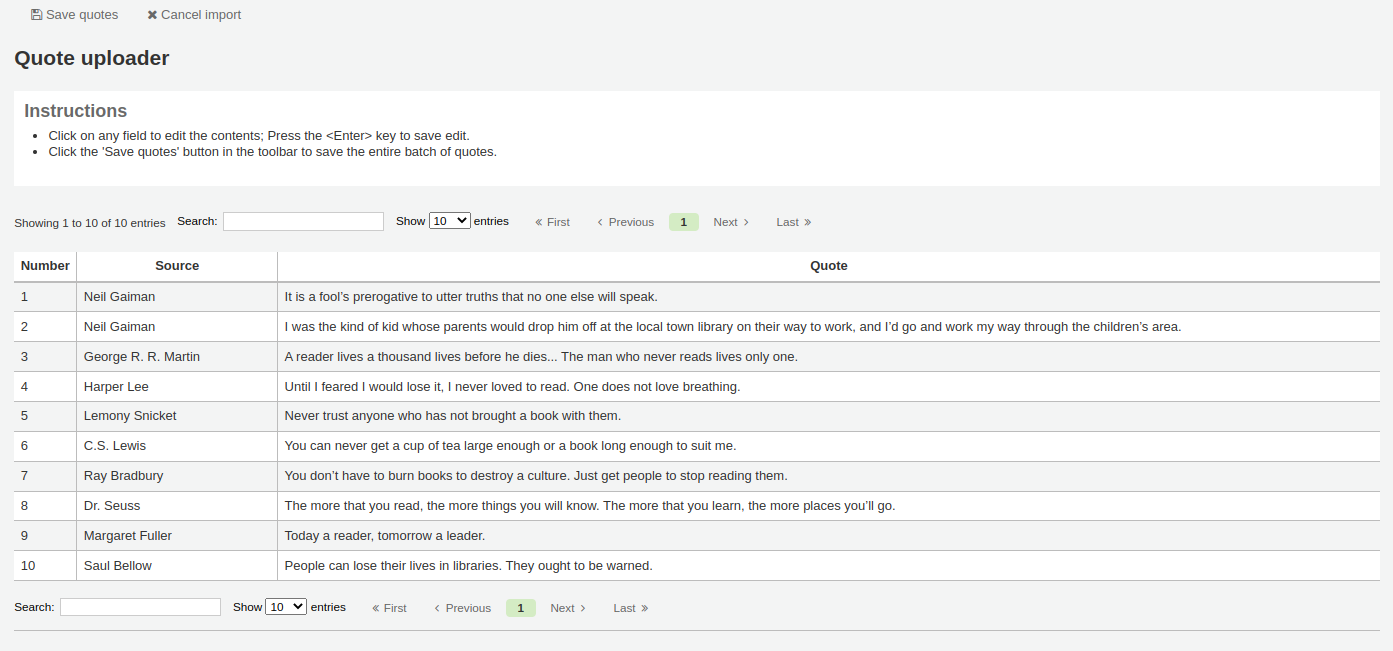
From the listing you can edit either the ‘Source’ or ‘Text’ fields by clicking on the desired field. When you are finished editing a field, press the <Enter> key on your keyboard to save the changes.

You can also delete quotes from this listing before completing the import.
Selecione citação(ões) que você deseja excluir clicando no id da citação correspondente.

Quando terminar a seleção, clique na chave ‘Excluir citações’.

Será mostrada uma mensagem de confirmação da exclusão.
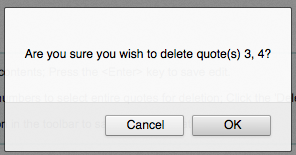
Após confirmar a exclusão, a lista será atualizada e a citação não irá mais ser exibida.
Once you are satisfied with the quotes, click the ‘Save quotes’ button in the toolbar at the top and the quotes will be saved.
Upload
- Get there: More > Tools > Additional Tools > Upload
This tool will allow you to upload files to your Koha system for selection from the Cataloging form.
Upload Files
When you first visit the Upload tool you might see a warning about missing a category.
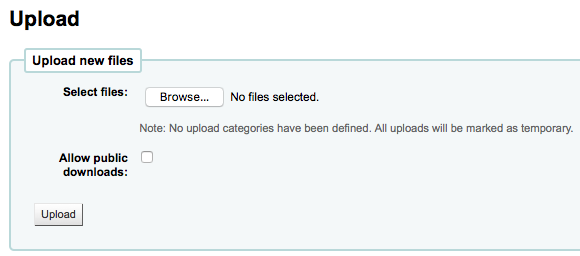
Categories are defined in the authorized value in the UPLOAD category. If you do not have upload categories then your files will be temporary and will be deleted the next time the server is rebooted. Once you have a value in the UPLOAD authorized value category you will see a Category pull down below the ‘Browse’ button.
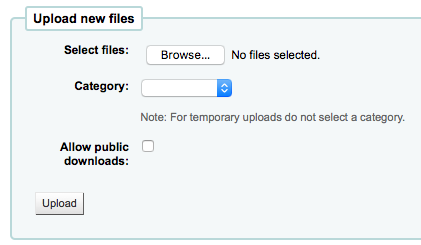
Browse your computer a file, choose a category and decide if the public will be able to download this file via the OPAC. Once your file is uploaded you will be presented with a confirmation.

Search Files
All uploaded files are searchable from below the upload form. Using the form you can search any part of the filename and/or the Hashvalue.Search uploaded files
You will be presened with the results of your search.