Administração
Parâmetros de base
Acesso: Mais > Administração
Importante
Configure estes “parâmetros” por ordem de visualização.
Bibliotecas
Quando estiver a configurar o seu sistema, adicione a informação para cada biblioteca que vai partilhar o sistema. Os dados serão usados em várias áreas do Koha.
Acesso: Mais > Administração > Parâmetros de base > Bibliotecas
Nota
Apenas os utilizadores com a permissão manage_libraries (ou superbibliotecários) terão acesso a esta secção.
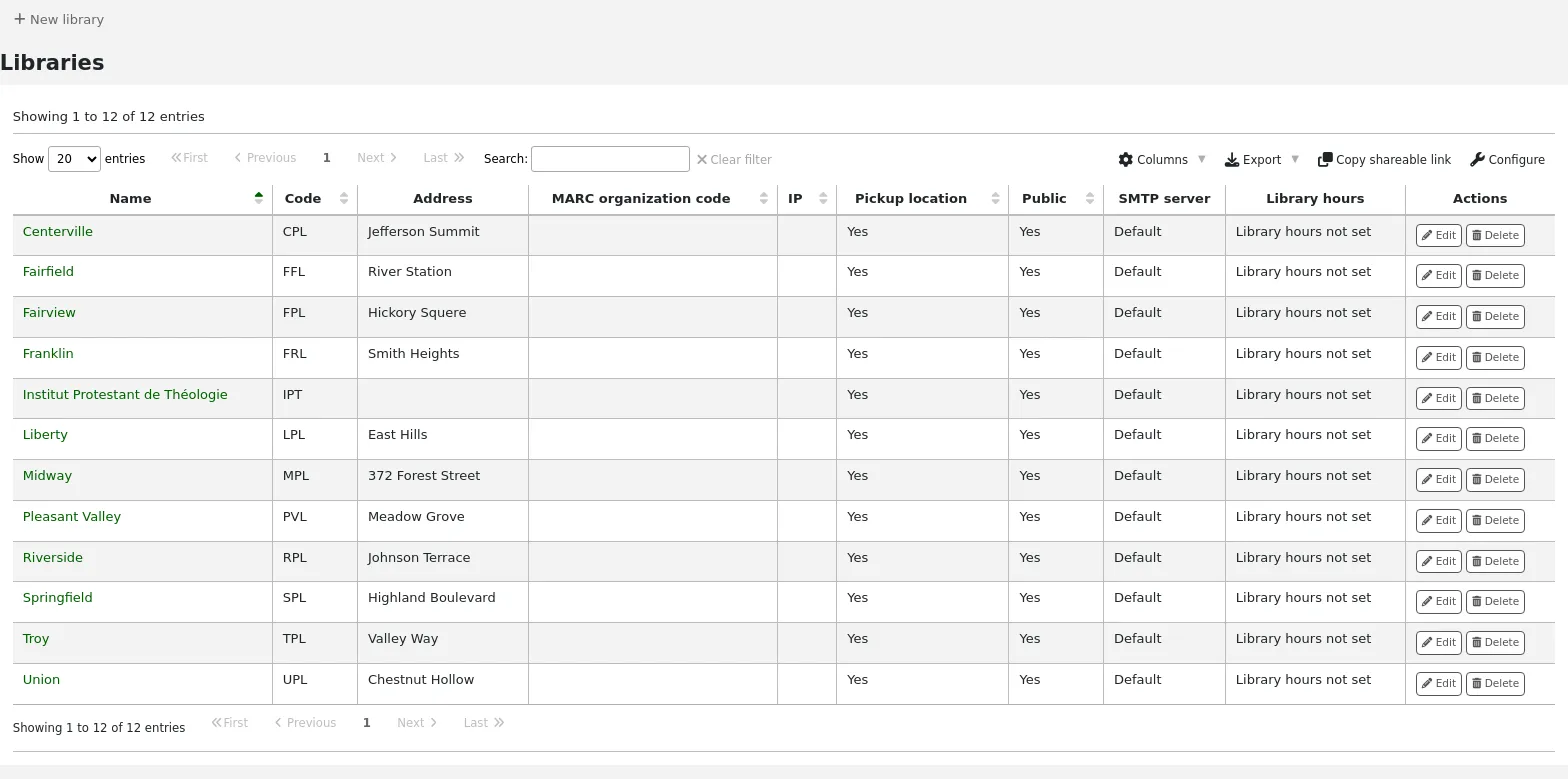
Quando estiver a visualizar esta página, verá a lista das bibliotecas já adicionadas ao sistema.
Nota
Pode personalizar as colunas desta tabela na secção Configurações da tabela do módulo de Administração (identificador da tabela: libraries).
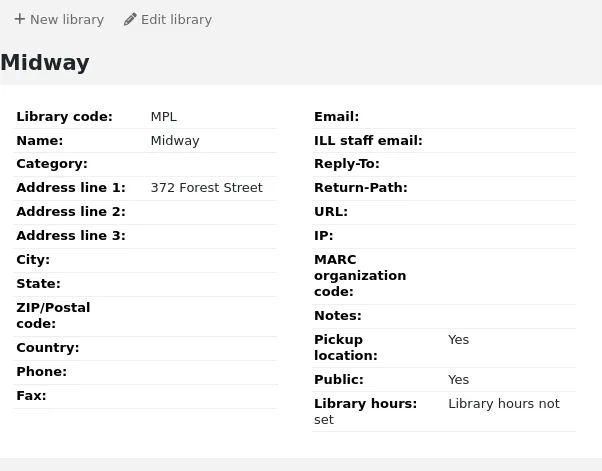
Clicar no nome da biblioteca apresenta uma visualização detalhada das informações da biblioteca.
Adicionar uma biblioteca
Para adicionar uma nova biblioteca:
Clicar em “Nova biblioteca”
Preencher o formulário
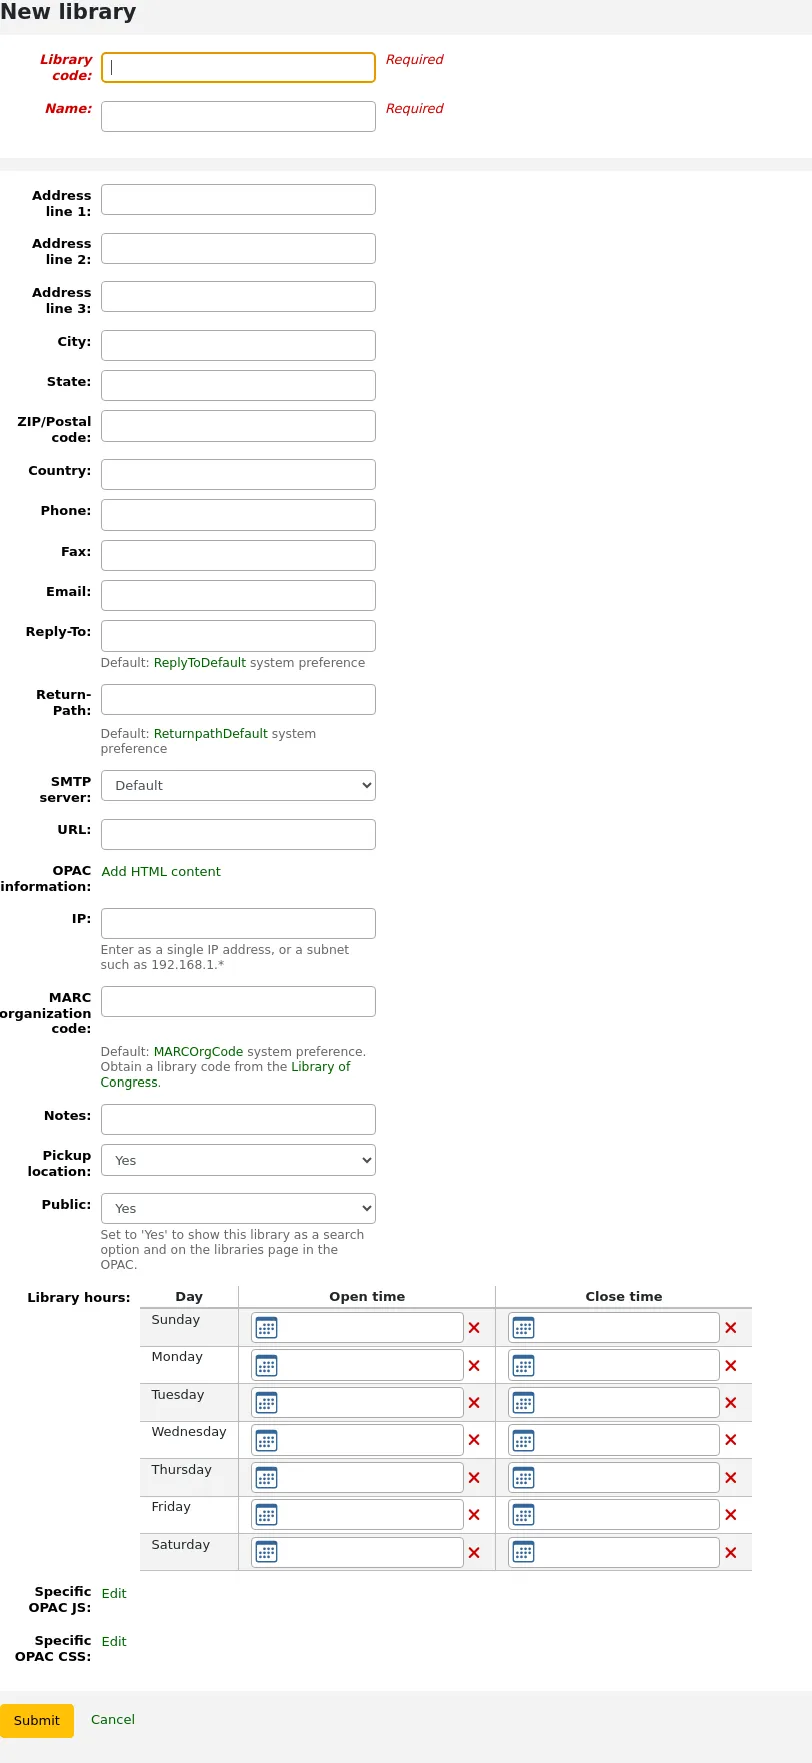
Código de biblioteca (obrigatório): o código não deve conter espaços ou hífens e deve ter 10 ou menos caracteres. Este código será usado como identificador único na base de dados.
Nome (obrigatório): o nome será mostrado no OPAC e na interface dos técnicos sempre que a biblioteca é mostrada, e deve ser um nome que faça sentido para os leitores e para os técnicos.
Endereço, cidade, estado, código postal, país, telefone, fax: os campos de endereço e contato podem ser usados para personalizar os avisos e talões para cada biblioteca; podem também serão exibidos na página “Bibliotecas” do OPAC, caso a biblioteca esteja configurada como “Pública”
Email: O endereço de email não é necessário, mas deve ser preenchido para cada biblioteca no seu sistema
Nota
Tenha a certeza que inseriu um email para a biblioteca para que os avisos sejam enviados do endereço correcto
Nota
Se nenhum endereço de email for inserido aqui, o endereço definido na preferência de sistema KohaAdminEmailAddress será utilizado para o envio de avisos desta biblioteca
Email da equipa de empréstimo interbibliotecas: se esta biblioteca utilizar um endereço de email específico para a gestão de empréstimos interbibliotecas, insira-o aqui
Nota
Se não for aqui introduzido nenhum endereço de correio eletrónico, o endereço definido na preferência de sistema ILLDefaultStaffEmail será utilizado para receber pedidos de empréstimo interbibliotecas para esta biblioteca
Email de resposta: pode introduzir um endereço de email diferente para resposta (“Reply-To”). Este é o endereço de email para o qual serão enviadas todas as respostas.
Nota
Se não for aqui introduzido nenhum endereço de correio electrónico, será utilizado o endereço definido na preferência de sistema ReplytoDefault para receber as respostas referentes a esta biblioteca
Email de retorno: pode introduzir um endereço de email diferente para o “Return-Path”. Este é o endereço de email para o qual serão enviadas todas as mensagens devolvidas.
Nota
Se não for aqui introduzido nenhum endereço de correio electrónico, o endereço definido na preferência de sistema ReturnpathDefault será utilizado para receber as mensagens devolvidas desta biblioteca.
Servidor SMTP: se esta biblioteca utilizar um servidor SMTP diferente do predefinido, especifique-o aqui.
URL: se este campo estiver preenchido, o nome da biblioteca aparecerá como um endereço na tabela de exemplares no OPAC
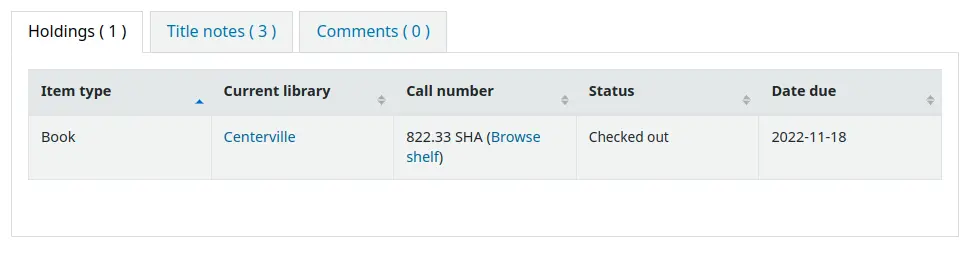
Informação OPAC: isto leva à ferramenta de personalização HTML, permitindo adicionar informação adicional sobre a biblioteca. Esta informação aparecerá na página “Bibliotecas” do OPAC, bem como na tabela de exemplares no OPAC.
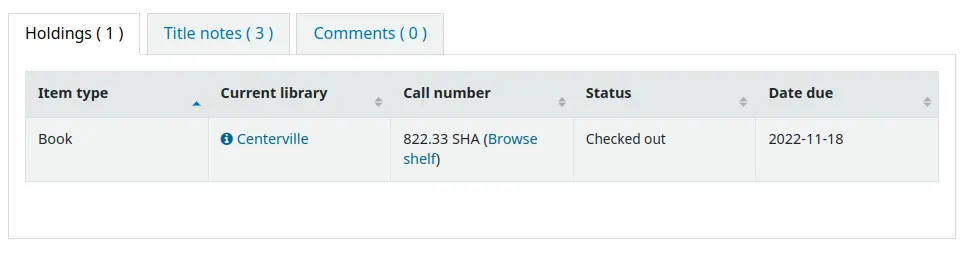
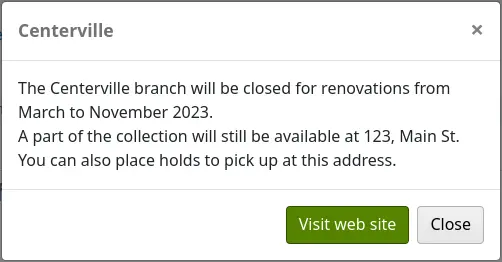
Clicar no nome da biblioteca que tem um pequeno ícone de “i” ao lado, abrirá um janela com a informação.
IP: este campo não necessita de ser preenchido, a menos que pretenda limitar o acesso à interface da equipa a um endereço IP ou a um intervalo de endereços IP específicos.
Nota
Os endereços e intervalos de IP das bibliotecas são utilizados pelas preferências de sistema StaffLoginLibraryBasedOnIP e StaffLoginRestrictLibraryByIP.
Código de organização MARC: se esta biblioteca tiver um código de organização MARC [https://www.loc.gov/marc/organizations/orgshome.html] específico, pode introduzi-lo aqui.
Nota
Se for deixado em branco, o código introduzido na preferência de sistema MARCOrgCode será utilizado para esta biblioteca.
Notas: se tiver alguma observação, pode inseri-la aqui. Não serão exibidas no OPAC.
Local de levantamento: escolha se esta biblioteca aparecerá como um local de recolha disponível para reservas e empréstimos entre bibliotecas.
Público: escolha se esta biblioteca irá aparecer na página “Bibliotecas” no OPAC, bem como uma opção de filtro na pesquisa avançada do OPAC.
Horário de funcionamento: se realiza empréstimos à hora, preencha o horário de funcionamento da biblioteca para cada dia da semana. Em seguida, pode definir a preferência de sistema ConsiderLibraryHoursInCirculation de acordo com as suas políticas.
Versão
Esta opção foi adicionada ao Koha na versão 24.05.
UserJS: utilize este campo para adicionar JavaScript personalizado ao OPAC desta biblioteca (quando os utilizadores estão ligados ou se existe uma entrada
SetEnv OPAC_BRANCH_DEFAULTno ficheiro de configuração do Apache)Nota
As modificações gerais aplicáveis a todas as bibliotecas podem ser inseridas na preferência de sistema OPACUserJS.
UserCSS: utilize este campo para adicionar CSS personalizado ao OPAC desta biblioteca (quando os utilizadores estão ligados ou se existe uma entrada
SetEnv OPAC_BRANCH_DEFAULTno ficheiro de configuração do Apache)Nota
As modificações gerais aplicáveis a todas as bibliotecas podem ser inseridas na preferência de sistema OPACUserCSS.
Se existirem campos adicionais para bibliotecas, estes serão apresentados na parte inferior do formulário.
Clique em “Submeter” para guardar a nova biblioteca.
Editar/eliminar uma biblioteca
Na tabela de bibliotecas, clique em “Editar” ou “Apagar” para editar ou apagar uma biblioteca.
Aviso
Não poderá editar o “Código da Biblioteca”.
Aviso
Não poderá remover qualquer biblioteca que tenha leitores ou exemplares associados.

Grupos de bibliotecas
Os grupos de biblioteca podem servir diversos propósitos: limitar o acesso aos dados dos utilizadores, restringir a modificação de itens, limitar as pesquisas no OPAC ou na interface dos técnicos, ou definir o comportamento das reservas.
Acesso: Mais > Administração > Parâmetros de base > Grupos de bibliotecas
Nota
Apenas os utilizadores com a permissão manage_libraries (ou superbibliotecários) terão acesso a esta secção.
Ao visitar esta página, vê uma lista dos grupos que já foram adicionados ao sistema.
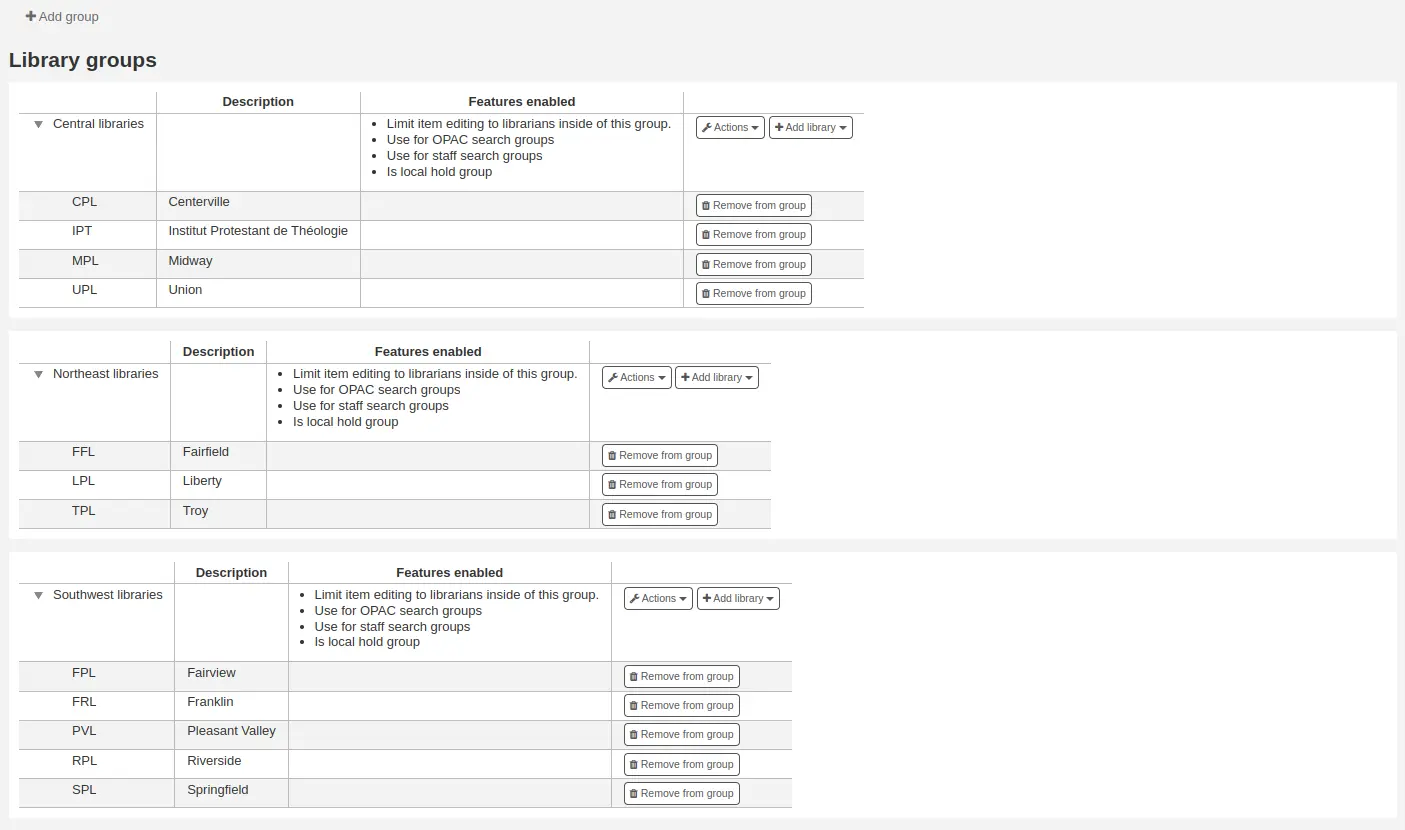
Adicionar um grupo
Para criar um novo grupo de biblioteca,
Clique no botão “Adicionar grupo” na parte superior do ecrã.
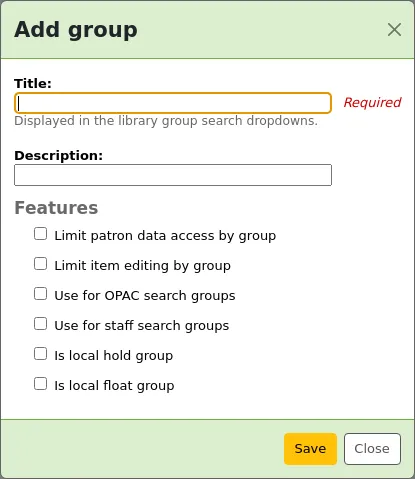
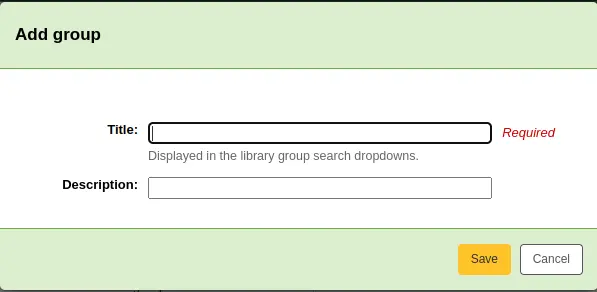
Título (obrigatório): dê um título ao grupo. Este título será apresentado na interface de limites da pesquisa avançada.
Descrição: opcionalmente, introduza uma descrição para este grupo. A descrição é utilizada apenas nesta página para dar uma ideia da finalidade do grupo.
Recursos: marque a utilização deste grupo
Limite o acesso aos dados dos leitores por grupo: isto impedirá os membros da equipa de visualizarem leitores de outros grupos.
Nota
Esta configuração pode ser sobreposta pela permissão view_borrower_infos_from_any_libraries (ou pela permissão superbibliotecário).
Limite a edição de exemplares por grupo: isto impedirá os membros da equipa de editarem exemplares das bibliotecas de outros grupos.
Nota
Esta pode ser substituída pela permissão edit_any_item (ou sendo superbibliotecário).
Utilize para grupos de pesquisa OPAC: isto tornará o grupo visível no menu suspenso de bibliotecas no topo do OPAC (quando a preferência de sistema OpacAddMastheadLibraryPulldown estiver definida como “Adicionar”) e na página de pesquisa avançada.
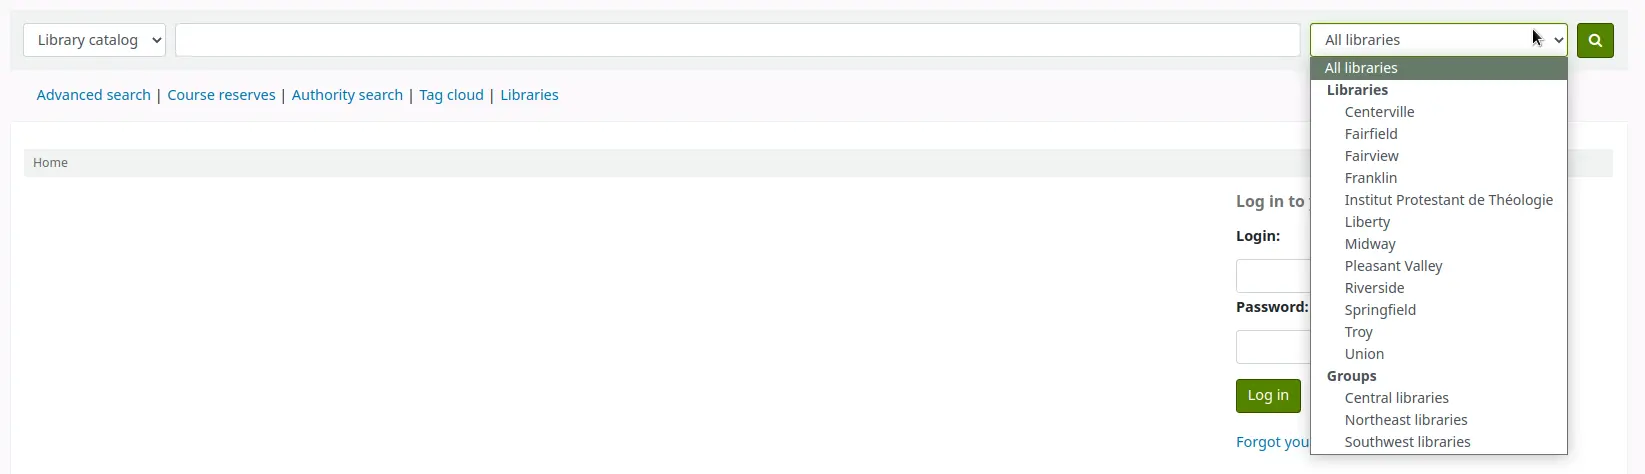
Para grupos de pesquisa da equipa: isto tornará o grupo visível no menu suspenso das bibliotecas, na pesquisa avançada da interface dos técnicos.

É um grupo de reserva local: isto fará deste grupo um grupo de reserva local, que pode ser utilizado para adicionar políticas de reserva nas regras de circulação e, assim, limitar os utilizadores a solicitar reservas apenas de exemplares pertencentes a esse grupo.
É um grupo de reservas local: isto define este grupo como um grupo de reservas local, que pode ser utilizado numa política de devolução ou numa política de reserva nas regras de circulação para determinar se um exemplar flutua (permanece na biblioteca onde foi devolvido) ou se é transferido de volta para a sua biblioteca de origem.
Clique em “Guardar” para criar o grupo.
Adicionar uma biblioteca a um grupo
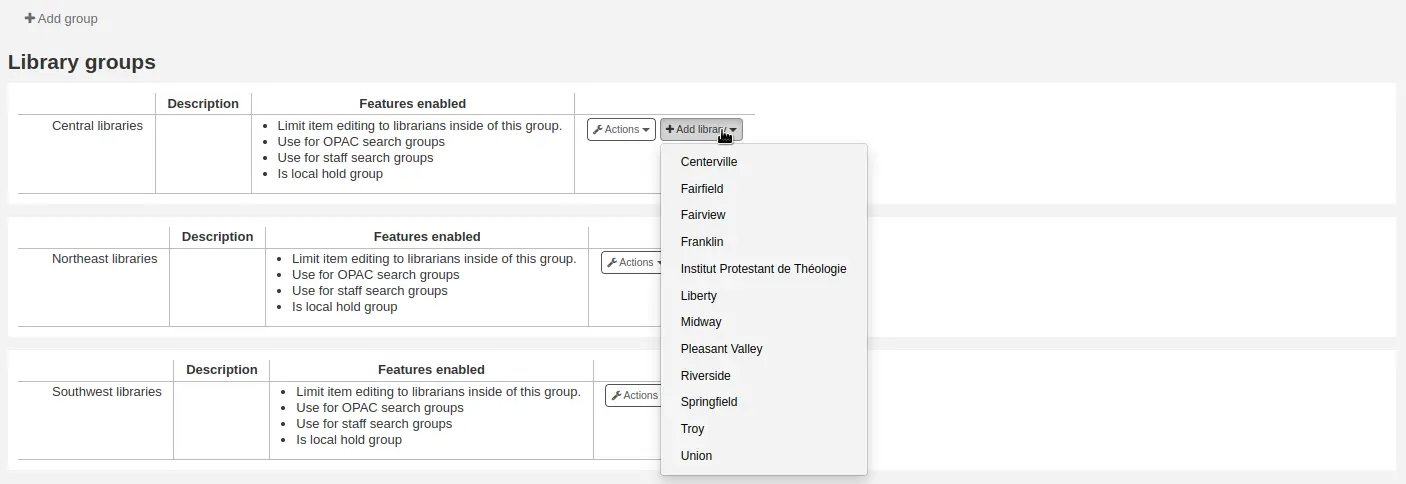
Clique no botão “Adicionar biblioteca” junto ao grupo para adicionar uma biblioteca a esse grupo. Será apresentada uma lista das bibliotecas que ainda não fazem parte do grupo.
Adicionar um subgrupo
Se o seu sistema for muito grande, pode criar subgrupos. Clique no botão “Ações” junto ao grupo e selecione a opção “Adicionar um subgrupo”.

Preencha o título e a descrição (opcional) do subgrupo. Os recursos serão herdados do grupo pai.
Eliminar um grupo
Para eliminar um grupo, clique no botão “Ações” junto ao grupo e selecione a opção “Eliminar”.
O sistema solicitará a confirmação da eliminação.
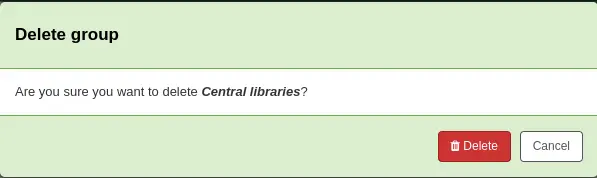
Clique em “Eliminar” para confirmar e apagar o grupo.
Balcões de atendimento
O Koha permite definir vários balcões de atendimento dentro da mesma biblioteca. Por exemplo, se tiver um balcão de atendimento para adultos e outro para o público infantil, ou se existir um balcão diferente para cada piso ou departamento.
Certifique-se de que ativa a preferência de sistema UseCirculationDesks para utilizar esta funcionalidade.
Acesso: Mais > Administração > Leitores e circulação > Balcões de atendimento
Adicionar balcões de atendimento
Para adicionar um novo balcão, clique no botão “Novo balcão” no topo da página.
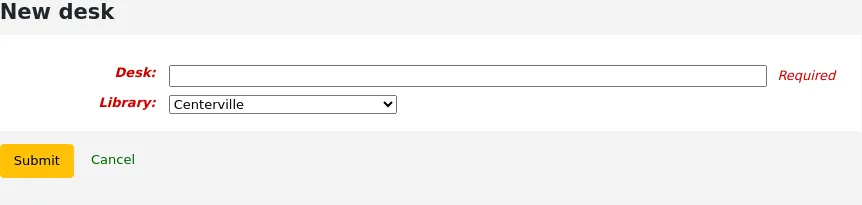
No campo “Balcão”, introduza um nome para o seu balcão.
Escolha a biblioteca onde este balcão se encontra.
Clique em “Submeter”.
Editar um balcão de atendimento
Para editar um balcão de atendimento existente, clique no botão “Editar” à direita do balcão que pretende modificar.
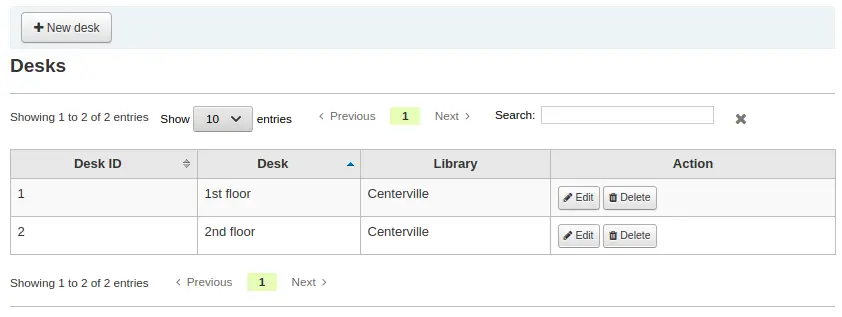
A partir daí, pode alterar o nome e/ou a biblioteca do balcão.
Eliminar um balcão de atendimento
Para eliminar um balcão de atendimento existente, clique no botão “Eliminar” à direita do balcão que pretende remover.
Tipos de documento
Acesso: Mais > Administração > Parâmetros de base > Tipos de documento
Nota
Apenas os colaboradores com a permissão manage_itemtypes (ou superbibliotecários) terão acesso a esta secção.
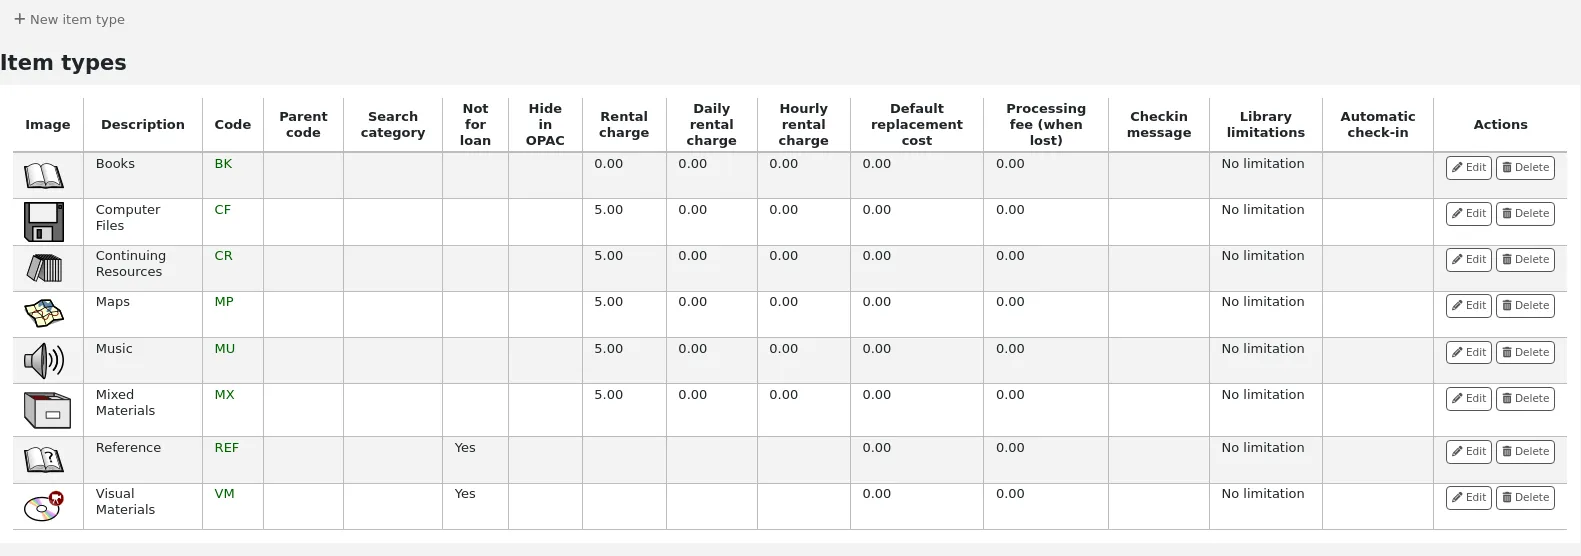
O Koha permite organizar a sua coleção por tipos de documento e códigos de coleção. Tal como as bibliotecas e as categorias de leitor, os tipos de documento são utilizados para controlar as regras de circulação.
Os tipos de documento referem-se geralmente ao tipo de material (livro, CD, DVD, etc.), mas podem ser utilizados da forma que melhor se adequa à sua biblioteca.
Nota
Pode personalizar as colunas desta tabela na secção Configurações da tabela do módulo de Administração (identificador da tabela: table_item_type).
Adicionando tipos de documento
Para adicionar um novo tipo de documento,
Clique no botão “Novo tipo de documento” na parte superior da página de tipos de documento.
Preencha o formulário:
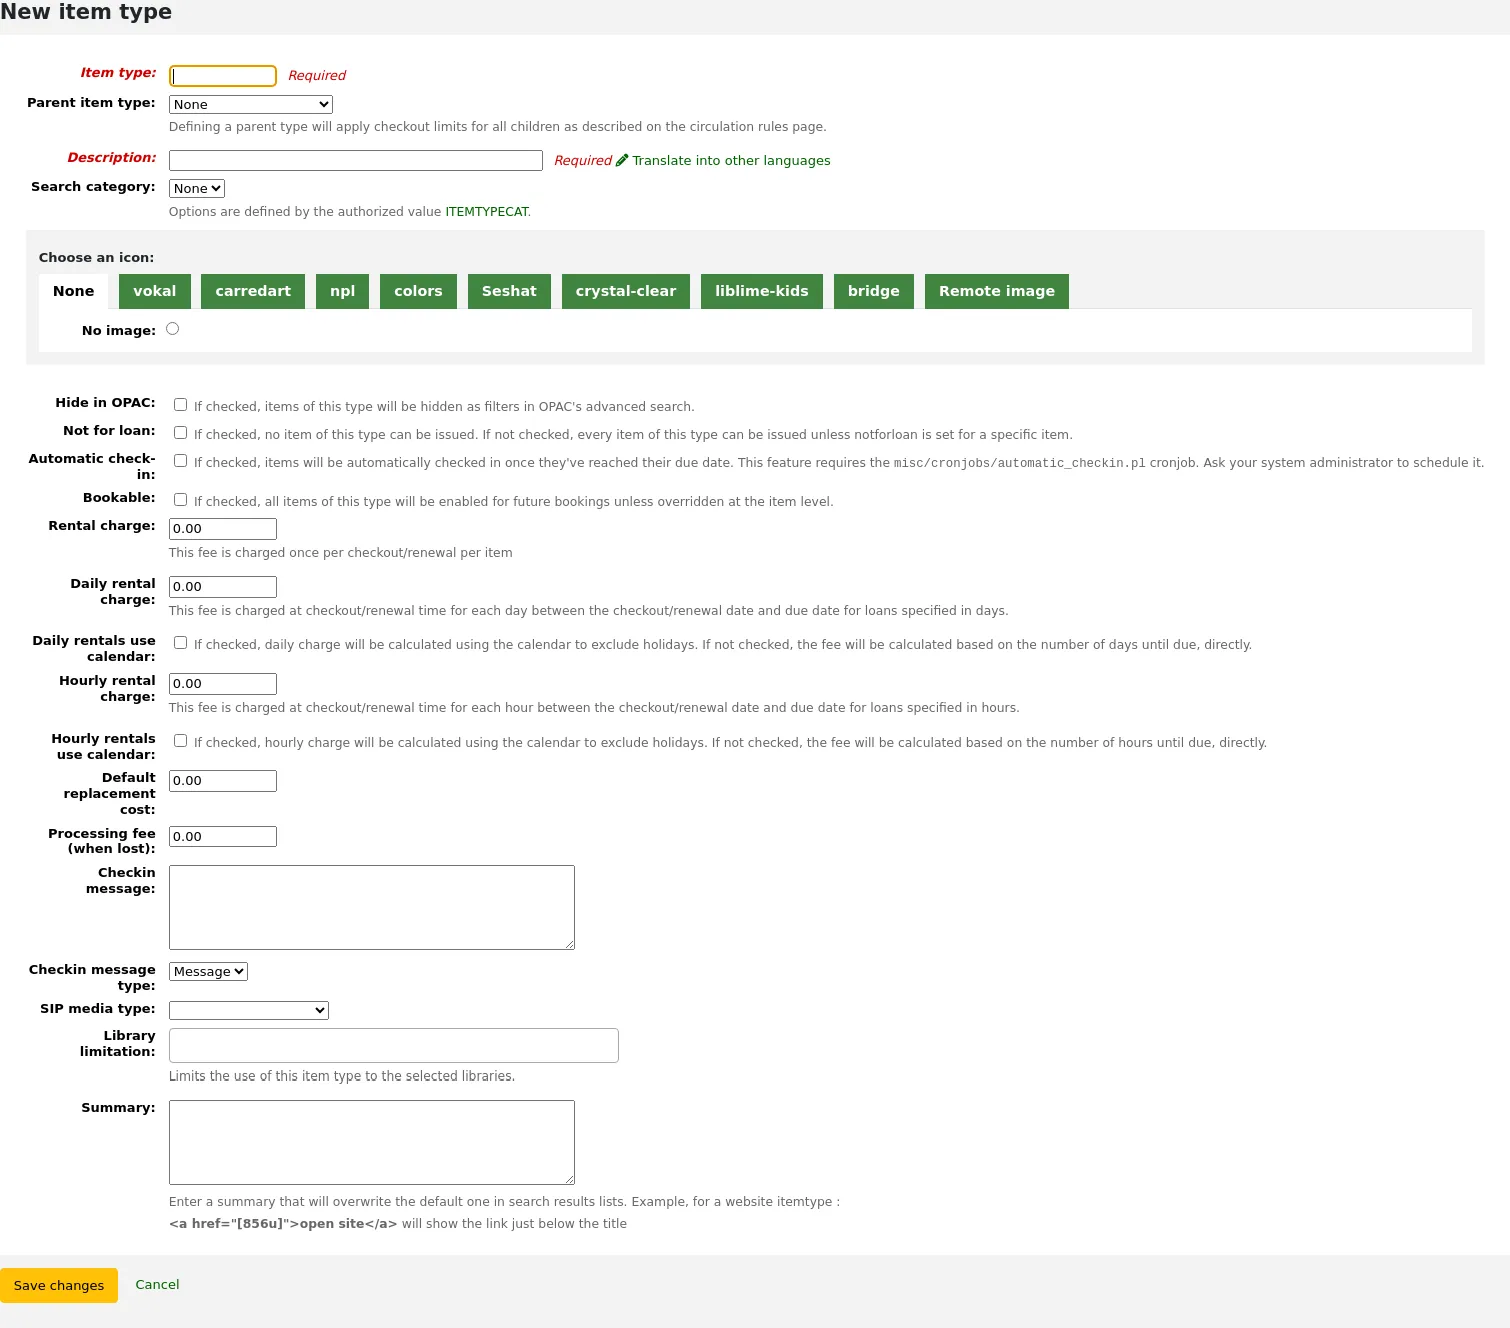
Tipo de documento: introduza um código curto para o seu tipo de artigo (máximo de 10 caracteres)
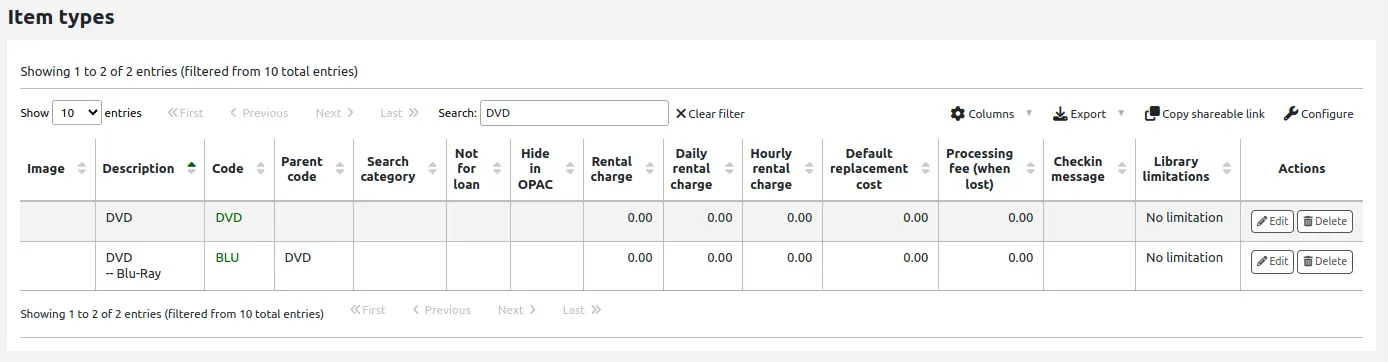
Tipo de documento pai: pode escolher um tipo de documento que servirá de categoria pai para este tipo de documento . Em seguida, pode definir regras de circulação com base neste tipo de documento pai.
Por exemplo, poderia ter tipos de documento DVD e Blu-ray, e o DVD seria o pai do tipo de documento Blu-ray.
Pode então criar uma regra de circulação apenas para Blu-ray ou para DVD e Blu-ray (DVD (Todos))
Descrição: introduza a definição em texto simples do tipo de documento
Em sistemas com vários idiomas instalados, pode traduzir a descrição do tipo de documento para todos esses idiomas utilizando a ligação «Traduzir para outros idiomas».
Categoria de pesquisa: os tipos de documento podem ser agrupados para pesquisa simultânea na pesquisa avançada do OPAC. Por exemplo, pode reunir DVDs e Blu-rays num grupo chamado “Filmes”, permitindo aos utilizadores pesquisá-los em conjunto. Estes grupos são definidos na categoria de valores autorizados ITEMTYPECAT.
Nota
As categorias de pesquisa são apenas utilizadas no OPAC. A equipa pode pesquisar tipos de documentos específicos na pesquisa avançada da interface administrativa.
Escolha um ícone: pode optar por associar uma imagem ao seu tipo de documento. Estas imagens aparecerão na interface da equipa e no OPAC, na pesquisa avançada e na tabela de exemplares, ou no registo bibliográfico, caso a preferência do sistema item-level_itypes esteja definida como nível de registo. Pode escolher um ícone a partir de diversas coleções de imagens ou ligar uma imagem remota.
Aviso
Se esta opção não estiver ativada, pode alterar a configuração de noItemTypeImages ou OPACNoItemTypeImages.
Nota
Para que as imagens dos tipos de item apareçam no OPAC, é necessário definir OPACnoItemTypeImages como “Mostrar”.
Ocultar no OPAC: para os exemplares que está a ocultar do OPAC, é possível impedir que o tipo de documento seja pesquisado no OPAC.
Importante
Isto não impedirá que estes exemplares apareçam nos resultados de pesquisa; simplesmente removerá o tipo de documento do formulário de pesquisa avançada.
Se pretende ocultar completamente exemplares de um determinado tipo de documento, digamos, por exemplo, que tem um acervo profissional com livros reservados à equipa e não pretende que estes apareçam no OPAC, utilize a preferência de sistema OpacHiddenItems.
Não disponível para empréstimo: selecione esta opção para os tipos de documento que não devem circular. Os exemplares marcados como “Não disponível para empréstimo” aparecerão no catálogo, mas não poderão ser emprestados aos utilizadores.
Devolução automática: pode selecionar esta opção para exemplares que não são físicos, mas para os quais ainda existem regras de circulação, como passes de museu ou ebooks.
Nota
Esta opção requer a rotina misc/cronjobs/automatic_checkin.pl. Solicite ao administrador do sistema que a agende.
Reservável: assinale esta opção para permitir marcações para todos os exemplares deste tipo.
Versão
Esta opção foi adicionada ao Koha na versão 24.11.
Taxa de aluguer: se cobra uma taxa fixa de aluguer para o levantamento de exemplares deste tipo, insira aqui o valor. Esta taxa será cobrada ao leitor no momento da recolha e da renovação.
Importante
Não introduza símbolos neste campo, apenas números e pontos decimais (por exemplo, 5,00 dólares devem ser introduzidos como 5 ou 5,00).
Taxa de aluguer diária: no caso de a taxa de aluguer ser cobrada com base no número de dias de empréstimo do exemplar, insira aqui o valor da diária. Esta taxa será cobrada ao leitor no momento da devolução, multiplicada pelo número de dias em que o exemplar esteve emprestado. Por exemplo, para um exemplar emprestado por 7 dias com uma taxa diária de 1 dólar, será cobrado ao utilizador o valor de 7 dólares no momento da devolução. Esta taxa diária de aluguer também será aplicada em casos de renovação.
Importante
Não introduza símbolos neste campo, apenas números e pontos decimais (por exemplo, 5,00 dólares devem ser introduzidos como 5 ou 5,00).
Empréstimos diários com base no calendário: assinale esta opção para excluir os feriados do cálculo da tarifa de locação diária.
Nota
Certifique-se de que introduz os dias de fecho no calendário para os excluir da cobrança diária do aluguer.
Taxa de aluguer por hora: se os exemplares forem emprestados por hora, introduza aqui o custo por hora. Mais uma vez, o valor total (custo por hora × número de horas de empréstimo) será cobrado ao leitor no momento da devolução ou da renovação.
Importante
Não introduza símbolos neste campo, apenas números e pontos decimais (por exemplo, 5,00 dólares devem ser introduzidos como 5 ou 5,00).
Empréstimos por hora utilizam o calendário: assinale esta opção para excluir os feriados do cálculo da tarifa de aluguer por hora.
Nota
Certifique-se de que introduz os dias de fecho no calendário para os excluir da cobrança diária do aluguer.
Custo de substituição padrão: é o valor que será cobrado ao leitor quando um exemplar deste tipo for perdido e o exemplar não tiver um custo de substituição. Se o exemplar tiver um custo de substituição, este será o valor cobrado ao leitor.
Importante
Não introduza símbolos neste campo, apenas números e pontos decimais (por exemplo, 5,00 dólares devem ser introduzidos como 5 ou 5,00).
Taxa de processamento (em caso de perda): esta taxa de processamento será acrescida ao custo de substituição caso o leitor perca um exemplar deste tipo.
Importante
Não introduza símbolos neste campo, apenas números e pontos decimais (por exemplo, 5,00 dólares devem ser introduzidos como 5 ou 5,00).
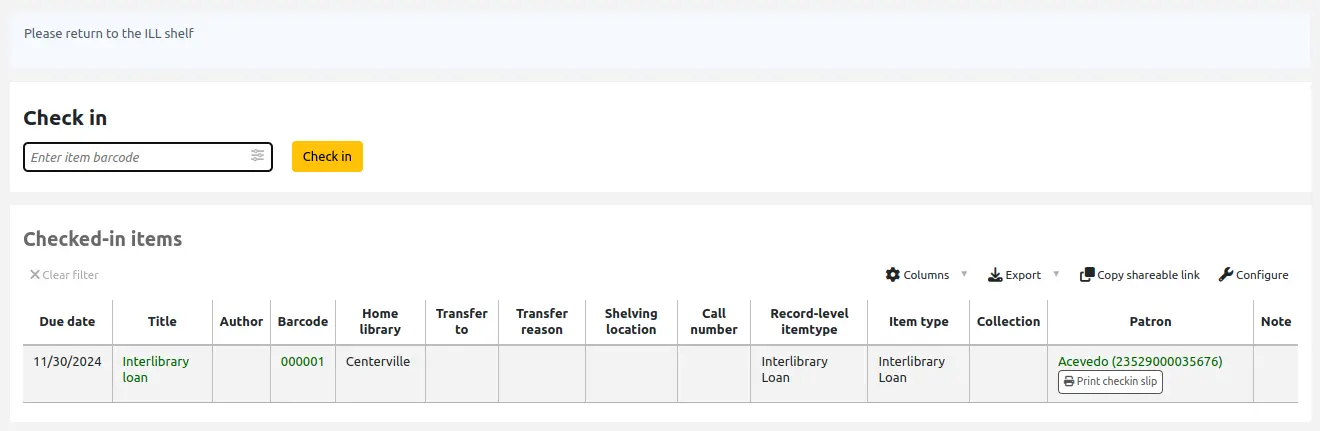
Mensagem de devolução: se pretender que uma mensagem ou um alerta seja apresentado quando exemplares deste tipo dão entrada, introduza aqui a mensagem.
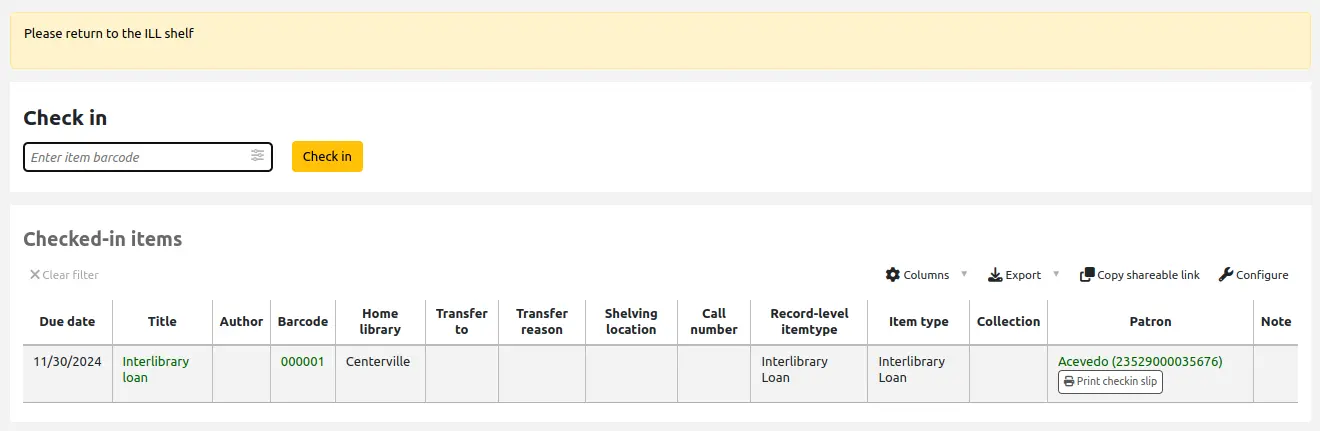
Tipo de mensagem de devolução: a mensagem de devolução pode ser uma «mensagem» ou um «alerta». A única diferença entre as duas é o estilo. Uma mensagem é azul
e um alerta é amarelo.
Tipo de suporte SIP: alguns dispositivos SIP requerem a utilização de um tipo de suporte específico para o SIP, em vez do tipo de documento do Koha (geralmente, os armários e os classificadores automáticos requerem este tipo de suporte). Se utilizar um dispositivo deste tipo, selecione o tipo de suporte SIP correspondente a esse tipo de documento.
Limitação da biblioteca: se este tipo de documento só deve ser utilizado em bibliotecas específicas, pode seleccioná-las aqui. Selecione «Todas as bibliotecas» se este tipo de documento for utilizado em todo o sistema de bibliotecas.
Nota
Se for deixado em branco, assume-se “Todas as bibliotecas”.
Dica
Para selecionar mais do que uma biblioteca, mantenha a tecla “Ctrl” premida enquanto seleciona as bibliotecas.
Resumo: este resumo é apenas utilizado em visualizações que não utilizam XSLT.
Verificar empréstimos anteriores: esta configuração só aparece se a preferência de sistema CheckPrevCheckout estiver definida como “A menos que substituído pela categoria de leitor ou pelo tipo de documento, fazer” ou “A menos que substituído pela categoria de leitor ou pelo tipo de documento, não fazer”. Isto permite que as bibliotecas personalizem se o Koha deve alertar a equipa quando um leitor já requisitou o mesmo título, com base no tipo de documento.
Herdar das preferências de sistema: utiliza a configuração da preferência de sistema CheckPrevCheckout.
Sim, e sobrepor as preferências de sistema: verifica sempre o histórico de circulação do leitor para este tipo de documento, independentemente da configuração da preferência do sistema CheckPrevCheckout.
Não, e sobrepor preferências de sistema: nunca verificar o histórico de circulação do leitor para este tipo de documento, independentemente da configuração da preferência de sistema CheckPrevCheckout.
Versão
Esta opção foi adicionada ao Koha na versão 25.11.
Quando terminar, clique em “Guardar alterações”.
Nota
Todos os campos, com exceção de “Tipo de documento”, serão editáveis a partir da lista de tipos de documento.
O seu novo tipo de documento aparecerá agora na lista.
Editar tipos de documento
Para editar um tipo de documento, clique no botão “Editar” junto ao mesmo ou clique no código do tipo de documento.
Consulte a secção Adicionar tipos de documento para obter uma descrição de cada campo.
Importante
Não poderá editar o código atribuído como “Tipo de documento”, mas poderá editar a descrição do tipo.
Eliminar tipos de documento
Para eliminar um tipo de documento, clique no botão “Apagar” ao lado.
Importante
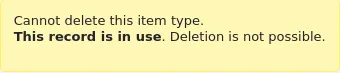
Não poderá eliminar tipos de documento que estejam a ser utilizados por exemplares ou registos bibliográficos no seu sistema. Caso isto ocorra, uma mensagem irá alertá-lo de que o tipo de documento está em uso.
Valores Autorizados
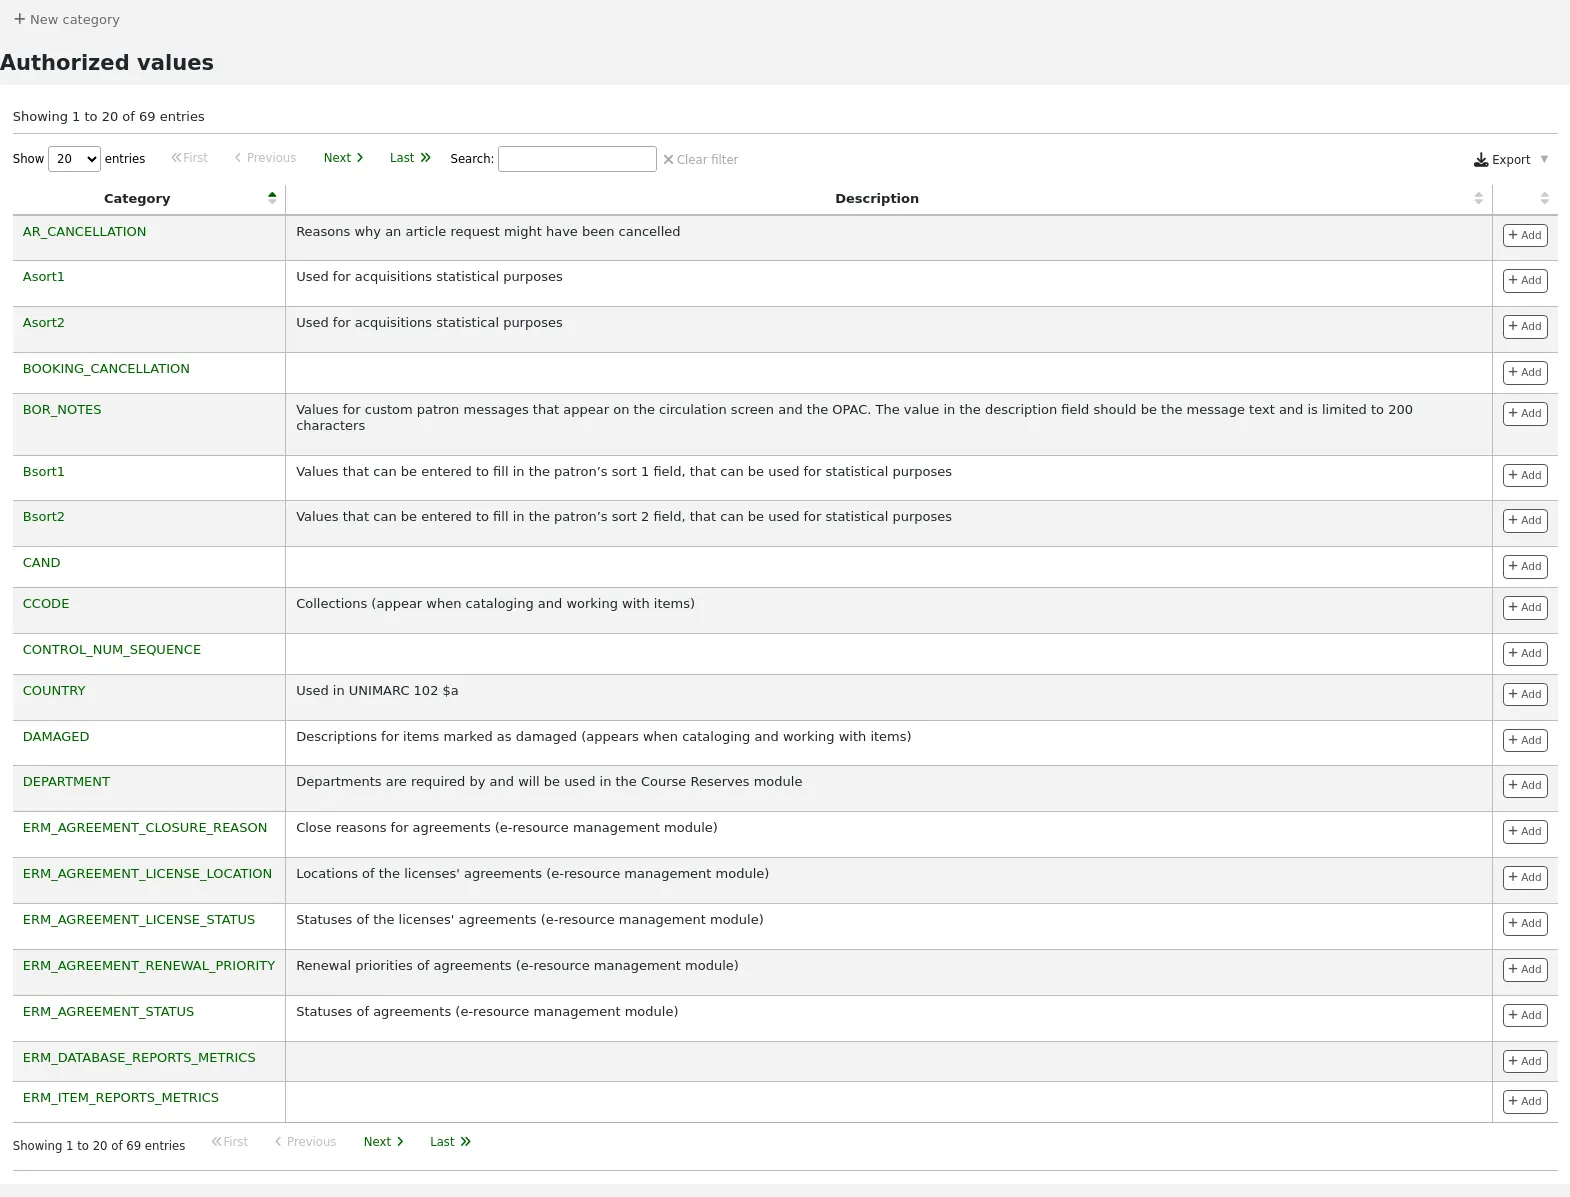
Os valores autorizados podem ser utilizados em diversas áreas do Koha. Trata-se de listas de termos, frases ou códigos controlados.
Por exemplo, um motivo para adicionar uma categoria de valores autorizados seria controlar os valores que podem ser introduzidos nos campos MARC pelos catalogadores.
Acesso: Mais > Administração > Parâmetros de base > Valores autorizados
Nota
Apenas os colaboradores com a permissão manage_auth_values (ou superbibliotecários) terão acesso a esta secção.
Categorias de valores autorizados existentes
O Koha é instalado com categorias de valores autorizados predefinidas que a sua biblioteca provavelmente utilizará ou que são utilizadas pelo sistema.
AR_CANCELLATION
Esta categoria contém as razões pelas quais um pedido de artigo pode ter sido cancelado.
Se optar por instalar os valores por omissão para esta categoria, terá
O exemplar não foi localizado nas prateleiras (NOT_FOUND)
O exemplar estava demasiado danificado para atender à solicitação (DAMAGED)
Cancelado a partir da página do leitor no OPAC (OPAC)
Pode alterá-los para atender às necessidades da sua organização.
Asort1
Estes valores são utilizados para fins estatísticos de aquisições. Pode utilizá-los como categorias estatísticas ao criar um fundo no módulo de aquisições.
Asort2
Estes valores são utilizados para fins estatísticos de aquisições. Pode utilizá-los como categorias estatísticas ao criar um fundo no módulo de aquisições.
BOOKING_CANCELLATION
Versão
Esta categoria de valores autorizados foi introduzida pela primeira vez na versão 24.11 do Koha.
Estes valores são utilizados ao cancelar marcações como os motivos do cancelamento da marcação.
BOR_NOTES
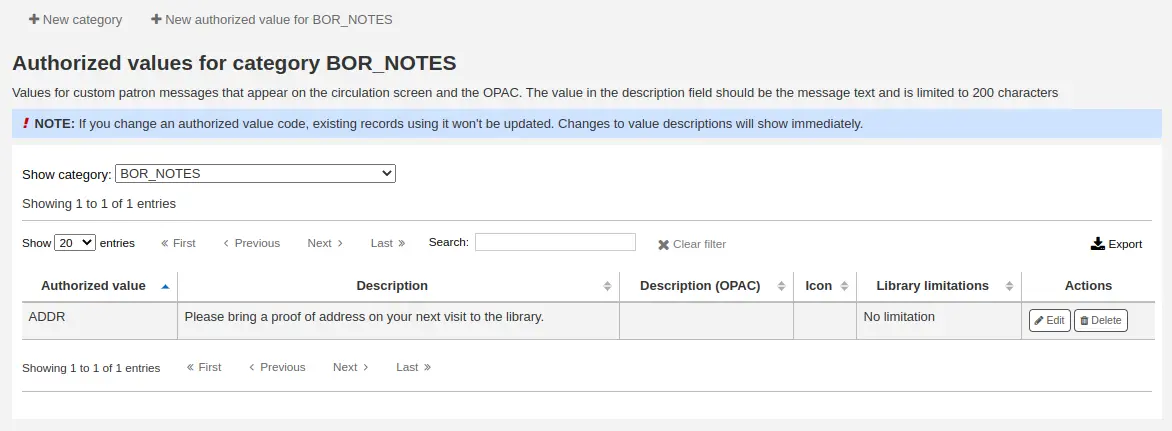
Estes valores são utilizados para mensagens ao leitor e mensagens de circulação predefinidas, que aparecem no ecrã de circulação e na conta do leitor no OPAC.
Escreva a mensagem que pretende que apareça no campo “Descrição”.
Nota
Este campo está limitado a 200 caracteres. No entanto, o campo de mensagem no registo do leitor pode conter mais do que isso. Escreva os primeiros 200 caracteres na descrição e escreva os restantes ao adicionar a mensagem.
Bsort1
Estes valores podem ser introduzidos para preencher o campo de classificação 1 do leitor.
Bsort2
Estes valores podem ser introduzidos para preencher o campo de classificação 2 do leitor
CAND
Uma lista utilizada no UNIMARC.
CCODE
Estes valores são códigos de coleção. Aparecem ao catalogar e ao trabalhar com os exemplares.
Isto é normalmente mapeado para o items.ccode na base de dados do Koha.
Se optar por instalar os valores por omissão para esta categoria, terá
Ficção (FIC)
Não ficção (NFIC)
Referência (REF)
Pode alterá-los para atender às necessidades da sua organização.
Aviso
Para obter melhores resultados ao pesquisar, evite utilizar hífens nos códigos de coleção.
CONTROL_NUM_SEQUENCE
Esta categoria é utilizada para gerar números de controlo no editor avançado de catalogação.
Introduza uma sequência de caracteres terminada num número como o valor autorizado e utilize a descrição para especificar o tipo de número. Por exemplo: “sprLib0001” e “Springfield Library”. No editor avançado, isto irá ativar um novo componente que lhe permitirá selecionar o tipo de número e gerar o próximo número da sequência.
COUNTRY
Uma lista de nomes de países utilizados no campo 102, subcampo $a, do UNIMARC.
DAMAGED
Esta categoria contém descrições para os exemplares marcados como danificados. Aparecem ao catalogar e ao trabalhar com os exemplares.
Isto é normalmente mapeado para items.damaged na base de dados.
Se optar por instalar os valores por omissão para esta categoria, terá
Danificado (1)
Pode alterá-los para atender às necessidades da sua organização.
Aviso
Os valores autorizados para DAMAGED devem ser numéricos.
DEPARTMENT
Esta categoria contém departamentos que são requeridos e utilizados no módulo de reservas de curso.
ERM_AGREEMENT_CLOSURE_REASON
Estes valores são usados para descrever o motivo do encerramento de um registo de acordo após ele ter sido marcado como “Encerrado” no módulo de gestão de recursos eletrónicos.
Também podem ser utilizados nos relatórios.
Os valores por omissão são
Expirado (expired)
Cancelado (cancelled)
ERM_AGREEMENT_LICENSE_LOCATION
Estes valores são utilizados para descrever a localização física de um registo de licença nos casos em que ainda possua uma cópia impressa da licença (em vez de uma versão eletrónica).
Os valores por omissão são
Armário de arquivo (filing cabinet)
Armário (cupboard)
ERM_AGREEMENT_LICENSE_STATUS
Estes valores são utilizados para descrever o estado de uma licença ligada a um registo de acordo no módulo de gestão de recursos eletrónicos. Isto ajuda a equipa a identificar as licenças no seu ciclo de vida.
Também podem ser utilizados nos relatórios.
Os valores por omissão são
Em controlo (controlling)
Futuro (future)
Histórico (historic)
ERM_AGREEMENT_RENEWAL_PRIORITY
Estes valores são utilizados para descrever a prioridade de renovação de um registo de acordo no módulo de gestão de recursos eletrónicos, de forma a indicar o grau de importância da renovação desse acordo.
Também podem ser utilizados nos relatórios.
Os valores por omissão são
Para revisão (for_review)
Renovar (renew)
Cancelar (cancel)
ERM_AGREEMENT_STATUS
Estes valores são utilizados para descrever o estado de um registo de acordo no módulo de gestão de recursos eletrónicos.
Também podem ser utilizados nos relatórios.
Os valores por omissão são
Ativo (active)
Em negociação (in_negotiation)
Fechado (closed)
Aviso
Não altere o valor autorizado para “Fechado” (a descrição pode ser alterada); é utilizado para ativar o menu suspenso “Razão do fecho”.
ERM_LICENSE_STATUS
Estes valores são utilizados para descrever o estado de um registo de licença no módulo de gestão de recursos eletrónicos. Ajudam a equipa a identificar as licenças no seu ciclo de vida.
Também podem ser utilizados nos relatórios.
Os valores por omissão são
Em negociação (in_negotiation)
Ainda não ativa (not_yet_active)
Ativo (active)
Rejeitada (rejected)
Expirado (expired)
ERM_LICENSE_TYPE
Estes valores são utilizados para descrever o tipo de licença no módulo de gestão de recursos eletrónicos.
Também podem ser utilizados em relatórios.
Os valores por omissão são
Local (local)
Consorcial (consortial)
Nacional (national)
Aliança (alliance)
ERM_PACKAGE_CONTENT_TYPE
Estes valores são utilizados para descrever os tipos de material encontrados num pacote local no módulo de gestão de recursos eletrónicos.
Isto é apenas para pacotes locais.
Os valores por omissão são
Texto completo agregado (AggregatedFullText)
Resumo e índice (AbstractAndIndex)
E-book (EBook)
Jornal eletrónico (EJournal)
Conteúdo misto (MixedContent)
Referência online (OnlineReference)
Impressão (Print)
Streaming de media (StreamingMedia)
Desconhecido (Unknown)
ERM_PACKAGE_TYPE
Estes valores são utilizados para descrever os tipos de pacote no módulo de gestão de recursos eletrónicos.
Isto é apenas para pacotes locais.
Os valores por omissão são
Local (local)
Completo(complete)
ERM_TITLE_PUBLICATION_TYPE
Estes valores são utilizados para descrever o tipo de material de um título no módulo de gestão de recursos eletrónicos.
Isto aplica-se apenas a títulos locais
Os valores por omissão são
Audiolivro (audiobook)
Livro (book)
Série de livros (bookseries)
Base de dados (database)
E-book (ebook)
Revista (journal)
Boletim informativo (newsletter)
Jornal (newspaper)
Actas (proceedings)
Relatório (report)
Streaming de áudio (streamingaudio)
Streaming de vídeo (streamingvideo)
Tese/Dissertação (thesisdissertation)
Não especificado (unspecified)
Website (website)
ERM_USER_ROLES
Estes valores são utilizados para descrever a função de um utilizador da equipa ligado a um registo de acordo ou de licença no módulo de gestão de recursos eletrónicos.
Os valores por omissão são
Bibliotecário de ERM (librarian)
Especialista na área (subject_specialist)
ETAT
Estes valores são utilizados nas implementações francesas do UNIMARC, no campo 995 $o, para identificar o estado do item. São semelhantes ao NOT_LOAN.
HINGS_AS
Estes valores são utilizados como designador geral do estado de aquisição do acervo. Este elemento de dados especifica o estado de aquisição da unidade no momento do relatório de recolha.
HINGS_C
Estes valores são utilizados como indicador geral de completude do acervo.
HINGS_PF
Estes valores são utilizados como designadores de forma física.
HINGS_RD
Estes valores são utilizados como designadores gerais de retenção de acervo. Este elemento de dados especifica a política de retenção para a unidade no momento do relatório de recolha.
HINGS_UT
Estes valores são utilizados como um designador de unidade do tipo posses gerais.
HOLD_CANCELLATION
Estes valores são utilizados ao cancelar reservas como os motivos pelos quais a reserva foi cancelada.
Se optar por instalar os valores por omissão para esta categoria, terá
O exemplar não foi localizado nas prateleiras (NOT_FOUND)
Artigo estava demasiado danificado para preencher a reserva (DAMAGED)
Pode alterá-los para atender às necessidades da sua organização.
HSBND_FREQ
Estes valores são frequências de entrega utilizadas pelo módulo de atendimento a utilizadores impossibilitados de se deslocar. São apresentados no separador housebound, na conta do utilizador, dentro da interface dos técnicos.
Se optar por instalar os valores por omissão para esta categoria, terá
Todas as semanas (EW)
Pode alterá-los para atender às necessidades da sua organização.
ILL_STATUS_ALIAS
Estes valores são estados de pedidos de empréstimo interbibliotecas (ILL) utilizados no módulo ILL.
ITEMTYPECAT
Estes valores são categorias de pesquisa para tipos de documentos. Permitem pesquisar vários tipos de documento simultaneamente.
Para agrupar os tipos de documento em categorias, escolha a categoria nas configurações dos tipos de documento.
Por exemplo, um valor de ITEMTYPECAT pode ser “NOVO”. Esta categoria de pesquisa poderia ser definida para os tipos de artigo “LIVROS NOVOS” e “DVDs NOVOS”. Isto irá substituir os tipos de item “LIVROS NOVOS” e “DVDs NOVOS” no formulário de pesquisa avançada pela opção “NOVO”. Quando um utilizador selecionar a categoria “NOVO”, irá pesquisar em múltiplos tipos de item com uma única pesquisa.
Nota
As categorias de pesquisa são apenas utilizadas no OPAC.
LANG
Esta categoria é uma lista de códigos de idioma da norma ISO 639-2.
LOC
Estes valores correspondem a localizações de prateleira. Normalmente aparecem ao adicionar ou editar um exemplar.
Isto é normalmente mapeado para items.location na base de dados do Koha.
Se optar por instalar os valores por omissão para esta categoria, terá
Audiovisual (AV)
Carrinho de livros (CART)
O CART é utilizado por UpdateItemLocationOnCheckin
Área infantil (CHILD)
Ficção (FIC)
Pilhas gerais (GEN)
Estante de novos materiais (NEW)
Em exposição (DISPLAY)
Centro de processamento (PROC)
O PROC pode ser utilizado com NewItemsDefaultLocation e UpdateItemLocationOnCheckin.
Referência (REF)
Gabinete do staff (STAFF)
Pode alterá-los para atender às necessidades da sua organização.
Aviso
Para obter melhores resultados ao pesquisar, evite utilizar hífens nos códigos de localização.
LOST
Estes valores são descrições para os exemplares marcados como perdidos. Aparecem ao adicionar ou editar um exemplar.
Isto é normalmente mapeado para items.itemlost na base de dados do Koha.
Se optar por instalar os valores por omissão para esta categoria, terá
Perdido (1)
Empréstimo em atraso (perdido) (2)
Perdido e pago (3)
Em falta (4)
Em falta no conjunto (5)
Pode alterá-los para atender às necessidades da sua organização.
Aviso
Os valores autorizados para LOST devem ser numéricos.
NOT_LOAN
Estes valores indicam os motivos pelos quais um exemplar não está disponível para empréstimo. Aparecem ao adicionar ou editar um exemplar.
Isto é normalmente mapeado para items.notforloan na base de dados do Koha.
Se optar por instalar os valores por omissão para esta categoria, terá
Encomendado (-1)
Não emprestável (1)
Coleção da equipa (2)
Adicionado ao conjunto (3)
Pode alterá-los para atender às necessidades da sua organização.
Aviso
Os valores autorizados para NOT_LOAN devem ser numéricos.
Valores numéricos negativos permitirão reservas (para utilização com o estado de “encomendado”, por exemplo).
Os números positivos não permitirão reservas ou empréstimos.
Um valor de 0 significa “para empréstimo”.
OPAC_SUG
Esta categoria contém uma lista de motivos apresentados no formulário de sugestão no OPAC.
Se optar por instalar os valores por omissão para esta categoria, terá
O exemplar que se encontra na prateleira está danificado (damaged)
Próximo título de autor popular (bestseller)
Pode alterá-los para atender às necessidades da sua organização.
ORDER_CANCELLATION_REASON
Estes valores indicam os motivos pelos quais uma encomenda pode ter sido cancelada. São utilizados nas aquisições.
Se optar por instalar os valores por omissão para esta categoria, terá
Nenhum motivo apresentado (0)
Esgotado (1)
Reposição de stock (2)
Pode alterá-los para atender às necessidades da sua organização.
PA_CLASS
Estes valores são utilizados para agrupar atributos de leitor no formulário de adição e edição de leitores.
PAYMENT_TYPE
Esta categoria preenche uma lista suspensa de tipos de pagamento personalizados ao pagar multas.
Se optar por instalar os valores por omissão para esta categoria, terá
Dinheiro via SIP2 (SIP00)
Visa via SIP2 (SIP01)
Cartão de crédito via SIP2 (SIP02)
Pode alterá-los para atender às necessidades da sua organização.
qualif
Estes valores são códigos de função (autor, editor, colaborador, etc.) utilizados no campo 7XX $4 do formato UNIMARC (francês).
RELTERMS
Esta categoria é uma lista de códigos e termos de relação.
Esta lista baseia-se na lista de códigos MARC21 para funções de relação [https://www.loc.gov/marc/relators/] da Biblioteca do Congresso
Importante
Esta lista não é mantida atualizada nas instalações existentes. Certifique-se de que adiciona novos valores à sua instalação à medida que são publicados pela Biblioteca do Congresso.
Pode ser ligado a um subcampo numa estrutura bibliográfica MARC para criar um menu suspenso que permita aos catalogadores fazerem uma seleção, em vez de digitarem o código de relação. No MARC21, os códigos de relação constam normalmente no subcampo $4.
REPORT_GROUP
Estes valores podem ser utilizados para classificar e filtrar os seus relatórios. Aparecerão como separadores na página de relatórios guardados.
Se optar por instalar os valores por omissão para esta categoria, terá
Conta (ACC)
Aquisições (ACQ)
Catálogo (CAT)
Circulação (CIRC)
Leitores (PAT)
Periódicos (SER)
Pode alterá-los para atender às necessidades da sua organização.
REPORT_SUBGROUP
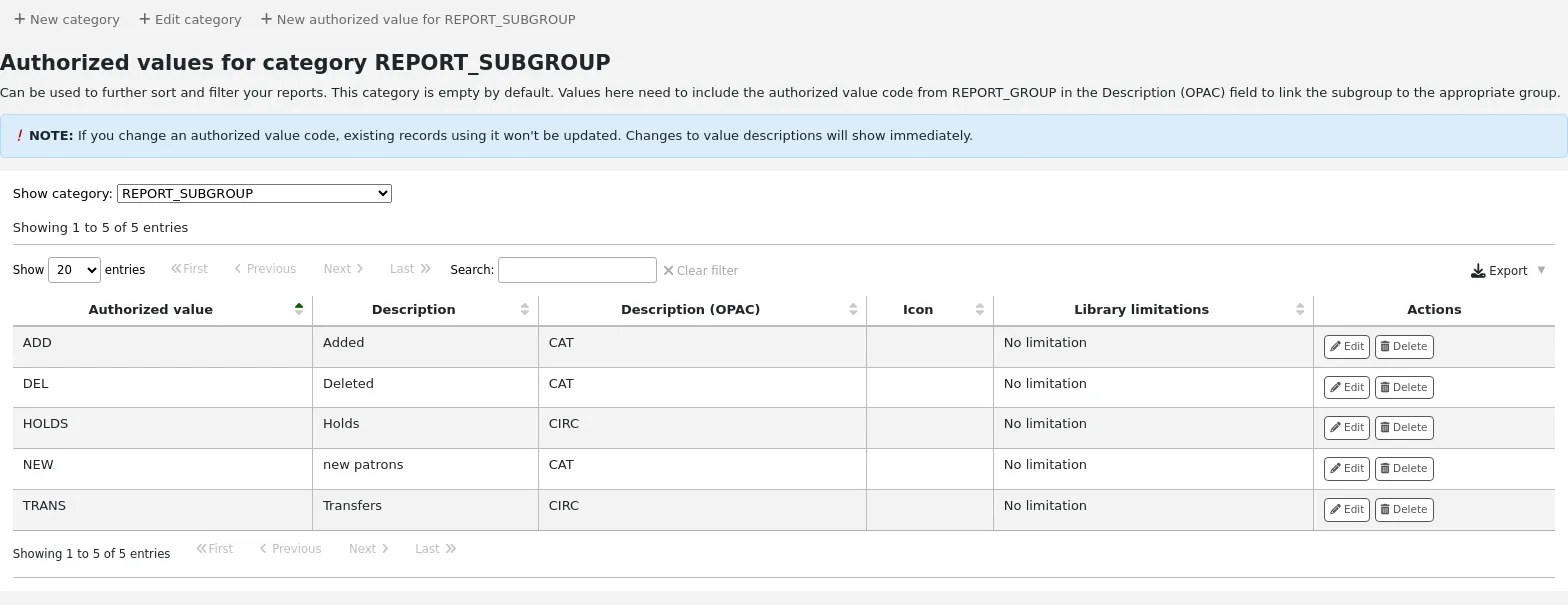
Estes valores podem ser utilizados para classificar e filtrar ainda mais os seus relatórios.
Os valores aqui devem incluir o código de valor autorizado de REPORT_GROUP no campo Descrição (OPAC) para ligar o subgrupo ao grupo apropriado.
RESTRICTED
Estes valores são utilizados como o estado de restrição de um exemplar. Aparecem ao adicionar ou editar um exemplar.
Isto é normalmente mapeado para items.restricted na base de dados do Koha.
Se optar por instalar os valores por omissão para esta categoria, terá
Acesso restrito (1)
Pode alterá-los para atender às necessidades da sua organização.
Aviso
Os valores autorizados para esta categoria devem ser numéricos.
RETURN_CLAIM_RESOLUTION
Estes valores são motivos pelos quais um pedido de devolução foi resolvido.
Se optar por instalar os valores por omissão para esta categoria, terá
Devolvido pelo leitor (RET_BY_PATRON)
Encontrado na biblioteca (FOUND_IN_LIB)
Pode alterá-los para atender às necessidades da sua organização.
ROADTYPE
Estes valores são tipos de logradouro a utilizar nos endereços dos utilizadores, no campo “tipo de logradouro” do formulário de leitor.
SIP_MEDIA_TYPE
Estes valores são utilizados ao criar ou editar um tipo de exemplar para atribuir um tipo de media específico do SIP a dispositivos como armários (lockers) e classificadores (sorters).
Se optar por instalar os valores por omissão para esta categoria, terá
Outro (000)
Livro (001)
Revista (002)
Revista encadernada (003)
Fita áudio (004)
Fita de vídeo (005)
CD/CDROM (006)
Disquete (007)
Livro com disquete (008)
Livro com CD (009)
Livro com fita áudio (010)
Aviso
Os tipos de suporte SIP estão limitados a 3 caracteres. Certifique-se de que os valores autorizados para SIP_MEDIA_TYPE não têm mais de 3 caracteres.
STACK
Estes valores são números de controlo de estante. Aparecem ao adicionar ou editar um exemplar.
Isto é normalmente mapeado para items.stack na base de dados do Koha.
Aviso
Os valores autorizados para esta categoria devem ser numéricos.
SUGGEST
Estes valores são motivos para a aceitação ou rejeição de sugestões de compra em aquisições. Aparecem ao gerir sugestões.
Se optar por instalar os valores por omissão para esta categoria, terá
Disponível via empréstimo interbibliotecas (AVILL)
Mais vendido (BSELL)
Documento que não está em conformidade com a nossa política de aquisição (Poldoc)
Documento muito caro (Expensive)
Orçamento insuficiente (Budget)
Exemplar da biblioteca em falta (LCL)
Exemplar de prateleira danificado (SCD)
Pode alterá-los para atender às necessidades da sua organização.
SUGGEST_FORMAT
Esta é uma lista de tipos de documento a apresentar num menu suspenso no formulário de sugestões do OPAC.
Se optar por instalar os valores por omissão para esta categoria, terá
Audiolivro (AUDIOBOOK)
Livro (BOOK)
EBook (EBOOK)
DVD (DVD)
Impressão larga (LP)
Pode alterá-los para atender às necessidades da sua organização.
Aviso
Os tipos de formato de sugestão estão limitados a 30 caracteres. Certifique-se de que os valores autorizados para esta categoria não excedem os 30 caracteres.
SUGGEST_STATUS
Esta é uma lista de valores de estado personalizados adicionais para sugestões que podem ser utilizados para além dos valores padrão.
Aviso
O estado da sugestão está limitado a 10 caracteres. Certifique-se de que o seu valor autorizado não tem mais de 10 caracteres.
Aviso
O estado da sugestão não deve conter espaços.
TERM
Estes valores são termos a utilizar no módulo de reservas de curso. Por exemplo: Primavera, Verão, Inverno, Outono.
Estes termos aparecerão no menu suspenso ao adicionar um novo curso.
TICKET_RESOLUTION
Versão
Esta categoria foi adicionada ao Koha na versão 24.05.
Estes valores são tipos de resolução a utilizar quando se marca questões do catálogo como “Resolvidas”.
TICKET_STATUS
Versão
Esta categoria foi adicionada ao Koha na versão 24.05.
Estes valores são estados a utilizar ao atualizar preocupações do catálogo.
UPLOAD
Estes valores são categorias a atribuir a carregamentos de ficheiros. Sem uma categoria, um carregamento é considerado temporário e pode ser removido durante a limpeza automatizada.
VENDOR_INTERFACE_TYPE
Estes valores são utilizados como tipos de interface de fornecedor no módulo de aquisições.
VENDOR_ISSUE_TYPE
Estes valores são utilizados como um tipo de problema com fornecedor ao adicionar um problema no módulo de aquisições.
VENDOR_TYPE
Estes valores são utilizados para categorizar fornecedores no módulo de aquisições.
WITHDRAWN
Estes valores são descrições para exemplares retirados. Aparecem ao adicionar ou editar um exemplar.
Isto é normalmente mapeado para items.withdrawn na base de dados do Koha.
Se optar por instalar os valores por omissão para esta categoria, terá
Retirado (1)
Pode alterá-los para atender às necessidades da sua organização.
Aviso
Os valores autorizados para esta categoria devem ser numéricos.
YES_NO
Este é um campo de valor autorizado genérico que pode ser utilizado onde quer que necessite de um menu suspenso simples de sim/não.
Se optar por instalar os valores por omissão para esta categoria, terá
Sim (1)
Não (0)
Aviso
Em geral, os campos binários requerem um valor 1 ou 0. Se alterar estes valores, certifique-se de que o campo ao qual pretende associá-los aceita valores diferentes de 0 ou 1.
Adicionar novas categorias de valores autorizados
Para além das categorias existentes que vêm por omissão no Koha, os bibliotecários podem adicionar as suas próprias categorias de valores autorizados para controlar os dados introduzidos no sistema.
Para adicionar uma nova categoria:
Clique em “Nova categoria”
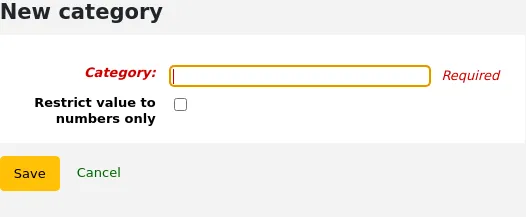
Preencher o formulário
Categoria: introduza o código da nova categoria. Limite o código a 32 caracteres (algo curto que deixe claro o propósito da categoria).
Aviso
Um código de categoria não pode conter espaços ou caracteres especiais, exceto sublinhados e hífens.
Restringir o valor apenas a números: assinale a caixa se os valores desta categoria deverem ser exclusivamente numéricos. Isto impedirá que a equipa crie valores autorizados que não estejam em conformidade com esta regra.
Versão
Esta opção foi adicionada ao Koha na versão 24.05.
Clicar em “Guardar”
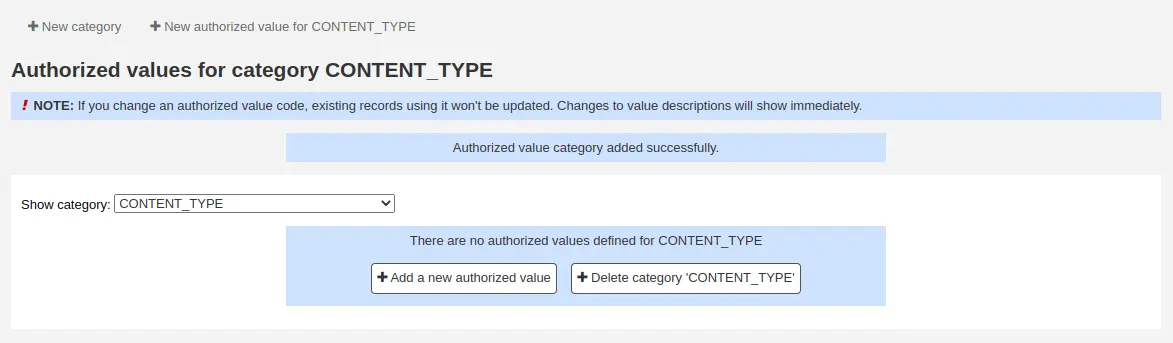
Prossiga para adicionar um novo valor autorizado à categoria.
Adicionando novos valores autorizados
Os novos valores autorizados podem ser adicionados a qualquer categoria existente ou nova.
Para adicionar um valor:
Na lista de categorias, clique no botão “Adicionar” à direita da categoria
Em alternativa, clique no nome da categoria e, em seguida, clique em “Novo valor autorizado para…”
Se a categoria ainda não tiver valores, clique no botão “Adicionar um novo valor autorizado” na parte inferior da página
Preencher o formulário
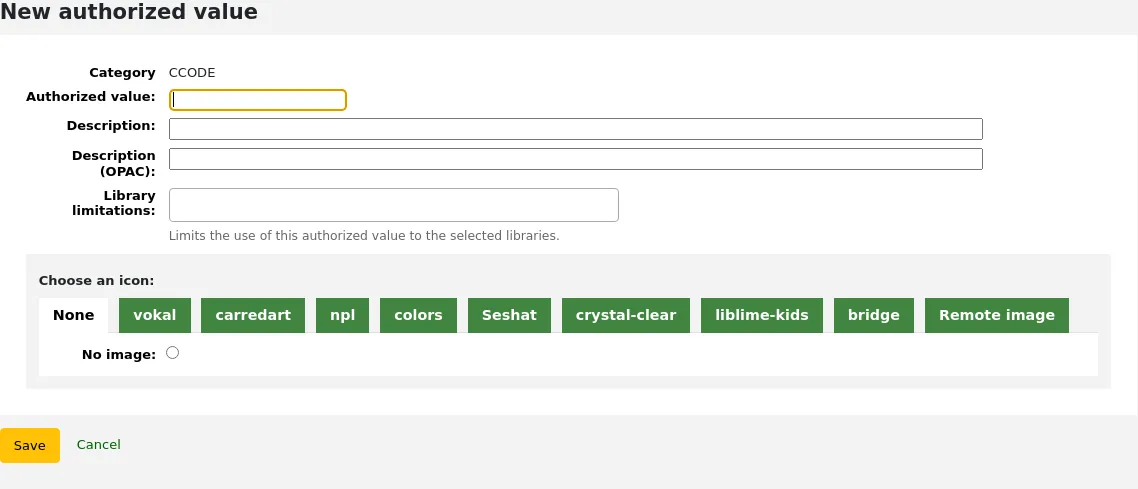
Valor autorizado: introduza um código para o seu valor autorizado
Nota
O valor autorizado está limitado a 80 caracteres e não pode conter espaços ou caracteres especiais, exceto sublinhados e hífens.
Algumas categorias, como SUGGEST_STATUS, podem ter limites mais rigorosos. Consulte a secção categorias de valores autorizados existentes acima para verificar os limites especificados.
Descrição: utilize este campo para o valor real que será apresentado.
Descrição (OPAC): se pretender visualizar uma descrição diferente no OPAC, introduza-a aqui. Se este campo estiver vazio, a “Descrição” será utilizada tanto na interface dos técnicos como no OPAC.
Limitações por biblioteca: se pretender restringir este valor autorizado a bibliotecas específicas, pode seleccioná-las neste menu. Para o disponibilizar a todas as bibliotecas, basta escolher “Todas as bibliotecas” no topo da lista.
Escolha um ícone: pode selecionar uma imagem que aparecerá ao lado do valor na interface da equipa e no OPAC.
Nota
Esta funcionalidade não funciona em todos os lugares. Aplica-se principalmente a localizações de artigos (LOC) e códigos de recolha (CCODE) na pesquisa avançada.
Clicar em “Guardar”
O novo valor irá aparecer na lista junto com os já existentes
Eliminar valores autorizados
Para eliminar um valor autorizado, clique no botão “Apagar” à direita do valor autorizado.
Assim que não restarem valores autorizados numa categoria de valores autorizados, pode eliminar a categoria.
Leitores e empréstimo
Configurações para controlar a circulação e a informação dos leitores.
Categorias de Leitores
As categorias de leitor permitem organizar os seus leitores em diferentes funções, faixas etárias e tipos de leitor.
Acesso: Mais > Administração > Leitores e circulação > Categorias de leitor
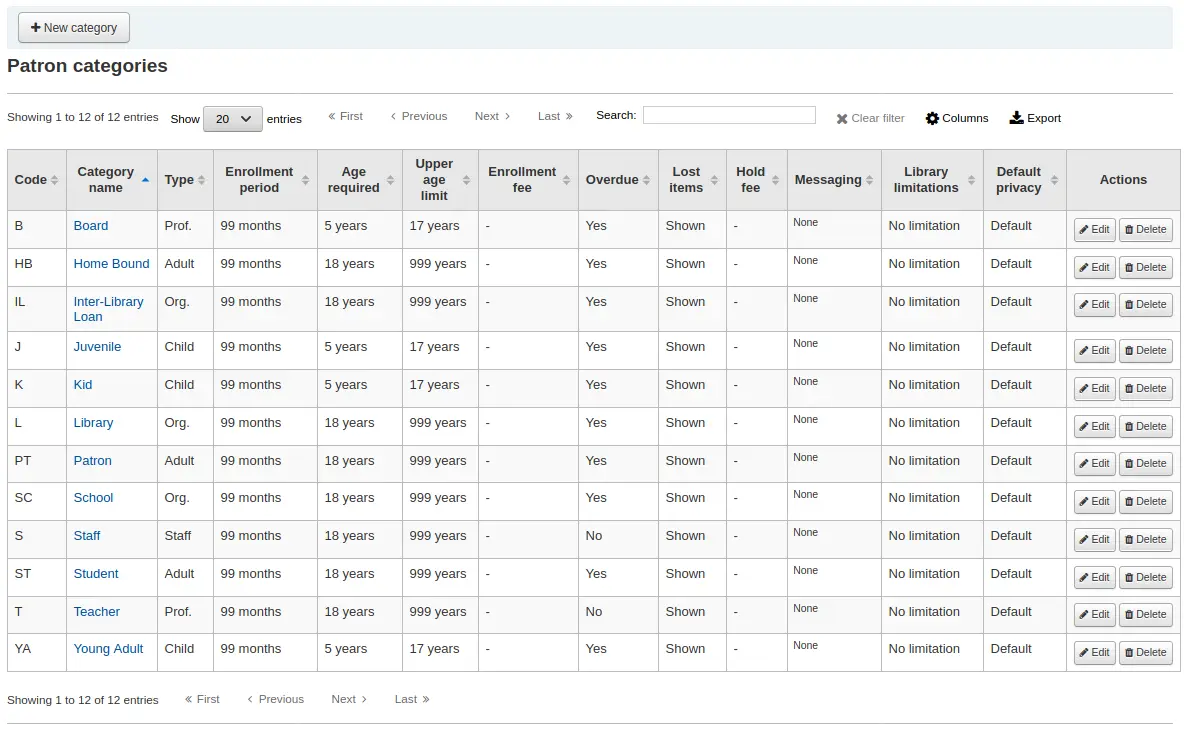
Nota
Pode personalizar as colunas desta tabela na secção Configurações da tabela do módulo de Administração (identificador da tabela: patron_categories).
Nota
Apenas os colaboradores com a permissão manage_patron_categories (ou superbibliotecários) terão acesso a esta secção.
Adicionar categoria de leitor
Para adicionar uma nova categoria de leitor, clique em “Nova categoria” no topo da página
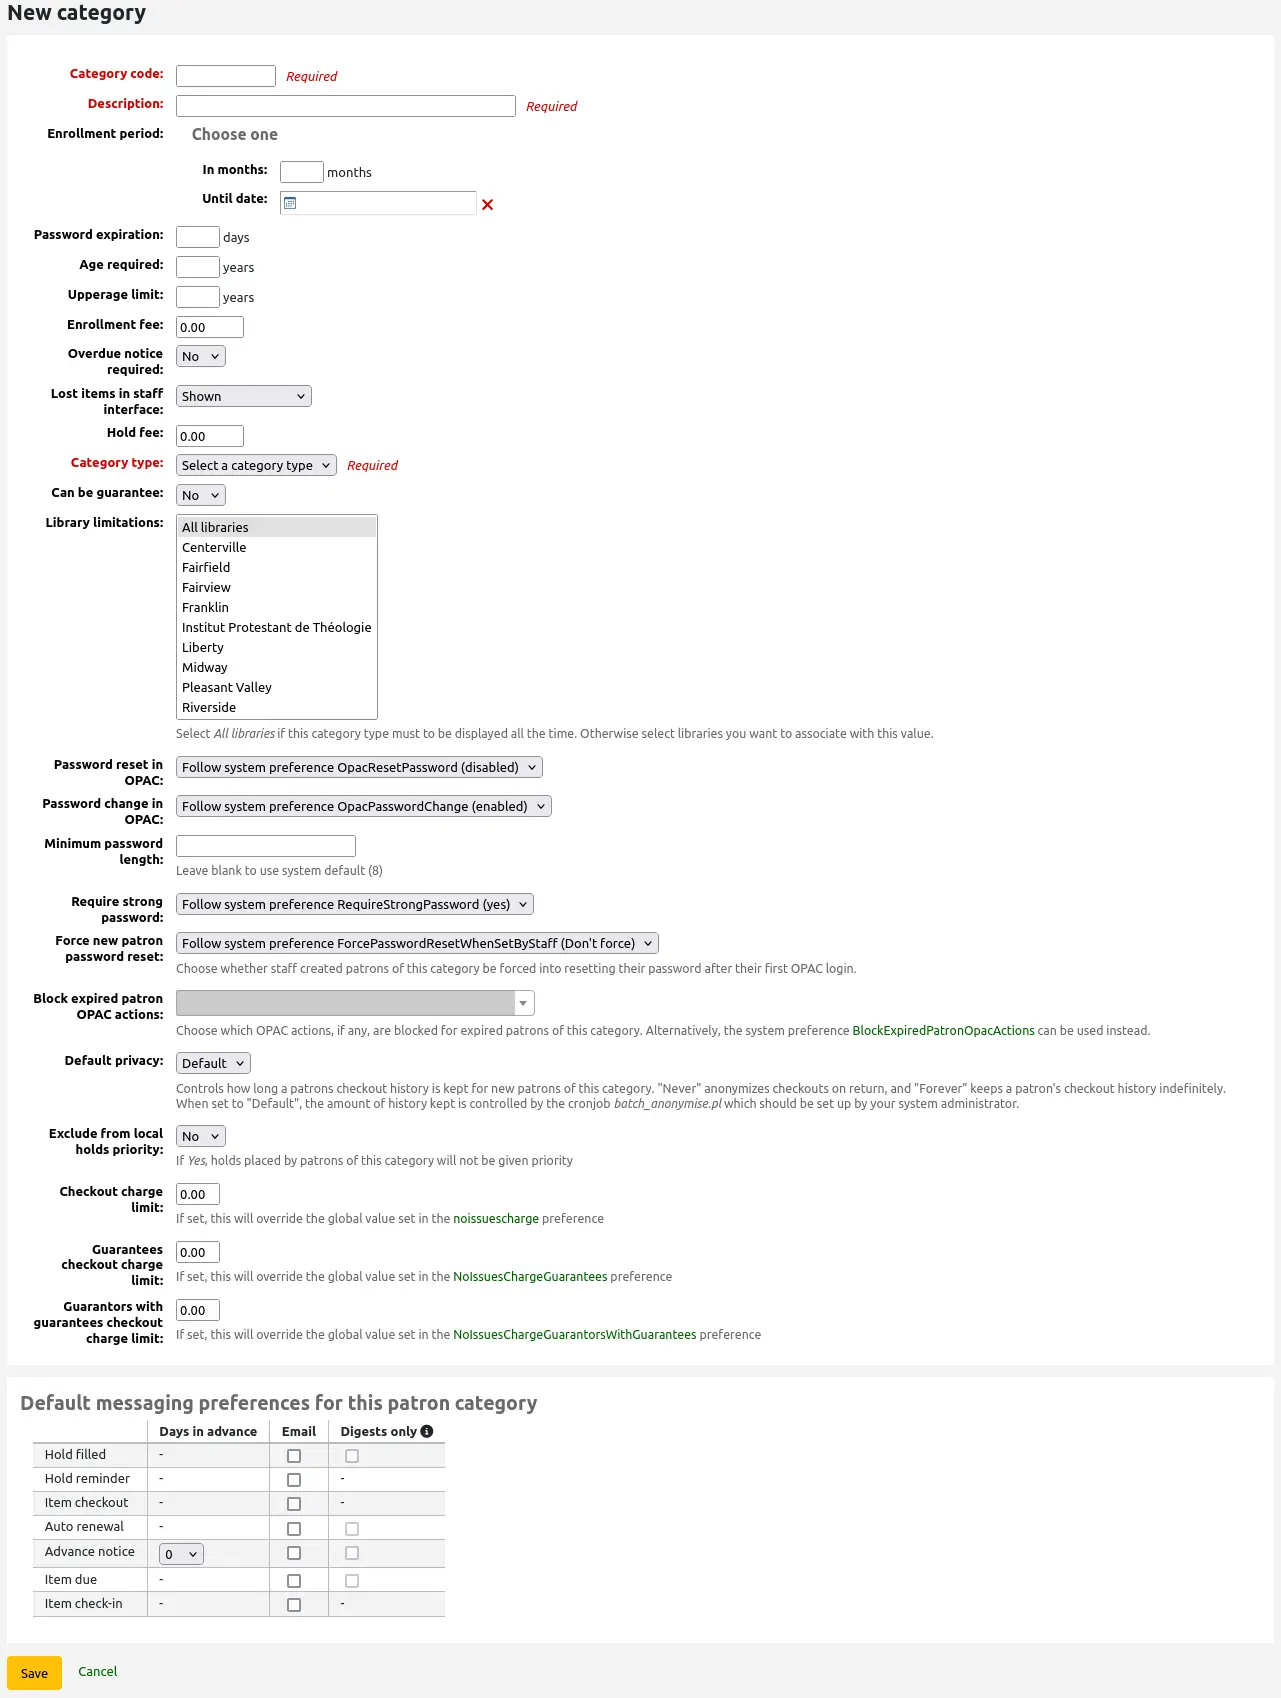
Código da categoria: um identificador para a sua nova categoria.
O código da categoria está limitado a 10 caracteres (números e letras) e deve ser único.
Este campo é obrigatório para guardar a categoria de utilizador. Se for deixado em branco, será apresentada uma mensagem de erro.
Descrição: uma versão em texto simples da categoria.
A descrição estará visível em todo o Koha.
Este campo é obrigatório para guardar a categoria de utilizador. Se for deixado em branco, será apresentada uma mensagem de erro.
Período de inscrição:
Em meses: deve ser preenchido se houver um período de inscrição limitado para os leitores. Por exemplo, os cartões de estudante expiram ao fim de 9 meses
Até à data: pode escolher uma data em que os cartões expirarão
Este campo é obrigatório para guardar a categoria de utilizador. Se for deixado em branco, será apresentada uma mensagem de erro.
Aviso
Não pode introduzir um limite mensal e uma data limite para a mesma categoria. Escolha inserir um ou outro.
Expiração da palavra-passe: introduza o número de dias após os quais o leitor deve alterar a sua palavra-passe.
Idade exigida: requisito de idade mínima (em anos) associado à categoria. Por exemplo, uma categoria de leitor “Adulto” poderia exigir uma idade mínima de 18 anos; isto significa que os leitores devem ter pelo menos 18 anos para pertencer a esta categoria.
Ao criar ou atualizar um leitor, será apresentado um aviso se o leitor for demasiado jovem para esta categoria.

Este valor é utilizado pela tarefa cron update_patrons_category.pl para alterar a categoria dos leitores que são demasiado jovens.
Limite superior de idade: idade máxima (em anos) associada à categoria. Por exemplo, uma categoria de leitor “Crianças” poderia ter um limite superior de idade de 18 anos, o que significa que os leitores podem manter cartões infantis até completarem 18 anos.
Ao criar ou atualizar um leitor, será apresentado um aviso se o leitor tiver uma idade superior à permitida para esta categoria.
Este valor é utilizado pela tarefa cron update_patrons_category.pl para alterar a categoria de leitores que ultrapassaram o limite de idade.
Taxa de inscrição: insira o valor caso cobre uma taxa de adesão aos seus membros (como por exemplo, os que residem noutra região).
Aviso
Introduza apenas números e decimais neste campo.
Nota
Dependendo do valor definido para a preferência do sistema FeeOnChangePatronCategory, esta taxa será cobrada tanto na renovação do registo do utilizador como no momento da sua inscrição inicial.
Aviso de atraso necessário: selecione “Sim” se pretender que os leitores desta categoria recebam avisos de atraso. Isto permitir-lhe-á configurar os aviso de atraso no módulo Ferramentas.
Exemplares perdidos na interface dos técnicos: defina, com base na categoria de leitor, se os exemplares perdidos serão apresentados na interface dos técnicos.
Exibido: os exemplares perdidos são apresentados na interface dos técnicos.
Ocultos por omissão: os exemplar perdidos ficam ocultos, mas os membros da equipa podem clicar em “Mostrar todos os exemplares” para os visualizar.
Nota
Isto aplica-se apenas à interface dos técnicos e, portanto, alterar este valor para categorias de leitores que não têm acesso à interface dos técnicos não fará qualquer diferença.
Taxa de reserva: insira o valor da taxa caso cobre aos leitores desta categoria uma taxa para efetuar reservas de exemplares.
Introduza apenas números e decimais neste campo.
Atenção
A partir da versão 26.05 do Koha, esta funcionalidade foi transferida para as regras de circulação e multas.
Tipo de categoria: escolha uma das seis categorias principais (categorias-pai)
Adulto: tipo de leitor mais comum, geralmente utilizado para uma categoria geral de “Leitor”.
Criança: outro tipo comum de leitor.
Staff: equipa da biblioteca
Organizacional: as organizações podem atuar como garantes para os leitores profissionais.
Profissional: os leitores profissionais podem estar ligados a leitores organizacionais.
Estatístico: este tipo de leitor é utilizado estritamente para fins estatísticos, como por exemplo a utilização de exemplares nas instalações da biblioteca.
Este campo é obrigatório para guardar a categoria de utilizador. Se for deixado em branco, será apresentada uma mensagem de erro.
Pode ter fiador: se os leitores desta categoria puderem ter fiadores, selecione sim. Isto fará com que as secções “Fiador (leitor)” e “Fiador (não leitor)” apareçam no formulário do leitor.
Limitações da biblioteca: se necessário, restrinja esta categoria a apenas algumas bibliotecas do seu sistema. Selecione “Todas as bibliotecas” se alguma biblioteca puder utilizar esta categoria.
Dica
Para selecionar mais do que uma biblioteca, mantenha a tecla “Ctrl” premida ao fazer a seleção.
Redefinição de palavra-passe no OPAC: determine se os leitores desta categoria têm permissão para redefinir as suas palavras-passe através da função “Esqueci-me da palavra-passe” do OPAC. Por omissão, será aplicada a regra definida na preferência de sistema OpacResetPassword.
Seguir a preferência de sistema OpacResetPassword.
Permitido: os leitores desta categoria poderão redefinir a sua palavra-passe através do OPAC, independentemente da configuração em OpacResetPassword.
Não permitido: os leitores desta categoria não poderão redefinir a sua palavra-passe através do OPAC, independentemente da configuração em OpacResetPassword.
Alteração de palavra-passe no OPAC: determine se os leitores desta categoria têm permissão para alterar as suas palavras-passe através do OPAC. Por omissão, será aplicada a regra definida na preferência de sistema OpacPasswordChange.
Seguir a preferência do sistema OpacPasswordChange.
Permitido: os leitores desta categoria poderão alterar a sua palavra-passe através do OPAC, independentemente da configuração em OpacPasswordChange.
Não permitido: os leitores desta categoria não poderão alterar a sua palavra-passe através do OPAC, independentemente da configuração em OpacPasswordChange.
Comprimento mínimo da palavra-passe: Introduza o comprimento mínimo da palavra-passe para os leitores desta categoria. Deixe em branco para utilizar o comprimento por omissão definido na preferência de sistema minPasswordLength.
Exigir palavra-passe forte: decida se pretende aplicar uma política de palavra-passe forte (pelo menos uma letra maiúscula, uma letra minúscula e um dígito) para os leitores desta categoria. Por omissão, será seguida a regra definida na preferência de sistema RequireStrongPassword.
Seguir a preferência do sistema RequireStrongPassword.
Sim: os leitores desta categoria terão de ter uma palavra-passe forte, independentemente da configuração em RequireStrongPassword.
Não: os leitores desta categoria não serão obrigados a ter uma palavra-passe forte, independentemente da configuração em RequireStrongPassword.
Forçar redefinição da palavra-passe do utilizador: escolha se os leitores desta categoria criados pela equipa serão obrigados a alterar a palavra-passe após o primeiro acesso ao OPAC.
Seguir a preferência do sistema ForcePasswordResetWhenSetByStaff
Forçar: os leitores desta categoria serão obrigados a alterar a sua palavra-passe quando iniciarem sessão no OPAC pela primeira vez, independentemente da configuração em ForcePasswordResetWhenSetByStaff
Não forçar: os leitores desta categoria não serão obrigados a alterar a sua palavra-passe quando iniciarem sessão no OPAC pela primeira vez, independentemente da configuração em ForcePasswordResetWhenSetByStaff
Nota
Isto aplica-se apenas aos leitores cuja conta foi criada manualmente por membros da equipa (ao contrário dos leitores que realizaram o seu próprio registo).
Versão
Esta configuração foi adicionada ao Koha na versão 24.11.
Bloquear ações de leitores expirados no OPAC: determine se os leitores desta categoria estão impedidos de realizar ações no OPAC caso as suas contas estejam expiradas. Por omissão, será aplicada a regra definida na preferência de sistema BlockExpiredPatronOpacActions.
Siga a preferência do sistema BlockExpiredPatronOpacActions.
Bloquear ações específicas:
Nota
Esta configuração substitui o que está definido na preferência de sistema BlockExpiredPatronOpacActions.
Aviso
Antes da versão 24.11 do Koha, esta definição é uma simples opção de ativar/desativar, sendo que todas as ações são bloqueadas se estiver ativada.
Verificar empréstimos anteriores: se a preferência de sistema CheckPrevCheckout estiver definida como uma das opções “A menos que seja substituído pela categoria de utilizador”, pode definir o valor para essa categoria de leitor específica aqui.
Sim, e tente sobrepor as preferências de sistema: o Koha irá verificar se o leitor já requisitou este exemplar, a menos que as definições pessoais do leitor o impeçam.
Não tente sobre as preferências de sistema: o Koha não vai verificar se o leitor já requisitou o exemplar, a menos que as definições pessoais do utilizador o permitam.
Herdar das preferências de sistema: será seguida a configuração da preferência de sistema CheckPrevCheckout.
Permitir empréstimo interbibliotecas (ILL) no OPAC: se a preferência de sistema ILLModule estiver ativada, esta configuração determina se os leitores desta categoria podem fazer pedidos de empréstimo interbibliotecas a partir do OPAC.
Privacidade predefinida: escolha as definições de privacidade predefinidas para os leitores desta categoria.
Omissão: o histórico de empréstimos será mantido indefinidamente, até que o script batch_anonymize.pl seja executado ou que seja realizada uma anonimização em lote manual.
Nunca: o histórico de empréstimos é anonimizado após a devolução. As estatísticas são mantidas, mas o vínculo entre o empréstimo, o exemplar e o leitor é removido.
Para sempre: o histórico de empréstimos nunca é anonimizado para os leitores desta categoria, independentemente das rotinas ou da anonimização manual.
Esta configuração pode ser editada pelo leitor via OPAC, caso o permita através da preferência de sistema OPACPrivacy.
Excluir da prioridade de reservas locais: escolha se as reservas para os leitores desta categoria recebem prioridade.
Sim: as reservas dos leitores desta categoria não recebem prioridade especial, independentemente da configuração em LocalHoldsPriority.
Não: os pedidos de reserva para leitores desta categoria estão sujeitos à configuração em LocalHoldsPriority.
Limite de multa para empréstimos: impede os leitores desta categoria de realizar empréstimos de artigos caso tenham débitos superiores ao valor especificado.
Se este campo for deixado em branco ou estiver definido para 0, o valor da preferência de sistema noissuescharge será utilizado para os leitores desta categoria.
Se este campo contiver um valor, irá sobrescrever o valor definido na preferência de sistema noissuescharge para os leitores desta categoria.
Versão
Esta configuração foi adicionada ao Koha na versão 24.11.
Guarantees checkout charge limit: prevent patrons from this category from checking out items if their guarantees collectively owe more than the specified amount.
Se este campo for deixado em branco ou estiver definido para 0, será utilizado o valor da preferência de sistema NoIssuesChargeGuarantees para os leitores desta categoria.
Se este campo contiver um valor, irá sobrescrever o valor definido na preferência do sistema NoIssuesChargeGuarantees para os leitores desta categoria.
Versão
Esta configuração foi adicionada ao Koha na versão 24.11.
Guarantors with guarantees checkout charge limit: prevent patrons from this category from checking out items if the patron has guarantors and those guarantors” guarantees collectively owe more than the specified amount.
Se este campo for deixado em branco ou estiver definido para 0, o valor da preferência de sistema NoIssuesChargeGuarantorsWithGuarantees será utilizado para os leitores desta categoria.
Se este campo contiver um valor, irá sobrescrever o valor definido na preferência do sistema NoIssuesChargeGuarantorsWithGuarantees para os leitores desta categoria.
Versão
Esta configuração foi adicionada ao Koha na versão 24.11.
Preferências de mensagens por omissão para esta categoria: atribuir preferências avançadas de mensagens por omissão para a categoria de leitor
Estas preferências padrão podem ser alteradas individualmente para cada leitor. Esta configuração serve apenas como omissão para facilitar a definição das mensagens ao registar novos leitores.
Nota
Isto requer que a preferência do sistema EnhancedMessagingPreferences esteja definida como “Permitir”.
Aviso
Estas definições padrão serão aplicadas apenas aos novos leitores adicionados ao sistema. Não alterarão as preferências dos leitores já existentes.
Se necessitar de aplicar as preferências padrão aos leitores existentes, pode forçar estas alterações executando o script borrowers-force-messaging-defaults, localizado na pasta misc/maintenance. Solicite assistência ao administrador do sistema para o utilizar.
Regras de empréstimo e multas
Estas regras definem como os seus exemplares circulam, como e quando as multas são calculadas e como as reservas são geridas.
Acesso: Mais > Administração > Leitores e circulação > Regras de circulação e multas
Nota
Apenas os colaboradores com a permissão manage_circ_rules (ou superbibliotecários) terão acesso a esta secção.
As regras são aplicadas do mais específico para o menos específico, utilizando-se o primeiro encontrado na seguinte ordem:
mesma biblioteca, mesma categoria de leitor, mesmo tipo de documento
mesma biblioteca, mesma categoria de leitor, todos os tipos de documento
mesma biblioteca, todas as categorias de leitor, mesmo tipo de documento
mesma biblioteca, todas as categorias de leitor, todos os tipos de documento
omissão (todas as bibliotecas), mesma categoria de leitor, mesmo tipo de documento
omissão (todas as bibliotecas), mesma categoria de leitor, todos os tipos de documento
omissão (todas as bibliotecas), todas as categorias de leitor, mesmo tipo de documento
omissão (todas as bibliotecas), todas as categorias de leitor, todos os tipos de documento
O CircControl e o HomeOrHoldingBranch também entram em jogo ao determinar qual a regra de circulação que deve ser seguida.
Se CircControl estiver definido como «a biblioteca em que está ligado», as regras de circulação serão seleccionadas com base na biblioteca em que está ligado
Se CircControl estiver definido como «a biblioteca do leitor», as regras de circulação serão selecionadas com base na biblioteca do leitor
Se CircControl estiver definido como «a biblioteca de origem do exemplar», as regras de circulação serão selecionadas com base na biblioteca do exemplar, sendo que HomeOrHoldingBranch determina se será utilizada a biblioteca de origem ou a biblioteca onde o exemplar se encontra atualmente.
Se IndependentBranches estiver definido para “Sim”, o valor de HomeOrHoldingBranch será utilizado para determinar se o exemplar pode ser emprestado. Se a biblioteca de origem do exemplar não corresponder à biblioteca em que o utilizador está ligado, o exemplar não poderá ser emprestado, a menos que possua a permission de superbibliotecário.
Importante
No mínimo, terá de definir uma regra de circulação por omissão. Esta regra deve ser configurada para todos os tipos de documento, todas as bibliotecas e todas as categorias de leitor. Abrangerá todos os casos que não se enquadrem numa regra específica. Se, ao realizar um empréstimo, não existir uma regra que contemple todas as bibliotecas, tipos de documento e categorias de leitor, é possível que os utilizadores sejam impedidos de fazer reservas.
Definir regras de circulação
Utilizando a matriz de regras de empréstimo, pode definir regras que dependem de combinações de categoria de leitor e tipo de documento.
Nota
Como a matriz é muito larga, pode exportar as regras existentes nos formatos Microsoft Excel ou CSV para as analisar, utilizando o botão ‘Exportar’ no topo da tabela.
Para definir as suas regras, escolha uma biblioteca no menu suspenso (ou “Regras padrão para todas as bibliotecas”, caso pretenda aplicar estas regras a todas as bibliotecas):
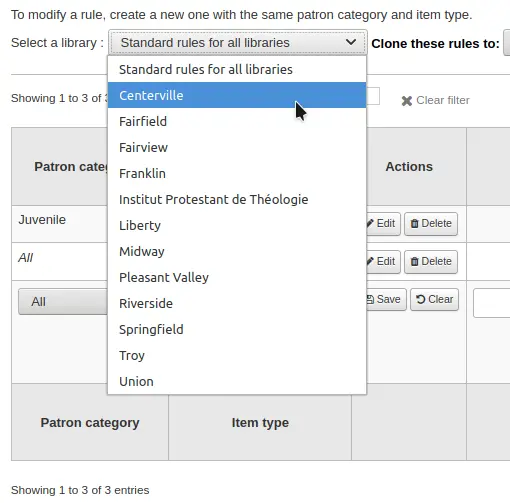
A partir da tabela pode escolher qualquer combinação de categorias de leitores e tipo de documentos aos quais deseja aplicar as regras

Primeiro escolha qual a categoria do leitor que deseja aplicar a regra. Senão é aplicada a todas as categorias
Escolha o tipo de documento ao qual pretende aplicar esta regra. Se mantiver a opção “Todos”, esta será aplicada a todos os tipos de documento para esta categoria de leitor.
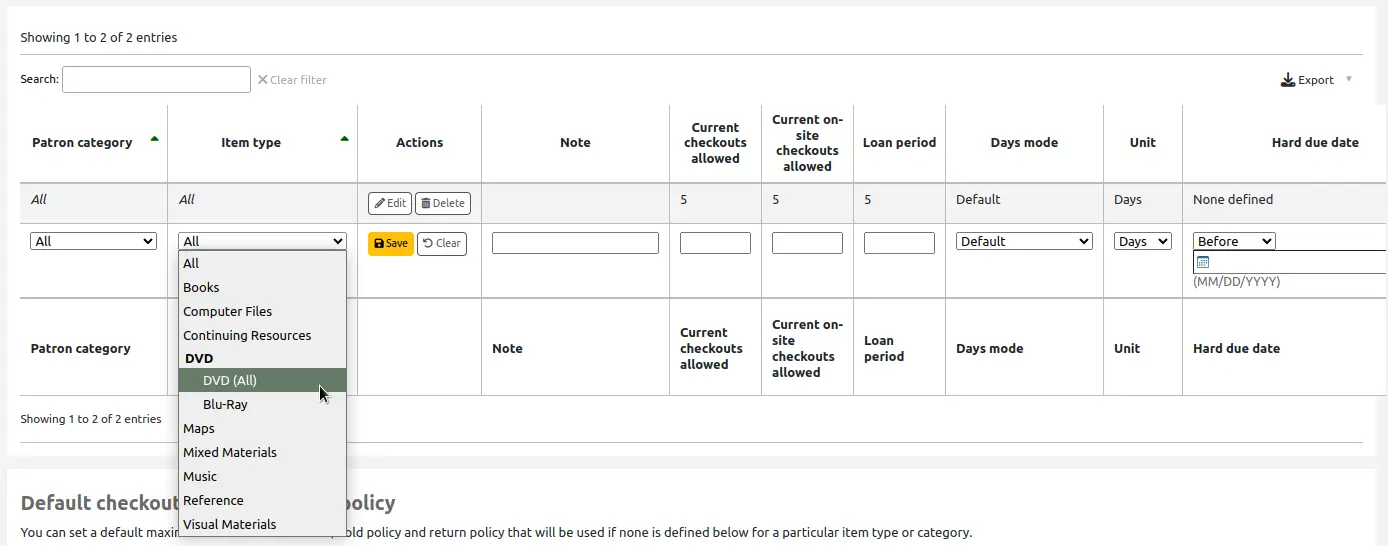
Se um tipo de documento tiver um tipo de documento pai, a regra é apresentada como Pai -> Filho. O número de levantamentos atuais será limitado ao valor máximo do pai (incluindo os tipos irmãos) ou à regra do tipo específico, prevalecendo o menor dos dois valores.
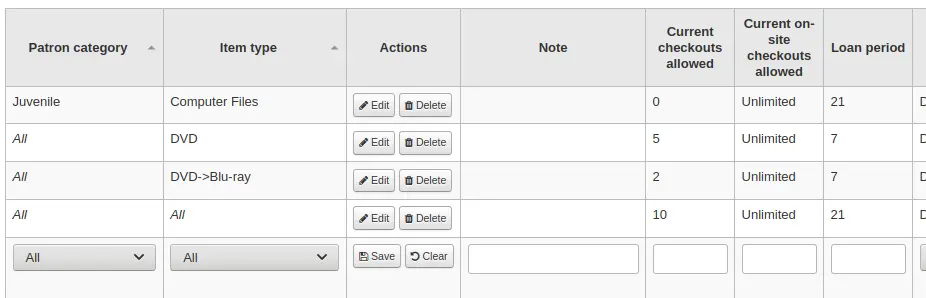
In the example above, there is a rule for the DVD item type with a maximum of 5 checkouts and a rule for Blu-ray, a child of DVD, with a maximum of 2 checkouts. A patron at this library will be able to check out a maximum of 2 Blu-rays in a total of 5 items of either DVD or Blu-ray types.
To summarize, a patron at this library would be able to take either : - 0 Blu-ray and a maximum of 5 DVDs - 1 Blu-ray and a maximum of 4 DVDs - 2 Blu-ray and a maximum of 3 DVDs
Add notes about your circulation rule into the notes field. This can be helpful to remember why and when something was last changed.
Limit the number of items of this type a patron of this category can have checked out at the same time by entering a number in the “Current checkouts allowed” field.
If you’re allowing on-site checkouts then you may also want to set a limit on the number of items of this type patrons of this category can have on-site.
Nota
This setting also depends on the ConsiderOnSiteCheckoutsAsNormalCheckouts preference
Define the period of time an item of this type can be checked out to a patron of this category by entering the number of units (days or hours) in the “Loan period” box.
Define if the loan period should include closed days or not in the “Days mode” column. The option chosen here will override the useDaysMode system preference for this particular rule.
The “Default” option will take the option defined in the useDaysMode system preference
Choose the “Calendar” option if you want to use the calendar to skip the days when the library is closed
Choose the “Datedue” option if you want to push the due date to the next open day
Choose the “Days” option if you want to ignore the calendar and calculate the due date directly
Choose the “Dayweek” option if you want to use the calendar to push the due date to the next open matching weekday for weekly loan periods, or the next open day otherwise
Choose which unit of time, days or hours, that the loan period and fines will be calculated in in the “Unit” column
Nota
If using “hours”, you can set library opening hours for each library and determine how the due time is calculated should it fall outside of opening hours.
You can also define a hard due date for a specific patron category and item type. The hard due date offers three options:
Exactly on: The due date of any item checked out with this rule will be set to the hard due date.
Before: Koha will calculate the normal loan period. If the calculated due date would be after or on the hard due date, the hard due date will be used instead.
After: Koha will calculate the normal loan period. If the calculated due date would be before the hard due date, the hard due date will be used instead.
“Fine amount” should have the amount you would like to charge for overdue items.
Importante
Enter only numbers and decimal points (no currency symbols).
Enter the “Fine charging interval” in the unit you set (ex. charge fines every 1 day, or every 2 hours). The finesCalendar system preference controls whether the days the library is closed will be taken into account or not.
“When to charge” is most handy in libraries that have a fine charging interval of more than 1 day.
End of interval: Given a grace period of 2 days and a fine interval of 7 days, the first fine will appear 7 days after the due date, it will always take one fine interval (7 days), before the first fine is charged.
Start of interval: Given a grace period of 2 days and a fine interval of 7 days, the first fine will appear 2 days after the due date and the second fine 7 days after the due date.
The “Fine grace period” is the period of time an item can be overdue before you start charging fines. The FinesIncludeGracePeriod system preference controls if the grace period will be included when calculating the fine or not.
Importante
This can only be set for the “Day” unit, not in “Hours”
The “Overdue fines cap” is the maximum fine per item for this patron and item type combination.
Importante
If this field is left blank then Koha will not put a limit on the fines this item will accrue. A maximum fine amount for all overdues can be set using the MaxFine system preference.
If you would like to prevent overcharging patrons for a lost items, you can check the box under “Cap fine at replacement price.” This will prevent the patron’s fines from going above the replacement price on the item.
Nota
If the “Overdue fines cap” is also set, the fine will be the lesser of the two, if both apply to the given overdue checkout.
If you charge patrons a fine when they don’t come to pick up their waiting holds in time (see below the number of days set in “Holds pickup period (day)”), enter the amount of the fine in “Expired hold charge”.
If this field is left empty, the value in the ExpireReservesMaxPickUpDelayCharge system preference is used.
Versão
This option was added to Koha in version 25.05.
If your library “fines” patrons by suspending their account you can enter the number of days their fine should be suspended in the “Suspension in days” field.
Importante
This can only be set for the “Day” unit, not in “Hours”
You can also define the maximum number of days a patron will be suspended in the “Max suspension duration” setting
The “Suspension charging interval” option is just like the “Fin charging interval”. For example, you could “fine” a patron one day suspension for every two days overdue.
Next decide if the patron can renew this item type and if so, enter how many times they can renew it in the “Renewals allowed” box.
If you allow unseen renewals (see UnseenRenewals), enter how many “unseen” renewals patrons can make. This is not in addition to the regular renewals, but rather how many “unseen” renewals can be made among the total number of renewals.
If you’re allowing renewals you can control how long the renewal loan period will be (in the units you have chosen) in the “Renewal period” box.
If you’re allowing renewals you can control how soon before the due date patrons can renew their materials with the “No renewals before” box.
Items can be renewed at any time if this value is left blank. Otherwise items can only be renewed if the item is due after the number in units (days/hours) entered in this box.
To control this value on a more granular level please set the NoRenewalBeforePrecision preference.
If you enable automatic renewals (see below), enter how much time before the due date the automatic renewal takes place.
You can enable automatic renewals for certain items/patrons if you’d like. This will renew automatically following your circulation rules unless there is a hold on the item.
Importante
You will need to enable the automatic renewal cron job for this to work.
Importante
This feature needs to have the «no automatic renewal before» column filled in or it will auto renew every day after the due date.
If you are using automatic renewals, you can use the “No automatic renewals after” to limit the time a patron can have the item. For example: don’t allow automatic renewals after a checkout period of 80 days.
Similar to the hard due date setting, you can also stop automatic renewals after a specific date using the “No automatic renewal after (hard limit)” setting.
If patrons of this category can place holds on items of this type, enter the total numbers of items (of this type) that can be put on hold in the “Holds allowed” field.
Leave empty to have unlimited holds.
If you’d rather put a hold limit per patron category, independent of the item type, see the default checkout and hold policy by patron category section below.
If you want to have a hard hold limit, independent of patron category and item type, for this particular library, see the Default checkout, hold, and return policy section below.
If you want to have a hard hold limit, independent of patron category, item type, and across all libraries, see the maxreserves system preference.
You can also set a daily limit on the number of holds a patron can place.
While the two settings before limit the holds that can be placed across various records, the next setting is used to limit the number of holds that can be placed on one record at the same time. For example, for fiction books you might want to allow only one item to be placed on hold at the same time by the same user. But for serials where items represent different issues more than one hold at the same time is fine.
Nota
If this is set to a number that is greater than 1, but not Unlimited, then staff will have the option of placing multiple holds at once when placing a hold on the next available item in the staff interface
Next you can decide how the availability of items influences the ability to place a hold. The “On shelf holds allowed” option has three settings:
Yes: This will allow to place holds on items at all times. It doesn’t matter if they are available or checked out.
If any unavailable: This will allow to place a hold as soon as one or more items of the record are checked out. It doesn’t matter if there are still one or more items available on the shelf.
If all unavailable: This will allow to place a hold as soon as all items on the record are checked out that could fill the hold. This is especially useful for libraries that don’t offer the service of getting items placed on hold off the shelf for patrons.
Under “OPAC item level hold” you can decide if patrons are allowed to place item specific holds on the item type in question. The options are:
Allow: Will allow patrons the option to choose next available or a specific item.
Don’t allow: Will only allow patrons to choose next available item.
Force: Will only allow patrons to choose a specific item.
You can set the number of days patrons have to come pick up their holds in the “Holds pickup period (day)” column. This value will set the hold’s “expiration date”. After that period, holds will be marked as problematic and will appear in the “Holds waiting past their expiration date” tab in the Holds awaiting pickup report.
The default period is set in the ReservesMaxPickUpDelay system preference, but this column allows to have more granular rules for various library, patron category, and item type combinations.
Hold fee: if you charge for placing holds, enter the amount the patron should be charged per hold matching this rule.
Versão
This circulation rule option was first introduced in version 26.05 of Koha. In previous versions, hold fees are part of the patron categories settings.
Enter only numbers and decimal points (no currency symbols).
At which point the fee is charged depends on the HoldFeeMode system preference.
If you want to allow patrons of this category to be able to place article requests on items of this type, choose an option in the “Article requests” column
No: patrons of this category will not be able to place article requests on items of this type
Yes: patrons of this category will be able to place article requests on items of this type, either on specific items (for example in the case of serial issues) or on entire records (for example in the case of monographs)
Record only: patrons of this category will be able to place article requests on records of this type, but not on specific items
Item only: patrons of this category will be able to place article requests on items of this type, but not on entire records
Aviso
This column will only appear if the ArticleRequests system preference is enabled.
If you want to use the article request functionality you need to enable it using the ArticleRequests system preference and configure the form using the other related preferences.
If you charge a rental fee for the item type and want to give this specific patron category a discount on that fee, enter the percentage discount (without the % symbol) in the “Rental discount” field
Nota
Enter the discount percentage using a decimal point.
Discounts must be a positive number with no more than two digits after the decimal. Whole numbers are also allowed. For example:
5,10,0.50,3.25,99.99.Values like
0.5,25.123, or-10are not accepted.If the UseRecalls system preference is enabled, you will have several options to control recalls.
Recalls allowed (total): enter the number of current recalls a patron of this category can have on items or records of this item type.
Recalls per record (count): enter the number of current recalls a patron of this category can have on any one record of this item type.
On shelf recalls allowed: choose if patrons can recall items on records that have available items
If any unavailable: if a record has more than one item and at least one is unavailable, the patron will be able to recall items from this record
If all unavailable: all items of a record must be unavailable in order for a patron to recall an item from this record
Recall due date interval (day): enter the number of days a patron has to return an item that has been recalled
Recall overdue fine amount: enter the fine amount a patron will be charged if they don’t return the recalled item by the due date
Recall pickup period: enter the number of days a patron has to come pick up the item they have recalled, once it has been marked as awaiting pickup.
Nota
This value supersedes the value in the RecallsMaxPickUpDelay system preference.
When finished, click “Save” to save your changes. To modify a rule, simply click the “Edit” button either at the beginning or at the end of the row. The row of the rule being edited will be highlighted in yellow and the values will appear filled in at the bottom of the table. Edit the values at the bottom and click save.
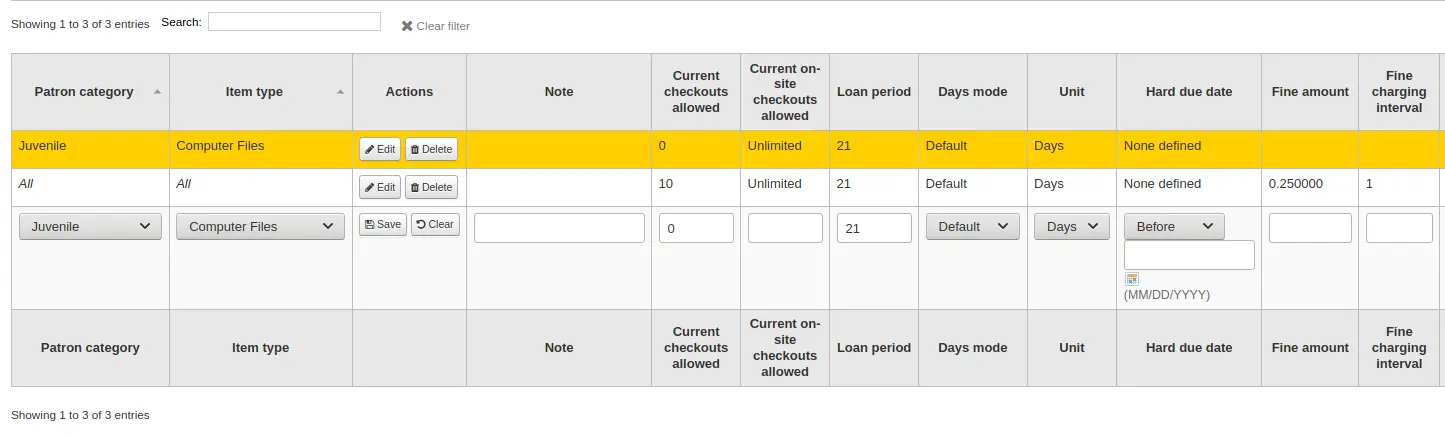
Nota
If, while editing a rule, you change either the patron category or the item type, it will create a new rule. You can do this to duplicate rules instead of creating new ones if the values are similar.
Alternatively, you can create a rule with the same patron category and item type and it will edit the existing one, as there can only be one rule per library- patron category-item type combination.
If you would like to delete your rule, click the “Delete” button at the beginning or at the end of the rule row.
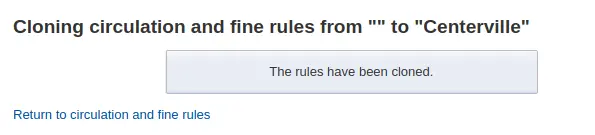
To save time you can clone rules from one library to another by choosing the clone option above the rules matrix. Please note that this will overwrite all rules already configured for that library.

Depois de escolher você será presenteado com uma mensagem de confirmação.
Default checkout, hold, and return policy
You can set a default maximum number of checkouts, a default maximum number of holds and a hold policy that will be used if none is defined below for a particular item type or category. This is the fall back rule for defaults.

From this menu you can set a default to apply to all item types and patrons in the library if no other option is set in the forms below.
Total current checkouts allowed: enter the total number of items patrons can have checked out at one time
Total current on-site checkouts allowed: enter the total number of items patrons can have checked out on site at a time (OnSiteCheckouts needs to be set to “Enable”)
Maximum total holds allowed (count): enter the total number of pending holds patrons can have at the same time.
Hold policy: control where patrons can place holds from
From any library: patrons from any library may put items on hold (default if none is defined)
From local hold group: only patrons from a library in the item home library’s local hold group may put this book on hold
From home library: only patrons from the item’s home library may put items on hold.
No holds allowed: no patron may put items on hold.
Hold and booking pickup library match: control where patron can pick up holds and bookings
qualquer biblioteca
item’s hold group
patron’s hold group
biblioteca de origem do exemplar
biblioteca de empréstimo do exemplar
Booking pre-processing (days): enter a number of days to prevent a new booking from starting too soon after an existing booking ends. This gives staff time to prepare the item between two bookings.
Versão
Esta opção foi adicionada ao Koha na versão 24.11.
Booking post-processing (days): enter a number of days to prevent a new booking from ending too close to the start of an existing booking. This gives staff time to receive and process the item between two bookings.
Versão
Esta opção foi adicionada ao Koha na versão 24.11.
Return policy: control where the item returns to once it is checked in
Exemplar retorna à origem
Exemplar retorna à biblioteca de empréstimo
Item floats: when an item floats, it stays where it was checked in and does not ever return “home”
Item floats by library group: The item will not be transferred and will stay at the library it was checked in at, if the check-in library is within the same “float group” in library groups as the item’s home library. If the library is not in the same float group, the item will be transferred back to its home library.
Once your policy is set, you can unset it by clicking the “Unset” button to the right of the rule.
Default checkout and hold policy by patron category
For this library, you can specify the maximum number of checkouts, on-site checkouts and holds that a patron of a given category can have, regardless of the item type.

Nota
If the total amount of checkouts, on-site checkout and holds for a given patron category is left blank, no limit applies, except possibly for a limit you define in the circulation rules above.
For example, if you have a rule in the matrix that says Board patrons are allowed 10 books and 5 DVDs but you want to make it so that Board patrons only have a total of 12 things checked out at once. If you enter 12 here and the patron has 10 books out already they will only be allowed 2 DVDs to equal the 12 total they’re allowed.
Default waiting hold cancellation policy
For this library, you can specify if patrons can cancel holds that are already awaiting pickup.

For each patron category and item type combination, choose if these patrons can cancel holds that are already waiting for pickup.
Just like the circulation rules, the more specific rules will apply before the more generic rules (i.e. the «all» patron categories / «all» item types rule will apply only if no other rule exists for this combination).
Default open article requests limit
If ArticleRequests is enabled, you can set a maximum number of open article requests a patron of a category can have at one time.
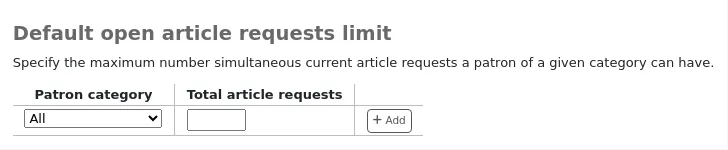
Nota
This will only appear if the ArticleRequests system preference is enabled.
Choose the patron category you want to limit.
Enter the number of open article requests a patron of this category can have at one given time
Click “Add”
Default article request fees
If ArticleRequests is enabled, you can set the fee a patron from a given category (or any category) needs to pay in order to request the article.

Nota
This will only appear if the ArticleRequests system preference is enabled.
Choose the patron category for which you want to add a fee, or choose “All” to set an overall fee for all patrons
Nota
The fee specific to a patron category will supersede the fee for all categories.
For example, if you set a fee for all categories to 2$ and a fee for Faculty to 3$, Faculty members will be charged 3$ and any other patron will be charged 2$.
Enter the fee amount (use a period as the decimal and don’t enter any symbols, e.g. enter 5.00 for 5$)
Click “Add”
The fee is charged to the patron when the request is placed.
When placing the request, either through the staff interface or the OPAC, a message appears to inform the staff member or the patron that the patron will be charged for every request and the amount of the fee.
Política por omissão para reembolso de devoluções de exemplares perdidos
Here, you can specify the default policy for lost item fees on return.

Refund lost item replacement fee: choose whether or not the item’s replacement cost is refunded when the lost item is returned.
Refund lost item charge: the replacement cost is refunded. This might create a credit to be paid out to the patron if they had already paid the fee.
Refund lost item charge (only if unpaid): the replacement cost is refunded only if it hasn’t yet been paid.
Refund lost item charge and charge new overdue fine: the replacement cost is refunded and overdue fines are calculated as of today.
Refund lost item charge and restore overdue fine: the replacement cost is refunded and fines are restored as of the day the item was declared lost.
Leave lost item charge: the replacement cost stays in the patron’s account.
Refund lost item processing fee: choose whether or not the item’s processing fee is refunded when the lost item is returned.
Refund lost item processing charge: the processing fee is refunded. This might create a credit to be paid out to the patron if they had already paid the fee.
Refund lost item processing charge (only if unpaid): the processing fee is refunded only if it hasn’t yet been paid.
Leave lost item processing charge: the processing fee stays in the patron’s account.
This policy will apply to this library. This rule is to be used with the RefundLostOnReturnControl system preference.
Nota
You can limit refunds based on age:
use the NoRefundOnLostReturnedItemsAge system preference to limit refunds based on when the item was marked lost;
use the NoRefundOnLostFinesPaidAge system preference to limit refunds based on when the fee was paid.
Default holds and bookings policies by item type
You can set and edit holds and bookings policies for a given item type, regardless of the patron’s category.
Select the item type from the dropdown menu.
Set policies as explained below.
Click “Add” to save this rule.
Add as many rules as you need.
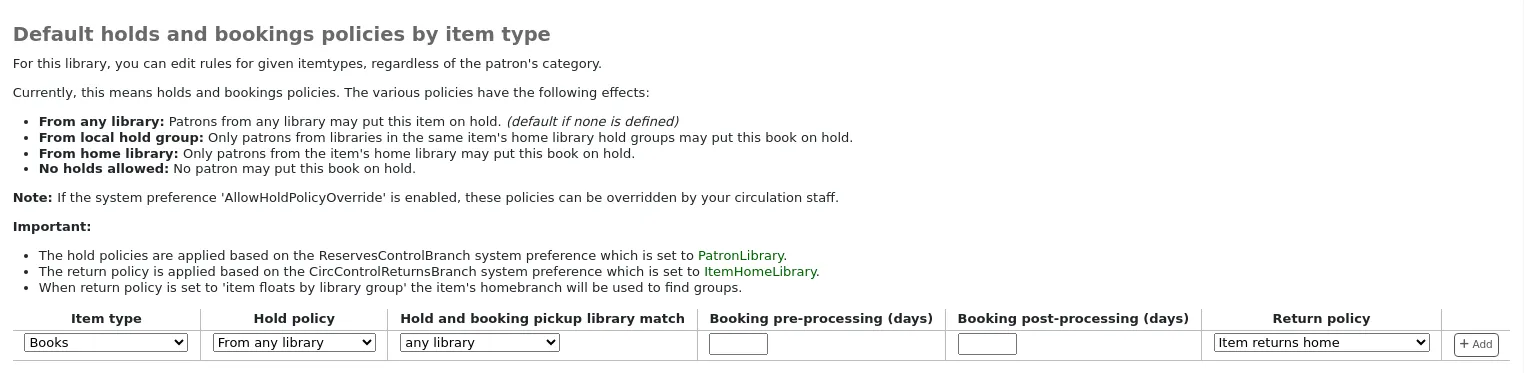
Hold policy: the various hold policies have the following effects.
From any library: patrons from any library may put this item on hold. (default if none is defined)
From local hold group: only patrons from libraries in the same item’s home library hold groups may put this book on hold.
From home library: only patrons from the item’s home library may put this book on hold.
No holds allowed: no patron may put this book on hold.
If the system preference AllowHoldPolicyOverride is set to “allow”, these hold policies can be overridden by staff.
Nota
The hold policies are applied based on the ReservesControlBranch system preference.
Hold and booking pickup library match: control where a patron can collect holds and bookings of the specified item type.
qualquer biblioteca
item’s hold group
patron’s hold group
biblioteca de origem do exemplar
biblioteca de empréstimo do exemplar
Booking pre-processing (days): add a buffer period before a new booking, to give staff time to prepare the item in-between two bookings.
Enter a number of days. This will prevent a new booking from starting too soon after an existing booking ends.
Booking post-processing (days): add a buffer period after a new booking, to give staff time to receive the item in-between two bookings.
Enter a number of days. This will prevent a new booking from ending too close to the start of an existing booking.
Return policy: the various return policies have the following effects.
Item returns home: on check-in at another library, the librarian will be prompted to transfer the item to its home library.
Item returns to issuing branch: on check-in, the librarian will be prompted to transfer the item to the library where it was checked out.
Item floats: the item will not be transferred from the library it was checked in at. It will remain at the check-in library until transferred manually or checked in at another library.
Item floats by library group: the item will not be transferred and will stay at the library it was checked in at, if the check-in library is within the same “float group” in library groups as the item’s home library. If the library is not in the same float group, the item will be transferred back to its home library.
When return policy is set to “item floats by library group” the item’s homebranch will be used to find groups.
Nota
The library whose return policy is used is determined by the CircControlReturnsBranch system preference.
Example
You may allow holds in your library service generally. However, you do not want brand new stock in the “New items” item type to be reserved by patrons at libraries other than the one to which the new stock belongs.
For the “New items” item type, you will set the “Hold policy” to “From home library” so that those items can only be placed on hold if the items” owning library and the patron’s home library are the same. You can set “Hold and booking pickup library match” to “item’s home library” to ensure the items on hold can only be collected from their home library. You should also set “Return policy” to “item returns home”.
Tipos de atributos de leitor
Get there: More > Administration > Patrons and circulation > Patron attribute types
Nota
Only staff with the manage_patron_attributes permission (or the superlibrarian permission) will have access to this section.
Patron attributes can be used to define custom fields to associate with your patron records. In order to enable the use of custom fields you need to set the ExtendedPatronAttributes system preference.
Um uso comum para este campo será o identificador do aluno ou o número/identificador da carta de condução.
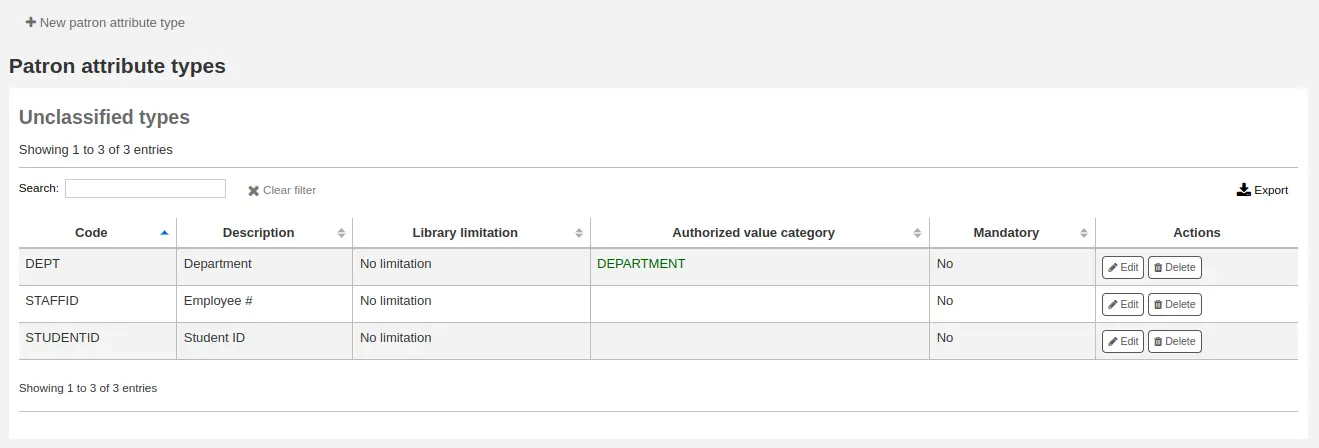
Adding patron attribute types
To add a new patron attribute type, click the “New patron attribute type” button at the top of the page
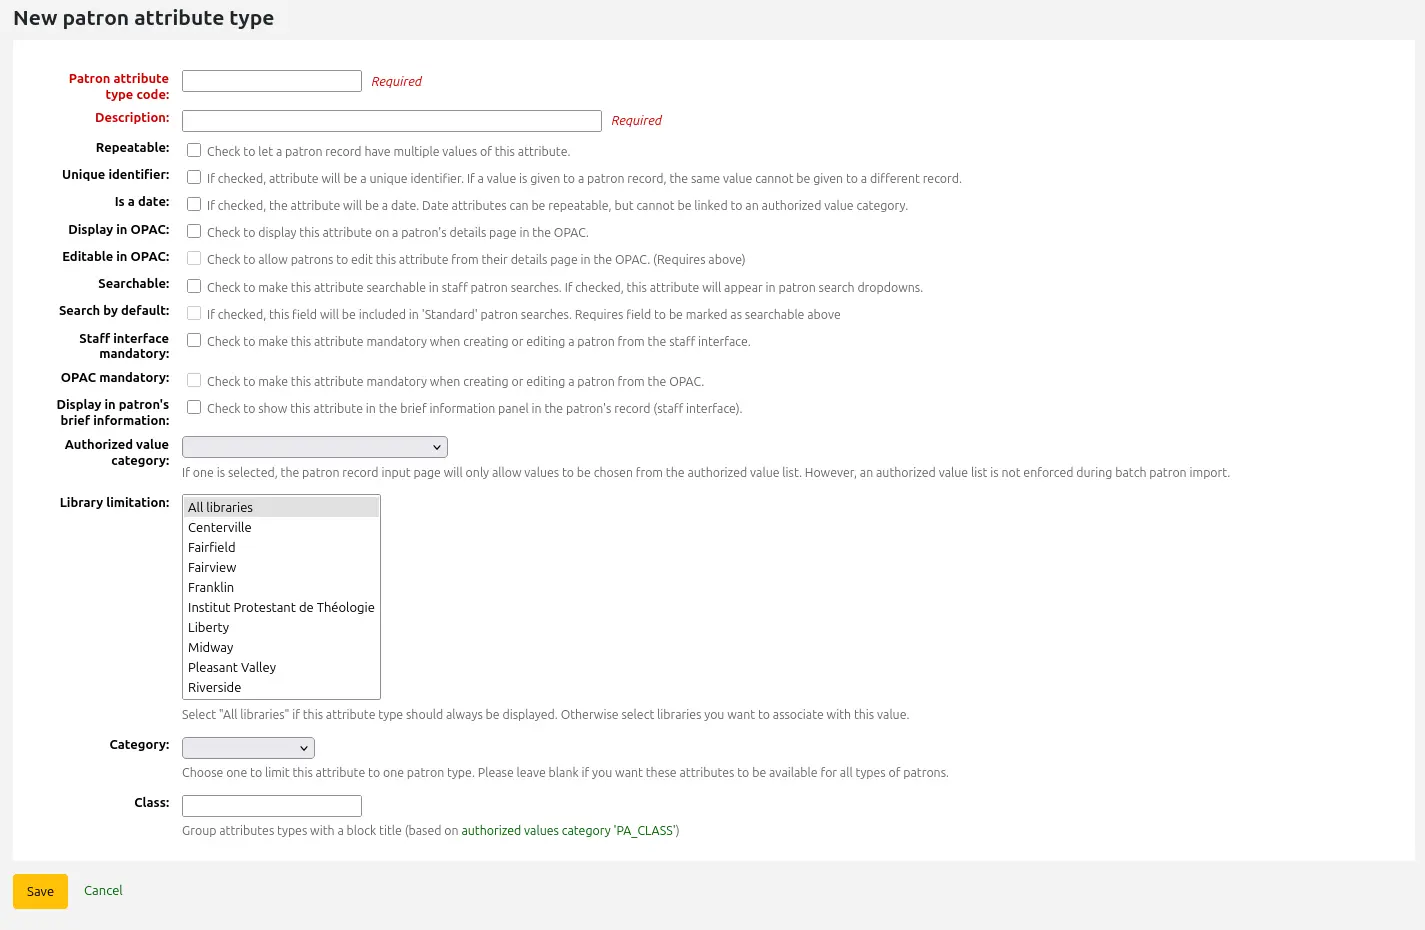
Patron attribute type code: enter a short code to identify this field
Aviso
This setting cannot be changed after an attribute is defined
Description: enter a longer (plain text) explanation of what this field will contain
Repeatable: check this box if a patron record can have multiple values of this attribute.
Aviso
This setting cannot be changed after an attribute is defined
Unique identifier: check this box if a value is given to a patron record, the same value cannot be given to a different record.
Unique attributes can be used as match points on the patron import tool
Aviso
This setting cannot be changed after an attribute is defined
Is a date: check this box if the attribute value should be a date. A date picker will be available.
Importante
Date attribute types cannot be linked to authorized value categories.
Versão
The date option was added to Koha in version 24.05.
Display in OPAC: check this box to display this attribute on a patron’s details page in the OPAC.
Editable in OPAC: check this box to enable patrons to edit this information in the OPAC.
Searchable: check this box to make this attribute searchable in the staff interface’s patron search.
Search by default: check this box to make this attribute searchable in the staff interface’s “standard” patron search, i.e., not a search on a particular field.
This option requires that the attribute type be searchable (see previous option).
Mandatory: check this box if the attribute must be filled for every patron
Display in patron’s brief information: check this box to make this attribute visible in the patron’s short detail display on the left of the checkout screen and other patron pages
Authorized value category: if one is selected, the patron record input page will only allow values to be chosen from the authorized value list.
You will first need to add an authorized value list for it to appear in this menu
Aviso
An authorized value list is not enforced during batch patron import.
Library limitations: if you would like this attribute to only be used by specific branches you can choose those branches from this list. Choose “All branches” to show it for all libraries.
Aviso
Patrons with attributes already set for them will not be altered. The branch limitation only limits the field based on the library at which the current staff is logged in.
If an attribute is set for a patron, it will be displayed in their file to all staff. However, only staff from the selected branches will be able to edit it.
Category: if you’d like to only show this attribute on patrons of one type choose that patron category here
Class: if you have a lot of attributes it might be handy to group them so that you can easily find them for editing. If you create an authorized value for PA_CLASS it will show in the “Class” drop-down menu and you can then change your attributes page to have sections of attributes
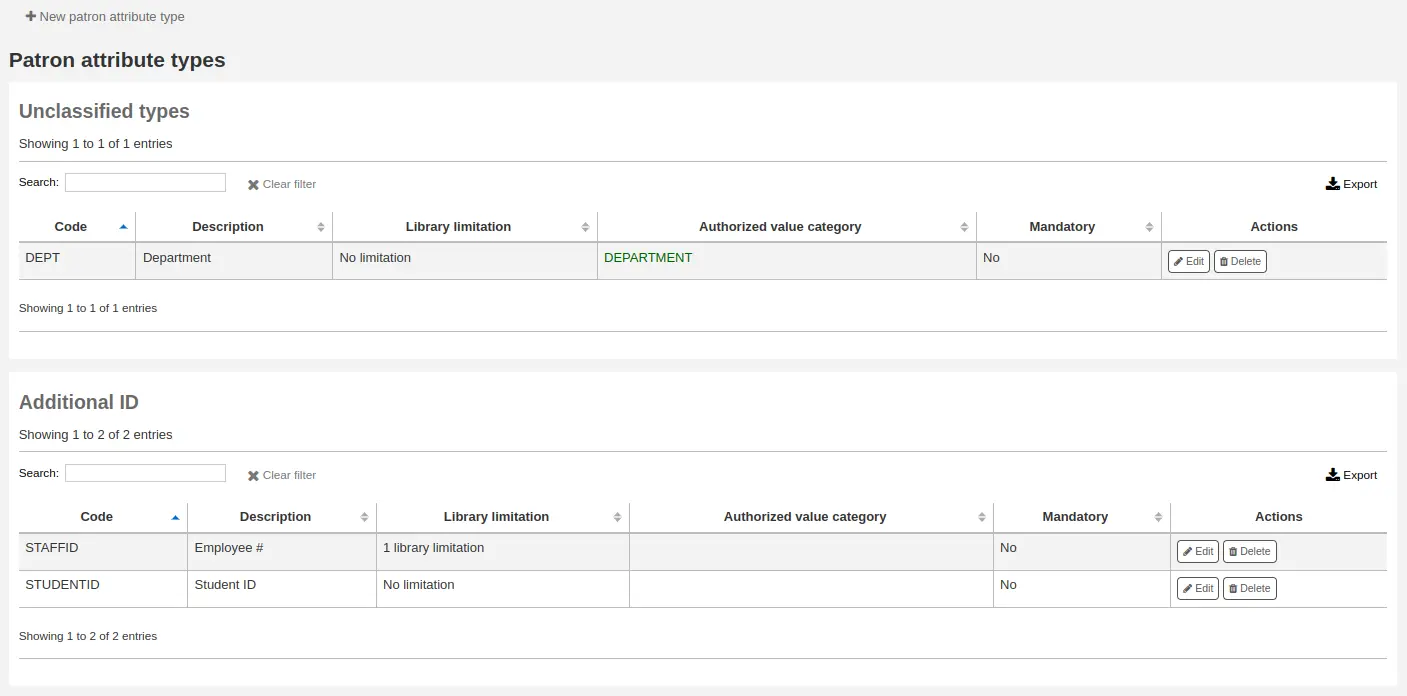
Click “Save” to save your new attribute.
Once added, your attribute will appear on the list of attributes and also on the patron record add/edit form
Editing/deleting patron attribute types
Each patron attribute has an edit and a delete button beside it on the list of attributes.
Alguns campos no atributo não podem ser editados após a criação:
Código do tipo de atributo de leitor
Repetível
Identificador único
Não poderá remover um atributo se estiver em uso.

Limites da biblioteca
Limitar a opção de transferir itens entre as biblioteca através da biblioteca de origem, a biblioteca de destino e o tipo de documento envolvido.
Get there: More > Administration > Patrons and circulation > Library transfer limits
Nota
Only staff with the manage_transfers permission (or the superlibrarian permission) will have access to this section.
These rules only go into effect if the preference UseBranchTransferLimits is set to “enforce”.
Antes de começar defina a biblioteca para a qual deseja definir os limites.

Transfer limits are set based on the collections codes you have applied via the Authorized values administration area.
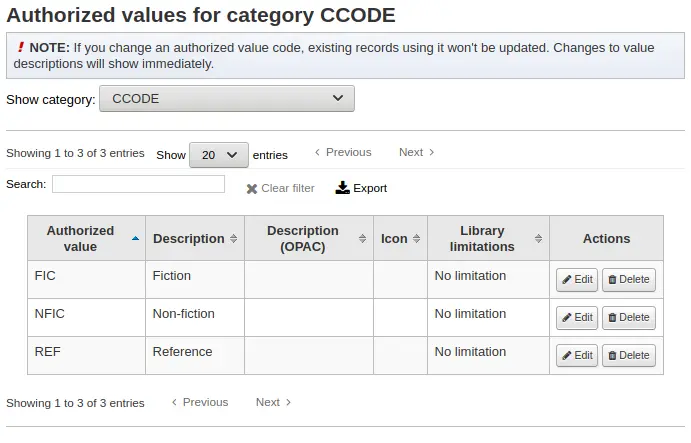
Collection codes will appear as tabs above the checkboxes:
Check the boxes for the libraries you allow your items to be transferred to for the collection code you have selected at the top (in the example below - FIC)
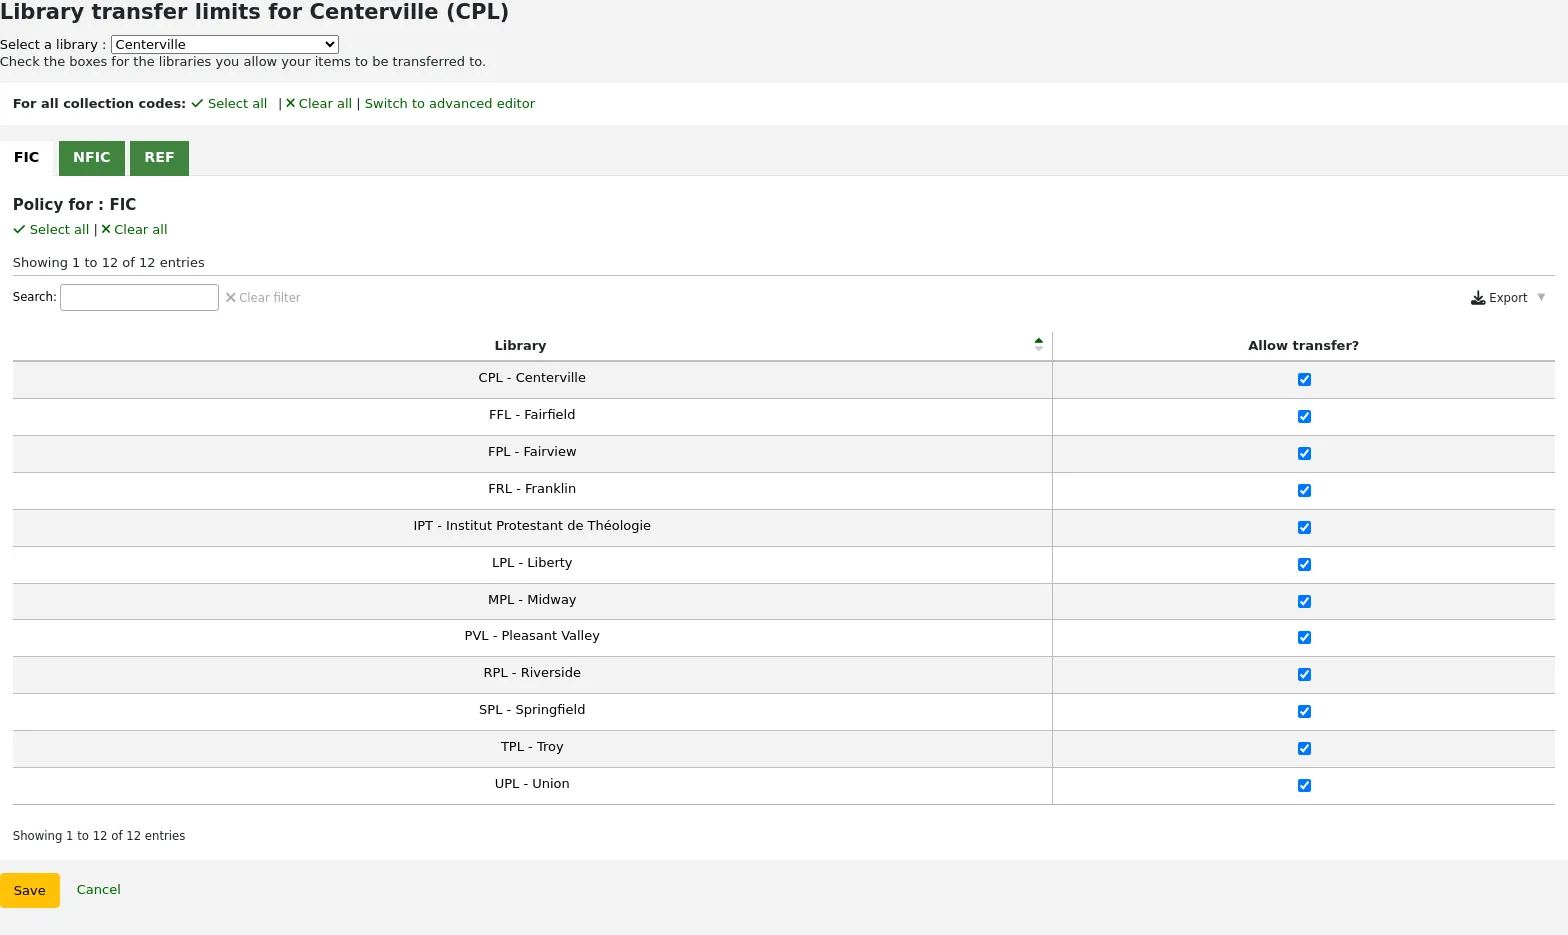
In the above example, Centerville library will allow patrons from all libraries except Liberty and Franklin to request items from their branch.
Tabela de custos de transporte
The transport cost matrix lets a library system define relative costs to transport books to one another.
Nota
Only staff with the manage_transfers permission (or the superlibrarian permission) will have access to this section.
In order for the system to use this matrix you must first set the UseTransportCostMatrix preference to “Use”.
Importante
The transport cost matrix takes precedence in controlling where holds are filled from, if the matrix is not used then Koha checks the StaticHoldsQueueWeight.
Custos são valores decimais entre um valor máximo arbitrário (ex. 1 ou 100) e 0 que o custo mínimo (sem custo). Por exemplo, pode usar a diferença entre cada biblioteca em milhas como o seu “custo”, se isso reflectir com precisão o custo de transferência. Talvez os correios sejam uma melhor medida. Bibliotecas compartilhando uma estação de correios teriam um custo de 1, correios adjacentes teria um custo de 2, etc
Para inserir os custos de transporte clique na célula que deseja alterar, desmarque a caixa “Desactivo” e insira o “custo”
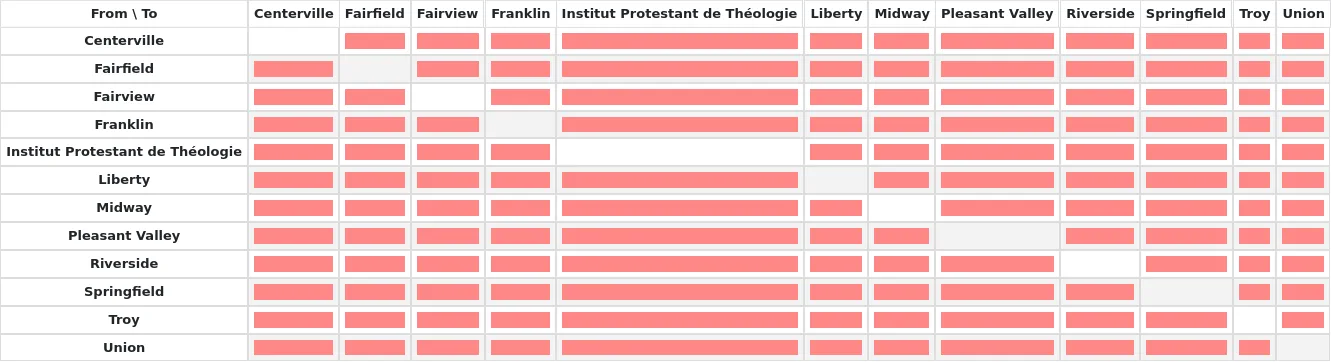
Após inserir o custo, pressione o botão Enter do seu teclado ou clique no botão “Guardar” no fundo da tabela para guardar as alterações.
Nota
A NULL value will make no difference where the From and To libraries are the same library. However, as a best practice, you should put a 0 in there. For all other To/From combinations, a NULL value will cause that relationship to act as if it has been disabled. So, in summary, don’t leave any of the values empty. It’s best to always put a number in there ( even if you choose to disable that given To/From option ).
Avisos de empréstimo
As bibliotecas podem decidir se desejam que os seus leitores sejam notificados automaticamente nos eventos de circulação (empréstimos e devoluções).
Get there: More > Administration > Patrons and circulation > Item circulation alerts
Nota
Only staff with the manage_item_circ_alerts permission (or the superlibrarian permission) will have access to this section.
These preferences are set based on patron types and item types.
Importante
These preference can be overridden by changes in the individual patron’s messaging preferences.
Para definir os avisos de empréstimo:
Choose your library from the pull down at the top of the screen
Para definir as preferências para todas as bibliotecas, mantenha o menu definido para “Omissão”
By default all item types and all patrons are notified of check ins and check outs. To change this, click on the item/patron type combo that you would like to stop notices for.
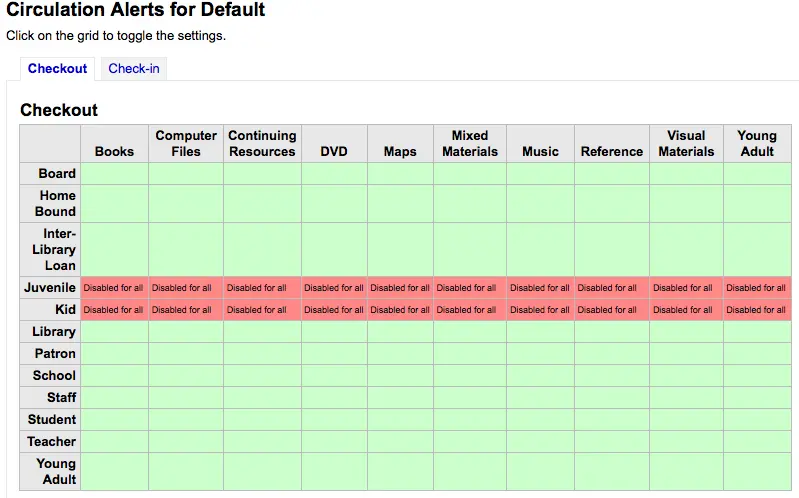
In the above example, Juveniles and Kids will not receive check out notices.
Cidades
Para uniformizar a introdução de leitor pode definir cidades, para que quando criar novo leitores simplesmente seleccione a cidade da lista em vez de ter que introduzir a cidade e o código postal.
Get there: More > Administration > Patrons and circulation > Cities and towns
Nota
Only staff with the manage_cities permission (or the superlibrarian permission) will have access to this section.
Adding a city
To add a new city, click the “New city” button at the top of the page and enter the city name, state, zip/postal code and country.
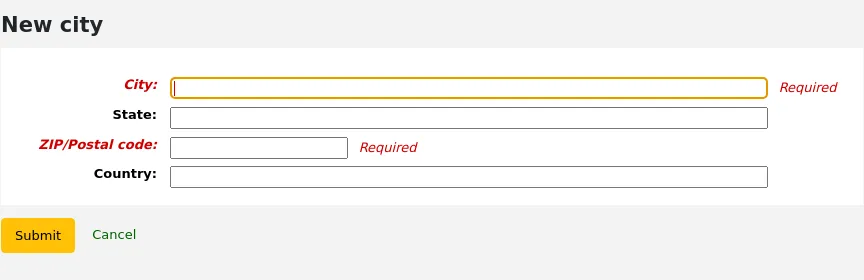
One you click Submit, your city will be saved and will be listed on the Cities and towns page
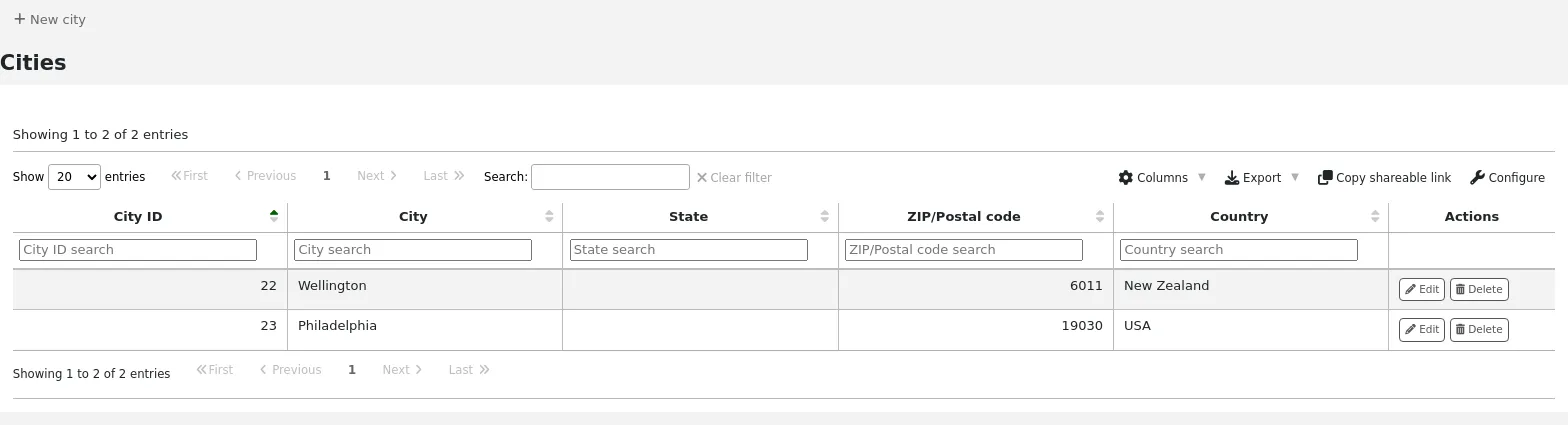
Cidades pode ser editadas e eliminadas a qualquer altura.
Viewing cities on patron add form
If you have defined local cities using the “New city” form, then when adding or editing a patron record you will see those cities in a pull down menu to make city selection easy.
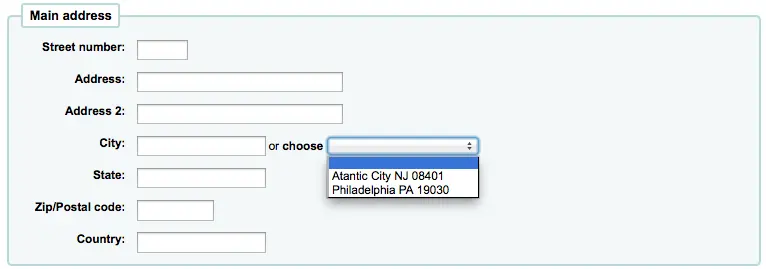
Isto permitirá uma inserção mais fácil de cidades nos registos de leitores sem risco de inserção de cidades ou códigos postais incorrectos.
Curbside pickup
The curbside pickup feature is used to set up appointments with patrons for them to pick up their holds. This section is used to configure the pickup windows
Get there: More > Administration > Patrons and circulation > Curbside pickup
Nota
In order to use this module, you must enable it with the CurbsidePickup system preference.
Nota
Only staff with the manage_curbside_pickups permission (or the superlibrarian permission) will have access to this section.
Setting up curbside pickup
From the configuration page, click the tab corresponding to the library for which you’re setting up curbside pickup
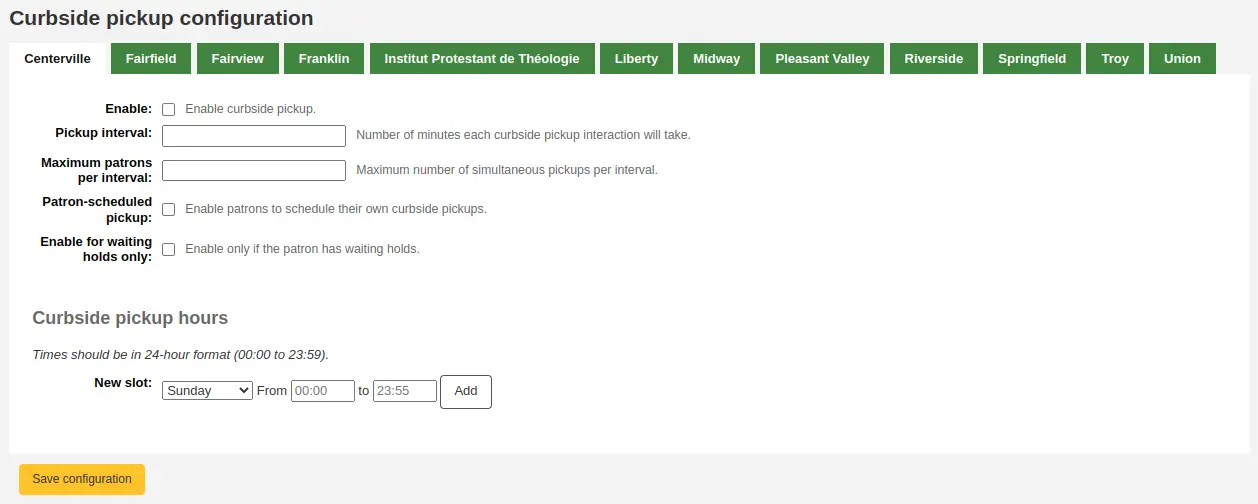
Preencher o formulário
Enable: check this box to enable curbside pickup at this library
Pickup interval: enter the number of minutes each curbside pickup interaction will take
Maximum patrons per interval: enter the number of patrons who can pickup in the same interval
Patron-scheduled pickup: check this box if you want to allow patrons to set up their own curbside pickup appointment through the OPAC
Enable for waiting holds only: check this box if curbside pickup should be limited to patrons who have holds awaiting pickup
Create curbside pickup slots
For each slot, enter the day of the week, the starting and ending hours of the time slot in which patrons can come
these can be your opening hours, if you allow curbside pickup throughout the day, or specific time slots in which you allow patrons to come by
For the hours, the format must be XX:XX (numbers with a colon) and it must be in 24-hour format (e.g. 1 PM is 13:00)
Click “Add”
Click “Save configuration”
Do this for every library that offers curbside pickup.
Patron restriction types
If you are using patron restriction types, you can manage the restriction types available from here.
Patron restriction types are enabled by the PatronRestrictionTypes system preference.
Get there: More > Administration > Patrons and circulation > Patron restriction types
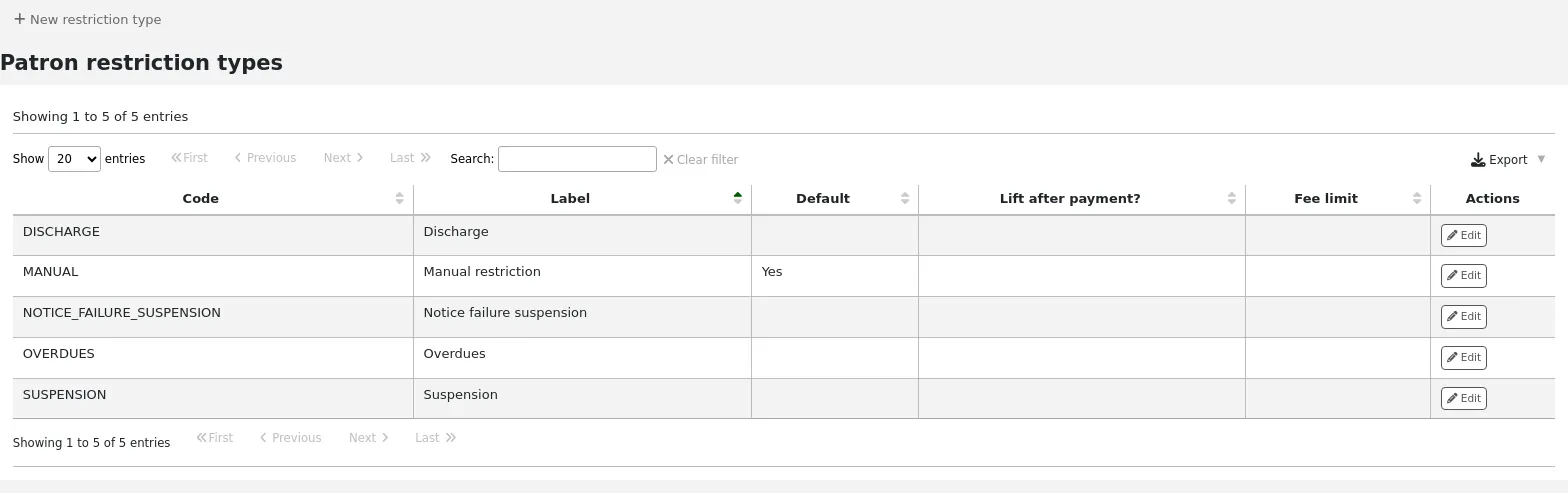
Nota
Only staff with the manage_patron_restrictions permission (or the superlibrarian permission) will have access to this section.
Adding a restriction type
To add a new restriction type, click the “New restriction type” button at the top of the page.
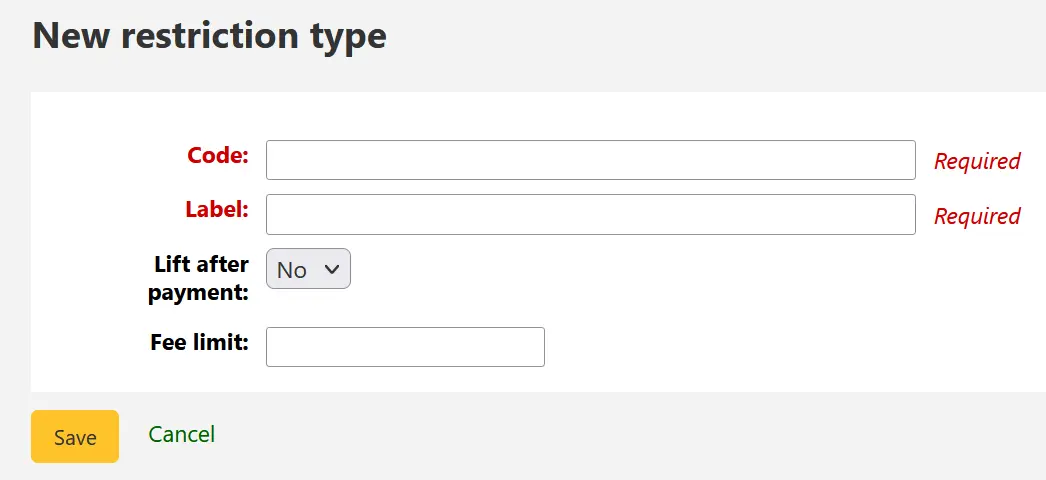
Code: enter a code for the restriction. Codes are limited to 50 characters and should not contain spaces, diacritics, or special characters.
Label: enter the label for the restriction. The label will be the one displayed throughout Koha.
Lift after payment: if set to “Yes”, restrictions using this type will be automatically lifted after payments equal to or exceeding the amount defined in “Fee Limit”.
Fee Limit: enter the amount that must be paid in order to lift a restriction of this type. This field is only used if “Lift after payment” is set to “Yes”.
Once you click “Save”, your restriction type will be saved and will be listed in the table of restriction types.
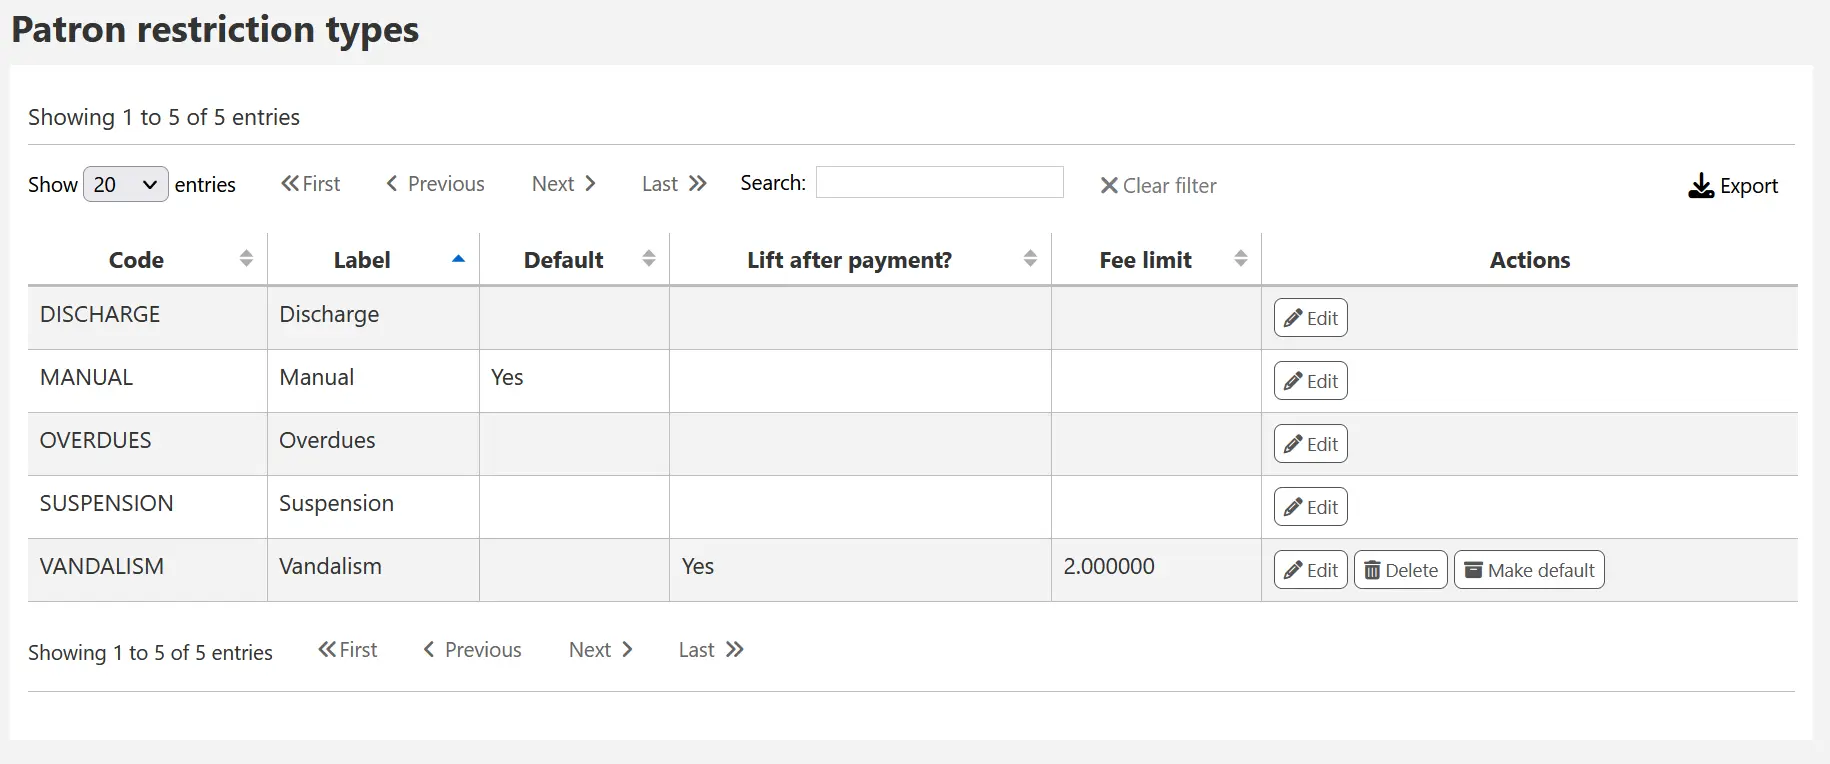
Locally created restriction types can be set to set as the default restriction type to use when manually adding a restriction to a patron account. This can be achieved using the “Make default” button.
You can also delete any locally created restriction types using the “Delete” so long as they have not been assigned as the default.
Contabilidade
Acesso: Mais > Administração > Contabilidade
This section deals with the parameters used in managing the patron accounts.
Debit types
Get there: More > Administration > Accounting > Debit types
Nota
Only staff with the manage_accounts permission (or the superlibrarian permission) will have access to this section.
This is where you define the manual fees you can charge patrons.
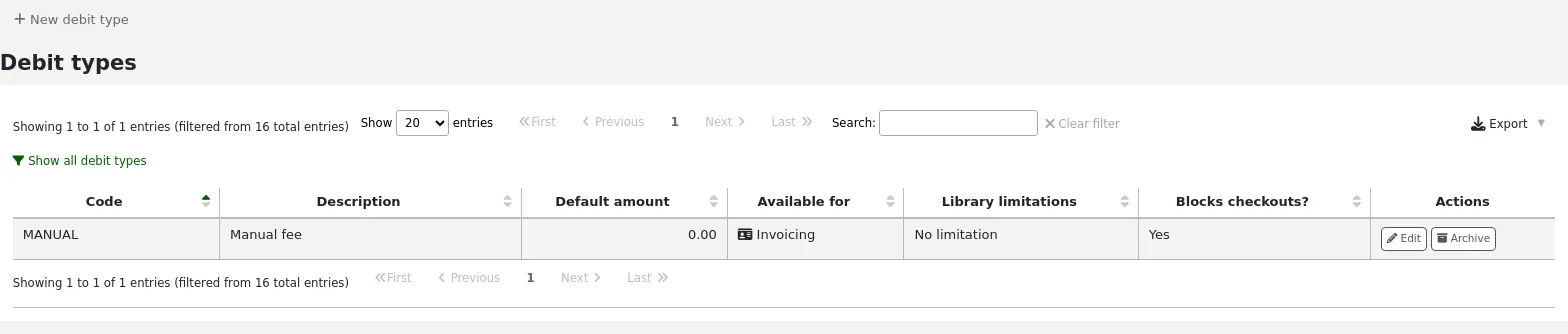
When you first get to the page, you will only see the manual fees that are already defined in your system.
You can see the default system fees by clicking «Show all debit types».
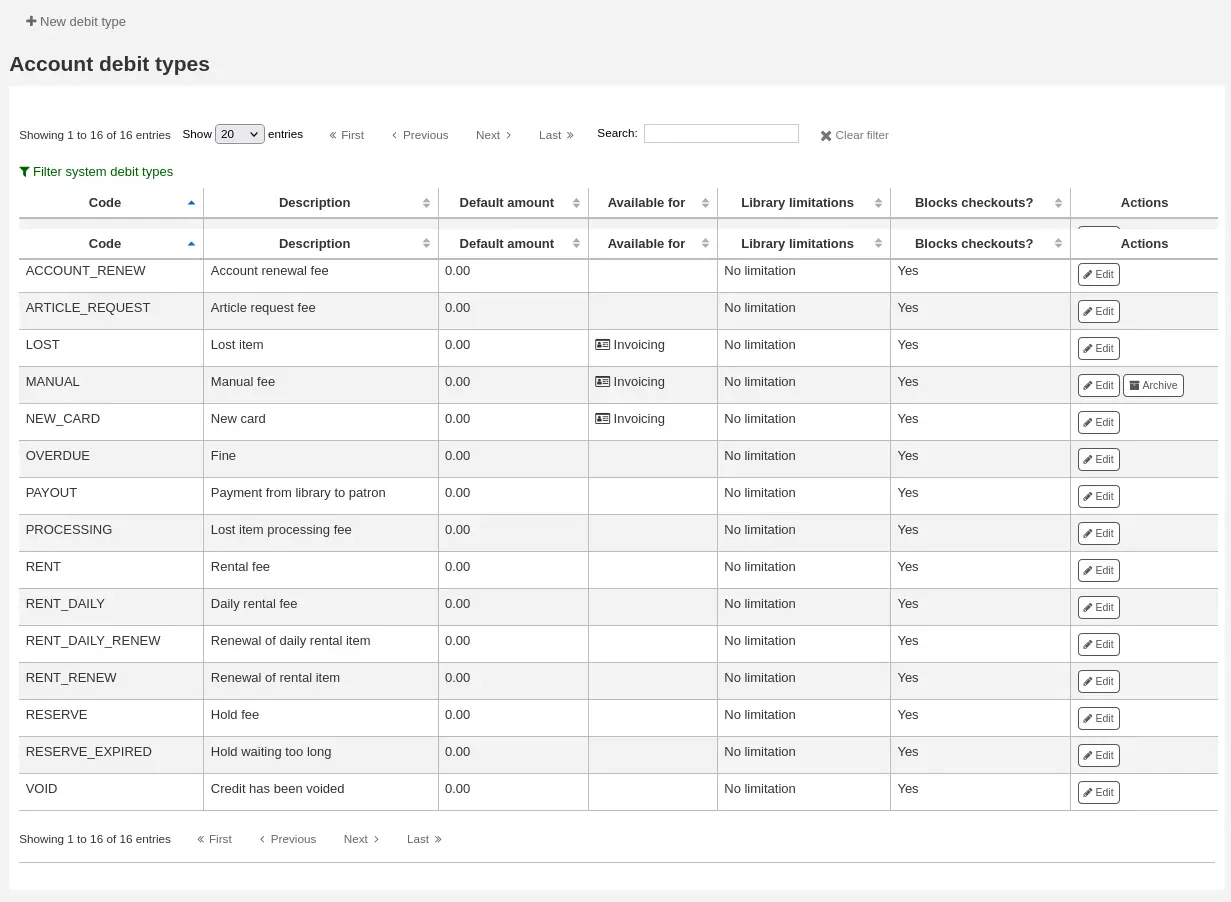
You can go back to seeing only the manual fees by clicking «Filter system debit types».
System debit types
Several debit types come installed with Koha. Most of them are automatic fees that are added according to the policies you set up elsewhere in Koha.
ACCOUNT (Account creation fee): this is charged to the patron’s account upon registration. The fee can be changed in the patron category settings under “Enrollment fee”.
ACCOUNT_RENEW (Account renewal fee): this is charged to the patron’s account when their account is renewed. Like the ACCOUNT debit type above, this can be changed in the patron category settings under “Enrollment fee”.
LOST (Lost item): this is charged to the patron’s account when an item in their file is declared lost. The amount depends on the item’s “replacement cost” field or on the item type’s default replacement cost. It can also be added manually in the manual invoices tab.
MANUAL (Manual fee): this is the default manual fee installed with Koha. This is not charged automatically by Koha, but can be added to a patron’s account manually in the manual invoices tab.
NEW_CARD (New card fee): this is another default manual fee installed with Koha. This will not be charged automatically by Koha, but can be added to a patron’s account manually in the manual invoices tab.
OVERDUE (Overdue fine): this is charged automatically to the patron’s account when they have overdue items. The amount for overdue fines are set in the circulation and fines rules.
PAYOUT (Payment from library to patron): this is used when the library reimburses the patron (for an over payment for example).
PROCESSING (Lost item processing fee): this is charged automatically to the patron’s account when an item in their file is declared lost. The amount is set by item type under “Processing fee (when lost)”.
RENT (Rental fee): this is charged automatically to the patron’s account upon checkout if the item type has a rental charge.
RENT_DAILY (Daily rental fee): this is charged automatically to the patron’s account upon checkout if the item type has a daily rental charge.
RENT_DAILY_RENEW (Renewal of daily rental item): this is charged automatically to the patron’s account upon renewal if the item type has a daily rental charge.
RENT_RENEW (Renewal of rental item): this is charged automatically to the patron’s account upon renewal if the item type has a rental charge.
RESERVE (Hold fee): this is charged automatically to the patron’s account upon placing a hold. The amount depends on the “Hold fee” amount in the patron’s category settings.
RESERVE_EXPIRED (Hold waiting too long): this is charged automatically to the patron’s account if they haven’t picked up their hold after the number of days defined in the ExpireReservesMaxPickUpDelay system preference. The amount is set in the ExpireReservesMaxPickUpDelayCharge system preference.
Adding a new debit type
To add a new debit type:
Click “New debit type”
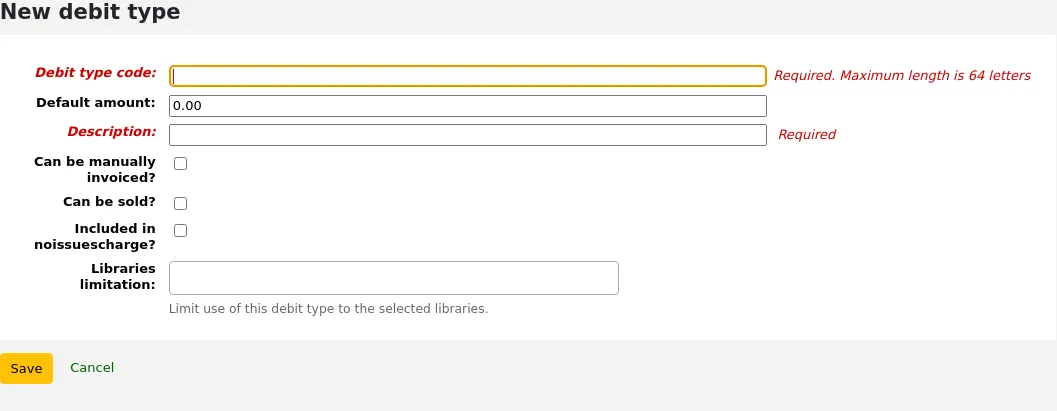
Debit type code: enter a code (limited to 64 letters).
Aviso
Codes should be limited to letters, numbers, and underscores (_).
Avoid spaces, diacritics, and special characters.
Default amount: enter the default amount.
Nota
Staff will be able to change this amount when adding the charge to the patron’s account, if necessary.
Importante
Do not enter currency symbols. Only write the amount with a decimal point (for example, 5 or 5.00 instead of $5).
Description: write a description, this description will be used in the drop-down menu when adding a new charge to a patron’s account or when making a sale in the point of sale as well as in their transaction history.
Can be manually invoiced: check this box if this debit type can be added manually by staff to a patron’s account via the manual invoices.
Can be sold: check this box if this debit type can be used in the point of sale.
Included in noissuescharge: check this box if this debit type should be included when calculating the amount owed by the patron for the noissuescharge system preference. This system preference is used to block checkouts when a patron owes over a certain amount of money to the library.
Libraries limitation: if necessary, select the libraries where this debit type can be used. Choosing “All libraries” will make the debit type available everywhere.
Nota
You can select more than one library by pressing the “Ctrl” key while selecting.
If you have any additional fields for account debit types (account_debit_types), they will be displayed here.
Clicar em “Guardar”
Editing an existing debit type
You can only modify the debit types you have added, as well as the “Manual fee”.
To edit a debit type:
Click the “Edit” button to the right of the debit type
Modify any field
Clicar em “Guardar”
Archiving a debit type
If there is a debit type you don’t need anymore, you can archive it.
Nota
There is no way to delete a debit type since they are used in the patron’s accounting section.
To archive a debit type, simply click the “Archive” button to the right of the debit type.
Restoring an archived debit type
If you need to use an archived debit type again, simply click on the “Restore” button to the right of the debit type.
This will make it available again.
Credit types
Get there: More > Administration > Accounting > Credit types
Nota
Only staff with the manage_accounts permission (or the superlibrarian permission) will have access to this section.
This is where you define the manual credits you can give patrons.
When you first get to the page, you will only see the credits that are already defined in your system.
You can see the default system credit types by clicking «Show all credit types».
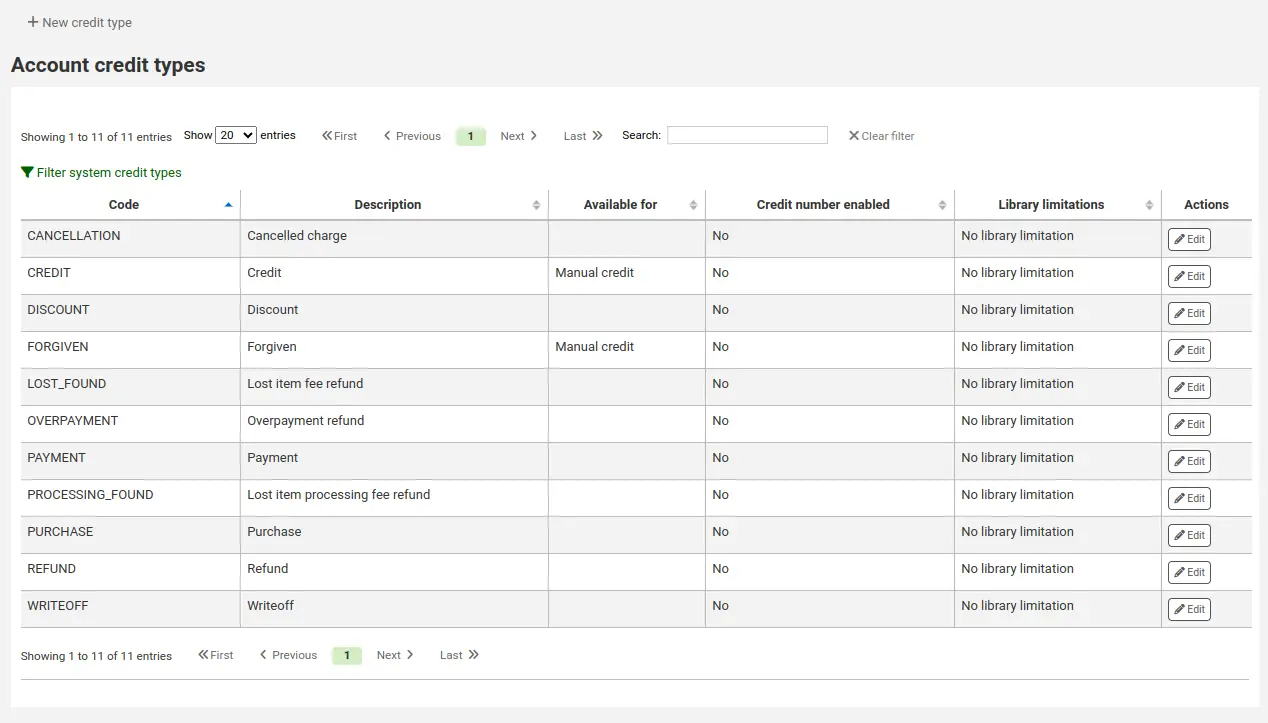
You can go back to seeing only the manual credit types by clicking «Filter system credit types».
System credit types
Several credit types come installed with Koha. Most of them are automatic credits that are added according to the policies you set up elsewhere in Koha. They can not be deleted.
CANCELLATION (Canceled charge): this is used when canceling a charge in a patron’s account
CREDIT (Credit): this is used for manual credits to give to your patrons.
DISCOUNT (A discount applied to a patrons fine): this is used to discount fines and charges.
FORGIVEN (Forgiven): this is used for manual credits to give to your patrons.
LOST_FOUND (Lost item fee refund): this is used when a previously lost item is returned. If you refund the lost fees (see Default lost item fee refund on return policy), this credit will be applied to refund the fee.
OVERPAYMENT (Over payment refund): this is automatically applied to a patron’s account when they paid too much for a fee. This is mostly used when backdating check-ins where the patron has already paid the full fine.
PAYMENT (Payment): as the name states, this is used to indicate fee payments.
PURCHASE (Purchase): this is used when a payment is made through the point of sale module.
REFUND (A refund applied to a patrons fine): this is used when refunding the payment of a fine or charge.
WRITEOFF (Writeoff): this is used when writing off a fine or charge.
Adding a new credit type
To add a new credit type:
Click “New credit type”
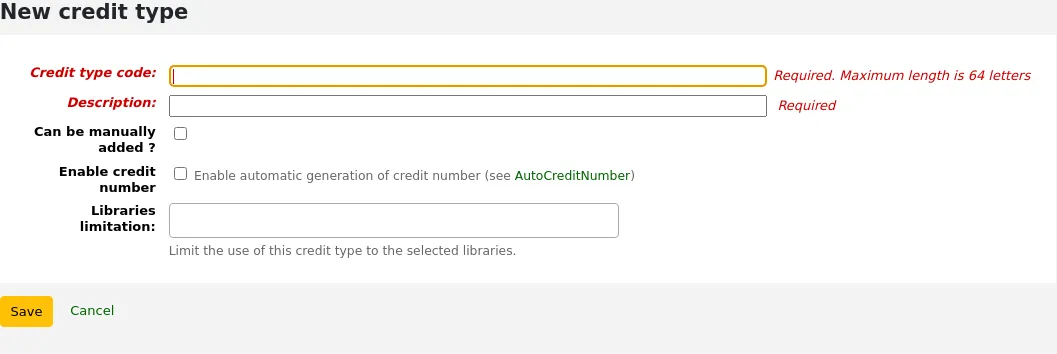
Enter a code (limited to 64 letters)
Aviso
Codes should be limited to letters, numbers, and underscores (_).
Avoid spaces, diacritics, and special characters.
Write a description
This description will be used in the drop-down menu when adding a new credit to a patron’s account as well as in their transaction history
If this credit type can be added manually by staff to a patron’s account via the manual credit, check the “Can be added manually?” check box
If you need this credit type to be sequentially numbered, check the “Enable credit number”. The format of the number is defined in the AutoCreditNumber system preference.
If this credit type is only to be used in specific branches, you can select the libraries in “Libraries limitation”
Nota
You can select more than one library by pressing the “Ctrl” key while selecting.
If you have any additional fields for account credit types (account_credit_types), they will be displayed here.
Clicar em “Guardar”
Editing an existing credit type
You can only modify the credit types you have added.
To edit a credit type:
Click the “Edit” button to the right of the credit type
Modify any field
Clicar em “Guardar”
Archiving a credit type
If there is a credit type you don’t need anymore, you can archive it.
Nota
There is no way to delete a credit type since they are used in the patron’s accounting section.
To archive a credit type, simply click the “Archive” button to the right of the credit type.
Restoring an archived credit type
If you need to use an archived credit type again, simply click on the “Restore” button to the right of the credit type.
This will make it available again.
Caixas registadoras
Get there: More > Administration > Accounting > Cash registers
This feature is enabled through the UseCashRegisters system preference.
Nota
Only staff with the manage_cash_registers permission (or the superlibrarian permission) will have access to this section.
If you have no cash registers already defined, you will be invited to create one.
Otherwise, you will see the list of all your cash registers.
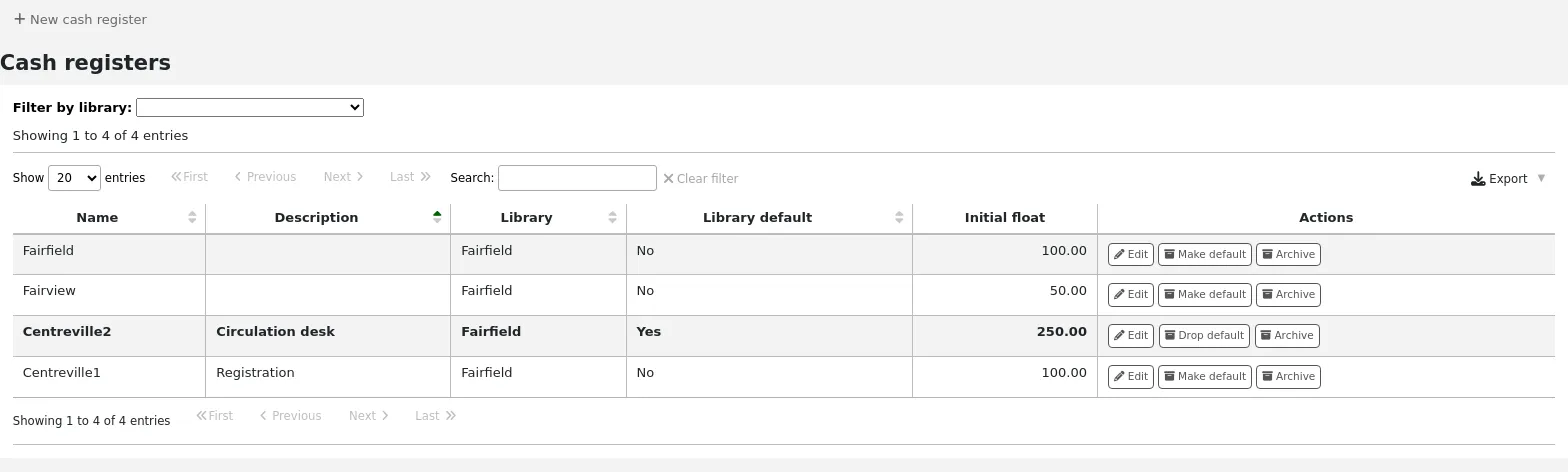
In the “Actions” columns, you can choose to edit your cash registers, make one of them default or remove the default status, and archive or restore an archived register.
The default status is only useful in libraries that have more than one register per branch. The default register will be preselected when entering a payment. If there is only one cash register per branch, the branch’s cash register will be selected when paying.
Adding a new cash register
Click on “New cash register”
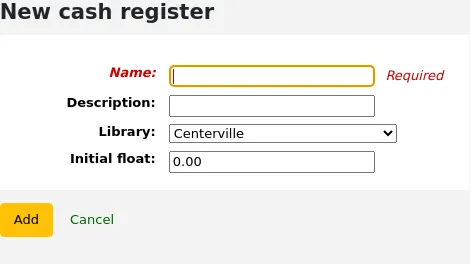
Give your cash register a name
Optionally you can also add a description
Choose in which library this cash register is located
And finally, enter the initial float, i.e. the amount in the cash register
Click “Add”
Plugins
This section is used to manage all types of plugins.
Importante
Before using plugins, make sure that they are enabled in the configuration file.
Nota
Only staff with the manage permission, the configure permission, or the admin permission (or the superlibrarian permission) will see this section.
See also the tool plugins and report plugins sections.
Acesso: Mais > Administração > Plugins
If there are any administrative plugins installed, they will appear under this section.
Nota
Only staff with the admin permission (or the superlibrarian permission) will be able to use administrative plugins.
Managing plugins
This section is used to view, manage and configure all types of plugins.
Nota
Only staff with the manage permission (or the superlibrarian permission) will be able to install and uninstall plugins.
The page will show all currently installed plugins.
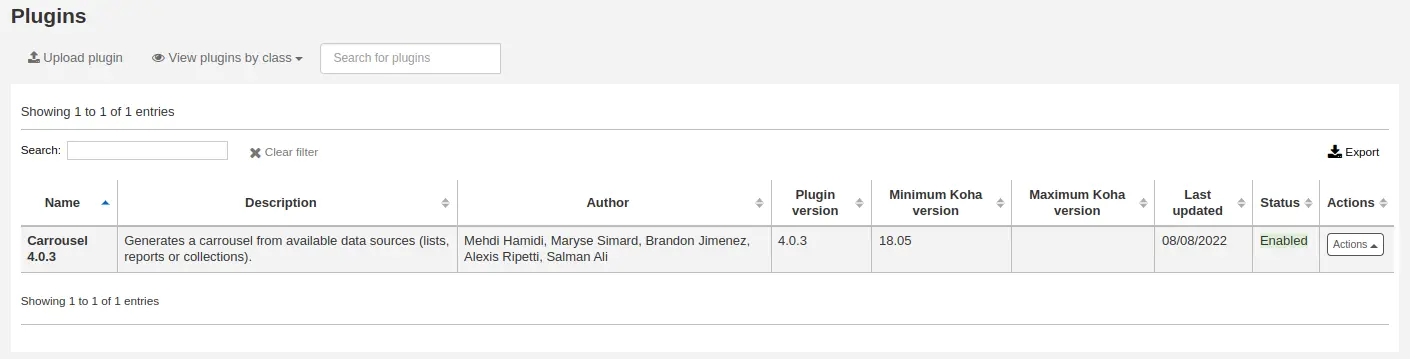
If you have a lot of plugins, you can view a subset by clicking “View plugins by class”.
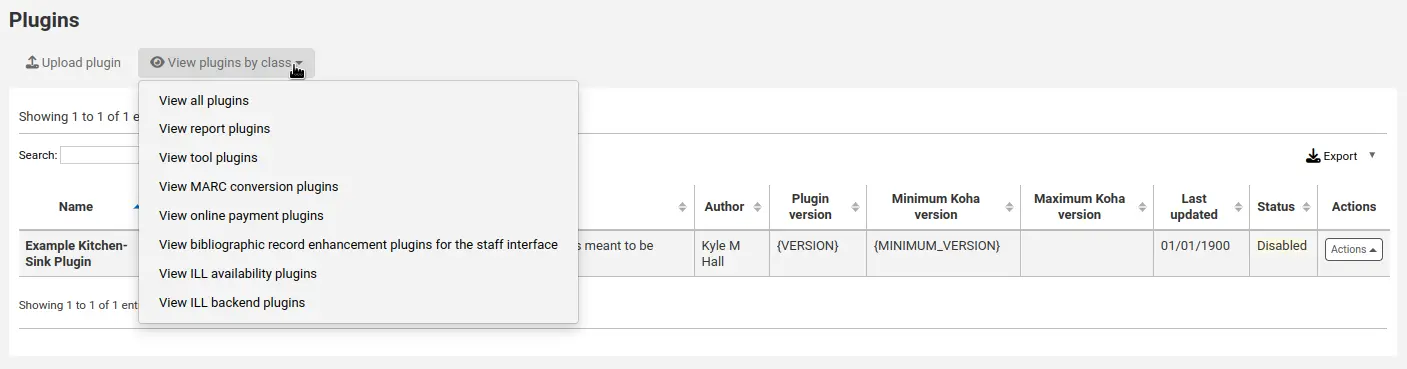
Installing a plugin
To install a new plugin manually,
Click “Upload plugin”.
Choose the KPZ file on your computer and click “Upload”.
If you configured external plugin repositories, you will have a search box at the top of the page to search these repositories and install directly from there without having to download and upload the KPZ file. To install a plugin from a repository,
Enter a search term in the search box.
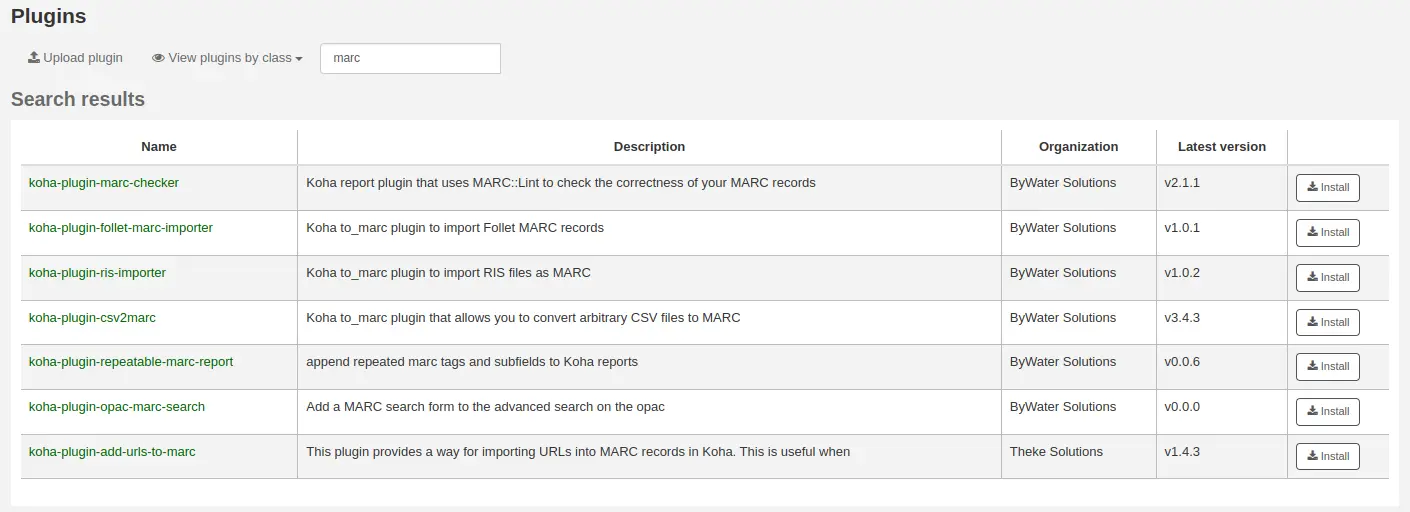
Click “Install” to the right of the plugin.
Some plugins might need to be enabled before usage.
To enable a plugin,
Click the “Actions” button to the right of the plugin and choose “Enable”
Using a plugin
All plugins are different. Some might need configuration before usage, others are simply run.
Click the “Actions” button and choose “Configure” or “Run”.
Follow the instructions issued by the plugin’s creator.
Nota
Only staff with the configure permission (or the superlibrarian permission) will be able to access plugin configuration.
Disabling a plugin
If you need to temporarily stop the plugin from taking effect, you can disable it.
Click the “Actions” button to the right of the plugin and choose “Disable”
This will not uninstall the plugin. It will remain installed, but will not have any effect on your Koha installation.
Deleting a plugin
To delete or uninstall a plugin,
Click the “Actions” button to the right of the plugin and choose “Delete”
This will remove the plugin from your Koha installation. Any action or effect it had will stop. If you need to, you can reinstall it later, provided it is still available.
Jobs
This section is used to manage background jobs. Jobs are tasks that are queued in the system to be treated when the server has the resources to do it, such as batch record modification and others.
Get there: More > Administration > Jobs
Nota
Only staff with the manage_background_jobs permission (or the superlibrarian permission) will have access to this section.
Managing jobs
By default, when accessing the page, you will only see current jobs and jobs enqueued in the last hour.
To see all jobs, uncheck the boxes at the top of the page.
Current jobs only: uncheck this to include finished jobs
Only include jobs enqueued in the last hour: uncheck this to include jobs enqueued earlier
You can search for jobs using the search boxes under the table headings.
To the right of each job, there are action buttons.
View: this will display the details of the job, including, but not limited to:
Job ID: this is the identifier of the job in the Koha database, an incremental number
Status: the status of the job
New: the job has been queued
Cancelled: the job was canceled by a user
Finished: the job was successfully carried out
Started: the job was started, but it is not yet finished
Running: the job is currently being executed
Failed: the job was started, but failed for some reason
Progress: indicates how much of the job is done
Type: indicates the type of job
Batch bibliographic record modification: batch of bibliographic records to be modified.
Batch bibliographic record deletion: batch of bibliographic records to be deleted.
Batch authority record modification: batch of authority records to be modified.
Batch authority record deletion: batch of authority records to be deleted.
Batch item record modification: batch of items to be modified.
Batch item record deletion: batch of items to be deleted.
Batch hold cancellation: a batch of holds to be canceled (when using the “Cancel selected” button).
Create eHoldings titles: titles to be created from a list in the ERM module.
Update Elasticsearch index: bibliographic or authority records, or items to be updated in the Elasticsearch index. Any changes to a bibliographic or authority record, or item trigger an update of the index, including changes in circulation status.
Holds queue update: when the RealTimeHoldsQueue system preference is enabled, changes to holds trigger an update of the holds queue.
Staged MARC records for import: bibliographic or authority records to be staged for import.
Import MARC records: staged bibliographic or authority records to be imported in the catalog.
Revert import MARC records: imported bibliographic or authority records to be reverted.
Queued: date and time when the job was queued
Started: date and time when the job was started
Ended: date and time when the job was finished
Report: this section will contain messages specific to the type of job (for example, number of records modified, in the case of batch record modification)
Detailed messages: this section will contain messages specific to the type of job (for example, which records were modified, in the case of batch record modification)
Cancel: for jobs that are still new or have started, it’s possible to cancel them
Catalog administration
Set these controls before you start cataloging on your Koha system.
Get there: More > Administration > Catalog
MARC bibliographic frameworks
Think of frameworks as templates for creating new bibliographic records. Koha comes with some predefined frameworks that can be edited or deleted, and librarians can create their own frameworks for content specific to their libraries.
Get there: More > Administration > Catalog > MARC bibliographic frameworks
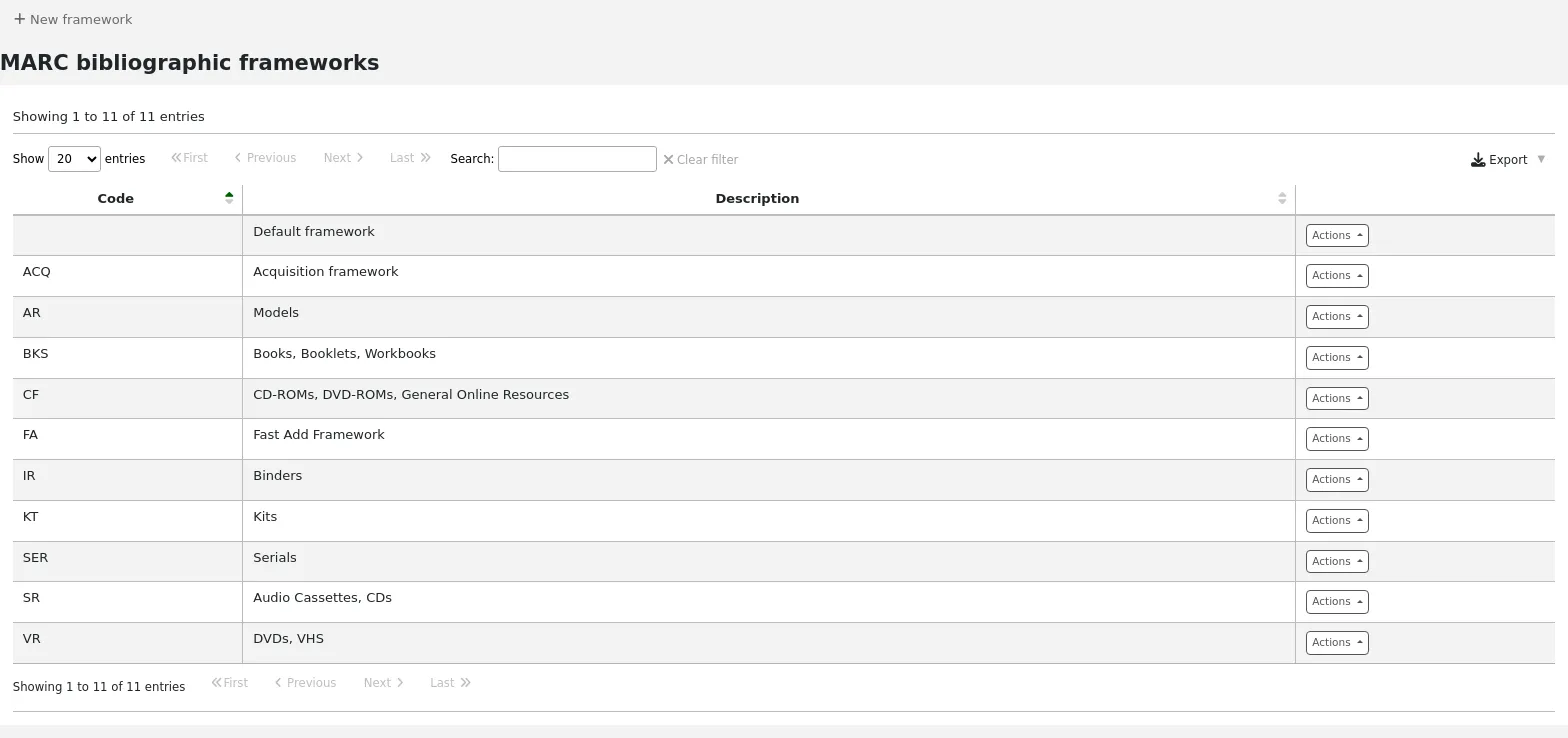
Nota
Only staff with the manage_marc_frameworks permission (or the superlibrarian permission) will have access to this section.
Importante
Do not delete or edit the Default framework since this will cause problems with your cataloging records - always create a new template based on the Default framework, or alter the other frameworks.
Adding a new framework
Para adicionar um novo modelo
Click “New framework”
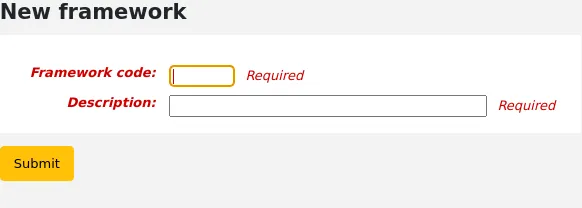
Code: enter a code of 4 or fewer characters, avoiding spaces, diacritics, or other special characters.
Description: enter a more detailed definition of your framework, this is what will be displayed in Koha.
Clicar em “Submeter”
Once your framework is added click “Actions” to the right of it on the list of frameworks and choose “MARC structure”
You will be asked to choose a framework to base your new framework on, this will make it easier than starting from scratch

Once your framework appears on the screen you can edit or delete each field by following the instructions for editing fields and subfields
Editing existing frameworks
Clicking “Actions” and then “Edit” to the right of a framework will only allow you to edit the description for the framework.

Editing framework fields and subfields
Frameworks are made up of MARC fields (tags) and subfields. To make edits to the fields and subfields associated with the framework you must click on “Actions” and then “MARC structure”.
Importante
Whenever you make changes to the framework fields and subfields, make sure to run the MARC bibliographic framework test.
Editing a MARC field (tag)
After clicking on “MARC structure” you will be taken to a screen listing all the available tags for that framework and you can search for the tag you need. To make edits to a MARC field click on “Actions” on the right of the field and choose “Edit tag”.
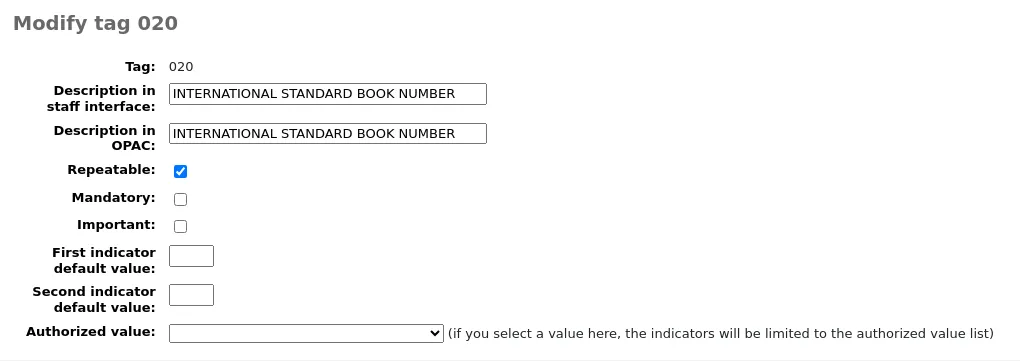
The next screen shows details of the tag.
Tag: the MARC tag, or field number, is uneditable.
Label for lib: text that will show in the staff interface MARC view, and in the basic editor if the advancedMARCeditor system preference is set to display labels.
Nota
If you use XSLT (see the XSLTDetailsDisplay system preference), the labels for the “Normal” view are defined in the XSLT stylesheet.
This will not affect the “Normal” view unless you don’t use XSLT.
Label for OPAC: text that will show on the MARC view in the OPAC.
Nota
If you use XSLT (see the OPACXSLTDetailsDisplay system preference), the labels for the “Normal” view are defined in the XSLT stylesheet.
This will not affect the “Normal” view unless you don’t use XSLT.
Repeatable: when checked, the field will have an icon next to it in the basic editor, allowing you to add multiples of that tag.
Mandatory: when checked, the record cannot be saved unless the field has a value. In the basic editor, a “Required” flag will display as a prompt.
Important: when checked, the field will generate a warning if it is not filled, but unlike “Mandatory”, you will still be able to save your record nonetheless. In the basic editor, an “Important” flag will display as a prompt.
Indicator default values: add default values for indicators here so that they will be prefilled to save time when cataloging, but can still be edited if required.
Authorized value: define an authorized value pull down list for the catalogers
Aviso
The authorized value option at field level does not work.
Click “Save changes” to save any modification.
Editing a MARC subfield
To edit the subfields associated with the tag, click “Actions” then “Edit subfields” to the right of the tag on the framework field list. Each subfield has its own tab which contains three sections - Basic constraints, Advanced constraints and Other options.
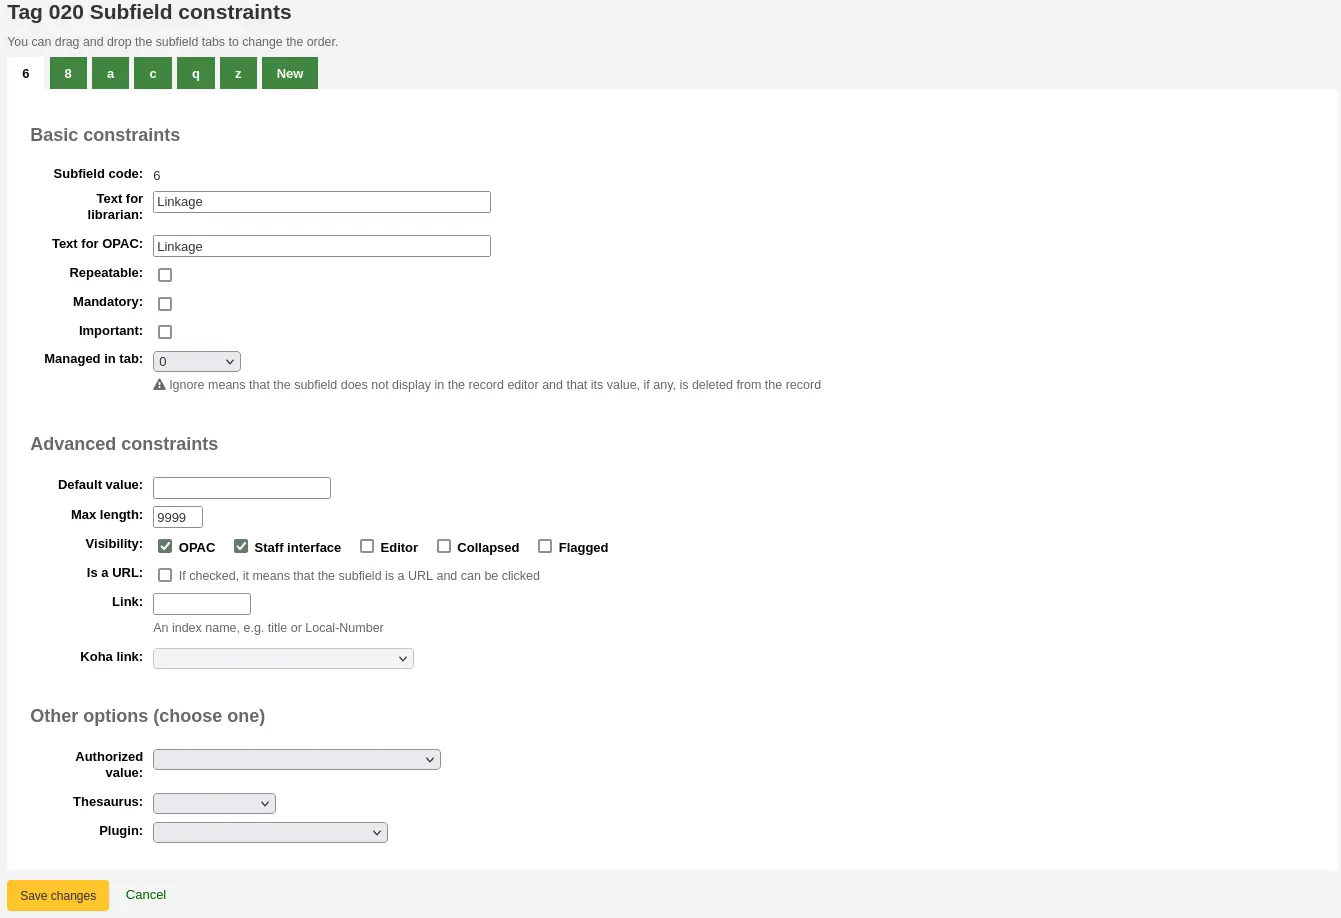
For each subfield you can set the following basic constraint options
Subfield code: this is the MARC subfield code, this wouldn’t normally be changed.
Text for librarian: text that will show in the staff interface MARC view, and in the basic editor if the advancedMARCeditor system preference is set to display labels.
Nota
If you use XSLT (see the XSLTDetailsDisplay system preference), the labels for the “Normal” view are defined in the XSLT stylesheet.
This will not affect the “Normal” view unless you don’t use XSLT.
Text for OPAC: text that will show on the MARC view in the OPAC.
Nota
If left empty, the “Text for librarian” is used instead
Nota
If you use XSLT (see the OPACXSLTDetailsDisplay system preference), the labels for the “Normal” view are defined in the XSLT stylesheet.
This will not affect the “Normal” view unless you don’t use XSLT.
Repeatable: when checked, the field will have an icon next to it in the basic editor, allowing you to add multiples of this subfield.
Mandatory: when checked, the record cannot be saved unless the subfield has a value. In the basic editor, a “Required” flag will display as a prompt.
Important: when checked, the field will generate a warning if it is not filled, but unlike “Mandatory”, you will still be able to save your record nonetheless. In the basic editor, an “Important” flag will display as a prompt.
Managed in tab: defines the tab where the subfield is shown.
Importante
All subfields of a given field must be in the same tab or ignored. Ignore means that the subfield is not managed.
Aviso
When importing records, or editing existing records, subfields that are managed in tab “ignore” will be deleted. If you still wish to keep the subfields, but hide them, use the “Visibility” options below.
For each subfield you can set the following advanced constraint options
Default value: defines what you want to appear in the field by default, this will be editable, but it saves time if you use the same text over and over or the same value in a field often.
Nota
There are several values that you can use here that will be replaced automatically when a new record is created:
<<MM>> - the current month, 2 digits
<<DD>> - the current day of month, 2 digits
<<YY>> - the current year, 2 digits
<<YYYY>> - the current year, 4 digits
<<USER>> - the username of the currently logged in user
For example: a default of «<<MM>>/<<DD>>/<<YYYY>>» (without quotes) will print the current date in the form of «01/21/2021»
Nota
When those default values are filled depends on the ApplyFrameworkDefaults system preference.
Max length: enter a value here to limit the number of characters that can be entered in the subfield.
Visibility: allows you to select from where this subfield is visible or hidden. Check the boxes where you would like the field to show, and uncheck the boxes where you would like it hidden.
OPAC: when checked, this will make the subfield available for display in the OPAC. For non-XSLT views, the field will be displayed. For XSLT views, it will depend on the stylesheet.
Staff interface: when checked, this will make the subfield available for display in the staff interface. For non-XSLT views, the field will be displayed. For XSLT views, it will depend on the stylesheet.
Editor: when checked, this will make the subfield available for modification in the basic editor.
Collapsed: when checked, the subfield will be hidden in the basic editor, but will display when the field label is clicked to expand all subfields.
Flagged: when checked, the subfield will be unavailable and hidden from all views (equivalent to all boxes being unchecked).
Is a URL: if checked, it means that the subfield is a URL and can be clicked.
Link: if you enter an index name here, a link appears after the subfield in the MARC detail view in the staff interface. If the librarian clicks on the link, a catalog search is done using the index and the content of the subfield.
Koha link: this field is used to create a link between the MARC subfield and a column in the items, biblioitems, and biblio database tables. The mappings can be changed from the Koha to MARC mapping page.
For each subfield you can set the following Other option values
Authorized value: means the value must be chosen from a drop-down menu generated from the authorized value list.
In the example below, the LANG authorized value category has been set to 041$a.

This creates a drop-down menu in the basic editor.
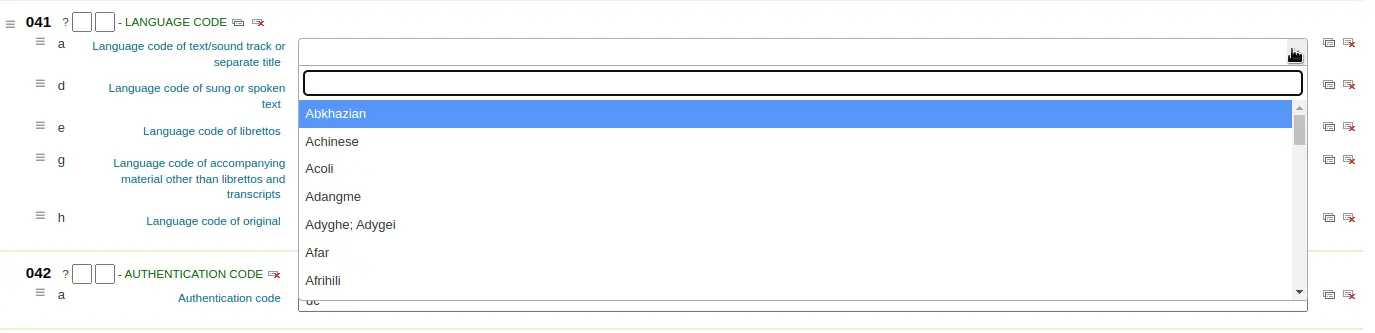
Thesaurus: means that the value is linked to the authority catalog of the selected category. Authority categories are managed in the Authority types section.
Plugin: means the value is calculated or managed by a cataloging plugin. Cataloging plugins, or value builders, can do almost anything.
Examples:
For call numbers there is an option to add a call number browser next to the call number subfield so that you can identify which call numbers are in use and which are not. Simply choose the cn_browser.pl plugin. Learn more in the cataloging section of this manual.
If you’d like to let file uploads via cataloging you can choose the upload.pl plugin and this will allow you to upload files to Koha to link to your records.
In UNIMARC there are plugins for every 1xx fields that are coded fields. The plugin is a huge help for cataloger! There are also two plugins (unimarc_plugin_210c and unimarc_plugin_225a that can «magically» find the editor from an ISBN, and the collection list for the editor)
If you would like to enable an autocomplete search for publishers in 260b and 264b you can set the plugin to marc21_field_260b.pl. When you start typing in a publisher name you will be given search results based on publisher names already in the catalog.
To save your changes, click “Save changes”.
Dica
You can drag and drop the subfield tabs to change the order in which they appear when cataloging with the basic editor.
By default, they will appear in alphanumeric order (0-9, then a-z).
Adding fields to frameworks
If a framework doesn’t contain a field that you require, you may need to add it. To add a field to a framework click the “New tag” button at the top of the framework definition.
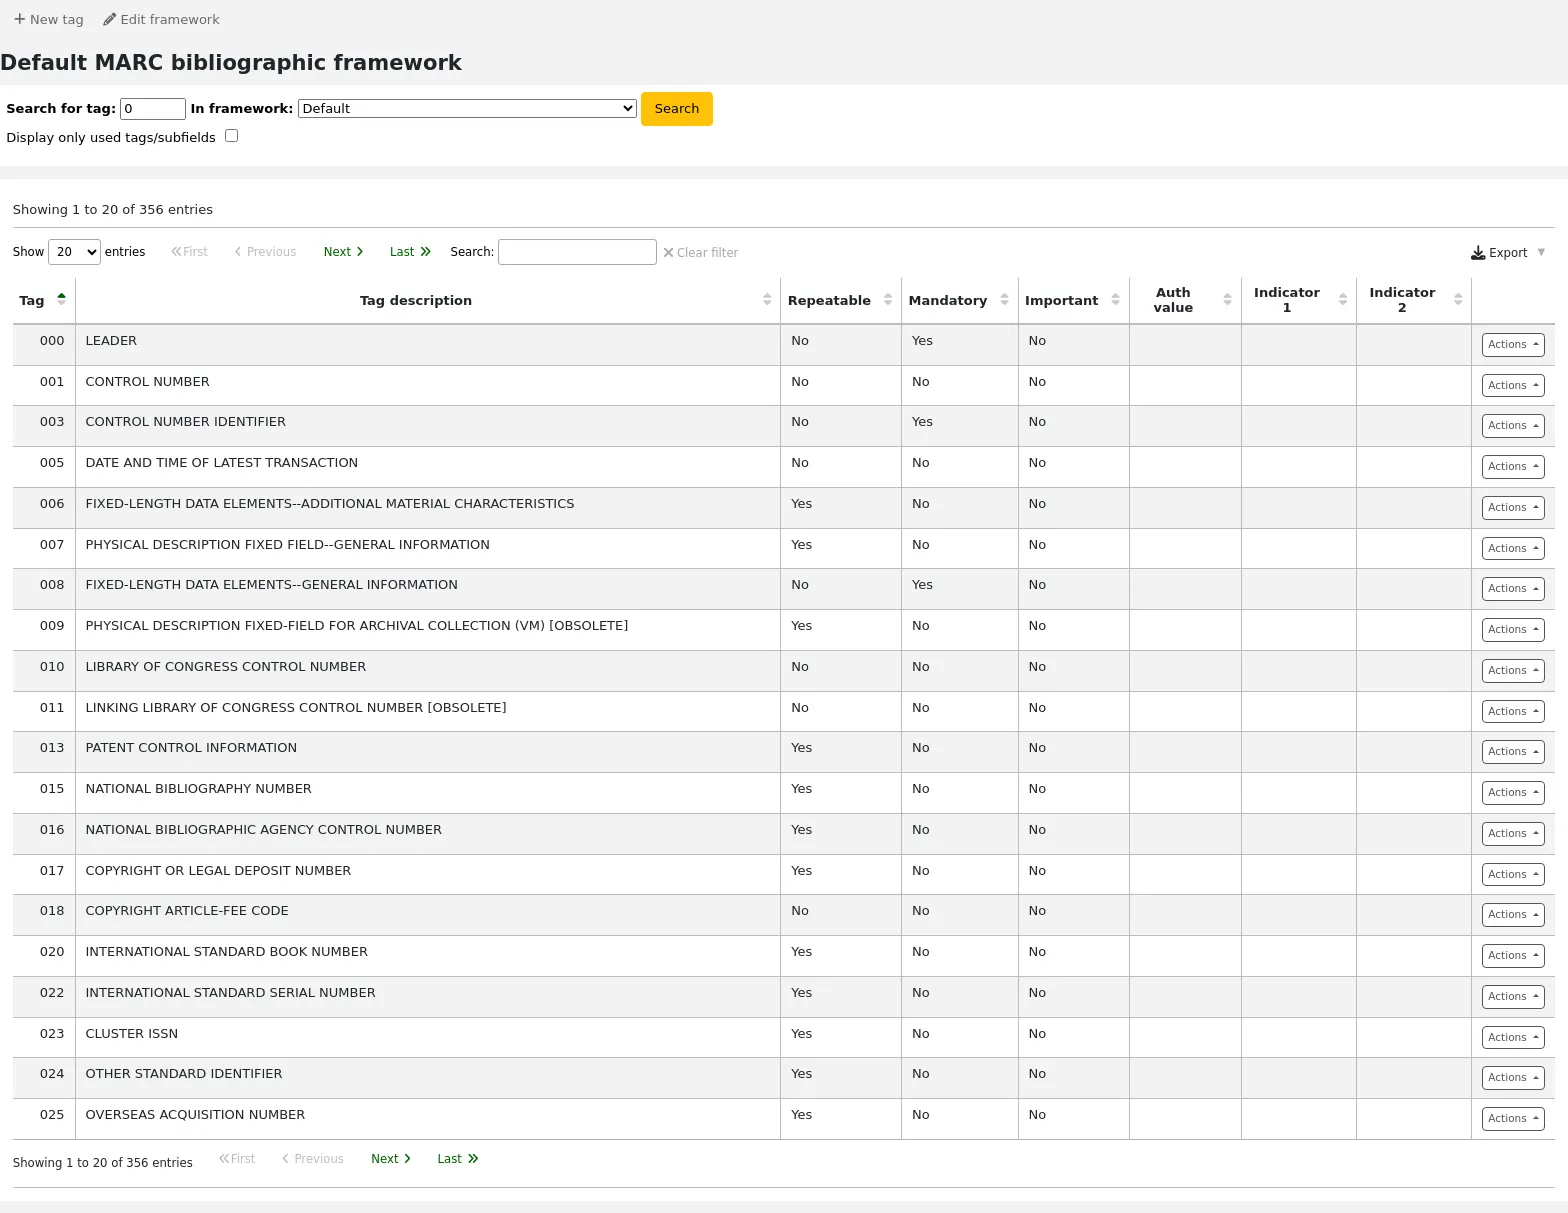
Isto abrirá um formulário em branco para inserir os dados do campo MARC
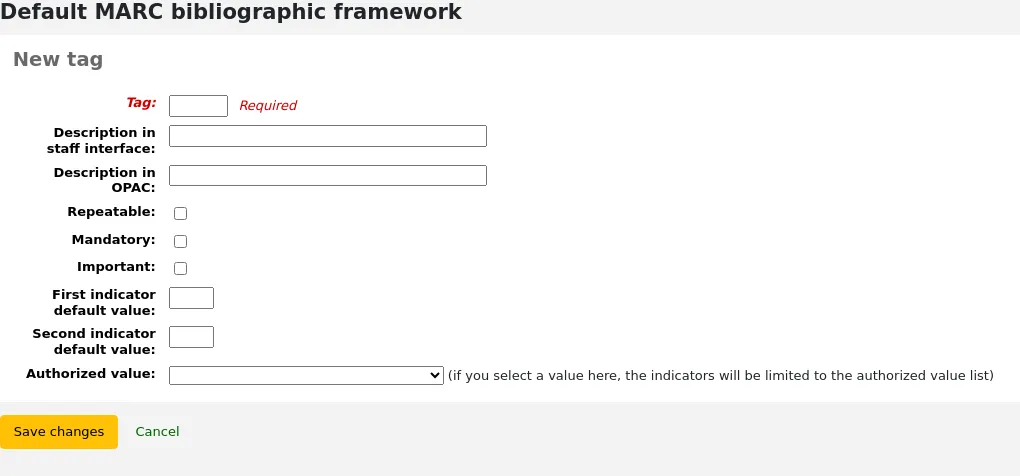
Enter the field number for your new tag. The process for entering the remainder of the settings for the new tag is the same as those found in the editing fields and subfields in frameworks section of this manual.
When you’re finished, click “Save changes” and your new tag will be displayed in the framework field list.
You will need to add at least one subfield to your new tag before it will appear in your framework when you are cataloging.
Click on the “Actions” button for your new tag and then “Edit subfields”. Click on the “New” tab and enter your subfield code. The process for entering the remainder of the settings for the new subfield is the same as those found in the editing fields and subfields in frameworks section of this manual.
Importing and exporting frameworks
Junto a cada modelo existe um link para importar ou exportar o modelo.
Export framework
To export a framework, click the “Export” option in the “Actions” button to the right of the framework title.
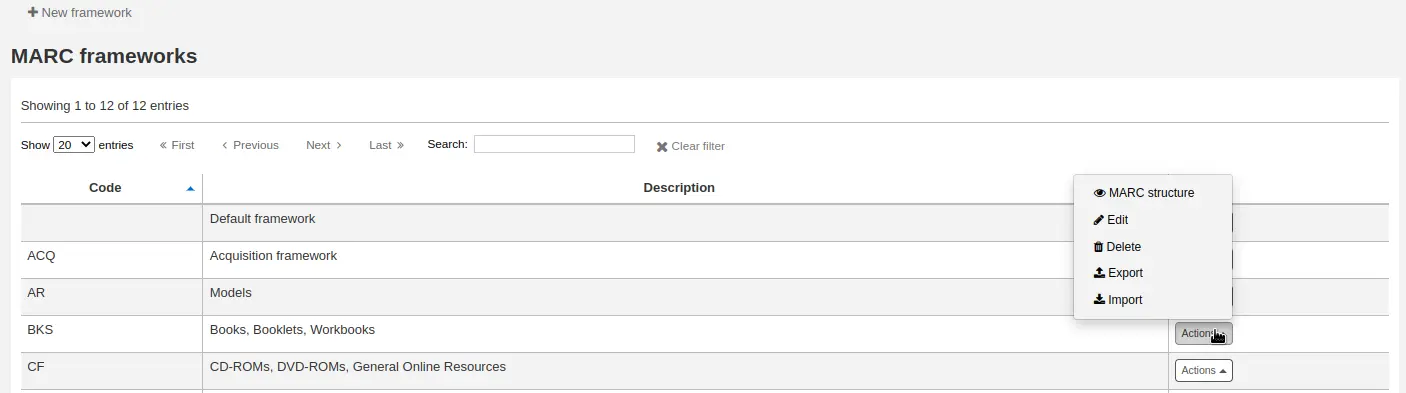
Quanto clicar em “Exportar” o sistema vai perguntar qual o formato no qual deseja exportar o ficheiro.
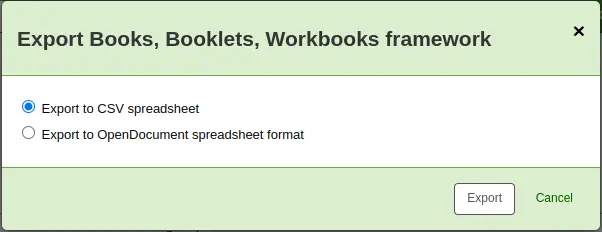
Um modelo exportado desta forma pode ser importado noutra instalação do Koha usando a opção de importar modelo.
Import framework
An easy way to create a new framework is to import one created for your or another Koha installation. This framework would need to be exported from the other system using the instructions above to be available for import here.
To import a framework you first need to create a new framework. Once you have that framework, click “Actions” then “Import” to the right of the new framework.
Será pedido para escolher um ficheiro do seu computador a importar para o modelo.
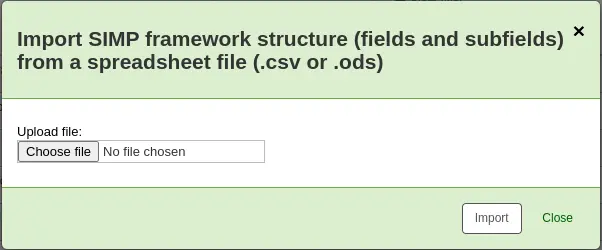
Será pedido para confirmar as suas ações antes do ficheiro ser carregado.
As your file is uploaded, you will see a spinning icon to indicate that the system is working.
Once your import is complete you will be brought to the framework edit tool where you can make any changes you need to the framework you imported.
Ligações Koha => MARC
While Koha stores the entire MARC record, it also stores common fields for easy access in various tables in the database (mainly the items, biblioitems, and biblio tables). Koha to MARC mapping is used to tell Koha where to find these values in the MARC record. Whenever a record is added or changed, this mapping will be used to update the linked database column. The information from the database columns is used as a way to quickly look up important information without having to parse the full MARC record. It is used for displaying information in a lot of pages and can also be used in reports.
In many cases, you will not have to change the default values set at the time of the installation, but it is important to know that the tool is here and can be used at any time.
Aviso
If you change mappings after data has been added to your catalog, ask your system administrator to run misc/batchRebuildBiblioTables.pl. This will update the values in the database columns for all your records.
Get there: More > Administration > Catalog > Koha to MARC mapping
Nota
Only staff with the manage_marc_frameworks permission (or the superlibrarian permission) will have access to this section.
The table shows all the database fields that can be mapped to MARC fields.
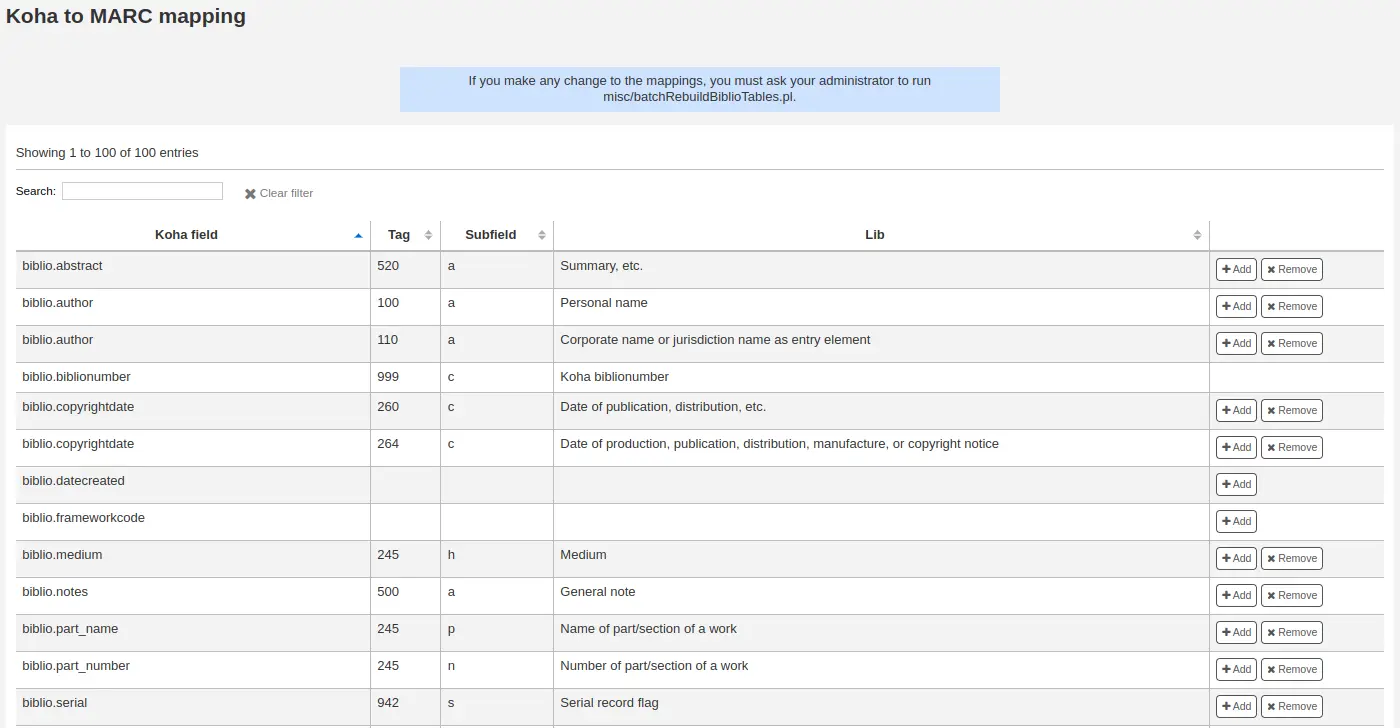
To add a new mapping, click on the “Add” button to the right of the appropriate field.
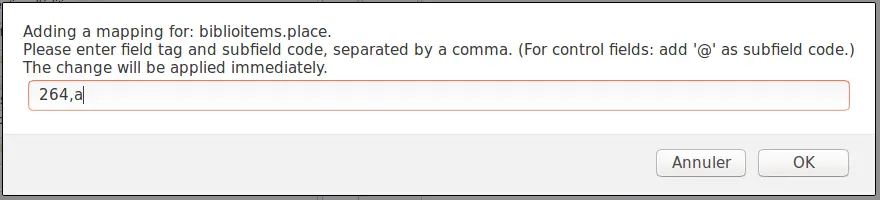
Write in the MARC field and subfield you would like to map, separated by a comma, to this Koha field (for example, «264,a») and click the “OK” button.
Nota
It is possible to link more than one MARC field to a database field. For example, you could link both 260$a and 264$a to the biblioitems.place field.
If you would like to clear the mapping for a database field, click the “Remove” button.
Nota
All changes are immediate. Records created or edited after the change will immediately have the new mappings. However, if you want to update the mappings for records already in the catalog, ask your system administrator to run misc/batchRebuildBiblioTables.pl. This will update the values in the database columns for all your records.
Teste do modelo bibliográfico MARC
The tool checks the MARC structure of bibliographic frameworks.
Get there: More > Administration > Catalog > MARC bibliographic framework test
Nota
Only staff with the manage_marc_frameworks permission (or the superlibrarian permission) will have access to this section.
If you change your MARC bibliographic framework, it’s recommended that you run this tool to test for errors in your definition.
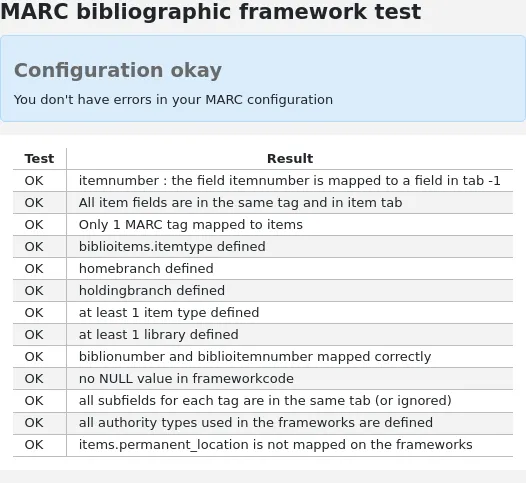
Fontes de classificação
Source of classification or shelving scheme are mapped to field 952$2 and 942$2 in Koha’s MARC bibliographic frameworks and stored in the items.cn_source and biblioitems.cn_source fields in the database.
Get there: More > Administration > Catalog > Classification sources
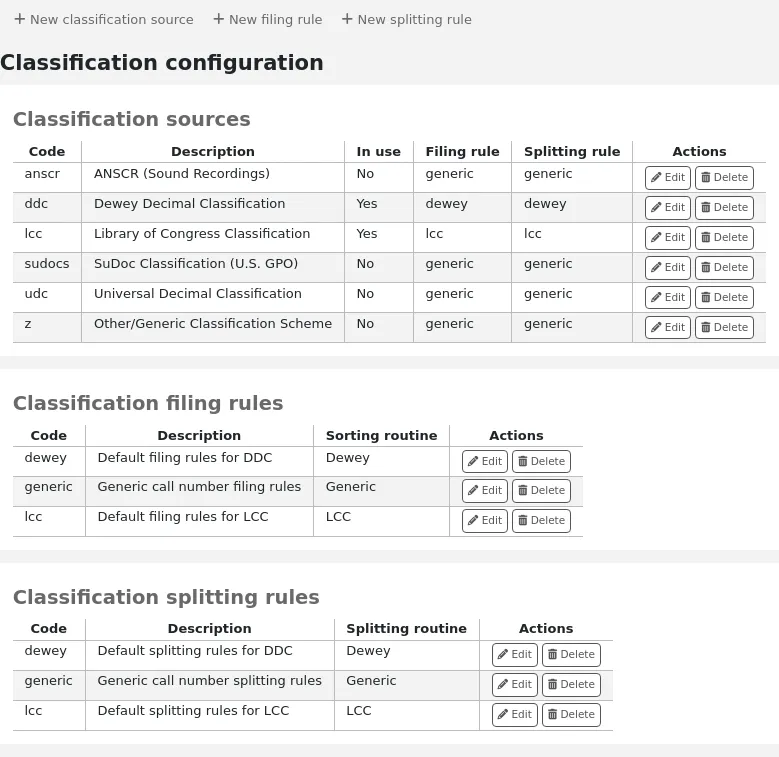
Nota
Only staff with the manage_classifications permission (or the superlibrarian permission) will have access to this section.
Commonly used classification sources are:
ddc - Dewey Decimal Classification
lcc - Library of Congress Classification
Se escolher instalar as fontes de classificação durante a instalação do Koha, verá outros valores também:
ANSCR (gravações de som)
Classificação SuDOC
Classificação Decimal Universal
Outra classificação (genérica)
Adding/editing classification sources
You can add your own source of classification by using the “New classification source” button. To edit use the “Edit” button.
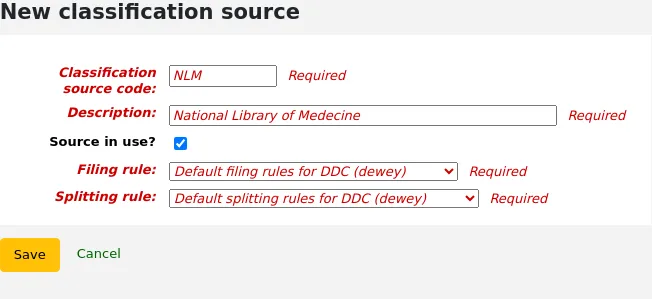
Quando criar ou editar:
Enter a code. The code is limited to 10 characters and must be unique.
Nota
The code is not editable once it has been created.
Enter a description. The description is used in the drop-down lists in the cataloging module.
Check the “Source in use?” checkbox if you want the value to appear in the drop-down list for this category.
Select the appropriate filing rule from the drop-down list.
Select the appropriate splitting rule from the drop-down list.
Classificação das regras de preenchimento
Filing rules determine the order in which items are placed on shelves. Filing rules normalize call numbers in order for Koha to be able to compare them and sort them in the right order.
For example, a Dewey call number such as “636.8/07 SHAW” will become “636_800000000000000_07_SHAW” in order to be sorted.
A cota classificada é guardada nos campos items.cn_sort ou biblioitems.cn_sort na base de dados
Values that are preconfigured in Koha are:
Dewey
LCC
Genérico
Filing rules are mapped to Classification sources. You can setup new filing rules by using the “New filing rule” button. To edit, use the “Edit” button.
Quando criar ou editar:
Enter a code. The code is limited to 10 characters and must be unique.
Nota
The code is not editable once it has been created.
Enter a description. The description is used in the drop-down list when creating or editing a classification source.
Escolha uma rotina de preenchimento apropriada - dewey, genérico ou lcc
The Dewey filing routine generates a sorted call number by following these rules:
Concatenates classification and item parts.
Converts to uppercase.
Removes any leading or trailing white spaces, and forward slashes (/)
Separates alphabetic prefix from the rest of the call number
Splits into tokens on white spaces and periods.
Leaves first digit group as is.
Converts second digit group to 15-digit long group, padded on right with zeroes.
Converts each whitespace to an underscore.
Removes any remaining non-alphabetical, non-numeric, non-underscore characters.
The generic filing routine generates a sorted call number by following these rules:
Concatenates classification and item parts.
Removes any leading or trailing white spaces.
Converts each whitespace to an underscore.
Converts to uppercase.
Removes non-alphabetical, non-numeric, non-underscore characters.
The LCC filing routine generates a sorted call number by following these rules:
Classification splitting rules
Splitting rules determine how call numbers are split when printed on a spine label.
Nota
Splitting rules are only used if your label layout specifies to split call numbers.
For example, a Dewey call number such as “636.8/07 SHAW” will become
636.807
SHAW
once printed on a spine label.
Values that are preconfigured in Koha are:
Dewey
LCC
Genérico
Splitting rules are mapped to Classification sources. You can setup new splitting rules by using the “New splitting rule” button. To edit, use the “Edit” button.
Quando criar ou editar:
Enter a code. The code is limited to 10 characters and must be unique.
Nota
The code is not editable once it has been created.
Enter a description. The description is used in the drop-down list when creating or editing a classification source.
Choose an appropriate splitting routine - Dewey, Generic, LCC or RegEx
The Dewey splitting routine looks for the three digits and the decimal, puts it on one line with the other parts (Cutter, prefix, etc.) each on a separate line (generally split on spaces).
The Generic splitting routine splits on spaces.
The LCC splitting routine puts each component on a separate line.
The RegEx splitting routine allows you to create a custom splitting routine.
Some examples of RegEx splitting routines:
Split on spaces:
s/\s/\n/g
Split on equal signs (=):
s/(\s?=)/\n=/g
Split on forward slashes (/):
s/(\s?\/)/\n/g
Remove first split if call number starts with J or K:
s/^(J|K)\n/$1 /
Cut after 9 characters:
s/(^.{9})/$1\n/
It is possible to mix and match RegEx splitting routines by clicking the “New” link just under the RegEx input box.
For example, if you want to cut after nine characters AND split on spaces, you can write both and the call number “971.42805092 C669r” will be split
971.42805
092
C669r
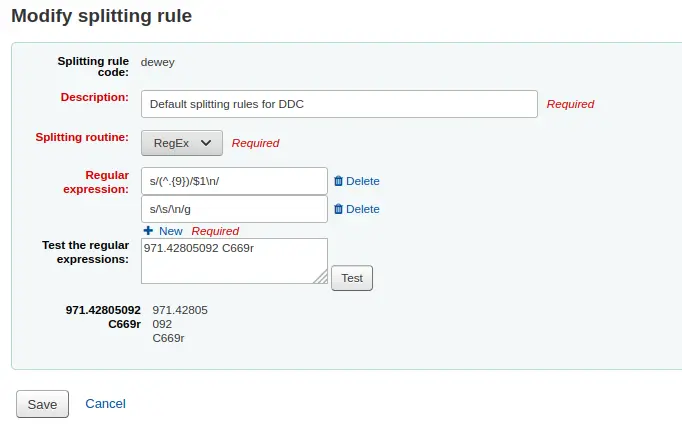
Regras de concordância
Regras de concordância são usadas quando se importam registos MARC para o Koha.
Get there: More > Administration > Catalog > Record matching rules
Nota
Only staff with the manage_matching_rules permission (or the superlibrarian permission) will have access to this section.
The rules that you set up here will be referenced with you Stage MARC records for import.
It is important to understand the difference between “Match points” and “Match checks” before adding new matching rules to Koha.
Match points are the criteria that you enter that must be met in order for an incoming record to match an existing MARC record in your catalog. You can have multiple match points on an import rule each with its own score. An incoming record will be compared against your existing records (“one record at a time”) and given a score for each match point. When the total score of the match points matches or exceeds the threshold given for the matching rule, Koha assumes a good match and imports/overlays according your specifications in the import process. An area to watch out for here is the sum of the match points. Double check that the matches you want will add up to a successful match.
Example:
Threshold of 1000
Match point on 020$a 1000
Match point on 022$a 1000
Match point on 245$a 500
Match point on 100$a 100
In the example above, a match on either the 020$a or the 022$a will result in a successful match. A match on 245$a title and 100$a author (and not on 020$a or 022$a) will only add up to 600 and not be a match. And a match on 020$a and 245$a will result in 1500 and while this is a successful match, the extra 500 point for the 245$a title match are superfluous. The incoming record successfully matched on the 020$a without the need for the 245$a match. However, if you assigned a score of 500 to the 100$a Match Point, a match on 245$a title and 100$a author will be considered a successful match (total of 1000) even if the 020$a is not a match.
Match checks are not commonly used in import rules. However, they can serve a couple of purposes in matching records. First, match checks can be used as the matching criteria instead of the match points if your indexes are stale and out of date. The match checks go right for the data instead of relying on the data in the indexes. (If you fear your indexes are out of date, a rebuild of your indexes would be a great idea and solve that situation!) The other use for a match check is as a “double check” or “veto” of your matching rule. For example, if you have a matching rule as below:
Threshold of 1000
Match point on 020$a 1000
Match check on 245$a
Koha will first look at the 020$a tag/subfield to see if the incoming record matches an existing record. If it does, it will then move on to the Match Check and look directly at the 245$a value in the incoming data and compare it to the 245$a in the existing “matched” record in your catalog. If the 245$a matches, Koha continues on as if a match was successful. If the 245$a does not match, then Koha concludes that the two records are not a match after all. The Match Checks can be a really useful tool in confirming true matches.
When looking to create matching rules for your authority records the following indexes will be of use:
Nome do índice |
Matches MARC tag |
|---|---|
LC-cardnumber |
010$a |
Personal-name |
100$a |
Corporate-name-heading |
110$a |
Meeting-name |
111$a |
Title-uniform |
130$a |
Chronological-term |
148$a |
Subject-topical |
150$a |
Name-geographic |
151$a |
Term-genre-form |
155$a |
Table: Authority indexes
Adding matching rules
To create a new matching rule :
Click “New record matching rule”
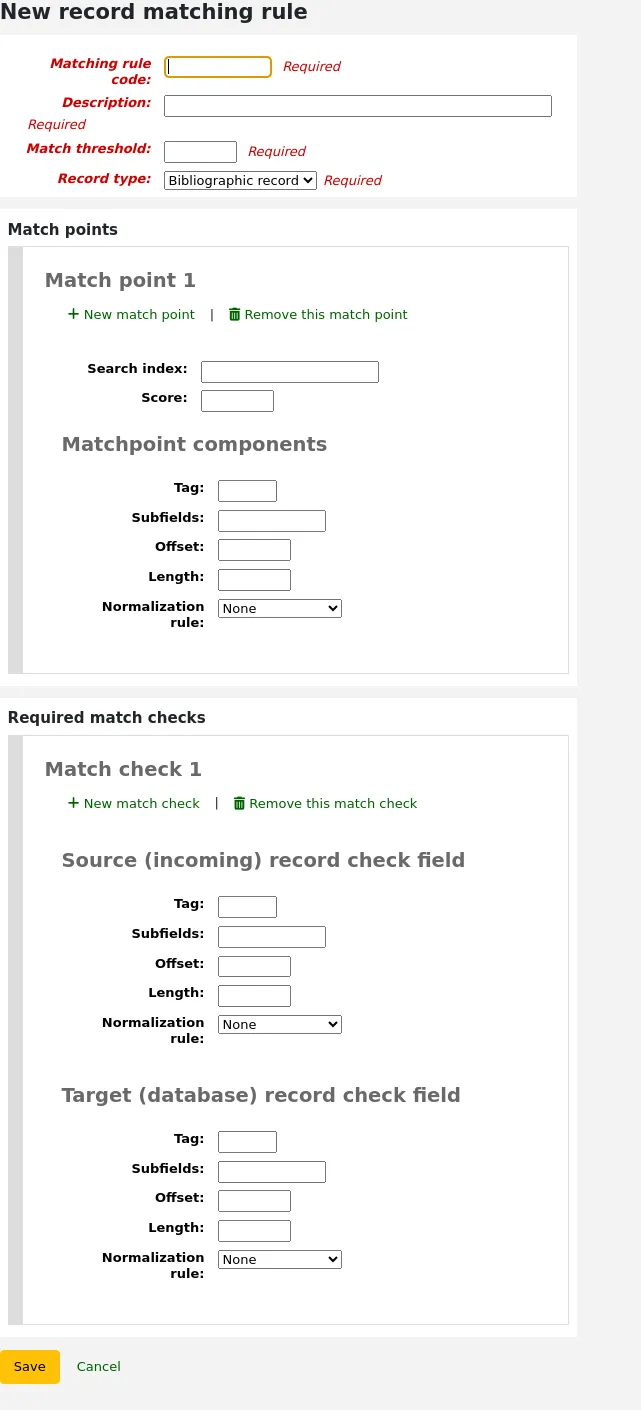
Escolha um nome único e insira-o no campo “Código da regra de correspondência”
“Descrição” pode ser o que quiser de forma a tornar claro qual a regra a ser escolhida
“Match threshold” is the total number of “points” a biblio must earn to be considered a “match”
“Record type” is the type of import this rule will be used for - either authority or bibliographic
As concordâncias são definidas para determinar o campo a comparar
“Search index” can be found by looking at the index configuration on your system. For Zebra you might find the right index names in your ccl.properties file. You can also find useful information in the Koha search indexes chapter of this manual.
“Score” - The number of “points” a match on this field is worth. If the sum of each score is equal or greater than the match threshold, the incoming record is a match to the existing record.
Enter the MARC tag you want to match on in the “Tag” field.
Enter the MARC tag subfield you want to match on in the “Subfields” field. For matching on controlfields like 001 the subfields input field can be left empty.
“Offset” - Para usar com campos de controle, “001-009”
“Tamanho” - É usado com os campos de controlo, 001-009
There are currently several options for “Normalization rules”:
None - no normalization rule will be applied
Remove spaces
Uppercase
Lowercase
Legacy default - this option was added to maintain the behavior form before the other normalization rules became available.
ISBN - using this option will improve matching on ISBN. If your incoming records ISBN fields contain extra text, like “9780670026623 (alk. paper)”, they will still match correctly.
“Required match checks” - While match points work on the search index, match checks work directly on the data and can be used as the matching criteria instead of the match points or in addition to them to confirm true matches.
Sample bibliographic record matching rule: Control number
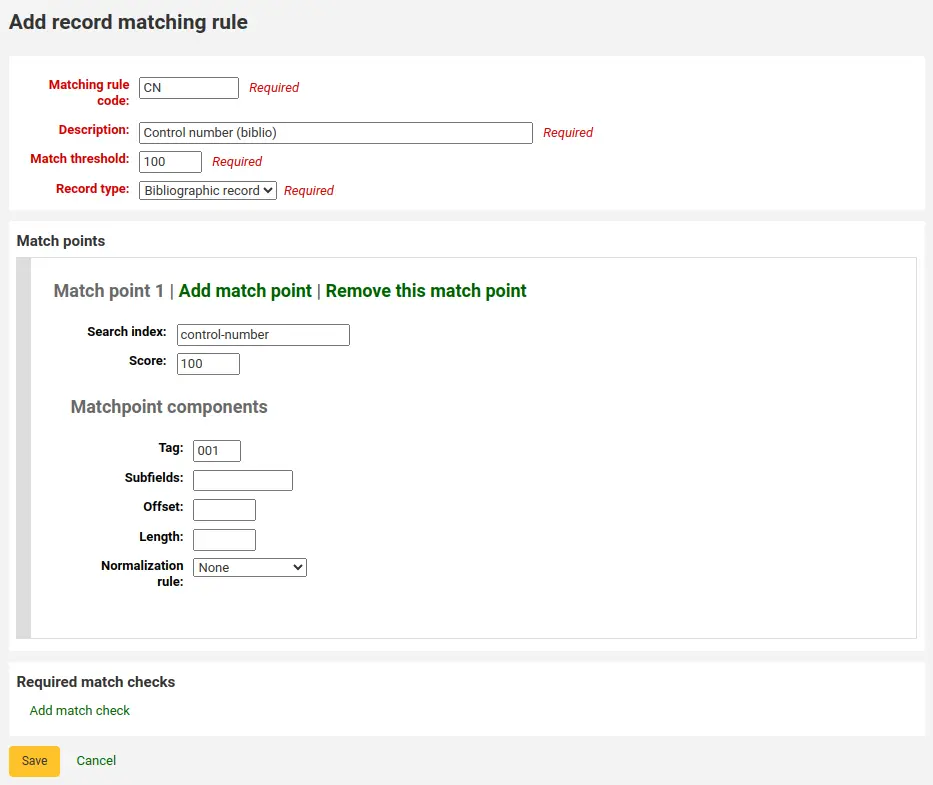
Limite para correspondência: 100
Record type: Bibliographic record
Nota
In order to match on the 001 in authority records, you will need to create a second rule, repeating all of these values and change just the record type to “Authority record”.
Concordância:
Search index: control-number
Score: 100
Tag: 001
Nota
In MARC21, this field is for the control number assigned by the organization creating, using, or distributing the record.
Subfields: empty
Offset: 0 or empty
Length: 0 or empty
Normalization rule: None
Required match checks: none (click “Remove this match check”)
Record sources
Versão
This section was added to Koha in version 24.05.
Record sources are used to indicate where records come from and optionally prevent records from specific sources to be edited in Koha.
This is particularly useful in instances where records are cataloged in another system and pushed to Koha. Sometimes, in those cases, it’s best to edit the records in the source system rather than in Koha.
Nota
Only staff with the manage_record_sources permission (or the superlibrarian permission) will have access to this section.
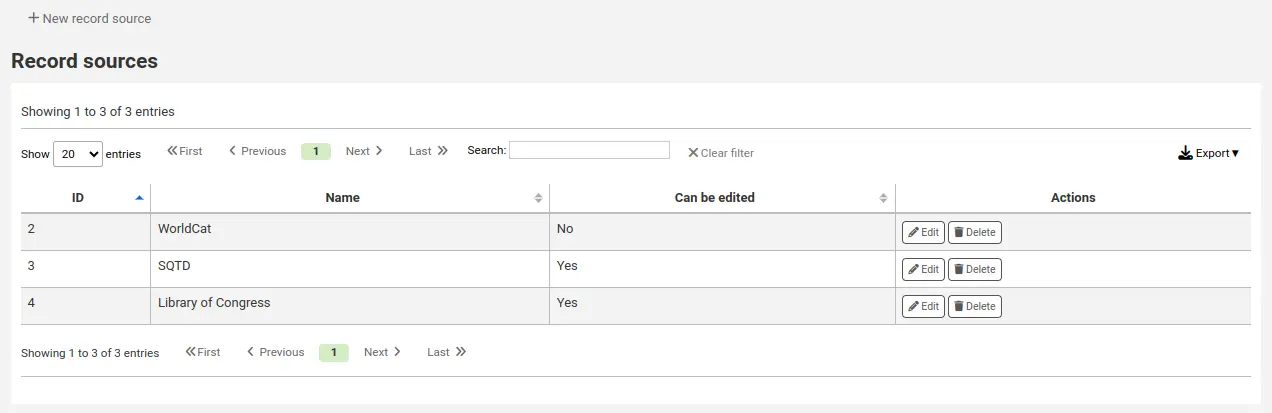
Adding a record source
To add a record source,
Click “New record source”
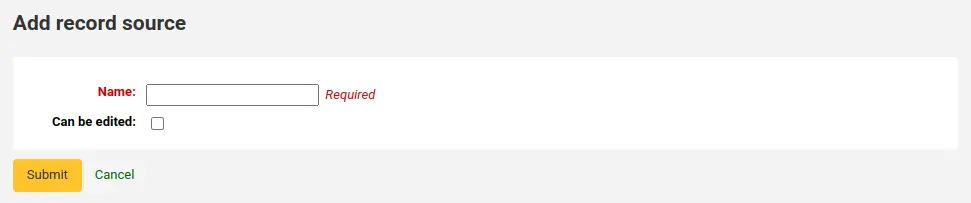
Preencher o formulário
Name: enter the name of the source
Can be edited: if this box is checked, records from this source will be editable in Koha. If it is not checked, only staff members with the edit_locked_records permission will be able to edit the records.
Clicar em “Submeter”
Editing a record source
To edit a record source, click the “Edit” button next to the source.
Deleting a record source
To delete a record source, click the “Delete” button next to the source and confirm.
Record overlay rules
Record overlay rules allow for defining rules for how incoming and original MARC records should be merged on a field tag and context basis when a MARC record is updated.
Nota
Only staff with the manage_marc_overlay_rules permission (or the superlibrarian permission) will have access to this section.
Contexts
Let’s first focus on understanding the concept of contexts.
Contexts are defined by «module» and «filter» enabling separate rule sets for different contexts.
By setting different filter values for these modules, rules are applied only when the filter value matches for a particular module. A wildcard; «*», can be used to match all possible filter values.
There are three different context modules:
- borrower
Allows for defining rules that will be applied if the currently logged in user’s borrowernumber matches the filter condition.
- categorycode
Allows for defining rules that will be applied if the currently logged in users’s category code matches the filter condition.
- source
Allows for defining rules that will be applied if the record is updated in a particular part of Koha. The following update methods are supported:
batchimport
z39.50
intranet
bulkmarcimport
import_lexile
batchmod
A context is really nothing but a module and filter combination. Every time a record is updated i Koha, a context is set an filter values populated with context dependent values.
Examples of two different contexts are saving record in the staff client or the currently logged in user having a particular borrowernumber, for example «12».
These two contexts are define as:
Module: source, filter: intranet
Module: borrower, filter: 12
Only the rules of one context, that is a module and filter combination, are applied. If multiple contexts matches they are not merged together.
If we have the following rules:
Module: source, filter: *, tag: 650, preset: Protect
Module: source, filter: *, tag: 500, preset: Protect
Module: borrower, filter: 12, tag: *, preset: Overwrite
And the context of the update where the rules are applied is:
source => "intranet" (wildcard match)
borrower => 1 (no match)
Only the first two rules will be applied.
If instead the context of rule evaluation was:
source => "intranet" (wildcard match)
borrower => 12 (an exact match, which is considered more specific than a wildcard match)
Only the second rule would be applied, even though the first two rules also matches they will be discarded since the context match of that rule set is of lower specificity because of the wildcard.
Context specificity is ranked in the following way:
First all the rules are grouped into rule sets identified by a unique filter and module combination.
If one or more contexts have a non wildcard filter condition match, the rule set of the context with the module of highest specificity is selected. (The modules are listed in order of specificity above).
If no exact context match is found, but one or more wildcard matches are, the rule set of the context with the module of highest specificity is selected.
If no context matches the default behavior is to overwrite, the original record with the incoming record.
Rules
A rule consists of a three different parts:
- Context
A module and filter to match against as described above.
- Tag
A field tag expression for defining which tag(s) the rule should be applied on. Three different tag expressions are supported:
An exact tag, for example «650».
A regular expression, for example «6..» matching all 6XX tags.
A wildcard, «*», matching all tags
When rules for a specific context are evaluated, the most specific match is selected. The tag expressions above are listed in order of specificity.
- Ações
Each rule defines a set of actions to take depending on the type of update. There are four types of update events: Added, Appended, Removed and Deleted. For each event an action is specified, whether to perform the update, or to skip it.
By enabling/disabling updates for these different events 16 different update behaviors can be defined. There are presets available for the most common/useful combinations:
Preset |
Added |
Appended |
Removed |
Deleted |
|---|---|---|---|---|
Protect |
Skip |
Skip |
Skip |
Skip |
Overwrite |
Adicionar |
Append |
Remove |
Eliminar |
Add new |
Adicionar |
Skip |
Skip |
Skip |
Add and append |
Adicionar |
Append |
Skip |
Skip |
Protect from deletion |
Adicionar |
Append |
Remove |
Eliminar |
Protect
Added: Skip, Appended: Skip, Removed: Skip, Deleted: Skip
The «Protect» preset will prevent all updates on matching fields, protecting them from being overwritten.
Given this rule:
Module: source, filter: *, Tag: 650, Preset: Protect
And the following original and incoming records:
100 1#$aTerrace, Vincent,$d1948-
650 #0$aTelevision serials$zUnited States$vCatalogs.
100 1#$aTerrace, Vincent,$d1948-
500 ##$aIncludes index.
650 #0$aTelevision pilot programs$zUnited States$vCatalogs.
The 650 field of the original record will retain its original value after the update (but since the default behavior if no rule matches is to overwrite, the 500 field will be added):
100 1#$aTerrace, Vincent,$d1948-
500 ##$aIncludes index.
650 #0$aTelevision serials$zUnited States$vCatalogs.
Overwrite
Added: Add, Appended: Append, Removed: Remove, Deleted: Delete
The «Overwrite» preset will allow all updates on matching fields.
Since the default behavior is to overwrite if no rule matches, adding a rule with the overwrite preset only makes sense if there is some other rule with a lower tag specificity with a different behavior, for example a wildcard tag rule.
So given these two rules:
Module: source, filter: *, Tag: *, Preset: Protect
Module: source, filter: *, Tag: 650, Preset: Overwrite
And the following original and incoming records:
500 ##$aIncludes index.
650 #0$aTelevision serials$zUnited States$vCatalogs.
Incoming record:
100 1#$aTerrace, Vincent,$d1948-
500 ##$aIncludes index.
650 #0$aTelevision pilot programs$zUnited States$vCatalogs.
All fields but 650 will be protected on the original record, and the resulting record will be:
500 ##$aIncludes index.
650 #0$aTelevision pilot programs$zUnited States$vCatalogs.
Add new
Added: Add, Appended: Skip, Removed: Skip, Deleted: Skip
The «Add new» allow updates only if the incoming field is new, that is there exists no fields with this tag in the original record.
Given this rule:
Module: source, filter: *, Tag: 650, Preset: Add
And the following original and incoming records:
100 1#$aTerrace, Vincent,$d1948-
650 #0$aTelevision serials$zUnited States$vCatalogs.
100 1#$aTerrace, Vincent,$d1948-
500 ##$aIncludes index.
650 #0$aTelevision pilot programs$zUnited States$vCatalogs.
The 650 in the incoming record will not overwrite the 650 field in the original record since the original record contains one or more 650 fields. The 500 field will be added since the default rule is to overwrite. The resulting record will be:
100 1#$aTerrace, Vincent,$d1948-
500 ##$aIncludes index.
650 #0$aTelevision serials$zUnited States$vCatalogs.
Por outro lado, se o registo original fosse:
100 1#$aTerrace, Vincent,$d1948-
O registo resultante será:
100 1#$aTerrace, Vincent,$d1948-
500 ##$aIncludes index.
650 #0$aTelevision pilot programs$zUnited States$vCatalogs.
Isto ocorre porque não existiam campos 650 no registo original; por isso, é permitido adicionar novos.
Add and append
Added: Add, Appended: Append, Removed: Skip, Deleted: Skip
Na predefinição «Adicionar e anexar», também é permitido anexar, mas não remover ou eliminar.
Assim, se tivermos a seguinte regra:
Module: source, filter: *, Tag: 650, Preset: Add and append
And the following original and incoming records:
100 1#$aTerrace, Vincent,$d1948-
650 #0$aTelevision serials$zUnited States$vCatalogs.
100 1#$aTerrace, Vincent,$d1948-
500 ##$aIncludes index.
650 #0$aTelevision pilot programs$zUnited States$vCatalogs.
O registo resultante será:
100 1#$aTerrace, Vincent,$d1948-
500 ##$aIncludes index.
650 #0$aTelevision serials$zUnited States$vCatalogs.
650 #0$aTelevision pilot programs$zUnited States$vCatalogs.
Note que o campo 650 «antigo» do registo original não foi removido, uma vez que apenas permitimos a adição ou o acréscimo de novos valores.
Se, em vez disso, utilizássemos a predefinição «Sobrepor», o registo resultante seria:
100 1#$aTerrace, Vincent,$d1948-
500 ##$aIncludes index.
650 #0$aTelevision pilot programs$zUnited States$vCatalogs.
com o campo 650 do registo original removido.
Protect from deletion
Added: Add, Appended: Append, Removed: Remove, Deleted: Skip
A definição predefinida «Proteger contra eliminação» permite todas as operações de atualização, exceto a eliminação. A eliminação é definida como a situação em que não existem campos da etiqueta correspondente no registo de entrada, pelo que todos os campos com essa etiqueta seriam removidos do registo original.
Assim, dada a seguinte regra:
Module: source, filter: *, Tag: 650, Preset: Protect from deletion
And the following original and incoming records:
100 1#$aTerrace, Vincent,$d1948-
650 #0$aTelevision serials$zUnited States$vCatalogs.
100 1#$aTerrace, Vincent,$d1948-
500 ##$aIncludes index.
650 #0$aTelevision pilot programs$zUnited States$vCatalogs.
O registo resultante será:
100 1#$aTerrace, Vincent,$d1948-
500 ##$aIncludes index.
650 #0$aTelevision pilot programs$zUnited States$vCatalogs.
Por outro lado, se o registo recebido fosse:
100 1#$aTerrace, Vincent,$d1948-
500 ##$aIncludes index.
Neste caso, a eliminação de 650 não seria permitida, e o valor do campo no registo original seria protegido. Em vez disso, o registo resultante seria:
100 1#$aTerrace, Vincent,$d1948-
500 ##$aIncludes index.
650 #0$aTelevision serials$zUnited States$vCatalogs.
Predefinições personalizadas
Para trabalhar com predefinições personalizadas, é necessária uma compreensão mais completa dos eventos de atualização:
- Added
Para uma regra de correspondência com uma etiqueta, a ação configurada para o evento «Adicionado» é aplicada a novos campos no registo de entrada caso o registo original não possua campos com essa etiqueta. Se a ação for «Adicionar», serão incluídos no registo original; se for «Ignorar», serão descartados.
- Appended
Se os dois registos possuírem campos em comum com a etiqueta de regra, isto é, um ou mais campos com valores de subcampo e identificador idênticos, a ação configurada para o evento «Anexado» será aplicada aos campos encontrados no registo de entrada, mas não no registo original. Se a ação for «Anexar», serão adicionados ao registo original; se for «Ignorar», serão descartados.
- Removed
Se os dois registos tiverem campos em comum com a etiqueta de regra, a ação configurada para o caso de «Remoção» será aplicada aos campos presentes no registo original, mas ausentes no registo de entrada. Se a ação for «Remover», serão removidos do registo original; se for «Ignorar», serão mantidos.
- Deleted
Se o registo original contiver campos com a etiqueta de regra, mas não for encontrado nenhum campo com essa etiqueta no registo de entrada, a ação configurada para o evento «Apagado» será aplicada aos campos do registo de entrada. Se a ação for «Apagar», os campos serão removidos do registo original; se for «Ignorar», serão mantidos.
Configuração dos conjuntos OAI
Nesta página pode criar, modificar e eliminar conjuntos OAI-PMH
Nota
Apenas a equipa com a permissão manage_oai_sets (ou a permissão superbibliotecário) terá acesso a esta secção.
Criar um conjunto
Para criar um conjunto:
Clicar no link “Adicionar um novo conjunto”
Preencha os campos obrigatórios “setSpec” e “setName”
Depois pode adicionar descrições ao conjunto. Para fazer isto clique em “Adicionar descrição” e preencha nova caixa de texto. Pode adicionar as descrições que desejar.
Clicar em “Guardar”
Modificar/eliminar um conjunto
Para modificar um conjunto, clique na ligação “Modificar” na mesma linha do conjunto que deseja modificar. Um formulário similar ao de criação irá aparecer e permitirá modificar os detalhes do conjunto.
Para eliminar um conjunto, clique na ligação “Eliminar” na mesma linha do conjunto que deseja eliminar.
Definir mapeamentos
Aqui pode definir como será formado um conjunto (que registos farão parte dele) através de mapeamentos. Os mapeamentos são listas de condições aplicadas ao conteúdo dos registos.
Fill the fields “Field”, “Subfield” and “Value”. For example if you want to include in this set all records that have a 999$9 equal to “XXX”. Fill “Field” with 999, “Subfield” with 9 and “Value” with XXX.
Se pretender adicionar outra condição, clique no botão “Adicionar” e repita o passo 1. Pode escolher entre os operadores booleanos “e” ou “ou” para ligar as suas condições.
Clicar em “Guardar”
Para eliminar uma condição, basta deixar pelo menos um dos campos “Campo”, “Subcampo” ou “Valor” em branco e clicar em “Guardar”.
Nota
Na verdade, uma condição é verdadeira se o valor no subcampo correspondente for estritamente igual ao definido em “Valor”. Um registo com 999$9 = “XXX YYY” não pertencerá a um conjunto cuja condição seja 999$9 = “XXX”.
E é sensível a maiúsculas : um registo com 999$9 = “xxx” não pertence a um conjunto cuja condição é 999$9 = “XXX”.
Construir conjuntos
Depois de configurar todos os seus conjuntos, precisa de os construir. Isto é feito executando o script misc/migration_tools/build_oai_sets.pl.
Campos de pesquisa de exemplar
Acesso: Mais > Administração > Catálogo > Campos de pesquisa de exemplar
Esta secção permite adicionar campos de pesquisa personalizados à opção de pesquisa de exemplares na interface dos técnicos.
Nota
Apenas os colaboradores com a permissão manage_item_search_fields (ou superbibliotecários) terão acesso a esta secção.
Adicionar um campo de pesquisa de exemplares personalizado
Para adicionar um novo campo de pesquisa, clique no botão “Novo campo de pesquisa”.
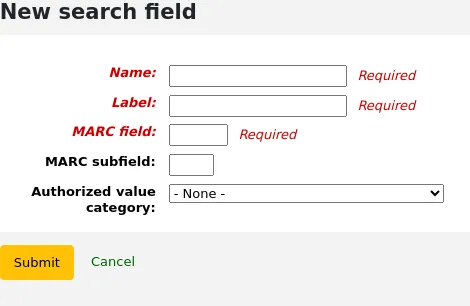
Nome: introduza o nome do campo de pesquisa
Descrição: introduza o rótulo do campo de pesquisa tal como este irá aparecer na página de pesquisa de exemplares
Campo MARC: introduza o número do campo MARC no qual pretende pesquisar; o campo MARC também aparecerá na página de pesquisa de exemplares
Subcampo MARC: Introduza o código do subcampo MARC a pesquisar
Categoria de valor autorizado: se necessário, escolha uma categoria de valor autorizado para este campo de pesquisa; isto transformará efetivamente este campo de pesquisa num menu suspenso, em vez de um campo de texto livre
Clique em “Submeter”.
Assim que o novo campo for adicionado, será visível na página de pesquisa de exemplares, na lista pendente que começa por “Código de barras”.
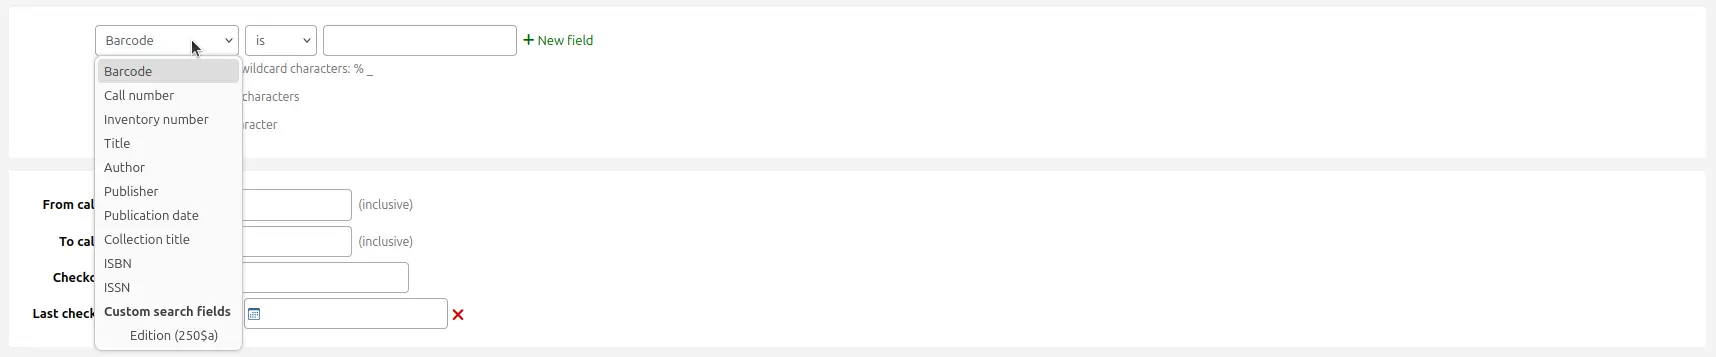
Editar um campo de pesquisa de exemplares
Para editar um campo de pesquisa de exemplares, clique no botão “Editar” junto ao campo de pesquisa na tabela.
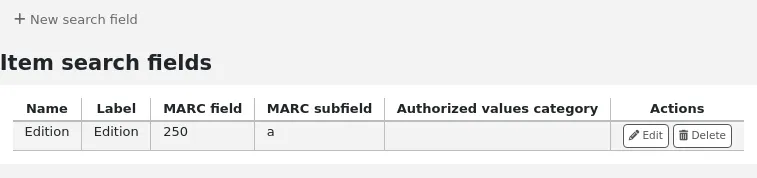
Faça as alterações e clique em “Submeter”.
Apagar um campo de pesquisa de exemplares
Para eliminar um campo de pesquisa de exemplares, clique no botão “Apagar” junto ao campo de pesquisa na tabela e confirme a eliminação.
Filtros de pesquisa
Os filtros de pesquisa são pesquisas ou filtros personalizados que podem ser aplicados aos resultados da pesquisa.
Esta funcionalidade é ativada através da preferência de sistema SavedSearchFilters.
Nota
Esta secção só será visível se a preferência de sistema SavedSearchFilters estiver ativada.
Nota
Apenas colaboradores com a permissão manage_search_filters (ou superbibliotecários) terão acesso a esta secção.
Os filtros de pesquisa são adicionados ao pesquisar no catálogo através da interface dos técnicos.
Esta página é utilizada para gerir filtros de pesquisa existentes.

Pode fazer alterações em cada filtro de pesquisa clicando nos botões de ação à direita.
Editar filtro: altere o nome do filtro e a sua disponibilidade no OPAC ou na interface da equipa
Editar pesquisa: ao clicar neste botão, será direcionado para o formulário de pesquisa avançada, com o filtro já aplicado. Pode alterar os parâmetros de pesquisa e clicar em “Guardar filtro” na parte superior da página.
Delete: clicking this button will delete the filter.
Aviso
There is no confirmation when deleting a search filter. Once you click “Delete”, the filter will be deleted immediately.
Nota
Search filters can be used as predefined search URLs that you can use on your website or in HTML customizations.
Search filters are available through relatively short links.
<OPACBaseURL>/cgi-bin/koha/opac-search.pl?limit=search_filter:<Id of filter>
Use this URL anywhere to link directly to the search.
Search engine configuration
Once you have switched to Elasticsearch in your SearchEngine system preference, you’ll see a new link for Search engine configuration in the Catalog section of Administration. Here you will manage indexes, facets, and their mappings to MARC fields and subfields.
Nota
Only staff with the manage_search_engine_config permission (or the superlibrarian permission) will have access to this section.
The page is separated in three tabs: search fields, bibliographic records, and authority records.
Importante
If you change anything in this page, you need to completely reindex your records, otherwise, only records added or edited after the change will be affected.
Perigo
Any change done through the interface will be lost if you click on
“Reset mappings” or if the rebuild command is run with the --reset
or -r parameter. The “Reset mappings” button and the --reset
parameter reset the settings to the defaults.
Search fields
The search fields tab in the search engine configuration page show all the search fields used by Elasticsearch in Koha.
The table shows:
Name: the name of the search field, as defined in the mappings file.
Aliases: some fields have aliases, for example, «author» can also be «au». These are hard-coded and cannot be changed.
Label: some fields have labels that are different from their name. These are used as the facet header when the field is used as a facet.
Type: the type influences how the data is stored and how it is searched.
Boolean: a 0 / 1 (no / yes) value.
Call Number: a call number influenced by the classification source.
Date: a date stored in ISO format.
Geo point: a geographic latitude and longitude value.
Versão
The Geo point type was added to Koha in version 24.05.
ISBN: ISBN standard number.
Number: a number.
Std. Number: a number.
String: a simple string of characters.
Sum: a sum of values.
Year: a four-digit year number.
Weight: a positive numerical value assigned to that search field to make it more «important» in a simple search. The higher the value, the more «important» this field is in the relevancy sorting.
Nota
Weighted search only works for bibliographic search, not authority search. It also only works for the simple search, unless the “Apply field weights to search” option in the advanced search is selected.
Searchable: whether this field is used in the staff interface or the OPAC.
Adding search fields
Versão
The possibility of adding search fields was added to Koha in version 24.05.
It is possible to add search fields from this table. Add the search field information in the last row of the table, and click the “Add” button at the end of the row.
Deleting search fields
Versão
The possibility of deleting added search fields was added to Koha in version 24.05.
It is possible to delete search fields that were added manually. The default search fields cannot be deleted because they are necessary for Koha to work properly.
To delete a search field, click the “Delete” button at the end of the row.
Bibliographic records
The bibliographic records tab in the search engine configuration page shows the MARC mappings for each search field used by Elasticsearch in Koha.
Nota
The default mappings are described in the Elasticsearch indexes section of the Searching chapter.
The table shows:
Search field: the corresponding search field (as defined in the search fields tab). Search fields can be repeated to include several MARC fields.
Sortable: indicates whether this mapping should be used in the sorting for this search field. For example, in MARC21, the title index has several different title fields, but only the 245 field is used for sorting.
Facetable: indicates whether this mapping can be used in the facets.
Versão
Facet configuration was added to Koha in version 24.05.
Suggestible: indicates whether this mapping is used in the browse search.
Searchable: indicates whether this mapping is used for searching.
Filter: the type influences the way values are indexed.
Punctuation: removes punctuation.
None: values are indexed as they are.
Mapping: indicates the MARC field mapped to that search field.
Nota
Mappings can include whole fields or only specific subfields. In the case of subfields, they can be indexed individually or as a single value.
Por exemplo:
520will index all the contents of the 520 field. Each subfield in the field will be indexed individually.100awill index only the contents of 100$a.020azwill index only the contents of subfields $a and $z of field 020. They will be indexed individually.245(abp)will index only the contents of subfields $a, $b and $p of field 245. They will be indexed as one entry.
For fixed-length fields, the syntax is as follows :
leader_/6will index position 6 of the leader (000).007_/0will index position 0 of field 007.008_/39will index position 39 of field 008.008_/15-17will index positions 15 to 17 of field 008, as one entity.
Adding mappings
To add a mapping, add the information in the last row of the table and click the “Add” button at the end of the row.
Importante
Remember that if you change anything in this page, you need to completely reindex your records, otherwise, only records added or edited after the change will be affected.
Perigo
Any change done through the interface will be lost if you click on
“Reset mappings” or if the rebuild command is run with the --reset
or -r parameter. The “Reset mappings” button and the --reset
parameter reset the settings to the defaults.
Deleting mappings
To delete a mapping, click the “Delete” button at the end of the row.
Some mappings are necessary for Koha to function properly and cannot be deleted.
Importante
Remember that if you change anything in this page, you need to completely reindex your records, otherwise, only records added or edited after the change will be affected.
Perigo
Any change done through the interface will be lost if you click on
“Reset mappings” or if the rebuild command is run with the --reset
or -r parameter. The “Reset mappings” button and the --reset
parameter reset the settings to the defaults.
Facet order
This section allows you to customize the facets, as displayed in the search results in the OPAC and staff interface.
Search field: the corresponding search field (as defined in the search fields tab).
Label: the search field’s label (as defined in the search fields tab).
Authorized value category: for some facets, it is possible to define an authorized value category that will manage the text displayed for the facet items. Some facets have hard-coded authorized value categories, such as LOC for location and CCODE for collections.
To reorder the facets, simply drag and drop the row where you want it.
To rename facets, you need to change the label in the search fields tab.
To delete a facet, click the “Delete” button.
To add a new facet,
first, add the search field,
then add mappings to that search field, making sure to set “Facetable” to “Yes”,
finally, add the facet in the facet order table, using the last row to enter the values, and click the “Add” button at the end of the row.
Versão
The option to add facets was added to Koha in version 24.05.
Aquisições
O módulo de Aquisições do Koha fornece uma forma para os técnicos registar encomendas feitas a fornecedores e gerir os orçamentos de compra.
Before using the acquisitions module, you will want to make sure that you have completed all of the set up.
Acesso: Mais > Administração > Aquisições
Moedas e câmbios
Se desejar realizar encomendas de mais que um país deverá inserir as taxas de câmbio para que o seu módulo de aquisições calcule os totais correctamente.
Nota
Only staff with the currencies_manage permission (or the superlibrarian permission) will have access to this section.
Get there: More > Administration > Acquisitions > Currencies and exchange rates
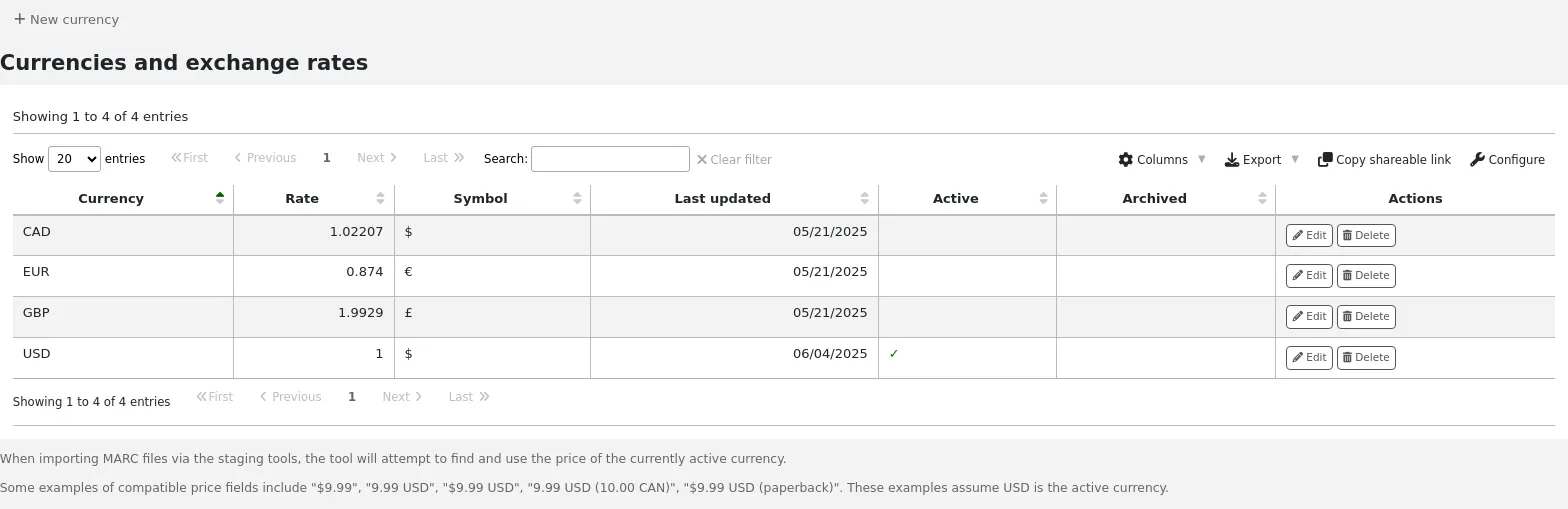
Nota
You can customize the columns of this table in the Table settings section of the Administration module (table id: currency).
Currency: this is the code for the currency. For default currencies, the ISO code is used as currency code (for example “USD” for the US dollar). The ISO code will be used when importing MARC files via the staging tools. The tool will attempt to find and use the price of the currently active currency.
Rate: the rate will be used to calculate the price in the active currency.
Nota
This data is not automatically updated, so be sure to keep it up to date so that your accounting is kept correct.
Symbol: this is the symbol for the currency (for example, $ for USD, or € for EUR).
Last updated: this is the date when the currency was last updated in Koha.
Active: the active currency is the main currency you use in your library. The active currency will have a check mark in the “Active” column. If you don’t have an active currency you will see an error message telling you to choose an active currency.
The active currency must have a rate of 1. There can only be one active currency.
Archived: archived currencies will have “Yes” in this column. Archived currencies cannot be used in the acquisitions module.
Nota
It is currently not possible to manually archive currencies. Currencies will be archived if Koha is updated and a currency that was used previously in the acquisitions module was deleted.
Ações: utilize os botões para editar ou eliminar moedas.
Nota
Se uma moeda tiver sido utilizada pelo menos uma vez, não será possível eliminá-la.
Adicionar uma nova moeda
Se uma moeda que utiliza ainda não estiver no sistema, pode criá-la.
Clique em “Nova moeda”.
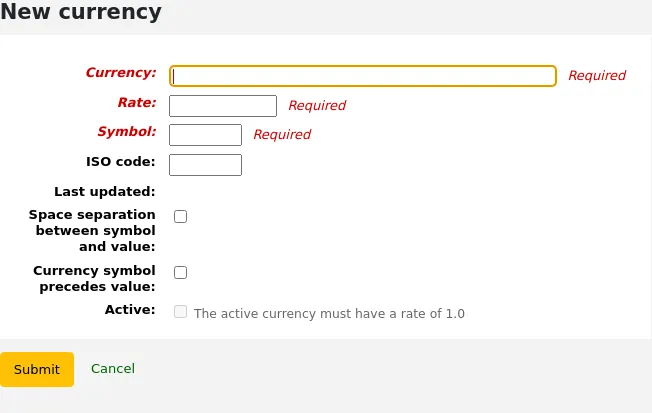
Preencha o formulário.
Moeda: introduza um código para a moeda, pode ser o código ISO ou outro código. É este código que será apresentado no módulo de aquisições.
Nota
Se decidir utilizar aqui um código personalizado, certifique-se de que preenche o código ISO correto para a moeda. Isto garantirá que os preços são calculados com base na taxa.
Nota
Este campo está limitado a 10 caracteres.
Taxa: introduza a taxa desta moeda em relação à sua moeda ativa.
Símbolo: introduza o símbolo da moeda (por exemplo, $ para USD ou € para EUR).
Código ISO: Introduza o código ISO da moeda (por exemplo, “USD” para o dólar americano). Este campo é opcional. Se este campo estiver vazio, o Koha utilizará o código da moeda (acima) como código ISO para os cálculos de preços.
Última atualização: esta será preenchida automaticamente com a data de hoje, não é possível alterar esta data manualmente.
Espaçamento entre o símbolo e o valor: se estiver marcado, o Koha apresenta o preço com um espaço antes do símbolo da moeda (por exemplo, 10,99 $ em vez de 10,99$).
O símbolo da moeda precede o valor: se estiver marcado, o Koha apresentará o símbolo da moeda antes do preço (por exemplo, $10,99 em vez de 10,99$).
Versão
Esta opção foi adicionada ao Koha na versão 24.11.
Ativa: assinale esta caixa se esta moeda for a moeda padrão utilizada no módulo de aquisições. Note que só pode existir uma moeda ativa e que a taxa de câmbio da moeda ativa deve ser 1.
Clique em “Submeter”.
Editar uma moeda
Se costuma encomendar a partir de outros países, será necessário atualizar a taxa de câmbio regularmente para calcular os preços com precisão.
Para editar uma moeda existente,
Clique no botão “Editar” à direita da moeda na tabela de moedas.
Altere a taxa ou outro valor.
Nota
Note que o código da moeda e a data da última atualização não podem ser editados.
Clique em “Submeter”.
Eliminar uma moeda
Se houver moedas que nunca utiliza, é possível eliminá-las.
Na tabela de moedas, clique no botão “Eliminar” à direita da moeda.
Aviso
As moedas que foram utilizadas pelo menos uma vez no módulo de aquisições não podem ser eliminadas.
Orçamentos
Os orçamentos são utilizados para monitorizar os valores contabilísticos relacionados com as aquisições. Por exemplo, pode criar um orçamento para o ano corrente (ex.: 2015) e depois dividir em fundos para diferentes áreas da biblioteca (ex.: livros, áudio, etc.).
Acesso: Mais > Administração > Aquisições > Orçamentos
Nota
Os membros da equipa devem possuir a permissão period_manage (ou a permissão superbibliotecário) para aceder à página de administração de orçamentos.
Recomenda-se a concessão, no mínimo, das seguintes permissões aos membros da equipa que necessitem de gerir orçamentos, uma vez que são interdependentes:
Quando visitar a administração principal de orçamento verá dois separadores, um para os orçamentos activos e outro para os inactivos.
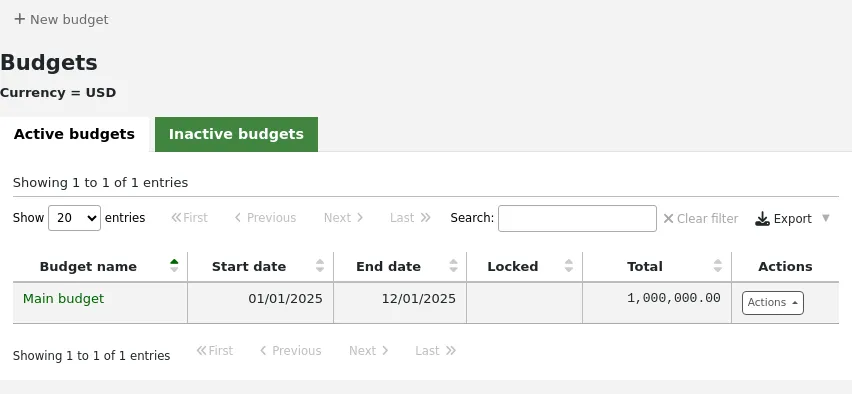
Adicionando orçamentos
Os orçamentos podem ser criados de raiz ou duplicando orçamentos de anos anteriores.
Nota
Os membros da equipa devem possuir a permissão period_manage (ou a permissão superbibliocário) para criar novos orçamentos ou duplicar orçamentos existentes.
Adicionar um novo orçamento
Se ainda não utilizou o Koha para aquisições, terá de começar do zero com um novo orçamento.
Para adicionar um novo orçamento,
Clique no botão “Novo orçamento”.
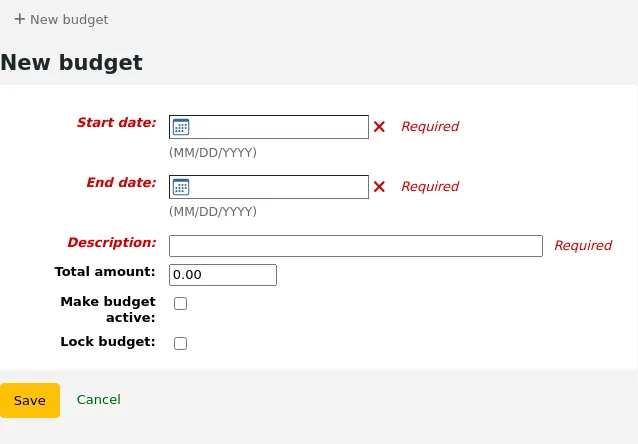
Preencha o formulário:
Data de início (obrigatório): escolha a data de início do período abrangido por este orçamento. Pode ser o início do ano civil, do ano fiscal, do ano letivo, do trimestre, etc.
Data de fim (obrigatório): escolha a data de fim do período abrangido por este orçamento.
Descrição (obrigatório): introduza uma descrição para este orçamento. A descrição deve ajudá-lo a identificar o orçamento ao encomendar.
Montante total: insira o valor do orçamento. Não utilize símbolos; basta introduzir o valor do orçamento utilizando números e casas decimais.
Tornar o orçamento ativo: a marcação de um orçamento como ativo permite utilizá-lo quando se efetuam encomendas no módulo de aquisições, mesmo que a encomenda seja efetuada após a data de fim do orçamento. Isto possibilitará registar pedidos realizados num período orçamental anterior.
Bloquear orçamento: bloquear um orçamento significa que não poderá adicionar fundos ou adicionar subfundos a esse orçamento, nem planear despesas. Bloqueie o orçamento assim que estiver configurado conforme desejado.
Clique em “Guardar”.
Será levado de volta à lista de orçamentos existentes.
Prossiga para adicionar fundos ao orçamento.
Duplicar um orçamento
No final do ano ou do período orçamental, pode duplicar o orçamento atual. Isto também duplicará todos os fundos, para que não tenha de começar do zero a cada ano ou período.
Para duplicar um orçamento,
Na lista de orçamentos, clique no botão “Ações” à direita.
Escolha “Duplicar”.
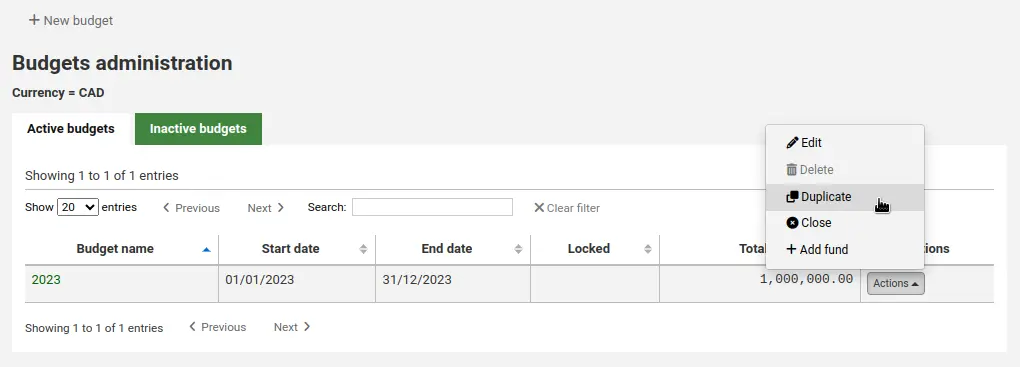
Em alternativa,
Na lista de orçamentos, clique no nome do orçamento.
No ecrã que lista o detalhe do orçamento, clique no botão “Editar” na parte superior e selecione “Duplicar orçamento”.
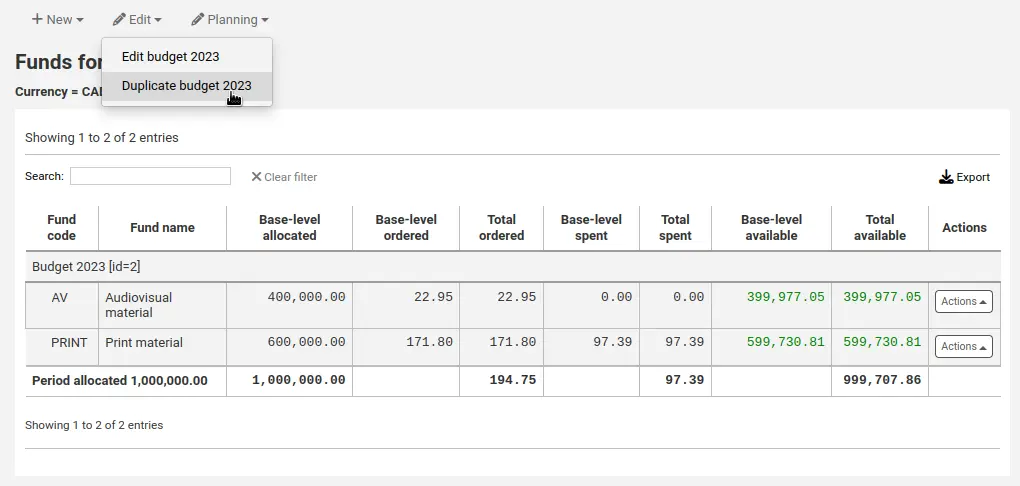
Em ambos os casos, será apresentado um formulário para duplicar o orçamento.
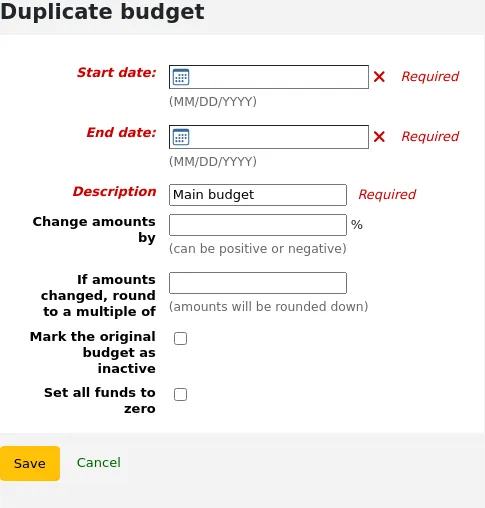
Data de início (obrigatório): escolha a data de início do período abrangido por este novo orçamento.
Data de fim (obrigatório): escolha a data de fim do período abrangido por este orçamento.
Descrição (obrigatório): introduza uma descrição para este novo orçamento.
Alterar montantes em: por omissão, são utilizados o montante total do orçamento duplicado e os montantes originais de cada fundo. No entanto, se necessário, pode optar por alterar os valores com base numa percentagem, que pode ser positiva ou negativa. Por exemplo, se o seu novo orçamento tiver sofrido um aumento de 2%, introduza 2. Inversamente, se o novo orçamento tiver sofrido uma redução de 2%, introduza -2.
Se os montantes forem alterados, arredonde para um múltiplo de: se introduzir um valor no campo “Alterar valores em”, o Koha calculará os valores automaticamente. Pode forçar o arredondamento dos montantes para baixo. Por exemplo, introduzir “100” irá arredondar os valores para baixo, para a centena mais próxima (5542 passará a ser 5500).
Marque o orçamento original como inativo: marque esta caixa se o orçamento original já não deve ser utilizado, com efeitos imediatos. Pode sempre editar o orçamento mais tarde para o tornar inactivo.
Definir todos os fundos como zero: Marque esta caixa se pretender que o novo orçamento contenha as mesmas estruturas de fundos do orçamento anterior, mas sem alocações, até introduzir manualmente um montante para o fundo.
Isto duplicará não só o orçamento, mas também todos os fundos a ele associados, permitindo reutilizar orçamentos e fundos de um ano para o outro.
Quando chegar o momento, pode encerrar o orçamento anterior para transferir os pedidos não recebidos e, se desejar, os fundos não utilizados para o novo orçamento.
Editar um orçamento
Nota
Os membros da equipa devem possuir a permissão period_manage (ou a permissão superbibliotecário) para editar os orçamentos existentes.
Pode editar orçamentos existentes para os tornar inativos ou bloqueá-los para impedir alterações nos fundos, por exemplo.
Para editar um orçamento,
Na lista de orçamentos, clique no botão “Ações” à direita.
Escolha “Editar”.
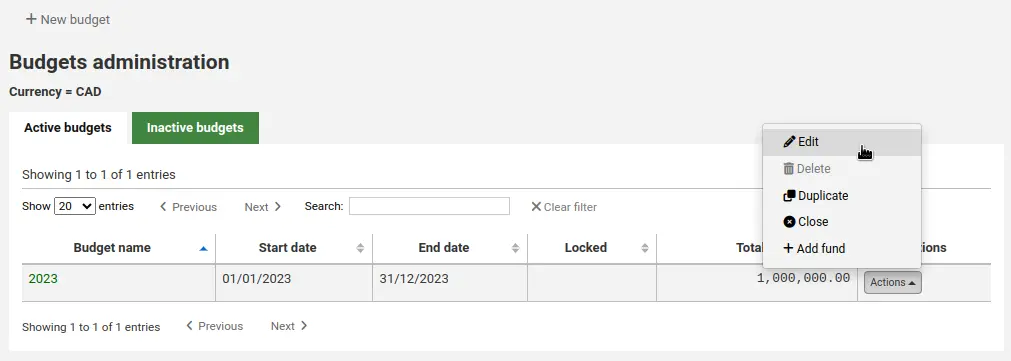
Em alternativa,
Na lista de orçamentos, clique no nome do orçamento.
No ecrã que lista o detalhe do orçamento, clique no botão “Editar” na parte superior e selecione “Editar orçamento”.
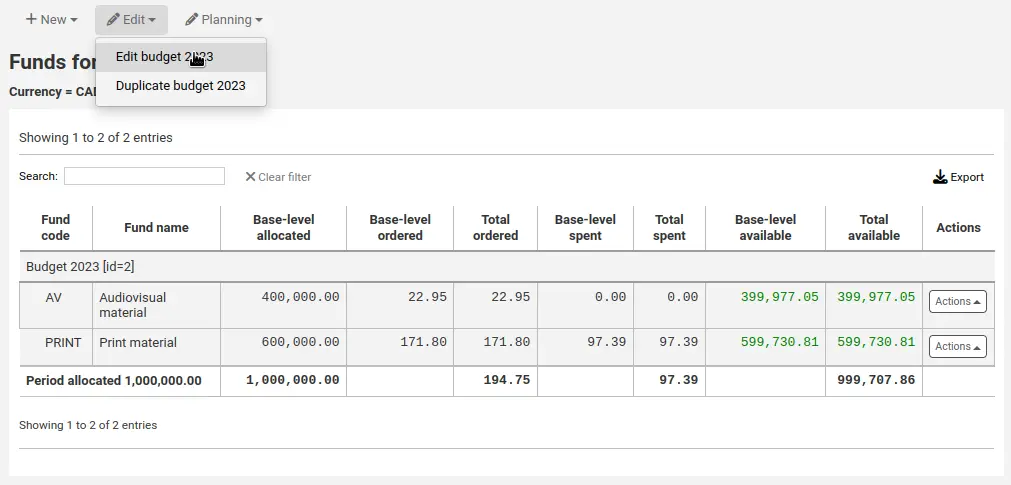
Em ambos os casos, será apresentado um formulário para duplicar o orçamento.
Faça as suas alterações (consulte as descrições dos campos acima).
Clique em “Guardar”.
Fechar um orçamento
Encerre um orçamento para transferir ou transportar encomendas não recebidas e, se desejar, fundos não utilizados de um orçamento anterior para um novo orçamento. Antes de terminar o orçamento, talvez queira duplicar o orçamento do ano anterior para ter um destino para onde transferir os pedidos não recebidos.
Nota
Os membros da equipa devem ter a permissão period_manage (ou a permissão superbibliotecário) para terminar os orçamentos existentes.
Para fechar um orçamento,
Na lista de orçamentos, clique no botão “Ações” à direita.
Escolha “Fechar”
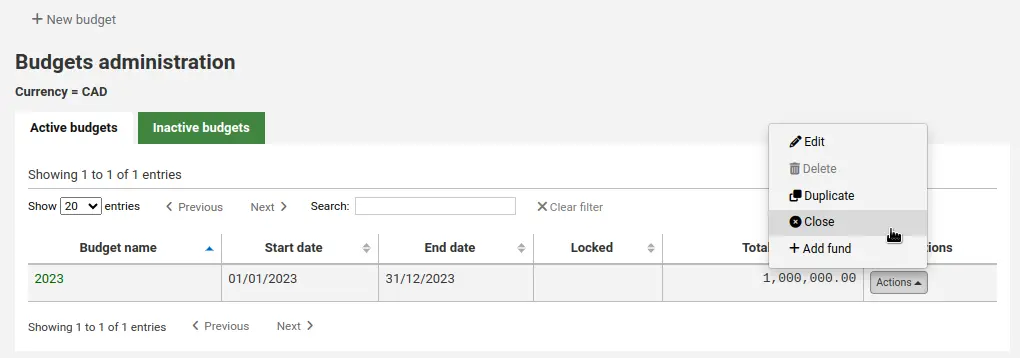
Nota
Os orçamentos sem encomendas não recebidas não podem ser encerrados.
Preencha o formulário.
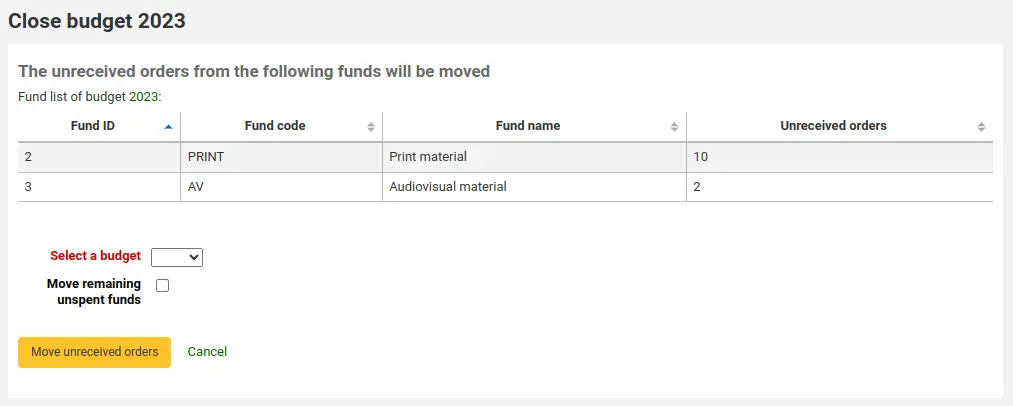
Selecione um orçamento: escolha o novo orçamento para os pedidos não recebidos no menu suspenso.
Nota
Para que os pedidos não recebidos sejam transferidos automaticamente para o novo orçamento, as estruturas de fundos do orçamento anterior devem existir no novo orçamento.
Transferir fundos não gastos: assinale esta caixa para transferir os valores não utilizados dos fundos do orçamento que está a ser encerrado para o orçamento selecionado.
Clique no botão “Mover encomendas não recebidas”.
Será apresentado um diálogo com a mensagem “Optou por mover todos os pedidos não recebidos de “Orçamento X” para “Orçamento Y”. Esta ação não pode ser revertida. Deseja continuar?”. O Orçamento X é o orçamento a encerrar, e o Orçamento Y é o orçamento selecionado.
Se tudo estiver correto pode clicar em “Ok” e as encomendas não recebidas e, se selecionados, os fundos não gastos serão movidos.
Espere até que o “Relatório após mover as encomendas não recebidas do orçamento X to Y” termine e mostre os resultados. Irá listar os números de encomendas que foram influenciados (agrupados por fundos) e detalhar se a encomenda não recebida foi movida ou ocorreu algum problema. Por exemplo, se o novo orçamento não contem o fundo com o mesmo nome que no orçamento anterior, a encomenda não será movida.
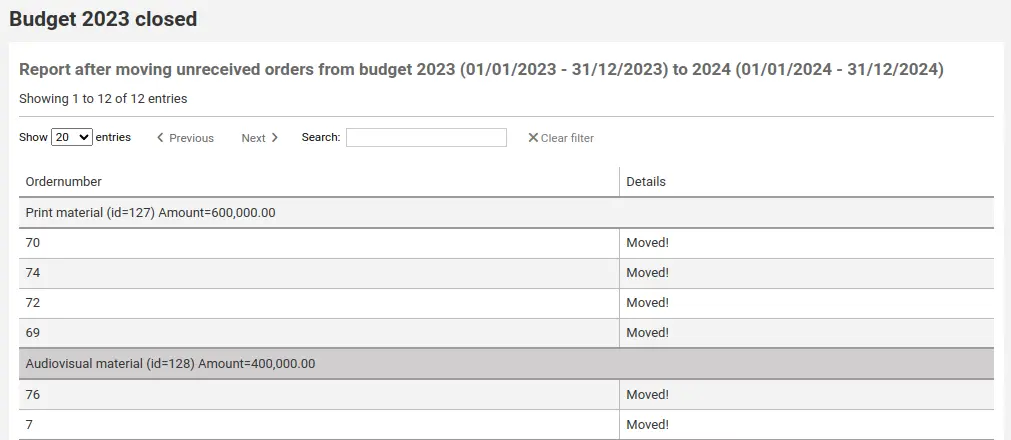
Eliminar um orçamento
Para eliminar um orçamento, este não deve conter fundos. Comece por eliminar os fundos.
Aviso
Isto não pode ser anulado. Certifique-se de que este orçamento precisa realmente de ser eliminado. Em vez disso, pode torná-lo inativo ou encerrá-lo.
Para eliminar um orçamento,
Na lista de orçamentos, clique no botão “Ações” à direita.
Escolha “Apagar”.
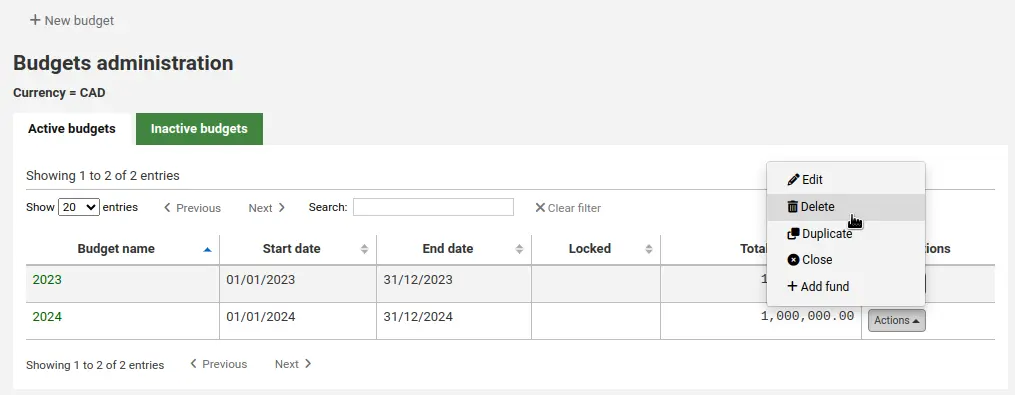
Clique em “Sim, eliminar”.

Fundos
Os fundos são divisões de um orçamento. Por exemplo, pode ter um orçamento para o ano em curso (ex.: 2015) e dividi-lo em fundos para diferentes áreas da biblioteca (ex.: livros, áudio, etc.).
Acesso: Mais > Administração > Aquisições > Fundos
Adicionar um fundo a um orçamento
Um fundo é adicionado a um orçamento. Certifique-se de que adiciona um orçamento antes de adicionar fundos.
Nota
Se um orçamento estiver bloqueado, não será possível adicionar fundos.
Para adicionar um novo fundo,
Na lista de orçamentos, clique no botão “Ações” à direita.
Selecione “Adicionar fundo”.
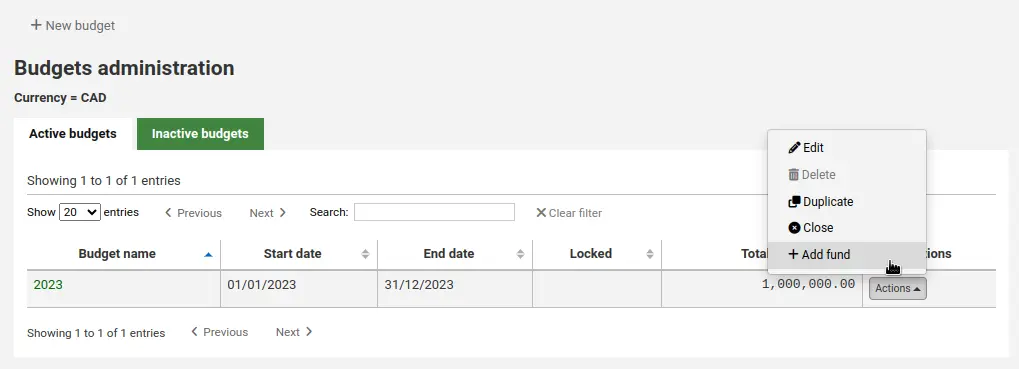
Em alternativa,
Na lista de orçamentos, clique no nome do orçamento.
No ecrã que lista os detalhes do orçamento, clique no botão “Novo” na parte superior e escolha a opção “Novo fundo para…”.
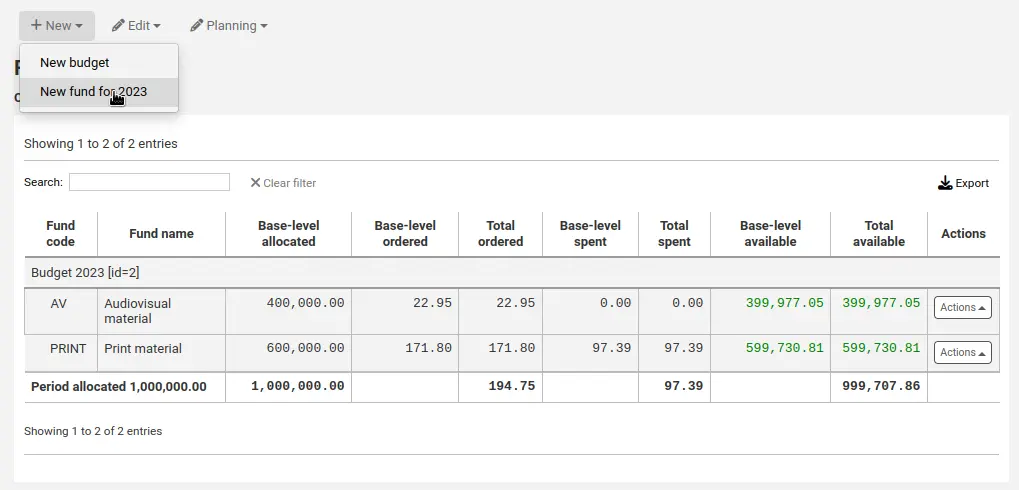
Em ambos os casos, ser-lhe-á apresentado um formulário para criar o novo fundo.
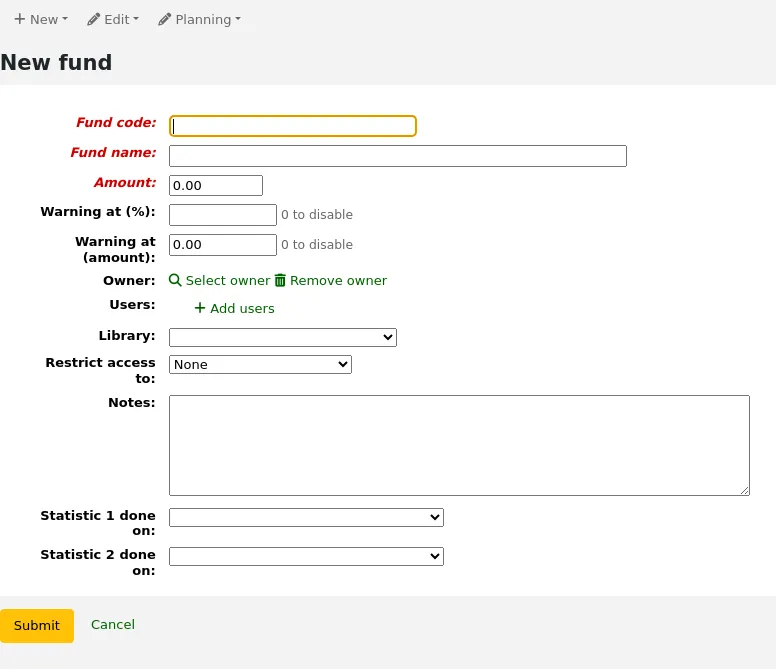
Código do fundo (obrigatório): Introduza um identificador único para o seu fundo.
Nome do fundo (obrigatório): introduza um nome para o fundo. Deve ser algo que a equipa compreenda, pois é esse o nome que será apresentado no momento da encomenda.
Valor (obrigatório): introduza o valor utilizando apenas números e casas decimais, sem outros caracteres.
Aviso em (%): introduza um valor percentual para que o Koha o avise quando tiver gasto essa percentagem do fundo, de forma a evitar gastos excessivos. Por exemplo, se introduzir 90%, o Koha emitirá um aviso por cada encomenda realizada após o consumo de 90% do fundo.
Aviso em (valor): o mesmo que o anterior, mas para um valor específico gasto. Por exemplo, se introduzir 5000, o Koha emitirá um aviso por cada encomenda realizada após o gasto de 5000 na verba.
Proprietário: pode optar por atribuir este fundo a um membro da equipa.
Clique em “Selecionar proprietário”.
Pesquise o membro da equipa no formulário de pesquisa de utilizadores.
Nota
Apenas os colaboradores com a permissão budget_modify (ou superbibliotecários) são retornados nos resultados da pesquisa.
Clique em “Selecionar” à direita do resultado do membro da equipa.
Nota
Um fundo só pode ter um proprietário.
Nota
Para limitar a utilização deste fundo ao proprietário, deve selecionar “Proprietário”, “Proprietário e utilizadores” ou “Proprietário, utilizadores e biblioteca” no campo “Restringir acesso a” abaixo. Caso contrário, a adição de utilizadores não terá qualquer efeito de restrição.
Nota
Os colaboradores da equipa com a permissão order_manage_all (ou superbibliotecário) poderão utilizar fundos independentemente de restrições.
Certifique-se de que a sua equipa não tem esta permissão se quiser restringir o acesso aos fundos.
Utilizadores: pode também adicionar utilizadores que poderão realizar gastos com este fundo.
Nota
Para limitar a utilização deste fundo aos utilizadores, deve selecionar “Proprietário e utilizadores” ou “Proprietário, utilizadores e biblioteca” no campo “Restringir acesso a” abaixo. Caso contrário, a adição de utilizadores não terá qualquer efeito de restrição.
Nota
Os colaboradores da equipa com a permissão order_manage_all (ou superbibliotecário) poderão utilizar fundos independentemente de restrições.
Certifique-se de que a sua equipa não tem esta permissão se quiser restringir o acesso aos fundos.
Clique em “Adicionar utilizadores”
Pesquise o membro da equipa no formulário de pesquisa de utilizadores.
Nota
Apenas os colaboradores com a permissão budget_modify (ou superbibliotecários) são retornados nos resultados da pesquisa.
Clique em “Adicionar” à direita do resultado do membro da equipa.
Nota
Pode adicionar quantos utilizadores precisar.
Clique em “Fechar” depois de todos os utilizadores terem sido adicionados.
Biblioteca: Se este fundo se destina a uma biblioteca específica, selecione-a aqui.
Nota
Para limitar a utilização deste fundo à biblioteca, deve selecionar “Proprietário, utilizadores e biblioteca” no campo “Restringir acesso a” abaixo. Caso contrário, a seleção de uma biblioteca não terá qualquer efeito de restrição.
Nota
Os colaboradores da equipa com a permissão order_manage_all (ou superbibliotecário) poderão utilizar fundos independentemente de restrições.
Certifique-se de que a sua equipa não tem esta permissão se quiser restringir o acesso aos fundos.
Restringir o acesso a: pode restringir quem pode fazer encomendas a partir deste fundo escolhendo entre “proprietário”, “proprietário e utilizadores” ou “proprietário, utilizadores e biblioteca”.
Aviso
Para utilizar a configuração de restrição de acesso, também deve definir os campos associados de biblioteca, utilizador ou proprietário.
Nota
Os colaboradores da equipa com a permissão order_manage_all (ou superbibliotecário) poderão utilizar fundos independentemente de restrições.
Certifique-se de que a sua equipa não tem esta permissão se quiser restringir o acesso aos fundos.
Observações: quaisquer observações descritivas sobre este fundo.
Nota
As observações apenas aparecerão neste ecrã (ao editar o fundo).
Estatística 1: este campo é utilizado para fins estatísticos. Selecione uma categoria de valores autorizados a partir da qual serão escolhidos valores aquando da realização de encomendas utilizando este fundo. Assim, poderá planear as despesas e gerar relatórios sobre as despesas com base nestas categorias. A categoria de valores autorizados padrão Asort1 é criada especificamente para este fim, mas pode utilizar qualquer categoria de valores autorizados neste campo (por exemplo, CCODE, para planear as despesas de acordo com as coleções).
Estatística 2: o mesmo que o anterior, para uma segunda categoria estatística. A categoria de valores autorizados padrão Asort2 é criada especificamente para este fim, mas pode utilizar qualquer categoria de valores autorizados.
Nota
Para saber mais sobre as categorias de planeamento, consulte o FAQ sobre as categorias de planeamento.
Clique em “Submeter”.
Será direcionado para uma lista de todos os fundos do orçamento.
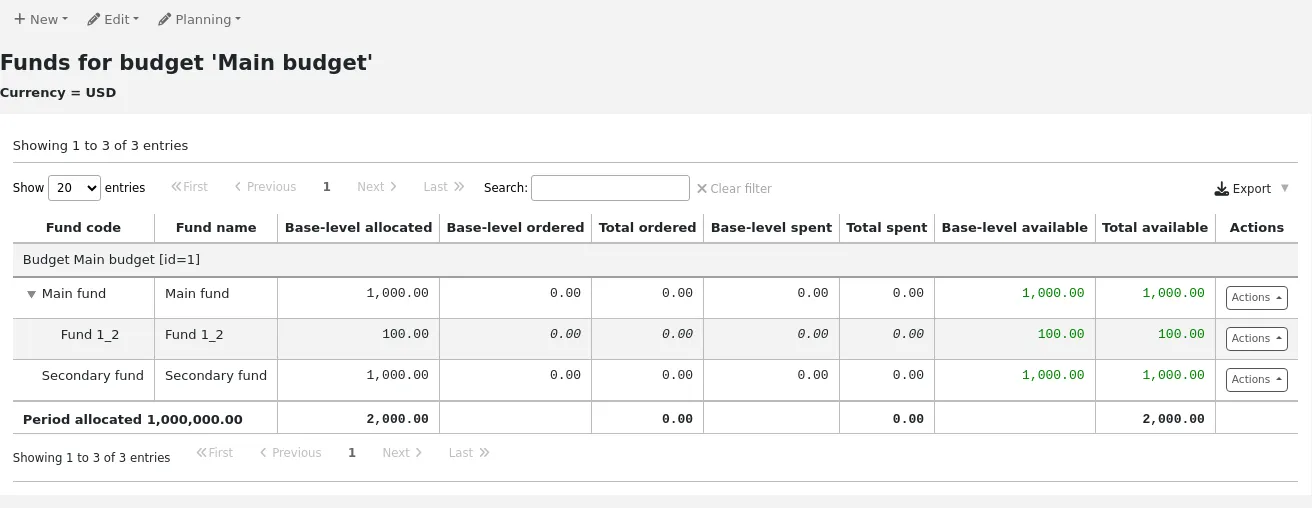
As colunas de valores monetários na tabela do fundo detalham-se da seguinte forma:
O valor alocado no nível base é o valor de “Montante” que definiu ao criar o fundo
O valor encomendado no nível base é o montante encomendado para este fundo (excluindo os fundos subordinados)
O total encomendado é o montante base encomendado para este fundo e todos os seus fundos subordinados
O valor gasto de nível base é o montante gasto referente a este fundo (excluindo os fundos subordinados)
O total gasto é o montante gasto de nível base para este fundo e todos os seus fundos subordinados
O nível base disponível é 1 - 2
Total disponível é 1 - 3
À direita de cada fundo encontrará um botão “Ações” onde poderá ver as opções “Editar”, “Eliminar” ou “Adicionar fundo filho”.
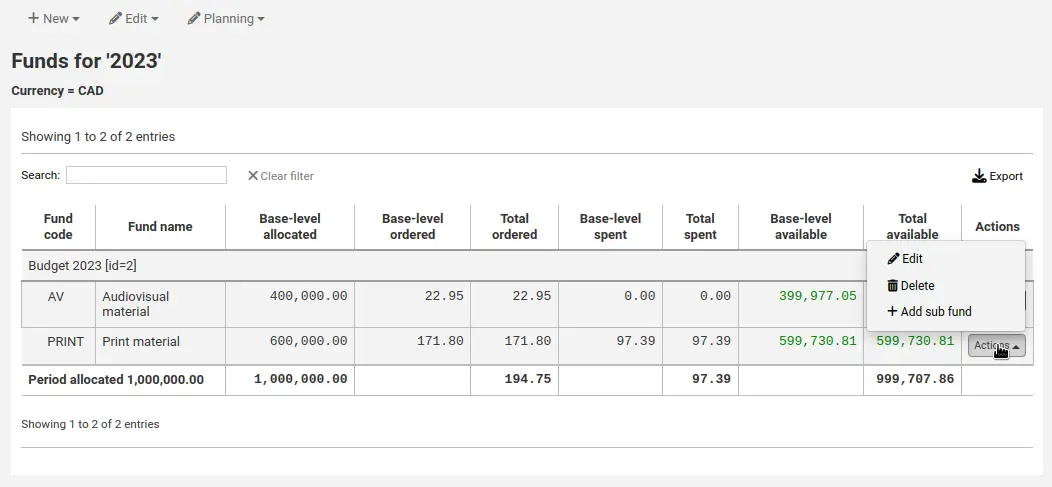
Adicionar um subfundo
Um subfundo é uma divisão mais detalhada do fundo. Um exemplo seria ter um fundo para «Ficção» e, dentro dele, um fundo para «Lançamentos» e outro para «Ficção Científica». É uma forma opcional de organizar ainda mais as suas finanças.
Nota
Se um orçamento estiver bloqueado, não será possível adicionar subfundos.
Para adicionar um subfundo a um fundo,
Na lista de todos os fundos ou na lista de fundos de um orçamento específico, clique no botão “Ações”, à direita.
Selecione «Adicionar subfundo».
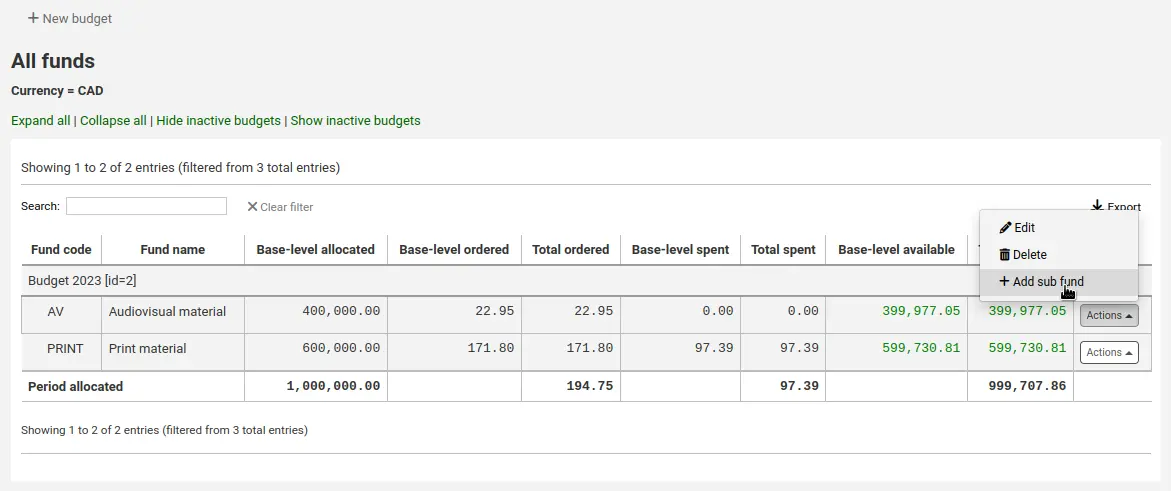
Preencha o formulário do novo subfundo. Os campos são os mesmos utilizados para adicionar um novo fundo. A única diferença é que o formulário indicará o fundo “pai” (ou fundo principal).
Clique em “Submeter”.
Os fundos que possuem subfundos aparecerão com uma pequena seta à esquerda. Ao clicar nela, verá os subfundos.
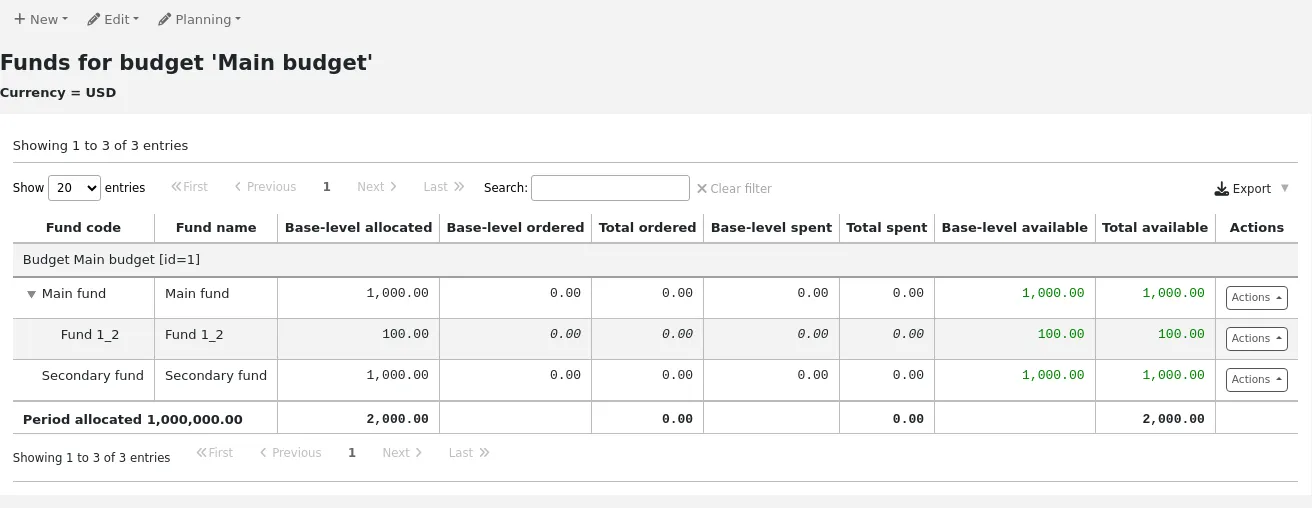
Eliminar fundos
É possível eliminar fundos, se necessário.
Aviso
A eliminação de um fundo que contenha encomendas resultará na eliminação dessas encomendas. Apague os fundos apenas se tiver a certeza de que a eliminação é necessária. Não é possível anular esta ação.
Para eliminar um fundo,
Na lista de todos os fundos ou na lista de fundos de um orçamento específico, clique no botão “Ações”, à direita.
Escolha “Apagar”.
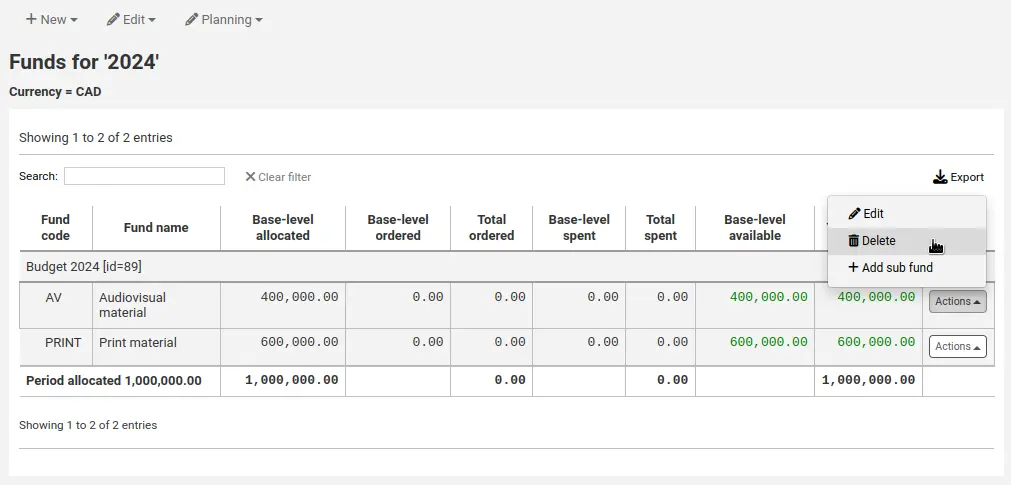
Clique em “Sim, eliminar este fundo” na mensagem de aviso.
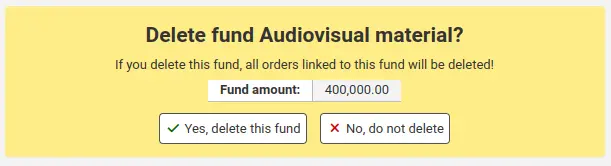
Planeamento do orçamento
Nota
Os membros da equipa devem possuir a permissão planning_manage, a permissão budget_manage e a permissão period_manage (ou a permissão superlibrarian) para aceder ao planeamento orçamental.
Quando estiver a visualizar os fundos clique no botão de planeamento para escolher como deseja gastar o orçamento.
Se escolher “Planear por meses”, verá o valor orçamentado detalhado por mês.
À esquerda, existem filtros que podem ser utilizados para limitar o que é apresentado na tabela.
Selecione o tipo de planeamento: escolha planear por meses, bibliotecas, tipos de item ou qualquer categoria de valor autorizado utilizada como estatística 1 ou 2 nos fundos.
Mostrar apenas os meus fundos: isto filtrará os fundos dos quais não é proprietário.
Mostrar apenas fundos ativos: isto filtrará os fundos que não foram utilizados (sem valor encomendado).
Mostrar valores reais/estimados: isto irá alterar a tabela para apresentar também as quantidades solicitadas.
Para ocultar algumas das colunas, desmarque as caixas na parte superior da tabela.
A partir daqui, pode planear os gastos do seu orçamento introduzindo valores manualmente ou clicando no botão “Preencher linha automaticamente”. Se optar pelo preenchimento automático, o sistema tentará distribuir o valor em conformidade; pode ser necessário fazer alguns ajustes para detalhar a divisão com maior precisão.
Depois de efetuar as alterações, clique no botão “Guardar”.
Nota
Se um orçamento estiver bloqueado, não será possível editar os valores.
Para exportar os seus dados como um ficheiro CSV, introduza um nome de ficheiro no campo “Descarregar para um ficheiro, na secção “Exportar” à esquerda, e clique no botão “Submeter”.
Contas EDI
A partir daqui, pode configurar as informações necessárias para se ligar aos seus fornecedores de aquisições.
Nota
Esta secção só aparecerá se a preferência de sistema EDIFACT estiver ativada.
Nota
Apenas os colaboradores com a permissão edi_manage (ou superbibliotecário) terão acesso a esta secção.
Nota
Antes de começar, necessitará de pelo menos um fornecedor configurado no módulo de aquisições.
Para adicionar informações da conta, clique no botão “Nova conta”.
Introduza as informações do seu fornecedor no formulário.
Consulte a secção perguntas sobre EDI para fornecedores do capítulo sobre o módulo de aquisições para obter uma descrição de cada campo.
Cada fornecedor terá uma conta.
EANs
Um EAN é o identificador que o fornecedor dá à biblioteca para que seja retornado a eles de forma a conhecer a conta a usar na faturação. Um conta EDI pode ter vários EANs.
Nota
Esta secção só aparecerá se a preferência de sistema EDIFACT estiver ativada.
Nota
Apenas os colaboradores com a permissão edi_manage (ou superbibliotecário) terão acesso a esta secção.
Para adicionar um EAN, clique no botão “Novo EAN”.
No formulário que aparece, insira as informações fornecidas pelo seu fornecedor.
Consulte a secção perguntas sobre EDI para fornecedores do capítulo sobre o módulo de aquisições para obter uma descrição de cada campo.
Parâmetros adicionais
Acesso: Mais > Administração > Parâmetros adicionais
Fornecedores de identidade
Esta secção é utilizada para definir e gerir fornecedores de identidade externos para utilizadores do Koha. É empregue quando os utilizadores provêm de uma fonte externa, como um sistema de gestão de alunos, uma Active Directory ou outras bases de dados semelhantes.
Acesso: Mais > Administração > Parâmetros adicionais > Fornecedores de identidade
Nota
Apenas os colaboradores com a permissão manage_identity_providers (ou superbibliotecários) terão acesso a esta secção.
Adicionar um fornecedor de identidade
Para adicionar um fornecedor de identidade, clique no botão “Novo fornecedor de identidade”.
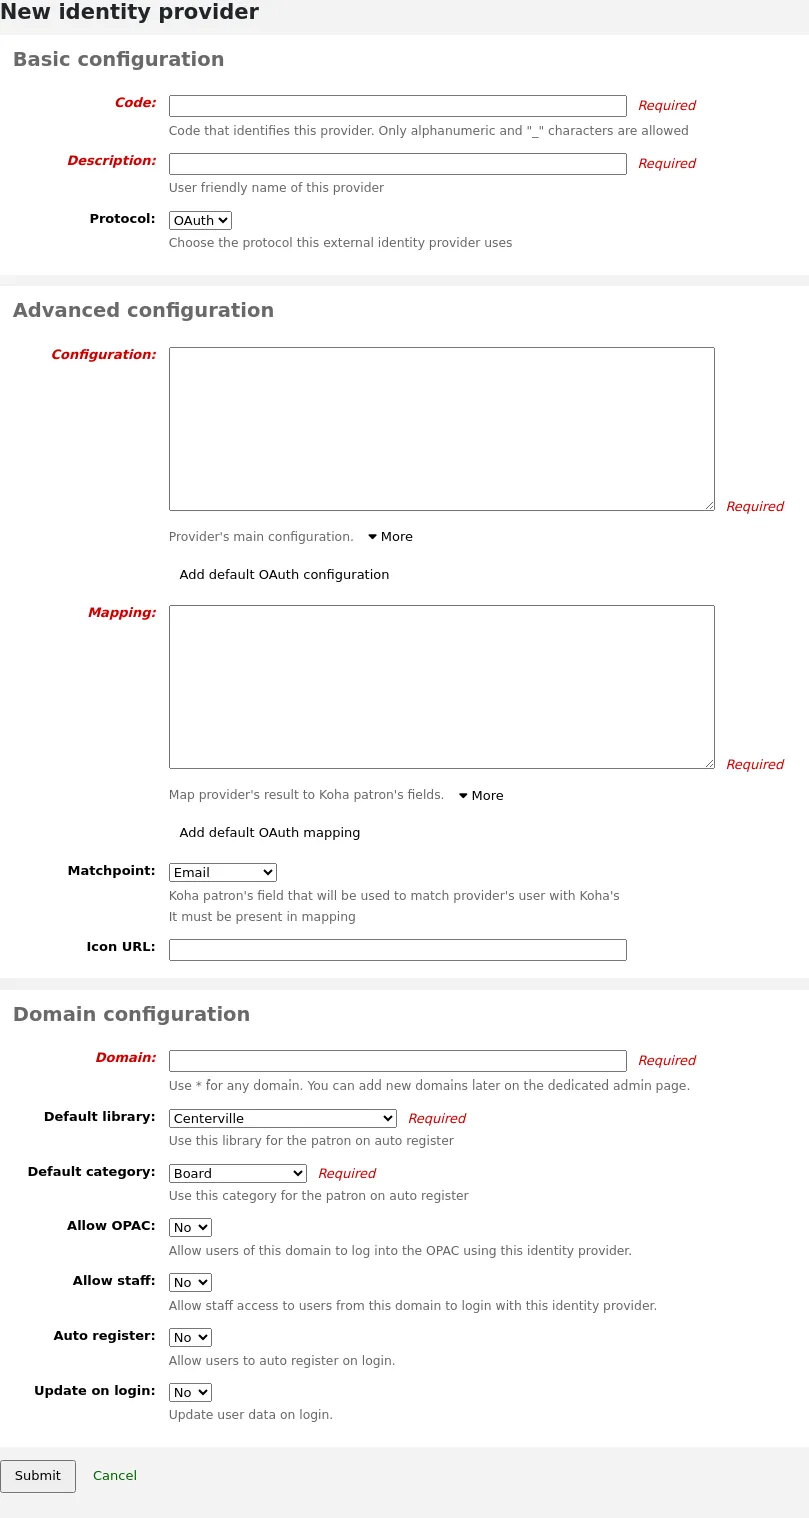
Configuração básica
Código: introduza um código para este fornecedor.
Nota
O código do fornecedor de identidade está limitado a 20 caracteres e pode conter apenas letras, números e sublinhados (_).
Descrição: introduza um nome para este fornecedor. É isso que verá na interface.
Protocolo: escolha qual o protocolo que este fornecedor de identidade utiliza.
OAuth
OIDC
Configuração avançada
Configuração: Utilize este campo para introduzir a configuração específica do protocolo escolhido acima.
Pode clicar no botão “Adicionar configuração padrão de OAuth” ou no botão “Adicionar configuração padrão de OIDC” para preencher previamente o campo com alguns valores padrão, os quais pode substituir pelos seus próprios valores.
A configuração padrão do OAuth é:
{
 "key": "<enter client id>",
 "secret": "<enter client secret>",
 "authorize_url": "<enter authorization endpoint>",
 "token_url": "<enter token endpoint>",
 "userinfo_url": "<enter user info endpoint (optional)>",
 "scope": "email"
}
A configuração padrão do OIDC é:
{
 "key": "<enter client id>",
 "secret": "<enter client secret>",
 "well_known_url": "<enter openid configuration endpoint>",
 "scope": "openid email"
}
Mapeamento: Utilize este campo para definir os mapeamentos de campos da base de dados externa para os campos de leitor do Koha.
A chave é o campo do Koha na tabela de leitores (borrowers), e o valor é o campo externo.
Nota
Pode encontrar todos os campos da tabela borrowers na estrutura da base de dados [https://schema.koha-community.org/].
Pode clicar no botão “Adicionar mapeamento OAuth padrão” ou no botão “Adicionar mapeamento OIDC padrão” para preencher previamente o campo com alguns valores padrão, os quais pode substituir pelos seus próprios valores.
Tanto o mapeamento OAuth padrão como o mapeamento OIDC padrão são:
{
 "email": "email",
 "firstname": "given_name",
 "surname": "family_name"
}
Se os campos externos estiverem aninhados, pode utilizar pontos para separar os níveis.
Por exemplo, se o primeiro nome estiver aninhado desta forma:
<user>
   <given_name>First name</given_name>
   <family_name>Family name</family_name>
   <email>Email address</email>
</user>
Use:
"firstname": "user.0.given_name"
Este irá procurar o campo «given_name» no primeiro campo «user» (0 = primeiro).
Importante
Se pretender utilizar a função de registo automático (ver abaixo), certifique-se de que «userid» ou «cardnumber» estão presentes nos mapeamentos.
Importante
Certifique-se de que o campo de correspondência (ver abaixo) está incluído nos mapeamentos.
Correspondência: escolha qual o campo que será utilizado para associar novos leitores a leitores existentes.
Nota
O campo aqui escolhido deve ser incluído nos mapeamentos (ver acima).
URL do ícone: se pretender que um ícone seja apresentado no ecrã de início de sessão para este fornecedor, introduza aqui o URL do ficheiro de imagem.
Configuração de domínio
Nota
Introduza pelo menos um domínio para este fornecedor. Após guardar, poderá adicionar mais domínios a este fornecedor.
Domínio: insira o domínio de email dos leitores que se vão autenticar.
Nota
Introduza um asterisco (*) para incluir todos os domínios.
Biblioteca padrão: se o registo automático estiver ativado, escolha em que biblioteca os novos leitores serão registados.
Categoria padrão: se o registo de auto-registo estiver activado, escolha qual a categoria de leitor que será atribuída aos novos leitores.
Permitir OPAC: escolha se os leitores deste domínio podem iniciar sessão no OPAC com as suas credenciais deste fornecedor de identidade.
Permitir equipa: escolha se os membros da equipa deste domínio podem iniciar sessão na interface dos técnicos utilizando as suas credenciais deste fornecedor de identidade.
Registo automático: escolha se será ou não criada uma nova conta de leitor no Koha quando um utilizador deste domínio inicia sessão pela primeira vez com as suas credenciais deste fornecedor de identidade.
Nota
Se o registo automático estiver ativado, certifique-se de que os campos «userid» ou «cardnumber» estão incluídos nos mapeamentos (ver acima).
Certifique-se também de que a biblioteca e a categoria predefinida estão definidas corretamente para novos leitores. Serão atribuídas aos novos leitores.
Atualização na autenticação: escolha se a conta do leitor no Koha deve ou não ser atualizada com as informações externas quando um leitor deste domínio se autentica com as suas credenciais deste fornecedor de identidade.
Aviso
As informações podem ser perdidas se as alterar diretamente no Koha.
Após preencher o formulário, clique em “Submeter” para guardar o novo fornecedor de identidade.
Terá de reiniciar o Koha após adicionar o fornecedor de identidade.
Adicionar um domínio de email a um fornecedor de identidade existente
Terá de adicionar pelo menos um domínio ao criar um novo fornecedor de identidade. É possível adicionar outros clicando no botão “Gerir domínios”, à direita do fornecedor de identidade na página principal dos fornecedores de identidade, e selecionando “Novo domínio de email”.
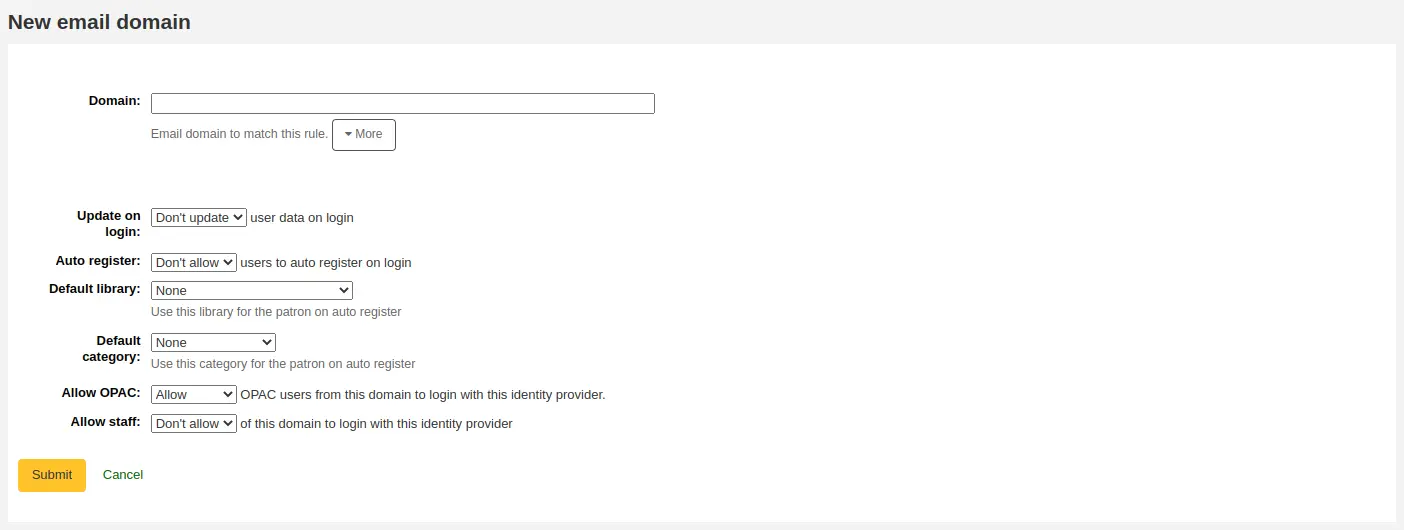
Domínio: insira o domínio de email dos leitores que se vão autenticar.
Nota
Introduza um asterisco (*) para incluir todos os domínios.
Atualização na autenticação: escolha se a conta do leitor no Koha deve ou não ser atualizada com as informações externas quando um leitor deste domínio se autentica com as suas credenciais deste fornecedor de identidade.
Aviso
As informações podem ser perdidas se as alterar diretamente no Koha.
Registo automático: escolha se será ou não criada uma nova conta de leitor no Koha quando um utilizador deste domínio inicia sessão pela primeira vez com as suas credenciais deste fornecedor de identidade.
Nota
Se o registo automático estiver ativado, certifique-se de que os campos «userid» ou «cardnumber» estão incluídos nos mapeamentos do fornecedor de identidade.
Certifique-se também de que a biblioteca e a categoria predefinida estão definidas corretamente para novos leitores. Serão atribuídas aos novos leitores.
Biblioteca padrão: se o registo automático estiver ativado, escolha em que biblioteca os novos leitores serão registados.
Categoria padrão: se o registo de auto-registo estiver activado, escolha qual a categoria de leitor que será atribuída aos novos leitores.
Permitir OPAC: escolha se os leitores deste domínio podem iniciar sessão no OPAC com as suas credenciais deste fornecedor de identidade.
Permitir equipa: escolha se os membros da equipa deste domínio podem iniciar sessão na interface dos técnicos utilizando as suas credenciais deste fornecedor de identidade.
Após preencher o formulário, clique em “Submeter” para guardar o novo domínio de email.
Servidores Z39.50/SRU
O Z39. 50 é um protocolo cliente/servidor para pesquisar e recuperar informação de bases de dados de computadores remotos. Em suma, é uma ferramenta utilizada para a catalogação por cópia.
O SRU (Search/Retrieve via URL) é um protocolo padrão baseado em XML para consultas de pesquisa, que utiliza a CQL (Contextual Query Language), uma sintaxe para representar consultas.
Com o Koha, pode ligar-se a qualquer destino Z39. 50 ou SRU que esteja disponível publicamente, ou para o qual possua as credenciais de acesso, e copiar registos bibliográficos ou de autoridade dessa fonte.
Acesso: Mais > Administração > Parâmetros adicionais > Servidores Z39.50/SRU
Nota
Apenas colaboradores com a permissão manage_search_targets (ou superbibliotecários) terão acesso a esta secção.
O Koha já vem com uma lista padrão de destinos Z39.50/SRU configurada, a qual pode ampliar, editar ou eliminar.
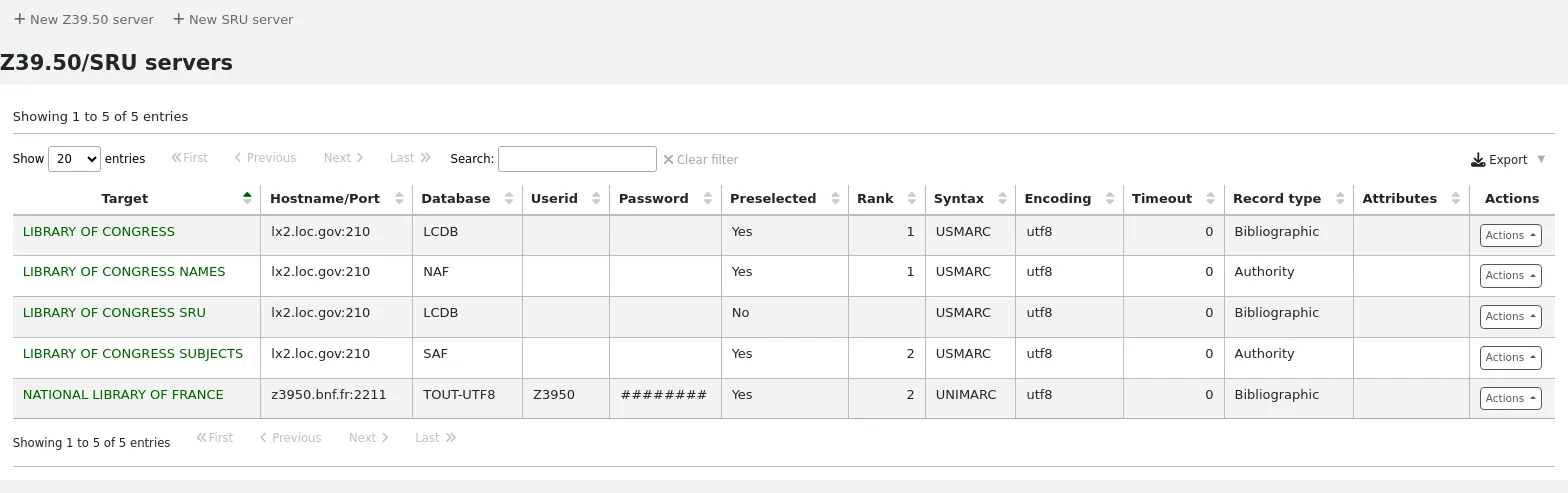
Adicionar servidor Z39.50
Para encontrar destinos Z39. 50 adicionais, pode utilizar o IRSpy da Index Data (https://irspy.indexdata.com [https://irspy.indexdata.com/]) ou a lista de destinos da Biblioteca do Congresso (https://www.loc.gov/z3950/). Também pode entrar em contacto com bibliotecas específicas e solicitar as informações de Z39. 50 às mesmas.
Na página principal do Z39. 50, clique em “Novo servidor Z39. 50”.
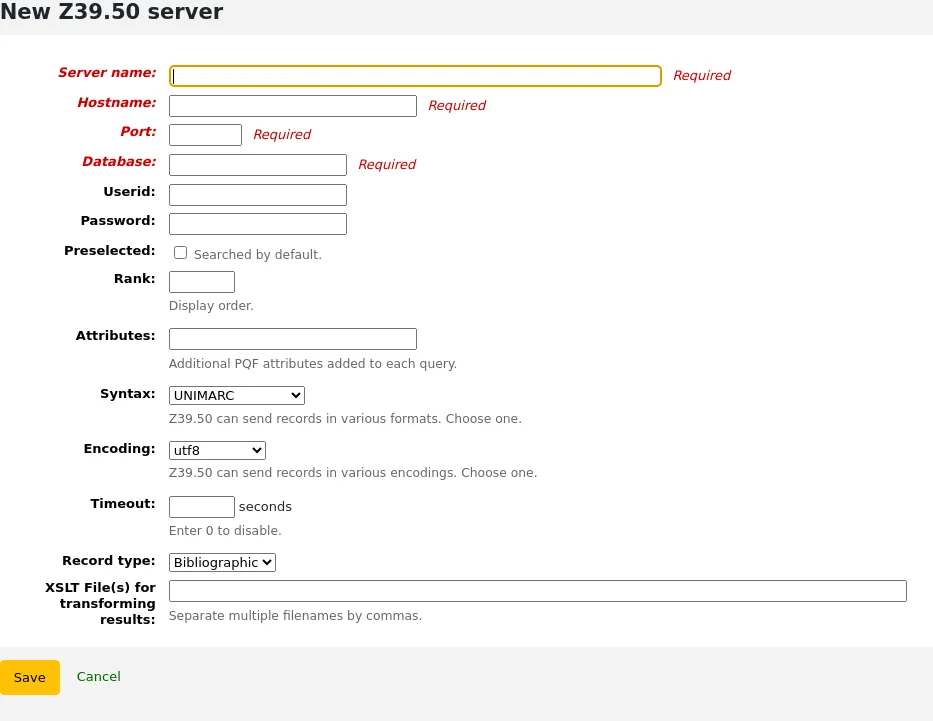
Nome do servidor: introduza um nome que ajude a identificar a origem (como o nome da biblioteca). Será guardado em letras maiúsculas.
Hostname: introduza o endereço de destino Z39.50.
Porta: introduza o número da porta de escuta para obter resultados deste alvo.
Base de dados: introduza o nome da base de dados.
Nome de utilizador: alguns servidores podem exigir palavra-passe. Se for esse o caso do servidor que está a tentar adicionar, introduza o seu nome de utilizador para essa fonte.
Palavra-passe: se o servidor estiver protegido por palavra-passe, introduza a sua palavra-passe para essa fonte.
Pré-selecionado: marque esta caixa se pretender que este destino seja sempre selecionado por defeito.
Posição: introduza um número que represente em que ponto da lista pretende que este alvo apareça. 0 é a primeira posição, seguida de 1, 2, etc.
Se este campo for deixado em branco, os alvos ficarão por ordem alfabética.
Atributos: introduza os atributos PQF a adicionar a todas as consultas.
Sintaxe: escolha o formato MARC utilizada por este destino.
Codificação: escolha a codificação de caracteres utilizada por este destino.
Nota
Se notar que os caracteres especiais não aparecem corretamente ao importar registos através do Z39. 50, significa que a codificação está incorreta. Altere-a para outra e tente importar novamente.
Tempo limite: introduza um número de segundos após o qual a tentativa de pesquisa do alvo será interrompida, caso não sejam encontrados resultados num tempo razoável. Isto é útil para alvos que demoram muito tempo.
Tipo de registo: escolha se se trata de um registo bibliográfico ou de autoridade.
Ficheiro(s) XSLT para transformar resultados: introduza um ou mais nomes de ficheiros XSLT (separados por vírgula) que pretende aplicar aos resultados da pesquisa.
Ao recuperar registos de fontes externas, pode querer automatizar algumas alterações nesses ficheiros. O XSLT permite fazer isso. O Koha já vem com alguns ficheiros XSLT de exemplo no directório /koha-tmpl/intranet-tmpl/prog/en/xslt/, prontos a usar:
Del952. xsl: Remover exemplares do Koha (campo 952) (MARC21)
Del995. xsl: Remover exemplares do Koha (campo 995) (UNIMARC)
Del9LinksExcept952.xsl: Remove endereços para autoridades nos registos bibliográficos ($9), exceto no caso de 952$9 (número do exemplar) (MARC21)
Del9LinksExcept995.xsl: Remove endereços para autoridades nos registos bibliográficos ($9), exceto no caso de 995$9 (número do exemplar) (UNIMARC)
Clique em “Guardar”.
Alvos Z39.50 bibliográficos sugeridos
As bibliotecas Koha que partilharam os seus alvos Z39. 50 estão listadas na wiki do Koha, em https://wiki.koha-community.org/wiki/Koha_Open_Z39.50_Sources.
Os alvos conhecidos e disponíveis publicamente estão listados na wiki do Koha em https://wiki.koha-community.org/wiki/Configure_Z39.50/SRU_targets.
Também pode encontrar alvos Z39. 50 abertos listados no site IRSpy, em https://irspy.indexdata.com/.
Sabe-se que estes alvos funcionam:
BIBLIOTECA DO CONGRESSO
- Nome do servidor:
BIBLIOTECA DO CONGRESSO
- Servidor:
lx2.loc.gov
- Porta:
210
- Base de dados:
LCDB
- Pré-selecionado:
selecione para pesquisar por omissão
- Classificação:
introduza um valor para a ordem de apresentação, por exemplo, 1
- Sintaxe:
MARC21/USMARC
- Codificação:
utf8
- Tempo limite:
0
- Tipo de registo:
Bibliográfico
OHIOLINK
- Nome do servidor:
OHIOLINK
- Servidor:
olc1.ohiolink.edu
- Porta:
210
- Base de dados:
INNOPAC
- Pré-selecionado:
selecione para pesquisar por omissão
- Classificação:
introduza um valor para a ordem de apresentação, por exemplo, 1
- Sintaxe:
MARC21/USMARC
- Codificação:
utf8
- Tempo limite:
0
- Tipo de registo:
Bibliográfico
Adicionar um servidor SRU
Na página principal do Z39.50/SRU, clique em “Novo servidor SRU”
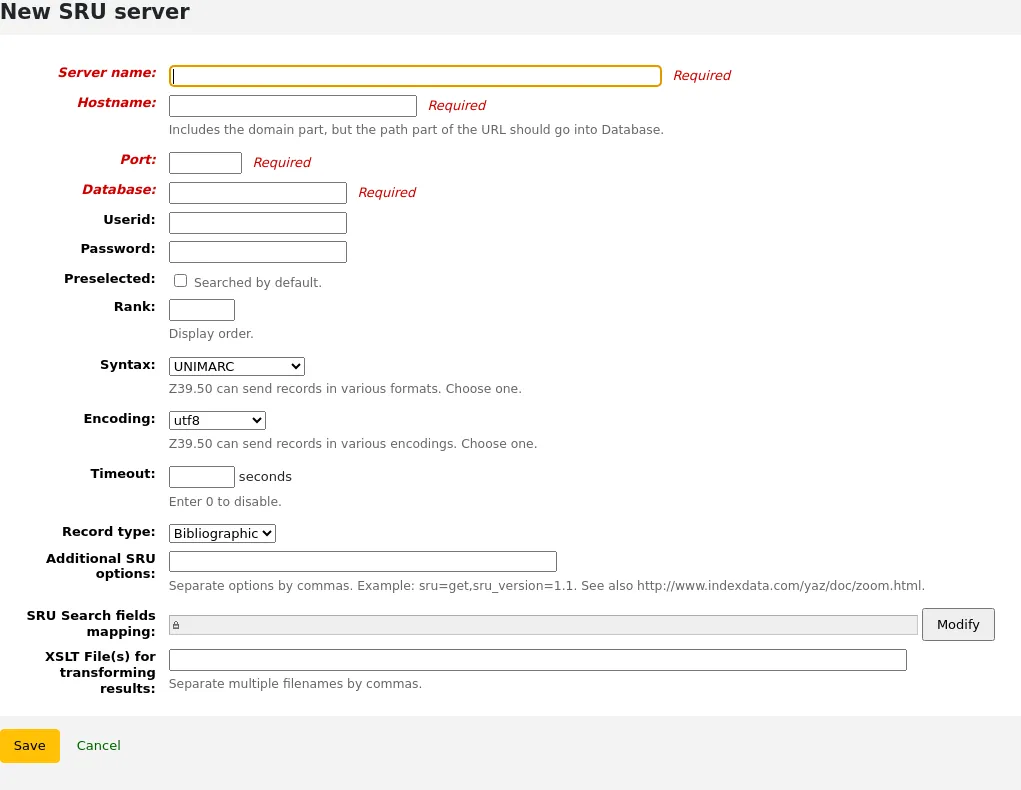
Nome do servidor: introduza um nome que ajude a identificar a origem (como o nome da biblioteca).
Hostname: introduza o endereço (URL) do alvo SRU.
Porta: introduza a porta na qual escutar para obter resultados deste alvo.
Base de dados: introduza o nome da base de dados.
Nome de utilizador: alguns servidores podem exigir palavra-passe. Se for esse o caso do servidor que está a tentar adicionar, introduza o seu nome de utilizador para essa fonte.
Palavra-passe: se o servidor estiver protegido por palavra-passe, introduza a sua palavra-passe para essa fonte.
Pré-selecionado: marque esta caixa se pretender que este destino seja sempre selecionado por defeito.
Posição: introduza um número que represente em que ponto da lista pretende que este alvo apareça. 0 é a primeira posição, seguida de 1, 2, etc.
Se este campo for deixado em branco, os alvos ficarão por ordem alfabética.
Sintaxe: escolha o formato MARC utilizada por este destino.
Codificação: escolha a codificação de caracteres utilizada por este destino.
Nota
Se notar que os caracteres especiais não aparecem corretamente ao importar registos através do Z39. 50, significa que a codificação está incorreta. Altere-a para outra e tente importar novamente.
Tempo limite: introduza um número de segundos após o qual a tentativa de pesquisa do alvo será interrompida, caso não sejam encontrados resultados num tempo razoável. Isto é útil para alvos que demoram muito tempo.
Tipo de registo: escolha se se trata de um registo bibliográfico ou de autoridade.
Opções adicionais de SRU: introduza aqui opções adicionais do servidor externo, como
sru_version=1.1ouschema=marc21, etc. Note que estas opções dependem do servidor.Mapeamento dos campos de pesquisa SRU: clique em “Modificar” para adicionar ou atualizar o mapeamento dos campos disponíveis no formulário de pesquisa do Koha para os nomes de índice específicos, dependentes do servidor.
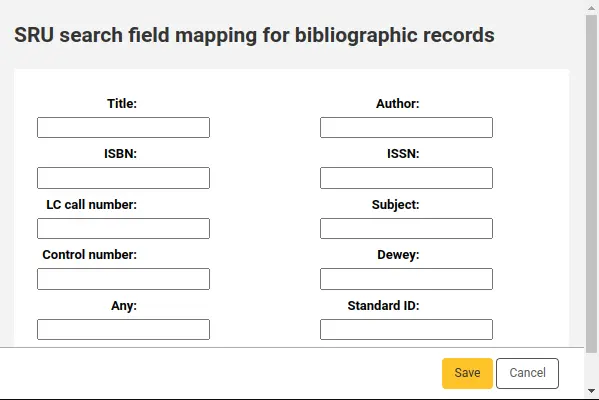
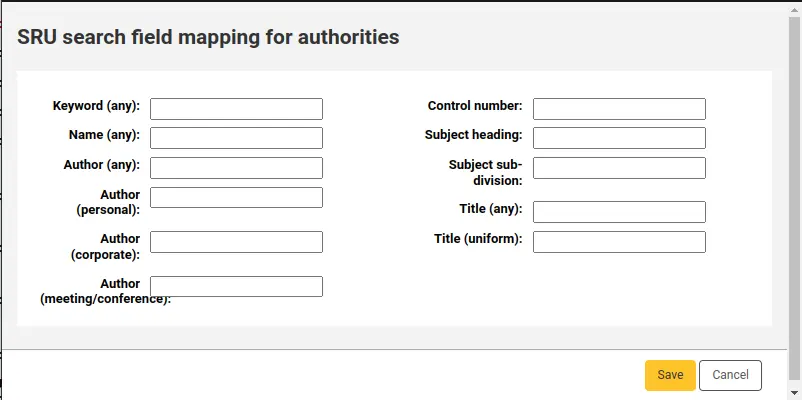
Para refinar as suas pesquisas, pode adicionar os seguintes índices ao mapeamento de campos de pesquisa SRU. Para fazer isso, edite o servidor e clique no botão Modificar junto ao campo.
Título
dc.title
ISBN
bath.isbn
Qualquer
cql.anywhere
Autor
dc.author
ISSN
bath.issn
Assunto
dc.subject
ID por omissão
bath.standardIdentifier
Tabela: Mapeamento de SRU
Ficheiro(s) XSLT para transformar resultados: introduza um ou mais nomes de ficheiros XSLT (separados por vírgula) que pretende aplicar aos resultados da pesquisa.
Ao recuperar registos de fontes externas, pode querer automatizar algumas alterações nesses ficheiros. O XSLT permite fazer isso. O Koha já vem com alguns ficheiros XSLT de exemplo no directório /koha-tmpl/intranet-tmpl/prog/en/xslt/, prontos a usar:
Del952. xsl: Remover exemplares do Koha (campo 952) (MARC21)
Del995. xsl: Remover exemplares do Koha (campo 995) (UNIMARC)
Del9LinksExcept952.xsl: Remove endereços para autoridades nos registos bibliográficos ($9), exceto no caso de 952$9 (número do exemplar) (MARC21)
Del9LinksExcept995.xsl: Remove endereços para autoridades nos registos bibliográficos ($9), exceto no caso de 995$9 (número do exemplar) (UNIMARC)
Clique em “Guardar”.
Repositórios OAI
Versão
Esta preferência de sistema foi introduzida na versão 24.11 do Koha.
Acesso: Mais > Administração > Parâmetros adicionais > Repositórios OAI
Esta secção é utilizada para definir de que repositórios OAI serão usados para recolher metadados para a criação de registos no Koha.
A recolha via OAI-PMH é um protocolo para recuperar registos de um repositório OAI-PMH. Os repositórios OAI-PMH podem ser utilizados pelas bibliotecas para coleções de história local, repositórios de teses, entre outros. Esta funcionalidade permite alojar e gerir uma coleção fora do Koha, mas incluir os registos no catálogo do Koha.
Assim que um ou mais repositórios OAI estiverem configurados, utilize o cronjob harvest_oai.pl para recolher os registos.
Adicionar um repositório OAI a agregar
Terá de adicionar um novo repositório OAI para cada conjunto que pretende recolher. Clique no botão “+ Novo repositório OAI”.
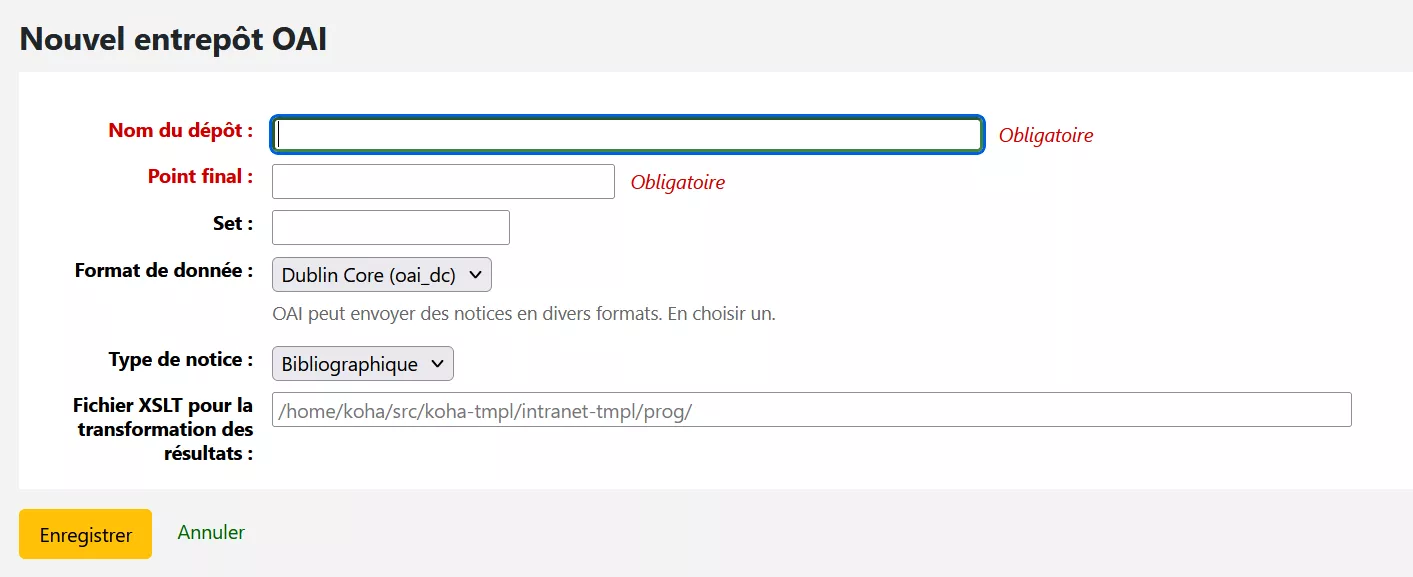
Nome do repositório: introduza um nome que o ajude a identificar a origem
Endpoint: introduza o URL.
O repositório deve fornecer o seu endpoint base; por exemplo,
https://doaj.org/oai?verb=Identifypara o Directory of Open Access Journals. No campo de endpoint do Koha, basta introduzir a informação que antecede?verb, p. ex.,https://doaj.org/oai.
Conjunto: o nome do conjunto que pretende agregar.
Geralmente, pode encontrar todos os conjuntos disponíveis adicionando
?verb=ListSetsao endpoint que introduziu no campo anterior.
Formato de dados: escolha o formato de agregação na lista.
Pode verificar os formatos disponíveis para um repositório adicionando
?verb=ListMetadataFormatsao endpoint que introduziu anteriormente.
Tipo de registo: escolha se vai recolher registos bibliográficos ou de autoridade neste conjunto.
Ficheiro XSLT para transformação de resultados: introduza o caminho do ficheiro XSLT que pretende aplicar para transformar o XML Dublin Core em MARC. Vários ficheiros XSLT são fornecidos por omissão:
Para registos bibliográficos:
<path_to_src>/koha-tmpl/intranet-tmpl/prog/en/xslt/OAIDCtoUNIMARCXML.xslou<path_to_src>/koha-tmpl/intranet-tmpl/prog/en/xslt/OAIDCtoMARC21XML.xslPara registos de autoridade:
<path_to_src>/koha-tmpl/intranet-tmpl/prog/en/xslt/AuthOAIDCtoUNIMARCXML.xslou<path_to_src>/koha-tmpl/intranet-tmpl/prog/en/xslt/AuthOAIDCtoMARC21XML.xsl
Clique em “Guardar” para guardar o novo repositório OAI.
Servidores SMTP
Acesso: Mais > Administração > Parâmetros adicionais > Servidores SMTP
Esta secção é utilizada para configurar servidores SMTP para o envio de emails pelo Koha.
Nota
Apenas os técnicos com a permissão manage_smtp_servers (ou superbibliotecários) terão acesso a esta secção.
A configuração padrão do SMTP é definida no ficheiro koha-conf.xml. No entanto, esta secção permite adicionar servidores adicionais.
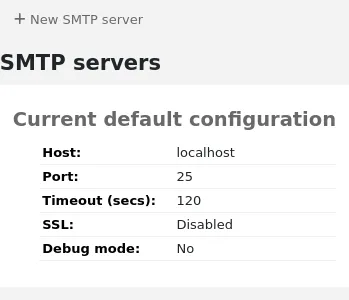
Para adicionar um novo servidor,
Clique em “Novo servidor SMTP”
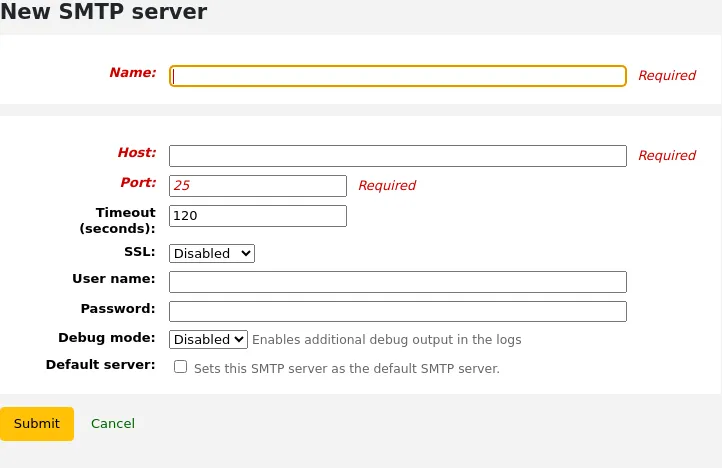
Nome (obrigatório): atribua ao servidor um nome significativo, sendo este o nome que será apresentado no Koha
Host (obrigatório): introduza o nome do host ou o endereço IP do servidor
Porta (obrigatório): introduza o número da porta fornecido pelo seu administrador
Tempo limite (segundos): Introduza o número de segundos após o qual um email não enviado resultará num erro
SSL: escolha o protocolo de segurança fornecido pelo seu administrador
Desativado: sem segurança (não recomendado)
SSL
STARTTLS
Nome de utilizador: introduza o nome de utilizador fornecido pelo seu administrador
Palavra-passe: insira a palavra-passe fornecida pelo seu administrador
Modo de depuração: escolha se pretende ativar o modo de depuração para enviar saídas adicionais para os registos
Servidor padrão: escolha se este servidor é o padrão a utilizar por todas as bibliotecas
Clicar em “Submeter”
Assim que o servidor for adicionado, poderá seleccioná-lo nos detalhes da biblioteca.
Testar a configuração SMTP
Versão
Esta opção foi introduzida pela primeira vez no Koha na versão 26.11.
Note que a alteração também foi incluída na versão 26.05.01.
Depois de adicionar as informações do servidor SMTP, pode clicar em “Enviar email de teste” para testar as definições do servidor. Este enviará uma mensagem de teste para o endereço definido na preferência do sistema KohaAdminEmailAddress e informará se a operação foi bem-sucedida ou se houve uma falha.
Em caso de falha, terá de verificar os ficheiros de registo para obter mais informações.
Quis dizer?
Acesso: Mais > Administração > Parâmetros adicionais > Quis dizer?
Nota
Apenas os colaboradores com a permissão manage_didyoumean (ou superbibliotecários) terão acesso a esta secção.
O Koha pode oferecer opções do tipo “Quis dizer?” nas pesquisas, com base em valores presentes nas suas autoridades.
Importante
Quis dizer? apenas funciona no OPAC no momento. Opções para o interface dos técnicos exige para desenvolvimentos futuros.
Usando esta página pode controlar quais as opções que o Koha dá ao leitor nos resultados de pesquisa.
Para activar a barra “Quis dizer?” nos resultados de pesquisa precisa de marcar a caixa à beira de cada plugin de que deseja usar. Os dois plugins que pode escolher são:
O plugin ExplodedTerms sugere ao utilizador a pesquisa por termos mais abrangentes/mais restritos/relacionados para uma determinada pesquisa feita. Isto é apenas relevante para bibliotecas com dados de autoridade altamente estruturados hierarquicamente.
O plugin AuthorityFile pesquisa o ficheiro de autoridade e sugere ao utilizador que talvez esteja interessado nos registos ligados ao top 5 das autoridades
Se deseja que um plugin tome prioridade face a outro simplesmente arraste um para cima do outro.
Se escolher ambos os plugins, verá várias opções no topo dos resultados da sua pesquisa
Se selecionar apenas AuthorityFile, apenas verá autoridades.
Configuração de tabelas
Esta área de administração irá ajudá-lo a ocultar ou exibir colunas em tabelas fixas, tanto na interface dos técnicos como no OPAC.
Acesso: Mais > Administração > Parâmetros adicionais > Configurações de tabelas
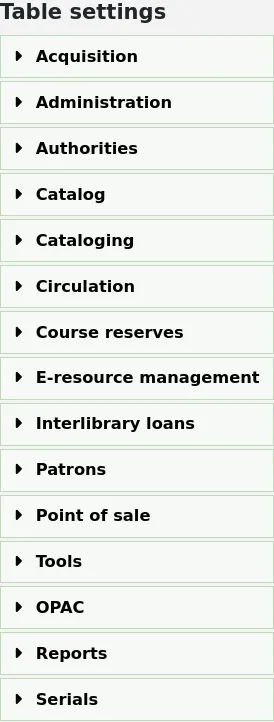
Nota
Apenas os colaboradores com a permissão manage_column_config (ou superbibliotecários) terão acesso a esta secção.
Clique no módulo no qual deseja editar tabelas e será mostrado as opções disponíveis.
Esta área permite controlar as colunas apresentadas na tabela em questão. Se nada estiver oculto, não verá marcas de verificação na coluna “oculto por omissão”.
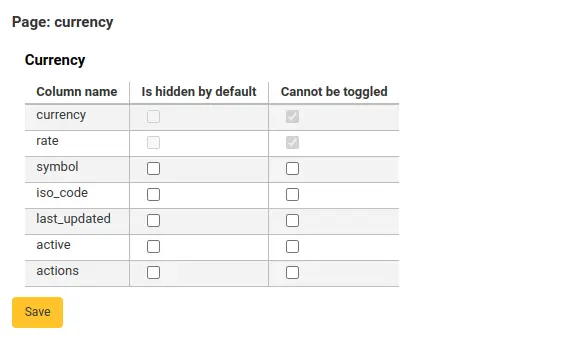
E verá todas as colunas ao visualizar a tabela na sua página habitual.
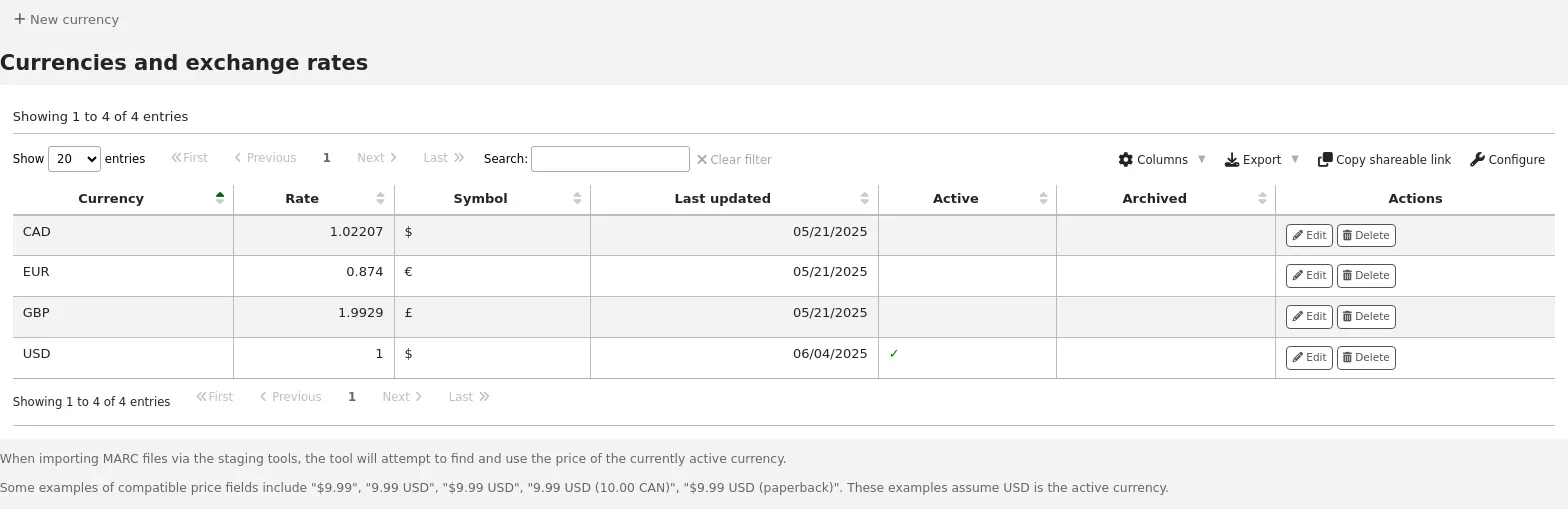
Se as colunas estiverem ocultas, apresentam uma marcação na coluna “oculta por omissão”.
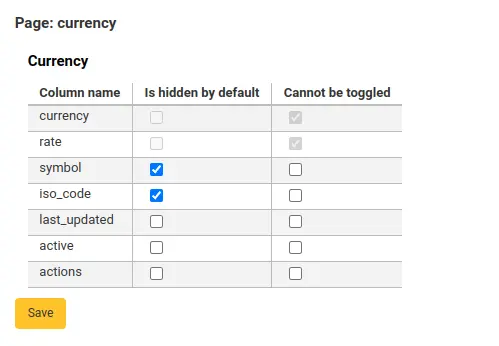
E oculta quando visualiza a tabela.
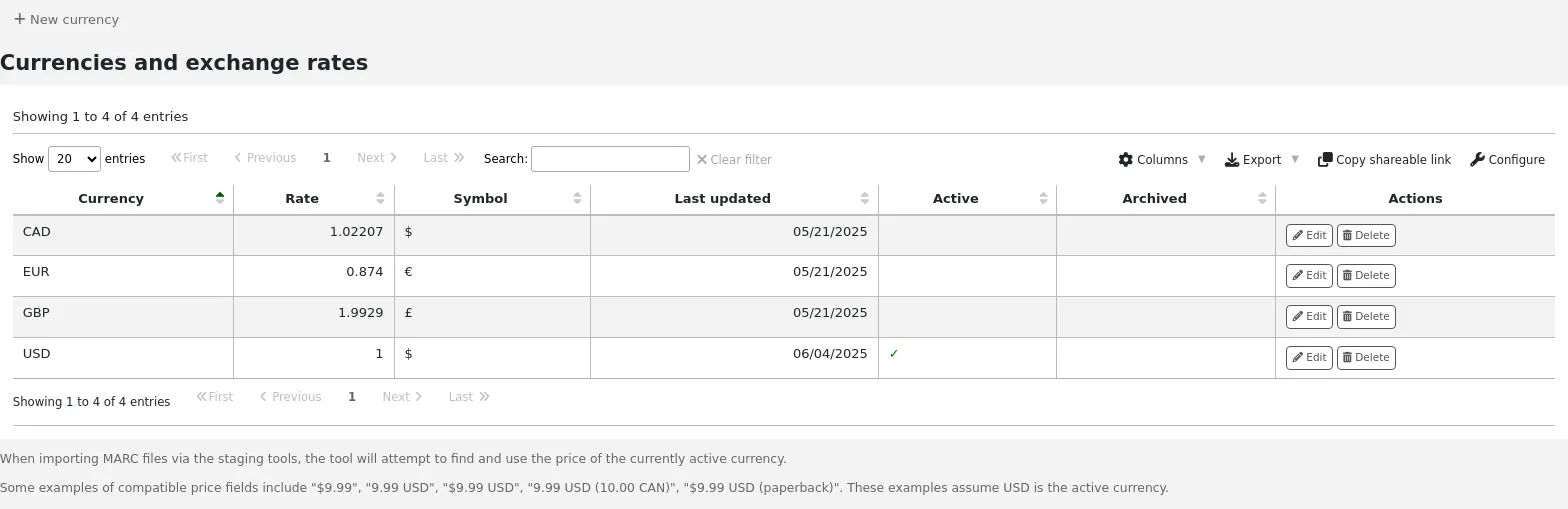
A coluna “Não pode ser alternada” é utilizada para impedir que os utilizadores individuais exibam ou ocultem esta coluna ao visualizar a tabela.
Os utilizadores individuais podem alternar a apresentação de colunas utilizando o botão “Colunas” na parte superior da tabela.
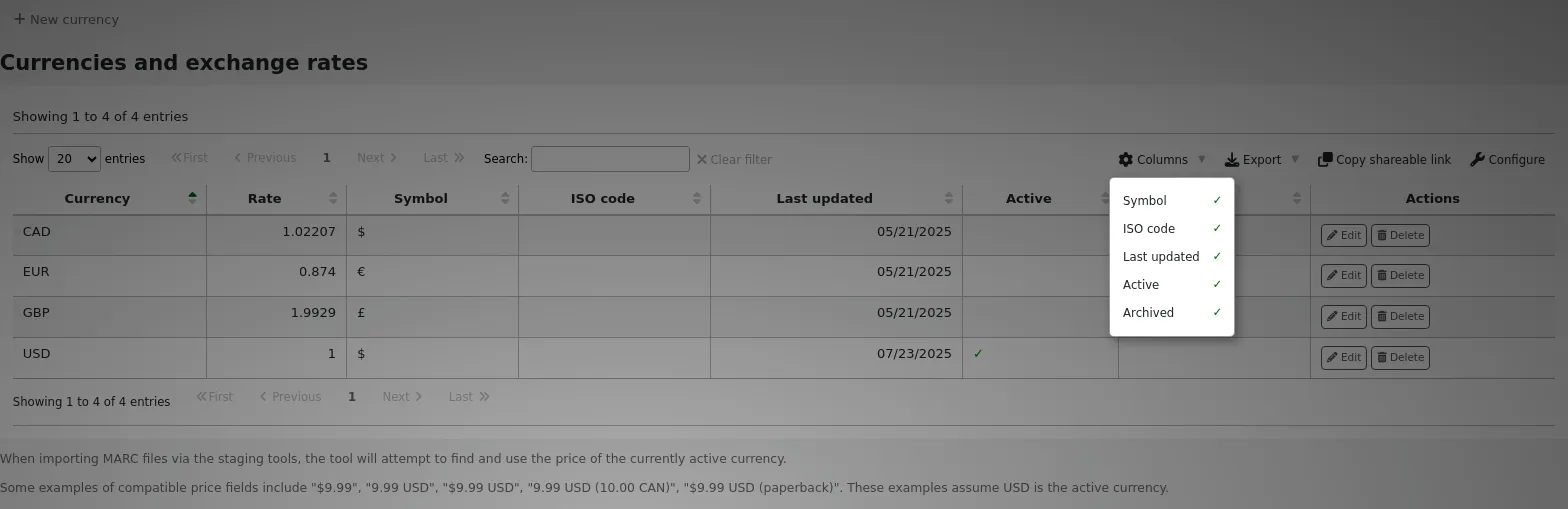
Por exemplo, na tabela Moedas, não é possível alternar a apresentação das colunas “Moeda” e “Taxa”. Quando o utilizador clica no botão “Colunas”, não consegue escolher se estas duas colunas estão ocultas ou visíveis.
Note que a utilização do botão “Colunas” para visualizar ou ocultar colunas altera a visualização apenas para o utilizador e sessão atuais. Assim que o utilizador sair do sistema, as colunas voltarão às definições padrão definidas na página de administração das definições da tabela. Isto não afetará nenhum outro utilizador.
Módulo |
Tabelas |
|---|---|
Aquisições |
|
Administração |
|
Autoridades |
Não existem tabelas que possam ser configuradas a partir do módulo Autoridades. |
Catálogo |
|
Catalogação |
|
Circulação |
|
Reservas de curso |
|
Gestão de recursos eletrónicos |
|
Empréstimos interbibliotecas |
|
Leitores |
|
Ponto de venda |
|
Ferramentas |
|
OPAC |
|
Relatórios |
|
Periódicos |
|
Nota
Os leitores não conseguem alternar a visibilidade das colunas no OPAC. Nas tabelas OPAC esta funcionalidade permite controlar apenas a visibilidade das colunas.
Nota
Quaisquer tabelas com colunas aqui listadas oferecem também, no cabeçalho da tabela, as opções de exportar para Excel, exportar para CSV, copiar ou imprimir.
Alertas de áudio
Se a preferência AudioAlerts estiver definida para “Ativar”, poderá controlar, a partir desta área, os vários sons de alerta utilizados pelo Koha.
Acesso: Mais > Administração > Parâmetros adicionais > Alertas de áudio
Nota
Apenas os colaboradores com a permissão manage_audio_alerts (ou superbibliotecários) terão acesso a esta secção.
Cada caixa de diálogo no Koha tem associada uma classe CSS que pode ser utilizada como selector para um som.
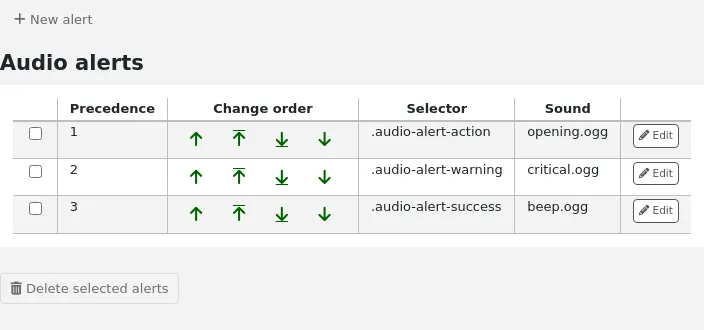
Pode editar as definições padrão clicando no botão “Editar” à direita de cada alerta.
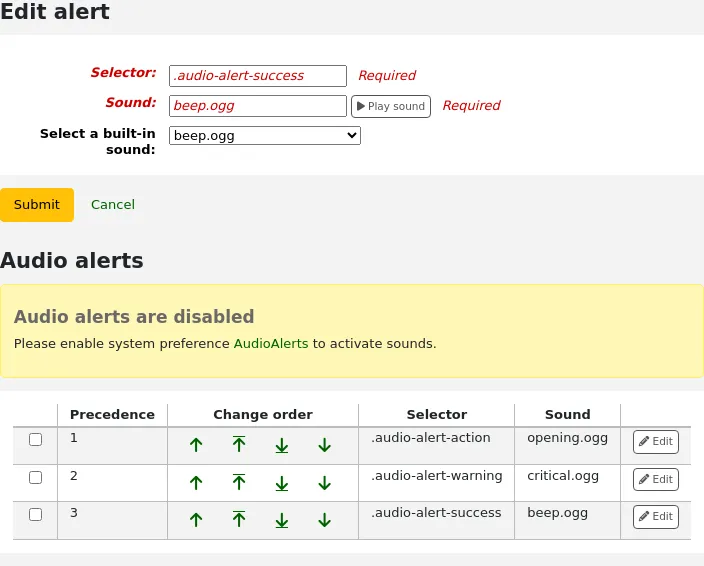
Pode atribuir alertas a outras classes CSS no Koha, inserindo esta informação na caixa de seleção. Por exemplo, se introduzir
body:contains('Check in message')
Assim, ao visitar a página de devolução ouvirá um alerta.
Cada página no Koha possui um identificador único no HTML o qual pode ser utilizado para restringir um som a uma página específica
Qualquer selector de identificador (onde o HTML contém id=»nome_do_id») pode também servir de gatilho, no formato: #nome_do_seletor
Operadores de serviços móveis
Importante
- Esta opção só aparecerá se a
preferência SMSSendDriver, SMSSendMaxChar está definida para “Email”.
Nota
Apenas os colaboradores com a permissão manage_sms_providers (ou a permissão superbibliotecários) terão acesso a esta secção.
Nota
Muitas operadoras móveis descontinuaram o suporte da funcionalidade SMS::Send::Email. A utilização desta funcionalidade não é recomendada, a menos que disponha de um gateway dedicado de SMS para email.
A partir daqui, pode registar quantas operadoras de telemóveis precisar para enviar notificações por SMS aos seus clientes utilizando o protocolo de email.
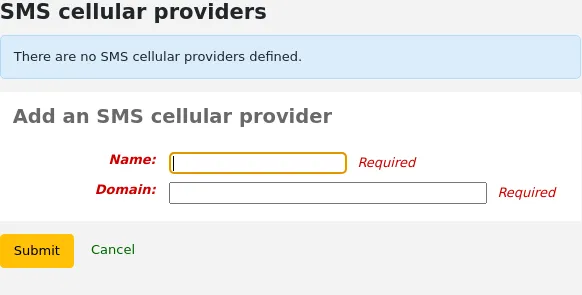
Alguns exemplos nos EUA são:
Operadora móvel |
Domínio de gateway de SMS |
|---|---|
Alltel |
sms.alltelwireless.com |
AT&T |
txt.att.net |
Boost Mobile |
sms.myboostmobile.com |
Project Fi |
msg.fi.google.com |
Republic Wireless |
text.republicwireless.com |
Sprint |
messaging.sprintpcs.com |
T-Mobile |
tmomail.net |
U.S. Cellular |
email.uscc.net |
Verizon Wireless |
vtext.com |
Virgin Mobile |
vmobl.com |
Tabela: Exemplos de fornecedores de SMS
Para adicionar novos fornecedores, introduza os dados no formulário e clique em “Adicionar novo” para guardar.
Estas opções aparecerão no OPAC para os leitores escolherem no separador messages, caso tenha a preferência EnhancedMessagingPreferences ativa.
Partilhar as suas estatísticas de uso
Pode partilhar as suas estatísticas de utilização do Koha com a comunidade Hea. A partilha das suas estatísticas de utilização ajuda no desenvolvimento do Koha, uma vez que a comunidade analisa regularmente estes dados para tomar decisões.
Nota
Apenas os colaboradores com a permissão manage_usage_stats (ou superbibliotecário) terão acesso a esta secção.
Note que as estatísticas são anonimizadas e nenhuma informação sobre os utilizadores é partilhada.
As estatísticas mundiais podem ser consultadas em https://hea.koha-community.org/
Partilhar as minhas estatísticas de utilização do Koha:
A opção predefinida é “Indeciso”; isto faz com que a mensagem apareça na página principal de administração.
Escolha “sim” se quiser partilhar as suas estatísticas de utilização
Escolha “não” se não quiser partilhar as suas estatísticas e não quiser ver a mensagem na página de administração
O seu país: escolha o país onde se encontra a sua biblioteca
Nome da biblioteca: introduza o nome da sua biblioteca
Tipo de biblioteca: escolha o tipo da sua biblioteca
URL da biblioteca: introduza o URL do site da sua biblioteca
Última atualização: aqui verá a data mais recente em que os seus dados foram enviados para o site da Hea
Geolocalização: utilize o mapa da direita para posicionar o marcador onde se encontra a sua biblioteca principal. As coordenadas aparecerão no campo Geolocalização.
Informações sobre as bibliotecas: se tiver mais do que uma biblioteca, pode selecionar aqui “sim” para as apresentar todas no mapa
Consulte a sua página pública: este é o URL para as suas informações no site da Hea.
Clique em “Atualizar a utilização de estatísticas” para guardar as informações.
Partilhar conteúdo com a Mana KB
O Mana KB é uma base de conhecimento global utilizada para partilhar conteúdos específicos para bibliotecas. Atualmente, o Koha está ligado ao Mana KB para partilhar modelos de assinaturas de periódicos e relatórios. Esta secção é utilizada para configurar a ligação com o Mana KB.
Acesso: Mais > Administração > Parâmetros adicionais > Partilhar contéudos com o Mana KB
Nota
Apenas os colaboradores com a permissão manage_mana (ou superbibliotecários) terão acesso a esta secção.
No formulário, escolha se pretende utilizar o Mana KB para partilhar conteúdo ou não. A opção predefinida é «Não, deixe-me pensar sobre isso». Se pretender utilizar o Mana KB, altere a opção para «Sim». Se não quiser partilhar com o Mana KB, escolha «Não»; isto removerá o retângulo azul da página inicial de administração.
O resto desta secção pressupõe que escolheu «Sim».
Escolha se pretende partilhar os seus modelos de assinatura automaticamente. Isto significa que, sempre que criar uma assinatura no módulo de periódicos, esta será automaticamente partilhada com a Mana KB e outras bibliotecas poderão copiá-la.
Para configurar o Mana KB, deve obter um token do Mana KB para autenticar a sua instalação do Koha no servidor do Mana KB.
Introduza o seu nome ou o nome da sua organização no campo «O seu nome».
Insira o seu email no campo «Email». Certifique-se de que tem acesso a esta caixa de entrada, pois receberá mais informações por email.
Assim que enviar as suas informações para a Mana KB, receberá um token da Mana KB.
No e-mail que receber, clique no endereço de confirmação e confirme que não é um robot para completar a configuração do Mana KB.
Campos adicionais
Esta secção é utilizada para adicionar campos personalizados a cestos de encomendas, faturas, assinaturas de periódicos e linhas de conta.
Nota
Apenas os colaboradores com a permissão manage_additional_fields (ou superbibliotecários) terão acesso a esta secção.
Para adicionar um novo campo, primeiro escolha a tabela à qual pretende adicioná-lo.
Aquisições
Faturas (aqinvoices): um campo adicionado a aqinvoices aparecerá ao visualizar uma fatura no módulo de aquisições.
Cestos de encomenda (aqbasket): um campo adicionado a aqbasket aparecerá na criação de um novo cesto de encomenda ou na modificação de um cesto de encomenda existente no módulo de aquisições.
Encomendas (aqorders): um campo adicionado a aqorders aparecerá ao adicionar encomendas a um cesto ou ao editar as encomendas em cestos abertos.
Fornecedores (aqbooksellers:vendor): um campo adicionado aos fornecedores aparecerá ao adicionar fornecedores ou editar fornecedores existentes.
Versão
Campos adicionais para fornecedores foram incluídos no Koha na versão 26.05.
Administração
Bibliotecas: um campo adicionado às bibliotecas aparecerá ao adicionar uma nova biblioteca ou ao editar bibliotecas existentes.
Versão
Campos adicionais para bibliotecas foram incluídos no Koha na versão 25.05.
ERM
Contratos (erm_agreements): um campo adicionado a erm_agreements aparecerá ao criar ou editar contratos no módulo ERM.
Versão
Campos adicionais para acordos de ERM foram adicionados ao Koha na versão 24.11.
Licenças (erm_licenses): um campo adicionado a erm_licenses aparecerá ao criar ou editar licenças no módulo ERM.
Versão
Campos adicionais para licenças de ERM foram adicionados ao Koha na versão 24.11.
Pacotes (erm_packages): um campo adicionado a erm_packages aparecerá ao criar ou editar pacotes no módulo ERM.
Versão
Campos adicionais para pacotes de ERM foram adicionados ao Koha na versão 24.11.
Títulos (erm_titles): um campo adicionado a erm_titles aparecerá ao criar registos de títulos locais no módulo ERM.
Versão
Campos adicionais para títulos de ERM foram adicionados ao Koha na versão 26.05.
Períodos de contrato (erm_agreement_periods): um campo adicionado a erm_agreement_periods aparecerá ao adicionar um período durante a criação de um contrato no módulo ERM.
Versão
Campos adicionais para títulos de ERM foram adicionados ao Koha na versão 26.05.
Leitores
Linhas de conta (crédito) (accountlines:credit): um campo associado aos créditos nas linhas de conta que aparecerá ao pagar ou cancelar multas na conta de um utilizador ou ao criar créditos manuais.
Linhas de conta (débito) (accountlines:debit): um campo adicionado à linha de débito da conta aparecerá ao criar uma fatura manual
Tipos de crédito de conta (account_credit_types): um campo adicionado aos tipos de crédito de conta aparecerá ao adicionar ou editar tipos de crédito.
Versão
Campos adicionais para tipos de crédito foram adicionados ao Koha na versão 25.05.
Tipos de débito de conta (account_debit_types): um campo adicionado aos tipos de débito de conta aparecerá ao adicionar ou editar tipos de débito.
Versão
Campos adicionais para tipos de débito foram incluídos no Koha na versão 25.05.
Periódicos
Assinaturas (subscription): um campo adicionado à assinatura aparecerá ao criar uma nova assinatura ou ao editar uma assinatura existente no módulo de periódicos.
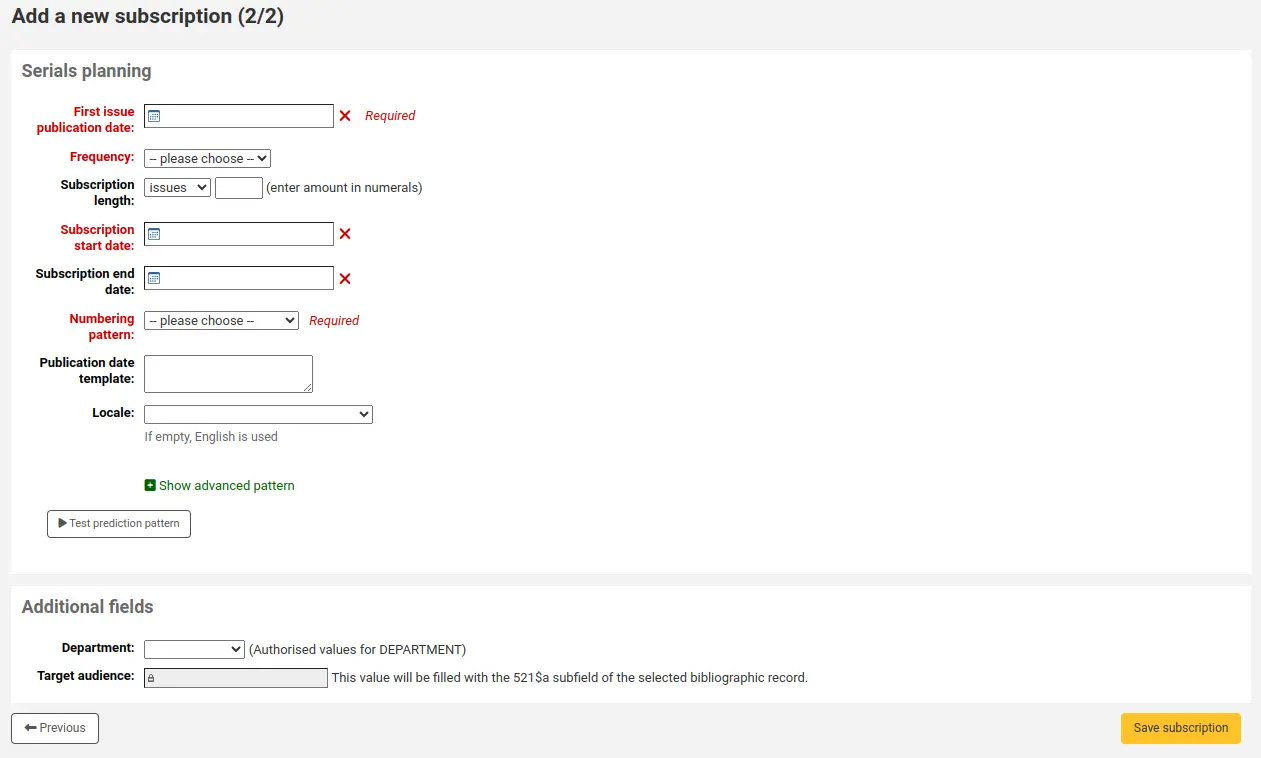
Clique em “Novo campo”.
Preencha o formulário.
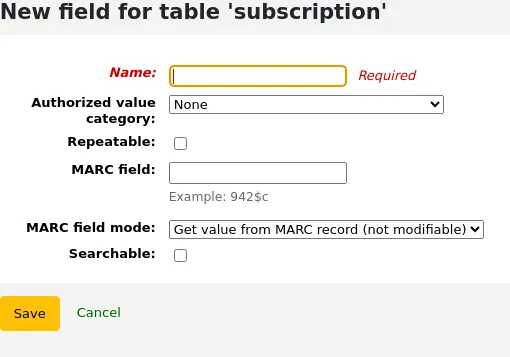
Nome: este é o nome do campo, da forma como você deseja que ele apareça.
Categoria de valores autorizados: se quiser adicionar um menu suspenso ao campo, escolha uma categoria de valores autorizados aqui (pode também criar uma nova categoria de valores autorizados, se necessário).
Repetível: se quiser que o campo seja repetível, marque esta caixa. Para campos de texto livre, será adicionado um botão «Novo» ao lado do campo, permitindo que a equipa o repita e insira um novo valor. Para campos com categorias de valores autorizados, será criada uma lista de caixas de seleção em vez de um menu suspenso, permitindo que a equipa escolha mais de uma opção.
Versão
Esta opção foi adicionada ao Koha na versão 24.11.
Campo MARC: para campos de assinatura adicionais, é possível ligar o campo a um campo MARC. O campo adicional será preenchido automaticamente com o valor desse campo MARC presente no registo correspondente.
Nota
Só pode escolher uma das duas opções (valor autorizado OU campo MARC)
Aviso
Se escolher o campo MARC, certifique-se de inseri-lo neste formato: campo$subcampo
Por exemplo: 590$a
Pesquisável: marque esta caixa se quiser poder pesquisar cestos ou assinaturas com base neste campo
Campos adicionais pesquisáveis de cestos de encomendas estarão disponíveis no formulário de busca avançada de encomendas
Campos adicionais pesquisáveis de faturas estarão disponíveis no formulário de pesquisa de faturas
Campos adicionais pesquisáveis de assinaturas estarão disponíveis no formulário de pesquisa avançada de assinaturas
Exemplos de campos adicionais
Exemplo 1: Campo de assinatura adicional utilizando valores autorizados
Talvez queira registar para qual departamento está encomendando este periódico
No campo “Nome”, digite “Departmento”
No campo “Categoria de valor autorizado”, escolha DEPARTAMENT
Marque a caixa “Pesquisável”
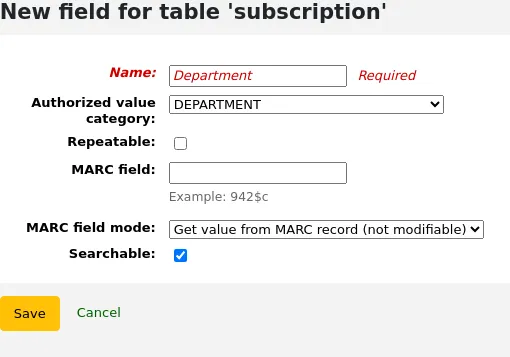
Ao adicionar uma assinatura, o campo aparecerá na secção “Campos adicionais”, acompanhado de um menu suspenso com os valores autorizados.
Ao visualizar a assinatura, o campo aparecerá em “Campos adicionais”.
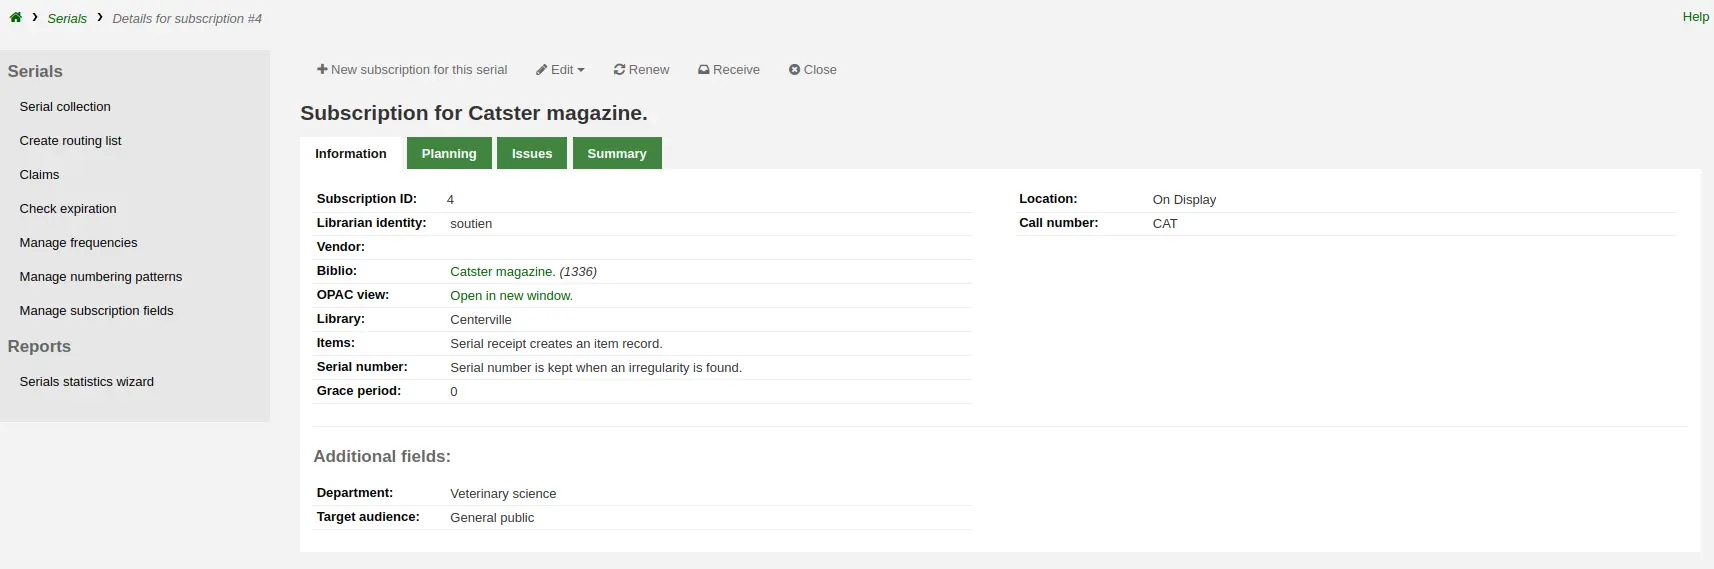
Como tornamos o campo pesquisável, ele também aparecerá na pesquisa de assinaturas de periódicos.
Exemplo 2: Campo de assinatura adicional utilizando campo MARC
Isto é particularmente útil se quiser visualizar informações bibliográficas na página de detalhes da assinatura. Neste exemplo, adicionaremos o campo 521$a, que corresponde, no formato MARC21, à nota de público-alvo.
No campo “Nome”, insira “Público-alvo”
No campo “Campo MARC”, insira “521$a”
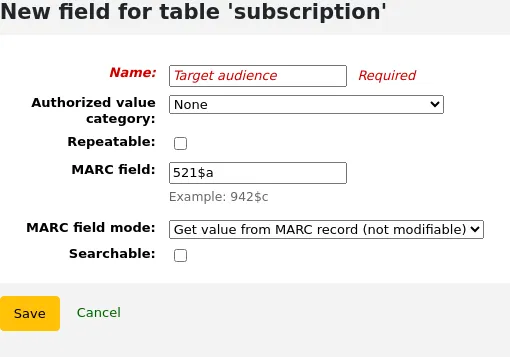
Nota
Não poderá editar este campo a partir do formulário de assinatura. Se precisar adicionar ou alterar o valor deste campo, deverá utilizar o módulo de catalogação.
Ao visualizar a assinatura, o campo e as informações do registo bibliográfico aparecerão em “Campos adicionais”.
Exemplo 3: Campo adicional de fatura de texto livre
Se precisar de inserir informações adicionais nas faturas, como o número do cheque utilizado para o pagamento, pode optar por não utilizar nenhum valor autorizado.
No campo “Nome”, digite “# Cheque”
Marque a caixa “Pesquisável”
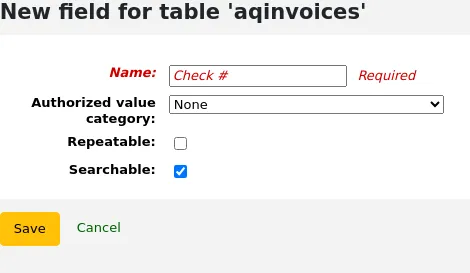
Os novos campos serão exibidos ao visualizar a fatura no módulo de aquisições.
Como tornamos o campo pesquisável, ele também aparecerá na pesquisa de faturas.
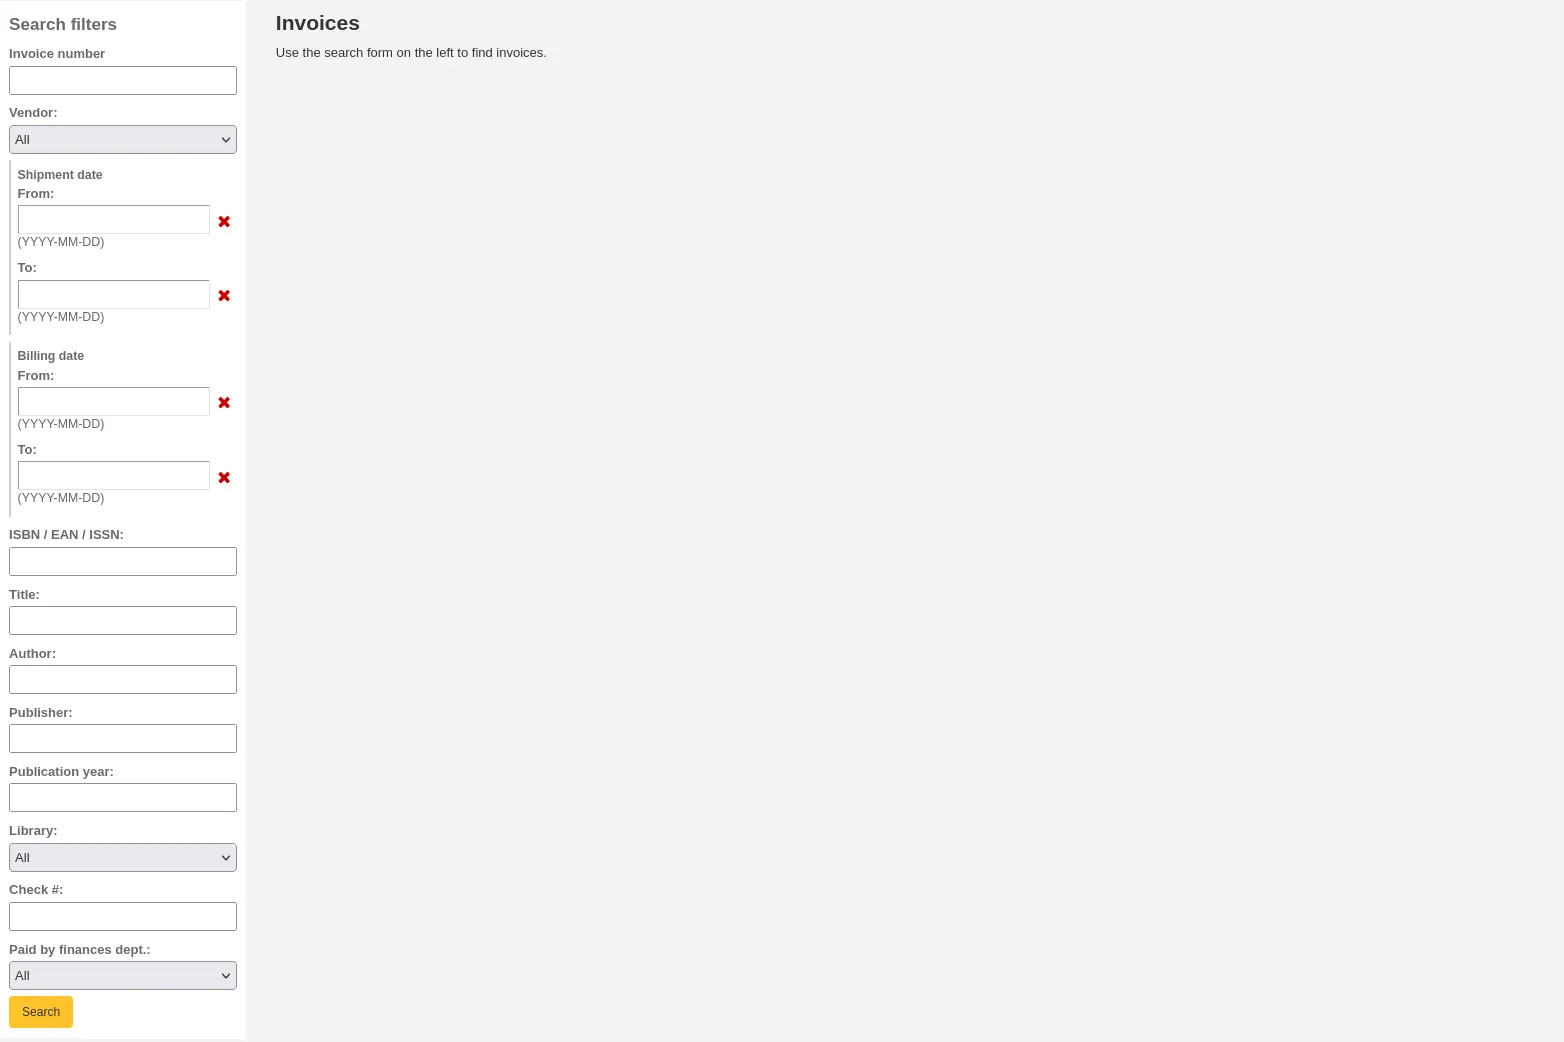
Atalhos de teclado
Esta secção é usada para redefinir os atalhos de teclado utilizados no editor de catalogação avançada.
Nota
Esta secção só aparecerá se a preferência de sistema EnableAdvancedCatalogingEditor estiver ativa.
Nota
Apenas os utilizadores com a permissão manage_keyboard_shortcuts (ou superbibliotecários) terão acesso a esta secção.
Para alterar um atalho, insira a combinação de teclas a ser utilizada no campo da coluna “Teclas de atalho” e clique em “Salvar atalhos”.
Certifique-se de seguir as regras de mapeamento de teclas ao inserir suas combinações de teclas:
Separe as teclas usando um hífen “-”
A tecla de controle é “Ctrl”
A tecla Alt é a “Alt”
A tecla Shift é “Shift”
Ao combinar várias teclas, elas devem estar na ordem especificada: Shift-Cmd-Ctrl-Alt