ILL (Interlibrary loan requests)
Il modulo ILL di prestito interbibliotecario permette agli utenti di gestire copie e prestiti da fonti esterne. Gli utenti inviano una richiesta dall’OPAC e usando il tab Le tue richieste ILL e lo staff la processerà. Oppure lo staff farà richieste ILL per conto di un utente.
Nota
Only staff with the ill permission (or the superlibrarian permission) will be able to create and manage ILL requests.
Configurazione
Prima di usare il modulo ILL devi essere sicuro di averne completato la configurazione.
Il modulo ILL può essere configurato per differenti tipi di richieste e flussi di lavoro, chiamati backend. I backend noti sono documentati dalla comunità Koha in https://wiki.koha-community.org/wiki/ILL_backends. Devi configurarne almeno uno.
Next, set your system preferences for interlibrary loans.
Library staff responsible for ILL requests need the ill permission (or the superlibrarian permission).
The ILL requests module uses system defined statuses. You can add custom statuses to match your ILL workflow as ILL_STATUS_ALIAS authorized values.
In patron categories, choose which patron categories are allowed to request interlibrary loans from the OPAC.
Version
Prior to version 23.11, this is not necessary. All patron categories are allowed to place ILL requests from the OPAC.
As of version 23.11, you must define the option for each patron category.
Notifiche ILL via email
Email notifications can be sent to ILL staff when a patron makes a request to modify or cancel an existing request. The notice templates are ILL_REQUEST_CANCEL and ILL_REQUEST_MODIFIED. The ILL staff email address can be configured per library. If this is not set the ILLDefaultStaffEmail system preference will be used.
Notifications can also be sent to patrons for requests that are either available for pick-up or are unavailable and have been canceled. The notice templates are ILL_PICKUP_READY and ILL_REQUEST_UNAVAIL. The notifications are enabled from the patron categories default patron messaging preferences. You can customize the notice text for these notices in the Notices and slips tool.
Crea richieste ILL
Get there: More > ILL requests

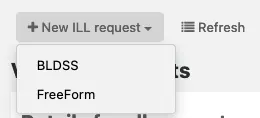
Scegli «Nuova richiesta ILL» e poi Freeform.
Nota
Le immagini mostrate qui provengono solo dal backend Freeform.

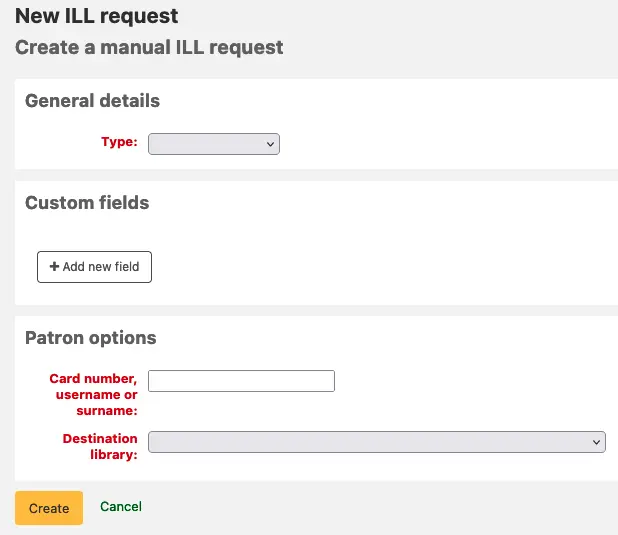
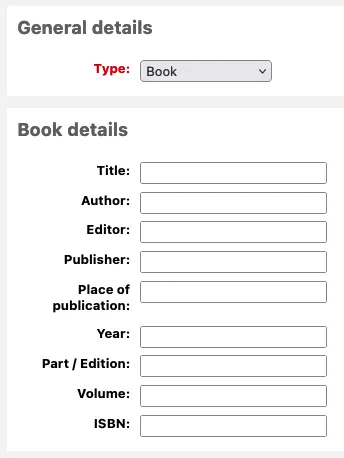
Select a Type: Book, Chapter, Journal, Journal article, Thesis, Conference, Other, Generic resource.
A different set of fields will display for each type.

Enter as much as information as you like.
Add custom fields, for example if you wished to add a note or if you are using the «Other» type of request.
Under the patron options, enter the patron card number and the library associated with the request.
Clicca su “Crea” e ti verrà mostrata una pagina con la descrizione della Richiesta.
Nota
If you have enabled the ILLCheckAvailability system preference and installed plugins for the staff interface you will be presented with search results. The user can click on a link to a relevant resource if found or proceed with the ILL request. If no results are found the ILL is completed in the usual way.
You can now manage your request or return to the list of ILL requests by clicking «List requests».
Visualizzare richieste ILL
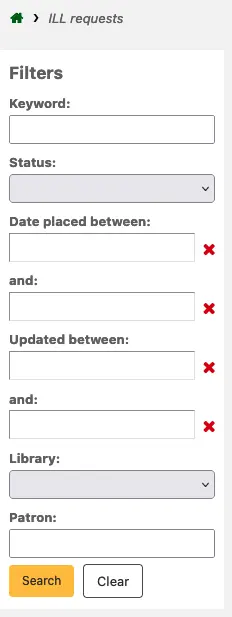
From the main ILL requests screen you can view, filter and sort your ILL requests. Click on the ‘List requests’ button from other pages in the ILL module to return to this list.

There is a large amount of data available in the Requests table; scroll right to see all the columns. You can customize the columns of this table in the Table settings section of the Administration module (table id: ill-requests).
You can use the ILLHiddenRequestStatuses preference to hide requests with completed statuses by default. Use the filters on the left of the page to display a subset of requests based on your chosen criteria.

Gestisci richieste ILL
Clicca su “Gestisci richiesta” nella colonna finale. In funzione dello stato della richiesta potrai vedere alcune delle seguenti opzioni:
Modifica la richiesta
you can edit the borrowernumber, biblionumber, branch and can add notes. If you have added custom ILL statuses you can also edit these.
Conferma richiesta
inviare la richiesta a un fornitore come il backend BLDSS.
Inoltra una richiesta a biblioteche partner
inviare la richiesta via email a partner library
Cambia fornitore
this allows you to move the request to a different provider (backend).
Elimina
cancella totalmente la richiesta. Nessun dettaglio verrà conservato in Koha.
Ripristina la richiesta
dopo lo stato di “Richiesto” o “Richiesto dai partner”, lo staff della biblioteca può cancellare la richiesta dalla fonte esterna. Lo stato passerà a “Nuovo”
Marca come operazione completata
si usa quando la richiesta ILL è stata evasa.
Modifica i metadati di copia
Dependent on the backend used for the request you may be able to edit, add or delete some or all of the request metadata. For example, if the metadata has originated from a requester using the FreeForm backend this may need to be edited, whereas metadata from an external recognized source such as BLDSS should not.
Mostra i metadati dal fornitore
Mostra metadati extra se inviati dal fornitore ILL e non inclusi nei campi standard della richiesta.
Log delle richieste ILL
Mostra lo storico delle modifiche di una richiesta.
Commenti
E” possibile aggiungere commenti a una richiesta IIL e questi saranno usati dallo staff ILL per tenere traccia del lavoro fatto. I commenti sono in sola lettua e mantenuti in ordine crono,ogico. Essi mostrano i dettagli dell’utente e la data del commento. Se sono presenti, il numero di commenti è mostrata nella pagina che elenca le richieste.
Prestito
This option is only available if you have the CirculateILL preference enabled. See the Circulating ILL materials section.
Stati della richiesta
The full list of installed ILL statuses are (with status codes):
New request (NEW)
Requested (REQ)
Requested from partners (GENREQ)
Request reverted (REQREV)
Cancellation requested – a patron has requested cancellation from the OPAC. (CANCREQ)
Completed (COMP)
Checked out (CHK)
Returned to library (RET)
Inoltra una richiesta a biblioteche partner
If you have a network of partner libraries which permit ILL requests you can manage this through Koha. First, you need to create your partner library accounts:
Create a patron category to be assigned to partner libraries. You may want to give it the description “Interlibrary loan” or “Library” and a category type of “Organization”. Then, enter this category in the ILLPartnerCode system preference.
Version
The ILLPartnerCode system preference was added to Koha in version 23.11. In previous versions, the partner code was defined in the koha-conf.xml file. The default code was “IL”.
You will need to create a patron account with this patron category for each partner library.
Each library must have an email address as this will be the mechanism for sending the inter-library loan request.
Nota
The notice template is ILL_PARTNER_REQ and the text can be customized from the Notices and slips tool.
Ora puoi usare l’opzione “Inoltra richieste ai partner” quando lavori le richieste.
Nota
If you have enabled the ILLCheckAvailability preference enabled you can use plugins to search the catalogs of your partner libraries using Z39.50 prior to confirming the request with a partner.
Circulating ILL materials
If you have enabled the CirculateILL preference you can checkout ILL items directly from the ILL request.
When you create a Book type request a brief catalog record is created automatically based on the Fast Add MARC framework. Once a request has a suitable status, a Checkout button is displayed on the Manage request toolbar. Clicking this will enable the user to check out the item either to the user who made the request or an in-house statistical patron.
To checkout an item:
Click on the Checkout button.
Select an item type when prompted. An item is created automatically which is attached to the biblio record that was created for the request. The barcode of the item is in the format ILL-requestid.
Next, at the patron checkout screen select a due date. If you do not select a due date the relevant circulation rule will be used to calculate the due date.
Once the item is checked out the status of the request is changed to “Checked out” and after it has been checked in the status updates to “Returned to library”.
Bibliographic records created as part of an ILL request will have an extra tab in the holdings table for that allows you to link back to the request in the ILL module.