Outils
Les outils de Koha permettent de réaliser toutes sortes d’opérations.
Aller à : Plus > Outils
Utilisateurs et circulation
Listes d’utilisateurs
Aller à : Plus › Outils › Utilisateurs et circulation › Listes d’utilisateurs
Les listes d’utilisateur sont un moyen de stocker un groupe d’utilisateurs pour une modification facile via l’outil de modification par lot ou pour faire des rapports.
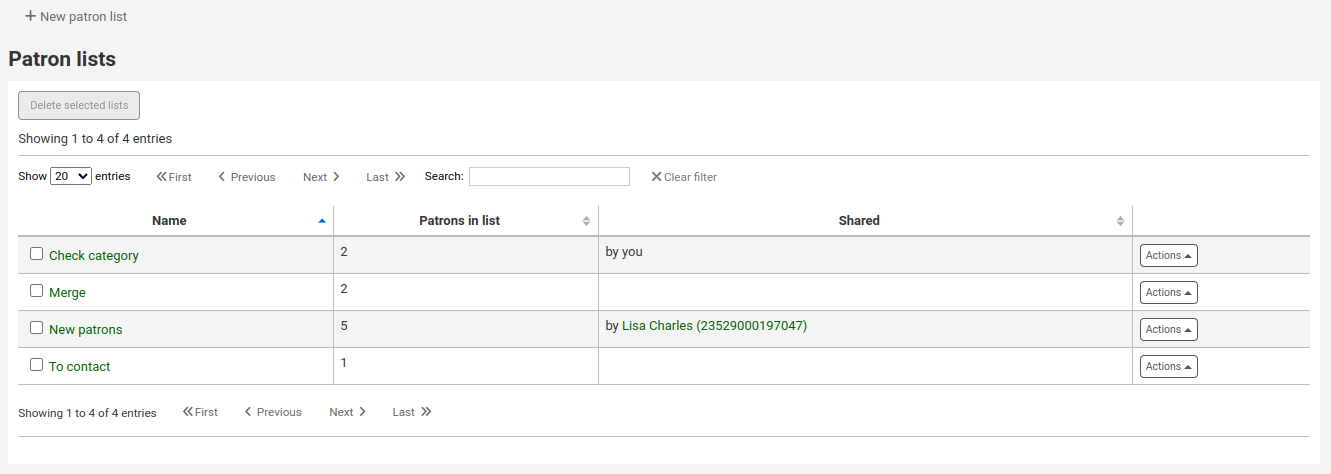
Pour créer une nouvelle liste, cliquez sur le bouton “Nouvelle liste d’adhérents”
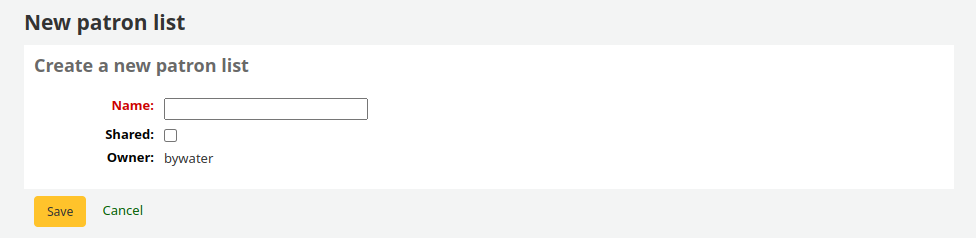
Saisissez le nom de la liste.
Si la boîte “Partagée” est cochée, Koha affichera cette liste à tous les utilisateurs qui ont la permission manage_patron_lists permission.
Enregistrer la liste.
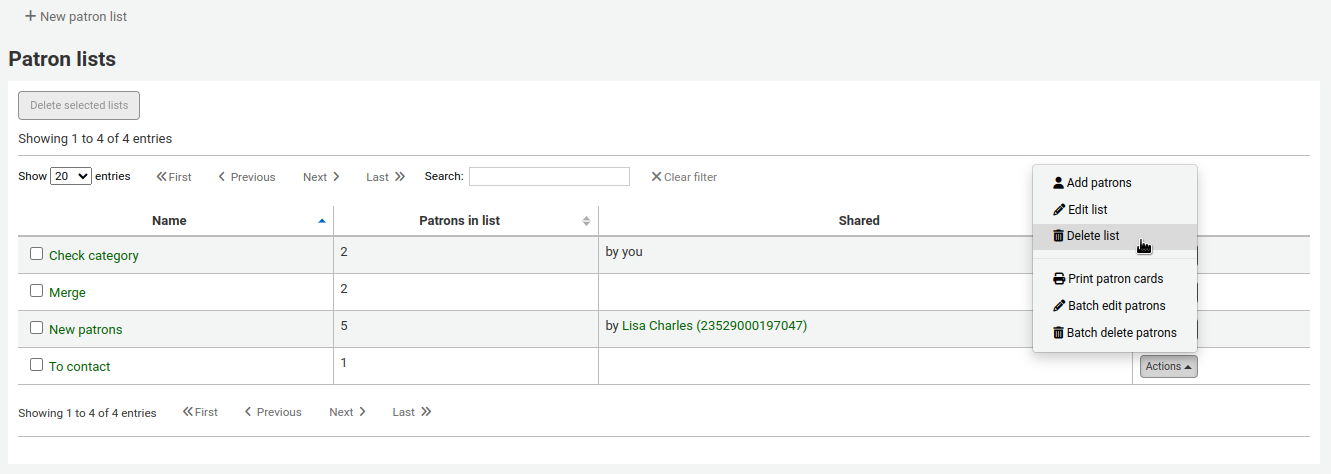
Chaque liste a son bouton “Actions” qui offre plus d’options.
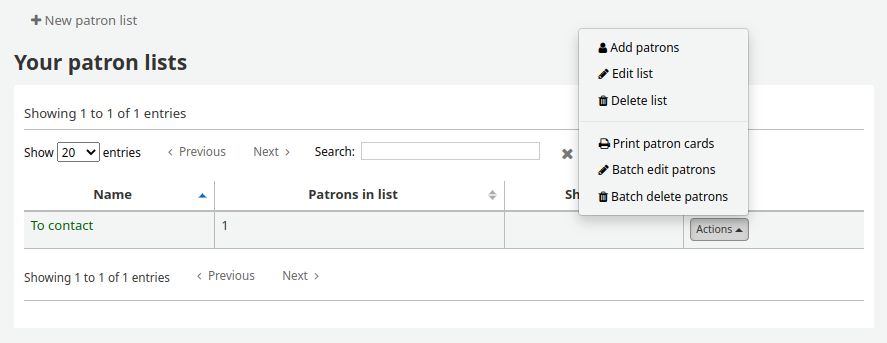
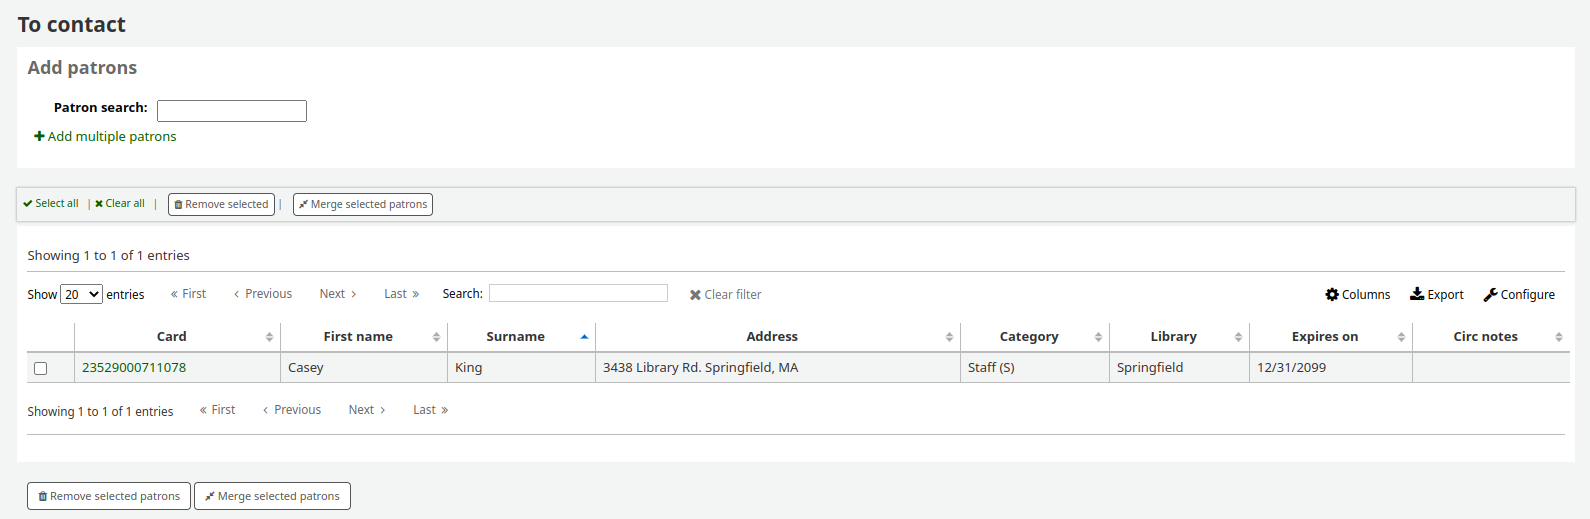
Pour ajouter des utilisateurs à la liste, cliquer sur l’option “Ajouter des utilisateurs” du bouton “Actions”.
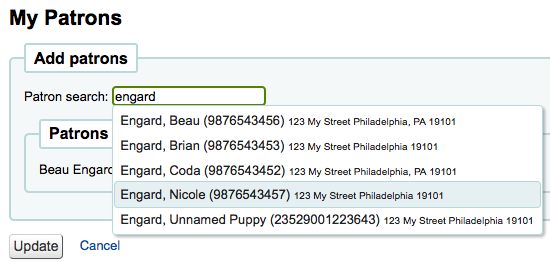
Saisir le nom ou le numéro de carte du lecteur dans la zone de recherche et cliquer sur le résultat pour ajouter le lecteur.
Vous pouvez aussi cliquer sur le lien “Saisir plusieurs numéros de cartes” et scanner (ou entrer manuellement) les codes-barres dans la boîte.
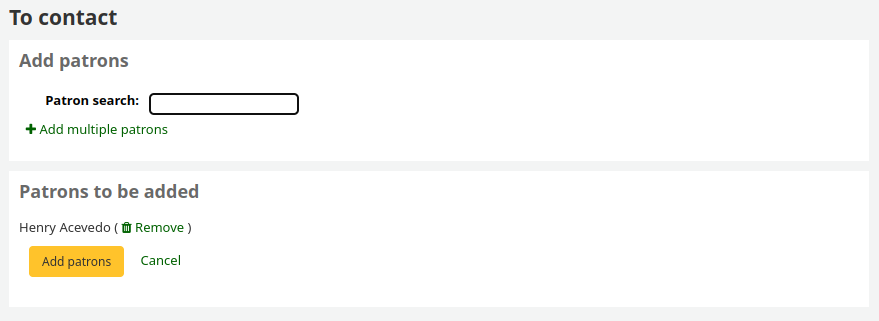
Une fois que tous les utilisateurs sont dans la boîte vous pouvez cliquer le bouton “Valider” pour les ajouter à la liste.
Note
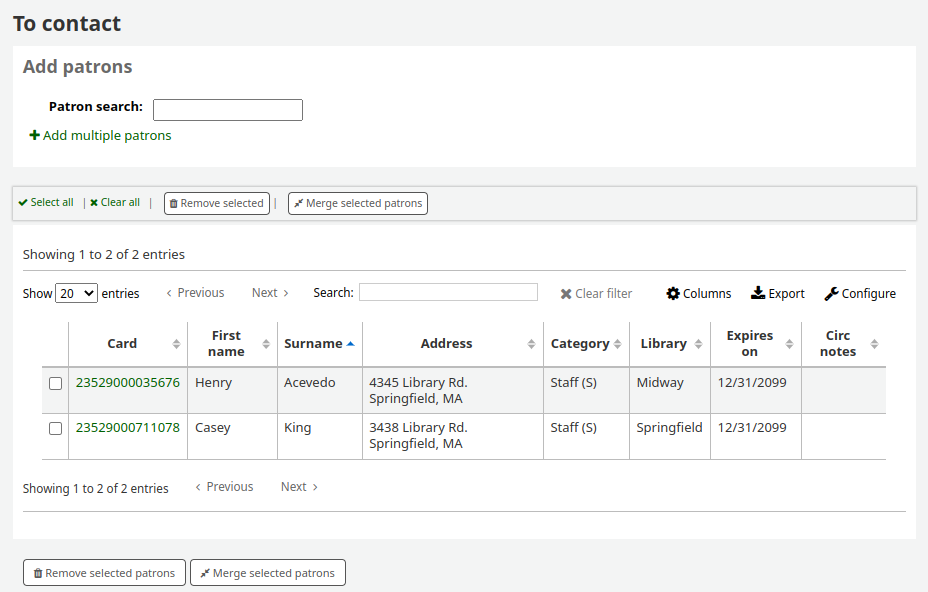
Vous pouvez personnaliser l’affichage des colonnes de ce tableau dans les “Configurations des tableaux” du module Administration (voir table id: patron-list-table).
To delete a list, click the “Actions” button and choose the “Delete list” option.
To delete multiple lists at once, select the lists and click the “Delete selected lists” button at the top of the table.
Version
The option to delete multiple lists at once was added in Koha version 23.11.
Clubs d’utilisateurs
Aller à : Plus > Outils > Utilisateurs et circulation > Clubs d’utilisateurs
Clubs d’utilisateurs crée des clubs dans lesquels les usagers peuvent être inscrits. C’est utile pour suivre des programmes de lectures estivales, des clubs de lecteurs ou autres.
Important
Staff will need the clubs permissions to edit clubs, templates and enroll patrons. To learn how to set patron permissions, go to the patron permissions section of this manual.
Créer un nouveau modèle de club
A club template is a template that will be used to create clubs. You can add fields that can be filled out at the time a new club is created based on the template, or a new enrollment is created for a given club based on the template.
To create a new club template:
Click on the “New club template” button.
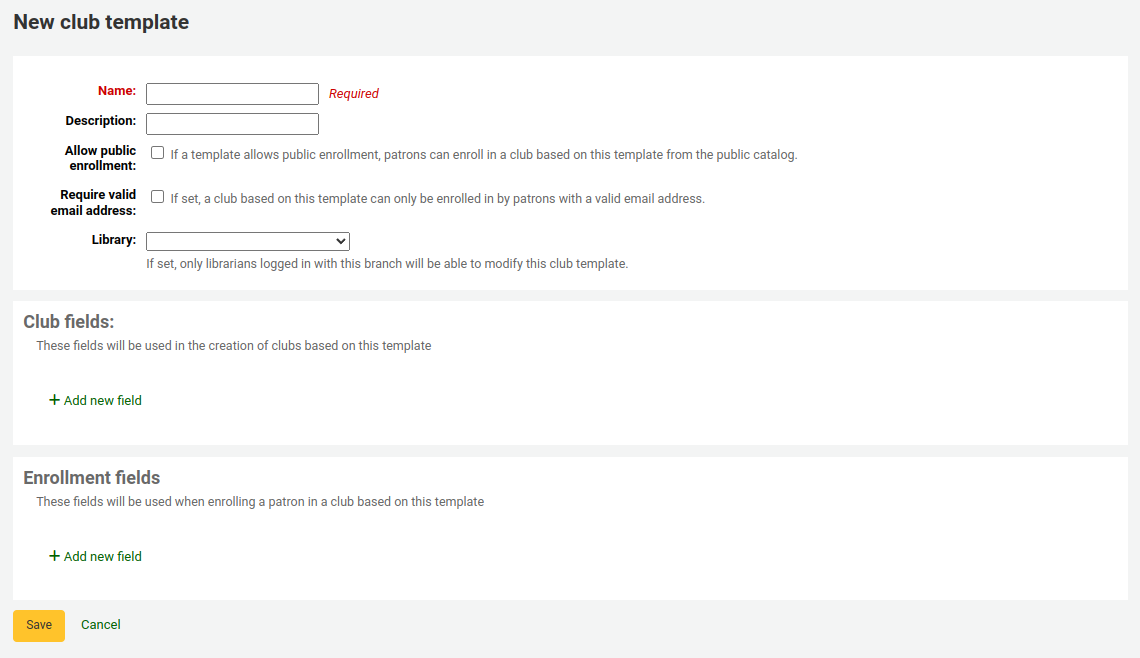
Fill out the form:
Name (required): enter a name for the club template. This could be something like “Adult book club”, “Children’s book club” or “Summer reading program”. Remember, these templates will be the starting point for each club you create.
Description: enter any additional information.
Allow public enrollment: if this box is checked, it will allow patrons to enroll in a club based on this template from the OPAC.
Require valid email address: if this box is checked, only patrons with a valid email address can enroll. So they will need a email address to enroll.
Library: choose a library to limit the use of this template to staff from a specific library. If you leave it blank, staff from any library will be able to create a new club using this template.
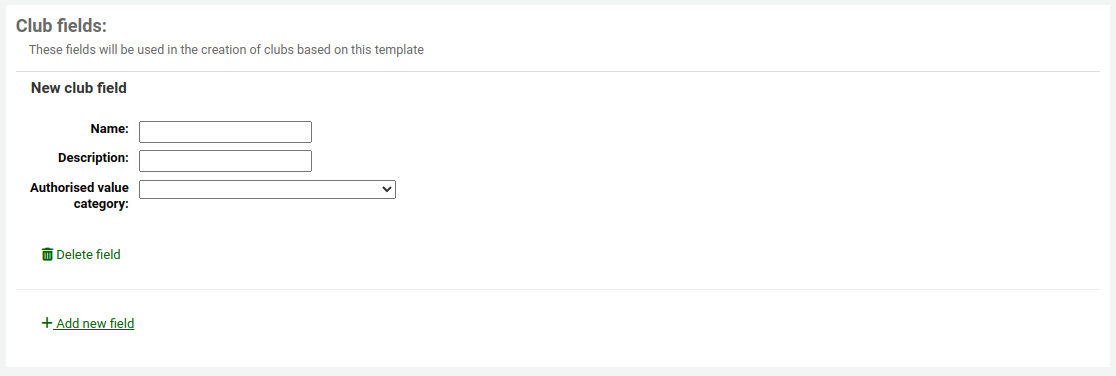
Club fields: these fields will be used when creating a club based on this template. For example, this can be the name of the club, the name of the animator, the theme, etc. To add a club field, click on “Add new field”.
Name: enter the text that will be used as the label of the field.
Description: enter any additional information about this field.
Authorized value category: if you want the field to be a dropdown menu, choose an authorized value category here. If this is left blank, the field will be a simple text field.
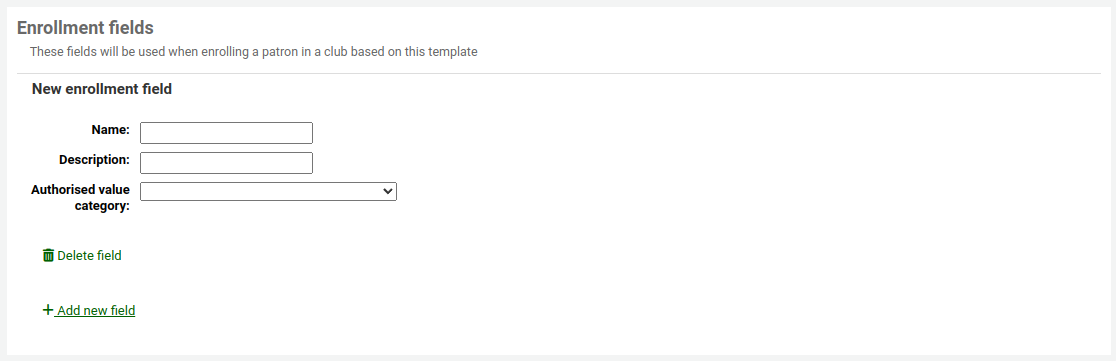
Enrollment fields: you can add any additional fields you want patrons to fill when they enroll in a club based on this template. To add an enrollment field, click on “Add new field”.
Name: enter the text that will be used as the label of the field.
Description: enter any additional information about this field.
Authorized value category: if you want the field to be a dropdown menu, choose an authorized value category here. If this is left blank, the field will be a simple text field.
Click “Save”.
Créer un nouveau club
Once the templates are created, you can create actual clubs.
Click on the “New club” dropdown menu and select the template you want to use.
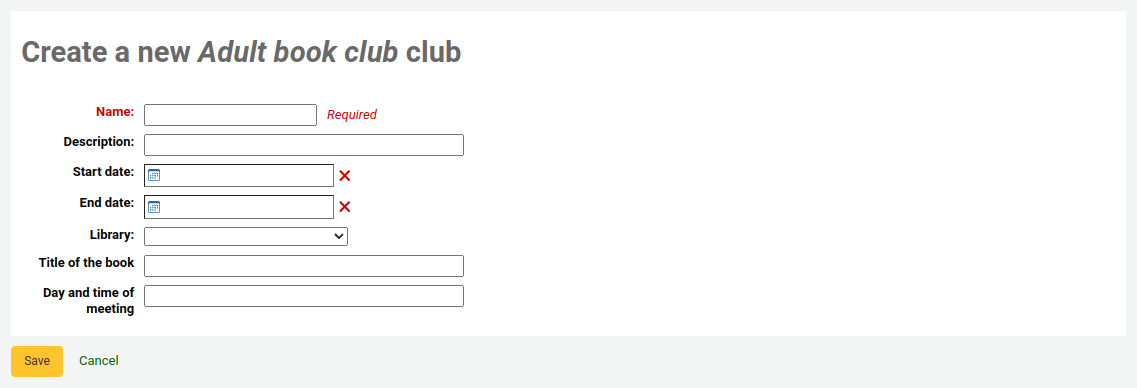
Fill out the form with the club information:
Name (required): enter the name of the specific club you are creating. This is the name the staff and the patrons will see when enrolling. For example, “Summer 2018 reading club”.
Description: enter any additional information about the club.
Start date: choose the start date of the enrollment period. Staff and patrons will not be able to enroll in the club before the start date.
End date: choose the end date of the enrollment period. Once the club expires, enrollment will not be possible.
Library: if this club is limited to a specific library, choose it here. Only patrons from this specific library will be able to enroll. If you leave it blank, patrons from any library will be able to enroll.
If there were “Club fields” in the template, they will appear at the bottom of the form.
Click “Save”.
Enrolling a patron in a club from the staff interface
To enroll a patron in a club from the staff interface:
Go to the patron’s account.
On the “Details” page or the “Check out” page, click on the “Clubs” tab. All ongoing clubs will be displayed in this tab.
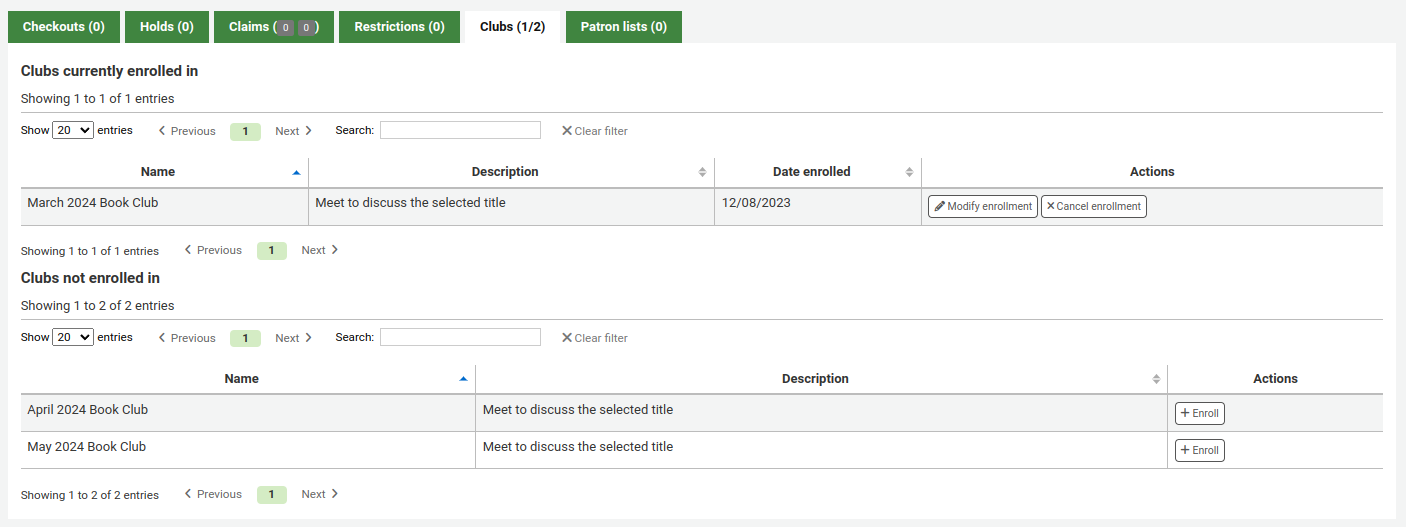
Click on the “Enroll” button.
If there were any “Enrollment fields” in the club template, they will appear here.
Click “Finish enrollment”.
You can also modify an enrollment by clicking the “Modify enrollment” button, or cancel an enrollment by clicking on the “Cancel enrollment” button.
Inscrire un utilisateur dans un club par l’OPAC
Si vous permettez les inscriptions publiques, Koha offrira ce club sur l’OPAC.
Patrons have to sign into their account.
In the “Your summary” section, they will be able to click on the “Clubs” tab and click the “Enroll” button to enroll.

If there were any “Enrollment fields” in the club template, they will appear here.
They can then click “Finish enrollment”.
Patron can also cancel their enrollment to a club by clicking the “Cancel enrollment” button.
Consulter les inscriptions
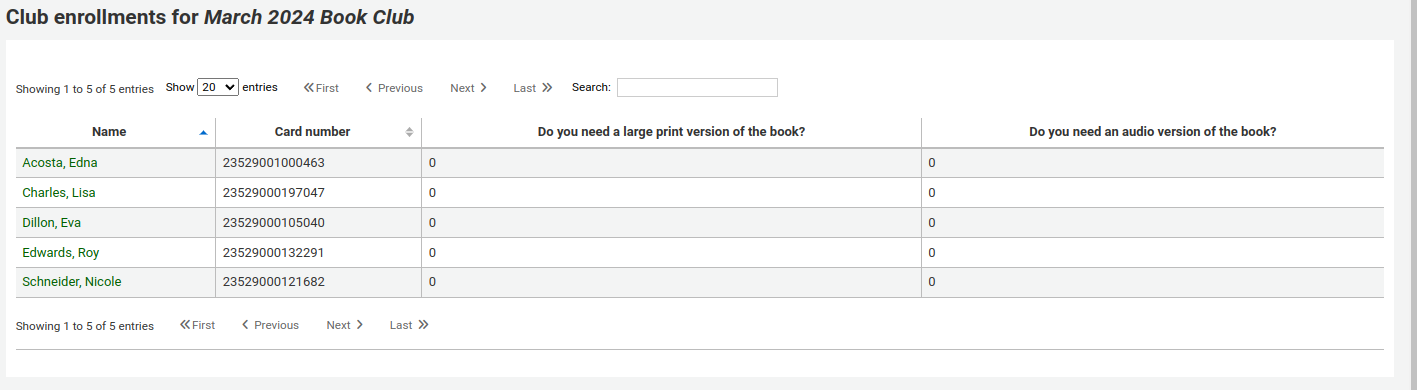
You can monitor the enrollments in each club by going to the “Patron clubs” tool page and choosing “Enrollment” from the “Actions” button next to the club.
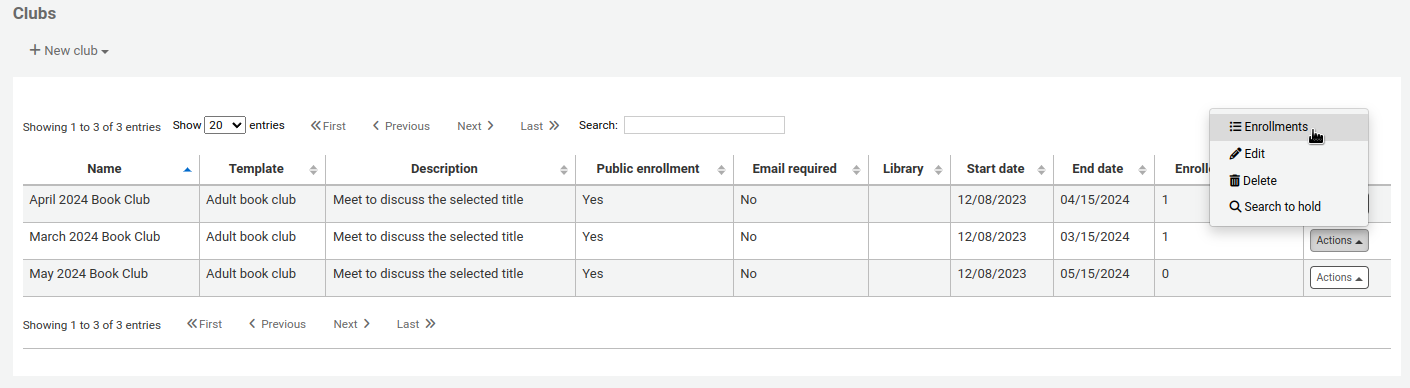
On this page, you will see the patrons enrolled in this club, as well as their answers to the enrollment fields.
Version
The values of the club enrollment fields are visible on this page from Koha version 23.11.
In prior versions, you need to create an SQL report to get the values. See this example in the Koha SQL reports library.
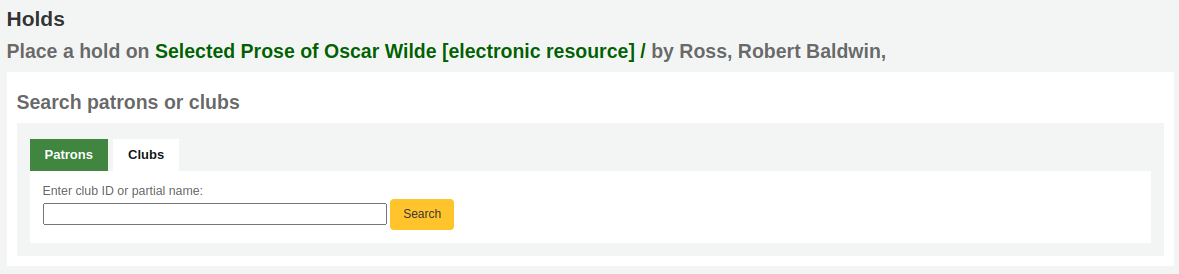
Placing a hold for a patron club
You can place holds for a patron club. Holds are placed for club members in a random order.
To place a hold for a patron club from the clubs page:
Aller dans l’outil clubs d’utilisateurs (“Home > Outils > Clubs utilisateurs”).
Cliquer sur le bouton “Actions” du club et choisir “Rechercher pour une réservation”.

Chercher le titre et choisir la notice.
Select “Place hold for [CLUBNAME]” from either the action links for the record,

or from the “Place hold” action in the menu bar.
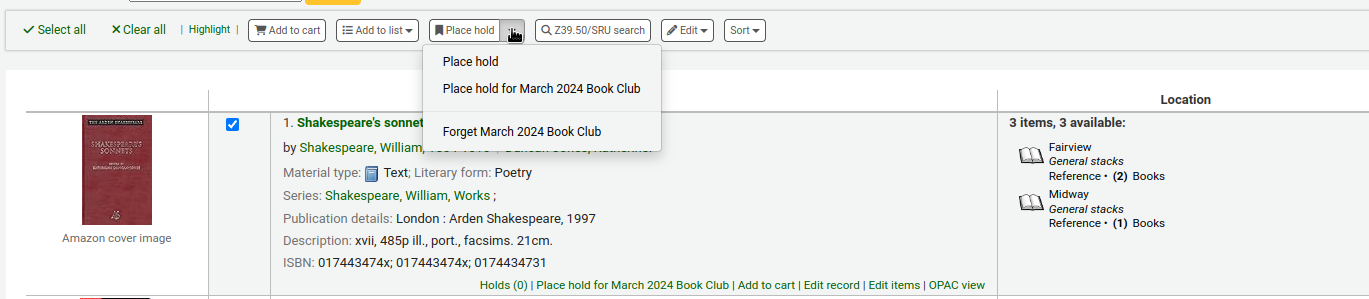
The place holds page is displayed and lists the club members.
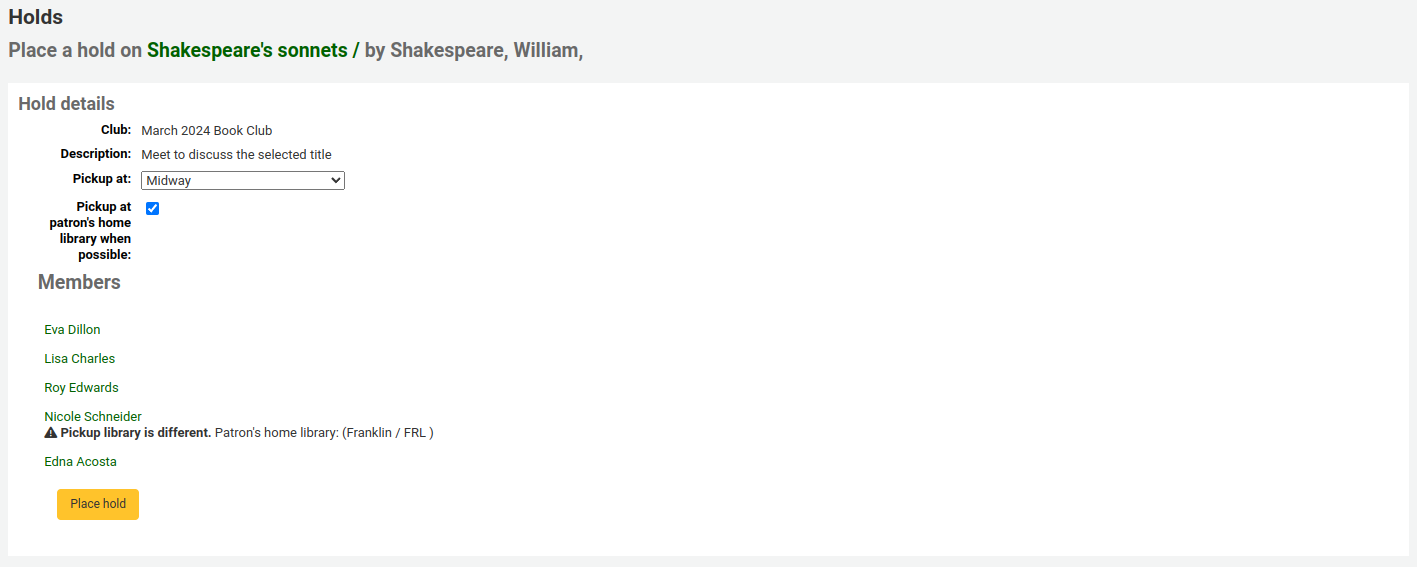
Cliquer sur le bouton “Réserver”.
Holds are placed for all club members at once, in a random priority order.
You can also place a hold for a patron club from the bibliographic record. When placing the hold, click on the “Clubs” tab and search for the club’s name. Then click the place hold button.
Import d’adhérent
Aller à : Plus > Outils > Adhérents et Circulation > Importer des adhérents
L’outil d’import d’adhérents est utilisé pour importer des adhérents en masse. Il est généralement utilisé par les établissements d’enseignement au moment de la rentrée d’un nouveau groupe d’étudiants.
Créer le fichier d’importation d’adhérents
You can download a blank CSV file with a header from the start page of the patron import tool that you can use as a template for your patron import. The header contains all fields that can be used with the patron import tool. You can delete fields and columns you don’t need with the exception of a few mandatory ones. When overlaying, if your new .csv includes blank columns, any existing values in patron records will be overwritten with blanks. It is best to remove any blank columns in a .csv to ensure no existing data is removed.
Important
numéro de carte, nom, ainsi que tous les champs définis dans la préférence-système :ref:`BorrowerMandatoryField <borrowermandatoryfield-label>`sont obligatoires et doivent correspondre à des entrées valides dans votre base de données.
Important
Le « mot de passe » devrait être stocké en texte, et sera converti en Bcrypt.
Si vos mots de passe sont déjà cryptés, voyez votre administrateur système pour envisager des solutions.
Important
Date formats should match your dateformat system preference, and must be zero-padded, e.g. “01/02/2008”. Alternatively you can supply dates in ISO format (e.g. “2008-12-01”).
Important
If your data contains special characters or diacritics, make sure your file is encoded in UTF-8. Otherwise, the special characters will not be imported correctly.
Note
Lors de modifications des attributs utilisateurs du paramètre “patron_attributes”, inscrire chaque attribut et/ou valeur séparé par une virgule.
Le code du type d’attribut et une colonne doivent précéder chaque valeur.
Par exemple : « INSTID:12345,BASEBALL:Cubs »
Ce champ doit être mis entre guillemets si des valeurs multiples sont définies.
Puisque les valeurs peuvent contenir des espaces, des doubles guillemets supplémentaires peuvent être exigés :
« INSTID:12345,BASEBALL:Cubs, » »BASEBALL:White Sox » »
Note
It’s possible to set restrictions using the patron import tool. If the expiration date and comment match an existing restriction, the one in the import file will be skipped. So a patron import can be repeated multiple times without creating duplicate restrictions. But if one of the criteria is different, a new restriction will be added.
Importer des adhérents
Une fois le fichier créé, vous pouvez utiliser l’outil d’import des adhérents pour charger les données dans Koha.
Choisissez votre fichier CSV

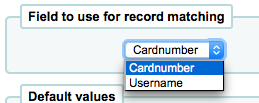
Choisissez de mettre en concordance les adhérents sur leur « Numéro de carte » ou sur leur « Nom » afin d’éviter d’ajouter des doublons au système. Des points de correspondance supplémentaires peuvent être configurés à l’aide d’attributs d’utilisateurs marqués comme uniques
Ensuite vous pouvez choisir les valeurs par défaut à appliquer à tous les adhérents que vous importez
Par exemple, si vous importez des adhérents spécifiques à un site vous pouvez utiliser le champ du formulaire d’importation pour appliquer le code du site à tous ceux que vous importez.
Finally, you need to decide on what data you want to replace if there are duplicates.
Un doublon est trouvé en utilisant le champ que vous avez choisi en tant que critère de concordance.

When using patron attributes in your installation, you can choose how they are handled on import. You can either decide to always overlay all patron attributes or you choose to only replace patron attributes included in your import file. This will leave other attributes untouched.

Notifications et tickets
Aller à : Plus > Outils > Utilisateurs et circulation > Notifications et tickets
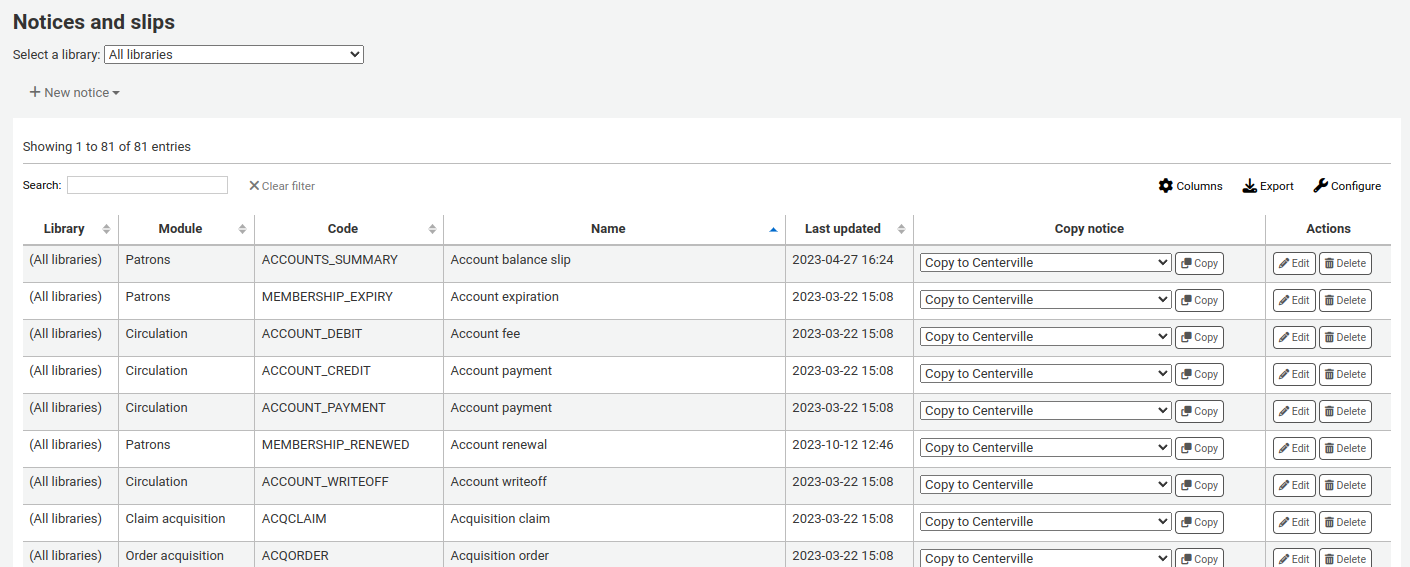
Toutes les notifications et les tickets (ou reçus) générés par Koha peuvent être personnalisés en utilisant l’outil “Notifications et tickets”. Koha est livré avec quelques notifications pré-remplies, qui seront visibles dès votre première visite sur cette page.
Note
Vous pouvez personnaliser les colonnes de ce tableau dans la section :ref:”Configurer les colonnes <column-settings-label>” du module Administration (référence du tableau : lettert).
Chaque notification peut être modifiée, mais très peu peuvent être supprimées, pour éviter une erreur système lors d’un envoi de message dont le modèle aurait été supprimé. Chaque notification ou ticket peut être modifié par site. Par défaut, vous les verrez tous pour tous les sites.
Si vous souhaitez appliquer un style à tous vos tickets, indiquez le nom de la feuille de style dans la préférence système :ref:”SlipCSS <slipcss-label>”. La même chose est valable pour les notifications avec la préférence système :ref:”NoticeCSS <noticecss-label>”.
Pour plus d’information à propos du formatage des notifications, vous pouvez consulter page du wiki intitulée Customising notices and slips (en anglais seulement).
Ajouter des notifications ou tickets
Pour ajouter une nouvelle notification ou ticket
Cliquez sur “Nouvelle notification”
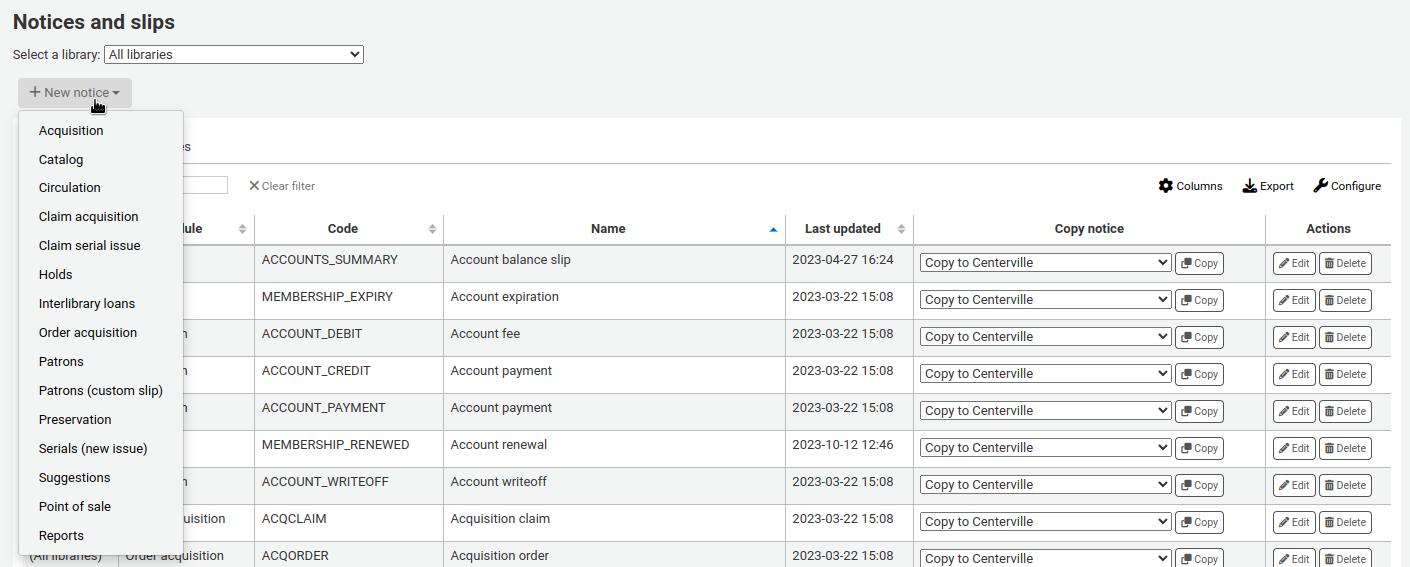
Choose the type of notice, or module this notice is related to
Acquisition: notice to be used in the acquisitions module
Catalog: notice to be used in the catalog
Circulation: notice or slip to be used for circulation (such as overdue notices)
Claim acquisition: notice to be used when claiming late orders in the acquisitions module
Claim serial issue: notice to be used when claiming late serial issues in the serials module
Holds: notice or slip to be used in the holds process
Interlibrary loans: notice to be used in the ILL request process
Order acquisition: notice to be used when ordering acquisitions
Patrons: notice or slip to be used in patron accounts
Patrons (custom slip): slip to be used in patron accounts
Version
This type of notice was added in Koha version 23.11.
Preservation: notice or slip to be used in the preservation process
Version
This type of notice was added in Koha version 23.11.
Serials (new issue): notice to be used to notify patrons of the arrival of a new serial issue
Suggestions: notice to be used in the purchase suggestion process
Point of sale: notice or slip to be used in the point of sale module
Reports: notice to format custom report results
Version
This type of notice was added in Koha version 23.11.
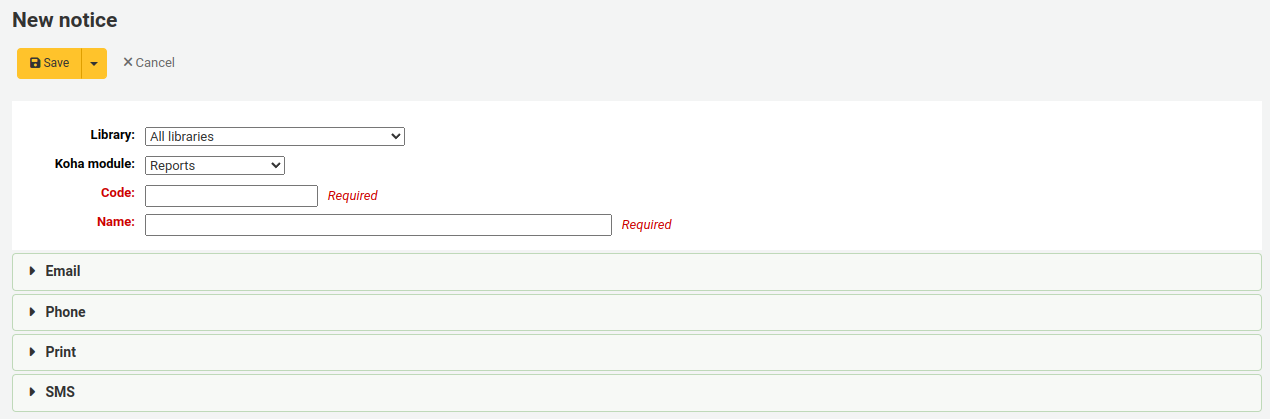
Fill out the notice information
Library: choose which library this notice or slip is for.
Important
Not all notices can be library specific. For more information review the Customising notices and slips wiki page.
Koha module: if you didn’t choose the correct module or type of notice previously, you can change it here.
Code: enter a unique alphanumeric code for this notice.
Important
Note that codes are limited to 20 characters.
Name: enter a descriptive name for the notice.
Note
For overdue notices, be sure to put your library name in the description, so that it will be visible when setting up your triggers.
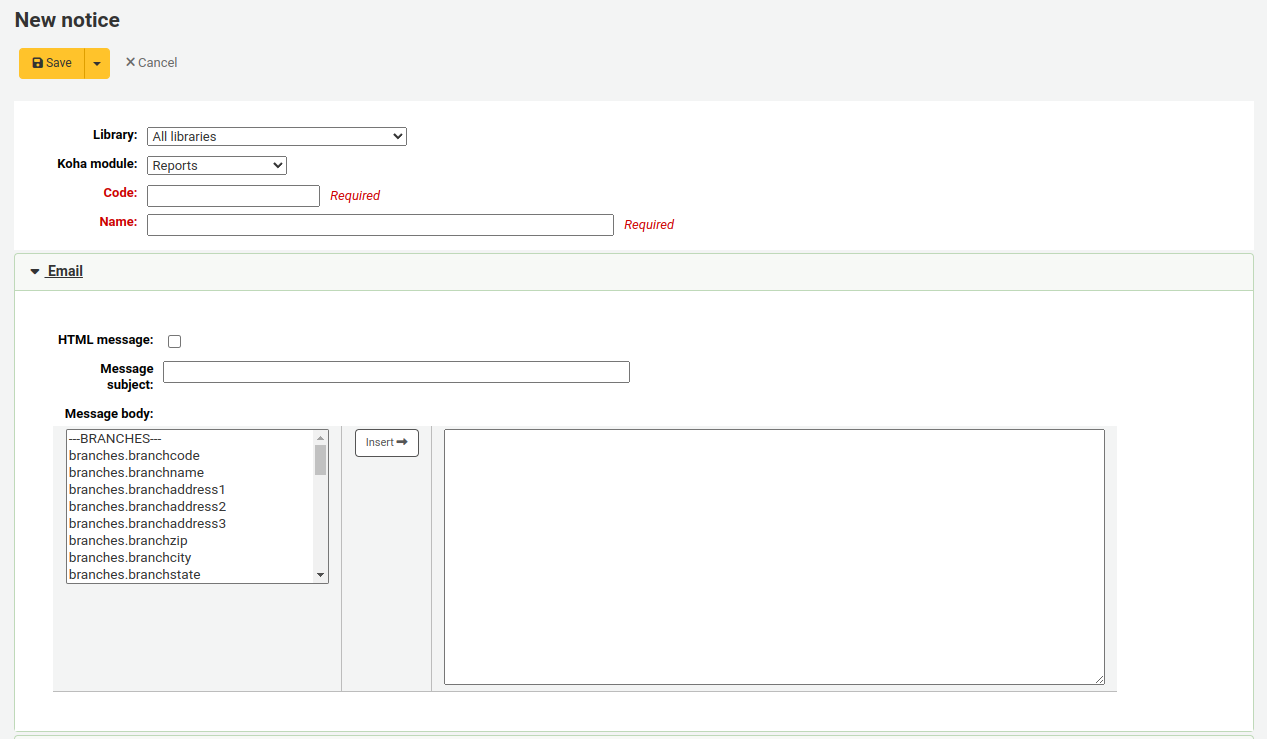
Next, you can customize the notice for every possible delivery method.
Every notice should have an email template set for it.
If the PhoneNotification system preference is enabled, you will have the option to add a phone template.
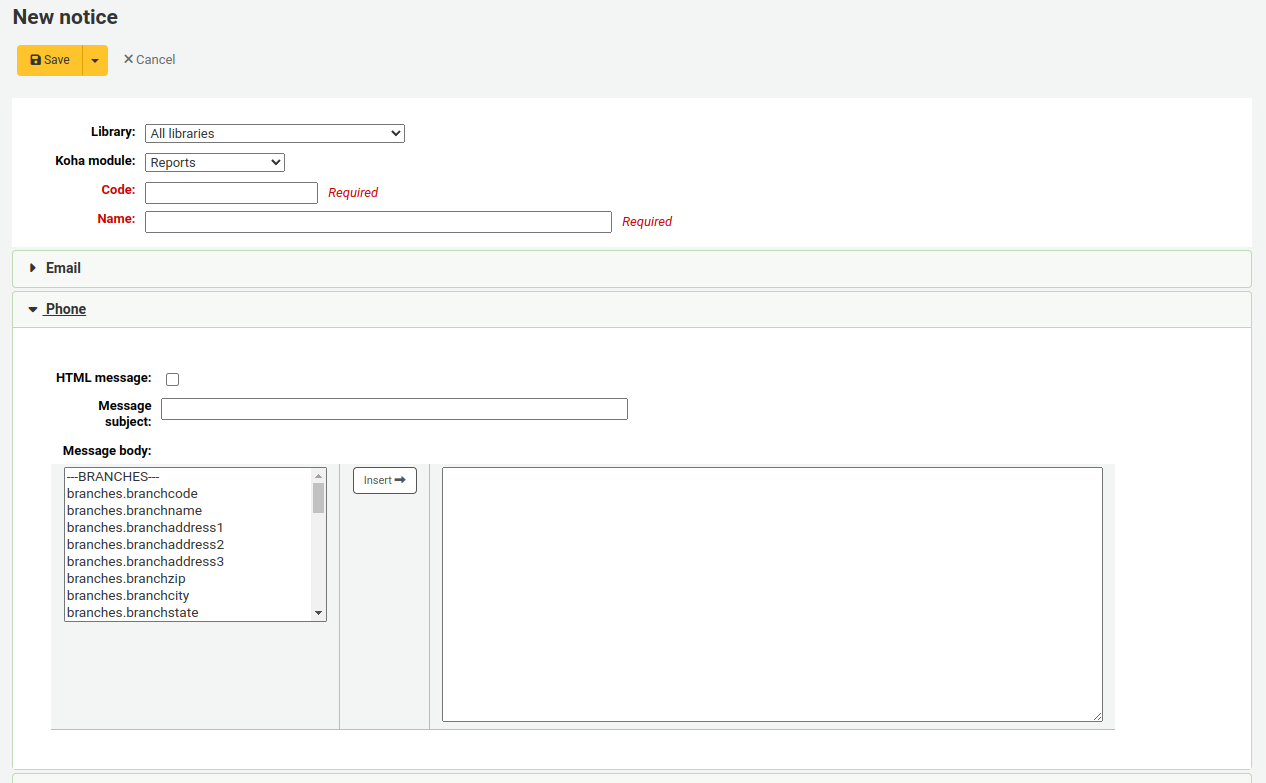
If you’re using the TalkingTechItivaPhoneNotification service you can set up a notification specific to that service.

If you plan on printing this notice, you can set the print template
If you have enabled SMS notices with the SMSSendDriver system preference, you can set the text for your SMS notices

Important
Text messages are limited to 1600 characters. Make sure to keep messages short and avoid adding variables that could be very long (such as the list of items due, for example).
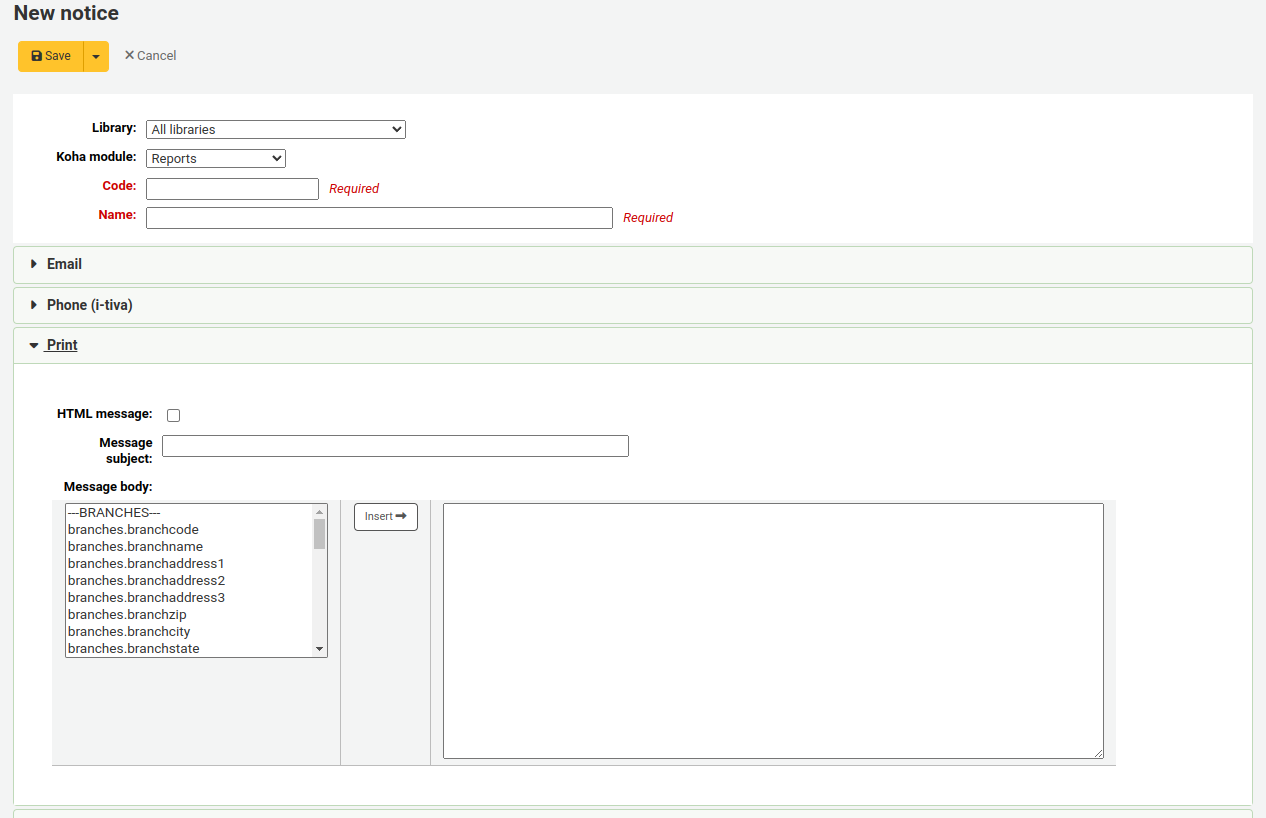
Each notice offers the same options
HTML message: if you plan on writing the notice or slip in HTML check the “HTML message” box, otherwise the content will be generated as plain text
Message subject: for emails, this is what will appear in the subject line of the email
Message body: feel free to type whatever message you feel is best, use the fields on the left hand side to enter individualized data from the from database.
You can also use Template toolkit syntax for more flexibility. See the Notices with Template Toolkit wiki page for more information.
Note
Pour plus d’information, consultez la page wiki Customising notices and slips (en anglais seulement).
Important
Overdue notices can use
<<items.content>>tags by themselves, or use<item></item>to span all of the tags. Learn more about the Overdue notice markup.On overdue notices make sure to use
<<items.content>>tags to print out the data related to all items that are overdue.The other option, only for overdue notices, is to use the
<item></item>tags to span the line so that it will print out multiple lines. One example for the<item></item>tag option is:<item>"<<biblio.title>>" by <<biblio.author>>, <<items.itemcallnumber>>, Barcode: <<items.barcode>> , Checkout date: <<issues.issuedate>>, Due date: <<issues.date\_due>> Fine: <<items.fine>> </item>
Important
Only the overdue notices take advantage of the
<item></item>tags, all other notices referencing items need to use<<items.content>>.Astuce
To add today’s date you can use the
<<today>>tag.Astuce
Si vous ne voulez pas imprimer le nom entier de l’utilisateur sur vos tickets ou notifications vous pouvez saisir une valeur dans les champs Autre nom ou Initiales pour chacun des utilisateurs et utiliser cette valeur à la place.
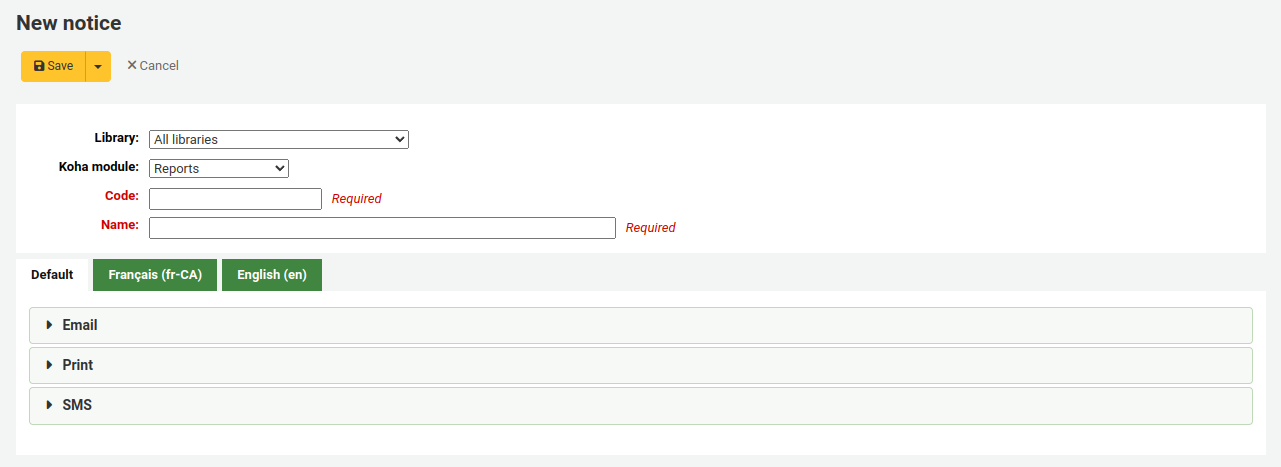
The system preference TranslateNotices will add tabs for each installed language to the notices editor. The notice defined in the “Default” tab will be used if there is no preferred language set for a patron (“Preferred language for notices” field in the patron file).
Aperçu du modèle de lettre
Pour quelques notifications, il est possible d’avoir un aperçu montrant ce qu’elle aurait l’air pour un utilisateur précis pour un exemplaire ou une notice en particulier.
Si un aperçu de la notification est disponible, l’entête du modèle contiendra des champs pour saisir les données à prévisualiser.
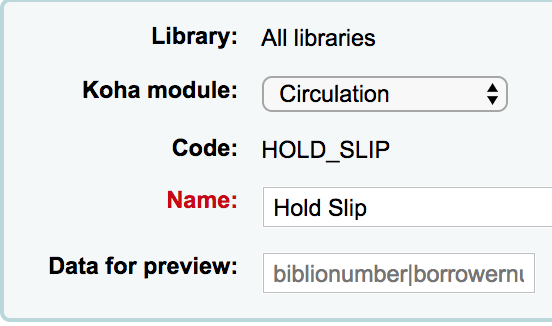
Saisissez les information nécessaires au modèle de notification, puis cliquez sur le bouton Prévisualisation sous le corps du message. La fenêtre de prévisualisation indiquera s’il y a un problème lors de la génération de l’aperçu.
Balises pour les avis de retard
Il y a deux balises que vous pouvez utiliser lors de la création des avis de retard, en plus des informations de la base de données. Pour plus d’information sur le formatage des informations d’exemplaires dans les avis de retard, consultez la page wiki Customizing notices and slips (en anglais seulement).
Important
Pour l’instant, ces nouvelles balises fonctionnent uniquement dans les avis de retard, pas dans les autres notifications en lien avec la circulation.
Ces balises sont <item> et </item> et elles peuvent inclure tous les champs des tables biblio, biblioitems et items.
Un exemple d’utilisation de ces zones dans un modèle de notification pourrait être :
The following item(s) is/are currently overdue:

<item>"<<biblio.title>>" by <<biblio.author>>, <<items.itemcallnumber>>, Barcode: <<items.barcode>> Fine: <<items.fine>></item>
Ce qui, en supposant qu’il y ait deux exemplaires en retard, doit donner la notification suivante :
The following item(s) is/are currently overdue:

"A Short History of Western Civilization" by Harrison, John B, 909.09821 H2451, Barcode: 08030003 Fine: 3.50
"History of Western Civilization" by Hayes, Carlton Joseph Huntley, 909.09821 H3261 v.1, Barcode: 08030004 Fine: 3.50
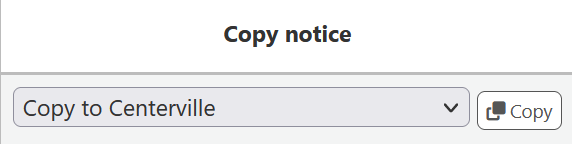
Copying notices and slips
You can also copy an existing notice to another library by selecting the library you want to copy it to in the column « Copy notice » and then clicking on the « Copy » button.
Notifications et tickets existants
Among the default notices are notices for several common actions within Koha. All of these notices can be customized by altering their text via the Notices and slips tool and their style using the NoticeCSS system preference to define a stylesheet.
Astuce
Review the Customising notices and slips wiki page for information on formatting item information in these notices.
Here are some of what those notices do:
2FA_DISABLE
This notice is sent to a staff user when they disable the two-factor authentication on their account.
2FA_ENABLE
This notice is sent to a staff user when they enable the two-factor authentication on their account.
2FA_OTP_TOKEN
This notice is used to send a time-based one-time password to a staff user for them to use to log into the staff interface if they have enabled the two-factor authentication on their account.
ACCEPTED
This notice is sent to the patron when their purchase suggestion is accepted.
Note
If you don’t want to send this notice, simply delete it.
ACCOUNT_PAYMENT
This notice is sent for each payment transaction in a patron’s account if the UseEmailReceipts system preference is set to “Send”.
ACCOUNT_WRITEOFF
This notice is sent for each writeoff transaction in a patron’s account if the UseEmailReceipts system preference is set to “Send”.
ACQCLAIM (Réclamation sur une commande)
Used for claiming orders in the aquisitions module.
ACQCLAIM is the code of the sample notice, but it’s possible to define several notices choosing any code. Only the module “Claim acquisition” will be taken into account. All notices with this module will appear in the pull down on the late orders page.
Cette notification est envoyée si ces conditions sont réunies :
L’employé déclencheant le courriel a une adresse courriel valide dans son compte.
The vendor contact marked as “Contact about late orders?” has a valid email address.
ACQORDER (Commande)
Used in the acquisitions module to send order information to the vendor
The notice is triggered manually from the basket summary page using the “Email order” button in the toolbar.
Cette notification est envoyée si ces conditions sont réunies :
L’employé déclencheant le courriel a une adresse courriel valide dans son compte.
The vendor contact marked as “Primary acquisitions contact” and “Contact when ordering” has a valid email address.
ACQ_NOTIF_ON_RECEIV
Used in the acquisition module to inform patrons on receiving orders they have been added to.
AR_CANCELED
This notice is sent to the patron when an article request is cancelled by staff.
AR_COMPLETED
This notice is sent to the patron when an article request is marked as completed by staff.
AR_PENDING
This notice is sent to the patron when an article request is changed to “pending” status
AR_PROCESSING
This notice is sent to the patron when an article request is marked as being processed by staff.
AR_REQUESTED
This notice is sent to the patron when an article request has been made in order to confirm the request.
AUTO_RENEWALS
This notice is sent to the patron if automatic renewals are enabled and the patron has chosen to receive it in their messaging preferences.
In order to send this notice, you must set the AutoRenewalNotices system preference to « according to patron messaging preferences ».
This notice is set so that, depending on the result of the renewal, whether is was successful or not, the message will be different.
AUTO_RENEWALS_DGST
This notice is sent to the patron if automatic renewals are enabled and the patron has chosen to receive the digest in their messaging preferences.
In order to send this notice, you must set the AutoRenewalNotices system preference to « according to patron messaging preferences ».
This notice is set so that, depending on the result of the renewal, whether is was successful or not, the message will be different.
AVAILABLE
This notice is sent to the patron who made a purchase suggestion, when the order created from the suggestion is received.
Note
If you don’t want to send this notice, simply delete it.
CART
This notice is used when sending the cart by email from the OPAC or when sending the cart by email from the staff interface.
CANCEL_HOLD_ON_LOST
This notice is sent to a patron who placed a hold on an item and staff marked this items as lost from the “Holds to pull” list.
This notice is sent if the CanMarkHoldsToPullAsLost system preference is set to “Allow to mark items as lost and notify the patron”.
CHECKIN
Cette notification est envoyée en tant que notification de « Retour » pour tous les exemplaires qui sont retournés
Cette notification est utilisée si deux conditions sont réunies :
La préférence système :ref: “EnhancedMessagingPreferences <enhancedmessagingpreferences-label>” est réglée sur “Autoriser”
L’utilisateur a demandé à recevoir cette notification
If EnhancedMessagingPreferencesOPAC is set to “Show”, patrons will be able to choose their messaging preferences in their online account in the Messaging tab.
Staff can select this notice for a patron in their messaging preferences.
CHECKOUT
Cette notification est envoyée comme notification de « Prêt » pour tous les exemplaires qui sont empruntés
Cette notification est utilisée si deux conditions sont réunies :
La préférence système :ref: “EnhancedMessagingPreferences <enhancedmessagingpreferences-label>” est réglée sur “Autoriser”
L’utilisateur a demandé à recevoir cette notification
If EnhancedMessagingPreferencesOPAC is set to “Show”, patrons will be able to choose their messaging preferences in their online account in the Messaging tab.
Staff can select this notice for a patron in their messaging preferences.
CHECKOUT_NOTE
This notice is sent to the system administration (the email address in KohaAdminEmailAddress) to alert them that a patron added a checkout note from their checkouts list on the OPAC.
DISCHARGE
Cette notification est utilisée pour générer un PDF qui atteste la quittance
Le PDF peut être téléchargé par l’utilisateur à partir de leur dossier en ligne ou à partir de l’interface professionnelle lors de la création de la quittance
La fonctionnalité Quitus est gérée par la préférence système :ref:”useDischarge <usedischarge-label>`.
DUE
This notice is sent as the “Item due” notice for an checked out item that is due today.
Cette notification est utilisée si deux conditions sont réunies :
La préférence système :ref: “EnhancedMessagingPreferences <enhancedmessagingpreferences-label>” est réglée sur “Autoriser”
L’utilisateur a demandé à recevoir cette notification
If EnhancedMessagingPreferencesOPAC is set to “Show”, patrons will be able to choose their messaging preferences in their online account in the Messaging tab.
Staff can select this notice for a patron in their messaging preferences.
DUEDGST
This notice is sent as the “Item due” notice for all checked out items that are due today (digest option).
Cette notification est utilisée si deux conditions sont réunies :
La préférence système :ref: “EnhancedMessagingPreferences <enhancedmessagingpreferences-label>” est réglée sur “Autoriser”
L’utilisateur a demandé à recevoir cette notification sous la forme d’un résumé
If EnhancedMessagingPreferencesOPAC is set to “Show”, patrons will be able to choose their messaging preferences in their online account in the Messaging tab.
Staff can select this notice for a patron in their messaging preferences.
HOLD (Réservation en attente de retrait)
This notice is sent to the patron when their hold is ready for pickup.
Cette notification est utilisée si deux conditions sont réunies :
La préférence système :ref: “EnhancedMessagingPreferences <enhancedmessagingpreferences-label>” est réglée sur “Autoriser”
L’utilisateur a demandé à recevoir cette notification sous la forme d’un résumé
If EnhancedMessagingPreferencesOPAC is set to “Show”, patrons will be able to choose their messaging preferences in their online account in the Messaging tab.
Staff can select this notice for a patron in their messaging preferences.
Lorsque cette notification fait référence à la table « branches » elle réfère à l’information du site de retrait.
HOLD_CHANGED
This notice is sent to library staff (either the email address in ExpireReservesAutoFillEmail), or the library’s reply-to address, to alert them that a hold has been canceled, the item filled the next hold and is now waiting for another patron.
This notice is only sent if ExpireReservesAutoFill is set to “Do”.
HOLD_REMINDER
This notice is sent to the patron when their hold has been waiting for pickup for more than a number of days
If EnhancedMessagingPreferencesOPAC is set to “Show”, patrons will be able to choose their messaging preferences in their online account in the Messaging tab. The notice is “Hold reminder”.
Staff can select this notice for a patron in their messaging preferences. The notice is “Hold reminder”.
The holds_reminder.pl cron job is required to generate this notice.
HOLDPLACED
This notice is sent to the library staff when a hold has been placed.
This notice requires the emailLibrarianWhenHoldIsPlaced system preference to be set to “Enable”.
When this notice references the branches table it is referring to the pickup library information.
ILL_PARTNER_REQ
This notice is used by the ILL module to send requests to partner libraries.
ILL_PICKUP_READY
This notice is sent to the patron when the inter-library loan they requested has been fulfilled and is now ready for pickup.
Staff can select this notice for a patron in their messaging preferences. The notice is “Interlibrary loan ready”.
Note
The option will only appear in the messaging preferences if the ILLModule system preference is enabled.
If EnhancedMessagingPreferencesOPAC is set to “Show”, patrons will be able to choose their messaging preferences in their online account in the Messaging tab. The notice is “Interlibrary loan ready”.
Note
The option will only appear in the messaging preferences if the ILLModule system preference is enabled.
ILL_REQUEST_CANCEL
This notice is sent to library staff when a patron cancels their inter-library loan request from their account in the OPAC.
ILL_REQUEST_MODIFIED
This notice is sent to library staff when a patron modifies their inter-library loan request from their account in the OPAC.
ILL_REQUEST_UNAVAIL
This notice is sent to the patron when the inter-library loan they requested has been cancelled because it was unavailable.
Staff can select this notice for a patron in their messaging preferences. The notice is “Interlibrary loan unavailable”.
Note
The option will only appear in the messaging preferences if the ILLModule system preference is enabled.
If EnhancedMessagingPreferencesOPAC is set to “Show”, patrons will be able to choose their messaging preferences in their online account in the Messaging tab. The notice is “Interlibrary loan unavailable”.
Note
The option will only appear in the messaging preferences if the ILLModule system preference is enabled.
ILL_REQUEST_UPDATE
This notice is sent to the patron to alert them that their inter-library loan request has been updated.
Staff can select this notice for a patron in their messaging preferences. The notice is “Interlibrary loan updated”.
Note
The option will only appear in the messaging preferences if the ILLModule system preference is enabled.
If EnhancedMessagingPreferencesOPAC is set to “Show”, patrons will be able to choose their messaging preferences in their online account in the Messaging tab. The notice is “Interlibrary loan updated”.
Note
The option will only appear in the messaging preferences if the ILLModule system preference is enabled.
LIST
This notice is used when sending a list by email from the OPAC or when sending a list by email from the staff interface.
MEMBERSHIP_EXPIRY
Cette notification peut être envoyée aux utilisateurs pour les avertir que leur carte va bientôt expirer.
Cette fonctionne demande l’activation de la préférence système MembershipExpiryDaysNotice, ainsi que l’activation du cron tâche en cron.
MEMBERSHIP_RENEWED
This notice can be sent to patrons to notify them that their library membership has been renewed.
The notice is generated by the membership_expiry.pl cronjob when it is called with the
--renewparameter.
NEW_CURBSIDE_PICKUP
This notice is sent to the patron when a curbside pickup is scheduled.
In order to send this notice,
The patron must have chosen to receive the “Hold filled” notice by email.
Staff can select this notice for a patron in their messaging preferences
If EnhancedMessagingPreferencesOPAC is set to “Show”, patrons will be able to choose their messaging preferences in their online account in the Messaging tab.
NEW_SUGGESTION
This notice is sent to library staff when the EmailPurchaseSuggestions system preference is enabled.
NOTIFY_MANAGER
This notice is sent to a staff member when they are assigned as manager of a suggestion in the acquisitions module.
ODUE (Avis de retard)
Cette notification est utilisée pour envoyer des avis de retard aux utilisateurs.
ODUE est le code de la notification par défaut, mais il est possible de paramétrer plusieurs messages différents pour différentes catégories d’utilisateurs ou différents niveaux d’avis.
Nécessite que vous définissiez les Déclencheurs de notifications
OPAC_REG
This notice is sent to library staff when the EmailPatronRegistrations system preference is enabled and a patron registers through the OPAC.
OPAC_REG_VERIFY
This notice is sent to the patron who registered through the OPAC if the PatronSelfRegistrationVerifyByEmail system preference is enabled.
ORDERED
This notice is sent to the patron who made a suggestion, when the “from a suggestion” option is used to create an order from it.
Note
If you don’t want to send this notice, just delete it.
PASSWORD_CHANGE
This notice is sent to a patron whose password was changed, if the NotifyPasswordChange system preference is enabled.
PASSWORD_RESET
Cette notification sera envoyée après une :ref:`demande de réinitialisation de mot de passe sur l’OPAC <resetting-your-password-label>`afin de confirmer l’adresse courriel de l’utilisateur.
La fonctionnalité de réinitialisation du mot de passe est gérée par la préférence système :ref:”OpacResetPassword <opacresetpassword-label>”.
PICKUP_RECALLED_ITEM
This notice is sent to the patron who has requested a recall when the item is ready for them to pick up.
PREDUE
This notice is sent as the “Advanced notice” when an item is due
Cette notification est utilisée si deux conditions sont réunies :
La préférence système :ref: “EnhancedMessagingPreferences <enhancedmessagingpreferences-label>” est réglée sur “Autoriser”
L’utilisateur a demandé à recevoir cette notification
If EnhancedMessagingPreferencesOPAC is set to “Show”, patrons will be able to choose their messaging preferences in their online account in the Messaging tab.
Staff can select this notice for a patron in their messaging preferences.
PREDUEDGST
This notice is sent as the “Advanced notice” digest for all items that are due
Cette notification est utilisée si deux conditions sont réunies :
La préférence système :ref: “EnhancedMessagingPreferences <enhancedmessagingpreferences-label>” est réglée sur “Autoriser”
L’utilisateur a demandé à recevoir cette notification sous la forme d’un résumé
If EnhancedMessagingPreferencesOPAC is set to “Show”, patrons will be able to choose their messaging preferences in their online account in the Messaging tab.
Staff can select this notice for a patron in their messaging preferences.
PRES_TRAIN_ITEM
This notice is the default slip used in the Preservation module to print a list of items in a train.
Version
The PRES_TRAIN_ITEM notice was introduced in version 23.11 of Koha.
PROBLEM_REPORT
This notice is sent to the email address in the KohaAdminEmailAddress system preference, or the library’s email address when a patron reports a problem on the OPAC.
RECEIPT
Used to send a payment receipt by email from the point of sale module.
REJECTED
This notice is sent when a patron’s purchase suggestion is rejected.
Note
If you don’t want to send this notice, just delete it.
RENEWAL
This notice is sent as the “Item checkout and renewal” notice for all items that are renewed
Cette notification est utilisée si trois conditions sont réunies :
La préférence système :ref: “EnhancedMessagingPreferences <enhancedmessagingpreferences-label>” est réglée sur “Autoriser”
The RenewalSendNotice system preference is set to “Send”
L’utilisateur a demandé à recevoir cette notification
If EnhancedMessagingPreferencesOPAC is set to “Show”, patrons will be able to choose their messaging preferences in their online account in the Messaging tab.
Staff can select this notice for a patron in their messaging preferences.
RETURN_RECALLED_ITEM
This notice is sent to the patron who currently has an item in their possession that has been recalled. It serves to notify them of the new due date for the checked out item.
SERIAL_ALERT (Nouveau numéro de périodique)
Notice used in the serials module to notify patrons/staff of new issues of a serial. SERIAL_ALERT (RLIST in older versions) is provided as a sample notice, but the notice code can be chosen freely as only the module is taken into account. Multiple notices can also be managed.
You have the option to select the notice used to inform the patron about a received serial issue when adding or editing a subscription. Choose from the “Patron notification” drop down menu.
If a notice has been selected for a subscription, patrons can subscribe to the email notification from the subscription tab in the detail view in the OPAC.
Note
Notice also that if you’d like to notify patrons of new serial issues, you can click on “define a notice” which will take you to the “Notices” tool.
SHARE_ACCEPT
Utilisée pour avertir un utilisateur qu’un autre utilisateur a accepté sa liste partagée.
Requires that the OpacAllowSharingPrivateLists system preference be set to “Allow”.
See Managing lists for more information about sharing lists.
SHARE_INVITE
Utilisée pour avertir l’utilisateur qu’un autre utilisateur aimerait partager une liste avec eux.
Requires that the OpacAllowSharingPrivateLists system preference be set to “Allow”.
See Managing lists for more information about sharing lists.
SR_SLIP
Used to notify library staff from a particular library branch of items that should be transferred to another library in the context of stock rotation.
Requires the stockrotation.pl cron job.
STAFF_PASSWORD_RESET
This notice is sent when a staff member sends a password reset email to a patron.
La fonctionnalité de réinitialisation du mot de passe est gérée par la préférence système :ref:”OpacResetPassword <opacresetpassword-label>”.
TICKET_ACKNOWLEDGE
This notice is sent to the reporter of a catalog concern when they report a concern through the staff interface, or when they report a concern through the OPAC, to acknowledge that the concern report was received.
The concern report feature is enabled in the staff interface by the CatalogConcerns system preference and in the OPAC by the OpacCatalogConcerns system preference.
TICKET_NOTIFY
This notice is sent to the cataloging team, to the email address in the CatalogerEmails system preference, to notify them that a concern was reported about a bibliographic record.
The concern report feature is enabled in the staff interface by the CatalogConcerns system preference and in the OPAC by the OpacCatalogConcerns system preference.
TICKET_RESOLVE
This notice is sent to the reporter of a catalog concern when the concern is marked as resolved with the “Notify” flag.
The concern report feature is enabled in the staff interface by the CatalogConcerns system preference and in the OPAC by the OpacCatalogConcerns system preference.
TICKET_UPDATE
This notice is sent to the reporter of a catalog concern when the concern is updated with the “Notify” flag.
The concern report feature is enabled in the staff interface by the CatalogConcerns system preference and in the OPAC by the OpacCatalogConcerns system preference.
TO_PROCESS
Utilisée pour avertir un membre du personnel si une suggestion d’achat a été déplacée vers le fonds qu’il gère
Nécessite la tâche en cron notice_unprocessed_suggestions
WELCOME
Envoyé aux adhérents quand leur compte est créé si la préférence AutoEmailOPACUser est paramétrée sur “Envoyer”.
Note
For security reasons, it is not possible to send the patron’s password in a notice.
Il y a aussi un jeu de tickets (ou reçus) pré-définis sur cette page. Tous ces tickets peuvent être personnalisés en modifiant leur contenu via l’outil “Notifications et Tickets” ainsi que leur apparence grâce à la préférence système :ref:”SlipCSS <slipcss-label>” pour définir une feuille de style. Voici à quoi servent ces tickets :
ACCOUNT_CREDIT
Used to print a receipt for a credit (either a payment, writeoff or other credit).
The slip or receipt can be printed manually with the “Print” button next to a credit type account line in the patron’s accounting tab.
The slip or receipt can also be printed semi-automatically when paying or writing off a charge if the FinePaymentAutoPopup system preference is enabled.
Note
It is possible to set specific notices for different credit types. To do so, create a new notice with the code CREDIT_ followed by the credit type code.
For example, to have a specific slip for writeoffs, create a new notice with the code CREDIT_WRITEOFF.
ACCOUNT_DEBIT
Used to print an invoice for a debit (any type of charge, such as a lost item fee, or overdue fine).
The slip or invoice can be printed manually with the “Print” button next to a debit type account line in the patron’s accounting tab.
Note
It is possible to set specific notices for different debit types. To do so, create a new notice with the code DEBIT_ followed by the debit type code.
For example, to have a specific slip for lost items, create a new notice with the code DEBIT_LOST.
ACCOUNTS_SUMMARY
Used to print a summary of outstanding charges and unused credits in the patron’s account.
The slip can be printed manually with the “Print account balance” option in the “Print” button at the top of the patron’s details page.
AR_SLIP
Used to print a slip for an article request
The slip or receipt can be printed manually when managing article requests from the staff interface.
Aller à : Circulation > Demandes d’articles > Actions > Imprimer le ticket
CHECKINSLIP
This slip lists all items that were checked in today for this patron
To print this slip, click Print > Print checkin slip from the patron file
You can also print this slip from the Check in page
ISSUEQSLIP
Le Ticket rapide inclut uniquement des exemplaires qui ont été empruntés aujourd’hui.
ISSUESLIP
Used to print a full slip in circulation
La notification ou le reçu indique les exemplaires empruntés aujourd’hui ainsi que les exemplaires qui sont déjà en prêt.
HOLD_SLIP
Utilisé pour imprimer un ticket de réservation
The holds slip is generated when a hold is confirmed and set to waiting.
OVERDUE_SLIP
Utilisé pour imprimer la liste des documents en retard
The overdues slip can be generated manually using the “print” menu in the patron account in the staff interface. It will show all items overdue.
RECALL_REQUESTER_DET
Used to print the details of the patron who has requested a recall on an item, when receiving the recall.
RECEIPT
Used to print a payment receipt in the point of sale module.
TRANSFERSLIP
Utilisé pour imprimer un ticket de transfert
Le ticket de transfert est imprimé lorsque vous confirmez un transfert d’un site vers un autre dans votre réseau
This tool also allows you to modify database entries for some specific purposes. So far, only the overdue fine description is available.
OVERDUE_FINE_DESC
This template is used to generate the description for overdue fines in a patron’s account.
Note
The information available to this customization come from the checkouts (issues), items and patrons (borrowers).
Déclencheurs de notification
Allez à : Plus > Outils > Utilisateurs et Circulation > Déclencheur de notification
Pour envoyer les avis de retard créés avec l’outil Notification et tickets, il faut d’abord définir ces messages dans les déclencheurs de notification.
Important
Afin d’envoyer les avis de retard aux utilisateurs, vous devez paramétrer les catégories d’utilisateurs pour recevoir des messages de retard.
Important
Selon la valeur de la préférence système :ref:`OverdueNoticeCalendar <overduenoticecalendar-label>” le délai pourra inclure ou non les jours de fermeture de la bibliothèque définis dans le :ref:`Calendrier <calendar-label>”.
L’outil de Paramétrage des relances vous permet d’envoyer jusqu’à trois avis de retard aux adhérents.
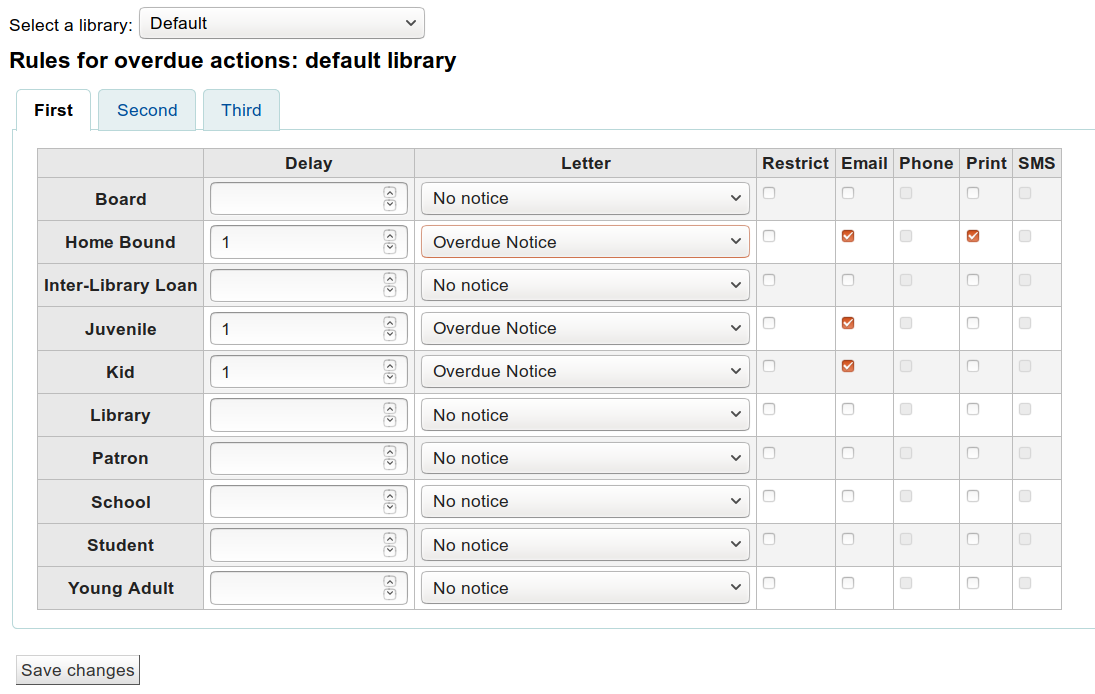
Le délai est un nombre de jours avant que le prêt le plus ancien soit pris en compte et qu’une action soit lancée.
Important
Si voulez que Koha déclenche une action (envoyer une lettre ou mettre des pièges sur un adhérent), une valeur pour le délai est exigée.
Pour envoyer des notifications supplémentaires, cliquez sur les onglets Deuxième et Troisième
Si vous voulez empêcher un adhérent de faire des prêts, en raison par exemple de ses retards, activez le blocage “Suspendu”. Un message apparaîtra au moment du prêt informant le bibliothécaire que l’adhérent est bloqué en raison de ses retards.
Si vous voulez suspendre un adhérent de cette façon, vous pouvez aussi faire en sorte que Koha lève automatiquement cette suspension avec la préférence système :ref:”AutoRemoveOverduesRestrictions <autoremoveoverduesrestrictions-label>”.
Next you can choose the delivery method for the overdue notice. You can choose from Email, Phone (if you are using the i-tiva Talking Tech service), Print and SMS (if you have set your SMSSendDriver).
Patron card creator
Aller à : Plus > Outils > Créateur de cartes adhérent
The patron card creator allow you to use layouts and templates which you design to print your custom patron cards on your printer. Here are some of the features of the patron card creator module:
Personnaliser les modèles de cartes d’adhérent avec le texte récupérer à partir des données d’adhérent
Personnaliser les templates des cartes pour imprimer les cartes d’adhérent (correspondre aux planches d’étiquettes)
Créer et gérer des lots de cartes adhérent
Exporter (comme PDF) un ou des lot(s) à imprimer
PREDUEDGST
Formats
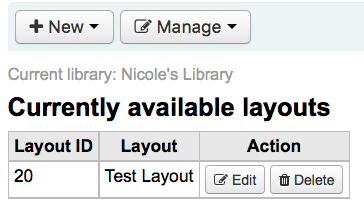
Aller à : Plus > Outils > Créateur de cartes adhérent > Gestion > Mise en page
Le format définit le texte et les images qui seront imprimés sur la carte et leur emplacement.
Note
Jusqu’à trois lignes de texte, le numéro d’adhérent sous forme de code à barres et jusqu’à deux images peuvent être imprimé sur la carte
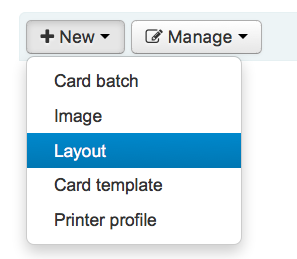
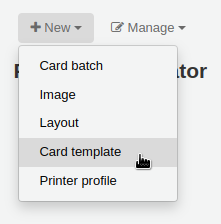
Add a layout
Si vous n’avez pas de modèle défini, ajoutez-en un nouveau en cliquant sur « Nouveau » puis « Modèle ».
Vous pouvez aussi choisir de cliquer sur « Gérer les modèles » sur le côté gauche.Là une liste des modèles disponibles que vous pouvez choisir pour l’édition vous est proposée .Mais en haut de la page il y a toujours le bouton « Nouveau modèle ».
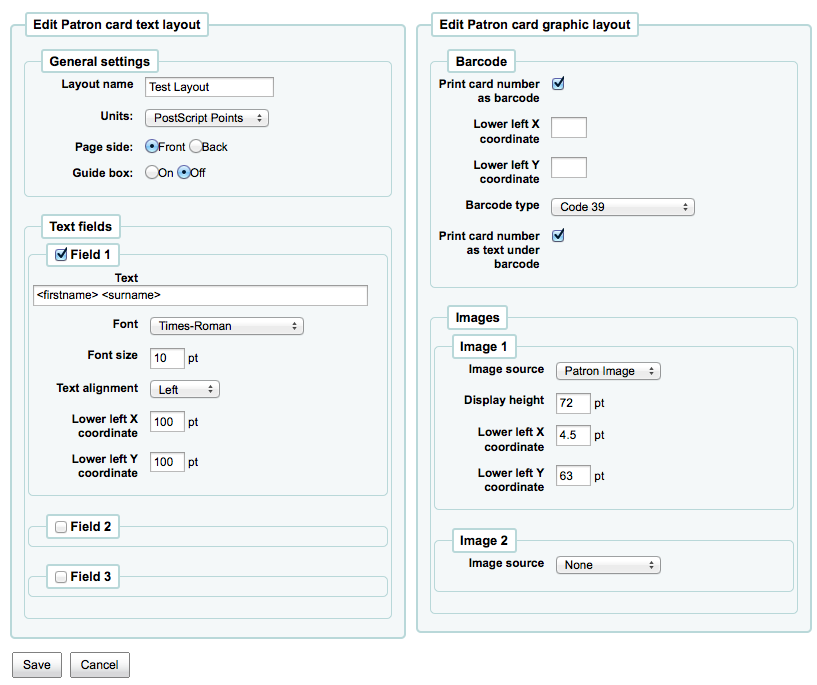
Le nom que vous attribuez au format est pour vous, nommez le d’une façon qui vous permette de l’identifier aisément par la suite
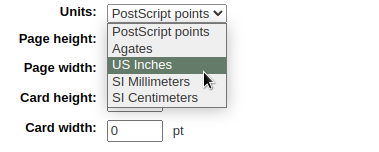
La liste des unités vous permet de choisir l’unité de mesure utilisée dans votre mise en page.
Note
A Postscript Point is 1/72 », an Adobe Agate is 1/64 », an Inch is 25.4 SI Millimeters
Next, note if this layout is for the front or the back of the patron card
Note
Vous aurez besoin d’un modèle à la fois pour le recto et le verso de votre carte si vous avez des cartes de bibliothèque à deux faces, cette option ne vous permet pas d’imprimer des cartes à deux faces, elle ne vous permet que de savoir quel côté de la carte vous créez.
La carte permet jusqu’à trois lignes de texte. Utilisez le contenu automatique et/ou ajoutez des champs personnalisés provenant du dossier de l’usager. Inscrire chaque champ personnalisé entouré de chevron. Exemple pour le prénom: <firstname> .
Note
La liste de toutes les colonnes de la base de données peut être consultée sur http://schema.koha-community.org
Pour chaque ligne de texte, vous pouvez choisir votre police de caractères, sa taille et l’emplacement du texte sur la carte en utilisant les coordonnées inférieures X et Y
In order to show the barcode and the patron card number you will need to check the “Print card number as barcode” option. This will turn the patron card number into a barcode. If you want the number to print in human readable format you will need to check the “Print card number as text under barcode” option.
Enfin vous pouvez choisir jusqu’à deux images à imprimer sur la carte.
L’option image de l’utilisateur peut être redimensionnée aux besoins.
L’option autre image sert à ajouter un logo ou symbole de la bibliothèque que vous pouvez téléverser dans l’outil de Créateur de carte utilisateur, option Gérer image”:ref:`manage images.
Important
C’est la responsabilité des concepteurs de définir les lignes de texte, code à barres et images de sorte qu’il n’y ait pas de chevauchement.
Après enregistrement, vos profils seront visibles sur la page « Gérer les profils ».
Modèles
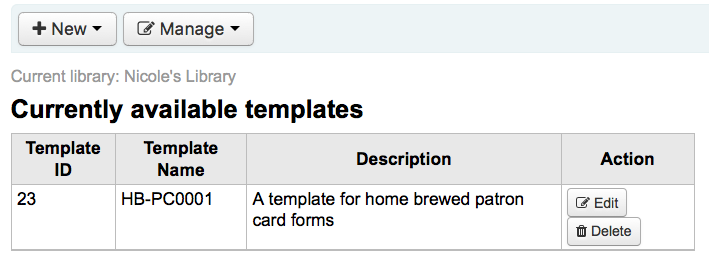
Aller à : Plus > Outils > Créateur de cartes adhérent > Gestion > Modèles de carte
Un modèle décrit l’agencement des étiquettes sur la planche d’étiquettes ou le stock de cartes que vous utilisez.Ce doit être Avery 5160 pour les étiquettes d’adresse, Gaylord 47-284 pour les étiquettes de dos ou Avery 28371 pour vos cartes d’adhérents, pour donner quelques exemples.Toute l’information dont vous avez besoin pour formater un modèle peut être dans le package, et sinon il peut habituellement être trouvé sur le site du fournisseur ou mesuré à partir d’un échantillon.
Add a template
Pour ajouter un nouveau modèle, cliquez sur le bouton « Nouveau modèle » en haut de votre page, cela vous amènera directement sur le formulaire d’édition de modèle.
Using the form that appears after pressing either “Edit” or “New template” you can define the template for your sheet of labels or cards.
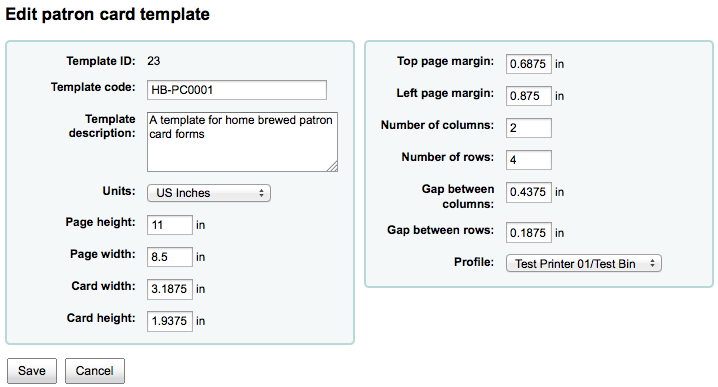
L’ID du gabarit est simplement un identifiant unique généré par le système
Template code should be the name of this template to identify it on a list of templates
Vous pouvez utiliser la description du modèle afin d’ajouter des informations sur le modèle
La liste déroulante “Unités” vous permet de choisir l’unité de mesure utilisée dans la définition du profil.
Note
A Postscript Point is 1/72 », an Adobe Agate is 1/64 », an Inch is 25.4 SI Millimeters
Les mesures (hauteur, largeur de la page, largeur et hauteur de la carte) peuvent être dans le package, et sinon peuvent habituellement être trouvés sur le site web du fournisseur ou peuvent être mesurés sur un échantillon.
Un profil est un jeu de réglages appliqué à un modèle donné juste avant l’impression qui corrige les anomalies uniques et particulières à une imprimante donnée (à laquelle le profil est attaché).
Avant de sélectionner un profil d’étiquette, essayez d’imprimer quelques exemples, vous pourrez plus facilement définir un profil qui correspond à votre combinaison d’imprimante et d’étiquettes
Si vous avez trouvé des anomalies d’impression, :ref:`Créer le profil de l’imprimante <patron-add-a-profile-label>`et rattachez-le au modèle.
Important
Ne pas préciser un profil si cela n’est nécessaire, par exemple ne cliquez pas pour définir un profil d’imprimante.Il n’est pas possible de retirer un profil d’un modèle mais vous pouvez basculer sur un autre profil.
Note
Si vous utilisez différents modèles d’imprimantes vous serez peut-être amenés à définir plusieurs modèles qui sont semblables à l’exception des différents profils définis.
Après enregistrement, vos profils seront visibles sur la page “Gérer modèles de cartes”.
Profils
Aller à : Plus > Outils > Créateur de cartes adhérent > Gestion > Profils
Un profil est un paramétrage d” « ajustement » appliqué à un modèle juste avant l’impression pour compenser des anomalies uniques et spécifiques à une imprimante donnée. Ceci signifie que si vous paramétrez un modèle et imprimez un test de données et trouvez que les exemplaires ne sont pas alignés de la même façon sur chaque carte, vous avez besoin de définir un profil pour chaque imprimante (ou même chaque bac d’alimentation d’une même imprimante), pour compenser la différence des styles d’impression, comme le décalage du texte vers la gauche, la droite, le haut ou le bas.
Si vos cartes s’impriment exactement comme vous voulez, vous n’aurez pas à utiliser un profil.
Add a profile
To add a new profile, you want to click on the “Profiles” button at the top of your page and choose “New profile”
To add a new profile, you want to click on the “New profile” button at the top of your page. Using the form that appears you can define the values to correct the card misalignment on your label sheet. You may also choose “Manage profiles” on the left side and select one of the currently available profiles for editing.
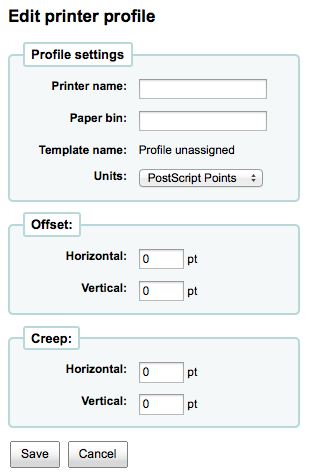
The Printer name and Paper bin do not have to match your printer exactly, they are for your reference so you can remember what printer you have set the profile for.
Note
Par exemple : vous pouvez si vous voulez utilisez le n° de modèle d’Imprimante comme nom d’imprimante, ou vous pouvez l’appeller « l’imprimante de mon bureau »
Le modèle sera rempli une fois que vous aurez choisi quel modèle appliqué au profil sur le formulaire de modification des templates
La liste des unités vous permet de choisir l’unité de mesure utilisée dans la définition du profil.
Note
A Postscript Point is 1/72 », an Adobe Agate is 1/64 », an Inch is 25.4 SI Millimeters
Offset pourra être utilisé quand l’image entière n’est pas centrée verticalement ou horizontalement. Le glissement décrit une condition où la distance entre les étiquettes change dans la largeur ou la hauteur de la page
Pour les valeurs de décalage et de fluage, les nombres négatifs déplacent les informations d’impression vers le haut et la gauche de la page imprimée et les nombres positifs les déplacent vers le bas et la droite
Exemple: le texte est imprimé à 0.25 » du côté gauche sur la première étiquette, à 0.28 » du côté gauche sur la deuxième étiquette, et à 0.31 » du côté gauche sur la troisième étiquette. Ceci signifie que le décalage horizontal devrait être configuré à (négatif) -0.03 » pour combler cette différence.
Après enregistrement, vos profils seront visibles sur la page “Gérer les profils”.
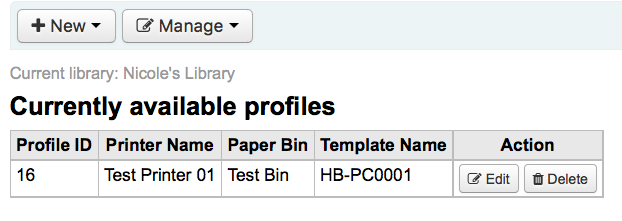
Une fois que vous avez enregistré votre nouveau profil; vous pouvez retourner à la liste des modèles et choisir de modifier le modèle correspondant à ce profil.
Lots
Aller à : Plus > Outils > Créateur de cartes adhérent > Gestion > Lots de cartes
Un lot est un ensemble d’adhérents pour lesquels vous souhaitez générer les cartes
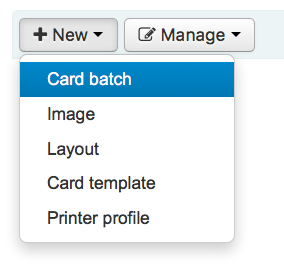
Add a batch
Pour ajouter un nouveau lot, veuillez cliquer sur le bouton « Nouveaux lots » en haut de votre page.En choisissant l’élement « Gérer les étiquettes » du menu de gauche, affichera une liste de lots déjà définis.Dans cet affichage vous pouvez soit sélectionné un lot pour le modifier soit en ajouter un nouveau.
Pour un nouveau lot, un message s’affiche dans un popup et vous amène à sélectionner les adhérents qui seront intégrés dans ce lot.
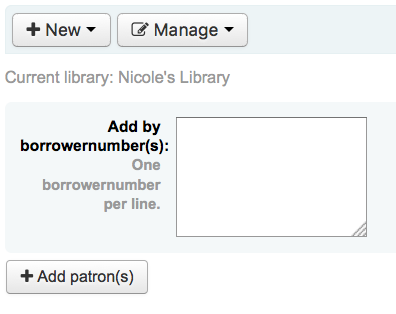
Après avoir sélectionné le bouton “Ajouter des adhérents”, le popup de Recherche d’adhérent s’affiche.
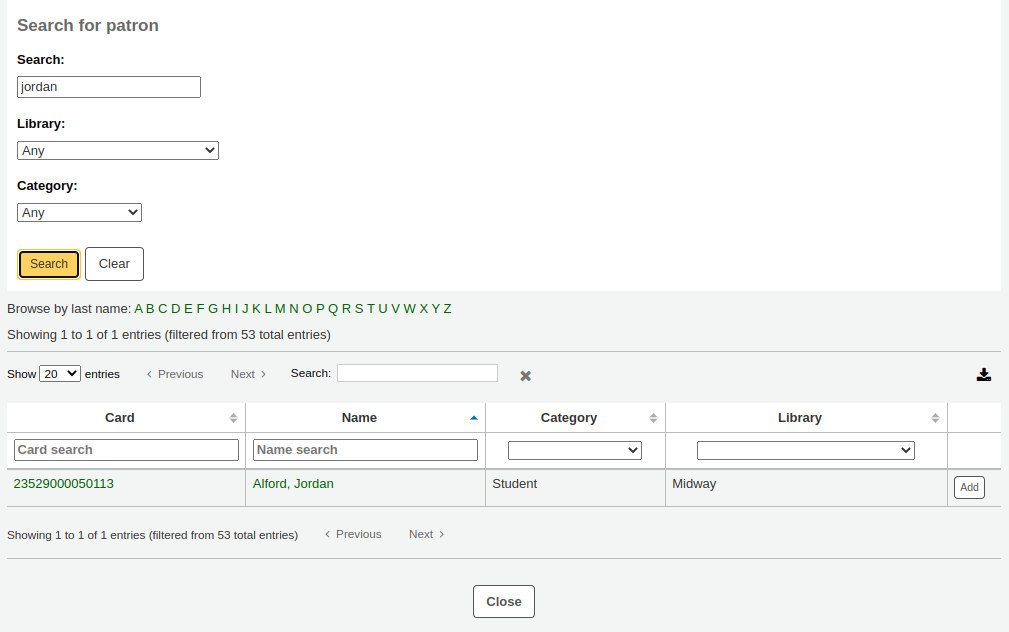
D’ici, vous pouvez chercher des adhérents à ajouter à votre lot par n’importe quelle partie de leur nom, leur catégorie et/ou leur site. Saisir * dans le champs de recherche affichera tous les adhérents.
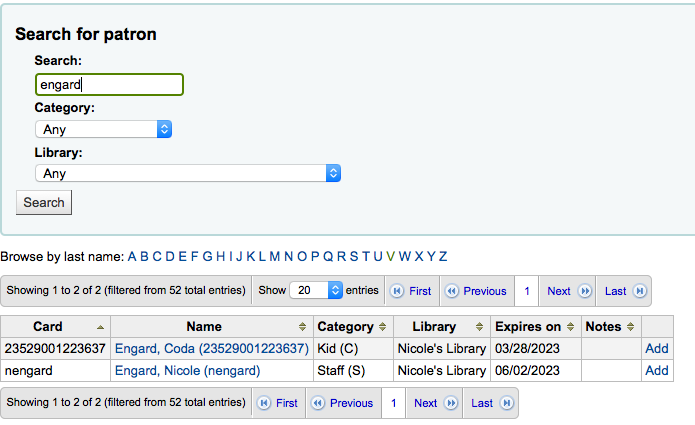
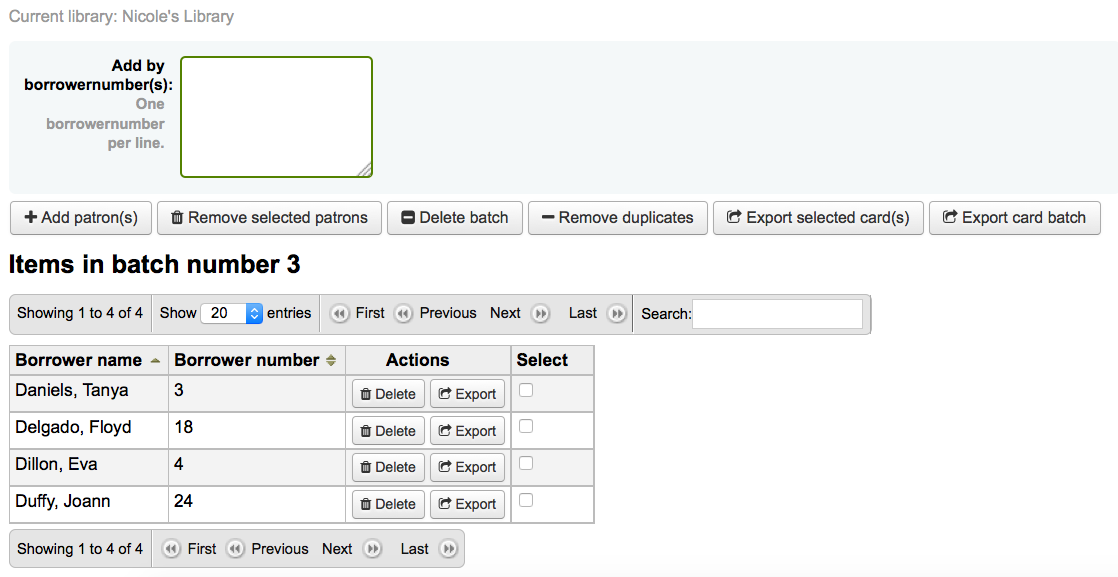
A partir des résultats, vous pouvez ajouter des adhérents au lot en cliquant sur le bouton « Ajouter ». Après avoir ajouté des adhérents, vous pouvez recommencer et faire une nouvelle recherche ou cliquer sur le bouton « Fermer » en bas de l’écran pour indiquer que vous avez terminé. Votre lot sera alors affiché.
Alternatively, you can use a custom report to create a batch. A report that contains borrowernumbers will have the option to send the report results to the patron card creator.

Version
The option to send report results to the patron card creator was added to Koha version 23.11.
If you are satisfied with your batch you can proceed to export. If you want to correct or even delete that batch the buttons to do so can be found at the top of your screen. You can always come back here through the “Manage > Card batches” button.
Si vous désirez exporter toutes les cartes d’utilisateurs que vous venez de créer, cliquez sur “Exporter le lot de cartes”. Autrement vous pouvez choisir des utilisateurs spécifiques dont vous voulez imprimer les cartes en cochant la boîte sur la droite de leur nom et choisir “Exporter les cartes sélectionnées”.
La fenêtre d’export qui apparait vous demande de choisir un modèle à appliquer, un format et une position de départ (à partir de quelle carte commencer l’impression).
Note
Concernant la position de départ, si les 6 premières étiquette sont déjà utilisées vous pouvez commencer à partir de la position 7. Les étiquettes sont numérotées de gauche à droite et de haut en bas.
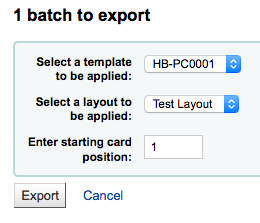
Lorsque vous cliquez sur «Export» vous obtiendrez un fichier PDF de vos étiquettes pour impression
Lorsque vous ouvrez le PDF vous verrez les cartes à imprimer

The above image shows a layout that is made up of two text lines. The first one is just plain text, the second one is composed of the <firstname> <surname> fields. A patron image is printed (if available) and the barcode of patrons number is displayed in code 39. All this is printed on a template with three columns and 8 rows using position 1-3 here. When printing this PDF please take care that your printer doesn’t rescale the PDF (e.g do not fit to paper size) otherwise the printer will not be able to print to the right place per your templates.
Manage images
Aller à : Plus > Outils > Créateur de cartes adhérent > Gestion > Images
Les images chargées avec cet outil apparaîtront dans le menu lors de la création d’une carte d’adhérents. Le nombre maximal d’images que vous pouvez télécharger (sans compter les photos de vos adhérents) est fixé par la préférence système ImageLimit.
Important
Les images doivent avoir un poids inférieur à 500 Ko.
Note
Les images chargées avec cet outil doivent avoir une résolution minimale de 300 ppi, ce qui est un minimum pour imprimer une image.
Au centre de l’écran se trouve un formulaire de chargement. Parcourez votre ordinateur pour trouvez le fichier idoine et donnez-lui un nom.
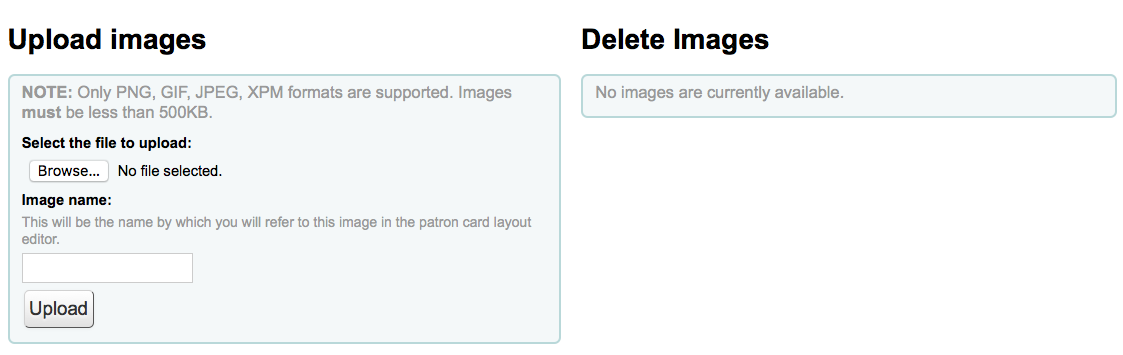
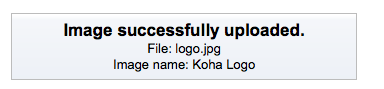
Une fois le fichier chargé sur le serveur, un message de confirmation est affiché.
L’image sera affichée avec le reste sur la droite de la page.
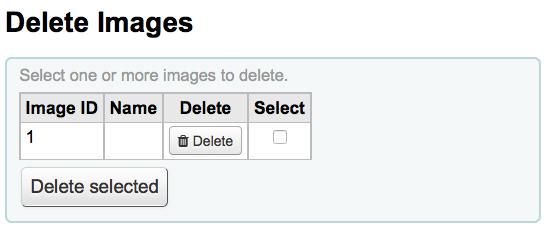
Pour supprimer une ou plusieurs de ces images, cochez la case à droite de chaque image que vous voulez supprimer puis cliquez sur le bouton “Supprimer”.
Batch patron deletion/anonymization
Aller à : Plus > Outils > Adhérents et circulation > Suppression d’adhérents et Anonymisation par lot
Cet outil vous permet, par lots, d’anonymiser l’historique de circulation ou de supprimer des comptes adhérents. Cela signifie que le système conserve un lien entre prêts et exemplaires, mais supprime le lien avec l’adhérent.
Important
Les dossiers utilisateurs avec frais de retard ou prêts en cours ne seront pas conservés. Ces dossiers ne seront toutefois pas supprimés complètement (ils seront plutôt déplacés vers la table delete_borrowers table). Attention, cet outil ne fait pas autant de contrôle qu’on pourrait l’espérer.
Important
Avant d’utiliser cet outil il est recommandé de faire une sauvegarde de votre base.Les changements faits ici sont permanents.
Important
L’anonymisation échouera sans prévenir si la préférence système :ref:”AnonymousPatron <anonymouspatron-label>” ne contient pas une valeur valide.
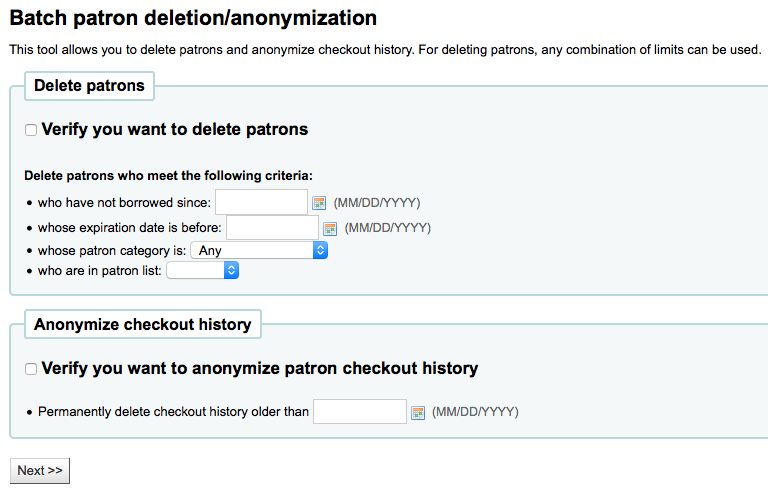
Pour supprimer ou anonymiser des adhérents
Check the “Verify” box on the task you would like to complete (delete or anonymize)
Entrez la date avant laquelle vous voulez modifier les données.
Lors de la suppression d’adhérents vous pouvez aussi choisir des utilisateurs qui :
n’ont pas emprunté depuis une date spécifique;
ont des comptes qui vont expirer avant une date spécifique;
sont dans une :ref:”catégorie d’adhérent <patron-categories-label>` particulière
sont dans une liste d’adhérents
Cliquez sur “Suivant”
Une demande de confirmation est affichée.
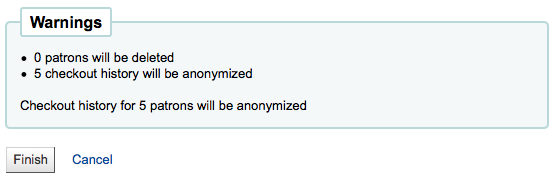
En cliquant sur Finir, vos données seront supprimées ou anonymisées.

Modification d’un lot d’utilisateurs
Aller à : Plus > Outils > Adhérents et Circulation > Modification d’adhérents par lot
With this tool you can make edits to a batch of patron records. Simply load in a file of cardnumbers (one per line), choose from a list of patrons or scan patron card numbers in to the box provided. All options are also available for use with borrowernumbers instead of cardnumbers.
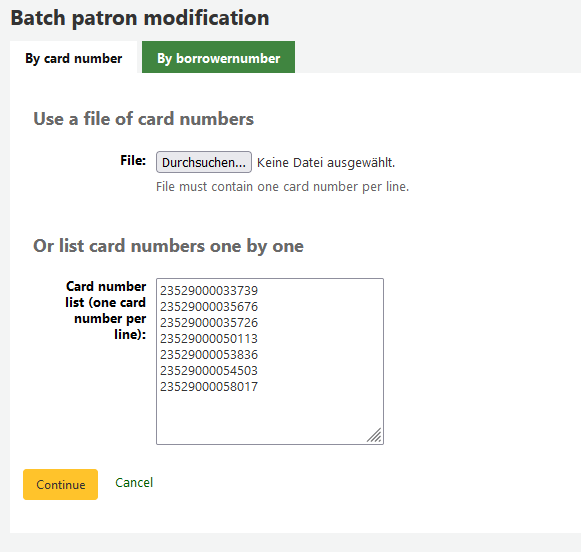
Once you have the file loaded or the cardnumbers or borrowernumbers entered click “Continue.” You will be presented with a list of the patrons and the changes you can make.
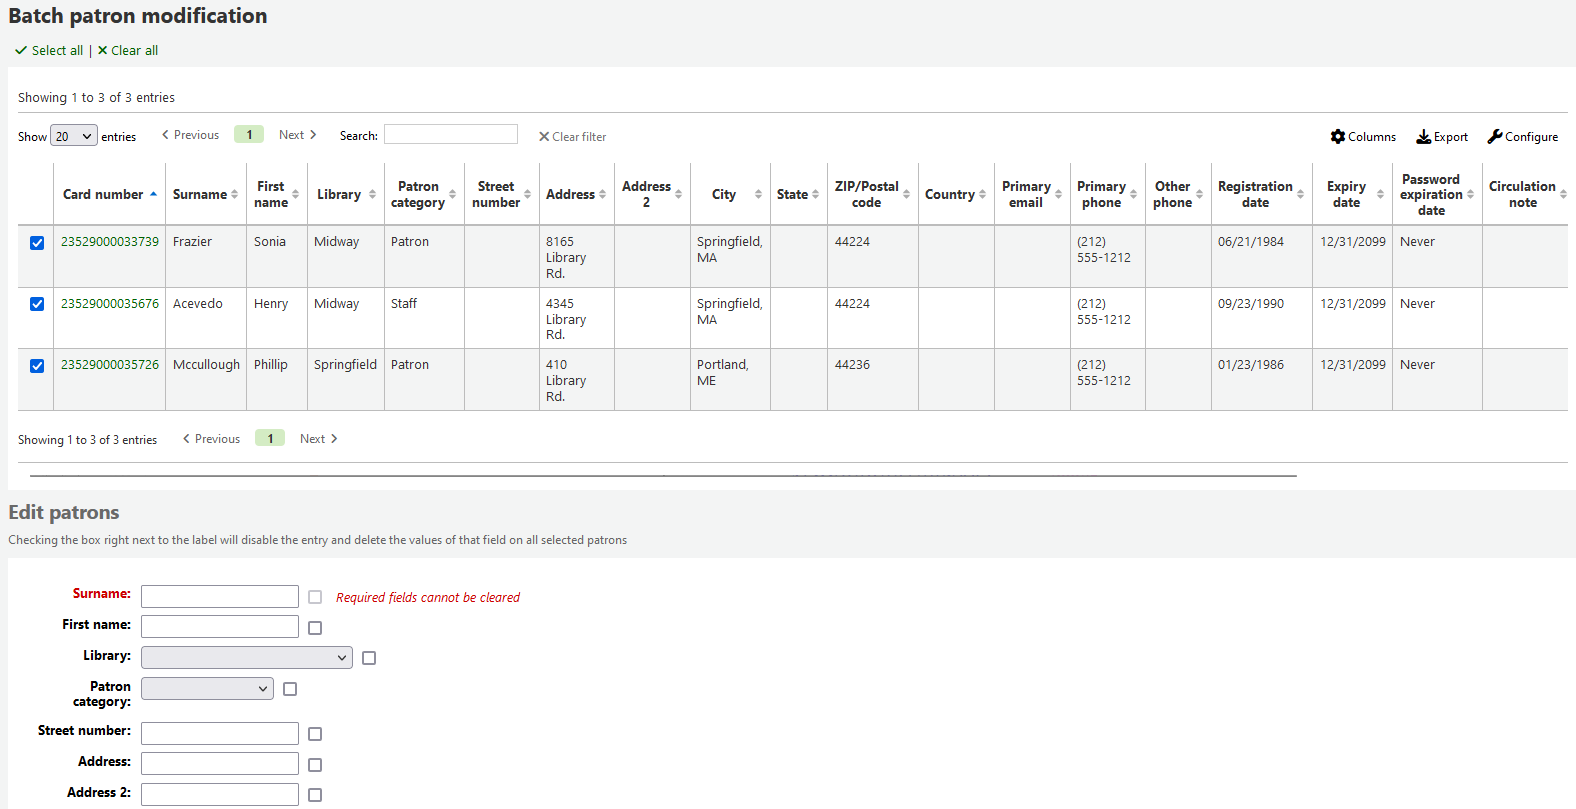
To the right of each text box there is a checkbox. Clicking that checkbox will clear our the field values.
Important
Note : Si le champ est obligatoire, vous ne pourrez supprimer la valeur qu’il contient.
If you have multiple patron attributes you can change them all by using the “+ New” link to the right of the text box. This will allow you to add another attribute value.
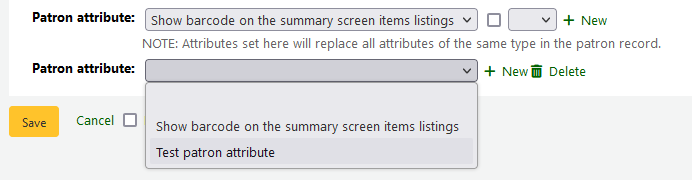
Once you have made the changes you want, you can click “Save” and the job will be enqueued.
Prolongation des dates de retour par lot
Aller à : Plus > Outils > Adhérents et Circulation > Prolongation des dates de retour par lot
Note
Access to this tool requires the batch_extend_due_dates permission.
This tool allows you to update due dates in bulk, this can be useful if a library needs to close unexpectedly and cannot accept returns.
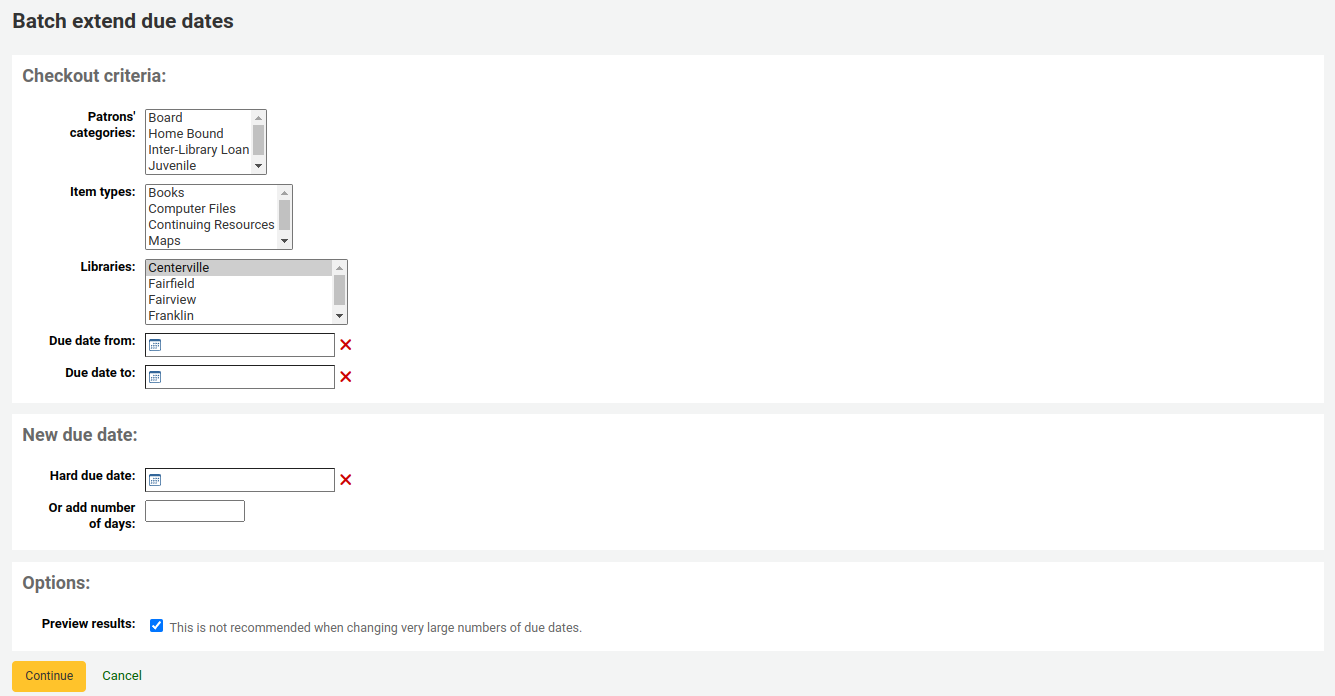
You can filter the selection of checkouts based on patron category, item types, library or a combination.
Astuce
If needed, you can select multiple options in the dropdown lists by holding the CTRL key while selecting the options.
Version
The option to filter by item type is available from Koha version 23.11.
Next, specify a date range for the current due date of the materials on loan. For example, you may want to extend the due dates for recent checkouts but exclude long overdue loans.
Choose to extend the due dates either to a new hard due date or by a number of days. Using the number of days option can prevent large numbers of loans being due on the same date.
You can choose whether to preview the results of your selections.
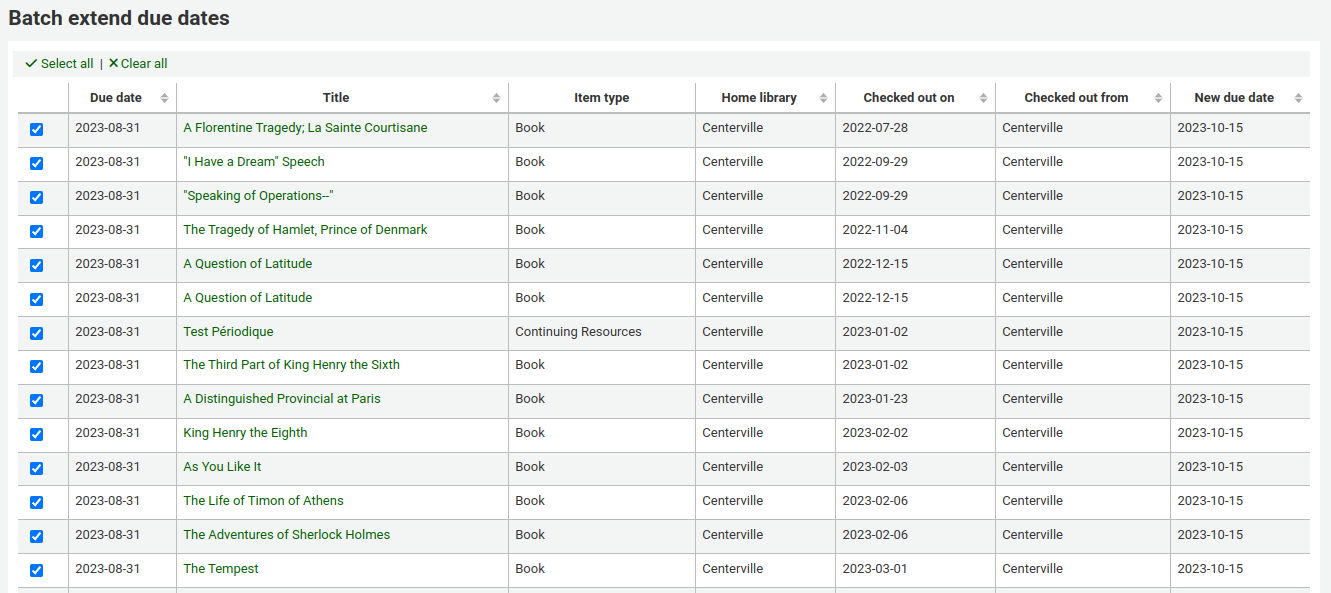
If you preview the results, you will see a table which shows you the current due date and the new due date so that you can check your selections. You can untick checkouts if they are incorrect or go back and change your selection.
Click on the “Modify selected checkouts” button to see a confirmation screen showing the checkouts that have been modified.
Tag moderation
Aller à : Plus > Outils > Adhérents et Circulation > Tags
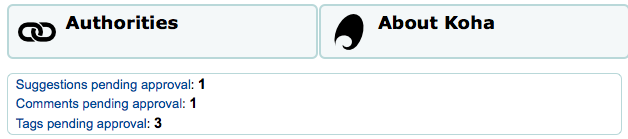
En fonction des Preferences systèmes de mots-clés, il est possible d’activer l’outil de validation de mots-clés pour gérer ce qui sera publié sur l’OPAC. Lorsqu’un mot-clé sera suggéré, un lien rapide vers les mots-clés en attente d’approbation sera visible sur la page d’accueil de l’interface professionnelle sous les modules:
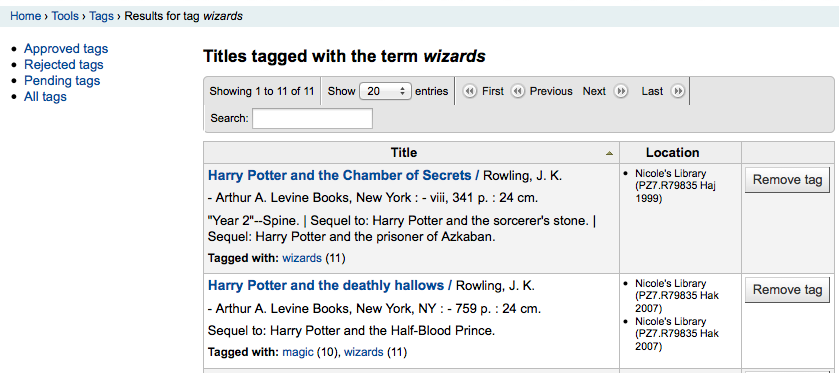
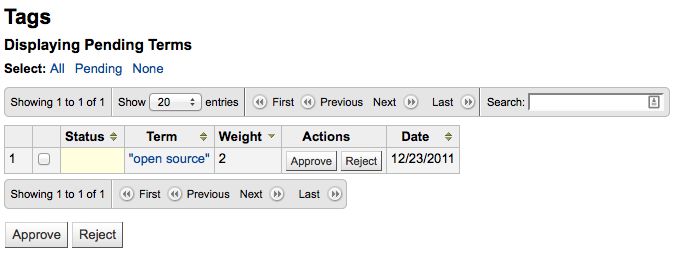
Pour modérer les tags, allez dans l’outil “Tags”. En allant pour la première fois dans cet outil, vous verrez une liste des tags qui sont en attente d’approbation ou de rejet par un bibliothécaire
Pour voir tous les titres auxquels ce tag a été ajouté, cliquez simplement sur le terme
A partir de cette liste de titres, vous pouvez supprimer un tag sans pour autant empêcher son utilisation dans le futur, en cliquant sur « Retirer tag » à droite du titre.
Pour valider un commentaire, vous pouvez soit cliquer sur le bouton « Approuver » en face du commentaire sélectionné, soit sélectionner tous les termes que vous souhaitez valider et cliquer sur « Accepter » en bas de la page.
To reject a tag, you can either click the “Reject” button in line with the term, or check all terms you want to reject and click “Reject” below the table.
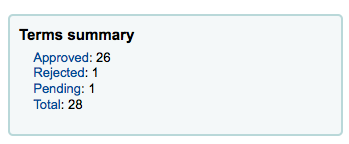
Après qu’un tag a été approuvé ou rejeté, il est déplacé dans la liste de tags qui convient. Un résumé de tous les tags est affiché sur la droite de la fenêtre.
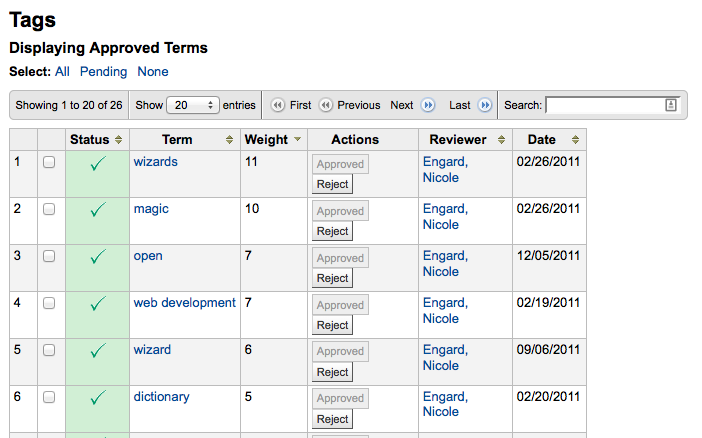
Qu’il soit approuvé ou rejeté, un tag peut à tout moment rejoindre l’autre liste. Dans la liste des tags approuvés, chaque tag a une option de rejet :
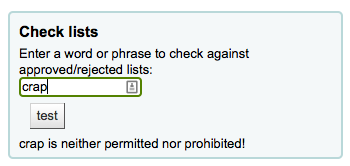
Pour vérifier les termes par rapport aux listes approuvées et rejetées (et, le cas échéant, en contradiction avec le lexique que vous avez appliqué à la modération des commentaires) entrer simplement le terme dans la zone de recherche en bas à droite de la page pour voir son statut
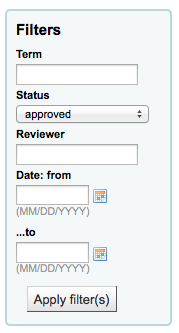
Enfin, vous pouvez trouver des tags en utilisant les filtres sur la gauche.
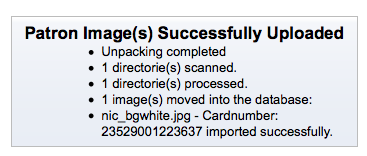
Upload patron images
Aller à : Plus > Outils > Adhérents et Circulation > Télécharger des photos d’adhérents
Lorsque la préférence système patron images autorise l’ajout d’image utilisateur, cet outil permet de téléverser un lot de plusieurs images utilisateurs et de les enregistrer dans les dossiers utilisateurs respectifs. Ces images pourront également servir dans le Créateur de carte utilisateur.
Créez un fichier texte et nommez-le « DATALINK.TXT » ou « IDLINK.TXT »
Sur chaque ligne du fichier texte, entrez le numéro de la carte de l’adhérent suivi d’une virgule (ou d’une tabulation), puis du nom du fichier image.
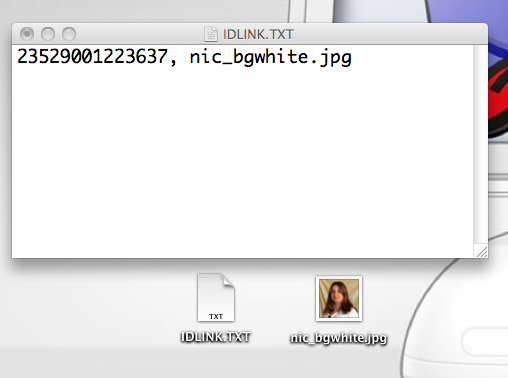
Veillez à ce que votre fichier soit bien en plein texte (txt) et pas en rtf.
Compressez au format ZIP votre fichier texte et vos fichiers image.
Go to the Upload patron images tool
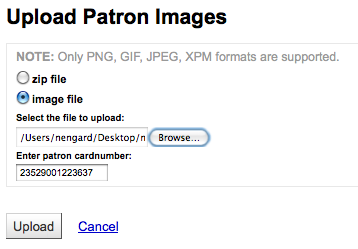
Pour une seule image, vous avez simplement à pointer le fichier image et à entrer le numéro de carte de l’adhérent.
Pour plusieurs images, téléchargez un fichier compressé ZIP.
Après envoi en serveur, un écran de confirmation s’affiche.
Important
Attention, il y a une limite de taille de l’image de 100 ko, nous vous conseillons une image de 200x300 pixels, mais les plus petites tailles fonctionnent également.
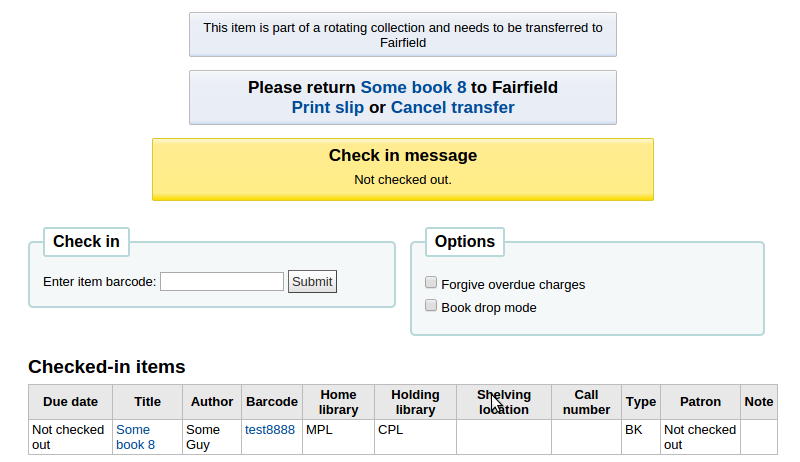
Rotation des collections
Aller à : Plus > Outils > Catalogue > Rotation des collections
Rotating collections is a tool for managing collections of materials that frequently get shifted from library to library. It adds the ability to store not only an item’s home library and current location but also information about where it is supposed to be transferred to next to ensure that all items in the collection are sent to the correct library. When an item in a rotating collection is checked in, library staff is notified that the item is part of a rotating collection and which branch it should be sent to if it is not at the correct one.
Important
La préférence système AutomaticItemReturn doit être positionnée sur « Ne pas transférer automatiquement les exemplaires vers leur site de rattachement à leur retour » pour que les collections tournantes fonctionnent correctement.
Pour créer une nouvelle collection tournante, cliquez sur le bouton « Nouvelle collection », remplissez le titre et la description et validez. Une fois validée, vous verrez « Collection ajoutée avec succès » ; cliquez sur « Retour au menu Collections tournantes » (ou sur Collections tournantes dans la barre latérale).
Pour ajouter des exemplaires à une collection, cliquez sur “Ajouter” et choisissez “Ajouter ou retirer des exemplaires” à côté du nom de la collection dans la liste. Sous “Ajouter ou retirer des exemplaires”, scannez ou tapez le code à barres de l’exemplaire que vous souhaitez ajouter à la collection, appuyez sur Entrée ou cliquez sur “Valider” si nécessaire.
To remove an item from a collection, either click “Remove” next to the item’s barcode in the list of items within the collection or check the « Remove item from collection » box next to the Barcode text box under « Add or remove items », and scan or type in the barcode, clicking « Submit » or hitting Enter if necessary. Note: The « Remove item from collection » checkbox will remain checked as long as you are on the « Add or remove items » page, unless you uncheck it, to facilitate quickly removing a number of items at a time by scanning their barcodes.
Transfer a rotating collection
Le transfert d’une collection sera:
Remplacer la localisation actuelle des exemplaires de cette collection par la bibliothèque dans laquelle celle-ci sera transférée
Entreprendre un transfert de sa localisation d’origine courante/bibliothèque d’attache à sa localisation courante/bibliothèque d’attache où il doit retourner. Lorsqu’une bibliothèque reçoit une collection, elle doit effectuer un retour des documents afin de compléter le transfert.
Vous pouvez transférer une collection d’une de ces deux façons:
From the main Rotating collections page, click on « Actions » and choose « Transfer » next to the title of the collection you wish to transfer; choose the library you wish to transfer the collection to and click « Transfer collection ».
Or, from the « add or remove items » page for a collection, you can click the « Transfer » button, choose the library you wish to transfer the collection to and click « Transfer Collection ».
Important
Pour compléter le processus de transfert, la bibliothèque recevant la collection tournante devrait enregistrer chaque exemplaire de la collection au moment où il sont reçus. Cela terminera le transfert en faisant en sorte que les exemplaires ne seront plus affichés « en transit ».
Si un exemplaire d’une collection tournante est retourné dans une bibliothèque différente de celle dans laquelle il a été transféré, une notification indiquera au personnel de la bibliothèque que l’exemplaire fait parti d’une collection tournante et leur précisera dans quelle bibliothèque l’exemplaire doit être envoyé.
Additional tools
Calendrier
Aller à : Plus > Outils > Outils supplémentaires > Calendrier
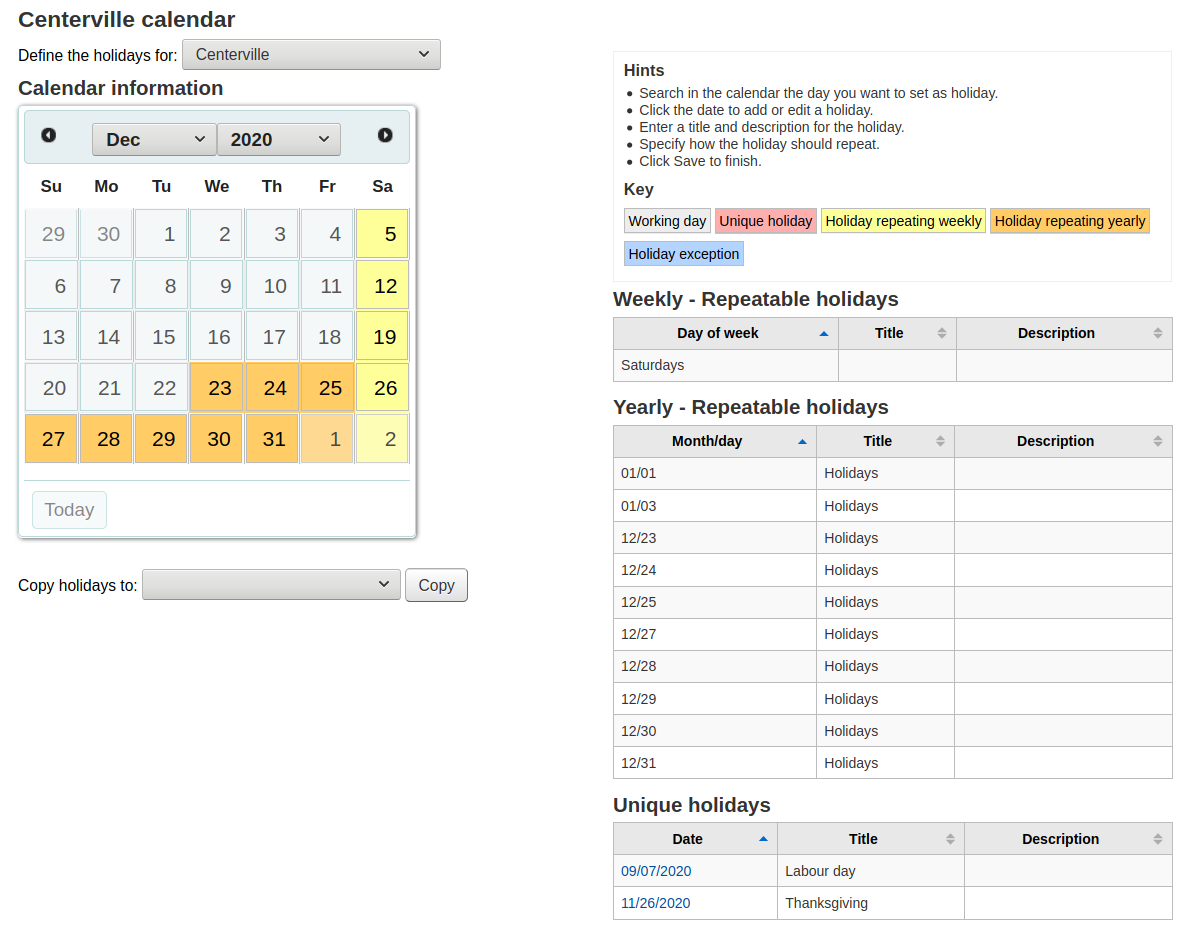
Libraries can define library closings and holidays to be used when calculating due dates. You can make use of the calendar by turning on the proper system preferences:
useDaysMode : sélectionnez la méthode de calcul des dates de retour -soit en incluant les jours où la bibliothèque est fermée, soit sans les inclure
finescalendar: vérifiera le calendrier des fermetures avant de calculer les amendes
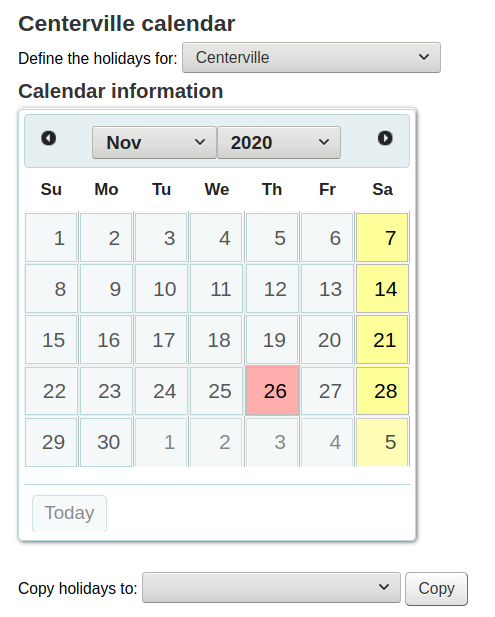
Adding events
Avant d’ajouter des jours, choisissez le site pour lequel vous voulez définir des jours de fermeture. Lorsque vous ajouterez des jours, vous pourrez préciser s’il se rapporte à un site ou bien à tous les sites. Pour ajouter un jour :
Cliquez sur la date du calendrier que vous voulez marquer comme jour de fermeture
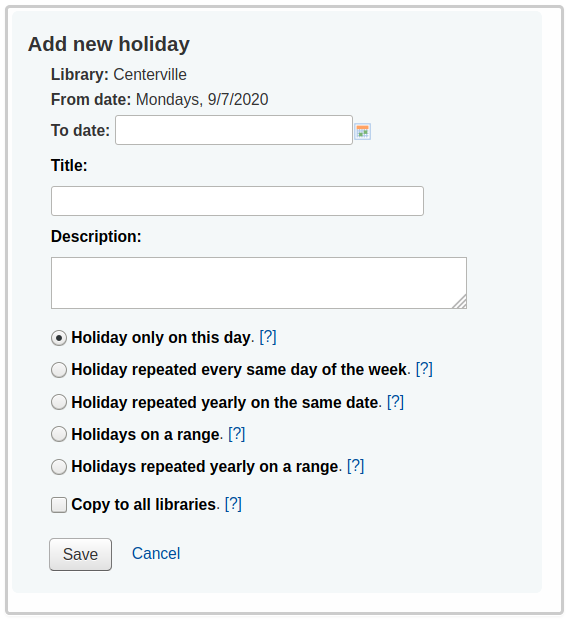
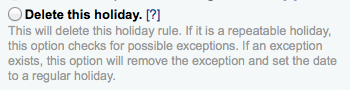
Dans le formulaire qui apparaît au-dessus du calendrier, saisissez les informations de fermeture (pour plus d’informations sur chaque option, cliquez sur le point d’interrogation [?] à droite de l’option)
L’information sur le site sera renseigné automatiquement en fonction du site que vous avez choisi.
L’information sur la date sera également renseignée automatiquement en fonction de la date que vous avez choisie dans le calendrier
If this holiday extends on more than one day, enter the end date in “To date”
In the “title” enter the name of the holiday or the reason for the closing
In the “description” enter more information about this holiday
Ensuite, vous spécifiez si le jour de fermeture est unique ou s’il est répété.
“Holiday only on this day”: this is a one day holiday
“Holiday repeated every same day of the week”: this is a weekly closing (if you’re closed every Sunday, for example)
“Holiday repeated yearly on the same date”: this is an annual holiday closing (if you’re closed on January 1st each year, for example)
“Holiday on a range”: this is a holiday that extends on several days
Note
Make sure to enter a “To Date” at the top if you choose “Holiday on a range”
“Holiday repeated yearly on a range”: this is a holiday that extends on several days each year (such as summer holidays for schools)
Note
Make sure to enter a “To Date” at the top if you choose “Holiday repeated yearly on a range”
Finalement, décidez d’appliquer ce jour de fermeture à toutes les bibliothèques ou bien uniquement à celle que vous avez sélectionnée initialement
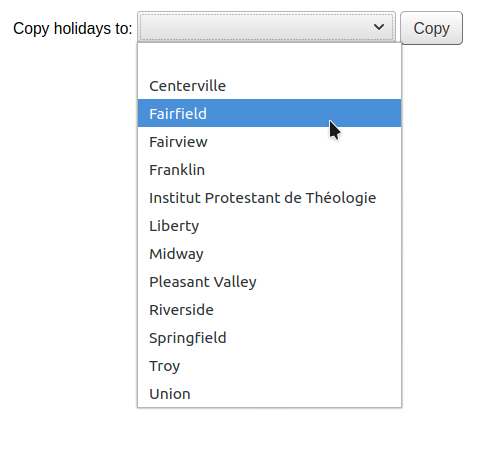
Si vous préférez saisir toutes les fermetures et ensuite toutes les copier d’un coup vers un autre site, vous pouvez utiliser le menu Copier en-dessous du calendrier
Après avoir sauvegardé vous verrez les événements affichés sous le calendrier
Editing events
Pour modifier un jour de fermeture :
Cliquez dans le calendrier sur le jour que vous voulez modifier.
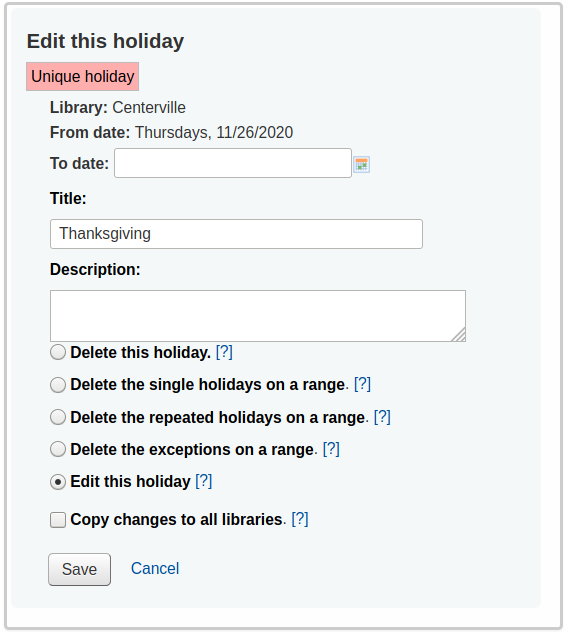
Dans ce formulaire, vous pouvez modifier ou supprimer les jours de fermeture. Pour valider la modification ou la suppression, cliquez sur “Enregistrer”.
Dans ce formulaire, vous pouvez modifier ou supprimer les jours de fermeture. Pour valider la modification ou la suppression, cliquez sur “Enregistrer”.
En cliquant sur des jours de fermeture répétables vous obtiendrez des options sensiblement différentes
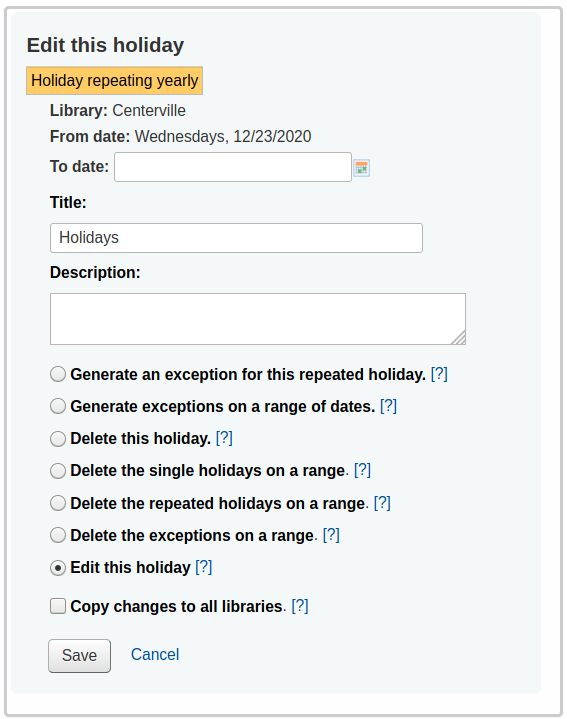
In the form above you will note that there is now an option to “Generate an exception for this repeated holiday” and “Generate exceptions on a range of dates” choosing one of these options will allow you to make it so that this date is not closed even though the library is usually closed on this date.
Dans ce formulaire, vous pouvez modifier ou supprimer les jours de fermeture. Pour valider la modification ou la suppression, cliquez sur “Enregistrer”.
Additional help
Quand vous ajoutez ou que vous modifiez des jours de fermeture, vous pouvez obtenir une aide supplémentaire en cliquant sur le plus bleu qui se trouve en regard des différentes rubriques du formulaire.
CSV profiles
Aller à : Plus > Outils > Outils supplémentaires > Profils CSV
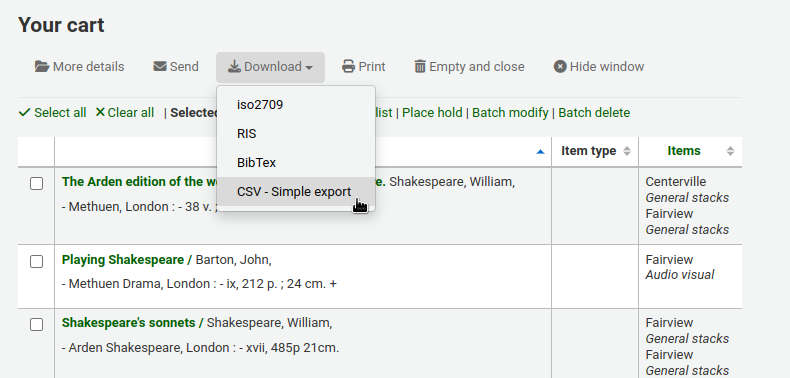
CSV profiles are created to define how you would like your cart or list to export.
CSV profiles are also used in the acquisitions module to export baskets and late orders, in the serials module to export late issues, and in the reports module to export the list of lost items.
Adding a CSV profile
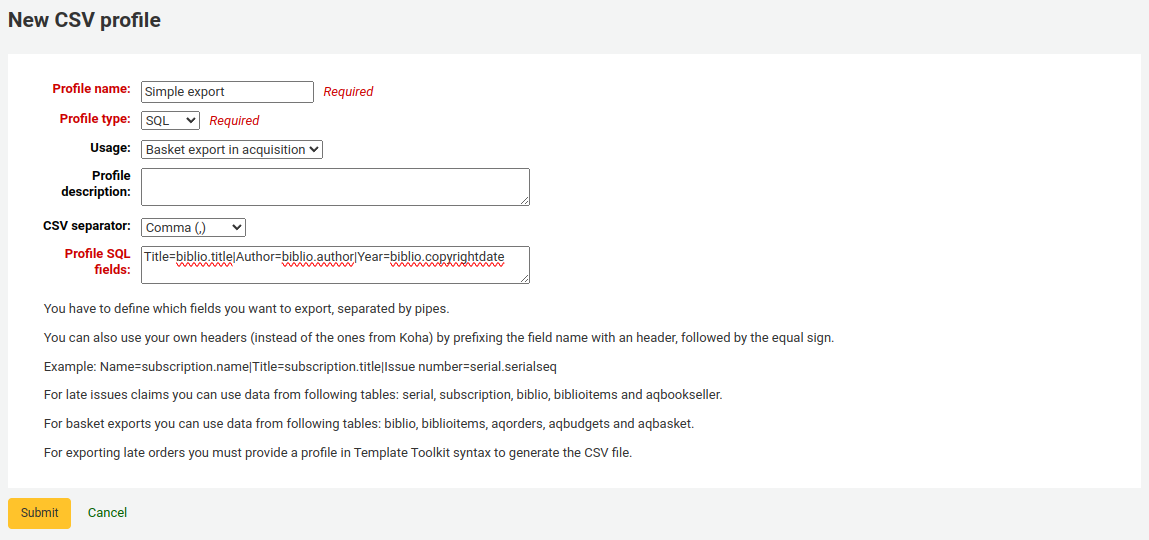
To add a CSV profile,
Click on “New CSV profile”
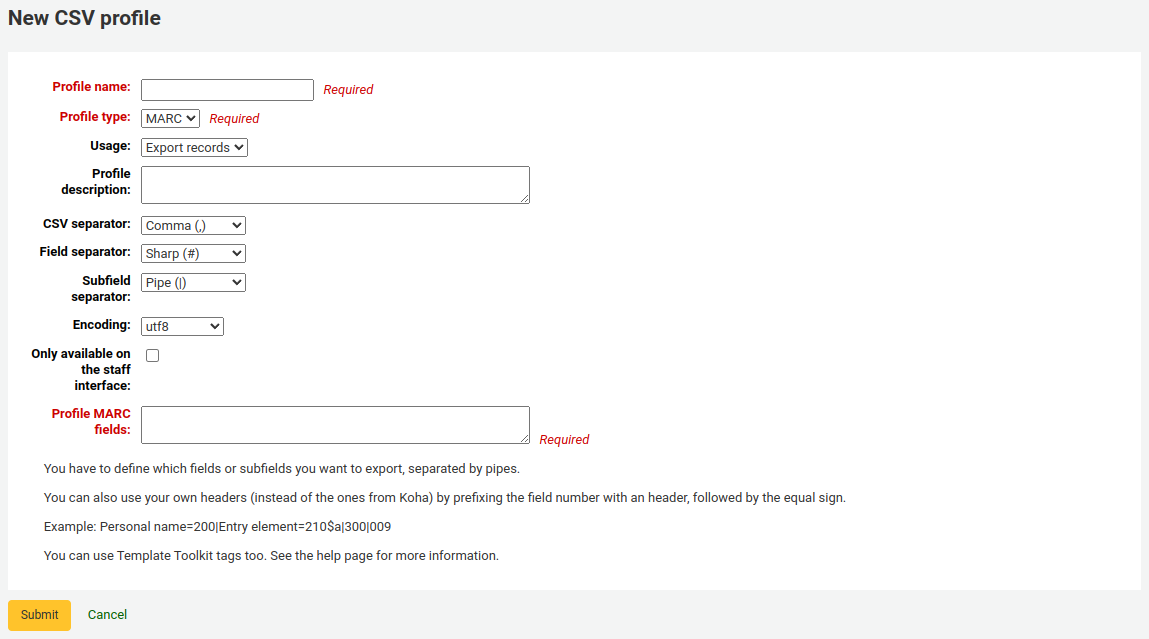
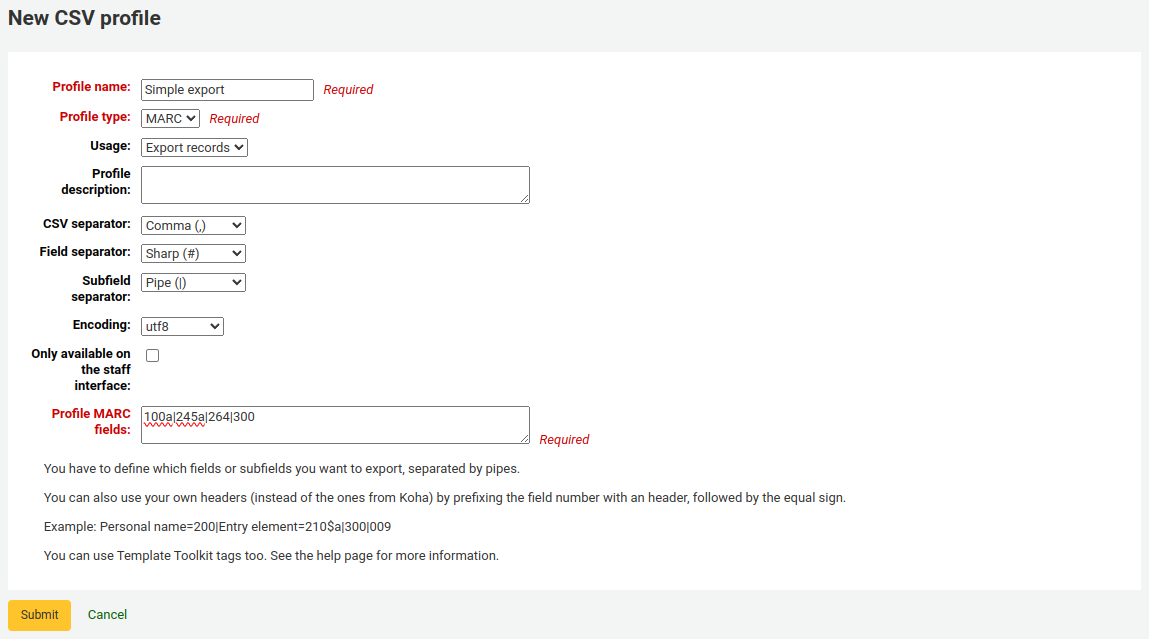
Profile name: enter a unique and meaningful name for the profile. This name will appear on the export pull down list when choosing “Download” from your cart or list, or when choosing the profile in the acquisitions, serials or reports module to export baskets, late orders, etc.
Profile type: this determines what type of fields you plan to use (MARC or SQL) to define your profile; it will also affect the “Usage” options below.
If you choose MARC, you will need to enter MARC fields.
If you choose SQL, you will need to enter SQL database fields.
Usage: this field is used to indicate what type of report this CSV profile is used with:
Export records (only available with MARC profile type): this is used to export records from your cart or lists.
Late serial issues claims (only available with SQL profile type): this is used to export late issues of serial subscriptions
Export late orders (only available with SQL profile type): this is used to export late orders in the acquisitions module.
Basket export in acquisition (only available with SQL profile type): this is used to download records from acquisitions baskets.
Export lost items in report (only available with SQL profile type): this is used to export a CSV from the lost items report.
Profile description: you can use this field to expand the profile name. The description will also appear in the OPAC when patrons download content, so make sure it’s clear for your patrons as well.
CSV separator: this is the character used to separate values and value groups.
Note
L’option la plus courante est la virgule car la plupart des tableurs savent ouvrir des données séparées par des virgules (en France, privilégier le point-virgule).
Field separator (only available with MARC profile type): this is the character used to separate duplicate fields.
For example, you may have multiple 650 fields and this is the character that will appear in between each one in the column.

Subfield separator (only available with MARC profile type): this is the character used to separate duplicate subfields.
For example, you may have multiple $a subfields in a field.
Encoding: use this field to define the character encoding used when saving the file.
Only available on the staff interface (only available with MARC profile type): check this box to limit this CSV profile to the staff interface only, meaning patrons will not be able to use this profile to export their cart or lists from the OPAC.
Profile MARC fields (only available with MARC profile type): enter the fields or subfields to export, separated by pipes.
For example:
200\|210$a\|301
Note
You can use the dollar sign ($) to separate the field number and subfield code, or simply write the field number and subfield code together.
For example:
200\|210$a\|301
Or without the dollar sign:
200\|210a\|301
Astuce
You can use your own headers (instead of the ones from Koha) by prefixing the field number with a header, followed by the equal sign.
For example:
Personal name=100\|title=245$a\|300
Note
You can customize further the profile with Template Toolkit syntax.
See Using Template Toolkit in MARC CSV profile below for more information and examples.
Profile SQL fields (only available with SQL profile type): enter the database fields to export, including the table name, separated by pipes.
For example:
biblio.title\|biblio.author
Astuce
You can use your own headers (instead of the ones from Koha) by prefixing the field with a header, followed by the equal sign.
For example:
Title=biblio.title\|Author=biblio.author
Important
For late issues claims you can use data from following tables:
serial
subscription
biblio
biblioitems
aqbookseller
For basket exports you can use data from following tables:
biblio
biblioitems
aqorders
aqbudgets
aqbasket
Important
Exporting late orders requires a profile using the Template Toolkit syntax (the same syntax as the notices and slips).
There is a default profile that comes with Koha that you can use as an example.
Title[% separator %]Author[% separator %]Publication year[% separator %]ISBN[% separator %]Quantity[% separator %]Number of claims
[%~ SET biblio = order.biblio ~%]
"[% biblio.title %]"[% separator ~%]
"[% biblio.author %]"[% separator ~%]
"[% bibio.biblioitem.publicationyear %]"[% separator ~%]
"[% biblio.biblioitem.isbn %]"[% separator ~%]
"[% order.quantity%]"[% separator ~%]
"[% order.claims.count%][% IF order.claims.count %]([% FOR c IN order.claims %][% c.claimed_on | $KohaDates %][% UNLESS loop.last %], [% END %][% END %])[% END %]"
[% END %]
Click “Submit” to save the new profile.
Using Template Toolkit in MARC CSV profiles
Template Toolkit syntax can be used to build complex CSV files.
For MARC information, you have to use the “fields” variables to access the field list of the current record.
Start with the column heading, equal sign, and the TT variable. Always separate CSV columns with a pipe (|).
For example, this will return a two-column CSV file, with the first column titled « Title » and the second column titled « Author ». The first column will contain 245$a and the second column will contain 100$a:
Title=[% fields.245.0.a.0 %]|Author=[% fields.100.0.a.0 %]
Important
It’s not possible to display an entire field (e.g. all of 245) you need to list the subfields you want to display.
The “0” indicate which field or subfield to print if there are more than one. For example, this will fetch the first subfield “a” of the first “245” field it finds in the record:
[% fields.245.0.a.0 %]
Single subfield
This is the syntax to get a single subfield from a MARC field.
For example, to get 245$a:
[% fields.245.0.a.0 %]
Multiple subfields in the same column
To concatenate multiple subfields in one column, you’ll need to use
[% FOREACH %]. Remember to always define the end of the FOREACH loop
with [% END %].
For example, to get both 245$a and 245$b in the same column:
[% FOREACH field IN fields.245 %][% field.a.0 %][% field.b.0 %][% END %]
Multiple subfield values
The previous examples only fetched the first occurrence of the subfield. In some
cases, a field might contain more than one subfield of the same code in a field.
In that case, you’ll need to use the join() key. The parentheses contain
the separator character.
For example, to get 260$a, $b, and $c, in a case where there might be more than one of each subfield, they will be separated by a semicolon followed by a space:
[% FOREACH field IN fields.260 %][% field.a.join('; ') %][% field.b.join('; ') %][% field.c.join('; ') %][% END %]
Indicator values
The indicators can be accessible using the indicator key.
For example, to get the value of the second indicator of the 245 field:
[% fields.245.0.indicator.2 %]
Fixed-length data field values
You can use substr() (substring) to get values from specific positions in
fixed-length data fields.
For example, to get the language from the 008 field (positions 35-37):
[% fields.008.0.substr(35,3) %]
Using conditions
Template Toolkit allows to add conditions, with [% IF %],
[% ELSIF %], and [% ELSE %]. Remember to always define the end
of the condition with [% END %].
For example, to get 650$a if indicator 2 for 650 is set:
Subject=[% FOREACH field IN fields.650 %][% IF field.indicator.2 %][% field.a.0 %][% END %][% END %]
Astuce
If you find you have extra spaces in your CSV, you can add tildes (~) inside the TT variables to remove extra whitespaces.
For example, the following code might replace the FOREACH variable with a space, making the title column start with a space:
Title=[% FOREACH field IN fields.245 %][% field.a.join(' ') %][% field.b.join(' ') %][% END %]
To correct this, add tildes at the beginning and end of the FOREACH variable:
Title=[%~ FOREACH field IN fields.245 ~%][% field.a.join(' ') %][% field.b.join(' ') %][% END %]
Modifying CSV profiles
To modify a CSV profile, click the “Edit” button next to the profile.
Alter the necessary fields and click “Submit”.
To delete a profile, click the “Delete” button next to the profile.
Using CSV profiles
MARC CSV profiles will appear on the export list or cart menu under the “Download” button in both the staff interface and the OPAC.
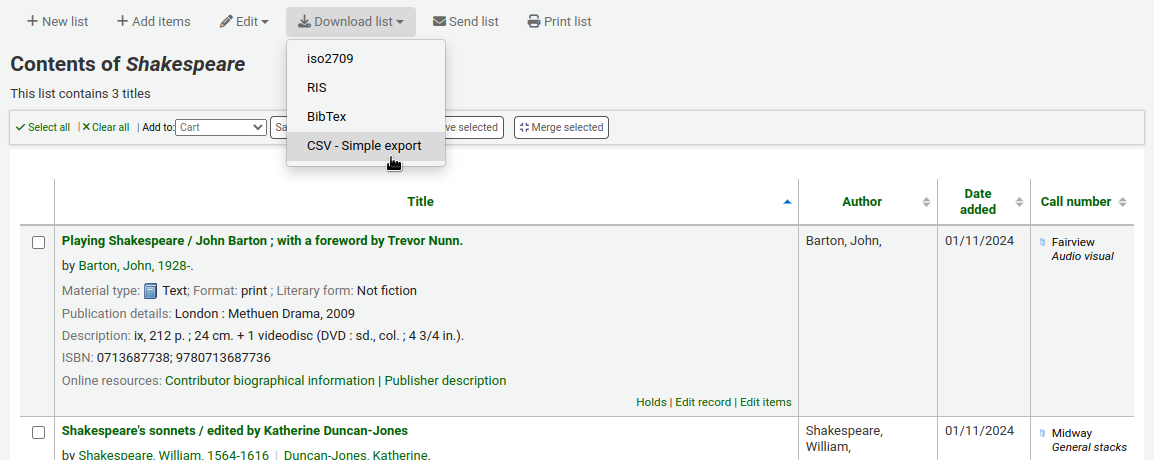
SQL CSV profiles will be available in various Koha modules in the staff interfaces depending on their usage.
“Late serial issues claims” CSV profiles will appear at the bottom of the late issues table in the serials module.
- “Export late orders” CSV profiles will appear at the bottom of the
late orders table in the acquisitions module.
- “Basket export in acquisition” CSV profiles will appear in the “Download”
button in acquisitions baskets.
“Export lost items in report” CSV profiles will appear in the lost items report.
Consultation des registres
Comment y accéder : Plus >Outils > Outils supplémentaires > Consultation des registres
Toutes les actions ayant lieu dans votre système Koha sont journalisées dans le fichier des registres. Vous pouvez limiter quelles actions seront journalisées au moyen des préférences système Registres. Ces registres sont disponibles dans l’outil Consultation des registres.
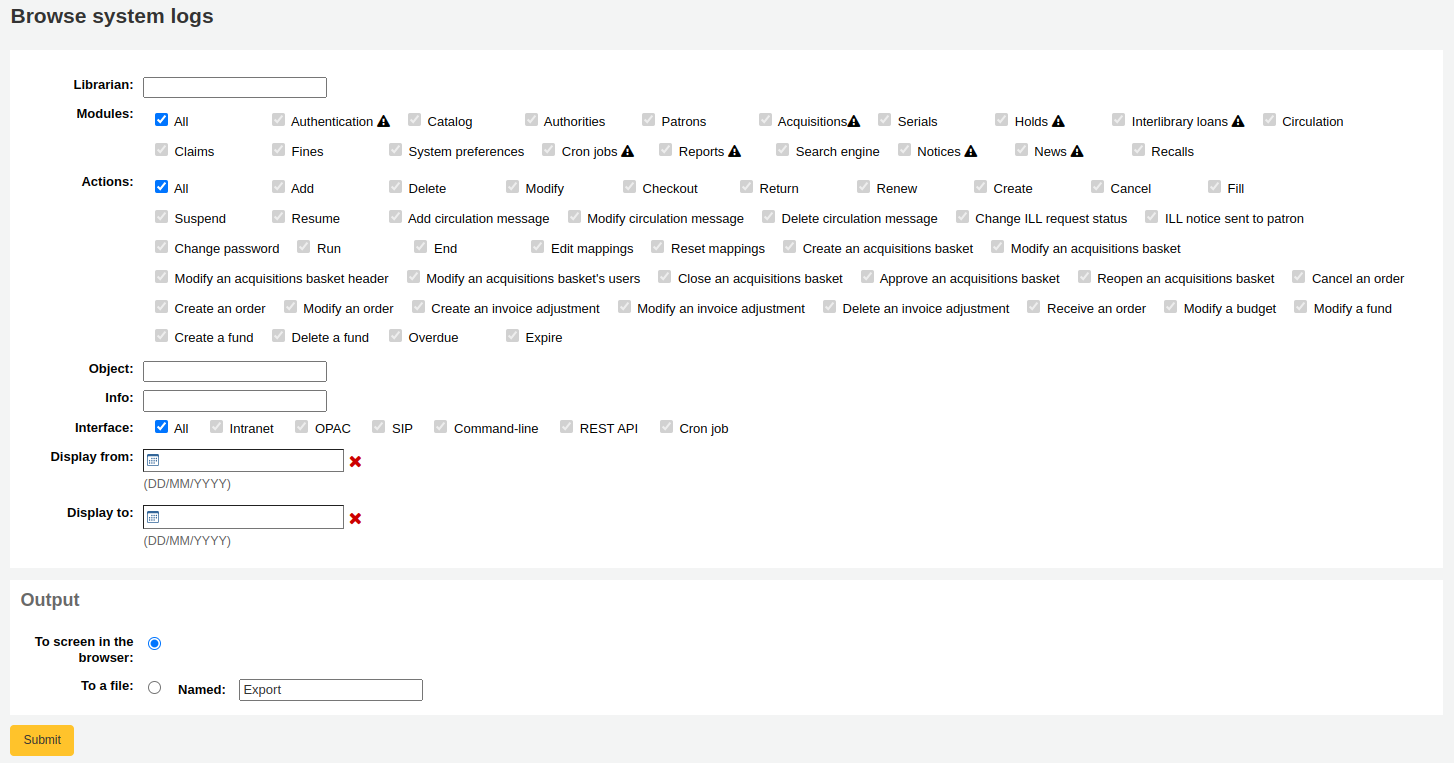
Note
The warning sign next to a module name indicates that the actions in this module are not logged. Change your logs preferences to log actions from a module.
En choisissant différentes combinaisons parmi les options proposées, vous produirez un fichier log spécifique.
Une recherche pour tous les logs qui sont reliés au module Circulation produit un résultat
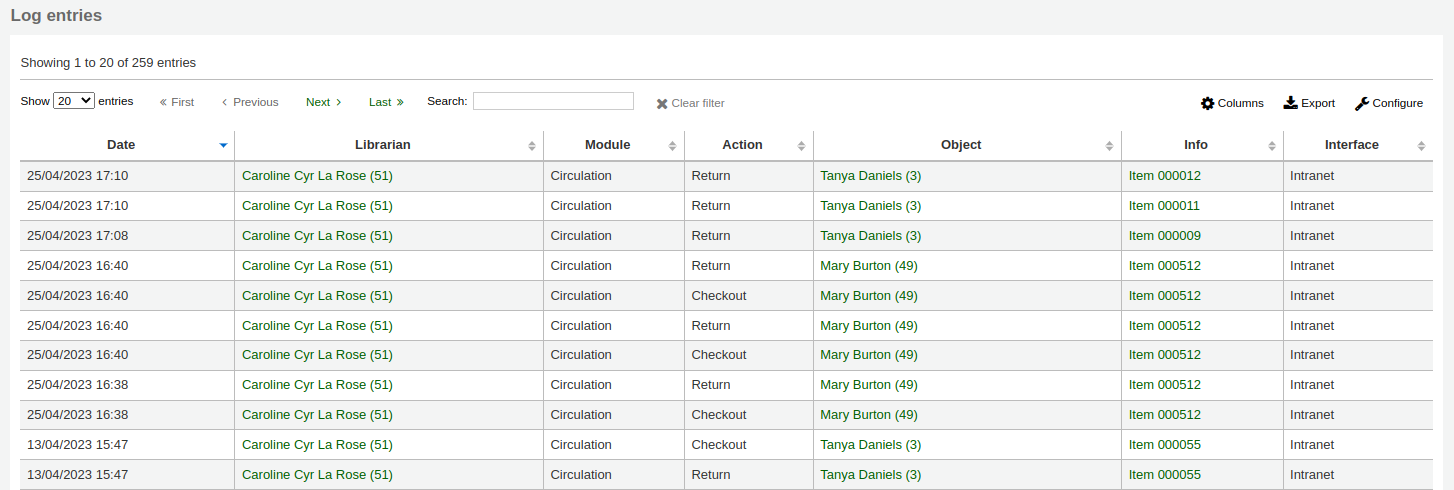
Note
Vous pouvez personnaliser les colonnes de ce tableau dans la section :ref:”Configurer les colonnes <column-settings-label>” du module Administration (référence du tableau : logst).
Nouvelles
Aller à : Plus > Outils > Outils supplémentaires > Annonces
Koha’s news module allows librarians to post news to the OPAC, staff interface and circulation receipts.

To add news to either the OPAC, the staff interface or a circulation receipt:
Click “New entry”
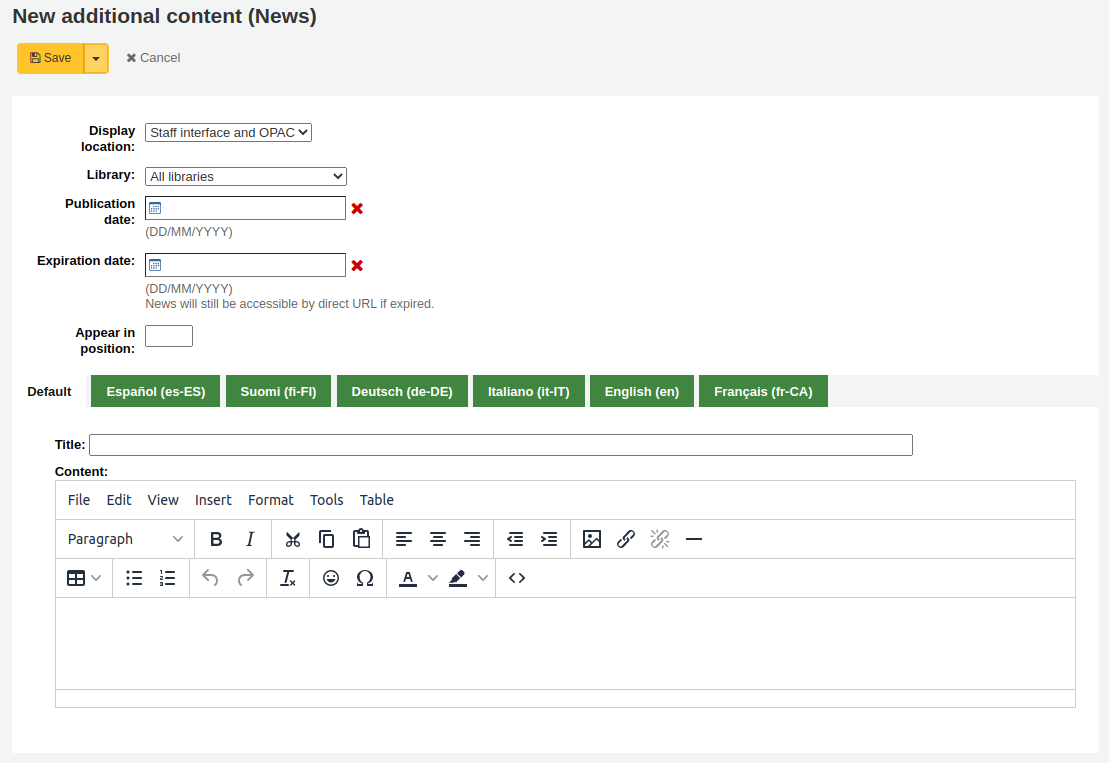
Code: enter a unique code for this news item
Display location: choose where to put the news

Librarian and OPAC interfaces: content will appear on the staff interface main page as well as in the news block on the OPAC
Librarian interface: content will appear on the staff interface main page
OPAC: content will appear in the top middle part of the OPAC page
Below the news in the OPAC there will be an RSS icon allowing you and your users to subscribe to library news
You can allow your users to choose to see branch-specific news with the OpacNewsLibrarySelect system preference
Slip: content will appear on the circulation receipts
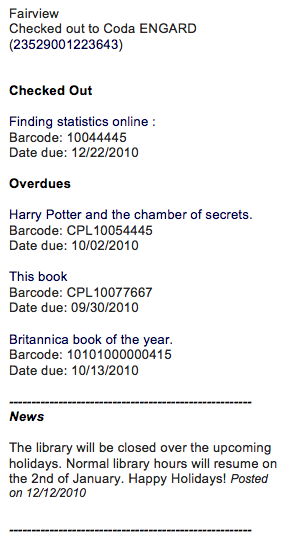
Note
This can be activated or deactivated in the Notices & slips tool
Library: choose the library for which this news item will be shown
Prior to end users logging in to the OPAC only news items listed to appear for “All libraries” will display unless your system administrator has configured an “OPAC_BRANCH_DEFAULT” override in virtual host configuration. See installation for details.
Publication date: use the publication date field to control from which date your news item appears
Examples: (these assume today’s date as 7 May 2019)
Publish on current date: set publication date as 7 May 2019
Schedule for publishing in future: set date later than 7 May 2019
Backdate the news item: set date earlier than 7 May 2019
Expiration date: use the expiration date field to automatically stop showing the news item when it is no longer relevant.
If this field is empty the news item will be shown until you remove it manually
Appear in position: you decide in what order your news items appear
If the field is left empty, the news will appear from newest to oldest
In this field, 0 is the top-most position; the larger the number, the lower in the list the news will appear
You can enter the news title and text for each language installed
Note
Vous pouvez choisir quel type d’éditeur utiliser (soit un éditeur de texte soit un éditeur WYSIWYG (what you see is what you get)) avec la préférence système AdditionalContentsEditor.
After filling in all of the fields, click “Save” at the top of the page.
Alternatively, click the arrow next to the “Save” button and choose “Save and continue editing” if you need to stay on this page to continue editing the news item.
Selon le choix retenu pour la préférence système NewsAuthorDisplay, vous pourrez aussi voir qui a créé l’annonce (utilise l’utilisateur connecté).
HTML customizations
Get there: More > Tools > Additional tools > HTML customizations
Koha’s HTML customizations tool allows staff to post content to the OPAC.
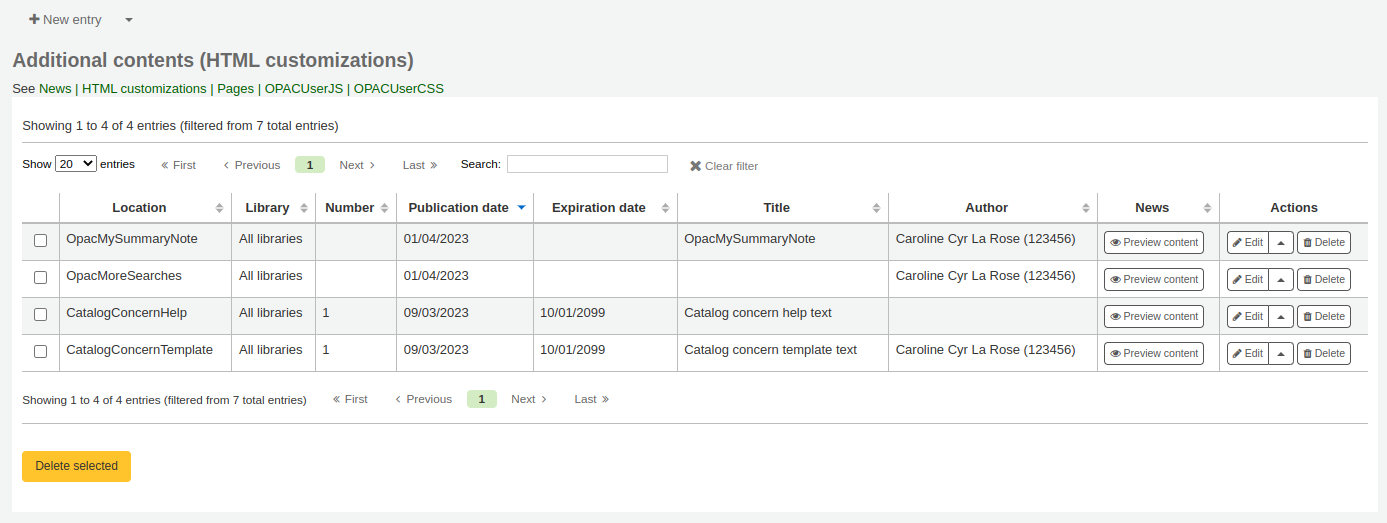
To add content to the OPAC:
Click “New entry”
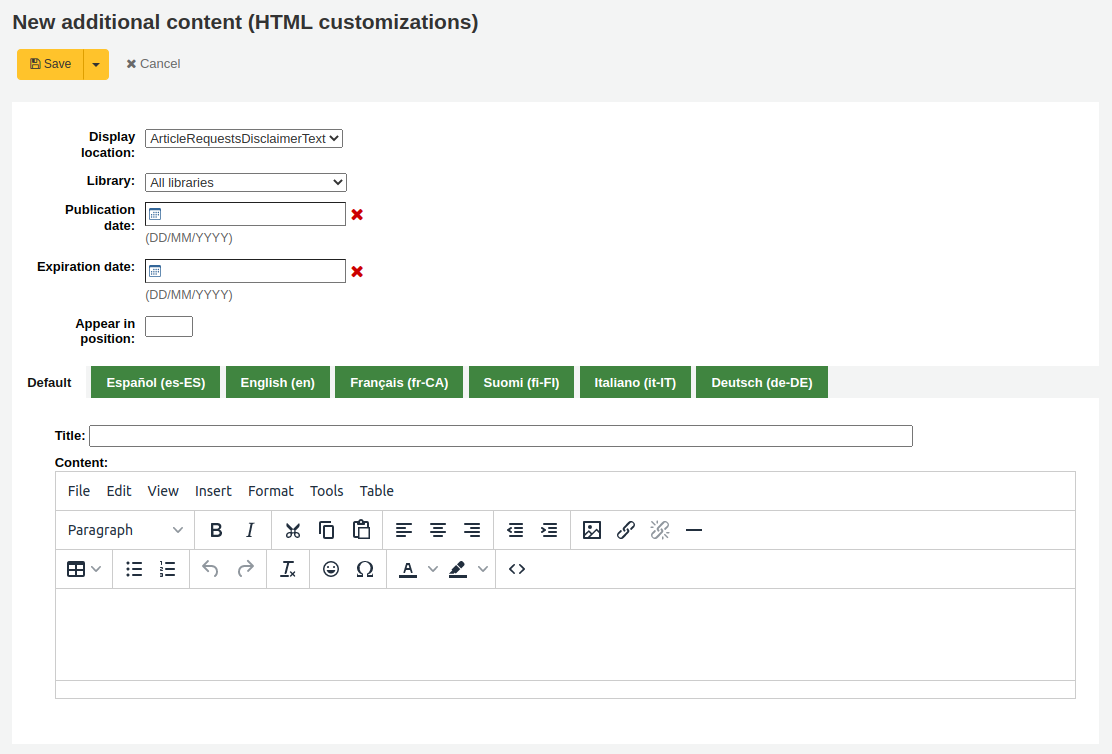
Code: enter a unique code for this additional content item
Display location: choose where to put the content
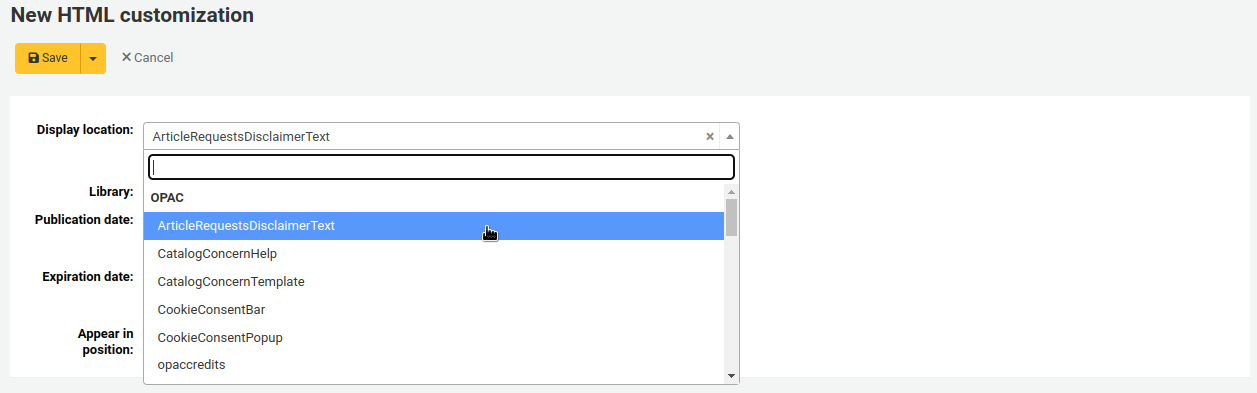
OPAC locations
The following image shows where each block is displayed on the OPAC’s main page, for the blocks that are displayed on the main page.
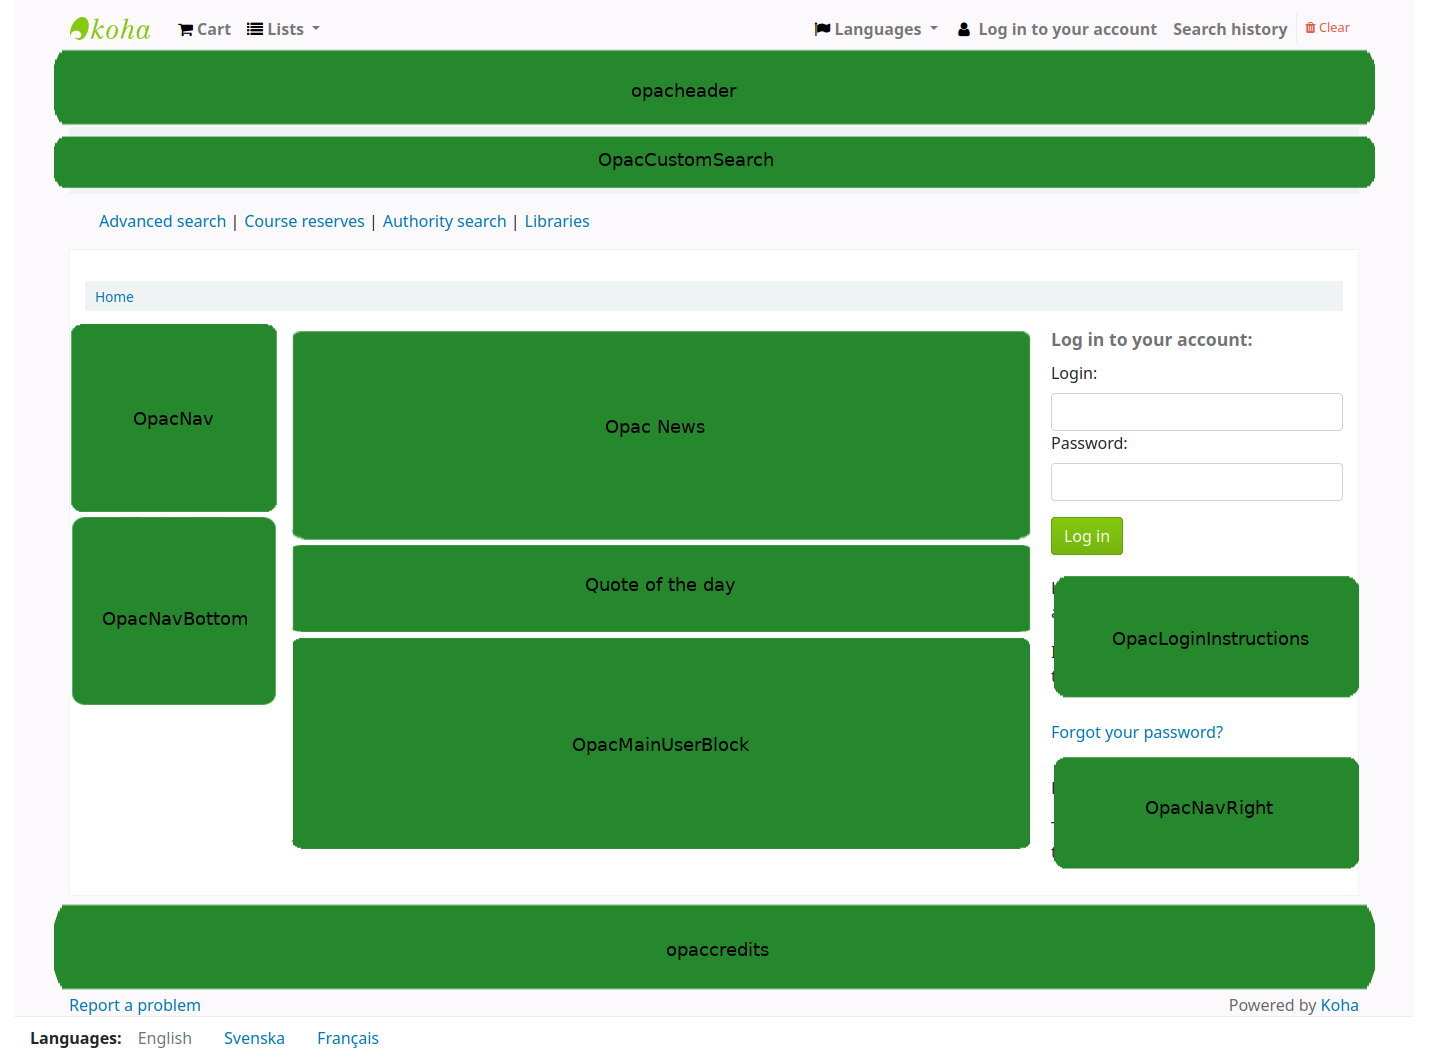
Note
The Quote of the day feature is found in the tools module, and the news are managed in the news tool. The rest of the customizable blocks are managed in the HTML customizations tool.
ArticleRequestsDisclaimerText: content will appear and patron will have to accept before they can continue to the article request form; use for any copyright/disclaimer patrons need to be aware of regarding photocopies or scans of articles or chapters
CatalogConcernHelp: content will appear at the bottom of catalog concern form when reporting a concern in the OPAC, or reporting a concern in the staff interface. The default text is « Please describe your concern clearly and the library will try to deal with it as quickly as possible ».
CatalogConcernTemplate: content will appear in the main text area of the catalog concern form when reporting a concern in the OPAC, or reporting a concern in the staff interface. The default text is
**Describe the concern**

A clear and concise description of what the concern is.

**To Reproduce**

Steps to reproduce the behavior:
1. Go to '...'
2. Click on '....'
3. Scroll down to '....'
4. See error

**Expected behavior**

A clear and concise description of what you expected to happen.
Astuce
Since this will be in a text field, there is no way to add formatting. Make sure to use the text editor, not the WYSIWYG editor, in order to have line breaks in your text.
opaccredits: content will appear at the bottom of the page
OpacCustomSearch: content will replace the simple search bar at the top of the page
opacheader: content will appear at the top of the OPAC page
OpacLibraryInfo: content will appear in the “Libraries” page in the OPAC, as well as in the holdings table in the OPAC
OpacLoginInstructions: content will appear under the login box on the OPAC’s main page
OpacMaintenanceNotice: content will replace the default maintenance message when the OpacMaintenance system preference is set to “Show”.
Version
Prior to Koha version 23.11, this was a system preference. See OpacMaintenanceNotice for more information.
OpacMainUserBlock: content will appear in the middle of the OPAC’s main page
OpacMoreSearches: content will appear under the search box at the top of the OPAC. By default (and depending on system preferences) there is a link for Advanced Search, Course reserves, Authority search, and Tag cloud. Any new searches will be added to the right of the already present links.
OpacMySummaryNote: content will appear above the patron’s summary and below the welcome message when the patron logs in to the OPAC and views their “your summary” tab.

OpacNav: content will appear on the left hand column of the main page and patron account on the OPAC. When on the patron account page, the content in OpacNav will appear before the account tabs (summary, charges, personal details, etc.)
OpacNavBottom: content will appear on the left hand column of the main page and patron account on the OPAC. When on the patron account page, the content in OpacNavBottom will appear after the account tabs (summary, charges, personal details, etc.). On the main page, the content in OpacNavBottom appears right below the content in OpacNav.
OpacNavRight: content will appear on the right side of the OPAC page
OPACResultsSidebar: content will appear on the search results page below the list of facets on the left side of the screen.
Version
Prior to Koha version 23.11, this was a system preference. See OPACResultsSidebar for more information.
OpacSuggestionInstructions: content will replace the text at the top of the purchase suggestion form on the OPAC
OpacSuppressionMessage: content will appear on the OPAC when a record is blocked. (See the OpacSuppression system preference for more information.)
Version
Prior to Koha version 23.11, this was a system preference. See OpacSuppressionMessage for more information.
PatronSelfRegistrationAdditionalInstructions: content will be displayed after the patron successfully creates a library account via the OPAC.
Version
Prior to Koha version 23.11, this was a system preference. See PatronSelfRegistrationAdditionalInstructions for more information.
Note
Note that this only appears after the patron has registered.
SCOMainUserBlock: content will appear in the center of the main page of the self check-out screen.
Version
Prior to Koha version 23.11, this was a system preference. See SCOMainUserBlock for more information.
SelfCheckHelpMessage: content will appear above the existing help message when clicking the “Help” link in the top right of the self check-out interface.
Version
Prior to Koha version 23.11, this was a system preference. See SelfCheckHelpMessage for more information.
SelfCheckInMainUserBlock: content will appear in the center of the main page of the self check-in screen.
Version
Prior to Koha version 23.11, this was a system preference. See SelfCheckInMainUserBlock for more information.
Staff interface locations
StaffAcquisitionsHome: content will appear at the bottom of the Acquisitions module main page.
StaffAuthoritiesHome: content will appear at the bottom of the Authorities main page.
StaffCataloguingHome: content will appear at the bottom of the Cataloguing module main page.
StaffListsHome: content will appear at the bottom of the Lists main page.
StaffPatronsHome: content will appear at the bottom of the Patrons module main page.
StaffPOSHome: content will appear at the bottom of the Point of sale main page.
StaffSerialsHome: content will appear at the bottom of the Serials module main page.
Library: choose the library for which this content will be shown
Prior to end users logging in to the OPAC only content blocks listed to appear for “All libraries” will display unless your system administrator has configured an “OPAC_BRANCH_DEFAULT” override in virtual host configuration.
Publication date: use the publication date field to control from which date your content appears
Examples: (these assume today’s date as 7 May 2019)
Publish on current date: set publication date as 7 May 2019
Schedule for publishing in future: set date later than 7 May 2019
Backdate the news item: set date earlier than 7 May 2019
Expiration date: use the expiration date field to automatically stop showing the content when it is no longer relevant.
If this field is empty the content will be shown until you remove it manually
Appear in position: you decide in what order your content appear, when there is more than one in the same display location
If the field is left empty, the content will appear from oldest to newest
In this field, 0 is the top-most position; the larger the number, the lower in the list the content will appear
You can enter the content title and text for each language installed
Note
The title is not shown for additional content. It mostly serves to know at a glance what the content is about when looking at the list of additional content items. If you want a title to appear, you must add it in the text portion.
Note
Vous pouvez choisir quel type d’éditeur utiliser (soit un éditeur de texte soit un éditeur WYSIWYG (what you see is what you get)) avec la préférence système AdditionalContentsEditor.
After filling in all of the fields, click “Save” at the top of the page.
Alternatively, click the arrow next to the “Save” button and choose “Save and continue editing” if you need to stay on this page to continue editing the news item.
Pages
Get there: More > Tools > Additional tools > Pages
The pages tool is a tool to create custom additional pages in the OPAC and in the staff interface. It is based on the same tool as the news and the HTML customizations, therefore it works in the same way.
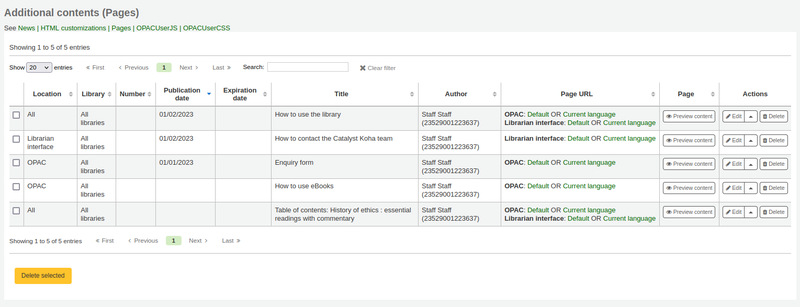
To add a new page:
Click “New entry”
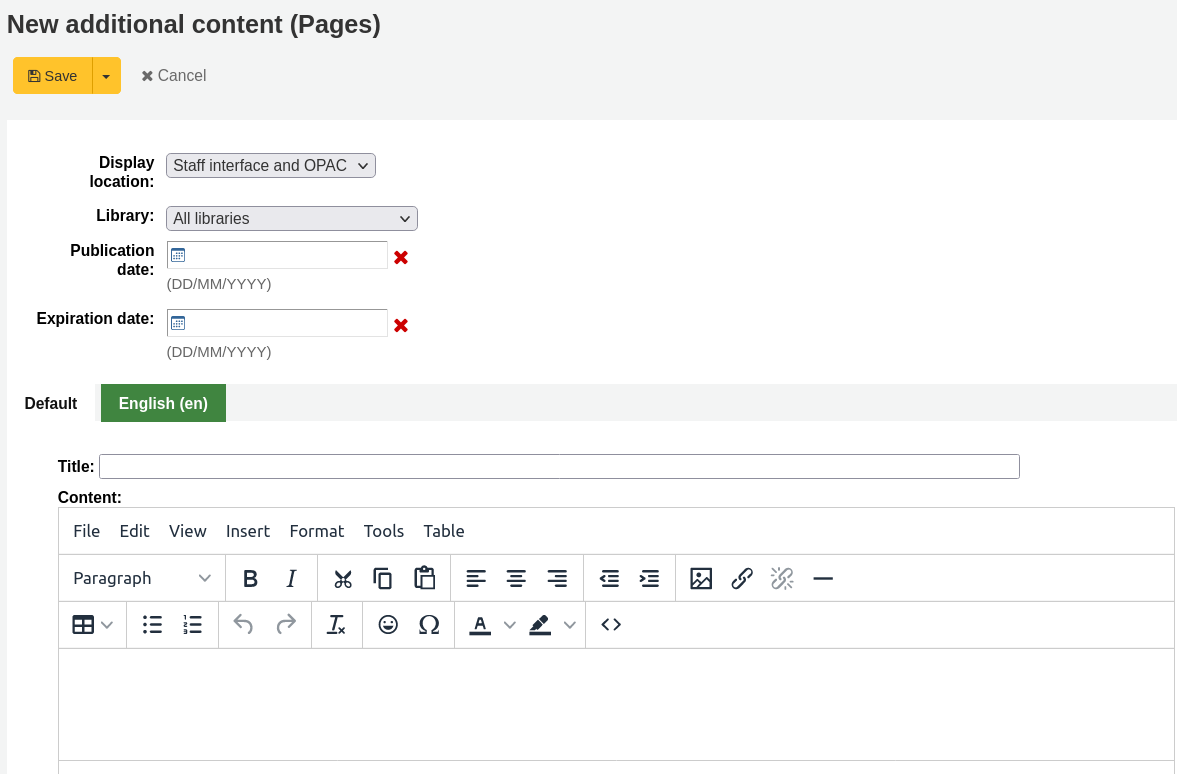
Display location: choose the interface from which this page should be accessed
Librarian and OPAC interfaces: two links will be created, one for the OPAC and one for the staff interface
Librarian interface: a link for the staff interface will be created
OPAC: a link for the OPAC will be created
Library: choose the library for which this page will be available
If an OPAC page is limited to a library, only logged in users whose home library matches the page library will be able to access the page.
Pages limited to a library will not be accessible to OPAC users who are not logged in, unless your system administrator has configured an “OPAC_BRANCH_DEFAULT” override in virtual host configuration.
If a staff interface page is limited to a library, only staff logged into that library will be able to access the page.
Publication date: use the publication date field to control from which date your page is accessible, if it should only be accessed at a future date.
Expiration date: use the expiration date field to remove the page after a specific date.
If this field is empty the page will be available until you remove it manually
You can enter the page title and content for each language installed
Note
Vous pouvez choisir quel type d’éditeur utiliser (soit un éditeur de texte soit un éditeur WYSIWYG (what you see is what you get)) avec la préférence système AdditionalContentsEditor.
After filling in all of the fields, click “Save” at the top of the page.
Alternatively, click the arrow next to the “Save” button and choose “Save and continue editing” if you need to stay on this page to continue editing the news item.
In the table, a link will be generated for the OPAC or the staff interface or both. Use this link in HTML customizations, news or system preferences such as IntranetNav or IntranetmainUserBlock so that the patrons or staff members can access the new page.
Note
To link to a specific page, use the code in the URL with the
code=parameter. For example:OPACBASEURL/cgi-bin/koha/opac-page.pl?code=staff_and_opac_42 STAFFCLIENTBASEURL/cgi-bin/koha/tools/page.pl?code=staff_and_opac_42
In multi-language installations, use the
language=parameter followed by the language code to link to the page in a specific language. For example:OPACBASEURL/cgi-bin/koha/opac-page.pl?code=staff_and_opac_42&language=fr-CA STAFFCLIENTBASEURL/cgi-bin/koha/tools/page.pl?code=staff_and_opac_42&language=fr-CA
To use a custom page
Once the page has been developed and saved, you will see a summary table of all custom pages. This table also displays the generated links to access these custom pages. The links will be available in both the default language, and the installed language currently in use by the logged in staff member.
There is a button to preview the created page. This is helpful to check how the page looks and functions before it is deployed.
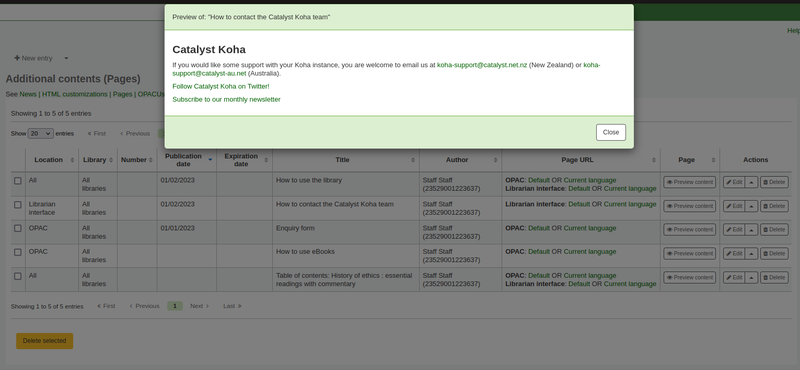
Now the page has been created, there are a number of ways to make the page accessible to your patrons in the Koha OPAC.
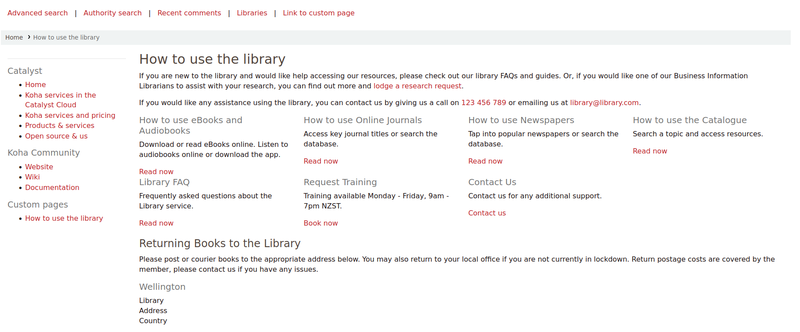
One option is to use an HTML customisation to add the link to the page to a section of the OPAC. The page can be added as a navigation link (in OpacNav, OpacNavBottom, or OpacNavRight). Depending on the page, it may be more suitable in the header (opacheader), footer (opaccredits), or main section of the homepage (OpacMainUserBlock).
HTML customizations are only displayed on the OPAC, so News items would be the appropriate tool to add the link to the main landing page of the staff interface.
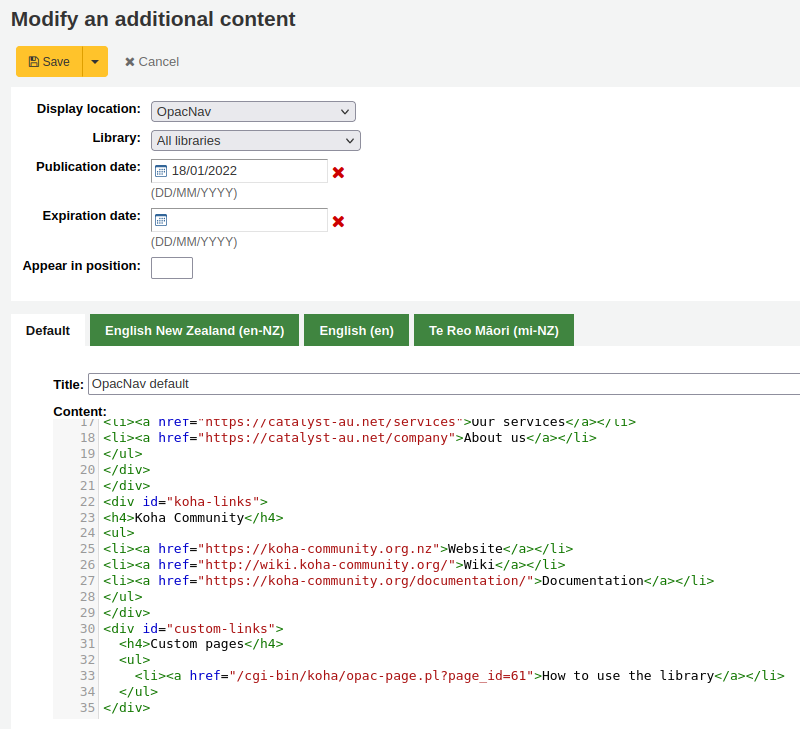
The benefit of putting the page link in an HTML customization or News item is that you can use the WYSIWYG editor, instead of writing code. However, there is always the option to write the content in the HTML text editor too, if you prefer.
Those more proficient in writing code could use jQuery (Javascript) to insert their page link anywhere in the OPAC or staff interface.
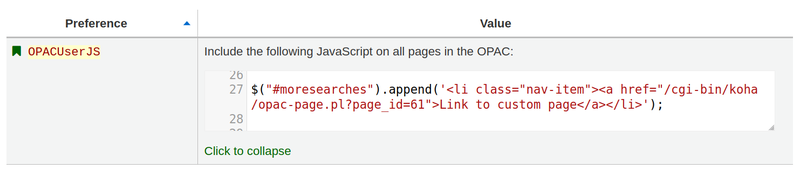
Using jQuery, the pages could be added to either interface as simple text links, or as more advanced button links or image links. Add code to the OPACUserJS system preference to apply jQuery to the OPAC, or to the IntranetUserJS system preference to apply jQuery to the staff interface.
Clever ways to use custom pages:
There are many interesting ways to use custom pages in a Koha library. We’ve heard discussion of pages being used for tables of contents, frequently asked questions pages for the library, and enquiry forms.
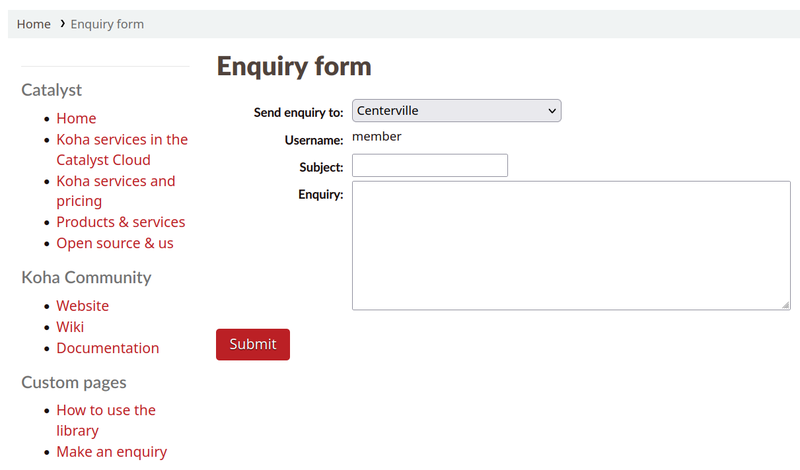
Another way to make custom Koha page content accessible for users, would be to catalogue those pages so they pop in in Koha search results, for example library tutorials that patrons may be looking for.
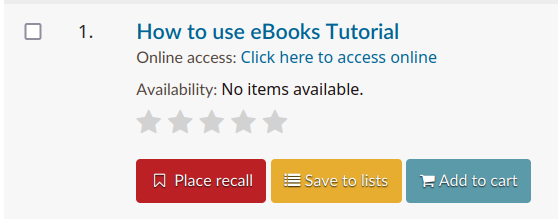
Once the page has been created, it can be catalogued in the URI field of a record (856$u). Alternatively, it could be catalogued in the URI field of an item attached to a record (952$u). Both of these fields get converted into hyperlinks by Koha. If catalogued in a record or item, it would then be indexed and become searchable.
Once catalogued, these pages could be used in other ways that are typically reserved for books and other records. The records representing pages can be added to lists, or stored in virtual collections or locations that make them easier to find in the catalogue. They could even be captured and displayed in carousels!
Task scheduler
Aller à : Plus > Outils > Outils supplémentaires > Planificateur de tâches
Le planificateur de tâche sert à programmer l’exécution d’un rapport.
To schedule a task, visit the task scheduler and fill in the form
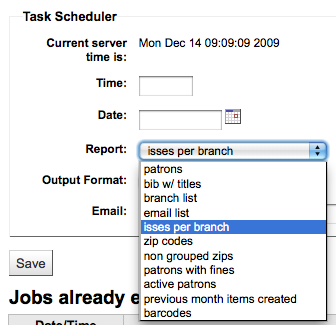
L’heure courante du serveur vous montre l’heure de votre serveur. La planification de tous vos états est basée sur cette heure-là, pas sur votre heure locale.
L’heure doit être entrée sous la forme hh:mm
La date doit être saisie en utilisant le calendrier pop up
Choisissez l’état que vous voulez programmer
Choisissez de recevoir le texte du résultat ou bien un lien vers le résultat
Saisissez dans Courriel l’adresse de la personne qui recevra l’état
Le planificateur de tâche sert à programmer l’exécution d’un rapport.

Vous pouvez également planifier les états directement depuis la liste des états enregistrés en cliquant sur le lien Planifier
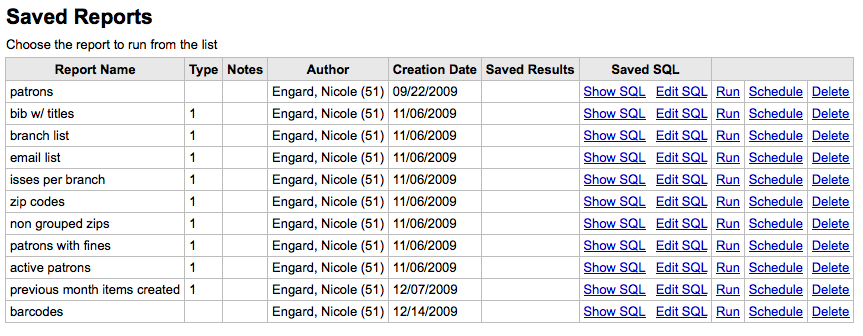
Problème
Le Planificateur de tâches ne fonctionnera pas si l’user du serveur web n’a pas la permission de l’utiliser. Pour trouver si le bon user a les permissions nécessaires, vérifiez /etc/at.allow pour voir les utilisateurs. Si vous n’avez pas ce fichier, vérifiez /etc/at.deny. Si at.deny existe mais est vide, alors tous les users peuvent l’utiliser. Voyez avec votre administrateur système pour ajouter l’user au bon endroit afin que le planificateur de tâches fonctionne.
Quote editor
Get there: More > Tools > Additional Tools > Quote editor
This tool will allow you to add and edit quotes to show on the OPAC or the staff interface.
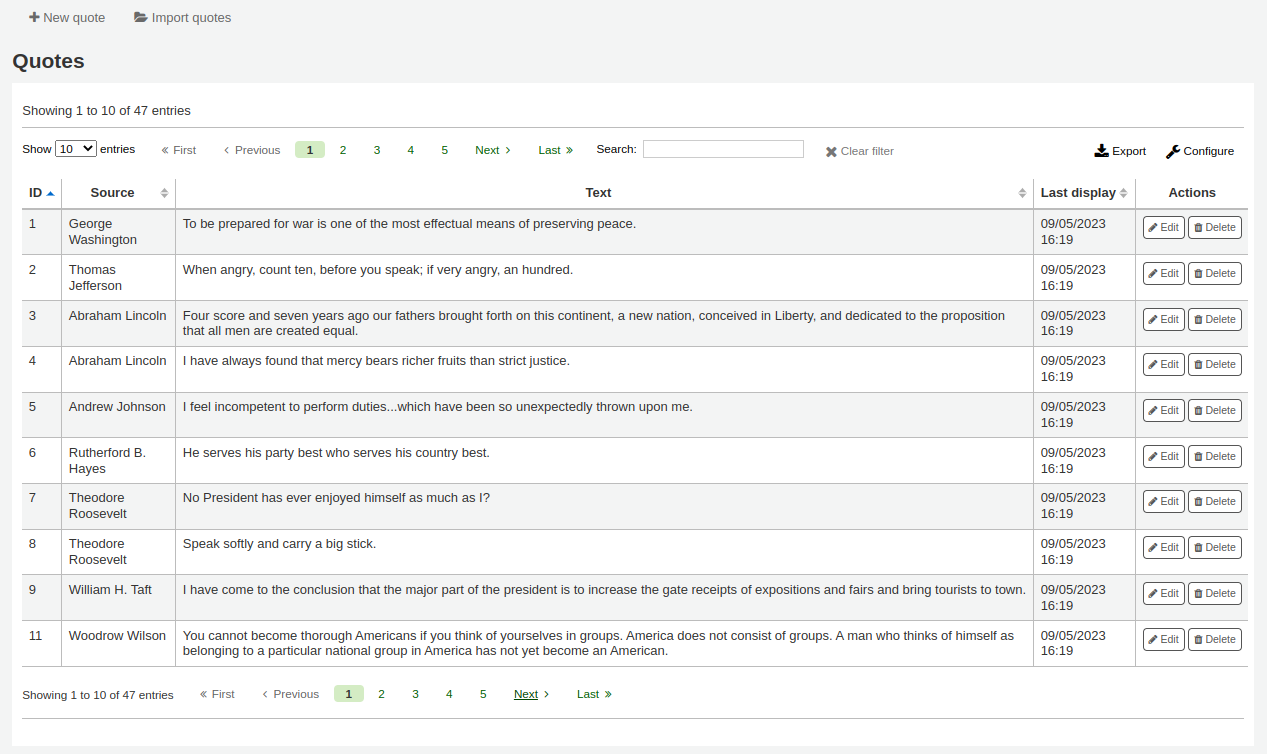
To turn this feature on set the QuoteOfTheDay system preference to either “OPAC”, “staff interface”, or both, and add at least one quote using this tool.
Les citations apparaîtront à l’OPAC au dessus de l’OpacMainUserBlock des Nouvelles.
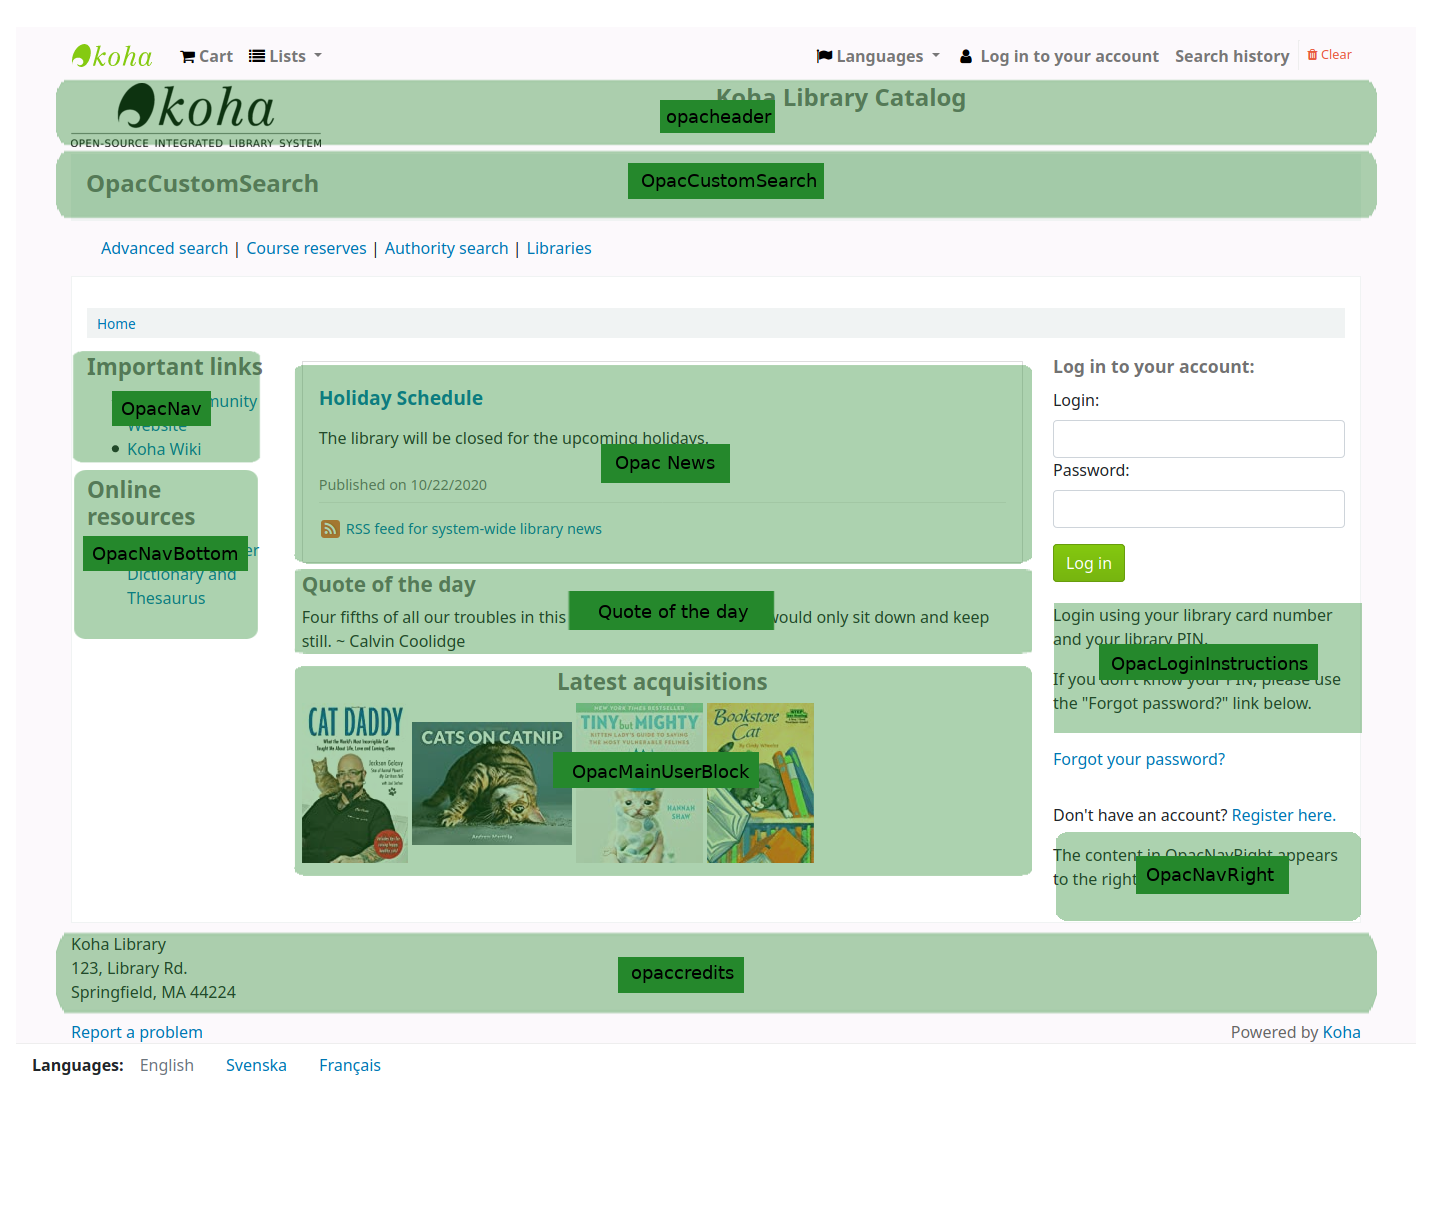
In the staff interface, the quotes will appear under the news on the left side.
Adding a quote
Pour ajouter une nouvelle notification
Click the “New quote” button in the toolbar at the top of the page.
Fill out the form.

Source: enter the source of the quote, e.g. the name of the person who said the quote
Text: enter the text of the quote
Avertissement
Les deux champs “Source” et “Texte” doivent être saisis pour que la citation soit sauvegardée.
Click “Submit” to save the new quote.
The new quote should now be visible in the list.
Importing quotes
You can import a batch of quotes as a CSV file. Your file must contain two columns in the form: « source », »text » with no header row.
Note
Vous serez invité à confirmer le téléchargement des fichiers de plus de 512 Ko de mémoire
To start the import process click the “Import quotes” button at the top of the screen.
Scannez les codes à barres des documents à renouveler

Après avoir sélectionné le fichier au format CSV, cliquer sur le bouton « Ouvrir » et le fichier sera chargé dans une table temporaire modifiable.
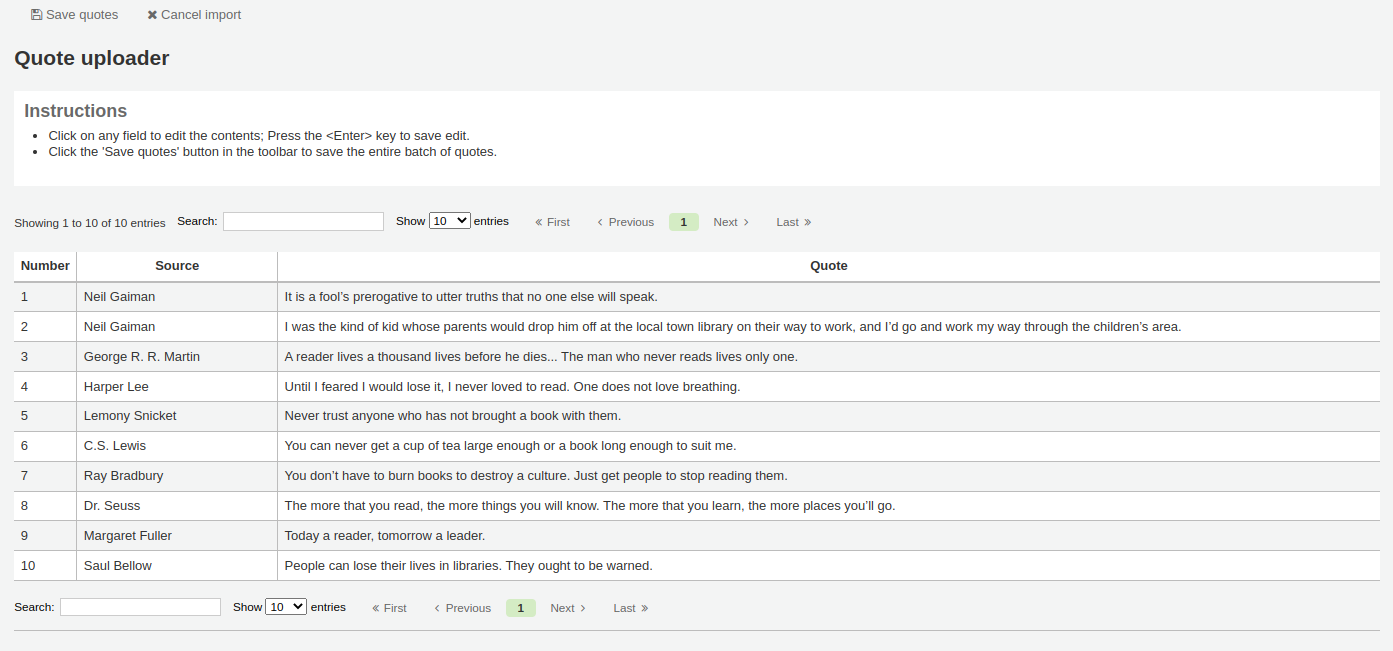
From the listing you can edit either the “Source” or “Text” fields by clicking on the desired field. When you are finished editing a field, press the <Enter> key on your keyboard to save the changes.

Quand vous êtes satisfait de vos citations, cliquer sur “Enregistrer Citations” dans la barre de menu et elles seront sauvegardées.
Editing a quote
To edit a quote, click on the “Edit” button to the right of the quote.
Edit either the “Source” or “Text” fields.
Click “Submit” to save the quote.
Deleting a quote
To delete a quote, click on the “Delete” button to the right of the quote.
Confirm the deletion by clicking “Delete”.
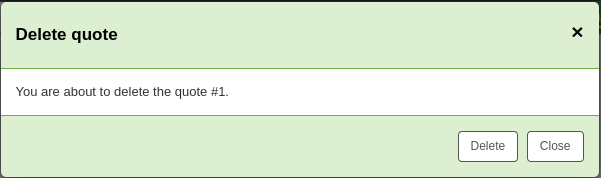
Tool plugins
This tool is used to view, manage and configure plugins used as tools.
This section will only be visible once you have uploaded tool-type plugins in the plugin administration page.
Get there: More > Tools > Additional Tools > Tool plugins
From this page, you will see only tool-type plugins.
See the managing plugins section of this manual to learn how to manage your tool-type plugins.
Télécharger
Aller à : Plus > Outils > Outils supplémentaires > Télécharger n’importe quel fichier
This tool will allow you to upload files to your Koha system for selection from the Cataloging form.
Upload files
When you first visit the Upload tool you might see a warning about missing a category.
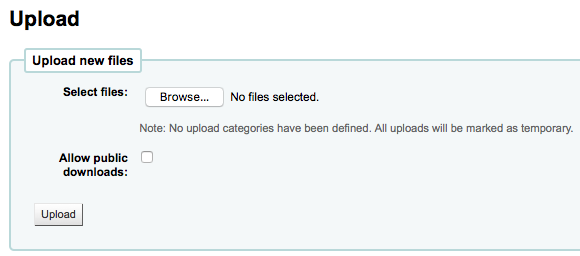
Categories are defined in the authorized value in the UPLOAD category. If you do not have upload categories then your files will be temporary and will be deleted the next time the server is rebooted. Once you have a value in the UPLOAD authorized value category you will see a Category pull down below the “Browse” button.
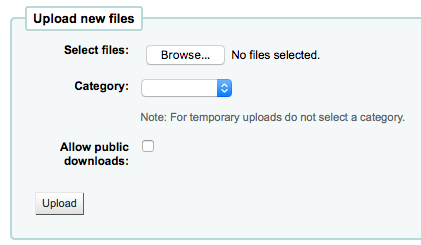
Browse your computer a file, choose a category and decide if the public will be able to download this file via the OPAC. Once your file is uploaded you will be presented with a confirmation.

Search files
All uploaded files are searchable from below the upload form. Using the form you can search any part of the filename and/or the Hashvalue.Search uploaded files
You will be presented with the results of your search.
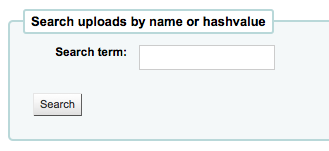
Accès aux fichiers
*Aller à : Plus > Outils > Outils supplémentaires > Accès aux fichiers
This option allows access to files stored on the server from the staff interface. The directories where the files are stored need to be defined in the koha-conf.xml file. In order to be able to access the tool, a staff patron requires the superlibrarian or access_files patron permission
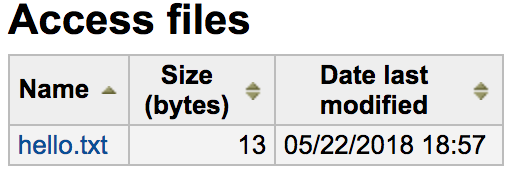
Rapports d’anomalie à l’OPAC
Aller à : Plus > Outils > Outils supplémentaires > Rapports d’anomalies à l’OPAC
This tool is used to manage the problem reports sent by patrons via the OPAC.
Note
This tool only appears if the OPACReportProblem system preference is enabled.
From this tool, you will see all the problems that were reported by patrons on the OPAC.
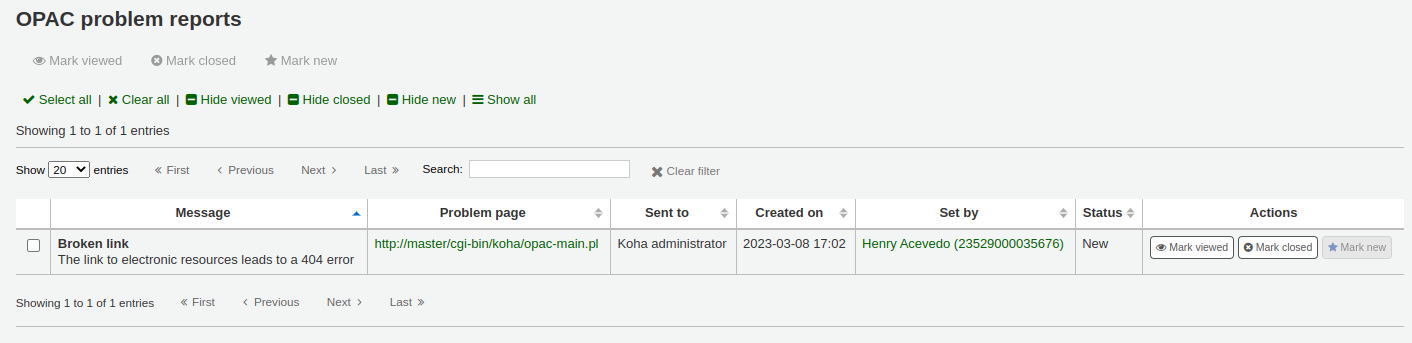
From the “Actions” column, you can
“Mark viewed”: mark this problem report as viewed, this will change the status of the problem report to “Viewed”
“Mark closed”: close this problem report, this will change the status of the problem report to “Closed”
“Mark new”: mark this problem as new (i.e. not viewed), this will revert the status back to “New”.
You can also batch change statuses by checking the boxes next to the problem reports you want to change and use the button at the top of the page.
Gestion de la trésorerie
Koha includes a number of options for dealing with monetary transactions and actions to allow for fine grained tracking of these processes for audit and analytic processes.
Caisses
Les caisses peuvent être utilisées pour suivre les transactions d’un emplacement particulier de votre bibliothèque. Cela peut se révéler particulièrement utile pour détailler où les espèces ont été perçues pour un paiement et quand elles en ont été retirées pour dépôt à la banque.
Setup
Pour activer l’usage des caisses, vous devez activer la préférence système UseCashRegisters.
Ensuite, vous pouvez configurer les caisses de votre bibliothèque dans la section caisses du module administration.
Cashup
The action of “cashing up” can be recorded against a cash register from both the library details and register details pages.
Clicking the Record cashup button will simply record the date and time that the action has taken place and is intended to allow the regular record of when money is collected from the cash register and taken to the bank.
Both of the above pages utilize the cashup record to limit the display of transactions/summaries to only pertinent information, since the last cashup.
Once a cashup has taken place, a summary of the transactions taken during that cashup period is available for display, and printing, via the Summary link found next to the last cashup date on the register details page.
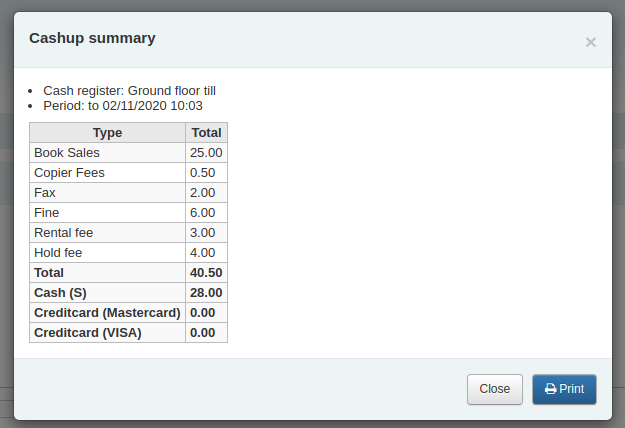
Cash summary for library
Aller à : Accueil > Outils > Résumé des encaissements par bibliothèque
A summary of transaction amounts associated to a libraries cash registers can be found under the “Cash summary for library” page tool.
The summary will list registers associated with your logged in branch alongside information about how much money should be found in each register, what is available to take to the bank and a breakdown of income vs outgoings.
Note: You can also access this page from the left hand menu available on the Point of sale page when that module is enabled.
Transaction history for register
Aller à : Accueil > Outils > Gestion de la trésorerie > Historique de transaction de registres
A list of all transactions to have taken place at a register is available by clicking on the cash register name from the library details page.
If you have the correct permissions, you can re-print receipts, issue refunds and record cashups from this page.
Note: You can also access this page from the left hand menu available on the Point of sale page when that module is enabled.
Commentaires
Aller à : Plus > Outils > Adhérents et Circulation > Commentaires
Tous les commentaires ajoutés aux notices bibliographiques par des adhérents via l’OPAC nécessitent une modération par les bibliothécaires. S’il y a des commentaires en attente de modération ils seront listés sur la page principale de l’interface professionnelle en dessous de la liste des modules :
puis vers la rubrique Commentaires dans le module Outils
To moderate comments click on the notification on the main dashboard or go directly to the Comments tool and click “Approve” or “Delete” to the right of the comments awaiting moderation.
La page vous informera de l’absence de commentaires
Vous pouvez également réviser et désapprouver des commentaires que vous aviez initialement approuvés en allant dans l’onglet “Commentaires approuvés”