Course reserves
O módulo de reservas para cursos no Koha permite que você mova temporariamente os exemplares para ‘reserva’ e defina regras específicas de circulação para estes exemplares enquanto eles estiverem reservados para um curso específico.
Course reserves setup
Before using course reserves you will need to do some set up.
First you will need to enable course reserves by setting the UseCourseReserves preference to ‘Use’.
Next you will need to have all of your course instructors added as patrons.
Next you will want to add a couple of new authorized values for Departments and Terms.
You may also want to create new item types, collection codes and/or shelving locations to make it clear that the items are on reserve to your patrons. You will also want to be sure to confirm that your circulation and fines rules are right for your new item types (whether they be hourly or daily loans).
Adding courses
Once you have completed your set up for course reserves you can start creating courses and adding titles to the reserve list.

A partir da página principal de reservas para o curso você pode adicionar um novo curso clicando em ‘Novo curso’ na barra da esquerda.
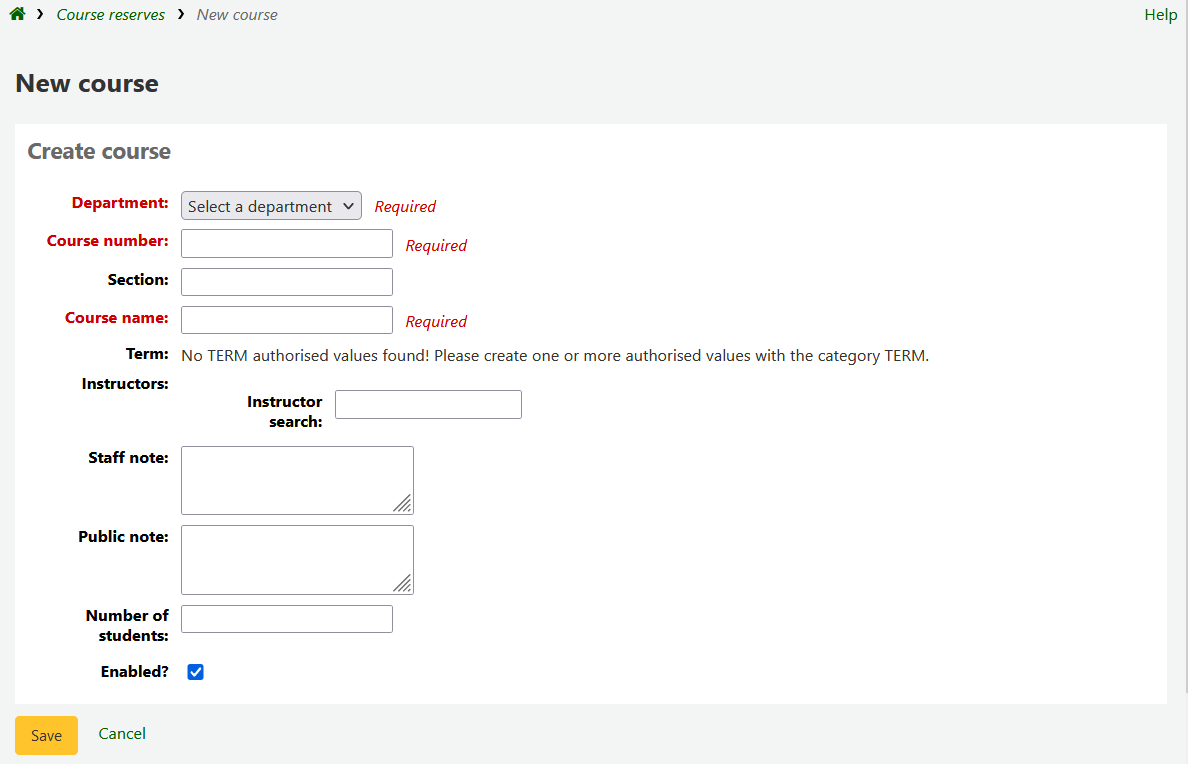
Your new course will need a department, number and name at the bare minimum. You can also add in additional details like course section number and term. To link an instructor to this course simply start typing their name and Koha will search your patron database to find you the right person.

Quando aparecer o nome do instrutor, apenas clique em cima e ele será adicionado. Você pode repetir este processo para todos os instrutores neste curso. O nome de cada instrutor irá aparecer sobre a caixa de pesquisa e poderá ser removido através do link ‘Remover’.

Caso você queira que seu curso tenha as reservas exibidas publicamente, você deve selecionar a caixa ‘Permitir’ antes de salvar seu novo curso.
Quando seu curso for salvo, ele será exibido na página de cursos com reservas e se tornará pesquisável através de qualquer dado inserido em seu cadastro.

Note
You can customize the columns of this table in the ‘Table settings’ section of the Administration module (table id: courses page, course_reserves_table).
Adding reserve materials
Antes de incluir materiais na reserva você precisa de ao menos um curso para adicioná-los. Para adicionar materiais acesse o módulo Reservas de Cursos.

Clique no título do curso para o qual você deseja adicionar materiais.
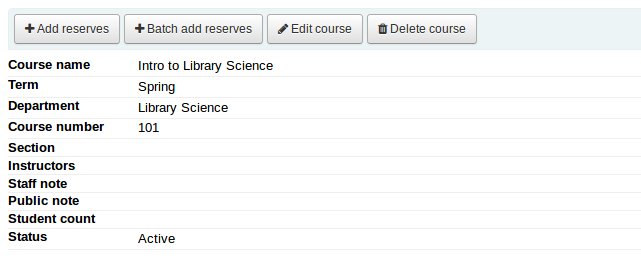
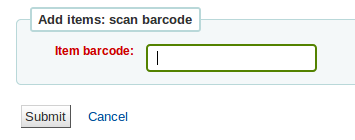
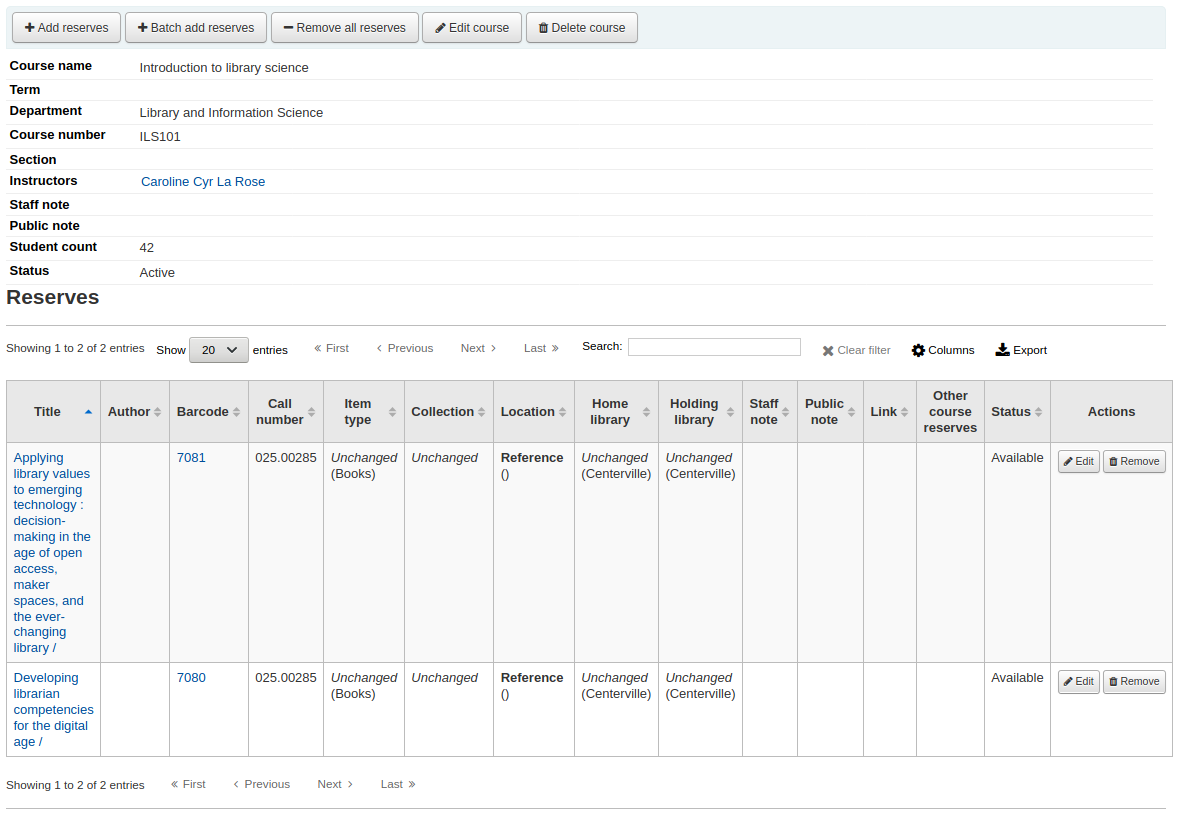
No cabeçalho da descrição do curso clique em ‘Adicionar reservas’ para incluir títulos a esta lista de reservas. Será solicitado o código de barras do exemplar.
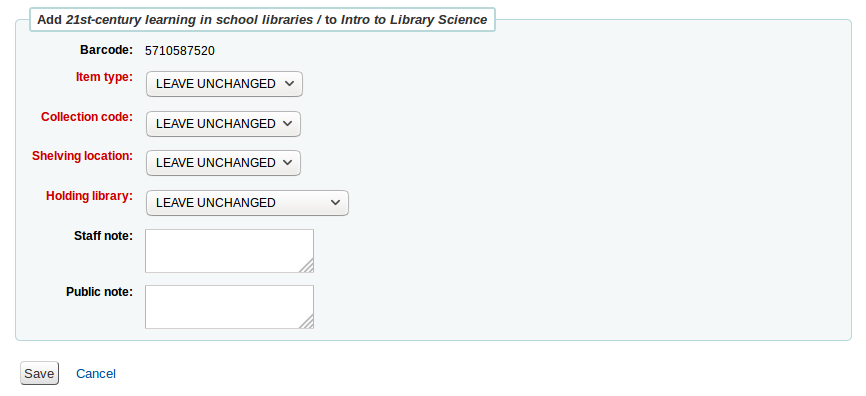
For each item, you can change the item type, collection code, shelving location or holding library. These changes will only apply while the course is active. When you deactivate the course, the items will go back to their original settings.
After you are done scanning the barcodes to add to the course you can see them on the course page
Note
You can customize the columns of this table in the ‘Table settings’ section of the Administration module (table id: reserves page, course_reserves_table).
You also have the possibility of adding several items at the same time. Click on ‘Batch add reserves’.
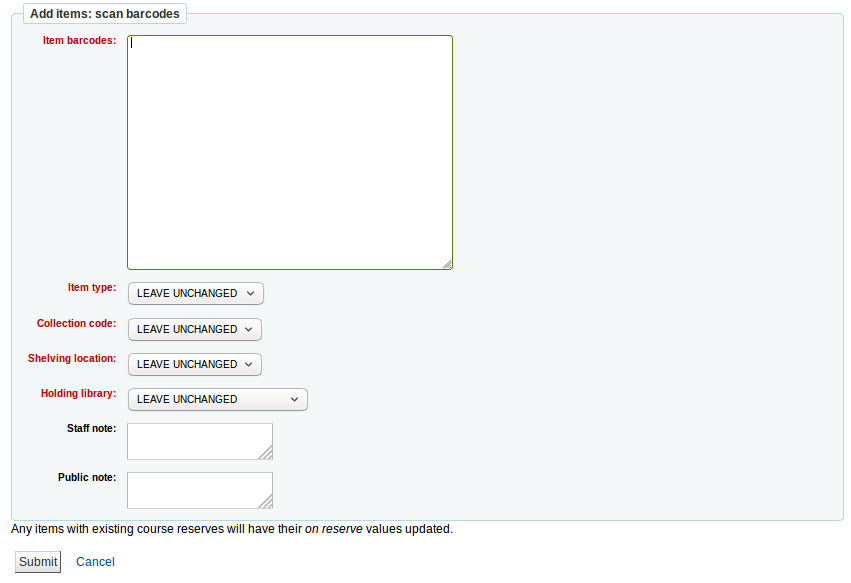
Scan the barcodes of the items you want to add to the reserve and change the item type, collection code, shelving location or holding library, if needed.
Course reserves in the OPAC
Once you have enabled course reserves and added courses you will see a link to course reserves below your search box in the OPAC.

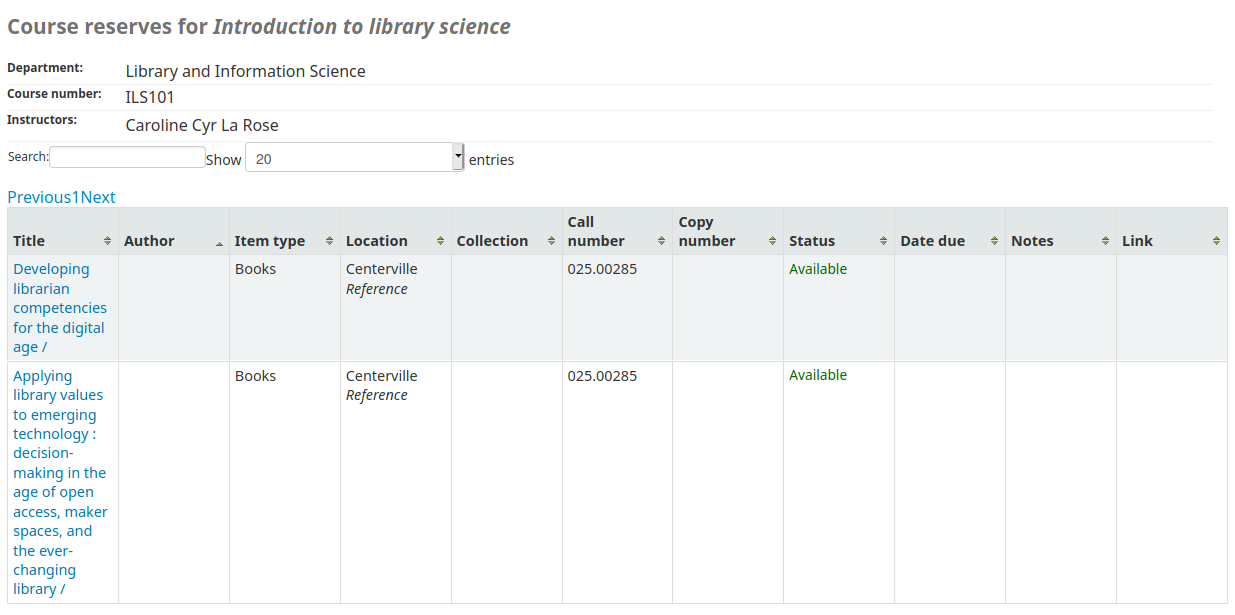
Clicking that link will show you your list of enabled courses (if you have only one course you will just see the contents of that one course).

Note
You can customize the columns of this table in the ‘Table settings’ section of the Administration module (table id: course_reserves_table).
You can search course reserves by any field (course number, course name, instructor name, department) that is visible in the list of courses. Clicking a course name will show you the details and reserve items.
Note
You can customize the columns of this table in the ‘Table settings’ section of the Administration module (table id: course-items-table).