Lists and cart
Lists are a way to save a collection of bibliographic records on a specific topic or for a specific purpose. The cart is a session specific storage space for bibliographic records.
Get there: More > Lists
Lists
Create a list
A list can be created by visiting the Lists page and clicking ‘New list’

The new list form offers several options for creating your list:
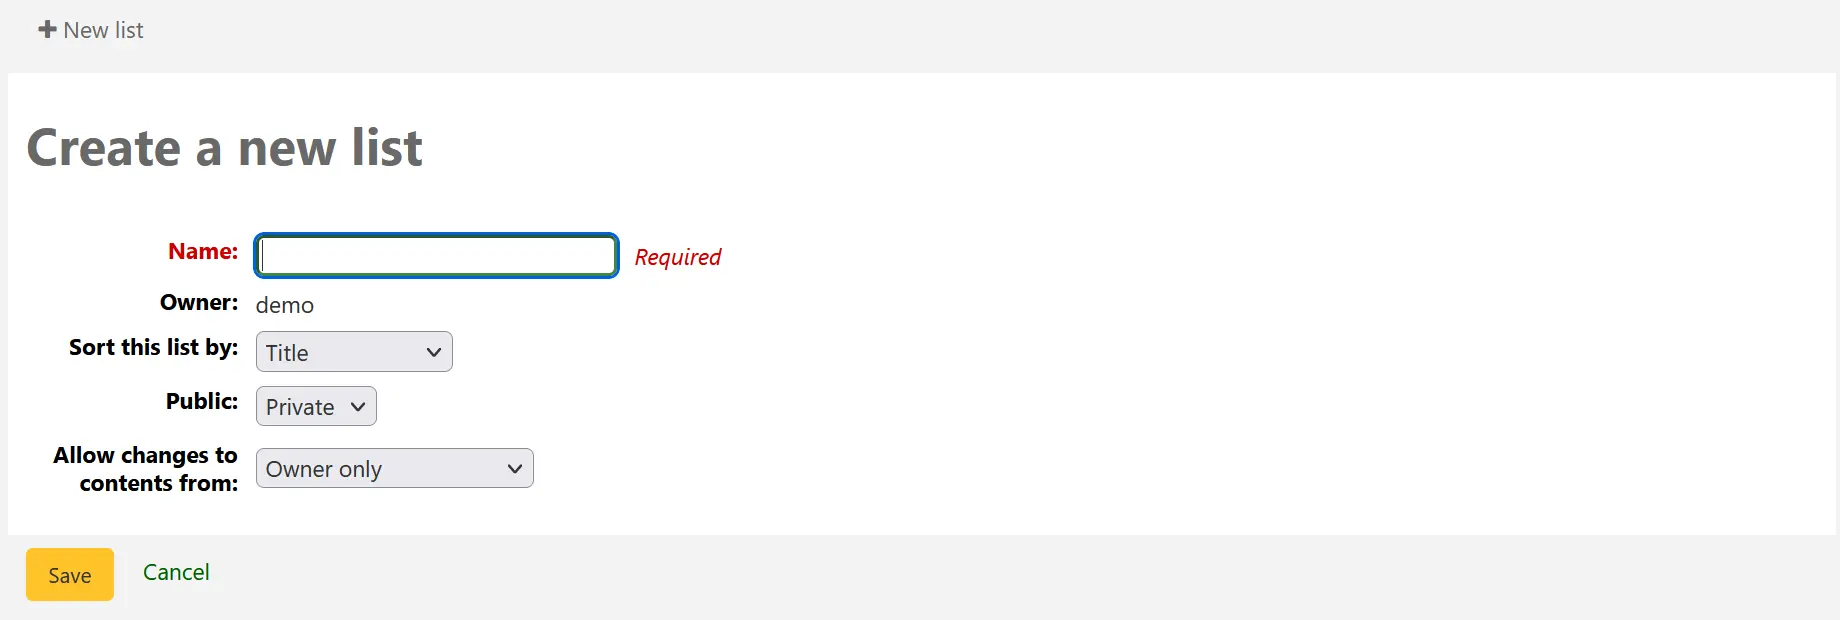
Name: the name is what will appear on the list of lists, it is the only required field
Owner: this is the username of the owner of the list, the creator is the default owner, but that can be changed later
Sort this list by: you can choose how to sort the list (by title, author, publication year, call number or date added to the list)
Public: decide if the list is going to be private or public
A private list can be seen only by you
A public list can be seen by everybody, including OPAC users
Note
Staff members must have the create_public_lists permission (or the superlibrarian permission) in order to create public lists.
Allow changes to contents from: decide who has permission to add or remove titles from the list
Nobody: this will close the list to contributions
Owner only: only you will be able to add or remove items from the list. If the list is public or shared, the OPAC users or sharers will not be able to change the list contents.
Anyone seeing this list: everyone who has access to the list will be able to add or remove titles. If the list is public, this means everyone. If the list is private, only the owner will have the ability to change the contents. And if the list is shared, the owner and sharers will have this ability.
Permitted staff only: this option will make the list content editable by staff members with the edit_public_list_contents permission.
Staff only: this option will make the list editable by all staff members (users with the catalogue permission).
A list can also be created from the catalog search results
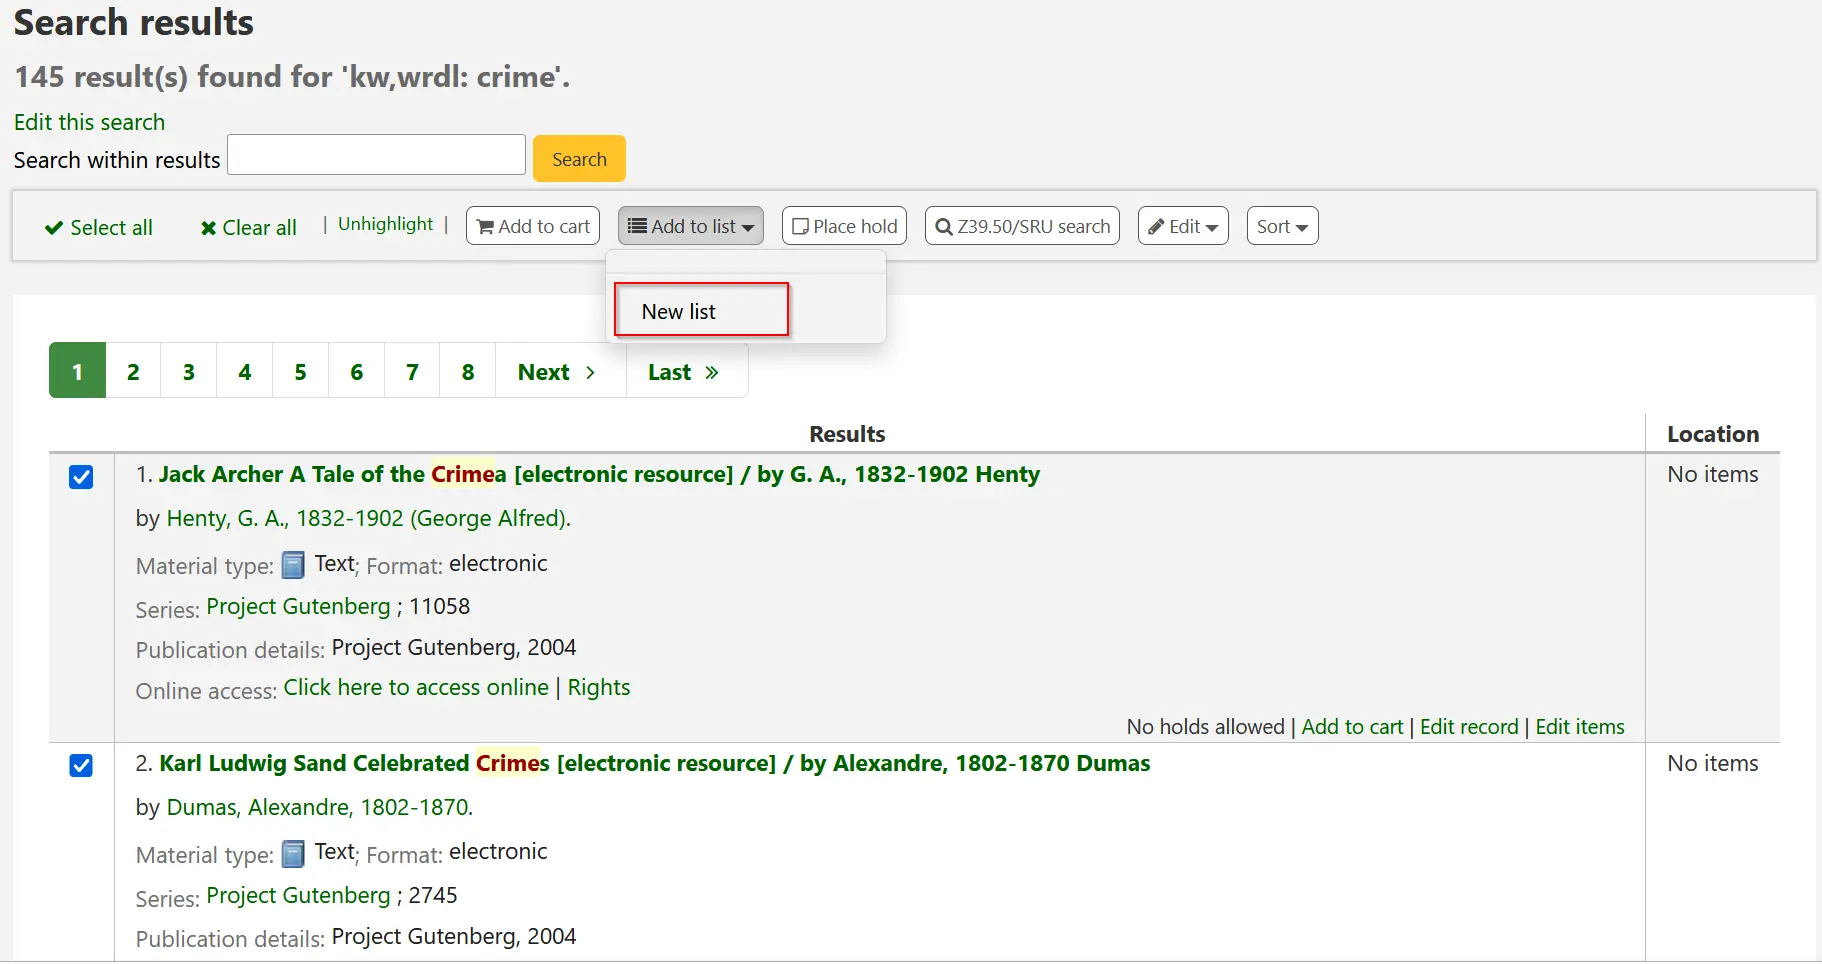
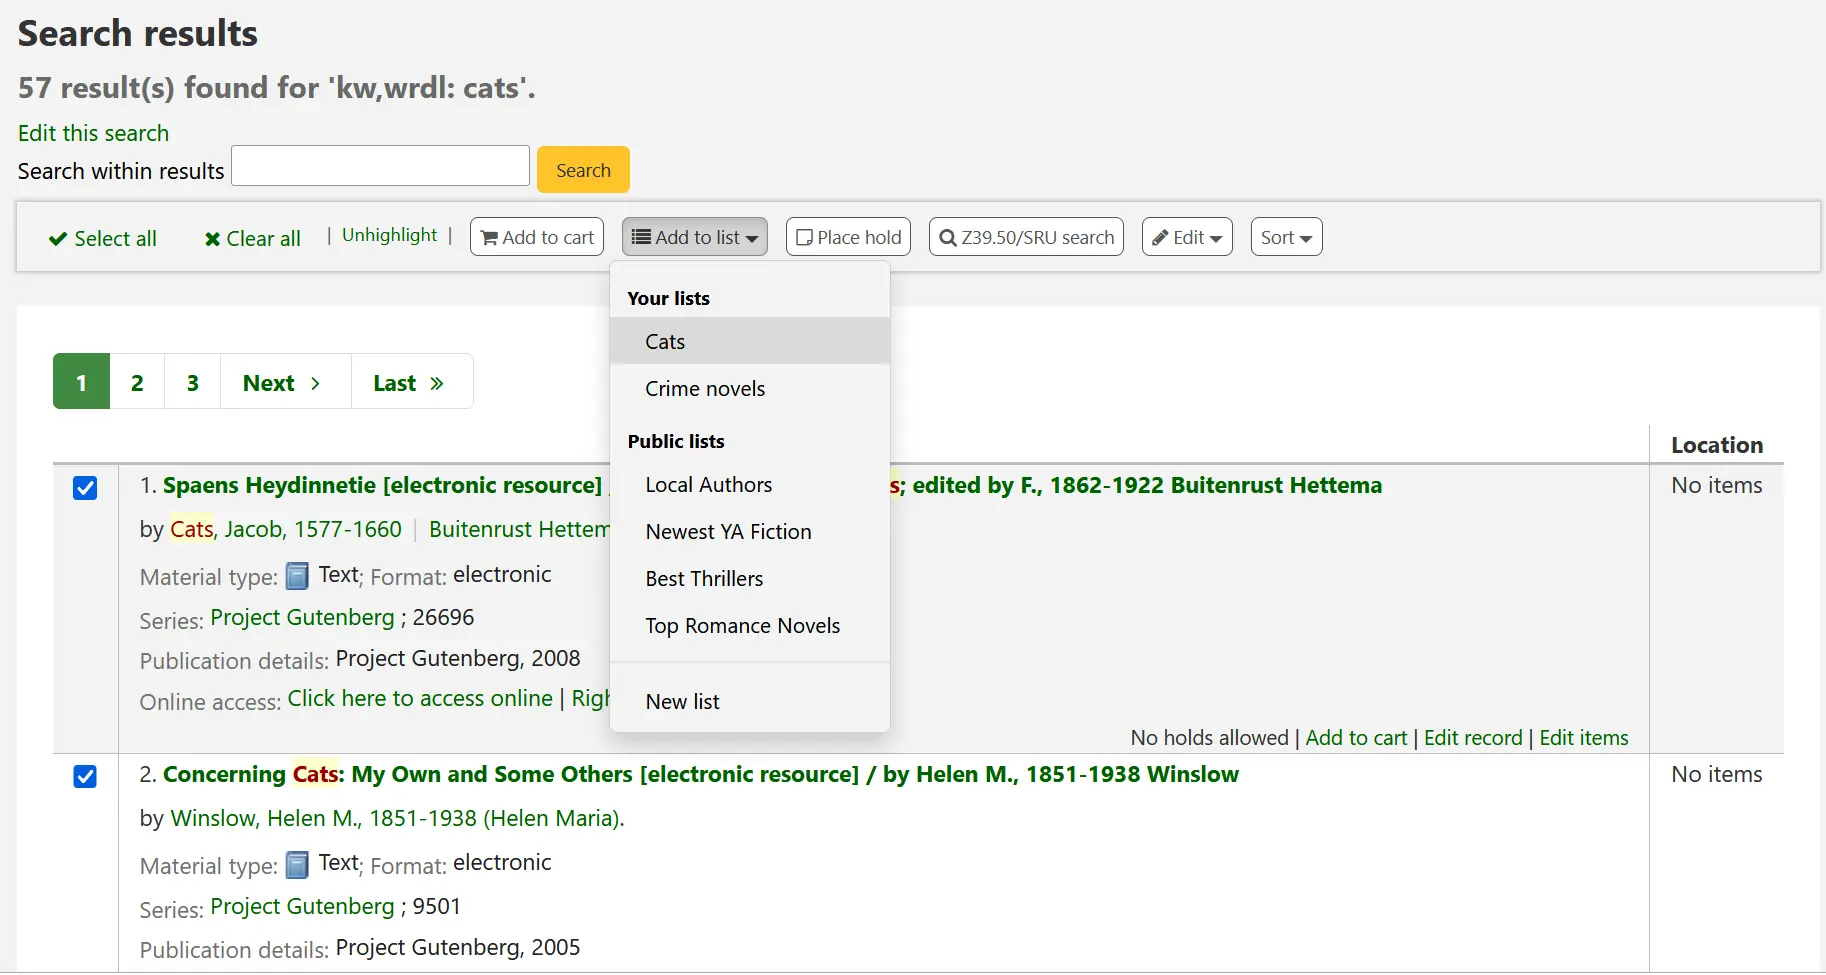
Check the box to the left of the titles you want to add to the new list
Choose ‘New list’ from the ‘Add to:’ pull down menu
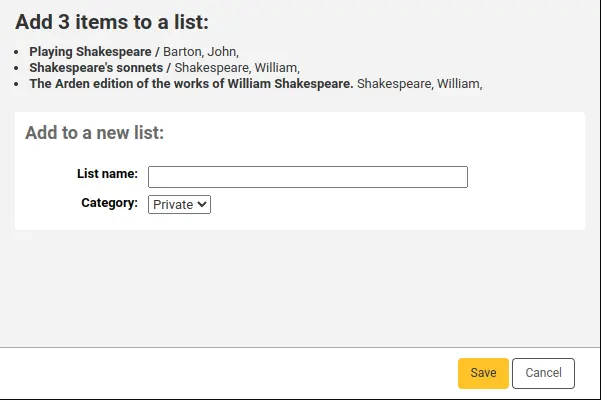
Name: the name is what will appear on the list of lists, it is the only required field
Category: decide if the list is going to be private or public
A private list can be seen only by you
A public list can be seen by everybody, including OPAC users
Note
Staff members must have the create_public_lists permission (or the superlibrarian permission) in order to create public lists.
The list will have the default sort (title) and the default modification permissions (owner only).
Once the list is saved it will accessible from the Lists page and from the ‘Add to’ menu at the top of the search results.
Add to a list
To add titles to an existing list click on the list name from the page of lists
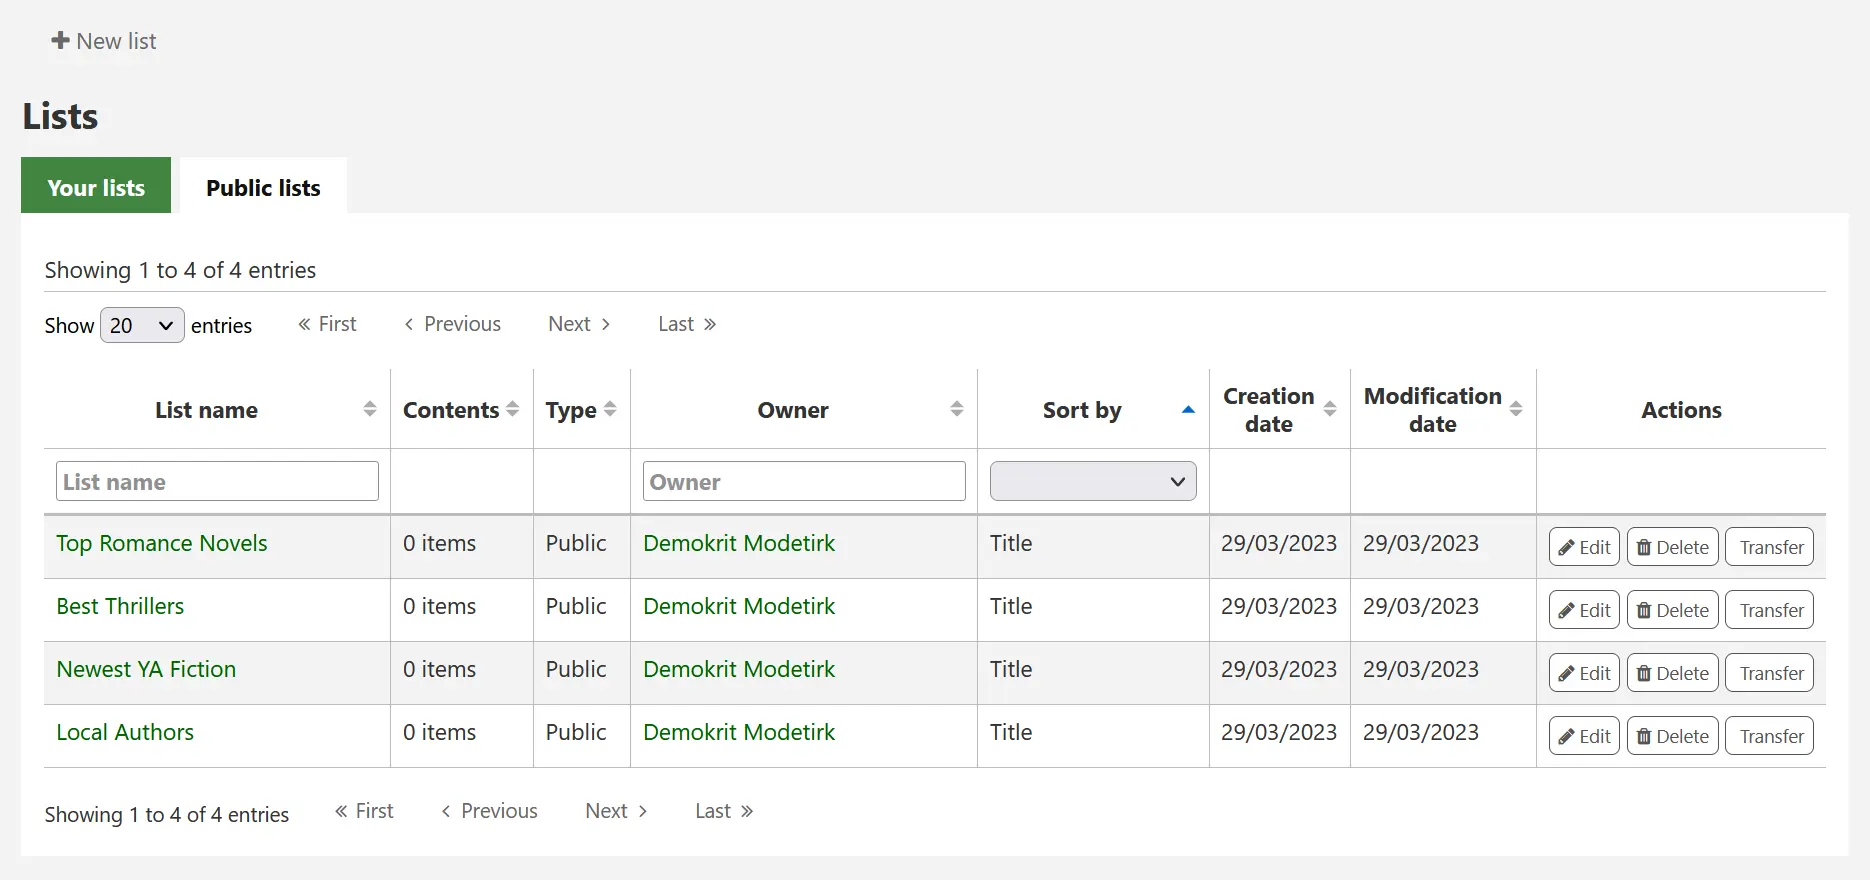
To open a list, click the list name.
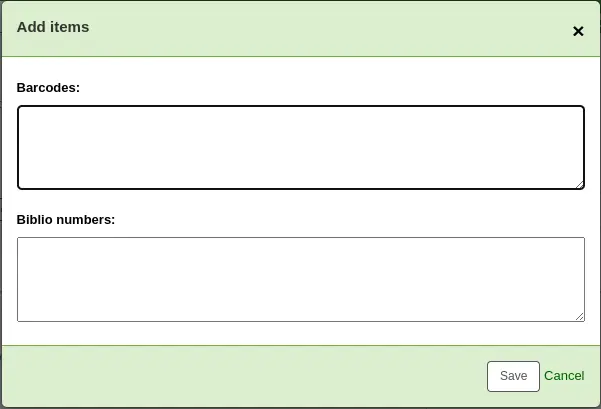
From that page, click ‘Add records’ to add titles by scanning barcodes into the box, or entering biblionumbers.
A title can also be added to a list by selecting titles on the search results page and choosing the list from the ‘Add to’ menu
Viewing lists
To see the contents of a list, visit the Lists page in the staff interface

From this page, you can perform some actions on the lists.
Edit: will allow you to edit the description and permissions for this list
Note
For public lists, this option will only appear to staff members with the edit_public_lists permission.
Delete: will delete the list
Note
For public lists, this option will only appear to staff members with the delete_public_lists permission.
Transfer: will allow you to change the owner of the list
Note
This option is only possible on public lists.
This option will only appear to staff members with the edit_public_lists permission.
Note
A notice will be sent to the new owner of the list.
The message sent when transferring ownership is TRANSFER_OWNERSHIP, which can be customized in the Notices and slips tool.
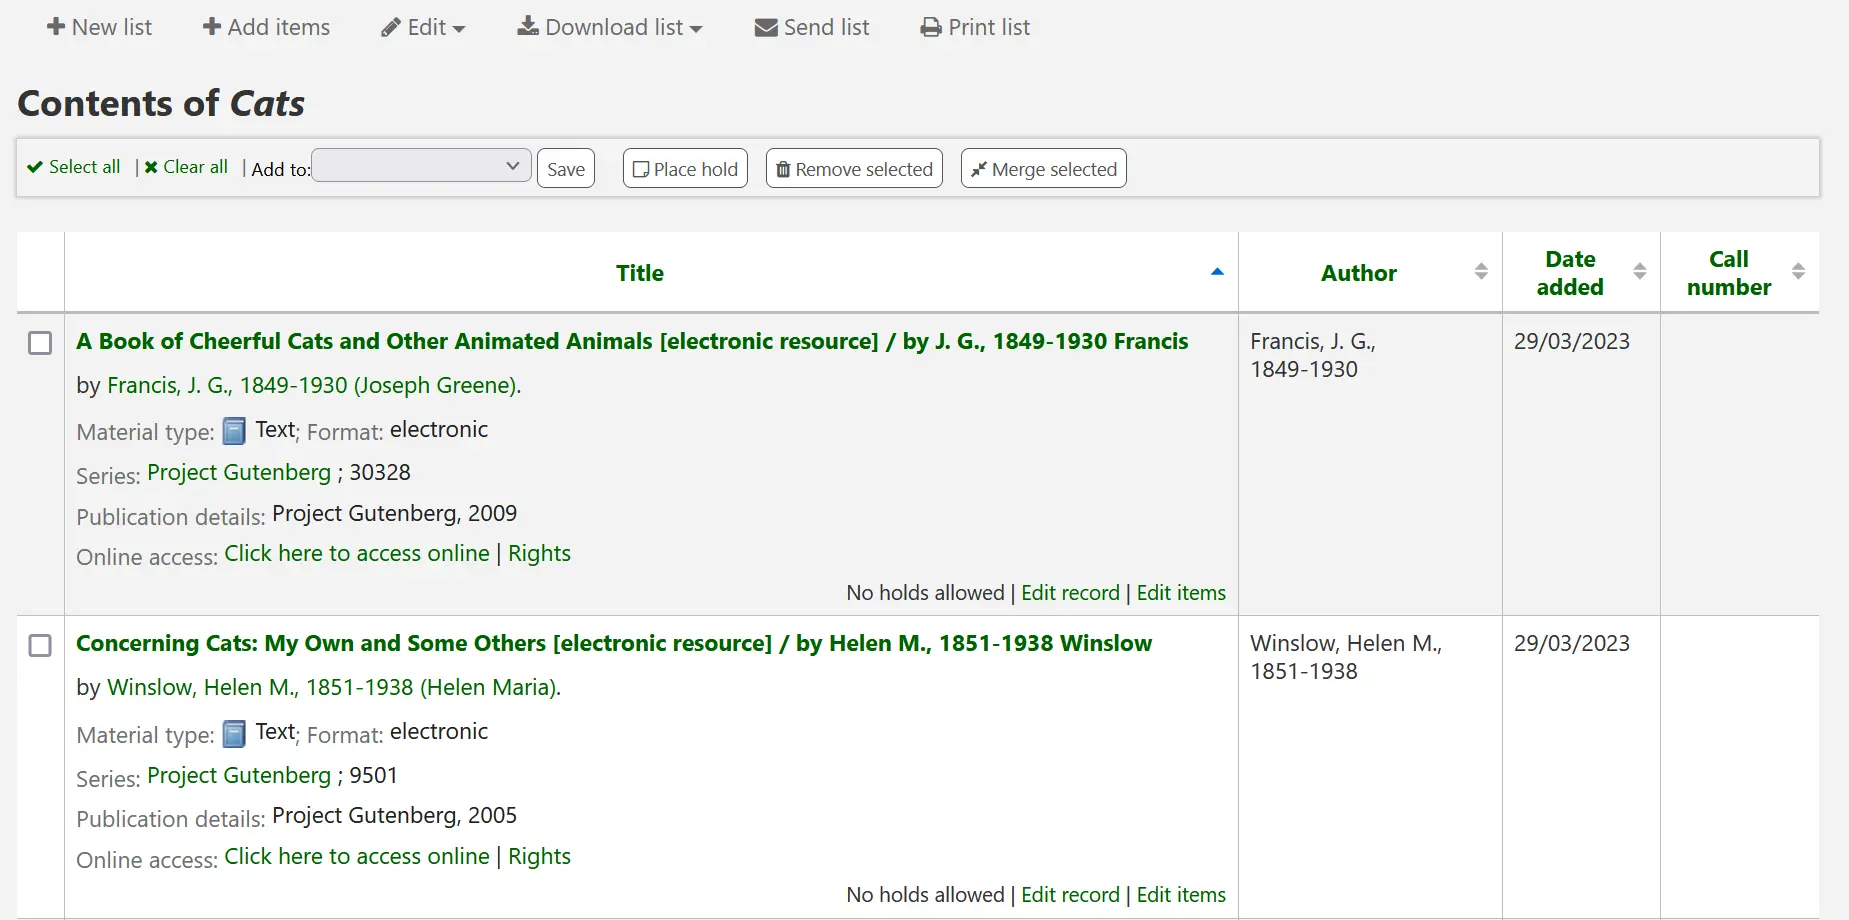
Clicking on the ‘List name’ will show the contents of the list

From this list of items you can perform several actions
New list: will allow you to create another list
Add records: will allow you to add items to the list with barcodes or biblionumbers
Edit: will allow you to edit the description and permissions for this list, or delete this list
Download list: will allow you to download the list using one of 3 default formats or your CSV profiles
Send list: will send the list to the email address you enter
Note
The message sent when emailing the list is LIST, which can be customized in the Notices and slips tool.
Print list: will present you with a printable version of the list
You can sort the columns by clicking on the column header.
Cart
The cart is a temporary holding place for items in the OPAC and/or staff client. The cart will be emptied once the session is ended (by closing the browser or logging out). The cart is best used for performing batch operations (holds, …) or for getting a list of items to be printed or emailed to yourself or a patron.
The cart feature can be turned off in the OPAC using the opacbookbag system preference.
If you would like to enable the cart in the staff interface, you need to set the intranetbookbag system preference to ‘Show.’ To add things to the cart, search the catalog and select the items you would like added to your cart and click on the ‘Add to cart’ button.
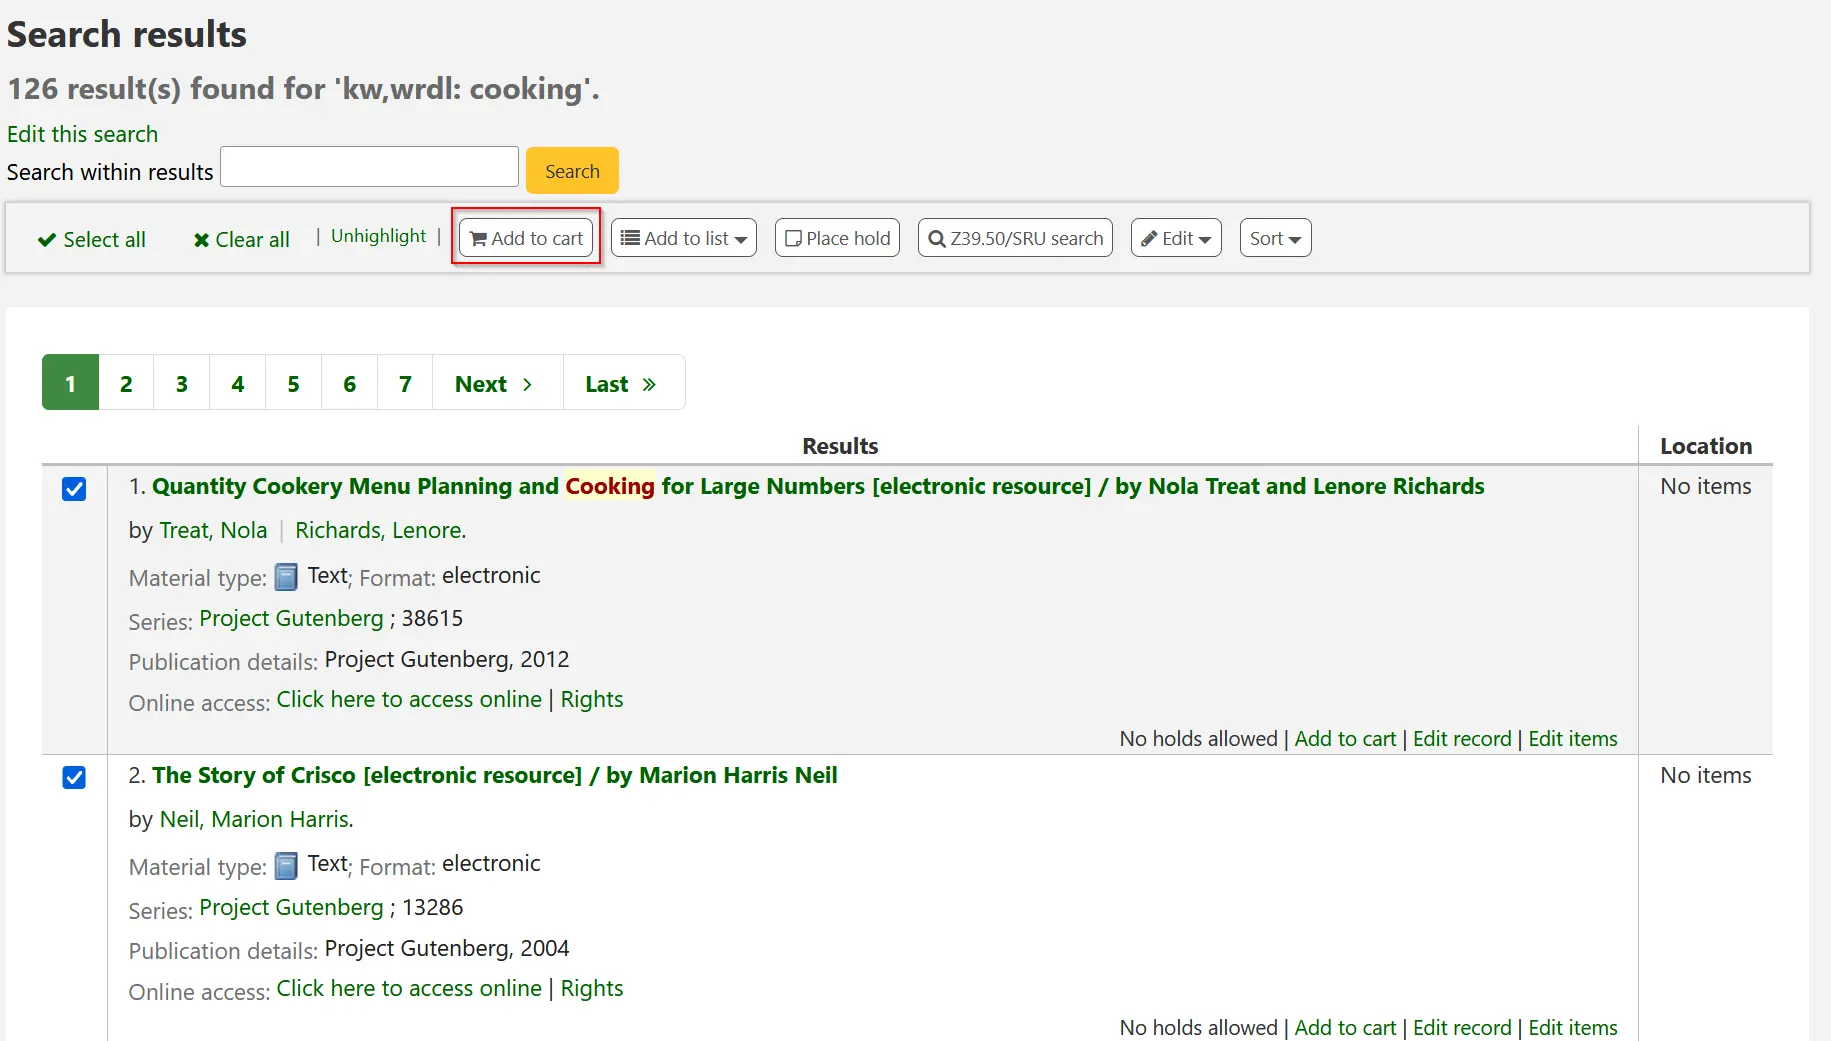
A confirmation will appear below the cart button at the top of the staff client

Clicking on the cart icon will provide you with the contents of the cart
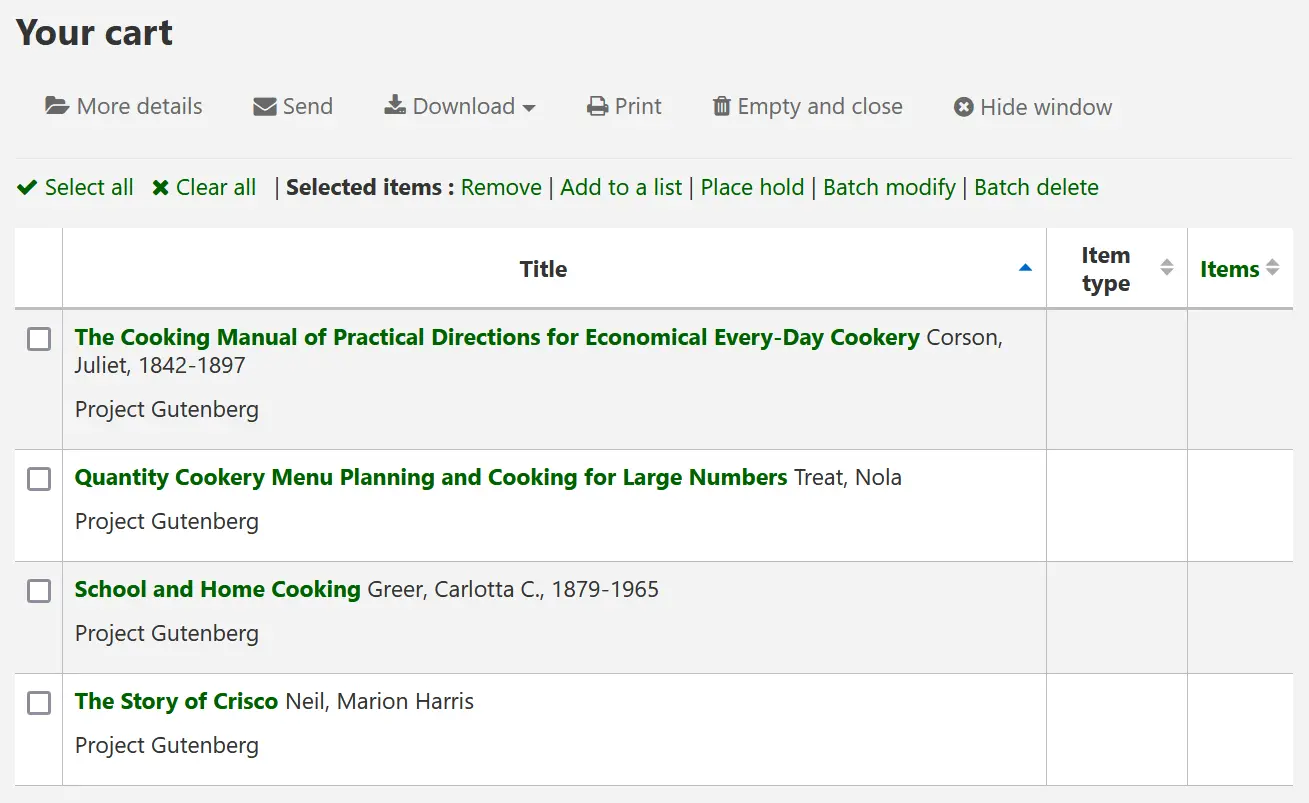
From this list of items you can perform several actions
‘More details’ will show more information about the items in the cart
‘Send’ will send the list to the email address you enter
Note
The message sent when emailing the cart is CART, which can be customized in the Notices and slips tool.
‘Download’ will allow you to download the cart using one of 3 default formats or your CSV profiles
‘Print’ will present you with a printable version of the cart
‘Empty and close’ will empty the cart and close the window
‘Hide window’ will close the window
Modifying bibliographic records via the cart
Bibliographic records can be modified in batch from the records added to a cart. Select the records in the cart you wish to modify and click ‘Batch modify’.
You will be taken to the ‘Batch record modification tool’ and from there the process to modify the bibliographic records is the same as if you had chosen to modify via Cataloging.