Periódicos
Serials actions can be accessed by going to the ‘More’ menu at the top of your screen and choosing ‘Serials’ or by clicking ‘Serials’ on the main Koha staff client page. The Serials module in Koha is used for keeping track of journals, newspapers and other items that come on a regular schedule. As with all modules, make sure you go through the related implementation checklist before using the Serials module.
Get there: More > Serials
Manage serial frequencies
O Koha mantém um registro da frequência de publicações para auxiliar no gerenciamento e duplicação.
Get there: More > Serials > Manage frequencies
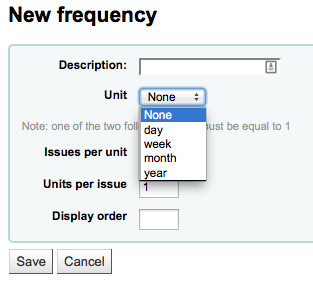
From this page you can view all of the existing frequencies in your system
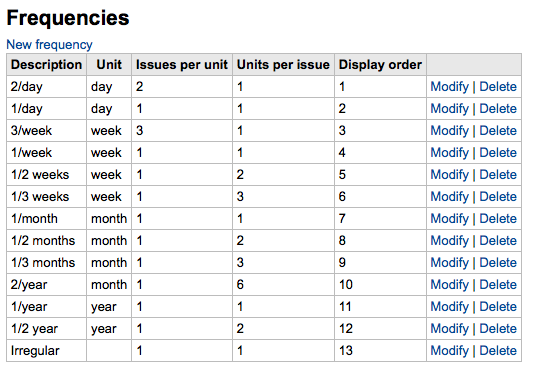
and create new ones.
Manage serial numbering patterns
Everytime you create a new numbering pattern in serials you can save it for later use. These patters are accessible via the ‘Manage numbering patterns’ page.
Get there: More > Serials > Manage numbering patterns
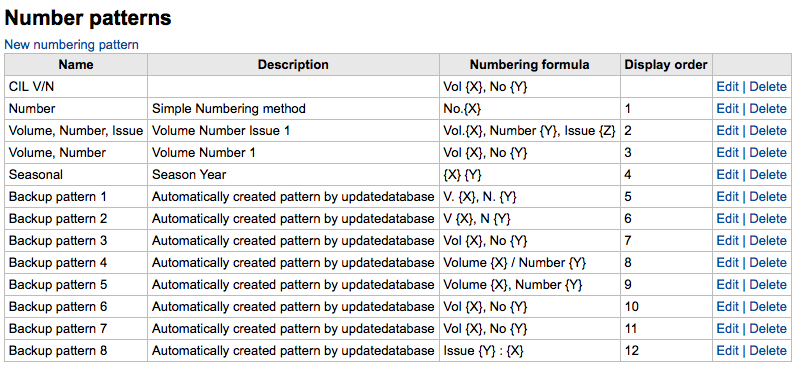
Esta página irá listar os padrões de numeração que você salvou anteriormente, bem como alguns padrões pré-definidos.
Note
If you have upgraded from a previous version of Koha you will see ‘Backup patterns’ listed for patterns used in version before Koha 3.14. This is how Koha saved your old numbering patterns. You can edit these to give them more meaningful names from here.
It will also allow you to create a new numbering pattern without first adding a subscription. To add new new pattern click ‘New numbering pattern’ at the top of the list of patterns.
Add a subscription
Subscriptions can be added by clicking the ‘New’ button on any bibliographic record
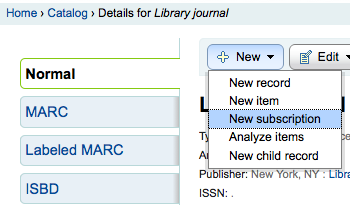
Or by visiting the Serials module and clicking ‘New subscription’
Se você adicionou uma nova assinatura no módulo de Periódicos você será levado a um formulário em branco (se estiver fazendo um novo registro bibliográfico, o formulário irá conter estas informações).
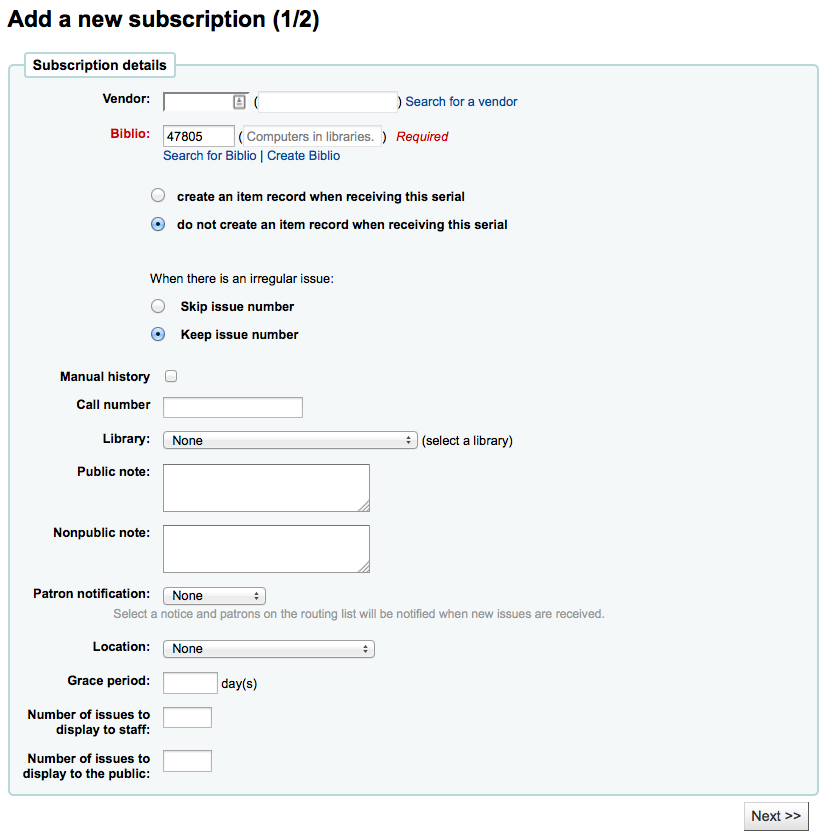
‘Funcionário’ irá exibir o nome de usuário do funcionário que está logado
‘Vendor’ can be found by either searching vendors entered via the Acquisitions module or entering the vendor ID number
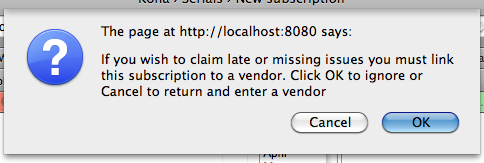
Informação do fornecedor não é obrigatória
Em aquisições, para fazer uma reclamação você precisa informar o fornecedor
‘Biblio’ é o registro MARC que você gostaria de linkar a esta inscrição
This can be done by searching for an existing record by clicking on the ‘Search for record’ link below the boxes or by entering the biblionumber for a record in the first box. Only if you search will the field between the parenthesis be filled in.
Next you can choose whether a new item is created when receiving an issue (if you barcode issues you’ll want to create an item at this time)
In order to determine how to handle irregularities in your subscription answer ‘When there is an irregular issue’, if the numbers are always sequential you’ll want to pick ‘Keep issue number’
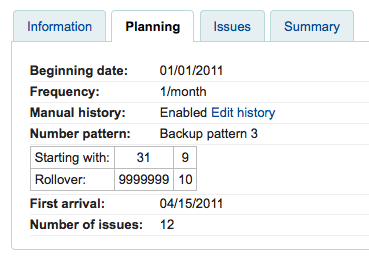
Checking the ‘Manual history’ box will allow you to enter serials outside the prediction pattern once the subscription is saved by going to the ‘Planning’ tab on the subscription detail page.
‘Call number’ is for your item’s call number or call number prefix
‘Biblioteca’ é o câmpus a que pertence esta assinatura.
Se mais de uma biblioteca assina este periódico, você terá que fazer uma assinatura para cada biblioteca
This can be done easily by using the ‘Edit as new (duplicate)’ option found on the subscription information page and changing only the ‘Library’ field

Use the ‘Public note’ for any notes you would like to appear in the OPAC for the patrons
‘Nonpublic note’ should be used for notes that are only visible to the librarians via the staff client
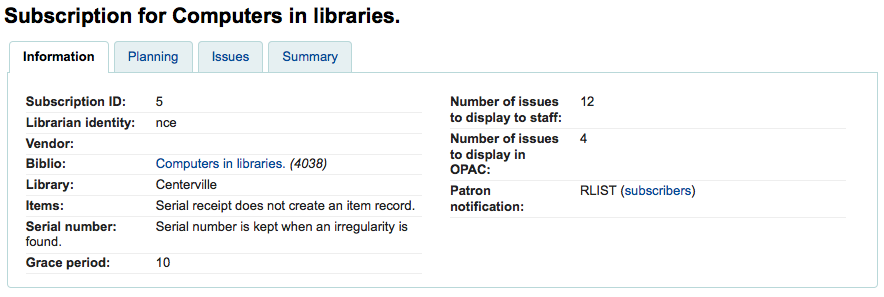
The ‘Patron notification’ option lets you pick a notice to send to patrons who subscribe to updates on this serial via the OPAC.
For this option to appear you need to make sure that you have a Routing list notice set up in the Notices Tool
‘Localização’ é utilizado para a localização na estante
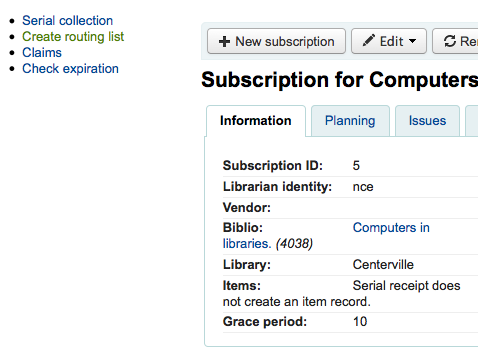
The ‘Grace period’ is the number of days before an issue is automatically moved from ‘Expected’ status to ‘Late’. This mechanism requires that the SerialsUpdate.pl cron job is set up to run regularly.
The Staff and OPAC display options allow you to control how many issues appear by default on bibliographic records in the Staff Client and the OPAC
If no values are entered in these fields, they will use the OPACSerialIssueDisplayCount and StaffSerialIssueDisplayCount system preference values
Once that data is filled in you can click ‘Next’ to enter the prediction pattern information.
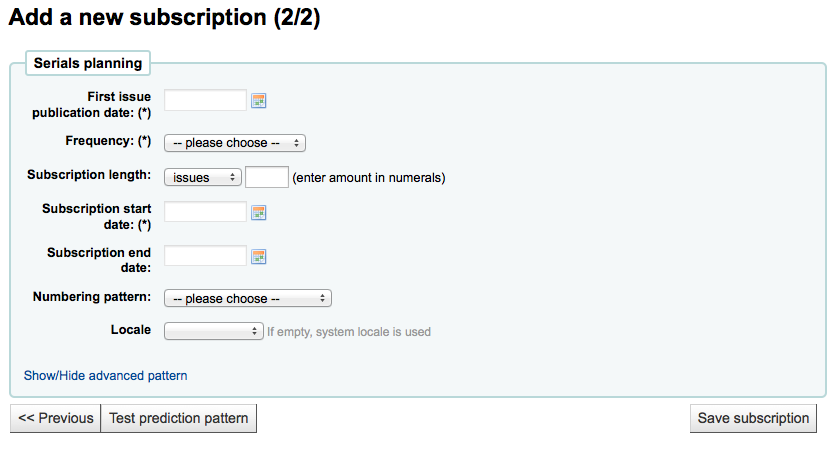
Em ‘Data de publicação do primeiro fascículo’ você precisa informar a data do fascículo que você tem em mãos, a data a partir da qual o padrão de datação irá iniciar
There are several pre-defined options for the ‘Frequency’ of publication all of which are visible alongside your own custom frequencies by visiting ‘Manage frequencies’
Sem periodicidade: alguns muito específicos (normalmente periódicos científicos) não tem uma periodicidade real. Quando você assina um título, você assina por 6 fascículos, que podem chegar em 1 …. ou 2 anos. Não possuem regularidade ou calendário de publicação.
Desconhecido selecione este se nenhuma das outras escolhas for relevante
Irregular. O periódico não é regular, mas tem uma periodicidade. Você sabe que ele vem em janeiro, depois outubro e dezembro. Ele é irregular, mas você sabe quando ele chega.
2/dia: Duas vezes ao dia
1/dia: Diário
3/semana: Três vezes por semana
1/semana: Semanalmente
1/ 2 semanas: Duas vezes no mês
1/ 3 semanas: Tri-semanalmente
1/mês: Mensal
1/ 2 meses (6/ano): Bimensal
1/ 3 meses (1/trimestre): Trimestral
1/trimestral (sazonal) : Trimestral relacionado as estações (ex. Verão, Outono, Inverno, Primavera)
2/ano: Semestral
1/ano: Anual
1/ 2 anos: Bienal
‘Duração da Assinatura’ é o número de fascículos ou meses de uma assinatura. Isto também é utilizado para configurar os avisos de renovação
‘Data de início da Assinatura’ é a data na qual a assinatura começou. Esta data é utilizada para configurar os avisos de renovação
‘Data de término da assinatura’ só deve ser inserida para assinaturas que acabaram
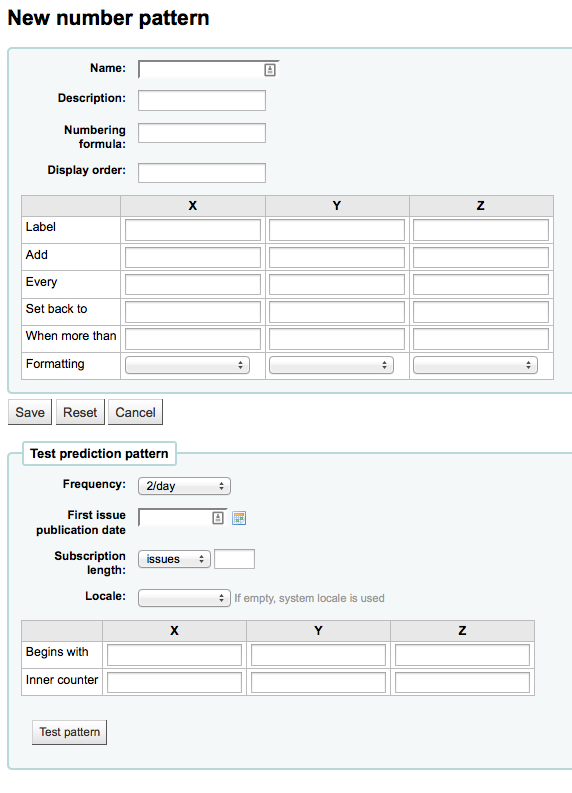
‘Numbering pattern’ will help you determine how the numbers are printed for each issue. Patterns entered here are saved and editable at any time by visiting ‘Manage numbering patterns’
Começe com a numeração do fascículo que tem em mãos, a numeração será considerada no campo ‘Primeira data de publicação’
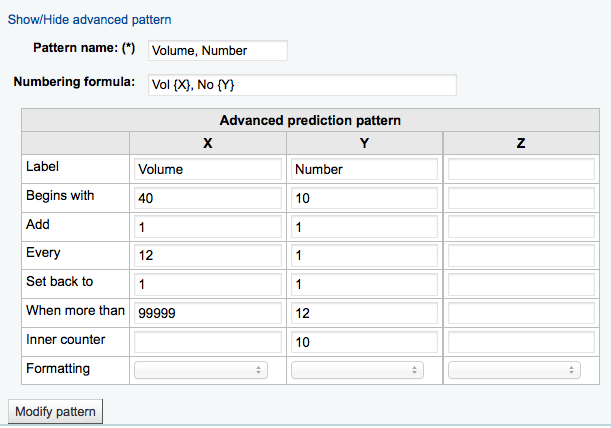
You can choose to create your own numbering pattern by choosing ‘None of the above’ and clicking the ‘Show/hide advanced pattern’ button at the bottom of the form
The ‘Locale’ option is useful when you want to display days, month or season. For example, if you have a German serial, you can use the German locale option to display days, etc. in German.
Once a ‘Numbering pattern’ is chosen the number formula will appear.
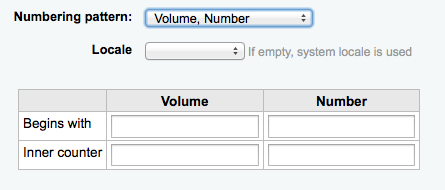
The ‘Begins with’ number is the number of the issue you’re holding in your hand.
The ‘Inner counter’ is used to tell Koha where the “receiving cycle” starts
For example: If the first issue to receive is “vol. 4, no. 1, iss. 796”, you need to set up “inner counter = 0” But if it’s “vol. 4, no. 2, iss. 797”, the inner counter should be “1”.
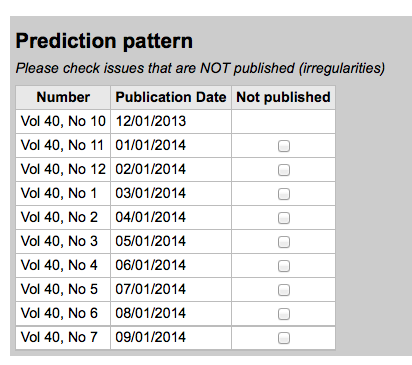
After filling in this data click the ‘Test prediction pattern’ button to see what issues the system will generate, if there are irregularities you can choose which issues don’t exist from the list presented.
If you have added a custom field, it will be editable above the buttons at the bottom of the screen

Click ‘Save subscription’ to save the information you have entered. Find sample serial examples in the serial pattern library on the wiki.
Edit a subscription
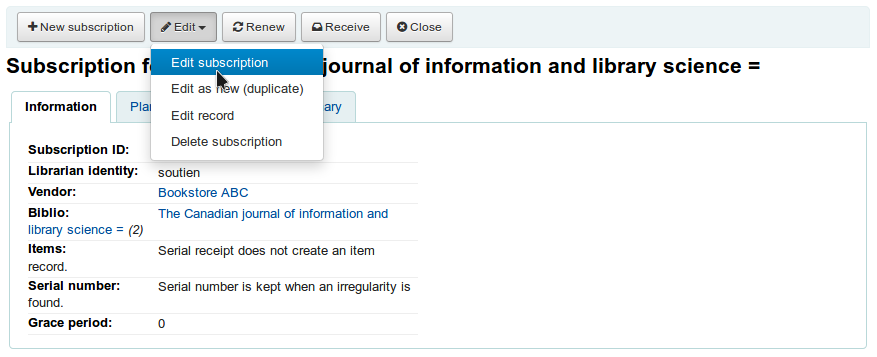
To edit a subscription, click on ‘Edit’ and ‘Edit subscription’ from the subscription page. This will take you back to the same form as the one used when creating a new subscription.
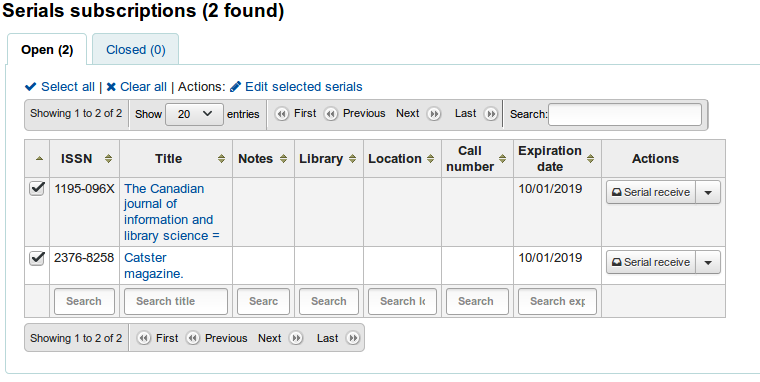
You can also batch edit subscriptions. To do so, search for the subscriptions you want to change. In the results, check the boxes next to the subscriptions to edit. The link ‘Edit selected serials’ will appear.
From there, you can change:
the vendor
the shelving location
the library
the item type
the public note
the nonpublic note
whether or not to create an item when receiving an issue
the expiration date
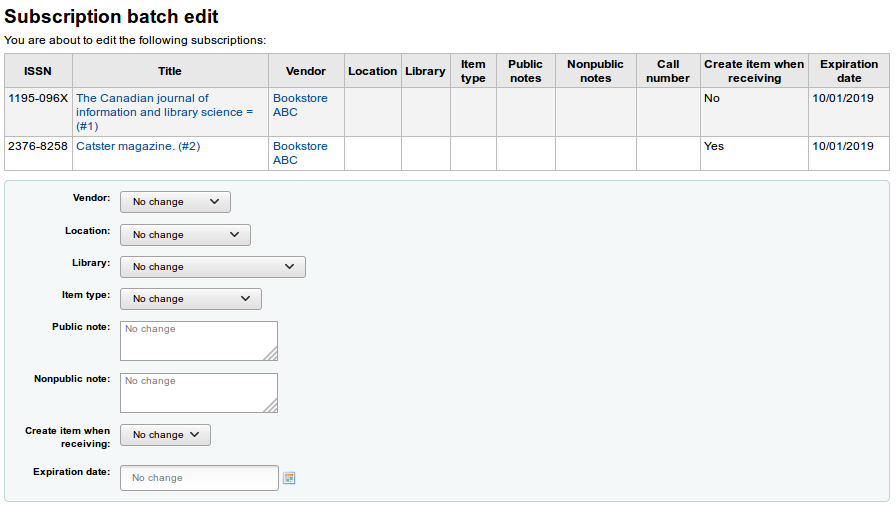
Note
Leave the field unchanged to keep the original values.
Receive issues
Issues can be marked as received from several locations. To find a subscription, use the search box at the top of the Serials page to search for the serial you’d like to receive issues for:
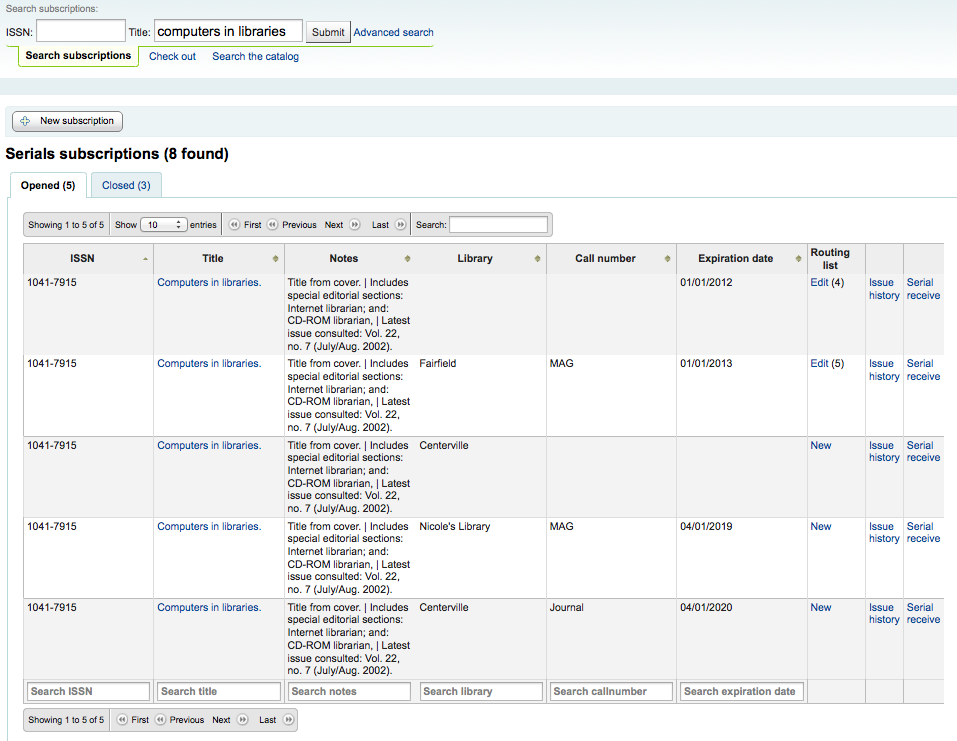
From the search results you can click the ‘Serial receive’ link or you can click on the subscription title and then click the ‘Receive’ button.
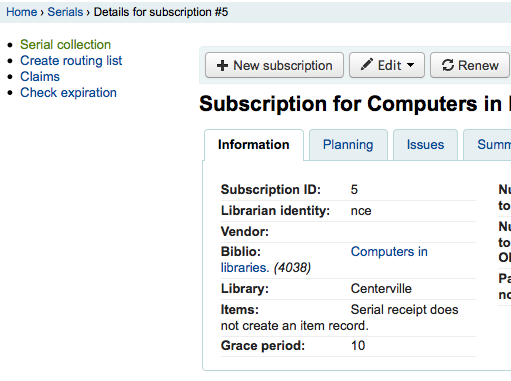
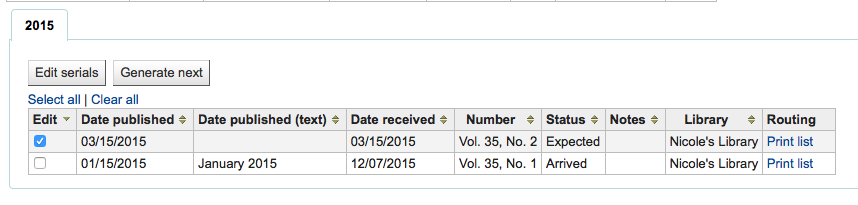
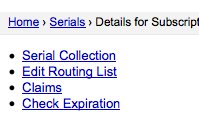
The final way to receive serials is from the ‘Serial collection’ page. To the left of the Subscription summary page there is a menu with a link to ‘Serial collection’
From the page that opens up you can click ‘Edit serial’ with the issue you want to receive checked.
Todas as três das opções abrirá o formulário de um número recebido:
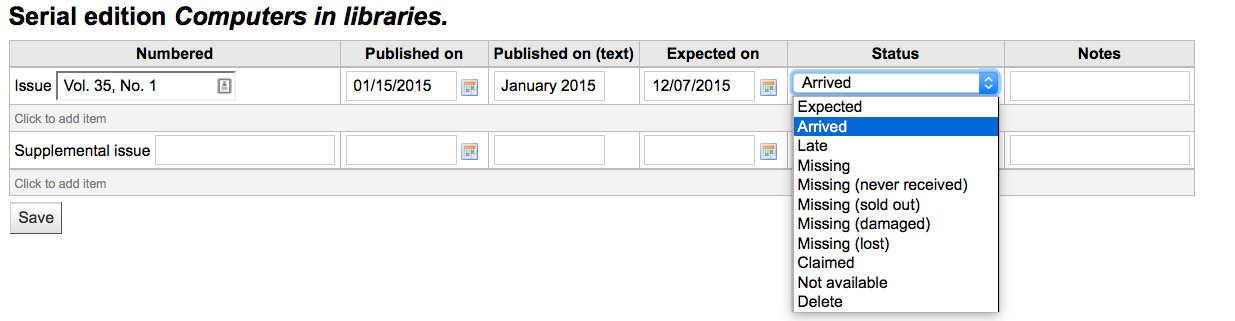
Selecionar ‘Chegado’ na lista de estado para marcar um periódico como recebido.
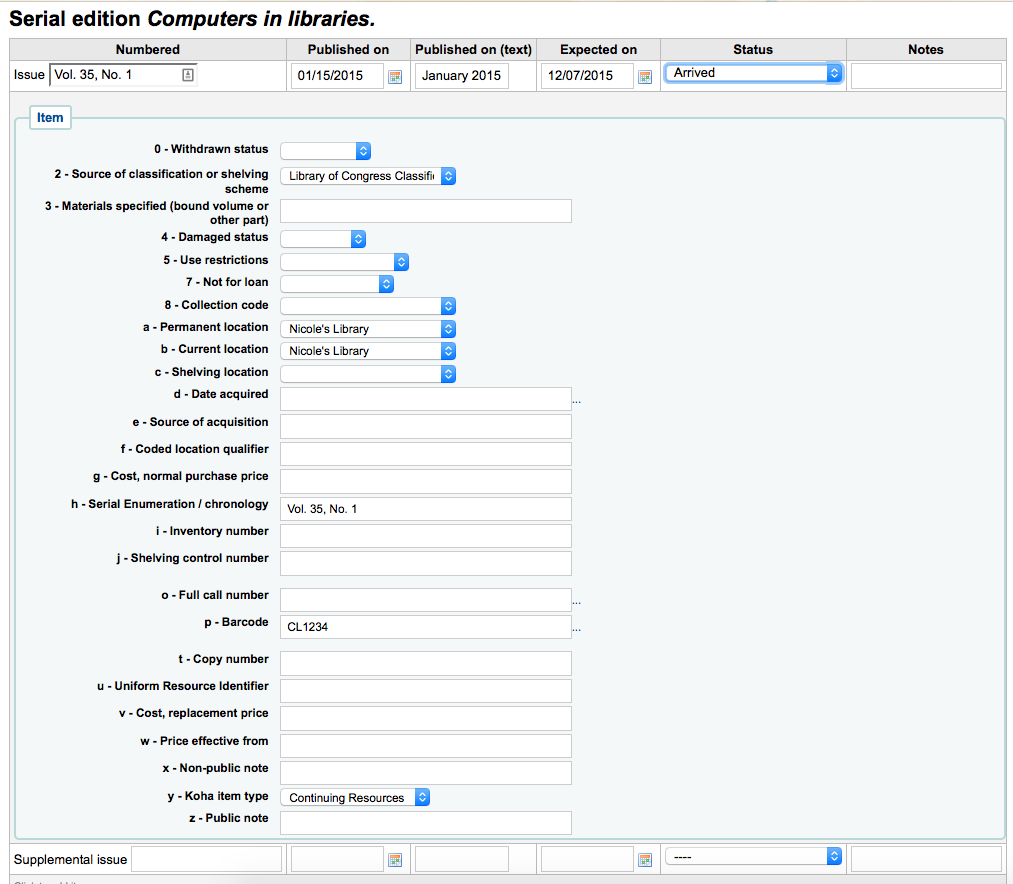
If you have decided to have an item record created for each issue an item add form will appear after choosing ‘Arrived’
If your issue has a supplemental issue with it, fill in the Supplemental issue information.
Key the entire numbering in the box after “Supplemental issue” no numbering will be inherited/auto-filled from the main issue, and exactly what you key in the box after “Supplemental issue” will be auto-filled in the item record’s Serial enumeration/chronology [MARC21 952$h] (if you create item records).
E.g., key this in its entirety if it’s what you would like displayed: “v.69 no.3 (Mar. 2015) suppl.”
If you have decided to have an item record created for each issue an item add form will appear for your supplement and for the issue itself
Assim que tiver inserido toda a sua informação pode guardar
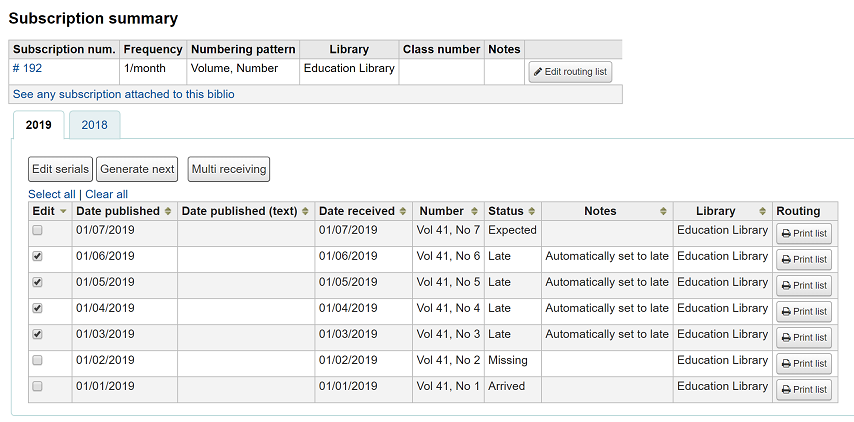
Serial collection
Each subscription has a Serial collection page available from the main Serials menu.
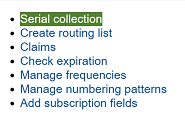
From this page you can manage additional tasks related to subscription issues such as multi receiving and editing.
Click on the Multi receiving button to bulk receive future issues of a subscription.
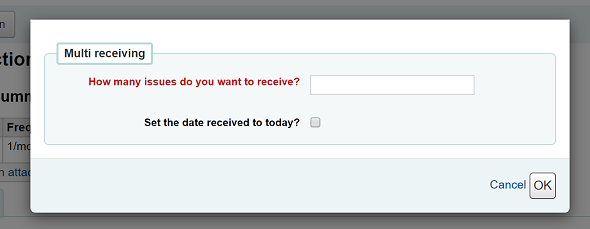
You can choose how many issues to receive and whether to set the received date to the current date.
Clicking the Generate next button will generate the next issue for you and mark the previously expected issue as ‘Late’ automatically.
Tick the box in the Edit column for one or more previous issues and then click the Edit serials button. You can edit the numbering, dates, status and add notes.
Create a routing list
A routing list is a list of people who receive the serial before it goes to the shelf. To enable routing lists you want to set your RoutingSerials preference to ‘Add’.
When on the subscription page you will see a link to the left that reads ‘Create routing list’ or ‘Edit routing list’
Clicando neste link você será levado ao menu onde é possível adicionar uma nova lista de circulação.
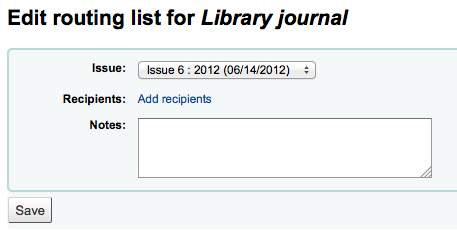
Aqui você pode clicar em ‘Adicionar usuários’ para adicionar pessoas à lista de circulação. No menu que aparece, você pode filtrar os usuários por uma parte do nome, biblioteca e/ou categoria de usuário.
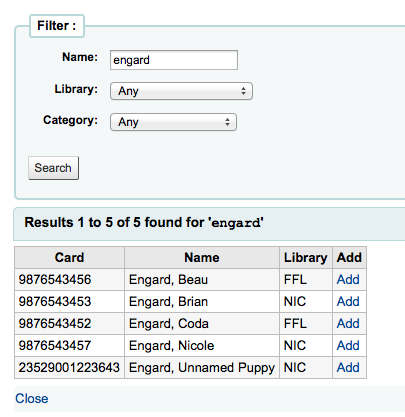
Clicando em ‘Adicionar’ à direita de cada nome irá adicioná-los à lista de circulação. Quando você tiver selecionado todas as pessoas para a lista, clique em ‘Fechar’ para voltar à lista de circulação.
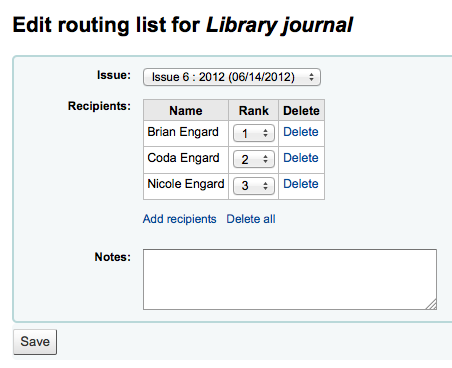
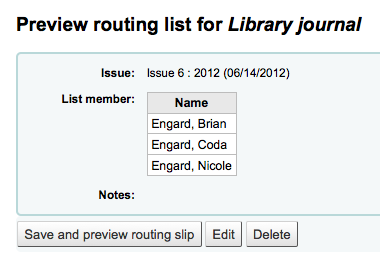
Se a lista está como você queria, clique em ‘Salvar’. Você terá uma visualização da Lista de Circulação. Para imprimir a lista, clique em ‘Salvar e visualizar canhoto de circulação’. Isto irá abrir uma versão imprimível da lista.
If RoutingListAddReserves is set to on then patrons listed in the routing list will automatically be added to the holds list for the issue.
To see a list of all of the routing lists for a specific patron is visit the Routing lists tab on their patron record. Patrons are able to see a list of their own routing lists when logged into the OPAC in the your routing lists tab.
Subscriptions in staff client
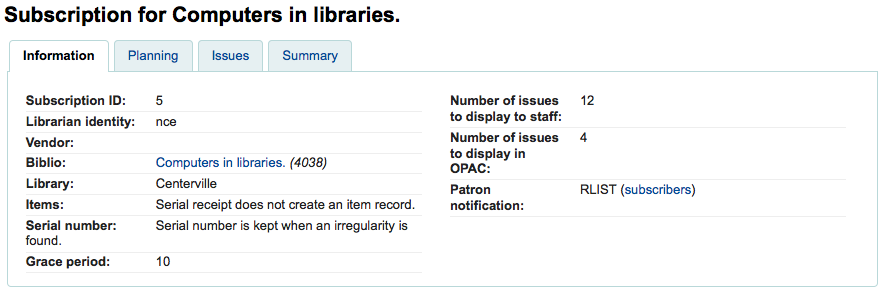
Subscription information will appear on bibliographic records under the ‘Subscriptions’ tab

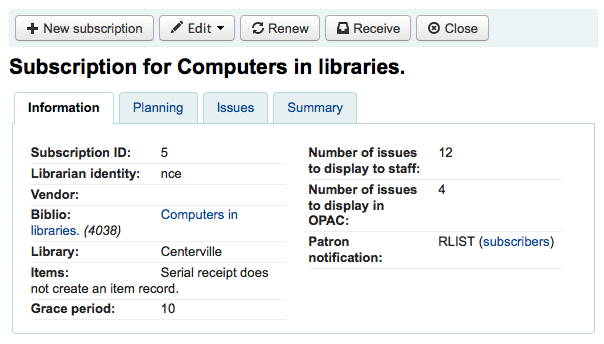
Clicking the ‘Subscription details’ link will take you to the Subscription summary page in the staff client.
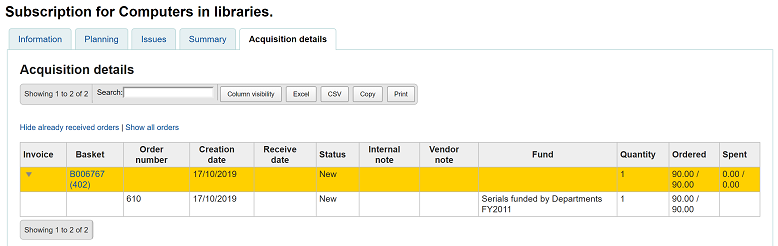
If you are using the Acquisitions module to keep track of serial subscriptions you will see an extra ‘Acquisition details’ tab in your subscription details.
Subscriptions in OPAC
When viewing the subscription in the OPAC there will be several options.
Like in the staff client, there will be a Subscriptions tab on the bibliographic record.
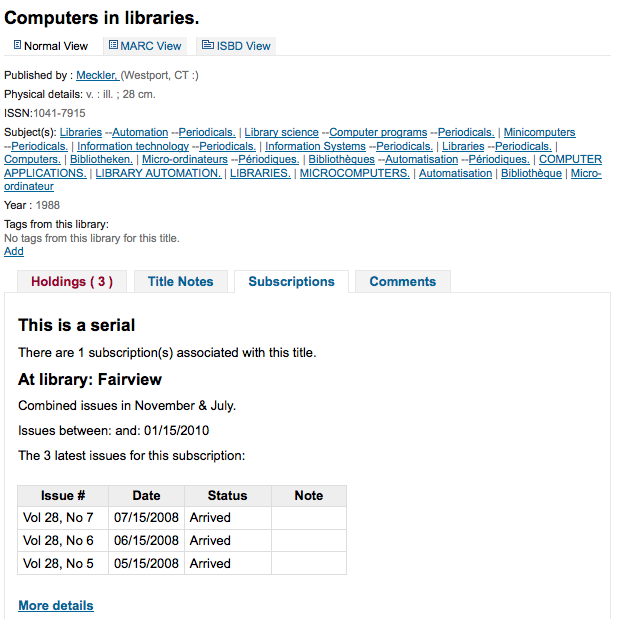
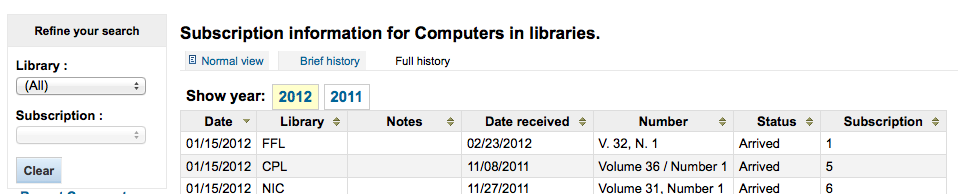
Under this tab will appear the number of issues you chose when setting up the subscription or in your OPACSerialIssueDisplayCount system preference. Clicking the ‘More details’ link will provide you with additional information about the serial history. You can set the default view of a serial in the OPAC with the SubscriptionHistory system preference.
There are two views, compact and full. The compact serial subscription will show basic information regarding the subscription
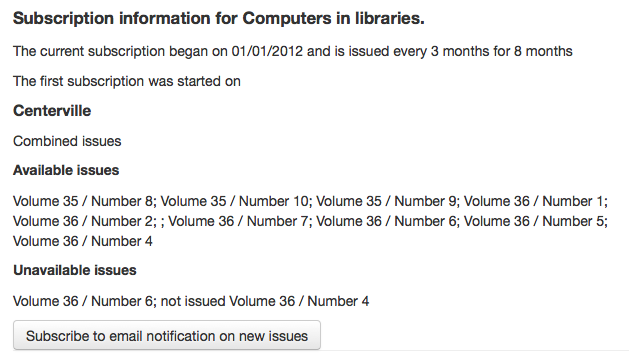
From this compact display patrons can subscribe to be notified of new issues as they are released by clicking the ‘Subscribe to email notifications of new issues’ button. For this link to appear you will want to have chosen to notify patrons on the subscription itself.
You can see those who subscribe to new issue alerts by going to the subscription page in the staff client and looking on the right of the ‘Information’ tab.
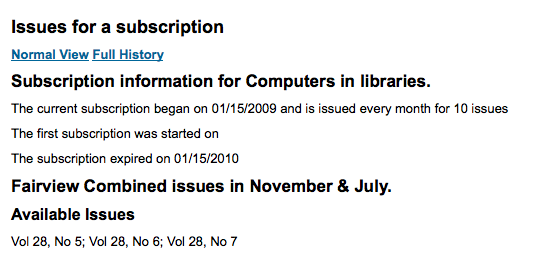
Whereas the full view shows extensive details, broken out by year, regarding the subscription
Claim late serials
Koha pode enviar e-mails para fornecedores de periódicos se você tiver fascículos atrasados. A esquerda da página principal, existe um link ‘Reclamações’
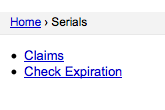
Os links para reclamação também irão aparecer a esquerda na página de detalhes da assinatura
Se você não tiver uma mensagem de reclamação definida você verá um aviso informando que você precisa primeiramente definir uma mensagem.

Clicando em ‘Reclamações’ fará com que uma lista de periódicos de diferentes fornecedores seja aberta para que sejam geradas reclamações para números em atraso.
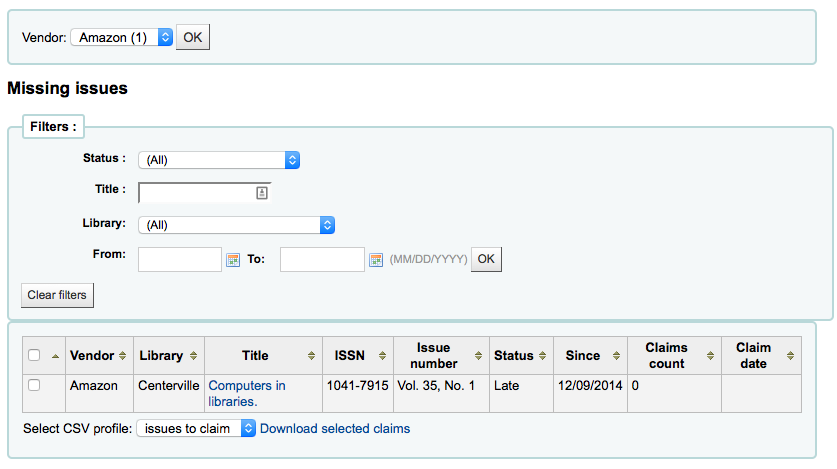
Na lista de fascículos em atraso você pode escolher para quais você deseja enviar reclamações por e-mail clicando na caixa ao lado esquerdo do fascículo em atraso, escolhendo o template do aviso e clicando em ‘Enviar notificação’.
Check serial expiration
Quando adicionar periódicos você informará o período da assinatura, usando a ferramenta de consulta de vencimento de assinaturas você verá quando suas assinaturas estiverem para vencer. Para usar a ferramenta clique no link ‘Verificar vencimento’ no menu de periódicos.
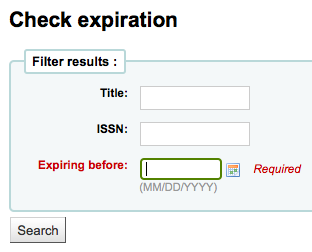
No formuário qua aparece você precisa digitar ao menos uma data para pesquisar.
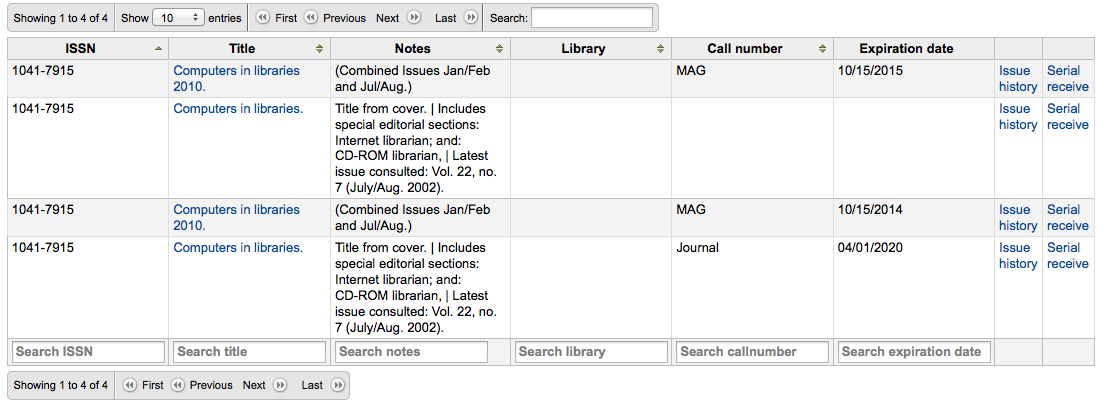
Nos resultados você verá todas as assinaturas que irão vencer após a data que você informou. A partir disto, você pode escolher a assinatura depois ou renová-la em um clique.

If there is more than one subscription, you can check the boxes and click on ‘Renew selected subscriptions’ to renew all the serials. The serials will be renewed for the same amount of time as their previous subscription (i.e. if the last subscription for that serial lasted one year, the serial will be renewed for one year; if the last subscription was for 16 issues, it will be renewed for another 16 issues).

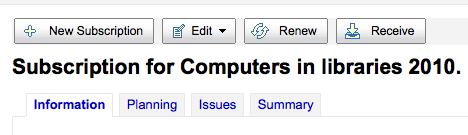
Renewing serials
If your serial subscription has expired you won’t be able to receive issues. To renew your subscription you can click the ‘Renew’ button at the top of your subscription detail page.
Another option is to click the ‘Renew’ link to the right of the subscription on the Serial collection page.

Once you click the ‘Renew’ link or button you will be presented with renewal options.
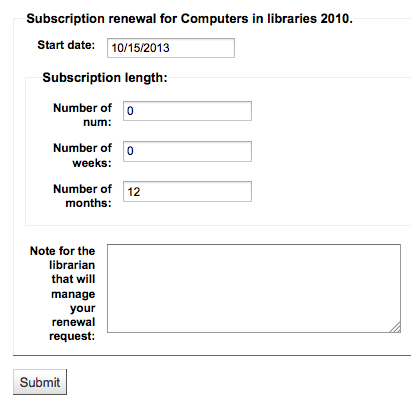
The start date should be the date your subscription period starts.
For the subscription length you’ll want to fill in one of the three fields presented: Number of issues, Number of months or Number of weeks.
Finally enter any notes you might have about this renewal.
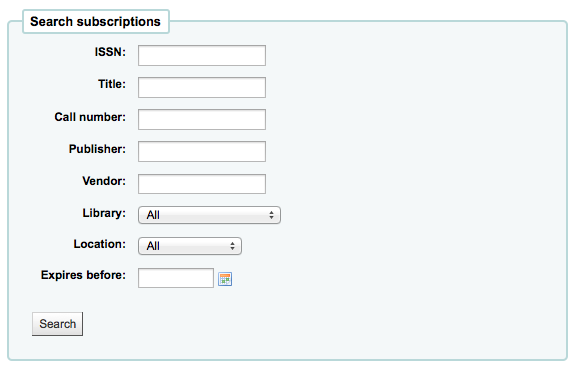
Searching serials
Once in the Serials module there is basic search box at the top that you can use to find subscriptions using any part of the ISSN and/or title.

You can also click the ‘Advanced search’ link to the right of the ‘Submit’ button to do a more thorough search of your serials.
From your results you can filter by using the search boxes at the bottom of each column and adjust the number of results using the toolbar at the top of the results set.