Using third party software with Koha
MarcEdit
Many libraries like to use MarcEdit for modifications or data cleanup. If you’d like to do this you will need to download it at: http://marcedit.reeset.net/
Important
Many of the actions described in this chapter can be done in Koha using Marc Modification Templates, but this section is here for those who are used to MarcEdit.
Ajouter un préfixe aux cotes
Lorsque vous importez des données dans Koha, vous voudrez peut-être les ordonner d’abord. Les utilisateurs de Koha ajoutent souvent un préfixe à la cote.
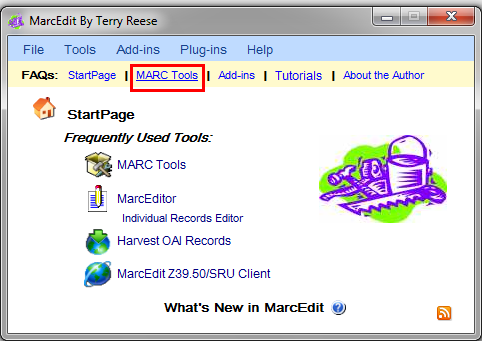
Ouvrir MarcEdit
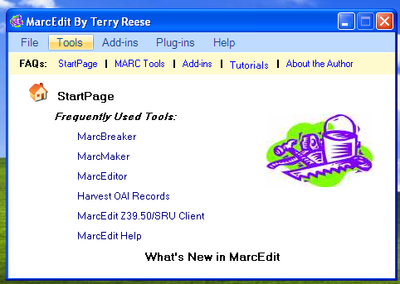
Cliquez sur “MarcEditor”
Go to Tools > Edit Subfield Data
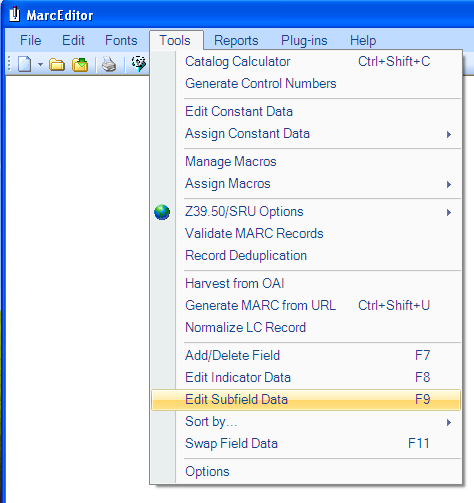
Pour ajouter les données avant, le caractère spécial est: ^b Pour ajouter les données avant au début du sous-champ, ajoutez ^b aux données du champ: cadre du texte et les données seront ajoutés dans Remplacer
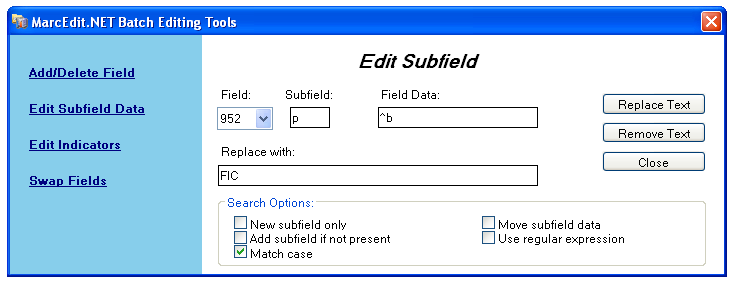
Pour ajouter les données avant le début du sous-champ alors qu’il remplace une chaîne de caractères, ajoutez ^b (chaîne à remplacer) au cadre de texte Field Data et les données s’ajouteront dans Remplacement avec la cadre de texte.
Importer des données Excel dans Koha
Supposons que vous ayez des notices de votre bibliothèque rédigées sur un feuille Excel, et que vous voulez les importer dans Koha. Comment procéder ? Koha ne vous autorisera pas à importer les notices Excel directement. Il existe une solution simple. Nous convertirons d’abord le fichier Excel en fichier Marc, puis nous l’importerons dans Koha.
Suivez les étapes suivantes pour importer les notices Excel dans Koha
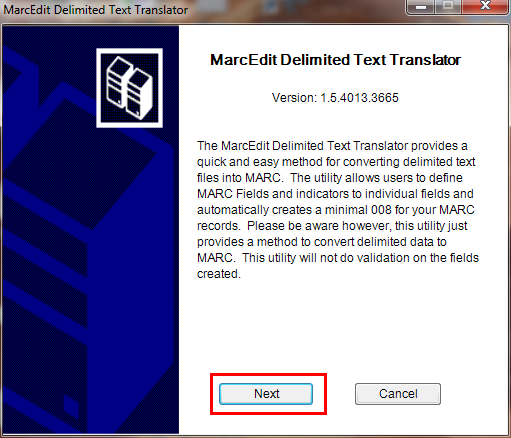
Converting from Excel format into .mrk format
First, we will convert excel format into .mrk format. For this we will use MarcEdit. You can download it from http://marcedit.reeset.net/
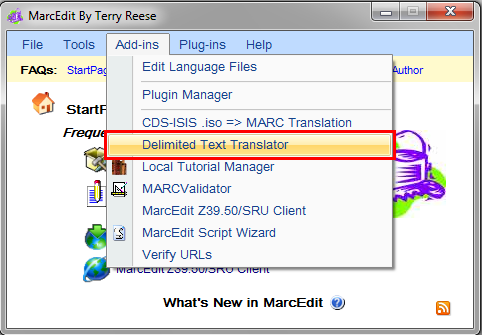
Now open it and select Add-ins–>Delimited Text Translator.
Cliquez sur “Suivant” lorsque la fenêtre suivante s’affiche.
Repérez votre fichier Excel.
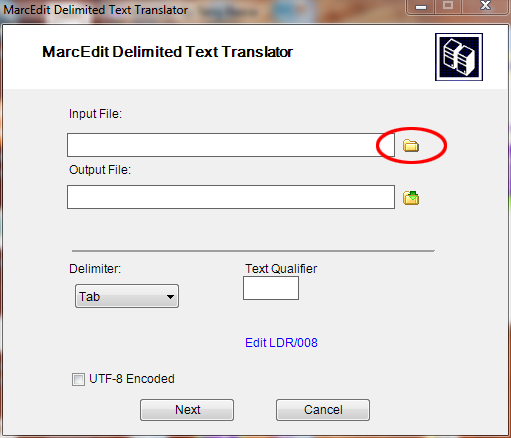
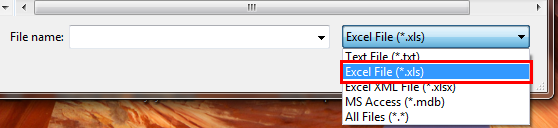
Locate your excel file by choosing the format Excel File(*.xls).
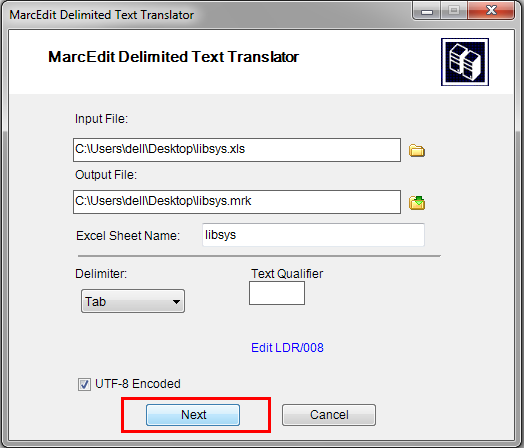
De la même manière, remplissez les autres entrées telles que Output File, Excel Sheet Name et cochez la codification UTF-8 (si obligatoire), puis cliquez sur “Suivant”.
Il vous sera demandé d’ajouter une correspondance aux champs pour reconnaître ces derniers par le format standard marc.
Supposons que pour le Champ 0 qui est la première colonne Map à: 0022$a (un ISSN valide pour la ressource continue), cliquez ensuite sur “Appliquer”.
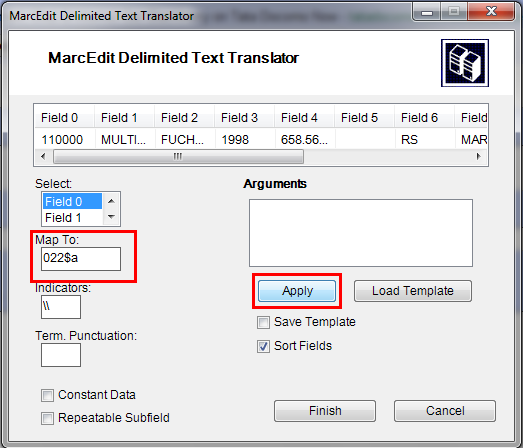
Note
You can customize Indicators and all other things, for more information on marc21 format visit the official library of congress site [http://www.loc.gov/marc/bibliographic/].
De la même manière, ajoutez une correspondance aux autres champs, et cliquez sur “Finir”.
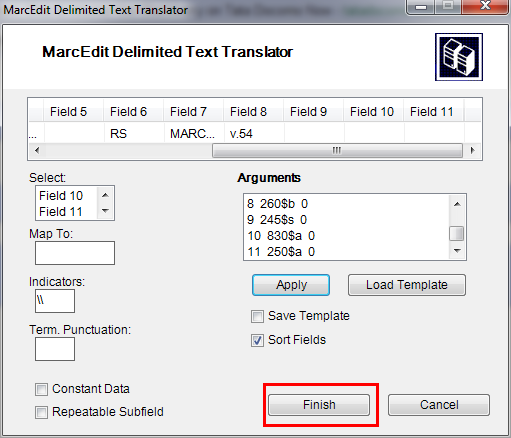
And then a window will appear indicating that your Marc Text File(*.mrk) has been created.
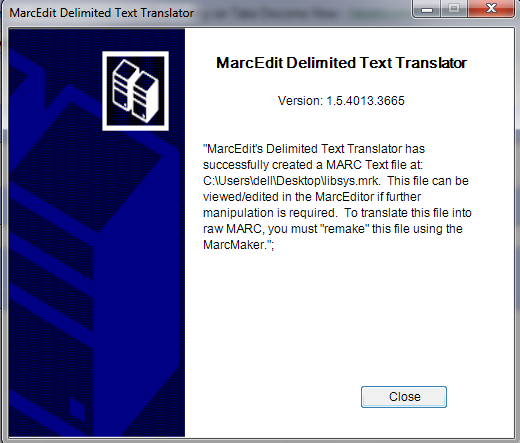
Cliquez sur “Fermer”. Vous avez pour l’instant créé un fichier .mrk depuis un fichier .xls. Vous pouvez regarder le contenu du fichier en double-cliquant dessus.
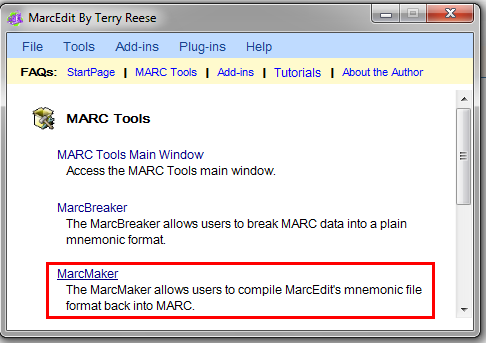
Convert .mrk file to .mrc
Nous convertirons le fichier .mrk que nous avons créé dans l’étape ci-dessus en un fichier de format Marc brut qui pourra être directement importé dans Koha.
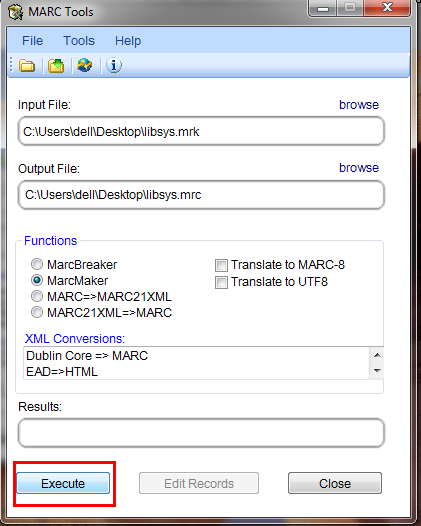
Pour cela, ouvrez encore une fois MarcEdit et sélectionnez Outils MARC.
Sélectionnez MarcMaker pour convertir le fichier .mrk en format .mrc.
Localisez votre fichier d’entrée et le nom de votre fichier de sortie. Cliquez ensuite sur “Exécuter”.
Cela affichera le Résultat.
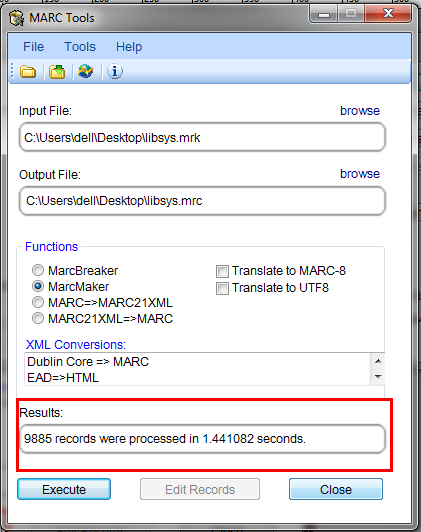
Cliquez sur “Fermer”. Vous avez maintenant vos notices Marc brut (fichier.mrc).
Import .mrc into Koha
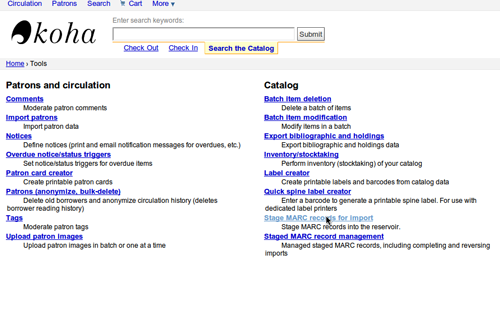
More information on importing records into Koha can be found in the “Stage MARC records for import” section of this manual.
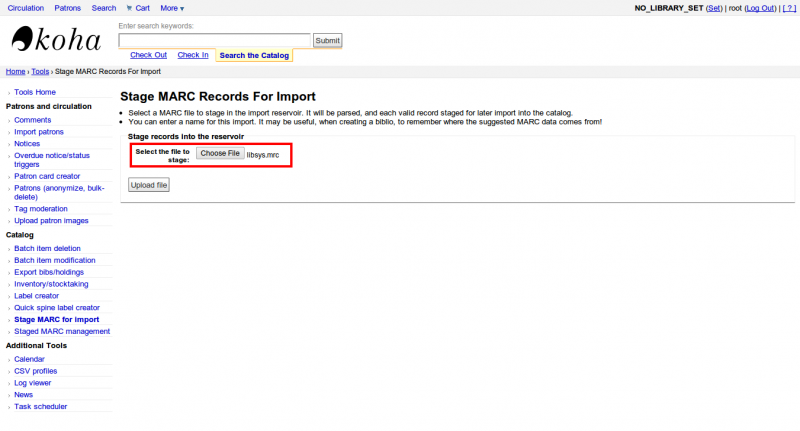
Pour finir, nous importerons le fichier.mrc créé dans Koha.
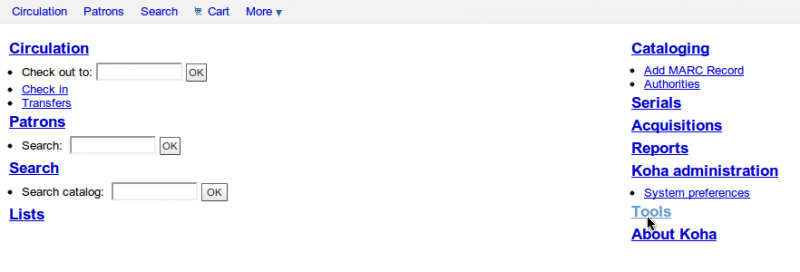
Cliquez sur Outils dans votre interface professionnelle.
Cliquez ensuite sur “Télécharger des notices MARC dans le réservoir”.
Choisissez ensuite votre fichier.mrc précédemment créé, et cliquez sur “Télécharger”.
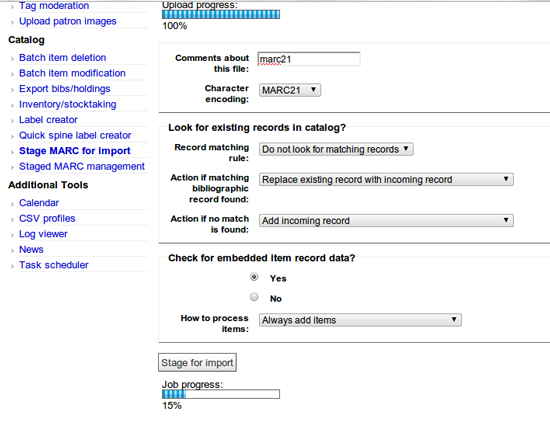
Vous pouvez aussi ajouter un commentaire à propos du fichier, puis cliquez sur “Télécharger dans le réservoir”.
Une fois l’importation effectuée, vous obtiendrez un résultat comme ceci:
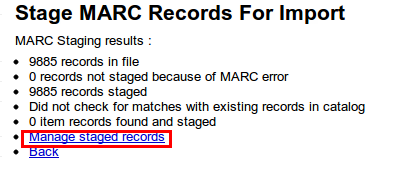
Cliquez ensuite sur “Gestion des notices téléchargées”.
Ici, vous pouvez changer les règles de correspondance.
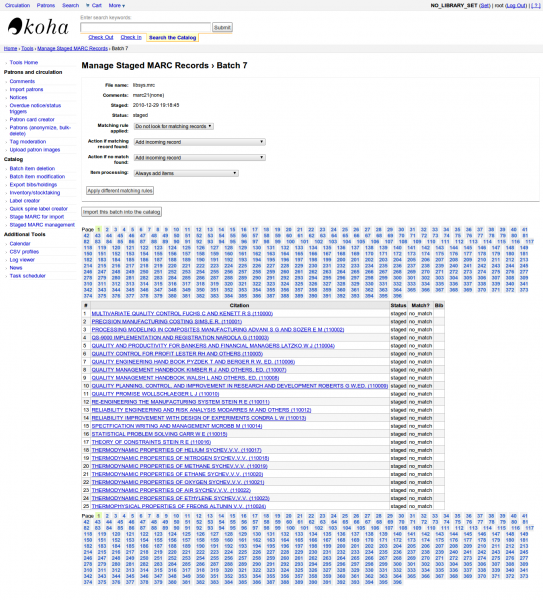
Cliquez sur “Importer ce lot dans le catalogue” lorsque vous avez terminé.
Après avoir importé toutes les notices, vérifiez le statut, il doit y avoir marqué « importé »
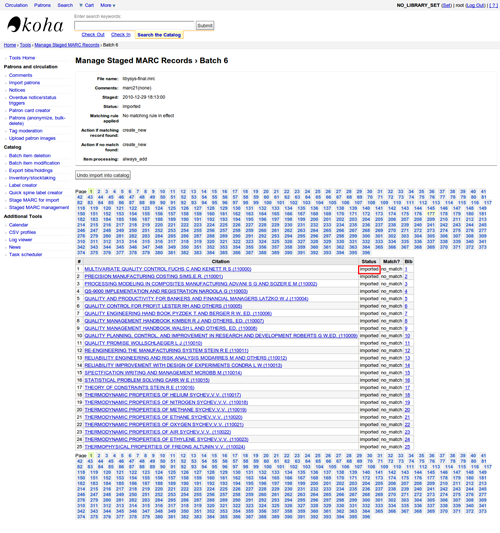
Vous pouvez même annuler l’opération d’importation.
En l’espace de quelques minutes, nous aurons importé à peu près 10 000 notices dans Koha
OCLC Connexion Gateway
Koha peut être configuré pour travailler avec OCLC Connextion Gateway. Cela permet aux bibliothèques d’utiliser OCLC Connexion comme outil de catalogage et envoyer simplement ces notices à Koha en un seul clic. Les instructions suivantes vous aideront à configurer le portail de connexion OCLC, si vous avez un administrateur du système, vous pourrez les consulter sur ce processus.
Setting up OCLC service on Koha
Vous devrez d’abord créer un fichier quelque part dans votre système avec l’information de configuration. Vous pouvez le mettre n’importe où, du moment qu’il est visible par le compte qui exécutera le service.
Le fichier contient 11 lignes. Les 6 premières lignes concernent le système de Koha:
host: The IP address of your Koha server
port: The port you want to use for the Connexion service. This port must be different from your SIP port, or any other service
koha: The full URL of your staff client
log: The location (full file specification) of your log for the service
user: The default Koha username to use for importing
password: The password that goes with that username
Les lignes restantes décrivent la mise en place:
match: The name of the matching rule from your system to use
overlay_action: "replace", "create_new", or "ignore"-- what to do if there is a match
nomatch_action: "create_new" or "ignore"-- what to do if there is no match
item_action: "always_add","add_only_for_matches","add_only_for_new", or "ignore" -- what to do with embedded 952 item data
import_mode: "direct" or "stage"
Voici un exemple de fichier:
host: 1.2.3.4
port: 8000
log: /home/koha/koha-dev/var/log/connexion.log
koha: http://kohastaff.myuniversity.edu
user: koha_generic_staff
password: password
match: 001
overlay_action: replace
nomatch_action: create_new
item_action: ignore
import_mode: direct
When choosing an “import_mode” if you use « direct » then the staged record will be immediately imported into Koha, and should be searchable after your indexes catch up. If you choose « stage », then the record will be placed in a staged batch for you to later go the Manage Staged MARC Records tool to finish the import.
Si vous importez plusieurs notices, elles seront dans le même lot jusqu’à que celui-ci soit importé; puis un nouveau lot sera créé.
En mode « direct », chaque notice sera dans son propre lot.
Pour démarrer le service, exécutez le script:
/location/of/connexion/import/daemon/connexion_import_daemon.pl -d -c /location/of/config/file.cnf
Setting up your OCLC desktop client
Note
Les captures d’écrans sont client de la connexion OCLC v.2.50, Koha v.3.12
To set up the OCLC Connexion desktop client to connect to Koha, go to Tools > Options, then choose the Export tab.
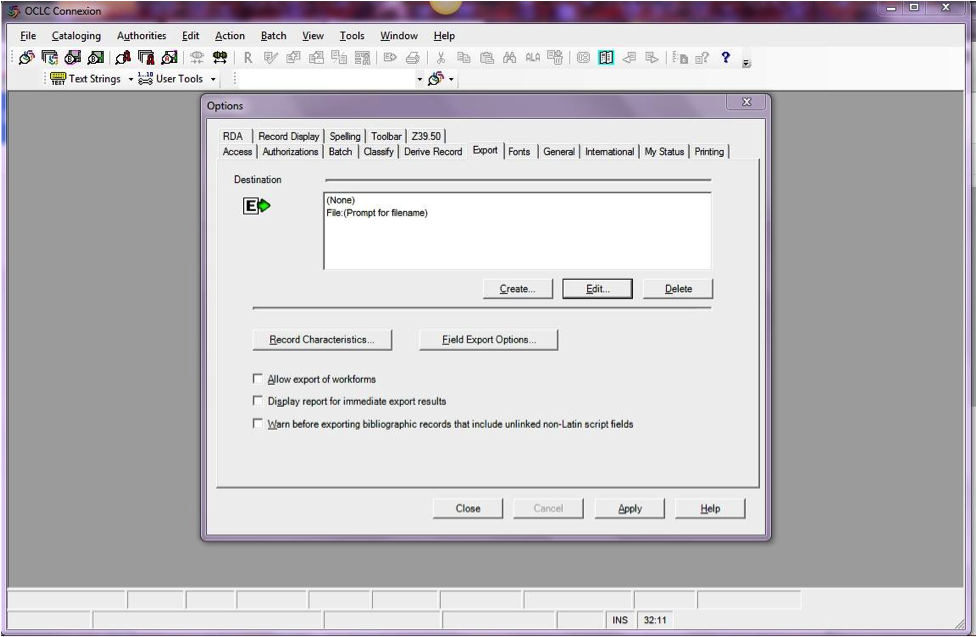
Cliquez sur le bouton « Créer… » pour paramétrer une nouvelle définition, puis choisissez « Export du portail OCLC » et cliquez sur OK.
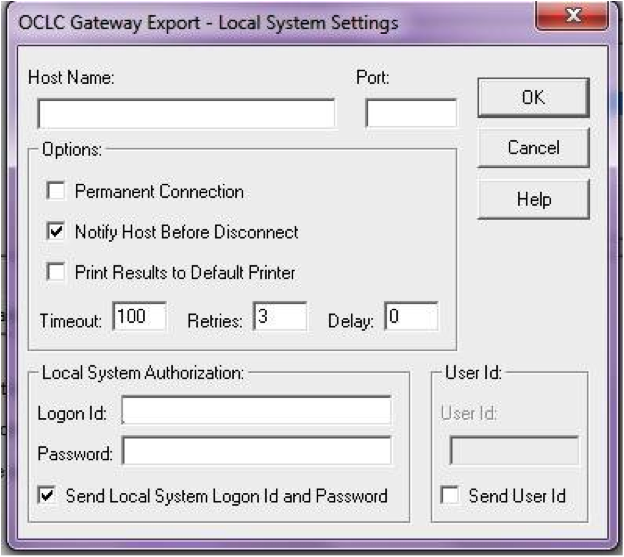
Saisissez l’information suivante:
« Host Name: » Your catalog’s appropriate IP address (from your config file above)
« Port: » Your catalog’s appropriate port number (from your config file above)
« Login ID: » The cataloger’s Koha login
« Password: » Mot de passe Koha du catalogueur
« Notify Host Before Disconnect » = checked,
« Timeout » = 100, « Retries » = 3, « Delay » = 0 (zero),
« Send Local System Logon ID Password » = checked.
Sélectionnez « OK » lorsque vous avez terminé et vous verrez l’option “Exportation de la passerelle » (l’adresse IP du catalogue et du port est noircie sur la capture d’écran suivante)
Gateway Export Added
Cliquez sur « Caractéristiques de la notice » et assurez-vous que les notices bibliographiques utilisent MARC21, UTF-8 Unicode, et cliquez sur OK pour enregistrer.
Caractéristiques de la notice
Vous devrez être prêt! Pour exporter une notice depuis le client de connexion OCLC à Koha, tapez sur F5 pendant que la notice est sur l’écran. Le dialogue d’exportation s’ouvrira, et vous verrez la tentative de connexion OCLC avec Koha. Un message annoncera que la notice a bien été ajoutée ou recouverte, en incluant son numéro biblio et un URL que vous pourrez copier dans votre navigateur pour pouvoir accéder directement à la notice.
Utilisation de la connexion OCLC
Les notices peuvent être exportées depuis Connexion OCLC par lot, ou une par une.
Exporter des notices une par une
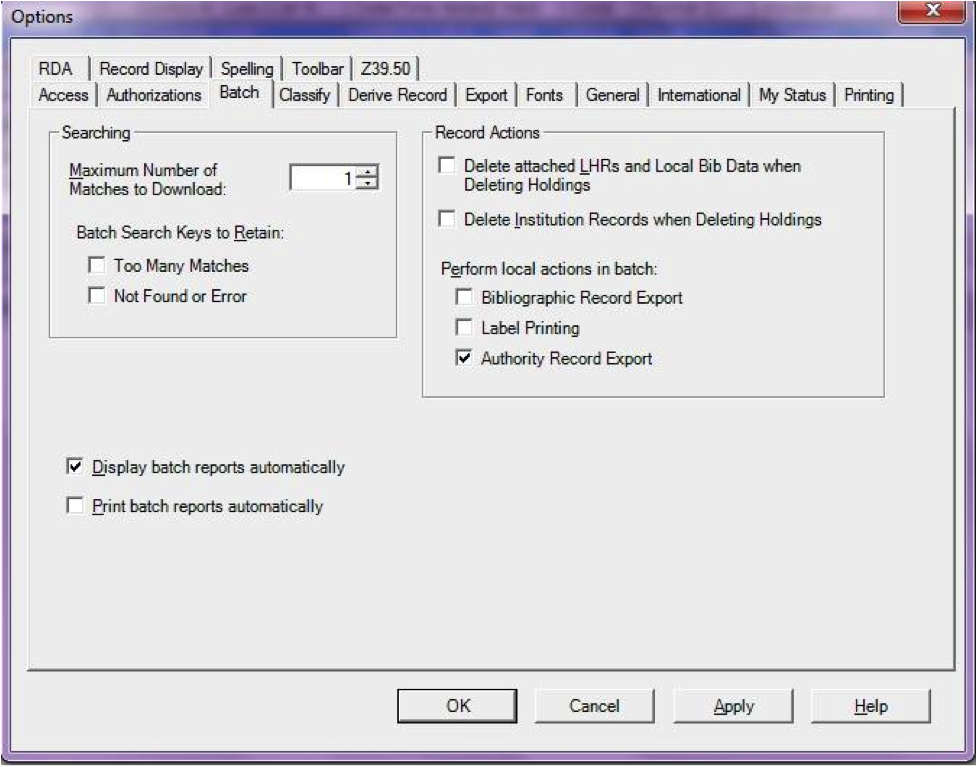
To export bibliographic records one by one, be sure your « Batch » options are correct: from the « Tools » menu, select « Options », and select the « Batch » tab. In the « Perform local actions in batch » area, « Bibliographic Record Export » should be unchecked
When ready to export, from the « Action » menu, select « Export » or use the F5 key. You will see a screen similar to the following if the import is successful and if the record is new to the Catalog; you may copy & paste the resulting URL into your Koha catalog to see the new record.
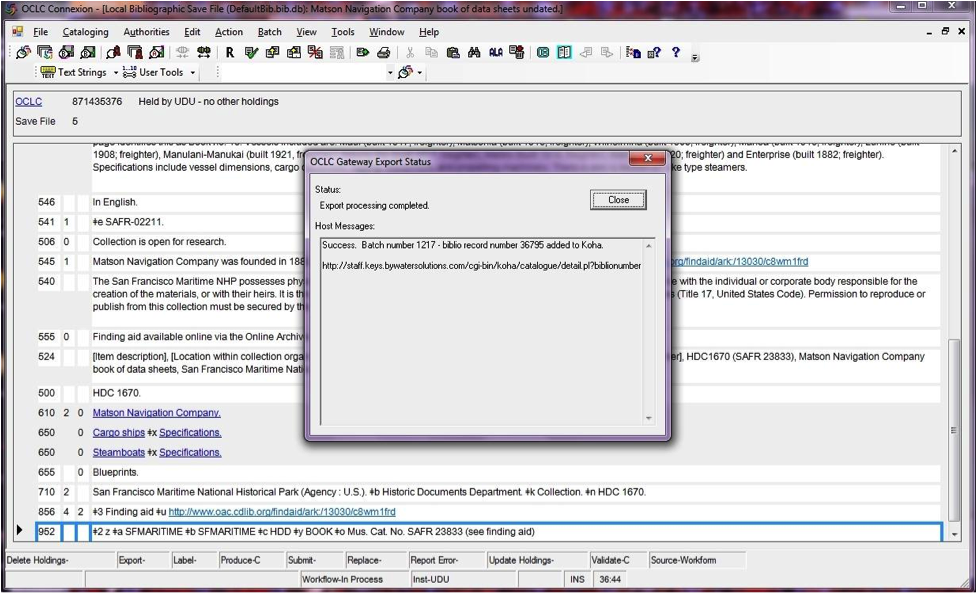
If the record was overlaid, you will see a message to that effect in the « OCLC Gateway Export Status » window
Exporter des notices par lot
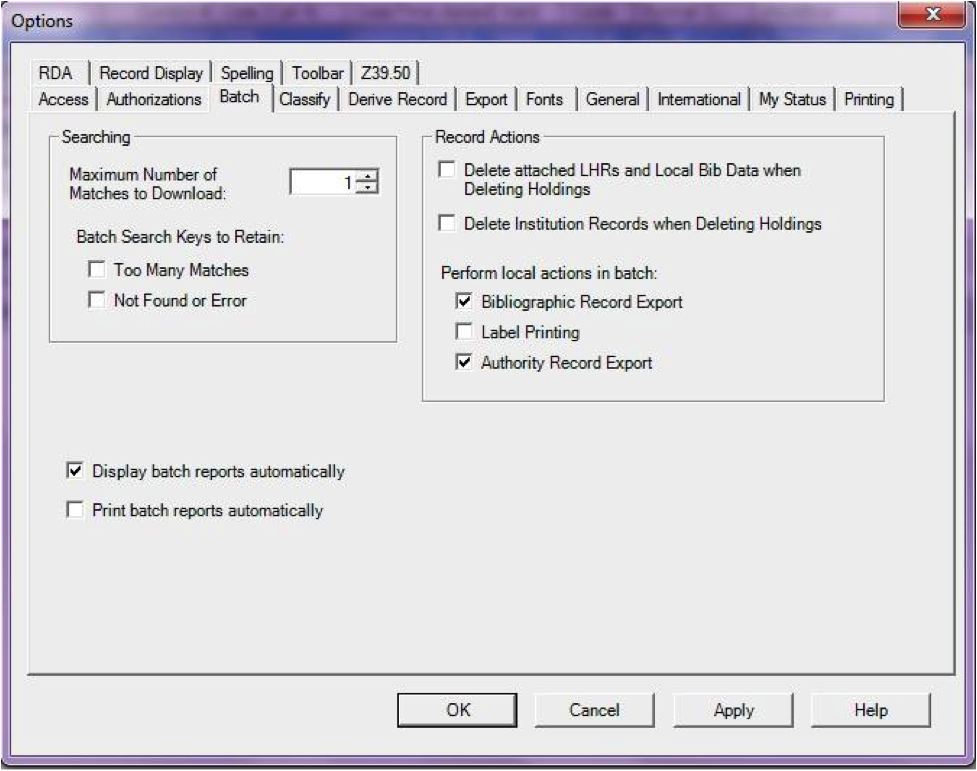
To export bibliographic records in a batch, be sure your « Batch » options are correct: from the « Tools » menu, select « Options », and select the « Batch » tab. In the « Perform local actions in batch » area, « Bibliographic Record Export » should be checkedOCLC
Lorsqu’une notice est prête à être exportée, sélectionnez « Exportation » ou utilisez la touche F5 depuis le menu « Action ». Le statut d’exportation sera marqué de « prêt ».
When ready to export the batch, from the « Batch » menu, select « Process batch » and check the appropriate « Path » and « Export » boxes
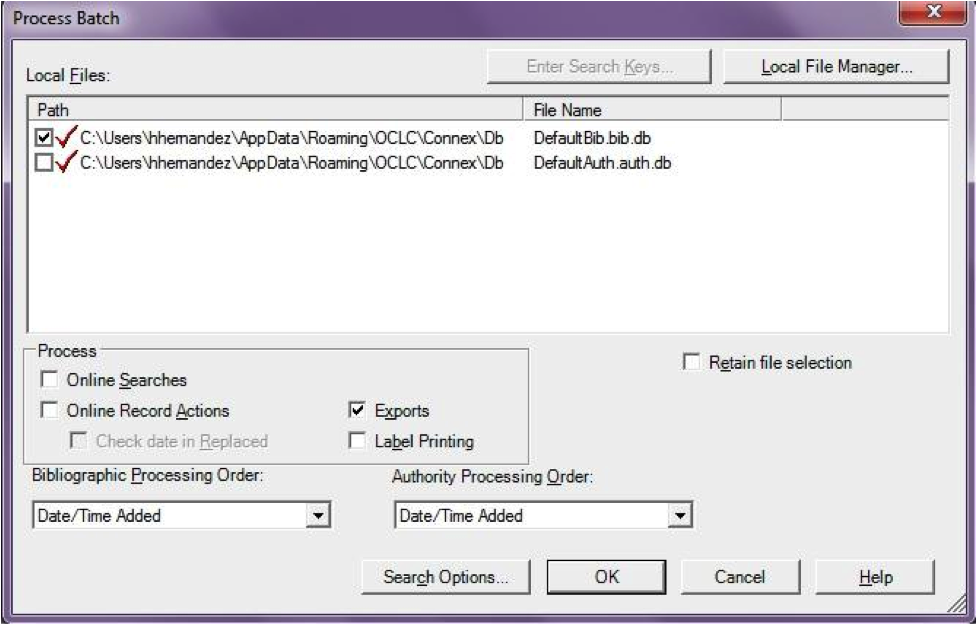
The export will begin, and the bib records will be exported & imported into Koha one by one; you will see « OCLC Gateway Export Status » windows, as above, showing you the results of each export. That window will stay there until you select « Close, » and then the next record’s export/import will begin. The process will continue until all records in the batch are completed. Then you may or may not see the Connexion Client export report (depending on your Client options for that).
Exemplaires dans OCLC
If you’d like to create your item records in OCLC you can do so by addding a 952 for each item to the bib record you’re cataloging. The Item/Holdings Cataloging Guide will break down what subfields you can use in the 952, but at the minimum you want to have subfield 2, a, b, and y on your items.
952 \$2CLASSIFICATION$aHOMEBRANCHCODE$bHOLDINGBRANCHCODE$yITEMTYPECODE
The subfield 2 holds the classification code. This can be ddc for Dewey or lcc for Library of Congress or z for Custom. Other classification sources can be found in the Classification Sources area in administration
Subfield a is your home library and needs to be the code for your home library, not the library name. You can find these codes in the Libraries administration area.
Subfield b is your holding library and needs to be the code for your holding library, not the library name. You can find these codes in the Libraries administration area.
Subfield y is your item type code. It needs to be the code, not the item type name. You can find these codes in the Item Types administration area.
952 \$2ddc$aMAIN$bMAIN$yBOOK
In addition to these required fields you can enter any other subfield you’d like. Most libraries will enter a call number in subfield o and a barcode in subfield p as well. Review the Item/Holdings Cataloging Guide for a full list of subfields and values.
Talking Tech
Talking Tech I-tiva is a third party, proprietary, product that libraries can subscribe to. Learn more here: http://www.talkingtech.com/solutions/library.
Instructions d’installation et de configuration
Assurez-vous que vous avez exécuté installer/data/mysql/atomicupdate/Bug-4246-Talking-Tech-itiva-phone-notifications.pl pour installer le pack de données requis (new syspref, notice placeholders and messaging transport preferences)
Pour l’utiliser, vous devez activer la préférence système Activer.
If you wish to process PREOVERDUE or RESERVES messages, you’ll need the EnhancedMessagingPreferences system preference turned on, and patrons to have filled in a preference for receiving these notices by phone.
For OVERDUE messages, overdue notice triggers must be configured under More > Tools > Overdue notice/status triggers. Either branch-specific triggers or the default level triggers may be used (script will select whichever is appropriate).
Envoyer un fichier de notices
Add the TalkingTech_itiva_outbound.pl script to your crontab
Ajouter un FTP/SFTP ou une autre méthode de transport pour envoyer le fichier de sortie au serveur I-tiva
Si vous le souhaitez, archivez le fichier des notices envoyées dans un autre répertoire après l’envoi
Run TalkingTech_itiva_outbound.pl –help for more information
Réception du fichier des résultats
Ajoutez un FTP/SFTP ou une autre méthode de transport pour envoyer le fichier des résultats dans un répertoire précis dans votre serveur Koha
Add the TalkingTech_itiva_inbound.pl script to your crontab, aimed at that directory
Si vous le souhaitez, archivez le fichier des résultats dans un autre répertoire après le processus
Run TalkingTech_itiva_inbound.pl –help for more information