الادارة
اﻹعدادات الرئيسية
للوصول: المزيد > الإدارة
هام
ضبط جميع 'المعاملات' بالترتيب حسب ظهورها.
المكتبات
أثناء تنصيب نظام كوها الخاص بك يجب عليك إضافة معلومات حول كل مكتبة ستشارك نظامك. سوف يتم استخدام هذه البيانات في العديد من أجزاء كوها.
Get there: More > Administration > Basic parameters > Libraries
ملاحظة
Only staff with the manage_libraries permission (or the superlibrarian permission) will have access to this section.
عند زيارة هذه الصفحة سوف تظهر لك قائمة بالمكتبات التي تمت إضافتها بالفعل إلى النظام.
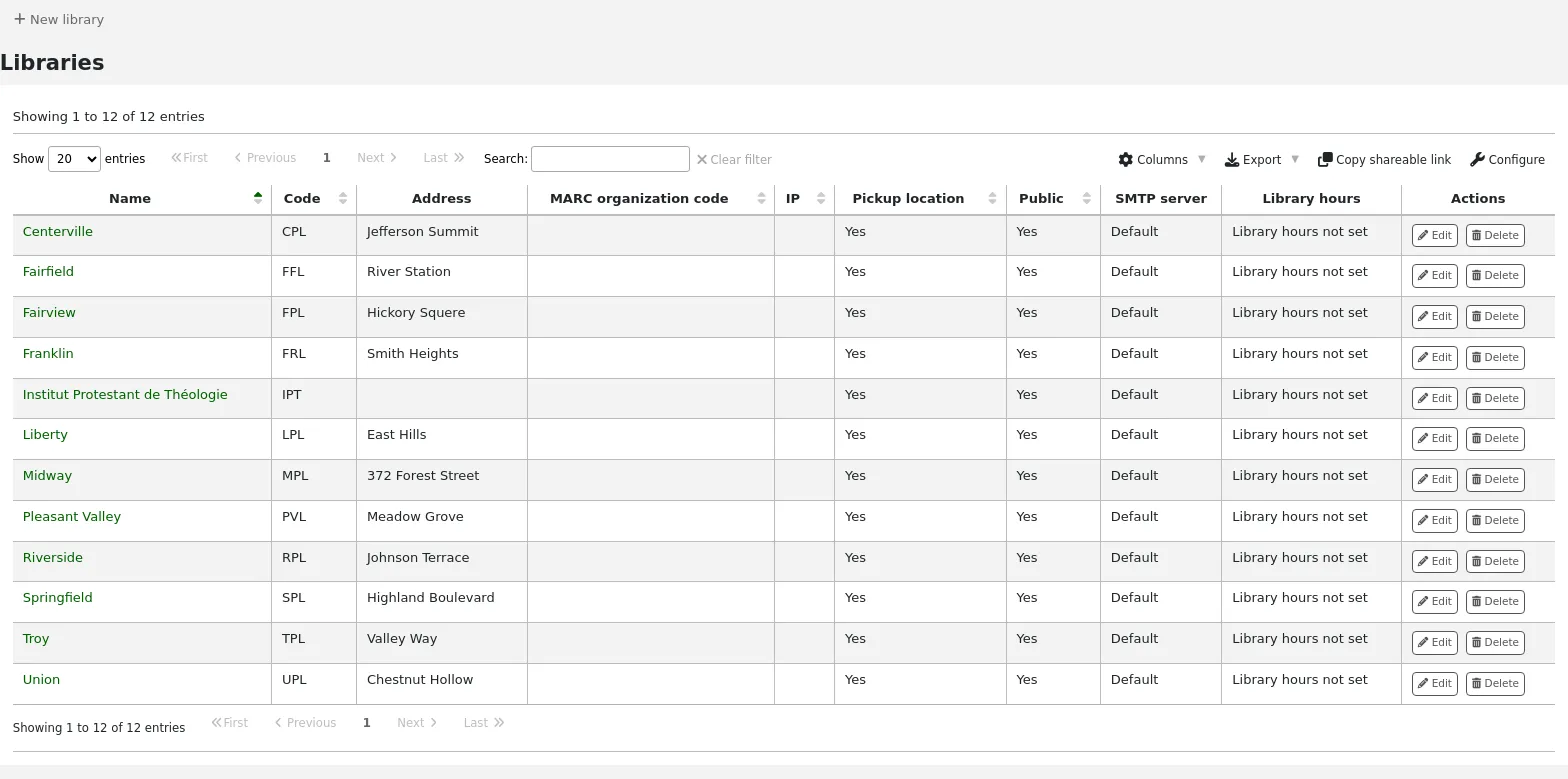
ملاحظة
You can customize the columns of this table in the Table settings section of the Administration module (table id: libraries).
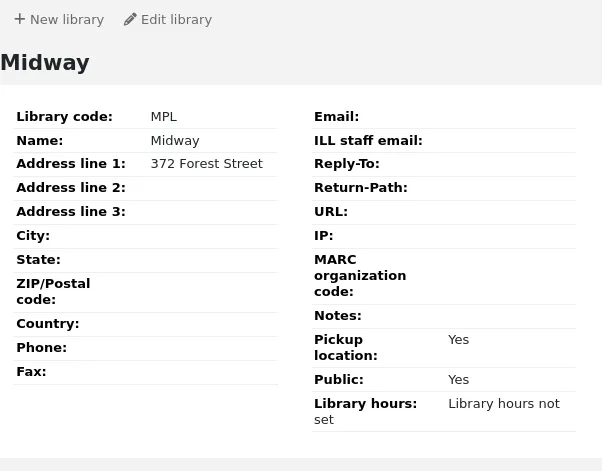
Clicking on the library's name will bring you to a detailed view of the library's information.
إضافة مكتبة
لإضافة مكتبة جديدة:
انقر على 'مكتبة جديدة'
Fill out the form
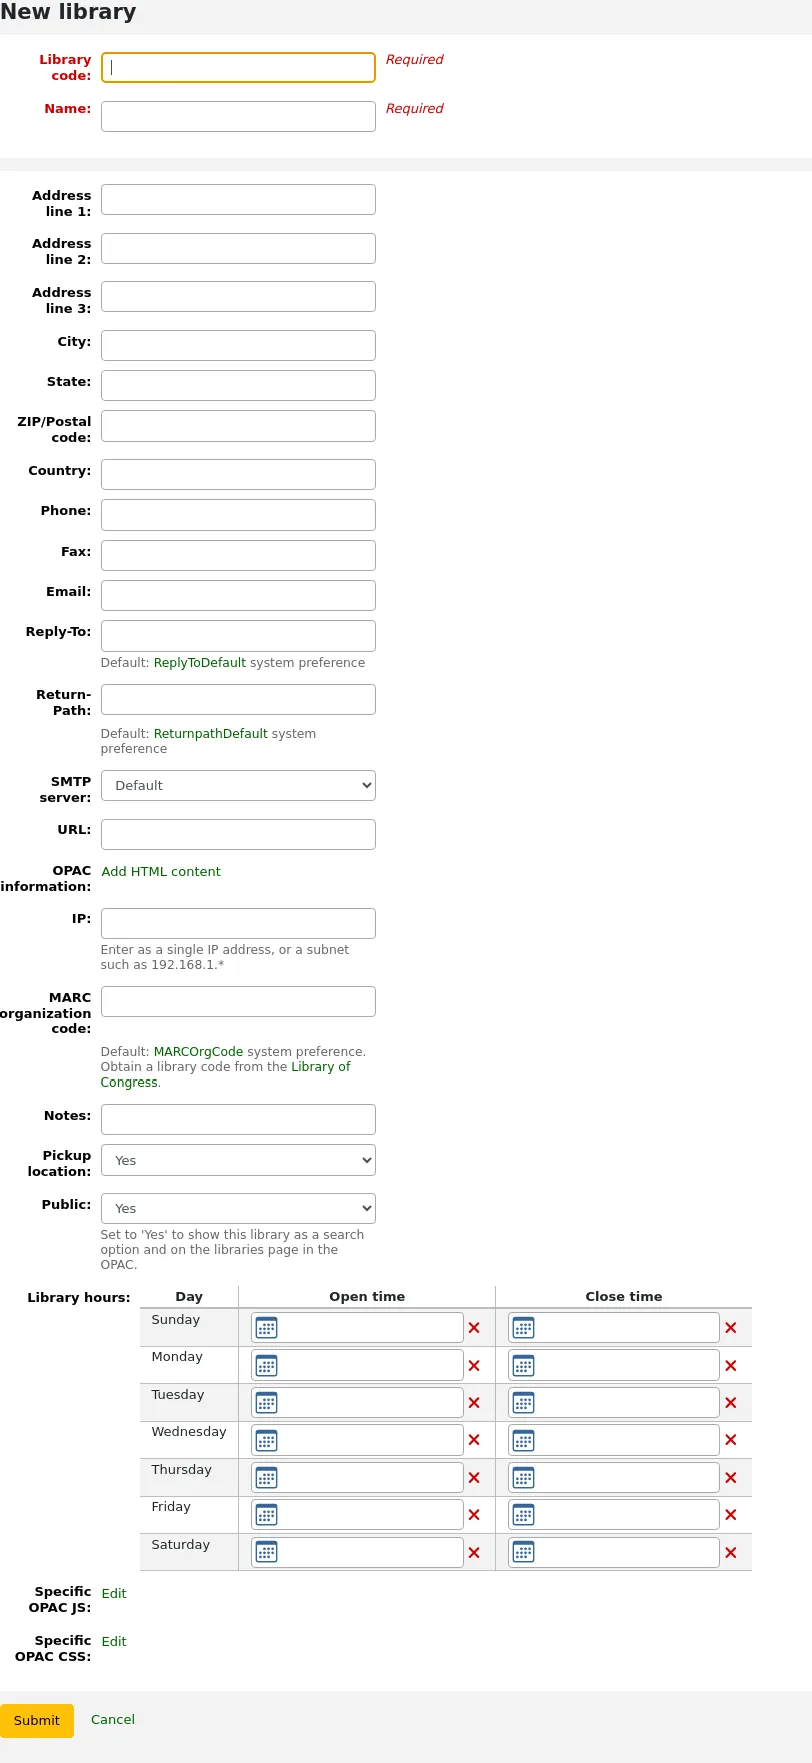
Library code (required): the code should not contain any spaces or hyphens and be 10 or fewer characters. This code will be used as a unique identifier in the database.
Name (required): the name will be displayed on the OPAC and staff interface wherever the library name displays, and should be a name that makes sense to your patrons and staff.
Address, city, state, zip/postal code, country, phone, fax: the address and contact fields can be used to make notices custom for each library, they will also be displayed in the 'Libraries' page of the OPAC, if this library is set as 'Public'
Email: the email address field is not required, but it should be filled for every library in your system
ملاحظة
تأكد من إدخال عنوان البريد الالكتروني لتتأكد من وصول الملاحظة من و إلىالعنوان الصحيح
ملاحظة
If no email address is entered here, the address in the KohaAdminEmailAddress system preference will be used to send notices from this library
ILL staff email: if this library uses a specific email address for interlibrary loan management, enter it here
ملاحظة
If no email address is entered here, the address in the ILLDefaultStaffEmail system preference will be used to receive ILL requests to this library
Reply-To: you can enter a different 'Reply-To' email address. This is the email address that all replies will go to.
ملاحظة
If no email address is entered here, the address in the ReplytoDefault system preference will be used to receive replies to this library
Return-Path: you can enter a different 'Return-Path' email address. This is the email address that all bounced messages will go to.
ملاحظة
If no email address is entered here, the address in the ReturnpathDefault system preference will be used to receive bounced messages from this library.
SMTP server: if this library uses a different SMTP server from the default, specify it here.
URL: if this field is populated, the library name will be linked in the holdings table on the OPAC
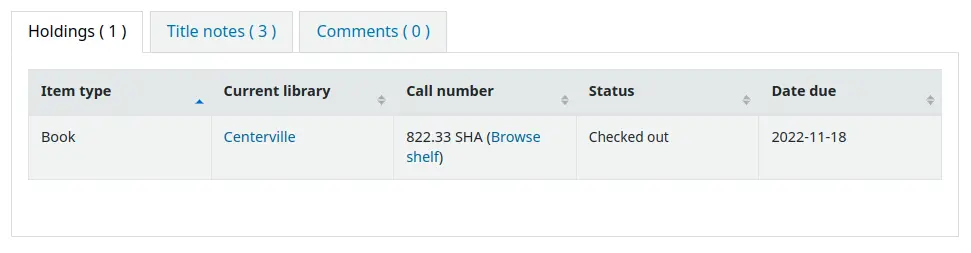
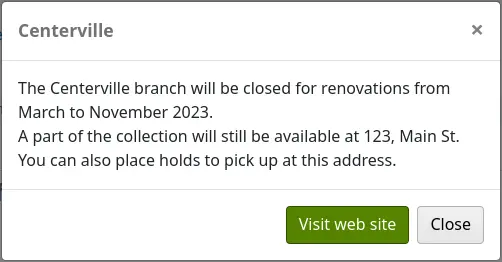
OPAC info: this leads to the HTML customization tool, so that you can add additional information about the library. This information will appear in the 'Libraries' page in the OPAC, as well as in the holdings table in the OPAC.
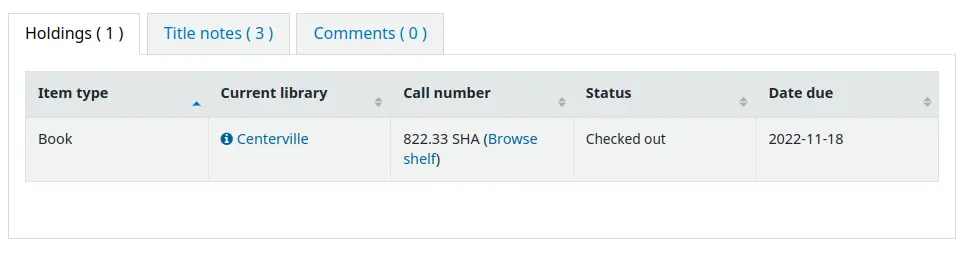
Clicking on the library name that has a small 'i' icon next to it will open a pop-up with the information.
IP: this field does not have be filled in unless you plan on limiting access to the staff interface to a specific IP address or range of IP addresses.
ملاحظة
Library IP addresses and ranges are used by the StaffLoginLibraryBasedOnIP and the StaffLoginRestrictLibraryByIP system preferences.
MARC organization code: if this library has a specific MARC organization code, you can enter it here.
ملاحظة
If left blank, the code entered in the MARCOrgCode system preference will be used for this library.
Notes: if you have any notes you can put them here. These will not show in the OPAC.
Pickup location: choose whether this library will display as an available pickup location for holds.
Public: choose whether this library will appear in the 'Libraries' page on the OPAC, as well as as a limit option in the OPAC advanced search.
Opening hours: if you do hourly loans, fill out the library's opening hours for each day of the week. You can then set the ConsiderLibraryHoursInCirculation system preference according to your policies.
Version
This option was added to Koha in version 24.05.
UserJS: use this field to add custom JavaScript to the OPAC of this library (when patrons are logged in, or if there is a
SetEnv OPAC_BRANCH_DEFAULTentry in the Apache configuration file)Version
This feature was added in Koha version 23.11.
ملاحظة
General modifications applicable to all libraries can be put in the OPACUserJS system preference.
UserCSS: use this field to add custom CSS to the OPAC of this library (when patrons are logged in, or if there is a
SetEnv OPAC_BRANCH_DEFAULTentry in the Apache configuration file)Version
This feature was added in Koha version 23.11.
ملاحظة
General modifications applicable to all libraries can be put in the OPACUserCSS system preference.
If you have any additional fields for libraries (branches), they will be displayed at the bottom of the form.
Click 'Submit' to save the new library.
تحرير/حذف مكتبة
From the libraries table, click 'Edit' or 'Delete' to edit or delete a library.
تحذير
You will be unable to edit the 'Library code'.
تحذير
لن تتمكن من حذف أي مكتبة لديها مستفيدين أو مواد مرتبطة بها.

مجموعات المكتبة
Library groups can serve various purposes: to limit access to patron data, to limit item modification, to limit OPAC or staff interface searches, or to define holds behavior.
Get there: More > Administration > Basic parameters > Library groups
ملاحظة
Only staff with the manage_libraries permission (or the superlibrarian permission) will have access to this section.
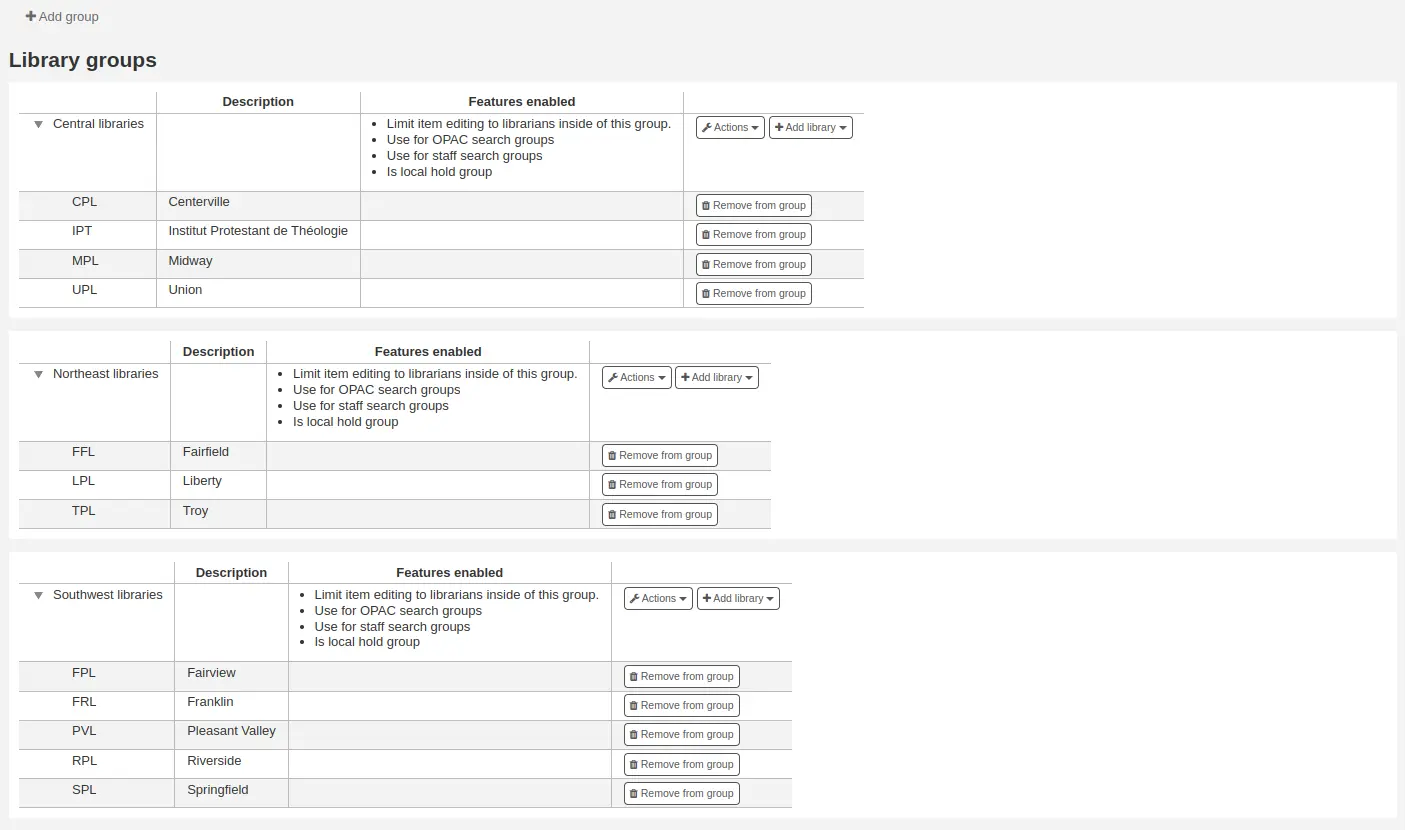
عند زيارة هذه الصفحة سوف تظهر لك قائمة بالمجموعات التي تمت إضافتها بالفعل إلى النظام.
إضافة مجموعة
To create a new library group,
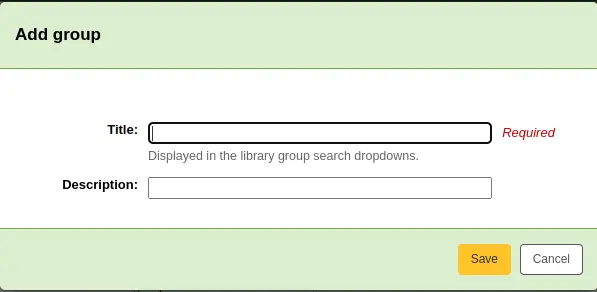
Click the 'Add group' button at the top of the screen.
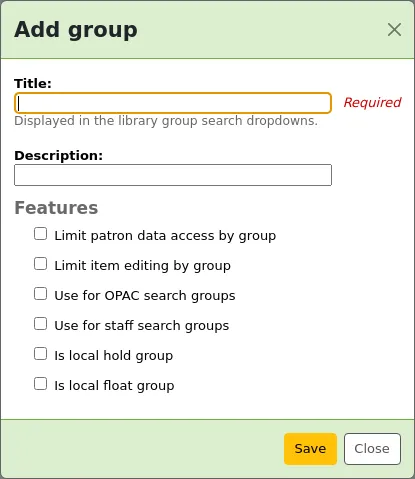
Title (required): give the group a title. This title will be displayed in the advanced search limit dropdown.
Description: optionally, enter a description for this group. The description is only used in this page to give an idea of what the group is used for.
Features: check the use of this group
Limit patron data access by group: this will limit staff members from seeing other groups' patrons.
ملاحظة
This can be overridden with the view_borrower_infos_from_any_libraries permission (or the superlibrarian permission).
Limit item editing by group: this will limit staff members from editing items from other groups' libraries.
ملاحظة
This can be overridden with the edit_any_item permission (or the superlibrarian permission).
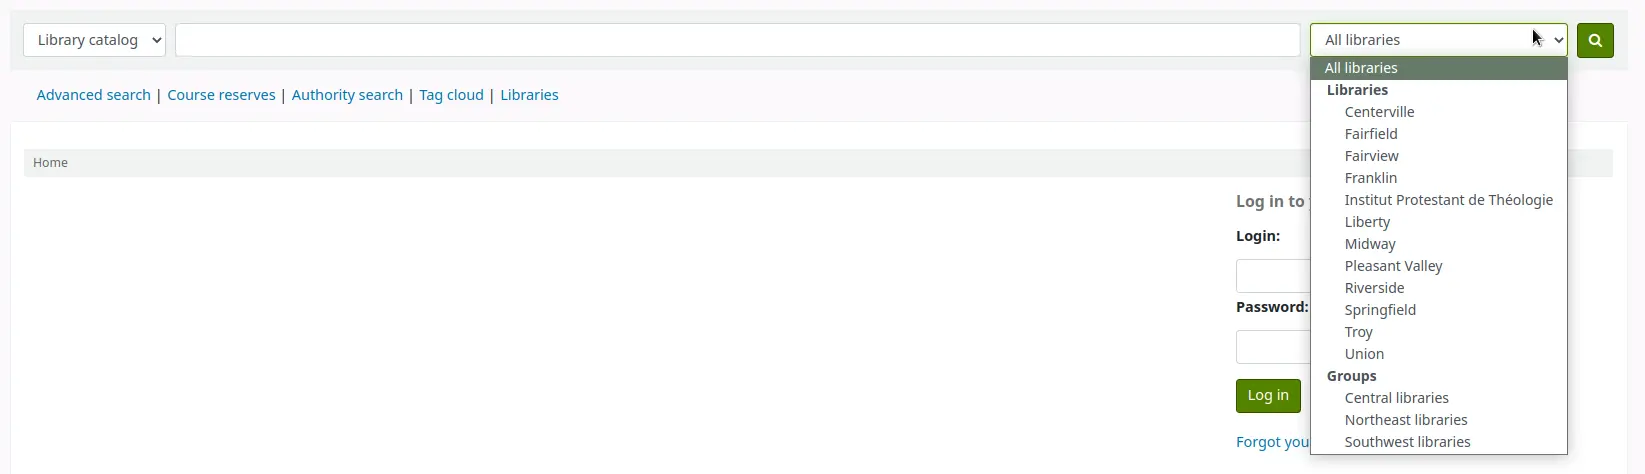
Use for OPAC search groups: this will make the group visible in the library dropdown menu at the top of the OPAC (when the OpacAddMastheadLibraryPulldown system preference is set to 'Add') and on the advanced search page.
Use for staff search groups: this will make the group visible in the library dropdown menu in the staff interface advanced search.

Is local hold group: this will make this group a local hold group, which can be used to add hold policies in the circulation rules to limit patrons to placing holds on items within the group only.
Is local float group: this will make this group a local float group, which can be used in a return policy or in a hold policy in circulation rules to determine if an item 'floats' (stays at the check-in library) or is transferred back to its home library.
Click 'Save' to create the group.
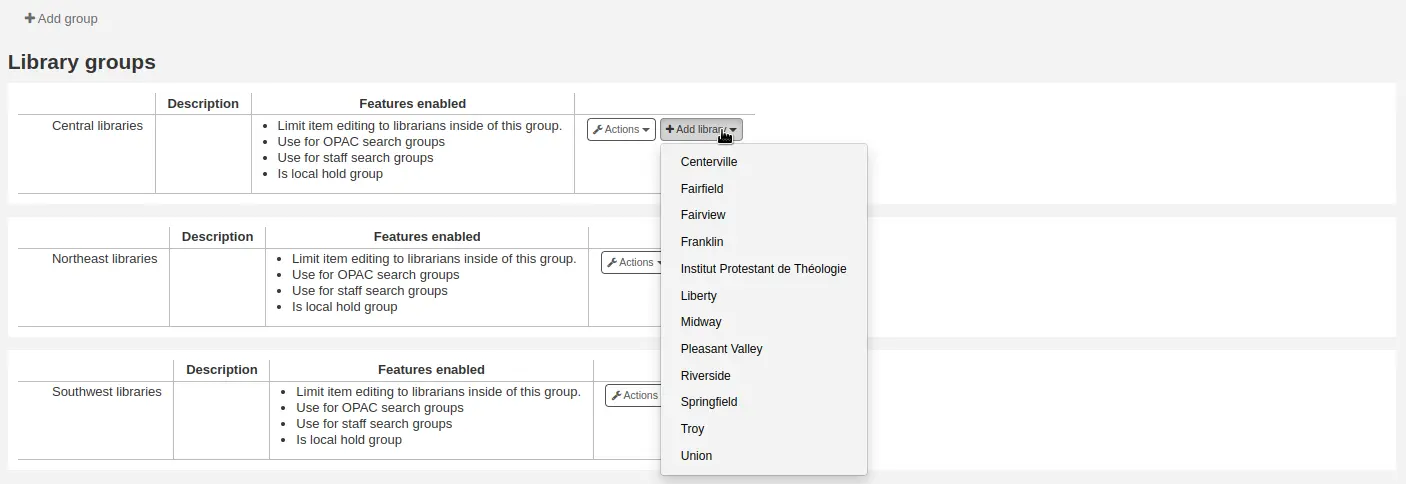
إضافة مكتبة إلى مجموعة
قم بالنقر على مربع "إضافة مكتبة" بجانب المجموعة لإضافة مكتبة إلى هذه المجموعة. سوف تظهر لك قائمة بالمكتبات التي لا تنتمي بالفعل لهذه المجموعة.
إضافة مجموعة فرعية
If your system is very large, you can create sub-groups. Click on the 'Actions' button next to the group and select the 'Add a sub-group' option.

Fill in the title and the description (optional) of the sub-group. The features will be inherited from the parent group.
حذف مجموعة
لحذف مجموعة، قم بالنقر على زر "إجراءات" بجانب المجموعة وتحديد خيار "حذف"
The system will ask to confirm the deletion.
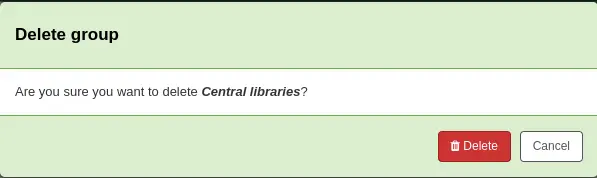
Click 'Delete' to confirm and delete the group.
مكاتب الإعارة
Koha allows you to define several circulation desks within a single library. For example, if you have an adult circulation desk and a children's circulation desk, or if you have a different desk for each floor or each department.
Make sure to enable the UseCirculationDesks system preference to use this functionality.
Get there: More > Administration > Patrons and circulation > Circulation desks
Adding circulation desks
To add a new circulation desk, click on the 'New desk' button at the top of the page.
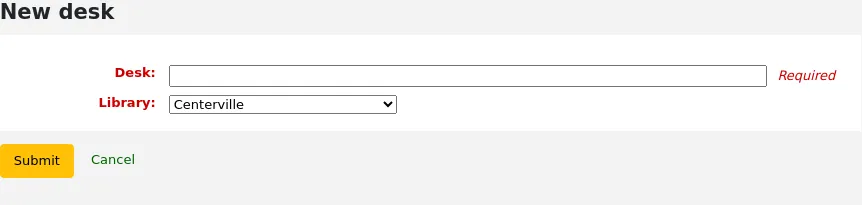
In the 'Desk' field, enter a name for your desk.
Choose the library in which this desk is.
Click 'Submit'.
Editing a circulation desk
To edit an existing circulation desk, click on the 'Edit' button to the right of the desk to modify.
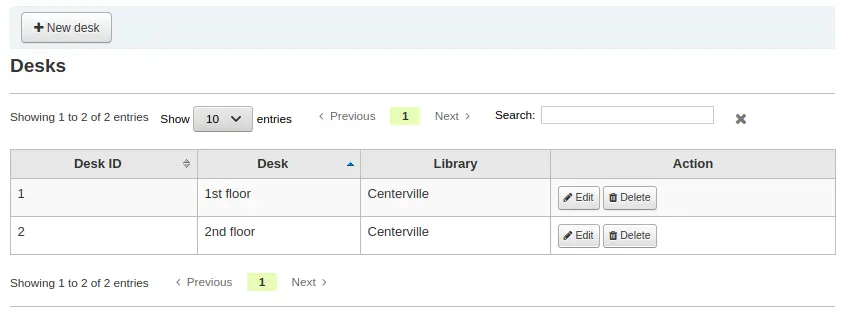
From there, you can change the name and/or the library of the desk.
Deleting a circulation desk
To delete an existing circulation desk, click on the 'Delete' button to the right of the desk to remove.
أنواع المادة
للوصول: المزيد > الإدارة > الضوابط الأساسية > أنواع المادة
ملاحظة
Only staff with the manage_itemtypes permission (or the superlibrarian permission) will have access to this section.
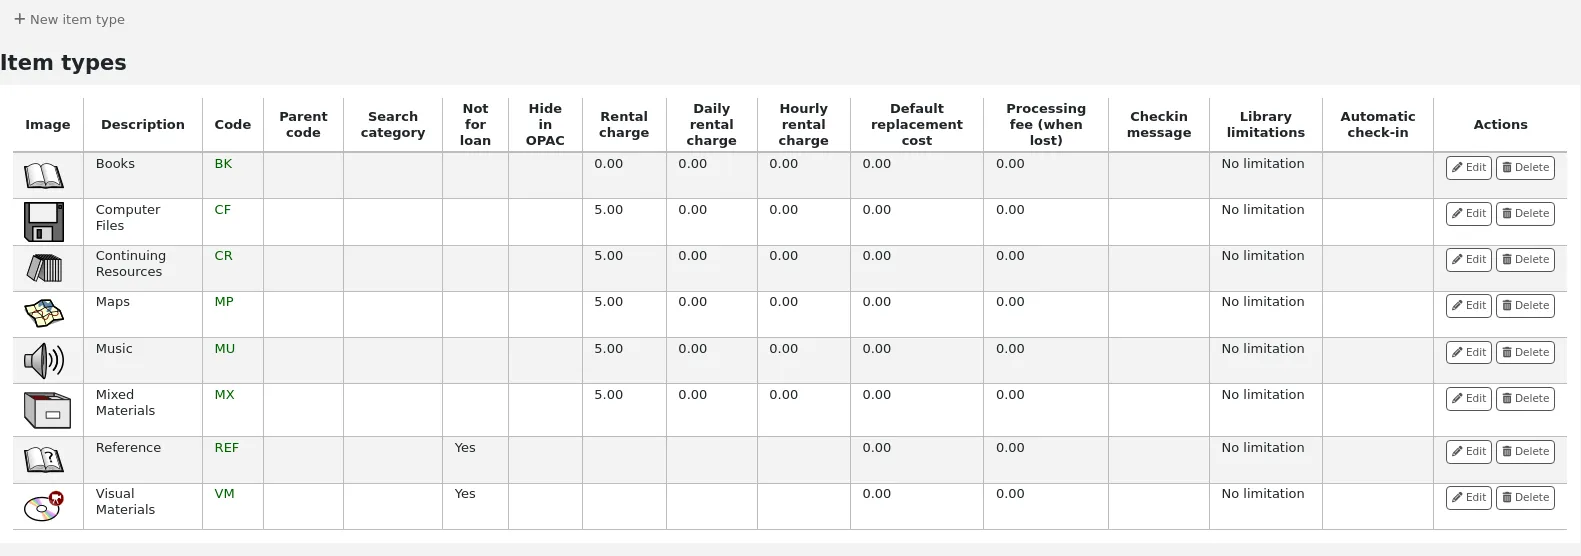
Koha allows you to organize your collection by item types and collection codes. Along with libraries and patron categories, item types are used to control circulation rules.
Item types typically refer to the material type (Book, CD, DVD, etc), but can be used in any way that works for your library.
ملاحظة
You can customize the columns of this table in the Table settings section of the Administration module (table id: table_item_type).
إضافة أنواع المادة
To add a new item type,
Click the 'New item type' button at the top of the item types page.
Fill out the form:
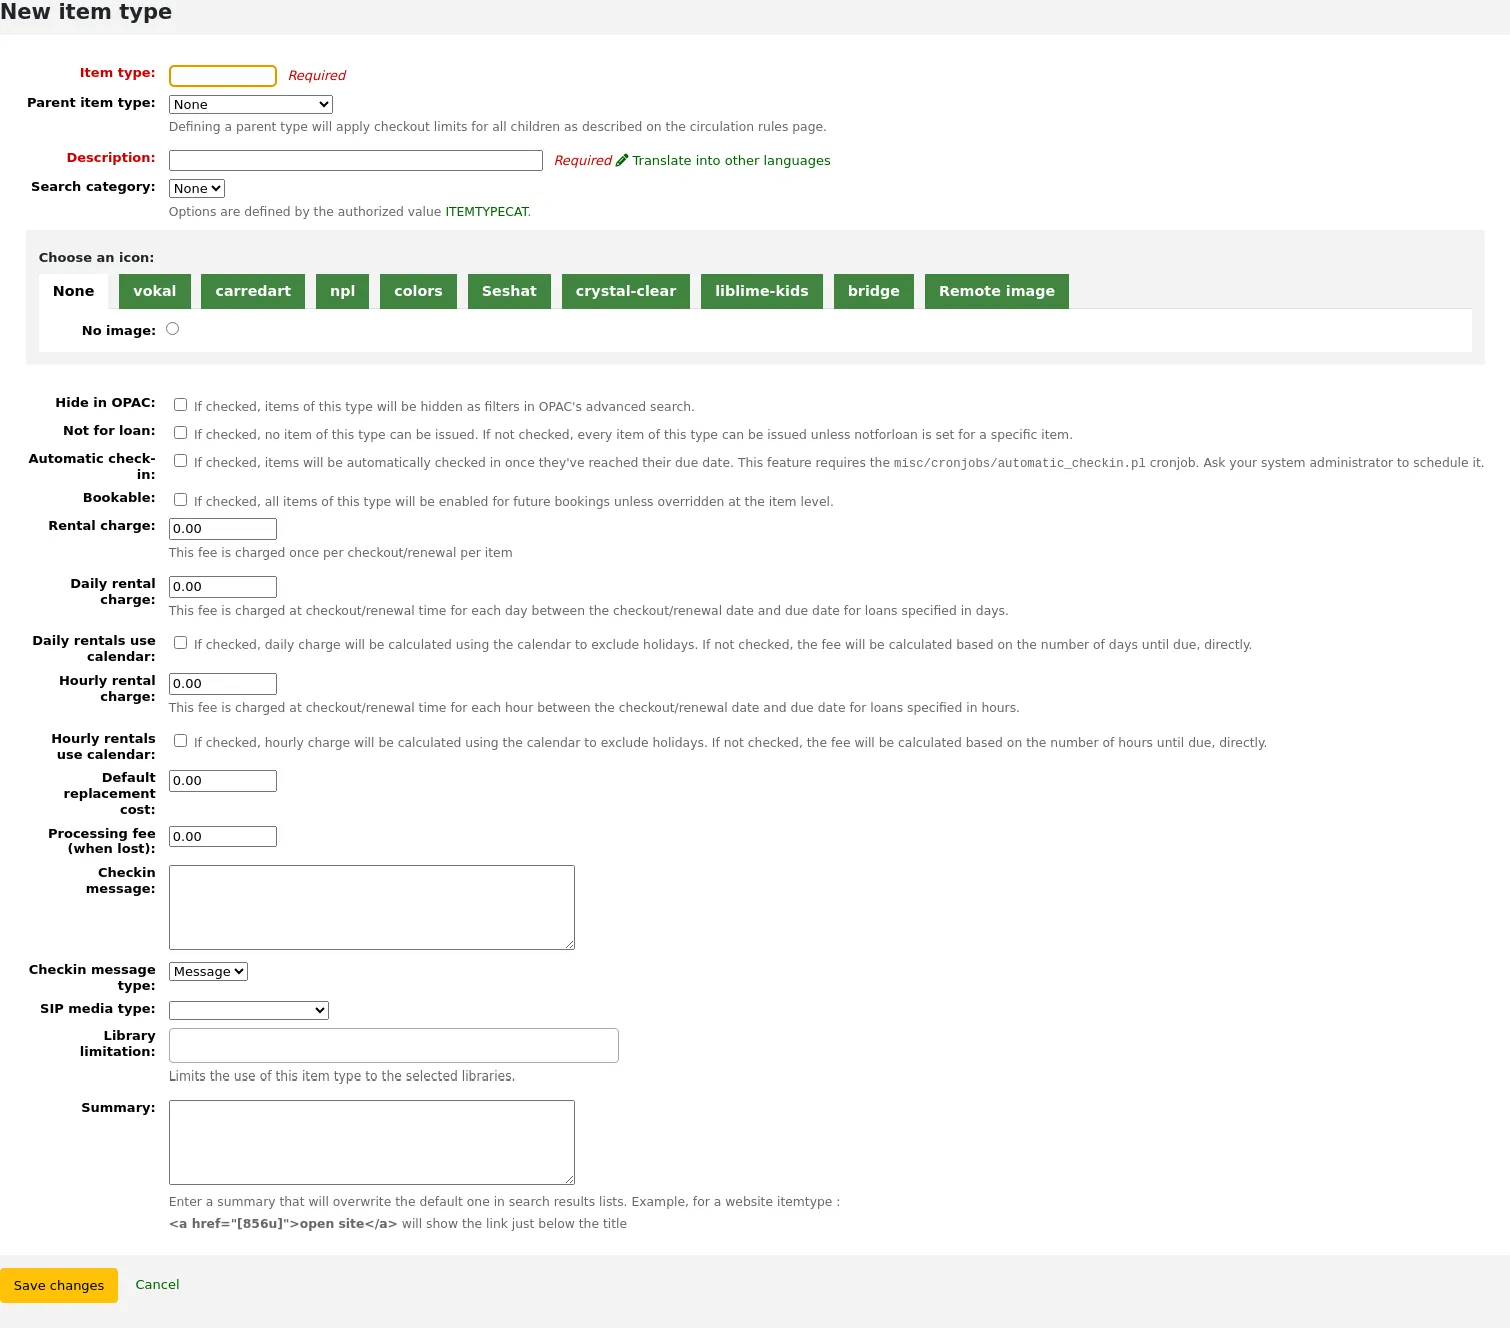
Item type: enter a short code for your item type (maximum of 10 characters)
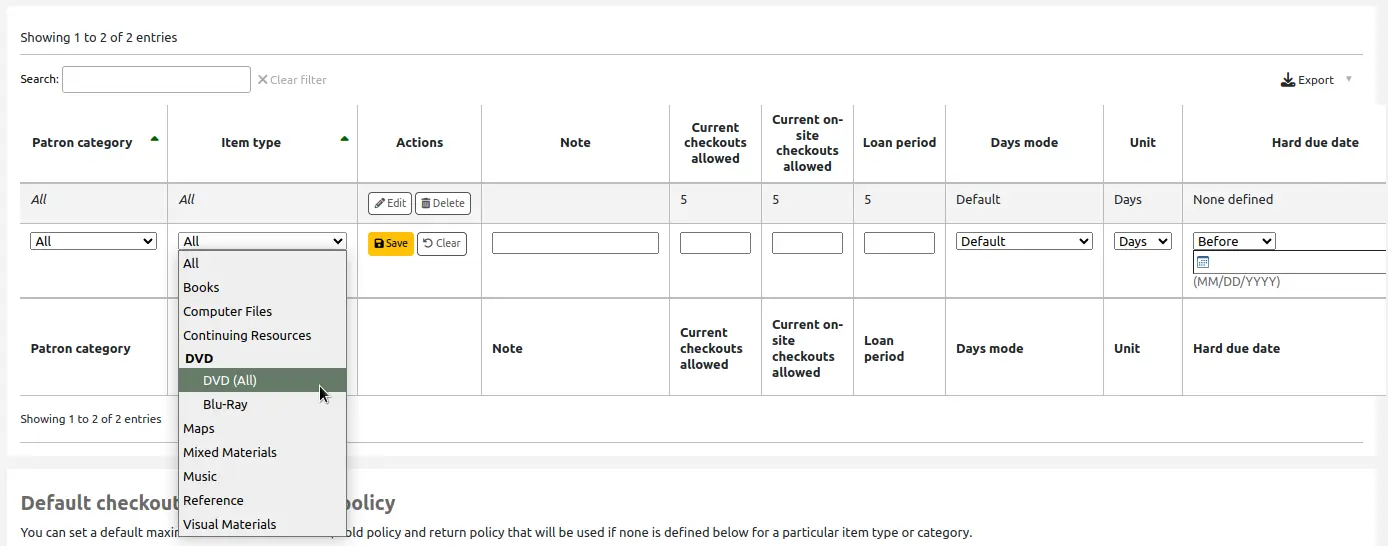
Parent item type: you can choose an item type that will act as a parent category for this item type. You can then define circulation rules based on that parent item type.
For example, you could have DVD and Blu-ray item types, and the DVD would be the parent of the Blu-ray item type.
You can then create a circulation rule for either Blu-ray only or DVD and Blu-ray (DVD (All))
Description: enter the plain text definition of the item type
In systems with multiple languages installed, you can translate the item type description in to all of those languages using the 'Translate into other languages' link.
Search category: item types can be grouped together for searching at the same time in the OPAC advanced search. For example, you can put DVDs and Blu-rays in a group called 'Movies' and then patrons can search them together. These groups are defined in the ITEMTYPECAT authorized value category.
ملاحظة
Search categories are used in the OPAC only. Staff can search for individual item types in the staff interface advanced search.
Choose an icon: you can choose to have an image associated with your item type. These images will appear in the staff interface and the OPAC, in the advanced search and in the holdings table, or the bibliographic record if the item-level_itypes system preference is set to record-level. You can choose an icon from a series of image collections, or you can link to a remote image.
تحذير
If this option is not enabled, you can change the setting of the noItemTypeImages or OPACNoItemTypeImages.
ملاحظة
To have your item type images appear in the OPAC you need to set OPACnoItemTypeImages to 'Show'.
Hide in OPAC: for items that you are suppressing from the OPAC, you can hide their item type from being searched in the OPAC.
مهم
This will not prevent those items to appear in search results, it will simply remove the item type from the advanced search form.
If you want to completely hide items from a certain item type, let's say that you have a professional library with books reserved for staff and you don't want those to appear in the OPAC, use the OpacHiddenItems system preference.
Not for loan: check this option for item types that should not circulate. Items marked 'Not for loan' will appear in the catalog, but cannot be checked out to patrons.
Automatic check-in: you can check this option for items that are not physical, but for which you still have circulation rules, such as museum passes or ebooks.
ملاحظة
This option requires the cronjob misc/cronjobs/automatic_checkin.pl. Ask your system administrator to schedule it.
Bookable: check this option to allow bookings for all items of this item type.
Version
This option was added to Koha in version 24.11.
Rental charge: if you charge a flat rental fee for checking out items of this type, enter the fee here. This fee will be charged to the patron upon checkout and renewal.
مهم
Do not enter symbols in this field, only numbers and decimal points (ex. $5.00 should be entered as 5 or 5.00).
Daily rental charge: if a rental charge should be charged by the number of days the item is checked out for, enter the daily fee here. This fee will be charged to the patron upon checkout multiplied by the number of days this item is checked out. For example, for an item checked out for 7 days with a daily rental charge of 1$, the patron will be charged 7$ upon checkout. This daily rental charge will also be applied for renewals.
مهم
Do not enter symbols in this field, only numbers and decimal points (ex. $5.00 should be entered as 5 or 5.00).
Daily rentals use calendar: check this option to exclude holidays from the daily rental fee calculation.
ملاحظة
Make sure to enter the closed days in the calendar to exclude them from the daily rental charge.
Hourly rental charge: if items are loaned out hourly, enter the cost per hour here. Again, the total (hourly cost * number of hours loaned) will be charged to the patron upon checkout and renewal.
مهم
Do not enter symbols in this field, only numbers and decimal points (ex. $5.00 should be entered as 5 or 5.00).
Hourly rentals use calendar: check this option to exclude holidays from the hourly rental fee calculation.
ملاحظة
Make sure to enter the closed days in the calendar to exclude them from the daily rental charge.
Default replacement cost: this is the amount that will be charged to the patron when an item of this type is lost AND the item doesn't have a replacement cost. If the item has a replacement cost, that is the amount that will be charged to the patron.
مهم
Do not enter symbols in this field, only numbers and decimal points (ex. $5.00 should be entered as 5 or 5.00).
Processing fee (when lost): this processing fee will be added to the replacement cost if a patron loses an item of this type.
مهم
Do not enter symbols in this field, only numbers and decimal points (ex. $5.00 should be entered as 5 or 5.00).
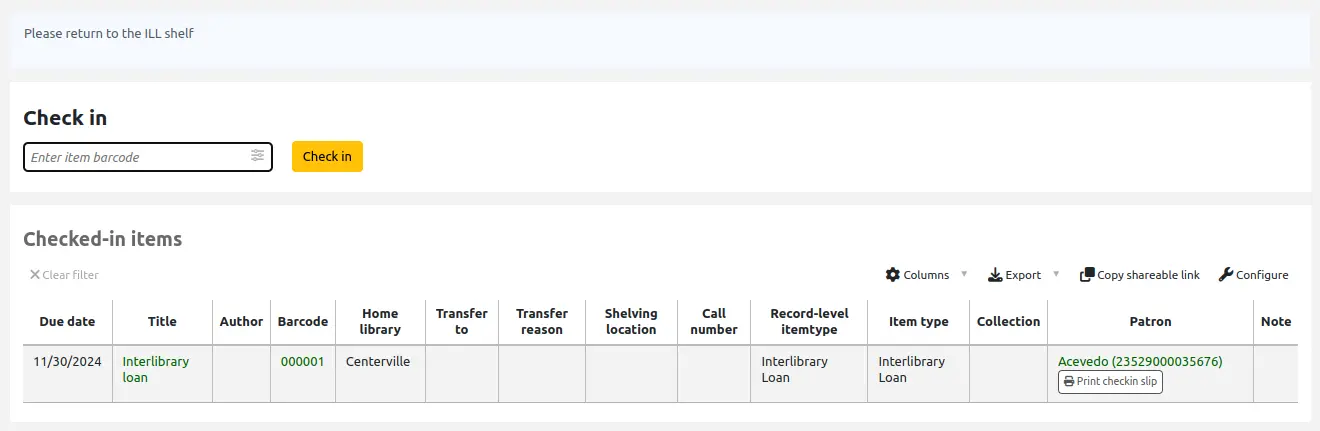
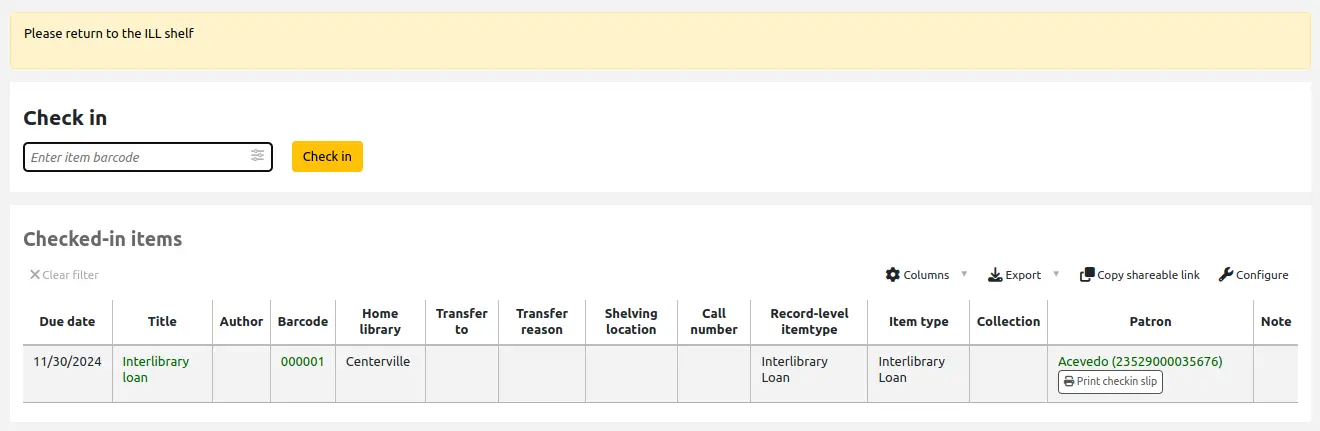
Checkin message: if you would like a message or alert to appear when items of this type are checked in, enter the message here.
Checkin message type: the checkin message can be a 'message' or an 'alert'. The only difference between these two is the styling. A message is blue
and an alert is yellow.
SIP media type: some SIP devices need you to use a SIP-specific media type instead of Koha's item type (usually lockers and sorters need this media type). If you use a device like this choose the SIP media type for this item type.
Library limitation: if this item type is only to be used in specific libraries, you can select them here. Select 'All libraries' if this item type is used across the library system.
ملاحظة
If this is left blank, 'All libraries' is assumed.
نصيحة
To select more than one library, hold the 'Ctrl' key while selecting the libraries.
Summary: this summary is used in non-XSLT displays only.
Check for previous checkouts: this setting only appears if the CheckPrevCheckout system preference is set to either 'Unless overridden by patron category or by item type, do' or 'Unless overridden by patron category or by item type, do not'. This allows libraries to customize whether Koha should warn staff when a patron has already checked out the same title, on a per-item type basis.
Inherit from system preferences: use the setting from the CheckPrevCheckout system preference.
Yes and override system preferences: always check the patron's circulation history for this item type, regardless of the setting of the CheckPrevCheckout system preference.
No and override system preferences: never check the patron's circulation history for this item type, regardless of the setting of the CheckPrevCheckout system preference.
Version
This option was added to Koha in version 25.11.

When finished, click 'Save changes'.
ملاحظة
All fields, with the exception of the 'Item type' will be editable from the item types list.
Your new item type will now appear on the list.
تحرير أنواع المادة
To edit an item type, click the 'Edit' button next to it, or click the item type code.
See the Adding item types section for a description of each field.
مهم
لن تتمكن من تحرير الرمز الذي قمت بتعيينه كـ'نوع المادة ' ولكن يمكنك تحرير وصف المادة.
حذف أنواع المادة
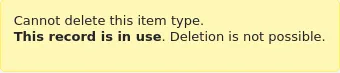
To delete an item type, click the 'Delete' button next to it.
مهم
You will not be able to delete item types that are being used by items or bibliographic records within your system. If that is the case, a message will alert you that the item type is in use.
قيم الاستناد
Authorized values can be used in several areas of Koha. They are lists of controlled terms, phrases or codes.
For example, one reason you would add an authorized value category would be to control the values that can be entered into MARC fields by catalogers.
للوصول: المزيد > الإدارة > الضوابط الأساسية > قيم الاستناد
ملاحظة
Only staff with the manage_auth_values permission (or the superlibrarian permission) will have access to this section.
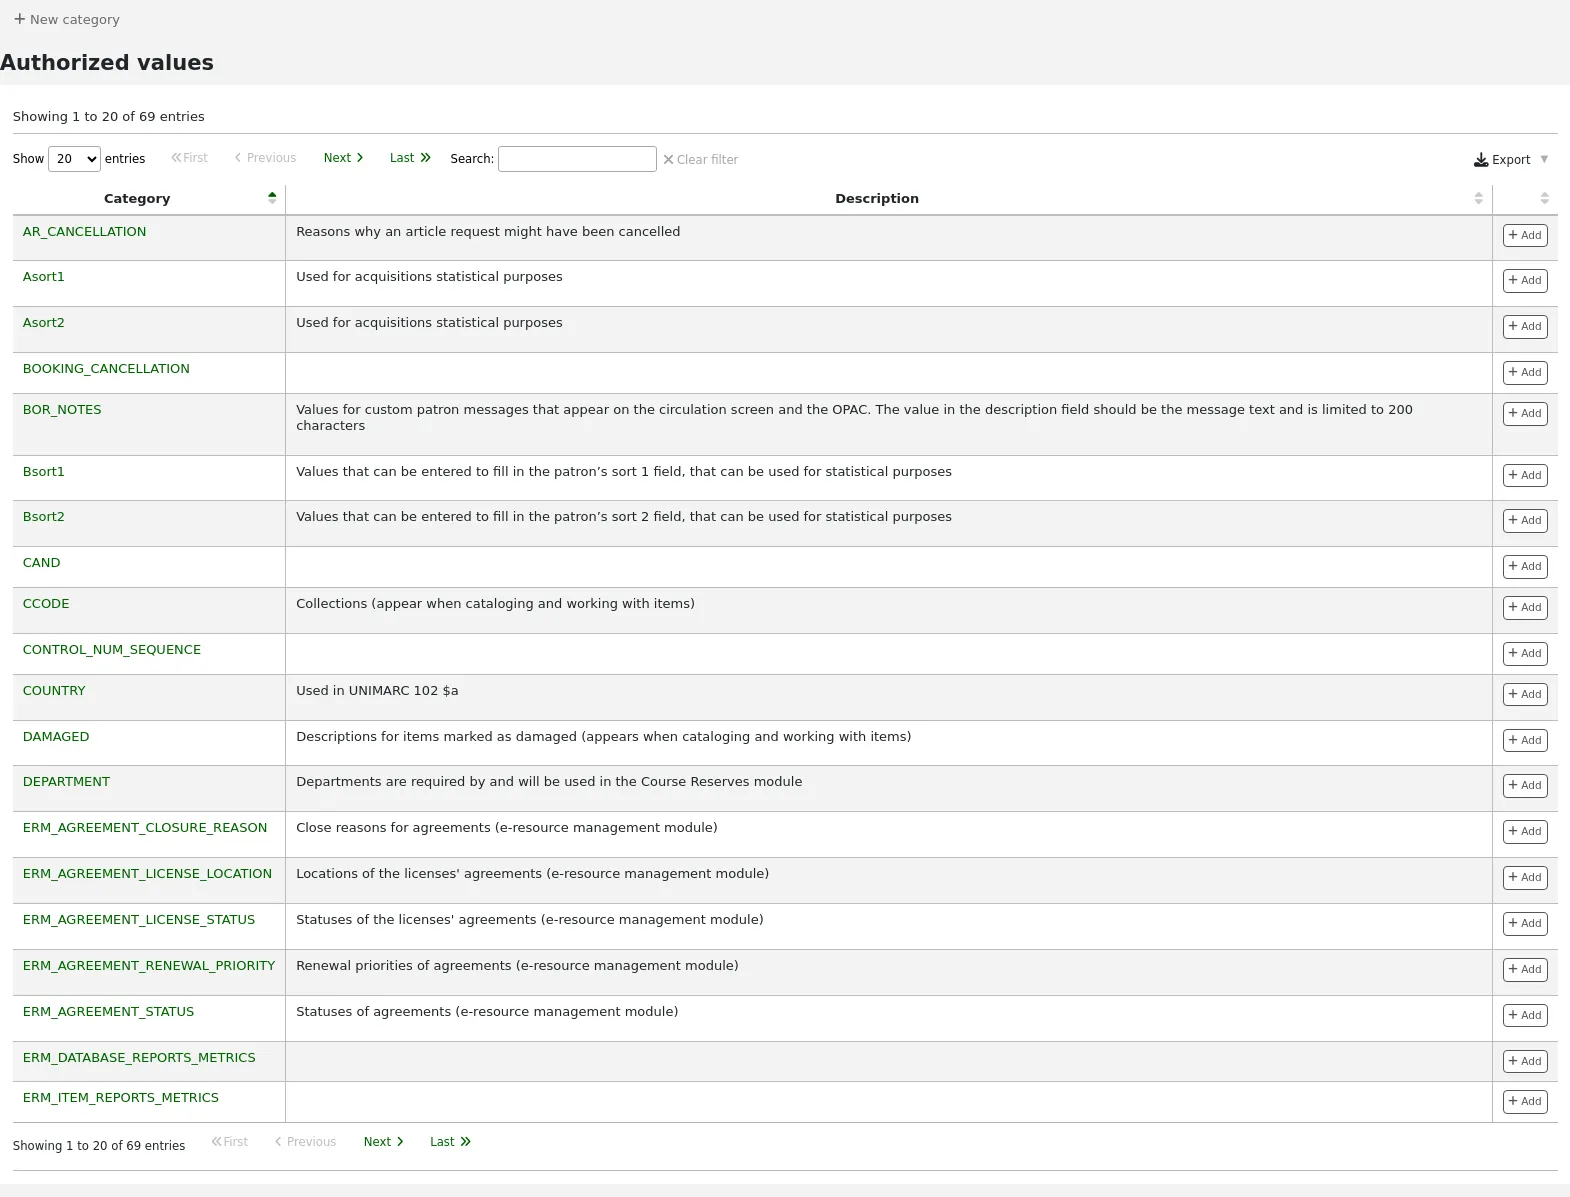
Existing authorized values categories
Koha installs with predefined authorized values categories that your library is likely to use or that are used by the system.
AR_CANCELLATION
This category contains reasons why an article request might have been canceled.
If you chose to install the default values for this category, you will have
Item could not be located on shelves (NOT_FOUND)
Item was found to be too damaged to fill article request (DAMAGED)
Cancelled from the OPAC user page (OPAC)
You can change those to suit your organization's needs.
Asort1
These values are used for acquisitions statistical purposes. You can use this as statistical categories when creating a fund in acquisitions.
Asort2
These values are used for acquisitions statistical purposes. You can use this as statistical categories when creating a fund in acquisitions.
BOOKING_CANCELLATION
Version
This authorized value category was first introduced in version 24.11 of Koha.
These values are used when canceling bookings, as reasons why the booking has been canceled.
BOR_NOTES
These values are used for predefined patron messages and circulation messages that appear on the circulation screen and the patron's account on the OPAC.
Write the message you want to appear in the 'Description' field.
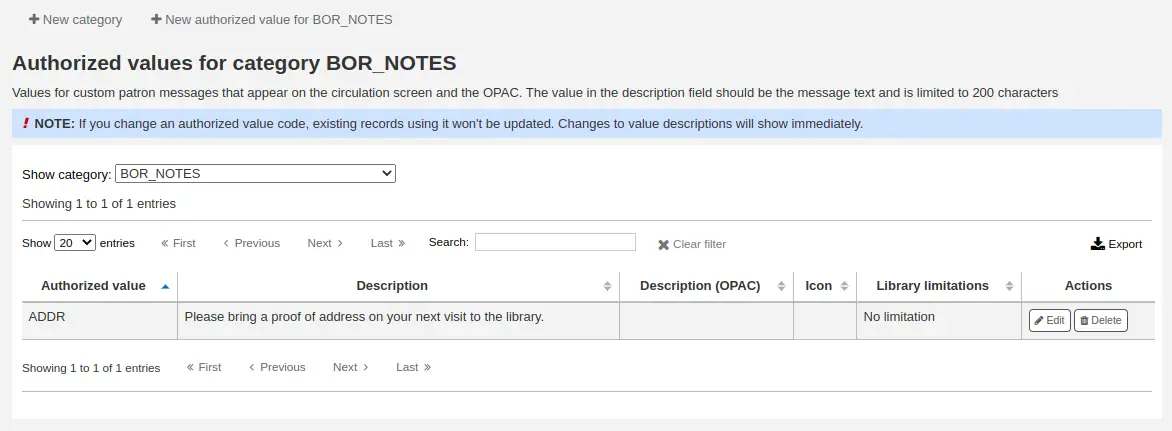
ملاحظة
This field is limited to 200 characters. However, the message field in the patron record can hold more than that. Write the first 200 characters in the description and write the rest when adding the message.
Bsort1
These values can be entered to fill in the patron's sort 1 field.
Bsort2
These values can be entered to fill in the patron's sort 2 field
CAND
A list used in UNIMARC.
CCODE
These values are collection codes. They appear when cataloging and working with items.
This is normally mapped to items.ccode in the Koha database.
If you chose to install the default values for this category, you will have
Fiction (FIC)
Non-fiction (NFIC)
Reference (REF)
You can change those to suit your organization's needs.
تحذير
For best results when searching, avoid using hyphens in collection codes.
CONTROL_NUM_SEQUENCE
This category is used to generate control numbers in the advanced cataloging editor.
Enter a string ending with a number as the authorized value and use the description to describe the type of number. For example, 'sprLib0001' 'Springfield library'. In the advanced editor, this will activate a new widget that will allow you to choose the type of number and generate the next number in the sequence.
البلد
A list of country names used in UNIMARC 102 $a.
ضرر
This category contains descriptions for items marked as damaged. They appear when cataloging and working with items.
This is normally mapped to items.damaged in the database.
If you chose to install the default values for this category, you will have
Damaged (1)
You can change those to suit your organization's needs.
تحذير
The authorized values for DAMAGED must be numerical.
الإدارة
This category contains departments, which are required by and are used in the course reserves module.
ERM_AGREEMENT_CLOSURE_REASON
These values are used to describe the closure reason for an agreement record once it has been marked as 'Closed' in the e-resource management module.
They can also be used in reporting.
Default values are
Expired (expired)
Cancelled (cancelled)
ERM_AGREEMENT_LICENSE_LOCATION
These values are used to describe the physical location of a license record in the case where you may still have a paper copy of the license (rather than electronic).
Default values are
Filing cabinet (filing cabinet)
Cupboard (cupboard)
ERM_AGREEMENT_LICENSE_STATUS
These values are used to describe the status of a license linked to an agreement record in the e-resource management module. It helps staff flag licenses in their life cycle.
They can also be used in reporting.
Default values are
Controlling (controlling)
Future (future)
Historic (historic)
ERM_AGREEMENT_RENEWAL_PRIORITY
These values are used to describe the renewal priority for an agreement record in the e-resource management module, in order to flag up how important the renewal of that agreement is.
They can also be used in reporting.
Default values are
For review (for_review)
Renew (renew)
Cancel (cancel)
ERM_AGREEMENT_STATUS
These values are used to describe the status of an agreement record in the e-resource management module.
They can also be used in reporting.
Default values are
Active (active)
In negotiation (in_negotiation)
Closed (closed)
تحذير
Do not change the authorized value for 'Closed' (the description can be changed), it is used to activate the 'Closure reason' dropdown menu.
ERM_LICENSE_STATUS
These values are used to describe the status of a license record in the e-resource management module. It helps staff flag up licenses in their life cycle.
They can also be used in reporting.
Default values are
In negotiation (in_negotiation)
Not yet active (not_yet_active)
Active (active)
Rejected (rejected)
Expired (expired)
ERM_LICENSE_TYPE
These values are used to describe the type of license in the e-resource management module.
They an also be used in reporting.
Default values are
Local (local)
Consortial (consortial)
National (national)
Alliance (alliance)
ERM_PACKAGE_CONTENT_TYPE
These values are used to describe the types of material found in a local package in the e-resource management module.
This is for local packages only.
Default values are
Aggregated full (AggregatedFullText)
Abstract and index (AbstractAndIndex)
E-book (EBook)
E-journal (EJournal)
Mixed content (MixedContent)
Online reference (OnlineReference)
Print (Print)
Streaming media (StreamingMedia)
Unknown (Unknown)
ERM_PACKAGE_TYPE
These values are used to describe the types of package in the e-resource management module.
This is for local packages only.
Default values are
Local (local)
Complete (complete)
ERM_TITLE_PUBLICATION_TYPE
These values are used to describe the type of material of a title in the e-resource management module.
This is for local titles only
Default values are
AudioBook (audiobook)
Book (book)
Bookseries (bookseries)
Database (database)
E-book (ebook)
Journal (journal)
Newsletter (newsletter)
Newspaper (newspaper)
Proceedings (proceedings)
Report (report)
Streaming audio (streamingaudio)
Streaming video (streamingvideo)
Thesis/Dissertation (thesisdissertation)
Unspecified (unspecified)
Website (website)
ERM_USER_ROLES
These values are used to describe the role of a staff user who is attached to an agreement or license record in the e-resource management module.
Default values are
ERM librarian (librarian)
Subject specialist (subject_specialist)
ETAT
These values are used in French UNIMARC installations in field 995 $o to identify item status. Similar to NOT_LOAN.
HINGS_AS
These values are used as general holdings acquisition status designator. This data element specifies acquisition status for the unit at the time of the holdings report.
HINGS_C
These values are used as general holdings completeness designator.
HINGS_PF
These values are used as physical form designators.
HINGS_RD
These values are used as general holdings retention designator. This data element specifies the retention policy for the unit at the time of the holdings report.
HINGS_UT
These values are used as general holdings type of unit designator.
HOLD_CANCELLATION
These values are used when canceling holds as reasons why the hold has been canceled.
If you chose to install the default values for this category, you will have
Item could not be located on shelves (NOT_FOUND)
Item was found to be too damaged to fill hold (DAMAGED)
You can change those to suit your organization's needs.
HSBND_FREQ
These values are delivery frequencies used by the housebound module. They are displayed on the housebound tab in the patron's account in the staff interface.
If you chose to install the default values for this category, you will have
Every week (EW)
You can change those to suit your organization's needs.
ILL_STATUS_ALIAS
These values are interlibrary loan (ILL) request statuses used in the ILL module.
ITEMTYPECAT
These values are search categories for item types. They allow multiple item types to be searched at the same time.
To combine item types in categories, choose the category in the item type settings.
For example, an ITEMTYPECAT value could be 'NEW'. This search category could be set for the item types 'NEW BOOKS' and 'NEW DVDS'. This will replace NEW BOOKS and NEW DVDS item types in the advanced search form by 'NEW'. When a patron chooses the searched for the category 'NEW', they will search multiple item types with a single search.
ملاحظة
Search categories are used in the OPAC only.
LANG
This category is a list of ISO 639-2 standard language codes.
LOC
These values are shelving locations. They usually appear when adding or editing an item.
This is normally mapped to items.location in the Koha database.
If you chose to install the default values for this category, you will have
Audio visual (AV)
Book cart (CART)
CART is used by UpdateItemLocationOnCheckin
Children's area (CHILD)
Fiction (FIC)
General stacks (GEN)
New materials shelf (NEW)
On display (DISPLAY)
Processing center (PROC)
PROC can be used with NewItemsDefaultLocation and UpdateItemLocationOnCheckin.
Reference (REF)
Staff office (STAFF)
You can change those to suit your organization's needs.
تحذير
For best results when searching, avoid using hyphens in location codes.
LOST
These values are descriptions for the items marked as lost. They appear when adding or editing an item.
This is normally mapped to items.itemlost in the Koha database.
If you chose to install the default values for this category, you will have
Lost (1)
Long overdue (lost) (2)
Lost and paid for (3)
Missing (4)
Missing from bundle (5)
You can change those to suit your organization's needs.
تحذير
The authorized values for LOST must be numerical.
NOT_LOAN
These values are reasons why an item is not for loan. They appear when adding or editing an item.
This is normally mapped to items.notforloan in the Koha database.
If you chose to install the default values for this category, you will have
On order (-1)
Not for loan (1)
Staff collection (2)
Added to bundle (3)
You can change those to suit your organization's needs.
تحذير
The authorized values for NOT_LOAN must be numerical.
Negative number values will still allow holds (use for 'on order' statuses, for example).
Positive numbers will not allow holds or checkouts.
A value of 0 means 'for loan'.
OPAC_SUG
This category contains a list of reasons displayed in the suggestion form on the OPAC.
If you chose to install the default values for this category, you will have
The copy on the shelf is damaged (damaged)
Upcoming title by popular author (bestseller)
You can change those to suit your organization's needs.
ORDER_CANCELLATION_REASON
These values are reasons why an order might have been canceled. They are used in acquisitions.
If you chose to install the default values for this category, you will have
No reason provided (0)
Out of stock (1)
Restocking (2)
You can change those to suit your organization's needs.
PA_CLASS
These values are used to group patron attributes together in the patron add and edit form.
PAYMENT_TYPE
This category populates a dropdown list of custom payment types when paying fines.
If you chose to install the default values for this category, you will have
Cash via SIP2 (SIP00)
Visa via SIP2 (SIP01)
Creditcard via SIP2 (SIP02)
You can change those to suit your organization's needs.
qualif
These values are function codes (author, editor, collaborator, etc.) used in UNIMARC 7XX $4 (French).
RELTERMS
This category is a list of relator codes and terms.
This list is based on the Library of Congress' MARC21 code list for relators
مهم
This list is not kept up to date in existing installations. Make sure to add new values to your installation as they are published by the Library of Congress.
It can be linked to a subfield in a MARC bibliographic framework in order to create a dropdown menu for catalogers to choose from instead of typing the relator code. In MARC21, relator codes are usually in subfield $4.
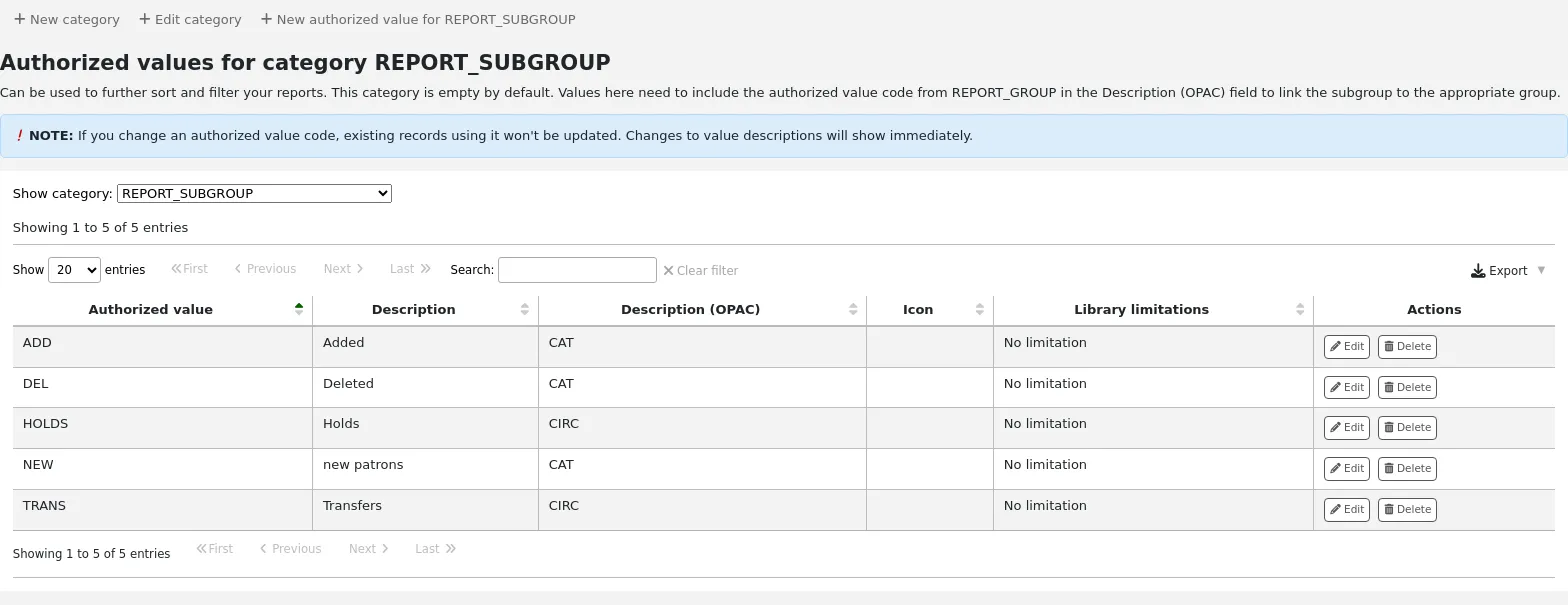
REPORT_GROUP
These values can be used as a way to sort and filter your reports. They will appear as tabs in the saved reports page.
If you chose to install the default values for this category, you will have
Account (ACC)
Acquisitions (ACQ)
Catalog (CAT)
Circulation (CIRC)
Patrons (PAT)
Serials (SER)
You can change those to suit your organization's needs.
REPORT_SUBGROUP
These values can be used to further sort and filter your reports.
Values here need to include the authorized value code from REPORT_GROUP in the Description (OPAC) field to link the subgroup to the appropriate group.
RESTRICTED
These values are used as the restricted status of an item. They appear when adding or editing an item.
This is normally mapped to items.restricted in the Koha database.
If you chose to install the default values for this category, you will have
Restricted access (1)
You can change those to suit your organization's needs.
تحذير
The authorized values for this category must be numerical.
RETURN_CLAIM_RESOLUTION
These values are reasons why a return claim has been resolved.
If you chose to install the default values for this category, you will have
Returned by patron (RET_BY_PATRON)
Found in library (FOUND_IN_LIB)
You can change those to suit your organization's needs.
ROADTYPE
These values are road types to be used in patron addresses, in the 'street type' field in the patron form.
SIP_MEDIA_TYPE
These values are used when creating or editing an item type to assign a SIP specific media type for devices like lockers and sorters.
If you chose to install the default values for this category, you will have
Other (000)
Book (001)
Magazine (002)
Bound journal (003)
Audio tape (004)
Video tape (005)
CD/CDROM (006)
Diskette (007)
Book with diskette (008)
Book with CD (009)
Book with audio tape (010)
تحذير
SIP media types are limited to 3 characters. Make sure your authorized values for SIP_MEDIA_TYPE do not have more than 3 characters.
STACK
These values are shelving control number. They appear when adding or editing an item.
This is normally mapped to items.stack in the Koha database.
تحذير
The authorized values for this category must be numerical.
اقتراح
These values are reasons for acceptance or rejection of purchase suggestions in acquisitions. They appear when managing suggestions.
If you chose to install the default values for this category, you will have
Available via ILL (AVILL)
Bestseller (BSELL)
Document not corresponding to our acquisition policy (Poldoc)
Document too expensive (Expensive)
Insufficient budget (Budget)
Library copy lost (LCL)
Shelf copy damaged (SCD)
You can change those to suit your organization's needs.
SUGGEST_FORMAT
This is a list of item types to display in a dropdown menu on the suggestion form on the OPAC.
If you chose to install the default values for this category, you will have
Audiobook (AUDIOBOOK)
Book (BOOK)
EBook (EBOOK)
DVD (DVD)
Large print (LP)
You can change those to suit your organization's needs.
تحذير
Suggestion format types are limited to 30 characters. Make sure your authorized values for this category do not have more than 30 characters.
SUGGEST_STATUS
This is a list of additional custom status values for suggestions that can be used in addition to the default values.
تحذير
The suggestion status is limited to 10 characters. Make sure your authorized value does not have more than 10 characters.
تحذير
The suggestion status must not contain any spaces.
TERM
These values are terms to be used in the course reserves module. For example: Spring, Summer, Winter, Fall.
These terms will appear in the dropdown menu when adding a new course.
TICKET_RESOLUTION
Version
This category was added to Koha in version 24.05.
These values are types of resolutions to be used when marking catalog concerns as 'Resolved'.
TICKET_STATUS
Version
This category was added to Koha in version 24.05.
These values are statuses to be used when updating catalog concerns.
UPLOAD
These values are categories to be assigned to file uploads. Without a category, an upload is considered temporary and may be removed during automated cleanup.
VENDOR_INTERFACE_TYPE
These values are used as types of interfaces for vendor interfaces in the acquisitions module.
VENDOR_ISSUE_TYPE
These values are used as a type of issue with a vendor when adding an issue in the acquisitions module.
VENDOR_TYPE
These values are used to categorize vendors in the acquisitions module.
WITHDRAWN
These values are descriptions for withdrawn items. They appear when adding or editing an item.
This is normally mapped to items.withdrawn in the Koha database.
If you chose to install the default values for this category, you will have
Withdrawn (1)
You can change those to suit your organization's needs.
تحذير
The authorized values for this category must be numerical.
YES_NO
This is a generic authorized value field that can be used anywhere you need a simple yes/no dropdown menu.
If you chose to install the default values for this category, you will have
Yes (1)
No (0)
تحذير
In general, binary fields require a 1 or 0 value. If you change these values, make sure the field you intend to attach it to can take other values than 0 or 1.
Adding new authorized value categories
In addition to the existing categories that come by default with Koha, librarians can add their own authorized value categories to control data that is entered into the system.
To add a new category:
قم بالنقر على 'فئة جديدة'

Fill out the form
Category: enter the category code for the new category. Limit your category code to 32 characters (something short to make it clear what the category is for).
تحذير
A category code cannot contain spaces or special characters other than underscores and hyphens.
Restrict value to numbers only: check the box if the values in this category should be numerical only. This will prevent staff from creating authorized values that don't comply to this rule.
Version
This option was added to Koha in version 24.05.
اضغط 'حفظ'

Proceed to add a new authorized value to the category.
Adding new authorized values
New authorized values can be added to any existing or new category.
To add a value:
From the categories list, click the 'Add' button on the right of the category
Alternatively, click on the category name, and then click 'New authorized value for ...'
If the category has no values yet, click on the 'Add a new authorized value' button at the bottom of the page
Fill out the form
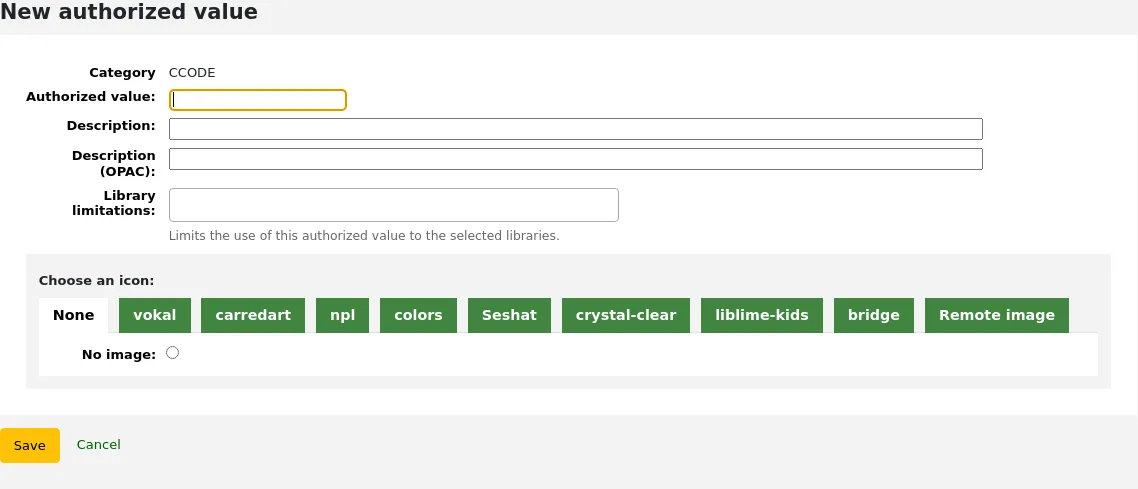
Authorized value: enter a code for your authorized value
ملاحظة
Authorized value is limited to 80 characters and cannot have spaces or special characters other than underscores and hyphens in it.
Some categories, such as SUGGEST_STATUS, may have stricter limits. Refer to the existing authorized values categories section above for specified limits.
Description: use this field for the actual value that will be displayed.
Description (OPAC): if you want a different description to show in the OPAC, enter it here. If this field is empty, the 'Description' will be used in both the staff interface and the OPAC.
Library limitations: if you would like to limit this authorized value to only specific libraries, you can choose them from this menu. To have it available to all libraries just choose 'All libraries' at the top of the list.
Choose an icon: you can choose an image that will appear next to the value in the staff interface and OPAC.
ملاحظة
This feature doesn't work everywhere. It's mostly for item locations (LOC) and collections (CCODE) in the advanced search.
اضغط 'حفظ'
ستظهر القيمة الجديدة في القائمة إلى جانب القيم الحالية
Deleting authorized values
To delete an authorized value, click on the 'Delete' button at the right of the authorized value.
Once there are no authorized values left in an authorized value category, you can delete the category.
المستخدمين والاعارة
الإعدادات للتحكم بعملية الإعارة ومعلومات المستفيد.
فئات مستخدمين
فئات المستفيدين تسمح لك ﻷن تنظم معلومات مستفيديك ، القواعد المختلفة ، مجموعات الأعمار ، وأنواع المستفيدين.
للوصول: المزيد > الإدارة > المستفيدون والإعارة > فئات المستفيد

ملاحظة
You can customize the columns of this table in the Table settings section of the Administration module (table id: patron_categories).
ملاحظة
Only staff with the manage_patron_categories permission (or the superlibrarian permission) will have access to this section.
إضافة فئه مستخدمين
لإضافة فئة مستفيد جديدة قم بالنقر على "فئة جديدة" أعلى الصفحة
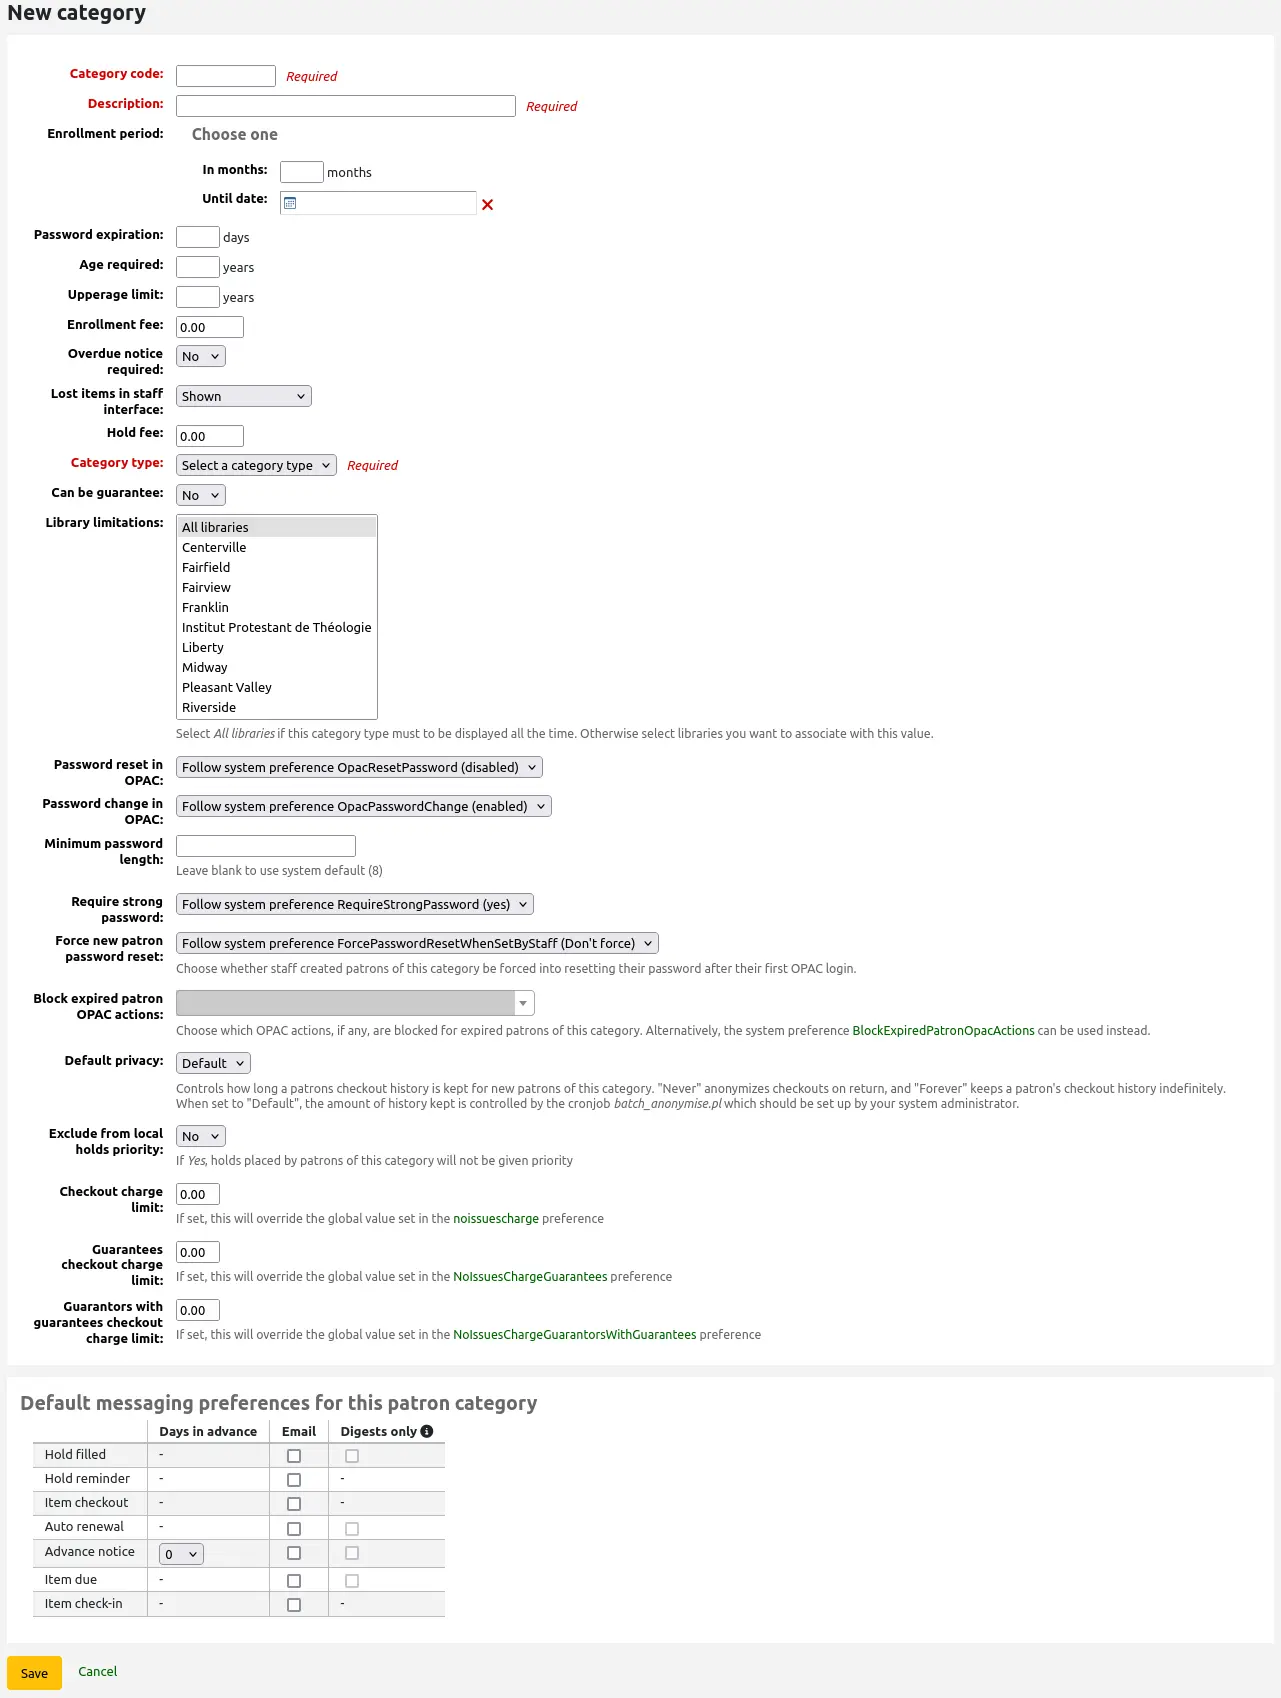
Category code: an identifier for your new category.
The category code is limited to 10 characters (numbers and letters) and must be unique.
هذا الحقل مطلوب من أجل المحافظة على فئة المستفيد الخاص بك. وإذا بقي فارغا سوف يظهر لك وجود خطأ.
Description: a plain text version of the category.
The description will be visible throughout Koha.
هذا الحقل مطلوب من أجل المحافظة على فئة المستفيد الخاص بك. وإذا بقي فارغا سوف يظهر لك وجود خطأ.
Enrollment period:
In months: should be filled in if you have a limited enrollment period for your patrons. For example, student cards expire after 9 months
Until date: you can choose a date when the cards will expire
هذا الحقل مطلوب من أجل المحافظة على فئة المستفيد الخاص بك. وإذا بقي فارغا سوف يظهر لك وجود خطأ.
تحذير
You cannot enter both a month limit and a date until for one category. Choose to enter either one or the other.
Password expiration: enter the number of days after which a patron has to change their password.
Age required: minimum age (in years) requirement associated with the category. For example, an 'Adult' patron category could have a minimum age of 18 years; this means patrons must be at least 18 to be in the patron category.
When creating or updating a patron, a warning will appear if the patron is too young for this category.

This value is used by the update_patrons_category.pl cron job to change the category of patrons who are too young.
Upper age limit: maximum age (in years) associated with the category. For example, a 'Children' patron category could have an upper age limit of 18, meaning patrons can have children cards until they turn 18.
When creating or updating a patron, a warning will appear if the patron is too old for this category.
This value is used by the update_patrons_category.pl cron job to change the category of patrons who are too old.
Enrollment fee: enter the amount if you charge a membership fee for your patrons (such as those who live in another region).
تحذير
Only enter numbers and decimals in this field.
ملاحظة
Depending on your value for the FeeOnChangePatronCategory system preference, this fee will be charged on patron renewal as well as when they are first enrolled.
Overdue notice required: choose 'Yes' if you want patrons from this category to receive overdue notices. This will enable you to set the overdue notice triggers in the Tools module.
Lost items in staff interface: decide on a patron category basis if lost items are shown in the staff interface.
Shown: lost items are shown in the staff interface.
Hidden by default: lost items are hidden, but staff members can click 'Show all items' to see them.
ملاحظة
This is only applicable in the staff interface, so changing this value on patron categories who do not have access to the staff interface won't make any difference.
Hold fee: enter the fee amount if you charge patrons from this category a fee for placing holds on items.
تحذير
Only enter numbers and decimals in this field.
Category type: choose one of the six main parent categories
Adult: most common patron type, usually used for a general 'Patron' category.
Child: another common patron type.
Staff: library staff
Organizational: organizations can be used as guarantors for Professional patrons.
Professional: professional patrons can be linked to Organizational patrons.
Statistical: this patron type is used strictly for statistical purposes, such as in-house use of items.
هذا الحقل مطلوب من أجل المحافظة على فئة المستفيد الخاص بك. وإذا بقي فارغا سوف يظهر لك وجود خطأ.
Can be guarantee: if the patrons of this category can have guarantors, choose yes. This will make the 'Patron guarantor' and 'Non-patron guarantor' sections appear in the patron form.
Library limitations: if necessary, limit this patron category to only some libraries in your library system. Select 'All libraries' if any library should to be able to use this category.
نصيحة
To select more than one library, hold the 'Ctrl' key while making your selection.
Password reset in OPAC: decide whether patrons of this category are allowed to reset their password through the OPAC's 'Forgotten password' function. By default, it will follow the rule set in the OpacResetPassword system preference.
Follow system preference OpacResetPassword.
Allowed: patrons of this category will be able to reset their password through the OPAC regardless of the setting in OpacResetPassword.
Not allowed: patrons of this category will not be able to reset their password through the OPAC regardless of the setting in OpacResetPassword.
Password change in OPAC: decide whether patrons of this category are allowed to change their password through the OPAC. By default, it will follow the rule set in the OpacPasswordChange system preference.
Follow system preference OpacPasswordChange.
Allowed: patrons of this category will be able to change their password through the OPAC regardless of the setting in OpacPasswordChange.
Not allowed: patrons of this category will be not able to change their password through the OPAC regardless of the setting in OpacPasswordChange.
Minimum password length: enter the minimum password length for patrons of this category. Leave blank to use the default length set in the minPasswordLength system preference.
Require strong password: decide whether to enforce a strong password policy (at least one uppercase letter, one lowercase letter and one digit) for patrons of this category. By default, it will follow the rule set in the RequireStrongPassword system preference.
Follow the system preference RequireStrongPassword.
Yes: patrons of this category will be required to have a strong password regardless of the setting in RequireStrongPassword.
No: patrons of this category will not be required to have a strong password regardless of the setting in RequireStrongPassword.
Force new patron password reset: choose whether staff-created patrons of this category are forced to change their password after their first OPAC login.
Follow system preference ForcePasswordResetWhenSetByStaff
Force: patrons of this category will be forced to change their password when they log into the OPAC for the first time, regardless of the setting in ForcePasswordResetWhenSetByStaff
Don't force: patrons of this category will not be forced to change their password when they log into the OPAC for the first time, regardless of the setting in ForcePasswordResetWhenSetByStaff
ملاحظة
This only applies to patrons whose account was manually created by staff members (as opposed to self-registered patrons).
Version
This setting was added to Koha in version 24.11.
Block expired patrons OPAC actions: decide if patrons from this category are blocked from performing actions in the OPAC if their account is expired. By default, it will follow the rule set in the BlockExpiredPatronOpacActions system preference.
Follow the system preference BlockExpiredPatronOpacActions.
Block specific actions:
ملاحظة
This setting overrides what is in the BlockExpiredPatronOpacActions system preference.
تحذير
Prior to Koha version 24.11, this setting is a simple on/off choice, and all actions are blocked if it is turned on.
Check for previous checkouts: if the CheckPrevCheckout system preference is set to either 'Unless overridden by patron category' options, you will be able to set the value for this particular patron category here.
Yes and try to override system preferences: Koha will check if the patron already checked out this item, unless the patron's personal settings prevent it.
No and try to override system preferences: Koha will not check in the patron already checked out this item, unless the patron's personal settings permit it.
Inherit from system preferences: the setting of the CheckPrevCheckout system preference will be followed.
Can place ILL in OPAC: if the ILLModule system preference is enabled, this setting determines if patrons of this category can place ILL requests from the OPAC.
Version
This option was added to Koha in version 23.11. In previous versions, all patrons can place ILL requests from the OPAC.
Default privacy: choose the default privacy settings for patrons of this category.
Default: checkout history will be kept indefinitely, until either the batch_anonymize.pl script is run or there is a manual batch anonymization which is performed.
Never: checkout history is anonymized upon return. Statistics are kept, but the link between the checkout, the item and the patron is removed.
Forever: checkout history is never anonymized for patrons of this category, regardless of the cron job or manual anonymization.
This setting can be edited by the patron via the OPAC if you allow it with the OPACPrivacy system preference.
Exclude from local holds priority: choose whether holds for patrons of this category are given a priority.
Yes: holds for patrons of this category are not given special priority, regardless of the setting in LocalHoldsPriority.
No: holds for patrons of this category are subjected to the setting in LocalHoldsPriority.
Checkout charge limit: prevent patrons from this category from checking out items if they owe more than the specified amount.
If this field is left empty, or is at 0, the value in the noissuescharge system preference will be used for patrons from this category.
If this field has a value, it will override the value in the noissuescharge system preference for patrons from this category.
Version
This setting was added to Koha in version 24.11.
Guarantees checkout charge limit: prevent patrons from this category from checking out items if their guarantees collectively owe more than the specified amount.
If this field is left empty, or is at 0, the value in the NoIssuesChargeGuarantees system preference will be used for patrons from this category.
If this field has a value, it will override the value in the NoIssuesChargeGuarantees system preference for patrons from this category.
Version
This setting was added to Koha in version 24.11.
Guarantors with guarantees checkout charge limit: prevent patrons from this category from checking out items if the patron has guarantors and those guarantors' guarantees collectively owe more than the specified amount.
If this field is left empty, or is at 0, the value in the NoIssuesChargeGuarantorsWithGuarantees system preference will be used for patrons from this category.
If this field has a value, it will override the value in the NoIssuesChargeGuarantorsWithGuarantees system preference for patrons from this category.
Version
This setting was added to Koha in version 24.11.
Default messaging preferences for this patron category: assign advanced messaging preferences by default to the patron category
These default preferences can be changed on an individual basis for each patron. This setting is just a default to make it easier to set up messages when creating new patrons.
ملاحظة
This requires that you have EnhancedMessagingPreferences system preference set to 'Allow'.
تحذير
These defaults will only be applied to new patrons that are added to the system. They will not edit the preferences of the existing patrons.
If you need to apply the default preferences to existing patrons, you can force those changes by running the borrowers-force-messaging-defaults script found in the misc/maintenance folder. Ask your system administrator for assistance with this script.
Circulation and fine rules
These rules define how your items are circulated, how and when fines are calculated and how holds are handled.
Get there: More > Administration > Patrons and circulation > Circulation and fine rules
ملاحظة
Only staff with the manage_circ_rules permission (or the superlibrarian permission) will have access to this section.
يتم تطبيق قواعد محددة من الأكثر تحديدا إلى الأقل تحديدا، وذلك باستخدام الموجود الأول في هذا الطلب:
نفس المكتبة، نفس فئة المستفيد، نفس نوع المادة
نفس المكتبة، نفس فئة المستفيد، كل أنواع المادة
نفس المكتبة، كل فئات المستفيد، نفس نوع المادة
نفس المكتبة، كل فئات المستفيد، كل أنواع المادة
الافتراضي (كل المكتبات)، نفس فئة المستفيد، نفس نوع المادة
الافتراضي (كل المكتبات)، نفس فئة المستفيد، كل أنواع المادة
الافتراضي (كل المكتبات)، كل فئات المستفيد، نفس نوع المادة
الافتراضي (كل المكتبات)، كل فئات المستفيد، كل أنواع المادة
The CircControl and HomeOrHoldingBranch also come in to play when figuring out which circulation rule to follow.
If CircControl is set to "the library you are logged in at" circulation rules will be selected based on the library you are logged in at
If CircControl is set to "the library the patron is from" circulation rules will be selected based on the patron's library
If CircControl is set to "the library the item is from" circulation rules will be selected based on the item's library where HomeOrHoldingBranch chooses if the item's home library or its holding library is used.
If IndependentBranches is set to 'Yes' then the value of HomeOrHoldingBranch is used in figuring out if the item can be checked out. If the item's home library does not match the logged in library, the item cannot be checked out unless you have the superlibrarian permission.
هام
At the very least you will need to set a default circulation rule. This rule should be set for all item types, all libraries and all patron categories. That will catch all instances that do not match a specific rule. When checking out if you do not have a rule for all libraries, all item types and all patron categories then you may see patrons getting blocked from placing holds.
Defining circulation rules
Using the issuing rules matrix you can define rules that depend on patron category/item type combos.
ملاحظة
The matrix being very wide, you can export the existing rules in Microsoft Excel or CSV format, to look at them, using the 'Export' button at the top of the table.
To set your rules, choose a library from the pull down (or 'Standard rules for all libraries' if you want to apply these rules to all branches):
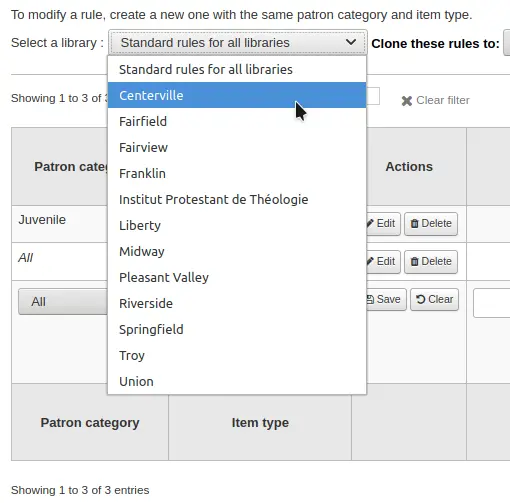
من المصفوفة تستطيع أن تختار أي مزيج من فئات المستفيدين وأنواع المواد لتطبق القواعد عليها

أولا اختيار فئة المستفيد التي ترغب في تطبيقها على القاعدة. إذا تركت هذا إلى "الكل" ستطبق على جميع فئات المستفيدين
Choose the item type you would like this rule to apply to. If you leave this to 'All' it will apply to all item types for this patron category
If an item type has a parent item type, the rule will be displayed as Parent -> Child. The number of current checkouts will be limited to either the maximum for the parent (including sibling types) or the specific type's rule, whichever is less.
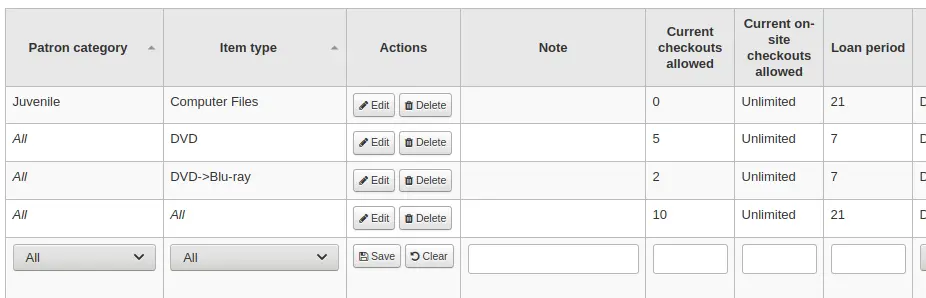
In the example above, there is a rule for the DVD item type with a maximum of 5 checkouts and a rule for Blu-ray, a child of DVD, with a maximum of 2 checkouts. A patron at this library will be able to check out a maximum of 2 Blu-rays in a total of 5 items of either DVD or Blu-ray types.
To summarize, a patron at this library would be able to take either : - 0 Blu-ray and a maximum of 5 DVDs - 1 Blu-ray and a maximum of 4 DVDs - 2 Blu-ray and a maximum of 3 DVDs
Add notes about your circulation rule into the notes field. This can be helpful to remember why and when something was last changed.
Limit the number of items of this type a patron of this category can have checked out at the same time by entering a number in the 'Current checkouts allowed' field.
If you're allowing on-site checkouts then you may also want to set a limit on the number of items of this type patrons of this category can have on-site.
ملاحظة
This setting also depends on the ConsiderOnSiteCheckoutsAsNormalCheckouts preference
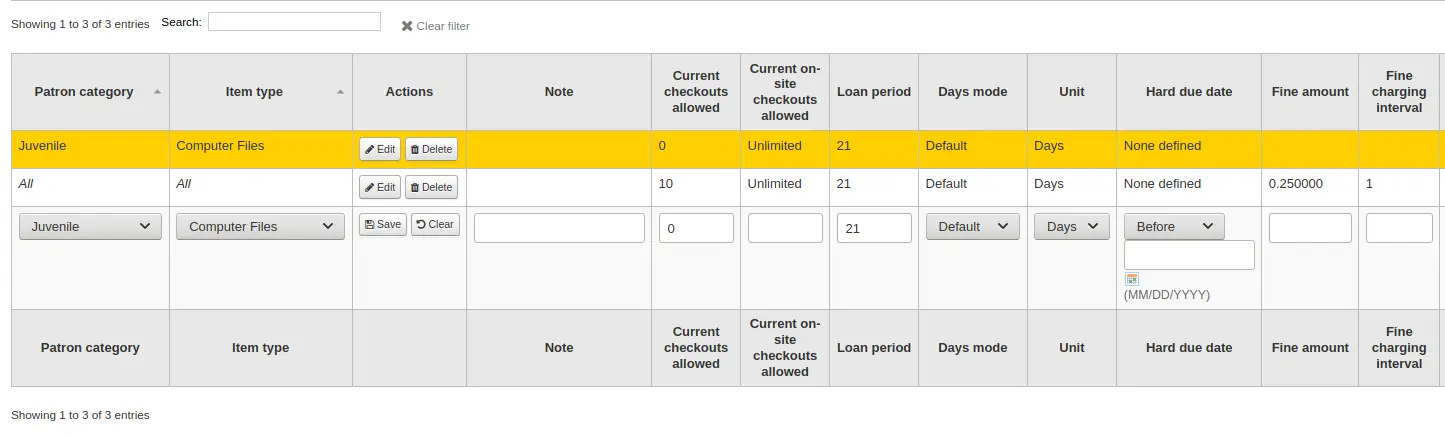
Define the period of time an item of this type can be checked out to a patron of this category by entering the number of units (days or hours) in the 'Loan period' box.
Define if the loan period should include closed days or not in the 'Days mode' column. The option chosen here will override the useDaysMode system preference for this particular rule.
The 'Default' option will take the option defined in the useDaysMode system preference
Choose the 'Calendar' option if you want to use the calendar to skip the days when the library is closed
Choose the 'Datedue' option if you want to push the due date to the next open day
Choose the 'Days' option if you want to ignore the calendar and calculate the due date directly
Choose the 'Dayweek' option if you want to use the calendar to push the due date to the next open matching weekday for weekly loan periods, or the next open day otherwise
Choose which unit of time, days or hours, that the loan period and fines will be calculated in in the 'Unit' column
ملاحظة
If using 'hours', you can set library opening hours for each library and determine how the due time is calculated should it fall outside of opening hours.
You can also define a hard due date for a specific patron category and item type. The hard due date offers three options:
Exactly on: The due date of any item checked out with this rule will be set to the hard due date.
Before: Koha will calculate the normal loan period. If the calculated due date would be after or on the hard due date, the hard due date will be used instead.
After: Koha will calculate the normal loan period. If the calculated due date would be before the hard due date, the hard due date will be used instead.
'Fine amount' should have the amount you would like to charge for overdue items.
هام
أدخل فقط الأرقام والنقاط العشرية (بدون رموز العملات).
Enter the 'Fine charging interval' in the unit you set (ex. charge fines every 1 day, or every 2 hours). The finesCalendar system preference controls whether the days the library is closed will be taken into account or not.
"متى يتم فرض الرسم" يفيد جدًا في المكتبات ذات فترة فرض الغرامات التي تزيد عن يوم واحد.
End of interval: Given a grace period of 2 days and a fine interval of 7 days, the first fine will appear 7 days after the due date, it will always take one fine interval (7 days), before the first fine is charged.
Start of interval: Given a grace period of 2 days and a fine interval of 7 days, the first fine will appear 2 days after the due date and the second fine 7 days after the due date.
The 'Fine grace period' is the period of time an item can be overdue before you start charging fines. The FinesIncludeGracePeriod system preference controls if the grace period will be included when calculating the fine or not.
هام
This can only be set for the 'Day' unit, not in 'Hours'
The 'Overdue fines cap' is the maximum fine per item for this patron and item type combination.
هام
If this field is left blank then Koha will not put a limit on the fines this item will accrue. A maximum fine amount for all overdues can be set using the MaxFine system preference.
إذا كنت ترغب في منع فرض رسوم زائدة على المستفيدين مقابل المواد المفقودة، يمكنك تحديد المربع أدنى "تجاوز الغرامة على سعر الاستبدال". سيمنع ذلك تجاوز غرامة المستفيد لسعر استبدال المادة.
ملاحظة
إذا تم ضبط "تجاوز غرامات التأخير" أيضا، ستكون الغرامة الأقل بين الاثنين، إذا انطبق الاثنان على الإعارة المتأخرة المحددة.
If you charge patrons a fine when they don't come to pick up their waiting holds in time (see below the number of days set in 'Holds pickup period (day)'), enter the amount of the fine in 'Expired hold charge'.
If this field is left empty, the value in the ExpireReservesMaxPickUpDelayCharge system preference is used.
Version
This option was added to Koha in version 25.05.
If your library 'fines' patrons by suspending their account you can enter the number of days their fine should be suspended in the 'Suspension in days' field.
هام
This can only be set for the 'Day' unit, not in 'Hours'
كما يمكنك تعرف الحد الأقصى لعدد أيام تعليق المستخدم في الإعداد "الحد الأقصى لفترة التعليق"
The 'Suspension charging interval' option is just like the 'Fin charging interval'. For example, you could 'fine' a patron one day suspension for every two days overdue.
Next decide if the patron can renew this item type and if so, enter how many times they can renew it in the 'Renewals allowed' box.
If you allow unseen renewals (see UnseenRenewals), enter how many 'unseen' renewals patrons can make. This is not in addition to the regular renewals, but rather how many 'unseen' renewals can be made among the total number of renewals.
If you're allowing renewals you can control how long the renewal loan period will be (in the units you have chosen) in the 'Renewal period' box.
إذا كنت تسمح بالتجديدات يمكنك التحكم في المدة التي يمكن للمستفيدين تجديد موادهم قبل تاريخ الاستحقاق باستخدام مربع "لا تجديدات قبل"
يمكن تجديد المواد في أي وقت إذا تركت هذه القيمة فارغة. وإلا فيمكن تجديد المواد فقط إذا كانت المادة بعد الرقم بالوحدات (أيام/ساعات) والذي يتم إدخاله في هذا المربع.
To control this value on a more granular level please set the NoRenewalBeforePrecision preference.
If you enable automatic renewals (see below), enter how much time before the due date the automatic renewal takes place.
Version
This option was added to Koha in version 23.11.
In previous versions, automatic renewals use the 'no renewals before' value, which applies to both regular and automatic renewals.
You can enable automatic renewals for certain items/patrons if you'd like. This will renew automatically following your circulation rules unless there is a hold on the item.
مهم
يجب عليك تفعيل كرون التجديد التلقائي ليعمل ذلك.
مهم
This feature needs to have the "no automatic renewal before" column filled in or it will auto renew every day after the due date.
If you are using automatic renewals, you can use the 'No automatic renewals after' to limit the time a patron can have the item. For example: don't allow automatic renewals after a checkout period of 80 days.
Similar to the hard due date setting, you can also stop automatic renewals after a specific date using the 'No automatic renewal after (hard limit)' setting.
If patrons of this category can place holds on items of this type, enter the total numbers of items (of this type) that can be put on hold in the 'Holds allowed' field.
Leave empty to have unlimited holds.
If you'd rather put a hold limit per patron category, independent of the item type, see the default checkout and hold policy by patron category section below.
If you want to have a hard hold limit, independent of patron category and item type, for this particular library, see the Default checkout, hold, and return policy section below.
If you want to have a hard hold limit, independent of patron category, item type, and across all libraries, see the maxreserves system preference.
You can also set a daily limit on the number of holds a patron can place.
While the two settings before limit the holds that can be placed across various records, the next setting is used to limit the number of holds that can be placed on one record at the same time. For example, for fiction books you might want to allow only one item to be placed on hold at the same time by the same user. But for serials where items represent different issues more than one hold at the same time is fine.
ملاحظة
If this is set to a number that is greater than 1, but not Unlimited, then staff will have the option of placing multiple holds at once when placing a hold on the next available item in the staff interface
Next you can decide how the availability of items influences the ability to place a hold. The 'On shelf holds allowed' option has three settings:
Yes: This will allow to place holds on items at all times. It doesn't matter if they are available or checked out.
If any unavailable: This will allow to place a hold as soon as one or more items of the record are checked out. It doesn't matter if there are still one or more items available on the shelf.
If all unavailable: This will allow to place a hold as soon as all items on the record are checked out that could fill the hold. This is especially useful for libraries that don't offer the service of getting items placed on hold off the shelf for patrons.
Under 'OPAC item level hold' you can decide if patrons are allowed to place item specific holds on the item type in question. The options are:
Allow: Will allow patrons the option to choose next available or a specific item.
Don't allow: Will only allow patrons to choose next available item.
Force: Will only allow patrons to choose a specific item.
You can set the number of days patrons have to come pick up their holds in the 'Holds pickup period (day)' column. This value will set the hold's 'expiration date'. After that period, holds will be marked as problematic and will appear in the 'Holds waiting past their expiration date' tab in the Holds awaiting pickup report.
The default period is set in the ReservesMaxPickUpDelay system preference, but this column allows to have more granular rules for various library, patron category, and item type combinations.
Version
This circulation rule option was added to Koha in version 23.11.
If you want to allow patrons of this category to be able to place article requests on items of this type, choose an option in the 'Article requests' column
No: patrons of this category will not be able to place article requests on items of this type
Yes: patrons of this category will be able to place article requests on items of this type, either on specific items (for example in the case of serial issues) or on entire records (for example in the case of monographs)
Record only: patrons of this category will be able to place article requests on records of this type, but not on specific items
Item only: patrons of this category will be able to place article requests on items of this type, but not on entire records
تحذير
This column will only appear if the ArticleRequests system preference is enabled.
If you want to use the article request functionality you need to enable it using the ArticleRequests system preference and configure the form using the other related preferences.
If you charge a rental fee for the item type and want to give this specific patron category a discount on that fee, enter the percentage discount (without the % symbol) in the 'Rental discount' field
ملاحظة
Enter the discount percentage using a decimal point.
Discounts must be a positive number with no more than two digits after the decimal. Whole numbers are also allowed. For example:
5,10,0.50,3.25,99.99.Values like
0.5,25.123, or-10are not accepted.If the UseRecalls system preference is enabled, you will have several options to control recalls.
Recalls allowed (total): enter the number of current recalls a patron of this category can have on items or records of this item type.
Recalls per record (count): enter the number of current recalls a patron of this category can have on any one record of this item type.
On shelf recalls allowed: choose if patrons can recall items on records that have available items
If any unavailable: if a record has more than one item and at least one is unavailable, the patron will be able to recall items from this record
If all unavailable: all items of a record must be unavailable in order for a patron to recall an item from this record
Recall due date interval (day): enter the number of days a patron has to return an item that has been recalled
Recall overdue fine amount: enter the fine amount a patron will be charged if they don't return the recalled item by the due date
Recall pickup period: enter the number of days a patron has to come pick up the item they have recalled, once it has been marked as awaiting pickup.
ملاحظة
This value supersedes the value in the RecallsMaxPickUpDelay system preference.
When finished, click 'Save' to save your changes. To modify a rule, simply click the 'Edit' button either at the beginning or at the end of the row. The row of the rule being edited will be highlighted in yellow and the values will appear filled in at the bottom of the table. Edit the values at the bottom and click save.
ملاحظة
If, while editing a rule, you change either the patron category or the item type, it will create a new rule. You can do this to duplicate rules instead of creating new ones if the values are similar.
Alternatively, you can create a rule with the same patron category and item type and it will edit the existing one, as there can only be one rule per library- patron category-item type combination.
If you would like to delete your rule, click the 'Delete' button at the beginning or at the end of the rule row.
To save time you can clone rules from one library to another by choosing the clone option above the rules matrix. Please note that this will overwrite all rules already configured for that library.

بعد الاختيار للنسخ ستُقدّم مع رسالة تأكيد.
Default checkout, hold, and return policy
You can set a default maximum number of checkouts, a default maximum number of holds and a hold policy that will be used if none is defined below for a particular item type or category. This is the fall back rule for defaults.

من هذه القائمة يمكنك أن تضبط الإفتراضيات للتطبيق على كل أنواع المواد والمستفيدين في المكتبة.
Total current checkouts allowed: enter the total number of items patrons can have checked out at one time
Total current on-site checkouts allowed: enter the total number of items patrons can have checked out on site at a time (OnSiteCheckouts needs to be set to 'Enable')
Maximum total holds allowed (count): enter the total number of pending holds patrons can have at the same time.
Hold policy: control where patrons can place holds from
From any library: patrons from any library may put items on hold (default if none is defined)
From local hold group: only patrons from a library in the item home library's local hold group may put this book on hold
From home library: only patrons from the item's home library may put items on hold.
No holds allowed: no patron may put items on hold.
Hold and booking pickup library match: control where patron can pick up holds and bookings
أي مكتبة
مكتبة حجز المادة
مجموعة حجز المستفيد
مكتبة المادة الرئيسية
المكتبة المقتنية للمادة
Booking pre-processing (days): enter a number of days to prevent a new booking from starting too soon after an existing booking ends. This gives staff time to prepare the item between two bookings.
Version
This option was added to Koha in version 24.11.
Booking post-processing (days): enter a number of days to prevent a new booking from ending too close to the start of an existing booking. This gives staff time to receive and process the item between two bookings.
Version
This option was added to Koha in version 24.11.
Return policy: control where the item returns to once it is checked in
إعادة المادة لمكتبتها الرئيسية
تعود المواد إلى المصدر الفرعي
Item floats: when an item floats, it stays where it was checked in and does not ever return 'home'
Item floats by library group: The item will not be transferred and will stay at the library it was checked in at, if the check-in library is within the same 'float group' in library groups as the item's home library. If the library is not in the same float group, the item will be transferred back to its home library.
Once your policy is set, you can unset it by clicking the 'Unset' button to the right of the rule.
Default checkout and hold policy by patron category
For this library, you can specify the maximum number of checkouts, on-site checkouts and holds that a patron of a given category can have, regardless of the item type.

ملاحظة
If the total amount of checkouts, on-site checkout and holds for a given patron category is left blank, no limit applies, except possibly for a limit you define in the circulation rules above.
على سبيل المثال، إذا كان لديك قاعدة في المصفوفة تقتضي بالسماح للمستفيدين الذين ينتمون لهيئة التدريس باستعارة 10 كتب و5 أقراص رقمية لكنك تريد أن تجعل إجمالي الاستعارات المسموح بها في المرة الواحدة 12 مادة فقط. إذا قمت بإدخال 12 هنا والمستفيد لديه 10 كتب معارة بالفعل فلن يسمح له سوى باستعارة 2 قرص رقمي ليصل إلى عدد 12 الإجمالي المسموح به.
Default waiting hold cancellation policy
For this library, you can specify if patrons can cancel holds that are already awaiting pickup.

For each patron category and item type combination, choose if these patrons can cancel holds that are already waiting for pickup.
Just like the circulation rules, the more specific rules will apply before the more generic rules (i.e. the "all" patron categories / "all" item types rule will apply only if no other rule exists for this combination).
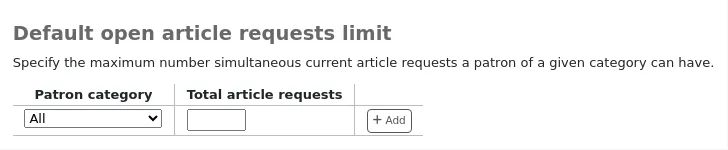
Default open article requests limit
If ArticleRequests is enabled, you can set a maximum number of open article requests a patron of a category can have at one time.
ملاحظة
This will only appear if the ArticleRequests system preference is enabled.
Choose the patron category you want to limit.
Enter the number of open article requests a patron of this category can have at one given time
Click 'Add'
Default article request fees
If ArticleRequests is enabled, you can set the fee a patron from a given category (or any category) needs to pay in order to request the article.

ملاحظة
This will only appear if the ArticleRequests system preference is enabled.
Choose the patron category for which you want to add a fee, or choose 'All' to set an overall fee for all patrons
ملاحظة
The fee specific to a patron category will supersede the fee for all categories.
For example, if you set a fee for all categories to 2$ and a fee for Faculty to 3$, Faculty members will be charged 3$ and any other patron will be charged 2$.
Enter the fee amount (use a period as the decimal and don't enter any symbols, e.g. enter 5.00 for 5$)
Click 'Add'
The fee is charged to the patron when the request is placed.
When placing the request, either through the staff interface or the OPAC, a message appears to inform the staff member or the patron that the patron will be charged for every request and the amount of the fee.
رسم رد المادة المفقودة الافتراضي في سياسة الرد
Here, you can specify the default policy for lost item fees on return.

Refund lost item replacement fee: choose whether or not the item's replacement cost is refunded when the lost item is returned.
Refund lost item charge: the replacement cost is refunded. This might create a credit to be paid out to the patron if they had already paid the fee.
Refund lost item charge (only if unpaid): the replacement cost is refunded only if it hasn't yet been paid.
Refund lost item charge and charge new overdue fine: the replacement cost is refunded and overdue fines are calculated as of today.
Refund lost item charge and restore overdue fine: the replacement cost is refunded and fines are restored as of the day the item was declared lost.
Leave lost item charge: the replacement cost stays in the patron's account.
Refund lost item processing fee: choose whether or not the item's processing fee is refunded when the lost item is returned.
Refund lost item processing charge: the processing fee is refunded. This might create a credit to be paid out to the patron if they had already paid the fee.
Refund lost item processing charge (only if unpaid): the processing fee is refunded only if it hasn't yet been paid.
Leave lost item processing charge: the processing fee stays in the patron's account.
This policy will apply to this library. This rule is to be used with the RefundLostOnReturnControl system preference.
ملاحظة
You can limit refunds based on age:
use the NoRefundOnLostReturnedItemsAge system preference to limit refunds based on when the item was marked lost;
use the NoRefundOnLostFinesPaidAge system preference to limit refunds based on when the fee was paid.
Default holds and bookings policies by item type
You can set and edit holds and bookings policies for a given item type, regardless of the patron's category.
Select the item type from the dropdown menu.
Set policies as explained below.
Click 'Add' to save this rule.
Add as many rules as you need.
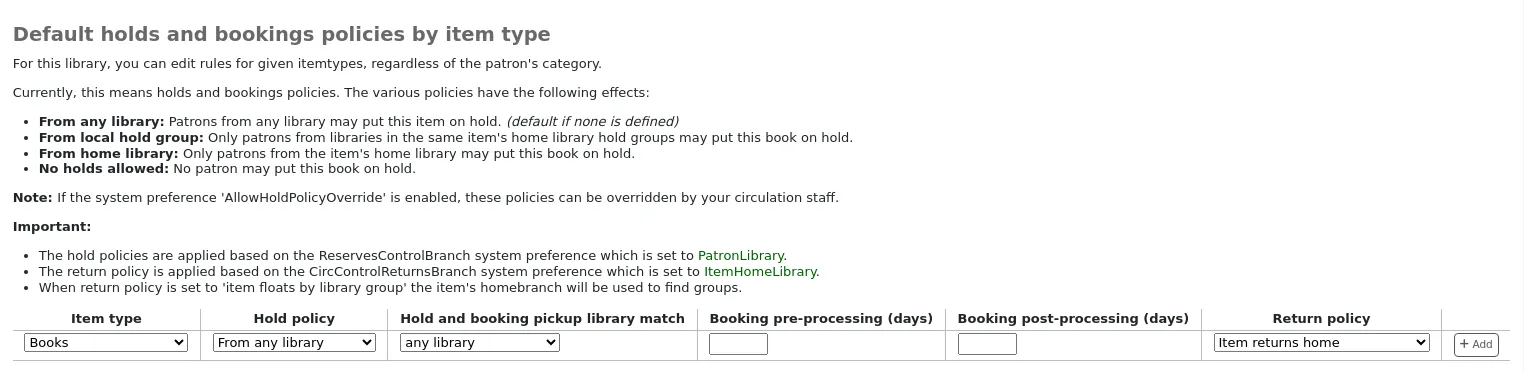
Hold policy: the various hold policies have the following effects.
From any library: patrons from any library may put this item on hold. (default if none is defined)
From local hold group: only patrons from libraries in the same item's home library hold groups may put this book on hold.
From home library: only patrons from the item's home library may put this book on hold.
No holds allowed: no patron may put this book on hold.
If the system preference AllowHoldPolicyOverride is set to 'allow', these hold policies can be overridden by staff.
ملاحظة
The hold policies are applied based on the ReservesControlBranch system preference.
Hold and booking pickup library match: control where a patron can collect holds and bookings of the specified item type.
أي مكتبة
مكتبة حجز المادة
مجموعة حجز المستفيد
مكتبة المادة الرئيسية
المكتبة المقتنية للمادة
Booking pre-processing (days): add a buffer period before a new booking, to give staff time to prepare the item in-between two bookings.
Enter a number of days. This will prevent a new booking from starting too soon after an existing booking ends.
Booking post-processing (days): add a buffer period after a new booking, to give staff time to receive the item in-between two bookings.
Enter a number of days. This will prevent a new booking from ending too close to the start of an existing booking.
Return policy: the various return policies have the following effects.
Item returns home: on check-in at another library, the librarian will be prompted to transfer the item to its home library.
Item returns to issuing branch: on check-in, the librarian will be prompted to transfer the item to the library where it was checked out.
Item floats: the item will not be transferred from the library it was checked in at. It will remain at the check-in library until transferred manually or checked in at another library.
Item floats by library group: the item will not be transferred and will stay at the library it was checked in at, if the check-in library is within the same 'float group' in library groups as the item's home library. If the library is not in the same float group, the item will be transferred back to its home library.
When return policy is set to 'item floats by library group' the item's homebranch will be used to find groups.
ملاحظة
The library whose return policy is used is determined by the CircControlReturnsBranch system preference.
Example
You may allow holds in your library service generally. However, you do not want brand new stock in the 'New items' item type to be reserved by patrons at libraries other than the one to which the new stock belongs.
For the 'New items' item type, you will set the 'Hold policy' to 'From home library' so that those items can only be placed on hold if the items' owning library and the patron's home library are the same. You can set 'Hold and booking pickup library match' to 'item's home library' to ensure the items on hold can only be collected from their home library. You should also set 'Return policy' to 'item returns home'.
أنواع سمات المستفيدين
للوصول: المزيد > الإدارة > المستفيدون والإعارة > أنواع سمات المستفيد
ملاحظة
Only staff with the manage_patron_attributes permission (or the superlibrarian permission) will have access to this section.
Patron attributes can be used to define custom fields to associate with your patron records. In order to enable the use of custom fields you need to set the ExtendedPatronAttributes system preference.
الإستخدام الشائع لهذا الحقل سيكون لأرقام هويات الطلاب أو أرقام شهادات القيادة الخاصة بهم
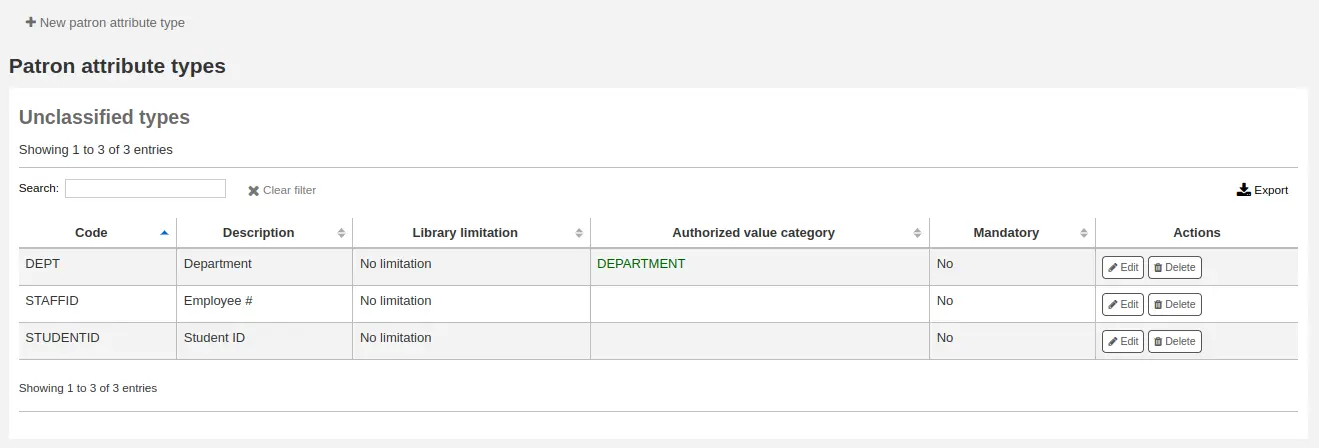
Adding patron attribute types
لإضافة سمة مستفيد جديدة، قم بالنقر على زر "نوع سمة مستفيد جديدة" أعلى الصفحة
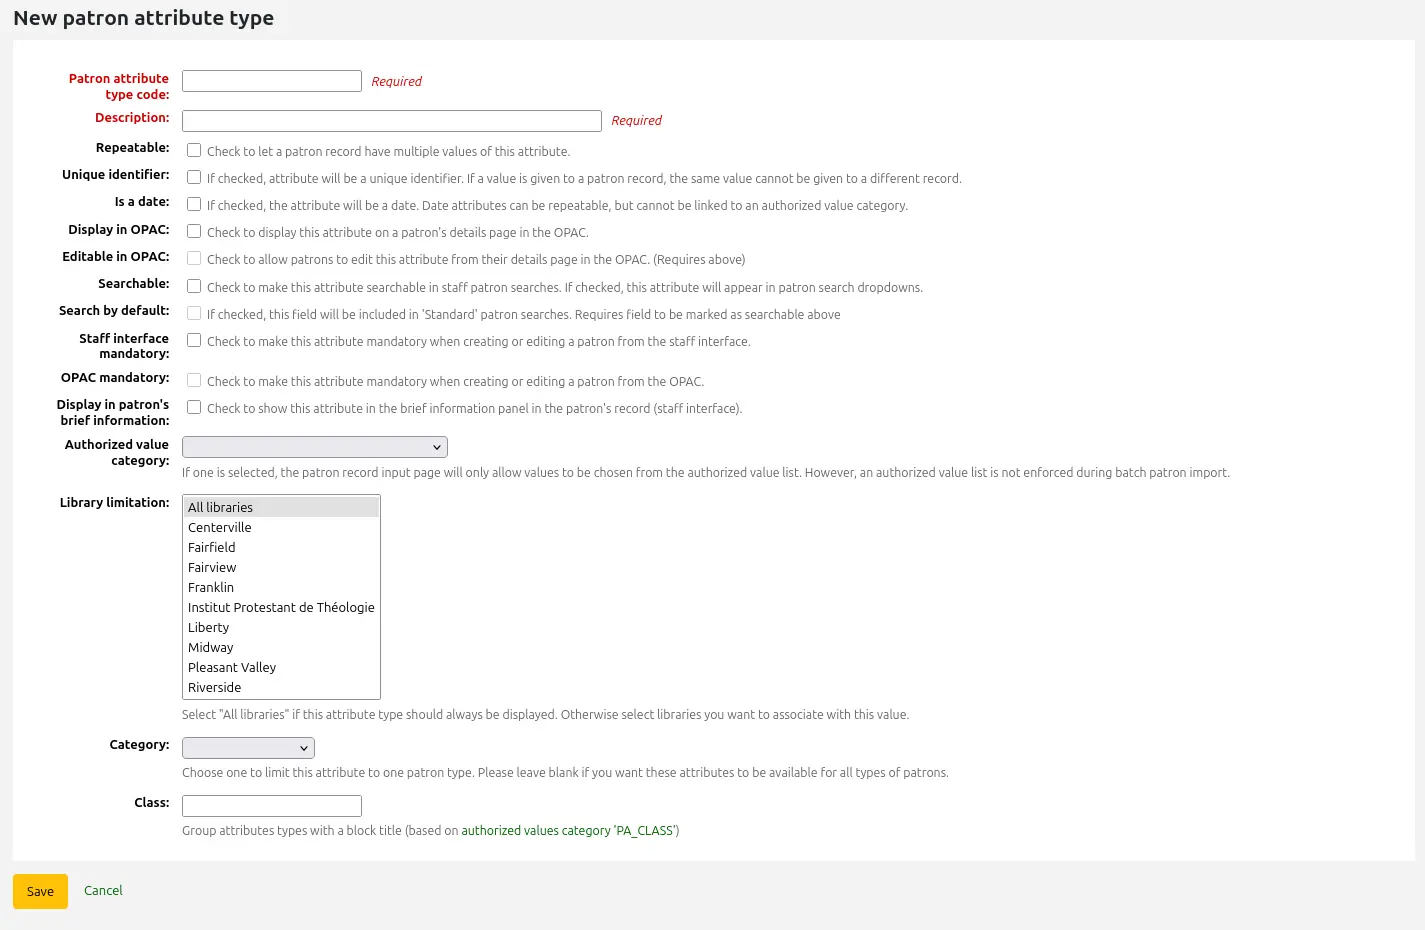
Patron attribute type code: enter a short code to identify this field
تحذير
لا يمكن تغيير هذا الإعداد بعد أن يم تعريف السمة
Description: enter a longer (plain text) explanation of what this field will contain
Repeatable: check this box if a patron record can have multiple values of this attribute.
تحذير
لا يمكن تغيير هذا الإعداد بعد أن يم تعريف السمة
Unique identifier: check this box if a value is given to a patron record, the same value cannot be given to a different record.
Unique attributes can be used as match points on the patron import tool
تحذير
لا يمكن تغيير هذا الإعداد بعد أن يم تعريف السمة
Is a date: check this box if the attribute value should be a date. A date picker will be available.
مهم
Date attribute types cannot be linked to authorized value categories.
Version
The date option was added to Koha in version 24.05.
Display in OPAC: check this box to display this attribute on a patron's details page in the OPAC.
Editable in OPAC: check this box to enable patrons to edit this information in the OPAC.
Searchable: check this box to make this attribute searchable in the staff interface's patron search.
Search by default: check this box to make this attribute searchable in the staff interface's 'standard' patron search, i.e., not a search on a particular field.
This option requires that the attribute type be searchable (see previous option).
Version
This option was added to Koha in version 23.11.
Mandatory: check this box if the attribute must be filled for every patron
Display in patron's brief information: check this box to make this attribute visible in the patron's short detail display on the left of the checkout screen and other patron pages
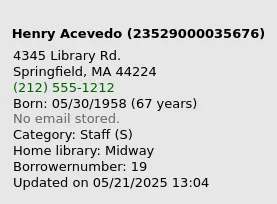
Authorized value category: if one is selected, the patron record input page will only allow values to be chosen from the authorized value list.
You will first need to add an authorized value list for it to appear in this menu
تحذير
An authorized value list is not enforced during batch patron import.
Library limitations: if you would like this attribute to only be used by specific branches you can choose those branches from this list. Choose 'All branches' to show it for all libraries.
تحذير
Patrons with attributes already set for them will not be altered. The branch limitation only limits the field based on the library at which the current staff is logged in.
If an attribute is set for a patron, it will be displayed in their file to all staff. However, only staff from the selected branches will be able to edit it.
Category: if you'd like to only show this attribute on patrons of one type choose that patron category here
Class: if you have a lot of attributes it might be handy to group them so that you can easily find them for editing. If you create an authorized value for PA_CLASS it will show in the 'Class' drop-down menu and you can then change your attributes page to have sections of attributes
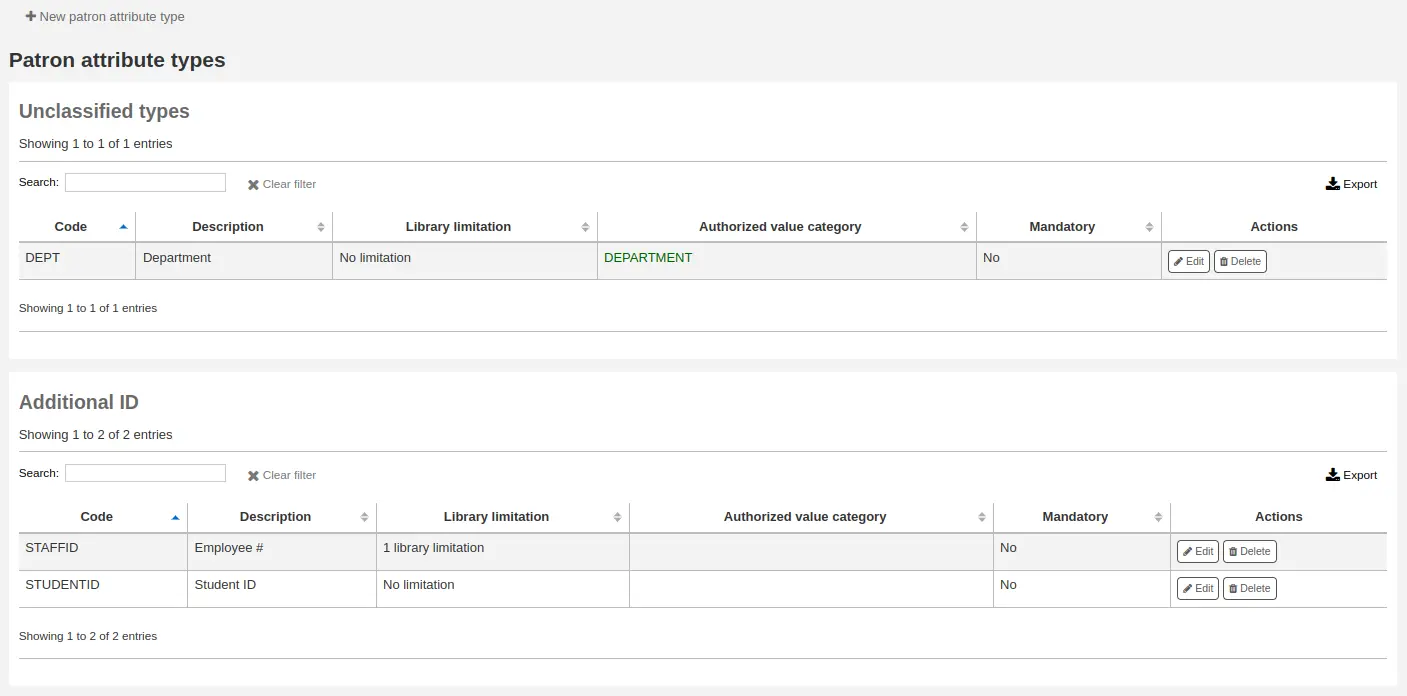
Click 'Save' to save your new attribute.
Once added, your attribute will appear on the list of attributes and also on the patron record add/edit form
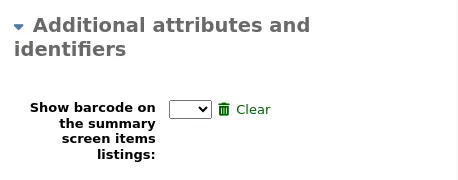
Editing/deleting patron attribute types
Each patron attribute has an edit and a delete button beside it on the list of attributes.
بعض الحقول في السمة أنشئت لمرة واحدة لن تحرر:
كود نوع سمة المستفيد
مكرر
معرِّف فريد
لن تتمكن من حذف سمة ما اذا كانت قيد الاستخدام.

حدود النقل بالمكتبة
تحديد القدرة على نقل المواد بين المكتبات بناء على المكتبة المرسلة، المكتبة المستلمة، ورمز المجموعة
للوصول: المزيد> الإدارة> المستفيدون والإعارة >حدود نقل المكتبة
ملاحظة
Only staff with the manage_transfers permission (or the superlibrarian permission) will have access to this section.
These rules only go into effect if the preference UseBranchTransferLimits is set to 'enforce'.
قبل أن تبدأ عليك الاختيار أي مكتبة تحدد هذه الحدود ل.

Transfer limits are set based on the collections codes you have applied via the Authorized values administration area.
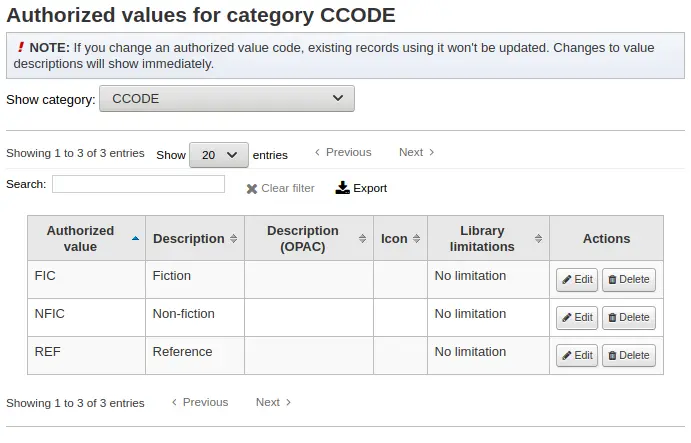
رموز المجموعة سوف تظهر كألسنة فوق صندوق التأشيرات:
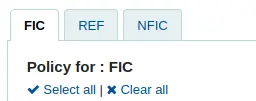
Check the boxes for the libraries you allow your items to be transferred to for the collection code you have selected at the top (in the example below - FIC)
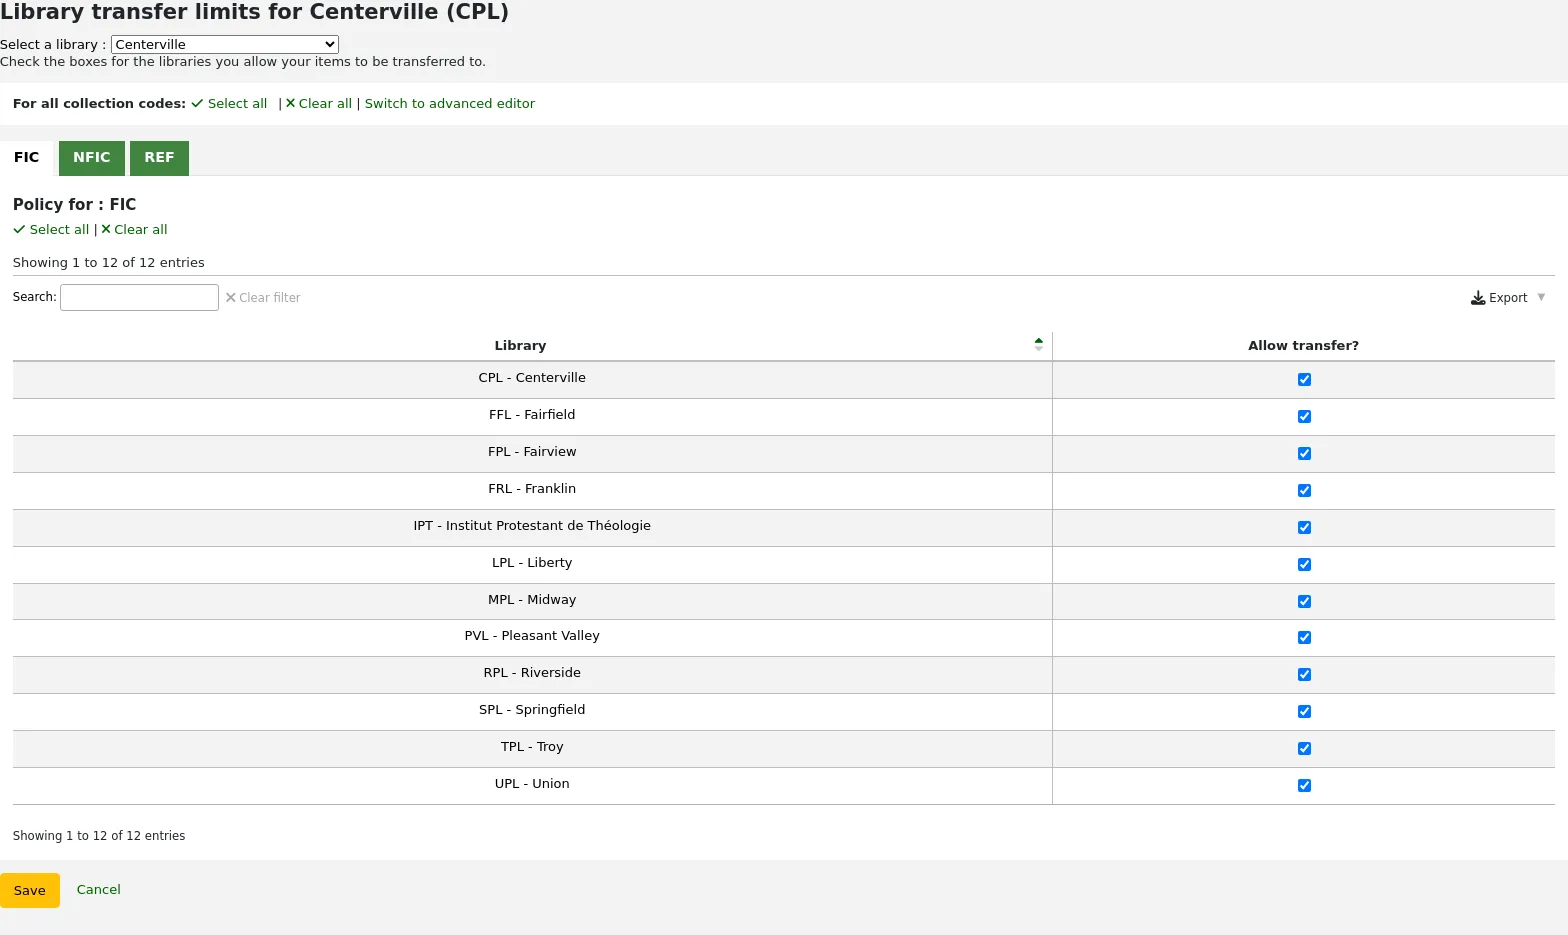
In the above example, Centerville library will allow patrons from all libraries except Liberty and Franklin to request items from their branch.
مصفوفة تكاليف النقل
The transport cost matrix lets a library system define relative costs to transport books to one another.
ملاحظة
Only staff with the manage_transfers permission (or the superlibrarian permission) will have access to this section.
In order for the system to use this matrix you must first set the UseTransportCostMatrix preference to 'Use'.
هام
لمصفوفة تكلفة النقل الأسبقية في التحكم في مكان ملء الحجز، إذا لم تكن المصفوفة قيد الاستخدام فسيقوم كوها بالتحقق من StaticHoldsQueueWeight.
التكاليف تكون قيمة عشرية بين القيم القصوى التعسفية (مثل 1 أو 100 ) وبين ال 0 وهي أقل قيمة (لا) كلفة. على سبيل المثال ، بإمكانك فقط أن تستخدم المسافة بين كل مكتبة بالميل كـ 'تكلفة' ، إذا كان فعلاً سيؤثر على تكلفة نقلهم. ربما مكتب البريد سيكون أفضل مقياس. المكتبات التي تتشارك بمكتب بريد ستحصل على قيمة من 1 مكاتب البريد المتجاورة ستحصل على قيمة 2، إلخ.
ببساطة لتدخل قيمة النقل أنقر على الخلية التي ترغب بتعديلها ، أزل التحديد عن مربع 'تعطيل' وأدخل 'التكلفة'
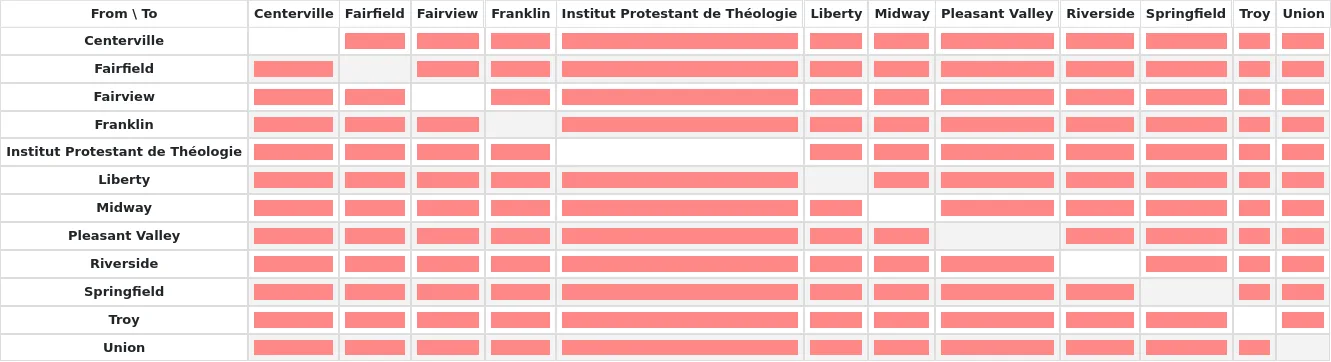
بعد ادخال التكلفة الخاصة بك، اكتب على لوحة مفاتيحك 'ادخل' أو انقر زر 'حفظ' أسفل المصفوفة لحفظ التغييرات.
ملاحظة
لن تؤدي قيمة لاغية لأي اختلاف حين تكون مكتبات من وإلى هى نفس المكتبة. غير أنه من الأفضل أن تقوم بوضع 0 هنا. لكل مجموعات إلى/من الأخرى، قد تتسبب القيمة اللاغية في تعطيل العلاقة. لذا، فباختصار، لا تترك أي قيم فارغة. من الأفضل دائماً وضع رقم هنا (حتى إذا اخترت تعطيل خيار من/إلى معين).
تنبيهات إعارة المادة
يمكن للمكتبات أن تقرر ما اذا كانت تريد اخطار العملاء بمستجدات الاعارة (حصر المدخلات وحصر المخرجات)
للوصول: المزيد > الإدارة > المستفيدون والإعارة > تنبيهات إعارة المادة
ملاحظة
Only staff with the manage_item_circ_alerts permission (or the superlibrarian permission) will have access to this section.
يتم تعيين هذه التفضيلات التي تعتمد على أنواع المستفيد وأنواع المادة.
هام
هذا التفضيل يمكن تجاوزه بواسطة التغييرات في تفضيلات رسائل المستفيد الفردية.
لإعداد تنبيهات لعملية الإعارة:
اختر مكتبتك من القائمة المنسدلة في أعلى الشاشة
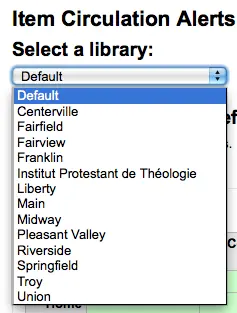
لضبط التفضيلات لجميع المكتبات، والحفاظ على القائمة من خلال التعيين على'افتراضي'
بشكل افتراضي يتم إشعار جميع أنواع المواد والمستفيدين بعمليات الإرجاع والإعارة. لتغيير ذلك، انقر فوق مادة/مستفيد نوع تركيبة والتي ترغب بإيقاف إشعاراتها.
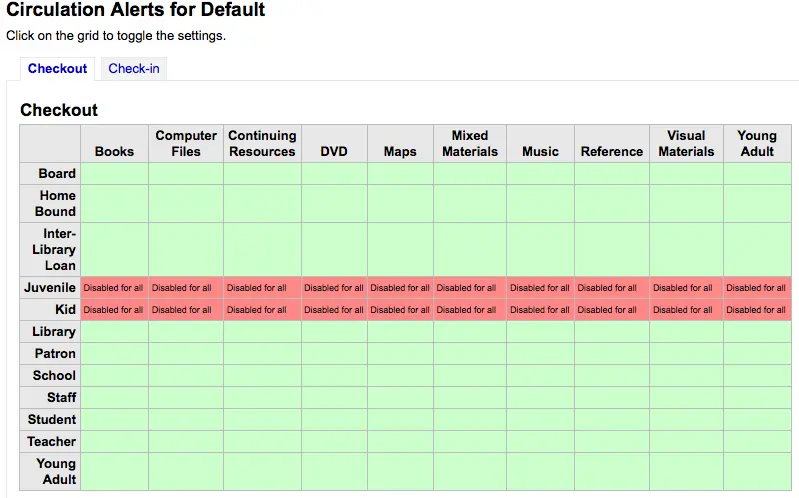
في المثال المذكور أعلاه، الأحداث والأطفال لن يستقبلوا إشعارات الإعارة.
مدن وبلدان
لتوحيد عملية إدخال المستفيدين ، بإمكانك ان تعرِّف المدن والبلدات داخل منطقتك، بذلك عندما يُضاف مستفيد جديد ، فإن أمين المكتبة ببساطة عليه أن يختار البلدة من القائمة بدلاً من أن يكتبها ويكتب معلومات رمزها البريدي (ZIP) .
للوصول: المزيد > الإدارة > المستفيدون والإعارة > المدن والبلدان
ملاحظة
Only staff with the manage_cities permission (or the superlibrarian permission) will have access to this section.
إضافة مدينة
لإضافة مدينة جديدة، انقر فوق زر 'مدينة جديدة' أعلى الصفحة وقم بإدخال اسم المدينة، الإقليم، الرمز البريدي والبلد.
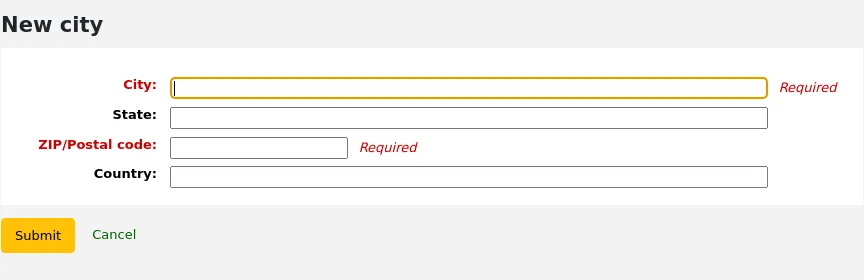
بمجرد النقر على إرسال، سيتم حفظ مدينتك وإدراجها في صفحة المدن والبلدان
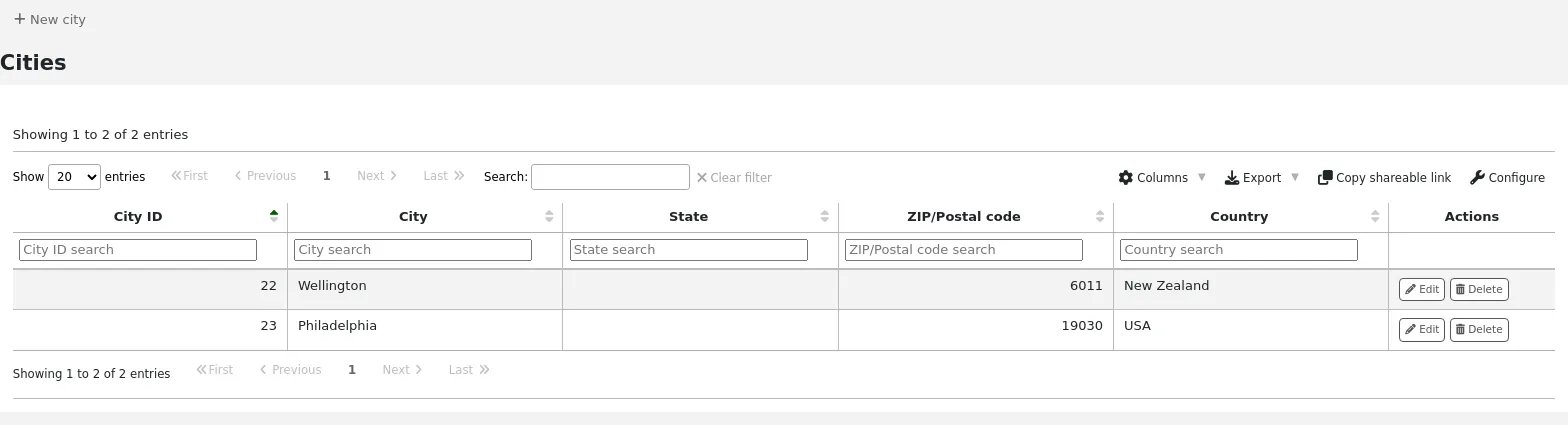
المدن تستطيع الإضافة والحذف في أي وقت.
عرض المدن في نموذج إضافة المستفيد
إذا كنت قد قمت بتعريف المدن المحلية باستخدام نموذج "مدينة جديدة"، فعند إضافة أو تحرير تسجيلة المستفيد سترى تلك المدن في القائمة المنسدلة لتسهيل اختيار المدينة.
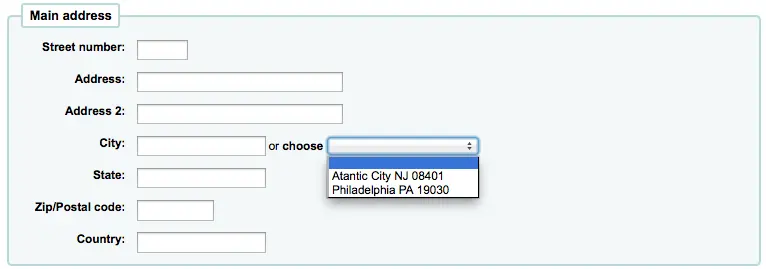
هذا سوف يسمح لدخول سهل للمدن المحلية في تسجيلة المستفيد دون المخاطرة من احتمال الأخطاء المطبعية أو رموز بريدية خاطئة.
Curbside pickup
The curbside pickup feature is used to set up appointments with patrons for them to pick up their holds. This section is used to configure the pickup windows
Get there: More > Administration > Patrons and circulation > Curbside pickup
ملاحظة
In order to use this module, you must enable it with the CurbsidePickup system preference.
ملاحظة
Only staff with the manage_curbside_pickups permission (or the superlibrarian permission) will have access to this section.
Setting up curbside pickup
From the configuration page, click the tab corresponding to the library for which you're setting up curbside pickup

Fill out the form
Enable: check this box to enable curbside pickup at this library
Pickup interval: enter the number of minutes each curbside pickup interaction will take
Maximum patrons per interval: enter the number of patrons who can pickup in the same interval
Patron-scheduled pickup: check this box if you want to allow patrons to set up their own curbside pickup appointment through the OPAC
Enable for waiting holds only: check this box if curbside pickup should be limited to patrons who have holds awaiting pickup
Create curbside pickup slots
For each slot, enter the day of the week, the starting and ending hours of the time slot in which patrons can come
these can be your opening hours, if you allow curbside pickup throughout the day, or specific time slots in which you allow patrons to come by
For the hours, the format must be XX:XX (numbers with a colon) and it must be in 24-hour format (e.g. 1 PM is 13:00)
Click 'Add'
Click 'Save configuration'
Do this for every library that offers curbside pickup.
Patron restriction types
If you are using patron restriction types, you can manage the restriction types available from here.
Patron restriction types are enabled by the PatronRestrictionTypes system preference.
Get there: More > Administration > Patrons and circulation > Patron restriction types
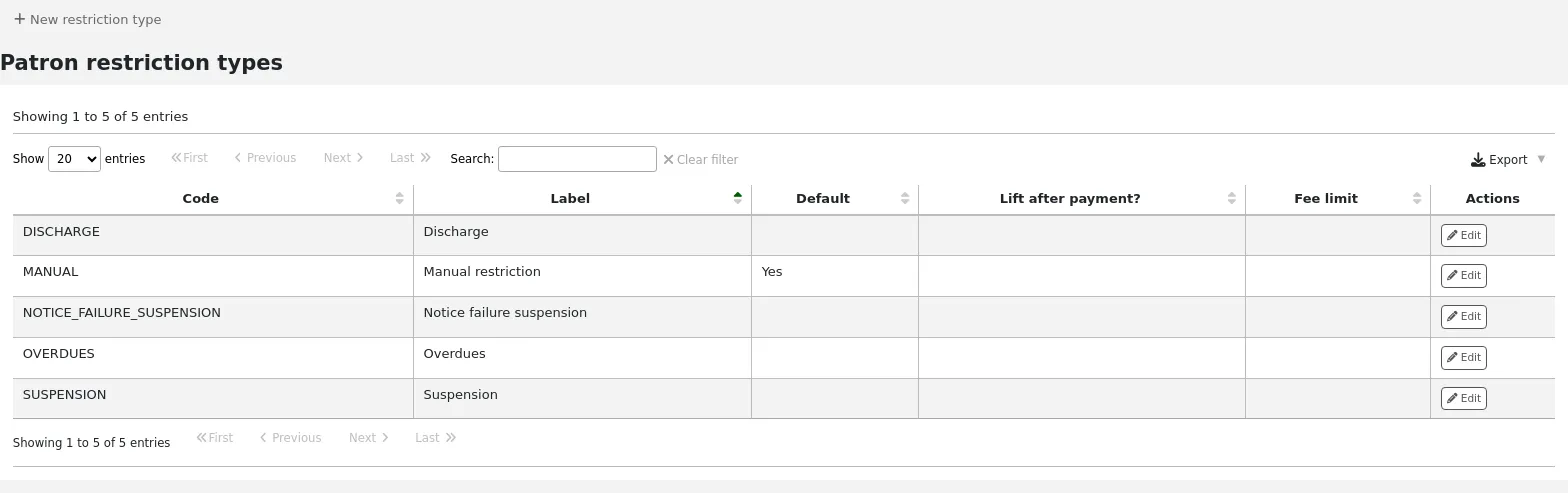
ملاحظة
Only staff with the manage_patron_restrictions permission (or the superlibrarian permission) will have access to this section.
Adding a restriction type
To add a new restriction type, click the 'New restriction type' button at the top of the page.
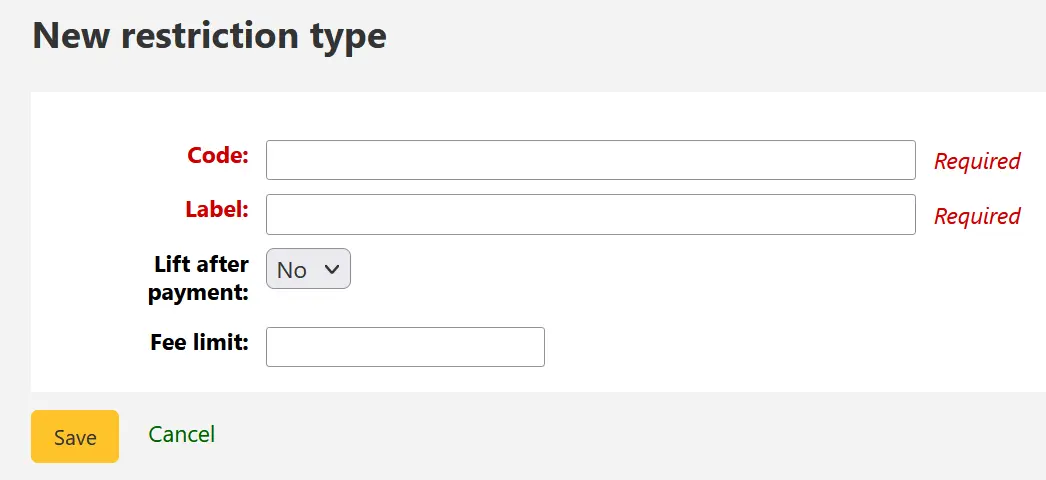
Code: enter a code for the restriction. Codes are limited to 50 characters and should not contain spaces, diacritics, or special characters.
Label: enter the label for the restriction. The label will be the one displayed throughout Koha.
Lift after payment: if set to 'Yes', restrictions using this type will be automatically lifted after payments equal to or exceeding the amount defined in 'Fee Limit'.
Fee Limit: enter the amount that must be paid in order to lift a restriction of this type. This field is only used if 'Lift after payment' is set to 'Yes'.
Once you click 'Save', your restriction type will be saved and will be listed in the table of restriction types.
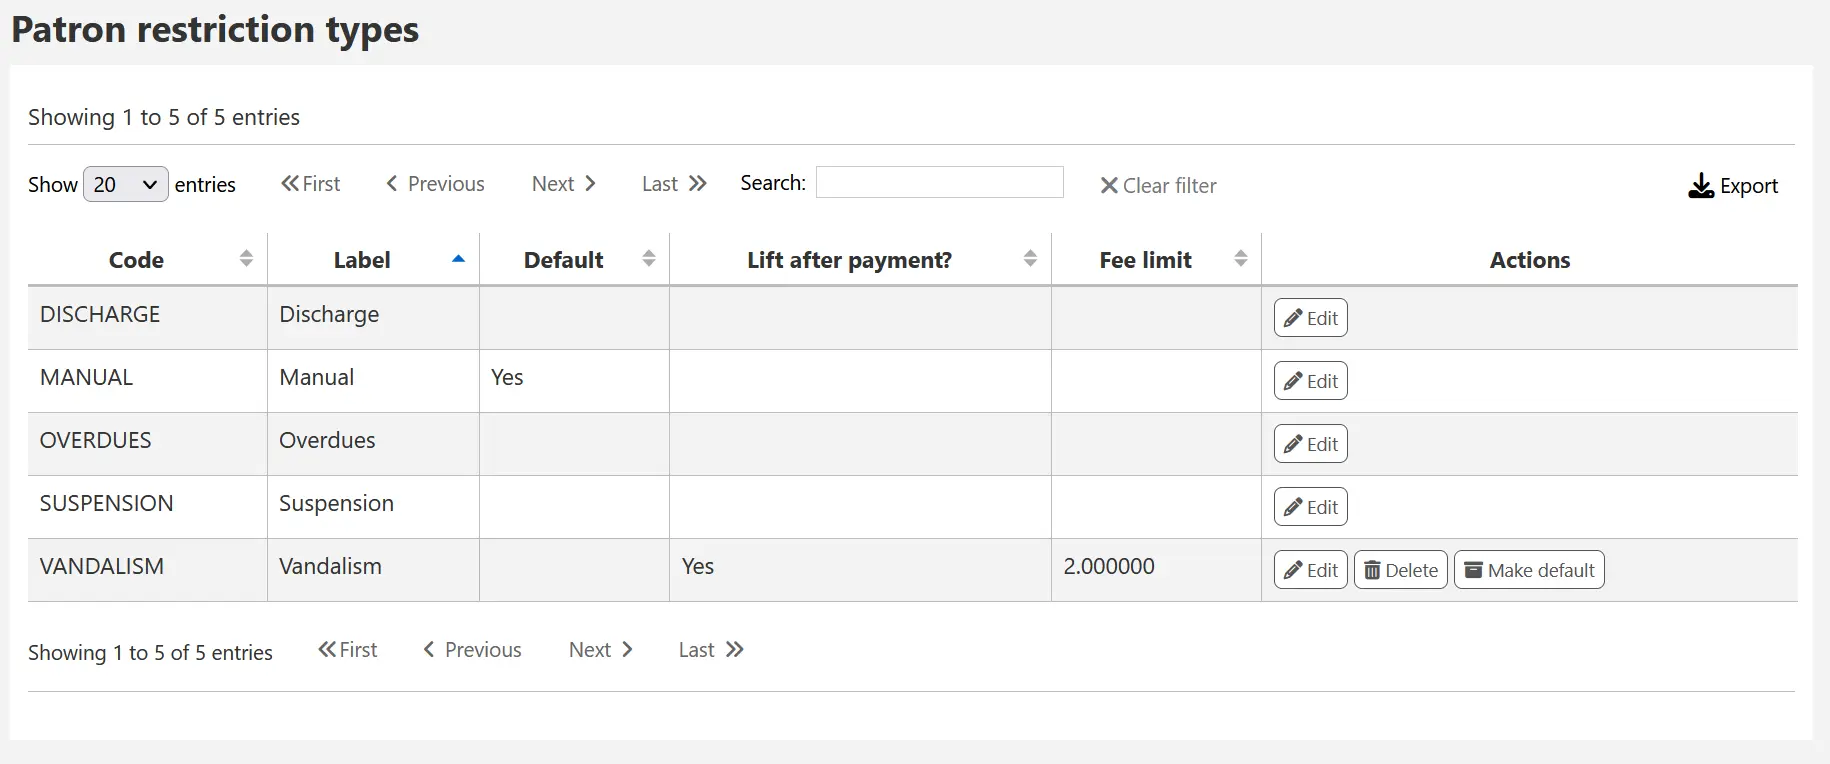
Locally created restriction types can be set to set as the default restriction type to use when manually adding a restriction to a patron account. This can be achieved using the 'Make default' button.
You can also delete any locally created restriction types using the 'Delete' so long as they have not been assigned as the default.
الحسابات
Get there: More > Administration > Accounting
This section deals with the parameters used in managing the patron accounts.
أنواع حساب المدين
Get there: More > Administration > Accounting > Debit types
ملاحظة
Only staff with the manage_accounts permission (or the superlibrarian permission) will have access to this section.
This is where you define the manual fees you can charge patrons.
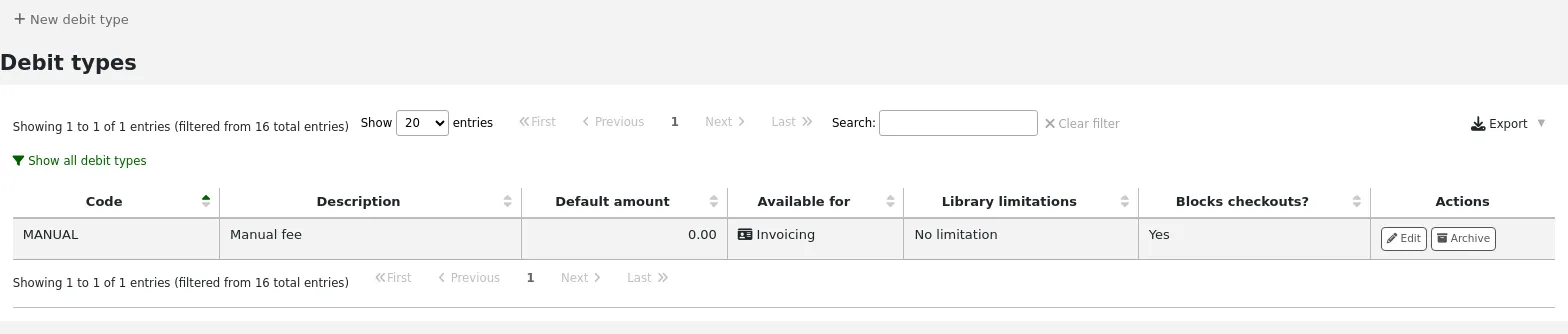
When you first get to the page, you will only see the manual fees that are already defined in your system.
You can see the default system fees by clicking "Show all debit types".
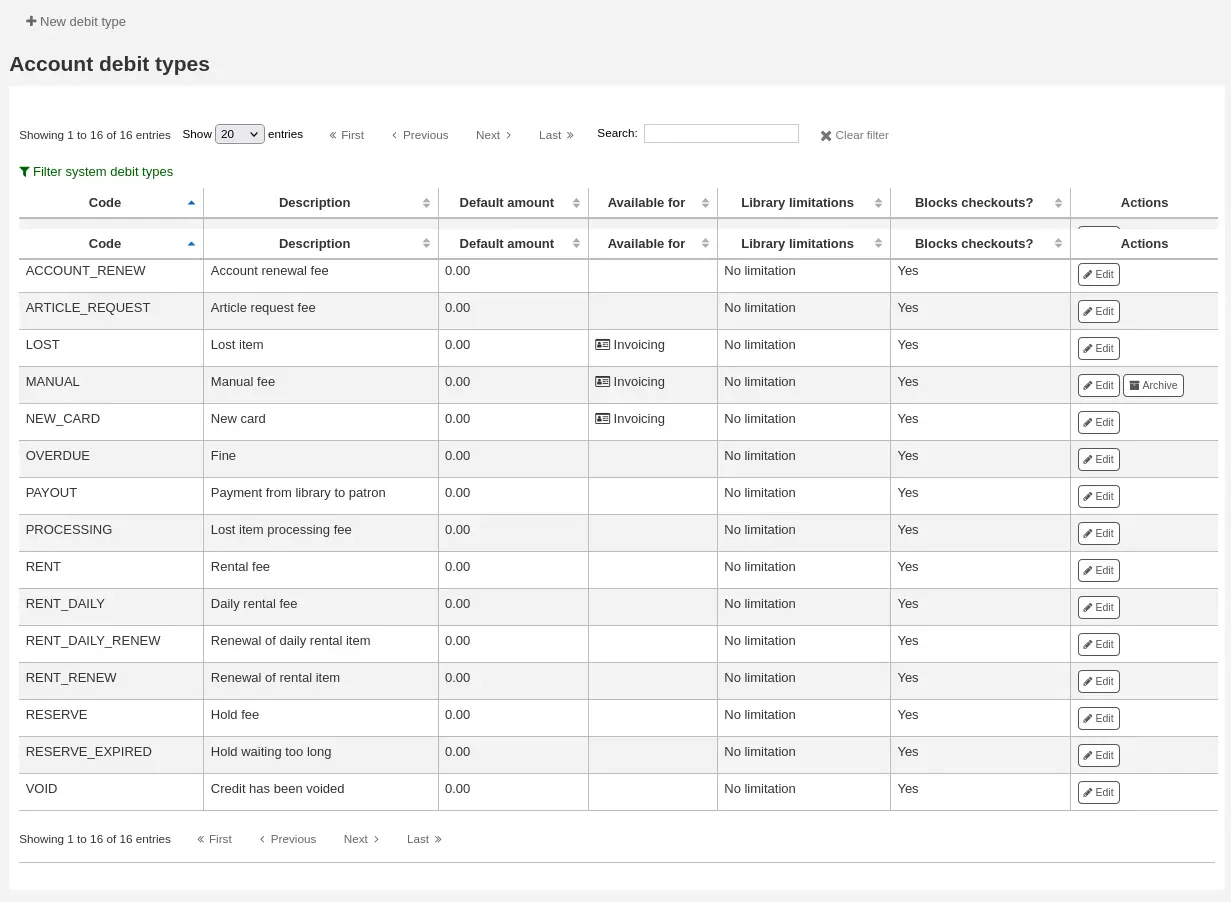
You can go back to seeing only the manual fees by clicking "Filter system debit types".
System debit types
Several debit types come installed with Koha. Most of them are automatic fees that are added according to the policies you set up elsewhere in Koha.
ACCOUNT (Account creation fee): this is charged to the patron's account upon registration. The fee can be changed in the patron category settings under 'Enrollment fee'.
ACCOUNT_RENEW (Account renewal fee): this is charged to the patron's account when their account is renewed. Like the ACCOUNT debit type above, this can be changed in the patron category settings under 'Enrollment fee'.
LOST (Lost item): this is charged to the patron's account when an item in their file is declared lost. The amount depends on the item's 'replacement cost' field or on the item type's default replacement cost. It can also be added manually in the manual invoices tab.
MANUAL (Manual fee): this is the default manual fee installed with Koha. This is not charged automatically by Koha, but can be added to a patron's account manually in the manual invoices tab.
NEW_CARD (New card fee): this is another default manual fee installed with Koha. This will not be charged automatically by Koha, but can be added to a patron's account manually in the manual invoices tab.
OVERDUE (Overdue fine): this is charged automatically to the patron's account when they have overdue items. The amount for overdue fines are set in the circulation and fines rules.
PAYOUT (Payment from library to patron): this is used when the library reimburses the patron (for an over payment for example).
PROCESSING (Lost item processing fee): this is charged automatically to the patron's account when an item in their file is declared lost. The amount is set by item type under 'Processing fee (when lost)'.
RENT (Rental fee): this is charged automatically to the patron's account upon checkout if the item type has a rental charge.
RENT_DAILY (Daily rental fee): this is charged automatically to the patron's account upon checkout if the item type has a daily rental charge.
RENT_DAILY_RENEW (Renewal of daily rental item): this is charged automatically to the patron's account upon renewal if the item type has a daily rental charge.
RENT_RENEW (Renewal of rental item): this is charged automatically to the patron's account upon renewal if the item type has a rental charge.
RESERVE (Hold fee): this is charged automatically to the patron's account upon placing a hold. The amount depends on the 'Hold fee' amount in the patron's category settings.
RESERVE_EXPIRED (Hold waiting too long): this is charged automatically to the patron's account if they haven't picked up their hold after the number of days defined in the ExpireReservesMaxPickUpDelay system preference. The amount is set in the ExpireReservesMaxPickUpDelayCharge system preference.
Adding a new debit type
To add a new debit type:
Click 'New debit type'
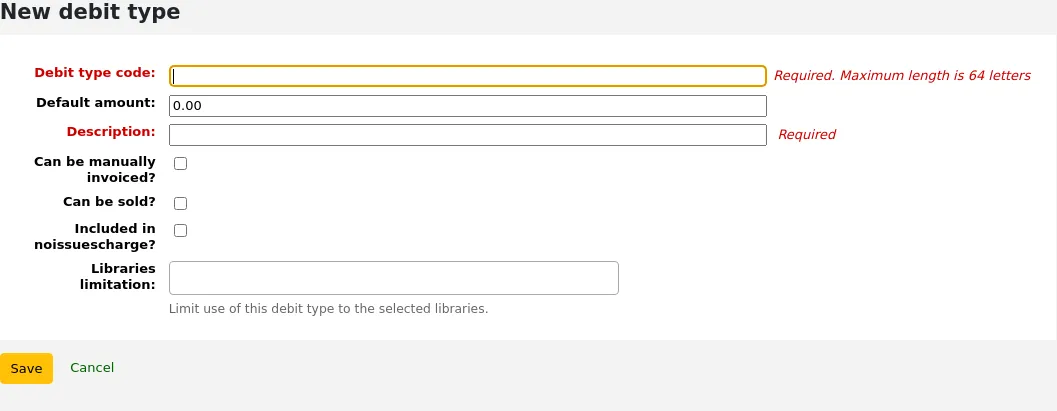
Debit type code: enter a code (limited to 64 letters).
تحذير
Codes should be limited to letters, numbers, and underscores (_).
Avoid spaces, diacritics, and special characters.
Default amount: enter the default amount.
ملاحظة
Staff will be able to change this amount when adding the charge to the patron's account, if necessary.
مهم
Do not enter currency symbols. Only write the amount with a decimal point (for example, 5 or 5.00 instead of $5).
Description: write a description, this description will be used in the drop-down menu when adding a new charge to a patron's account or when making a sale in the point of sale as well as in their transaction history.
Can be manually invoiced: check this box if this debit type can be added manually by staff to a patron's account via the manual invoices.
Can be sold: check this box if this debit type can be used in the point of sale.
Included in noissuescharge: check this box if this debit type should be included when calculating the amount owed by the patron for the noissuescharge system preference. This system preference is used to block checkouts when a patron owes over a certain amount of money to the library.
Libraries limitation: if necessary, select the libraries where this debit type can be used. Choosing 'All libraries' will make the debit type available everywhere.
ملاحظة
You can select more than one library by pressing the 'Ctrl' key while selecting.
If you have any additional fields for account debit types (account_debit_types), they will be displayed here.
اضغط 'حفظ'
Editing an existing debit type
You can only modify the debit types you have added, as well as the 'Manual fee'.
To edit a debit type:
Click the 'Edit' button to the right of the debit type
Modify any field
اضغط 'حفظ'
Archiving a debit type
If there is a debit type you don't need anymore, you can archive it.
ملاحظة
There is no way to delete a debit type since they are used in the patron's accounting section.
To archive a debit type, simply click the 'Archive' button to the right of the debit type.
Restoring an archived debit type
If you need to use an archived debit type again, simply click on the 'Restore' button to the right of the debit type.
This will make it available again.
أنواع الاعتماد
Get there: More > Administration > Accounting > Credit types
ملاحظة
Only staff with the manage_accounts permission (or the superlibrarian permission) will have access to this section.
This is where you define the manual credits you can give patrons.
When you first get to the page, you will only see the credits that are already defined in your system.
You can see the default system credit types by clicking "Show all credit types".
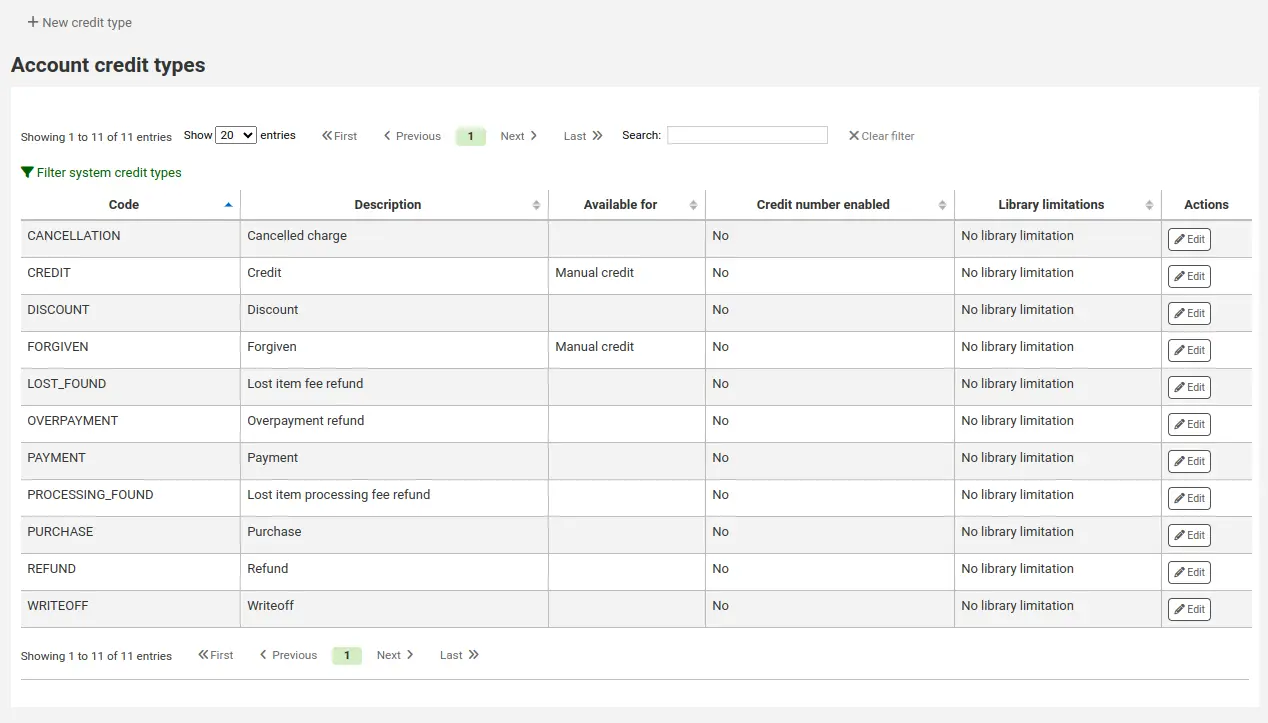
You can go back to seeing only the manual credit types by clicking "Filter system credit types".
System credit types
Several credit types come installed with Koha. Most of them are automatic credits that are added according to the policies you set up elsewhere in Koha. They can not be deleted.
CANCELLATION (Canceled charge): this is used when canceling a charge in a patron's account
CREDIT (Credit): this is used for manual credits to give to your patrons.
DISCOUNT (A discount applied to a patrons fine): this is used to discount fines and charges.
FORGIVEN (Forgiven): this is used for manual credits to give to your patrons.
LOST_FOUND (Lost item fee refund): this is used when a previously lost item is returned. If you refund the lost fees (see Default lost item fee refund on return policy), this credit will be applied to refund the fee.
OVERPAYMENT (Over payment refund): this is automatically applied to a patron's account when they paid too much for a fee. This is mostly used when backdating check-ins where the patron has already paid the full fine.
PAYMENT (Payment): as the name states, this is used to indicate fee payments.
PURCHASE (Purchase): this is used when a payment is made through the point of sale module.
REFUND (A refund applied to a patrons fine): this is used when refunding the payment of a fine or charge.
WRITEOFF (Writeoff): this is used when writing off a fine or charge.
Adding a new credit type
To add a new credit type:
Click 'New credit type'
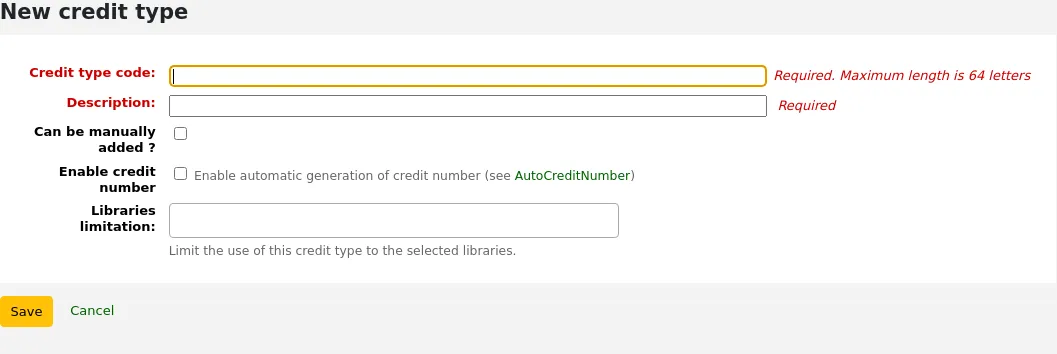
Enter a code (limited to 64 letters)
تحذير
Codes should be limited to letters, numbers, and underscores (_).
Avoid spaces, diacritics, and special characters.
Write a description
This description will be used in the drop-down menu when adding a new credit to a patron's account as well as in their transaction history
If this credit type can be added manually by staff to a patron's account via the manual credit, check the 'Can be added manually?' check box
If you need this credit type to be sequentially numbered, check the 'Enable credit number'. The format of the number is defined in the AutoCreditNumber system preference.
If this credit type is only to be used in specific branches, you can select the libraries in 'Libraries limitation'
ملاحظة
You can select more than one library by pressing the 'Ctrl' key while selecting.
If you have any additional fields for account credit types (account_credit_types), they will be displayed here.
اضغط 'حفظ'
Editing an existing credit type
You can only modify the credit types you have added.
To edit a credit type:
Click the 'Edit' button to the right of the credit type
Modify any field
اضغط 'حفظ'
Archiving a credit type
If there is a credit type you don't need anymore, you can archive it.
ملاحظة
There is no way to delete a credit type since they are used in the patron's accounting section.
To archive a credit type, simply click the 'Archive' button to the right of the credit type.
Restoring an archived credit type
If you need to use an archived credit type again, simply click on the 'Restore' button to the right of the credit type.
This will make it available again.
سجلات نقدية
للوصول: المزيد > الإدارة > المحاسبة > السجلات النقدية
This feature is enabled through the UseCashRegisters system preference.
ملاحظة
Only staff with the manage_cash_registers permission (or the superlibrarian permission) will have access to this section.
If you have no cash registers already defined, you will be invited to create one.
Otherwise, you will see the list of all your cash registers.
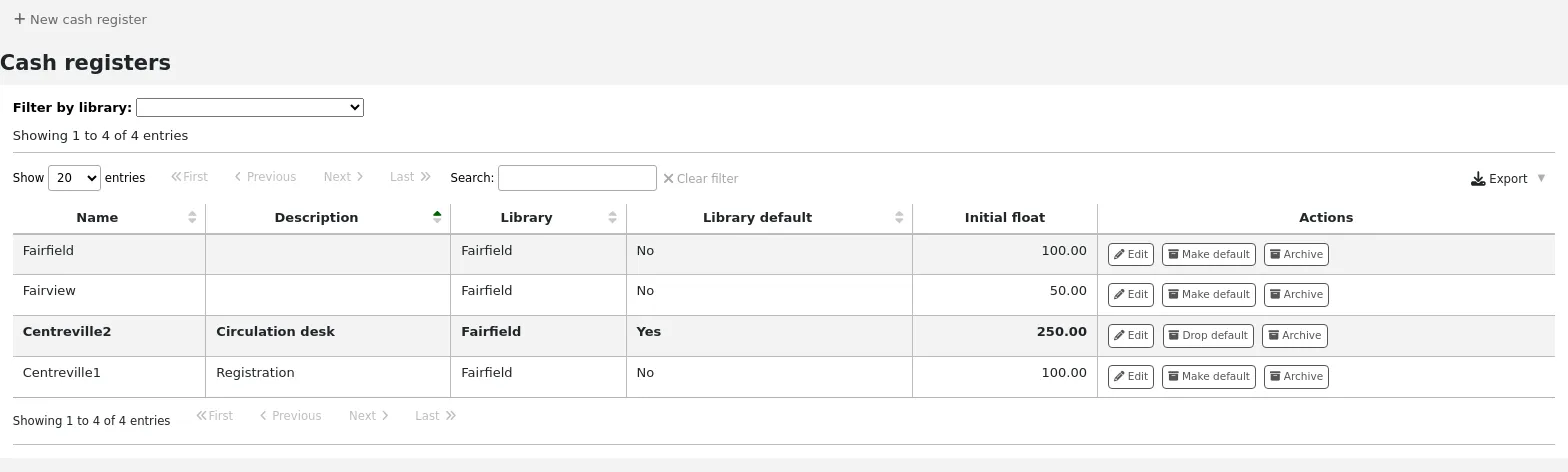
In the 'Actions' columns, you can choose to edit your cash registers, make one of them default or remove the default status, and archive or restore an archived register.
The default status is only useful in libraries that have more than one register per branch. The default register will be preselected when entering a payment. If there is only one cash register per branch, the branch's cash register will be selected when paying.
إضافة سجل نقدي جديد
قم بالنقر على 'سجل نقدي جديد'
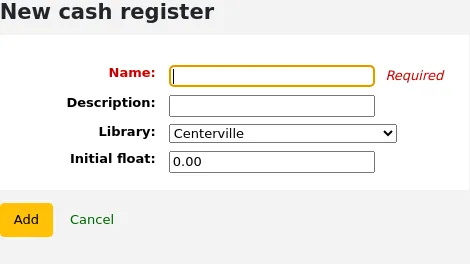
Give your cash register a name
Optionally you can also add a description
Choose in which library this cash register is located
And finally, enter the initial float, i.e. the amount in the cash register
Click 'Add'
Plugins
This section is used to manage all types of plugins.
مهم
Before using plugins, make sure that they are enabled in the configuration file.
ملاحظة
Only staff with the manage permission, the configure permission, or the admin permission (or the superlibrarian permission) will see this section.
See also the tool plugins and report plugins sections.
Get there: More > Administration > Plugins
If there are any administrative plugins installed, they will appear under this section.
ملاحظة
Only staff with the admin permission (or the superlibrarian permission) will be able to use administrative plugins.
Managing plugins
This section is used to view, manage and configure all types of plugins.
ملاحظة
Only staff with the manage permission (or the superlibrarian permission) will be able to install and uninstall plugins.
The page will show all currently installed plugins.
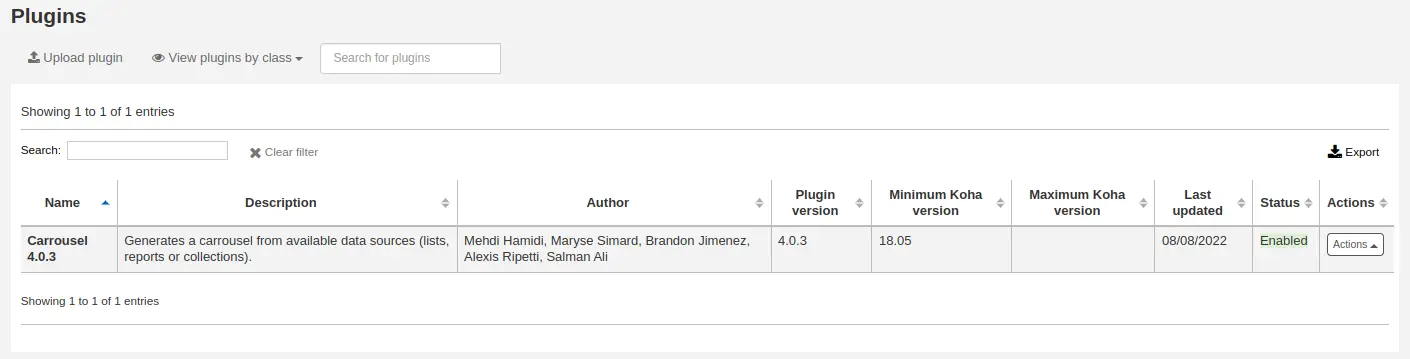
If you have a lot of plugins, you can view a subset by clicking 'View plugins by class'.

Installing a plugin
To install a new plugin manually,
Click 'Upload plugin'.
Choose the KPZ file on your computer and click 'Upload'.
If you configured external plugin repositories, you will have a search box at the top of the page to search these repositories and install directly from there without having to download and upload the KPZ file. To install a plugin from a repository,
Enter a search term in the search box.

Click 'Install' to the right of the plugin.
Some plugins might need to be enabled before usage.
To enable a plugin,
Click the 'Actions' button to the right of the plugin and choose 'Enable'
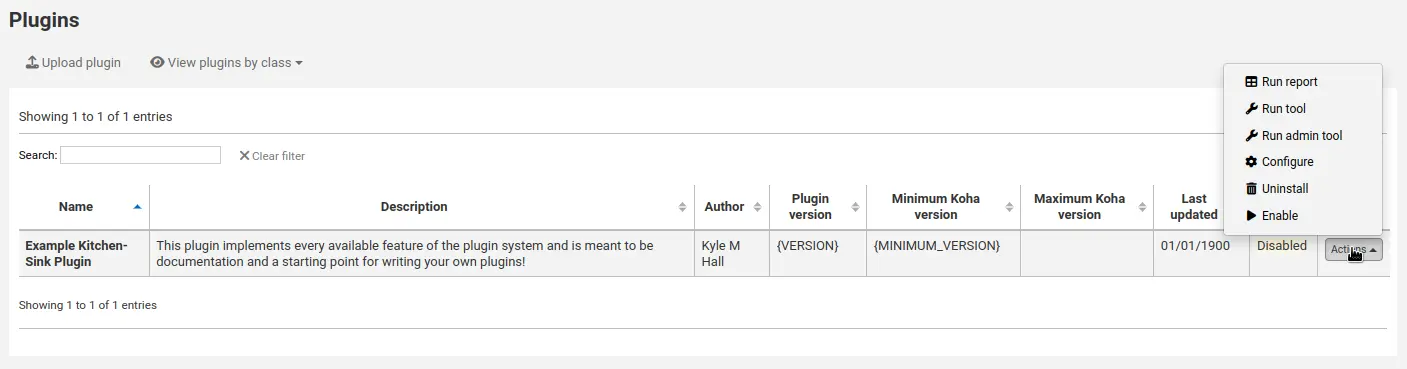
Using a plugin
All plugins are different. Some might need configuration before usage, others are simply run.
Click the 'Actions' button and choose 'Configure' or 'Run'.
Follow the instructions issued by the plugin's creator.
ملاحظة
Only staff with the configure permission (or the superlibrarian permission) will be able to access plugin configuration.
Disabling a plugin
If you need to temporarily stop the plugin from taking effect, you can disable it.
Click the 'Actions' button to the right of the plugin and choose 'Disable'
This will not uninstall the plugin. It will remain installed, but will not have any effect on your Koha installation.
Deleting a plugin
To delete or uninstall a plugin,
Click the 'Actions' button to the right of the plugin and choose 'Delete'
This will remove the plugin from your Koha installation. Any action or effect it had will stop. If you need to, you can reinstall it later, provided it is still available.
Jobs
This section is used to manage background jobs. Jobs are tasks that are queued in the system to be treated when the server has the resources to do it, such as batch record modification and others.
Get there: More > Administration > Jobs
ملاحظة
Only staff with the manage_background_jobs permission (or the superlibrarian permission) will have access to this section.
Managing jobs
By default, when accessing the page, you will only see current jobs and jobs enqueued in the last hour.
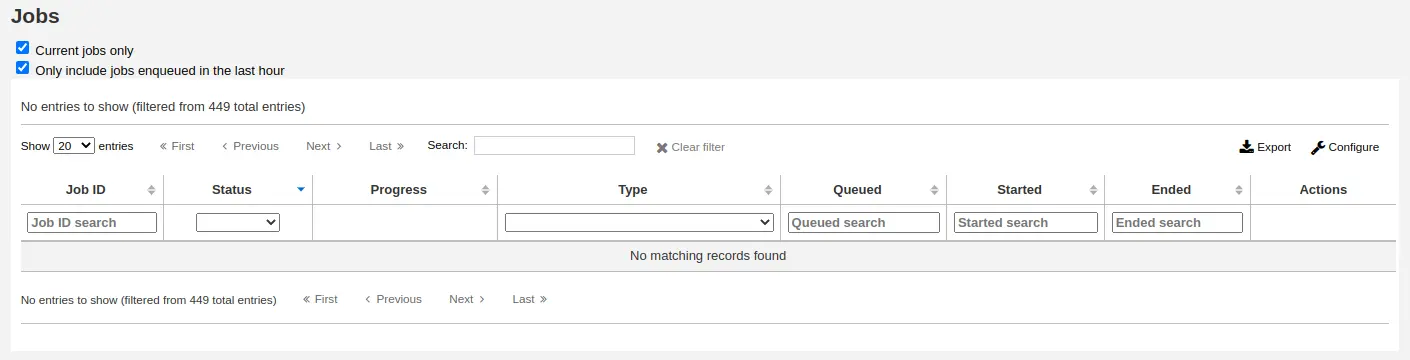
To see all jobs, uncheck the boxes at the top of the page.
Current jobs only: uncheck this to include finished jobs
Only include jobs enqueued in the last hour: uncheck this to include jobs enqueued earlier
You can search for jobs using the search boxes under the table headings.
To the right of each job, there are action buttons.
View: this will display the details of the job, including, but not limited to:
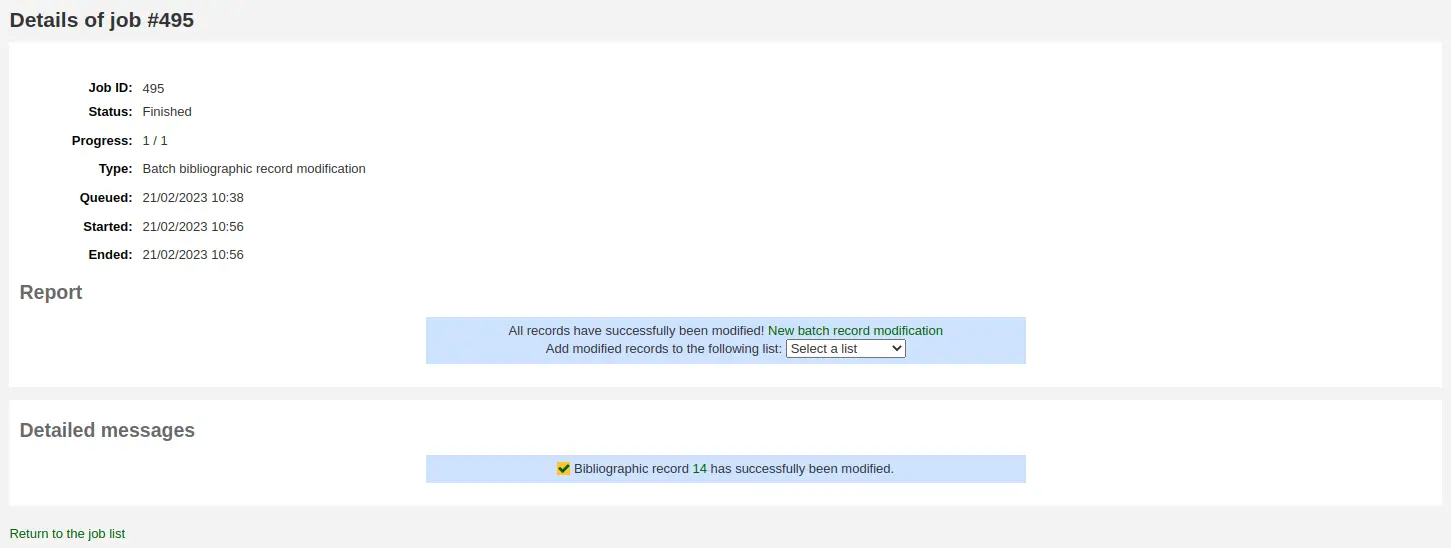
Job ID: this is the identifier of the job in the Koha database, an incremental number
Status: the status of the job
New: the job has been queued
Cancelled: the job was canceled by a user
Finished: the job was successfully carried out
Started: the job was started, but it is not yet finished
Running: the job is currently being executed
Failed: the job was started, but failed for some reason
Progress: indicates how much of the job is done
Type: indicates the type of job
Batch bibliographic record modification: batch of bibliographic records to be modified.
Batch bibliographic record deletion: batch of bibliographic records to be deleted.
Batch authority record modification: batch of authority records to be modified.
Batch authority record deletion: batch of authority records to be deleted.
Batch item record modification: batch of items to be modified.
Batch item record deletion: batch of items to be deleted.
Batch hold cancellation: a batch of holds to be canceled (when using the 'Cancel selected' button).
Create eHoldings titles: titles to be created from a list in the ERM module.
Update Elasticsearch index: bibliographic or authority records, or items to be updated in the Elasticsearch index. Any changes to a bibliographic or authority record, or item trigger an update of the index, including changes in circulation status.
Holds queue update: when the RealTimeHoldsQueue system preference is enabled, changes to holds trigger an update of the holds queue.
Staged MARC records for import: bibliographic or authority records to be staged for import.
Import MARC records: staged bibliographic or authority records to be imported in the catalog.
Revert import MARC records: imported bibliographic or authority records to be reverted.
Queued: date and time when the job was queued
Started: date and time when the job was started
Ended: date and time when the job was finished
Report: this section will contain messages specific to the type of job (for example, number of records modified, in the case of batch record modification)
Detailed messages: this section will contain messages specific to the type of job (for example, which records were modified, in the case of batch record modification)
Cancel: for jobs that are still new or have started, it's possible to cancel them
إدارة الفهرس
اضبط عناصر التحكم هذه قبل البدأ بالفهرسة على نظام كوها الخاص بك.
للوصول: المزيد> الإدارة> الفهرس
إطارات مارك البيبلوغرافية
فكر في الإطارات كقوالب لإنشاء تسجيلات بيبلوغرافية جديدة. يأتي كوها بمجموعة إطارات سابقة التعريف يمكن تحريرها أو حذفها، كما يمكن لموظفي المكتبة إنشاء الإطارات الخاصة بهم لمحتوى خاص بمكتباتهم.
للوصول: المزيد > الإدارة > الفهرس > إطارات مارك البيبلوغرافية
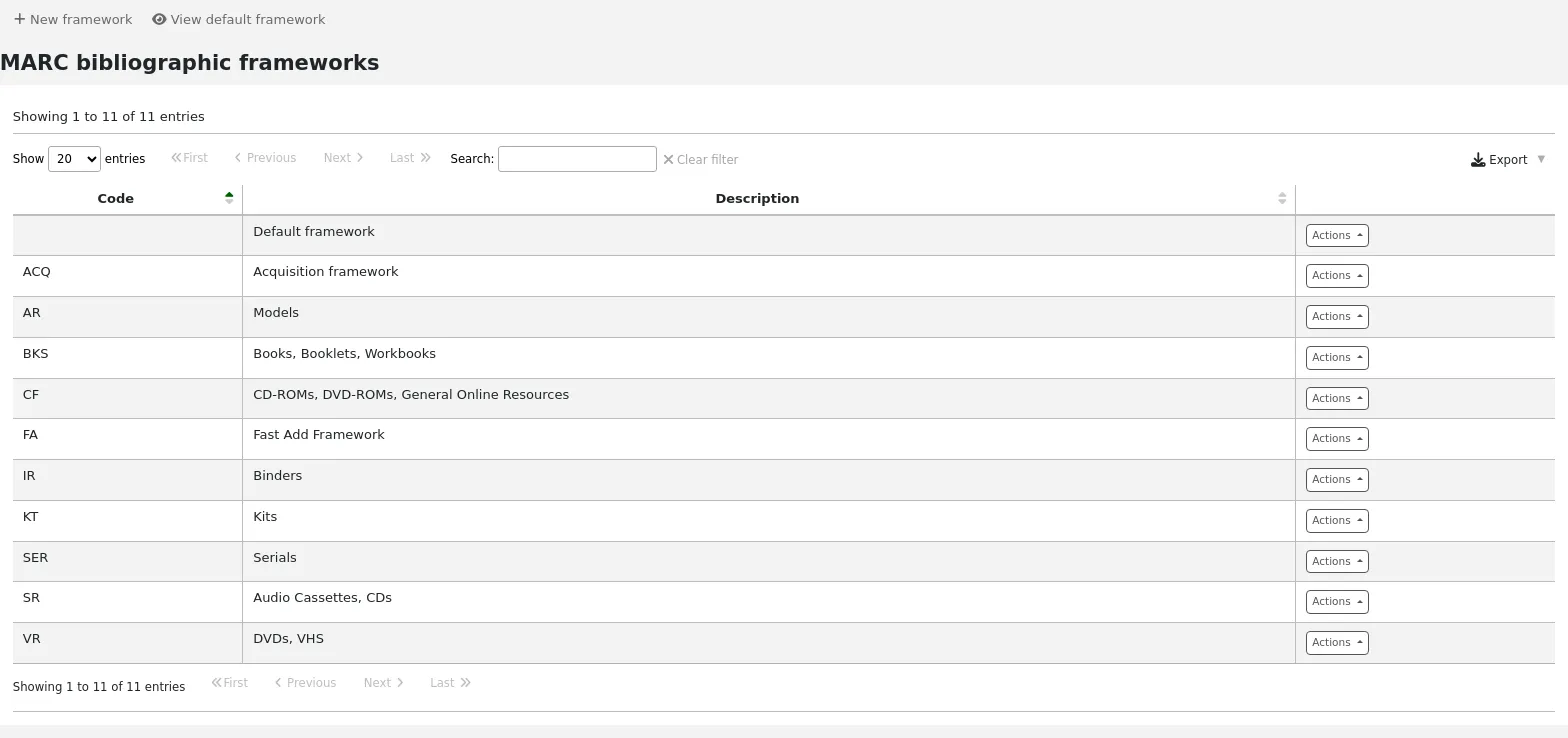
ملاحظة
Only staff with the manage_marc_frameworks permission (or the superlibrarian permission) will have access to this section.
هام
لا تقم بحذف أو تعديل الإطار الافتراضي ﻷن ذلك سيتسبب في مشكلات مع تسجيلات الفهرسة الخاصة بك - قم دائماً بإنشاء قالب جديد بناء على الإطار الافتراضي، أو قم بتعديل الإطارات الأخرى.
Adding a new framework
لإضافة قالب جديد
قم بالنقر على 'إطار جديد'

Code: enter a code of 4 or fewer characters, avoiding spaces, diacritics, or other special characters.
Description: enter a more detailed definition of your framework, this is what will be displayed in Koha.
اضغط 'إرسال'
Once your framework is added click 'Actions' to the right of it on the list of frameworks and choose 'MARC structure'
You will be asked to choose a framework to base your new framework on, this will make it easier than starting from scratch

Once your framework appears on the screen you can edit or delete each field by following the instructions for editing fields and subfields
Editing existing frameworks
Clicking 'Actions' and then 'Edit' to the right of a framework will only allow you to edit the description for the framework.

Editing framework fields and subfields
Frameworks are made up of MARC fields (tags) and subfields. To make edits to the fields and subfields associated with the framework you must click on 'Actions' and then 'MARC structure'.
مهم
Whenever you make changes to the framework fields and subfields, make sure to run the MARC bibliographic framework test.
Editing a MARC field (tag)
After clicking on 'MARC structure' you will be taken to a screen listing all the available tags for that framework and you can search for the tag you need. To make edits to a MARC field click on 'Actions' on the right of the field and choose 'Edit tag'.
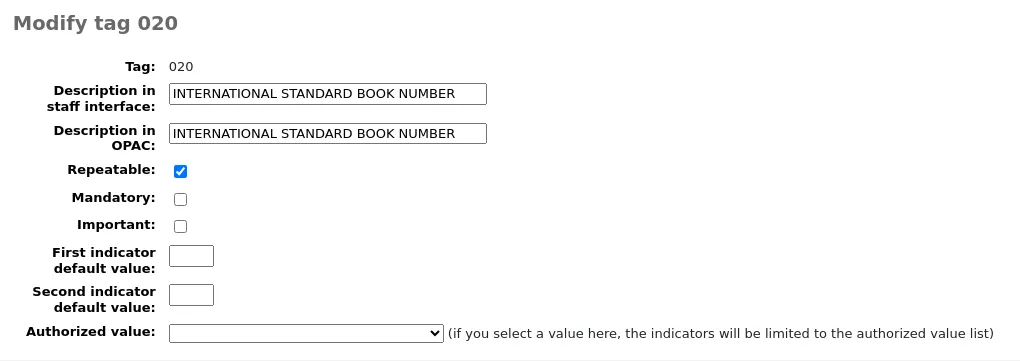
The next screen shows details of the tag.
Tag: the MARC tag, or field number, is uneditable.
Label for lib: text that will show in the staff interface MARC view, and in the basic editor if the advancedMARCeditor system preference is set to display labels.
ملاحظة
If you use XSLT (see the XSLTDetailsDisplay system preference), the labels for the 'Normal' view are defined in the XSLT stylesheet.
This will not affect the 'Normal' view unless you don't use XSLT.
Label for OPAC: text that will show on the MARC view in the OPAC.
ملاحظة
If you use XSLT (see the OPACXSLTDetailsDisplay system preference), the labels for the 'Normal' view are defined in the XSLT stylesheet.
This will not affect the 'Normal' view unless you don't use XSLT.
Repeatable: when checked, the field will have an icon next to it in the basic editor, allowing you to add multiples of that tag.
Mandatory: when checked, the record cannot be saved unless the field has a value. In the basic editor, a 'Required' flag will display as a prompt.
Important: when checked, the field will generate a warning if it is not filled, but unlike 'Mandatory', you will still be able to save your record nonetheless. In the basic editor, an 'Important' flag will display as a prompt.
Indicator default values: add default values for indicators here so that they will be prefilled to save time when cataloging, but can still be edited if required.
Authorized value: define an authorized value pull down list for the catalogers
تحذير
The authorized value option at field level does not work.
Click 'Save changes' to save any modification.
Editing a MARC subfield
To edit the subfields associated with the tag, click 'Actions' then 'Edit subfields' to the right of the tag on the framework field list. Each subfield has its own tab which contains three sections - Basic constraints, Advanced constraints and Other options.
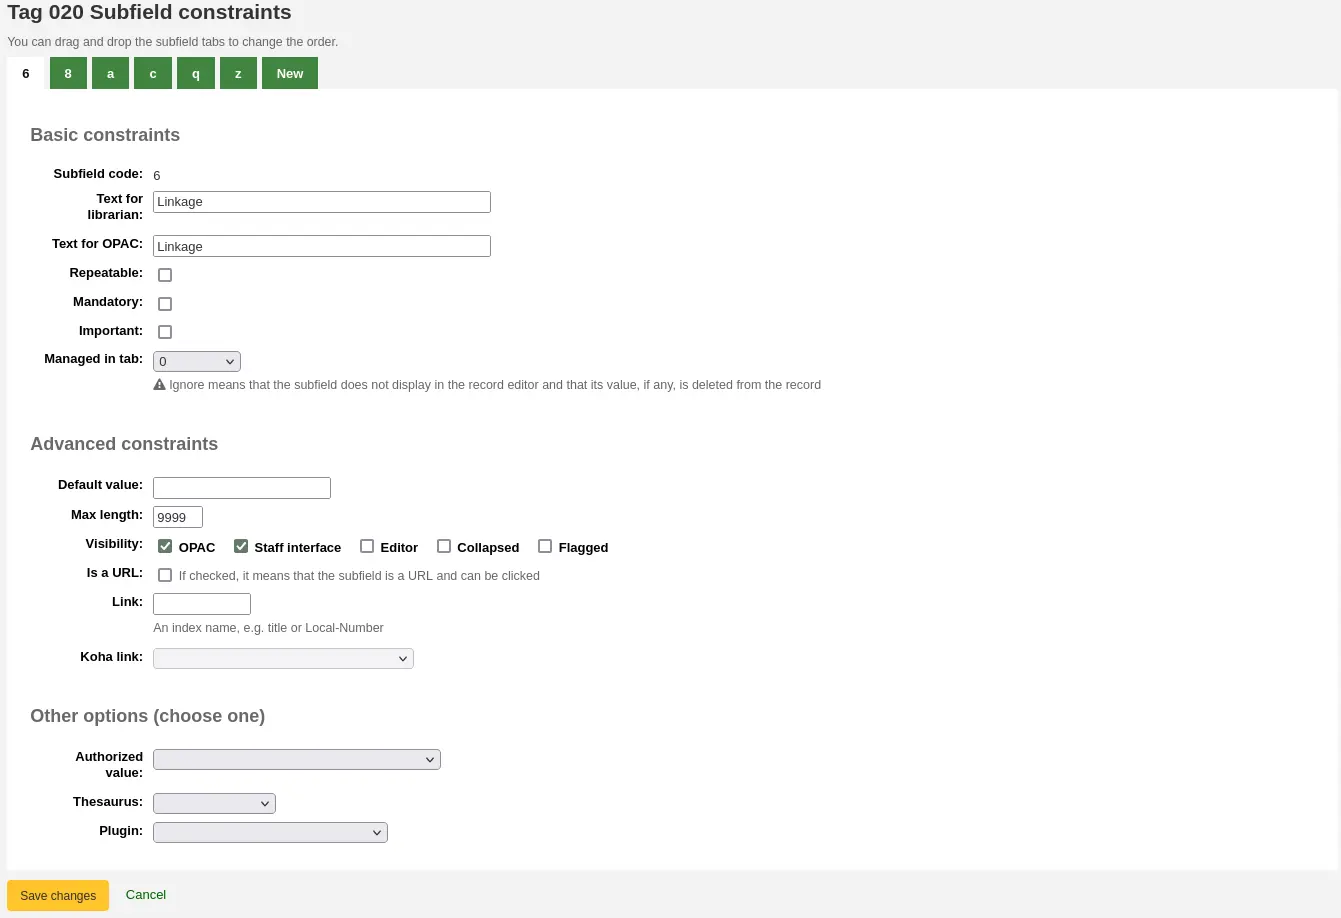
For each subfield you can set the following basic constraint options
Subfield code: this is the MARC subfield code, this wouldn't normally be changed.
Text for librarian: text that will show in the staff interface MARC view, and in the basic editor if the advancedMARCeditor system preference is set to display labels.
ملاحظة
If you use XSLT (see the XSLTDetailsDisplay system preference), the labels for the 'Normal' view are defined in the XSLT stylesheet.
This will not affect the 'Normal' view unless you don't use XSLT.
Text for OPAC: text that will show on the MARC view in the OPAC.
ملاحظة
If left empty, the 'Text for librarian' is used instead
ملاحظة
If you use XSLT (see the OPACXSLTDetailsDisplay system preference), the labels for the 'Normal' view are defined in the XSLT stylesheet.
This will not affect the 'Normal' view unless you don't use XSLT.
Repeatable: when checked, the field will have an icon next to it in the basic editor, allowing you to add multiples of this subfield.
Mandatory: when checked, the record cannot be saved unless the subfield has a value. In the basic editor, a 'Required' flag will display as a prompt.
Important: when checked, the field will generate a warning if it is not filled, but unlike 'Mandatory', you will still be able to save your record nonetheless. In the basic editor, an 'Important' flag will display as a prompt.
Managed in tab: defines the tab where the subfield is shown.
مهم
All subfields of a given field must be in the same tab or ignored. Ignore means that the subfield is not managed.
تحذير
When importing records, or editing existing records, subfields that are managed in tab 'ignore' will be deleted. If you still wish to keep the subfields, but hide them, use the 'Visibility' options below.
For each subfield you can set the following advanced constraint options
Default value: defines what you want to appear in the field by default, this will be editable, but it saves time if you use the same text over and over or the same value in a field often.
ملاحظة
There are several values that you can use here that will be replaced automatically when a new record is created:
<<MM>> - the current month, 2 digits
<<DD>> - the current day of month, 2 digits
<<YY>> - the current year, 2 digits
<<YYYY>> - the current year, 4 digits
<<USER>> - the username of the currently logged in user
For example: a default of "<<MM>>/<<DD>>/<<YYYY>>" (without quotes) will print the current date in the form of "01/21/2021"
ملاحظة
When those default values are filled depends on the ApplyFrameworkDefaults system preference.
Max length: enter a value here to limit the number of characters that can be entered in the subfield.
Visibility: allows you to select from where this subfield is visible or hidden. Check the boxes where you would like the field to show, and uncheck the boxes where you would like it hidden.
OPAC: when checked, this will make the subfield available for display in the OPAC. For non-XSLT views, the field will be displayed. For XSLT views, it will depend on the stylesheet.
Staff interface: when checked, this will make the subfield available for display in the staff interface. For non-XSLT views, the field will be displayed. For XSLT views, it will depend on the stylesheet.
Editor: when checked, this will make the subfield available for modification in the basic editor.
Collapsed: when checked, the subfield will be hidden in the basic editor, but will display when the field label is clicked to expand all subfields.
Flagged: when checked, the subfield will be unavailable and hidden from all views (equivalent to all boxes being unchecked).
Is a URL: if checked, it means that the subfield is a URL and can be clicked.
Link: if you enter an index name here, a link appears after the subfield in the MARC detail view in the staff interface. If the librarian clicks on the link, a catalog search is done using the index and the content of the subfield.
Koha link: this field is used to create a link between the MARC subfield and a column in the items, biblioitems, and biblio database tables. The mappings can be changed from the Koha to MARC mapping page.
يمكنك ضبط قيم الخيارات أخرى التالية لكل حقل فرعي
Authorized value: means the value must be chosen from a drop-down menu generated from the authorized value list.
In the example below, the LANG authorized value category has been set to 041$a.

This creates a drop-down menu in the basic editor.
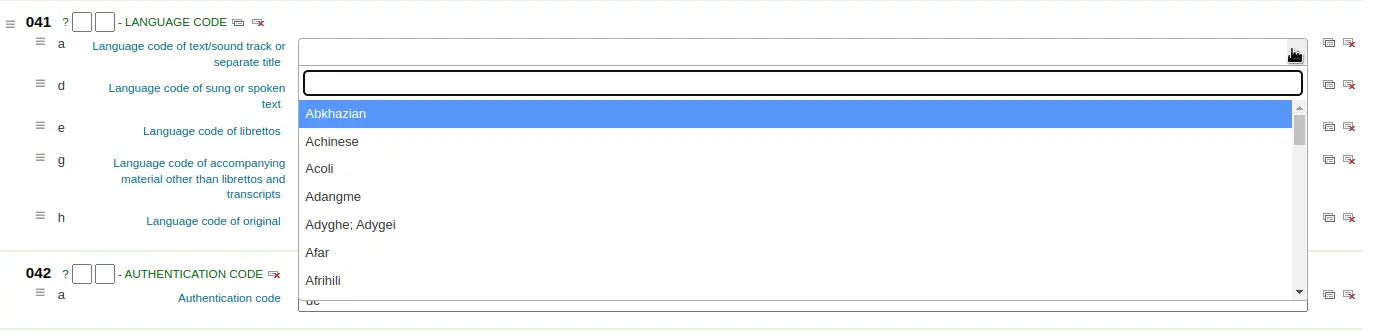
Thesaurus: means that the value is linked to the authority catalog of the selected category. Authority categories are managed in the Authority types section.
Plugin: means the value is calculated or managed by a cataloging plugin. Cataloging plugins, or value builders, can do almost anything.
أمثلة:
For call numbers there is an option to add a call number browser next to the call number subfield so that you can identify which call numbers are in use and which are not. Simply choose the cn_browser.pl plugin. Learn more in the cataloging section of this manual.
If you'd like to let file uploads via cataloging you can choose the upload.pl plugin and this will allow you to upload files to Koha to link to your records.
في UNIMARC توجد برامج إضافية لكل الحقول 1XX المرمزة. يعد البرنامج الإضافي مساعدة كبيرة للمفهرس! كما يوجد برنامجين إضافيين (unimarc_plugin_210c and unimarc_plugin_225a يمكنهما العثور على محرر من ISBN، وقائمة المجموعة للمحرر بطريقة "سحرية")
If you would like to enable an autocomplete search for publishers in 260b and 264b you can set the plugin to marc21_field_260b.pl. When you start typing in a publisher name you will be given search results based on publisher names already in the catalog.
To save your changes, click 'Save changes'.
نصيحة
You can drag and drop the subfield tabs to change the order in which they appear when cataloging with the basic editor.
By default, they will appear in alphanumeric order (0-9, then a-z).
Adding fields to frameworks
If a framework doesn't contain a field that you require, you may need to add it. To add a field to a framework click the 'New tag' button at the top of the framework definition.
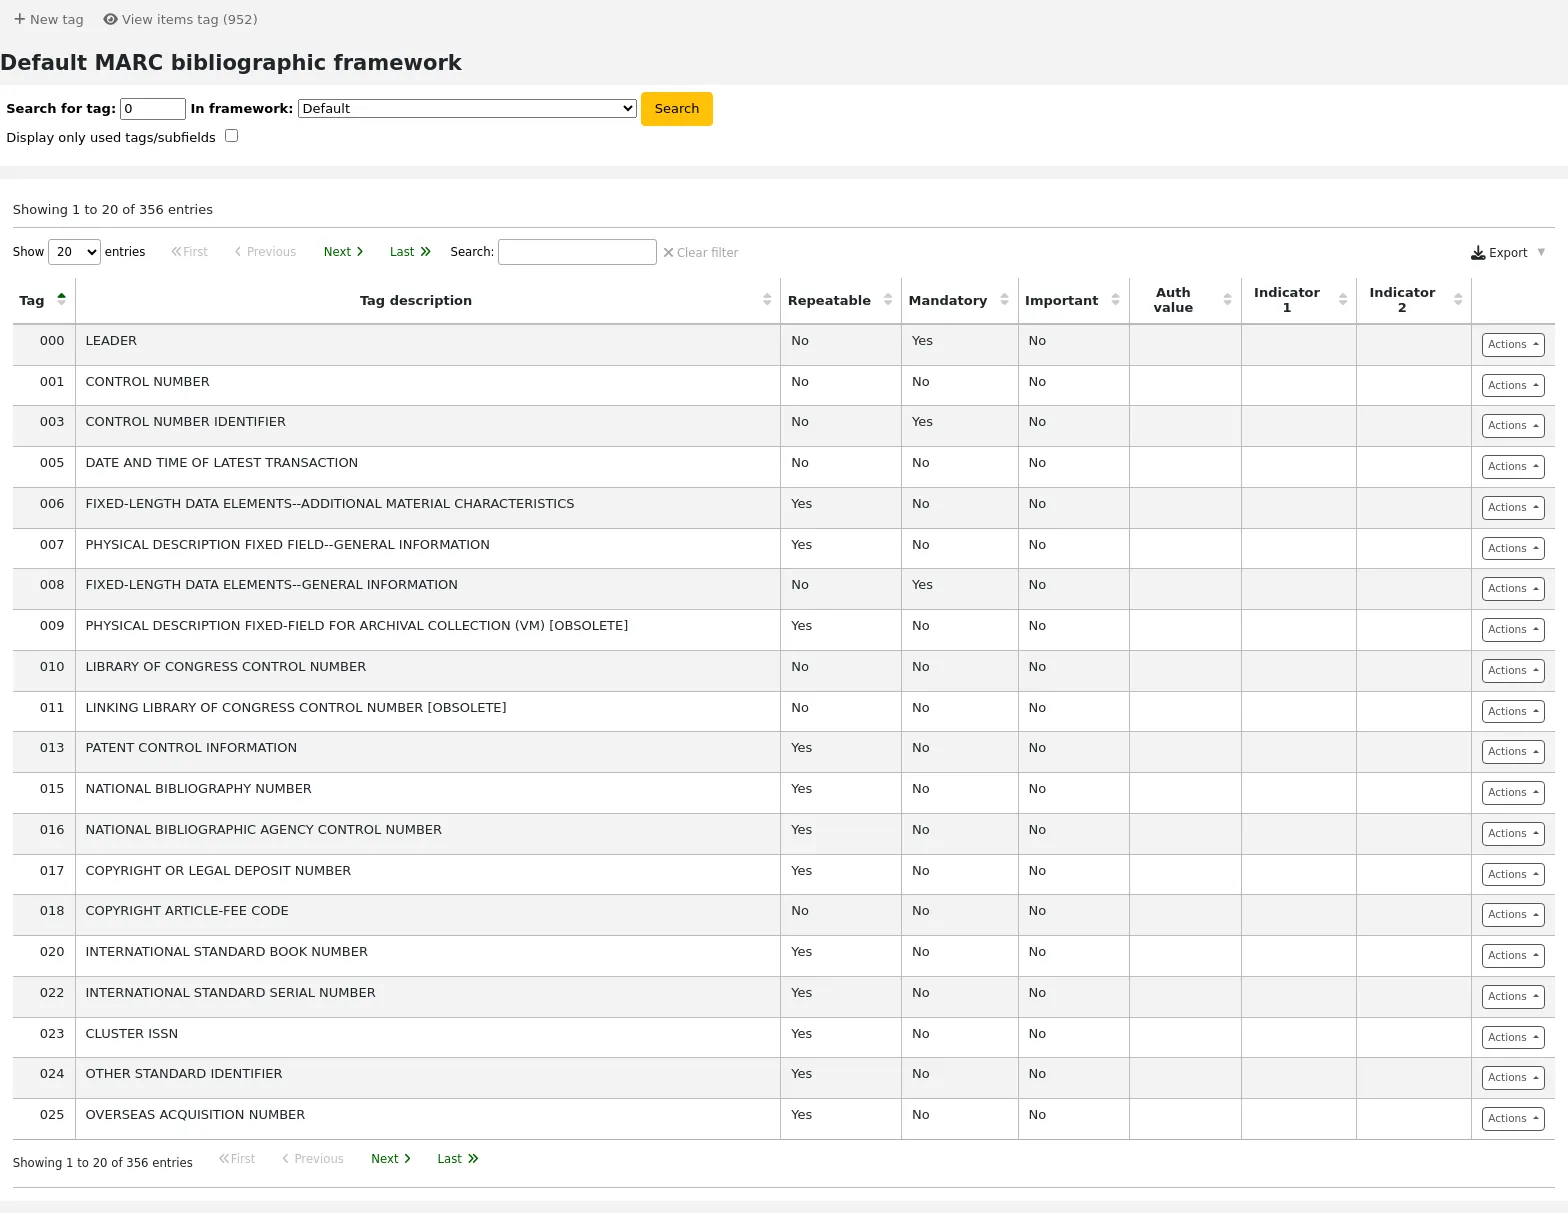
هذا سوف يفتح نموذج فارغ للإدخال بيانات حقل مارك
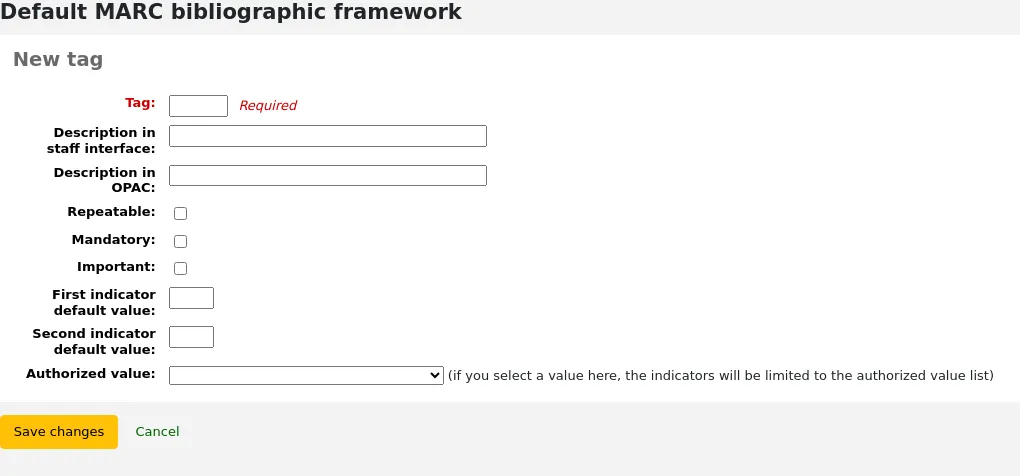
Enter the field number for your new tag. The process for entering the remainder of the settings for the new tag is the same as those found in the editing fields and subfields in frameworks section of this manual.
When you're finished, click 'Save changes' and your new tag will be displayed in the framework field list.
You will need to add at least one subfield to your new tag before it will appear in your framework when you are cataloging.
Click on the 'Actions' button for your new tag and then 'Edit subfields'. Click on the 'New' tab and enter your subfield code. The process for entering the remainder of the settings for the new subfield is the same as those found in the editing fields and subfields in frameworks section of this manual.
Importing and exporting frameworks
بجانب كل إطار يوجد رابط لاستيراد أو تصدير الإطار
تصدير الإطار
To export a framework, click the 'Export' option in the 'Actions' button to the right of the framework title.
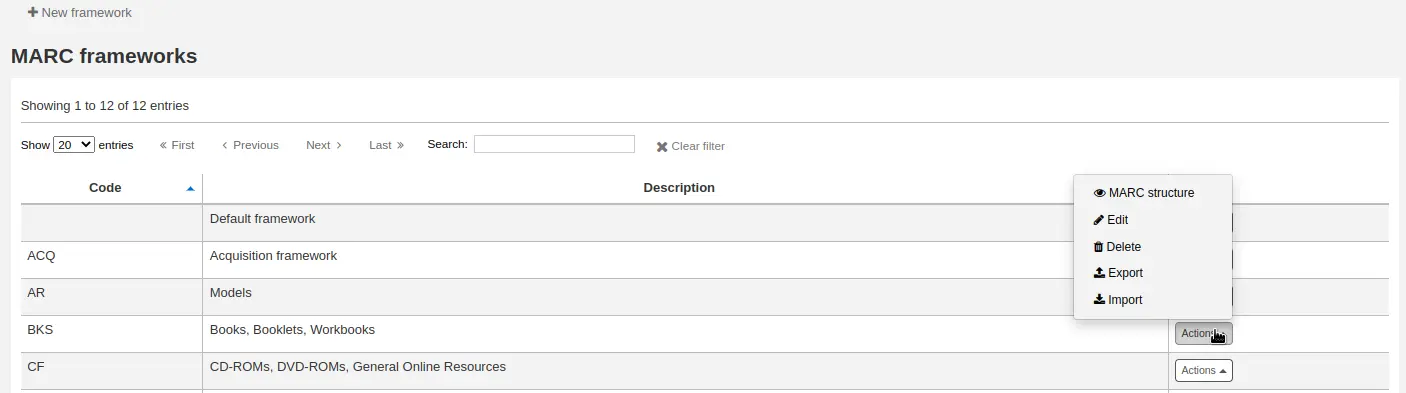
حين تقوم بالنقر على "تصدير" ستظهر لك رسالة لاختيار التصدير الذي تريد تصدير الملف به
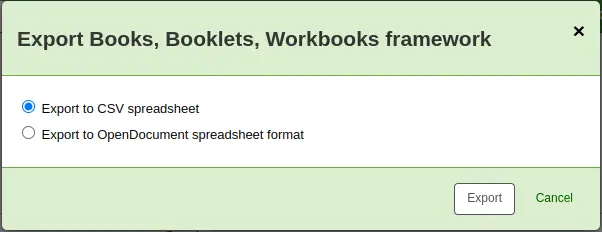
يمكن استيراد الإطار الذي تم تصديره بهذه الطريقة إلى أي من تثبيتات كوها الأخرى باستخدام خيار استيراد الإطار
استيراد الإطار
An easy way to create a new framework is to import one created for your or another Koha installation. This framework would need to be exported from the other system using the instructions above to be available for import here.
To import a framework you first need to create a new framework. Once you have that framework, click 'Actions' then 'Import' to the right of the new framework.
ستظهر لك رسالة بالعثور على ملف على حاسوبك لاستراده إلى الإطار
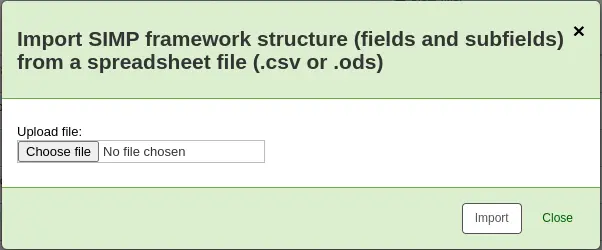
ٍسيطلب منك تأكيد إجراءاتك قبل استيراد الملف
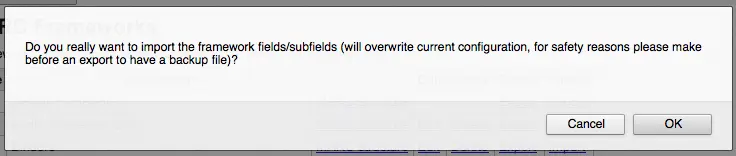
As your file is uploaded, you will see a spinning icon to indicate that the system is working.
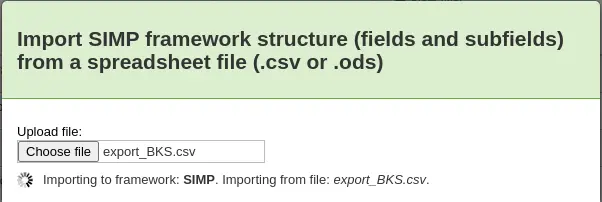
Once your import is complete you will be brought to the framework edit tool where you can make any changes you need to the framework you imported.
كوها لتعيين مارك
While Koha stores the entire MARC record, it also stores common fields for easy access in various tables in the database (mainly the items, biblioitems, and biblio tables). Koha to MARC mapping is used to tell Koha where to find these values in the MARC record. Whenever a record is added or changed, this mapping will be used to update the linked database column. The information from the database columns is used as a way to quickly look up important information without having to parse the full MARC record. It is used for displaying information in a lot of pages and can also be used in reports.
In many cases, you will not have to change the default values set at the time of the installation, but it is important to know that the tool is here and can be used at any time.
تحذير
If you change mappings after data has been added to your catalog, ask your system administrator to run misc/batchRebuildBiblioTables.pl. This will update the values in the database columns for all your records.
للوصول: المزيد > الإدارة > الفهرس > تخطيط كوها إلى مارك
ملاحظة
Only staff with the manage_marc_frameworks permission (or the superlibrarian permission) will have access to this section.
يعرض الجدول جميع حقول قاعدة البيانات التي يمكن تخطيطها إلى حقول مارك.
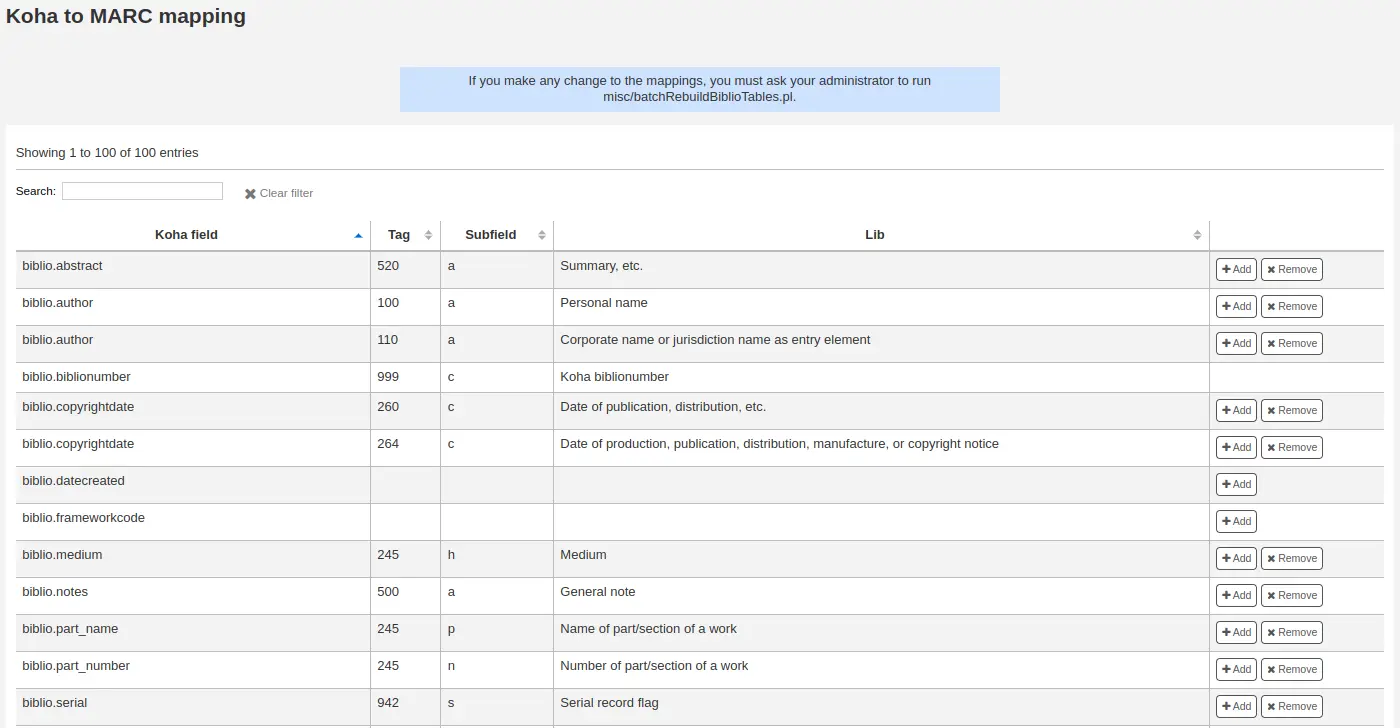
لإضافة تخطيط جديد، قم بالنقر على زر "إضافة" على يسار الحقل المناسب.
Write in the MARC field and subfield you would like to map, separated by a comma, to this Koha field (for example, "264,a") and click the 'OK' button.
ملاحظة
من الممكن ربط أكثر من حقل مارك إلى حقل قاعدة بيانات. على سبيل المثال: يمكنك ربط كلًا من 260$a و 264$a إلى حقل biblioitems.place
إذا كنت ترغب في مسح تخطيط لحقل قاعدة بيانات، قم بالنقر على زر "إزالة"
ملاحظة
All changes are immediate. Records created or edited after the change will immediately have the new mappings. However, if you want to update the mappings for records already in the catalog, ask your system administrator to run misc/batchRebuildBiblioTables.pl. This will update the values in the database columns for all your records.
اختبار إطار مارك البيبلوغرافي
The tool checks the MARC structure of bibliographic frameworks.
للوصول: المزيد > الإدارة > الفهرس > اختبار إطار مارك البيبلوغرافي
ملاحظة
Only staff with the manage_marc_frameworks permission (or the superlibrarian permission) will have access to this section.
If you change your MARC bibliographic framework, it's recommended that you run this tool to test for errors in your definition.
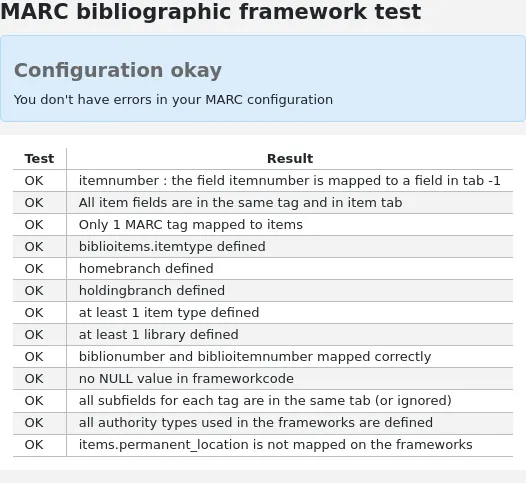
مصادر التصنيف
Source of classification or shelving scheme are mapped to field 952$2 and 942$2 in Koha's MARC bibliographic frameworks and stored in the items.cn_source and biblioitems.cn_source fields in the database.
للوصول: المزيد > الإدارة > الفهرس > مصادر التصنيف
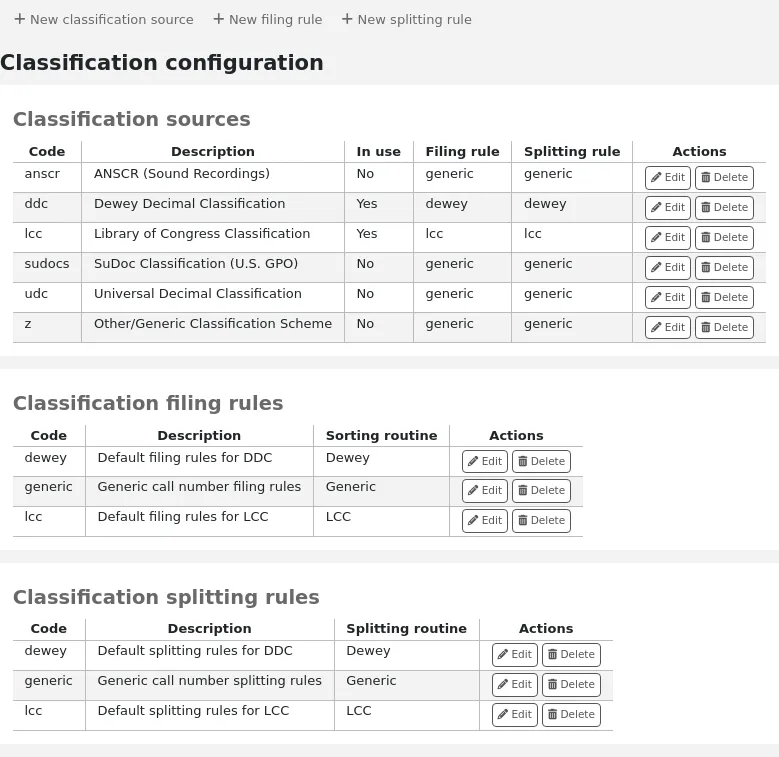
ملاحظة
Only staff with the manage_classifications permission (or the superlibrarian permission) will have access to this section.
Commonly used classification sources are:
ddc - تصنيف ديوي العشري
lcc - تصنيف مكتبة الكونغرس
اذا اخترت لتثبيت مصادر التصنيف خلال تثبيت كوها, سترى قيم أخرى أيضاً:
ANSCR (تسجيل صوتي)
تصنيف SuDOC
التصنيف العشري العالمي
آخر/التصنيف العام
إضافة/تحرير مصادر التصنيف
يمكنك إضافة مصدر التصنيف الخاص بك باستخدام زر "مصدر تصنيف جديد". وللتحرير قم باستخدام زر "تحرر".
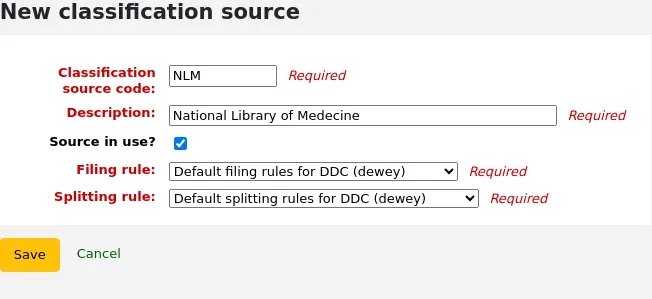
عند الإنشاء أو التحرير:
Enter a code. The code is limited to 10 characters and must be unique.
ملاحظة
The code is not editable once it has been created.
Enter a description. The description is used in the drop-down lists in the cataloging module.
Check the 'Source in use?' checkbox if you want the value to appear in the drop-down list for this category.
Select the appropriate filing rule from the drop-down list.
Select the appropriate splitting rule from the drop-down list.
التصنيف وقواعد التصنيف
Filing rules determine the order in which items are placed on shelves. Filing rules normalize call numbers in order for Koha to be able to compare them and sort them in the right order.
For example, a Dewey call number such as '636.8/07 SHAW' will become '636_800000000000000_07_SHAW' in order to be sorted.
The sorted call number is saved in the items.cn_sort or biblioitems.cn_sort fields in the database
Values that are preconfigured in Koha are:
ديوى
LCC
عام
Filing rules are mapped to Classification sources. You can setup new filing rules by using the 'New filing rule' button. To edit, use the 'Edit' button.
عند الإنشاء أو التحرير:
Enter a code. The code is limited to 10 characters and must be unique.
ملاحظة
The code is not editable once it has been created.
Enter a description. The description is used in the drop-down list when creating or editing a classification source.
اختر روتين التصنيف المناسب - ديوي ، العام أو الكونغرس
The Dewey filing routine generates a sorted call number by following these rules:
Concatenates classification and item parts.
Converts to uppercase.
Removes any leading or trailing white spaces, and forward slashes (/)
Separates alphabetic prefix from the rest of the call number
Splits into tokens on white spaces and periods.
Leaves first digit group as is.
Converts second digit group to 15-digit long group, padded on right with zeroes.
Converts each whitespace to an underscore.
Removes any remaining non-alphabetical, non-numeric, non-underscore characters.
The generic filing routine generates a sorted call number by following these rules:
Concatenates classification and item parts.
Removes any leading or trailing white spaces.
Converts each whitespace to an underscore.
Converts to uppercase.
Removes non-alphabetical, non-numeric, non-underscore characters.
The LCC filing routine generates a sorted call number by following these rules:
قواعد تقسيم التصنيف
Splitting rules determine how call numbers are split when printed on a spine label.
ملاحظة
Splitting rules are only used if your label layout specifies to split call numbers.
For example, a Dewey call number such as '636.8/07 SHAW' will become
636.807
SHAW
once printed on a spine label.
Values that are preconfigured in Koha are:
ديوى
LCC
عام
Splitting rules are mapped to Classification sources. You can setup new splitting rules by using the 'New splitting rule' button. To edit, use the 'Edit' button.
عند الإنشاء أو التحرير:
Enter a code. The code is limited to 10 characters and must be unique.
ملاحظة
The code is not editable once it has been created.
Enter a description. The description is used in the drop-down list when creating or editing a classification source.
Choose an appropriate splitting routine - Dewey, Generic, LCC or RegEx
The Dewey splitting routine looks for the three digits and the decimal, puts it on one line with the other parts (Cutter, prefix, etc.) each on a separate line (generally split on spaces).
The Generic splitting routine splits on spaces.
The LCC splitting routine puts each component on a separate line.
The RegEx splitting routine allows you to create a custom splitting routine.
Some examples of RegEx splitting routines:
Split on spaces:
s/\s/\n/g
Split on equal signs (=):
s/(\s?=)/\n=/g
Split on forward slashes (/):
s/(\s?\/)/\n/g
Remove first split if call number starts with J or K:
s/^(J|K)\n/$1 /
Cut after 9 characters:
s/(^.{9})/$1\n/
It is possible to mix and match RegEx splitting routines by clicking the 'New' link just under the RegEx input box.
For example, if you want to cut after nine characters AND split on spaces, you can write both and the call number '971.42805092 C669r' will be split
971.42805
092
C669r
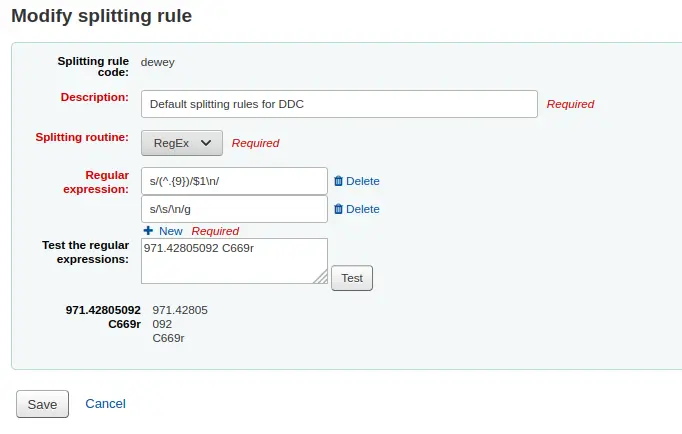
قواعد مضاهاة التسجيلة
قواعد مضاهاة التسجيلة تستخدم عندما يتم استيراد تسجيلات مارك إلى كوها
للوصول: المزيد > الإدارة > الفهرس > قواعد مضاهاة التسجيلة
ملاحظة
Only staff with the manage_matching_rules permission (or the superlibrarian permission) will have access to this section.
The rules that you set up here will be referenced with you Stage MARC records for import.
It is important to understand the difference between 'Match points' and 'Match checks' before adding new matching rules to Koha.
Match points are the criteria that you enter that must be met in order for an incoming record to match an existing MARC record in your catalog. You can have multiple match points on an import rule each with its own score. An incoming record will be compared against your existing records ('one record at a time') and given a score for each match point. When the total score of the match points matches or exceeds the threshold given for the matching rule, Koha assumes a good match and imports/overlays according your specifications in the import process. An area to watch out for here is the sum of the match points. Double check that the matches you want will add up to a successful match.
مثال:
حد المطابقة: 100
نقطة المضاهاة في 020$a 1000
نقطة المضاهاة في 022$a 1000
نقطة المضاهاة في 245$a 500
نقطة المضاهاة في 100$a 100
In the example above, a match on either the 020$a or the 022$a will result in a successful match. A match on 245$a title and 100$a author (and not on 020$a or 022$a) will only add up to 600 and not be a match. And a match on 020$a and 245$a will result in 1500 and while this is a successful match, the extra 500 point for the 245$a title match are superfluous. The incoming record successfully matched on the 020$a without the need for the 245$a match. However, if you assigned a score of 500 to the 100$a Match Point, a match on 245$a title and 100$a author will be considered a successful match (total of 1000) even if the 020$a is not a match.
Match checks are not commonly used in import rules. However, they can serve a couple of purposes in matching records. First, match checks can be used as the matching criteria instead of the match points if your indexes are stale and out of date. The match checks go right for the data instead of relying on the data in the indexes. (If you fear your indexes are out of date, a rebuild of your indexes would be a great idea and solve that situation!) The other use for a match check is as a 'double check' or 'veto' of your matching rule. For example, if you have a matching rule as below:
حد المطابقة: 100
نقطة المضاهاة في 020$a 1000
فحص المضاهاة في 245$a
Koha will first look at the 020$a tag/subfield to see if the incoming record matches an existing record. If it does, it will then move on to the Match Check and look directly at the 245$a value in the incoming data and compare it to the 245$a in the existing 'matched' record in your catalog. If the 245$a matches, Koha continues on as if a match was successful. If the 245$a does not match, then Koha concludes that the two records are not a match after all. The Match Checks can be a really useful tool in confirming true matches.
عندما تقوم بإنشاء قواعد مضاهاة لتسجيلات الاستناد الخاصة بك، سوف تفيدك الفهارس التالية:
اسم الفهرس |
يطابق وسم مارك |
|---|---|
LC-cardnumber |
010$a |
الأسم الشخصي |
100$a |
رأس-اسم-الشركة |
110$a |
اسم-اللقاء |
111$a |
العنوان الموحد |
130$a |
فترة-زمنية |
148$a |
الموضوع-موضوعي |
150$a |
اسم-جغرافي |
151$a |
مصطلح-نوع-تنسيق |
155$a |
جدول: فهارس الاستناد
إضافة قواعد مضاهاة
لإنشاء قاعدة مطابقة جديدة :
انقر 'قاعدة مطابقة تسجيلة جديدة'
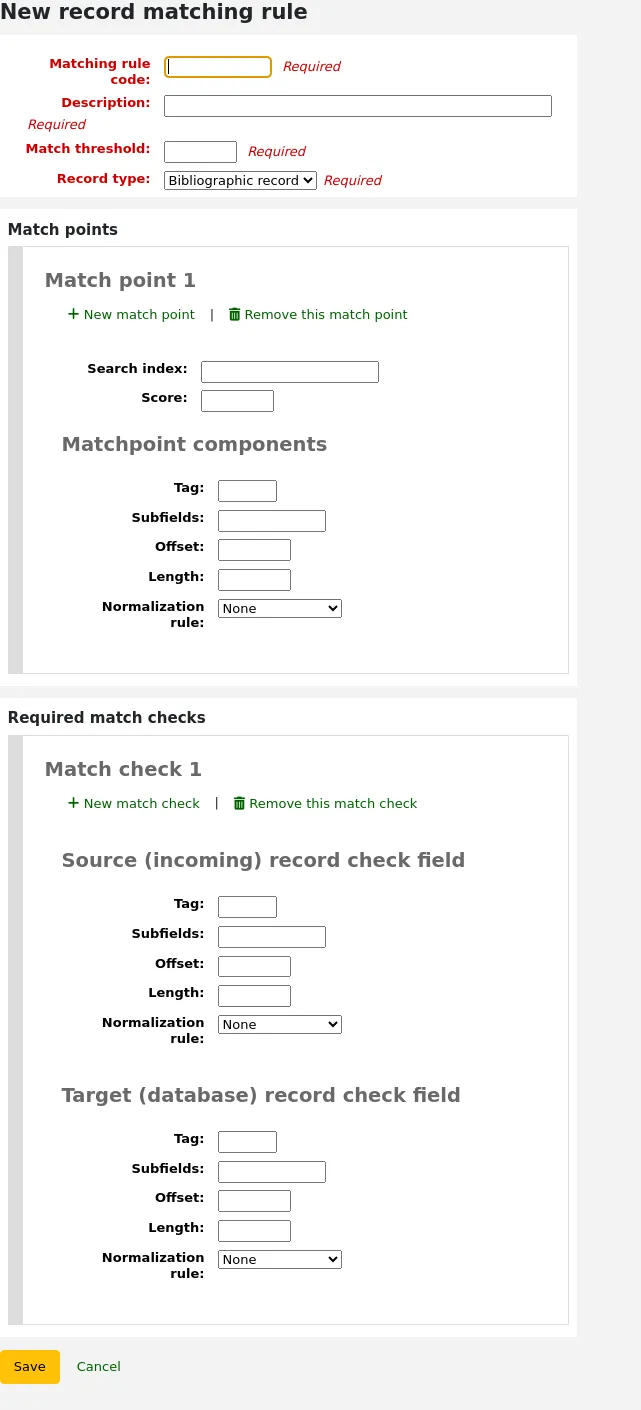
اختر اسم فريد و إدخاله في 'رمز حكم المطابقة' حقل
'الوصف' من الممكن أن يكون أي شيء تريد أن تجعله واضحاً بالنسبة لك عن قواعد التي قمتَ باختيارها
'حد المطابقة' - مجموع 'النقاط' التي يجب على التسجيلة أن تكسبها لكي تُعتَبر 'مطابقة'
"نوع التسجيلة" هو نوع الاستيراد الذي سوف تستخدم هذه القاعدة له - إما استنادي أو بيبلوغرافي
نقاط المطابقة يتم ضبطها لتحديد ما هي الحقول التي ستتم المطابقة عليها
'Search index' can be found by looking at the index configuration on your system. For Zebra you might find the right index names in your ccl.properties file. You can also find useful information in the Koha search indexes chapter of this manual.
'Score' - The number of 'points' a match on this field is worth. If the sum of each score is equal or greater than the match threshold, the incoming record is a match to the existing record.
Enter the MARC tag you want to match on in the 'Tag' field.
Enter the MARC tag subfield you want to match on in the 'Subfields' field. For matching on controlfields like 001 the subfields input field can be left empty.
'الأوفست'- للاستخدام مع حقول التحكم, 001-009
'الطول' للاستخدام مع الحقول المضبوطة ، 001-009
There are currently several options for 'Normalization rules':
None - no normalization rule will be applied
Remove spaces
Uppercase
Lowercase
Legacy default - this option was added to maintain the behavior form before the other normalization rules became available.
ISBN - using this option will improve matching on ISBN. If your incoming records ISBN fields contain extra text, like '9780670026623 (alk. paper)', they will still match correctly.
'Required match checks' - While match points work on the search index, match checks work directly on the data and can be used as the matching criteria instead of the match points or in addition to them to confirm true matches.
عينة قاعدة مضاهاة التسجيلة البيبلوغرافية: رقم التحكم
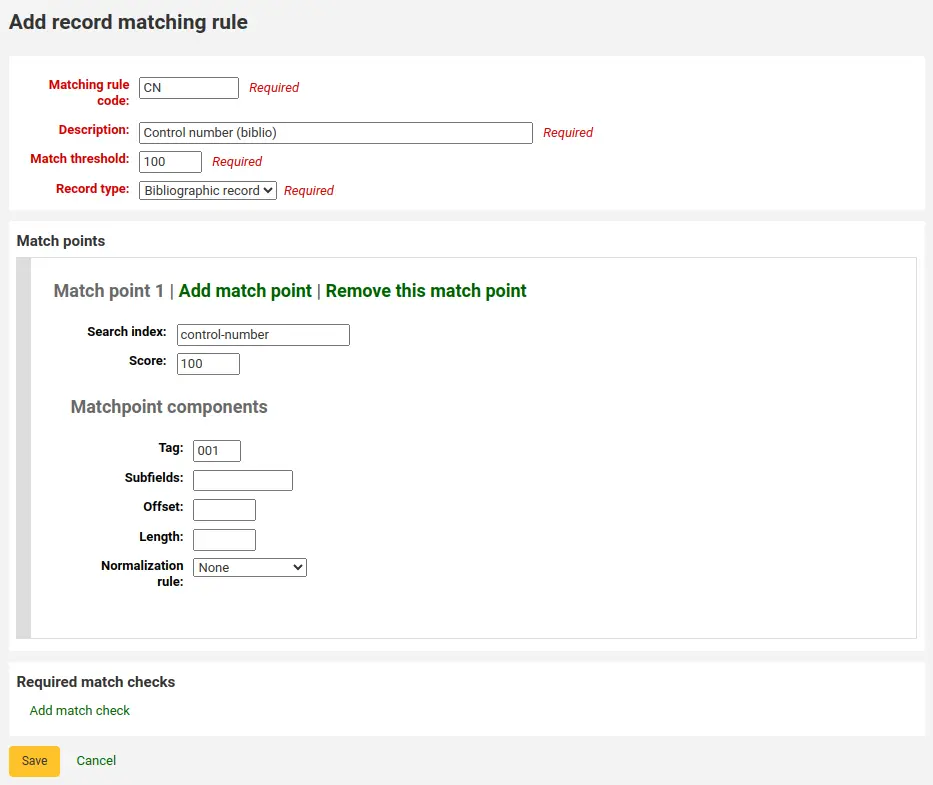
حد المطابقة: 100
Record type: Bibliographic record
ملاحظة
In order to match on the 001 in authority records, you will need to create a second rule, repeating all of these values and change just the record type to 'Authority record'.
نقاط المطابقة( فقط الأولى) :
Search index: control-number
Score: 100
وسم: 001
ملاحظة
In MARC21, this field is for the control number assigned by the organization creating, using, or distributing the record.
Subfields: empty
Offset: 0 or empty
Length: 0 or empty
Normalization rule: None
Required match checks: none (click 'Remove this match check')
Record sources
Version
This section was added to Koha in version 24.05.
Record sources are used to indicate where records come from and optionally prevent records from specific sources to be edited in Koha.
This is particularly useful in instances where records are cataloged in another system and pushed to Koha. Sometimes, in those cases, it's best to edit the records in the source system rather than in Koha.
ملاحظة
Only staff with the manage_record_sources permission (or the superlibrarian permission) will have access to this section.
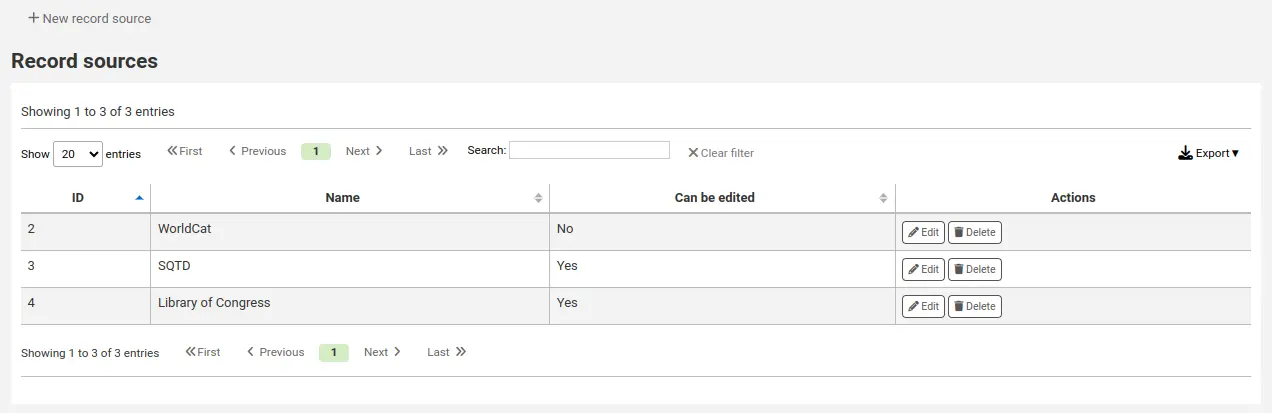
Adding a record source
To add a record source,
Click 'New record source'
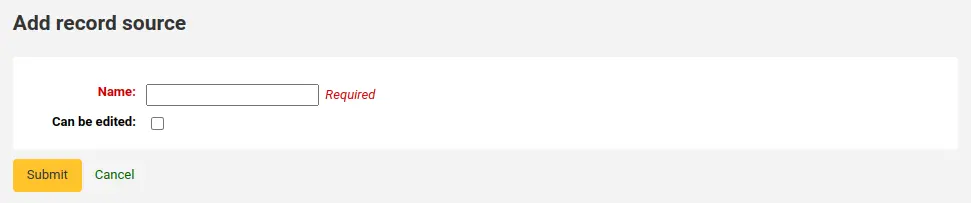
Fill out the form
Name: enter the name of the source
Can be edited: if this box is checked, records from this source will be editable in Koha. If it is not checked, only staff members with the edit_locked_records permission will be able to edit the records.
اضغط 'إرسال'
Editing a record source
To edit a record source, click the 'Edit' button next to the source.
Deleting a record source
To delete a record source, click the 'Delete' button next to the source and confirm.
Record overlay rules
Record overlay rules allow for defining rules for how incoming and original MARC records should be merged on a field tag and context basis when a MARC record is updated.
ملاحظة
Only staff with the manage_marc_overlay_rules permission (or the superlibrarian permission) will have access to this section.
Contexts
Let's first focus on understanding the concept of contexts.
Contexts are defined by "module" and "filter" enabling separate rule sets for different contexts.
By setting different filter values for these modules, rules are applied only when the filter value matches for a particular module. A wildcard; "*", can be used to match all possible filter values.
There are three different context modules:
- borrower
Allows for defining rules that will be applied if the currently logged in user's borrowernumber matches the filter condition.
- categorycode
Allows for defining rules that will be applied if the currently logged in users's category code matches the filter condition.
- source
Allows for defining rules that will be applied if the record is updated in a particular part of Koha. The following update methods are supported:
batchimport
z39.50
intranet
bulkmarcimport
import_lexile
batchmod
A context is really nothing but a module and filter combination. Every time a record is updated i Koha, a context is set an filter values populated with context dependent values.
Examples of two different contexts are saving record in the staff client or the currently logged in user having a particular borrowernumber, for example "12".
These two contexts are define as:
Module: source, filter: intranet
Module: borrower, filter: 12
Only the rules of one context, that is a module and filter combination, are applied. If multiple contexts matches they are not merged together.
If we have the following rules:
Module: source, filter: *, tag: 650, preset: Protect
Module: source, filter: *, tag: 500, preset: Protect
Module: borrower, filter: 12, tag: *, preset: Overwrite
And the context of the update where the rules are applied is:
source => "intranet" (wildcard match)
borrower => 1 (no match)
Only the first two rules will be applied.
If instead the context of rule evaluation was:
source => "intranet" (wildcard match)
borrower => 12 (an exact match, which is considered more specific than a wildcard match)
Only the second rule would be applied, even though the first two rules also matches they will be discarded since the context match of that rule set is of lower specificity because of the wildcard.
Context specificity is ranked in the following way:
First all the rules are grouped into rule sets identified by a unique filter and module combination.
If one or more contexts have a non wildcard filter condition match, the rule set of the context with the module of highest specificity is selected. (The modules are listed in order of specificity above).
If no exact context match is found, but one or more wildcard matches are, the rule set of the context with the module of highest specificity is selected.
If no context matches the default behavior is to overwrite, the original record with the incoming record.
Rules
A rule consists of a three different parts:
- Context
A module and filter to match against as described above.
- Tag
A field tag expression for defining which tag(s) the rule should be applied on. Three different tag expressions are supported:
An exact tag, for example "650".
A regular expression, for example "6.." matching all 6XX tags.
A wildcard, "*", matching all tags
When rules for a specific context are evaluated, the most specific match is selected. The tag expressions above are listed in order of specificity.
- Actions
Each rule defines a set of actions to take depending on the type of update. There are four types of update events: Added, Appended, Removed and Deleted. For each event an action is specified, whether to perform the update, or to skip it.
By enabling/disabling updates for these different events 16 different update behaviors can be defined. There are presets available for the most common/useful combinations:
Preset |
Added |
Appended |
Removed |
Deleted |
|---|---|---|---|---|
Protect |
Skip |
Skip |
Skip |
Skip |
Overwrite |
Add |
Append |
Remove |
Delete |
Add new |
Add |
Skip |
Skip |
Skip |
Add and append |
Add |
Append |
Skip |
Skip |
Protect from deletion |
Add |
Append |
Remove |
Delete |
Protect
Added: Skip, Appended: Skip, Removed: Skip, Deleted: Skip
The "Protect" preset will prevent all updates on matching fields, protecting them from being overwritten.
Given this rule:
Module: source, filter: *, Tag: 650, Preset: Protect
And the following original and incoming records:
100 1#$aTerrace, Vincent,$d1948-
650 #0$aTelevision serials$zUnited States$vCatalogs.
100 1#$aTerrace, Vincent,$d1948-
500 ##$aIncludes index.
650 #0$aTelevision pilot programs$zUnited States$vCatalogs.
The 650 field of the original record will retain its original value after the update (but since the default behavior if no rule matches is to overwrite, the 500 field will be added):
100 1#$aTerrace, Vincent,$d1948-
500 ##$aIncludes index.
650 #0$aTelevision serials$zUnited States$vCatalogs.
Overwrite
Added: Add, Appended: Append, Removed: Remove, Deleted: Delete
The "Overwrite" preset will allow all updates on matching fields.
Since the default behavior is to overwrite if no rule matches, adding a rule with the overwrite preset only makes sense if there is some other rule with a lower tag specificity with a different behavior, for example a wildcard tag rule.
So given these two rules:
Module: source, filter: *, Tag: *, Preset: Protect
Module: source, filter: *, Tag: 650, Preset: Overwrite
And the following original and incoming records:
500 ##$aIncludes index.
650 #0$aTelevision serials$zUnited States$vCatalogs.
Incoming record:
100 1#$aTerrace, Vincent,$d1948-
500 ##$aIncludes index.
650 #0$aTelevision pilot programs$zUnited States$vCatalogs.
All fields but 650 will be protected on the original record, and the resulting record will be:
500 ##$aIncludes index.
650 #0$aTelevision pilot programs$zUnited States$vCatalogs.
Add new
Added: Add, Appended: Skip, Removed: Skip, Deleted: Skip
The "Add new" allow updates only if the incoming field is new, that is there exists no fields with this tag in the original record.
Given this rule:
Module: source, filter: *, Tag: 650, Preset: Add
And the following original and incoming records:
100 1#$aTerrace, Vincent,$d1948-
650 #0$aTelevision serials$zUnited States$vCatalogs.
100 1#$aTerrace, Vincent,$d1948-
500 ##$aIncludes index.
650 #0$aTelevision pilot programs$zUnited States$vCatalogs.
The 650 in the incoming record will not overwrite the 650 field in the original record since the original record contains one or more 650 fields. The 500 field will be added since the default rule is to overwrite. The resulting record will be:
100 1#$aTerrace, Vincent,$d1948-
500 ##$aIncludes index.
650 #0$aTelevision serials$zUnited States$vCatalogs.
On the other hand, if the original record was:
100 1#$aTerrace, Vincent,$d1948-
The resulting record will be:
100 1#$aTerrace, Vincent,$d1948-
500 ##$aIncludes index.
650 #0$aTelevision pilot programs$zUnited States$vCatalogs.
This is because there were no 650 fields in the original record, so adding new ones is permitted.
Add and append
Added: Add, Appended: Append, Removed: Skip, Deleted: Skip
In the "Add and append" preset, appending is also permitted, but not removing or deleting.
So if we have the following rule:
Module: source, filter: *, Tag: 650, Preset: Add and append
And the following original and incoming records:
100 1#$aTerrace, Vincent,$d1948-
650 #0$aTelevision serials$zUnited States$vCatalogs.
100 1#$aTerrace, Vincent,$d1948-
500 ##$aIncludes index.
650 #0$aTelevision pilot programs$zUnited States$vCatalogs.
The resulting record will be:
100 1#$aTerrace, Vincent,$d1948-
500 ##$aIncludes index.
650 #0$aTelevision serials$zUnited States$vCatalogs.
650 #0$aTelevision pilot programs$zUnited States$vCatalogs.
Note that the "old" 650 field from the original record was not removed since we only allow adding or appending new values.
If we instead used the "Overwrite" preset the resulting record would instead be:
100 1#$aTerrace, Vincent,$d1948-
500 ##$aIncludes index.
650 #0$aTelevision pilot programs$zUnited States$vCatalogs.
with the 650 field of the original record removed.
Protect from deletion
Added: Add, Appended: Append, Removed: Remove, Deleted: Skip
The preset "Protect from deletion" will allow all update operations except deletion. Deletion is defined as when there are no fields of the matching tag in the incoming record so that all of the fields with this tag would be removed on the original record.
So given the following rule:
Module: source, filter: *, Tag: 650, Preset: Protect from deletion
And the following original and incoming records:
100 1#$aTerrace, Vincent,$d1948-
650 #0$aTelevision serials$zUnited States$vCatalogs.
100 1#$aTerrace, Vincent,$d1948-
500 ##$aIncludes index.
650 #0$aTelevision pilot programs$zUnited States$vCatalogs.
The resulting record will be:
100 1#$aTerrace, Vincent,$d1948-
500 ##$aIncludes index.
650 #0$aTelevision pilot programs$zUnited States$vCatalogs.
On the other hand, if the incoming record was:
100 1#$aTerrace, Vincent,$d1948-
500 ##$aIncludes index.
In this case the deletion of 650 would not be permitted and the value of the field on the original record would be protected. The resulting record would instead be:
100 1#$aTerrace, Vincent,$d1948-
500 ##$aIncludes index.
650 #0$aTelevision serials$zUnited States$vCatalogs.
Custom presets
To work with custom presets, a more complete understanding of the update events is required:
- Added
For a matching rule with a tag, the action configured for the "Added" event is applied for new fields in the incoming record if the original record has no fields with that tag. If the action is "Add" they will be added to the original record, if "Skip" they will be thrown away.
- Appended
If the two record have common fields with the rule tag, that is one or more fields with identical subfield and identifier values, the action configured for the "Appended" event is applied for fields found in incoming record but not in original record. If the action is "Append" they will be added to the original record, if "Skip" they will be thrown away.
- Removed
If the two records have common fields with the rule tag, the action configured for the "Removed" action is applied for fields found in original record but not in incoming record. If the action is "Remove" they will removed from the original record, if "Skip" they will be kept.
- Deleted
If the original record have fields with the rule tag, but no fields with this tag is found in the incoming record, the action configured for the "Deleted" event is applied for the fields in the incoming record. If the action is "Delete" the fields will be removed from the original record, if "Skip" they will be kept.
تكوين مجموعات OAI
في هذه الصفحة بإمكانك إنشاء ، تعديل وحذف مجموعات OAI-PMH
ملاحظة
Only staff with the manage_oai_sets permission (or the superlibrarian permission) will have access to this section.
أنشئ مجموعة
لانشاء مجموعة:
النقر على رابط 'إضافة ضبط جديد'
ملء الحقول الإجبارية 'setSpec' و 'setName'
ثم يمكنك إضافة الأوصاف لهذه المجموعة. للقيام بذلك، انقر على 'أضف وصف ' واملء مربع النص الذي تم إنشاؤه حديثا. يمكنك إضافة أوصاف كما تشاء.
اضغط على 'زر'حفظ'
Modify/delete a set
لتعديل المجموعة، فقط أنقر على وصلة 'عدل' على نفس السطرمن المجموعة التي تود تعديلها. حيث سيُعرض لك نموذج مشابه لنموذج إنشاء المجموعة ، سيتيح لك تعديل setSpec، setName والمواصفات.
لحذف مجموعة، فقط انقر على الرابط 'حذف' على نفس السطر من المجموعة التي تريد حذفها.
تعريف مخططات
Here you can define how a set will be build (what records will belong to this set) by defining mappings. Mappings are a list of conditions on record content.
املئ الحقول 'حقل', 'حقل فرعي' و'قيمة'. مثال اذا كنت تريد أن تُدرج في هذه المجموعة كل التسجيلات التي تمتلك 999$9 مساوي إلى 'XXX'. املئ 'حقل' مع 999, 'حقل فرعي' مع 9 و 'قيمة' مع XXX.
If you want to add another condition, click on 'Add' button and repeat step 1. You can choose between 'and' or 'or' Boolean operators to link your conditions.
اضغط على 'حفظ'
لحذف شرط، فقط اترك واحد على الأقل من 'حقل'،'حقل فرعي' أو 'قيمة' فارغة وانقر على 'حفظ'.
ملاحظة
يكون الشرط صحيحاً في حال كانت القيمة في الحقل الفرعي المطابق تتساوى بدقة لما قمتَ بتحديده في القيمة. فتسجيلة بالقيم 999$9 = 'XXX YYY' لن تنتمي إلى ضبطك الذي شرطه هو 999$9 = 'XXX'.
وهي حساسة لحالة الحروف: فالتسجيلة التي تحوي 999$9 = 'xxx' لن ينتمي إلى المجموعة حيث الشرط هو 999$9 = 'XXX'.
بناء مجموعة
بمجرد تهيئة جميع الحزم، يجب عليك بناء الحزم. ويتم ذلك عن طريق استدعاء النص misc/migration_tools/build_oai_sets.pl.
حقول بحث المواد
Get there: More > Administration > Catalog > Item search fields
This section allows you to add custom search fields to the item search option in the staff interface.
ملاحظة
Only staff with the manage_item_search_fields permission (or the superlibrarian permission) will have access to this section.
Adding a custom item search field
To add a new search field, click the 'New search field' button.

Name: enter the search field's name
Label: enter the label of the search field as it will appear on the item search page
MARC field: enter the MARC field number to search in; the MARC field will also appear on the item search page
MARC subfield: enter the MARC subfield code to search in
Authorized value category: if needed, choose an authorized value category for this search field; this will effectively turn this search field in a dropdown menu instead of a free text field
Click 'Submit'.
Once the new field is added, it will be visible on the item search page, in the dropdown that starts with 'Barcode'.
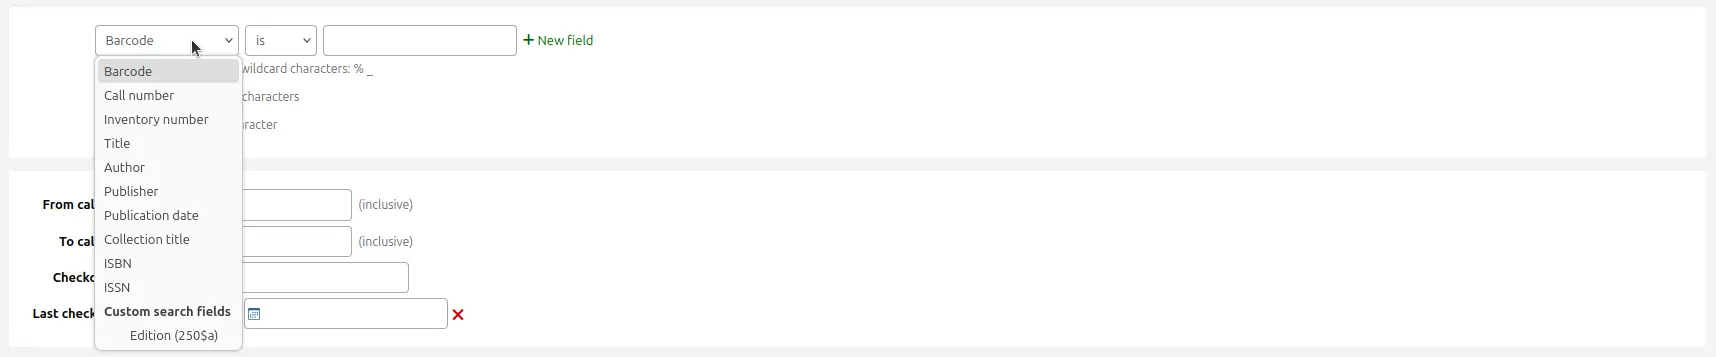
Editing a custom item search field
To edit an item search field, click the 'Edit' button next to the search field in the table.
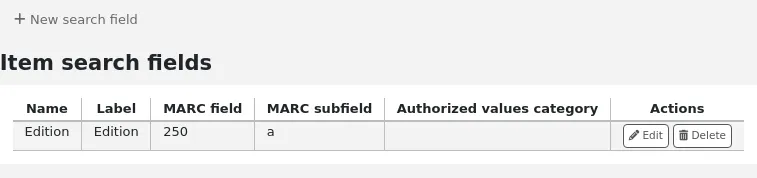
Make the changes and click 'Submit'.
Deleting a custom item search field
To delete an item search field, click the 'Delete' button next to the search field in the table and confirm the deletion.
Search filters
Search filters are custom searches or filters that can be applied to search results.
This functionality is enabled on using the SavedSearchFilters system preference.
ملاحظة
This section will only be visible if the SavedSearchFilters system preference is enabled.
ملاحظة
Only staff with the manage_search_filters permission (or the superlibrarian permission) will have access to this section.
Search filters are added by searching the catalog through the staff interface.
This page is used to manage existing search filters.

You can make changes to each search filter by clicking on the action buttons on the right.
Edit filter: change the name of the filter, and its availability in the OPAC or staff interface
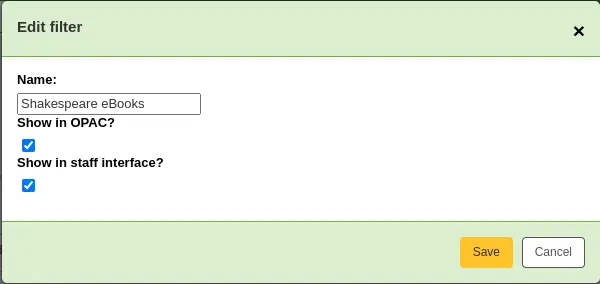
Edit search: clicking this button will bring you to the advanced search form, with the filter already applied. You can change the search parameters, and click 'Save filter' at the top of the page.
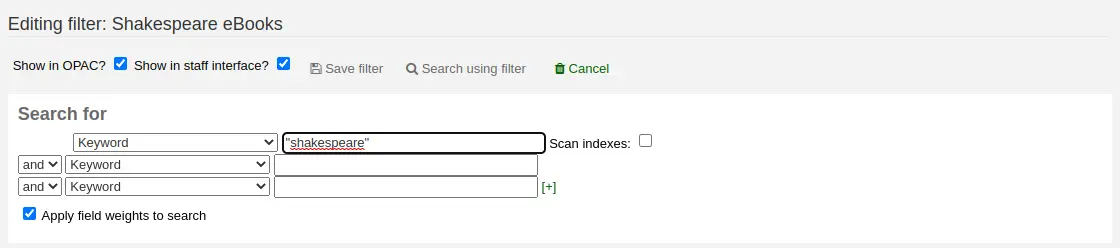
Delete: clicking this button will delete the filter.
تحذير
There is no confirmation when deleting a search filter. Once you click 'Delete', the filter will be deleted immediately.
ملاحظة
Search filters can be used as predefined search URLs that you can use on your website or in HTML customizations.
Search filters are available through relatively short links.
<OPACBaseURL>/cgi-bin/koha/opac-search.pl?limit=search_filter:<Id of filter>
Use this URL anywhere to link directly to the search.
تهيئة محرك البحث
Once you have switched to Elasticsearch in your SearchEngine system preference, you’ll see a new link for Search engine configuration in the Catalog section of Administration. Here you will manage indexes, facets, and their mappings to MARC fields and subfields.
ملاحظة
Only staff with the manage_search_engine_config permission (or the superlibrarian permission) will have access to this section.
The page is separated in three tabs: search fields, bibliographic records, and authority records.
مهم
If you change anything in this page, you need to completely reindex your records, otherwise, only records added or edited after the change will be affected.
خطر
Any change done through the interface will be lost if you click on
'Reset mappings' or if the rebuild command is run with the --reset
or -r parameter. The 'Reset mappings' button and the --reset
parameter reset the settings to the defaults.
Search fields
The search fields tab in the search engine configuration page show all the search fields used by Elasticsearch in Koha.
The table shows:
Name: the name of the search field, as defined in the mappings file.
Aliases: some fields have aliases, for example, "author" can also be "au". These are hard-coded and cannot be changed.
Label: some fields have labels that are different from their name. These are used as the facet header when the field is used as a facet.
Type: the type influences how the data is stored and how it is searched.
Boolean: a 0 / 1 (no / yes) value.
Call Number: a call number influenced by the classification source.
Date: a date stored in ISO format.
Geo point: a geographic latitude and longitude value.
Version
The Geo point type was added to Koha in version 24.05.
ISBN: ISBN standard number.
Number: a number.
Std. Number: a number.
String: a simple string of characters.
Sum: a sum of values.
Year: a four-digit year number.
Weight: a positive numerical value assigned to that search field to make it more "important" in a simple search. The higher the value, the more "important" this field is in the relevancy sorting.
ملاحظة
Weighted search only works for bibliographic search, not authority search. It also only works for the simple search, unless the 'Apply field weights to search' option in the advanced search is selected.
Searchable: whether this field is used in the staff interface or the OPAC.
Adding search fields
Version
The possibility of adding search fields was added to Koha in version 24.05.
It is possible to add search fields from this table. Add the search field information in the last row of the table, and click the 'Add' button at the end of the row.
Deleting search fields
Version
The possibility of deleting added search fields was added to Koha in version 24.05.
It is possible to delete search fields that were added manually. The default search fields cannot be deleted because they are necessary for Koha to work properly.
To delete a search field, click the 'Delete' button at the end of the row.
Bibliographic records
The bibliographic records tab in the search engine configuration page shows the MARC mappings for each search field used by Elasticsearch in Koha.
ملاحظة
The default mappings are described in the Elasticsearch indexes section of the Searching chapter.
The table shows:
Search field: the corresponding search field (as defined in the search fields tab). Search fields can be repeated to include several MARC fields.
Sortable: indicates whether this mapping should be used in the sorting for this search field. For example, in MARC21, the title index has several different title fields, but only the 245 field is used for sorting.
Facetable: indicates whether this mapping can be used in the facets.
Version
Facet configuration was added to Koha in version 24.05.
Suggestible: indicates whether this mapping is used in the browse search.
Searchable: indicates whether this mapping is used for searching.
Filter: the type influences the way values are indexed.
Punctuation: removes punctuation.
None: values are indexed as they are.
Version
Filters were added to Koha in version 23.11.
Mapping: indicates the MARC field mapped to that search field.
ملاحظة
Mappings can include whole fields or only specific subfields. In the case of subfields, they can be indexed individually or as a single value.
For example:
520will index all the contents of the 520 field. Each subfield in the field will be indexed individually.100awill index only the contents of 100$a.020azwill index only the contents of subfields $a and $z of field 020. They will be indexed individually.245(abp)will index only the contents of subfields $a, $b and $p of field 245. They will be indexed as one entry.
For fixed-length fields, the syntax is as follows :
leader_/6will index position 6 of the leader (000).007_/0will index position 0 of field 007.008_/39will index position 39 of field 008.008_/15-17will index positions 15 to 17 of field 008, as one entity.
Adding mappings
To add a mapping, add the information in the last row of the table and click the 'Add' button at the end of the row.
مهم
Remember that if you change anything in this page, you need to completely reindex your records, otherwise, only records added or edited after the change will be affected.
خطر
Any change done through the interface will be lost if you click on
'Reset mappings' or if the rebuild command is run with the --reset
or -r parameter. The 'Reset mappings' button and the --reset
parameter reset the settings to the defaults.
Deleting mappings
To delete a mapping, click the 'Delete' button at the end of the row.
Some mappings are necessary for Koha to function properly and cannot be deleted.
مهم
Remember that if you change anything in this page, you need to completely reindex your records, otherwise, only records added or edited after the change will be affected.
خطر
Any change done through the interface will be lost if you click on
'Reset mappings' or if the rebuild command is run with the --reset
or -r parameter. The 'Reset mappings' button and the --reset
parameter reset the settings to the defaults.
Facet order
This section allows you to customize the facets, as displayed in the search results in the OPAC and staff interface.
Search field: the corresponding search field (as defined in the search fields tab).
Label: the search field's label (as defined in the search fields tab).
Version
This column was added to Koha in version 23.11.
Authorized value category: for some facets, it is possible to define an authorized value category that will manage the text displayed for the facet items. Some facets have hard-coded authorized value categories, such as LOC for location and CCODE for collections.
Version
This option was added to Koha in version 23.11.
To reorder the facets, simply drag and drop the row where you want it.
To rename facets, you need to change the label in the search fields tab.
To delete a facet, click the 'Delete' button.
تنبيه
In Koha versions 23.11 and earlier, it is not possible to delete facets. But it is possible to uncheck the 'Display' checkbox to hide them from the search results.
To add a new facet,
first, add the search field,
then add mappings to that search field, making sure to set 'Facetable' to 'Yes',
finally, add the facet in the facet order table, using the last row to enter the values, and click the 'Add' button at the end of the row.
Version
The option to add facets was added to Koha in version 24.05.
التزويد
وحدة عمليات التزويد في كوها توفر وسيلة للمكتبة حيث يمكن أن تسجل طلبات الشراء مع الموردين وإدارة ميزانيات الشراء.
Before using the acquisitions module, you will want to make sure that you have completed all of the set up.
Get there: More > Administration > Acquisitions
العملات وأسعار الصرف
اذا وضعت أوامر من أكثر من بلد واحد ستحتاج إلى ادخال أسعار صرف العملات لذلك وحدة التزويد ستحسب الاجماليات بشكل صحيح.
ملاحظة
Only staff with the currencies_manage permission (or the superlibrarian permission) will have access to this section.
Get there: More > Administration > Acquisitions > Currencies and exchange rates

ملاحظة
You can customize the columns of this table in the Table settings section of the Administration module (table id: currency).
Currency: this is the code for the currency. For default currencies, the ISO code is used as currency code (for example 'USD' for the US dollar). The ISO code will be used when importing MARC files via the staging tools. The tool will attempt to find and use the price of the currently active currency.
Rate: the rate will be used to calculate the price in the active currency.
ملاحظة
لا يتم تحديث هذه البيانات تلقائيا، لذلك يجب التأكد من المحافظة على حداثتها بحيث تبقى حساباتك صحيحة.
Symbol: this is the symbol for the currency (for example, $ for USD, or € for EUR).
Last updated: this is the date when the currency was last updated in Koha.
Active: the active currency is the main currency you use in your library. The active currency will have a check mark in the 'Active' column. If you don't have an active currency you will see an error message telling you to choose an active currency.
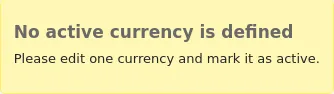
The active currency must have a rate of 1. There can only be one active currency.
Archived: archived currencies will have 'Yes' in this column. Archived currencies cannot be used in the acquisitions module.
ملاحظة
It is currently not possible to manually archive currencies. Currencies will be archived if Koha is updated and a currency that was used previously in the acquisitions module was deleted.
Actions: use the buttons to edit or delete currencies.
ملاحظة
If a currency was used at least once, it will not be possible to delete it.
Adding a new currency
If a currency that you use is not already in your system, you can create it.
Click 'New currency'.
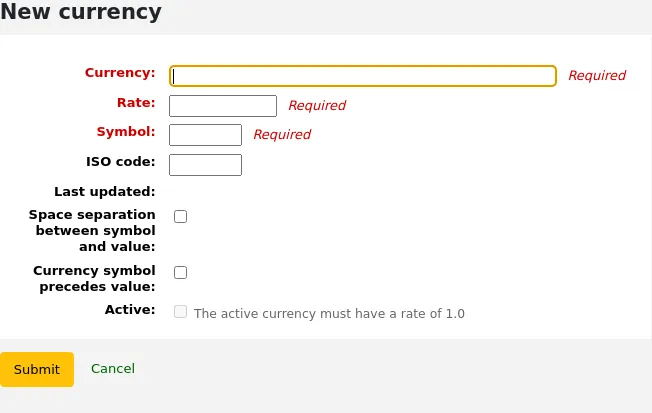
Fill out the form.
Currency: enter a code for the currency, this can be the ISO code, or another code. This is what will be displayed in the acquisitions module.
ملاحظة
If you decide to use a custom code here, make sure to fill out the ISO code with the correct code for the currency. This will ensure that prices are calculated according to the rate.
ملاحظة
This field is limited to 10 characters.
Rate: enter the rate of this currency relative to your active currency.
Symbol: enter the symbol for the currency (for example, $ for USD, or € for EUR).
ISO code: enter the ISO code for the currency (for example 'USD' for the US dollar). This field is optional. If this field is empty, Koha will use the currency code (above) as the ISO code for price calculations.
Last updated: this will be filled automatically with today's date, it is not possible to manually change this date.
Space separation between symbol and value: if checked, Koha will display the price with a space before the currency symbol (for example, 10.99 $ rather than 10.99$).
Currency symbol precedes value: if checked, Koha will display the currency symbol before the price (for example, $10.99 rather than 10.99$).
Version
This option was added to Koha in version 24.11.
Active: check this box if this currency is the default currency used in the acquisitions module. Note that there can only be one active currency and that the active currency's rate must be 1.
Click 'Submit'.
Editing a currency
If you often order from other countries, it will be necessary to update the exchange rate regularly in order to calculate the prices precisely.
To edit an existing currency,
Click the 'Edit' button to the right of the currency in the currencies table.
Change the rate, or other value.
ملاحظة
Note that the currency code and the last updated date cannot be edited.
Click 'Submit'.
Deleting a currency
If there are currencies that you never use, it is possible to delete them.
From the currencies table, click the 'Delete' button to the right of the currency.
تحذير
Currencies that have been used at least once in the acquisitions module cannot be deleted.
الميزانيات
Budgets are used for tracking accounting values related to acquisitions. For example you could create a budget for the current year (ex. 2015) and then break that into funds for different areas of the library (ex. Books, Audio, etc).
Get there: More > Administration > Acquisitions > Budgets
ملاحظة
Staff members must have the period_manage permission (or the superlibrarian permission) in order to access the budgets administration page.
It is recommended to minimally give the following permissions to staff members who need to manage budgets, since these are interdependent:
عند زيارة الادارة الرئيسية للميزانية سوف ترى تبويبان، واحد لتنشيط الميزانيات وآخر لعدم تنشيط الميزانيات.
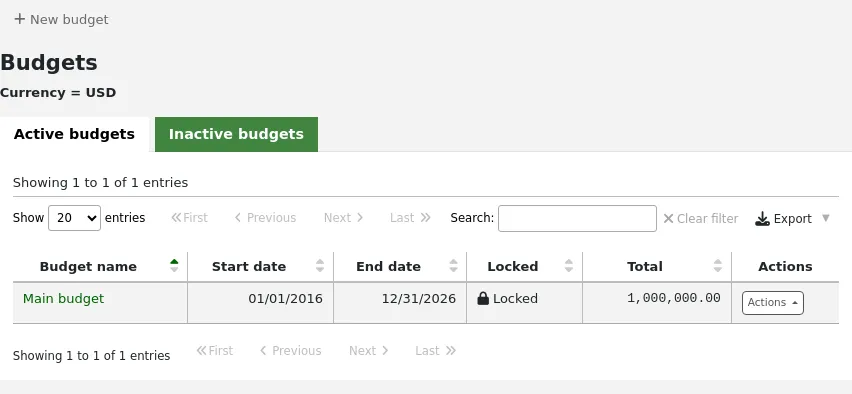
Adding budgets
Budgets can either be created from scratch or by duplicating the previous year's budget.
ملاحظة
Staff members must have the period_manage permission (or the superlibrarian permission) in order to create new budgets or duplicate existing budgets.
Adding a new budget
If you haven't used Koha before for acquisitions, you'll need to start fresh with a new budget.
To add a new budget,
Click the 'New budget' button.
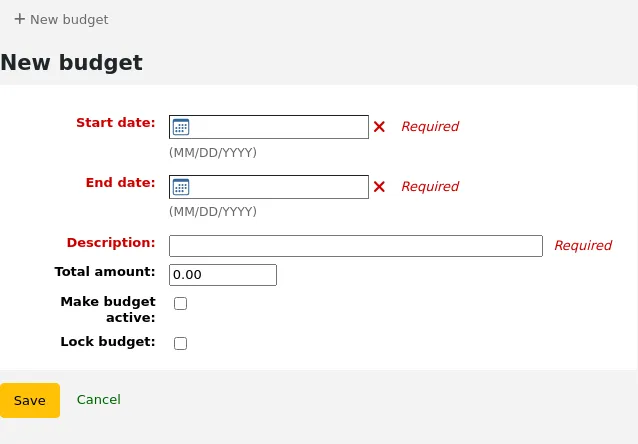
Fill out the form:
Start date (mandatory): choose the starting date for the time period this budget is for. This can be the start of the calendar year, fiscal year, academic year, quarter, etc.
End date (mandatory): choose the ending date for the time period this budget is for.
Description (mandatory): enter a description for this budget. The description should be something that will help you identify the budget when ordering.
Total amount: enter the amount for the budget. Do not use any symbols, simply enter the amount of the budget with numbers and decimals.
Make budget active: marking a budget as active makes it usable when placing orders in the acquisitions module, even if the order is placed after the budget end date. This will allow you to record orders that were placed in a previous budget period.
Lock budget: locking a budget means that you will not be able to add funds or add sub funds to this budget, and you will not be able to plan spending. Lock the budget once it is set as you wish.
Click 'Save'.
You will be brought back to the list of existing budgets.
Proceed to add funds to the budget.
Duplicating a budget
At the end of the year, or the end of your budget period, you can duplicate the current budget. This will also duplicate all funds, so you don't have to start from scratch each year or period.
To duplicate a budget,
From the list of budgets, click the 'Actions' button on the right.
Choose 'Duplicate'.
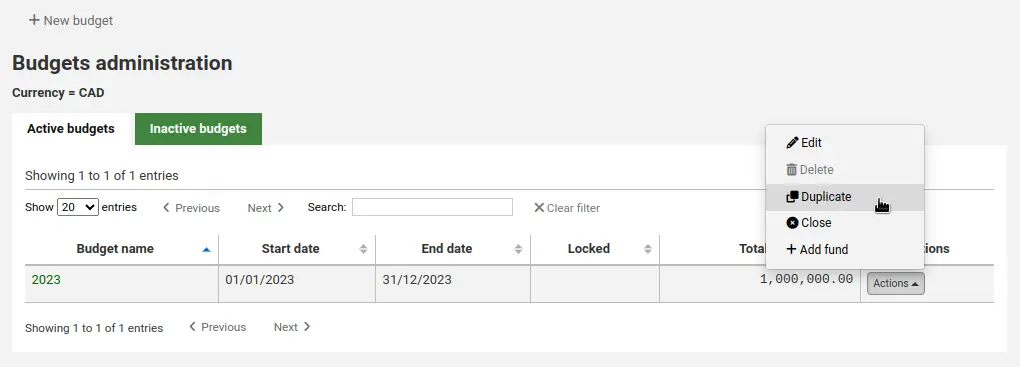
Alternatively,
From the list of budgets, click on the budget name.
On the screen listing the budget breakdown, click the 'Edit' button at the top and choose to 'Duplicate budget'.
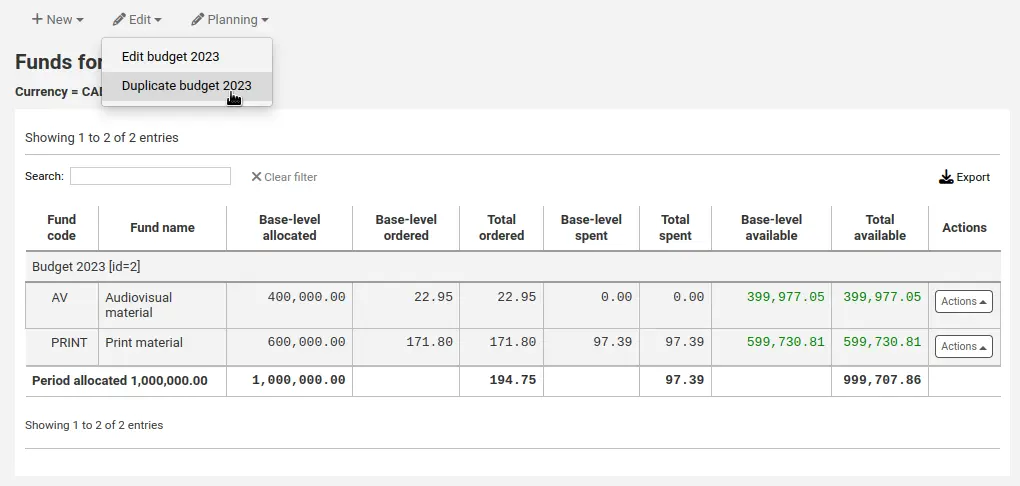
In both cases, you will be presented with a form to duplicate the budget.
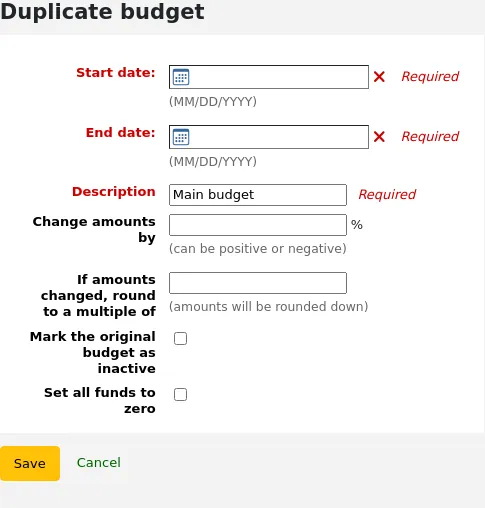
Start date (mandatory): choose the starting date for the time period this new budget is for.
End date (mandatory): choose the ending date for the time period this budget is for.
Description (mandatory): enter a description for this new budget.
Change amounts by: by default, the total amount from the duplicated budget and the original amounts for each fund will be used. However, if needed, you can indicate to change the amounts by a percentage, that can be positive or negative. For example, if your new budget was increased by 2%, enter 2. Inversely, if your new budget was decreased by 2%, enter -2.
If amounts changed, round to a multiple of: if you entered a value in 'Change amounts by', Koha will calculate the amounts automatically. You can force it to round down the amounts. For example, entering '100', will round down the amounts to the hundreds (5542 will become 5500).
Mark the original budget as inactive: check this box if the original budget should no longer be used, effective immediately. You can always edit the budget later to make it inactive.
Set all funds to zero: check this box if you wish the new budget to contain all the same fund structures as the previous budget but no allocations until you manually enter an amount in the fund.
This will not only duplicate the budget, but all of the funds associated with that budget so that you can reuse budgets and funds from year to year.
When the time comes, you can close the previous budget to move unreceived orders, and, if desired, unspent funds to the new budget.
Editing a budget
ملاحظة
Staff members must have the period_manage permission (or the superlibrarian permission) in order to edit existing budgets.
You can edit existing budgets to make them inactive or lock them to prevent fund changes, for example.
To edit a budget,
From the list of budgets, click the 'Actions' button on the right.
Choose 'Edit'.
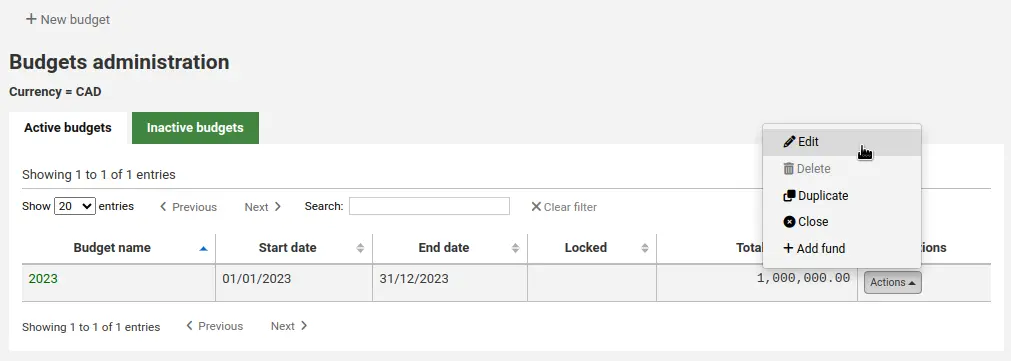
Alternatively,
From the list of budgets, click on the budget name.
On the screen listing the budget breakdown, click the 'Edit' button at the top and choose to 'Edit budget'
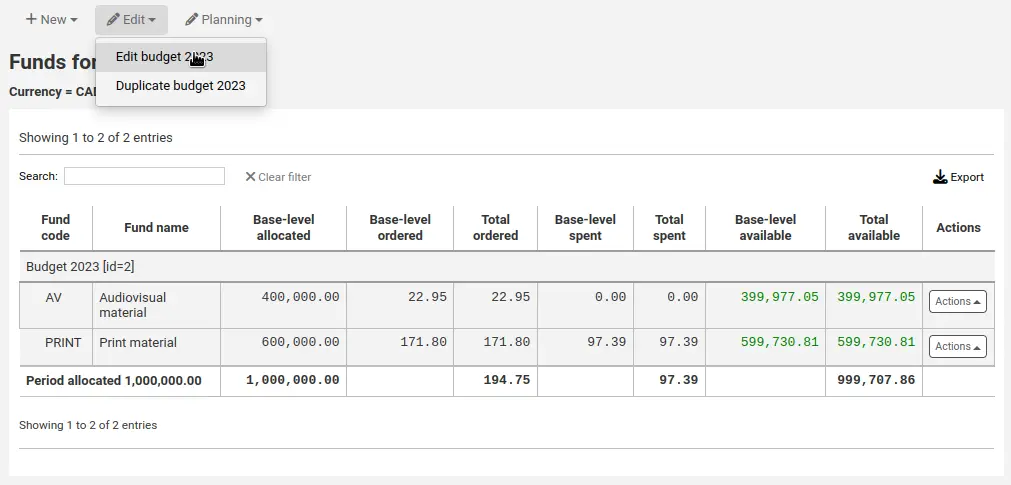
In both cases, you will be presented with a form to duplicate the budget.
Make your changes (see the field descriptions above).
Click 'Save'.
Closing a budget
Close a budget to move or roll over unreceived orders and if desired unspent funds from a previous budget to a new budget. Before closing your budget you might want to duplicate the previous year's budget so that you have somewhere for the unreceived orders to roll to.
ملاحظة
Staff members must have the period_manage permission (or the superlibrarian permission) in order to close existing budgets.
To close a budget,
From the list of budgets, click the 'Actions' button on the right.
Choose 'Close'
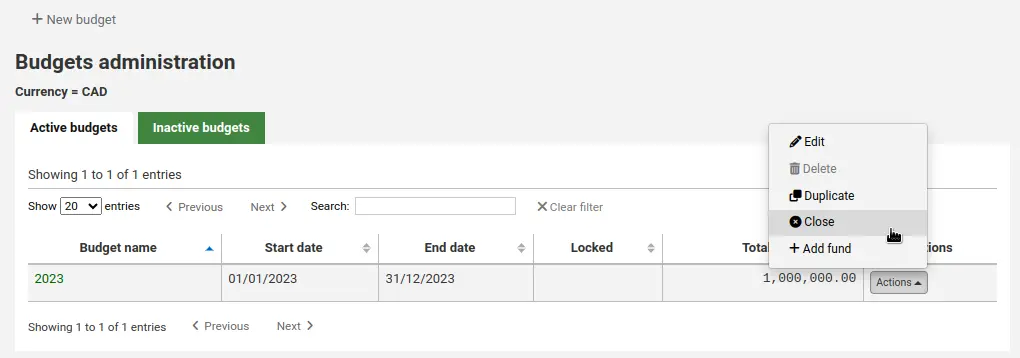
ملاحظة
Budgets without unreceived orders cannot be closed.
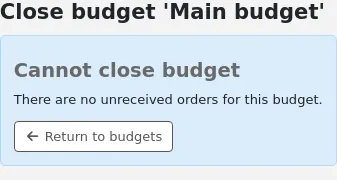
Fill out the form.
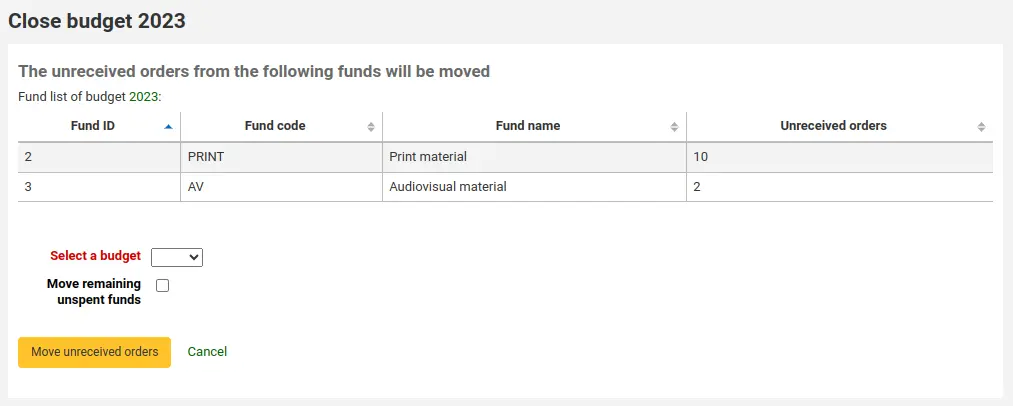
Select a budget: choose the new budget for the unreceived orders from the dropdown.
ملاحظة
In order for the unreceived orders to be automatically moved to the new budget, the fund structures in the previous budget must exist in the new budget.
Move remaining unspent funds: check this box to move the unspent amounts from the funds of the budget being closed to the selected budget.
Click the 'Move unreceived orders' button.
You will be presented with a dialog box that says 'You have chosen to move all unreceived orders from 'Budget X' to 'Budget Y'. This action cannot be reversed. Do you wish to continue?' Budget X is the budget to be closed and Budget Y is the selected budget.
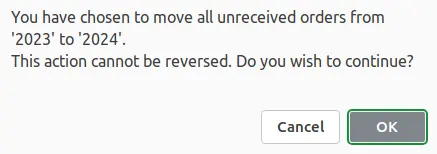
إذا بدا كل شيء جيداً قم بالنقر على "موافق" وسيتم نقل الطلبيات غير المستلمة والتمويلات غير المنفقة إذا تم تحديدها
انتظر حتى يتم عرض "تقرير بعد نقل الطلبيات غير المستلمة من الميزانية س إلى ص". سيقوم ذلك بإدراج أرقام الطلبية التي تم تجميعها بواسطة التمويل وتفاصيل ما إذا تم نقل الطلبيات غير المستلمة أم أن هناك مشكلة. على سبيل المثال: إذا لم تكن الميزانية الجديدة تحتوي على تمويل بنفس الاسم كالميزانية السابقة فلن يتم نقل الطلبية.
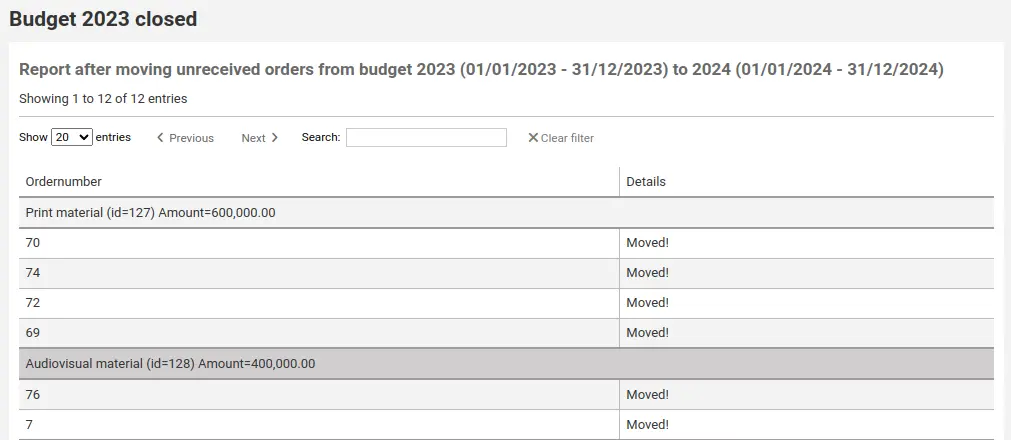
Deleting a budget
In order to delete a budget, it must not have funds. Start by deleting the funds.
تحذير
This cannot be undone. Make sure you are certain this budget needs to be deleted. You can make it inactive or close it, instead.
To delete a budget,
From the list of budgets, click the 'Actions' button on the right.
Choose 'Delete'.
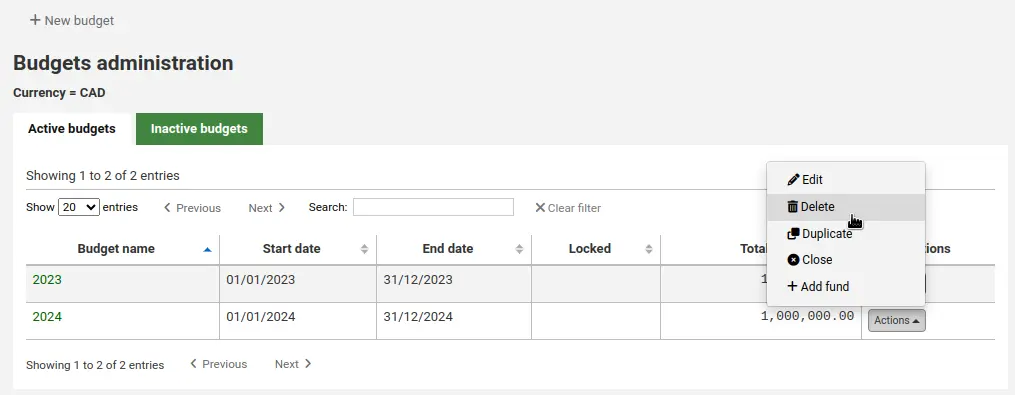
Click 'Yes, delete'.

التمويلات
Funds are divisions of a budget. For example you could have a budget for the current year (ex. 2015) and then break that into funds for different areas of the library (ex. Books, Audio, etc).
Get there: More > Administration > Acquisitions > Funds
Adding a fund to a budget
A fund is added to a budget. Make sure to add a budget before adding funds.
ملاحظة
If a budget is locked, it will not be possible to add funds.
To add a new fund,
From the list of budgets, click the 'Actions' button on the right.
Choose 'Add fund'.
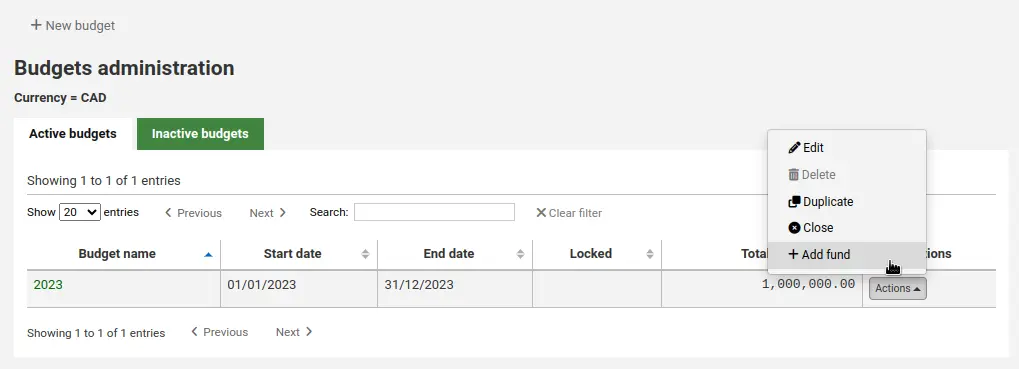
Alternatively,
From the list of budgets, click on the budget name.
On the screen listing the budget breakdown, click the 'New' button at the top and choose the 'New fund for...' option.

In both cases, you will be presented with a form to create the new fund.
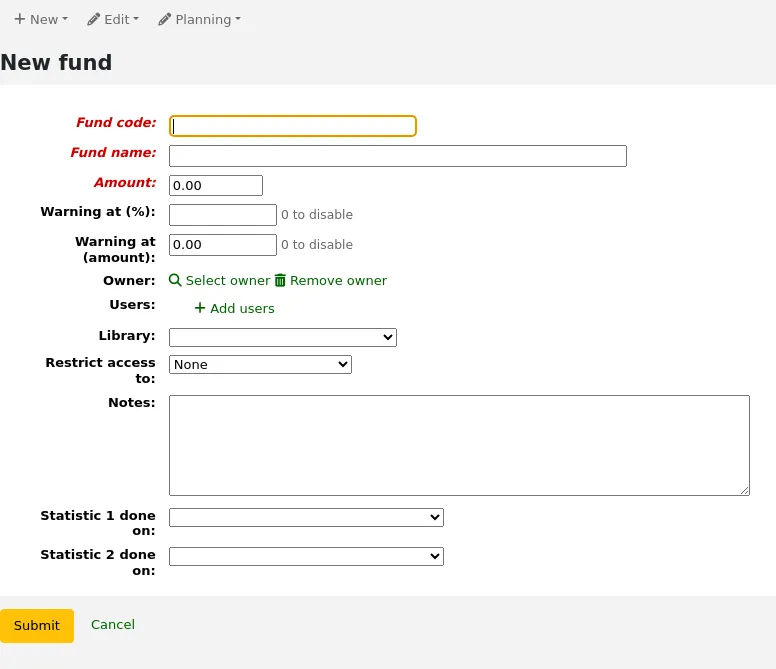
Fund code (mandatory): enter a unique identifier for your fund.
Fund name (mandatory): enter a name for the fund. This should be something that staff will understand, as this is what will be displayed when ordering.
Amount (mandatory): enter the amount with only numbers and decimals, no other characters.
Warning at (%): enter a percentage value to have Koha warn you when you have spent this percentage of the fund, to prevent overspending. For example, if you enter 90%, Koha will warn you for each order after 90% of the fund is spent.
Warning at (amount): same as above but for a specific amount of money spent. For example, if you enter 5000, Koha will warn you for each order after 5000 is spent in the fund.
Owner: you can choose to assign this fund to a staff member.
Click 'Select owner'.
Search for the staff member in the patron search form.
ملاحظة
Only staff with the budget_modify permission (or the superlibrarian permission) are returned in the search results.
Click 'Select' to the right of the staff member's result.
ملاحظة
A fund can only have one owner.
ملاحظة
In order to limit the use of this fund to the owner, you must choose either 'Owner', 'Owner and users' or 'Owner, users and library' in the 'Restrict access to' field below. Otherwise, adding users will not have any restricting effect.
ملاحظة
Staff members with the order_manage_all permission (or the superlibrarian permission) will be able to use funds regardless of restrictions.
Make sure your staff doesn't have that permission if you want to restrict access to funds.
Users: you can also add users who will be able to spend in that fund.
ملاحظة
In order to limit the use of this fund to the users, you must choose either 'Owner and users' or 'Owner, users and library' in the 'Restrict access to' field below. Otherwise, adding users will not have any restricting effect.
ملاحظة
Staff members with the order_manage_all permission (or the superlibrarian permission) will be able to use funds regardless of restrictions.
Make sure your staff doesn't have that permission if you want to restrict access to funds.
Click 'Add users'
Search for the staff member in the patron search form.
ملاحظة
Only staff with the budget_modify permission (or the superlibrarian permission) are returned in the search results.
Click 'Add' to the right of the staff member's result.
ملاحظة
You can add as many users as you need.
Click 'Close' once all the users have been added.
Library: If this fund is for a specific library, choose it here.
ملاحظة
In order to limit the use of this fund to the library, you must choose 'Owner, users and library' in the 'Restrict access to' field below. Otherwise, choosing a library will not have any restricting effect.
ملاحظة
Staff members with the order_manage_all permission (or the superlibrarian permission) will be able to use funds regardless of restrictions.
Make sure your staff doesn't have that permission if you want to restrict access to funds.
Restrict access to: you can restrict who can order from this fund by choosing either the 'owner', 'owner and users' or 'owner, users and library'.
تحذير
Without an owner, the access restriction will be ignored, be sure to enter an owner as well as choose a restriction.
ملاحظة
Staff members with the order_manage_all permission (or the superlibrarian permission) will be able to use funds regardless of restrictions.
Make sure your staff doesn't have that permission if you want to restrict access to funds.
Notes: any descriptive notes about this fund.
ملاحظة
Notes will only appear on this screen (when editing the fund).
Statistic 1 done on: this is used for statistical purposes. Choose an authorized value category from which to choose values when placing orders using this fund. You will then be able to plan spending and report on spending according to those categories. The default authorized value category Asort1 is created specifically for this purpose, but you can use any authorized value category in this field (CCODE for example to plan spending according to collections).
Statistic 2 done on: same as above, for a second statistical category. The default authorized value category Asort2 is created specifically for this purpose, but you can use any authorized value category.
ملاحظة
لمعرفة المزيد حول فئات التخطيط، انظر الأسئلة الشائعة حول فئة التخطيط.
Click 'Submit'.
You will be brought to a list of all of the funds for the budget.
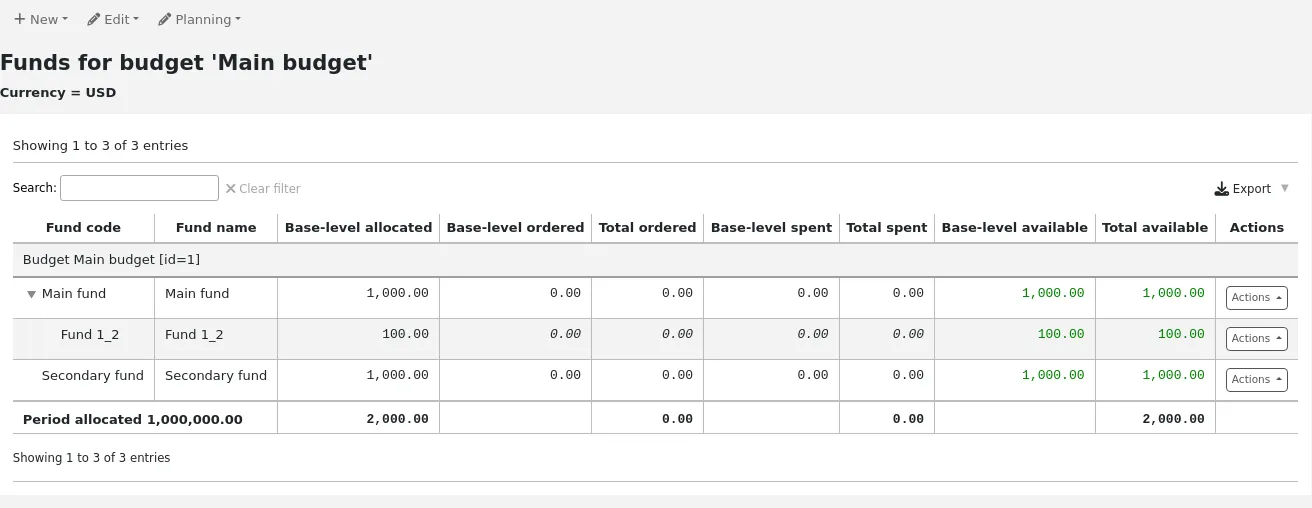
The monetary columns in the fund table break down as follows:
Base-level allocated is the 'Amount' value you defined when creating the fund
Base-level ordered is the ordered amount for this fund (without child funds)
Total ordered is the base-level ordered for this fund and all its child funds
Base-level spent is the spent amount for this fund (without child funds)
Total spent is the base-level spent for this fund and all its child funds
Base-level available is 1 - 2
Total available is 1 - 3
To the right of each fund you will find the 'Actions' button under which you will find the 'Edit,' 'Delete,' and 'Add sub fund' options.
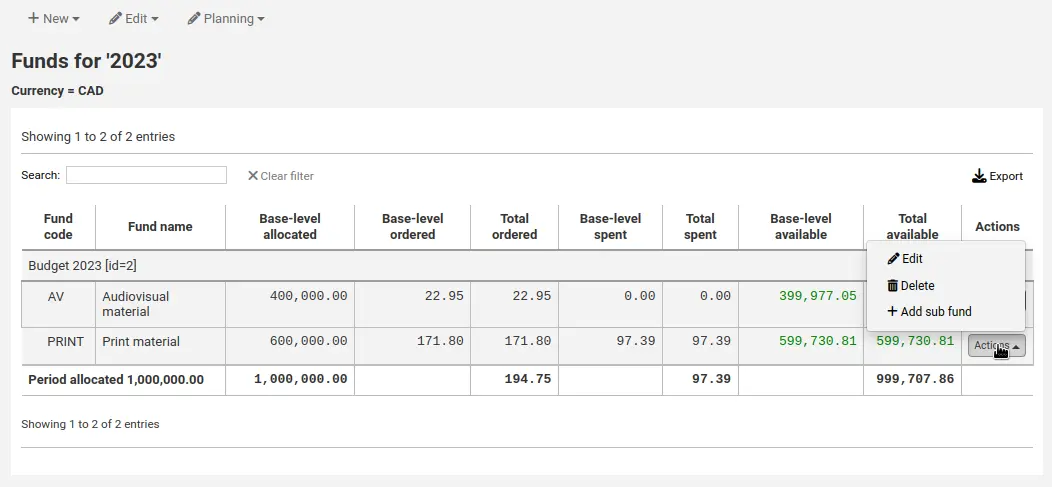
Adding a sub fund
A sub fund is a more granular division of the fund. An example would be to have a fund for 'Fiction' and under that have a fund for 'New releases' and a fund for 'Science Fiction.' It is an optional way to further organize your finances.
ملاحظة
If a budget is locked, it will not be possible to add sub funds.
To add a sub fund to a fund,
From the list of all funds, or from the list of funds of a specific budget, click the 'Actions' button on the right.
Choose 'Add sub fund'.
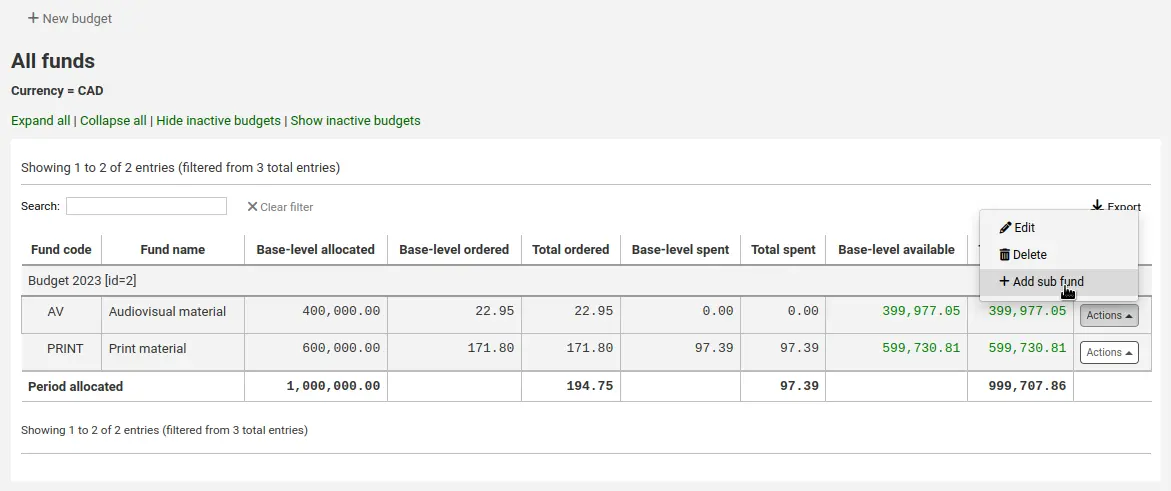
Fill out the new sub fund form. Fields are the same as for adding a new fund. The only difference is that the form will state the 'parent' fund.
Click 'Submit'.
Funds with sub funds will show with a small arrow to the left. Clicking that will show you the sub funds.

Deleting funds
It is possible to delete funds, if necessary.
تحذير
Deleting a fund in which there are orders will delete those orders. Only delete funds if you are certain it needs to be deleted. It is not possible to undo this.
To delete a fund,
From the list of all funds, or from the list of funds of a specific budget, click the 'Actions' button on the right.
Choose 'Delete'.
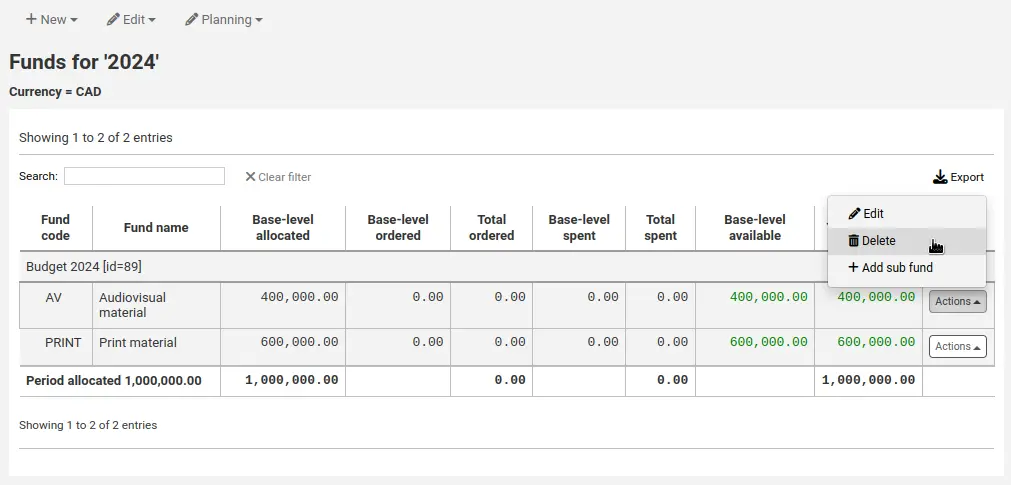
Click 'Yes, delete this fund' in the warning message.
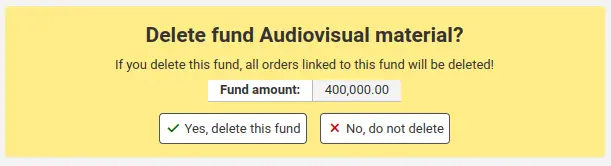
Budget planning
ملاحظة
Staff members must have the planning_manage permission, the budget_manage permission, and the period_manage permission (or the superlibrarian permission) in order to access budget planning.
أثناء عرض قائمة التمويلات، قم بالنقر على زر "تخطيط" واختيار كيف ترغب في تخطيط إنفاق ميزانيتك.
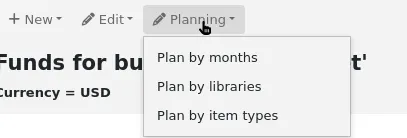
If you choose 'Plan by months' you will see the budgeted amount broken down by months.

On the left are filters that can be used to limit what is shown in the table.
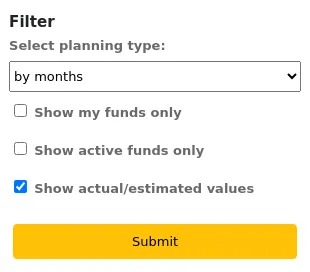
Select planning type: choose to plan by months, libraries, item types, or any authorized value category used as statistic 1 or 2 in the funds.
Show my funds only: this will filter out funds of which you are not the owner.
Show active funds only: this will filter out funds that have not been used (no ordered amount).
Show actual/estimated values: this will alter the table to show the ordered amounts as well.
To hide some of the columns, uncheck the boxes at the top of the table.
From here, you can plan your budget spending by manually entering values or by clicking the 'Auto-fill row' button. If you choose to auto-fill the form the system will try to divide the amount accordingly, you may have to make some edits to split things more accurately.
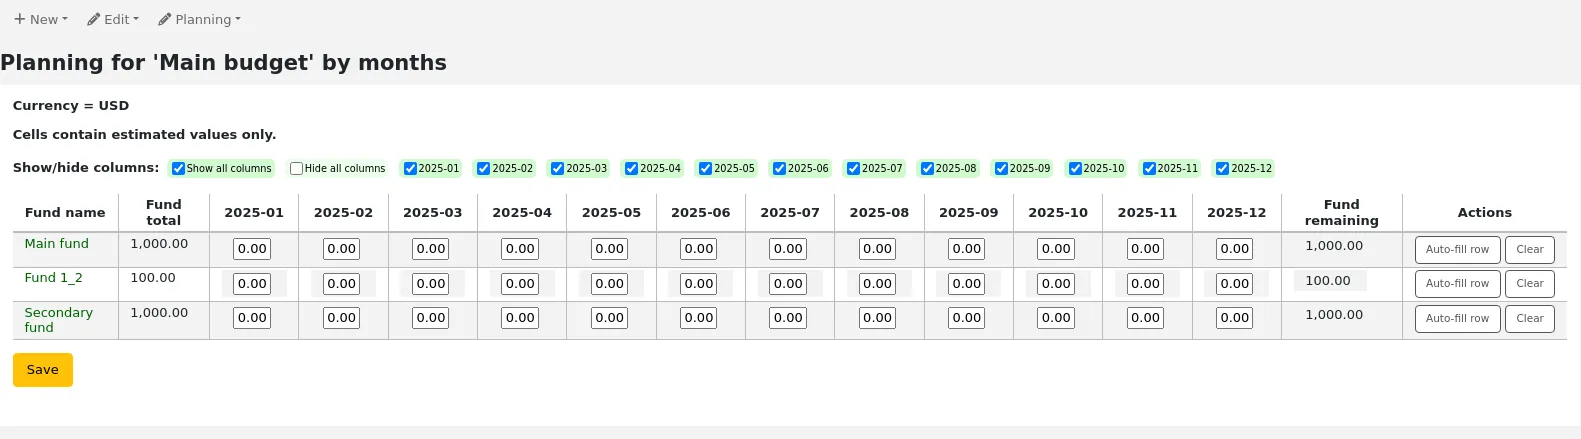
Once your changes are made, click the 'Save' button.
ملاحظة
If a budget is locked, it will not be possible to edit the values.
To export your data as a CSV file, enter a file name in the 'Output to a file named' field, in the 'Export' section on the left, and click the 'Submit' button.
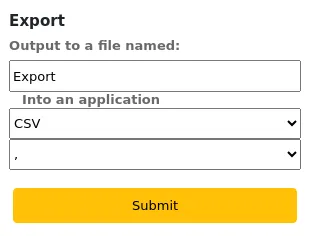
حسابات EDI
From here you can set up the information needed to connect to your acquisitions vendors.
ملاحظة
This section will only appear if the EDIFACT system preference is enabled.
ملاحظة
Only staff with the edi_manage permission (or the superlibrarian permission) will have access to this section.
ملاحظة
Before you begin you will need at least one vendor set up in acquisitions.
To add account information click the 'New account' button.
Enter your vendor's information in the form.
See the EDI questions for vendors section of the acquisitions module chapter for a description of each field.
سوف يحصل كل مورد على حساب واحد.
المكتبة EANs
EAN هو المعرف الذي يمنحه المورد للمكتبة لارسله لهم من أجل معرفة أي الحسابات يسخدم عند ارسال الفاتورة للمكتبة. حساب EDI واحد يمكنه احتواء عدة EANs.
ملاحظة
This section will only appear if the EDIFACT system preference is enabled.
ملاحظة
Only staff with the edi_manage permission (or the superlibrarian permission) will have access to this section.
To add an EAN click the 'New EAN' button.
In the form that appears enter the information provided by your vendor.
See the EDI questions for vendors section of the acquisitions module chapter for a description of each field.
عوامل إضافية
Get there: More > Administration > Additional parameters
Identity providers
This section is used to define and manage external identity providers for Koha users. This is used when your users come from an external source, such as student management system, active directory, or other similar databases.
Get there: More > Administration > Additional parameters > Identity providers
ملاحظة
Only staff with the manage_identity_providers permission (or the superlibrarian permission) will have access to this section.
Adding an identity provider
To add an identity provider, click the 'New identity provider' button.
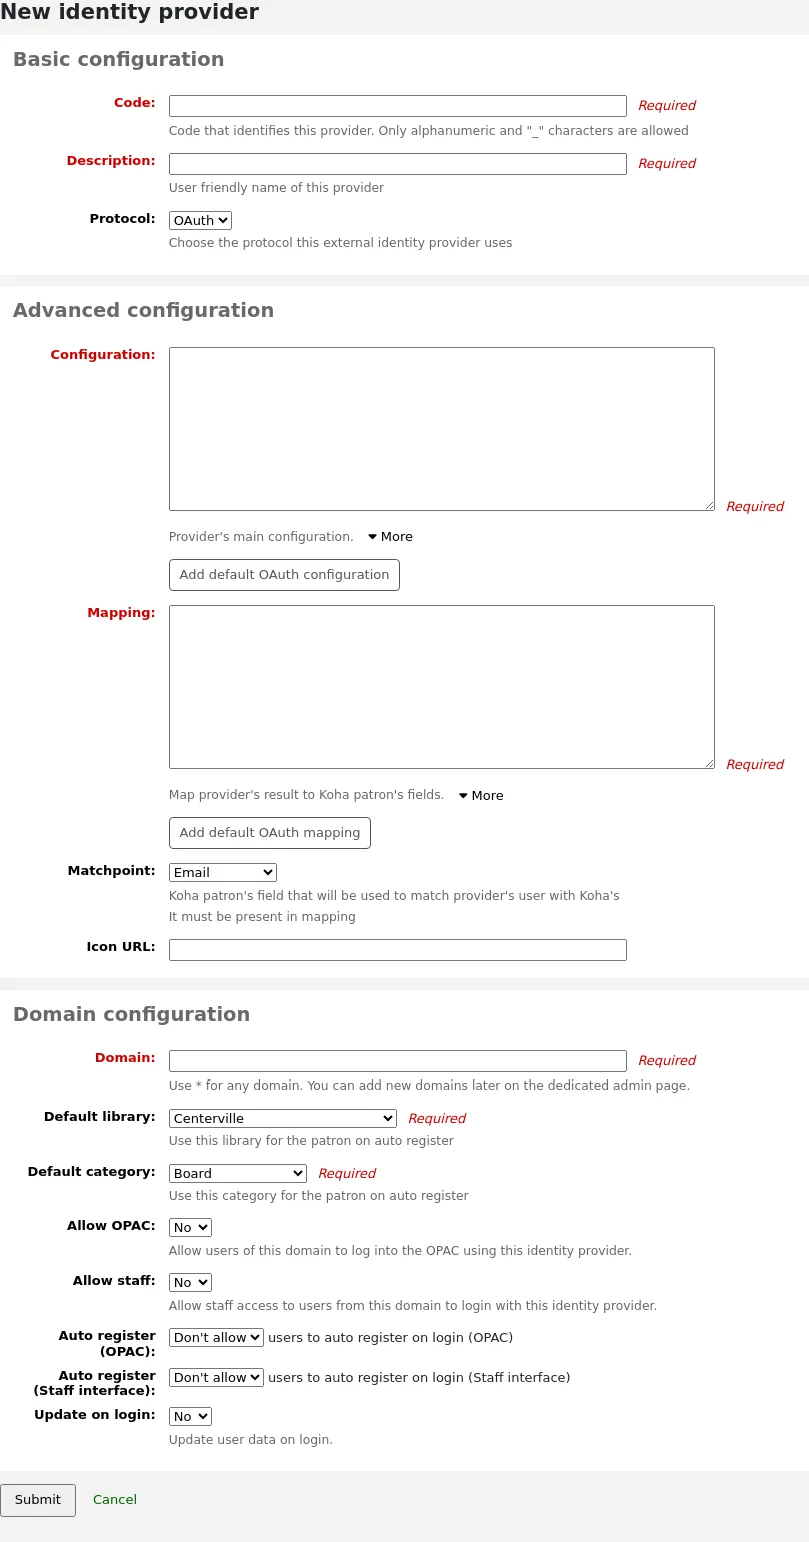
Basic configuration
Code: enter a code for this provider.
ملاحظة
The code for the identity provider is limited to 20 characters and can only be composed of letters, numbers, and underscore (_).
Description: enter a name for this provider. This is what you will see in the interface.
Protocol: choose which protocol this identity provider uses.
OAuth
OIDC
Advanced configuration
Configuration: Use this field to enter the configuration specific to the protocol chosen above.
You can click on the 'Add default OAuth configuration' button or the 'Add default OIDC configuration' button to prefill the field with some default values, which you can change for your own values.
The default OAuth configuration is:
{
 "key": "<enter client id>",
 "secret": "<enter client secret>",
 "authorize_url": "<enter authorization endpoint>",
 "token_url": "<enter token endpoint>",
 "userinfo_url": "<enter user info endpoint (optional)>",
 "scope": "email"
}
The default OIDC configuration is:
{
 "key": "<enter client id>",
 "secret": "<enter client secret>",
 "well_known_url": "<enter openid configuration endpoint>",
 "scope": "openid email"
}
Mapping: Use this field to define the field mappings from the external database to the Koha borrower fields.
The key is the Koha field from the borrowers table, and the value is the external field.
ملاحظة
You can find all fields for the borrowers table in the database structure.
You can click on the 'Add default OAuth mapping' button or the 'Add default OIDC mapping' button to prefill the field with some default values, which you can change for your own values.
Both the default OAuth mapping and default OIDC mapping are:
{
 "email": "email",
 "firstname": "given_name",
 "surname": "family_name"
}
If the external fields are nested, you can use periods to separate the levels.
For example, if the firstname is nested like so:
<user>
   <given_name>First name</given_name>
   <family_name>Family name</family_name>
   <email>Email address</email>
</user>
Use:
"firstname": "user.0.given_name"
This will fetch the "given_name" field in the first "user" field (0 = first).
مهم
If you plan on using the auto register function (see below), make sure either "userid" or "cardnumber" are present in the mappings.
مهم
Make sure the field for the matchpoint (see below) is included in the mappings.
Matchpoint: choose which field is used to match incoming users to existing users.
ملاحظة
The field chosen here must be included in the mappings (see above).
Icon URL: if you want an icon to show on the login screen for this provider, enter the URL to the image file here.
Domain configuration
ملاحظة
Enter at least one domain for this provider. Once it is saved, you will be able to add more domains to this provider.
Domain: enter the email domain for incoming users.
ملاحظة
Enter an asterisk (*) to include all domains.
Default library: if auto register is enabled, choose at which library new users will be registered.
Default category: if auto register is enabled, choose which patron category will be assigned to new users.
Allow OPAC: choose if patrons of this domain can log into the OPAC with their credentials from this identity provider.
Allow staff: chose if staff members of this domain can log into the staff interface with their credentials from this identity provider.
Auto register: choose whether or not a new patron account is created in Koha when a user from this domain logs in for the first time with their credentials from this identity provider.
ملاحظة
If auto register is enabled, make sure the "userid" or "cardnumber" fields are included in the mappings (see above).
Also make sure the default library and default category are set correctly for new patrons. These will be assigned to the new patrons.
Update on login: choose whether or not the patron account in Koha is updated with the external information when a user from this domain logs in with their credentials from this identity provider.
تحذير
Information may be lost if you change it directly in Koha.
Once the form is completed, click 'Submit' to save the new identity provider.
You will need to restart Koha once the identity provider is added.
Adding an email domain to an existing identity provider
You will need to add at least one email domain when creating a new identity provider. You can add more by clicking the 'Manage domains' button to the right of the identity provider from the main identity providers page, and clicking 'New email domain'.
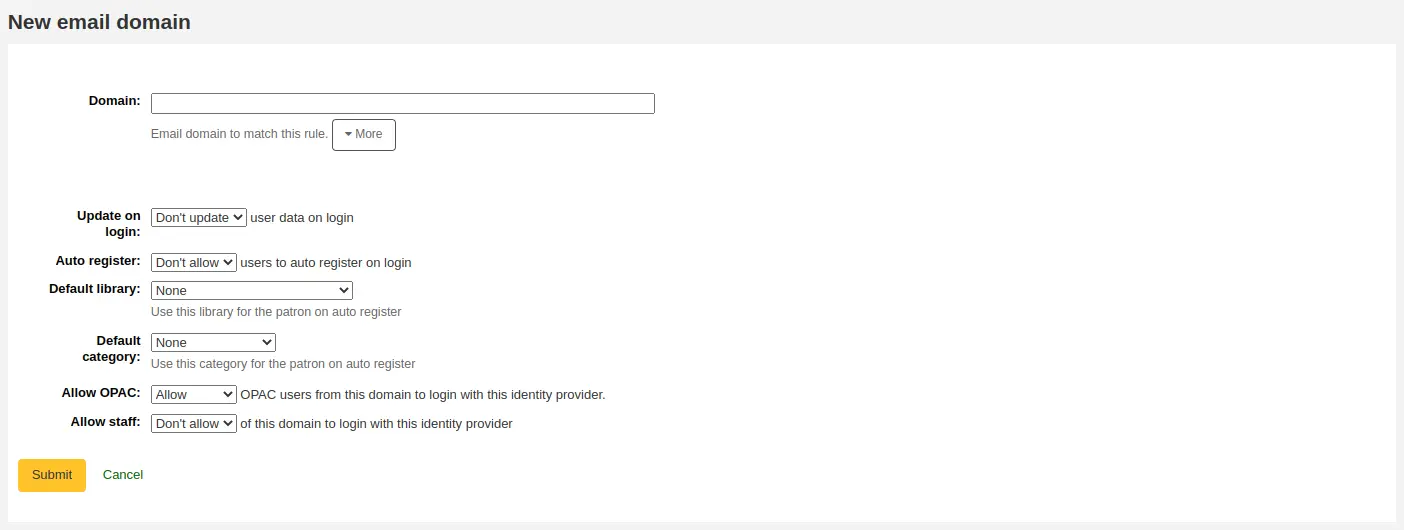
Domain: enter the email domain for incoming users.
ملاحظة
Enter an asterisk (*) to include all domains.
Update on login: choose whether or not the patron account in Koha is updated with the external information when a user from this domain logs in with their credentials from this identity provider.
تحذير
Information may be lost if you change it directly in Koha.
Auto register: choose whether or not a new patron account is created in Koha when a user from this domain logs in for the first time with their credentials from this identity provider.
ملاحظة
If auto register is enabled, make sure the "userid" or "cardnumber" fields are included in the mappings of the identity provider.
Also make sure the default library and default category are set correctly for new patrons. These will be assigned to the new patrons.
Default library: if auto register is enabled, choose at which library new users will be registered.
Default category: if auto register is enabled, choose which patron category will be assigned to new users.
Allow OPAC: choose if patrons of this domain can log into the OPAC with their credentials from this identity provider.
Allow staff: chose if staff members of this domain can log into the staff interface with their credentials from this identity provider.
Once the form is completed, click 'Submit' to save the new email domain.
خوادم Z39.50/SRU
Z39.50 is a client/server protocol for searching and retrieving information from remote computer databases. In short, it's a tool used for copy cataloging.
SRU (Search/Retrieve via URL) is a standard XML-based protocol for search queries, utilizing CQL (Contextual Query Language), a standard syntax for representing queries.
Using Koha you can connect to any Z39.50 or SRU target that is publicly available or that you have the log in information to and copy bibliographic or authority records from that source.
Get there: More > Administration > Additional parameters > Z39.50/SRU servers
ملاحظة
Only staff with the manage_search_targets permission (or the superlibrarian permission) will have access to this section.
Koha comes with a default list of Z39.50/SRU targets set up that you can add to, edit or delete.
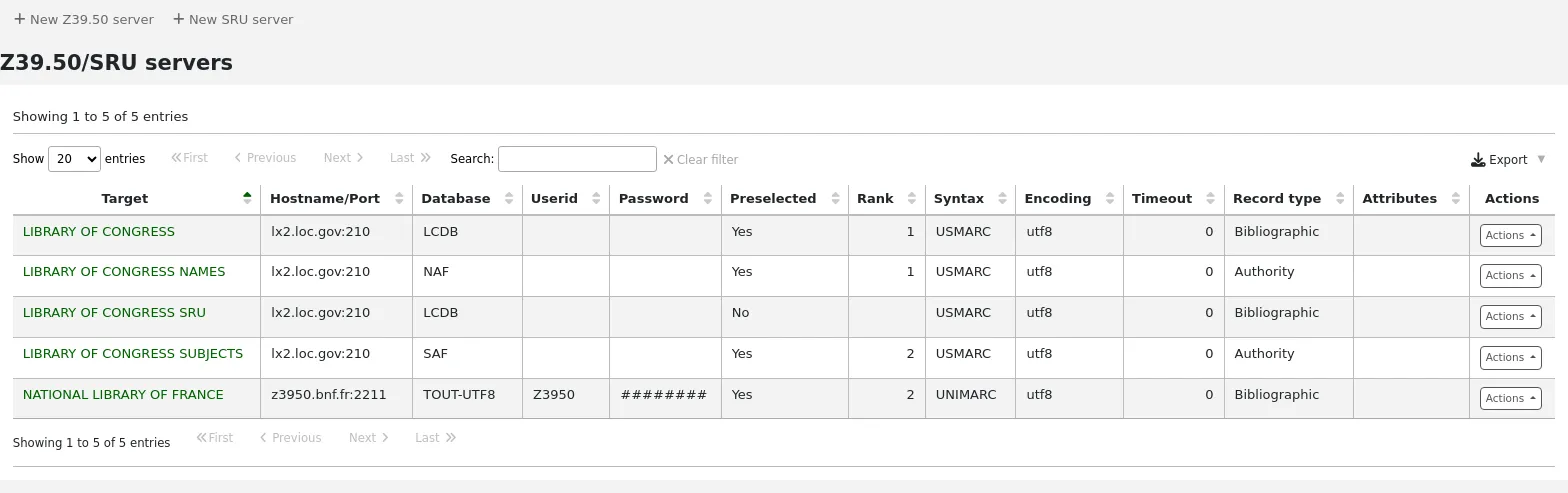
Adding a Z39.50 target
To find additional Z39.50 targets, you can use Index Data's IRSpy https://irspy.indexdata.com or the Library of Congress's list of targets https://www.loc.gov/z3950/. You can also contact individual libraries and ask for their Z39.50 information.
From the main Z39.50 page, click 'New Z39.50 server'.
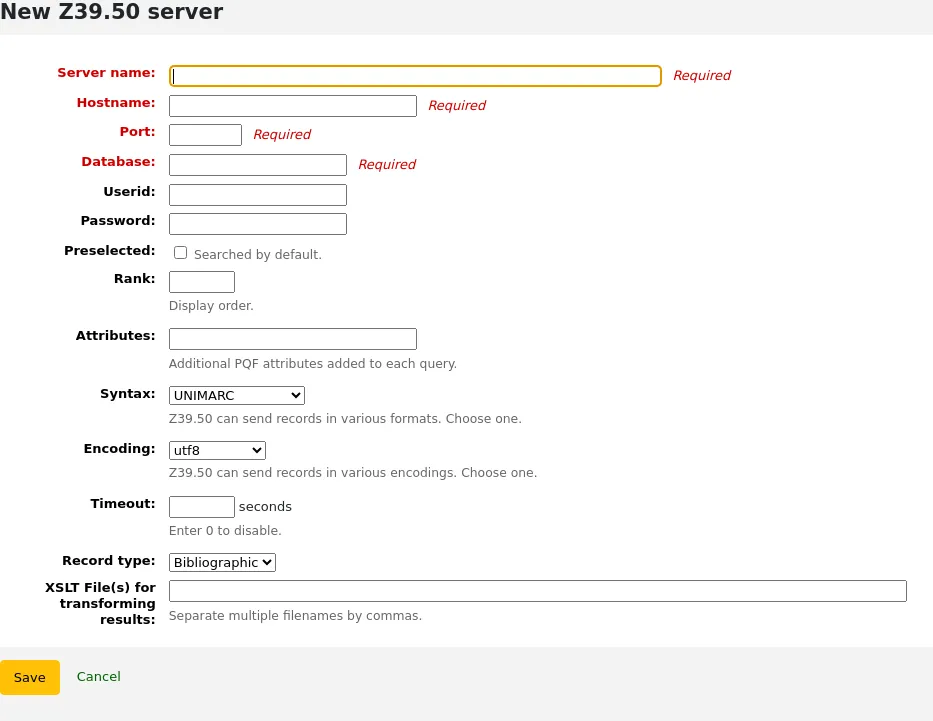
Server name: enter a name that will help you identify the source (such as the library name). It will be saved in capital letters.
Hostname: enter the address to the Z39.50 target.
Port: enter the port number to listen on to get results from this target.
Database: enter the name of the database.
Userid: some servers might be password protected. If that is the case for the server you are trying to add, enter your user ID for that source.
Password: if the server is password protected, enter your password for that source.
Preselected: check this box if you want this target to always be selected by default.
Rank: enter a number representing where in the list you'd like this target to appear. 0 is the top position, then 1, 2, etc.
إذا تم تركه فارغاً ستكون الأهداف مرتبة ترتيباً أبجدياً
Attributes: enter PQF attributes to be added to all queries.
Syntax: choose the MARC flavor used by this target.
Encoding: choose the character encoding used by this target.
ملاحظة
If you notice special characters don't appear correctly when you import records through Z39.50, it means the encoding is wrong. Change it to another and try importing again.
Timeout: enter a number of seconds after which to stop trying to search the target if results aren't found in a reasonable amount of time. It is helpful for targets that take a long while.
Record type: choose if this is a bibliographic or an authority target.
XSLT file(s) for transforming results: enter one or more (comma-separated) XSLT file names that you want to apply on the search results.
When retrieving records from external targets you may wish to automate some changes to those records. XSLT's allow you to do this. Koha ships with some sample XSLT files in the /koha-tmpl/intranet-tmpl/prog/en/xslt/ directory ready for use:
Del952.xsl: Remove Koha items (field 952) (MARC21)
Del995.xsl: Remove Koha items (field 995) (UNIMARC)
Del9LinksExcept952.xsl: Remove links to authorities in bibliographic records ($9), except in the case of 952$9 (itemnumber) (MARC21)
Del9LinksExcept995.xsl: Remove links to authorities in bibliographic records ($9), except in the case of 995$9 (itemnumber) (UNIMARC)
Click 'Save'.
Suggested bibliographic Z39.50 targets
Koha libraries that have shared their Z39.50 targets are listed on the Koha wiki at https://wiki.koha-community.org/wiki/Koha_Open_Z39.50_Sources.
Known publicly available targets are listed on the Koha wiki at https://wiki.koha-community.org/wiki/Configure_Z39.50/SRU_targets.
You can also find open Z39.50 targets listed on the IRSpy website at https://irspy.indexdata.com/.
These targets are known to work:
LIBRARY OF CONGRESS
- Server name:
LIBRARY OF CONGRESS
- Hostname:
lx2.loc.gov
- Port:
210
- Database:
LCDB
- Preselected:
select to search by default
- Rank:
enter a value for the display order, for example 1
- Syntax:
MARC21/USMARC
- Encoding:
utf8
- Timeout:
0
- Record type:
Bibliographic
OHIOLINK
- Server name:
OHIOLINK
- Hostname:
olc1.ohiolink.edu
- Port:
210
- Database:
INNOPAC
- Preselected:
select to search by default
- Rank:
enter a value for the display order, for example 1
- Syntax:
MARC21/USMARC
- Encoding:
utf8
- Timeout:
0
- Record type:
Bibliographic
Adding an SRU target
من صفحة Z39.50/SRU الرئيسية، قم بالنقر على "خادم SRU جديد"
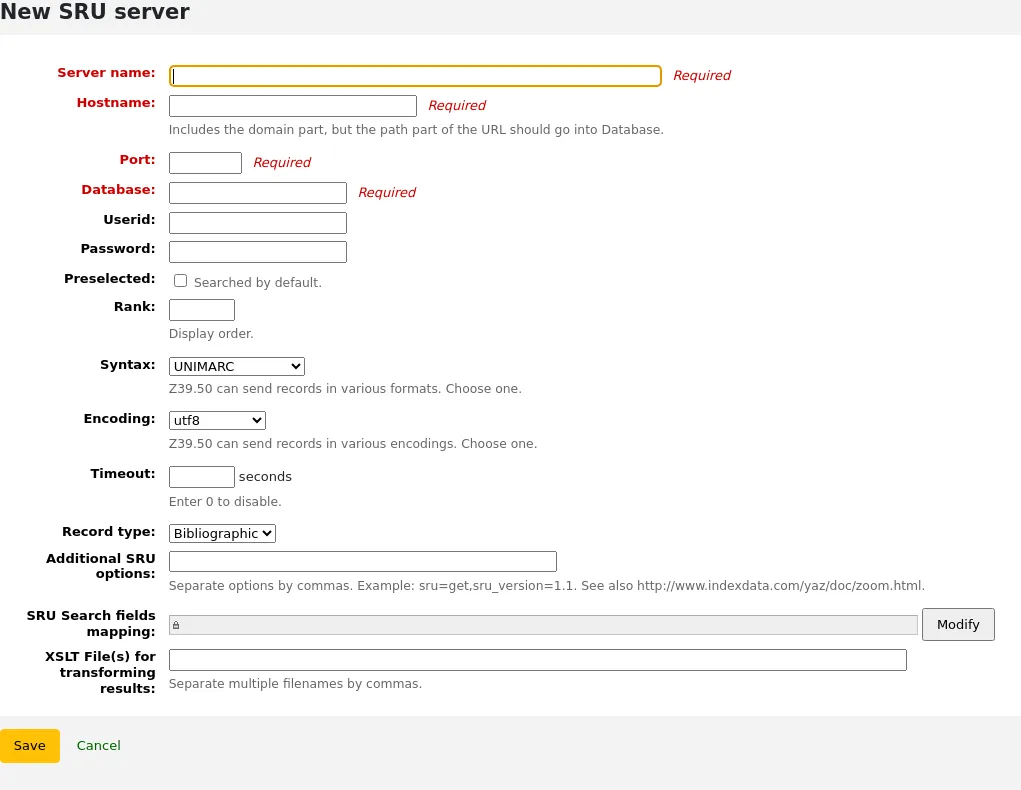
Server name: enter a name that will help you identify the source (such as the library name).
Hostname: enter the address (URL) to the SRU target.
Port: enter which port to listen on to get results from this target.
Database: enter the name of the database.
Userid: some servers might be password protected. If that is the case for the server you are trying to add, enter your user ID for that source.
Password: if the server is password protected, enter your password for that source.
Preselected: check this box if you want this target to always be selected by default.
Rank: enter a number representing where in the list you'd like this target to appear. 0 is the top position, then 1, 2, etc.
إذا تم تركه فارغاً ستكون الأهداف مرتبة ترتيباً أبجدياً
Syntax: choose the MARC flavor used by this target.
Encoding: choose the character encoding used by this target.
ملاحظة
If you notice special characters don't appear correctly when you import records through Z39.50, it means the encoding is wrong. Change it to another and try importing again.
Timeout: enter a number of seconds after which to stop trying to search the target if results aren't found in a reasonable amount of time. It is helpful for targets that take a long while.
Record type: choose if this is a bibliographic or an authority target.
Additional SRU options: enter additional options of the external server here, like
sru_version=1.1orschema=marc21, etc. Note that these options are server dependent.SRU Search field mapping: click 'Modify' to add or update the mapping from the available fields on the Koha search form to the specific server dependent index names.
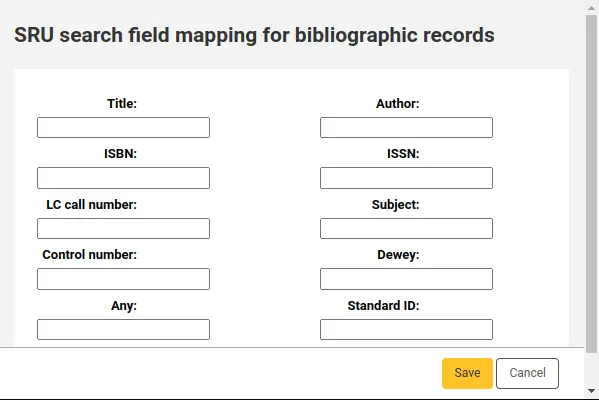
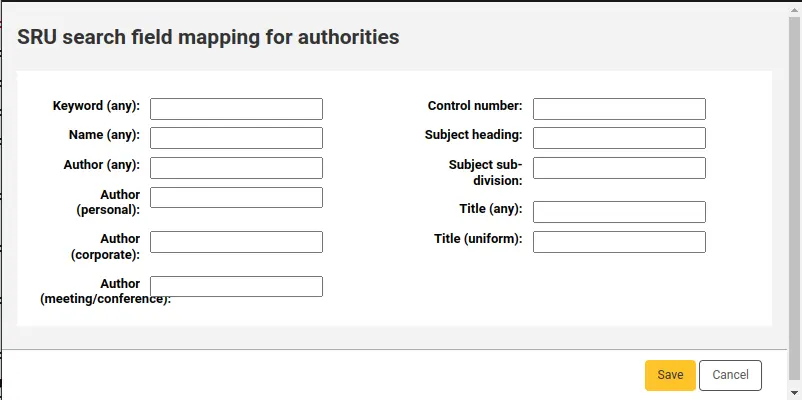
للمزيد من التنقيح لبحثك، يمكنك إضافة أسماء الفهارس التالية إلى تخطيطات حقل بحث SRU. للقيام بذلك، قم بتحرير الخادم والنقر على زر تعديل بجانب هذا الحقل.
عنوان
dc.title
تدمك
bath.isbn
أي
cql.anywhere
مؤلف
dc.author
تدمد
bath.issn
الموضوع
dc.subject
معرف قياسي
bath.standardIdentifier
جدول: تخطيط SRU
XSLT file(s) for transforming results: enter one or more (comma-separated) XSLT file names that you want to apply on the search results.
When retrieving records from external targets you may wish to automate some changes to those records. XSLT's allow you to do this. Koha ships with some sample XSLT files in the /koha-tmpl/intranet-tmpl/prog/en/xslt/ directory ready for use:
Del952.xsl: Remove Koha items (field 952) (MARC21)
Del995.xsl: Remove Koha items (field 995) (UNIMARC)
Del9LinksExcept952.xsl: Remove links to authorities in bibliographic records ($9), except in the case of 952$9 (itemnumber) (MARC21)
Del9LinksExcept995.xsl: Remove links to authorities in bibliographic records ($9), except in the case of 995$9 (itemnumber) (UNIMARC)
Click 'Save'.
OAI repositories
Version
This feature was first introduced in version 24.11 of Koha.
Get there: More > Administration > Additional parameters > OAI repositories
This section is used to define which OAI repositories to harvest metadata from in order to create records in Koha.
OAI-PMH harvesting is a protocol to retrieve records from an OAI-PMH repository. OAI-PMH repositories may be used by libraries for local history collections, thesis repositories... This functionality allows you to host and manage a collection outside of Koha but include the records in your Koha catalogue.
Once one or more OAI repositories are set up, use the harvest_oai.pl cronjob to harvest the records.
Adding an OAI repository to harvest
You will need to add a new OAI repository for each set you want to harvest. Click on the button '+ New OAI repository'.
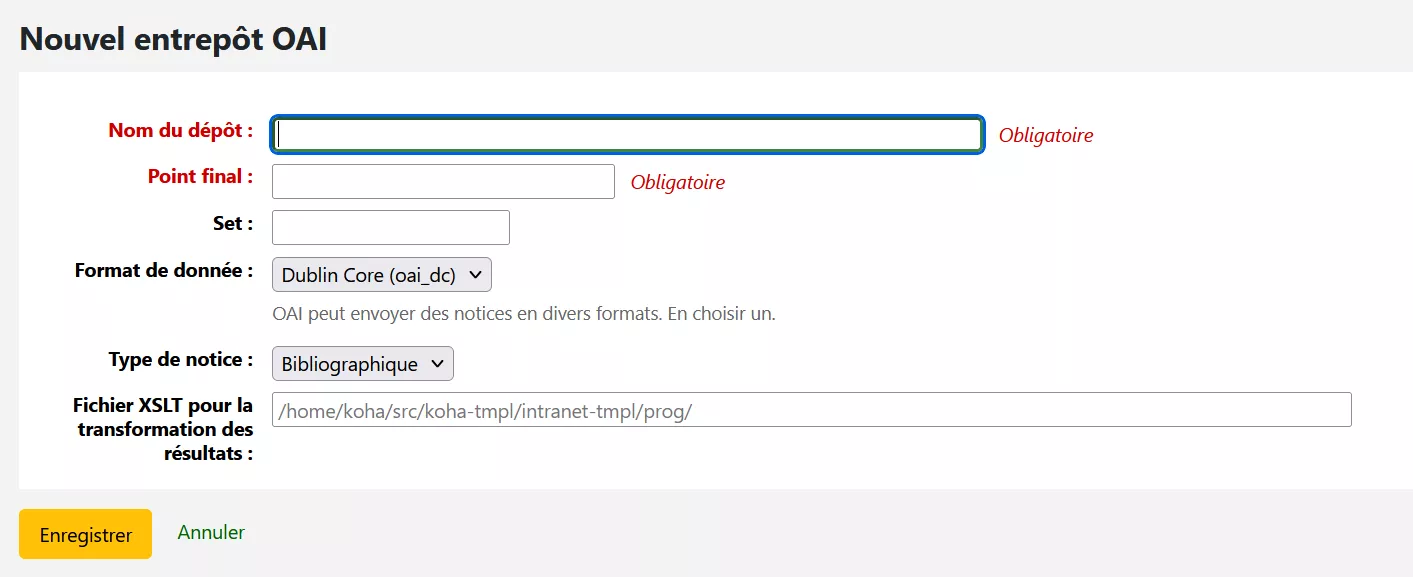
Repository name: enter a name that will help you identify the source
Endpoint: enter the URL.
The repository should provide you with its base endpoint; for example
https://doaj.org/oai?verb=Identifyfor the Directory of Open Access Journals. In the Koha endpoint field, simply enter the information before?verb, e.g.https://doaj.org/oai.
Set: the name of the set you want to harvest.
You can usually find all the sets available by adding
?verb=ListSetsto the endpoint you entered in the previous field.
Data format: choose the format to harvest in the list.
You can check the formats available for a repository by adding
?verb=ListMetadataFormatsto the endpoint you entered previously.
Record type: choose if you will harvest bibliographic or authority records in this set.
XSLT file for transforming results: type the path of the XSLT file you want to apply to transform Dublin Core XML to MARC. Several XSLT files are provided by default:
For bibliographic records:
<path_to_src>/koha-tmpl/intranet-tmpl/prog/en/xslt/OAIDCtoUNIMARCXML.xslor<path_to_src>/koha-tmpl/intranet-tmpl/prog/en/xslt/OAIDCtoMARC21XML.xslFor authority records:
<path_to_src>/koha-tmpl/intranet-tmpl/prog/en/xslt/AuthOAIDCtoUNIMARCXML.xslor<path_to_src>/koha-tmpl/intranet-tmpl/prog/en/xslt/AuthOAIDCtoMARC21XML.xsl
Click 'Save' to save the new OAI repository.
SMTP servers
Get there: More > Administration > Additional parameters > SMTP servers
This section is used to configure SMTP servers to send emails through Koha.
ملاحظة
Only staff with the manage_smtp_servers permission (or the superlibrarian permission) will have access to this section.
The default STMP configuration is set in the koha-conf.xml file. But this section allows you to add additional servers.
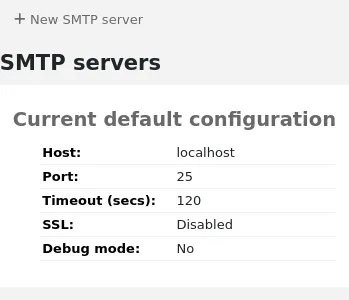
To add a new server,
Click 'New SMTP server'
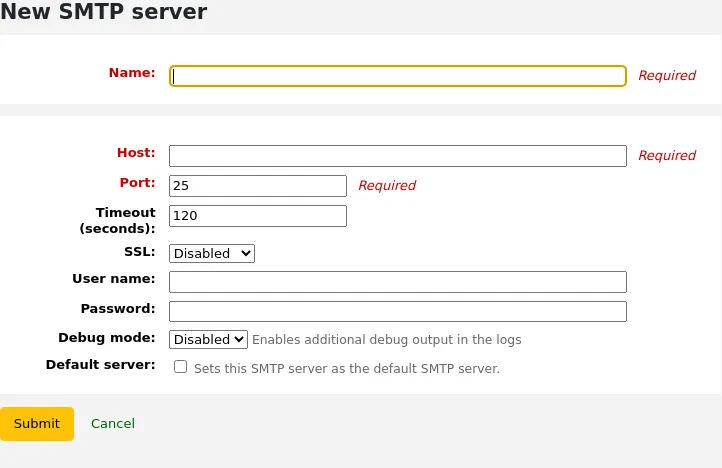
Name (required): give the server a significant name, this is the name that will be displayed in Koha
Host (required): enter the host name or IP address of the server
Port (required): enter the port number provided by your administrator
Timeout (seconds): enter the number of seconds after which an unsent email will result in an error
SSL: choose the security protocol provided by your administrator
Disabled: no security (not recommended)
SSL
STARTTLS
Username: enter the username provided by your administrator
Password: enter the password provided by your administrator
Debug mode: choose whether to enable the debug mode to send additional output to the logs
Default server: choose whether this server is the default one to be used by all libraries
اضغط 'إرسال'
Once the server is added, you can select it in the library's details.
هل تعني؟
Get there: More > Administration > Additional parameters > Did you mean?
ملاحظة
Only staff with the manage_didyoumean permission (or the superlibrarian permission) will have access to this section.
Koha can offer 'Did you mean?' options on searches based on values in your authorities.
هام
Did you mean? only works in the OPAC at this time. The intranet options are here for future development.
بإستخدام هذه الصفحة بإمكانك أن تتحكم بالخيارات التي يعطيها كوها للمستفيدين في نتائج بحثهم .
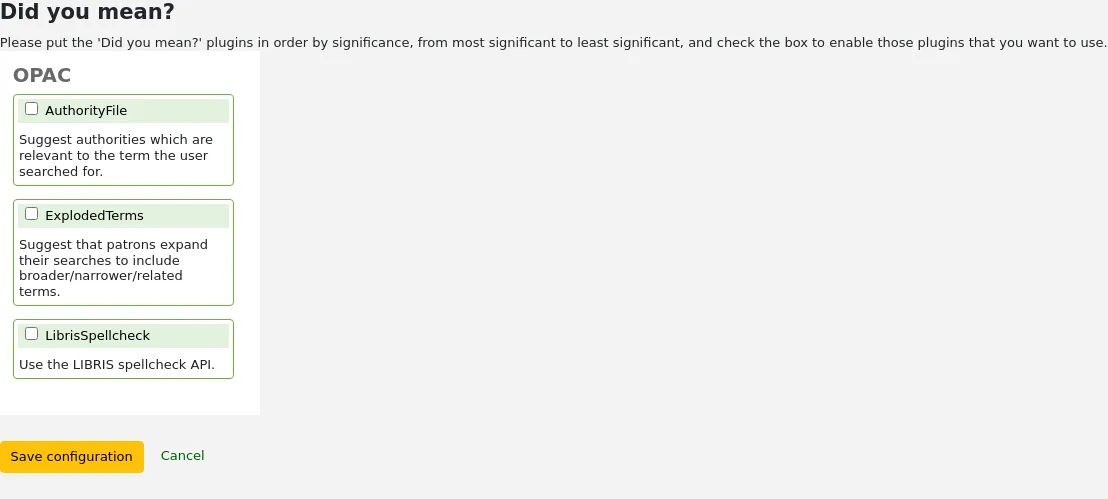
لِتُشغِّل شريط 'هل تقصد؟' في نتائج بحثك تحتاج أن تختار مربع الإختيار بجانب كل إضافة ترغب بإستخدامها. الإضافتان الَّتان ينبغي أن تختار منهما هما:
الإضافة البرمجية المسماة ExplodedTerms تقترح على المستفيد أنه يُحاول أن يبحث عن مصطلح أعرض أو أضيق أو متعلق للبحث المقصود (مثال: في حال بحث المستخدم عن "نيويورك(الولاية)" قد ينقر على وصلة تضييق المصطلحات إذا ما كان مهتماً أيضاً بـ "نيويورك(المدينة)". هذا يتعلق فقط بالمكتبات ذات البيانات الإستنادية عالية الضبط هرمياً.
الإضافة البرمجية AuthorityFile للملف الإستنادي تبحث في الملف الإستنادي وتقترح ما من الممكن أن يجذب إهتمام المستخدم من التسجيلات الببليوغرافية المرتبطة بالإستنادات
إذا ما أردتَ أن تأخذ إحدى الإضافات الأولوية فوق الأخرى ببساطة أسحبها فوق الإضافات الأخرى.
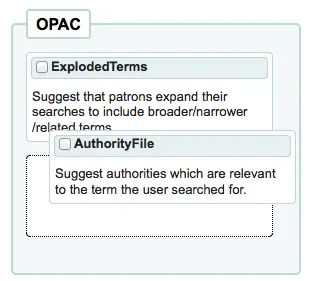
If you choose both plugins you will see several options at the top of your search results
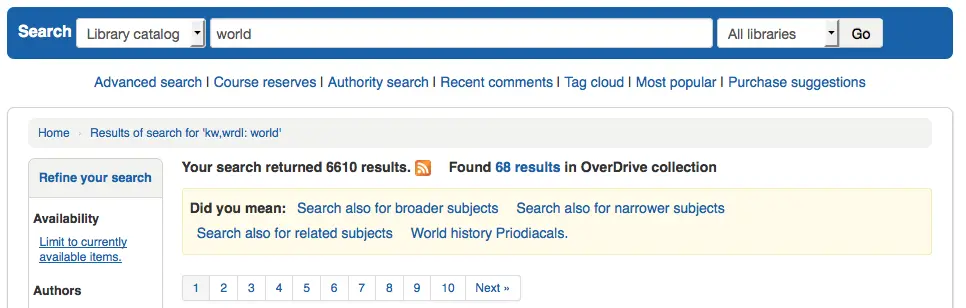
If you choose just the AuthorityFile you'll see just authorities.

إعدادات الجدول
This administration area will help you hide or display columns on fixed tables throughout the staff interface and OPAC.
Get there: Administration > Additional parameters > Table settings
ملاحظة
Only staff with the manage_column_config permission (or the superlibrarian permission) will have access to this section.
النقر على النظام الفرعي الذي ترغب في تحرير الجداول له سيعرض الخيارات المتاحة لك.
This area lets you control the columns that show in the table in question. If nothing is hidden you will see no check marks in the 'is hidden by default' column.
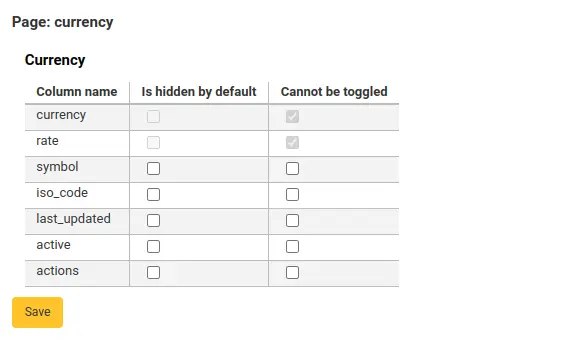
And will see all of the columns when viewing the table on its regular page.
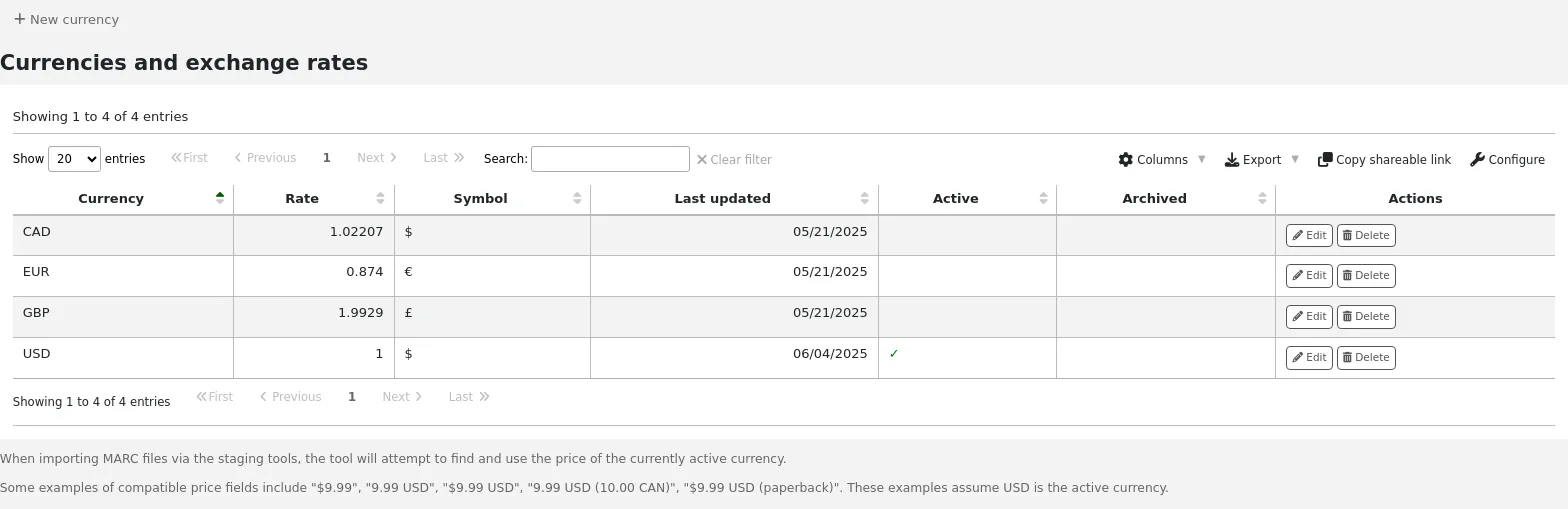
If columns are hidden they will have checks in the 'is hidden by default' column.
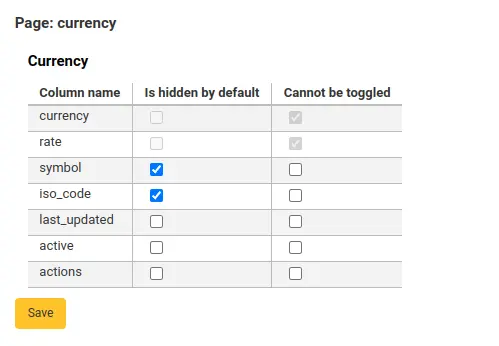
And hidden when you view the table.

The 'Cannot be toggled' column is used to prevent individual users from showing or hiding this column when viewing the table.
Individual users can toggle columns using the 'Columns' button at the top of the table.
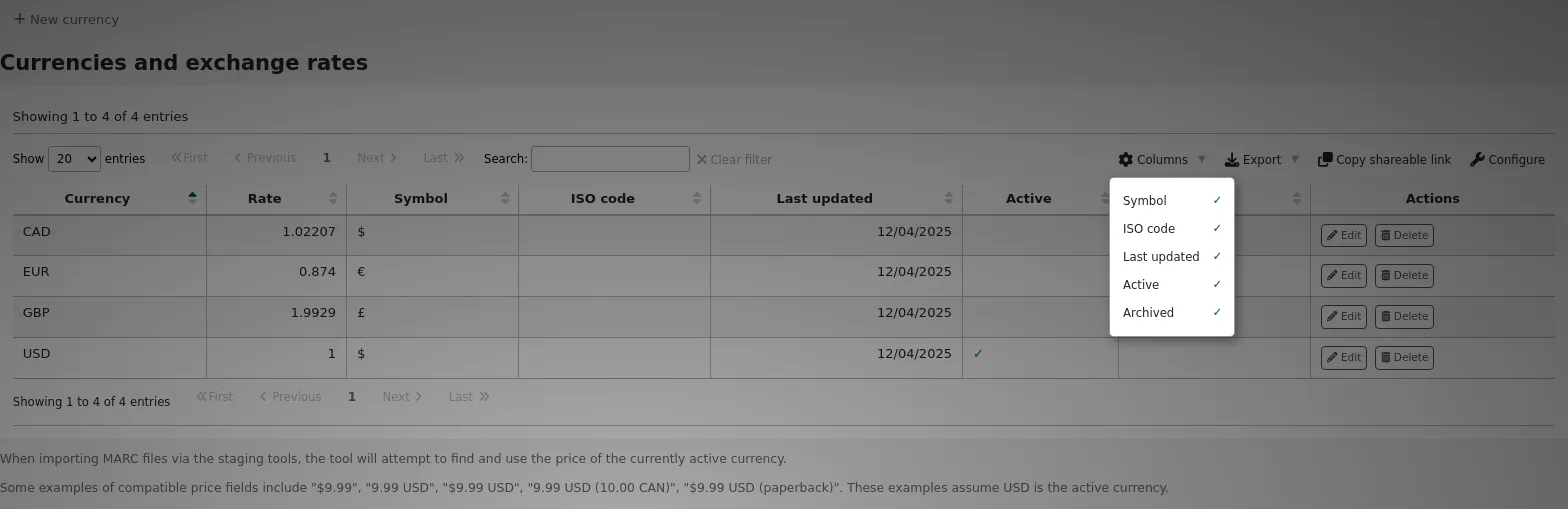
For example, in the Currencies table, the 'Currency' and 'Rate' columns cannot be toggled. When the user clicks on the 'Columns' button, they are not able to choose whether these two columns are hidden or visible.
Note that using the 'Columns' button show or hide columns will only toggle them for the current user and session. Once the user logs out, the columns will go back to their default settings as set in the table settings administration page. It will not affect any other user.
الوحدة |
Tables |
|---|---|
التزويد |
|
الادارة |
|
إستناد |
There aren't any tables that can be configured from the Authorities module. |
الفهرس |
|
الفهرسة |
|
الإعارة |
|
Course reserves |
|
E-resource management |
|
الإعارات بين المكتبات |
|
مستخدمين |
|
نقطة البيع |
|
الأدوات |
|
أوباك |
|
التقارير |
|
الدوريات |
|
ملاحظة
Patrons in the OPAC can't toggle column visibility. For OPAC tables this feature only allows to control the visibility of columns.
ملاحظة
Any tables with columns listed here also have the option to export to Excel, export to CSV, copy, or print within the table header.
تنبيهات صوتية
If you have your AudioAlerts preference set to 'Enable' you will be able to control the various alert sounds that Koha uses from this area.
Get there: More > Administration > Additional parameters > Audio alerts
ملاحظة
Only staff with the manage_audio_alerts permission (or the superlibrarian permission) will have access to this section.
Each dialog box in Koha has a CSS class assigned to it that can be used as a selector for a sound.
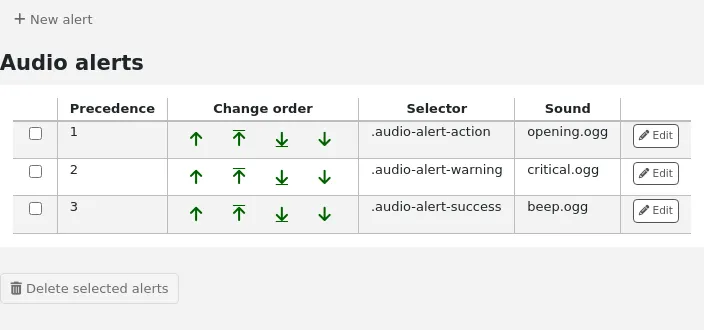
You can edit the defaults by clicking the 'Edit' button to the right of each alert.
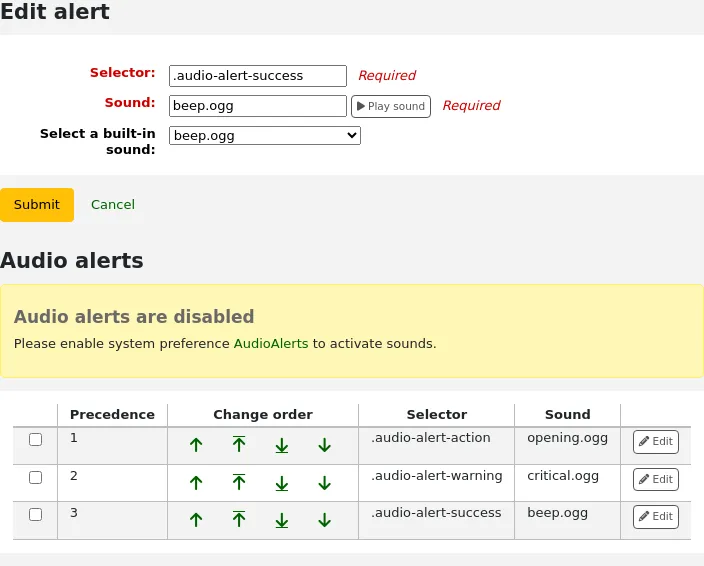
You can assign alerts to other CSS classes in Koha by entering that information in the selector box. For example if you enter
body:contains('Check in message')
Then when you visit the check-in page you will hear an alert.
Every page in Koha has a unique ID in the body tag which can be used to limit a sound to a specific page
Any ID selector (where HTML contains id="name_of_id" ) and can also be a trigger as: #name_of_selector
مقدمي خدمة الرسائل النصية القصيرة
مهم
- This option will only appear if the
SMSSendDriver, SMSSendMaxChar preference is set to 'Email'.
ملاحظة
Only staff with the manage_sms_providers permission (or the superlibrarian permission) will have access to this section.
ملاحظة
Many mobile providers have deprecated support for the SMS::Send::Email feature. It is not recommended for use unless you have a dedicated SMS to Email gateway.
From here you can enter as many cellular providers as you need to send SMS notices to your patrons using the email protocol.
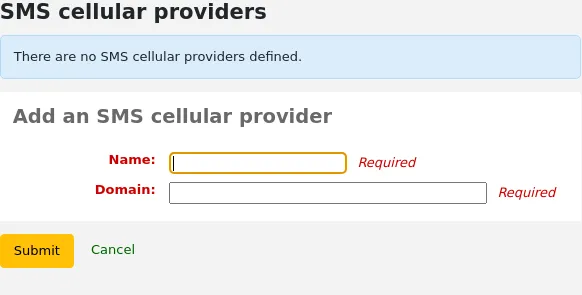
Some examples in the US are:
Mobile carrier |
SMS gateway domain |
|---|---|
Alltel |
sms.alltelwireless.com |
AT&T |
txt.att.net |
Boost Mobile |
sms.myboostmobile.com |
Project Fi |
msg.fi.google.com |
Republic Wireless |
text.republicwireless.com |
Sprint |
messaging.sprintpcs.com |
T-Mobile |
tmomail.net |
U.S. Cellular |
email.uscc.net |
Verizon Wireless |
vtext.com |
Virgin Mobile |
vmobl.com |
Table: SMS provider examples
To add new providers enter the details in the form and click 'Add new' to save.
These options will appear in the OPAC for patrons to choose from on the Messaging tab if you have EnhancedMessagingPreferences enabled.

مشاركة إحصائيات استخدامي
You can share your Koha usage statistics with the Hea community. Sharing your usage statistics helps with the development of Koha as the community regularly checks these statistics to make decisions.
ملاحظة
Only staff with the manage_usage_stats permission (or the superlibrarian permission) will have access to this section.
Note that statistics are anonymized and no patron information is shared.
Worldwide statistics can be viewed at https://hea.koha-community.org/
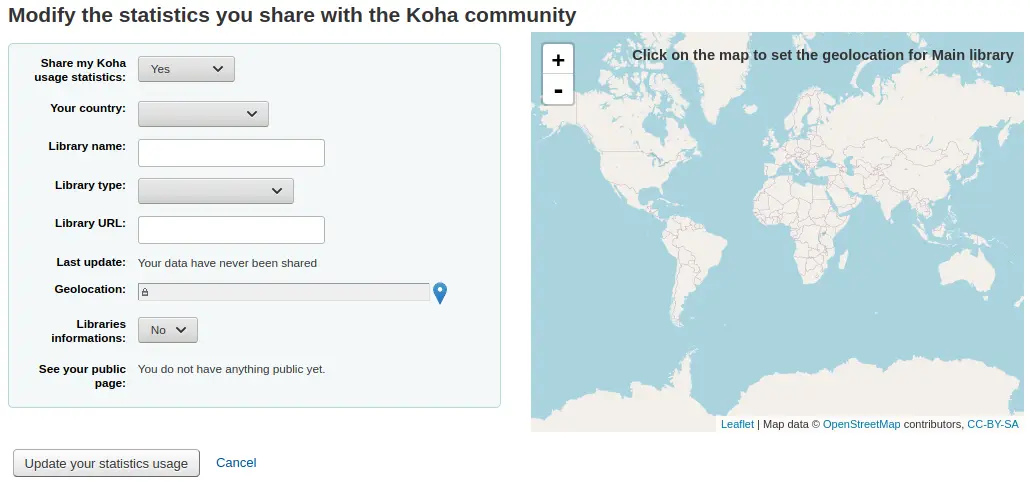
Share my Koha usage statistics:
The default choice is 'Undecided', this make the message appear on the administration main page.
Choose 'yes' if you want to share your usage statistics
Choose 'no' if you don't want to share your statistics and you don't want to see the message on the administration page
Your country: choose the country where your library is located
Library name: enter your library's name
Library type: choose your library's type
Library URL: enter your library's Web site URL
Last update: here your will see the last date when your data was uploaded to the Hea website
Geolocation: use the map on the right to put the marker where your main library is situated. The coordinates will appear in the Geolocation field.
Libraries information: if you have more than one branch, you can choose 'yes' here to put all your branches on the map
See your public page: this is the URL to your information on the Hea website.
Click 'Update your statistics usage' to save the information.
مشاركة المحتوى مع قاعدة معرفة مانا
Mana KB is a worldwide knowledge base used to share content specific to libraries. Koha is currently connected to Mana Kb in order to share serial subscription models and reports. This section is used to configure your connexion with Mana KB.
Get there: More > Administration > Additional parameters > Share content with Mana KB
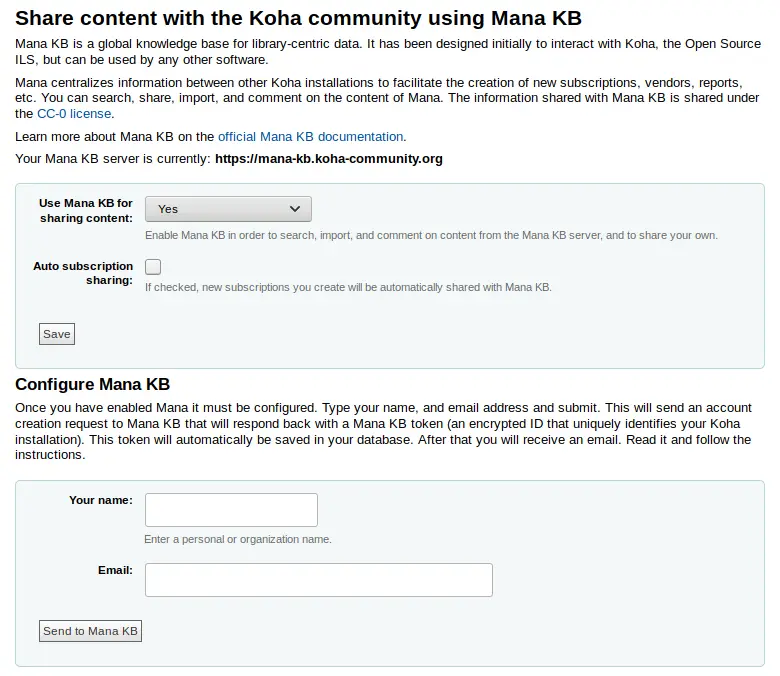
ملاحظة
Only staff with the manage_mana permission (or the superlibrarian permission) will have access to this section.
In the form, choose whether you want to use Mana KB to share content or not. The default is "No, let me think about it". If you do want to use Mana KB, change the option to "Yes". If you do not want to share with Mana KB, choose "No", this will remove the blue rectangle from the Administration home page.
The rest of this section assumes you chose "Yes".
Choose whether you want to share your subscription models automatically. This means that every time you create a subscription in the serials module, it will be automatically shared with Mana KB and other libraries will be able to copy it.
In order to configure Mana KB, you must get a Mana KB token to authenticate your Koha installation on the Mana KB server.
Enter your name or your organization's name in the "Your name" field.
Enter your email in the "Email" field. Make sure you have access to this email inbox since you will receive further information by email.
Once you send your information to Mana KB, you will get a Mana KB token.

In the email your receive, click on the confirmation link and confirm you are not a robot to finish the Mana KB setup.
حقول إضافية
This section is used to add custom fields to order baskets, invoice, serial subscriptions, and accountlines.
ملاحظة
Only staff with the manage_additional_fields permission (or the superlibrarian permission) will have access to this section.
To add a new field, first choose which table you want to add it to.
Acquisitions
Invoices (aqinvoices): a field added to aqinvoices will appear when viewing an invoice in the acquisitions module.
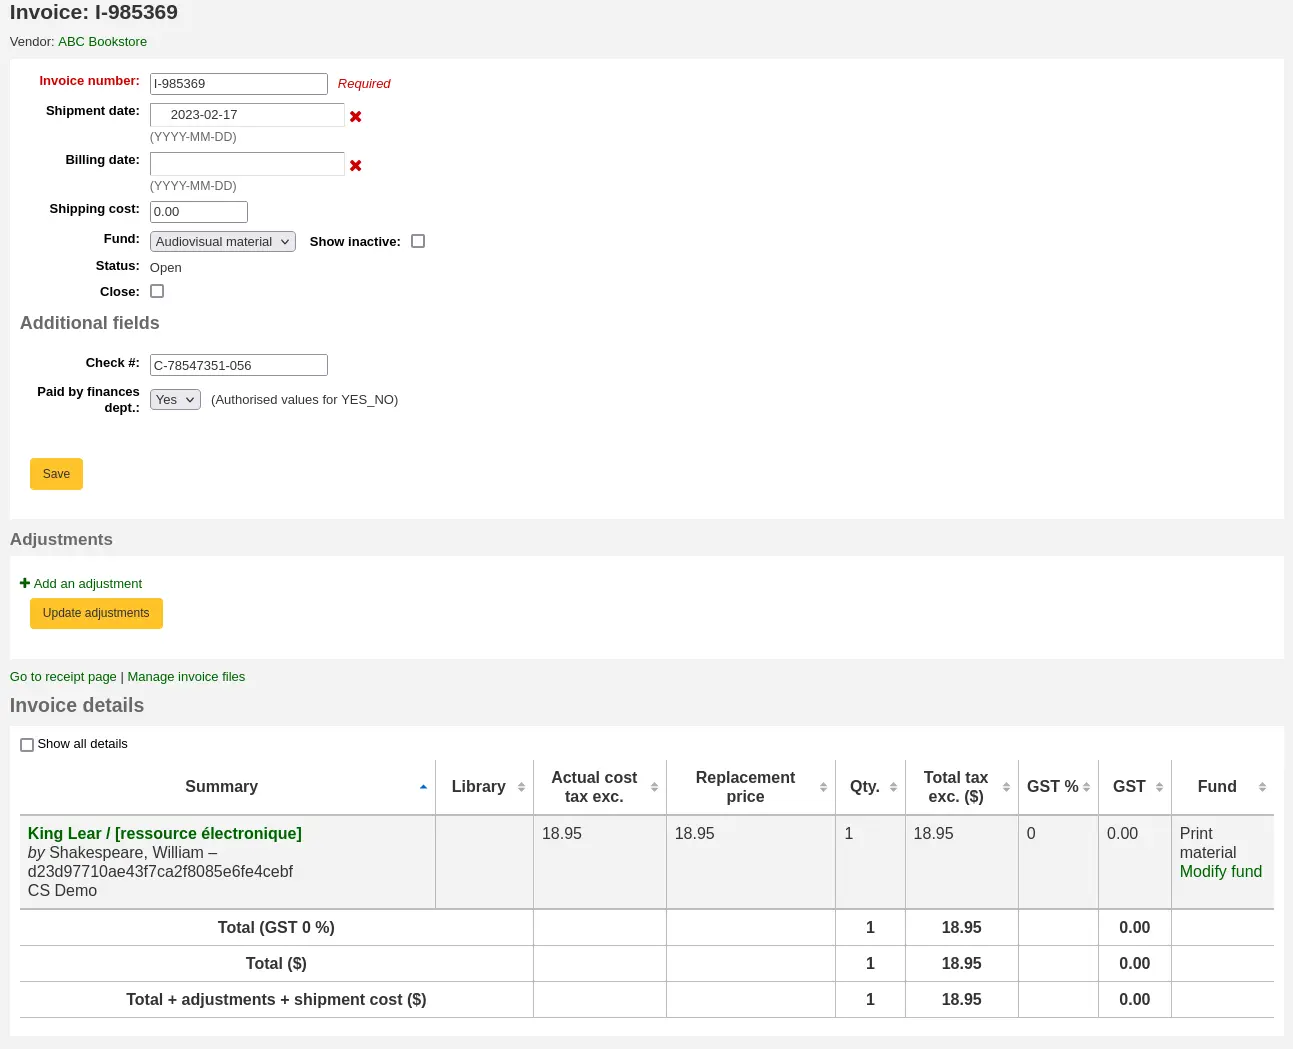
Order baskets (aqbasket): a field added to aqbasket will appear upon the creation of a new order basket or the modification of an existing order basket in the acquisitions module.

Order lines (aqorders): a field added to aqorders will appear when adding orders to a basket or editing orders in open baskets.
Administration
Libraries (branches): a field added to branches will appear when editing libraries.
Version
Additional fields for libraries were added to Koha in version 25.05.
ERM
Agreements (erm_agreements): a field added to erm_agreements will appear when creating or editing agreements in the ERM module.
Version
Additional fields for ERM agreements were added to Koha in version 24.11.
Licenses (erm_licenses): a field added to erm_licenses will appear when creating or editing agreements in the ERM module.
Version
Additional fields for ERM licenses were added to Koha in version 24.11.
Packages (erm_packages): a field added to erm_packages will appear when creating or editing packages in the ERM module.
Version
Additional fields for ERM packages were added to Koha in version 24.11.
Patrons
Account lines (credit) (accountlines:credit): a field added to account line credits will appear when paying or writing off charges in a patron's account or when creating manual credits.
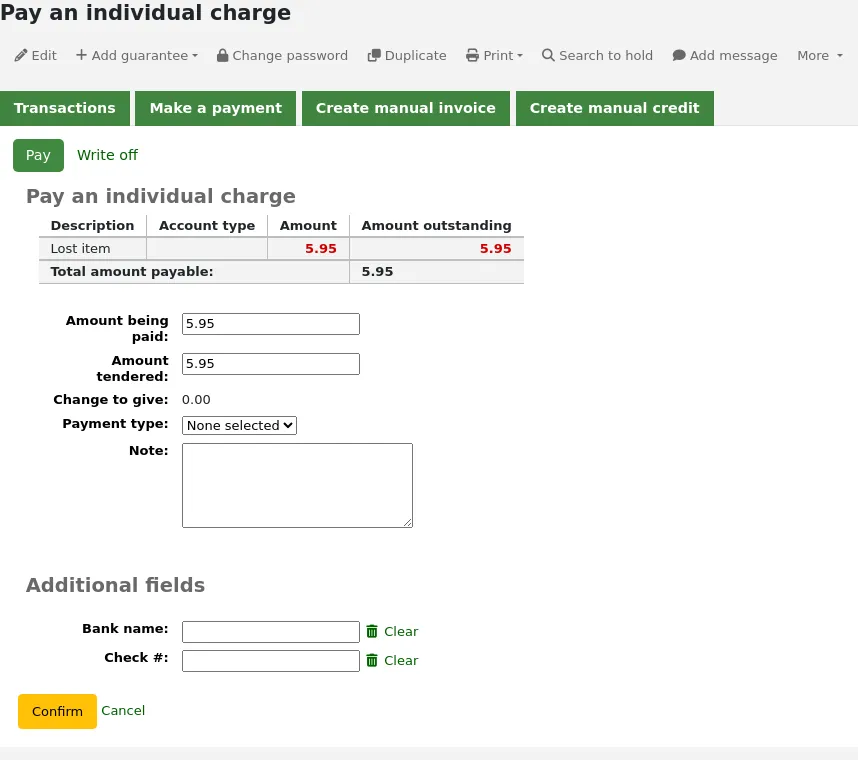
Account lines (debit) (accountlines:debit): a field added to account line debit will appear when creating a manual invoice
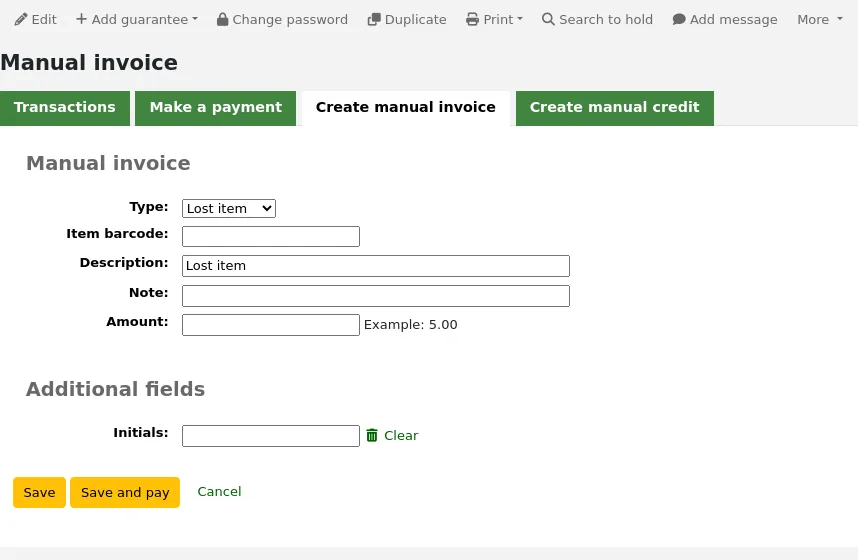
Account credit types (account_credit_types): a field added to account credit types will appear when adding or editing credit types.
Version
Additional fields for credit types were added to Koha in version 25.05.
Account debit types (account_debit_types): a field added to account debit types will appear when adding or editing debit types.
Version
Additional fields for debit types were added to Koha in version 25.05.
Serials
Subscriptions (subscription): a field added to subscription will appear when creating a new subscription or when editing an existing subscription in the serials module.
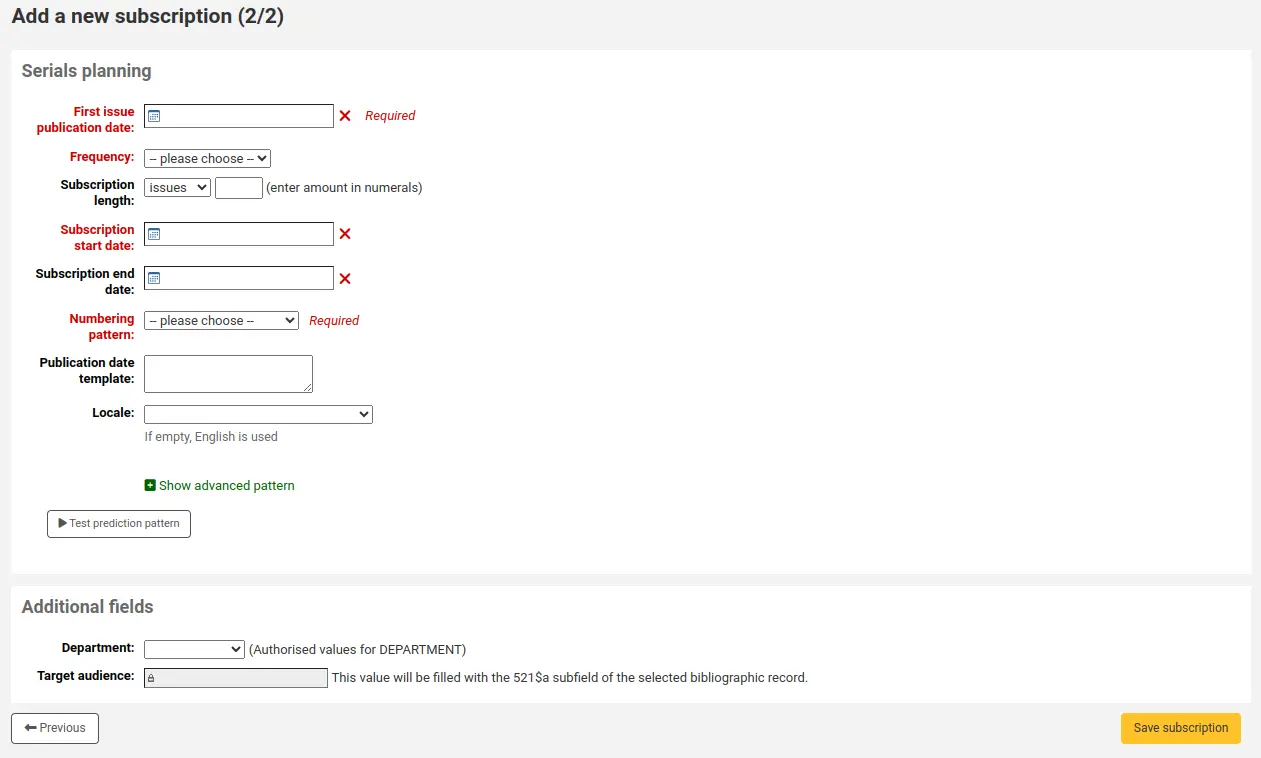
Click on 'New field'.
Fill out the form.
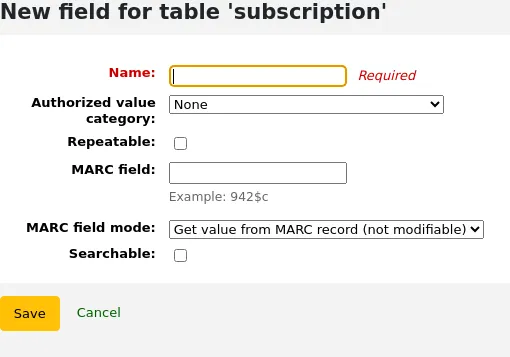
Name: this is the name of the field as you want it to appear.
Authorized value category: if you want to add a dropdown menu to the field choose an authorized value category here (you can also create a new authorized value category if you need to).
Repeatable: if you want the field to be repeatable, check this box. For free text fields, it will add a 'New' button next to the field so that staff can repeat the field and add a new value. For fields with authorized value categories, it will create a list of checkboxes instead of a dropdown menu allowing staff to choose more than one option.
Version
This option was added to Koha in version 24.11.
MARC field: for additional subscription fields, it is possible to link the field to a MARC field. The additional field will be automatically populated with the corresponding record's value for this MARC field.
ملاحظة
You can only choose one of the two options (authorized value OR MARC field)
تحذير
If you choose the MARC field, make sure you enter it in this format: field$subfield
For example: 590$a
Searchable: check this box if you want to be able to search baskets or subscriptions based on this field
Order basket searchable additional fields will be available in the orders advanced search form
Invoice searchable additional fields will be available in the invoice search form
Subscription searchable additional fields will be available in the subscription advanced search form
Examples of additional fields
Example 1: Additional subscription field using authorized values
You might want to track which department you're ordering this serial for
In the 'Name' field, enter 'Department'
In the 'Authorized value category' field, choose DEPARTMENT
Check the 'Searchable' box
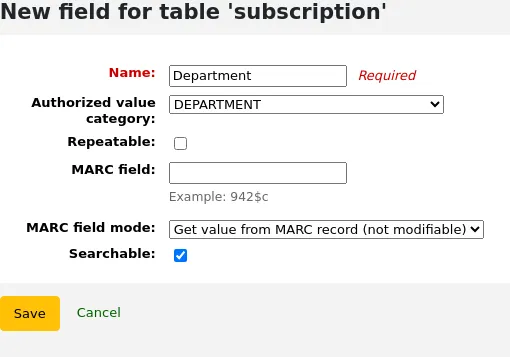
When you are adding a subscription, the field will be in the 'Additional fields' section with its authorized values drop-down menu.
When you view the subscription, the field will appear under 'Additional fields'.

Because we made the field searchable, it will also be in the serials subscription search.
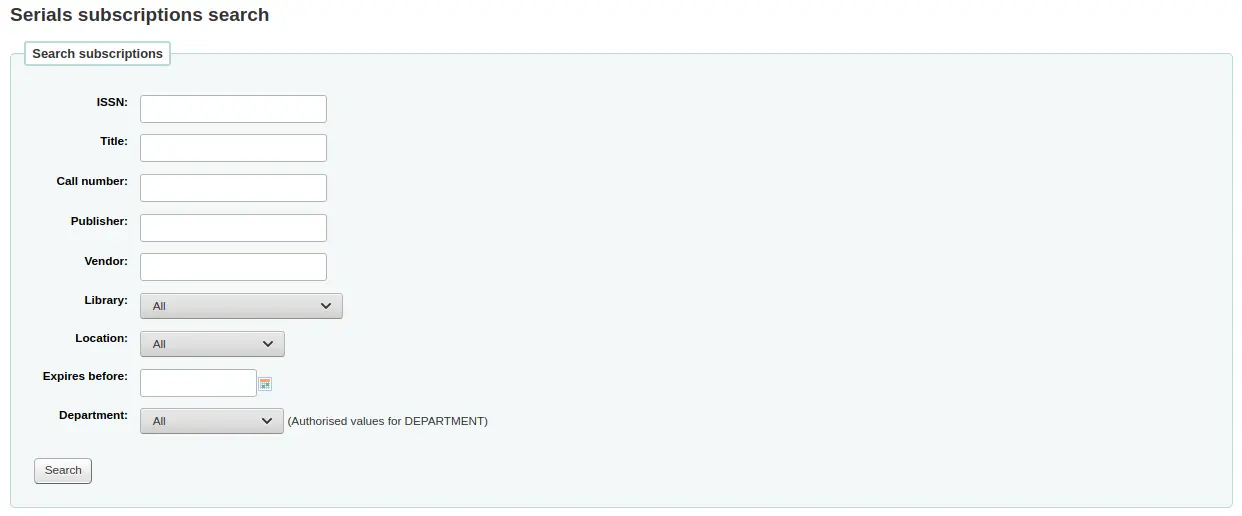
Example 2: Additional subscription field using MARC field
This is particularly useful if you want to view bibliographic information in the subscription detail page. In this example, we will add the 521$a field, which is, in MARC21, the target audience note.
In the 'Name' field, enter 'Target audience'
In the 'MARC field' field, enter '521$a'
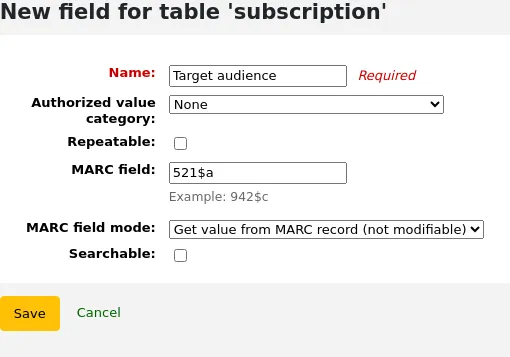
ملاحظة
You will not be able to edit this field from the subscription form. If you need to add or change the value in this field, you must go through the cataloging module.
When you view the subscription, the field and the information from the bibliographic record will appear under 'Additional fields'.
Example 3: Free text invoice additional field
If you need to enter additional information in invoices, such as the number of the check used to pay for the invoice, you can choose not to use an authorized value at all.
In the 'Name' field, enter 'Check #'
Check the 'Searchable' box
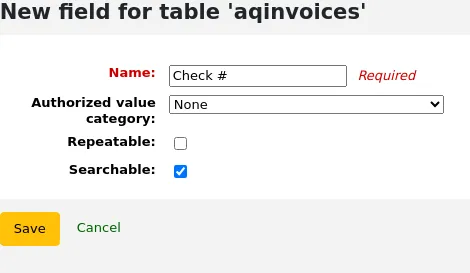
The new fields will be displayed when viewing the invoice in the acquisitions module.
Because we made the field searchable, it will also be in the invoice search.
Keyboard shortcuts
This section is used to redefine the keyboard shortcuts used in the advanced cataloging editor.
ملاحظة
This section will only appear if the EnableAdvancedCatalogingEditor system preference is enabled.
ملاحظة
Only staff with the manage_keyboard_shortcuts permission (or the superlibrarian permission) will have access to this section.
To change a shortcut, enter the combination of keys to use in the field in the 'Shortcut keys' column, and click 'Save shortcuts'.
Make sure to follow the key map rules when entering your key combinations:
Separate keys using a hyphen '-'
Control key is 'Ctrl'
Alt key is 'Alt'
Shift is 'Shift'
If combining multiple keys they must be in specified order: Shift-Cmd-Ctrl-Alt