الفهرسة¶
Before you start cataloging in Koha you're going to want to do some basic setup. Refer to the تطبيق نظام كوها - قائمة التحقق for a full list of these things. Most importantly you're going to want to make sure that your قوالب مارك الببليوجرافية are all defined the way you want. Once in the cataloging module you will not be able to add or remove fields and subfields so your frameworks must be ready before you start cataloging.
You can also use OCLC Connexion to send records directly in to Koha. For more information on that please review the OCLC Connexion Gateway setup Appendix.
- Get there: More > Cataloging
التسجيلات الببليوغرافية¶
In Koha the bibliographic record contains the main information related to the material. This includes things like the title, author, ISBN, etc. This information is stored in Koha in Marc (different flavors of Marc are supported in Koha). Once this information is saved, تسجيلات المواد can be attached.
إضافة التسجيلات¶
Records can be added to Koha via original or copy cataloging. You can also choose to use the basic or advanced cataloging interface for all of your work.
If you would like to catalog a record using a blank template in the basic editor
انقر على 'تسجيلة جديدة'
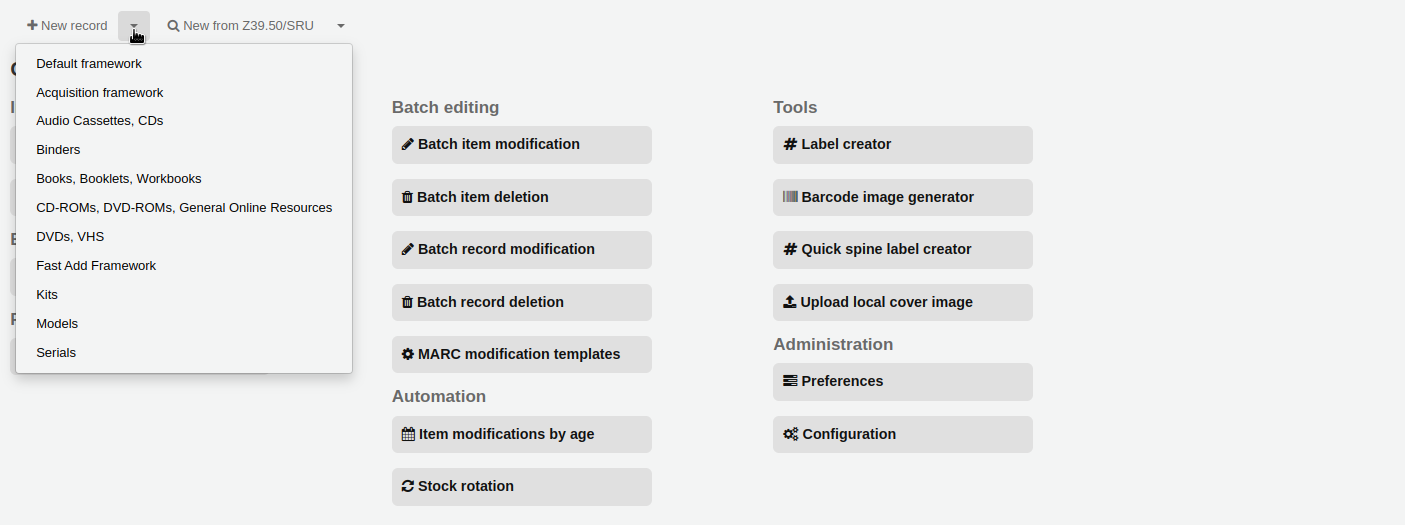
- اختر القالب الذي تريد أن تبني عليه تسجيلتك
If you would like to catalog a record using a blank template in the advanced editor
- Enable the EnableAdvancedCatalogingEditor preference
- Click the 'Advanced editor' button

If you want to catalog a record based on an existing record at another library in the editor you last used (basic or advanced)
Click 'New from Z39.50/SRU'

ابحث عن المادة التي ترغب بفهرستها
Note
إذا لم تعثر على أي نتائج، حاول البحث عن عدد أقل من الحقول، فليست كل الأهداف ب Z39.50 يمكن البحث فيها بكل حقول مارك.
Search targets can be altered by using the Z39.50 Admin area.
من قائمة النتائج ستتمكن من عرض مارك أو عرض البطاقة للتسجيلات أو اختر أن تستوردهم إلى كوها
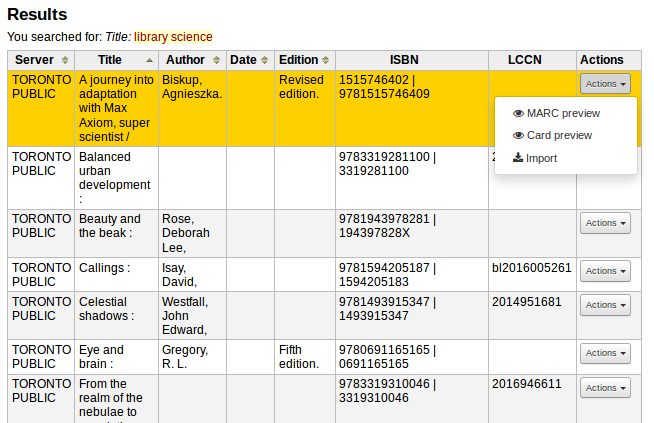
بالإضافة إلى وصلة الإستيراد على يسار كل عنوان ، بإمكانك النقر على العنوان الذي تهتم به وستنبثق لك قائمة من الوصلات لتعرض التسجيلة وتستوردها

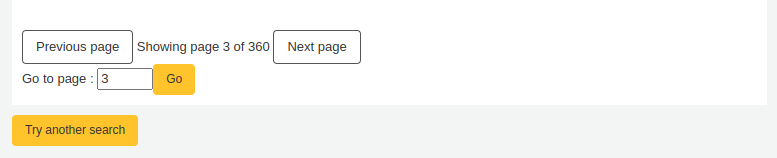
إذا لم تجد العنوان الذي تبحث عنه في نتائج بحث Z39.50 فبإمكانك أن تنقر على زر 'جرب بحثاً آخر' في الزاوية اليمنى السفلى من نتائج بحثك
Basic Editor Cataloging¶
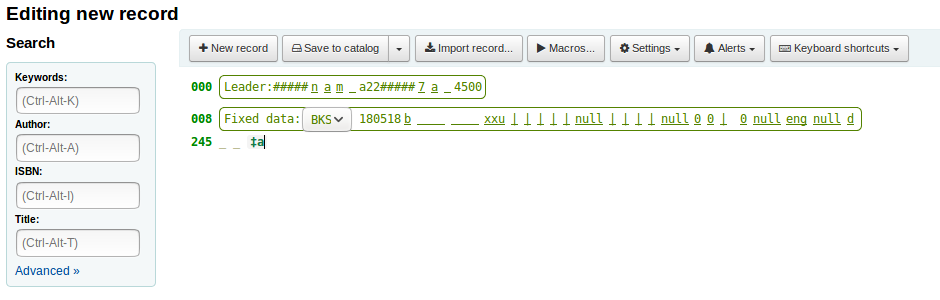
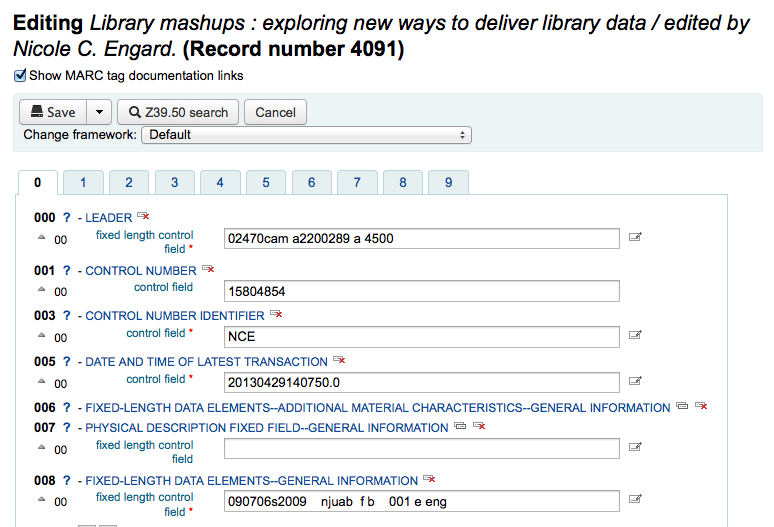
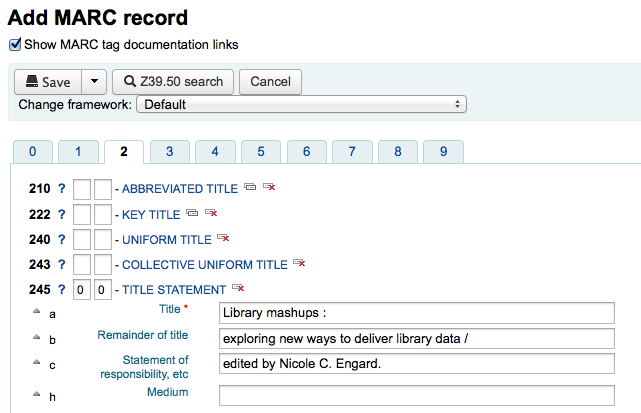
In the basic editor once you've opened a blank framework or imported a record via Z39.50 you will be presented with the form to continue cataloging
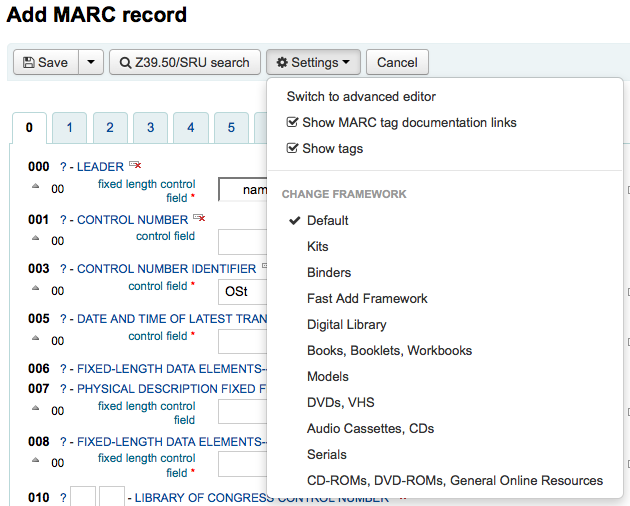
If you would rather not see the MARC tag numbers you can change the value in your hide_marc system preference or each user can check the box next to 'Show tags' found under 'Settings'.
للتوسيع الوسم الغير ظاهر انقر على وصف الوسم
للحصول على المساعدة من مكتبة الكونغرس عن تيجان مارك أنقر على علامة الإستفهام(؟) على يسار كل رقم حقل
- If you feel that this clutters the screen you can hide the question marks by unchecking the box next to the 'Show MARC tag documentation links' note found under 'Settings'
Sometimes fields may not be editable due to the value in your BiblioAddsAuthorities system preference. If you have this preference set to not allow catalogers to type in fields controlled by authorities you may see a lock symbol to the left of the field.

اذا ظهرت هذه الأيقونة يجب أن تضغط الأيقونة على يسار الحقل للبحث عن الاستناد الموجود.
من قائمة النتائج انقر على 'اختر الإستناد' لتجلبها إلى تجسلات فهرسك.

لتكرار الحقل انقر على أيقونة 'تكرار هذا الوسم' على يمين الوسم

للانتقال إلى الحقول الفرعية بالترتيب الصحيح، انقر فوق السهم إلى يمين الحقل
لتكرارالحقل الفرعي انقر على الايقونة (لإزالة نسخ الحقل ، انقر على أيقونة حذف النسخ) على يسار الحقل
لإزالة الحقل الفرعي (إذا كان هناك أكثر من واحد من نفس النوع)، انقر على - (علامة ناقص) إلى يمين الحقل
لاستخدام البرنامج المساعد أنقر على الأيقونة على يمين الحقل

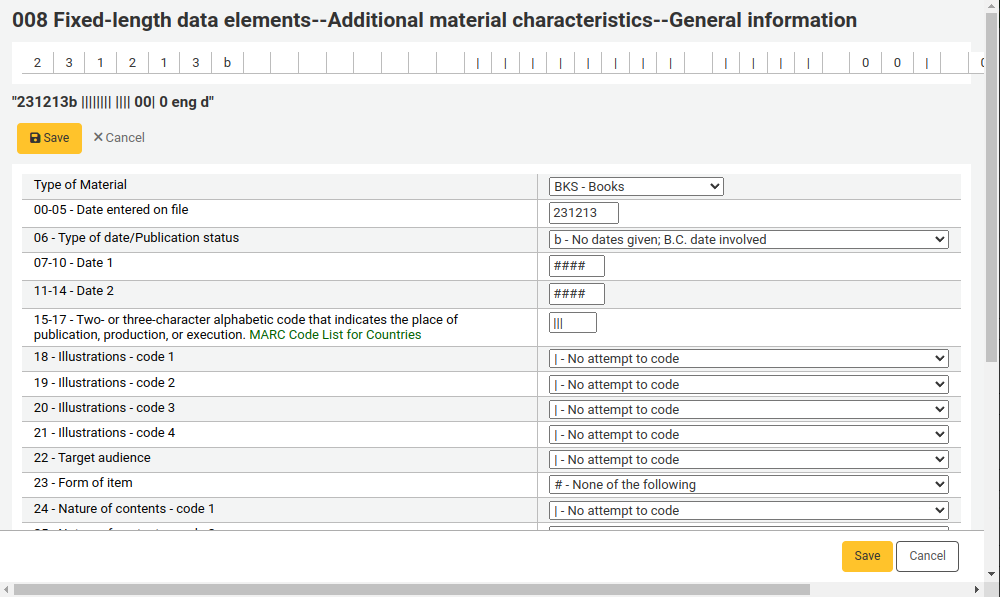
بعض الحقول الثابتة لديها المحررين والتي ستتغير بالاستناد إلى نوع المادة الأساسي في فهرستك (على سبيل المثال حقول 006 و 008)
بمجرد أن تنتهي، انقر على زر 'حفظ' في الأعلى واختر إذا ما كنت تود أن تحفظ وتستعرض التسجيلة الببليوغرافية التي أنشئتها، أو أن تتابع إلى إضافة/تحرير المواد المرتبطة بالتسجيلة
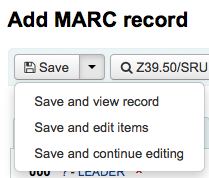
- Choosing 'Save and view record' will bring you right to the record you just cataloged
- Choosing 'Save and edit items' will bring you to the add/edit item form after saving the bib record so that you can attach holdings
- Choosing 'Save and continue editing' will allow you to save your work so far and keep you in the editor to continue working
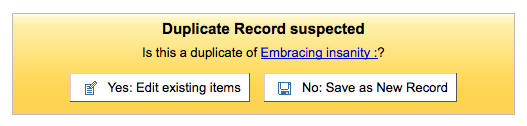
اذا كنت على وشك اضافة سجل مكرر للنظام سيتم تحذيرك قبل الحفظ
Advanced Editor Cataloging¶
In order to use the Advanced cataloging editor you need to enable the EnableAdvancedCatalogingEditor preference.
Important
This feature is currently experimental, and may have bugs that cause corruption of records. It also does not include any support for UNIMARC or NORMARC fixed fields. Please help us test it and report any bugs, but do so at your own risk.
In the advanced editor once you've opened a blank framework or imported a record via Z39.50 you will be presented with the form to continue cataloging
Using the search box on the left you can perform Z39.50 searches

And from those Z39.50 results you can view the marc record by clicking the link to the right

Clicking 'Import' will bring the record in to the editor where you can perform your edits
Note
When adding a new field in the Advanced Editor, you need to key underscores for a blank indicator, and surround the indicators with spaces.
Note
You need to key a space before the first subfield delimiter, but not before or after other subfield delimiters in the field.
At the bottom of the editor you will see help from the Library of Congress for the field you are on. In cases where your MARC is invalid you will see red highlighting. To edit the record using only keyboard functions the Keyboard shortcuts button will inform you of the necessary commands
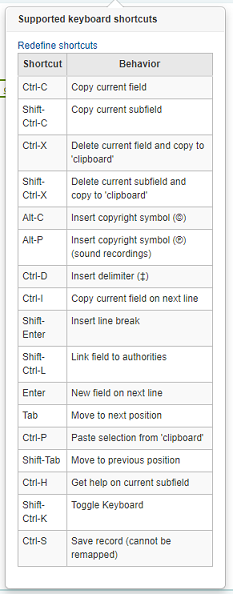
Advanced Cataloging Keyboard Shortcuts¶
The following keyboard shortcuts can be used in the advanced cataloging module to save time and clicking.
| اختصار | سلوك |
|---|---|
| Ctrl-D | أدخل محدد (‡) |
| Ctrl-H | الحصول على مساعدة حول الحقل الفرعي الحالي |
| Ctrl-S | حفظ التسجيلة |
| Ctrl-X | Delete current field |
| Ctrl-Shift-X | Delete current subfield |
| إدخال | حقل جديد في السطر التالي |
| Shift-Enter | قم بإدخال فاصل سطر |
| تبويب | انتقل للموضع التالي |
| Shift-Tab | انتقل للموضع السابق |
Macros in Advanced Cataloging¶
To record a new macro:
- Select the "> Macros..." button
- A window will pop up. In this window, select "New macro...," key the new macro's name in the pop-up box and select OK.
- Now click to the right of the little number 1, and key the first line of your macro. For a multi-line, i.e., multi-field macro, hit the return key so that a little number 2 appears, and key the second line/field, etc.
- Your macros will be automatically saved. When finished you can select the "x" to close the window, or select a macro to run on the record that you're editing, or select another macro to run.
To edit an existing macro:
- Select the "> Macros..." button
- A window will pop up. In this window, select the macro that you wish to edit & make your changes.
- Your work will automatically be saved, and when finished you can select the "x" to close the window, or select a macro to run on the record that you're editing, or select another macro to run.
The basic syntax of the macro language:
- new 500=‡aEdited with Rancor
- Creates a new 500 with a ‡a subfield and sets it to "Edited with Rancor".
- 245c= by J.K. Rowling.
- Sets the first ‡c subfield of the first 245 tag in the record to " by J.K. Rowling", creating it if necessary.
- 082a={084a}
- Sets the ‡a subfield of the first 082 tag (creating the subfield if necessary) to the contents of the first 084‡a.
- indicators=_1
- Sets the indicators of the last mentioned tag (in this case, 082) to "_" and "1".
- new 090a=Z674.75.W67
- Creates a new ‡a subfield on the first 090 (but only if that field already exists) and sets it to Z674.75.W67.
- new 090a at end=Z674.75.W67
- Same as above.
- new 245b after a= a tale of might and magic /
- Creates a new ‡b after the first a subfield and sets it to " a tale of might and magic /".
- delete 245b
- Deletes the first ‡b subfield on the first 245 to ‡b
إضافة تسجيلات تحليلية¶
تقوم المكتبات في بعض الأحيان بجعل مقالات الدوريات والمقالات المتضمنة داخل الدراسات والسلاسل متاحة لمستفيديها عبر الفهرسة التحليلية. الفهرسة التحليلية تُنشئ تسجيلات ببليوغرافية مُنفصلة لتلك المقالات ، الفصول ، الأقسام ...الخ. الموجودة داخل مصدر أكبر مثل الكتاب ، أو مقالة داخل مجلة أو صحيفة أو سلسلة. وأيضاً في الفهرسة التحليلية يتم إنشاء تسجيلة ببليوغرافية للعنوان ، وهو لا ينفصل فيزيائياً عن المادة المُضيفة. تعلم المزيد عن التحليل في الفصل 13 من قاف2.
If you would like to catalog analytic records there are two options. One is to use the مداخل تحليلية funtion; the other is the Analytics Enhanced Workflow.
مداخل تحليلية¶
The Easy Analytics feature makes linking analytic records together easier. The first thing you need to do is set the EasyAnalyticalRecords preference to 'Display' and the UseControlNumber preference to 'Don't use.'
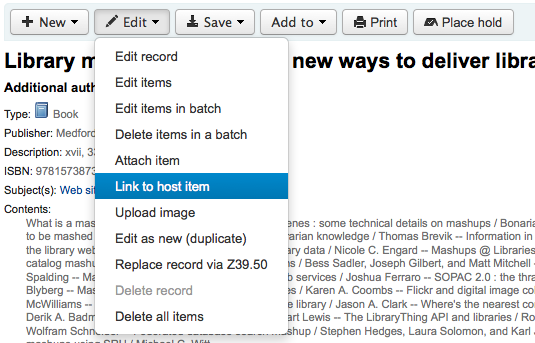
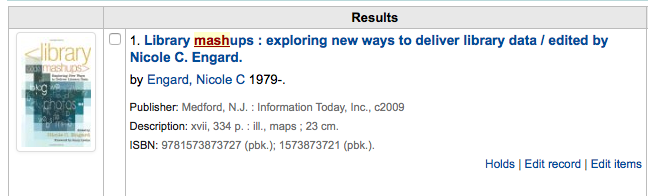
After cataloging your analytic record (see Adding Records for more on creating records) click 'Edit' from the normal view and choose to 'Link to Host Item'
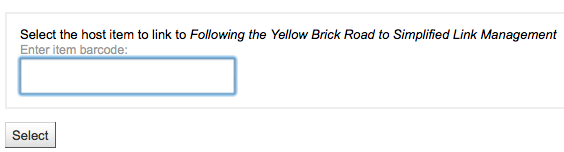
سيُطالبك بإدخال الباركود للمادة التي يجب أن ترتبط بها هذه التسجيلة.
بعد إدخال باركود المادة والنقر على 'تحديد' ستتلقى رسالة تأكيد.

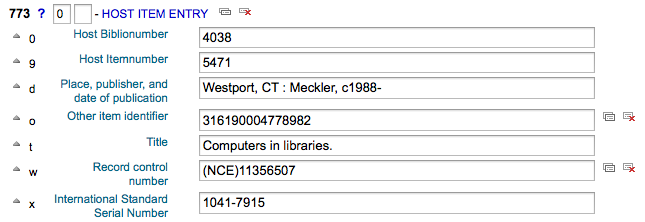
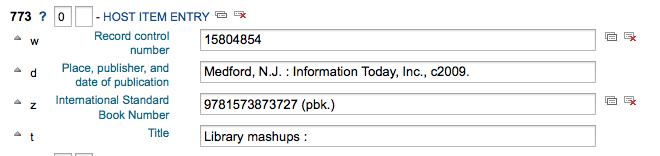
التسجيلة سيُضاف لها الآن الحقل 773 مملوء كما ينبغي لإتمام الربط.
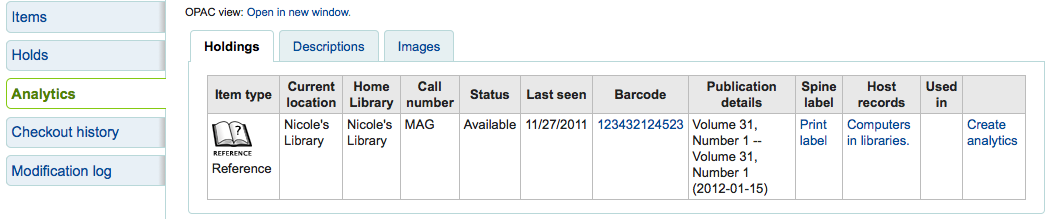
لتعرض كل المواد المربوطة بالتسجيلة المستضيفة ، قم بالبحث عن التسجيلة ، أنقر على تبويب التحليلات على اليمين وستعرض التحليلات المرتبطة بكل باركود تحت العامود "مستخدم في".

Note
من الممكن أيضاً أن تُنشئ تسجيلات تحليلية من هذه الشاشة بالنقر على "أنشئ تحليلات"
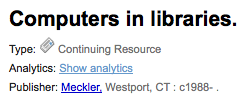
بإمكانك أيضاً أن ترى التحليلات المرفقة مع هذه التسجيلة من خلال النقر على وصلة 'أعرض التحليلات' بالقرب من أعلى التسجيلة في العرض الإعتيادي
When looking at the analytic record you will also see a link to the host item under the 'Host records' column in the holdings table when viewing the 'Analytics' tab.
Analytics Enhanced Workflow¶
To use the Enhanced Workflow method of adding analytics, the first thing you need to do is set the EasyAnalyticalRecords preference to 'Don't display' and the UseControlNumber preference to 'Use.'
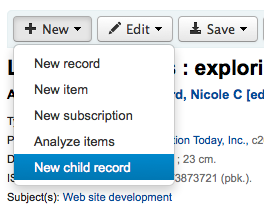
After cataloging your original record (see Adding Records for more on creating records) click 'New' from the normal view and choose to 'New child record.'
التسجيلة سيُضاف لها الآن الحقل 773 مملوء كما ينبغي لإتمام الربط.
لتعرض كل المواد المربوطة بالتسجيلة المستضيفة ، قم بالبحث عن التسجيلة ، أنقر على تبويب التحليلات على اليمين وستعرض التحليلات المرتبطة بكل باركود تحت العامود "مستخدم في".
بإمكانك أيضاً أن ترى التحليلات المرفقة مع هذه التسجيلة من خلال النقر على وصلة 'أعرض التحليلات' بالقرب من أعلى التسجيلة في العرض الإعتيادي
When looking at the analytic record you will also see a link to the host item under the 'Host records' column in the holdings table when viewing the 'Analytics' tab.
تعديل الأحداث¶
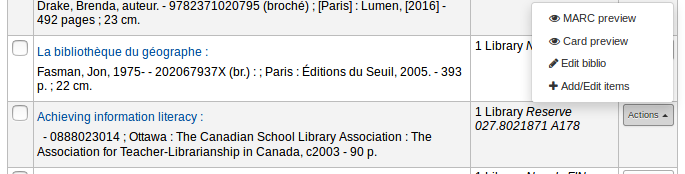
إذا ما ربطتَ تسجيلة تحليلية بطريقة غير صحيحة فبإمكانك حذف الربط من خلال تحرير المادة في التسجيلة التحليلية ( وليس التسجيلة المُضيفة). لتفعل ذلك أذهب إلى التسجيلة التحليلية وانقر على زر 'تحرير' واختر 'تحرير المواد'. على يمين كل مادة بإمكانك أن ترى خيارين.

- بالنقر على 'التحرير في المُضيف' سيسمح لك بتحرير المادة في التسجيلة المُضيفة.
- بالنقر على 'إلغاء الربط' سيمحى الحقل 773 والرابط بين التسجيلة التحليلية والمٌضيف.
تعديل التسجيلات¶
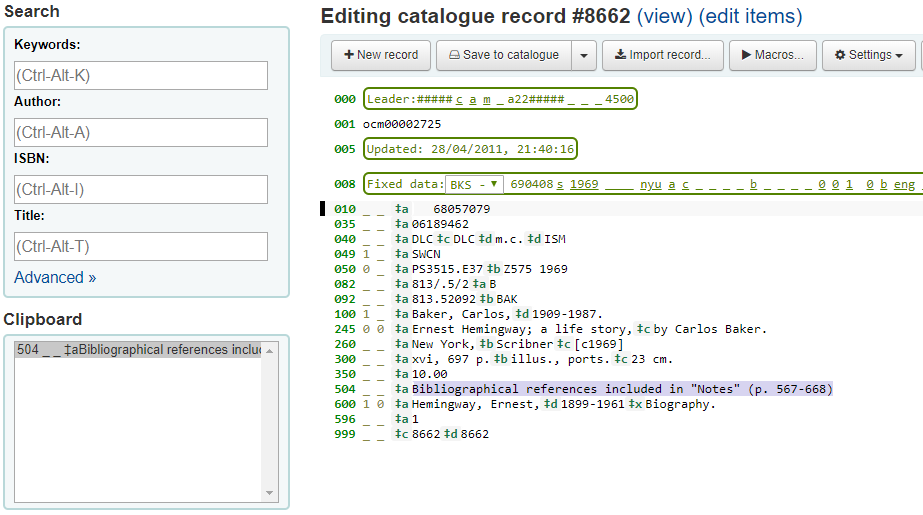
لتعديل التسجيلة يمكنك النقر على "تعديل الببليوغرافية" من نتائج البحث على صفحة الفهرسة
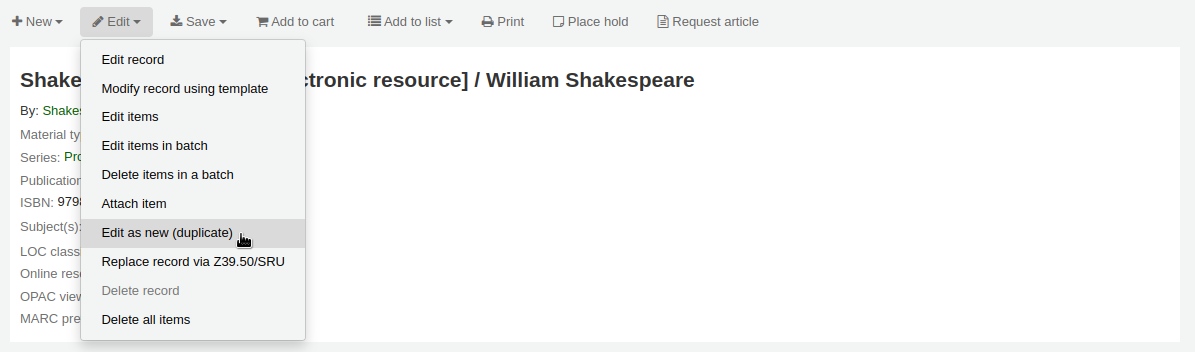
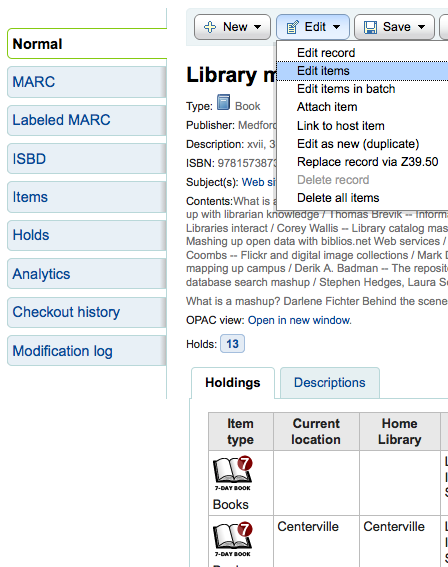
أو عن طريق النقر فوق الزر تعديل على تسجيلة الببليوغرافية واختار 'تعديل التسجيلة'
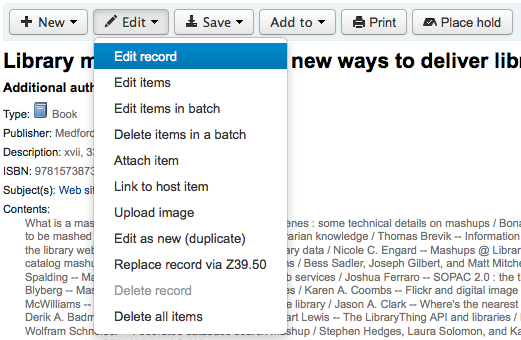
فتح التسجيلة سوف يكون في تحرير المارك
البديل هو البحث عن طريق Z39.50 إلى تراكب سجلك مع كامل التسجيلة عثر عليها في مكتبة أخرى. يمكنك القيام بذلك عن طريق اختيار 'استبدال سجل عبر Z39.50 ' من القائمة' تحرير'.
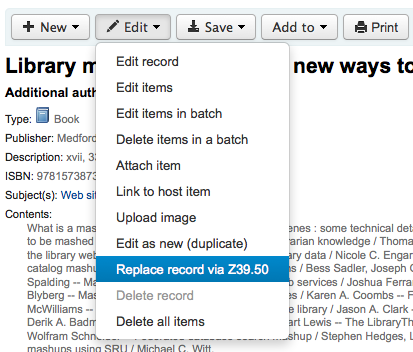
عندما تختار ذلك ، فإنه سيُجلب لك نافذة بحث Z39.50 لتبحث في المكتبات الأخرى عن التسجيلة في السؤال.
عند إنتهائك من عمل تعديلاتك (من خلال الطريقة) بإمكانك ان تنقر على 'حفظ' في أعلى يمين المحرر.
You can also use the edit menu to add your own custom cover image if you have either OPACLocalCoverImages and/or LocalCoverImages set to 'Display' by choosing 'Upload Image' from the menu.
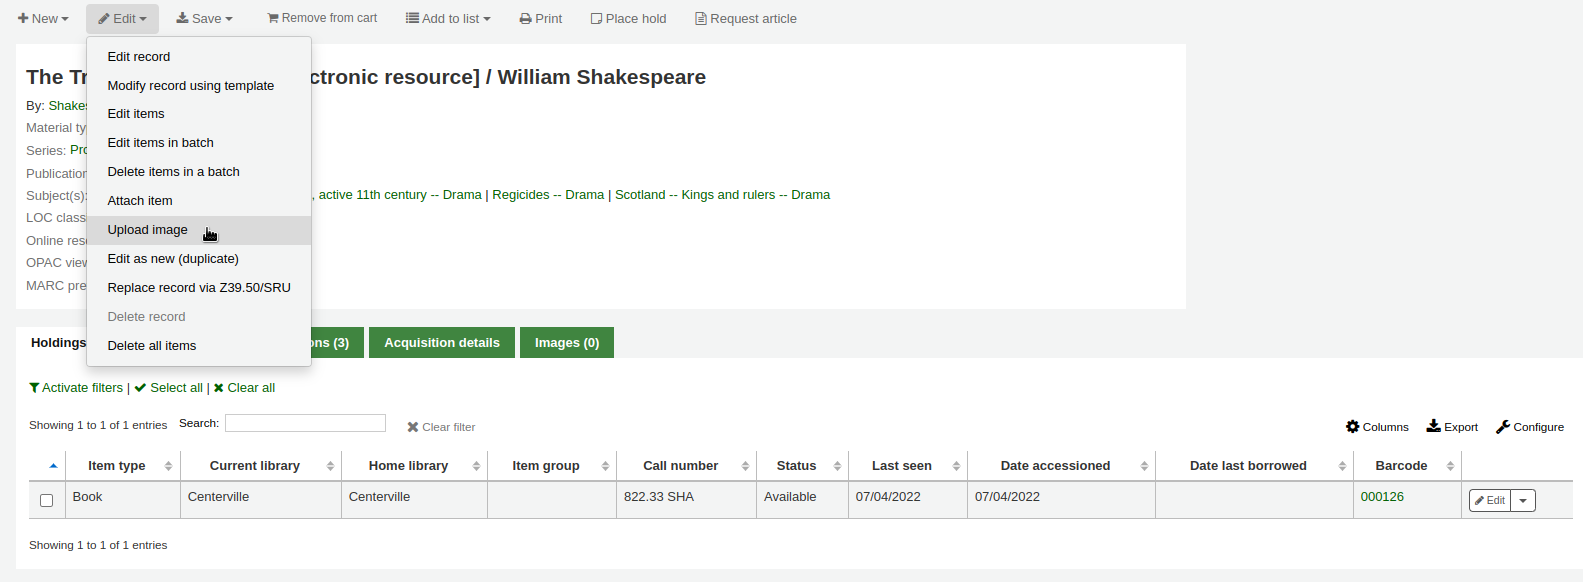
Choosing to 'Upload Image' will take you to the Upload Local Cover Image Tool.
تكرار التسجيلات¶
في بعض الأوقات نسخ التسجيلات التي تحتاج إلى فهرس قد لا تجدها عن طريق Z39.50. في هذه الحالات باستطاعتك إنشاء نسخة طبق الأصل للتسجيلة المشابهة وتعديل ما هو ضروري لإنشاء تسجيلة جديدة. لتكرار تسجيلة موجودة اضغط على 'تحرير كجديد (تكرار)' من قائمة التحرير في التسجيلة البيبليوغرافية
هذا سوف يفتح تسجيلة مارك جديدة مع ملئ الحقول في قيم من تسجيلة الببليوغرافية الأصلية.
Attaching files to Records¶
If you would like to upload files to Koha you can do so with a few settings.
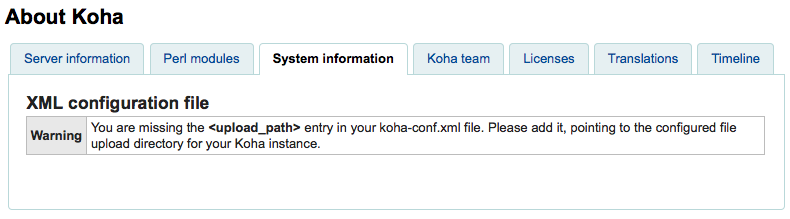
You will need to ask your system administrator to set the 'upload_path' config variable to point to where the files will be stored
You can see if your upload path is set correctly by visiting About Koha > System Information. If there is an error you will see it there.
You will want to be sure that your OPACBaseURL system preference is set appropriately
You will want to add the upload.pl plugin to the 856$u subfield in one (or multiple) of your frameworks
Once you are all set up you can continue with cataloging as regular. You will see a plugin icon next to the 856$u that will open up the upload and/or search window
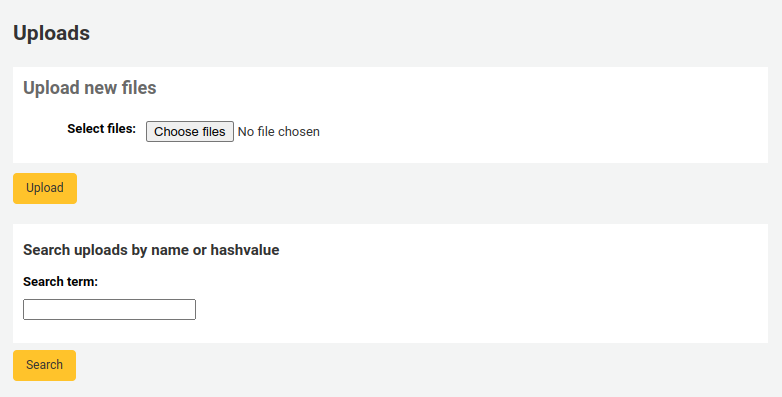
From this menu you can click browse to find a file and attach it, or you can search files you have uploaded previously using the search box. From the search results you can choose which file to attach.
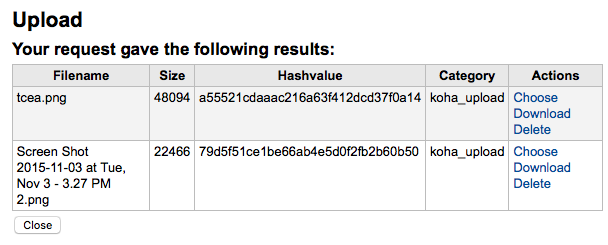
Once the file is chosen it will appear as a link in the MARC record and on the detail display.
Merging Records¶
لدمج التسجيلات البيبلوغرافية يجب عليك الذهاب إلى نظام الفهرسة الفرعي وإجراء بحث
If you see duplicates on that search results screen you can check the boxes next to the duplicates and click the 'Merge selected' button at the top of the results.
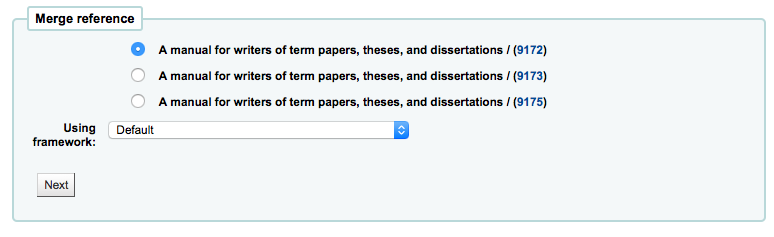
Once you have selected the records you want to merge, click the 'Merge selected' button at the top of the list. You will be asked which of the records you would like to keep as your primary record and which will be deleted after the merge. If the records were created using different frameworks, Koha will also ask you what Framework you would like the newly merged record to use.
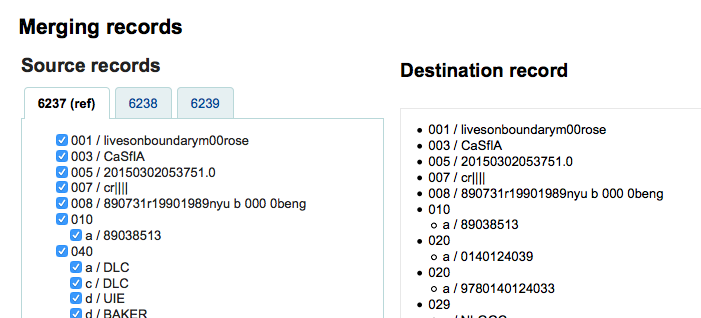
You will be presented with the MARC for all of the records (each accessible by tabs labeled with the bib numbers for those records). By default the entire first record will be selected, uncheck the fields you don't want in the final (destination) record and then move on to the second tab to choose which fields should be in the final (destination) record.
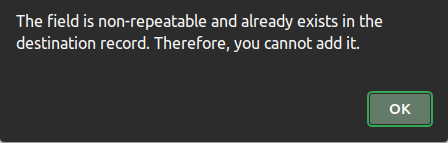
هل عليكَ أن تضيف حقلاً غير متكرر (مثل اختيارك للحقل 245 من كلتا التسجيلتين #1 و#2) ستواجه خطأً
Below the records you are merging is an option to enter fields to report on. This will allow you to control what fields you see on the merge confirmation page:

If you enter nothing you will be presented with a confirmation of biblionumbers only

If you enter fields you will see those on the confirmation page (you can set defaults with the MergeReportFields preference)
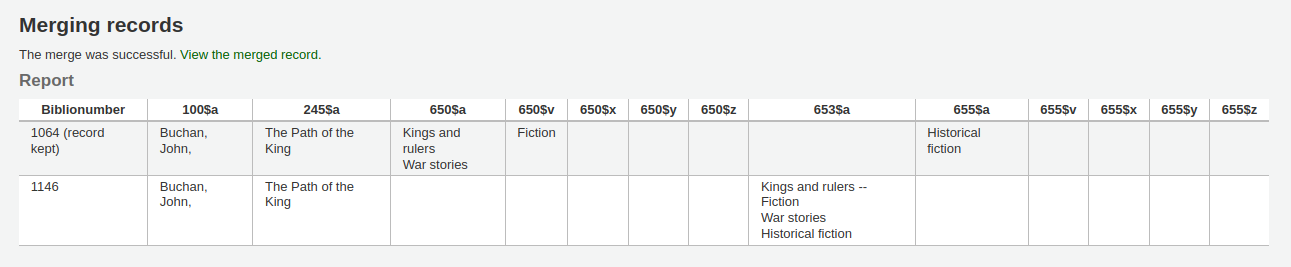
بمجرد إتمام تحديداتك قم بالنقر على زر "دمج". ستحتوي التسجيلة الأولى الآن على البيانات التي اخترتها وكذلك المواد/ المقتنيات لكلتي التسجيلتين البيبلوغرافيتين وسيتم حذف التسجيلة الثانية
Important
من المهم إعادة بناء كشاف زيبرا الخاص بك مباشرة بعد دمج التسجيلات. إذا تم إجراء بحث عن التسجيلة التي تم حذفها سوف يعرض كوها للمستفيدين مع وجود خطأ في الأوباك.
Note
If you would like you can also use the قوائم tool for merging records together. Learn more here.
حذف تسجيلة¶
للتعديل أدخل نسجيلة المستفيد وببساطة انقر على زر 'تحرير' في الجزء العلوي من تسجيلة المستفيد.
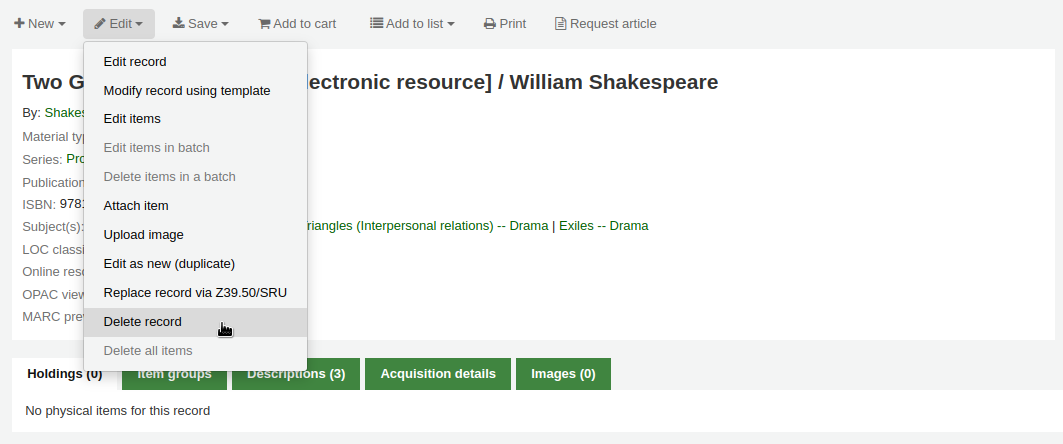
Bibliographic records can only be deleted one all items have been deleted. If you try to delete a bibliographic record with items still attached you will see that the delete option is grayed out.

تسجيلات المواد¶
في كوها كل تسجيلة ببليوغرافية يمكن أن تحوي واحدة أو أكثر من المواد المرفقة. هذه المواد أحياناً يُشار إليها كمقتنيات. كل مادة تحتوي معلومات للنسخة المادية التي تملكها المكتبة.
إضافة المواد¶
بعد حفظ تسجيلة ببليوغرافية جديدة، سيتم إعادة توجيهك إلى سجل مادة فارغ لذلك يمكنك إرفاق مادة بالتسجيلة الببليوغرافية. يمكنك أيضاً النقر على 'إضافة/تحرير مواد' من نتائج بحث الفهرسة
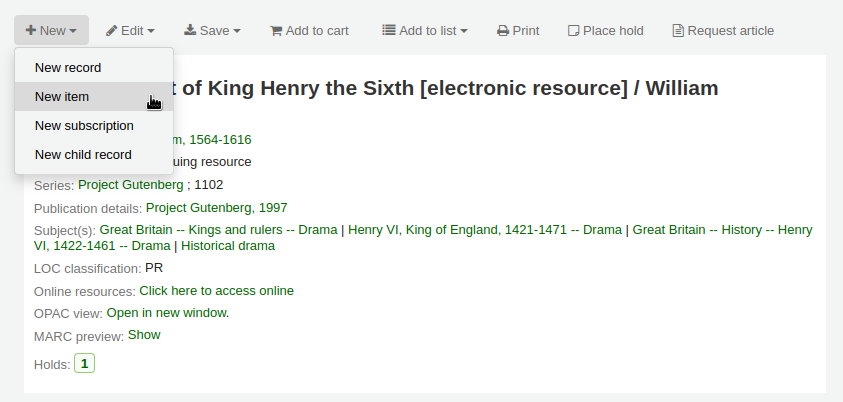
أو يمكنك إضافة مادة جديدة في أي وقت عن طريق النقر على 'جديد' على تسجيلة الببليوغرافية واختيار 'مادة جديدة'
سيظهر نموذج تحرير المادة:
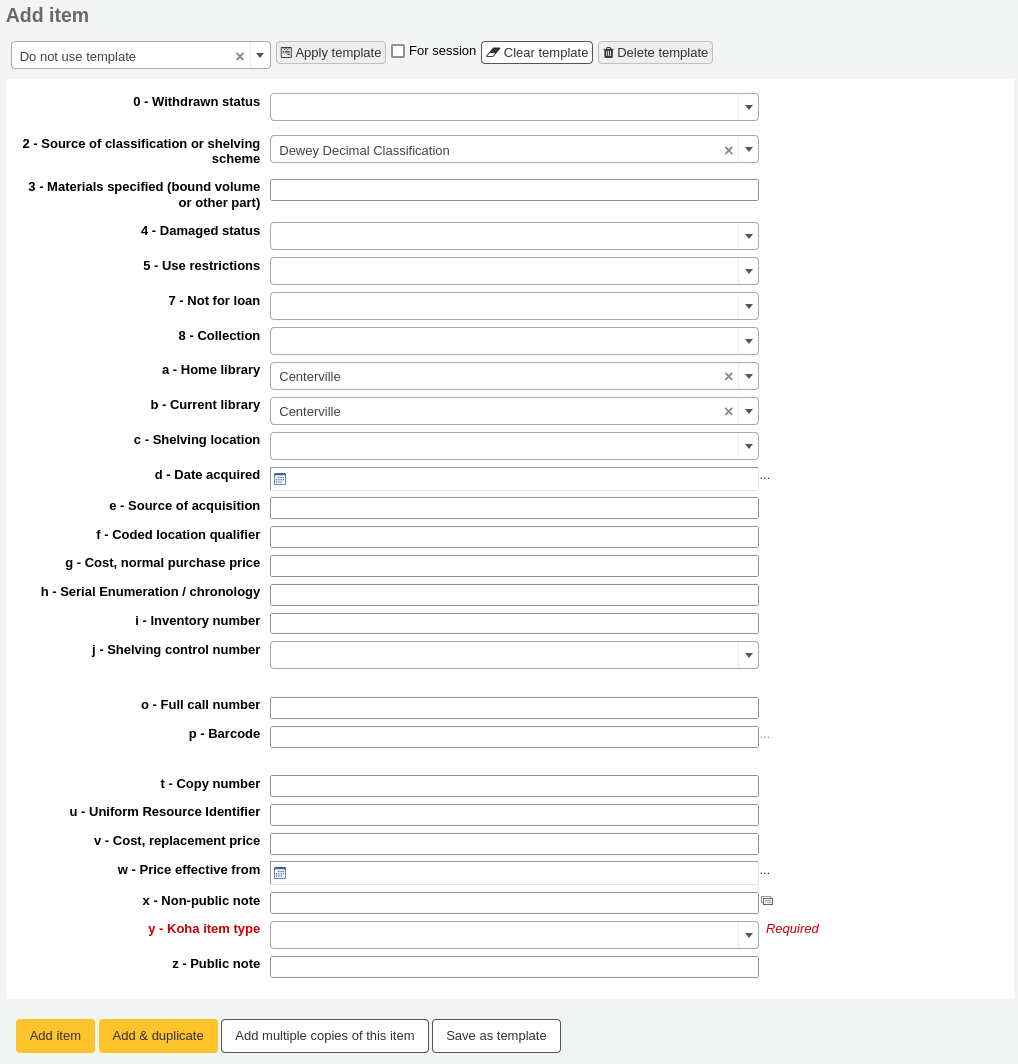
على أقل تقدير، إذا كنت تخطط لتعميم هذا المواد، ينبغي إدخال الحقول التالية بشأن المواد الجديدة:
2- مصدر التصنيف
a - الموقع الدائم
ب - الموقع الحالي
o - رقم الاستدعاء بالكامل
If you'd like you can use the call number browser plugin for this field. If it's enabled you'll see a ... to the right of the field. When clicked that will open a call number browser window if the row is highlighted in Red then the call number is in use, if there is a thin Green line instead then the call number can be used.

p - الباركود
ج - التكلفة, سعر الإستبدال
- ستفرض هذه القيمة إلى المستفيدين عند علامتك والمادة التي تم إعارتها بأنها 'مفقودة'
y - نوع مادة كوها
To make sure that these values are filled in you can mark them as mandatory in the framework you're using and then they will appear in red with a 'required' label. The item will not save until the required fields are filled in.

Note
To make item subfields required in a framework you'll want to edit the 952 field in the framework editor.
تحت شكل الإضافة هناك 3 أزرار لإضافة هذه المواد

- إضافة المادة سوف تضيف فقط مادة واحدة
- Add & Duplicate will add the item and fill in a new form with the same values for your to alter
- "إضافة عدة مواد" سيسألك عن عدد المواد وبعدها ستتم إضافة هذا العدد من المواد بالإضافة إلى +1 إلى الباركود لكي يكون كل باركود متفرداً
سوف تظهر المواد التي قمت بإضافتها أعلى نموذج إضافة بمجرد إرسالها.

سوف تظهر موادك أيضا أدنى التفاصيل البيبلوجرافية في عرض التسجيلة البيبلوجرافية.
If you have SpineLabelShowPrintOnBibDetails set to 'Display' then there will also be a link to print a quick spine label next to each item.

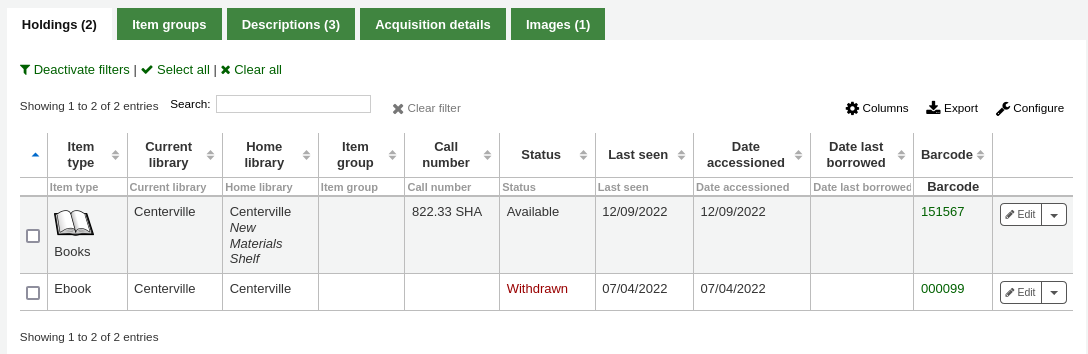
You can also filter the contents of your holdings table by clicking the 'Activate filters' links. This will show a row at the top where you can type in any column to filter the results in the table.
تحرير المواد¶
المواد من الممكن أن تحرر بعدة طرق.
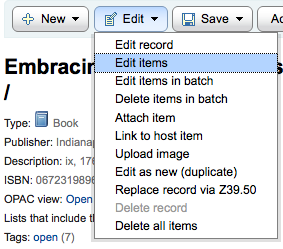
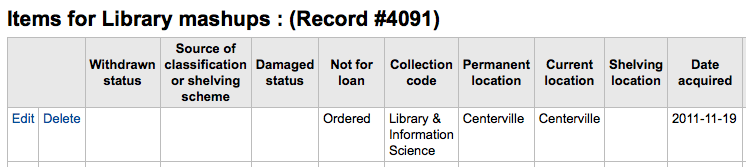
بالنقر على 'تحرير' و 'تحرير المواد' من التسجيلة الببليوغرافية
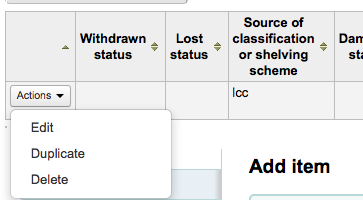
Which will open up a list of items where you can click the 'Actions' button to the left of the specific item you would like to edit and choose 'Edit'.
بالنقر على 'تحرير المواد' بجانب المادة في تبويب 'المواد'
Which will open up the editor on the item you'd like to edit
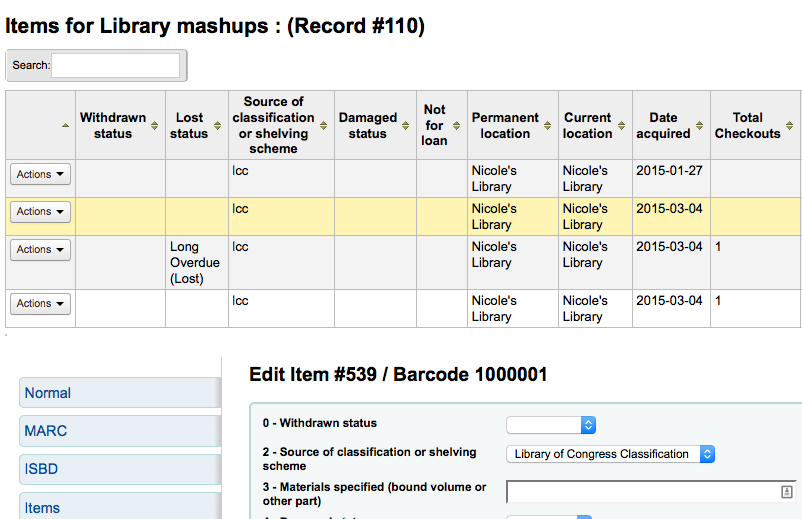
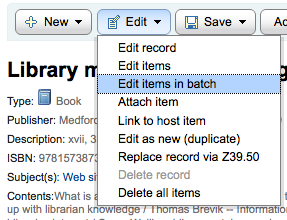
بالنقر على 'تحرير' ومن ثم 'تحرير المواد كدفعة'
This will open up the batch item modification tool where you can edit all of the items on this record as a batch.
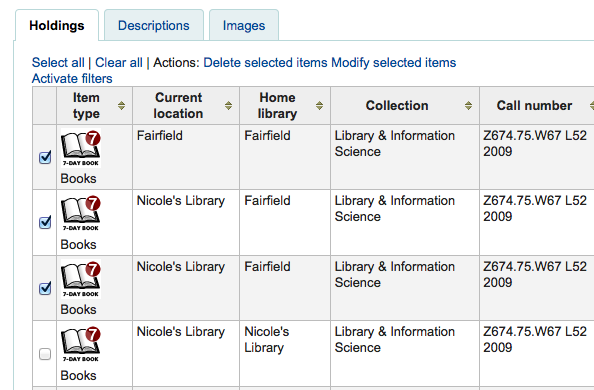
You can also enable تفعيل to have checkboxes appear to the left of each item on the detail display. You can then check off the items you would like to edit and click 'Modify selected items' at the top of the list.
You can click 'Edit' to the right of each item in the Holdings tab
There is also a link to Edit items from the search results in the staff client
Finally you can use the Batch Item Modification tool
تحديثات سريعة لحالات المادة¶
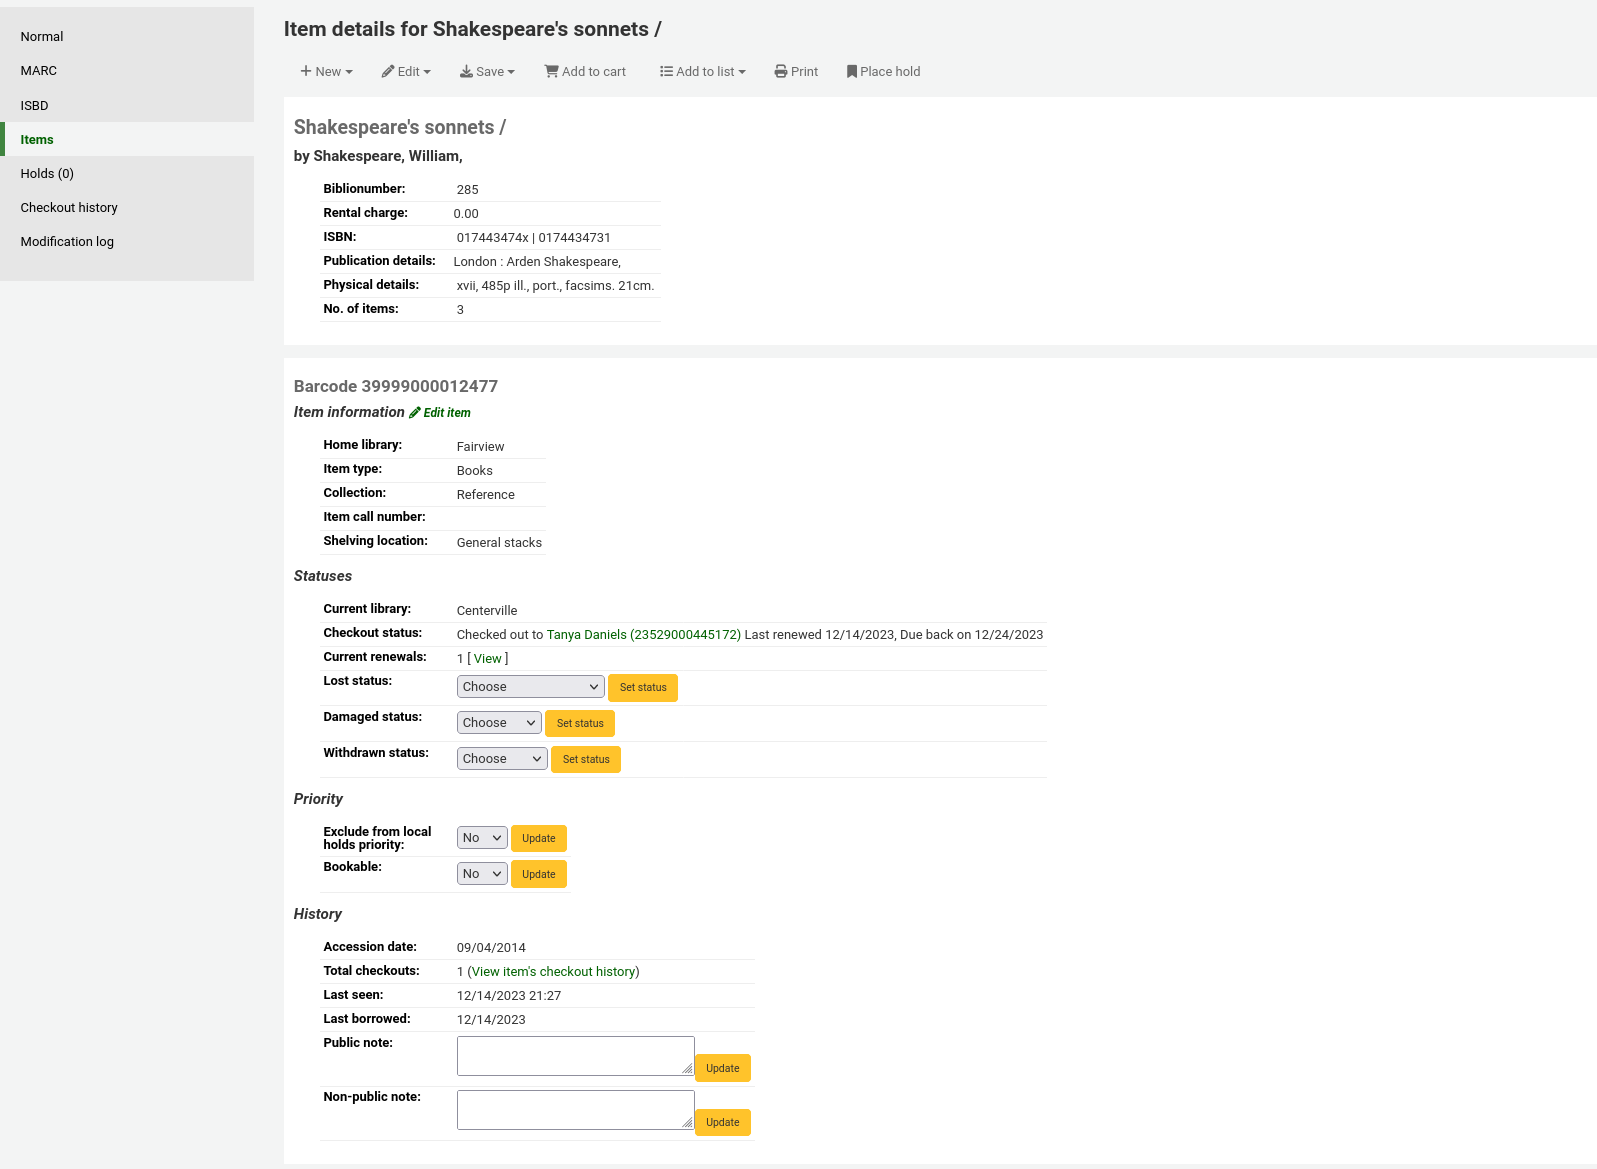
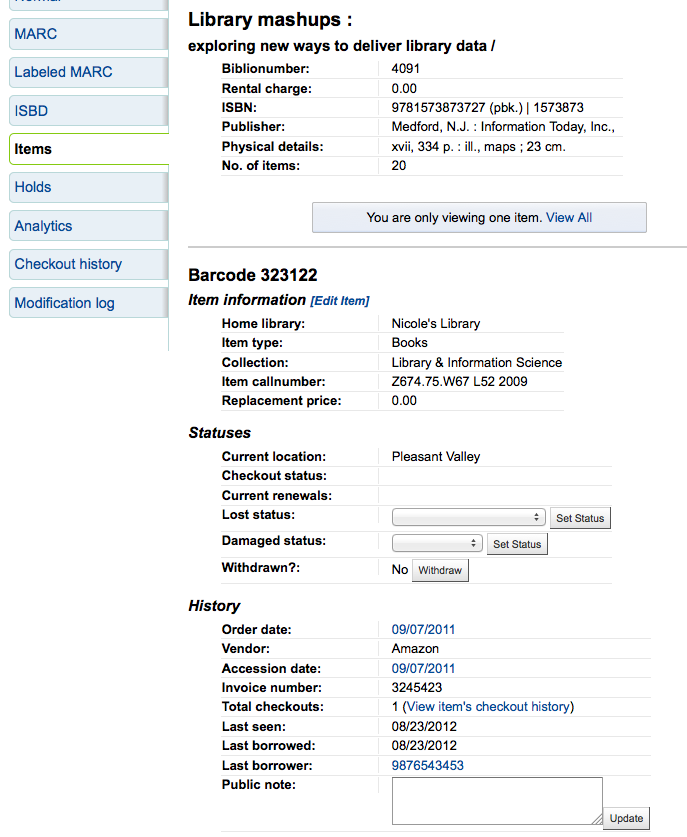
غالباً ما يحتاج موظفو الإعارة لتغير حالة مادة إلى ضائعة أو تالفة. هذا لا يتطلب منك أن تحرر كل تسجيلة المادة. بدلاً من ذلك بالنقر على باركود المادة في ملخص الإعارة أو تاريخ الإعادة سيجلب لك ذلك ملخص المادة. وبامكانك أيضاً الحصول على ملخص المادة بالنقر على تبويب المواد على يمين صفحة التفاصيل الببليوغرافية.
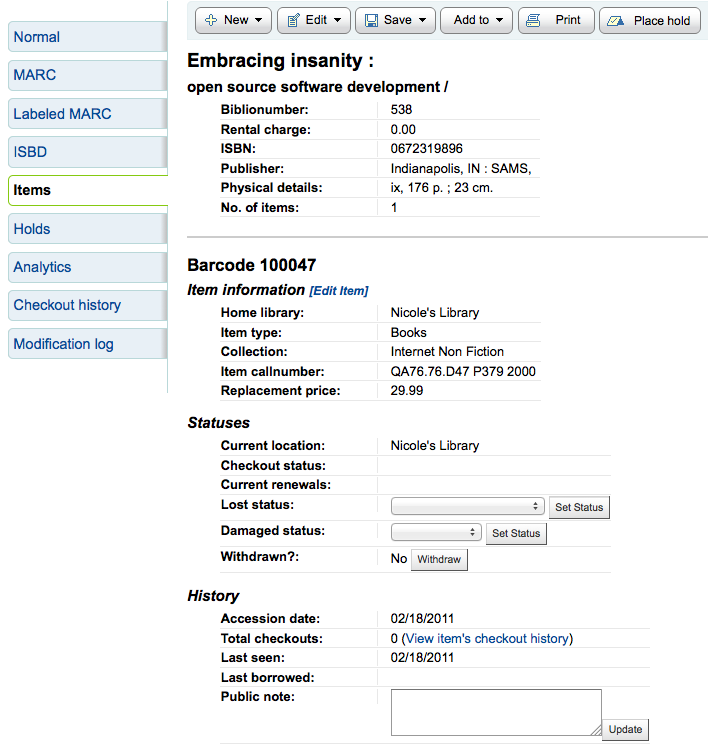
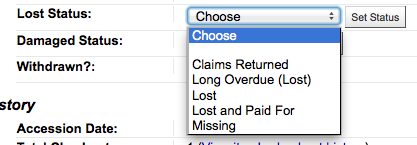
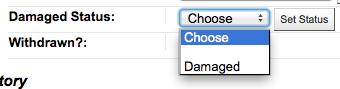
من هذا العرض يمكنك أن تحدد مادة على أنها ضائعة من خلال إختيار حالتها بأنها ضائعة من القائمة المنسدلة والنقر على زر 'ضبط الحالة'
يمكنك تحديد مادة "تالفة" عن طريق اختيار حالة تالف من القائمة المنسدلة والنقر على زر "ضبط الحالة"
Duplicating Items¶
You can easily duplicate each item by clicking the 'Action' button the left of each item on the edit items screen
From here you can choose to 'Duplicate' the item and this will populate the form with the values from the item you chose.
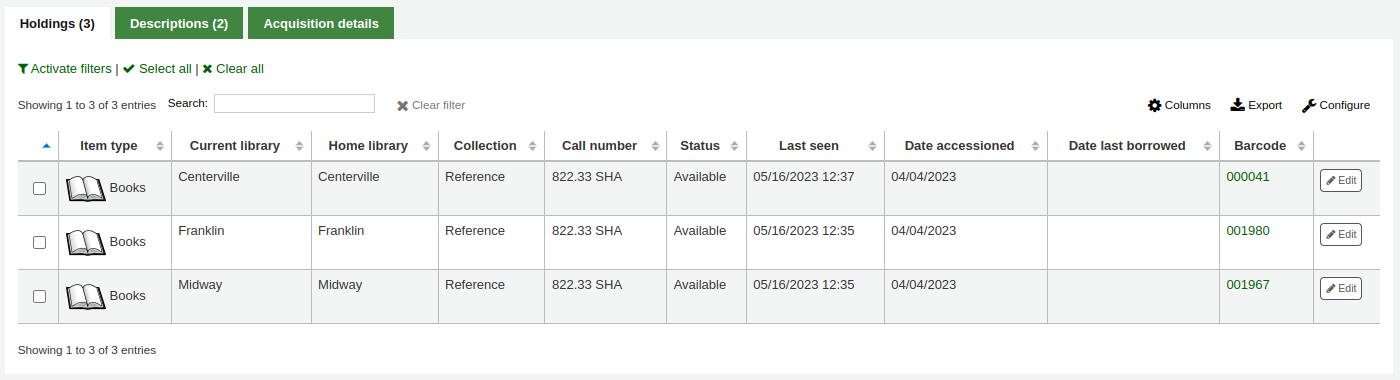
معلومات المادة¶
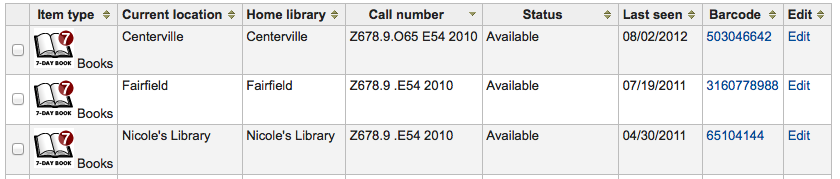
على يسار كل تسجيلة ببليوغرافية هناك تبويب لعرض المواد.
Clicking that tab will give you basic information about the items. From here you can see basic information about the item such as the home library, item type, collection code, call number and replacement price. You can also see and edit the status information. If an item is marked lost or withdrawn you will also see the date that status was applied.
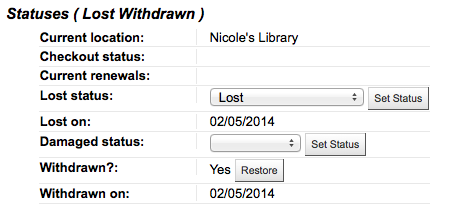
In the History section you will see information about the check out history of the item and if you ordered the item via the acquisitions module then this section will include information about the order.

إذا كان تاريخ الطلب أوالموافقة مرتبطا فالنقر عليه سيأخذك إلى معلومات التزويد عن تلك المادة
نقل مواد¶
يمكن نقل مواد من تسجيلة ببلوغرافية إلى أخرى وذلك باستخدام خيار ربط المادة
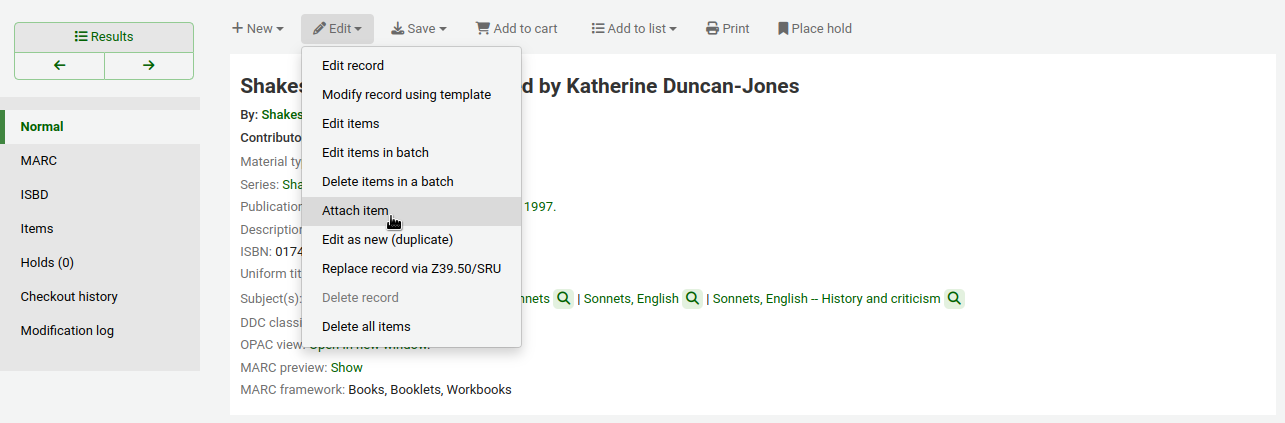
قم بزيارة التسجيلة الببلوغرافية التي تريد ربطها بالمادة و اخترمن قائمة "تحرير " خيار" ربط مادة "
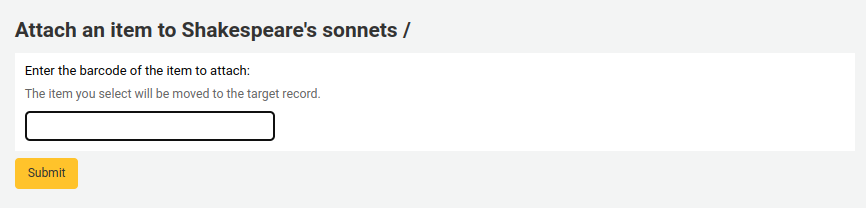
بكل بساطة ادخل رقم التسلسلي للمادة التي تريد أن تنقلها واضغط على 'اختر'
If you want to move all items to a new record creating only one bibliographic record you can use the Merge Records tool instead.
حذف مواد¶
هناك العديد من الطرق لحذف تسجيلات المادة. إذا كنت تحتاج فقط إلى حذف مادة واحدة يمكنك القيام بذلك عن طريق فتح صفحة التفاصيل عن التسجيلة الببليوغرافية والنقر على زر 'تعديل' في الأعلى. من هناك يمكنك اختيار'تعديل المواد'.
سوف تظهر لك قائمة بالمواد ويوجد إلى جانب كل منها رابط يسمى "حذف". قم بالنقر على الرابط وإذا لم تكن المادة معارة سوف يتم حذف تلك المادة.
اذا كنت تعرف أن كل المواد المرتبطة بتسجيلتك هي ليست مُعارة حالياً يمكنك استخدام خيار 'حذف كل المواد' تحت قائمة 'التحرير' وسوف تُزيل كل المواد من التسجيلة.
You can also enable تفعيل to have checkboxes appear to the left of each item on the detail display. You can then check off the items you would like to delete and click 'Delete selected items' at the top of the list.
Finally you can use the batch delete tool to delete a batch of items.
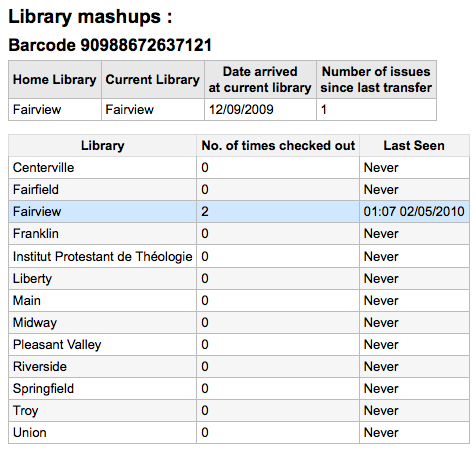
Item Specific Circulation History¶
كل سجل الببليوغرافية ويحافظ على تاريخ الإعارة(مع أو بدون معلومات المستفيد اعتمادا على الإعدادات الخاصة بك)، وتهدف كل هذه المادة لها صفحة تاريح الإعارة لرؤية هذا، انقر على علامة التبويب "مواد" على يمين التسجيلة التي تشاهدها.
تحت عنوان 'تاريخ' هو رابط 'مشاهدة تاريخ خروج المواد,'بالضغط عليه سيفتح تاريخ المواد التي ستبدو مختلفة بعض الشئ من صفحة تاريخ التسجيلات الببليوغرافية.
إستناد¶
تسجيلات الاستناد هي الطريقة للتحكم بمجالات في قوالب مارك.استخدام تسجيلات الاستناد يزودك بالتحكم بكل المواضيع الأساسية,الأسماء الشخصية والأماكن
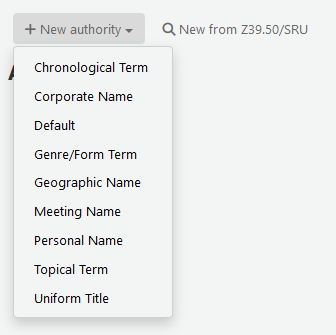
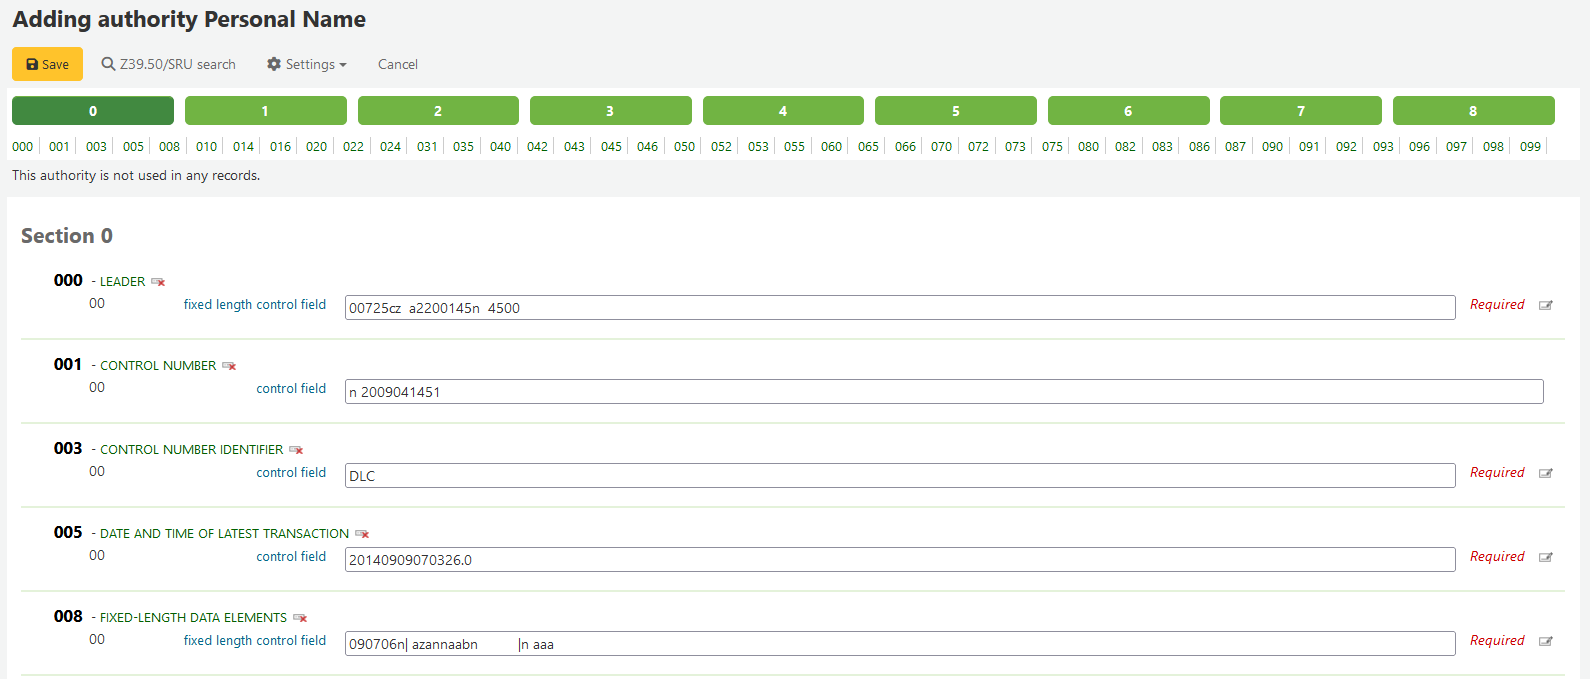
إضافة استنادات¶
لإضافة تسجيلة استناد جديدة يمكنك إما اختيار نوع الاستناد من زر "استناد جديد" أو بحث مكتبة أخرى عن طريق النقر على زر "جديد من Z39.50"
إذا اخترت إدخال استناد جديد من الصفر، سيظهر لك نموضج يتيح لك إدخال كل التفاضيل الضرورية بخصوص تسجيلة استنادك.

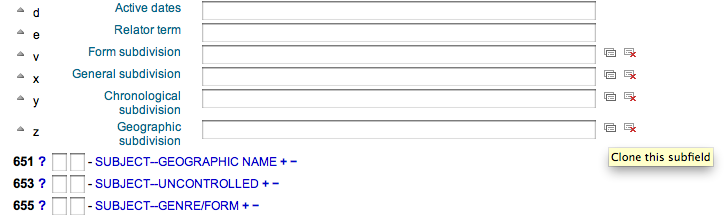
لتوسع القيم المطوية ببساطة أُنقر على العنوان وسيظهر الحقل الفرعي. لتكرر حقلاً أو حقلاً فرعياً فقط أنقر على علامة الجمع (+) على يسار تسمية الحقل. لتستخدم الإضافة المساعدة للحقل ببساطة أنقر على علامة الإقتطاع (...) على اليسار من الحقل.
عند ربط الإستنادات إلى مقتنيات أخرى ، بإمكانك أن تستخدم إضافة موجد الإستنادات بالنقر على النقاط (...) على يسار الحقل.
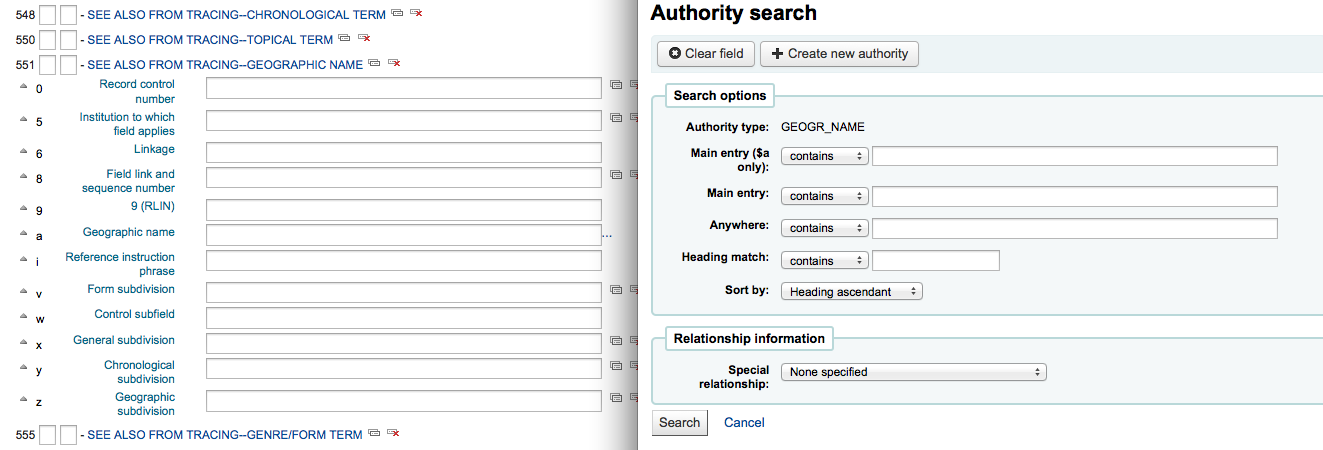
من هناك بإمكانك البحث في ملف الإستنادات عن الإستناد ليتم الربط. إذا لم تتمكن من إيجاد إستناد ليتم ربطه، بإمكانك أن تنقر على زر 'إنشاء جديد' وتضيف الإستناد الذي تحتاج أن يتم ربطه. هذه الإضافة تسمح لك أيضاً أن تختار علاقة الوصل بين الإستنادات.

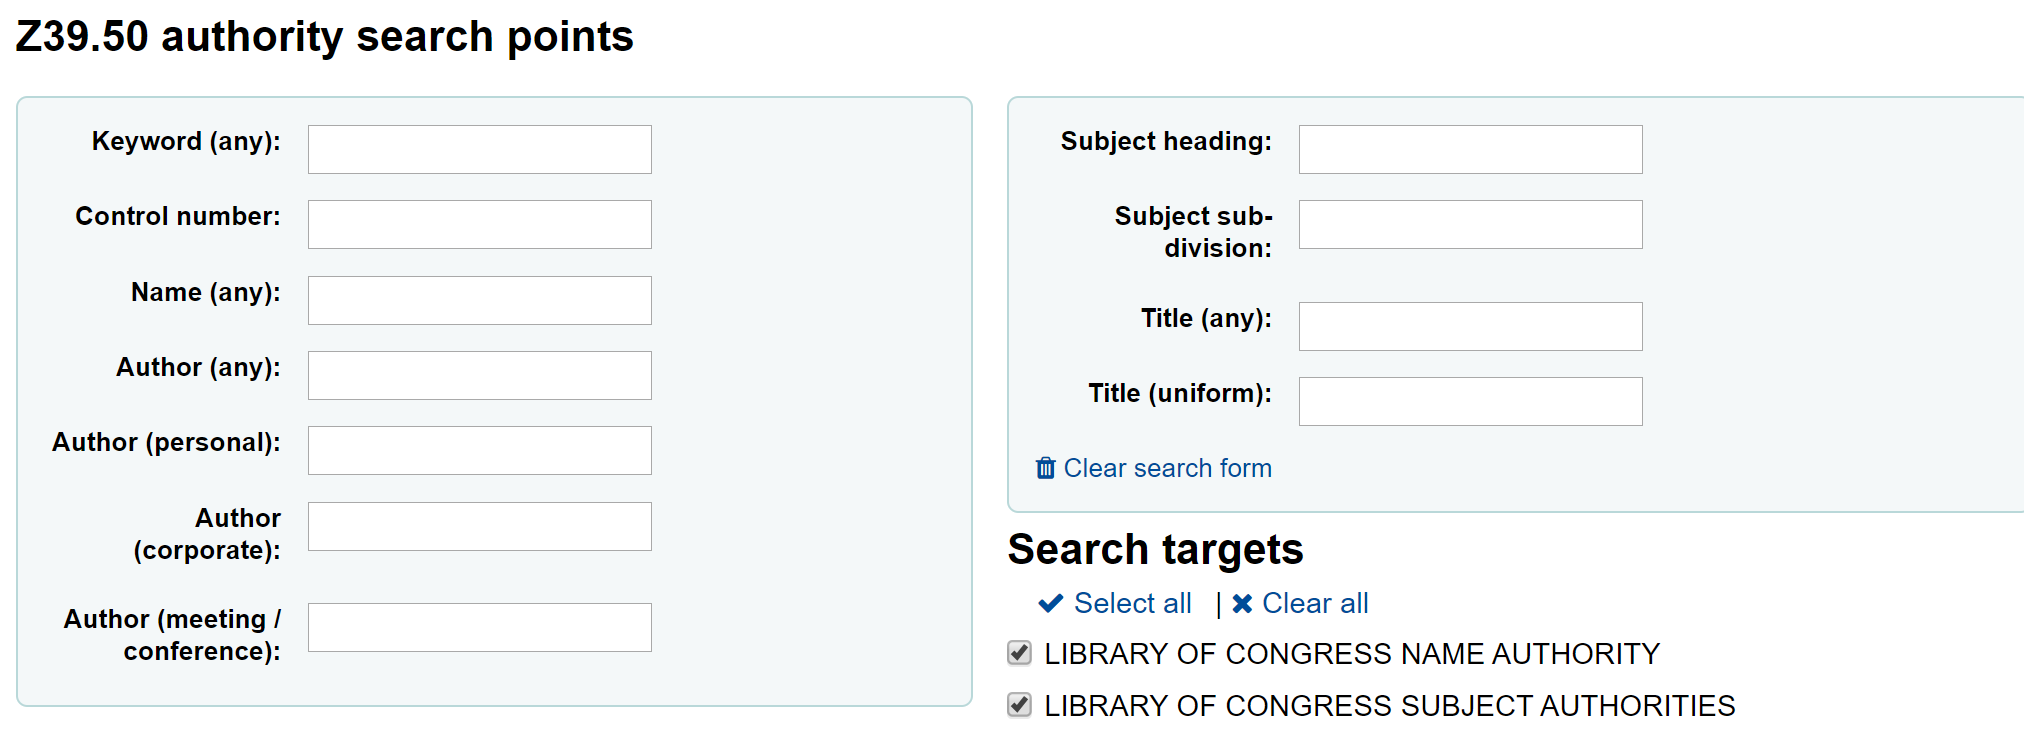
إذا قمت باختيار بحث مكتبة أخرى عن تسجيلة الاستناد سيظهر لك مربع بحث.
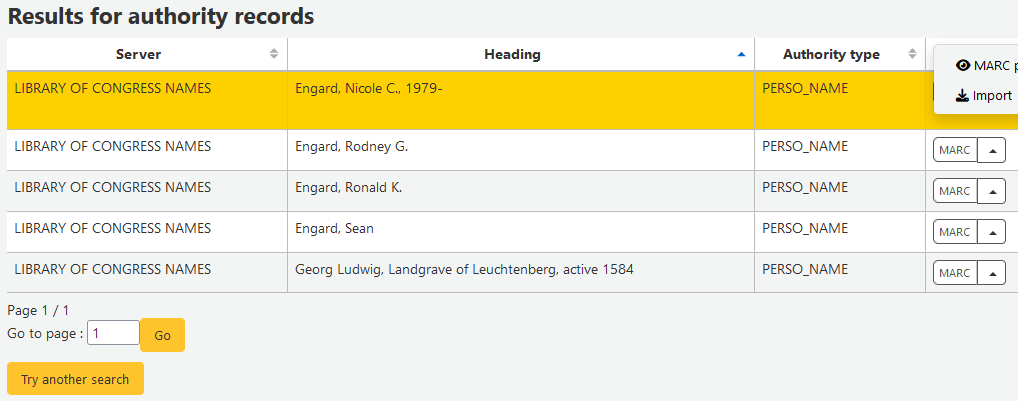
من النتائج يمكنك اختيار رابط "استيراد" على يسار التسجيلة التي ترغب في إضافتها إلى كوها
سيظهر لك نموذج لتحرير الاستناد قبل حفظه في نظامك
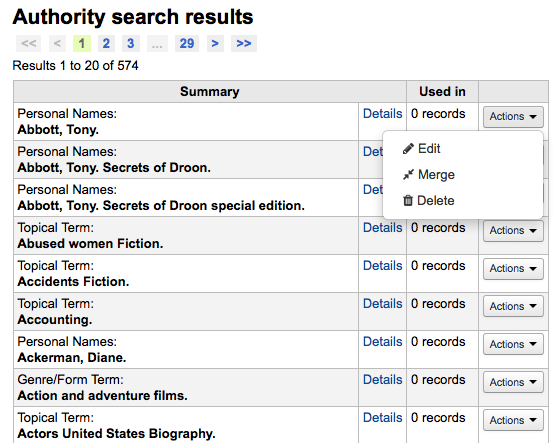
بحث الاستنادات¶
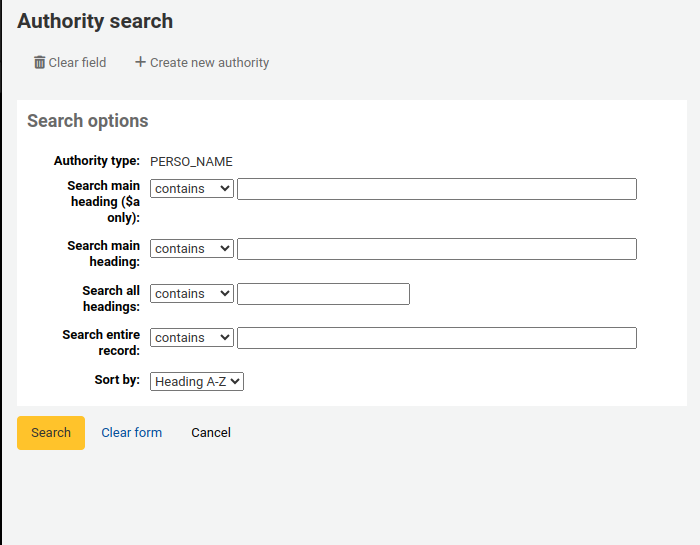
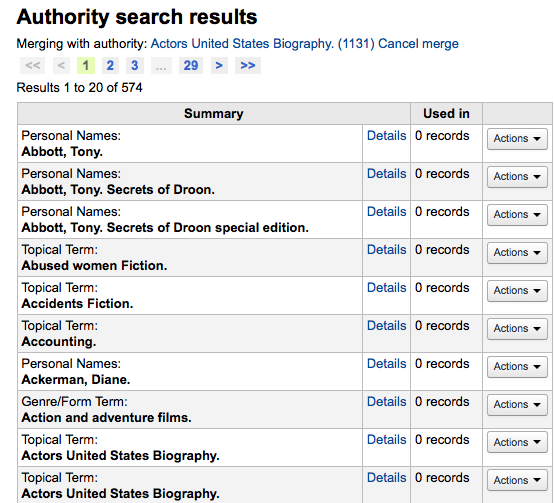
من صفحة الإستنادات تستطيع أن تبحث عن مواد موجودة وعن التسجيلات الببليوغرافية التي تتعلق بها.

From the results you will see the authority record, how many bibliographic records it is attached to, an 'Actions' menu that includes the ability to edit, merge and delete (if there are no bibliographic records attached).
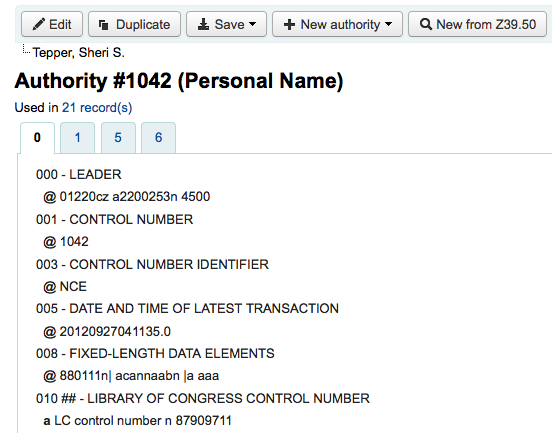
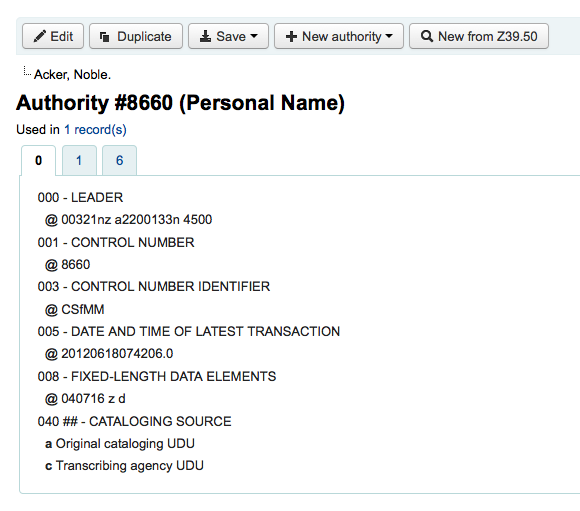
النقر على ملخص التسجيلة الإستنادية سيفتح لك التسجيلة الكاملة والخيارات لتحرير التسجيلة.
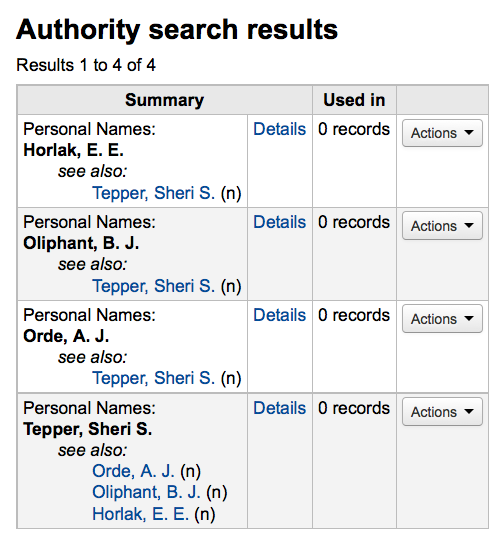
إذا تضمن الإستناد أنظر أيضاً بداخله، فستراهم ظاهرين في نتائج البحث، والنقر على الرأس الذي يحمل الوصلة سيشغل بحثاً آخر عن ذاك الرأس بدلاً من البحث الأول.
تعديل الإستنادات¶
يمكن تحرير الاستنادات عن طريق النقر على ملخص الاستناد من نتائج البحث والنقر على زر "تحرير" أعلى التسجيلة

Once you've made the necessary edits, simply click 'Save' and dontmerge is set to 'Do', Koha will immediately update all of the bib records linked to the authority with the new authority record's data. If dontmerge is set to "Don't" then Koha won't edit bib records when changes are made to authorities, rather, this is done later by the merge_authority.pl cronjob.
لحذف التسجيلة الإستنادية يجب عليك أولا التأكد من عدم ارتباطها مع أي تسجيلات ببليوغرافية. وإذا لم يتم استخدامه من قبل أي تسجيلات الببليوغرافية في الرابط 'حذف' الذي يظهر على يسار نتائج البحث في التسجيلة كما يظهر الزر بعد النقر على ملخص التسجيلة الإستنادية.
بحث الاستنادات¶
If you have duplicate authority records you can merge them together by clicking the 'Merge' link, found in the actions menu, next to two results on an authority search.

After clicking 'Merge' on the first result you will see that authority listed at the top of the results.
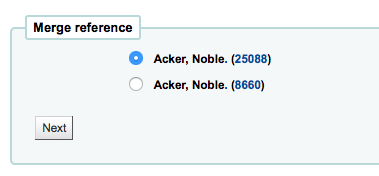
Next you need to click 'Merge' next to the second result you'd like to merge.
أولاً سيتم سؤالك عن أي التسجيلتين التي ترغب في الاحتفاظ بها كتسجيلة رئيسية وأيها سيتم حذفها بعد الدمج.
سوف يظهر لك مارك لكلا من التسجيلتين (يمكن الوصول لكل منهما عن طريق تبويبات معنونة بالرقم البيبلوجرافي لهاتين التسجيلتين). افتراضيا، سيتم تحديد التسجيلة الأولي بأكملها، قم بالغاء تحديد الحقول التي لا تريدها في التسجيلة النهائية (الوجهة) ثم انتقل إلى التبويب الثاني لاختيار الحقول التي يجب أن تكون موجودة في التسجيلة النهائية (الوجهة).
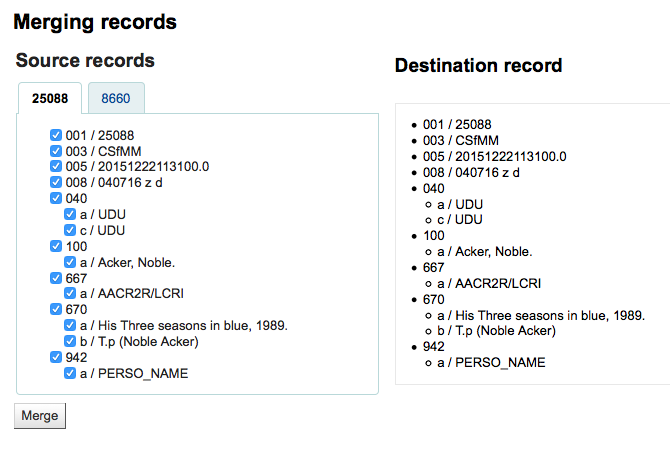
بمجرد إتمامك لتحديداتك قم بالنقر على زر "دمج". ستحتوي التسجيلة الأولية على البيانات التي اخترتها وسيتم حذف التسجيلة الثانية.
Cataloging Guides¶
Bibliographic Record Cataloging Cheat Sheet¶
| Tag | Label | Description | Instructions |
|---|---|---|---|
| 000 | LEADER | Describes the record(i.e. surrogate) -- is it a record for a monograph? A serial? | Click in this field to fill it in. Then set "Bibliographic level" to 'a' for articles or 's' for serials. Otherwise, leave everything as is. |
| 001 | CONTROL NUMBER | Accession number. | Enter the accession number written inside the item here. For articles and items which do not have accession numbers, leave blank. |
| 003 | CONTROL NUMBER IDENTIFIER | Your MARC Organizational Code | Click in this field to fill it in (will auto fill if you have your MARCOrgCode preference set). |
| 005 | D & T LATEST TRANSACTION | Current date and time. | Click in this field to fill it in. |
| 008 | FIXED-LENGTH DATA ELEMENTS | Field containing computer-readable representations of a number of things. | Generally you will only use 's' (single) or 'm' (multiple) options for position 06- use the former when the item was published in a single year, the latter when it was published over the course of several. If there is a single date, only enter a date in the first date field (positions 07-10). Enter the three-digit country code in positions 15-17, being sure to add spaces if the country code is fewer than three characters long. If there is an index, note that fact in position 31. Enter the three-letter language code in positions 35-37. |
| 010 | LCCN | A number assigned by the Library of Congress to uniquely identify the work. | Check on the copyright page of the book (if it was published in the US) or the LC catalog for this number. If you can't find it, don't worry about it. |
| 020 | ISBN | Unique number used by publishers to identify books. | If this number isn't listed on the book, there probably isn't one. |
| 022 | ISSN | Unique number used by publishers to identify serials. | If this number isn't listed on the book, there probably isn't one. |
| 033 | DATE/TIME OF EVENT | Used for auction dates. Required for auction catalogs. | For auctions that took place on only one day, enter the date of the auction in the format YYYYMMDD in the subfield 'a' and a '0' in the first indicator. For auctions that took place over two consecutive days or any number of non-consecutive days, create a subfield 'a' for each day with the date in the format YYYYMMDD, and put a '1' in the first indicator. For auctions that took place over more than two consecutive days, create a subfield 'a' (in format YYYYMMDD) for the first day and a subfield 'a' (also in format YYYYMMDD) for the last day, and put a '2' in the first indicator. |
| 040 | CATALOGING SOURCE | Identifies which libraries created and modified the record. | For imported records, add a subfield 'd' with your OCLC code as the value. For new records, make sure that the subfield 'c' with your OCLC code as the value. |
| 041 | LANGUAGE CODE | Identifies all the languages used in an item, when two or more languages are present. | For significant portions of a text in a given language, there should be a subfield 'a' with that language code. If there are only summaries or abstracts in a specific language, create a subfield 'b' with that language code. |
| 100 | MAIN ENTRY--PERSONAL | Authorized form of the main author's name | See Authorized headings sheet and AACR2. The first indicator should generally be a '1', to indicate that the entry is surname first. If the name consists only of a forename, however, the first indicator should be '0'. |
| 110 | MAIN ENTRY--CORPORATE | Authorized form of the name of the main corporate author. Required for auction catalogs. | Auction catalogs should use a 110 field rather than a 100 field. See Authorized headings sheet and AACR2. Set the first indicator to '2'. |
| 111 | MAIN ENTRY--MEETING | Authorized form of the name of a meeting which acted as a main offer (e.g. conference proceedings) | See Authorized headings sheet and AACR2. Set the first indicator to '2'. |
| 245 | TITLE STATEMENT | Transcription of the title statement from the title page (or chief source of information) | Enter the title in subfield 'a', the subtitle in subfield 'b', and the statement of responsibility in subfield 'c'. If you are creating a record for a single volume or part of a multi-part item, you should put the part number in subfield 'n' and the part title in subfield 'p.' For auction catalogs, the date (in 'MM/DD/YYYY' format) should be listed in square brackets in subfield 'f'. See ISBD punctuation sheet. Set the first indicator to '0' if there is no author, otherwise set it to '1'. Set the second indicator to the number of non-filing characters (i.e. characters in an initial articles plus the space... for "The " set the second indicator to '4'). |
| 246 | VARYING FORM OF TITLE | Alternate form of title for searching and filing purposes | If the patron might look for the work under a different title, enter it here. Do not include initial articles. The first indicator should be '3', unless the title is merely a variant spelling, in which case the first indicator should be '1'. |
| 250 | EDITION STATEMENT | Transcription of the edition statement from the title page (or chief source of information) | Transcribe the edition statement exactly as it appears on the title-page. You may abbreviate if the edition statement is very long. |
| 260 | PUBLICATION (IMPRINT) | Publication information. | Put the location of publication in subfield 'a', the publisher in subfield 'b', and the year (or probable year) in subfield 'c'. See ISBD punctuation sheet. |
| 300 | PHYSICAL DESCRIPTION | Physical description | Enter the pagination statement in subfield 'a', a brief description of "special" contents such as illustrations or maps in subfield 'b' (see AACR2), and the size of the item in subfield 'c'. See ISBD punctuation sheet. |
| 490 | SERIES STATEMENT | Shows the series statement exactly as it appears on the item. | Transcribe the series statement into subfield 'a' with the volume number in subfield 'v'. See ISBD punctuation sheet. Set the first indicator to '1' if you are using an 830. As a general rule, you should do so. |
| 500 | GENERAL NOTE | Notes that don't fit anywhere else. | Enter notes as full sentences, with a separate 500 field for each distinct topic. |
| 501 | WITH NOTE | Notes whether the work is bound with the works described by other records. | Put description of relationship in subfield 'a'. |
| 504 | BIBLIOGRAPHY, ETC. NOTE | Indicates whether the work includes a bibliography. | If the work includes a bibliography and index, put the text "Includes bibliographical references (p. XXX-XXX) and index." in subfield 'a'. If the work does not include an index, remove that part of the sentence. If the references are scattered throughout the work and not gathered into a distinct sentence, remove the parenthetical statement. |
| 505 | FORMATTED CONTENTS | List of contents in a standard format. Unformatted contents can be listed in a 500 (General Note) field. | See ISBD punctuation sheet. Set the first indicator to '0'. If you are separately coding authors and titles, set the second indicator to '0'. Otherwise, leave the second indicator blank. |
| 518 | DATE/TIME OF EVENT NOTE | Used for auction dates. | For auction catalogs, enter the date of the auction in the format 'January 2, 1984' in the subfield 'a' |
| 520 | SUMMARY, ETC. | A brief summary or abstract of the book or article. | In general you do not need to write a summary. A summary might be called for, however, with items that cannot be easily reviewed by a patron, such as books with highly acidic paper or CD-ROMs. |
| 546 | LANGUAGE NOTE | Note describing the languages used in the work | Only needed for works in multiple languages. See ISBD punctuation sheet. |
| 561 | PROVENANCE INFORMATION | Describes the previous ownership of the item. | Used only for rare books. |
| 563 | BINDING INFORMATION | Describes the binding of the item. | Used only for rare books. |
| 590 | LOCAL NOTE | Local notes. Required for auction catalogs. | Used for auction catalogs to indicate what types of coins are sold in the auction- Roman, Greek, etc. |
| 600 | SUBJECT ADDED--PERSONAL | Authorized form of personal names for people discussed in the work | See Authorized headings sheet and AACR2. The first indicator should generally be a '1', to indicate that the entry is surname first. If the name consists only of a forename, however, the first indicator should be '0'. If you found the name in the LC authority file, set the second indicator to '0'. Otherwise set the second indicator to '4'. |
| 610 | SUBJECT ADDED--CORPORATE | Authorized form of corporate names for organizations discussed in the work | See Authorized headings sheet and AACR2. Set the first indicator to '2'. If you found the name in the LC authority file, set the second indicator to '0'. Otherwise set the second indicator to '4'. |
| 611 | SUBJECT ADDED--MEETING | Authorized form of meeting names for meetings discussed in the work | See Authorized headings sheet and AACR2. Set the first indicator to '2'. If you found the name in the LC authority file, set the second indicator to '0'. Otherwise set the second indicator to '4'. |
| 630 | SUBJECT ADDED--UNIFORM TITLE | Authorized form of titles for other works discussed in the work | See Authorized headings sheet and AACR2. Set the first indicator to the number of non-filing characters (i.e. characters in an initial articles plus the space... for "The " set the first indicator to '4'). If you found the name in the LC authority file, set the second indicator to '0'. Otherwise set the second indicator to '4'. |
| 650 | SUBJECT ADDED--TOPICAL | Library of Congress Subject Heading terms describing the subject of the work | See Authorized headings sheet and AACR2. If you found the name in the LC authority file, set the second indicator to '0'. Otherwise set the second indicator to '4'. |
| 651 | SUBJECT ADDED--GEOGRAPHICAL | Library of Congress Subject Heading geographical terms describing the subject of the work | See Authorized headings sheet and AACR2. If you found the name in the LC authority file, set the second indicator to '0'. Otherwise set the second indicator to '4'. |
| 655 | INDEX TERM--GENRE/FORM | Describes what an item is as opposed to what the item is about. | Generally used only for auction catalogs, which should have the genre heading "Auction catalogs." (make sure to find the authorized heading!) If you found the name in the LC authority file, set the second indicator to '0'. If you are using a term from a specific thesaurus, set the second indicator to '7' and put the code for the thesaurus in subfield '2'. Otherwise set the second indicator to '4'. |
| 690 | LOCAL SUBJECT ADDED--TOPICAL | Used for headings from any custom subject authority file. | If there is no appropriate LCSH term, you can use a 690 with subject headings you find on other items in the catalog. |
| 691 | LOCAL SUBJECT ADDED--GEOGRAPHICAL | Used for headings from any custom subject authority file. | If there is no appropriate LCSH term, you can use a 691 with subject headings you find on other items in the catalog. |
| 700 | ADDED ENTRY--PERSONAL | Used for second authors and other persons related to the production of the work. | See Authorized headings sheet and AACR2. The first indicator should generally be a '1', to indicate that the entry is surname first. If the name consists only of a forename, however, the first indicator should be '0'. |
| 710 | ADDED ENTRY--CORPORATE | Used for corporate bodies related to the production of the work (e.g. publishers). | See Authorized headings sheet and AACR2. Set the first indicator to '2'. |
| 711 | ADDED ENTRY--MEETING | Used for meetings related to the production of the work (e.g. symposia that contributed to the work). | See Authorized headings sheet and AACR2. Set the first indicator to '2'. |
| 730 | ADDED ENTRY--UNIFORM TITLE | Used for uniform titles related to the production of the work (e.g. a work that inspired the present work) | See Authorized headings sheet and AACR2. Set the first indicator to the number of non-filing characters (i.e. characters in an initial articles plus the space... for "The " set the first indicator to '4'). |
| 773 | HOST ITEM ENTRY | Describes the larger bibliographic unit that contains the work (e.g. book or journal containing the article being described in the current record) | If the host publication is author main entry, enter the authorized form of the author's name in subfield 'a'. Put the title in subfield 't'. If the host publication is an independent work, put publication information in subfield 'd'. When available, ISSN and ISBN should always be used in, in subfields 'x' and 'z' respectively. Relationship information (e.g. volume number, page number, etc.) goes in subfield 'g'. Subfield 'q' contains an encoded representation of the location of the item: volume, issue, and section numbers are separated by colons, and the first page is entered following a '<' at the end of the subfield. See ISBD punctuation sheet. Set the first indicator to '0'. If you want the label "In:" to be generated, leave the second indicator blank. If you want something else displayed before the 773 text, set the second indicator to '8' and add a subfield 'i' with the label you want at the beginning of the field (e.g. "$iOffprint from:"). |
| 830 | SERIES ENTRY--UNIFORM TITLE | Authorized form of the series name transcribed in the 490 field. Often this will just be the same as the 490. | See Authorized headings sheet and AACR2. Set the second indicator to the number of non-filing characters (i.e. characters in an initial articles plus the space... for "The " set the second indicator to '4'). |
| 852 | LOCATION/CALL NUMBER | Provides the section name for pre-barcode books, pamphlets, and some articles and serials. | Do not put anything in this field if you are cataloging a volume which gets only one record and a barcode. If the item does not get a barcode, or you are currently creating a record for an article in a volume, put the section in subfield 'a' (see ANS cataloging documentation), and the call number in subfield 'i'. Set the first indicator to '8'. |
| 856 | ELECTRONIC ACCESS | Links to material available online. | Put the URL of any electronic copies or summaries, etc. in subfield 'u' and a link title in subfield 'y'. Set the first indicator to '4'. |
| 942 | ADDED ENTRY ELEMENTS (KOHA) | Used for Koha-specific data. | Set the subfield 'c' to the appropriate item type. |
Table: Cataloging Guide
Item/Holdings Record Cataloging Guide¶
This table represents the default embedded holdings data in Koha. This information can be used for migration or importing data purposes
| MARC21 Tag/subfield | Data Element | Description | Notes |
|---|---|---|---|
| 952$0 | Withdrawn status | Default values:
|
Coded value, matching Authorized Value category ('WITHDRAWN' in default installation) |
| 952$1 | Lost status | Default values:
|
It's possible to configure OPAC so that lost items don't display with the hidelostitems system preference. Coded value, matching Authorized Value category ('LOST' in default installation) |
| 952$2 | Classification | Classification scheme that defines filing rules used for sorting call numbers. | A choice of classification sources as they are defined in administration. If no classification scheme is entered, the system will use the value entered in the DefaultClassificationSource preference. |
| 952$3 | Materials specified | Specific issues of serials or multi-part items. | Displayed when items are checked out and in to tell the staff how many pieces the item has. Copy/volume data is stored in 952$h and $t for display in Normal views. |
| 952$4 | Damaged status | Default values:
|
Coded value, matching Authorized Value category ('DAMAGE' in default installation) |
| 952$5 | Use restrictions | Default values:
|
Coded value, matching Authorized Value category ('RESTRICT' in default installation). This value has no effect on circulation. |
| 952$7 | Not for loan | Default values:
|
Coded value, matching Authorized Value category ('NOT_LOAN' in default installation). Negative number values can still be placed on hold. |
| 952$8 | Collection code | Coded value | Coded value, matching Authorized Value category ('CCODE' in default installation) |
| 952$9 | Item number | System-generated item number. | Does not display in the item record. |
| 952$a | Owning Library ** | Branch code | Required. Code must be defined in Libraries, Branches and Groups |
| 952$b | Holding library ** (usually the same as 952$a ) | Branch code | Required. Code must be defined in Libraries, Branches and Groups |
| 952$c | Shelving location code | Coded value, matching Authorized Value category ('LOC' in default installation) | |
| 952$d | Date acquired | YYYY-MM-DD | Date formats in the 952 subfields are required to be in the system internal format for data loading and subsequent item editing: YYYY-MM-DD |
| 952$e | Source of acquisition | Coded value or vendor string | Filled in automatically with the Koha assigned vendor id by Acquisitions when an item is received. |
| 952$g | Purchase price | Decimal number, no currency symbol (ex. 10.00) | Filled in automatically by Acquisitions when an item is received. |
| 952$h | Serial enumeration | Filled in automatically by Serials if the issue is received there. | |
| 952$o | Koha full call number | Can be filled in automatically based on the itemcallnumber system preference. | |
| 952$p | Barcode * | Max 20 characters | |
| 952$t | Copy number | Max 32 characters | |
| 952$u | Uniform Resource Identifier | Item specific URL | Full URL starting with http:// Only needed if your item has its own URL, not necessary if the bib record has a 856$u that applies to all items on the record. |
| 952$v | Replacement price | Decimal number, no currency symbol (ex. 10.00) | Filled in automatically by Acquisitions when an item is received. |
| 952$w | Price effective from | YYYY-MM-DD | Date formats in the 952 subfields are required to be in the system internal format for data loading and subsequent item editing: YYYY-MM-DD. Filled in automatically by Acquisitions when an item is received. |
| 952$x | Nonpublic note | This is a note field for notes that will not appear in the OPAC. Right now this note does not appear anywhere but in the item edit screen in the staff client. | |
| 952$y | Koha item type ** | Coded value, required field for circulation | Required. Coded value, must be defined in Item types |
| 952$z | Public note |
Table: Koha Embedded Holdings Data
* - required for circulation
** - required by Koha
Handling On Order Items and Holds¶
If you tend to import your MARC records when you have ordered the book (as opposed to when you receive the books), and allow patrons to place holds on those books, you may need to add item records to the *.mrc file before importing.
The easiest way to import your latest order is to first run your records through MARCEdit. Download your MARC records, saving them to your desktop or some other location you use/will remember. If you have MARCEdit already installed you should simply have to double click on your MARC records, and they will automatically open in MARCEdit.
Important
هذا الشرح التعليمي قد كتب بمارك نسخة 5.2.3769.41641 على ويندوز XP، قد تختلف التعليمات اذا اختلتف الإصدارة أو نظام التشغيل.
الملف الأساسي الخاص بك سيكون تلقائياً في المدخلات. تأكد من أن MarcBreaker تم اختياره، ومن ثم انقر "تنفيذ"

سوف يتم تقديم ملخص من معالجة التسجيلات أسفل الشاشة
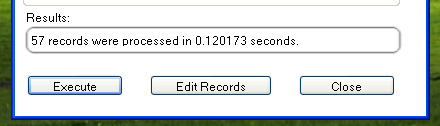
انقر فوق "تحرير التسجيلات' للإستمرار في إضافة تسجيلات المواد
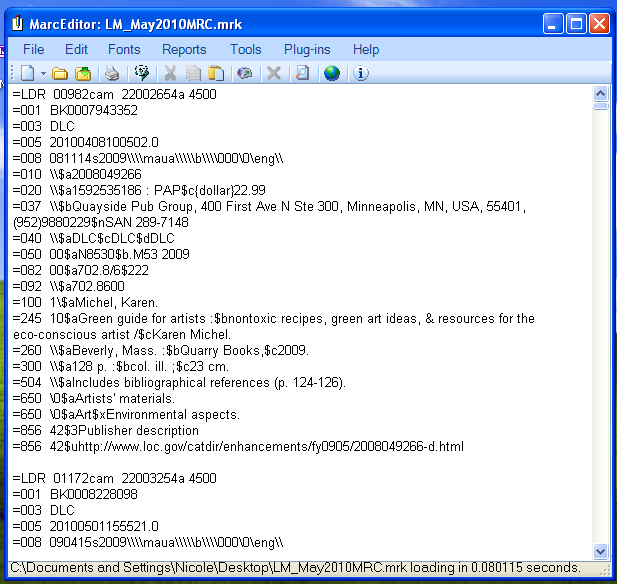
شاشتك سوف تستبدل بشاشة أكبر تحتوي على تسجيلات مارك
Click on Tools > Add/Edit Field

ادخل في كوها معلومات المادة المحددة
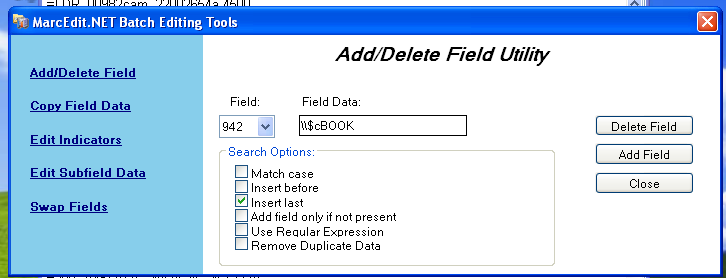
- في مربع الحقل، اكتب 942
- In the Field Data box, type \\$c and the item type code (\\$cBOOK in this example)
- إفحص إعدادات اسم المضيف
- إضغط 'إضافة حقل'
إدخل بيانات تسجيلة المادة
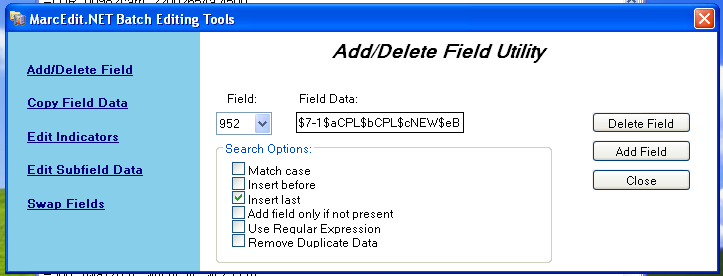
- في مربع الحقل، اكتب 952
- In the Field Data box, type
$7ORDERED_STATUS$aPERM_LOC$bCURR_LOC$cSHELVING_LOCATION$eSOURCE_OF_ACQ$yITEM_TYPE
- مثال . $7-1$aCPL$bCPL$cNEW$eBrodart$ كتاب
- في تنصيب كوها الافتراضي -1 هي القيمة لحالات الطلب
- You may want to look at other subfields you would like data in -- for example, changing the collection code to put all the items in the same collection (8), automatically fill in the acquisition date (d), or put in a public note (z).
- Be sure you use the $ to separate subfields; adding each subfield on a separate line will cause that many items to be imported with your MARC record (in the example above, four items, each with one of those subfields corrected)
- Make sure you look at the Administration > Authorized Values in Koha to put the correct code into the field
- مثال . $7-1$aCPL$bCPL$cNEW$eBrodart$ كتاب
- إفحص إعدادات اسم المضيف
- إضغط 'إضافة حقل'
أغلق نافذة تحرير الحقل
Click on File > Compile into MARC
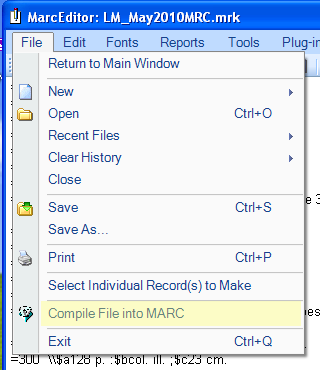
إختيار مكان حفظ الملف الخاص ك
Now you want to go into your Koha system and follow the instructions for importing MARC records.
Once the item has come in, you will need to go to the item record and individually change the item to have the correct barcode, and manually change the status from Ordered to the blank line in the Not for Loan field.
Note
If you purchase your cataloged item records, you may want to request your vendor put in the information you need into the MARC records for you; that way, you could import the edited-by-the-vendor file, overwriting the current record, automatically replacing the data with what you need.