To place an order you must first search for the vendor or bookseller you want to send the order to.
Important
If you are planning on using EDIFACT to submit your order you will need to first set up your library's EDI Accounts and EANs.
Note
If you're using EDI for ordering you will want to download your order record from your vendor before starting the process in Koha.
To create a basket you must first search for the vendor you're ordering from:
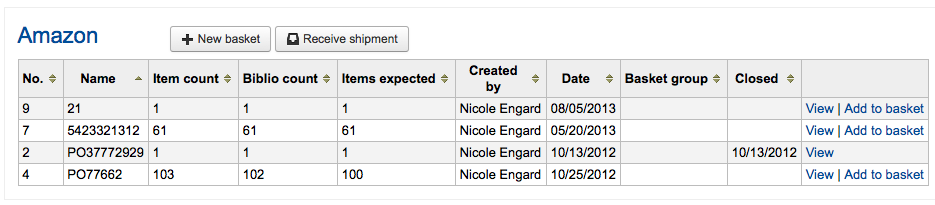
And click the 'New basket' button to the right of the vendor name.
Note
You can also add to an existing basket by clicking the 'Add to basket' link to the far right of each basket's information in the results table.
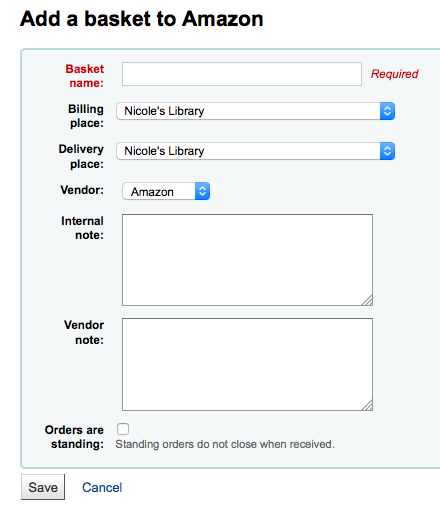
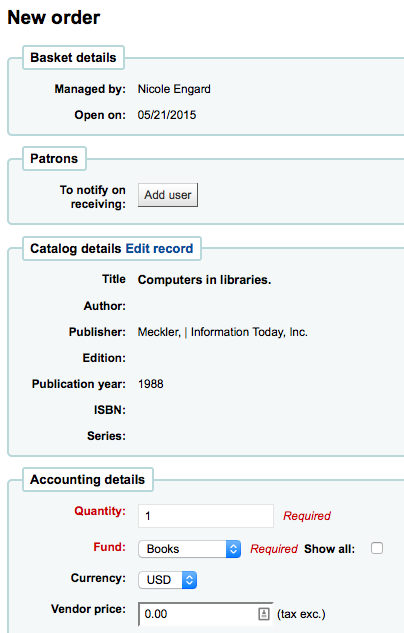
After clicking 'New basket' you will be asked to enter some information about the order:
-
When adding a basket you want to give it a name that will help you identify it later
-
Enter in the Billing Place and Delivery Place (this will default the library you're logged in at)
-
If you would like to change the vendor you're ordering from you can use the Vendor pull down menu
-
The notes fields are optional and can contain any type of information
-
If you're ordering standing items (items which arrive regularly) then you will want to check the 'Orders are standing' box for this basket
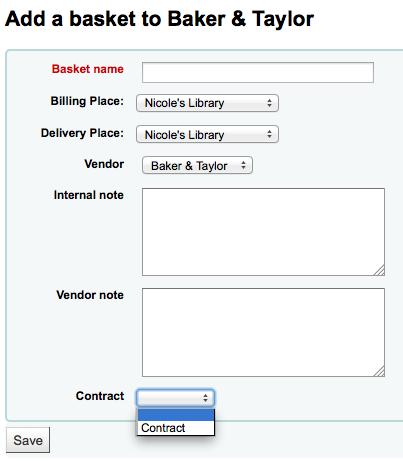
If you have added contracts to the vendor you're ordering from, you will also have an option to choose which contract you're ordering these items under.
When finished, click 'Save'
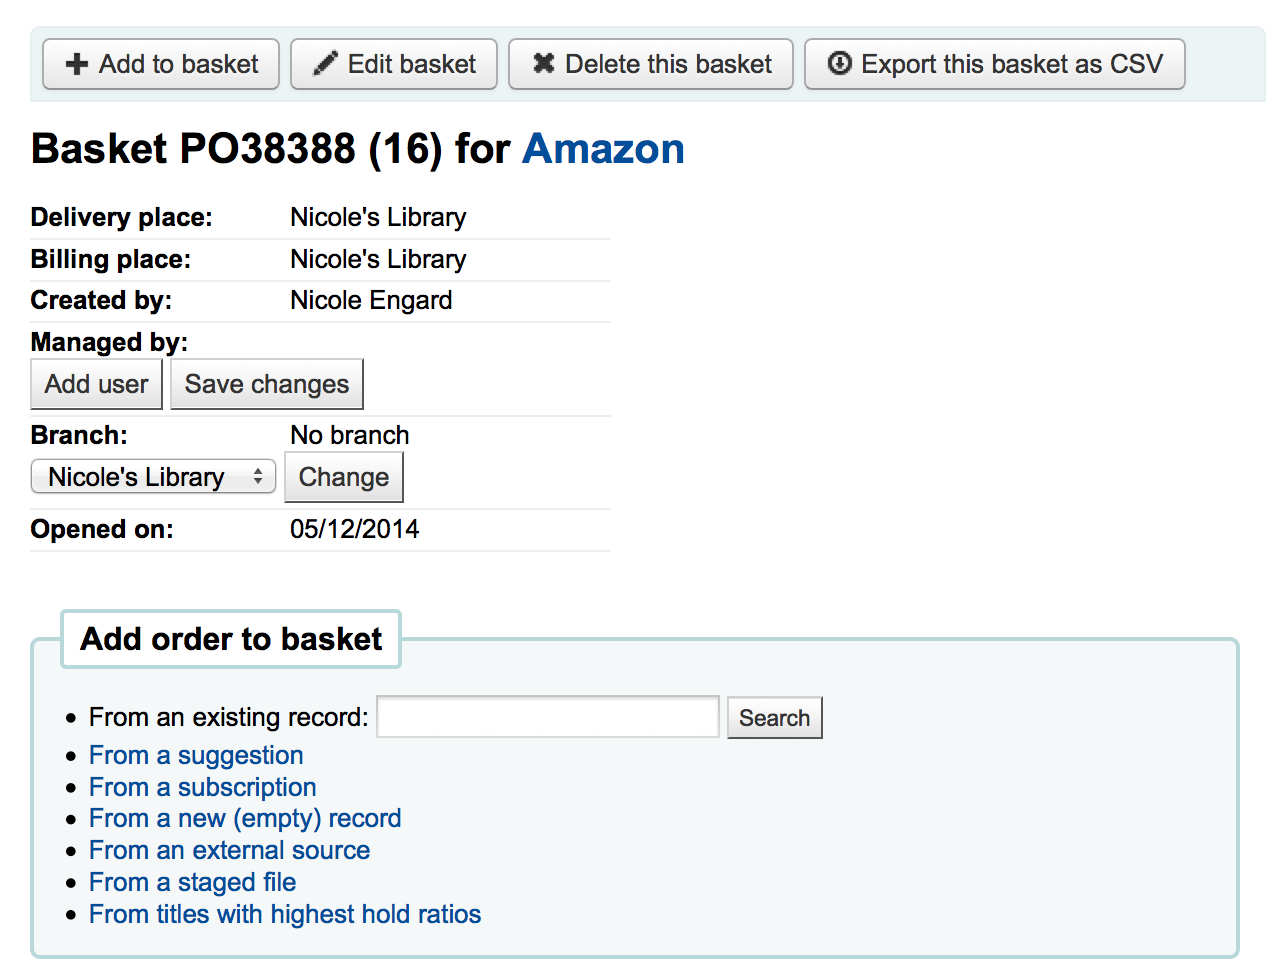
Once your basket is created you are presented with several options for adding items to the order.
-
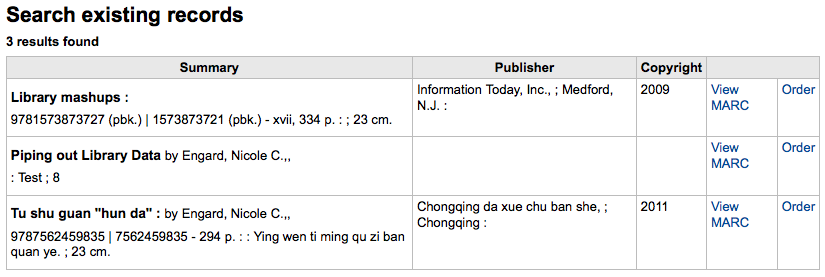
If you are ordering another copy of an existing item, you can simply search for the record in your system.
-
From the results, simply click 'Order' to be brought to the order form.
-
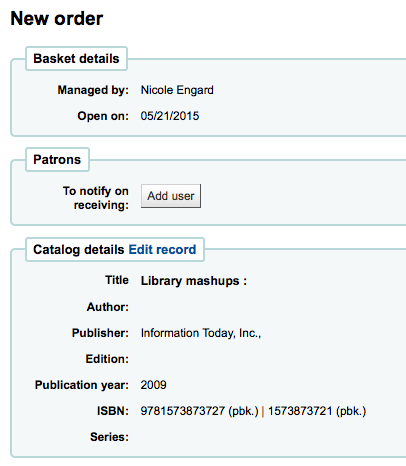
All of the details associated with the item will already be listed under 'Catalog details.'
-
-
-
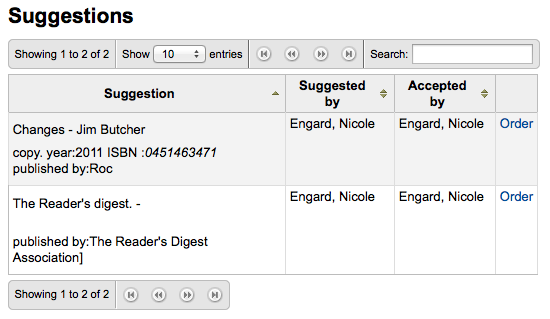
If you allow patrons to make purchase suggestions (learn more in the Managing Suggestions section of this manual), then you can place orders from those suggestions. In order to keep track of suggestions that have been ordered and received you must place the order using this link.
-
From the results, click 'Order' next to the item you want to order and you will be presented with the order form including a link to the suggestion
-
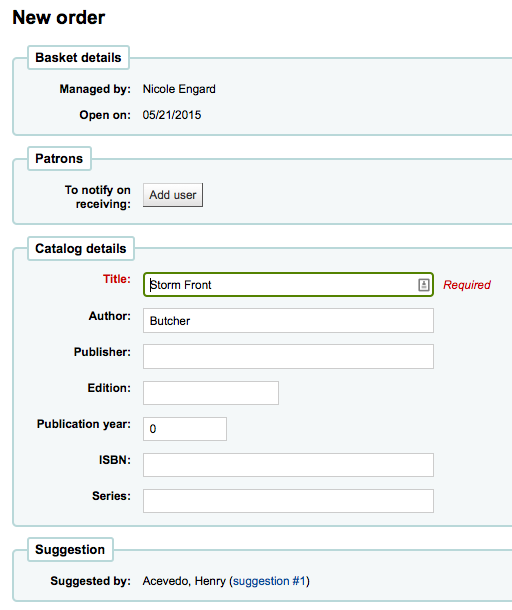
From this form you can make changes to the Catalog Details if necessary.
-
When the item appears in your basket it will include a link to the suggestion.
-
-
Orders added to the basket in this way will notify the patron via email that their suggestion has been ordered and will update the patron's 'My purchase suggestions' page in the OPAC.
-
-
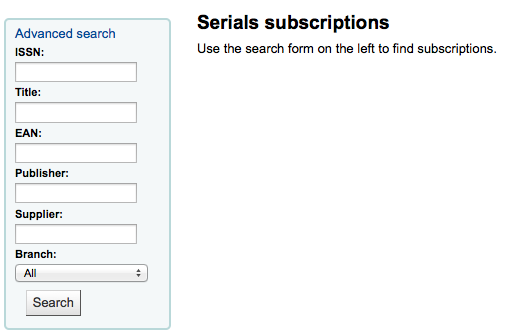
If you're using the Serials module you can link your subscription order information to acquisitions by choosing to order 'From a subscription'
-
After clicking the order link you will be brought to a search page that will help you find your subscription
-
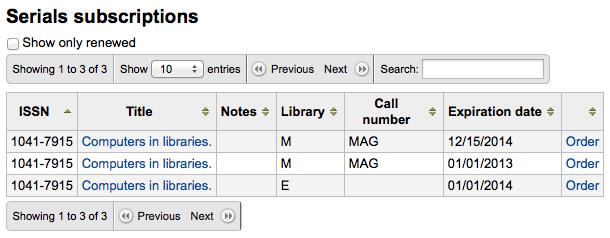
Your results will appear to the right of the form and each subscription will have an 'Order' link to the right
-
Clicking 'Order' will bring the subscription info in to the order form without an 'Add item' section since you are just ordering a subscription and an item isn't needed
-
-
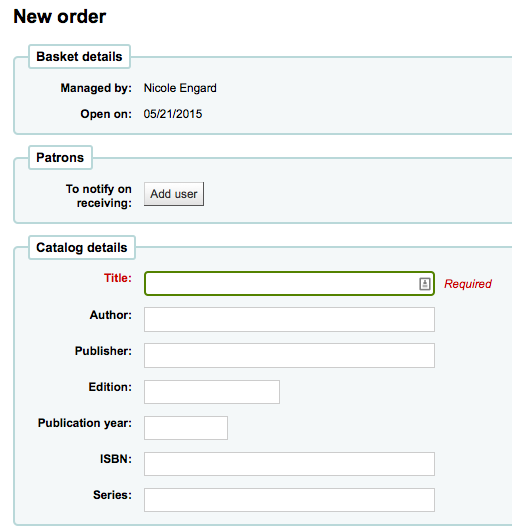
To order from a record that can't be found anywhere else, choose the 'From a new (empty) record.'
-
You will be presented with an empty form to fill in all of the necessary details about the item you are ordering.
-
-
If you want to search other libraries for an item to purchase, you can use the 'From an external source' option that will allow you to order from a MARC record found via a Z39.50 search.
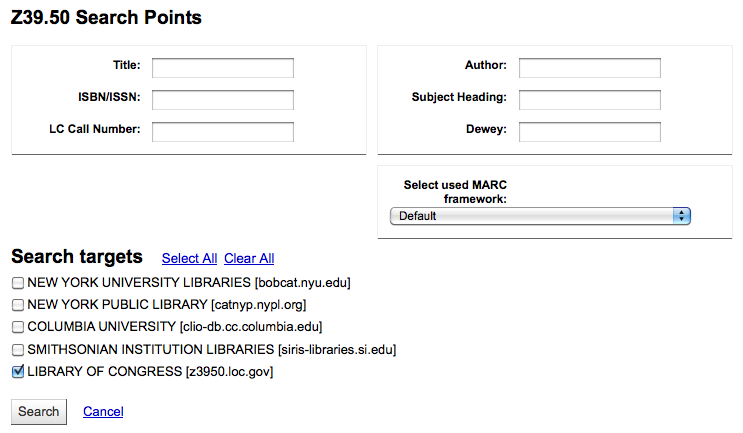
-
From the results, click the Order link next to the item you want to purchase.

-
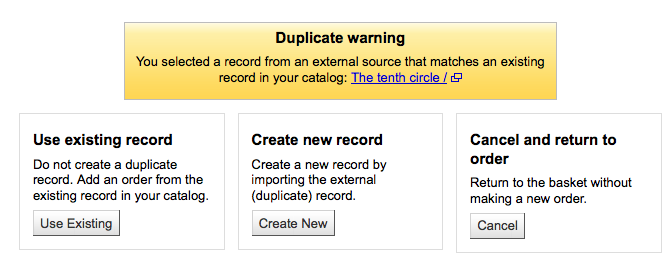
If the item you're ordering from an external source looks like it might be a duplicate, Koha will warn you and give you options on how to proceed.
-
From the warning, you can choose to order another copy on the existing bib record, create a new bib record, or cancel your order of this item.
-
-
In the order form that pops up, you will not be able to edit the catalog details.
-
-
The next option for ordering is to order from a staged record (learn more about staging records).
Note
This is the option you will choose if you have an order file from your vendor.
-
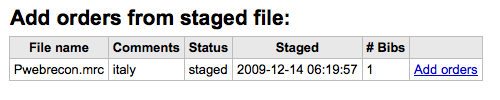
From the list of files you are presented with, choose the 'Add orders' link to add the records in the staged file to your order.
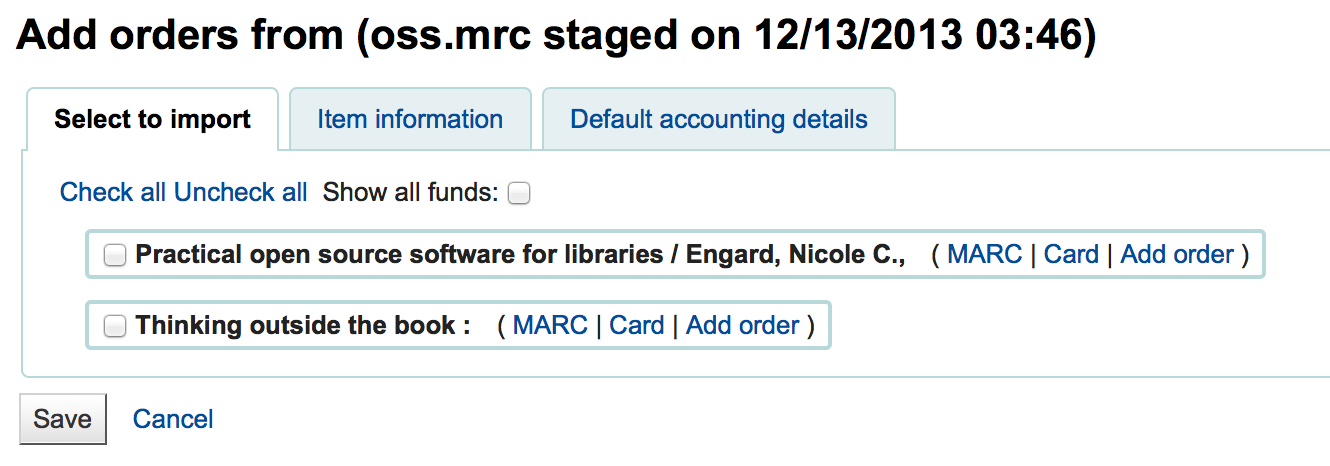
-
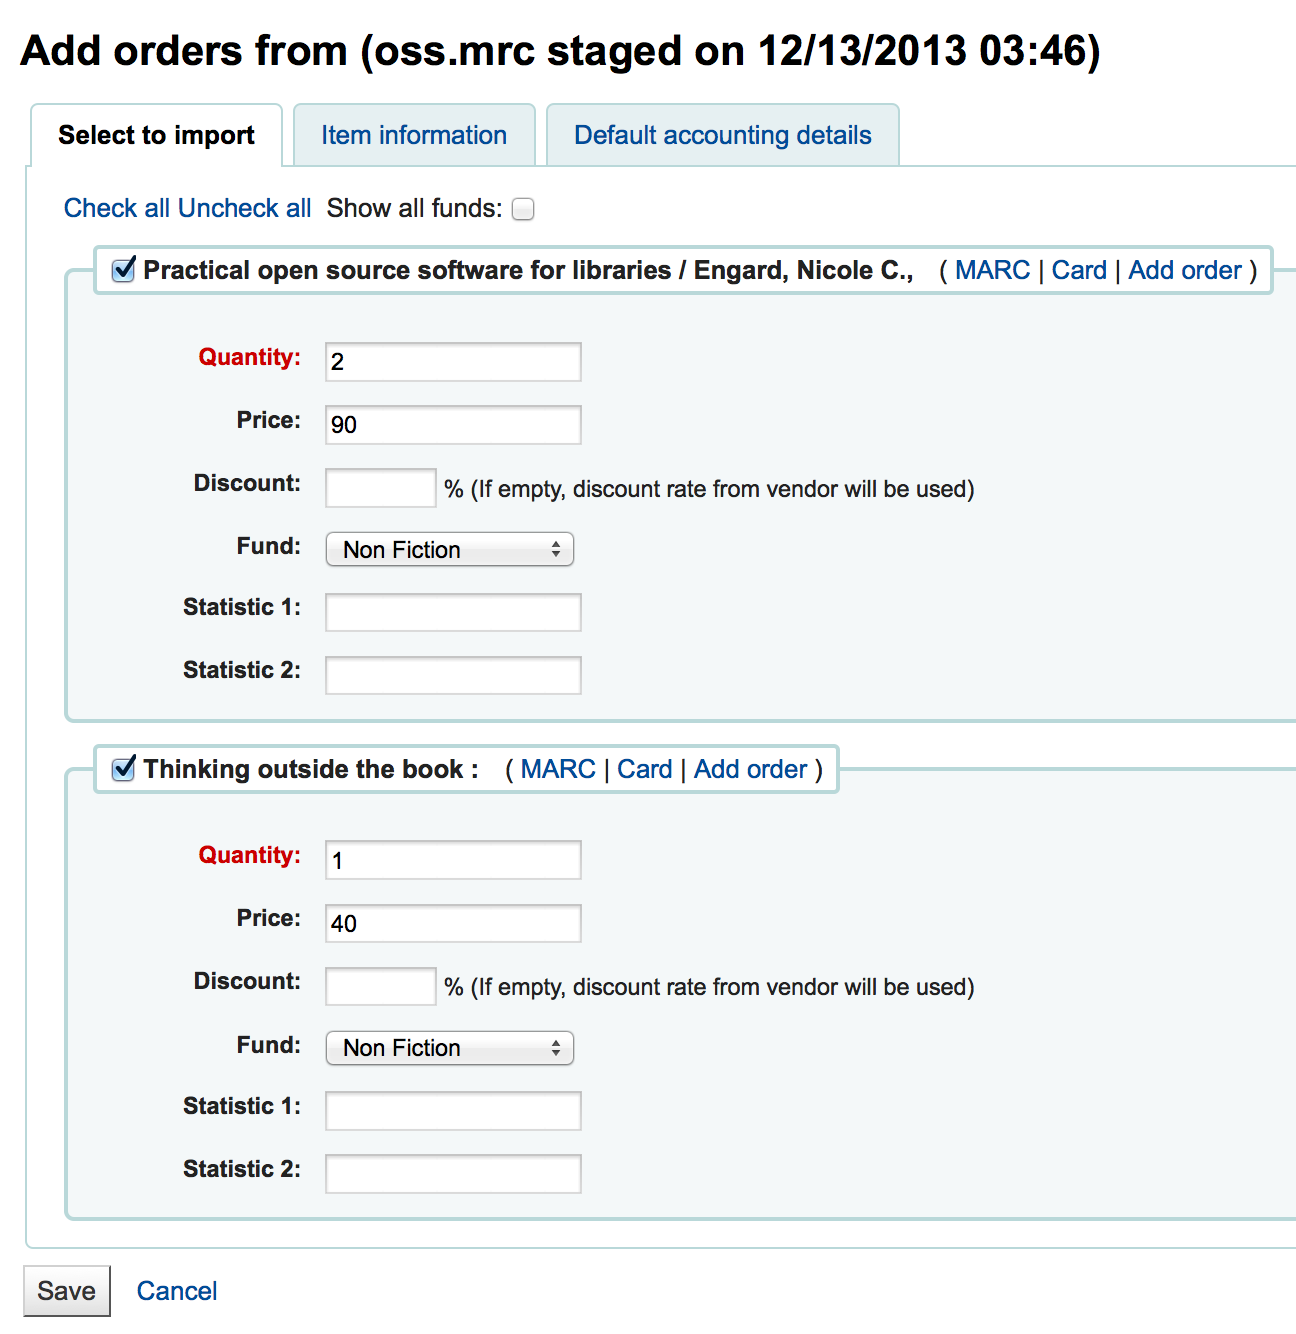
Next to each title is a checkbox, check the items you would like to order, or choose 'Check all' at the top. Depending on your settings in the MarcFieldsToOrder preference Koha will populate the next screen with with the relevant Quantity, Price, Fund, Statistic 1, and Statistic 2 found within the staged file.
-
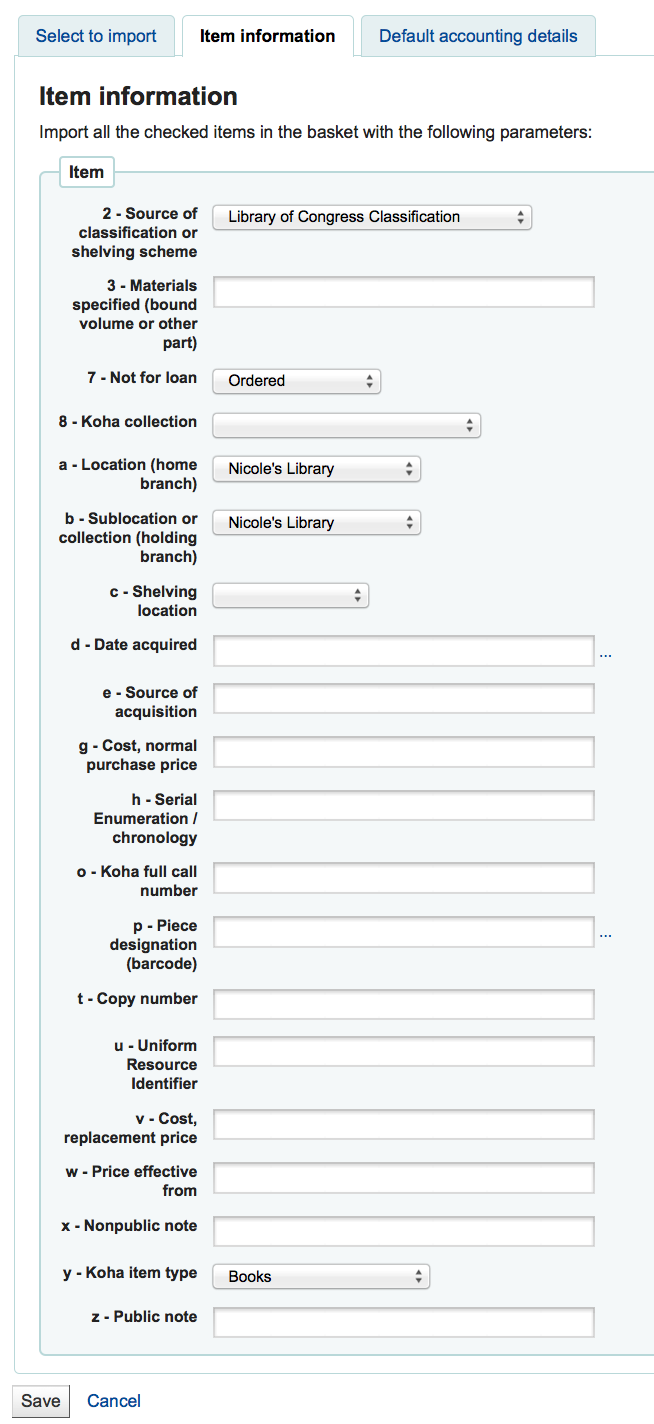
In the 'Item Information' tab you can enter information that will be added to every ordered item such as item type, collection code and not for loan status.
-
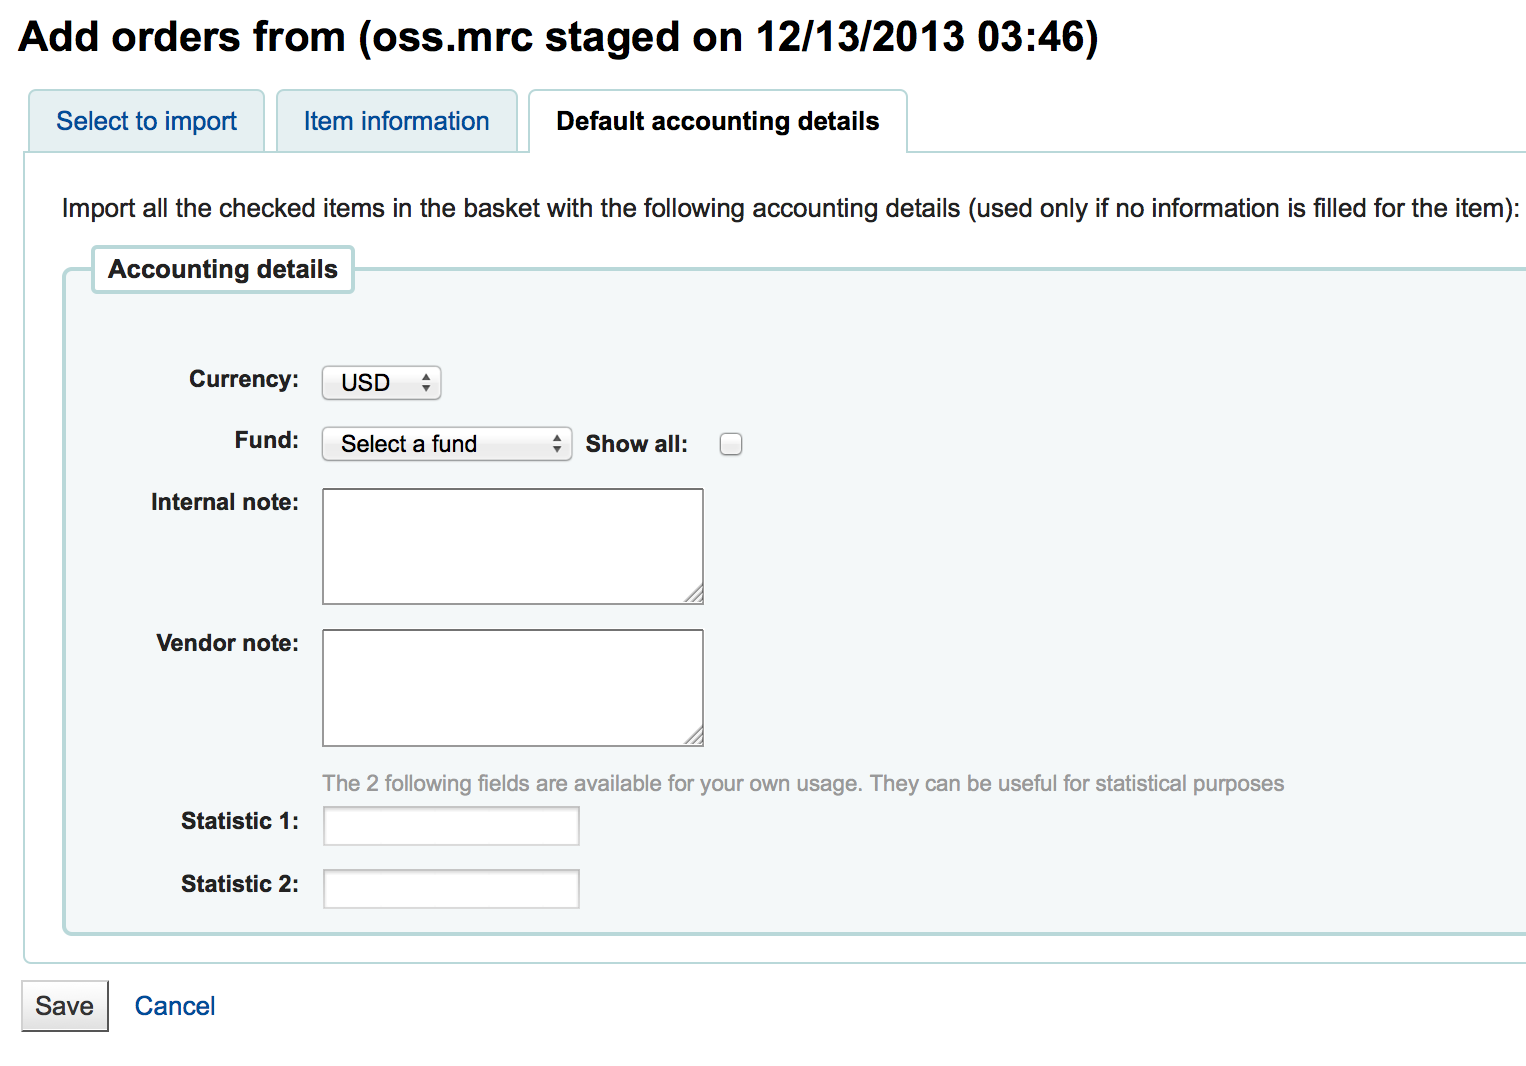
If no information is imported from the MARC record regarding fund information the 'Default accounting details' tab can be used to apply values related to the accounting.
-
-
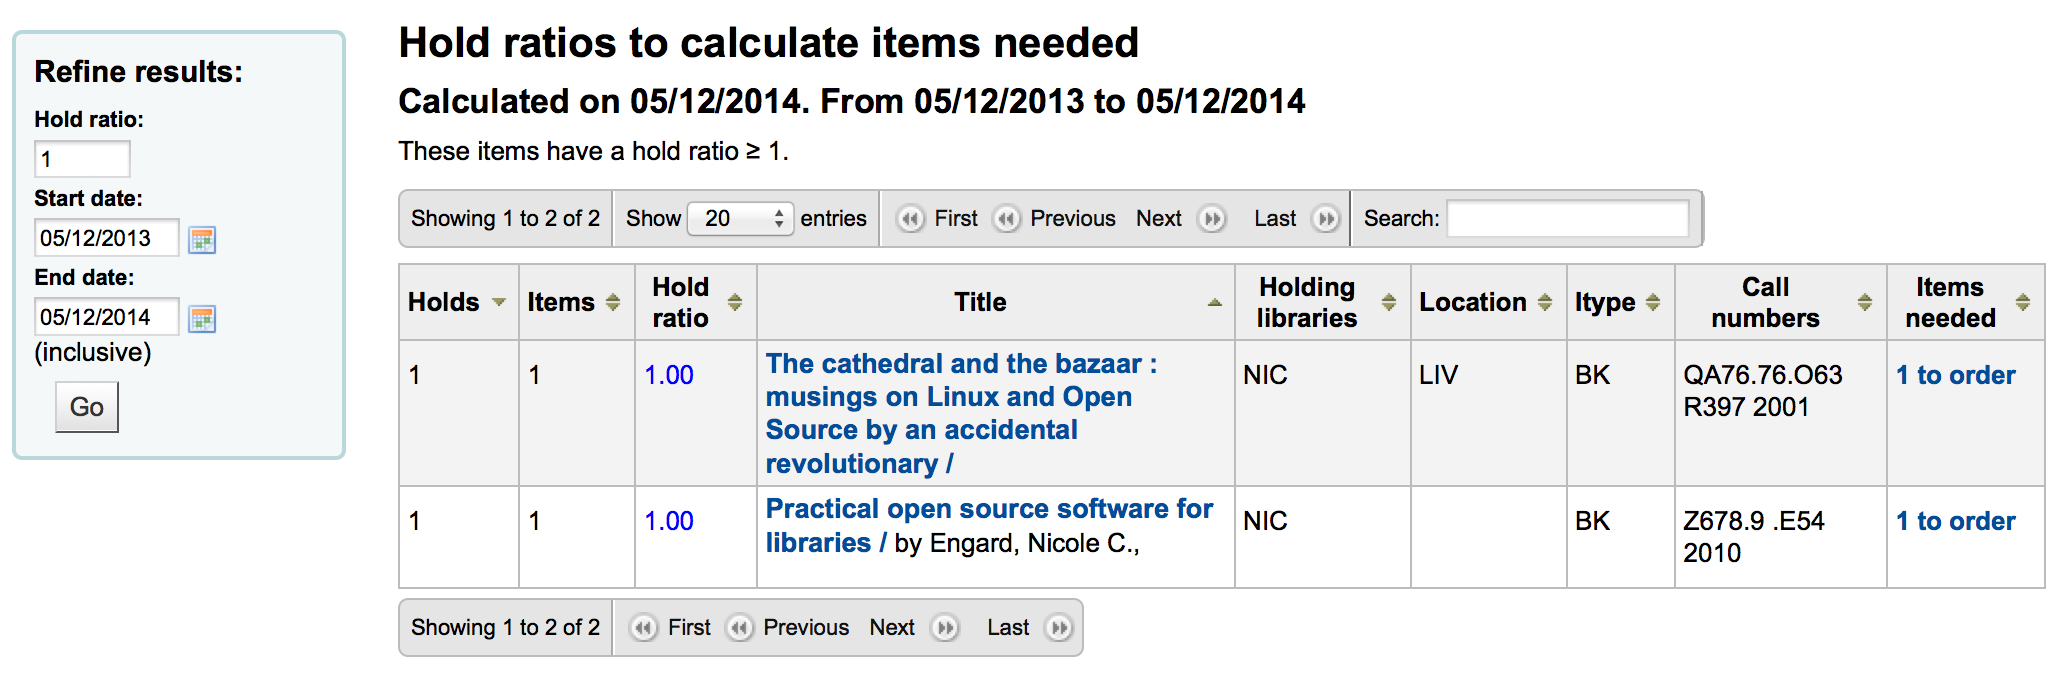
The final option for ordering is to order from a list of titles with the highest hold ratios
-
This option will take you to the Holds Ratio report where you can find items with a high hold ratio and order additional copies. Next to each title will be a link with the number of items to order, click that and it will add the item to your basket.
-
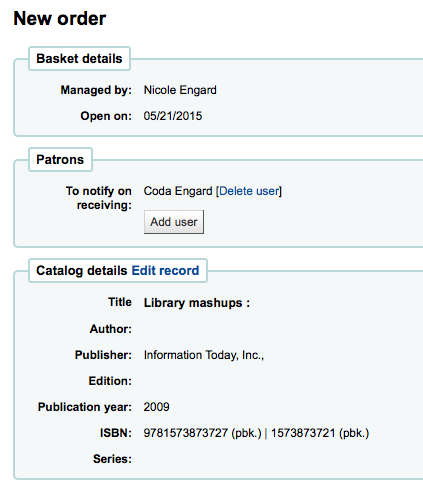
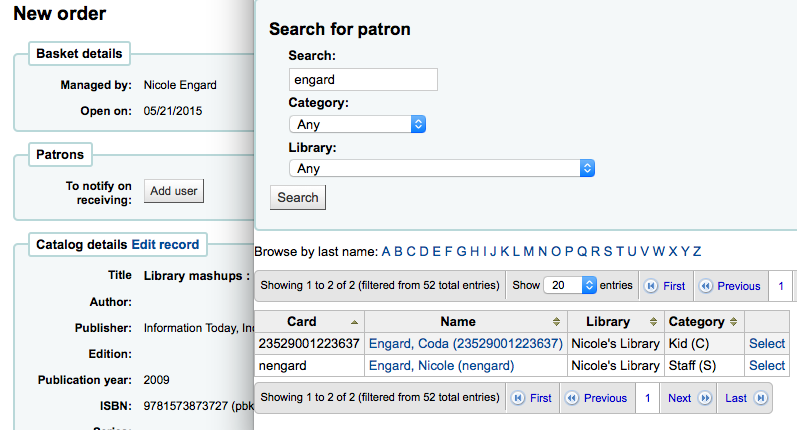
With any of the above ordering options you're presented with an option to notify patrons of the new item when it's received. The contents of that notification can be edited in the Notices & Slips tool and will have the code of ACQ_NOTIF_ON_RECEIV. In the 'Patrons' section you will see an option to 'Add user'. Click that button to add patrons who will be notified of the new issue.
-
In the window that pops up search for the patrons you'd like to notify and click 'Select'
-
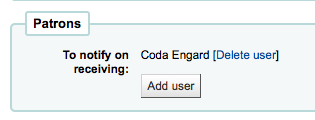
Once you're done you can close the window and you'll see the list of patrons under the 'Patrons' section
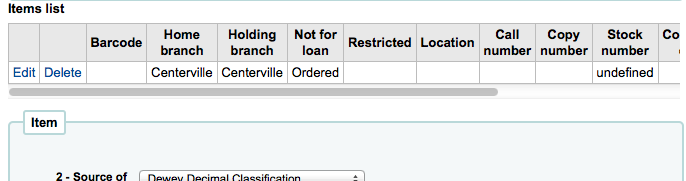
After bringing in the bib information (for all import methods except for the staged file), if your AcqCreateItem system preference is set to add an item when ordering you will enter the item info next. You need to fill out at least one item record and then click the 'Add' button at the bottom left of the item form.
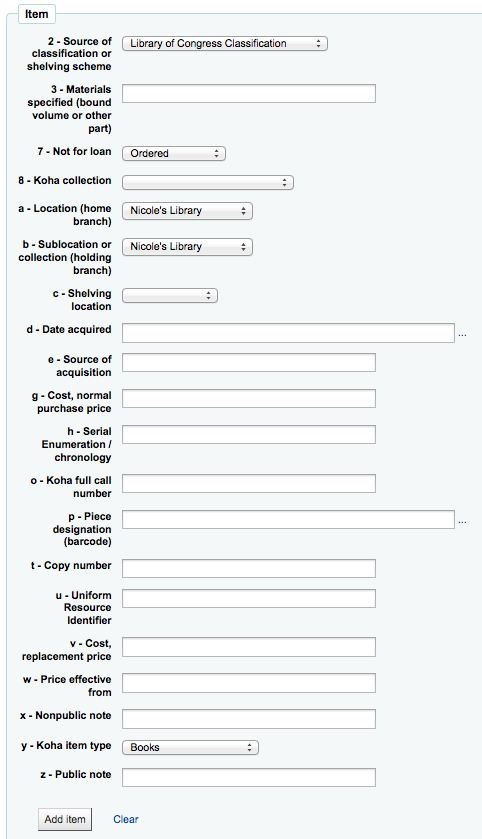
After clicking the 'Add item' button below the item record the item will appear above the form and then you can enter your next item the same way (if ordering more than one item).
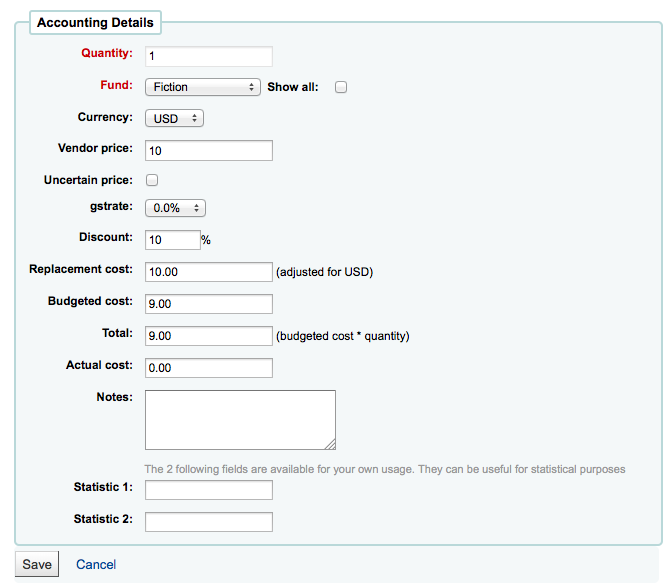
Once you have entered the info about the item, you need to enter the Accounting information.
-
Quantity is populated by the number of items you've added to the order above.
-
Important
You cannot edit the quantity manually, you must click 'Add' below the item form to add as many items as you're ordering.
-
-
The list of funds is populated by the funds you have assigned in the Acquisitions Administration area.
-
The currency pull down will have the currencies you set up in the Acquisitions Administration area.
-
The vendor price is the price before any taxes or discounts are applied.
-
If the price is uncertain, check the uncertain price box.
-
A basket with at least one uncertain price can't be closed.
-
-
If you are charged sales tax, choose that from the gstrate field
-
Enter the percentage discount you're receiving on this order, once you enter this, hit tab and Koha will populate the rest of the cost fields below.
-
If you added Planning Values when creating the Fund, those values will appear in the two Planning Value fields.
Once you have filled in all of the fields click 'Save' to add the item to your basket. If your price goes over the amount availalbe in the fund you will be presented with a confirmation.
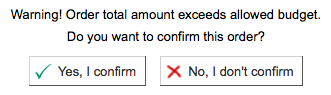
The confirmation warning will allow you order past your fund amount if you so choose.
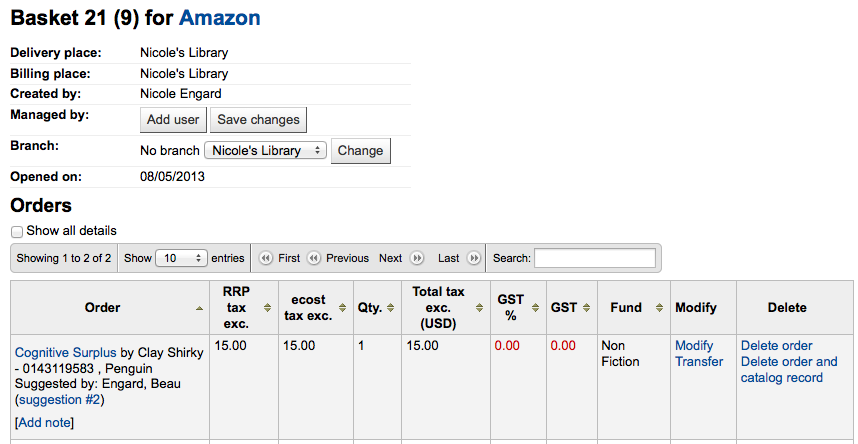
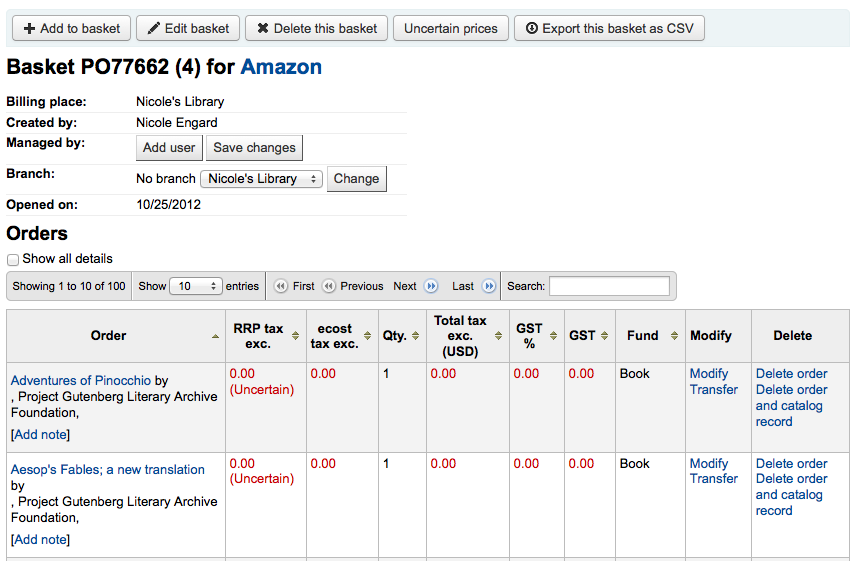
After an item is added to the basket you will be presented with a basket summary.
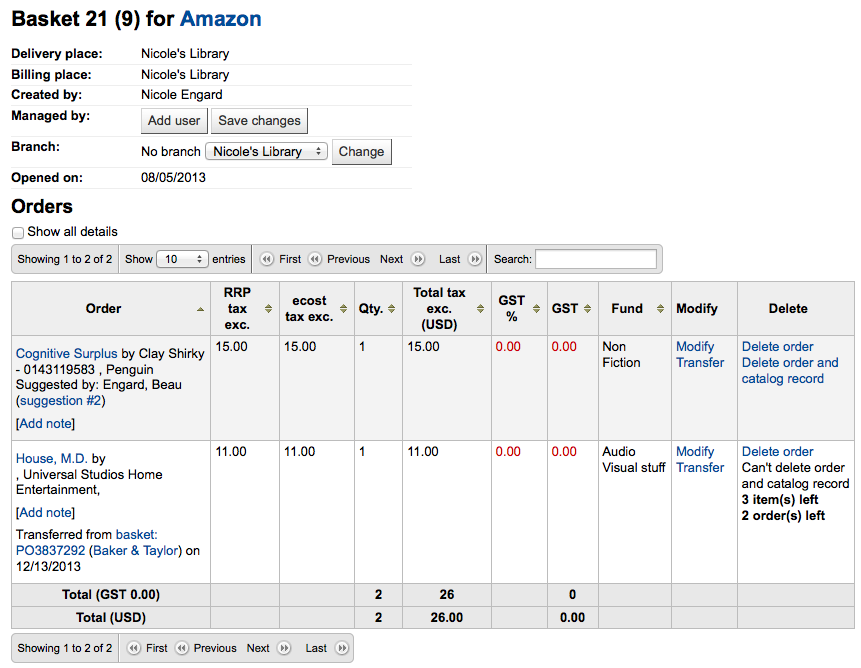
If you would like to see more details you can check the 'Show all details' checkbox
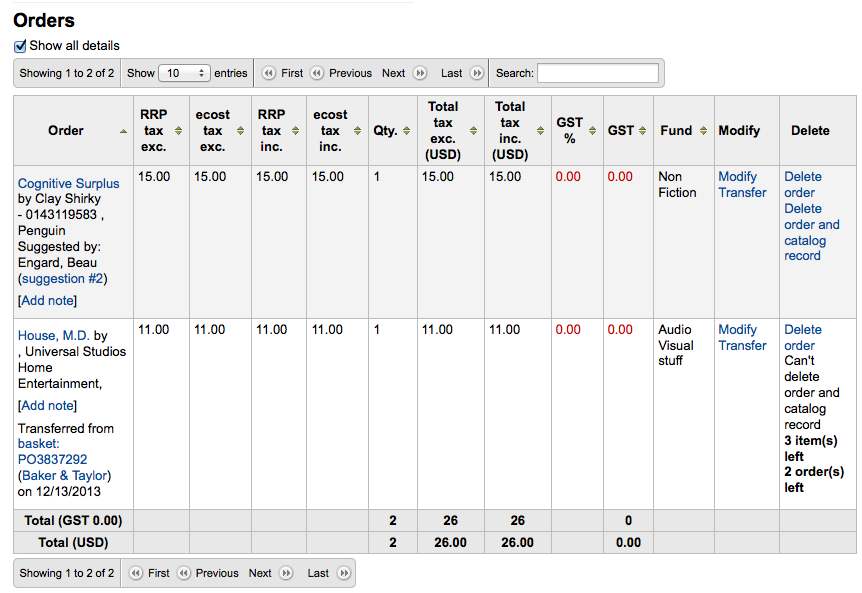
From here, you can edit or remove the items that you have added.
-
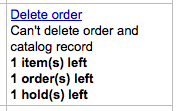
Choosing to 'Delete the order' will delete the order line but leave the record in the catalog.
-
Choosing to 'Delete order and catalog record' removes both the order line and the record in the catalog.
-
The catalog record cannot always be deleted. You might see notes explaining why.
-
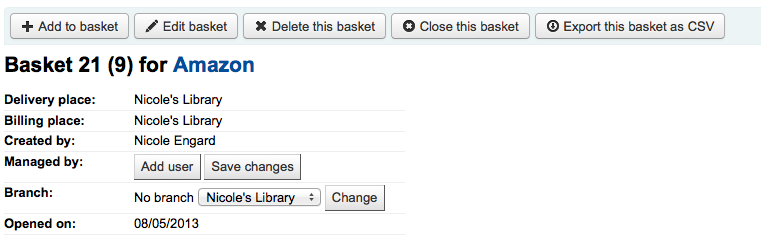
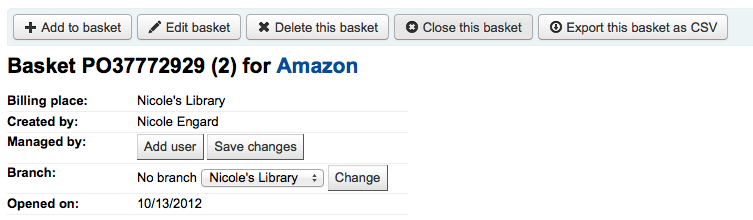
On the summary page, you also have the option to edit the information that you entered about the basket by clicking the 'Edit basket header information' button, to delete the basket altogether by clicking the 'Delete this basket' button, or to export your basket as a CSV file by clicking the 'Export this basket as CSV' button.
If you're using EDI for your order you can click the 'Create EDIFACT order' button when you're done to send the file to the vendor and close the basket.

Once you're sure your basket is complete, you can click 'Close this basket' button to indicate that this basket is complete and has been sent to the vendor.
Important
You must close the basket to be able to receive items when they arrive. Only items in closed baskets will show as ready to receive.
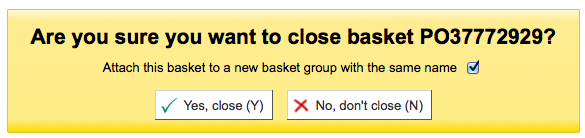
If you have your BasketConfirmations preference set to show a confirmation, you will be asked if you are sure about closing the basket.
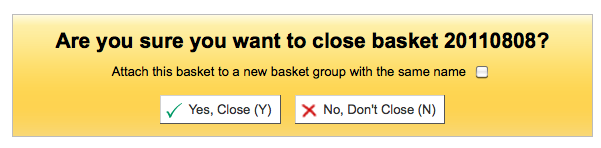
When closing the basket you can choose to add the basket to a group for easy printing and retrieval. If you check the box to 'Attach this basket to a new basket group' you will be brought to the group list where you can print a PDF of the order.

Important
A basket with at least one item marked as 'uncertain price' will not be able to be closed.
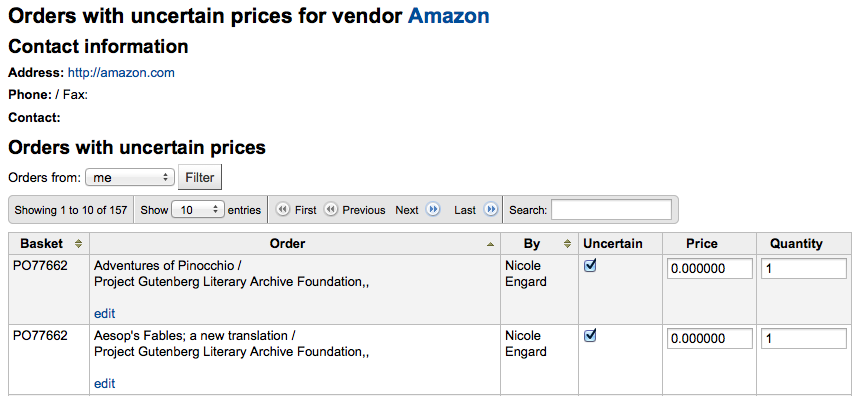
Clicking the 'Uncertain Prices' button will call up a list of items with uncertain prices to quick editing. From that list, you can quickly edit the items by entering new prices and quantities.
Important
The Uncertain Prices page is independent of the basket. It is linked to the vendor so you will see all items on order with uncertain prices for that vendor.
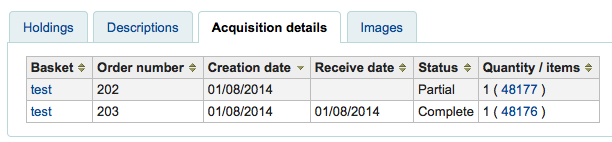
Once your order is entered you can search for it through acquisitions or view the information on the biblio detail page in the staff client (if the AcquisitionDetails preference is set to 'Display).
A basket group is simply a group of baskets. In some libraries, you have several staff members that create baskets, and, at the end of a period of time, someone then groups them together to send to the vendor in bulk. That said, it is possible to have one basket in a basket group if that's the workflow used in your library.
When you are finished adding items to your basket, click 'Close this Basket.'
You will be asked if you want to 'Attach this basket to a new basket group with the same name'. A basket group is necessary if you want to be able to print PDFs of your orders.
Your completed order will be listed on the Basket Grouping page for printing or further modification.
If you closed the basket before generating the EDIFACT order you can do so from the basket grouping page.
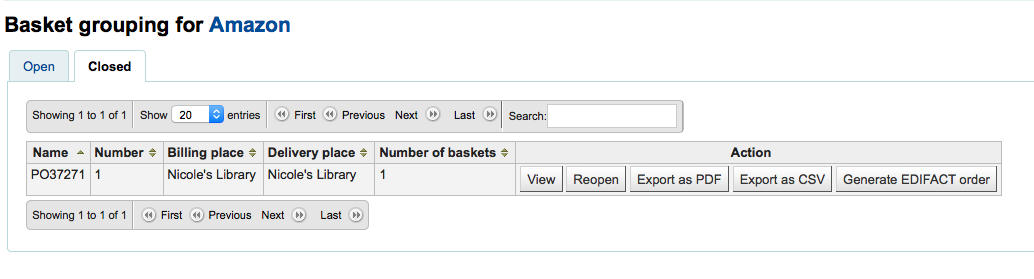
Clicking the 'Print' button next to your order will generate a PDF for printing, which will have all of your library information followed by the items in your order.
