-
Get there: More > Tools > Additional Tools > Calendar
Libraries can define library closings and holidays to be used when calculating due dates. You can make use of the Calendar by turning on the proper system preferences:
-
Get there: More > Administration > Global System Preferences > Circulation > useDaysMode
-
Choose the method for calculating due date - either include days the library is closed in the calculation or don't include them.
-
-
Get there: More > Administration > Global System Preferences > Circulation > finescalendar
-
This will check the holiday calendar before charging fines
-
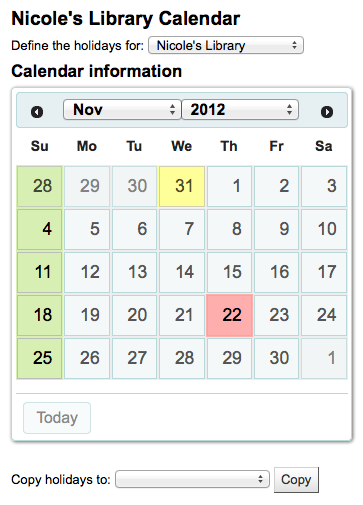
Before adding events, choose the library you would like to apply the closings to. When adding events you will be asked if you would like to apply the event to one branch or all branches. To add events, simply
-
Click on the date on the calendar that you would like to apply the closing to

-
In the form that appears above the calendar, enter the closing information (for more info on each option click the question mark [?] to the right of the option)
-
Library will be filled in automatically based on the library you chose from the pull down at the top of the page
-
The day information will also be filled in automatically based on the date you clicked on the calendar
-
In the description enter the reason the library is closed
-
Next you can choose if this event is a one time event or if it is repeatable.
-
If this is a one day holiday choose 'Holiday only on this day'
-
If this is a weekly closing (like a weekend day) then you can choose 'Holiday repeated every same day of the week'
-
If this is an annual holiday closing choose 'Holiday repeated yearly on the same date'
-
If the library is going to be closed for the week or a range of time choose 'Holiday on a range' and enter a 'To Date' at the top
-
If the library is going to be closed for a range of time each year (such as summer holidays for schools) choose 'Holiday repeated yearly on a range' and enter a 'To Date' at the top
-
-
Finally decide if this event should be applied to all libraries or just the one you have originally selected
-
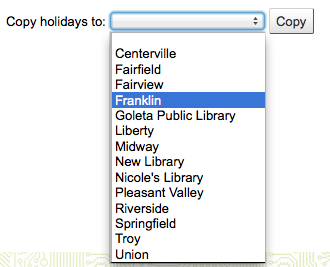
If you'd rather enter all the holidays and then copy them all to another branch all at once you can use the copy menu below the calendar
-
-
-
After saving you will see the event listed in the summary to the right the calendar

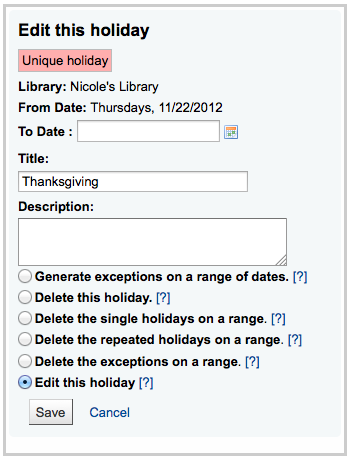
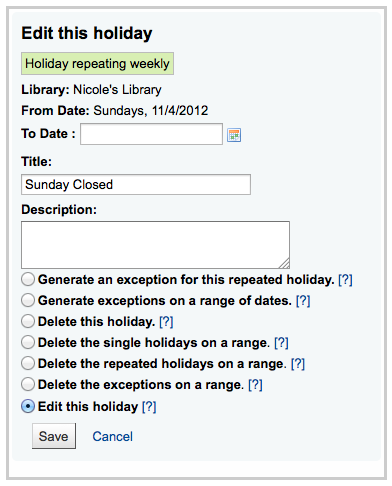
To edit events
-
Click on the event on the calendar that you want to change (do this by clicking on the date on the calendar, not the event listed in the summary)
-
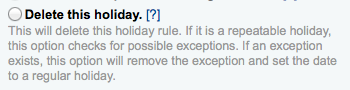
From this form you can make edits to the holiday or delete the holiday completely.
-
All actions require that you click 'Save' before the change will be made.
-
-
Clicking on repeatable events will offer slightly different options
-
In the form above you will note that there is now an option to 'Generate an exception for this repeated holiday,' choosing this option will allow you to make it so that this date is not closed even though the library is usually closed on this date.
-
All actions require that you click 'Save' before the change will be made.
-
-
When adding or editing events you can get additional help by clicking on the question mark next to various different options on the form
-
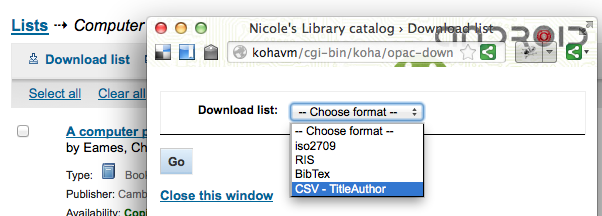
Get there: More > Tools > Additional Tools > CSV Profiles
CSV Profiles are created to define how you would like your cart or list to export.
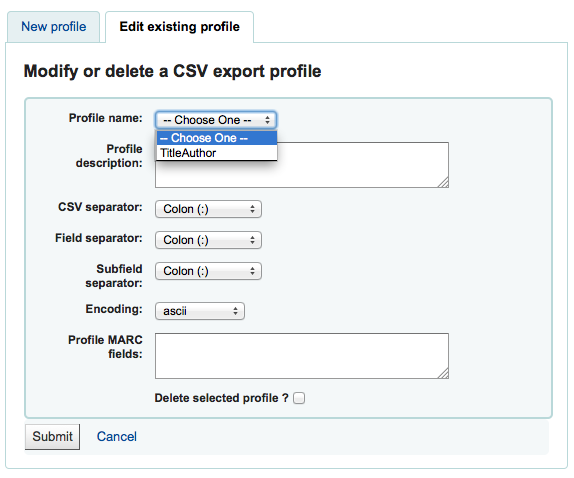
To add a CSV Profile
-
Click 'CSV Profiles' from the Tools menu
-
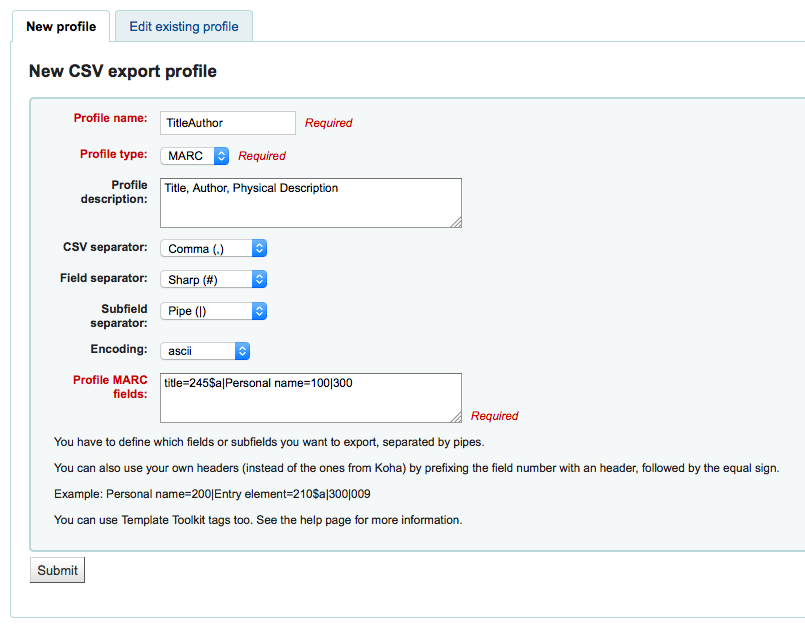
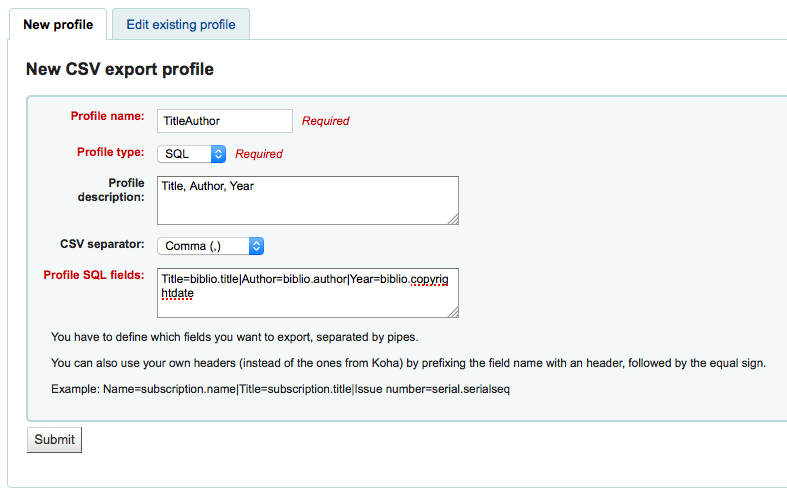
The 'Profile type' determines what type of fields you plan to use (MARC or SQL) to define your profile
-
If you choose MARC then you will need to enter MARC fields
-
If you choose SQL then you will need to enter SQL database fields
-
The 'Profile name' will appear on the export pull down list when choosing 'Download' from your cart or list
-
The 'Profile description' is for your own benefit, but will also appear in the OPAC when patrons download content, so make sure it's clear to your patrons as well
-
The 'CSV separator' is the character used to separate values and value groups
Note
The most common option here is comma because most spreadsheet applications know how to open files split by commas.
-
The 'Field separator' is the character used to separate duplicate fields
-
Example: You may have multiple 650 fields and this is the character that will appear in between each one in the column

-
-
The 'Subfield separator' is the character used to separate duplicate subfields
-
Example: You may have multiple $a subfields in a field
-
-
The 'Encoding' field lets you define the encoding used when saving the file
-
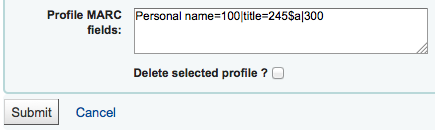
Finally format your CSV file using the 'Profile MARC' or 'Profile SQL' field
-
Define which fields or subfields you want to export, separated by pipes. Example : 200|210$a|301 for MARC and biblio.title|biblio.author for SQL
-
Note
You can also use your own headers (instead of the ones from Koha) by prefixing the field number with an header, followed by the equal sign. Example : Personal name=100|title=245$a|300
-
When you have entered in all of the information for you profile, simply click 'Submit' and you will be presented with a confirmation that your profile has been saved.

-
Once you have created at least one CSV Profile an 'Edit profile' tab will appear next to the 'New profile' button.
-
Choose the profile you would like to edit and alter the necessary fields.
-
After submitting your changes you will be presented with a confirmation message at the top of the screen

-
To delete a profile, check the 'Delete selected profile' option before clicking 'Submit Query'
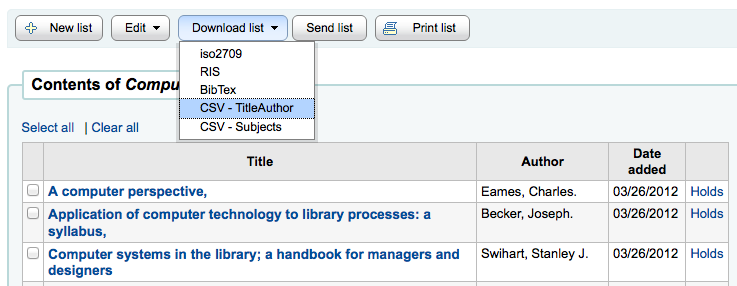
Your CSV Profiles will appear on the export list or cart menu under the 'Download' button in both the staff client and the OPAC
-
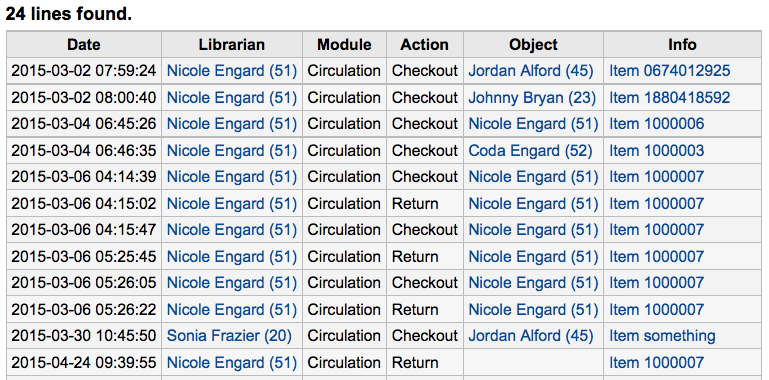
Get there: More > Tools > Additional Tools > Log Viewer
Actions within the Koha system are tracked in log files. Your system preferences can be changed to prevent the logging of different actions. These logs can be viewed using the Log Viewer Tool.
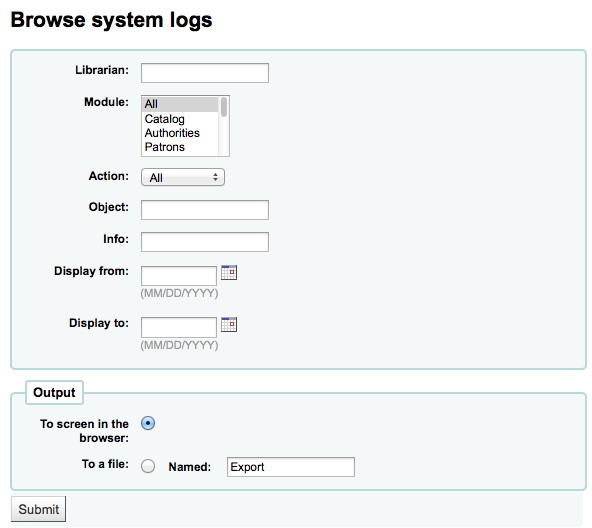
Choosing different combinations of menu options will produce the log file for that query.
-
Get there: More > Tools > Additional Tools > News
Koha's news module allows librarians to post news to the OPAC, staff interface and circulation receipts.
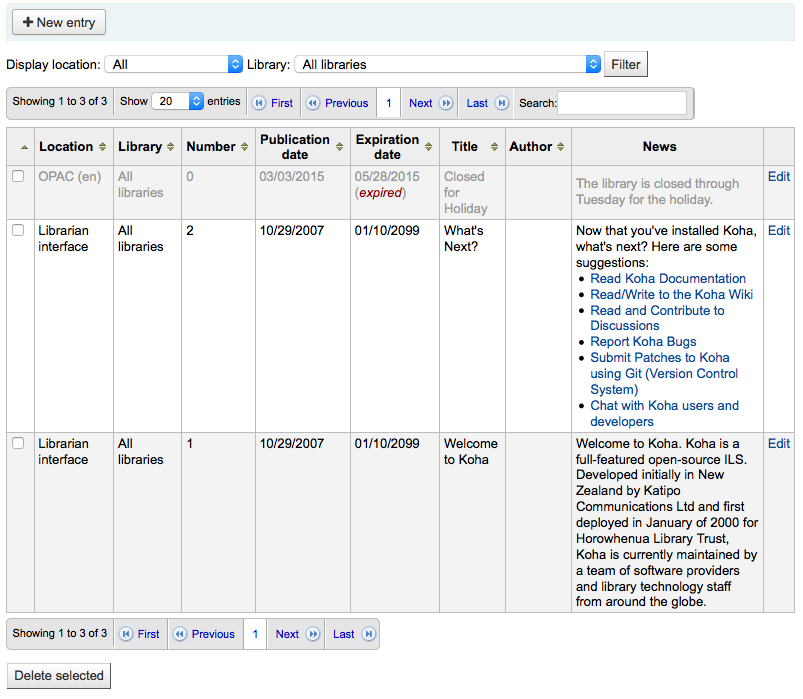
To add news to either the OPAC, the Staff Client or a Circulation receipt:
-
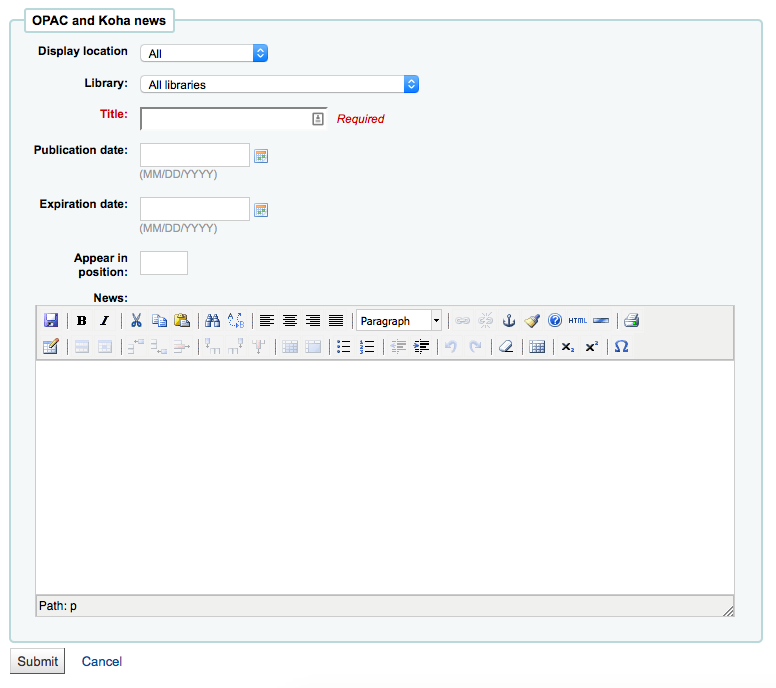
Click 'New Entry'
-
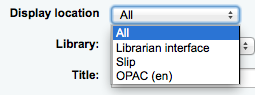
Under 'Display Location' choose whether to put the news on the OPAC, Slip (circulation receipt) or the Librarian (Staff) Interface.
-
Choose the library this news item will show for
-
Choose a title for your entry
-
Using the publication and expiration date fields you can control from which date and for how long your news item appears
-
Examples: (these assume today's date as 07-May-2015)
-
Publish on current date: set publication date as 07-May-2015
-
Schedule for publishing in future: set date later than 07-May-2015
-
Backdate the news item: set date earlier than 07-May-2015
-
-
-
'Appear in position' lets you decide what order your news items appear in
-
The 'News' box allows for the use of HTML for formatting of your news item
-
-
After filling in all of the fields, click 'Submit'
-
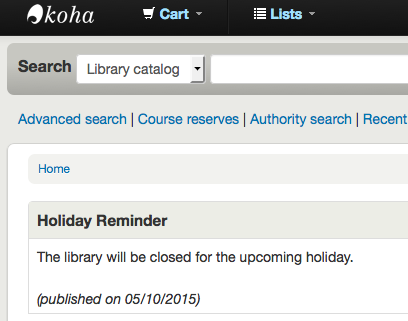
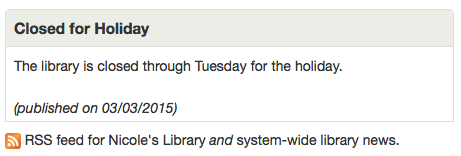
News in the OPAC will appear above the OpacMainUserBlock
-
Below the news in the OPAC there will be an RSS icon allowing you to subscribe to library news
-
-
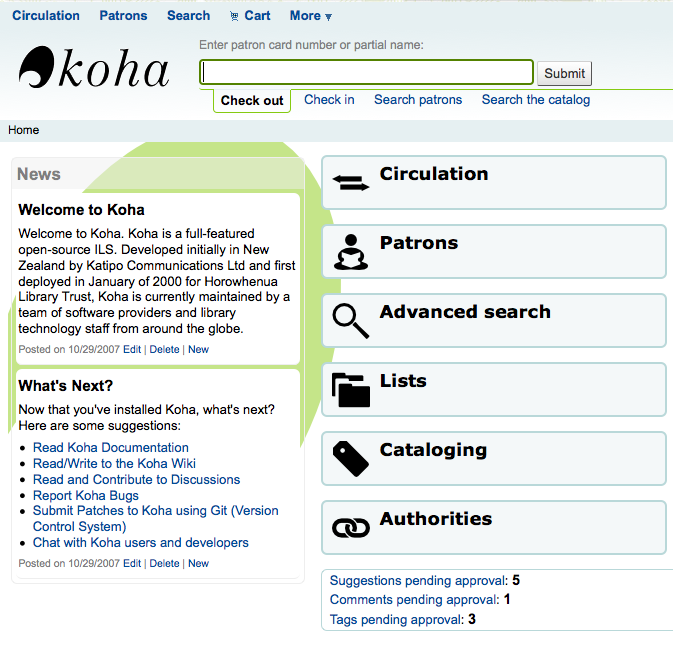
News in the Staff Client will appear on the far left of the screen
-
News on the circulation receipts will appear below the items that are checked out
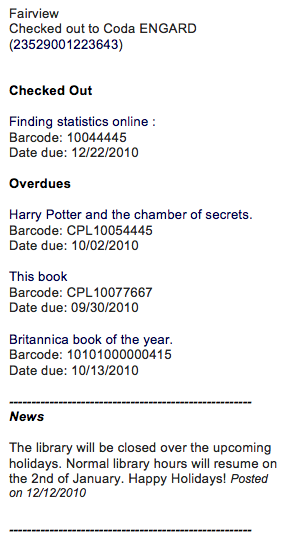
-
Depending on your choice for the NewsAuthorDisplay preference you will also see the person who created the news item (this uses the logged in person)
-
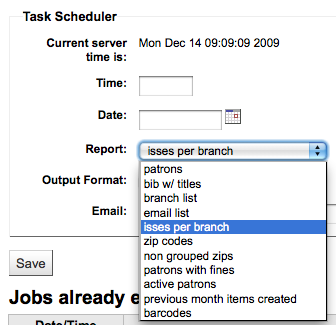
Get there: More > Tools > Additional Tools > Task Scheduler
The task scheduler is a way to schedule reports to run whenever you want.
To schedule a task, visit the Task Scheduler and fill in the form
-
Current Server Time shows the time on your server (schedule all of your reports to run based on that time - not on your local time)
-
Time should be entered as hh:mm (2 digit hour, 2 digit minute)
-
Date should be entered using the calendar pop up
-
From Report choose the report you want to schedule
-
Choose whether to receive the text of or a link to the results
-
In the Email filed enter the email of the person you want to receive your report
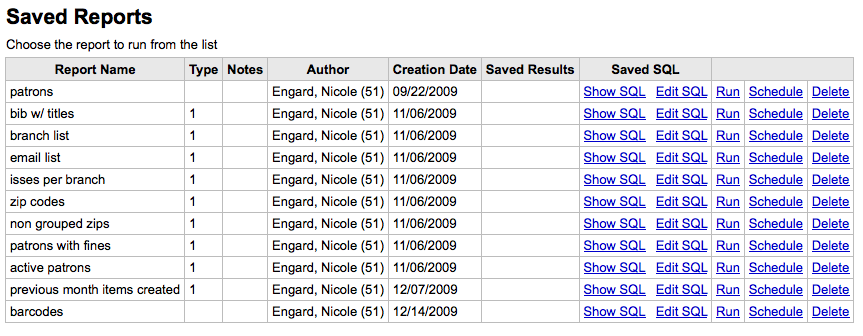
Below the task scheduler form, there is a list of scheduled reports

You can also schedule reports directly from the list of saved reports by clicking the 'Schedule' link
Task scheduler will not work if the user the web server runs as doesn't have the permission to use it. To find out if the right user has the permissions necessary, check /etc/at.allow to see what users are in it. If you don't have that file, check etc/at.deny. If at.deny exists but is blank, then every user can use it. Talk to your system admin about adding the user to the right place to make the task scheduler work.
-
Get there: More > Tools > Additional Tools > Edit quotes for QOTD feature
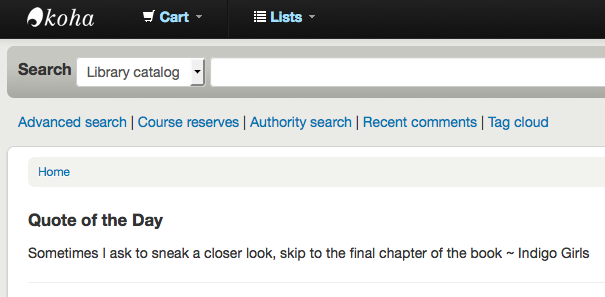
This tool will allow you to add and edit quotes to show on the OPAC if you're using the Quote of the Day (QOTD) feature.
To turn this feature on set the QuoteOfTheDay preference to 'Enable and add at least one quote via the Quote of the Day Editor. Once these steps are complete you will see your quotes above the OpacMainUserBlock in the OPAC:
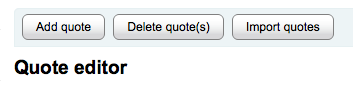
To add a quote:
-
Click the 'Add quote' button in the toolbar and an empty quote entry will be added to the end of the current quote list.
-
Important
Both the 'Source' and the 'Text' fields must be filled in in order to save the new quote.

-
-
When finished filling in both fields, press the <Enter> key on your keyboard to save the new quote.
-
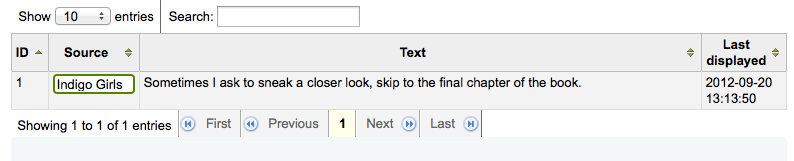
The list will update and the new quote should now be visible in the list.
Note
You may cancel the addition of a new quote any time prior to saving it simply by pressing the <Esc> key on your keyboard.
Once the current quote pool has been loaded into the editing table, you may edit the quote source and text.
-
Edit either the 'Source' or 'Text' fields by clicking on the desired field.
-
When you are finished editing a field, press the <Enter> key on your keyboard to save the changes.
The list will be updated, the edits saved, and visible.
If you'd like you can also delete quote(s).
-
Select the quote(s) you desire to delete by clicking on the corresponding quote id.
-
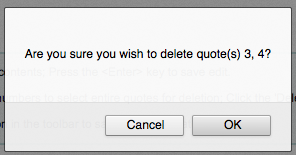
Once quote selection is finished, simply click the 'Delete quote(s)' button.
-
You will be prompted to confirm the deletion.
-
After confirming the deletion, the list will update and the quote(s) will no longer appear.
If you'd like you can import a batch of quotes as a CSV file. Your file must contain two columns in the form: "source","text" with no header row.
Note
You will be prompted to confirm upload of files larger than 512KB.
-
To start the import process click the 'Import quotes' button at the top of the screen
-
Once on the import quotes screen you can browse your computer for the file you would like to import

-
After selecting the CSV file, click the 'Open' button and the file will be uploaded into a temporary editing table.
-
From the listing you can edit either the 'Source' or 'Text' fields by clicking on the desired field. When you are finished editing a field, press the <Enter> key on your keyboard to save the changes.

-
You can also delete quotes from this listing before completing the import.
-
Select the quote(s) you desire to delete by clicking on the corresponding quote id.
-
Once quote selection is finished, simply click the 'Delete quote(s)' key.

-
You will be prompted to confirm the deletion.
-
After confirming the deletion, the list will update and the quote(s) will no longer appear.
-
-
Once you are satisfied with the quotes, click the 'Save quotes' button in the toolbar at the top and the quotes will be saved.
-
Get there: More > Tools > Additional Tools > Upload
This tool will allow you to upload files to your Koha system for selection from the Cataloging form.
When you first visit the Upload tool you might see a warning about missing a category.
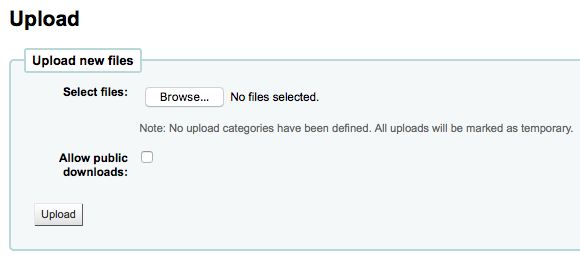
Categories are defined in the authorized value in the UPLOAD category. If you do not have upload categories then your files will be temporary and will be deleted the next time the server is rebooted. Once you have a value in the UPLOAD authorized value category you will see a Category pull down below the 'Browse' button.
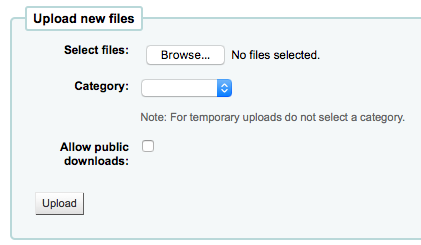
Browse your computer a file, choose a category and decide if the public will be able to download this file via the OPAC. Once your file is uploaded you will be presented with a confirmation.

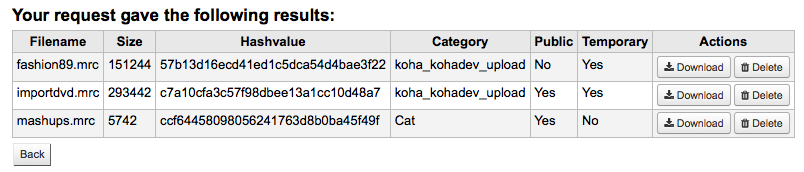
All uploaded files are searchable from below the upload form. Using the form you can search any part of the filename and/or the Hashvalue.
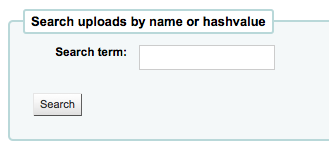
You will be presened with the results of your search.