Table of Contents
- Patrons and Circulation
- Catalog
- Batch item modification
- Batch item deletion
- Batch record deletion
- Batch Record Modification
- Automatic item modifications by age
- Export Data (MARC & Authorities)
- Inventory/Stocktaking
- Label Creator
- Quick Spine Label Creator
- MARC modification templates
- Stage MARC Records for Import
- Staged MARC Record Management
- Upload Local Cover Image
- Additional Tools
Tools in Koha all perform some sort of action. Often many of the items listed under Tools in Koha are referred to as 'Reports' in other library management systems.
-
Get there: More > Tools
-
Get there: More > Tools > Patrons and Circulation > Patron lists
Patron lists are a way to store a group of patrons for easy modification via the batch patron modification tool or reporting.
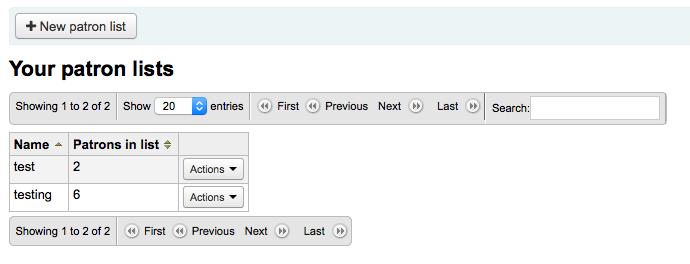
To create a new list of patrons click the 'New patron list' button
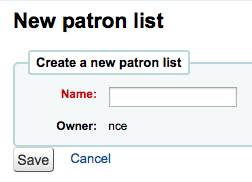
Enter a list name and save the list.
Each list has an 'Actions' menu with more list options.
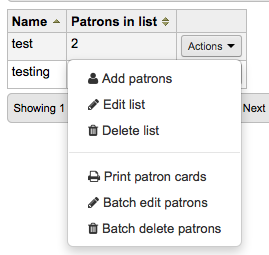
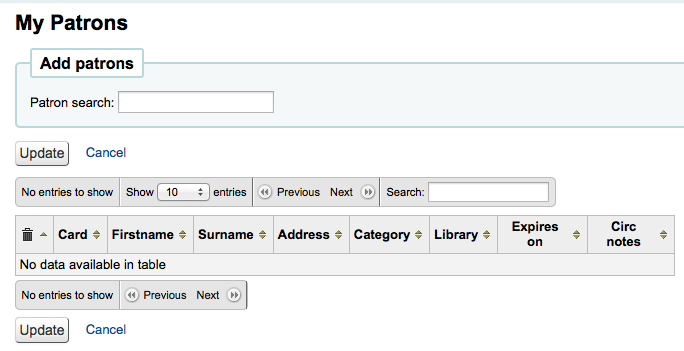
To add patrons to the list click the 'Add patrons' link in the 'Actions' menu.
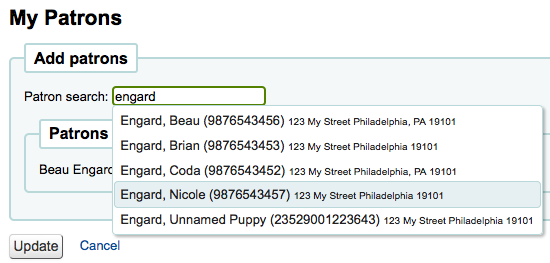
Enter the patron's name or cardnumber in the search box and click on the right result to add the patron.
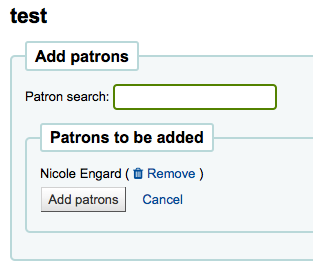
Once you have all of the patrons you would like to add you can click the 'Add patrons' button to save them to the list.
-
Get there: More > Tools > Patrons and Circulation > Comments
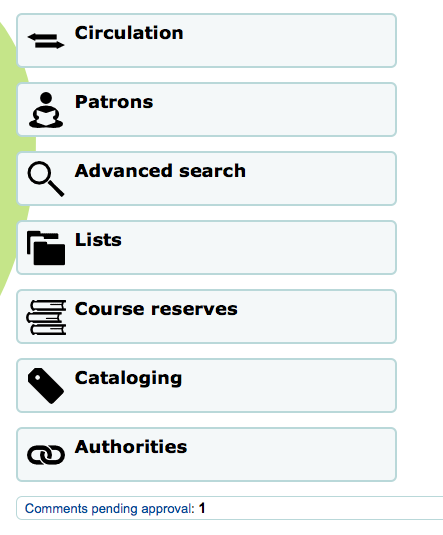
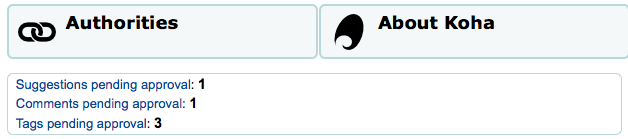
All comments added by patrons via the OPAC to bibliographic records require moderation by the librarians. If there are comments awaiting moderation they will be listed on the main page of the staff client below the module list:
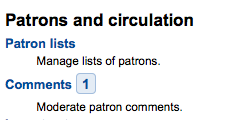
and next to the Comments tool on the Tools Module
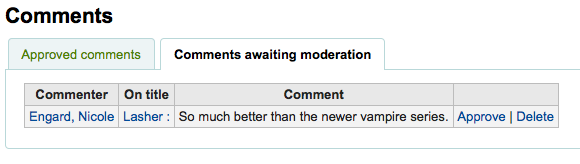
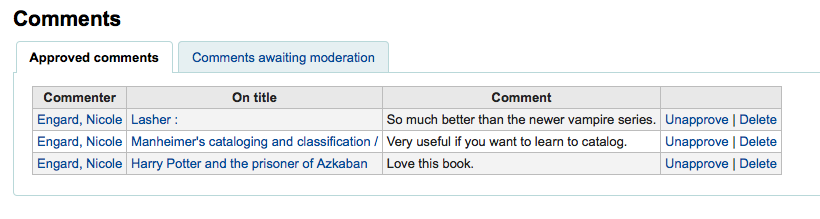
To moderate comments click on the notification on the main dashboard or go directly to the Comments Tool and click 'Approve' or 'Delete' to the right of the comments awaiting moderation.
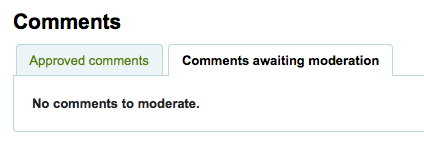
If there are no comments to moderate you will see a message saying just that
You can also review and unapprove comments you have approved in the past by choosing the 'Approved comments' tab
-
Get there: More > Tools > Patrons and Circulation > Import Patrons
The patron import tool can be used at any time to add patrons in bulk. It is commonly used in universities and schools when a new batch of students registers.
Your Koha installation comes with a blank CSV file that you can use as a template for your patron records. If you would like to create the file yourself, make sure that your file has the following fields in this order as the header row:
cardnumber, surname, firstname, title, othernames, initials, streetnumber, streettype, address, address2, city, state, zipcode, country, email, phone, mobile, fax, emailpro, phonepro, B_streetnumber, B_streettype, B_address, B_address2, B_city, B_state, B_zipcode, B_country, B_email, B_phone, dateofbirth, branchcode, categorycode, dateenrolled, dateexpiry, gonenoaddress, lost, debarred, debarredcomment, contactname, contactfirstname, contacttitle, guarantorid, borrowernotes, relationship, ethnicity, ethnotes, sex, password, flags, userid, opacnote, contactnote, sort1, sort2, altcontactfirstname, altcontactsurname, altcontactaddress1, altcontactaddress2, altcontactaddress3, altcontactstate, altcontactzipcode, altcontactcountry, altcontactphone, smsalertnumber, privacy, patron_attributes
Important
The 'password' should be stored in plaintext, and will be converted to a Bcrypt hash.
If your passwords are already encrypted, talk to your systems administrator about options
Important
Date formats should match your system preference, and must be zero-padded, e.g. '01/02/2008'.
Important
The fields 'branchcode', 'categorycode' and all fields you have defined in the BorrowerMandatoryField preference are required and must match valid entries in your database.
Note
If loading patron attributes, the 'patron_attributes' field should contain a comma-separated list of attribute types and values.
-
The attribute type code and a colon should precede each value.
-
For example: "INSTID:12345,BASEBALL:Cubs"
-
This field must be wrapped in quotes if multiple values are defined.
-
Since values can contain spaces, additional doubled-quotes may be required:
-
"INSTID:12345,BASEBALL:Cubs,""BASEBALL:White Sox"""
-
-
When replacing a patron record, any attributes specified in the input file replace all of the attribute values of any type that were previously assigned to the patron record.
-
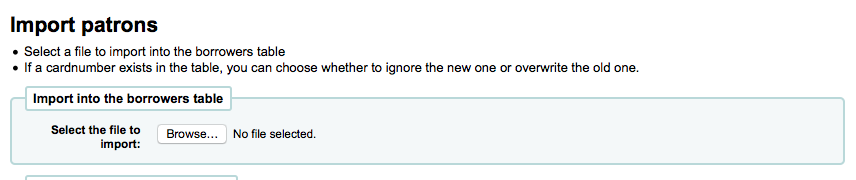
Once you have created your file, you can use the Patron Import Tool to bring the data into Koha.
-
Choose your CSV file
-
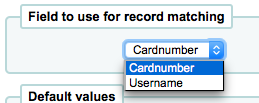
Choose to match on 'Cardnumber' or 'Username' to prevent adding of duplicate card numbers to the system
-
Next you can choose default values to apply to all patrons you are importing
-
ex. If you're importing patrons specific to one branch you can use the field on the Import form to apply the branch code to all those you are importing.
-
-
Finally you need to decide on what data you want to replace if there are duplicates.

-
A matching record is found using the field you chose for matching criteria to prevent duplication
-
If you included patron attributes in your file you can decide whether to add your values to existing values or erase existing values and enter only your new values.
-
-
Get there: More > Tools > Patrons and Circulation > Notices & Slips
All notices and circulation receipts (or slips) generated by Koha can be customized using the Notices & Slips Tool. The system comes with several predefined templates that will appear when you first visit this tool.
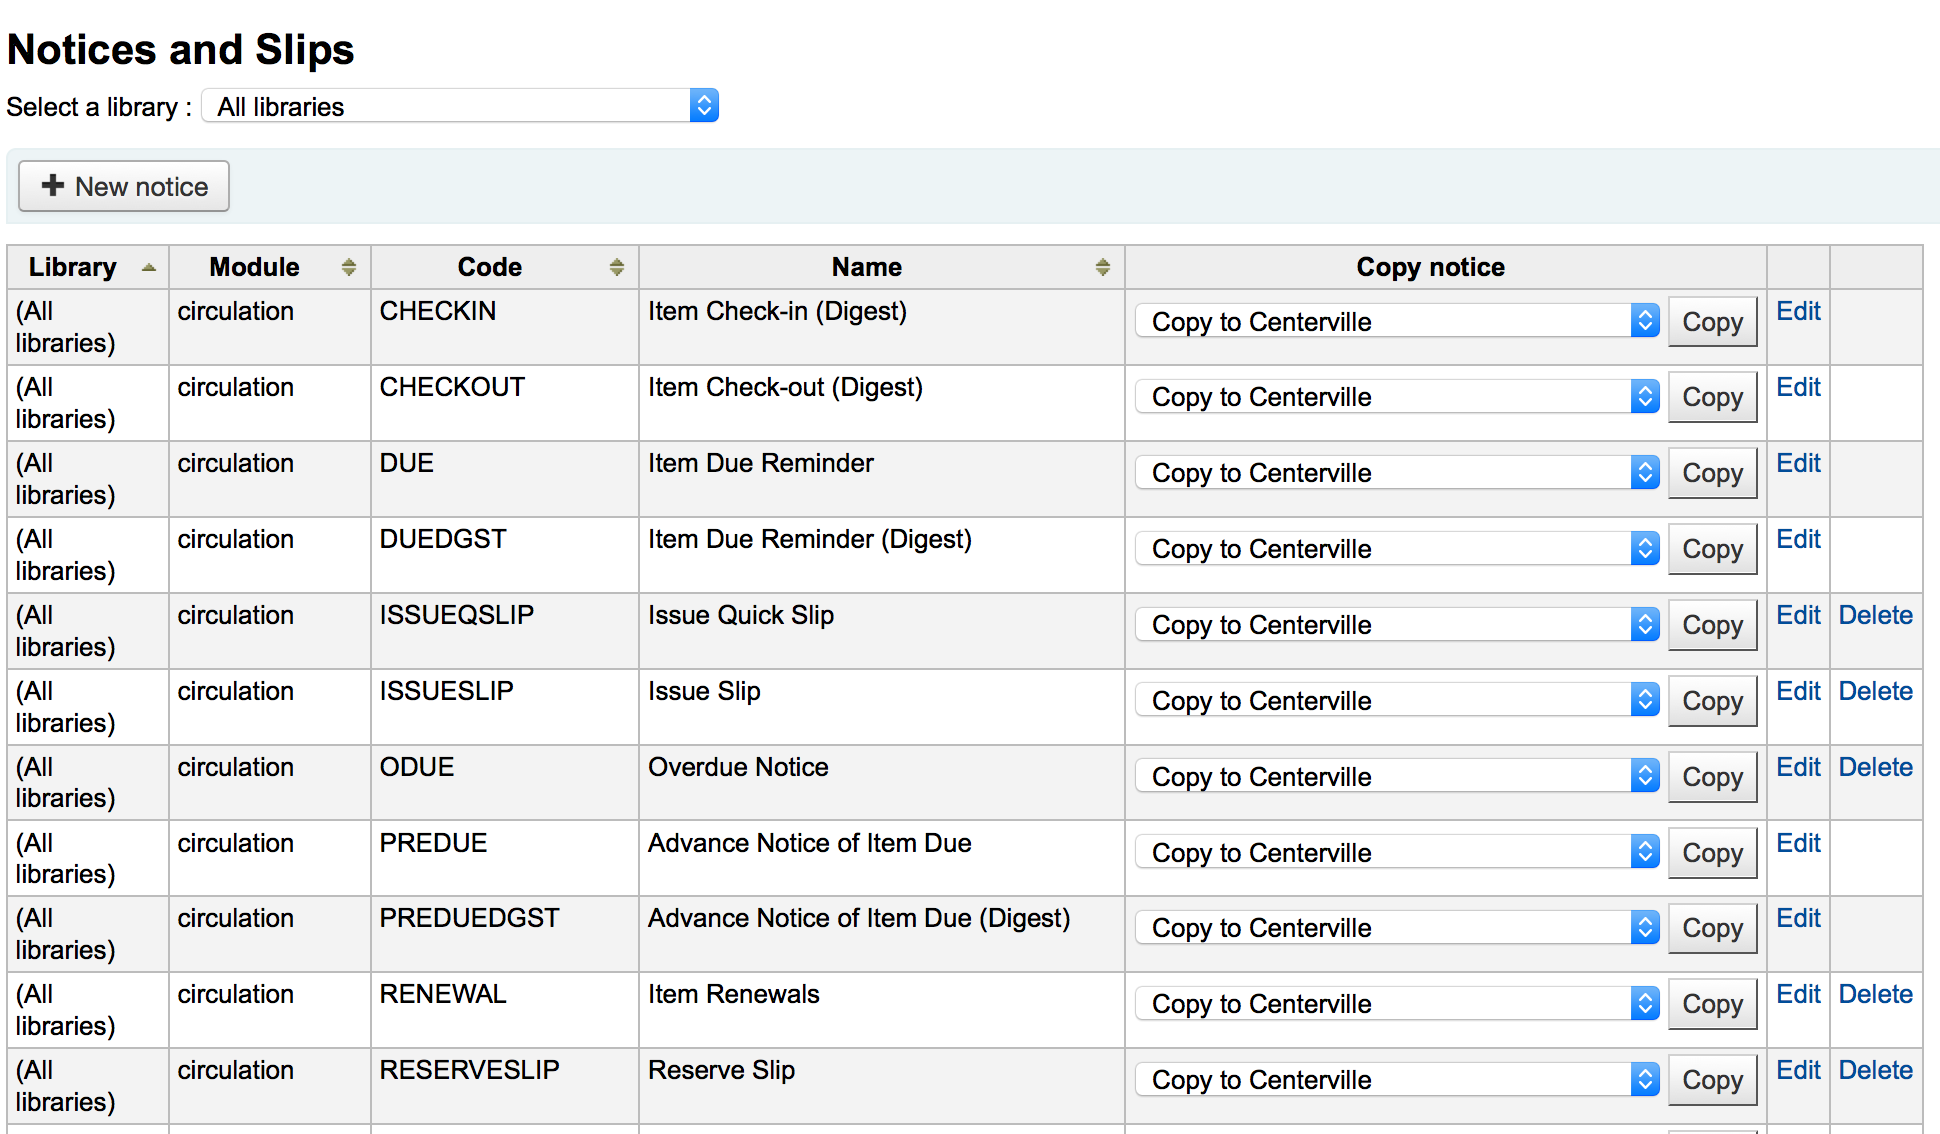
Each notice can be edited, but only a few can be deleted, this is to prevent system errors should a message try to send without a template. Each notice and slip can be edited on a per library basis, by default you will see the notices for all libraries.
If you have a style you'd like applied to all slips you can point the SlipCSS preference to a stylesheet. The same is true for notices, using the NoticeCSS preference to define a stylesheet.
You will also want to review the Notices & Slips Field Guide for more information on formatting these notices.
To add a new notice or slip
-
Click 'New Notice'

-
Choose which library this notice or slip is for
-
Important
Not all notices can be branch specific for more information review the Notices & Slips Field Guide in this manual.
-
-
Choose the module this notice is related to
-
The Code is limited to 20 characters
-
Important
When working with the overdue notices you want each notice at each branch to have a unique code. Think about using the branch code in front of the notice code for each branch.
-
-
Use the name field to expand on your Code
-
Note
With overdue notices, be sure to put your branch name in the description as well so that it will be visible when setting up your triggers.
-
-
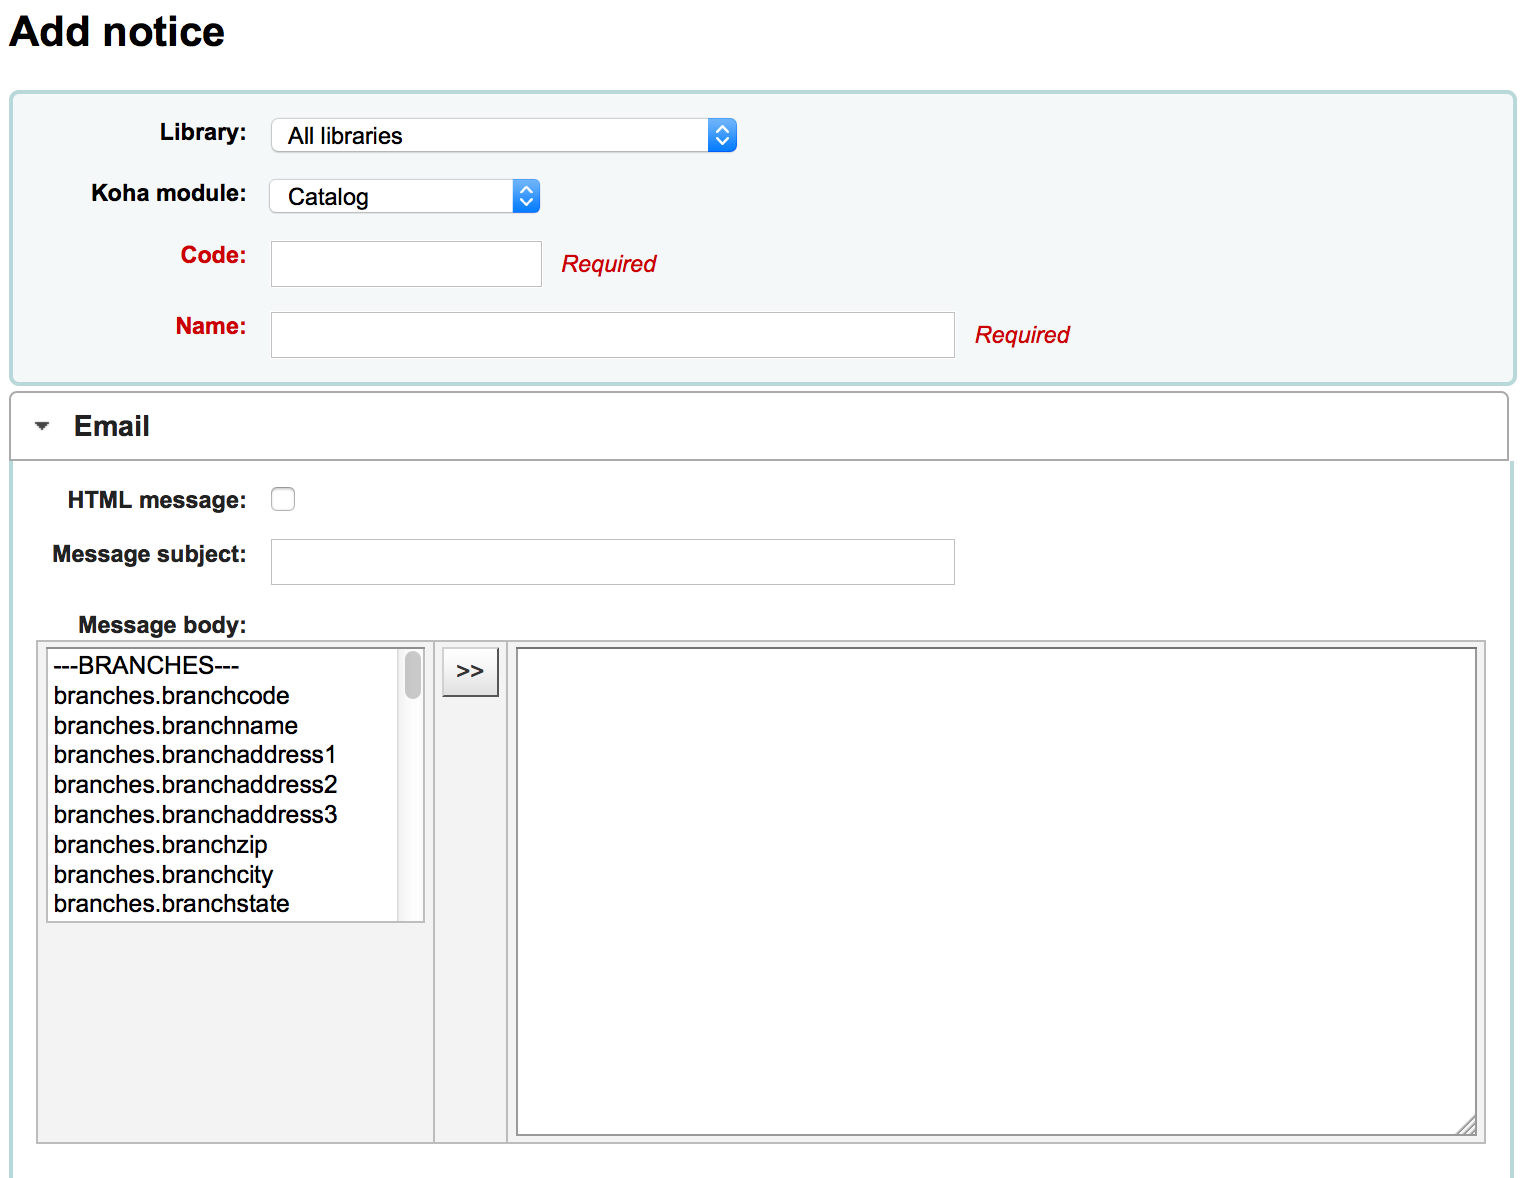
Next you can customize the notice for every possible delivery method
-
Every notice should have an Email template set for it
-
If you're using the TalkingTechItivaPhoneNotification service you can set up a Phone notification

-
If you plan on printing this notice you can set the Print template next
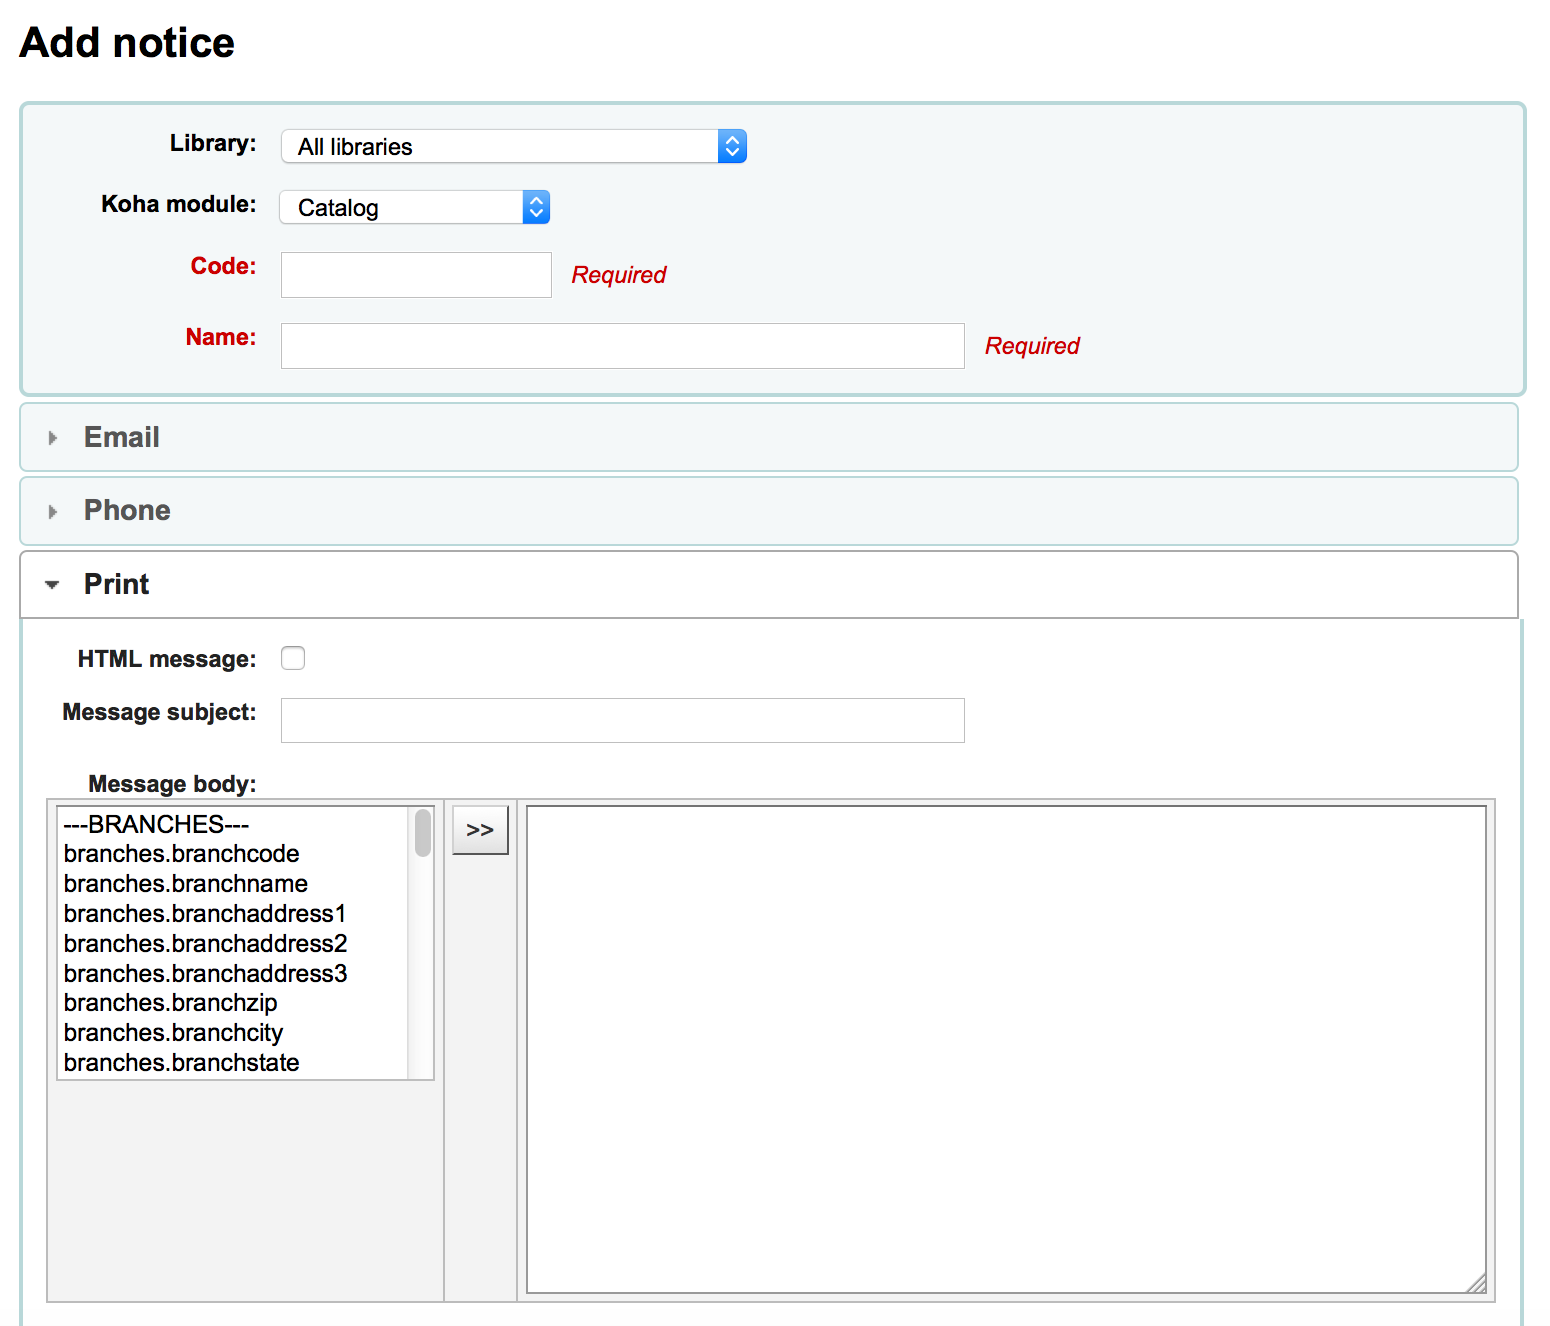
-
If you have enabled SMS notices with the SMSSendDriver preference you can set the text for your SMS notices next
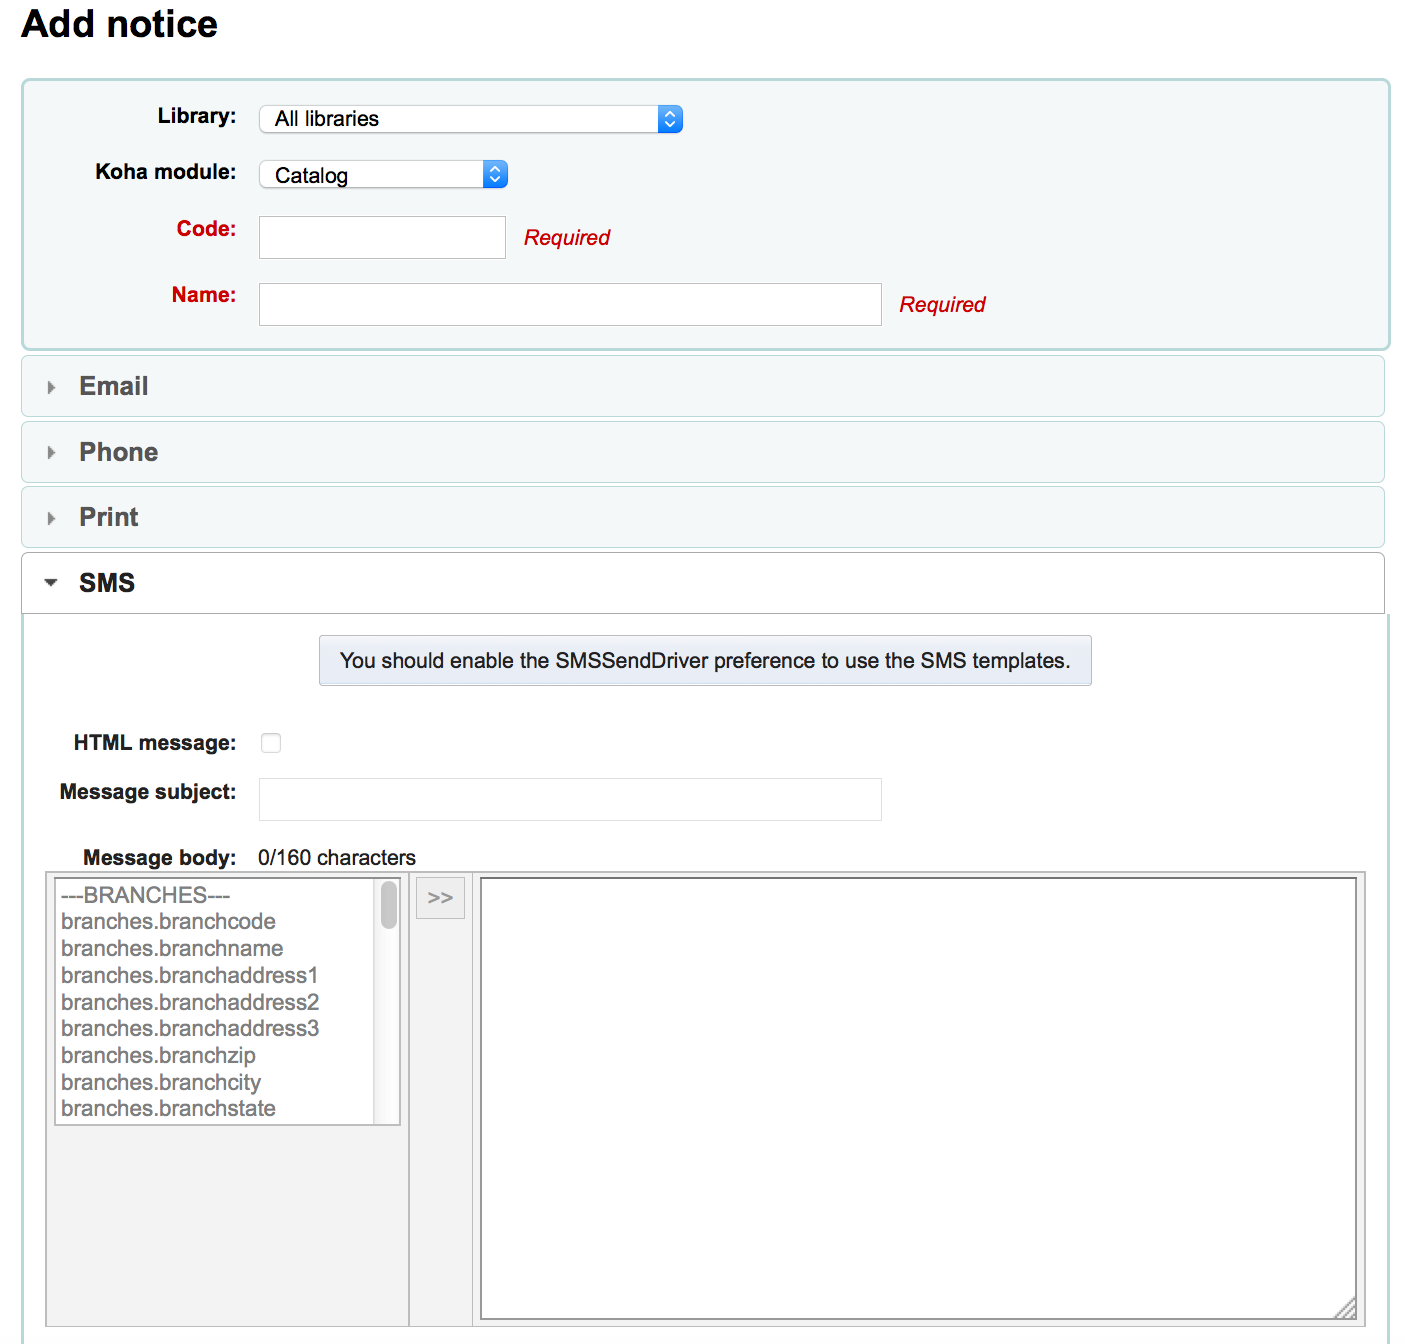
-
-
Each notice offers you the same options
-
If you plan on writing the notice or slip in HTML check the 'HTML Message' box, otherwise the content will be generated as plain text
-
Message Subject is what will appear in the subject line of the email
-
In the message body feel free to type whatever message you feel is best, use the fields on the left hand side to enter individualized data from the from database.
-
Note
Review the Notices & Slip Field Guide for info on what fields can be used here.
-
Important
Overdue notices can use <<items.content>> tags by themselves, or use <item></item> to span all of the tags. Learn more about the Overdue Notice Markup
-
On overdue notices make sure to use <<items.content>> tags to print out the data related to all items that are overdue.
-
The other option, only for overdue notices, is to use the <item></item> tags to span the line so that it will print out multiple lines One example for the <item></item> tag option is:
<item>"<<biblio.title>>" by <<biblio.author>>, <<items.itemcallnumber>>, Barcode: <<items.barcode>> , Checkout date: <<issues.issuedate>>, Due date: <<issues.date_due>> Fine: <<items.fine>> Due date: <<issues.date_due>> </item>
-
-
Important
Only the overdue notices take advantage of the <item></item> tags, all other notices referencing items need to use <<items.content>>
-
Note
To add today's date you can use the <<today>> syntax
-
Note
If you don't want to print the patron's full name on your slips or notice you can enter data in the Other name or Initials field for each patron and use that value instead.
-
-
When creating your overdue notices there are two tags in addition to the various database fields that you can use in your notices. You will also want to review the Notices & Slips Field Guide for information on formatting item information in these notices.
Important
These new tags only work on the overdue notices, not other circulation related notices at this time.
These tags are <item> and </item> which should enclose all fields from the biblio, biblioitems, and items tables.
An example of using these tags in a notice template might be like:
   The following item(s) is/are currently overdue:

   <item>"<<biblio.title>>" by <<biblio.author>>, <<items.itemcallnumber>>, Barcode: <<items.barcode>> Fine: <<items.fine>></item>
Which, assuming two items were overdue, would result in a notice like:
   The following item(s) is/are currently overdue:

   "A Short History of Western Civilization" by Harrison, John B, 909.09821 H2451, Barcode: 08030003 Fine: 3.50
   "History of Western Civilization" by Hayes, Carlton Joseph Huntley, 909.09821 H3261 v.1, Barcode: 08030004 Fine: 3.50
Among the default notices are notices for several common actions within Koha. All of these notices can be customized by altering their text via the Notices & Slips tool and their style using the NoticeCSS preference to define a stylesheet. You will also want to review the Notices & Slips Field Guide for information on formatting item information in these notices. Here are some of what those notices do:
-
-
Sent to patrons when their account is set up if the AutoEmailOPACUser preference is set to 'Send'
-
-
-
Used in the claim acquisition module
-
Get there: More > Acquisitions > Late issues
-
-
CHECKIN
-
This notice is sent as the 'Check in' notice for all items that are checked in
-
This notice is used if two criteria are met:
-
The EnhancedMessagingPreferences is set to 'Allow'
-
The patron has requested to receive this notice
-
Get there: OPAC > Login > my messaging
-
Get there: Staff Client > Patron Record > Notices
-
-
-
-
CHECKOUT
-
This notice is sent as the 'Check out' notice for all items that are checked out
-
This notice is used if two criteria are met:
-
The EnhancedMessagingPreferences is set to 'Allow'
-
The patron has requested to receive this notice
-
Get there: OPAC > Login > my messaging
-
Get there: Staff Client > Patron Record > Notices
-
-
-
-
DUE
-
This notice is sent as the 'Item due' for an item is due
-
This notice is used if two criteria are met:
-
The EnhancedMessagingPreferences is set to 'Allow'
-
The patron has requested to receive this notice
-
Get there: OPAC > Login > my messaging
-
Get there: Staff Client > Patron Record > Notices
-
-
-
-
DUEDGST
-
This notice is sent as the 'Item due' for all items that are due
-
This notice is used if two criteria are met:
-
The EnhancedMessagingPreferences is set to 'Allow'
-
The patron has requested to receive this notice as a digest
-
Get there: OPAC > Login > my messaging
-
Get there: Staff Client > Patron Record > Notices
-
-
-
-
HOLD (Hold Available for Pickup)
-
This notice is used if two criteria are met:
-
The EnhancedMessagingPreferences is set to 'Allow'
-
The patron has requested to receive this notice
-
Get there: OPAC > Login > my messaging
-
Get there: Staff Client > Patron Record > Notices
-
-
-
When this notice references the branches table it is referring to the pickup branch information.
-
-
HOLDPLACED (a notice to the library staff that a hold has been placed)
-
This notice requires the emailLibrarianWhenHoldIsPlaced system preference to be set to 'Enable'
-
When this notice references the branches table it is referring to the pickup branch information.
-
-
MEMBERSHIP_EXPIRY
-
This notice can be sent to patrons to warn them that their cards are expiring soon.
-
Requires that you have the MembershipExpiryDaysNotice set and the related cron job set.
-
-
-
This notice is used to send Overdue Notices to Patrons
-
See a Sample Overdue Notice
-
Requires that you set Overdue Notice/Status Triggers
-
-
PREDUE
-
This notice is sent as the 'Advanced notice' for an item is due
-
This notice is used if two criteria are met:
-
The EnhancedMessagingPreferences is set to 'Allow'
-
The patron has requested to receive this notice
-
Get there: OPAC > Login > my messaging
-
Get there: Staff Client > Patron Record > Notices
-
-
-
-
PREDUEDGST
-
This notice is sent as the 'Advanced notice' for all items that are due
-
This notice is used if two criteria are met:
-
The EnhancedMessagingPreferences is set to 'Allow'
-
The patron has requested to receive this notice as a digest
-
Get there: OPAC > Login > my messaging
-
Get there: Staff Client > Patron Record > Notices
-
-
-
-
RENEWAL
-
This notice is sent as the 'Check out' notice for all items that are renewed
-
This notice is used if three criteria are met:
-
The EnhancedMessagingPreferences is set to 'Allow'
-
The RenewalSendNotice preference is set to 'Send'
-
The patron has requested to receive the checkout notice
-
Get there: OPAC > Login > my messaging
-
Get there: Staff Client > Patron Record > Notices
-
-
-
-
-
Used in the serials module to notify patrons/staff of new issues of a serial
-
Get there: More > Serials > New Subscription
-
-
You have the option to select the 'Routing List' notice when creating a new subscription (Choose from the 'Patron notification' drop down).
-
Note
Notice also that if you'd like to notify patrons of new serial issues, you can click on 'define a notice' which will take you to the 'Notices' tool
-
-
SHARE_ACCEPT
-
Used to notify a patron when another patron has accepted their shared list.
-
Requires that you set OpacAllowSharingPrivateLists to 'Allow'
-
-
SHARE_INVITE
-
Used to notify a patron that another patron would like to share a list with them.
-
Requires that you set OpacAllowSharingPrivateLists to 'Allow'
-
-
TO_PROCESS
-
Used to notify a staff member if a purchase suggestion has been moved to the fund they manage
-
Requires the notice_unprocessed_suggestions cron job
-
There are also a set of predefined slips (or receipts) listed on this page. All of these slips can be customized by altering their text via the Notices & Slips tool and their style using the SlipCSS preference to define a stylesheet. Here is what those slips are used for:
-
ISSUEQSLIP
-
Used to print the quick slip in circulation
-
The quick slip only includes items that were checked out today
-
-
ISSUESLIP
-
Used to print a full slip in circulation
-
The slip or receipt will show items checked out today as well as items that are still checked out
-
-
HOLD_SLIP
-
Used to print a holds slip
-
The holds slip is generated when a hold is confirmed
-
-
TRANSFERSLIP
-
Used to print a transfer slip
-
The transfer slip is printed when you confirm a transfer from one branch to another in your system
-
-
Get there: More > Tools > Patrons and Circulation > Overdue Notice/Status Triggers
In order to send the overdue notices that you defined using the Notices tool, you need to first set the triggers to have these messages.
Important
In order to have overdue notices sent to your patrons, you need to set that patron category to require overdue notices.
Important
Depending on the value of your OverdueNoticeCalendar preference the delay may or may not include days the library is closed based on the holiday calendar.
The Overdue Notice/Status Triggers tool gives the librarian the power to send up to three notices to each patron type notifying them of overdue items

-
Delay is the number of days after an issue is due before an action is triggered.
-
Important
If you want Koha to trigger an action (send a letter or restrict member), a delay value is required.
-
-
To send additional notices, click on the tabs for 'Second' and 'Third' notice
-
If you would like to prevent a patron from checking items out because of their overdue items, check the 'Restrict' box, this will put a notice on the patron's record at checkout informing the librarian that the patron cannot check out due to overdue items.
-
If you choose to restrict a patron in this way you can also have Koha automatically remove that restriction with the AutoRemoveOverduesRestrictions preference.
-
-
Next you can choose the delivery method for the overdue notice. You can choose from Email, Phone (if you are using the iTiva Talking Tech service), Print and SMS (if you have set your SMSSendDriver).
-
Note
The Feed option is not yet a feature in Koha, it is there for future development.
-
-
See a Sample Overdue Notice
-
Get there: More > Tools > Patron Card Creator
The Patron Card Creator allow you to use layouts and templates which you design to print your custom patron cards on your printer. Here are some of the features of the Patron Card Creator module:
-
Customize patron card layouts with text retrieved from the Koha patron data
-
Design custom card templates for printed patron cards (to match the label sheets)
-
Build and manage batches of patron cards to print
-
Export (as PDF) single or multiple batches to print
-
Export (as PDF) single or multiple patron cards from within a batch
-
Get there: More > Tools > Patron Card Creator > Manage > Layouts
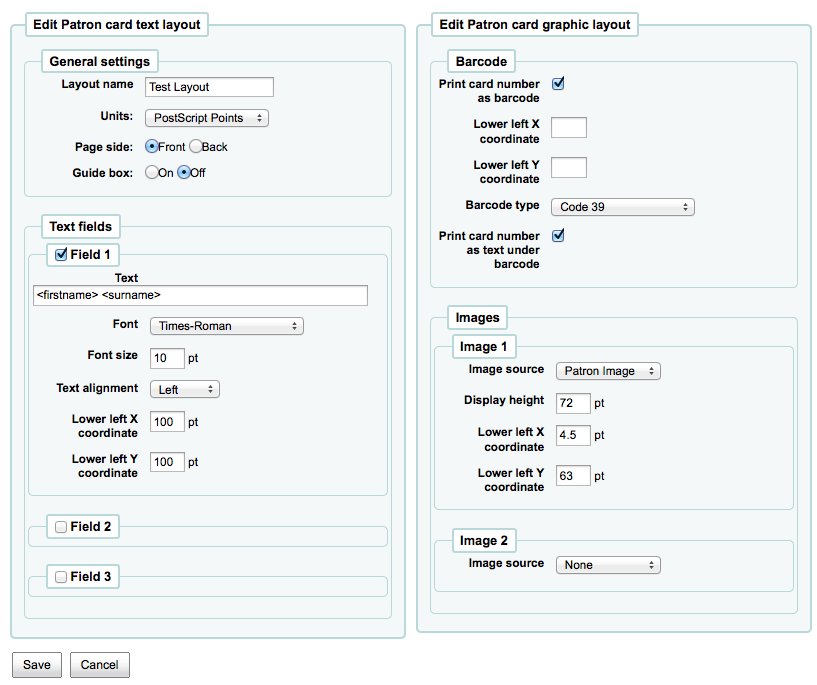
A layout defines the text and images that will be printed on to the card and where it will appear.
Note
Up to three lines of text, the patron's number in barcode representation and up to two images can be printed on to the card.
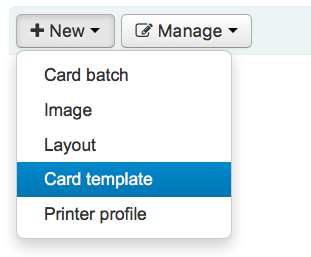
If you have no layouts defined, you will add a new layout by clicking the 'New' button and choosing 'Layout'.
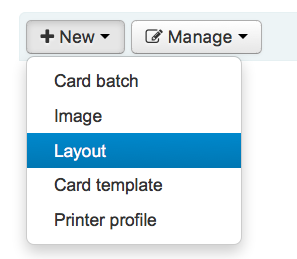
You may also choose to press 'Manage layout' on the left side. Here you are offered a list of available layouts you can select for editing. But at the top of the page there is still the 'New layout' button.
-
The name you assign to the layout is for your benefit, name it something that will be easy to identify at a later date
-
The Units pull down is used to define what measurement scale you're going to be using for your layout.

-
Note
A Postscript Point is 1/72" an Adobe Agate is 1/64", an Inch is 25.4 SI Millimeters
-
-
Next note if this layout is for the front or the back of the patron card
-
Note
You will need a layout for both the front and back of your card if you have 2-sided library cards, this option doesn't allow you to print two sided cards, just lets you track which side of the card you're designing.
-
-
You have the option of adding up to 3 lines of text to your card. Your text can be static text of your choosing and/or fields from the patron record. If you want to print fields from the patron record you want to put the field names in brackets like so - <firstname>
-
Note
A full list of field names can be found in the database schema at http://schema.koha-community.org
-
-
For each line of text, you can choose your font, font size and the location of the text on the card using the lower X and Y coordinates
-
In order to show the barcode and the patron card number you will need to check the 'Print Card Number as Barcode' option. This will turn the patron card number into a barcode. If you want the number to print in human readable format you will need to check the 'Print Card Number as Text Under Barcode' option.
-
Finally you can choose up to two images to print on the card.
-
One can be the patron image which you can resize to meet your needs.
-
The other image can be something like a library logo or symbol that you uploaded using the 'Manage Images' module of the Patron Card Creator Tool.
-
Important
It is the designers responsibility to define textlines, barcode and images such that overlap is avoided.
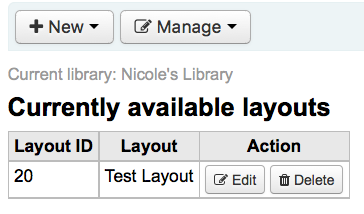
After saving, your layouts will appear on the 'Manage layouts' page.
-
Get there: More > Tools > Patron Card Creator > Manage > Card templates
A template describes the arrangement of labels on the label sheet/card stock you are using. This might be Avery 5160 for address labels, Gaylord 47-284 for spine labels or Avery 28371 for your patron cards, just to give a couple of examples. All of the information you will need for setting up a template may be on the packaging, and if not it can usually be found on the vendor's website or can be measured from a sample sheet.
To add a new template click on the 'New template' button at the top of your page which brings you to the Edit template form immediately. You may also choose to press 'Manage templates' on the left side. Here you are offered a list of available templates you can select for editing. But in the top of the page there is still the 'New template' button.
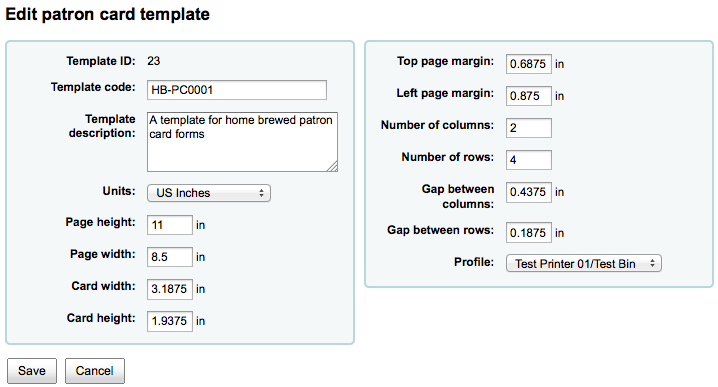
Using the form that appears after pressing either 'Edit' or 'New template'you can define the template for your sheet of labels or cards.
-
Template ID is simply a system generated unique id
-
Template Code should be the name of this template to identify it on a list of templates
-
You can use the Template Description to add additional information about the template
-
The Units pull down is used to define what measurement scale you're going to be using for the template.
-
Note
A Postscript Point is 1/72" an Adobe Agate is 1/64", an Inch is 25.4 SI Millimeters
-
-
The measurements (page height, page width, card width, card height) may be on the packaging, and if not it can usually be found on the vendor's website or can be measured from a sample sheet.
-
A profile is a set of "adjustments" applied to a given template just prior to printing which compensates for anomalies unique and peculiar to a given printer (to which the profile is assigned).
-
Before defining a profile try printing some sample cards so that you can take measurements to define a profile to perform the right adjustments for your printer/template combination.
-
After finding and documenting any anomalies in the printed document, then you can create a profile and assign it to the template.
-
Important
Do not specify a profile unless needed, i.e. do not click to define a printer profile. It is not possible to remove a profile from a template but you can switch to another profile.
-
Note
If you are using different printers you may be required to define several templates that are identical only different profiles are specified.
-
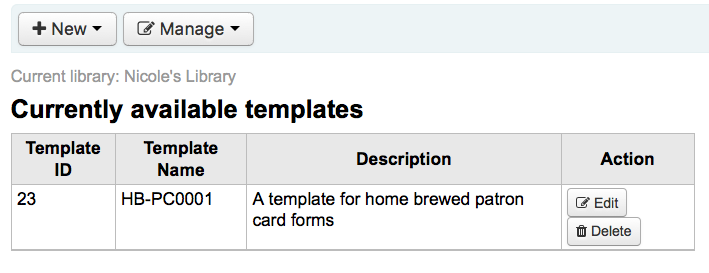
After saving, your templates will appear on the 'Manage templates' page.
-
Get there: More > Tools > Patron Card Creator > Manage > Profiles
A profile is a set of "adjustments" applied to a given template just prior to printing which compensates for anomalies unique and peculiar to a given printer. This means if you set a template up and then print a sample set of data and find that the items are not all aligned the same on each card, you need to set up a profile for each printer (or even different tray selections on the same printer) to make up for the differences in printing styles, such as the shifting of text to the left, right, top or bottom.
If your cards are printing just the way you want, you will not need a profile.
To add a new profile, you want to click on the 'Profiles' button at the top of your page and choose 'New Profile'
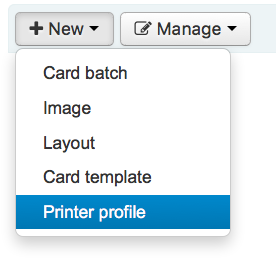
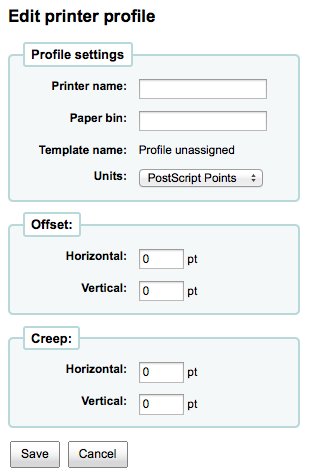
To add a new profile, you want to click on the 'New profile' button at the top of your page. Using the form that appears you can define the values to correct the card misalignments on your label sheet. You may also choose 'Manage profiles' on the left side and select one of the currently available profiles for editing.
-
The Printer Name and Paper Bin do not have to match your printer exactly, they are for your reference so you can remember what printer you have set the profile for.
-
Note
For example: if you want to use the Printer model number in printer name you can, or you can call it 'the printer on my desk'
-
-
Template will be filled in once you have chosen which template to apply the profile to on the template edit form
-
The Units pull down is used to define what measurement scale you're going to be using for your profile.
-
Note
A Postscript Point is 1/72" an Adobe Agate is 1/64", an Inch is 25.4 SI Millimeters
-
-
Offset should be used when the entire image is off center either vertically or horizontally. Creep describes a condition where the distance between the labels changes across the page or up and down the page
-
For offset and creep values, negative numbers move the printed information up and to the left on the printed sheet and positive numbers move down and to the right
-
Example: the text is printed 0 .25" from the left edge of the first label, 0 .28" from the left edge of the second label and 0 .31" from the left edge of the third label. This means the horizontal creep should be set to (minus) -0.03 " to make up for this difference.
-
After saving, your profiles will appear on the 'Manage Printer Profiles' page.
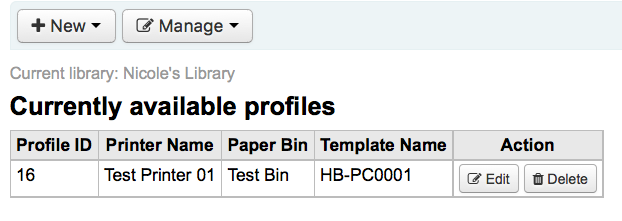
Once you have saved your new profile, you can return to the list of templates and choose to edit the template that this profile is for.
-
Get there: More > Tools > Patron Card Creator > Manage > Card batches
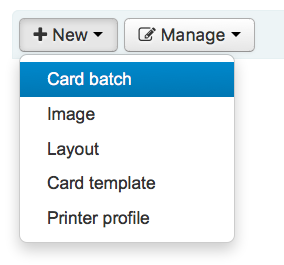
A batch is a collection of patrons for whom you want to generate cards.
To add a new batch, you want to click on the 'New batches' button at the top of your page. Choosing the menu item 'Manage batches' on the left a list of already defined batches is displayed. In this display you can either select a batch for editing or add a new batch.
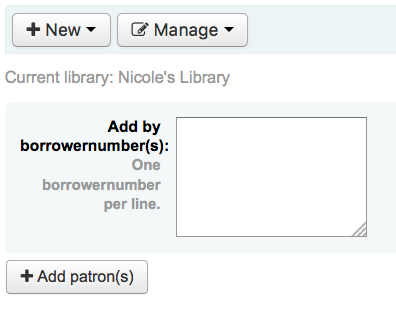
For a new batch a message pops up and directs you to select patrons to be processed in this batch.
After choosing the 'Add item(s)' button the Patron Search window pops up.
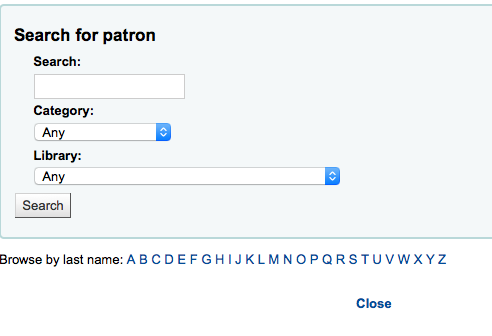
From here you can search for patrons to add to your batch by any part of their name, their category and/or library. Entering * in the search box will display all the patrons.
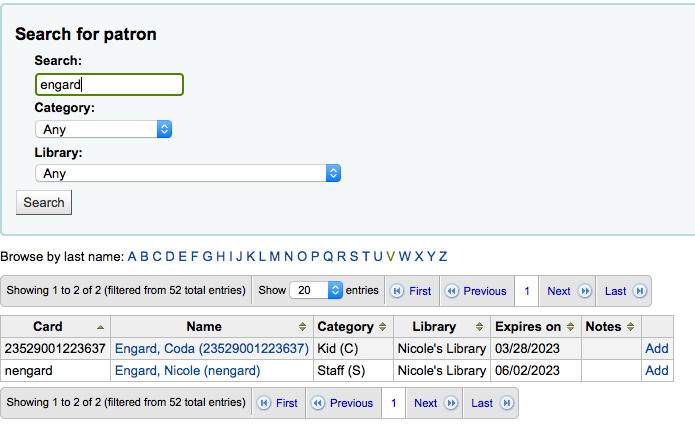
From the results you can add patrons to the batch by clicking the 'Add' button. After adding patrons from the results you can start over and perform another search or click 'Close' at the bottom of the screen to indicate that you are done. You will then be presented with your batch.
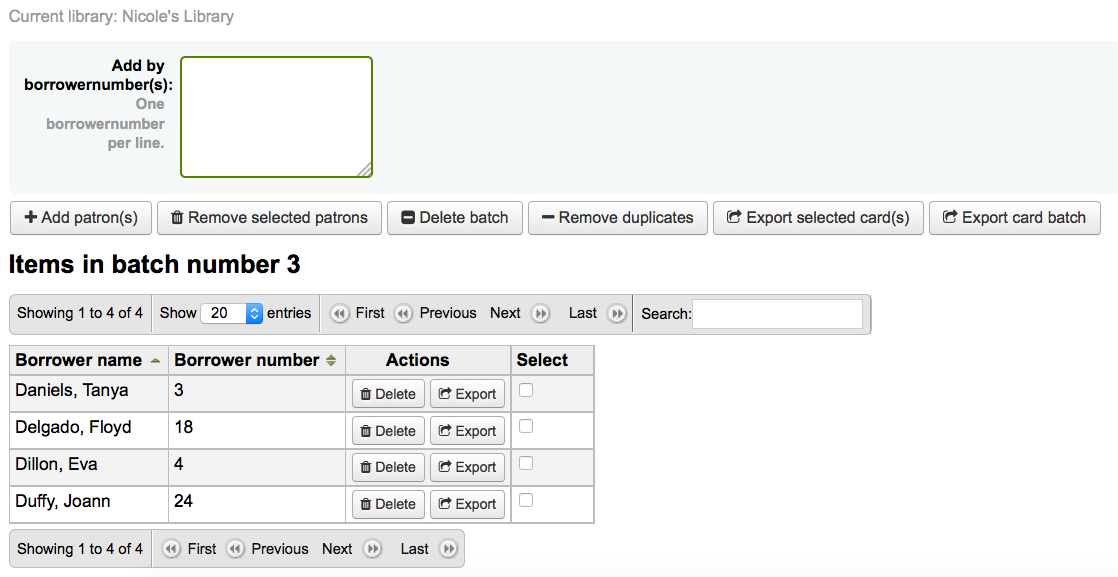
If you are satisfied with your batch you can proceed to export. If you want to correct or even delete that batch the buttons to do so can be found at the top of your screen. You can always come back here through the 'Manage > Card batches' button.
If you would like to export all patron cards you can click 'Export card batch' otherwise you can choose specific patrons to print cards for by checking the box to the right of their names and then choose 'Export selected card(s)' at the top.
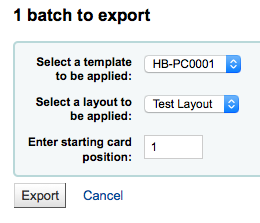
The export menu will ask you to choose a template, a layout and starting position (where on the sheet should printing begin).
Note
For the starting position if the first 6 labels have already been used on your sheet you can start printing on label in position 7 on the sheet. The labels are numbered left to right from top to bottom.
Once you click 'Export' you will be presented with a PDF of your labels for printing
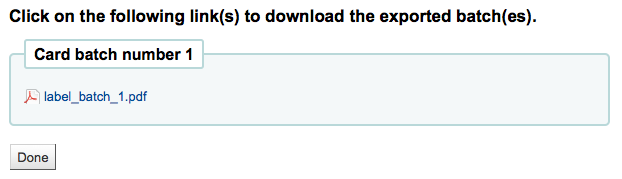
When you open the PDF you will see the cards for printing

The above image shows a layout that is made up of two textlines. The first one is just plain text, the second one is composed of the <firstname> <surname> fields. A patron image is printed (if available) and the barcode of patrons number is displayed in code 39. All this is printed on a template with three columns and 8 rows using position 1-3 here. When printing this PDF please take care that your printer doesn't rescale the PDF (e.g do not fit to paper size) otherwise the printer will not be able to print to the right place per your templates.
-
Get there: More > Tools > Patron Card Creator > Manage > Images
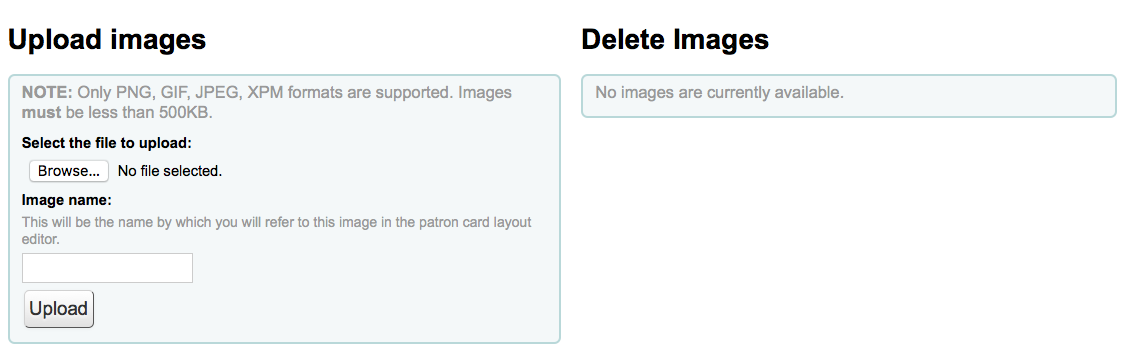
Images uploaded using this tool will appear on the menu when creating patron card layouts. You are limited in how many images you can upload (not counting patron images) by the ImageLimit system preference.
Important
Images must be under 500k in size.
Note
Pictures uploaded with this tool should be at least 300dpi which is the minimum quality for a printable image.
In the center of the screen is a simple upload form, simply browse for the file on your computer and give it a name you'll recognize later.
Once the file is uploaded you will be presented with a confirmation message.
And the image will be listed with all of your others on the right hand side of the page.
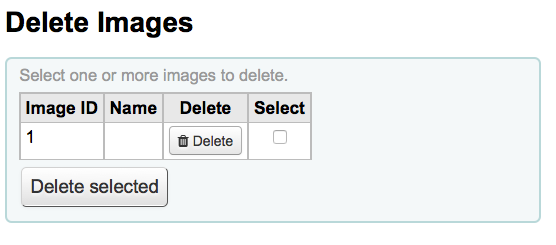
To delete one or multiple of these images, click the checkbox to the right of each image you want to delete and click the 'Delete' button.
-
Get there: More > Tools > Patrons and Circulation > Patrons (anonymize, bulk-delete)
This tool allows you to bulk anonymize circulation histories (this means that you keep records of how many times items were checked out - but not the patrons who checked the items out) or bulk delete patrons (remove them from the system completely).
Important
Patrons with outstanding fines or items checked out are not saved. They are not completely removed from the system (they are only moved to the delete_borrowers table), but this tool does not provide as many checks as one may desire.
Important
Before using this tool it is recommended that you backup your database. Changes made here are permanent.
Important
The anonymization will fail quietly if AnonymousPatron preference does not contain a valid value.
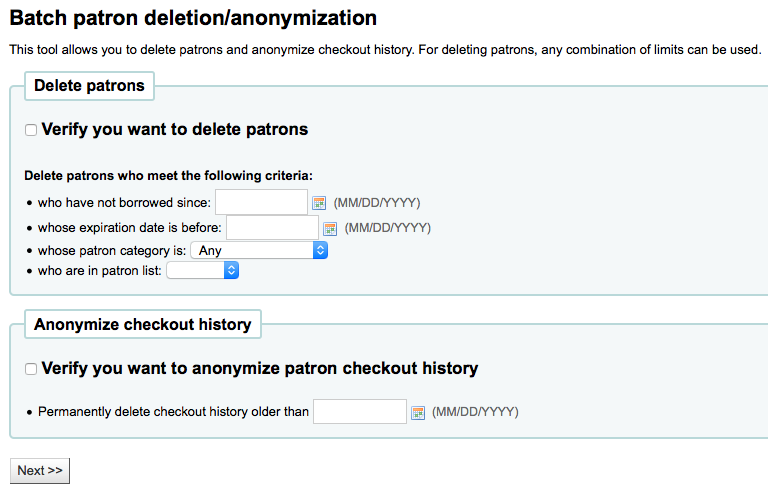
To either delete or anonymize patrons
-
Check the 'Verify' box on the task you would like to complete (Delete or Anonymize)
-
Enter a date before which you want to alter the data
-
If deleting patrons you can also choose to find patrons who
-
have not borrowed since a specific date
-
have accounts that will expire before a specific date
-
are in a specific patron category
-
are in a patron list
-
-
Click 'Next'
-
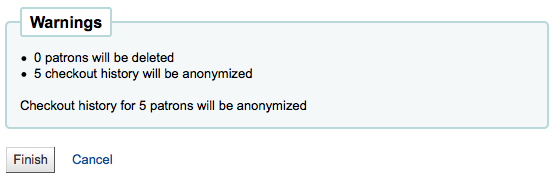
A confirmation will appear asking if you're sure this is what you want to happen
-
Clicking 'Finish' will delete or anonymize your data

-
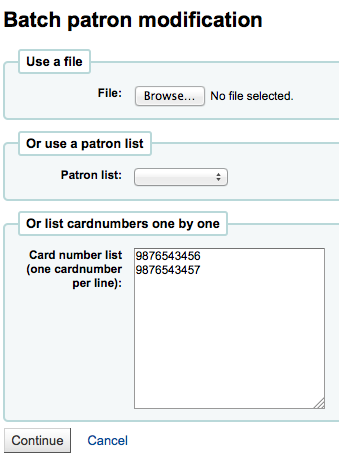
Get there: More > Tools > Patrons and Circulation > Batch patron modification
With this tool you can make edits to a batch of patron records. Simply load in a file of cardnumbers (one per line), choose from a list of patrons or scan patron card numbers in to the box provided.
Once you have the file loaded or the barcodes scanned click 'Continue.' You will be presented with a list of the patrons and the changes you can make.
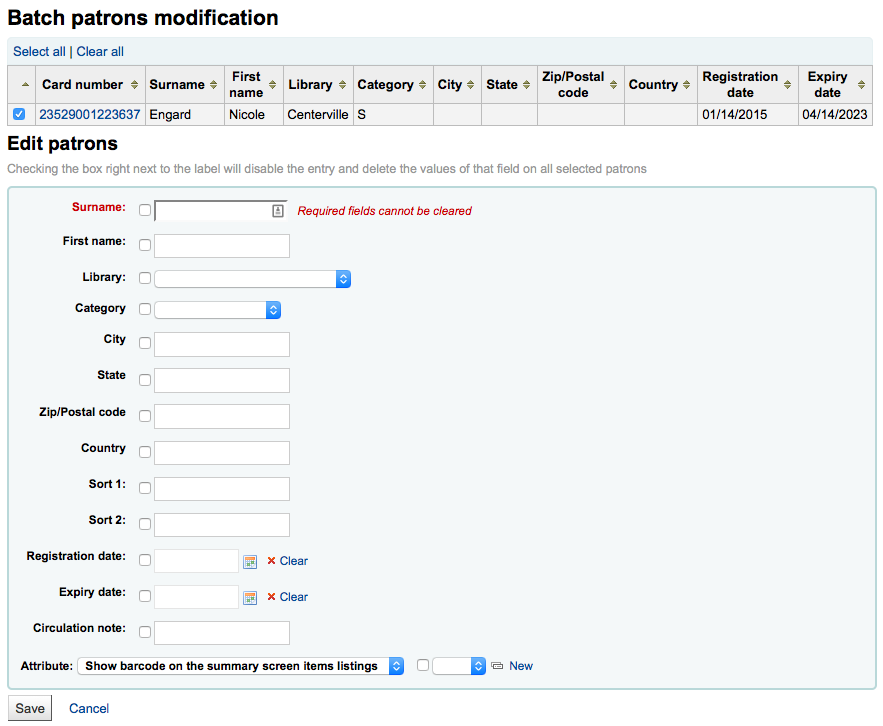
To the left of each text box there is a checkbox. Clicking that checkbox will clear our the field values.
Important
If the field is mandatory you will not be able to clear the value in it.
If you have multiple patron attributes you can change them all by using the plus (+) sign to the right of the text box. This will allow you to add another attribute value.
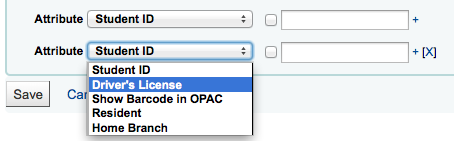
Once you have made the changes you want, you can click 'Save' and Koha will present you with the changed patron records.
-
Get there: More > Tools > Patrons and Circulation > Tags
Depending on your tagging system preferences, librarians may need to approve tags before they are published on the OPAC. This is done via the Tag Moderation Tool. If there are tags awaiting moderation they will be listed on the main staff dashboard under the module labels:
To moderate the tags visit the Tags tool. When first visiting the tool, you will be presented with a list of tags that are pending approval or rejection by a librarian

-
To see all of the titles this tag was added to simply click on the term
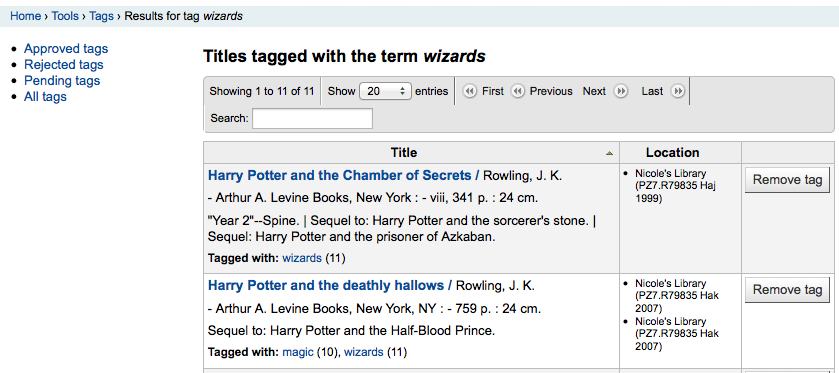
-
From this list of titles you can remove a tag without outright rejecting it from being used in the future by clicking the 'Remove tag' button to the right of the title.
-
-
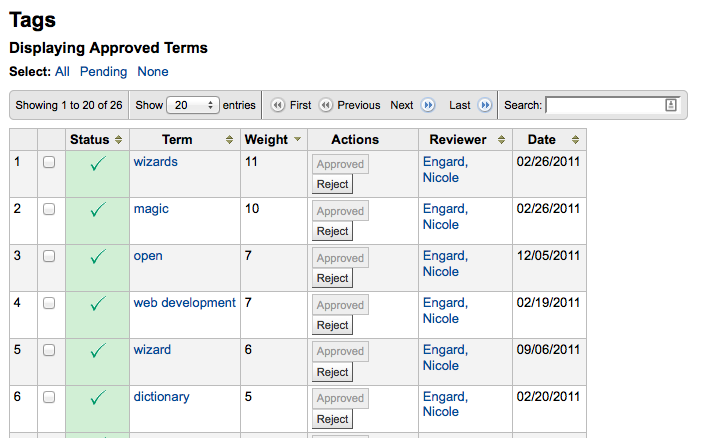
To approve a tag, you can either click the 'Approve' button in line with the term, or check all terms you want to approve and click 'Approve' below the table.
-
To reject a tag, you can either click the 'Reject' button in line with the term, or check all terms you want to approve and click 'Reject' below the table.
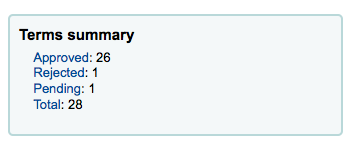
Once a tag has been approved or rejected it will be moved to the appropriate list of tags. A summary of all tags will appear on the right of the screen.
Even though a tag is approved or rejected, it can still be moved to another list. When viewing approved tags each tag has the option to reject:
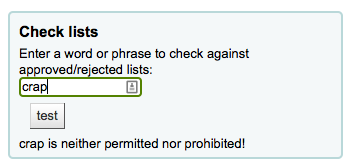
To check terms against the approved and rejected lists (and possibly against the dictionary you have assigned for tag moderation) simply enter the term into the search box on the bottom right of the screen to see the status of the term
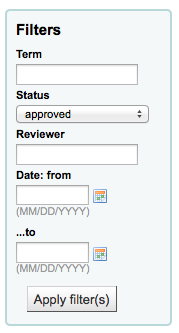
Finally you can find tags by using the filters on the left.
-
Get there: More > Tools > Patrons and Circulation > Upload Patron Images
Patron images can be uploaded in bulk if you are allowing patron images to be attached to patron records. These images can also be used when creating patron cards.
-
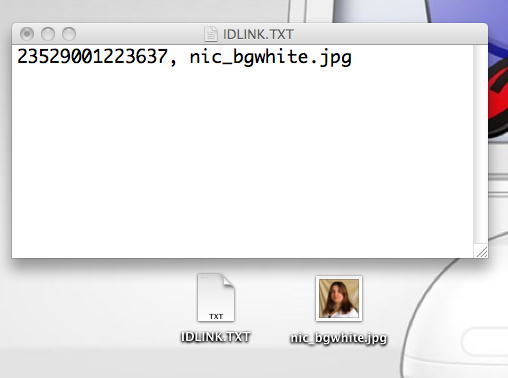
Create a txt file and title it "DATALINK.TXT" or "IDLINK.TXT"
-
On each line in the text file enter the patron's card number followed by comma (or tab) and then the image file name
-
Make sure that your TXT file is a plain text document, not RTF.
-
-
Zip up the text file and the image files
-
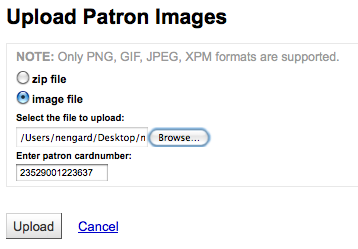
Go to the Upload Patron Images Tool
-
For a single image, simply point to the image file and enter the patron card number
-
For multiple images, choose to upload a zip file
-
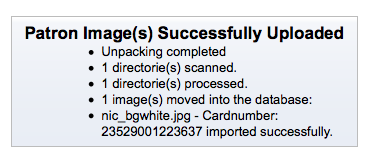
After uploading you will be presented with a confirmation
Important
There is a limit of 100K on the size of the picture uploaded and it is recommended that the image be 200x300 pixels, but smaller images will work as well.
-
Get there: More > Tools > Catalog > Rotating Collections
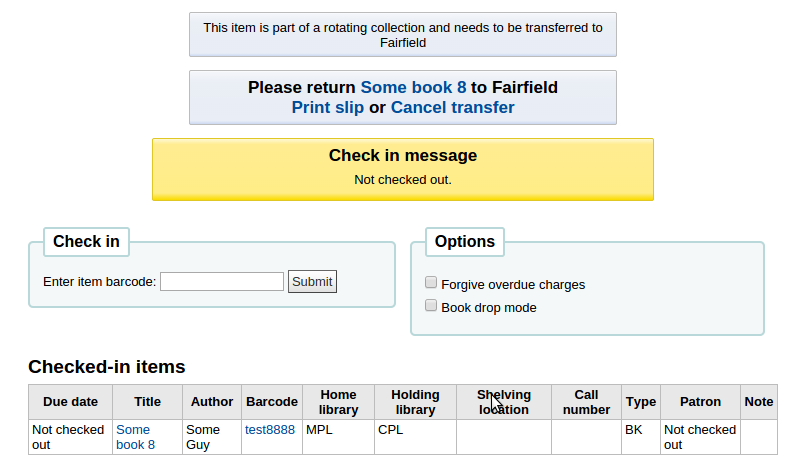
Rotating Collections is a tool for managing collections of materials that frequently get shifted from library to library. It adds the ability to store not only an item's home library and current location but also information about where it is supposed to be transferred to next to ensure that all items in the collection are sent to the correct library. When an item in a rotating collection is checked in, library staff is notified that the item is part of a rotating collection and which branch it should be sent to if it is not at the correct one.
Important
The AutomaticItemReturn system preference must be set to "Don't automatically transfer items to their home library when they are returned" for Rotating Collections to function properly.
-
To create a new rotating collection, click the "New Collection" button, fill in the Title and Description, and click Submit. Once submitted you'll see "Collection Name added successfully"; click "Return to rotating collections home" to return to the main Rotating Collections management page (or click Rotating Collections in the sidebar).
-
To add items to a collection, click "Add or remove items" next to the collection's name in the list of collections. Under "Add or remove items" scan or type in the barcode of the item you wish to add to the collection, and hit Enter or click Submit if necessary.
-
To remove an item from a collection, either click Remove next to the item's barcode in the list of items within the collection or check the "Remove item from collection" box next to the Barcode text box under "Add or remove items, and scan or type in the barcode, clicking Submit or hitting Enter if necessary. Note: The "Remove item from collection" checkbox will remain checked as long as you are on the "Add or remove items" page, unless you uncheck it, to facilitate quickly removing a number of items at a time by scanning their barcodes.
Transferring a collection will:
-
Change the current location of the items in that collection to the library it is to be transferred to
-
Initiate a transfer from its original current location/holding library to the current location/holding library it is to be rotated to. When a library receives a collection they will need to check in the items to complete the transfer.
You can transfer a collection in one of two ways:
-
From the main Rotating Collections page, click on Transfer next to the title of the collection you wish to transfer; choose the library you wish to transfer the collection to and click "Transfer collection".
-
Or, from the "add or remove items" page for a collection, you can click the Transfer button, choose the library you wish to transfer the collection to and click "Transfer Collection".
Important
In order to complete the transfer process, the library receiving the rotating collection should check in all items from the collection as they receive them. This will clear the transfer so that the items are no longer shown as being "in transit".
If an item in a rotating collection is checked in at a library other than the one it is supposed to be transferred to, a notification will appear notifying library staff that the item is part of a rotating collection, also letting them know where the item needs to be sent.