The Koha Acquisitions module provides a way for the library to record orders placed with vendors and manage purchase budgets.
Before using the Acquisitions Module, you will want to make sure that you have completed all of the set up.
-
Get there: More > Administration > Acquisitions
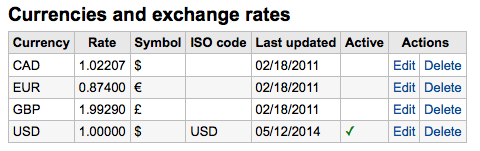
If you place orders from more than one country you will want to input currency exchange rates so that your acquisitions module will properly calculate totals.
-
Get there: More > Administration > Acquisitions > Currencies and Exchange Rates
Note
This data is not automatically updated, so be sure to keep it up to date so that your accounting is kept correct.
The ISO code you enter will be used when importing MARC files via the staging tools, the tool will attempt to find and use the price of the currently active currency.
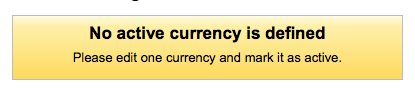
The active currency is the main currency you use in your library. Your active currency will have a check mark in the 'Active' column. If you don't have an active currency you will see an error message telling you to choose an active currency.
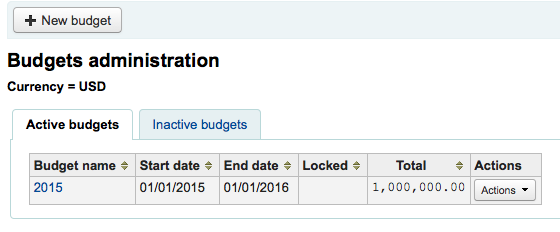
Budgets are used for tracking accounting values related to acquisitions. For example you could create a Budget for the current year (ex. 2015) and then break that into Funds for different areas of the library (ex. Books, Audio, etc).
-
Get there: More > Administration > Acquisitions > Budgets
When visiting the main budget administration you will see two tabs, one for active and one for inactive budgets.
Budgets can either be created from scratch, by duplicating the previous year's budget or by closing a previous year's budget.
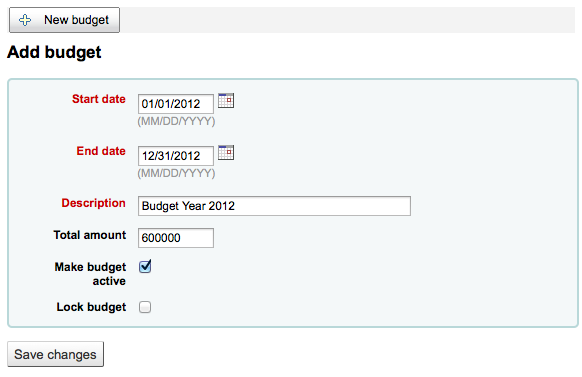
If you haven't used Koha before for acquisitions then you'll need to start fresh with a new budget. To add a new budget click the 'New Budget' button.
-
Choose the time period this budget is for, whether it's an academic year, a fiscal year, a quarter, etc.
-
The Description should be something that will help you identify the budget when ordering
-
In the amount box do not use any symbols, simply enter the amount of the budget with numbers and decimals.
-
Marking a budget active makes it usable when placing orders in the acquisitions module, even if the order is placed after the budget end date. This will allow you to record orders that were places in a previous budget period.
-
Locking a budget means that Funds will not be able to be modified by librarians
Once you have made your edits, click the 'Save Changes' button. You will be brought to a list of your existing budgets.
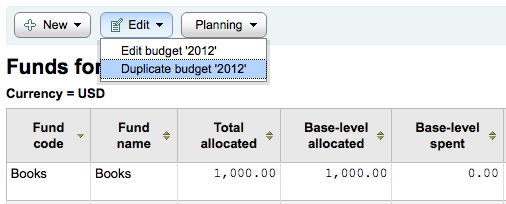
To duplicate a budget from a previous year, click on the link for the budget name from the list of budgets
On the screen listing the budget breakdown click the Edit button at the top and choose to Duplicate budget
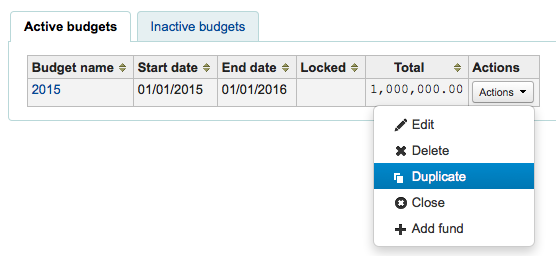
You can also click the 'Actions' button to the right of the budget and choose 'Duplicate'.
In both cases you will be presented with a form where you simply need to enter the new start and end date and save the budget.
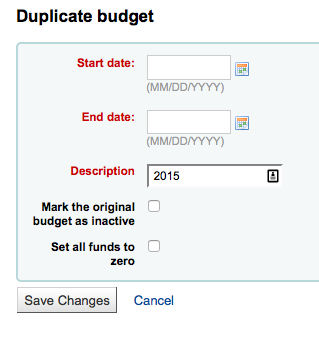
Check the box for 'Mark the original budget as inactive' if the original budget should no longer be used.
Check the box for 'Set all funds to zero' if you wish the new budget to contain all the same fund structures as the previous budget but no allocations until you manually enter an amount in the fund.
This will not only duplicate your budget, but all of the funds associated with that budget so that you can reuse budgets and funds from year to year and so that you can move unreceived orders and if desired unspent funds from a previous budget to the new budget.
Close a budget to move or roll over unreceived orders and if desired unspent funds from a previous budget to a new budget. Before closing your budget you might want to duplicate the previous year's budget so that you have somewhere for the unreceived orders to roll to.
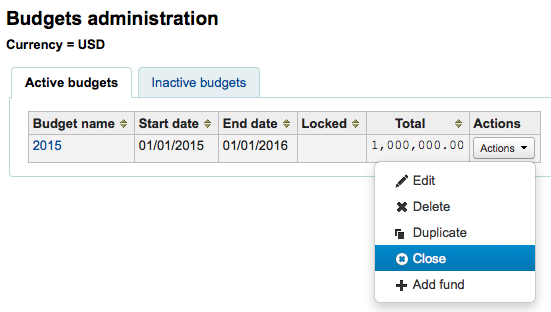
Find the previous budget with unreceived orders on the Active budgets or the Inactive budgets tab and select 'Close' under 'Actions'.
Note
In order for the unreceived orders to be automatically moved to the new budget, the fund structures in the previous budget must exist in the new budget. Budgets without unreceived orders cannot be closed.
When you select 'Close' you will be presented with a form.
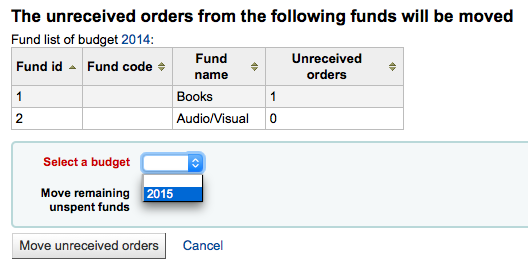
Use the 'Select a budget' drop down to choose the new budget for the unreceived orders.
Check the box for 'Move remaining unspent funds' to move the unspent amounts from the funds of the budget being closed to the selected budget.
Once you have made your choices, click the 'Move unreceived orders' button. You will be presented with a dialog box that says 'You have chosen to move all unreceived orders from 'Budget X' to 'Budget Y'. This action cannot be reversed. Do you wish to continue?' Budget X is the budget to be closed and Budget Y is the selected budget.
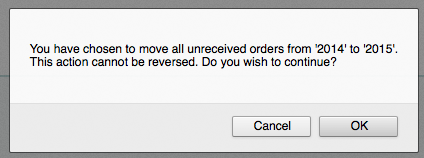
If everything seems correct click 'OK' and the unreceived orders and, if selected, unspent funds will be moved.
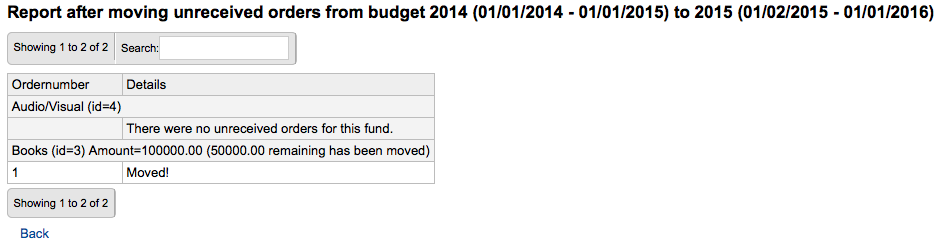
Wait until the 'Report after moving unreceived orders from budget X to Y' displays. This will list the order numbers which have been impacted (grouped by fund) and detail if the unreceived order was moved or if there was a problem. For example, if the new budget does not contain a fund with the same name as the previous budget, the order will not be moved.
-
Get there: More > Administration > Acquisitions > Funds
A fund is added to a budget.
Important
A budget must be defined before a fund can be created.
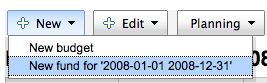
To add a new fund click the New button and then choose which Budget you would like to add the fund to.
In the form that appears you want to enter the basics about your fund.
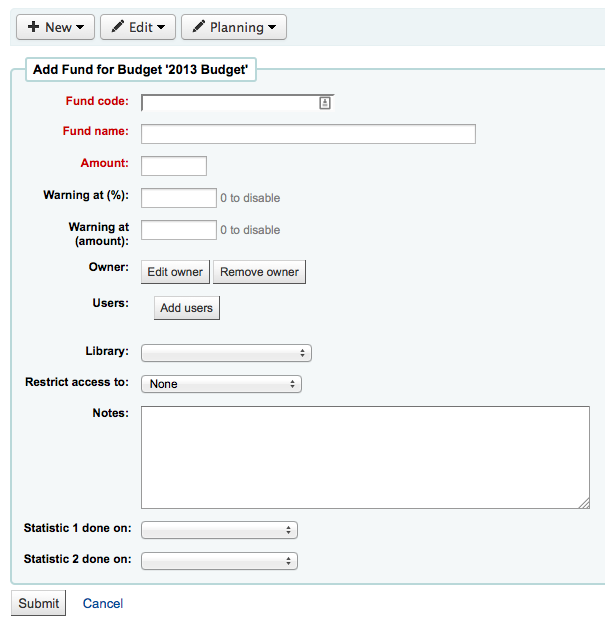
The three first fields are required, the rest are optional
-
Fund Code is a unique identifier for your fund
-
The Fund Name should be something that librarians will understand
-
Amount should be entered with only numbers and decimals, no other characters
-
Warning at (%) or Warning at (amount) can be filled in to make Koha warn you before you spend a certain percentage or amount of your budget. This will prevent you from overspending.
-
You can choose to assign this fund to a librarian. Doing so will make it so that only that librarian can make changes to the Fund
-
Choose which library will be using this fund
-
You can restrict who can order from this fund by choosing either the 'owner', 'owner and users' or 'owner, users and library' from the 'Restrict access to' menu

-
Important
Without an owner, the access restriction will be ignored, be sure to enter an owner as well as choose a restriction
-
-
Notes are simply for any descriptive notes you might want to add so that librarians know when to use this fund
-
Planning categories are used for statistical purposes. To learn more about planning categories, check out the Planning Category FAQ.
When complete, click 'Submit' and you will be brought to a list of all of the funds for the budget.
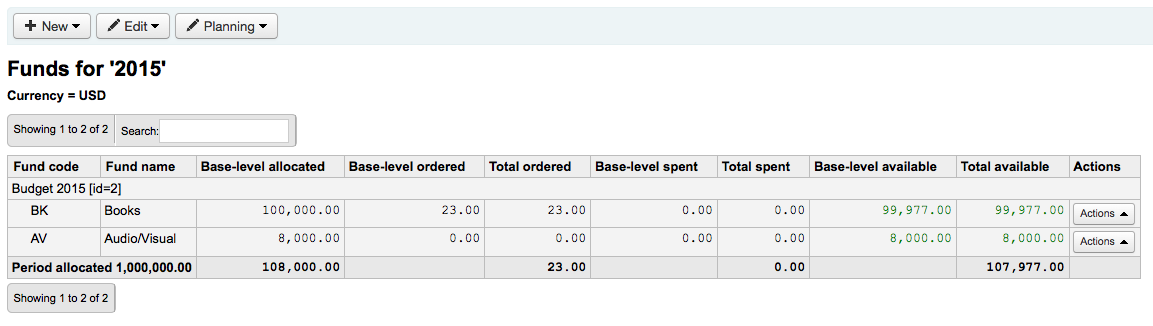
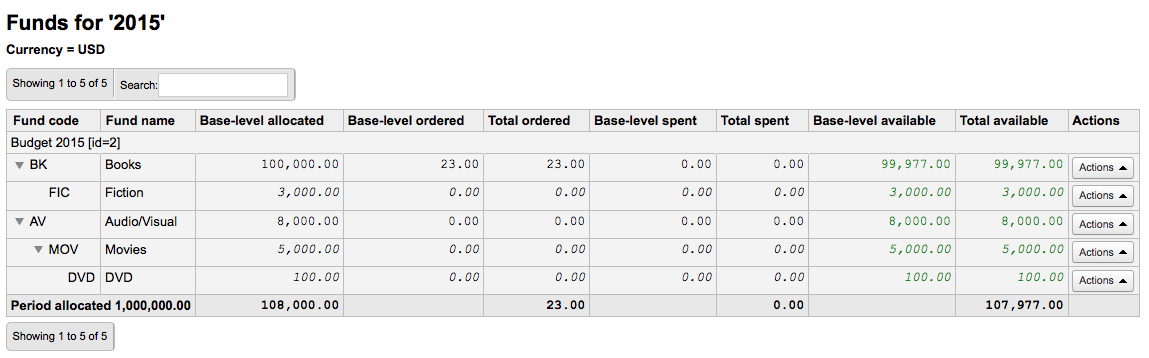
The monetary columns in the fund table break down as follows:
-
Base-level allocated is the "Amount" value you defined when creating the fund
-
Base-level ordered is the ordered amount for this fund (without child funds)
-
Total ordered is the base-level ordered for this fund and all its child funds
-
Base-level spent is the spent amount for this fund (without child funds)
-
Total spent is the base-level spent for this fund and all its child funds
-
Base-level available is 1 - 2
-
Total available is 1 - 3
To the right of each fund you will find the 'Actions' button under which you will find the 'Edit,' 'Delete,' and 'Add Child Fund' options.
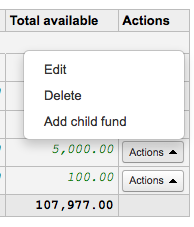
A child fund simply a sub-fund of the fund listed. An example would be to have a fund for 'Fiction' and under that have a fund for 'New Releases' and a fund for 'Science Fiction.' It is an optional way to further organize your finances.
Funds with children will show with a small arrow to the left. Clicking that will show you the children funds.
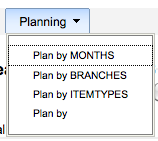
When viewing the list of funds click the 'Planning' button and choose how you would like to plan to spend your budget.
If you choose 'Plan by MONTHS' you will see the budgeted amount broken down by months:
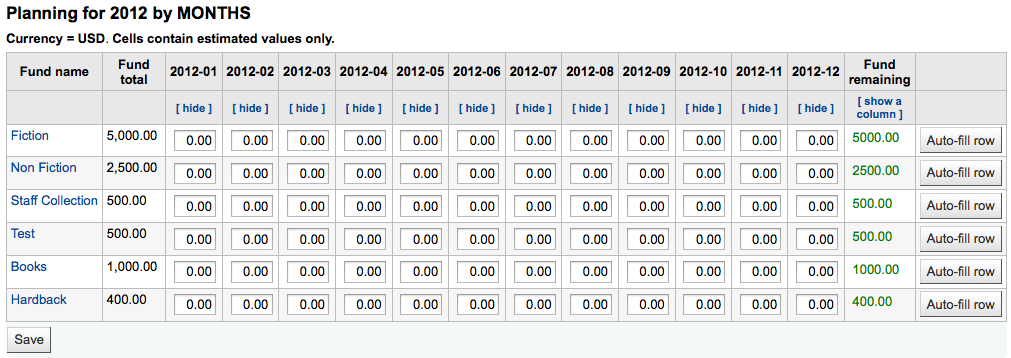
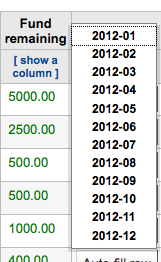
To hide some of the columns you can click the 'hide' link to the right (or below as in the screenshot above) the dates. To add more columns you can click the 'Show a column' link found below the 'Fund Remaining' heading.
From here you can plan your budget spending by manually entering values or by clicking the 'Auto-fill row' button. If you choose to auto-fill the form the system will try to divide the amount accordingly, you may have to make some edits to split things more accurately.

Once your changes are made, click the 'Save' button. If you would like to export your data as a CSV file you can do so by entering a file name in the 'Output to a file named' field and clicking the 'Output' button.

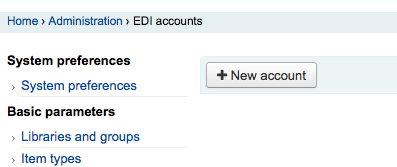
From here you can set up the information needed to connect to your acquisitions vendors.
Note
Before you begin you will need at least one Vendor set up in Acquisitions.
To add account information click the 'New account' button.
In the form that appears you will want to enter your vendor information.

Each vendor will have one account.
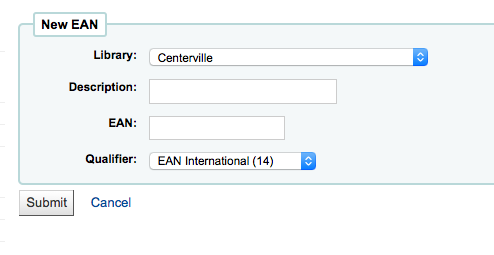
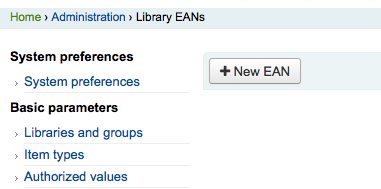
A library EAN is the identifier the vendor gives the library to send back to them so they know which account to use when billing. One EDI account can have multiple EANs.
To add an EAN click the 'New EAN' button.
In the form that appears enter the information provided by your vendor.