संरक्षक
आयात करने या संरक्षक जोड़ने से पहले सुनिश्चित करें कि आपका : ref: संरक्षक श्रेणियां <patron-categories-label>.
एक नए संरक्षक जोड़ें:
संरक्षक 'संरक्षक' मॉड्यूल के लिए जा रहा द्वारा जोड़ा जाता है।
Get there: Patrons
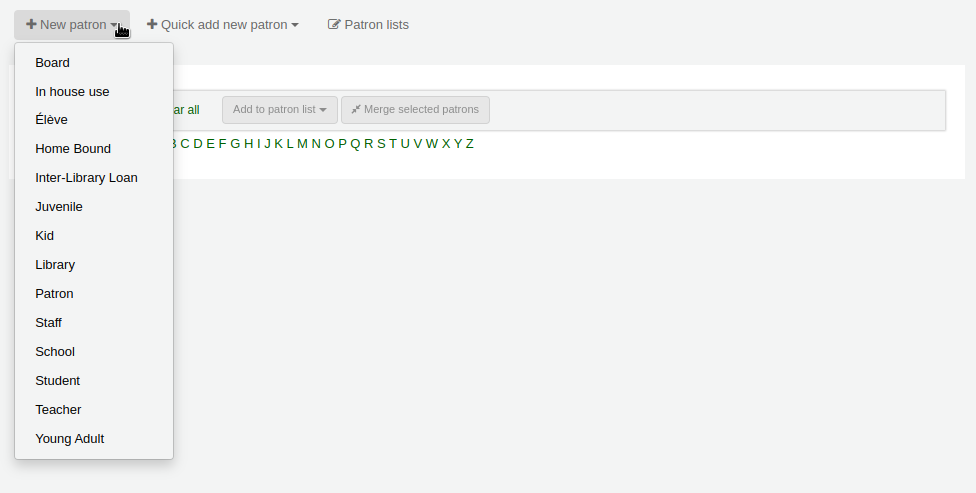
वहाँ एक बार जब आप एक नया संरक्षक जोड़ सकते हैं.
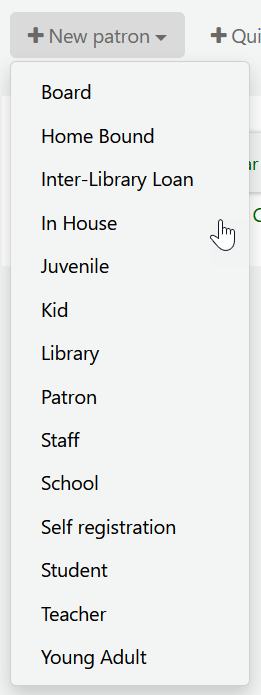
क्लिक करें 'नई संरक्षक'
टिप्पणी
पैट्रन ऐड फॉर्म पर दिखाई देने वाले फ़ील्ड को संपादित करके नियंत्रित किया जा सकता है BorworeUnwantedfield सिस्टम वरीयता।
टिप्पणी
आवश्यक फ़ील्ड को परिभाषित किया गया है BorrowerMandatoryField सिस्टम वरीयता
सबसे पहले अपने संरक्षक के बारे में जानकारी की पहचान दर्ज करें

'सैल्यूटेशन' को पॉपुलेट किया गया है उधारकर्ता शीर्षक सिस्टम वरीयताएँ
टिप्पणी
यदि आप ऑन-प्रिन्टिंग से पूर्ण नामों को रोकना चाहते हैं स्लिप्स और आप किसी भी चीज़ के लिए इनिशियल या अन्य नाम फ़ील्ड का उपयोग नहीं कर रहे हैं, तो आप उन्हें संक्षिप्त रूप से उपयोग कर सकते हैं नाम के संस्करण तब पर्ची पर मुद्रित किए जाते हैं।
उदाहरण के लिए:
Firstname: Nicole C.
Surname: Engard
Initials: NCE
फिर पर्ची पर आप इसे प्रिंट कर सकते हैं <<borrowers.initials>> बजाय पूरा नाम (एनसीई).
या आप कुछ इस तरह कर सकता है:
Firstname: Nicole
Surname: Engard
Initials: E
फिर पर्ची पर आप इसे प्रिंट कर सकते हैं <<borrowers.initials>>, <<borrowers.firstname>> बजाय पूरा नाम (ई, निकोल).
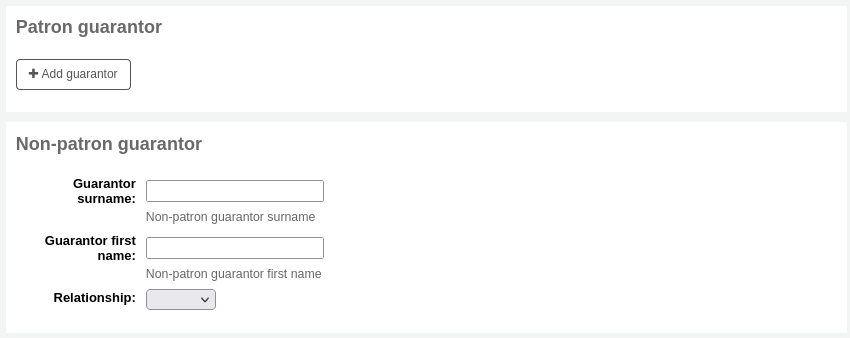
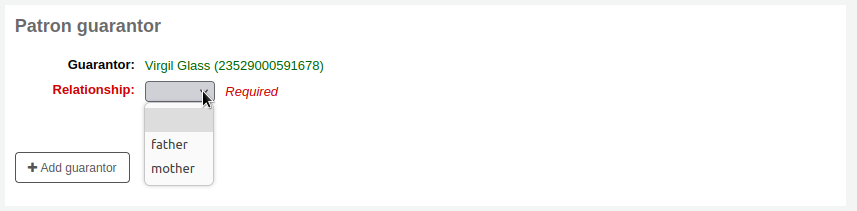
यदि यह संरक्षक एक बच्चा है, तो आपको बाल संरक्षक को एक वयस्क संरक्षक (गारंटर) से संलग्न करने के लिए कहा जाएगा।
टिप्पणी
गारंटर केवल संरक्षक से जुड़ा हो सकता है, जिनके category' हां 'पर सेट की गारंटी हो सकती है।
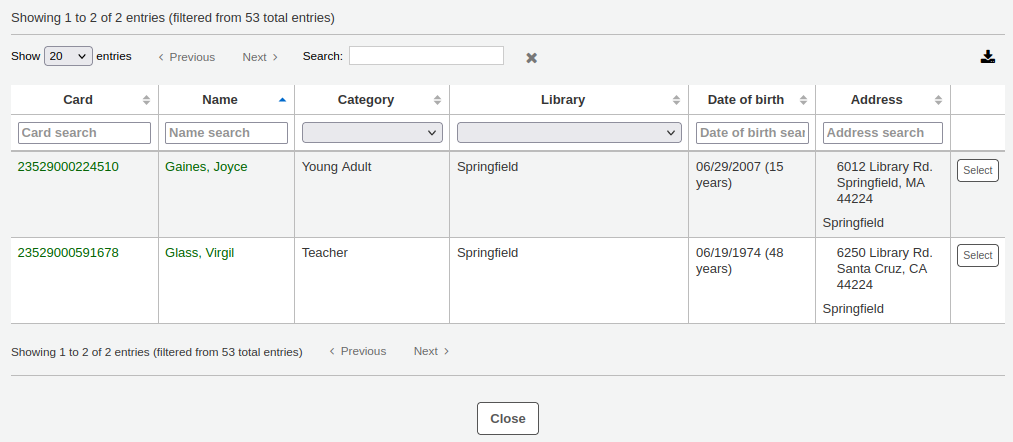
यदि गारंटर लाइब्रेरी का संरक्षक है, तो मौजूदा संरक्षक के लिए अपने सिस्टम को खोजने के लिए 'गारंटर जोड़ें' पर क्लिक करें
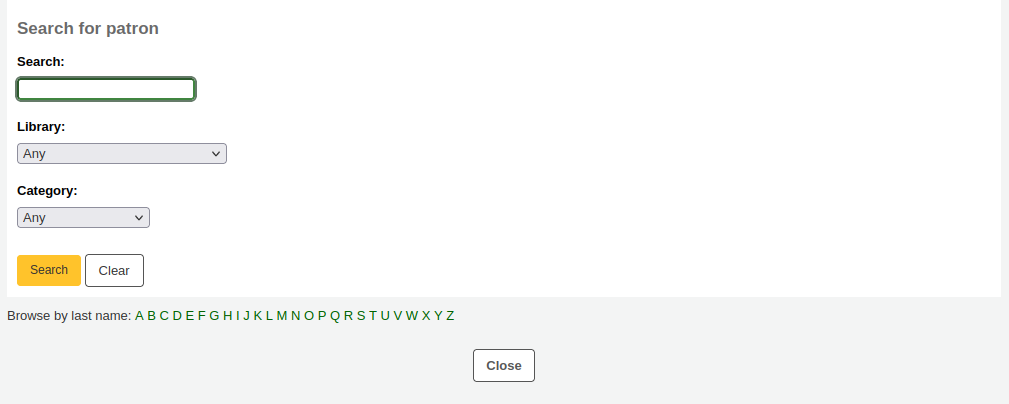
संरक्षक चुनने के लिए 'चयन करें' पर क्लिक करें
संबंधों का उपयोग कर सेट किया जाता है: ref: borrowerRelationship<borrowerRelationship-label> सिस्टम वरीयता
टिप्पणी
संरक्षक खाते (उदाहरण के लिए माता-पिता दोनों) में एक से अधिक गारंटर जोड़ना संभव है।
यदि गारंटर संरक्षक नहीं है, तो आप अभी भी 'गैर-संरक्षक गारंटर' अनुभाग में अपनी जानकारी जोड़ सकते हैं।
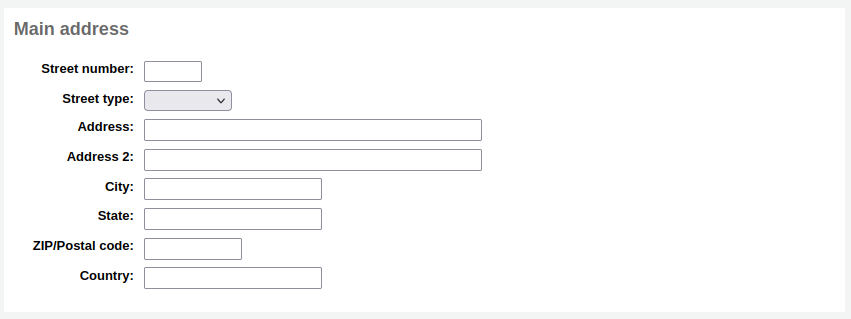
अगला मुख्य पता और संपर्क जानकारी दर्ज करें
टिप्पणी
स्ट्रीट टाइप ड्रॉप-डाउन मेनू को रोडटाइप द्वारा पॉप्युलेट किया गया हैE अधिकृत मान
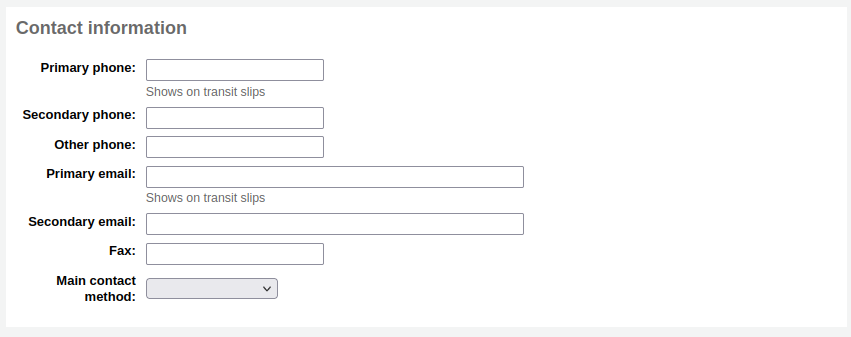
संपर्क जानकारी के लिए, ध्यान दें कि प्राथमिक फोन नंबर और प्राथमिक ईमेल पता वही होते हैं जो नोटिस और स्लिप पर प्रसारित होते हैं जो प्रचलन के दौरान मुद्रित होते हैं (रसीदें, स्थानांतरण पर्ची और स्लिप्स पकड़ें)। प्राथमिक ईमेल वह भी है जो अतिदेय नोटिस और अन्य संदेश जाते हैं।
'मुख्य संपर्क विधि' का उपयोग रिपोर्ट में और कर्मचारियों के लिए यह जानने के लिए किया जा सकता है कि संरक्षक से संपर्क करने की कोशिश करते समय पहले किस विधि का उपयोग करना है।
आप प्रत्येक संरक्षक के लिए एक वैकल्पिक पता भी रिकॉर्ड कर सकते हैं। उदाहरण के लिए संरक्षक के घर के पते को संग्रहीत करने के लिए एक शैक्षणिक सेटिंग में इसका इस्तेमाल किया जा सकता है।
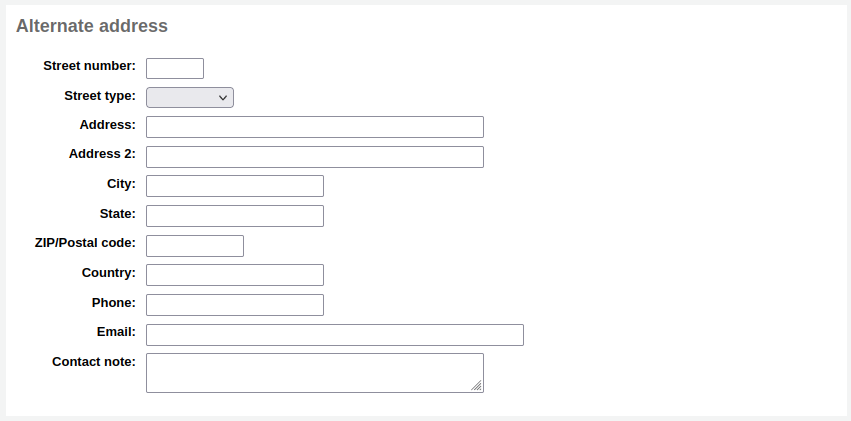
प्रत्येक संरक्षक का एक वैकल्पिक संपर्क हो सकता है। उदाहरण के लिए एक वैकल्पिक संपर्क माता-पिता या अभिभावक हो सकता है।

पुस्तकालय प्रबंधन अनुभाग शामिल मूल्यों है कि पुस्तकालय के भीतर उपयोग किया जाता है
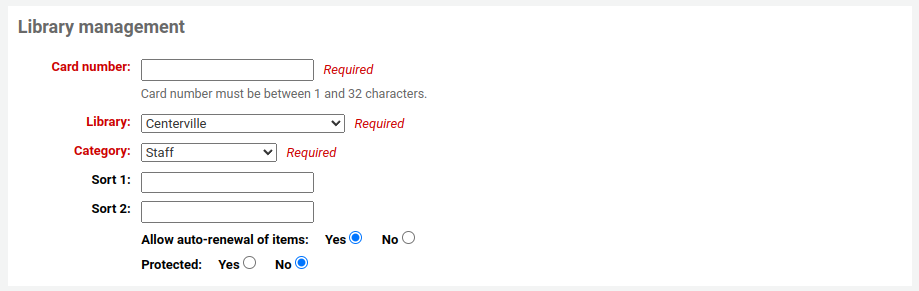
कार्ड नंबर फ़ील्ड स्वचालित रूप से गणना की जाती है यदि आपके पास है autoMemberNum सिस्टम प्राथमिकता उस तरह से सेट है
टिप्पणी
एक नव स्थापित प्रणाली के लिए इस वरीयता 1 पर शुरू करने और बाद 1 से हर बार वेतन वृद्धि होगी। यह आपके बारकोड के शुरू संख्या के साथ शुरू, संरक्षक रिकॉर्ड में हाथ से पहले बारकोड दर्ज करें और संरक्षक को बचाने के लिए है। उसके बाद क्षेत्र 1 से उस नंबर को वेतन वृद्धि होगी।
अगर आप गलती से शुरुआत में गलत संरक्षक श्रेणी चुना है, तो आप पाएंगे कि यहां ठीक कर सकते हैं
1 और 2 क्रमबद्ध अपने पुस्तकालय के भीतर सांख्यिकीय प्रयोजनों के लिए उपयोग किया जाता है
आप Bsort1 और Bsort2 में मान जोड़कर इन क्षेत्रों के लिए ड्रॉप-डाउन मेनू बना सकते हैं अधिकृत मान श्रेणियां
'ऑटो-रिन्यूअल ऑफ आइटम्स' का उपयोग यह नियंत्रित करने के लिए किया जाता है कि क्या इस संरक्षक के चेकआउट को संचलन नियमों के अनुसार नवीनीकृत किया जाएगा। यदि 'हां' पर सेट किया जाता है, तो जिन आइटमों के लिए संचलन नियमों में स्वत: नवीनीकरण सक्षम है, वे स्वचालित रूप से नवीनीकृत हो जाएंगे। इसके लिए आवश्यक है स्वचालित_नवीनीकरण cronjob दैनिक चलाने के लिए। यदि 'नहीं' पर सेट किया जाता है, तो जिन आइटमों के लिए संचलन नियमों में स्वत: नवीनीकरण सक्षम है, वे स्वचालित रूप से नवीनीकृत नहीं होंगे।
संरक्षित: संरक्षित संरक्षक को मैन्युअल रूप से या बैच द्वारा हटाया नहीं जा सकता है। इस तरह के रूप में सिस्टम संरक्षक के लिए उपयोग करें statistical संरक्षक, SIP2 संरक्षक, the self चेकआउट उपयोगकर्ता, या superadmin।
संस्करण
'संरक्षित' विकल्प को कोहा के संस्करण 23.11 में जोड़ा गया था।।
'पिछले चेकआउट के लिए चेक' का उपयोग संरक्षक के व्यक्तिगत वरीयता को निर्धारित करने के लिए किया जाता है ताकि वे अपने संचलन के इतिहास की जांच कर सकें कि क्या उन्होंने अतीत में इस मद को उधार लिया है। यह :ref: संरक्षक श्रेणी<adding-a-patron-category-label> और CheckPrevCheckout सिस्टम वरीयता को स्थापित करता है।
नोटिस के लिए पसंदीदा भाषा: यदि translateNotices को अनुमति देने के लिए सेट किया गया है, तो आप स्थापित भाषाओं में भाषा चुन पाएंगे जिसमें संरक्षक नोटिस प्राप्त करना पसंद करेंगे (जैसे कि अतिदेय नोटिस और उन्नत नोटिस)।।
अगले, लाइब्रेरी सेटअप अनुभाग अतिरिक्त पुस्तकालय सेटिंग्स शामिल
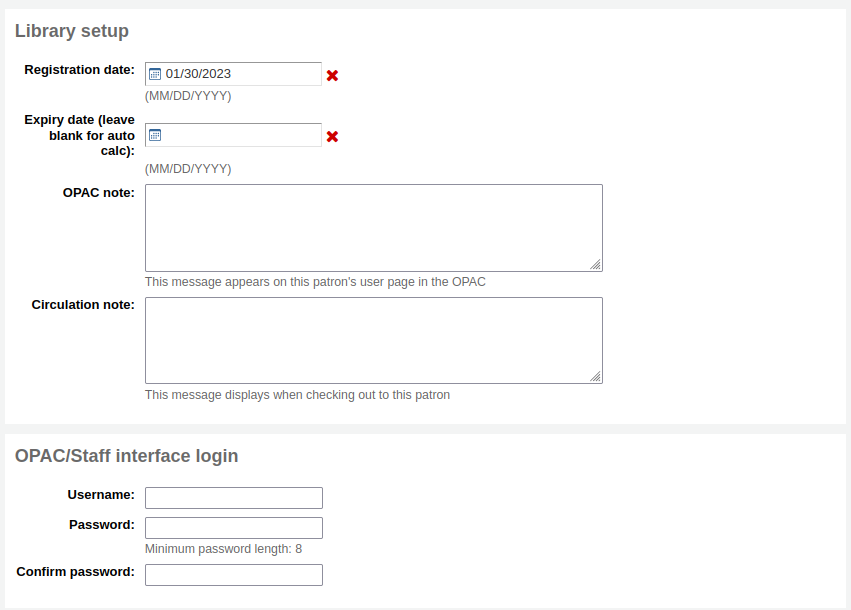
पंजीकरण की तारीख स्वचालित रूप से आज की तारीख के साथ में भरा जाएगा
आयात करने और/या संरक्षक जोड़ने से पहले सुनिश्चित करें कि आपका : ref: संरक्षक श्रेणियां <patron-categories-label>.
ओपेक टिप्पणी संरक्षक के लिए एक नोट है, यह ओपेक पर संरक्षक के ऑनलाइन खाते में दिखाई देंगे

टिप्पणी
यह सभी देखें ओपेक संदेशों
सर्कुलेशन नोट अपने पुस्तकालय के कर्मचारियों के लिए पूरी तरह होती है और जब संचलन स्टाफ संरक्षक के लिए बाहर एक आइटम जाँच करने के लिए चला जाता दिखाई देंगे
'ओपैक / स्टाफ इंटरफ़ेस लॉगिन' अनुभाग उपयोगकर्ता नाम और पासवर्ड का उपयोग ओपैक में अपने खाते में प्रवेश करने के लिए संरक्षक (या स्टाफ सदस्य) और स्टाफ इंटरफ़ेस में लॉग इन करने के लिए कहता है।
कर्मचारी केवल स्टाफ लॉगिन में लॉग इन करने के लिए इस लॉगिन जानकारी का उपयोग करने में सक्षम होंगे यदि उनके पास कम से कम है: ref: केटॉलागिग अनुमतियां हैं <patron-permissions-label>.
यदि आपने हाउसबाउंड मॉड्यूल को सक्षम किया है, ( के साथ HouseboundModule सिस्टम वरीयता), आप इस संरक्षक के लिए एक हाउसबाउंड भूमिका चुन सकेंगे।

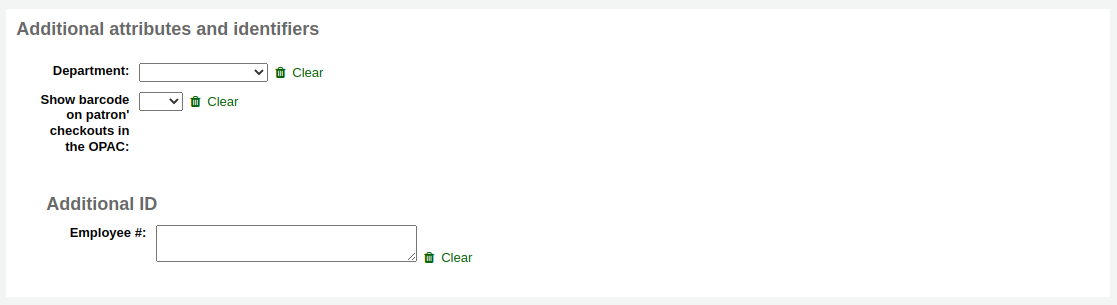
यदि आपके पास सेट है अतिरिक्त संरक्षक गुण प्रशासन मॉड्यूल में, ये अगले दिखाई देंगे
अंत में, यदि आपके पास EnhancedMessagingPreferences सिस्टम प्रिफरेंस 'सेट' करने के लिए है, तो आप इस संरक्षक के लिए मैसेजिंग प्राथमिकताएं चुन सकते हैं।
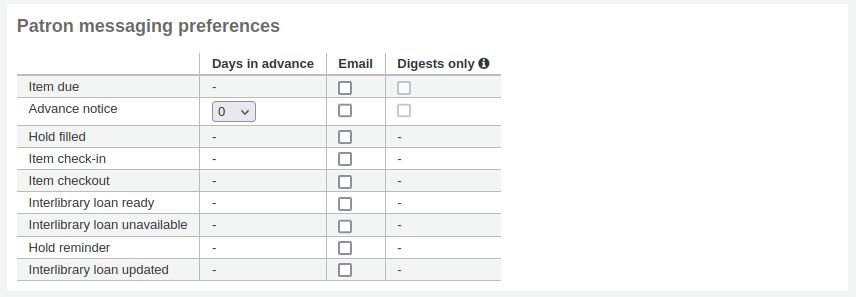
प्रत्येक नोटिस की परिभाषा में देखें अग्रिम नोटिस और नोटिस नोटिस अनुभाग
चेतावनी
ये वरीयताएं आपके द्वारा सेट किए गए किसी भी ओवरराइड को ओवरराइड कर देंगी संरक्षक श्रेणियां
चेतावनी
ओपीएसी के माध्यम से संरक्षक द्वारा इन वरीयता को बदला जा सकता है यदि EnhancedMessagingPreferencesOPAC सिस्टम वरीयता' शो 'के लिए सेट है
समाप्त होने पर, क्लिक करें 'सहेजें'
यदि यह प्रणाली संदिग्धों इस संरक्षक एक और यह तुम्हें चेतावनी देगा का डुप्लिकेट है.

टिप्पणी
देखें :ref:`PatronDuplicateMatchingAddFIelds`<PatronDuplicateMatchingAddFIelds-label> प्रणाली को देखने या बदलने के लिए जो कि डुप्लिकेट संरक्षक का पता लगाने के लिए उपयोग किया जाता है। डिफ़ॉल्ट उपनाम, प्रथम नाम और जन्म तिथि है।
आप संरक्षक वर्ग पर एक न्यूनतम या अधिकतम आयु सीमा निर्धारित किया है और आवश्यकता है कि जन्म तिथि में भरे जाने हैं, कोहा चेतावनी देना होगा यदि आप संरक्षक जोड़ रहे हैं बहुत पुराना या संरक्षक श्रेणी आपने चुना है के लिए युवा है:

यदि संरक्षक का श्रेणी में नामांकन शुल्क है, तो खाता बनाते समय शुल्क संरक्षक के खाते में लगाया जाएगा। फिर आप संरक्षक के लेखांकन टैब में प्रभारी प्रबंधित कर सकते हैं.
जल्दी एक संरक्षक जोड़ें
यदि आपका परिसंचरण डेस्क बहुत व्यस्त है और आप जल्दी से संरक्षक पंजीकरण करना चाहते हैं, तो आप 'त्वरित जोड़ें' सुविधा का उपयोग कर सकते हैं। यह जोड़ने के लिए केवल कुछ आवश्यक फ़ील्ड के साथ अतिरिक्त संरक्षक रूप का संक्षिप्त संस्करण है।
यह सुविधा दो सिस्टम वरीयताओं का उपयोग करती है: BorrowerMandatoryField और PatronQuickAddFields. ये दो सिस्टम वरीयताएं हैं जो नियंत्रित करती हैं कि कौन से फ़ील्ड त्वरित जोड़ फ़ॉर्म में हैं.
त्वरित एक संरक्षक जोड़ने के लिए, संरक्षक मॉड्यूल के लिए जाना
Get there: Patrons
'त्वरित नया संरक्षक जोड़ें ' बटन पर क्लिक करें.
आपको संरक्षक श्रेणी चुनने के लिए कहा जाएगा।
फिर, आपको एक संक्षिप्त रूप के साथ प्रस्तुत किया जाएगा।
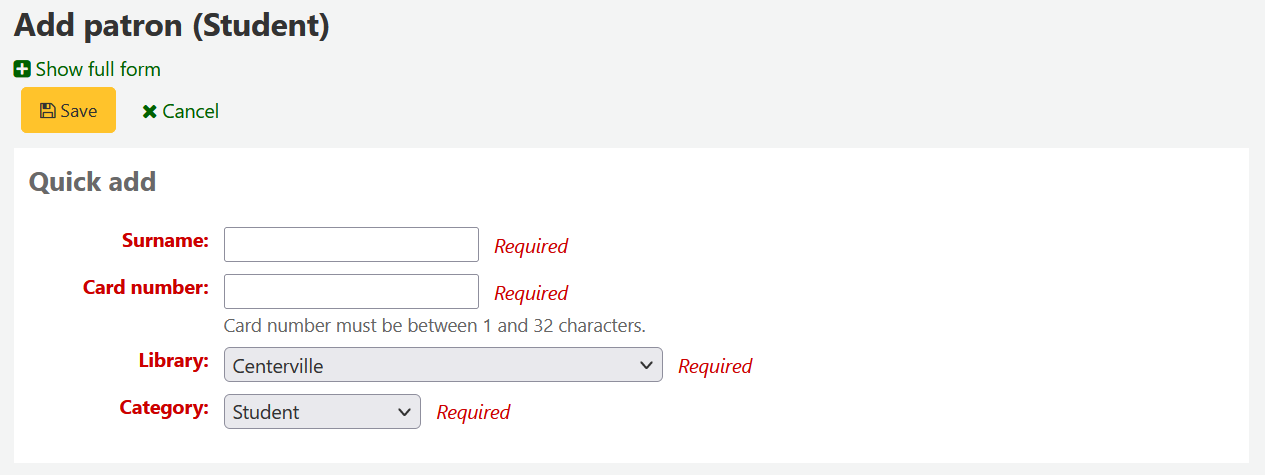
फ़ॉर्म भरने के बाद, 'सहेजें' पर क्लिक करें।
अगर आपको पूर्ण फॉर्म तक पहुंचने की ज़रूरत है, तो आप 'सेव' बटन के ऊपर 'पूर्ण फॉर्म दिखाएं' पर क्लिक कर सकते हैं।
स्टाफ संरक्षक जोडे
'स्टाफ' प्रकार के संरक्षक के रूप में सभी कर्मचारियों के सदस्यों को कोहा में प्रवेश किया जाना चाहिए। चरणों में निम्नलिखित का पालन करें :ref:`एक कर्मचारी सदस्य जोड़ने के लिए' एक संरक्षक <add-a-new-patron-label> 'जोड़ें। स्टाफ क्लाइंट तक पहुंचने के लिए स्टाफ सदस्य अनुमतियां देने के लिए, इन चरणों का पालन करें: ref: `संरक्षक अनुमतियां '<patron-permissions-label>
महत्वपूर्ण
इन कर्मचारियों को ग्राहक में लॉग इन करने के लिए इस्तेमाल किया जाएगा के बाद से अपने कर्मचारियों को सुरक्षित उपयोगकर्ता नाम और पासवर्ड आवंटित करने के लिए याद रखें।
एक सांख्यिकीय संरक्षक जोड़ें
घर वस्तुओं में उपयोग को ट्रैक करने का एक तरीका है एक सांख्यिकीय संरक्षक को सामग्री "जांचना"। "चेक आउट" प्रक्रिया पुस्तक की जांच नहीं करती है, बल्कि इसके बजाय आइटम के घर के उपयोग में ट्रैक करती है। घर के उपयोग में ट्रैकिंग के लिए इस विधि का उपयोग करने के लिए आपको सबसे पहले एक आवश्यकता होगी :ref:`संरक्षक श्रेणी <patron-categories-label>' आपके सांख्यिकीय संरक्षक के लिए सेट अप करें।

अगले, आप सांख्यिकीय प्रकार का एक नया संरक्षक बनाने की आवश्यकता होगी
इसके बाद, ': ref:' में दिए गए चरणों का पालन करें, एक नया संरक्षक जोड़ें इस मैनुअल के <add-a-new-patron-label> '' सेक्शन।चूंकि यह संरक्षक वास्तविक व्यक्ति नहीं है, इसलिए केवल आवश्यक फ़ील्ड, सही लाइब्रेरी और कुछ भी नहीं भरें।
घर के उपयोग में ट्रैकिंग के अन्य तरीकों के बारे में जानने के लिए यहां जाएं. इस मैनुअल के :ref:`ट्रैकिंग इन-हाउस-उपयोग <tracking-in-house-use-label> ट्रैकिंग।
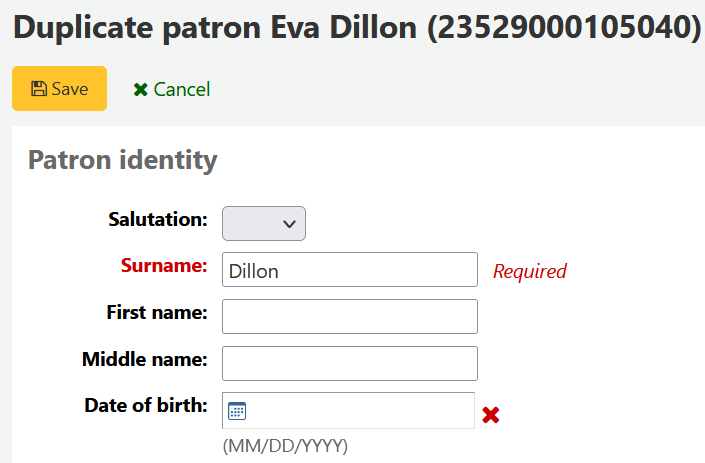
डुप्लिकेट एक संरक्षक
कभी कभी जब आप अपने सिस्टम के लिए एक नया परिवार जोड़ रहे हैं आप और अधिक से अधिक संपर्क जानकारी टाइप करने के लिए नहीं करना चाहती। Koha आप एक संरक्षक नकल के लिए करने के लिए और करने के लिए केवल भागों आप चाहते हैं बदल (या करने की जरूरत है) परिवर्तन की अनुमति देता है।
संरक्षक आप अपने बेस (संरक्षक आप से जानकारी नकल करना चाहते हैं) के रूप में उपयोग करना चाहते खोलें
उनके रिकॉर्ड के शीर्ष पर 'डुप्लीकेट' बटन पर क्लिक करें

प्रथम नाम, कार्ड नंबर, यूज़रनेम और पासवर्ड के अपवाद के साथ क्षेत्रों की सभी दोहराया गया है। लापता टुकड़े में भरें और क्लिक करें 'बचाने'
नोट
एक क्षेत्र है कि पहले से ही डेटा पॉप्यूलेट होती है में क्लिक करके सभी जानकारी की है कि क्षेत्र में साफ हो जाएगा (कुछ अलग करने में यह आसान के लिए आप टाइप करने के लिए कर रही है)
आप अपने नए संरक्षक के लिए लाया जाएगा

Adding patron images
You can add patron pictures to help identify patrons. To enable this feature, you must first set the patronimages system preference to 'Allow'.
If the preference is set to 'Allow', you will see a placeholder image under the patron's name on the left of the screen.
Click the 'Add' button on the placeholder image.
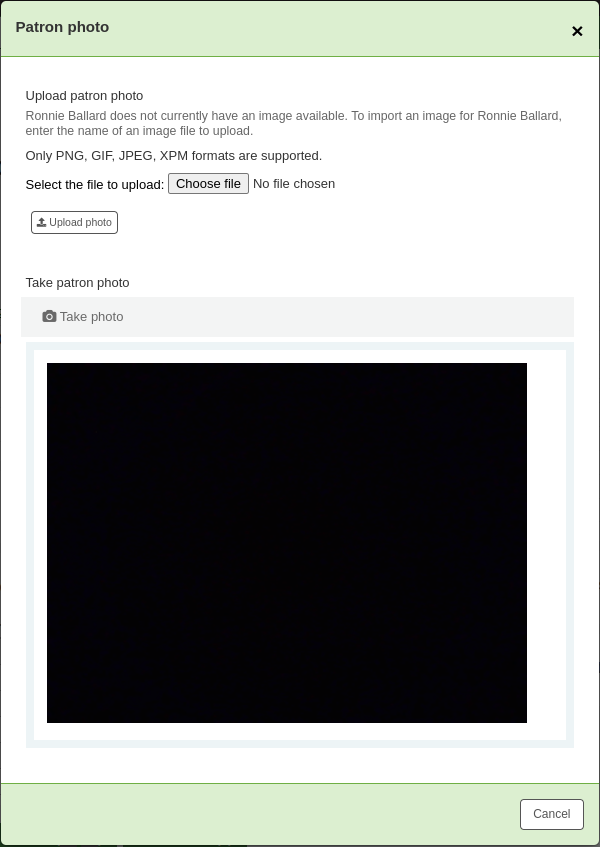
आपके पास या तो कंप्यूटर से मौजूदा चित्र अपलोड करने या वेब कैमरा के साथ एक तस्वीर लेने का विकल्प है।।
To upload an existing image, click 'Browse' or 'Choose file' to find the image on your computer and click 'Upload' to load the image in the patron's file.
चेतावनी
चित्र अपलोड के आकार पर 100K की एक सीमा होती है और यह सिफारिश की है कि छवि 200x300 पिक्सल हो, लेकिन छोटे छवियों के रूप में अच्छी तरह से काम करेगा.
वेबकैम के साथ एक तस्वीर लेने के लिए, वेबकैम के संरक्षक का सामना करने के बाद '' फोटो 'ले जाएं' बटन पर क्लिक करें। सिस्टम एक तस्वीर लेगा और समीक्षा के लिए आपको प्रस्तुत करेगा। यदि आप संतुष्ट हैं, तो 'अपलोड' पर क्लिक करें। यदि नहीं, तो नई तस्वीर लेने के लिए 'रीटेक फोटो' पर क्लिक करें। आप 'डाउनलोड फोटो' पर क्लिक करके चित्र भी डाउनलोड कर सकते हैं।
थोक में संरक्षक छवियों को जोड़ने के लिए, use का उपयोग करें : ref: 'संरक्षक छवियां अपलोड करें <upload-patron-images-label>' टूल
संपादित करें सरक्षक
Koha में संरक्षक कई बटन संपादित में से एक का उपयोग कर संपादित किया जा सकता है।
पूरे संरक्षक रिकॉर्ड को संपादित करने के लिए बस संरक्षक रिकार्ड के शीर्ष पर 'संपादन' बटन पर क्लिक करें।
संरक्षक रिकॉर्ड के विशिष्ट खंड को संपादित करने के लिए (उदाहरण के लिए 'लाइब्रेरी उपयोग' अनुभाग) अनुभाग के पास 'संपादित करें' बटन पर क्लिक करें।

Edit the patron's file and click 'Save'.
चेतावनी
ध्यान दें कि * अपने स्वयं के * उपयोगकर्ता नाम को बदलना आपको कोहा से लॉग इन करेगा।
Modifying patron passwords
संरक्षक पासवर्ड वसूली योग्य नहीं हैं।।
पासवर्ड लेबल के बगल में संरक्षक विवरण पृष्ठ पर सितारे हमेशा वहाँ हैं, भले ही पासवर्ड सेट न हो।।
यदि कोई संरक्षक अपना पासवर्ड भूल जाता है, तो एकमात्र विकल्प अपना पासवर्ड रीसेट करना है।।
यह स्टाफ इंटरफ़ेस से किया जा सकता है। संरक्षक के पासवर्ड को बदलने के लिए 'चेंज पासवर्ड' बटन पर क्लिक करें।।
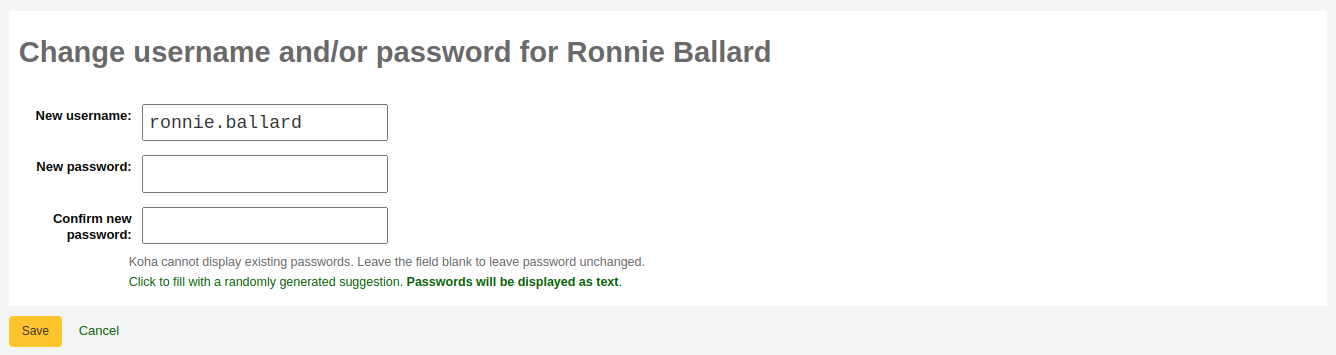
कोहा मौजूदा पासवर्ड प्रदर्शित नहीं कर सकते क्योंकि वे डेटाबेस में एन्क्रिप्टेड हैं। पासवर्ड को अपरिवर्तित छोड़ने के लिए फ़ील्ड को खाली छोड़ दें।
यदि आप लिंक लेबल क्लिक करें यह फार्म स्वचालित रूप से एक यादृच्छिक पासवर्ड उत्पन्न कर सकते हैं "एक बेतरतीब ढंग से उत्पन्न सुझाव के साथ भरने के लिए क्लिक करें। पासवर्ड के रूप में पाठ। प्रदर्शित किया जाएगा"
चेतावनी
ध्यान दें कि यहाँ * अपने स्वयं के * उपयोगकर्ता नाम को बदलना आपको कोहा से बाहर लॉग इन करेगा।
इस फॉर्म के माध्यम से पासवर्ड बदलने से पासवर्ड की समाप्ति तिथि भी अपडेट हो जाएगी, जैसा कि patron श्रेणी में सेट किया गया है.
If the NotifyPasswordChange system preference is enabled, the patron will receive a notification indicating their password was changed.
टिप्पणी
इस ईमेल की सामग्री को नोटिस और पर्ची उपकरण के साथ अनुकूलित किया जा सकता है। अक्षर का कोड PASSWORD _CHANGE है।।
यदि OpacResetPassword इसे अनुमति देता है, तो आप संरक्षक को 'अधिक' पर क्लिक करके पासवर्ड रीसेट करने के लिए एक पासवर्ड रीसेट ईमेल भी भेज सकते हैं।
यह संरक्षक को एक पासवर्ड रीसेट ईमेल भेजेगा, यदि भेजे गए एक के समान :ref:`'आपका पासवर्ड भूल गए?' <resetting-your-password-label> `ओपेक पर लिंक। हालांकि, रीसेट लिंक 2 दिनों के बजाय 5 दिनों के बाद समाप्त होने के लिए सेट है जब इसे इस तरह से भेजा जाता है।
टिप्पणी
ईमेल की सामग्री को इसके साथ अनुकूलित किया जा सकता है नोटिस और स्लिप्स टूल. पत्र का कोड है STAFF_PASSWORD_RESET।
केवल 'सुपरलाइब्रेरियन' अनुमतियों वाले स्टाफ सदस्य पासवर्ड समाप्ति तिथि को मैन्युअल रूप से देख और बदल सकते हैं। संरक्षक के रिकॉर्ड के शीर्ष पर स्थित 'संपादन' बटन पर क्लिक करके या 'पुस्तकालय उपयोग' अनुभाग के बगल में स्थित 'संपादन' बटन पर क्लिक करके इस तिथि को बदला जा सकता है।
Adding patron flags
प्रतिबंधों संरक्षक को चैक आउट करने से रोकने के लिए उपयोग किया जाता है।
Patrons can also be blocked from checking items out by setting patron flags.

If you would like your circulation staff to confirm a patron's address before checking items out to the patron, set the 'Gone no address' flag. This will create a warning when checking out.

If the patron reports that they have lost their card you can set the 'Lost card' flag to prevent someone else from using that card to check items out.

If you would like to bar a patron from the library you can add a manual restriction.

टिप्पणी
यह समान है :ref:`प्रतिबंध टैब <patron-restrictions-label>`संरक्षकों के विवरण पृष्ठ के निचले भाग में।
टिप्पणी
A patron can automatically be restricted with the Overdue/notice status triggers
If you enter in a date and/or note related to the restriction, you will see that in the restricted message as well.

एक संरक्षक रिकॉर्ड में नोट्स और संदेश जोड़ना
आप एक संरक्षक रिकॉर्ड में नोट छोड़ सकते हैं। ऐसा करने के कई तरीके हैं: आप या तो एक परिसंचरण नोट या एक आंतरिक संदेश जोड़ सकते हैं। ये संरक्षक को देखने के लिए ओपेक में नहीं दिखाएंगे। यदि आप चाहते हैं कि संरक्षक नोटों और संदेशों को देखें, तो उपयोग करें ओपेक नोट्स और ओपेक संदेश।
Circulation notes
Circulation notes are added to the patron's file through the add patron form or the edit patron form, in the 'Library set-up' section.
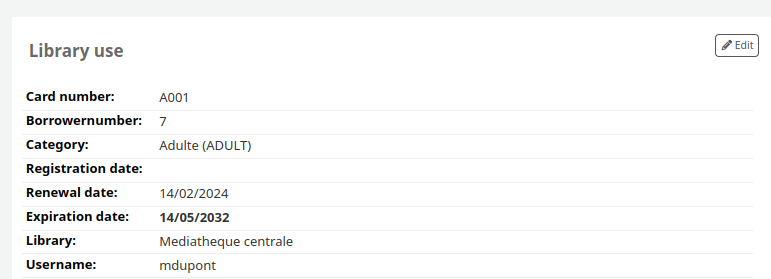
In the staff interface, circulation notes will be in the 'Library use' section of the patron's file.
Circulation messages
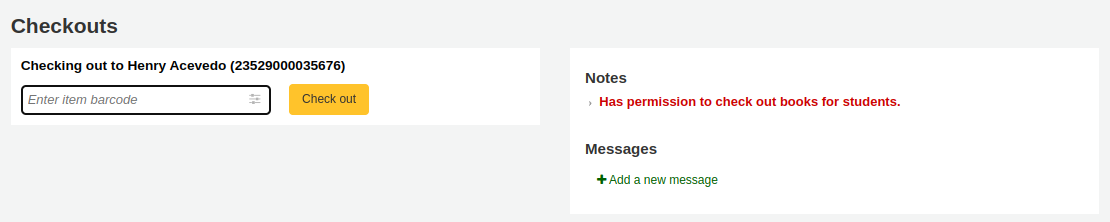
Internal messages are added to the patron's file using the 'Add message' button.
To leave an internal message, choose "Staff - Internal note" in the 'Add a message for' field. Enter your message in the box, or choose a predefined message in the drop-down menu.
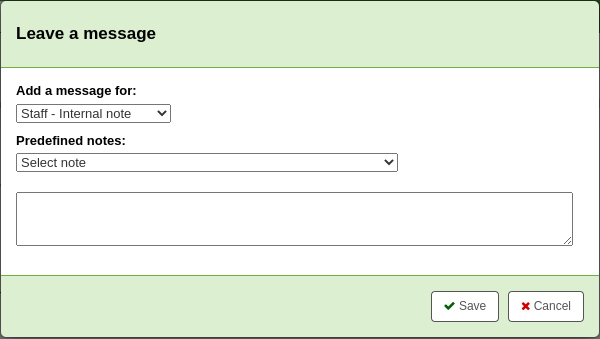
टिप्पणी
पूर्वनिर्धारित संदेश BOR_NOTES में जोड़े गए हैं अधिकृत मूल्य श्रेणी
Once saved, the internal message is shown in bold red on the patron's detail page in the staff interface, at the top of the page just under the row of action buttons.

यह चेकआउट पृष्ठ पर, चेकआउट बॉक्स के दाईं ओर भी दिखाई देगा।

यदि आपको संदेश को संपादित करने की आवश्यकता है, तो संदेश के बगल में 'संपादित' बटन पर क्लिक करें, पाठ को संपादित करें और 'सहेजें' पर क्लिक करें।
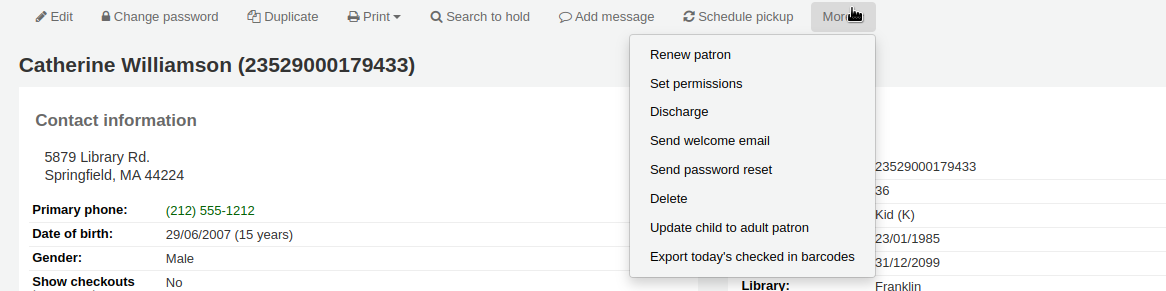
बच्चों को वयस्कों में बदलना
Children patrons do not become adults automatically in Koha unless the update patron categories cron job is running.
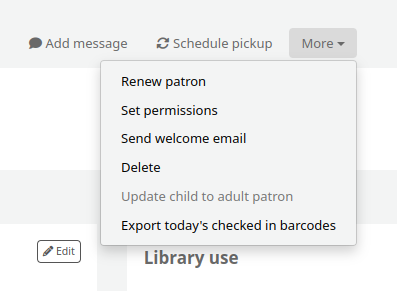
To upgrade a child patron to and adult patron category manually go to the 'More' menu and choose 'Update child to adult patron'.
You will then be presented with a pop up window asking which one of your adult patron categories this child should be updated to.
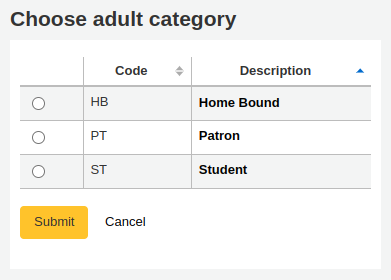
टिप्पणी
This list shows the patron categories that have the category type 'adult'.
नवीनीकृत संरक्षक खाता
एक संरक्षक खाते को नवीनीकृत करते समय आप या तो समाप्ति की तारीख को मैन्युअल रूप से संरक्षक रिकॉर्ड में संपादित कर सकते हैं या शीर्ष पर स्थित टूलबार में अधिक मेनू से 'नवीनीकृत संरक्षक' विकल्प का उपयोग कर सकते हैं।
उत्तरार्द्ध का उपयोग करके नई समाप्ति तिथि की गणना उपयोगकर्ता के संरक्षक श्रेणी के लिए कॉन्फ़िगर की गई नामांकन अवधि का उपयोग करके की जाएगी। सिस्टम प्राथमिकता BorrowerRenewalPeriodBase यह निर्धारित करता है कि नई समाप्ति तिथि की गणना वर्तमान तिथि से या पुरानी समाप्ति तिथि से की जाएगी।
'नवीनीकृत संरक्षक' विकल्प का उपयोग करने का एक फायदा यह है कि यह एक्शन_लॉग्स टेबल में सदस्यता नवीनीकरण के रूप में लॉग इन किया जाएगा और लॉग दर्शक का उपयोग करते समय दिखाई देगा या मॉडिफैटन लॉग संरक्षक खाते से।
विवरण खाते पर संरक्षक खाते की नवीनीकरण तिथि दिखाई देगी।
यदि संरक्षक एक में है संरक्षक श्रेणी सदस्यता शुल्क के साथ, नवीकरण पर शुल्क भी जोड़ा जाएगा। फिर आप संरक्षक के :ref:`लेखांकन टैब <fines-label>`में प्रभारी प्रबंधित कर सकते हैं .
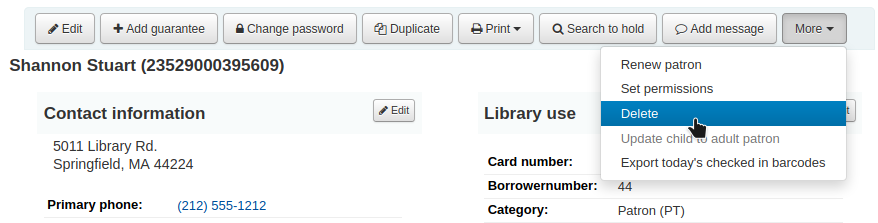
संरक्षक खाता हटाना
'अधिक' ड्रॉप-डाउन से, संरक्षक खाता हटाया जा सकता है।
यदि संरक्षक के पास चेकआउट, होल्ड, जुर्माना या क्रेडिट है तो अलर्ट होगा।
यदि संरक्षक के पास वर्तमान चेकआउट हैं, तो विलोपन संभव नहीं होगा।

यदि संरक्षक के पास बकाया जुर्माना है, तो विलोपन संभव नहीं होगा।

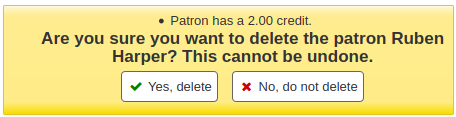
यदि एक संरक्षक के पास अप्रयुक्त क्रेडिट है, तो संरक्षक को हटाने का विकल्प संभव है लेकिन एक चेतावनी होगी।
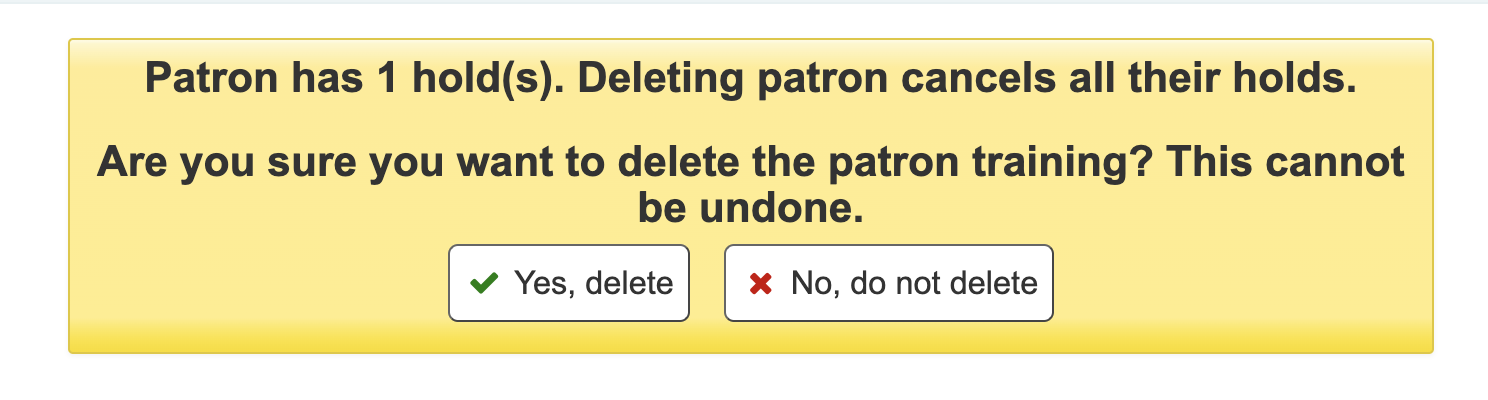
If a patron has existing holds on their account, the option to delete the patron is possible. The hold will be cancelled and moved to the old_reserves table.
यदि किसी संरक्षक के पास सार्वजनिक या साझा है:ref:lists <lists-label>, उन्हें संरक्षक के साथ हटा दिया जाएगा, जब तक कि ListOwnershipUponPatronDeletion सिस्टम वरीयता 'इन सूचियों के मालिक को बदलें' पर सेट किया गया है।।
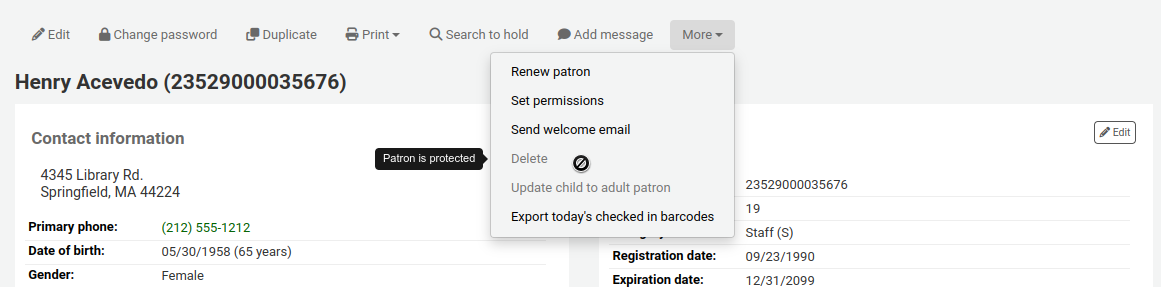
यदि कोई संरक्षक संरक्षित है, तो 'Delete' विकल्प अक्षम हो जाएगा। किसी भी तरह संरक्षक को हटाने के लिए, :ref:` संरक्षक <editing-patrons-label>` संपादित करें और 'Library प्रबंधन' अनुभाग में 'संरक्षित' के तहत 'No' चुनें, सहेजें और फिर हटा दें।।
संरक्षक स्व संपादन का प्रबंधन
यदि आप ओपैक के माध्यम से ओपीएसी के माध्यम से अपने खातों को संपादित करने की अनुमति दे रहे हैं OPACPatronDetails वरीयता तो आपको लागू होने से पहले स्टाफ क्लाइंट के माध्यम से सभी परिवर्तनों को स्वीकार करने की आवश्यकता होगी। यदि संरक्षक संपादन कार्यवाही का इंतजार कर रहे हैं तो वे मॉड्यूल सूची के नीचे स्टाफ क्लाइंट डैशबोर्ड पर दिखाई देंगे (अन्य वस्तुओं के साथ कार्रवाई की प्रतीक्षा कर रहे हैं)।
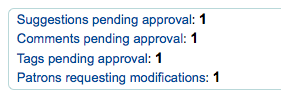
नोट
सुपर पुस्तकालय किसी भी शाखा के लिए संशोधनों को देखेंगे, अन्य स्टाफ केवल संरक्षक जो शाखा में अपने प्रवेश के लिए संबंधित के लिए संशोधनों को देखेंगे।
आप लिंक 'संशोधनों का अनुरोध संरक्षक' पर क्लिक करें जब आप का अनुरोध परिवर्तन के साथ संरक्षक की एक सूची के लिए लाया जाएगा।
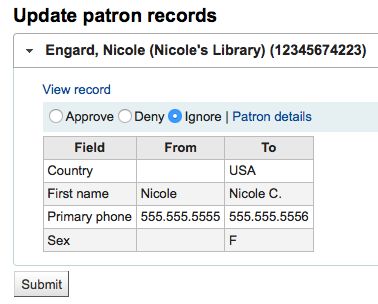
यहाँ से आप 'स्वीकृत' कर सकते हैं और संरक्षक रिकॉर्ड, 'हटाएँ' और परिवर्तन को हटाने या 'पर ध्यान न दें' और परिवर्तनों की समीक्षा करने के बाद में लंबित रखने के लिए परिवर्तन लागू करें।
आप बटन के अधिकार के लिए 'संरक्षक विवरण' लिंक पर क्लिक कर सकते हैं आप पूरे संरक्षक रिकॉर्ड देखने के लिए करना चाहते हैं। यह एक नए टैब में खुल जाएगा।
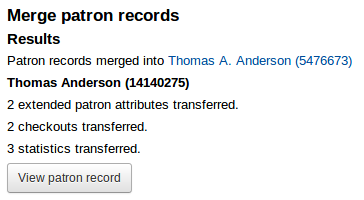
संरक्षक अभिलेखों को विलय करना
यदि आप दो कार्डों के साथ गलती से एक संरक्षक के साथ समाप्त हो जाते हैं तो अपने रिकॉर्ड एक साथ विलय करना संभव है ताकि आप अपना ऋण इतिहास न खोएं या होल्ड न करें।
संरक्षक सूची में, उन रिकॉर्ड्स के बगल में स्थित बॉक्स चेक करें जिन्हें आप मर्ज करना चाहते हैं और 'चयनित संरक्षक मर्ज करें' बटन पर क्लिक करें।
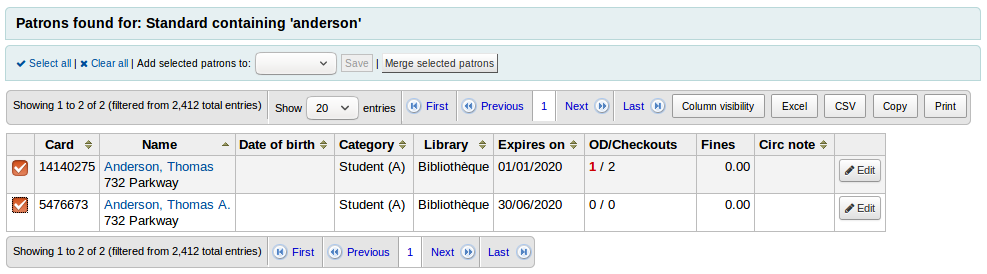
नोट
एक समय में दो से अधिक रिकॉर्ड्स मर्ज करना संभव है।
उस संरक्षक रिकॉर्ड का चयन करें जिसे आप रखना चाहते हैं

यदि आवश्यक हो, तो विभिन्न खातों के बीच अंतर देखने के लिए 'संरक्षकों की तुलना करें' बटन पर क्लिक करें।
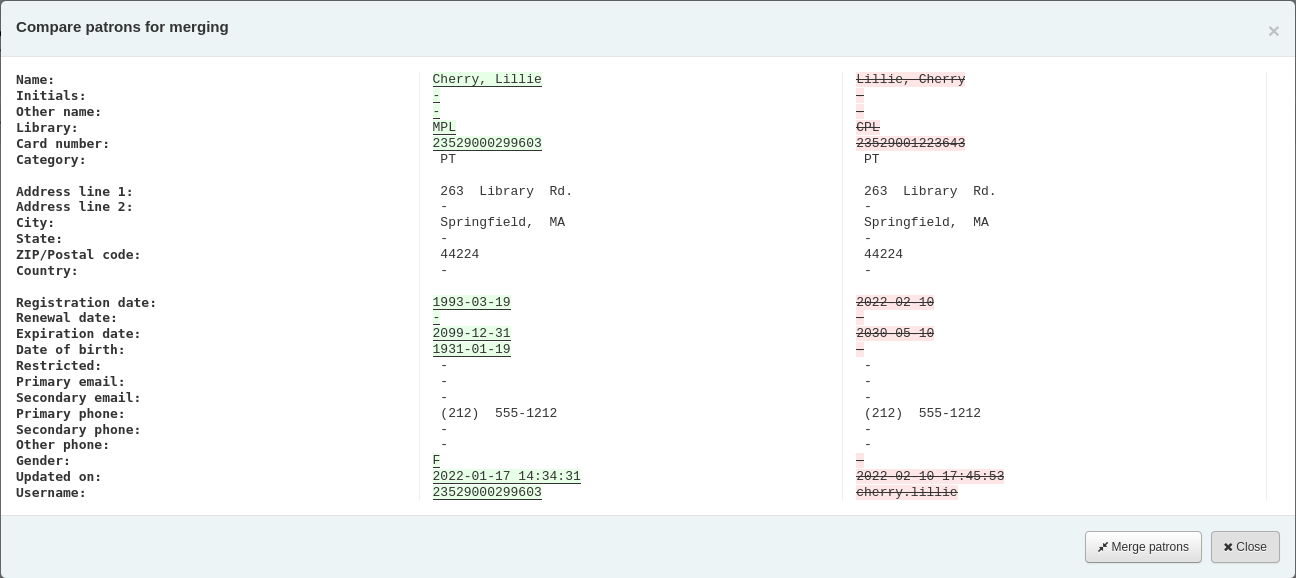
'मर्ज संरक्षक' बटन पर क्लिक करें।
चेकआउट और आंकड़े सही रिकॉर्ड में स्थानांतरित कर दिए जाएंगे और दूसरा हटा दिया जाएगा।
संरक्षक अनुमतियों
संरक्षक अनुमतियां स्टाफ के सदस्यों के कर्मचारियों ग्राहक के लिए उपयोग की अनुमति देने के लिए उपयोग किया जाता है।
महत्त्वपूर्ण
एक स्टाफ सदस्य 'सूची' अनुमतियों को जो उन्हें स्टाफ इंटरफेस देखने के लिए अनुमति (बहुत कम से कम) स्टाफ इंटरफेस वे होनी चाहिए में लॉग इन करने के लिए आदेश में।
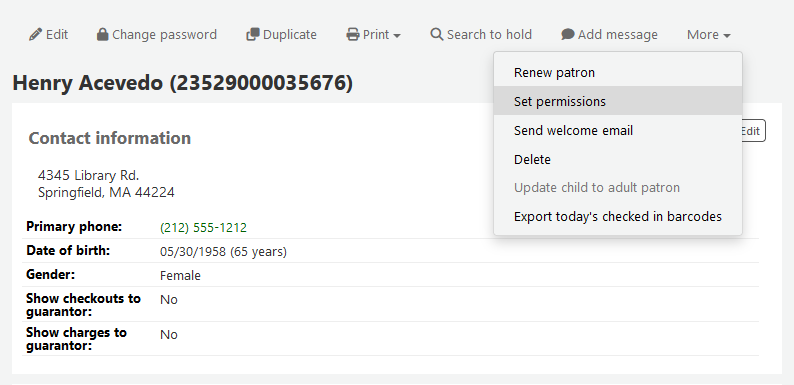
संरक्षक अनुमतियाँ सेटिंग
संरक्षक रिकॉर्ड पर 'अधिक' पर क्लिक करें और संरक्षक अनुमतियों को बदलने के लिए 'अनुमतियां सेट करें' चुनें
आपको वरीयताओं की सूची के साथ प्रस्तुत किया जाएगा, जिनमें से कुछ को सही शीर्षक पर 'विवरण दिखाएँ' लिंक पर क्लिक करके विस्तारित किया जा सकता है।
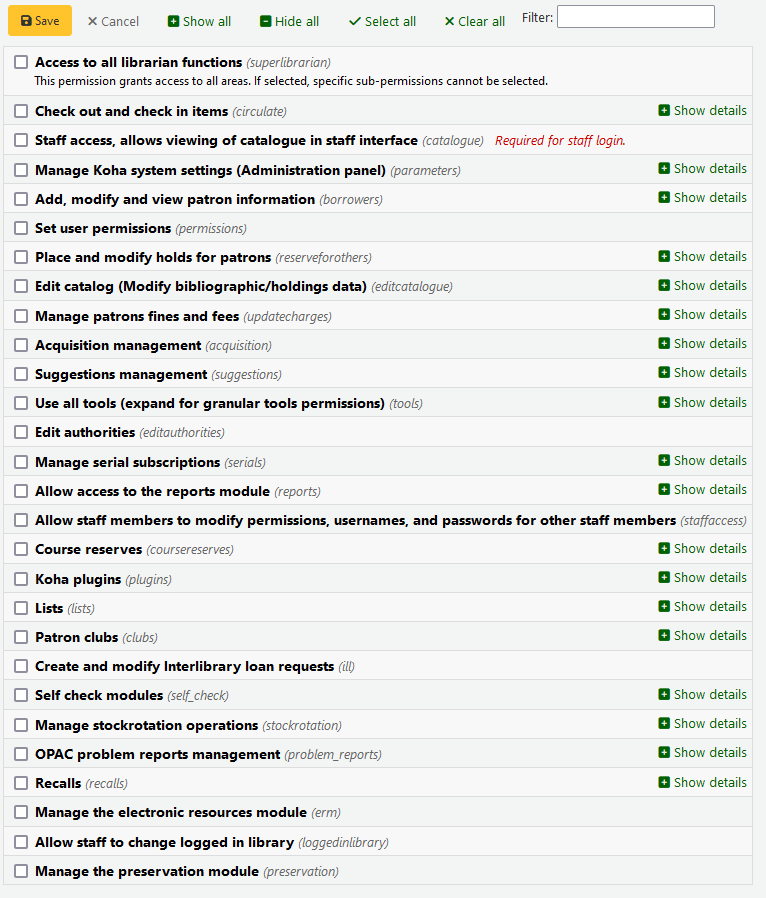
सभी मामलों में, यदि माता-पिता की अनुमति की जाँच की जाती है, तो उपयोगकर्ता के पास सभी बच्चे की अनुमति है। यदि आप अधिक दानेदार स्तर पर अनुमतियाँ सेट करना चाहते हैं, तो अनुभाग का विस्तार करें और केवल उन अनुमतियों की जाँच करें जो आप उस उपयोगकर्ता के पास हैं।
संरक्षक अनुमतियां निर्धारित
सभी लाइब्रेरियन फ़ंक्शंस तक पहुंच (सुपरलिब्रेरियन)
नोट
इस के साथ चयनित किसी अन्य अनुमतियों को चुनने के लिए कोई जरूरत नहीं है
आइटम में चैक आउट और चैक इन (circulate)
परिसंचरण अनुमतियाँ शेष (circulate_remaining_permissions)
यह अनुमति नीचे सूचीबद्ध अनुमतियों द्वारा कवर किए गए को छोड़कर सभी परिसचांलन अधिकारों को प्रदान करती है
यदि कोई सीमा मौजूद है तो फोर्स चेकआउट करें (force_checkout)
इस अनुमति के साथ एक स्टाफ सदस्य को निम्नलिखित मामलों में एक चेक आउट प्रतिबंध को ओवरराइड करने की अनुमति दी जाएगी:
उम्र प्रतिबन्ध
यह आइटम एक और संरक्षक को जारी हैं
यह आइटम ऋण के लिए नहीं है
संरक्षक के पास अतिदेय आइटम है
आइटम खोया
यह आइटम उच्च मांग आइटम हैं
यह आइटम एक होल्ड पर है
देखा/नहीं देखा के रूप में मार्क चेकआउट नोट्स (manage_checkout_notes)
- उपयोगकर्ताओं द्वारा लिखे गए चेकआउट नोट्स को प्रबंधित करने की अनुमति
ओपेक के माध्यम से
कर्बसाइड पिकअप प्रबंधित करें (manage_curbside_pickups)
संरक्षक कर्बसाइड पिकअप नियुक्तियों का प्रबंधन करने की अनुमति
खातों के लिए प्रतिबंध प्रबंधित करें (manage_restrictions)
एक प्रतिबंध यह है कि संरक्षक के रिकार्ड पर हो सकता है उठाने के लिए स्टाफ के सदस्य के लिए अनुदान की अनुमति
अतिदेय आइटम रिपोर्ट निष्पादित (overdues_report)
संचालन के तहत पाया बकाया रिपोर्ट चलाने के लिए अनुमति
अवरुद्ध नवीकरण ओवरराइड (override_renewals)
इस अनुमति के साथ, यदि कोई प्रतिबंध है, तो एक कर्मचारी सदस्य नवीनीकरण को ओवरराइड कर सकता है
कर्मचारियों सदस्य की भी आवश्यकता है circulate_remaining_permissions
Staff access, allows viewing the catalogue in staff interface (catalogue) Required for staff login.
महत्त्वपूर्ण
This permission must be given to all staff members to allow them to log into the staff interface
This will allow access to the staff interface, with the possibility of
searching the catalogue (simple search, advanced search and item search)
searching the authorities
viewing the checkout history of a title (no patron information is shown)
creating private or public lists, adding items to private lists and public lists, if the public list permission allows it, editing and deleting private lists
using the cart
viewing course reserves
कोहा प्रणाली सेटिंग्स (प्रशासन पैनल) (पैरामीटर) प्रबंधित करें
खाता डेबिट और क्रेडिट प्रकार प्रबंधित करें (manage_accounts)
यह तक पहुँच देता है डेबिट प्रकार अनुभाग
बास्केट या सदस्यता के लिए अतिरिक्त फ़ील्ड प्रबंधित करें (manage_additional _fields)
यह तक पहुँच देता है अतिरिक्त फ़ील्ड अनुभाग
महत्वपूर्ण
इस अनुमति के लिए आवश्यक है कि स्टाफ सदस्य के पास 'सीरियल सब्सक्राइबर्स प्रबंधित करें' अनुभाग से 'एक मौजूदा सदस्यता संपादित करें' की अनुमति हो और 'अधिग्रहण और / या सुझाव प्रबंधन' अनुभाग से 'टोकरी और ऑर्डर लाइनों को प्रबंधित करें' की अनुमति हो।
ऑडियो अलर्ट प्रबंधित करें (manage_audio_alerts)
उपयोग करने की क्षमता ऑडियो अलर्ट प्रशासन मॉड्यूल में विन्यास.
Manage authorized value categories and authorized values (manage_auth_ values)
उपयोग करने की क्षमता अधिकृत मूल्य प्रशासन मॉड्यूल में विन्यास.
Manage background jobs (manage_background_jobs)
The ability to access the jobs management section of the administration module.
परिसंचालन नियम प्रबंधित (manage_circ_rules)
पहुँचने की क्षमता:ref: सर्कुलेशन और जुर्माना नियमों तक <circulation-and-fine-rules-label> प्रशासन मॉड्यूल में कॉन्फ़िगरेशन।
संचलन नियमों का प्रबंधन किसी भी पुस्तकालय के रूप में होता है (manage_circ_rules_from_ any_libraries)
यदि उपयोगकर्ता में लॉग इन नहीं किया जाता है तो केवल अपने स्वयं के पुस्तकालय से संचलन नियमों को संपादित कर सकते हैं
स्टाफ सदस्य के पास अभी भी 'प्रचलन के नियमों का प्रबंधन' करने की अनुमति है।
शहरों और कस्बों का प्रबंधन (manage_cities)
उपयोग करने की क्षमता शहरों और कस्बों प्रशासन मॉड्यूल में विन्यास.
वर्गीकरण स्रोतों और फाइलिंग नियमों को प्रबंधित करें (manage_classifications)
प्रशासन मॉड्यूल में : ref: वर्गीकरण स्रोत <classification-sources-label> कॉन्फ़िगरेशन तक पहुंचने की क्षमता.
कॉलम कॉन्फ़िगरेशन प्रबंधित करें (manage_column_config)
उपयोग करने की क्षमता कॉलम कॉन्फ़िगर करें प्रशासन मॉड्यूल में पेज.
कर्बसाइड पिकअप प्रबंधित करें (manage_curbside_pickups)
को अनुमति: ref: कर्बसाइड पिकअप स्लॉट और पैरामीटर का प्रबंधन करें <curbside-pickup-configuration-label> प्रशासन मॉड्यूल में।
प्रबंधित करें क्या आपका मतलब है? विन्यास (manage_didyoumean)
उपयोग करने की क्षमता क्या आपका मतलब है? प्रशासन मॉड्यूल में विन्यास.
Manage authentication providers (manage_identity_providers)
Grants access to the Identity providers configuration in the administration module.
आइटम परिसंचालन अलर्ट को प्रबंधित करें (manage_item_circ_alerts)
उपयोग करने की क्षमता आइटम संचलन अलर्ट प्रशासन मॉड्यूल में विन्यास.
आइटम खोज फ़ील्ड प्रबंधित करें (manage_item_search_fields)
उपयोग करने की क्षमता आइटम खोज फ़ील्ड प्रशासन मॉड्यूल में विन्यास..
आइटम प्रकार प्रबंधित करें (manage_itemtypes)
उपयोग करने की क्षमता आइटम प्रकार प्रशासन मॉड्यूल में विन्यास.
उन्नत कैटलॉगिंग संपादक के लिए कीबोर्ड शॉर्टकट प्रबंधित करें (manage_ keyboard_shortcuts)
प्रशासन मॉड्यूल में कीबोर्ड शॉर्टकट कॉन्फ़िगरेशन तक पहुंचने की क्षमता
पुस्तकालयों और पुस्तकालय समूहों का प्रबंधन करें (manage_libraries)
उपयोग करने की क्षमता पुस्तकालय and पुस्तकालय समूह प्रशासन मॉड्यूल में विन्यास पृष्ठों.
माना केबी सामग्री साझाकरण प्रबंधित करें(manage_mana)
तक पहुँचने की क्षमता :ref:`माना केबी के साथ शेयर सामग्री <share-with-mana-kb-label>`प्रशासन मॉड्यूल में
मार्क ग्रंथ सूची और प्राधिकरण ढांचे को प्रबंधित करें और उनका परीक्षण करें (manage_marc_frameworks)
The ability to access the MARC bibliographic framework, authority types, Koha to MARC mapping, and MARC Bibliographic framework test configuration areas in the administration module.
रिकॉर्ड मिलान नियम प्रबंधित करें (manage_matching_rules)
उपयोग करने की क्षमता रिकार्ड मिलान नियम cप्रशासन मॉड्यूल में विन्यास.
OAI सेट प्रबंधित करें (manage_oai_sets)
उपयोग करने की क्षमता OAI सेट करता है प्रशासन मॉड्यूल में विन्यास.
विस्तारित संरक्षक विशेषताओं को प्रबंधित करें (manage_patron_attributes)
उपयोग करने की क्षमता संरक्षक विशेषता प्रकार रशासन मॉड्यूल में विन्यास.
संरक्षक श्रेणियों का प्रबंधन करें (manage_patron_categories)
उपयोग करने की क्षमता संरक्षक श्रेणियां प्रशासन मॉड्यूल में विन्यास..
खोज इंजन कॉन्फ़िगरेशन प्रबंधित करें (manage_search_engine_config)
प्रशासन मॉड्यूल में खोज इंजन कॉन्फ़िगरेशन तक पहुंचने की क्षमता। नोट: यह क्षेत्र केवल तभी दिखाई देगा जब :ref:`खोज इंजन 'सिस्टम वरीयता'<SearchEngine-label> एलेस्टिक्स खोज 'पर सेट हो।
Manage saved search filters (manage_search_filters)
The ability to access the search filters administration page in the administration module.
Z39.50 और SRU सर्वर कॉन्फ़िगरेशन प्रबंधित करें (manage_search_targets)
उपयोग करने की क्षमता Z39.50/SRU servers प्रशासन मॉड्यूल में विन्यास.
एसएमएस सेलुलर प्रदाताओं की व्यवस्था करें (manage_sms_providers)
एसएमएस सेलुलर प्रदाताओं प्रशासन मॉड्यूल में विन्यास की क्षमता। नोट: यह क्षेत्र केवल तभी दिखाई देगा जब SMSSendDriver सिस्टम वरीयता 'ईमेल' पर सेट हो।
Manage SMTP servers (manage_smtp_servers)
The ability to access the SMTP servers section of the administration to add new SMTP servers.
Manage system preferences (manage_sysprefs)
The ability to access the system preferences in the administration module.
लाइब्रेरी ट्रांसफर सीमा और परिवहन लागत मैट्रिक्स प्रबंधित करें (manage_transfers)
तक पहुँचने की क्षमता लाइब्रेरी ट्रांसफर लिमिट और ट्रांसपोर्ट कॉस्ट मैट्रिक्स एडमिनिस्ट्रेशन मॉड्यूल में कॉन्फ़िगरेशन पेज.
उपयोग सांख्यिकी सेटिंग्स प्रबंधित करें (manage_usage_stats)
तक पहुँचने की क्षमता अपने उपयोग के आंकड़े साझा करें प्रशासन मॉड्यूल में विन्यास.
शेष सिस्टम पैरामीटर अनुमतियाँ (parameters_remaining_permissions)
प्रशासन मॉड्यूल में सभी शेष क्षेत्रों तक पहुंचने की क्षमता.
संरक्षक जानकारी जोड़ें, संशोधित करें और देखें (borrowers)
संरक्षक जानकारी जोड़ें, संशोधित करें और देखें (edit_borrowers)
संरक्षक फ़ाइलों को देखने के लिए संरक्षक मॉड्यूल तक पहुंचने की क्षमता, साथ ही साथ नए संरक्षक और संरक्षक फ़ाइलों को संपादित करने की क्षमता
किसी भी लाइब्रेरी से संरक्षक जानकारी देखें (view_borrower_infos_from_any_libraries)
यदि उपयोगकर्ता में लॉग इन नहीं किया जाता है, तो वह केवल अपने स्वयं के पुस्तकालय या पुस्तकालयों के समूह से संरक्षक जानकारी प्राप्त कर सकेगा।
उपयोगकर्ता अनुमतियां सेट (permissions)
अन्य स्टाफ सदस्यों के लिए अनुमतियाँ सेट करने की क्षमता
संरक्षक के लिए स्थान रखें और संशोधित करें (reserveforothers)
होल्ड प्राथमिकता संशोधन (modify_holds_priority)
कर्मचारी सदस्यों को प्राथमिकता में बदलाव करने की अनुमति देता है (कतार से नीचे और नीचे बढ़ते हुए)
संरक्षक के लिए होल्ड रखे (place_holds)
स्टाफ सदस्यों को स्टाफ इंटरफेस में रखने की अनुमति देता है
सूची संपादित करें (ग्रंथ सूची / होल्डिंग्स डेटा संशोधित करें) (editcatalogue)
उन्नत कैटलॉगिंग संपादक का उपयोग करें (advanced_editor)
कैटलॉगिंग मॉड्यूल में उन्नत कैटलॉगिंग एडिटर का उपयोग करने की क्षमता देता है
नोट
इस अनुमति वाले स्टाफ सदस्यों के पास 'एडिट कैटलॉग (संशोधित ग्रंथ सूची / होल्डिंग्स डेटा संशोधित)' की भी अनुमति होनी चाहिए
एक बार में सभी आइटम हटाएं (delete_all_items)
का उपयोग करने के लिए सूचीबद्ध करने में विकल्प 'संपादन' मेनू के नीचे पाया 'सभी आइटम हटाएं' की क्षमता
Edit any item including items that would otherwise be restricted (edit_any_item)
Ability to edit items belonging to libraries from other library groups.
सूची संपादित करें (ग्रंथ सूची/होल्डिंग्स डेटा संशोधित करें) (edit_catalogue)
के माध्यम से सभी कैटलॉगिंग कार्यों तक पहुंचने की क्षमता Cataloging पृष्ठ
आइटम संपादित करें (edit_items)
में परिभाषित उप-क्षेत्रों में आइटम संशोधन को सीमित करें SubfieldsToAllowForRestrictedEditing सिस्टम वरीयता (edit_items_restricted)
यदि जाँच की जाती है, तो स्टाफ सदस्य केवल कुछ आइटम सबफील्ड्स को संशोधित करने में सक्षम होगा
नोट
कृपया ध्यान दें कि 'आइटम संपादित करें' की अनुमति अभी भी आवश्यक है
फास्ट कैटलॉगिंग (fast_cataloging)
केवल सूची का उपयोग करके कैटलॉग करने की क्षमता तेजी से जोड़ें फ्रेमवर्क __ पृष्ठ पर मिला
दूसरों के स्वामित्व वाले आइटम संपादक टेम्प्लेट बनाएं, अपडेट करें और हटाएं (manage_item_editor_templates)
प्रबंधित करने की क्षमता आइटम टेम्पलेट अन्य उपयोगकर्ताओं द्वारा बनाई गई
आइटम समूह बनाएं, अपडेट करें और हटाएं, आइटम समूह से आइटम जोड़ें या हटाएं (manage_item_groups)
प्रबंधन करने की क्षमता देता है आइटम समूह
संरक्षक जुर्माना और फीस की व्यवस्था करें (updatecharges)
संरक्षक के लिए डिस्काउंट डेबिट (छूट)
शुल्क से छूट लागू करने की क्षमता प्रदान करें
Add manual credits to a patron account (manual_credit)
The ability to add manual credits to a patron's account
Add manual invoices to a patron account (manual_invoice)
The ability to create manual invoices in a patron's account
संरक्षक के लिए भुगतान क्रेडिट (payout)
संरक्षक को क्रेडिट प्रतिपूर्ति की क्षमता प्रदान करें
संरक्षकों को रिफंड भुगतान (वापसी)
उन भुगतानों को वापस करने की क्षमता प्रदान करें जो संरक्षक पहले से ही पुस्तकालय में कर चुके हैं
जुर्माना और शुल्क के प्रबंधन के लिए अनुमति प्राप्त करना (remaining_permissions)
अन्य उपश्रमणों में बताए गए कार्यों के अलावा जुर्माना और फीस का प्रबंधन करने की क्षमता प्रदान करें (छूटों, भुगतान, धनवापसी और राइटऑफ़)
जुर्माना और फीस बट्टे खाते में(writeoff)
संरक्षक शुल्क बट्टे मे डालने की क्षमता देता है
अधिग्रहण प्रबंधन (acquisition)
चेतावनी
सभी अधिग्रहण उप-अनुमतियाँ अधिग्रहण के मुख पृष्ठ पर पहुंच देती हैं। इसका मतलब है कि जिन कर्मचारियों के पास निम्नलिखित में से एक या अधिक अनुमतियाँ हैं, वे बजट को देखने, विक्रेता की जानकारी देखने और देखने और चालान देखने में सक्षम होंगे।
फंड जोड़ें और हटाएं (लेकिन फंड को संशोधित नहीं कर सकते) (budget_add_del)
Grants the ability to add funds and delete funds within a budget
ध्यान दें कि इसके लिए budget_manage और budget_modify अनुमतियाँ आवश्यक हैं ताकि यह सही ढंग से काम कर सके
फंड का प्रबंधन करें (budget_manage)
तक पहुँचने की क्षमता देता है निधि प्रशासन पृष्ठ
ध्यान दें कि यह केवल पृष्ठ तक पहुंच प्रदान करता है, आपको अपने कर्मचारियों को budget_add_del और budget_modify देना होगा यदि आप चाहते हैं कि वे धनराशि में परिवर्तन करने में सक्षम हों
सभी फंड का प्रबंधन करें (budget_manage_all)
उन पर प्रतिबंध (मालिक, उपयोगकर्ता या पुस्तकालय प्रतिबंध) की परवाह किए बिना सभी निधियों तक पहुंच देखना
ध्यान दें कि budget_manage अनुमति की आवश्यकता है
फंड संशोधित करें (लाइनें नहीं बना सकते, लेकिन मौजूदा को संशोधित कर सकते हैं) (budget_modify)
फंड की जानकारी और मात्रा को संपादित करने की क्षमता देता है
ध्यान दें कि इसके लिए सही तरीके से काम करने के लिए budget_add_del और budget_manage अनुमतियों की आवश्यकता है
अनुबंधों का प्रबंधन करें (contracts_manage)
जोड़ने, संपादित करने और हटाने की क्षमता प्रदान करता है विक्रेताओं के साथ अनुबंध
मुद्राओं और विनिमय दरें प्रबंधित करें (currencies_manage)
उपयोग करने की क्षमता मुद्राएं और विनिमय दरें कॉन्फ़िगरेशन पृष्ठ.
बास्केट मिटाएँ (delete_reports)
बास्केट को हटाने की क्षमता प्रदान करता है
टोकरियों को हटाने के लिए स्टाफ सदस्य के पास order_manage की अनुमति भी होनी चाहिए।
चालान हटाएं (edit_notices)
चालान हटाने की क्षमता देता है
EDIFACT ट्रांसमिशन प्रबंधित करें (edi_manage)
तक पहुँचने की क्षमता देता है ईडीआई खाता प्रशासन पृष्ठ, the पुस्तकालय EANs प्रशासन पृष्ठ और पहुंच भेजी गई ईडीआई संदेशों
चालान संपादित करें (edit_invoices)
चालान संपादित करने की क्षमता प्रदान करता है (चालान संख्या, बिलिंग या शिपिंग तिथि जैसे चालान जानकारी संशोधित करें, समायोजन जोड़ें, आदि)
स्टाफ़ सदस्य किसी इनवॉइस के विरुद्ध आदेश तब तक प्राप्त नहीं कर पाएगा जब तक कि उनके पास आदेश_अनुमति भी प्राप्त न हो
बास्केट समूह का प्रबंधन करें (group_manage)
की क्षमता देता है बास्केट समूह बनाएं, संपादित करें, बंद करें और हटाएं
चालान मर्ज करें (edit_notices)
बास्केट और ऑर्डर लाइनों का प्रबंधन करें (order_manage)
की क्षमता देता है आदेश रखना, बास्केट बनाना, ऑर्डर लाइनें जोड़ना, बास्केट बंद करना आदि शामिल हैं।
उन पर प्रतिबंधों की परवाह किए बिना सभी बास्केट और ऑर्डर लाइनें प्रबंधित करें (order_manage_all)
सभी बास्केट और ऑर्डर को प्रबंधित करने की क्षमता देता है, भले ही वे मालिक, उपयोगकर्ता या लाइब्रेरी तक सीमित हों
ध्यान दें कि order_manage अनुमति की आवश्यकता है
आदेश प्राप्त करें और शिपमेंट का प्रबंधन करें (order_receive)
चालान बनाने, आइटम प्राप्त करने और देर से ऑर्डर का दावा करने की क्षमता देता है
बजट प्रबंधित करें (period_manage)
यह बजट प्रशासन पृष्ठ और बजट बनाने, संपादित करने और हटाने की क्षमता तक पहुँच प्रदान करता है
यह अनुमति बजट निधि को संपादित करने की क्षमता नहीं देती है।
बजट की योजना का प्रबंधन करें (planning_manage)
देखने की क्षमता देता है बजट की योजना
ध्यान दें कि इस कार्य के लिए budget_manage और period_manage अनुमतियों की आवश्यकता है
बंद चालानों को फिर से खोलें (reopen_closed_invoices)
बंद चालानों को फिर से खोलने की क्षमता देता है
विक्रेताओं को प्रबंधित करें (vendors_manage)
विक्रेताओं के लिए जोड़ने, संपादित करने और हटाने की क्षमता देता है
ध्यान दें कि विक्रेताओं को अधिग्रहण और सीरियल मॉड्यूल में उपयोग किया जाता है।
सुझाव प्रबंधन
खरीद सुझाव प्रबंधित करें (suggestions_manage)
की क्षमता देता है क्रय सुझाव बनाएं और प्रबंधित करें, जिसमें नए सुझाव बनाना और सुझावों की स्थिति बदलना शामिल है
सभी उपकरण का उपयोग करें (उपकरण)
सर्वर पर संग्रहीत फ़ाइलों तक पहुंच (access_files)
तक पहुंच अपलोड उपकरण
Perform batch extend due dates (batch_extend_due_dates)
Access to the Batch extend due dates tool
संरक्षक छवियों को अपलोड में बैच या एक समय में करें (batch_upload_patron_images)
तक पहुंच छवि अपलोड उपकरण
पुराने उधारकर्ताओं को हटाएं और प्रचलन / इतिहास को अज्ञात करें (उधारकर्ता के पठन इतिहास को हटाता है) (delete_anonymize_patrons)
तक पहुंच: रेफरी सरंक्षक टूल को अनामित
परिभाषित दिनों जब पुस्तकालय बंद है (edit_calendar)
इस तक पहुंच कैलेंडर / अवकाश उपकरण
ओपेक और स्टाफ इंटरफेस के लिए समाचार लिखें(edit_news)
तक पहुंच न्यूज टूल
अतिदेय मदों के लिए नोटिस/स्थिति ट्रिगर करें (edit_notice_status_triggers)
तक पहुंच अतिदेय नोटिस स्थिति / ट्रिगर्स टूल
नोटिस को परिभाषित करें (edit_notices)
तक पहुंच नोटिस और स्लिप उपकरण
संरक्षक के बैच संशोधन को पूरा करें (edit_patrons)
तक पहुंच बैच संरक्षक संशोधन उपकरण
दिन-प्रतिदिन की सुविधा के लिए उद्धरण संपादित करें (edit_quotes)
इस तक पहुंच उद्धरण दिवस (क्यूओटीडी) संपादक
निर्यात ग्रंथ सूची और होल्डिंग्स डेटा (export_catalog)
इन तक पहुंच डेटा निर्यात उपकरण
आयात संरक्षक डेटा (import_patrons)
तक पहुंच संरक्षक उपकरण आयात करें
अपने कैटलॉग की सूची निष्पादित करें (इन्वेंट्री)
तक पहुंच इन्वेंटरी उपकरण
आइटमों का बैच विलोपन करें (items_batchdel)
तक पहुंच बैच मद विलोपन उपकरण का उपयोग
आइटमों का बैच संशोधन करें (items_batchmod)
तक पहुंच बैच मद संशोधन उपकरण का उपयोग
AllowForRestrictedBatchmod वरीयता में सबफ़िल्ड्सटो में परिभाषित सबफ़िल्ड के लिए बैच आइटम संशोधन को सीमित करें (items_batchmod_restricted)
प्रतिबंधित करता है बैच आइटम संशोधन केवल परिभाषित उप-क्षेत्रों को संशोधित करने के लिए उपकरण: रेफरी: `SubfieldsToAllowForRestrictedBatchmod<SubfieldsToAllowForRestrictedBatchmod-label>' वरीयता
कृपया ध्यान दें कि items_batchmod अनुमति अभी भी आवश्यक है
सूची और संरक्षक डेटा से प्रिंट करने योग्य लेबल और बारकोड बनाएं (label_creator)
तक पहुंच संरक्षक कार्ड निर्माता और :ref:`त्वरित लेबल निर्माता <quick-spine-label-creator-label>' उपकरण
सीएसवी निर्यात प्रोफाइल की व्यवस्था करें (manage_csv_profiles)
इन तक पहुंच सीएसवी प्रोफाइल उपकरण
जोड़ें, संपादित करें और संरक्षक सूचियों और उनकी सामग्री को हटाना (manage_patron_lists)
तक पहुंच संरक्षक सूची उपकरण
मंचित मार्क रिकॉर्ड प्रबंधित करें,आयातों को पूरा करने और उलटने सहित (manage_staged_marc)
इस तक पहुंच चरणबद्ध मार्क टूल प्रबंधित करें
मार्क संशोधन टेम्पलेट प्रबंधित करें (marc_modification_templates)
तक पहुंच मार्क संशोधन टेम्पलेट्स उपकरण
मध्यम संरक्षक टिप्पणियाँ (moderate_comments)
इस तक पहुंच :टिप्पणियाँ उपकरण <comments-label>`
मध्यम संरक्षक टैग (moderate_tags)
इस तक पहुंच टैग उपकरण
रिकॉर्ड की बैच विलोपन (ग्रंथ सूची या प्राधिकरण) को पूरा करें (records_batchdel)
तक पहुंच :ref:` बैच रिकॉर्ड हटाना टूल<batch-record-deletion-label>`
रिकॉर्ड का बैच संशोधन (ग्रंथ सूची या प्राधिकरण) करें (records_batchmod)
तक पहुंच बैच मद संशोधन उपकरण का उपयोग
घूर्णन संग्रह का प्रबंधन (rotating_collections)
प्रवेश करें घूर्णन संग्रह उपकरण
कार्यों को चलाने के लिए अनुसूची (schedule_tasks)
तक पहुंच टास्क समयबद्धक उपकरण
जलाशय में स्टेज मार्क रिकॉर्ड (stage_marc_import)
तक पहुंच स्टेज मार्क रिकॉर्ड उपकरण
कोई भी फाइल अपलोड करें (upload_general_files)
के माध्यम से फाइल अपलोड करने के लिए उपयोग करें अपलोड उपकरण
स्थानीय कवर चित्र अपलोड करें (upload_local_cover_images)
इन तक पहुंच :ref:`'स्थानीय कवर छवि उपकरण अपलोड करें <adding-cover-images-label>' साथ ही रिकॉर्ड विवरण पृष्ठ से स्थानीय कवर छवियों को जोड़ने और हटाने की अनुमति भी है
अपलोड की गई फाइलों को प्रबंधित करें (upload_manage)
के माध्यम से अपलोड की गई फाइलों तक पहुंच अपलोड उपकरण
ध्यान दें कि इस अनुमति के लिए upload_general_files की अनुमति आवश्यक है
तंत्र लॉग ब्राउज़ करें (view_system_logs)
तक पहुंच लॉग व्यूअर टूल
प्राधिकरण को संपादित करें (editauthorities)
प्राधिकरण रिकॉर्ड बनाने, संपादित करने और हटाने की क्षमता देता है
ध्यान दें कि केवल कैटलॉग अनुमति के साथ प्राधिकरण रिकॉर्ड खोजना संभव है
सीरियल सदस्यताएँ प्रबंधित करें (सीरियल)
एक सीरियल की समाप्ति की जाँच करें(check_expiration)
जाँच करने की क्षमता देता है सीरियलों की समाप्ति तिथि
लापता सीरियलों का दावा करें (claim_serials)
की क्षमता देता है लापता इश्यूों का दावा करें
एक नई सदस्यता बनाएँ (create_subscription)
की क्षमता देता है नई सदस्यताएँ जोड़ें
मौजूदा सदस्यता हटाएं (delete_subscription)
सीरियल सदस्यता को हटाने करने की क्षमता देता है
मौजूदा सदस्यता संपादित करें (edit_subscription)
करने की क्षमता देता है मौजूदा सीरियल सदस्यताएँ संपादित करें
यह अनुमति हटाने के लिए या एक सदस्यता बनाने की क्षमता शामिल नहीं है
सीरियल प्राप्त (receive_serials)
की क्षमता देता है प्राप्त इश्यू मौजूदा सदस्यता के
एक सदस्यता को नवीनीकृत करें (renew_subscription)
की क्षमता देता है नवीनीकृत सीरियल सदस्यताएँ
रूटिंग (रूटिंग)
प्रबंधन करने की क्षमता देता है रूटिंग सूची
किसी भी शाखा से सदस्यता प्रबंधित करें (superserials)
यह अनुमति केवल तभी उपयोगी है यदि IndependentBranches सिस्टम वरीयता का उपयोग किया जाता है
रिपोर्टों मॉड्यूल के लिए उपयोग की अनुमति दें (रिपोर्ट)
इस पर पाई गई रिपोर्ट सर्कुलेशन पेज इस अनुमति से नियंत्रित नहीं होती हैं; यह केवल रिपोर्ट मॉड्यूल तक पहुंच को नियंत्रित करता है
रिपोर्टो में सांख्यिकी विज़ार्ड अनुभाग और मुख्य रिपोर्ट पृष्ठ पर अन्य रिपोर्ट निम्नलिखित अनुमतियों में से किसी एक के साथ चलाया जा सकता है। वे केवल SQL रिपोर्ट को प्रभावित करते हैं।
एसक्यूएल रिपोर्ट बनाएँ (create_reports)
बनाने की क्षमता निर्देशित रिपोर्ट या SQL रिपोर्ट, लेकिन सहेजे नहीं गए
एसक्यूएल रिपोर्ट मिटाएँ (delete_reports)
सहेजे जाने की क्षमता SQL रिपोर्ट
ध्यान दें कि आपको उन्हें हटाने में सक्षम होने के लिए execute_reports की आवश्यकता है
एसक्यूएल रिपोर्ट निष्पादित करें (execute_reports)
की योग्यता :ref:`कस्टम SQL रिपोर्ट चलाएं <running-custom-reports-label>, लेकिन उन्हें बनाएँ या संपादित न करें
स्टाफ के सदस्यों को अन्य स्टाफ के सदस्यों के लिए अनुमतियों को संशोधित करने की अनुमति दें (staffaccess)
इस अनुमति के लिए ऊपर उधारकर्ताओं की अनुमति की आवश्यकता होती है
पाठ्यक्रम रिजर्व (coursereserves)
इस तक पहुंच की अनुमति दें: 'पाठ्यक्रम भंडार मॉड्यूल
ध्यान दें कि यदि UseCourseReserves सिस्टम वरीयता सक्षम नहीं है, तो इन अनुमतियों का कोई प्रभाव नहीं पड़ेगा
पाठ्यक्रम रिजर्व जोड़े (add_reserves)
अनुदान करने की क्षमता मौजूदा पाठ्यक्रमों में आइटम जोड़ें
पाठ्यक्रम रिजर्व हटाए (delete_reserves)
मौजूदा पाठ्यक्रमों से आइटम हटाने की क्षमता प्रदान करें
पाठ्यक्रम में जोड़ें, संपादित और पाठ्यक्रम से हटाए (manage_courses)
की क्षमता देता है बनाएँ, संपादित करें और पाठ्यक्रमों को हटाएं, लेकिन आइटम का प्रबंधन नहीं
कोहा प्लगइन (plugins)
प्लगिन विन्यस्त करें (configure)
एक प्लगइन के 'कॉन्फ़िगर' अनुभाग को चलाने की क्षमता देता है अगर यह एक है
ध्यान दें कि प्लगइन्स तक पहुंचने में सक्षम होने के लिए स्टाफ सदस्य को या तो रिपोर्ट अनुमति या उपकरण अनुमति (नीचे) की आवश्यकता है
प्लगइन्स प्रबंधित करें (प्रबंधित करें)
प्लगइन्स की स्थापित या स्थापना रद्द करने की क्षमता
ध्यान दें कि प्लगइन्स तक पहुंचने में सक्षम होने के लिए स्टाफ सदस्य को या तो रिपोर्ट अनुमति या उपकरण अनुमति (नीचे) की आवश्यकता है
रिपोर्ट प्लग इन का उपयोग करें (रिपोर्ट)
रिपोर्ट प्लग इन का उपयोग करने की क्षमता
टूल प्लग इन (उपकरण) का उपयोग करें
उपकरण प्लगइन का उपयोग करने की क्षमता
सूची (सूचीयाँ)
महत्त्वपूर्ण
All staff members have permission to create, modify and delete their own lists. These permissions are only necessary if you'd like to give a staff member permission to edit or delete public lists that they have not created.
सार्वजनिक सूचीयाँ हटाएं(delete_public_lists)
किसी और द्वारा बनाई गई सार्वजनिक सूचियों को हटाने की क्षमता
Edit public lists contents (edit_public_list_contents)
The ability to change the contents of public lists that have the "Permitted staff only" permission.
Edit public lists (edit_public_lists)
The ability to edit the name, settings, and permissions of a public list owned by someone else.
This does not give the staff member permission to change the contents of the list, unless the list permissions allow them to.
संरक्षक क्लब (क्लब)
क्लब बनाएं और संपादित करें (edit_clubs)
संरक्षक क्लब बनाएं और संपादित करें संरक्षक क्लब टूल
क्लब टेम्पलेट बनाएं और संपादित करें (edit_templates)
का उपयोग करके क्लब टेम्प्लेट बनाएं और संपादित करें संरक्षक क्लब टूल
क्लबों में दाखिला लेना (नामांकन)
संरक्षक फ़ाइल से संरक्षक नामांकित करें
क्लबों में संरक्षक को भर्ती करने के लिए उधारकर्ताओं की अनुमति की आवश्यकता होती है
अतरपुस्तकालय ऋण अनुरोधों को बनाएं और संशोधित करें (ill)
के लिए पहुँच देता है इंटरलाइब्रेरी लोन (ILL) मॉड्यूल
स्वयं जांच मॉड्यूल (self_check)
स्वयं चेक-इन मॉड्यूल में लॉग इन करें (self_checkin_module)
नोट
यह अनुमति संरक्षक को किसी अन्य ओपेक कार्यक्षमता का उपयोग करने से रोकती है
ओपेक पर स्वयं चेकआउट निष्पादित करें (self_checkout_module)
नोट
यह अनुमति संरक्षक मिलान के लिए उपयोग की जानी चाहिए :ref:`AutoSelfCheckID <autoselfcheck-preferences-label>`सिस्टम वरीयता
प्रबंधित करें स्टॉकरोटेशन संचालन (स्टॉकोटेशन)
रोटा से आइटम जोड़ें और निकालें (manage_rota_items)
केवल इस अनुमति वाले कर्मचारी ही रोटा में वस्तुओं का प्रबंधन कर पाएंगे, लेकिन रोटा स्वयं नहीं
रोटा बनाएं, संपादित करें और हटाएं (manage_rotas)
केवल इस अनुमति वाले कर्मचारी ही रोटा का प्रबंधन कर पाएंगे, लेकिन वास्तविक वस्तुओं को नहीं
नकदी प्रबंधन (cash_management)
नकद रजिस्टर जोड़ें, संपादित करें और संग्रह करें (manage_cash_registers)
इस अनुमतियों वाले कर्मचारी प्रशासन मॉड्यूल में : ref:नकद रजिस्टर का प्रबंधन करने में सक्षम होंगे <cashregisters-label>
बिक्री पृष्ठ के बिंदु पर पहुँचें और भुगतान लें (भुगतान करें)
बिक्री मॉड्यूल के बिंदु तक पहुंच प्रदान करता है
रिकॉल (रिकॉल)
संरक्षकों के लिए रिकॉल प्रबंधित करें(manage_recalls)
रिकॉल प्रबंधन पृष्ठ तक पहुंच प्रदान करता है
इलेक्ट्रॉनिक संसाधन मॉड्यूल प्रबंधित करें (erm)
यह अनुमति दो उद्देश्यों को पूरा करती है
लाइब्रेरी स्टाफ को ईआरएम रिकॉर्ड (समझौतों, लाइसेंस, ईहोल्डिंग आदि) तक पहुंच देता है
लाइब्रेरी स्टाफ के पास समझौते और लाइसेंस रिकॉर्ड्स के रूप में संलग्न होने के लिए यह अनुमति होनी चाहिए
Allow staff to change logged in library (loggedinlibrary)
The ability to change the library when logging into the staff interface.
The ability to set the library in the staff interface.
टिप्पणी
Staff members who do not have this permission will only be able to log into their home library.
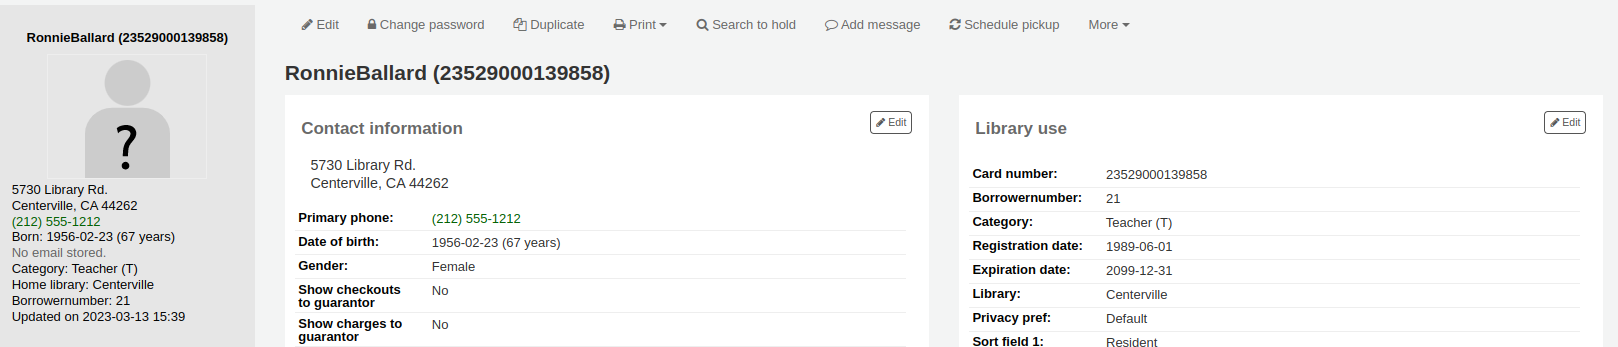
संरक्षक जानकारी
जब एक संरक्षक रिकॉर्ड को देखने के रिकार्ड का बाएं हाथ की ओर पर पाया कई टैब में से एक से जानकारी देखने का विकल्प है।
Get there: Patrons > Browse or search for patron > Click patron name
चेकआउट
वस्तुओं की जांच करने के निर्देश के लिए, देखें चेक आउट आउट इस मैनुअल के खंड।
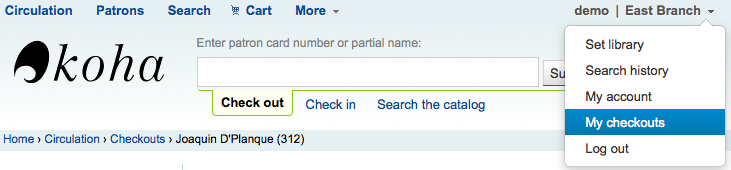
स्टाफ सदस्य स्टाफ क्लाइंट के ऊपर सही में अपने उपयोगकर्ता नाम पर क्लिक करें और चुनने 'मेरे checkouts' द्वारा अपने स्वयं के स्क्रीन के बाहर की जाँच उपयोग कर सकते हैं
विवरण
टिप्पणी
स्टाफ सदस्य स्टाफ क्लाइंट के ऊपर सही में अपने उपयोगकर्ता नाम पर क्लिक करें और 'मेरा खाता' चुनने के द्वारा अपने स्वयं के खाते के विवरण उपयोग कर सकते हैं

सभी संरक्षक जानकारी विवरण टैब में दिखाई देगी। इसमें सभी संपर्क जानकारी, नोट्स, कस्टम संरक्षक विशेषताएँ, संदेश प्राथमिकताएं, आदि शामिल हैं, जब संरक्षक जोड़ते हैं।
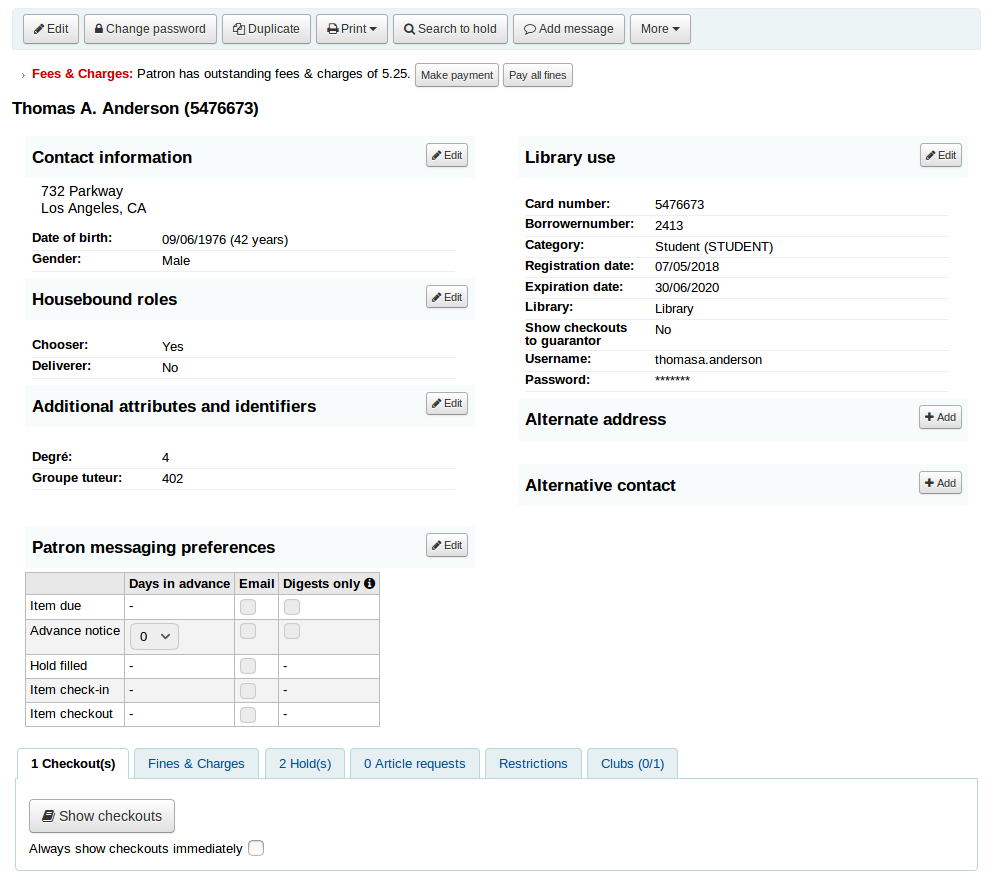
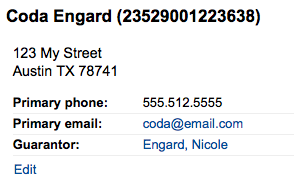
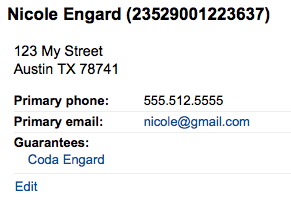
संरक्षक के मामले में जिन्हें 'बाल' या 'पेशेवर' के रूप में चिह्नित किया गया है और उनके गारंटियों को अतिरिक्त जानकारी उनके रिकॉर्ड पर दिखाई देगी।
एक बच्चा संरक्षक अपने गारंटर की सूची देगा
जमानती के रिकार्ड पर, सभी बच्चों और/या पेशेवरों सूचीबद्ध किया जाएगा
यदि संरक्षक की आयु उनकी संरक्षक श्रेणी में परिभाषित आयु सीमा के बाहर है, तो उनके रिकॉर्ड पर एक चेतावनी दिखाई देगी।

सर्कुलेशन सारांश
Below the patron's information on the details screen is a tabbed display of the items they have checked out, overdue, and on hold, among other things.
चेकआउट
The first tab shows the items the patron currently has checked out. The number of current checkouts will be displayed in the tab title.

टिप्पणी
You can customize the columns of this table in the 'Table settings' section of the Administration module (table id: issues-table, under Patrons).
Click 'Configure' at the top right of the table to access the administration module directly.
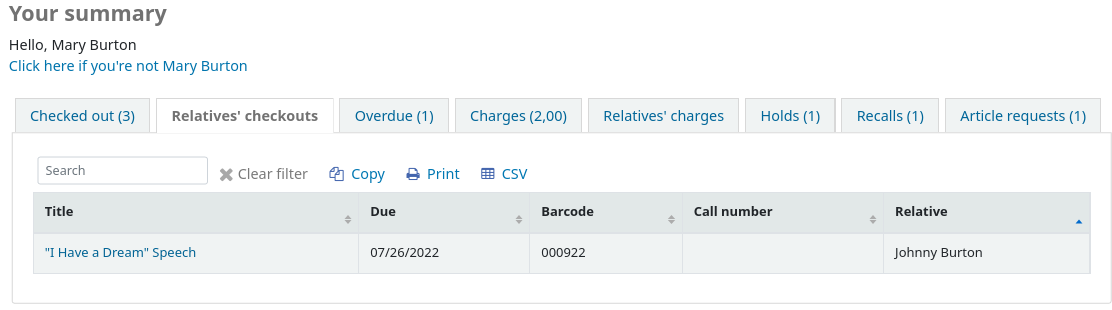
संबंधी' चैकआउट
If the patron has family at the library, staff can see what the other family members have checked out. The total number of checkouts among all family members will be displayed in the tab title.
टिप्पणी
You can customize the columns of this table in the 'Table settings' section of the Administration module (table id: relatives-issues-table, under Patrons).
Click 'Configure' at the top right of the table to access the administration module directly.
चार्ज
The Charges tab will only show in the patron accounts that have unpaid amounts or unused credits. The total amount of unpaid charges or unused credits will be displayed in the tab title.
टैब बिना किसी विवरण के कुल राशि दिखाएगा। विवरण देखने के लिए, पर जाएँ लेखांकन टैब.

Guarantees' charges
This tab will appear if the patron has guarantees and those guarantees have unpaid charges in their account. The total amount owed by guarantees will be displayed in the tab title.
The tab will show the guarantee's name and the total unpaid amount, without any details. To see details, go to the guarantee's accounting tab.

होल्डस
यदि संरक्षक के पास होल्ड है, तो इस टैब के शीर्षक पर होल्ड की संख्या दिखाई देगी और विवरण टैब में दिखाई देगा।
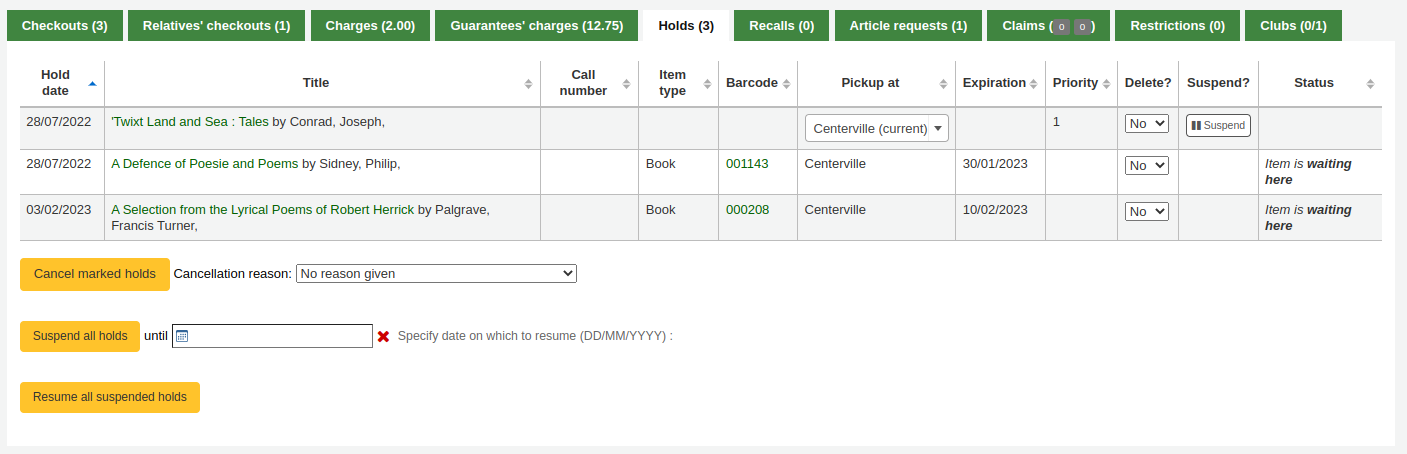
टिप्पणी
बारकोड और कॉल नंबर केवल आइटम-स्तरीय होल्ड या होल्ड पर दिखाई देंगे जिनकी पुष्टि की गई है। रिकॉर्ड-स्तर वाले होल्ड को उठाया जाने की प्रतीक्षा नहीं कर रहे हैं, जिनमें बारकोड या कॉल नंबर नहीं होंगे।
यहां से आप संरक्षक के होल्ड को प्रबंधित कर सकते हैं: पिक लाइब्रेरी को बदल सकते हैं, होल्ड को रद्द या निलंबित कर सकते हैं।
टिप्पणी
आप केवल होल्ड को निलंबित करने में सक्षम होंगे यदि SuspendHoldsIntranet सिस्टम वरीयता" अनुमति "पर सेट है।
टिप्पणी
यदि, किसी होल्ड को निलंबित करते समय, आप एक तिथि निर्धारित करना चाहते हैं, जिस पर स्वचालित रूप से होल्ड को फिर से शुरू करने के लिए, सेट करें AutoResumeSuspendedHolds सिस्टम वरीयता" अनुमति दें "और यह सुनिश्चित करने के लिए :ref:`unsuspend_holds क्रोन जॉब <cron-unsuspend-holds-label> सक्रिय है।
रिकाल्स
If recalls are enabled, currently active recalls requested by the patron will appear in this tab. The number of active recalls will be displayed in the tab title.

यहां से स्टाफ के सदस्य प्रत्येक रिकॉल की स्थिति देख सकते हैं और उन्हें प्रबंधित कर सकते हैं.
अनुच्छेद अनुरोधों
If the ArticleRequests system preference is enabled, and the circulation rules allow it, the patrons will be able to request articles, either through the OPAC or in the staff interface. The number of active requests will be displayed in the tab title.
संरक्षक के अनुरोध का विवरण, और इसकी स्थिति, इस टैब में दिखाई दे रहे हैं.

Claims
If the patron has claimed they returned items, but those were not checked in, the claims will be shown in this tab. The number of resolved and unresolved claims will be displayed in the tab title. The first number, in green (or in gray if it's 0), represents the number of resolved claims and the second number, in yellow (or in gray if it's 0), represents the number of unresolved claims.

From this tab, staff can edit claim notes and resolve claims.
प्रतिबंध
प्रतिबंध टैब सभी संरक्षक के लिए दिखाई देगा। आप टैब पर कि वहाँ होगा के संरक्षक कोई प्रतिबंध नहीं है।

संरक्षक अपने अकाउंट पर प्रतिबंध है तो टैब संख्या और विवरण दिखाएगा।
- कम से कम चार प्रकार के प्रतिबंध हैं:
मैनुअल
अतिदेय राशि
सस्पेंसन
डिस्चार्ज
'मैन्युअल प्रतिबंध जोड़ें' लिंक का उपयोग करके आप यहां से संरक्षक रिकॉर्ड में प्रतिबंध जोड़ सकते हैं। इसका उपयोग किसी भी प्रकार के प्रतिबंध के लिए किया जा सकता है जिसे आपको संरक्षक रिकॉर्ड पर मैन्युअल रूप से डालने की आवश्यकता होती है।
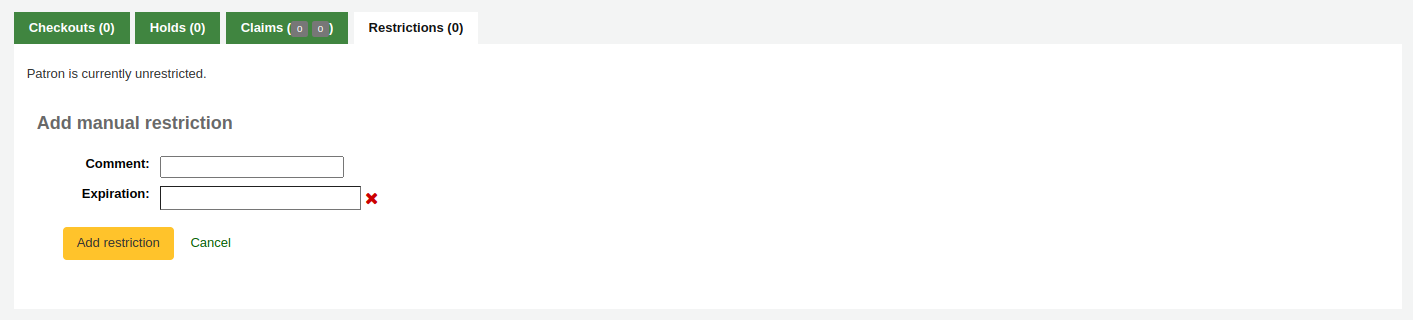
Type: if the PatronRestrictionTypes system preference is enabled, you will have a choice of restriction types. This list can be managed from the patron restriction types administration page
टिप्पणी: प्रतिबंध की व्याख्या करने के लिए एक टिप्पणी दर्ज करें
Expiration: optionally enter an expiration date for this restriction. If there is no expiration date, the restriction will stay on the file until it is removed. If there is an expiration date, the restriction will automatically be expired and it will show in gray.
संस्करण
Expired restrictions are marked as such as of Koha version 23.11. In prior versions, if a restriction was expired, it looked the same as an active restriction, but it stopped blocking circulation nonetheless.
टिप्पणी
Expired restrictions will stay visible in the patron's file, but will not block circulation.
You can use the cleanup_database.pl cronjob with the --restrictions flag to automatically remove expired restrictions.

अतिदेय प्रतिबंध स्वचालित रूप से सेट किए जाते हैं जब अतिदेय नोटिस भेजे जाते हैं यदि आपने निर्दिष्ट किया था कि आप संरक्षक को प्रतिबंधित करना चाहते हैं ओवरड्यू नोटिस/स्थिति ट्रिगर टूल.
जब तक अतिदेय वस्तुओं को वापस नहीं किया जाता है यह प्रतिबंध अपने आप नहीं हटाया जाएगा AutoRemoveOverduesRestrictions सिस्टम वरीयता 'डू' पर सेट है.
में परिसंचरण नियम, आप उन पर जुर्माना लगाने के बजाय (या इसके अलावा) उन्हें निलंबित करके ठीक उपयोगकर्ताओं को चुन सकते हैं। उस मामले में, अतिदेय दस्तावेज़ को वापस करने से निलंबन प्रतिबंध लागू हो जाएगा।
यदि आपने एक डिस्चार्ज उनके लिए जारी किया है तो संरक्षक भी प्रतिबंधित हो सकते हैं। एक बार डिस्चार्ज हो जाने के बाद, संरक्षक स्वचालित रूप से प्रतिबंधित हो जाता है।
Patrons can also be restricted by setting flags in their accounts.
एक संरक्षक रिकॉर्ड पर प्रतिबंध चेकआउट को रोक देगा। वास्तव में, चेकआउट पृष्ठ पर जाने पर एक संदेश लाल रंग में दिखाई देगा।
प्रतिबंध भी आइटम को नवीनीकृत करने से रोक सकता है यदि RestrictionBlockRenewing सिस्टम वरीयता 'ब्लॉक' पर सेट है।
ओपेक पर, संरक्षक को एक संदेश मिलेगा जिसमें कहा गया है कि उनका खाता जमे हुए है। वे ओपेक से होल्ड रखने में सक्षम नहीं होंगे।

यदि आपके पास ऐसे संरक्षक हैं जिनके पास एक से अधिक प्रतिबंध हैं, तो आप उनके प्रतिबंध की अवधि को कम कर सकते हैं या नहीं CumulativeRestrictionPeriods प्रणाली वरीयता।
टिप्पणी
यदि आप संरक्षकों को विभिन्न कार्यों को करने से रोकना चाहते हैं यदि उनका रिकॉर्ड प्राचीन नहीं है, तो निम्न सिस्टम वरीयताओं की जाँच करें:
सेट करें OverduesBlockCirc सिस्टम वरीयता जो अन्य सामग्रियों की जाँच से अतिदेय सामग्री वाले संरक्षक को रोकने के लिए 'ब्लॉक' करती है।
सेट करें OverduesBlockRenewing सिस्टम वरीयता 'सभी संरक्षक वस्तुओं के लिए नए सिरे से ब्लॉक करें' या 'इस आइटम के लिए केवल नए सिरे से ब्लॉक करें', ऐसे संरक्षक को रोकने के लिए जिनके पास अपने ऋणों को नवीनीकृत करने से अतिदेय सामग्री है।
में मान दर्ज करें noissuescharge और NoIssuesChargeGuarantees प्रणाली वरीयताओं के लिए बाहर की जाँच करने के लिए सिस्टम वरीयताएँ जो जुर्माना में एक निश्चित राशि से अधिक है या संरक्षक हैं जिनकी गारंटी एक निश्चित राशि से अधिक है।
यदि कोई निश्चित राशि से अधिक बकाया हो, तो ओपैक पर रखने से संरक्षक को रोकने के लिए maxoutstanding सिस्टम वरीयता दर्ज करें।
एक मान दर्ज करें OPACFineNoRenewals सिस्टम वरीयता जो ओपेक से अपने ऋणों को नवीनीकृत करने के लिए एक निश्चित राशि से अधिक का भुगतान करने वाले संरक्षक को रोकने के लिए।
सेट करें BlockExpiredPatronOpacAction<BlockExpiredPatronOpacActions-label>s सिस्टम वरीयता' ब्लॉक 'के लिए यदि आप संरक्षक को जिनकी सदस्यता ओपेक से अपने ऋण रखने या नवीनीकृत करने के लिए समाप्त हो गई है को रोकना चाहते हैं।
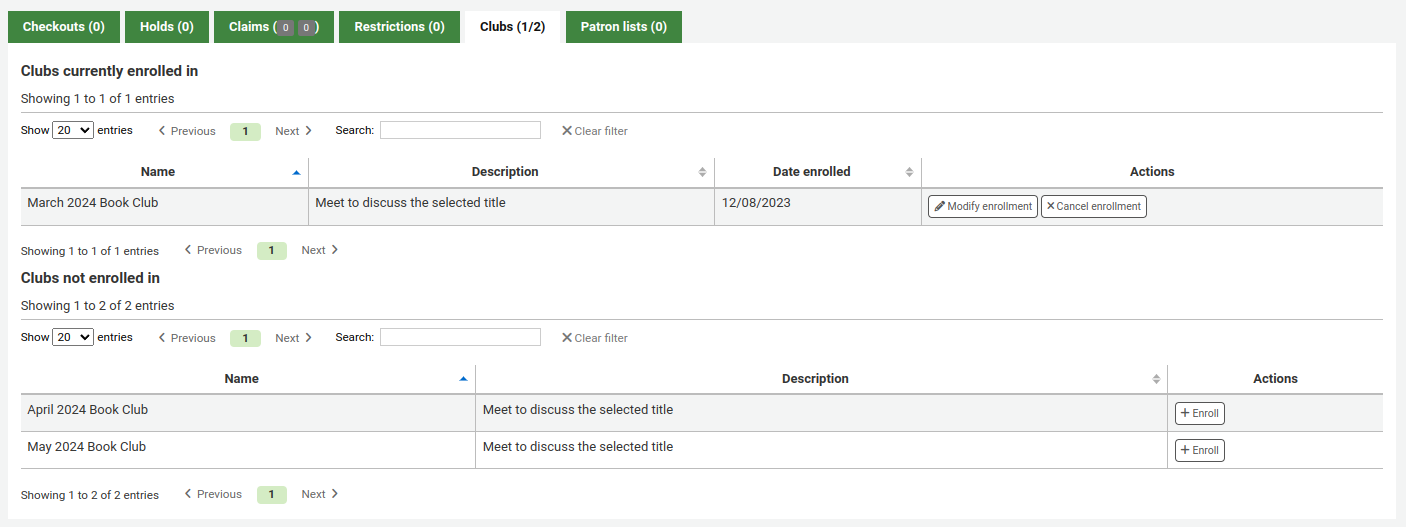
क्लब
If you use patron clubs, patrons will have a tab in their record indicating which club they are enrolled in, if any. The first number in the tab title is the number of clubs in which the patron is enrolled, and the second number is the number of clubs the patron is not enrolled in.
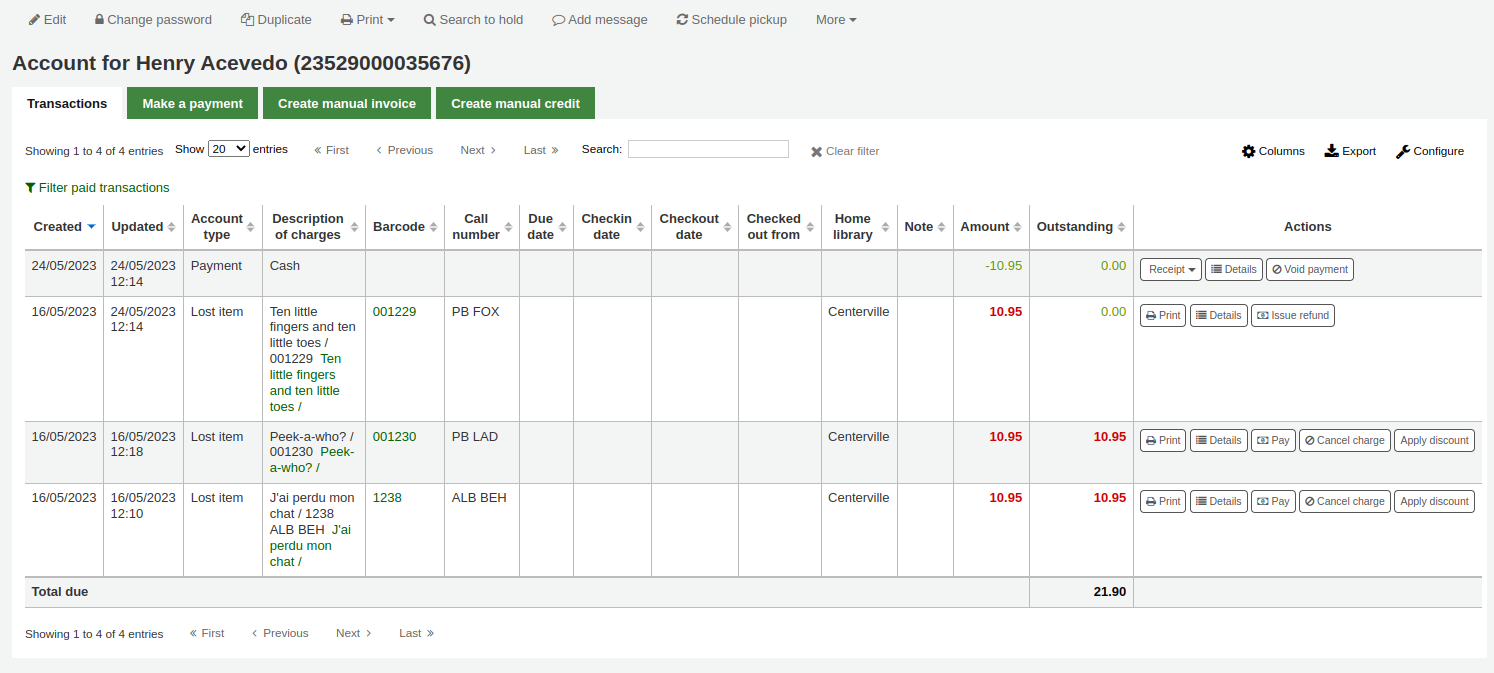
लेखांकन
The patron's complete accounting history will appear on the Accounting tab. The Accounting tab will show all types of charges and credits: overdue fines, membership fees, rental fees, hold fees and any other charge you may have for patrons.
टिप्पणी
आप इस तालिका के स्तंभों को 'तालिका सेटिंग्स' व्यवस्थापन मॉड्यूल के अनुभाग (तालिका आईडी: खाता-जुर्माना) को अनुकूलित कर सकते हैं।
टिप्पणी
It's possible to print a summary of outstanding charges and unused credits in the patron's account by clicking 'Print' at the top of the page and choosing the 'Print account balance'.
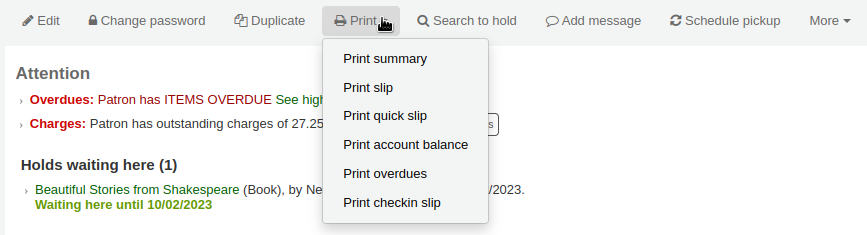
'Print summary' will print a full summary of the patron's account, including outstanding charges.
लेन-देन टैब आपको निम्नलिखित कॉलम दिखाएगा:
दिनांक: शुल्क, भुगतान या क्रेडिट की तारीख पोस्ट की गई थी
जुर्माना के मामले में यह आखिरी दिन है कि ठीक उपार्जित किया गया था होना होगा
खाता प्रकार: यह किस प्रकार का शुल्क, भुगतान या क्रेडिट है
In cases where an account type may have an accompanying status it will be displayed alongside the account type in brackets.
शुल्कों का विवरण: अतिदेय वस्तुओं के लिए नियत तारीख और मद के रिकॉर्ड के लिंक सहित आरोपों का विवरण जहां एक उपलब्ध है
टिप्पणी
For overdue fines, the default is the title and the due date. You can customize this by editing the OVERDUE_FINE_DESC template in the Notices and slips tool.
बारकोड: यदि चार्ज किसी विशेष आइटम से जुड़ा हुआ है, तो बारकोड प्रदर्शित होता है
Call number: if the charge is linked to a particular item, the item's call number is displayed
नियत तिथि: यदि शुल्क अतिदेय है, तो नियत तिथि प्रदर्शित की जाती है
चेक इन डेट: यदि चार्ज अतिदेय है, तो चेक डेट प्रदर्शित की जाती है
चेकआउट तिथि: यदि शुल्क अतिदेय है, तो चेक आउट तिथि प्रदर्शित की जाती है
होम लाइब्रेरी: यदि चार्ज को किसी विशेष आइटम से जोड़ा जाता है तो होम लाइब्रेरी प्रदर्शित होती है
नोट: यह नोट किसी भी शुल्क/भुगतान के बारे में
यदि आप पेपैल के साथ ओपेक के माध्यम से ओपैक के माध्यम से जुर्माना अदा करने की अनुमति दे रहे हैं (EnablePayPalOpacPayments) आपको एक नोट दिखाई देगा जो इस तरह से भुगतान किए गए आइटमों के लिए 'पेपॉल' कहता है
राशि: भुगतान या आरोप की कुल राशि
बकाया: राशि अभी भी चार्ज पर देय
क्रियाएं:
नीचे दी गई जानकारी के अनुसार खाता लाइन पर उपलब्ध कार्यों का चयन
तालिका आप 'फ़िल्टर भुगतान लेनदेन' पर क्लिक कर सकते हैं के शीर्ष पर सभी पूरा लेनदेन को छिपाने के लिए और ऊपर है कि आप खोज बॉक्स का उपयोग कर सकते हैं एक विशिष्ट शुल्क या भुगतान खोजने के लिए।
क्रिया
Action buttons will be available for the different account lines depending on the user's permissions and the account type and status.
A button to print or email a receipt or invoice for that line item
टिप्पणी
If the line item is a credit (payment, writeoff or other credit), the receipt that will be printed will be the ACCOUNT_CREDIT notice. It can be customized in the Notices and slips tool.
If the line item is a debit (a charge), the invoice that will be printed will be the ACCOUNT_DEBIT notice. It can be customized in the Notices and slips tool.
शुल्क के बारे में अधिक जानकारी और किए गए किसी भी भुगतान को दिखाने के लिए एक बटन
भुगतान/क्रेडिट को शून्य (रिवर्स) करने के लिए एक बटन
यह बटन केवल भुगतान / क्रेडिट लाइन पर दिखाई देगा। लाइन को शून्य करने पर यह किसी भी ऋण / डेबिट के लिए भुगतान प्रक्रिया को बहाल करने वाली भुगतान प्रक्रिया को उलट देगा, जिसे भुगतान / क्रेडिट पहले ऑफसेट करने के लिए उपयोग किया जा सकता है। यह कार्रवाई उन मामलों को ठीक करने के लिए आमतौर पर उपयोग की जाती है जहां भुगतान दर्ज किया गया था लेकिन वास्तव में कभी भी राहत नहीं मिली। क्रेडिट लाइन को शून्य राशि पर सेट किया जाएगा और VOID को अपडेट किया जाएगा।
एक शुल्क / डेबिट को रद्द करने (हटाने) का बटन
यह बटन केवल एक शुल्क / डेबिट लाइन पर दिखाई देगा, जिस पर पहले से कोई भुगतान / क्रेडिट नहीं है। लाइन को रद्द करने पर इसे 'रद्द' के रूप में चिह्नित किया जाएगा और एक 'CANCELLATION` लाइन को जोड़ा जाएगा और इसके खिलाफ ऑफसेट किया जाएगा। यह कार्रवाई उन मामलों को ठीक करने के लिए सबसे अधिक उपयोग की जाती है जहां गलती से चार्ज किया गया था।
बकाया राशि के साथ शुल्क / डेबिट के भुगतान का बटन
This button will appear against any charge/debit with an outstanding amount. The subsequent page can be used to pay or writeoff the line partially or in full with a PAYMENT or WRITEOFF line will being added.
क्रेडिट का भुगतान जारी करने के लिए एक बटन
यह बटन किसी भी क्रेडिट लाइन के खिलाफ दिखाई देगा, जिसकी राशि बकाया है और आपके पास पेआउट अनुमति है। यह लाइब्रेरियन को संरक्षक को बकाया ऋण वापस करने और PAYOUT लाइन के साथ कार्रवाई रिकॉर्ड करने की अनुमति देता है।
चार्ज / डेबिट के खिलाफ धनवापसी जारी करने का बटन
यह बटन किसी भी शुल्क / डेबिट लाइन के खिलाफ दिखाई देगा जो भुगतान किया गया है या आंशिक रूप से भुगतान किया गया है और आपके पास धनवापसी अनुमति है। बाद के मॉडल संवाद आपको आंशिक रूप से या पूर्ण रूप से ऑफसेट ऋण वापस करने की अनुमति देगा, या तो नकद या खाते में जोड़े गए क्रेडिट के माध्यम से।
शुल्क / डेबिट पर छूट लागू करने के लिए एक बटन
यह बटन किसी भी शुल्क / डेबिट के खिलाफ दिखाई देगा जो पहले से ही क्रेडिट / भुगतान से ऑफसेट नहीं किया गया है और आपके पास छूट अनुमति है। बाद के मॉडल संवाद आपको शुल्क पर छूट जोड़ने की अनुमति देंगे।
जुर्माना/शुल्क चार्ज करना
Most fees and fines will be charged automatically if the fines cron job is running. Fines will also be charged when an overdue item is checked in if the CalculateFinesOnReturn system preference is enabled.
जुर्माना आपके आधार पर लिया जाएगा परिसंचरण और जुर्माना नियम
आपके द्वारा निर्धारित नियमों के आधार पर होल्ड शुल्क लिया जाएगा संरक्षक प्रकार और श्रेणियाँ प्रशासन क्षेत्र
आपकी फीस के आधार पर किराया शुल्क लिया जाएगा :ref:`आइटम प्रकार <item-types-label>' प्रशासन क्षेत्र
एक आइटम सूचीबद्ध मॉड्यूल के माध्यम से 'खो' अंकन स्वचालित रूप से संरक्षक है कि आइटम के लिए प्रतिस्थापन लागत चार्ज होगा
एक में संरक्षक बनाना श्रेणी एक नामांकन शुल्क के साथ।
एक संरक्षक खाते को श्रेणी में नामांकन शुल्क के साथ नवीनीकृत करना।
लेख अनुरोध शुल्क संचलन नियम पृष्ठ के लेख अनुरोध शुल्क अनुभाग के आधार पर चार्ज किया जाएगा।
मैन्युअल चालान बनाना
For fees that are not automatically charged, staff can create a manual invoice.
टिप्पणी
Staff need the manual_invoice (or superlibrarian) permission in order to add manual credits to a patron's account.
Click on the 'Create manual invoice' tab
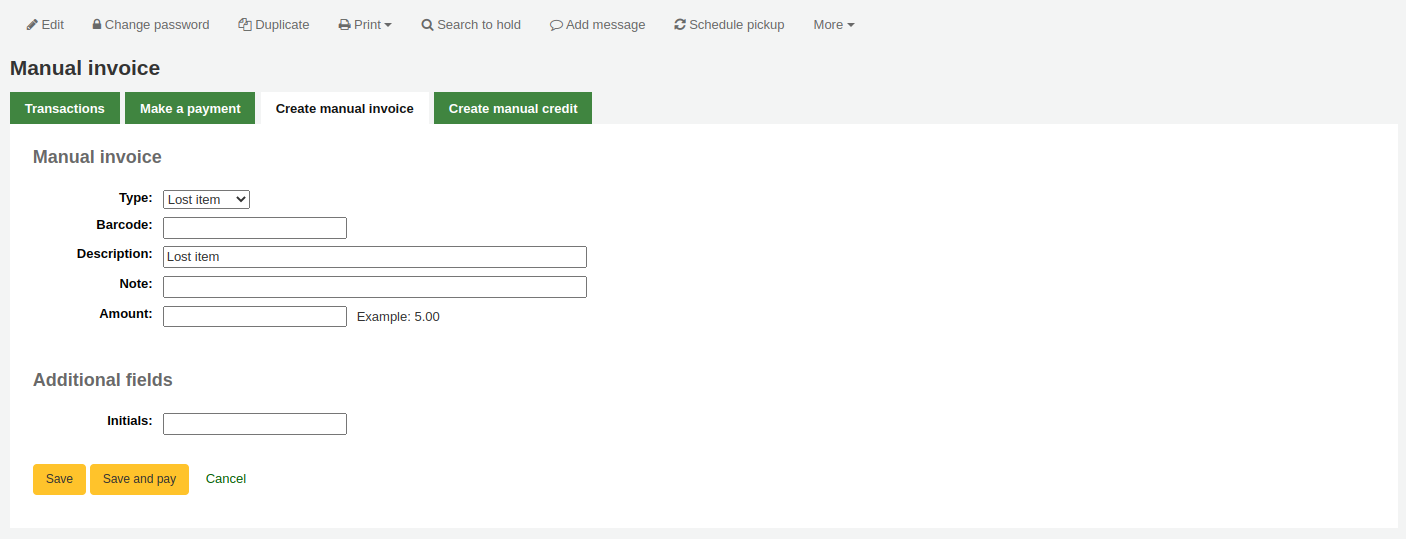
Type: choose the type of invoice to create.
टिप्पणी
मैन्युअल इनवॉइस टाइप पुल डाउन मेनू में अतिरिक्त मान जोड़ने के लिए, उन्हें इसमें जोड़ें डेबिट प्रकार एडमिनिस्ट्रेशन मॉड्यूल में.
Barcode: if the fee is associated with an item you can enter its barcode so that the line item shows a link to that item.
Description: enter the description of the charge.
Note: if needed, add a note about this charge.
Amount: enter the amount of the charge, do not enter currency symbols, only numbers and decimals
If any additional fields were set up for account line debits, they will appear here.
Click 'Save' to charge the amount to the patron's account, or
Click 'Save and pay' to charge the amount to the patron's account and go directly to the payment page.
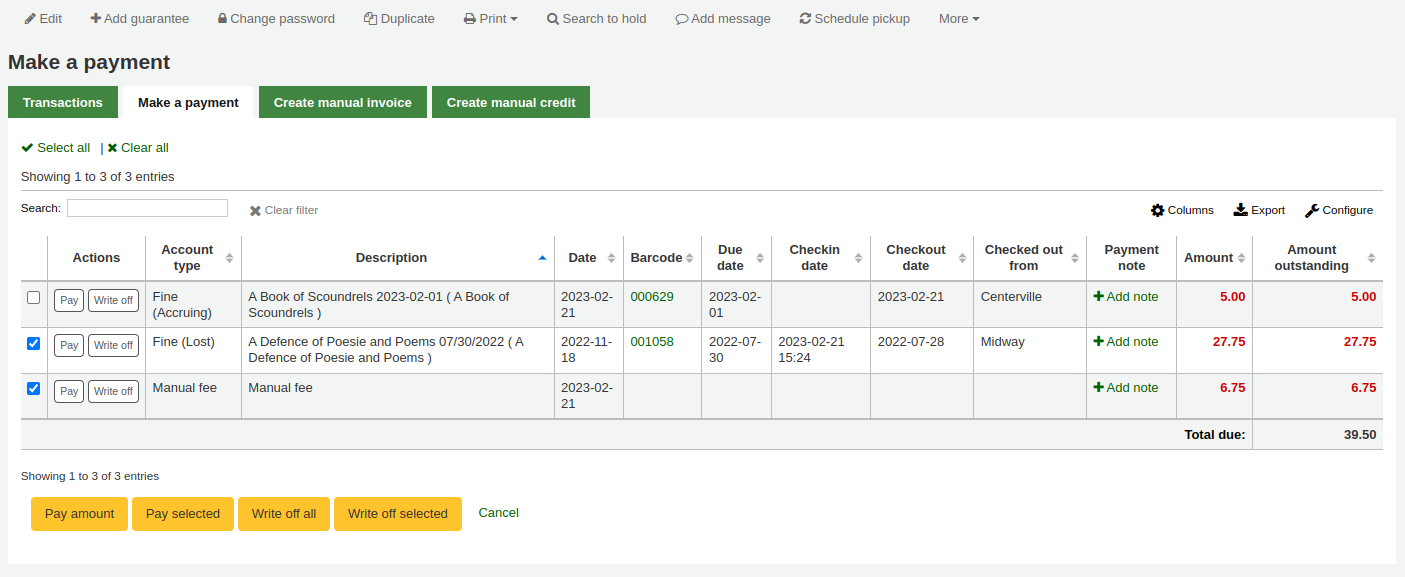
Paying and writing off charges
Each account line can be paid in full or written off using the 'Make a payment' tab.

टिप्पणी
आप इस तालिका के स्तंभों को 'तालिका सेटिंग' व्यवस्थापन मॉड्यूल के अनुभाग (टेबल आईडी: पे-फ़ाइन-टेबल) को अनुकूलित कर सकते हैं।
Each account line can be paid in full, partially paid, or written off.
Paying an individual charge in full
To pay an individual charge in full:
If you need to add a note about the payment, click 'Add note' and type in the note before proceeding.
Click the 'Pay' button next to the charge to be paid in full.
A table will show the details of the charge being paid, the full amount of the charge will be populated for you in the 'Amount being paid' and the 'Amount tendered' fields.
टिप्पणी
If you made a mistake and this charge should be written off instead, you can switch between 'Pay' and 'Write off' mode using the buttons located at the top of this tab. See Writing off an individual charge below.

Amount being paid: this is the amount that will be debited from the charge. When paying a charge in full, this should be the full amount.
Amount tendered: this is the actual amount handed to you by the patron, it will be used to calculate the change. For example, if a patron has a 2.75$ fine to pay, and they pay with a 5$ bill, enter 5 in 'Amount tendered'.
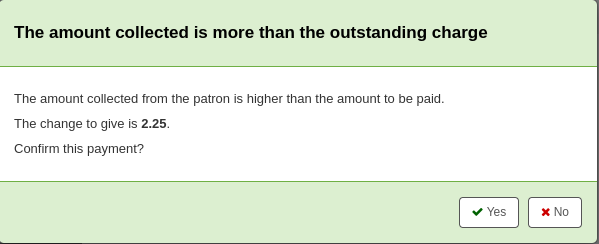
Change to give: if the amount being paid and the amount tendered are different (i.e. more money was collected) the amount of change to be given will be displayed.
भुगतान प्रकार: भुगतान का प्रकार चुनें।
टिप्पणी
This field will only appear if one or more values are defined under the PAYMENT_TYPE authorized value.
टिप्पणी
This field will be required if either the UseCashRegisters system preference or the RequirePaymentType system preference is enabled.
Cash register: if the UseCashRegisters system preference is enabled, you will have a choice of cash register in which to enter the transaction.
टिप्पणी
If the UseCashRegisters system preference is enabled, and the CASH payment type is chosen above, you will be required to choose a cash register for the payment.
Whether or not this field is required when another payment type is chosen is determined by the RequireCashRegister system preference.
If any additional fields were set up for account line credits, they will appear here.
Click 'Confirm'.
यदि परिवर्तन को संरक्षक को वापस दिया जाना था, तो एक पॉप-अप विंडो आपको याद दिलाने के लिए दिखाई देगी, यह पुष्टि करने के लिए 'हां' पर क्लिक करें कि आपने सही राशि वापस दी और भुगतान की पुष्टि की।
The charge's outstanding amount will be set to zero (fully paid), and a payment line will be added in the patron's transactions.
टिप्पणी
If the FinePaymentAutoPopup system preference is enabled, a print dialogue window will display. The receipt printed uses the letter ACCOUNT_CREDIT, which can be modified in the Notices and slips tool. If change was given for this transaction the details will be included when using this system preference.
In addition to printing receipts you can enable email receipts for payment and writeoff transactions with the UseEmailReceipts system preference. The email sent uses the ACCOUNT_PAYMENT letter, which can be modified in the Notices and slips tool.
Partially paying an individual charge
To partially pay an individual charge:
Click the 'Pay' button next to the charge to be partially paid.
A table will show the details of the charge being paid, the full amount of the charge will be populated for you in the 'Amount being paid' and the 'Amount tendered' fields.
टिप्पणी
If you made a mistake and this charge should be written off instead, you can switch between 'Pay' and 'Write off' mode using the buttons located at the top of this tab. See Partially writing off an individual charge below.

Amount being paid: this is the amount that will be debited from the charge. When partially paying a charge, enter the amount that should be paid.
Amount tendered: this is the actual amount handed to you by the patron, it will be used to calculate the change. For example, if a patron has a 2.75$ fine to pay, and they pay with a 5$ bill, enter 5 in 'Amount tendered'.
Change to give: if the amount being paid and the amount tendered are different (i.e. more money was collected) the amount of change to be given will be displayed.
भुगतान प्रकार: भुगतान का प्रकार चुनें।
टिप्पणी
This field will only appear if one or more values are defined under the PAYMENT_TYPE authorized value.
टिप्पणी
This field will be required if either the UseCashRegisters system preference or the RequirePaymentType system preference is enabled.
Cash register: if the UseCashRegisters system preference is enabled, you will have a choice of cash register in which to enter the transaction.
टिप्पणी
If the UseCashRegisters system preference is enabled, and the CASH payment type is chosen above, you will be required to choose a cash register for the payment.
Whether or not this field is required when another payment type is chosen is determined by the RequireCashRegister system preference.
If any additional fields were set up for account line credits, they will appear here.
Click 'Confirm'.
यदि परिवर्तन को संरक्षक को वापस दिया जाना था, तो एक पॉप-अप विंडो आपको याद दिलाने के लिए दिखाई देगी, यह पुष्टि करने के लिए 'हां' पर क्लिक करें कि आपने सही राशि वापस दी और भुगतान की पुष्टि की।
The charge will be updated to show the original amount and the current amount outstanding, and a payment line will be added in the patron's transactions.
टिप्पणी
If the FinePaymentAutoPopup system preference is enabled, a print dialogue window will display. The receipt printed uses the letter ACCOUNT_CREDIT, which can be modified in the Notices and slips tool. If change was given for this transaction the details will be included when using this system preference.
In addition to printing receipts you can enable email receipts for payment and writeoff transactions with the UseEmailReceipts system preference. The email sent uses the ACCOUNT_PAYMENT letter, which can be modified in the Notices and slips tool.
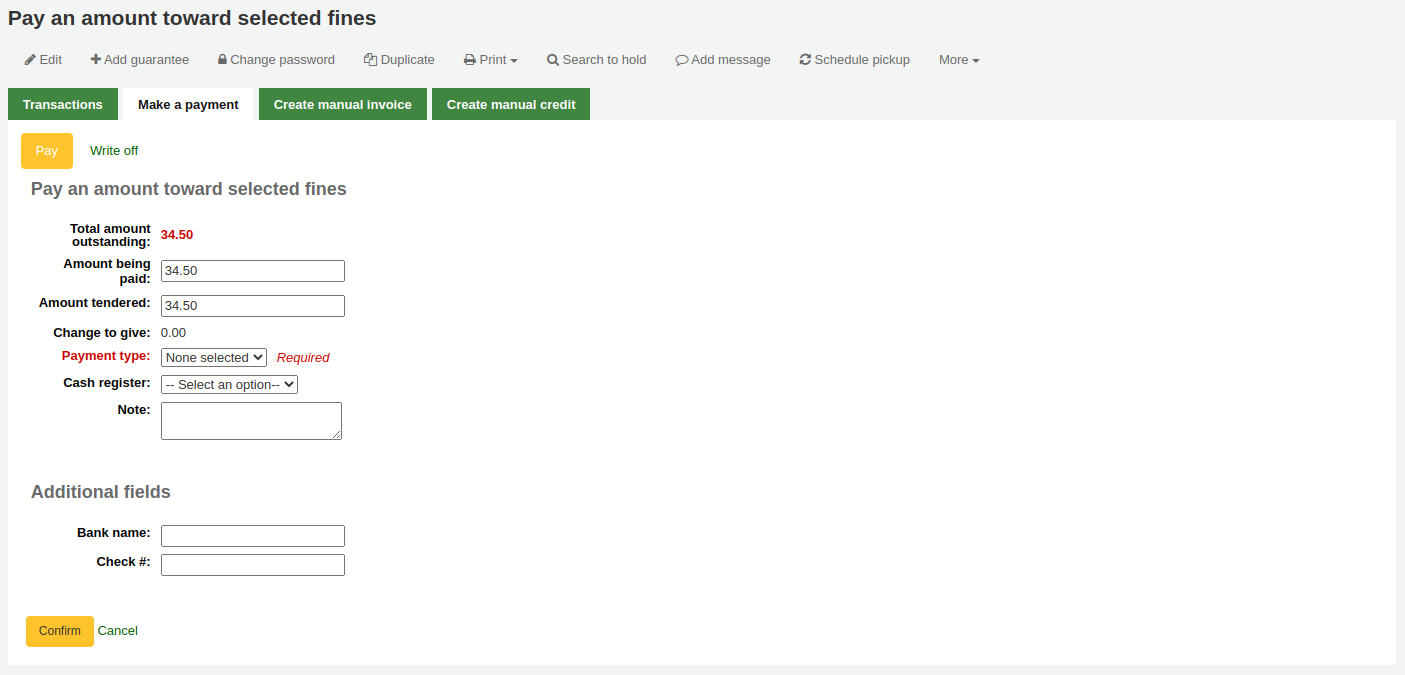
Paying an amount towards all charges
To pay an amount towards all charges:
Click the 'Pay amount' button.
The total amount outstanding in the patron's account will be displayed, and populated for you in the 'Amount being paid' and the 'Amount tendered' fields.
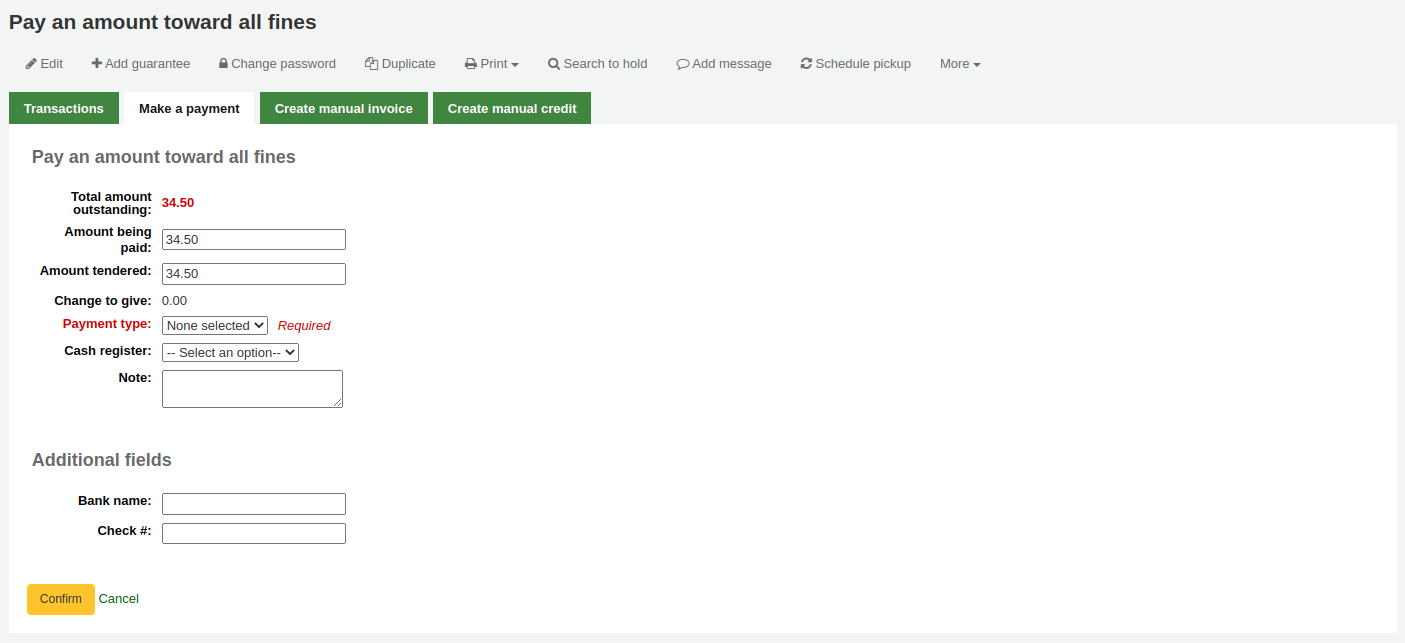
Total amount outstanding: this is the total unpaid charges in the patron's account.
Amount being paid: this is the amount that will be debited from the outstanding amount. Enter the amount that will be paid.
Amount tendered: this is the actual amount handed to you by the patron, it will be used to calculate the change. For example, if a patron has a 2.75$ fine to pay, and they pay with a 5$ bill, enter 5 in 'Amount tendered'.
Change to give: if the amount being paid and the amount tendered are different (i.e. more money was collected) the amount of change to be given will be displayed.
भुगतान प्रकार: भुगतान का प्रकार चुनें।
टिप्पणी
This field will only appear if one or more values are defined under the PAYMENT_TYPE authorized value.
टिप्पणी
This field will be required if either the UseCashRegisters system preference or the RequirePaymentType system preference is enabled.
Cash register: if the UseCashRegisters system preference is enabled, you will have a choice of cash register in which to enter the transaction.
टिप्पणी
If the UseCashRegisters system preference is enabled, and the CASH payment type is chosen above, you will be required to choose a cash register for the payment.
Whether or not this field is required when another payment type is chosen is determined by the RequireCashRegister system preference.
Note: if needed, add a note about this payment.
If any additional fields were set up for account line credits, they will appear here.
Click 'Confirm'.
यदि परिवर्तन को संरक्षक को वापस दिया जाना था, तो एक पॉप-अप विंडो आपको याद दिलाने के लिए दिखाई देगी, यह पुष्टि करने के लिए 'हां' पर क्लिक करें कि आपने सही राशि वापस दी और भुगतान की पुष्टि की।
The charges' outstanding amounts will be updated, with the payment applied to oldest charges first, and a payment line will be added in the patron's transactions.
टिप्पणी
If the FinePaymentAutoPopup system preference is enabled, a print dialogue window will display. The receipt printed uses the letter ACCOUNT_CREDIT, which can be modified in the Notices and slips tool. If change was given for this transaction the details will be included when using this system preference.
In addition to printing receipts you can enable email receipts for payment and writeoff transactions with the UseEmailReceipts system preference. The email sent uses the ACCOUNT_PAYMENT letter, which can be modified in the Notices and slips tool.
Paying selected charges
To pay only some charges:
Check the selection boxes next to the charges to be paid.
Click the 'Pay selected' button.
The total outstanding amount for the selected charges will be displayed, and populated for you in the 'Amount being paid' and the 'Amount tendered' fields.
Total amount outstanding: this is the total unpaid amount for the selected charges.
Amount being paid: this is the amount that will be debited from the total outstanding amount of the selected charges. Enter the amount that will be paid.
Amount tendered: this is the actual amount handed to you by the patron, it will be used to calculate the change. For example, if a patron has a 2.75$ fine to pay, and they pay with a 5$ bill, enter 5 in 'Amount tendered'.
Change to give: if the amount being paid and the amount tendered are different (i.e. more money was collected) the amount of change to be given will be displayed.
भुगतान प्रकार: भुगतान का प्रकार चुनें।
टिप्पणी
This field will only appear if one or more values are defined under the PAYMENT_TYPE authorized value.
टिप्पणी
This field will be required if either the UseCashRegisters system preference or the RequirePaymentType system preference is enabled.
Cash register: if the UseCashRegisters system preference is enabled, you will have a choice of cash register in which to enter the transaction.
टिप्पणी
If the UseCashRegisters system preference is enabled, and the CASH payment type is chosen above, you will be required to choose a cash register for the payment.
Whether or not this field is required when another payment type is chosen is determined by the RequireCashRegister system preference.
Note: if needed, add a note about this payment.
If any additional fields were set up for account line credits, they will appear here.
Click 'Confirm'.
यदि परिवर्तन को संरक्षक को वापस दिया जाना था, तो एक पॉप-अप विंडो आपको याद दिलाने के लिए दिखाई देगी, यह पुष्टि करने के लिए 'हां' पर क्लिक करें कि आपने सही राशि वापस दी और भुगतान की पुष्टि की।
The selected charges' outstanding amounts will be updated, with the payment applied to oldest charges first, and a payment line will be added in the patron's transactions.
टिप्पणी
If the FinePaymentAutoPopup system preference is enabled, a print dialogue window will display. The receipt printed uses the letter ACCOUNT_CREDIT, which can be modified in the Notices and slips tool. If change was given for this transaction the details will be included when using this system preference.
In addition to printing receipts you can enable email receipts for payment and writeoff transactions with the UseEmailReceipts system preference. The email sent uses the ACCOUNT_PAYMENT letter, which can be modified in the Notices and slips tool.
Writing off all charges
To write off all charges in a patron's account:
Click the 'Write off all' button
Confirm the writeoff
All charges' outstanding amounts will be set to zero (fully paid/written off), and a writeoff line will be added in the patron's transactions.
Writing off an individual charge
To write off a single charge:
If you need to add a note about the writeoff, click 'Add note' and type in the note before proceeding
Click the 'Write off' button next to the charge to be written off
A table will show the details of the charge being written off, the full amount of the charge will be populated for you in the 'Writeoff amount' field.
टिप्पणी
If you made a mistake and this charge should be paid instead, you can switch between 'Pay' and 'Write off' mode using the buttons located at the top of this tab. See Paying an individual charge in full above.
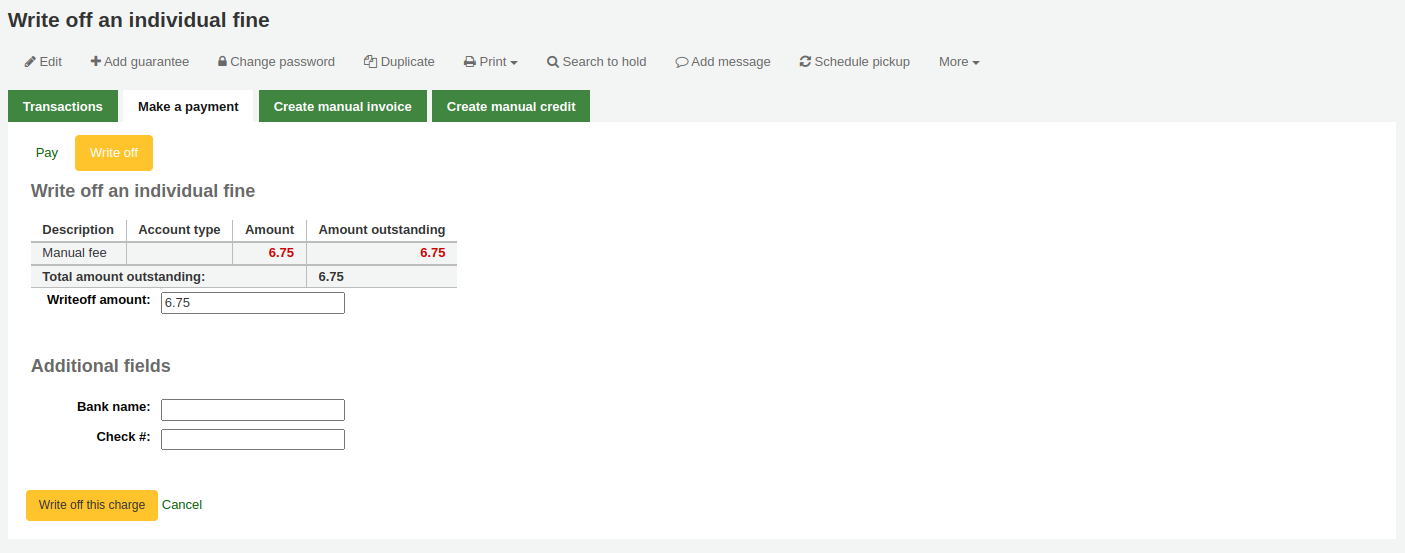
Writeoff amount: this is the amount that will be debited from the charge. When writing off a charge completely, this should be the full amount.
If any additional fields were set up for account line credits, they will appear here.
Click 'Write off this charge'
The charge's outstanding amount will be set to zero (fully paid/written off), and a writeoff line will be added in the patron's transactions.
टिप्पणी
If the FinePaymentAutoPopup system preference is enabled, a print dialogue window will display. The receipt printed uses the letter ACCOUNT_CREDIT, which can be modified in the Notices and slips tool. If change was given for this transaction the details will be included when using this system preference.
In addition to printing receipts you can enable email receipts for payment and writeoff transactions with the UseEmailReceipts system preference. The email sent uses the ACCOUNT_WRITEOFF letter, which can be modified in the Notices and slips tool.
Partially writing off an individual charge
To partially write off a single charge:
If you need to add a note about the writeoff, click 'Add note' and type in the note before proceeding
Click the 'Write off' button next to the charge to be written off
A table will show the details of the charge being written off, the full amount of the charge will be populated for you in the 'Writeoff amount' field.
टिप्पणी
If you made a mistake and this charge should be paid instead, you can switch between 'Pay' and 'Write off' mode using the buttons located at the top of this tab. See Partially paying an individual charge above.
Writeoff amount: this is the amount that will be debited from the charge. When partially writing off a charge, enter the amount to be written off.
If any additional fields were set up for account line credits, they will appear here.
Click 'Write off this charge'
The charge will be updated to show the original amount and the current amount outstanding, and a writeoff line will be added in the patron's transactions.
टिप्पणी
If the FinePaymentAutoPopup system preference is enabled, a print dialogue window will display. The receipt printed uses the letter ACCOUNT_CREDIT, which can be modified in the Notices and slips tool. If change was given for this transaction the details will be included when using this system preference.
In addition to printing receipts you can enable email receipts for payment and writeoff transactions with the UseEmailReceipts system preference. The email sent uses the ACCOUNT_WRITEOFF letter, which can be modified in the Notices and slips tool.
Writing off selected charges
To write off only some charges:
If you need to add a note about the writeoff, click 'Add note' and type in the note before proceeding
Check the selection boxes next to the fines to be written off
Click the 'Writeoff selected' button
The total outstanding amount for the selected charges will be displayed, and populated for you in the 'Writeoff amount' field.
टिप्पणी
If you made a mistake and this charge should be paid instead, you can switch between 'Pay' and 'Write off' mode using the buttons located at the top of this tab. See Paying selected charges above.
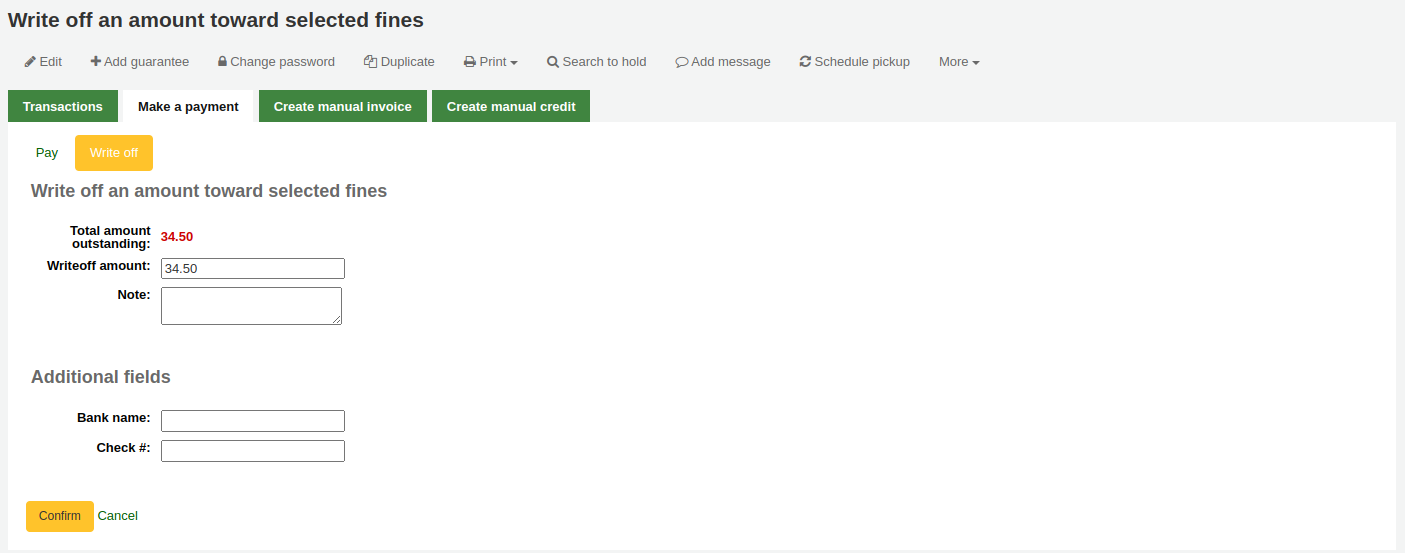
Writeoff amount: this is the amount that will be debited from the charge. When writing off the charges completely, this should be the full amount.
Note: if needed, enter a note about this writeoff.
If any additional fields were set up for account line credits, they will appear here.
Click 'Confirm'
The selected charges' outstanding amounts will be updated, with the writeoff applied to oldest charges first, and a writeoff line will be added in the patron's transactions.
टिप्पणी
If the FinePaymentAutoPopup system preference is enabled, a print dialogue window will display. The receipt printed uses the letter ACCOUNT_CREDIT, which can be modified in the Notices and slips tool. If change was given for this transaction the details will be included when using this system preference.
In addition to printing receipts you can enable email receipts for payment and writeoff transactions with the UseEmailReceipts system preference. The email sent uses the ACCOUNT_WRITEOFF letter, which can be modified in the Notices and slips tool.
जुर्माना या शुल्क रद्द करें
यदि किसी उपयोगकर्ता से किसी चीज़ के लिए शुल्क लिया गया था और यह एक त्रुटि है, तो आप कार्रवाई कॉलम में 'शुल्क रद्द करें' बटन पर क्लिक करके शुल्क रद्द कर सकते हैं।

एक बार क्लिक करने पर रद्द शुल्क के समान राशि के 'रद्द शुल्क' के लिए खाते में एक नई पंक्ति जोड़ी जाएगी। रद्द किए गए शुल्क की अब 'रद्द' स्थिति होगी और बकाया राशि 0 होगी।

यदि आपने गलती से कोई शुल्क रद्द कर दिया है, तो आप रद्दीकरण रद्द कर सकते हैं (नीचे देखें शून्य भुगतान)।
अमान्य भुगतान
यदि आप गलती से भुगतान के रूप में चिह्नित और आइटम करते हैं, तो आप लाइन के दाईं ओर 'शून्य' पर क्लिक करके उस लाइन आइटम को उल्टा कर सकते हैं

Once clicked a new line item will be added to the account showing the payment as ‘Voided’. The payment line is added back to the Pay fines tab as an outstanding charge.

मैन्युअल क्रेडिट बनाना
मैनुअल क्रेडिट बंद जुर्माना के कुछ हिस्सों को भुगतान करने के लिए, या एक ठीक राशि माफ करने के लिए इस्तेमाल किया जा सकता है।
टिप्पणी
Staff need the manual_credit (or superlibrarian) permission in order to add manual credits to a patron's account.
Click 'Create manual credit'.
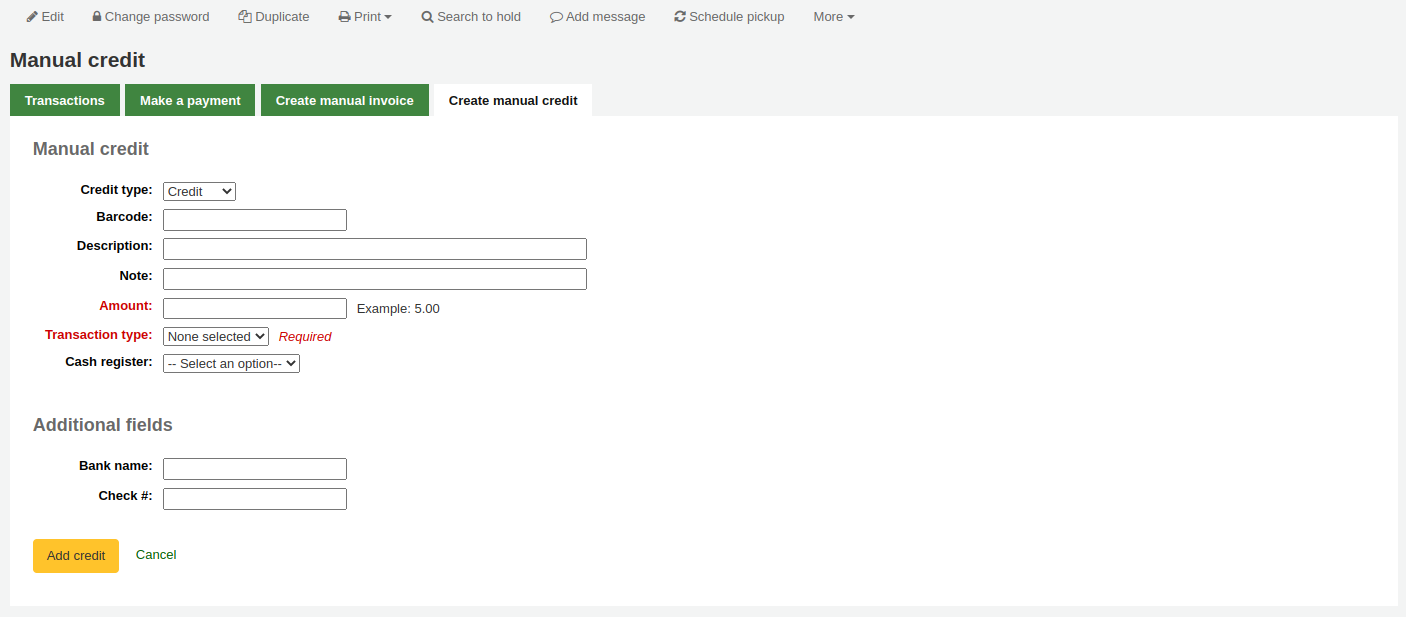
Type: choose the type of credit to apply.
टिप्पणी
To add additional values to the manual credit type drop-down menu, add them to the credit types in the Administration module.
Barcode: if this credit is associated with an item you can enter that item's barcode so that the line item links to the right item.
Description: enter the description of the credit.
Note: if needed, add a note about this credit.
Amount: enter the credit's amount, do not enter currency symbols, only numbers and decimals.
Transaction type: choose the type of credit.
टिप्पणी
This field will only appear if one or more values are defined under the PAYMENT_TYPE authorized value.
टिप्पणी
This field will be required if either the UseCashRegisters system preference or the RequirePaymentType system preference is enabled.
Cash register: if the UseCashRegisters system preference is enabled, you will have a choice of cash register in which to enter the transaction.
टिप्पणी
If the UseCashRegisters system preference is enabled, and the CASH transaction type is chosen above, you will be required to choose a cash register for the payment.
Whether or not this field is required when another transaction type is chosen is determined by the RequireCashRegister system preference.
If any additional fields were set up for account line credits, they will appear here.
Click 'Add credit'.
This will add a credit line to the patron's account.
टिप्पणी
If the AccountAutoReconcile system preference is set to 'Do', the credit will automatically be used to reduce the outstanding amounts in the patron's account, starting with the oldest charges.
टिप्पणी
If the AutoCreditNumber system preference is enabled, credits will be numbered.
Printing invoices
प्रत्येक खाते लाइन के अधिकार के लिए वहाँ एक प्रिंट कड़ी है। उस लिंक पर क्लिक लाइन आइटम की कुल अकाउंट में बकाया के साथ तारीख और लाइन आइटम का विवरण भी शामिल है कि के लिए एक चालान प्रिंट होगा।
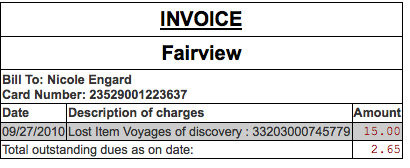
रूटिंग सूचियां
सभी सीरियल रूटिंग सूचियों की एक सूची संरक्षक से संबंधित 'रूटिंग सूचियों' टैब के माध्यम से संरक्षित संरक्षक से संबंधित होगी।
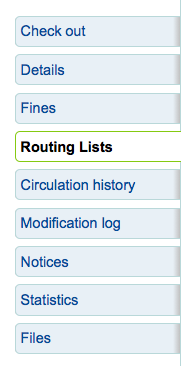
इस टैब पर आप देख सकते हैं और है कि इस संरक्षक पर है रूटिंग सूची के सभी संपादित करने के लिए सक्षम हो जाएगा।
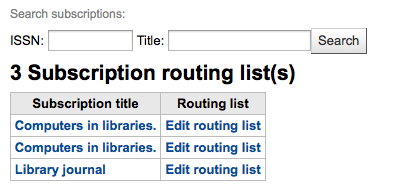
परिसंचालन इतिहास
यदि आपने सेट किया है तो परिसंचरण इतिहास टैब दिखाई देगा : ref: intranetreadinghistory<intranetreadinghistory-label> वरीयता इसे प्रकट करने की अनुमति देने के लिए। यदि आपके पास है OPACPrivacy सिस्टम प्राथमिकता 'अनुमति दें' पर सेट है और संरक्षक ने निर्णय लिया है कि लाइब्रेरी इस जानकारी को नहीं रख सकती है यह टैब केवल वर्तमान में चेक आउट आइटम दिखाएगा।

नोट
आप इस तालिका के स्तंभों को 'तालिका सेटिंग्स' व्यवस्थापन मॉड्यूल के अनुभाग (तालिका आईडी: checkouthistory-table) को अनुकूलित कर सकते हैं।
यह देखने के लिए कि किसी आइटम को नवीनीकृत किया गया था और किसके द्वारा, नवीकरण कॉलम की संख्या में 'देखें' पर क्लिक करें।
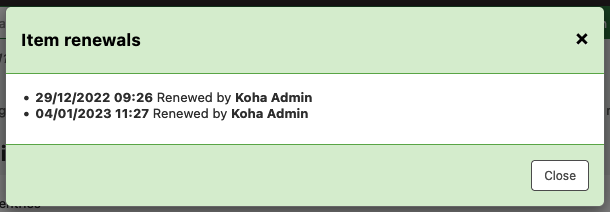
आप आज में जाँच की मदों के लिए बारकोड की एक सूची निर्यात करना चाहते है तो आप पृष्ठ के शीर्ष सही पर अधिक मेनू के तहत है कि विकल्प मिल सकता है।
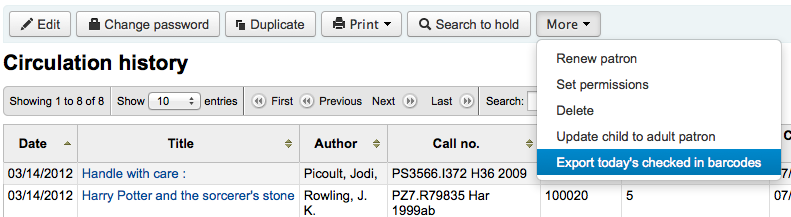
यह प्रति पंक्ति एक बारकोड के साथ एक पाठ फ़ाइल उत्पन्न होगा।
होल्डस इतिहास
होल्ड इतिहास टैब उन सभी होल्डरों को दिखाता है जो संरक्षक ने अपनी स्थिति के साथ बनाए हैं।
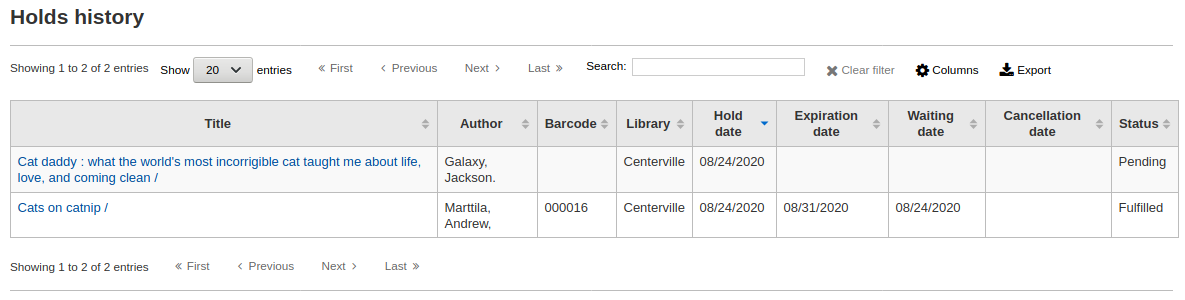
नोट
आप इस तालिका के स्तंभों को 'तालिका सेटिंग' व्यवस्थापन मॉड्यूल के अनुभाग (तालिका आईडी: होल्डहिस्टोरन-तालिका) को अनुकूलित कर सकते हैं।
संशोधन लॉग
यदि आपने अपना सेट सेट किया है: ref: 'BorrowersLog<BorrowersLog-label>` संरक्षक रिकॉर्ड में परिवर्तनों को ट्रैक करने के लिए, तो यह टैब दिखाई देगा। संशोधन लॉग दिखाएगा जब संरक्षक रिकॉर्ड में परिवर्तन किए गए थे। यदि आपने भी चालू किया है: ref: IssueLog`<IssueLog-label> और : ref: ReturnLog<ReturnLog-label>` आप इस स्क्रीन पर चेकइन और आउट भी देखेंगे।
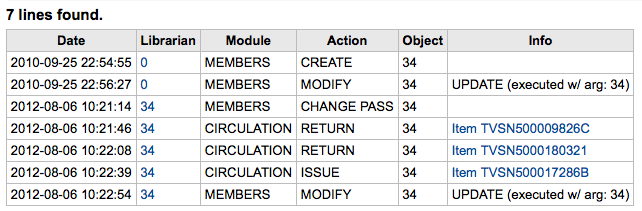
लाइब्रेरियन क्षेत्र लाइब्रेरियन जो परिवर्तन किए के लिए संरक्षक संख्या से पता चलता
संरक्षक मॉड्यूल के लिए मॉड्यूल सूचियों 'सदस्यों'
कार्रवाई तुम बताओ कि क्या कार्रवाई लॉग इन किया जा रहा था
वस्तु क्षेत्र उधारकर्ता नंबर जाता है कि संशोधित किया जा रहा सूचीबद्ध करता है (उपरोक्त उदाहरण में, यह मेरे अपने ही रिकॉर्ड को बदल रहा था)
नोटिस
संरक्षक की संदेश प्राथमिकताएं <#setpatronmessaging> __ सेट की जाती हैं जब: ref: adding <add-a-new-patron-label> 'or : ref: संपादन <editing-patrons-label>' संरक्षक। यह टैब उन संदेशों को दिखाएगा जो भेजे गए हैं और जो भेजे जाने के लिए कतारबद्ध हैं:
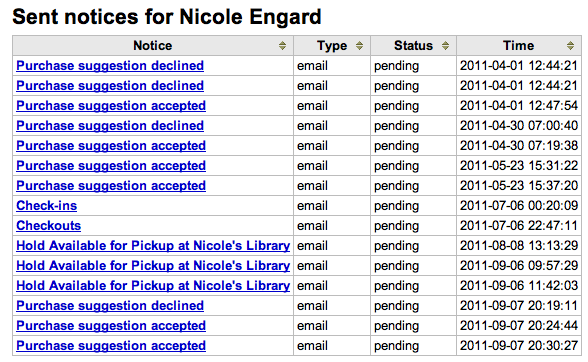
संदेश शीर्षक पर क्लिक करके देखें विस्तार आप संदेश है कि भेजा गया था का पूरा पाठ को दिखाने के लिए होगा।
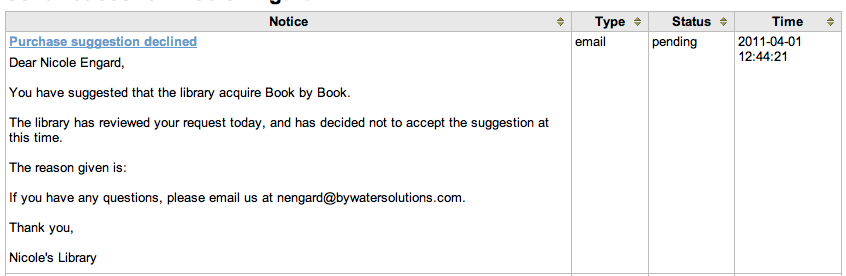
अगर संदेश में भेजा गया या असफल होने की स्थिति है तो आपके पास स्थिति के तहत पाए गए 'resentd बटन' पर क्लिक करके संरक्षक को संदेश 'भेजने' का विकल्प होगा।
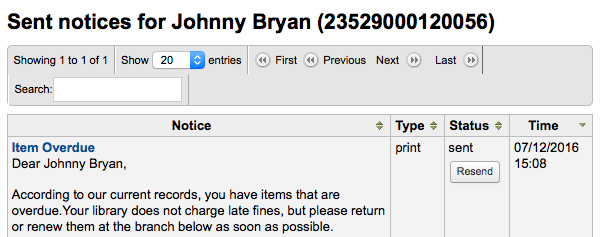
सांख्यिकी
आपके द्वारा अपने मूल्यों के लिए निर्धारित किए गए सेट के आधार पर StatisticsFields सिस्टम वरीयता, आप एक संरक्षक के परिसंचरण कार्यों के आंकड़े देख सकते हैं।
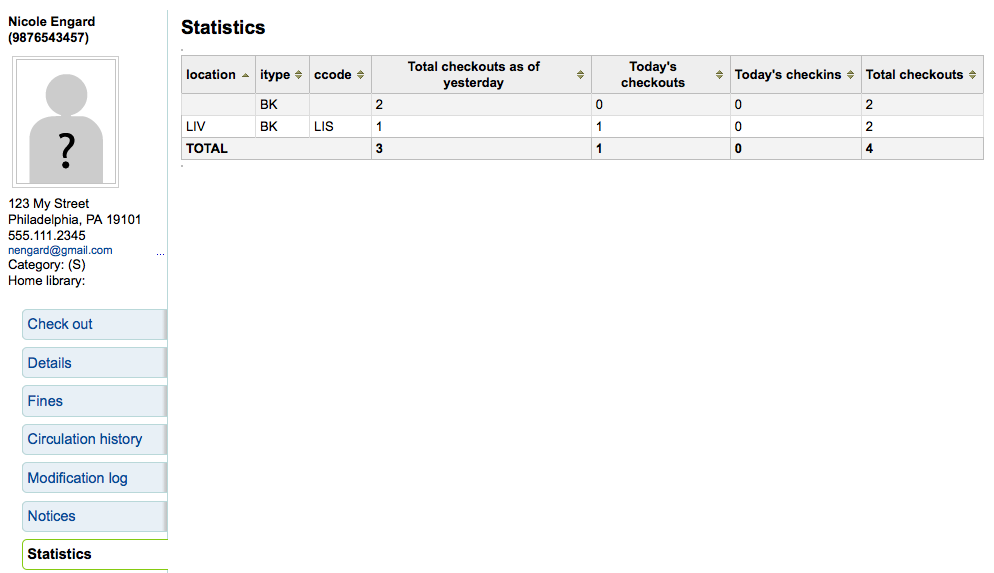
फ़ाइलें
यदि आप सेट करते हैं : ref: 'DoBorrowerFiles<EnableBorrowerFiles-label>' को सक्षम करें 'Do' को सक्षम करें, टैब टैब संरक्षक जानकारी पृष्ठ पर दिखाई देगा।
यहाँ से आप संरक्षक रिकॉर्ड करने के लिए संलग्न करने के लिए फाइल अपलोड कर सकते हैं।
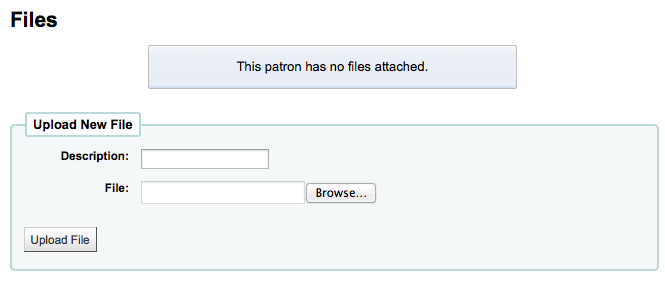
सभी फाइलों को अपलोड कर रहे हैं कि एक फार्म है, जहां अतिरिक्त फ़ाइलों से अपलोड किया जा सकता ऊपर दिखाई देगा।
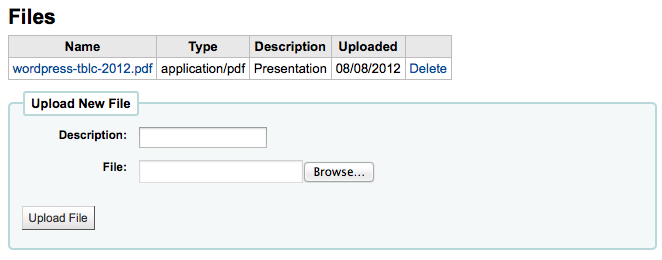
खरीद सुझाव
आप संरक्षक रिकॉर्ड पर एक खरीद सुझाव टैब देखेंगे संरक्षक किसी भी खरीद के सुझाव दिए हैं तो।
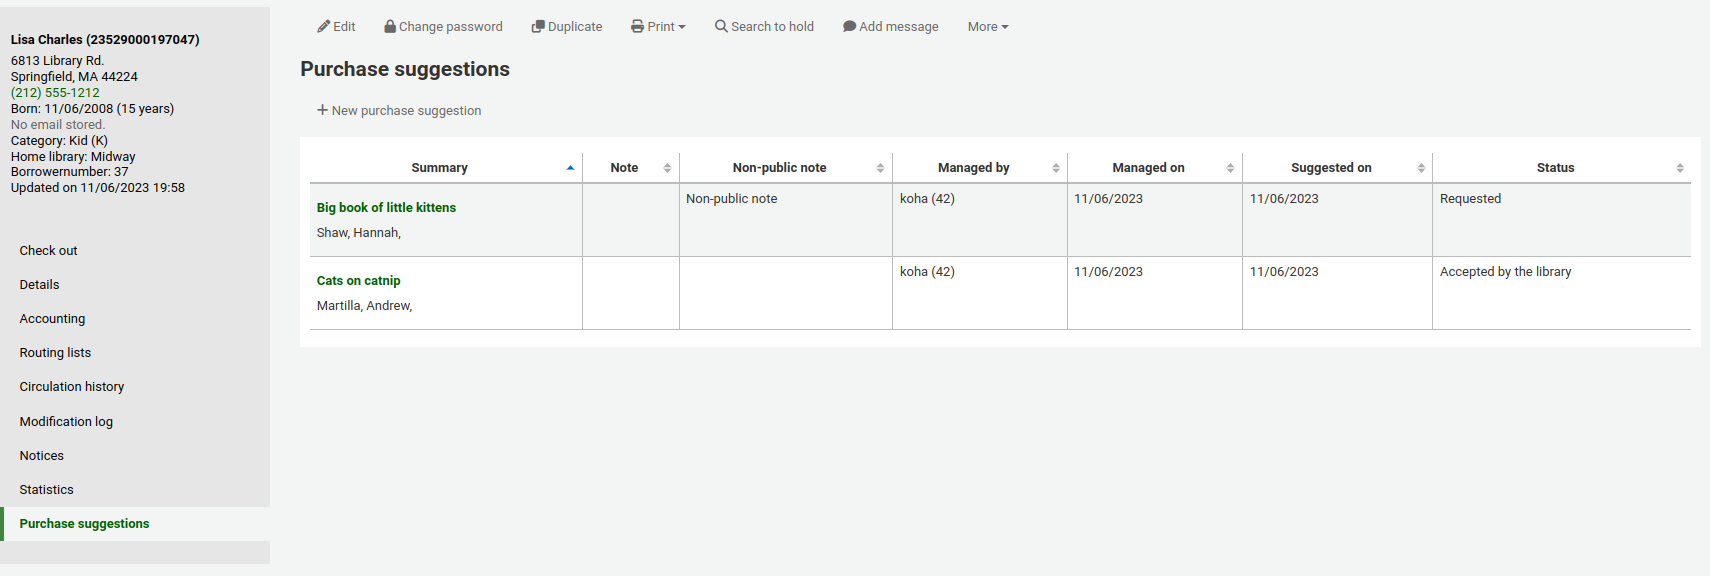
यहाँ से आप संरक्षक और उनकी स्थिति द्वारा किए गए सभी सुझावों को देख सकते हैं, आप भी शीर्ष पर 'नई खरीद सुझाव' बटन पर क्लिक करके संरक्षक की ओर से एक खरीद सुझाव बना सकते हैं।
Learn more about managing purchase suggestions in the Acquisitions chapter of this manual.
संरक्षक निर्वहन
A discharge is a certificate that says the patron has no current checkouts and no holds. To enable this option on the patron record, set the useDischarge system preference to 'Allow'.
टिप्पणी
In France, a "quitus" ("discharge") is needed if you want to register for an account in a library or a university.
टिप्पणी
शैक्षिक पुस्तकालयों अक्सर आवश्यकता से पहले आप स्नातक कर सकते हैं आप पुस्तकालय में एक स्पष्ट रिकॉर्ड है।
Emitting a discharge
To generate a discharge for a specific patron, click the 'Discharges' tab on the left of the patron record.
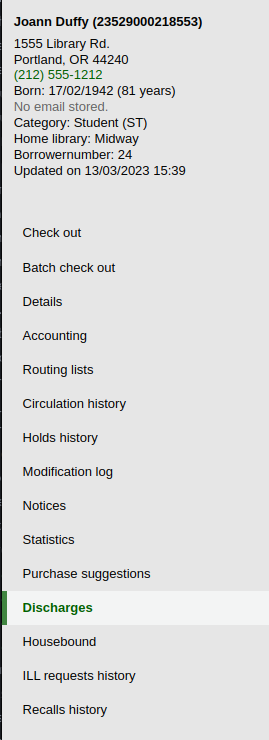
Or click on the 'More' button and choose 'Discharge'.
If the patron can have a discharge generated, it will have a button that says 'Generate discharge'

If the patron has checkouts or holds, you'll see a message explaining why the patron cannot be discharged.

Once the letter is generated you will have a PDF to download.
टिप्पणी
You can customize this message in the Notices and slips tool. The letter code is DISCHARGE.
टिप्पणी
You can style the PDF using the NoticeCSS preference, or add inline CSS in the DISCHARGE letter in the Notices and slips tool.
The patron will have a restriction added to their account.

A history of discharges will be added to the 'Discharges' tab.

Approving discharge requests
Patrons can request discharges via the OPAC. Any pending discharges will be listed below the menu buttons on the main staff interface page, with other pending requests.
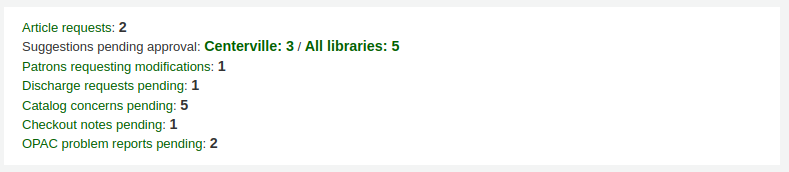
Clicking the pending discharge request link will open a screen where you can approve those discharges by clicking 'Allow'.
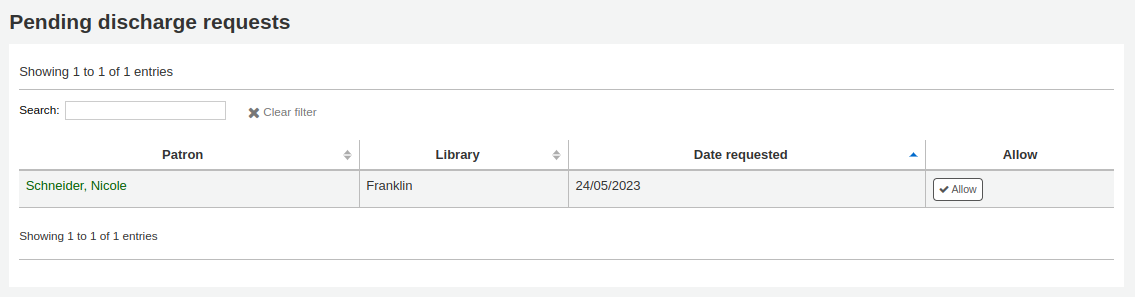
हाउसबाउंड संरक्षक
There are three roles a patron can have in regard to housebound circulation:
महत्त्वपूर्ण
हाउसबाउंड मॉड्यूल का उपयोग करने के लिए, HouseboundModule और ExtendedPatronAttributes सिस्टम प्राथमिकताएँ सक्षम होनी चाहिए.
चयनकर्ता
चयनकर्ता हाउसबाउंड संरक्षक के लिए सामग्री चुनने के लिए प्रभारी है।
यदि आपने हाउसबाउंड मॉड्यूल को सक्षम किया है, तो HouseboundModule सिस्टम वरीयता, आप देखेंगे कि संरक्षक अब अपने रिकॉर्ड में एक नया खंड 'हाउसबाउंड भूमिकाएँ' कहते हैं।
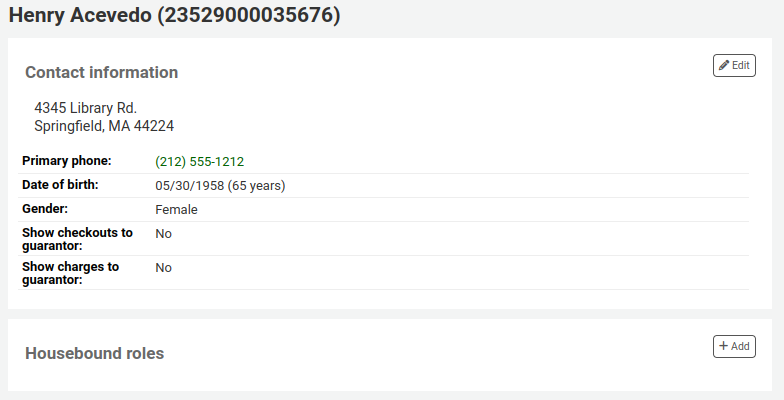
इस संरक्षक को 'चयनकर्ता' के रूप में चिह्नित करने के लिए 'जोड़ें' बटन पर क्लिक करें।

तारक
डिलिवर एक विशिष्ट समय पर चुने हुए सामग्रियों को एक विशिष्ट दिन पर होमबाउंड संरक्षक को वितरित करने के लिए है।
'हाउसबाउंड भूमिकाओं' में, 'संरक्षक' के रूप में इस संरक्षक को चिह्नित करने के लिए 'जोड़ें' बटन पर क्लिक करें।

हाउसहोल्ड कर्जदार
To create a housebound profile for a housebound patron, click on the 'Housebound' tab in their record.
वहां से, आप उनकी हाउसबाउंड प्रोफ़ाइल जानकारी संपादित कर सकते हैं।
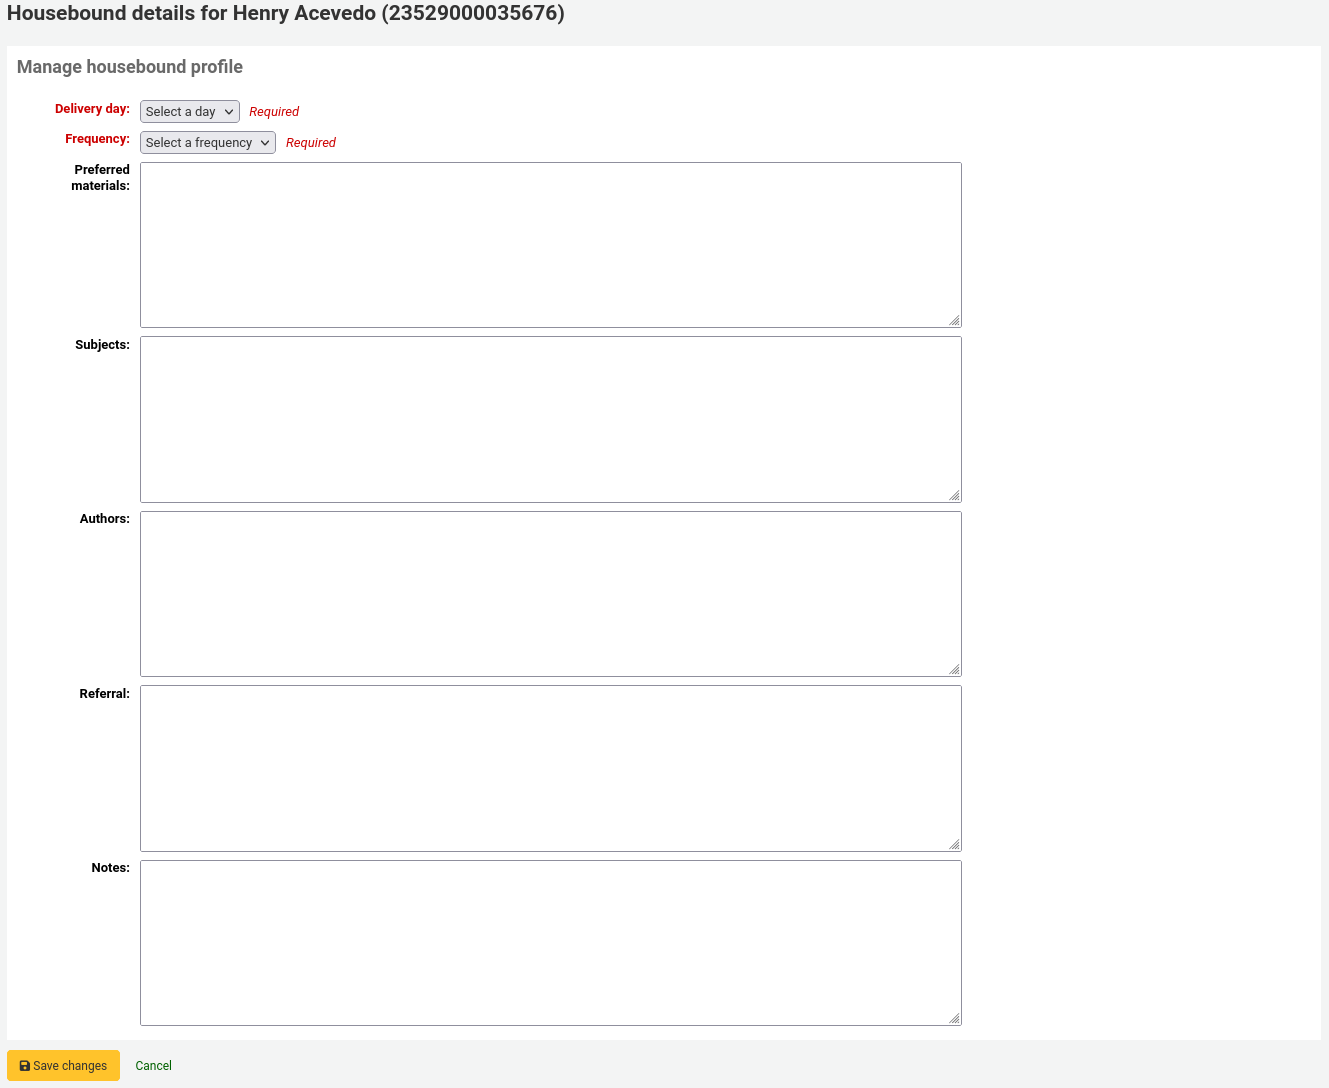
डिलीवरी का दिन: किस दिन (या 'कोई') संरक्षक अपनी डिलीवरी प्राप्त करना पसंद करता है.
फ़्रीक्वेंसी: वह फ़्रीक्वेंसी चुनें, जिस पर वे अपनी डिलीवरी प्राप्त करना चाहते हैं।
टिप्पणी
आवृत्तियों को HSBND_FREQ सूची के माध्यम से प्रबंधित किया जाता है अधिकृत मूल्य.
पसंदीदा सामग्री: नोट दर्ज करें जो कि चयनकर्ता को हाउसबाउंड संरक्षक के लिए उपयुक्त दस्तावेज चुनने में मदद करेगा.
उदाहरण के लिए: किताबें, डीवीडी, पत्रिकाएं आदि।
Subjects: if the housebound patron has a preference for particular subjects, enter them here. This will help the chooser select interesting documents for the patron.
उदाहरण के लिए: रोमांस, कुकबुक, थ्रिलर आदि।
लेखक: यदि हाउसबाउंड संरक्षक के पसंदीदा लेखक हैं, तो उन्हें यहां दर्ज करें।
उदाहरण के लिए: डेनिएल स्टील, जेम्स पैटरसन, आदि।
रेफरल: अगर हाउसबाउंड संरक्षक के पास एक रेफरल है, तो इसे यहां दर्ज करें।
नोट: किसी भी अन्य नोट को दर्ज करें जो चयनकर्ता या डिलीवरी करने वाले की मदद कर सकता है।
हाउसबाउंड प्रोफ़ाइल को बचाने के लिए 'परिवर्तन सहेजें' बटन पर क्लिक करें।
प्रसंगों का समन्वय
यात्राओं की योजना बनाने के लिए, हाउसबाउंड संरक्षक के रिकॉर्ड पर जाएं।
उनके हाउसबाउंड टैब में, आप डिलीवरी प्रदान करने में सक्षम होंगे।
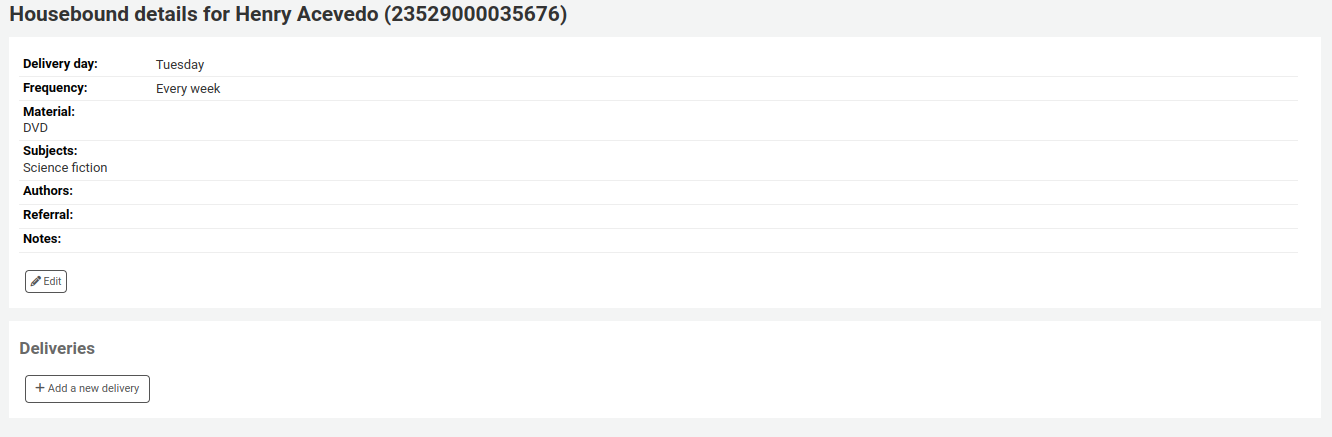
'एक नई डिलीवरी जोड़ें' पर क्लिक करें।
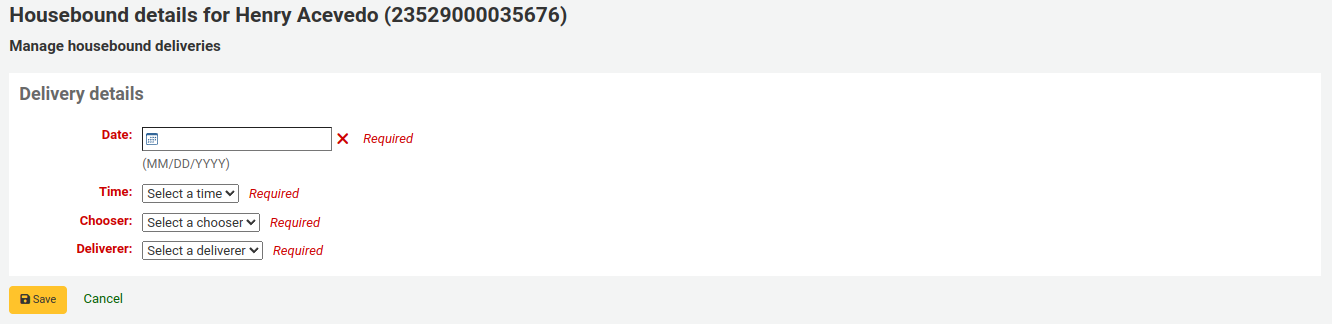
जानकारी भरें:
Date: enter the date of the delivery.
Time: select a time of day for the delivery. The choices are morning, afternoon, or evening.
Chooser: select a chooser who will be in charge of selecting the materials for this housebound patron.
टिप्पणी
This list is populated by the patrons having the chooser role.
Deliverer: select a deliverer who will be in charge of picking up the materials and bringing them over to the housebound patron.
टिप्पणी
This list is populated by the patrons having the deliverer role.
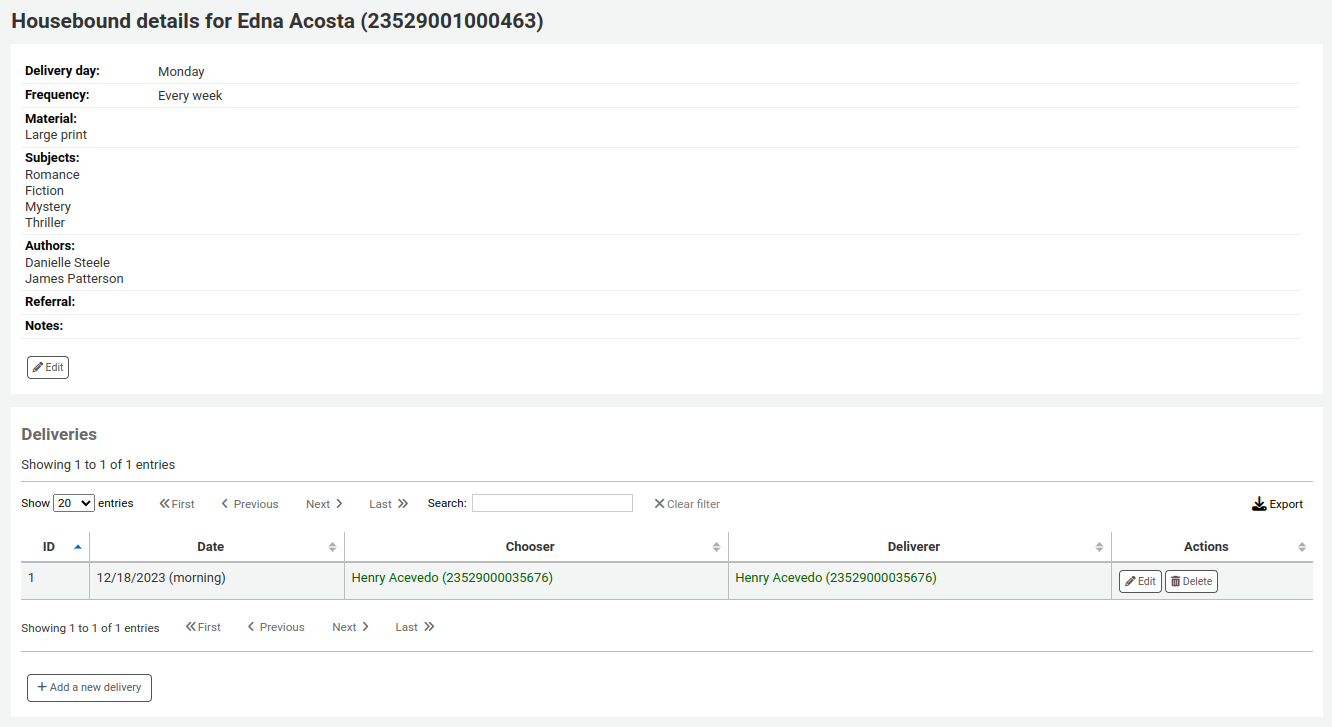
टिप्पणी
Choosers and Deliverers can be notified of planned deliveries via reports.
Example reports can be found in the SQL Reports Library at https://wiki.koha-community.org/wiki/SQL_Reports_Patrons#Patron_Characteristics.
रिकॉल इतिहास
यदि रिकॉल सक्षम हैं, वर्तमान में सक्रिय संरक्षक द्वारा अनुरोधित रिकॉल इस टैब में दिखाई देंगे।
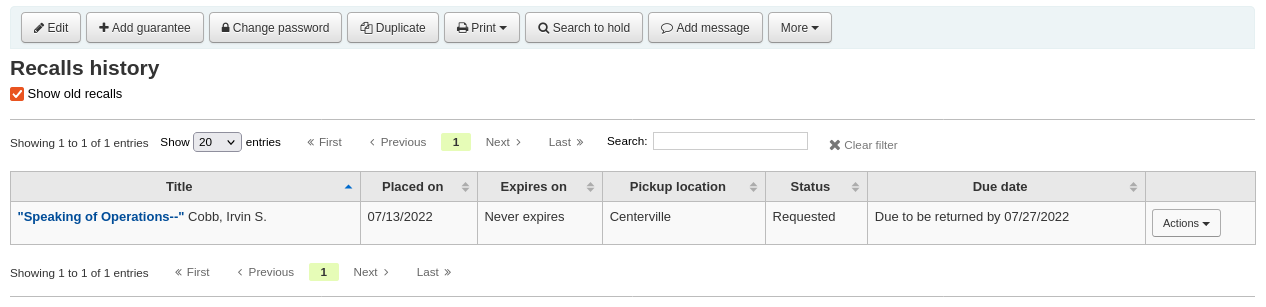
यहां से स्टाफ के सदस्य प्रत्येक रिकॉल की स्थिति देख सकते हैं और उन्हें प्रबंधित कर सकते हैं.
स्टाफ इंटरफ़ेस में दो कारक प्रमाणीकरण
कोहा स्टाफ इंटरफेस में लॉग इन करने के लिए टू-फैक्टर ऑथेंटिकेशन (2FA) प्रदान करता है।
यह टू-फैक्टर ऑथेंटिकेशन टाइम-बेस्ड वन-टाइम पासवर्ड (TOTP) का इस्तेमाल करता है। एक TOTP एक पासवर्ड है जिसका उपयोग केवल एक बार किया जा सकता है और यह केवल सीमित समय के लिए वैध होता है।
टू-फैक्टर ऑथेंटिकेशन का उपयोग करने के इच्छुक उपयोगकर्ताओं के पास इन TOTPs को जनरेट करने के लिए एक ऐप होना चाहिए। कोई भी ऑथेंटिकेटर ऐप, जैसे कि Google ऑथेंटिकेटर, औरOTP, FreeOTP और कई अन्य का उपयोग किया जा सकता है। एप्लिकेशन जो उनके 2FA खातों (या तो क्लाउड-आधारित या स्वचालित) के बैकअप को सक्षम करते हैं, की सिफारिश की जाती है।
Turn on the two-factor authentication with the TwoFactorAuthentication system preference.
एक बार यह हो जाने के बाद, कर्मचारी उपयोगकर्ता को पृष्ठ के शीर्ष पर अपने उपयोगकर्ता नाम पर क्लिक करके और 'मेरा खाता' पर क्लिक करके अपने खाते में जाना होगा।
इसके बाद यूजर को और > मैनेज टू-फैक्टर ऑथेंटिकेशन पर जाना होगा।
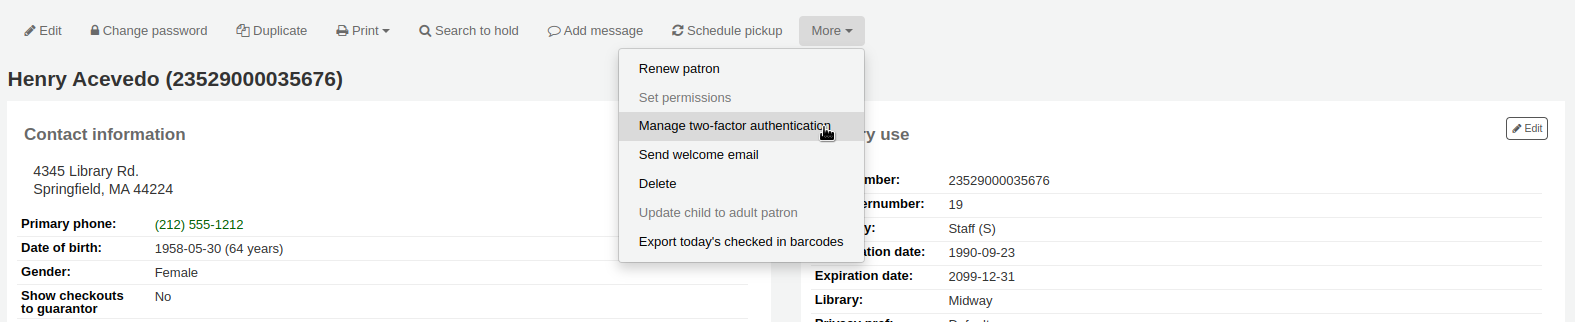
इस पृष्ठ पर पहली बार जाने पर स्थिति 'अक्षम' होनी चाहिए।

'दो-कारक प्रमाणीकरण सक्षम करें' पर क्लिक करें।
एक क्यूआर कोड पेश किया जाएगा। इस कोड को एक ऑथेंटिकेटर ऐप के साथ स्कैन किया जाना चाहिए (सुझावों के लिए ऊपर देखें)।
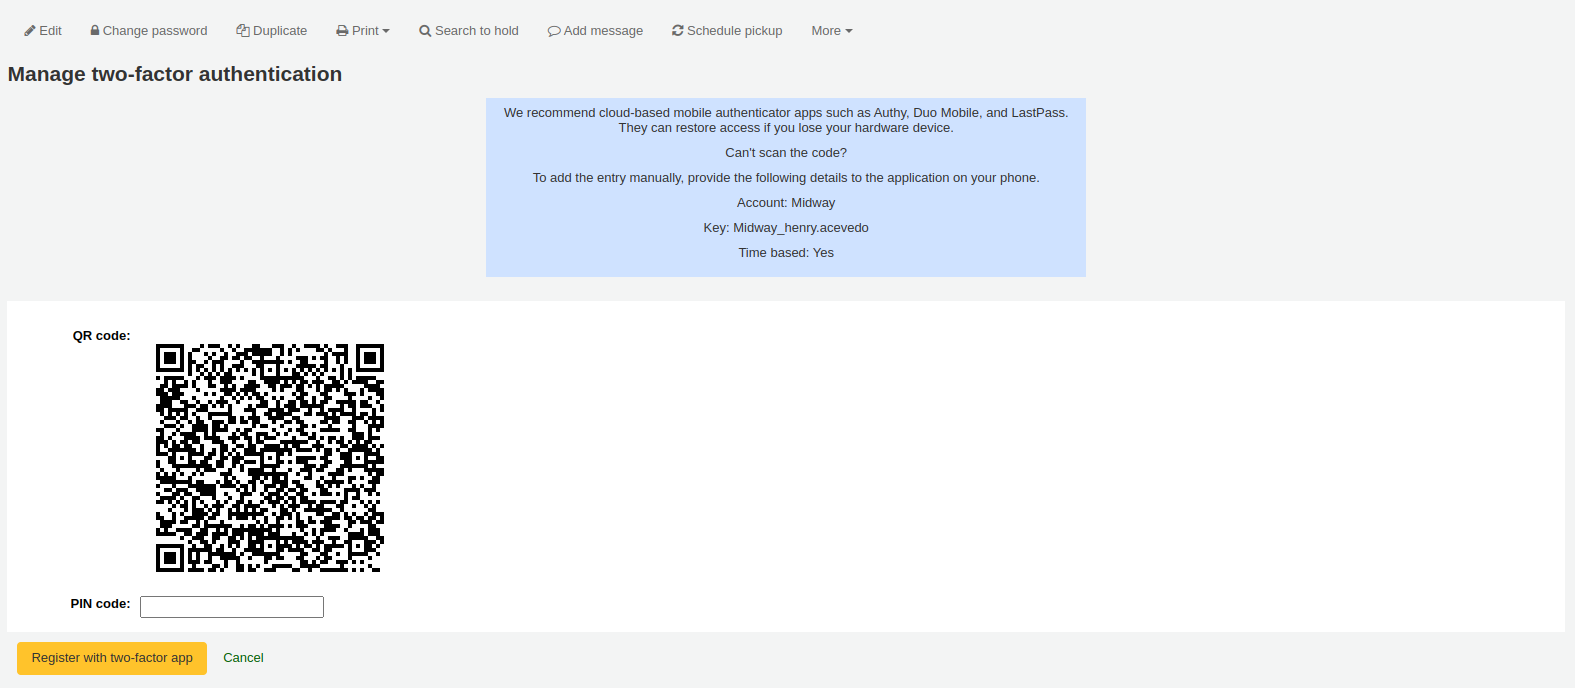
टिप्पणी
यदि ऐप क्यूआर कोड को स्कैन करने की अनुमति नहीं देता है, तो पृष्ठ उन क्रेडेंशियल्स को देता है जिन्हें मैन्युअल रूप से दर्ज किया जा सकता है (खाता, कुंजी, समय-आधारित)।
एक बार क्यूआर कोड स्कैन हो जाने के बाद, ऐप एक समय-आधारित पिन कोड लौटाएगा। उपयोगकर्ता को पिन कोड फ़ील्ड में यह पिन कोड दर्ज करना होगा और 'टू-फैक्टर ऐप के साथ पंजीकरण' पर क्लिक करना होगा।
टू-फैक्टर ऑथेंटिकेशन की स्थिति अब सक्षम हो जाएगी।
टिप्पणी
An email will be sent to the user's email address to alert them that the two-factor authentication has been enabled on their account.
You can customize this message in the Notices and slips tool. The letter code is 2FA_ENABLE.
जब यह उपयोगकर्ता स्टाफ इंटरफ़ेस में लॉग इन करने का प्रयास करता है, तो उन्हें हमेशा की तरह अपना उपयोगकर्ता नाम और पासवर्ड दर्ज करना होगा, लेकिन दो-कारक प्रमाणीकरण कोड भी।
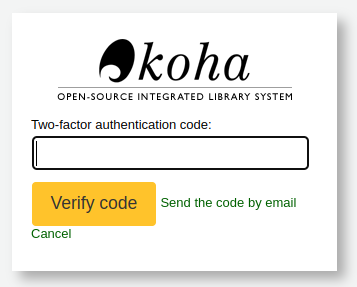
उपयोगकर्ता को तब अपना प्रमाणक ऐप खोलना होगा, एक समय-आधारित वन-टाइम पासवर्ड जनरेट करना होगा और लॉग इन करने के लिए इसे फ़ील्ड में दर्ज करना होगा।
टिप्पणी
Alternatively, if the user doesn't have the app handy, they can click on 'Send the code by email', which will send them an email with a time-based one-time password for them to use.
The email is based on the 2FA_OTP_TOKEN notice template, which can be customized in the Notices and slips tool.
यदि उपयोगकर्ता अपने दो-कारक प्रमाणीकरण को अक्षम करना चाहता है, तो वे कर्मचारी इंटरफ़ेस में अपने खाते में जा सकते हैं, अधिक क्लिक करें > दो-कारक प्रमाणीकरण प्रबंधित करें और 'दो-कारक प्रमाणीकरण अक्षम करें' पर क्लिक करें।

टिप्पणी
An email will be sent to the user's email address to alert them that the two-factor authentication has been disabled on their account.
You can customize this message in the Notices and slips tool. The letter code is 2FA_DISABLE.
संरक्षक खोज
Clicking on the link to the Patron module will bring you to a search/browse screen for patrons. From here you can search for a patron by their name or their card number.

टिप्पणी
By default, the search is a 'Starts with' search, meaning that you have to search by the beginning of the patron's name or the beginning of the patron's card number. You can use the DefaultPatronSearchMethod system preference to change the patron search method to a 'Contains' search to be able to search for any part of the patron's name or cardnumber.
Clicking the 'More options' symbol to the right of the search box will open up an advanced patron search with more filters including the ability to limit to a specific category and/or library.
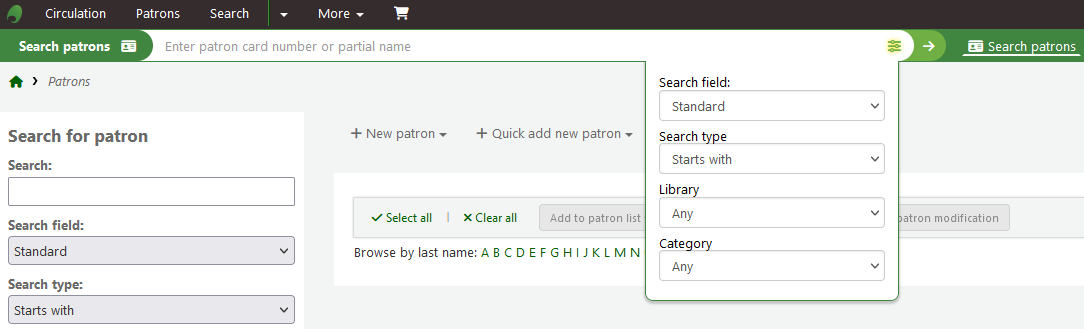
आप पृष्ठ के बाएं हाथ की ओर खोज विकल्पों का उपयोग कर अपने संरक्षक परिणामों को फ़िल्टर कर सकते हैं।
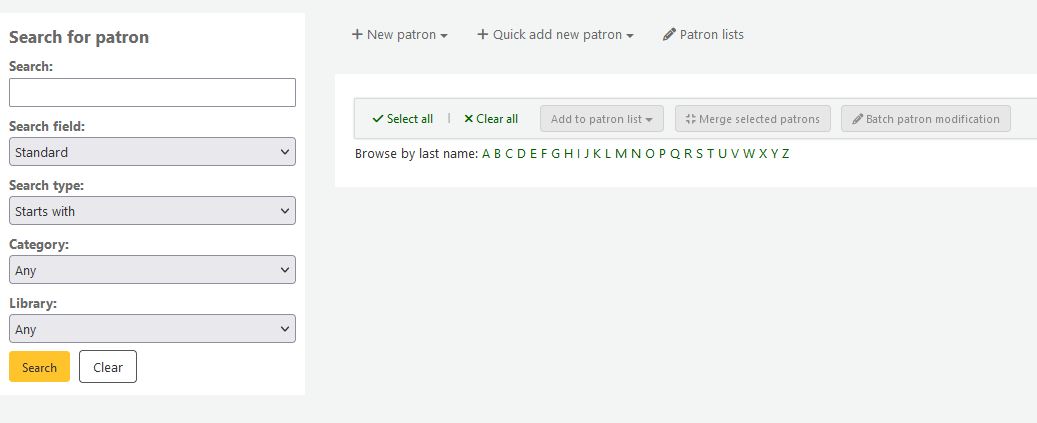
आप 'खोज क्षेत्रों' के लिए क्या चुना है पर निर्भर करता है कि आप विभिन्न अलग अलग तरीकों से संरक्षक के लिए खोज सकते हैं।
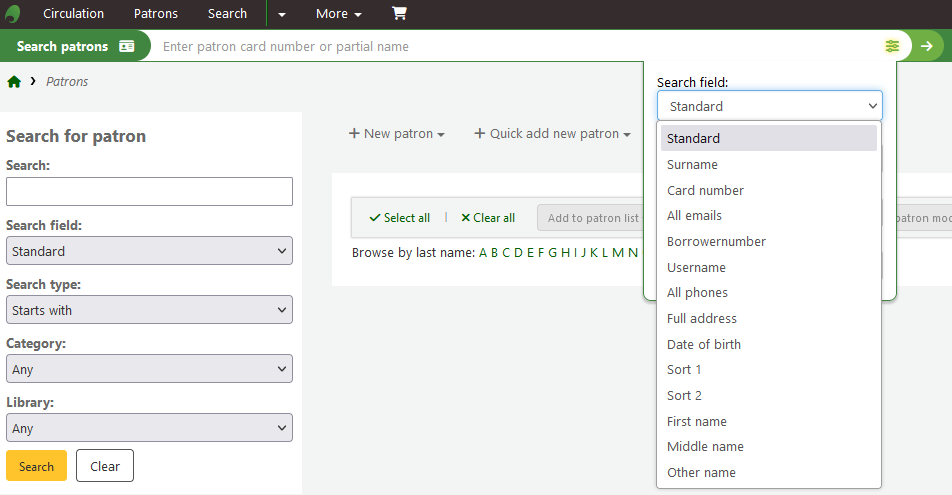
मानक:
उनके नाम, उपयोगकर्ता नाम, ईमेल पता या बारकोड के किसी भी हिस्से दर्ज
टिप्पणी
You can use the system preference DefaultPatronSearchFields to define other fields to be used for searching with this option.
Surname:
Search for the patron's surname
Card number:
Search for the patron's card number
All emails:
Search all of the defined patron fields for email addresses
Borrowernumber:
Search for the Koha borrowernumber
Username:
Search for the patron's username
All phones:
Will search all of the defined patron fields for phone numbers. Enter the phone number exactly as it is in the system or by using spaces between each batch of numbers.
उदाहरण: प्राप्त करने के लिए (212) 555-1212 आप इसके लिए वास्तव में खोज सकते हैं के रूप में यह दर्ज किया गया था या 212 555 1212 के लिए खोज से
Full address:
Search for the patron's address in all address fields
जन्म तिथि
जन्म तिथि को निर्धारित प्रारूप का उपयोग करके दर्ज किया जाना चाहिए : ref: dateformat<dateformat-label> वरीयता।
छाँटे क्षेत्र 1
यह एक कस्टम क्षेत्र है जोकि पुस्तकालयों संरक्षक के बारे में डेटा के किसी भी प्रकार के लिए उपयोग कर सकते हैं।
छाँटे क्षेत्र 2
यह एक कस्टम क्षेत्र है जोकि पुस्तकालयों संरक्षक के बारे में डेटा के किसी भी प्रकार के लिए उपयोग कर सकते हैं।
First name:
Search for the patron's first name
Middle name:
Search for the patron's middle name
Other name:
Search all of the patron's other names fields
आप भी करने के लिए या तो खेतों कि स्ट्रिंग आपके द्वारा दर्ज साथ शुरू करने या स्ट्रिंग के लिए खोज सकते हैं। का चयन 'में शामिल है' एक वाइल्डकार्ड खोज की तरह काम करेंगे।
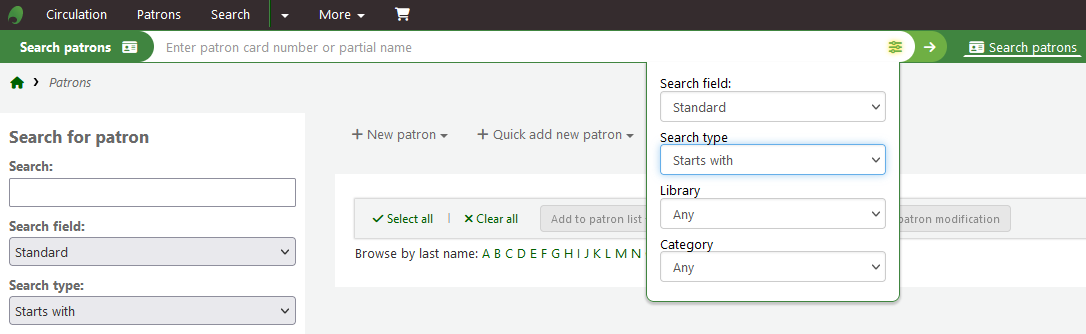
तुम भी शीर्ष भर में जुड़े हुए पत्र पर क्लिक करके संरक्षक रिकॉर्ड के माध्यम से ब्राउज़ कर सकते हैं।

यदि आपकी खोज केवल एक परिणाम देती है, तो आपको सीधे संरक्षक की फ़ाइल में ले जाया जाएगा। यदि आपकी खोज एक से अधिक परिणाम देती है, तो आपको एक सूची दी जाएगी जिसमें से चयन करना है।
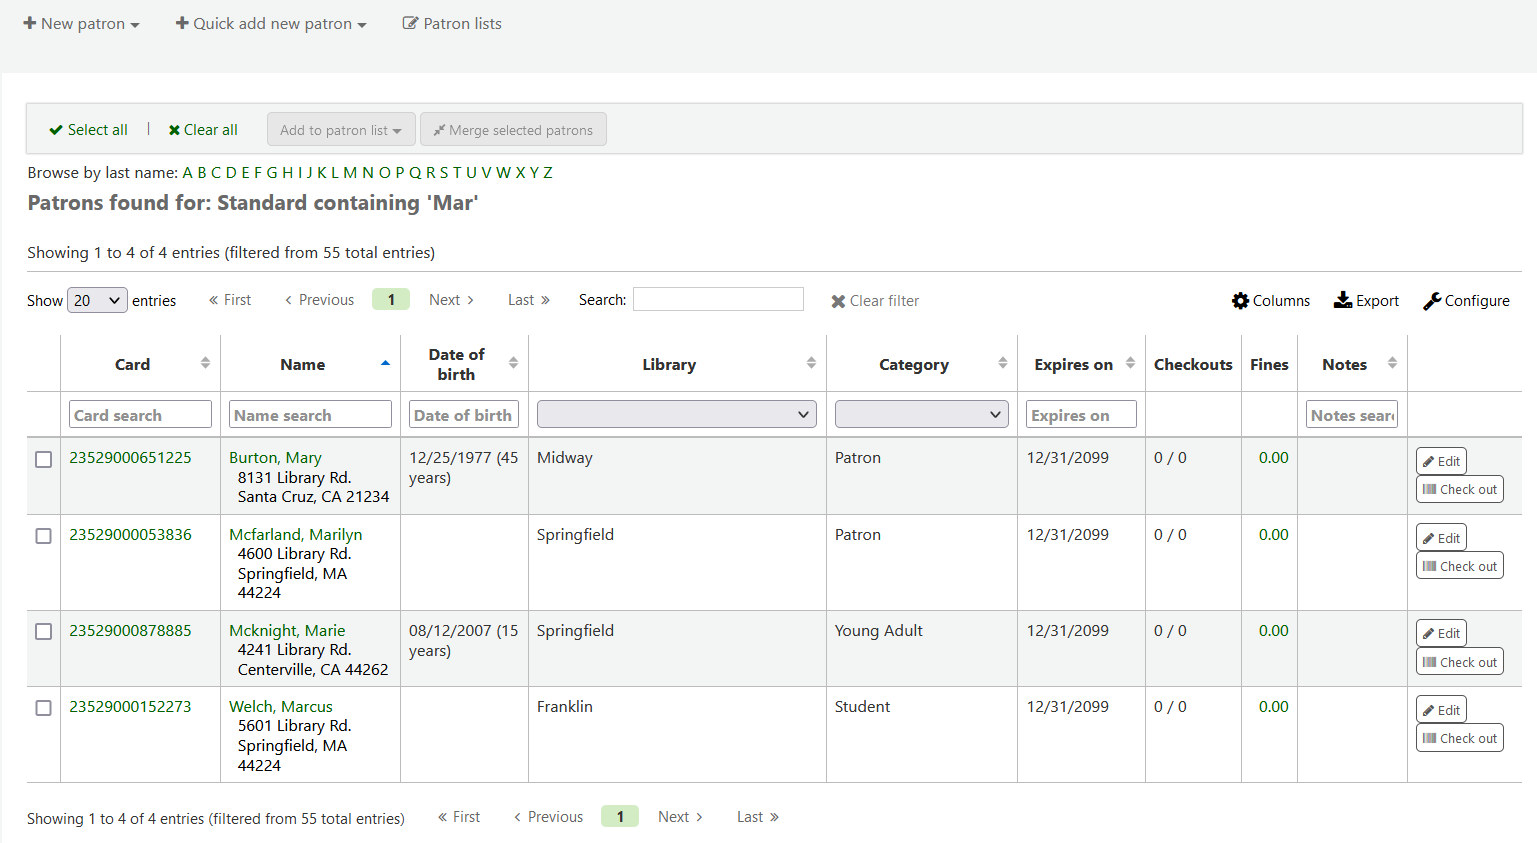
टिप्पणी
You can customize the columns of this table in the 'Table settings' section of the Administration module, under the patrons tab (table id: memberresultst).
Selecting one or more patrons from the list of results by using the checkbox in the leftmost column will show other features you can use for the selected patrons.
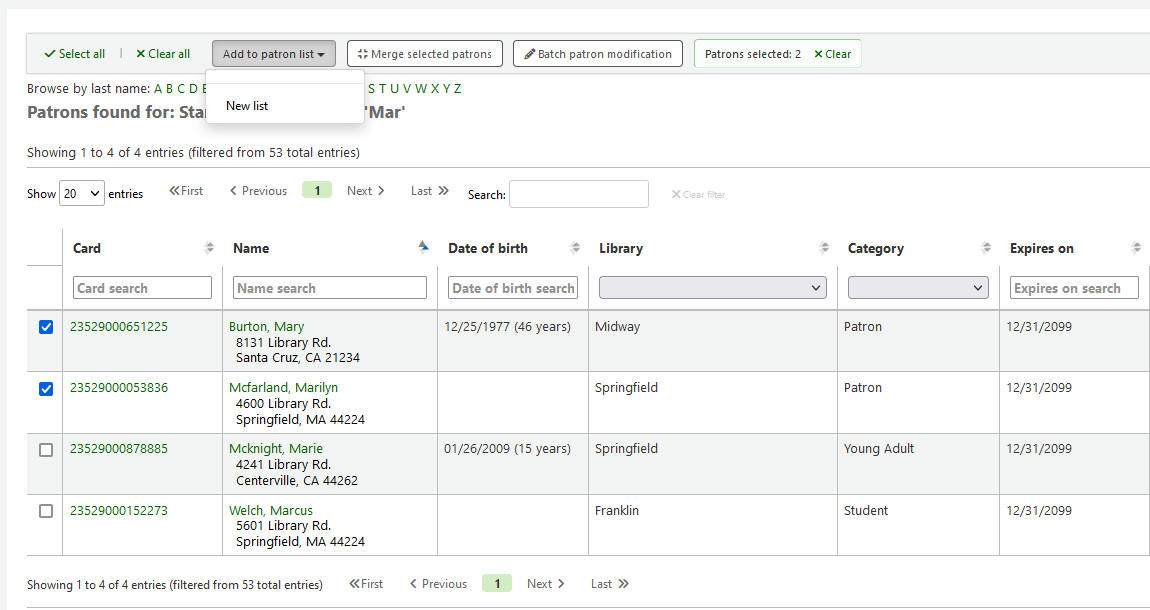
Add to patron list:
Add the selected patrons to an existing 'patron list' or create a new list
Merge selected patrons:
Allows you to 'merge the selected patrons'
Batch patron modification:
Sends the selected patrons to the batch patron modification tool
संरक्षक के साथ संवाद
कोहा संरक्षक के साथ संवाद करने के लिए कई विकल्प प्रदान करता है, जिनमें से कुछ पहले से ही इस अध्याय में शामिल किए गए हैं।
ओपेक टिप्पणीयाँ
OPAC नोटों को संरक्षक की फ़ाइल में संरक्षक रूप जोड़ें या संरक्षक फ़ॉर्म संपादन, जोड़ें। 'लाइब्रेरी सेट-अप' अनुभाग।
वे ओपेक में संरक्षक के ऑनलाइन खाते के :ref:`आपका सारांश' अनुभाग <your-summary-label> को दिखाते हैं।
स्टाफ इंटरफेस में, ओपेक नोट्स संरक्षक की फ़ाइल के 'लाइब्रेरी उपयोग' अनुभाग में होंगे।
ओपेक संदेश
ओपेक संदेशों को 'संदेश जोड़ें' बटन का उपयोग करके संरक्षक की फ़ाइल में जोड़ा जाता है।
एक संदेश छोड़ने के लिए, संरक्षक ओपेक में देखने में सक्षम होगा, 'ओपैक - संरक्षक का नाम' चुनें 'फ़ील्ड के लिए एक संदेश जोड़ें'। अपना संदेश बॉक्स में दर्ज करें, या ड्रॉप-डाउन मेनू में पूर्वनिर्धारित संदेश चुनें।
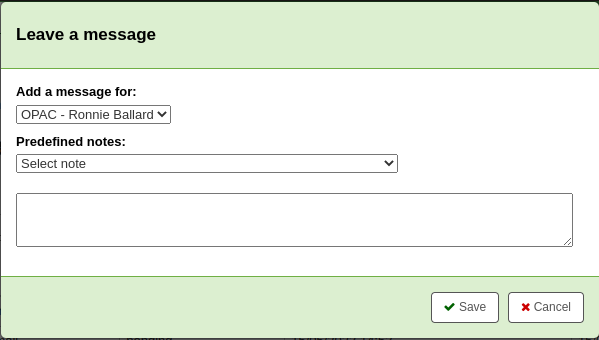
टिप्पणी
पूर्वनिर्धारित संदेश BOR_NOTES में जोड़े गए हैं अधिकृत मूल्य श्रेणी
Once saved, the patron will be able to see the message in the 'Your summary' section of their online account. The patron will also be able to see the date on which the message was added as well as the name of the branch. They will have the option to dismiss the message. This will hide the message from their OPAC account and mark it as read, but it will not delete the message.

स्टाफ इंटरफ़ेस में, ओपैक संदेश संरक्षक बटन के विस्तार पृष्ठ पर दिखाए जाते हैं, पृष्ठ के शीर्ष पर केवल एक्शन बटन की पंक्ति के नीचे।

यह चेकआउट पृष्ठ पर, चेकआउट बॉक्स के दाईं ओर भी दिखाई देगा।

यदि आपको संदेश को संपादित करने की आवश्यकता है, तो संदेश के बगल में 'संपादित' बटन पर क्लिक करें, पाठ को संपादित करें और 'सहेजें' पर क्लिक करें।
चेतावनी
If you edit a message that has been dismissed by the patron, it will stay as 'Read' and the patron will not see your edit.
If the patron dismisses the message, a 'Read' mention with the date will appear next to the message in the staff interface to inform staff members that this message was read by the patron.

अग्रिम नोटिस और होल्ड नोटिस
यदि आपने सक्षम किया है EnhancedMessagingPreferences सिस्टम वरीयता, तो आप बिल्ली को अग्रिम नोटिस देने के साथ-साथ नोटिस भी देते हैं एक नया संरक्षक जोड़ना या :ref:` एक संरक्षक का संपादन <editing-patrons-label>`.
यदि EnhancedMessagingPreferencesOPAC सिस्टम वरीयता 'शो' पर सेट है, तो संरक्षक अपने ऑनलाइन खाते में अपनी मैसेजिंग वरीयताओं को संशोधित करने में सक्षम होंगे।
देय वस्तु: लाइब्रेरी में दिन और आइटम पर एक नोटिस वापस आने वाला है
Customize this notice by editing the DUE or DUEDGST notices in the Notices and slips tool
उन्नत नोटिस: संरक्षक के कारण किया जा रहा आइटम के अग्रिम में एक नोटिस (संरक्षक अग्रिम में दिनों की संख्या चुन सकते हैं)
Customize this notice by editing the PREDUE or PREDUEDGST notices in the Notices and slips tool
Hold filled: A notice when you have confirmed the hold is waiting for the patron, and when a curbside pickup is scheduled.
Customize the hold filled notice by editing the HOLD template in the Notices and slips tool.
Customize the curbside pickup scheduled notice by editing the NEW_CURBSIDE_PICKUP template in the Notices and slips tool.
आइटम चेक-इन: एक नोटिस जिसमें संरक्षक की सभी वस्तुओं को सूचीबद्ध किया गया है
CHECKIN नोटिस को संपादित करके इस नोटिस को अनुकूलित करें नोटिस और स्लिप टूल
आइटम चेकआउट: एक नोटिस जो सभी वस्तुओं को सूचीबद्ध करता है, संरक्षक ने अभी-अभी चेक आउट किया है और / या नवीनीकृत किया है, यह चेकआउट रसीद का एक इलेक्ट्रॉनिक रूप है।
Customize this notice by editing the CHECKOUT notice in the Notices and slips tool
टिप्पणी
If the RenewalSendNotice system preference is set to 'Send', this notice will be called 'Item checkout and renewal'.
For renewals, the notice sent is RENEWAL.
Interlibrary loan ready: A notice that is sent when an inter-library loan the patron requested has been fulfilled and is now ready for pickup.
Customize this notice by editing the ILL_PICKUP_READY notice in the Notices and slips tool
This option will only appear if the ILLModule system preference is enabled.
Interlibrary loan unavailable: A notice that is sent when an inter-library loan the patron requested has been cancelled because it was unavailable.
Customize this notice by editing the ILL_REQUEST_UNAVAIL notice in the Notices and slips tool
This option will only appear if the ILLModule system preference is enabled.
स्वत: नवीनीकरण: एक नोटिस जो संरक्षक को सूचित करता है कि उनके चेकआउट स्वचालित रूप से नवीनीकृत हो गए हैं, या यदि उनके स्वत: नवीनीकरण में कोई समस्या थी।
AUTO_RENEWAL या AUTO_RENEWAL_DGST नोटिस को नोटिस एंड स्लिप्स टूल में संपादित करके इस नोटिस को कस्टमाइज़ करें
यह विकल्प केवल तभी दिखाई देगा जब AutoRenewalNotices संरक्षक संदेश वरीयताओं के अनुसार" पर सेट है
Hold reminder: A notice that is sent a certain number of days after the hold has been filled, in order to remind the patron that they have to pick it up.
Customize this notice by editing the HOLD_REMINDER notice in the Notices and slips tool.
This notice requires the holds_reminder.pl cron job.
Interlibrary loan updated: A notice that is sent when an inter-library loan the patron requested has been updated.
Customize this notice by editing the ILL_REQUEST_UPDATE notice in the Notices and slips tool
This option will only appear if the ILLModule system preference is enabled.
डिलीवरी विधि के साथ-साथ 'डाइजेस्ट ओनली' बॉक्स की जाँच करके पाट्र्स अपने पाचन को प्राप्त करने का विकल्प चुन सकते हैं। एक डाइजेस्ट उस प्रकार के सभी संदेशों का संयोजन है (इसलिए एक ईमेल में 3 दिनों के लिए सभी आइटम) प्रत्येक ईमेल के लिए कई ईमेल के बजाय एक ईमेल में।
वर्तमान में समर्थित वितरण विधियाँ निम्नलिखित हैं:
ईमेल
एसएमएस (पाठ संदेश)
स्वचालित फोन कॉल प्रणाली
प्रिंट
अग्रिम नोटिस (अग्रिम नोटिस और देय आइटम) उत्पन्न करने के लिए, आपको सीमा को चलाने की आवश्यकता है advance_notices.pl cronjob. फिर process_message_queue.pl cronjob नोटिस या भेज देंगे :ref:`gather_print_notices.pl cronjob <cron-print-hold-notices-label>`उन्हें एक अच्छी फ़ाइल में इकट्ठा करेंगे जिसे आप प्रिंट कर सकते हैं और नियमित मेल के माध्यम से भेज सकते हैं.
अतिदेय नोटिस
अतिदेय नोटिस को प्रबंधित किया जाता है नोटिस और स्लिप्स और जब वे भेजे जाते हैं तो प्रबंधित किया जाता है ओवरड्यू नोटिस/स्थिति ट्रिगर टूल.
संरक्षक अतिदेय नोटिस प्राप्त करने से बाहर नहीं निकल सकते हैं जैसे वे अन्य नोटिस (जैसे अग्रिम नोटिस या होल्ड नोटिस)
अतिदेय नोटिस उत्पन्न करने के लिए, आपको चलाने की आवश्यकता है overdue_notices.pl cronjob. फिर process_message_queue.pl cronjob नोटिस या भेज देंगे gather_print_notices.pl cronjob उन्हें एक अच्छी फ़ाइल में इकट्ठा करेंगे जिसे आप प्रिंट कर सकते हैं और नियमित मेल के माध्यम से भेज सकते हैं.